MORE HANDBOOKS ARE ON THEIR WAY! We will let you know when they get here.
×

PJG
-
Posts
117 -
Joined
-
Last visited
Content Type
Profiles
Forums
Gallery
Events
Everything posted by PJG
-
 Thanks James...I haven't decided yet how best do tackle the water. Woodland Scenics makes some interesting products that look promising. https://woodlandscenics.woodlandscenics.com/show/category/Water
 -
Great work as always Mike!
-
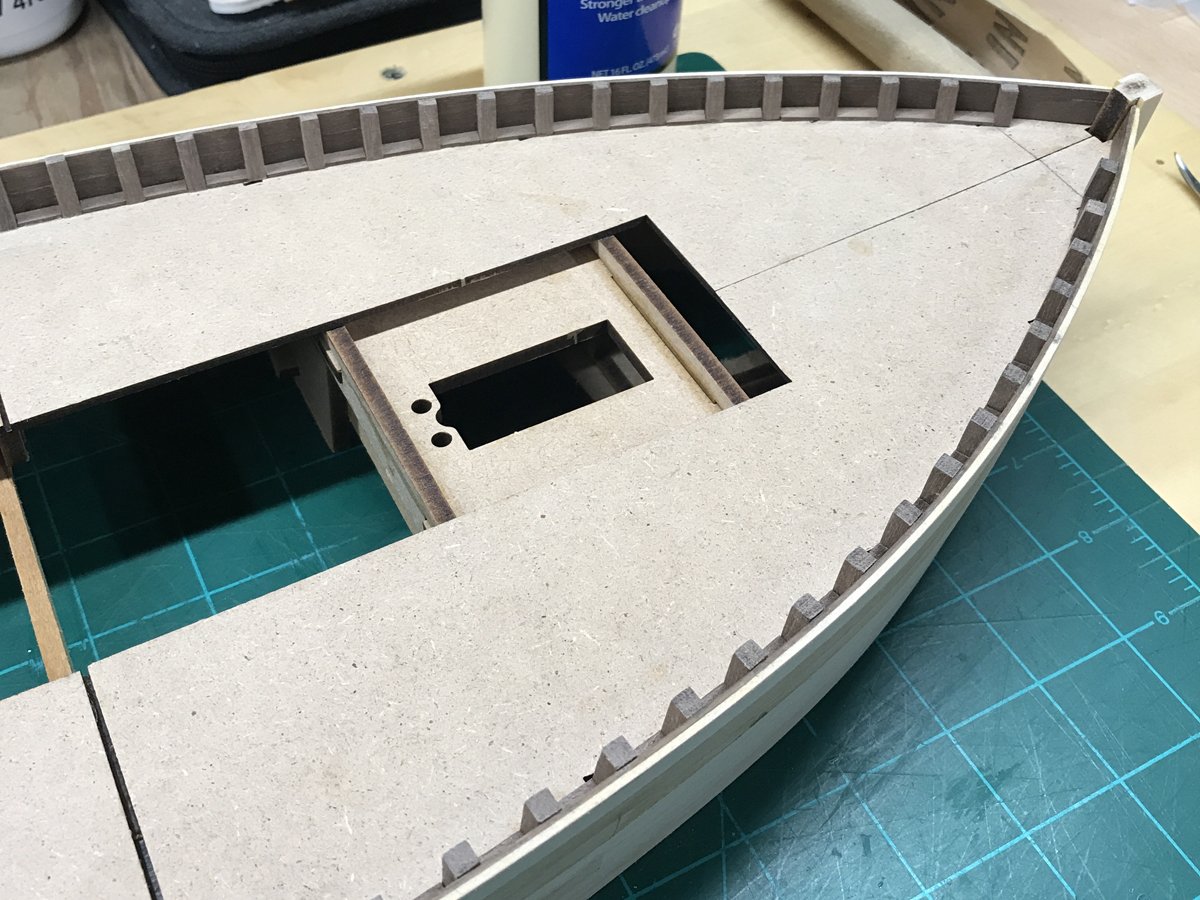
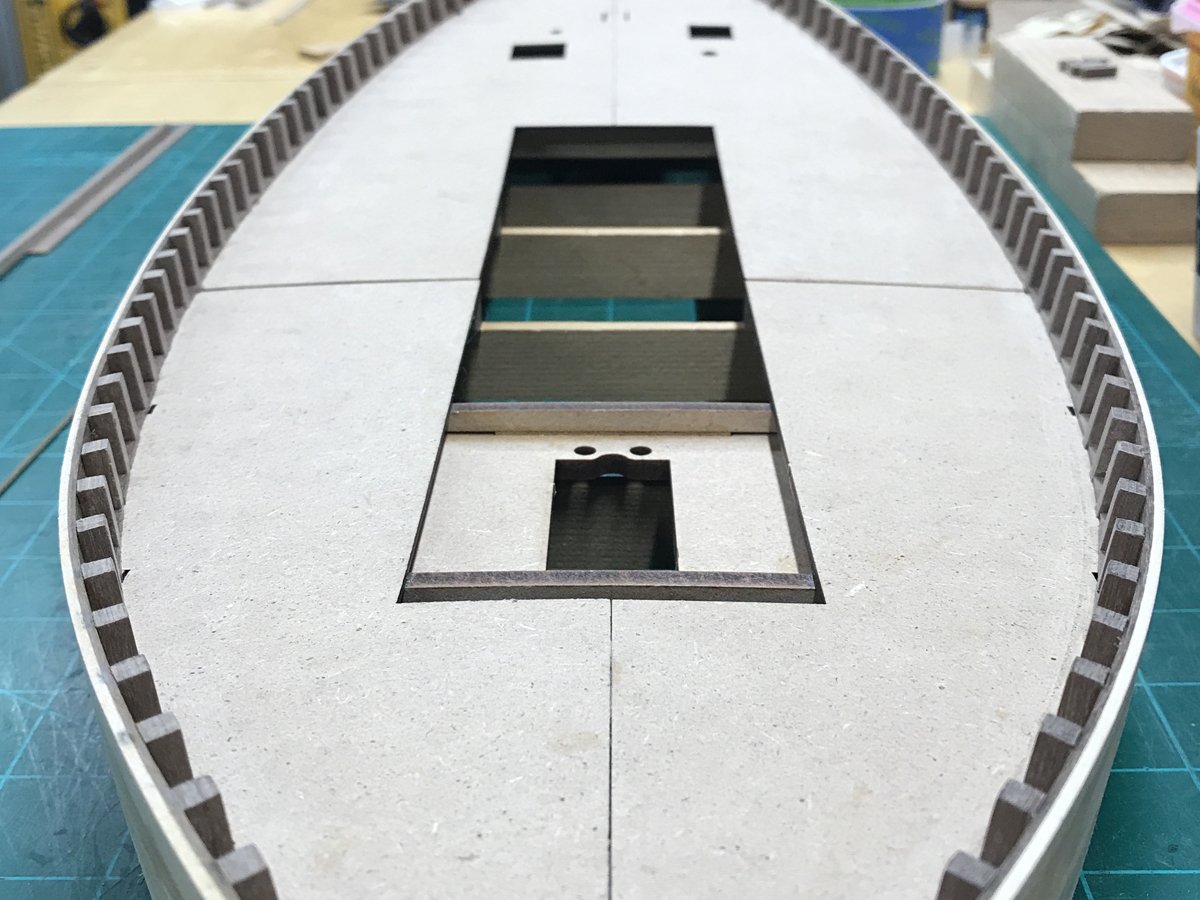
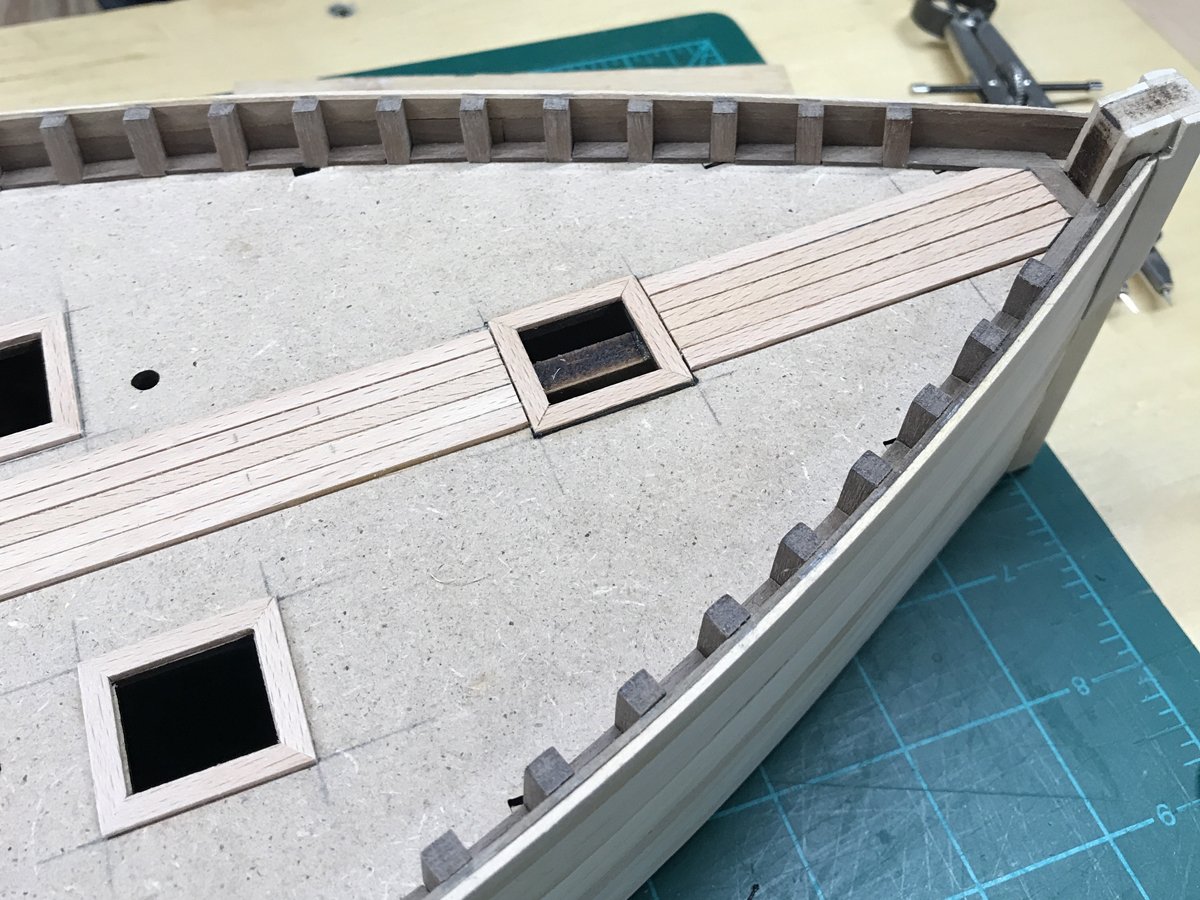
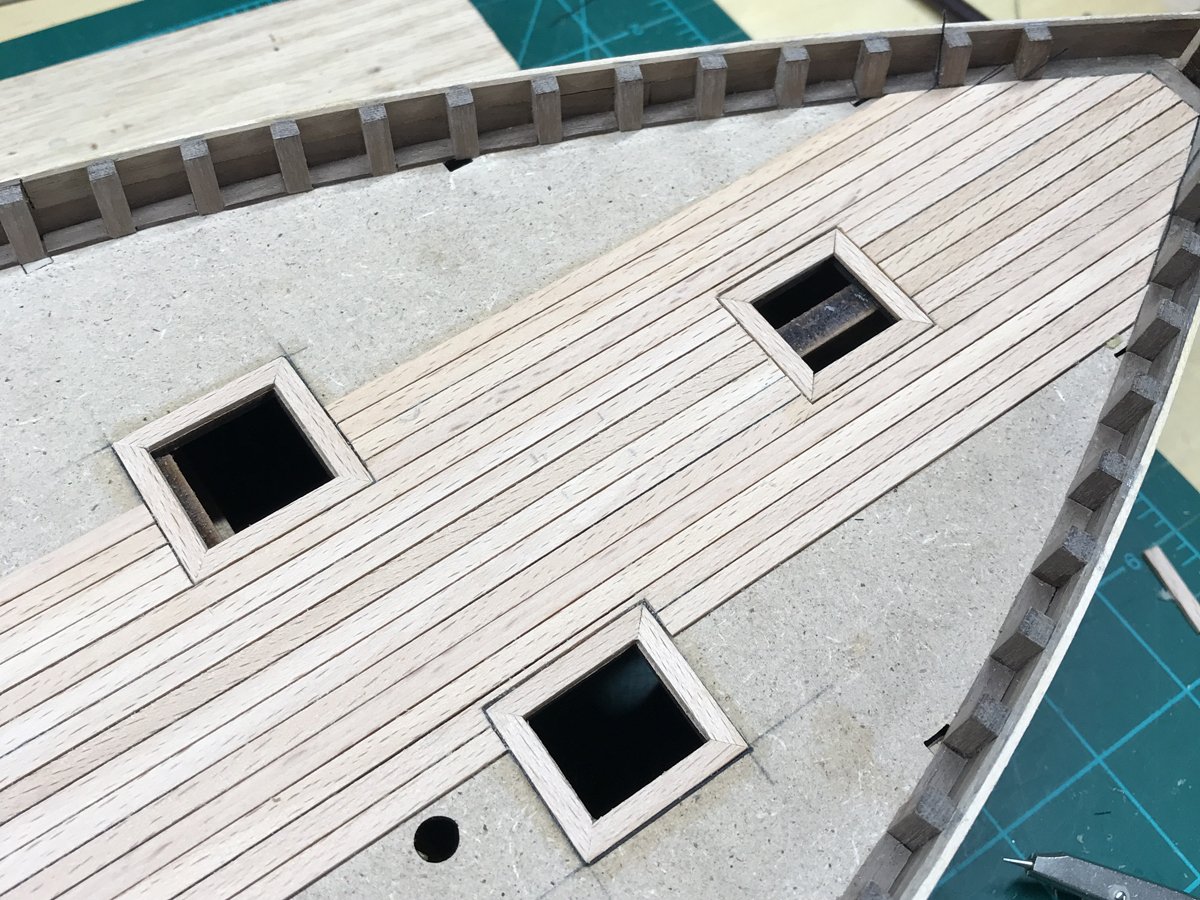
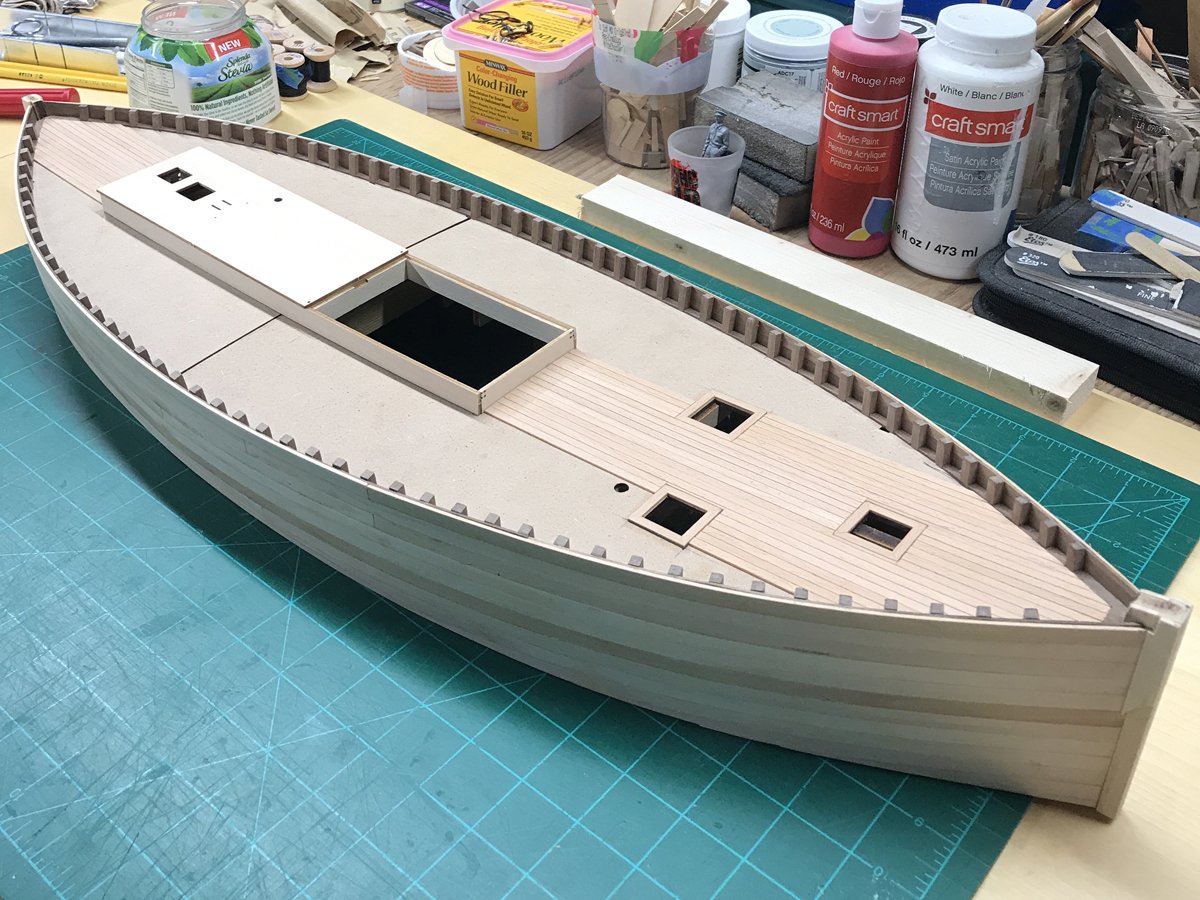
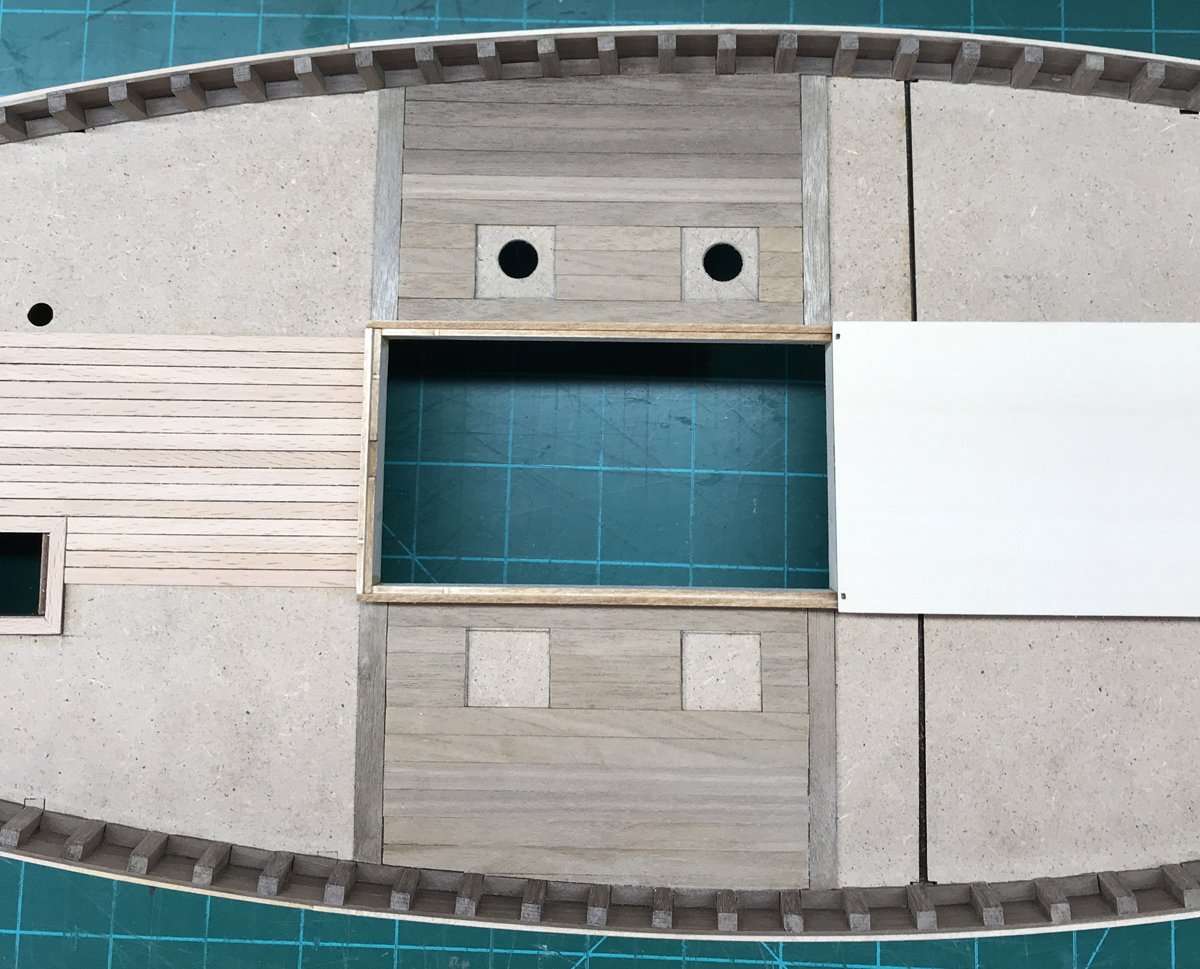
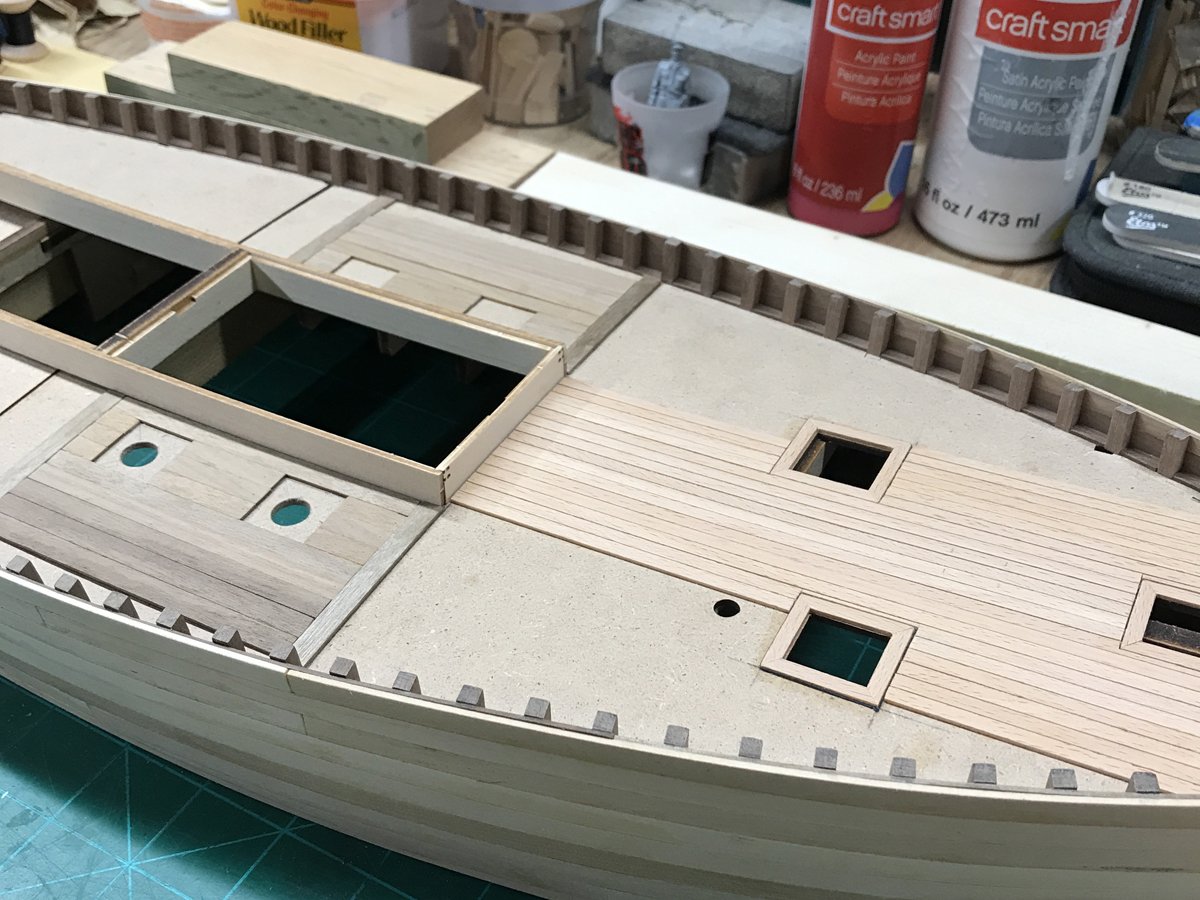
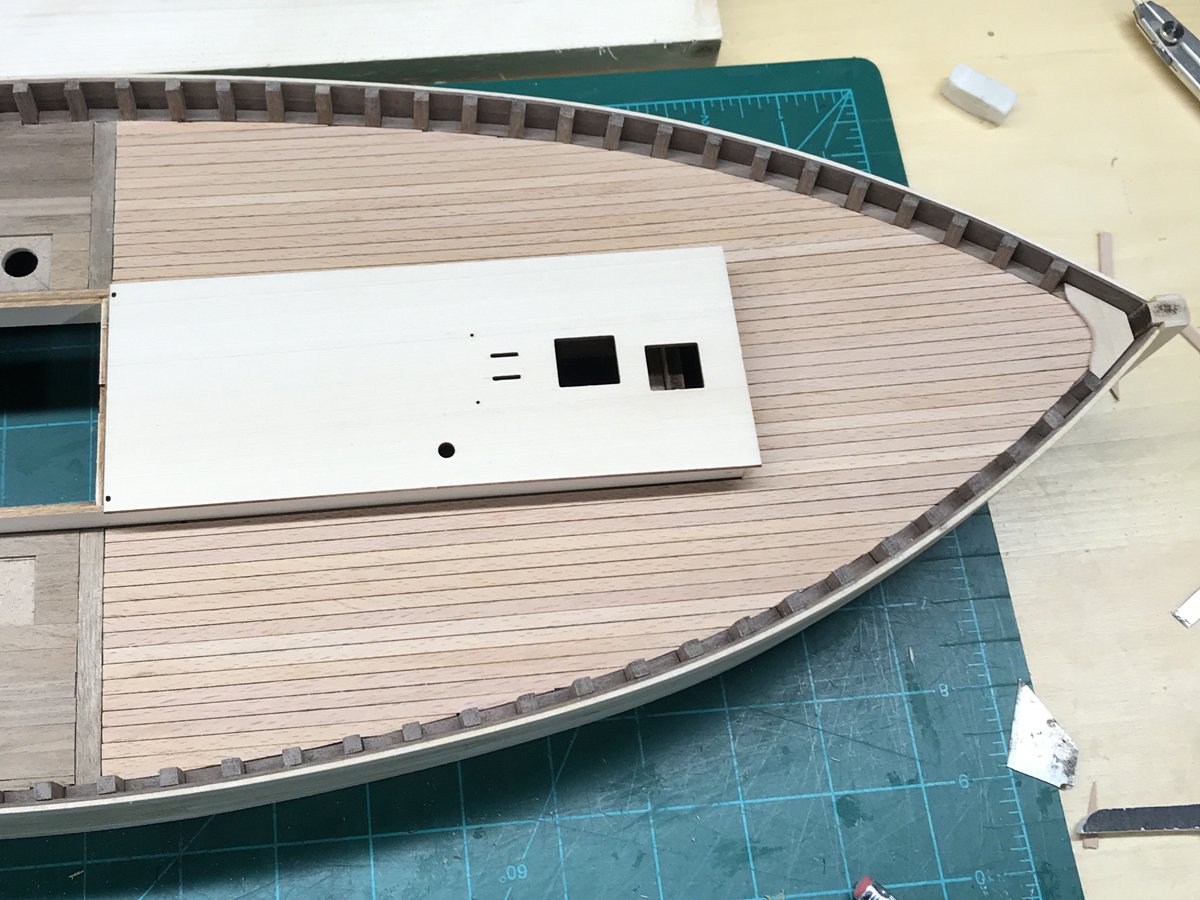
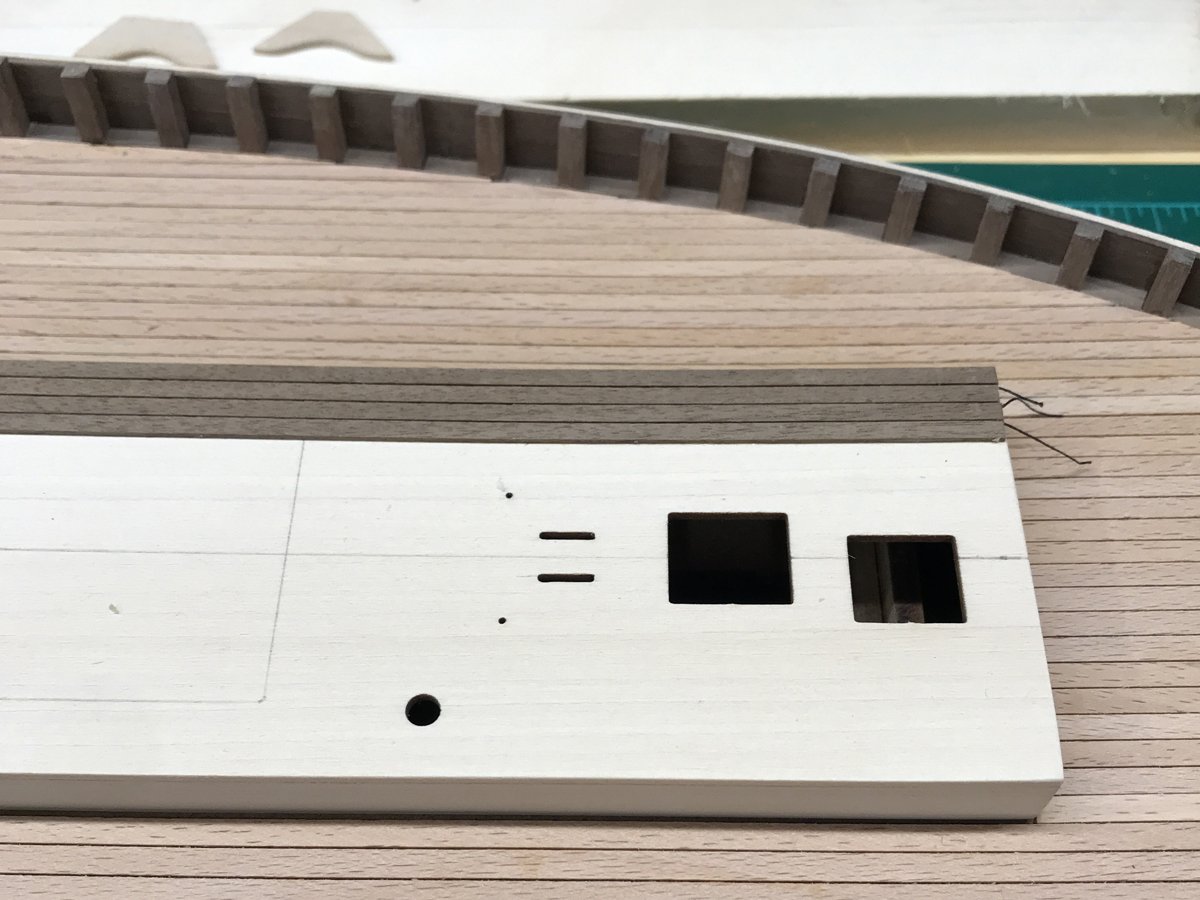
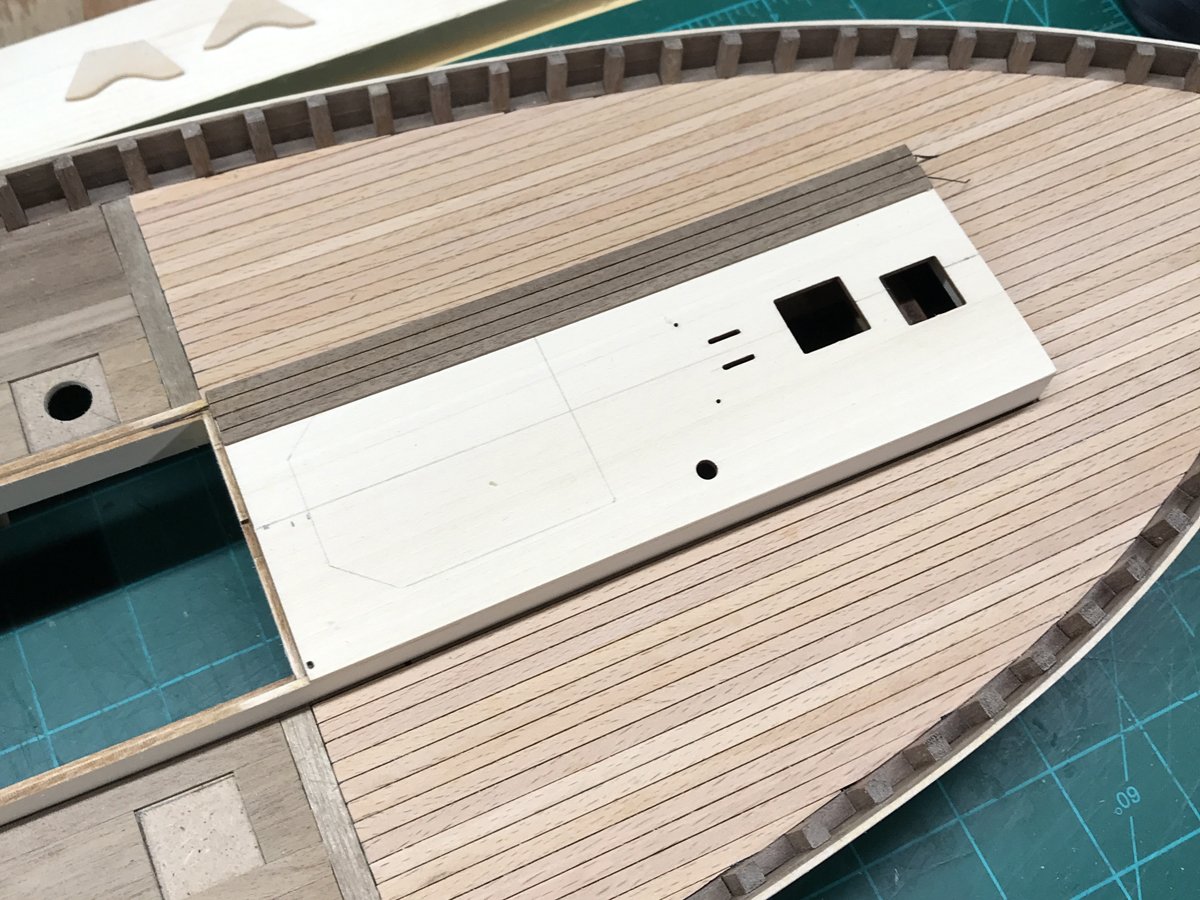
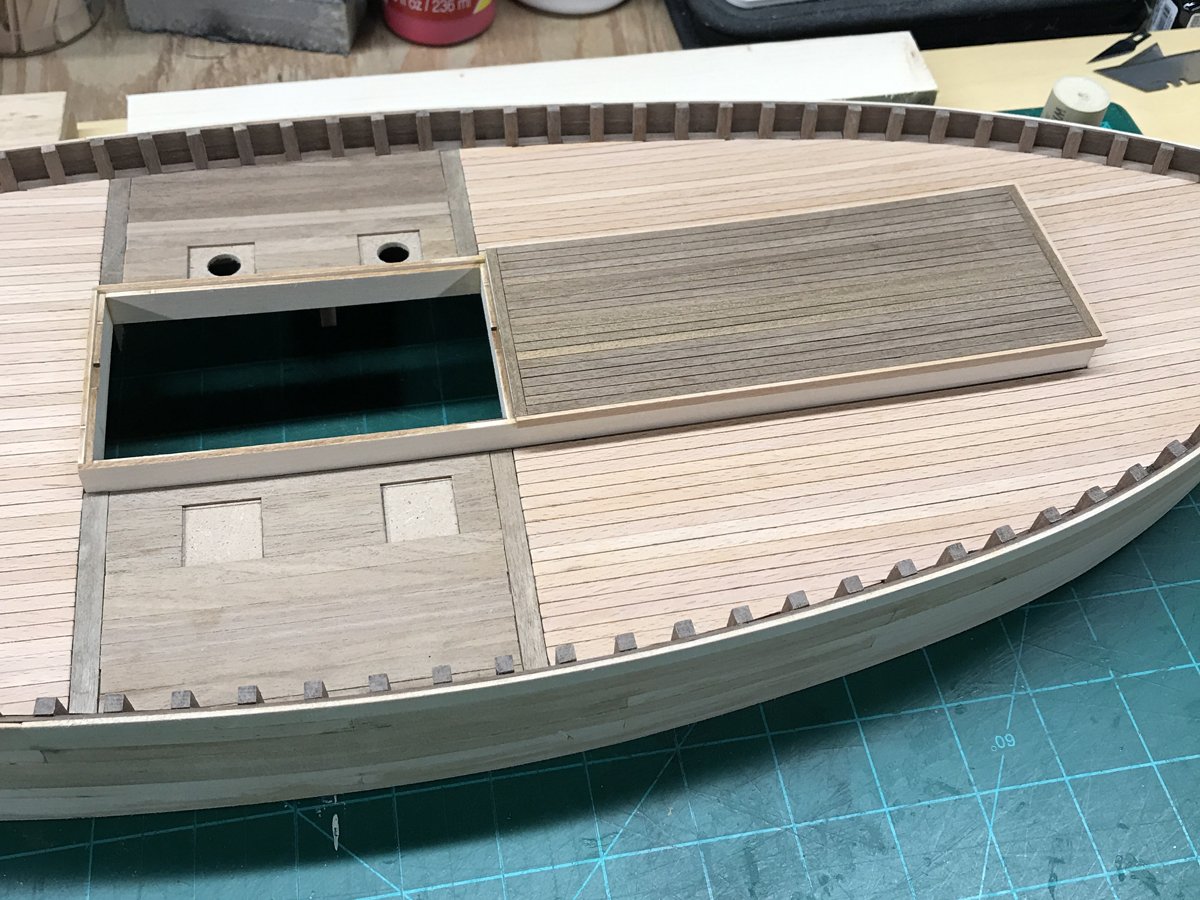
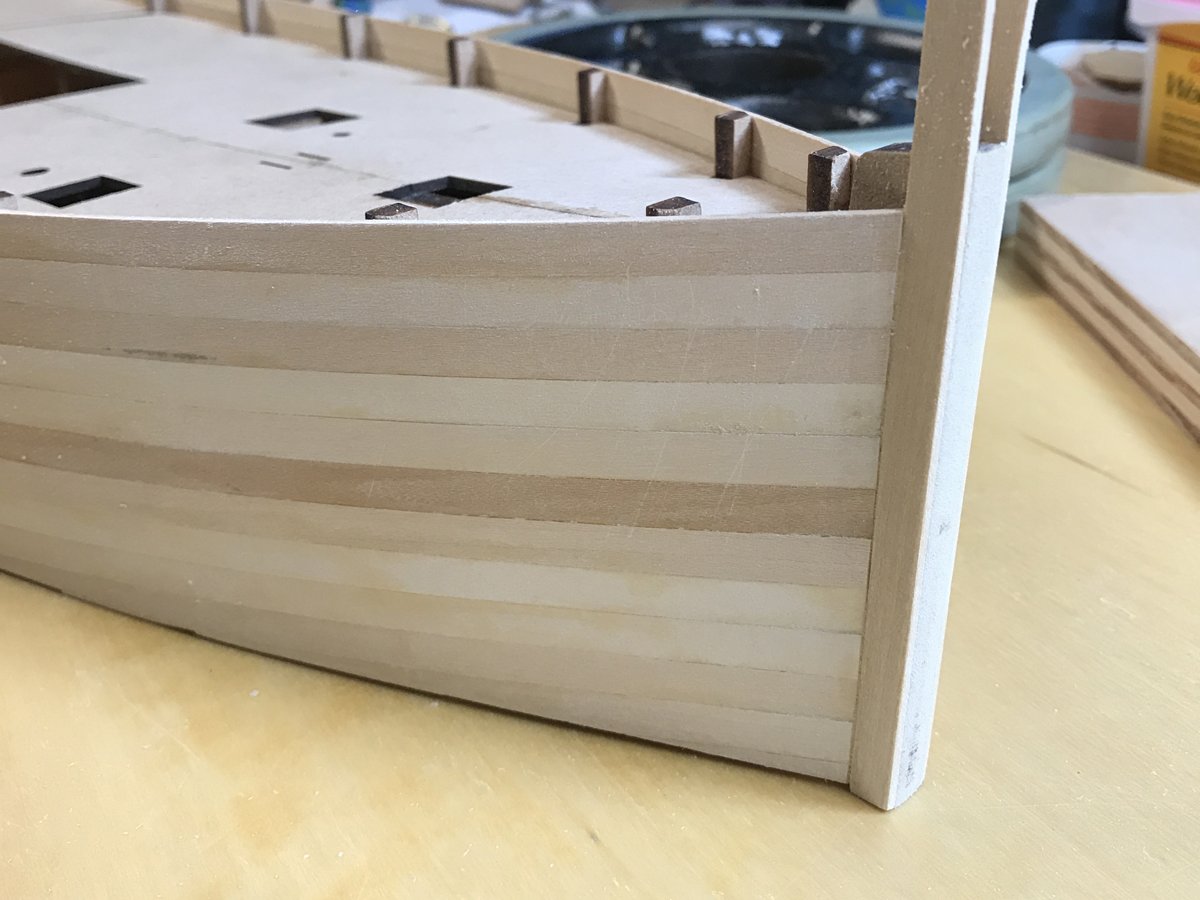
Timberheads and bulwark planking I did things a little differently than the instructions suggested for the timberheads and planking along the bulwark. I wanted my timberheads to appear as if they were coming through the deck rather than sitting on top so an alternate approach was necessary. The instructions call for installing the entire deck to the bulwarks first, followed by placing the timberheads on top. I suppose it would be possible to cut and refine the bottom of each timberhead to sit perfectly flush on the deck but I wasn’t confident I could pull that off 92 times! Even if I did manage to do that, I still don’t think the look would have been what I was after. Instead, I used walnut strip to create a band along the bulwark from which the timberheads would appear to emerge. It would also allow the deck planking to terminate to a clean edge which made more sense to me than running planks to the bulwark. Ultimately, I think this technique worked out to be an improvement over the timberheads-on-top method and I’m satisfied with the results. Speaking of authenticity, it’s worth noting that the layout of the timberheads as indicated in the instructions doesn’t accurately depict how they’d line up on the real boat. I’m sure most here already knows this, but they should be square to their partner across the deck given that each pair of timberheads is actually the protruding top of a single frame. This occurred to me after the fact and I ultimately decided it wasn’t worth the considerable time and effort it would have required to remove all 92 timberheads (and the inserts between them) and source the material to make new ones. Unlike the instruction booklet, the plans do show the timberheads in correct alignment. If you do opt to make this adjustment, the material provided in the kit for this step will need to be replaced with larger stock. It will take as much as twice the material to accommodate the extreme angles necessary approaching the bow and stern. Because my timberheads were not going to be sitting on top of the deck, I didn't have to be overly precise with the bottom cuts. Filling the spaces with walnut strip. I deliberately left these slightly "loose" to make it apparent that this part of the deck went around the timberheads and not under. Timberheads complete! Planking the deck As for deck planking, the kit supplies darkly colored 1mm square strips of wood that can be placed between each 1x3.5mm plank to simulate caulking. This is a nice feature but I felt the lines it created were far too heavy for my eye and there is some grain visible. Rather than the strips, I used thread to create spaces that looked more “in scale” to me. I installed my planks in long, single strips rather than edge-butting shorter ones. I’ll add those detail lines later. Before the deck planking can be completed, the central superstructure needs to be partially constructed and dry-fitted to the hull to ensure that deck planks are terminating at the correct lengths. Building the superstructure is a simple process using the perfectly die-cut parts provided in the kit. The decking on either side of the hold is treated differently than the rest. This is the area where the nets are set and retrieved and a secondary “slotted” deck rests on top. There are 4 scuttle hatches (2 per side) in this area that are referred to in the manual as “fish pond hatches”. Given their locations, I think it’s safe to assume that fish are loaded through these hatches leaving the central hold open to receive the incoming nets (up to 3 miles worth!). This area of the deck can also be divided into sections with “pond boards”. There are a lot of details about this area in terms of functionality I’d love to know that the documentation in the kit doesn’t provide. For instance: was the “fish pond” area of the hold actually filled with water (such as on modern crab boats)? If anyone knows, please share. Oddly enough, the photos of the finished boat on the box and in the advertising I've seen don't include the border detail around the hatches and skylight. In the instruction booklet, however, they are included. The plans also indicate the presence of these trim boards so I opted to include them. Adding the central superstructure (temporarily) to ensure that my planking was terminating correctly. Adding the "fish pond" sub-deck that will be covered with a slotted secondary deck. There are only 1 mm gaps between the boards of the secondary deck so the sub-deck will be mostly unseen. I drilled out 2 of the 4 fish pond hatches as these will be open in the final display. With the fish pond sub-deck in place, the rest of the forward deck can be completed. The completed forward deck (minus butt-joints and weathering). I'm satisfied with the overall look the thread "caulking" created. The rest of the deck planks in place. I decided early on I would be adding detail to the central superstructure/wheelhouse area so this is the beginning of that. Given how numerous these boats were up and down the Scottish coast, I don't think it's too far a stretch to assume each captain/crew equipped and finished their boats to suit their individual tastes. I'll do the same!


-
Very nice progress B.E., I'm looking forward to see how you tackle the interior details of the hold. I've actually been fooling around with fabricating herring for my build (1/32 fifie) so clearly your pursuit of detail is contagious!
- 261 replies
-
- 2
-

-
- muirneag
- vanguard models
- (and 2 more)
-
Thanks for the positive feedback guys...I'll be posting build updates shortly. Being back to work in-person has put a major dent in my free time!
-
I wasn't expecting the planking of my waterline hull to take this long but it turns out I created several unforeseen challenges by cutting the bulkheads before the planks were installed rather than after. If anyone opts to build this boat at the waterline, I would recommend planking the bulkheads below the waterline first and cutting after. As they say, hindsight is 20/20. I won't go into the tedious details of how I went about keeping my waterline level against the natural tendency of the planks fighting to straighten out but I will say it was a true test of my patience. A simple solution would have been to start at the waterline with level planks and "cheat" them gradually into the correct position at the rail with fillers where needed but I thought it was worth taking the time and effort to do it right. Now that it's finally done I'm glad I did. Given that I intend to paint my hull I'm not so sure it's worth wasting all that lovely walnut strip on a second layer. View from the stern. With a good finish sanding I think one layer of planks will be fine. View from the bow. Given that my boat will be displayed in the act of fishing, I left a quarter inch of hull below the water line to account for variations in the surface of the water. Speaking of fishing, I found this interesting/educational link that has been extremely helpful in describing to me exactly how this kind of drift-net fishing was actually done and how the nets were rigged. For instance, this style of herring fishing was done primarily after dark (according to this source) so perhaps some kind of light source needs to shown in my build. Regardless, it's an interesting read. https://electricscotland.com/lossiemouth/boats/fisher07.pdf

-
Thanks Yves...I have some 1/35 figures kicking around from some old plastic Tamiya armor kits and you're absolutely right about the nearly undetectable size difference from 1/35 to 1/32. I'll definitely look in to what's available and see if I can find something appropriate.
-
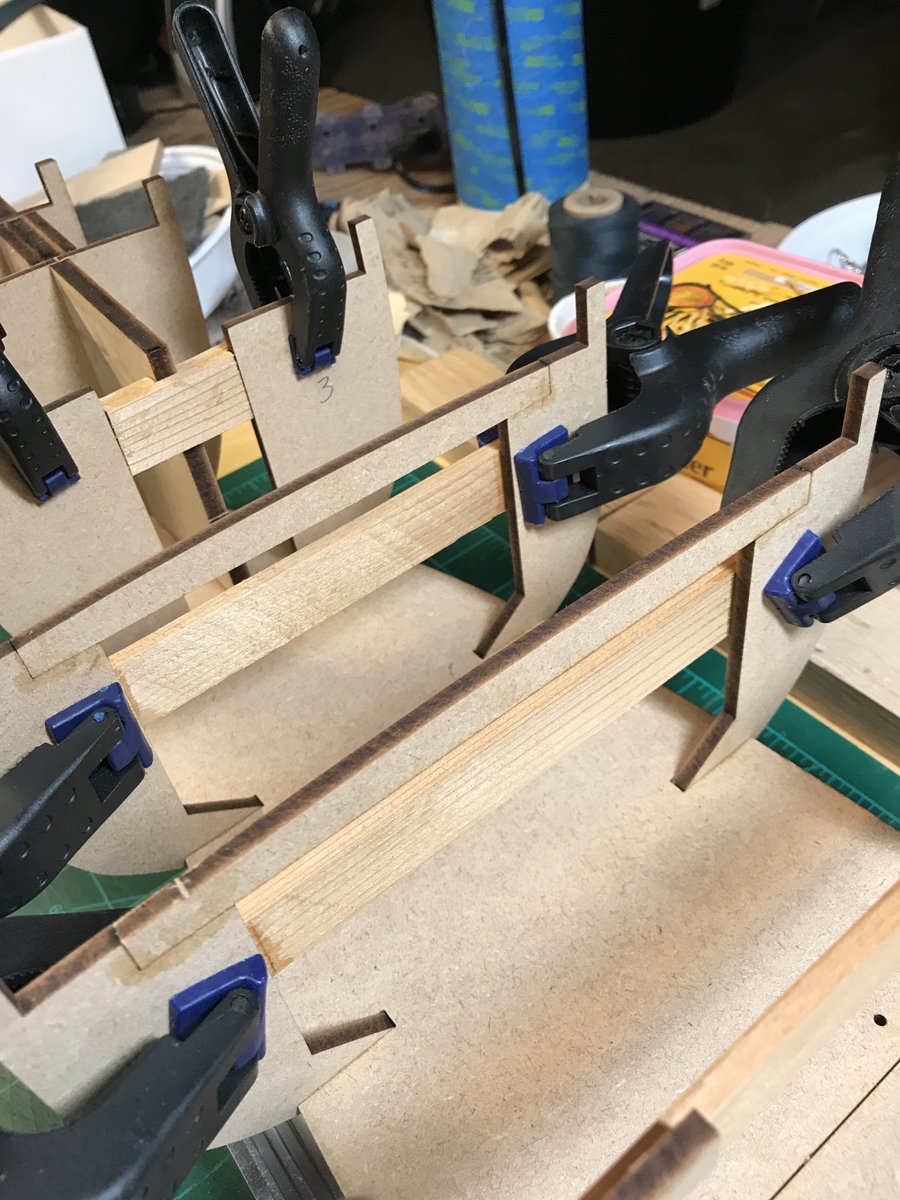
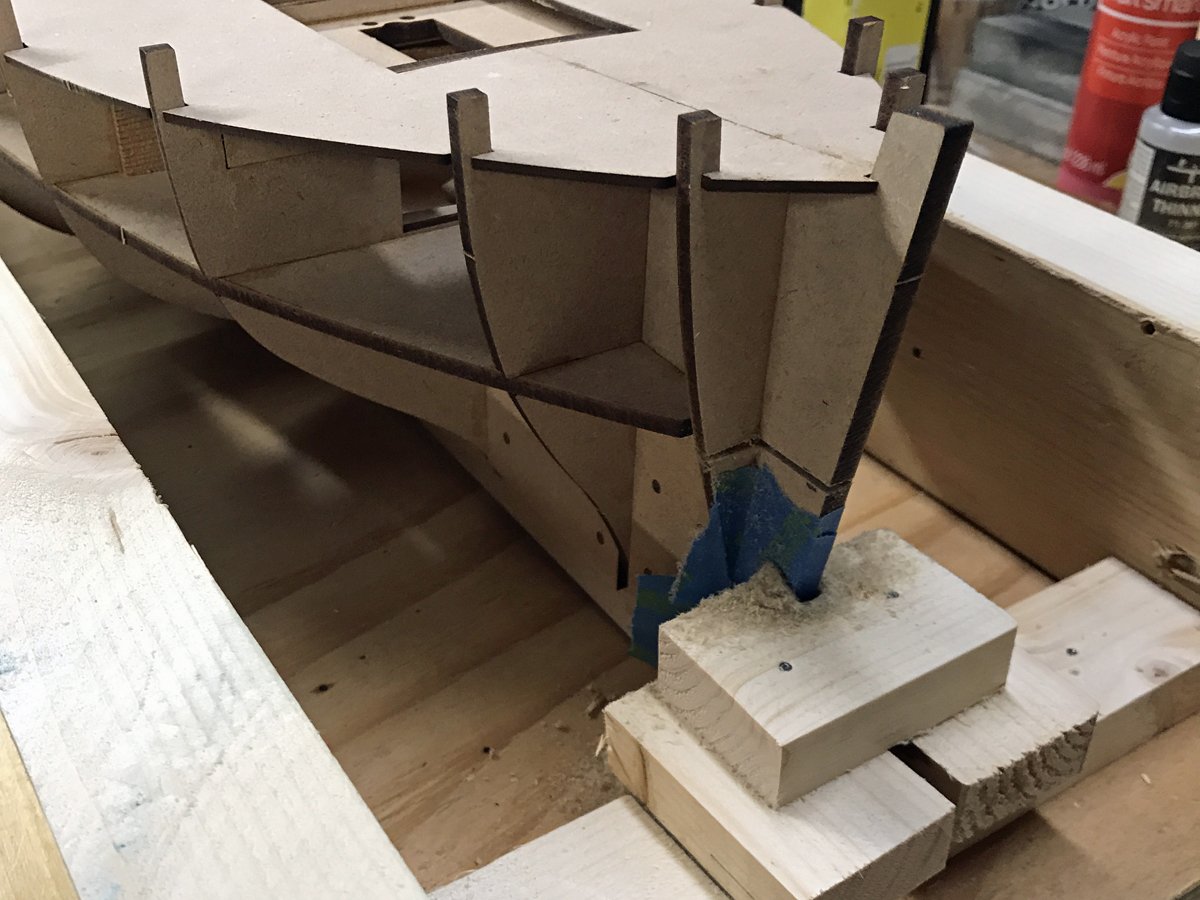
Because I don't own or have access to a decent bandsaw, I had to figure out a plan to cut my hull at the waterline with a hand saw. My original plan was to plank first and cut when the whole thing was more stable but the more I thought about it, the more it made sense to get this major hurdle out of the way before I wasted time on a step that might get damaged in the cutting process. I built a cradle from scrap dimensional lumber with the top edge serving as the waterline guide. The keel of the boat runs up-hill from the stern about an inch over its length so I added support where needed to maintain this angle. I almost missed this very important detail but thought the frame looked odd sitting flat in the cradle so back to the plans I went (thankfully). Bow elevated and secured to get the correct waterline position. Slowly but surely I cut my way from the stern to bow using the top rails of the cradle to guide the blade. This was probably the most potentially-disastrous step in the entire build so I took my time and made frequent inspections of the cut along the way to confirm accuracy. Success! Hopefully this will be the last time I use a hand saw building a model ship! The first plank the instructions suggest installing is the top-most that runs along the tops of the bulkhead frames. I opted to start with the second plank. I did this because the top plank is only glued at the bow and stern post to allow the tabs above the deck to be removed later. The second plank from the top can be glued at half its width to the bulkheads which creates a much more secure foundation to work from. It's also worth noting that while the instructions seem to indicate running full lengths of strip the entire length of the hull, the strips are actually too short to do that so you need 2 pieces per run. I cut my strips just past halfway (overlapping back and forth) to make the connection in the more forgiving midships area where the bending is less intense. Another surprise (that shouldn't have been a surprise) was that weight needs to added to the deck while the first few planks are installed to keep the frame from lifting in the middle. The rake (correct term?) of the rail is fairly pronounced at the bow so the tendency is for the planks to want to straighten out, thus causing the middle to lift. Once both planks were secured and dry, the frame seems to have settled back to the correct position. I may need to do a little additional fairing here and there along the way but for the most part I don't expect problems as the planking makes its way to the waterline.
-
Thank you guys!
-
Thank you...it’s a fun kit to build, especially if you want to approach it as a blank canvas and do your own thing.
- 52 replies
-
- 2
-
-
- model shipways
- new bedford whaleboat
- (and 1 more)
-
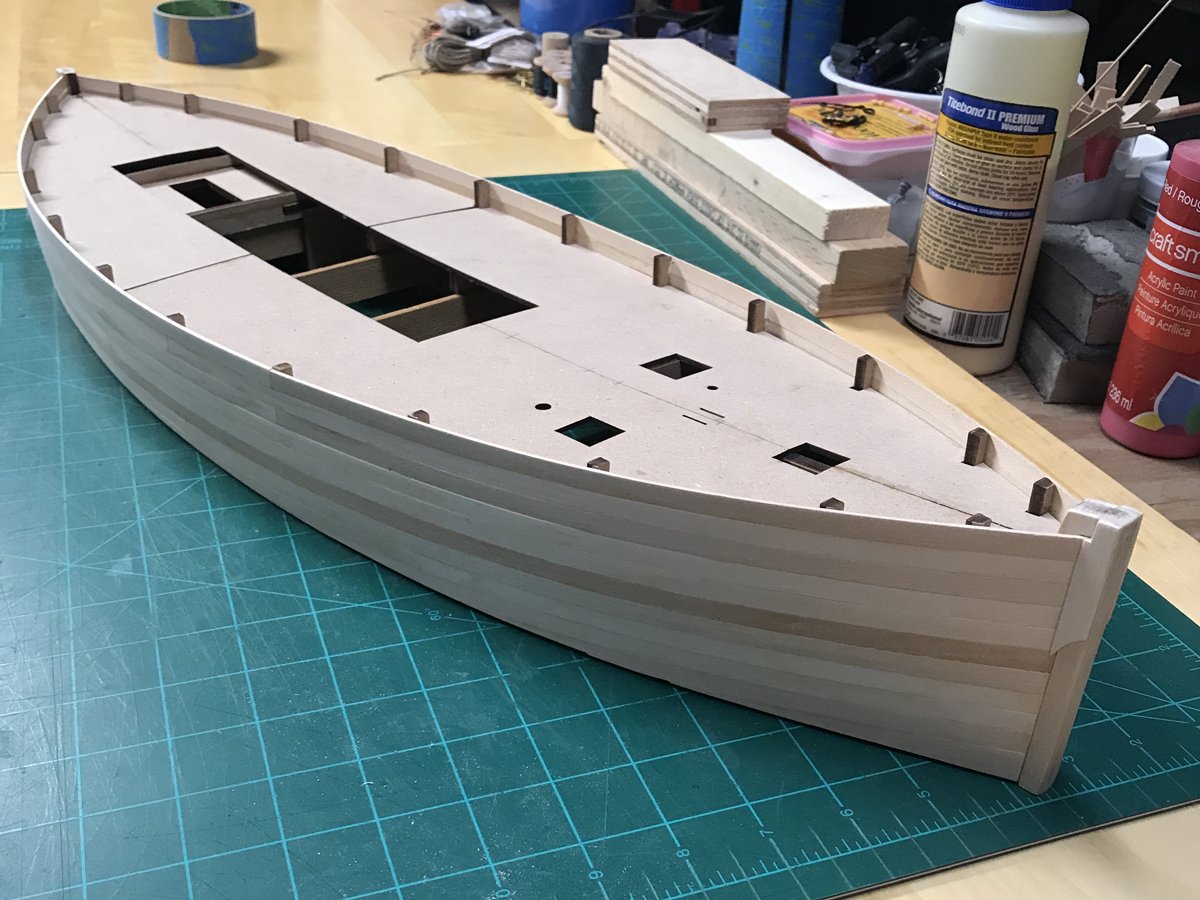
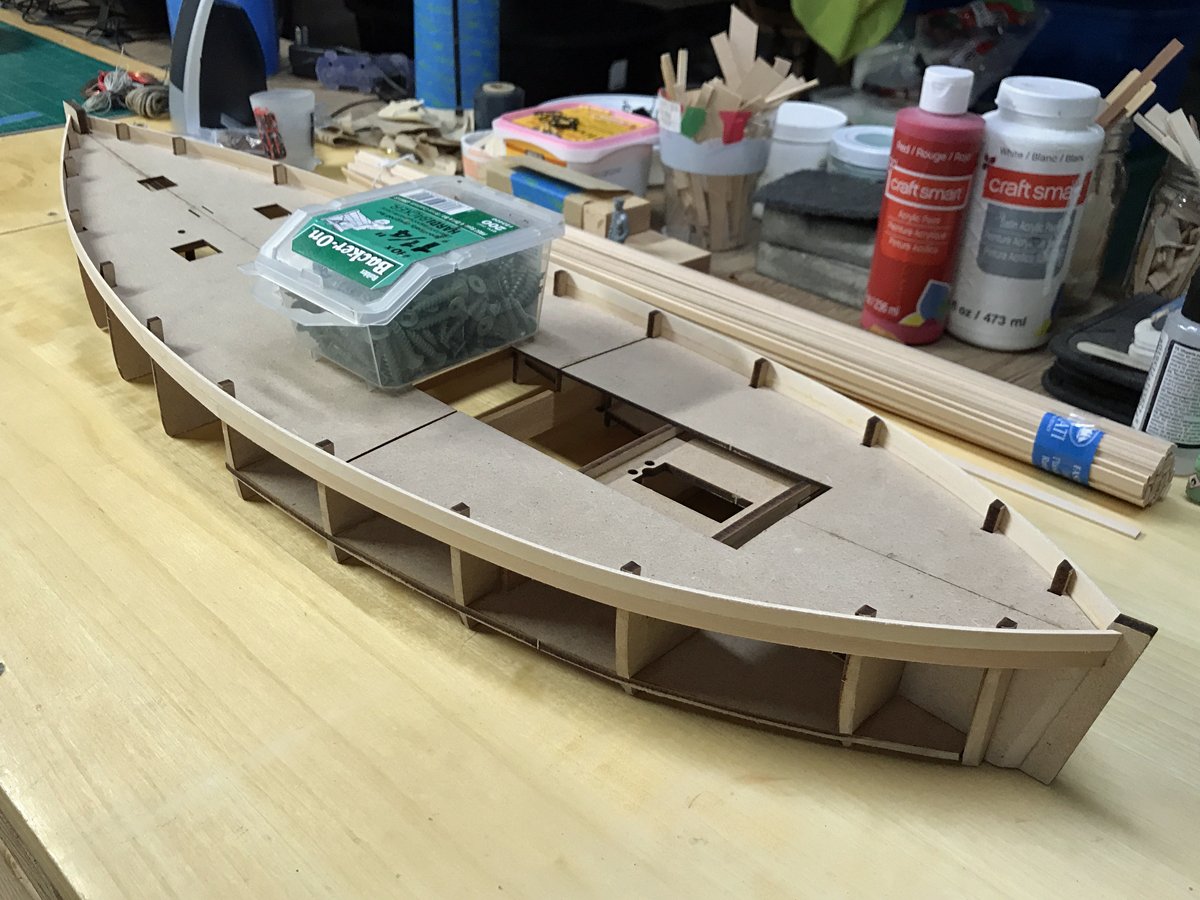
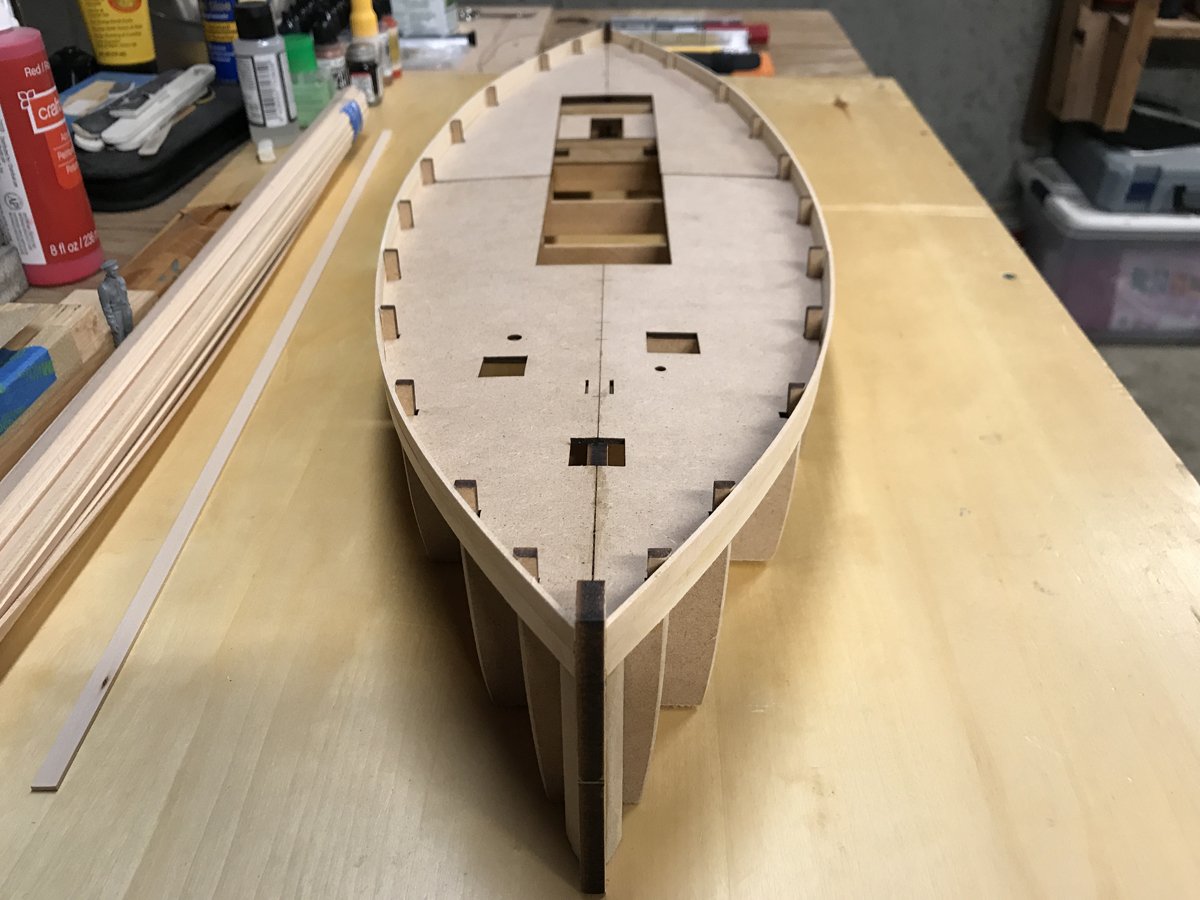
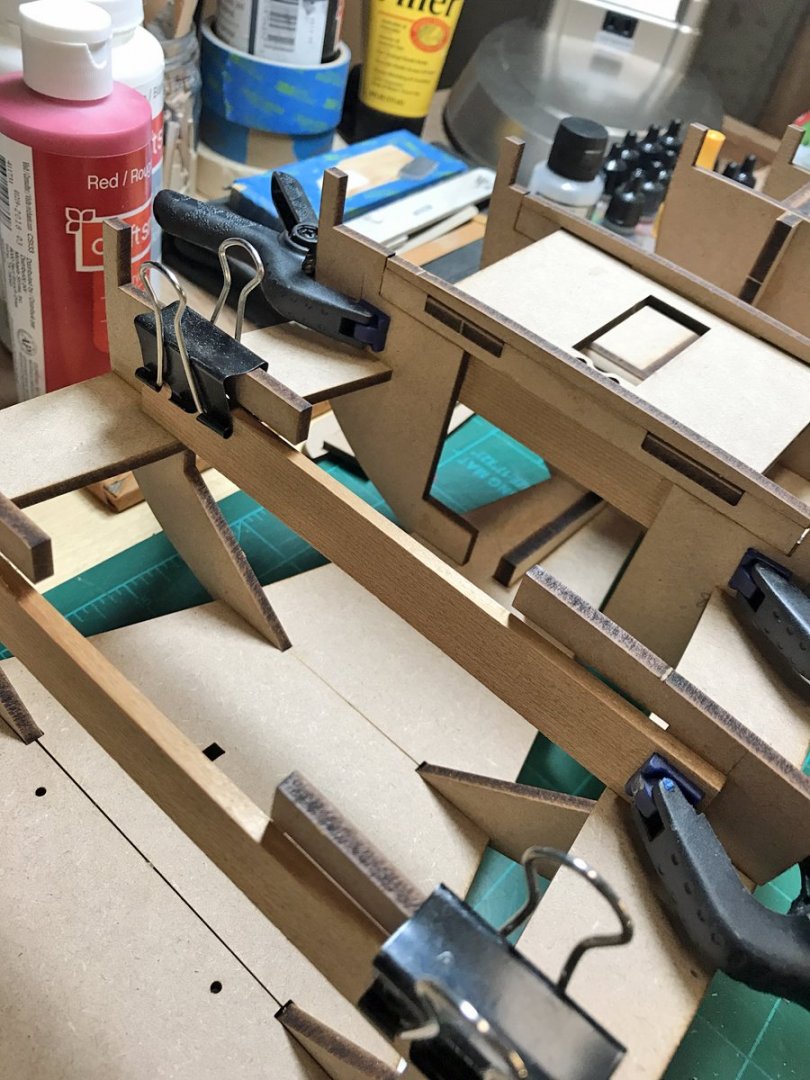
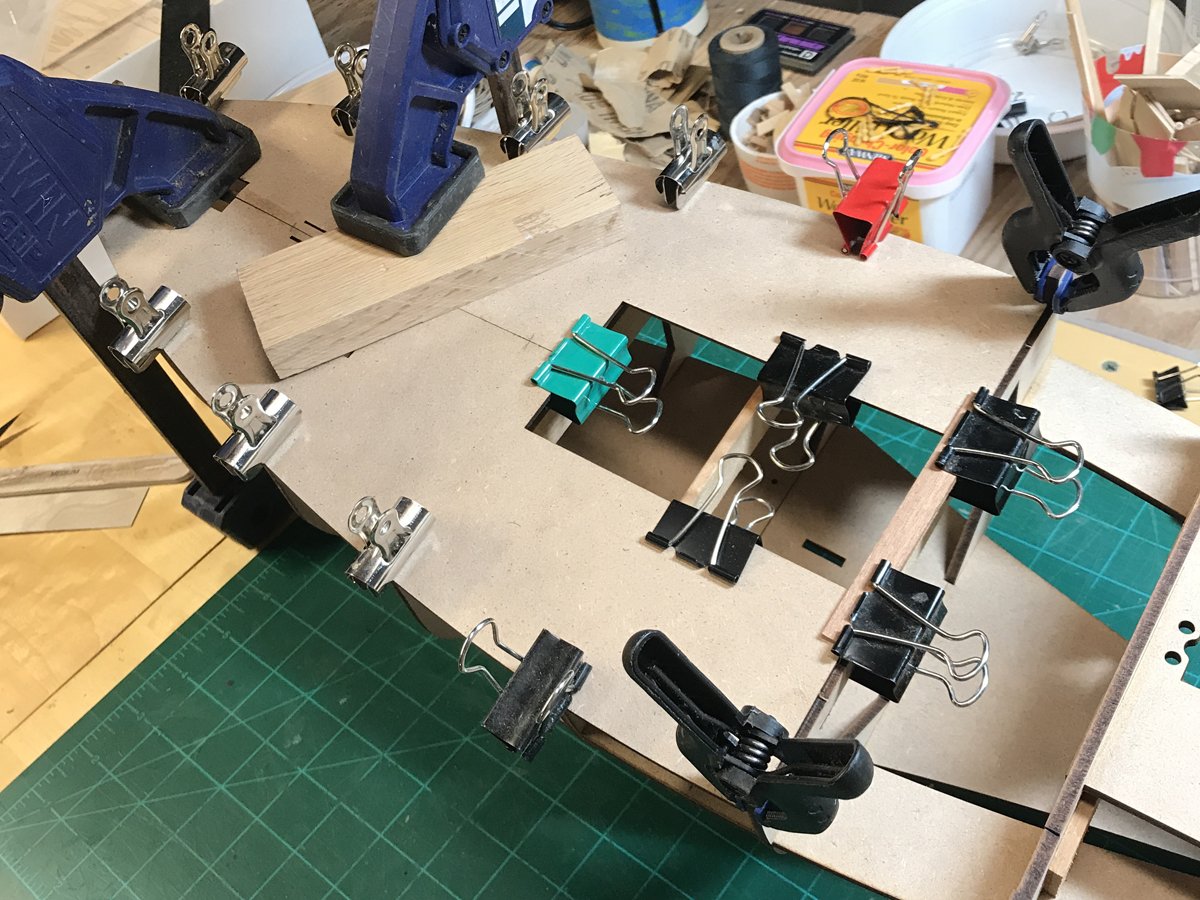
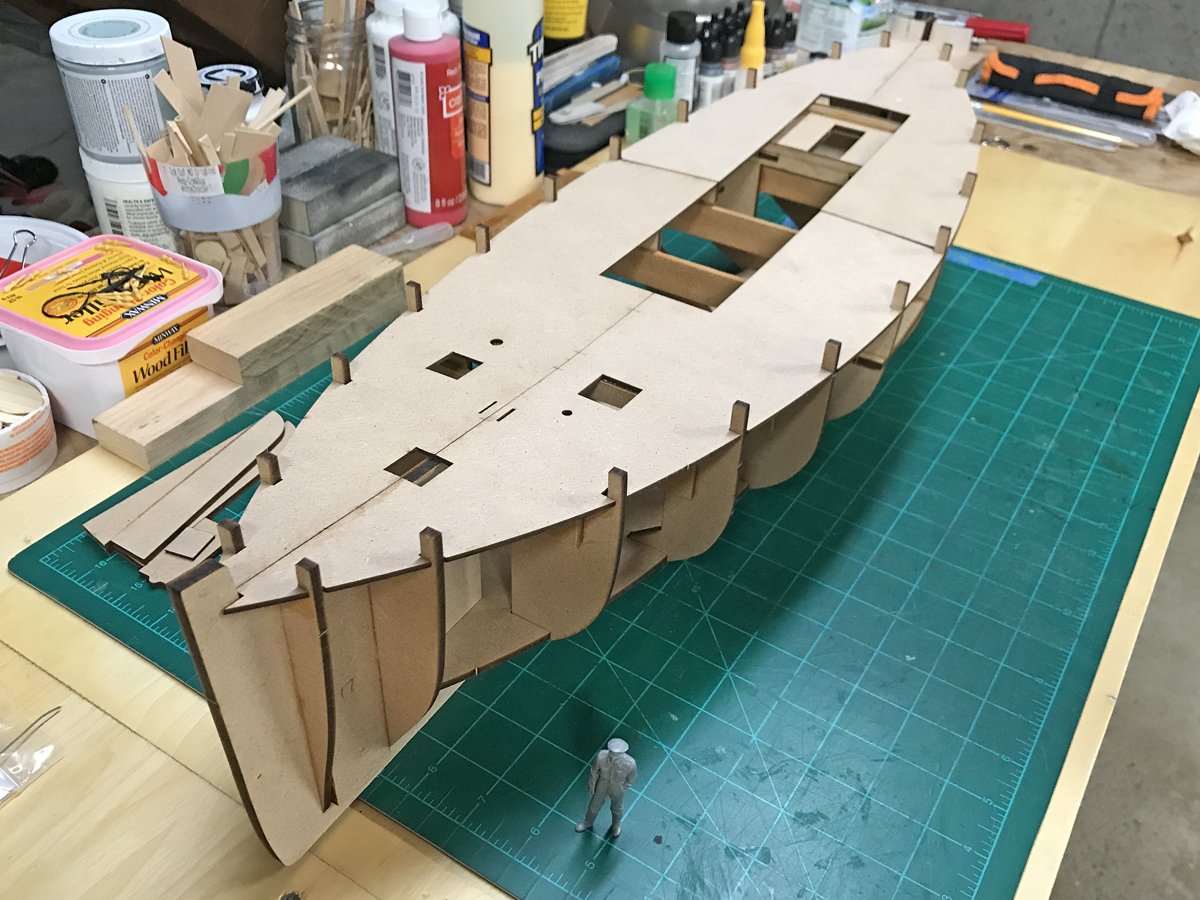
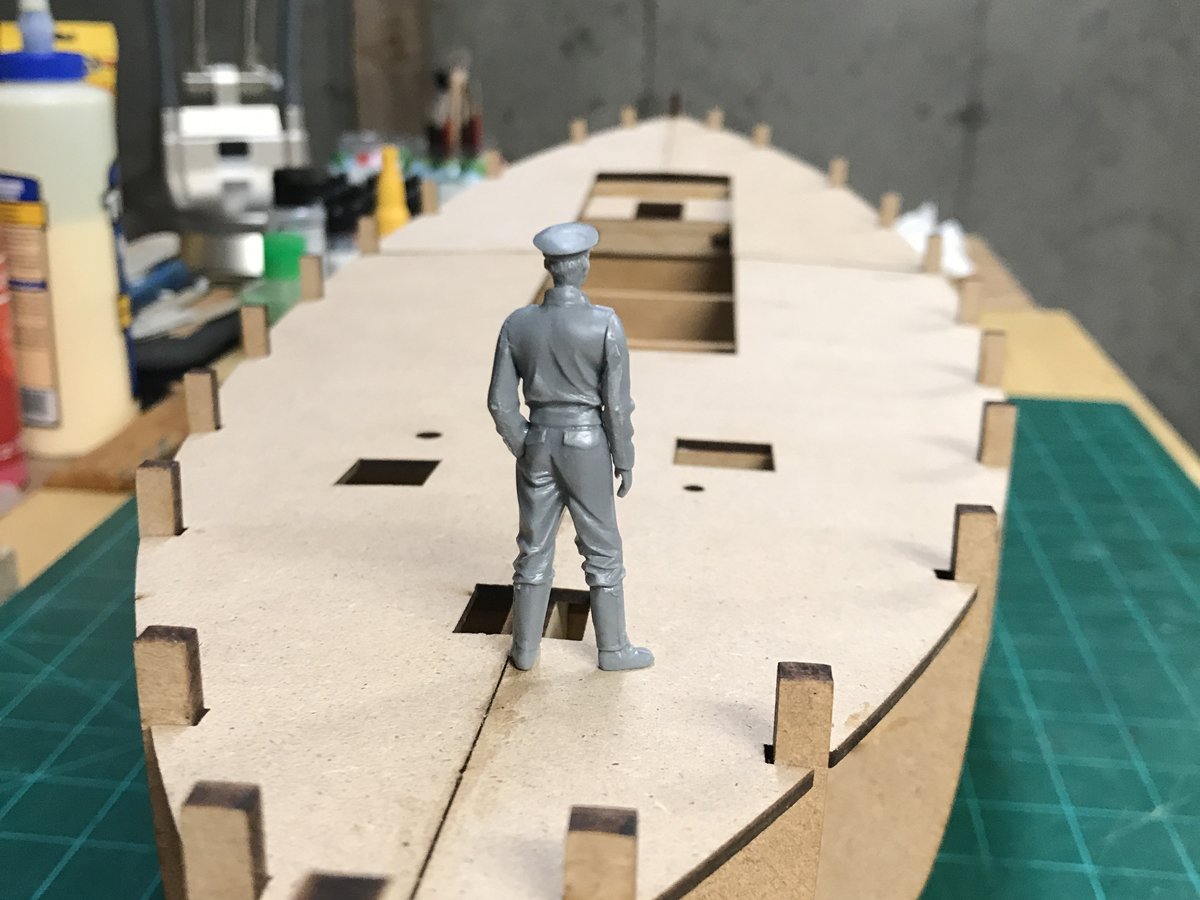
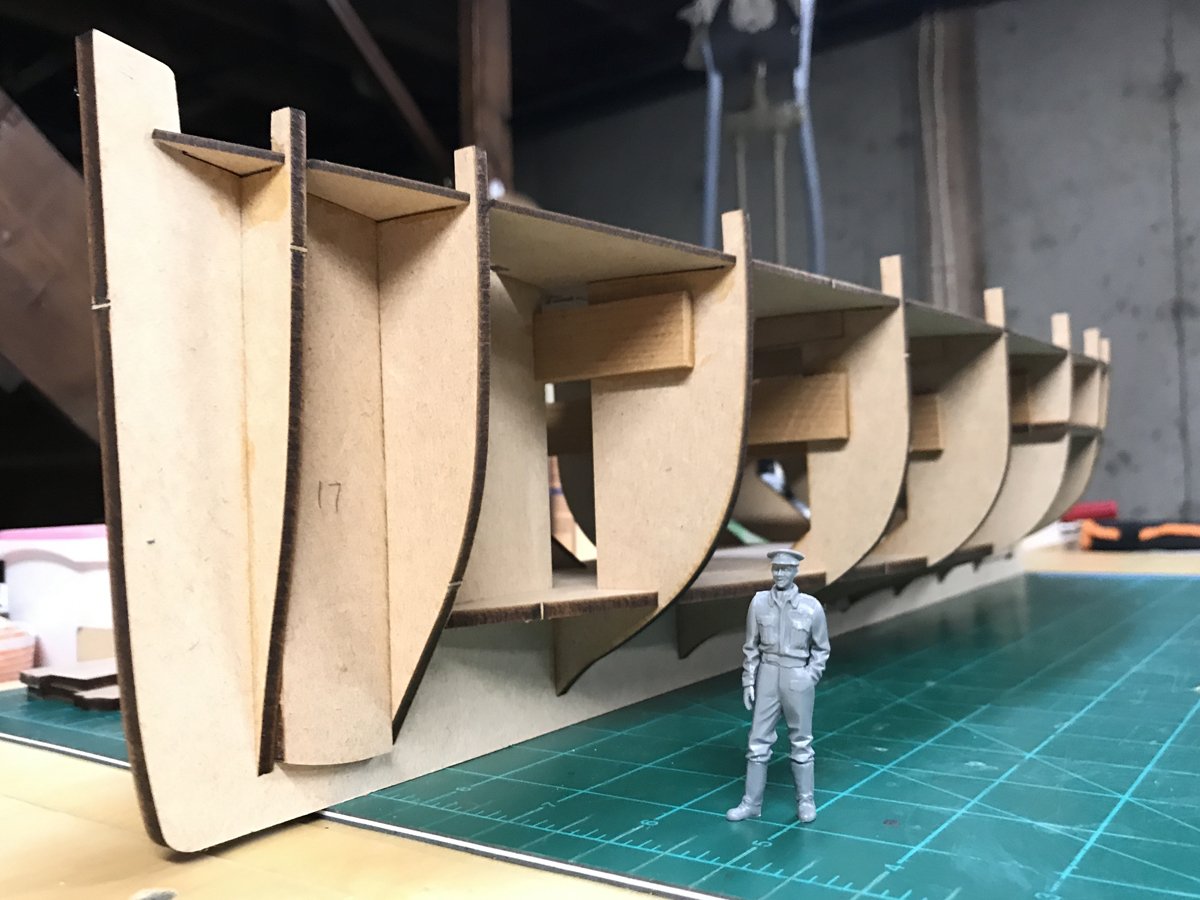
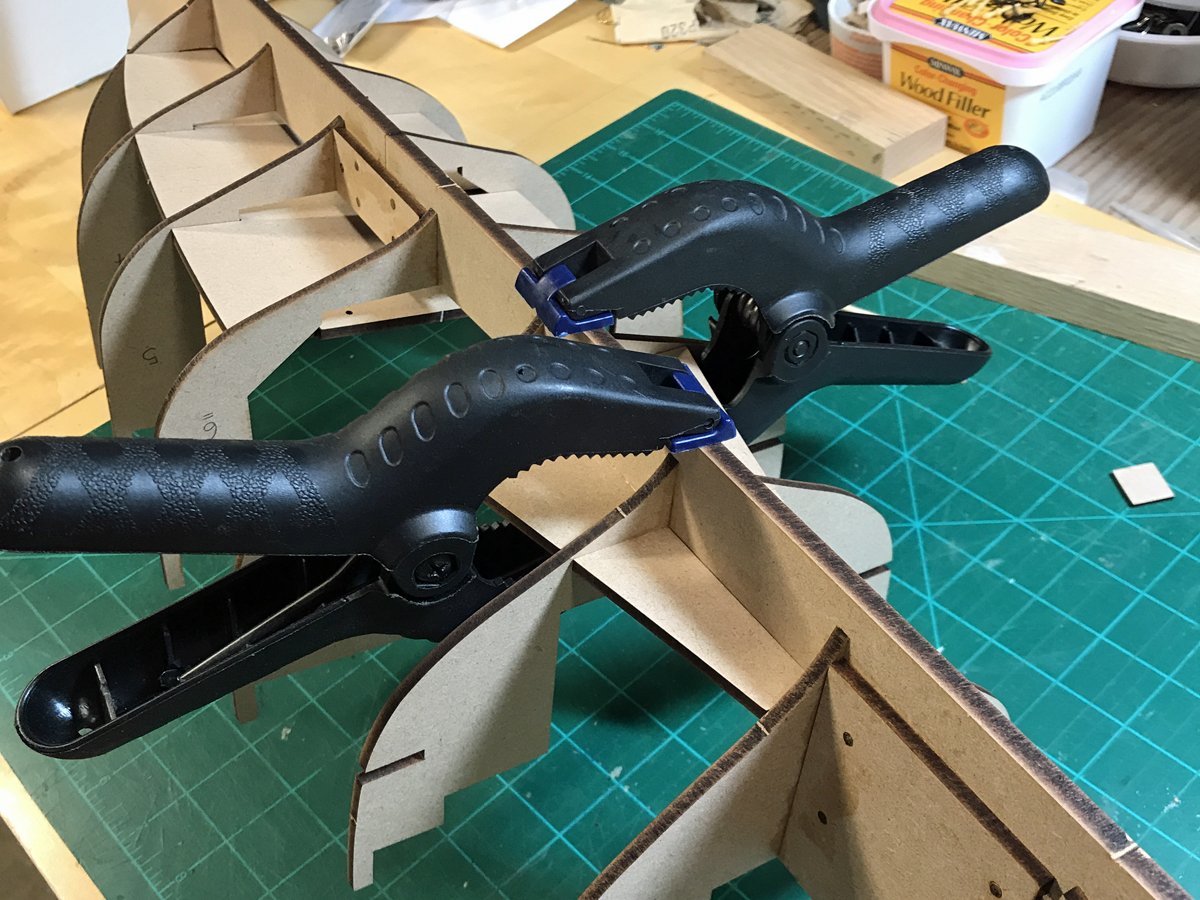
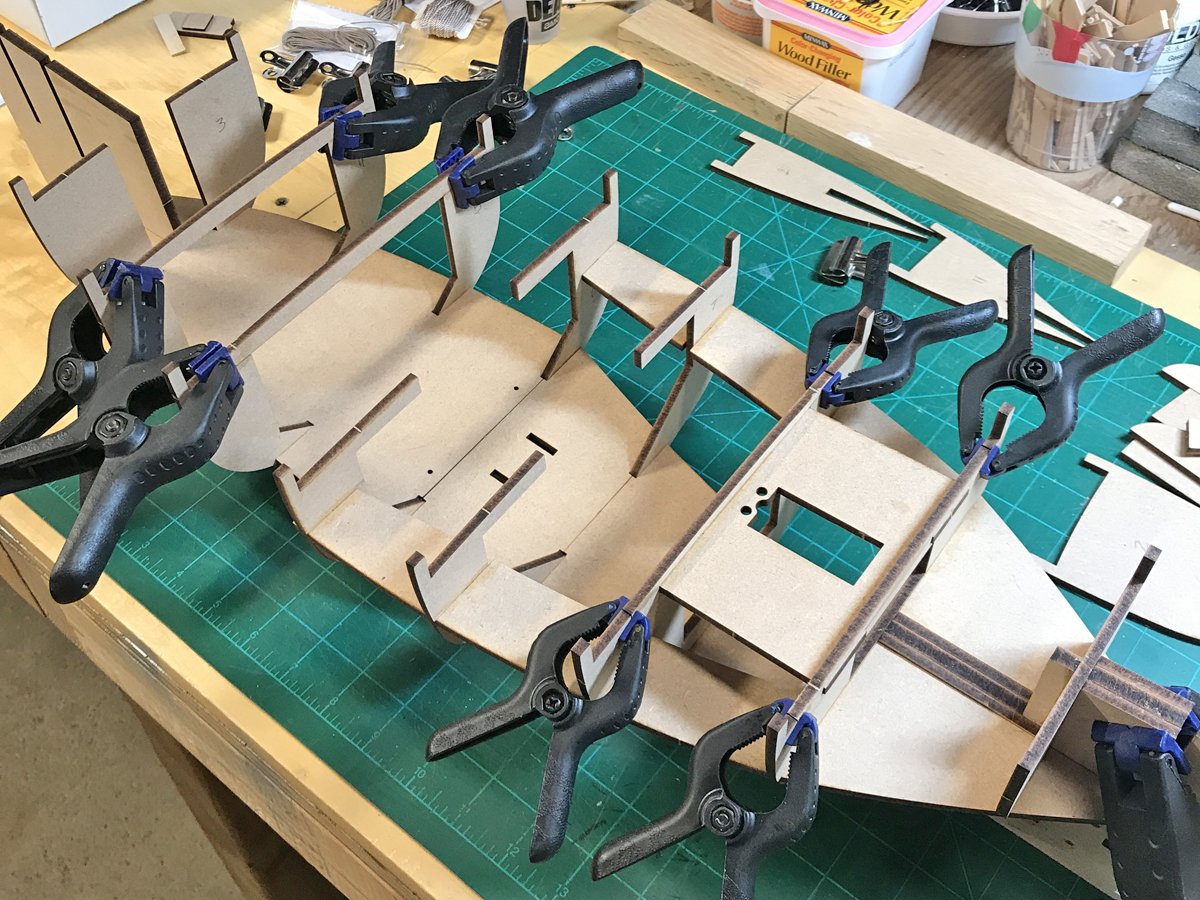
So I've added additional support across all the open bulkheads above the waterline in hopes of keeping the hull from deforming when I remove the lower portion. With the sub-deck glued down and the planking in place I can't see any reason why the overall structure won't hold up to the cutting process. Once the cut is made and everything looks solid/stable, I'll need to remove some of the cross supports to allow detailing in the area below the open hatches where the nets are stored. That's a way down the road so for now I'll stick to the tasks at hand. The added cross section supports along with sub-deck structure and planking should be sufficient to keep the hull secure later on (fingers crossed). It took pretty much every kind of clamp/clip I have to secure the sub-deck firmly in place. The sub-deck is down and along with the additional cross supports appear to result in a pretty solid hull. I've added a 1/32 Spitfire pilot who may well be converted into a Scottish fisherman to give a sense of overall scale. That's all for now...thanks for stopping by.

-
Thanks for the link/info Kevin, I’ll check that out.
-
Thanks Bob...I appreciate the heads up!
-
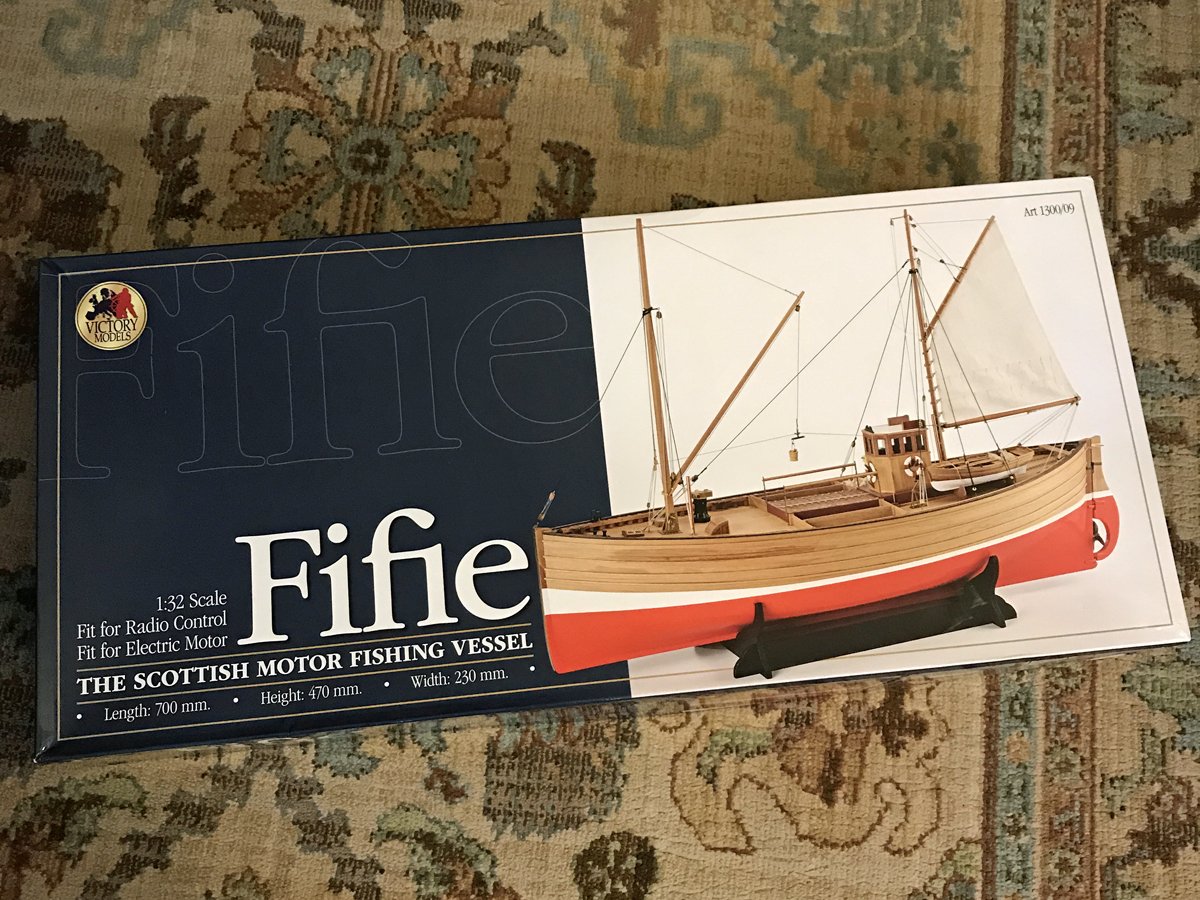
kit review 1:32 Fifie – The Scottish Motor Fishing Vessel by Amati
PJG replied to James H's topic in REVIEWS: Model kits
I just started a build log for this kit. So far, so good! -
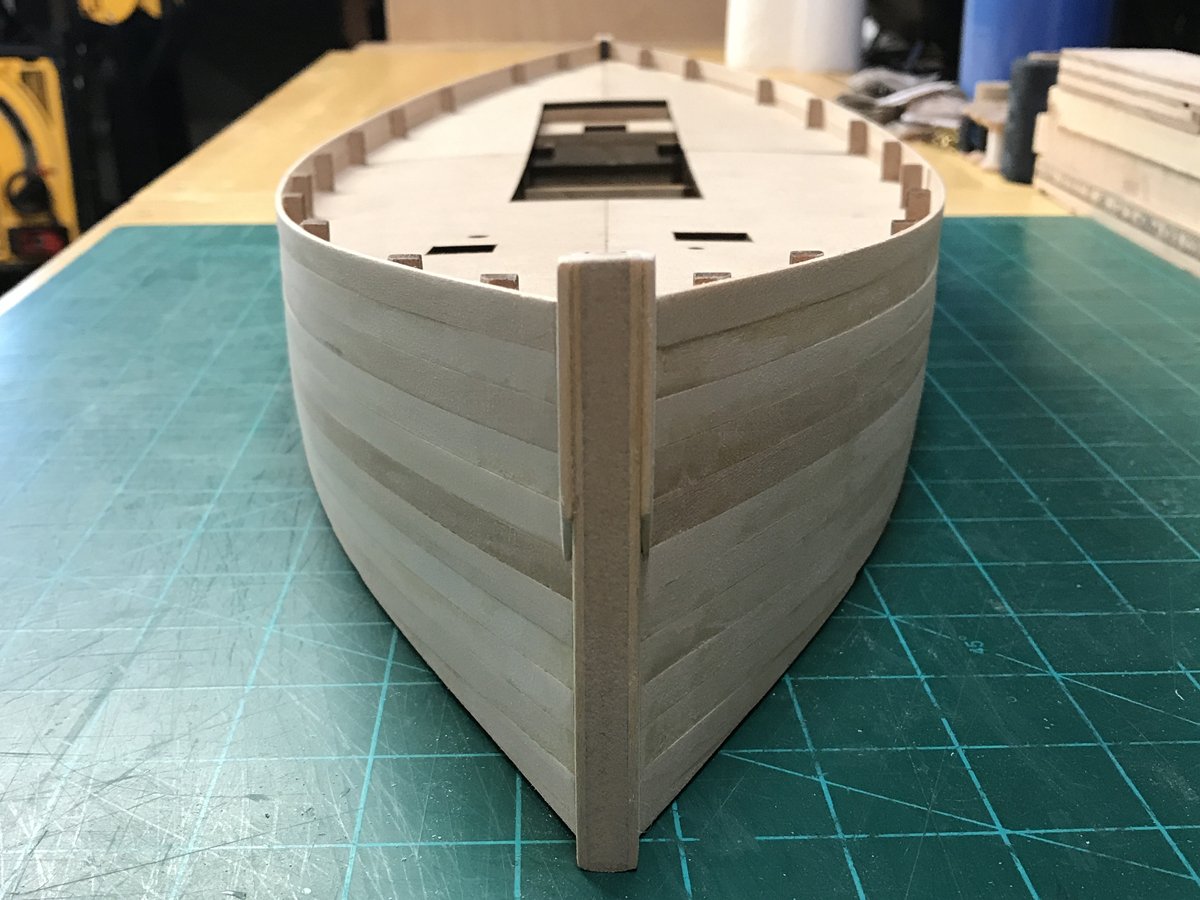
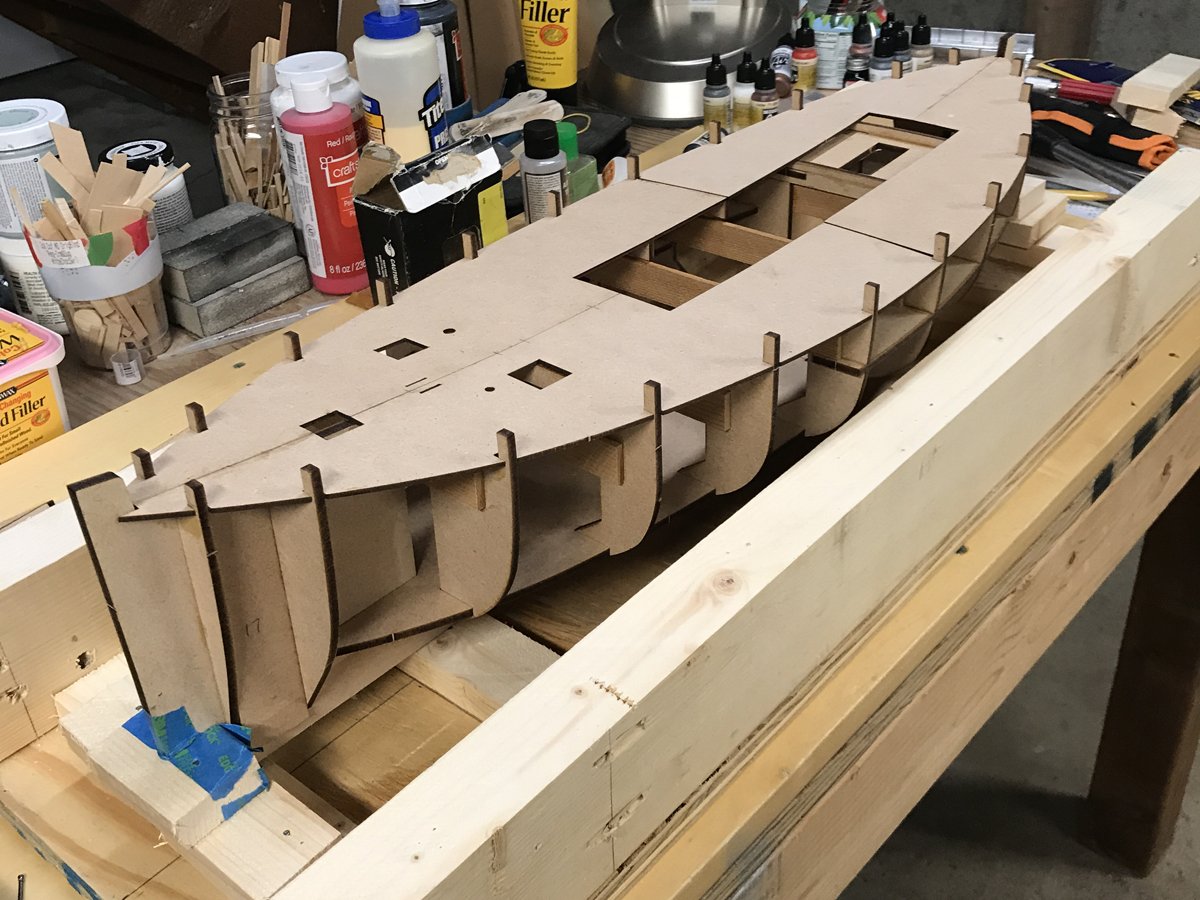
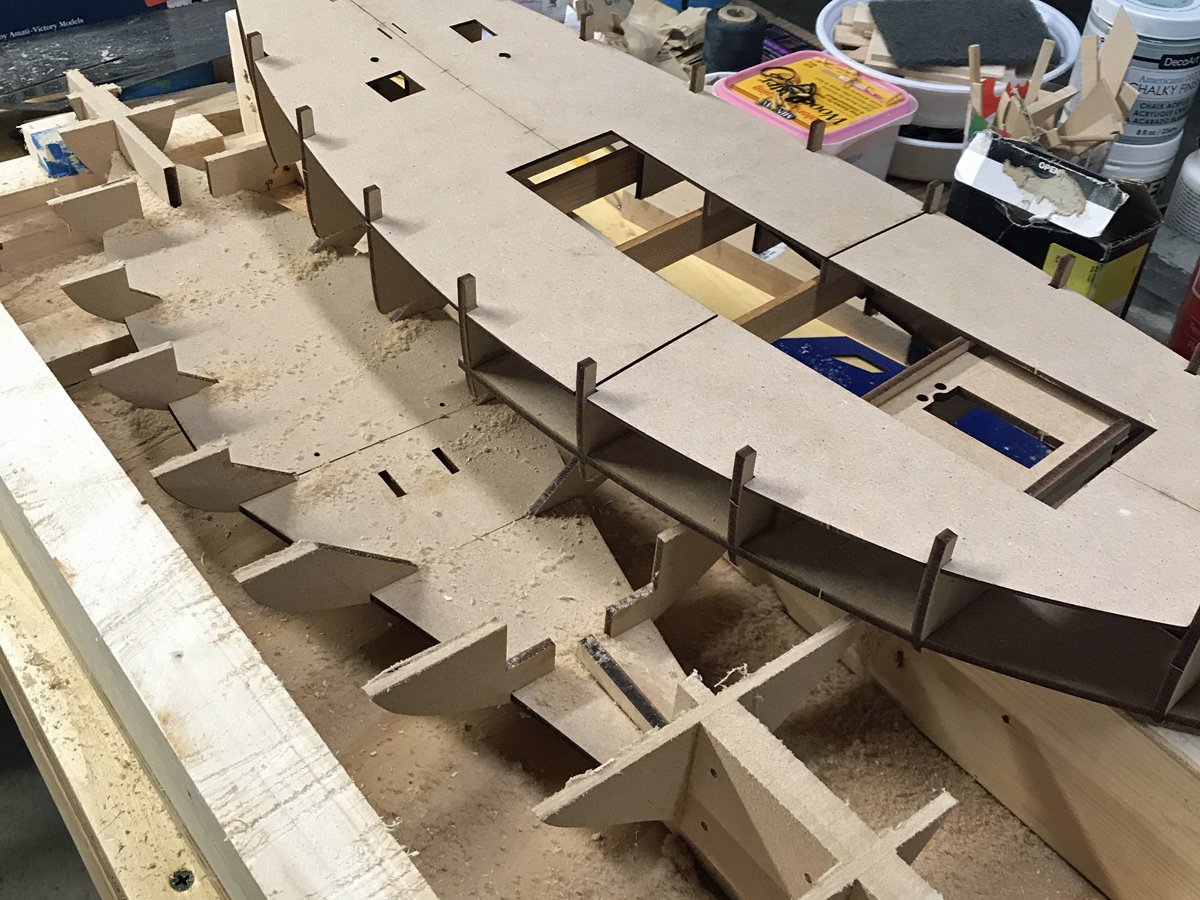
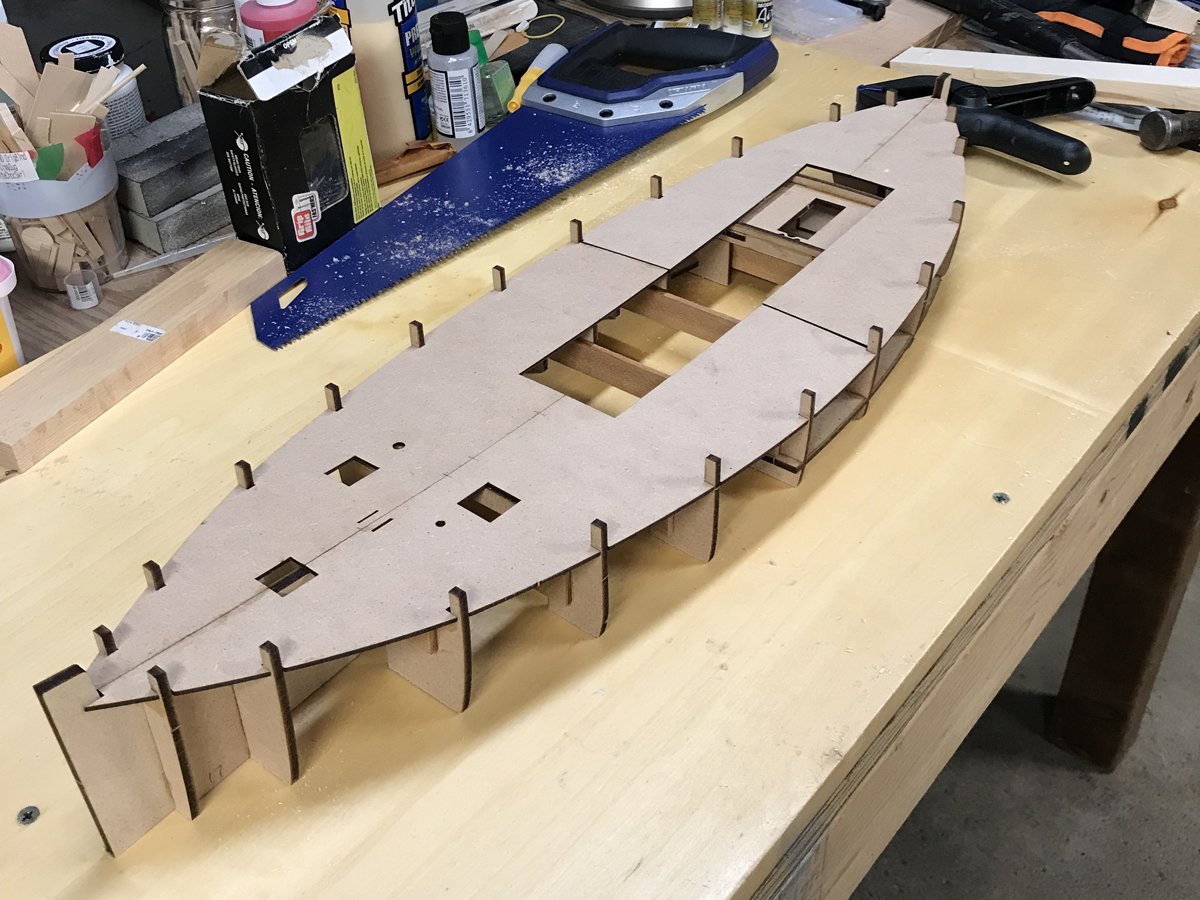
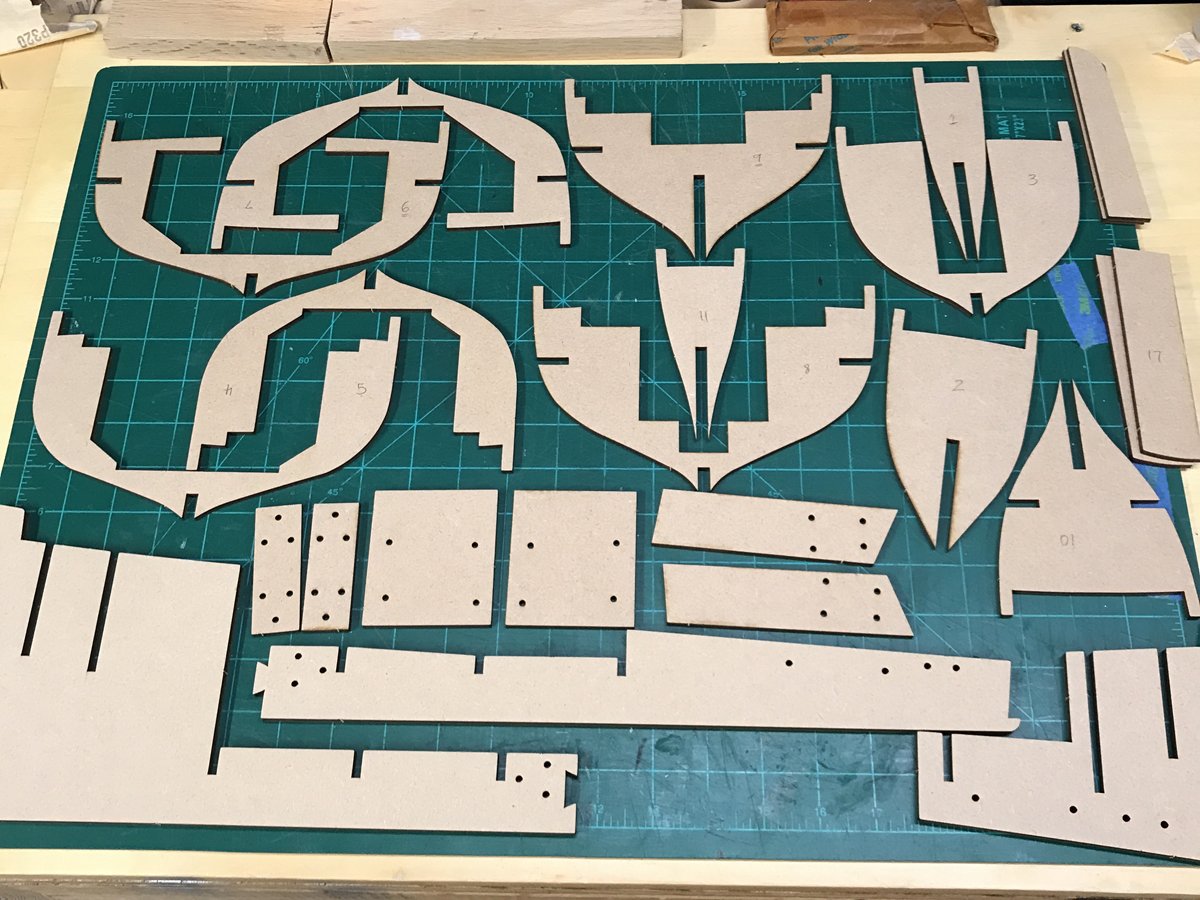
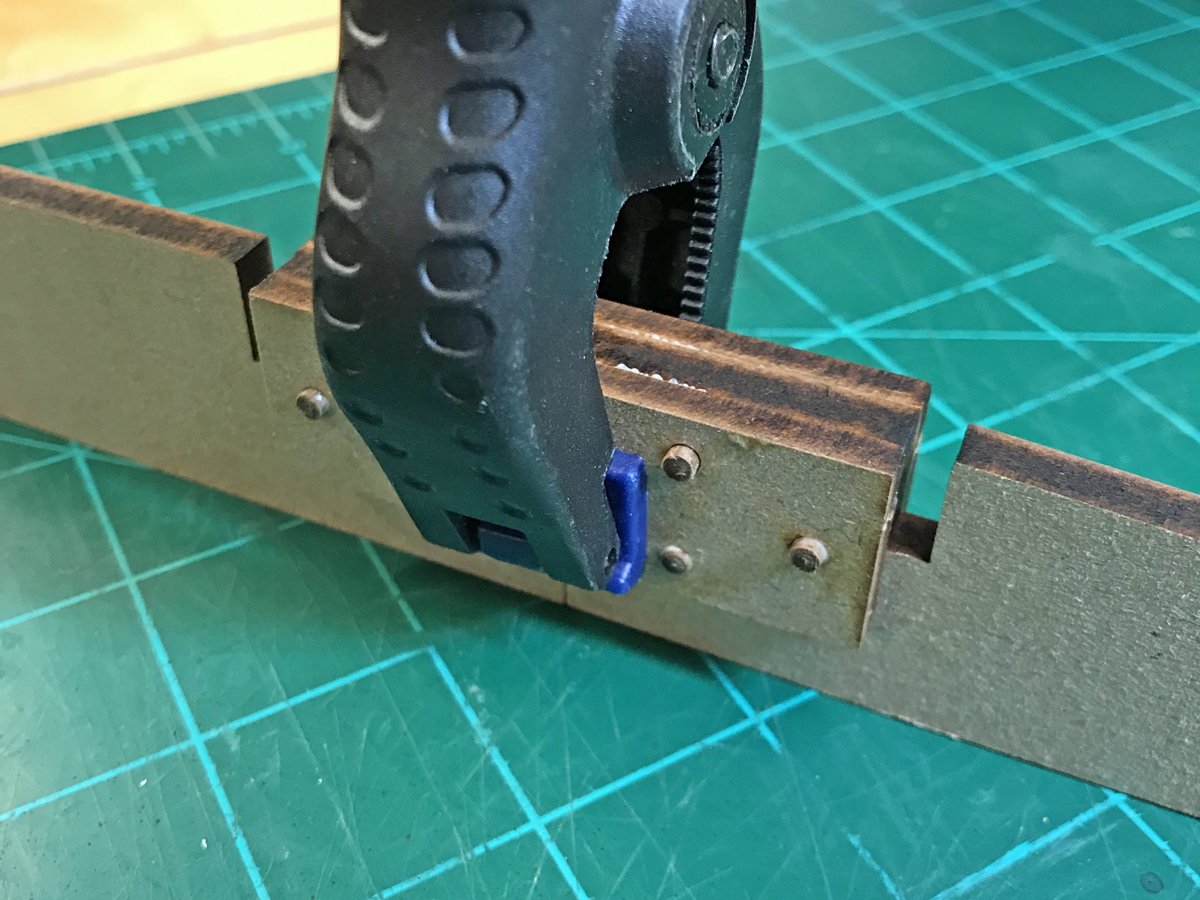
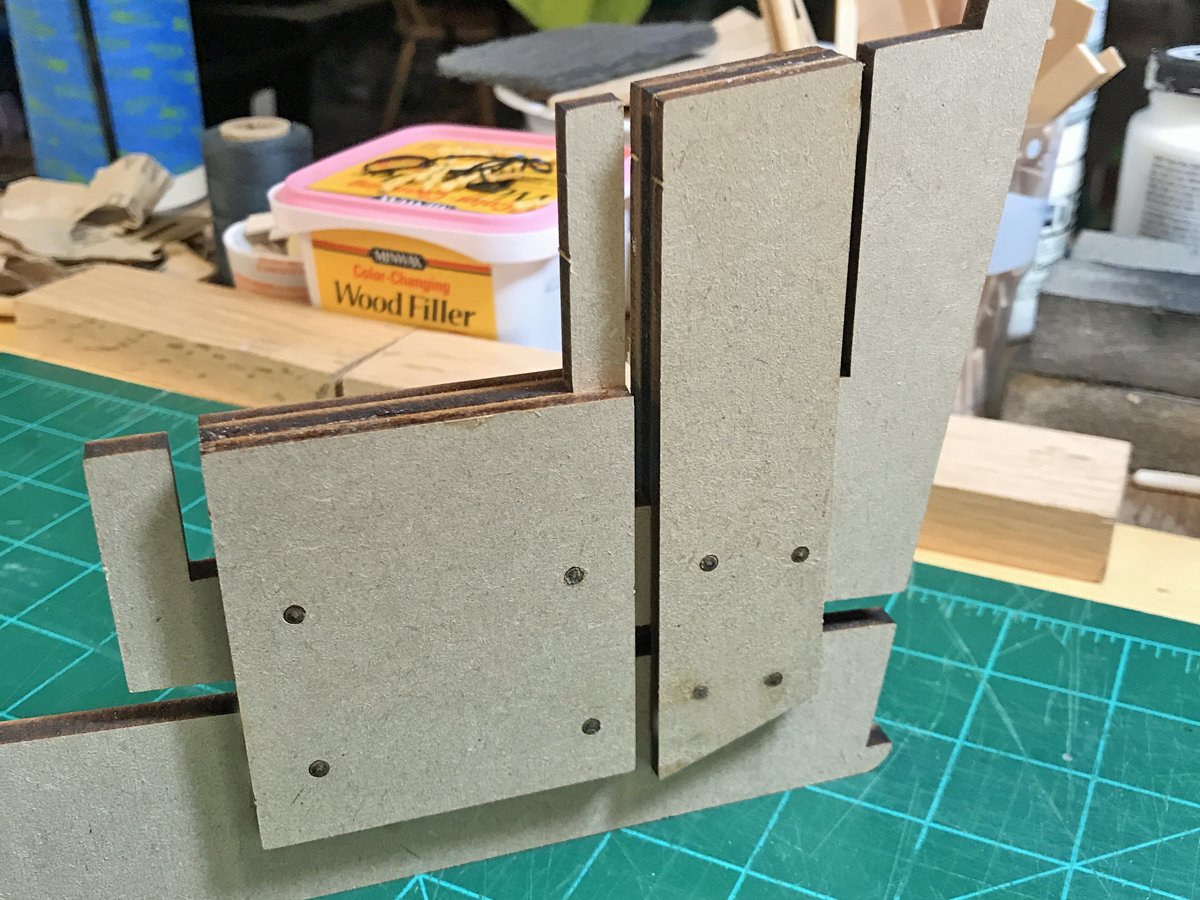
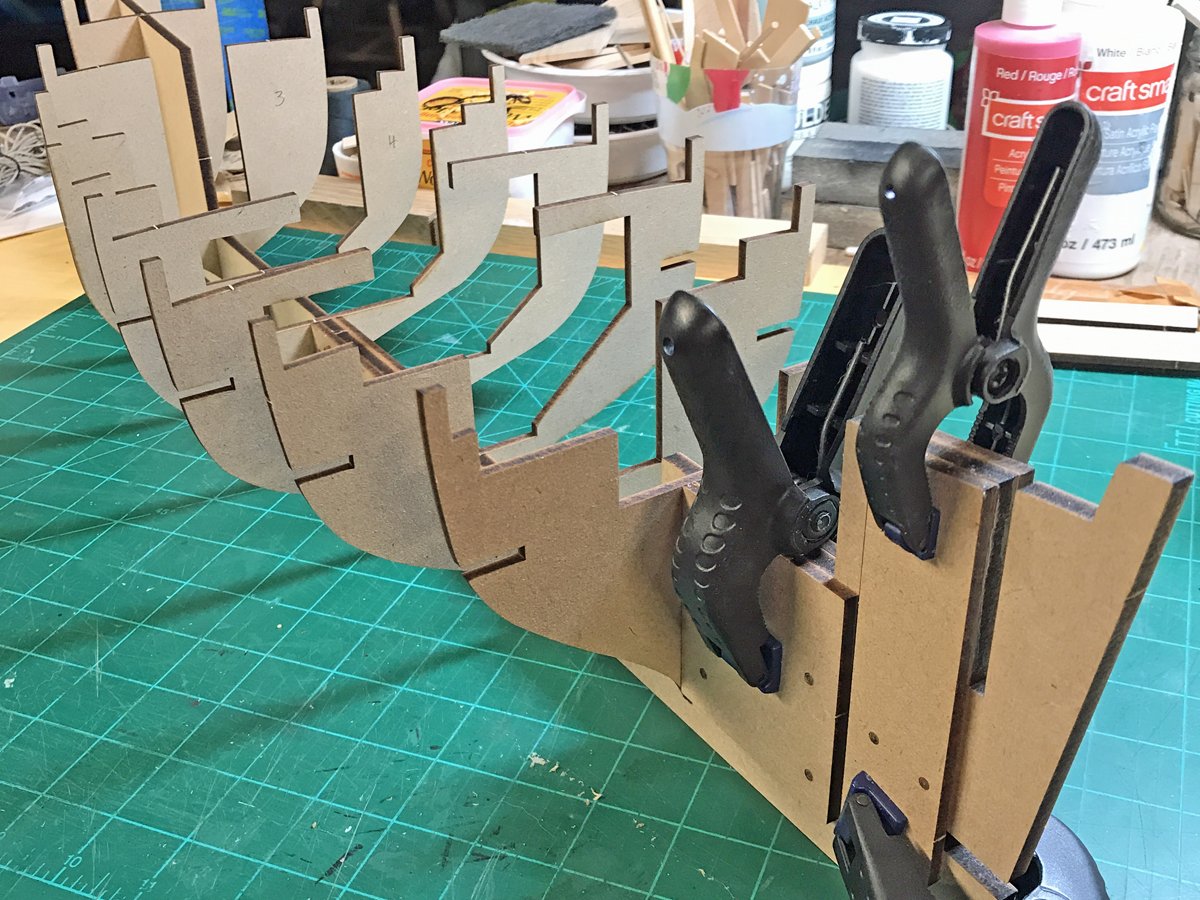
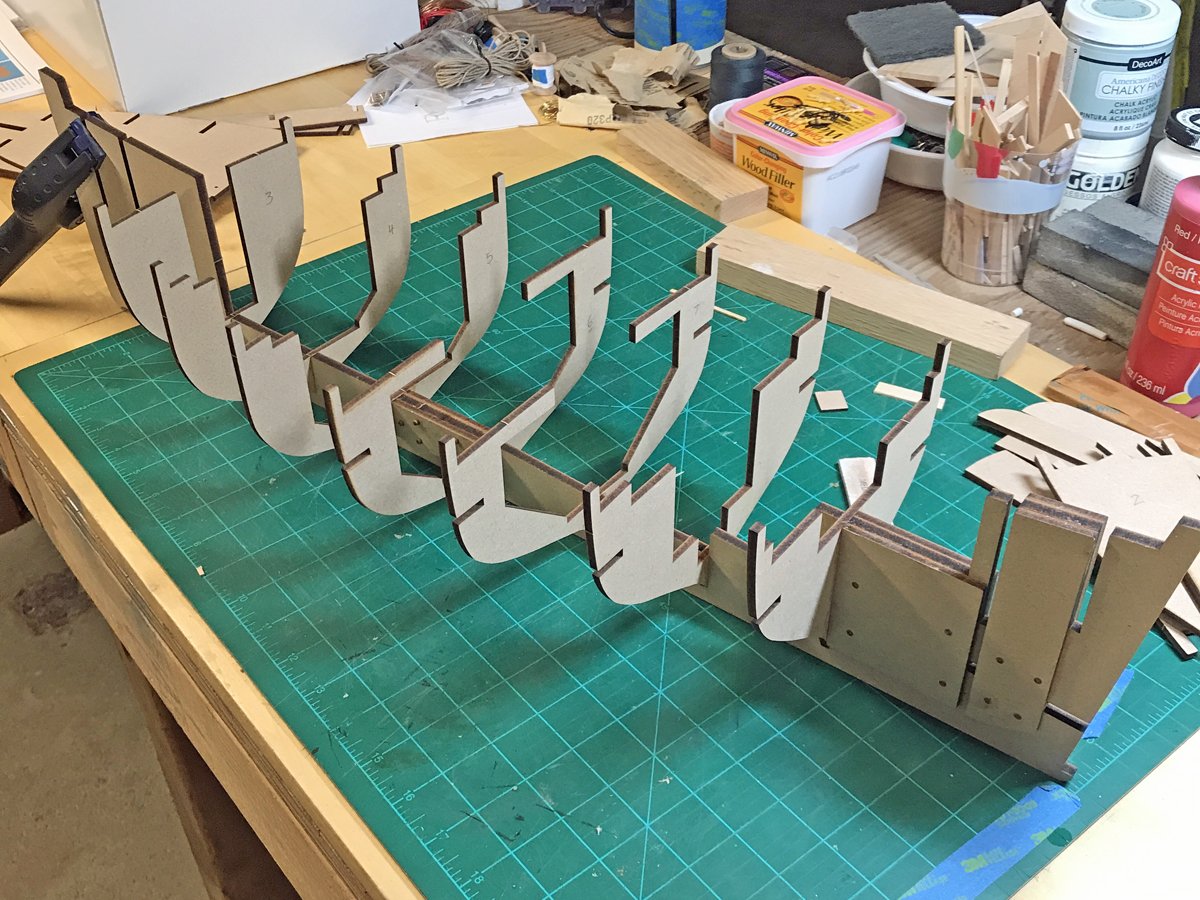
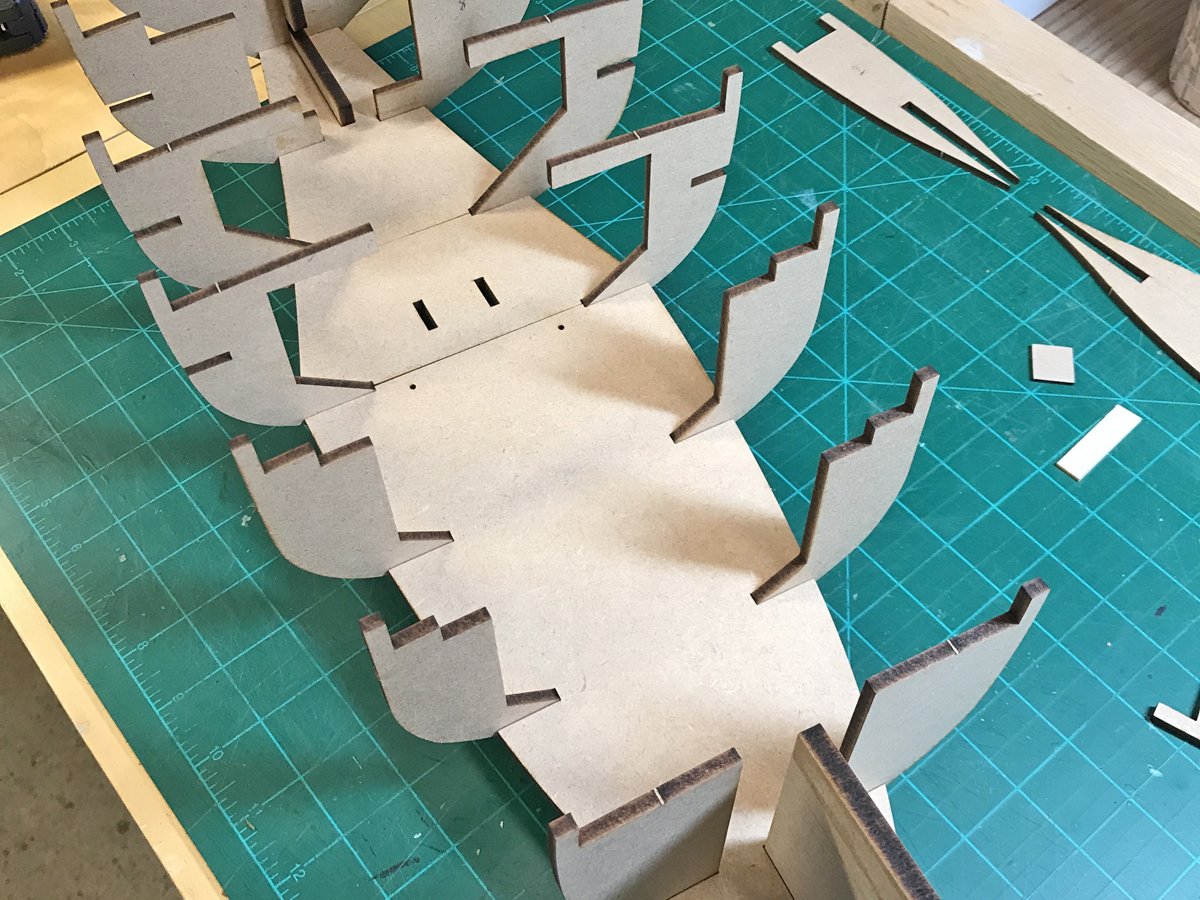
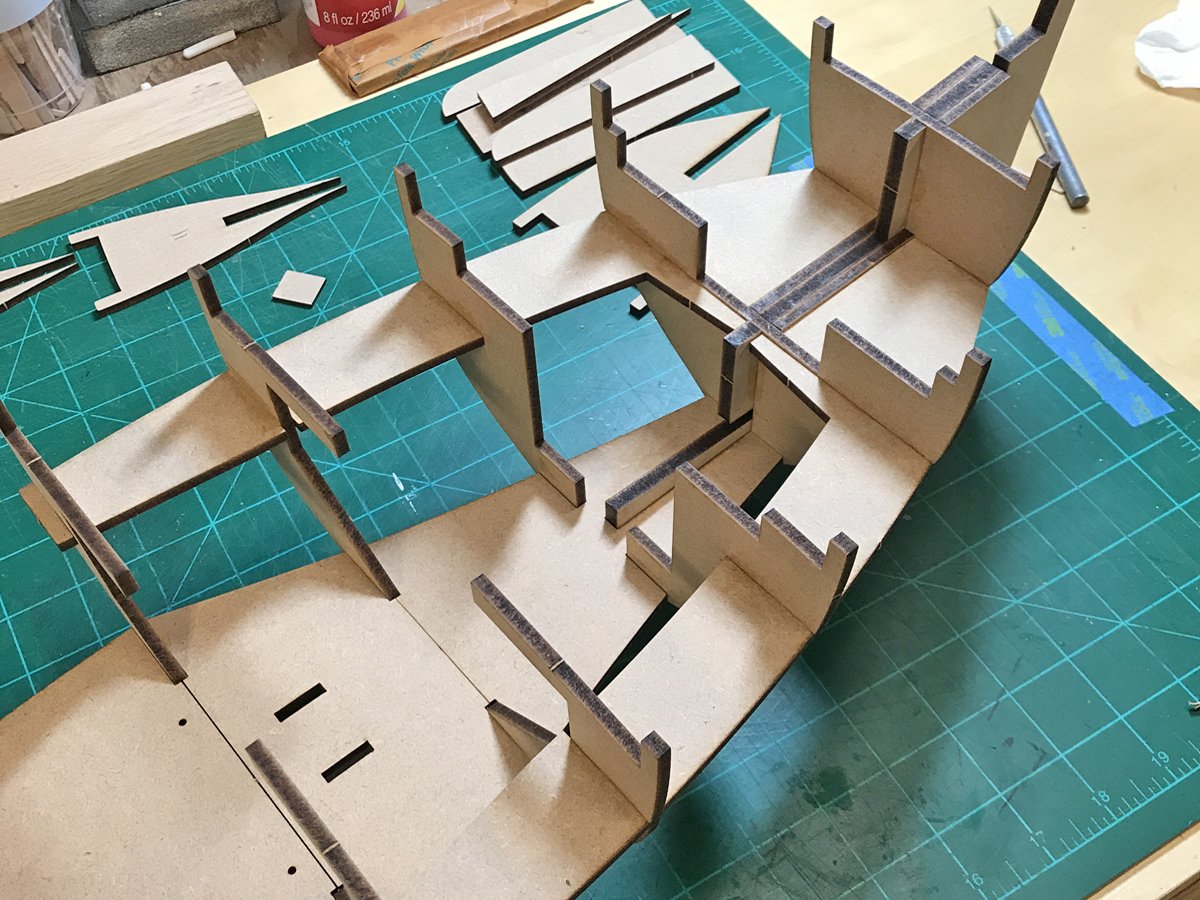
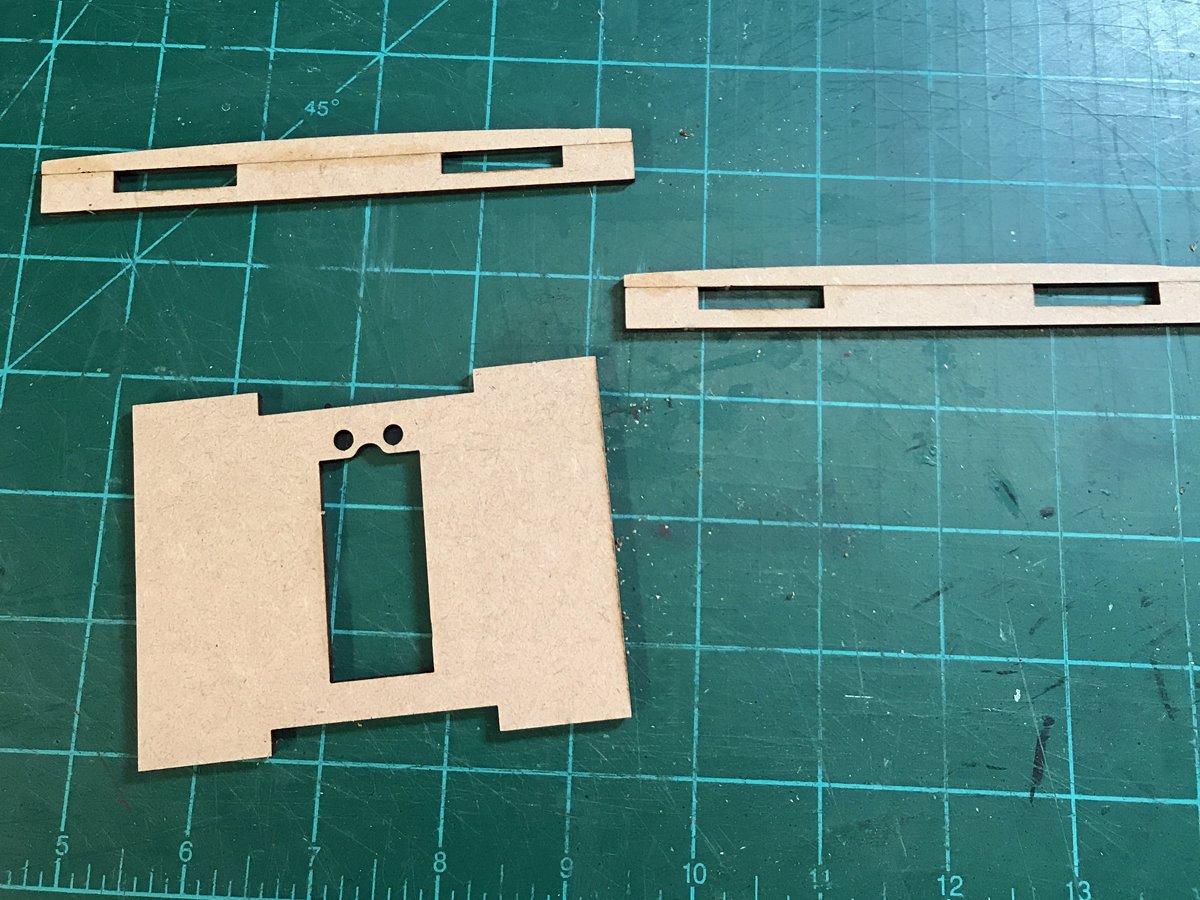
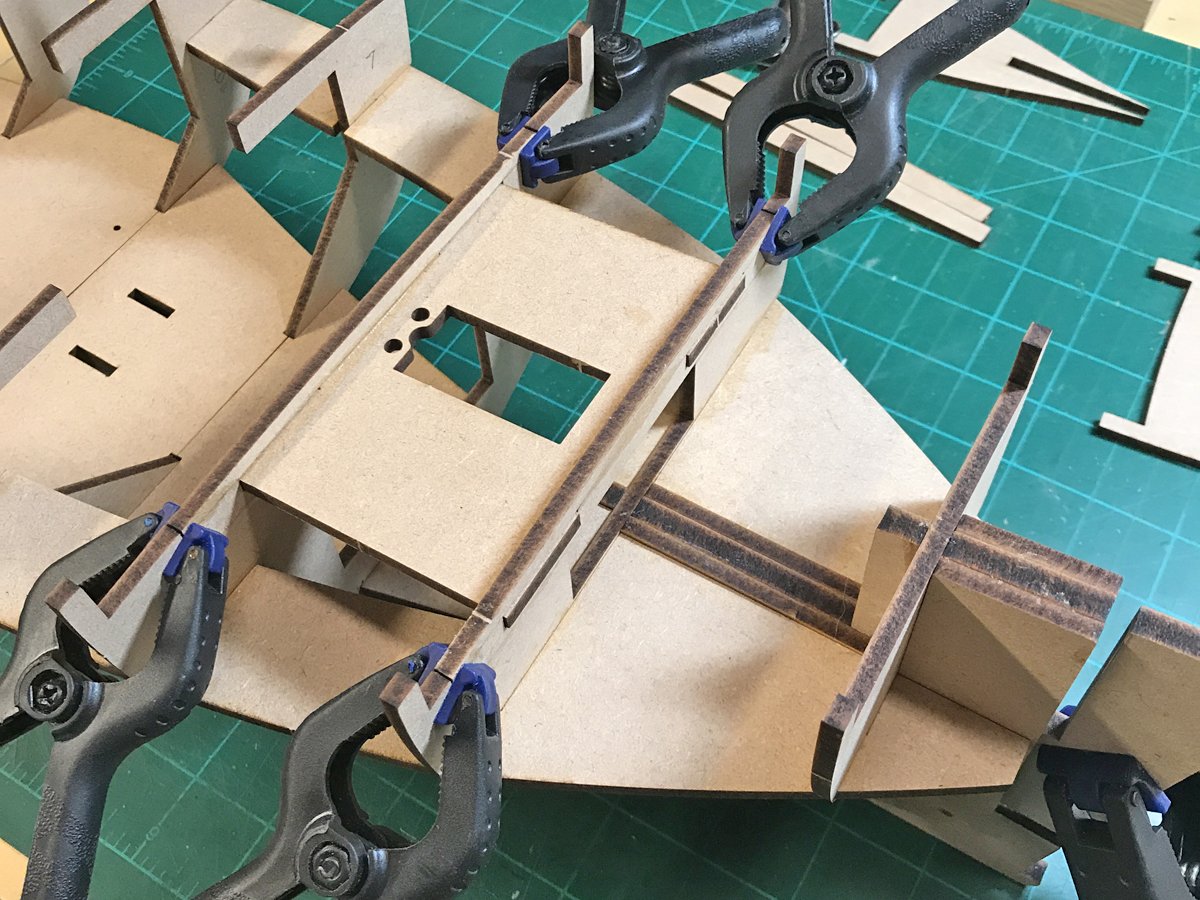
I won’t spend much time going over the kit in general because James H did a very thorough job of that in his excellent review here. As James said, the box is packed with high quality material, a clear, full-color instruction booklet and 7 sheets of detailed plans. I’ve read lots of great things about Chris Watton’s kit designs here and from what I've experienced so far, the praise is well-deserved. A word of caution for those of you with limited work space...this is a BIG kit! I knew the specs going in but didn't fully appreciate the sheer size of this thing until I started dry-fitting the frames. I'm drooling over the possibilities in terms of adding detail to this build but you need to have plenty of space if you decide to give this one a go. I have fairly ambitious plans for this kit. I'll be displaying the Fifie as a waterline build in the act of hauling nets. I haven't quite figured out how I'll be pulling this off but I love the look of these boats in the water and really want to display it that way. I'd also like to add some crew if I can get my hands on some halfway decent 1:32 figures to rework into Scottish fishermen. With that said, here we go... A nice big box full of high quality stuff! The die-cuts here are very clean and precise...not at all like my previous build. Kudos to Chris Watton's clever engineering which makes assembling the frames problem-free and extremely sturdy. Even I can't screw this up! Stern assembly. The bulkheads fit perfectly without modification. Making quick work of the frames thanks to excellent fit/finish. Each part adds stability and guarantees correct alignment. This tray is intended to house the rudder servo if you plan to do an RC build but needs to be installed regardless. And just like that, if you're not going to be chopping the hull off at the waterline (probably a wise choice!), the sub-deck can be installed. I, however, will need to do some additional planning to add support and stability for the surgery to come. Stay tuned...

-
Amazing metal work Mike...your craftsmanship is second to none!
-
Thanks Mike...I appreciate the kind comments!
-
Thanks Steve
-
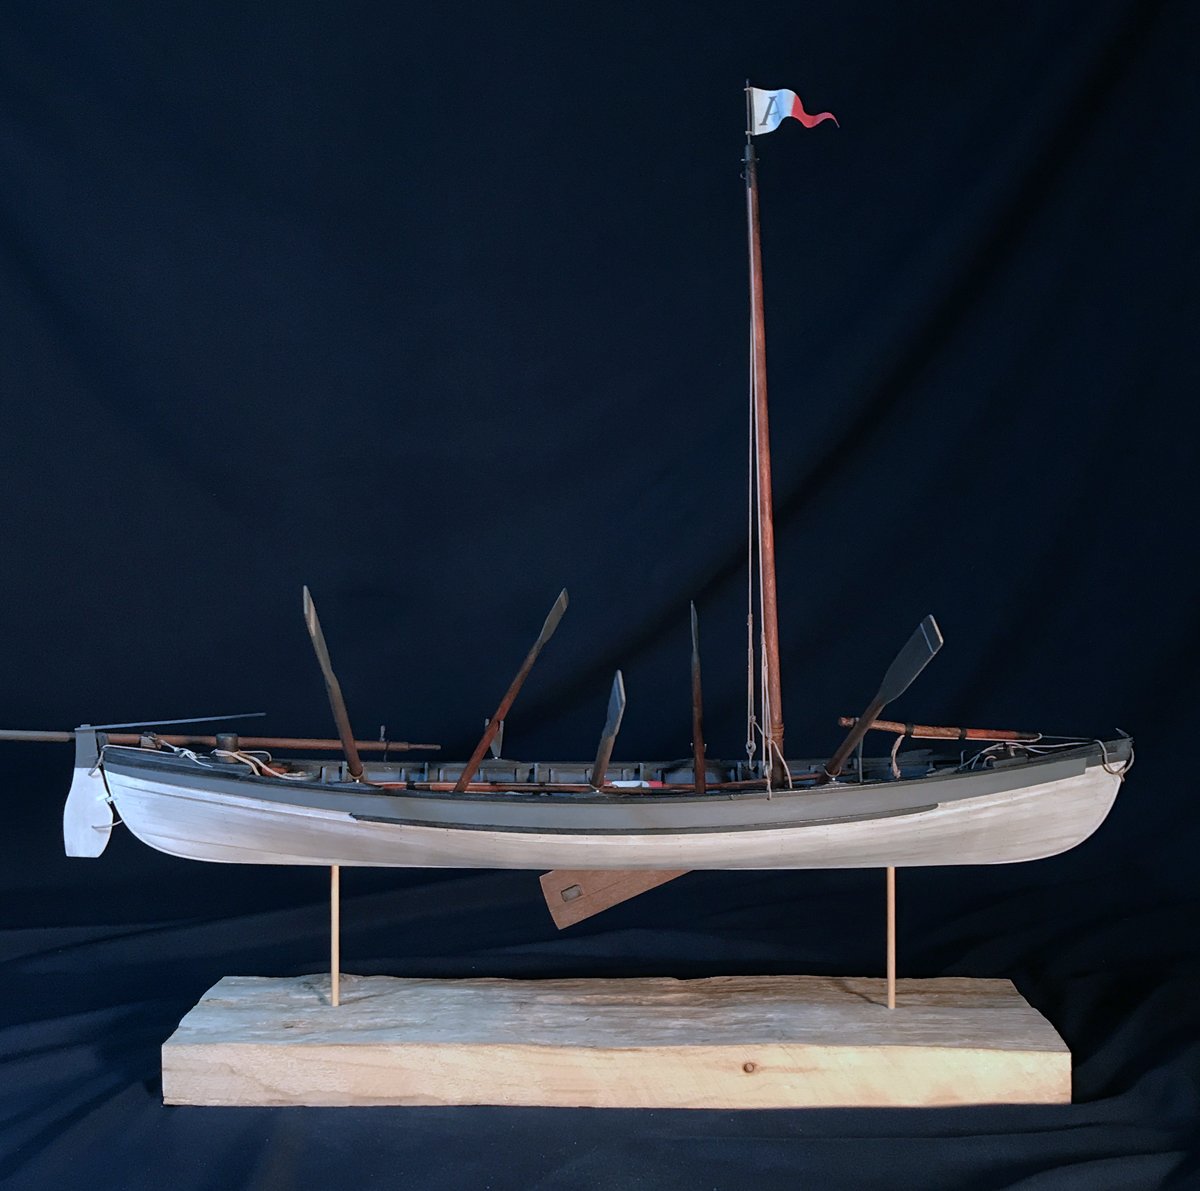
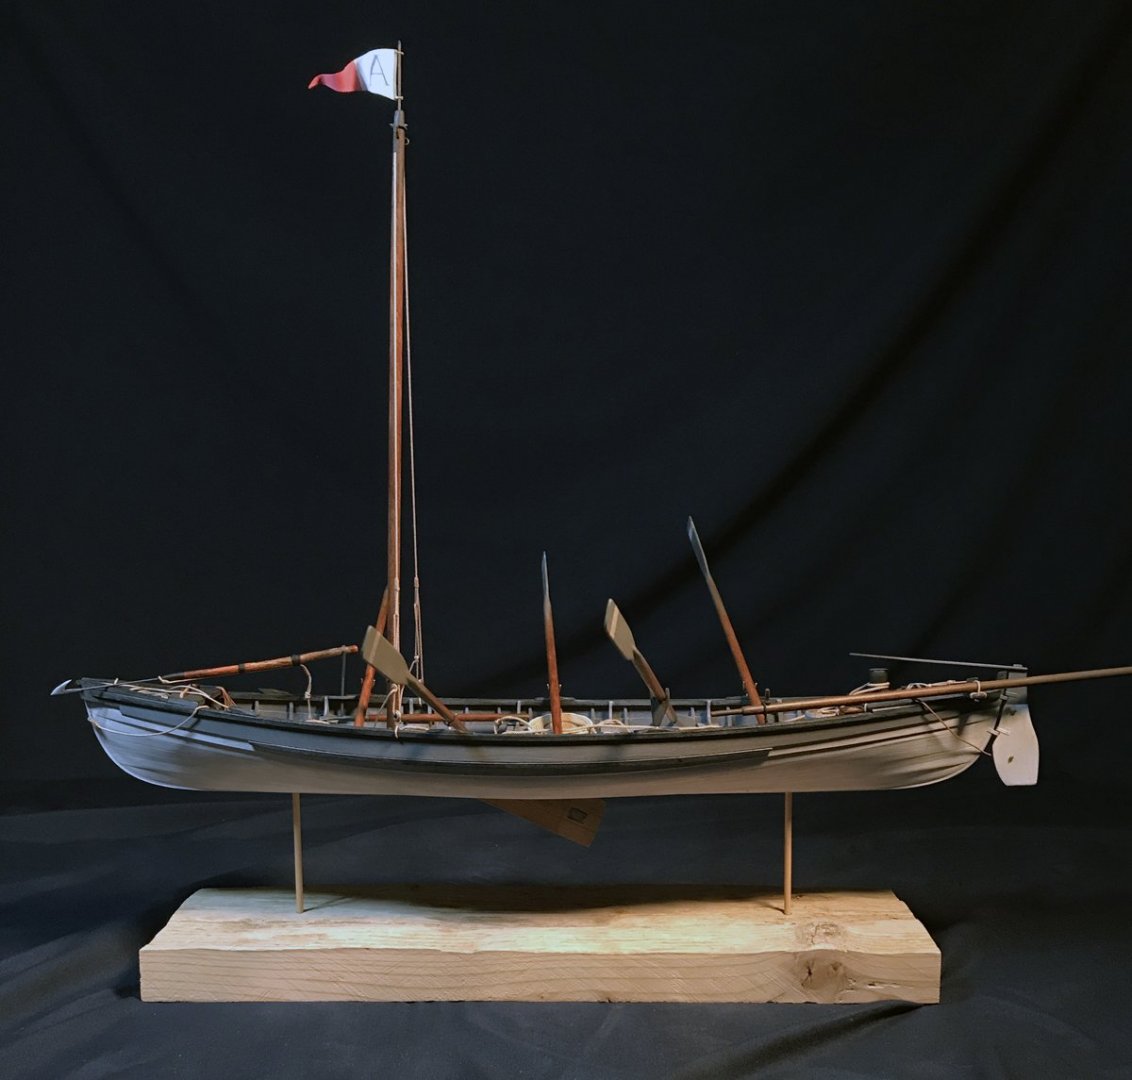
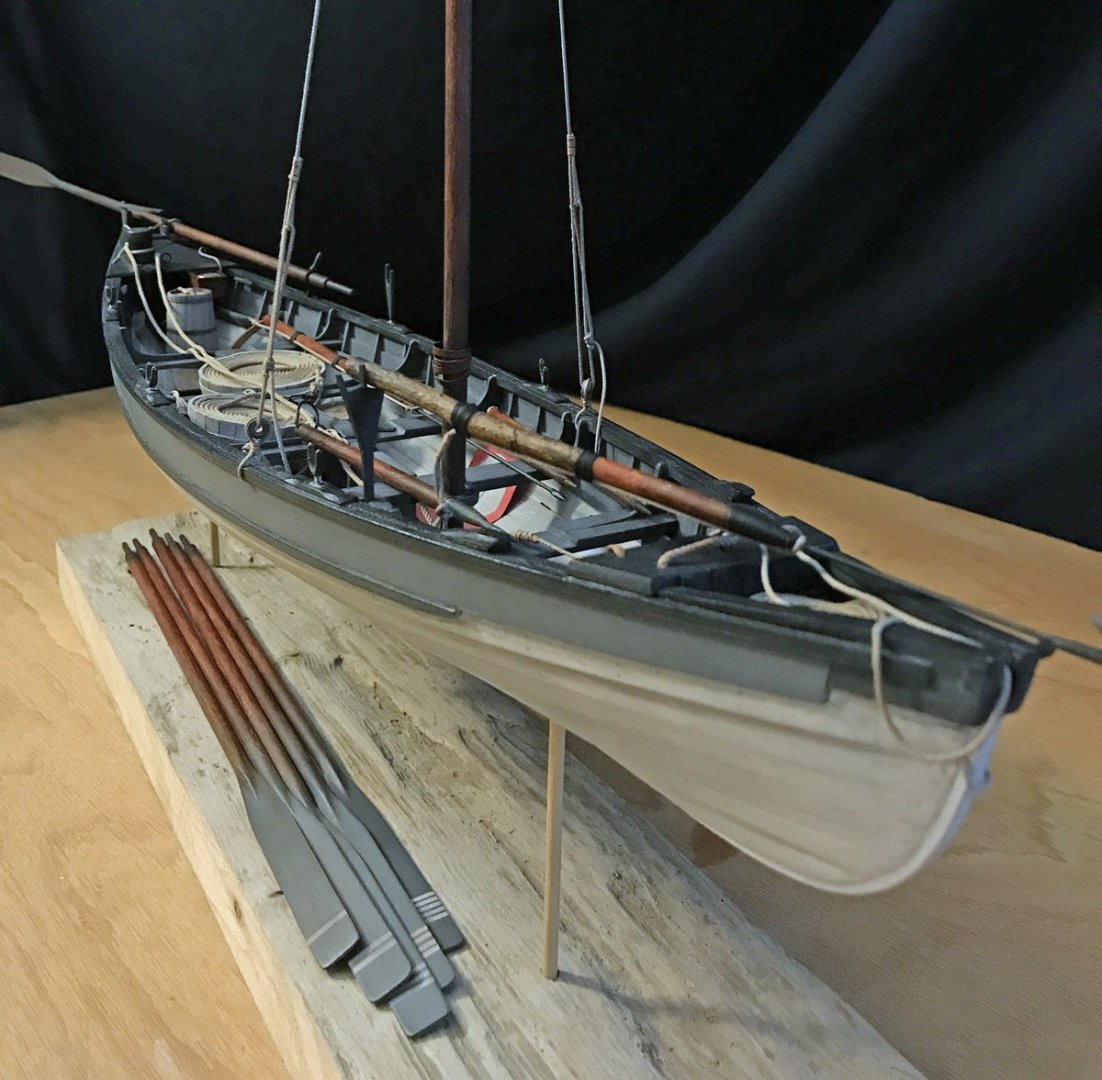
Knowing when to stop My tendency with all things creative is to keep doing "one more thing" until I've made a mess of it. The good news is, I'm going to break that habit with this model. I struggled a bit with the decision to not include the sail on this boat but after spending some time with and without my paper mock-up in place, I decided l much preferred the sail-free look. I may revisit that at some point in the future but for the moment, this build is officially done. Thanks to everyone who took the time to drop in, have a look, make encouraging comments and show interest in general. It's much appreciated.


- 52 replies
-
- 15
-
-

-

-
- model shipways
- new bedford whaleboat
- (and 1 more)
-
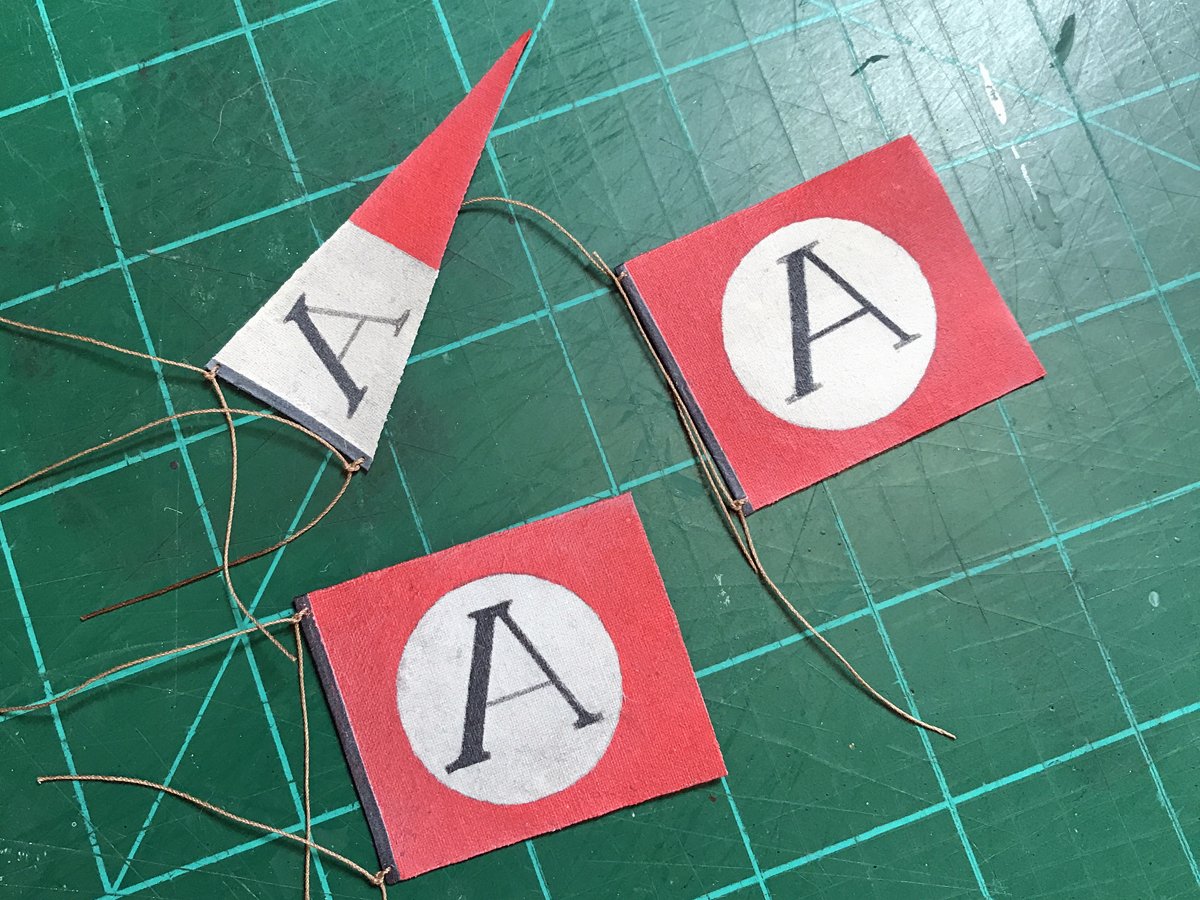
Thanks...they're made from the material that came in the kit for the sail. It looks like the Adeline Gibbs is a different ship. I checked the crew lists for the years in question and my guy doesn't appear. I do appreciate the heads-up to another great resource though!
-
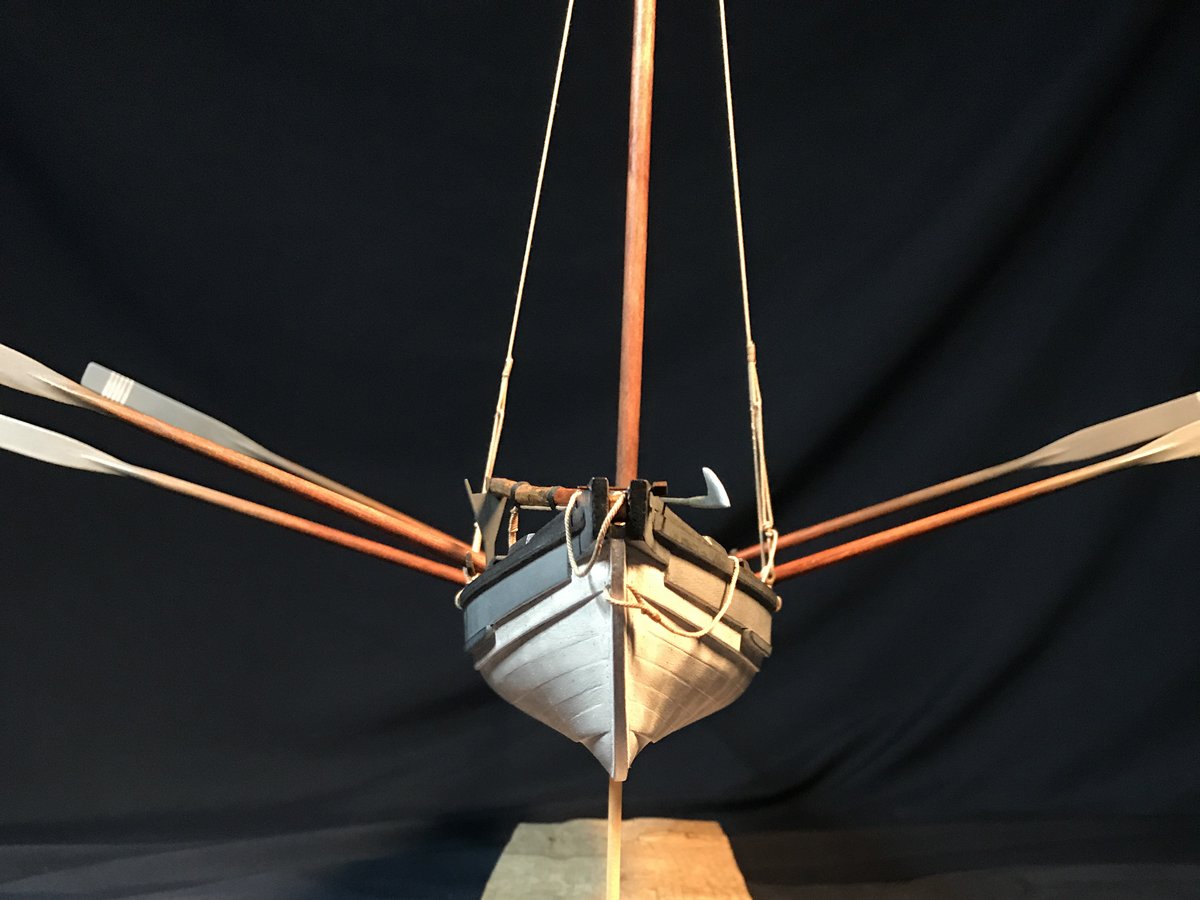
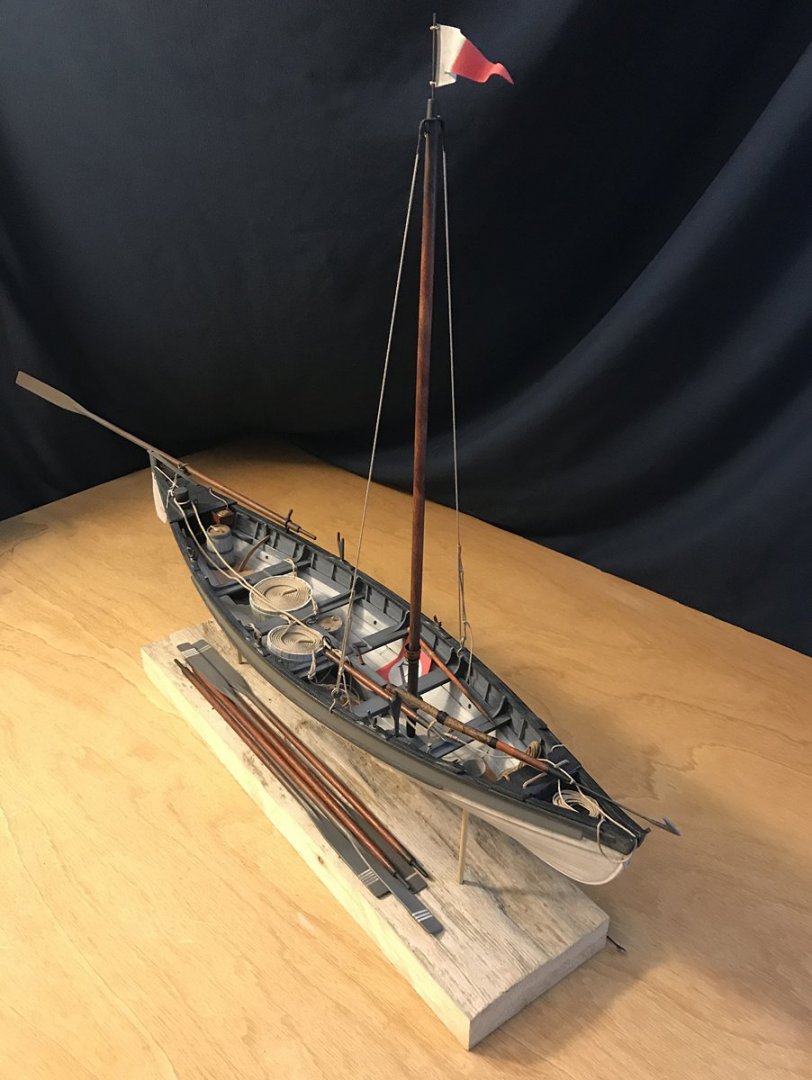
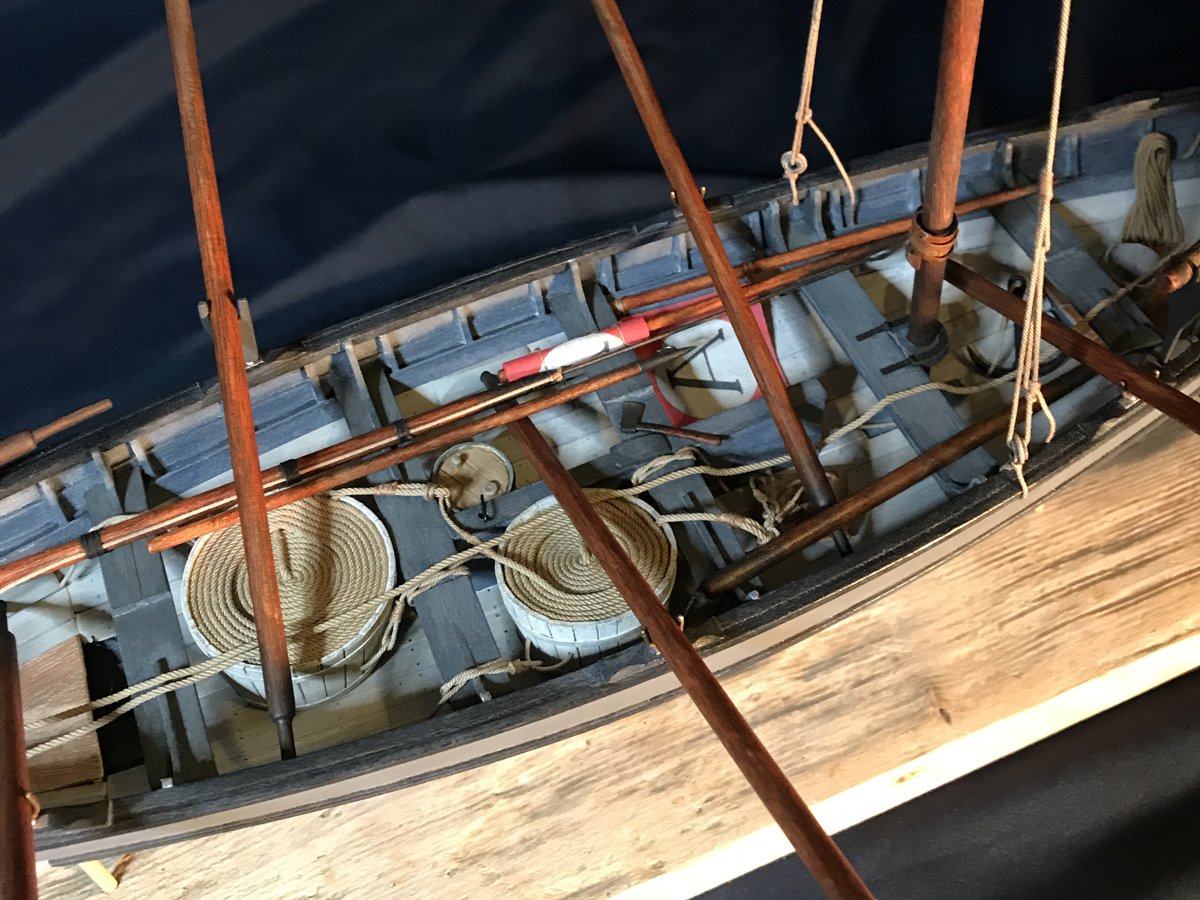
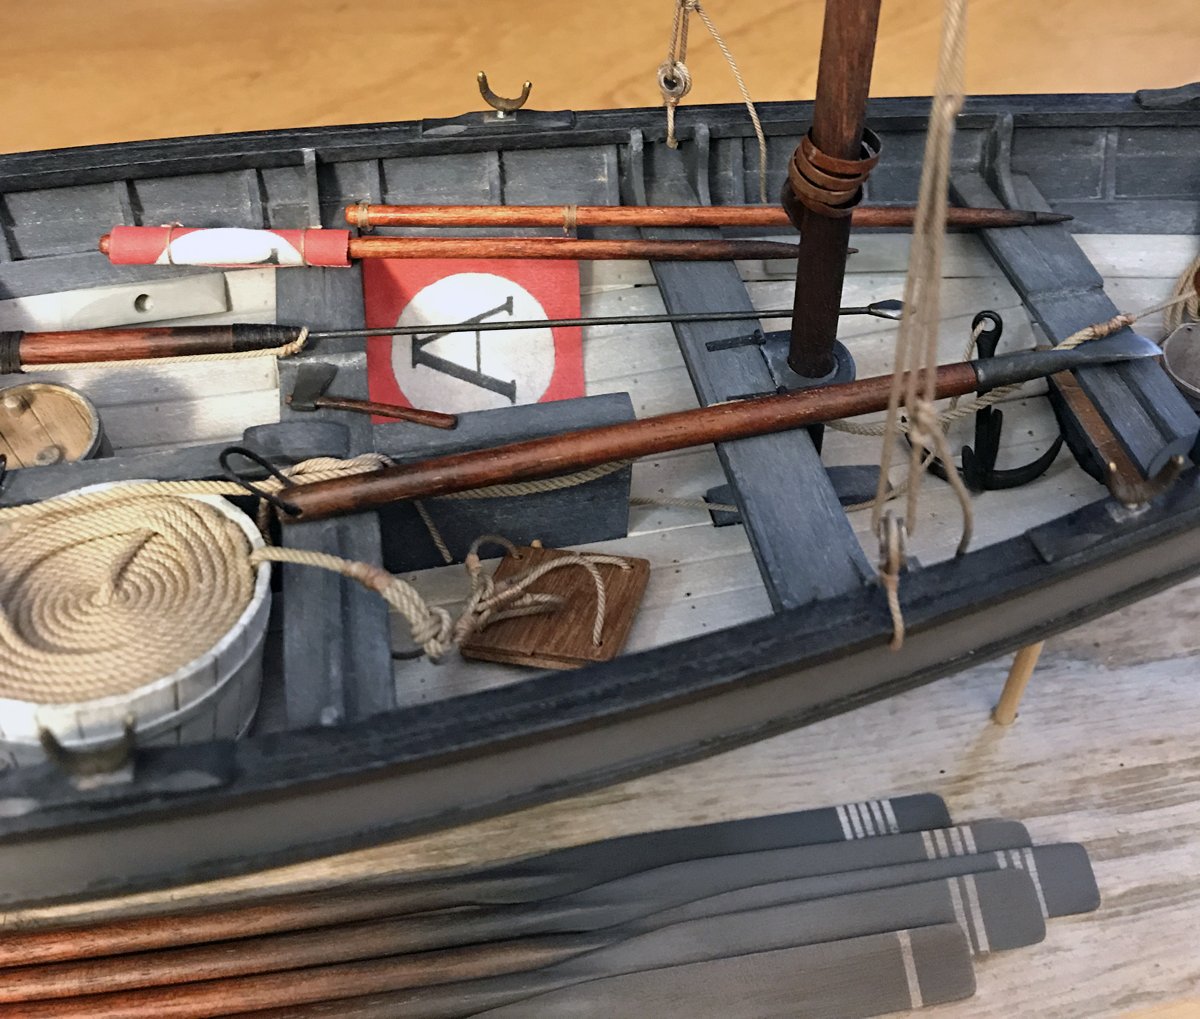
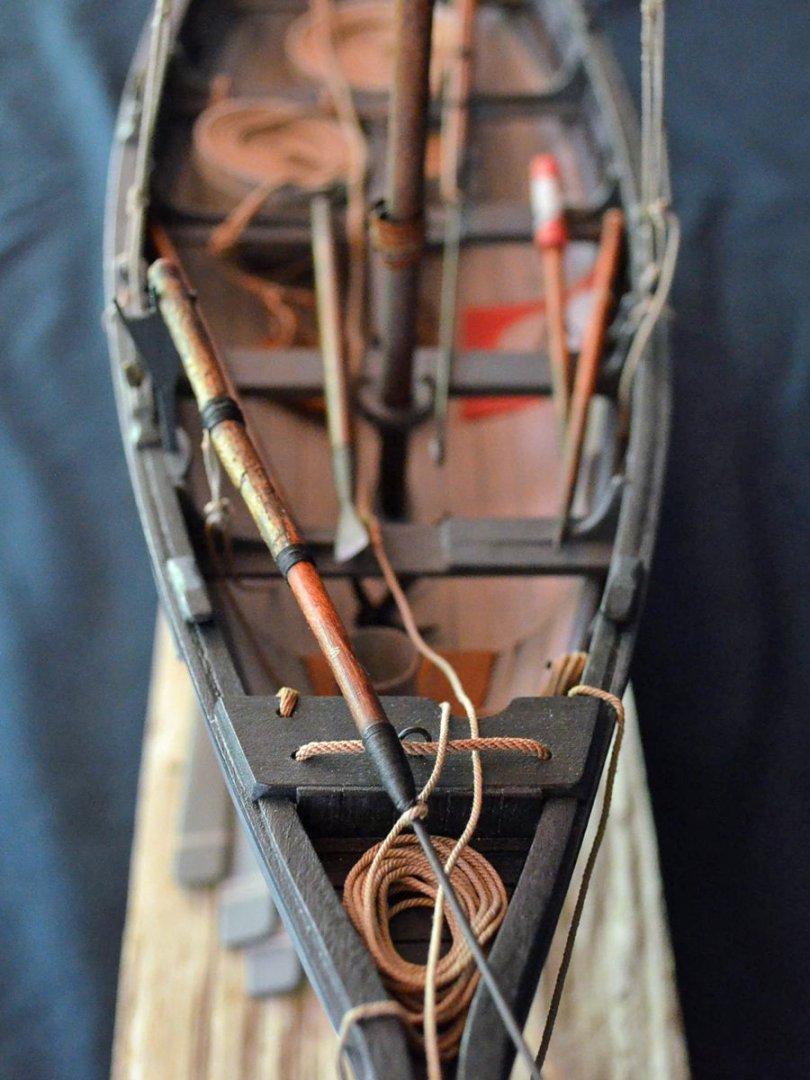
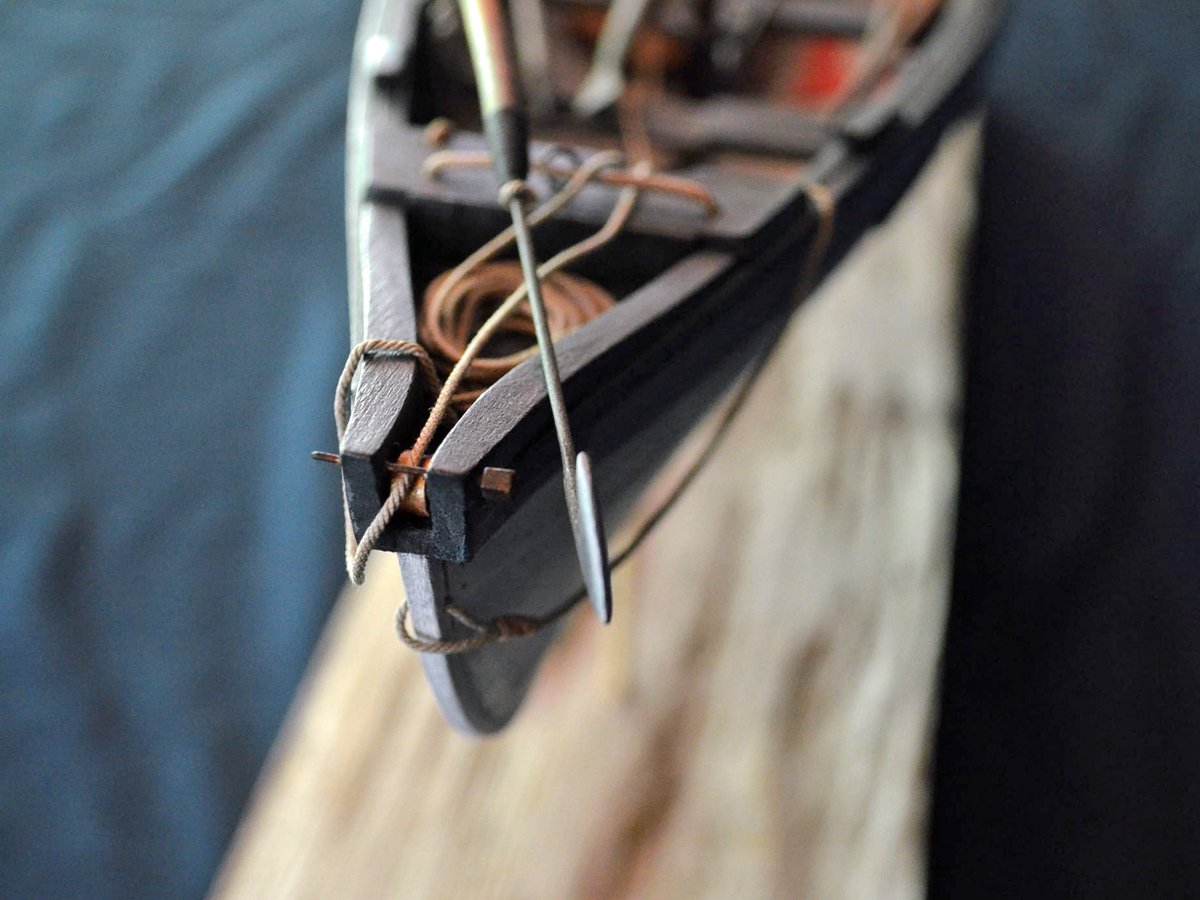
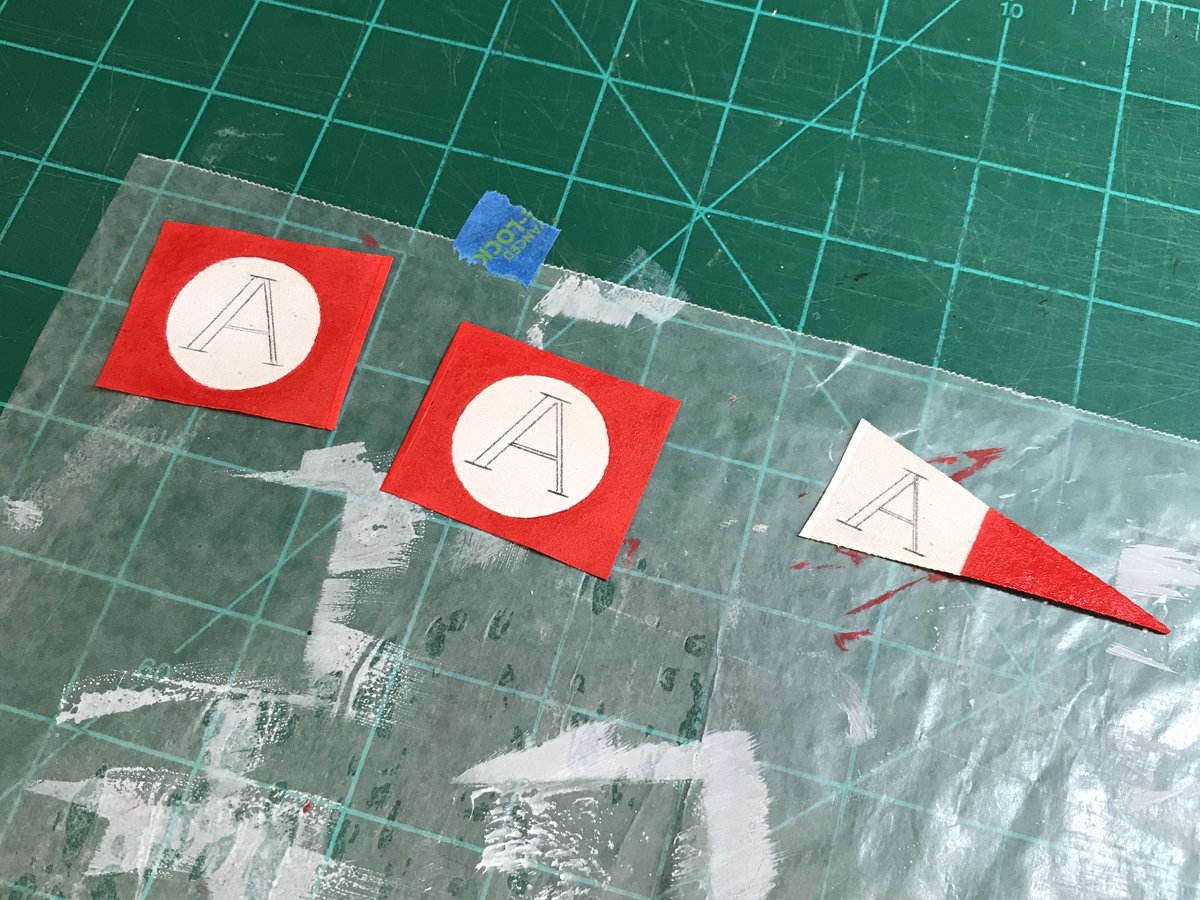
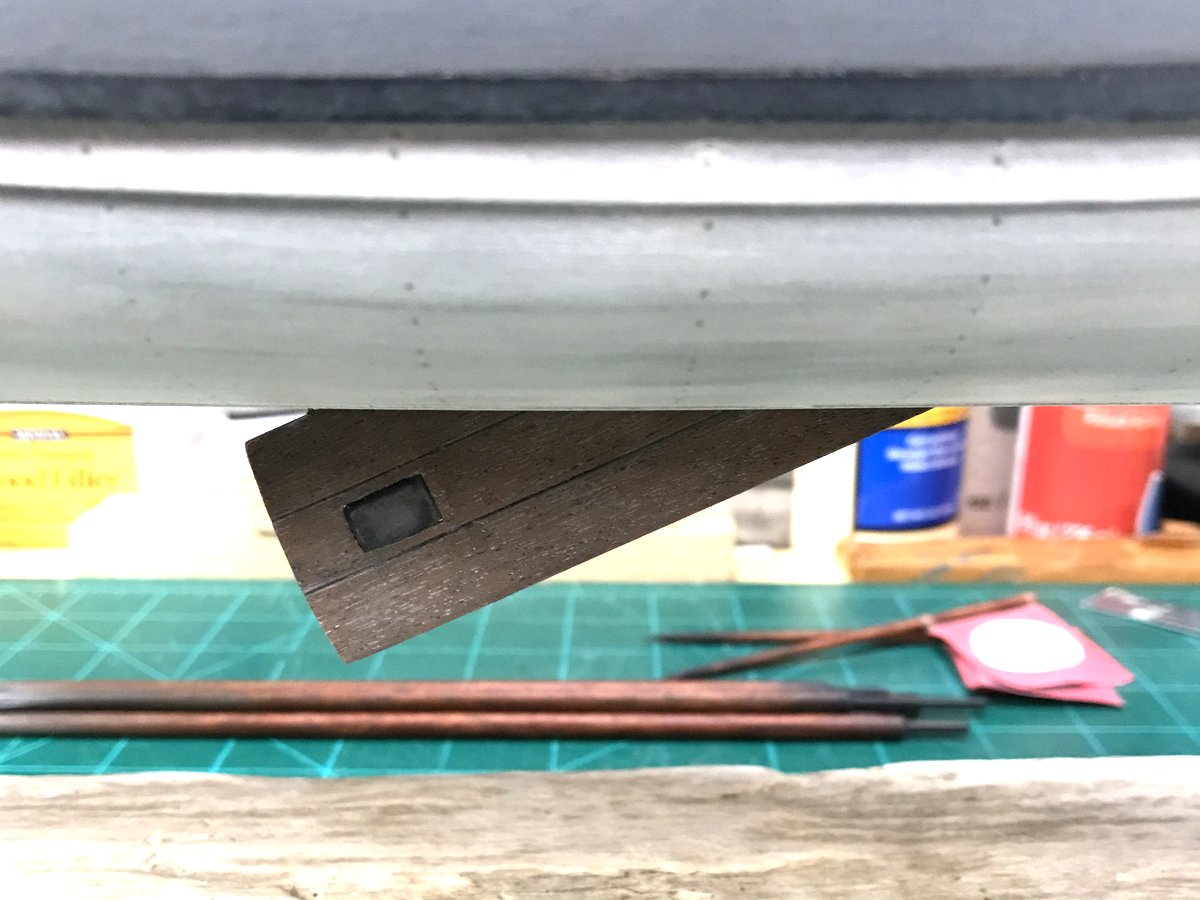
A few more small things and a little history As I mentioned early on in this log, I picked this boat because I had become aware of ancestors who served on whale ships out of several New England whaling ports and aboard many ships (including the Morgan). I wanted to associate this boat with a specific ancestor and the ship he sailed on. Given the 1850-1870 general window for this particular style of boat I went with the Adeline which he was aboard in 1856. I don't have any information as to the design of the ship's flag but found enough examples from other ships active during this period to make an educated guess. I don't have any proof that whaleboats flew any type of marking pennants atop their masts or individualized their waifs to sort out their kills from those of other boats but given the level of activity during this "peak" period it doesn't seem too far-fetched. Regardless of historical evidence/accuracy, my boat flies Adeline's colors! Once weathered and displayed, these should add a nice pop of color/interest. I ended up making the center board from 3 individual pieces rather than the single piece die-cut offered in the kit. The plans also show a lead weight inserted into the middle board which I made from Sculpey clay. I'm assuming that these center boards had to have had some kind of reenforcing structure (iron rods running from top to bottom through each board?) unless there's some kind of fancy nailing/joinery that could hold boards together end-to-end like this. These things must have undergone a lot of stress beneath a tacking boat.
- 52 replies
-
- 2
-
-
- model shipways
- new bedford whaleboat
- (and 1 more)
-
Hi Mike...I generally use Mohawk papers because they're a local mill that's pretty generous with their sample books and I know them through print vendors at work. Most of the card stock you'd find in an office supply store is 80lb and isn't available in textures. It's usually not acid-free which probably doesn't matter if you're planning to paint it. Acrylic paints should be fine on any paper-based product. Craft stores (Michael's in my area) have a pretty good selection of individual sheets of all kinds of stuff. The "craft" paper is less likely to delaminate which the standard card stock is prone to when manipulated too much. I use 70 lb most of the time but good paper typically comes in weights up to 120 (very sturdy).
-
These look great Mike. Carving the entire oar rather than the 2-piece method I used is definitely the better way to go. I may need to revisit mine...for the 3rd time!
-
I like the larger scale of the Fifie kit...I don't think I could really work on anything much smaller than 1/32 given the sorry state of my eyes!
-
kit review 1:32 Fifie – The Scottish Motor Fishing Vessel by Amati
PJG replied to James H's topic in REVIEWS: Model kits
This kit will be my second build, hopefully getting under way in the next couple weeks. I've gone through the contents of the big, hefty box and everything looks top-notch as James indicated in his review (the primary reason I bought it). I'm trying very hard to stay disciplined and finish my whaleboat but the temptation to dig in is hard to resist. Courage! I'll also be doing a build log on this boat if anyone is interested in how a relative rookie tackles the job.