PJG
-
Posts
117 -
Joined
-
Last visited
Content Type
Profiles
Forums
Gallery
Events
Everything posted by PJG
-
 This is coming along beautifully Tim...I really like your color choices, particularly the sharp contrast between the clean white paint and darker deck treatment. I also can't get over how quickly some of you guys work at such high level of craftsmanship...amazing!
- 79 replies
-
- 2
-

-
- Fifie
- Victory Models
- (and 1 more)
-
Thanks guys for the nice comments and encouragement! Mike...the LEDs are the nanos (1.6mm) from Evan Designs. According to what I read on the the website you can run up to 9 of these on one 3V battery. I have a total of 8 on 2 batteries (4 per) so I think I should be ok. I'm sure there are better, more efficient ways to set this kind of thing up but the fact that they work and my boat hasn't burned to the waterline (yet) is about the best I could do given my complete lack of electronics expertise 😂. Thanks Michael...the fish are still on the "maybe" list for the final display. If I can tuck them away somewhere in the hold where their unsettling flatness isn't so apparent they could still make the final cut.
-
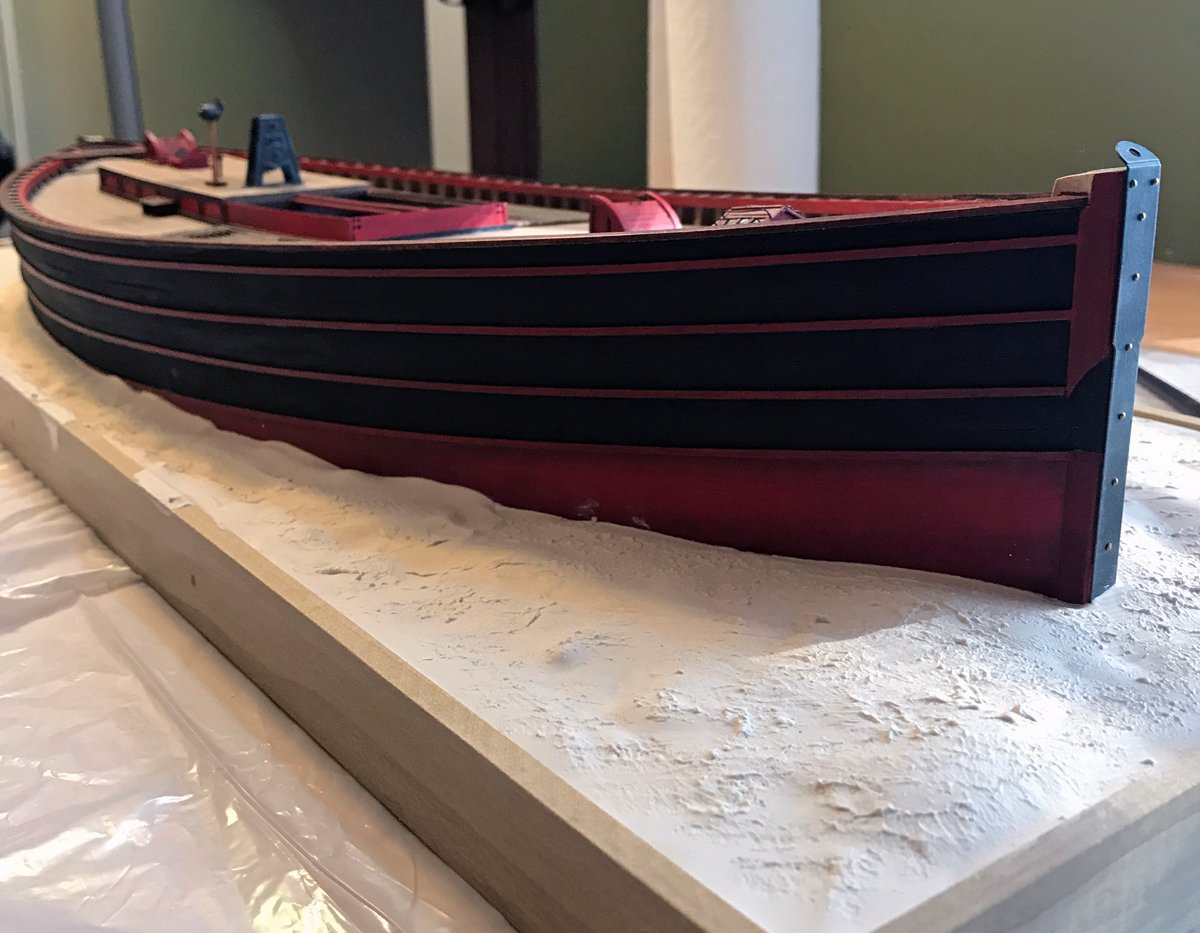
The hull looks great Tim...both the super clean planking job and nice color choices. The white timber heads and gunwale is very sharp 👍 Is the pottery in the background your work as well? Also very nice!
- 79 replies
-
- 2
-
-
- Fifie
- Victory Models
- (and 1 more)
-
This certainly doesn't look like the work of a guy who needs planking practice...top-notch craftsmanship, as always. Looking forward to your next build...would love to see you tackle one of Chuck's beautiful kits!
-
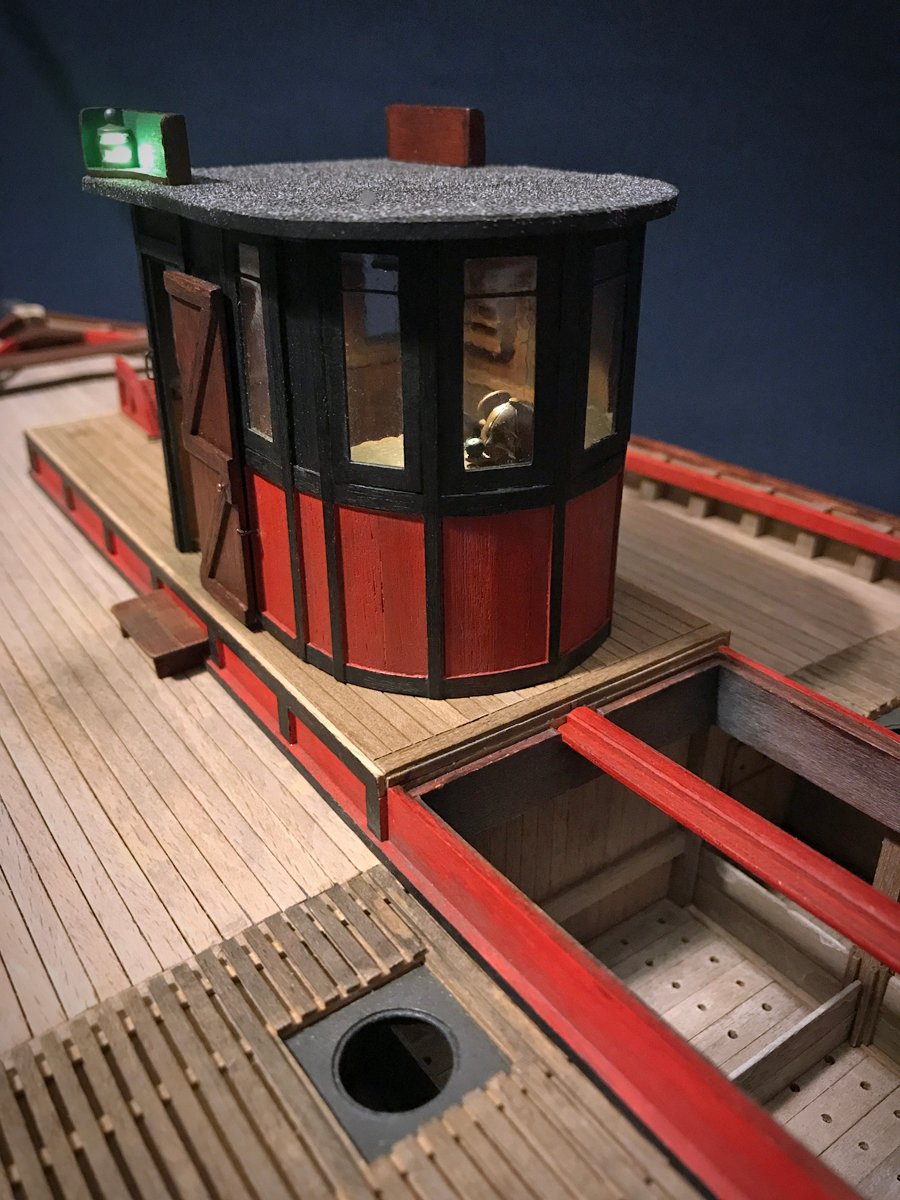
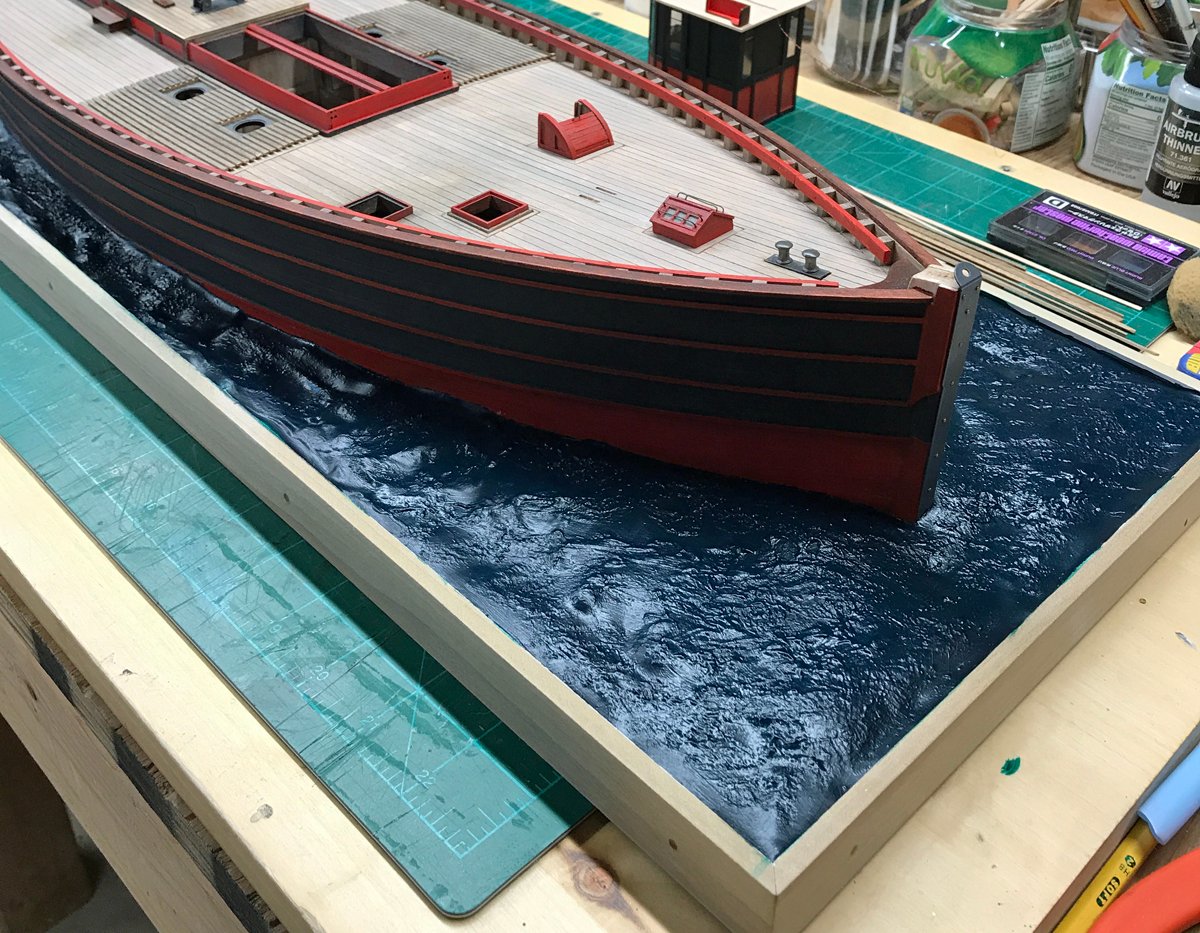
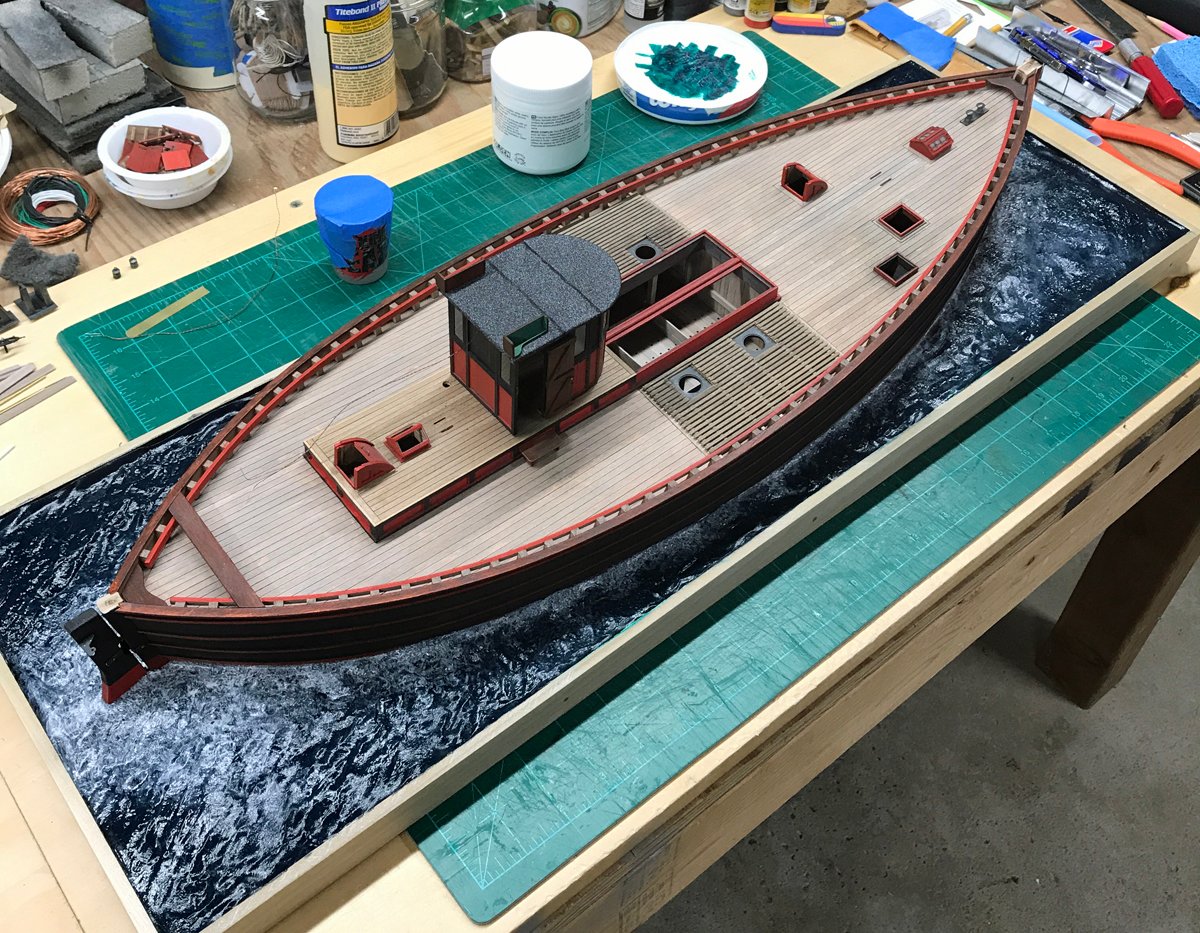
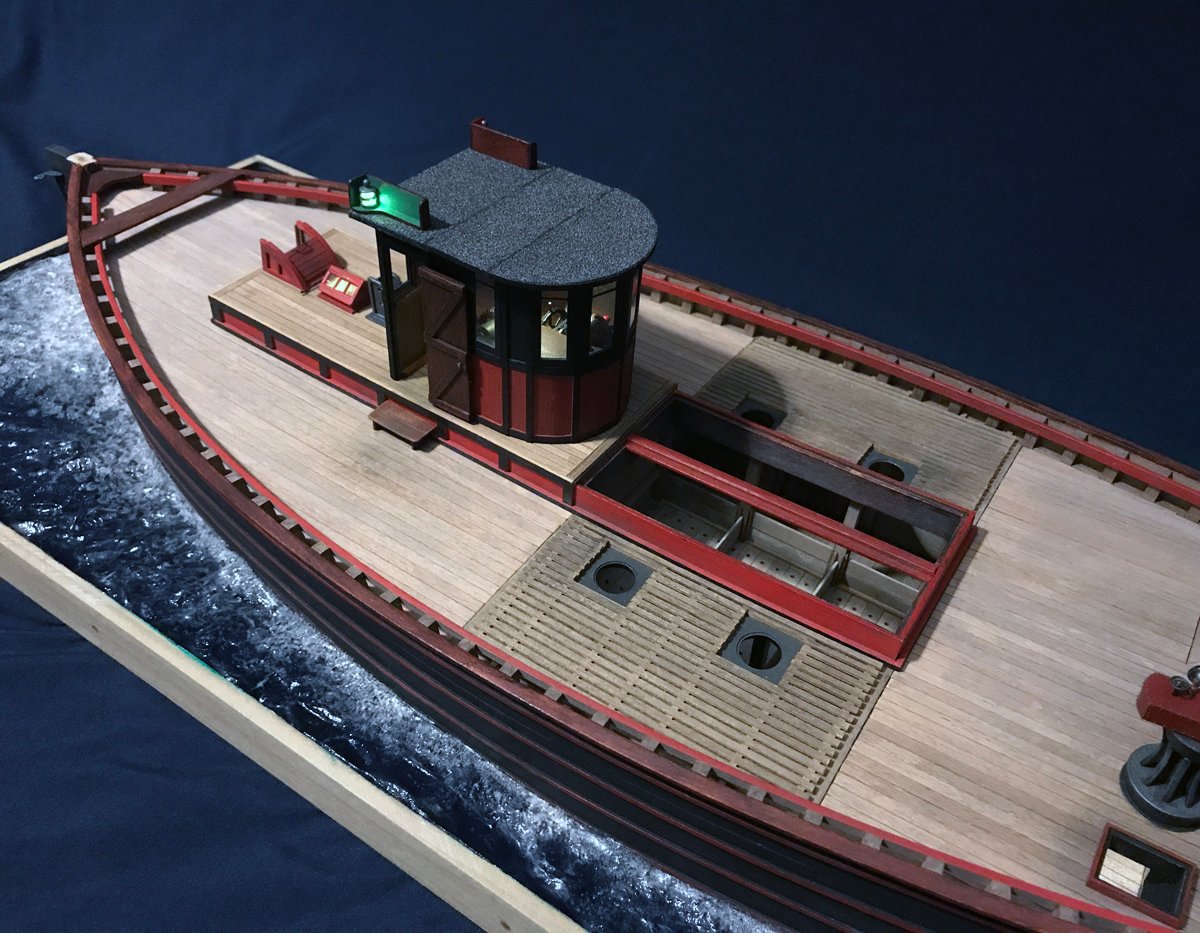
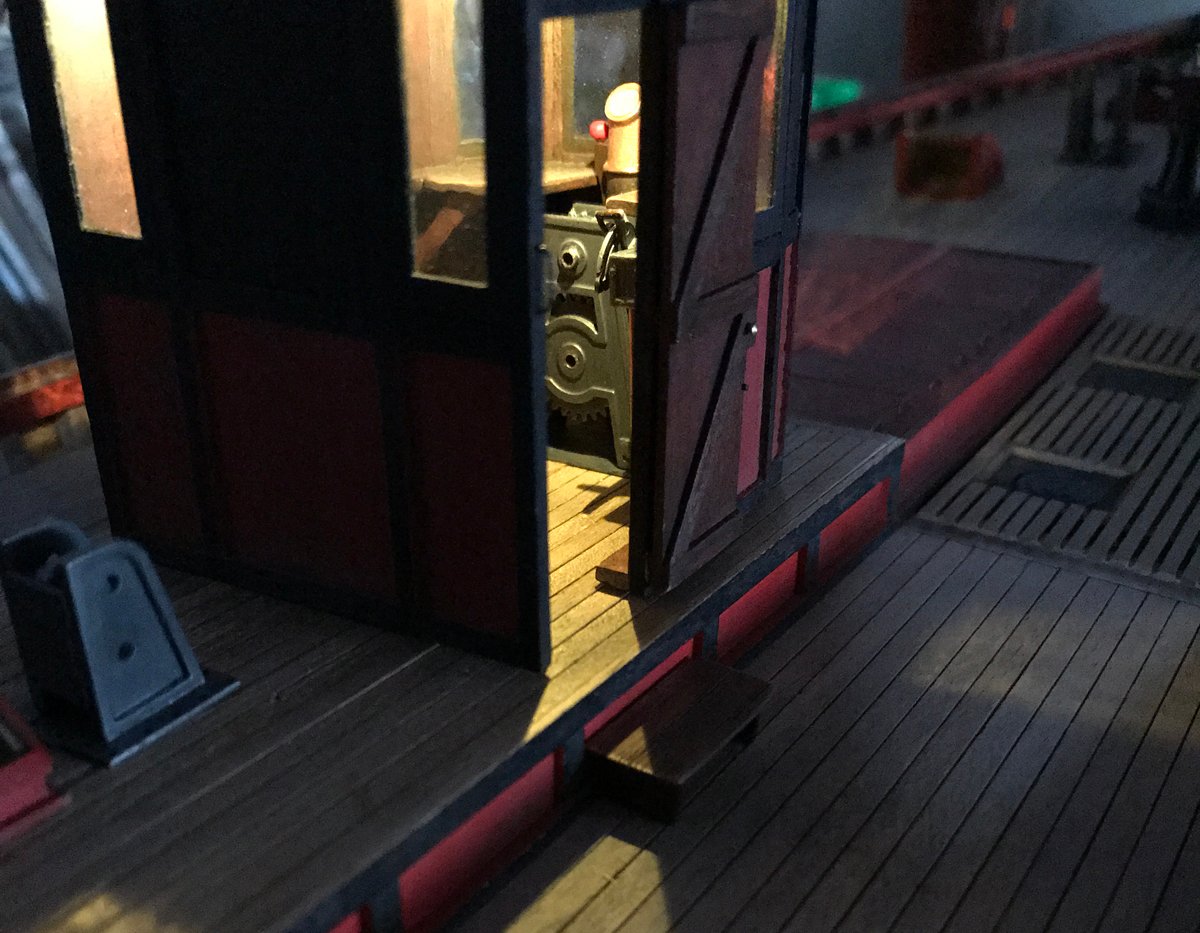
It's been too long since my last update but I think I've finally gotten enough done to make it worth while. I finally arrived at a binnacle I could live with (number 5 I believe 🤦🏻♂️). The wheelhouse roof is glued on now so there's no turning back! I added a little support structure to the wheelhouse ceiling and made the light fixture the LED for this area will live in. A final look at the wheelhouse interior before the roof goes on. I added a loading hatch for the coal bin which will be visible below deck when the LEDs are installed. I have no idea where the coal was actually stored on any given boat but close to the stove and boiler seems like a reasonable guess. The weathering on the deck shows up better in this photo than others and is a pretty good representation of what it looks like in person. I built my base from a good quality piece of 3/4" plywood to prevent warping when my plaster of Paris "water" is poured and trimmed the edges with scrap I had available. There are 2 access holes for my LED switches and future battery changes. After some test-fitting, the below-deck detail pieces were glued in place. After fooling around with the position of the LEDs I found that this position worked best to light things enough to see but no so much that it was over the top. When the boat was in place I noticed areas visible through the coal hatch that I hadn't planned for initially. The addition of the back wall of the cabin and false "hall" solved that problem. I almost forgot to add the "real" coal to my bin before I closed the boat permanently but managed to avoid that senior moment 😂 Next, I added some weathering to the fish hold partition boards and net drying planks. After a lot of changing my mind I ultimately decided to use plaster of paris to create my simulated sea. There are lots of epoxy/resin products out there to do the same thing but I just felt more comfortable working with something less complicated. Thanks to my old friend YouTube I was able to get some excellent information on getting a good, bubble and lump free mix (happy to share if anyone is interested). After a couple test pours I made a large enough batch to fill my base. The only major downside to plaster of paris, particularly in one big batch spread over a fairly large area, is its quick set time. Once you begin stirring your mix the clock starts to run. The instructions suggest a 30 minute workable period but my batch was too hard to manipulate in no more than 10 minutes. Because of this, I didn't get to finesse the surface as much as I would have liked, but ultimately, I don't think it really mattered. It would have been nice to be able to clean up overspill with a rag rather than a chisel but at least my mixing bucket can now be used as an anchor for an actual boat! I was a little skeptical that the surface was very water-like but a little paint went a long way towards fixing that. After letting the plaster cure for several days (at least 72 hours is recommended to ensure no moisture is trapped) I did a base coat of flat black acrylic paint and added a 70/30 paint to water wash of deep green on top of that. This was a semi-gloss finish and starts to make the water look much more water-like. Next I made a 50/50 (approximately) wash of white acrylic paint and high gloss Mod Podge (I love this stuff) to give the water a bit of a foamy look around the hull. You can see from the practice piece in the upper right, the black undercoat saved me many layers of my "North Sea" green! Once I was satisfied my water was reasonably believable, two more heavy coats of the Mod Podge were added to really push the gloss. Once the lights were wired I took a few photos away from my disgracefully cluttered work bench to get a feel for my overall progress. Lights on... I still have a lot left to do but hopefully I'll have this one finished in the foreseeable future...as always, thanks for checking in!

-
Thanks Mike...this build is getting to the point where I think I may need the Glenfiddich soon! 😂
-
As always, thanks for the positive feedback guys! @BobG The window glass is clear plastic (the thinnest stuff I could find) with a coat of glossy Mod Podge thinned to about 50/50 with water. The window frames are made of layered paper. The Mod Podge gives the glass the "wavy" look but also does a great job gluing the layers together. One of these days I'll remember to document this stuff as I do it rather than trying to explain it later 😂
-
The build is looking good Ras...very clever solution on the binnacle. I'm still not happy with mine after three attempts so back to the drawing board!
-
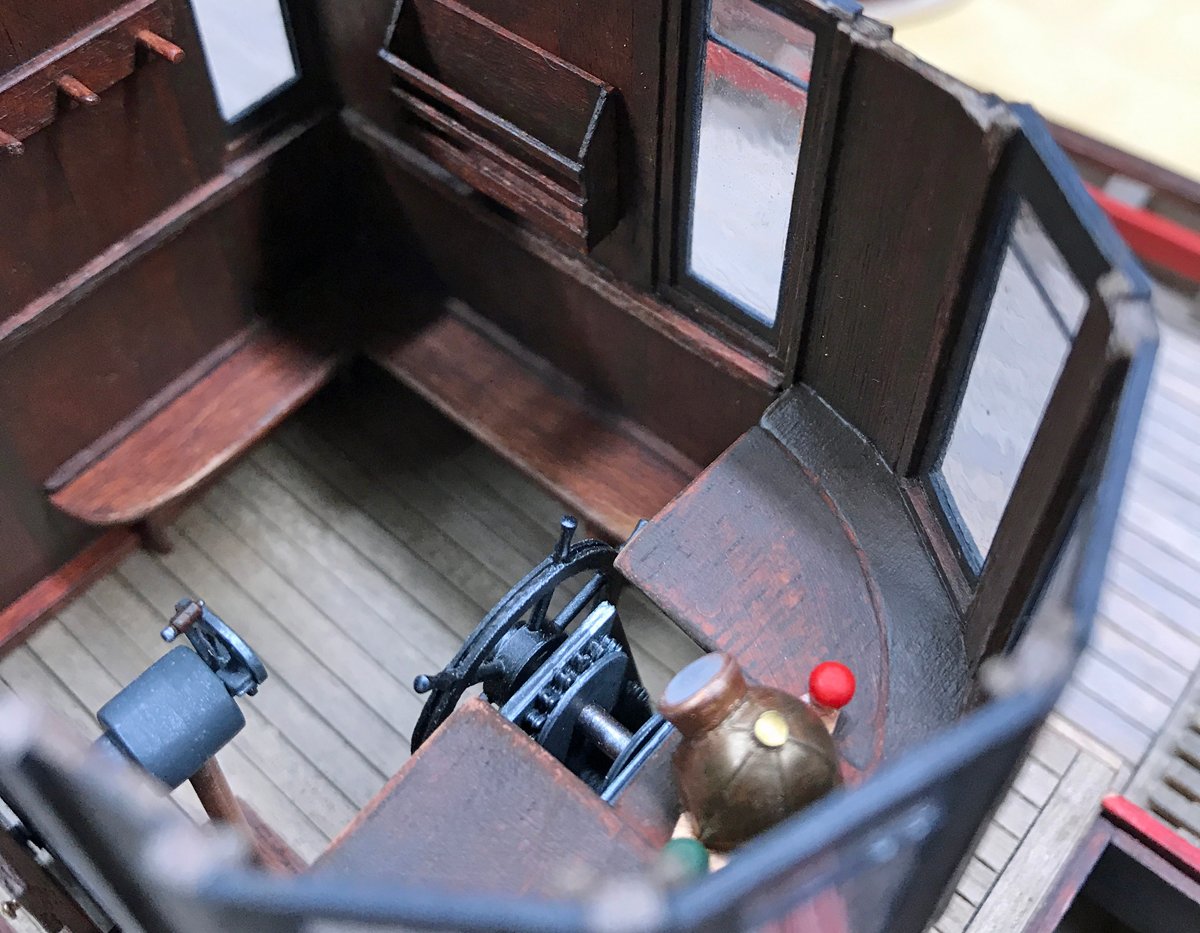
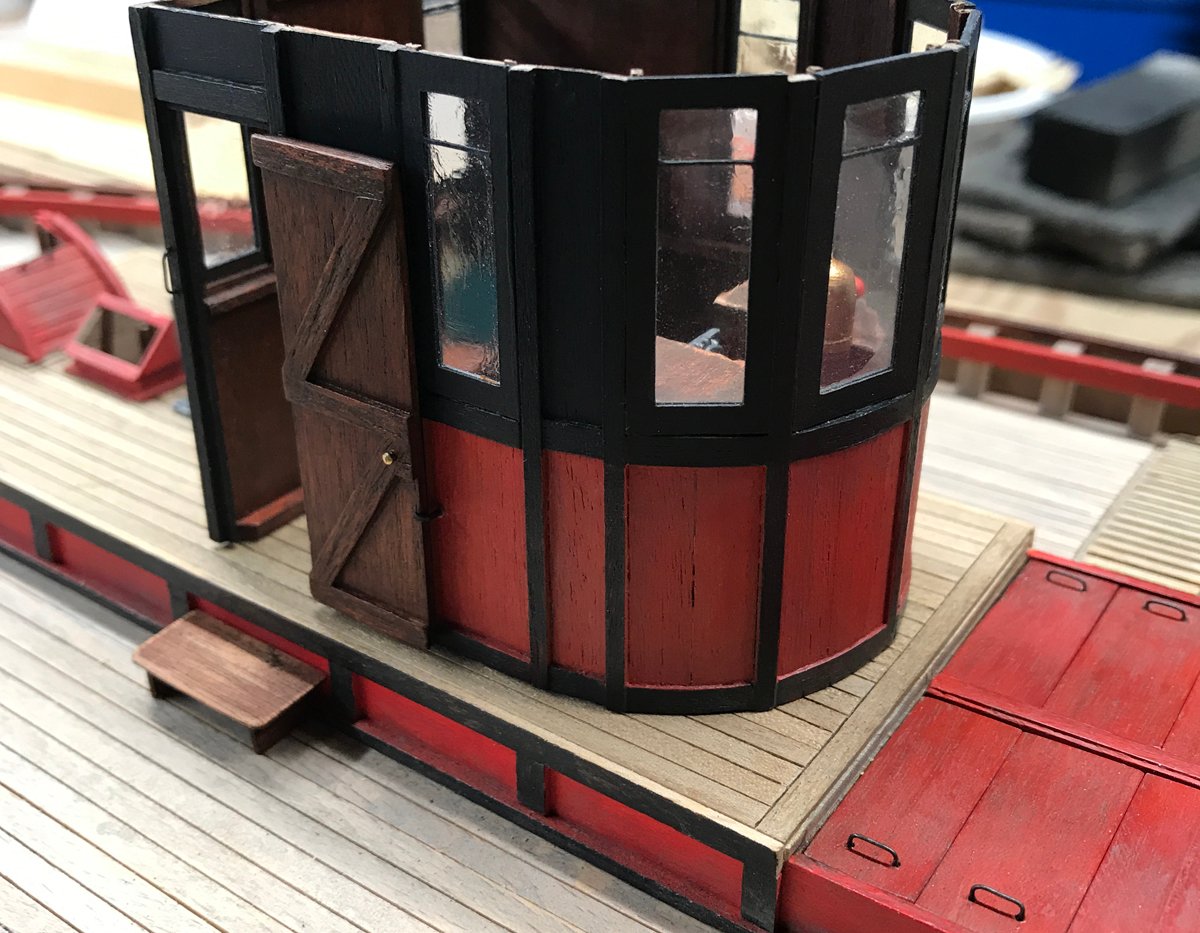
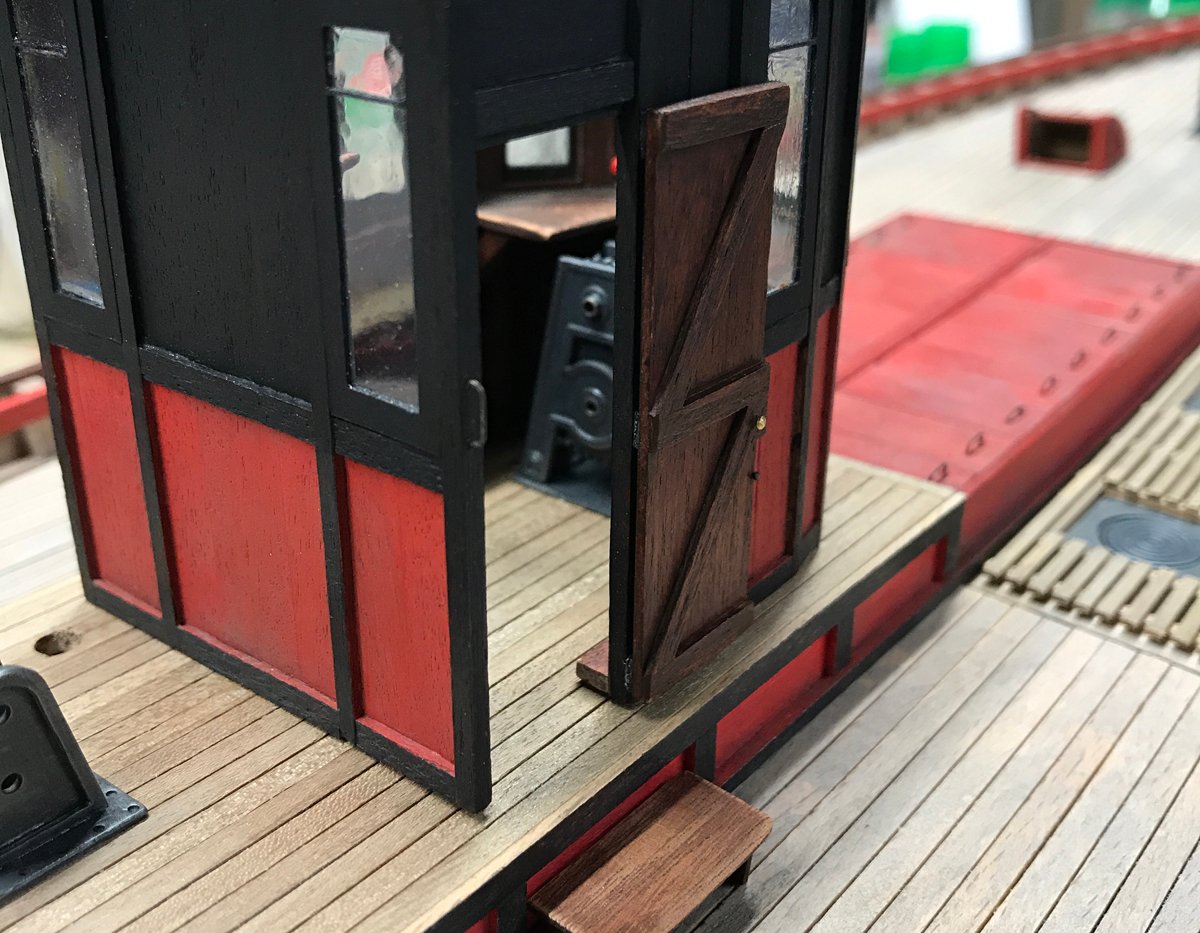
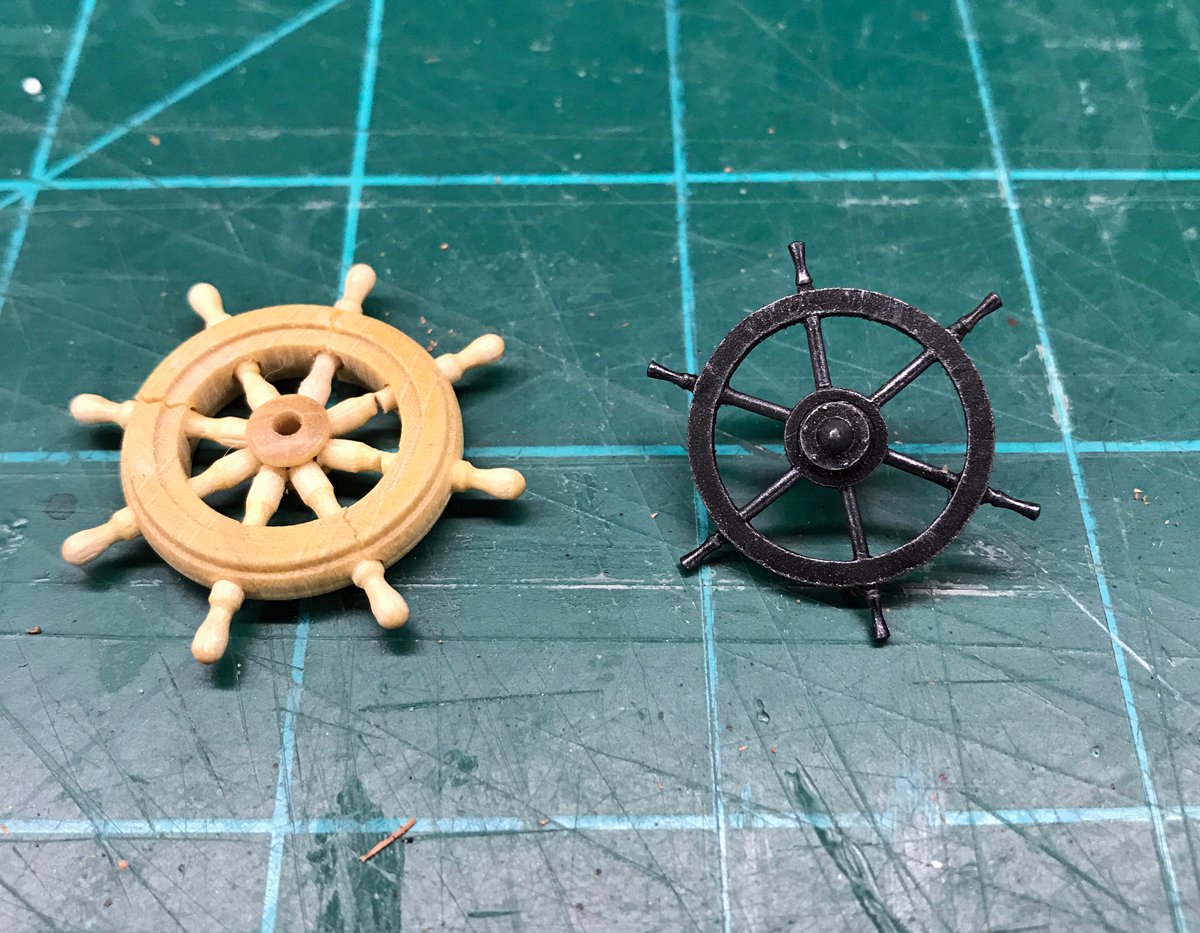
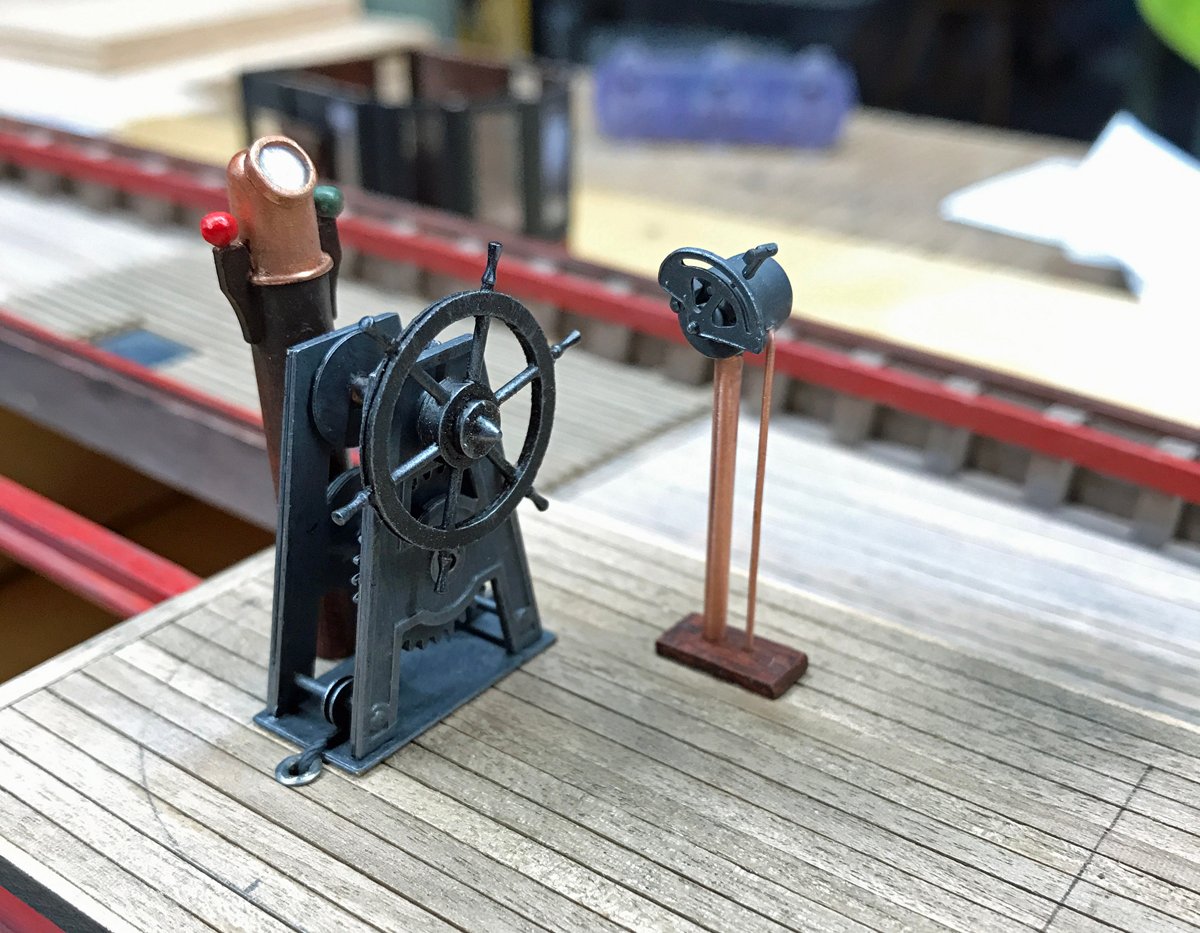
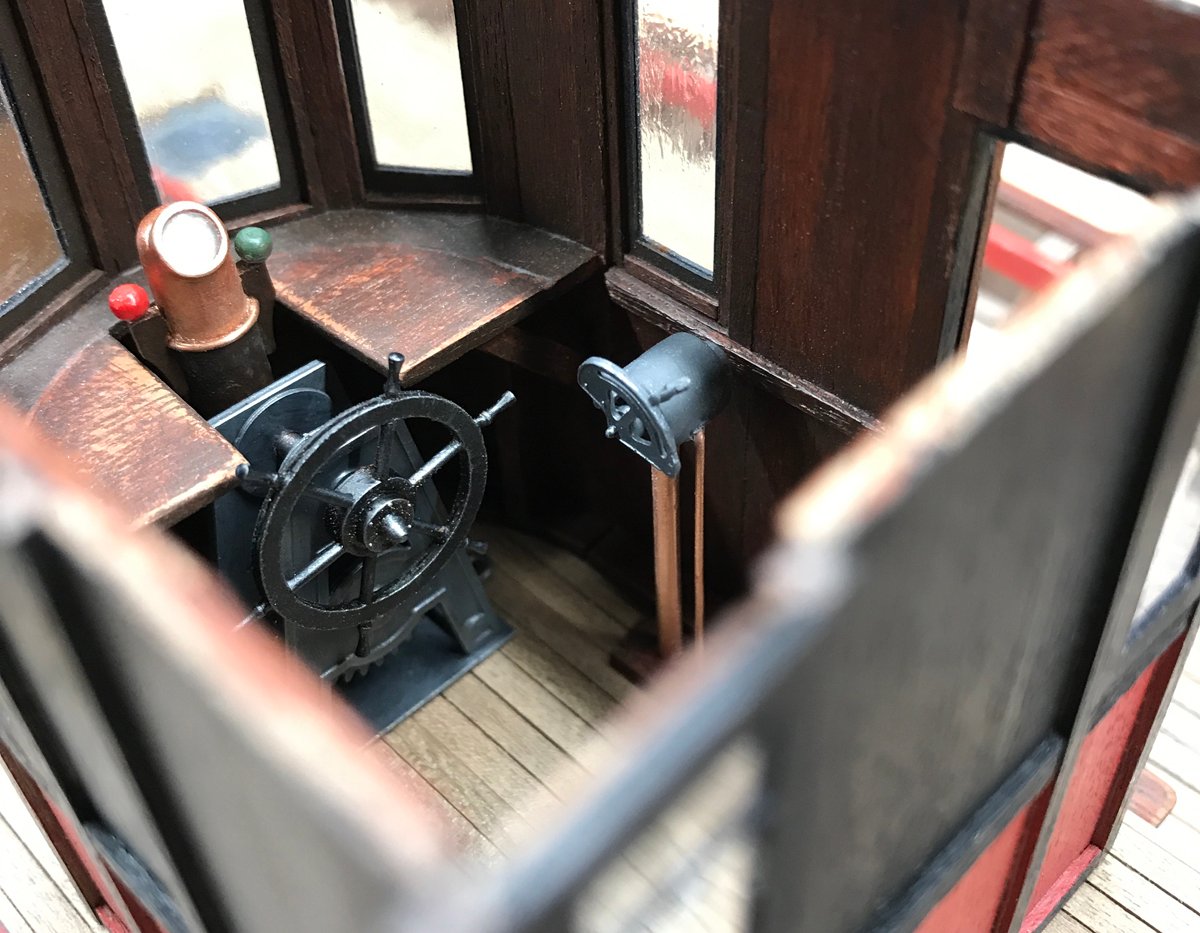
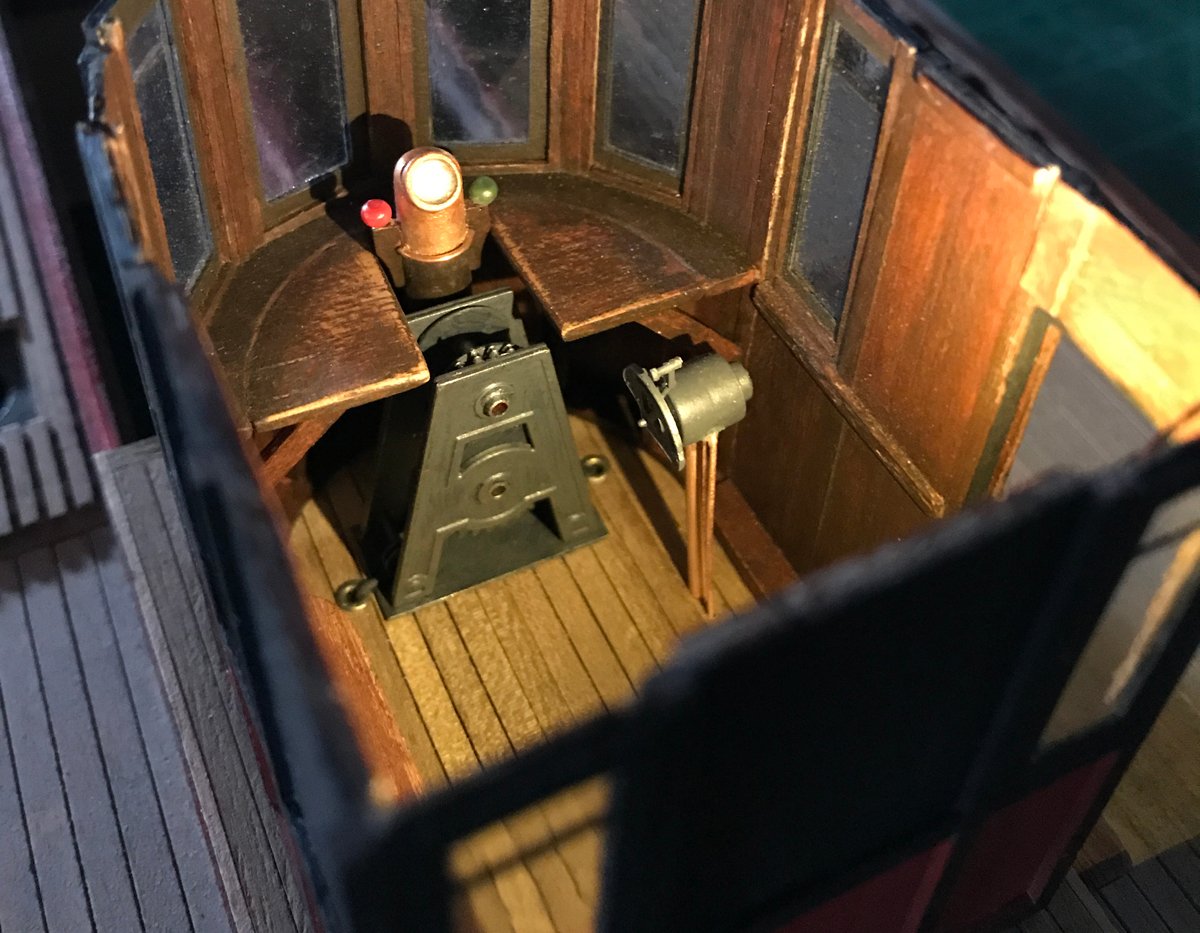
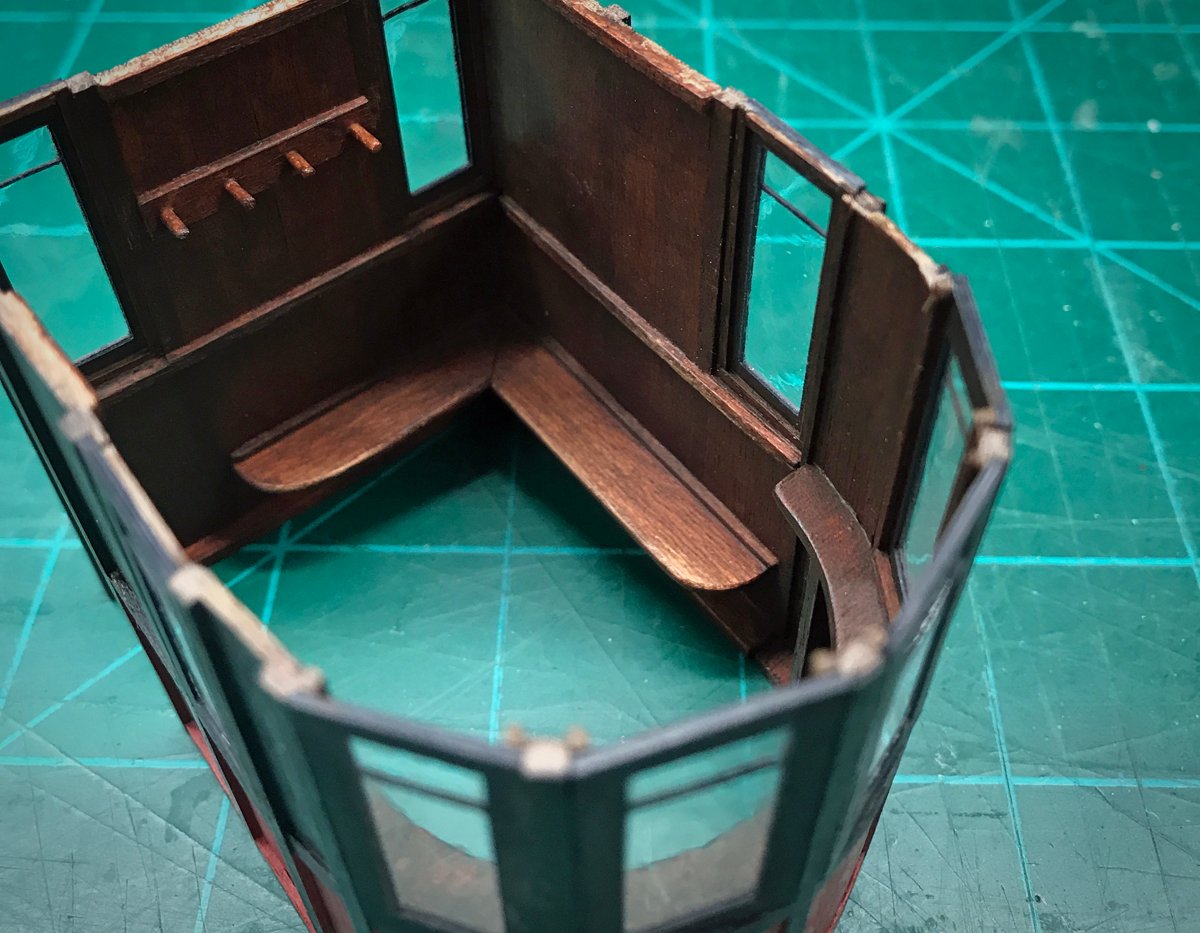
Thanks guys for the nice comments and great suggestions! I've been a bit distracted lately planning a scratch build that's become a bit of an obsession (now I see why some of you call it the "dark side" 😂) but trying my best to stay focused on the task at hand. I'm not sure what's up with the USPS but I finally received the mini LEDs I ordered so long ago I almost forgot about them. Now that I have them I've started fooling around with where and how to use them to best effect...that's still a work in progress. Otherwise, building and rebuilding my wheelhouse interior has taken far too long and made me a little crazy. This will be a short update, but some progress is better than none... I've got my wheelhouse door where I want it and added a step and grab handle to assist the older crew members when conditions are rough on the Scottish coast. My wheelhouse interior has gone through several changes, amongst them: 3 different attempts at a binnacle (still not happy), 3 throttle configurations (this was the first) and so many wheels I lost track. I finally arrived at a wheel I could live with after several attempts. The ring is paper and the rest metal. The wheel that came with the kit (mine was damaged) is so out of scale and seemingly inappropriate for this boat I never had any intention of using it. The Vanguard 1/64 kits have far more realistic wheels than what Amati offers here. This is pretty much the final configuration I'll be going with. When the wheelhouse roof is on a lot of this detail is hard to see clearly given the "wavy" glass in the windows. On to experiments with LEDs... I was a little reluctant to attempt lighting on this build but with all the below deck detail I took the time to build it seemed like a waste to have it hidden in the shadows. I would have done things a little differently in terms of making accommodations for wiring, etc. but I think I can pull it off without too much backtracking. Thanks for checking in!
-
@Mike_In_RI Thanks for the wheelhouse hints/suggestions. It didn't occur to me that the wheel mechanism might be covered...that makes a lot of sense. I do plan to try the pedestal style binnacle and see how that looks. We'll see how profitable the boat is before I consider any more luxury items for the crew 😂 I used clear plastic sheet (the thinnest I could find) with a 50/50 mix of Mod Podge (glossy) brushed on after it was glued into the frames.
-
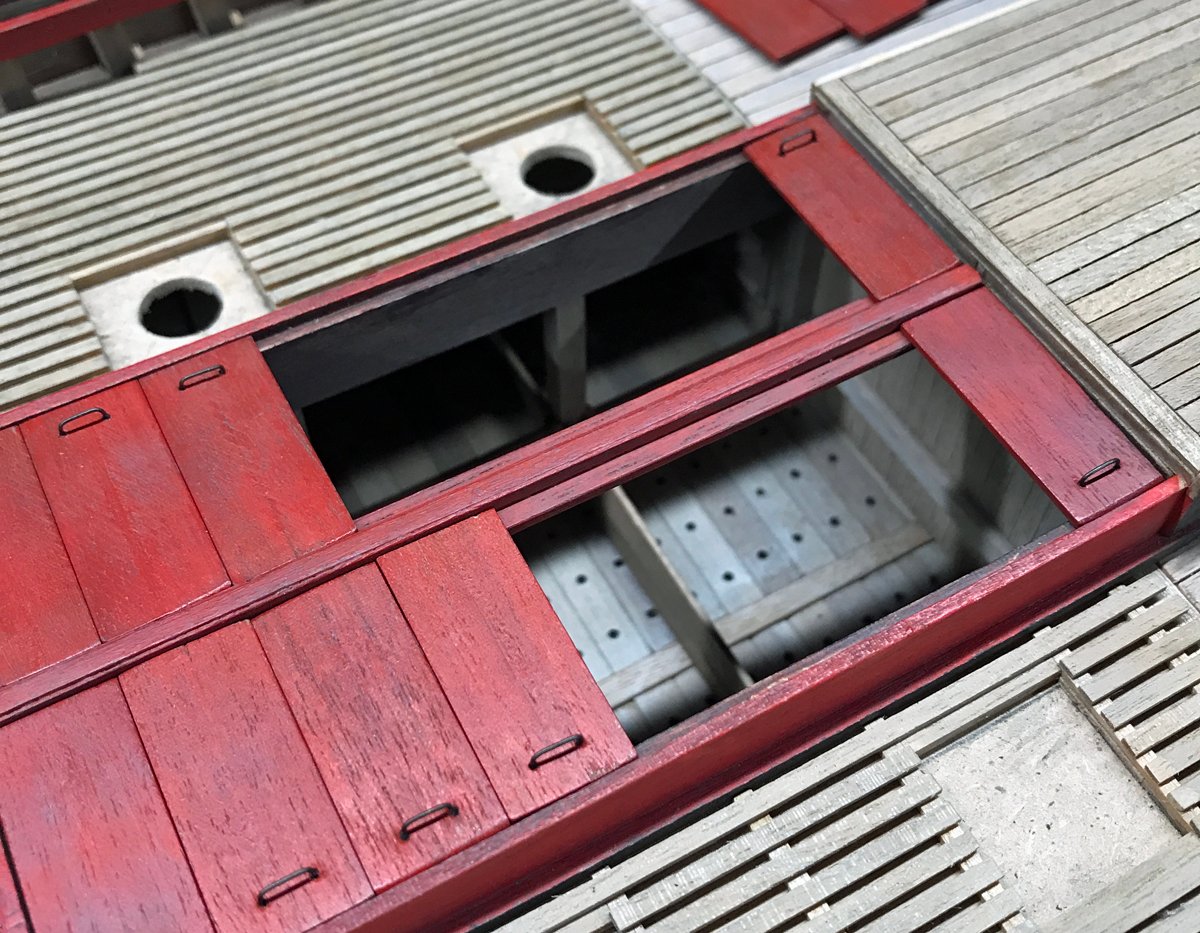
@Tim Moore @Ras Ambrioso @BobG Thanks guys for the nice comments, they're appreciated! I wish I had something more concrete/specific to share on how I do weathering but it's mostly a trial and error process. A few things that I do consistently are: 1. Paint with multiple layers of heavily thinned washes (90/10 or 80/20 water to paint). It's much easier to slowly build your way up to a look you're after rather than trying to step back from going too far. 2. I use Vallejo Model Air acrylic paint...it's really versatile and forgiving to work with and cleans up easily with water. It brushes nicely on wood and works great with the air brush (thus the name). I'm sure there are other great products out there but this is the paint I use. You can do a lot of layering with this paint (properly thinned) without too much build up. 3. I use ground up pastel to add subtle color/depth to areas where more weathering makes sense (heavy traffic areas, around door handles, etc.). It also works to bring out the grain in most woods. Tamiya makes a product that I think is essentially the same thing but much more expensive. I think they call their product "Weathering Master". Ras...as for my fish hold covers and the grab-handles I went with, I can almost guarantee there's very little historically accurate about them 😂 ! I've also seen photos that show what you describe (plain boards with nothing at all on them) but I'm willing to stretch the truth a bit in the service of an interesting presentation. I've been struggling with the idea of using figures in this build but the further I move along the less likely I am to do that. Ultimately, I think adding details like grab-handles with signs of use/wear around them goes further to sell the realism of the build than figures I'd almost certainly do a bad job of pulling off. I also spent way too much time and energy on 300+ little herring that probably won't make the final cut either but don't hold me to that!
-
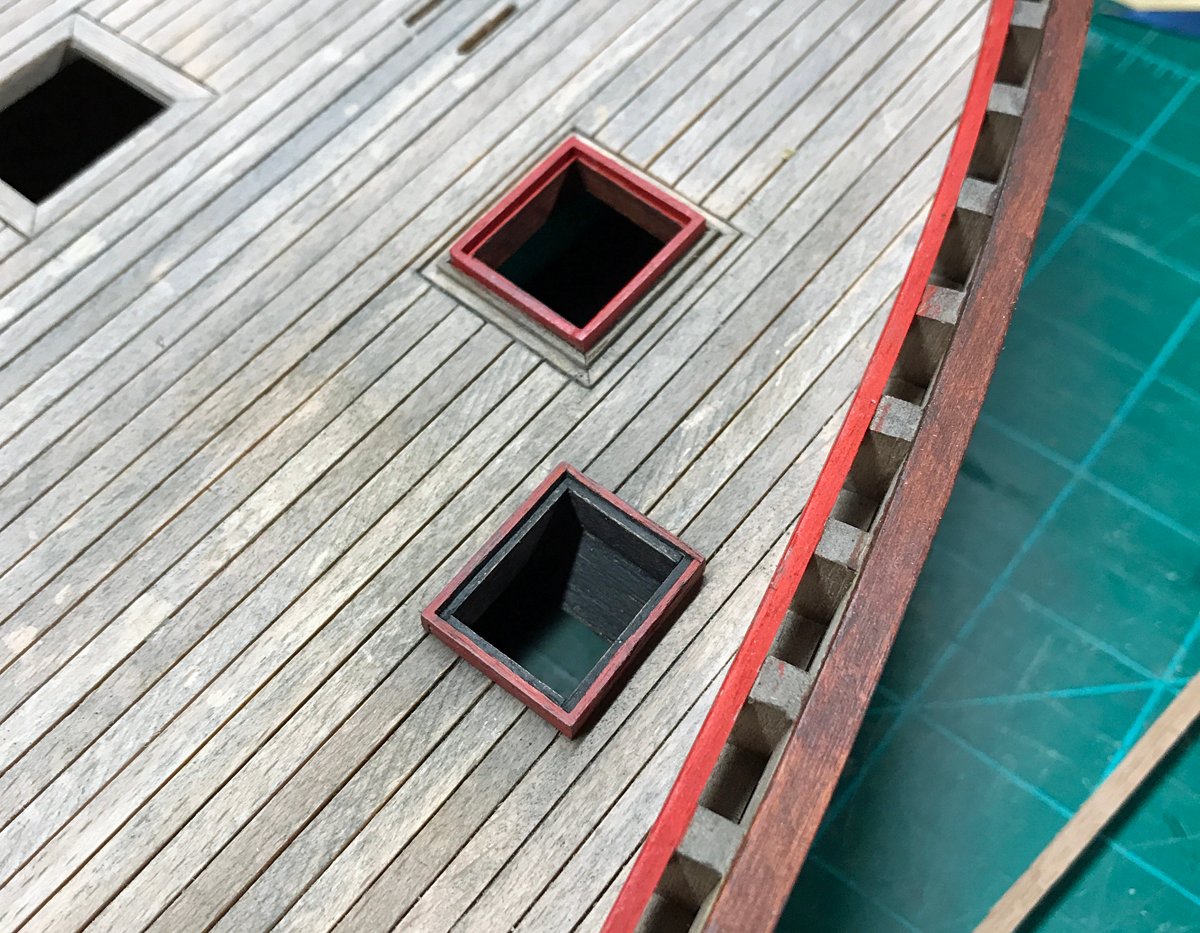
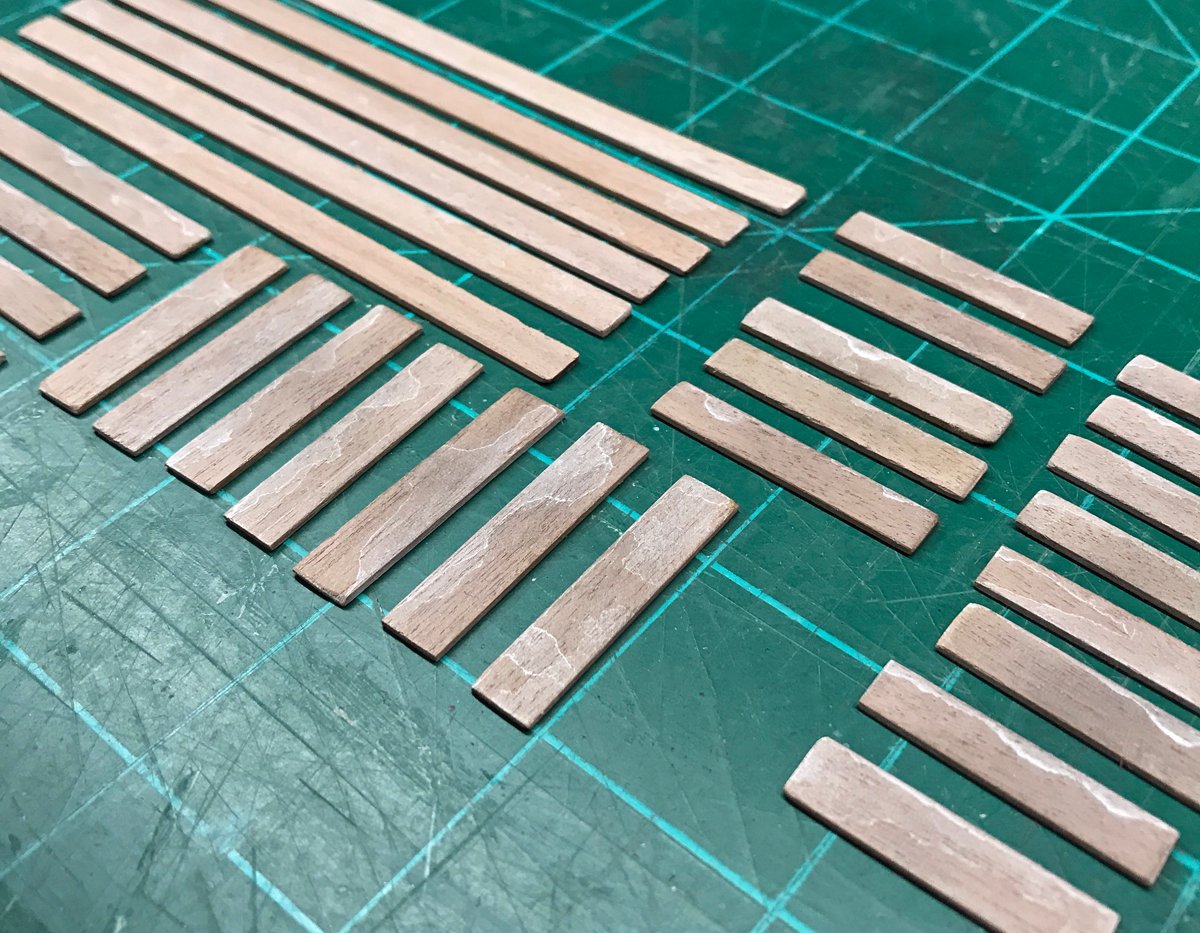
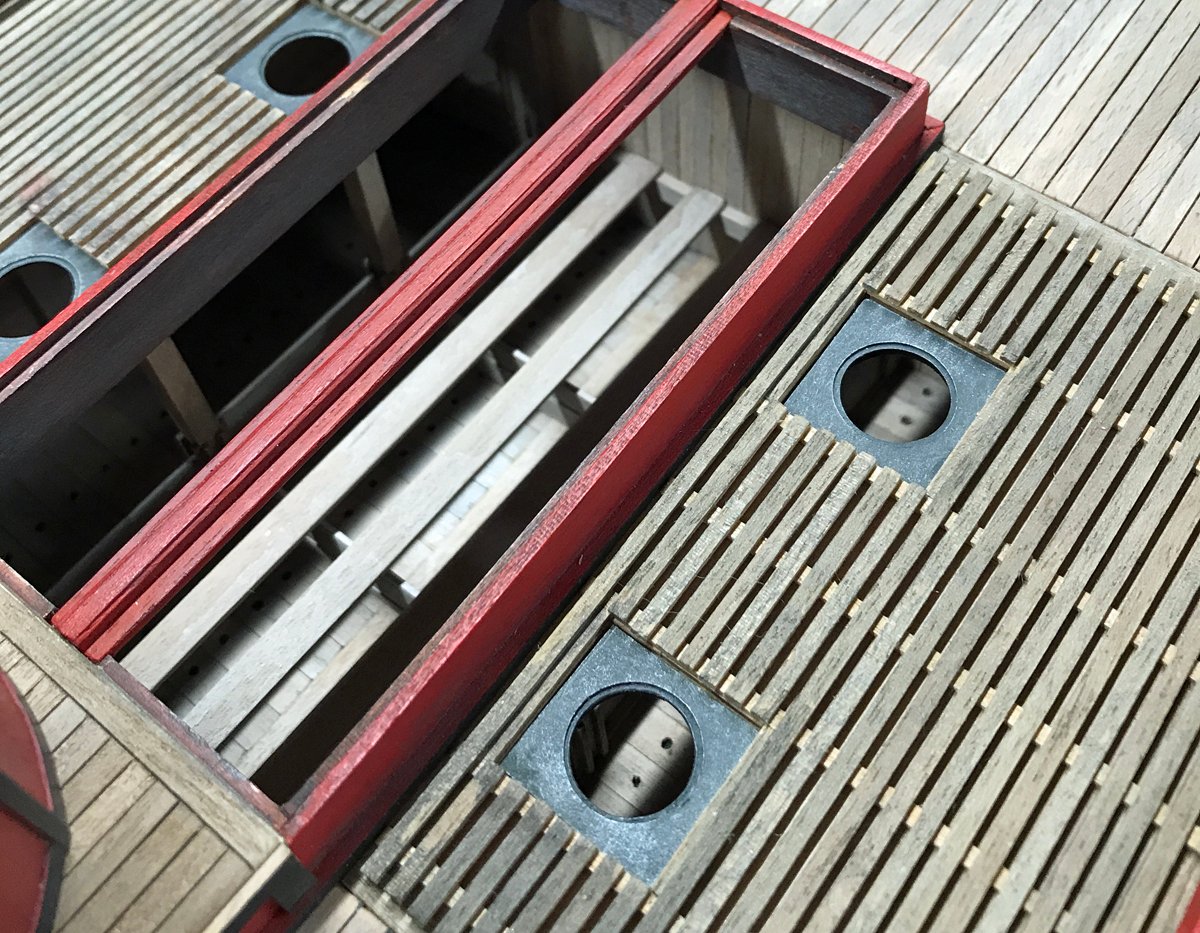
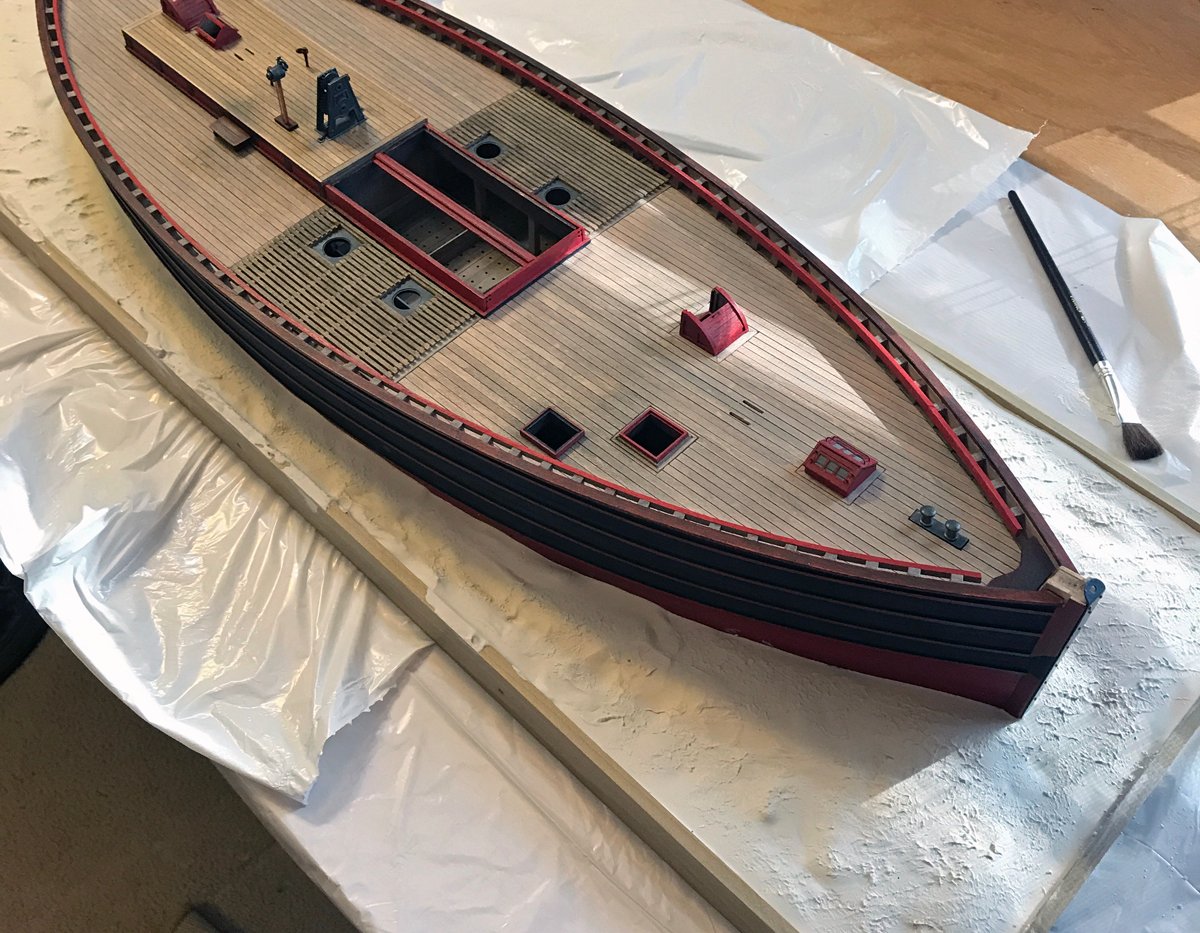
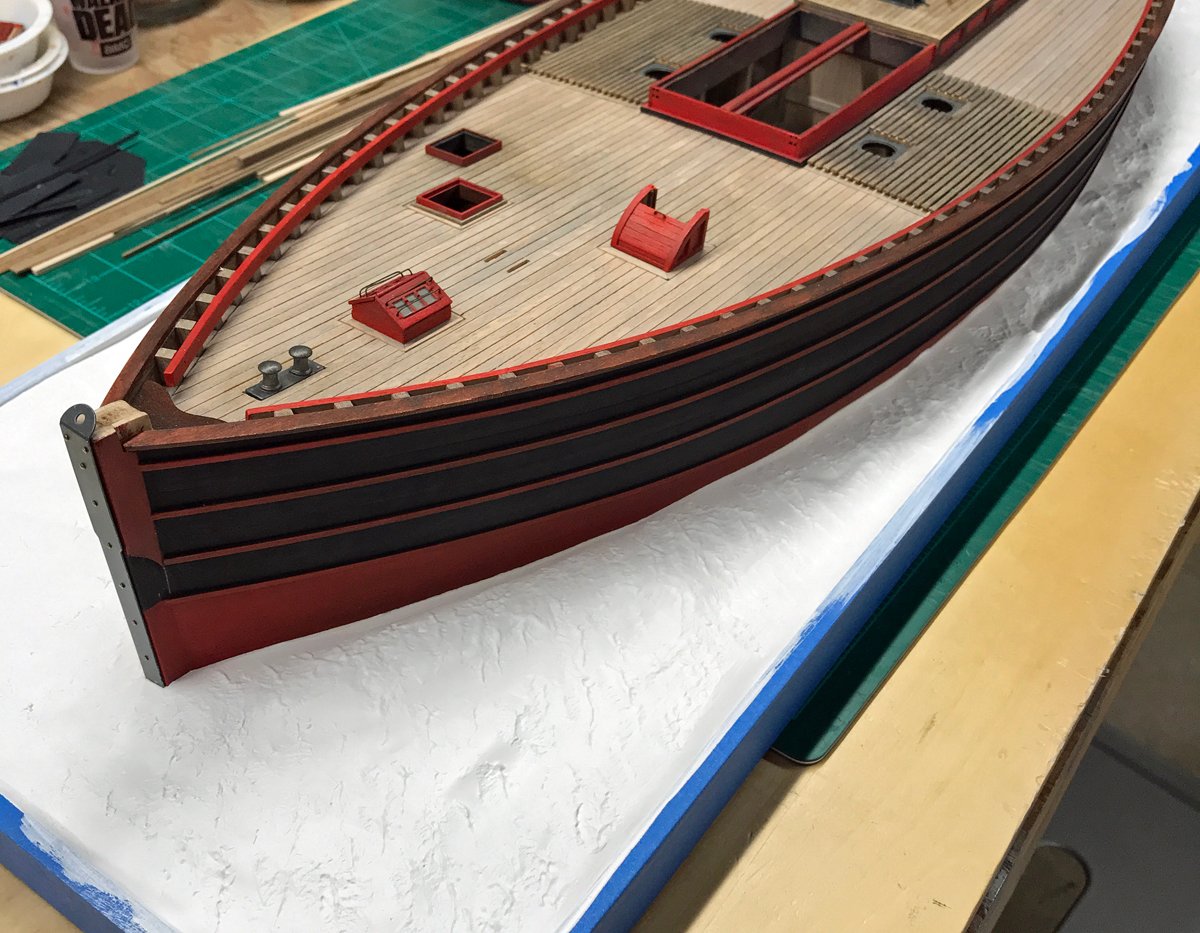
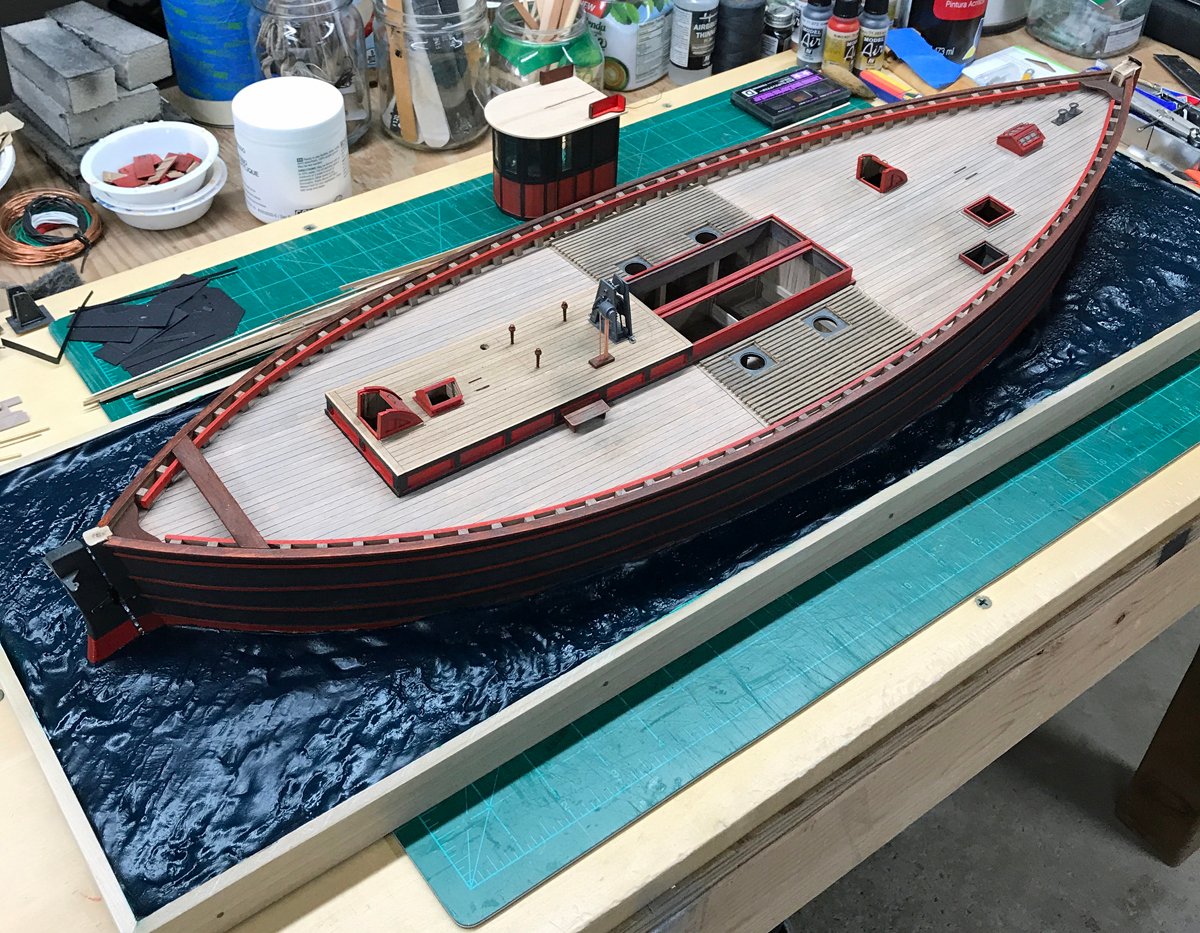
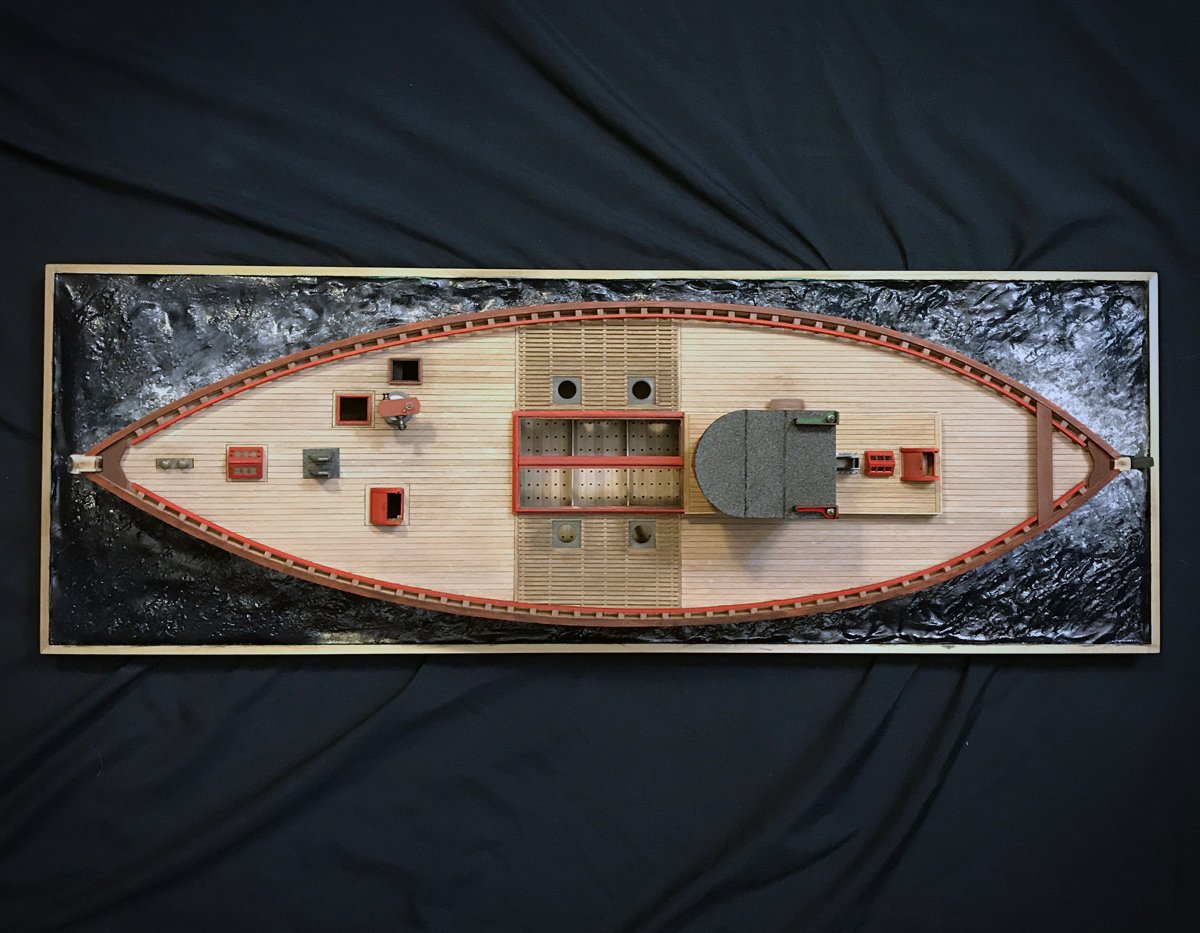
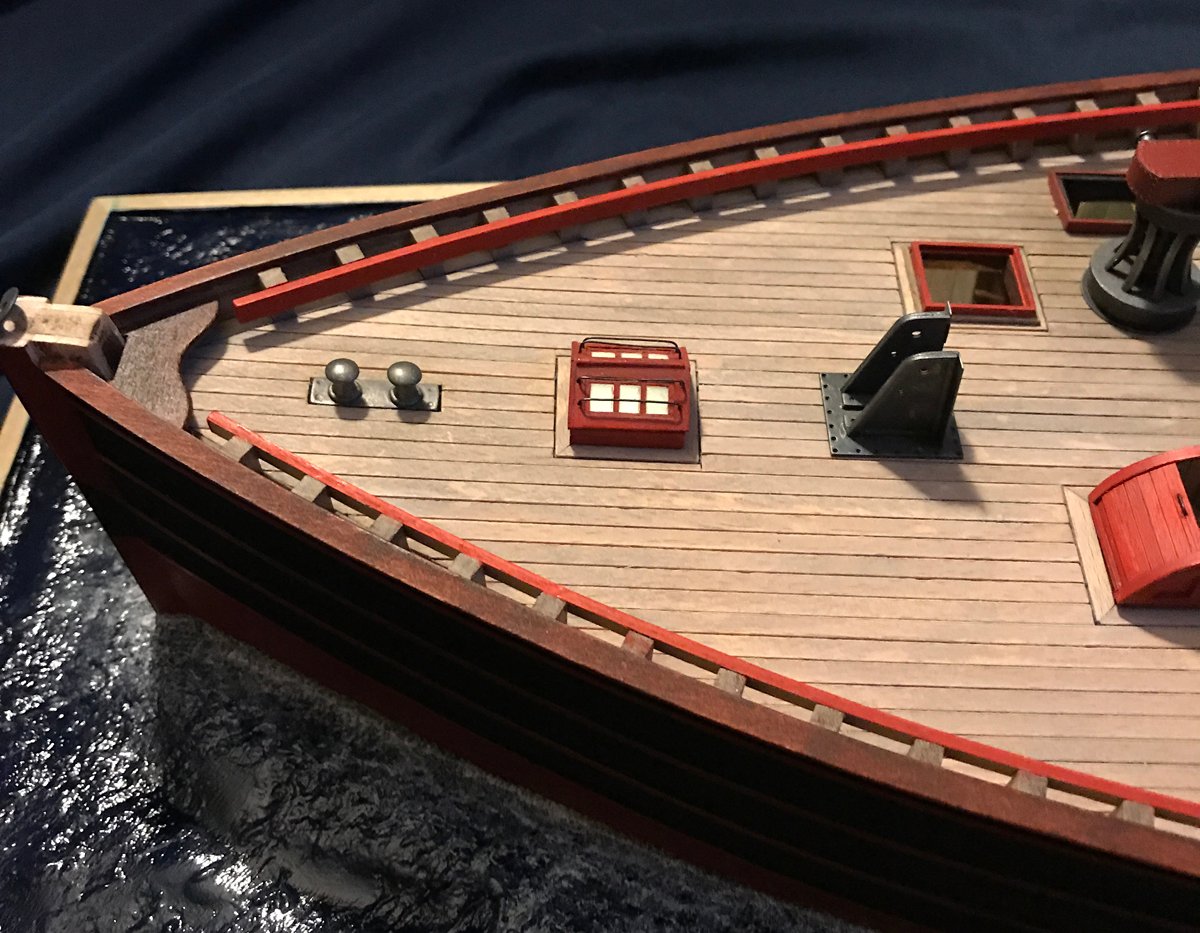
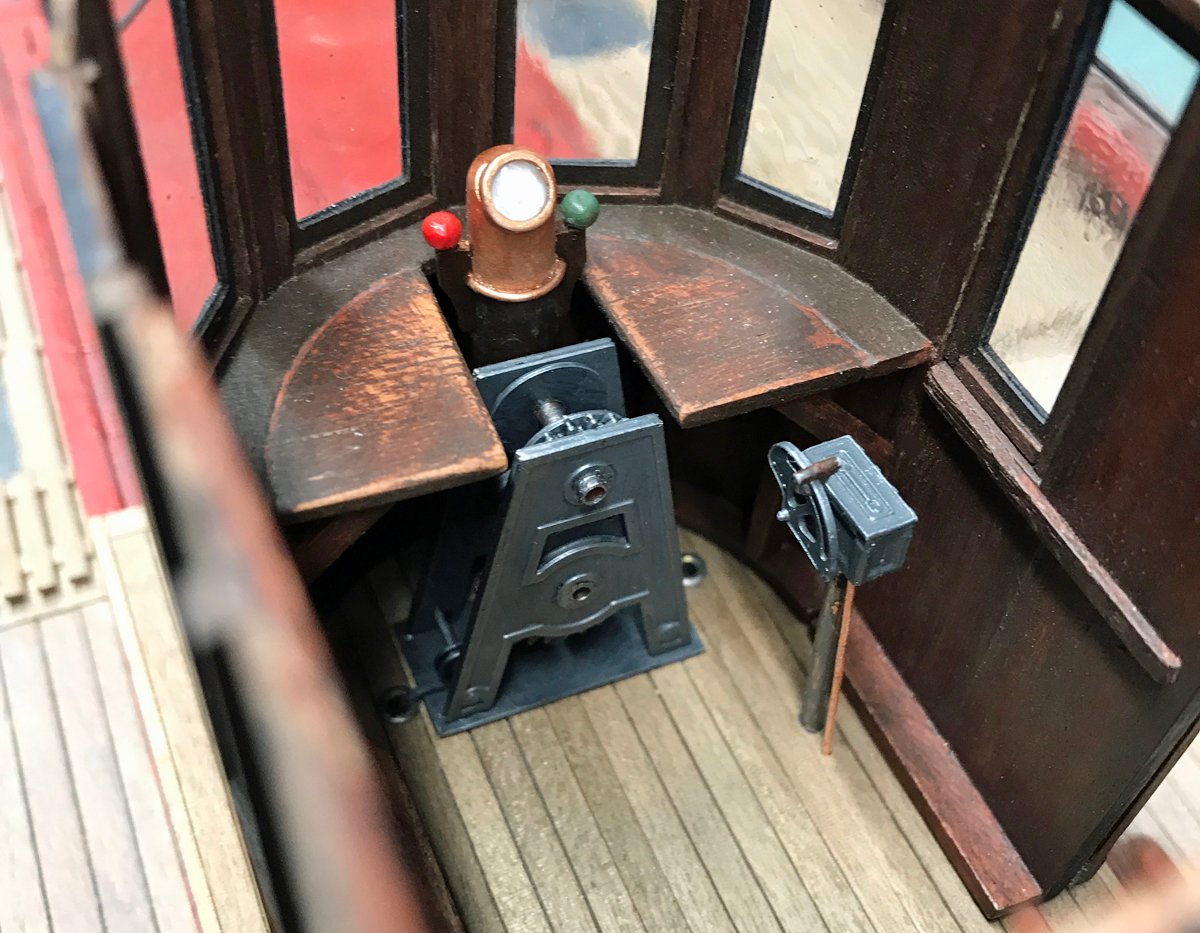
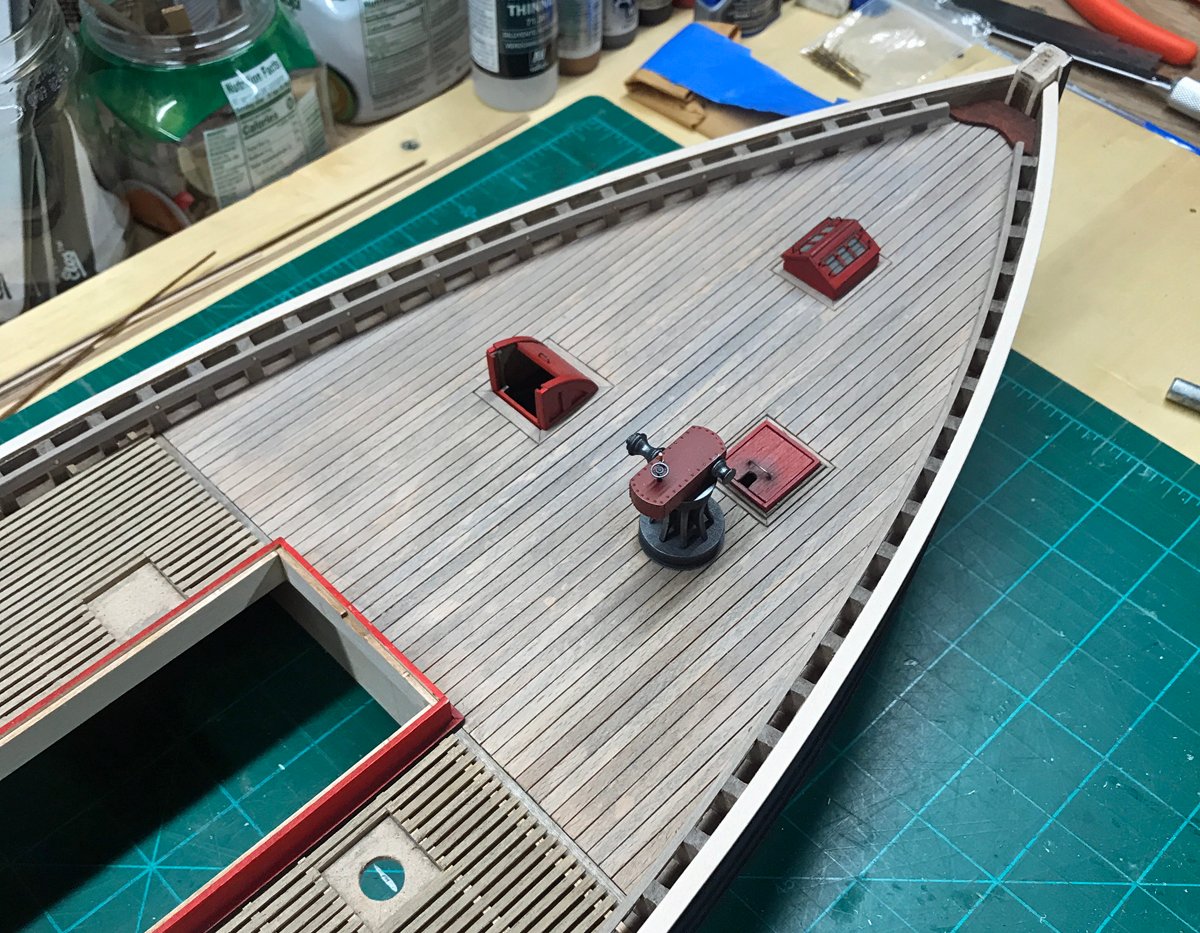
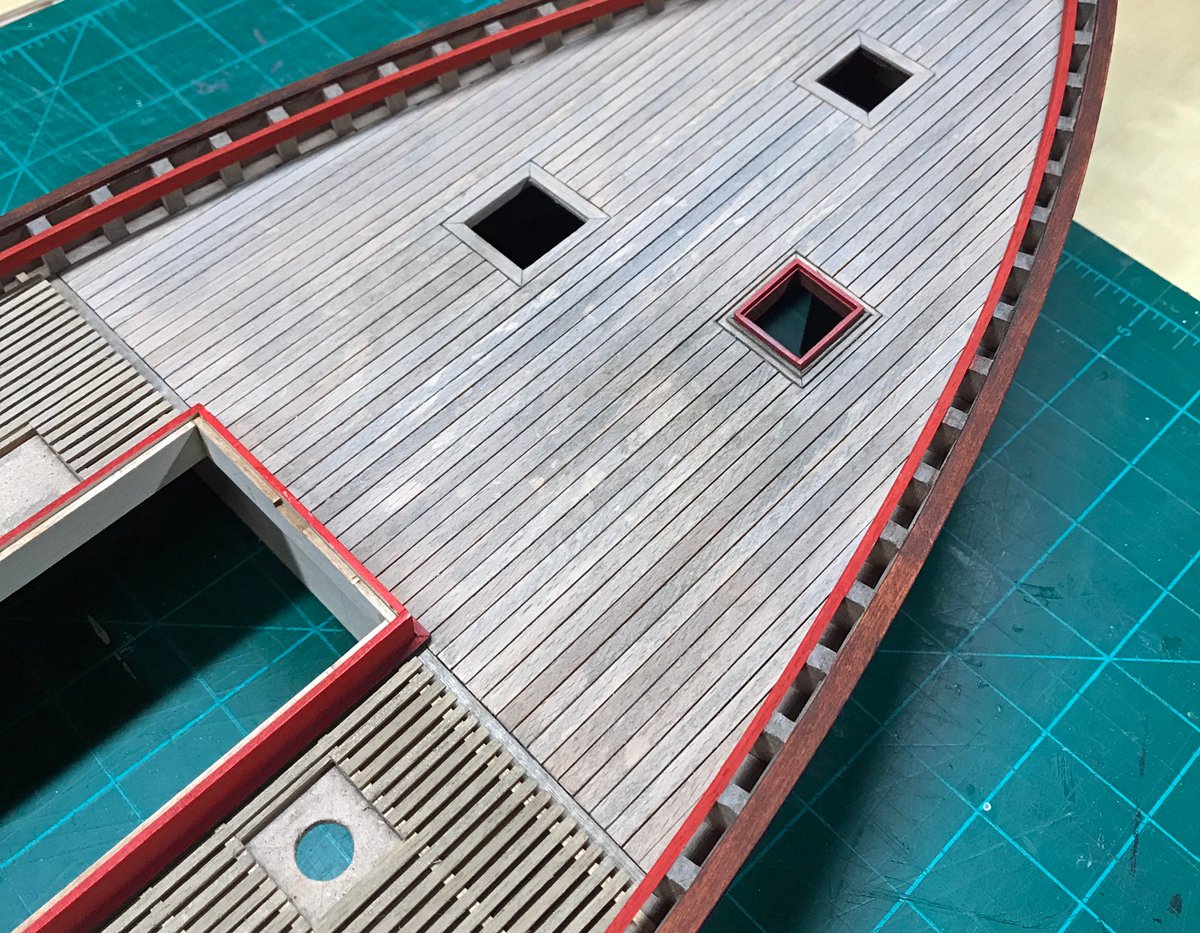
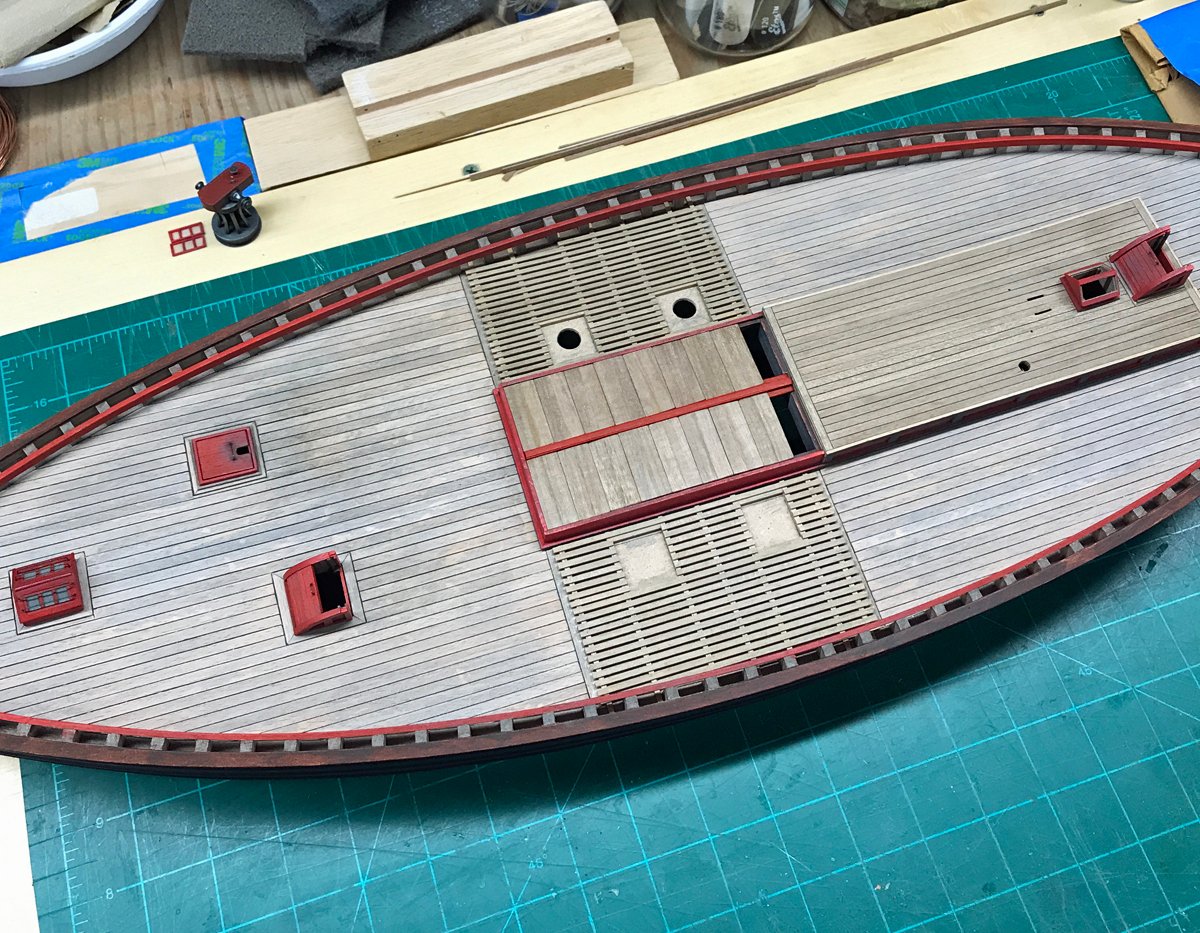
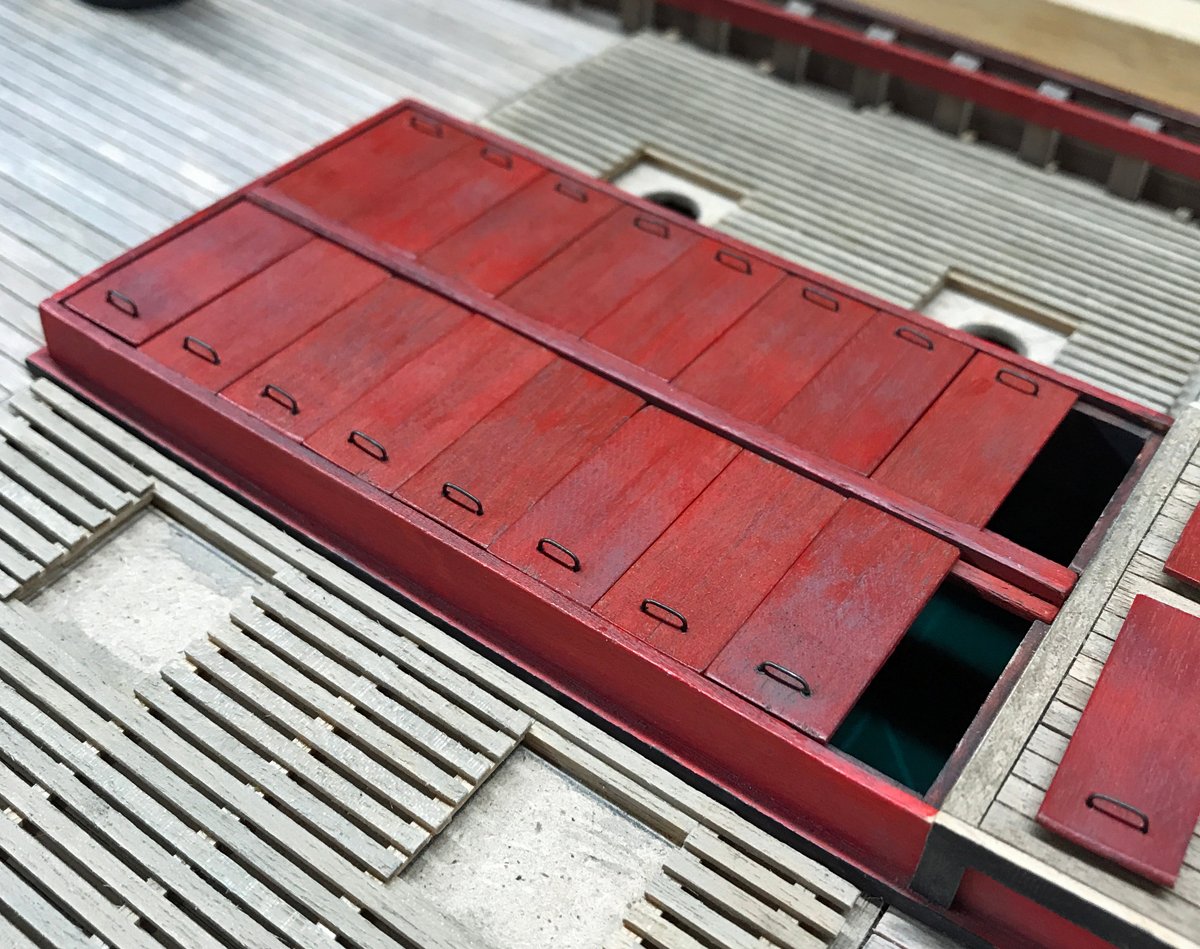
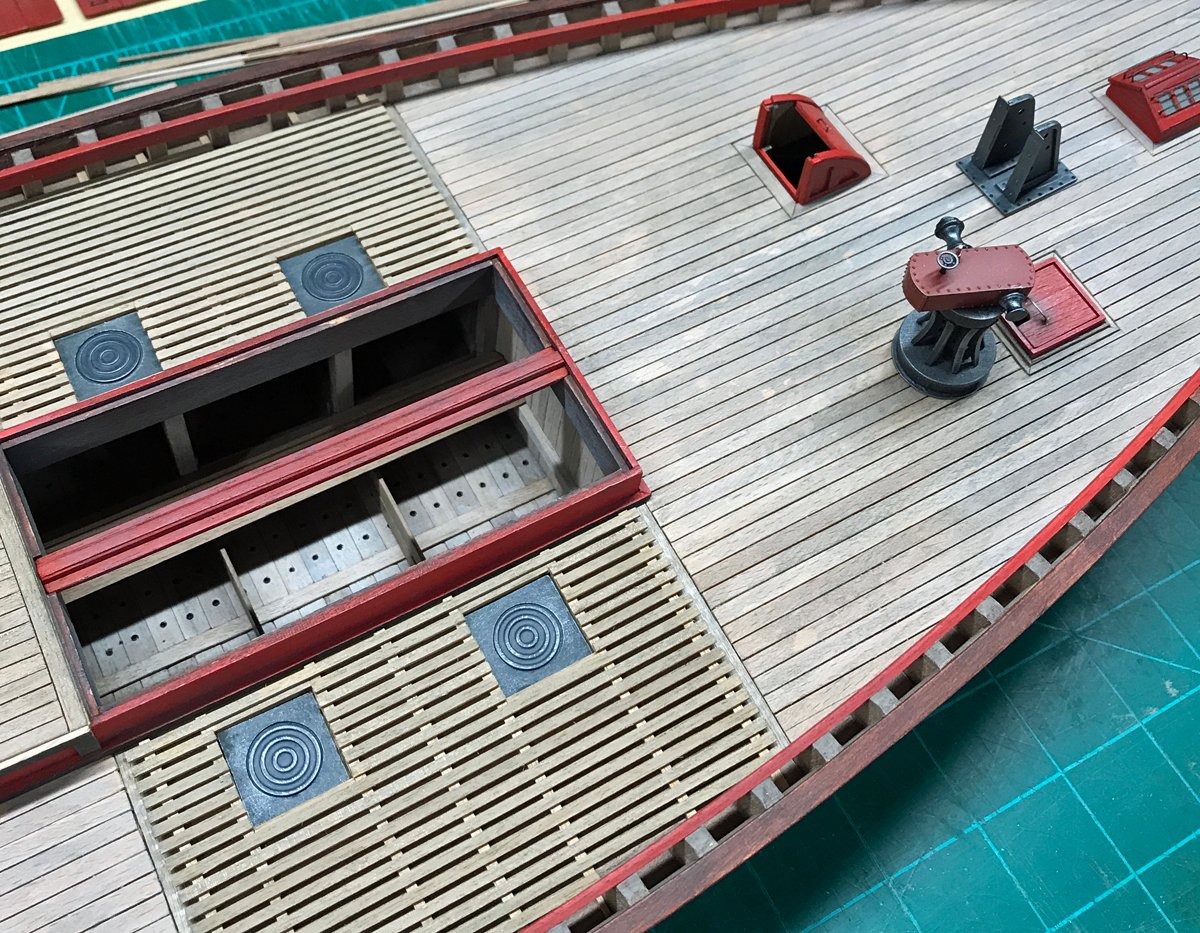
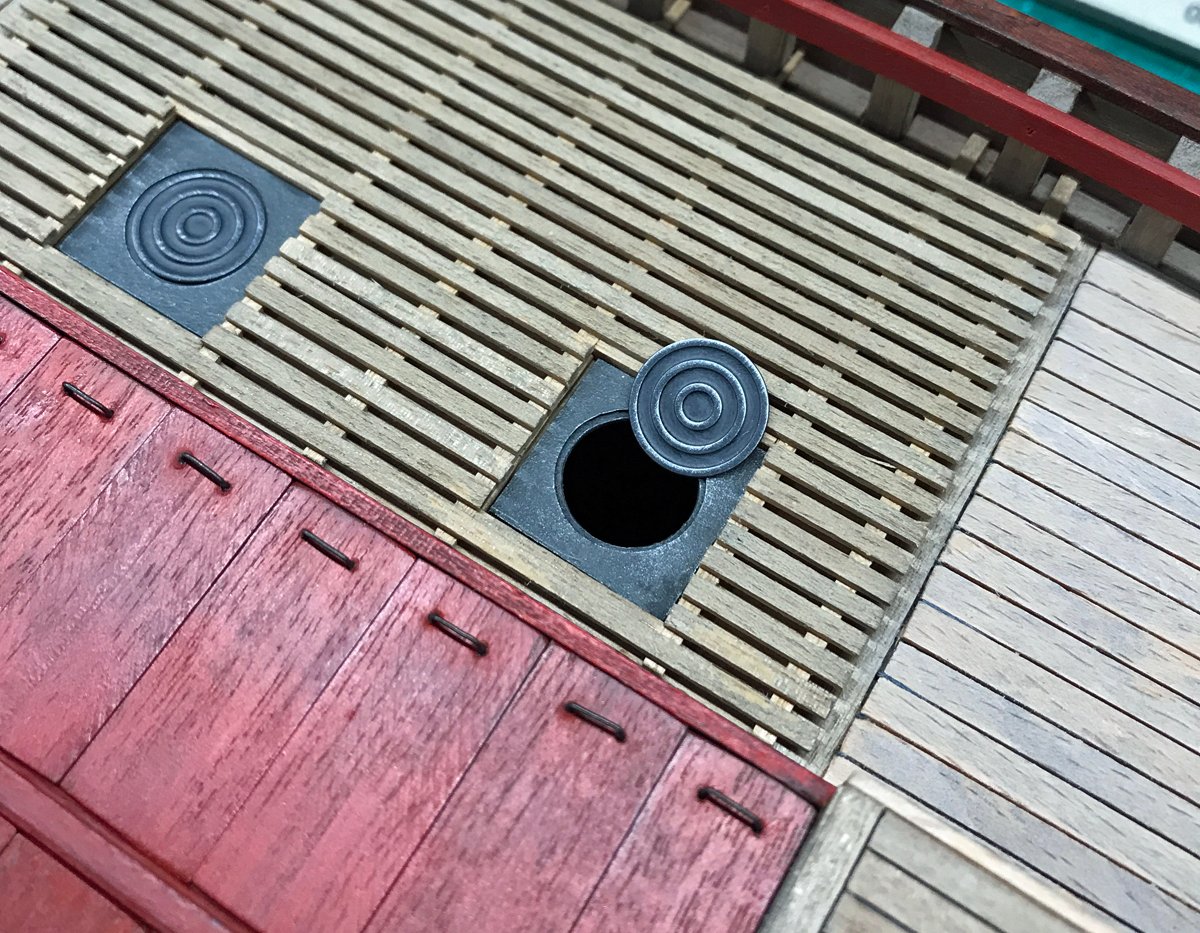
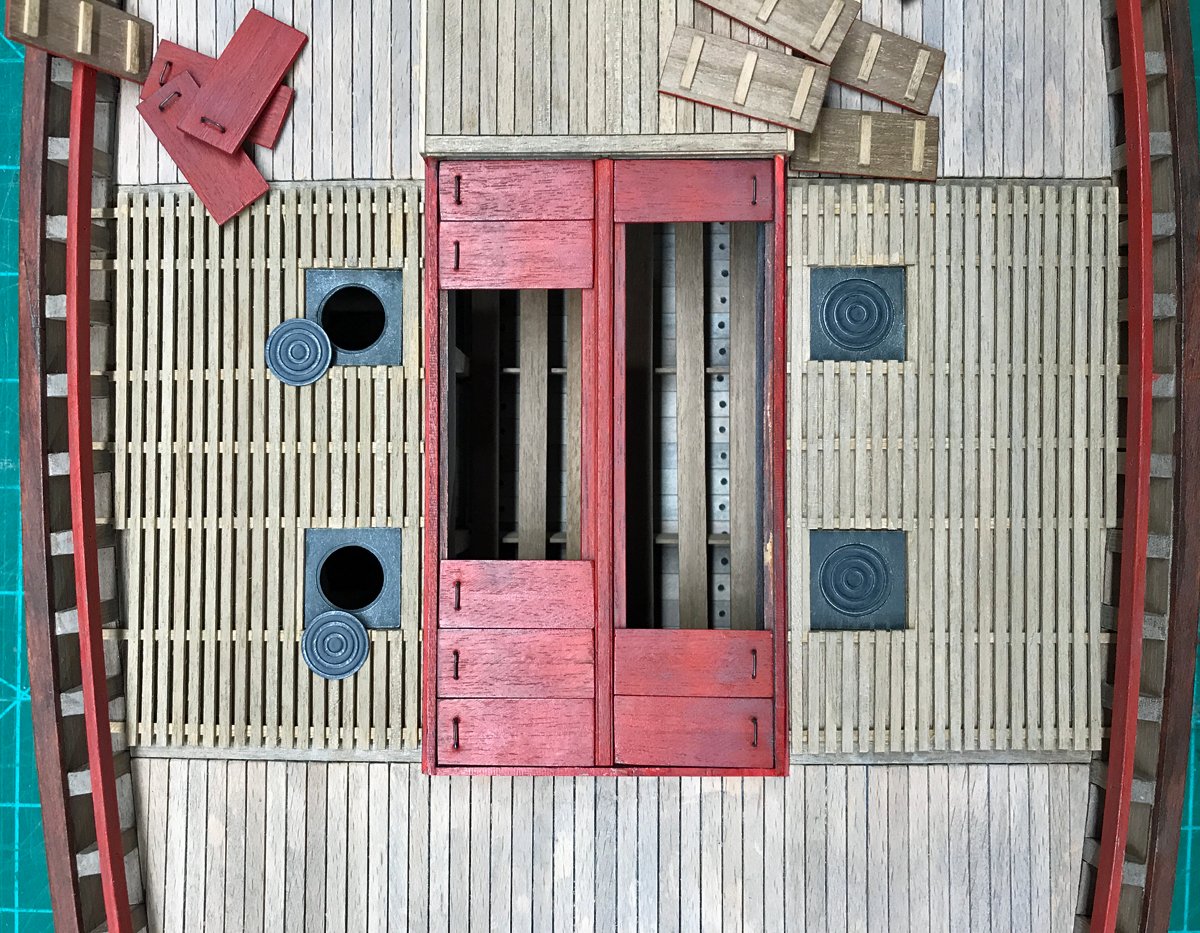
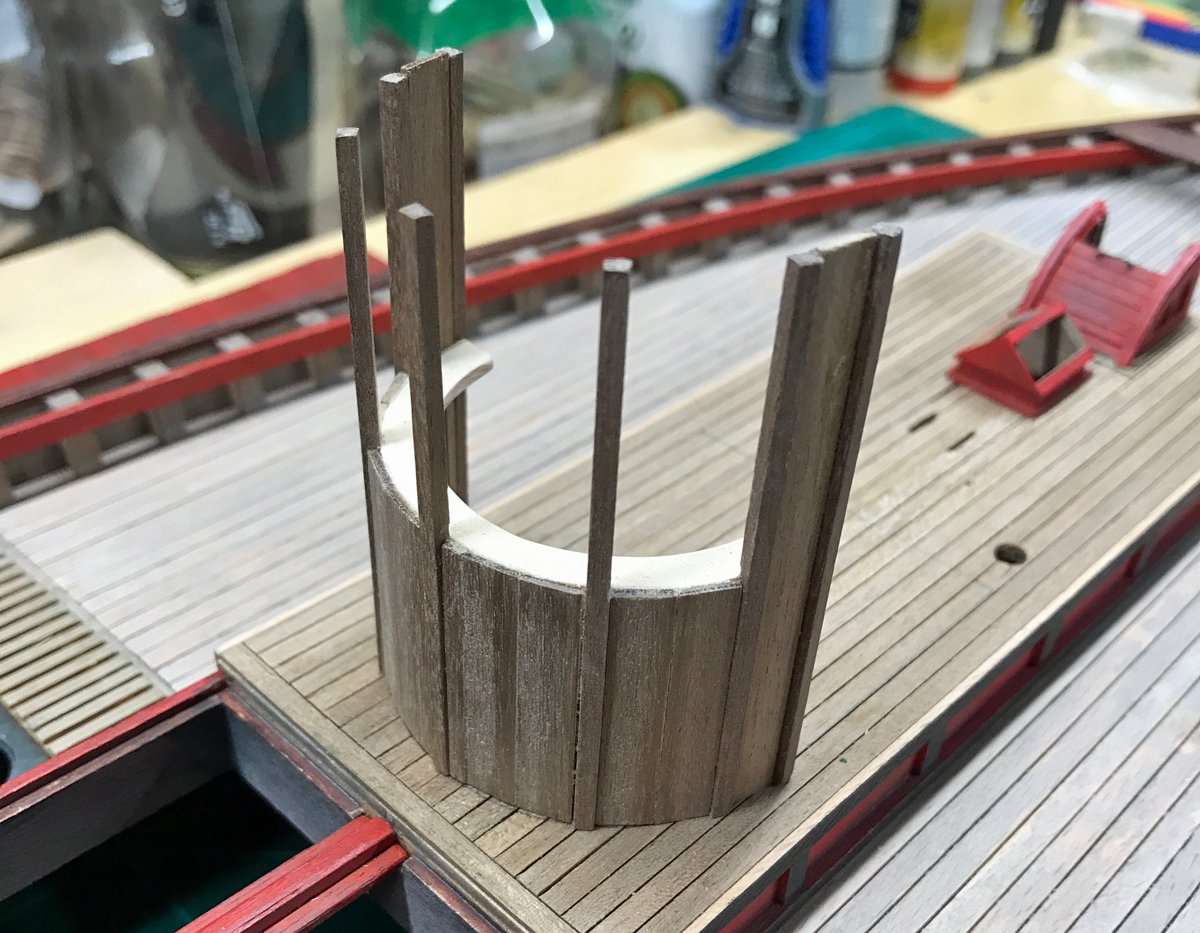
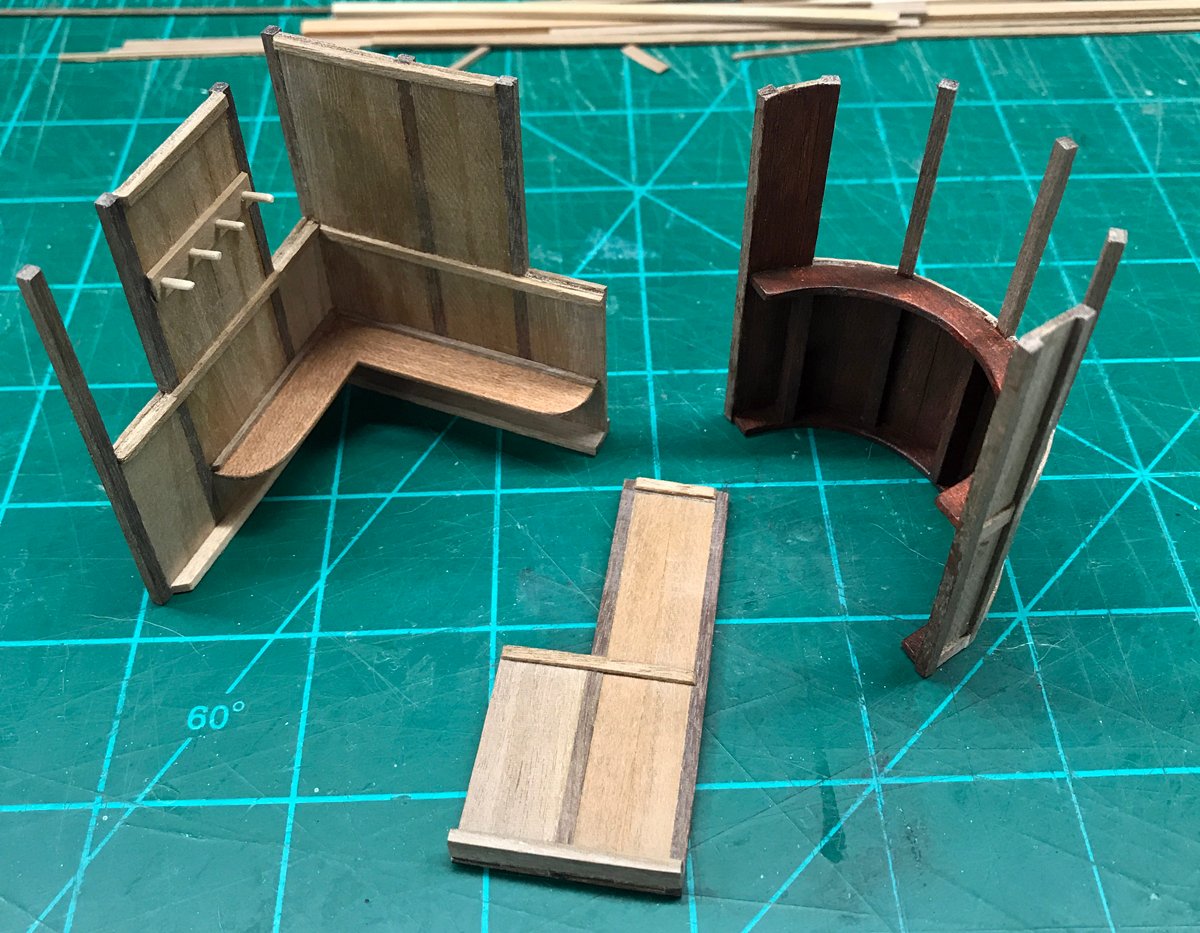
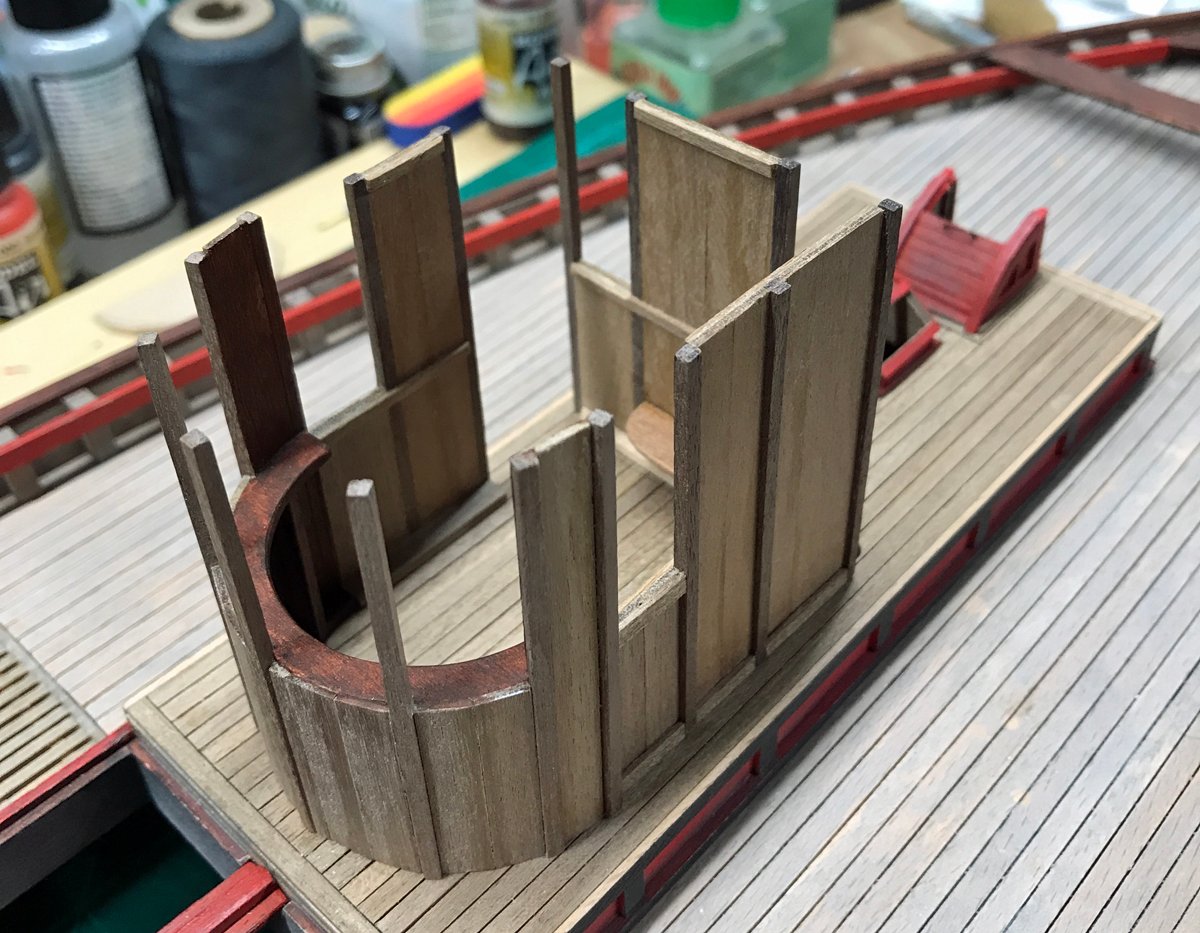
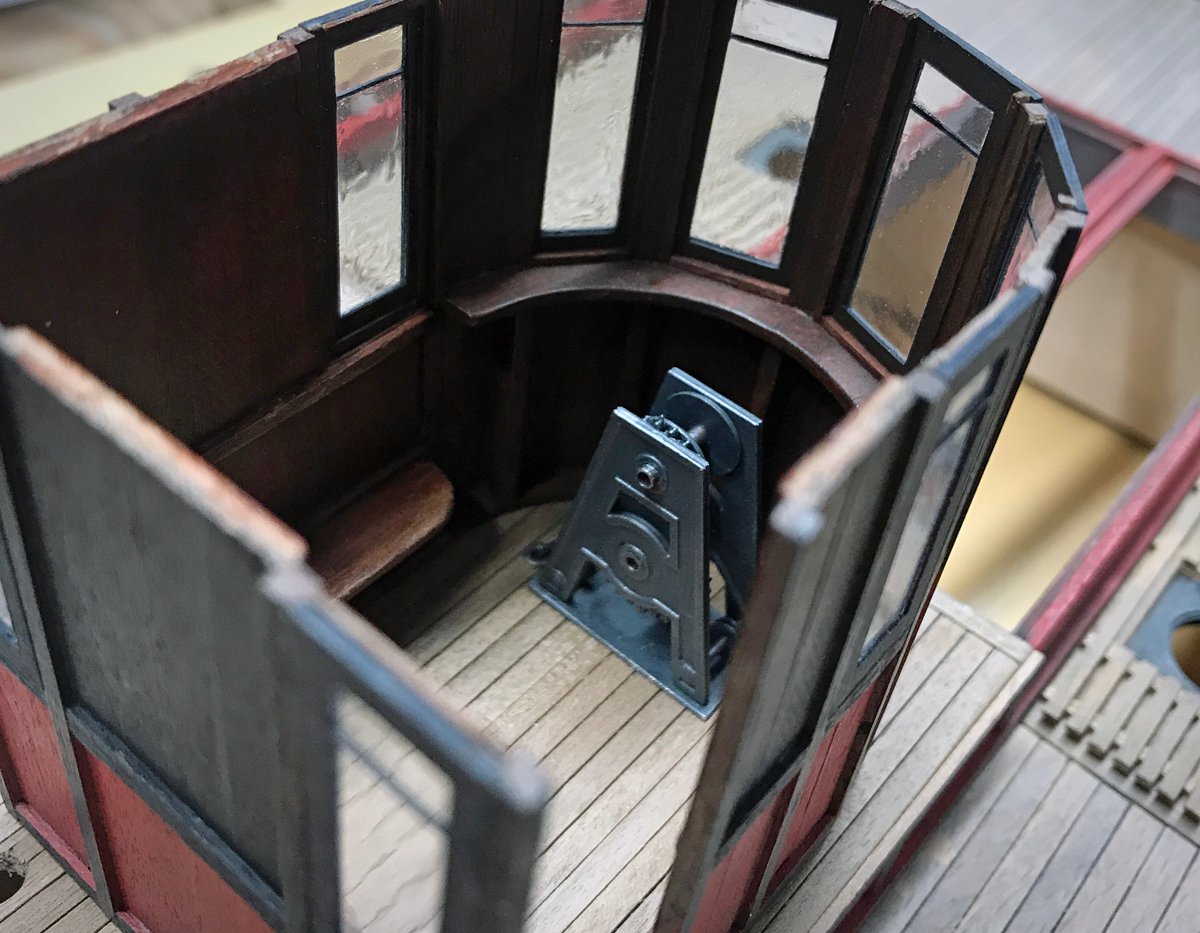
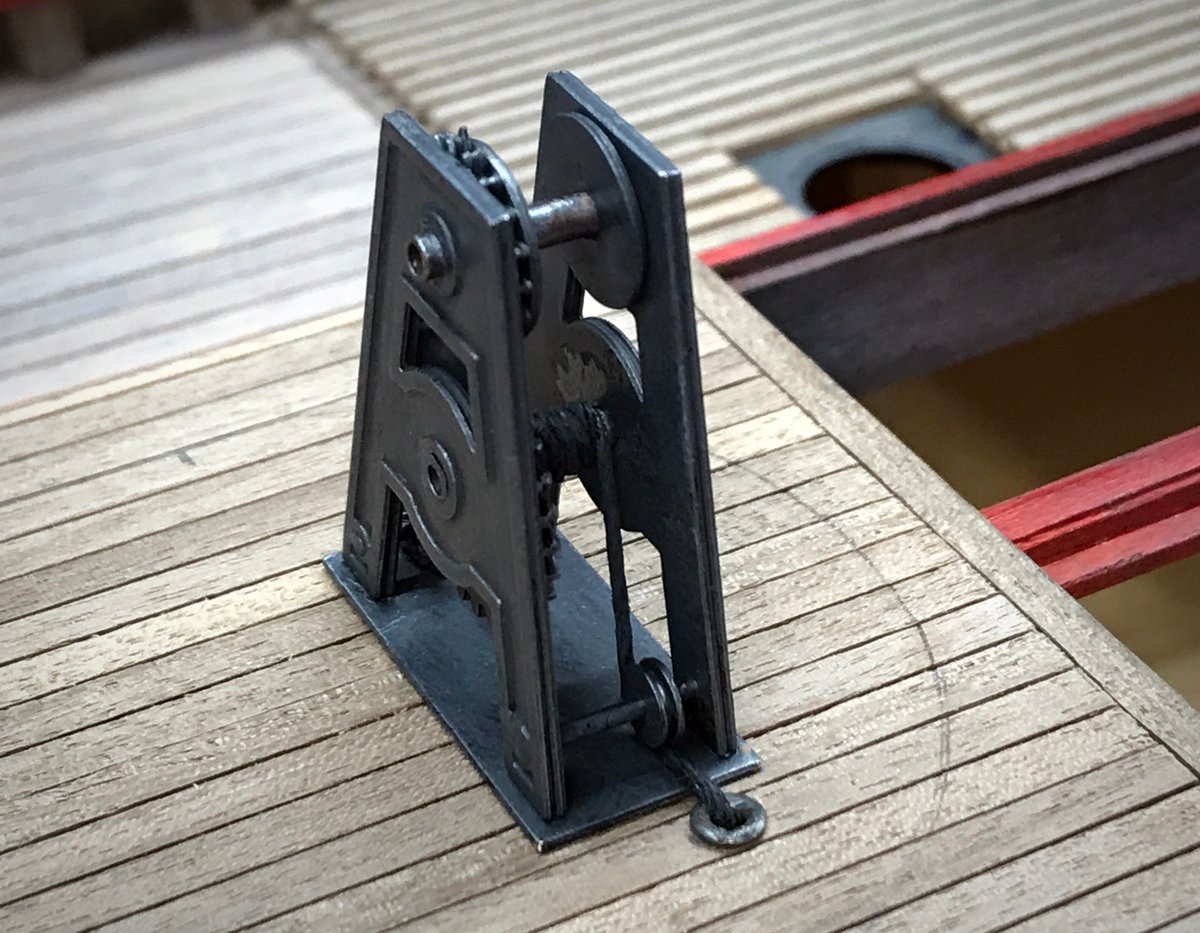
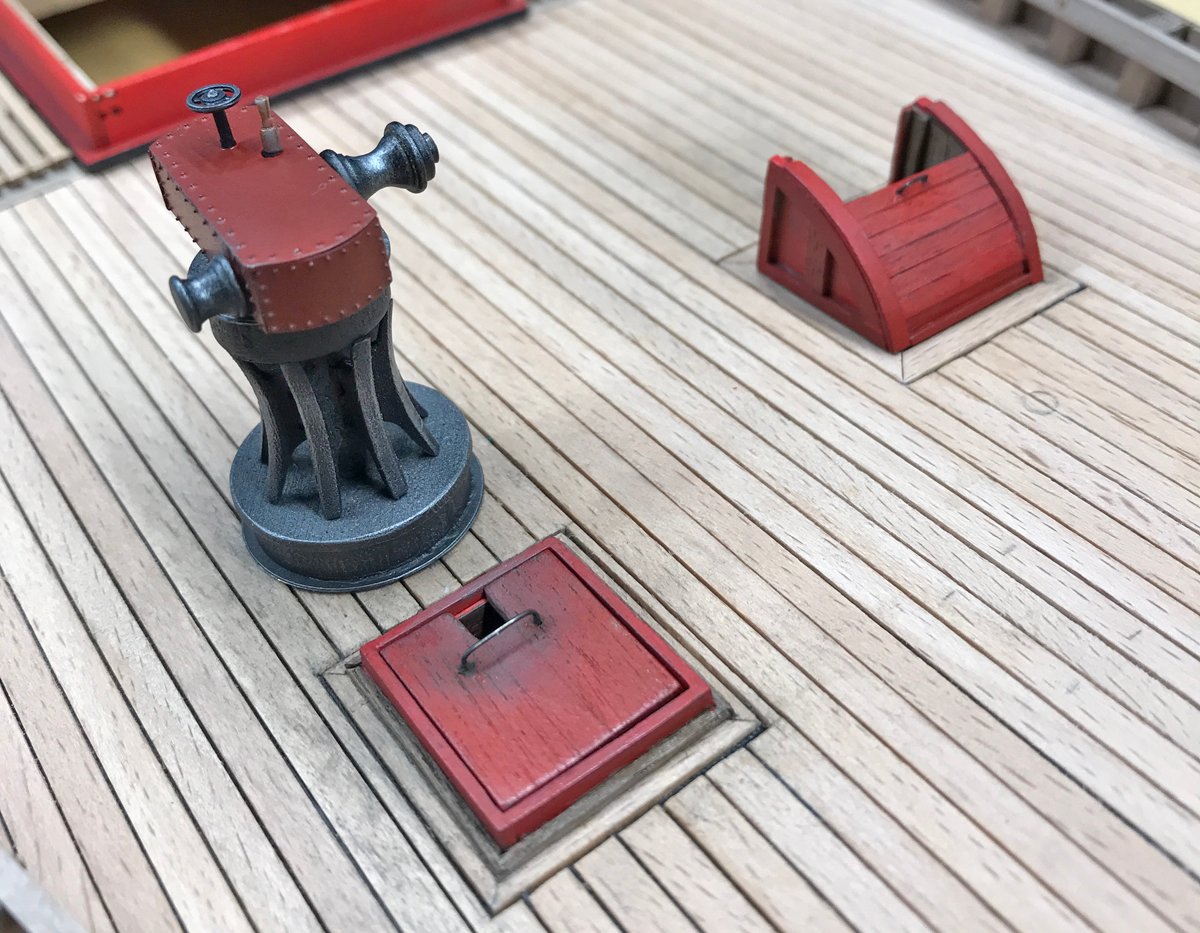
Progress continues, slowly but surely. I've started fooling around with some weathering on the deck..it's not easy to see in these photos but I'm mostly satisfied with the results in person. The deck is starting to look like people actually work on it. I've also added the top rail and painted the timber that runs along the top of the timber heads. I'll be dulling down that bright red later. I'll be adding more weathering later to simulate foot traffic and general grime but for now I think it's looking ok. I've also started fabricating the covers for the fish hold. I'm looking for a "used" texture so I won't be using the material provided in the kit for those. I decided to use the same style grab-handle I made for the warp room hatch cover and the same board and batten construction method for the covers themselves. I made the plates the scuttle covers sit on/in with paper. One piece with a slightly larger diameter circle than the other. After painting they worked out pretty well and all 4 openings can be displayed open or closed. The instructions called for the forward bollards (correct term?) to sit on top of the deck but it looked a little "off" to me so I inset the piece into the deck instead. I also spent a fair amount of time filing the casting lines off this part. It may have just been the luck of the draw but my kit had a pretty rough casting of this particular piece. On to the wheelhouse. I decided to scratch-build an alternative version of this structure for my boat. I was looking for something with a little more space than what's called for in the plans and this seemed like a good opportunity to further customize the build. I added a bench for the helmsman to relax on when time allowed along with pegs to hang gear. I try to take care of my crew 😂 I won't be using the wheel provided in the kit...it looks far too bulky and out of scale. Given the design of the structure the wheel attaches to I took a guess at how the rope/cable that controls the rudder exits the wheelhouse. There's nothing specific/detailed in the plans so this will have to do. When the wheel house is in place, this area is barely visible. I'll be adding a few more details to this area in addition to a more appropriate wheel. I'd imagine there would be a binnacle and some kind of control for the motor. I may also add a light source here if I can find a way to do it convincingly. Stay tuned... All in all, things are starting to come together...who knows, maybe I'll actually finish this thing some day. Thanks for checking in!
-
Thanks Ras, Rik for the interesting links/info. Those steam powered models are amazing!
-
Thanks Ras...I was able to find a couple images of this particular capstan and you and Mike are absolutely right. Everything that makes these things work is right there on top. The only thing it required from below deck was the steam feed. Here's a short Youtube clip of a 1/6 working model someone built of one of these capstans...incredible.
-
I'm with B. E. on this...given how clean the rest of the build is, weathered sails might seem out of place. By the way, the rest of the boat is beautifully done, congratulations!
- 222 replies
-
- 1
-
-
- First Build
- Lady Isabella
- (and 2 more)
-
Thanks Mike for providing the interesting link/info. The Reaper's capstan looks like it has a reasonable amount of room in its base to house whatever was necessary to turn the larger vertical spindle (probably the wrong term) and the housing on top, the smaller horizontal rollers. You're probably right that most of the stuff that made it work was within the capstan itself and a simple steam feed from the boiler finished the job. Luckily, what's directly under the capstan won't be visible in my build so I'm safe either way! 😂
-
Thanks Steve...I use Vallejo's Model Air. I think it's primarily designed to be an airbrush paint for plastic kits but I find it works nicely with a regular brush on wood surfaces. I use it in several thinned layers rather than all in one coat.
-
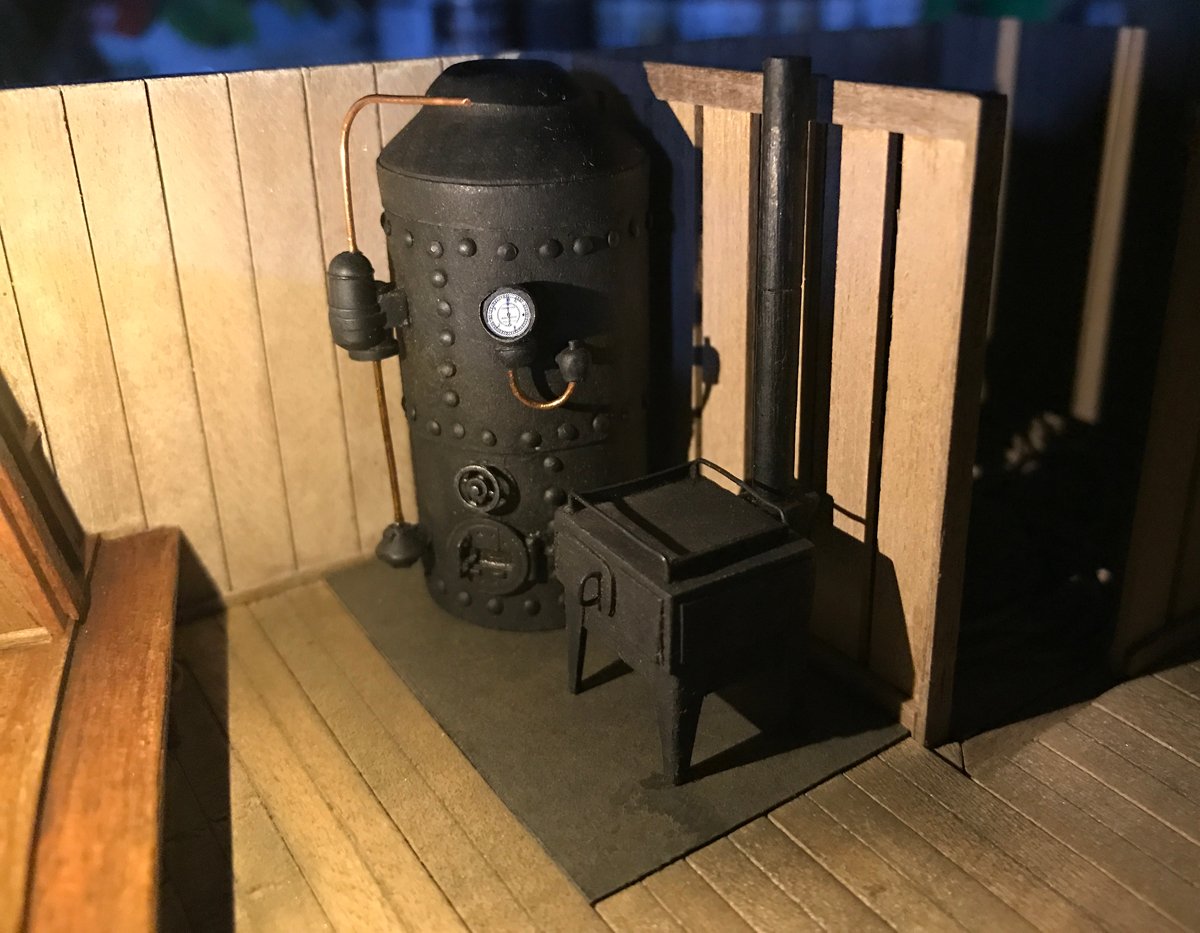
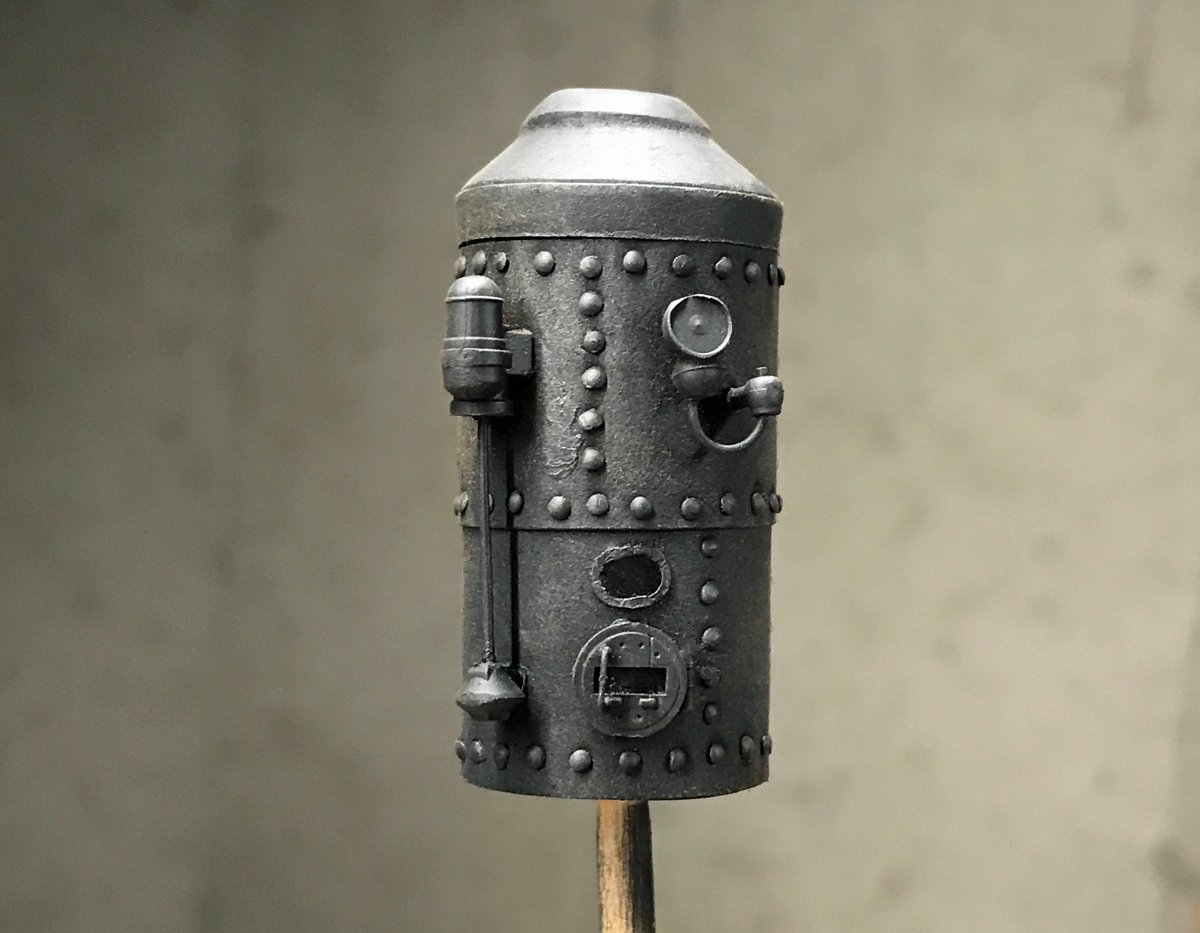
Thanks Mike... I have some mini-LEDs on order to fool around with possibly lighting the below-deck detail areas. We’ll see how that goes. Yes, from what I’ve been able to find, a “donkey” boiler was used to power the capstan. I added one (or at least my loose interpretation of one!) to my forward cabin detail area below deck. I’m not an engineer but I’m assuming there was a certain amount of machinery below deck under the capstan where the steam was fed and the gears that turn the capstan lived. I haven’t seen anything definitive on this. The kit does call for a pipe that runs from the base of the capstan overboard. I’m assuming this is the drainage pipe you’re referencing. I’ll add that when I permanently install the capstan. Thanks Bob... I did add weathering to the metal parts as part of the paint job. I used a gunmetal gray first and then dry-brushed a little silver to simulate wear.
-
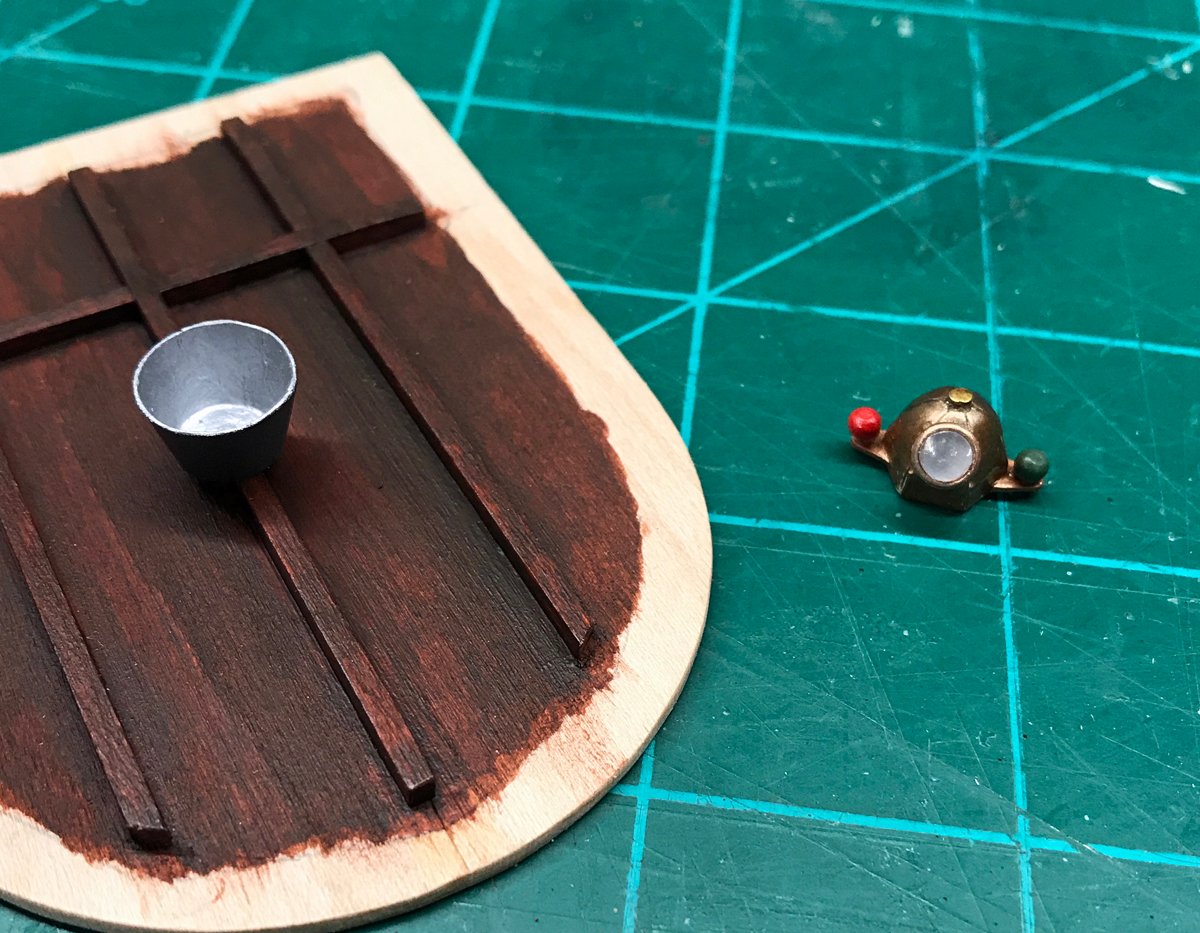
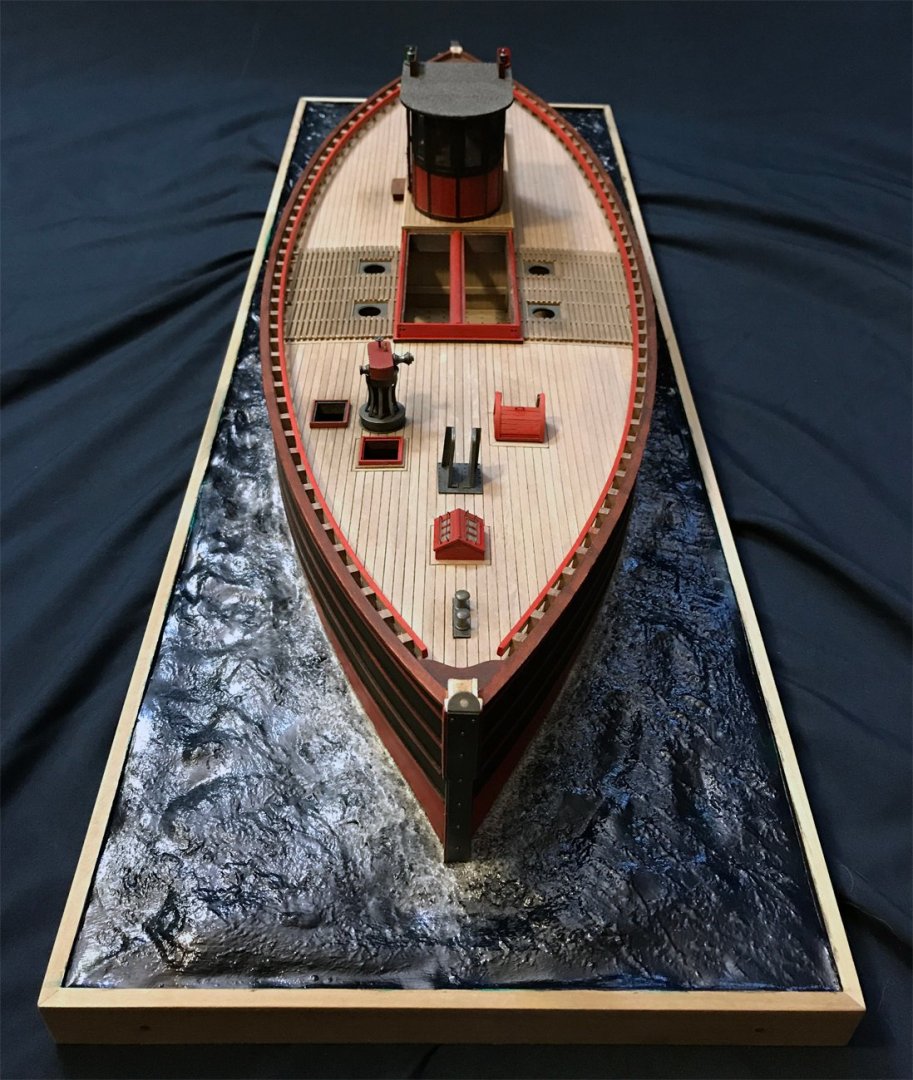
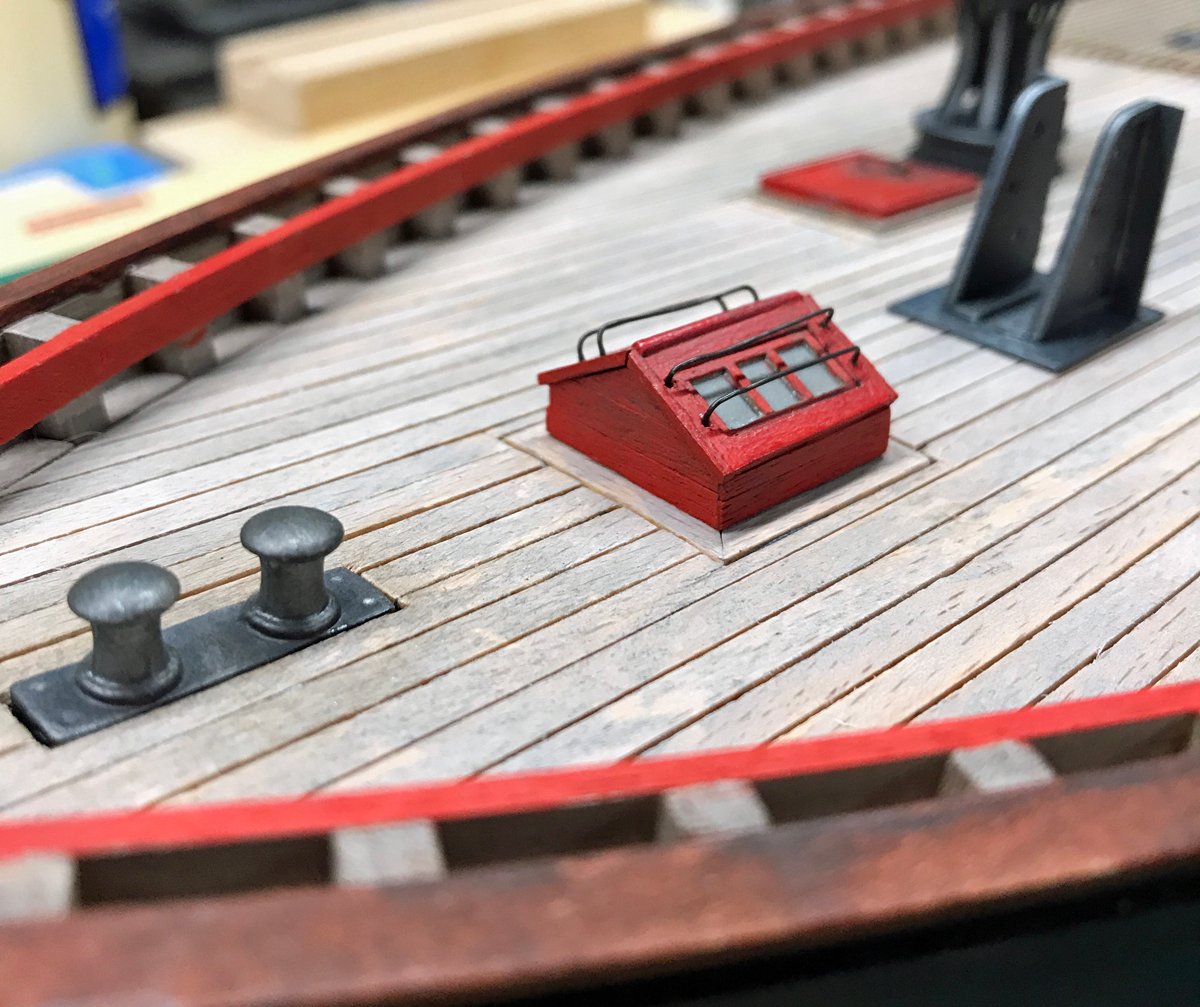
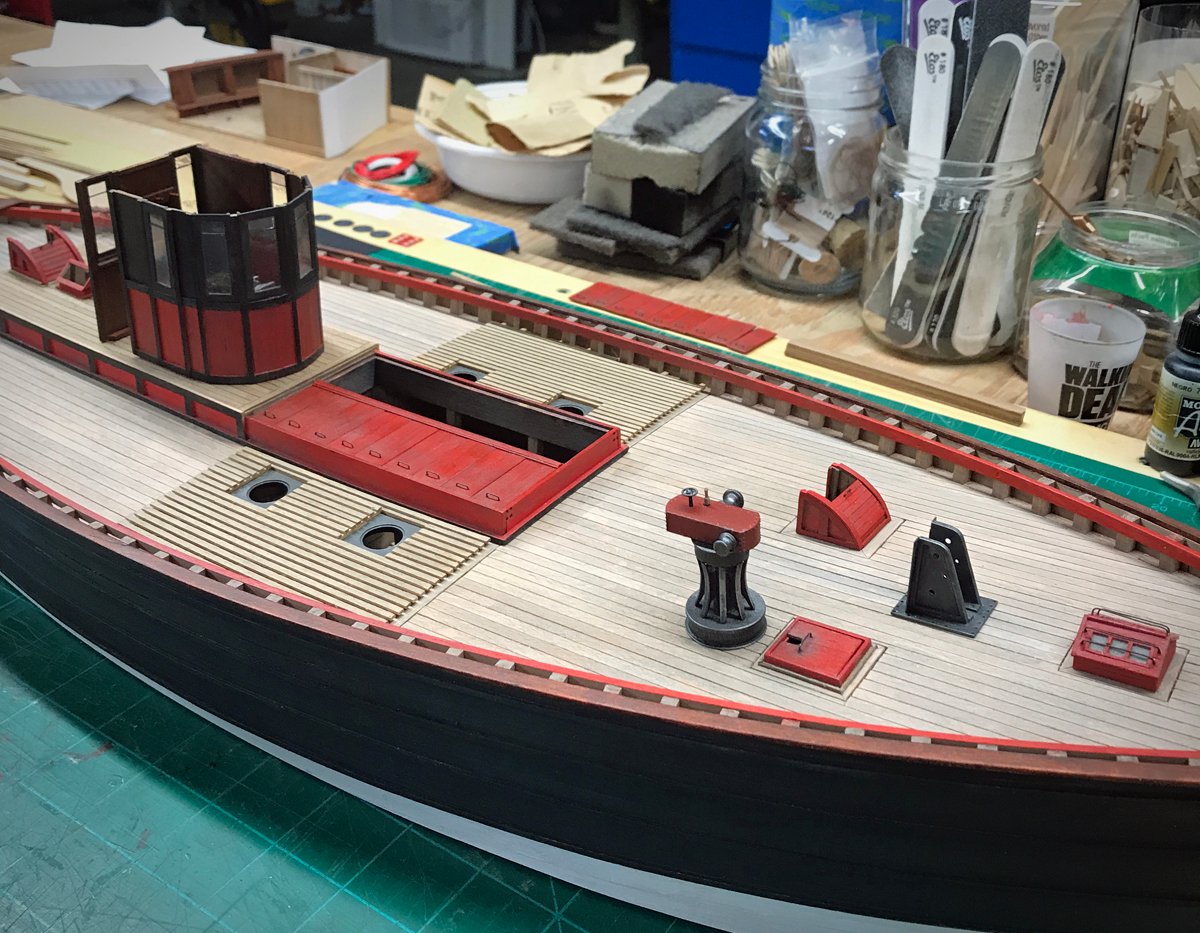
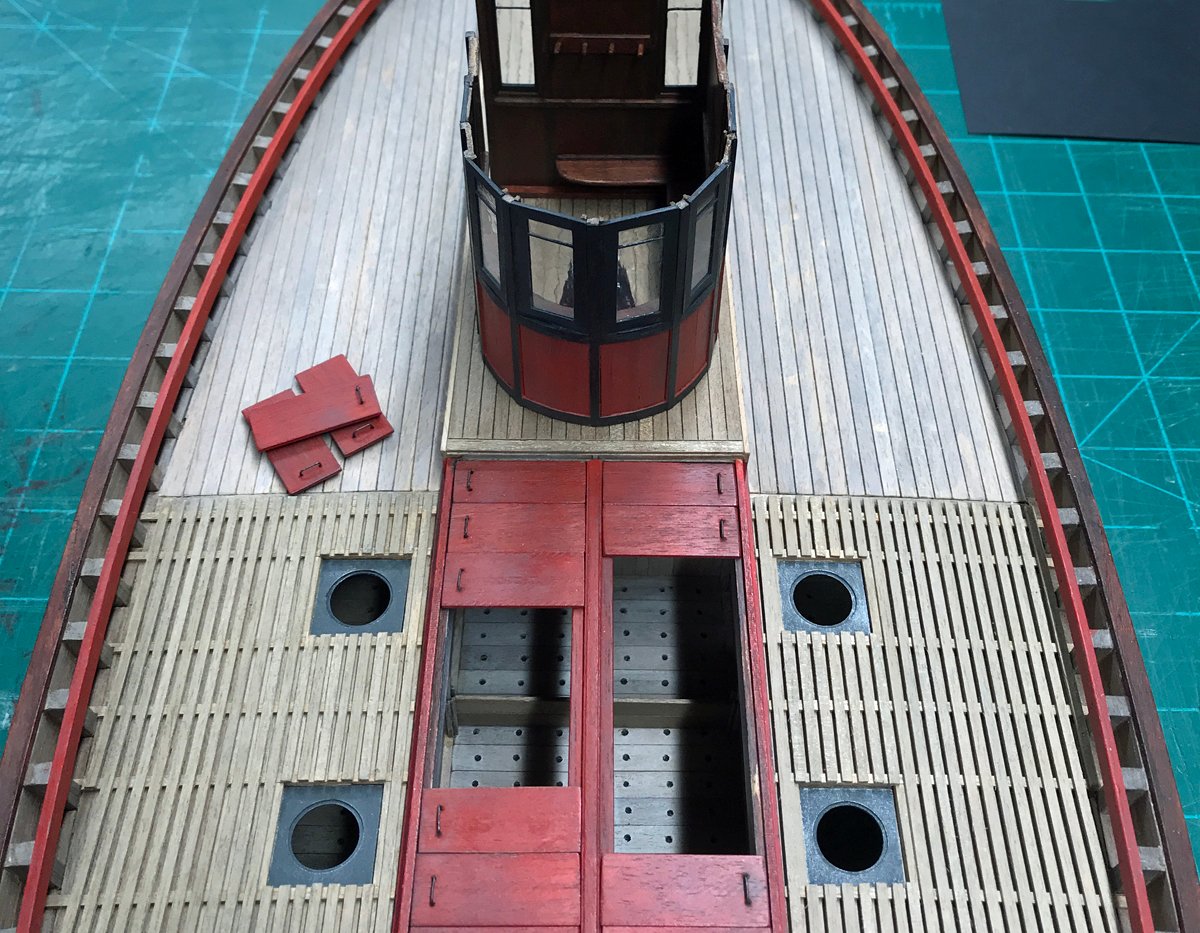
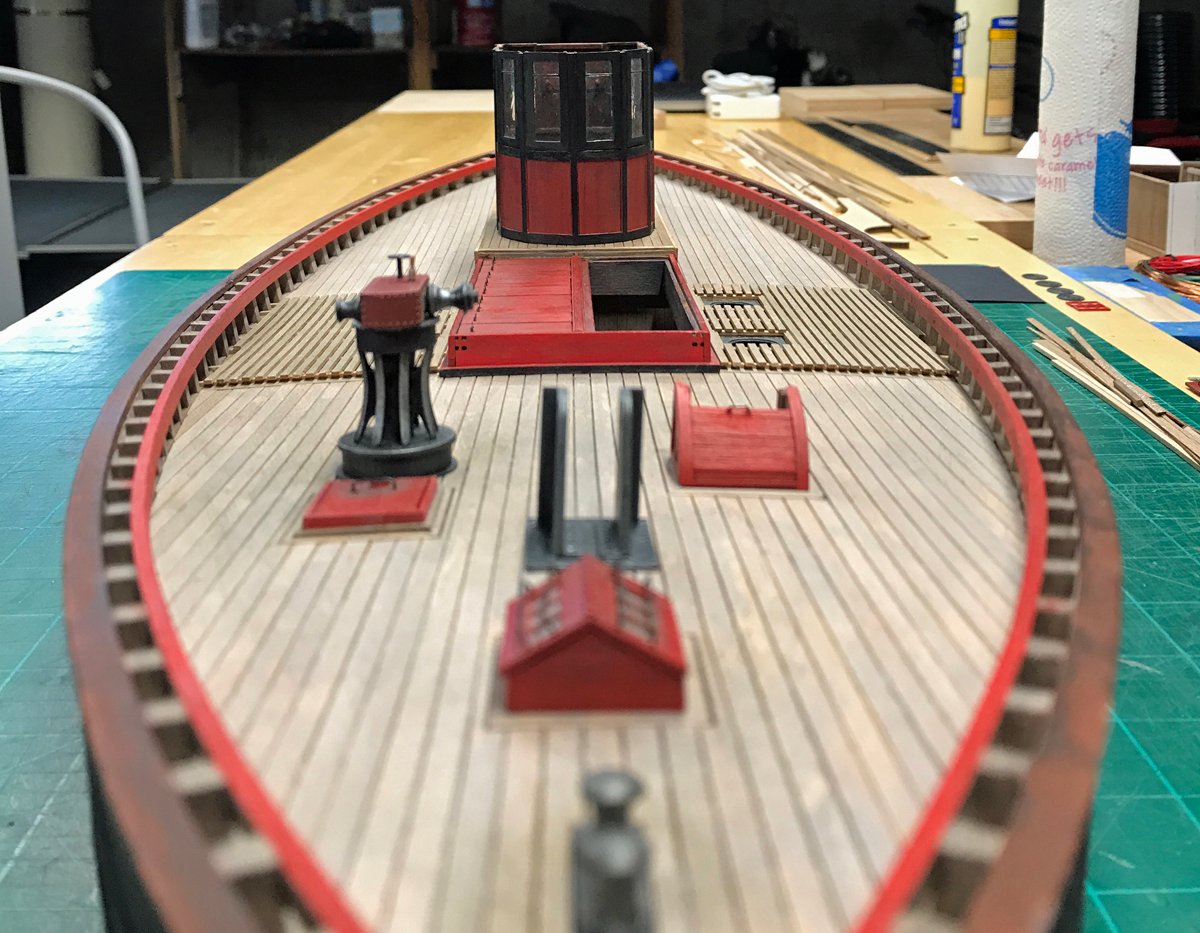
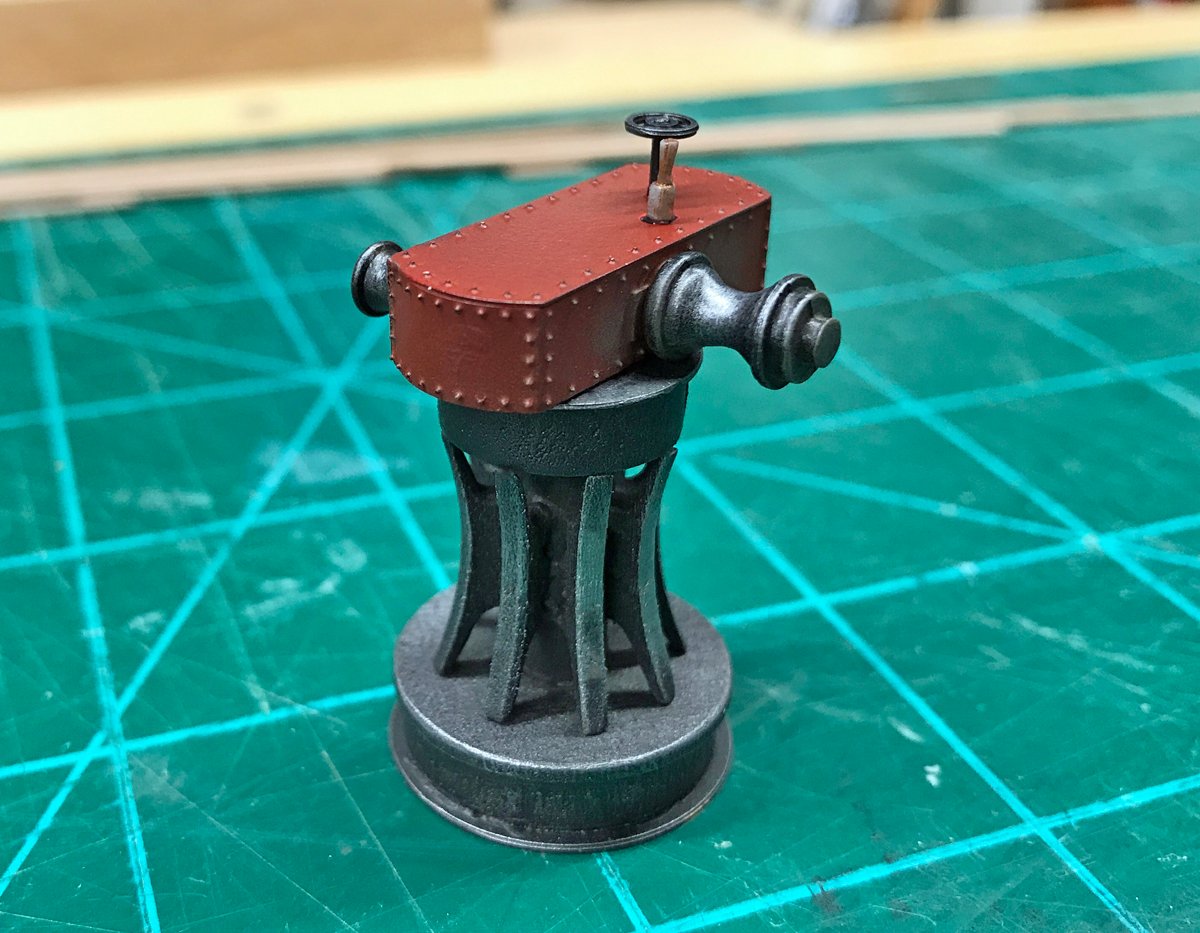
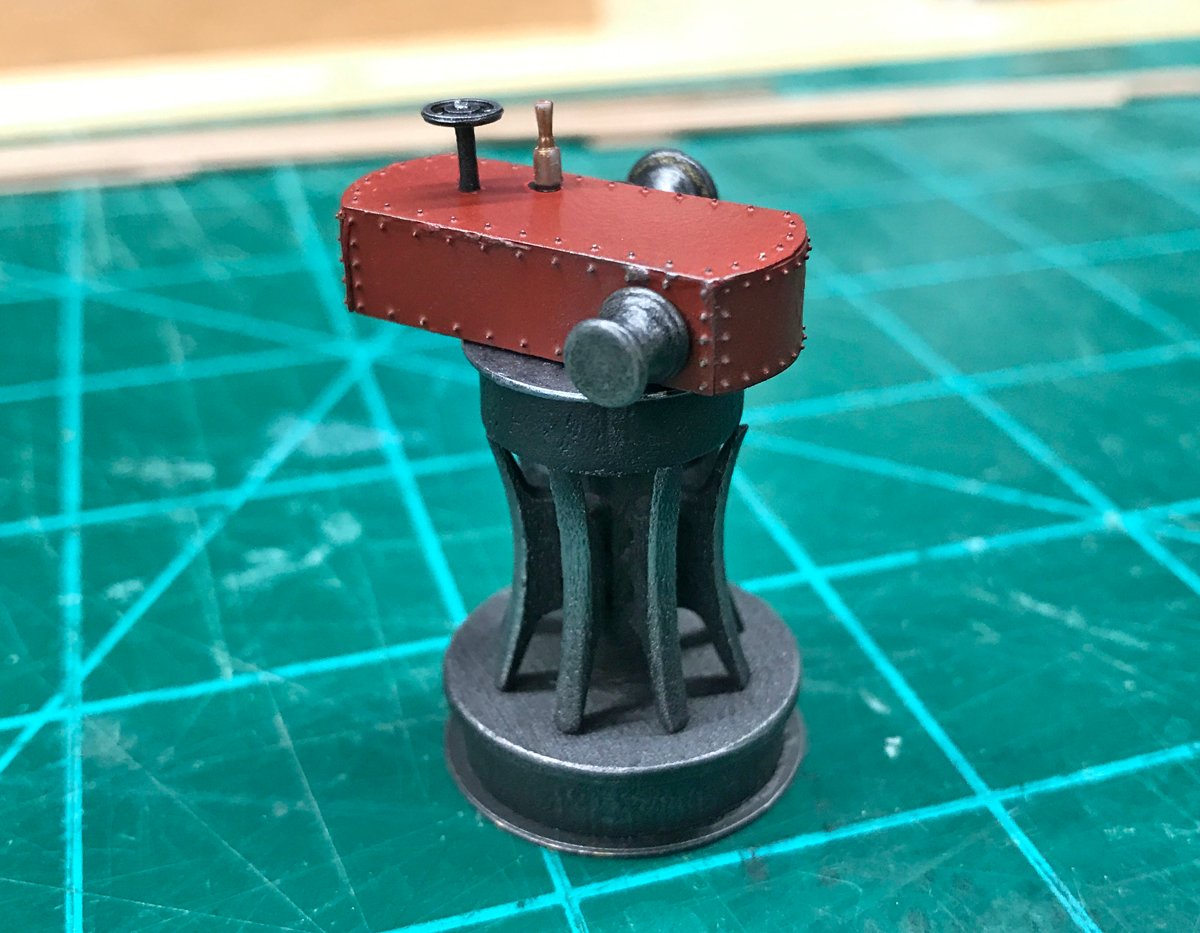
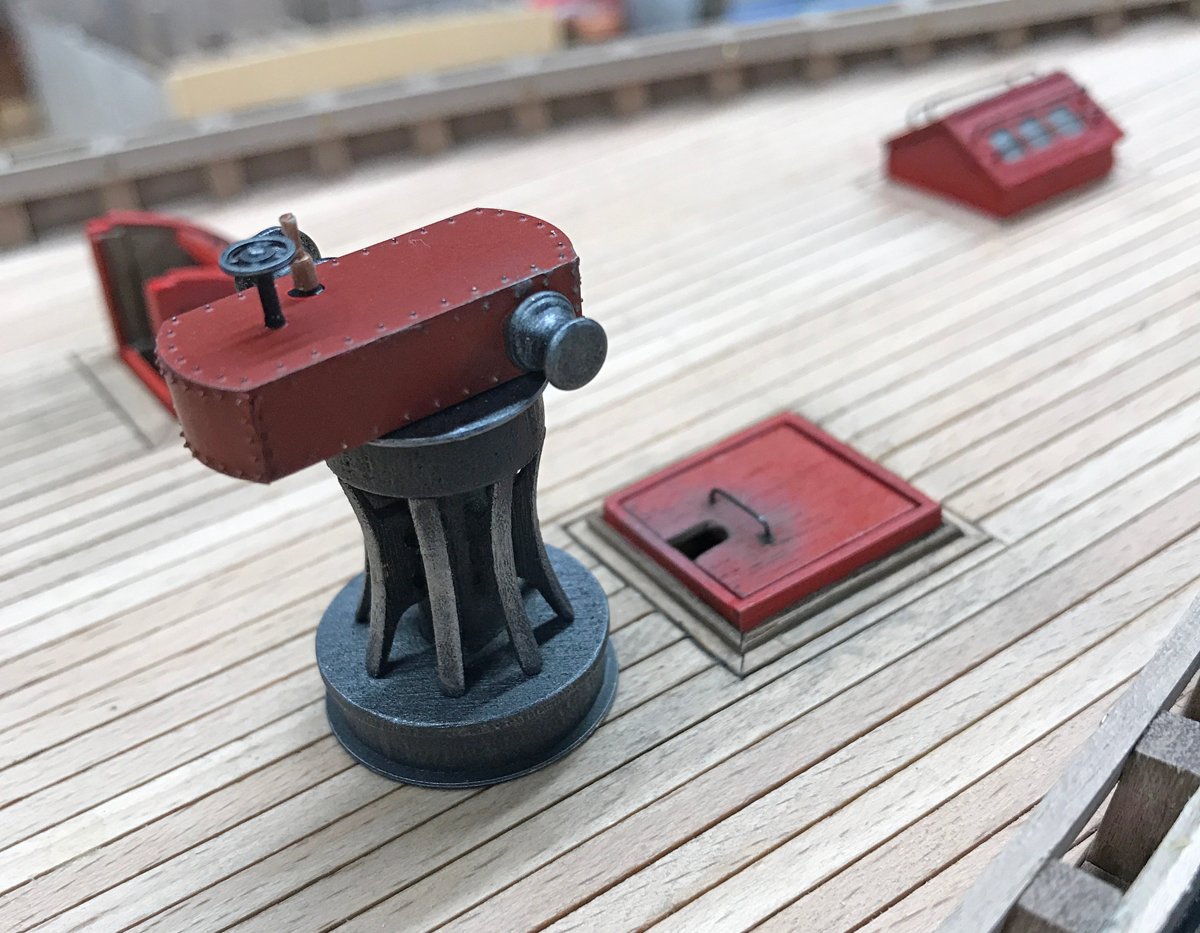
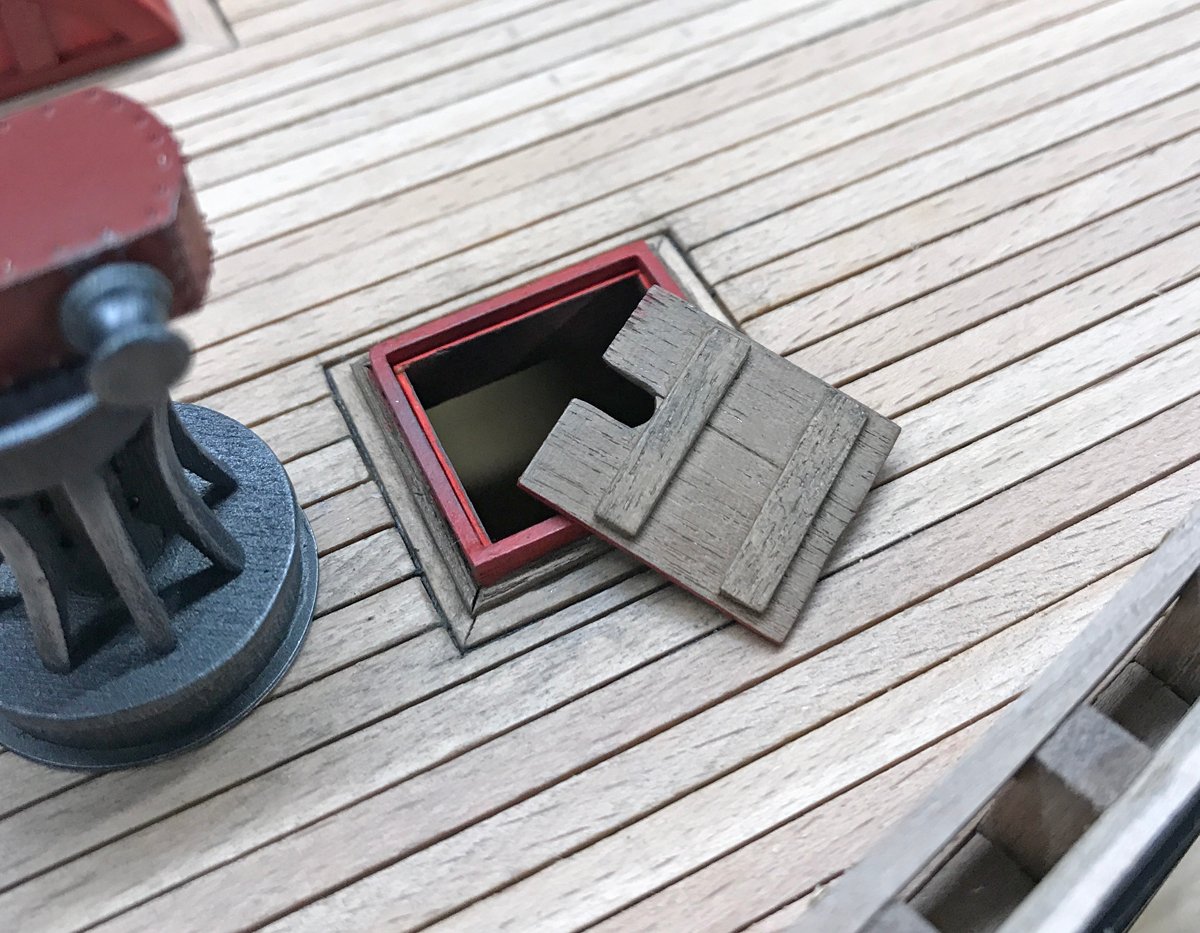
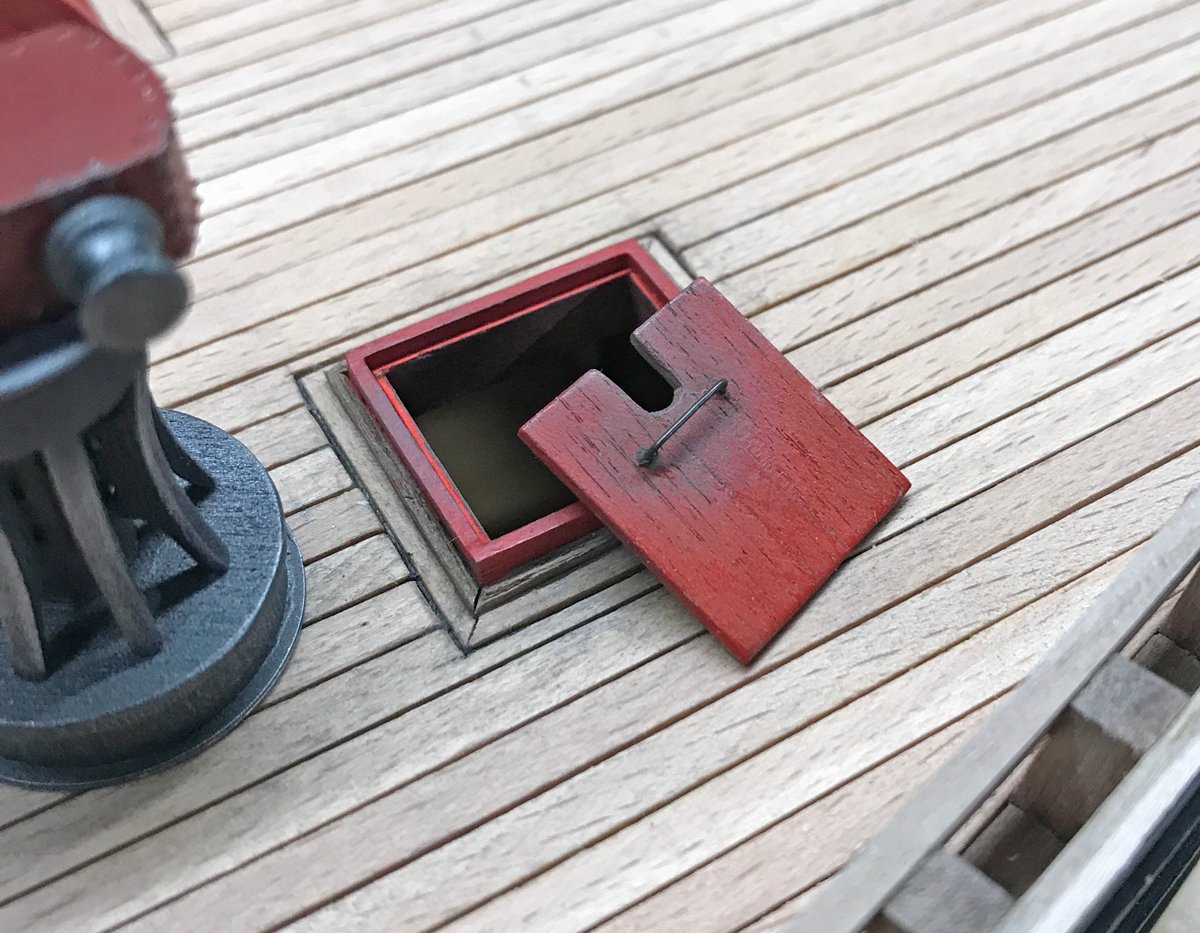
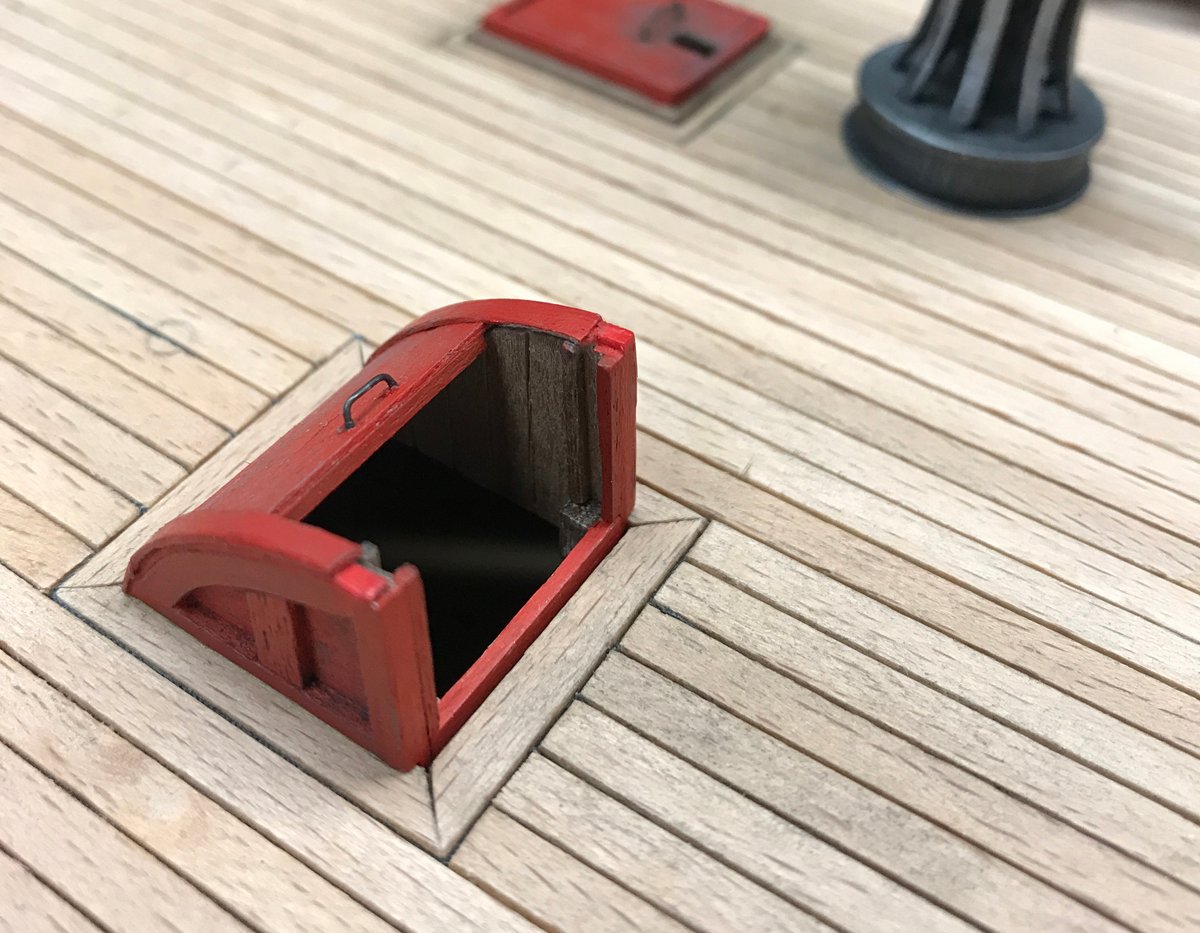
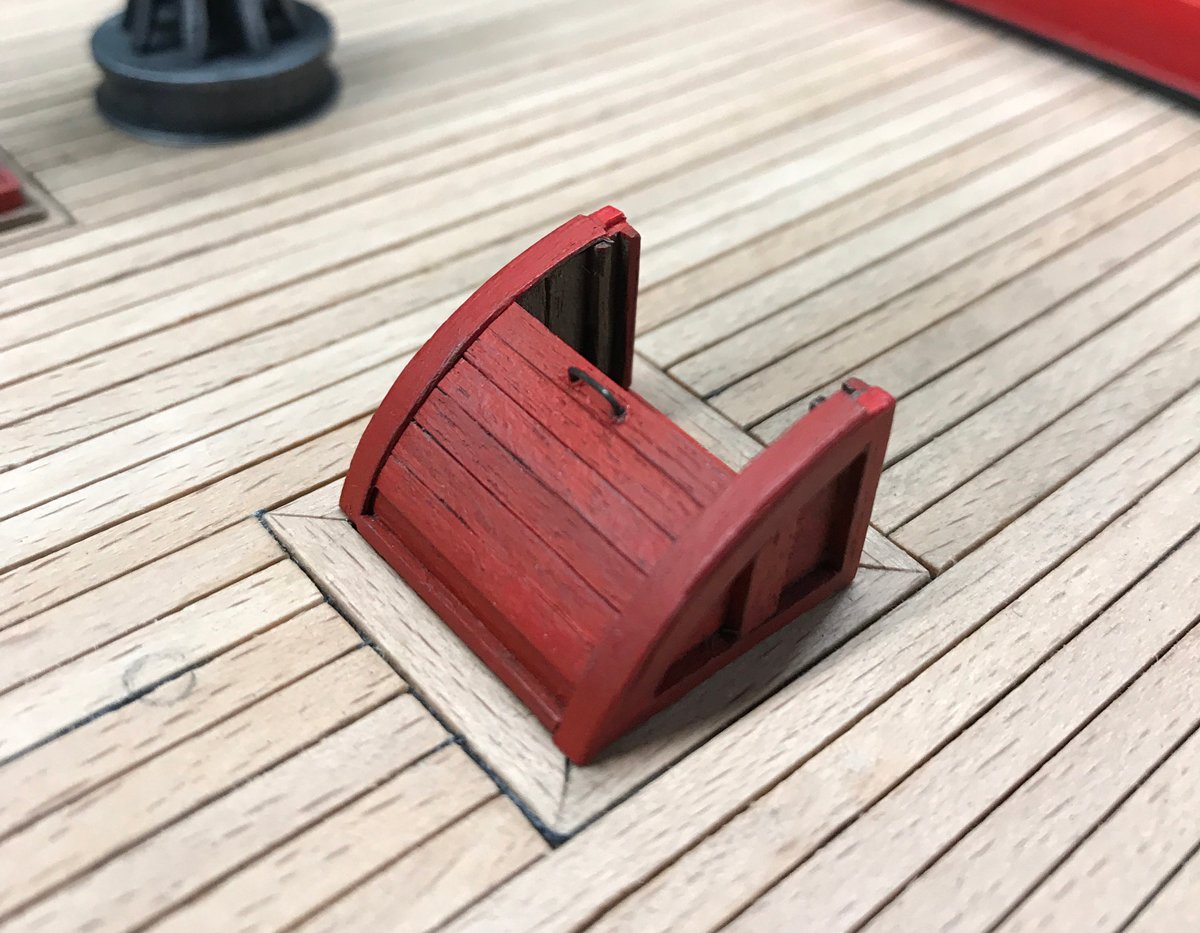
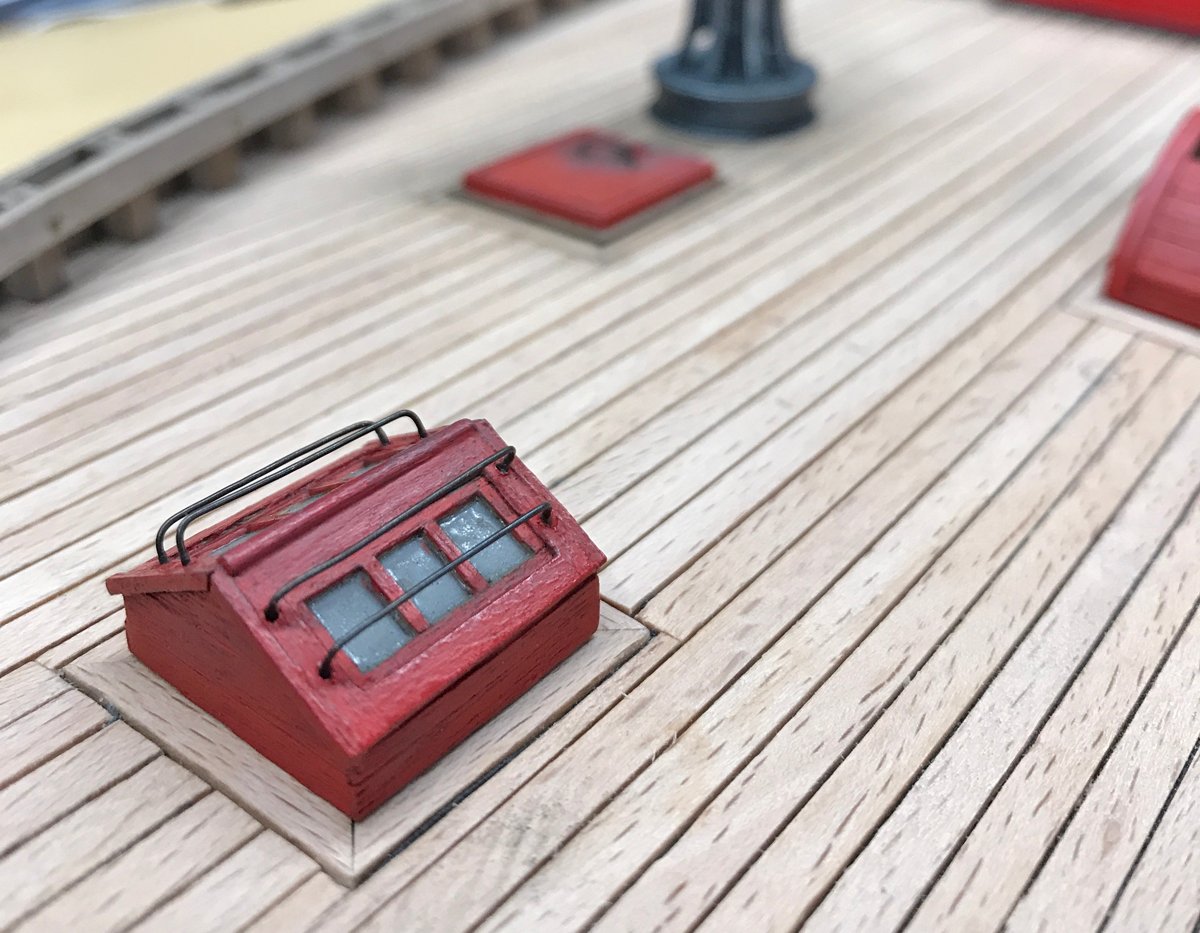
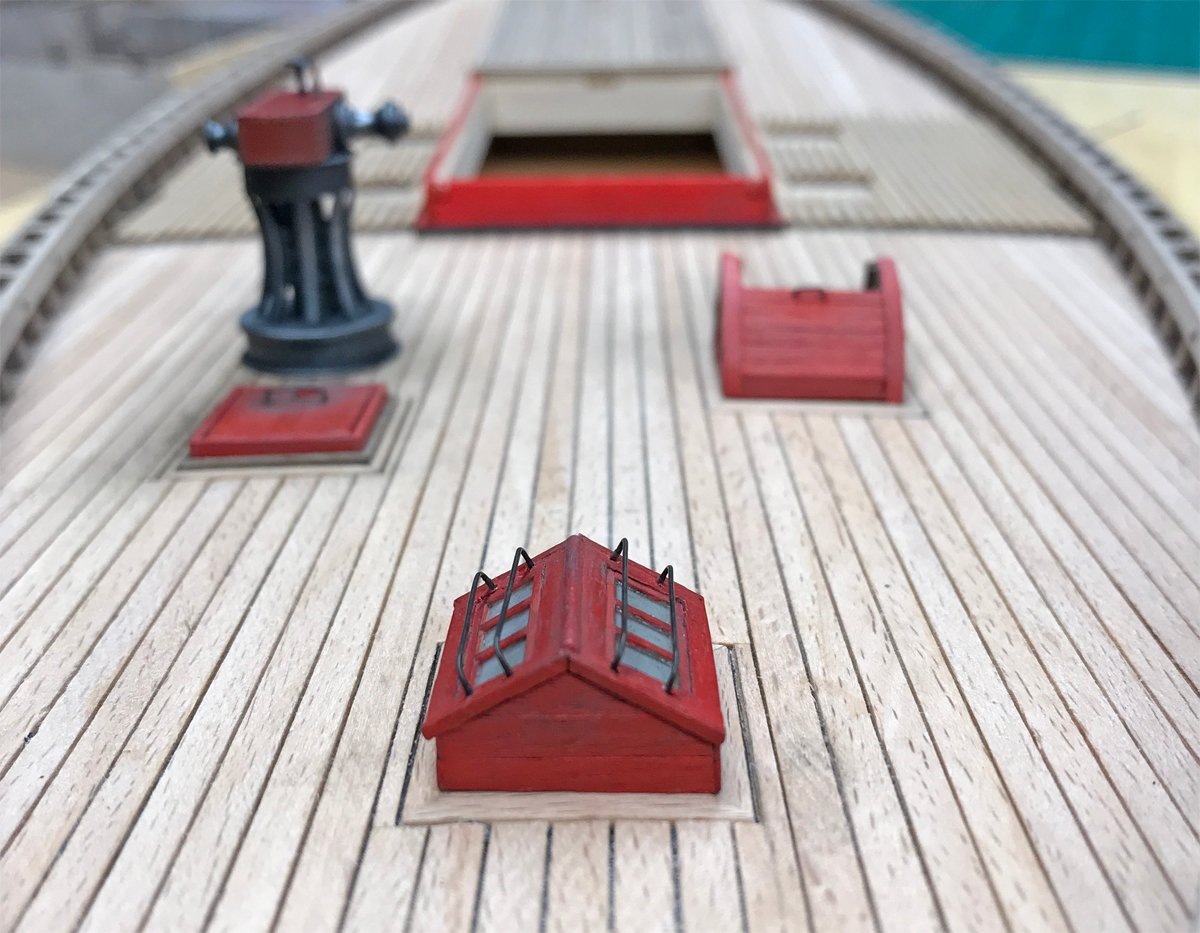
Thanks guys for the nice comments...they're very much appreciated! So I've finally climbed out from below deck and started making some progress on things you'll actually see on this model. First, I tackled the capstan. This was easy enough to build and the paint scheme is utilitarian compared to some of the other builds and photos I've seen. I have to say I'm not a fan of working with photo etched parts (particularly painting) but there's no denying the level of detail they offer. I went with a simple metal look although there is wood grain visible in close up photos that I don't pick up on under normal viewing conditions. I gave the red casing a subtle gloss to add a little contrast. The brass rollers just didn't look real to me so I painted those as well. Along with the capstan, the warp room hatch, forward companion way and light were added. Given how easily the brass parts shed paint with pretty much any minor contact I'll be setting the capstan safely aside until the end of the build. The warp room hatch will be open in my final display so I detailed both sides of the cover so it can be leaned against the rail, etc. and look believable. I built this from scraps and added the grab handle. The forward companion way in the open position so the below deck details can be seen. I built the forward light from scratch to match the basic style of the rear version. Sticking with the theme of a working boat built and maintained by fishermen rather than naval architects, I'm attempting to create a certain "roughness" that hopefully doesn't cross the line into "sloppy build". The wheel house should go a long way to see if I'm on the right track. Thanks for checking in and stay tuned...
-
Thanks James...the difference being the whole project will only take you a week or two to finish 😂 Thank you!
-
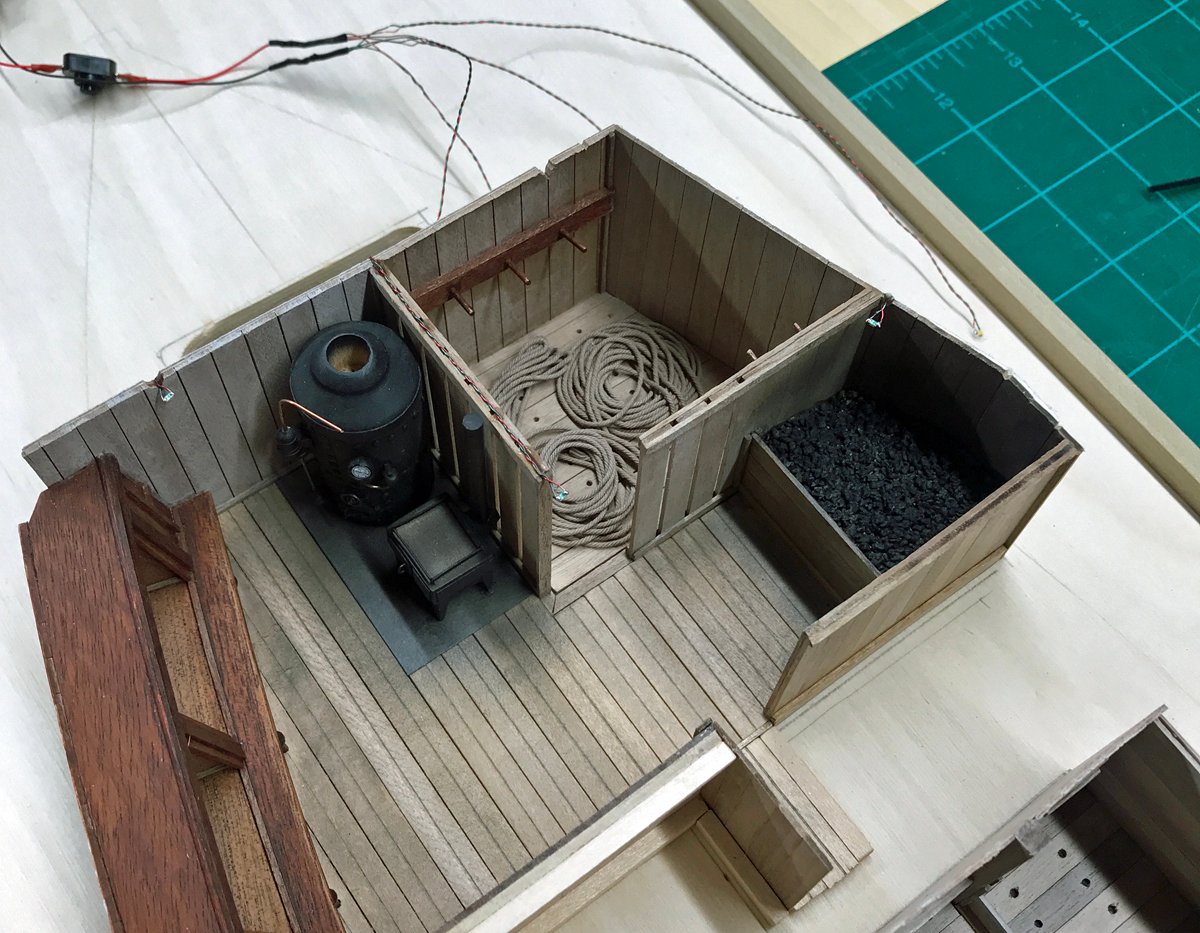
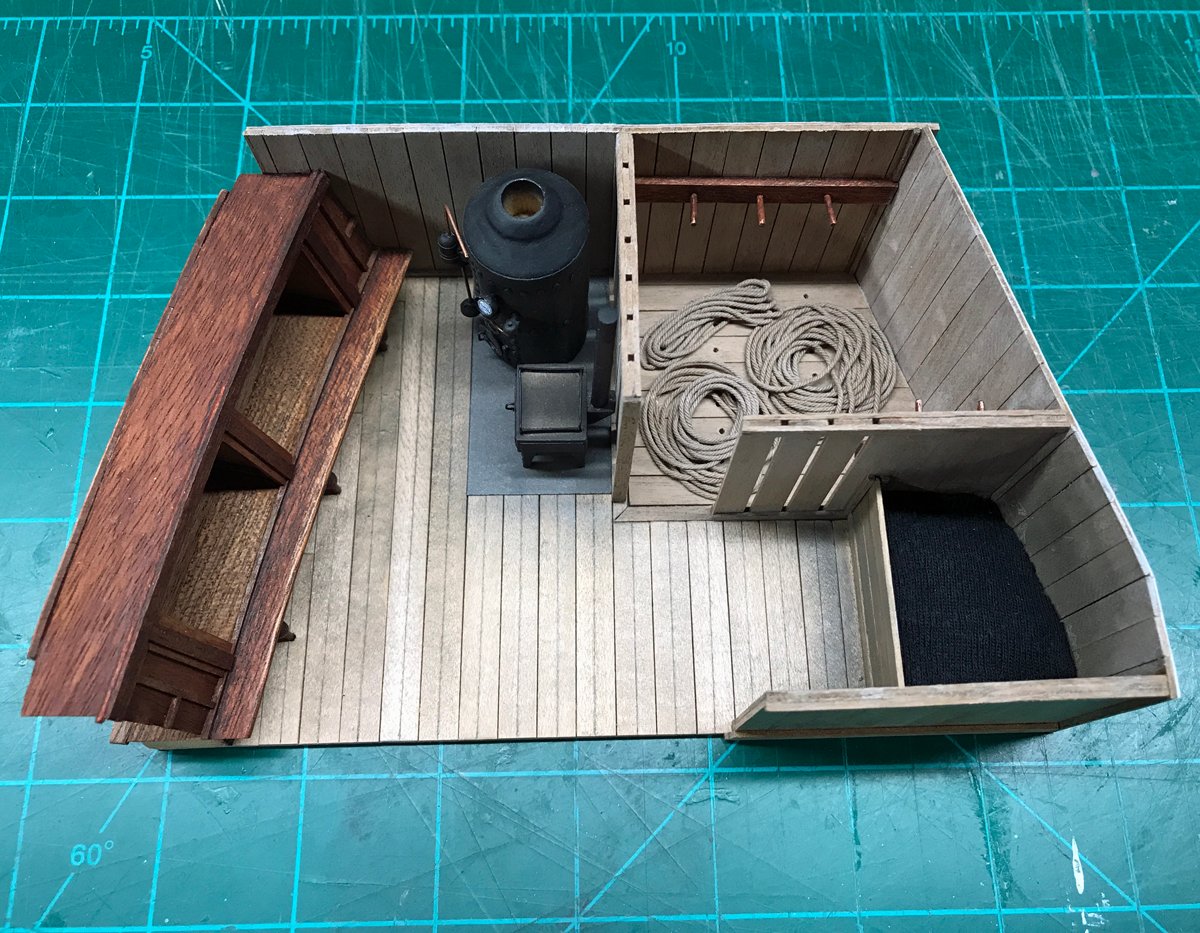
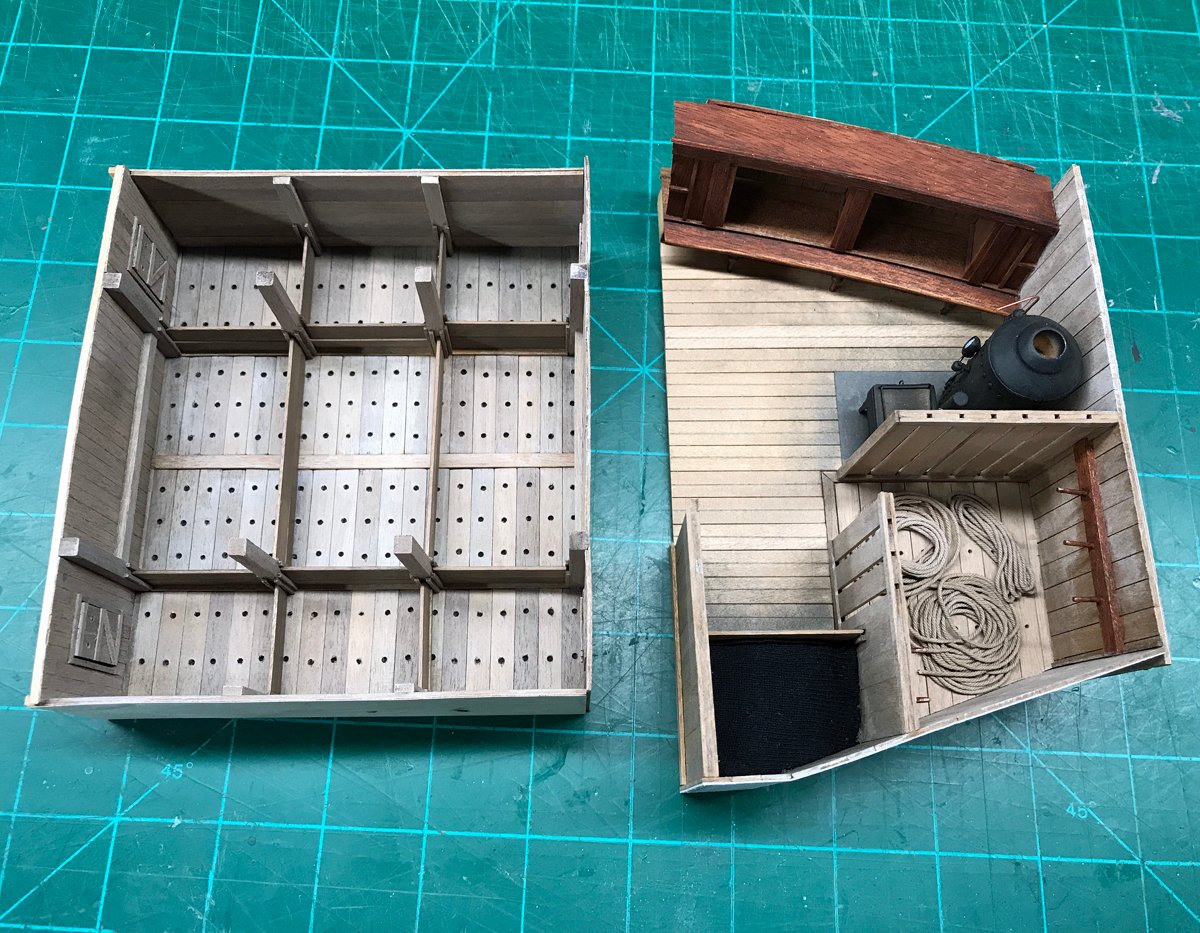
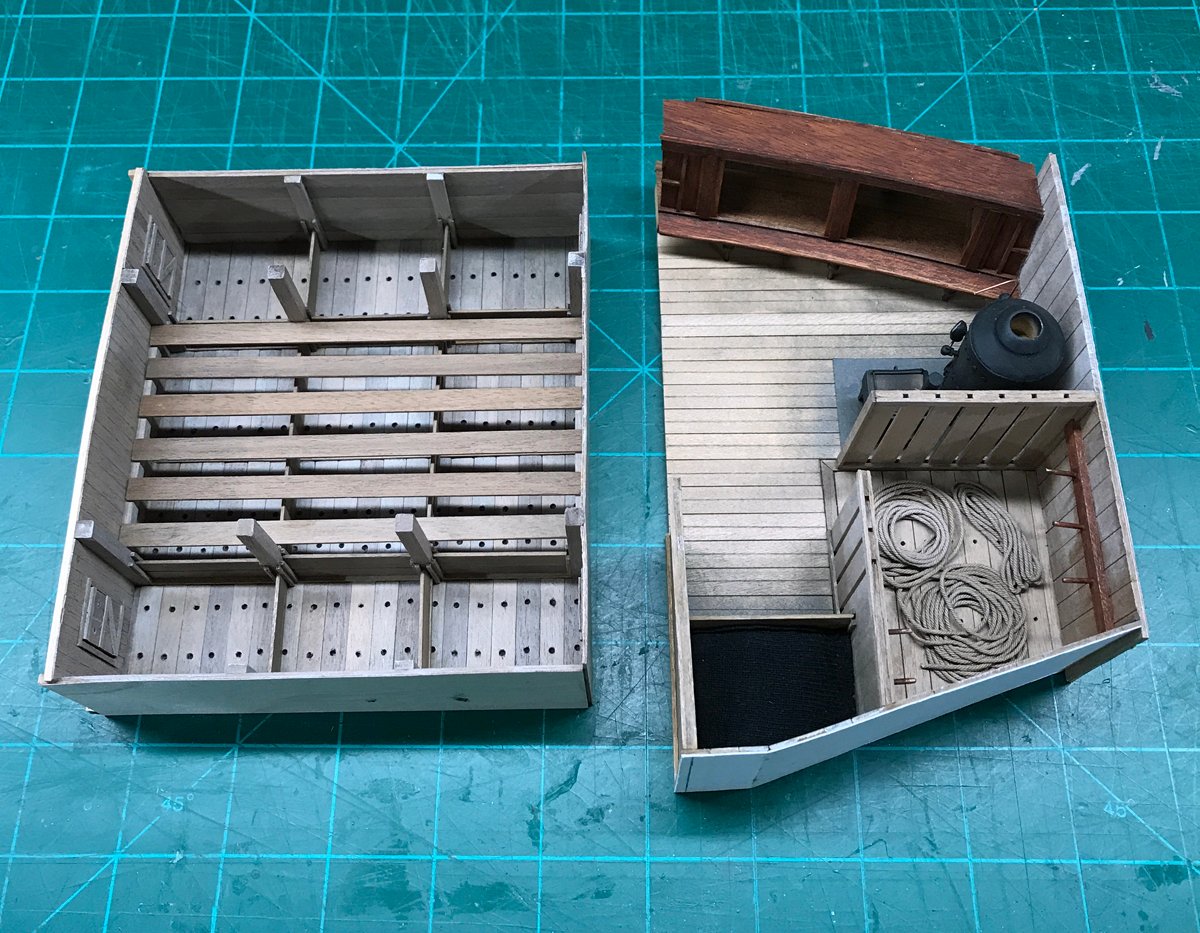
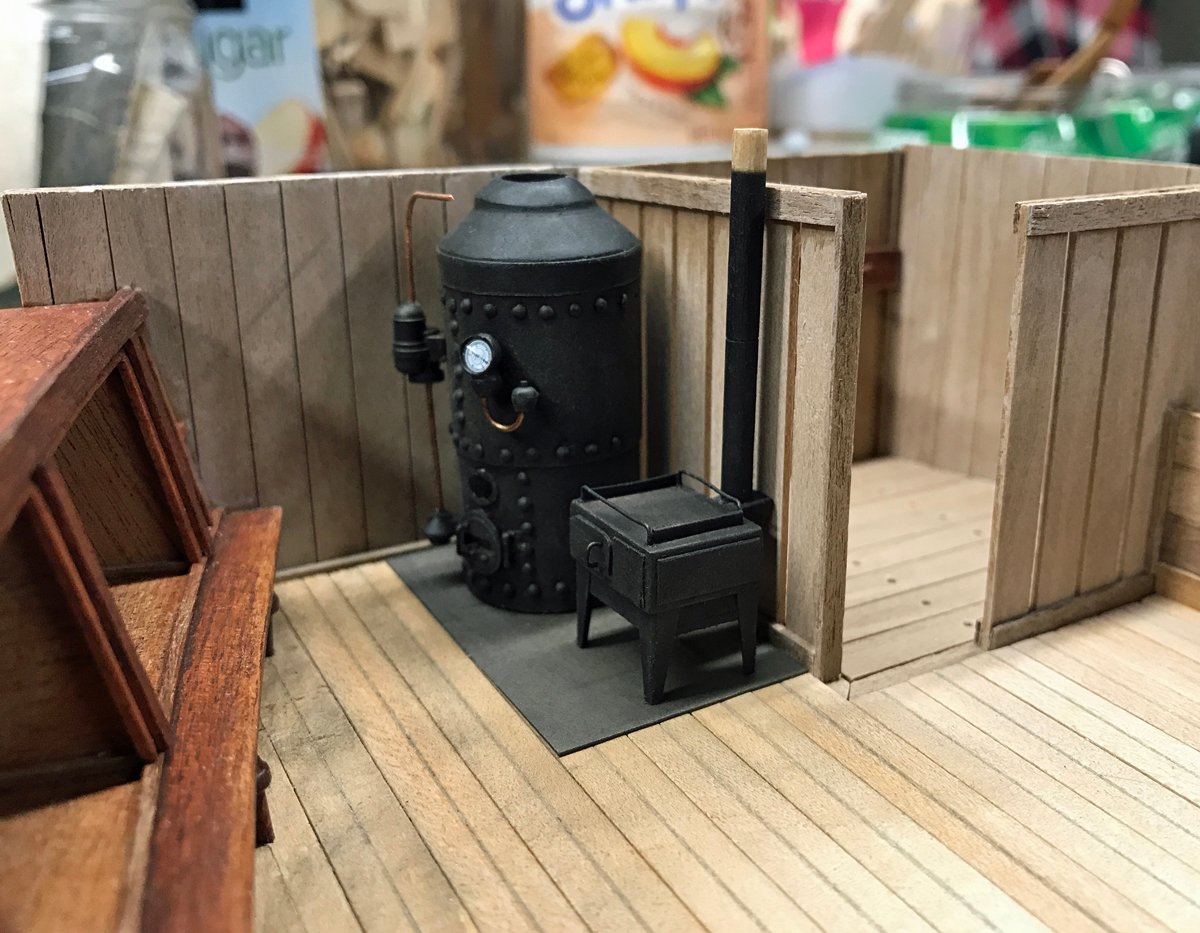
So I've added a little more detail to the forward cabin. I'm mostly satisfied with this area now but will be adding some subtle light (I hope) so the detail below deck will be easier to see. I still need to add a layer of "coal" to my bunker to cover the fabric/foam filler that's there now...it hasn't quite dried yet. I'll also be adding more rope to the warp room but need to place an order with Chuck. The fish hold has been weathered (hard to see in these photos) so I can finally start working above deck again. Thanks for checking in!
-
Thanks Yves! Yes, I'll be venting the stove and boiler above deck.
-
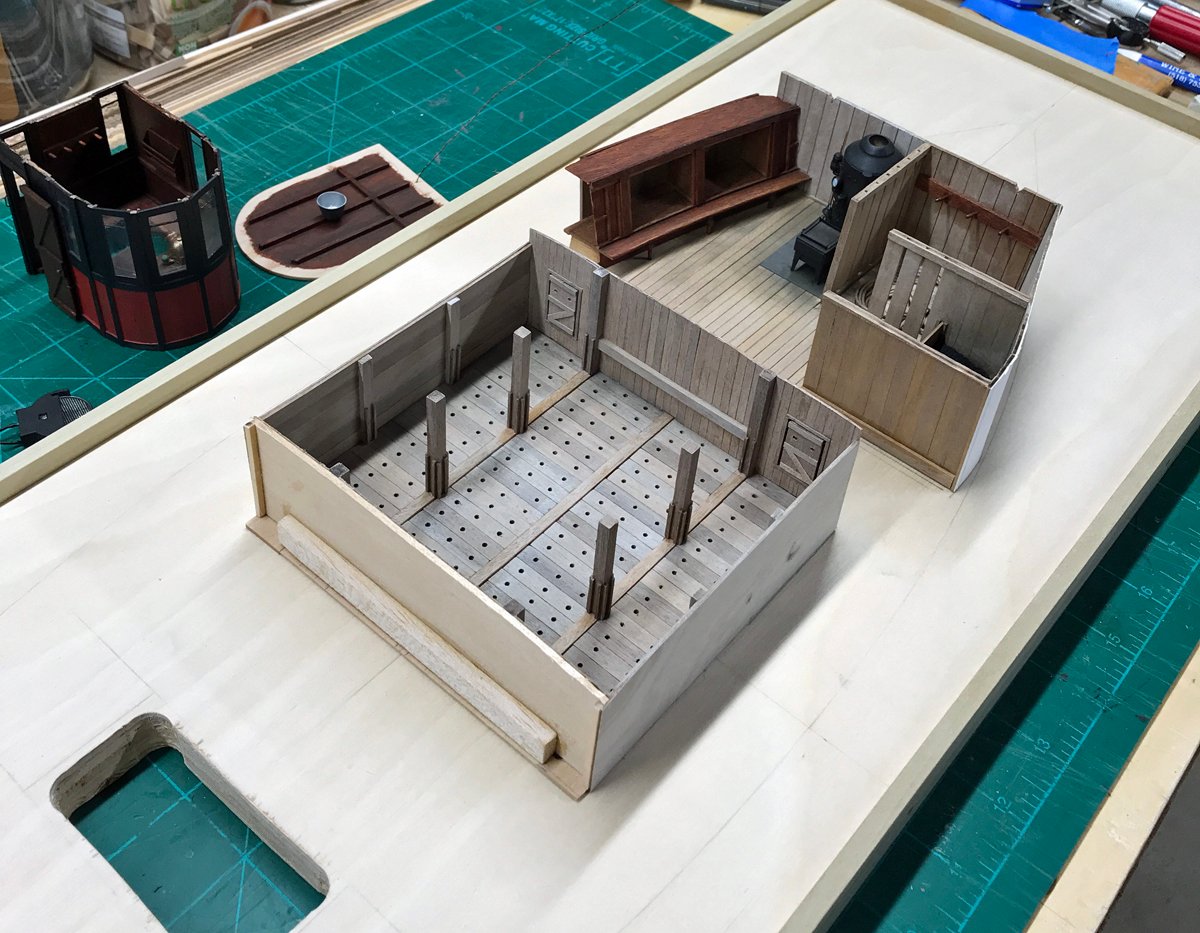
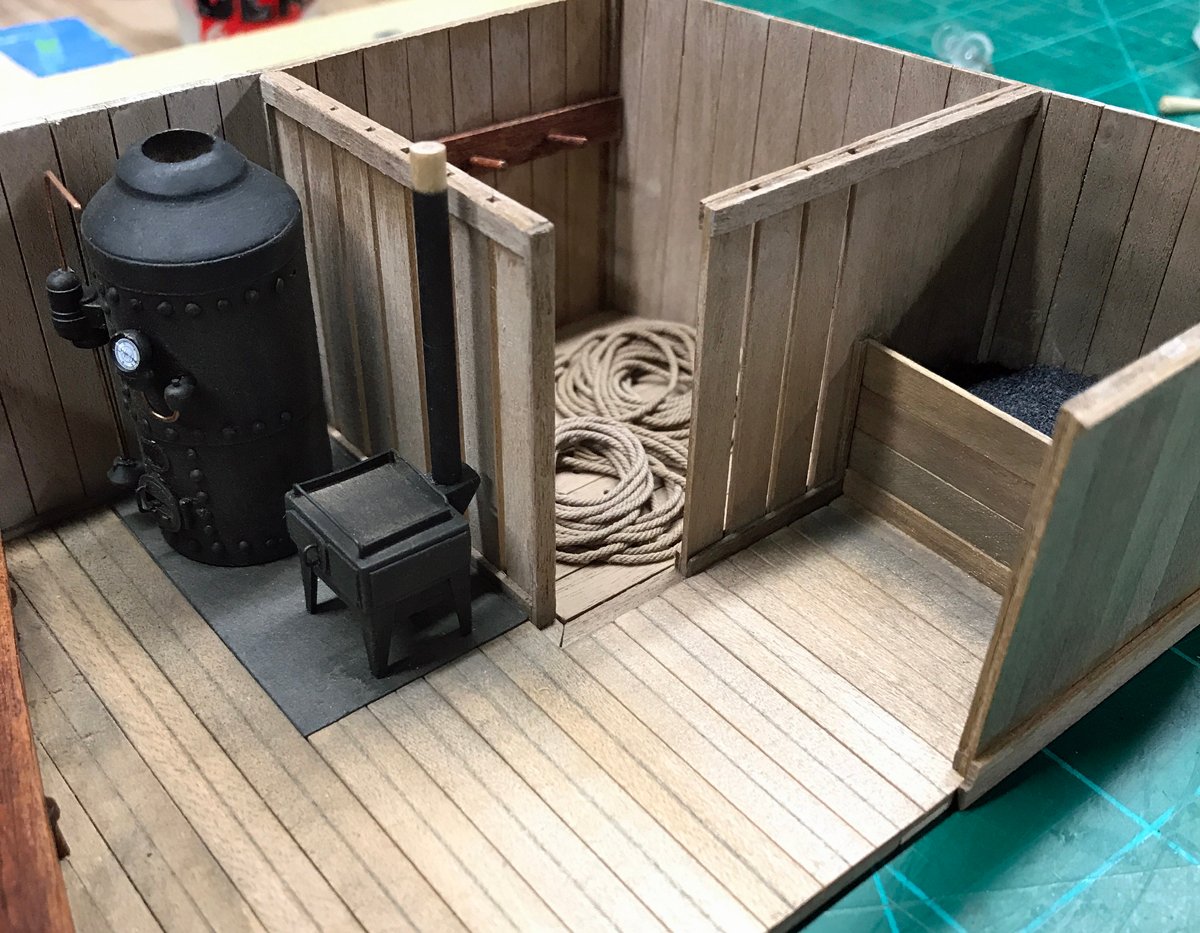
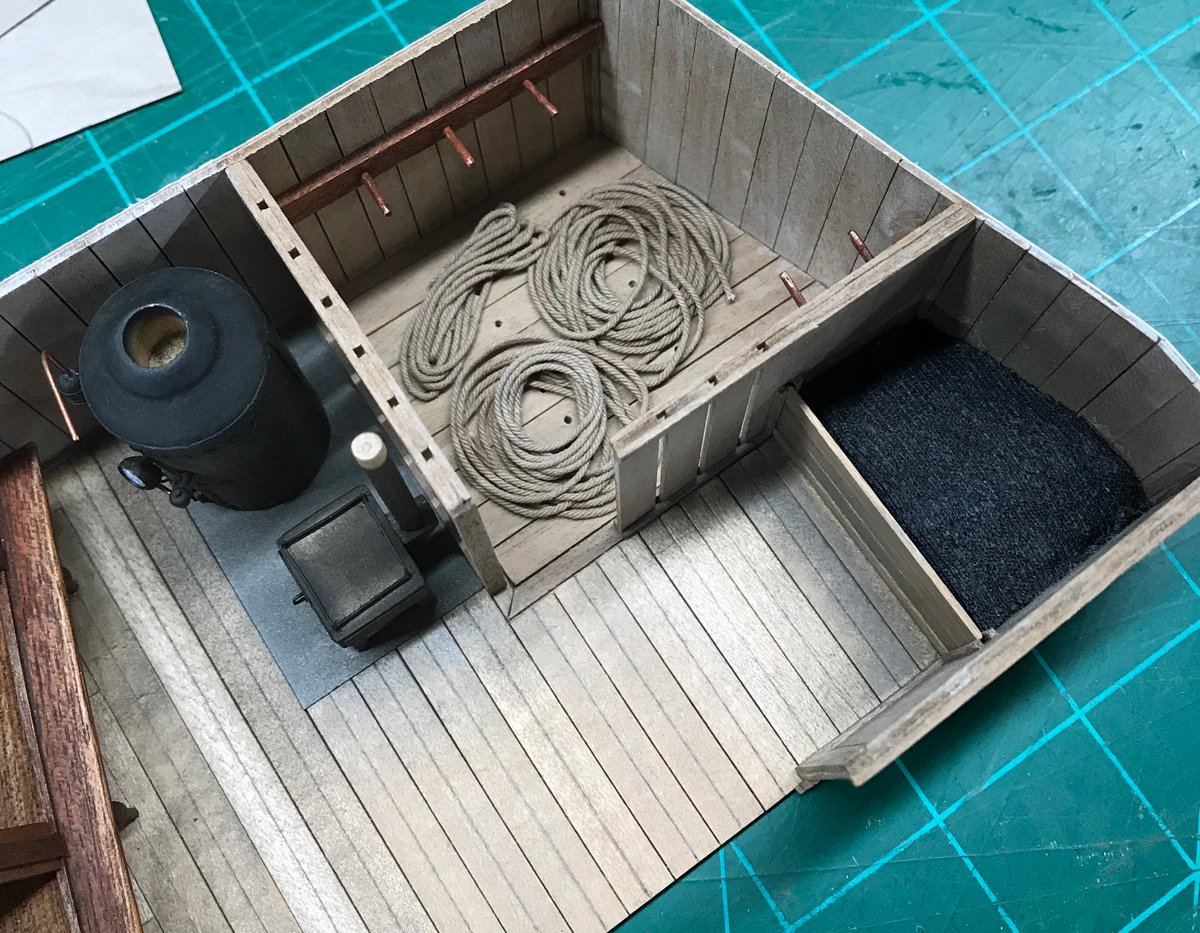
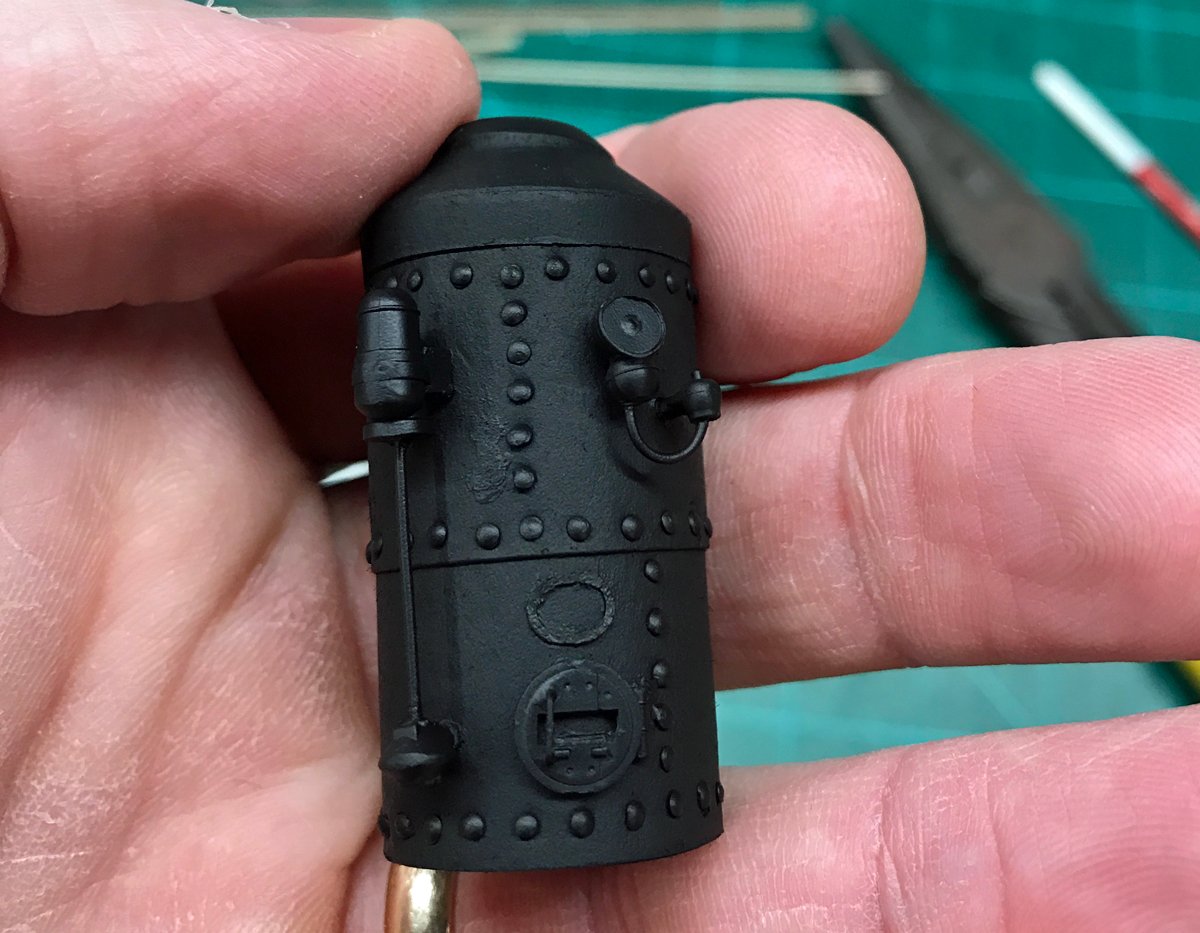
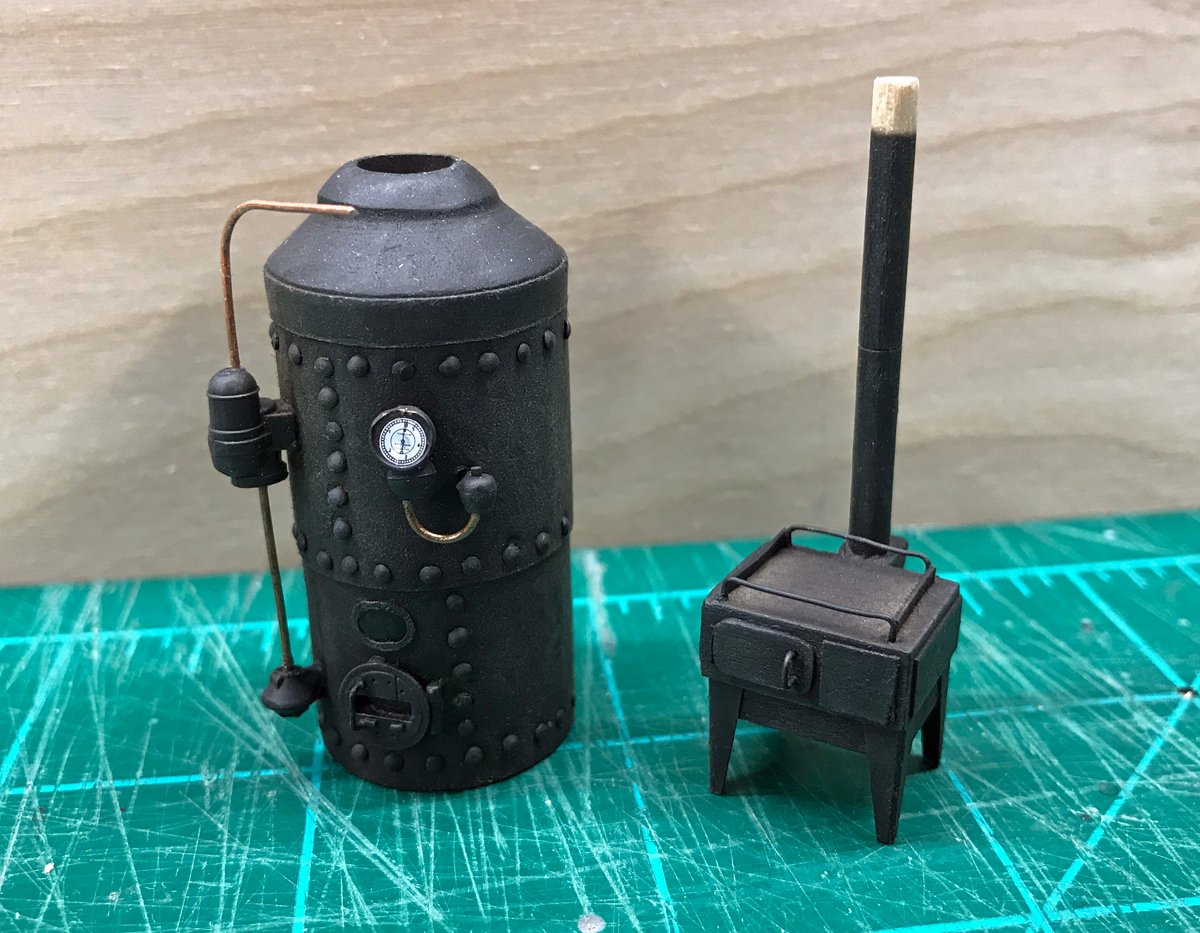
A quick update on the forward cabin. The steam boiler (to power the capstan) and cooking stove will be partially visible through the forward hatch so I tried to make them reasonably believable. The boiler was fabricated with a wine cork, paper, wire, straight pins and leftover parts from a WWI plastic airplane kit. The stove is mostly wood, paper and wire. They're both fairly rough, but suitable for the purpose. On to finishing up the warp room and coal bunker and that should do it for this mini-project.
-
Always nice to see fellow New Yorkers join the ranks...welcome!
-
Beautiful kit, beautifully done...very impressive work!
- 201 replies
-
- 2
-
-
- Duchess of Kingston
- Vanguard Models
- (and 1 more)