


TheRedGnome
-
Posts
34 -
Joined
-
Last visited
Content Type
Profiles
Forums
Gallery
Events
Posts posted by TheRedGnome
-
-
Thanks for the welcome Old Collingwood. One thing I've been seeing is that a lot of people build their ships in relatively the same amount of space that I have available to me, and the other half have power tools and a full blown shop.
 The wife has started seeing me looking at workspace setups and asking if I'm about to head to the hardware store and buy a bunch of lumber to do the same.
-
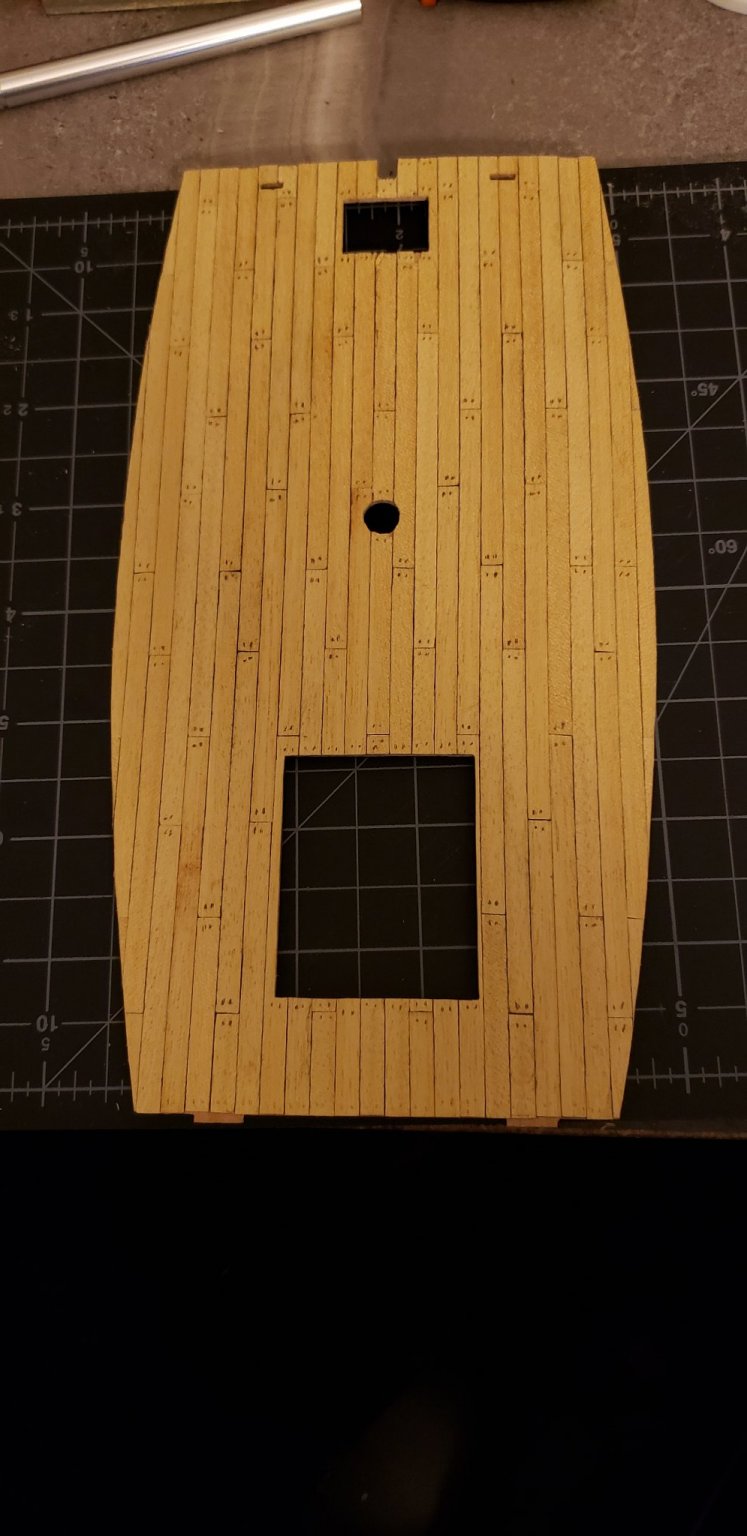
Last night, with the help from some Glenlivet 12 year, I managed to finish planking the first deck. It turned out even better than I thought it would.

- Ryland Craze, Larry Cowden, Baker and 5 others
-
 8
8
-
Thanks again for the warm welcome everyone. Also thanks for the remarks about my skipjack Ryland and Meddo, I learned a lot while making it... especially when it came to applying CA glue.
Allen, I'll eventually be moving back out towards the ocean within the decade, it's something my wife and I are saving up for. I planned on getting the vice cleaned up this weekend. I know there's a number very faintly stamped into the metal, hoping to find out the manufacturer during its restoration.
- allanyed, mtaylor and Old Collingwood
-
3
-
Thanks for the welcome Meddo. I've already learned a lot about what others have done for their own Mayflowers, as well as others that were built around the same time period. It's nice having so many people to talk about the little things.
- mtaylor, JeffT and Old Collingwood
-
3
-
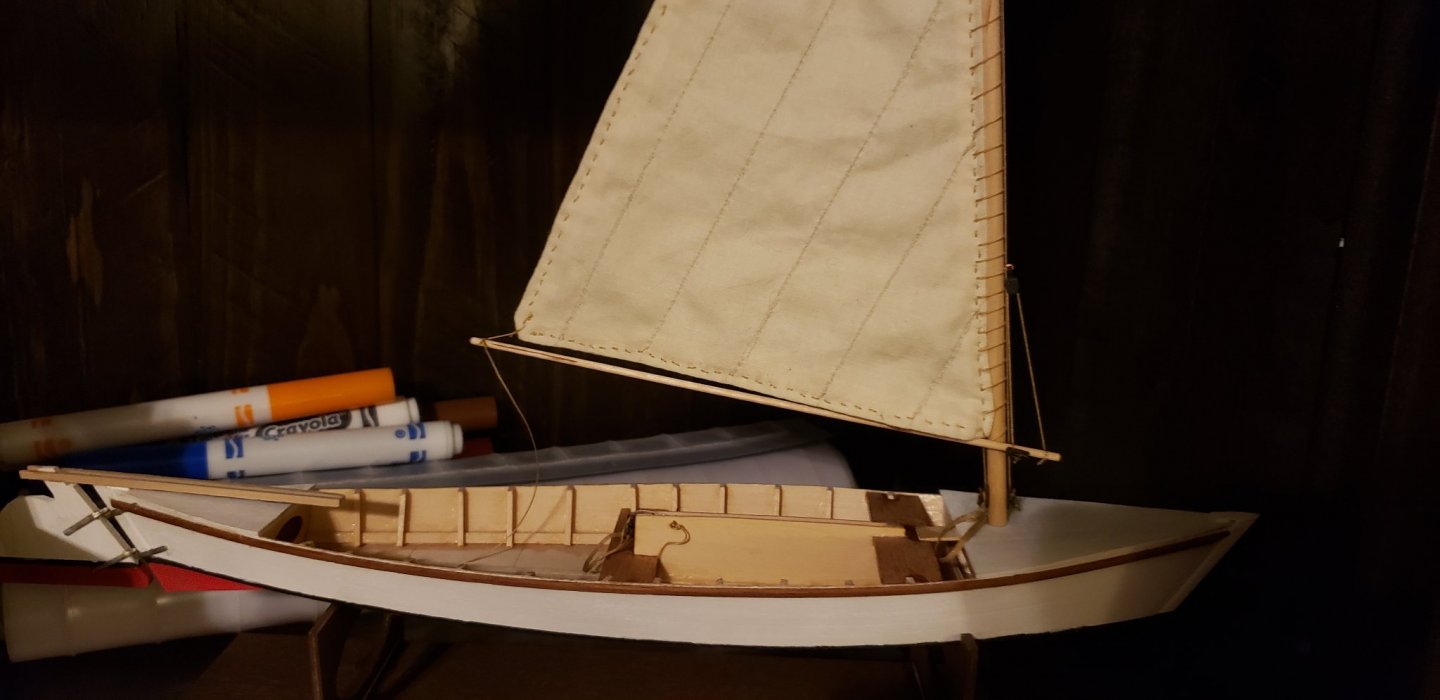
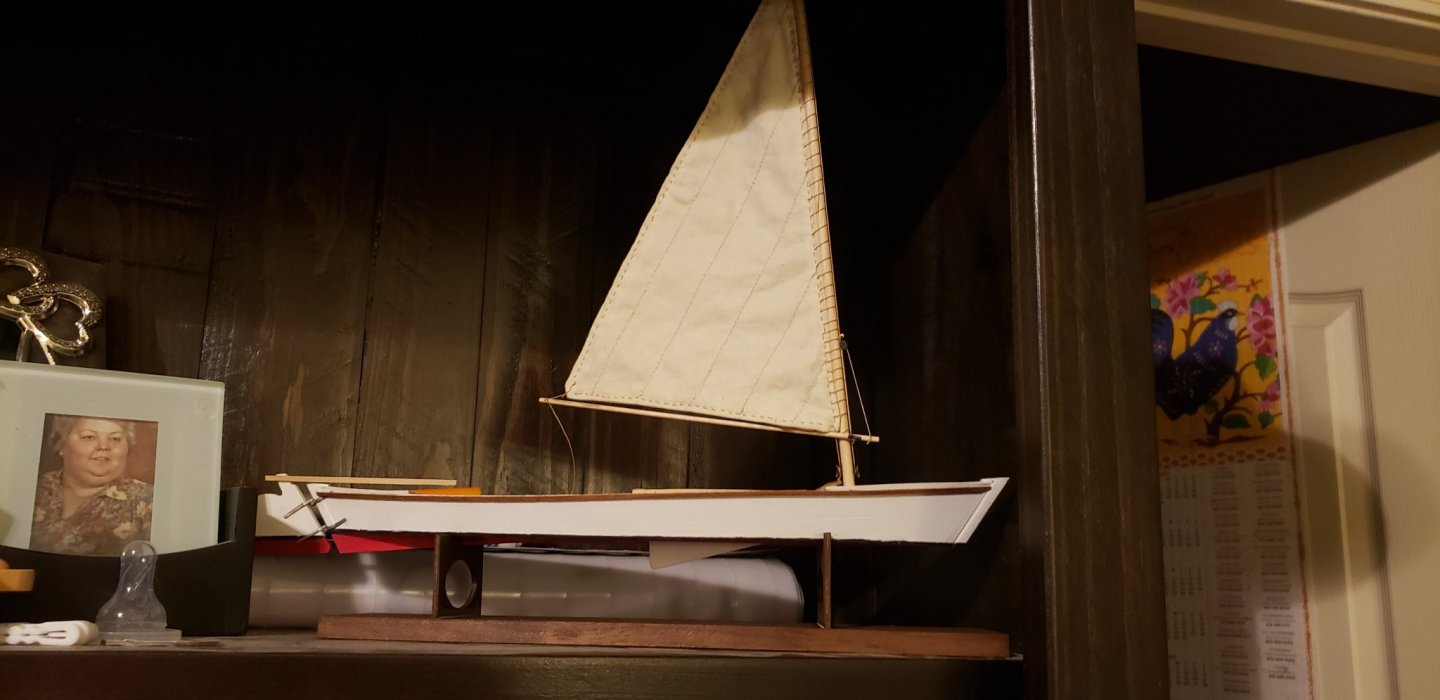
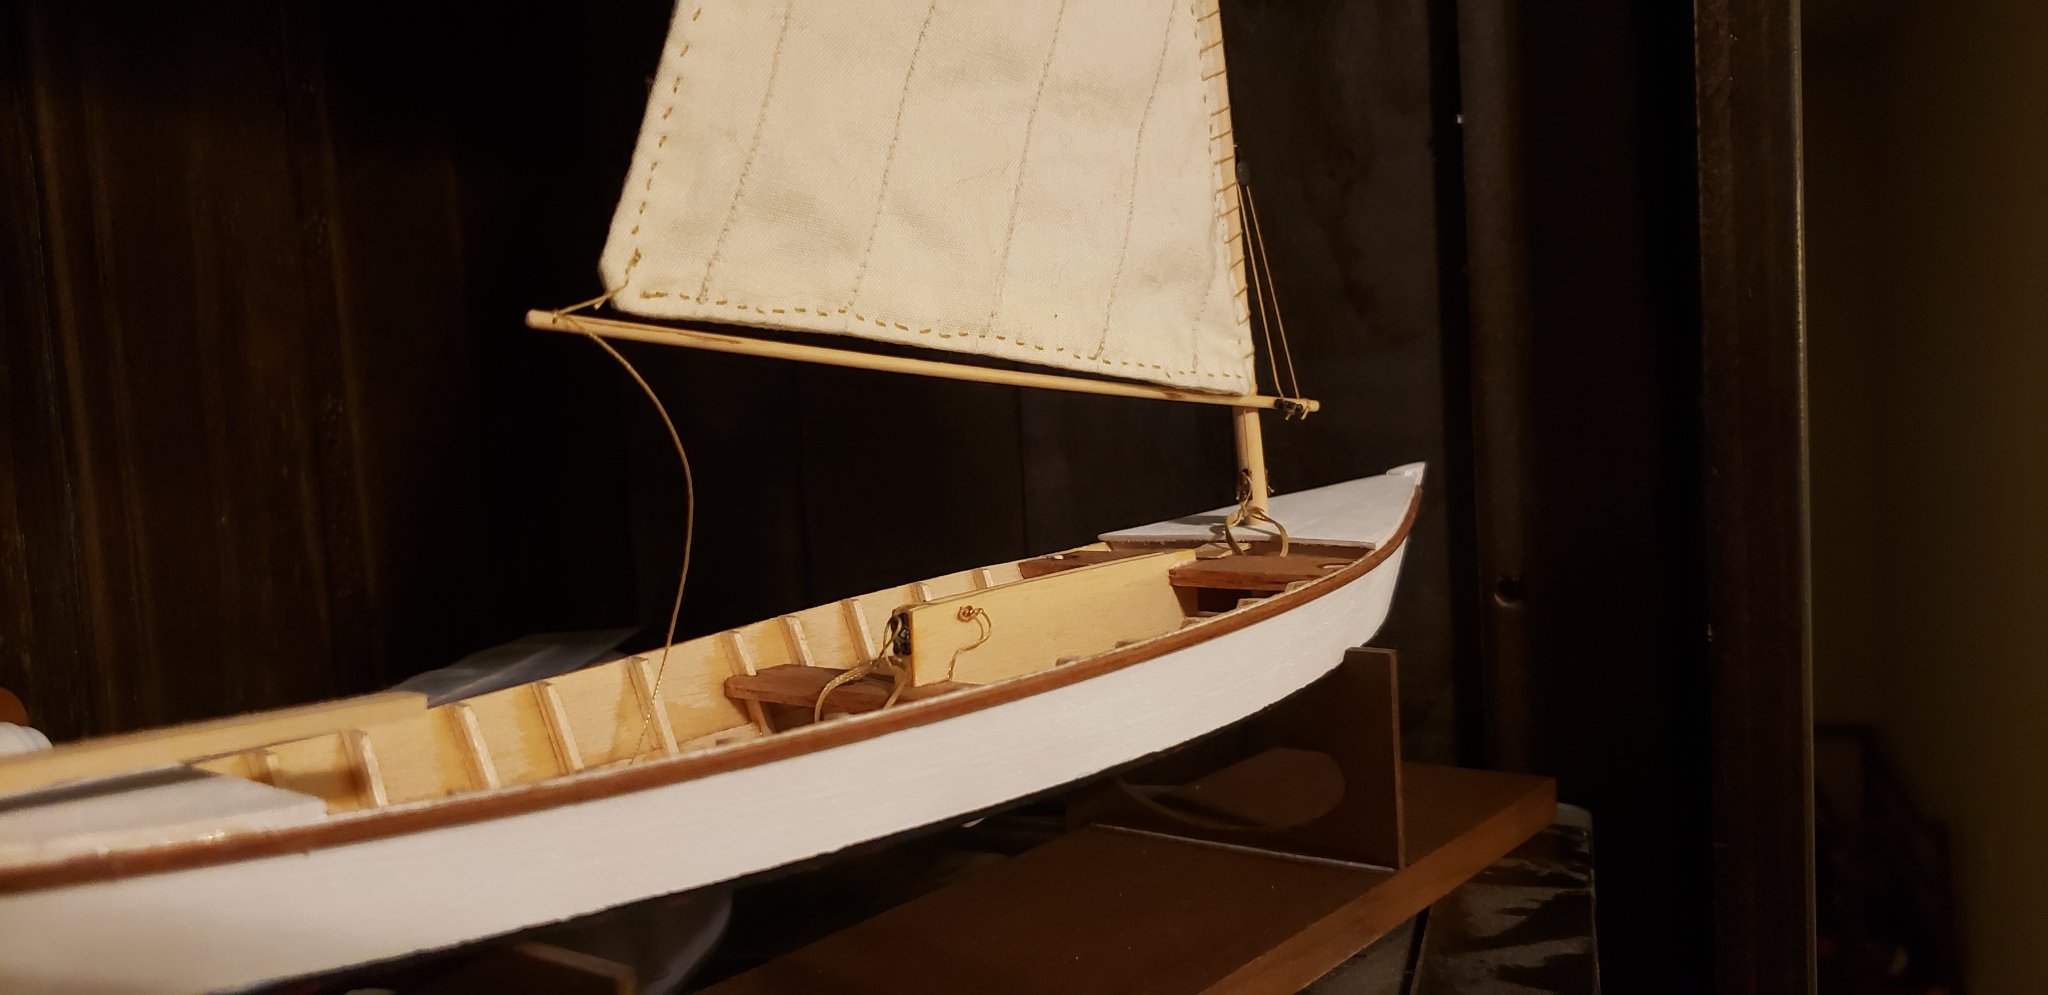
The vice i was talking about above (pics were taken by my father before I was able to pick it up), as well as the skipjack I've already completed. The skipjack was also my first real attempt at airbrush painting.
.thumb.jpg.c5f43f0d62410d9bf34b99b96a88ceb8.jpg)
.thumb.jpg.0f84e892f58bd235e2303ea34aadb151.jpg)
.thumb.jpg.23a9140802170ea58d5a9e1d13f84a98.jpg)

- mtaylor, JeffT, Ryland Craze and 3 others
-
6
-
Good Morning/Afternoon/Evening! My name is Dan and I'm happy to have found such a wonderful community. These forums are a treasure trove of knowledge and ideas, from both amateur and veteran builders. As a youth I would build cars & airplanes (both plastic) due to my asthma preventing me from doing a lot of physical activities, so the basic concepts of modelling aren't foreign to me. My dad was also super handy with tools and wood working... I'm even lucky enough to have a hobby vice that's been in my family for generations (it was my great great grandfather's), just needs some cleaning and a fresh coat of paint.
At the time, I lived in Maryland near Solomon's Island not far from the Pax River Naval base. I always wanted to start building wooden ships, but startup costs were considerably higher compared to the plastic kits that I could get over at the local general hobby store like Micheal's. In 2002 when I turned 13, I moved to
the middle of nowherenortheast Arkansas with the rest of my family leaving the nautical world behind. I try to surround myself with anything that deals with the ocean... my work office is decorated with a couple paintings of ships and has various things I've picked up through the years of living by the Atlantic (including part of a whale vertebrae that I found on the beach one day), my home has a fresh water aquarium and I'm working on constructing a salt water aquarium. My home office is rather small, especially since my wife and I share it for the time being, so it hampers the space I have for decor here... and I also have a toddler, so shelf space to store things out of reach of little fingers are a high value commodity. As such, my current working space is also small (just the L portion of my computer desk).I can finally start getting into building the models I always dreamed of building now that I'm well into my career (software programmer for 12 years), life is pretty stable (at least, as stable as it can be in these turbulent times), and have the financial means for it (you can't deny that it does cost a fair amount to start up... but what hobby doesn't really?). I started out with the Model Shipway's Skipjack, since that ship originated from the area I grew up in. I'll get a couple pictures of it up to this thread later, they're currently sitting on my phone. There's a build log up for my current work in progress, Artesania Latina's Mayflower, that I'll keep updated weekly
- Old Collingwood, mtaylor, JeffT and 2 others
-
5
-
Howdy everyone! When I was a kid, I did a lot of plastic models but then stopped about 15 years ago due to college and early adult job hopping. Now that I've got the time (and more disposable income), I've started back up and wanted to get into something I always dreamed of doing... wooden ships. I grew up in Maryland near Solomon's Island before moving out to Arkansas when I turned 13. Some of my fondest childhood memories is seeing the sailboats out on the Bay so building these allow me to rekindle those feelings.
I picked up this kit at a hobby shop in Memphis (nearest one to me, at about an hour away) about a month ago and have been steadily working on it. It's not my first wooden model, but it's my first one with actual rigging (my first was a Chesapeake Bay Skipjack). Here are some pictures of the progress that I've managed to get so far. I'm not expecting this to be a fast build by any means, as the only time I can work on this is when my toddler is asleep, but I'll try to keep this thread updated at least once a week of any progress that I've made on it.
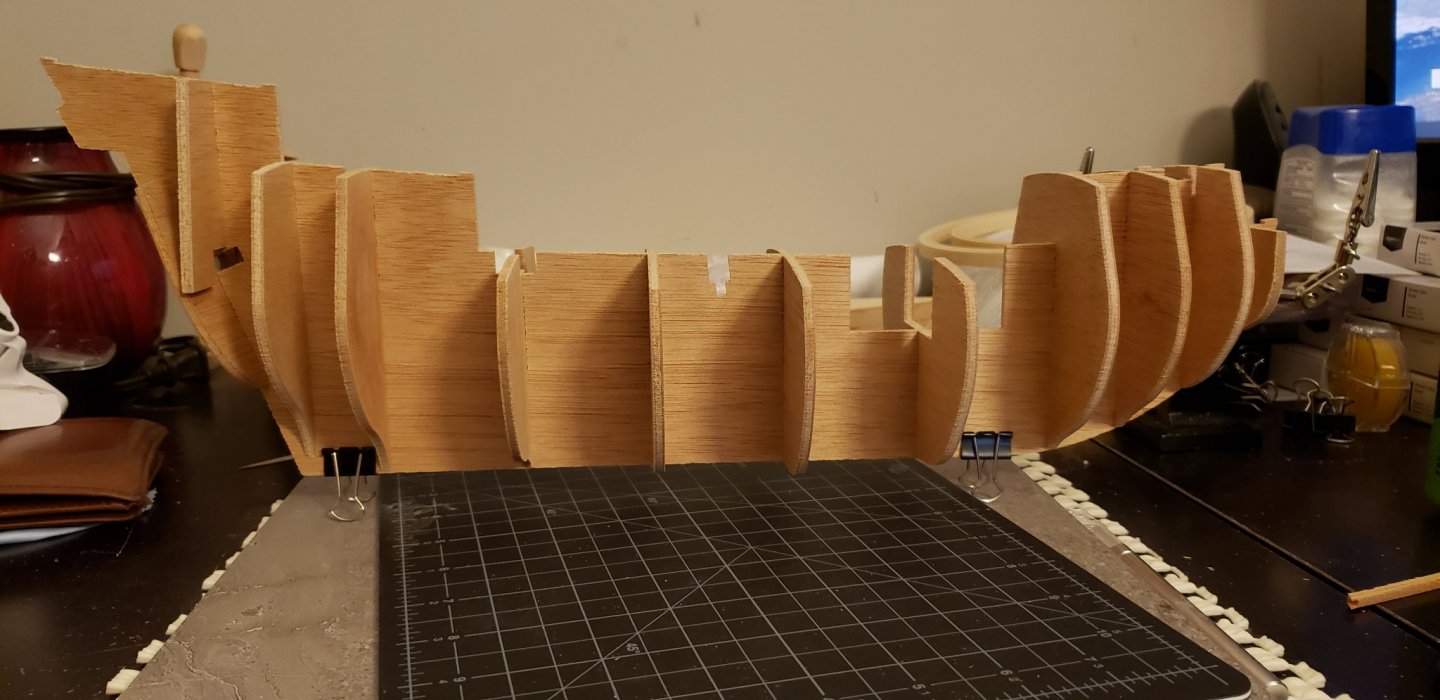
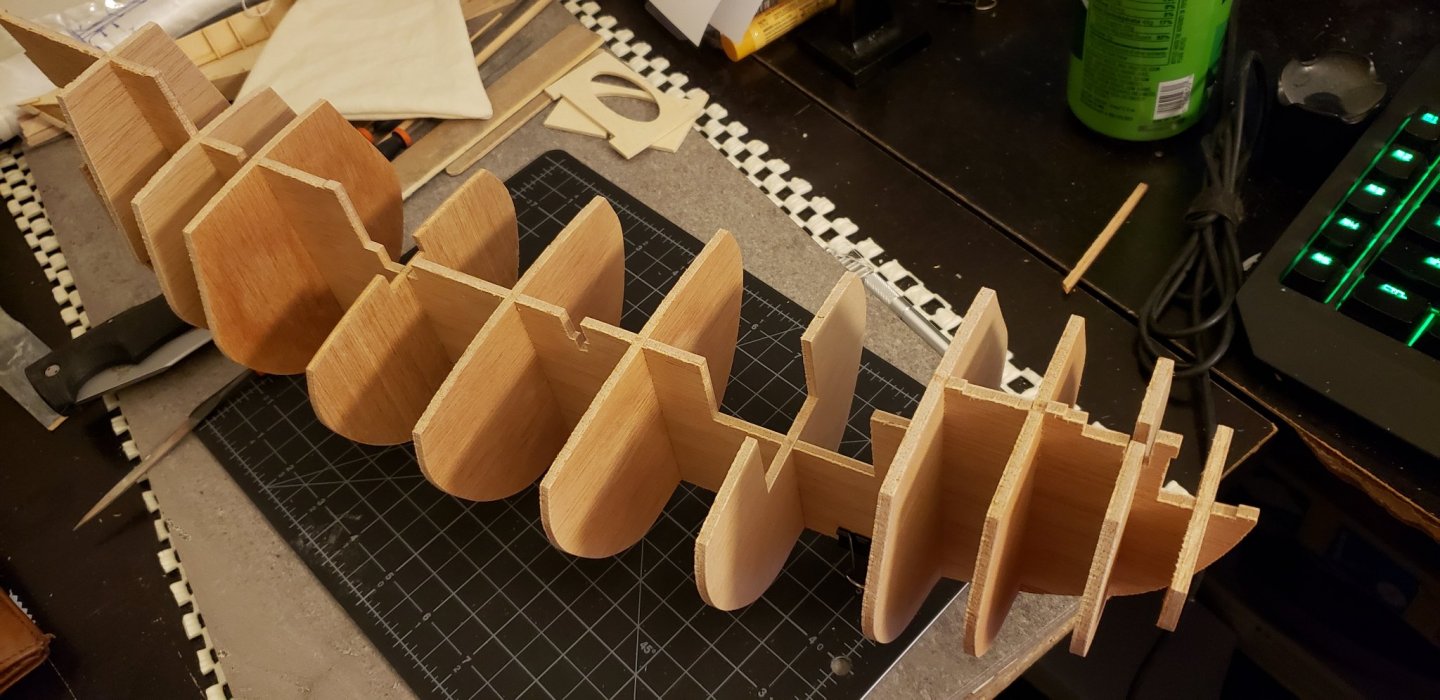
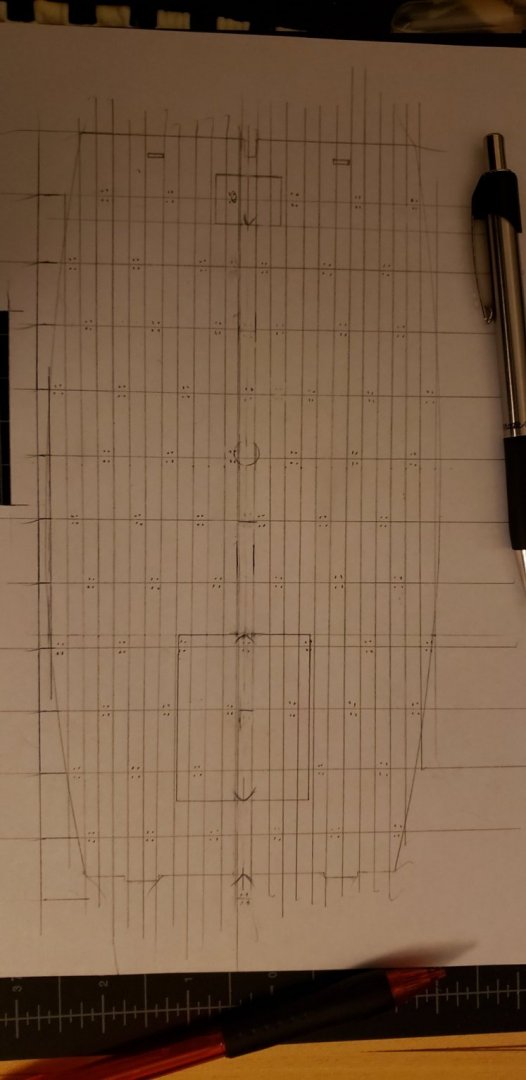
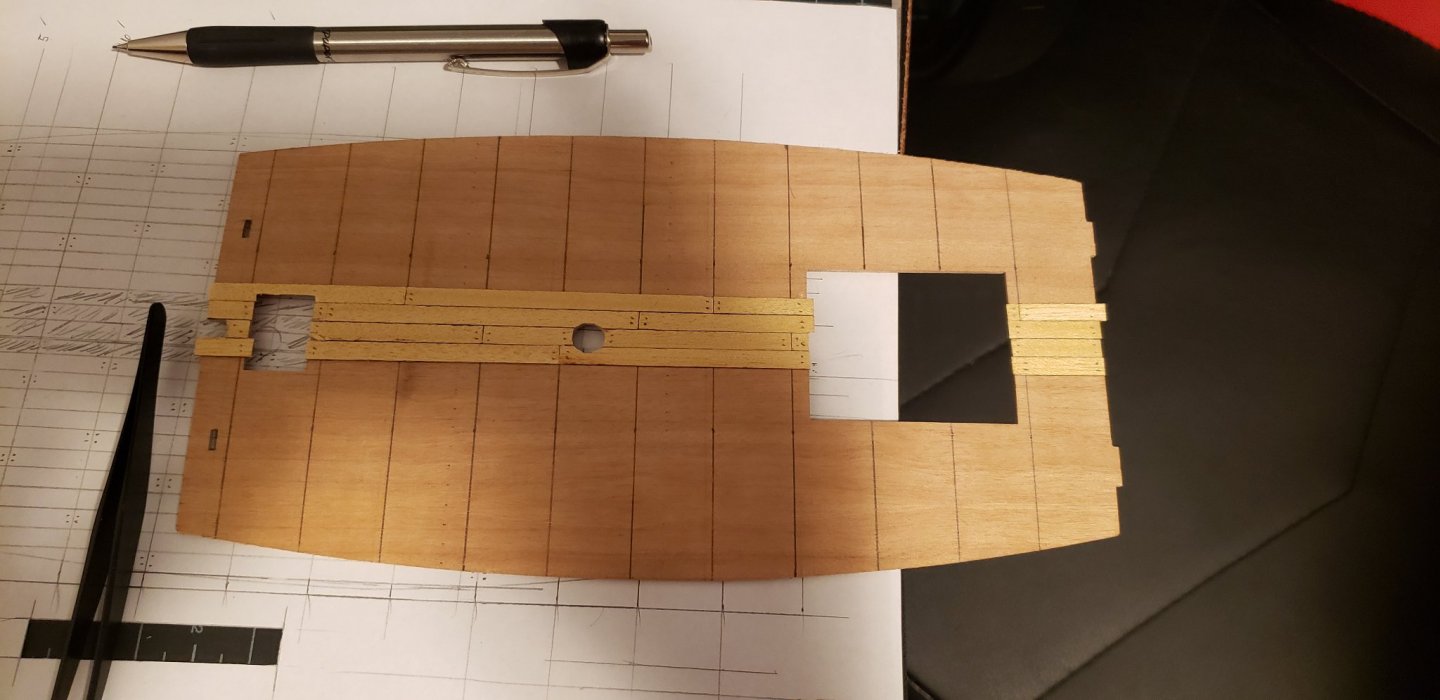
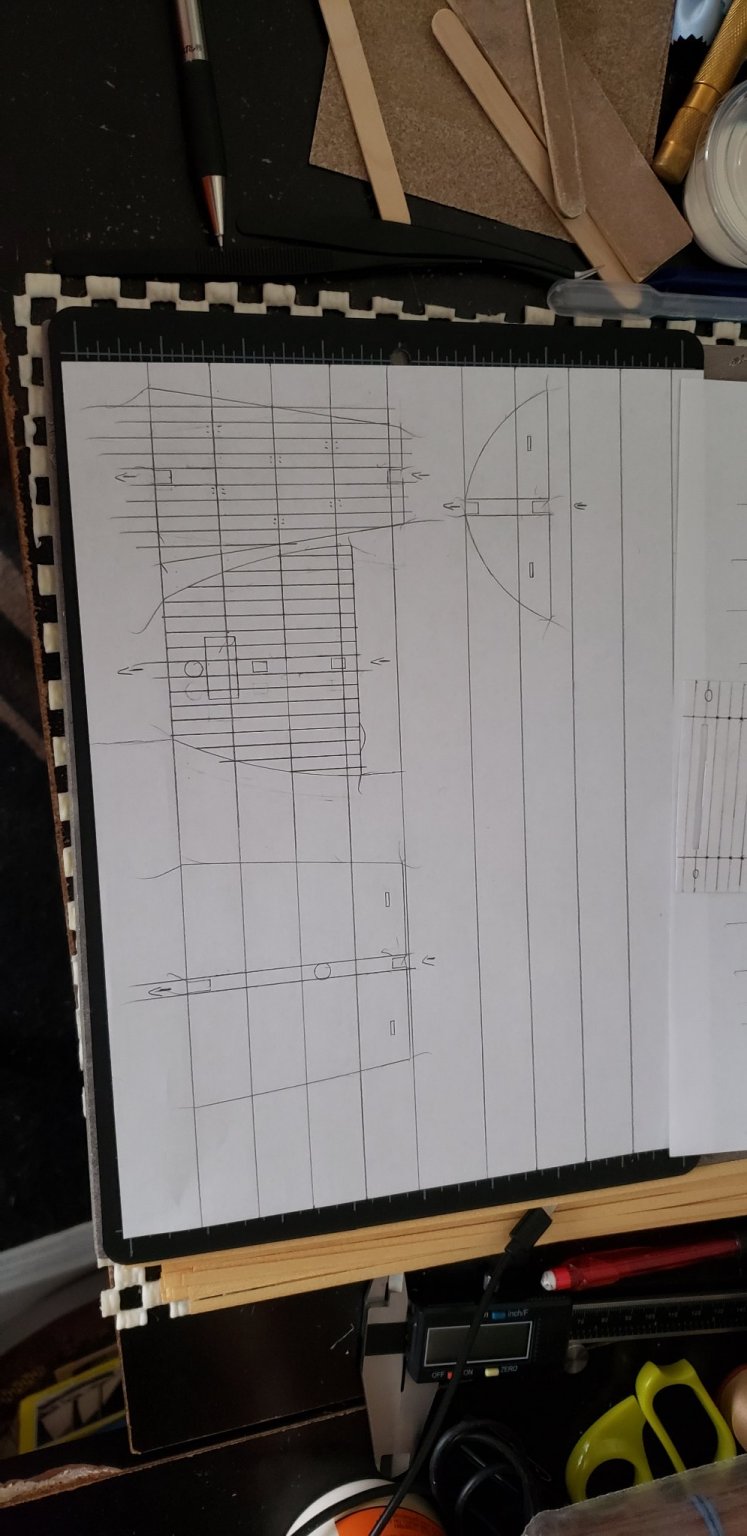
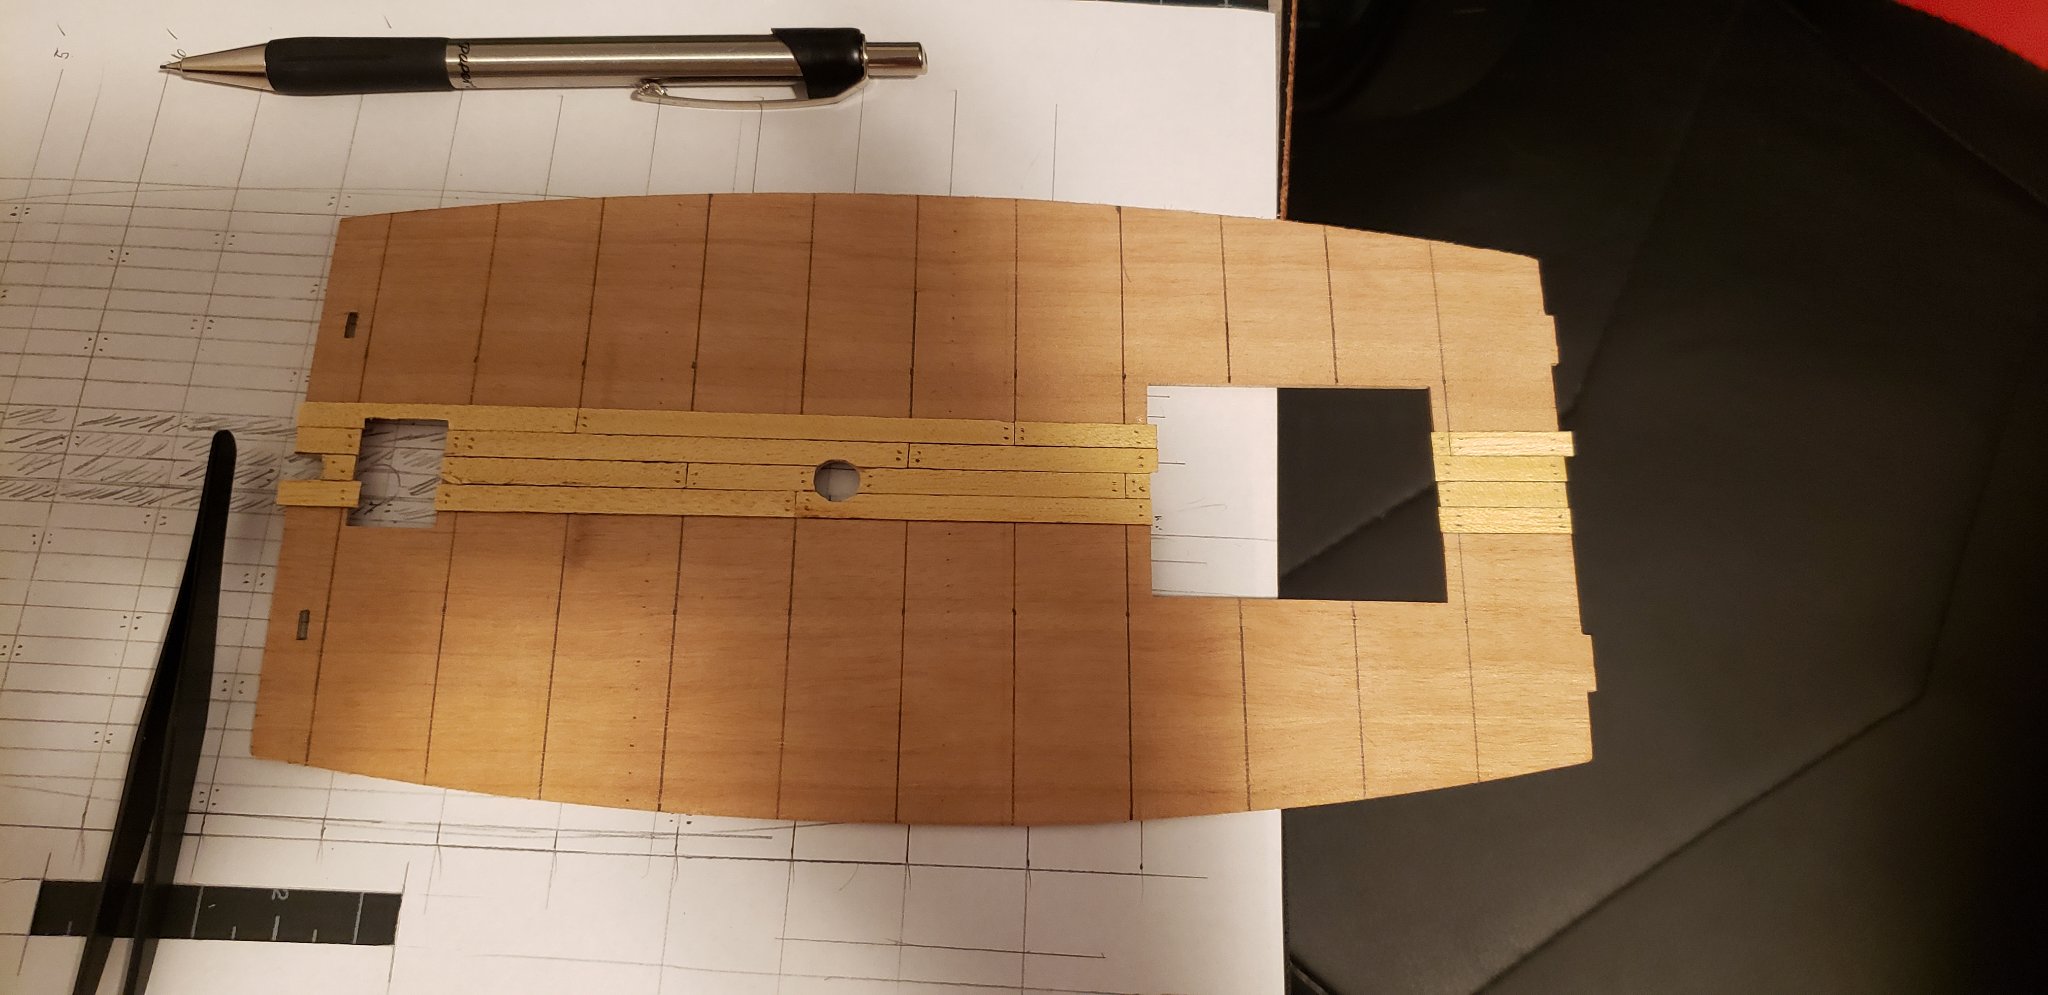
For starters, I got the framing set in place. It's as close to straight as I could get them. I've yet to fair them up yet as that appears to be "major step" 5 in the included instructions, I'm only on step 2. After doing a lot of reading and research, I decided to go with a "3 butt planking style" for my deck and drew some pictures to reference off of. The plank length I decided on was a scaled 16 feet, which comes out to 3 inches by my calculations.
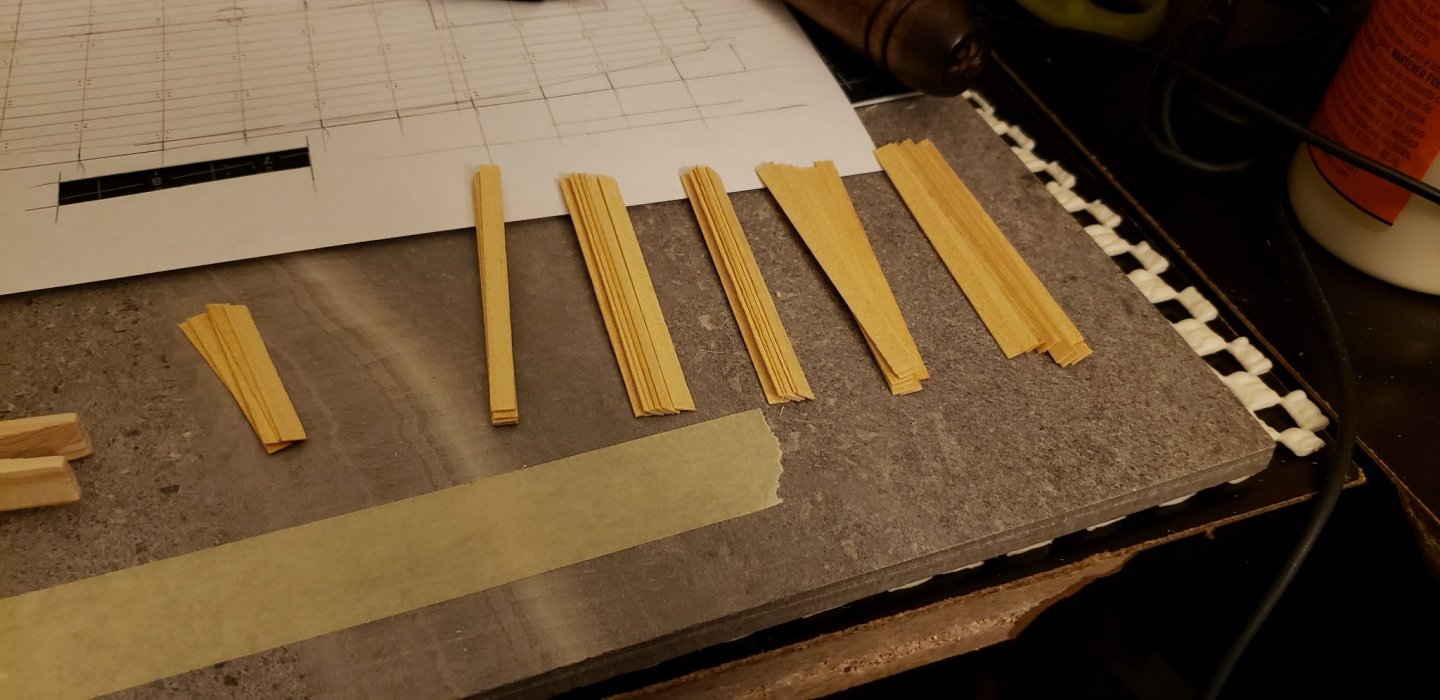
To make things easier on myself, I created a little bit of a jig with some spare wood so I could get the basic plank length uniform. The riser on the left that they butt against is just a couple paint stirring sticks that have been laminated and then brad nailed to the plank of scrap poplar. My "fence" is some more of that stirring stick cut down to 3 inches, and glued perpendicularly to a popsicle stick after making sure they were square. I used a chisel to carefully carve out the rabbet that they sit in, giving myself some room for longer planks later projects. I didn't cut out all of my planks yet, just enough to give me 36 "full lengths" to start with.
I also realize that the drawing I made of the deck to reference off of is shifted from the actual deck... simply put, I drew the picture "starting" at the stern side of the deck but then decided afterwards (before actually planking it) that I wanted them to be started flush against the stem side instead. I'm just too lazy to go through the process of redrawing that one in particular. The other deck images are all based on starting flush at their respective stem sides.
~Dan


.jpg.999bd6dd5bfb59d53ed022454ad26f4b.jpg)
.jpg.d24ecf23f3a14696f5d99977adcd06ad.jpg)
.jpg.86a8d4bb46429a2c2b97362079a02286.jpg)


Mayflower by TheRedGnome - Artesania Latina - 1:64
in - Kit build logs for subjects built from 1501 - 1750
Posted
Thanks Backer.
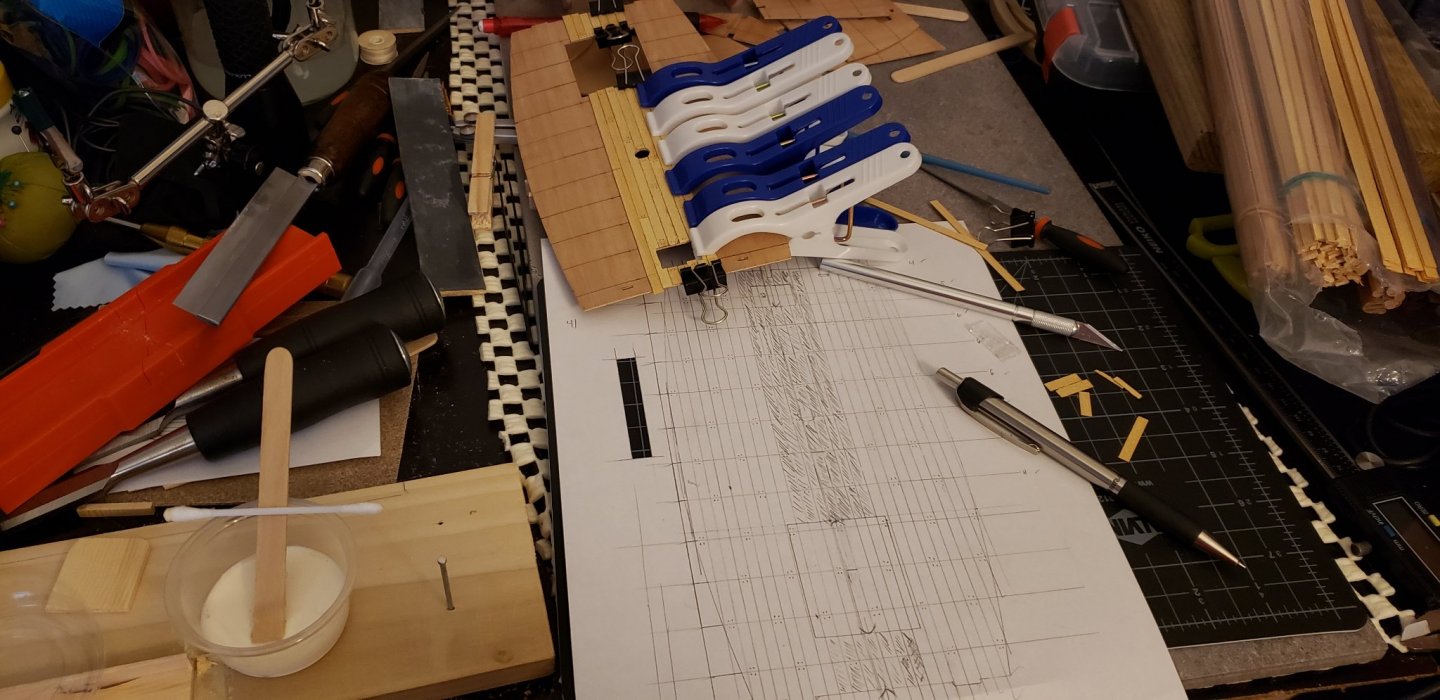
I finished planking the decks last night. Since I had planks left over that I had pre-cut, I decided to use some of the false deck scrap and try my hand at some tree nailing. I'll also use this planked scrap to test out the finish that I planned on using for the boat.