
ChrisSC
-
Posts
163 -
Joined
-
Last visited
Content Type
Profiles
Forums
Gallery
Events
Everything posted by ChrisSC
-
Acrylic clear over India Ink
ChrisSC replied to ChrisSC's topic in Painting, finishing and weathering products and techniques
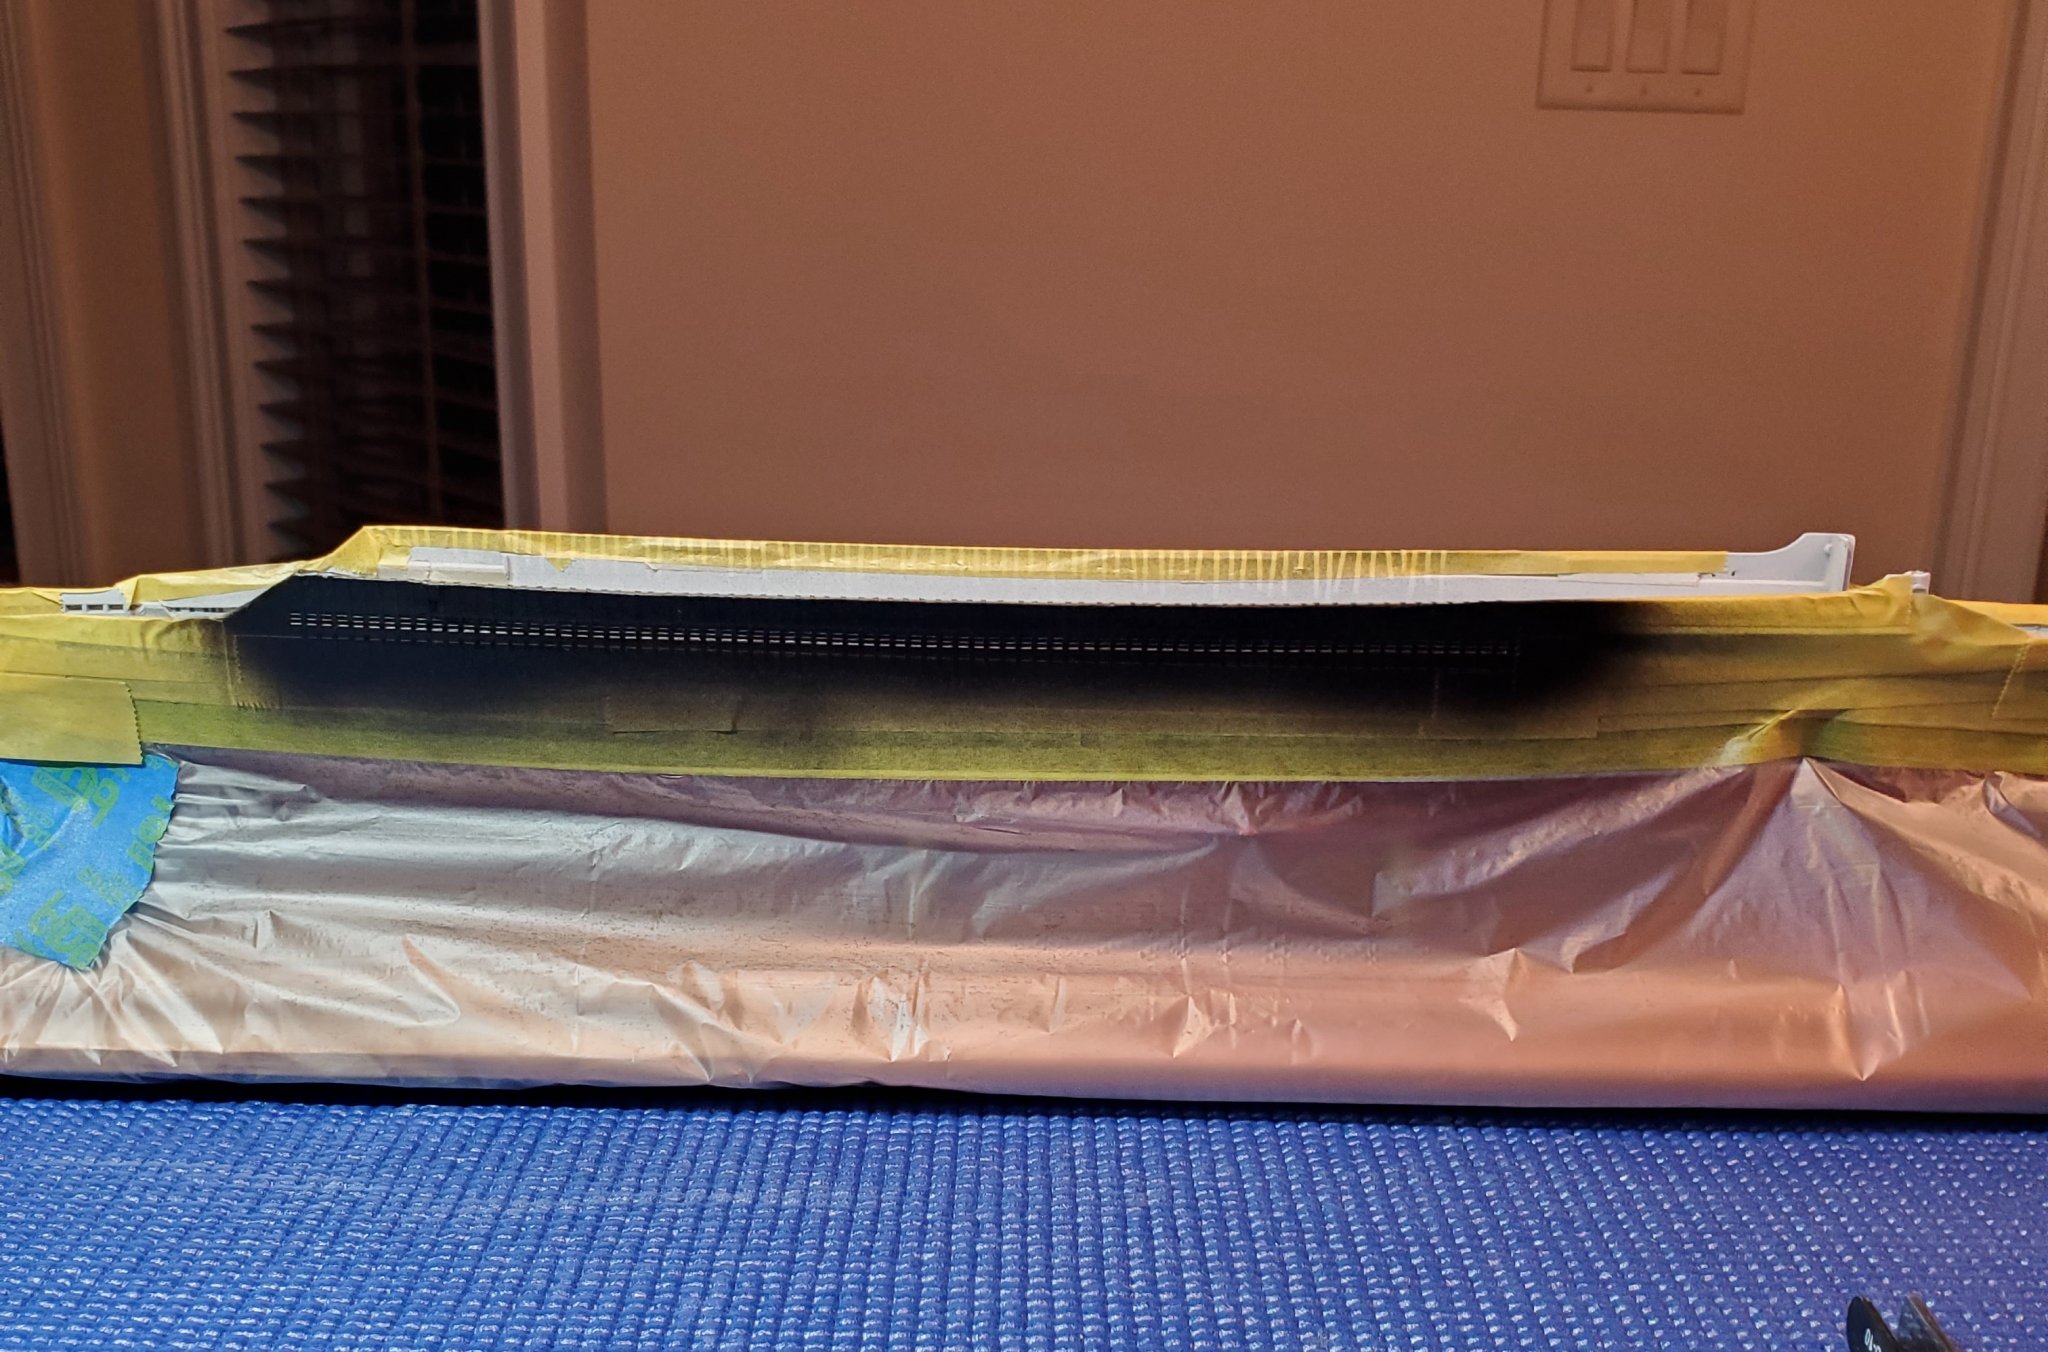
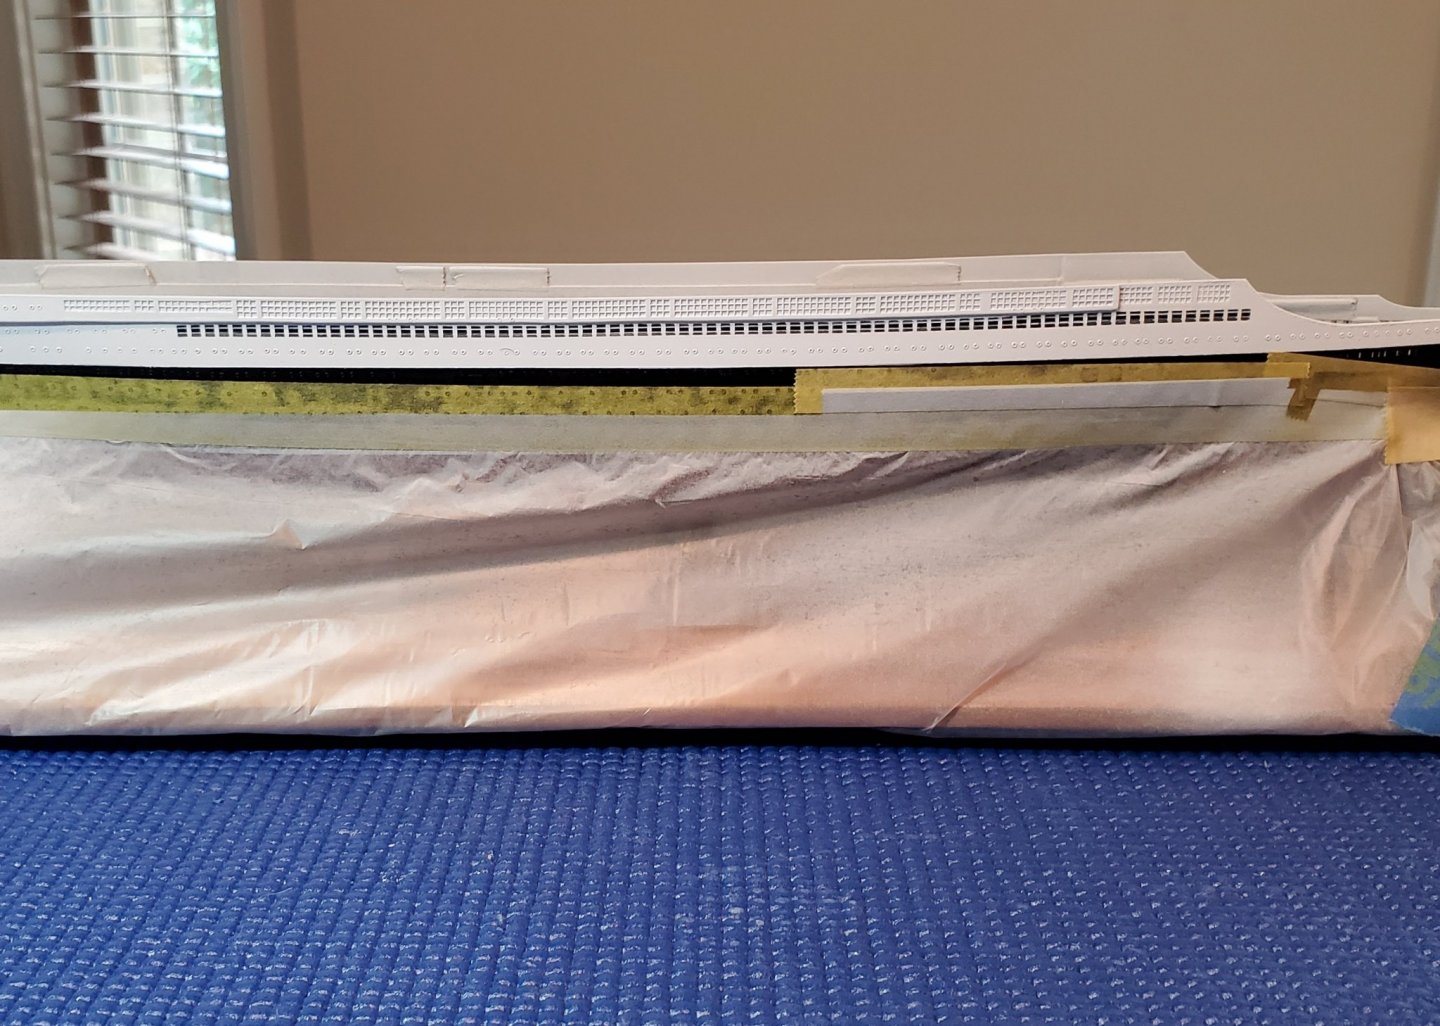
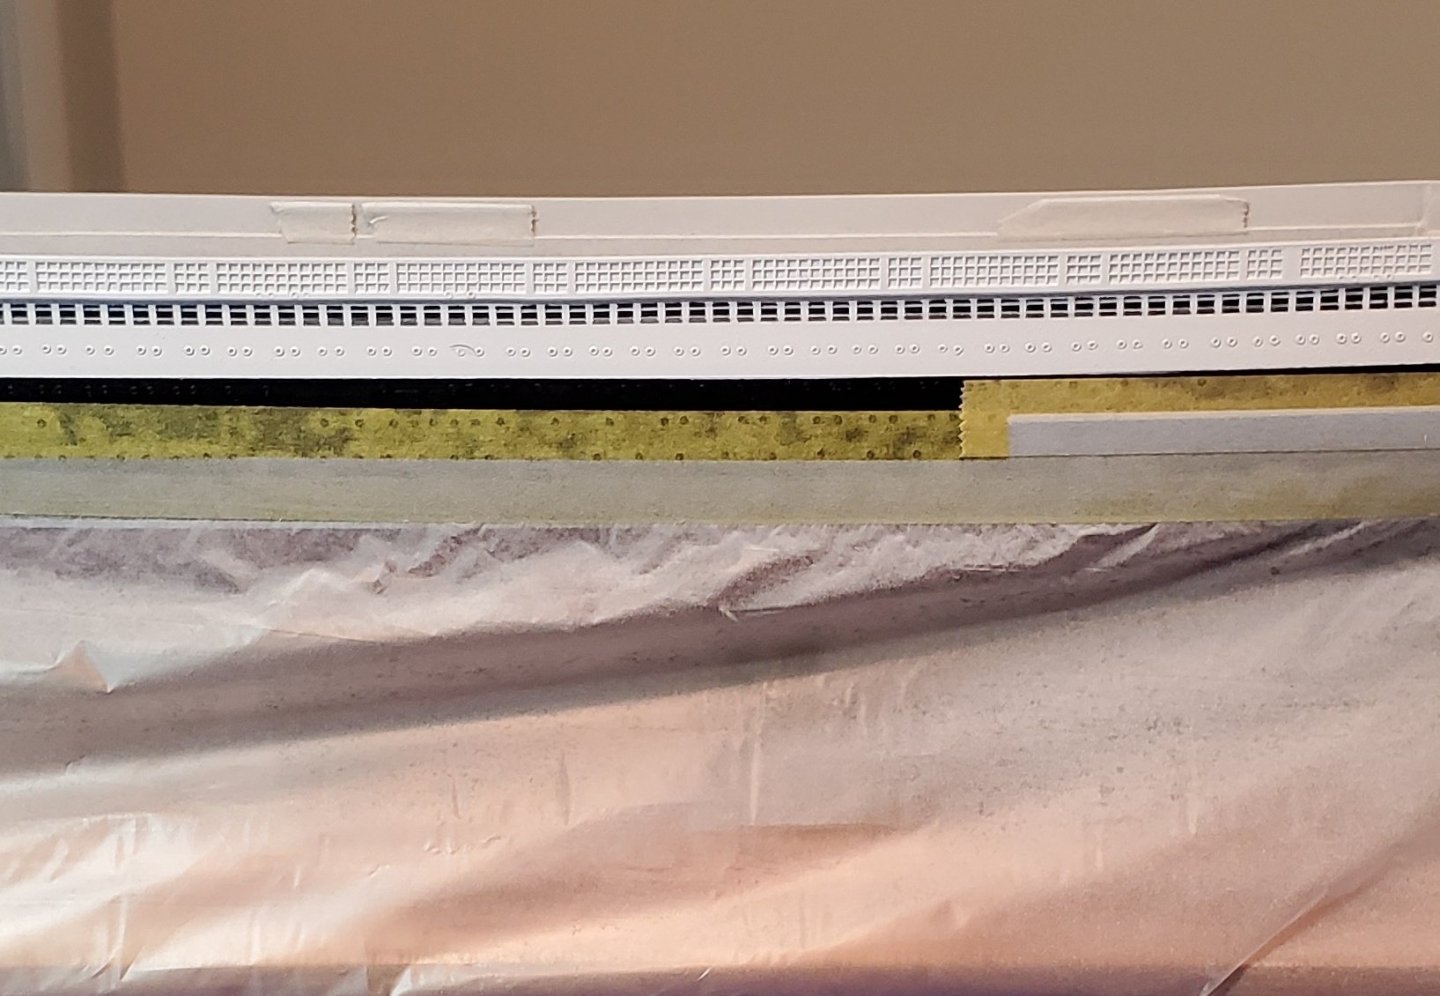
I sprayed them instead. The plastic is not very consistent but at this scale they will have to be good enough. There is a trace of white where there should be for the most part. If you are standing next to the model they look OK. The camera magnifies the flaws. I am still debating on how to do the top row which are more prominent.
-
Acrylic clear over India Ink
ChrisSC replied to ChrisSC's topic in Painting, finishing and weathering products and techniques
Yes 1/600 is definitely a challenge lol. This is my second attempt at one. I did a Queen Elizabeth and was really not happy with how the windows came out. I wound up using a paint pen to try and salvage a mess and get the frames white. It was a disappointment. I am hoping to improve on this one so I'm trying different things. I have now crossed India Ink off the list!
-
Acrylic clear over India Ink
ChrisSC replied to ChrisSC's topic in Painting, finishing and weathering products and techniques
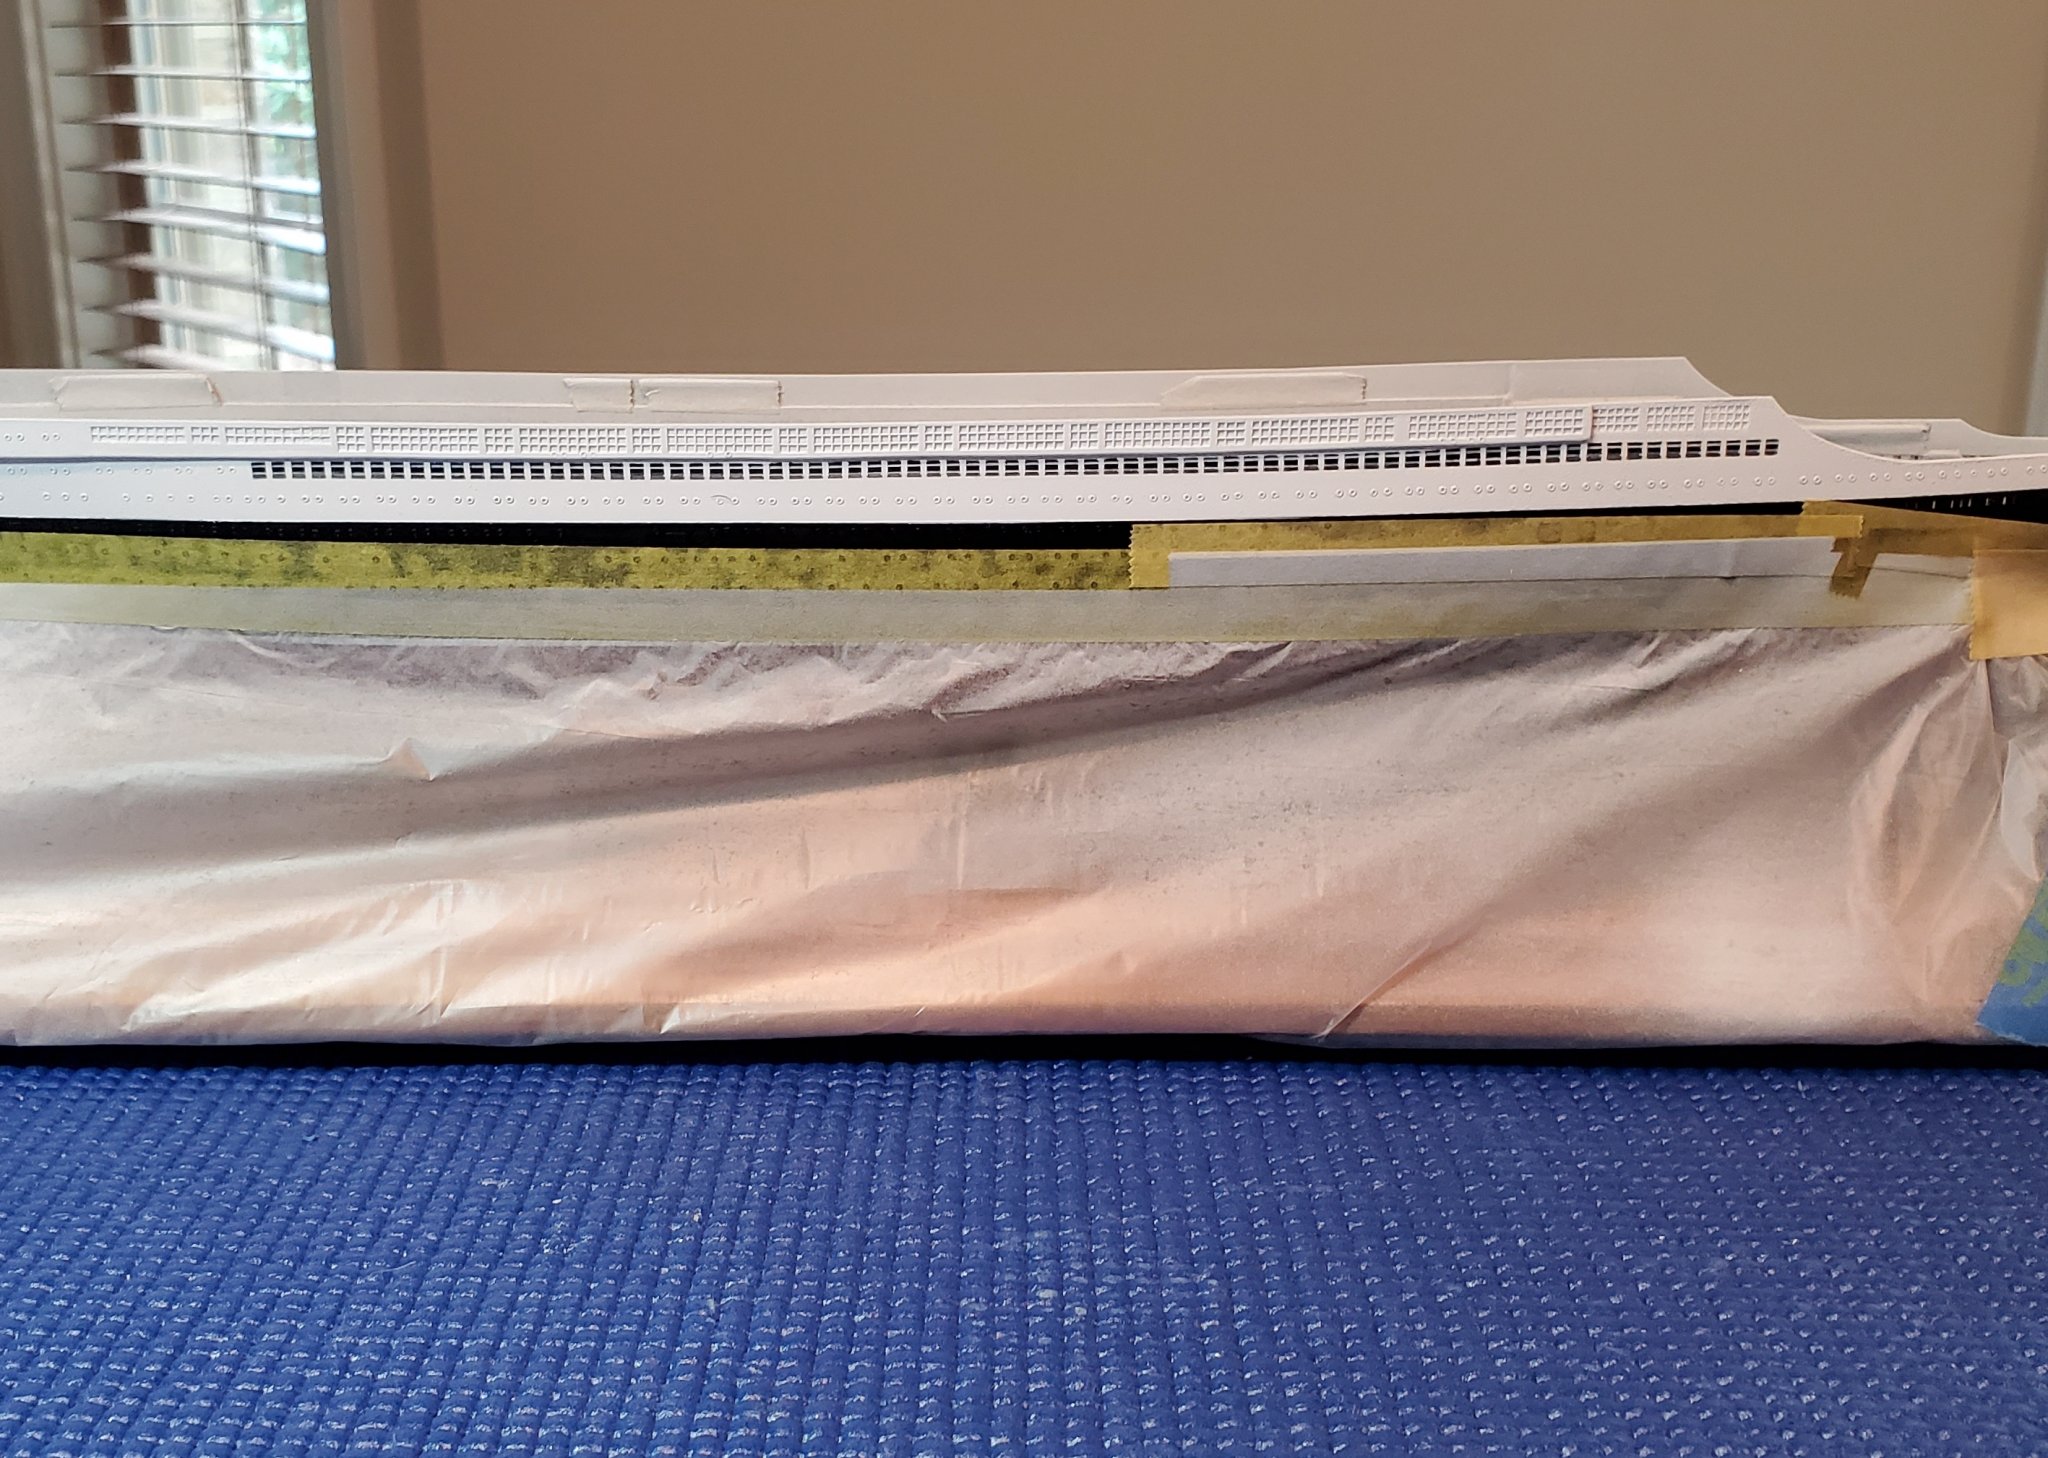
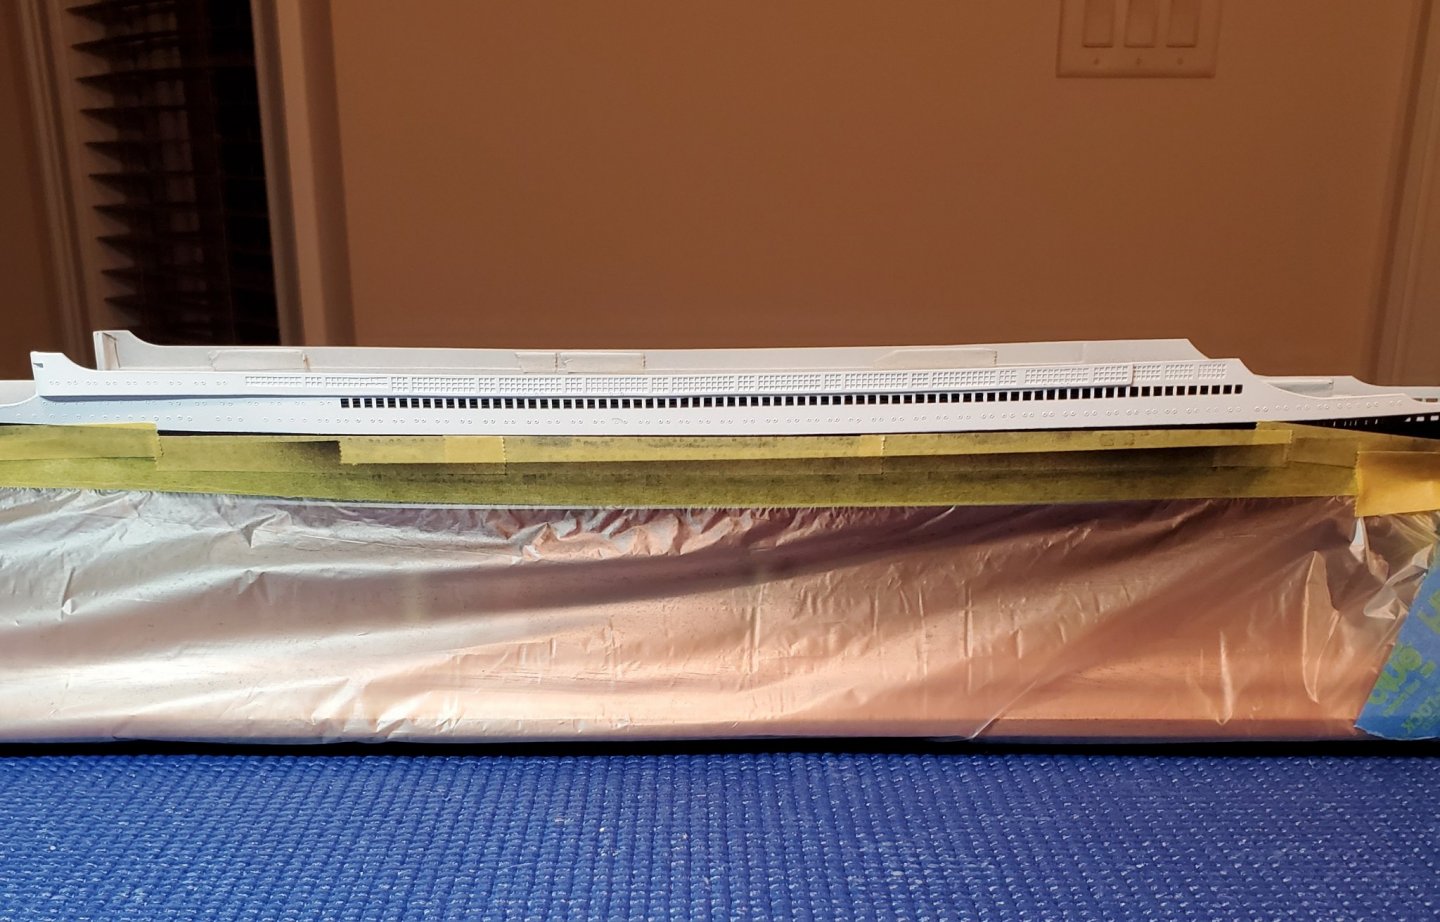
That's what I've decided to do. It's a 1/600 scale SS France so there are just so many tiny windows which are impossible to mask. As you can see here I can mask the general outline of the windows but the actual individual frames are way too small to mask and spray. The windows I just did are actually divided into 3 sections each so I now need to get white paint on two horizontal lines per window. Then there are the sections of windows above what I just painted which basically have the same issues only there are a lot more of them! So my thinking was it would be great if I had something I could apply into each window and do a neater job and save a lot of eyestrain and time. I am going to try and learn how to dry brush and see if I can get white paint somewhat neatly on them that way after painting the black.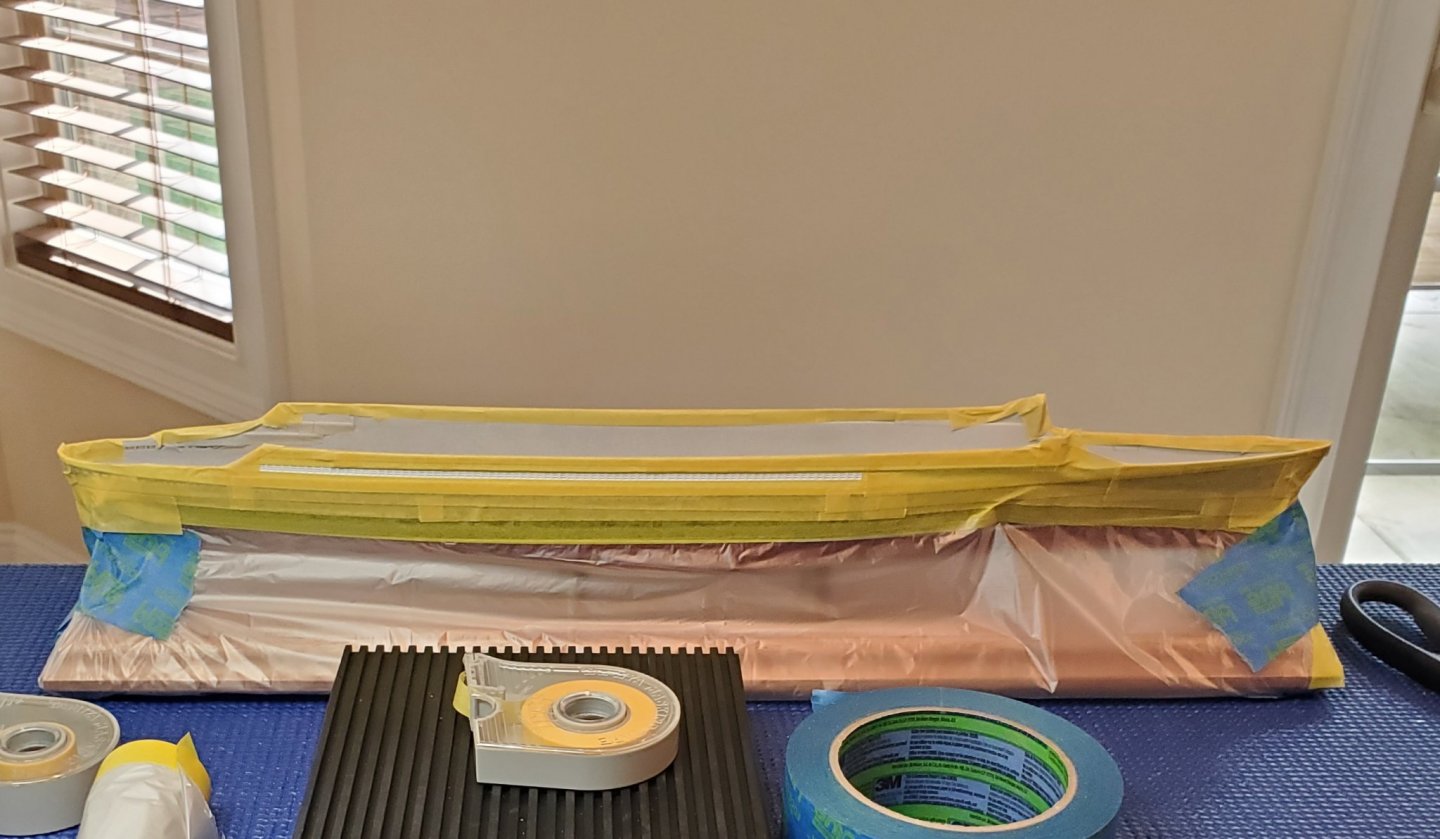

-
Acrylic clear over India Ink
ChrisSC replied to ChrisSC's topic in Painting, finishing and weathering products and techniques
That seems to be exactly what I have observed with it today. -
Acrylic clear over India Ink
ChrisSC replied to ChrisSC's topic in Painting, finishing and weathering products and techniques
It's very confusing to me. The reason I posted the question here is that I could not find any discussion online about what I want to do with it. Lots of talk about using it as a wash but nothing close to what I was curious about. I'm not a chemist and I have no prior experience with India Ink so I can only take the advice of the people answering my question. I don't know who is right or wrong about the situation. Someone online had recommended using the India Ink which is why I tried it. I have gotten opinions here and in other places that vary quite a lot. Some say it will be an issue and some not. So far the tiny bit I have used as a test sample is still smudging if I touch it. I'll try again tomorrow and if it's still smudging then I will just go another direction. I am using a waterproof version that comes in a pen from Germany, it was one of the more expensive pens available. I do not see any ingredient breakdown on the pen. Thank you all for your input. -
Acrylic clear over India Ink
ChrisSC replied to ChrisSC's topic in Painting, finishing and weathering products and techniques
Yes I'm going to stick with like coverings, all acrylics. At least I know there won't be any unsuspected bleeding mess going on with just using acrylic paint. The only reason I considered this ink was the size of the applicator tip was something I could get inside these areas but it's not worth the possible mess that ink brings mixed with a top coat of paint. -
Acrylic clear over India Ink
ChrisSC replied to ChrisSC's topic in Painting, finishing and weathering products and techniques
It was worth a try but I do believe I am asking it to do something it's not made to do. -
Acrylic clear over India Ink
ChrisSC replied to ChrisSC's topic in Painting, finishing and weathering products and techniques
Well I have been putting it on several differently prepared pieces of styrene. One of them is painted with the same acrylic paint that is on the model and is also what I plan to seal it with, Tamiya acrylic. So far it is acting the same on everything except paper. It dries very well on paper lol. -
Acrylic clear over India Ink
ChrisSC replied to ChrisSC's topic in Painting, finishing and weathering products and techniques
I painted the hull in gloss black so I could affix the decals without silvering. I really am not a fan of gloss paints so I want to put a coat of flat clear on the ship after I get the decals on. From what I have seen so far today if I use this ink it's going to make a giant mess as I don't trust it's ability to not be affected by a clear coat over it. The windows are very tiny and numerous and this India Ink pen has the perfect size applicator to get into these tiny spots so I thought I would experiment with it. On my last ship I had tons of trouble trying to get the windows painted so I figured I would try an alternate method. I also tried Tamiya Panel Line Accent on the last one and it was very aggressive and started melting and staining whatever it touched (white paint). I may mask and spray the windows black and try dry brushing the raised areas white....I have never tried that method either! I'll wait until tomorrow and see if this ink ever dries, if not I have to come up with another plan. -
Acrylic clear over India Ink
ChrisSC replied to ChrisSC's topic in Painting, finishing and weathering products and techniques
Thanks. Yes that's what I'm doing. So far I have found it is taking forever to dry. It's been several hours and will still smudge if I touch it so it's not looking like a viable alternative to paint. I only drew a tiny square box of it on a painted piece of styrene and it won't dry. On paper it will not smudge immediately after applying it but not so on plastic. -
Hi. I am wondering if anyone has used waterproof India Ink on a plastic model and then tried to seal it with a flat clear. I have very tiny windows that I would like to make black. Someone had mentioned using an ultra fine point India Ink pen to blacken these areas. My concern is I plan to seal the whole model with an acrylic flat clear after I'm done and I am curious if the clear will either make the ink run or have any other adverse effects on it. I'm hoping someone may have tried this and has some advice/experience to share. I would be putting the ink over Tamiya acrylic paint and sealing it with Tamiya acrylic flat clear. I have looked everywhere for this specific information but have had no luck finding any information. Thanks in advance for any input.
-
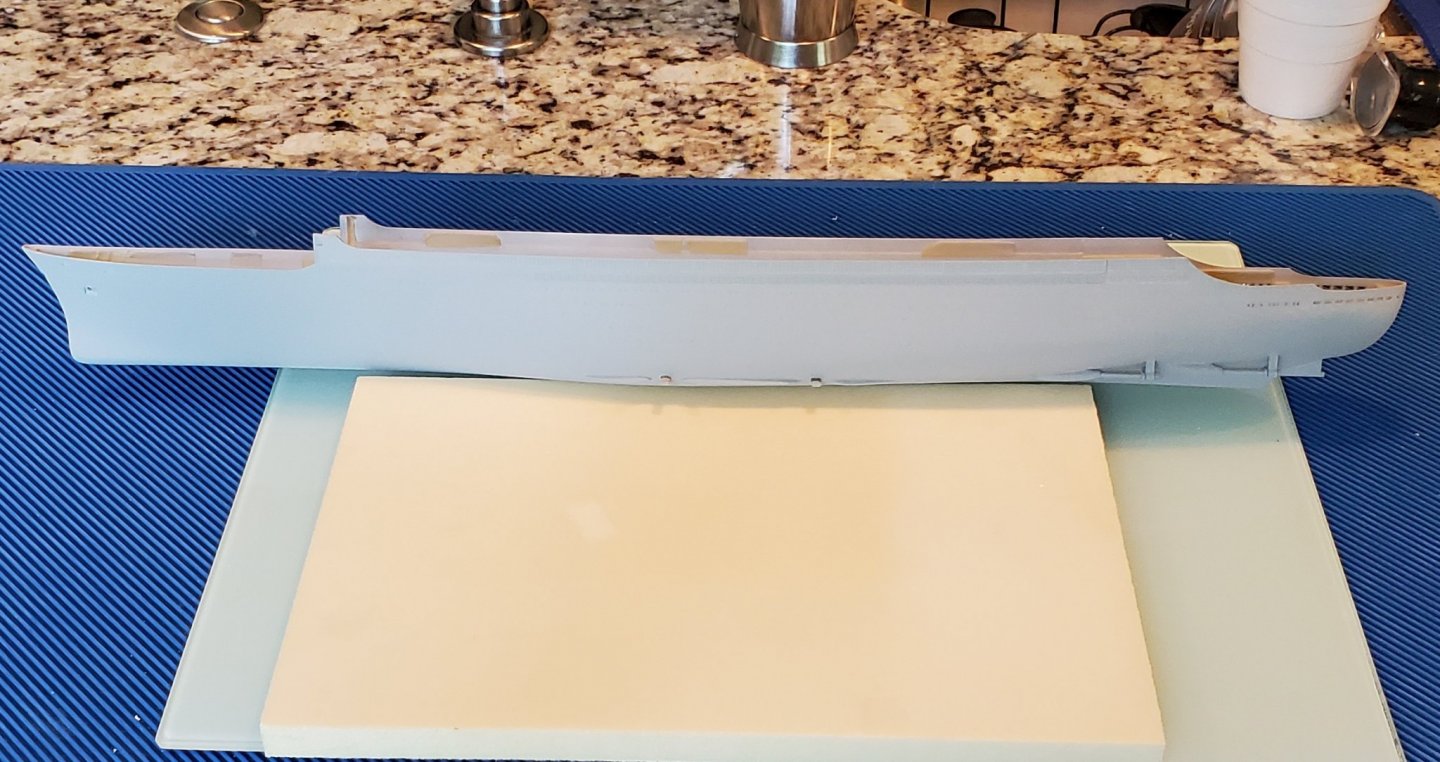
Well I got the color on the hull of my 1/600 France. Now I need to put decals and a coat of flat clear on it. When that's done I will try to figure out how I am going to paint all these tiny windows.
-
Thanks Yves. Bill, so far I have acquired the Airfix 1/600 RMS Queen Elizabeth, Queen Elizabeth 2, Mauritania, Queen Mary 2, and SS France. I know there was a Canberra made and I believe that might be the only Airfix ocean liner I am missing. I also have the Revell 1/570 Queen Mary which I started but wound up putting off. The Revell Queen Mary is going to be a major project as it is very out of proportion. The whole bridge area is way too flat and the deck house is way too high towards the stern. I'm not a rivet counter by any means but it's so far off that to me it looks very bad. Once I started it I wound up starting to half way scratch build the bridge and I decided I would just wait on that whole model and maybe start from scratch on a lot of it at a later date. I am pretty new to modeling so I think I would be more comfortable building a few more that don't need major surgery and work on getting my skills up for so much scratch building. I like the way the Airfix models are set up much more than the Revell Queen Mary. The Queen Mary also has lots of very exaggerated details such as the funnel rings and deck planking that would probably not look good melded together with styreen sheets. I may just do everything from the hull up myself when I pick up some more experience. These are some photos of what I started doing on Queen Mary before deciding to wait until I feel I somewhat know what I'm doing lol!
-
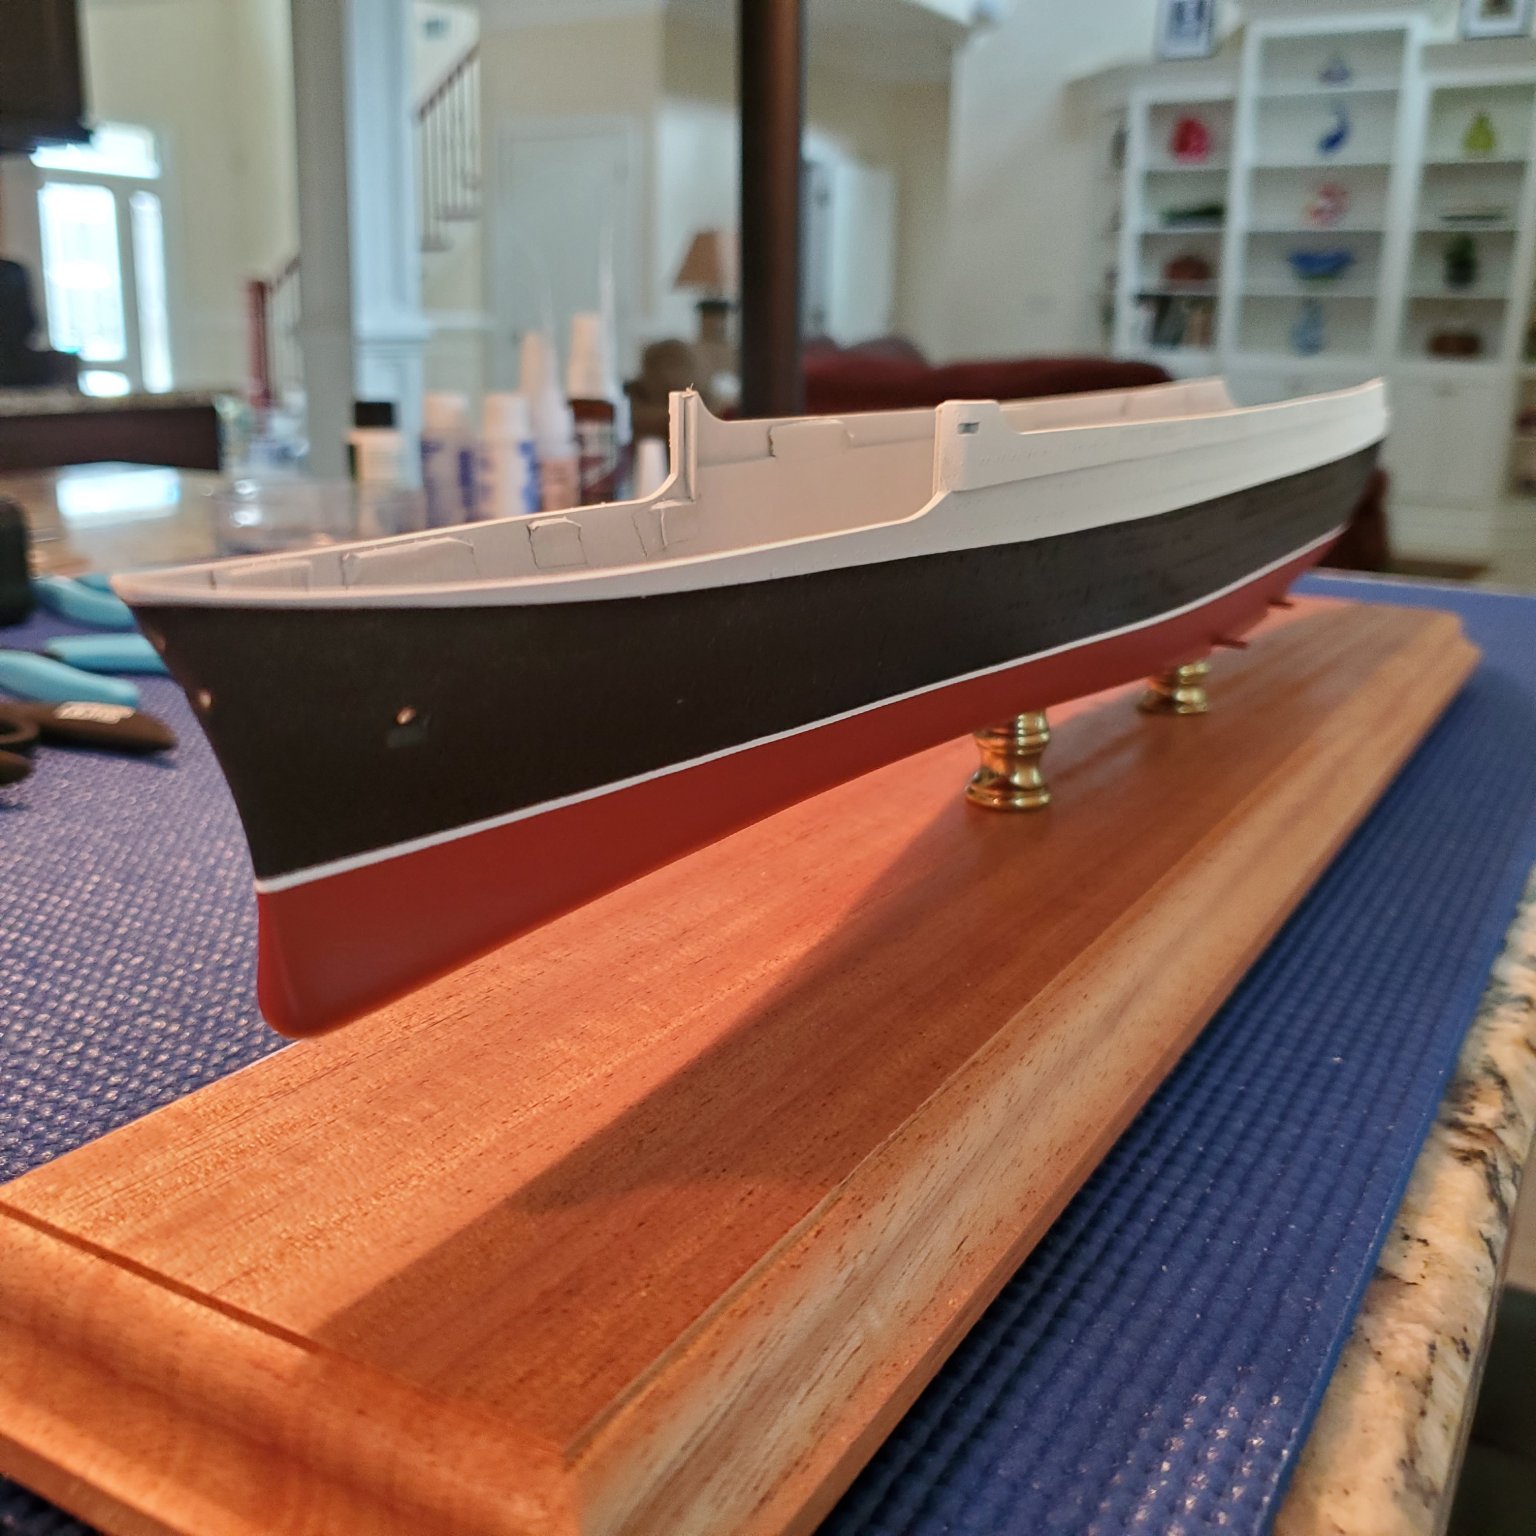
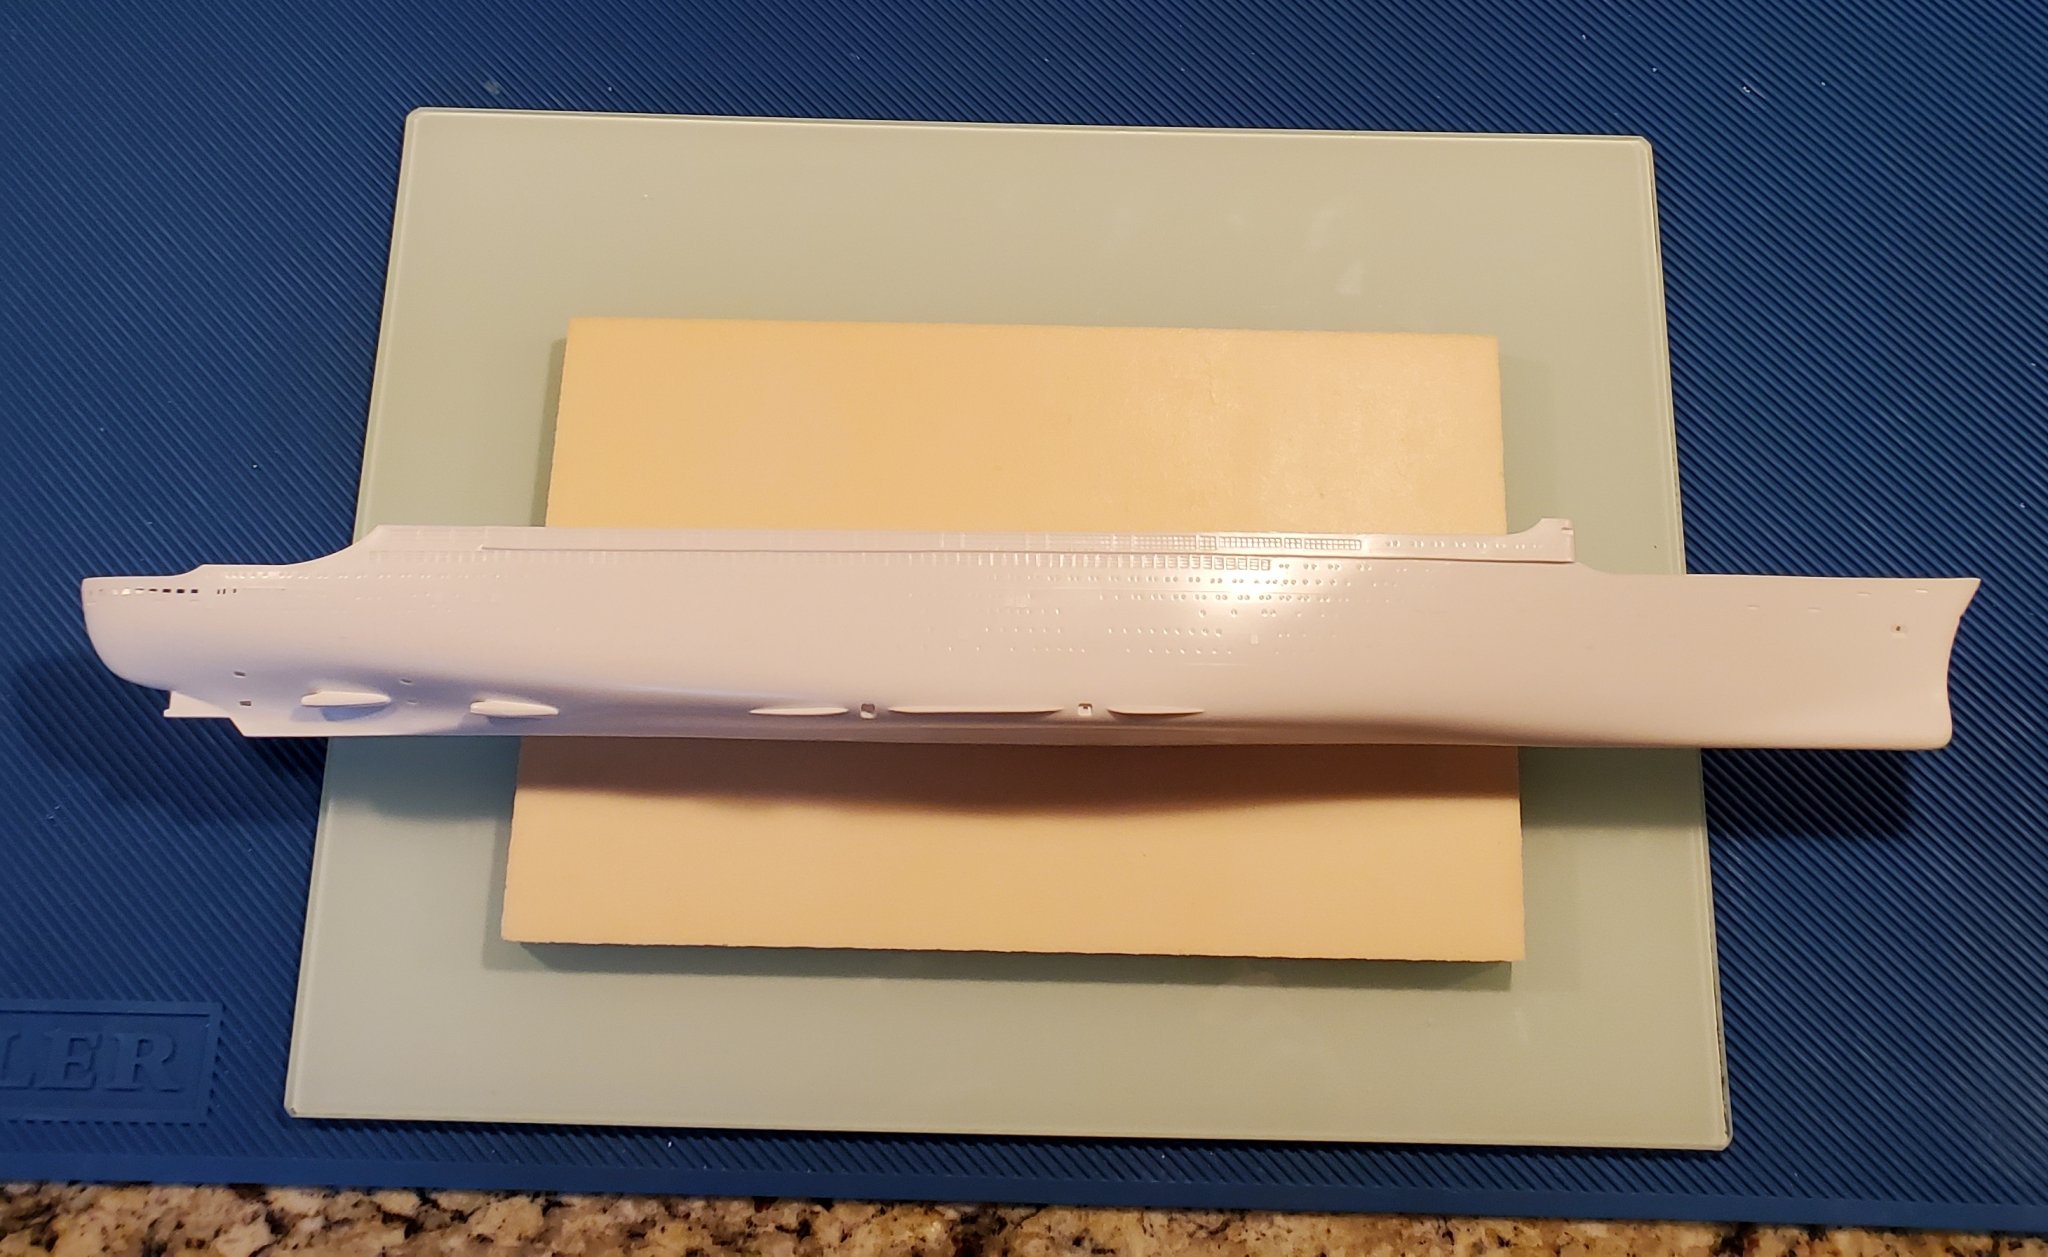
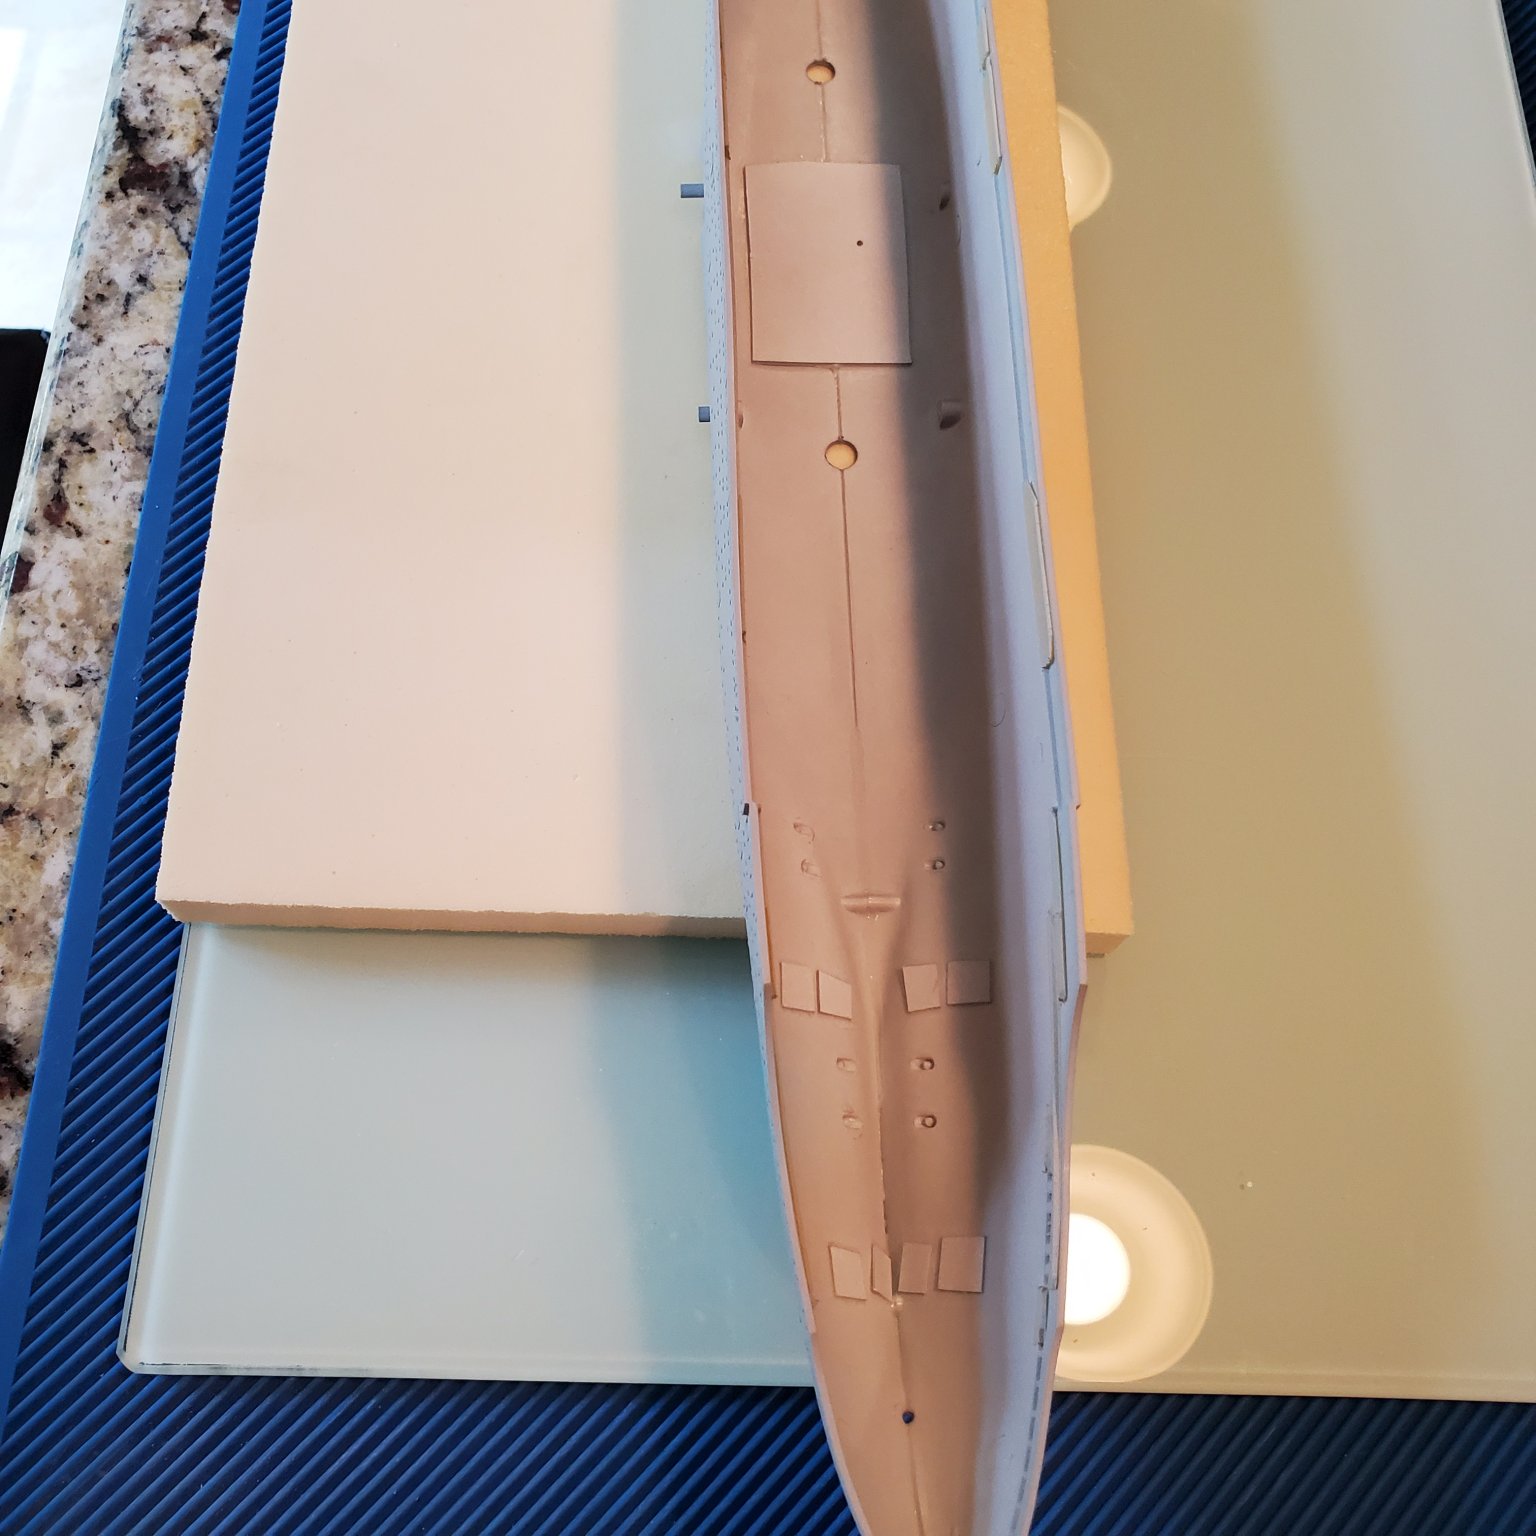
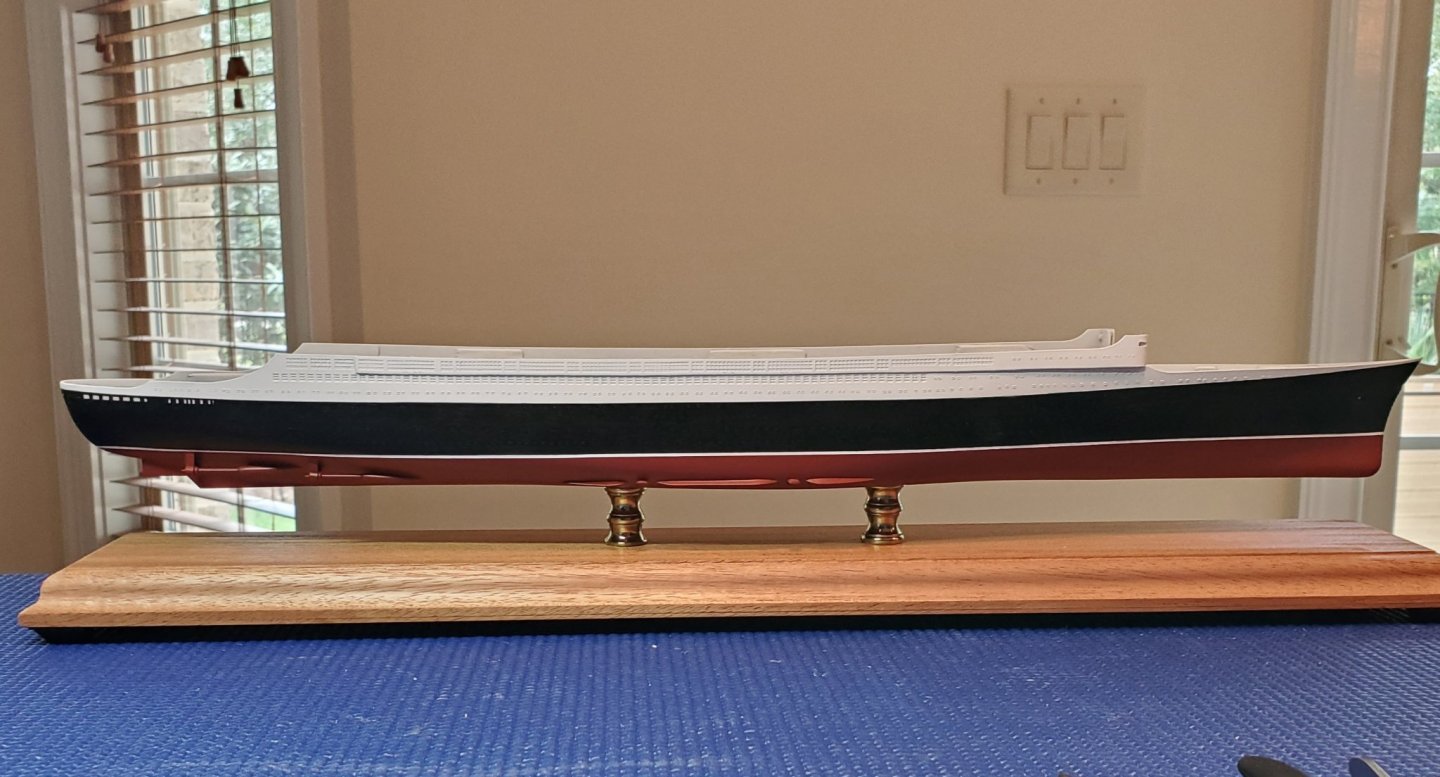
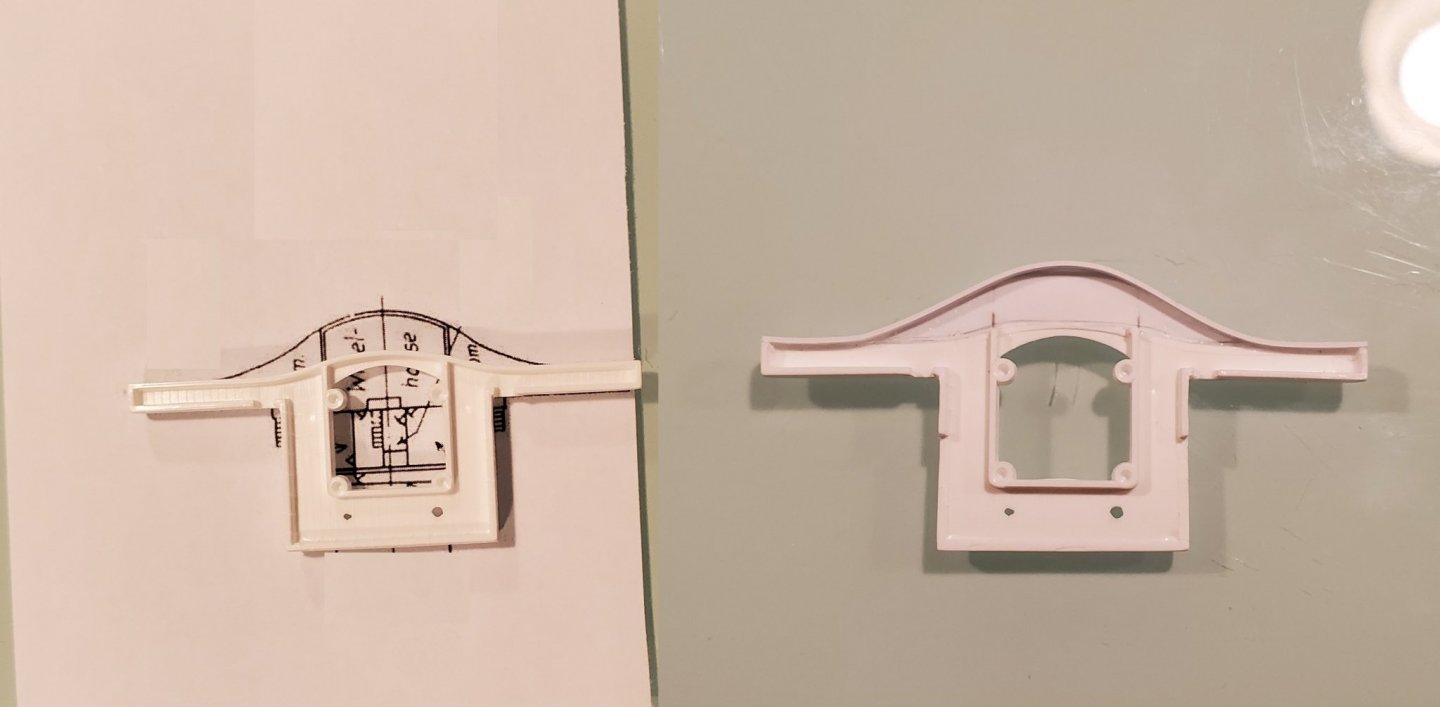
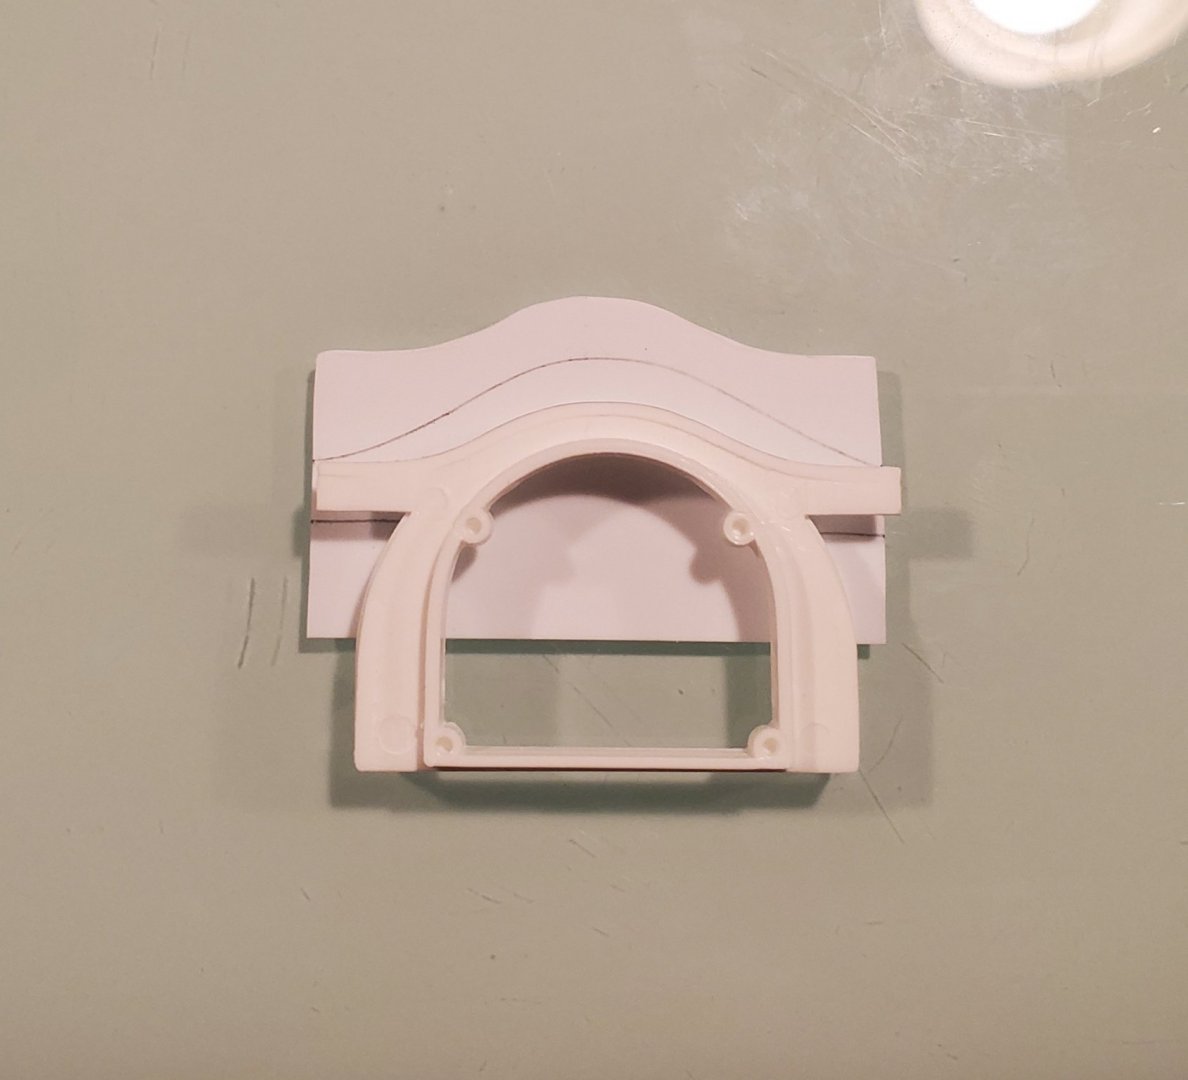
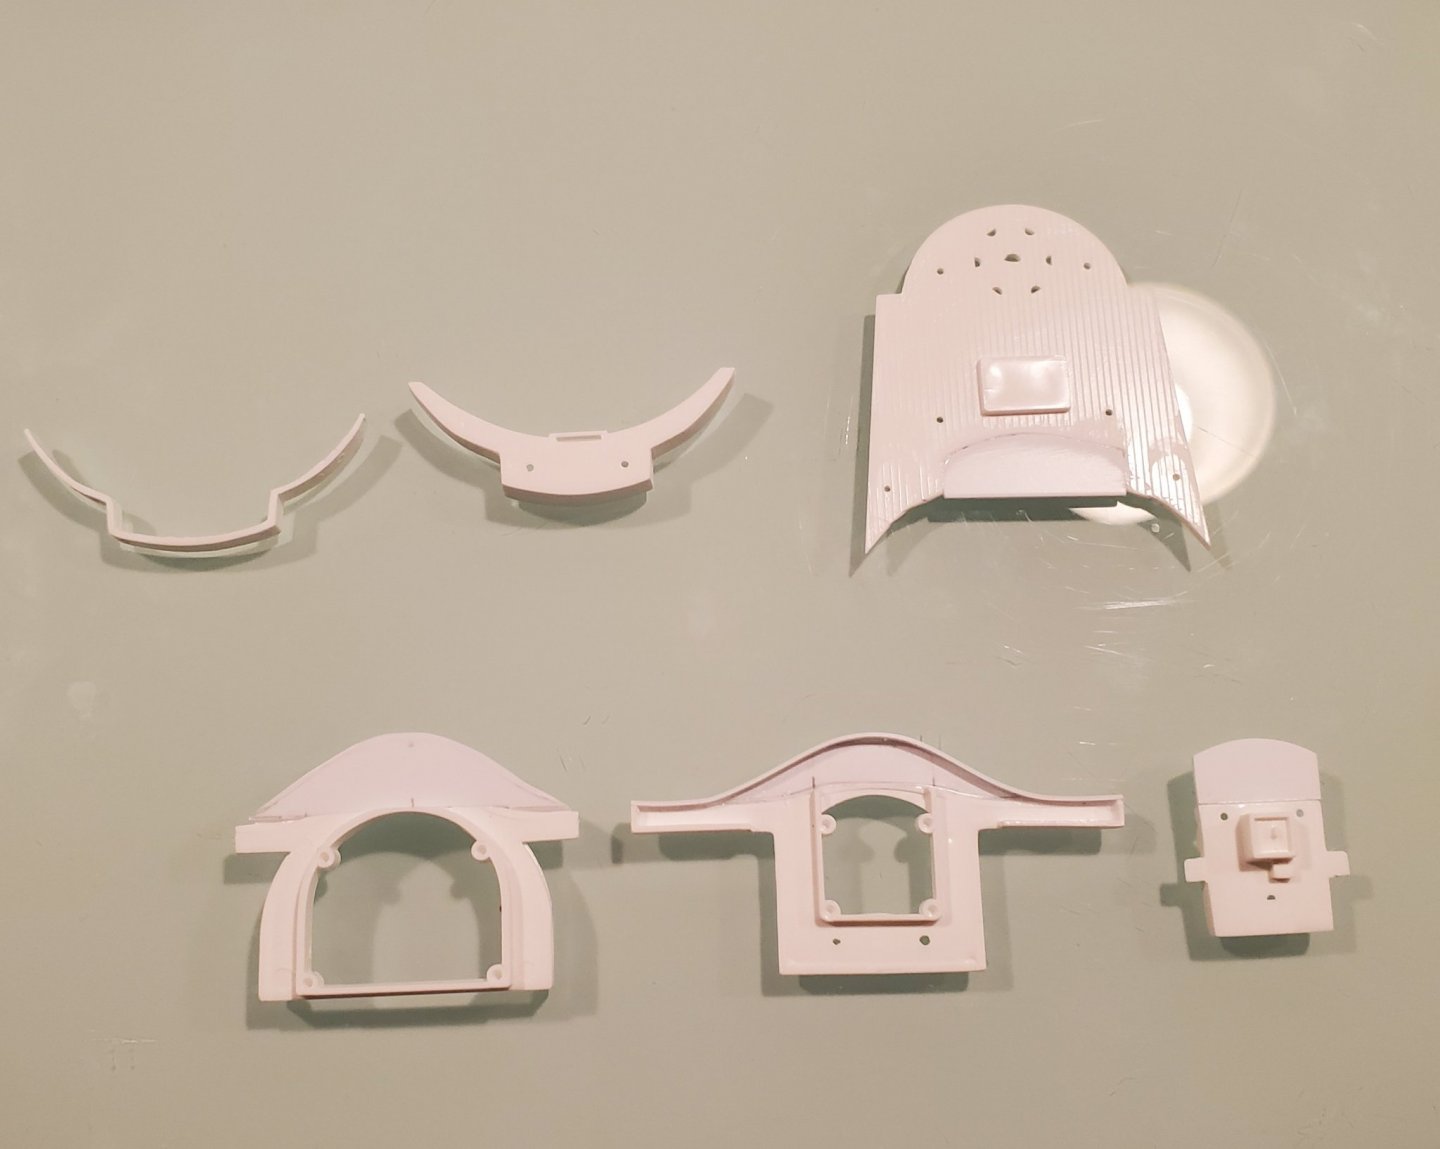
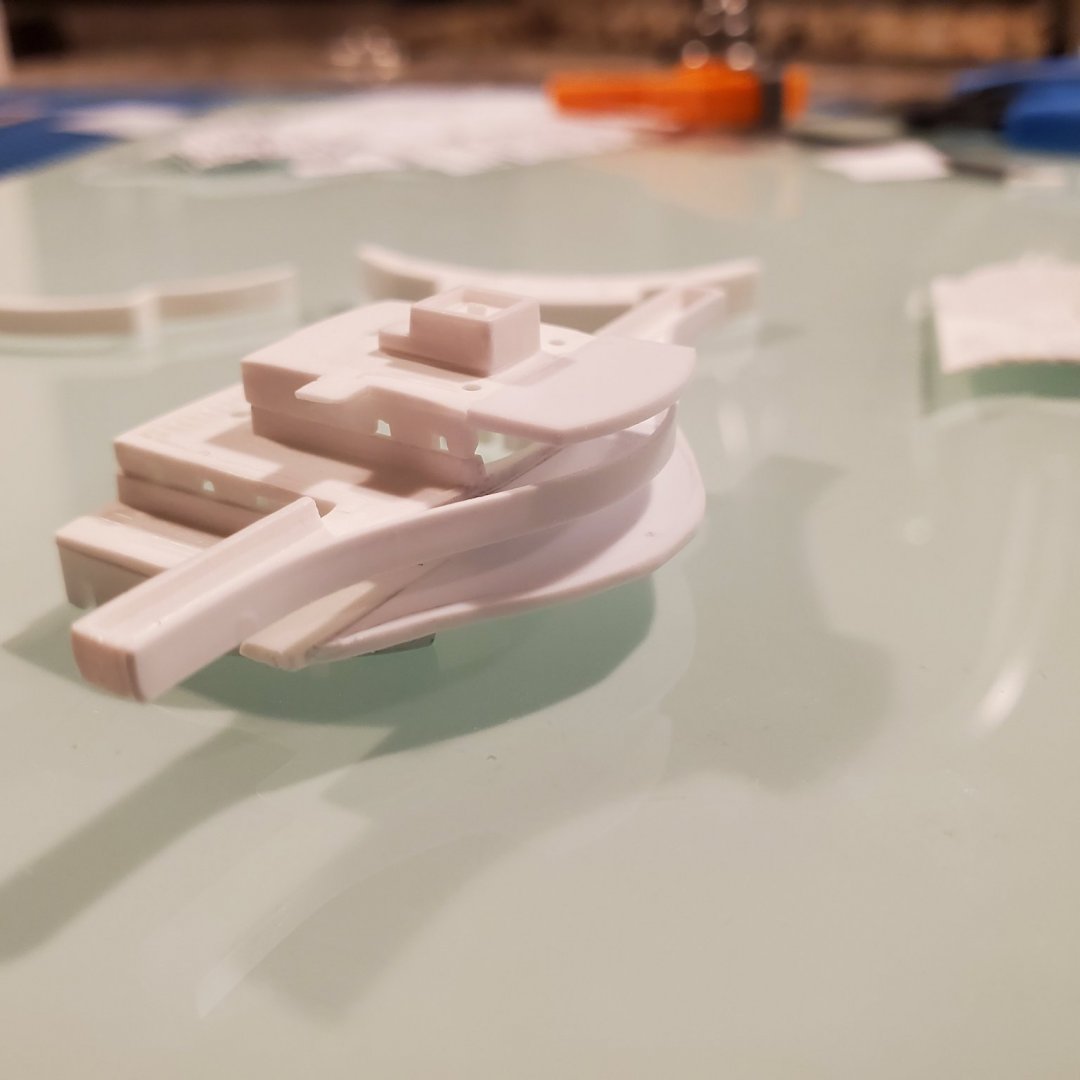
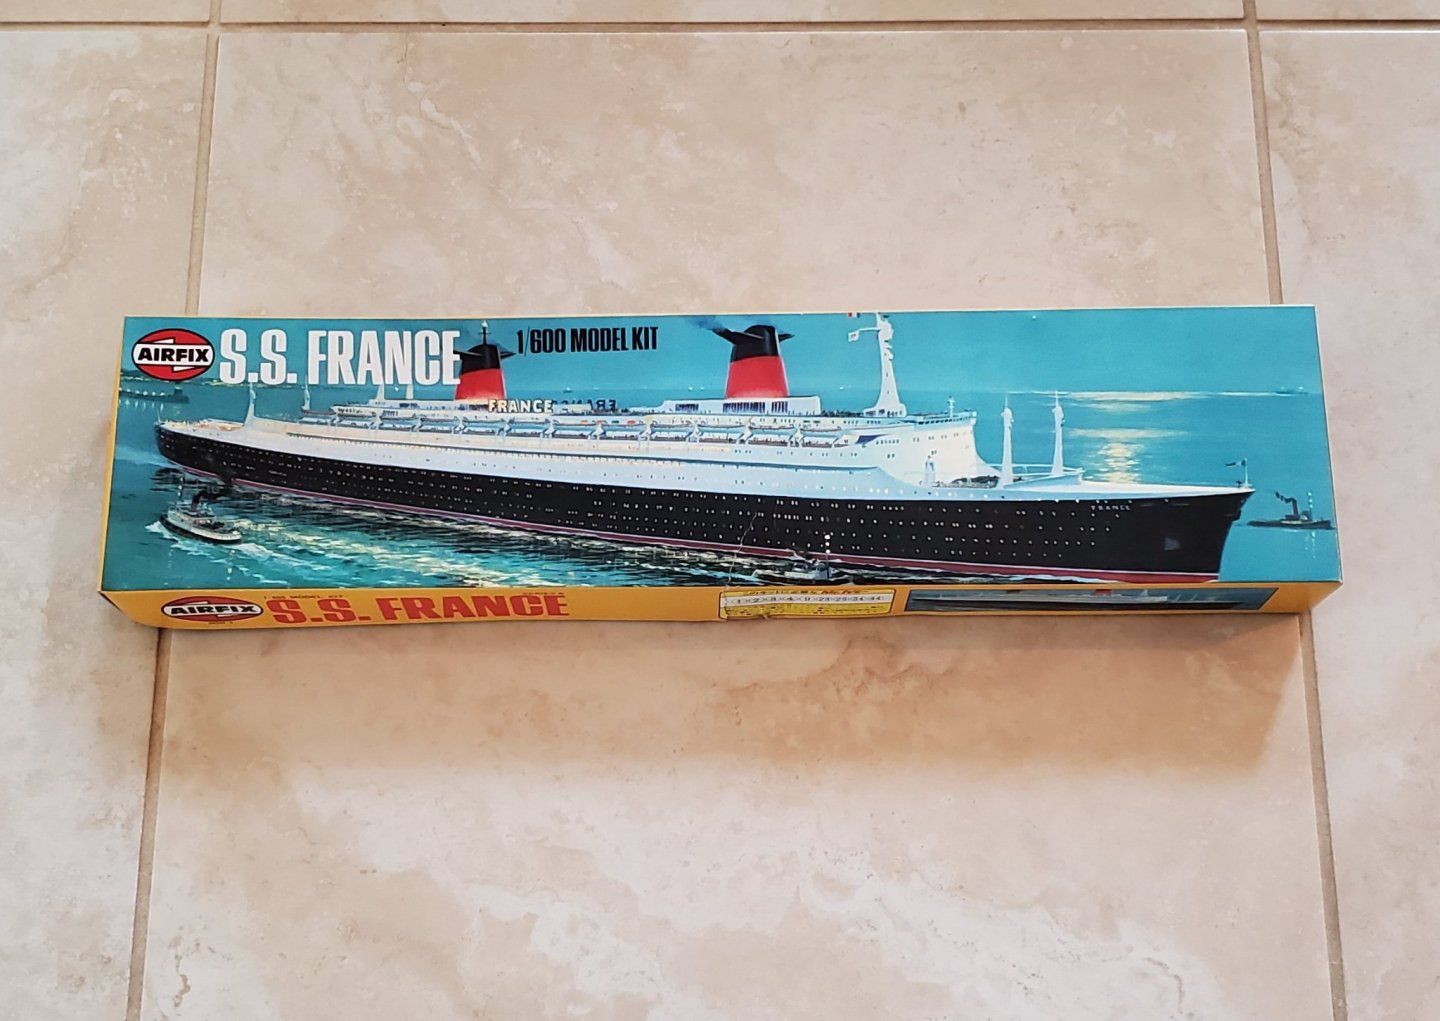
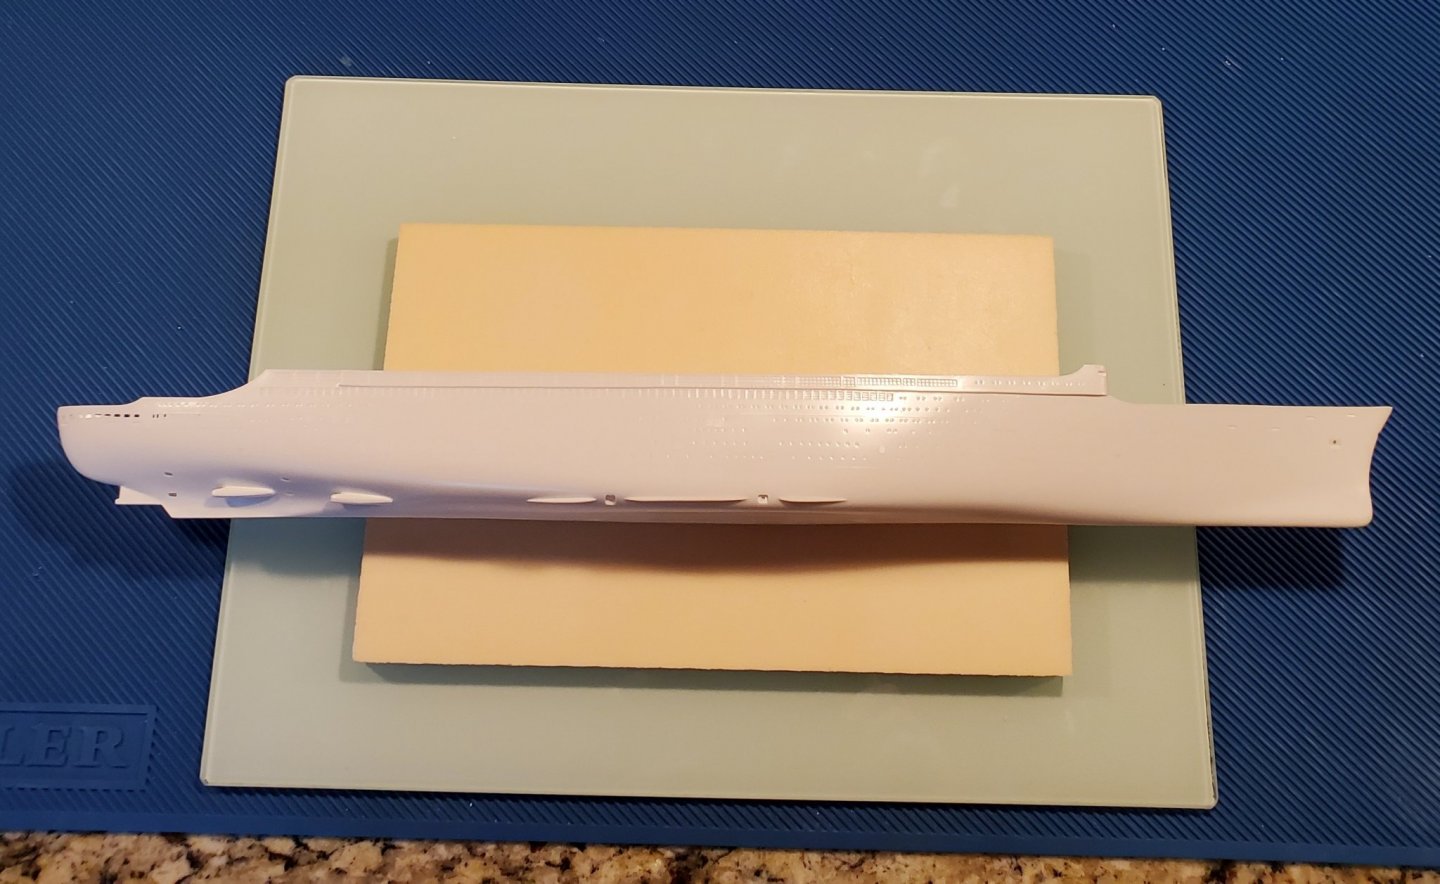
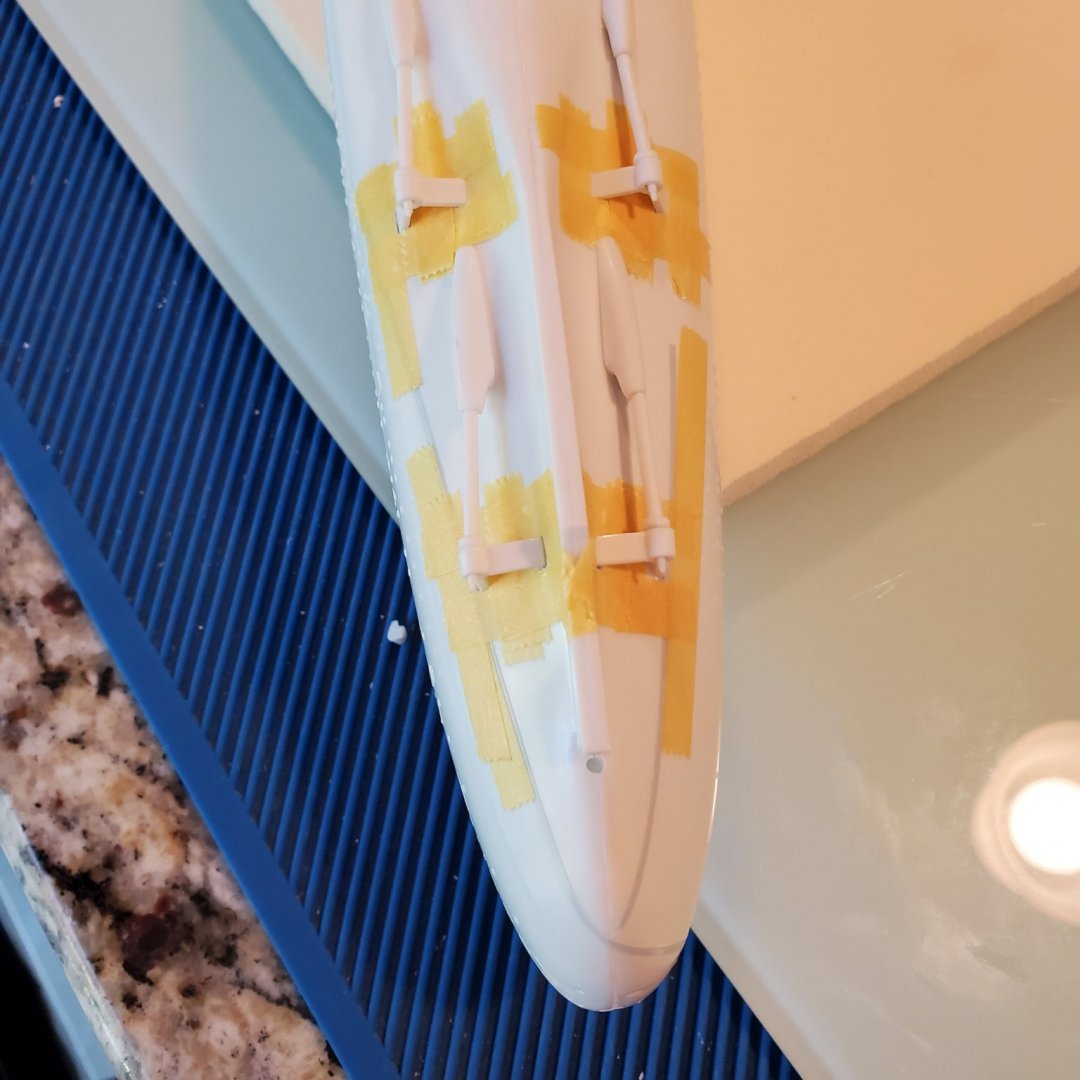
After enjoying building the Airfix 1/600 RMS Queen Elizabeth I purchased as many 1/600 Liners as I could find. The rarest one is the Airfix SS France which I finally found on ebay at a high but reasonable price. She is my current project but I have to be careful since messing her up and trying to replace her would not be easy. So far she is in prime with the propeller shafts and stabilizers installed. I really would have preferred to leave them until near the end of the build but they needed a lot of filler which would have messed up the paint job. I'll just have to watch out for them as they are very delicate. Once I get the hull painted and mounted on the stand they will be much less vulnerable to damage. The holes for the shaft supports were just a mess and the hull had quite a bit of warp to it so I filled the support holes first from the inside with styreen sheet and then putty on the outside. I also glued in a brace of styrene sheet to help hold the two halves of the warped hull together. She needs a little more filler before paint.

-
Thanks guys. I think I am going to do a 1/570 Queen Mary next. I figure she might as well have her sister as company!
- 28 replies
-
- 2
-

-
- airfix
- queen elizabeth
- (and 2 more)
-
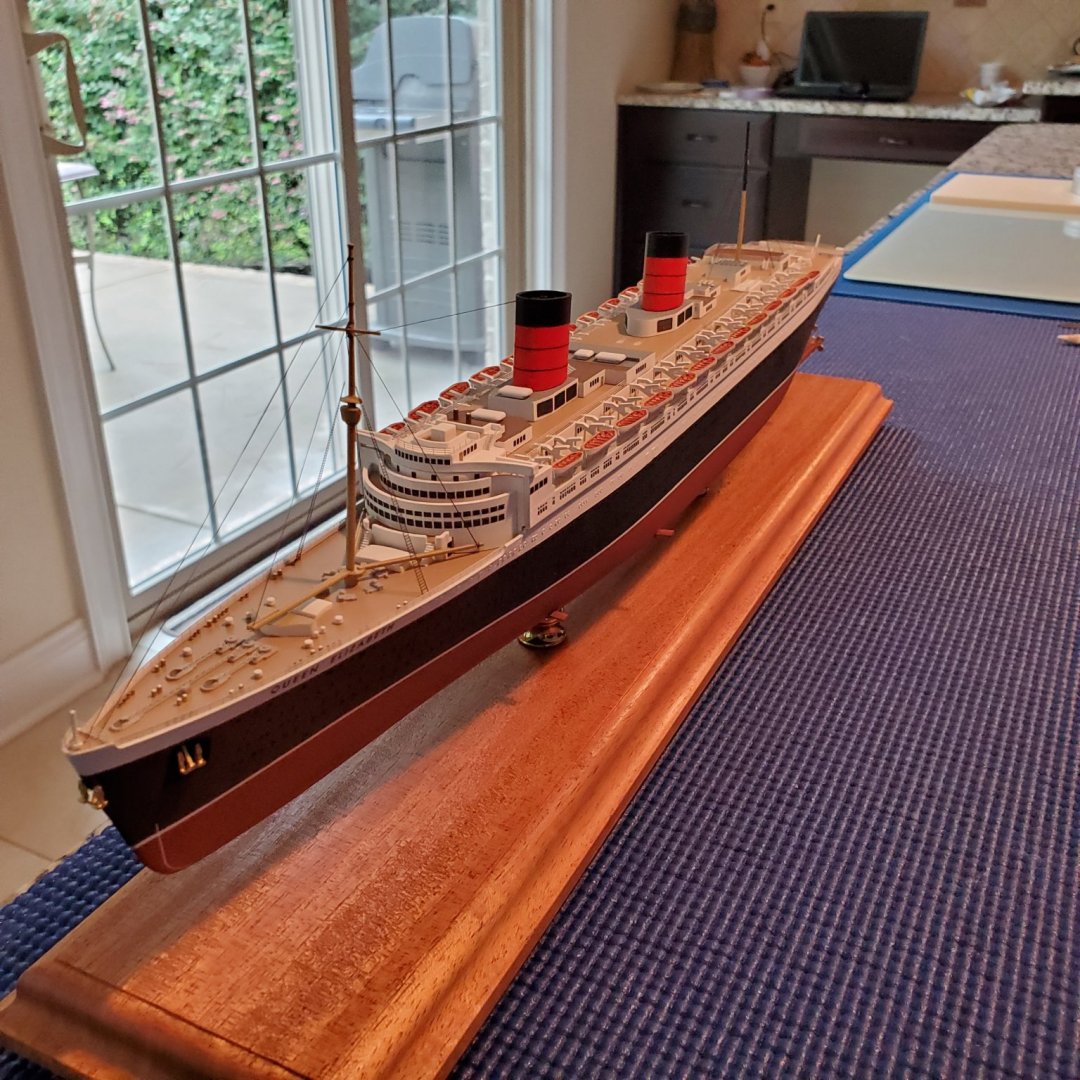
Thanks so much for your kind words. In a perfect world I would be able to finish my 1/350 Lusitania that is half built but unfortunately I have been waiting on some parts I need for a few months. I don't think I am going to build the 1/200 Titanic in the near future. In all honesty I really enjoyed this 1/600 and I think I may build several more of the kits I have in that scale. I am leaning towards either an Airfix 1/600 RMS QE2 or a Revell 1/570 RMS Queen Mary.
- 28 replies
-
- 4
-
-
- airfix
- queen elizabeth
- (and 2 more)
-
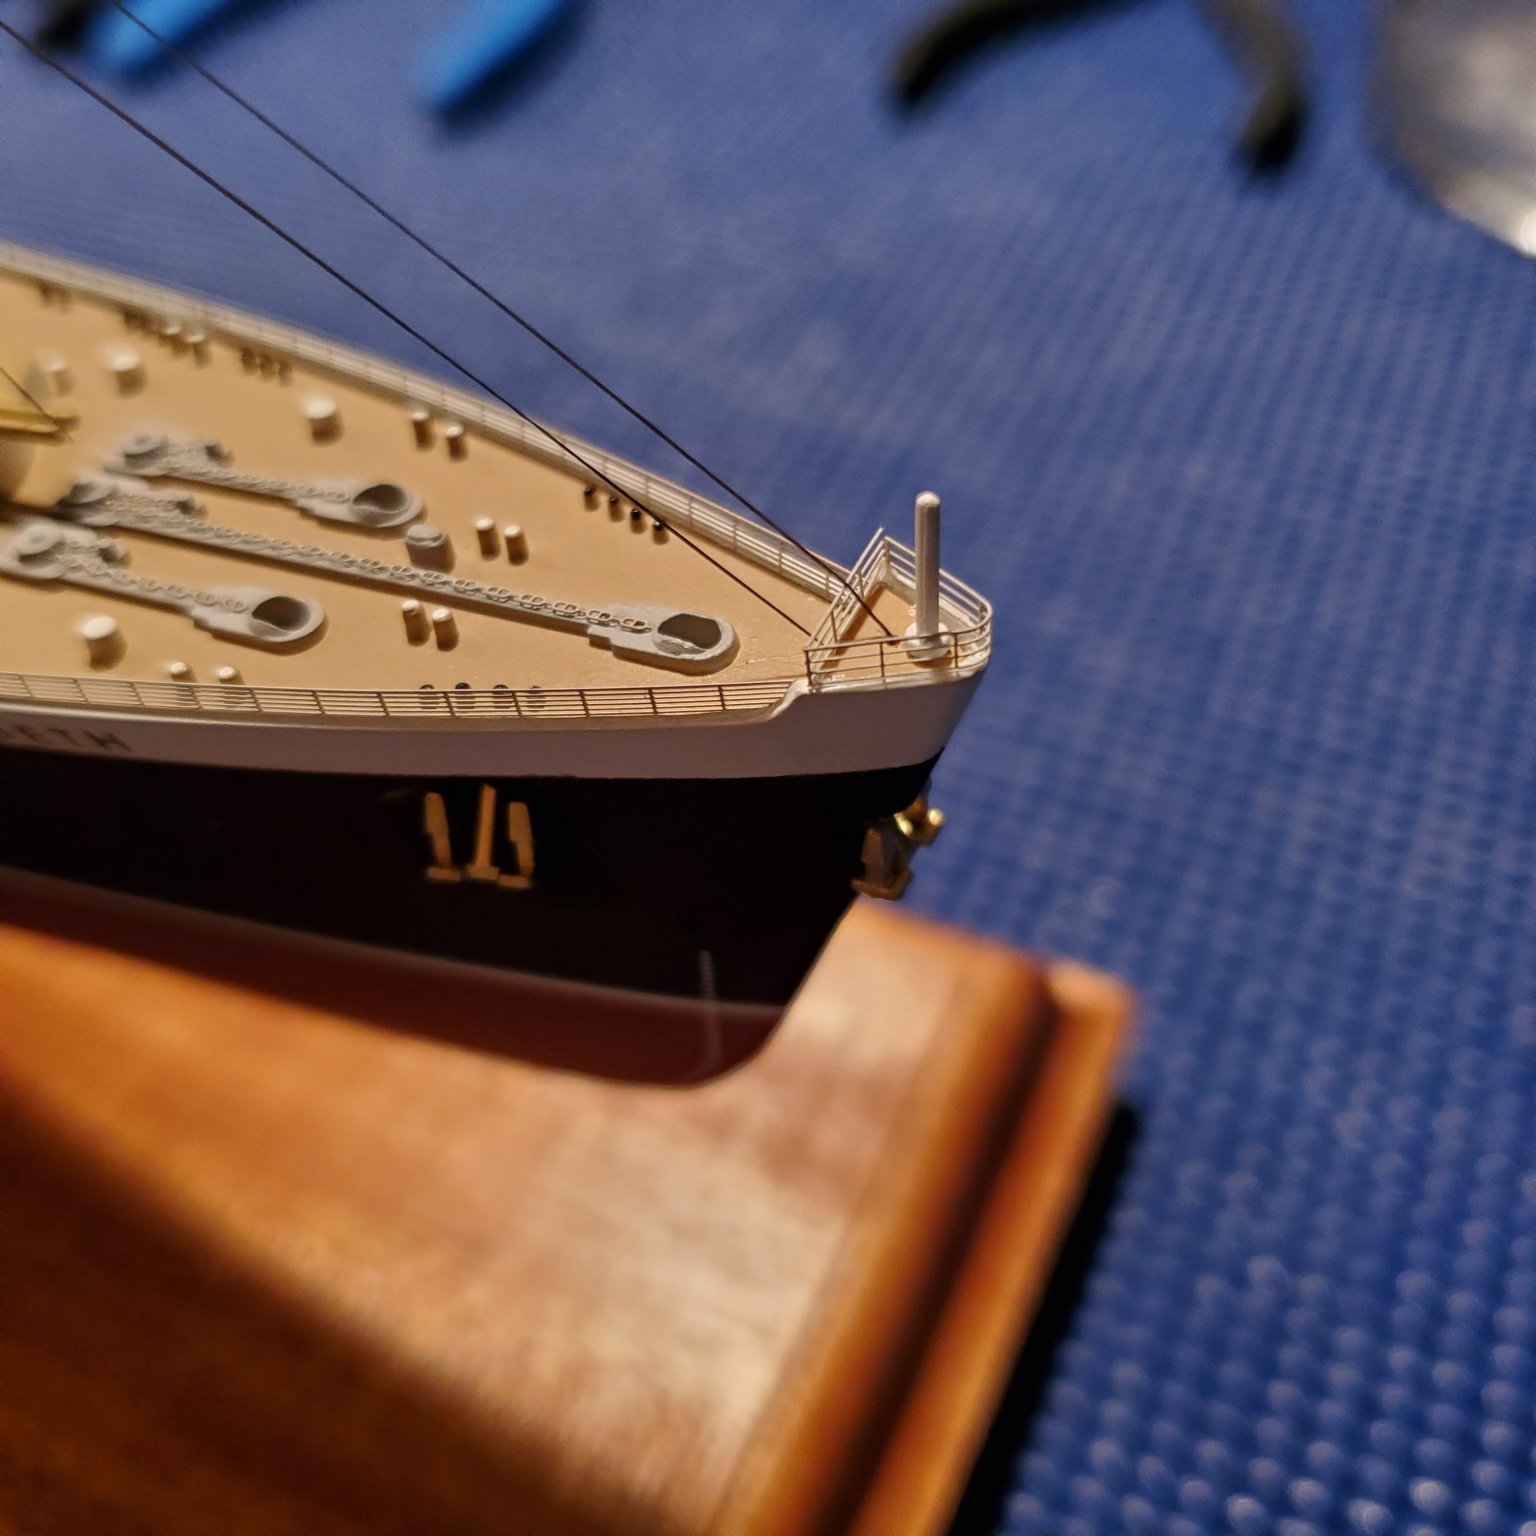
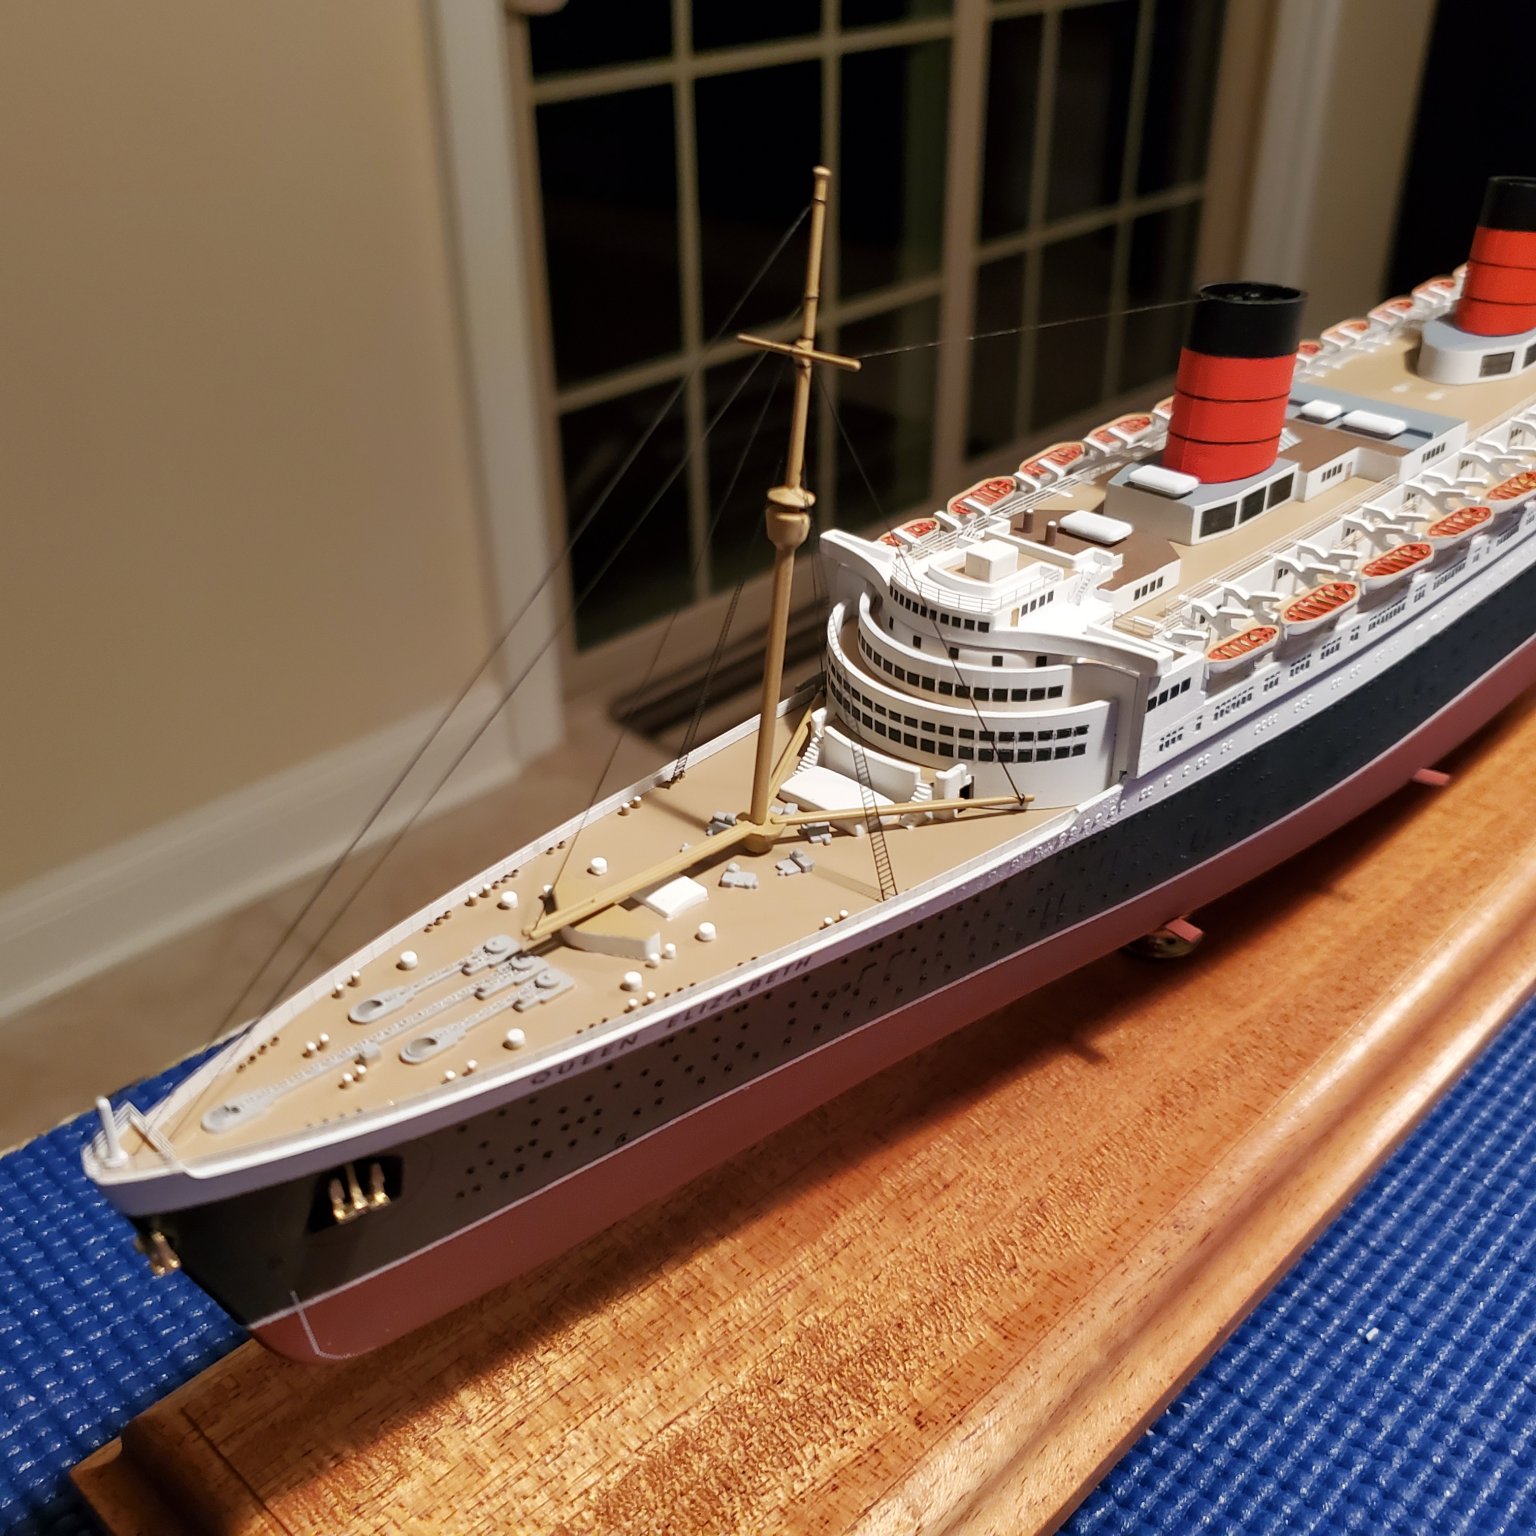
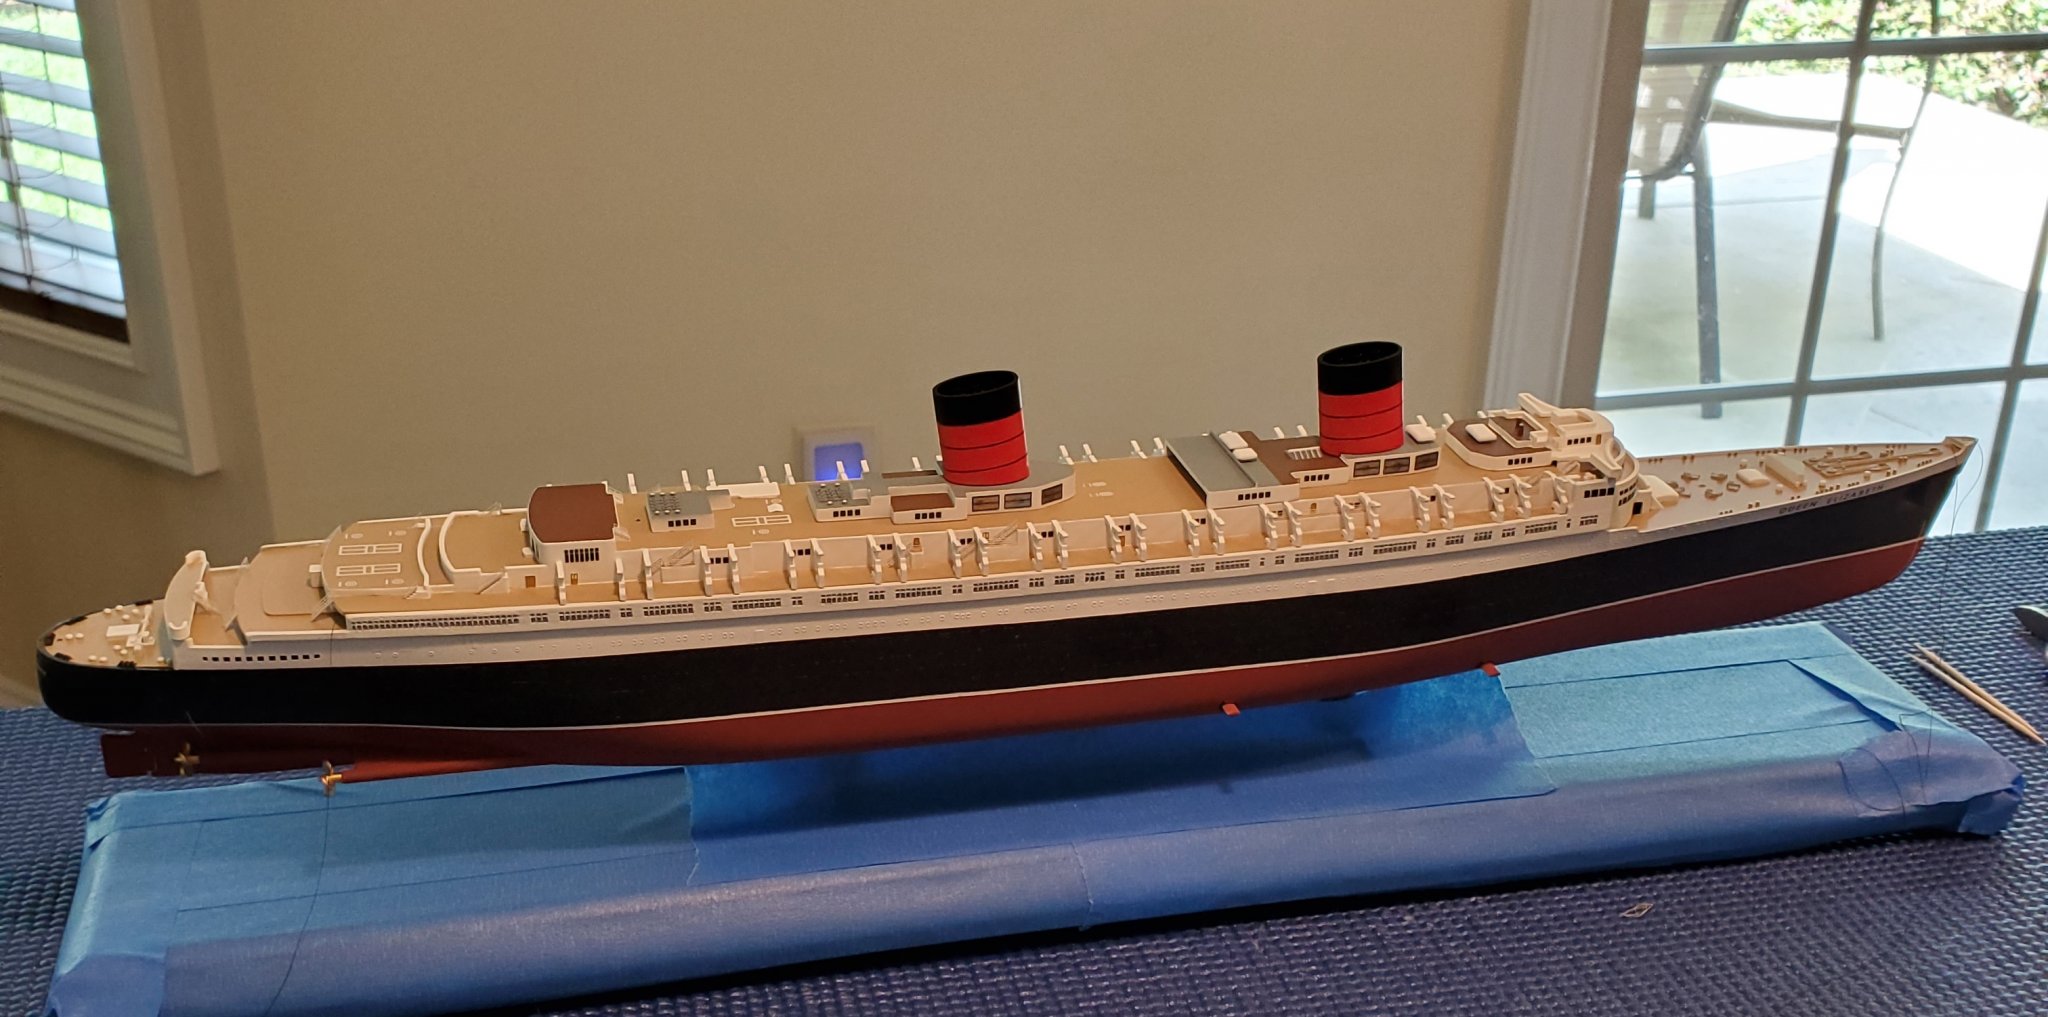
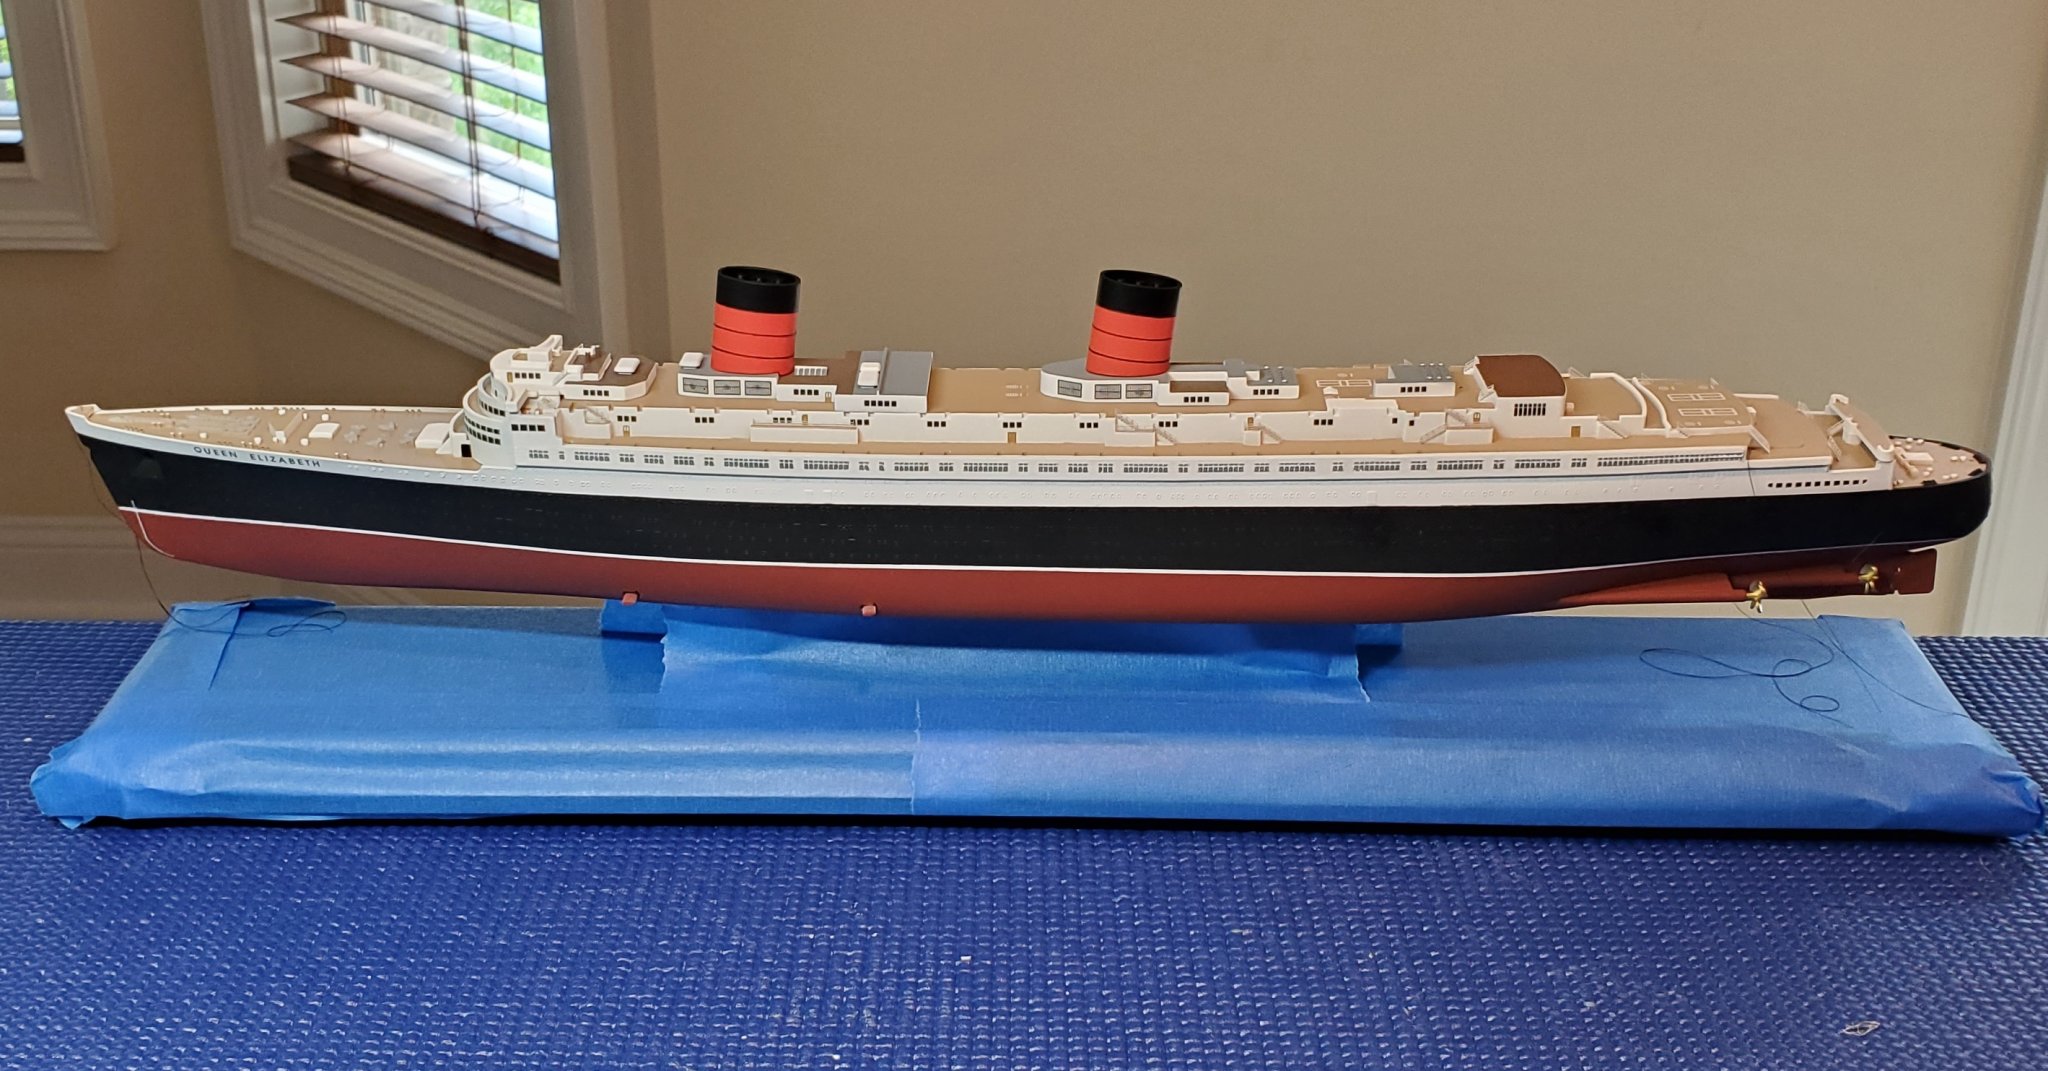
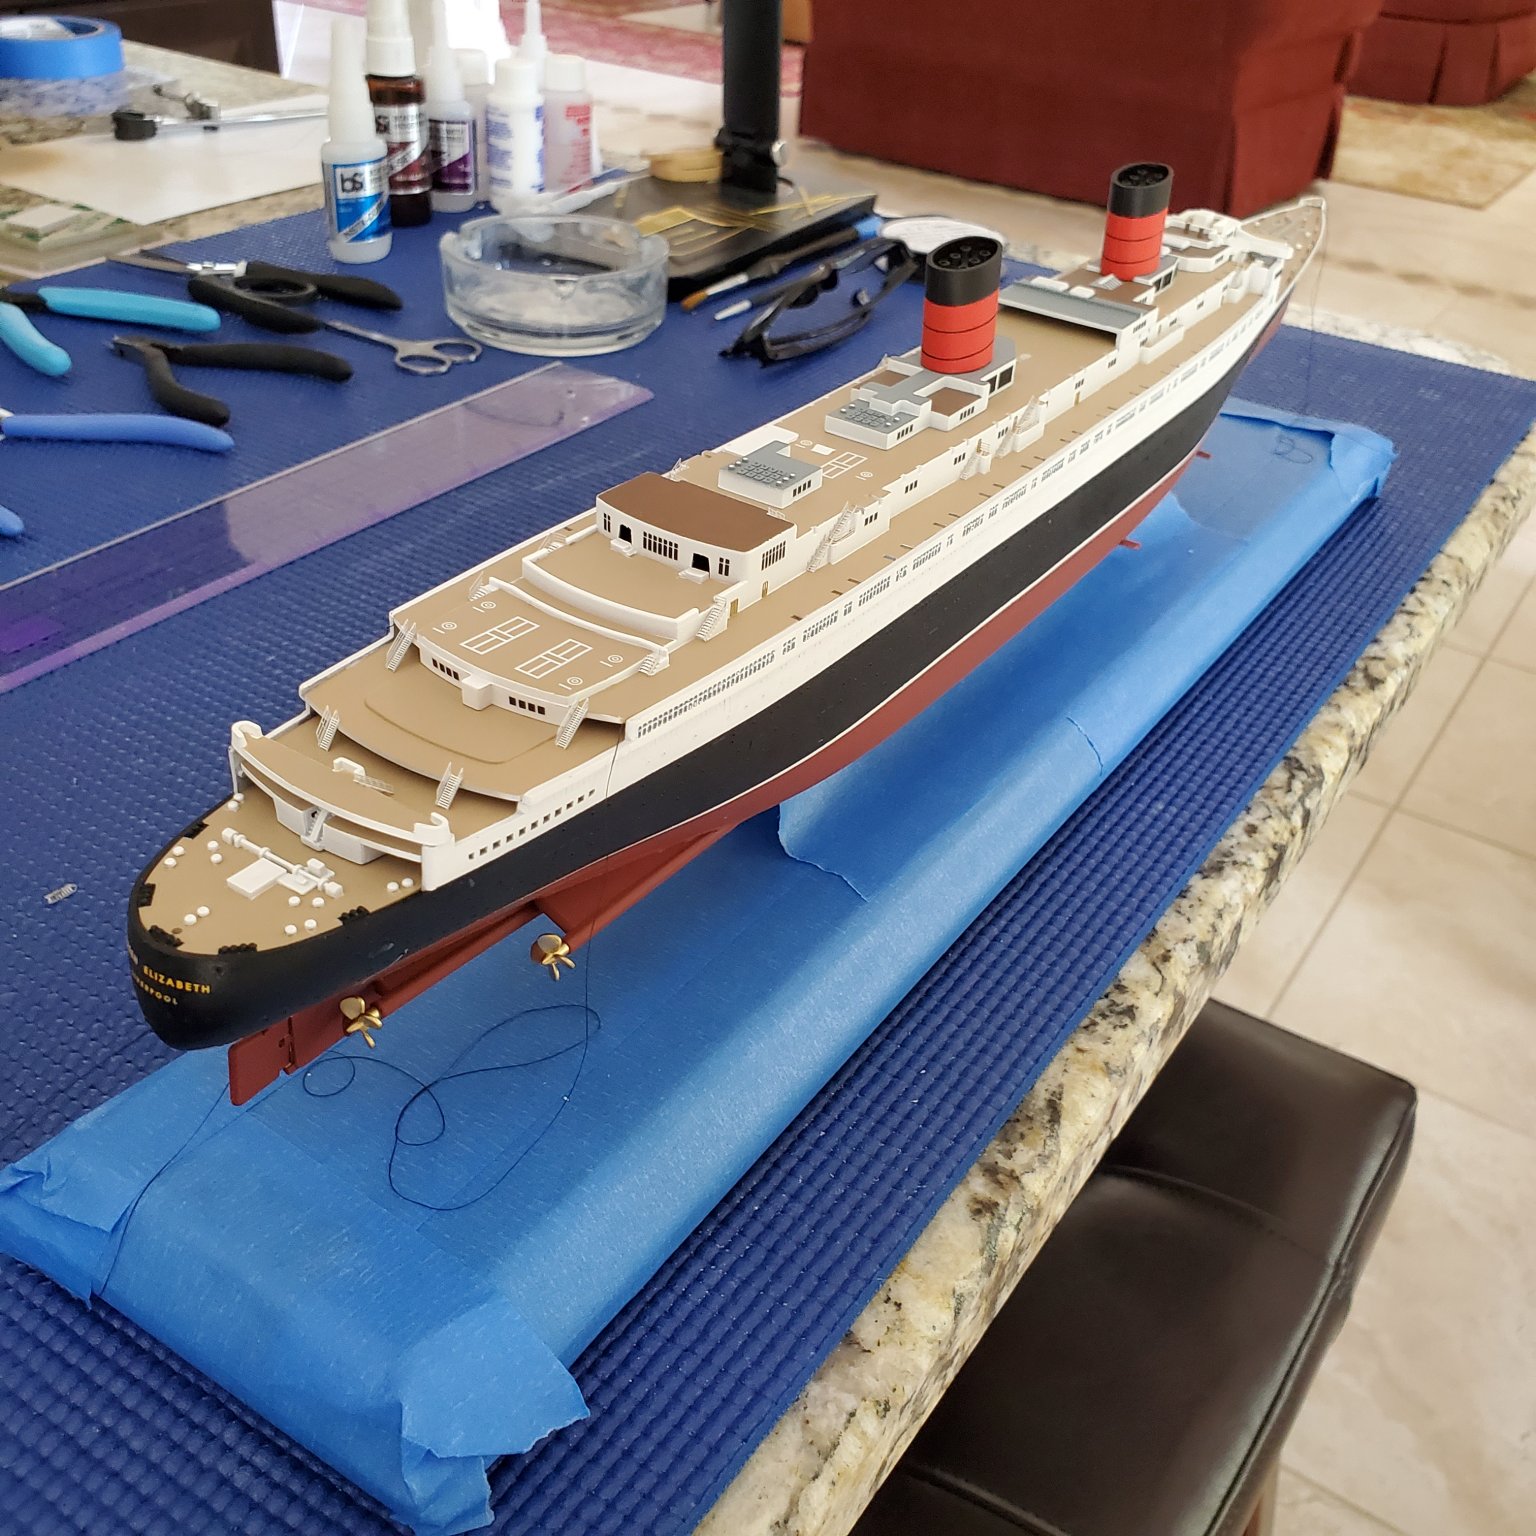
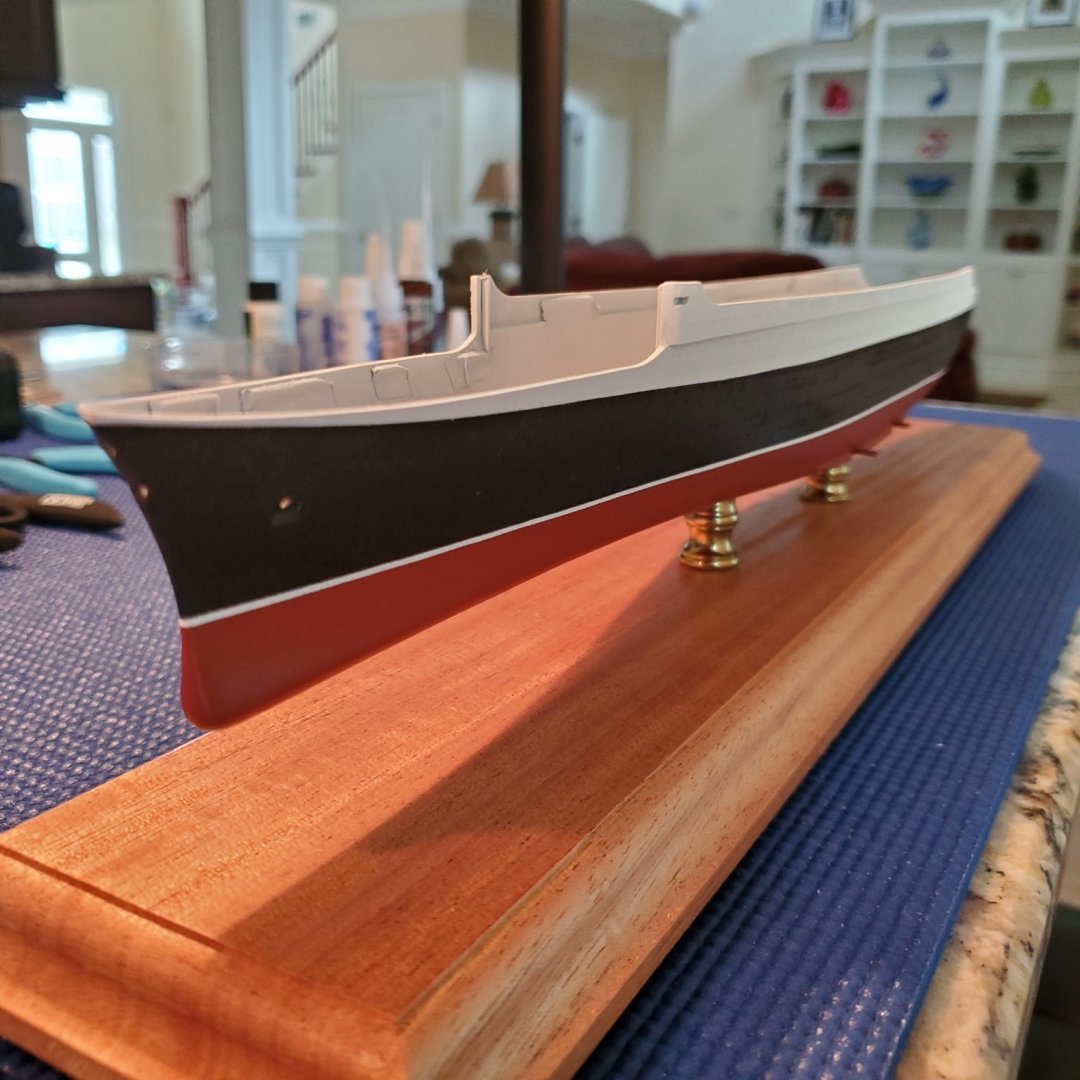
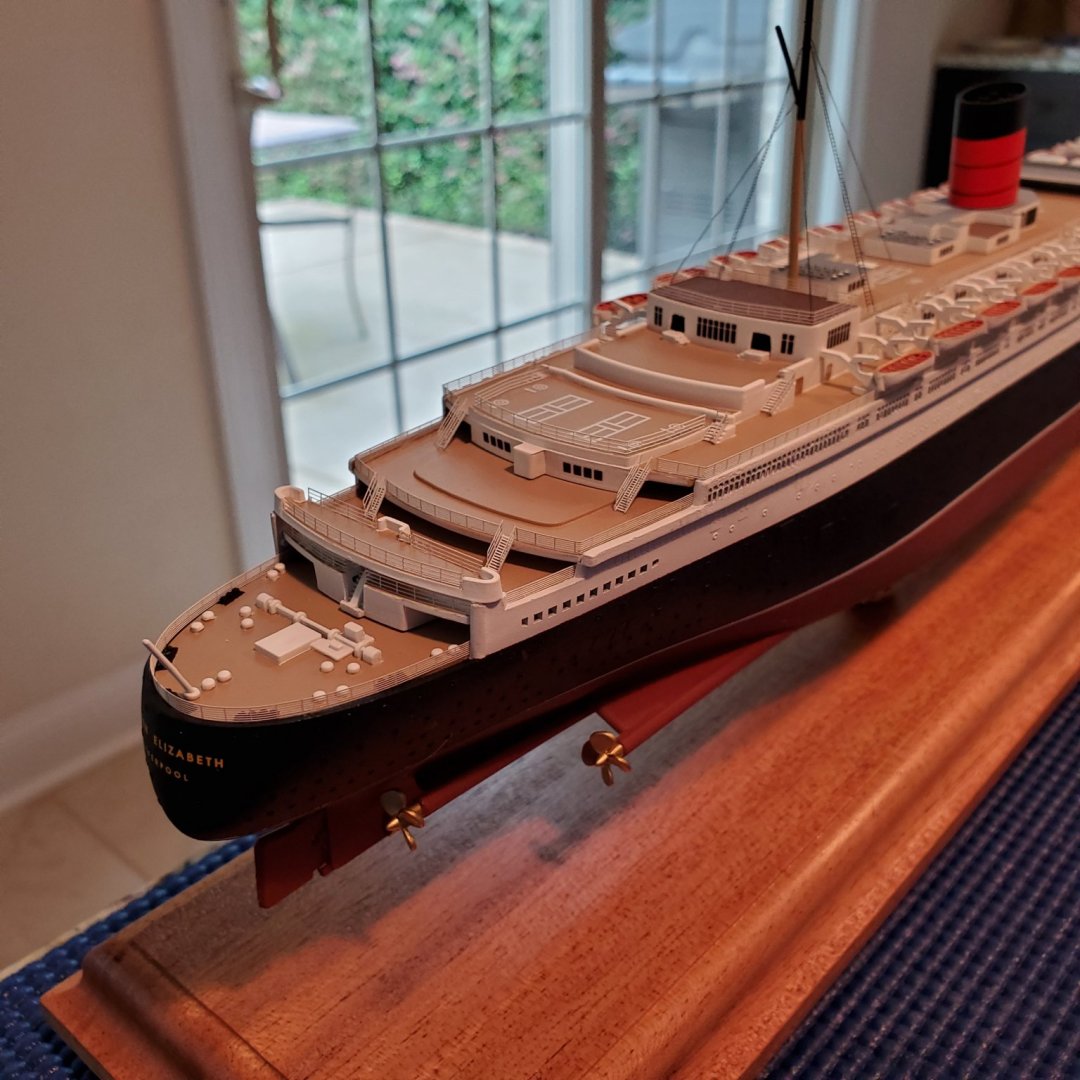
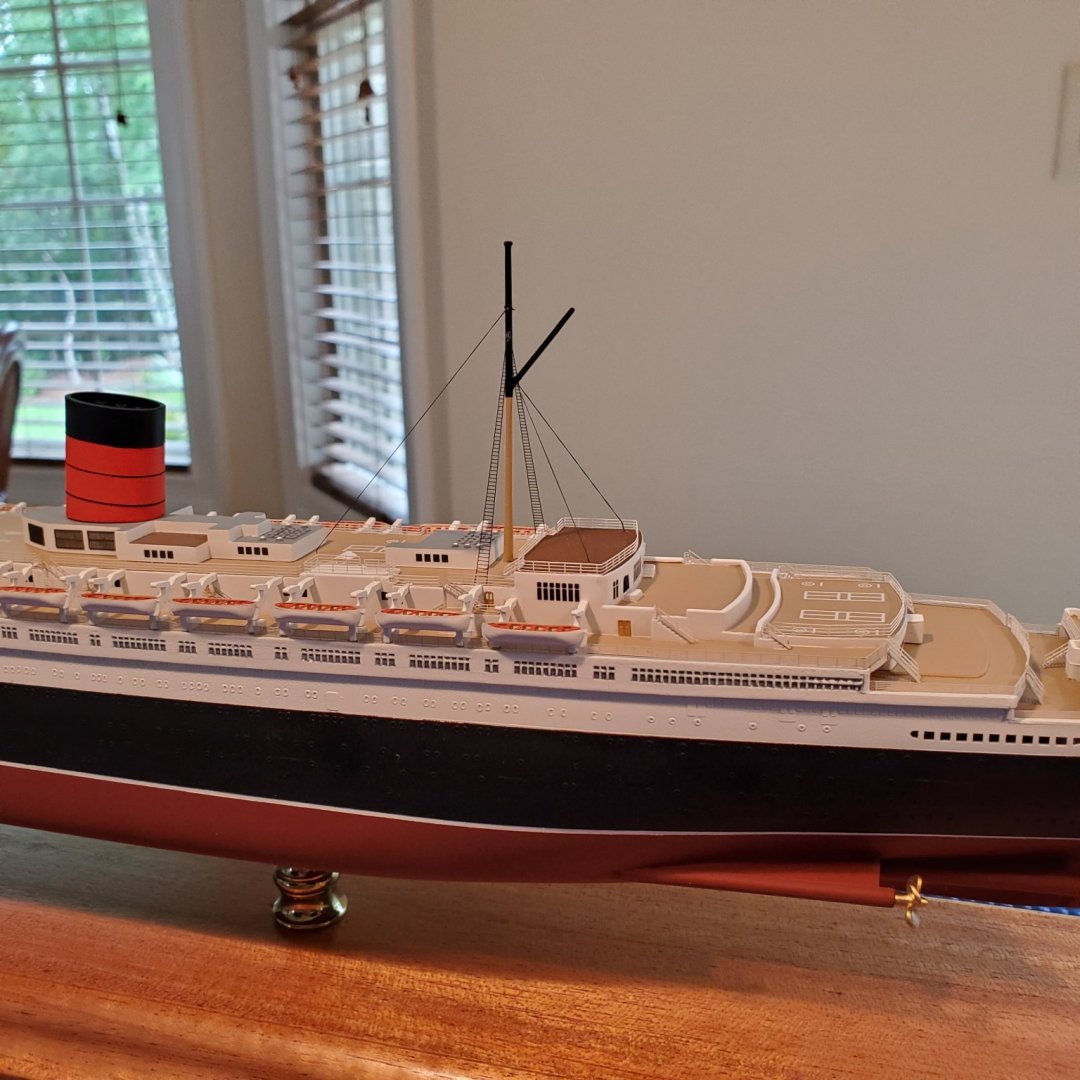
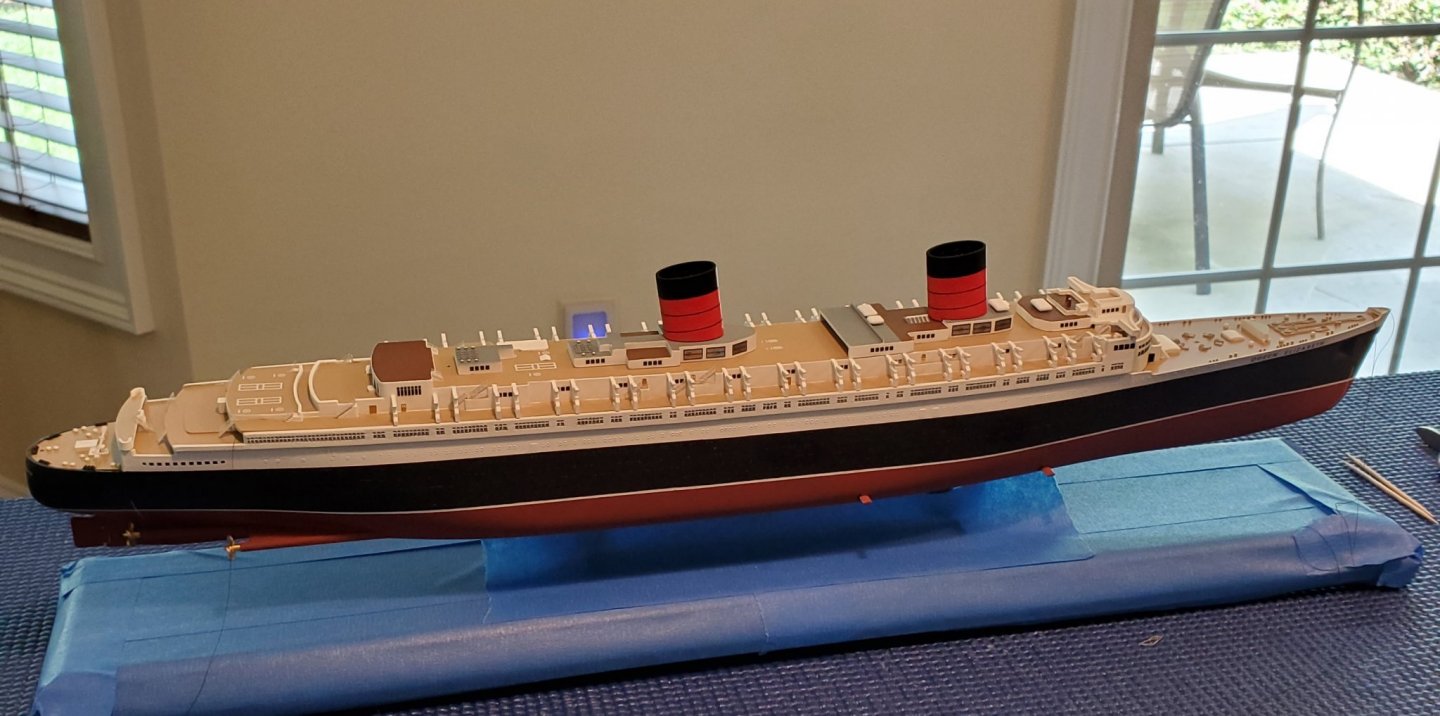
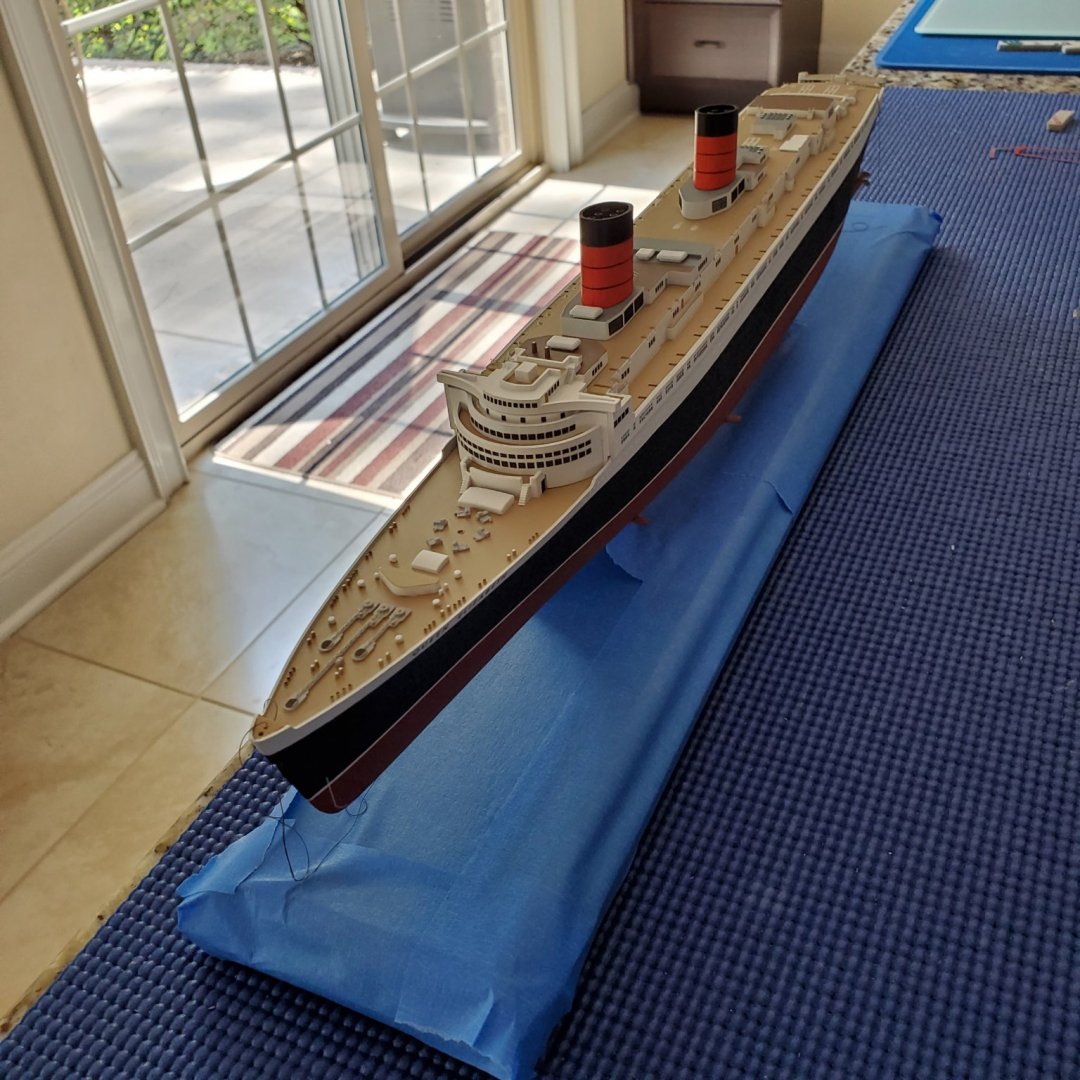
1/600 Queen Elizabeth is done. I finished up the stern area this morning. That's a wrap. Thanks for all the interest and comments.
- 28 replies
-
- 7
-
-
- airfix
- queen elizabeth
- (and 2 more)
-
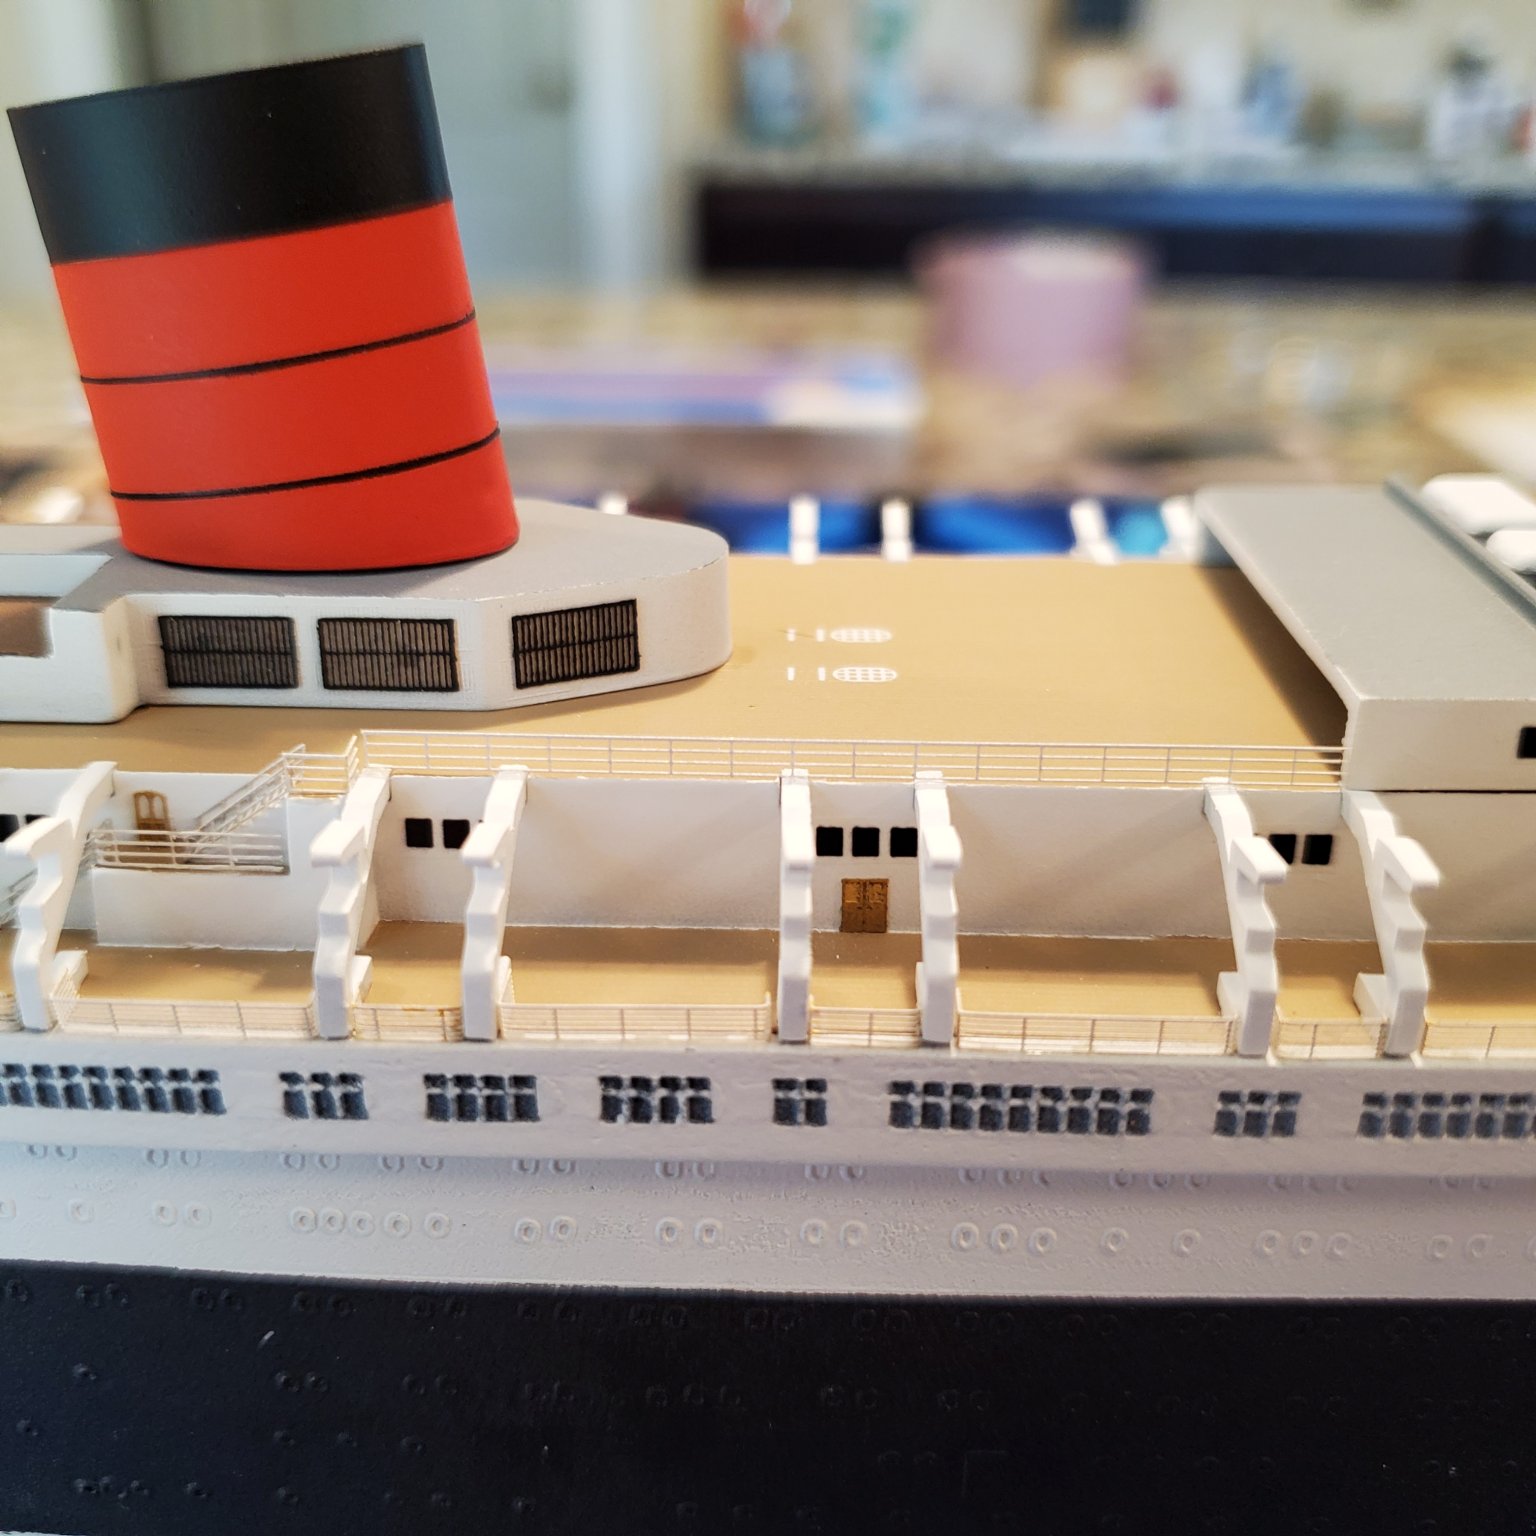
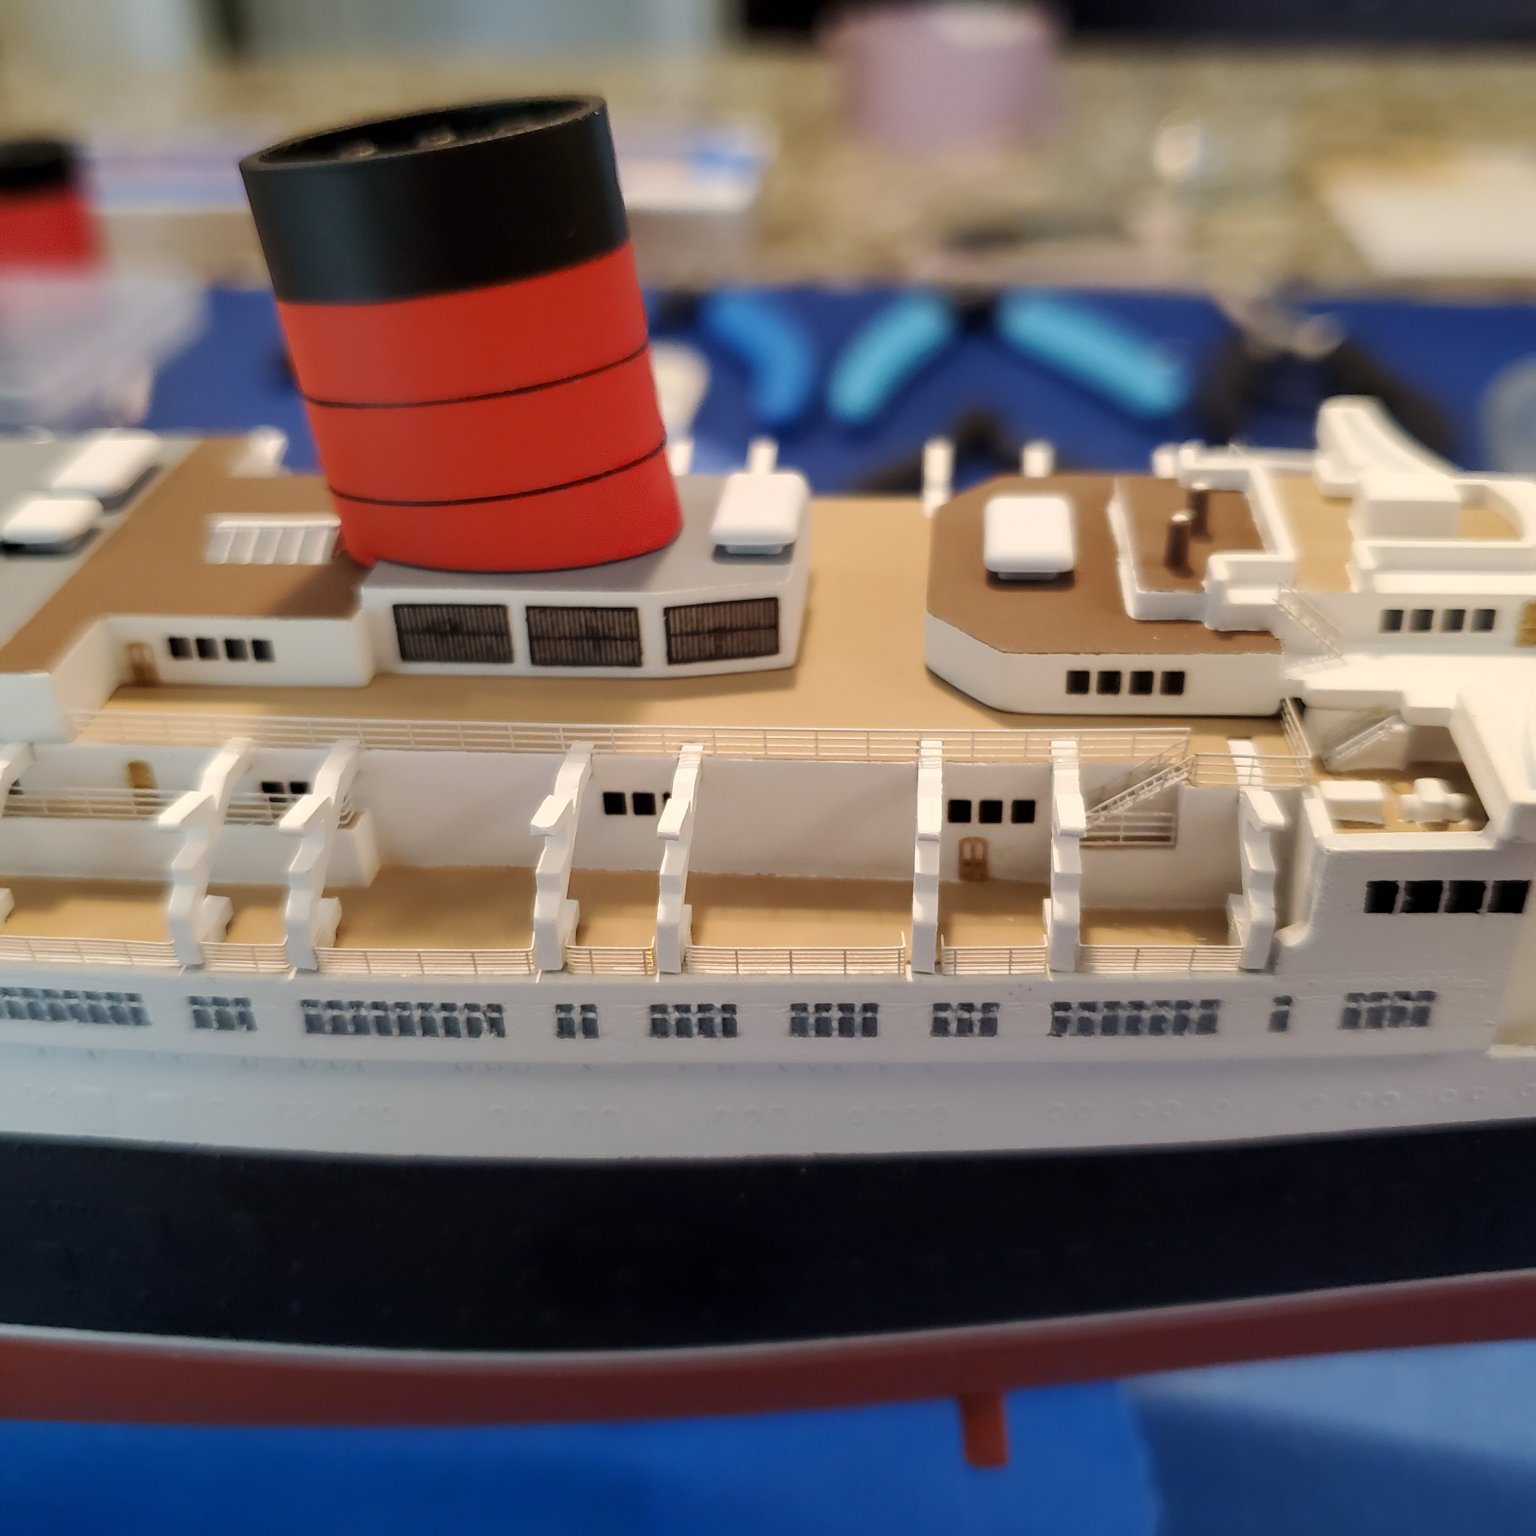
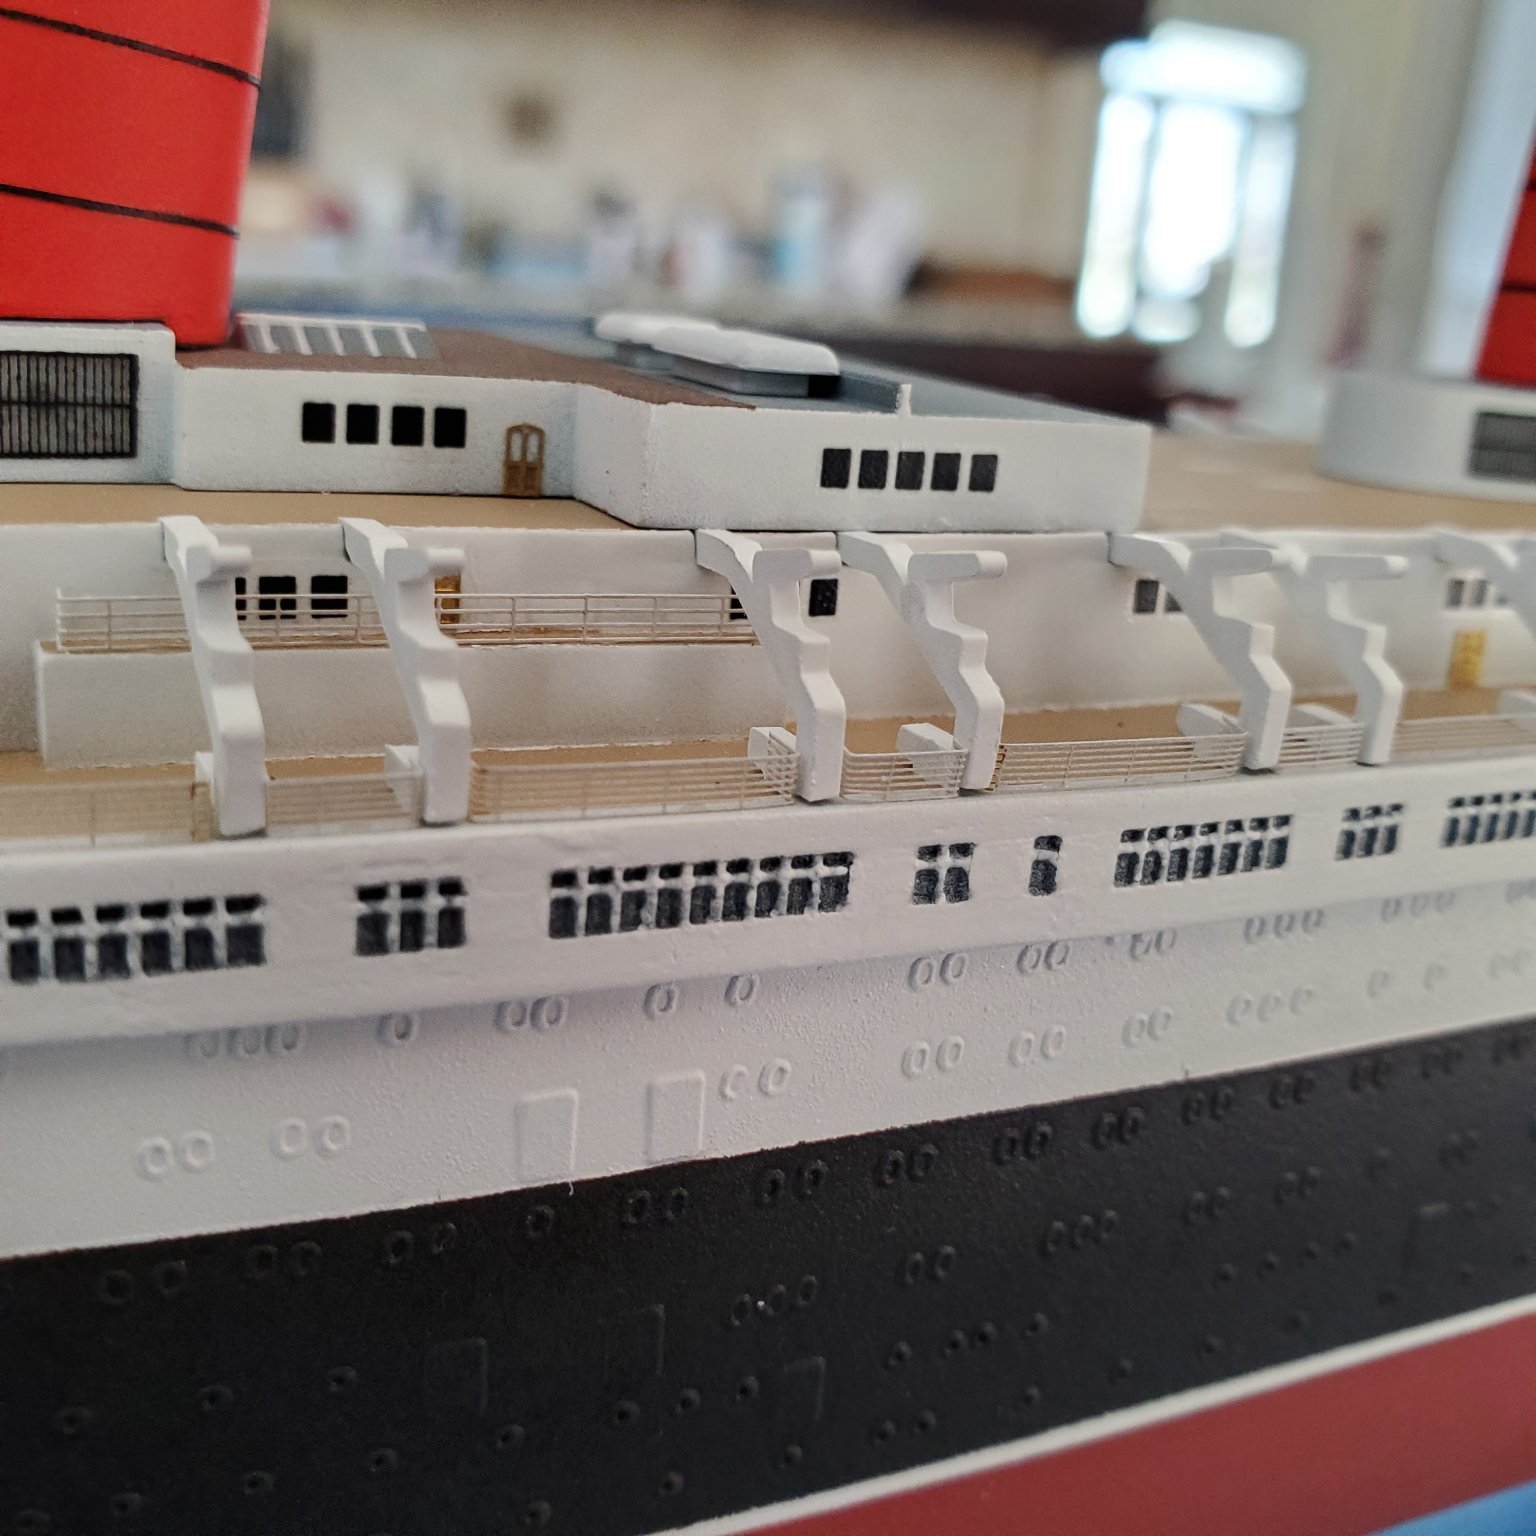
Thanks. I think I am just going to leave it alone. It is only the railing around the brown area in the photo. My intention was to just tack a corner down then slightly pull the rear of the railing into a slight curve. Instead I grabbed the super thin CA as opposed to the thicker stuff and it immediately wicked under and welded the whole thing in place. It's not too bad, unfortunately it has the darkest color under it that's on the ship and shows itself. To tell you the truth the camera highlights everything, in life you don't even see most of the railings. At least at 57 I don't lol!
- 28 replies
-
- 5
-
-
- airfix
- queen elizabeth
- (and 2 more)
-
Almost done on my 1/600 Queen Elizabeth. I think if all goes well I will finish her off tomorrow. I installed all the railings on the forecastle and its little platform, the bridge railings, the forward mast and ratlines, some rigging, and the anchors. Tomorrow I will finish up the main mast, rear ratlines and rigging, and a few more railings at the stern. Then it will be onto something else, maybe a Queen Mary.


- 28 replies
-
- 3
-
-
- airfix
- queen elizabeth
- (and 2 more)
-
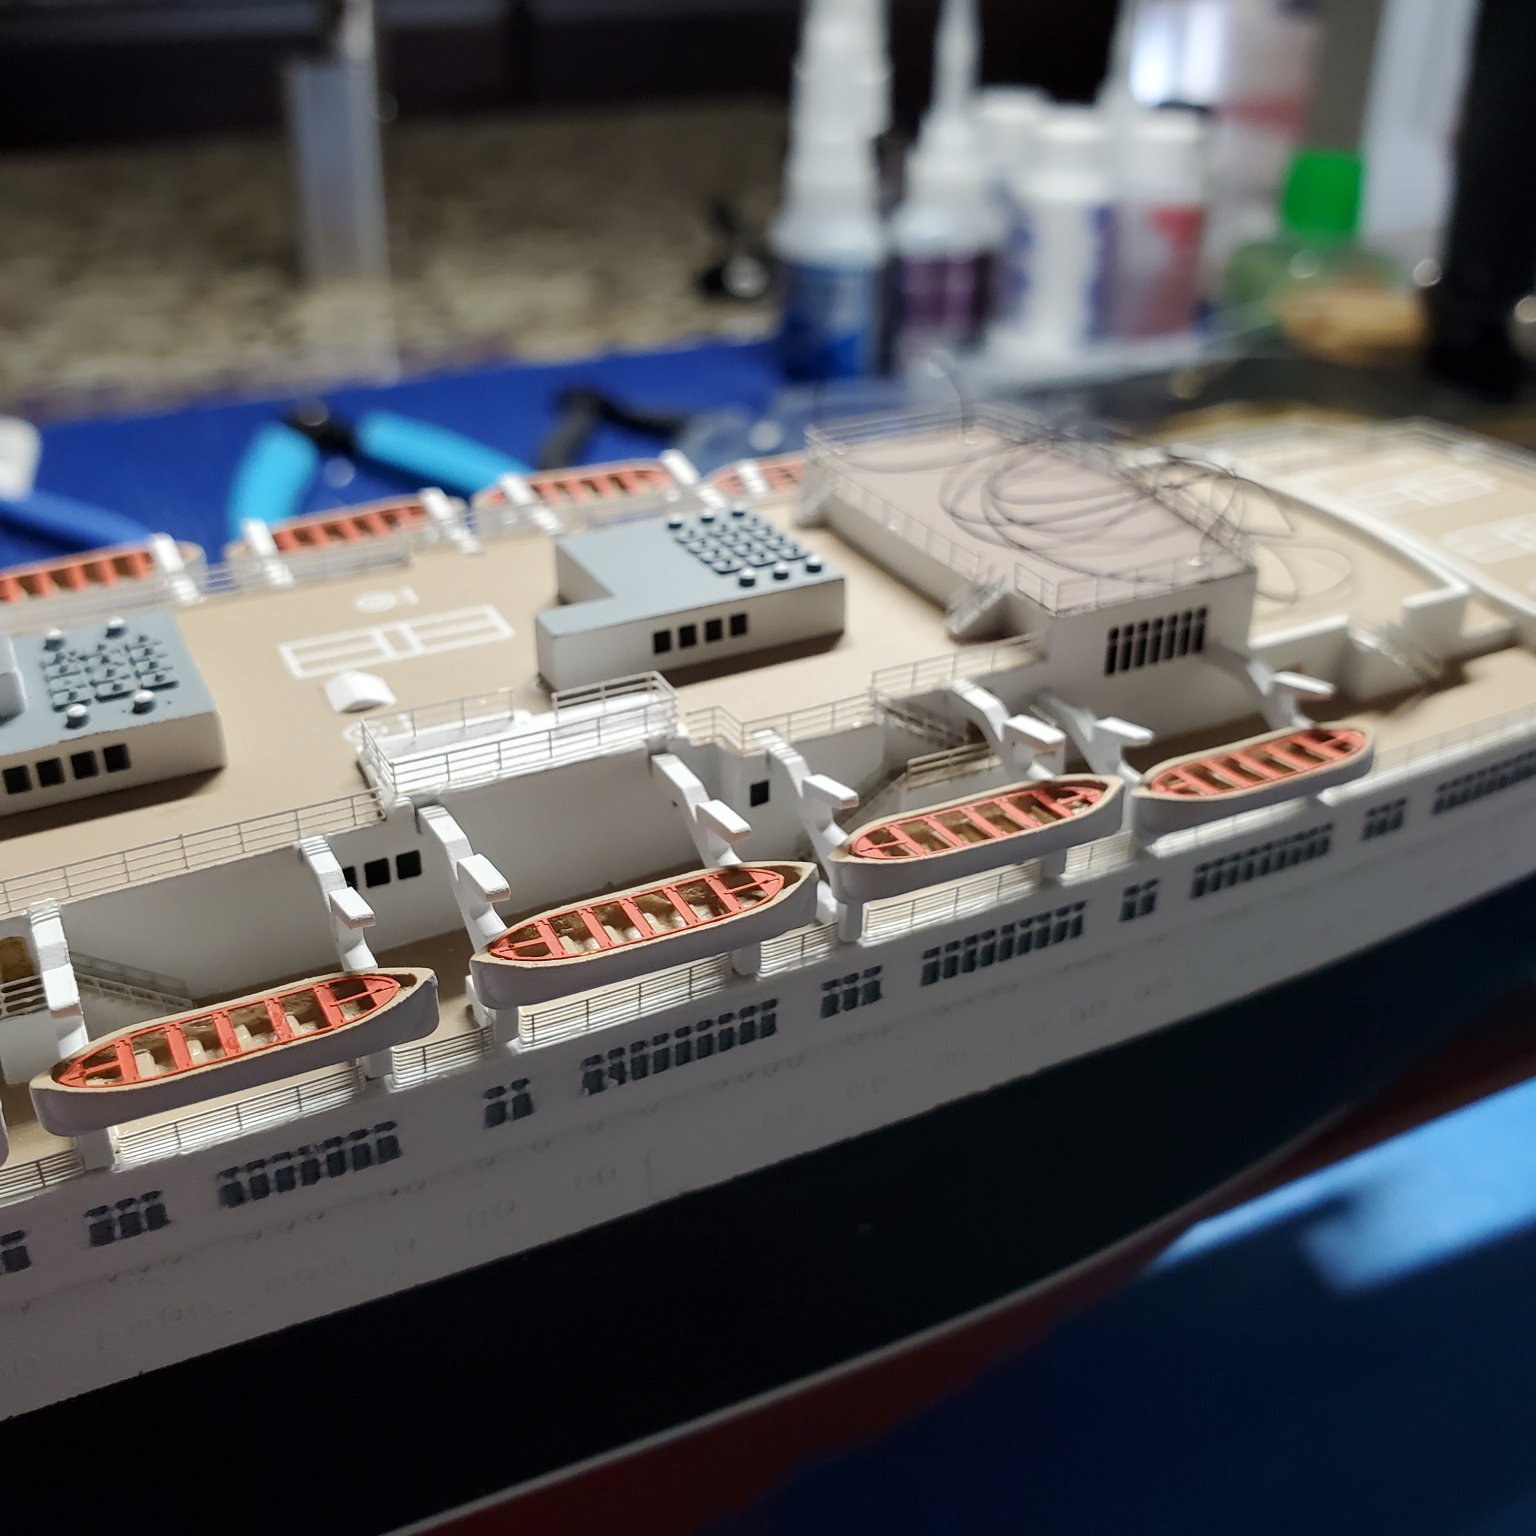
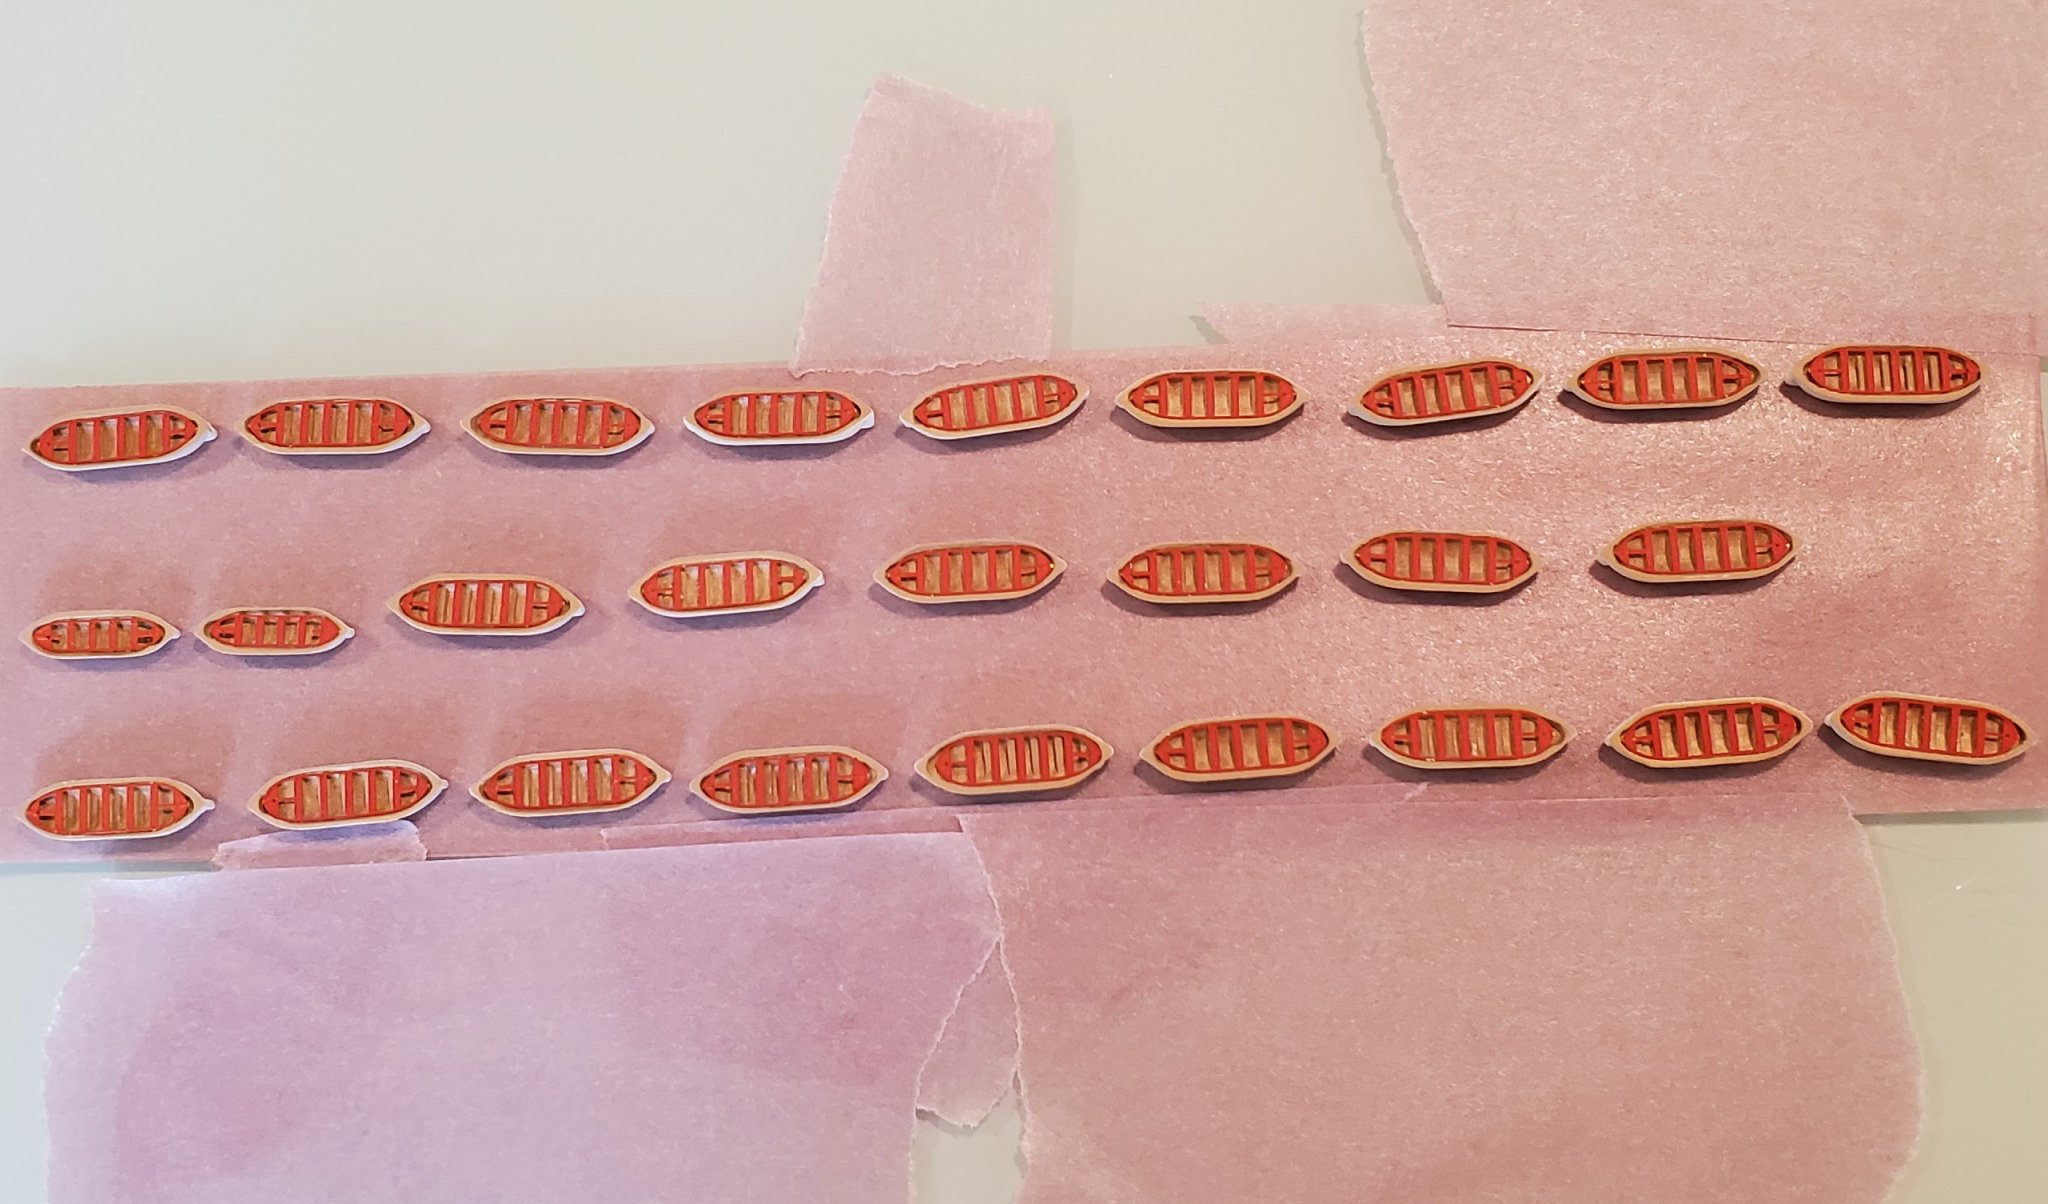
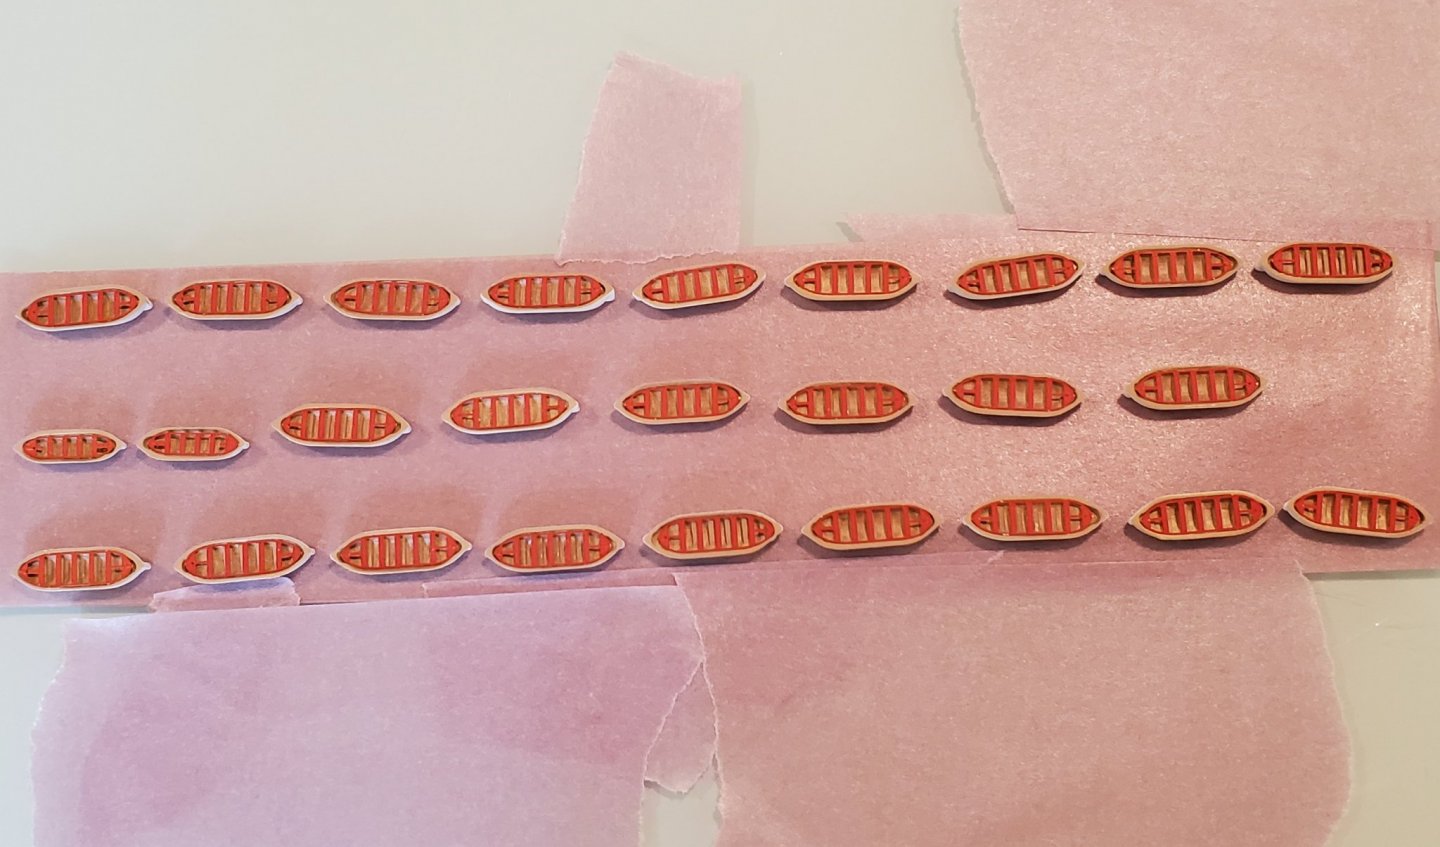
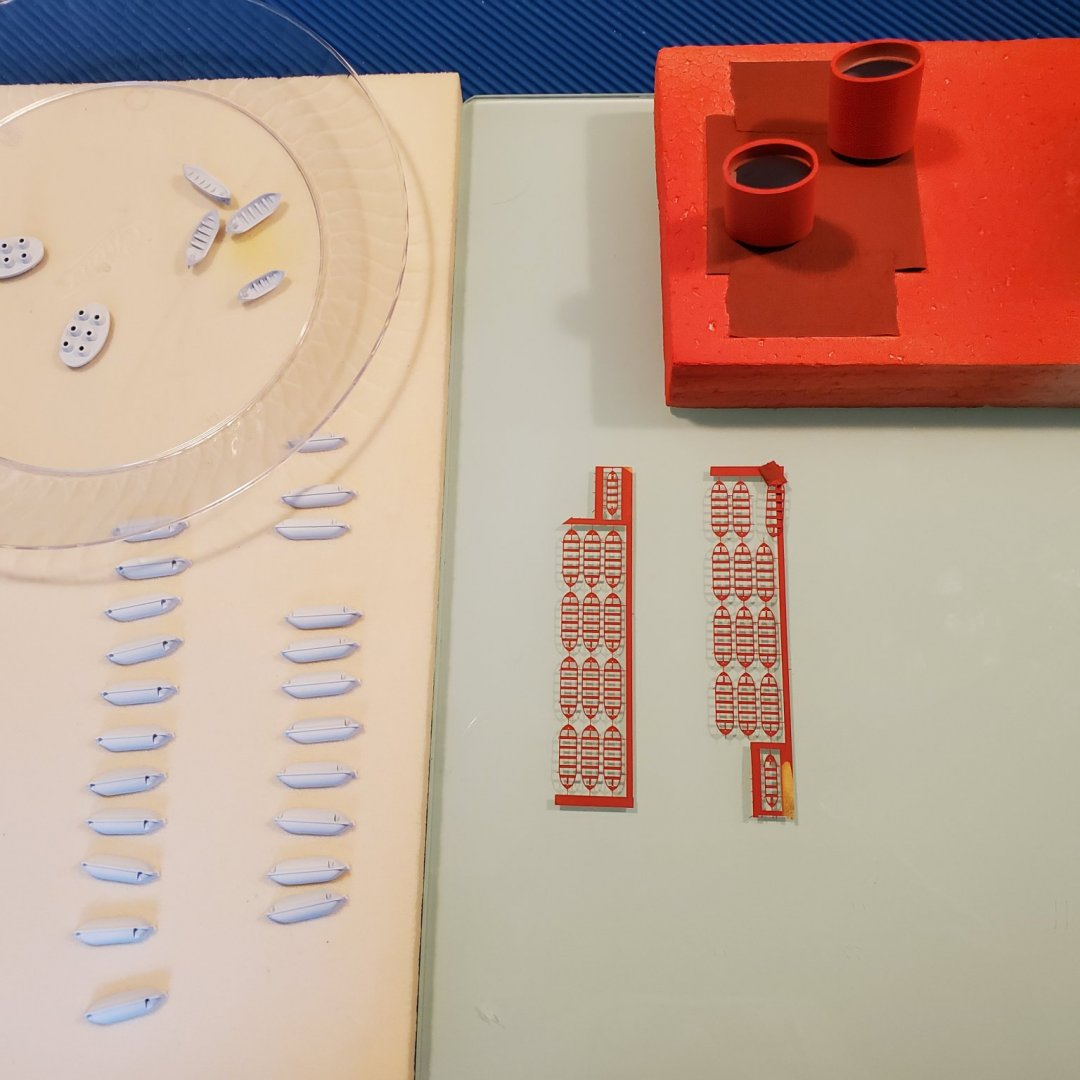
Thanks a lot Louie da fly. I installed the lifeboats and added more railings. The boats really don't fit very well on the davits but they are now attached. I also had the top most section of railing around the brown area get stuck in a position I didn't want....I hate CA glue for that reason. It will have to stay that way as it's never coming off lol. She is almost done. Another couple of days for a few more railings, masts, ratlines, and 4 or 5 pieces of rigging and I'm gonna call it done.

- 28 replies
-
- 3
-
-
- airfix
- queen elizabeth
- (and 2 more)
-
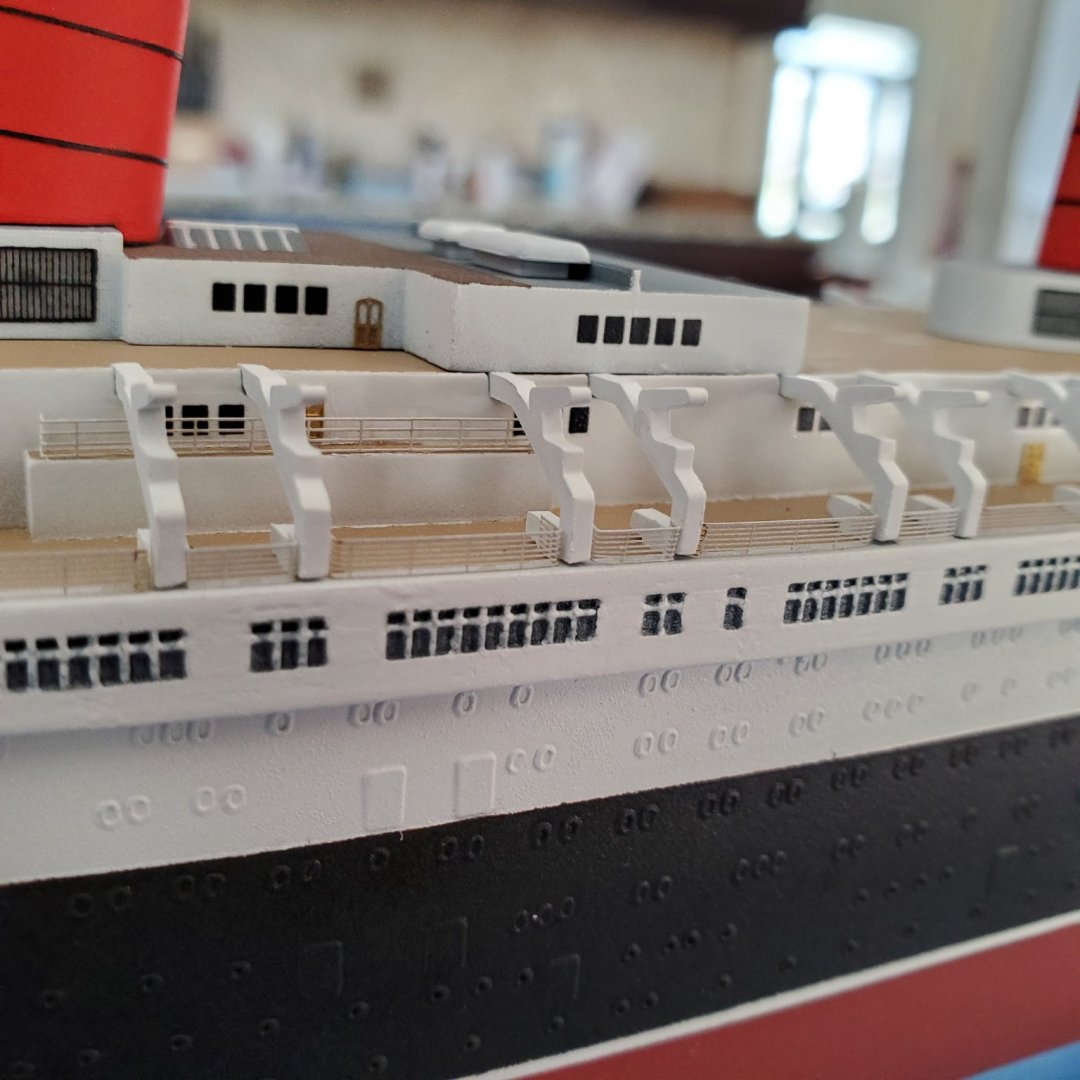
More railings on Queen Elizabeth. I am finding that these 1/600 railings are a lot harder to do than 1/350! Tedious for sure and difficult to see and place. If you're standing 2 feet away you don't even see them. Lots more of them to do.

- 28 replies
-
- 3
-
-
- airfix
- queen elizabeth
- (and 2 more)
-
Thanks Steven. Some more progress on my 1/600 Queen Elizabeth. Davits are installed, lifeboats are finished, and I am starting to install some railings that will be easier to do now than when the lifeboats are in the way.

- 28 replies
-
- 3
-
-
- airfix
- queen elizabeth
- (and 2 more)
-
Thanks so much, that inspires me to do as nice a job of it as I can.
- 28 replies
-
- 3
-
-
- airfix
- queen elizabeth
- (and 2 more)
-
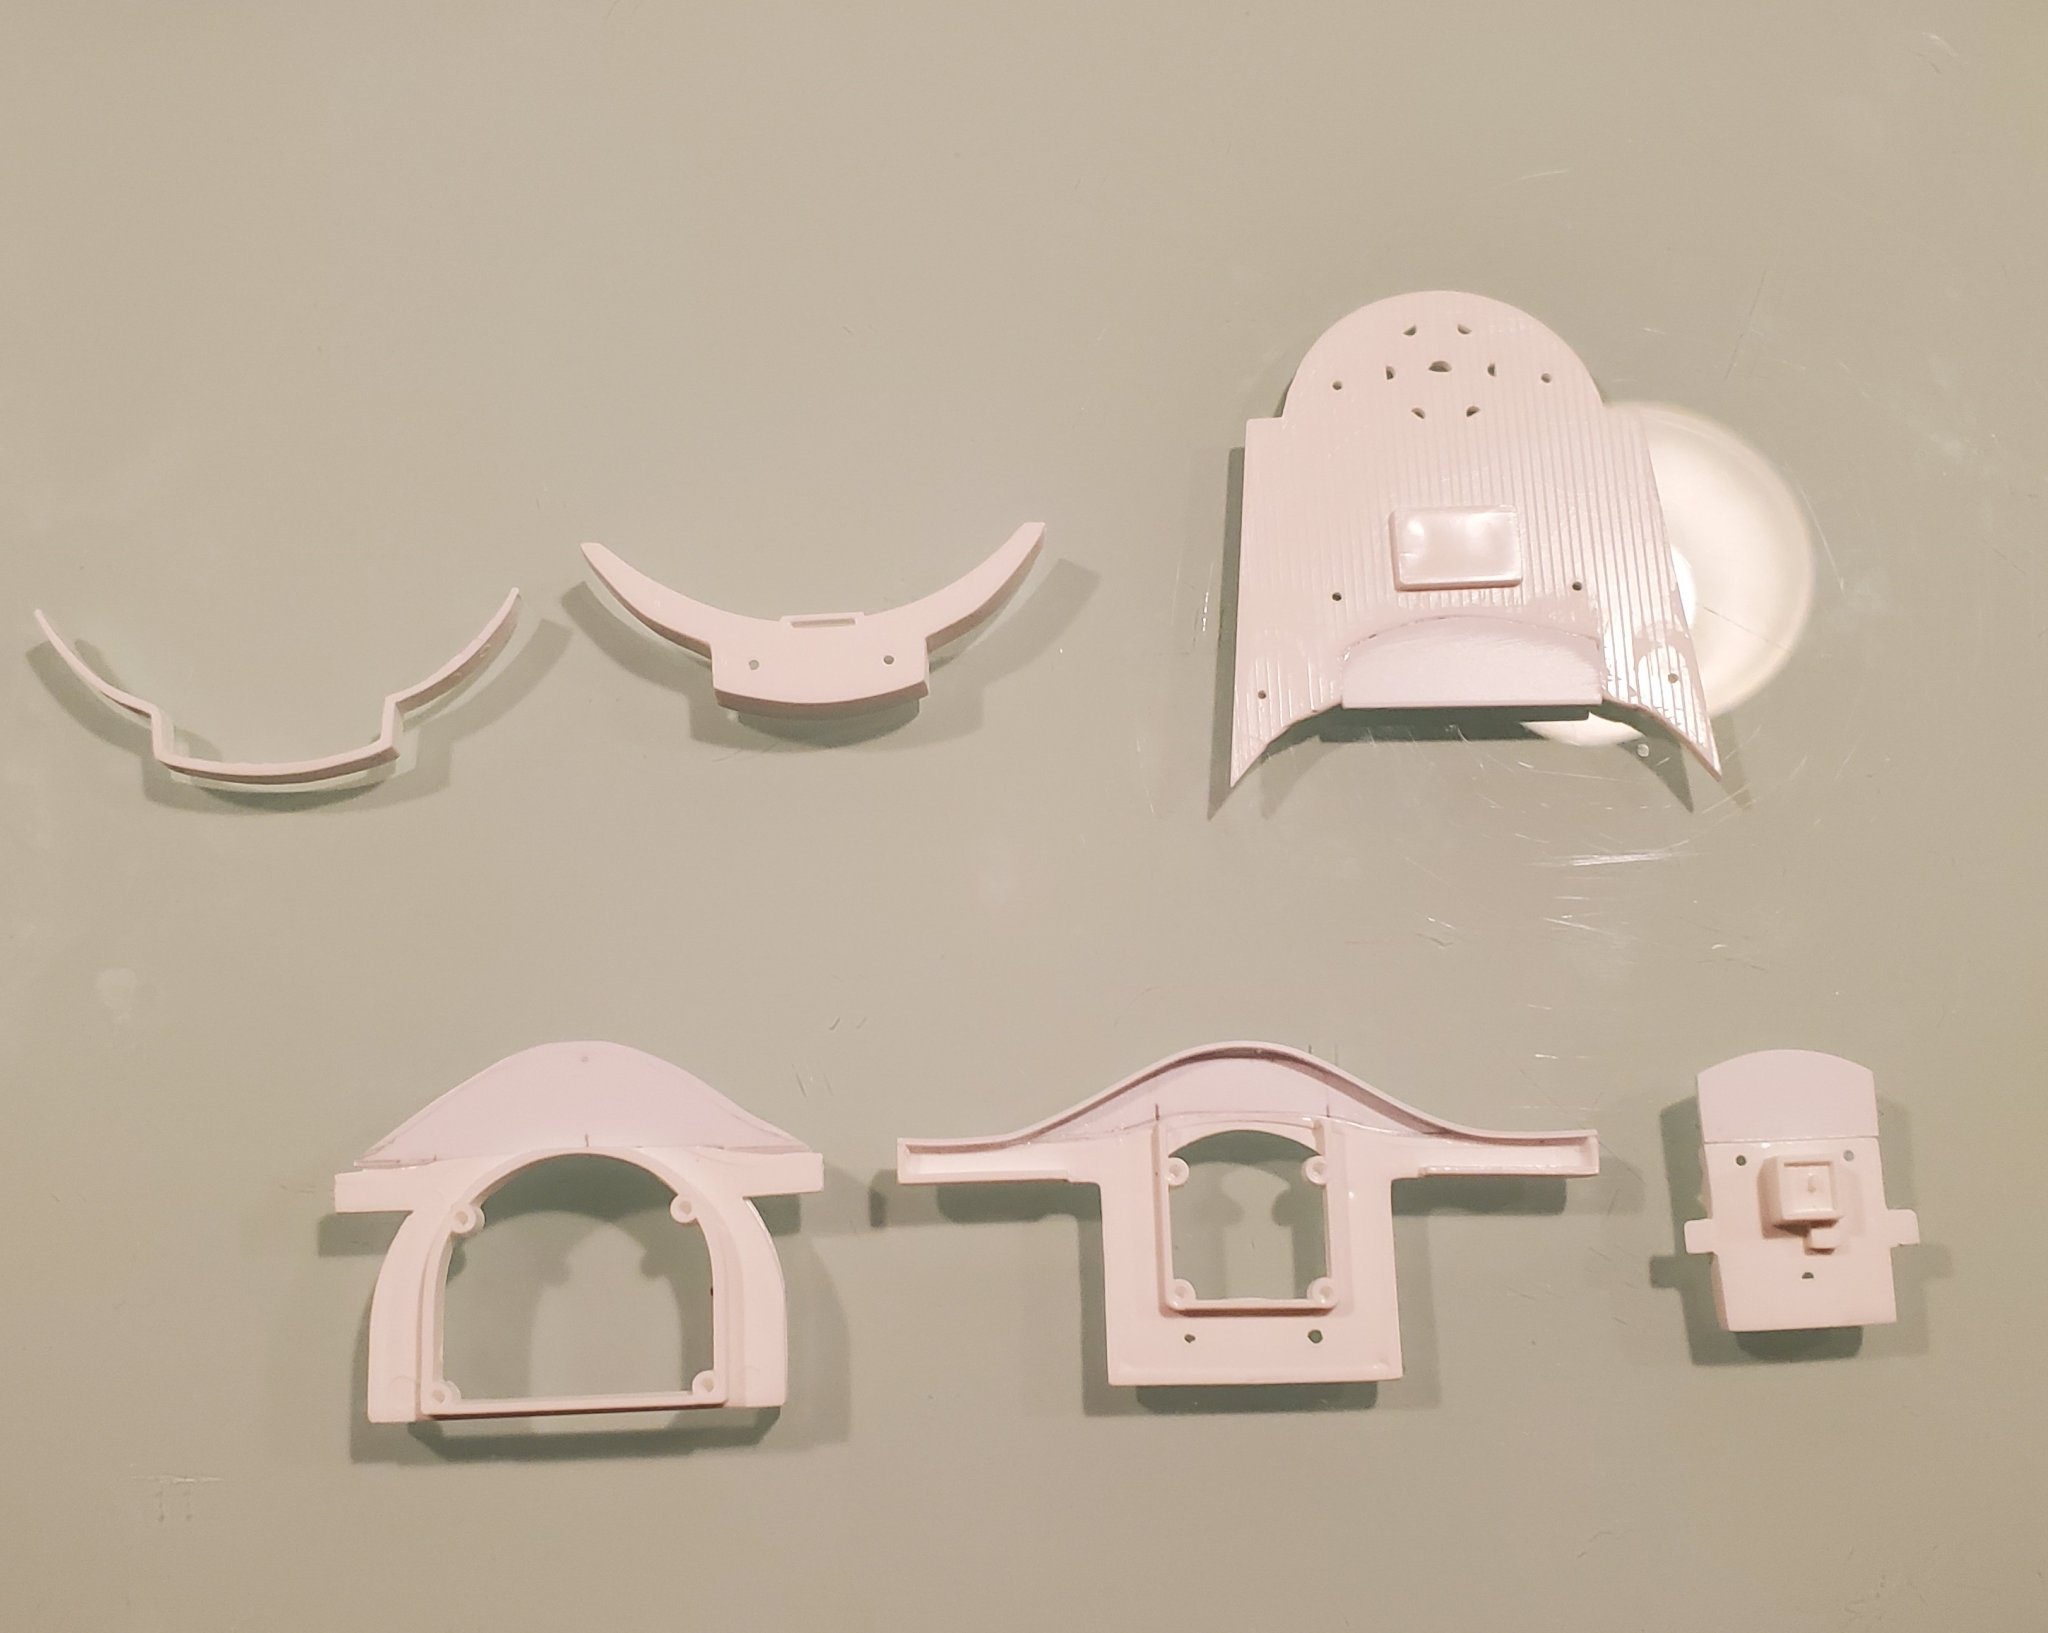
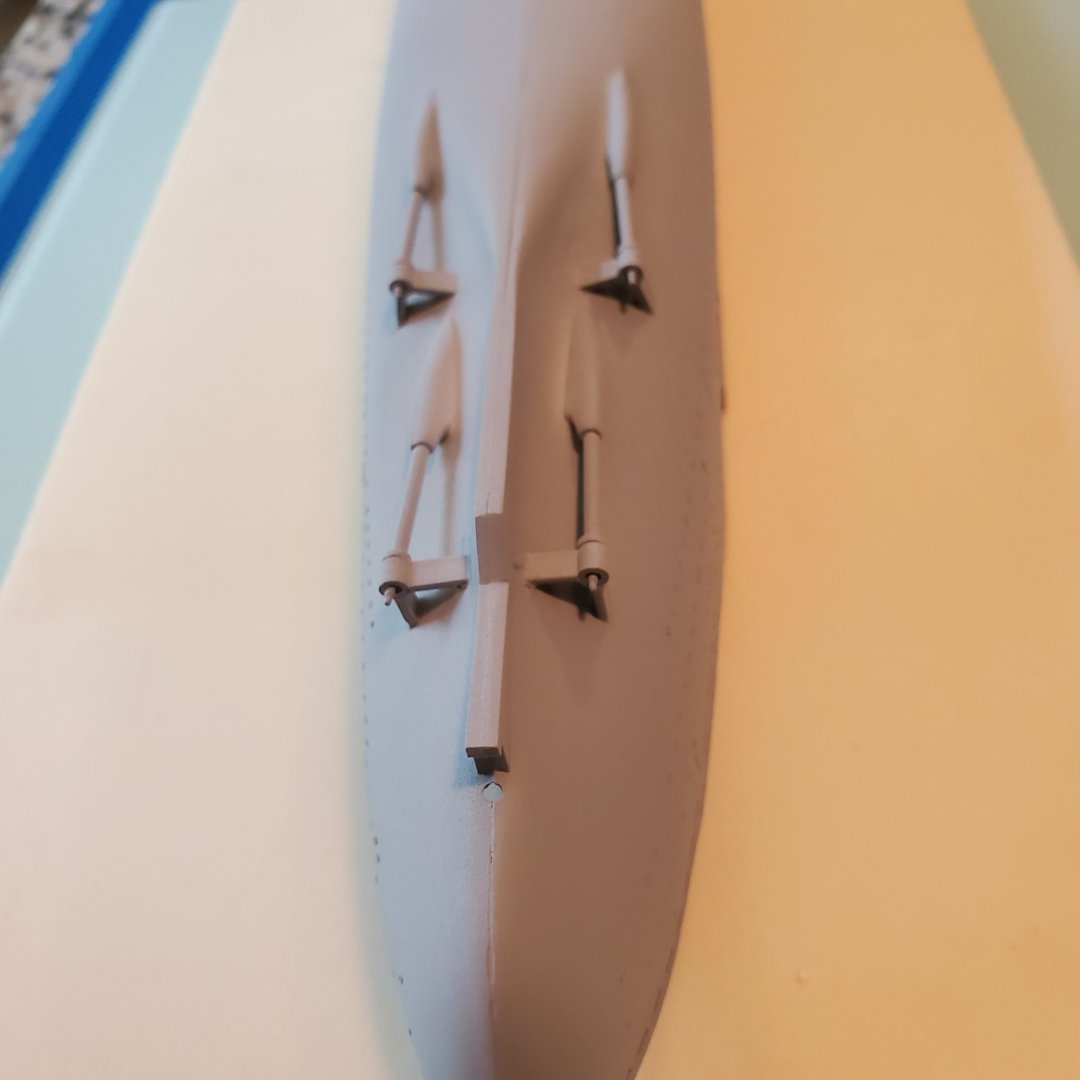
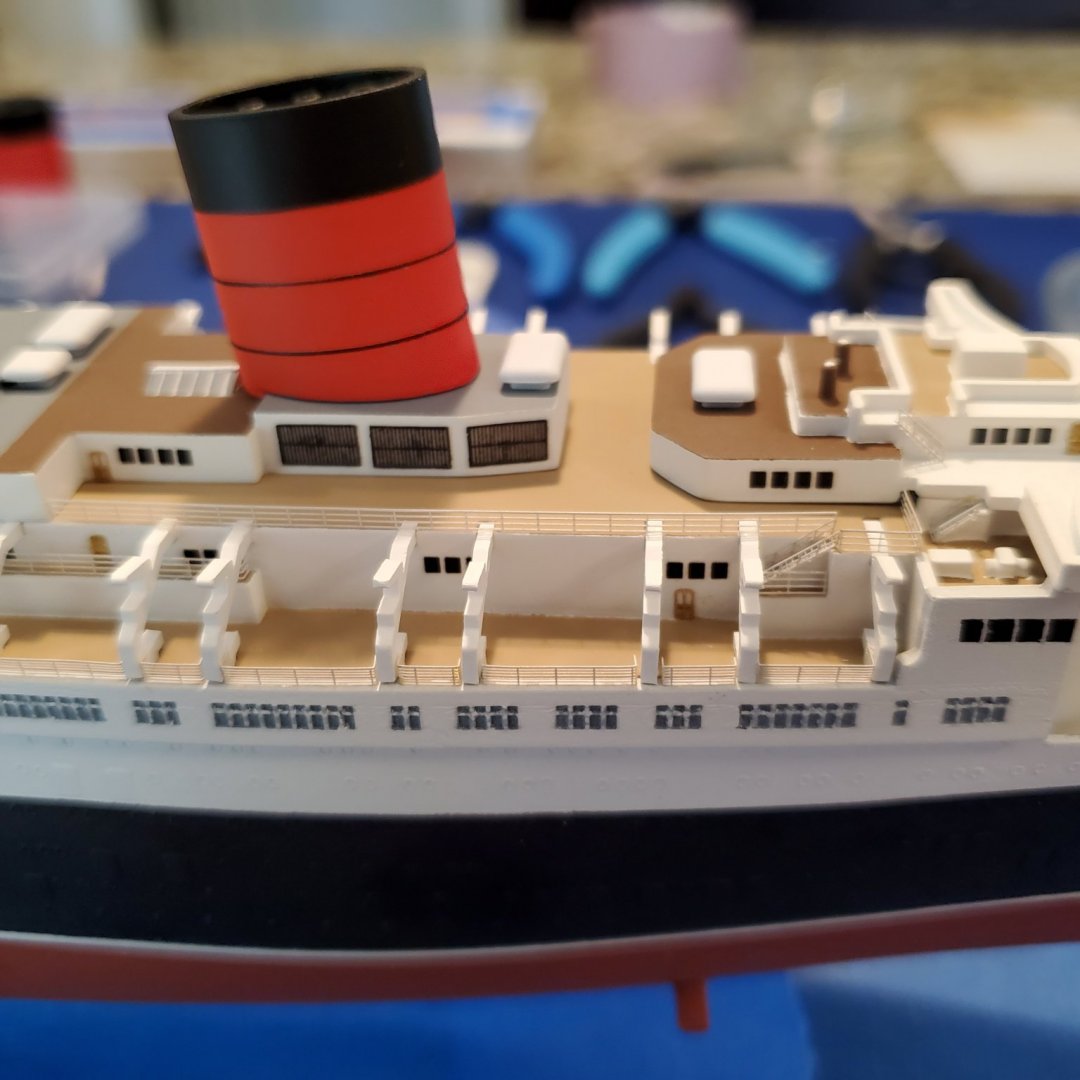
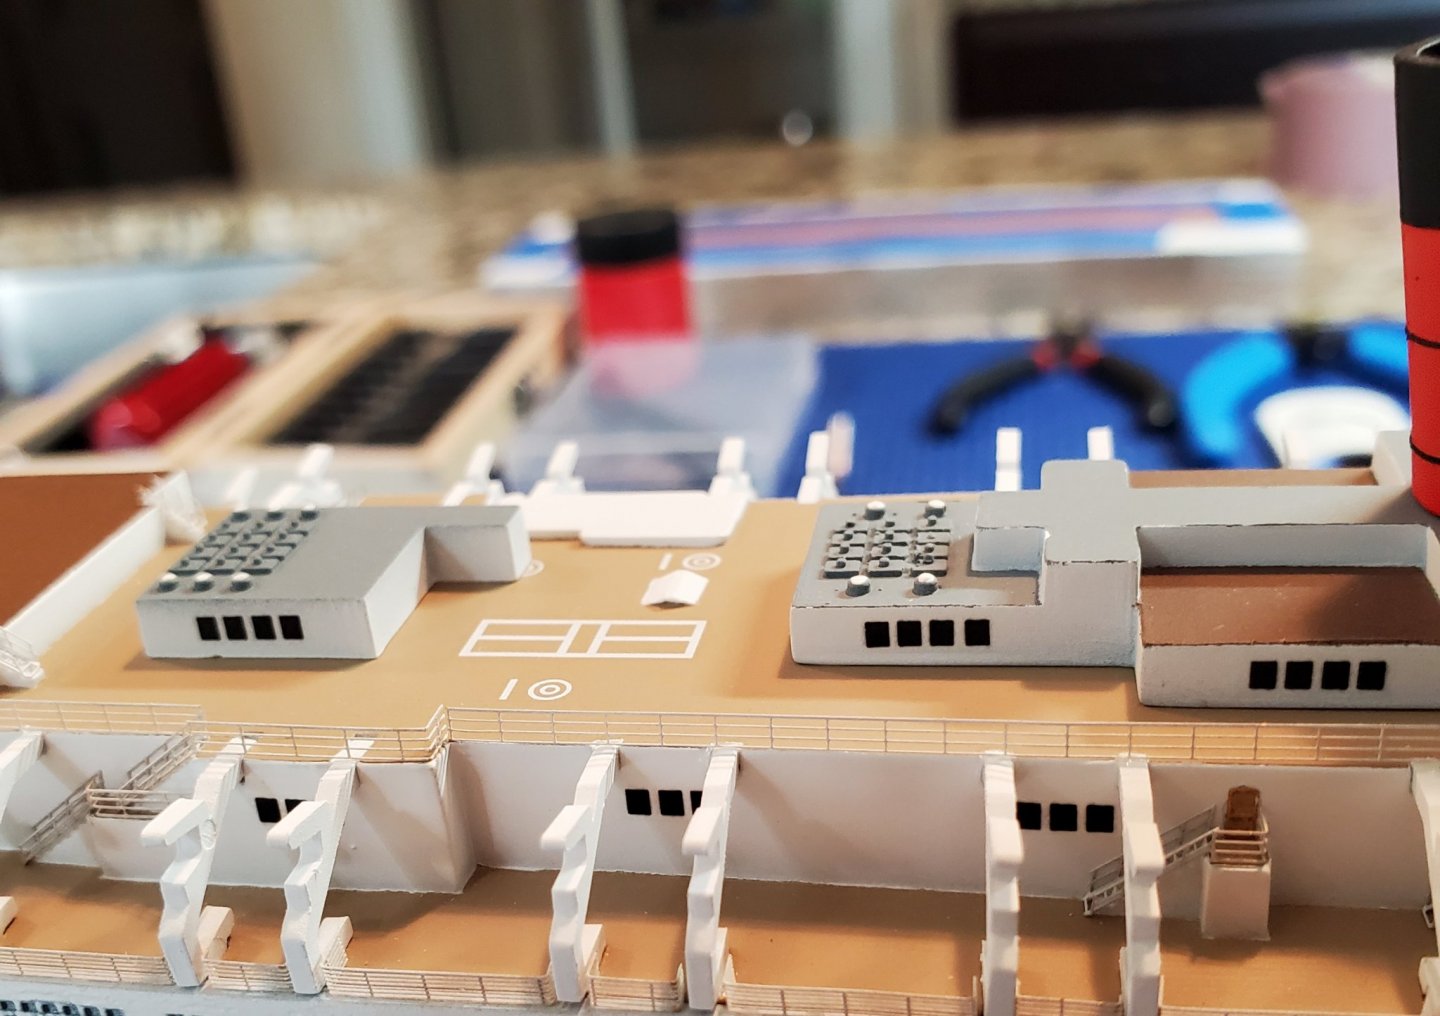
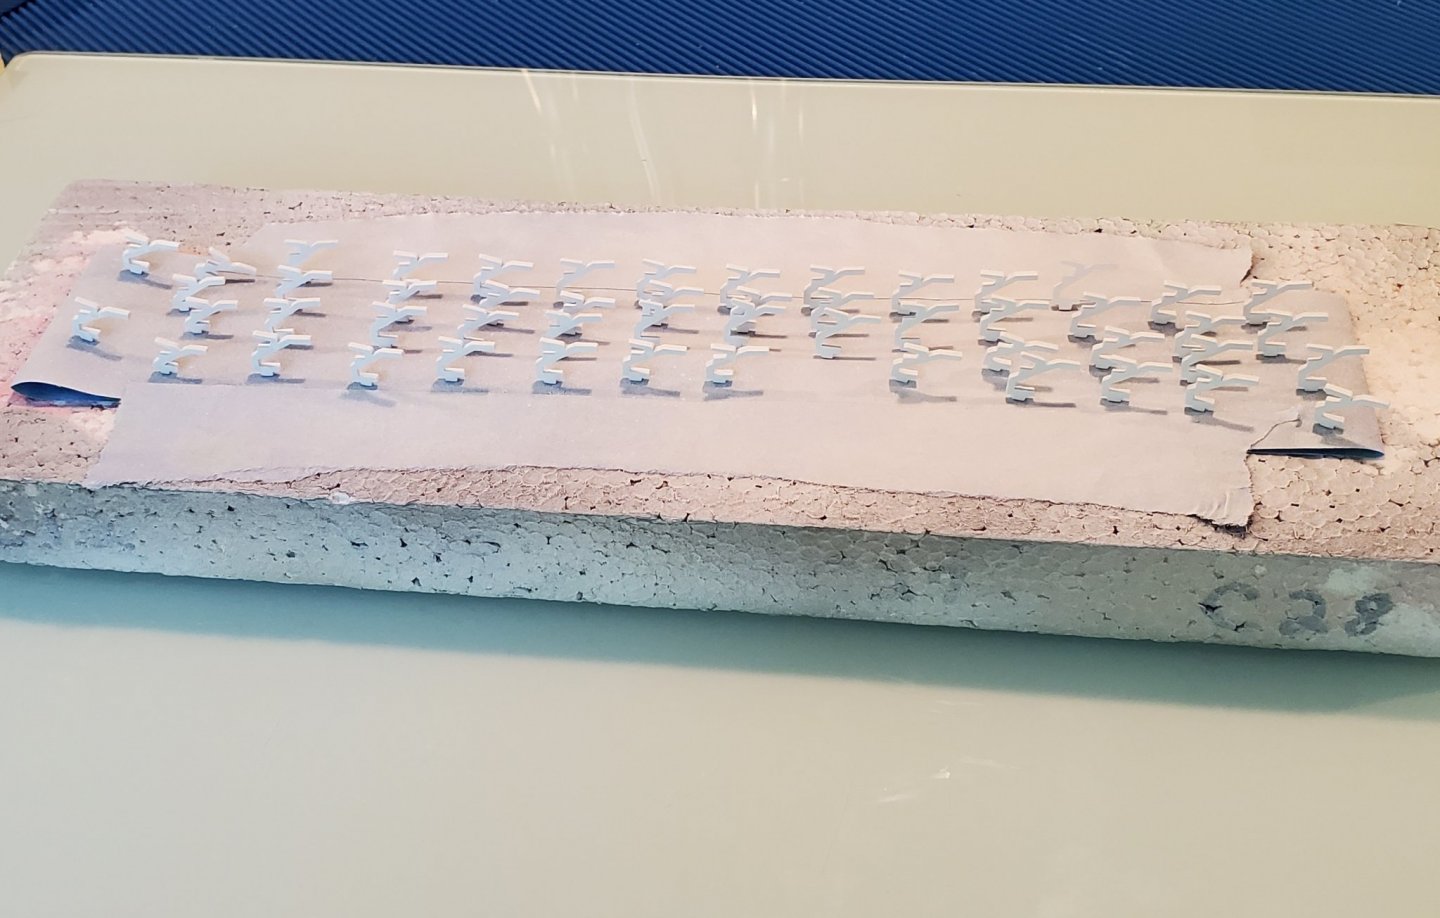
I decided against the PE davits, they are just too thin IMO to hold the lifeboats. I was going to use some of the parts and make a combo out of plastic and PE but I don't think it will look good, I am going to use the seats though. I painted and installed the funnels. All that remains are the railings, masts, lifeboats and rigging.


- 28 replies
-
- 5
-
-
- airfix
- queen elizabeth
- (and 2 more)