
DaKea90
-
Posts
102 -
Joined
-
Last visited
Content Type
Profiles
Forums
Gallery
Events
Everything posted by DaKea90
-
 There is one thing, I'm quite curious about: There are so many people who build a cross-section of the Echo - why is noone building a full model of her? oO Greenwich has a full set of plans of her including an image of her stern decorations! Is it that she's just in a weird spot sizewise - too big for a small build but too small for a proper big multi-year project?
 -
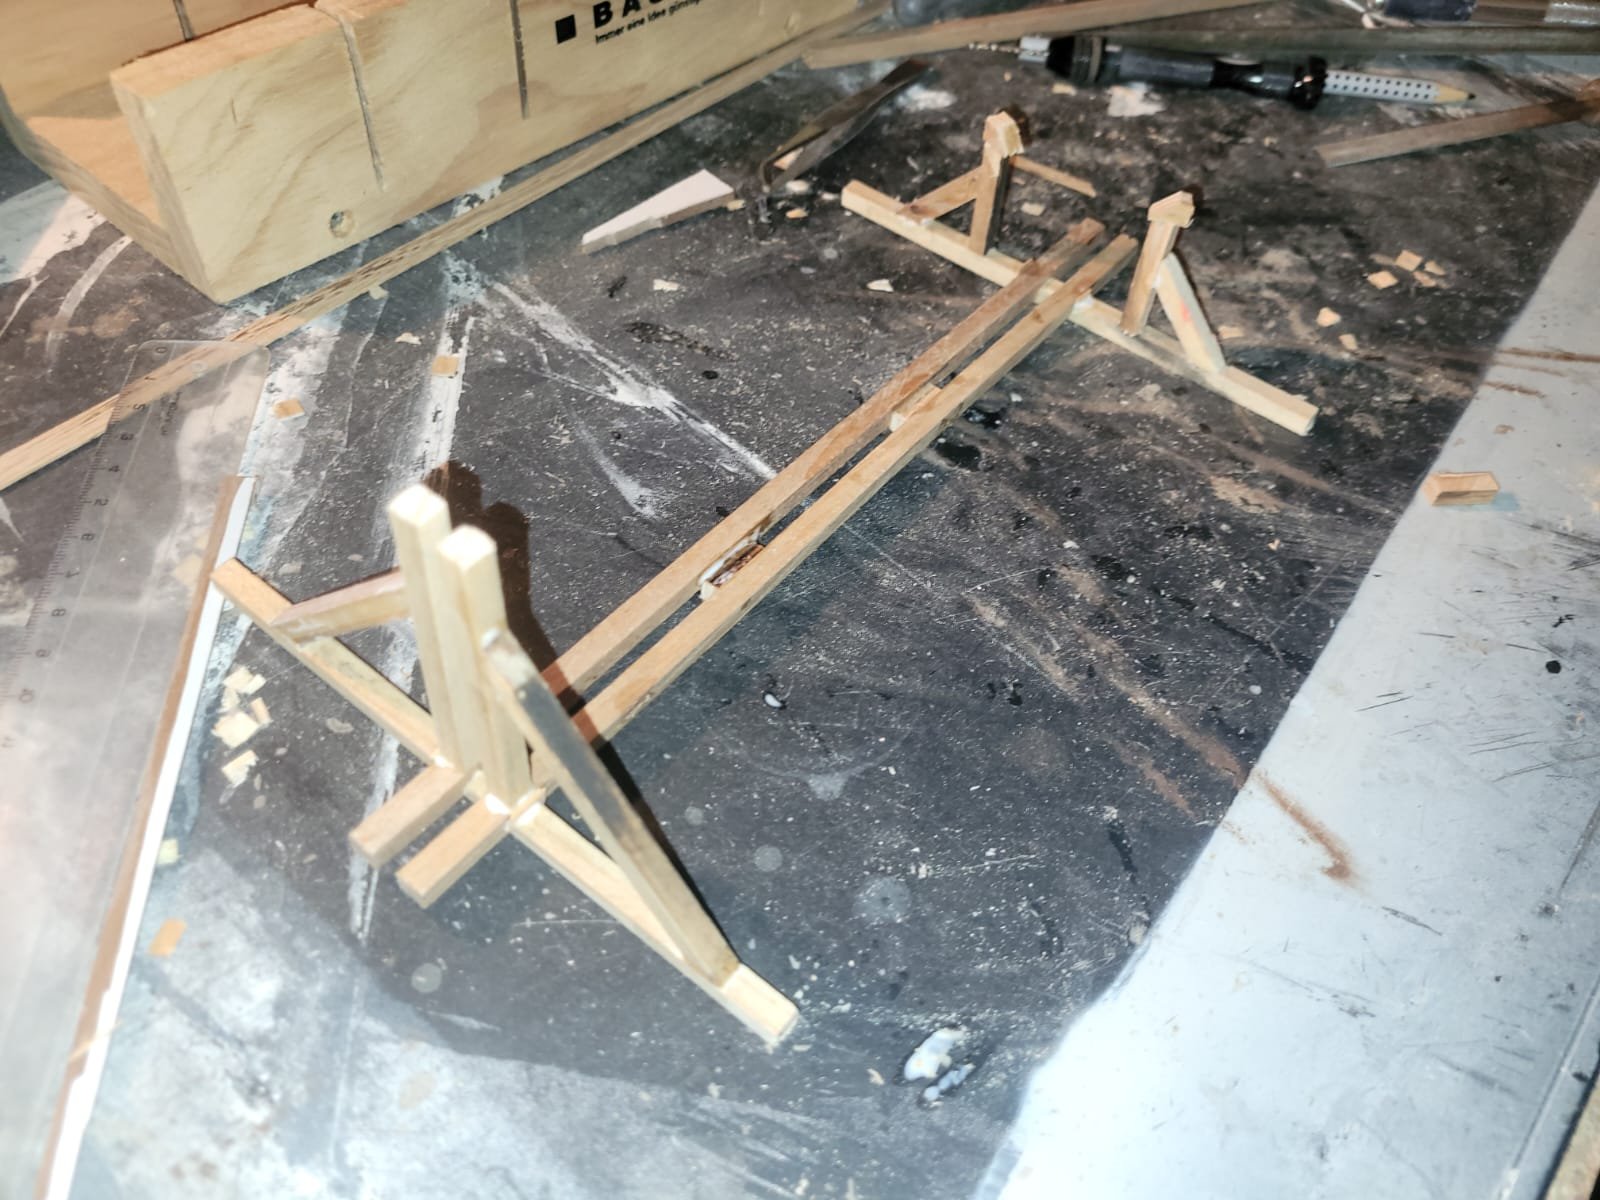
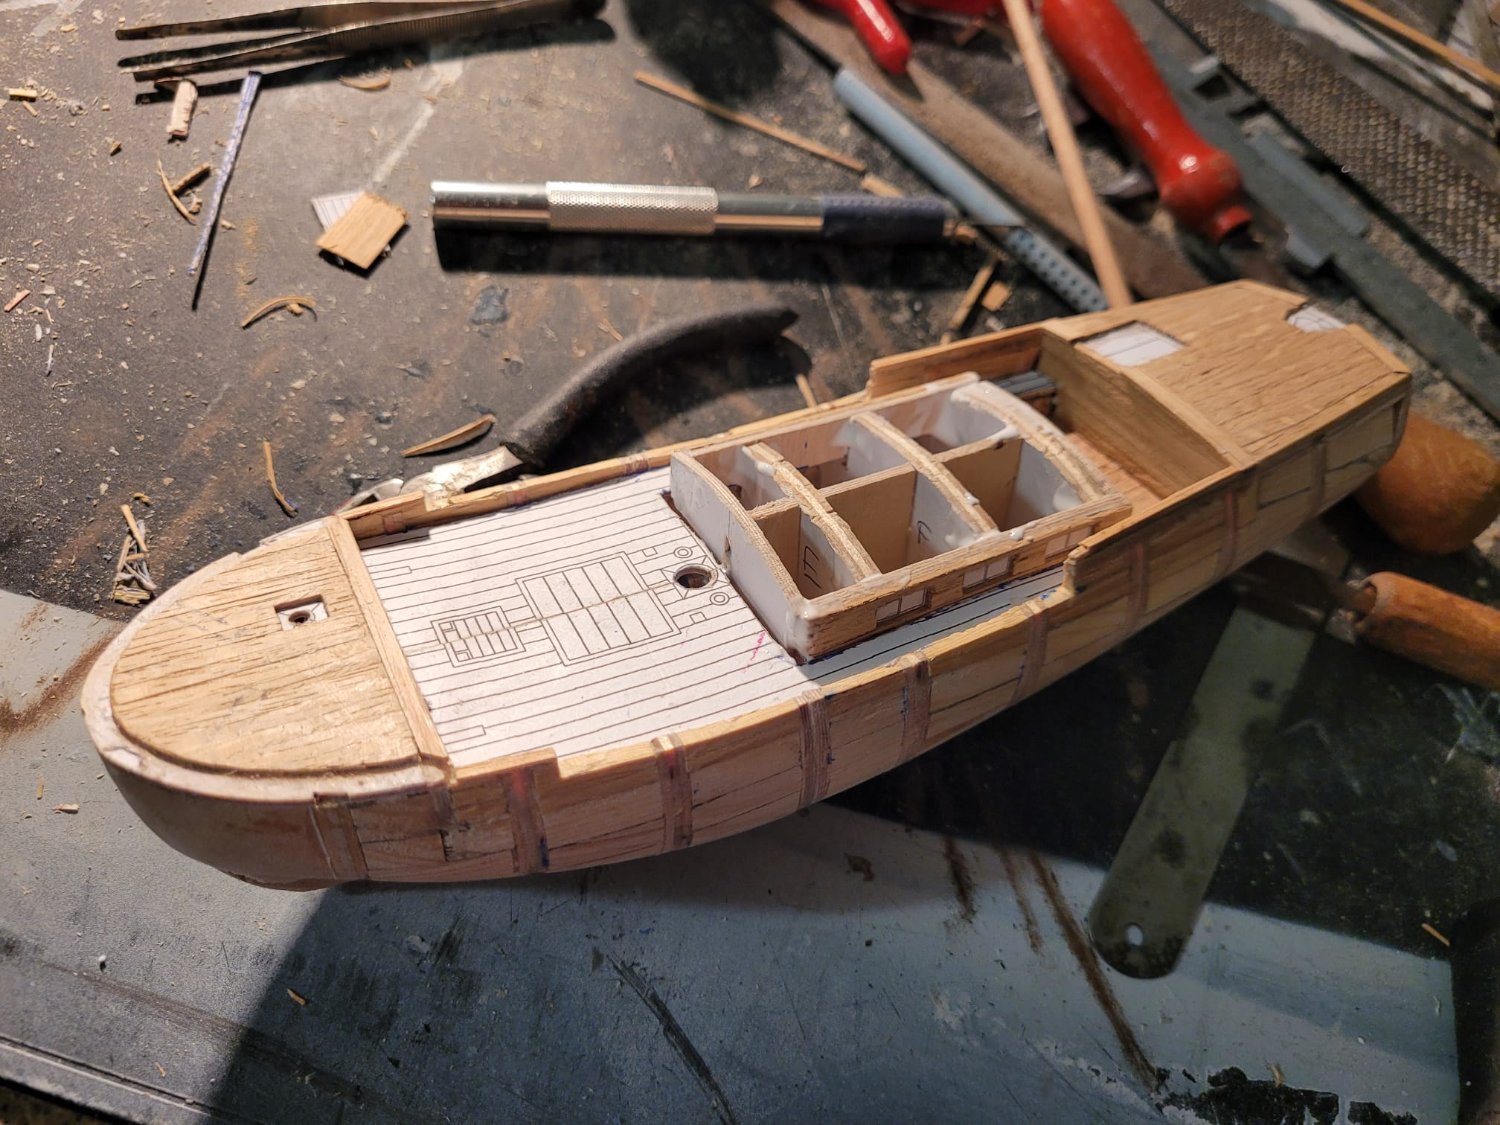
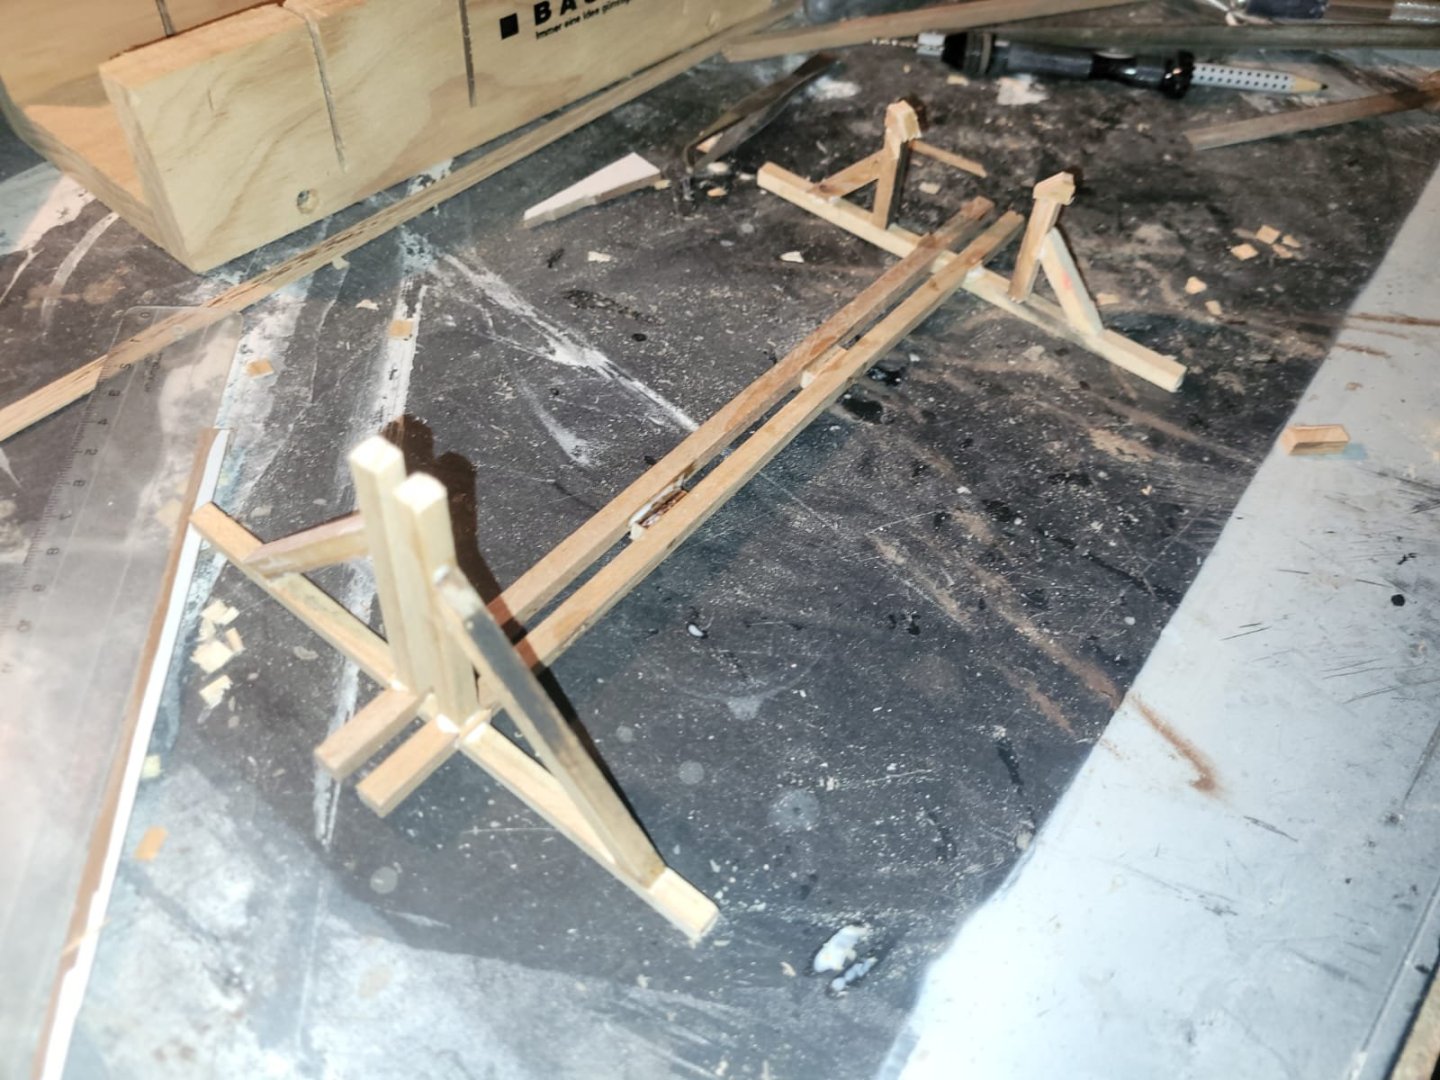
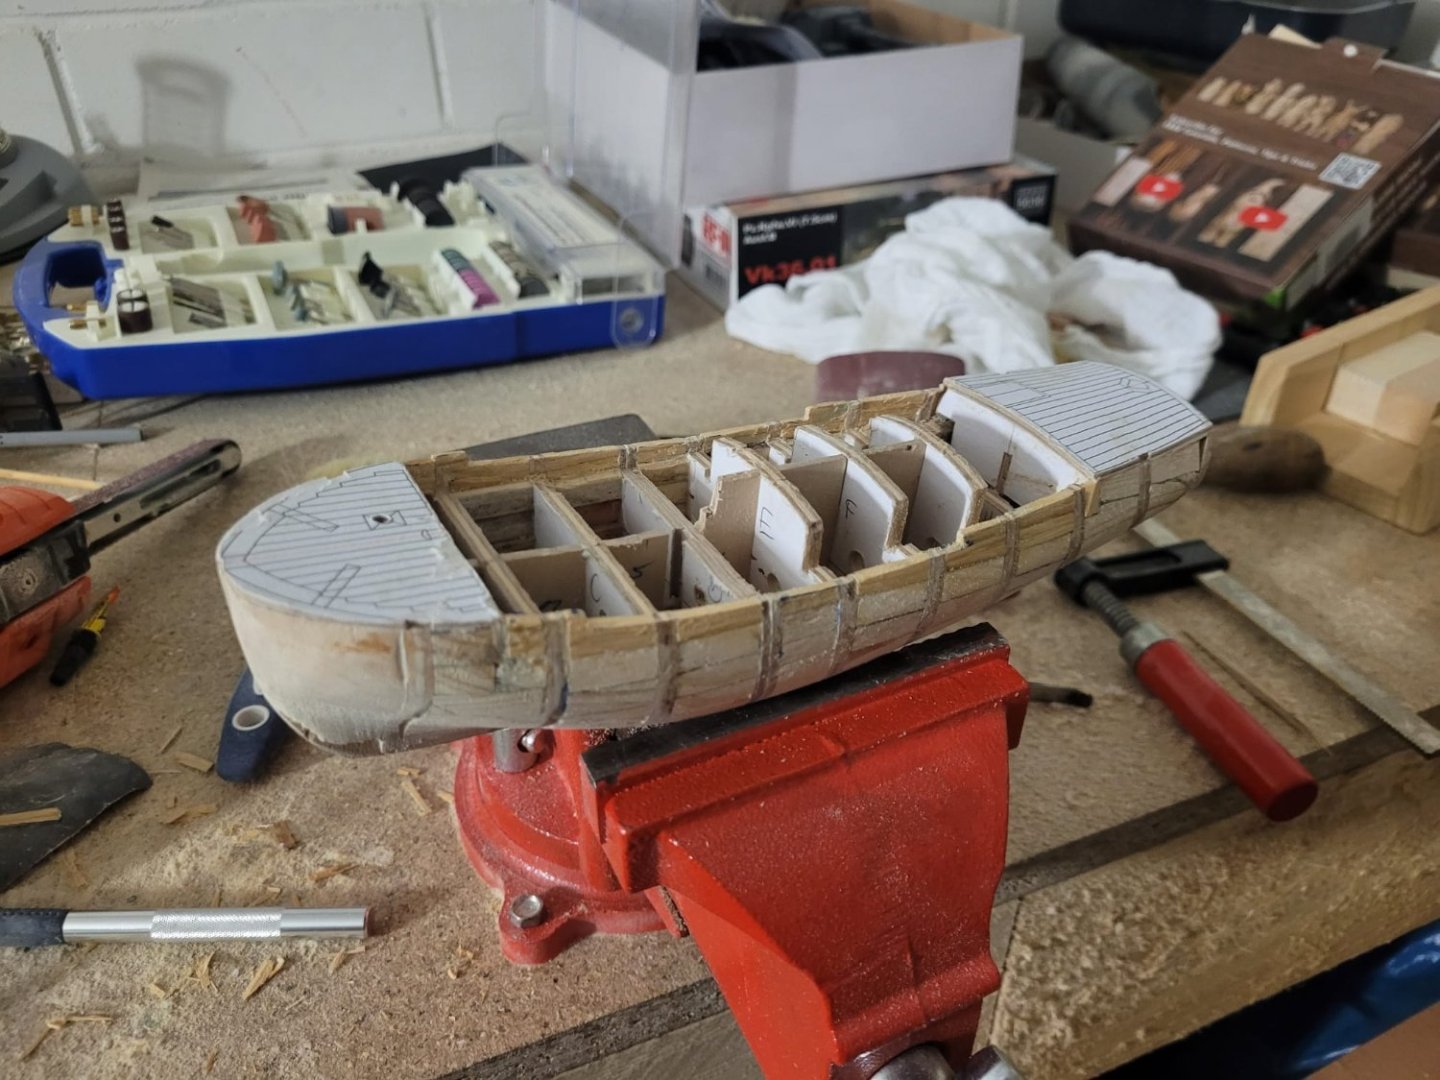
Soooo, progress! Woohoo The deck is done, so are the hatches and gangways. I had to realize that I have no tool, to remove the big hatches to replace the framing. I've also installed the stem and stern post. The thing that I'm pretty proud of is the jig where the hull can stand in. It's simple but it works - and will probably need a rework later on The next steps are the windows for the cabin and the planking of the hull can begin.

-
Wow, your build is impressive! Look how small she is O.O The only thing my inner Monk has to criticize is the colour of the flags. The Brandenburgian flag that dates back to before the time of the personal union with Prussia is a red eagle on white ground and not a black eagle on yellow ground which looks more like Austria. But I understand that each build has some artistic freedom to it. On the other hand having such colourful flags is quite fitting for a colourful ship like the Golden Yacht.
- 55 replies
-
- 2
-

-

-
- miniature
- Brandenburg State Yacht
- (and 1 more)
-
It's been a while, but I've made a bit of progress today. I've almost completed planking the deck. There are only two itsy-bitsy planks right next to the kabin left to do. These will be done next time. I also think I will redo the framing for the hatches in front of the cabin. I think I'll use walnut for a nicer contrast. The deck fittings will be left until the hull is planked and done, just before installing the rigging. I hope, my next building session does not lie half a year in the future as the last one oO

-
Impressive work! The details are mind blowing O.O
-
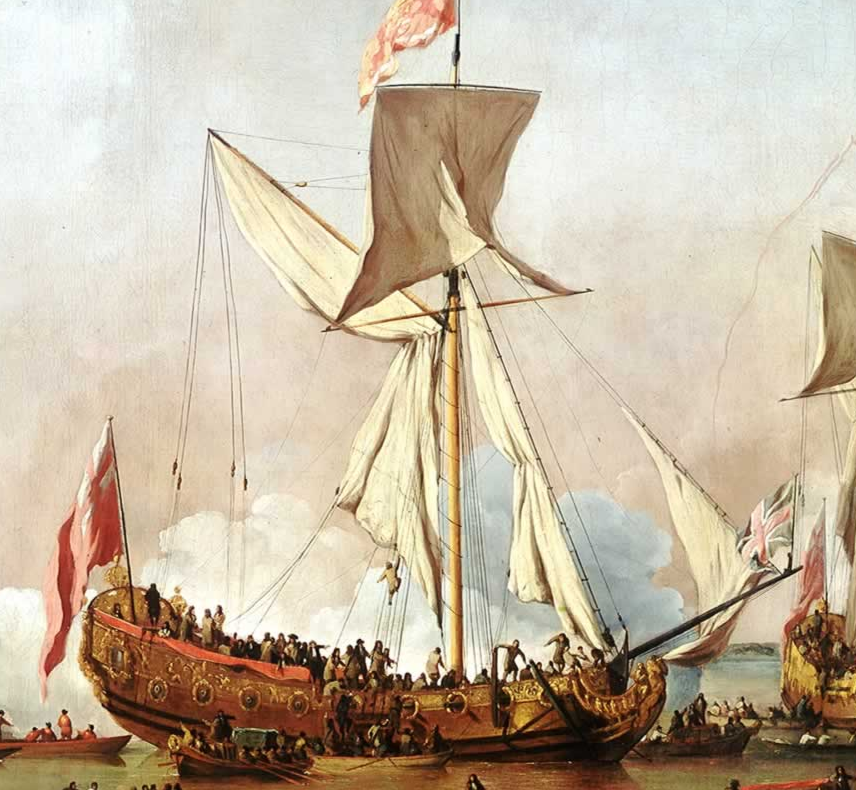
One thought that carried over from my own build, which may be told too late at this point: I guess, the rear-most guns were dummies. It was not uncommon for objects of the baroque era to look like.. more, essentially. Windows painted on a building's walls for symmetry, for example. This is also true for ships in general and royal yachts, specifically. Take the english Royal Yacht Mary II (built three to four years after the Golden Yacht) as an example. In this painting by Willem van der Velde you can see that she seems to have a broadside of 8 or 9 guns - but only three have a shadow (the three forward of the ratlines, although she's said to have four per side). That's because such yachts weren't really built for war, but for representation. Your model shows it pretty clearly, the rear-most guns have almost no room for recoil. They'd crush the cabin, if they were fired. If I were to build the Golden Yacht again, I'd omit these two guns and install a pair of dummies instead - maybe even the first pair, too.
- 55 replies
-
- 2
-
-
- miniature
- Brandenburg State Yacht
- (and 1 more)
-
Hey Aussie, I've used the very same plans to build my own Golden Yacht. If you want to take a look at it, here is a link to the log: Although my log's title states that I've built it in 1/100th scale, it's very much not I'm not quite sure about the exact scale, but I guess, it's somewhere in the 1/150th - 1/200th range. What I want to say is that it's possible, but I'll never build anything in that small a scale again xD
- 55 replies
-
- 4
-
-
-
- miniature
- Brandenburg State Yacht
- (and 1 more)
-
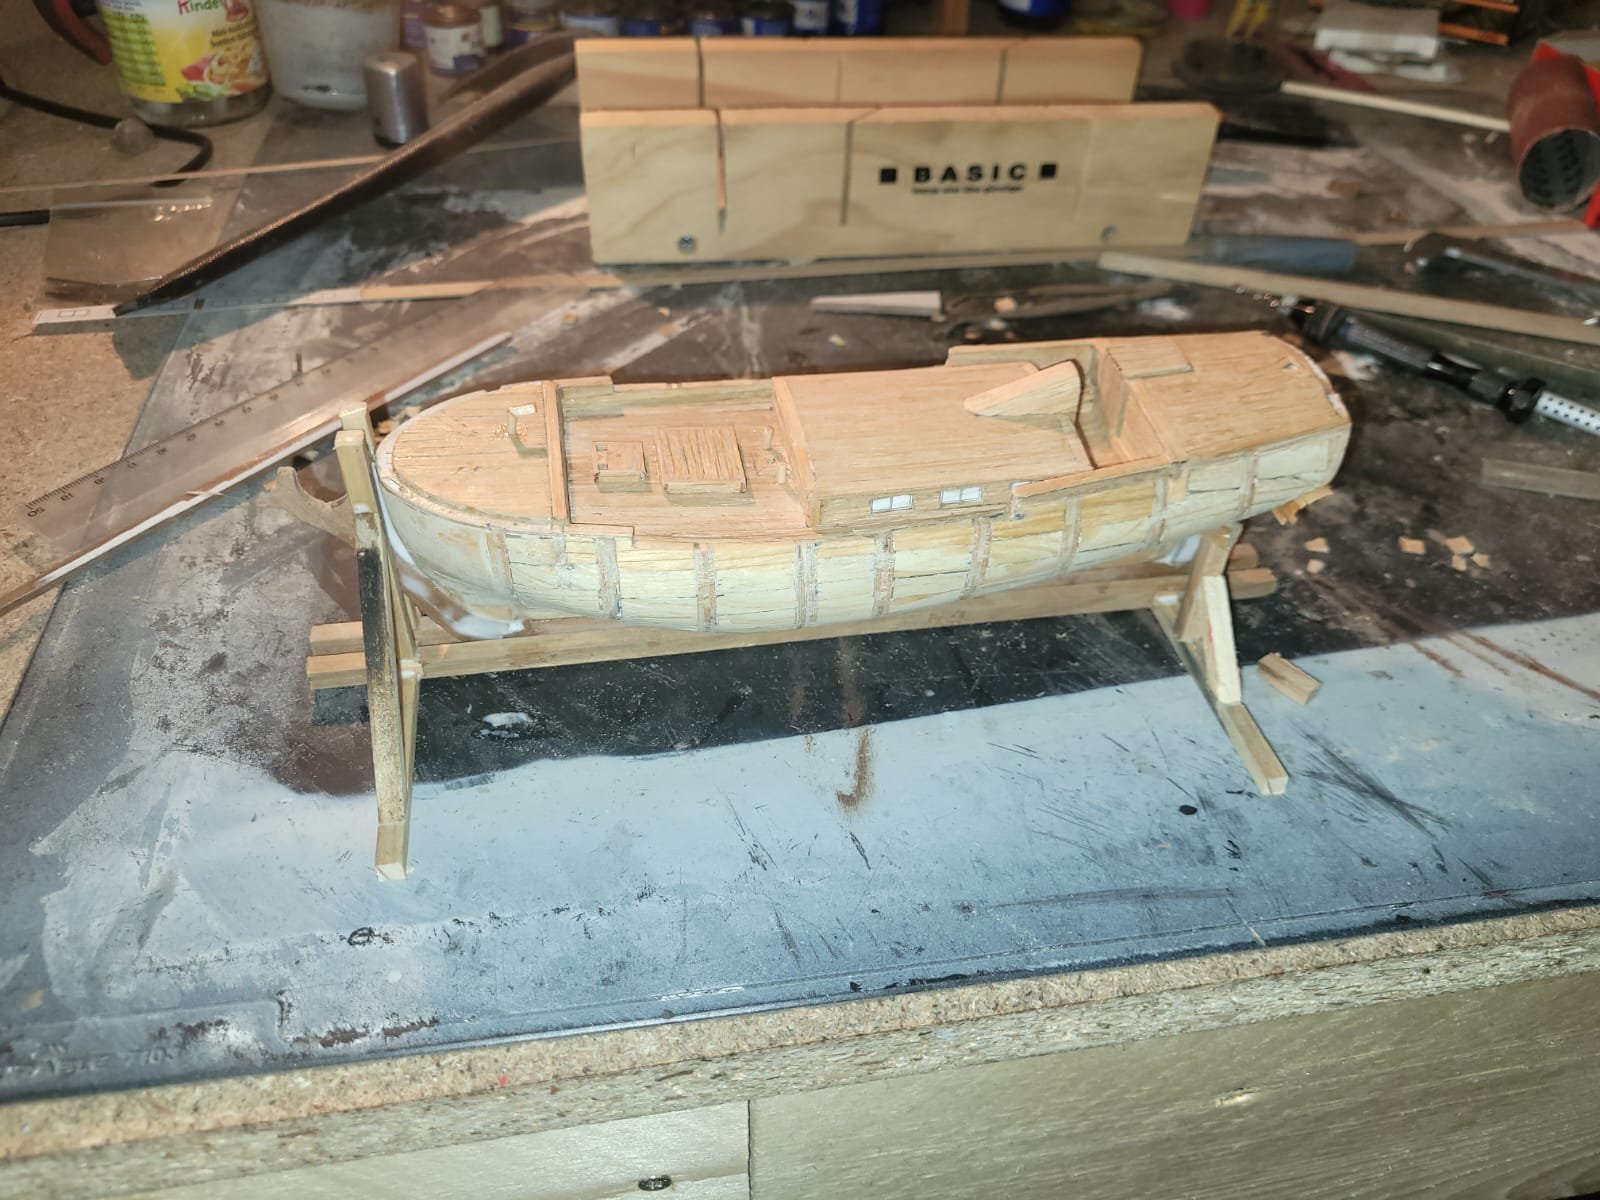
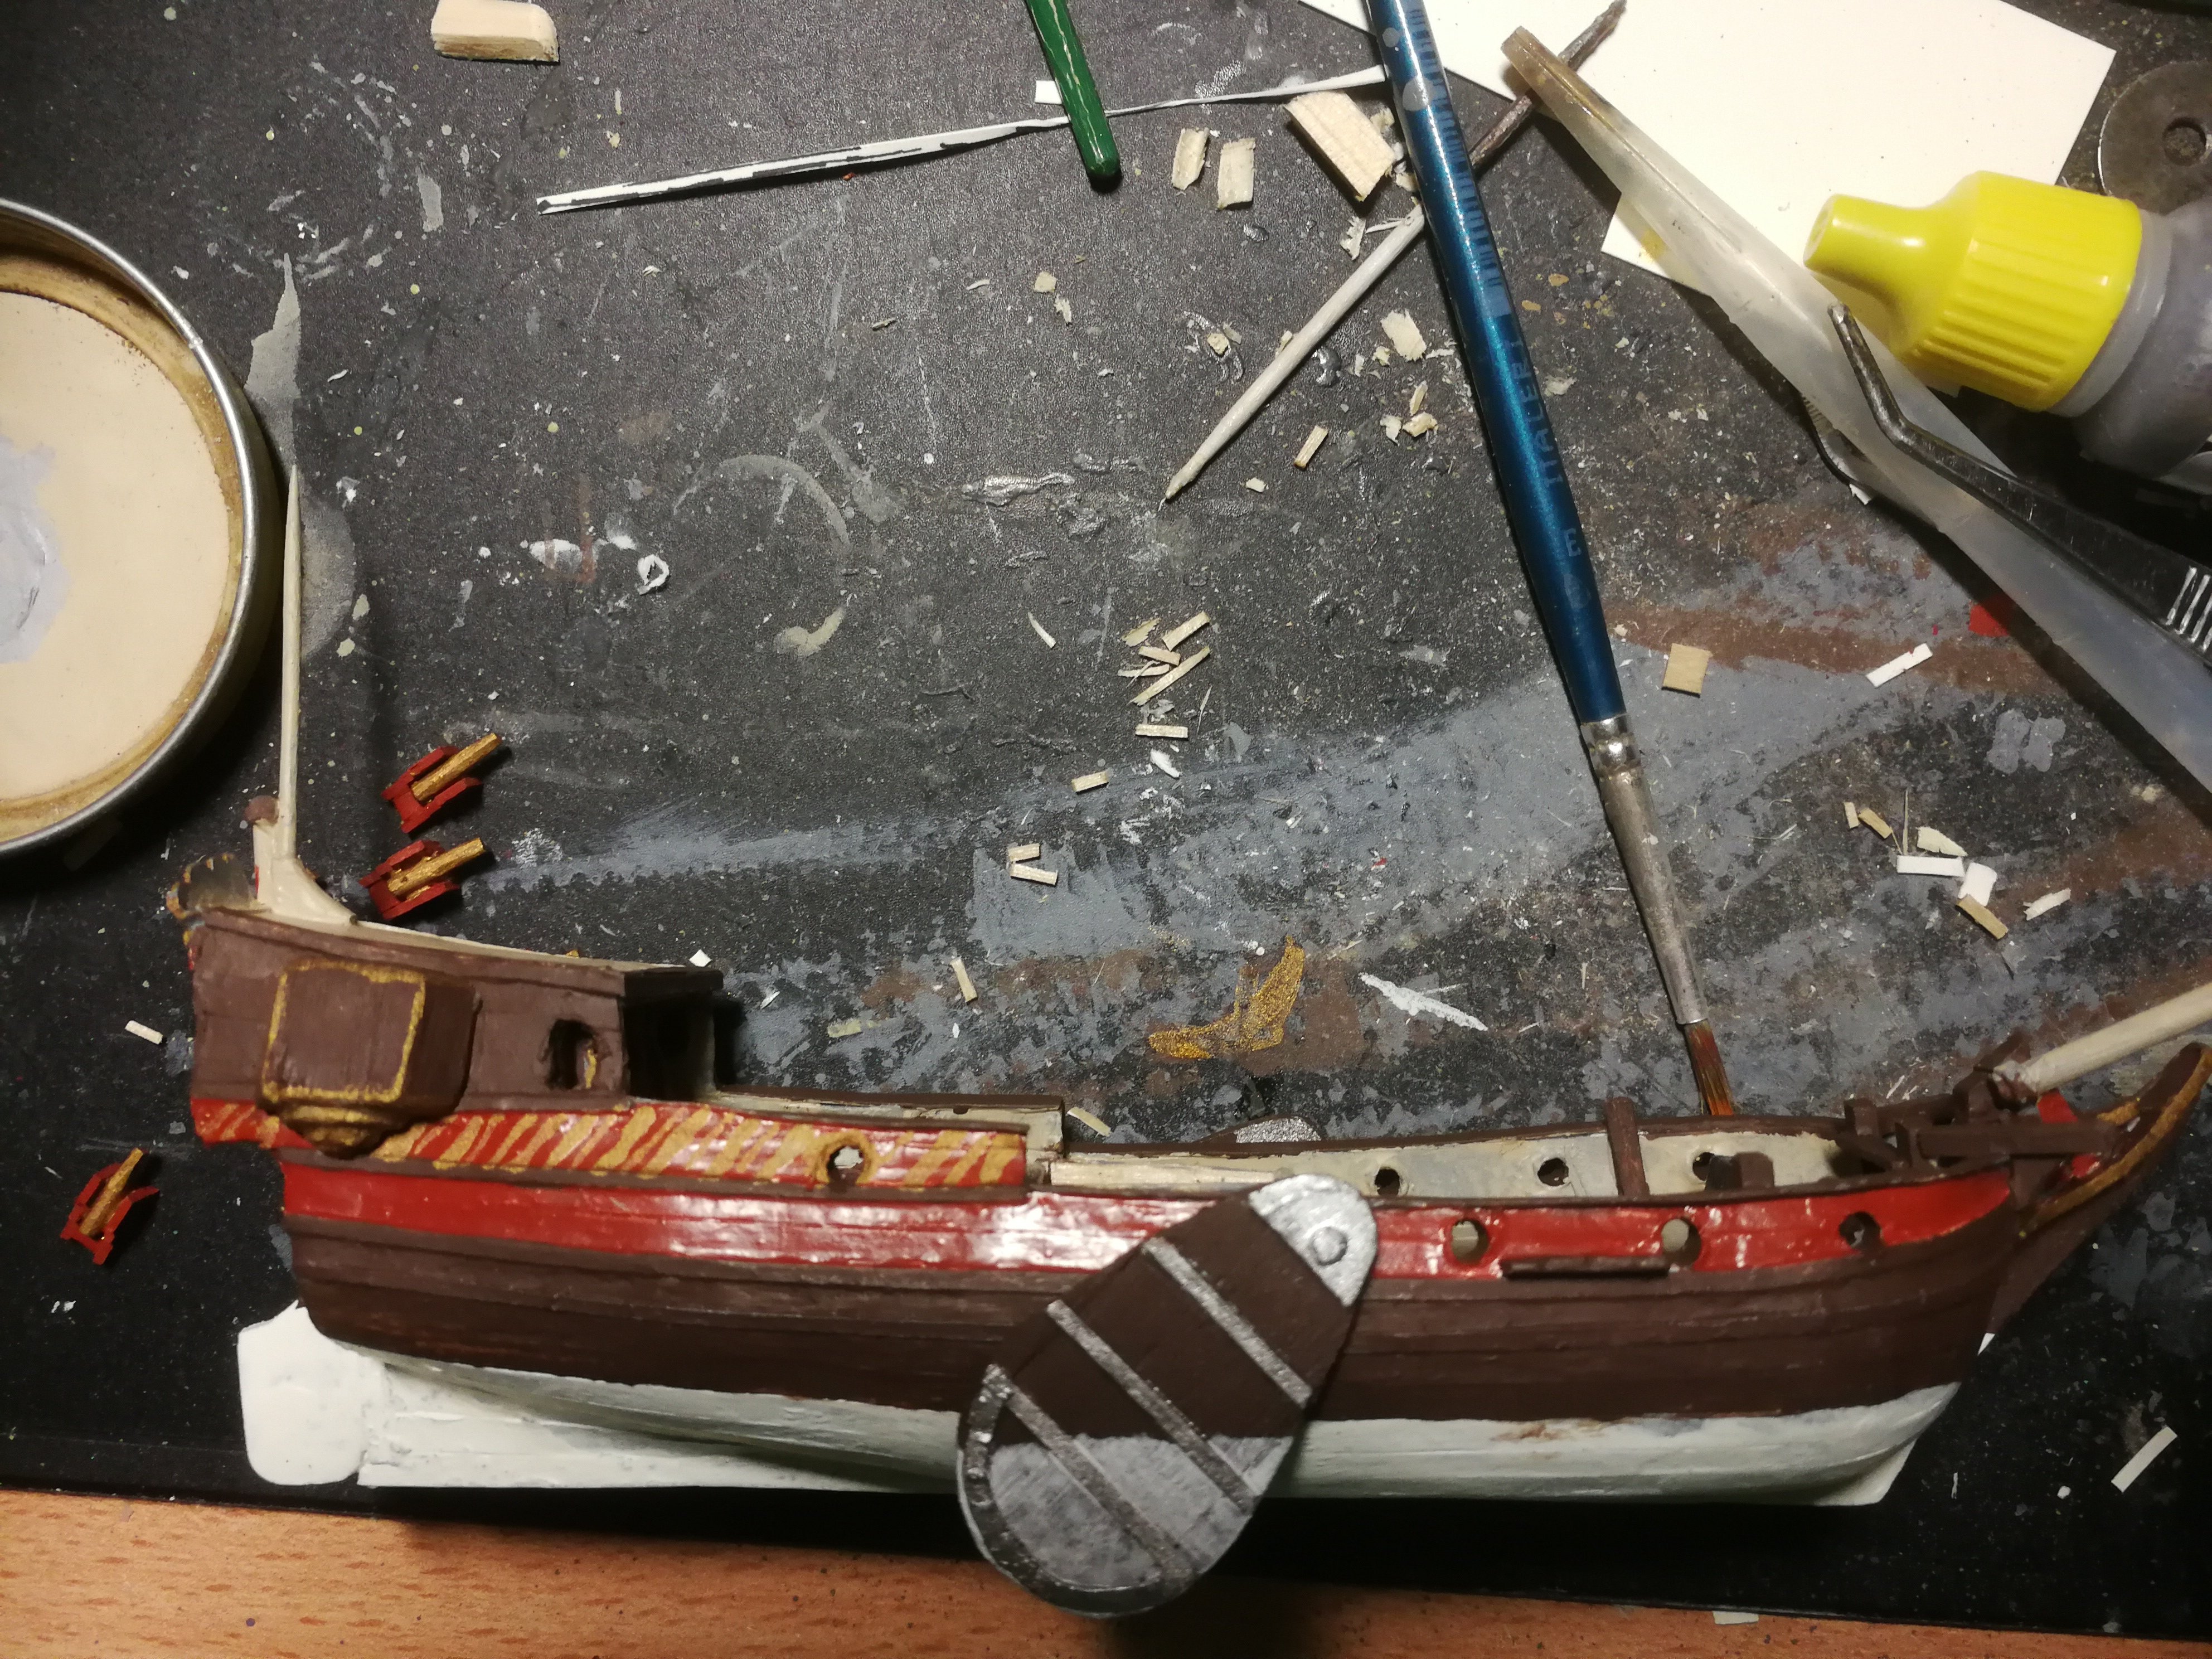
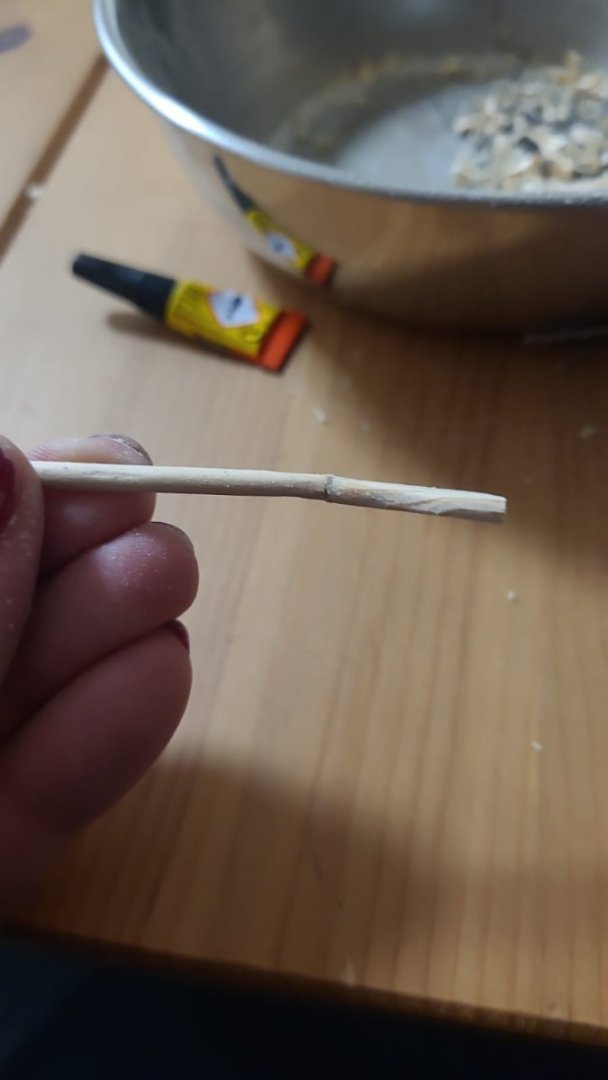
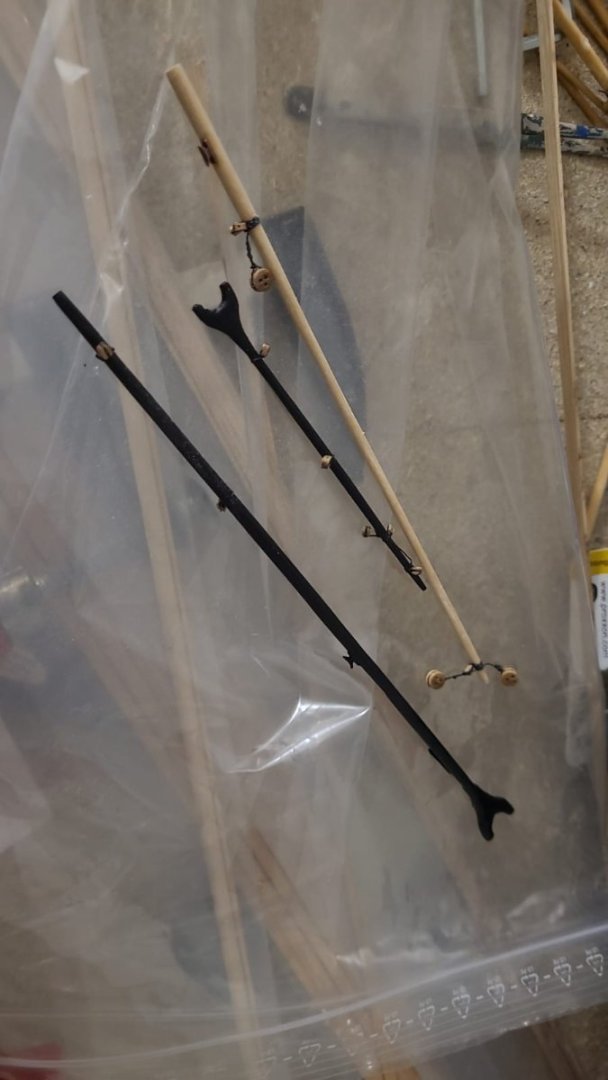
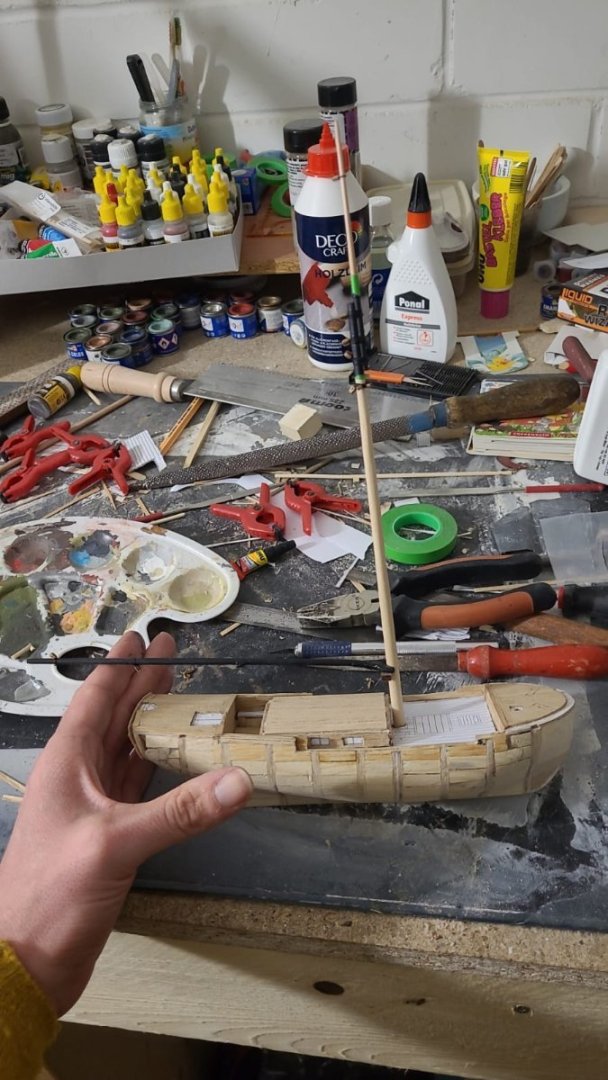
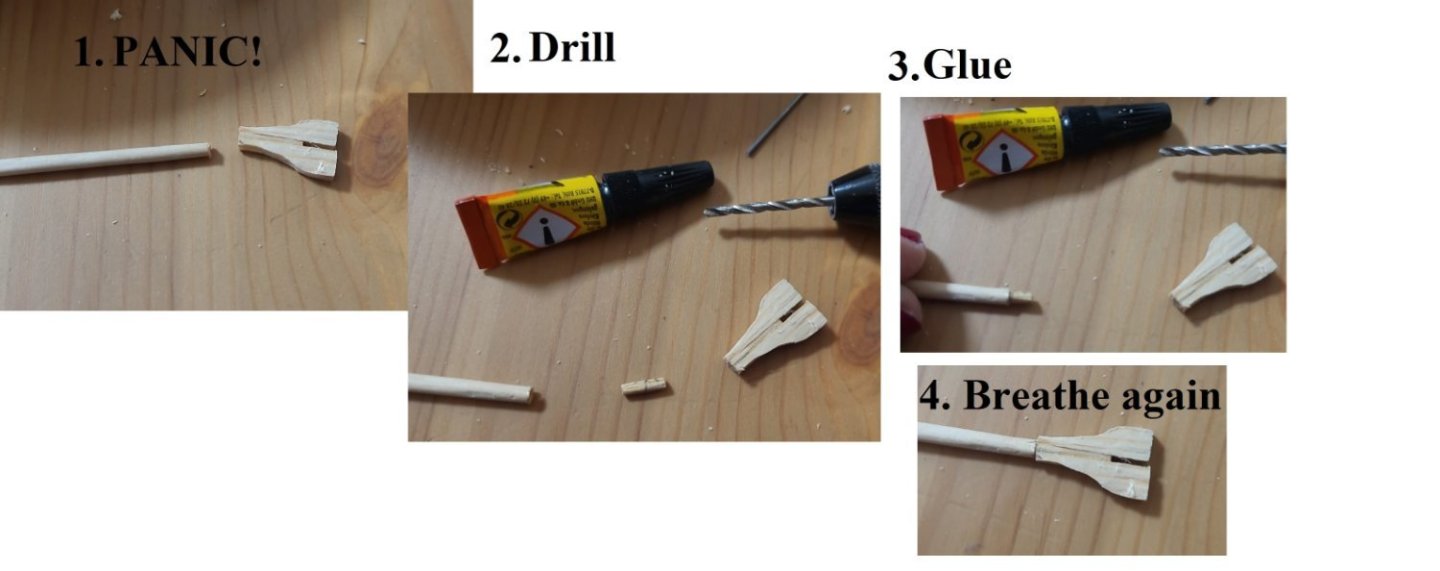
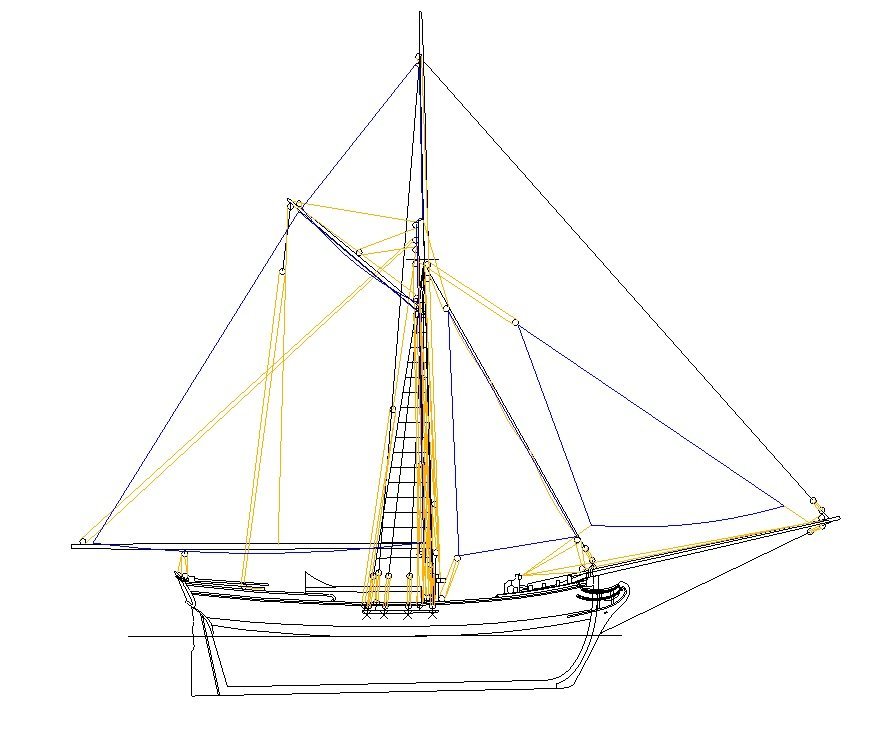
Hey some good progress has been made again. Mast, bowsprit, gaff and gaff sail boom are done. When I made the gaff sail boom, I made a small oopsie and had a little heart attack: I broke the "fork" that goes to the mast (Klaue in german), but I was able to repair it. The only hint that this happened is that the fork connects to the gaff sail boom in a slight angle. I'm fine with that, though. Here you can see the gaff, gaff sail boom and bowsprit painted and with all clamps, blocks and dead eyes attached I close my update with a picture of the current status of the hull. The mast is not yet glued in place.
-
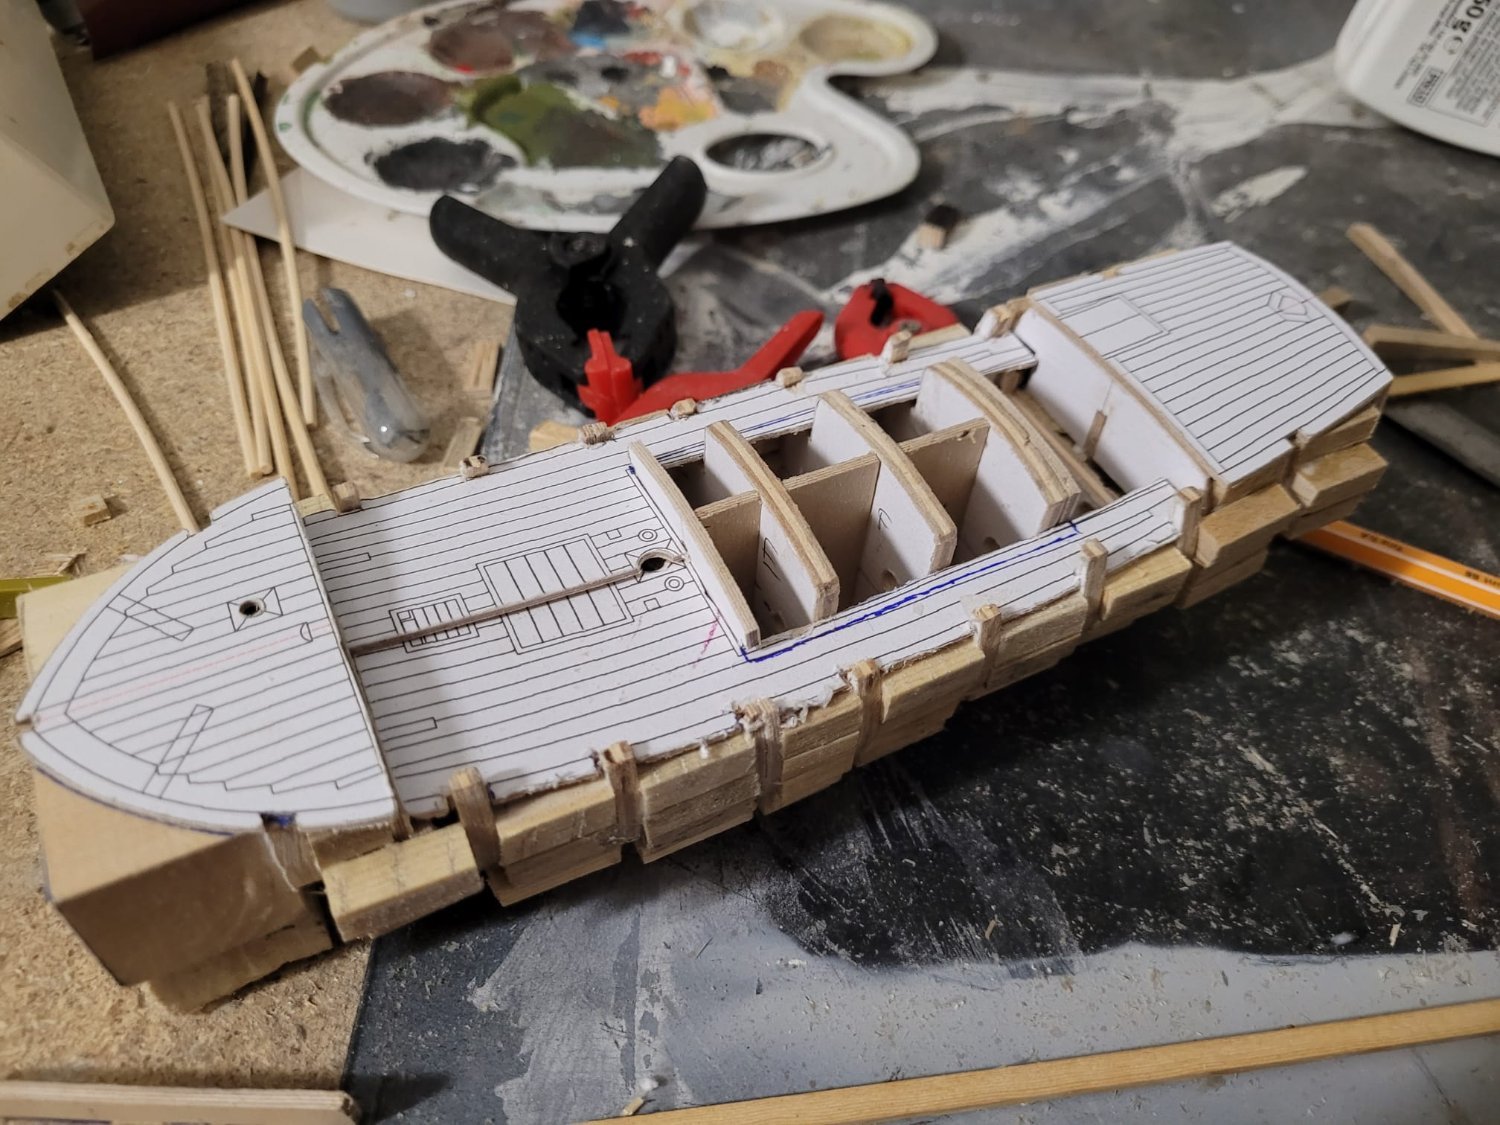
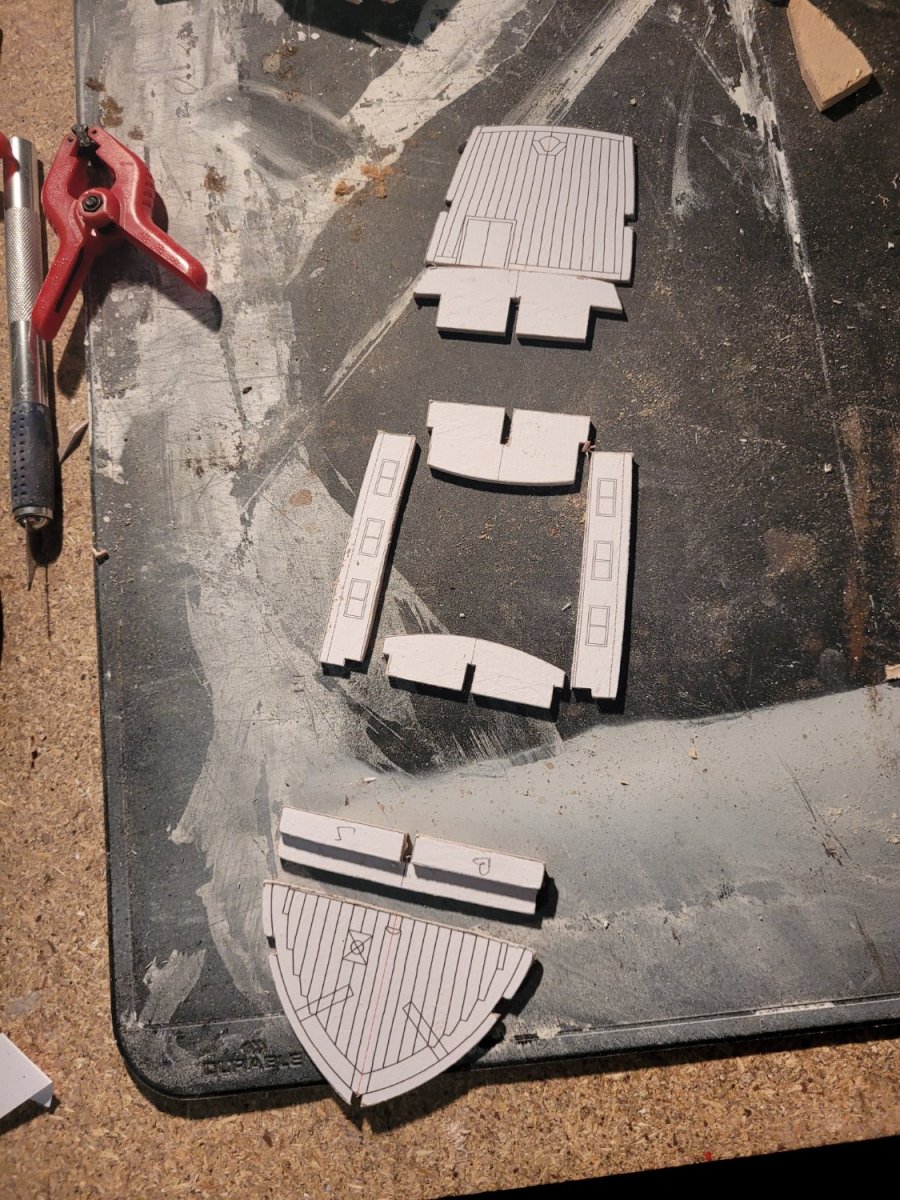
I just realized that I will need to tear out the main deck again. Its planks are 1mm thick and as you can see, the windowsills of the passenger's cabin sit visibly less than one 1mm above the main deck. Fortunately, I have another template already printed out.
-
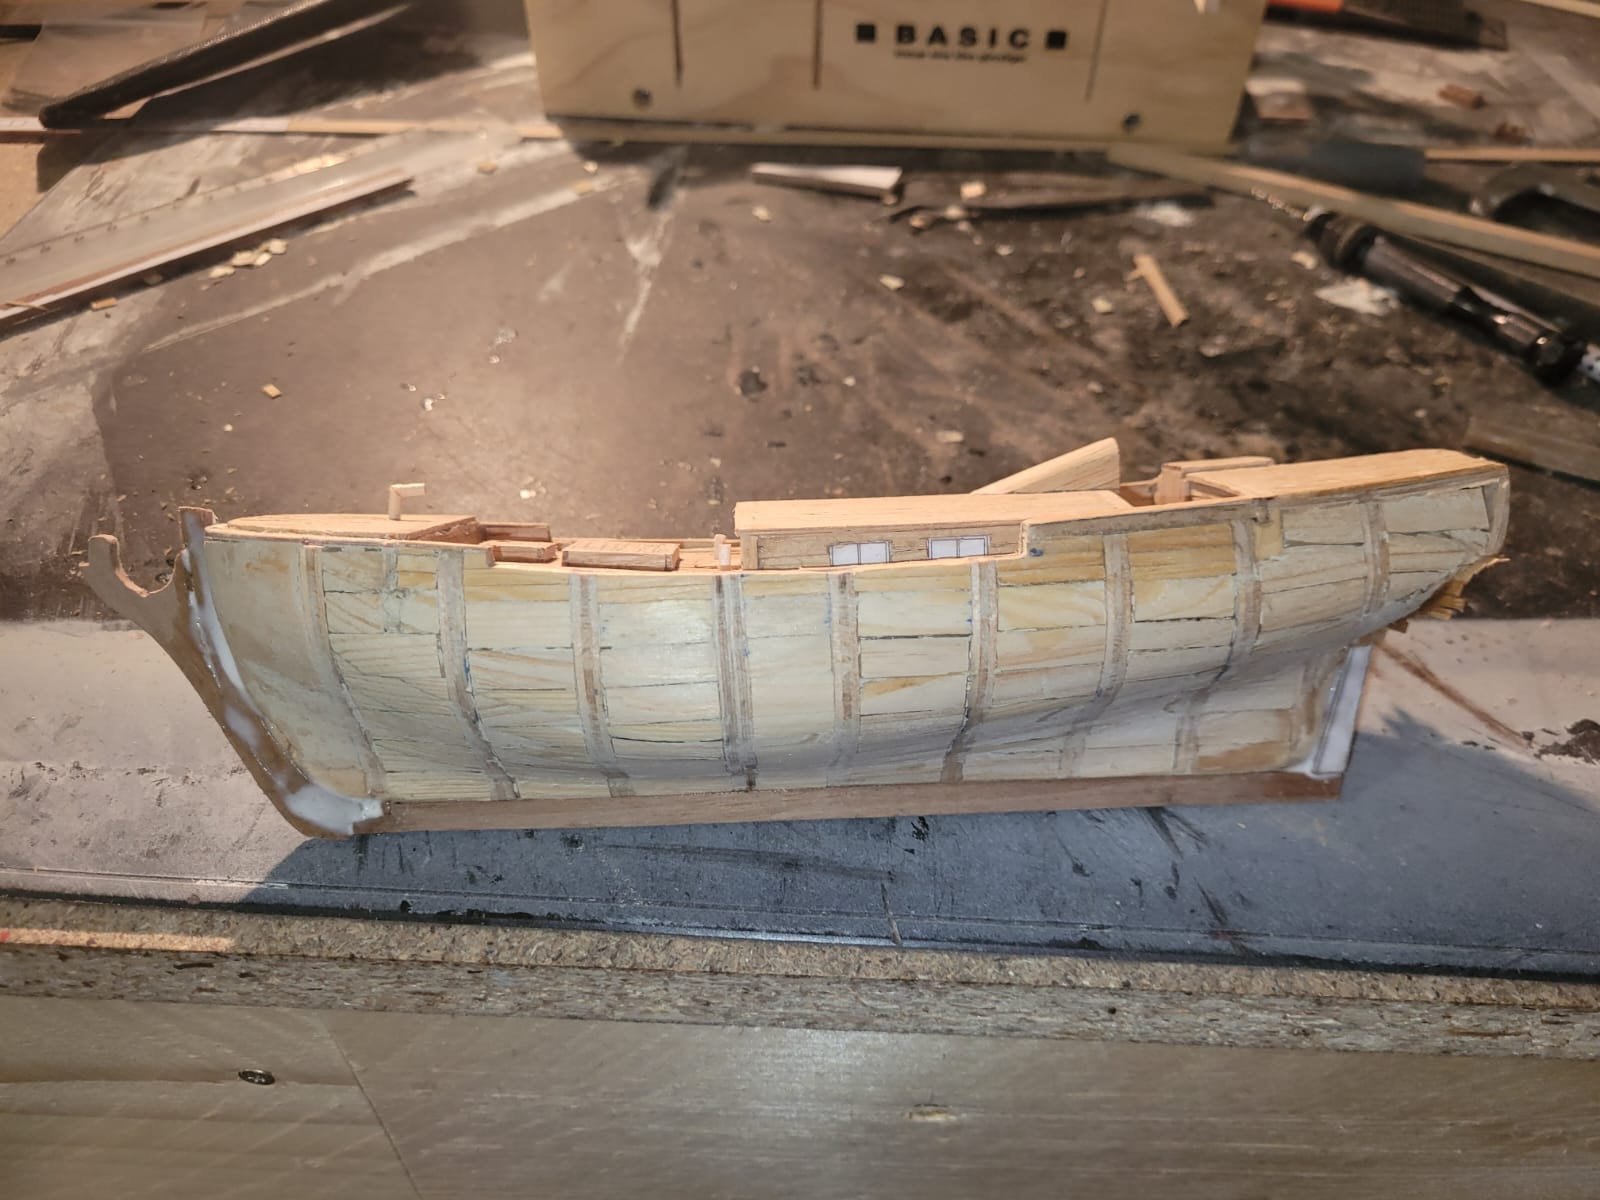
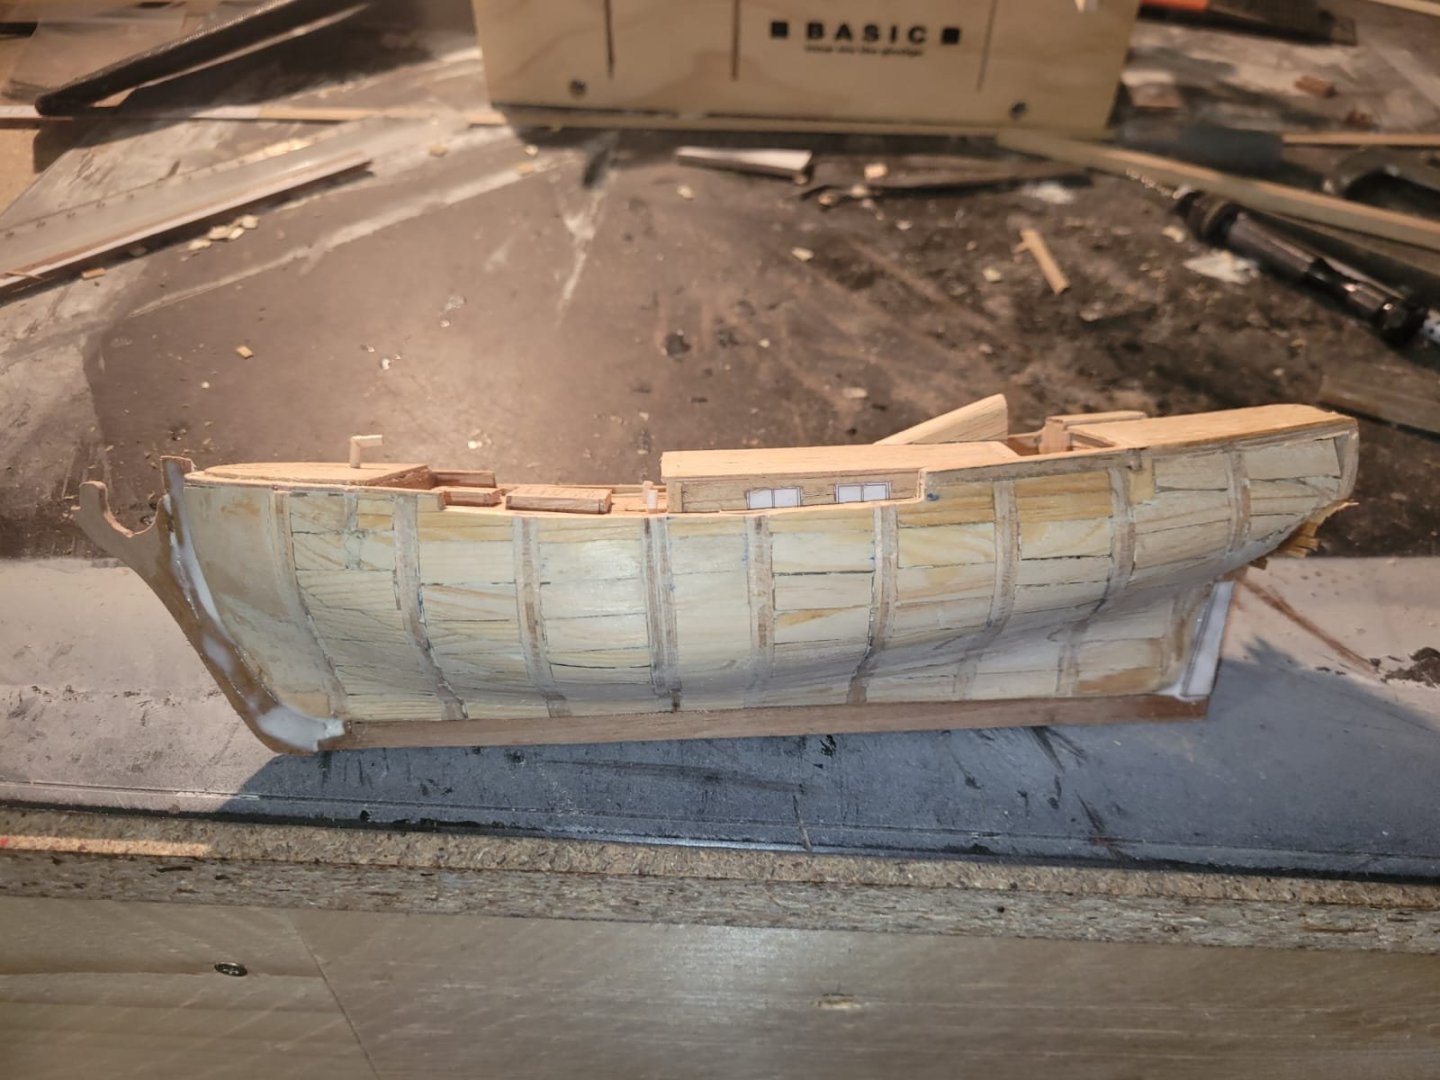
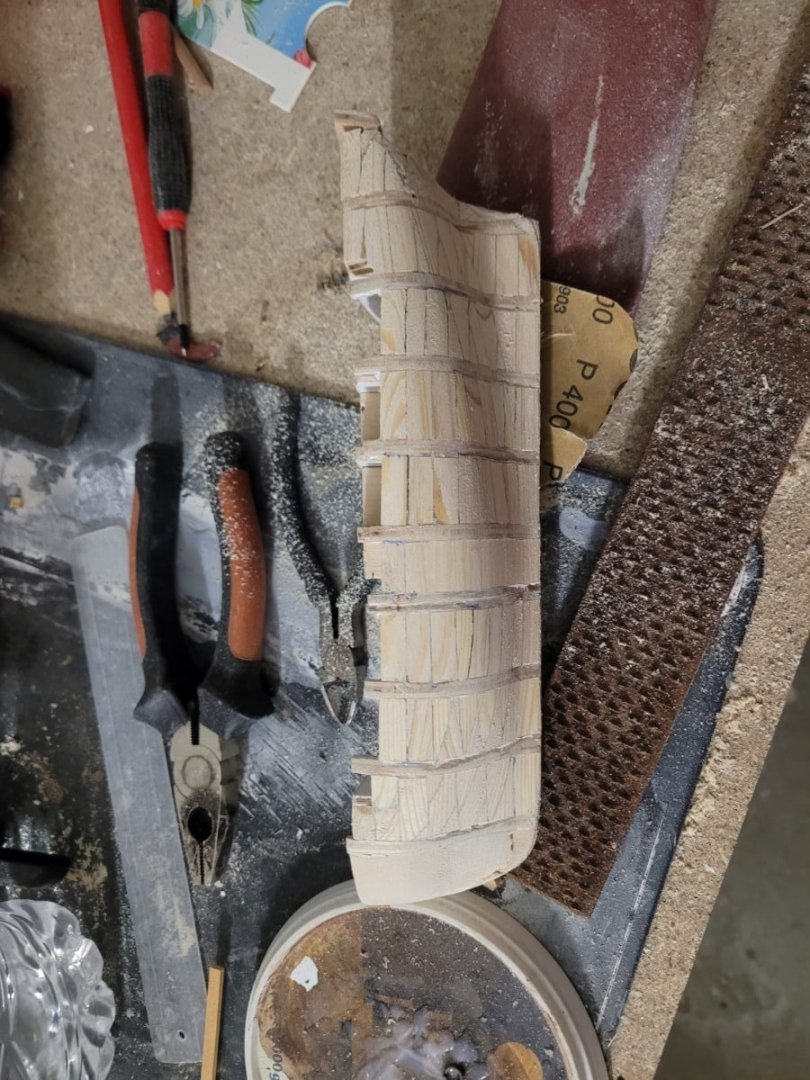
The first planking is done. The next planking will be the main deck and then the passengers cabin.

-
The Proxxon is smaller, indeed, but not by THAT much. The B&D's measurements are 19,6 x 45,4 x 14,4 cm; 1,2 Kilogramm, compared to 19,3 x 33 x 11,2 cm; 0,9 Kilogramm (both according to amazon). Yes, it's a thrid shorter shorter overall, but it's only 300 gramm lighter. Now for something completely different: Another bit of progress was made today
-
Proxxon would have been nice, but the Black&Decker did only cost less than a third (rather a quarter) as much as the Proxxon-equivalent. I was limited by the budget of the person, who wanted to give me this present after all.
-
This one: It's relatively small, handy and has a small dustbin to the rear. The only downside is its noise, but you can counter it with even basic ear protection.

-
Good progress was made. I've sanded the hull and used a new tool that I got for christmas. It's a small band sander. The left side of the hull was sanded by hand with a grater, the right side was sanded with the band sander and only small adjustments were made with the grater and sanding paper. The left side took me 2,5 hours to finish, the right side only 45 minutes! I know, which method I will use from now on.

-
Fillers are all done. Wow, now that I see this picture on a large screen, I am amazed about how sharply focused those clamps in the background are and how blurry the hull is as if my camera wants to say "Yeah, don't look to closely. It looks weird." I also testfitted the decks. I need to rework the cutouts for the bullwarks on the sides of the decks. For now it's a pretty tight fit, but I like the general look of it.

-
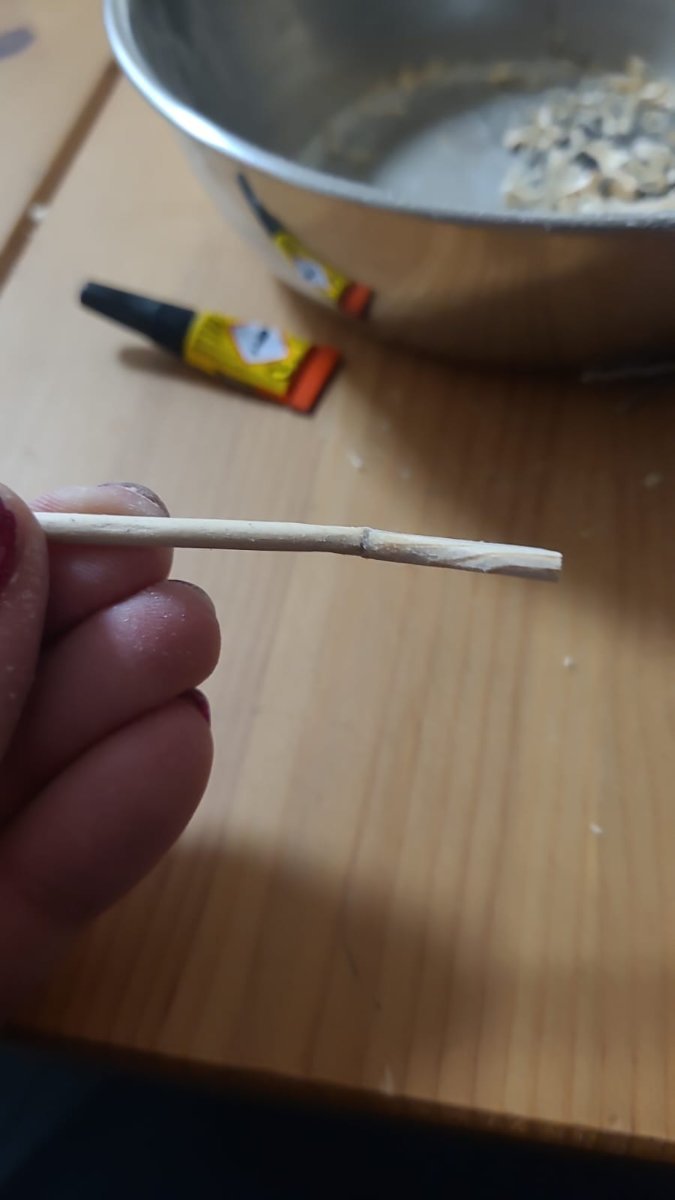
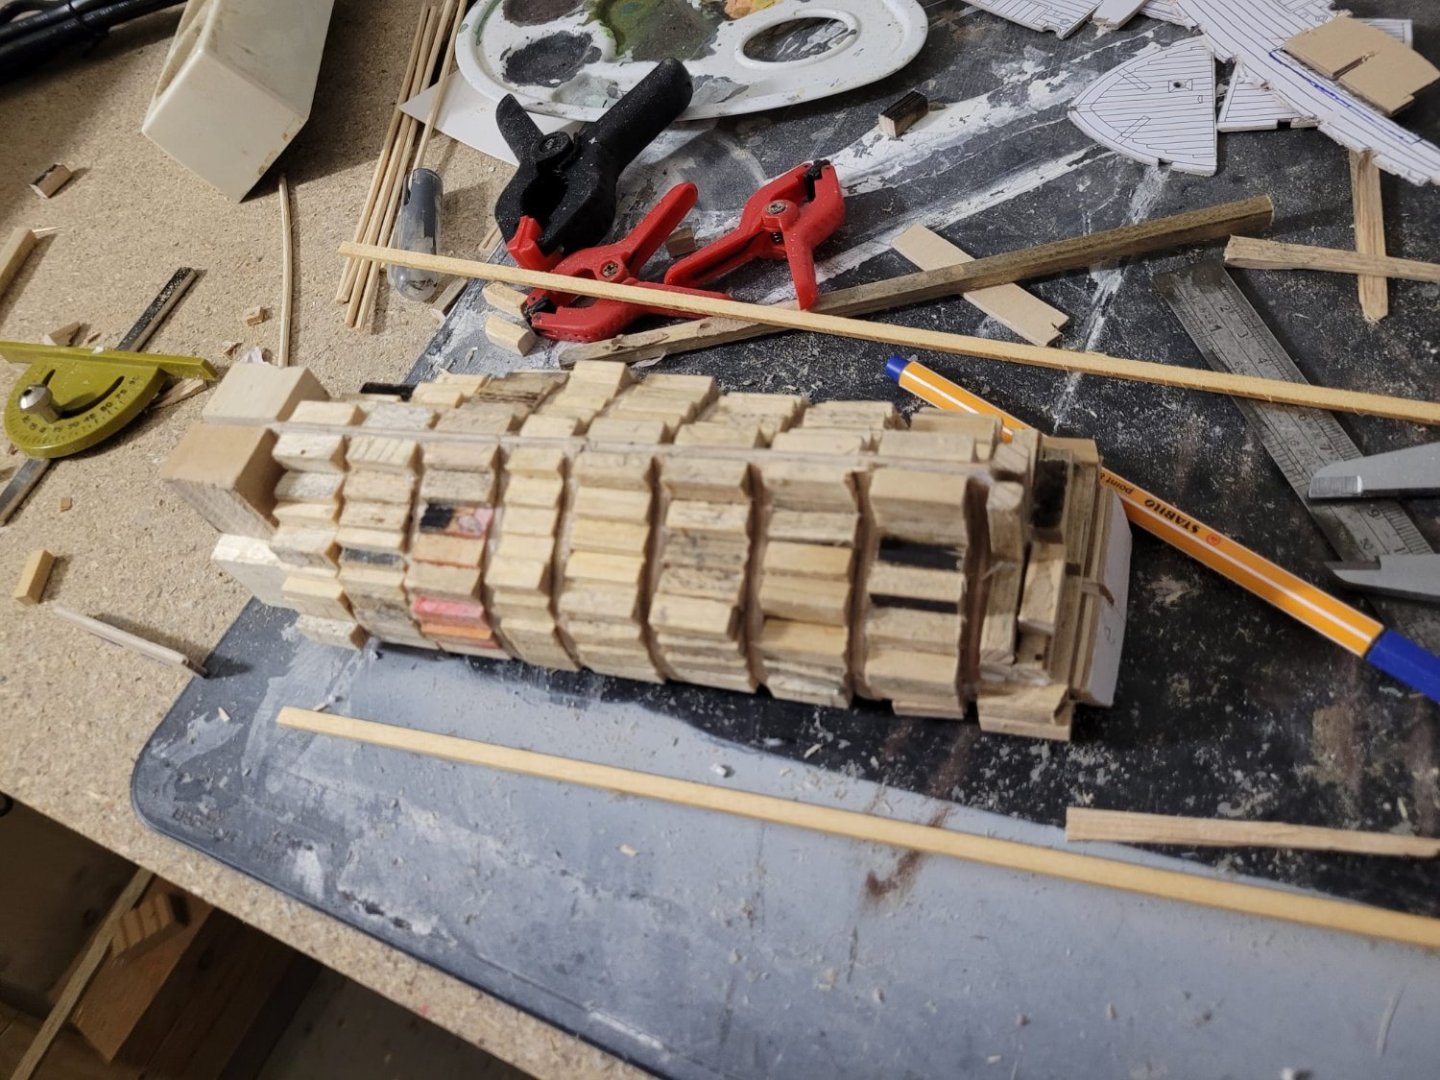
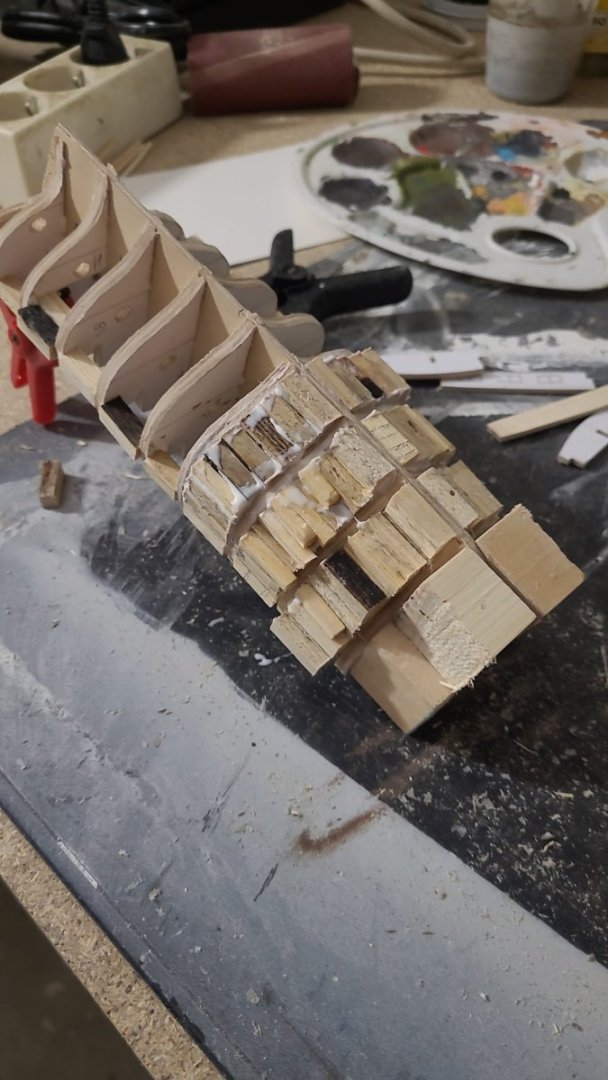
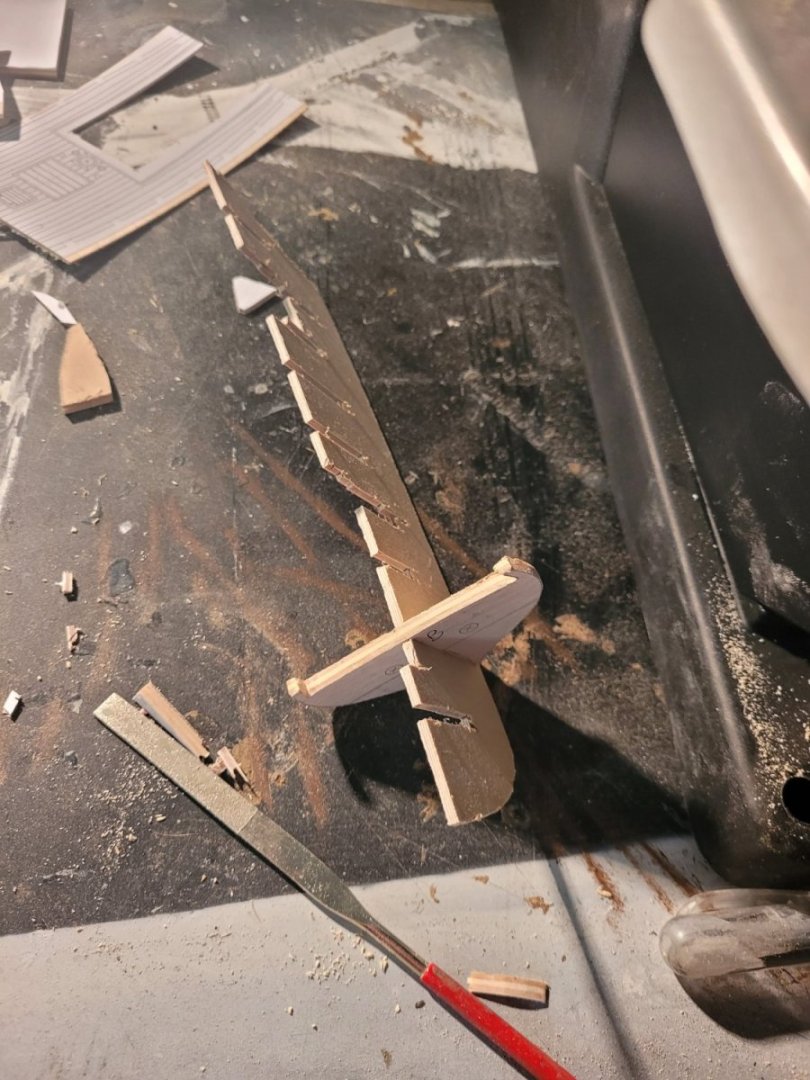
Hey The packet sloop project is not dead. As one of my new year resolutions I decided to carry on working on her. For once I have to thank all those people who burnt their money during new year's eve pyro show, because I collected a lot of sticks from rockets. I cut them to length and used them as filler between the bulkheads. This picture was taken yesterday. Today I've completed the next four sections, so only two to go and then there will be a lot of sanding. I'm pretty hyped now and as I'm currently unemployed, I have a good amount of time to work on her. See you next time!
-
What a beauty!
-
Hi guys, it's been a very busy time for me. Life has been kicking a bit. I had not much time on the workbench and won't have for a bit, I think. Also, comparing myself with you guys and the pressure, I put myself under, to get some good pictures to post another update, killed my mojo almost completely. Nevertheless, there is some progress. I changed the rig of the Packet almost completely. She looses the outer jib and both square topsails and gains a topgaffsail. This almost halves the number of ropes (From over 30 to 18!), therefore can be handled with less crew - more profit per voyage from Stralsund to Göteborg 😉 I plan to build another sloop at some point, which will be an armed one and will get the square sails. Also I reduced the length of the mast by around 2m. Don't expect any further updates in the near future or updates everytime I had benchtime, but I will share the big milestones with you (hull done, rig done, finishing line).
-
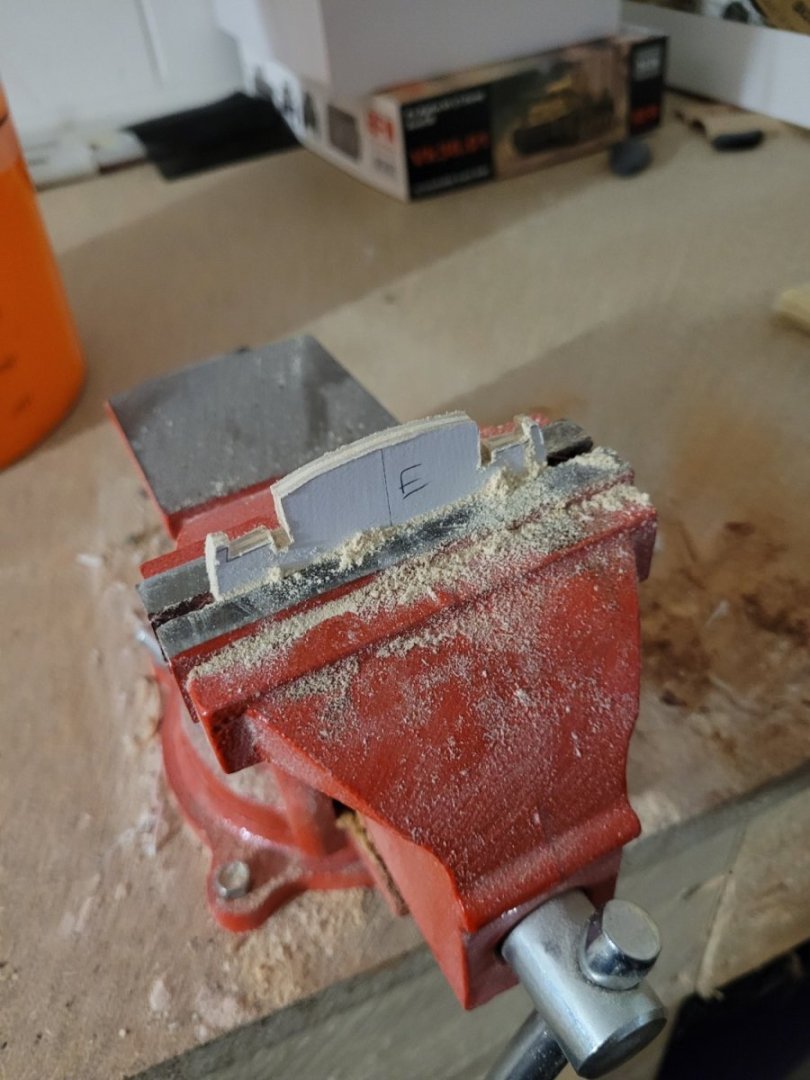
I had some time in my workshop recently and did some cleaning up. Ast time, I told you, Bulkhead E had gone missing, but also that it could not have gone far. Look, where I found it: That was a real facepalm moment, let me tell you this. I also discovered that the deck line on bulkhead D was too high - about 3 or 4 mm. So there is some work left to do. I received a shipment of basswood for the filler blocks.
-
Hi Meriadoc Brandybuck, thank you for your kind words and input. As long as no cut on any part of the rigging is made, it's not too late to talk about it and alter it. So don't be afraid to mention anything that you find worth mentioning. We can talk about it and I can explain my thought process, but in the end, it's my task to think about your points and mine and alter stuff - or not. But input is always appreciated as this is my very first modell developed from a plan drawn in a time long gone. 😁 Concerning your points: Not only did I crosscheck with other sloops, but also consulted literature like Chapman, zu Mondfeld or Marquardt. The common theme was, like Chapman said, "the whole of the main-mast ought to be thrice (three times) their breadth". Chapman gives the breadth of this sloop with 13 1/4 feet, which brings the main-mast's length to 29 3/4 feet. I used a foot length of 33,192 cm (I can't recall why why... Stockholm foot measures 29,69 cm), so the breadth measures 4,398 m and the length of the main mast 13,19 m. BUT I didn't just used Chapman as reference, but, as mentioned, also the other sloops. This raised the factor from 3 to 3,3345 and the mast length to 14,665 m. The length of a foot chosen doesn't matter, though, as it is only a number, a factor that affects each length, width, breadth,... The ratio between the several individual parts stays the same. This leaves the question "What is 'the whole of the main mast'?" I looked into the literature and asked fellow modellers and came to the conclusion, that in the majority of cases, this meant the length from the deck to the mast topp. And this answer I went with and built my further measurements around as all other diameters and lengths take the length and/or diameter of the main mast (which are connected.. the latter is around 2,5% of the former) as a point of reference.
-
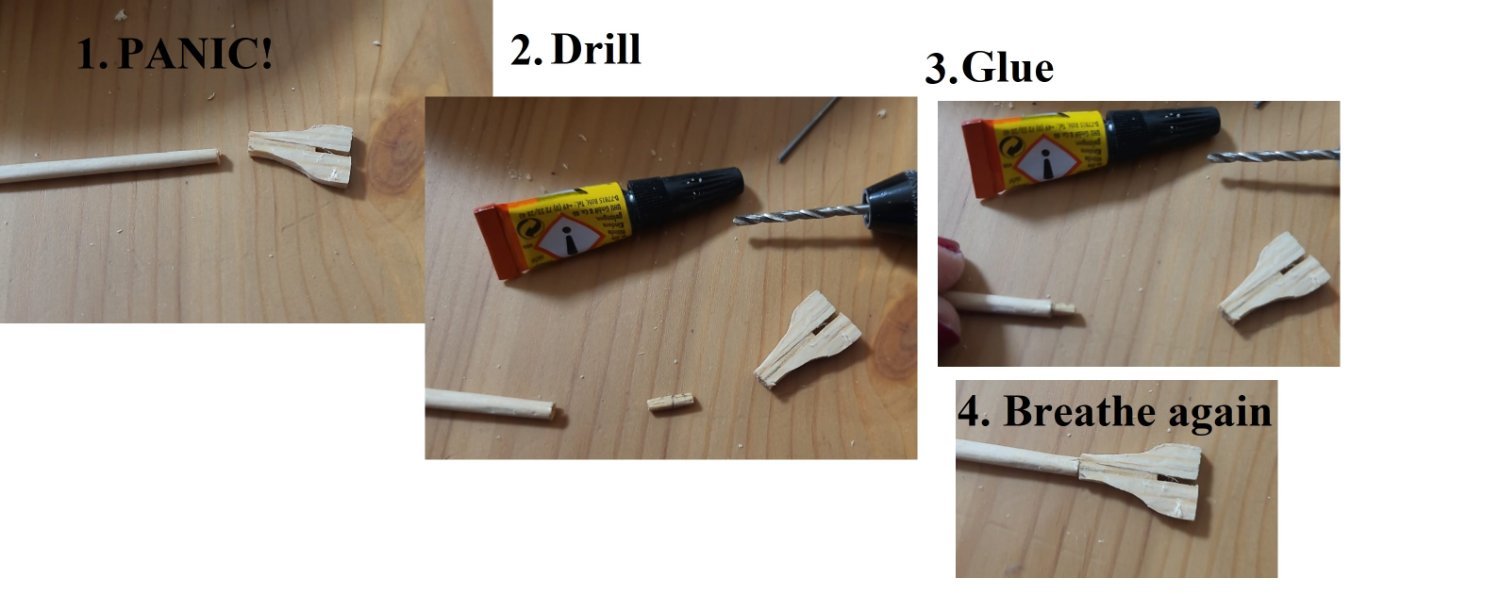
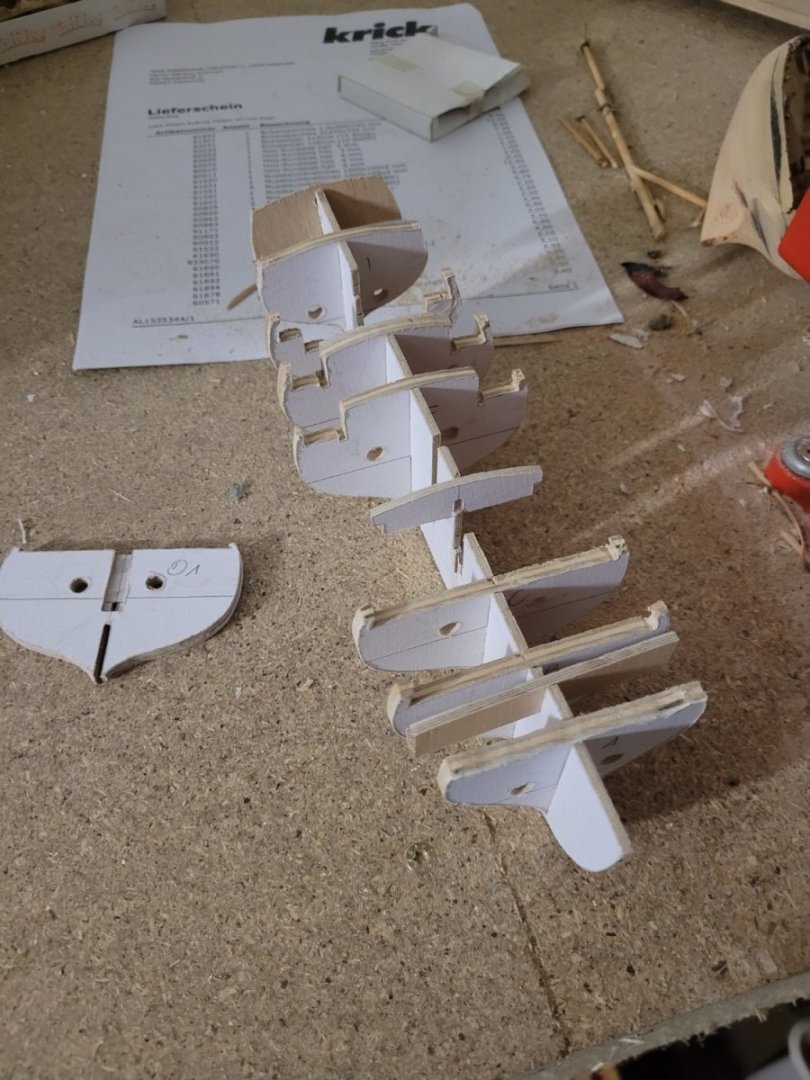
Quick update: most of the bulkheads are sanded in shape but not yet tapered. I lost bulkhead E somehow... I mean, it has to be somewhere near my workbench as I hadn't left my workshop 🙃
-
L'Amarante? 🤩 Awesome! I'm really looking forward to this.
- 589 replies
-
- 3
-
-
- le gros ventre
- cargo
- (and 1 more)
-
As this build is moving to the finishing line: what will be your next project?
- 589 replies
-
- 3
-
-
- le gros ventre
- cargo
- (and 1 more)
-
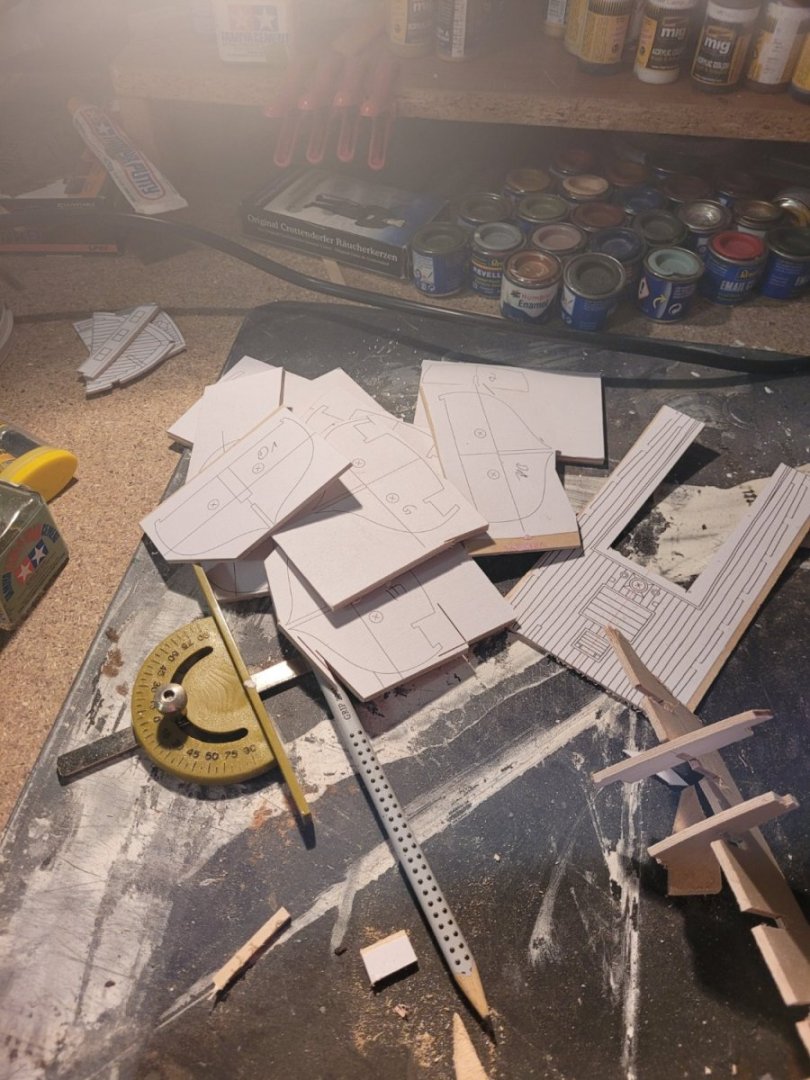
It has begun! The first cut is cut and the first glue is shed. Here are some pictures of my progress the parts for decks and cabins that are finished Some things, that still need some fine-tuning Bulkhead B is already in place In two weeks, I'll have plenty of time to finish the bulkheads and to start working on the deck-planking. A learning, that I'll take with me to the next project - Her Majesties Yacht Mary II - will be, that the width tolerances of the bulkhead's slits may be greater than 0mm 😅 maybe 0.5mm or something in between.

-
Were the canon periers some kind of Proto-carronade? Where were they installed?