Strelok
-
Posts
95 -
Joined
-
Last visited
Content Type
Profiles
Forums
Gallery
Events
Everything posted by Strelok
-
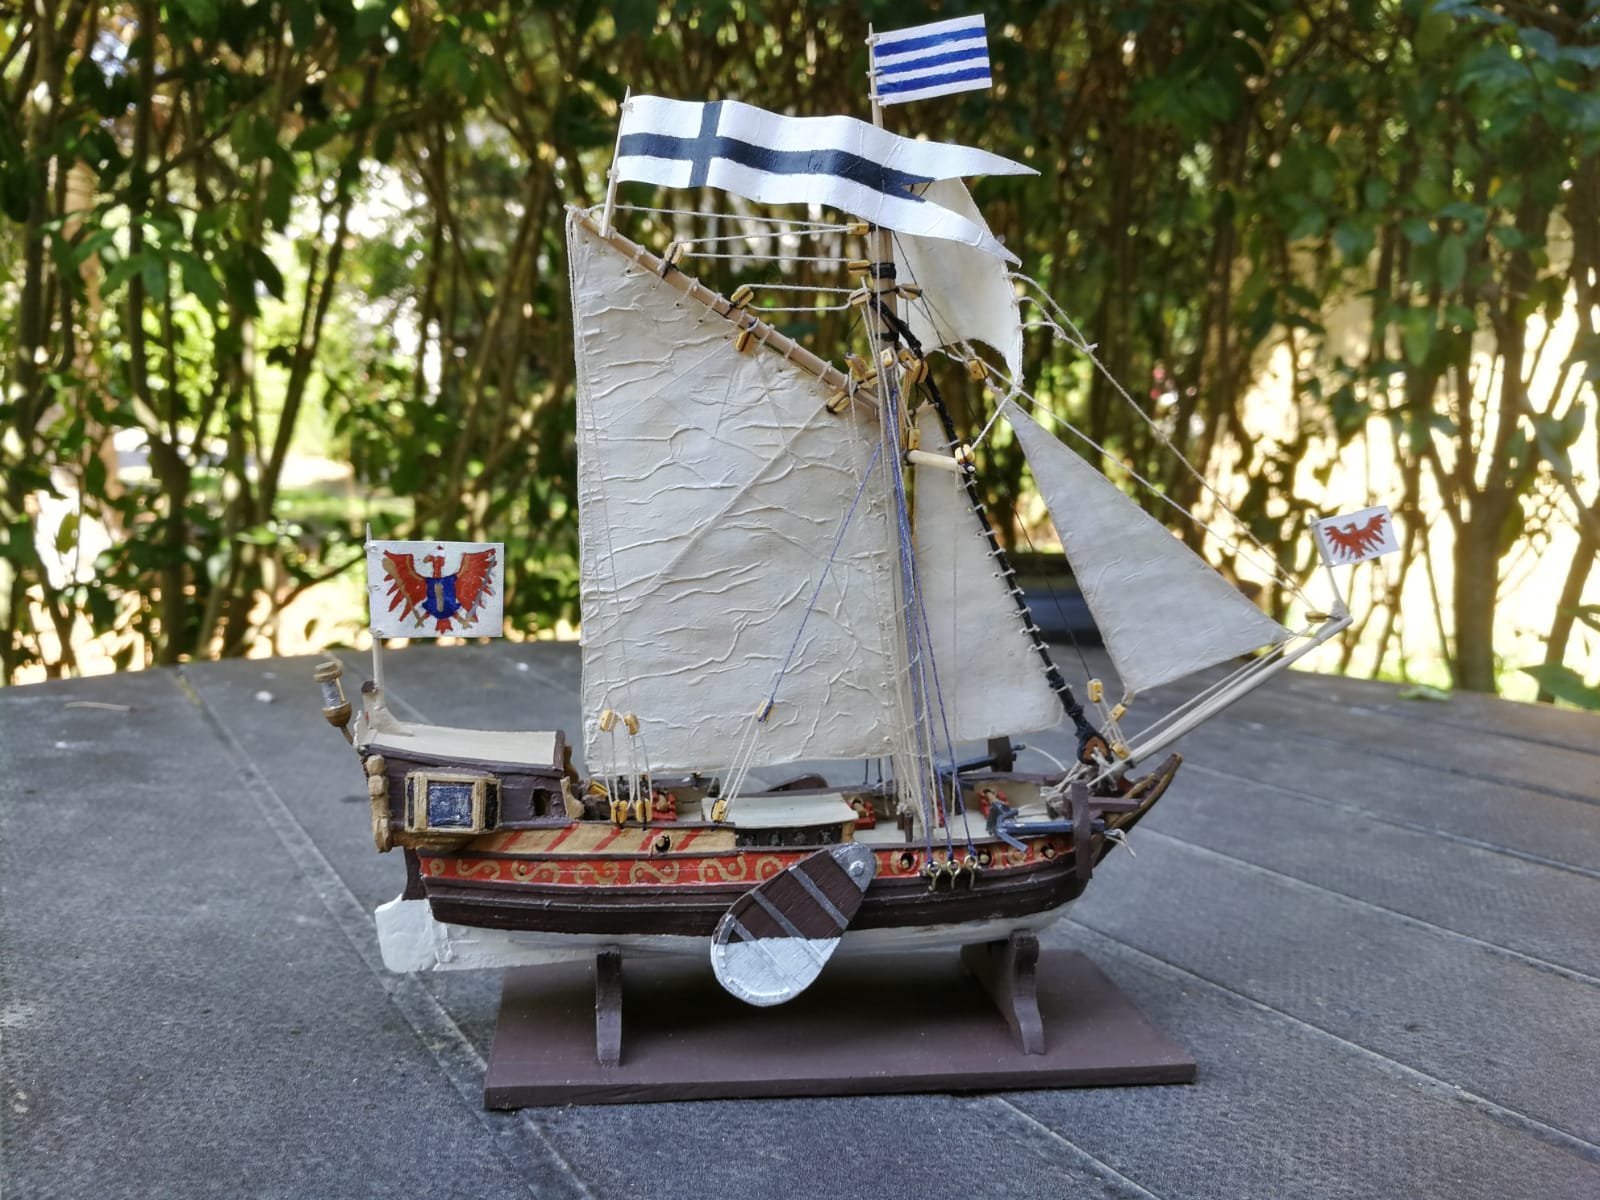
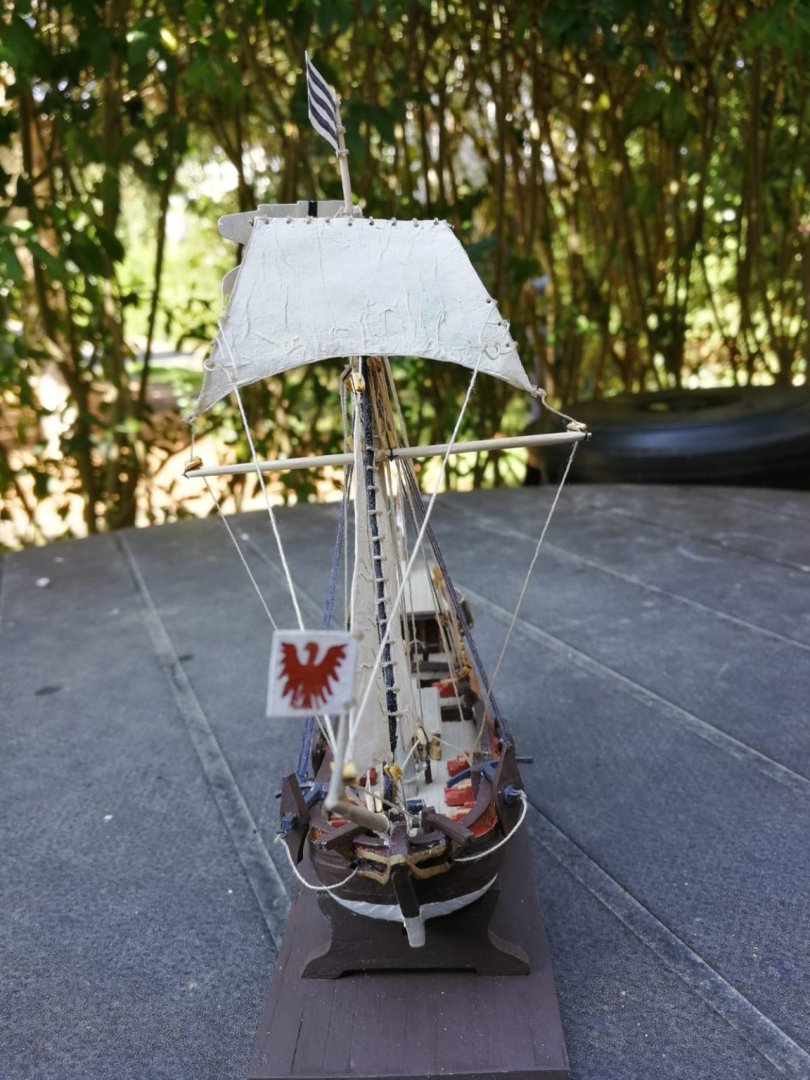
 The last entry! Construction days 28 - 31 were spent installing the sails, flags, running and standing rig. I encountered no major or minor problems. But I noticed something: while on the start of day 29, the Yacht still looked like a construction site with all its threads hanging loose and no sails, this day brought a big change. After installing the main and topsail, she had turned into a ship. After adding both stay sails the next day, the transformation was complete. I close this diary with some pictures of my Golden Yacht in broad daylight.
.thumb.jpeg.768dfce9ff9e4998a175f2a464757f09.jpeg)
.thumb.jpeg.eb61b4aab653b14a5ca0b9ffd11b8be4.jpeg)
.thumb.jpeg.33b0c7ba810b9a2ebed5378134df6a87.jpeg)
.thumb.jpeg.b30e821021bc2d196557e52603cad3a2.jpeg)
.thumb.jpeg.de0ad5f7a3d985625bfdc9b9d645a170.jpeg)
.thumb.jpeg.2df6f130222c36ce64be7179c173cfce.jpeg)
.thumb.jpeg.9f288f00ac836919a46da5cef80d8379.jpeg)

- 19 replies
-
- 6
-

-
- golden yacht
- card
- (and 1 more)
-
The thing is, that the Prince was captured after days of chase by several frigates (including HMS Endymion, which was the fastest frigate of the Royal Navy by that time), because one of her masts cracked a tiny bit under the pressure of all her sails.
- 355 replies
-
- 1
-
-
- prince de neufchatel
- schooner
- (and 3 more)
-
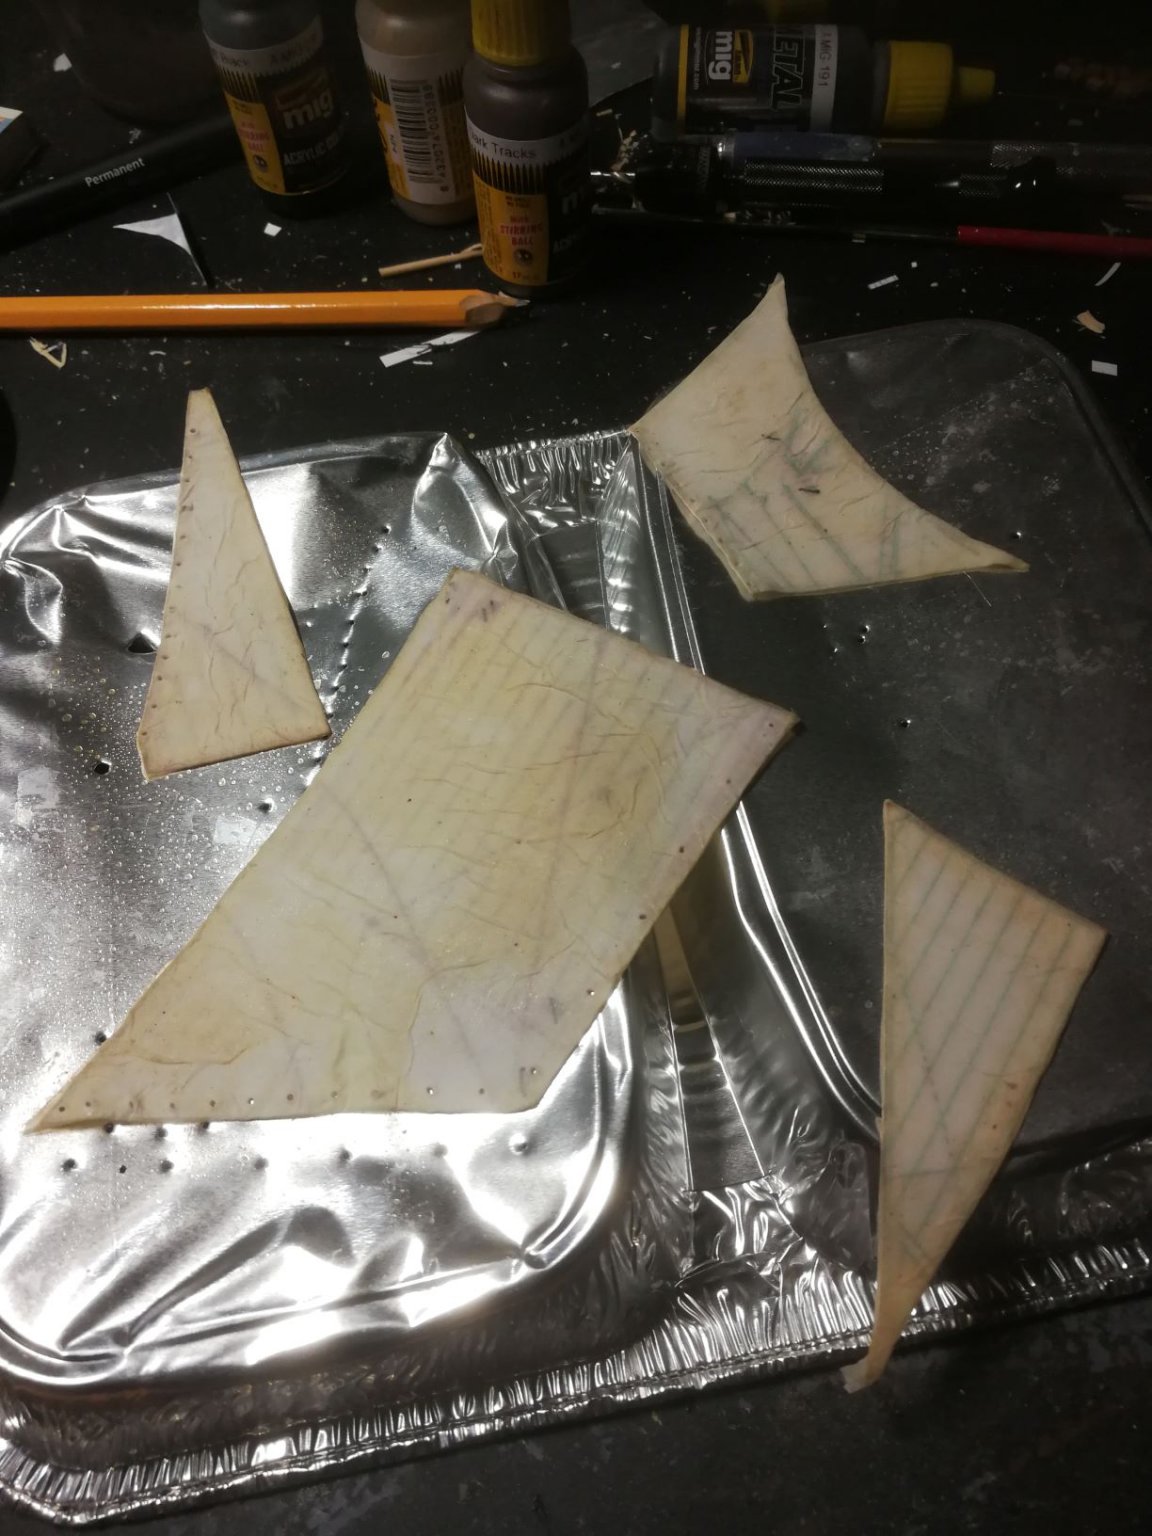
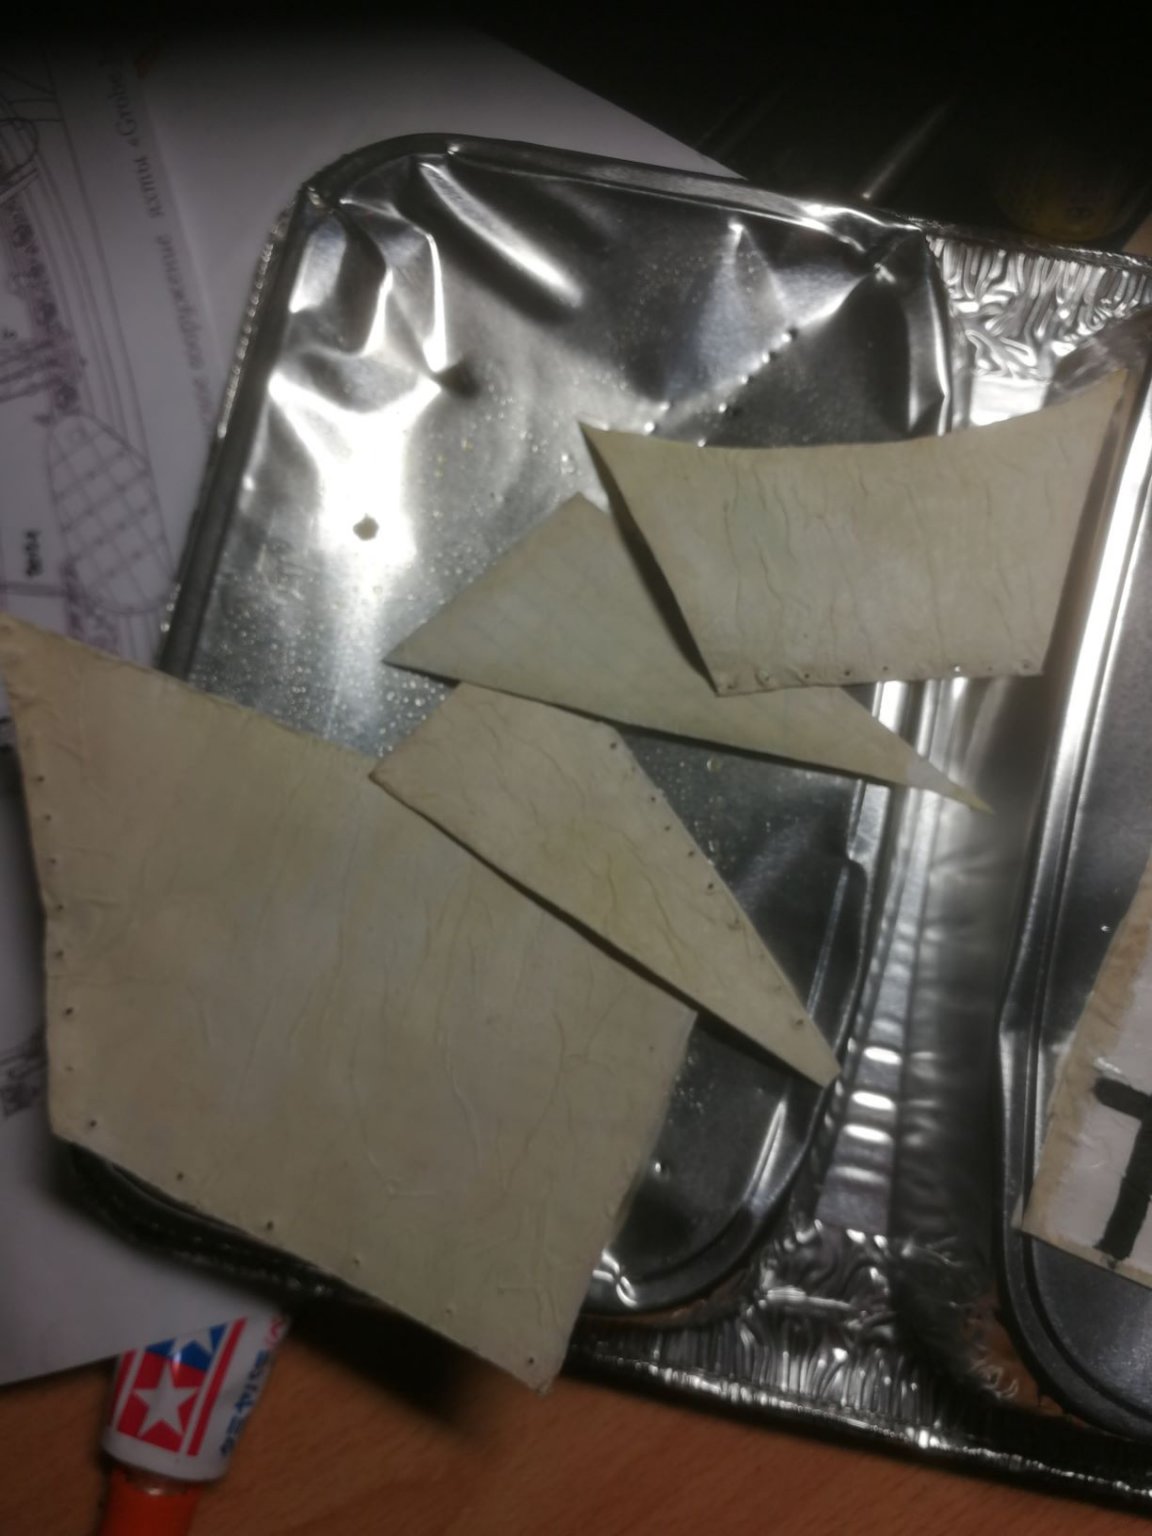
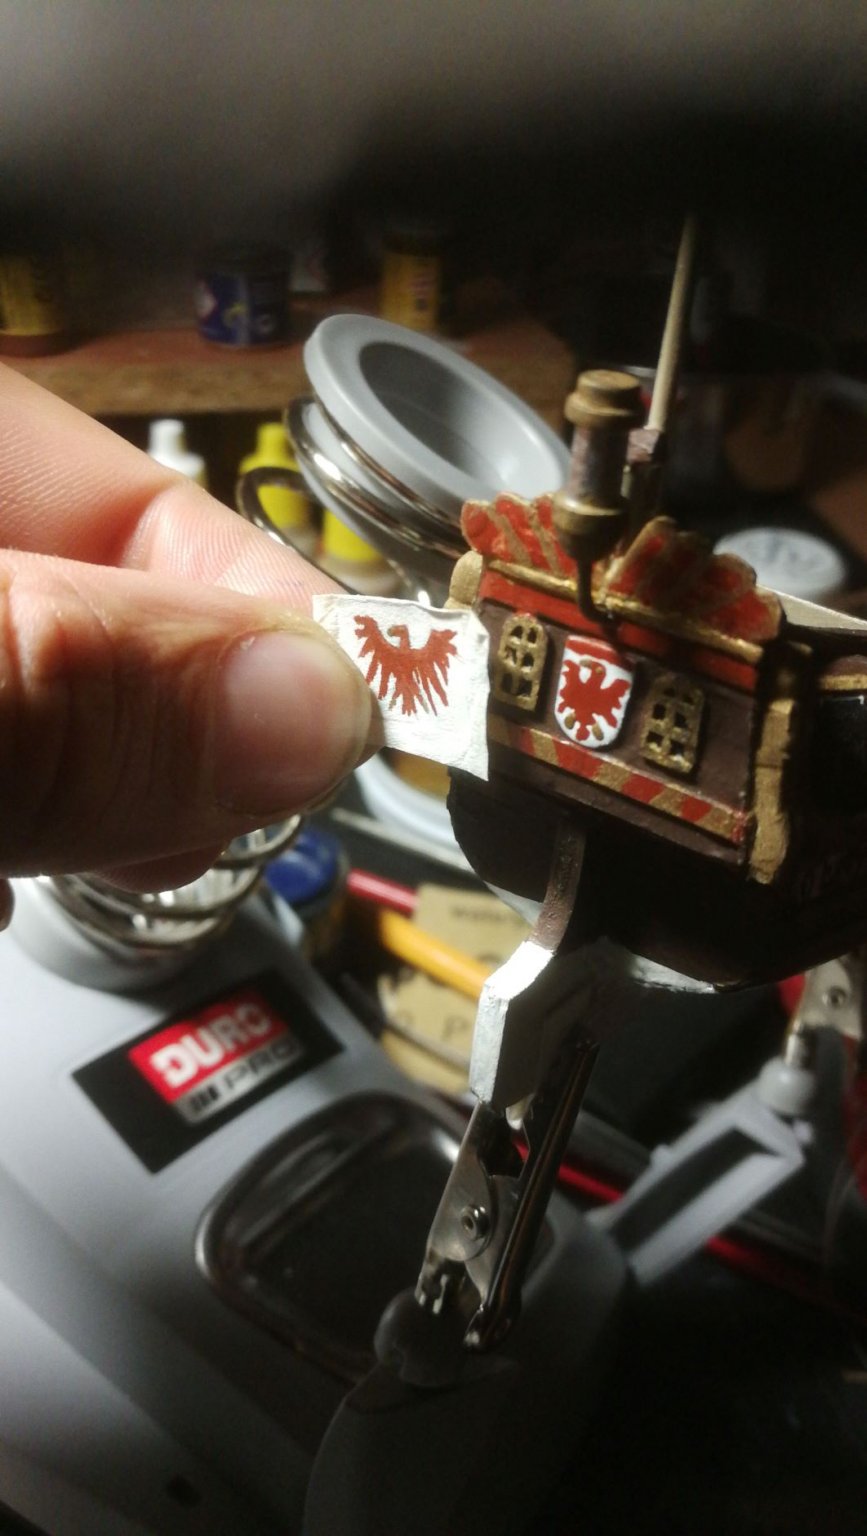
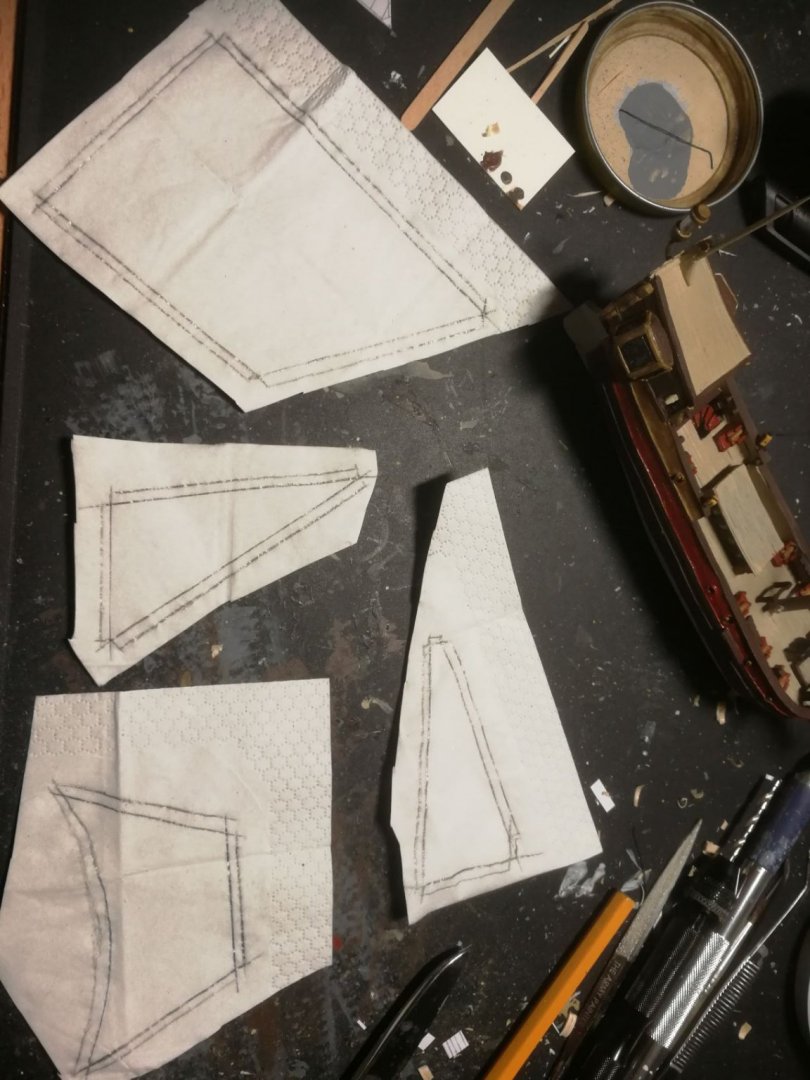
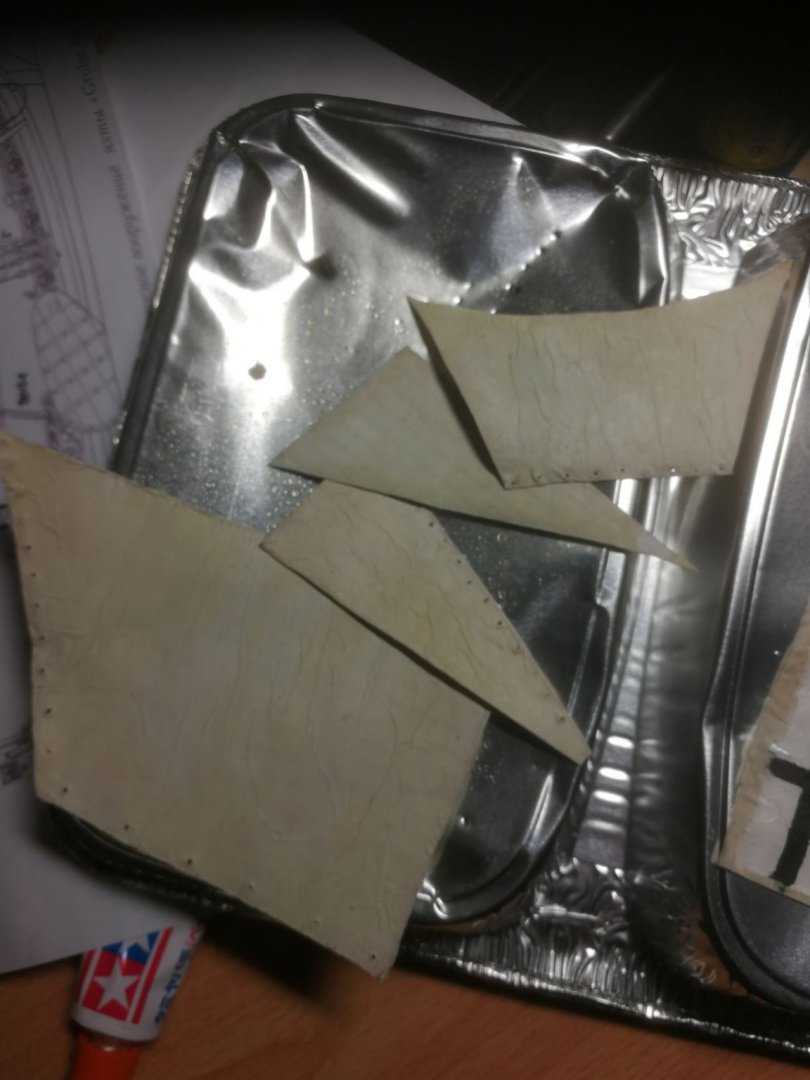
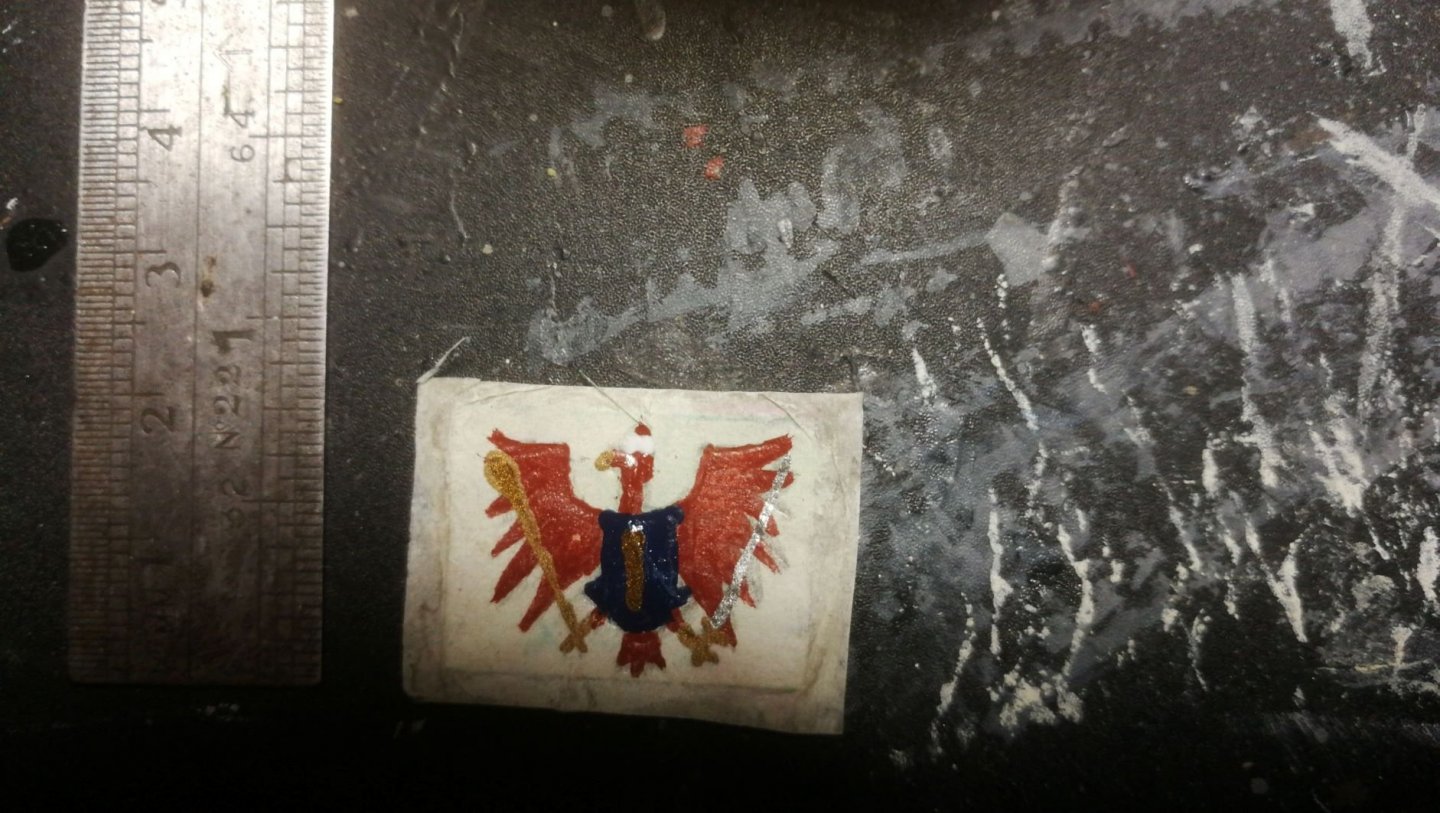
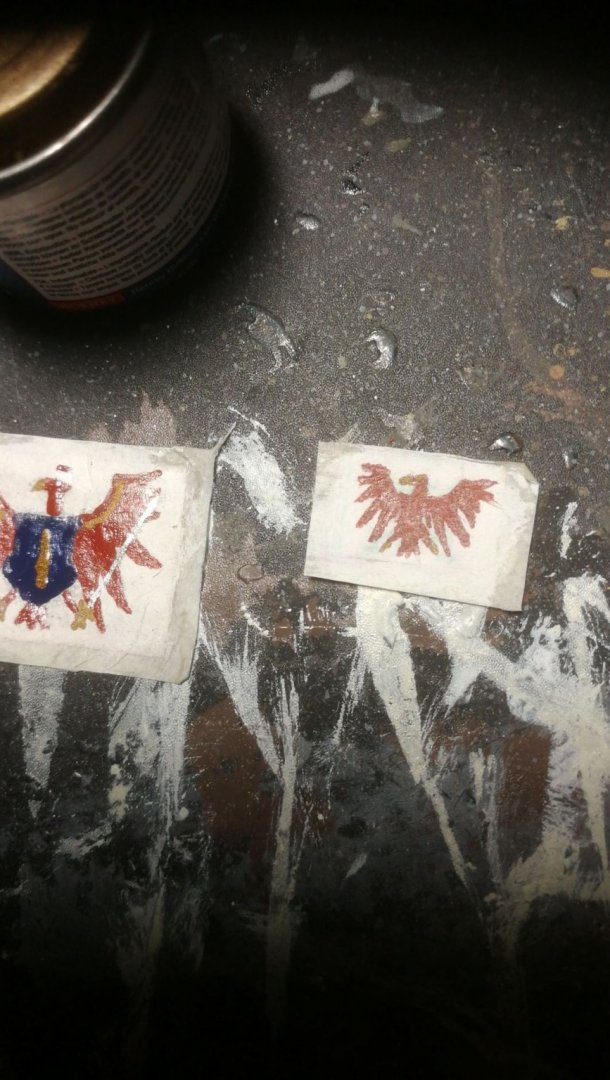
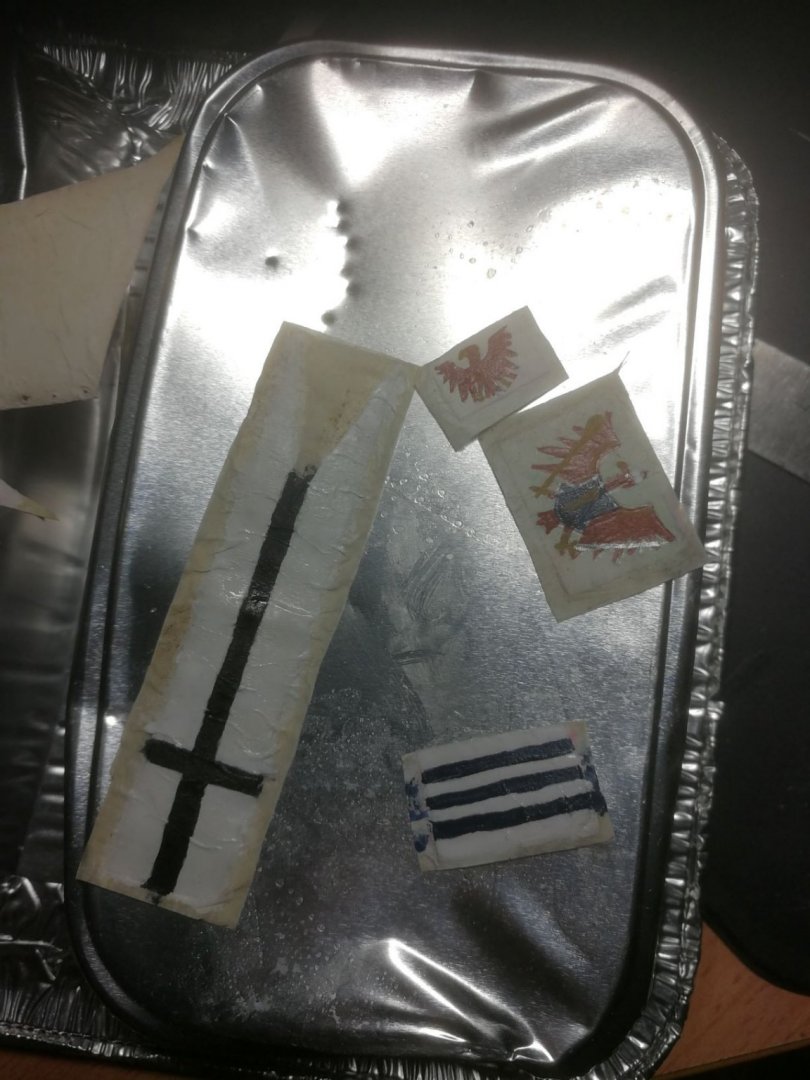
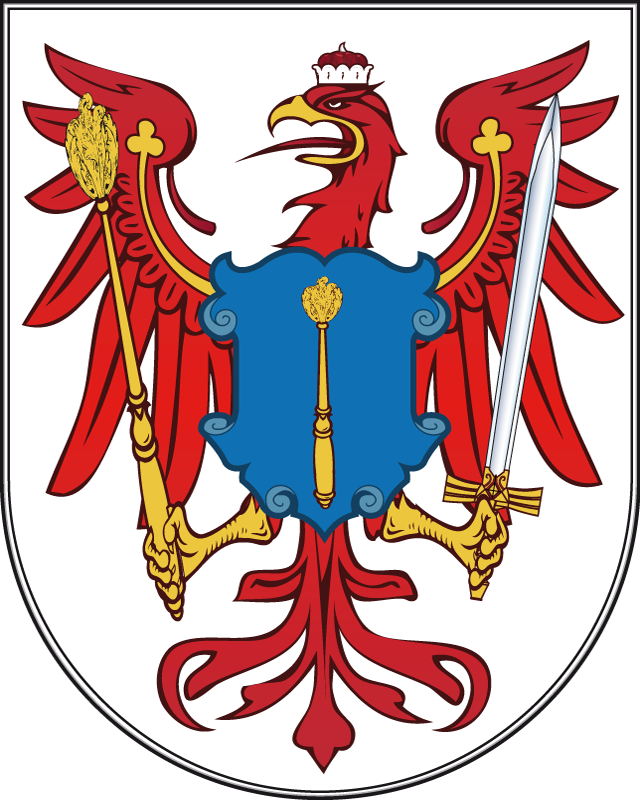
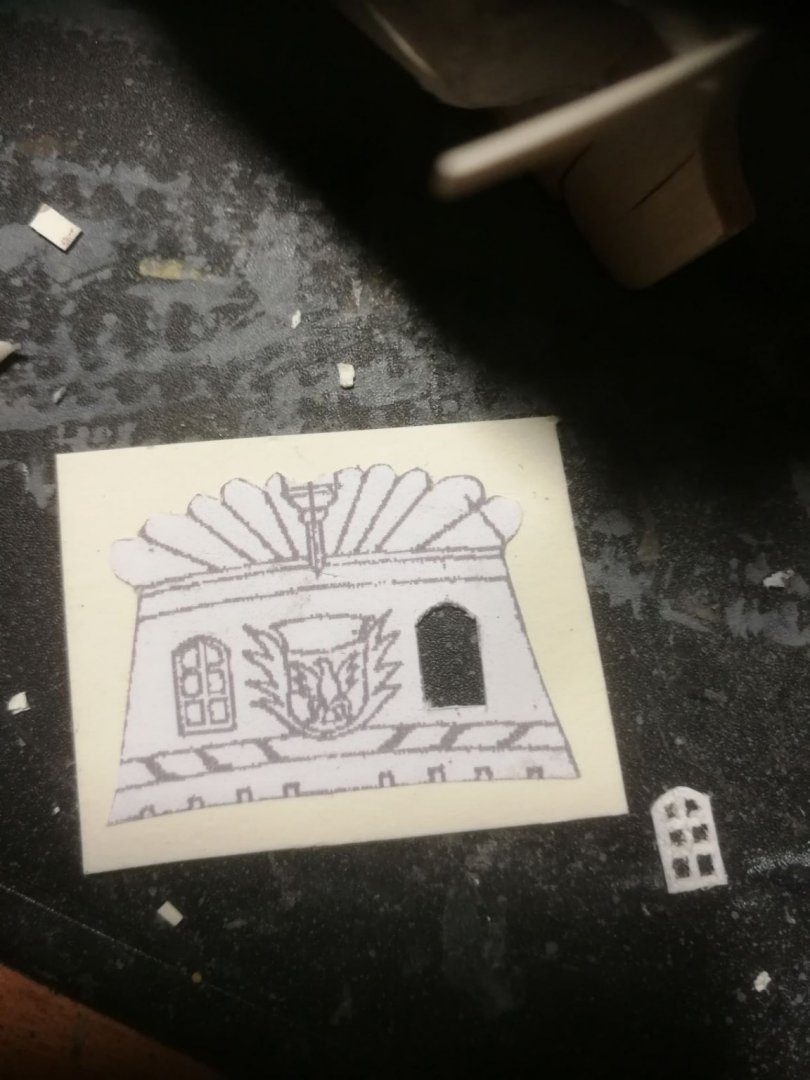
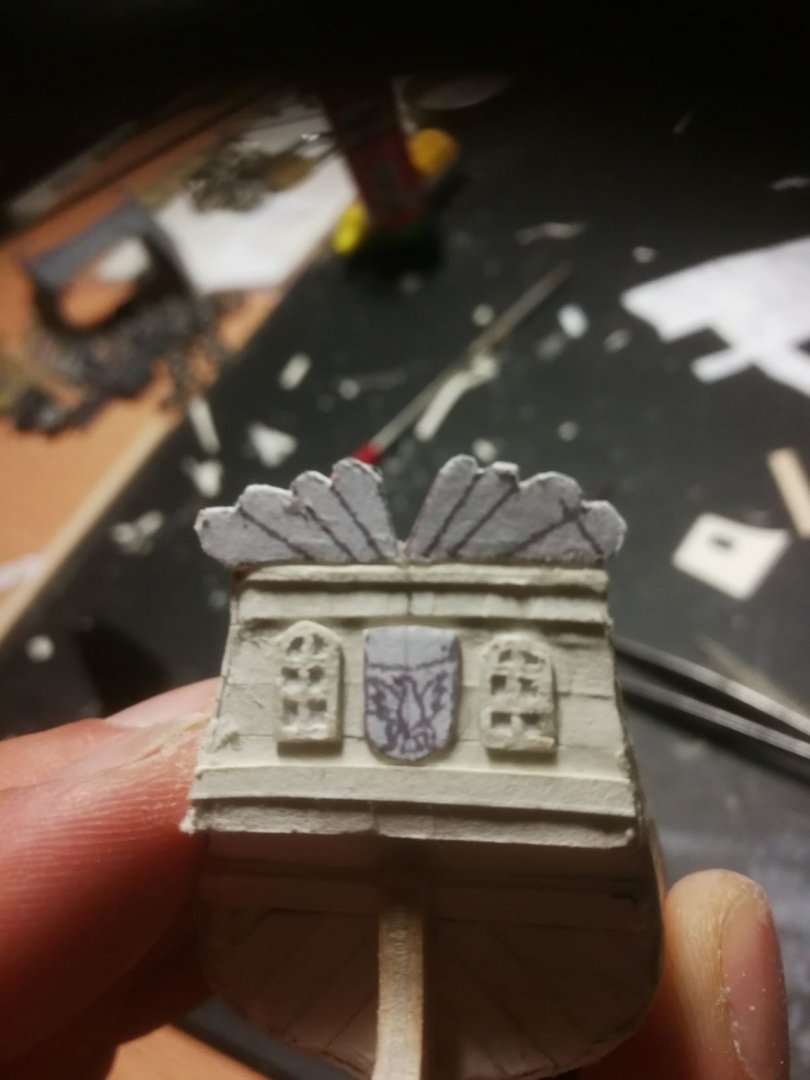
Concerning the sails, I ran into some problems. I don't have a sewing meching and even if I had one, I wouldn't know, how to use it properly. So I kept asking my friends and relatives, but either they were scared off by the small size or they were busy with other things. So I needed to come up with my own solution. My first idea was to just cut some cloth handkerchief to size, stabilize the edges with pva glue. This idea was discarded quickly as it would probably result in a pretty shabby look. I will tell you, how I made them. I cut the edges off a paper tissue, copied the tamplates to it, cut them out and seperated the four layers of the paper tissue. I then mixed PVA glue with water, laid one of the layers on top of the cut-out template and brushed the watered glue over it quite generously. I let it dry for some minutes and repeated the same process on the reverse side of the template. After letting them dry for two days, I then punched holes into them for attaching them to their yards. At the end, I painted the sails with a 50/50-mix of Ammo of Mig RAL 9001 Cremeweiß and Ammo of Mig matt white. After letting it dry, I gave it a patchy drybrushing with unmixed, but diluted matt white. The result looks like a sail to me 😁 Following are the pictures of the seperate steps: The other clothy things on the Yacht are her four flags. Unfortunately, while having four flagpoles, I had only templates for three flags 🤔 I had to come up with an own creation for the flag flying from the gaff-flagpole. I decided for a long flag with a swallowtail and a simple black cross on it, showing the (then) future links between Brandenburg and Prussia. I don't know, if it is a contemporary or even plausible solution, but to be honest: I don't really care 🤪 It surely does look nice. All flags were made in a similar fashion as the sails: cutting the templates out and glueing paper tissues on both sides. But the flags received only a layer of diluted white paint. This way, they look a bit brighter than the sails, but still not tidy white. Furthermore, I was able to guess the outlines of the pictures. After that, the flags needed their eagles. I will show you the original coat of arms of the Margrave of Brandenburg, just for comparison: This is my version of it on the largest flag with a ruler next to it for scale comparison. It is all handpainted with only a few preemptive sketches. But - of course - if there is a large flag - there needs to be a small flag, too. And it doesn't end there, as the eagle needed to be painted to the heraldic shield on the stern of the Yacht. By this point, painting had degenerated to dipping the painty brush with the outmost care on to the shield and praying, that it won't screw up everything. At the end, I was surprised, that one really could - with a bit of forced imagination - recognize an eagle. I call it "the electoral turkey of Branden-booook" These are all the flags, I've made: They still need to be cut to shape. When I started the flags, I imagined them to be the hardest part of the hole Yacht-build so far, but in the end, they were pretty easy to make and paint. Better results could definitively have been achieved by just using a printer or other fancy stuff, but I know: I've made them all by myself and painted them by hand. I've never done anything like this before, let alone this small. I am very proud of the results.


- 19 replies
-
- 3
-
-
- golden yacht
- card
- (and 1 more)
-
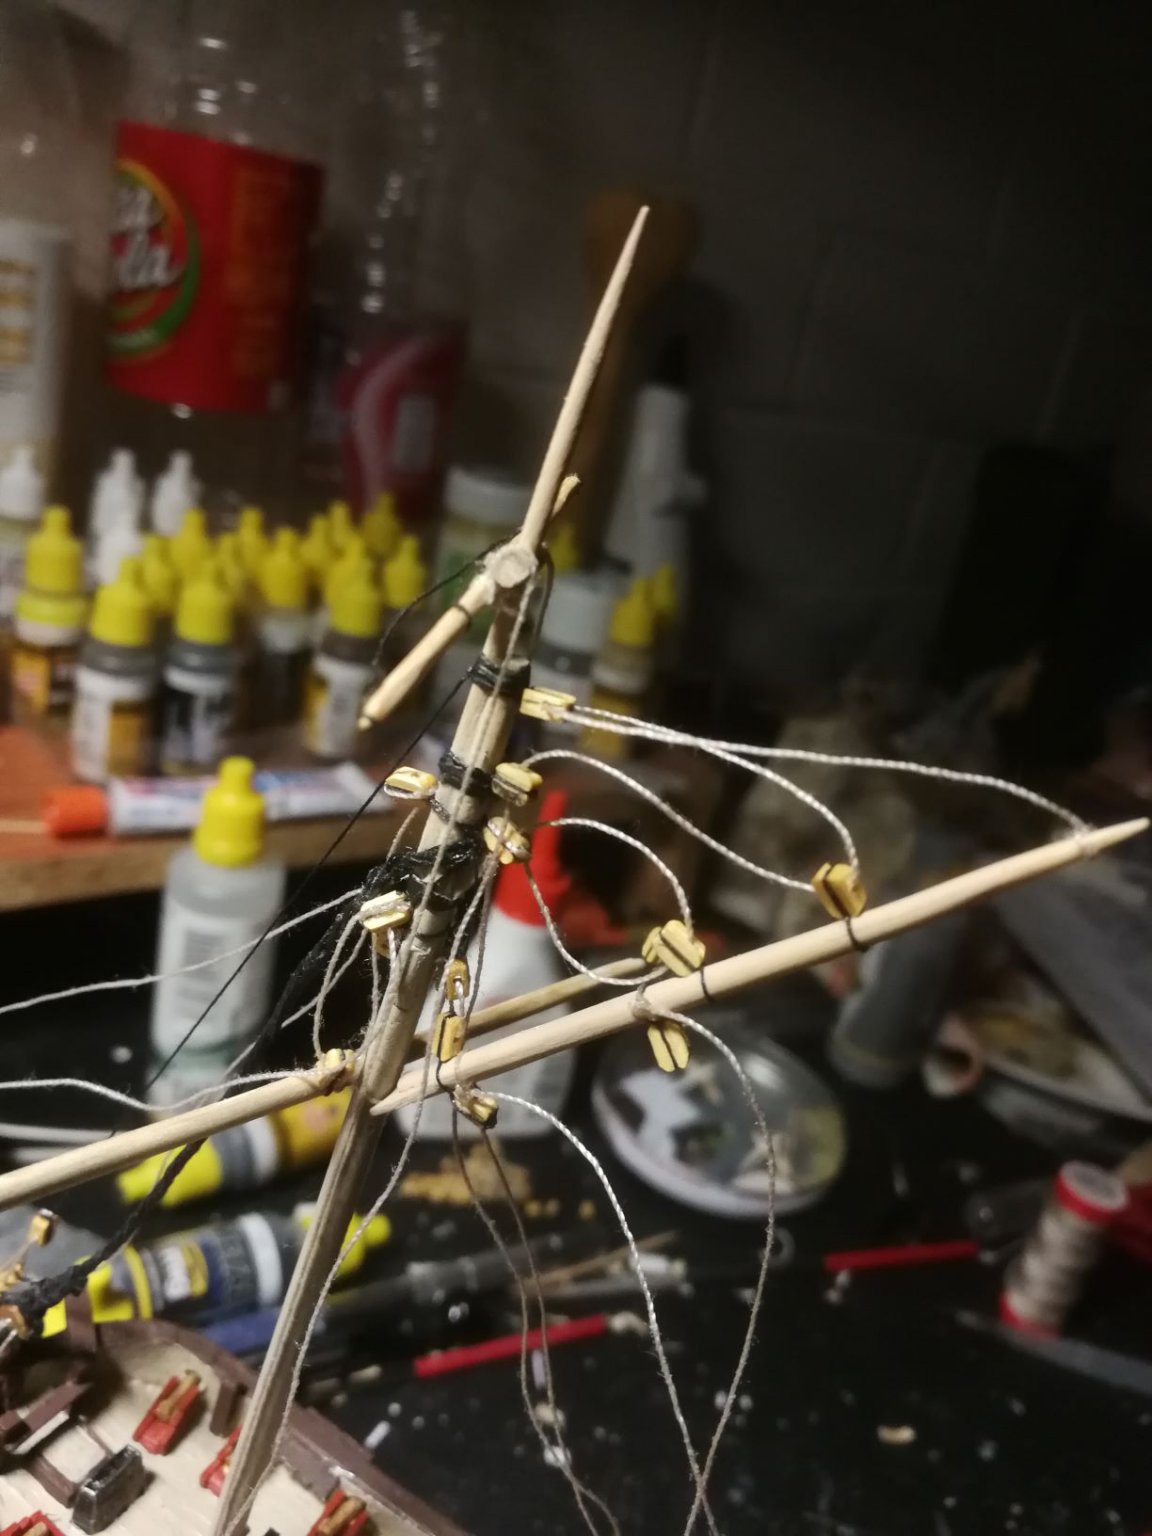
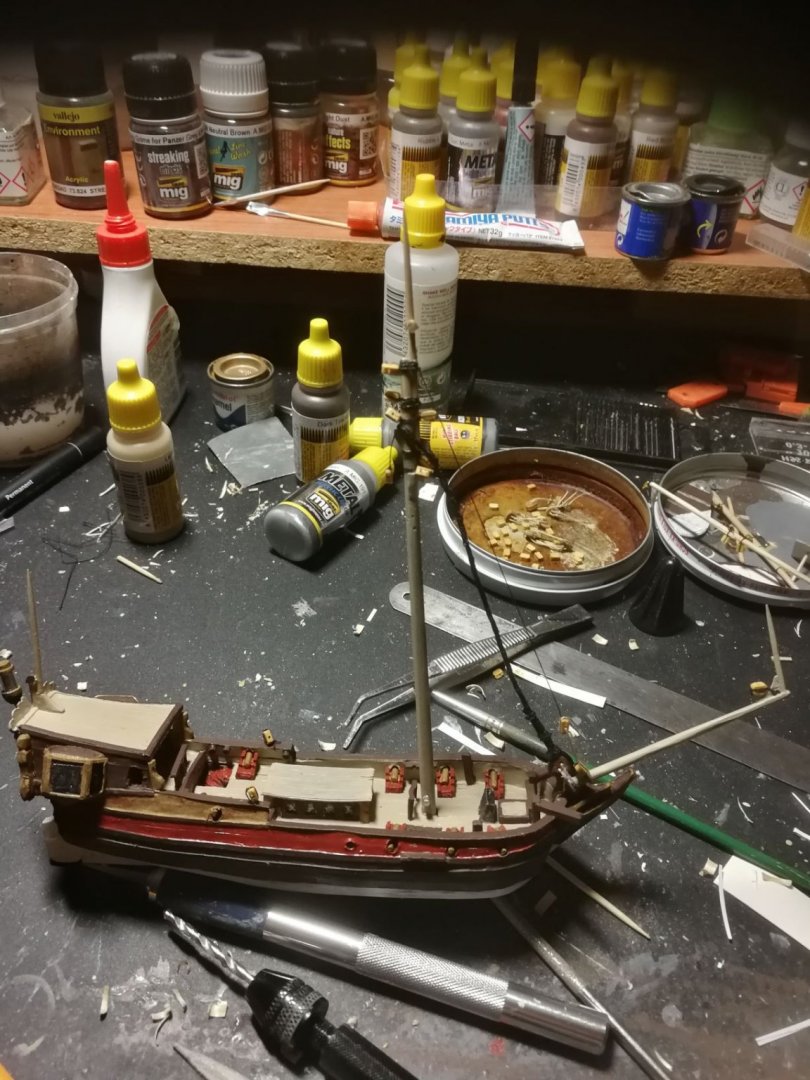
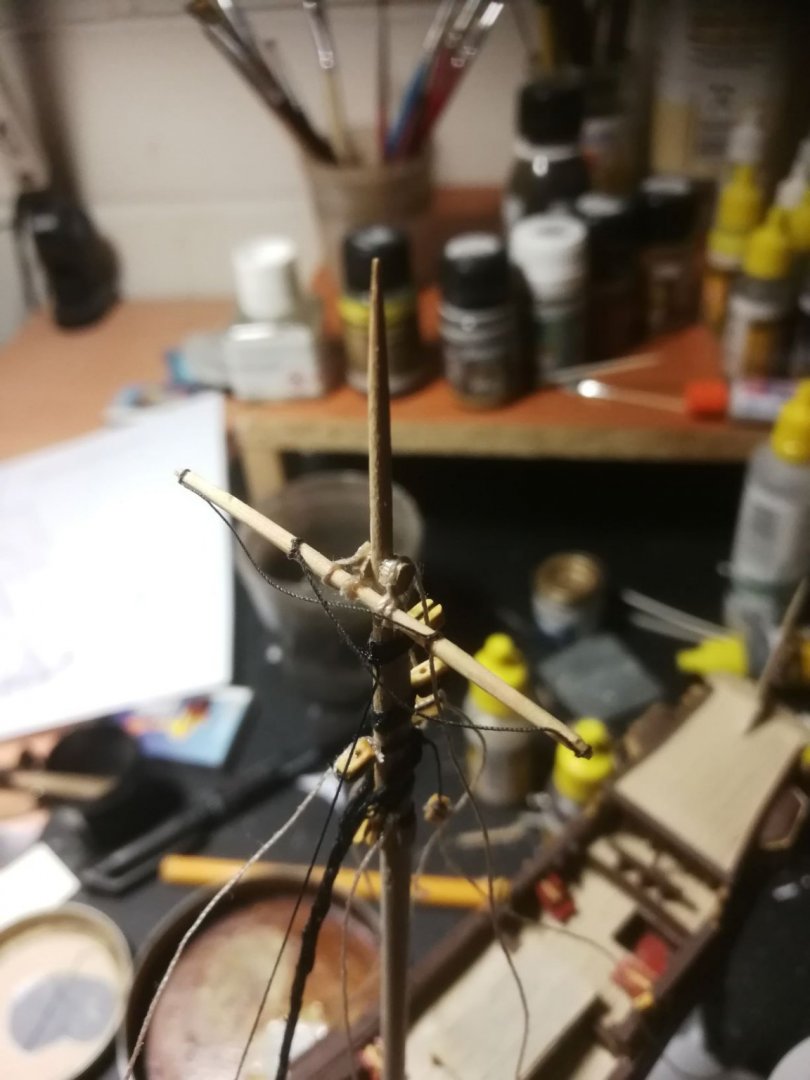
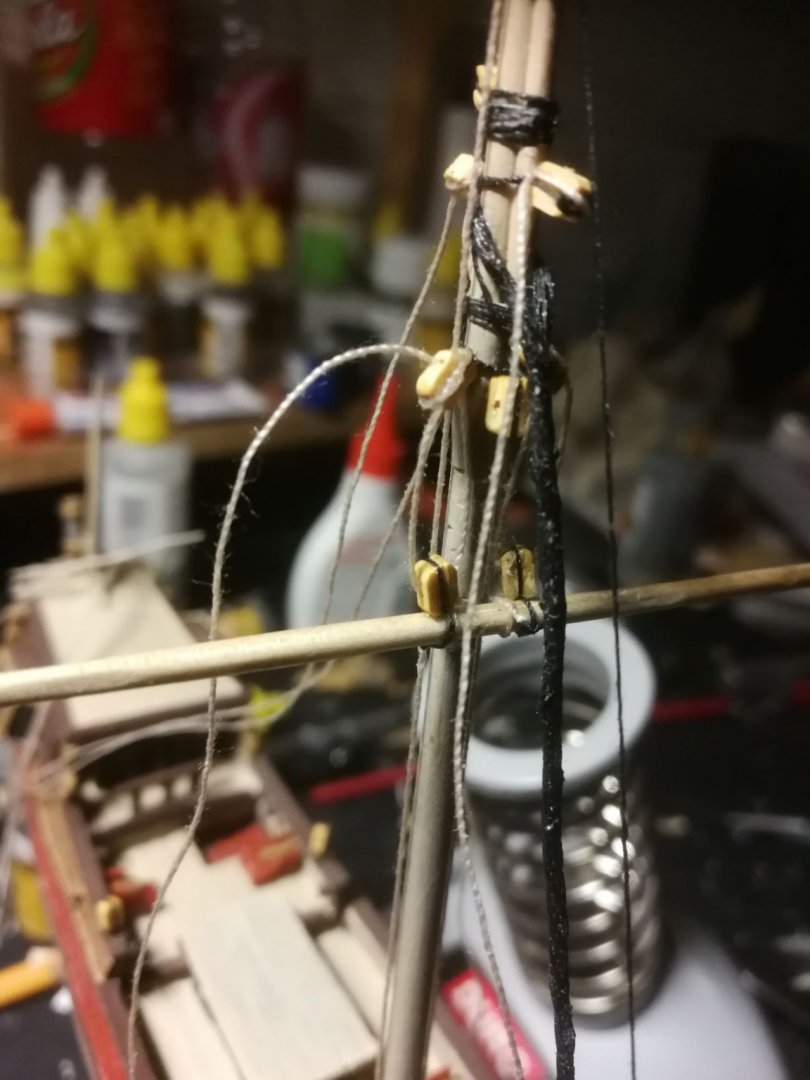
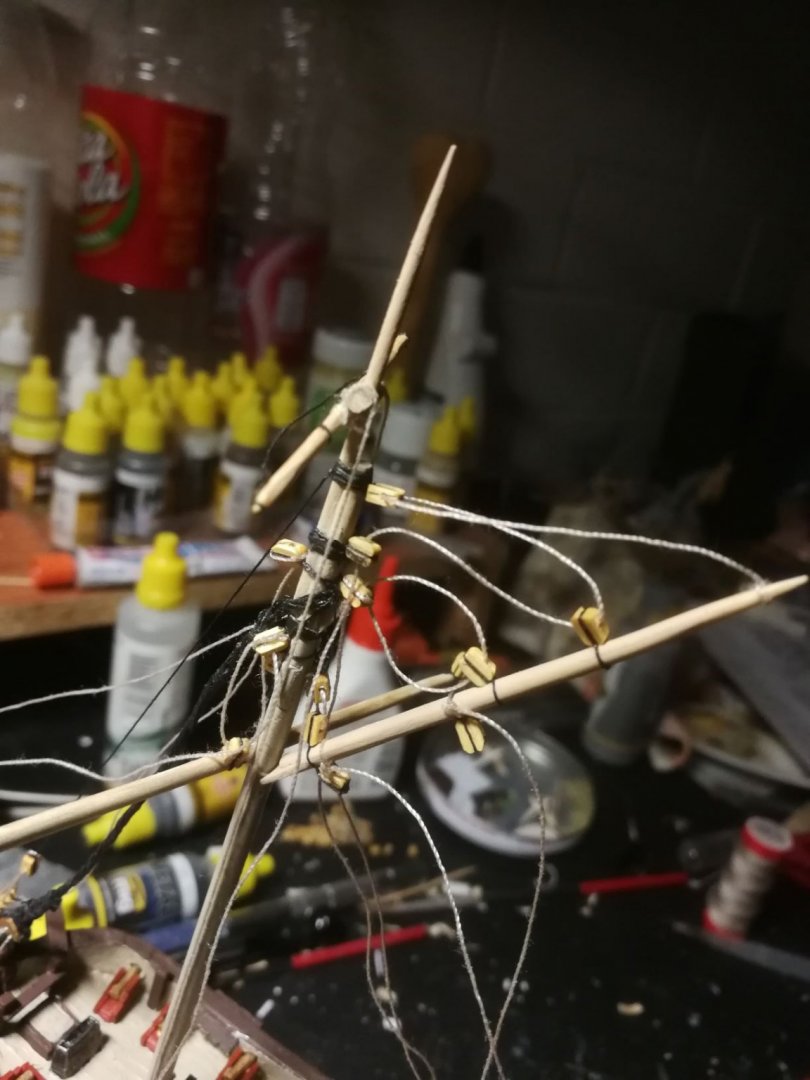
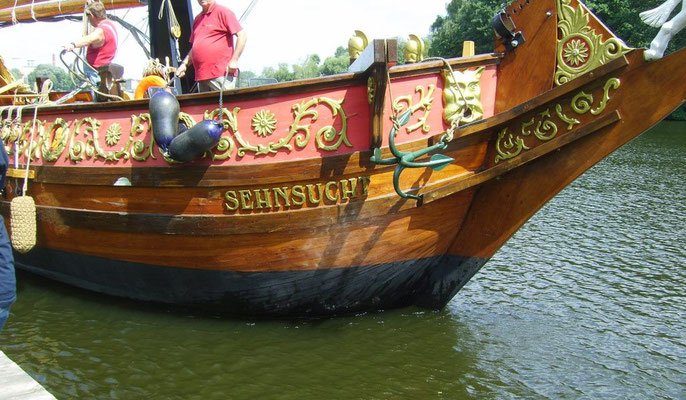
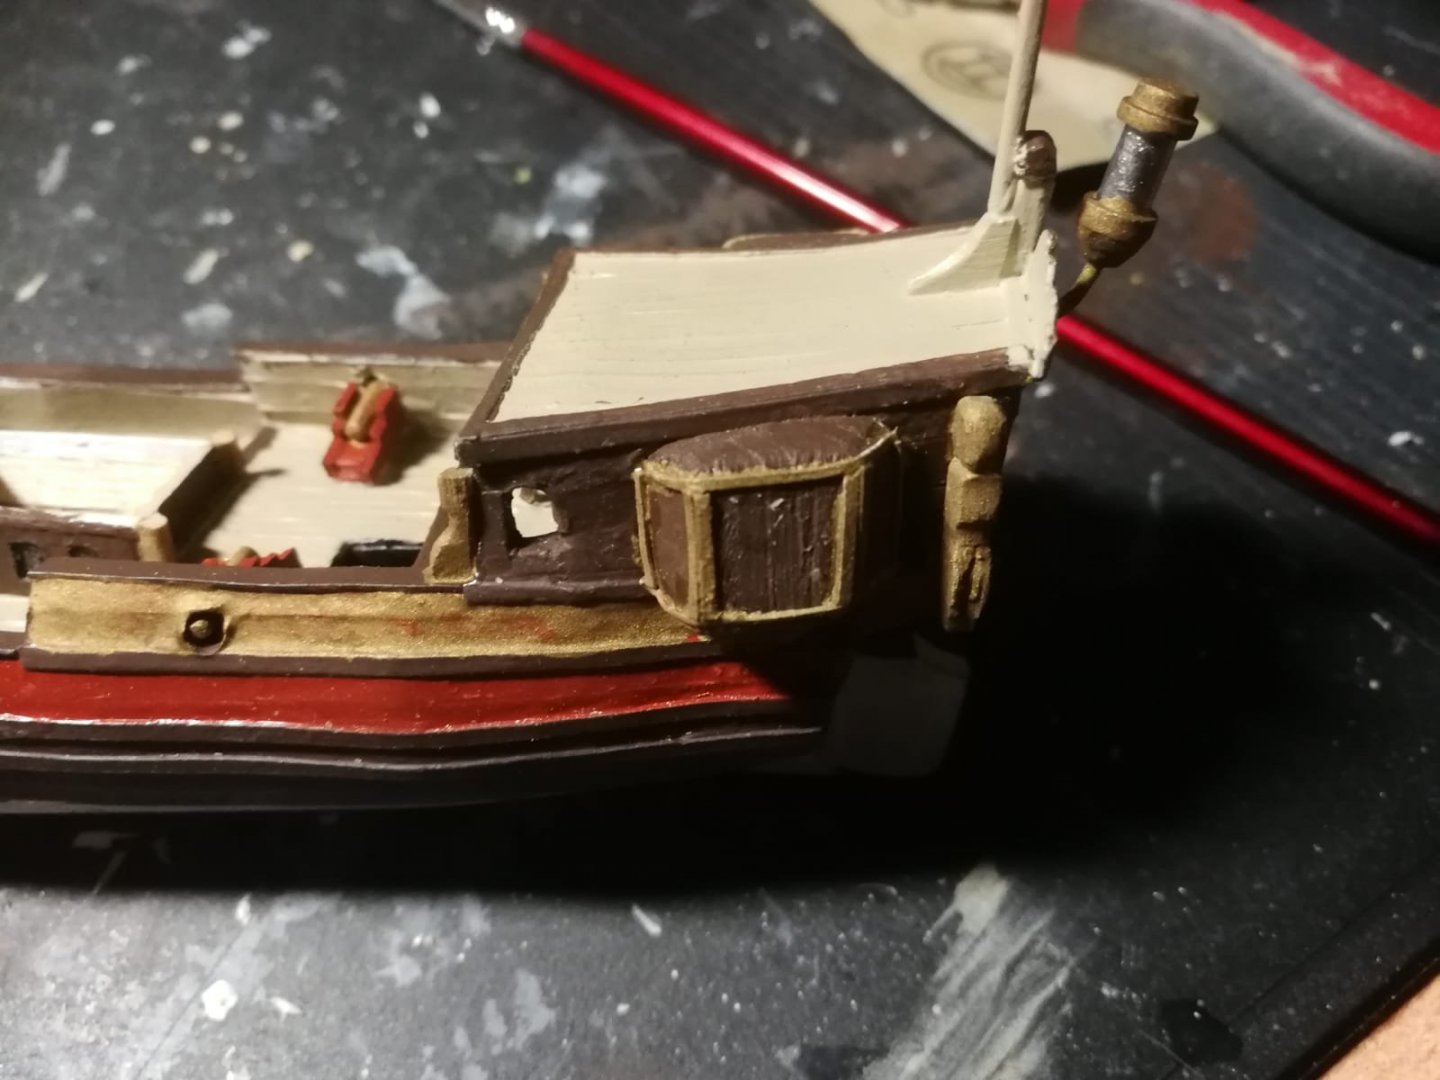
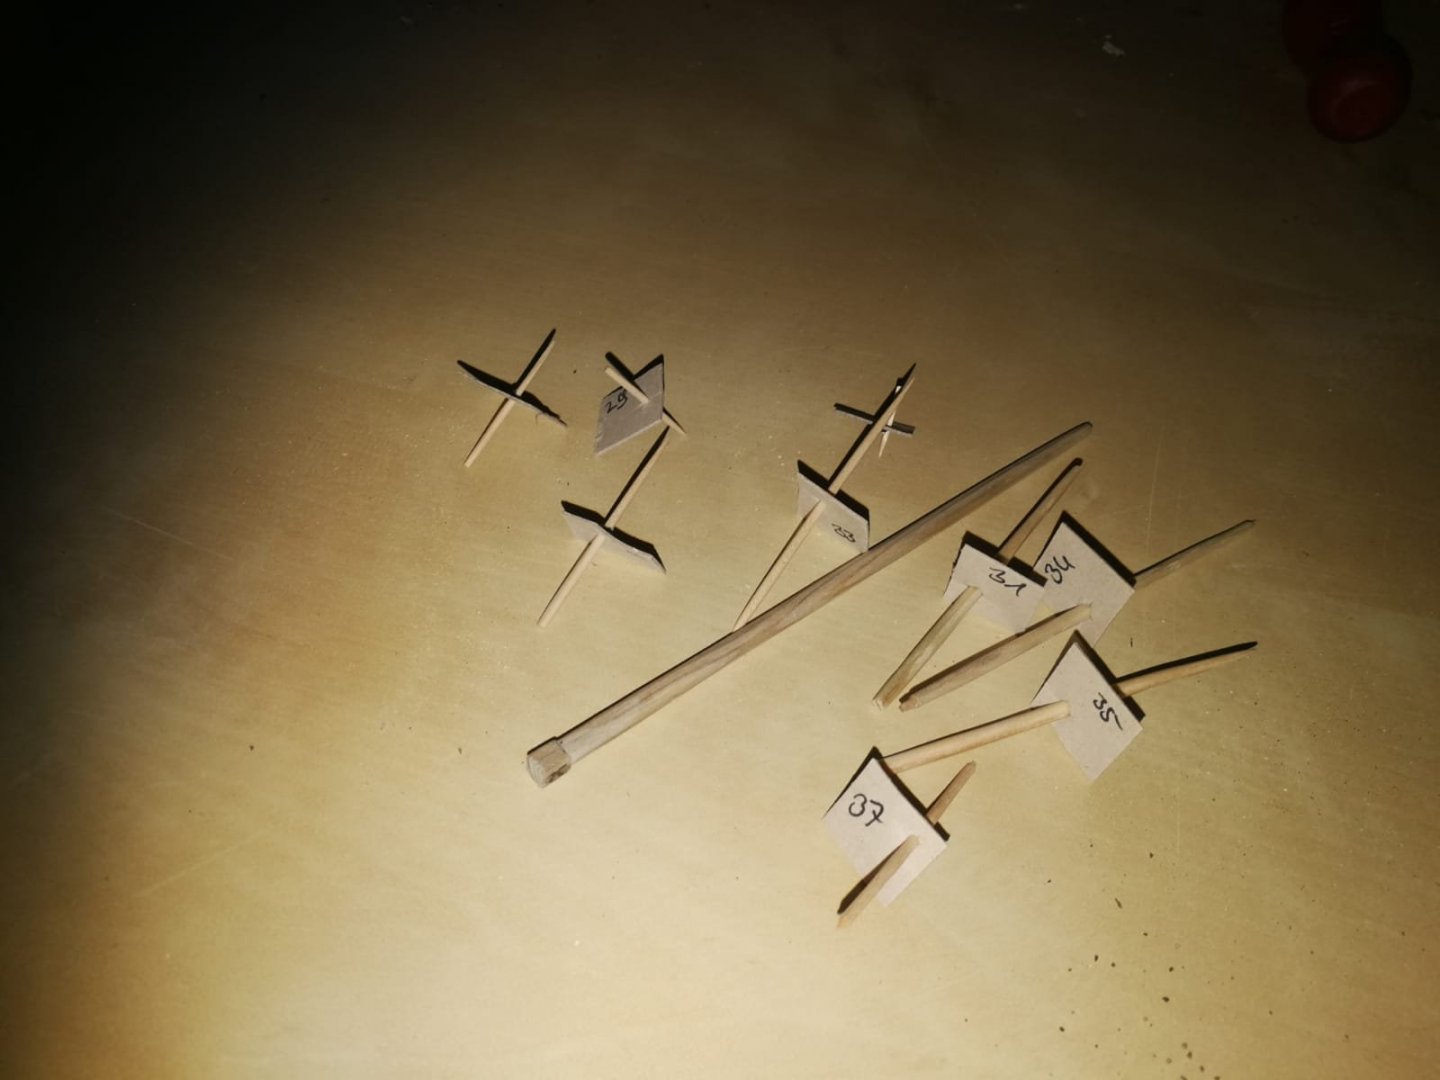
A very good day, my friends. The following two posts will sum up my progress of the days 24 to 27 of me building the Golden Yacht. In this post, I will concentrate on building the rigging andsome decorations, whereas the next shows all wannabe-cloth related things. First, I wanted to install all the standing rig, but as I still had not yet built the deadeyes, I just installed a stay 😆 After that came the topsail yard, the main yard (name is just guessed) and the gaff (?). In german, I would describe them as Mars-Rah, Groß-Rah and Besanbaum (even though the gaff sail could be described as the main sail - parallel to other fore-and-aft-rigged ships and the "main yard" has no sail attached - but maybe someone could say something enlightening). The topsail yard is conected to the mast by yarn and glue, main yard and gaff just hang loose until the sail are installed. I then tried some ideas to "produce" the sails, which you will see in the next post, but this one I want to conclude with some more golden decorations. I took a look at my templates and the reconstructed Golden Yacht, estimated my painting skills and decided not to try to recreate them hardcore, but to take those pictures as a guideline. Here is the reconstruction: And this is, what I achieved: Not quite the same standards, but one can see some similarities. I painted them not with a brush but by but by dipping a toothpick into the colour and placing pixel-ish dots next to another. This way, I achieved a line or wave of controlled "flow" and more or less equal width all along. I was quite surprised, how well they came out and played with the idea, to rework them by adding fancy spikes to achieve a more flowery and branchy look. I have not done it yet and also haven't decided, if I will try it. Next: on to some cloth imitation

- 19 replies
-
- 2
-
-
- golden yacht
- card
- (and 1 more)
-
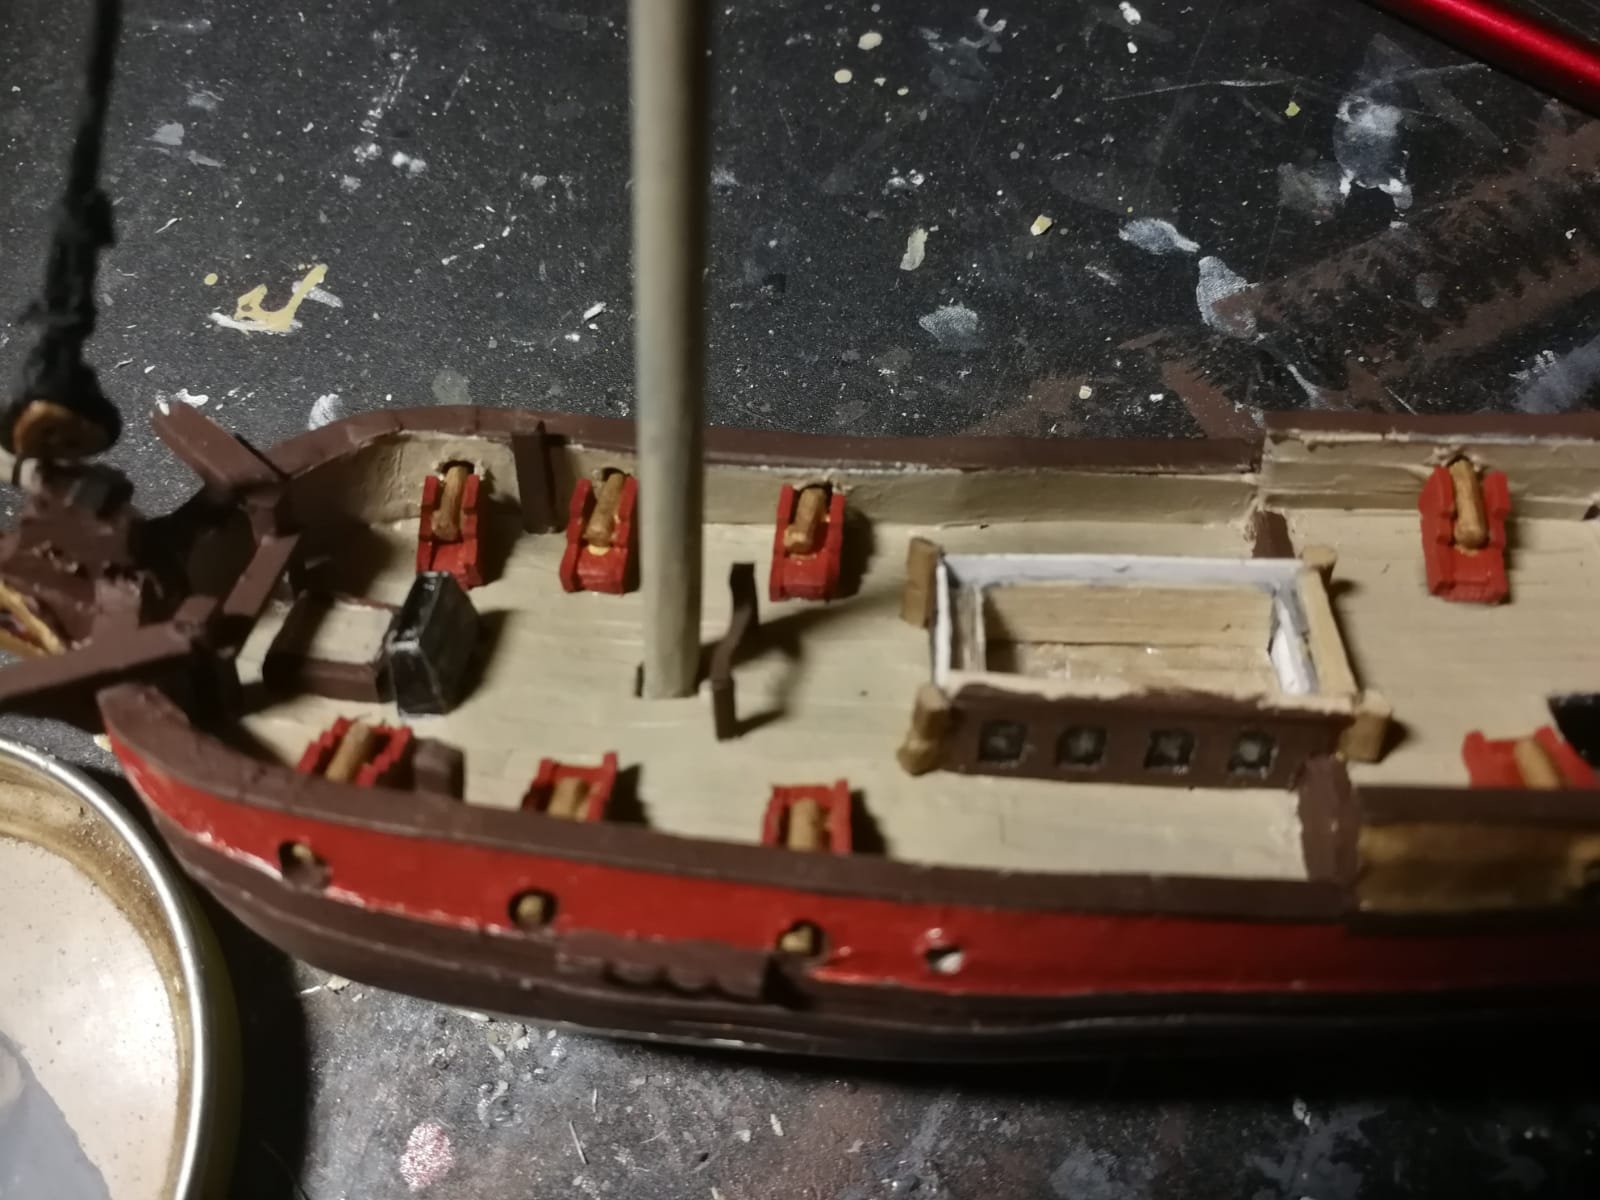
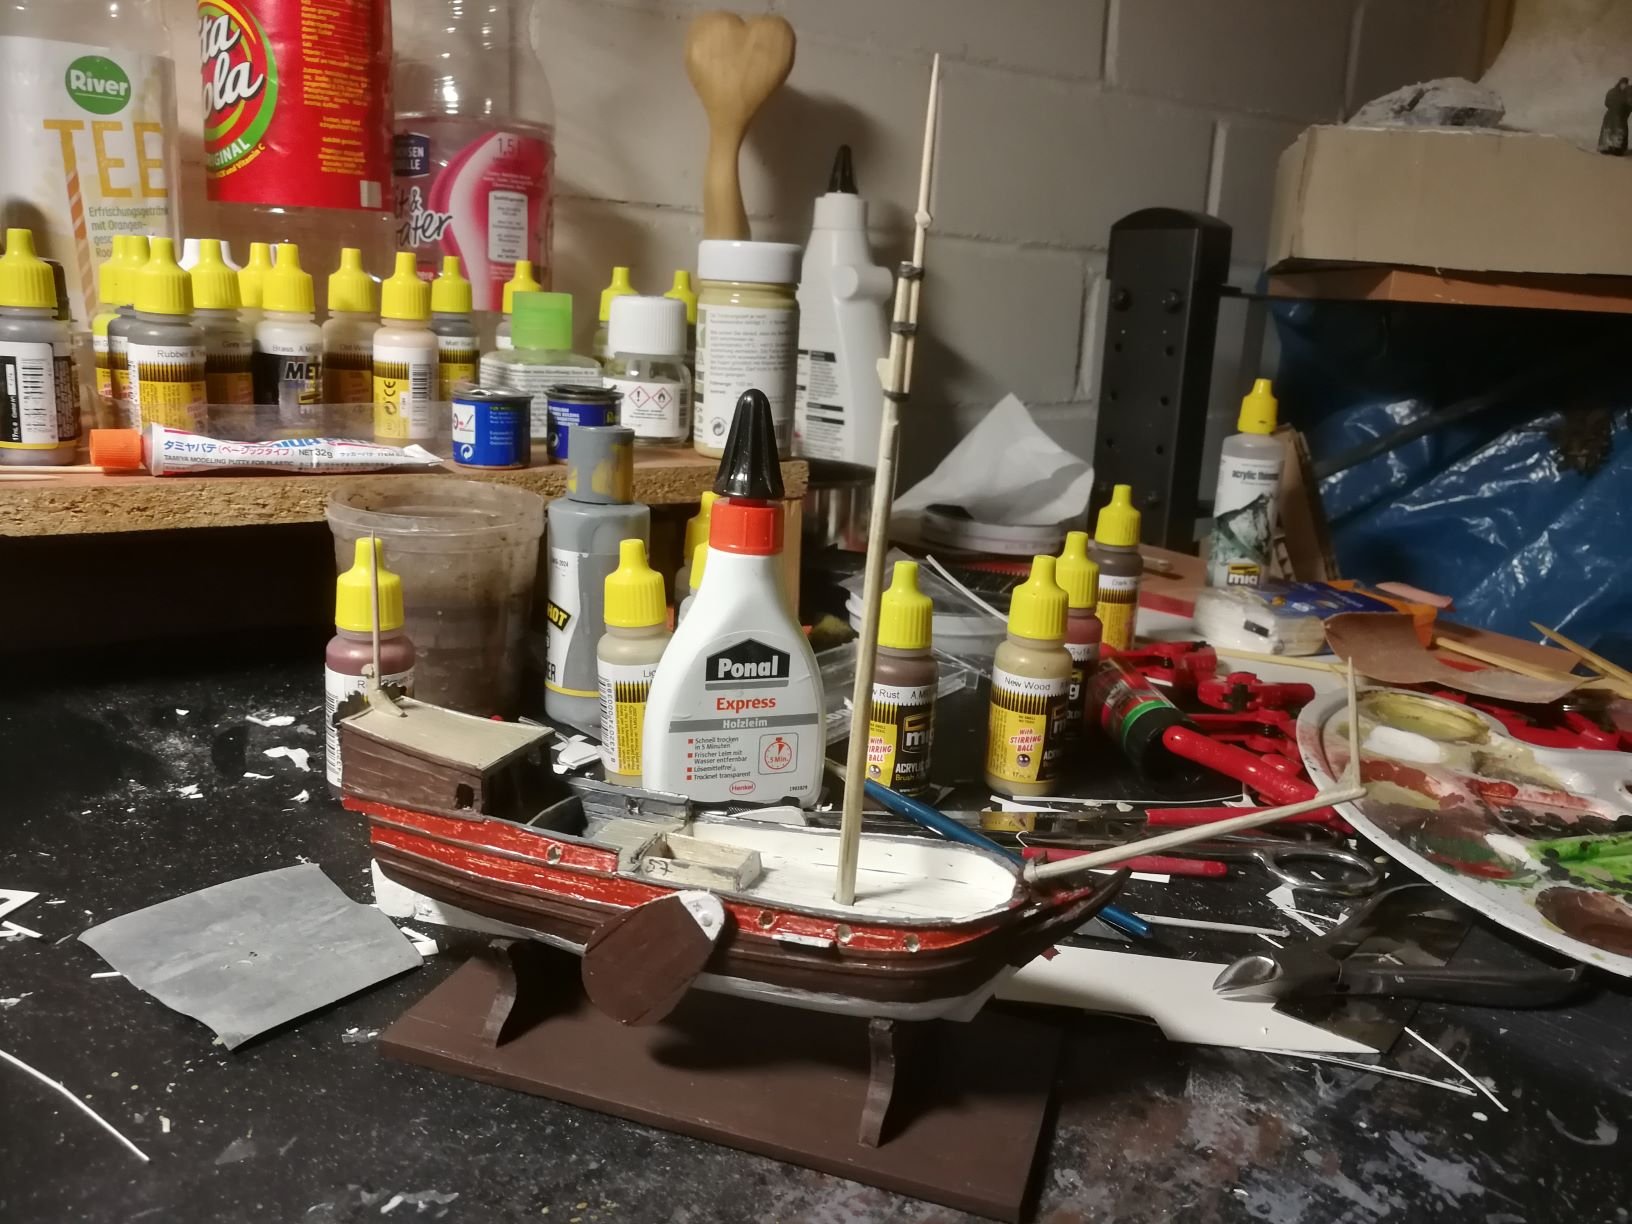
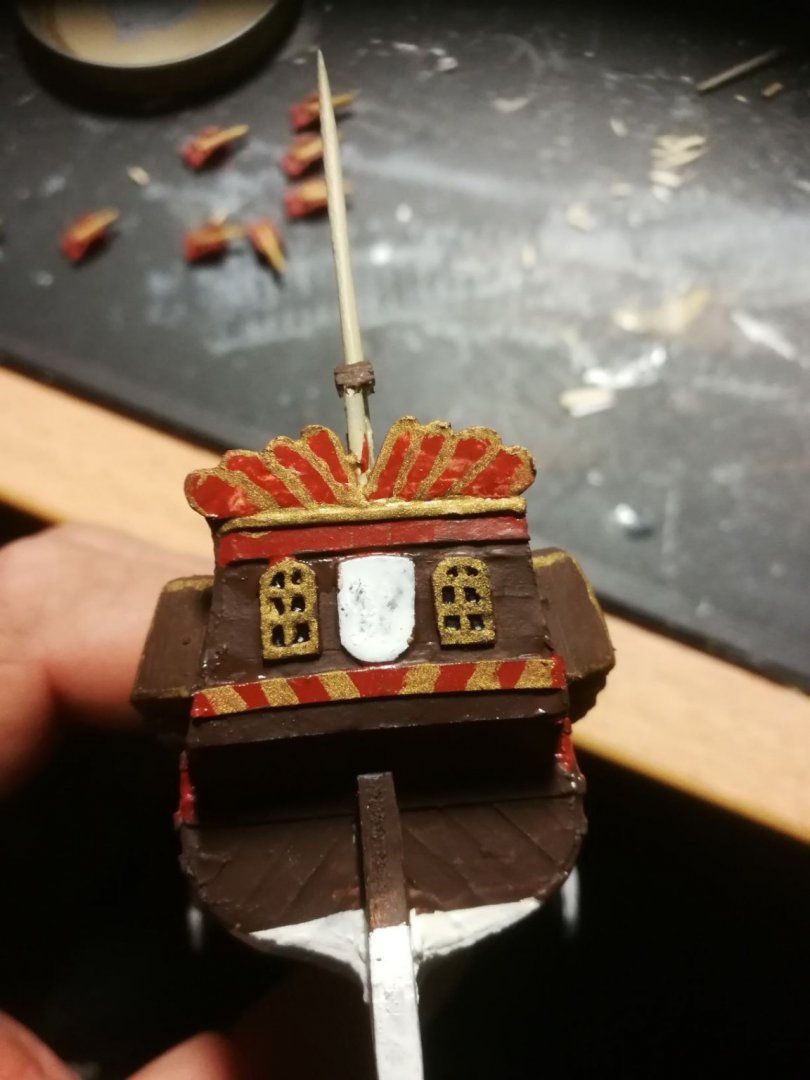
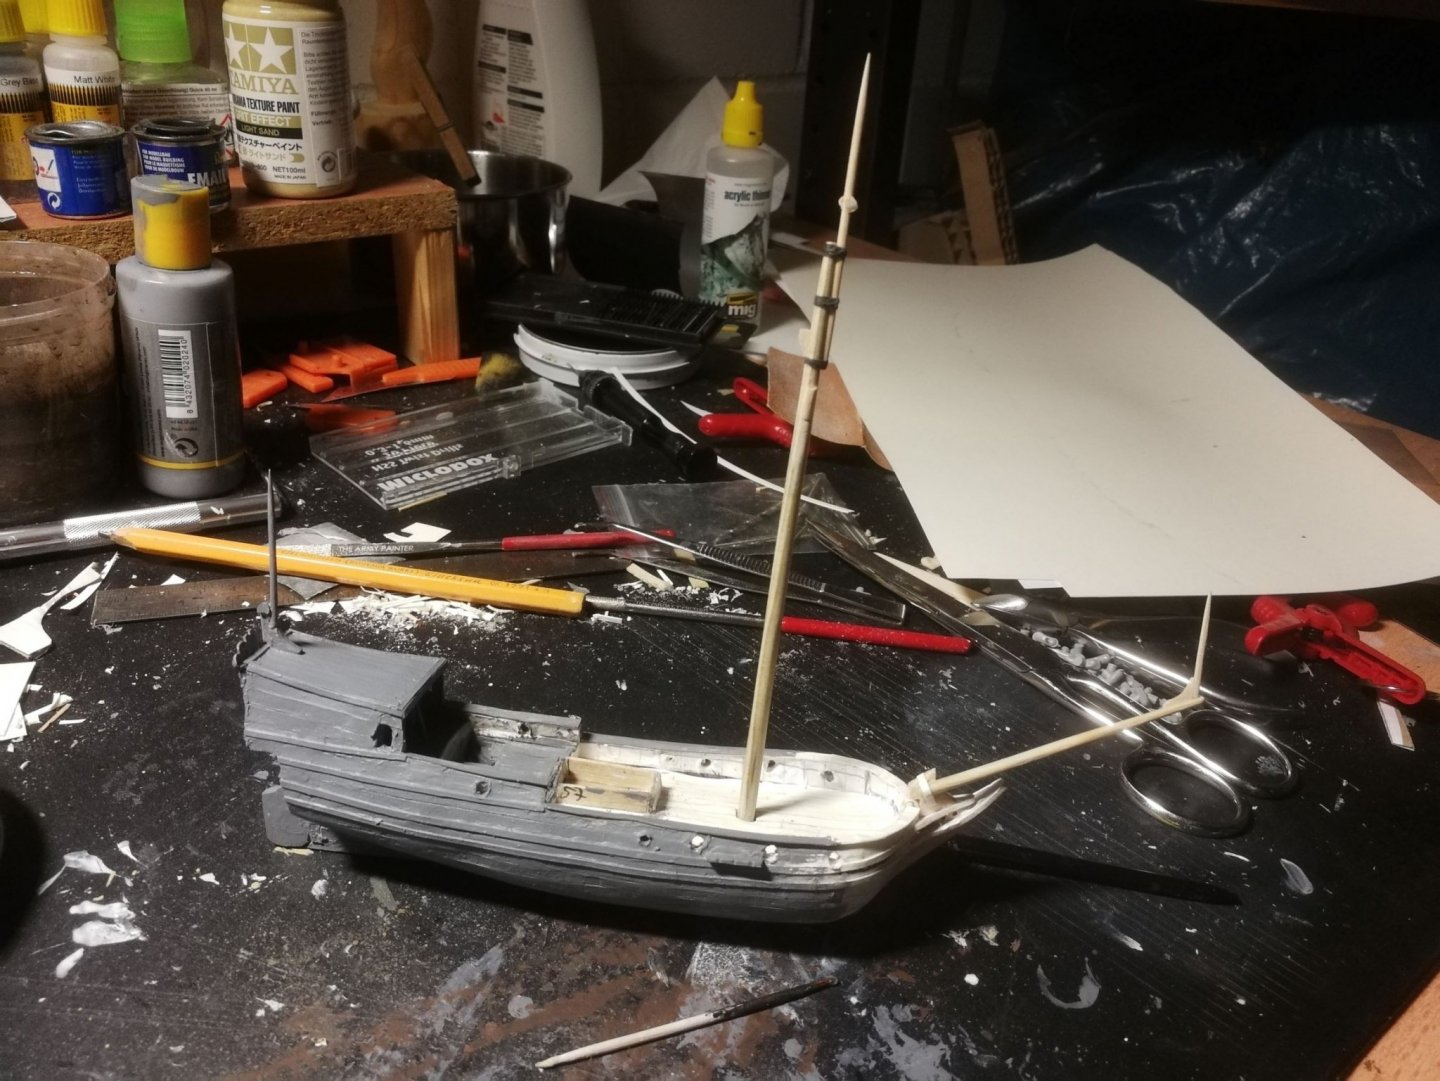
On to the days 20 to 23, which is the current state of work, As a start, I painted the rear of the cabin in its final colours: black for the windows with golden frames, decorations in gold and red. The heraldic shield received its white background, but I haven't found the courage to try the brandenburgian red eagle 🤪 The lantern was scavenged from my old Constructo Santa Maria (as are some parts of the rig). I carved some wannabe mermaid statues for the sides of the cabin and some kind-of fishes for the front 😆 the galleries recieved their third dimensions, but are still missing the windows. But I just had an idea, how to make them. On the deck I installed the guns, which recieved a nicer carriage in red and a barrell in golden/brass-colour. The stove was painted black and recieved a silver dry-brushing. In retrospect it would have been better to use a dark grey base colour instead of the black. But mistakes need to be made to prevent them being repeated. The "deck house" - which is just an upward extension of the dining room, I think - was finally installed. It was just the same procedure: glueing the template to 0,5mm paper, cutting out the windows and glueing it to normal paper, which was later painted black. It still needs its roof, but after that, the deck is - almost 😁 - done! The mast is also glued and ready for yards and rigging - I hop, I am, too. For the only stay on this ship and for the many more coming with the next projects, I decided to build my own ropewalk. That was before seeing, that there is a section in this forum just dedicated for ropes and so on. I just watched some videos on Youtube about how ropes were made in ye aulden days, took some Lego stuff and gave it a try. It took my only one and a half hour to come up with something, that could more than to pretend to be working as intended. The only problem is, that it is too leight. I can't put both stations on the table and work, because they won't just stay on their position. I put two bars between them to hold them in place - but they are working way too good. As the rope shortens, the hole apparatus comes under tension like a bow, that is drawn. This time, I was able to work around it and received a rope, that even stayed in shape - after I put glue all around 🤦♂️😆 Maybe I had spun the threads in the wrong direction... For now, I don't need any more stays, but the spanish frigate is ship-rigged, so I will need multiple stays of various length - but that is a problem for my future-me. That's all progress, that has been made up until today. I don't know, when I will post another update, but by now, saturday seems like a good day to resume work.


- 19 replies
-
- 4
-
-
- golden yacht
- card
- (and 1 more)
-
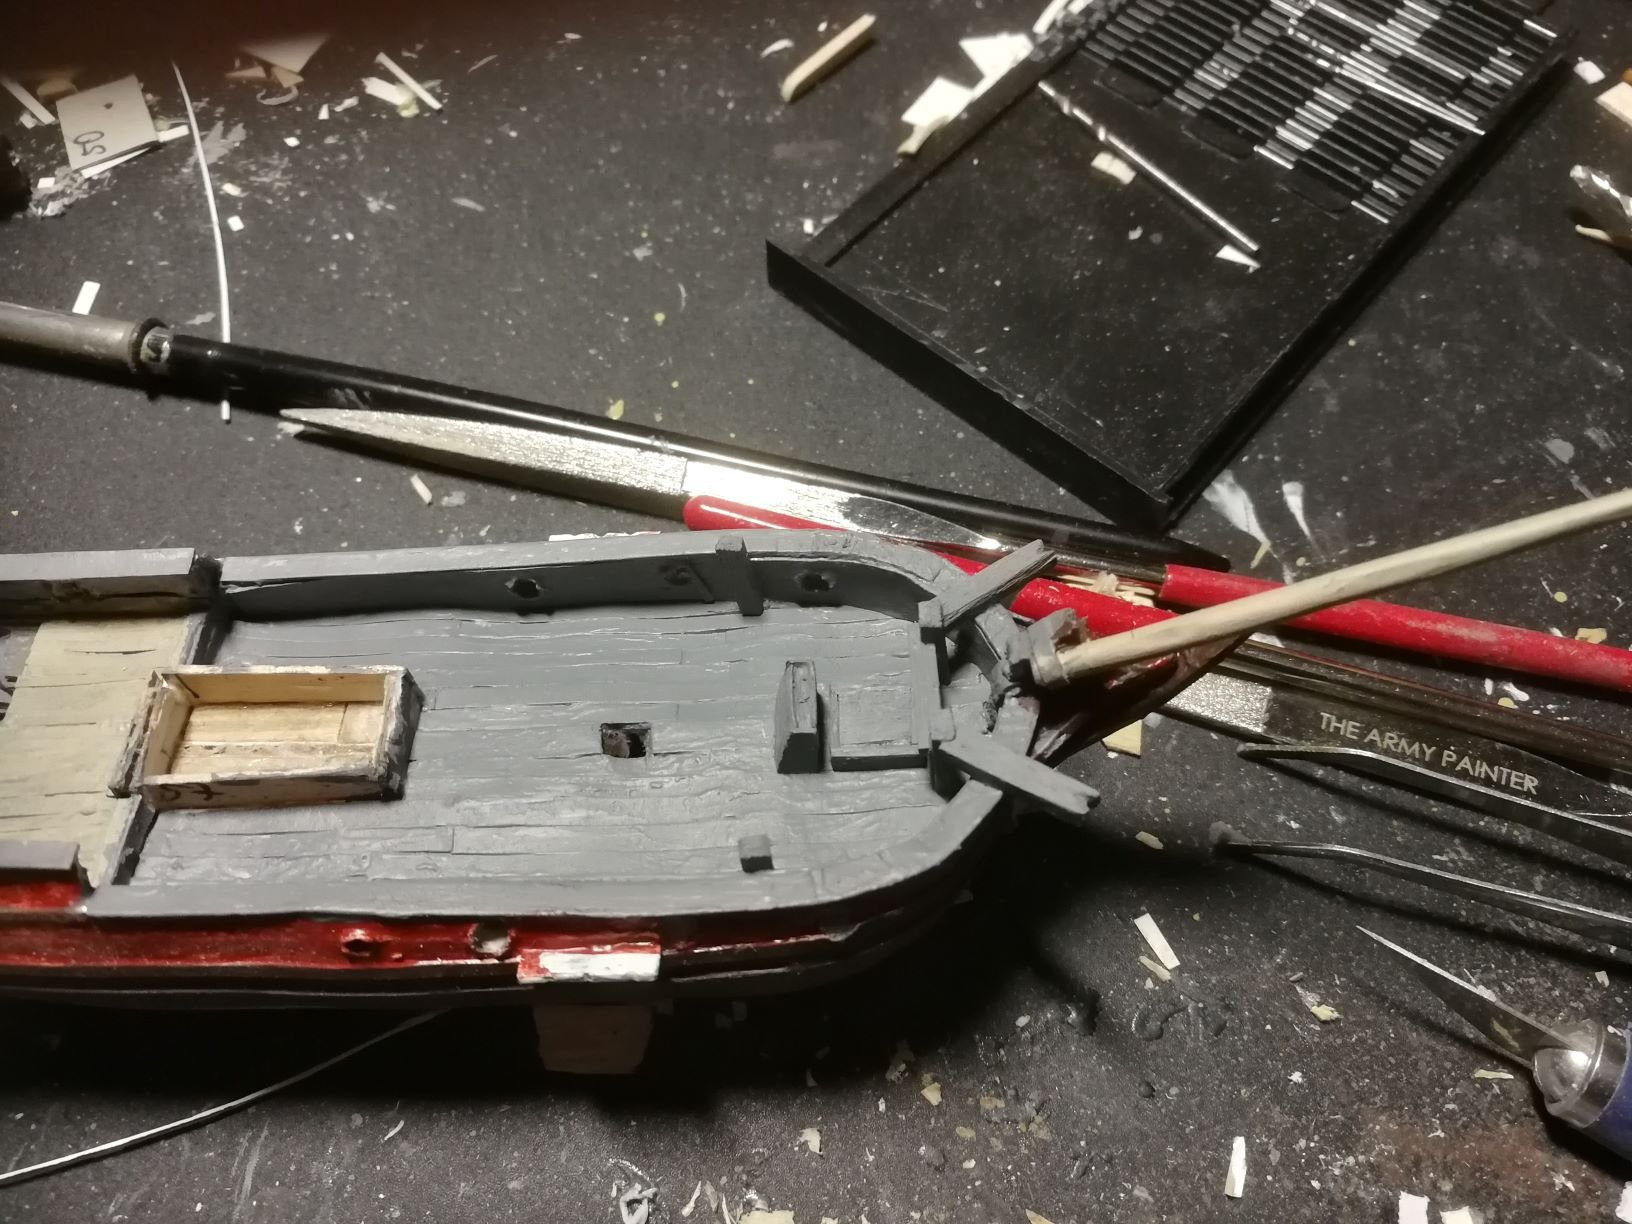
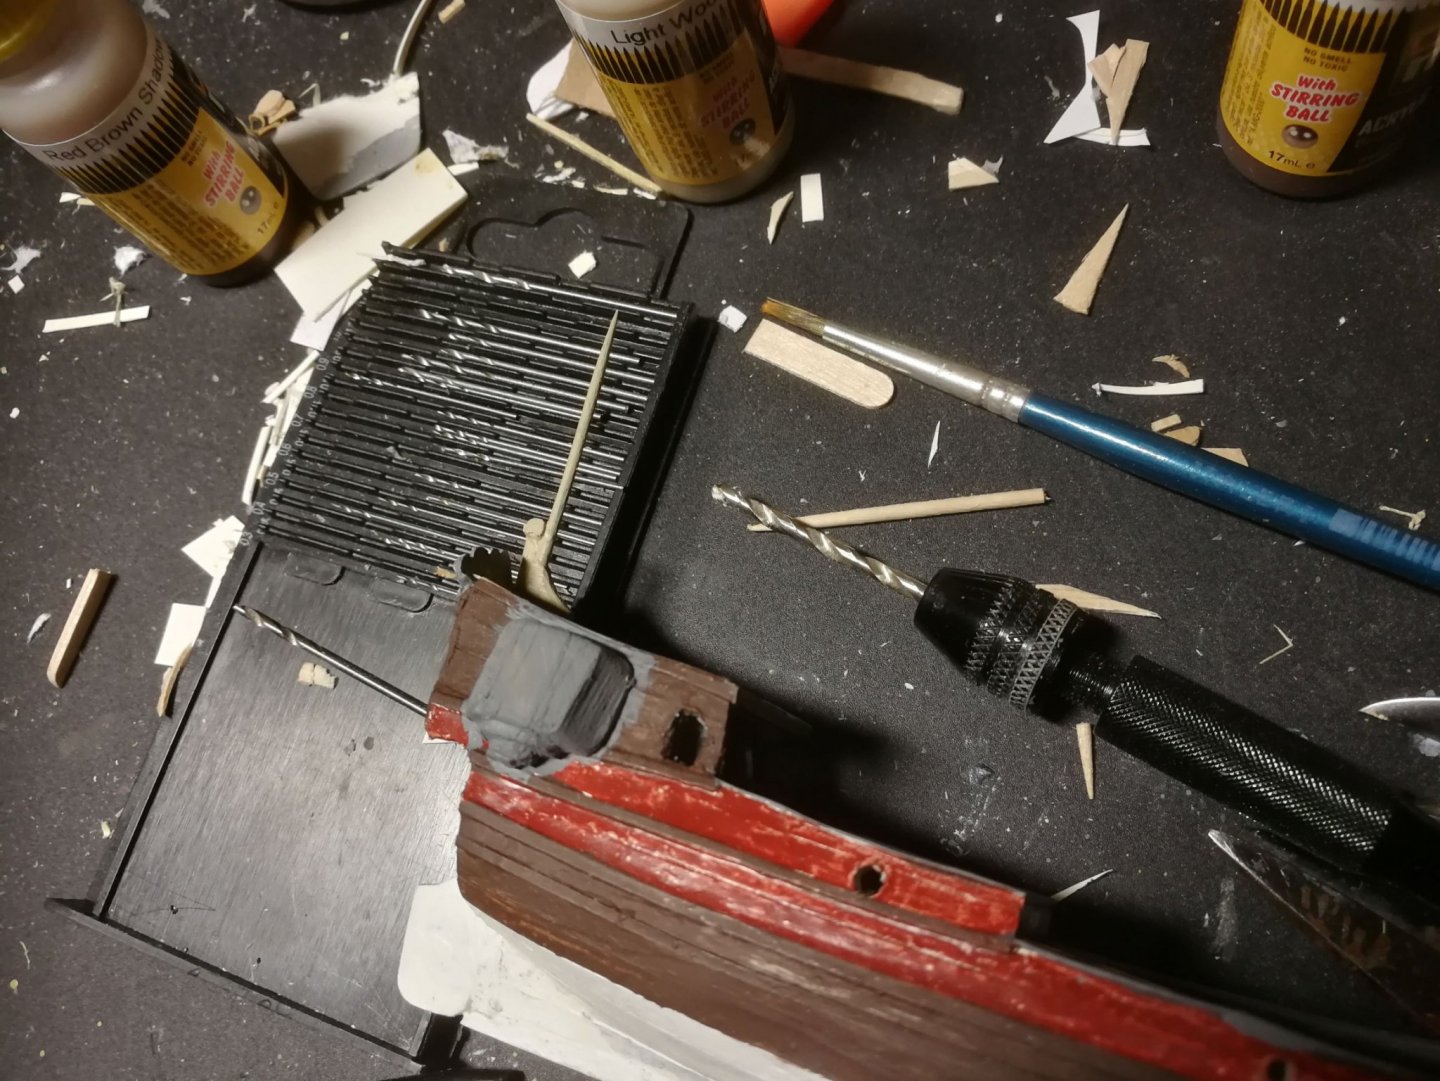
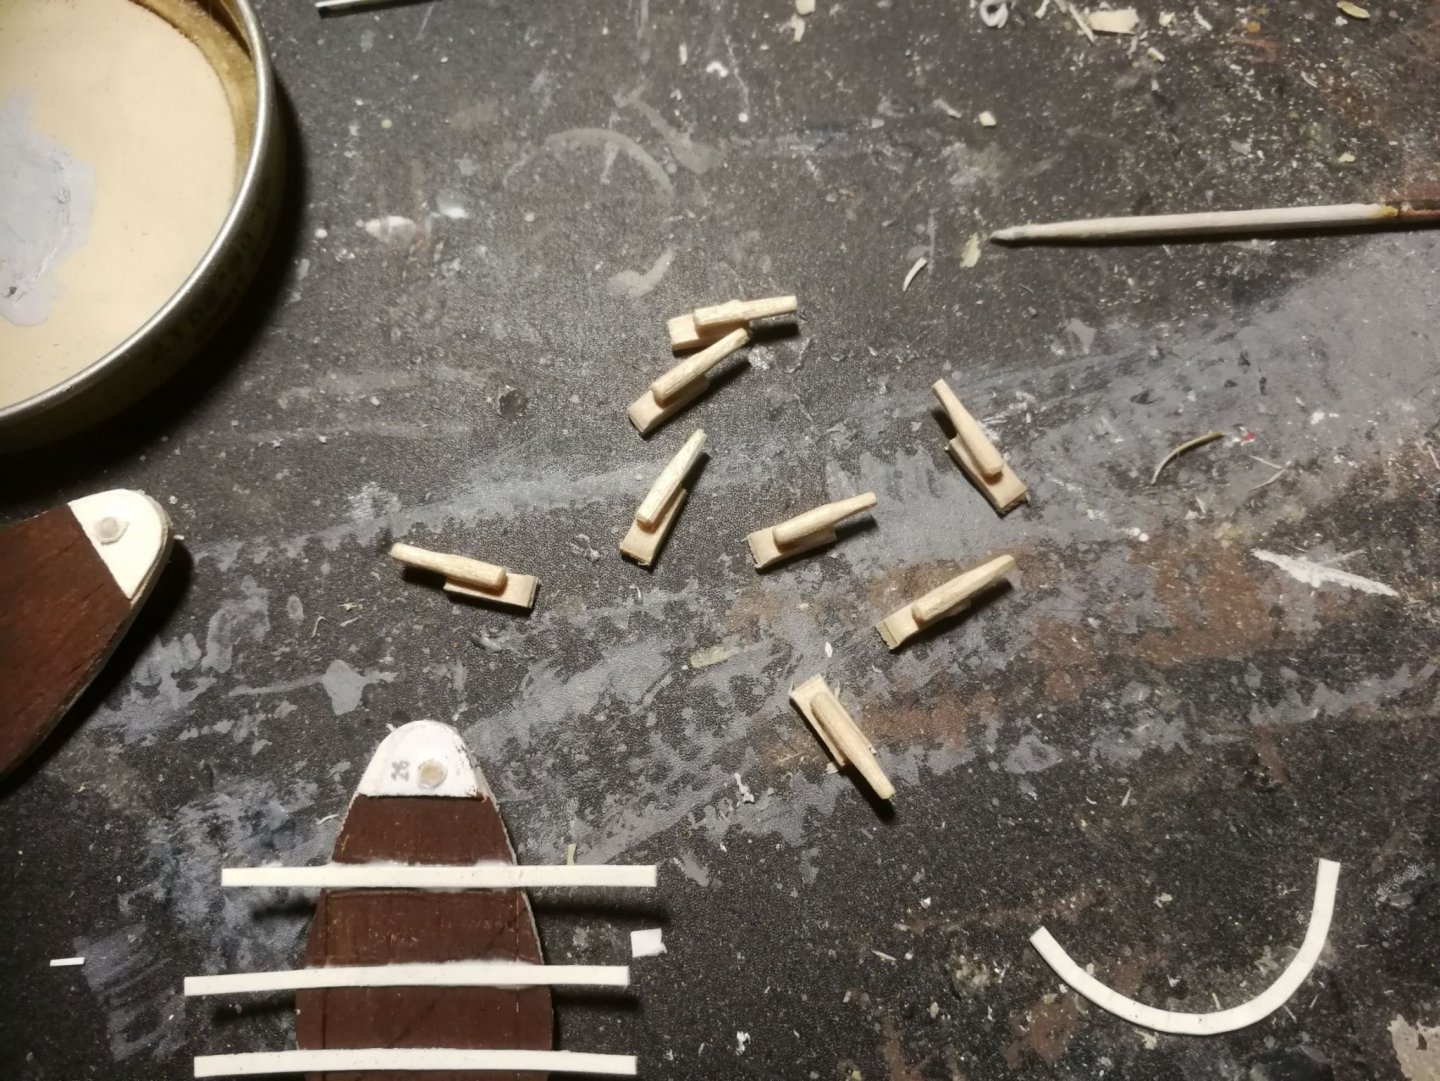
Hi guys, Thanks for all your likes and nice comments! responding to mtaylor: That's a nice idea, I'll think about it. on with the progress of the days 18 - 20: I did finish the rear of the ship including the roof of the cabin and some smaller things, so that I could start priming. For the roof, I just cut some 1,5 - 2mm strips of 0,5mm paper and glued them right to the bullwarks. The produce a nicer looking edge, I folded strips lengthways and glued them just along the corners. For priming, I used Ammo by Mig's One shot grey primer. It is to be used with an airbrush, but as I don't have one, I use it with a brush - and it still works just fine. All paints, I am using, are by Ammo by Mig, except for the golden paint, that you will see later. That's Humbrol 54 Brass The mast is not yet glued in, but the bowsprit and the rear flagpole are. I also drilled the holes for the guns (four on each side) and the mounting point for the swords. (behind the first three gun ports). After the primer had dried over night, I applied the first coat of colour - more out of curiosity, how it changed her appearance than by being convinced that it was the right time to do it 😁 I've run into problems while uploading this picture. The upload was interrupted and I received a warning message, which reads "-200"... Nothing more was shown 🤨 After completing this post, I retried the process and this time, the upload finished and all was fine. After painting the hull, I added some stuff to the deck (stove and all the other parts don't know the english terms for, let alone the german ones 😁) and primed the rest of the ship. I then built cabin's side galeries. They are built up by glueing three pieces of rocket sticks together and sanding this piece into shape. I am not quite satisfied with the result, as they still look quite rough and boxy, especially the galeries' roof has the wrong angle, but I tried and tried and was not able to achieve perfection 🤔 Much later, I added some strips of paper to give it a more threedimensional and interesting look, which helps a bit, but not a lot.. Maybe they are not done yet. While I was in the mood to do some details and smaller parts, I decided to try the cannons. I cut a piece of toothpick to a little less than 1cm length, tapered one end and glued it to a two-layer piece of coffee stick. As I had no more building time left, I left the completion of the guns to another day. I also cut some strips of paper to act as iron reinforcements on the swords. Also some words about the swords: I glued the template to my 0,5mm heavy paper, cut it out and glued some coffee sticks to it. I then glued the top end's reinforcements to it and drilled a hole with the size of a toothpick as diameter. The piece of toothpick was then glued in and cut to length. This was, I can stick the swords into the corresponding hole in the hull for comparison or a more complete look or painting the waterline on the swords (the black line, that you can see on the picture above). After I glued the iron paper strip reinforcements on, I let the glue dry thoroughly, before I cut the excess paper off from both sides. Next time, you will see that last summary of multiple days and a have a look on my current stage. Theoretically, I could finish her in a couple of days, but I haven't found anyone, who could help me with the sails and flags. Well, there is still a lot more to do than sails and flags and those things CAN be done, I just need to move my lazy a** into my workshop.


- 19 replies
-
- 4
-
-
- golden yacht
- card
- (and 1 more)
-
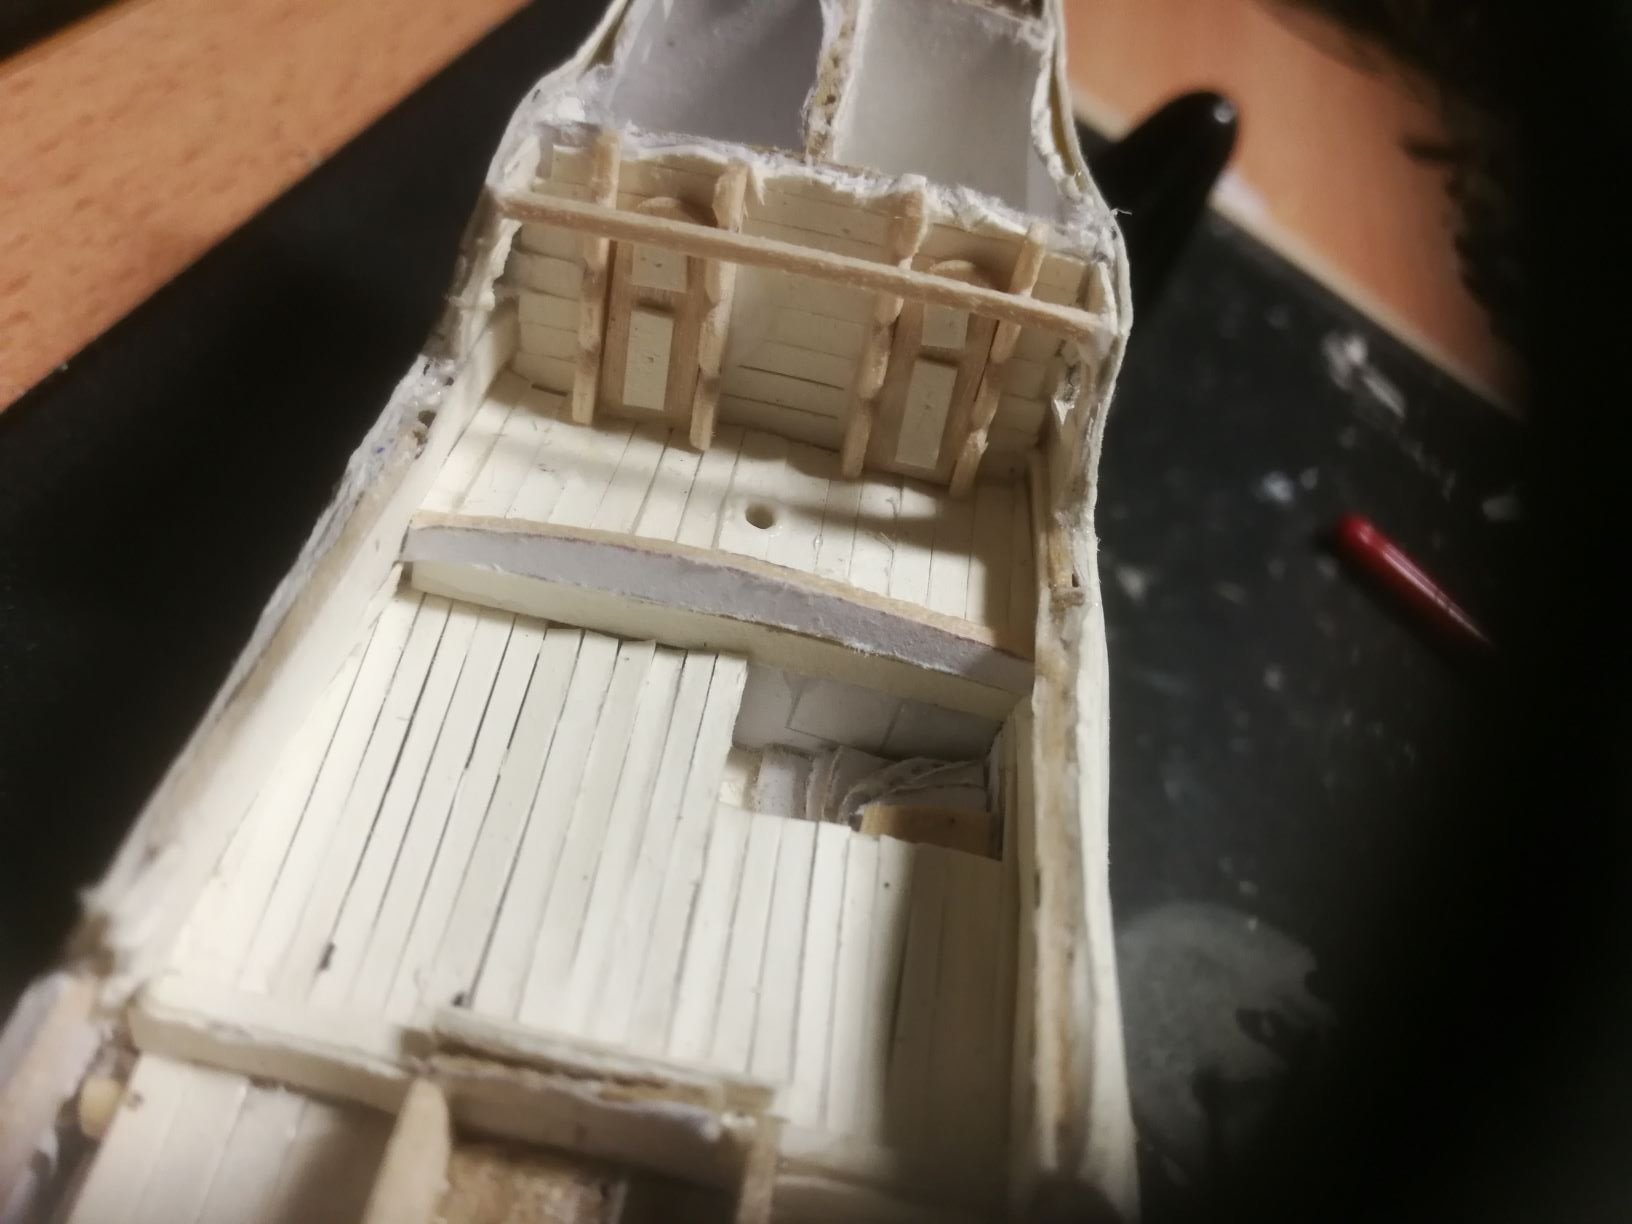
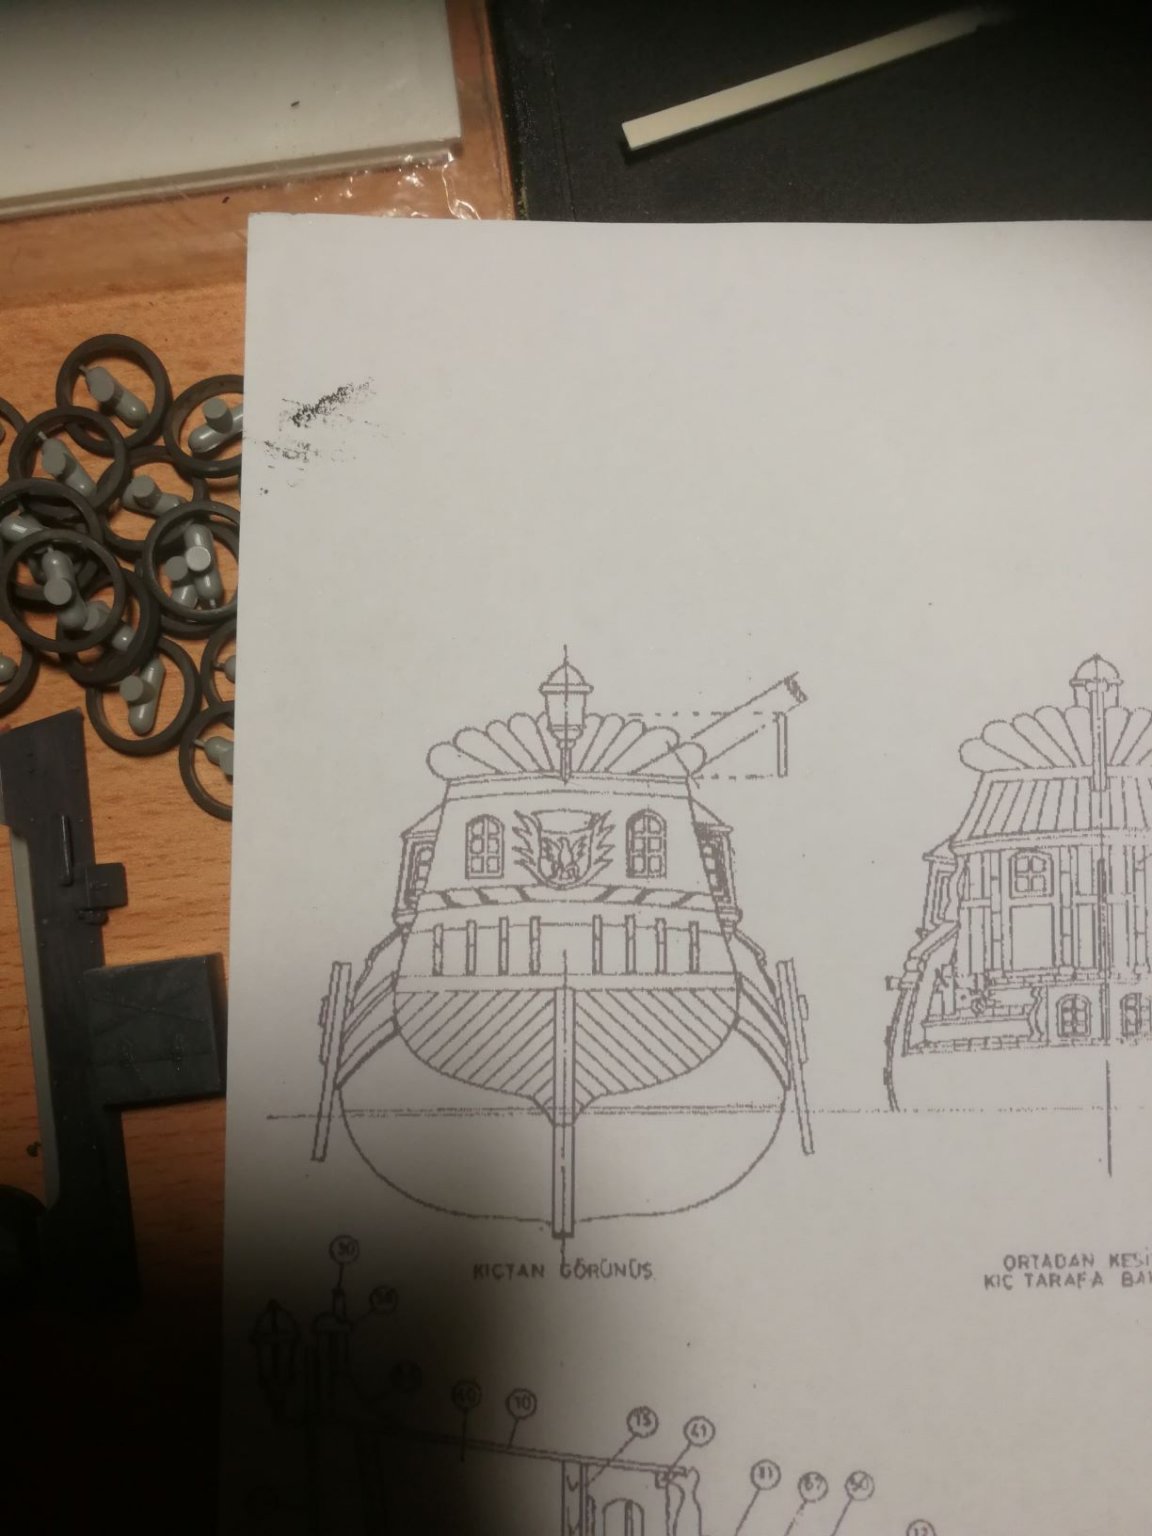
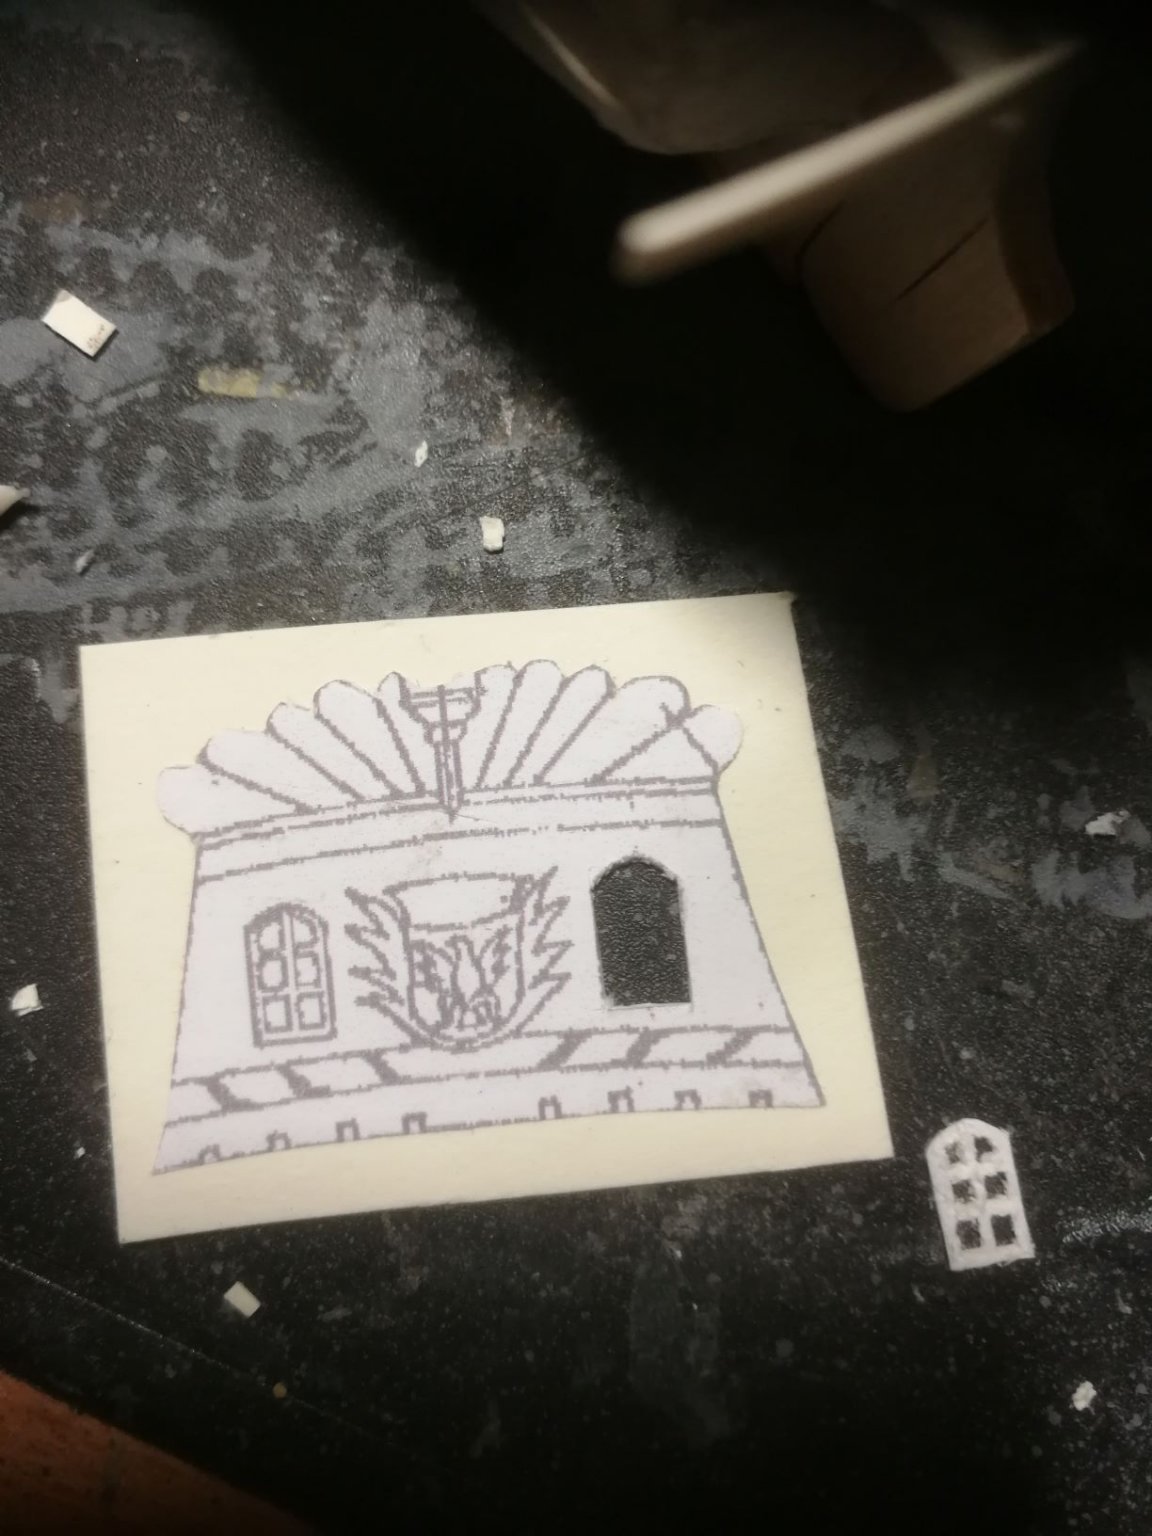
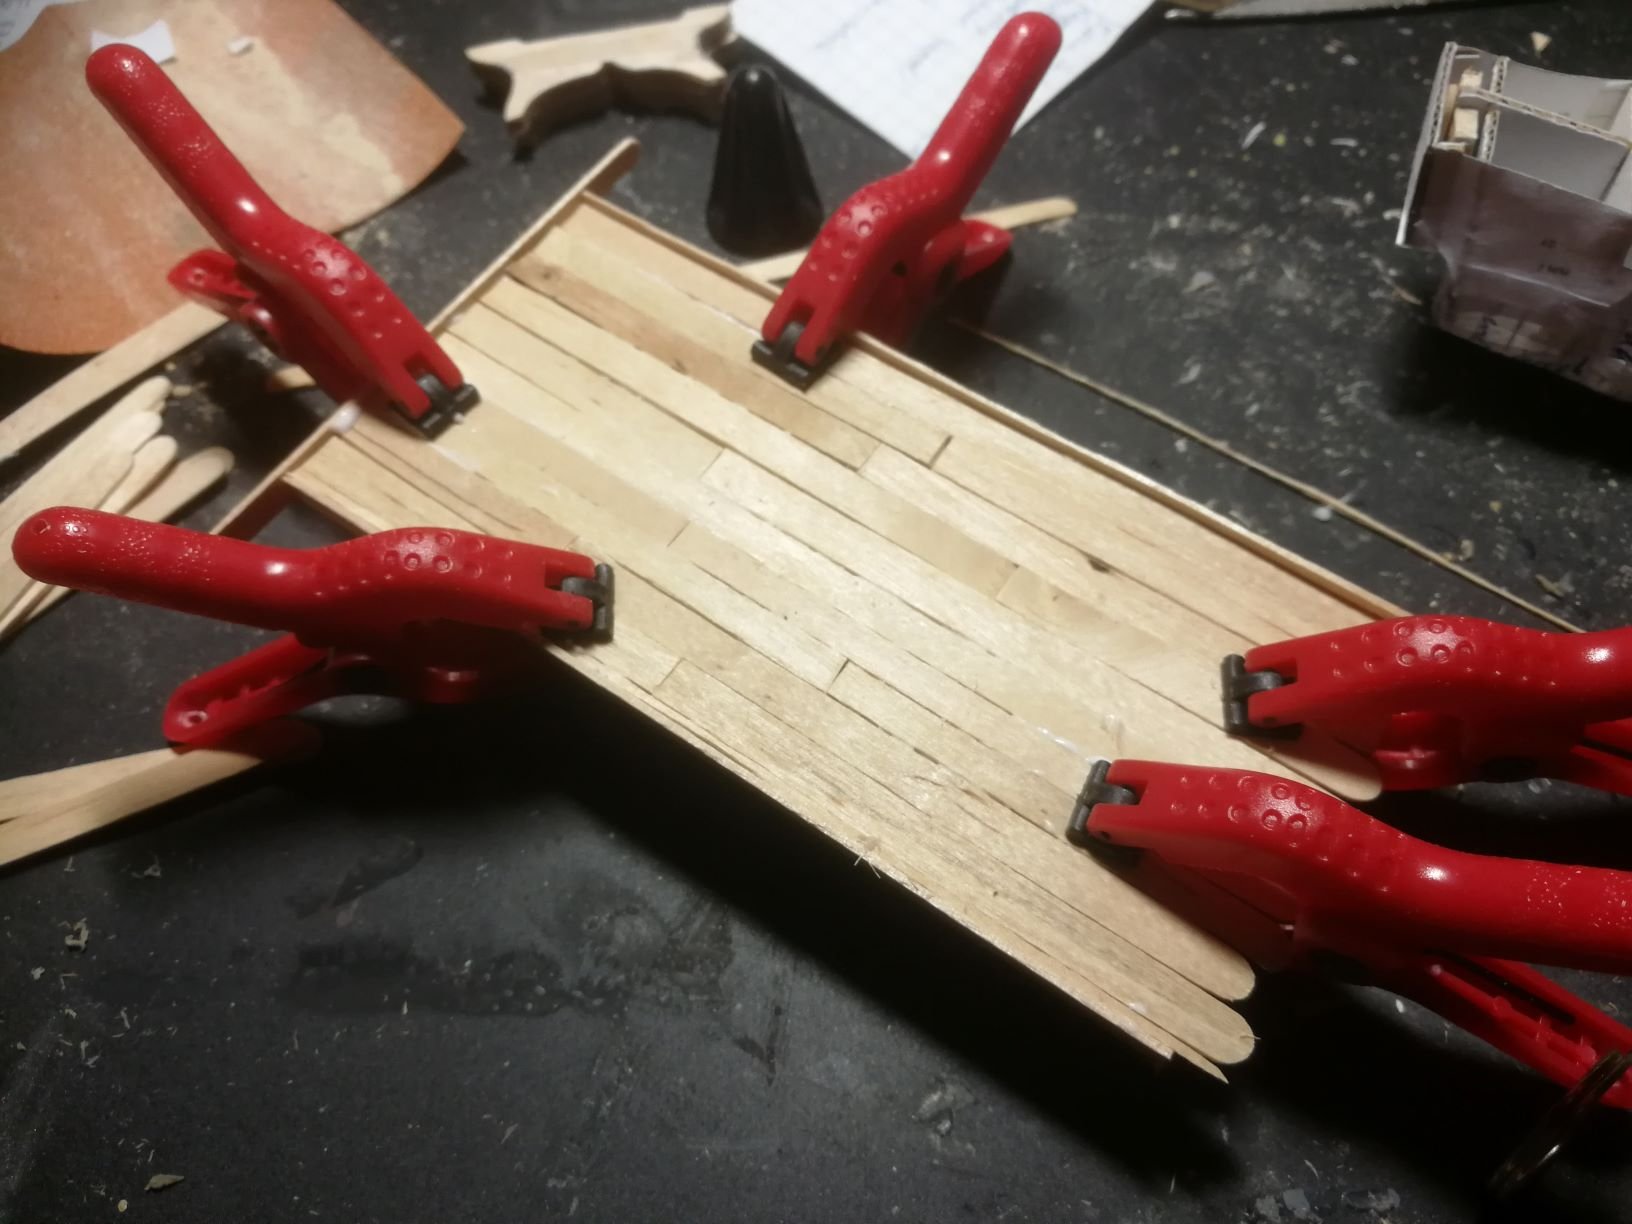
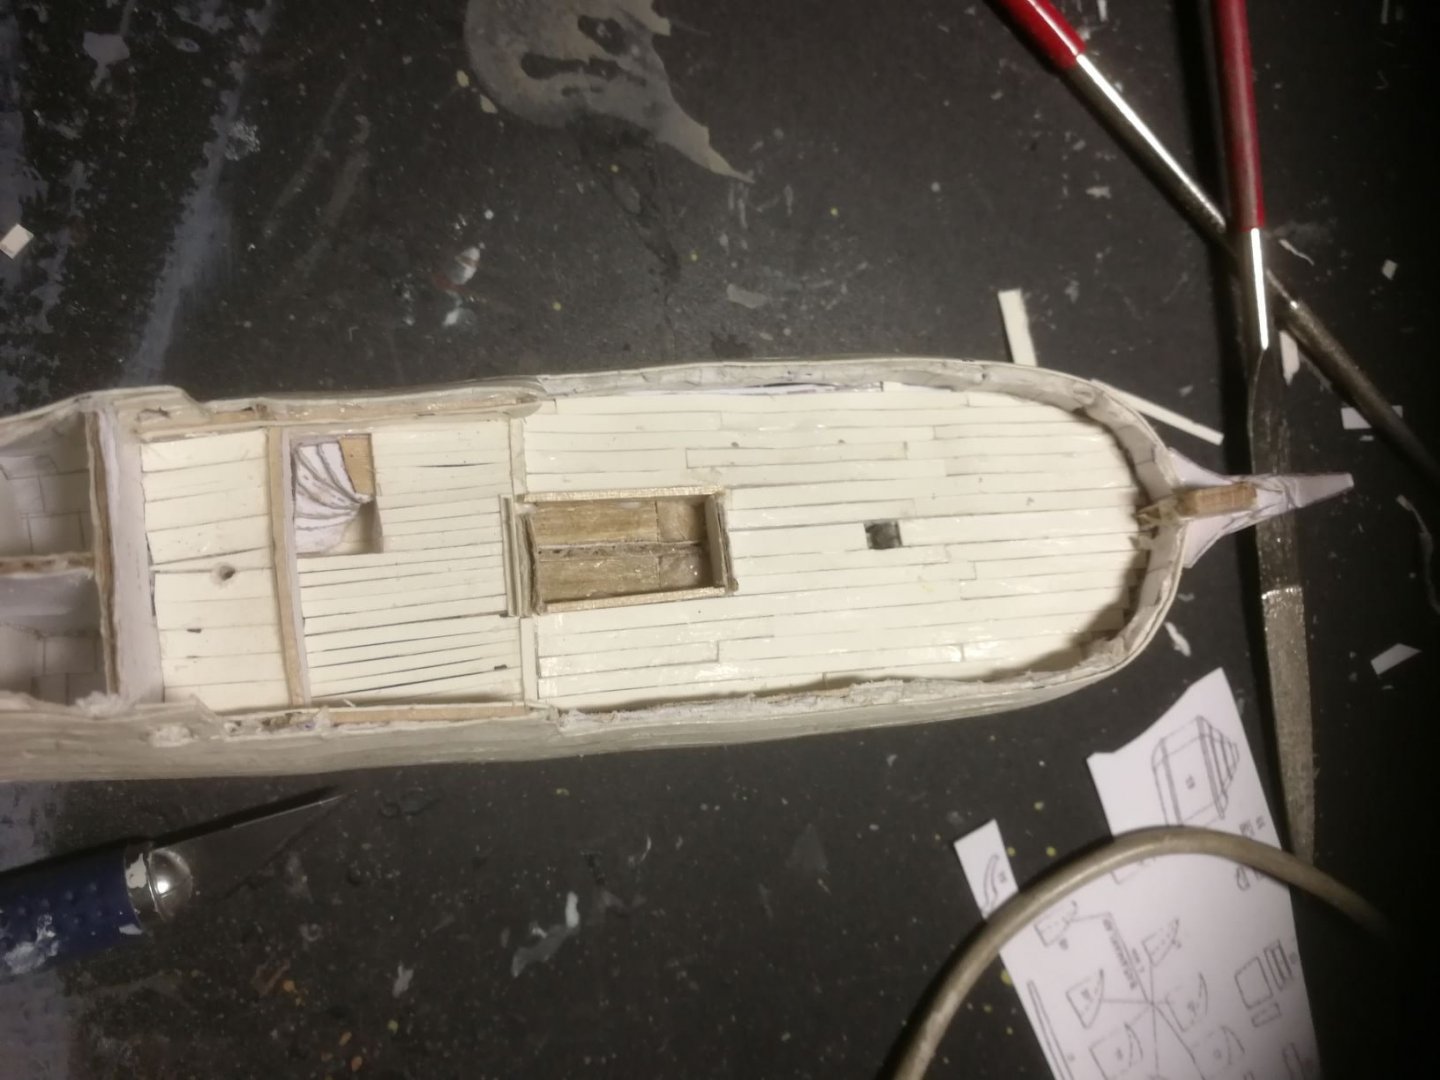
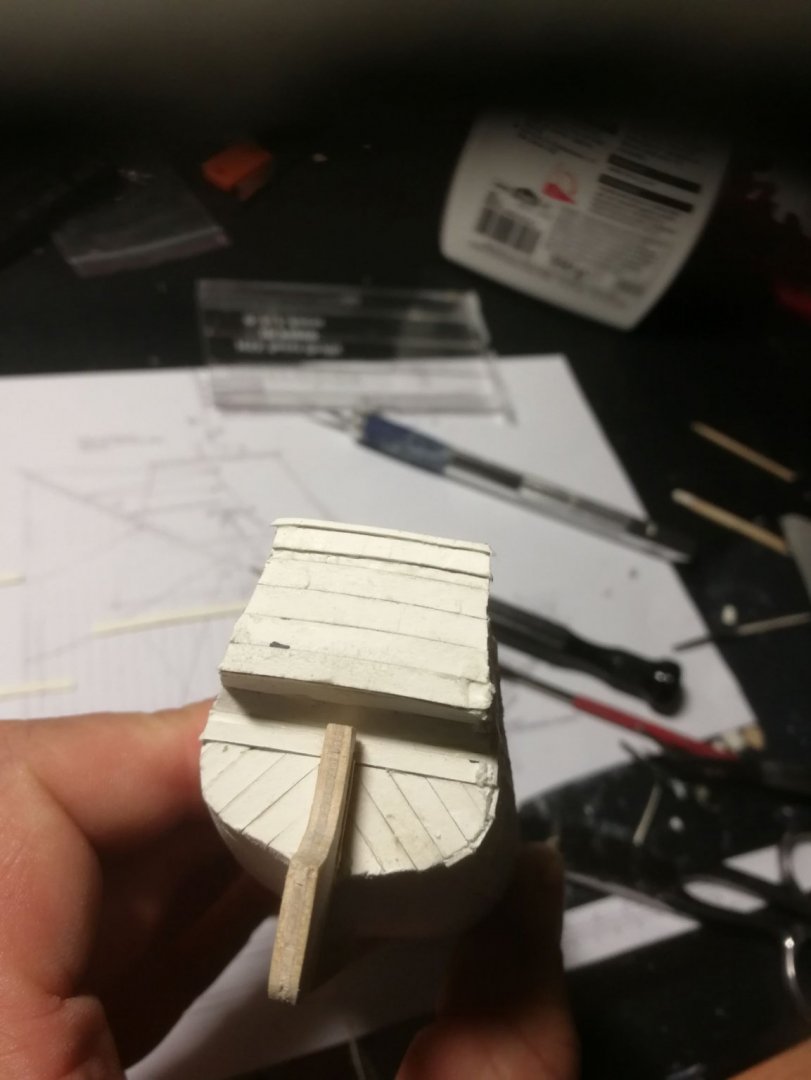
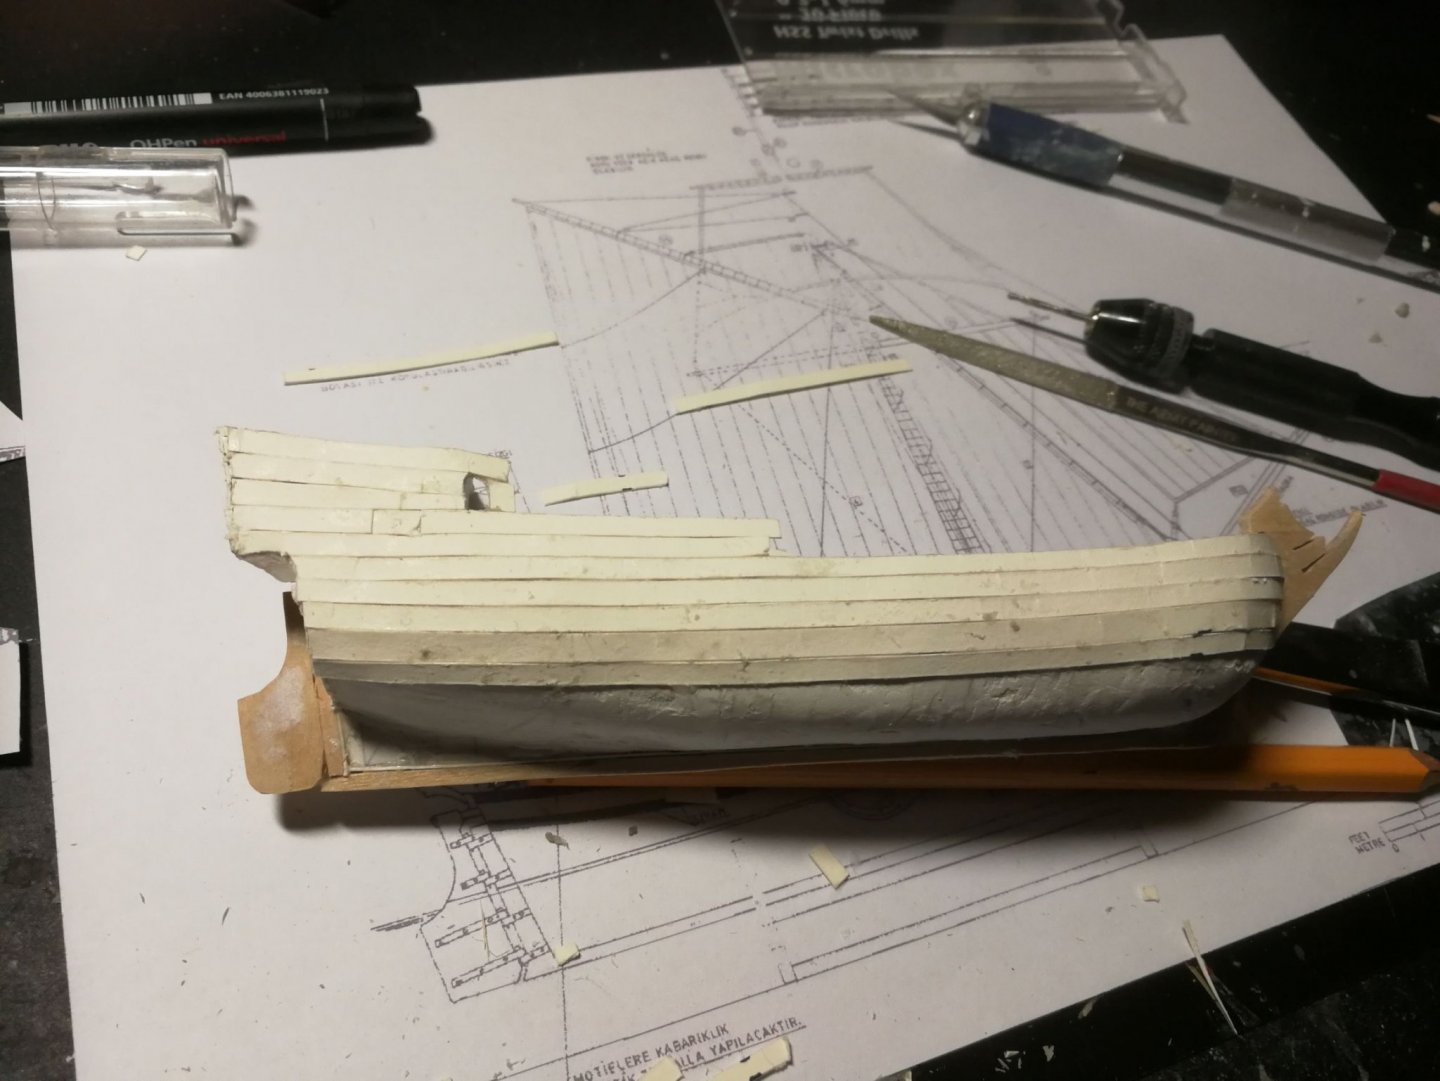
Hi guys! On with the log of day 14 - 17. The planking of the hull was made the same way as on the stern: a bit too long, but cut to size, when the glue had set. Below the water line, I adjusted the front end of the plank according to the shape of the hull. After all planking was finished, I gave it a good sanding. This deleted all the steps between the planks and the ship looked less like a amateurishly clinker-planked boat. I had also put planks on the inside of the cabin's windows. This area was quite fragile up until this point, but more rigid afterwards. Before returning to the cabin, I planked all the decks. The rearmost was redone later. It looked a bit odd with that triangular plank in the middle as I had work from the edges inwards. The front side of the cabin was planked horizontally. The doors were made with the round ends from coffee-sticks and are flanked by "columns". They are also made by coffee-sticks, that I cut in half and carved and sanded some curvature into. On the original Golden Yacht, these were carved wooden statues of women, but you can sadly only do so much in 1/100th scale. Still, I am pleased with the result. The columns were again made longer than necessary and cut down to length, after the glue had set. The hole in front of the doors is for the rudder pole, which I installed later. The rear view of the cabin was a bit trickier as it was even more decorated (or at least should be). I include you the picture of the plan for comparison. I cut the picture of the layout from the plans and glued it to my 0,5mm heavy paper. I then cut out the windows, the heraldic shield and the ornaments for the roof. The latter ones were glued at their bottom to a small piece of wood (less then 1x1mm in diameter), which would function like a foot or base, so that the ornaments can be glued on upright. The shield was glued on right away, as it didn't need further touchup. But the windows did. I pushed my scalpell along the windows lines in, to extract the would-be glassy part of the windows. then I glued a normal piece of paper to it. Then the windows were glued to the cabin. The only things left to finish the cabin, were the side galleries, the roof and flagpole. After that, the hull would be ready for priming and the first layer of colour. But that's a story for another day.


- 19 replies
-
- 3
-
-
- golden yacht
- card
- (and 1 more)
-
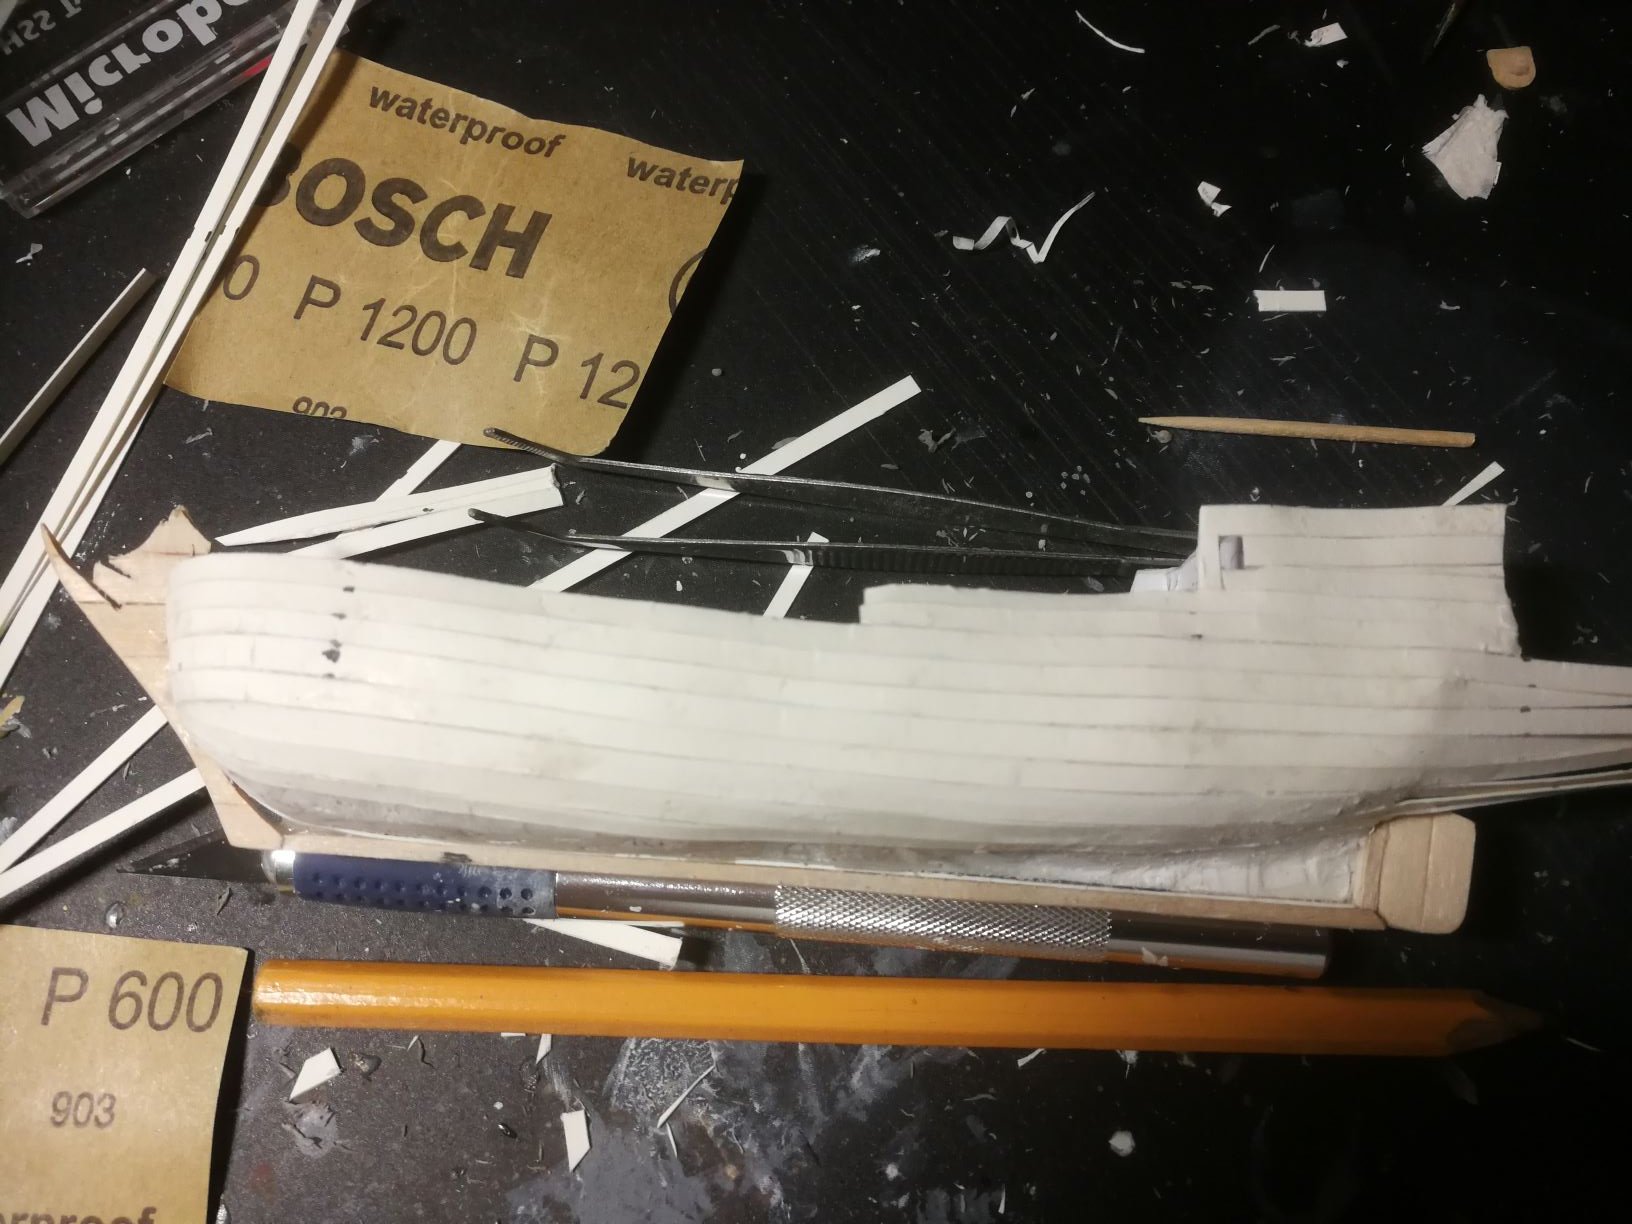
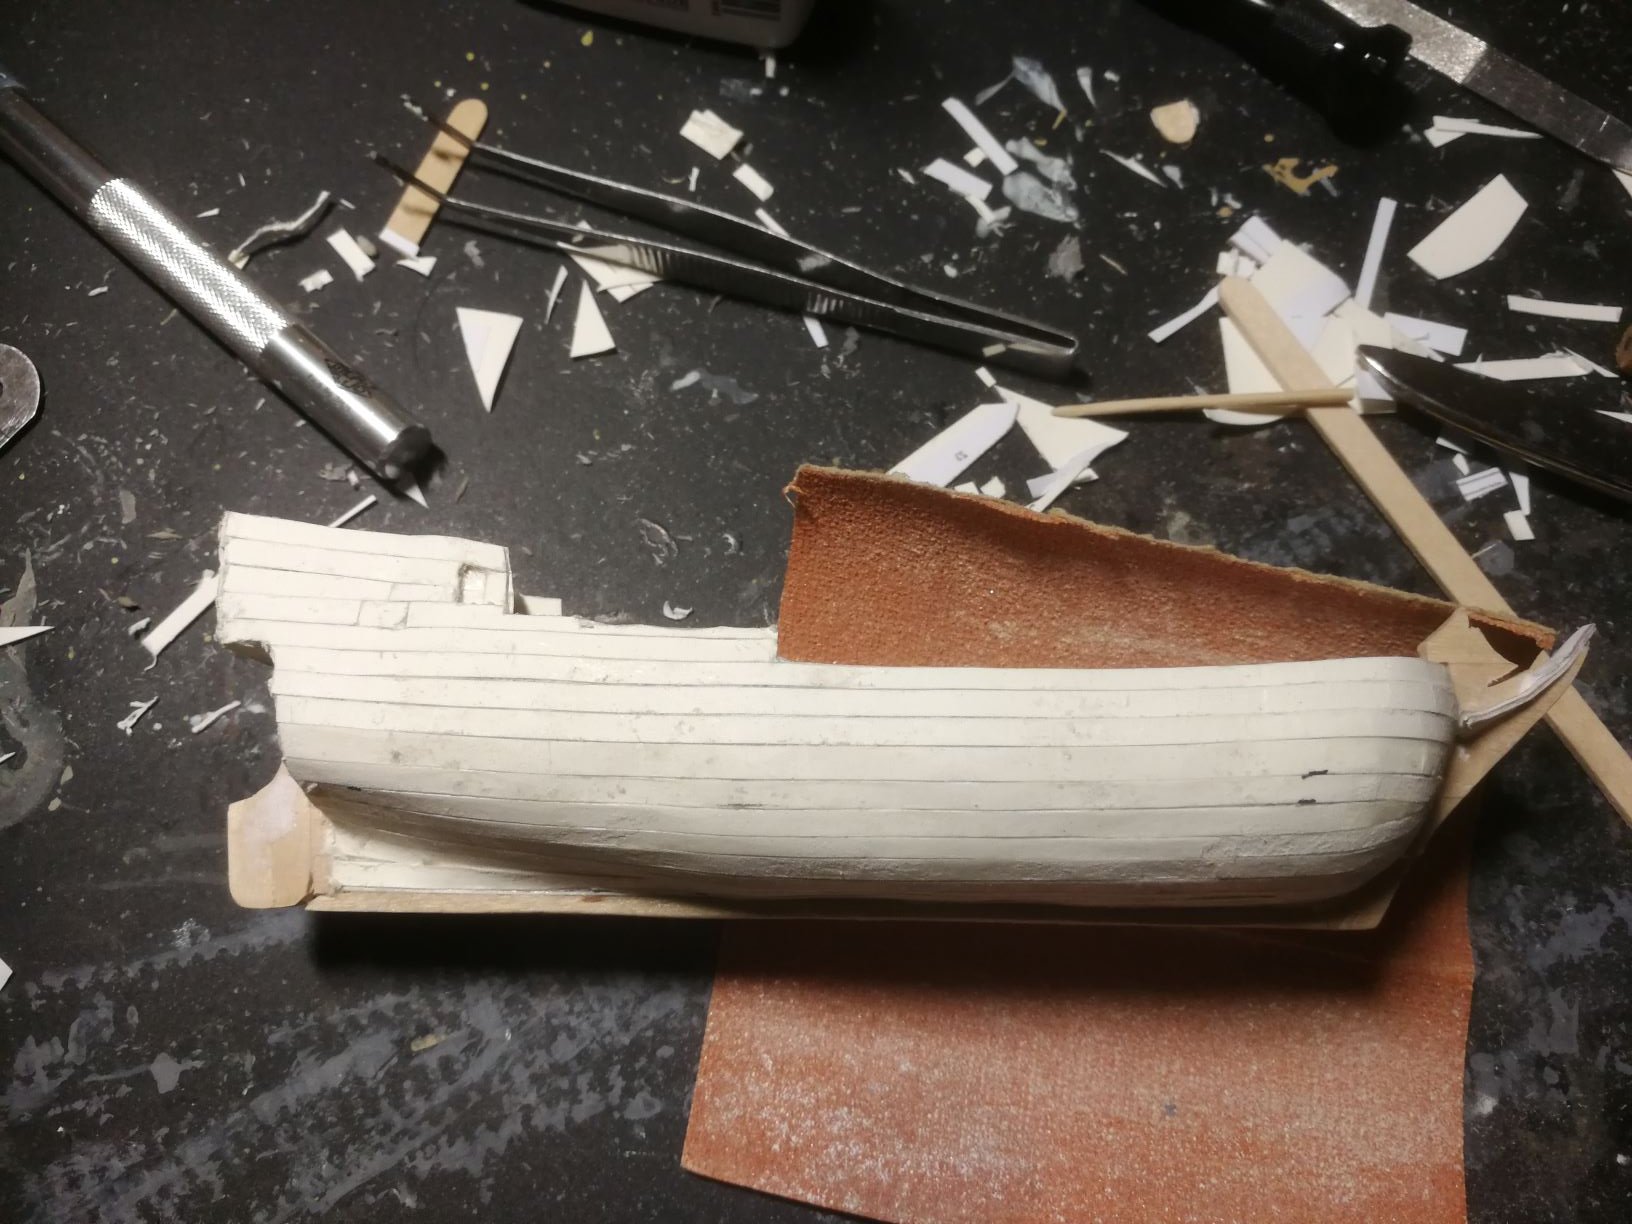
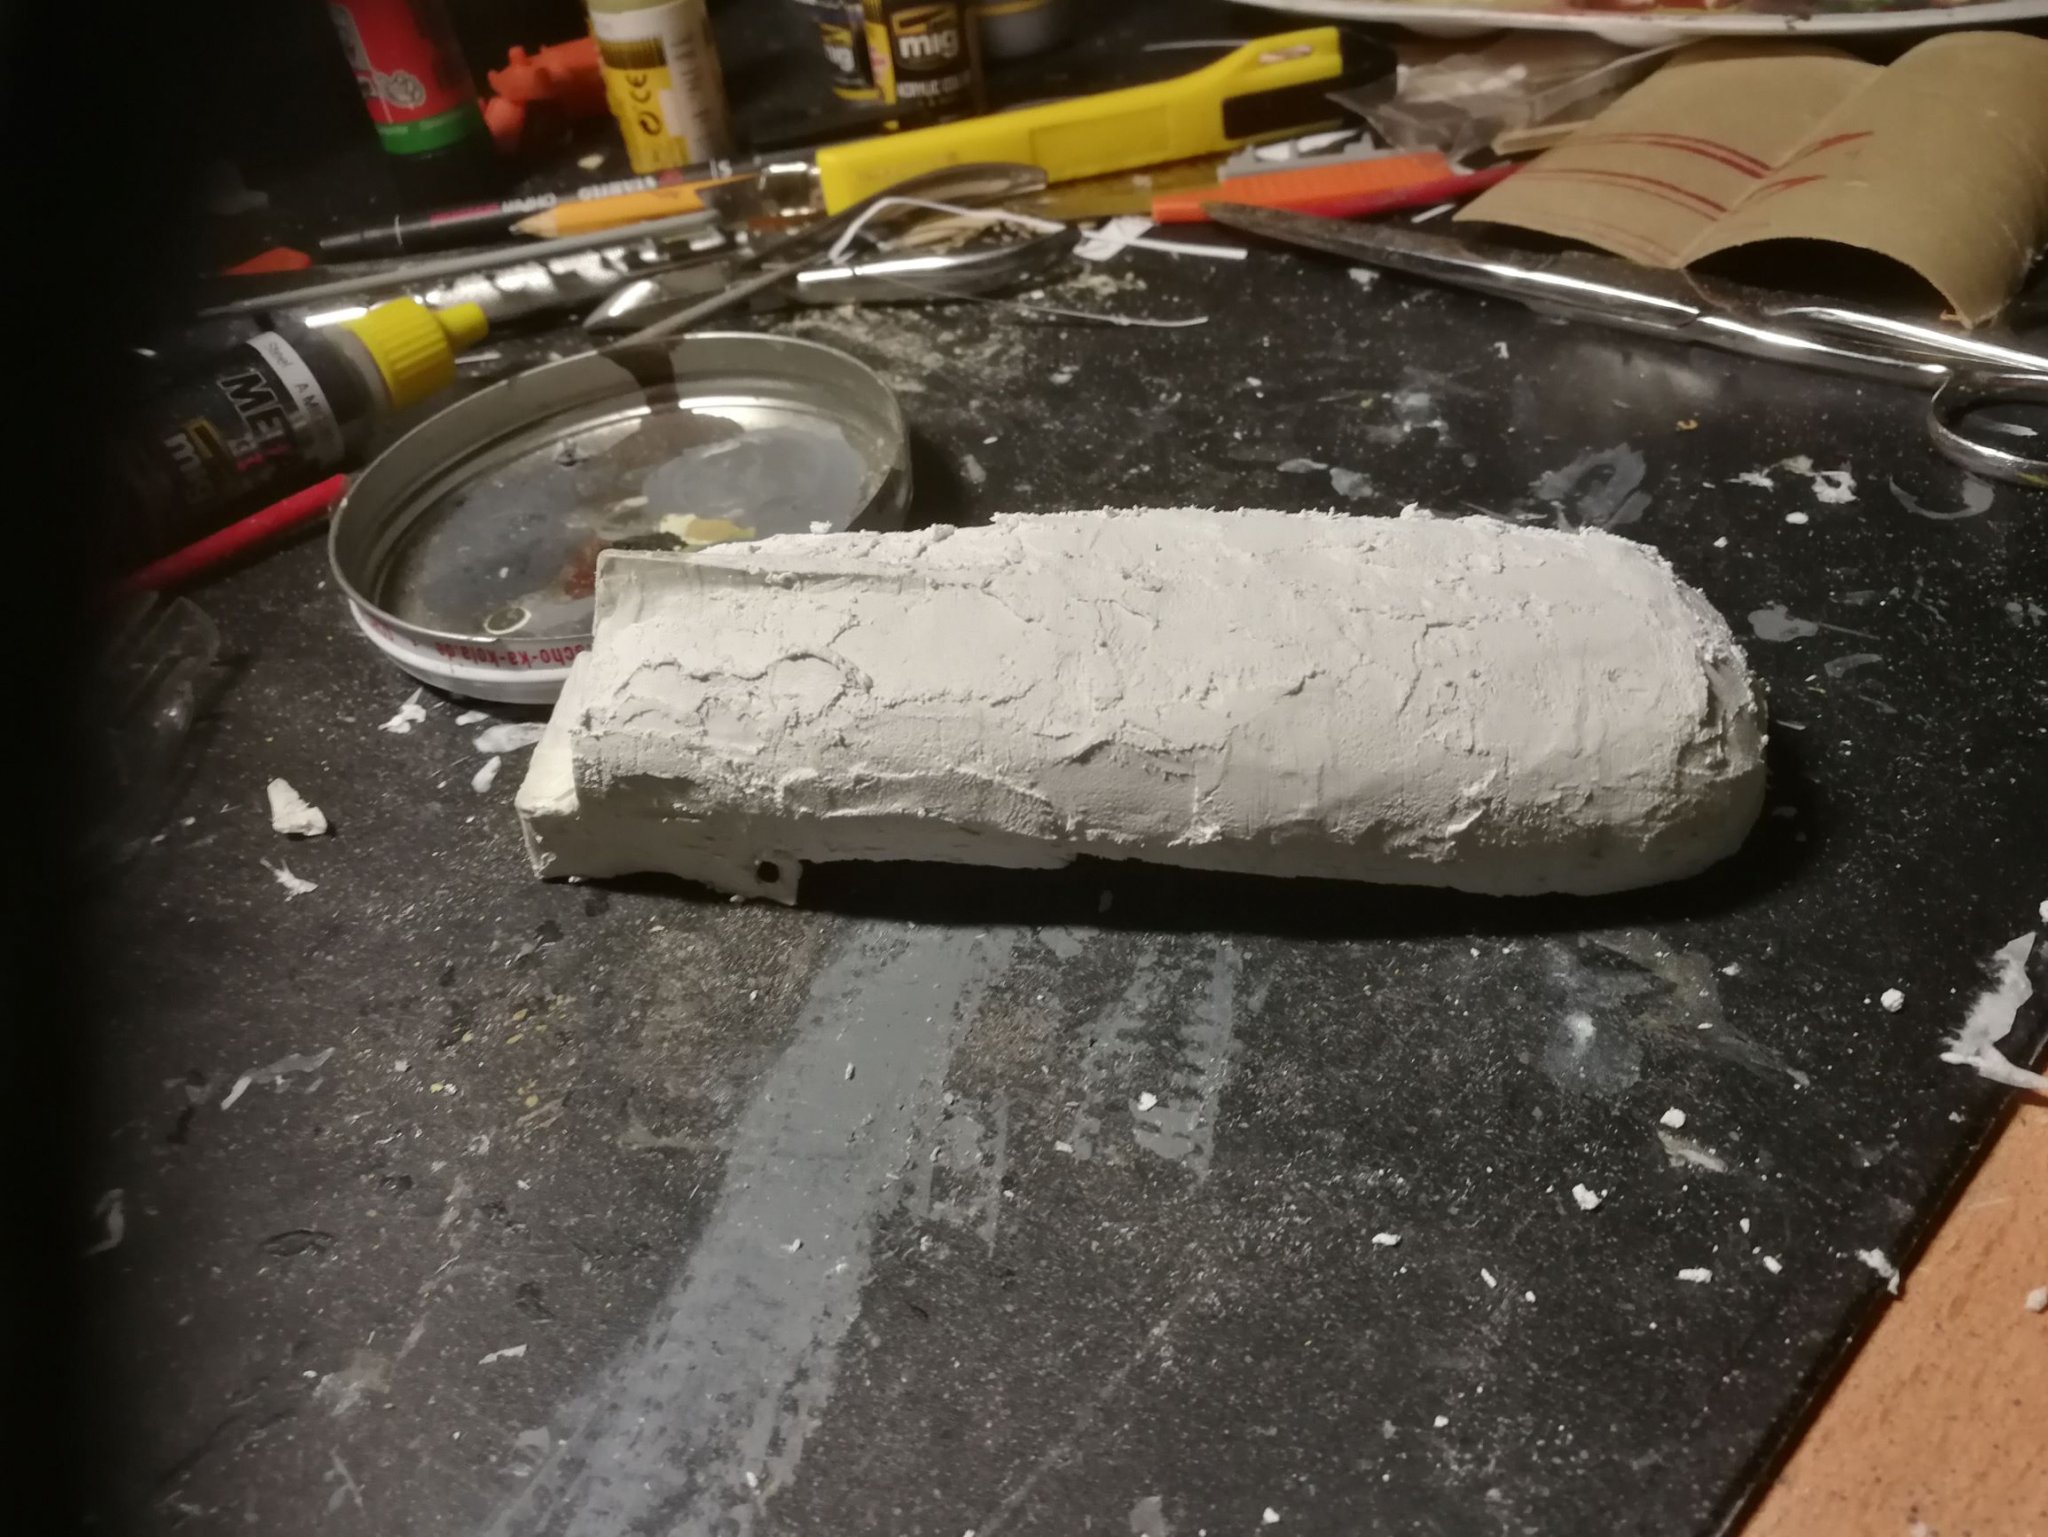
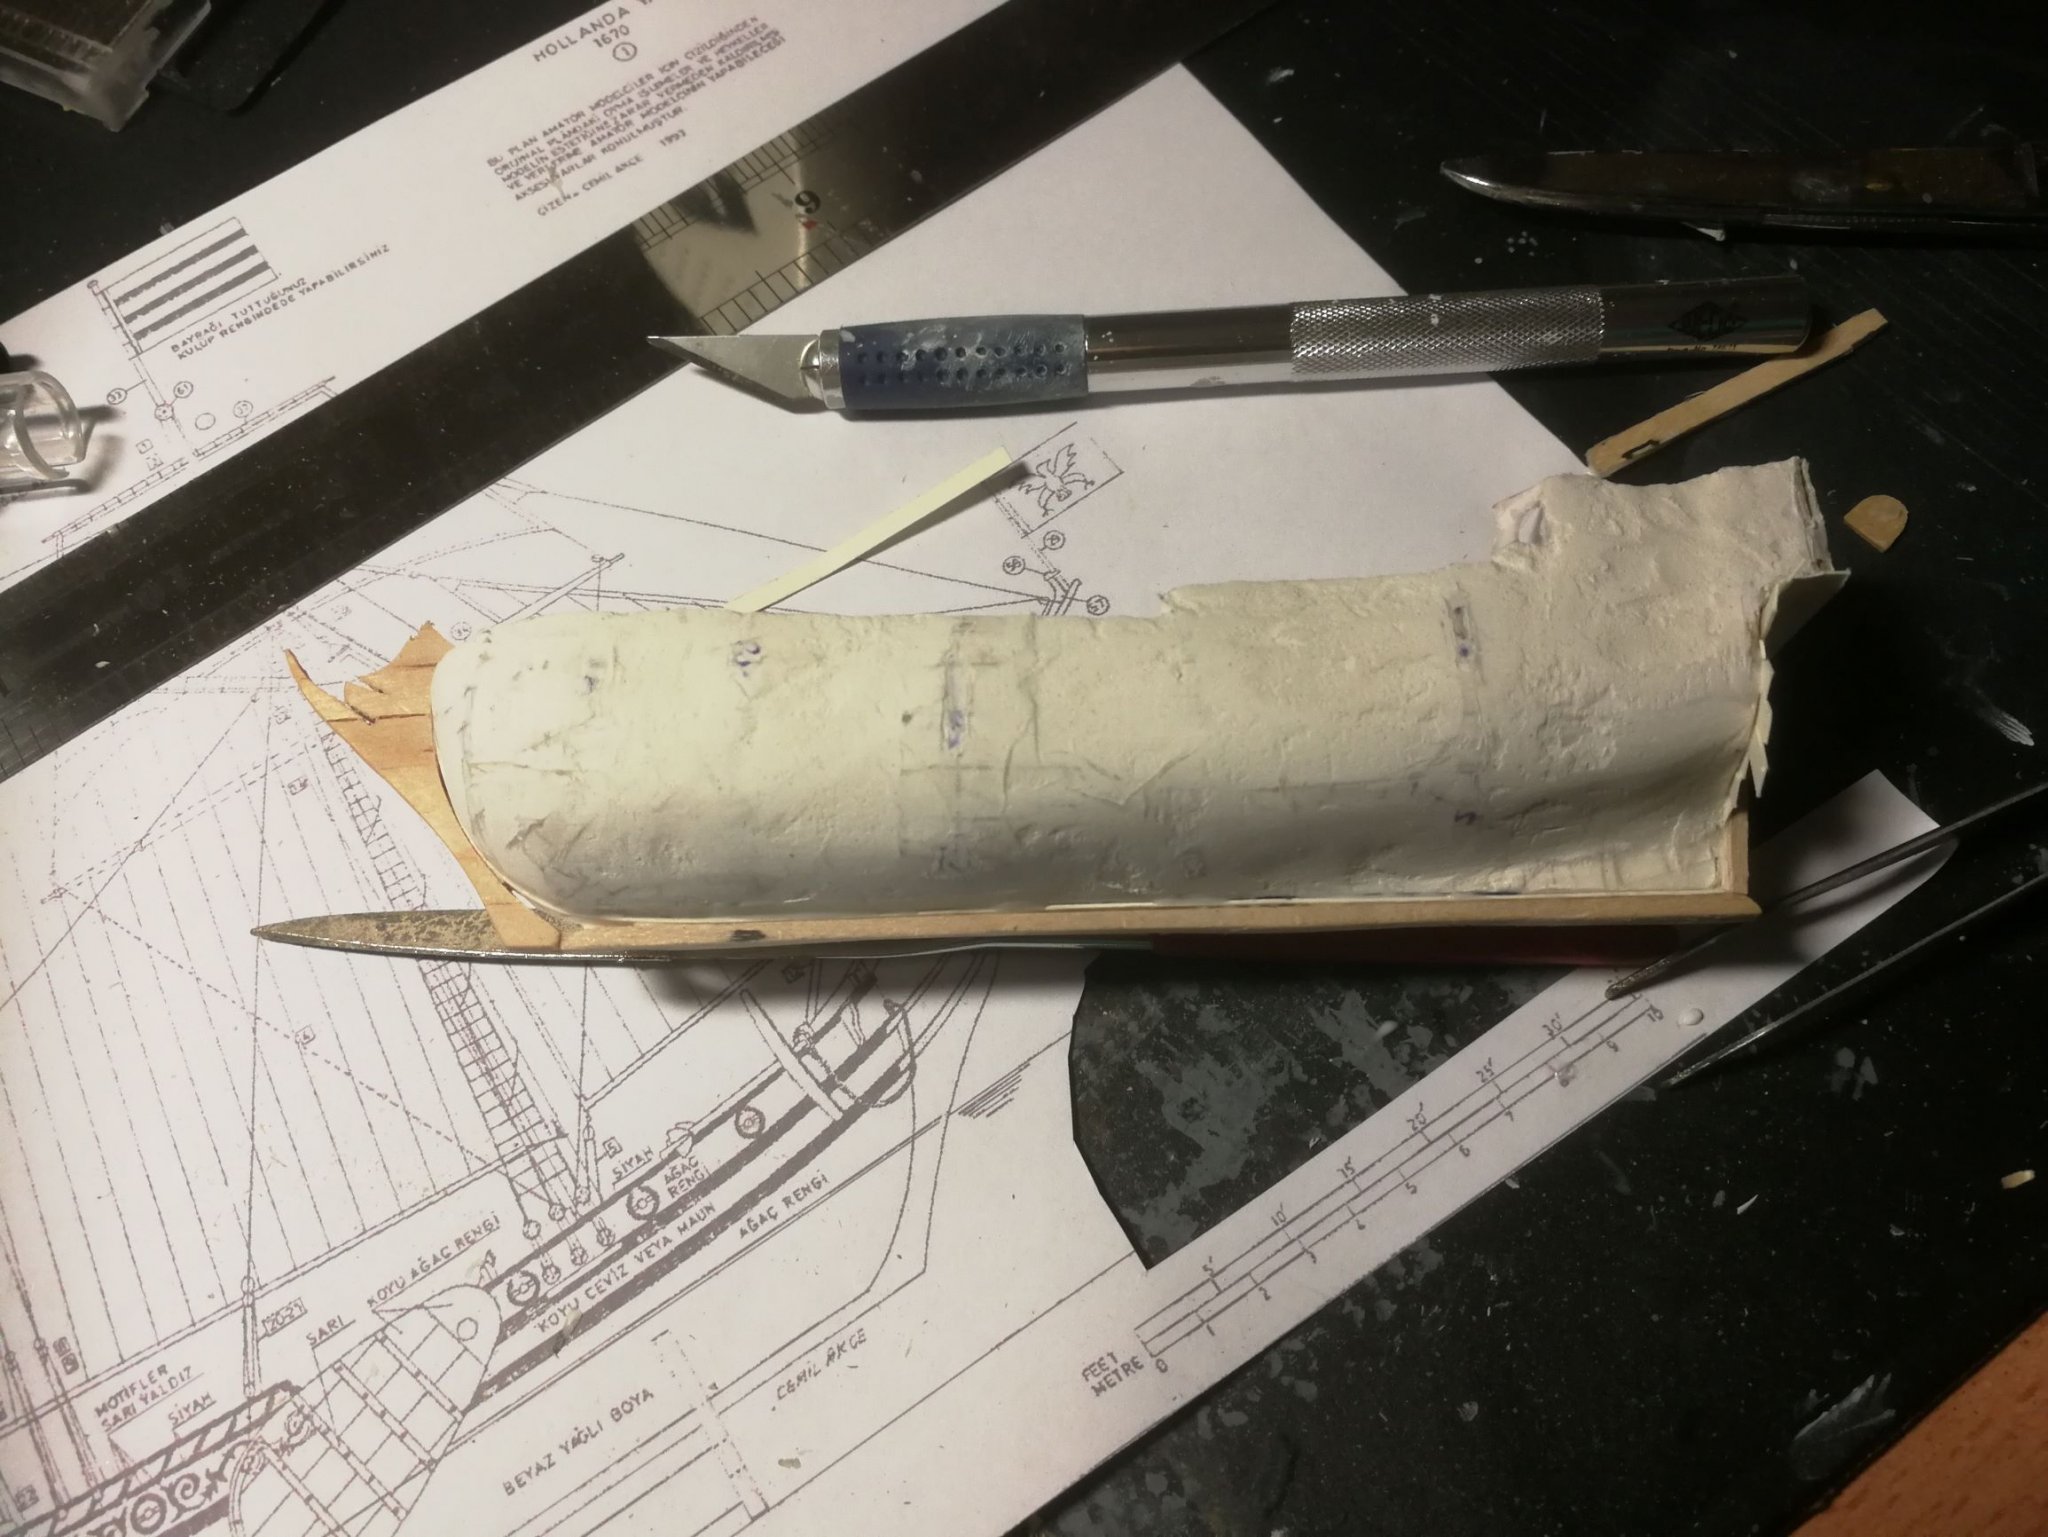
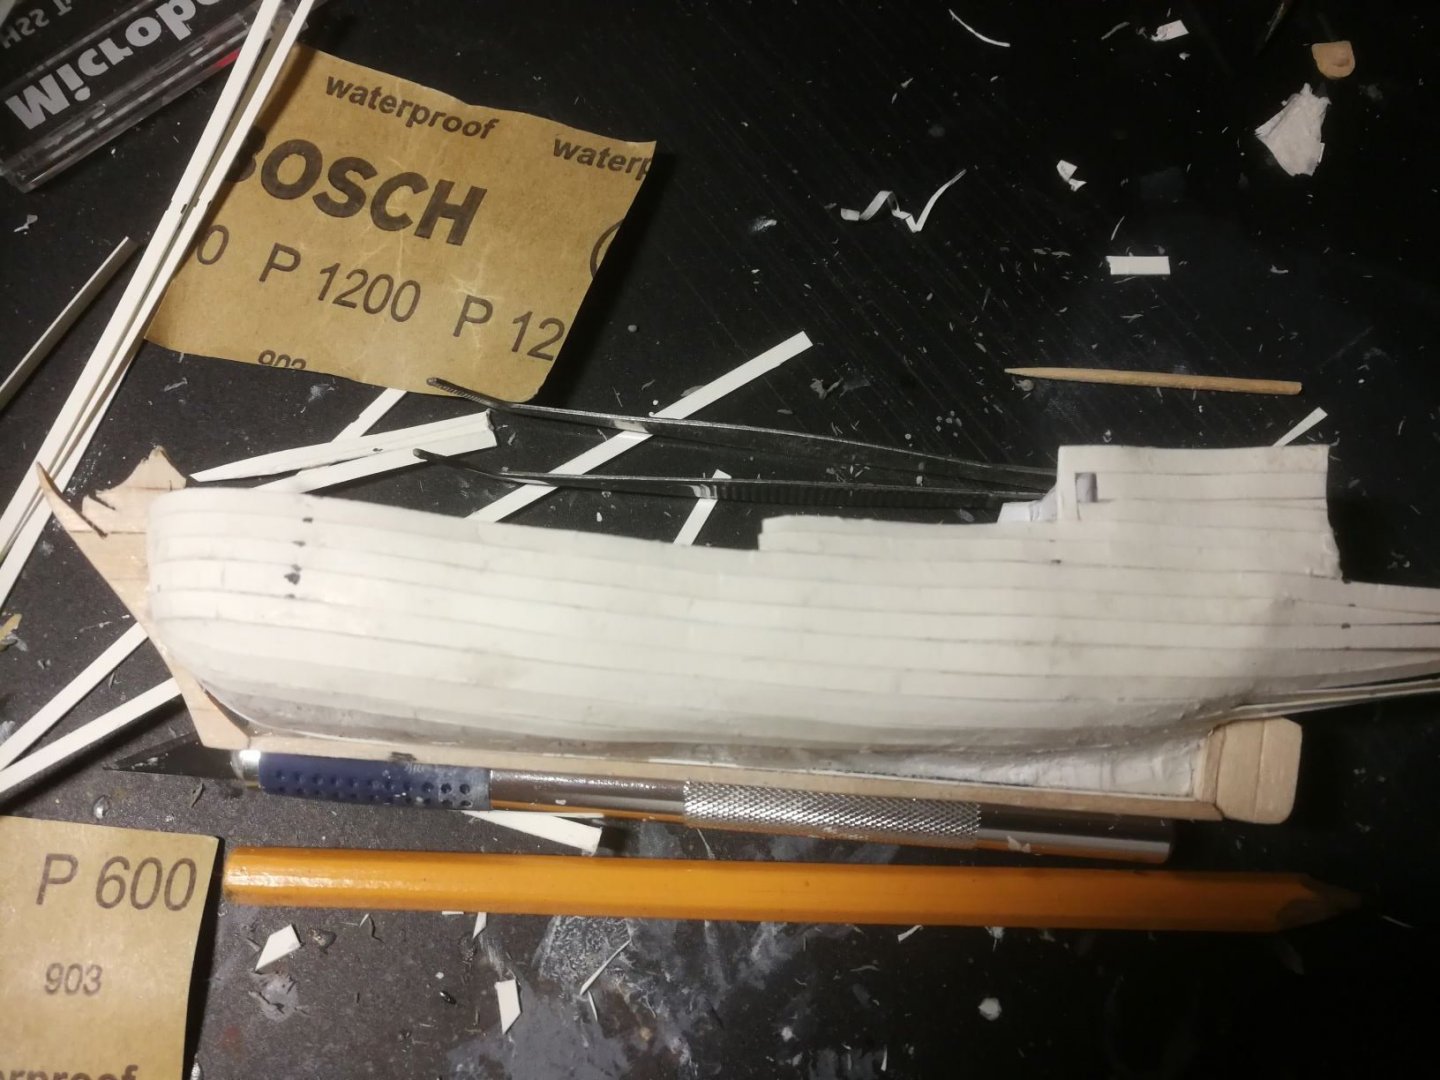
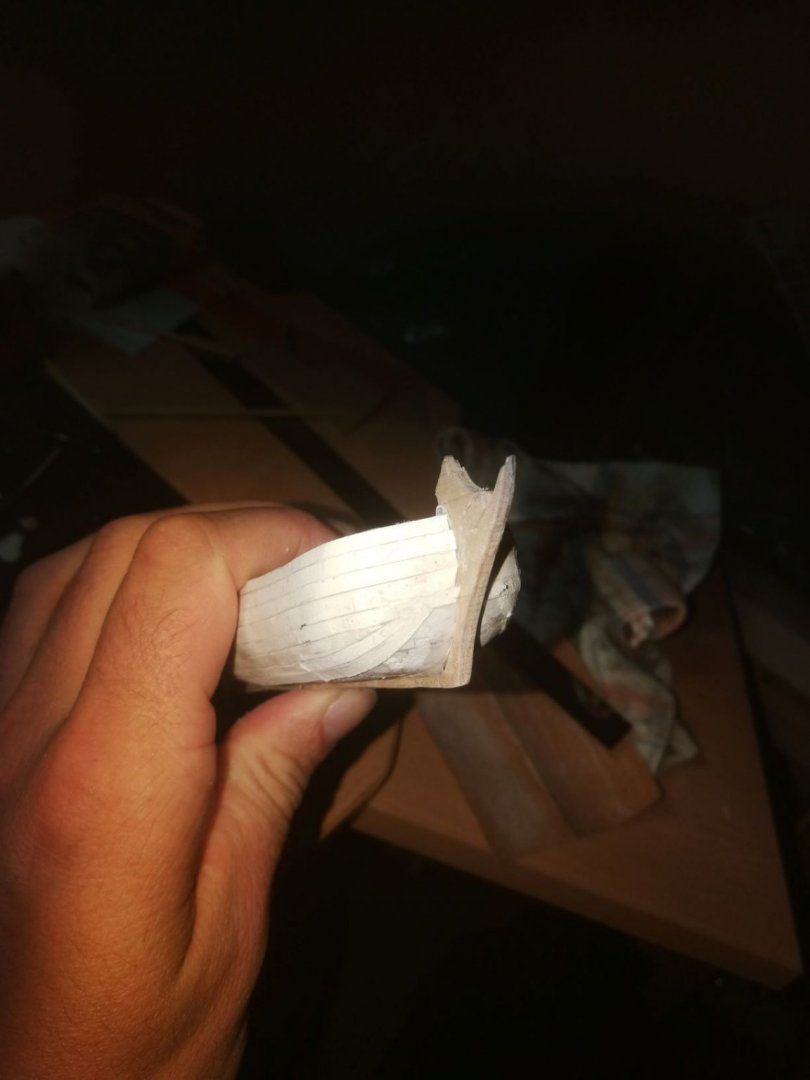
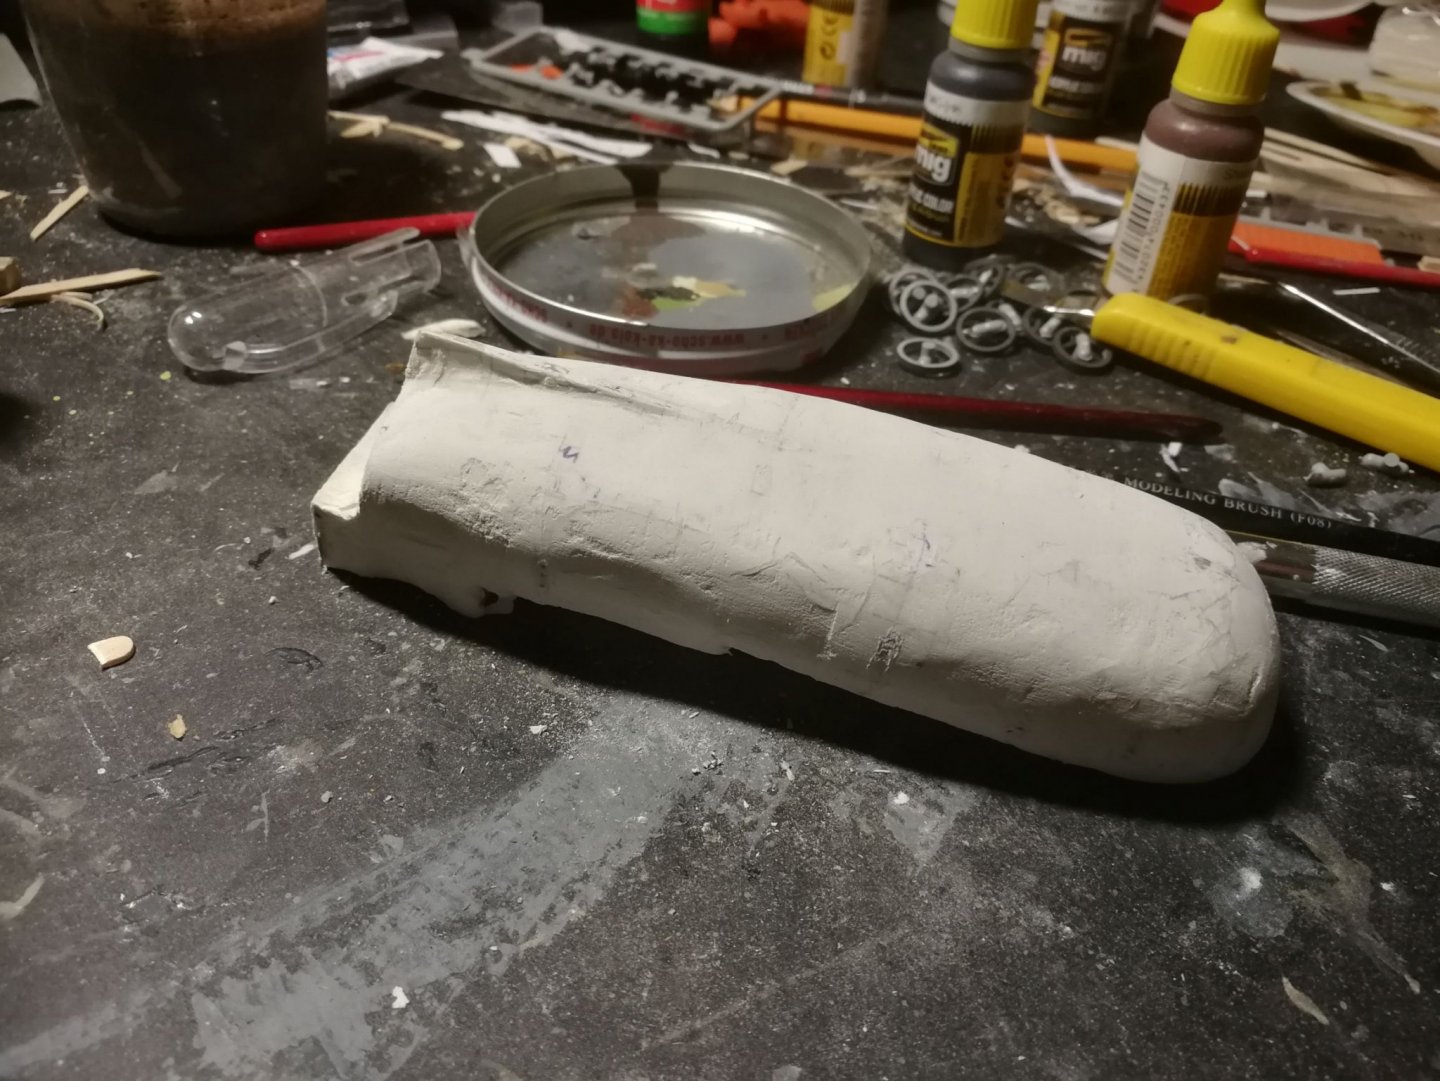
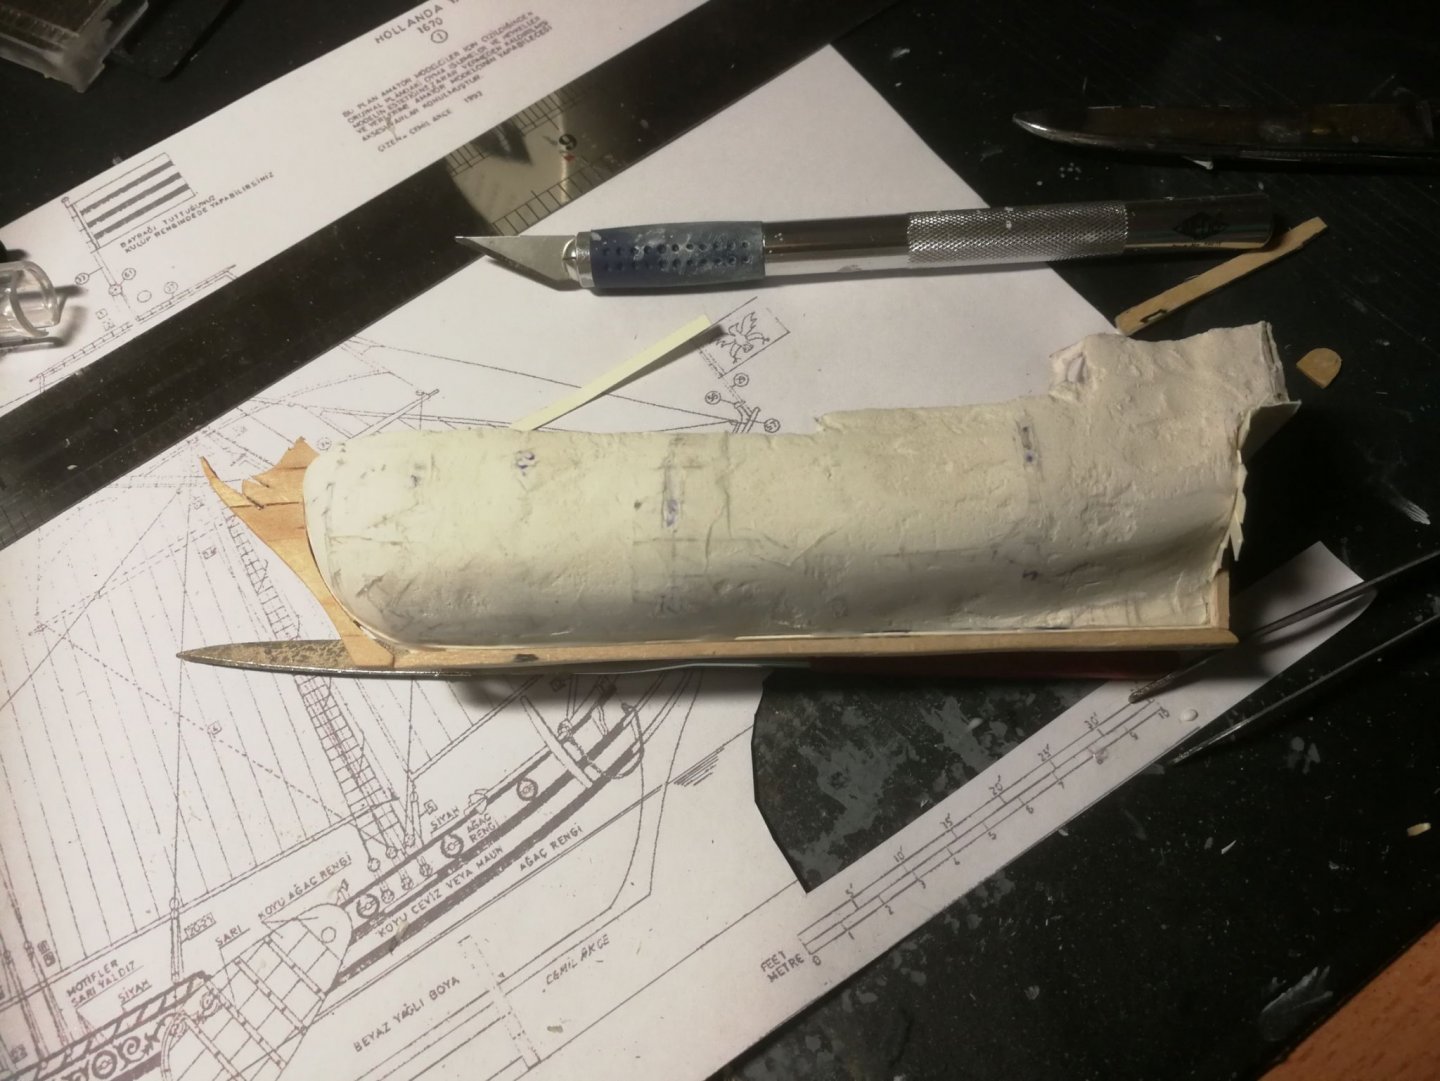
Hi guys! Louie, I am humbled by your kind words as I am in awe everytime I take a look at your impressive dromone. She is some kind of scale for me or when I get asked, what I do, when I say "I build a ship", I show them my pictures AND pictures of your dromone or Doris' Royal Caroline to give some hints, what is possible. Anyway, returning to days 9 to 13 As I was shying away from deck planking, I decided to putty the hull. I used white outdoor putty, that I had bought in a supermarket for less than 2€ (US $2,37). I tried to used as little as possible, so that the shape of the bullwark wouldn't be obscured. I first puttied one side in the morning and the other side in the afternoon, so that the first side had time to dry for some hours. I left it over night as it was and came back the next morning for sanding. I used different grids, starting with a very heavy one (60 or so) and achieved a smooth surface with the following sandings (grid: 400, 600, 1200) By the way, the rings in the background belong to my other current build: a 1/35th scale Dicker Max by Dragon Models. It is the first of two vehicles (the other one being a Dicker Max, too), that I'm building for a diorama. It is set in early summer 1941, right before the german invasion of the Soviet Union. The two Dicker Maxes receiving maintenance - one by resupplying of the ammunition and cleaning of the gun, the other just had a repait of the brakes and now the crew is putting the track back on. I keep building two or three kits at any one time, so that I can just change the kit, when I lost interest in another or stumbled into a problem, which I have to think about first. After sanding the hull, I glued the keel and all related parts to the hull. I was pretty pleased with the fit. Only one small gap needed to be filled. On this picture, you also can see a part of the plan. Regarding the "quality" of the plans, I am pretty pleased with my results (you'll see them, too. Just be patient 😁) You also can see, That I started the planking of the yacht's stern. This took me two days - on the first day, I put the "planks" on, on the second day, they were cut to length and shape. This way, I achieved a nice fit without gaps or other flaws around the edges For the planks, I cut strips of around 2-3mm of breadth of 0,5mm heavy cardboard-like paper. I used strips of the same size for the planking of the hull sides. This was the first time, I could see her lines clearly and realized, that I was on a good way. The planking looks still a bit messy on this picture. The look improved massively, when I sanded the planking after finishing it. But that's another story.

- 19 replies
-
- 2
-
-
- golden yacht
- card
- (and 1 more)
-
Thanks for your advice, Chuck! I have already planned for the next ship (a spanish 22-gun frigate) to use wood for backbone and bullwarks. Cardboard is, as you say, way too flexible for this job. Concerning the deadeyes: atm I am almost done with the hull. Planking and colour is done, it only needs some touch-ups. The mast is installed and some parts of the rigging are already in place. The pictures that you've seen so far are almost a month old 😉
- 19 replies
-
- 2
-
-
- golden yacht
- card
- (and 1 more)
-
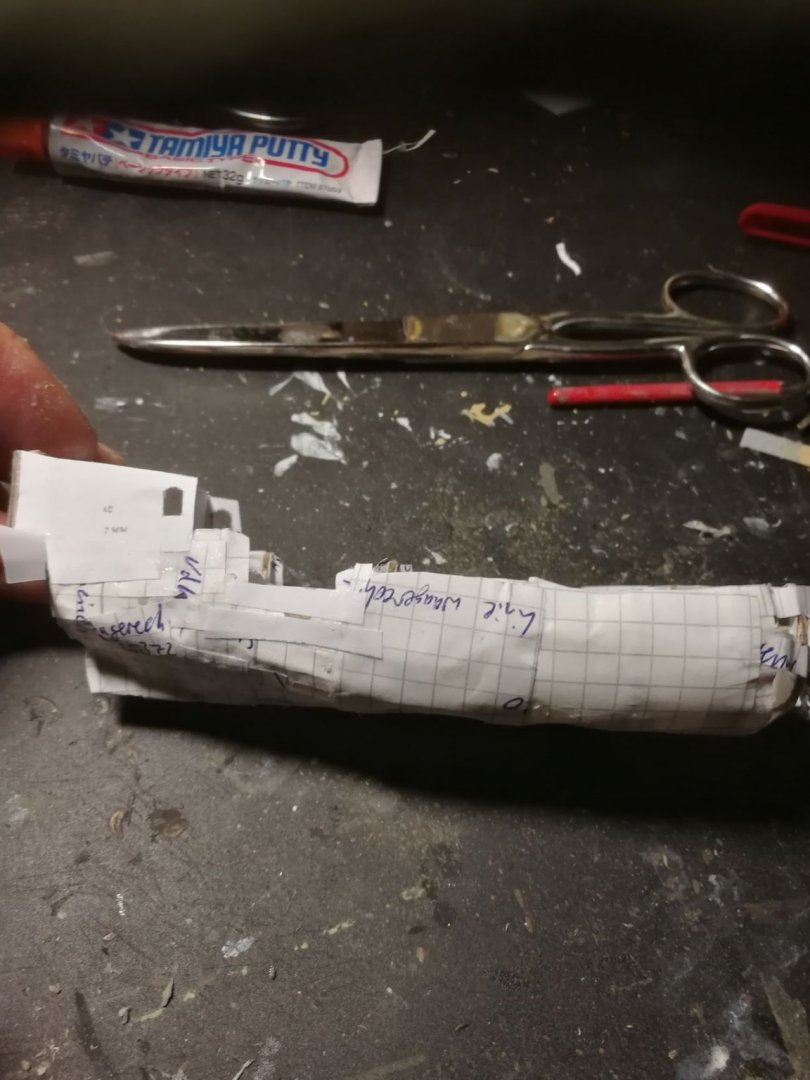
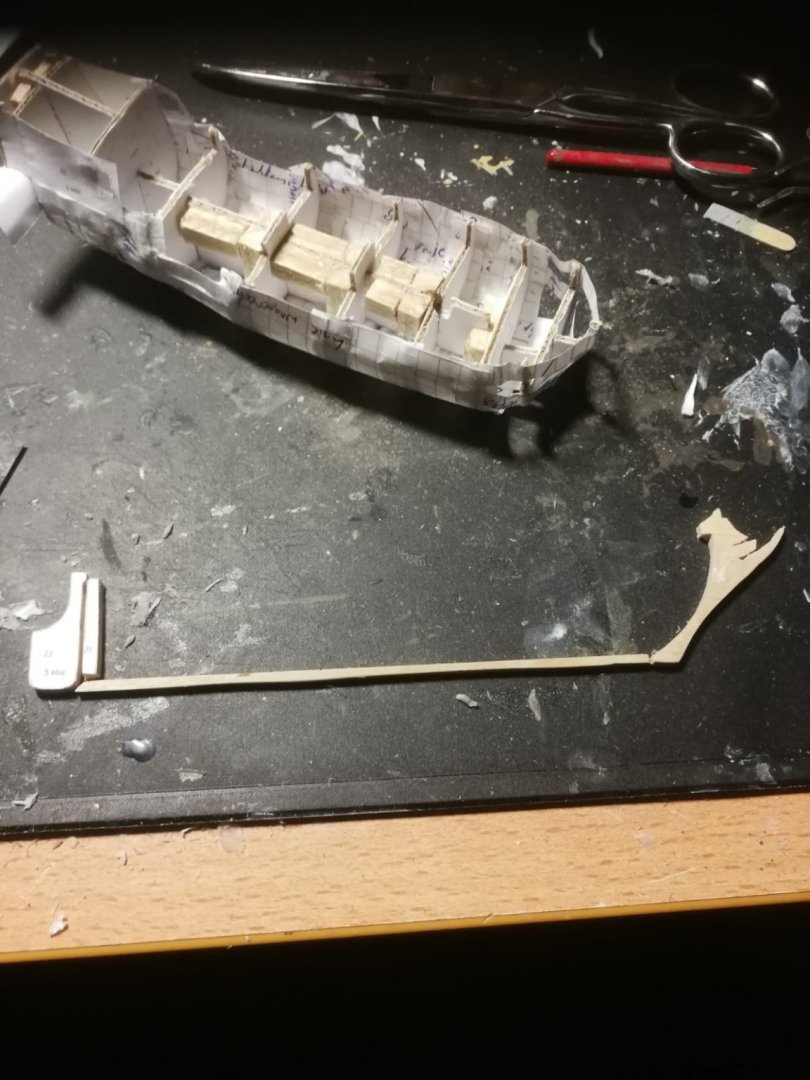
Hi guys, here is the summed up progress of 5 to 8. I rebuilt the hull with thinner, but stronger cardboard and stiffened it with wood from rocket sticks. During this work, the backbone developed a twist in itself. I only realized it way later. I glued strips of paper along the bullwarks and backbone, to extent the area to glue – I don't know, if it really had an effect. It was this early, that I learned the true meaning of „scratch building“ - you look at some pictures and drafts and scratch your head asking yourself „How can I solve this or that problem“ The spaces between the bullwarks were then filled with more strips of paper, which formed the first layer of „planking“ in the broadest sense of the word. I also started the work on the base. I took a piece of very thick cardboard (3mm-ish) and glued coffee sticks to it. This surface was sanded until it was nicely even. The last things I made during these days were keel, rudder and so on. I glued three coffee sticks together to achieve the needed thickness of around 3mm. After the glue had set, I cut them into shape with a fretsaw. This was the first time I had touched a fretsaw in 20 years 😁 I still need to learn to hold her correctly (vertically and not with a slight angle), but I'm satisfied with the results. The next steps were to apply putty to the hull to extinct all dents and create a nice rounded surface for the outer layer of planks and to start with the planking. But this is a topic for another day.

- 19 replies
-
- 4
-
-
- golden yacht
- card
- (and 1 more)
-
It has begun.
-
Good day my fellow modellers, I've built scale models since my early teens and also tried out some ships, but nothing more came of it. When I got a copy of the online PC-game "Naval Action" by Game-Labs, I realized, that a did want to try ship building for a second time. My dream ship was (and still is) the american-built topsail-schooner Prince de Neufchâtel from the war of 1812. I even found plans, but had to acknowledge, that building it just with passion, but without experience would lead to a terrible result. So I looked for some ship's plans to practice and found a few. More or less a month ago I started to build the first of them: the private Golden Yacht, owned by the Great Elector Frederick William I. of Brandenburg-Prussia during his last years. The reason, I chose her, was that her plans only took up three DIN A4 sheets of paper - one for all parts, one for the detals of deck and galery and one with standing and running rig. The plans themselves seem to be of turkish origin. As I've already started the build a month ago, I will summarize the work of a couple of days in each post, until I've caught up with the current state. Because of the ongoing pandemic and the resulting shortages in funds on my behalf, I devided trying to use as many parts and materials, I already owned and to buy as few as possible. So for the main mast and bowsprit I sanded the wooden sticks of firework rockets round and conical, for smaller pieces (flag poles, yards and so on) I took toothpicks and carved them thinner using my scalpell. The keel and other parts "with edges" were made of the wooden sticks you use, to stir your coffee, where I glued two or three together, depending on the thickness I needed. The bullwarks and backbone of the hull were made from cardboard boxes, which led to a problem: as the bullwarks were each a tiny bit thicker than the slit in the backbone, the latter was bent horizontally. I mean, the front and rear part were pressed downward by two or three millimeters compared to the middle part. Fortunately I realized it, BEFORE I started planking the hull.. Unfortunately I had already glued in some wood to stiffen to backbone. Result: I needed to rebuild the hull completely. But that was to be work for another day.


- 19 replies
-
- 3
-
-
- golden yacht
- card
- (and 1 more)
-
I will! Up until now it was a learning on the go process. The next "big" thing is the production of the dead eyes. I already have an idea, how to do it, but time will show, if it works
-
Thank you all for this warm welcome. The last days were a bit stressfull for me, but when I'm done with work today, I'll start the log and post a link here. I'm really looking forward to all this. 😊
-
I greet you, my dear fellow modellers! After a long time of just spying unregistered, I decided to join your ranks. Another reason is that I started a Golden Yacht a few weeks ago and want to share my progress 😅 so there will be a scratch-build log following in the next days. A few details to my background: I'm 30 and started scale kit building during my early teens. I also tried out some wooden ships (Constructo Bluenose and Bounty beginner kits, a 1:72 tug boat by Revell and an a bit more advanced Constructo Santa Maria). I was completely inexperienced and did not receive much help from my father. So the results were not satisfying and nothing more came of it. During the last winter, I started playing the online PC-game Naval Action and stumbled by sheer luck over some beautiful ships like the french frigate Renommee or the american topsail-schooner Prince de Neufchatel. I fell a bit in love, I must confess, and the wish began to grow to call them my own in one way or the other. While searching the internet, I found the plans for both in 1:50ish and many more. As I realized, that they were way beyond my league, I decided to build some smaller ships for practice. So the Golden Yacht in 1/100th scale was started and the follow-up project will be a spanish 22-gun-frigate. At the same time, I'm building some 1/35th scale tanks for a diorama. I'm looking forward to some nice and fruitful conversations
-
The Byzantines were remnants of the Roman Empire, which was split by Emperor Constantine the Great during the 4th century AD after an almost century long series of civil wars, barbaric intrusions and economic crisis. It outlived its western brother by almost a thousand years. Culturally the Eastern Roman Empire was closer to the ancient Greeks, as they were admired for their education, philsophy and literature. It is also named the Byzantine Empire, because the capital Constantinopel (and nowadays Istanbul) had its roots in the old doric-greek colony of Byzantion.
.jpeg.48435379df9492eff00585cf6ad7a999.jpeg)
.jpeg.e1ddc63cd9e85da1999c8cc61c6339f9.jpeg)
.jpeg.c8bf587d62d298470945233080b8f8d7.jpeg)
.jpeg.1be3cd58eebe9a5241361d230b27b34d.jpeg)
.jpeg.05c794f6796dfa7dc1372d79f7638c7a.jpeg)
.jpeg.b18b2accaece430409097b16e48e17d8.jpeg)
.jpeg.6f922807945d2938b4ba756506b1f919.jpeg)