marsalv
-
Posts
616 -
Joined
-
Last visited
Content Type
Profiles
Forums
Gallery
Events
Everything posted by marsalv
-
L'Amarante by marsalv - 1:36 - POF
marsalv replied to marsalv's topic in - Build logs for subjects built 1501 - 1750
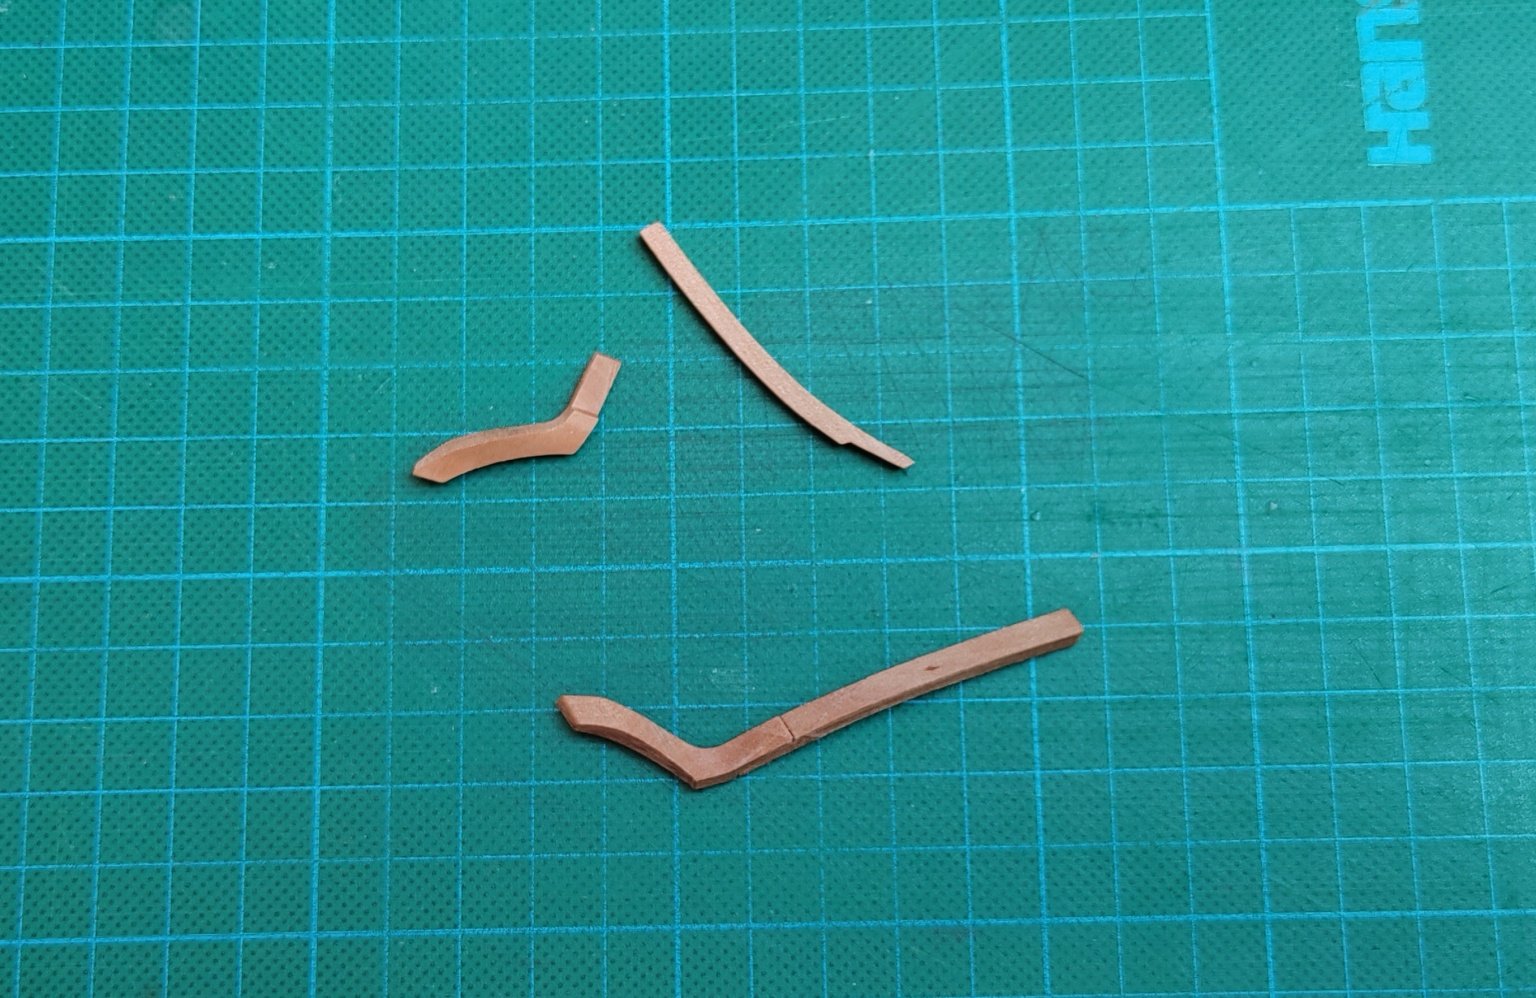
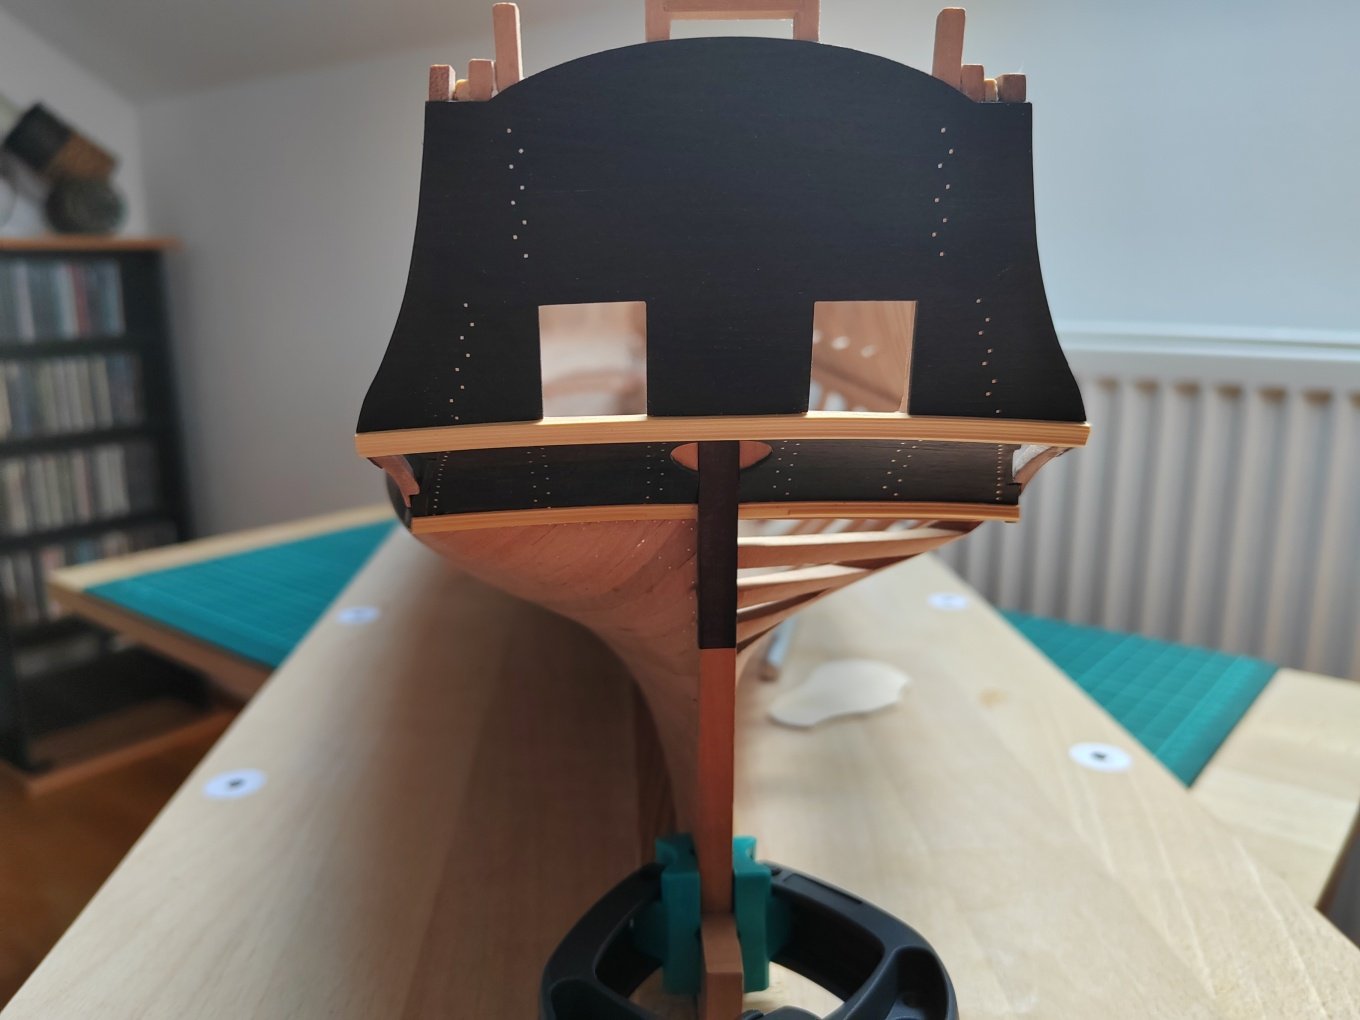
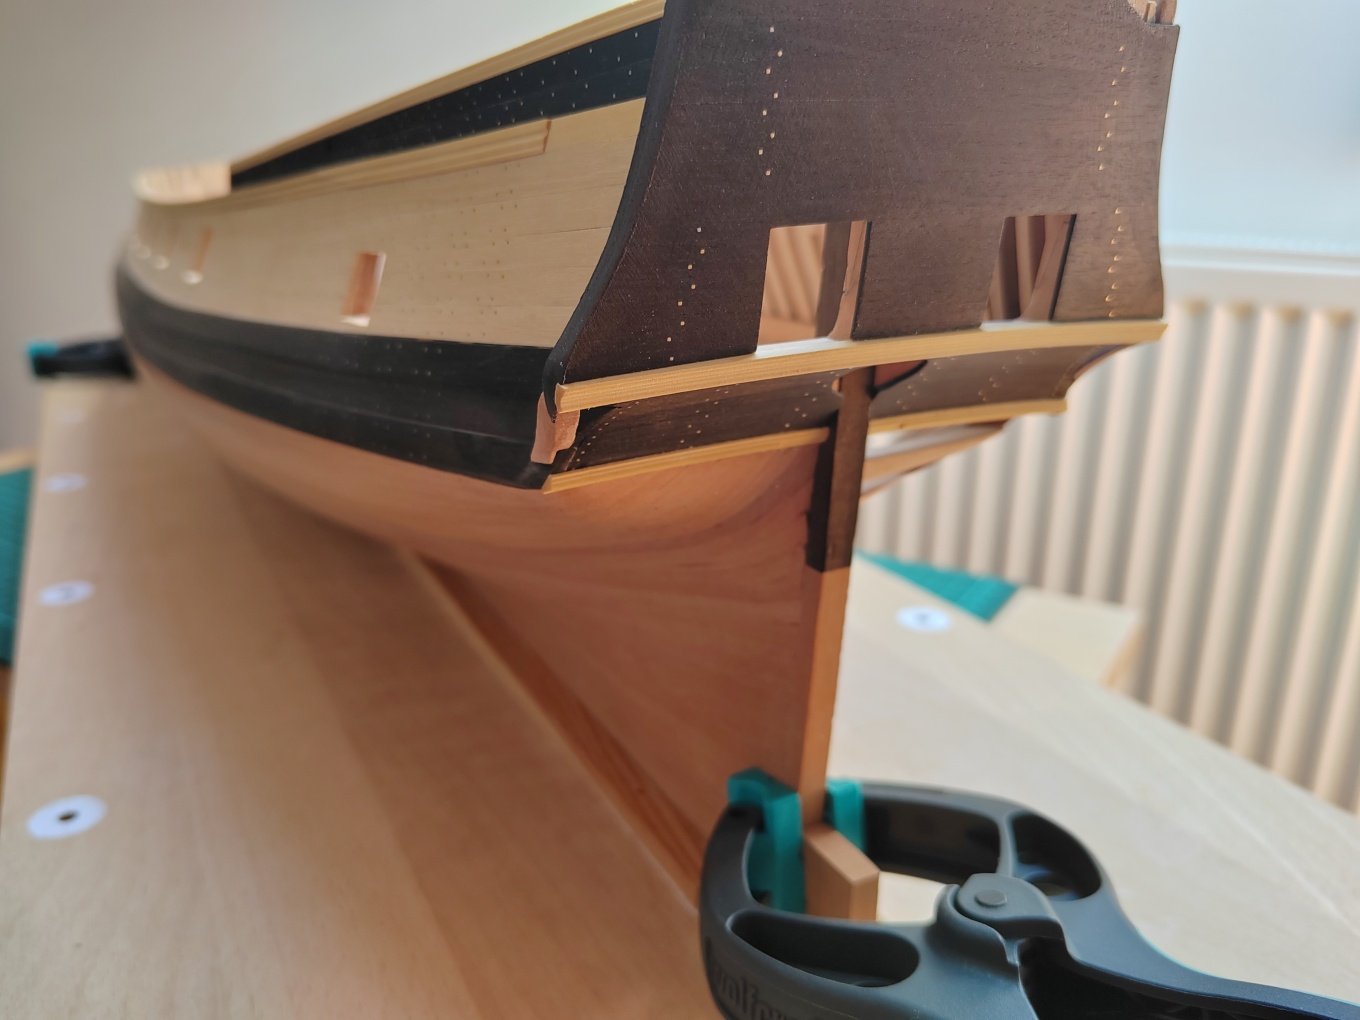
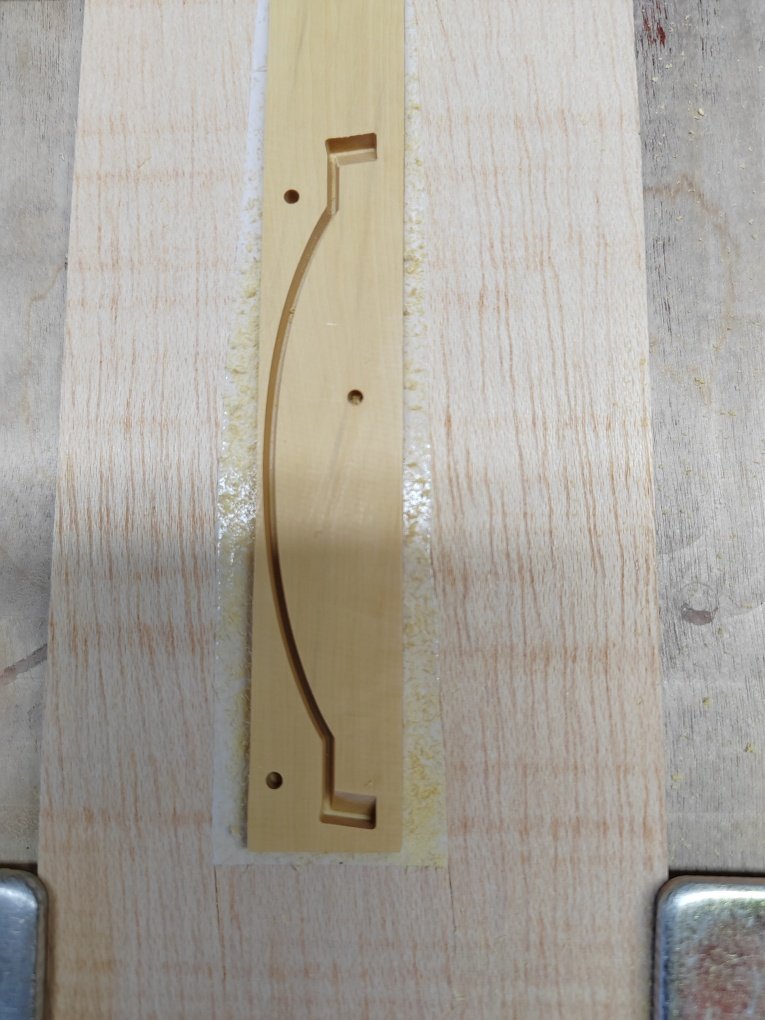
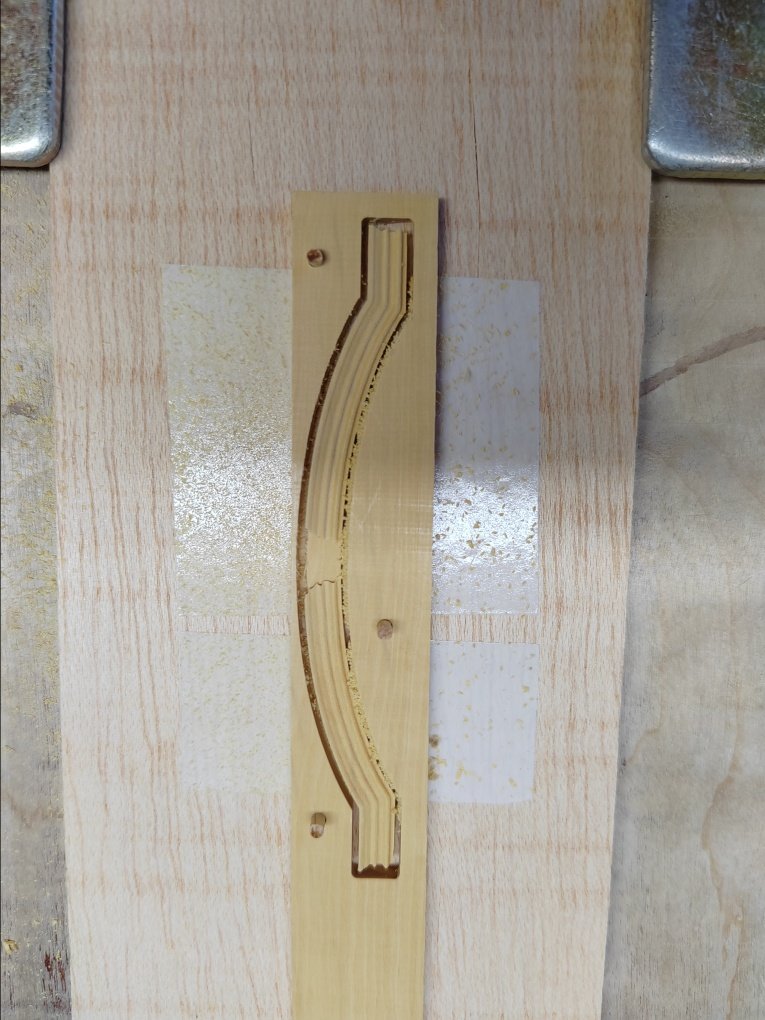
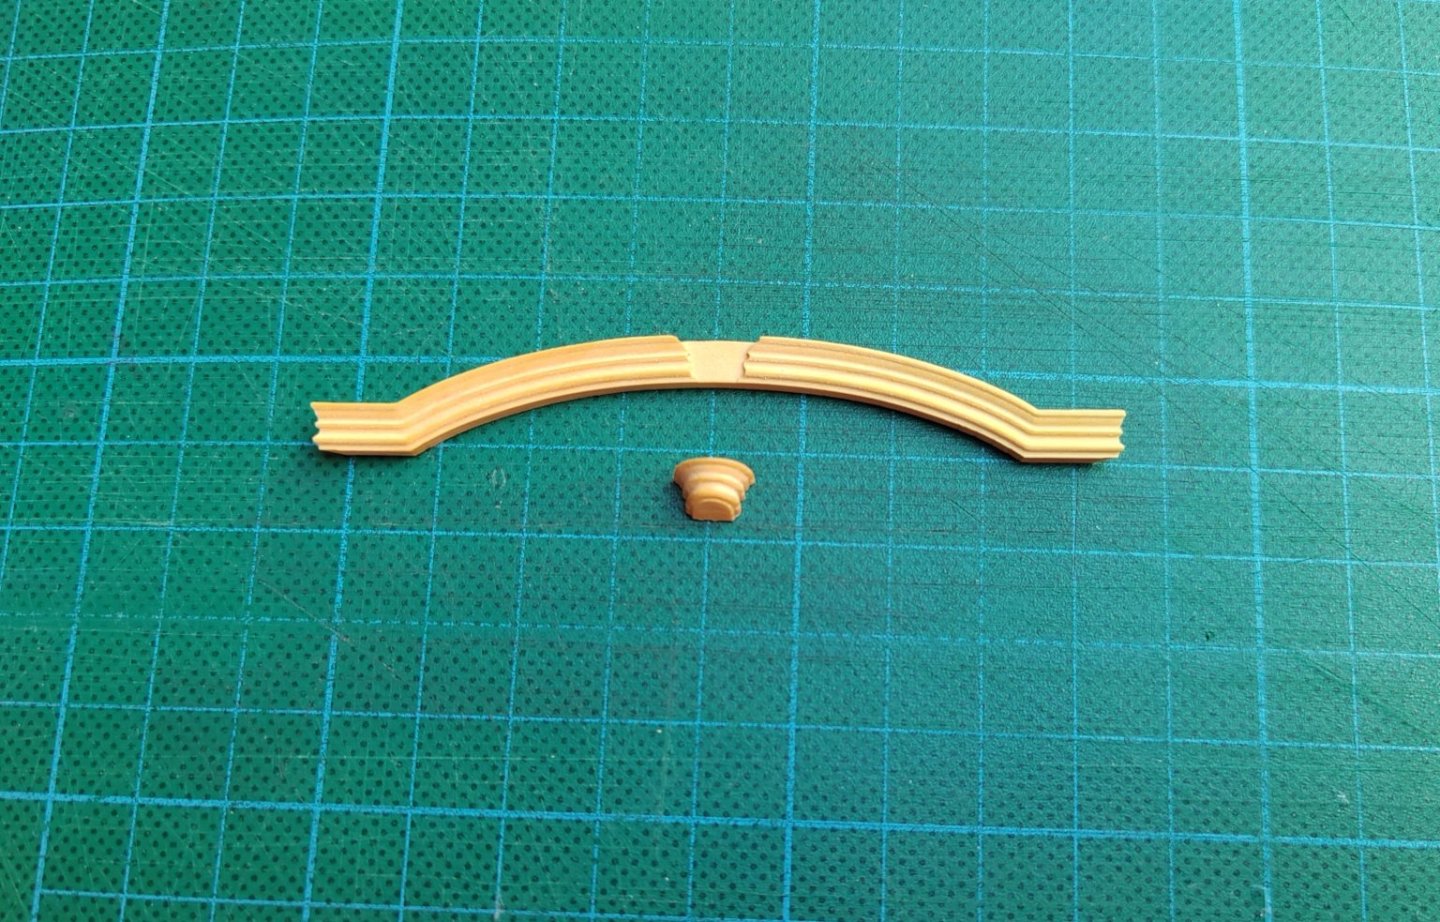
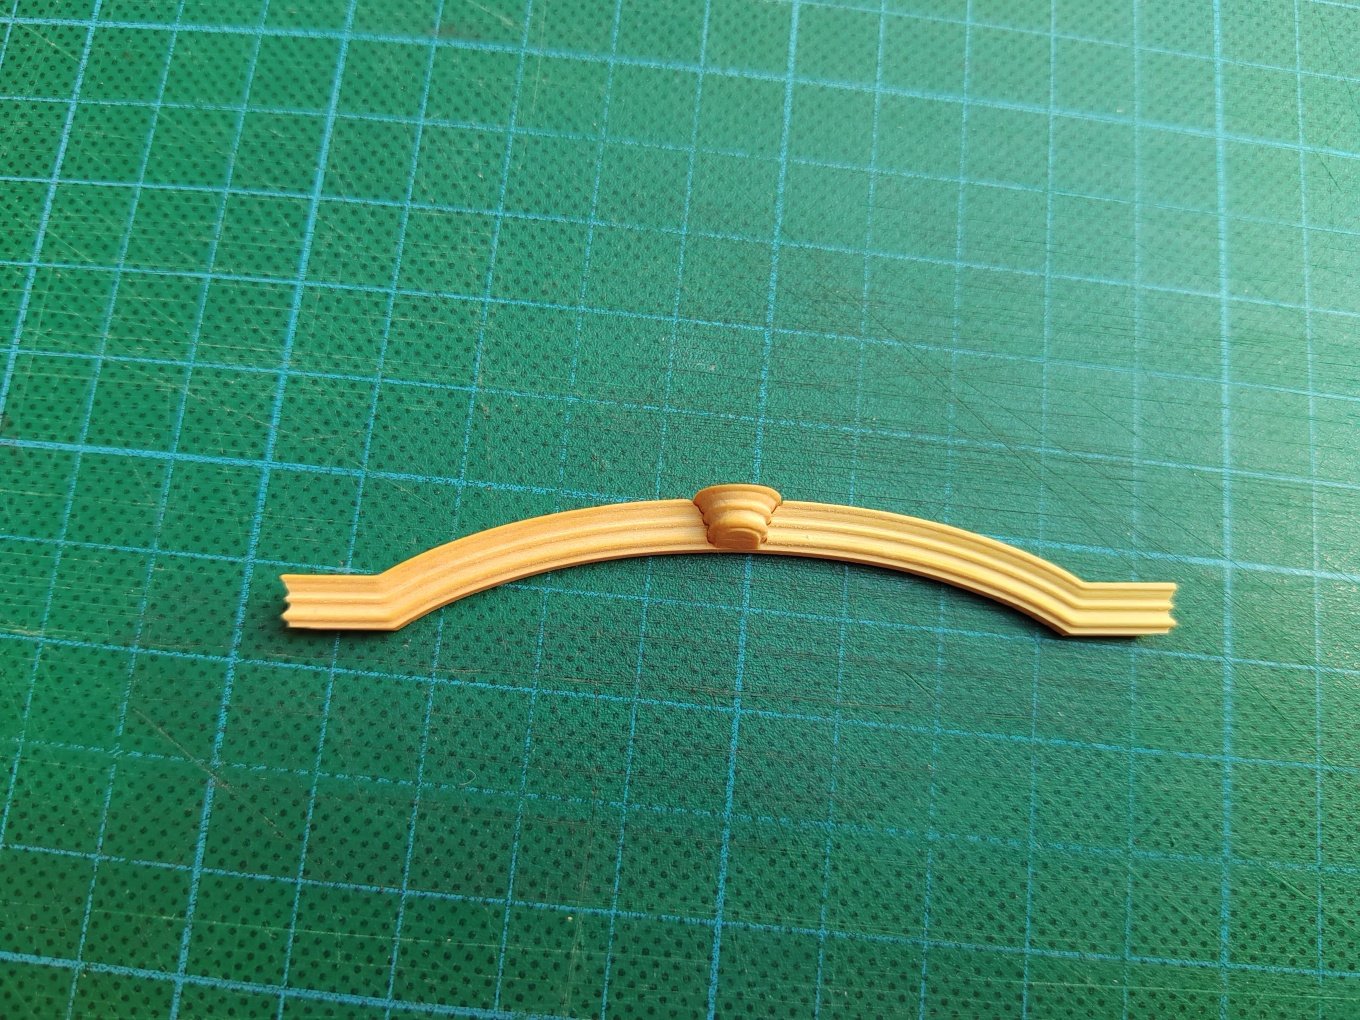
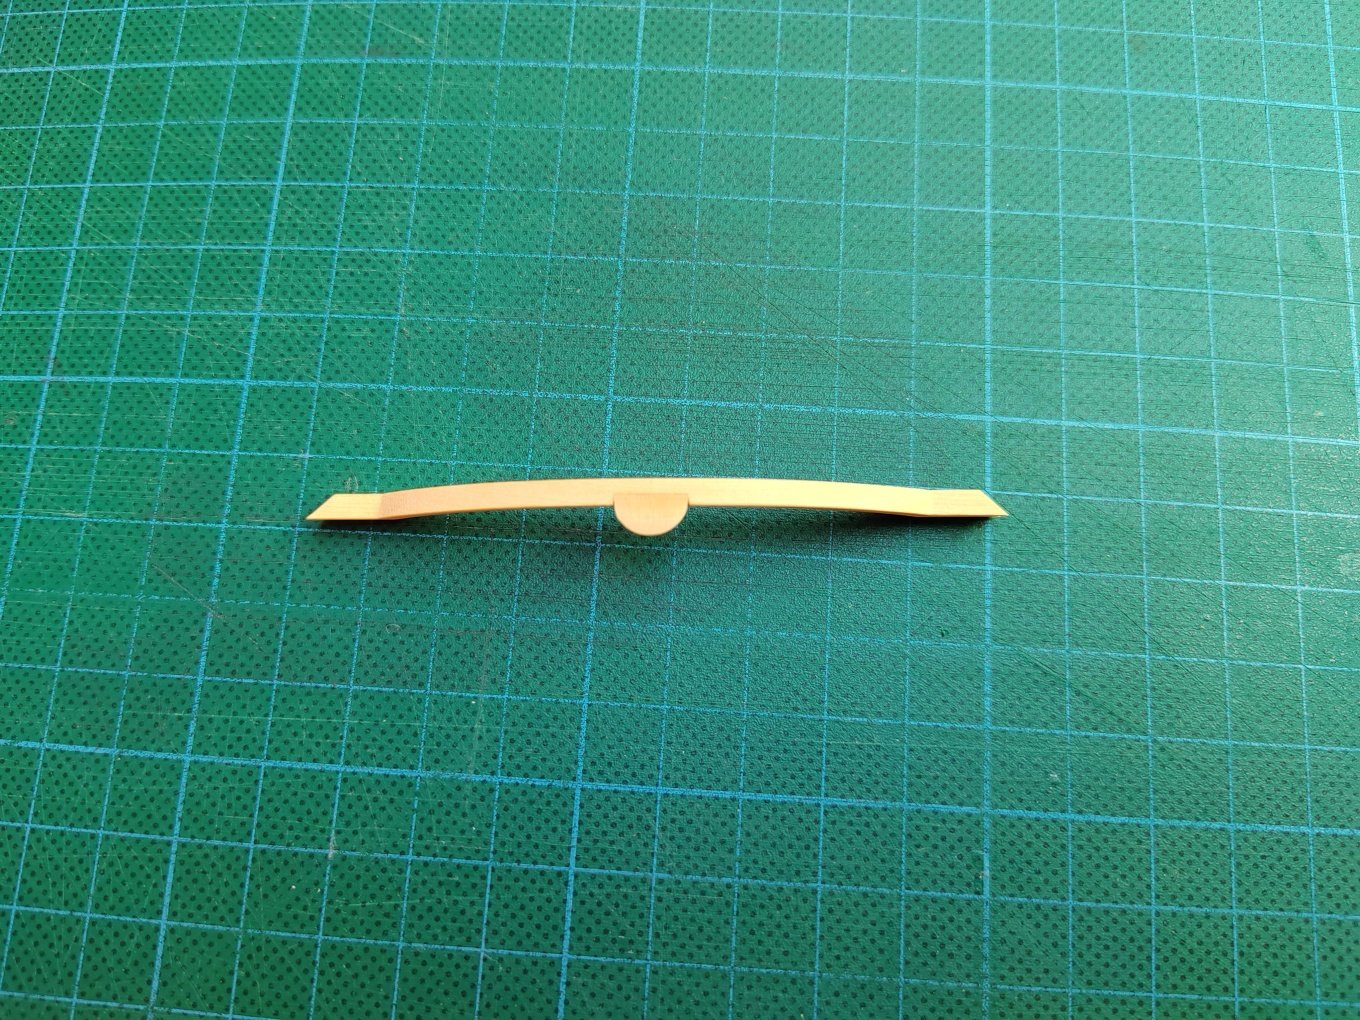
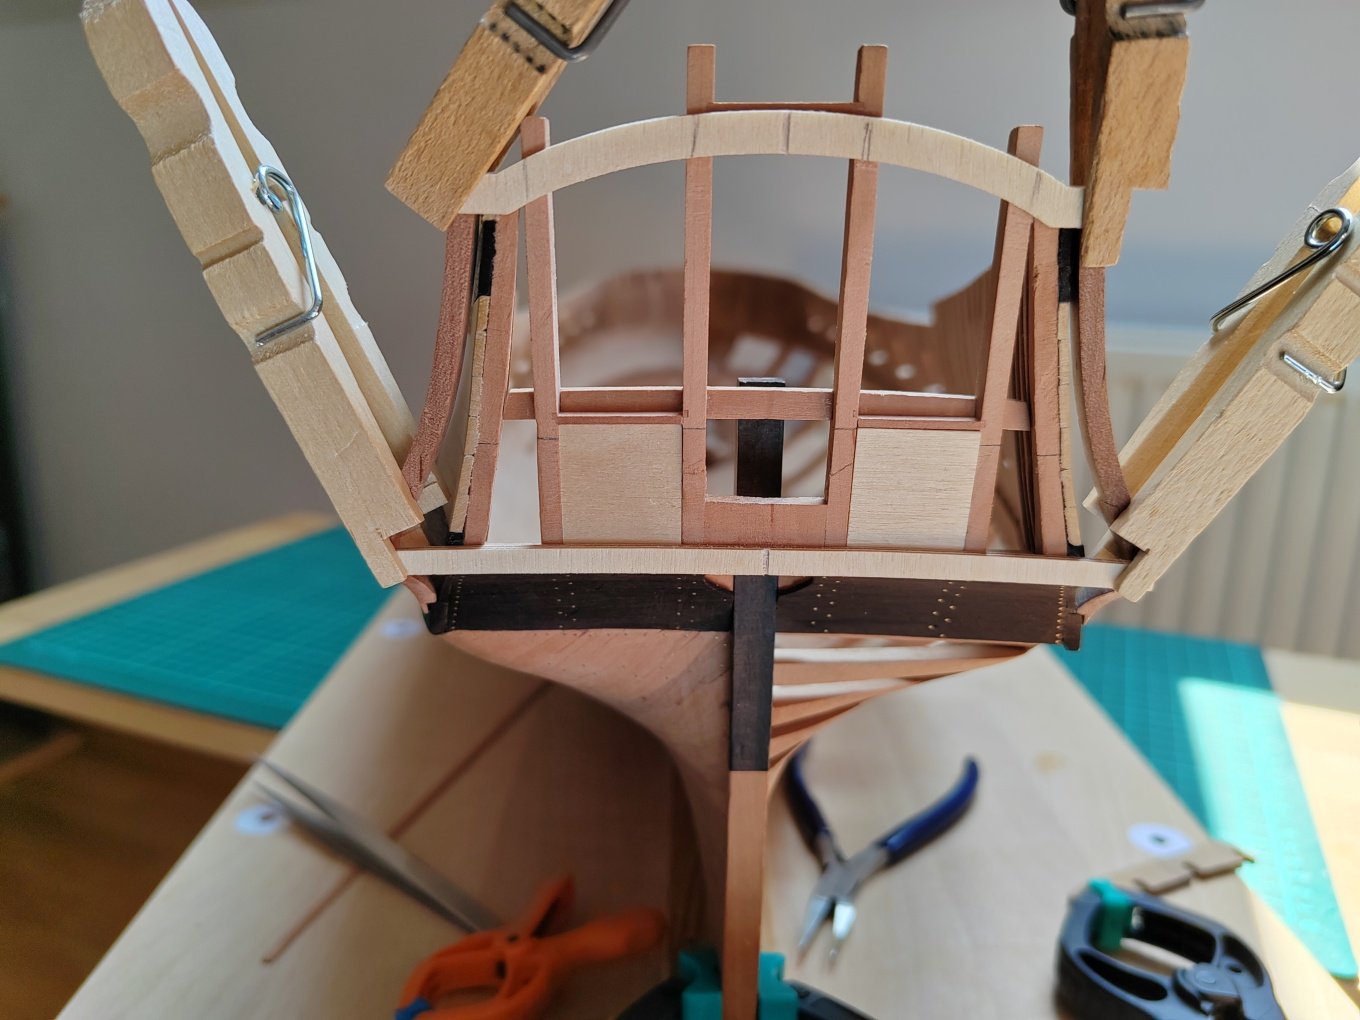
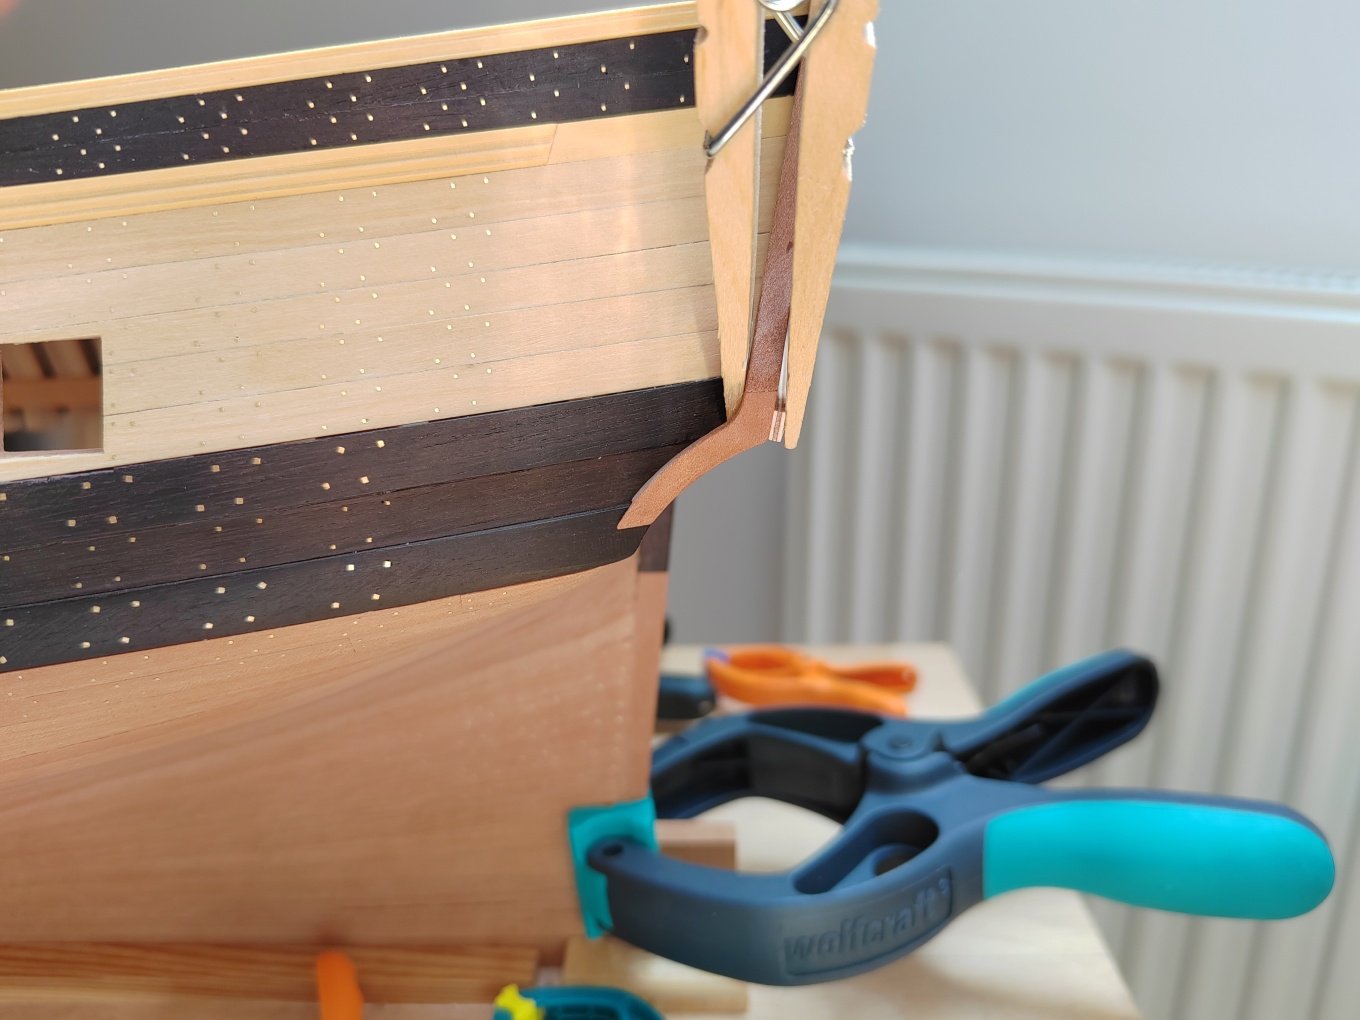
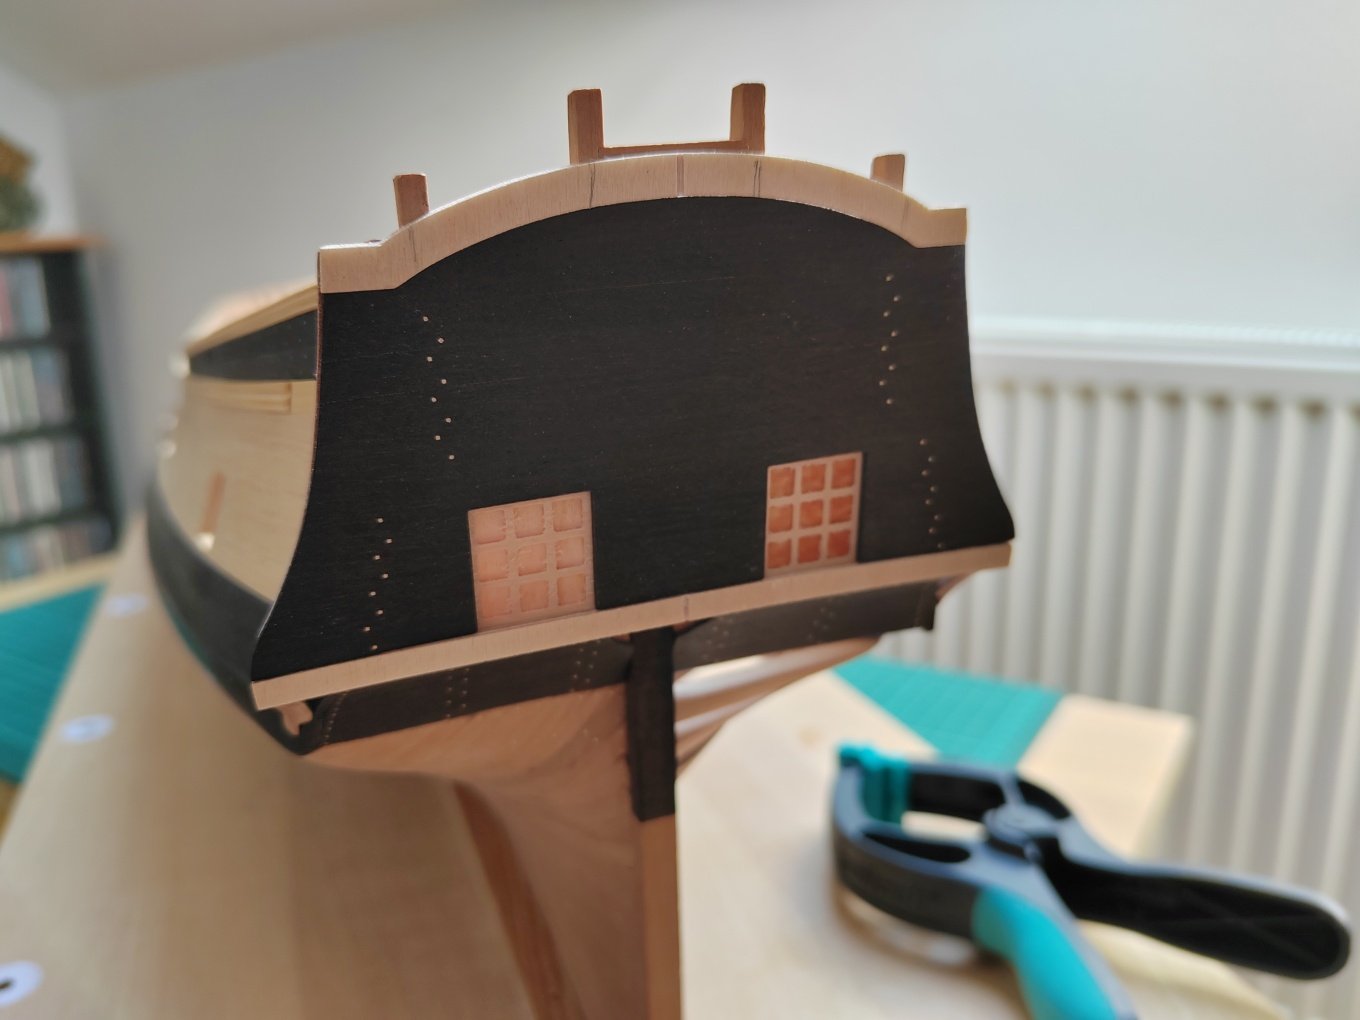
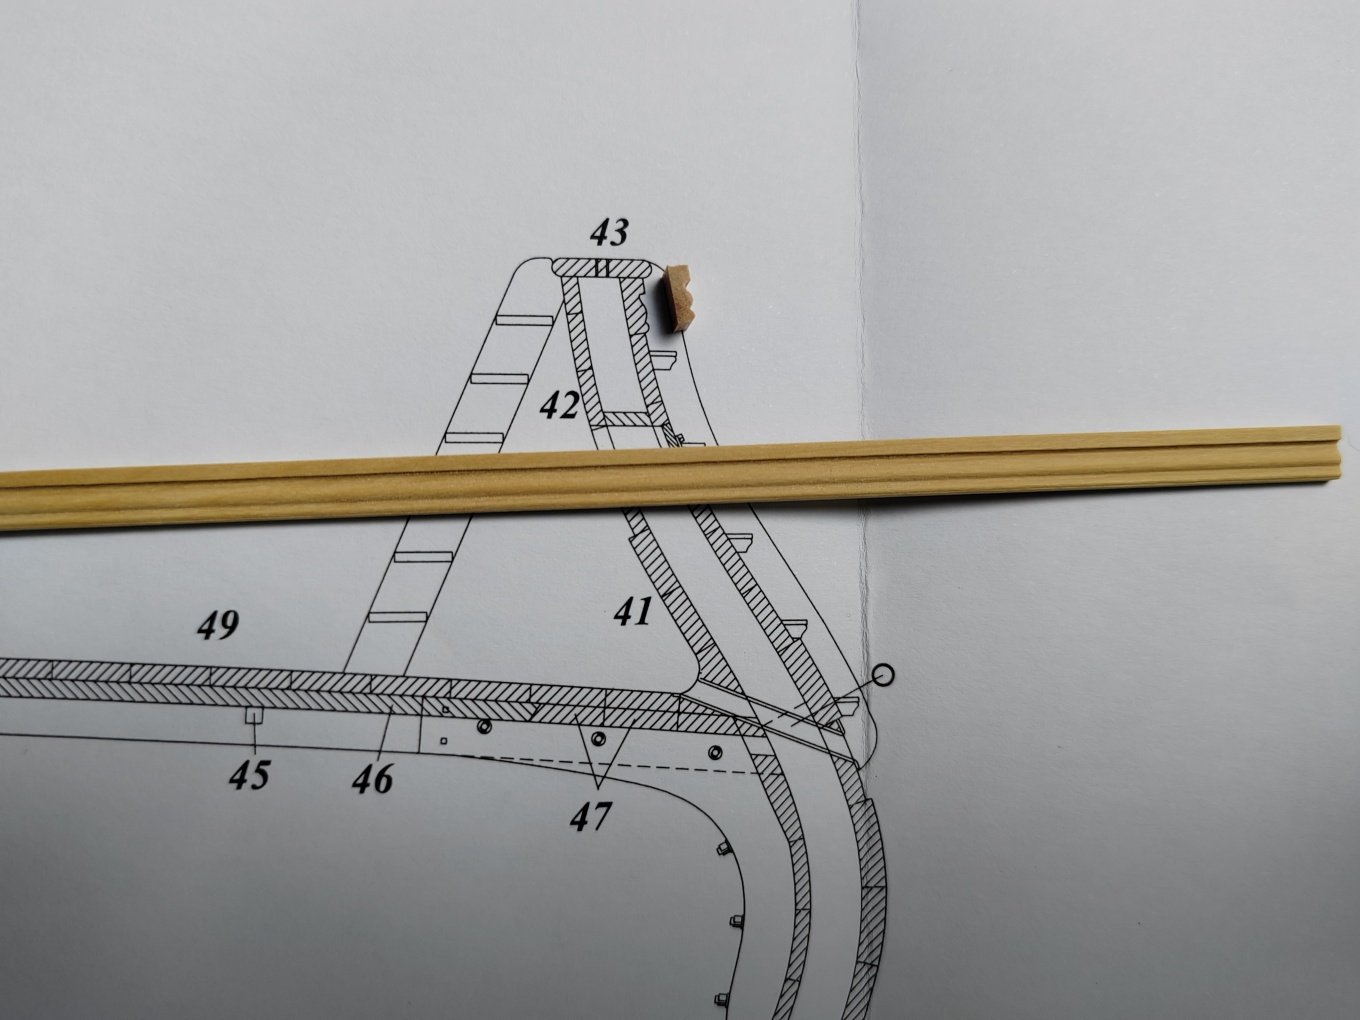
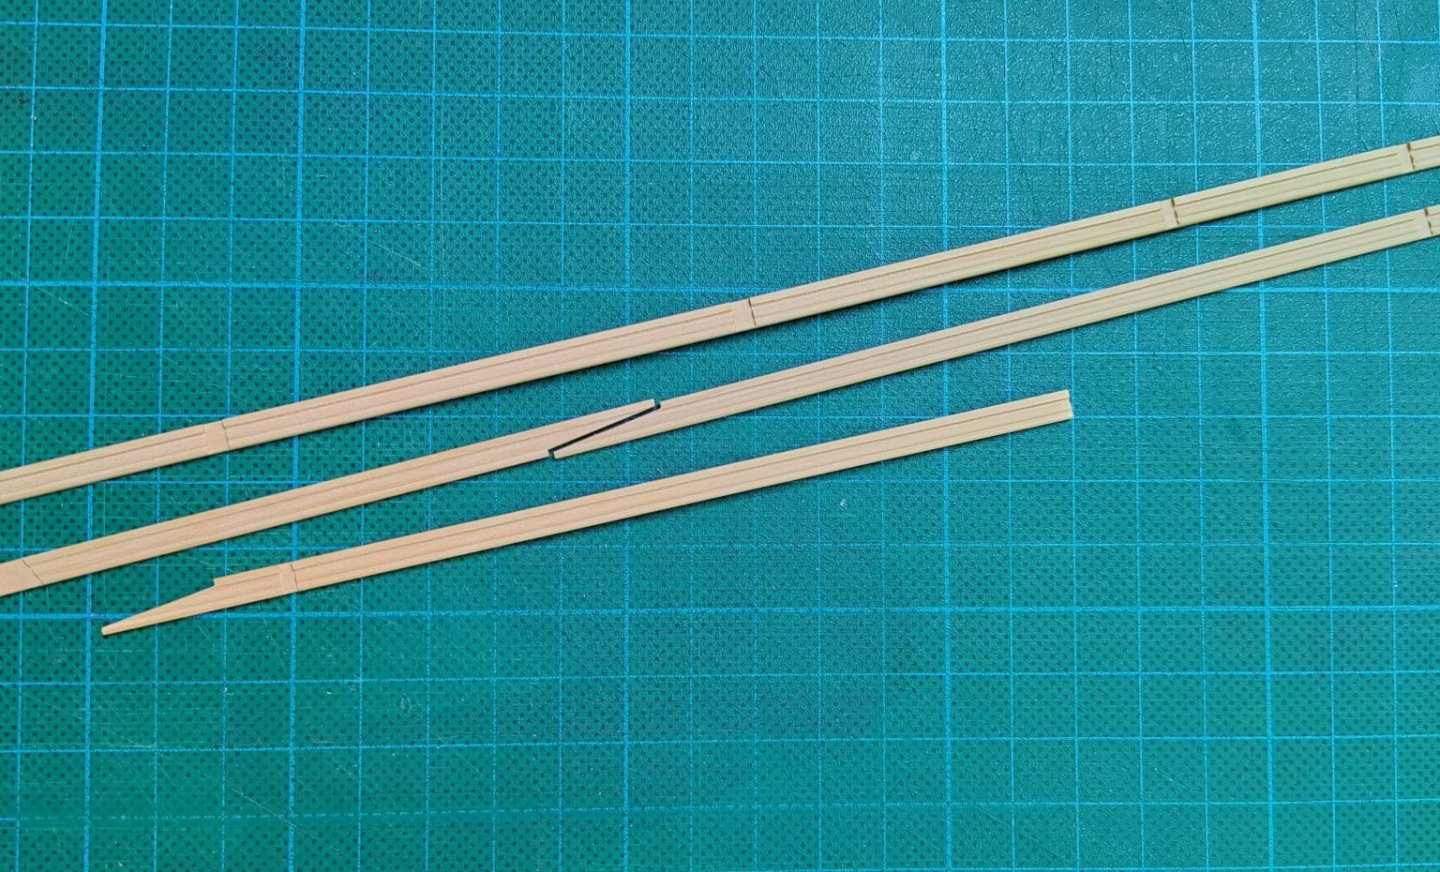
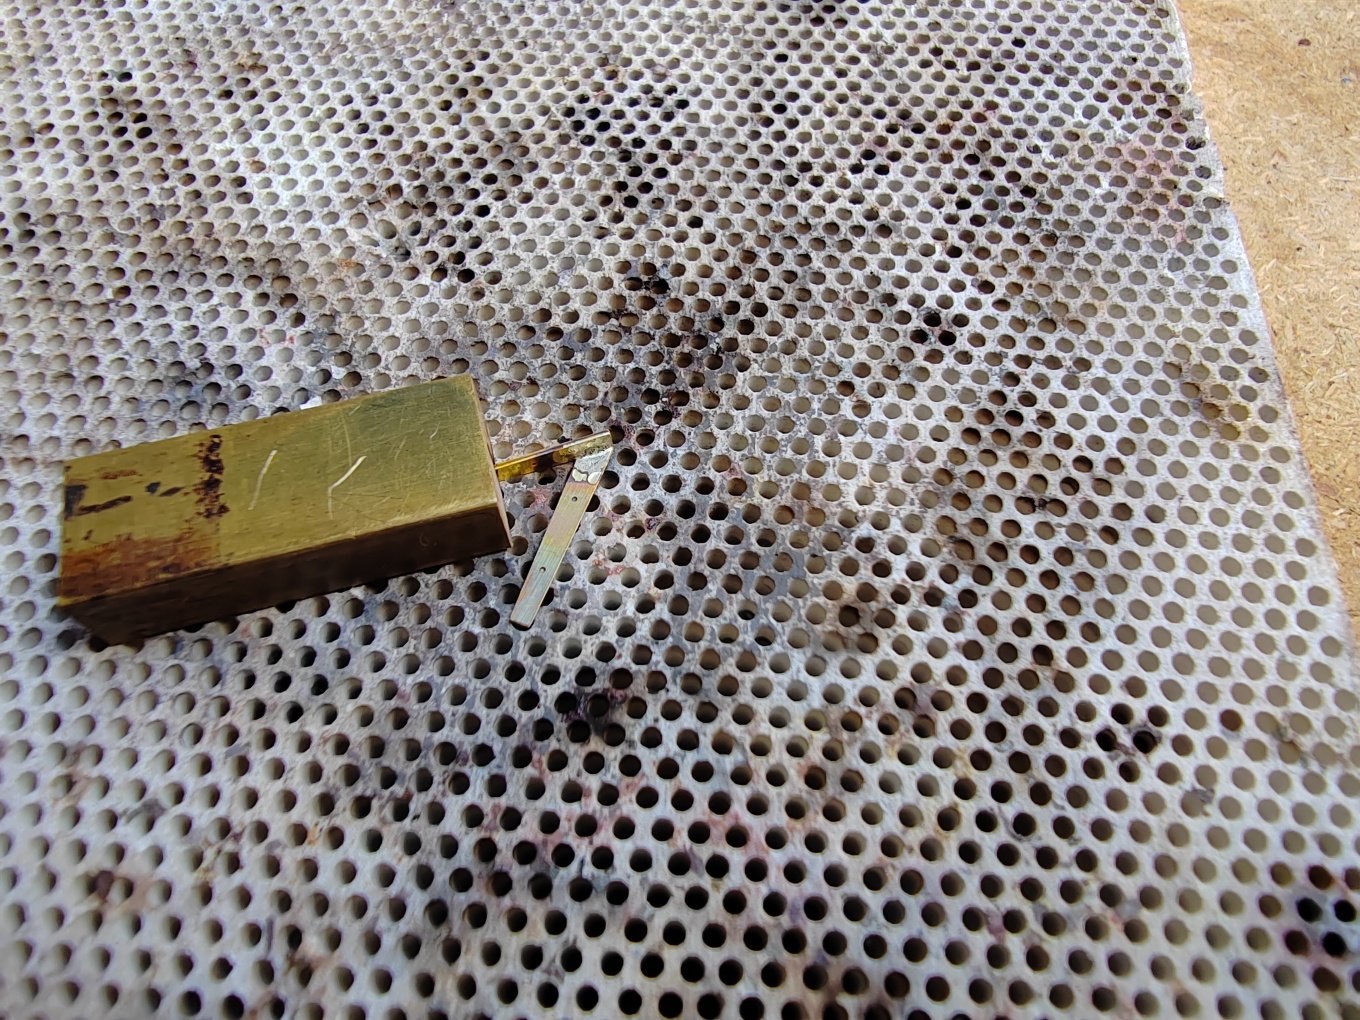
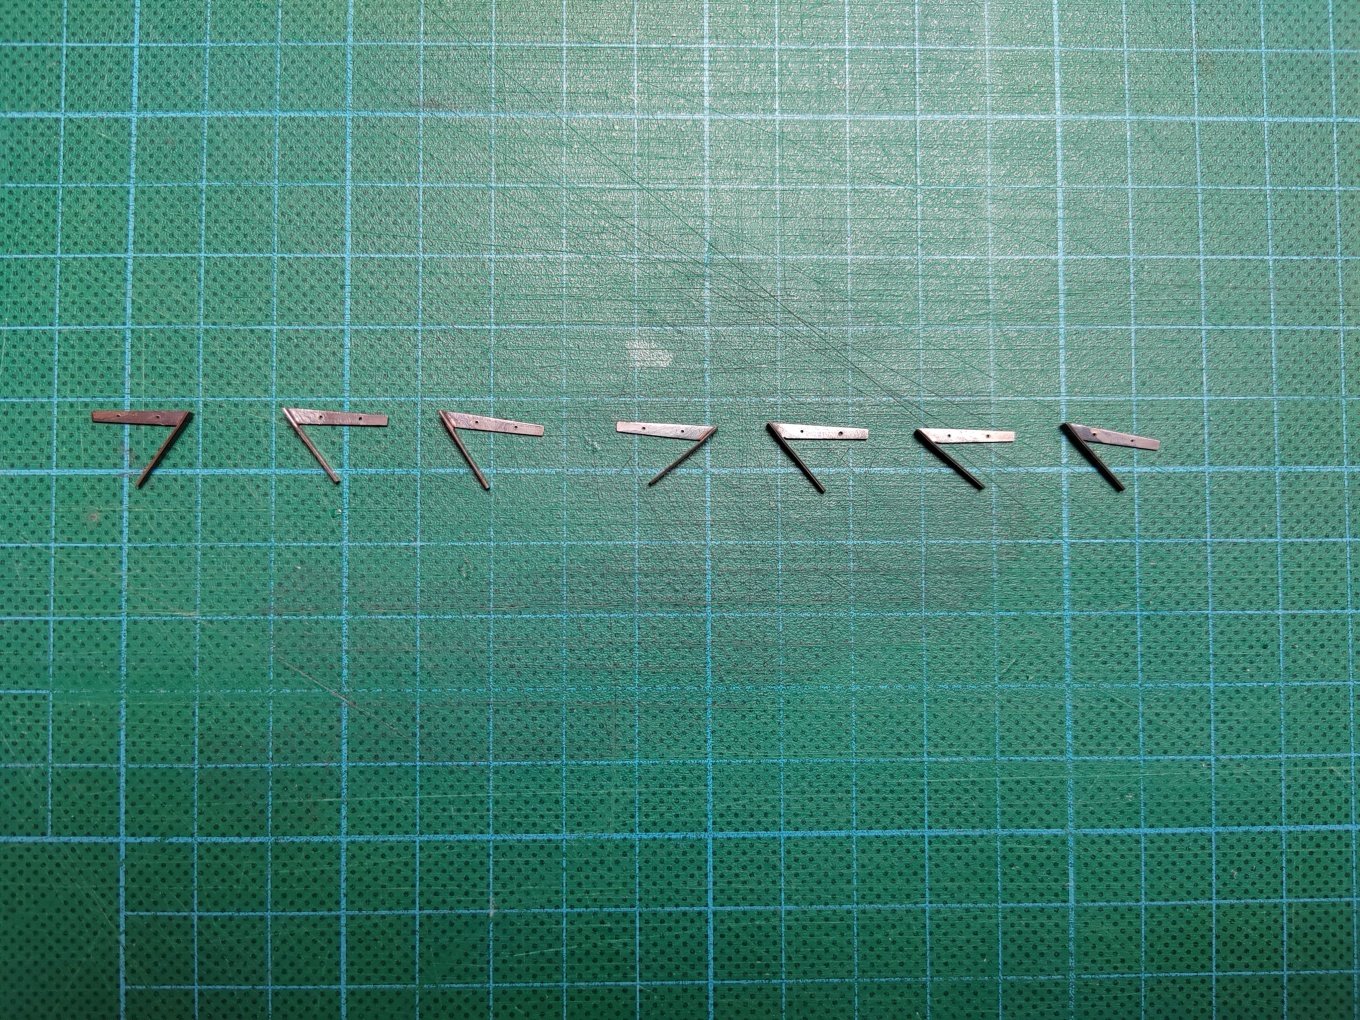
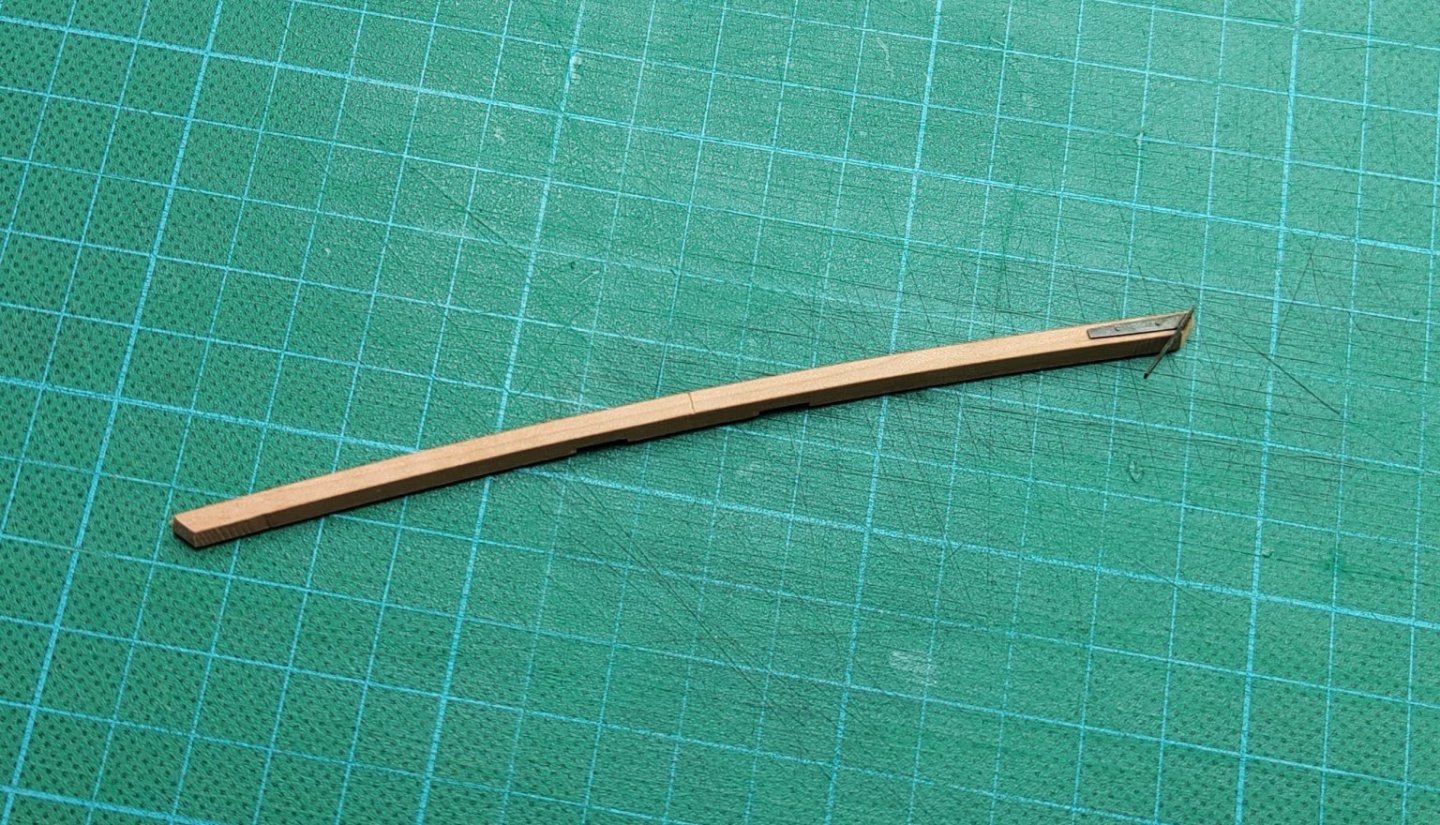
Thank you guys . Continuation of work on the stern - molding rails.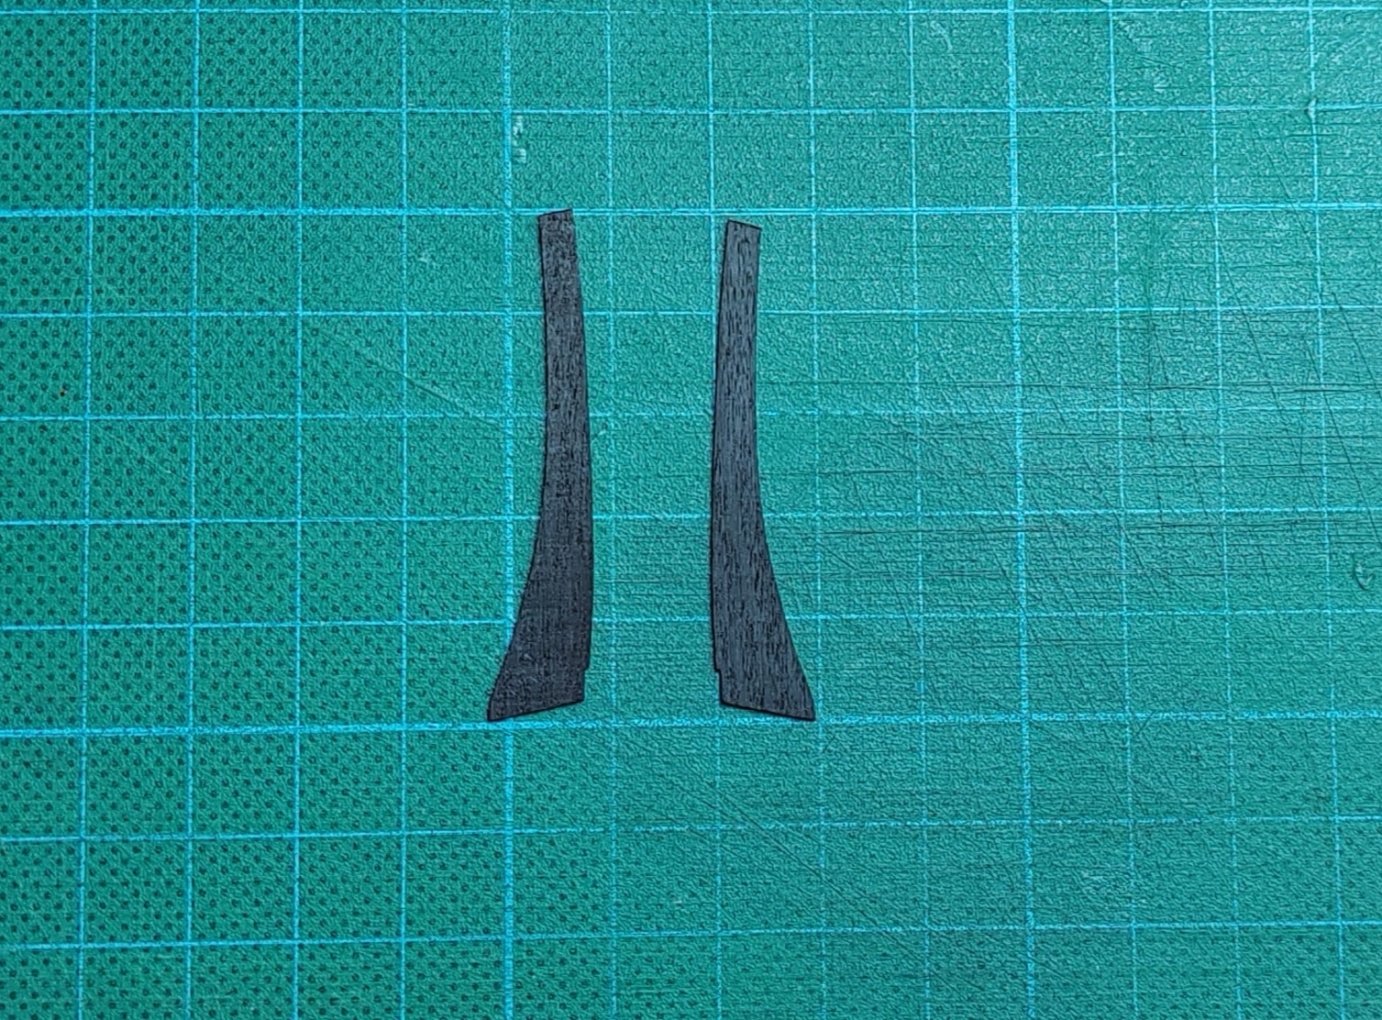
-
L'Amarante by marsalv - 1:36 - POF
marsalv replied to marsalv's topic in - Build logs for subjects built 1501 - 1750
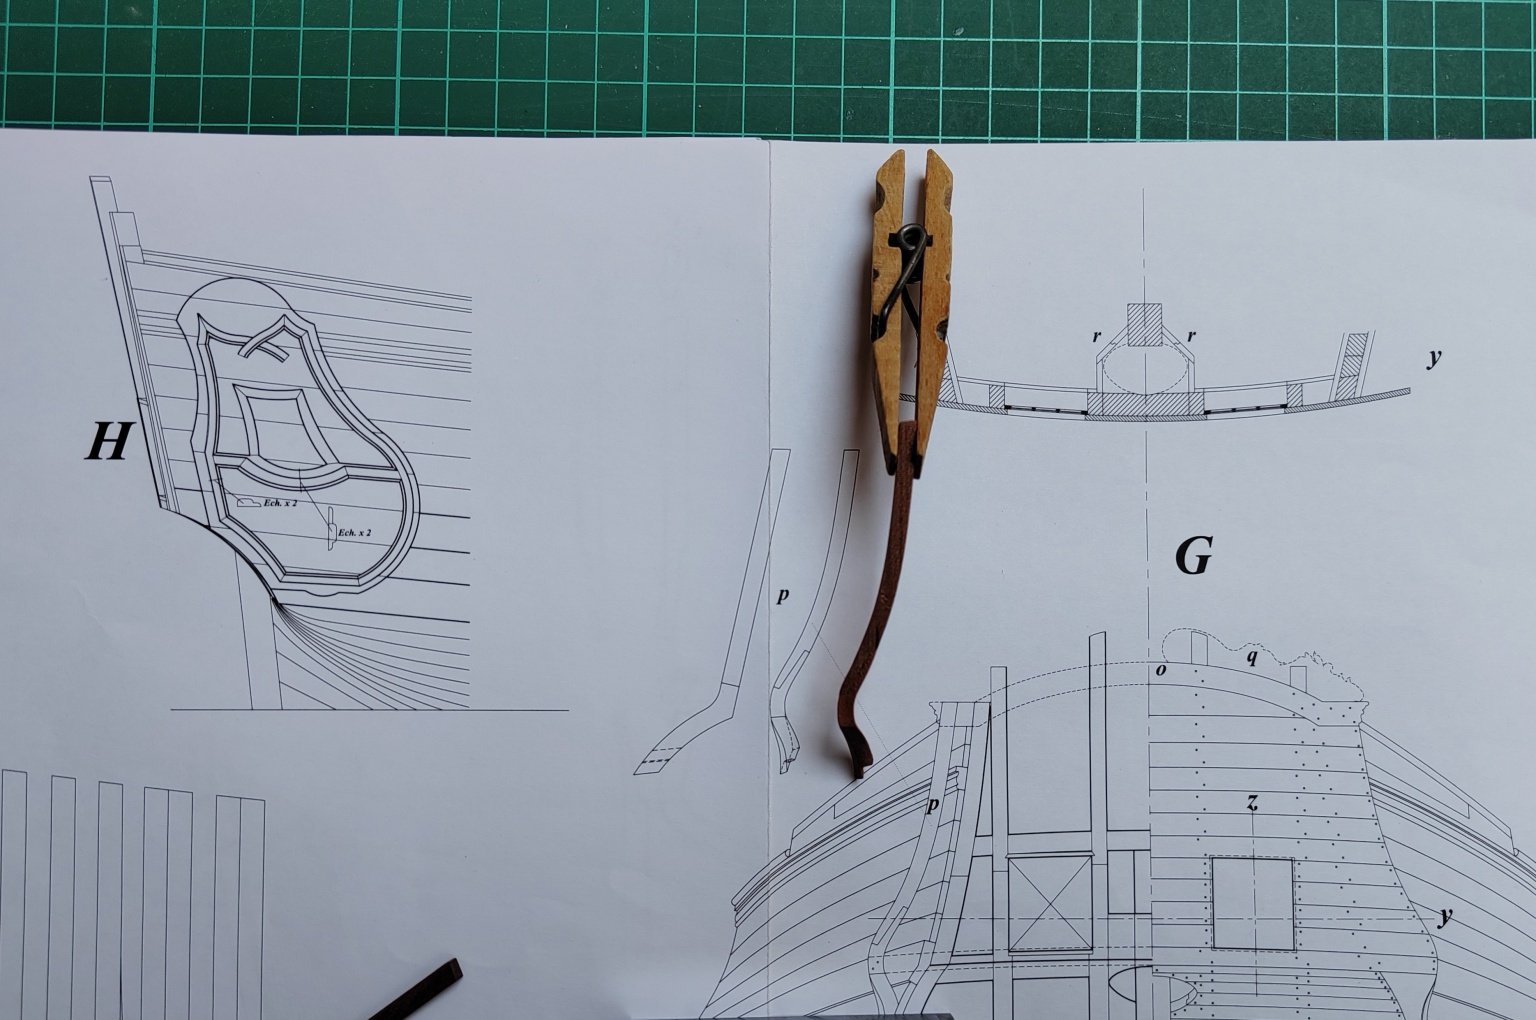
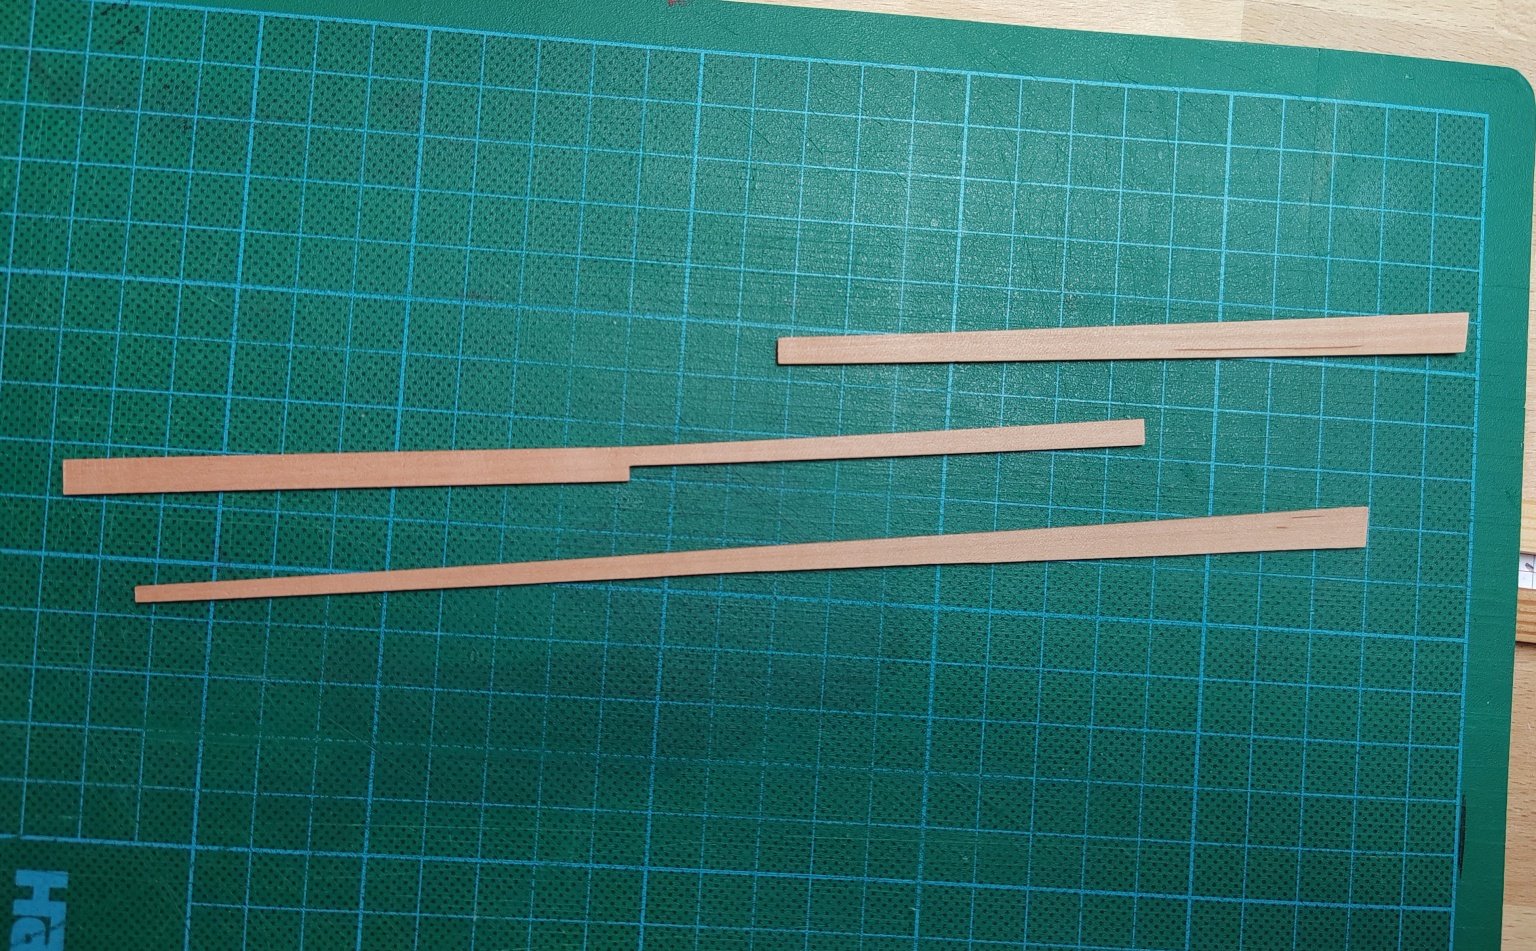
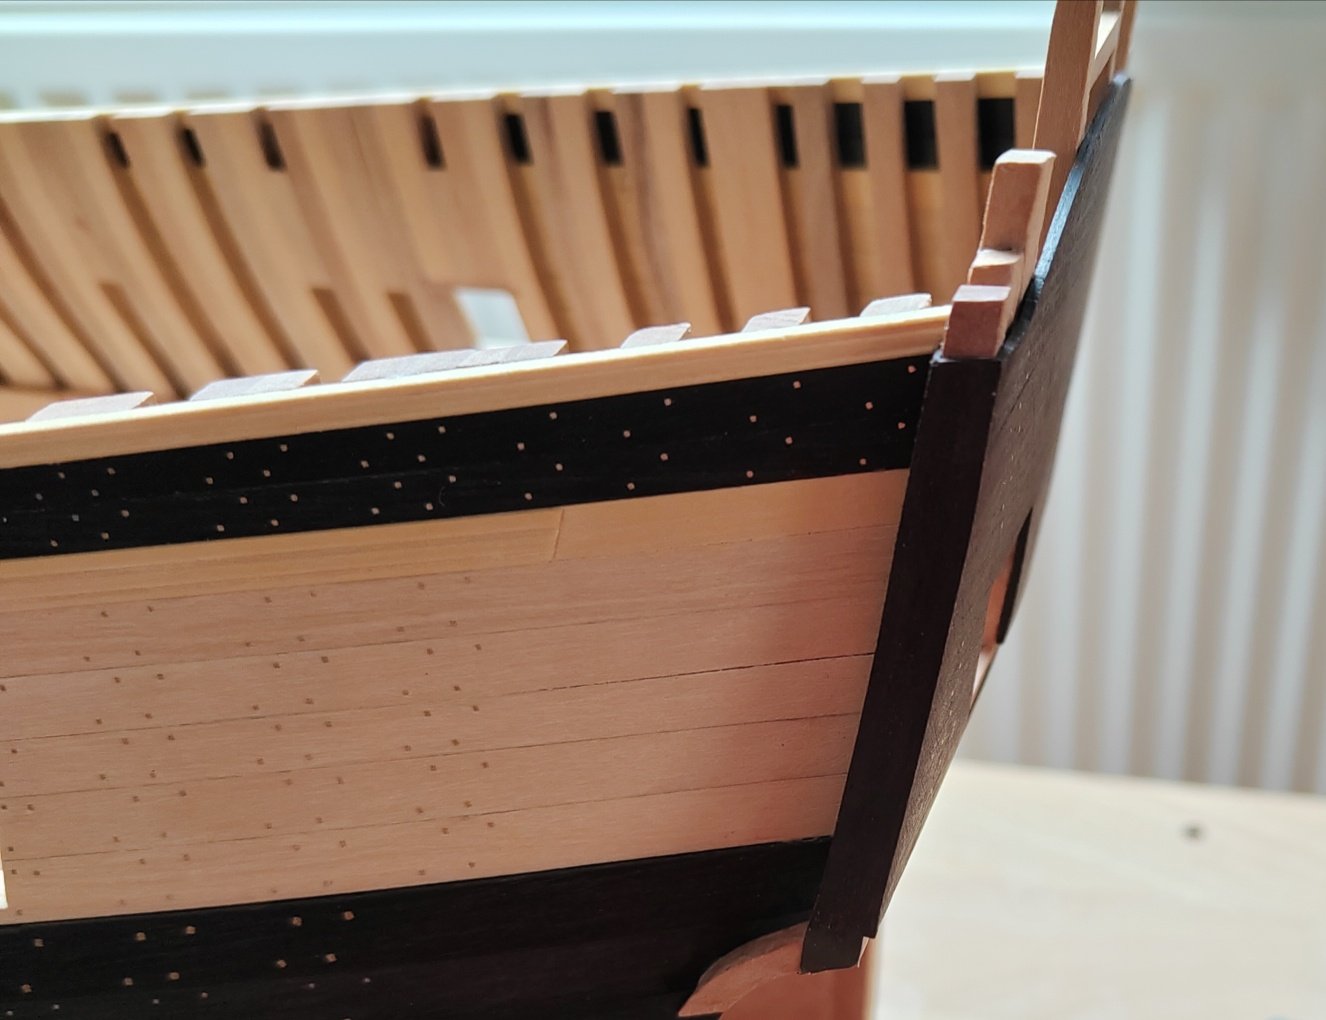
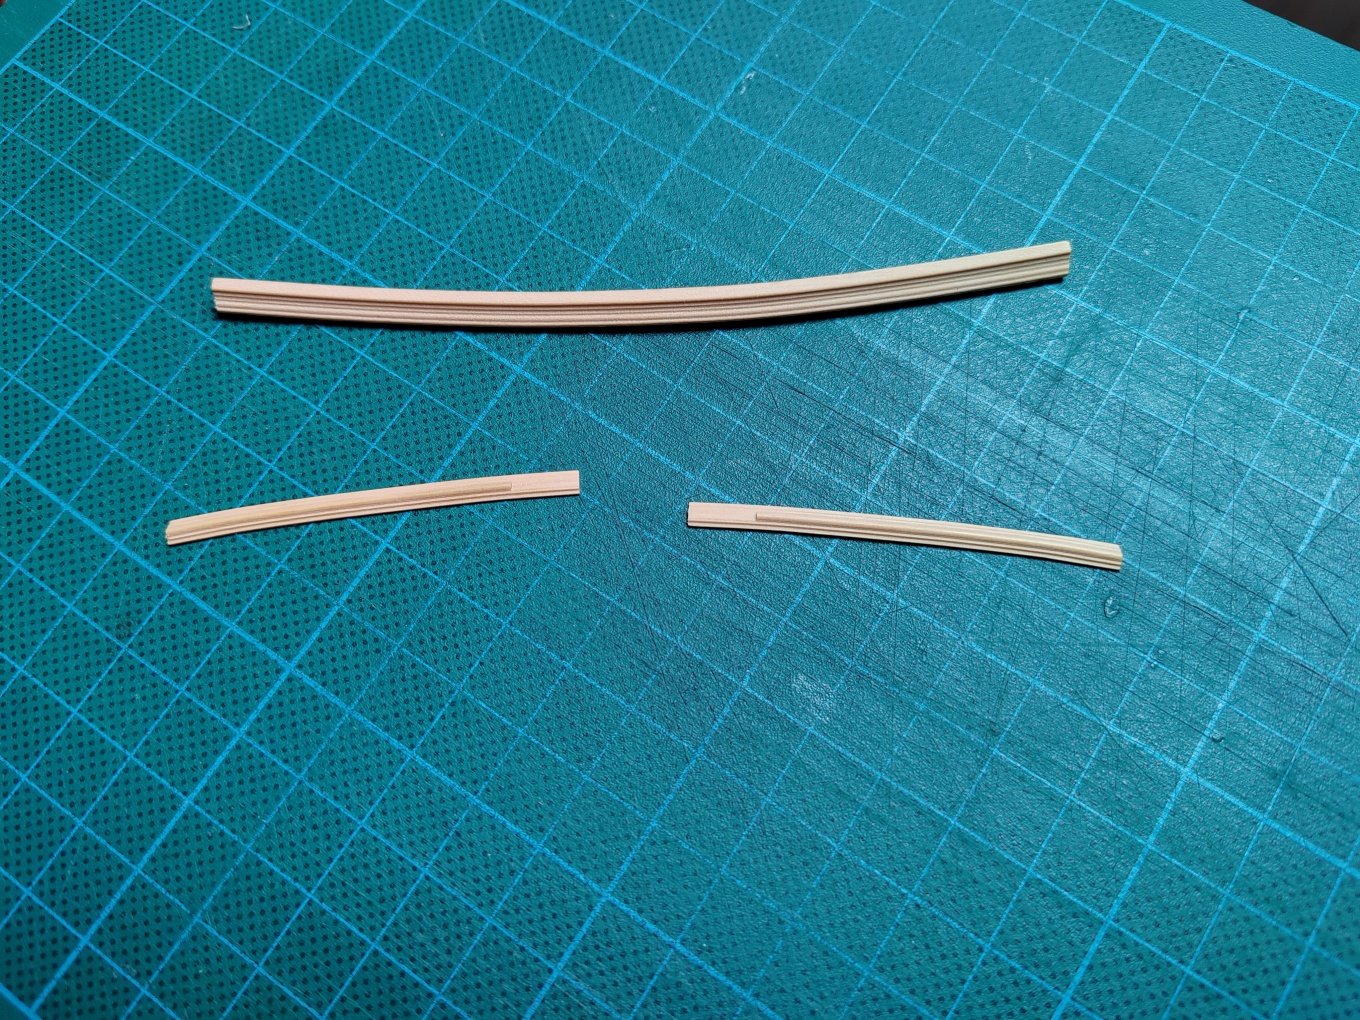
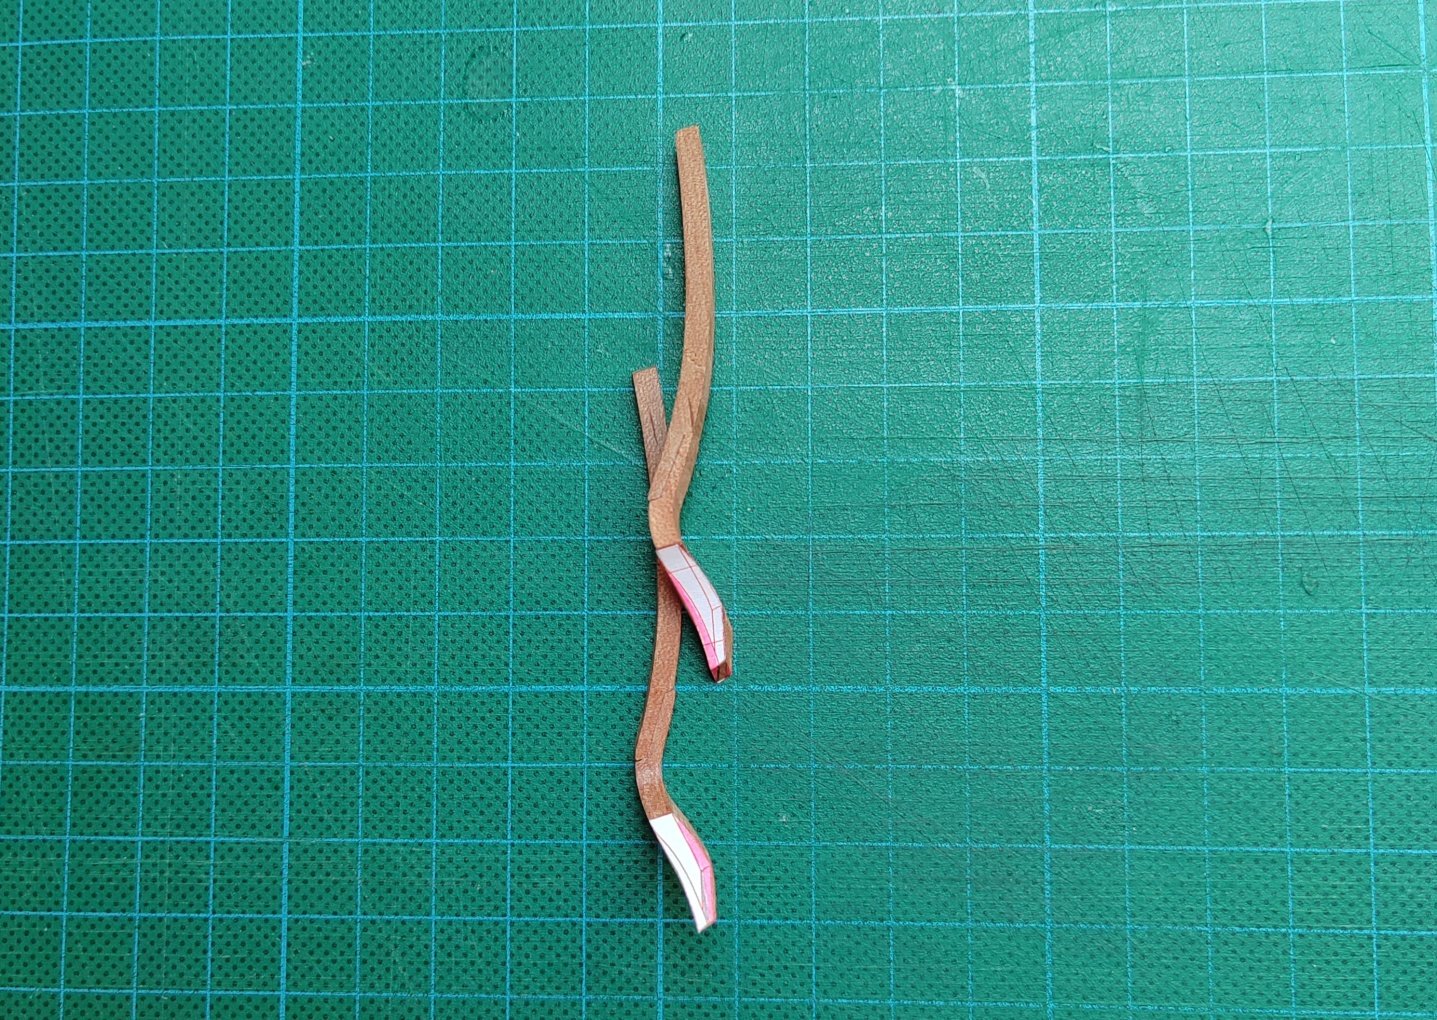
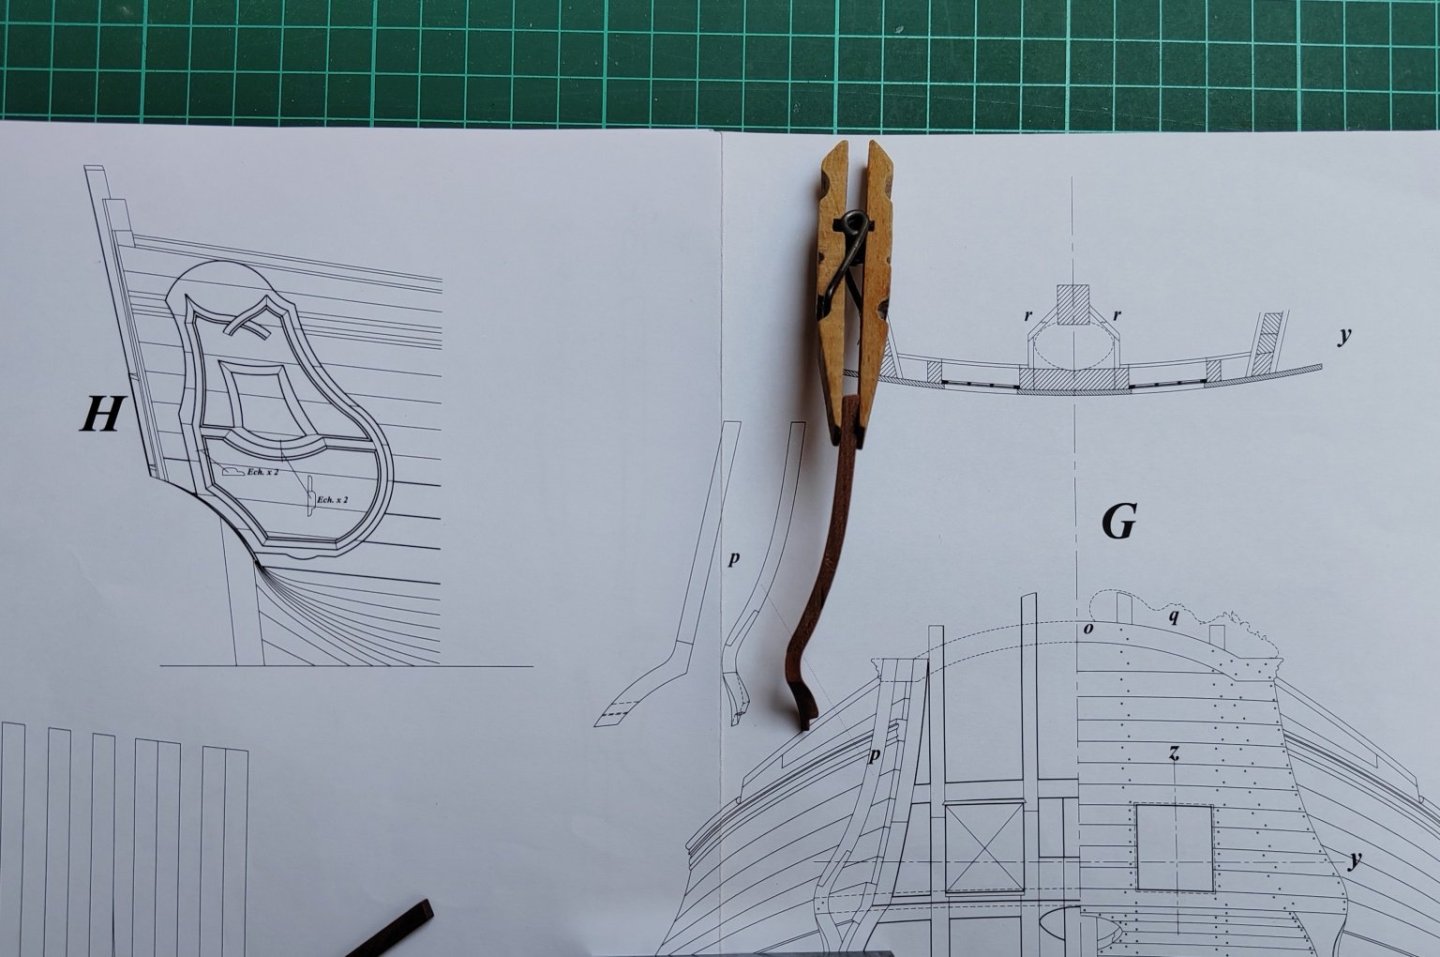
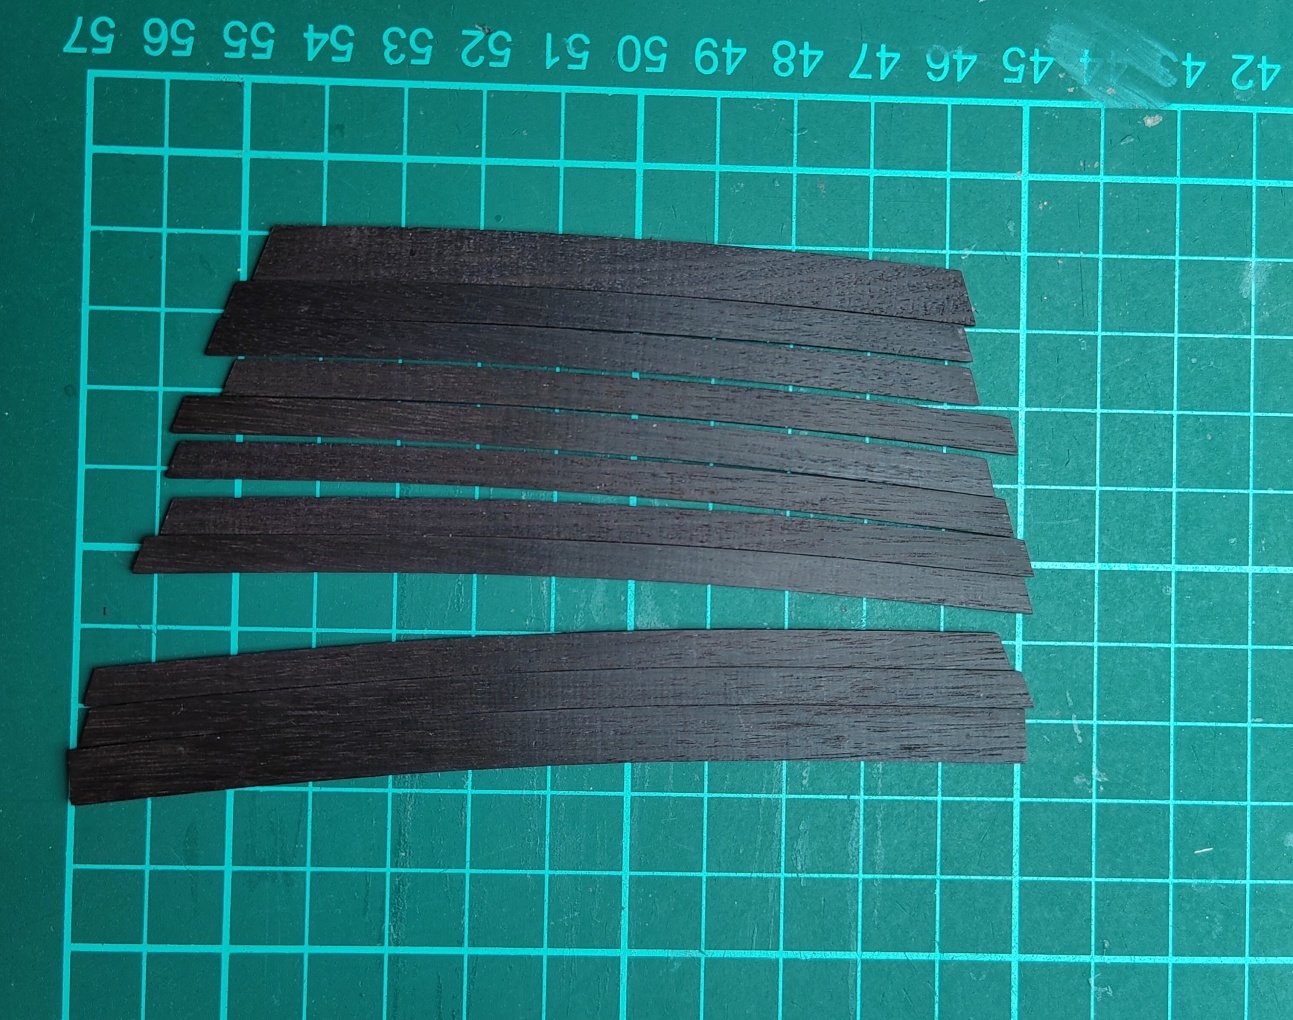
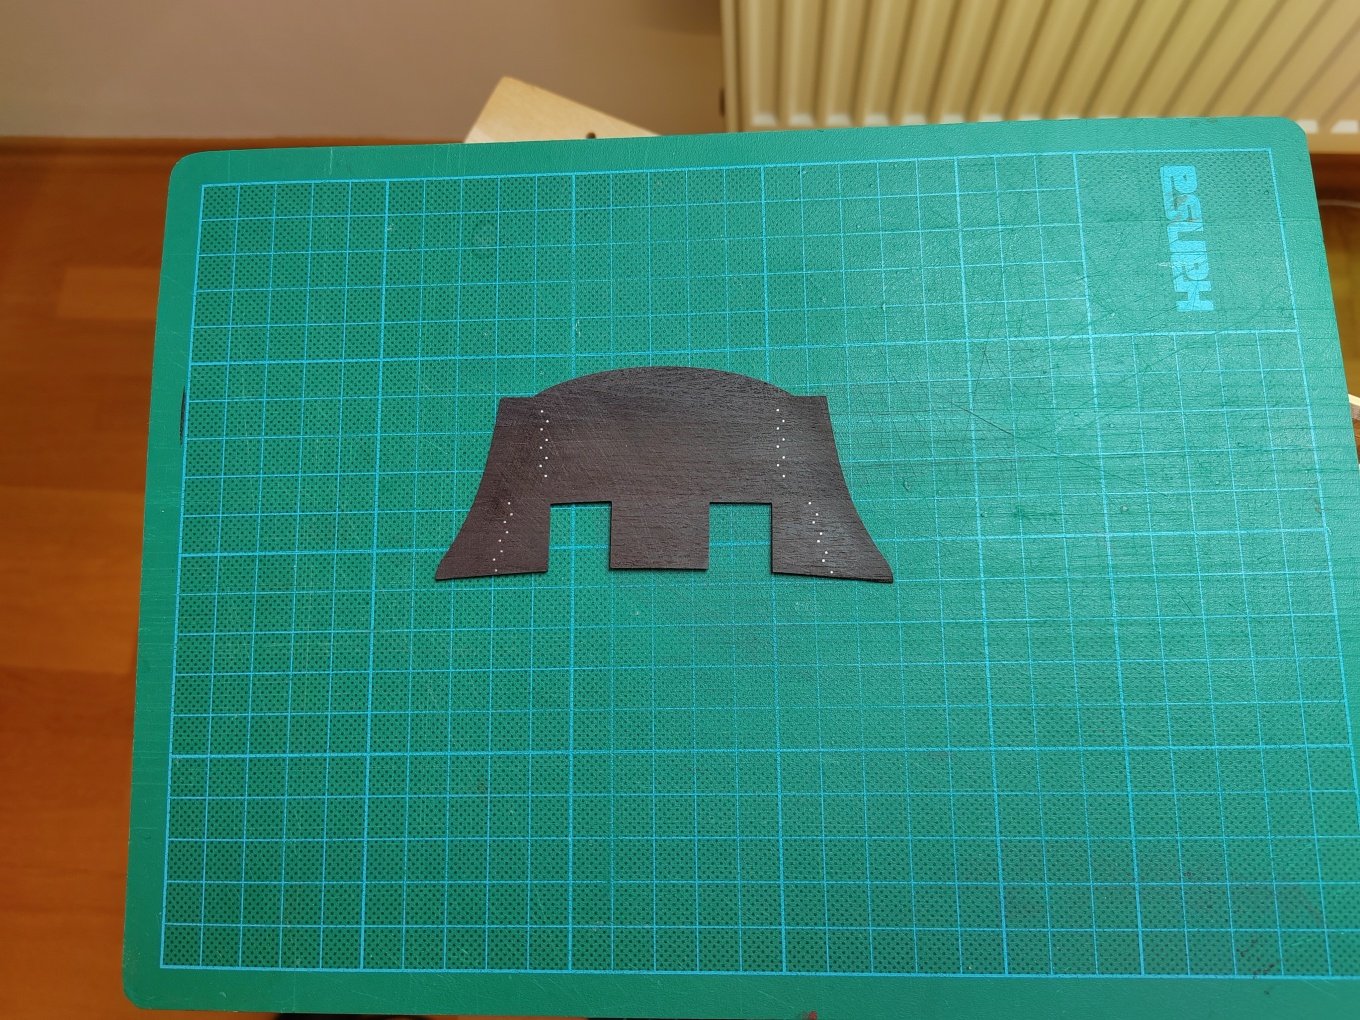
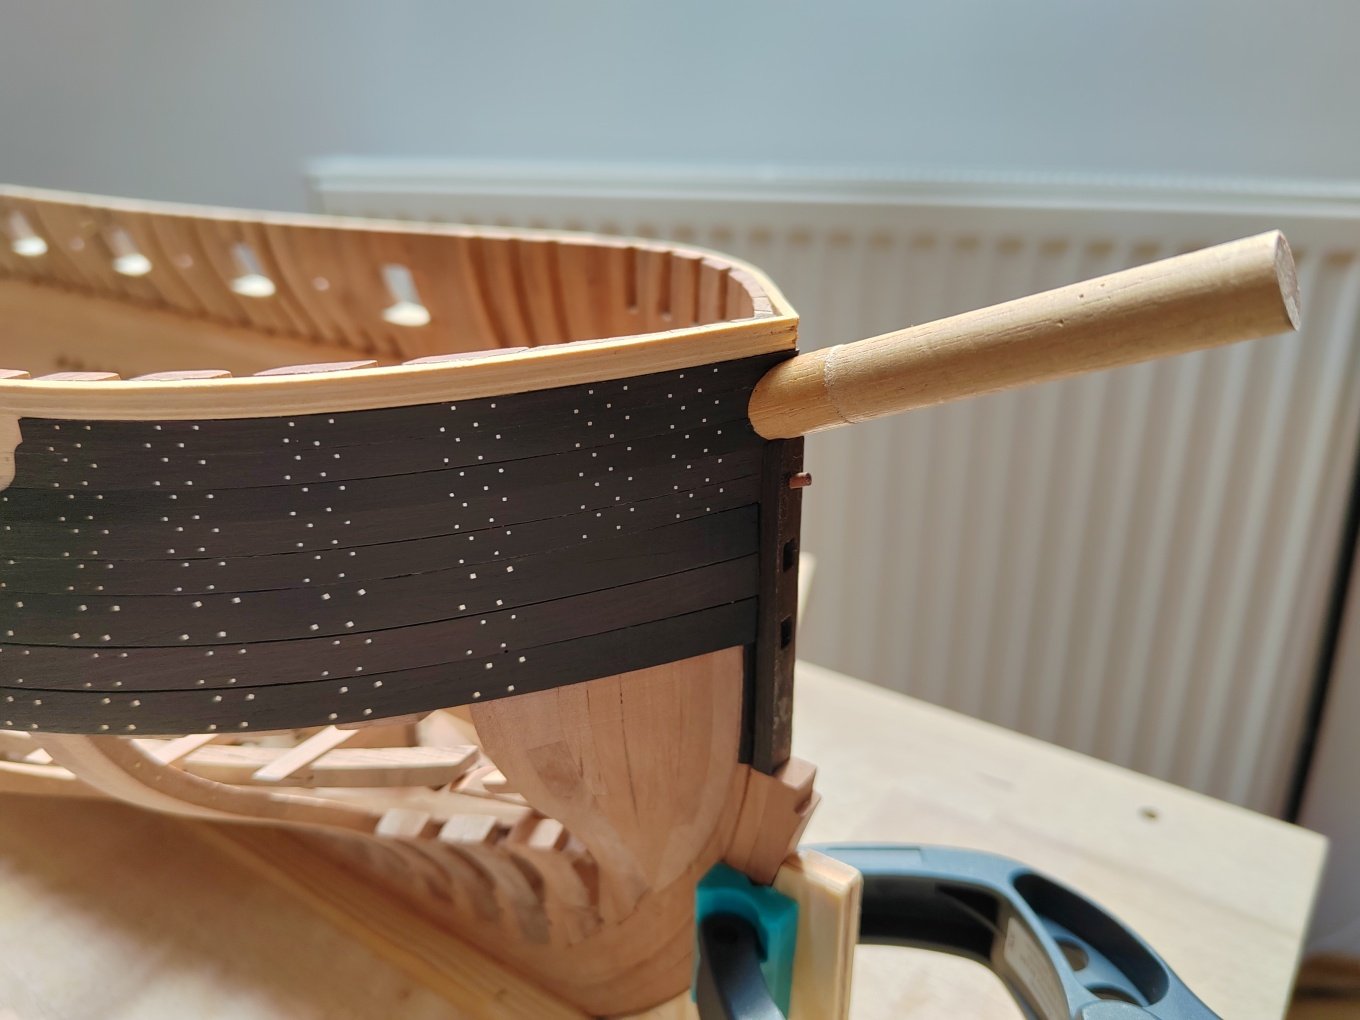
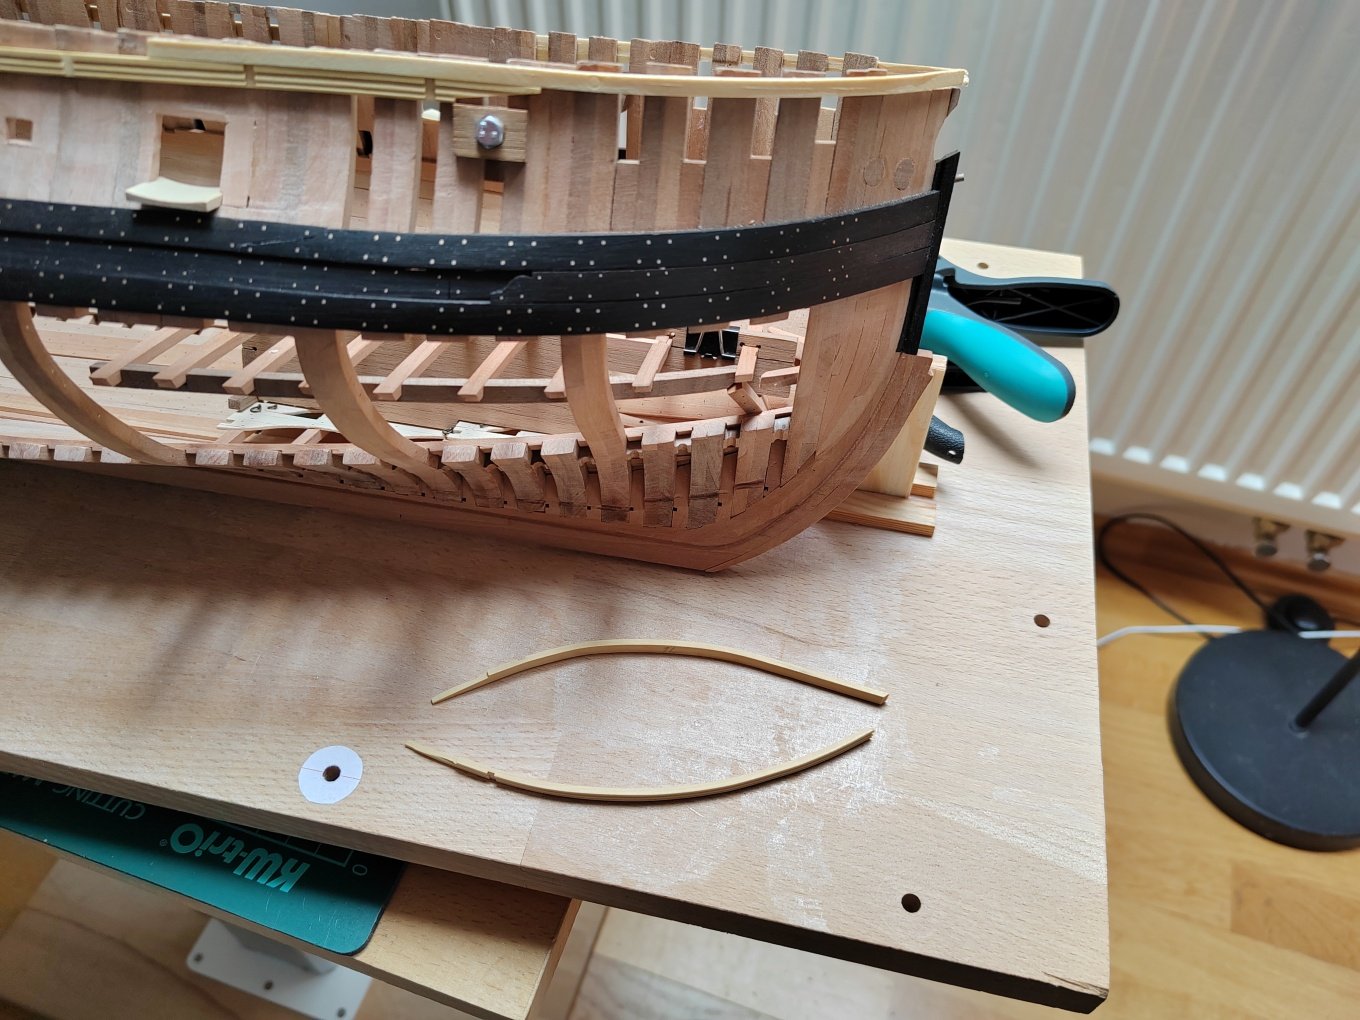
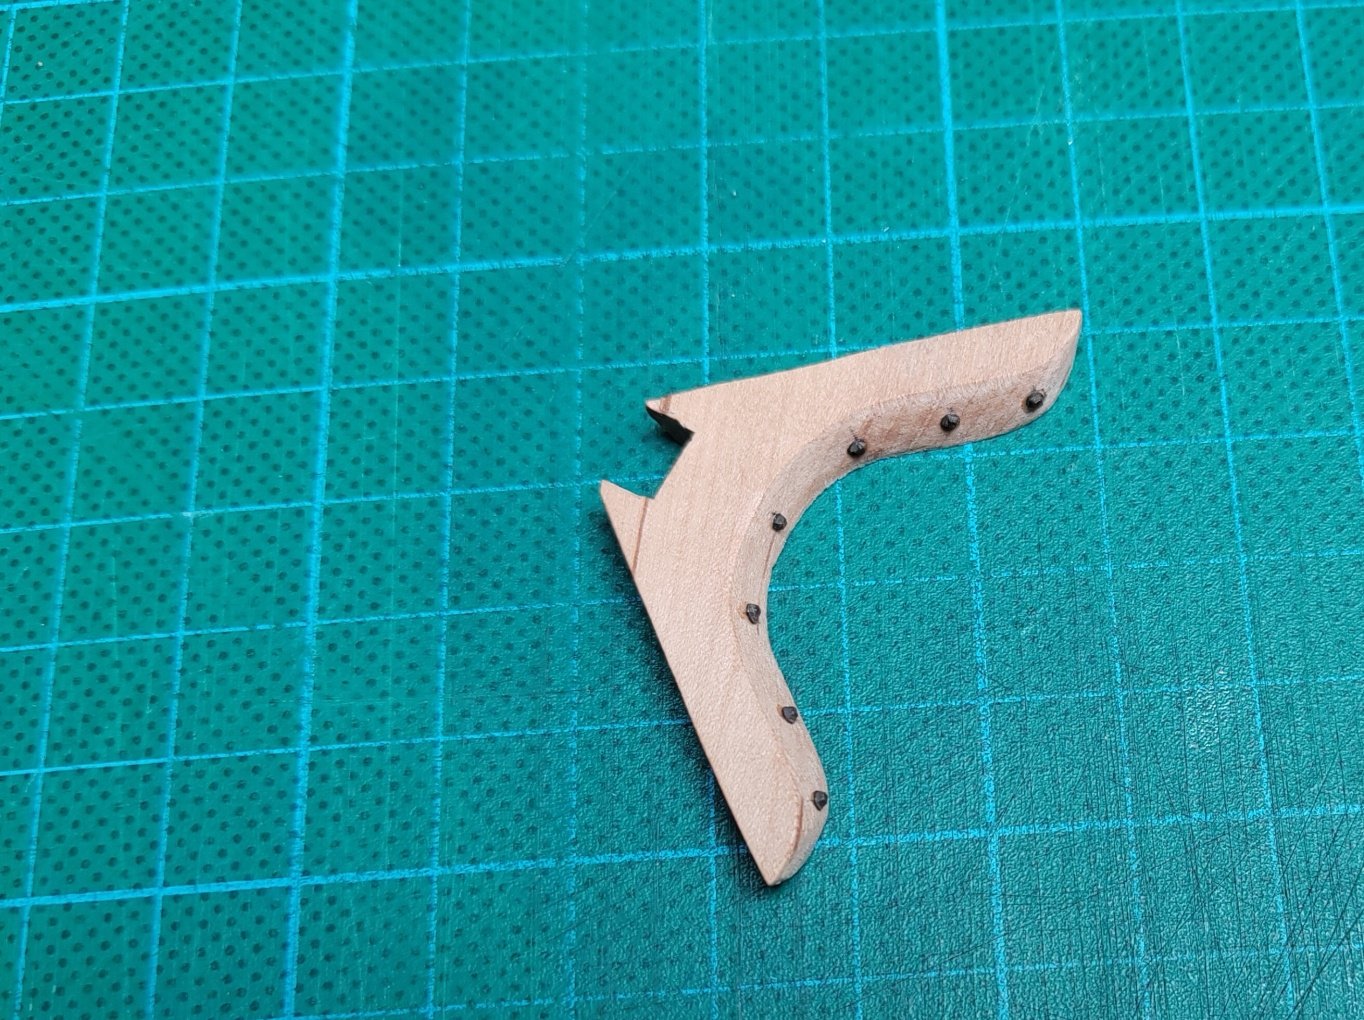
Thank you druxey. I continue with the planking of the stern. First it was necessary to make another rather complicated part defining the extension of the sides at the stern. The part is "shaped" in all three axes and the production is quite complex.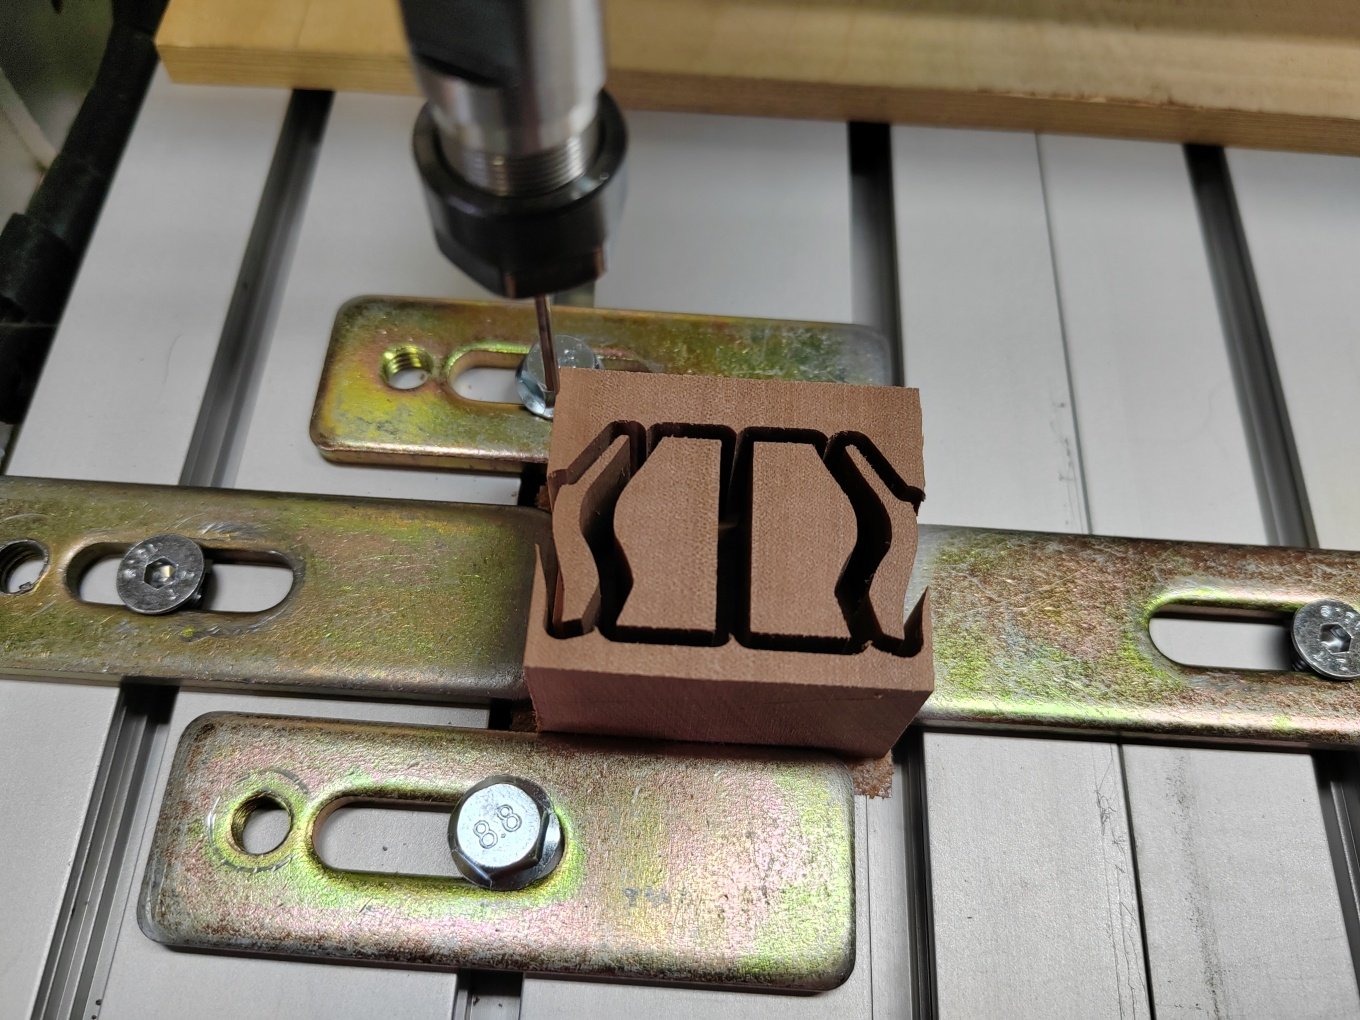


-
L'Amarante by marsalv - 1:36 - POF
marsalv replied to marsalv's topic in - Build logs for subjects built 1501 - 1750
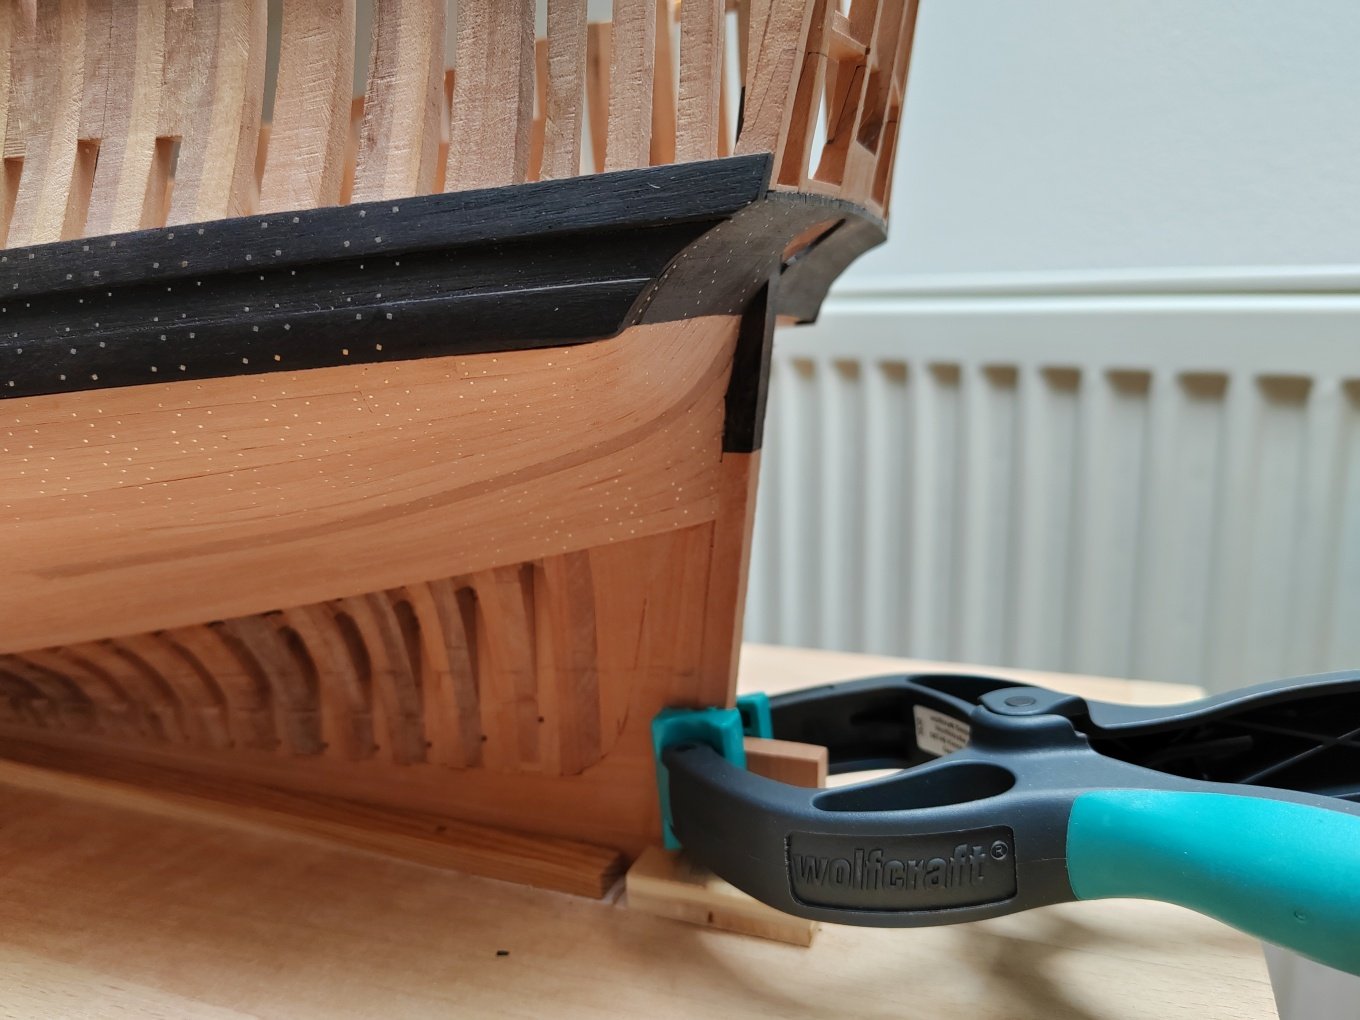
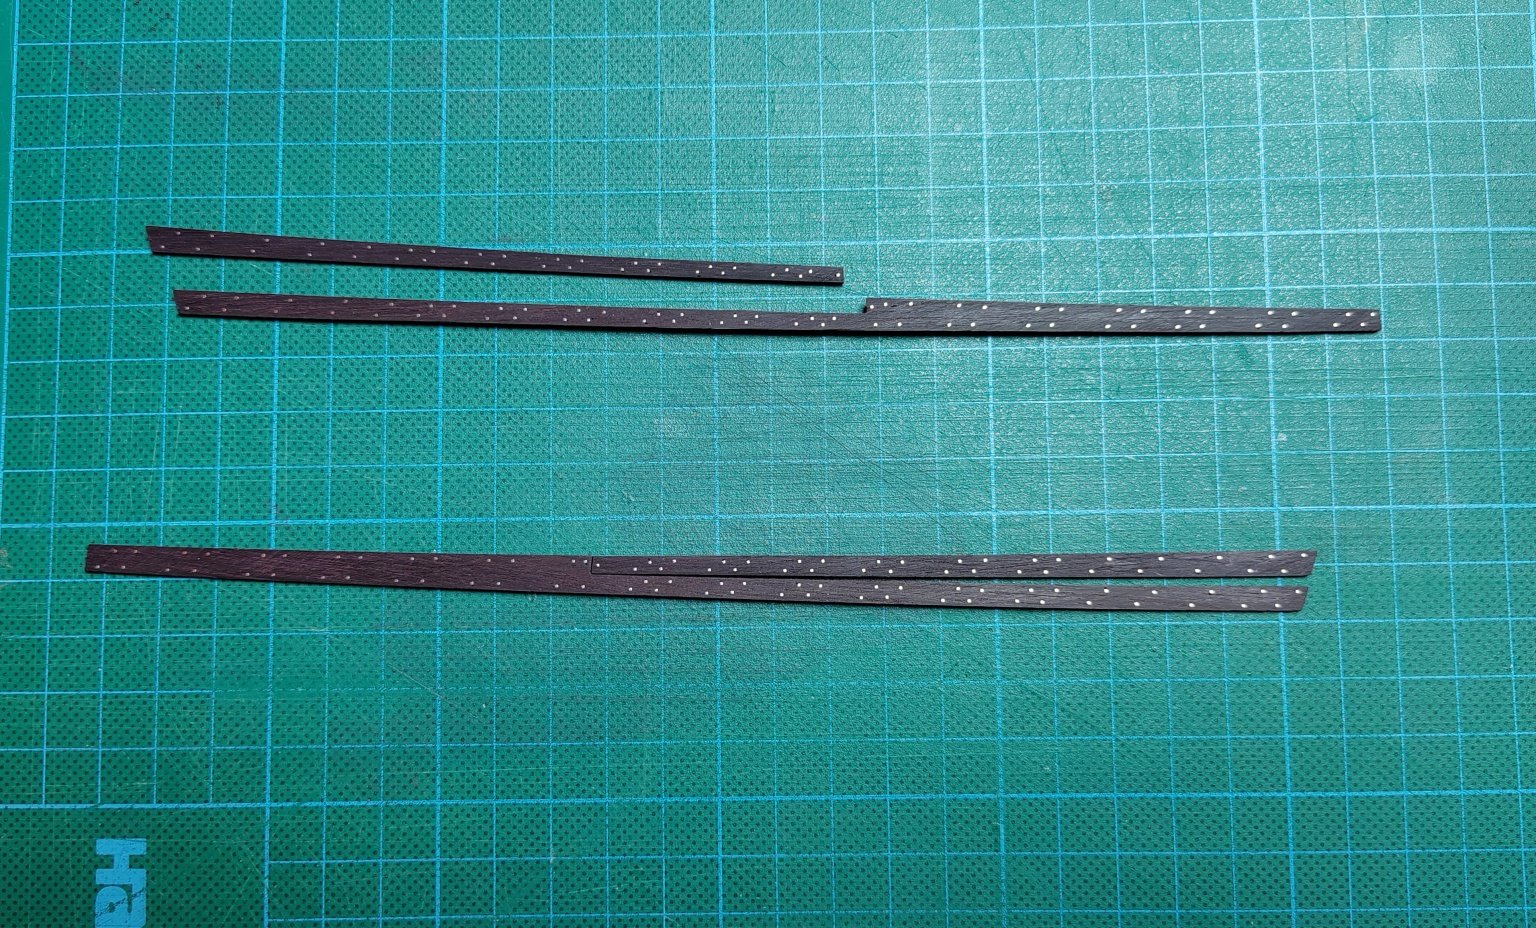
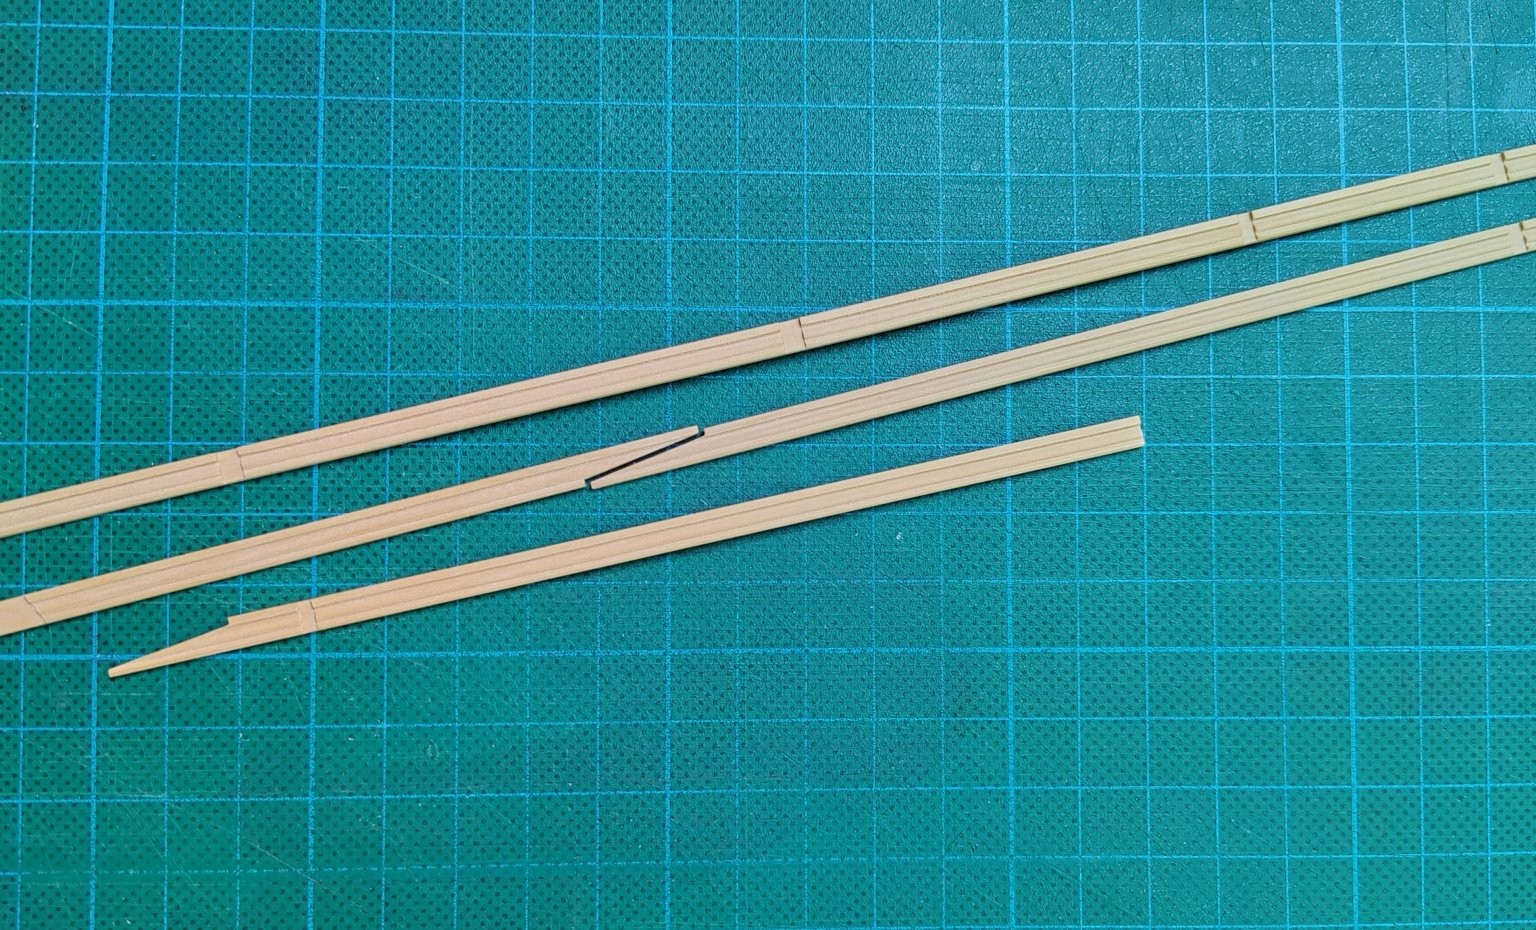
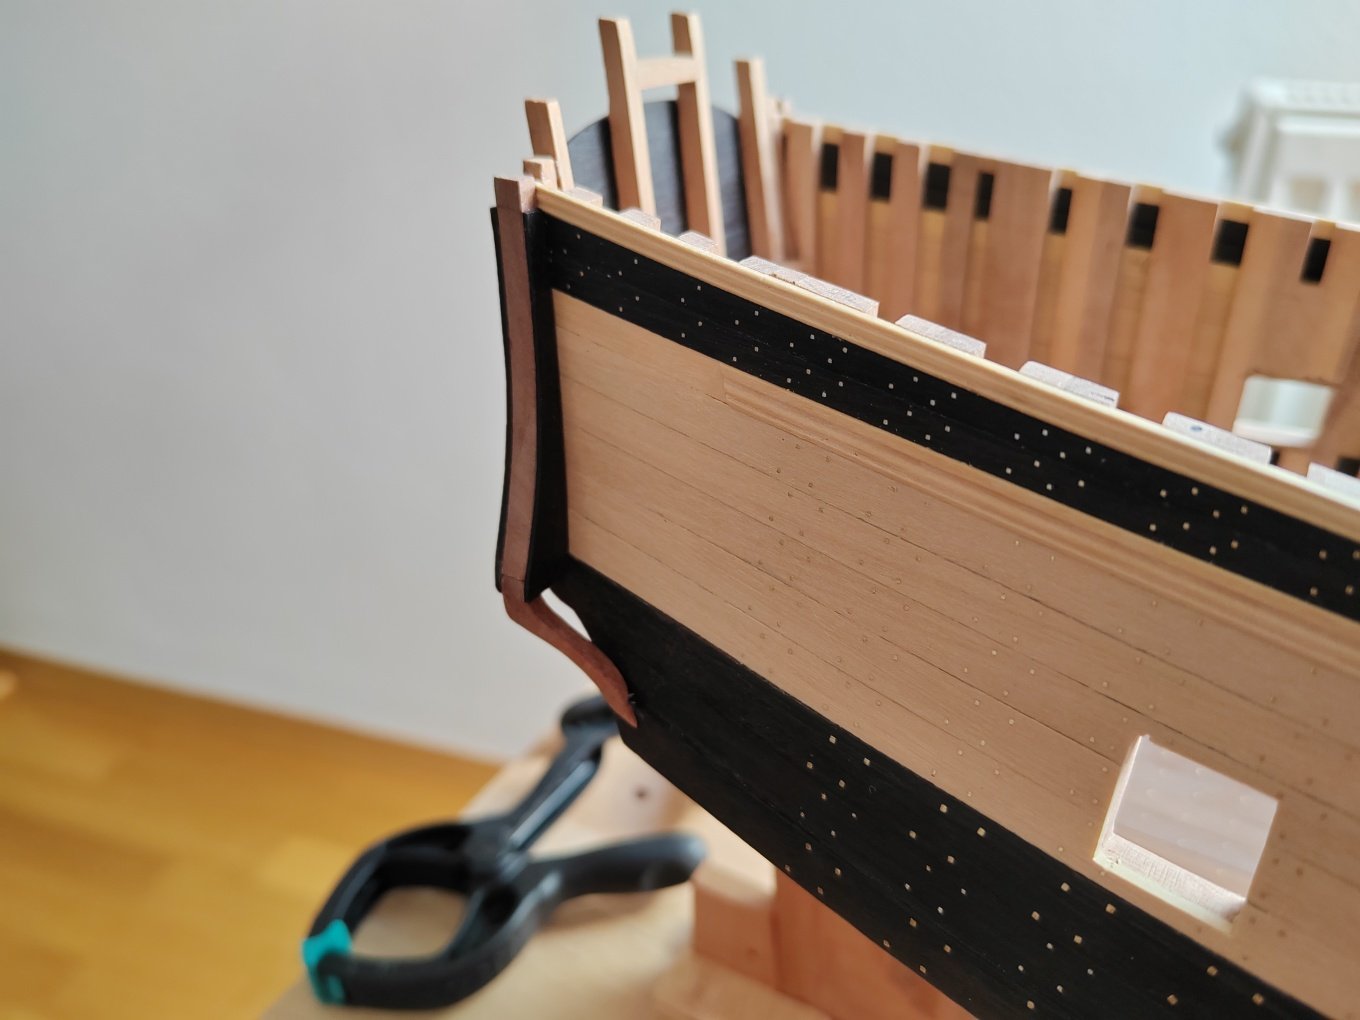
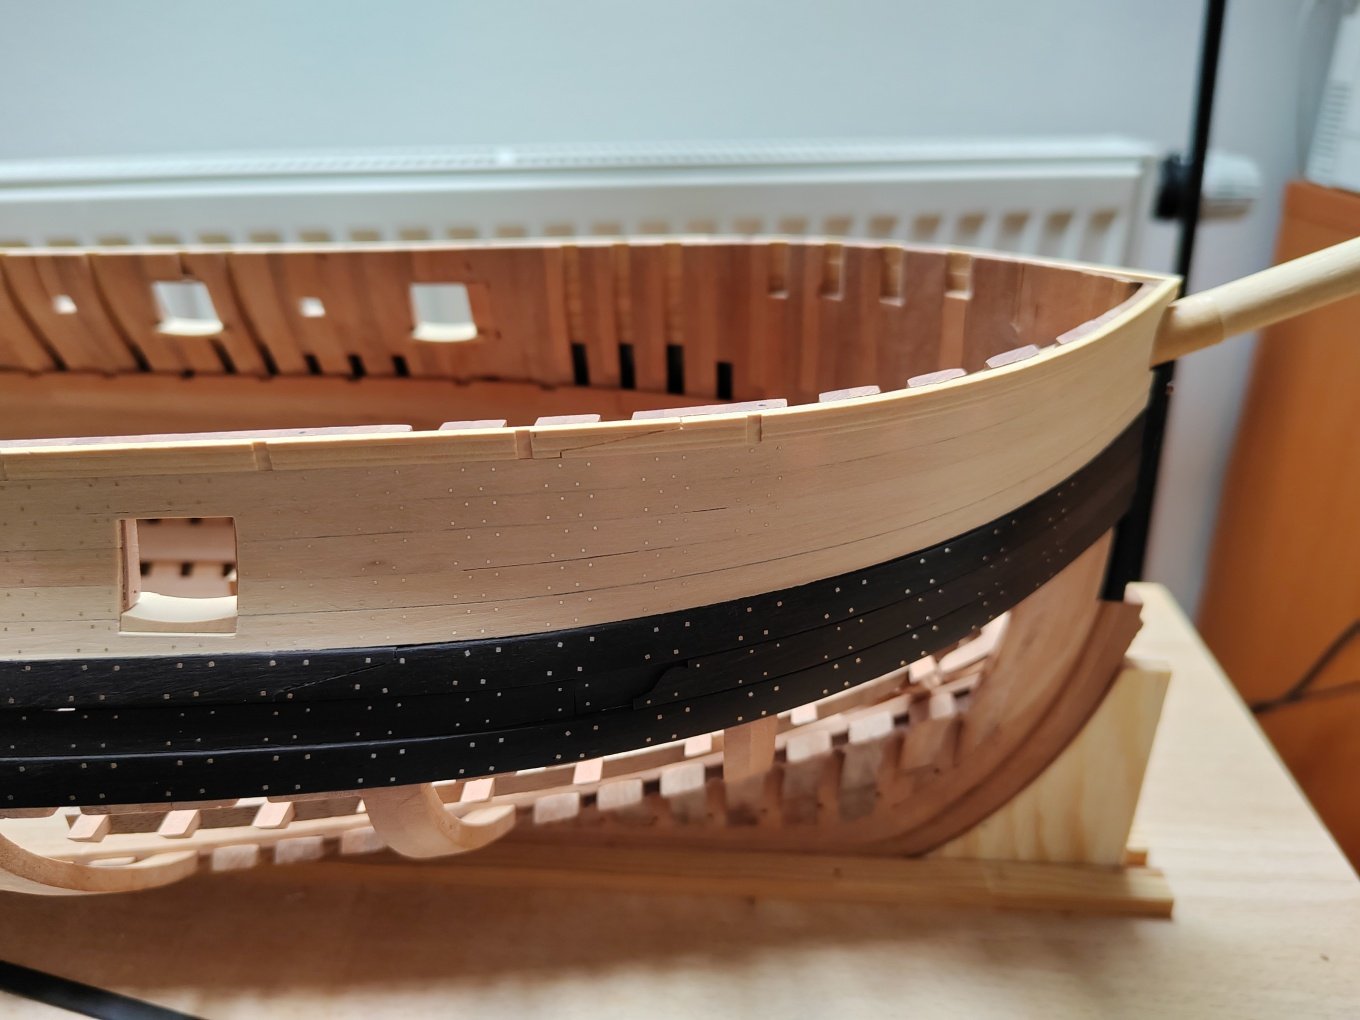
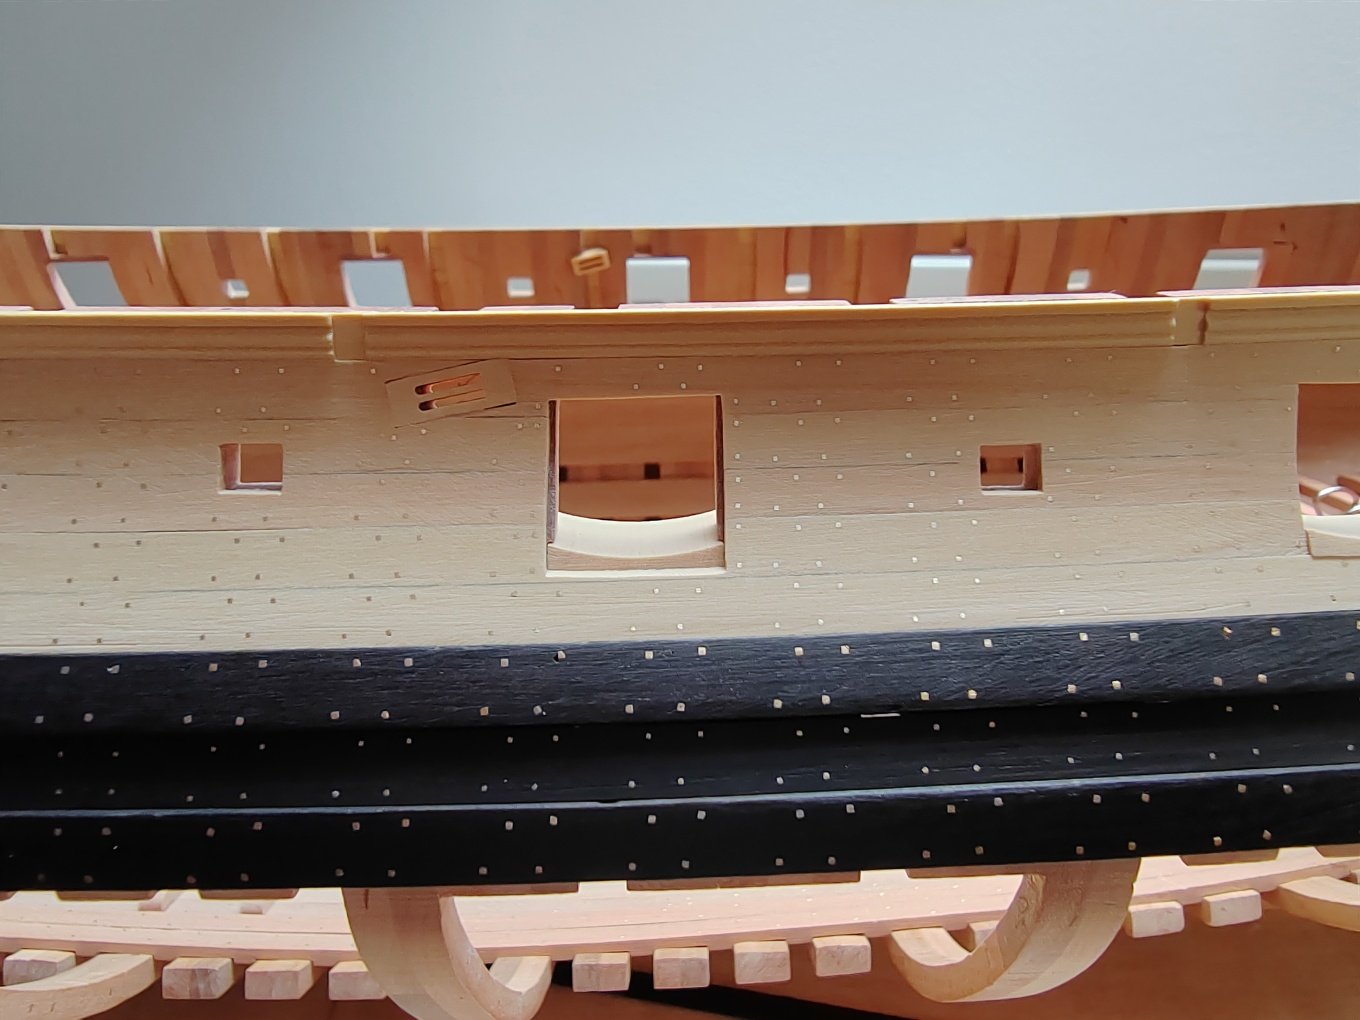
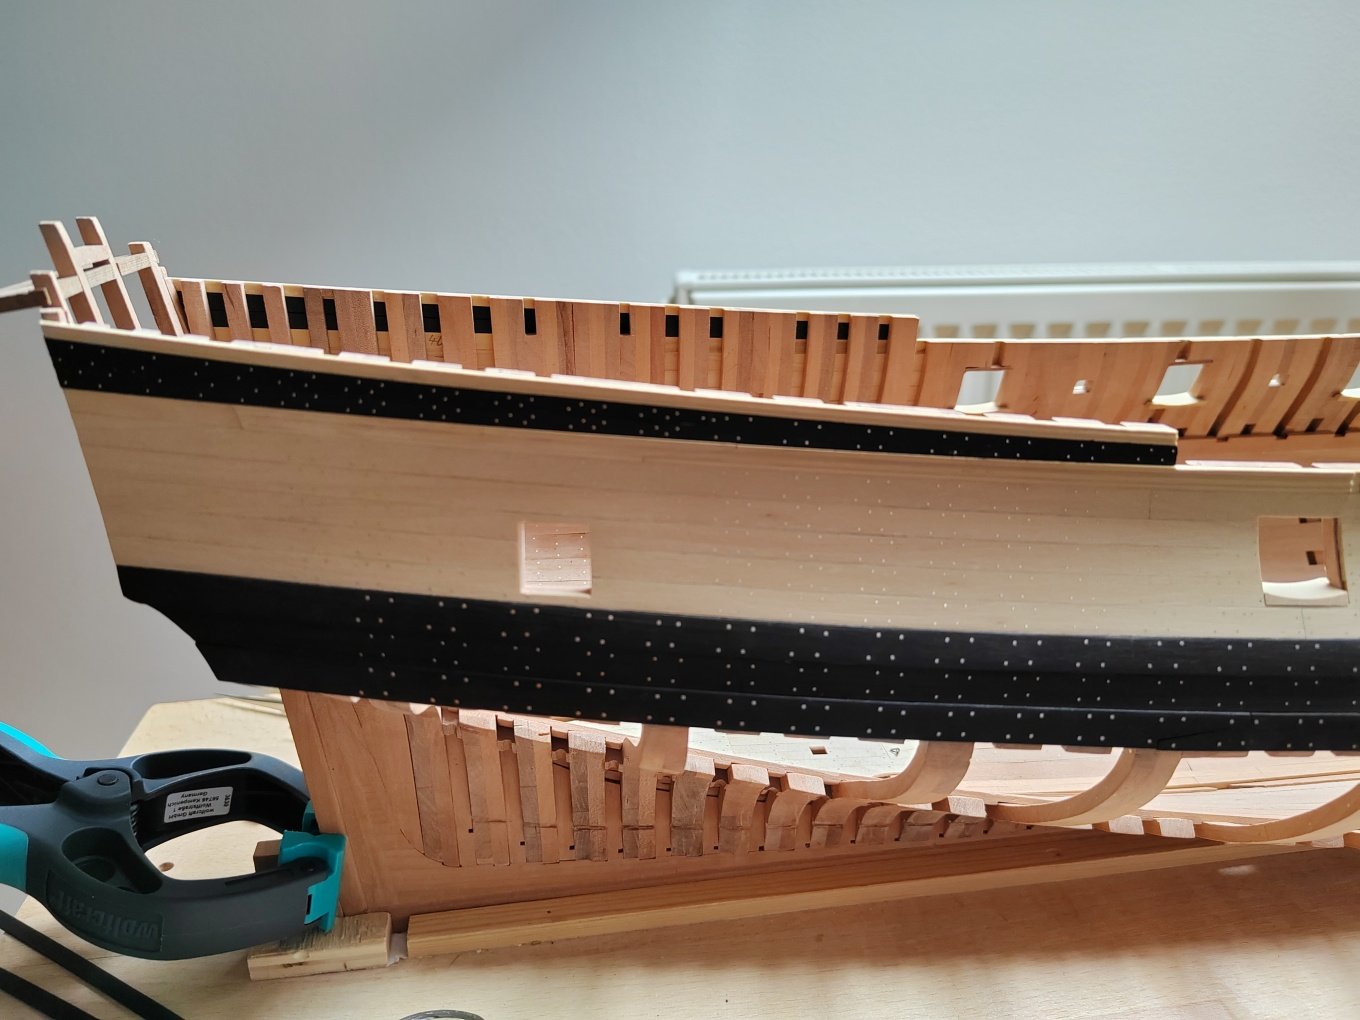
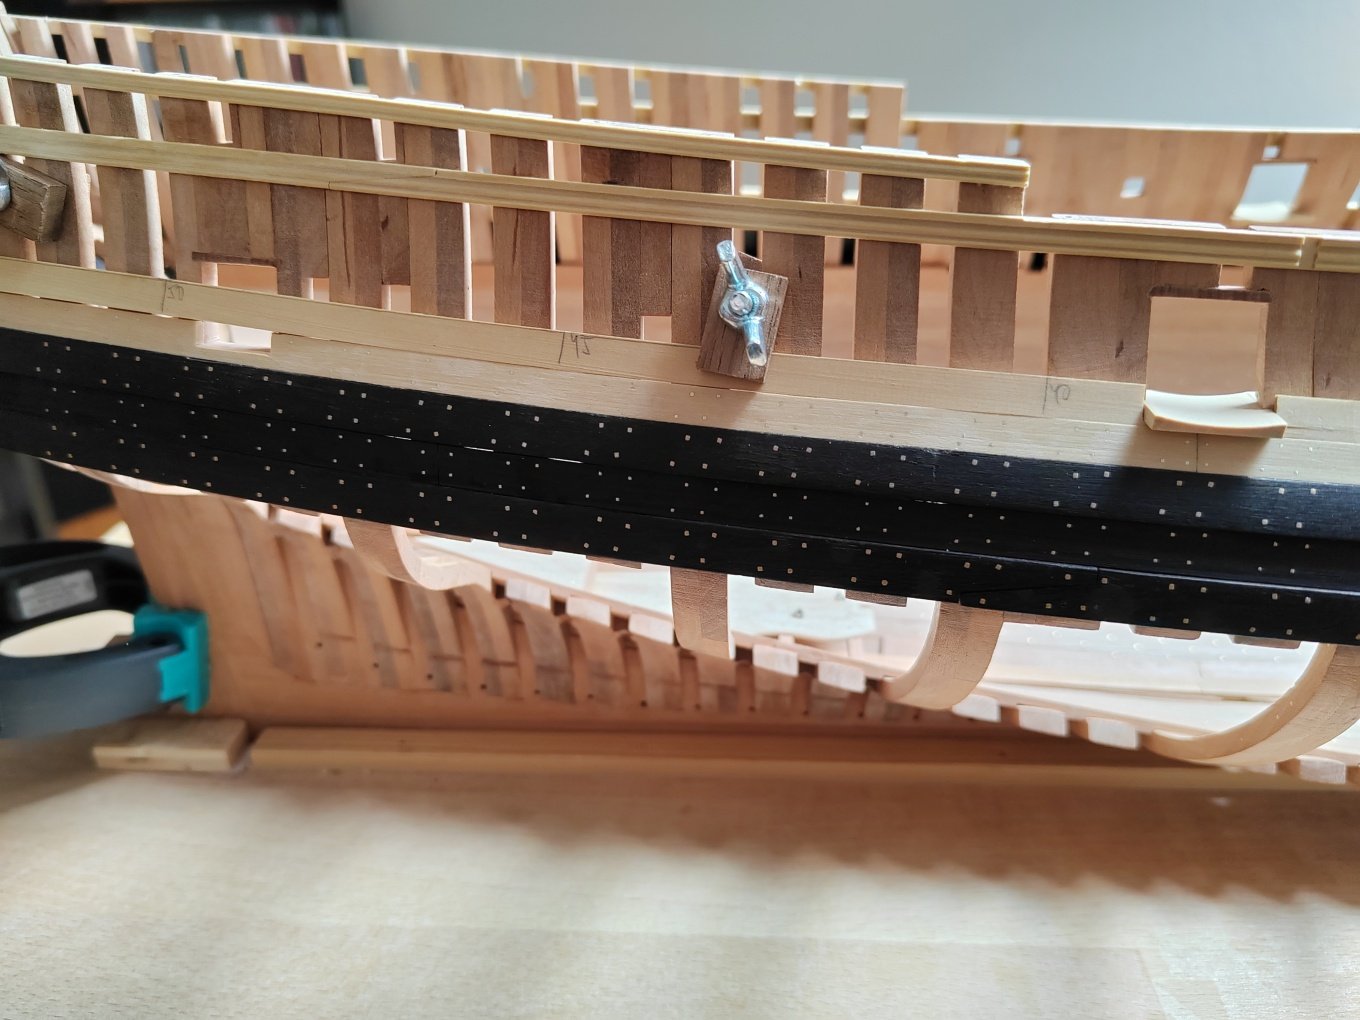
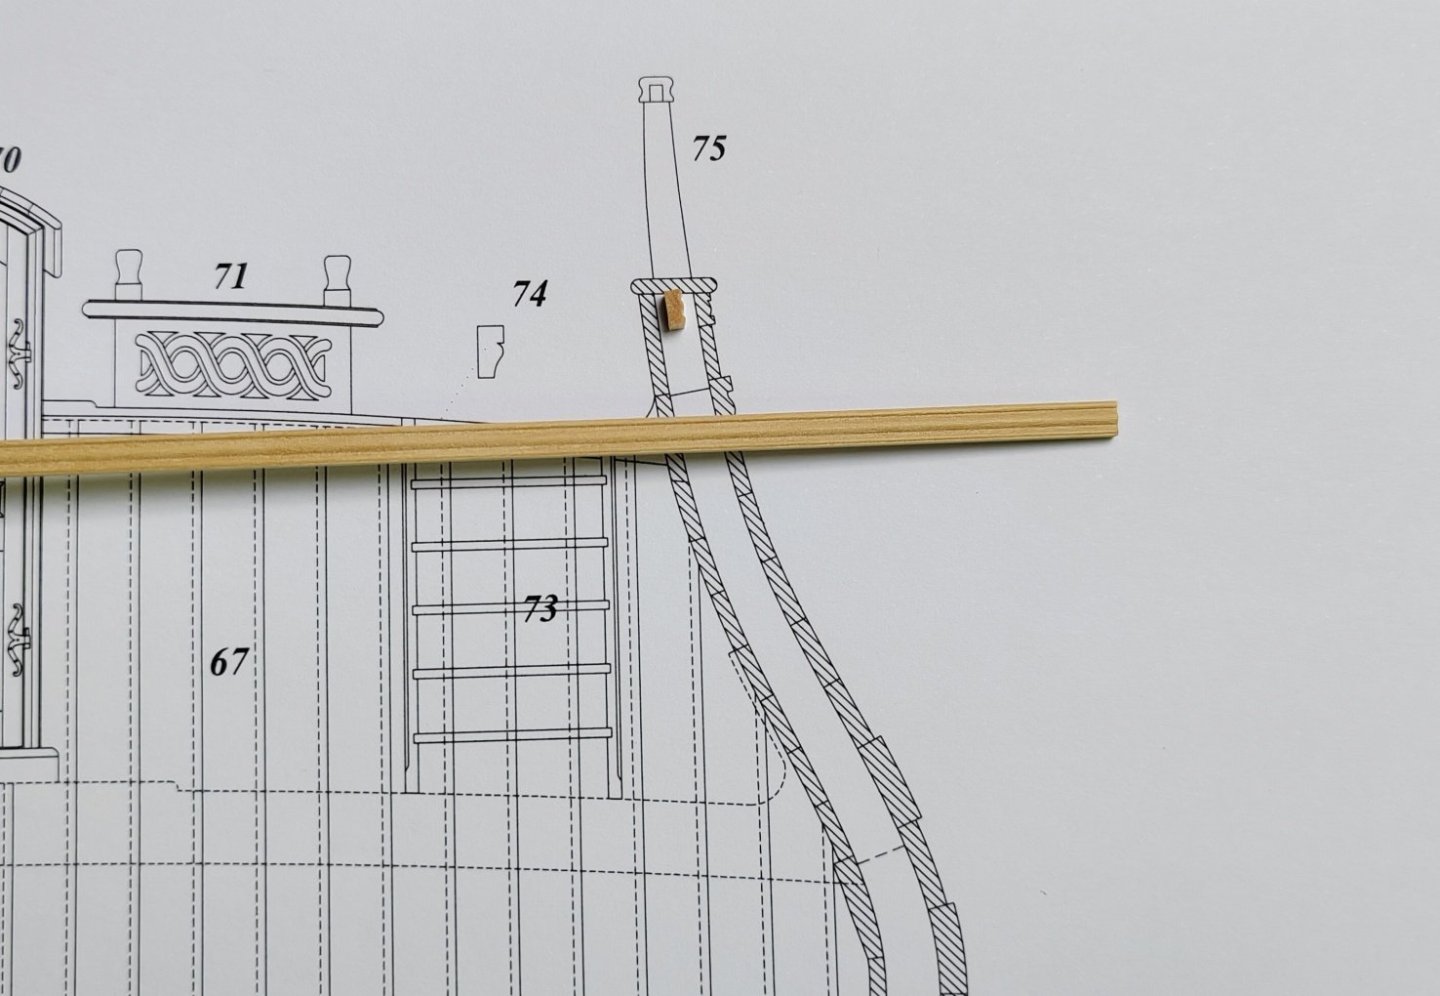
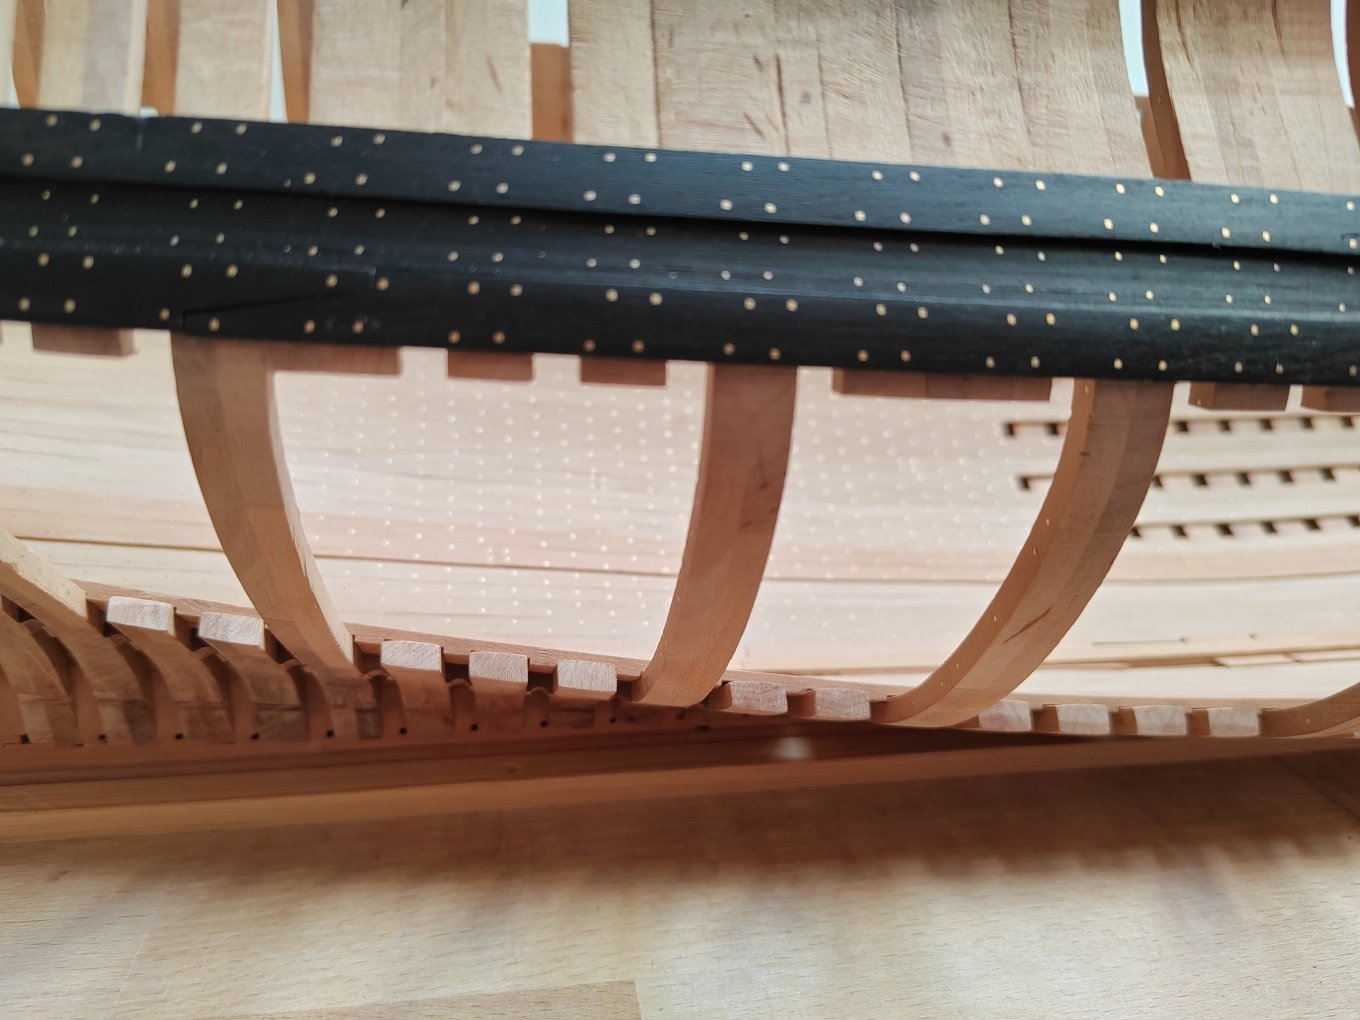
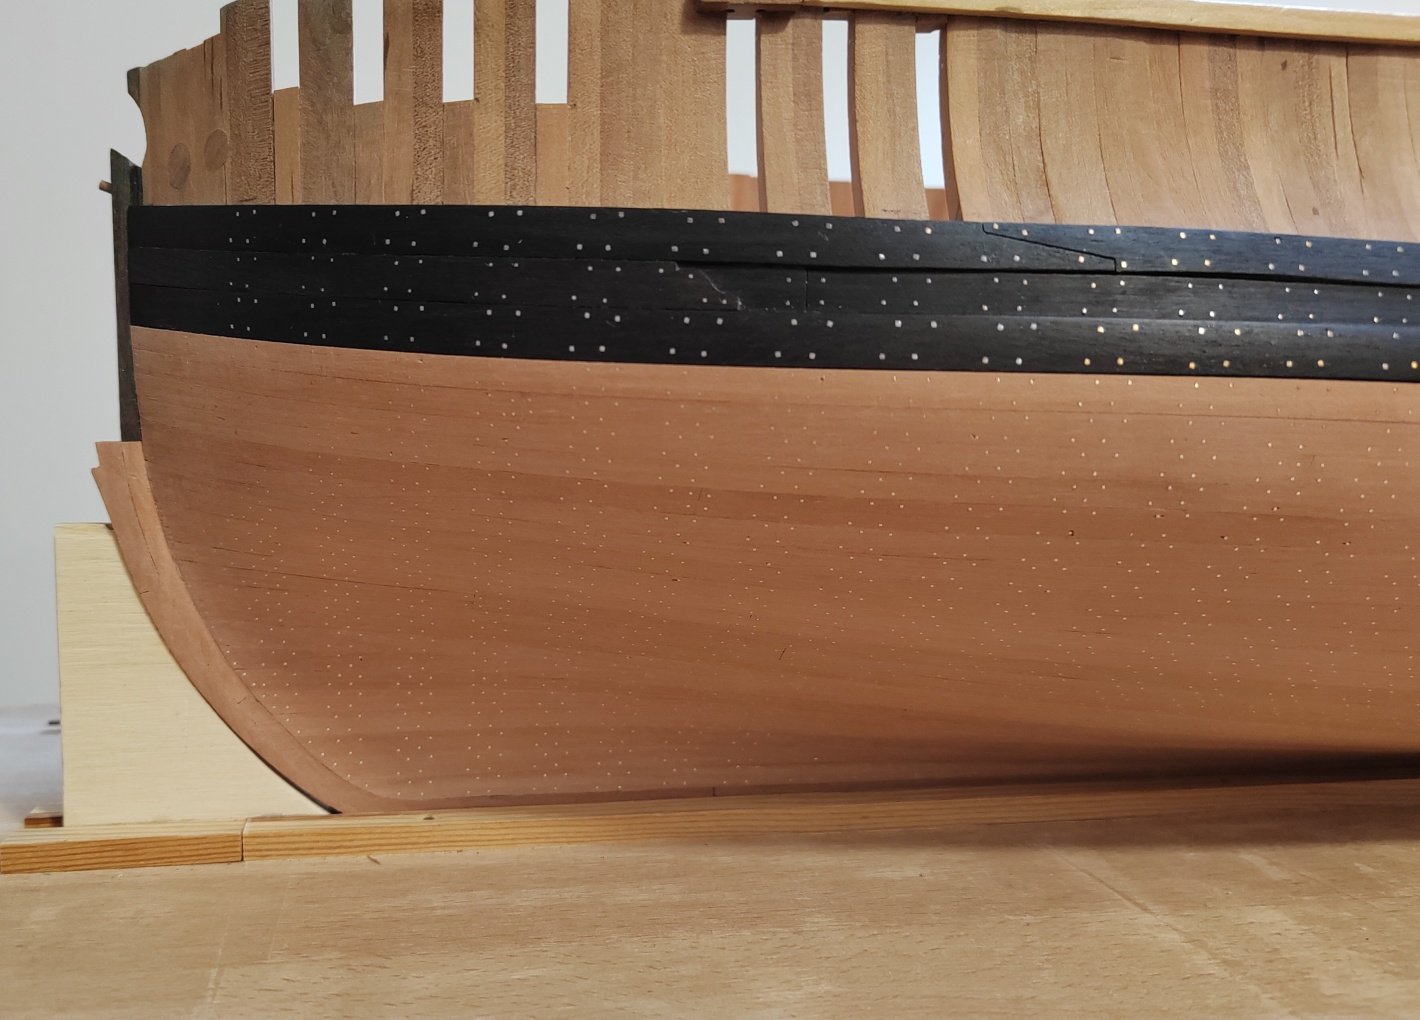
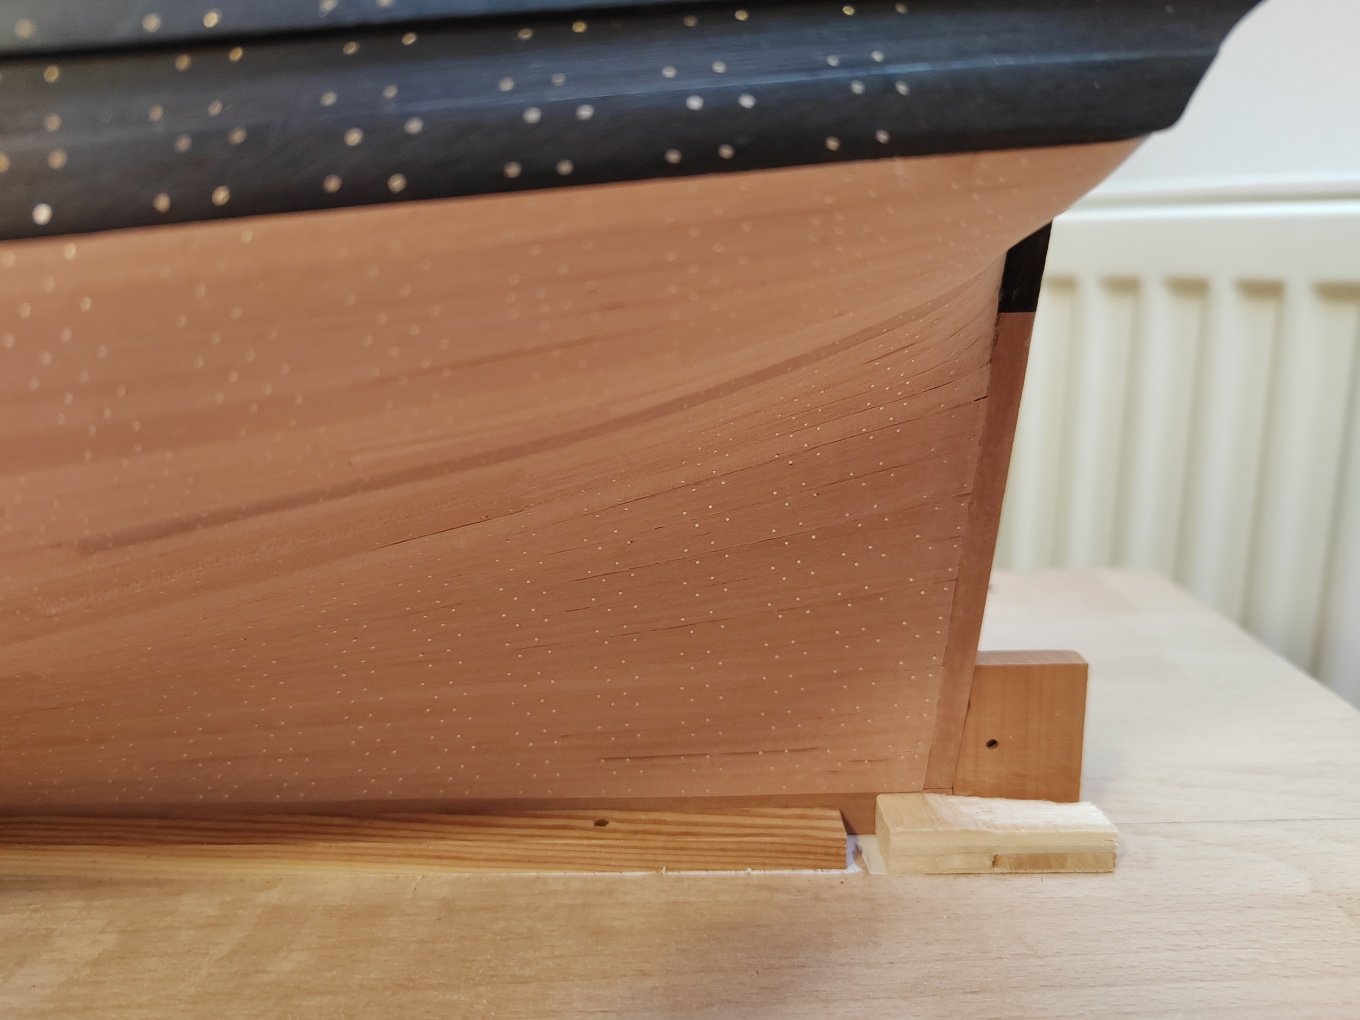
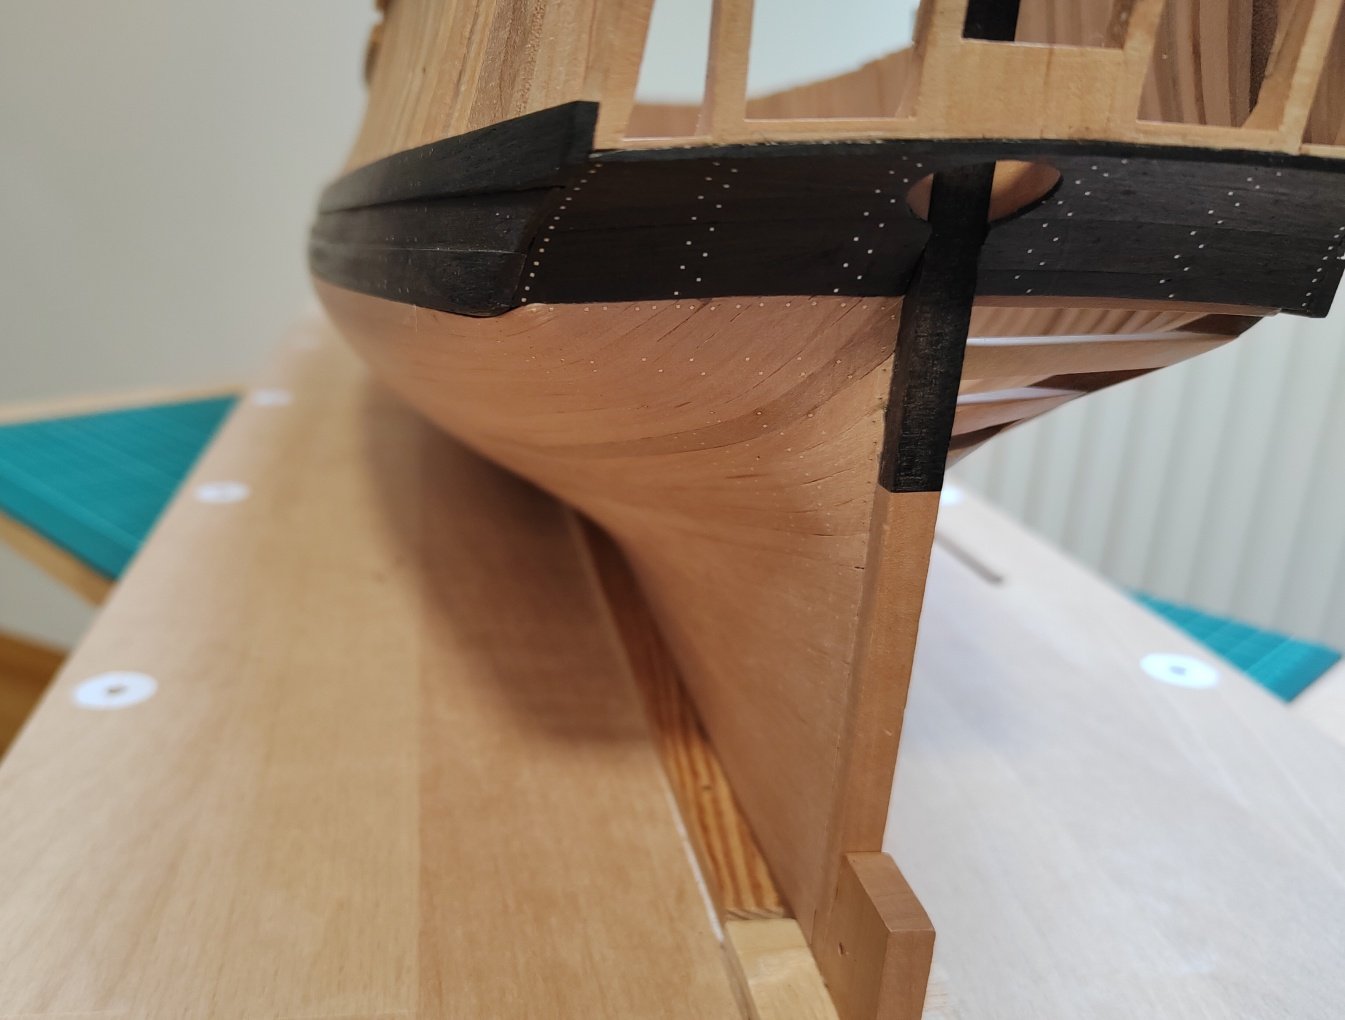
Thank you guys. To Chris - I don't like the black caulking between the planks to be too prominent, so the caulking here is created only by blackening the edge of the plank with a pencil so that it is not too prominent. The only exception is the planks on the decks, where the caulking is created with black paper. Here this color contrast makes a bit more sense (at least from my point of view). I continue by planing the "thicker" part of the bow.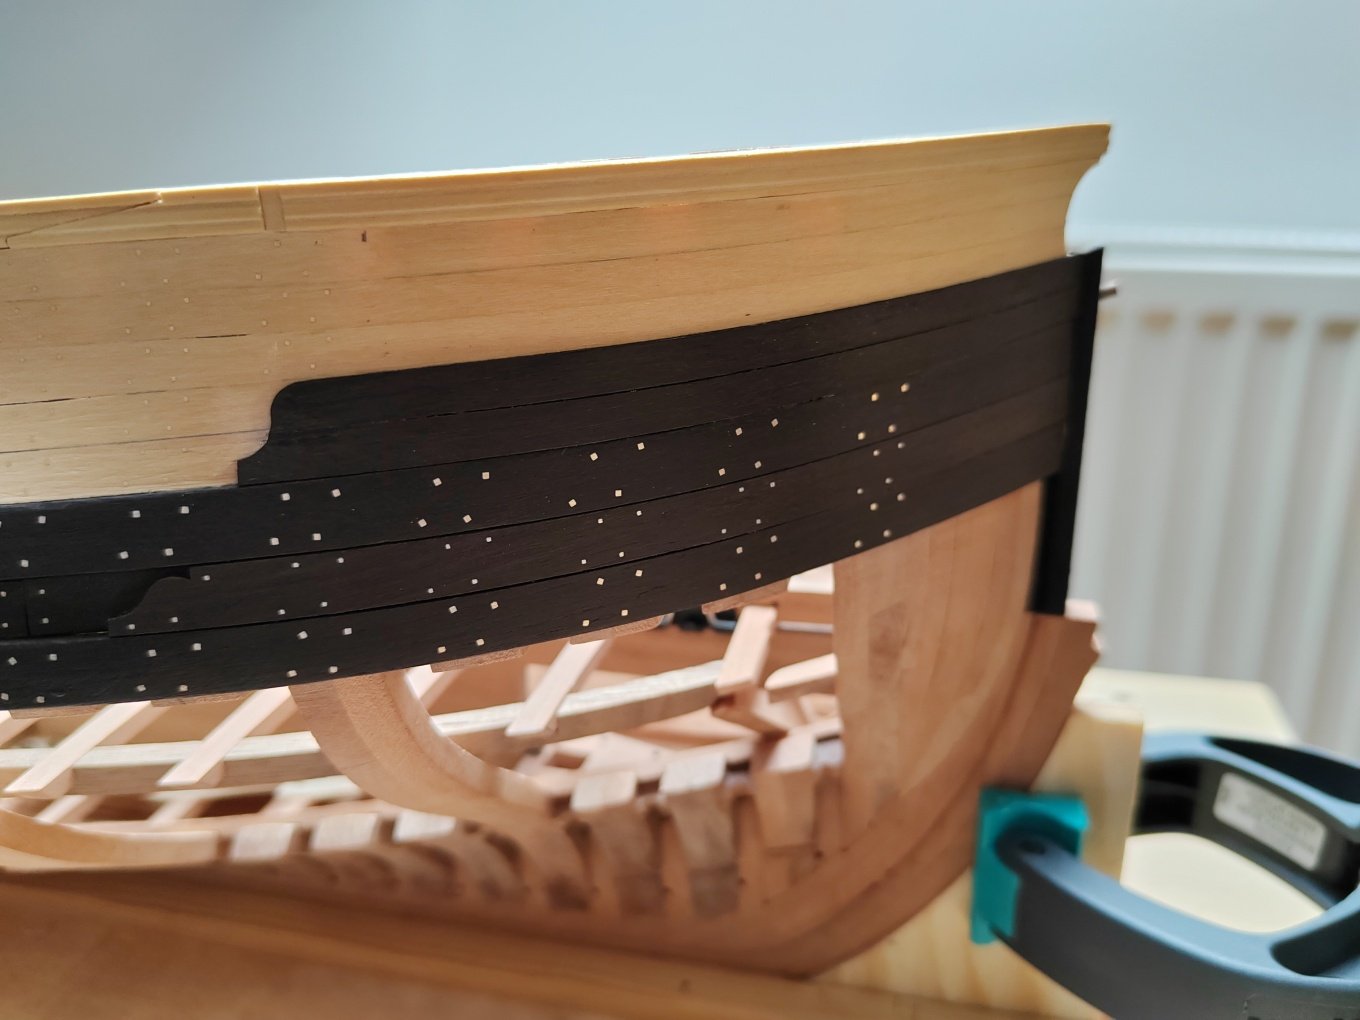

-
L'Amarante by marsalv - 1:36 - POF
marsalv replied to marsalv's topic in - Build logs for subjects built 1501 - 1750
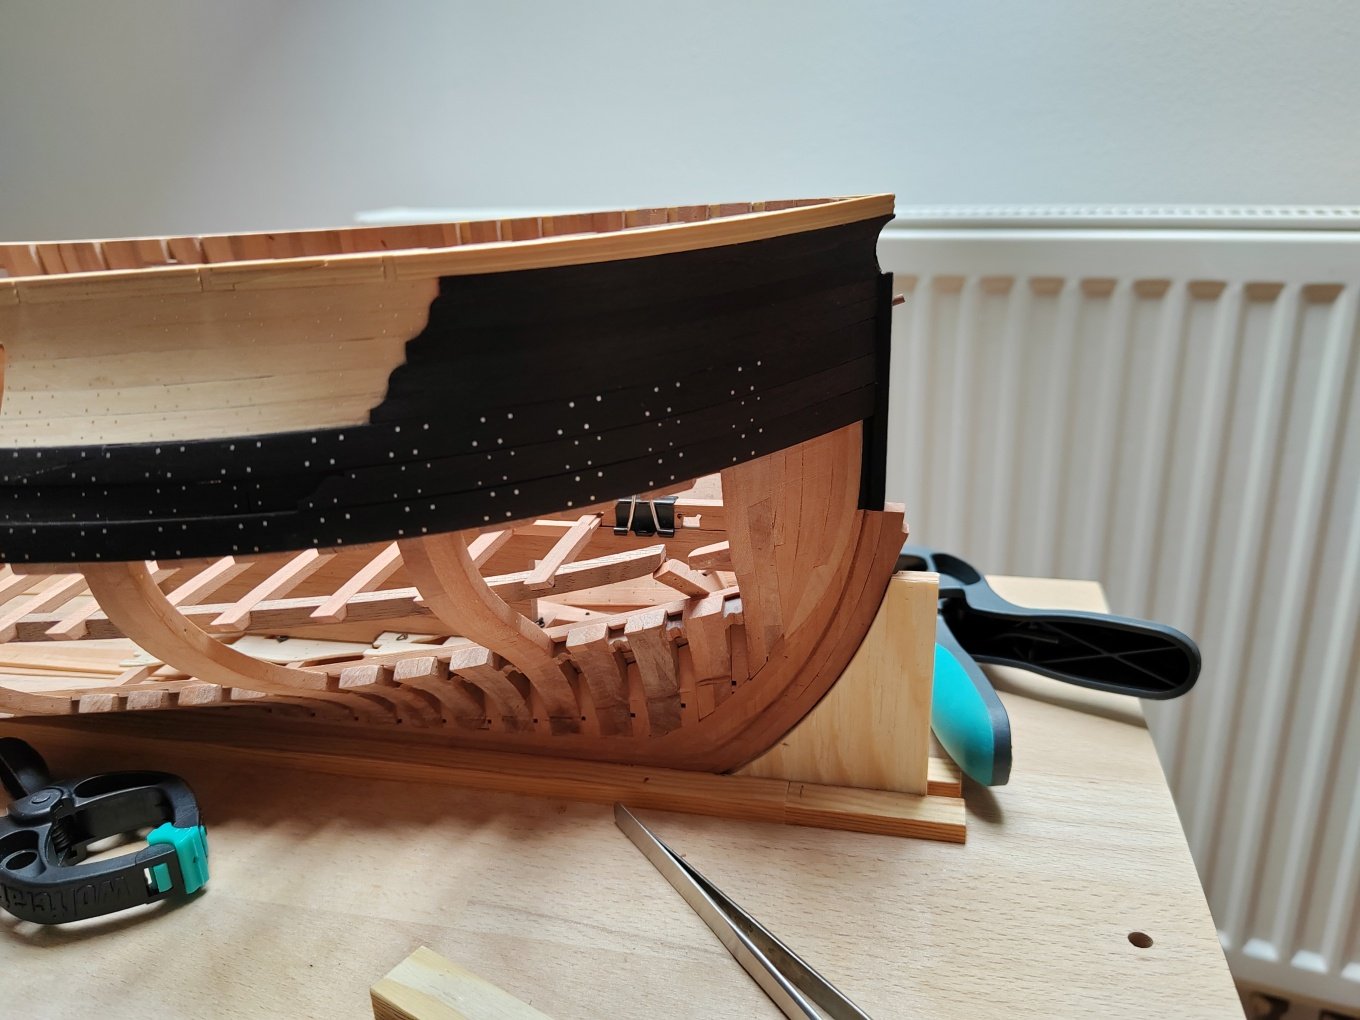
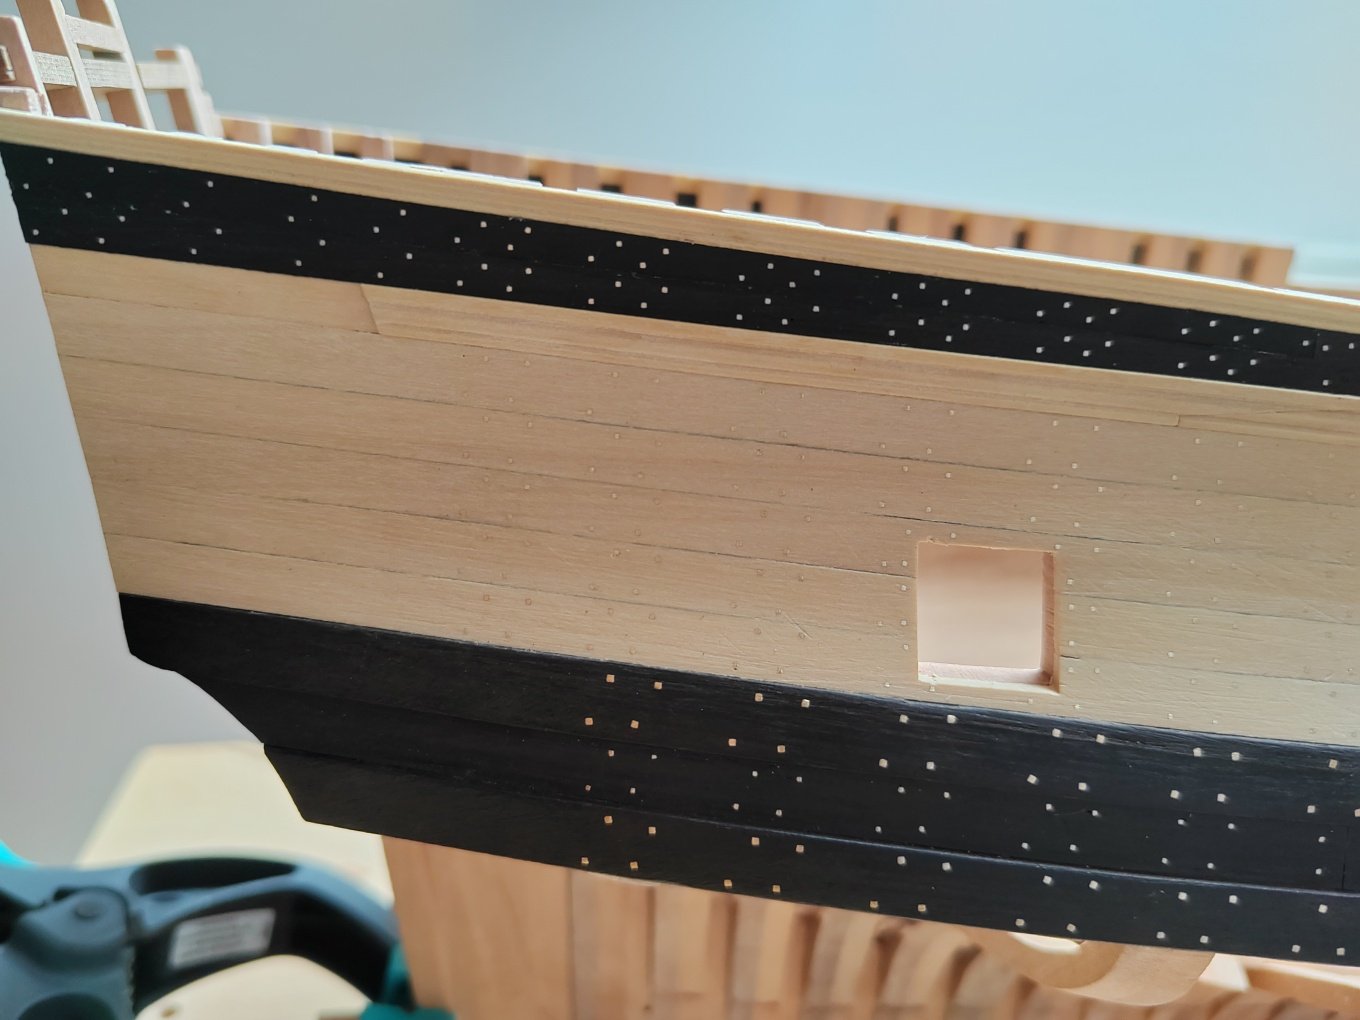
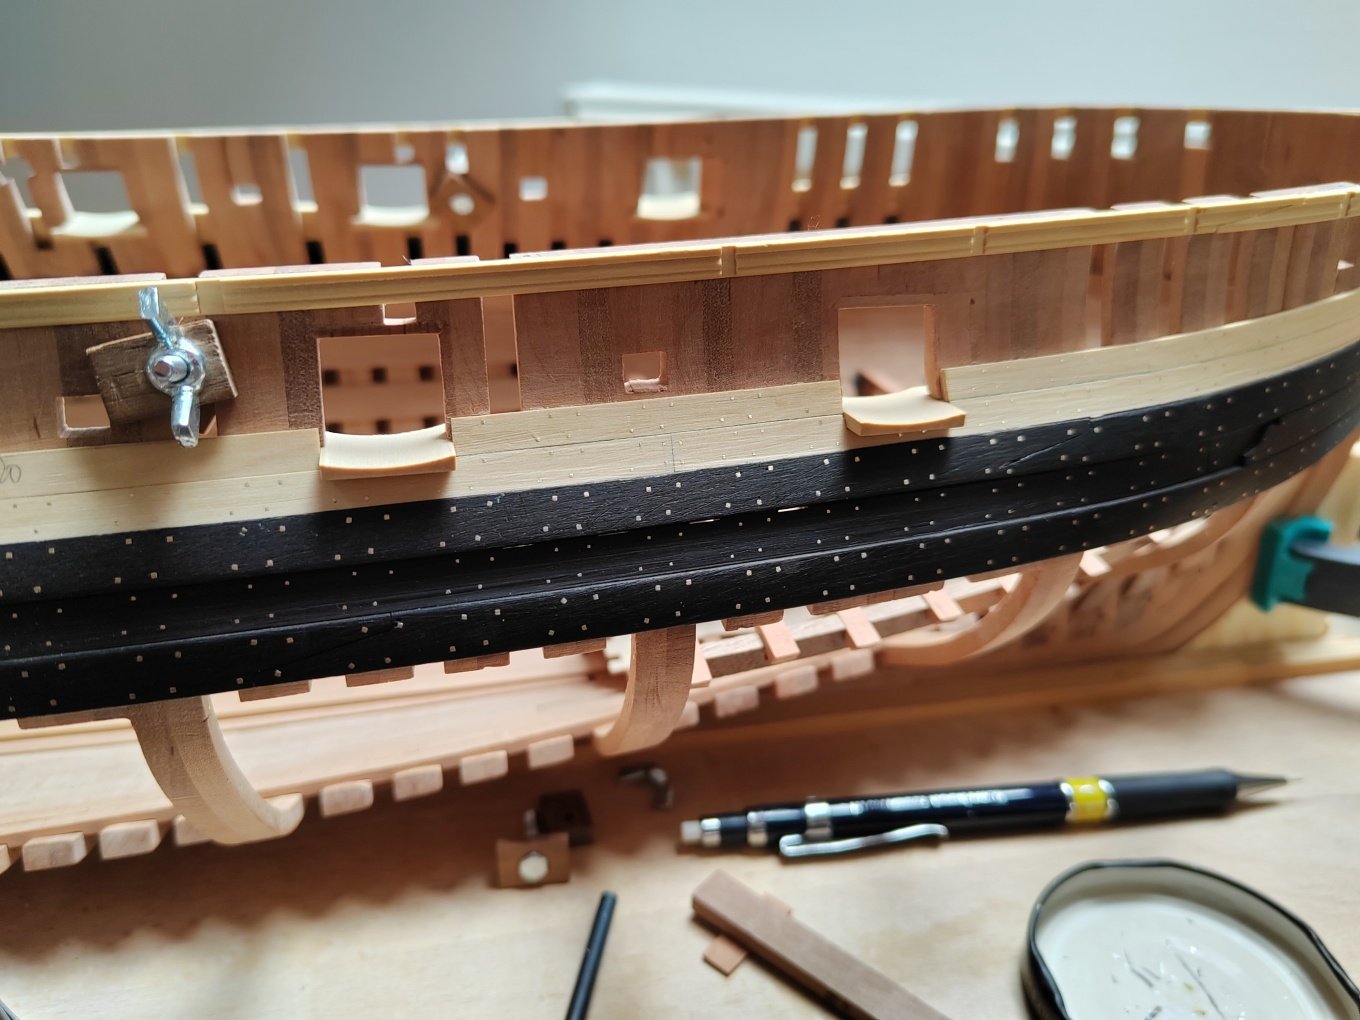
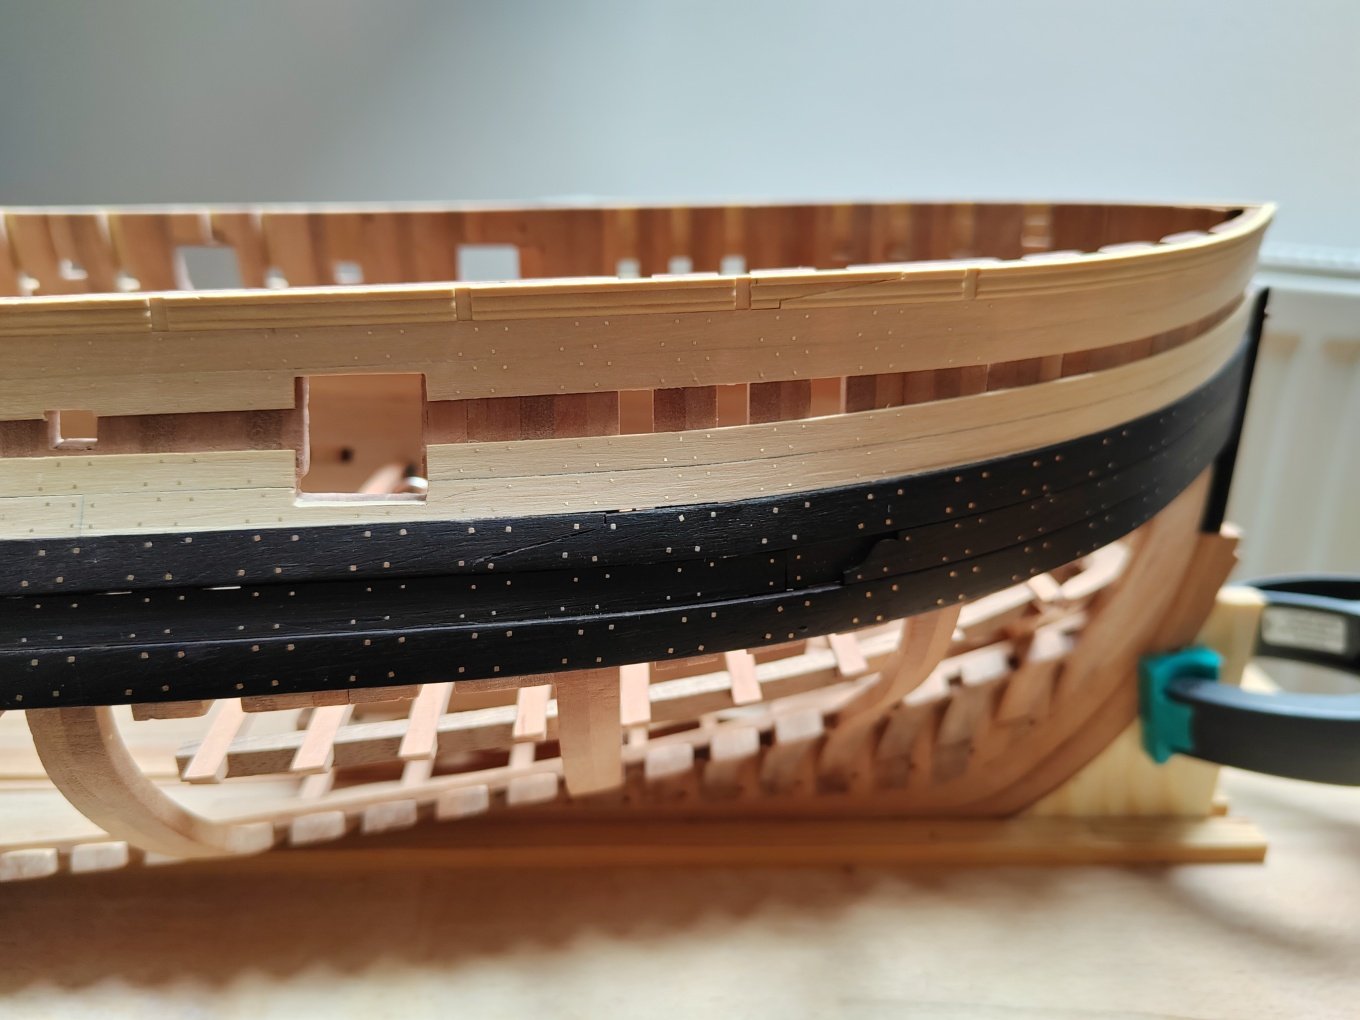
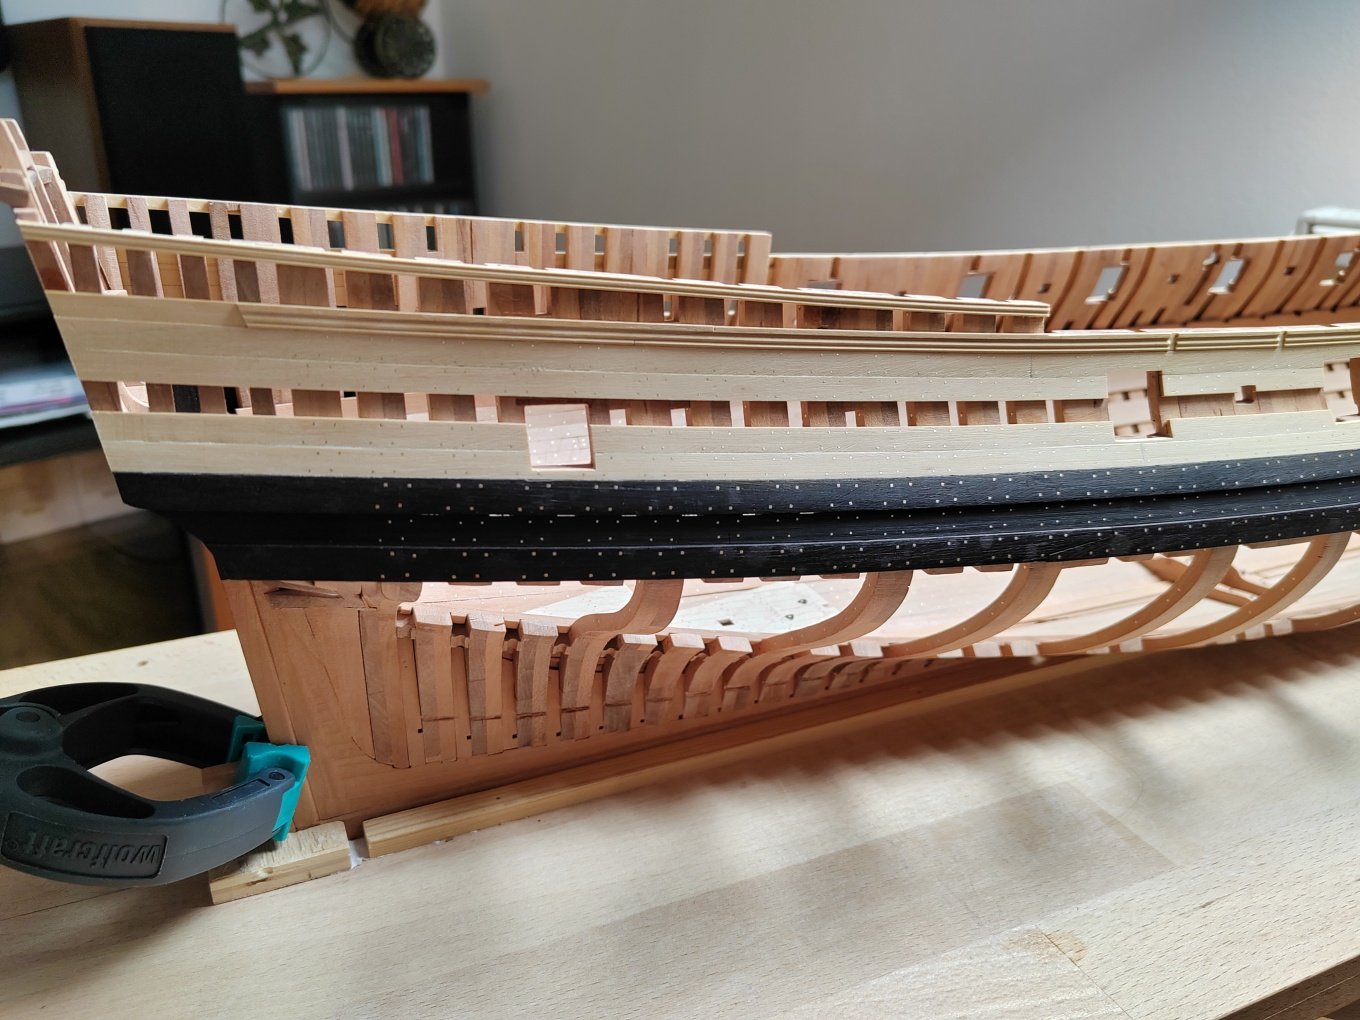
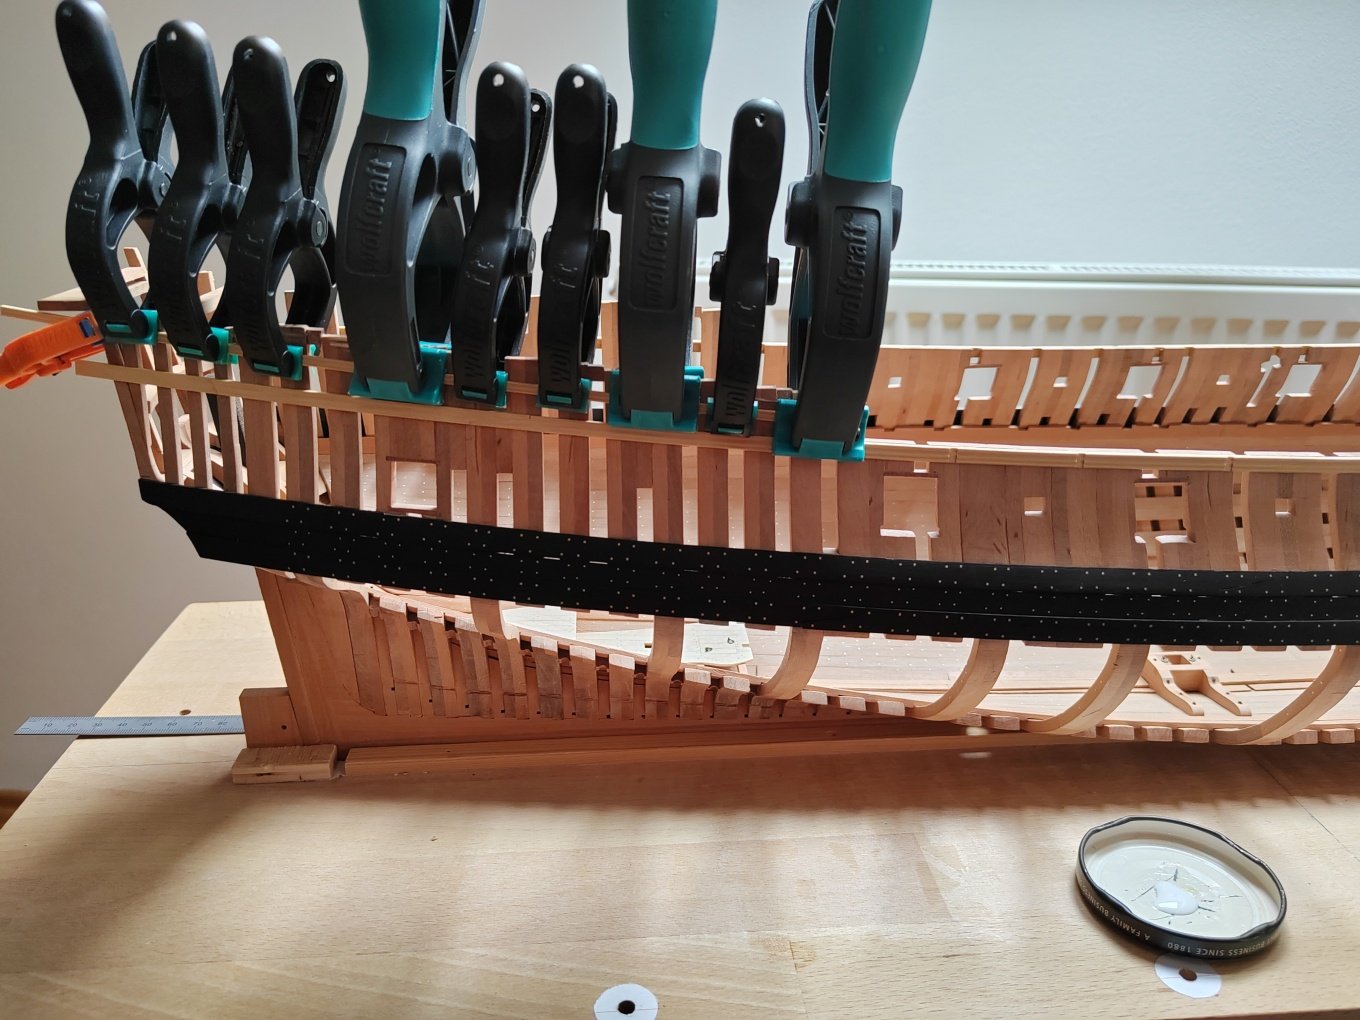
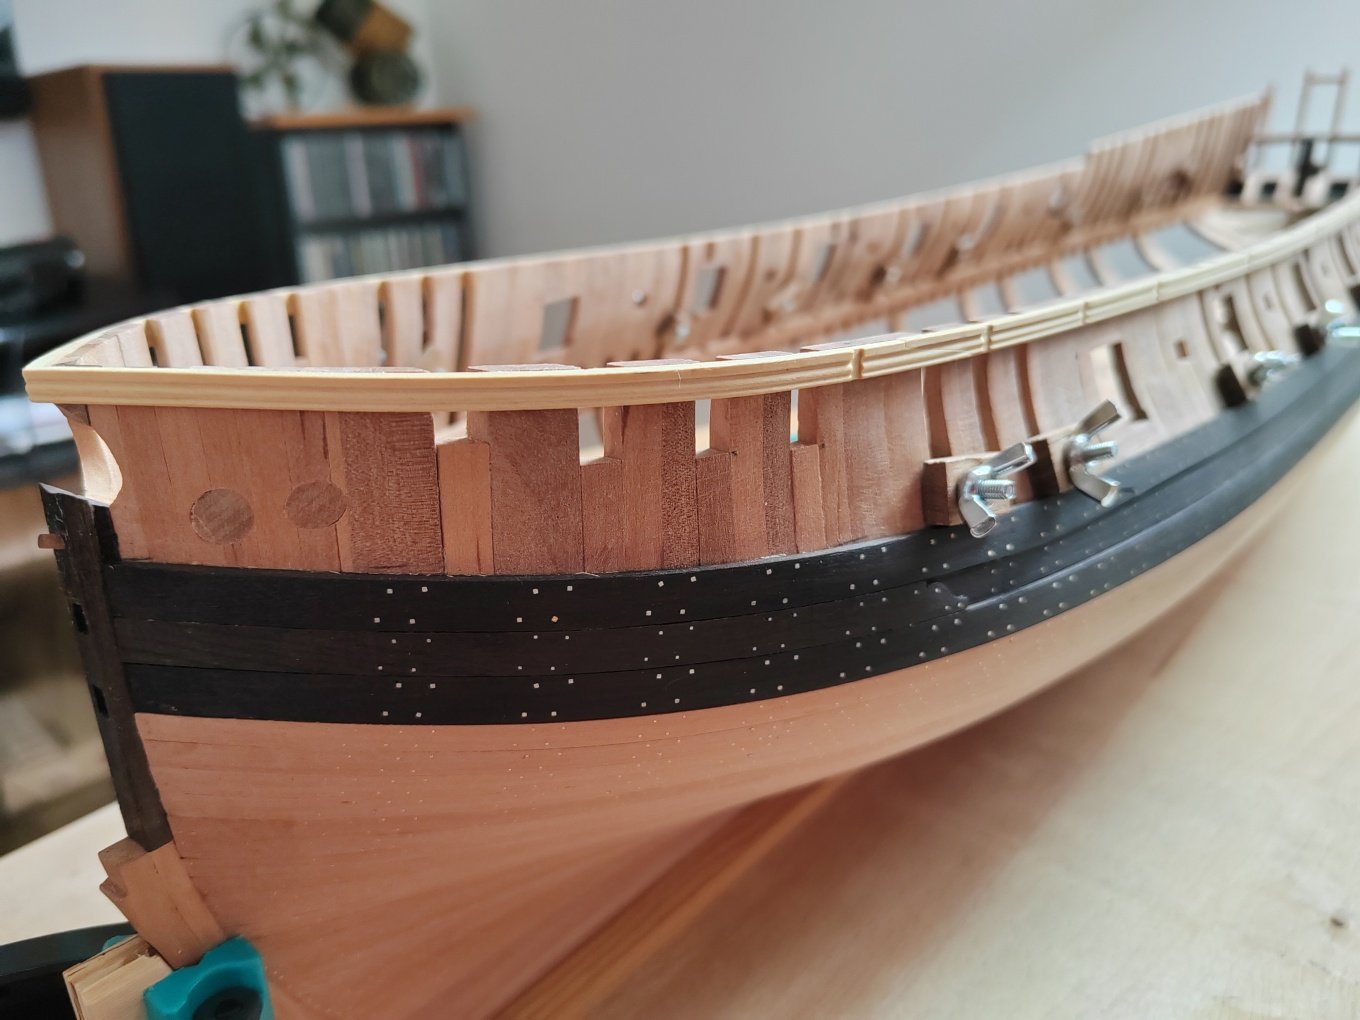
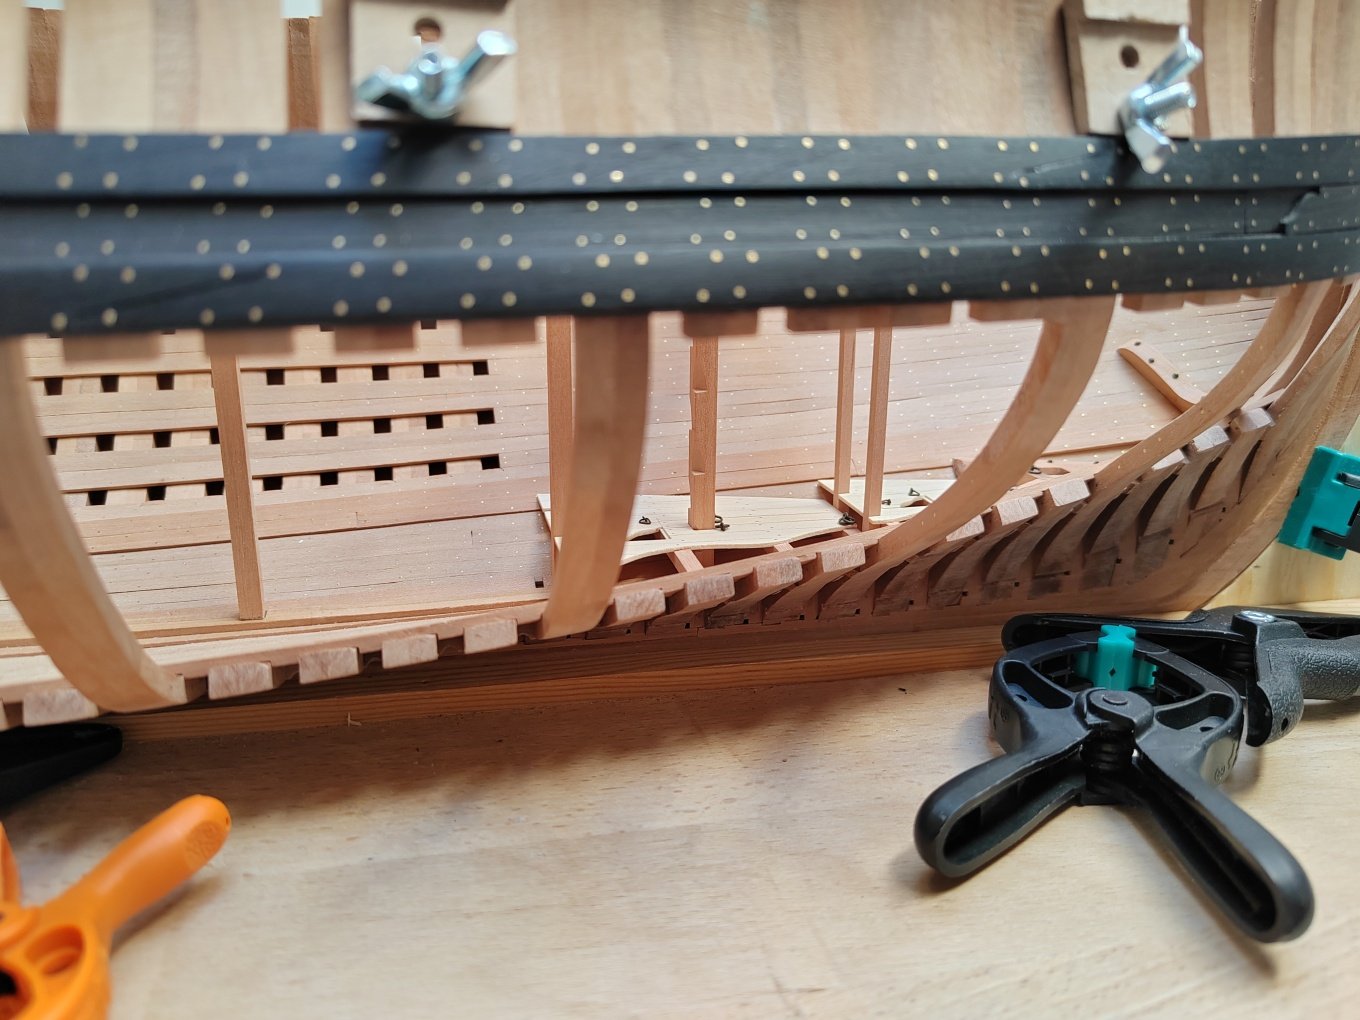
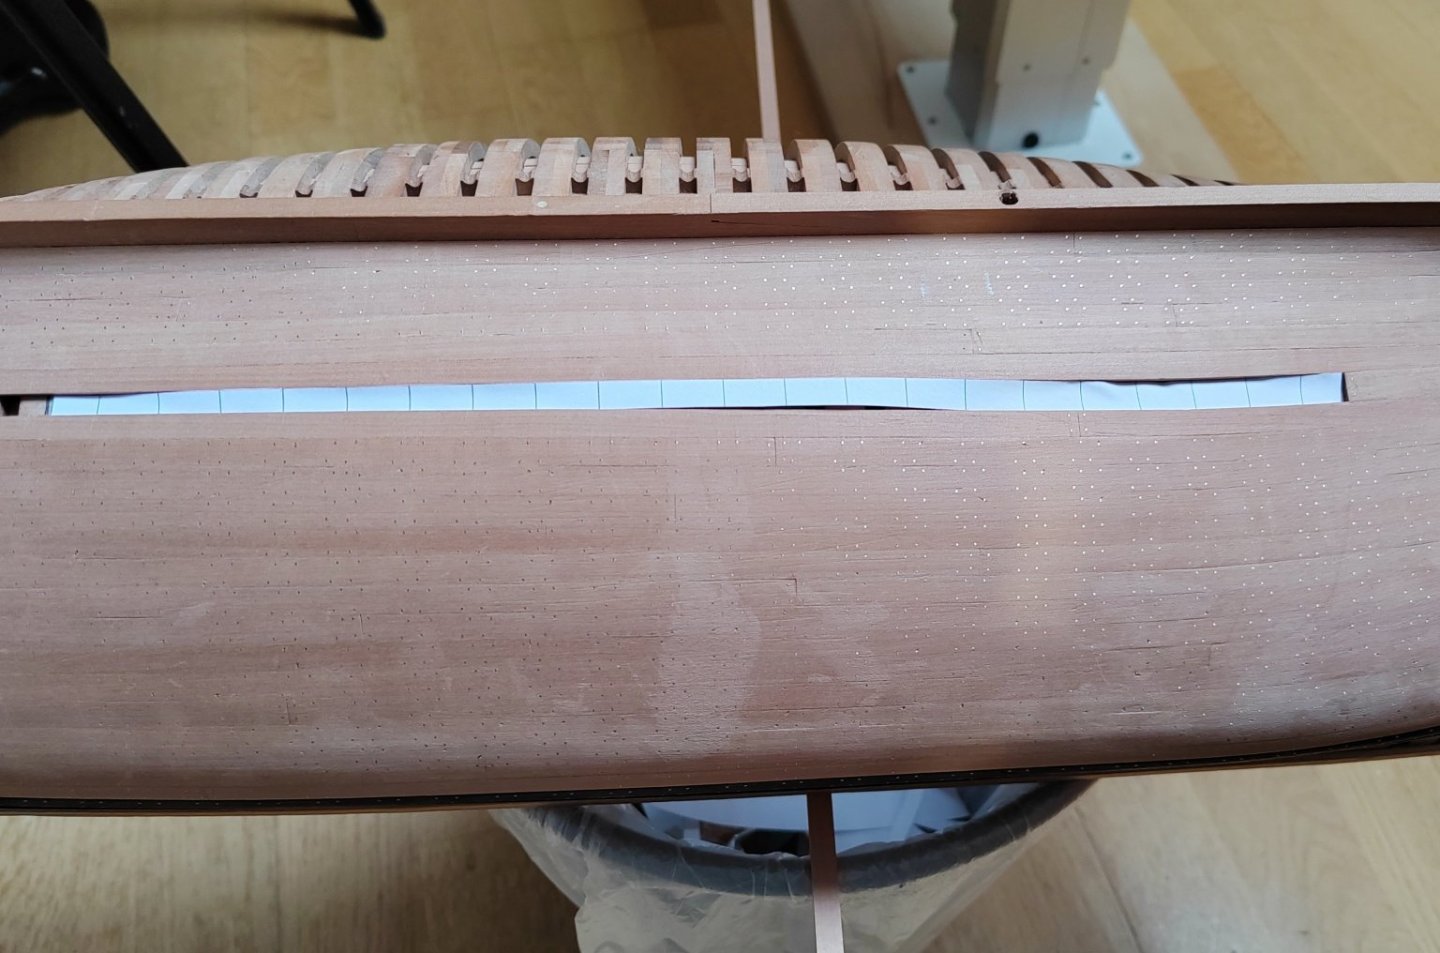
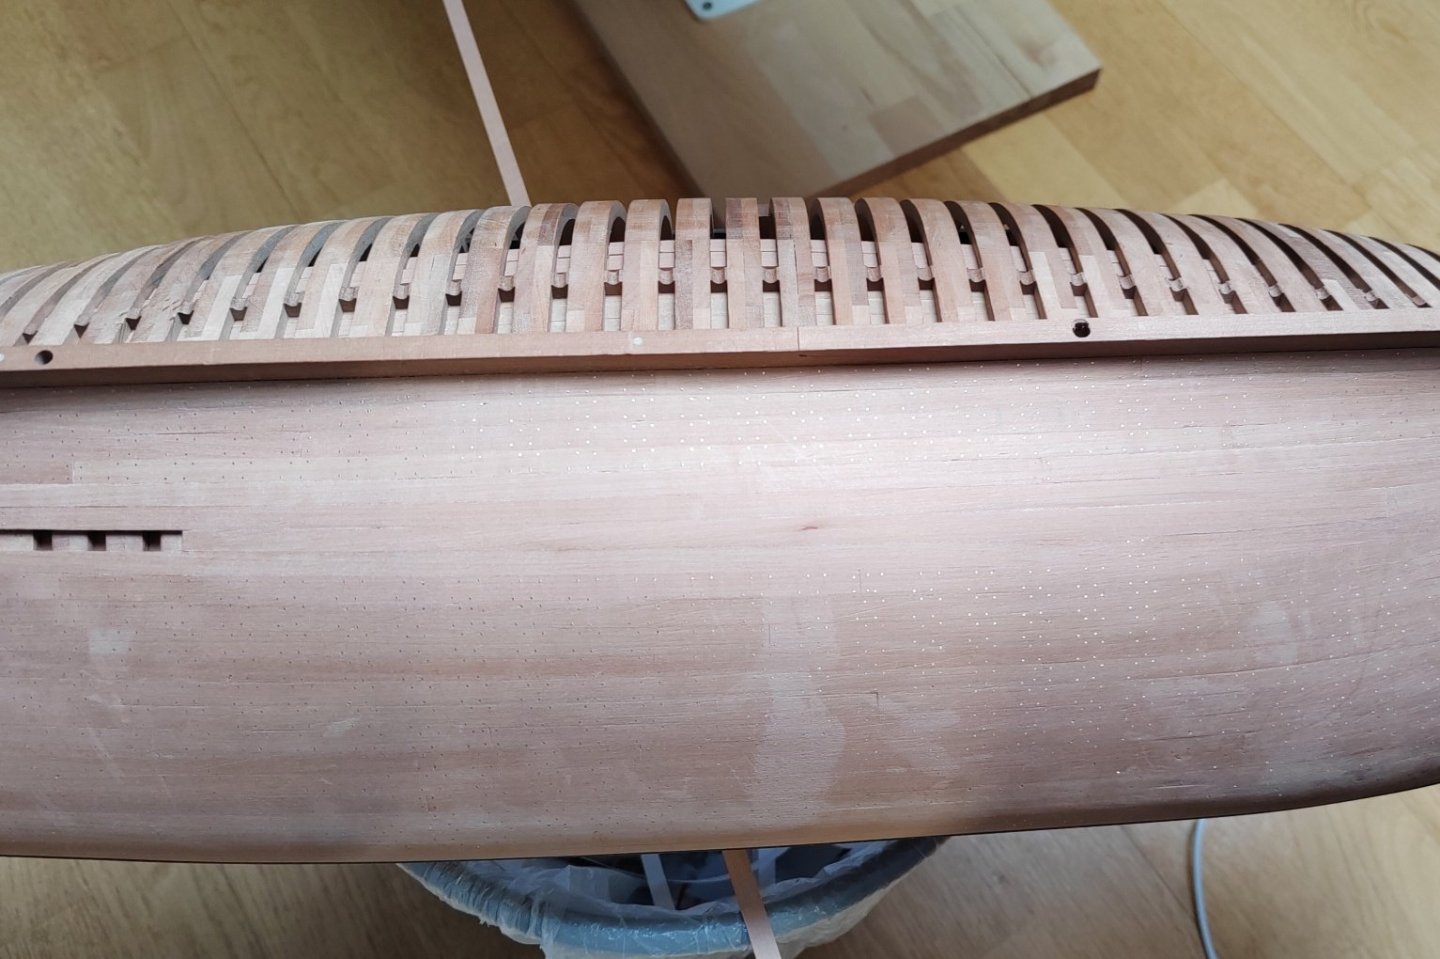
Planking between wales and molding rails completed.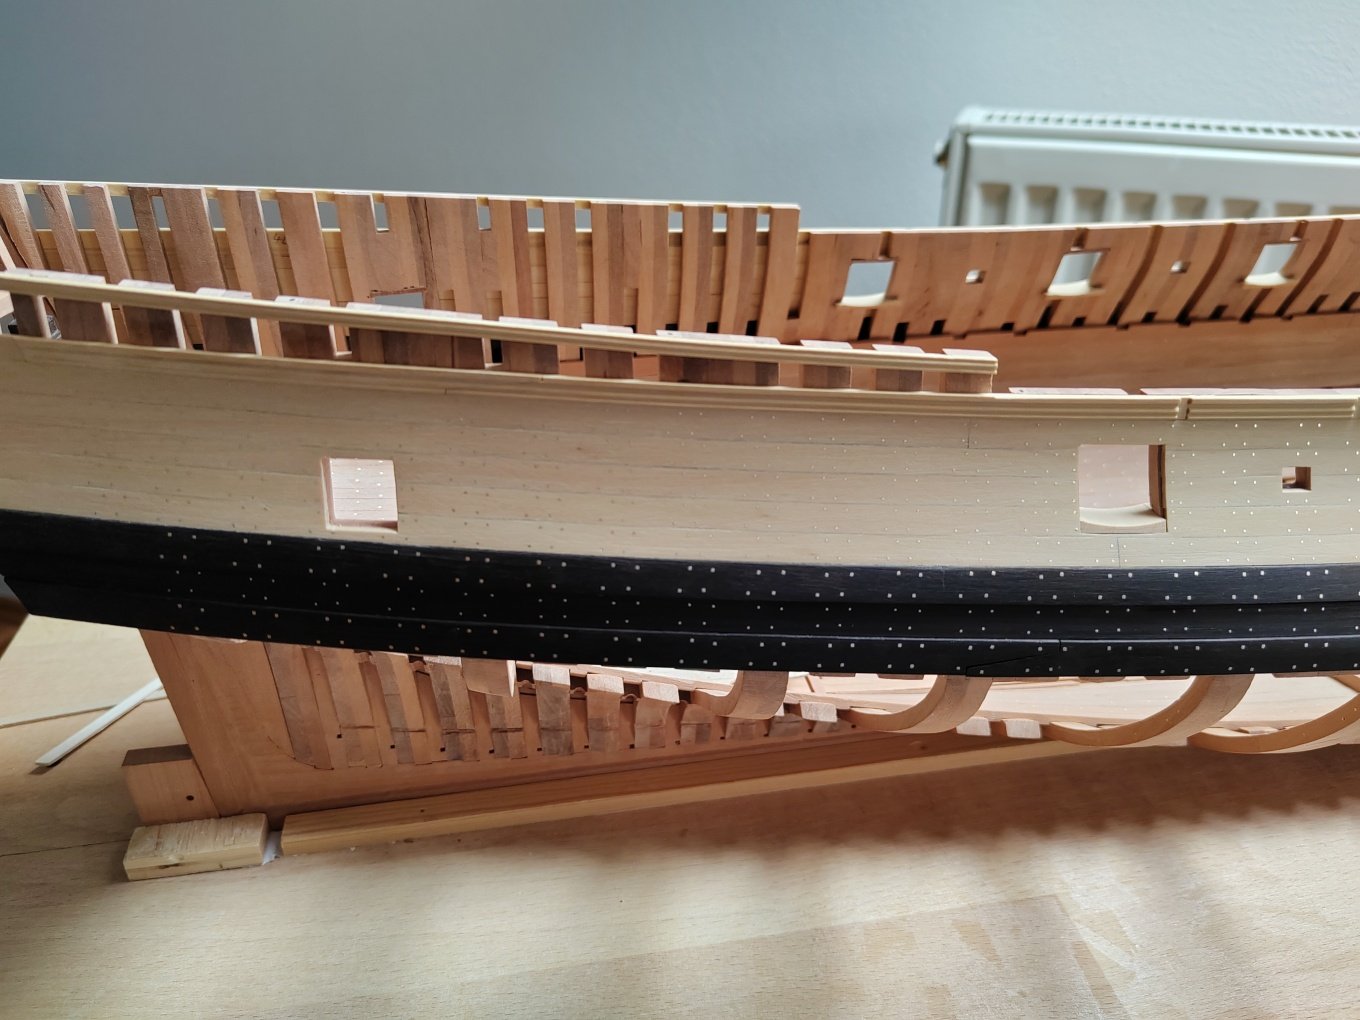
-
L'Amarante by marsalv - 1:36 - POF
marsalv replied to marsalv's topic in - Build logs for subjects built 1501 - 1750
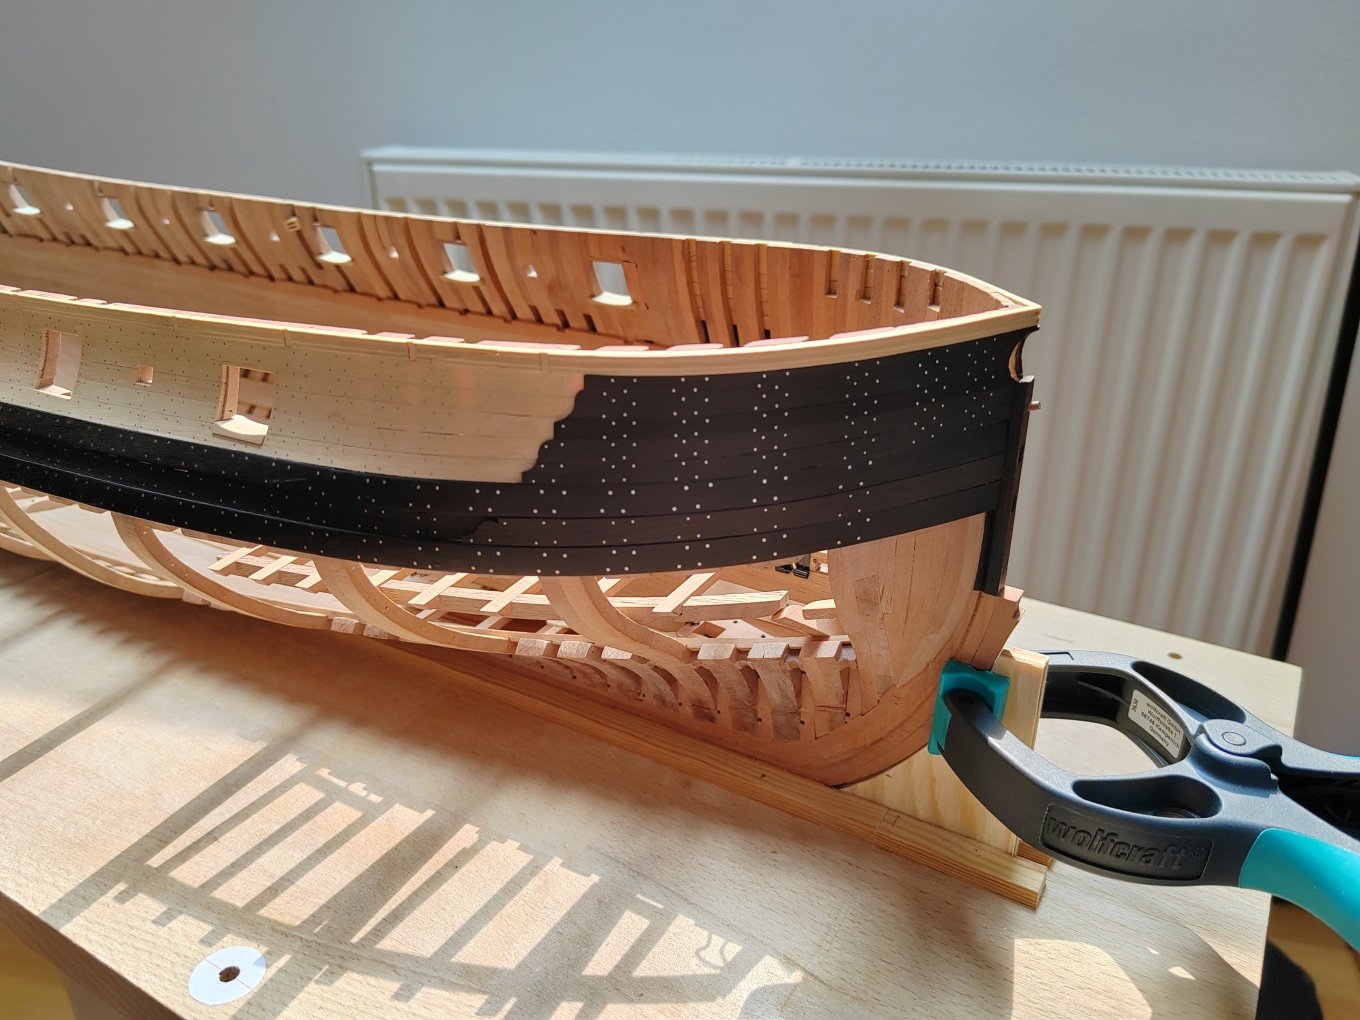
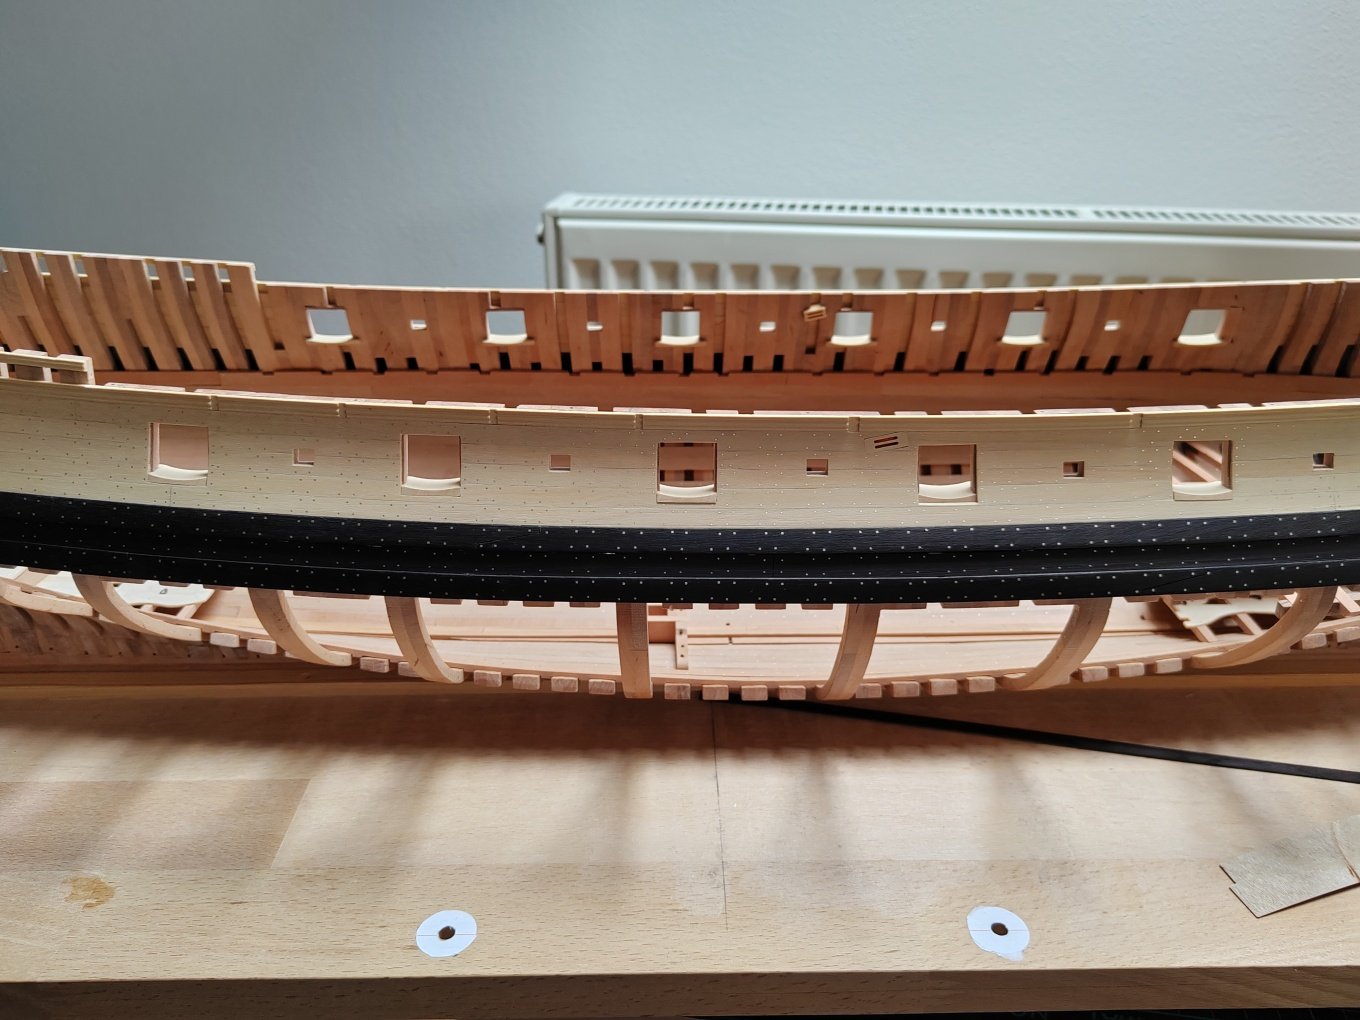
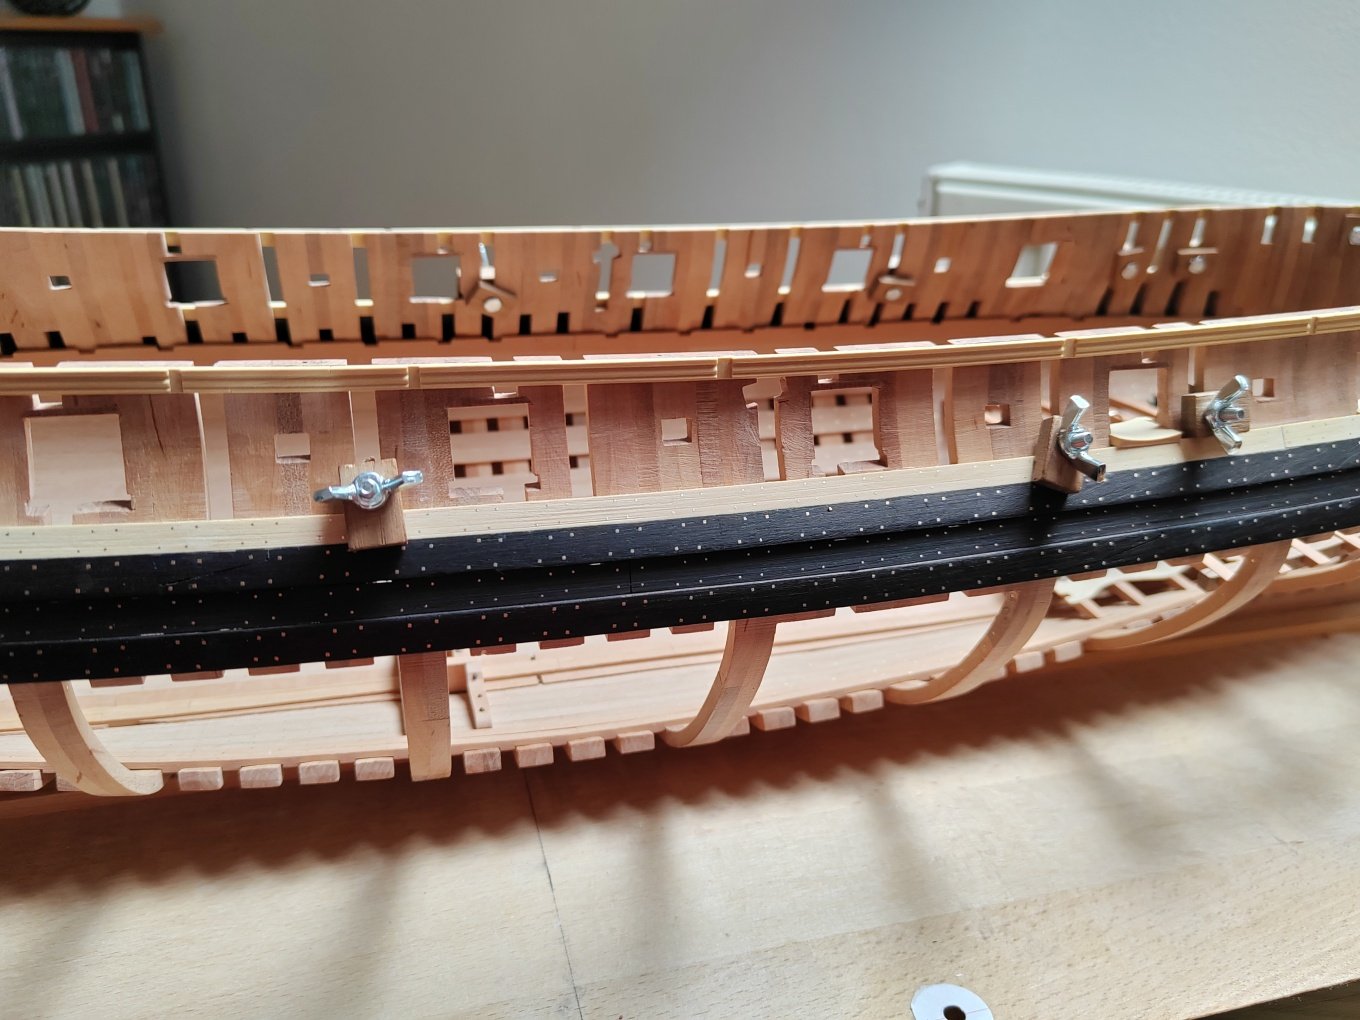
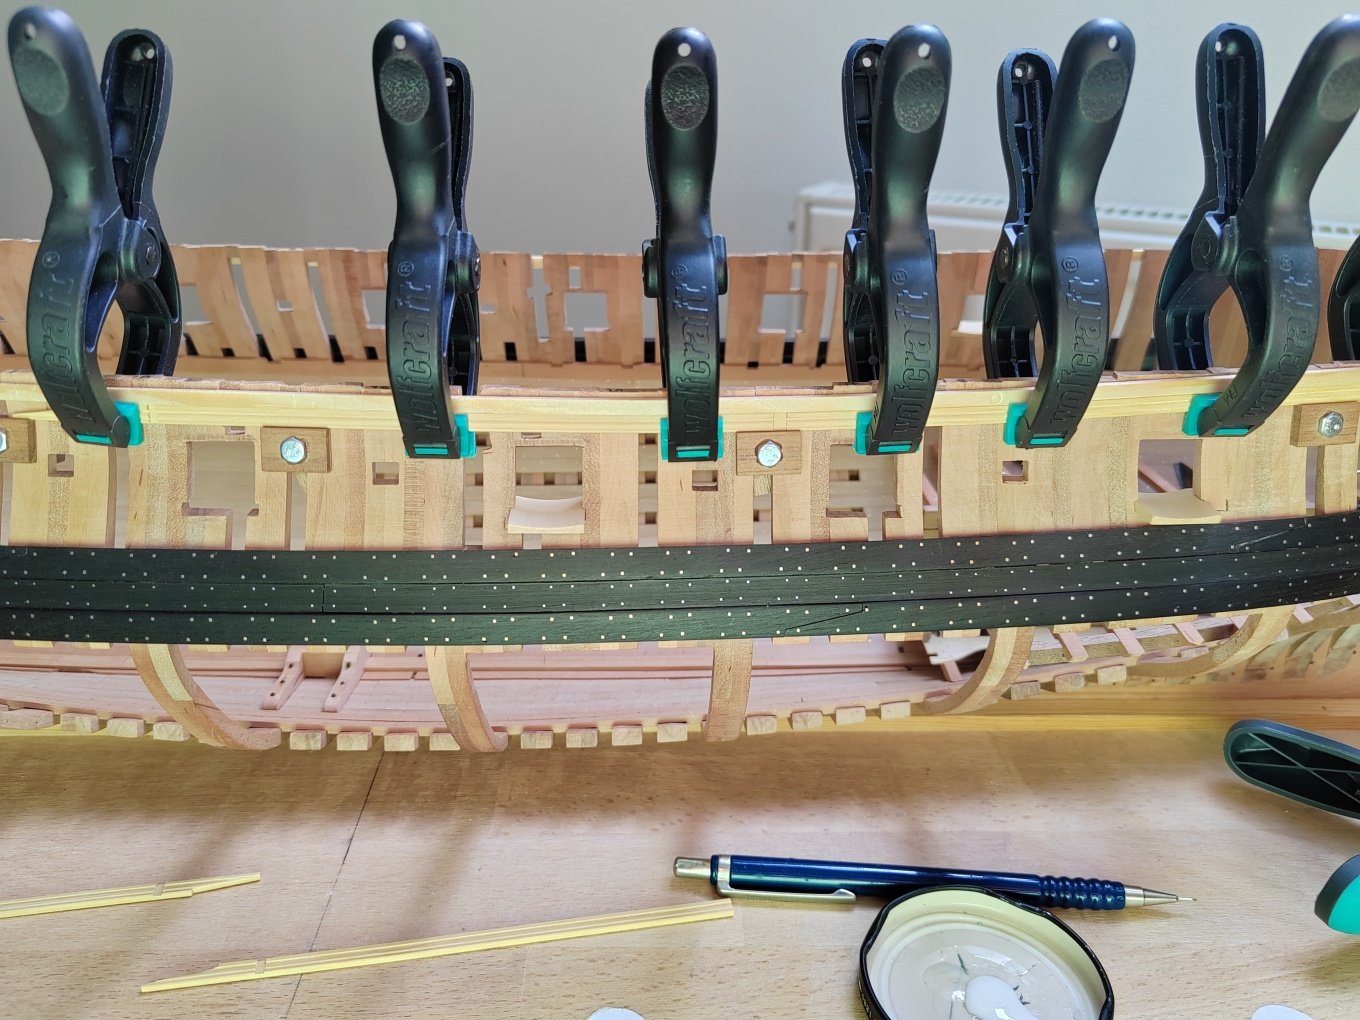
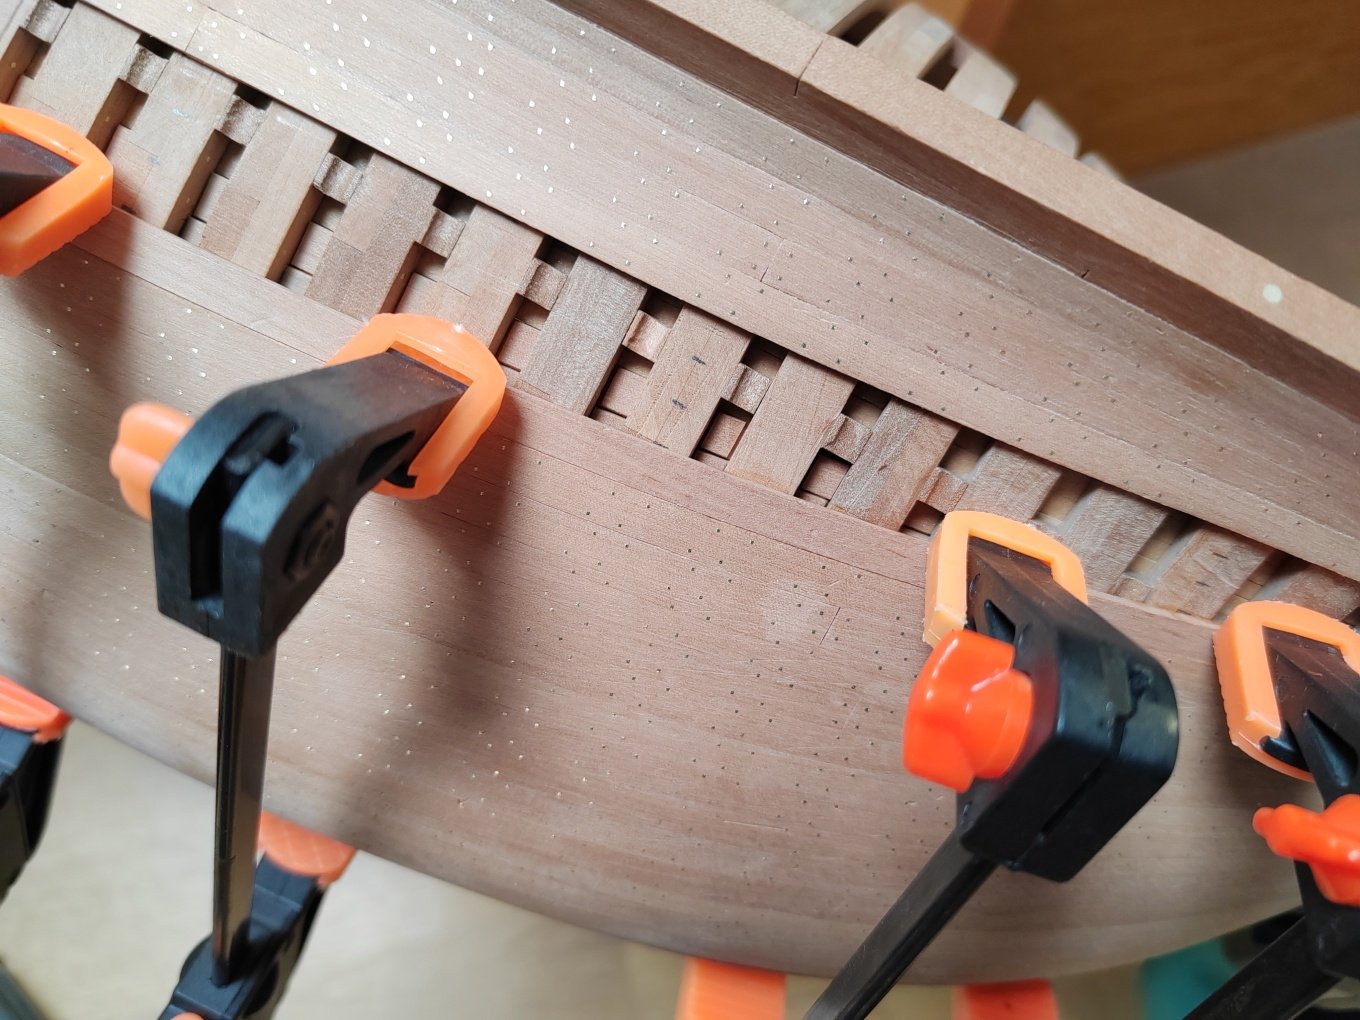
I started planking between the wales and molding rails.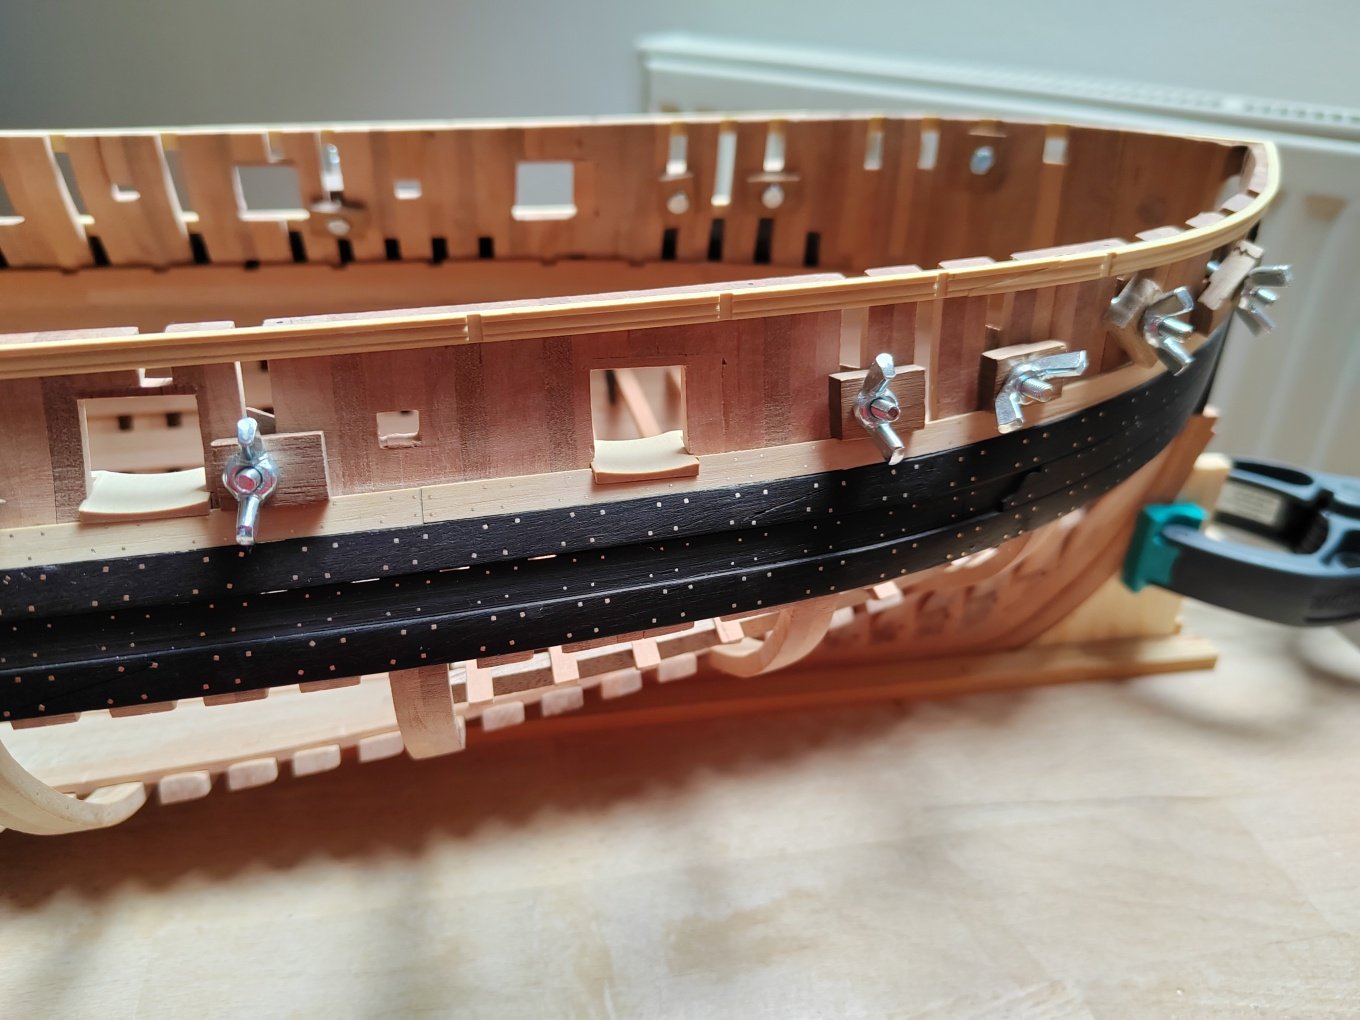
-
L'Amarante by marsalv - 1:36 - POF
marsalv replied to marsalv's topic in - Build logs for subjects built 1501 - 1750
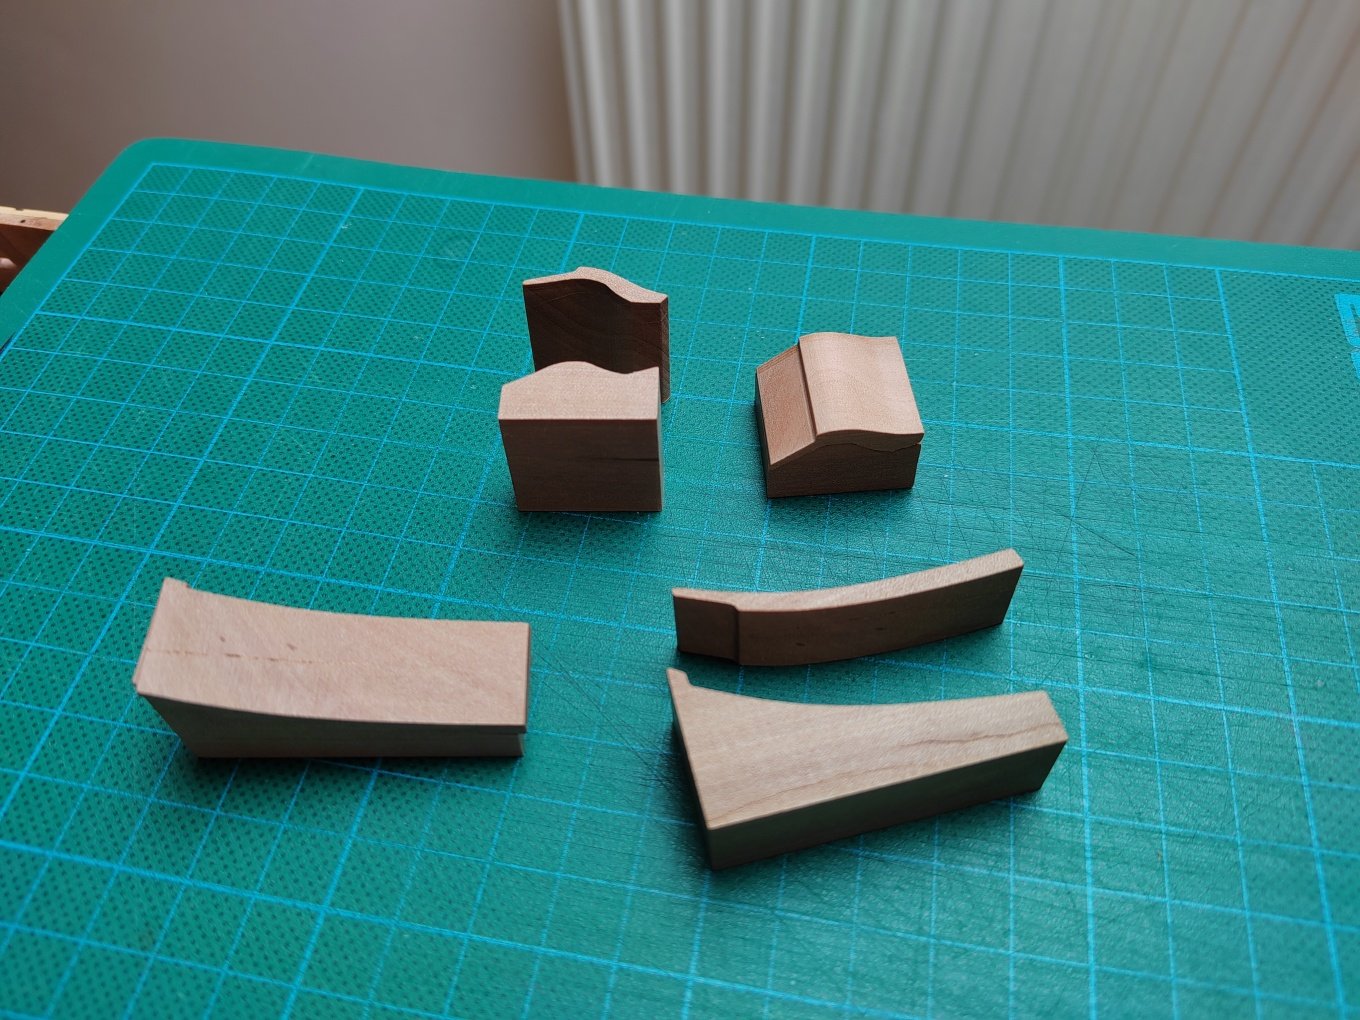
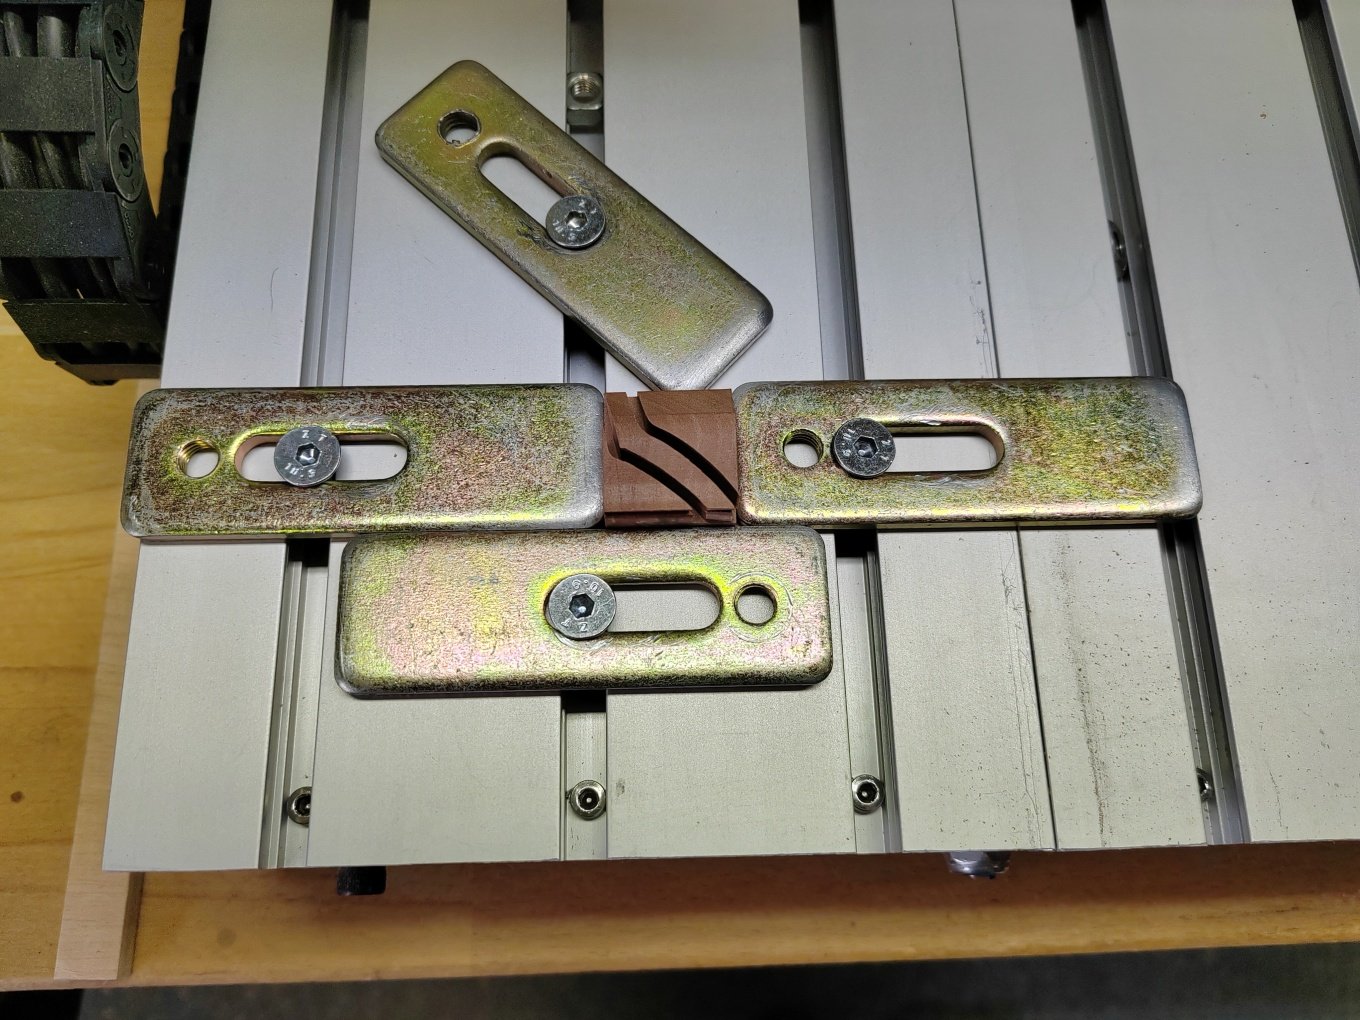
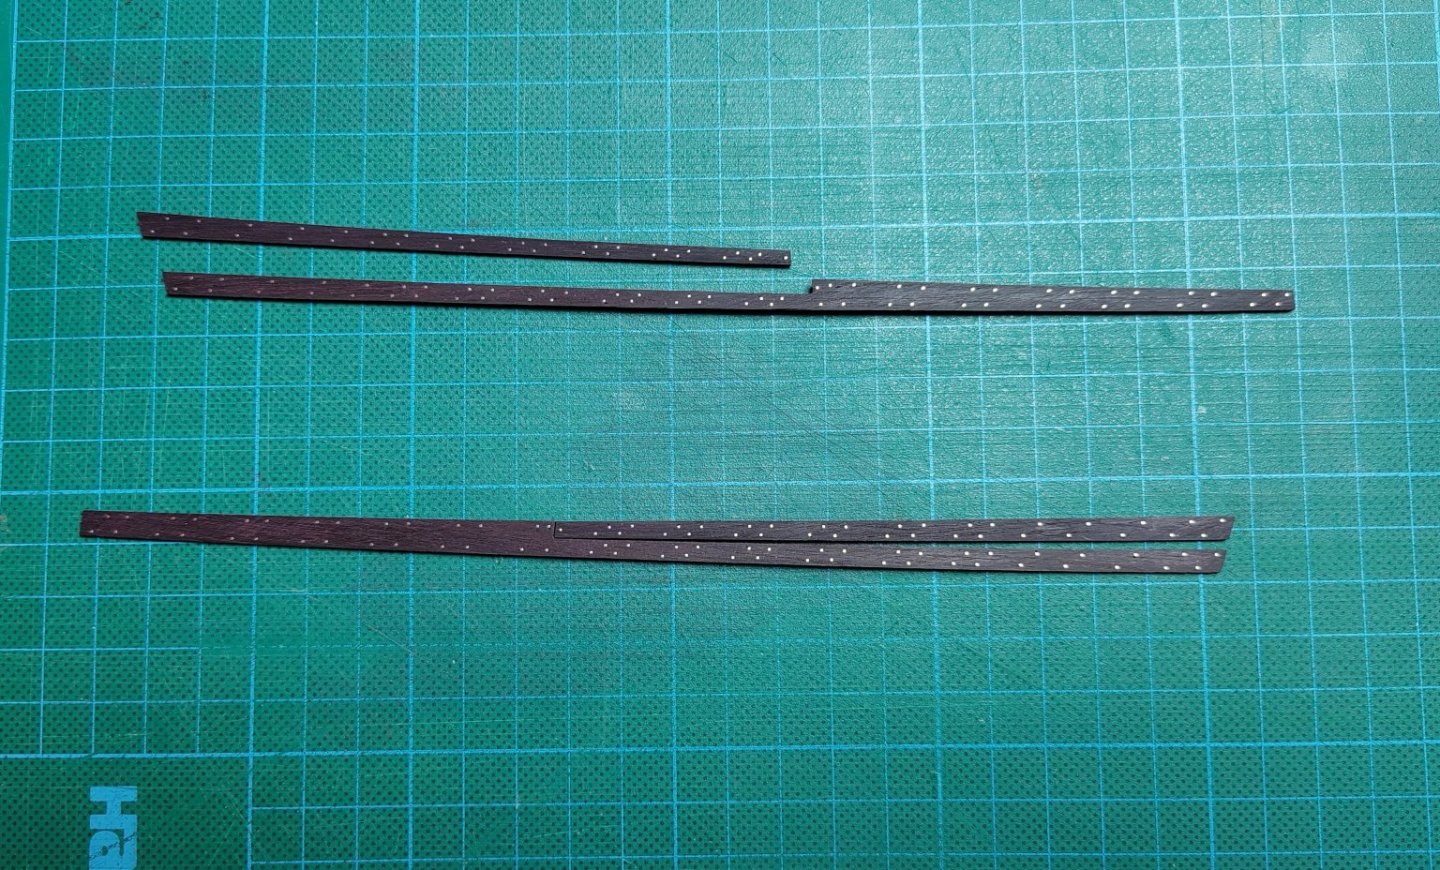
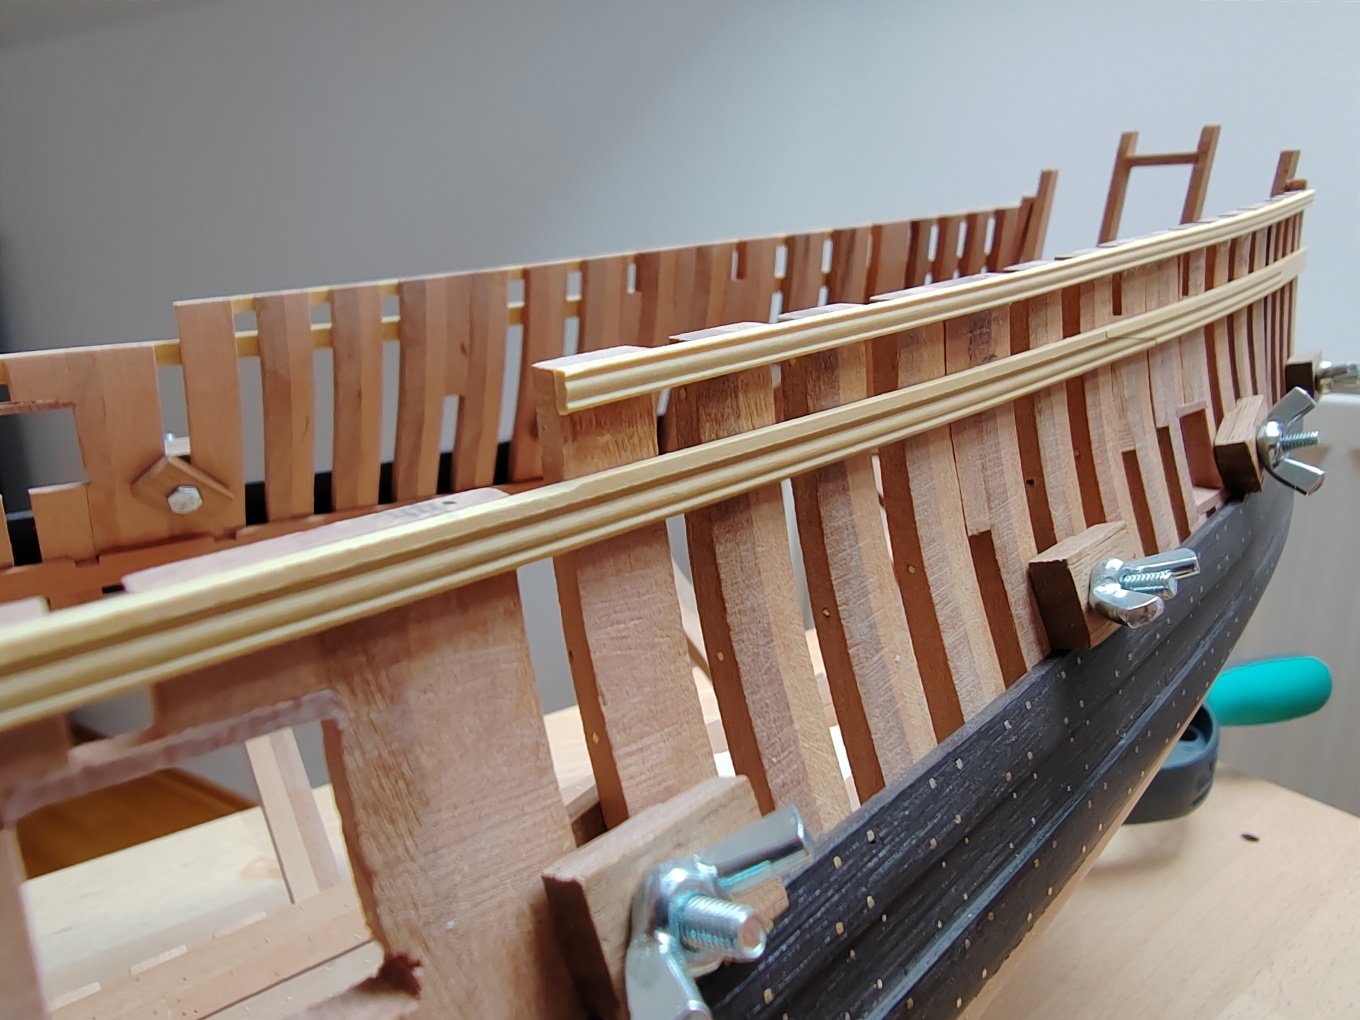
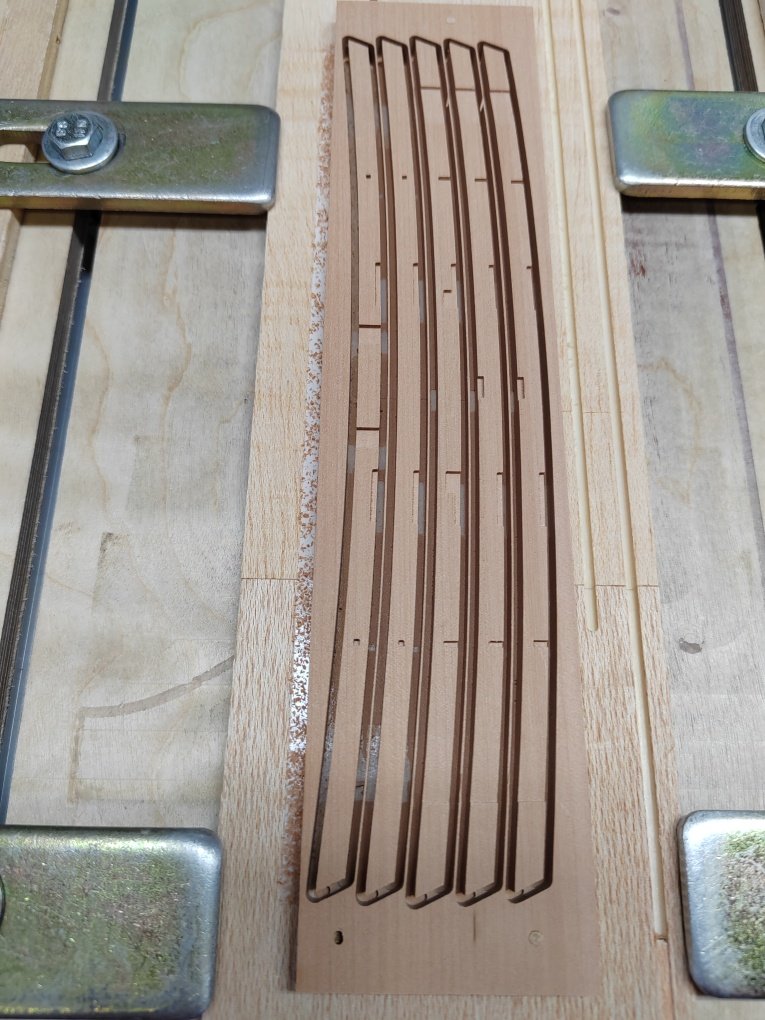
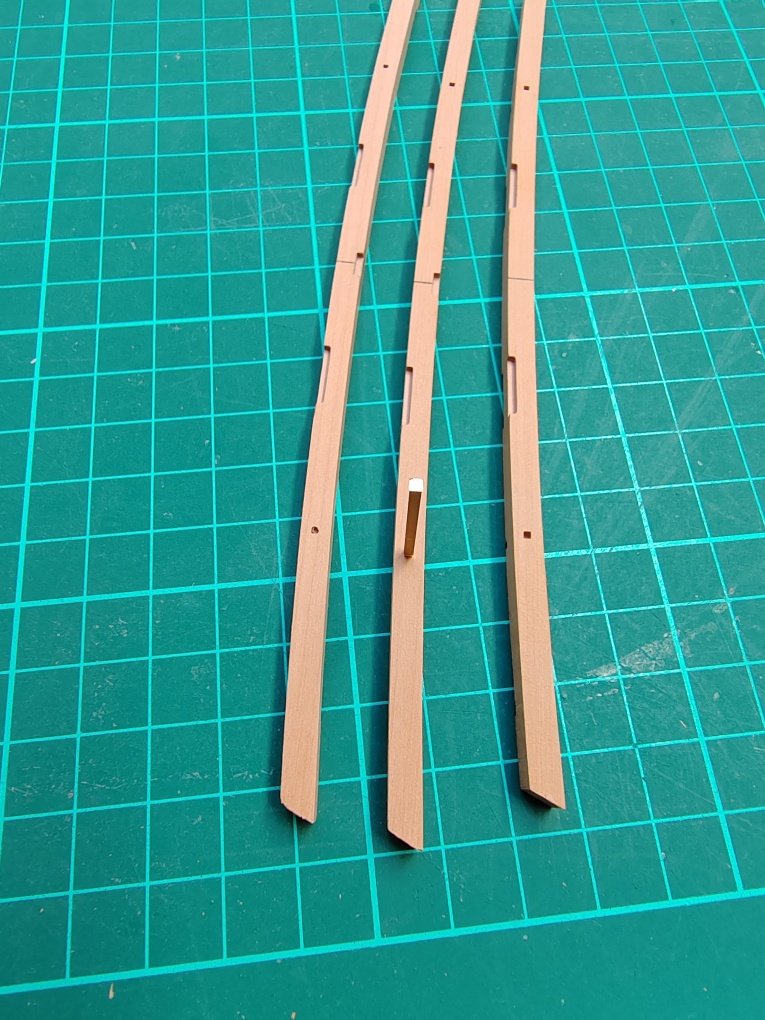
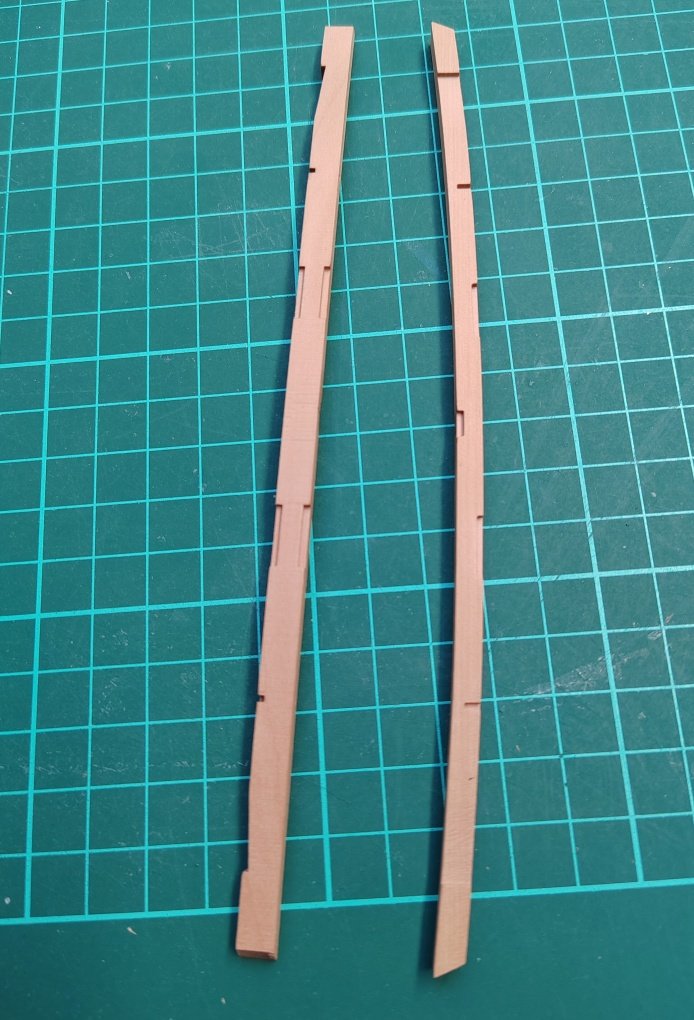
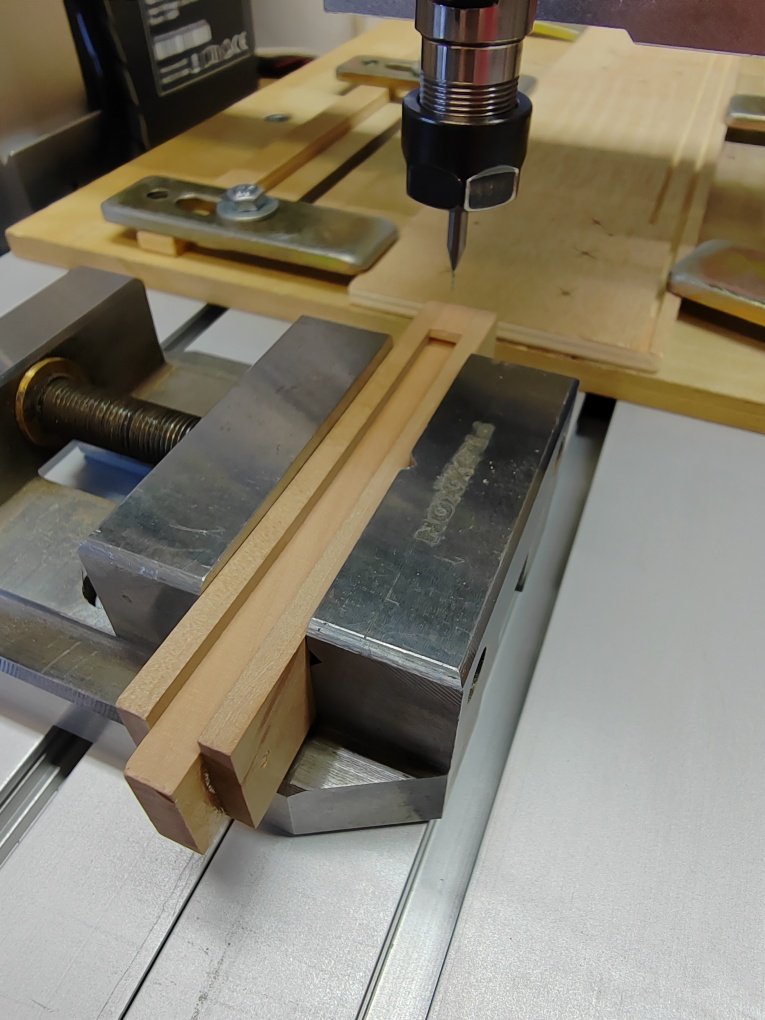
I continue with molding rails.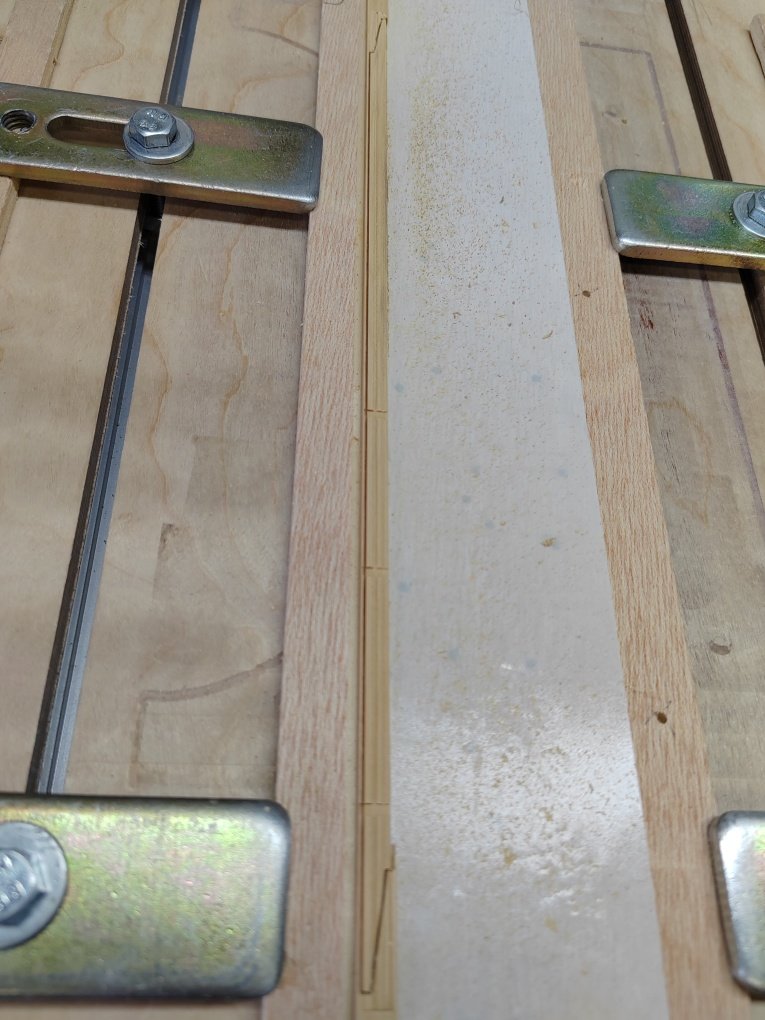
-
You are really carving master. Fantastic work.
-
L'Amarante by marsalv - 1:36 - POF
marsalv replied to marsalv's topic in - Build logs for subjects built 1501 - 1750
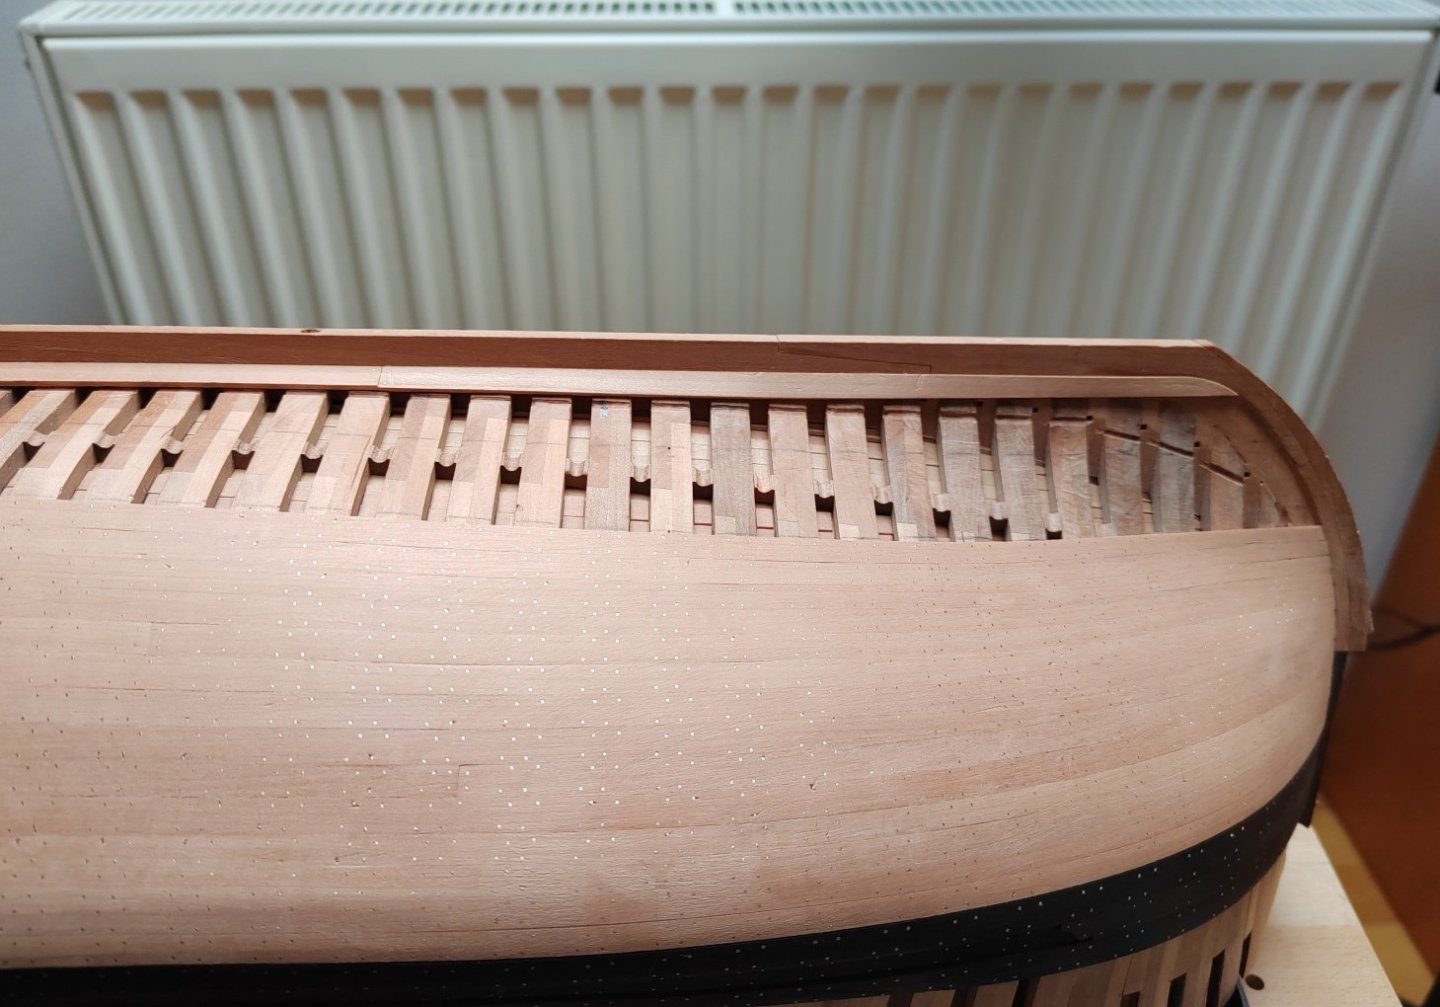
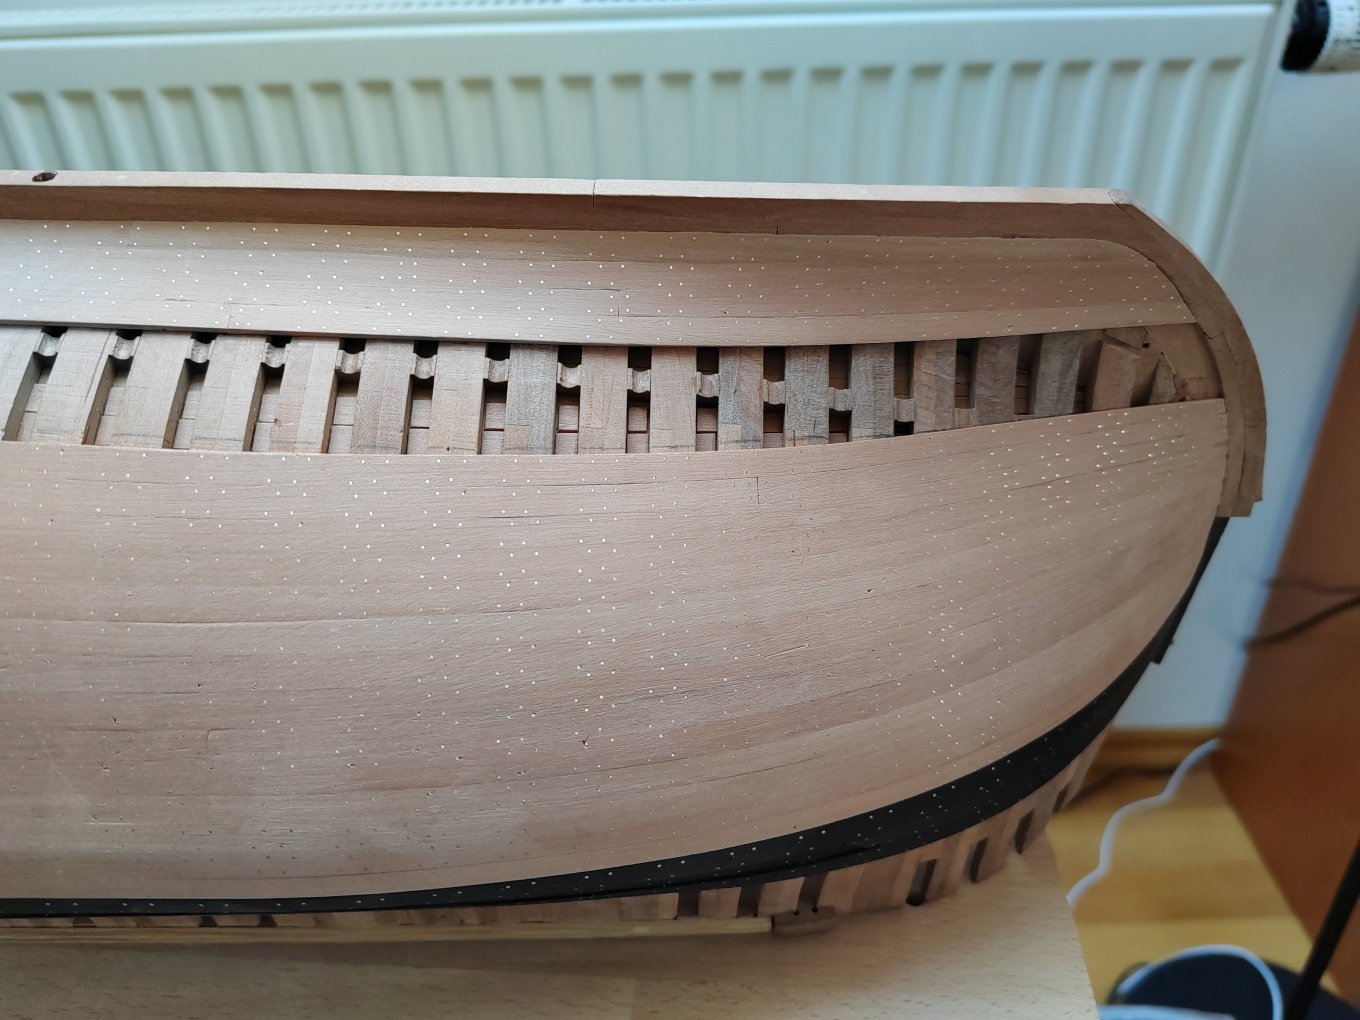
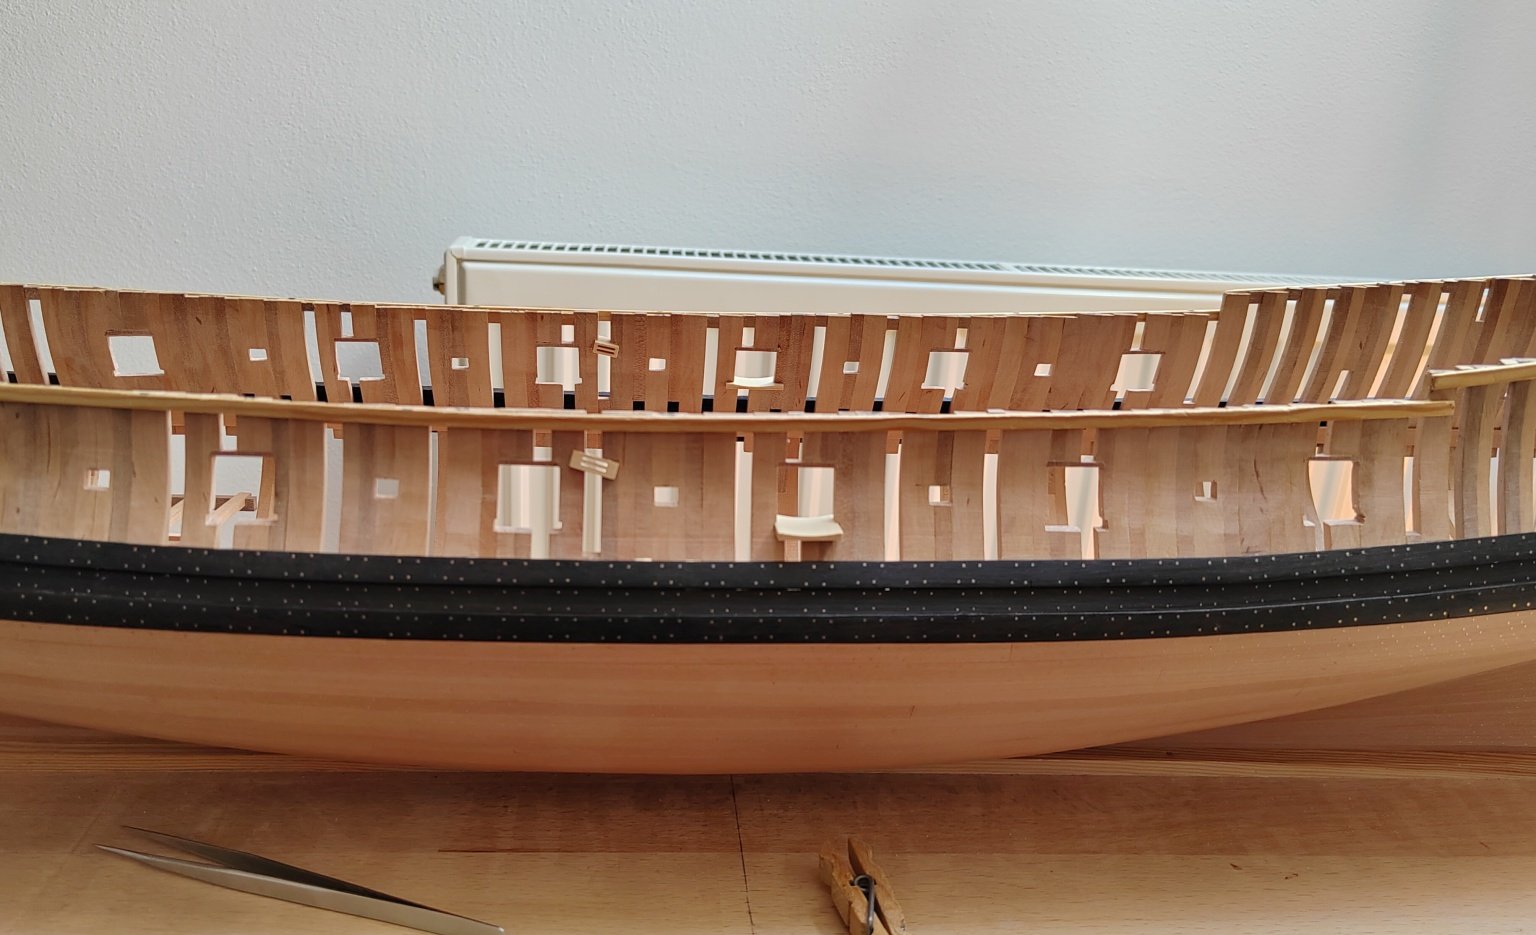
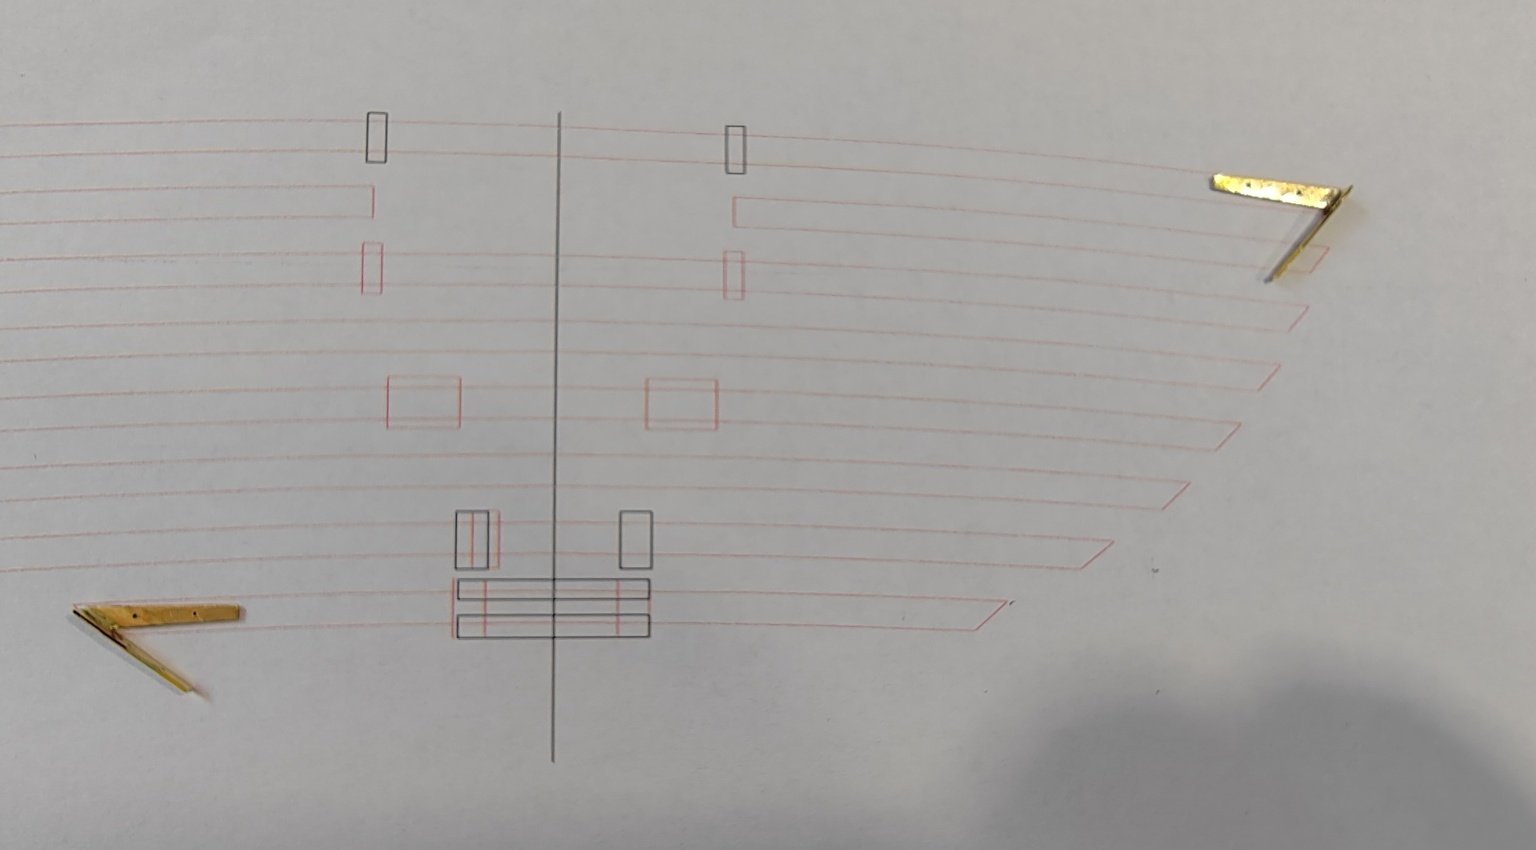
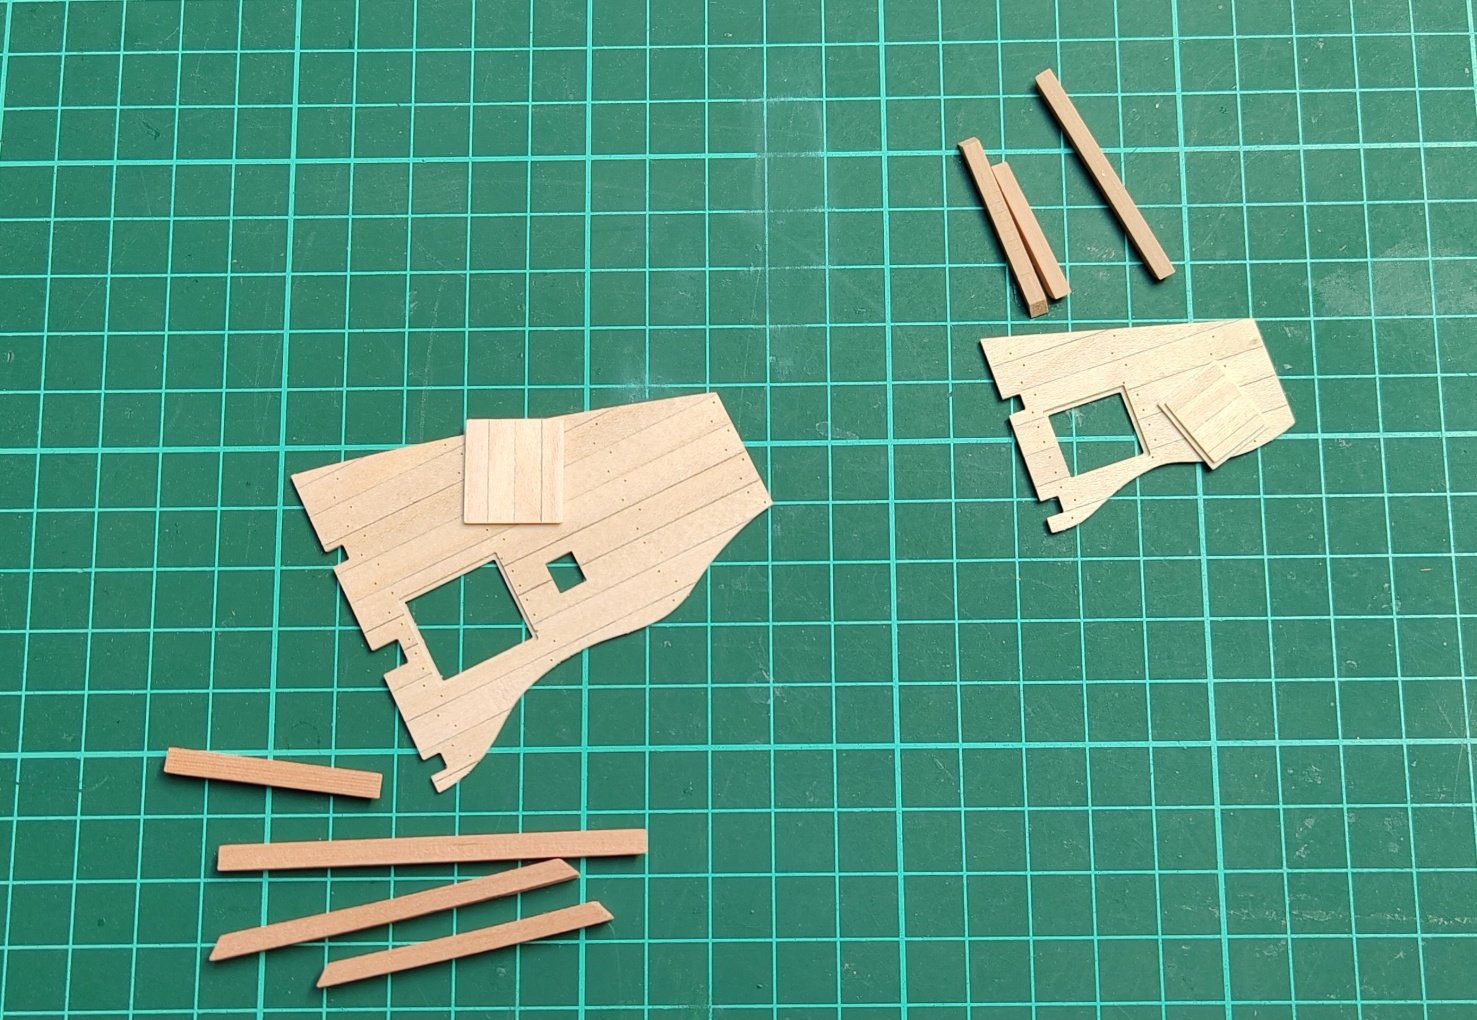
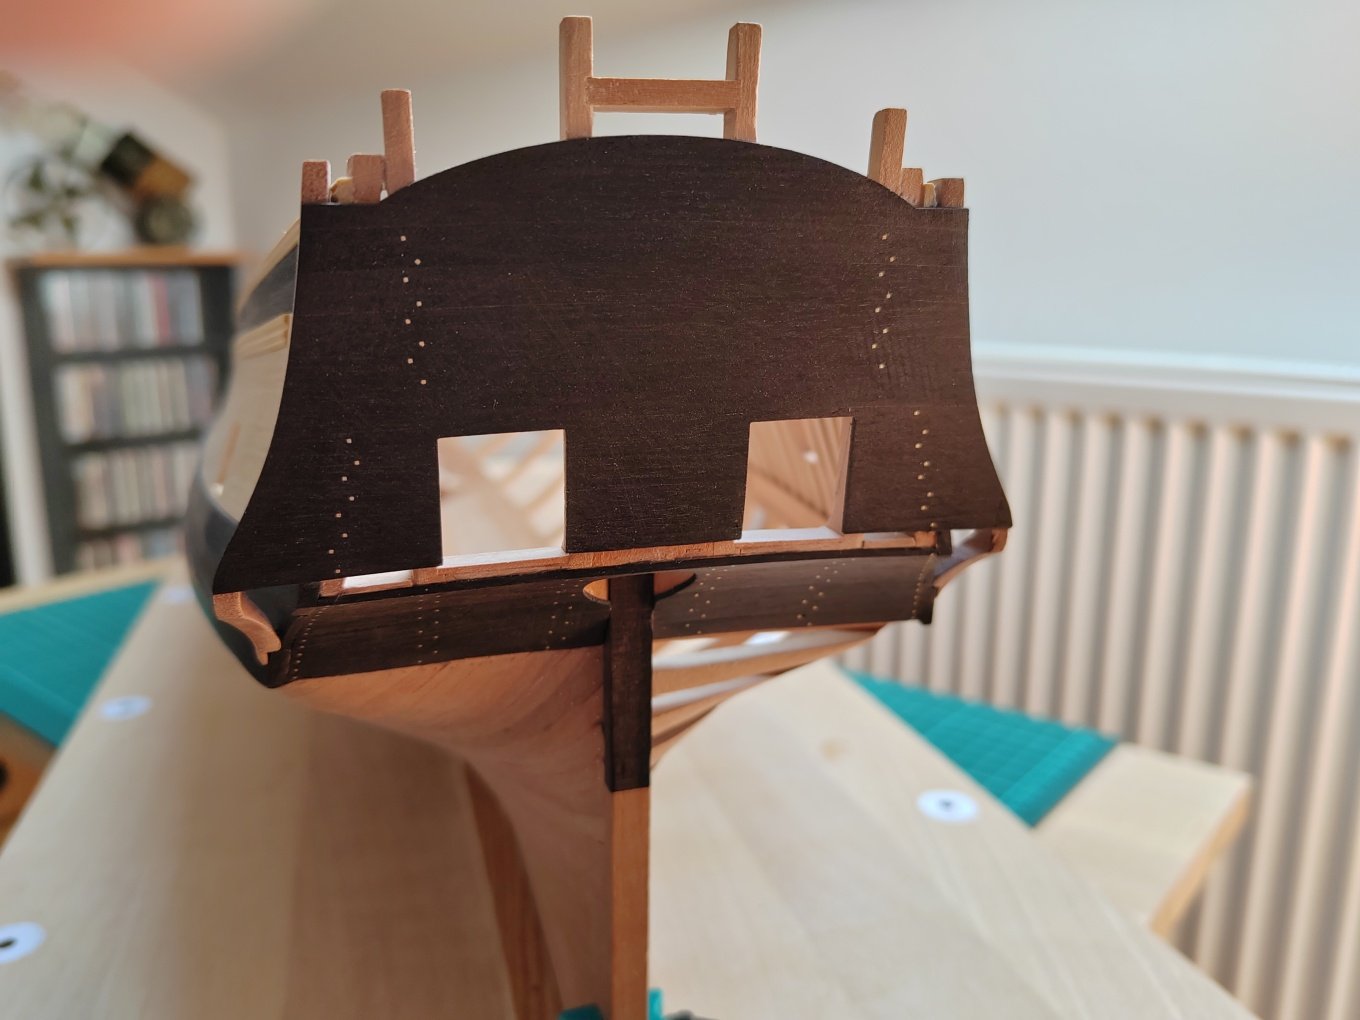
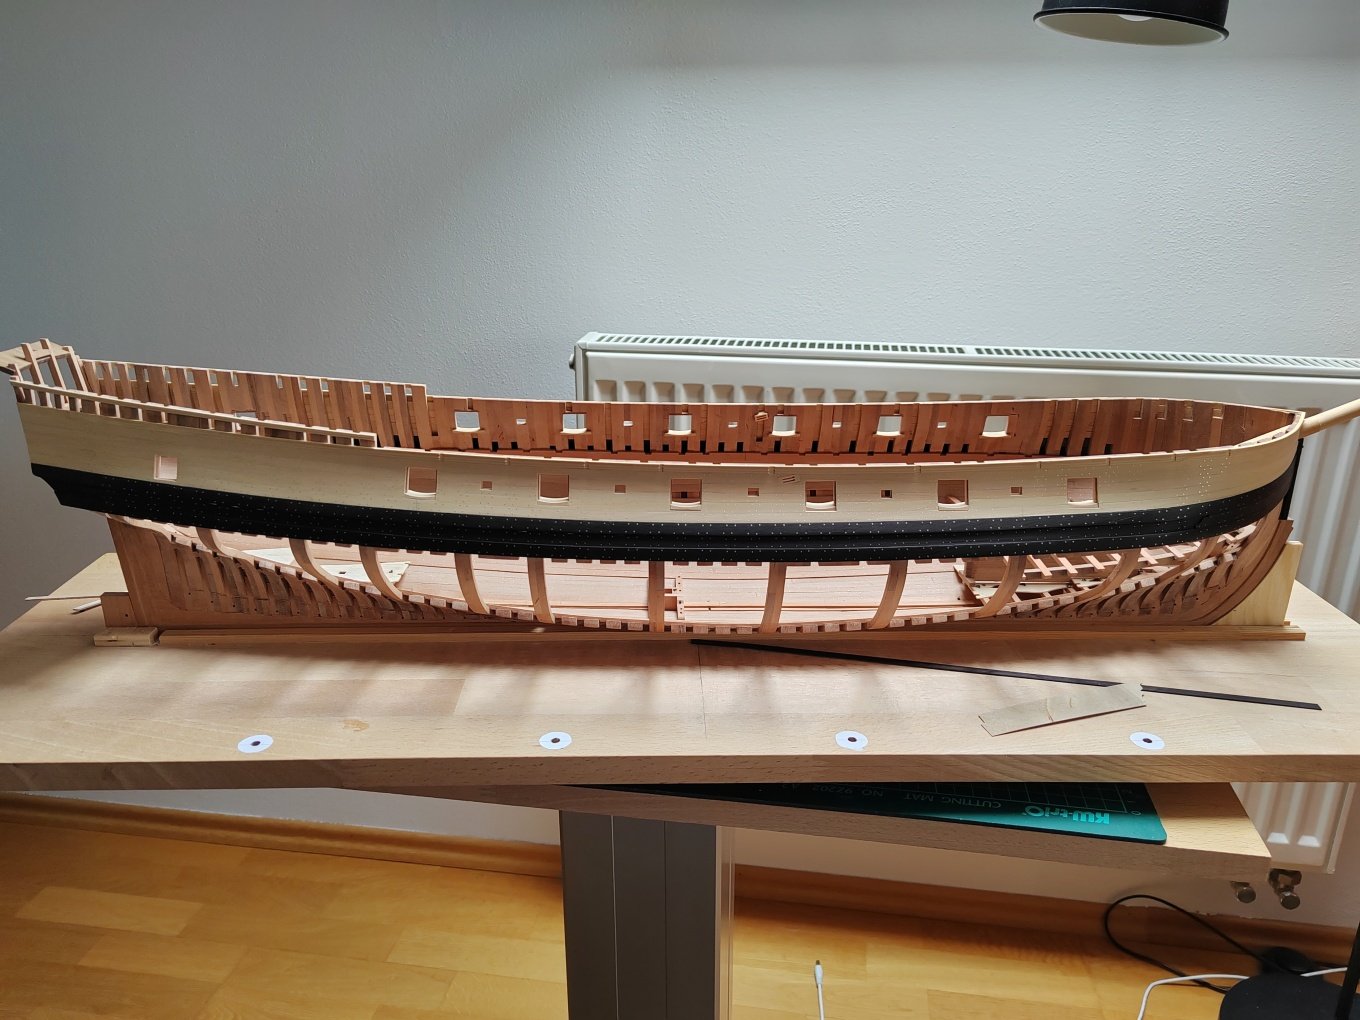
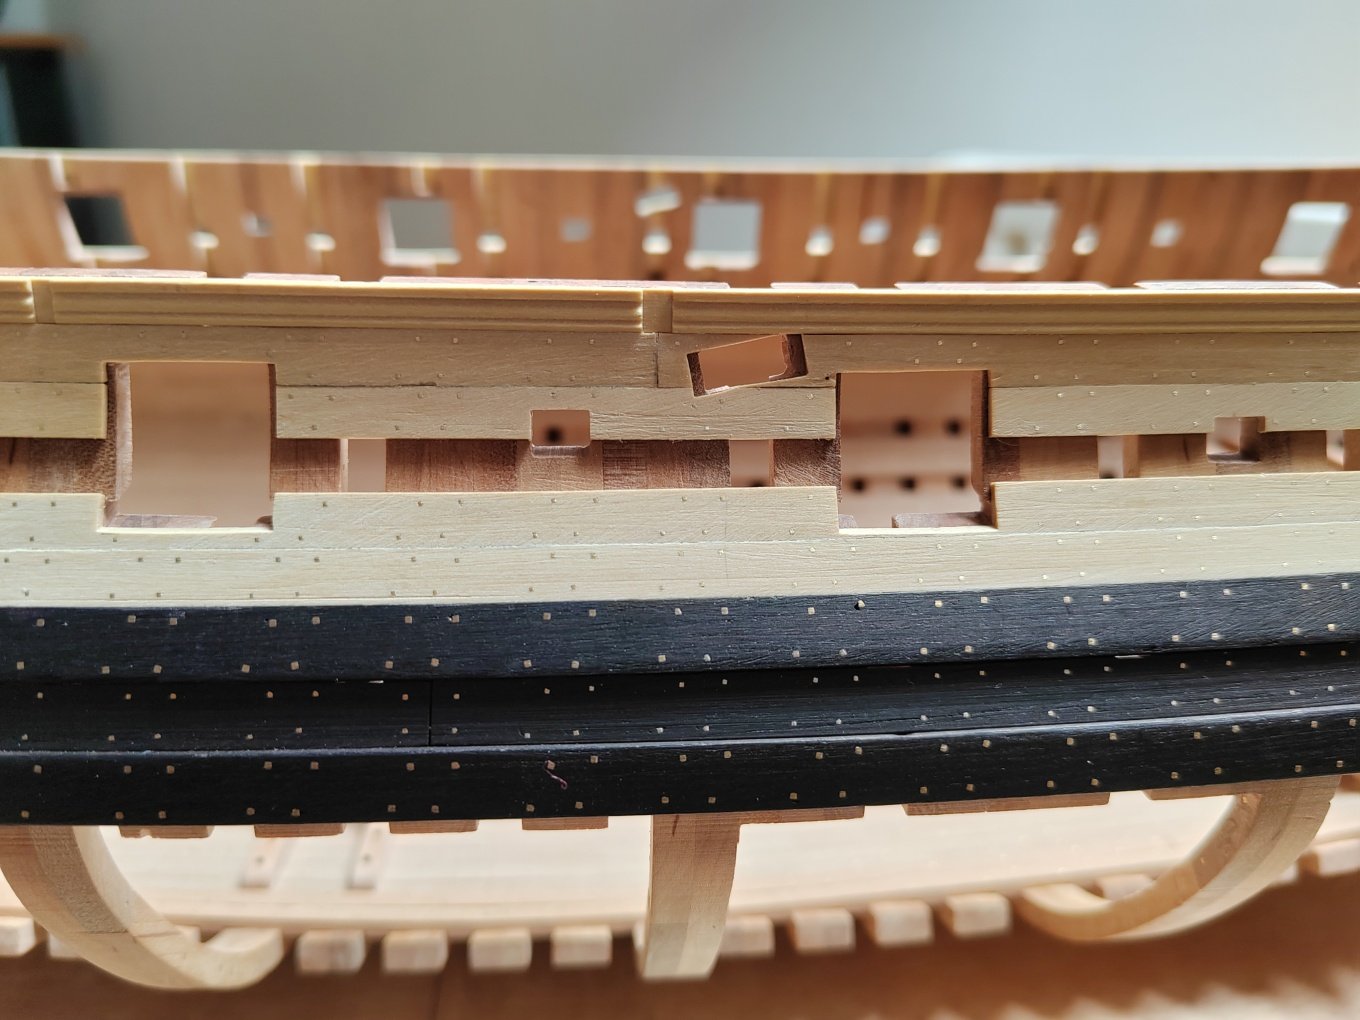
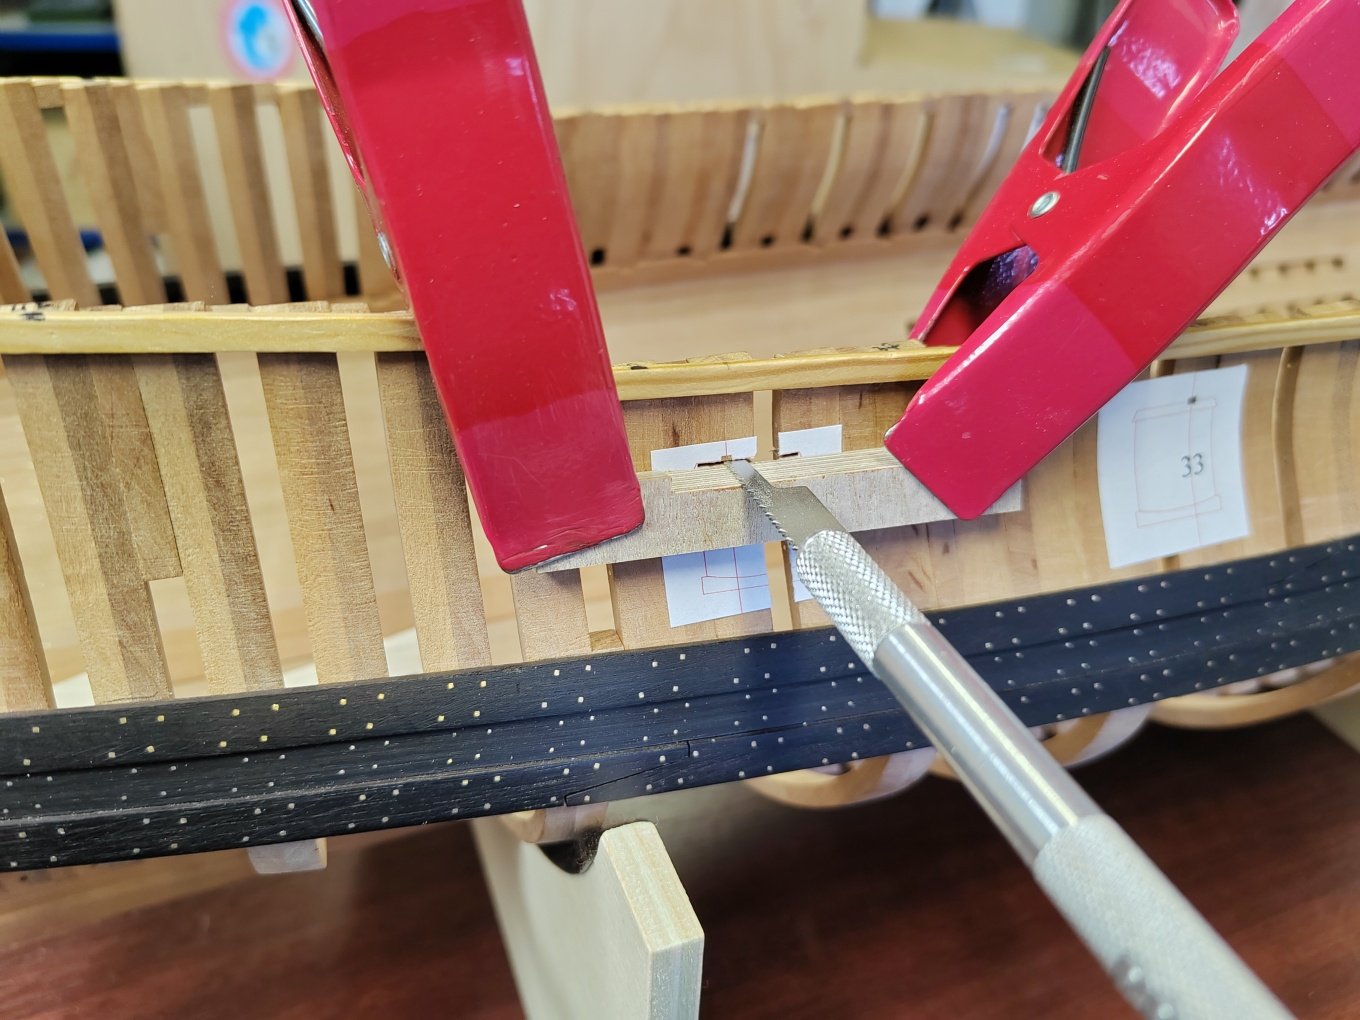
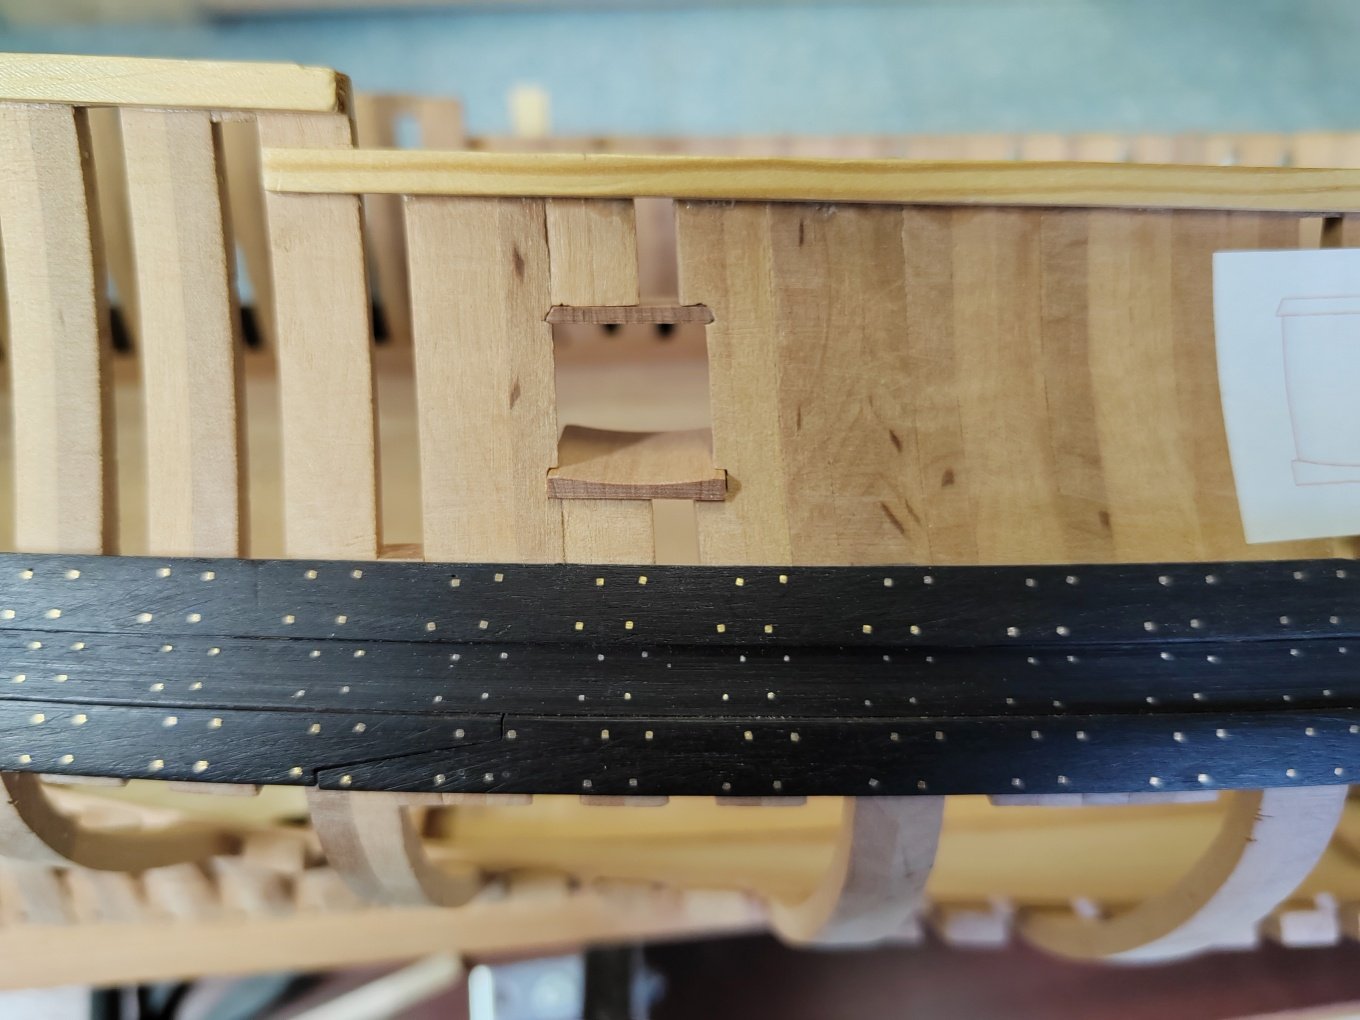
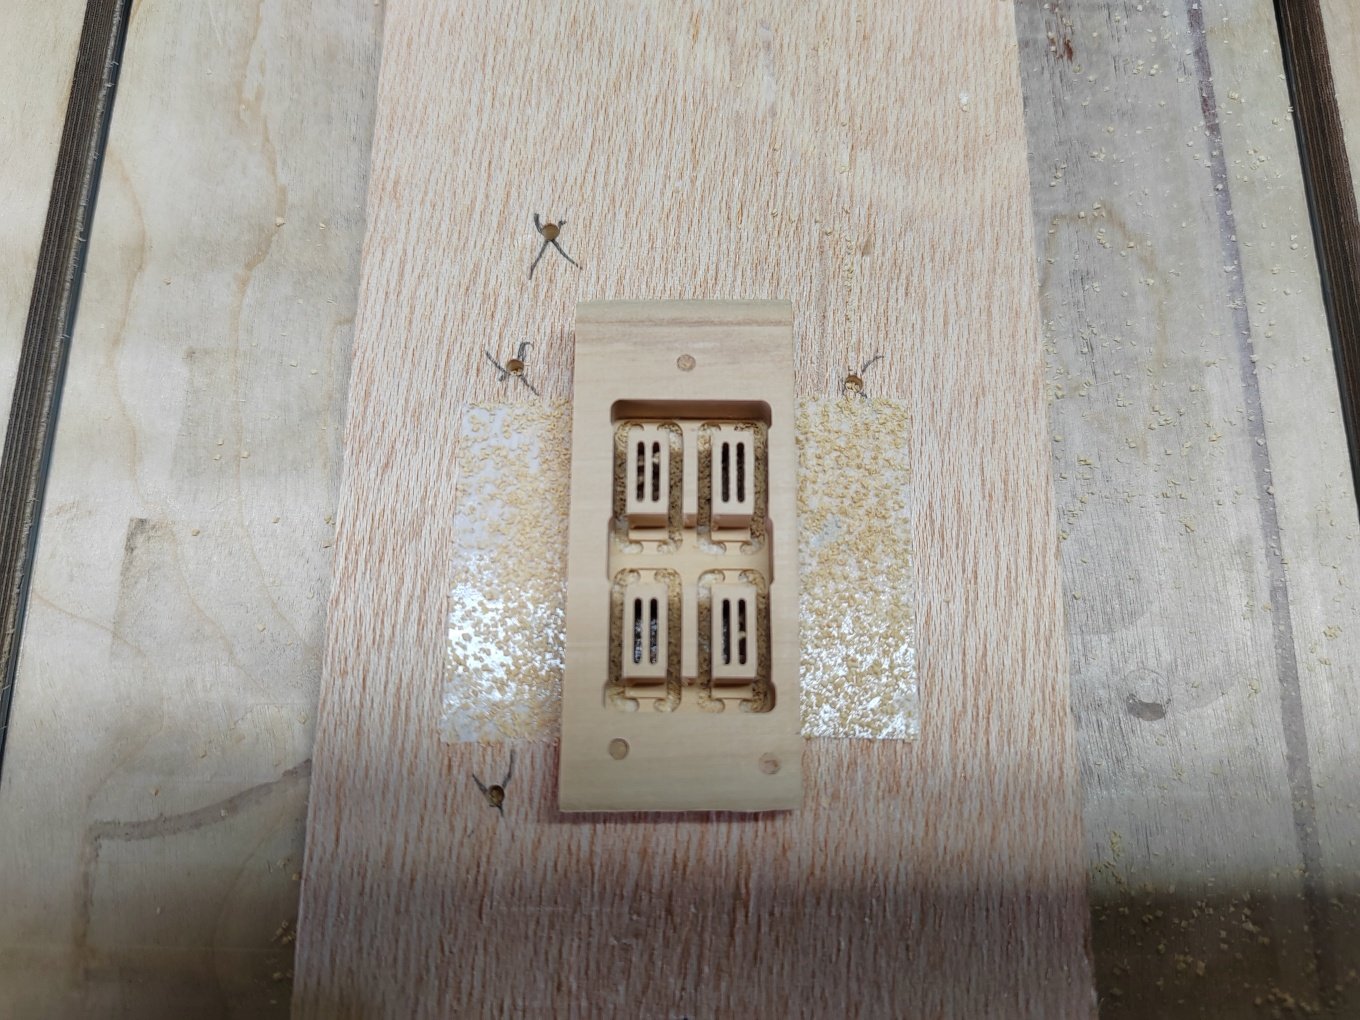
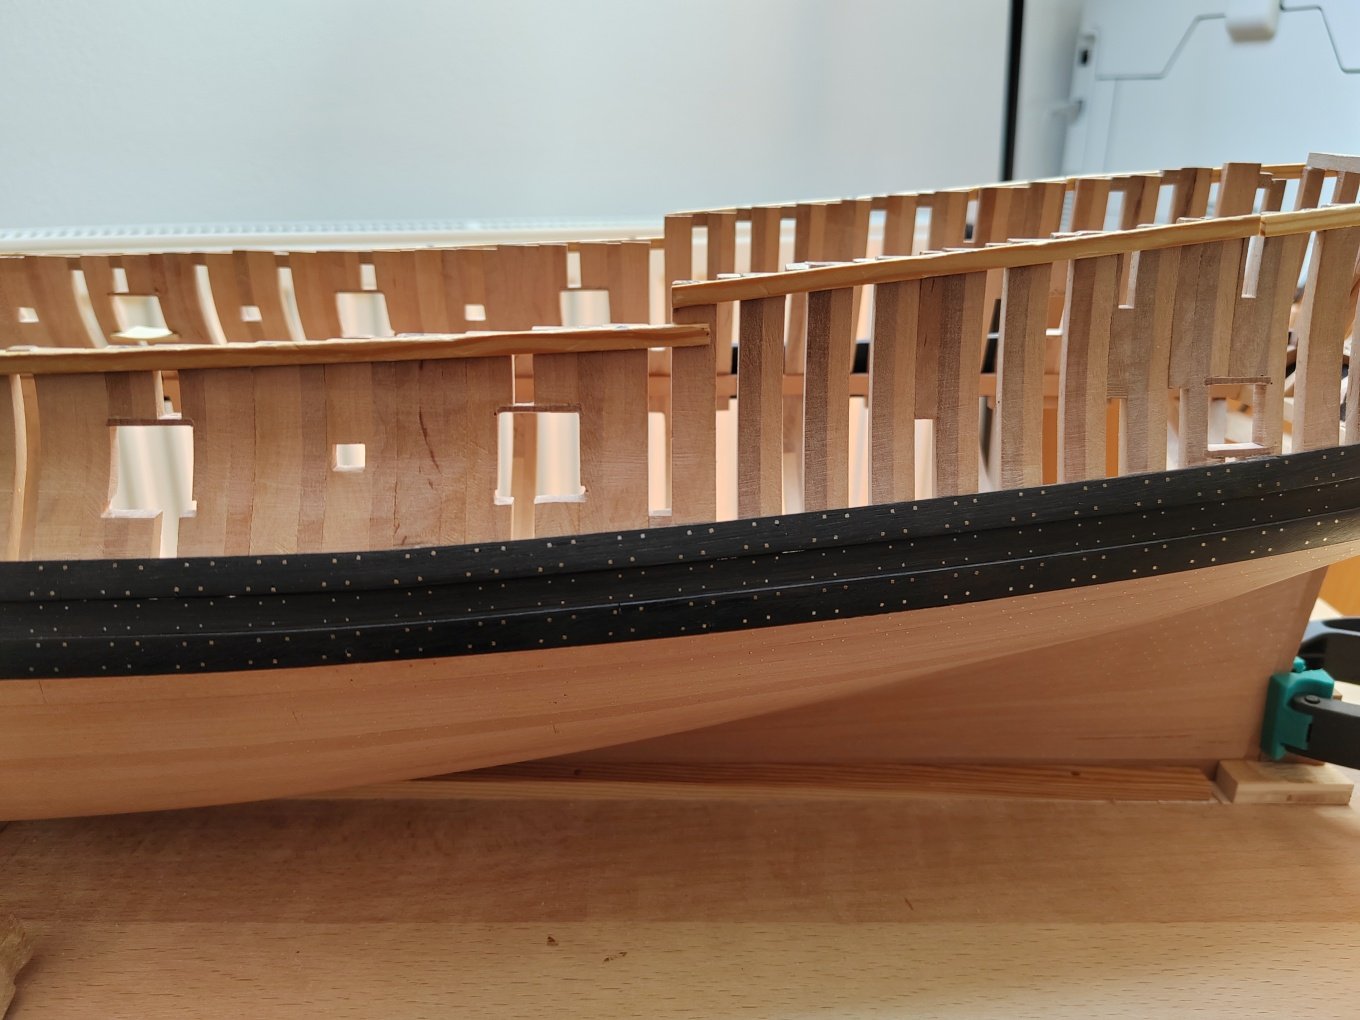
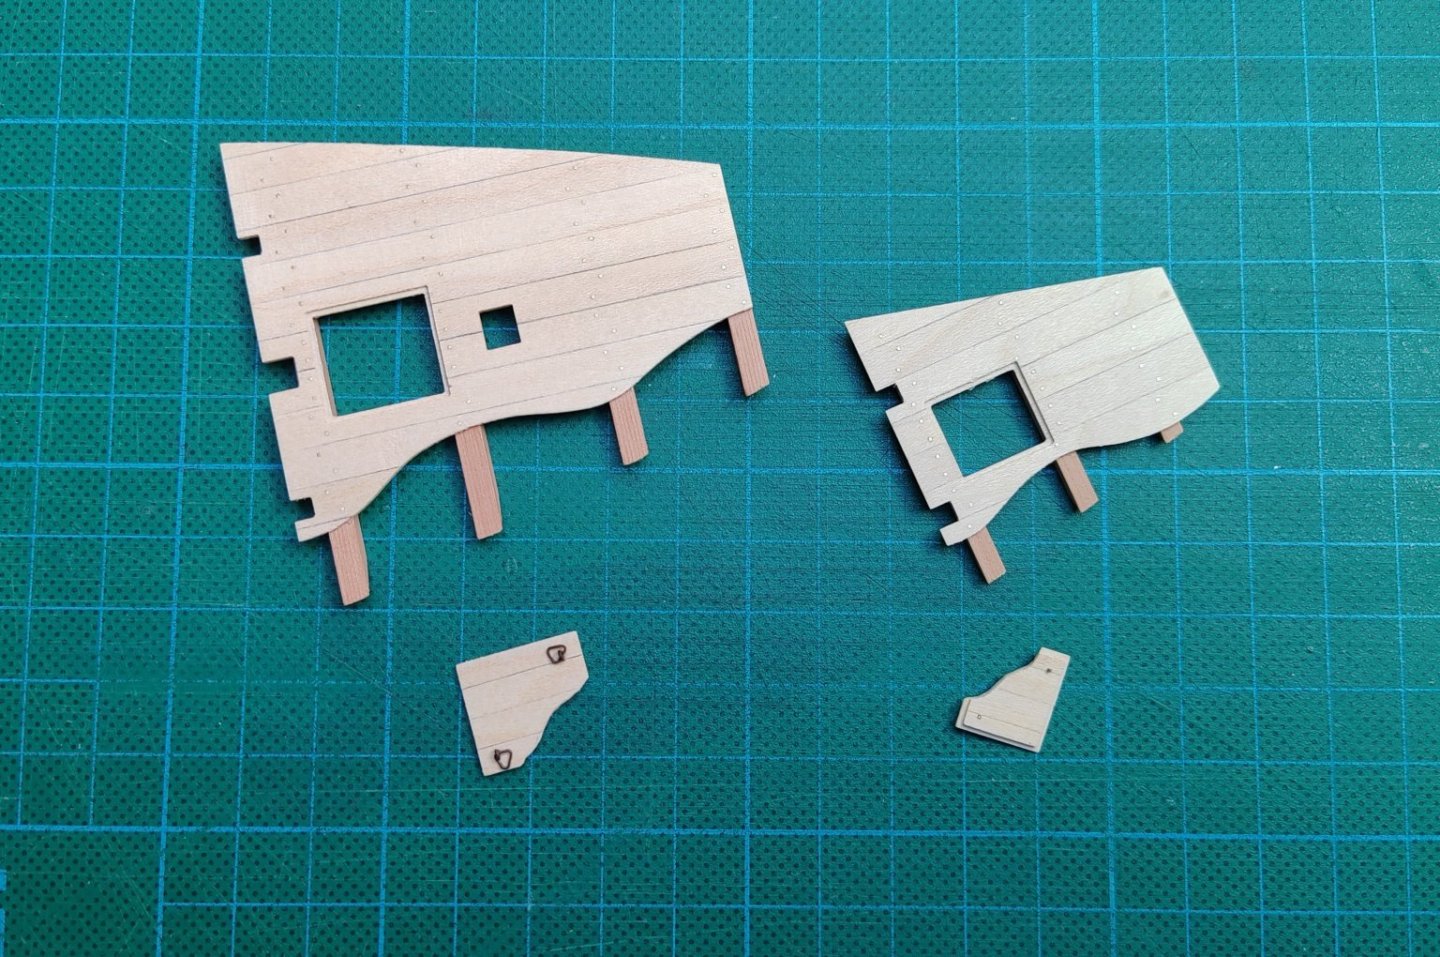
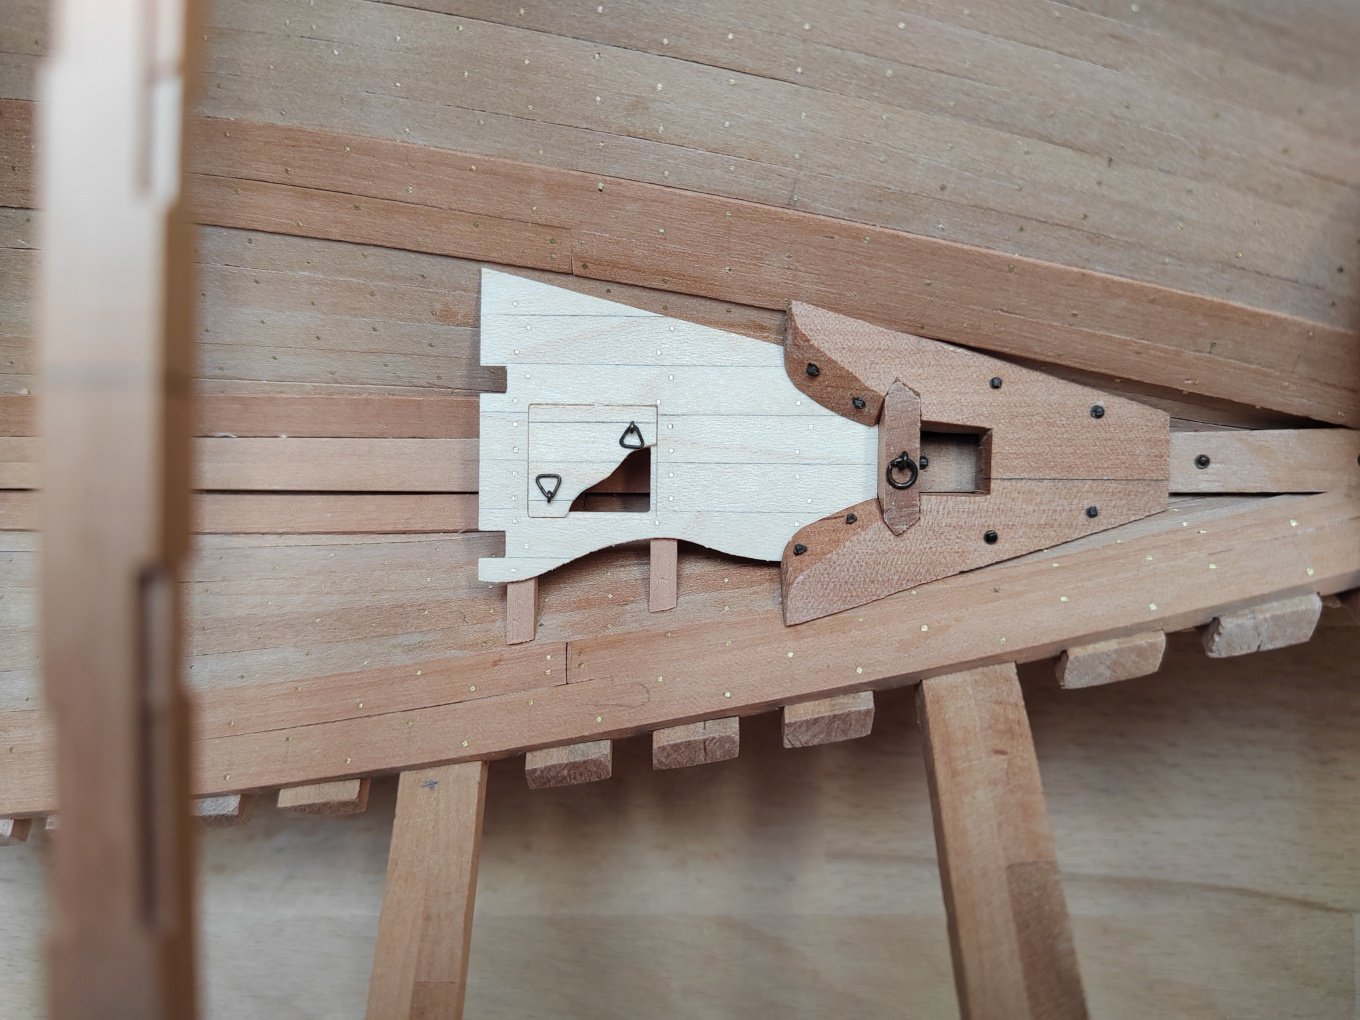
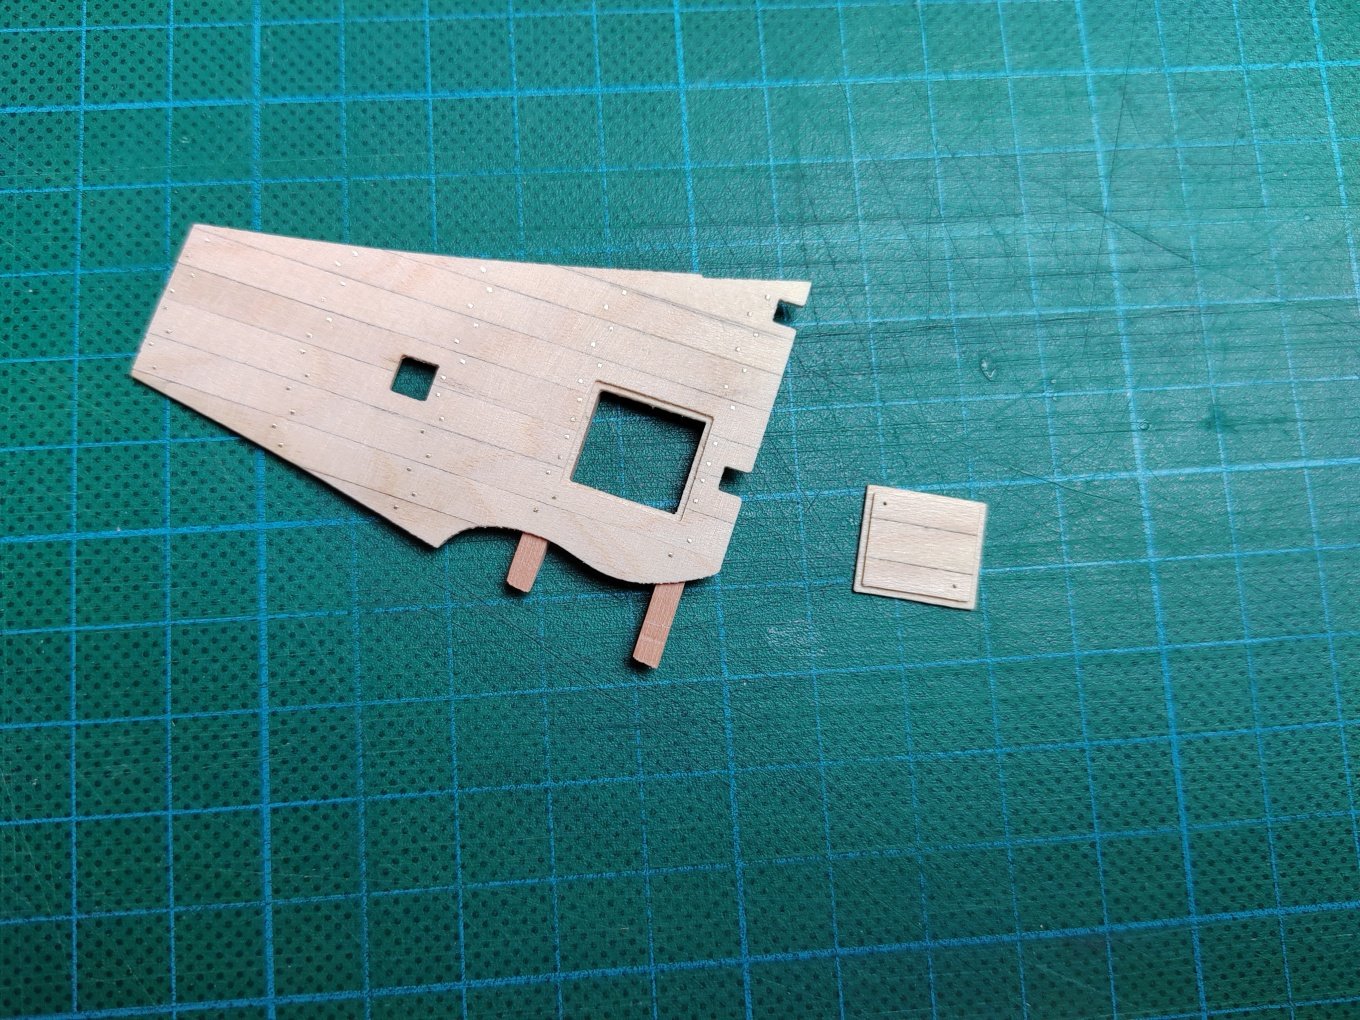
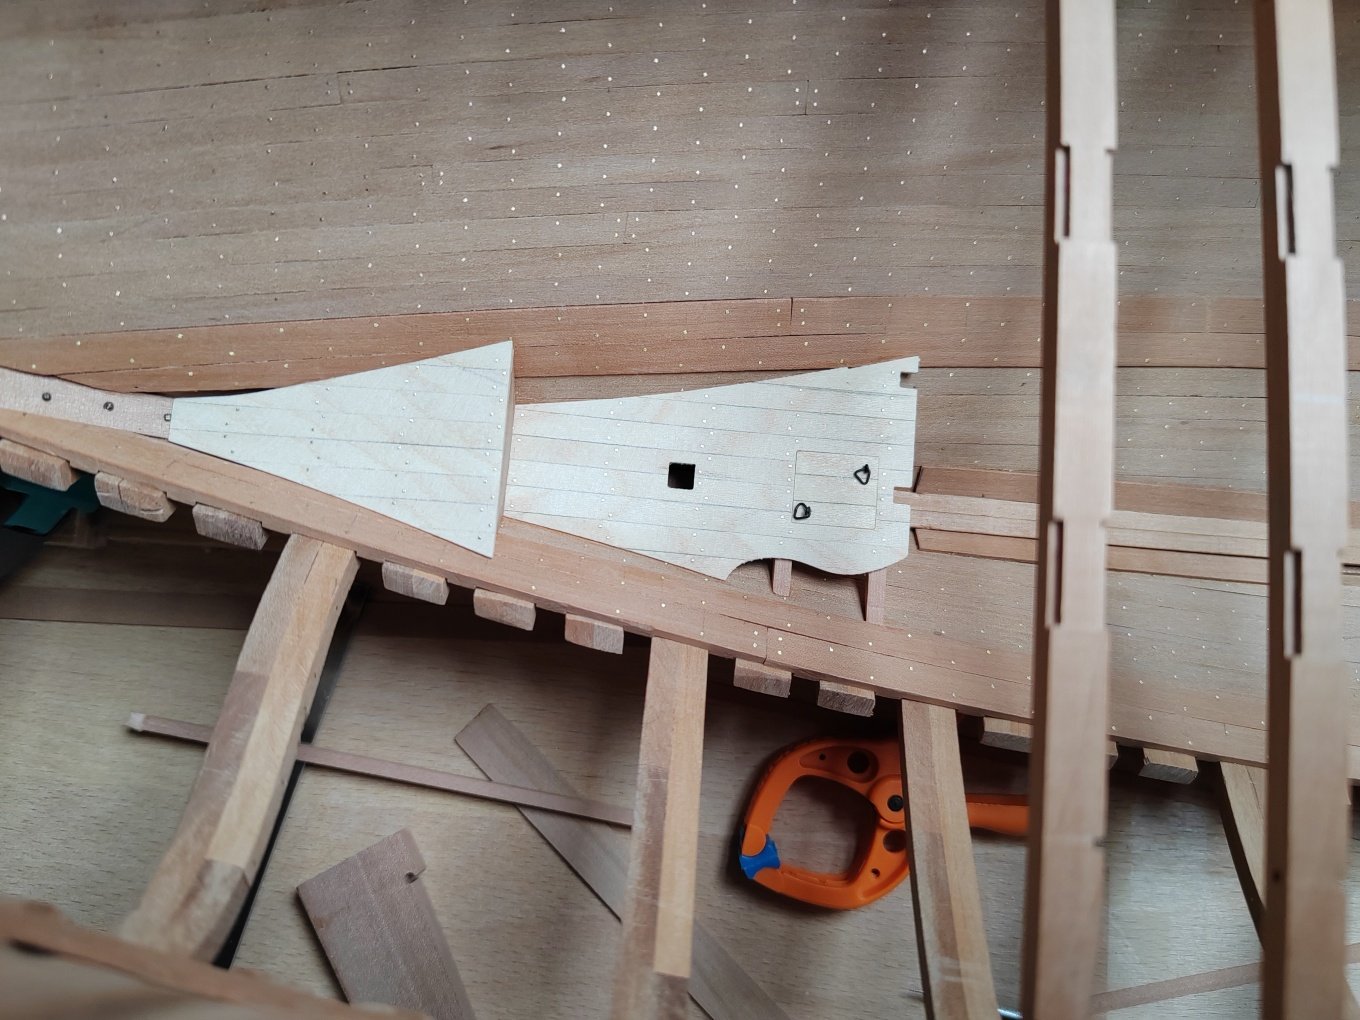
I decided to finish the outer planking above the wales first before installing the interior equipment. The first thing I had to do was cut out the holes for the gunport and oars.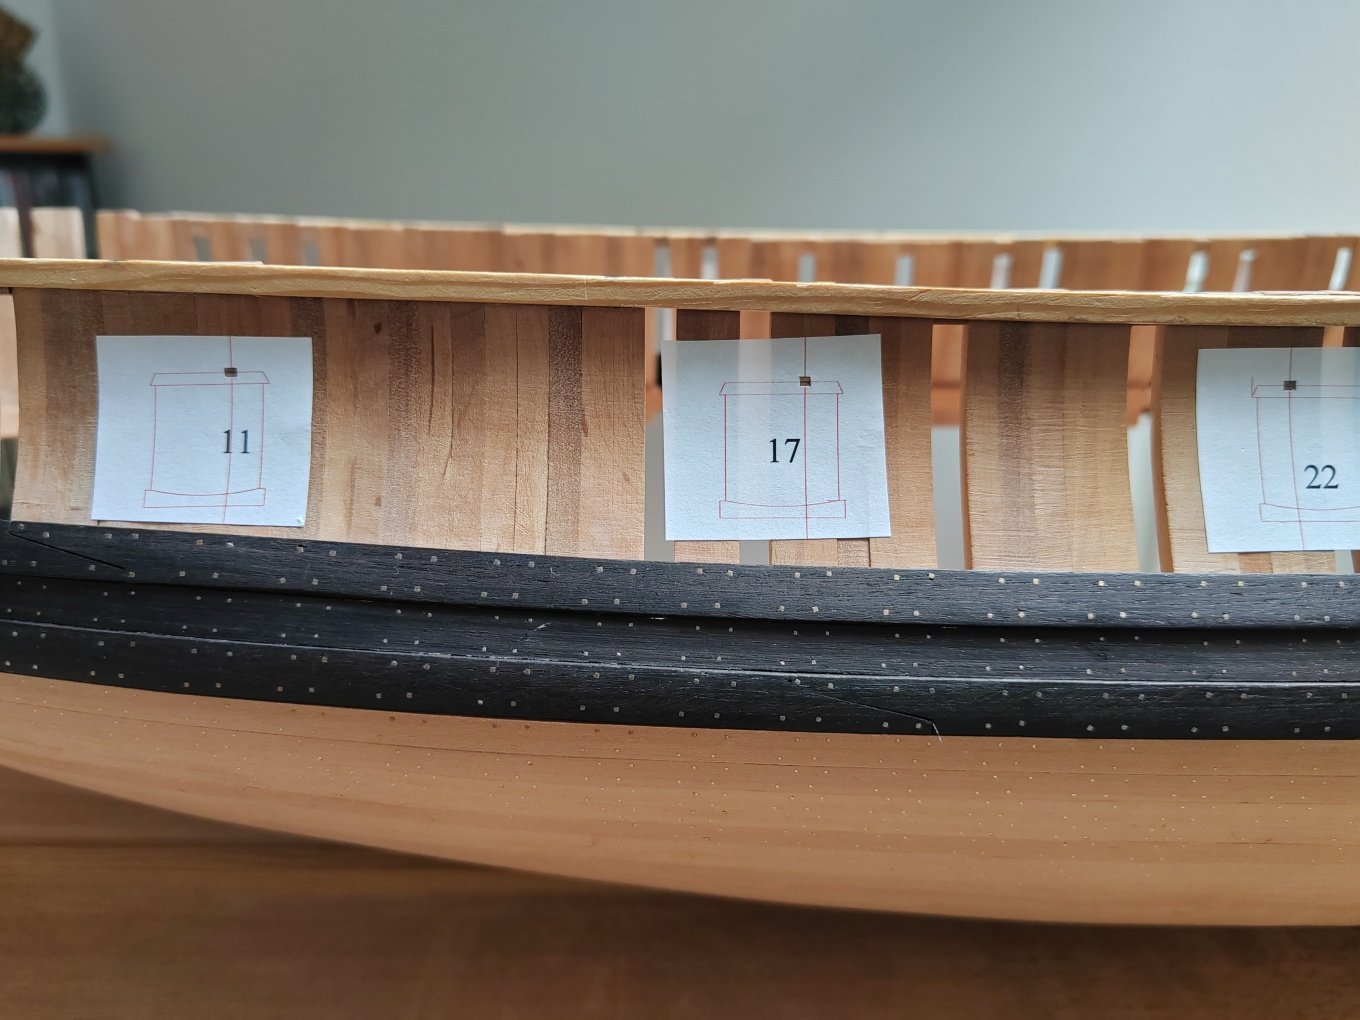
-
L'Amarante by marsalv - 1:36 - POF
marsalv replied to marsalv's topic in - Build logs for subjects built 1501 - 1750
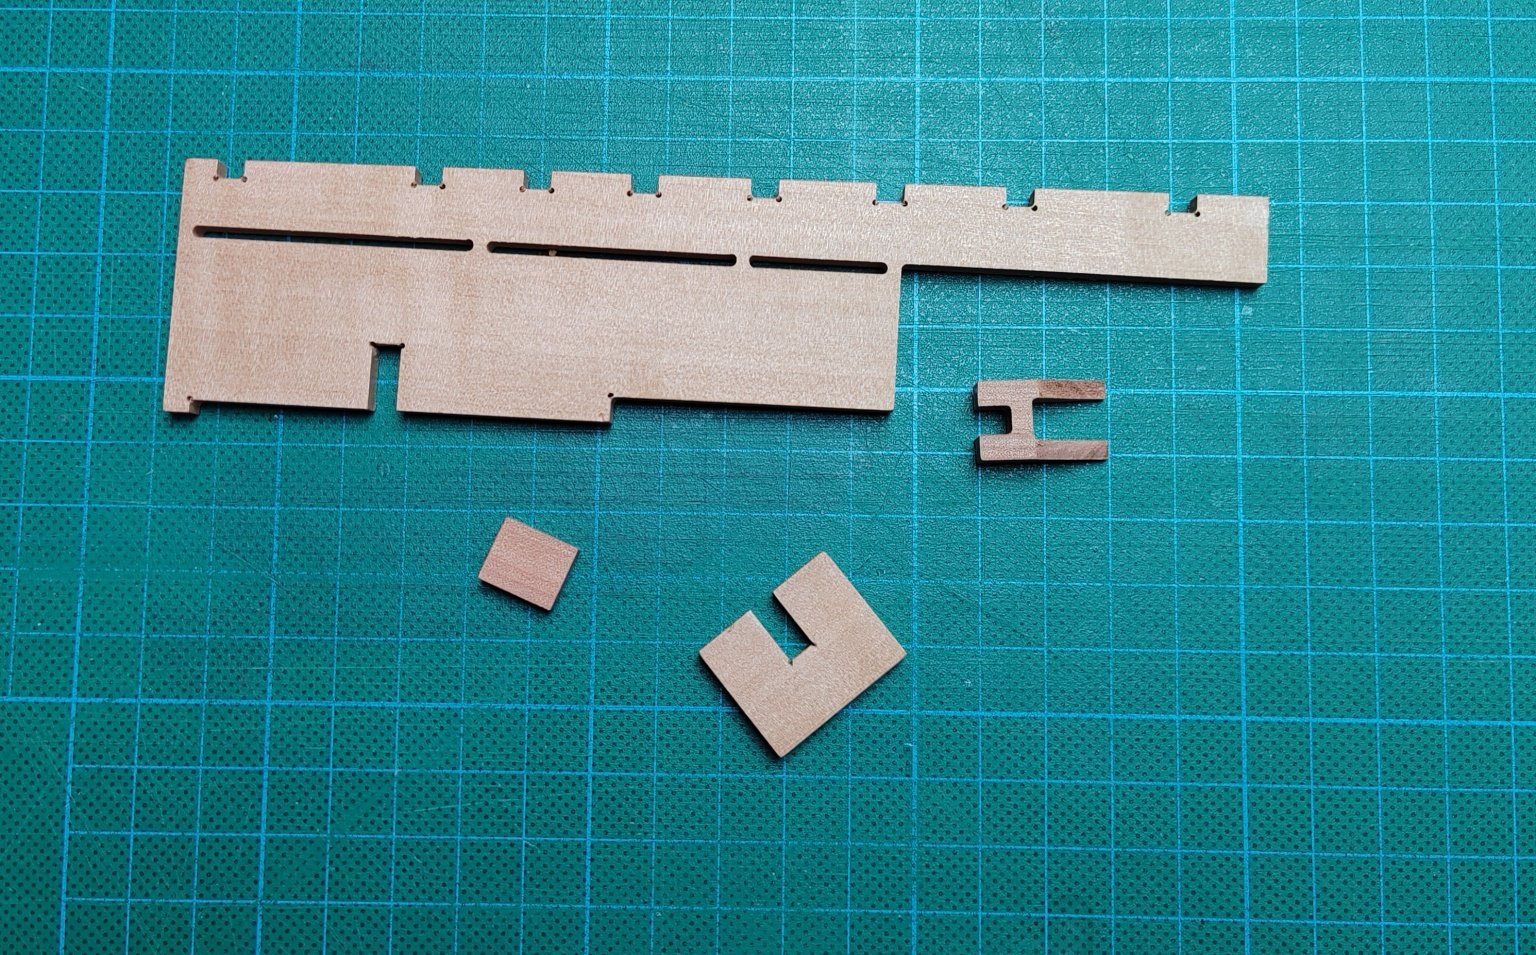
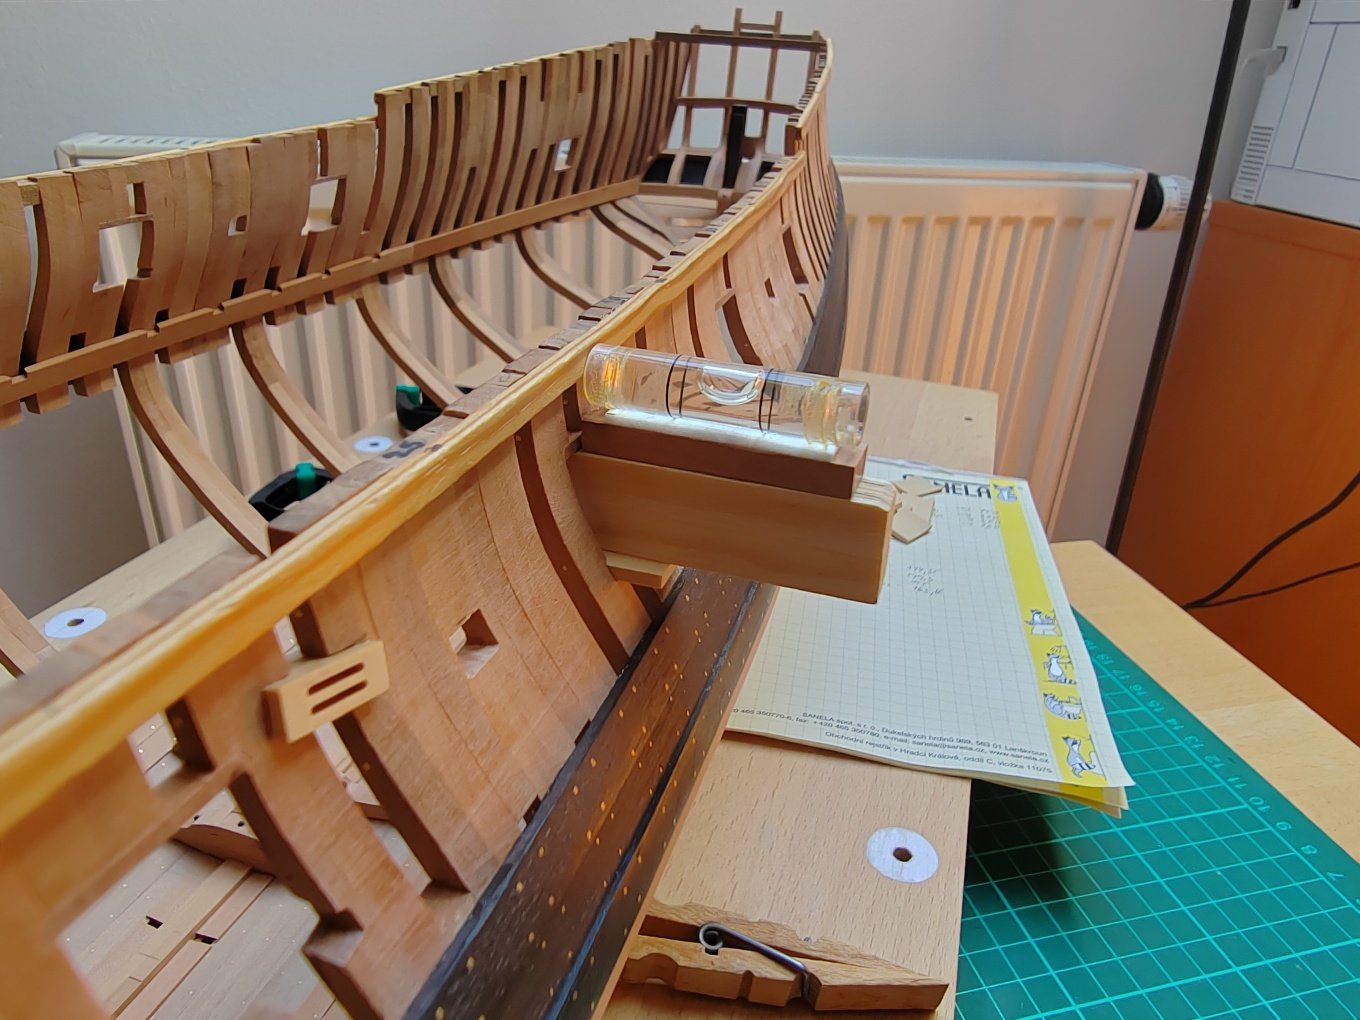
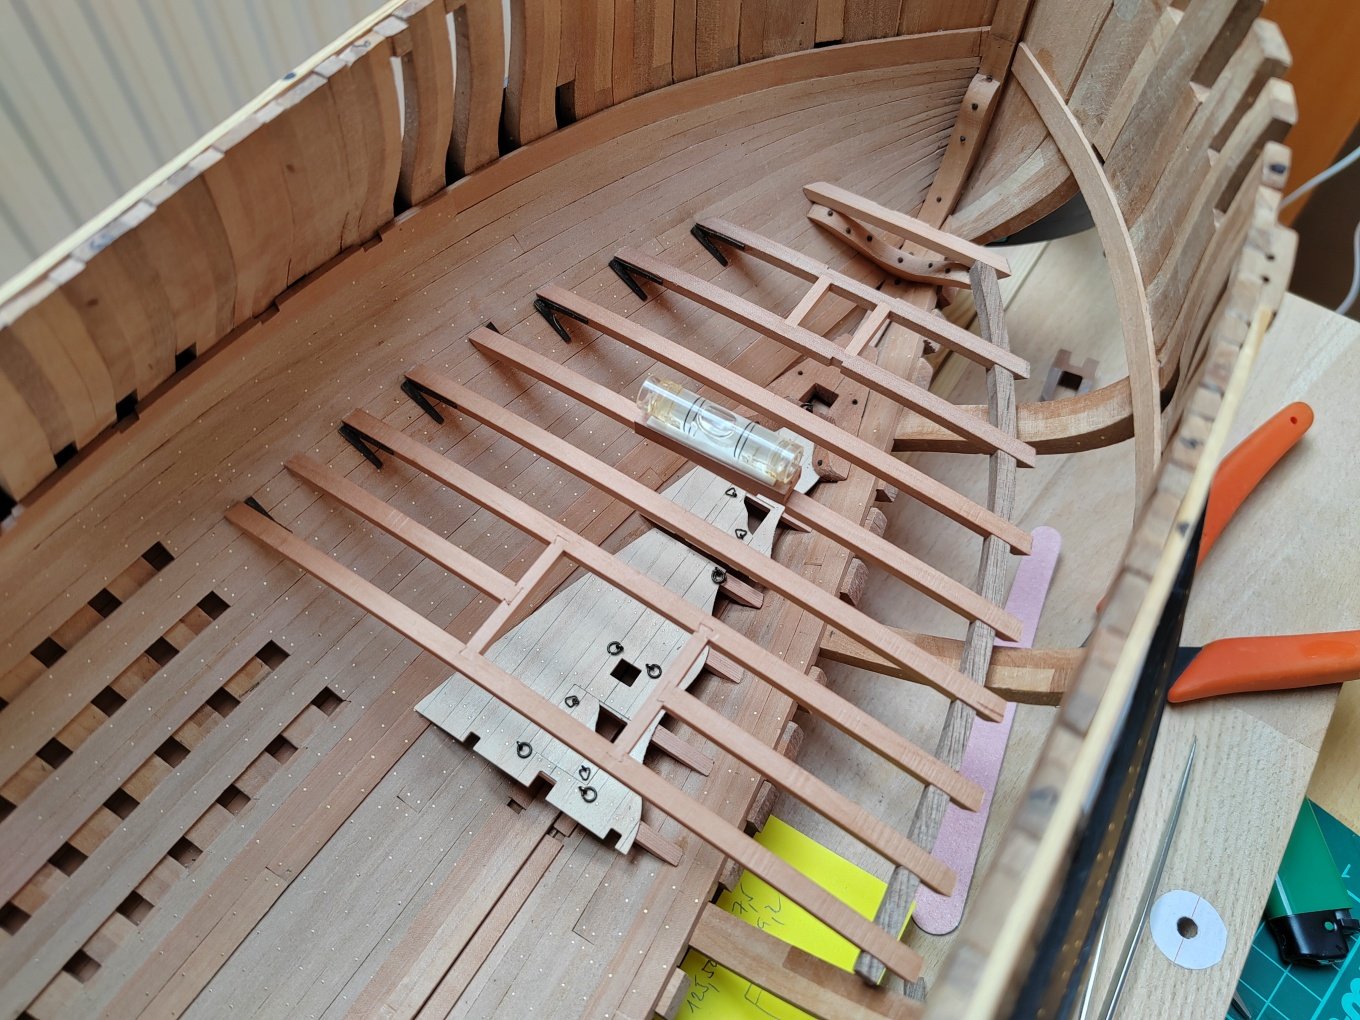
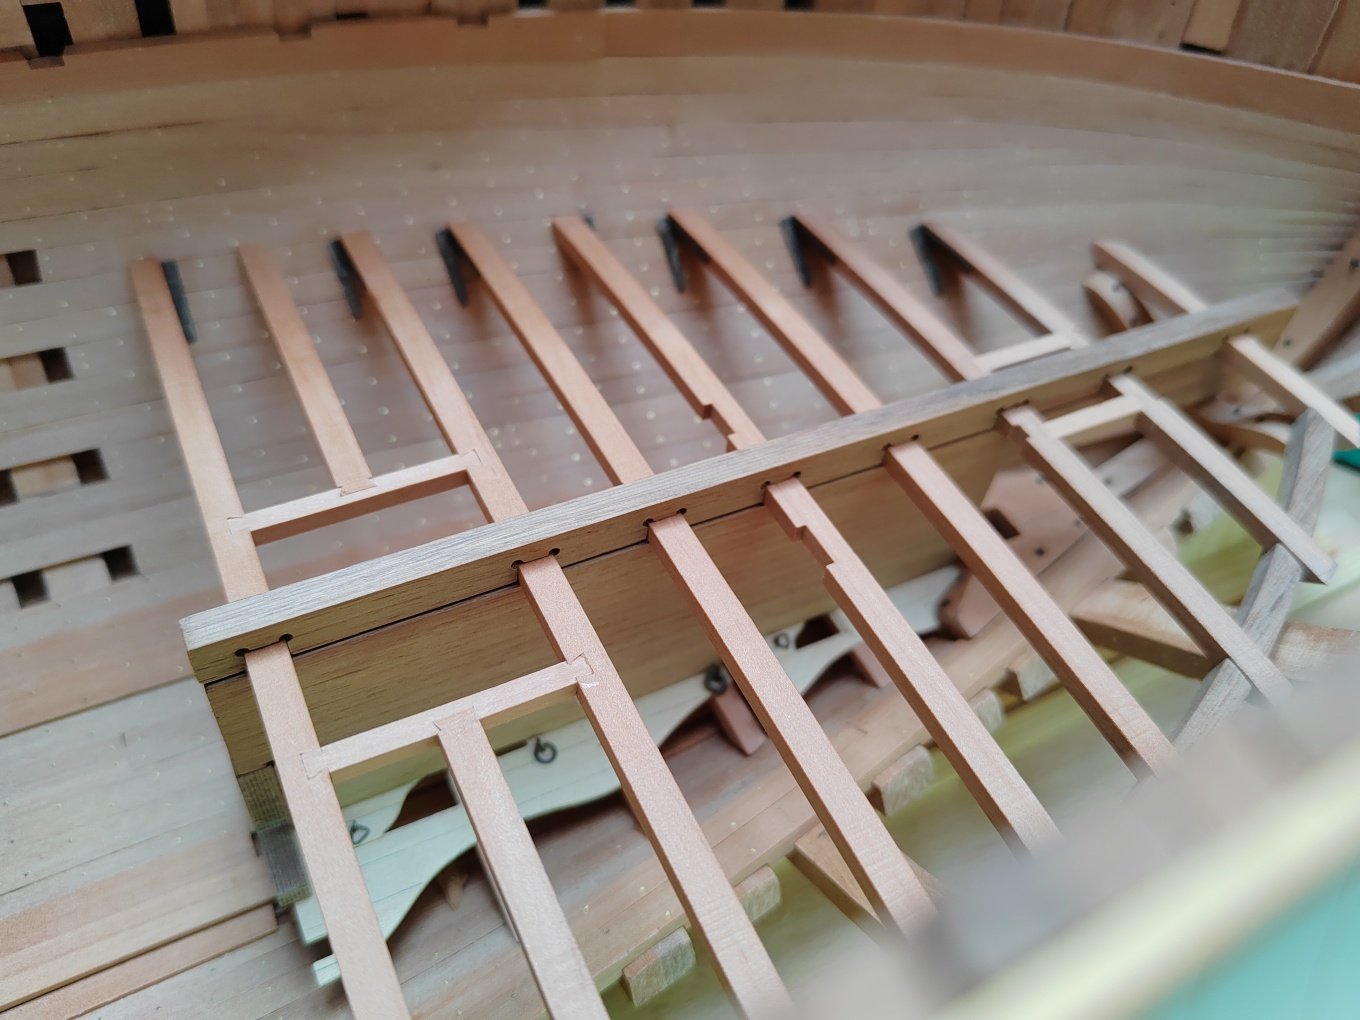
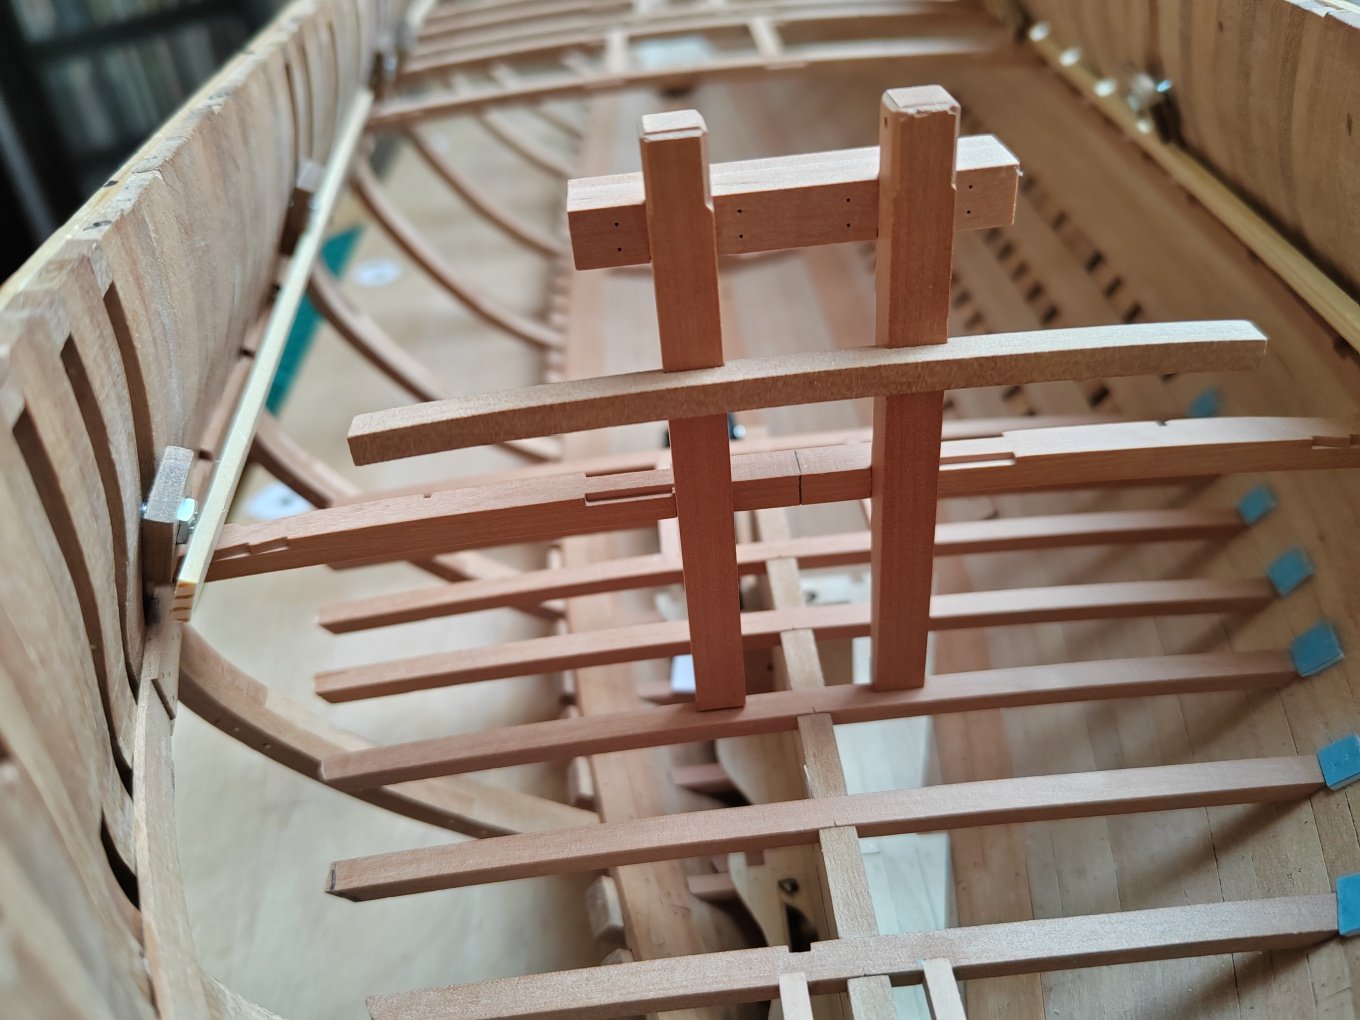
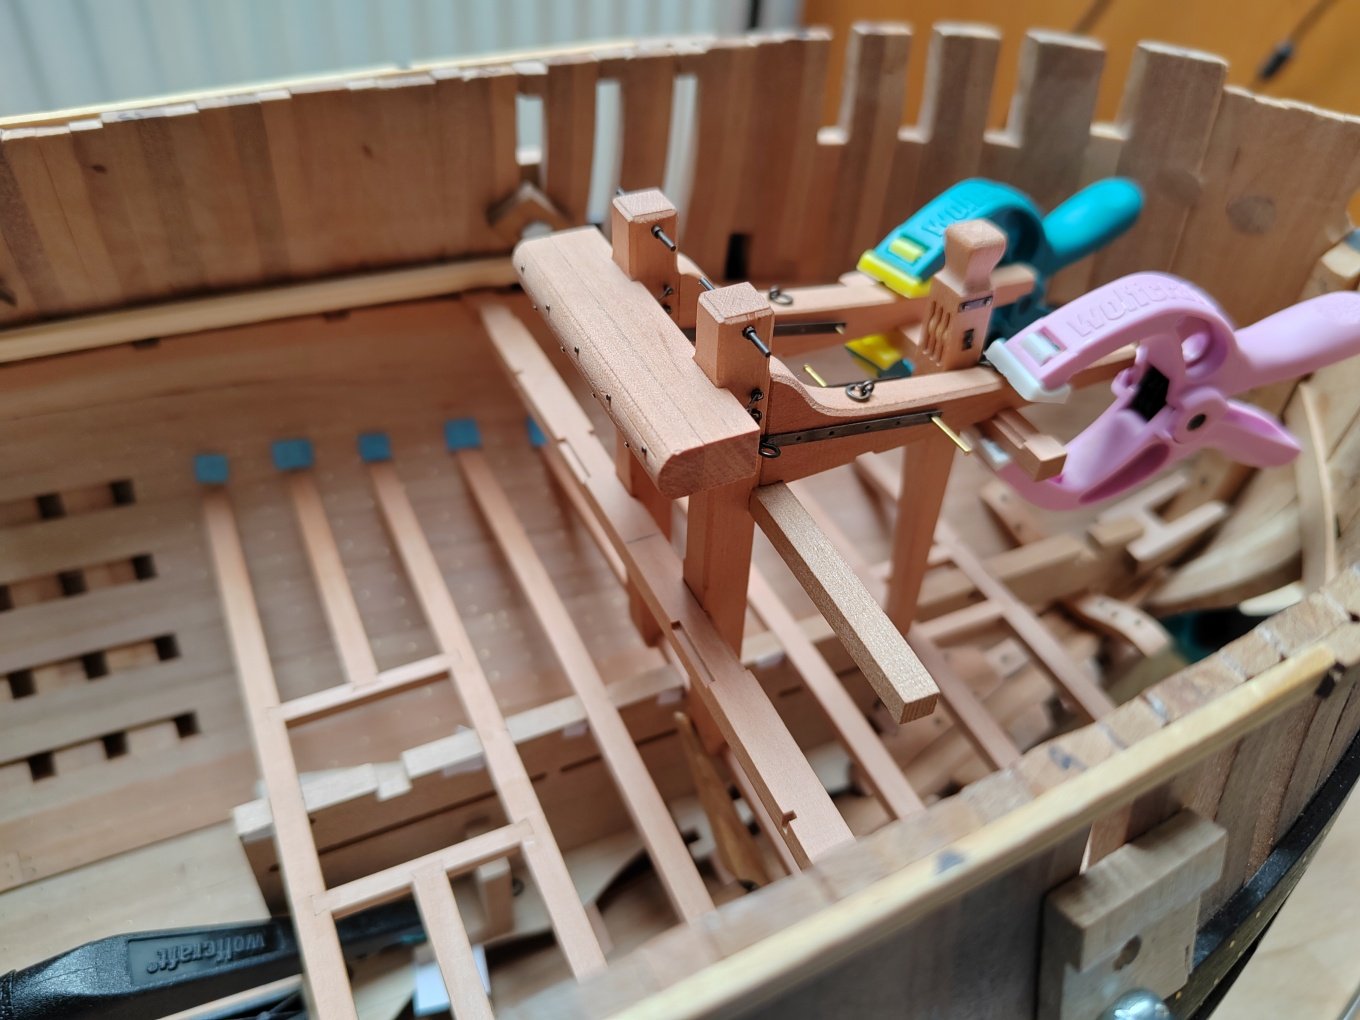
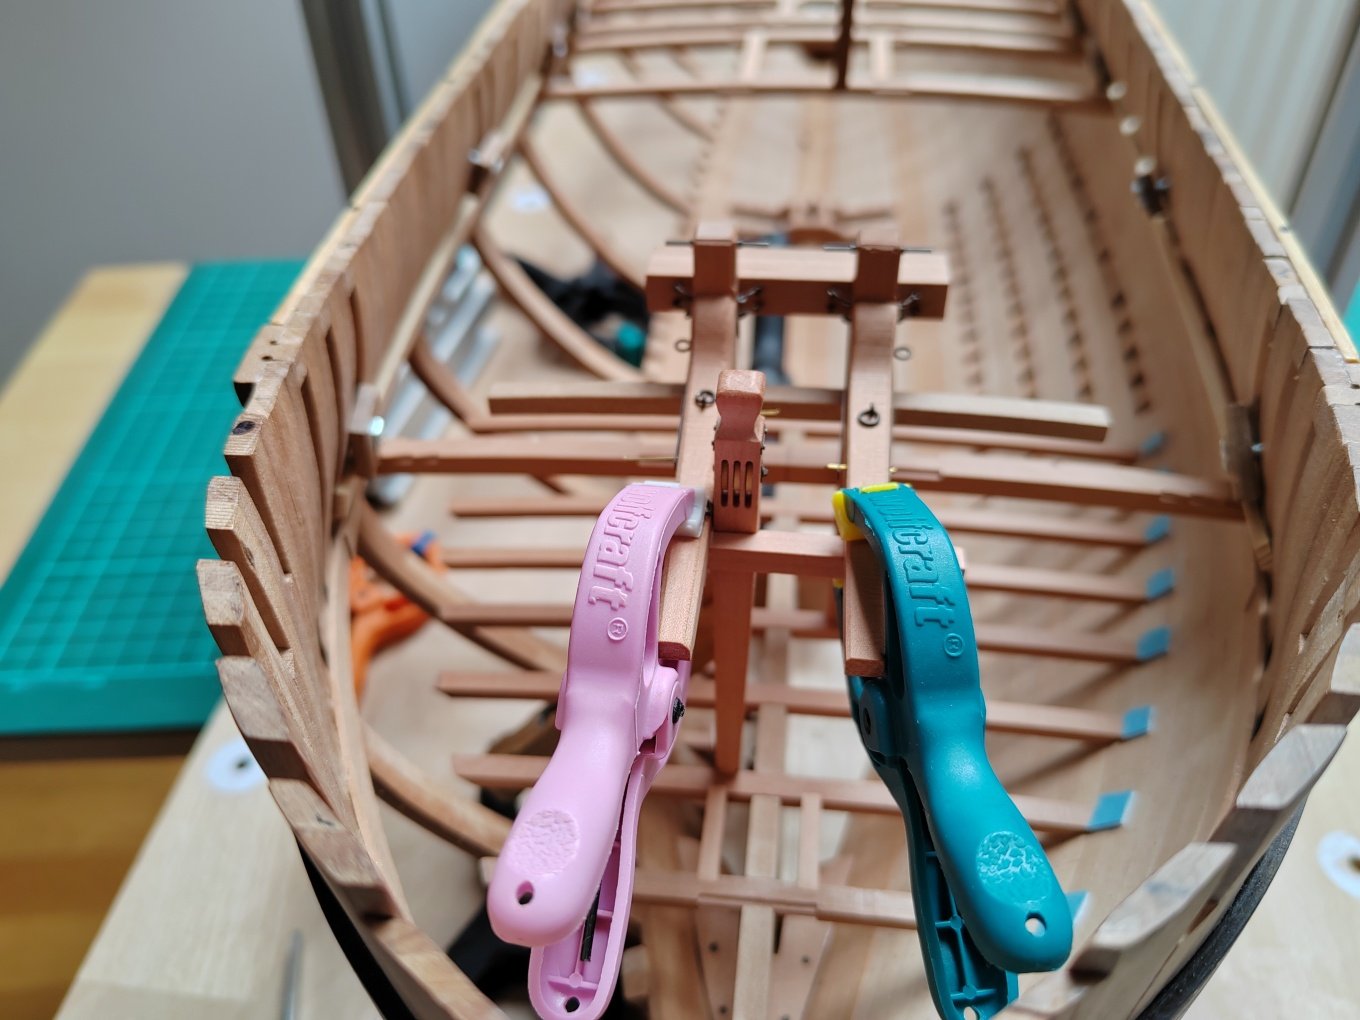
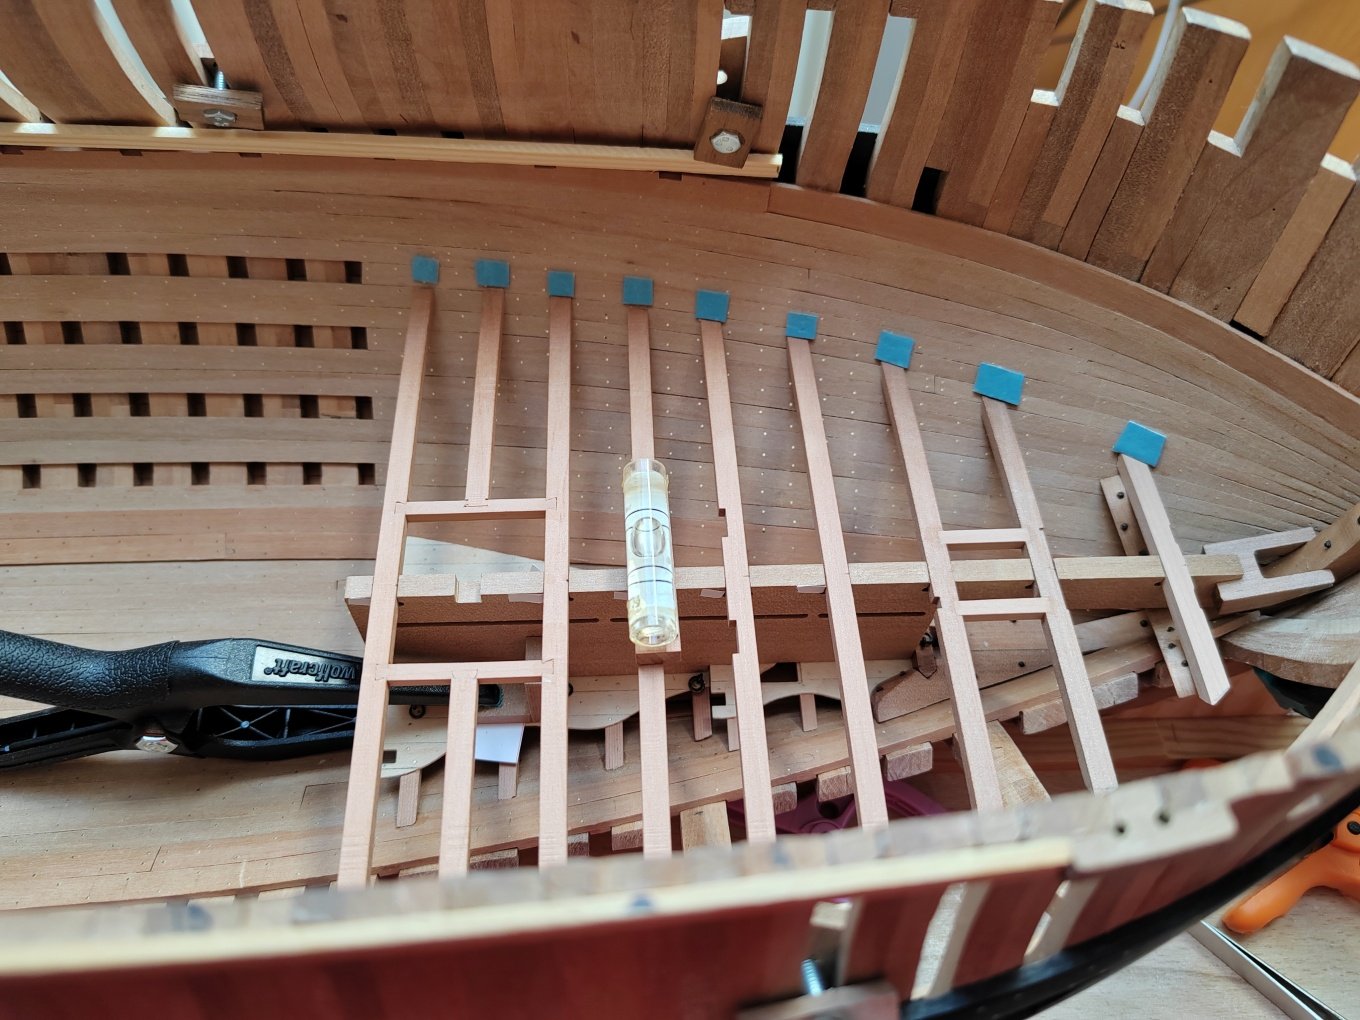
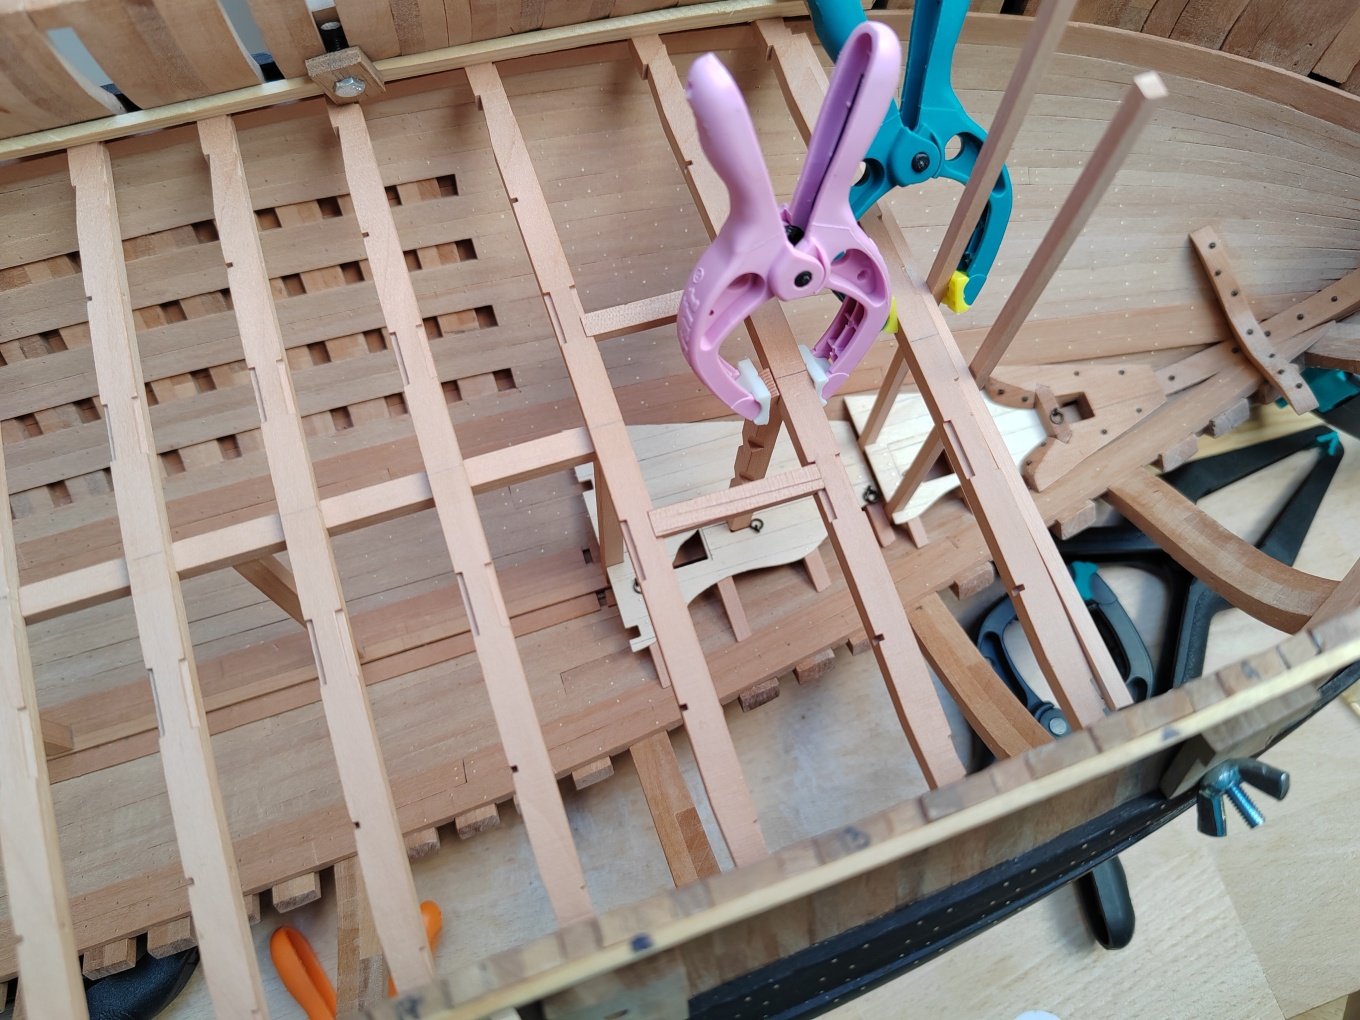
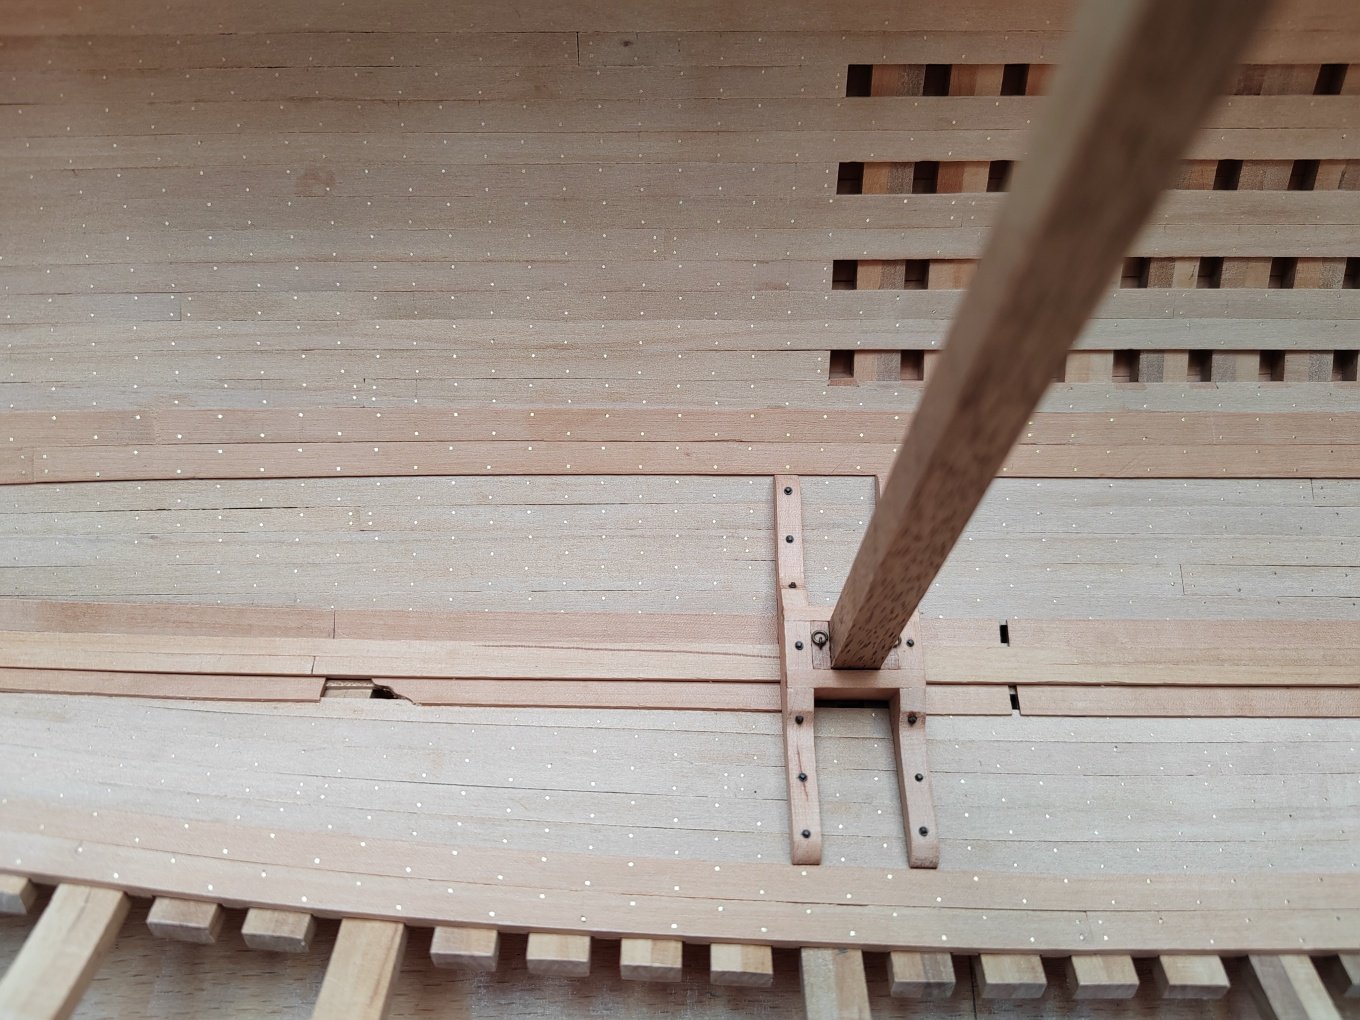
Installation of deck beams. Before other installations and bulkheads are installed, the deck beams are fixed with an auxiliary fixture.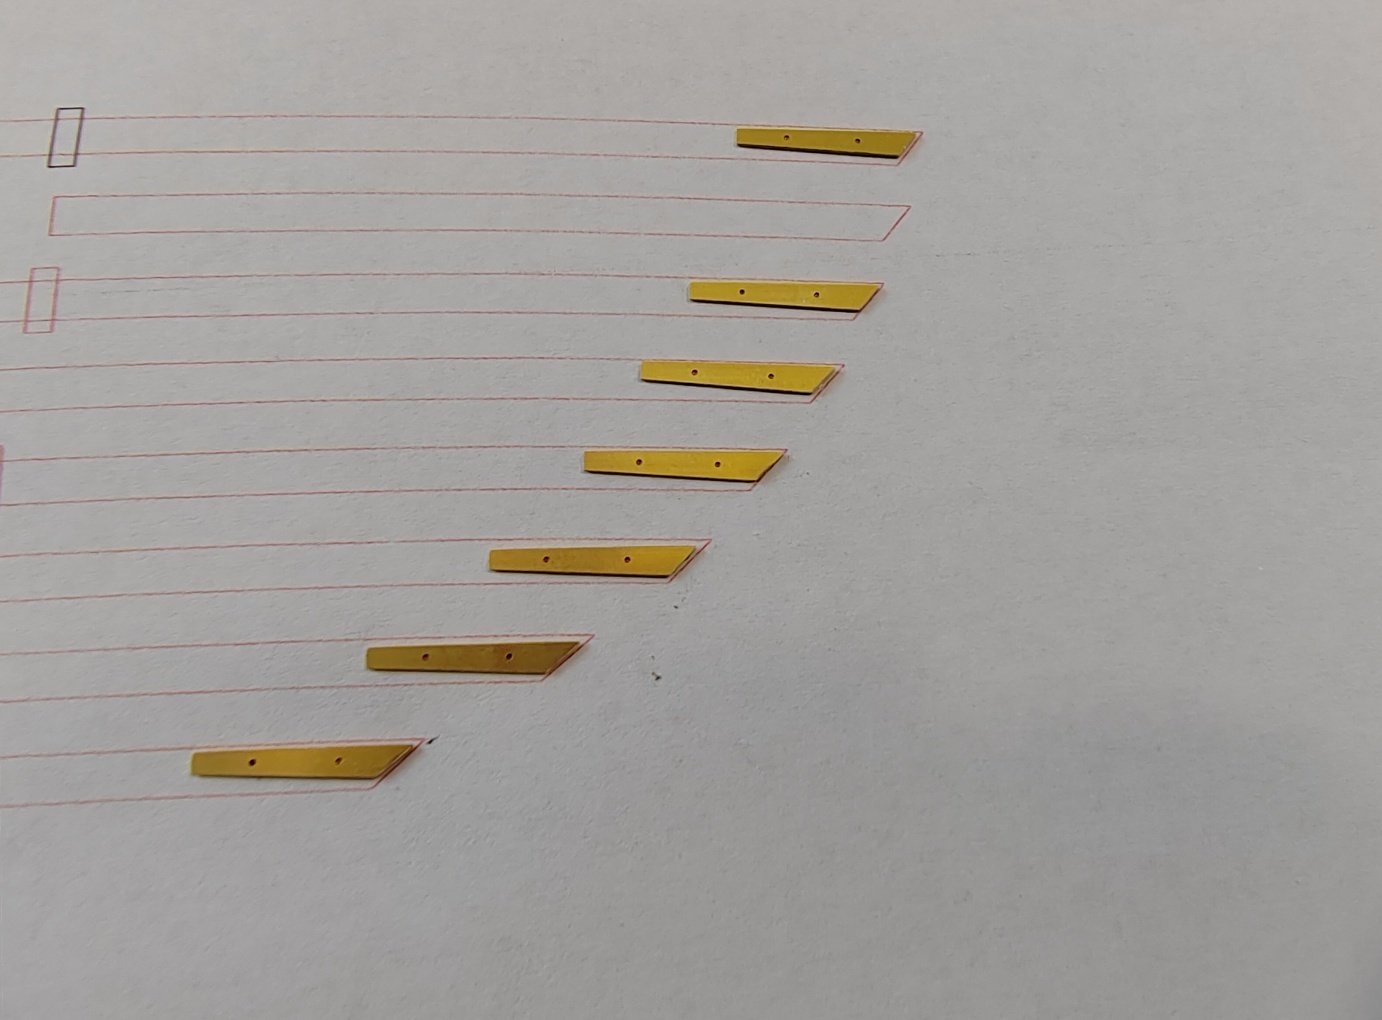

-
L'Amarante by marsalv - 1:36 - POF
marsalv replied to marsalv's topic in - Build logs for subjects built 1501 - 1750
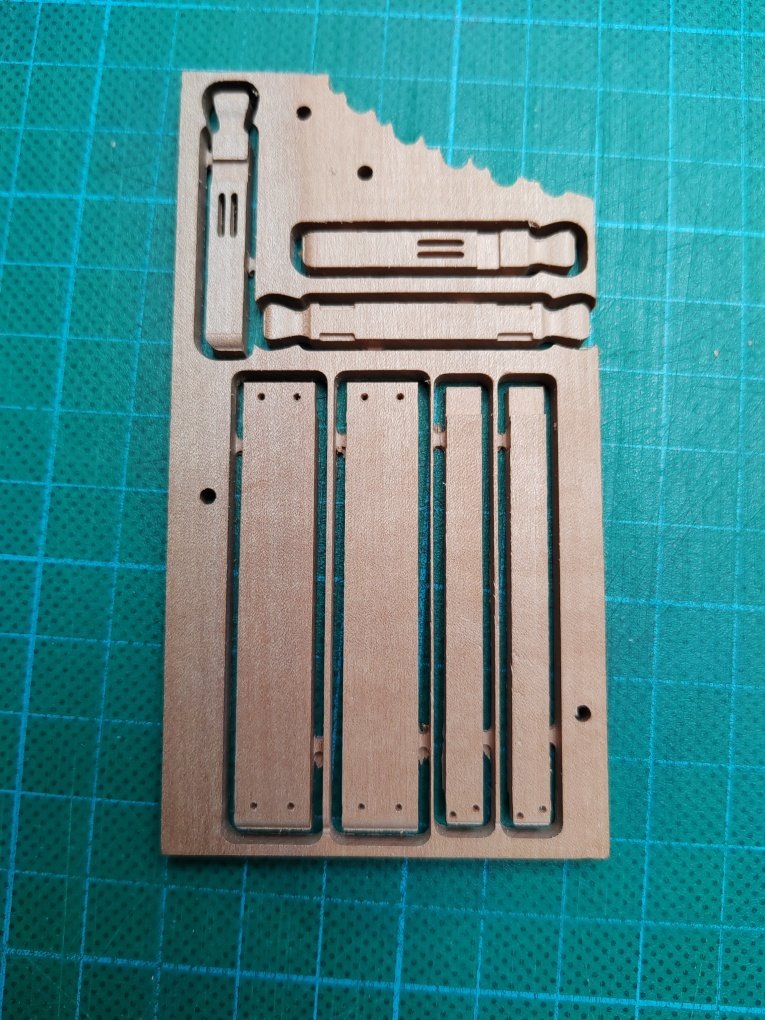
Other deck constructions.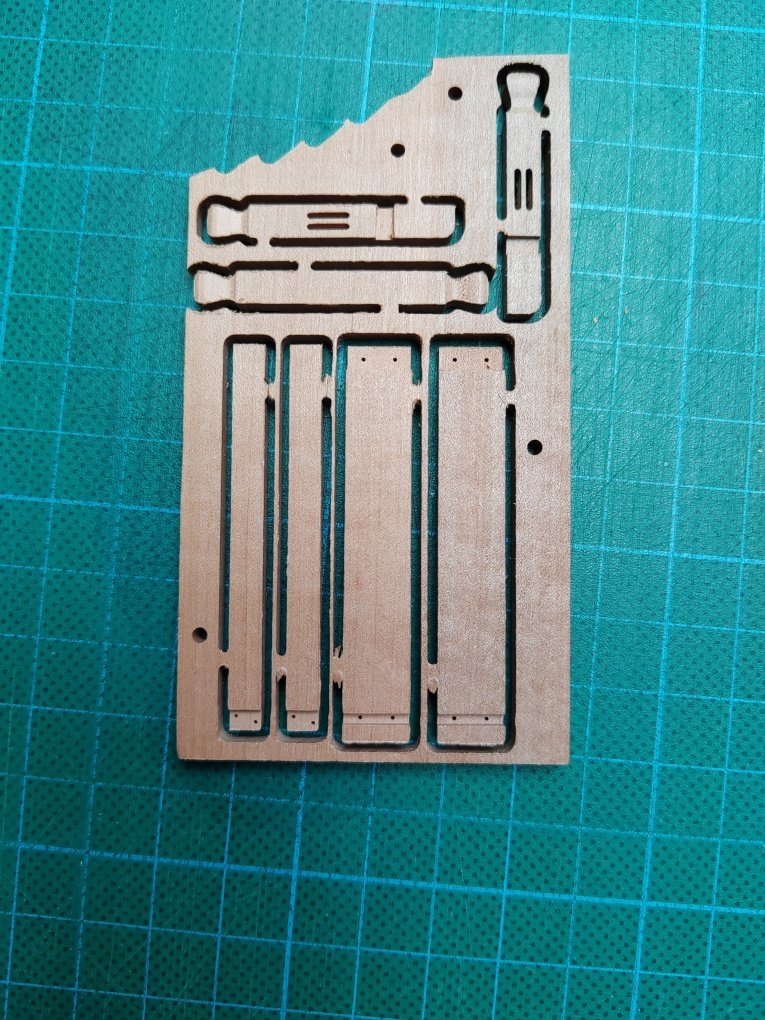


-
L'Amarante by marsalv - 1:36 - POF
marsalv replied to marsalv's topic in - Build logs for subjects built 1501 - 1750
To No Idea - Vectric programs can read DXF files. So it is necessary to have a CAD program available in which I draw what I need to mill and save such a drawing in DXF format. I then load it into Vectric's Aspire program and then create the milling data there. -
L'Amarante by marsalv - 1:36 - POF
marsalv replied to marsalv's topic in - Build logs for subjects built 1501 - 1750
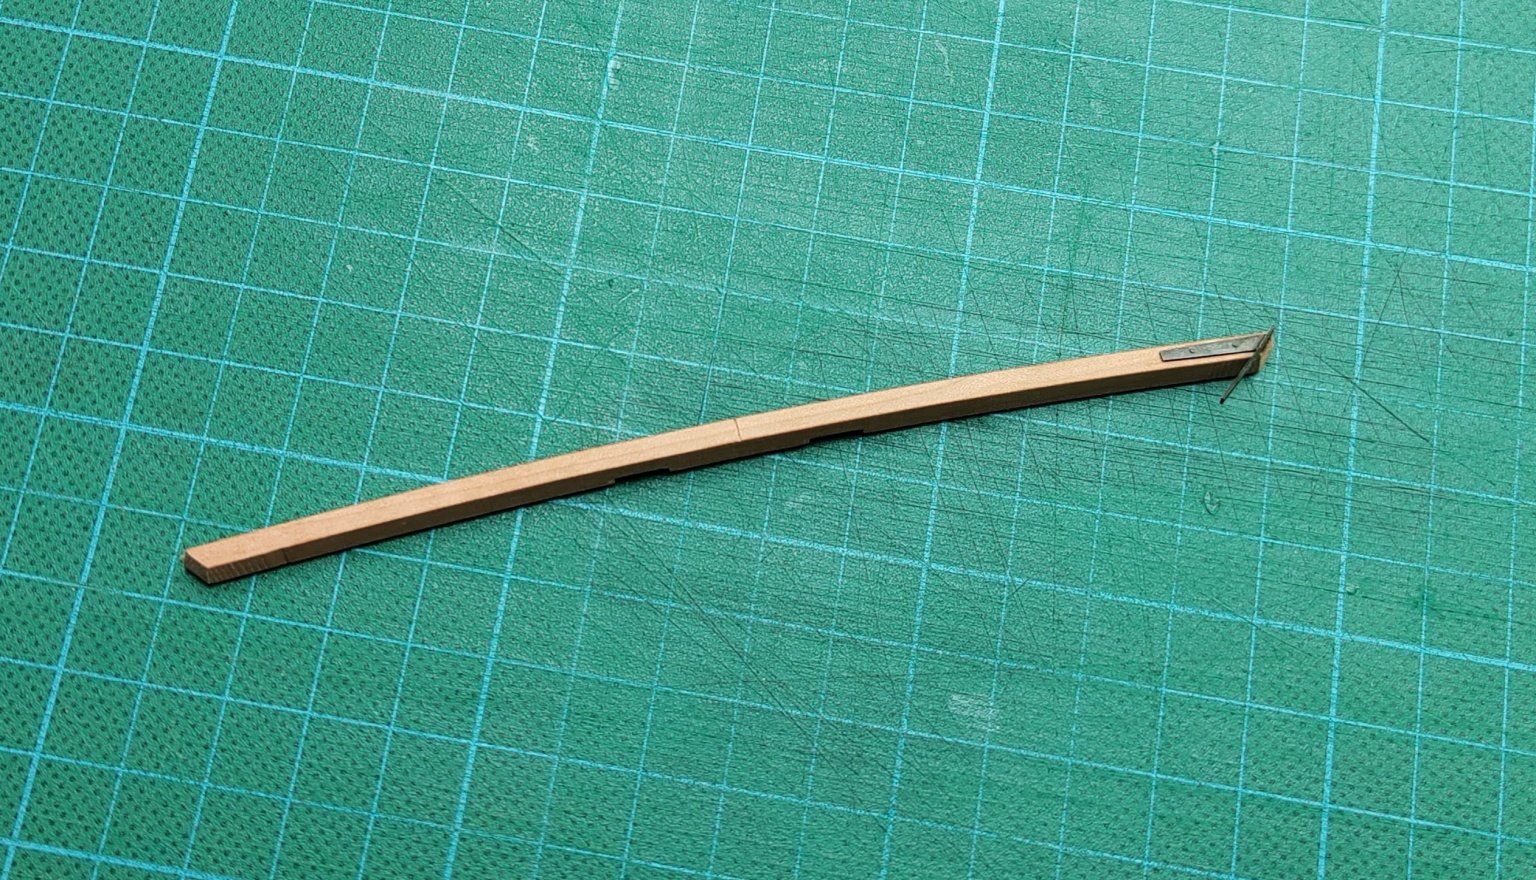
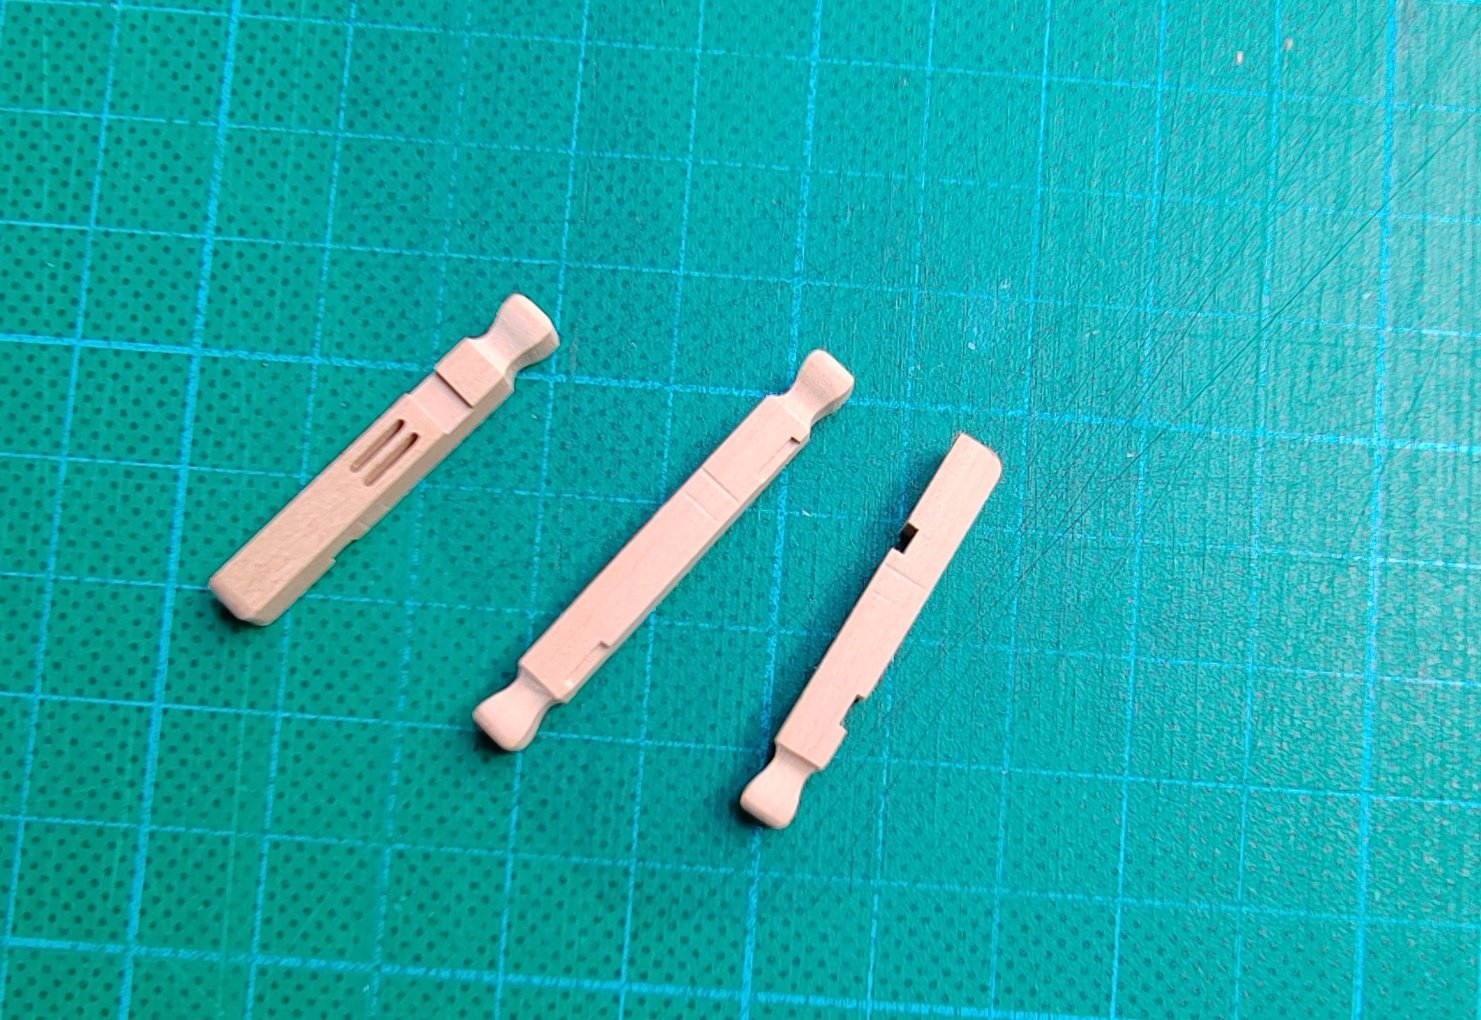
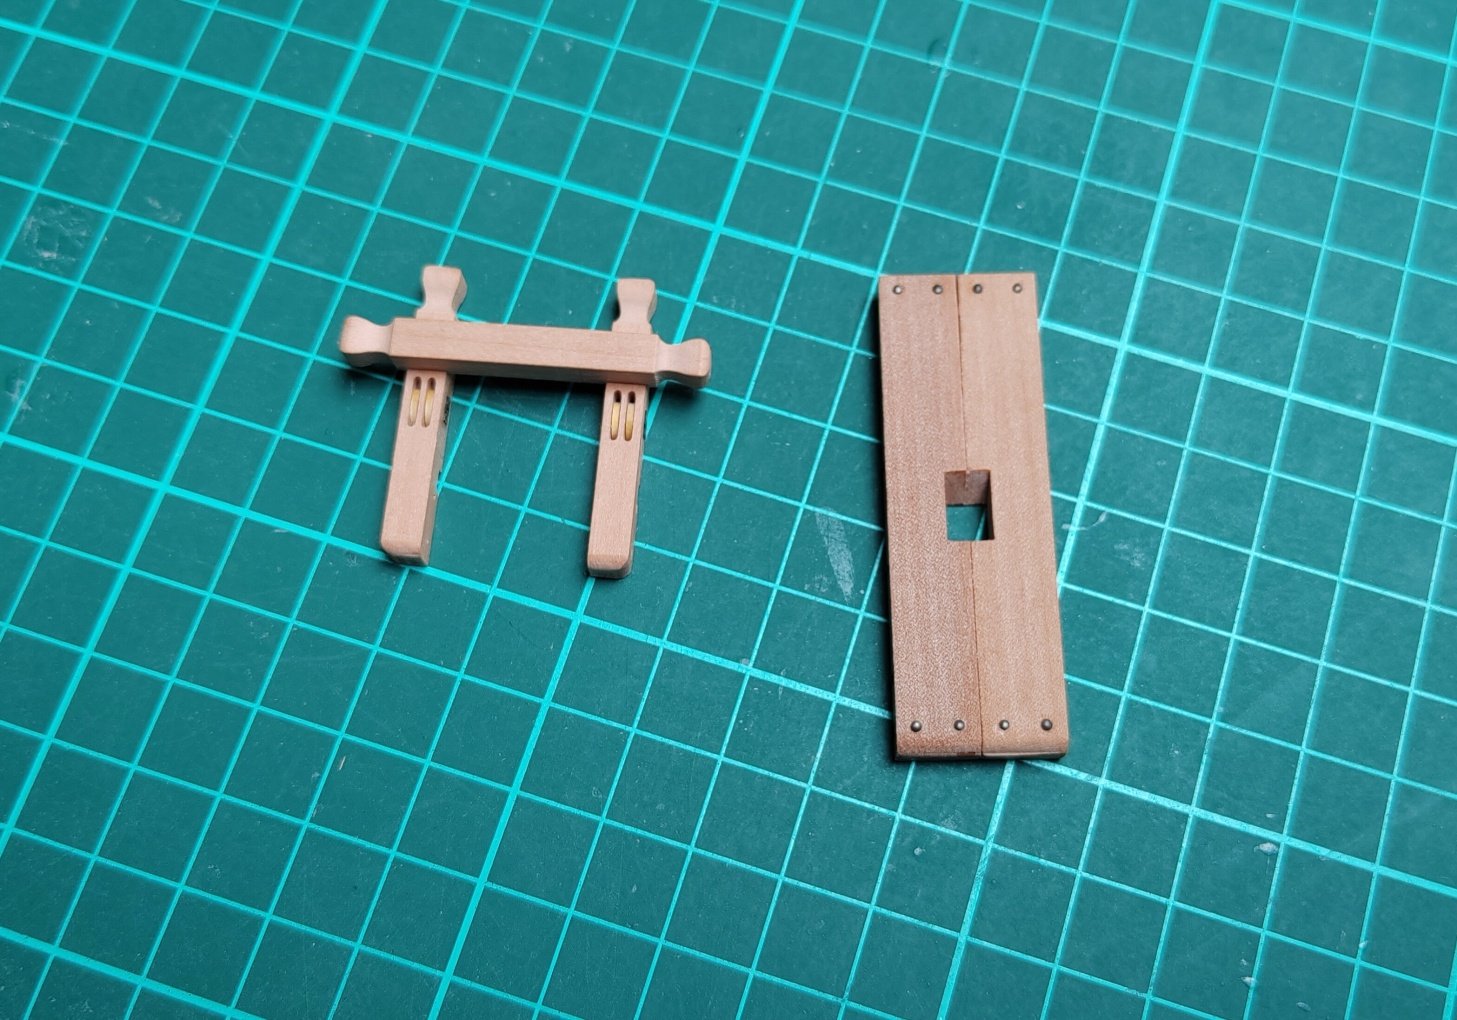
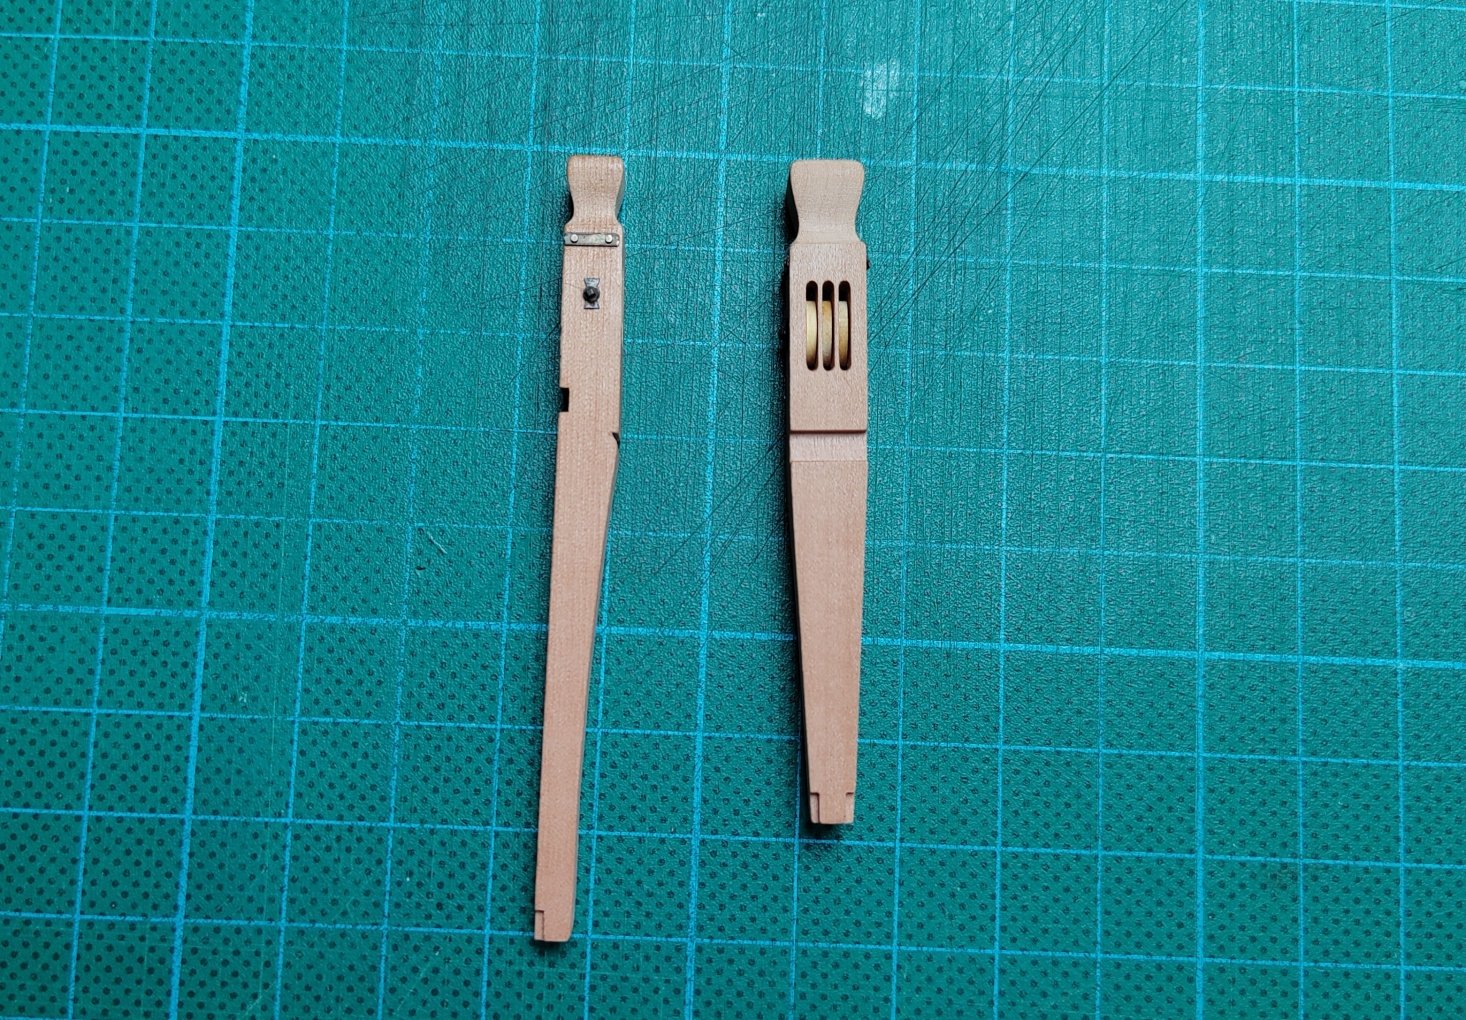
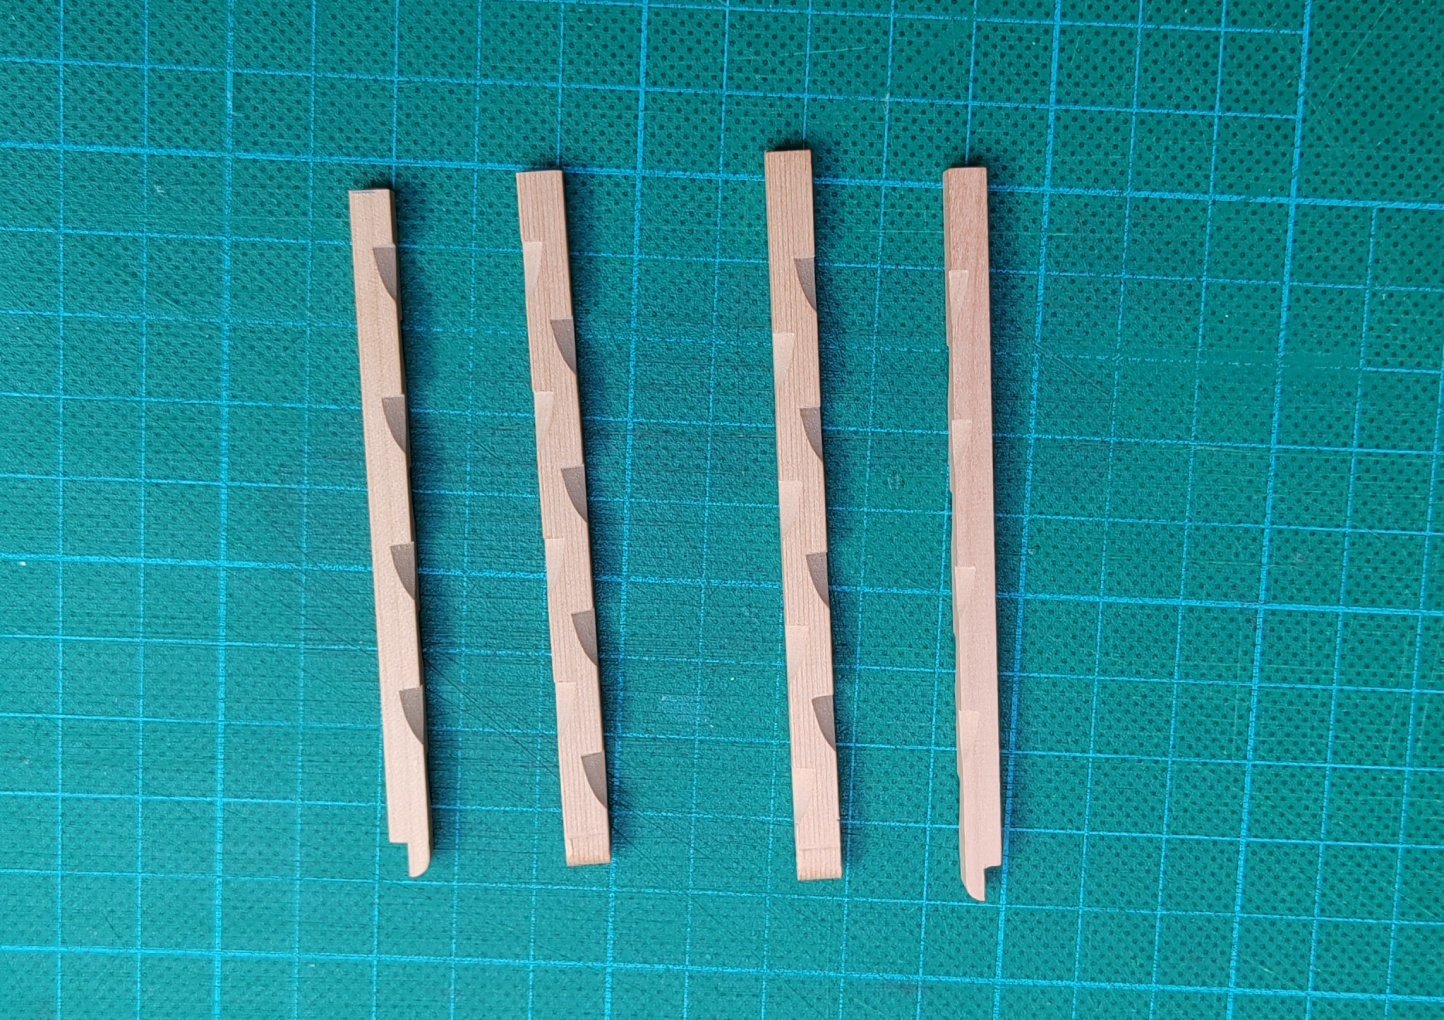
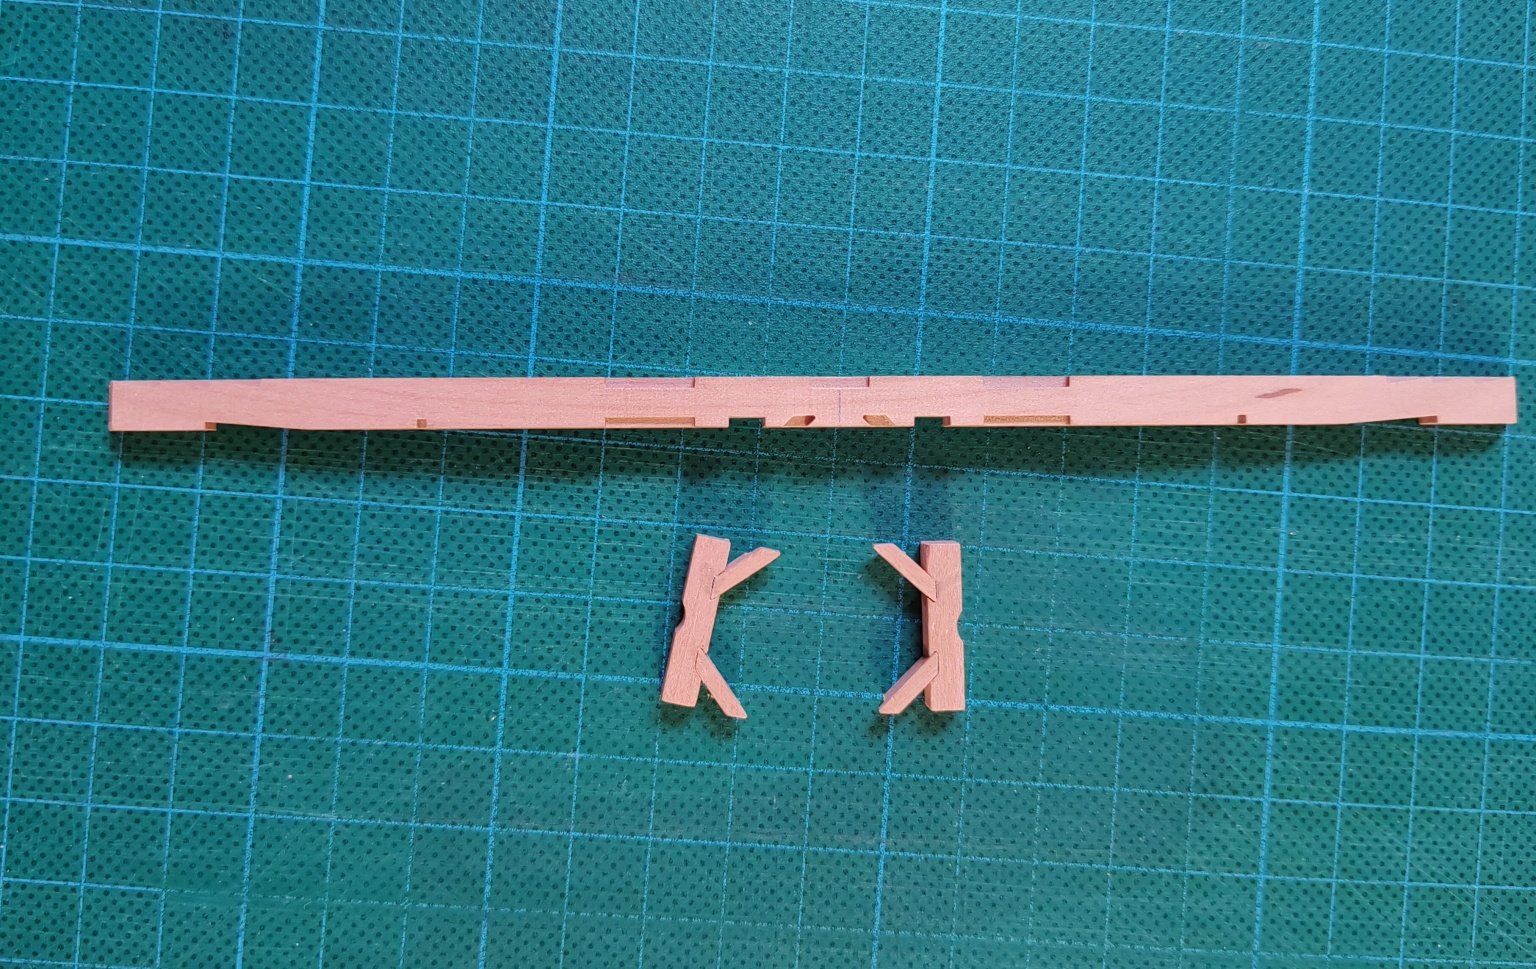
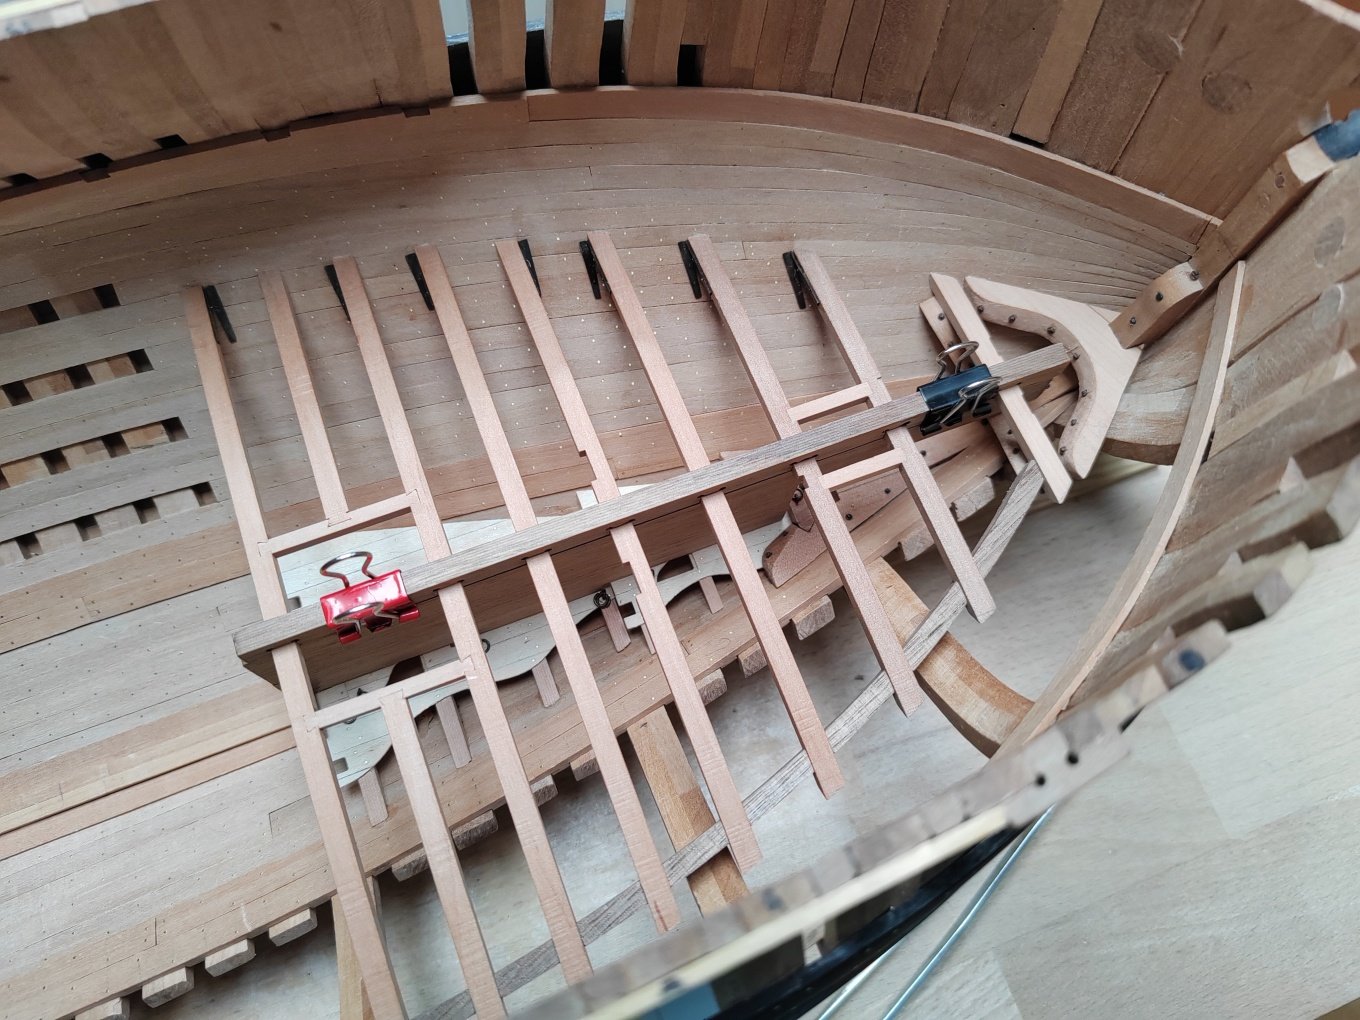
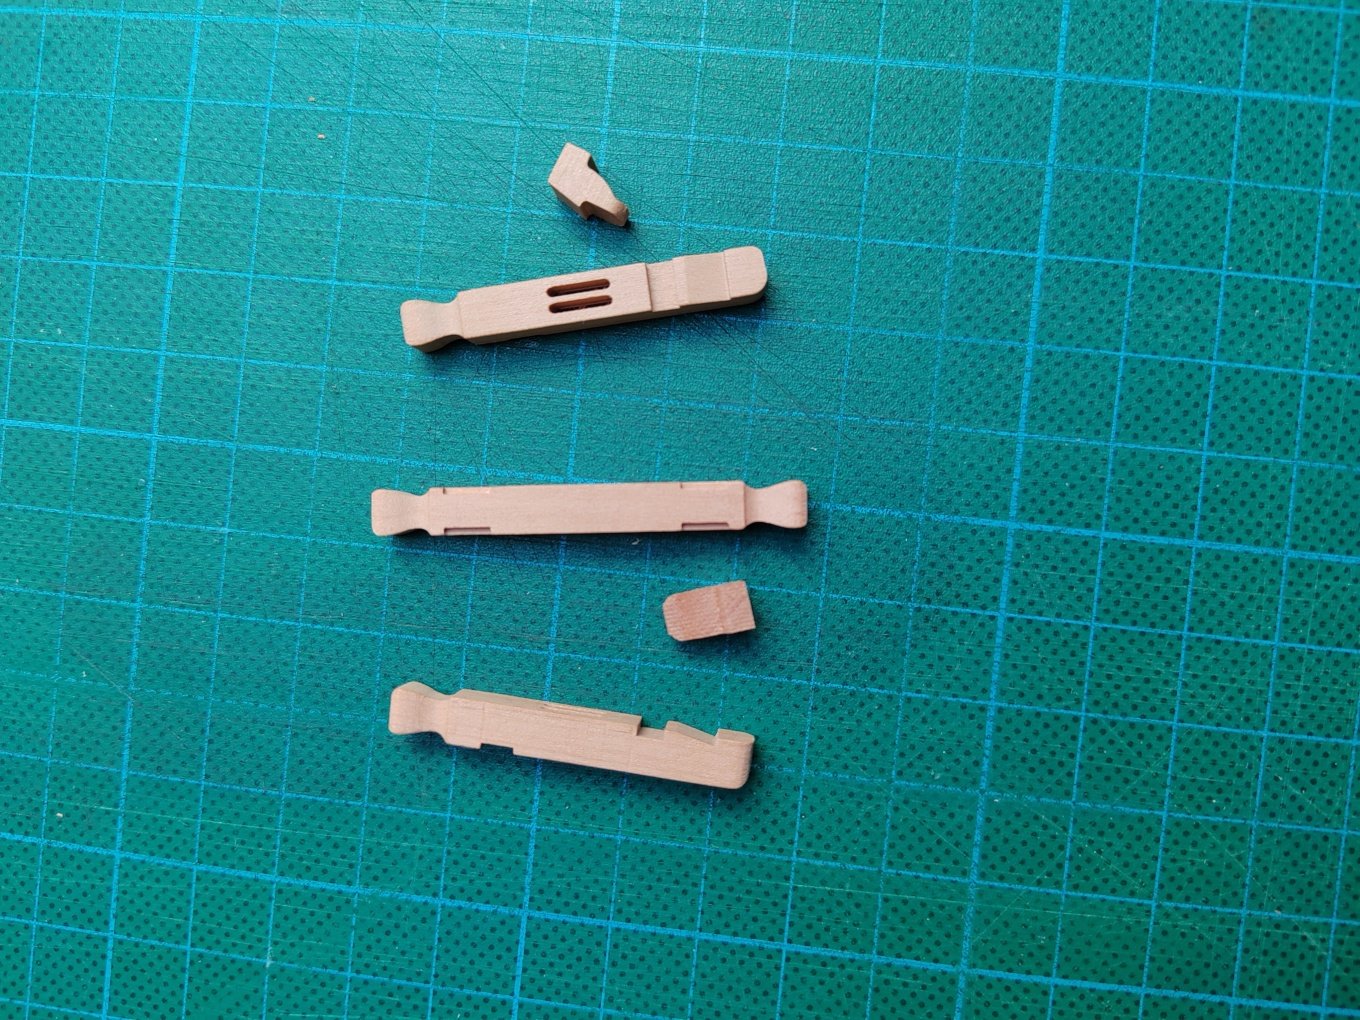
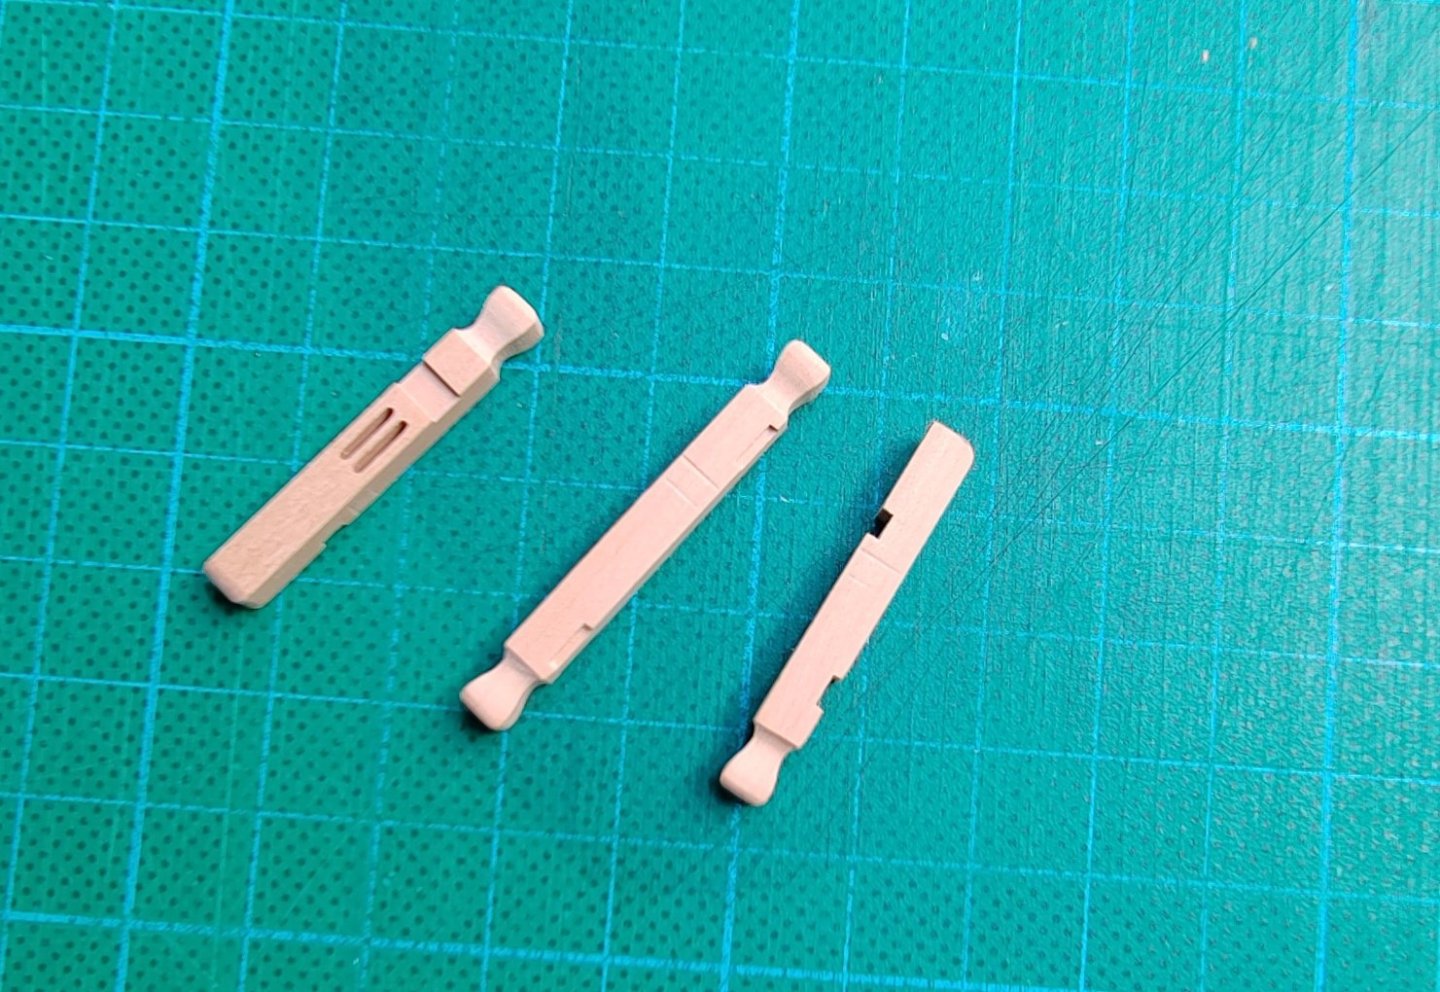
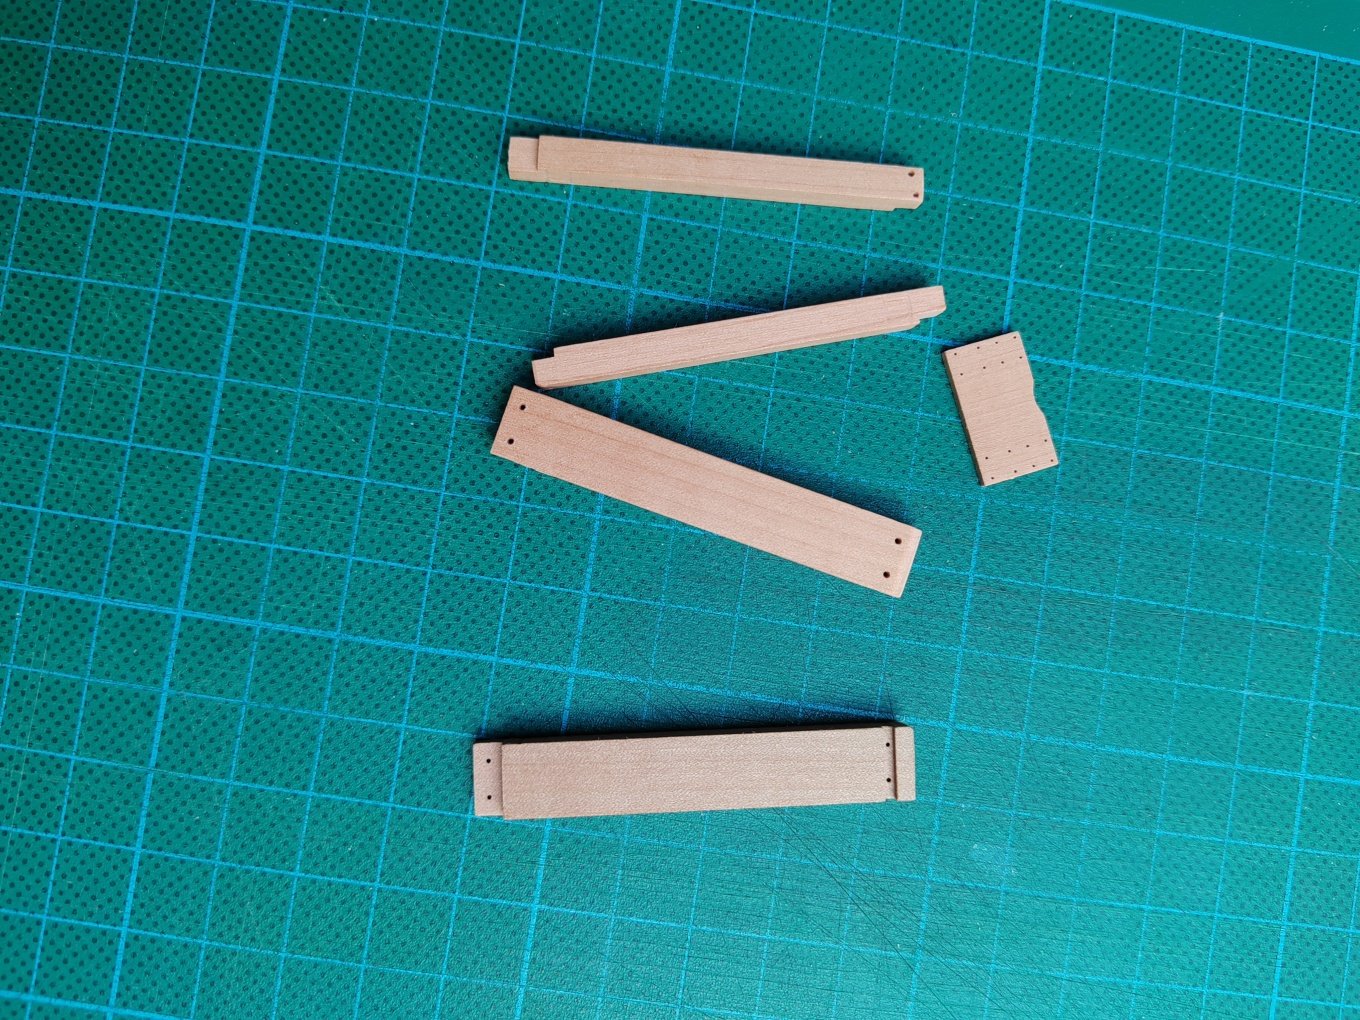
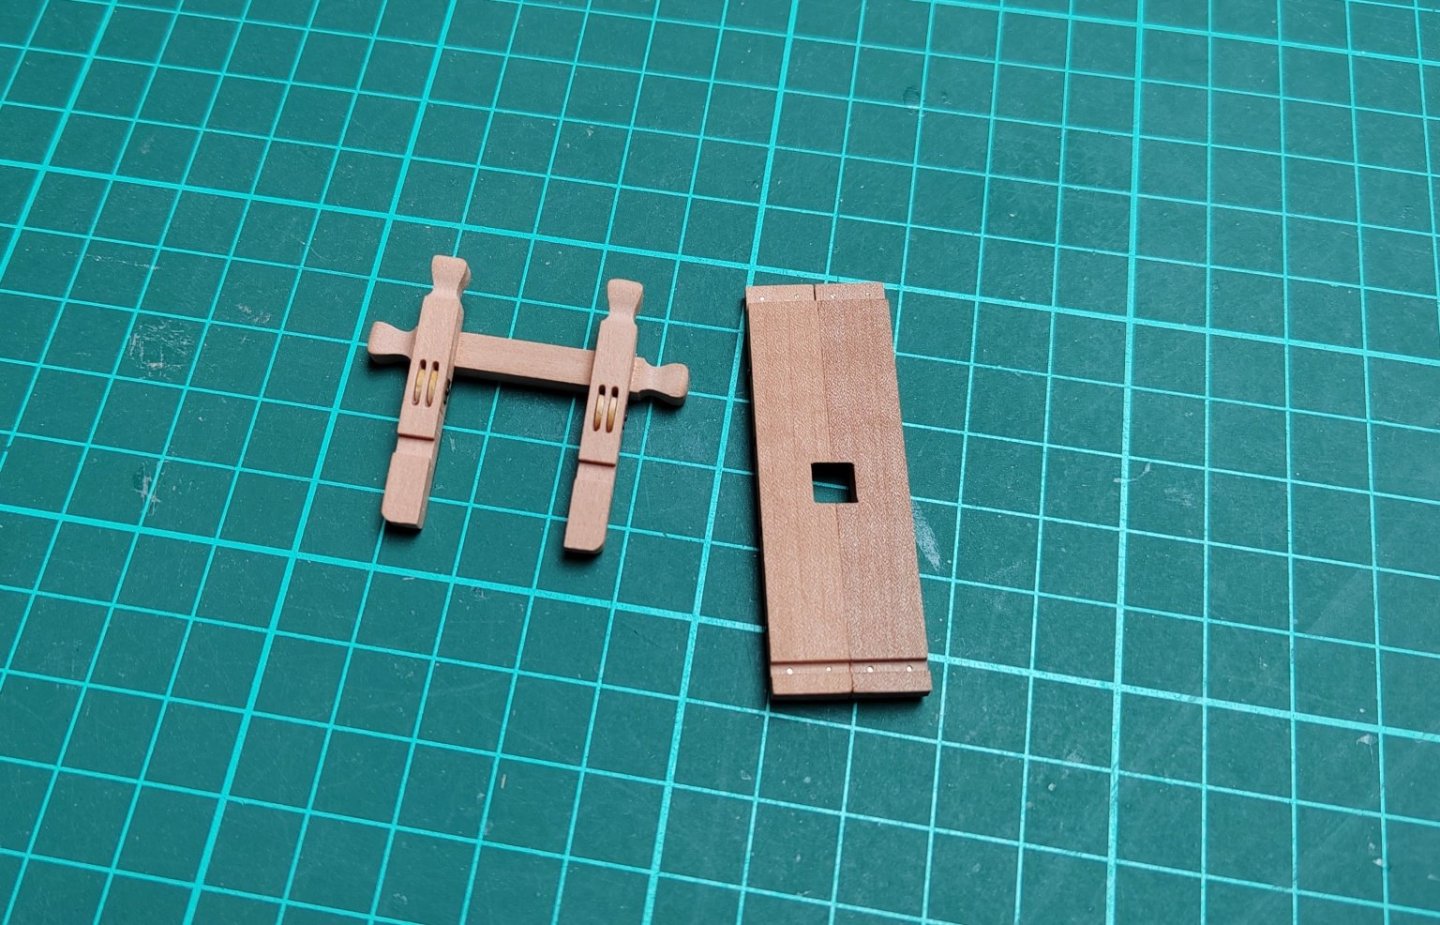
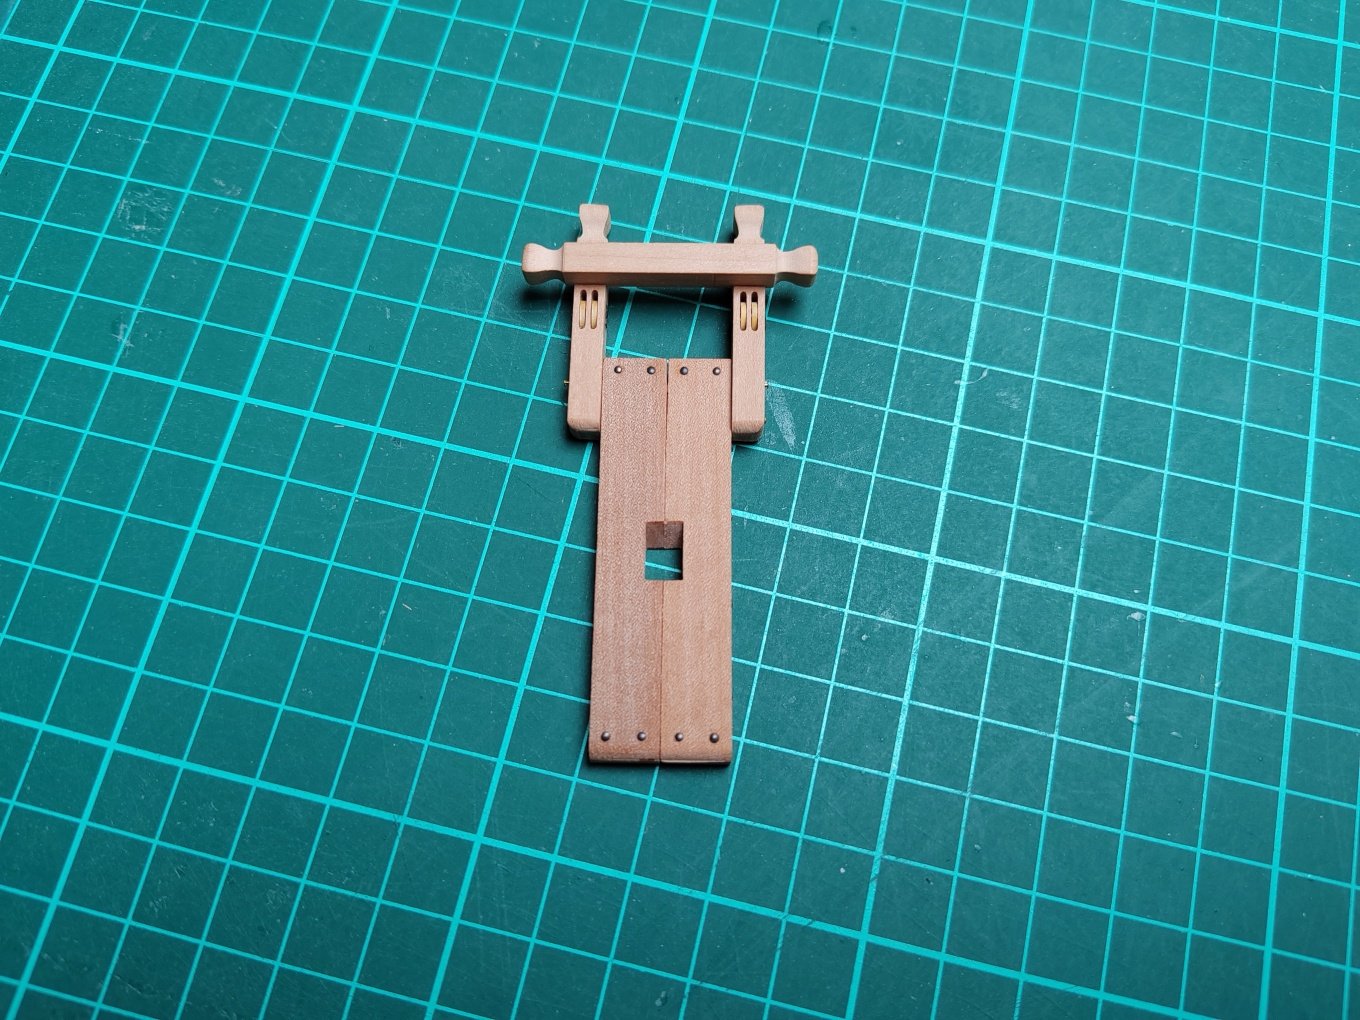
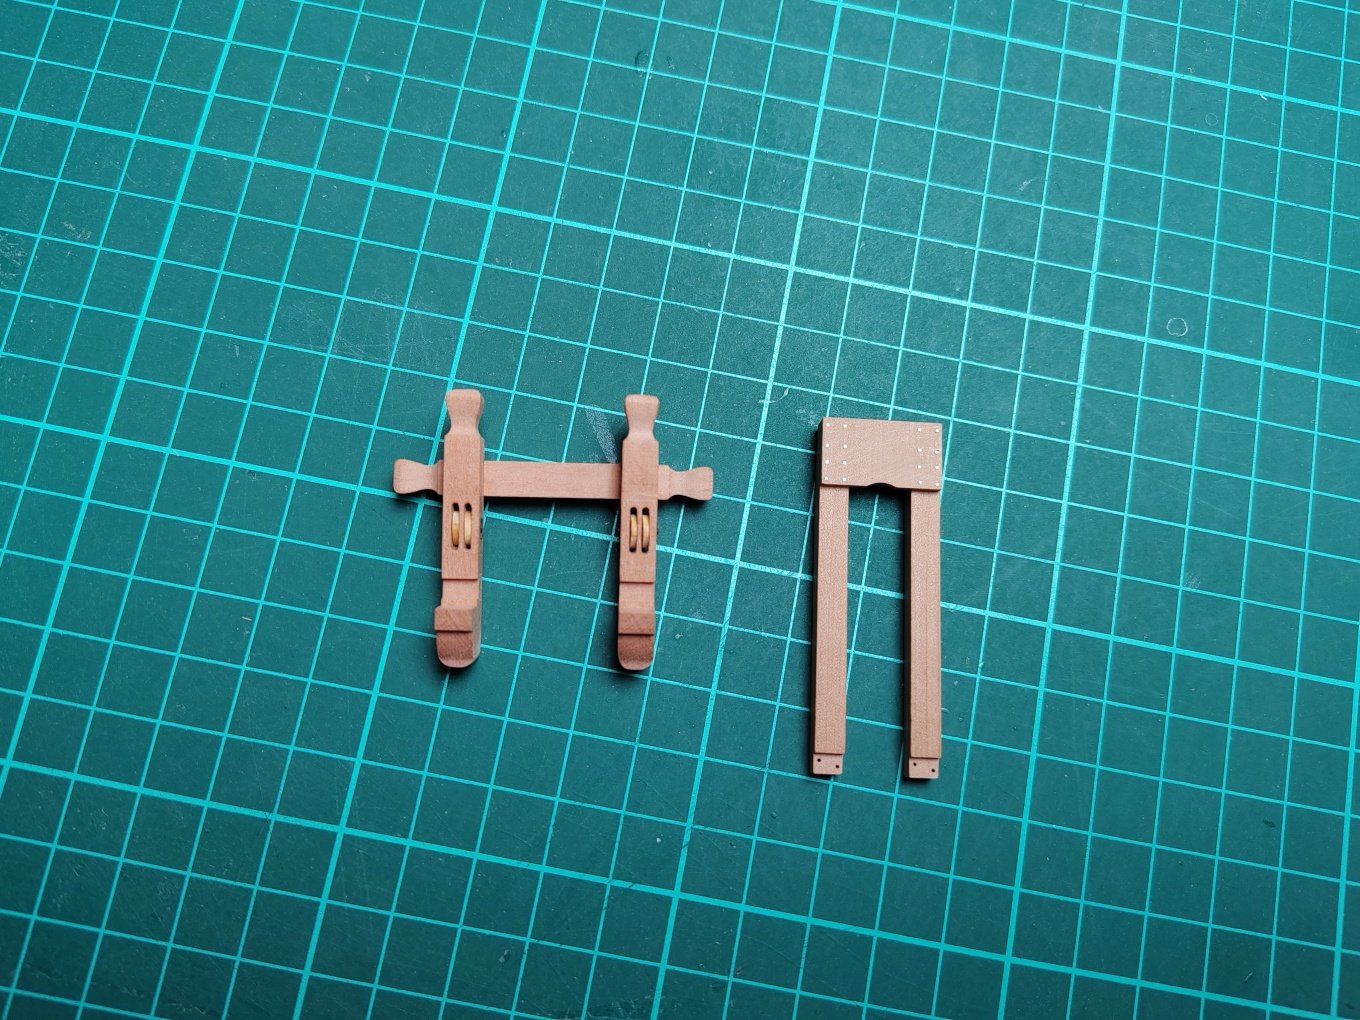
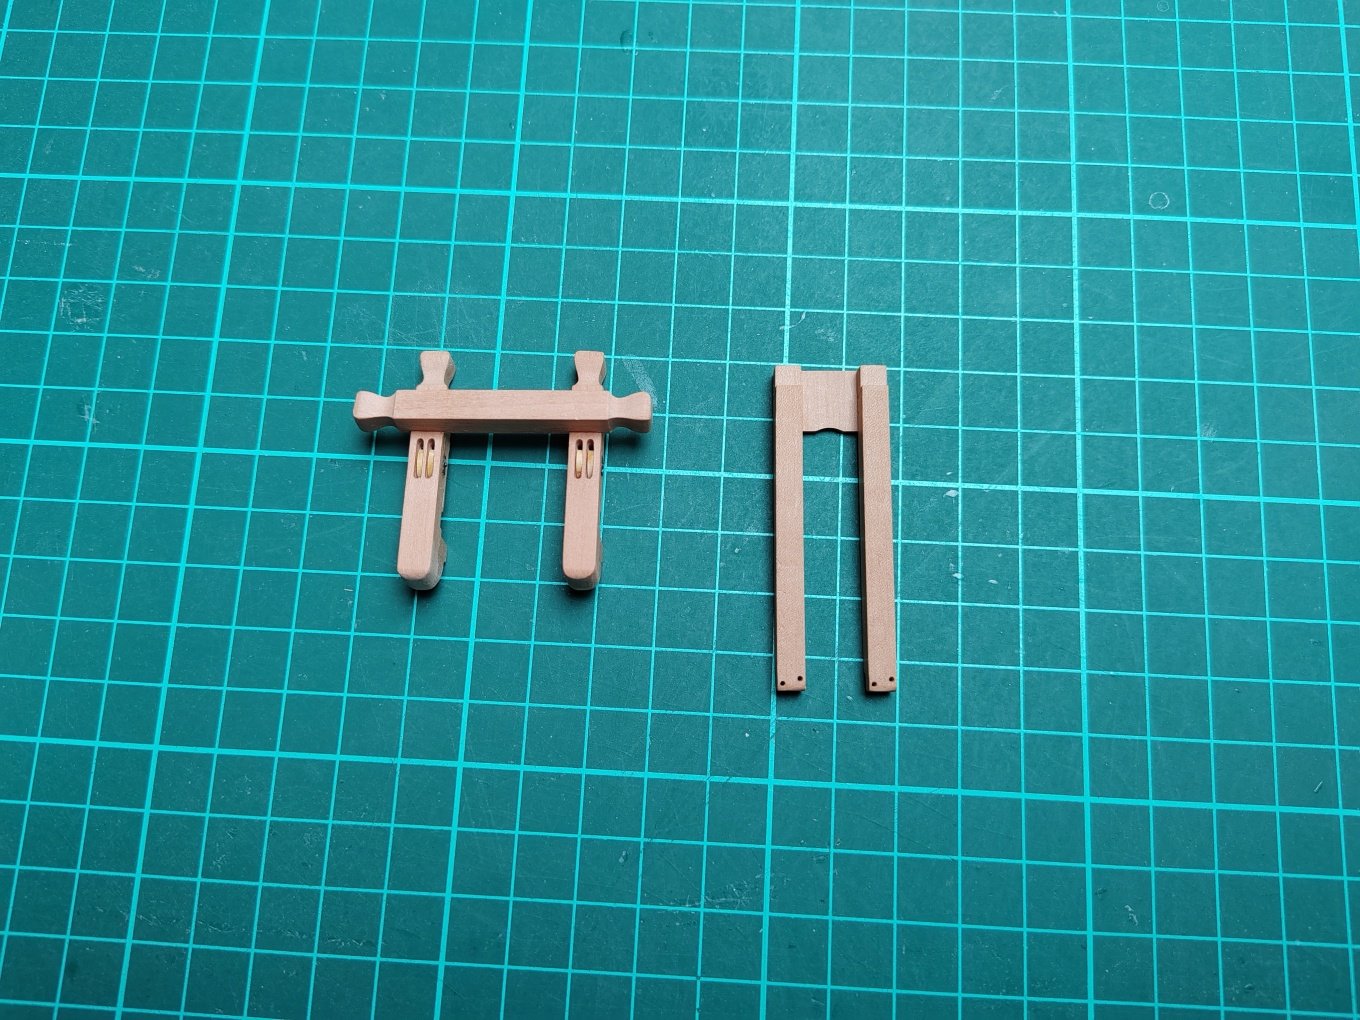
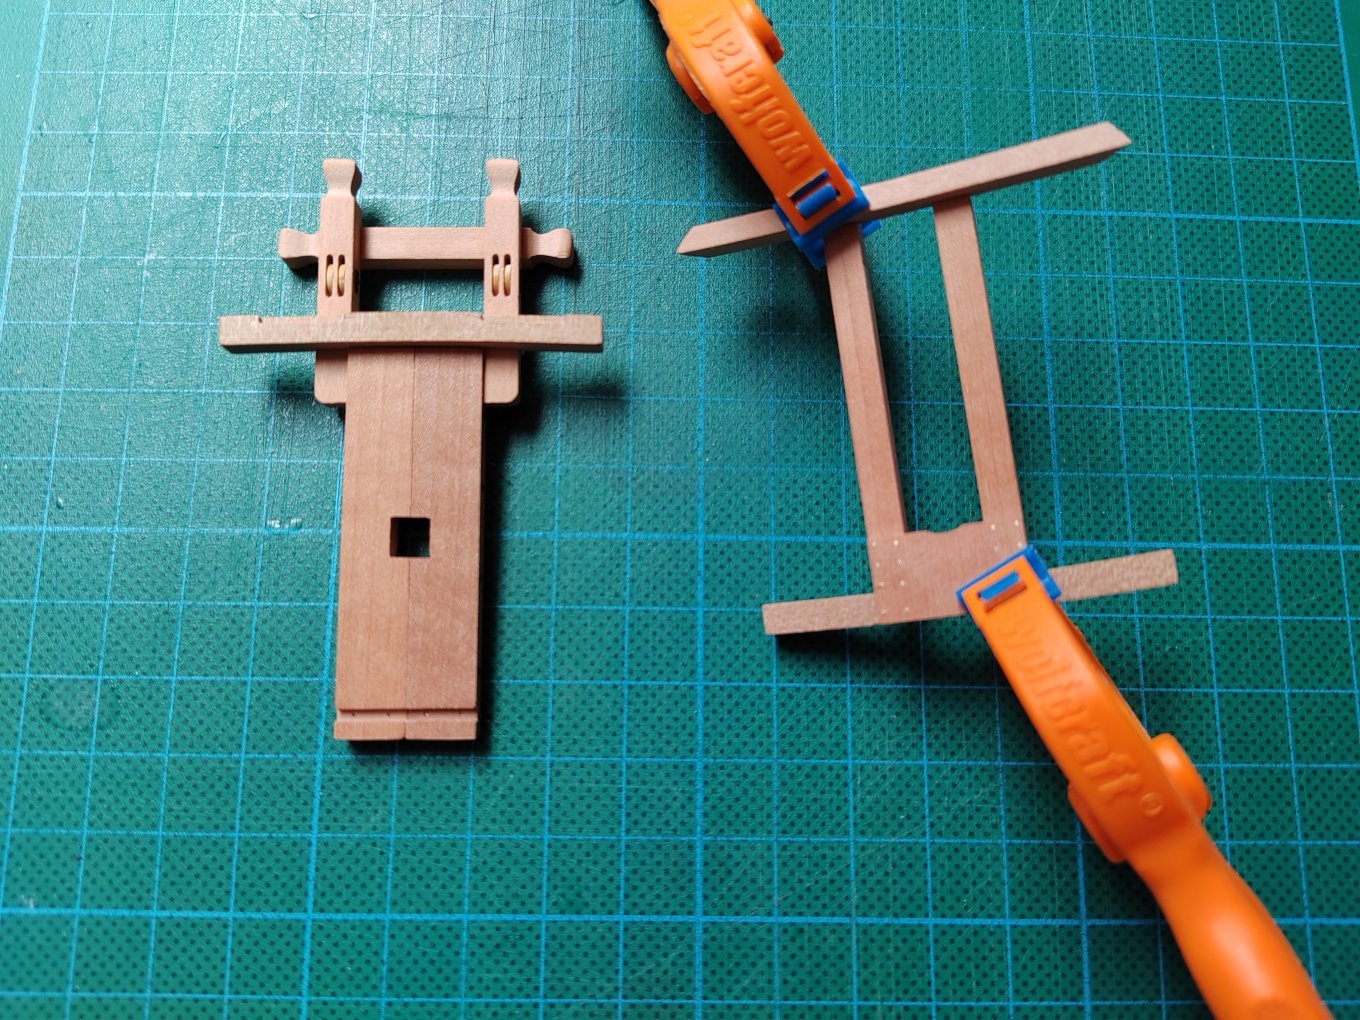
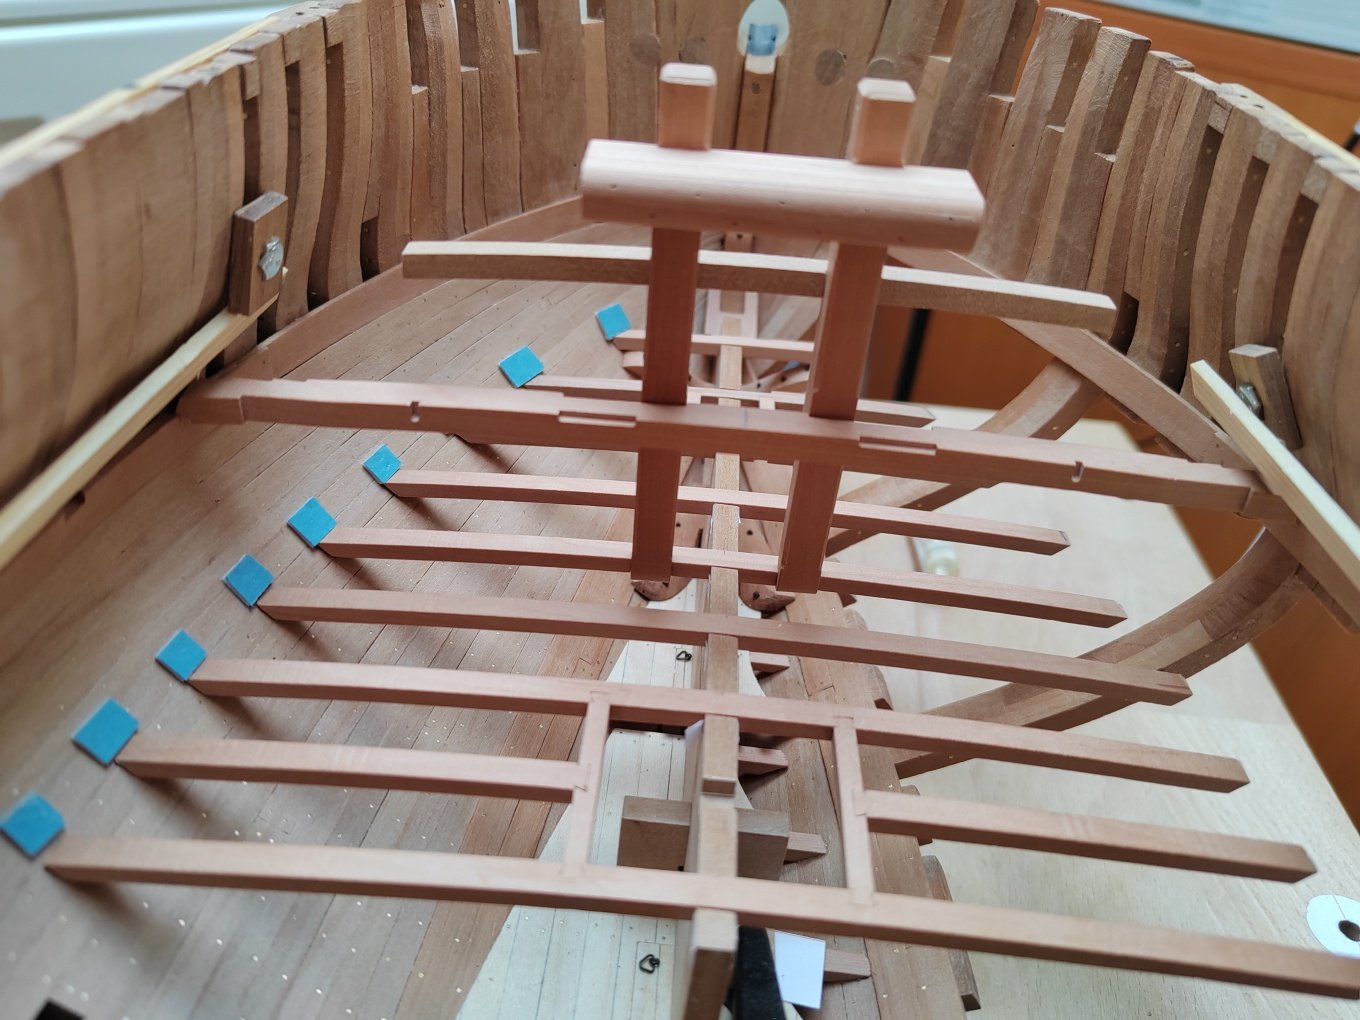
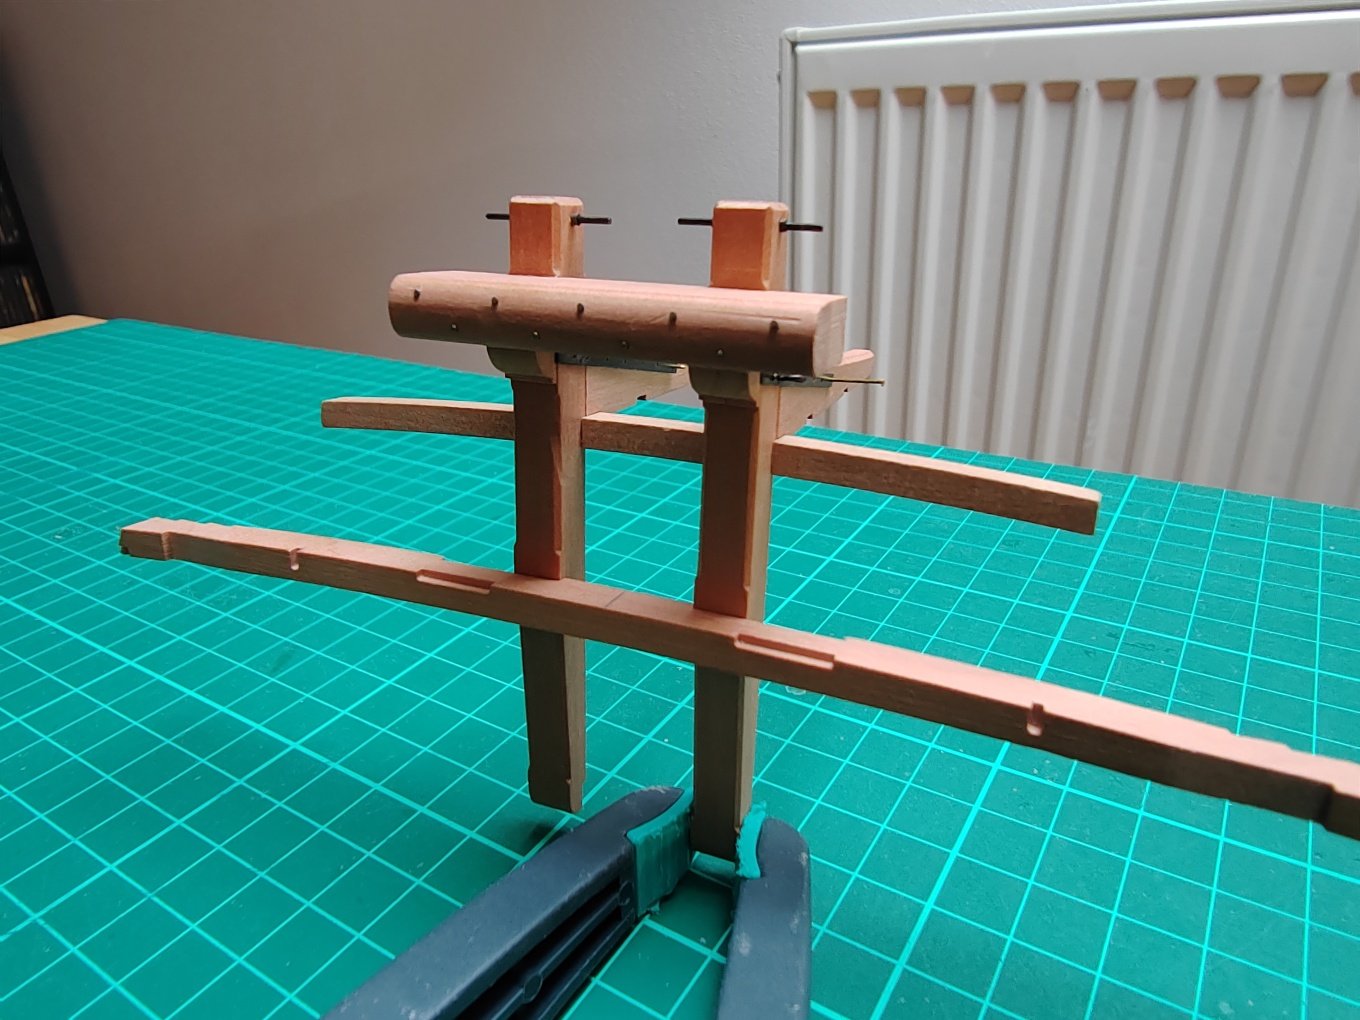
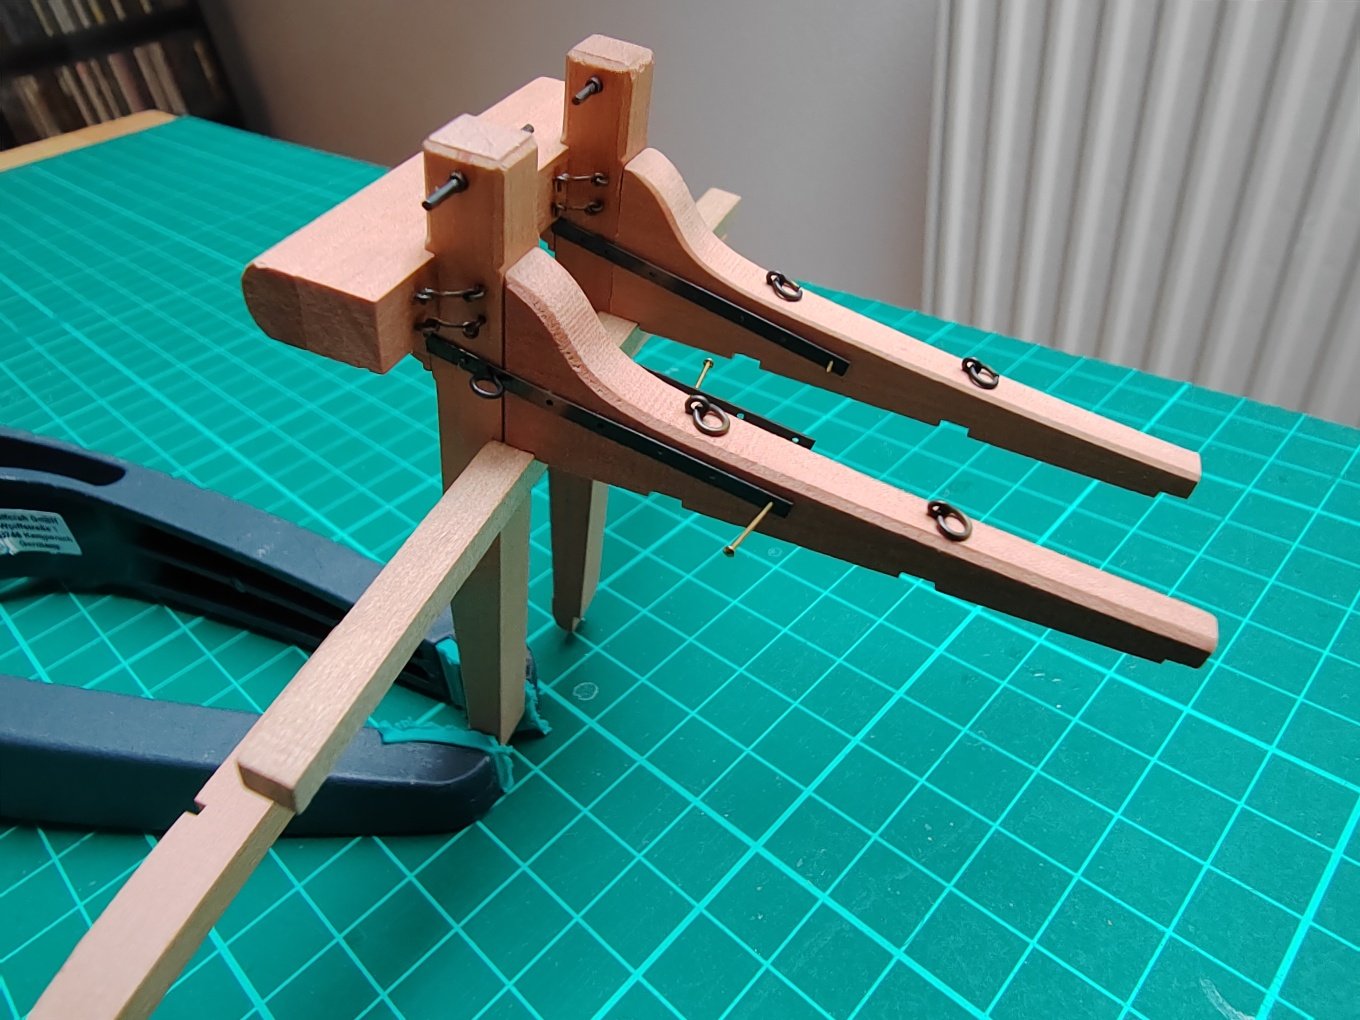
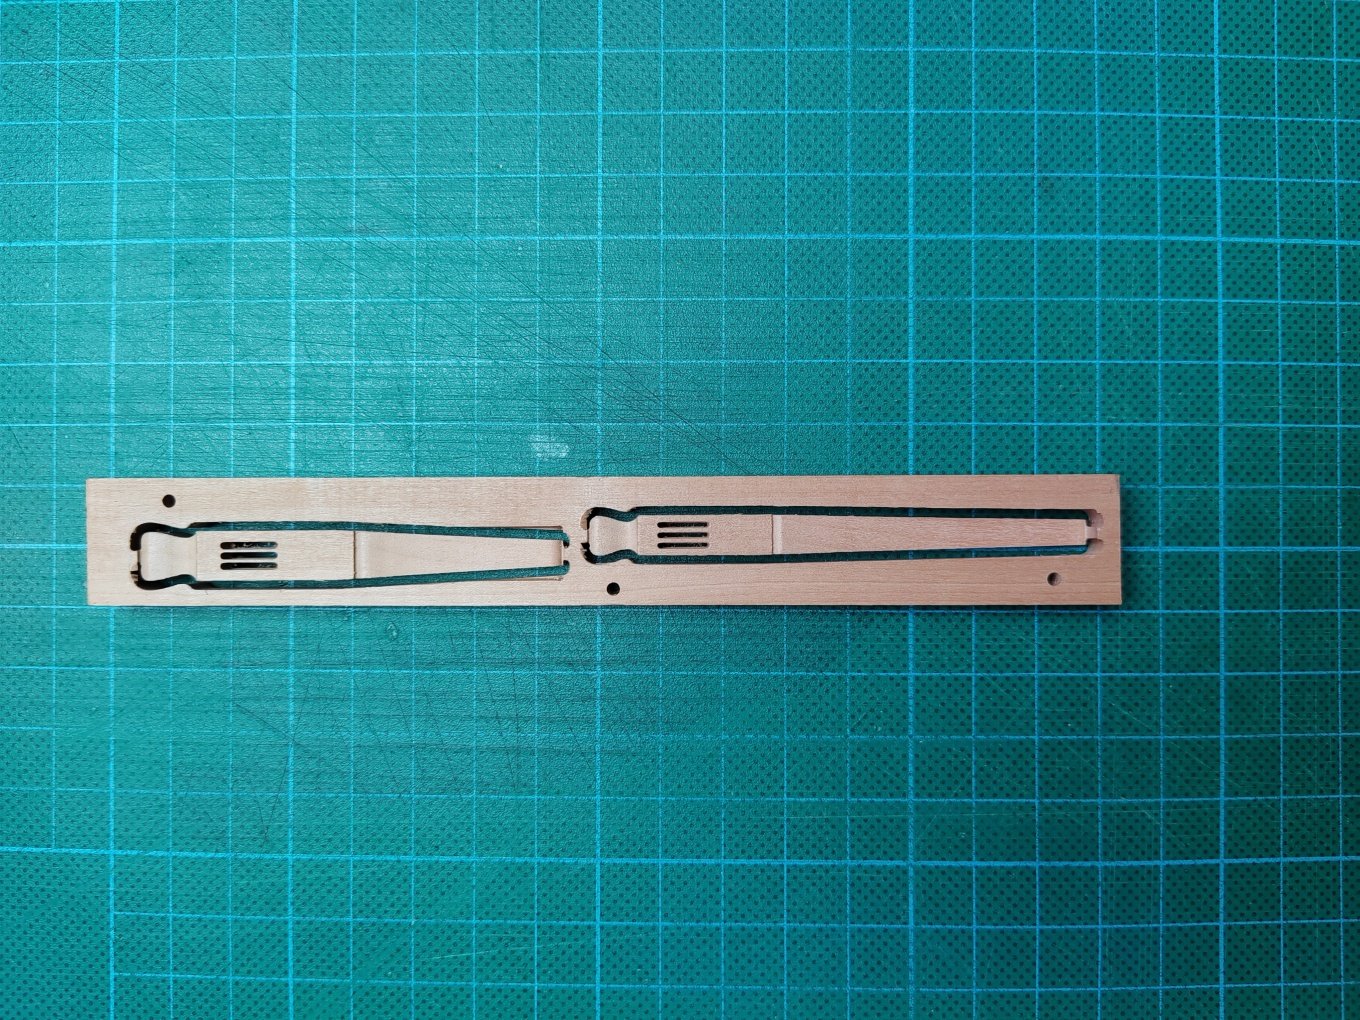
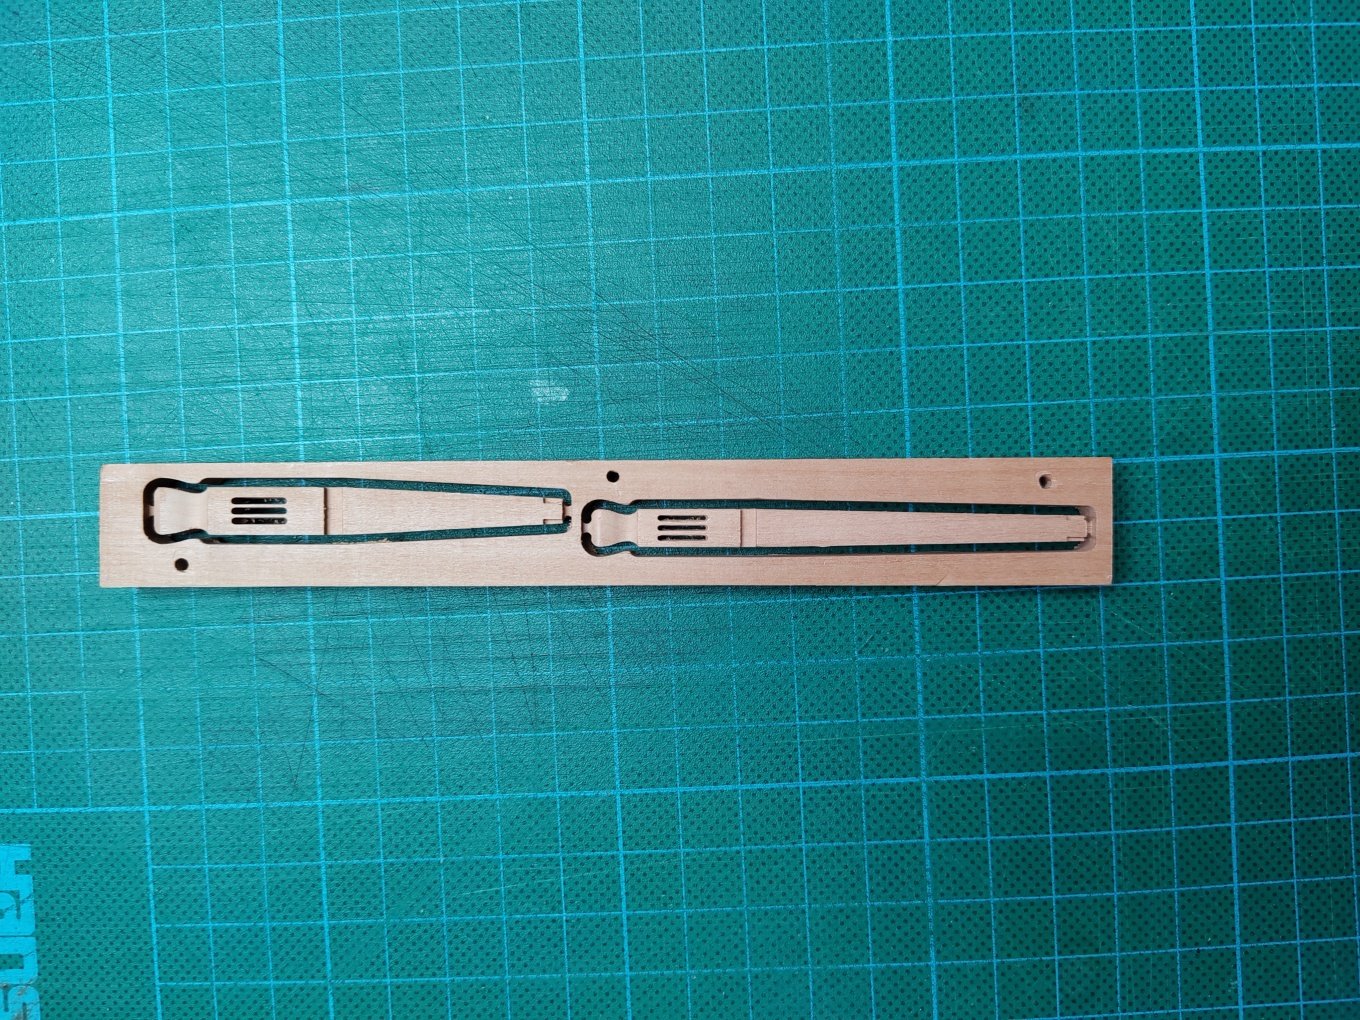
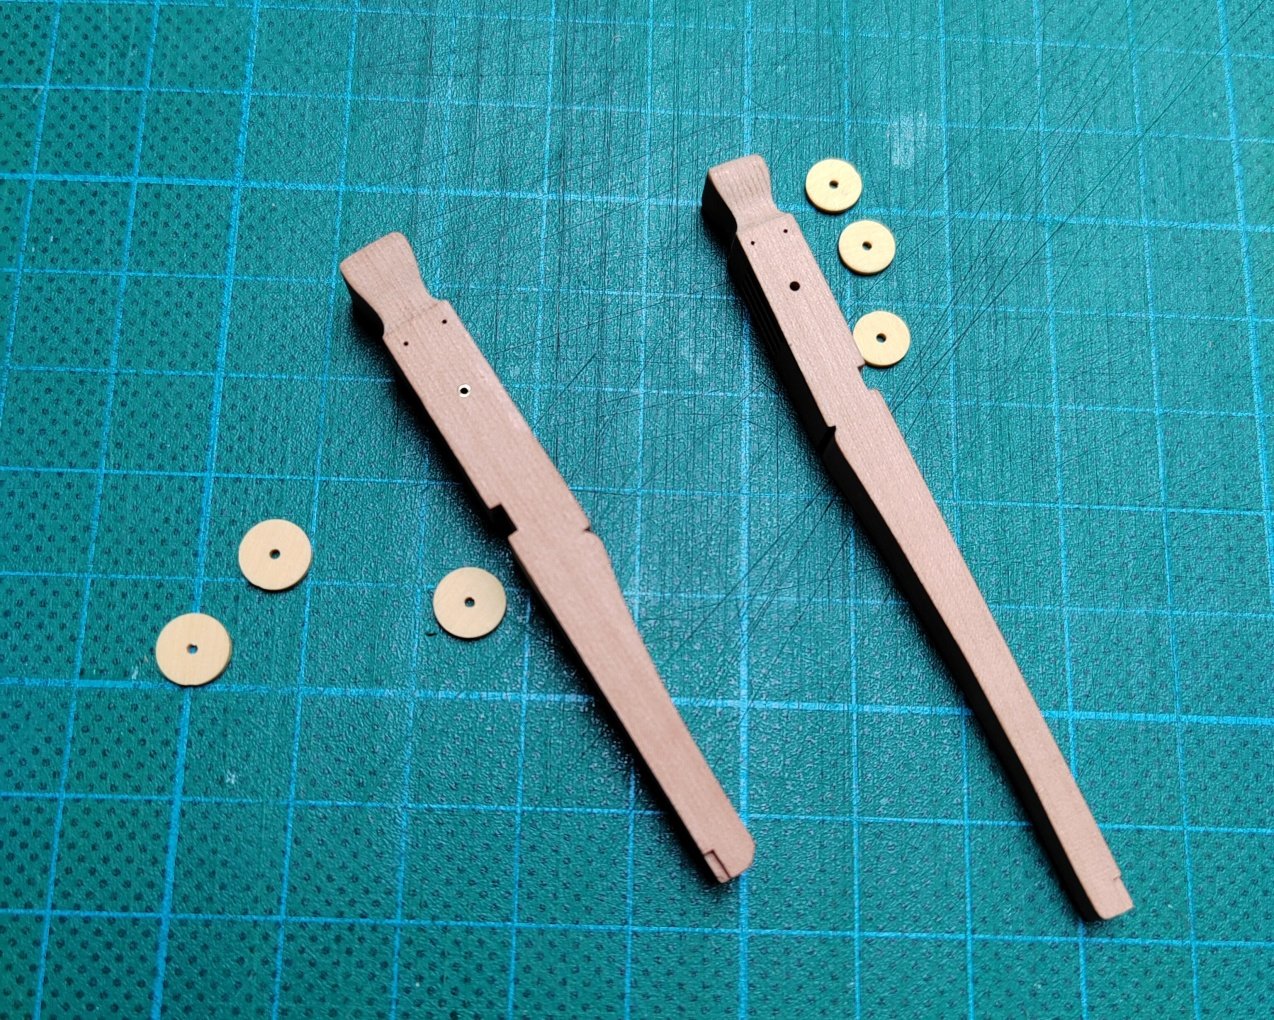
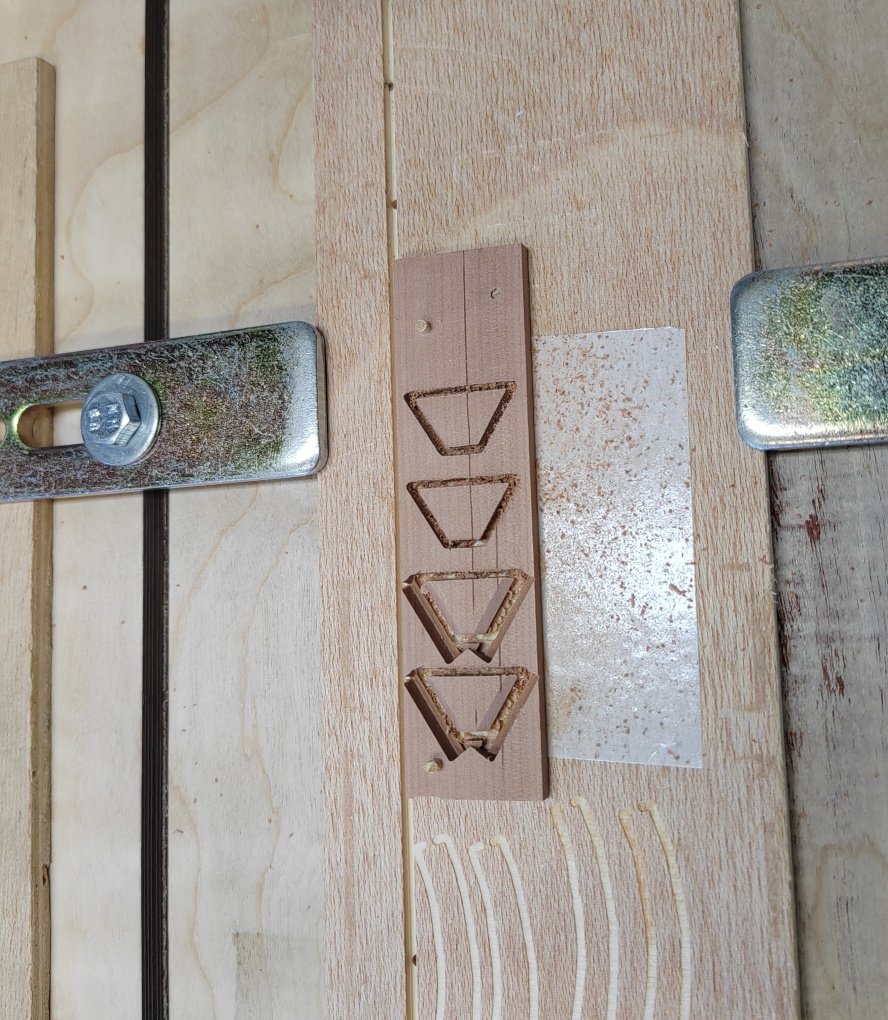
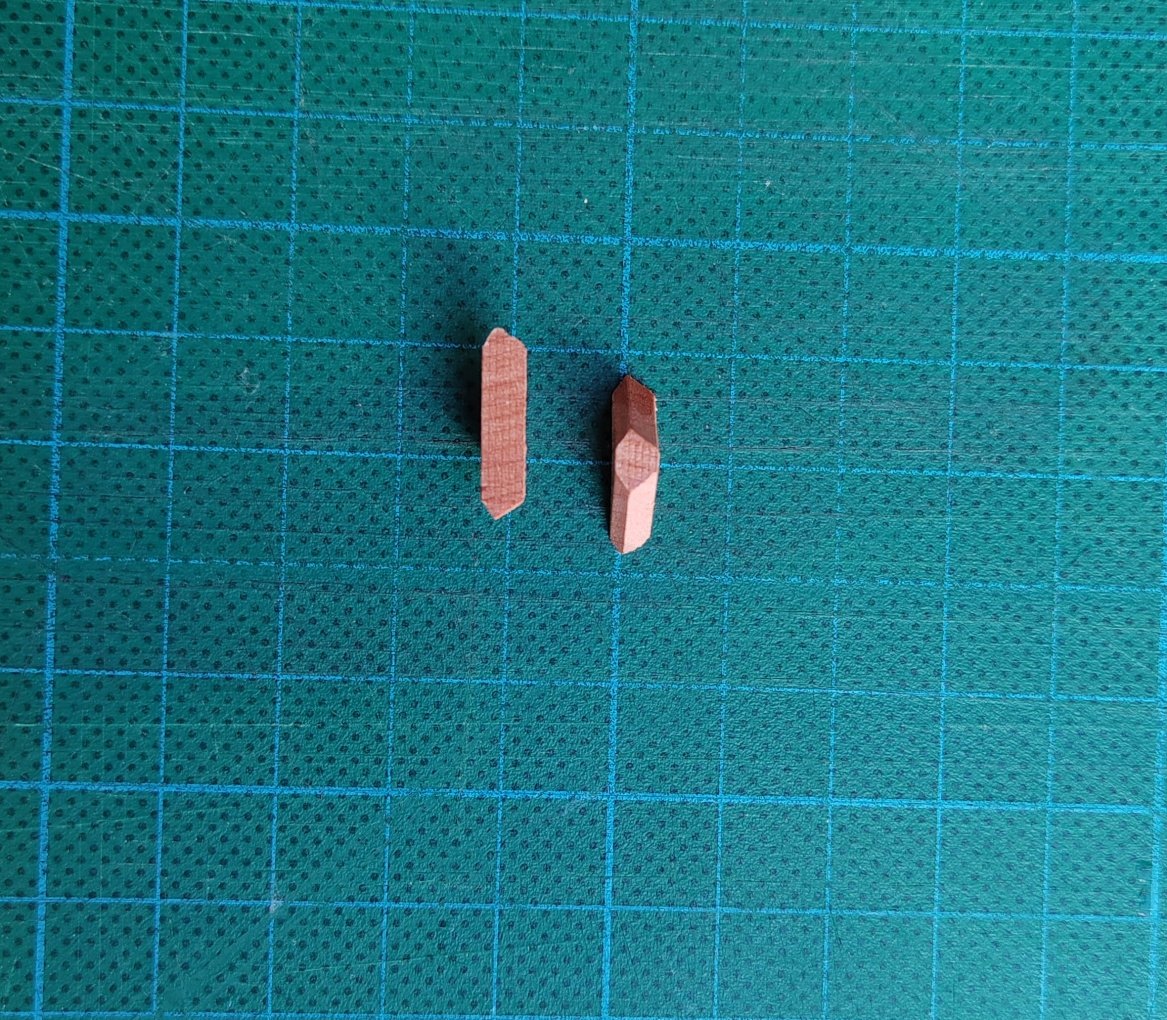
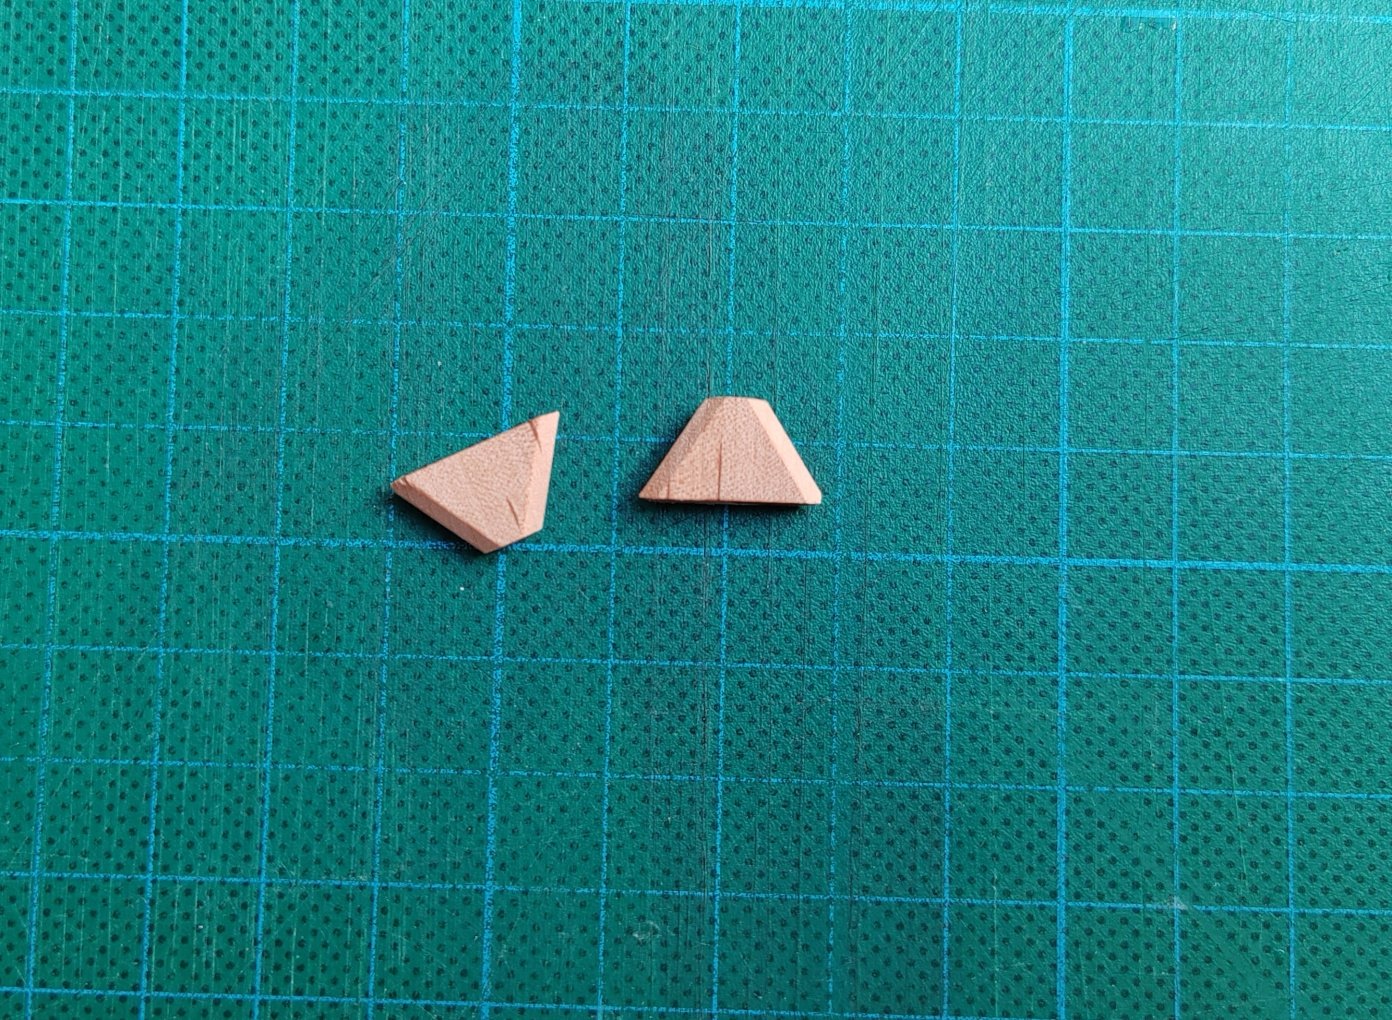
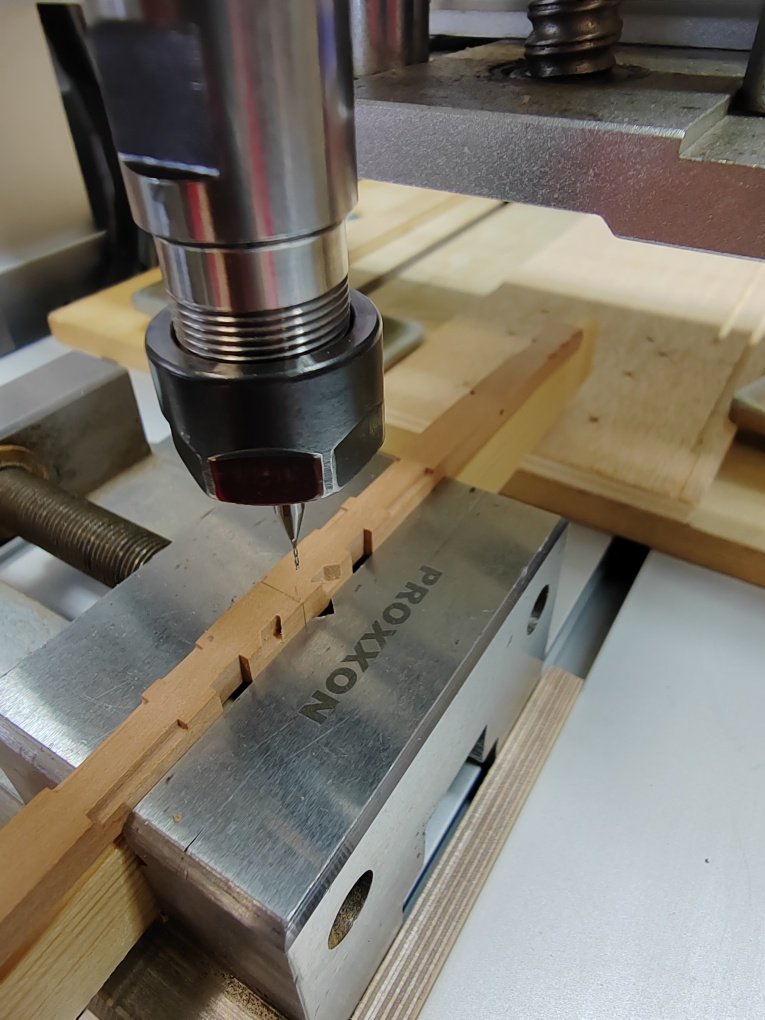
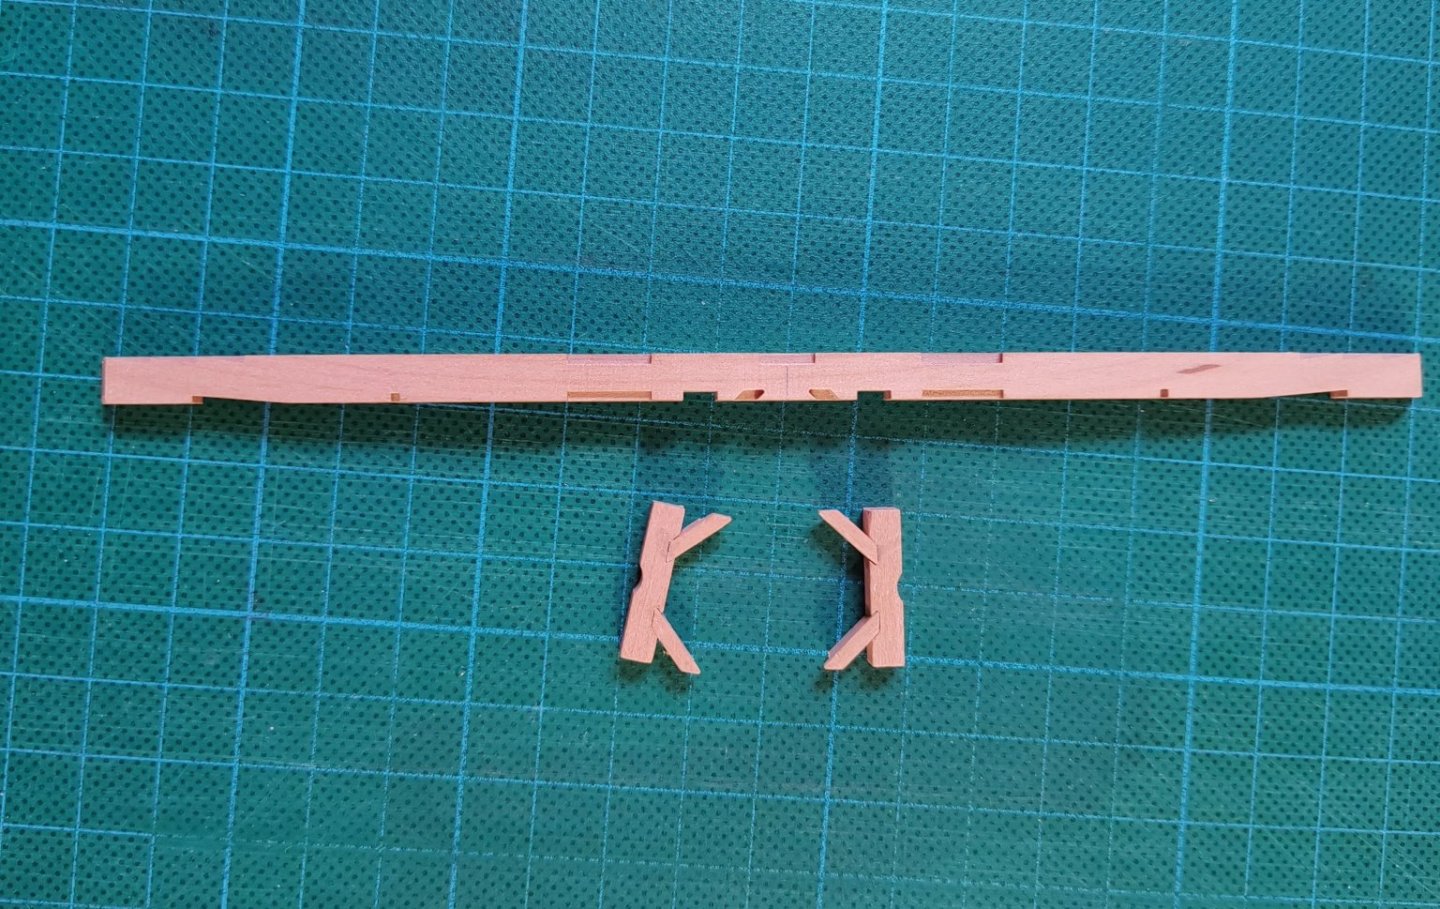
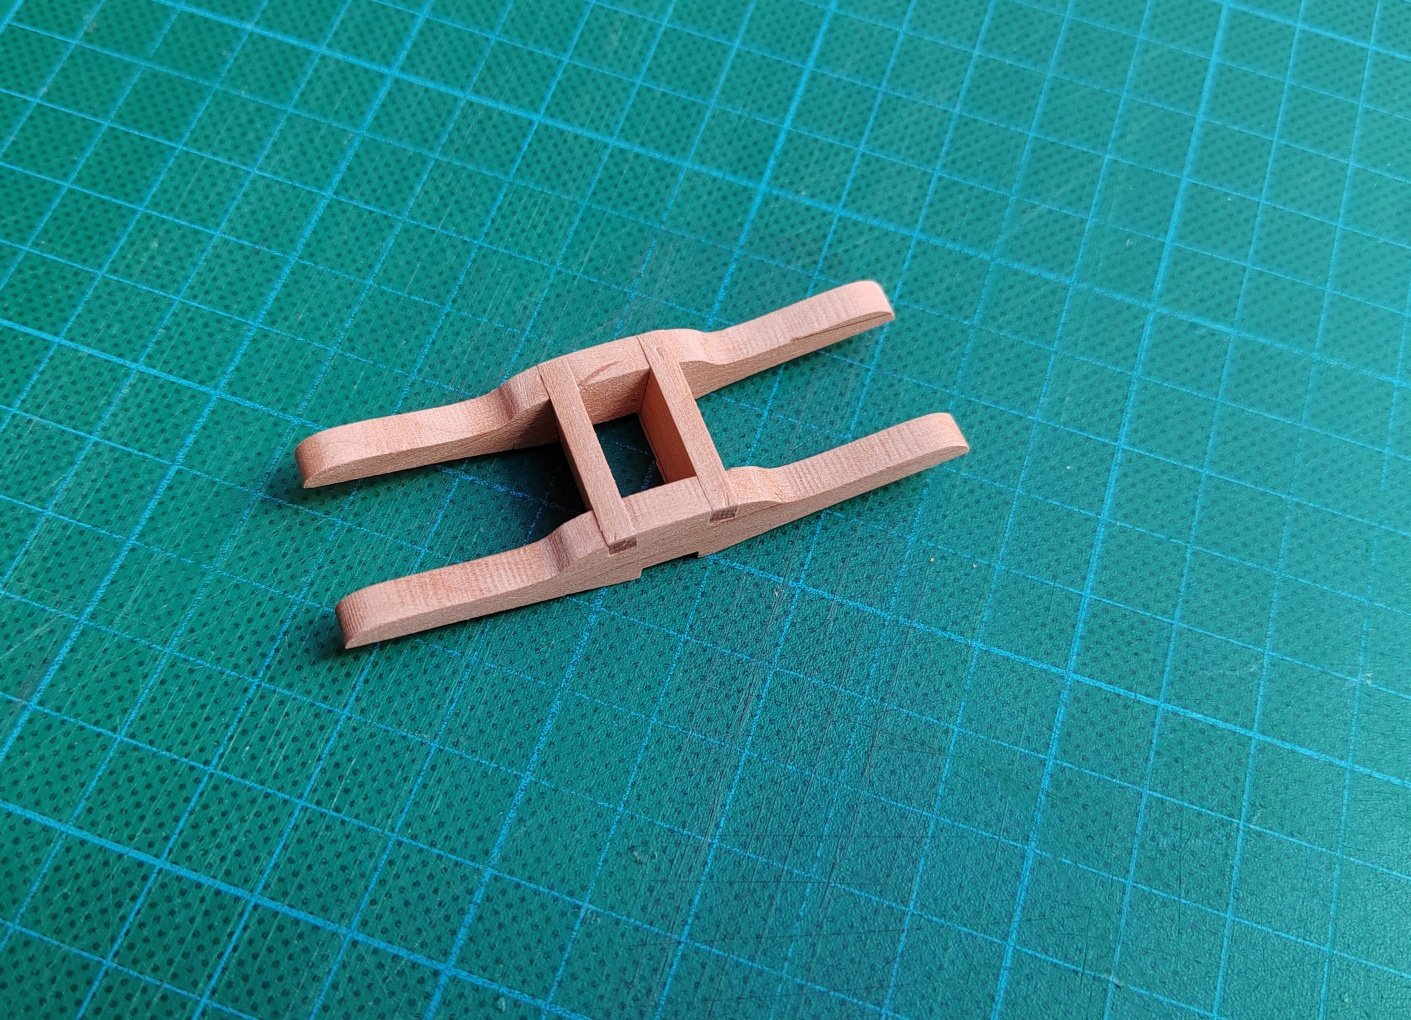
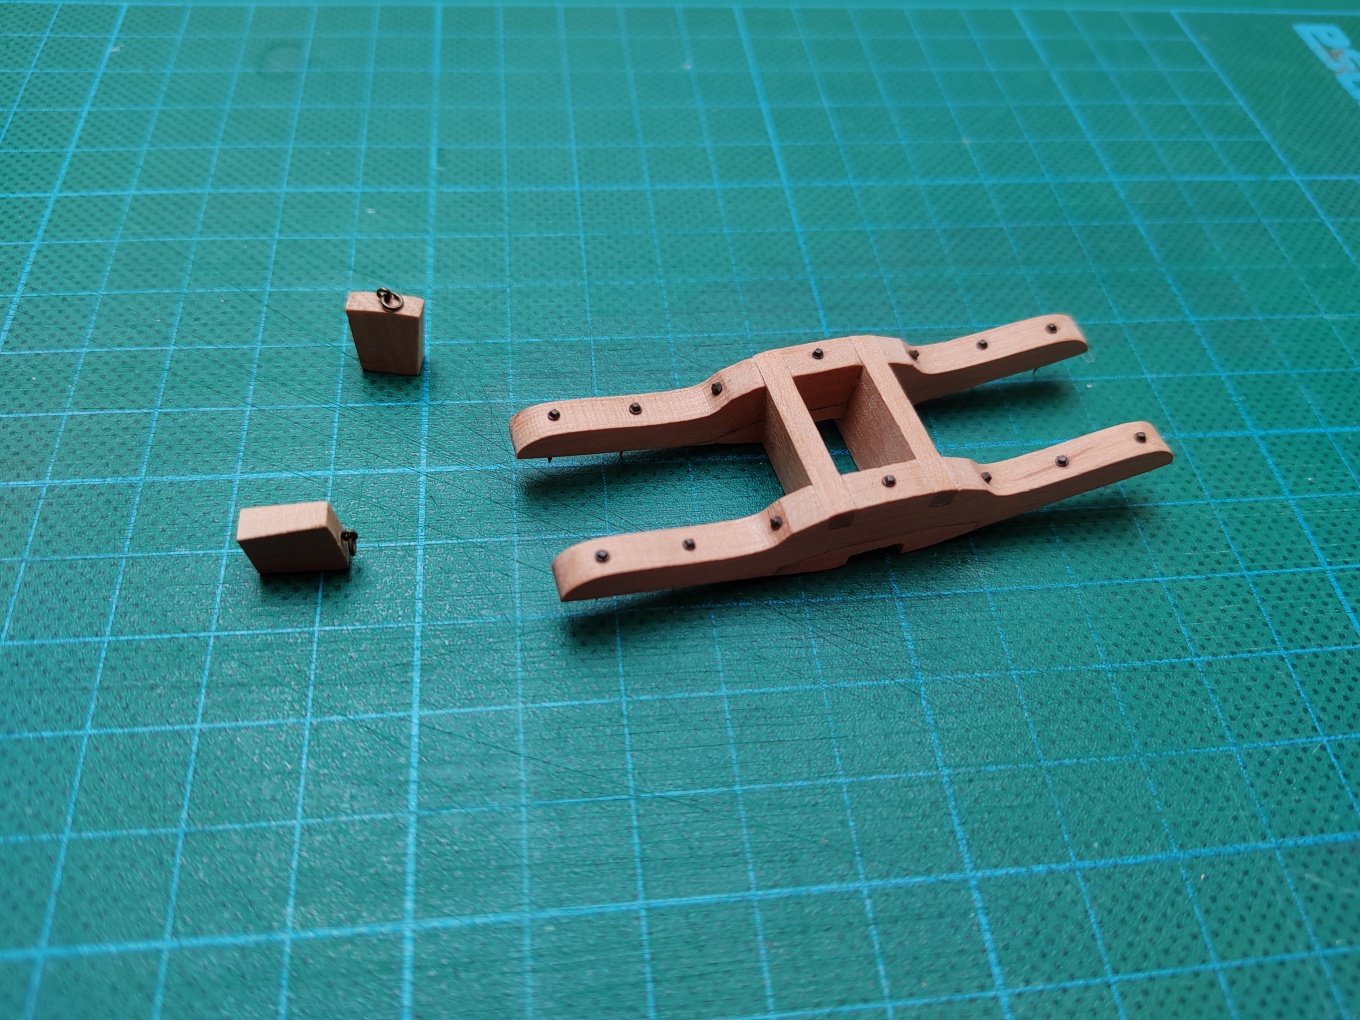
Thank you guys . To properly position the deck beams, it is advisable to already have some of the structural elements that will be part of the decks. I started with main bitts and standarts and jeer-bitts.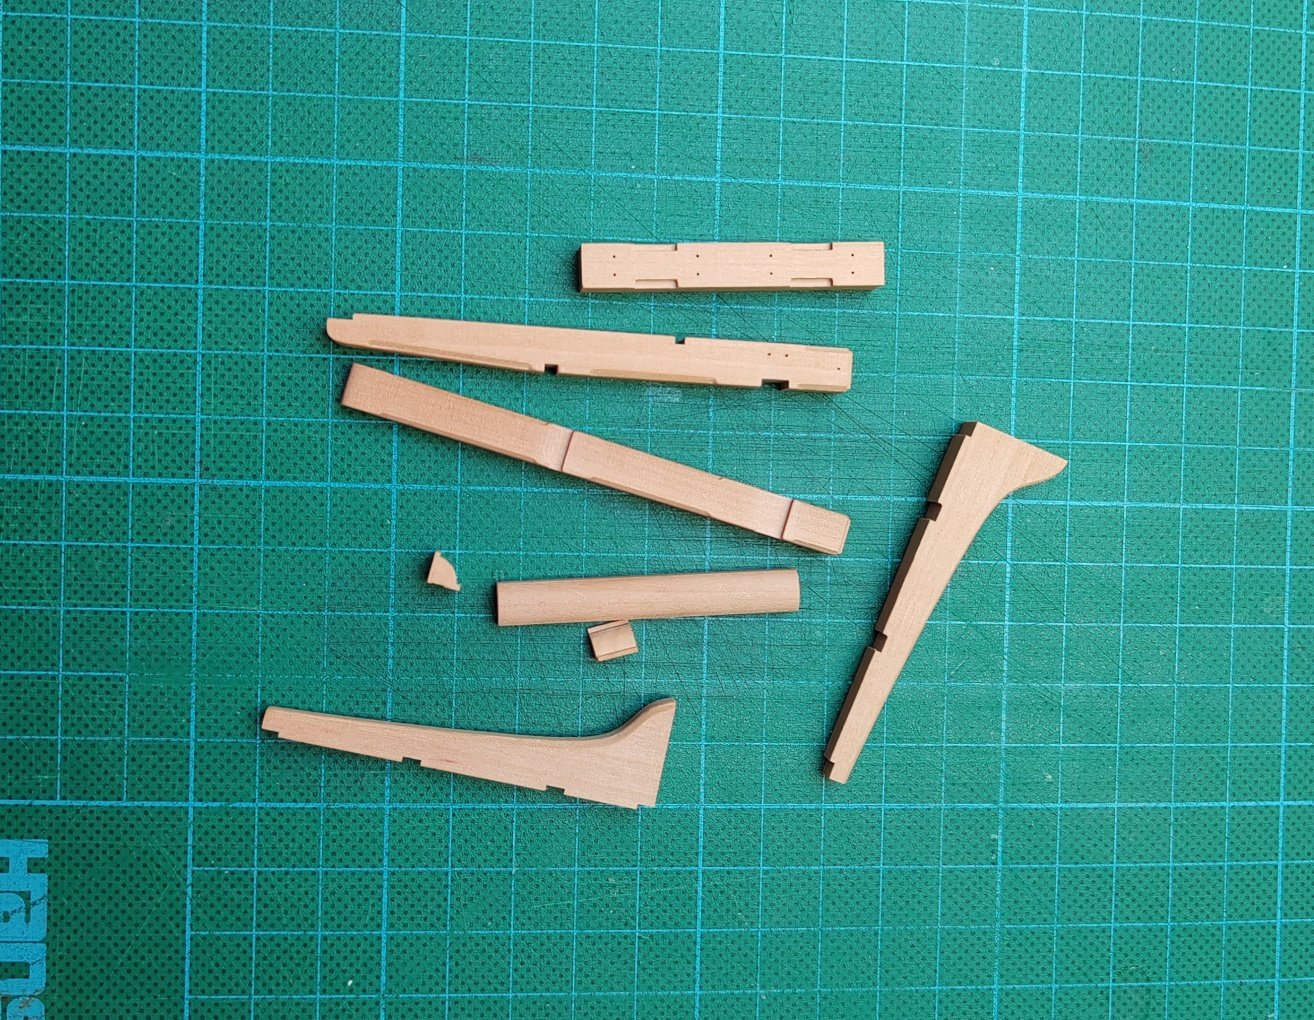

-
L'Amarante by marsalv - 1:36 - POF
marsalv replied to marsalv's topic in - Build logs for subjects built 1501 - 1750
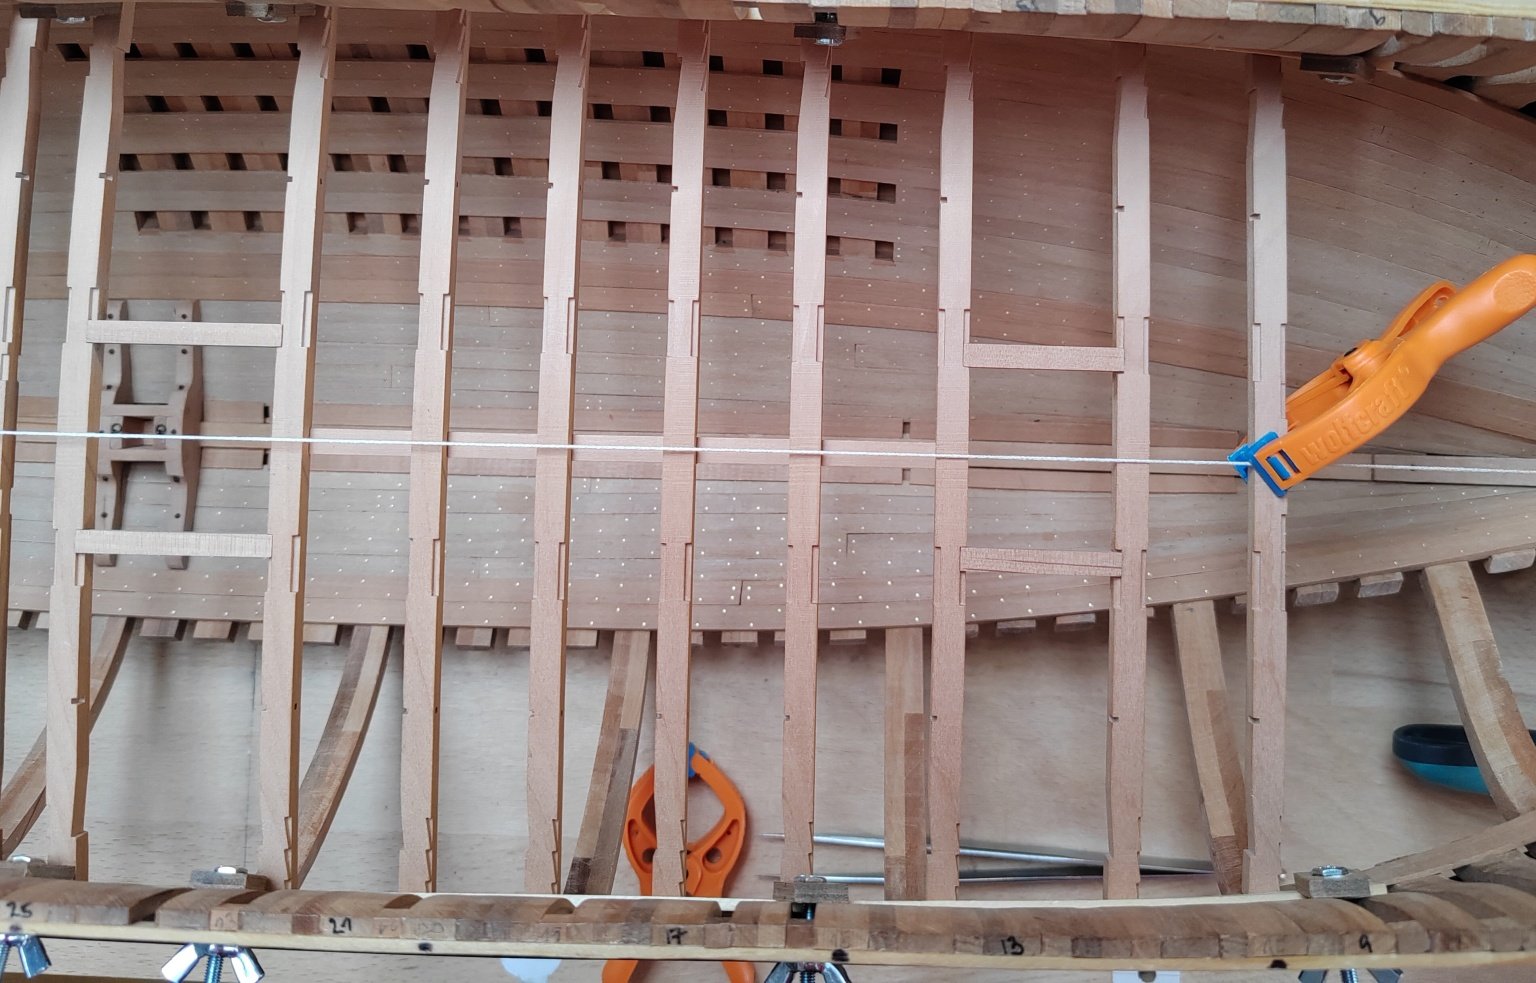
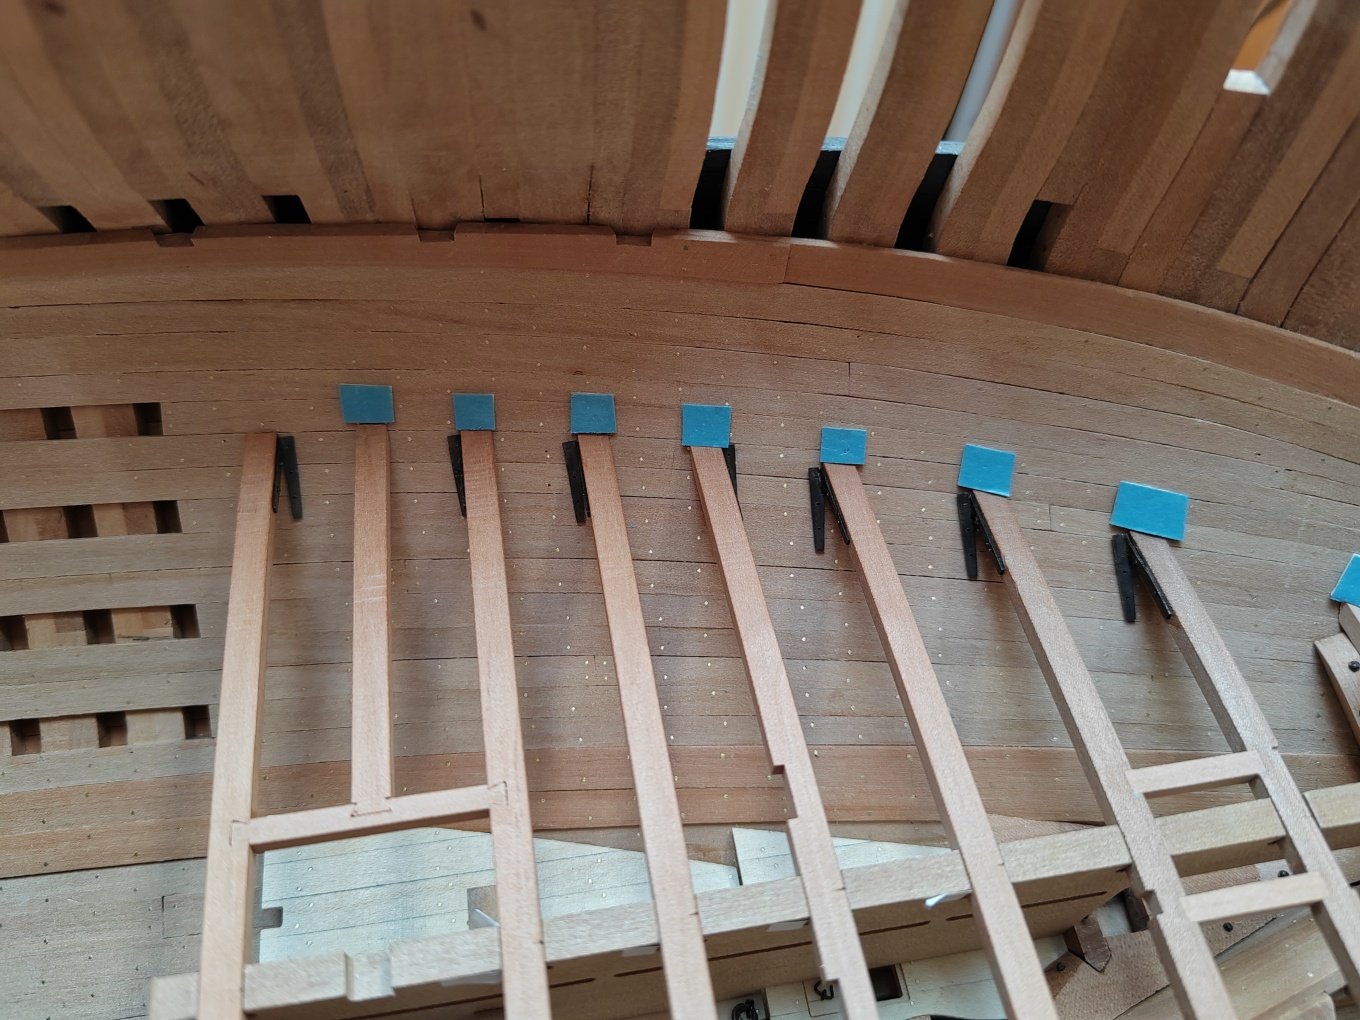
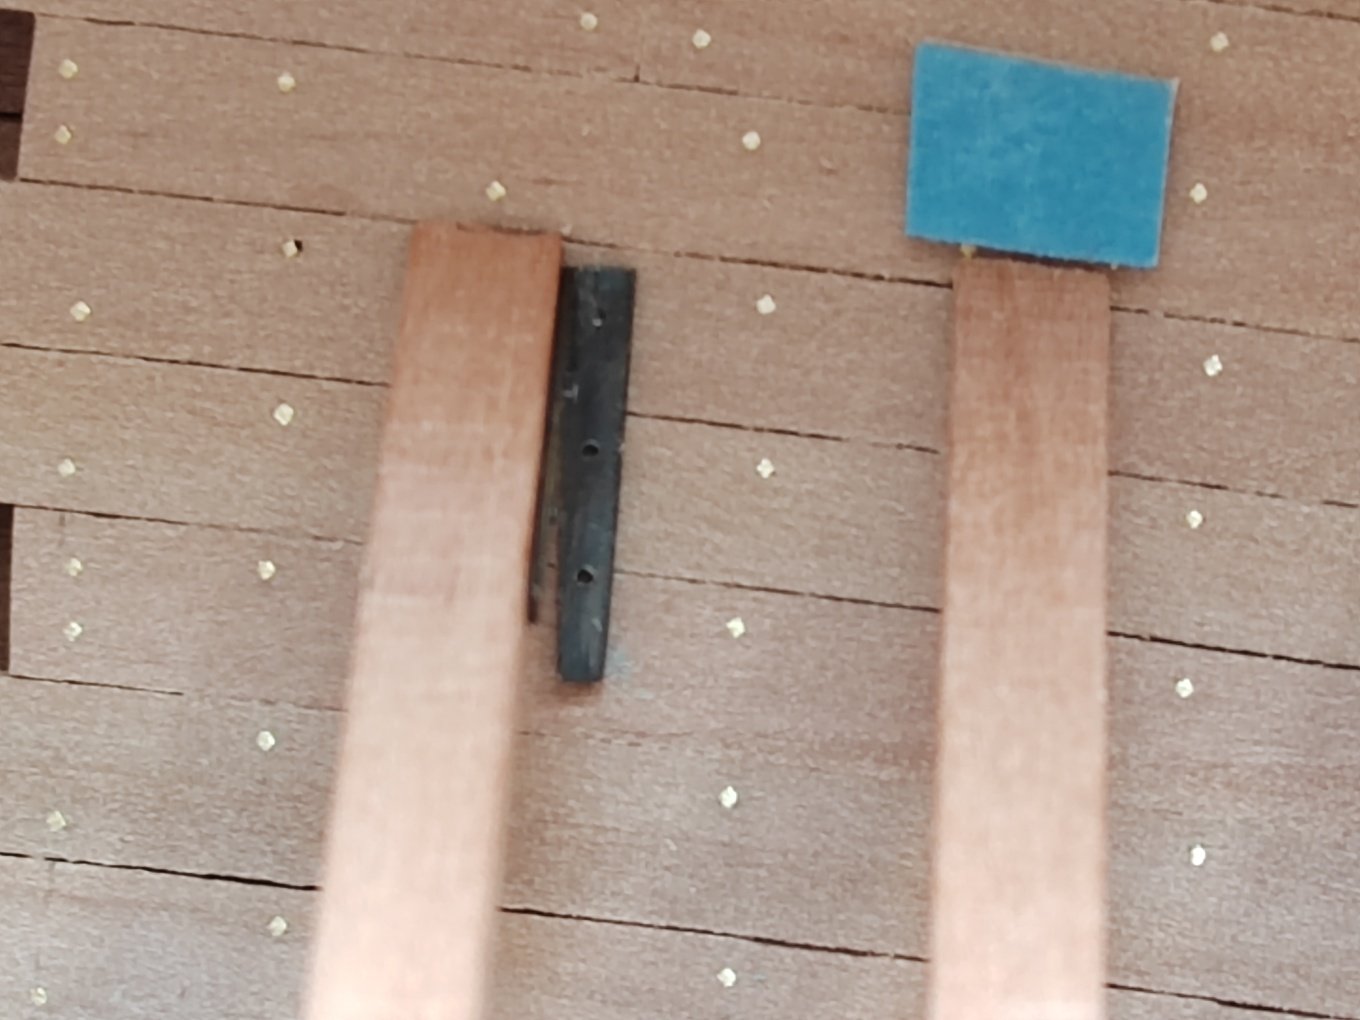
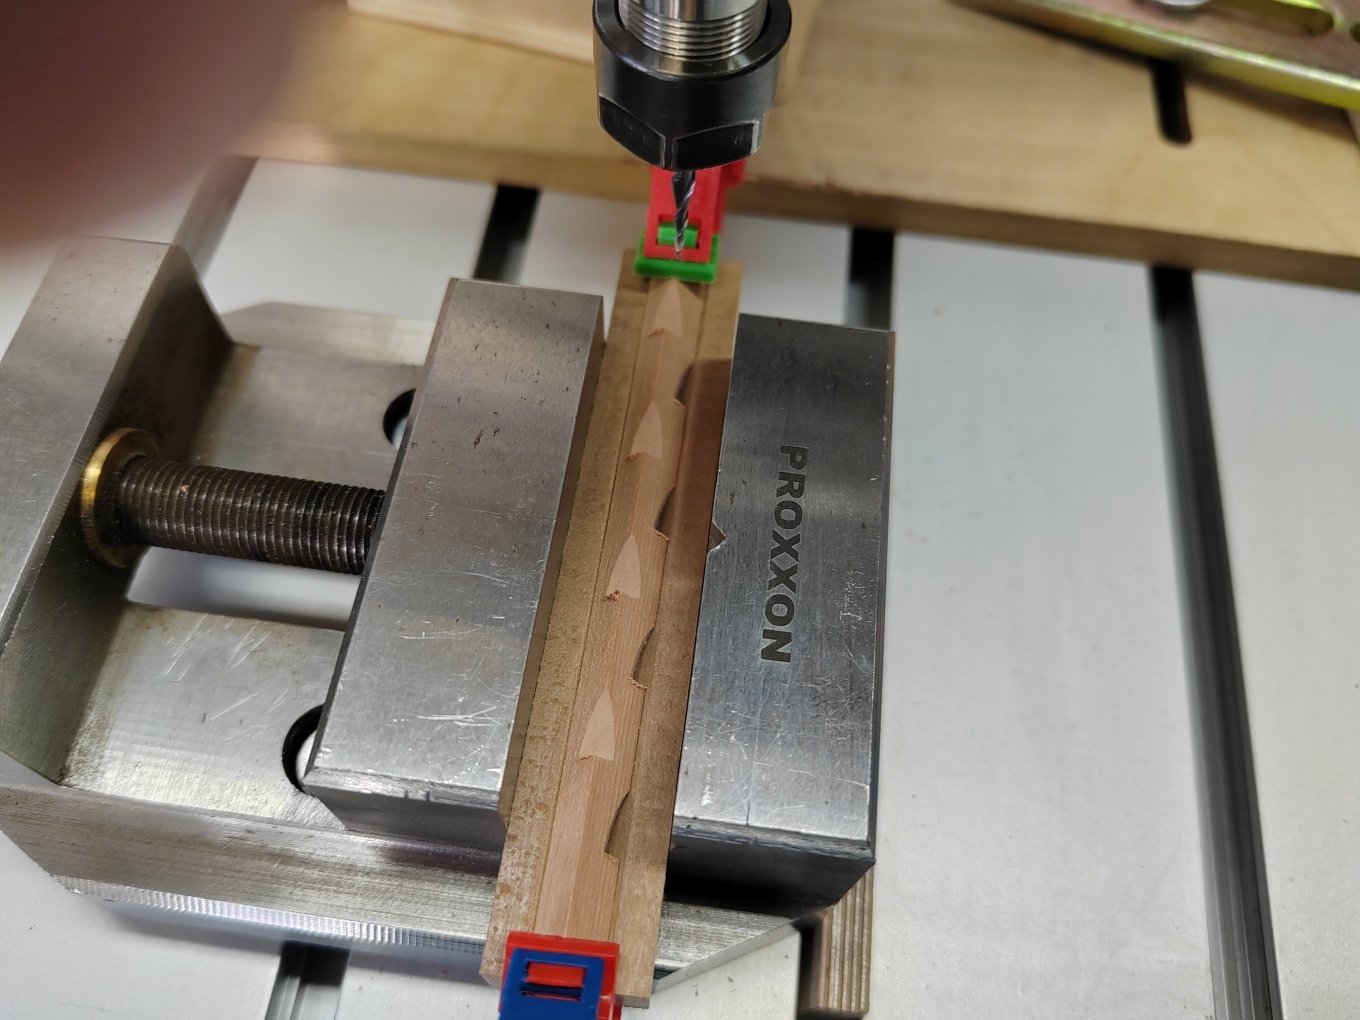
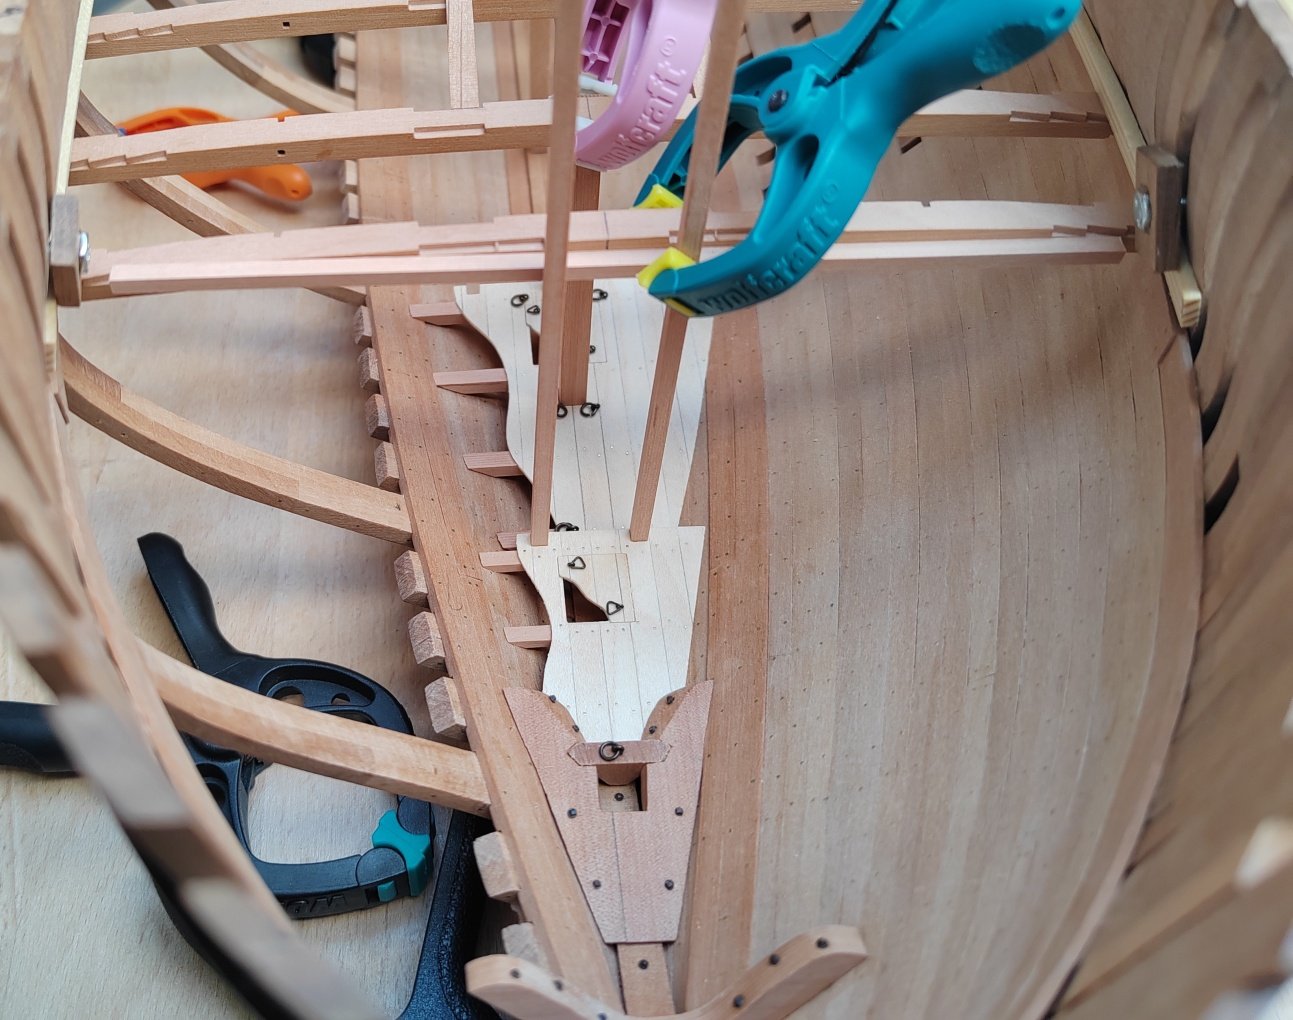
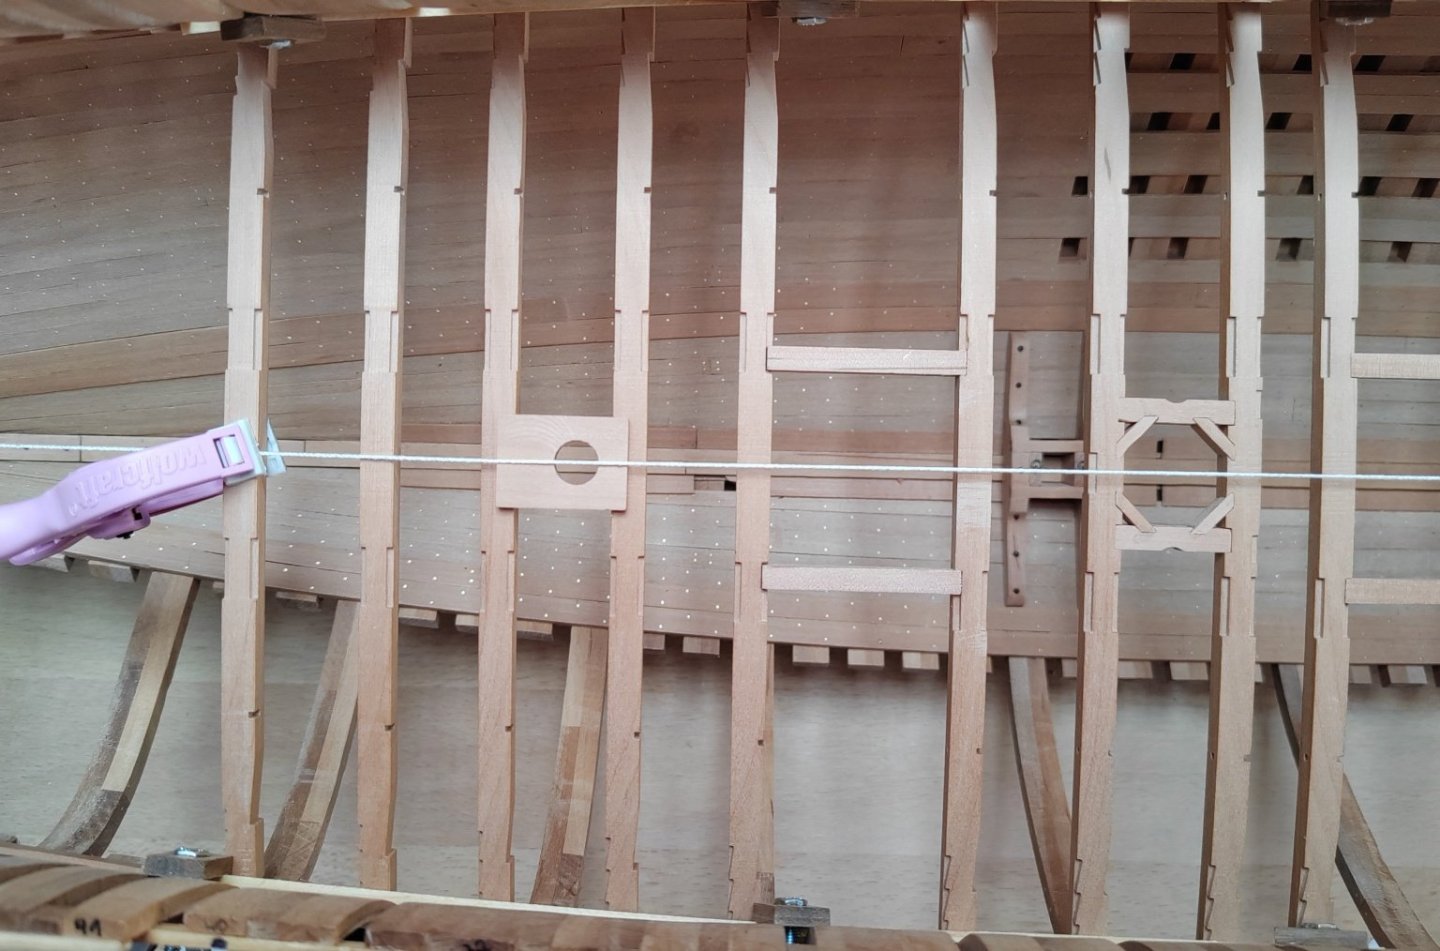
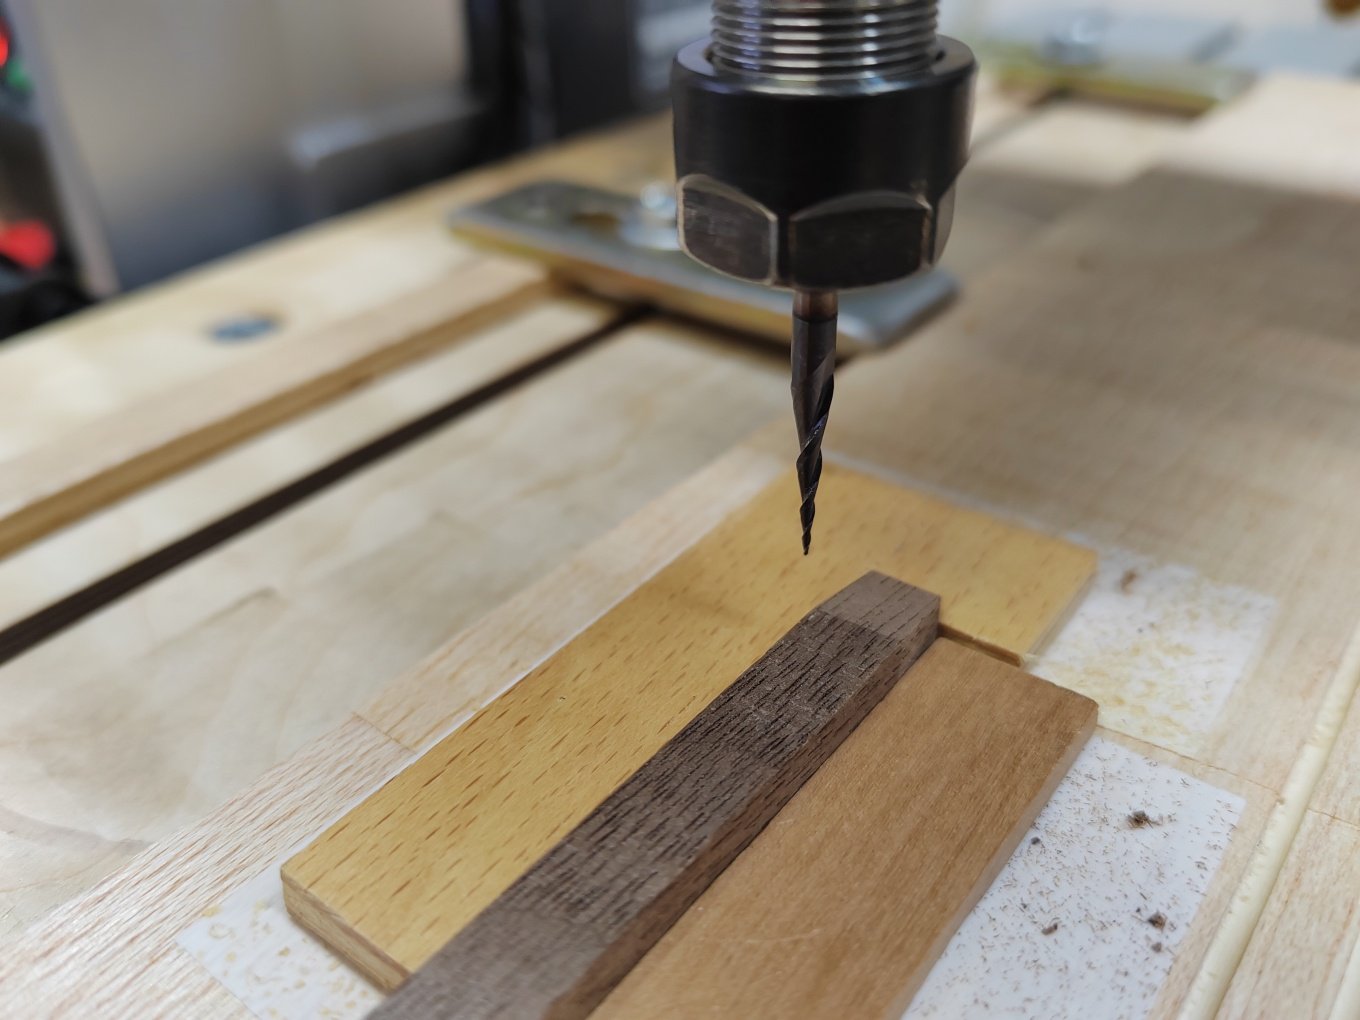
Hi No Idea, at Le Gros Ventre I made Samson's post using a shape cutter. Here it's completely CNC - the result is nice . I continue with the deck beams in the lower front part of the hull. These deck beams will be attached to the inner planking on one side, on the other side, where the frames are cut out, the ends of the deck beams will be in the air, which makes their installation somewhat complicated. I made an auxiliary jig for this purpose.


-
L'Amarante by marsalv - 1:36 - POF
marsalv replied to marsalv's topic in - Build logs for subjects built 1501 - 1750
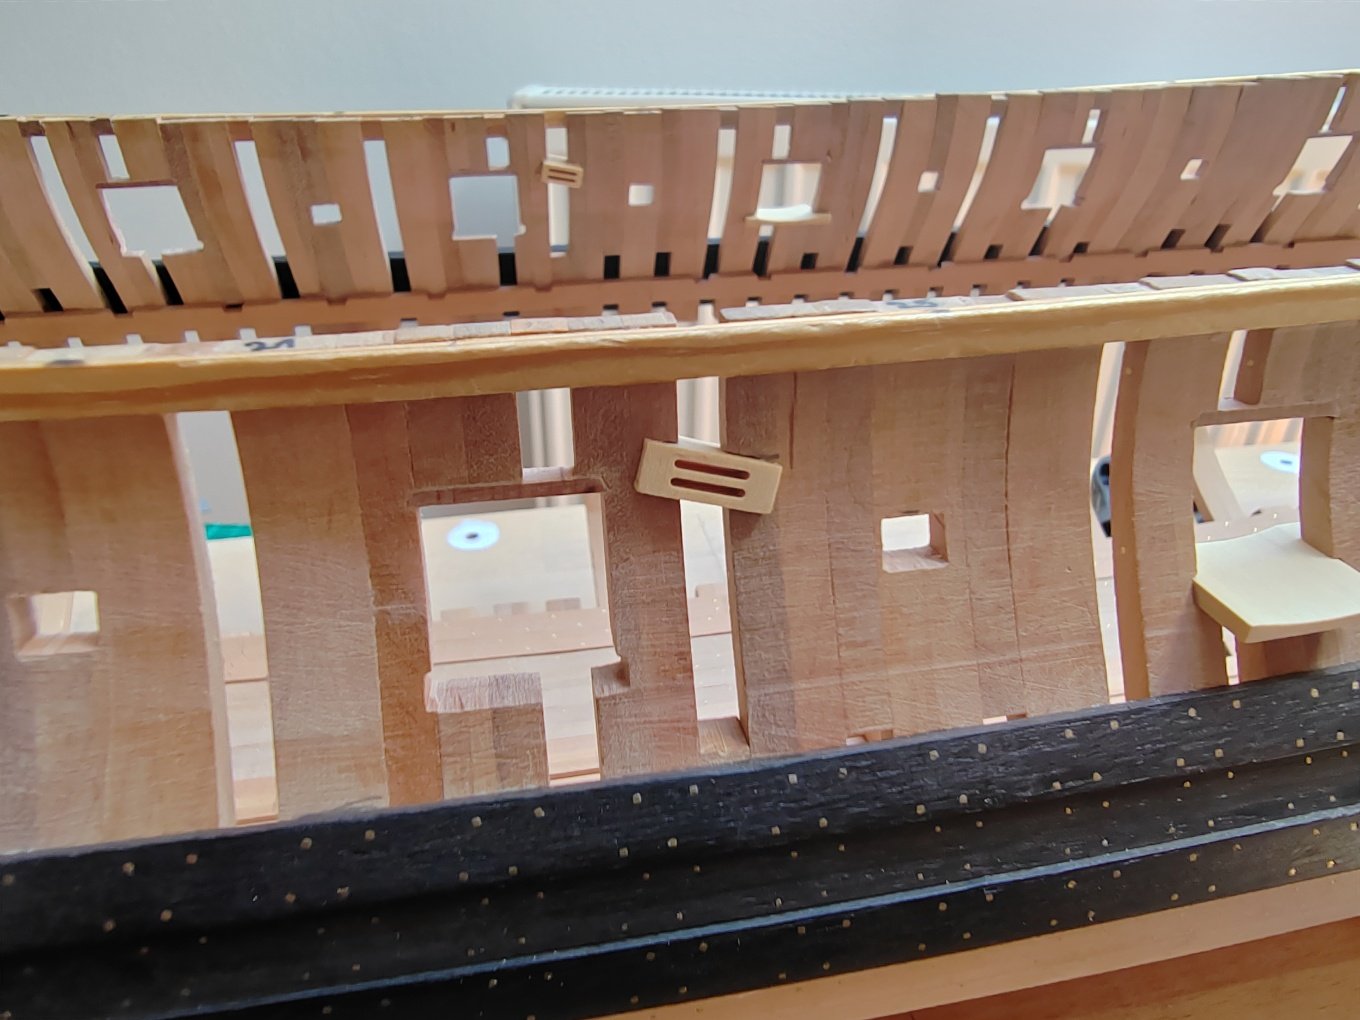
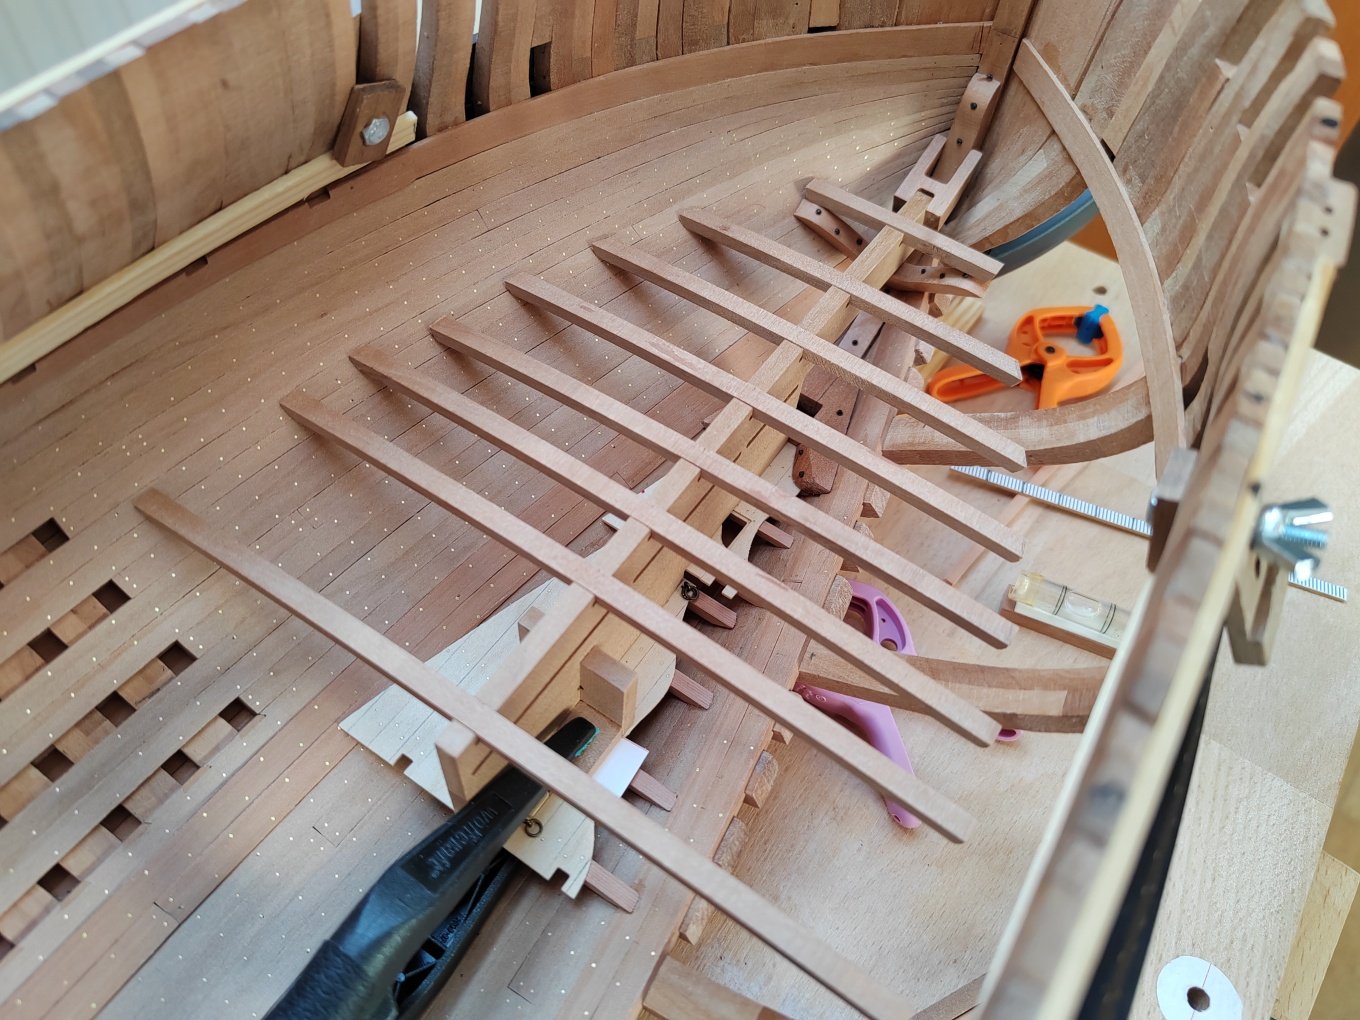
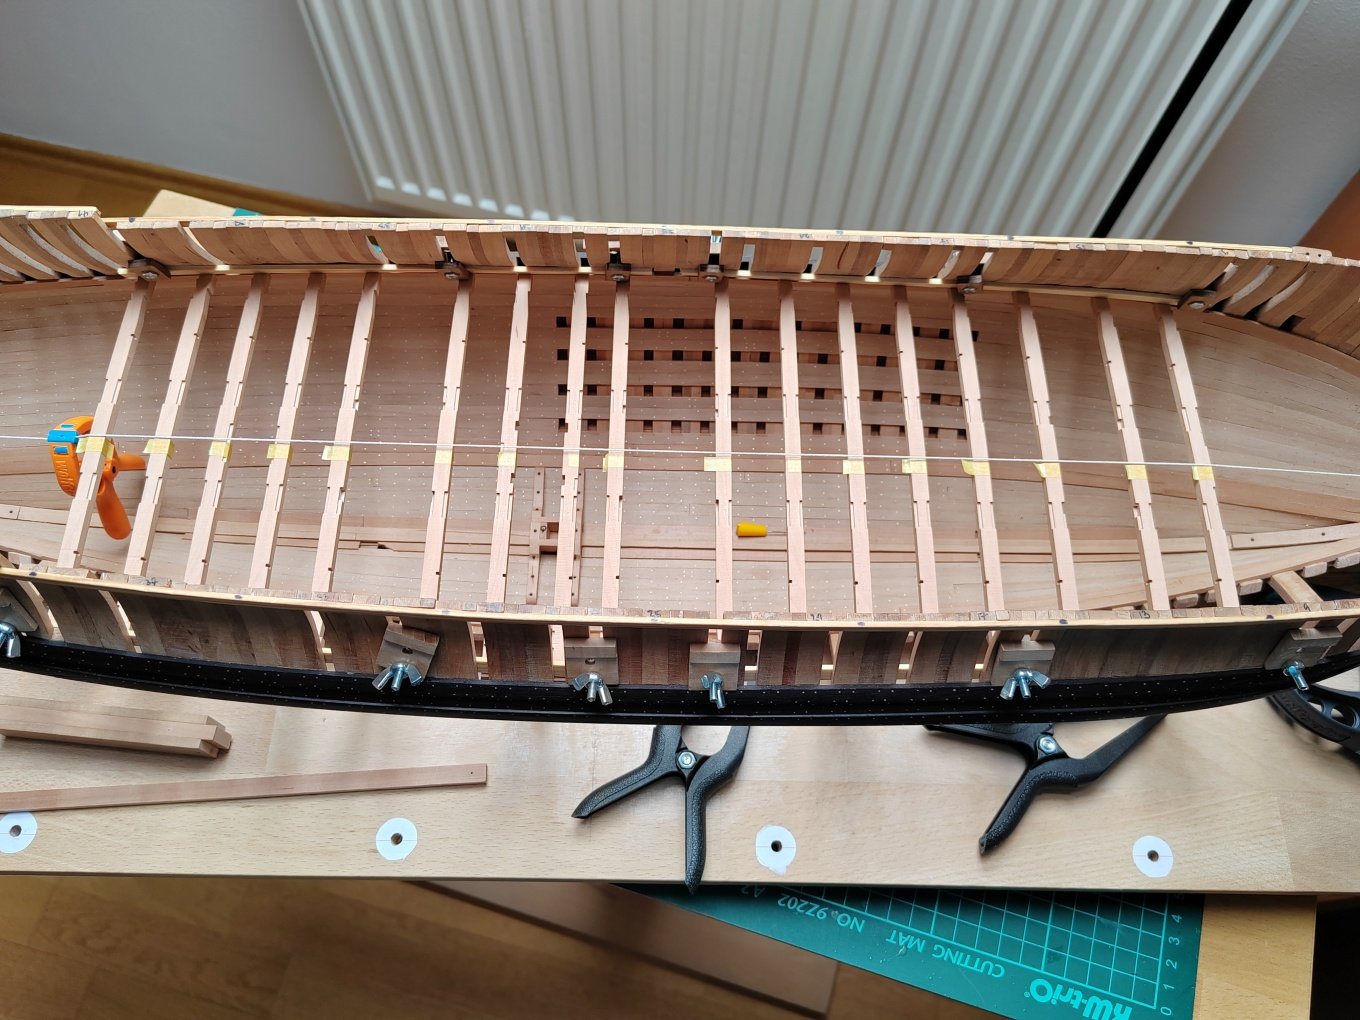
Interior floors.


-
L'Amarante by marsalv - 1:36 - POF
marsalv replied to marsalv's topic in - Build logs for subjects built 1501 - 1750
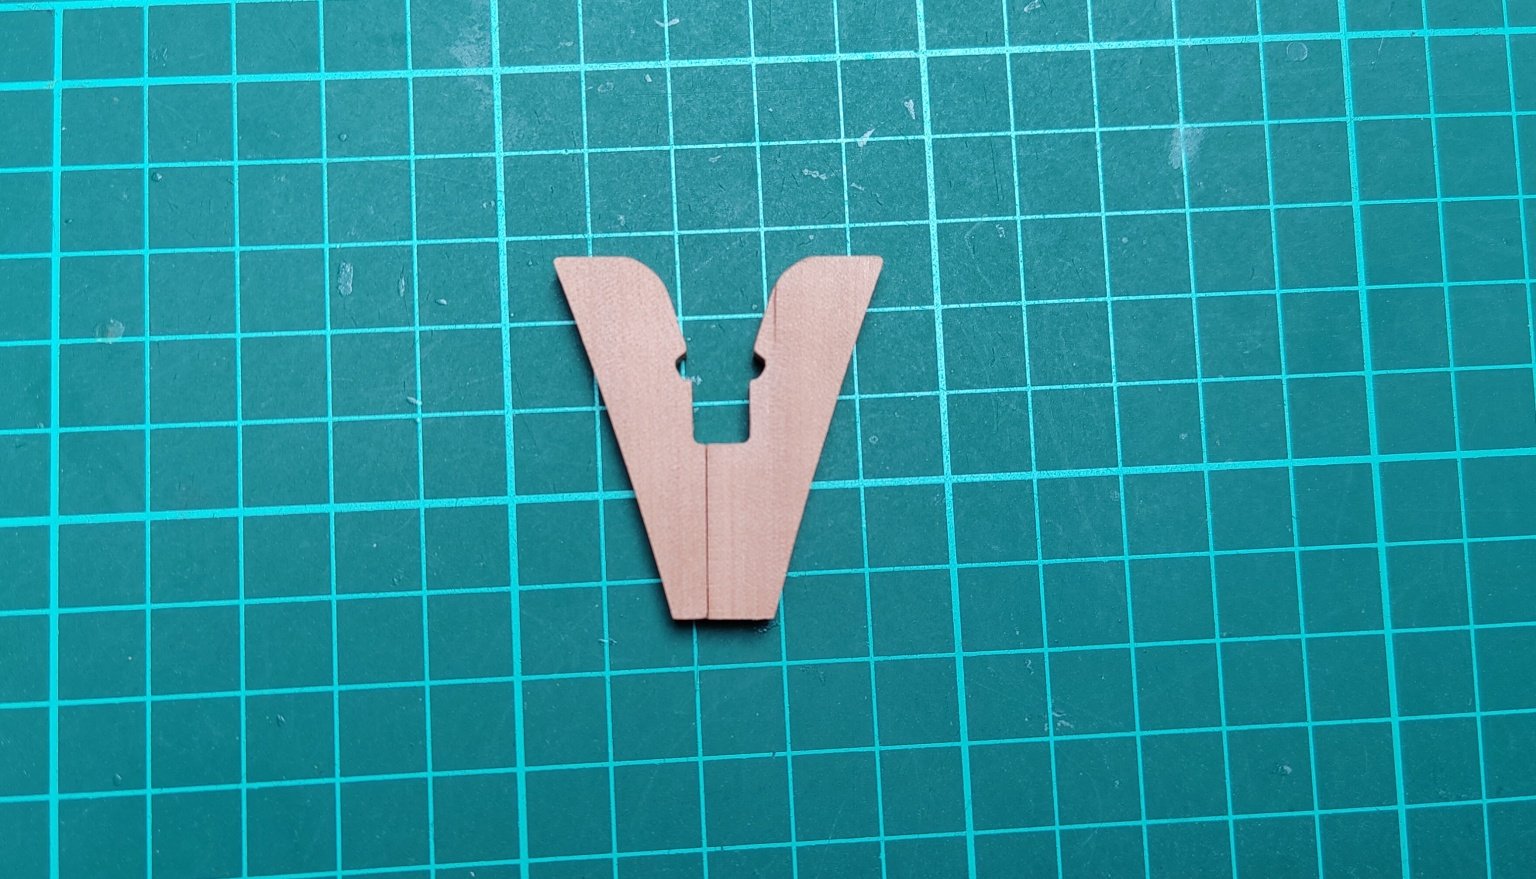
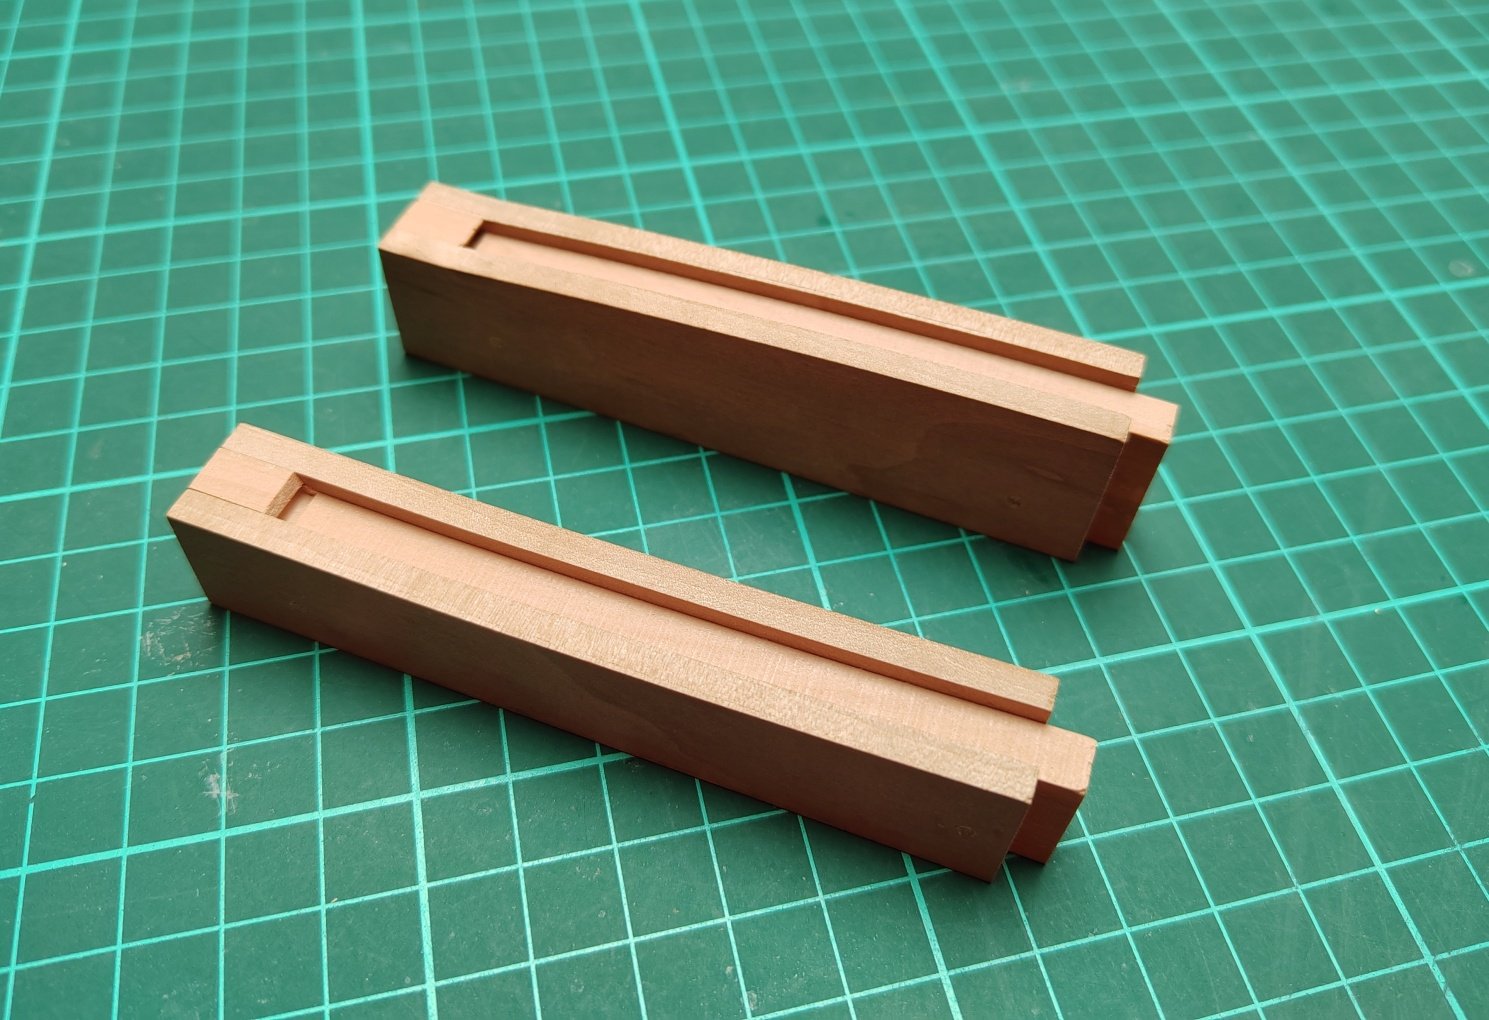
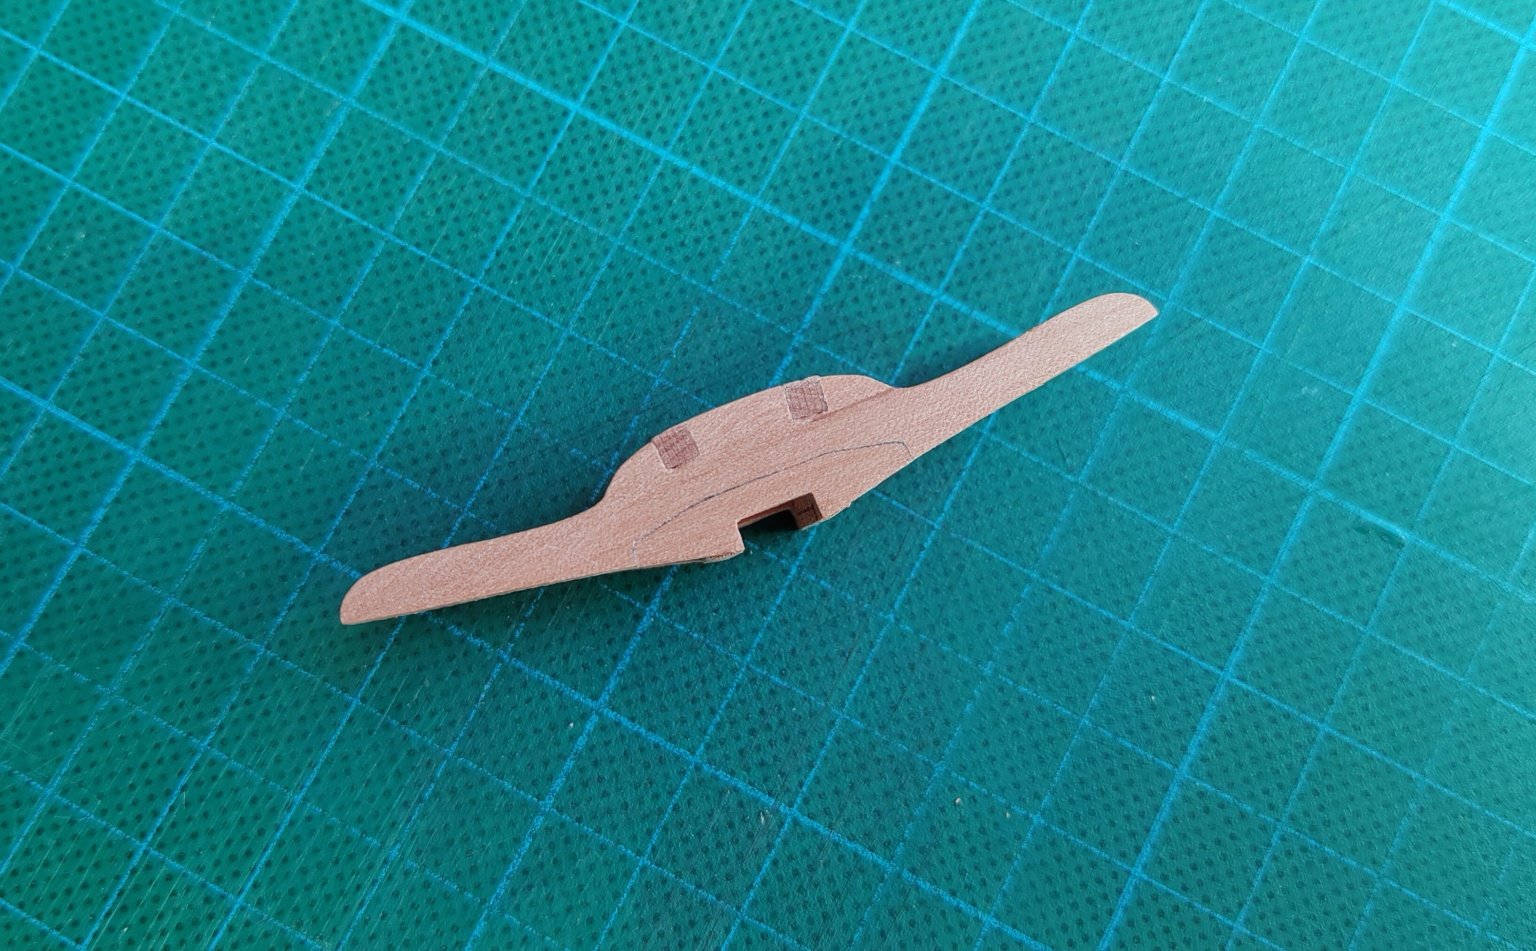
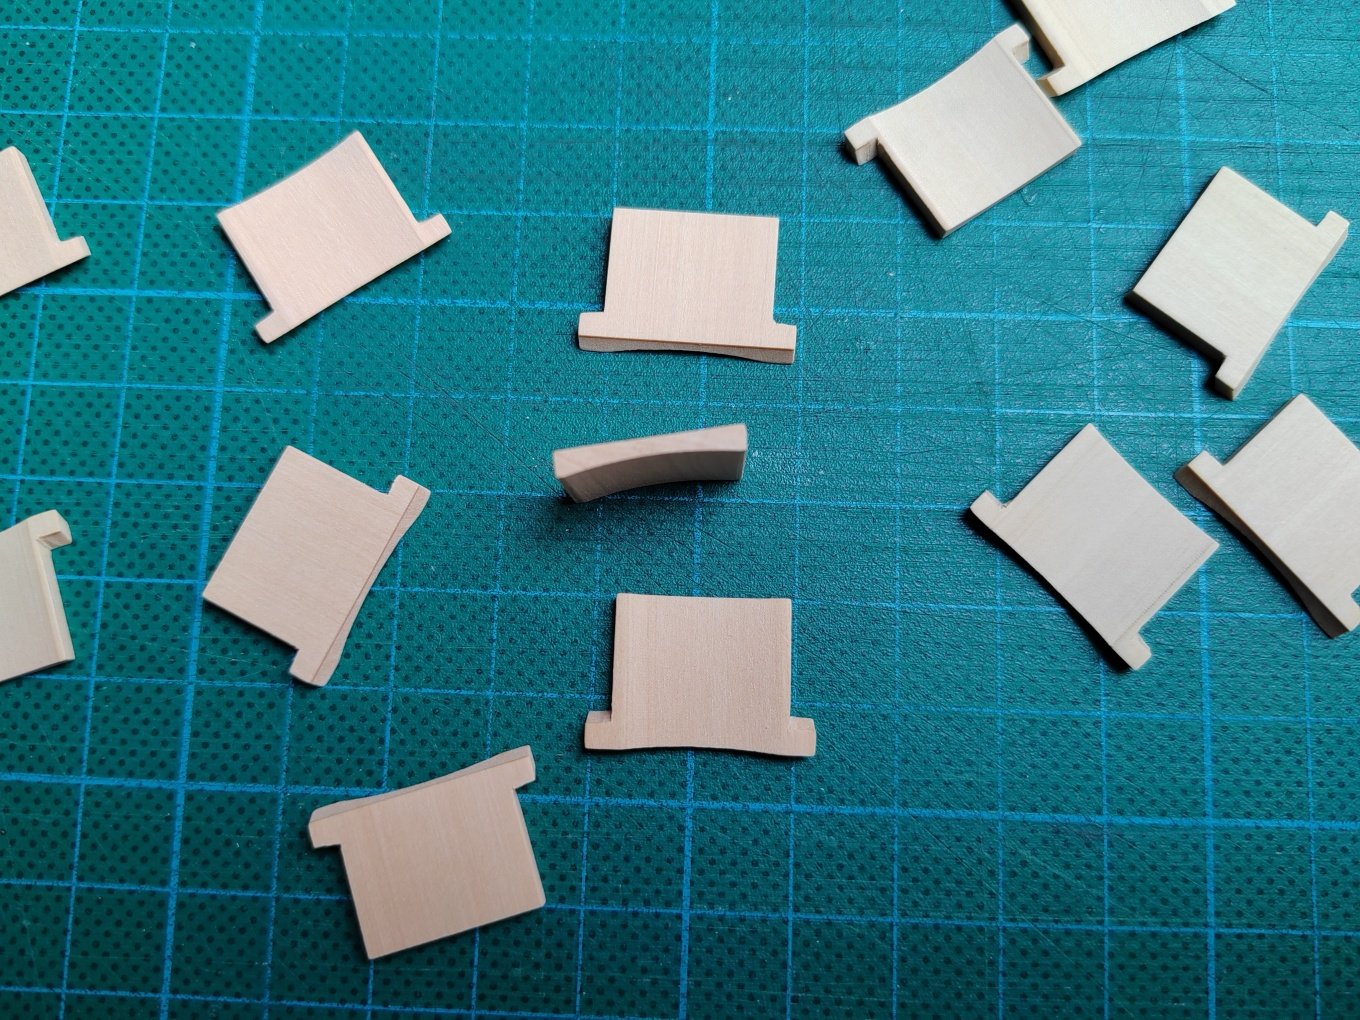
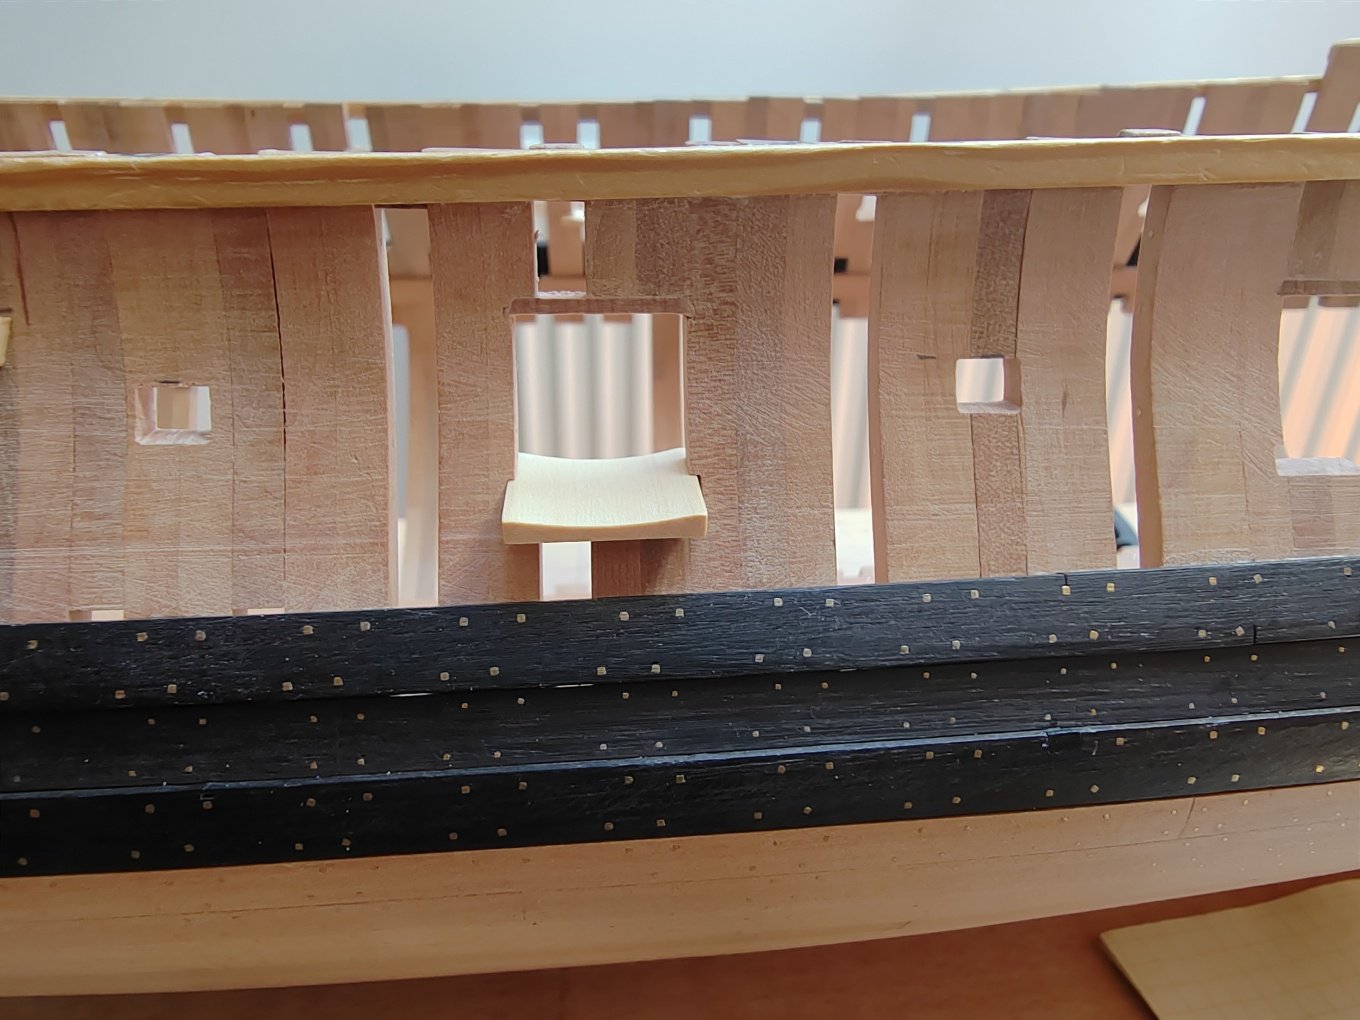
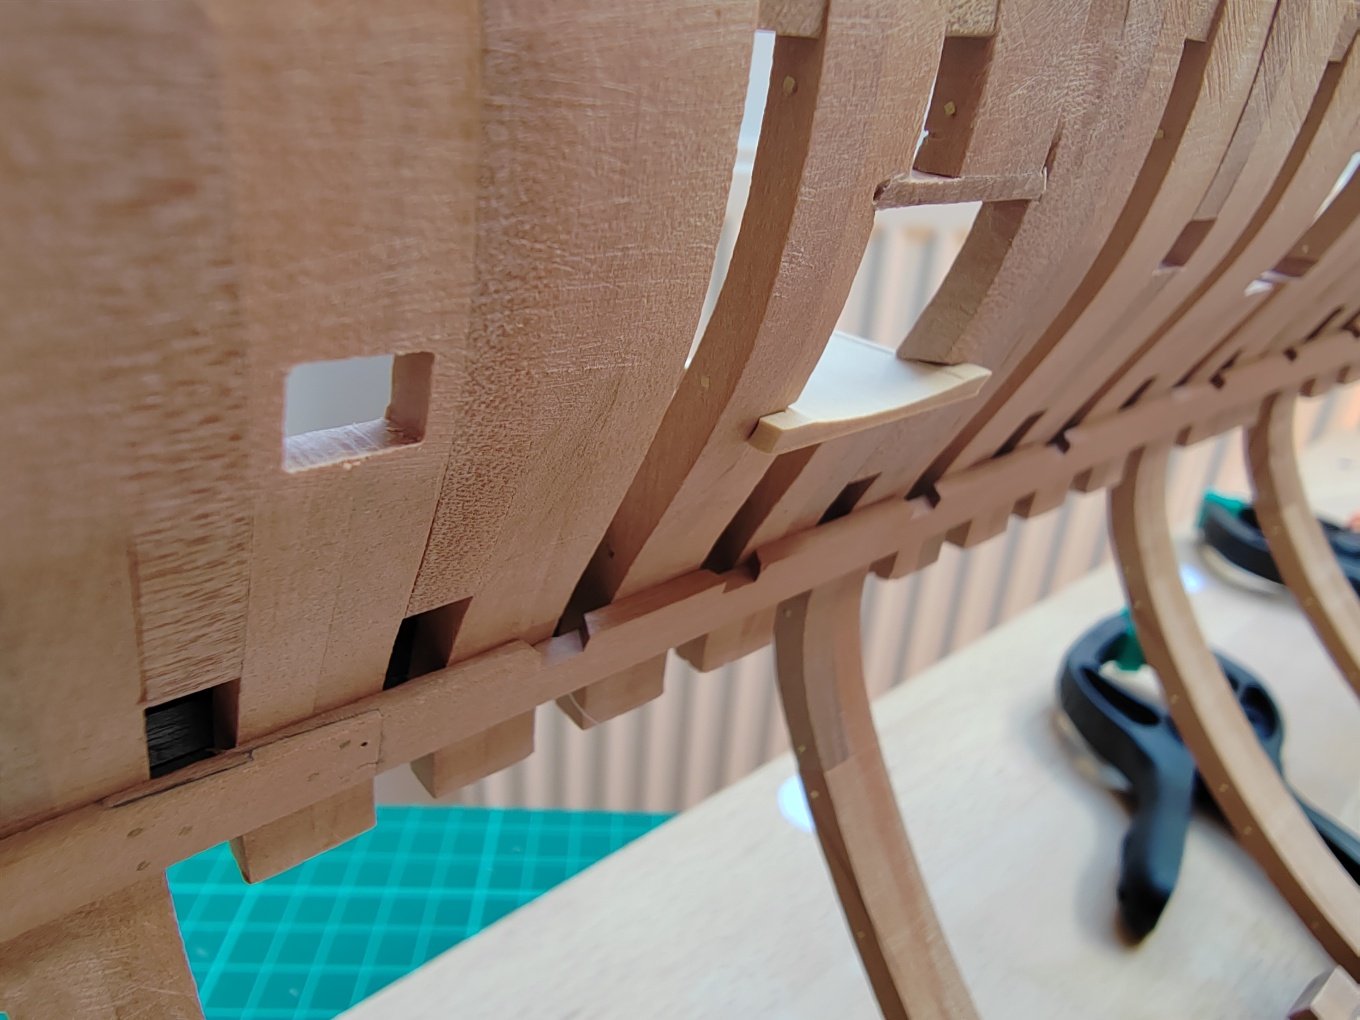
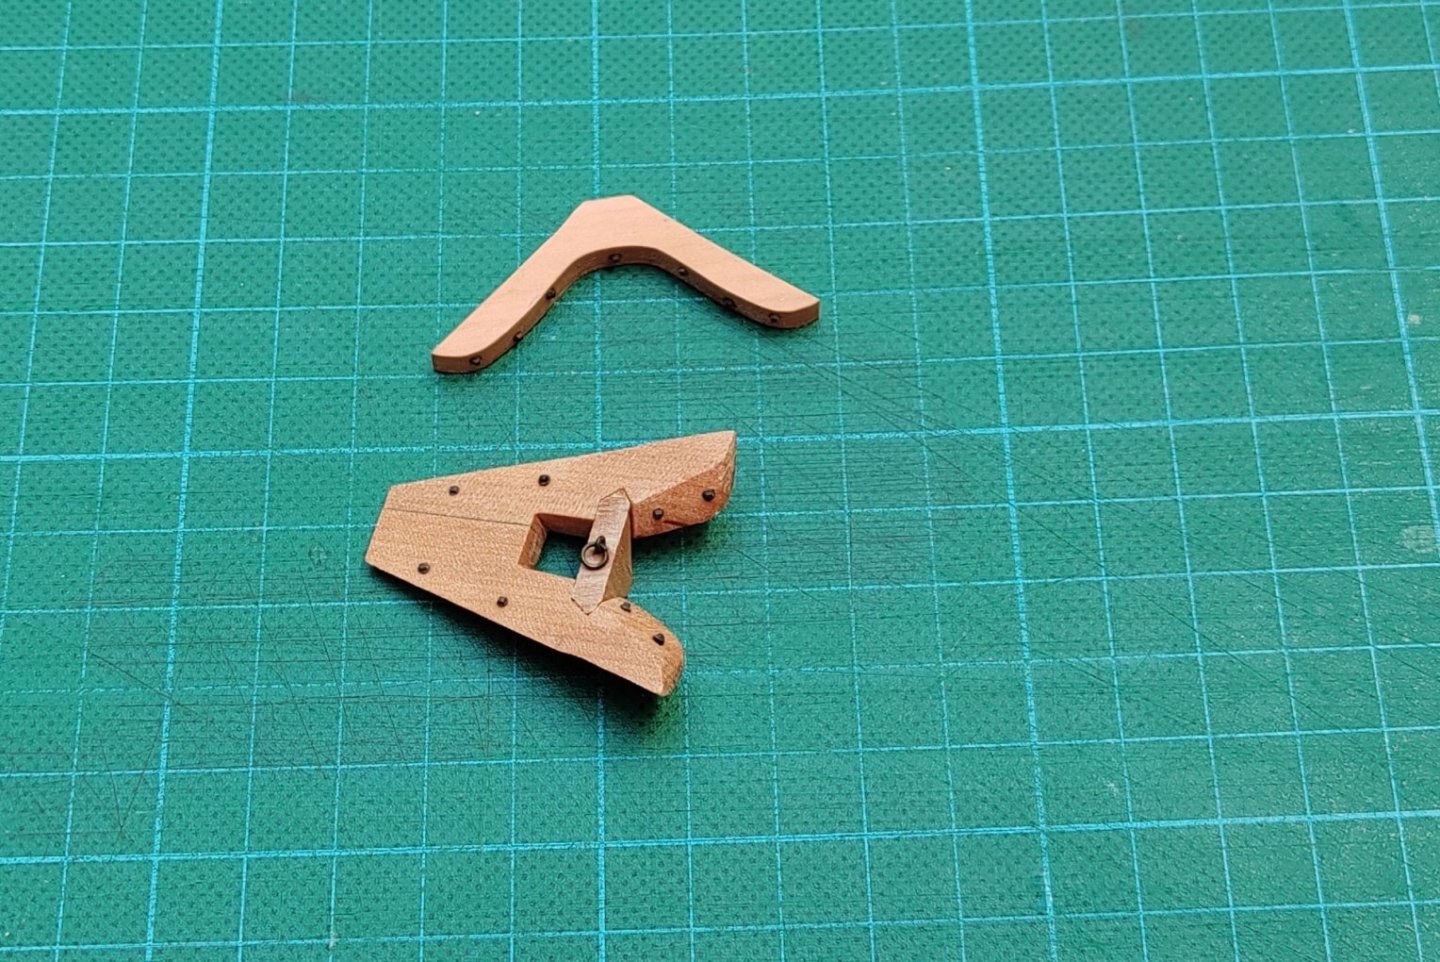
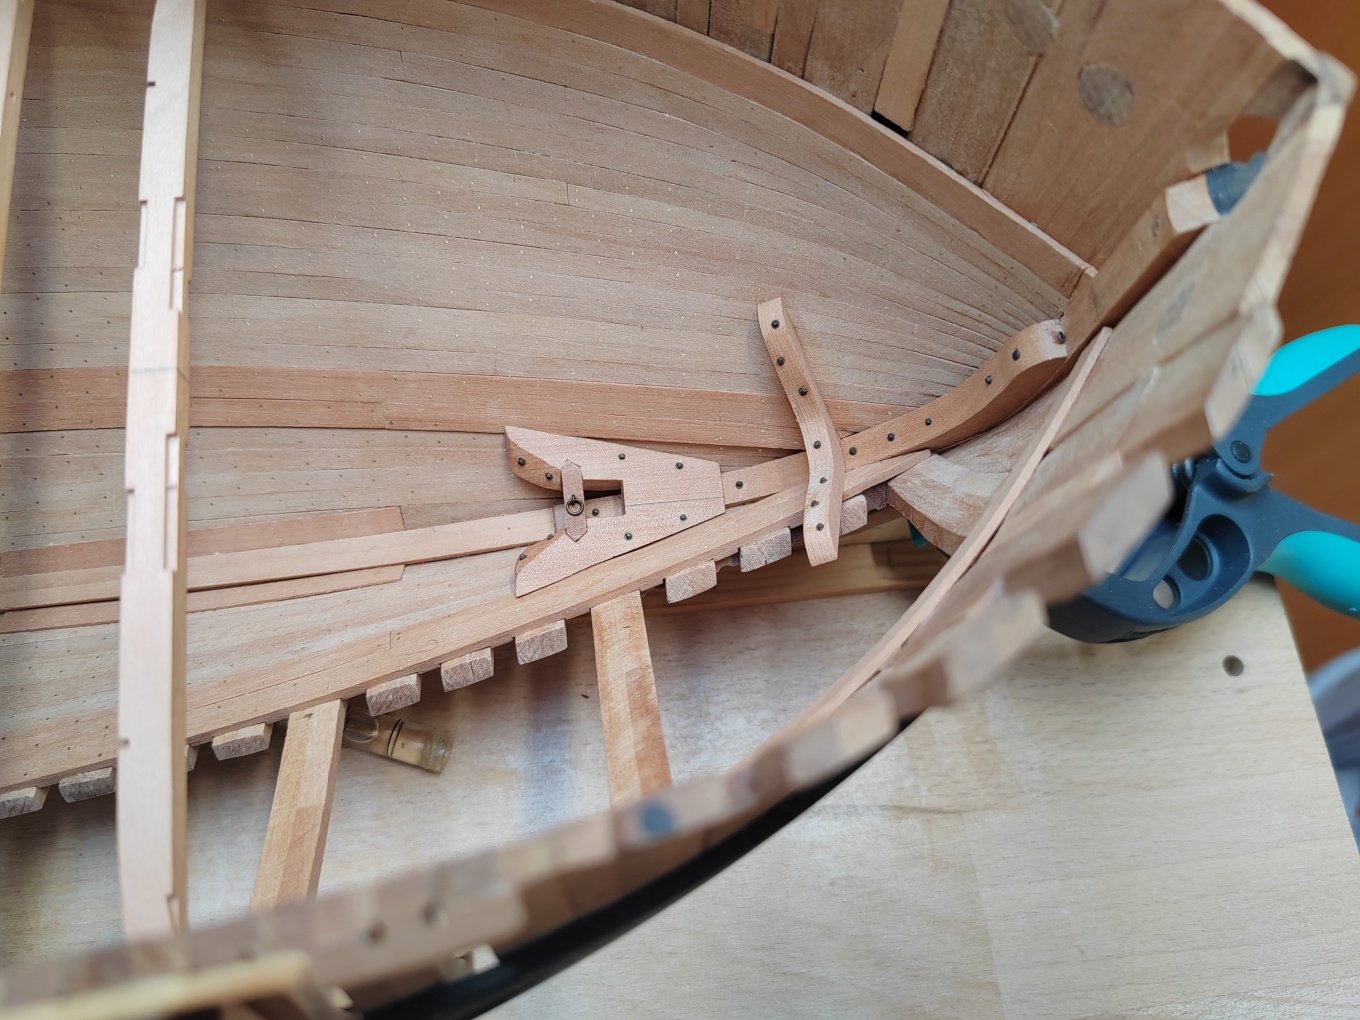
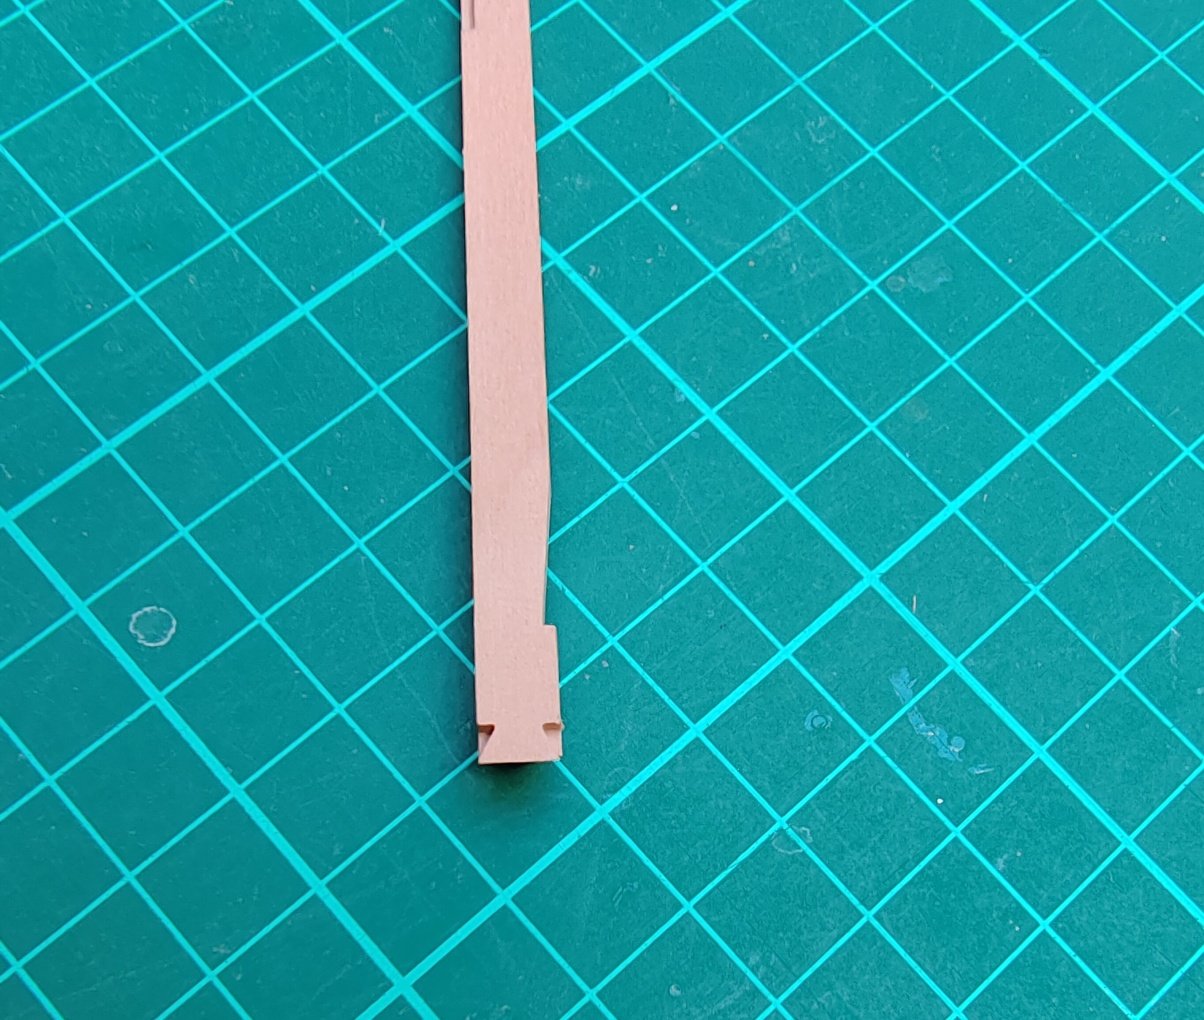
Thank you guys, the deck beams are ready for later installation so I started with the internal installations. The foremast step was the first to come.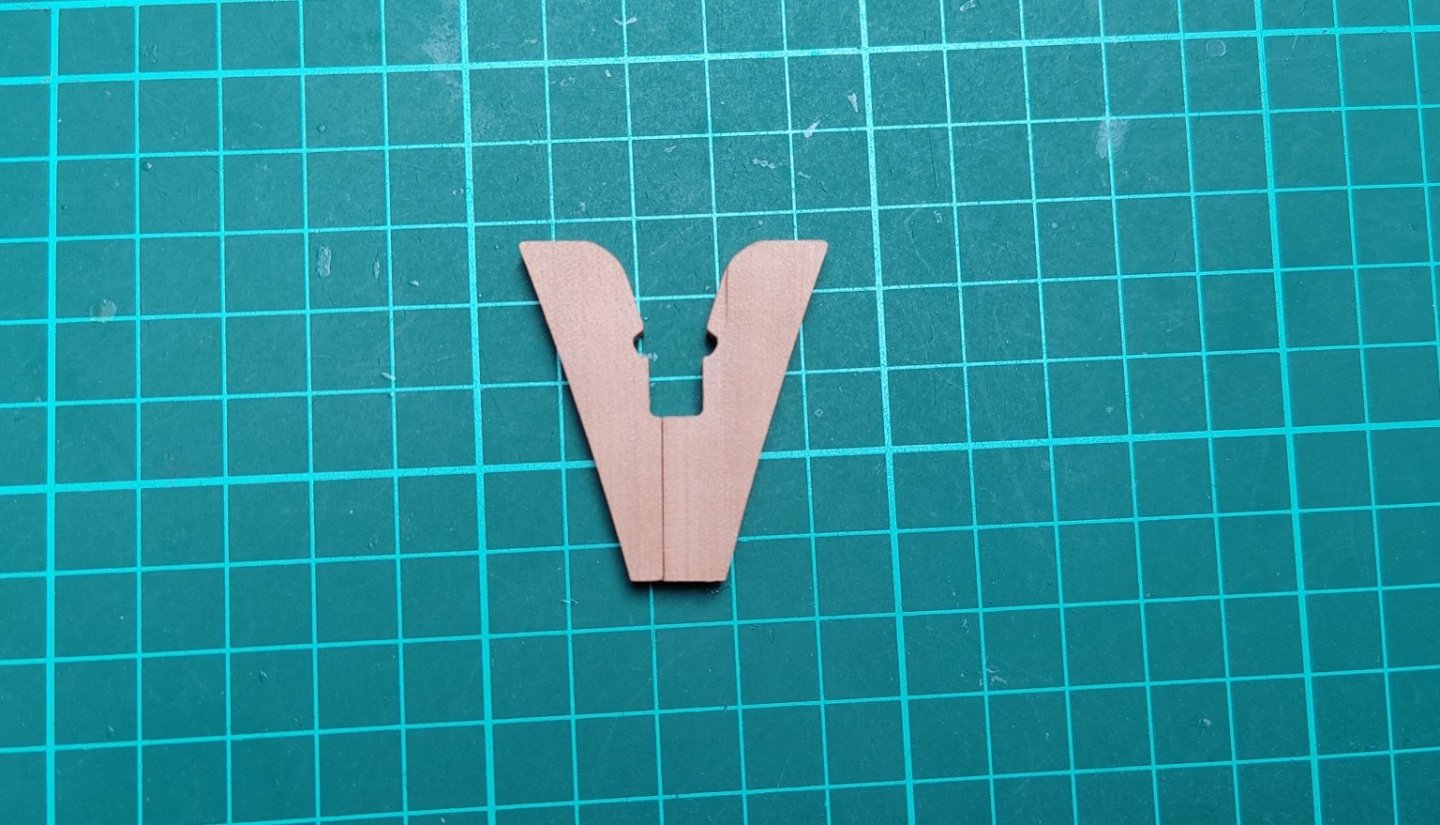
-
L'Amarante by marsalv - 1:36 - POF
marsalv replied to marsalv's topic in - Build logs for subjects built 1501 - 1750
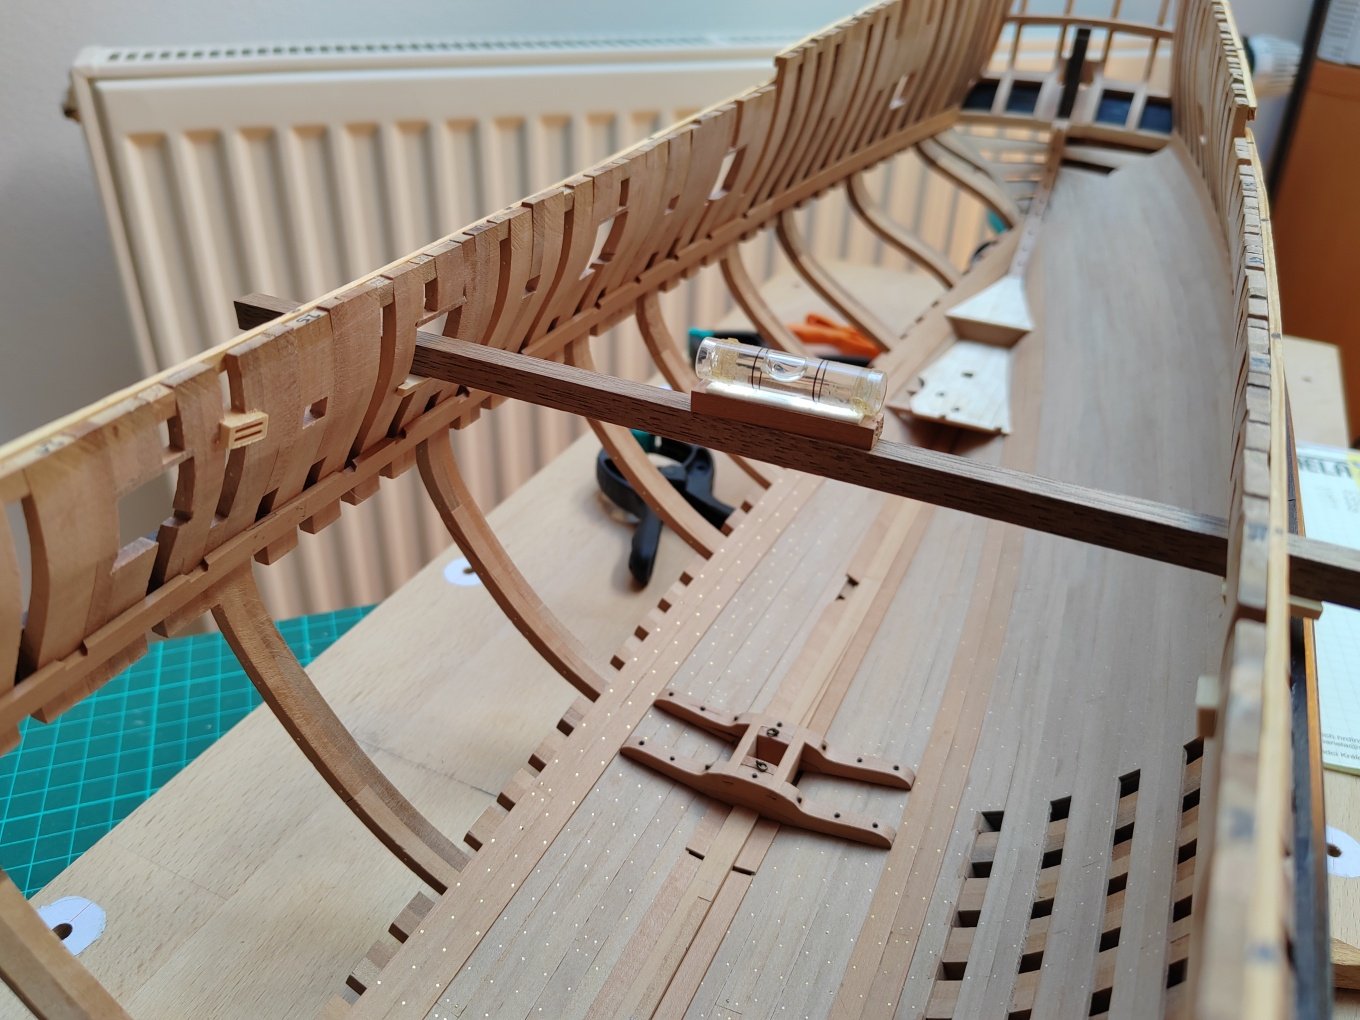
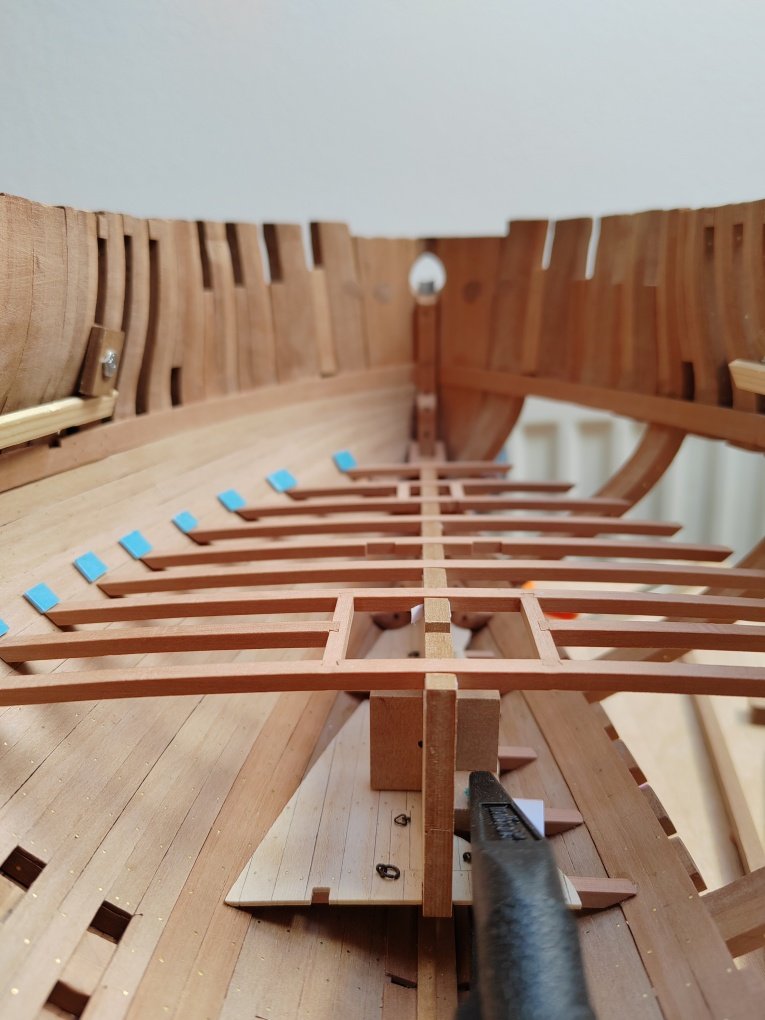
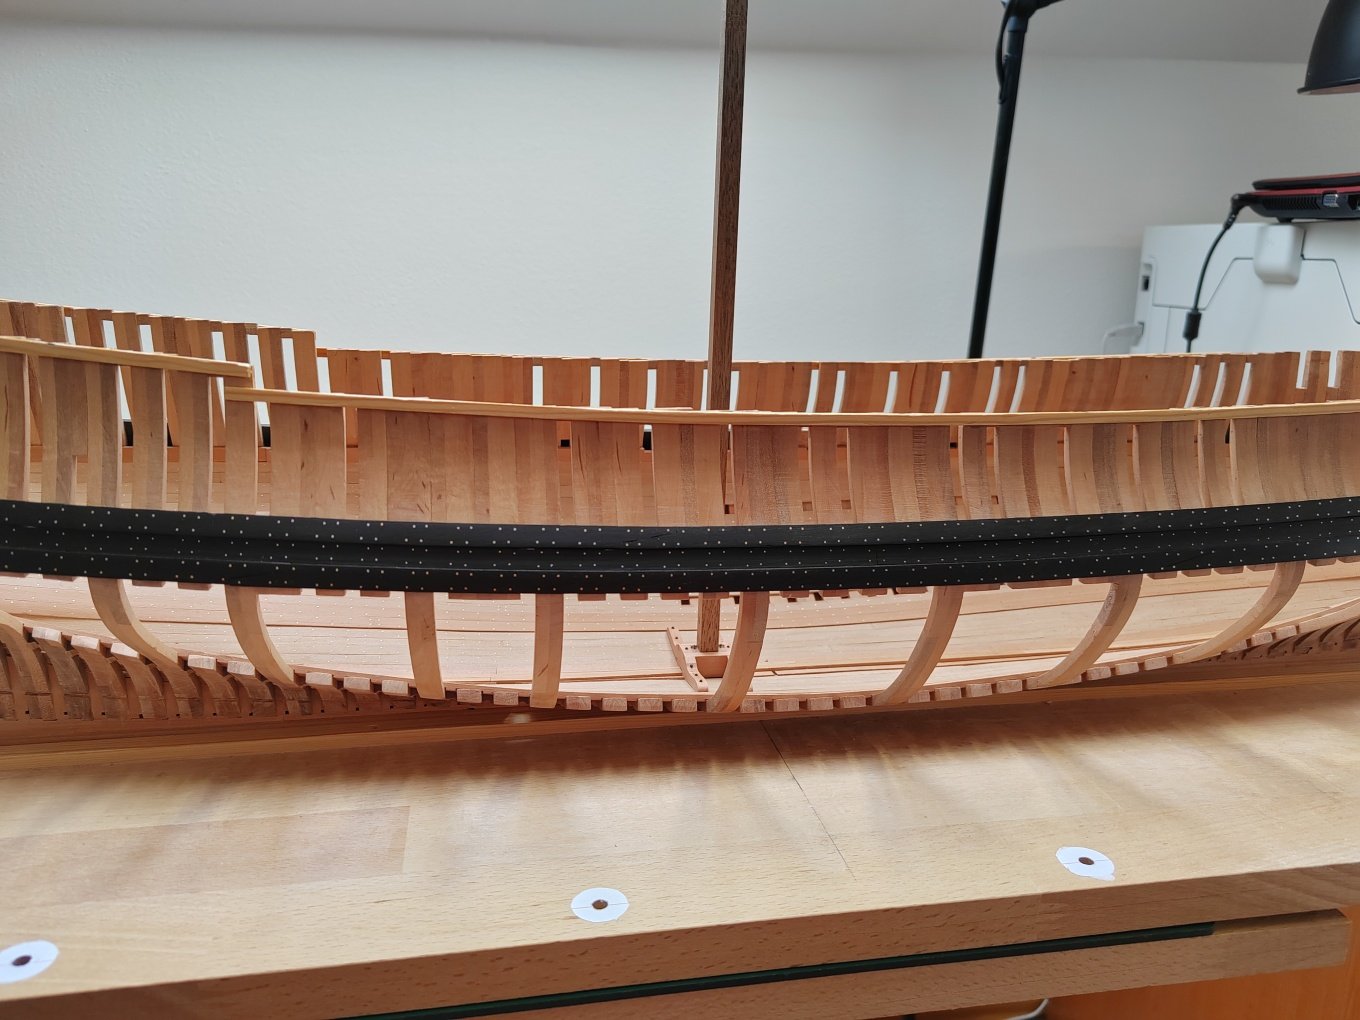
Temporary placement of deck beams.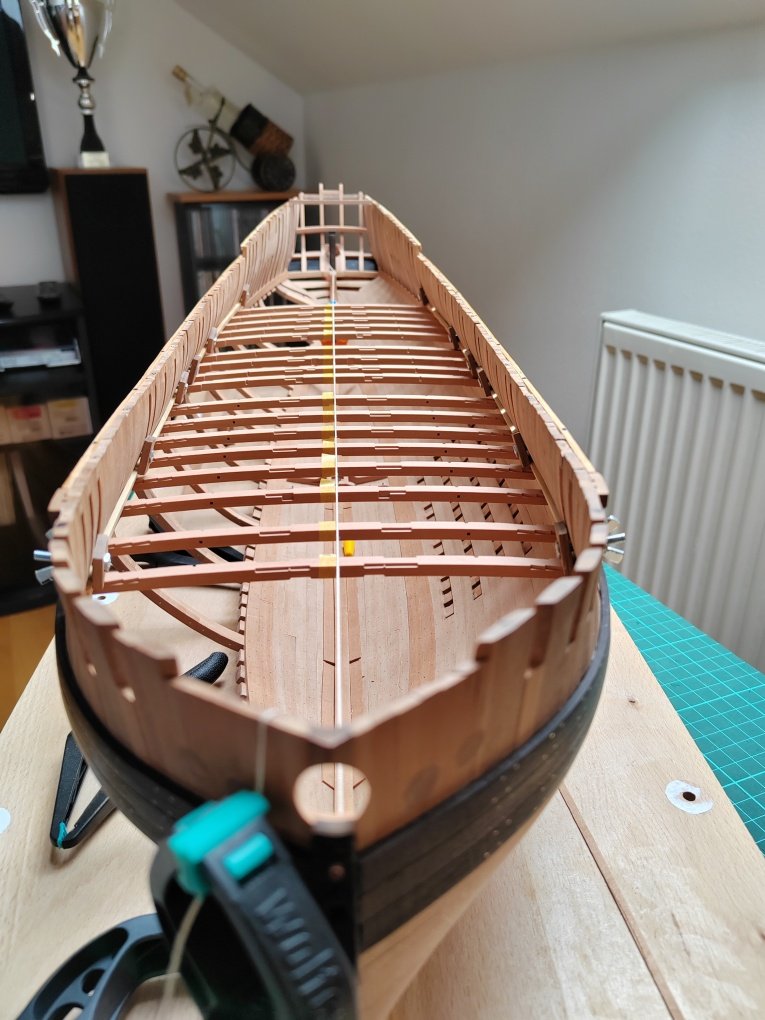

-
L'Amarante by marsalv - 1:36 - POF
marsalv replied to marsalv's topic in - Build logs for subjects built 1501 - 1750
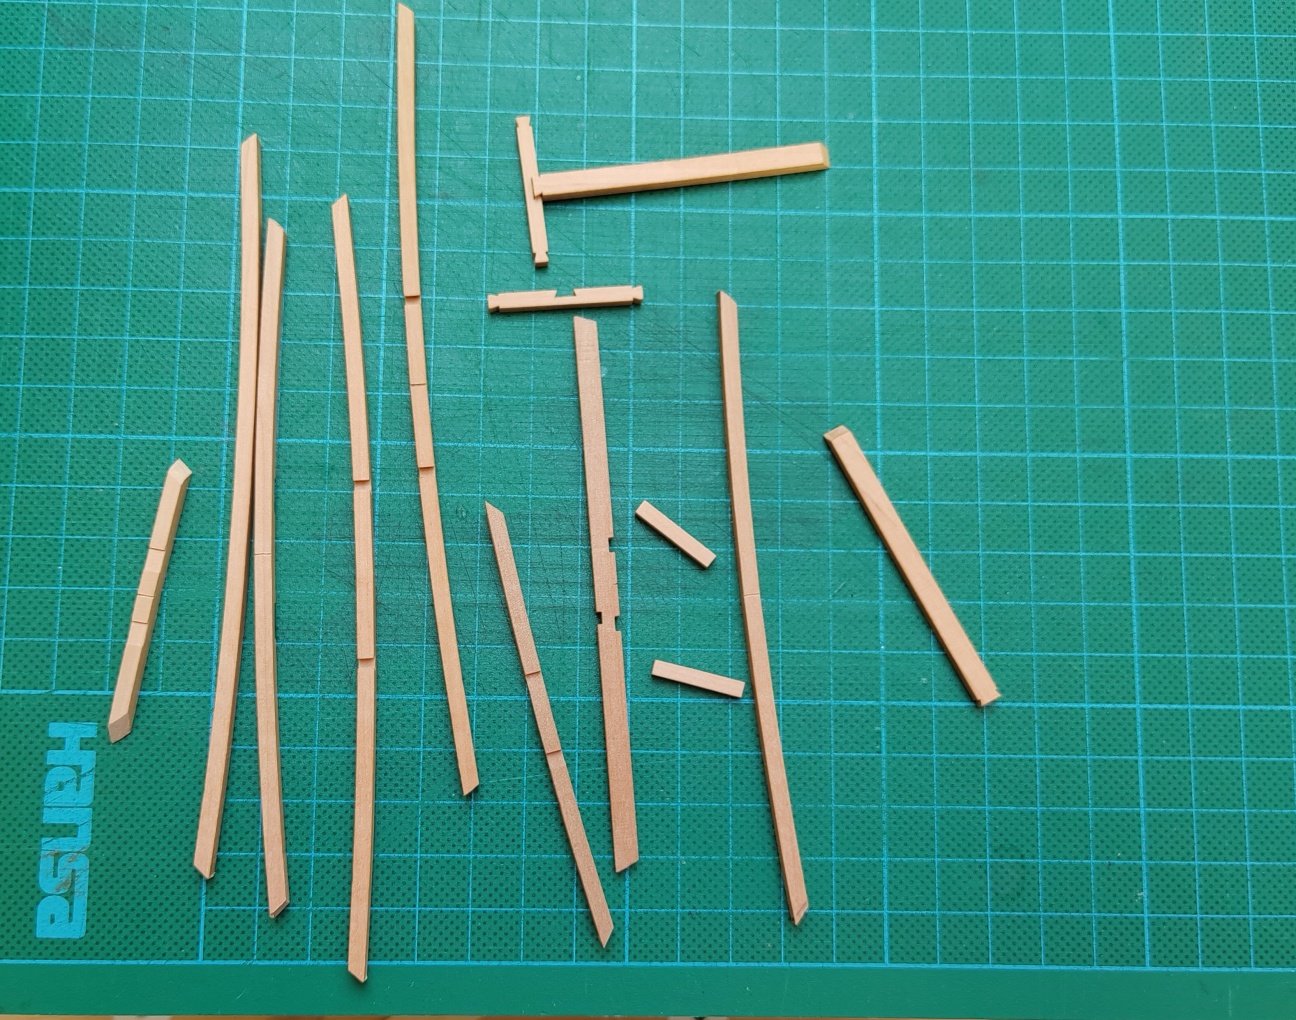
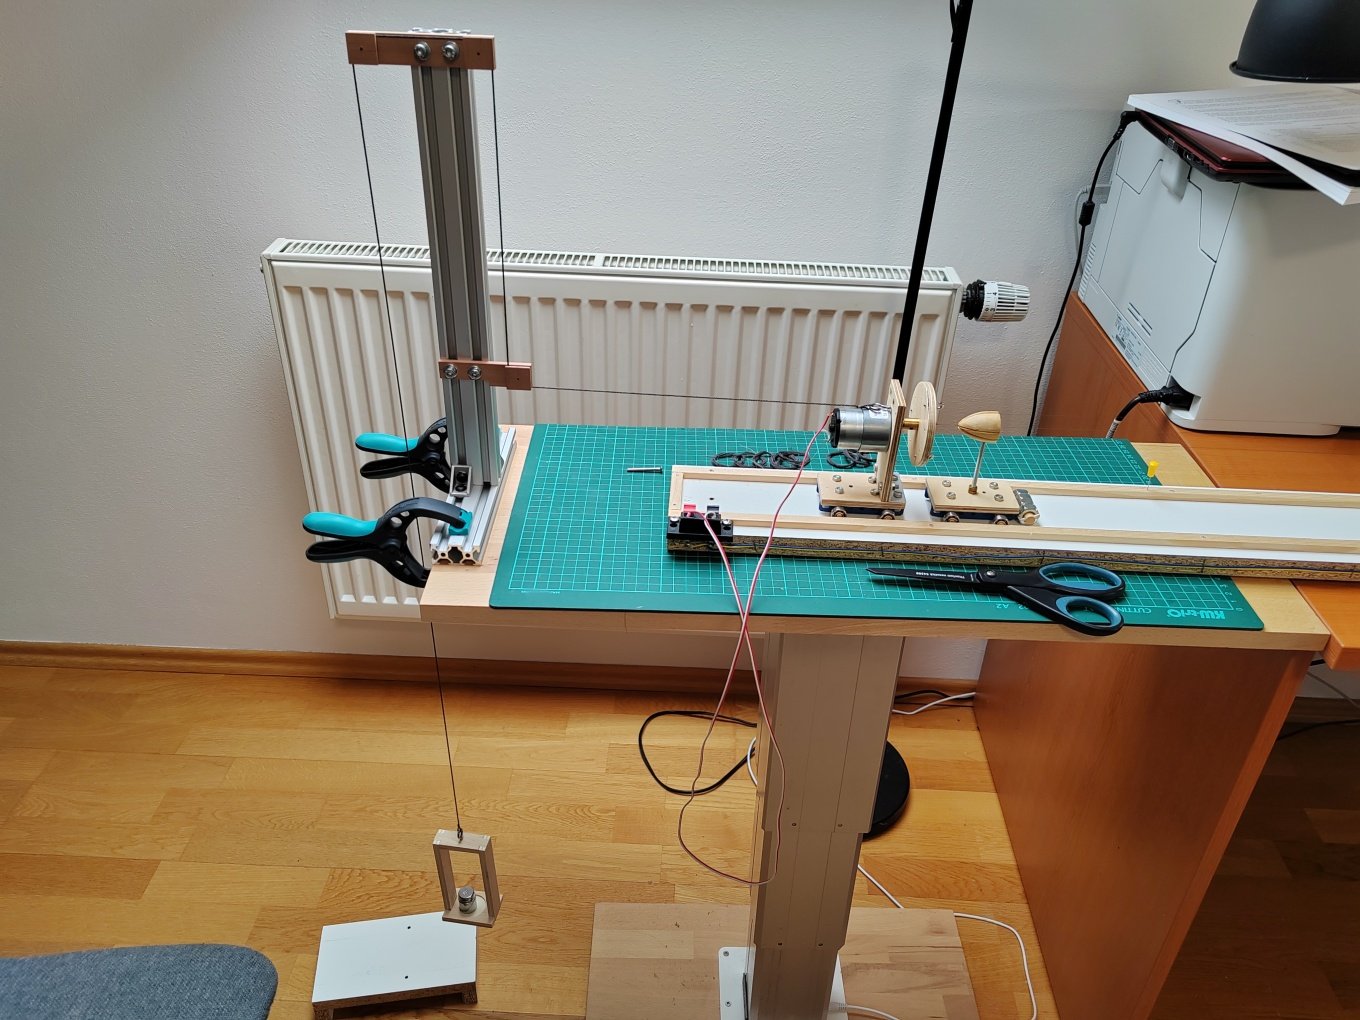
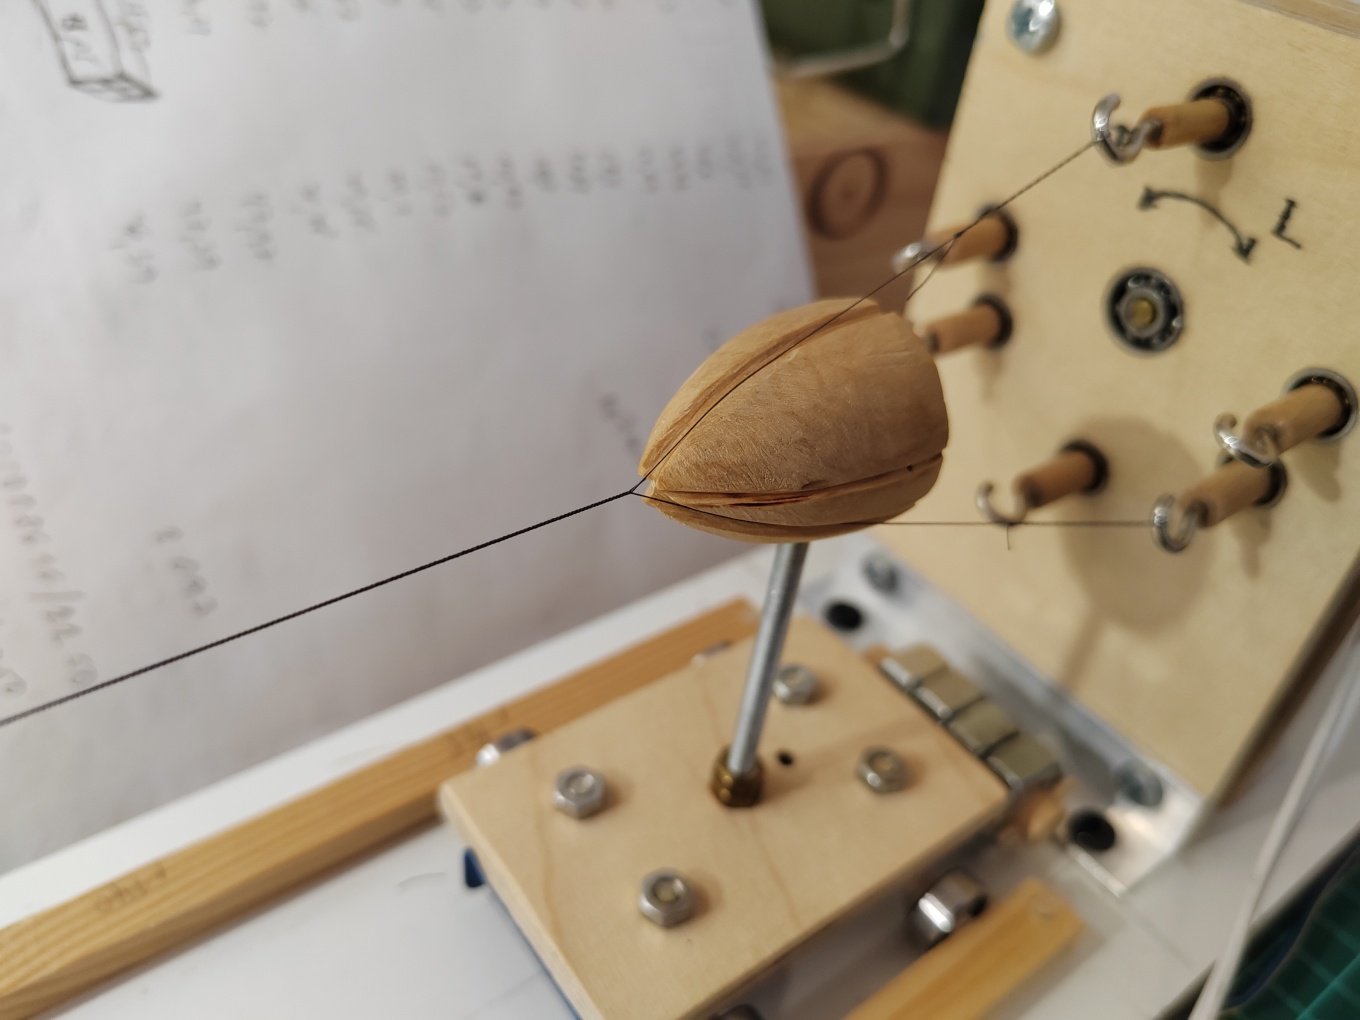
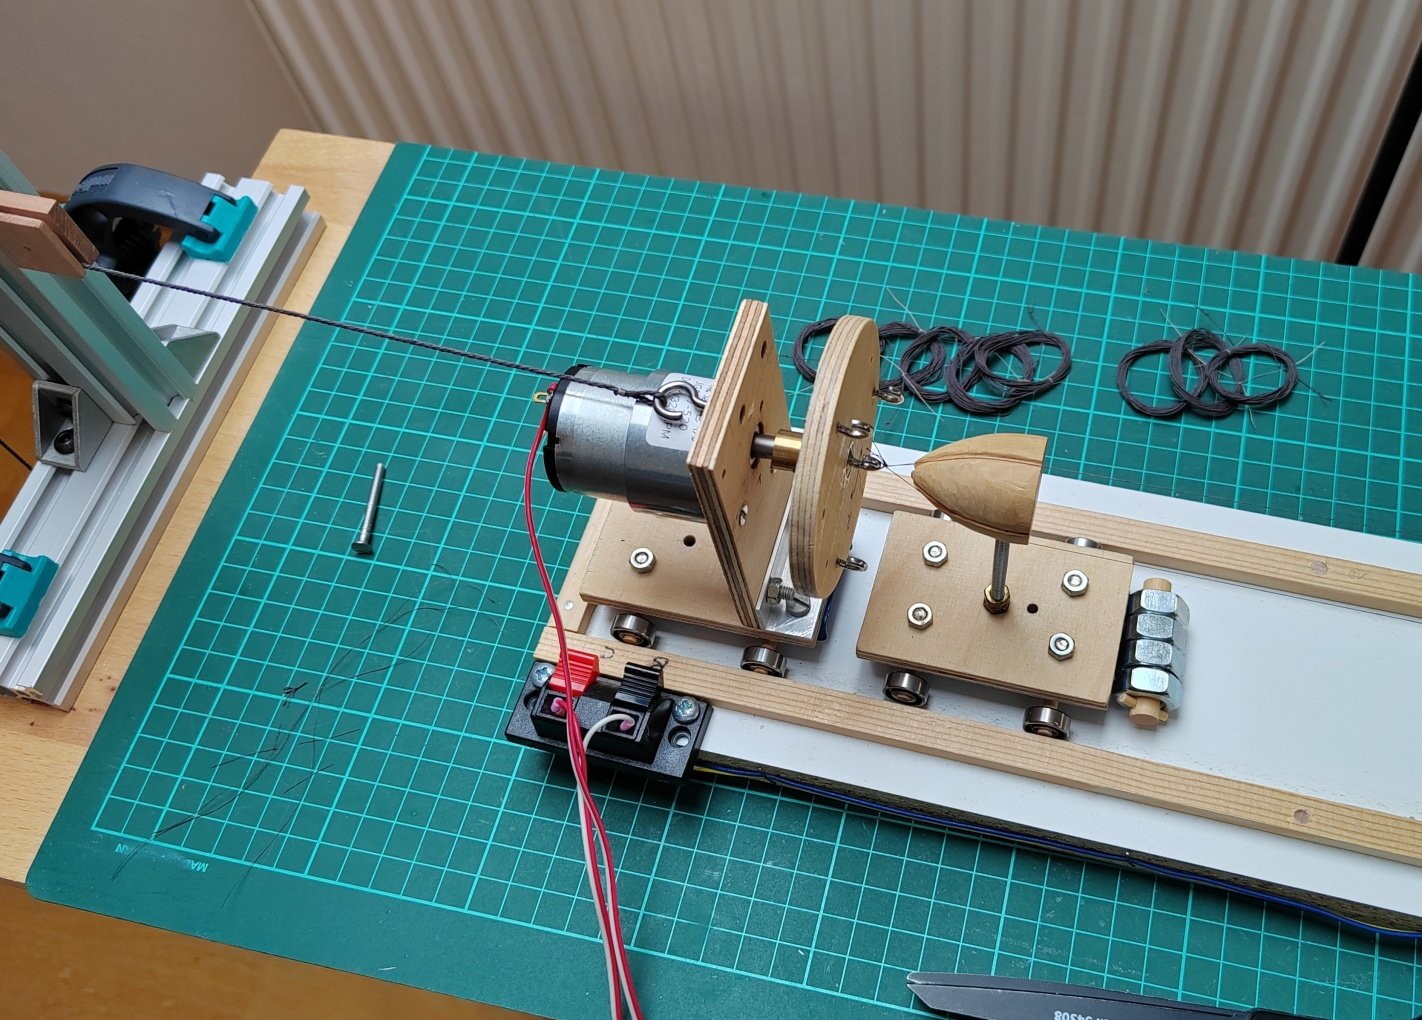
To druxey: Thanks for the inspiration. I'll try it next time. But I read somewhere that the angle at which the individual strands enter the rope should be about 45 degrees. That should be harder to achieve with the solution you proposed. Making of deck beams.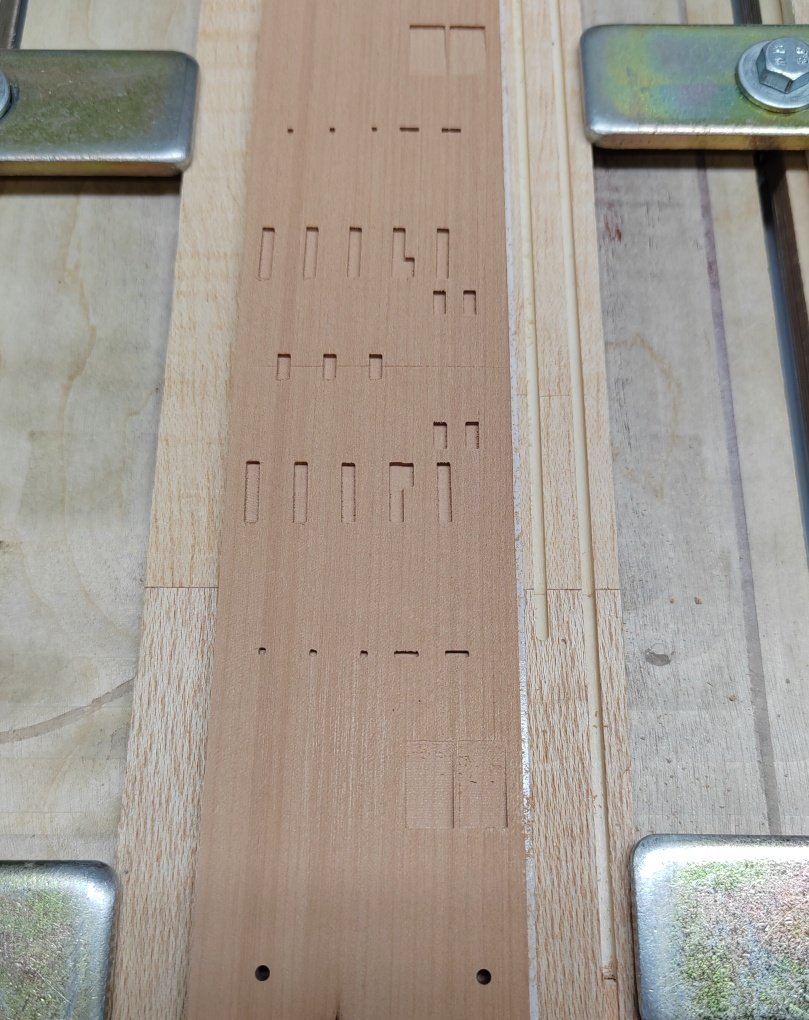


-
L'Amarante by marsalv - 1:36 - POF
marsalv replied to marsalv's topic in - Build logs for subjects built 1501 - 1750
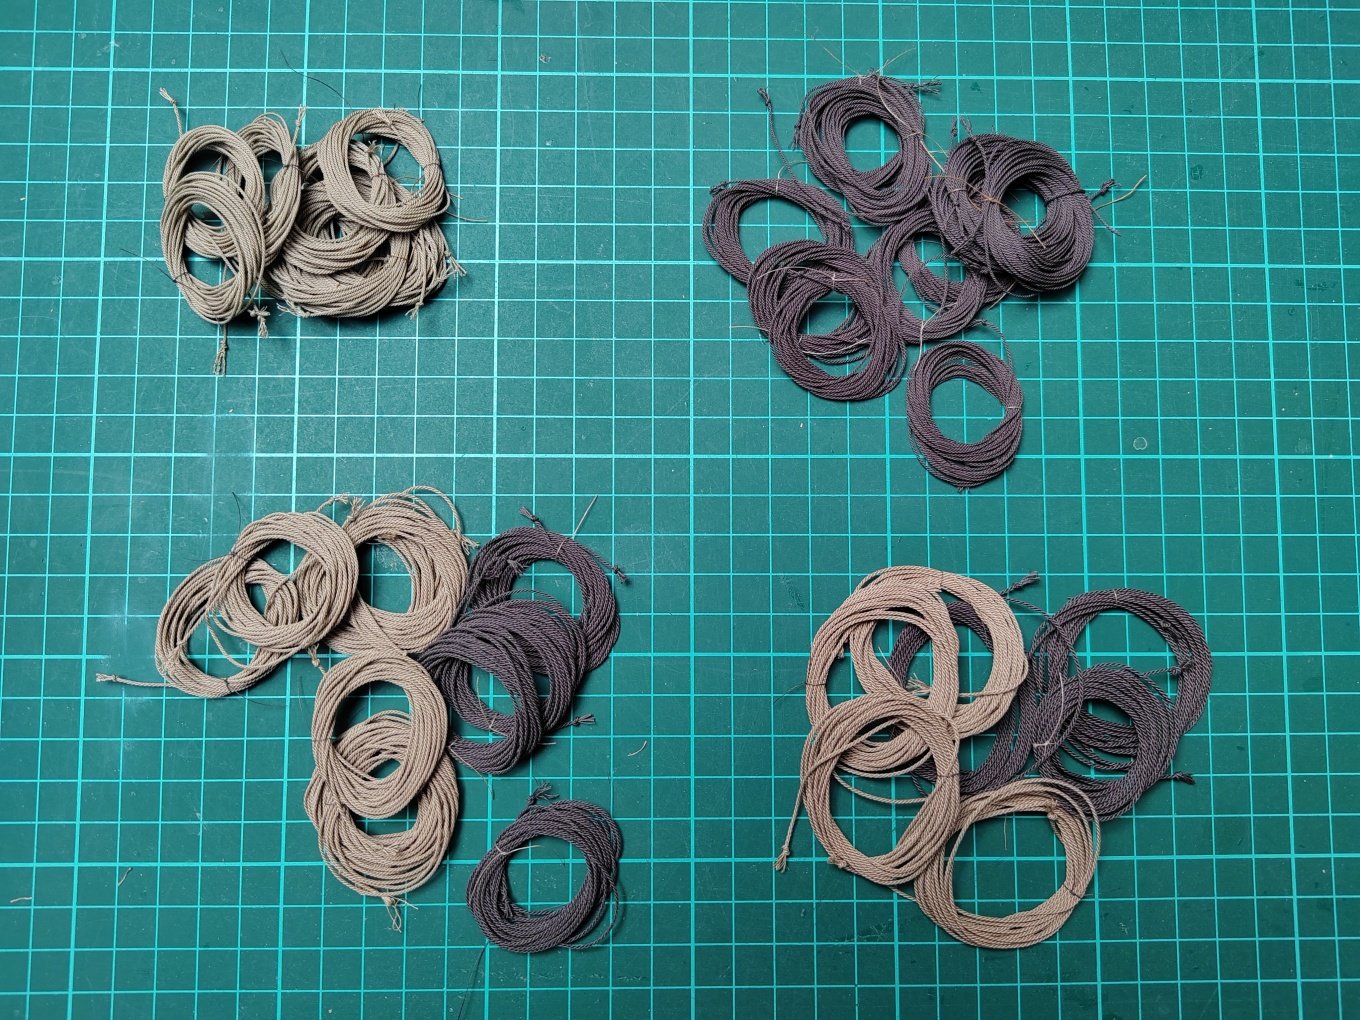
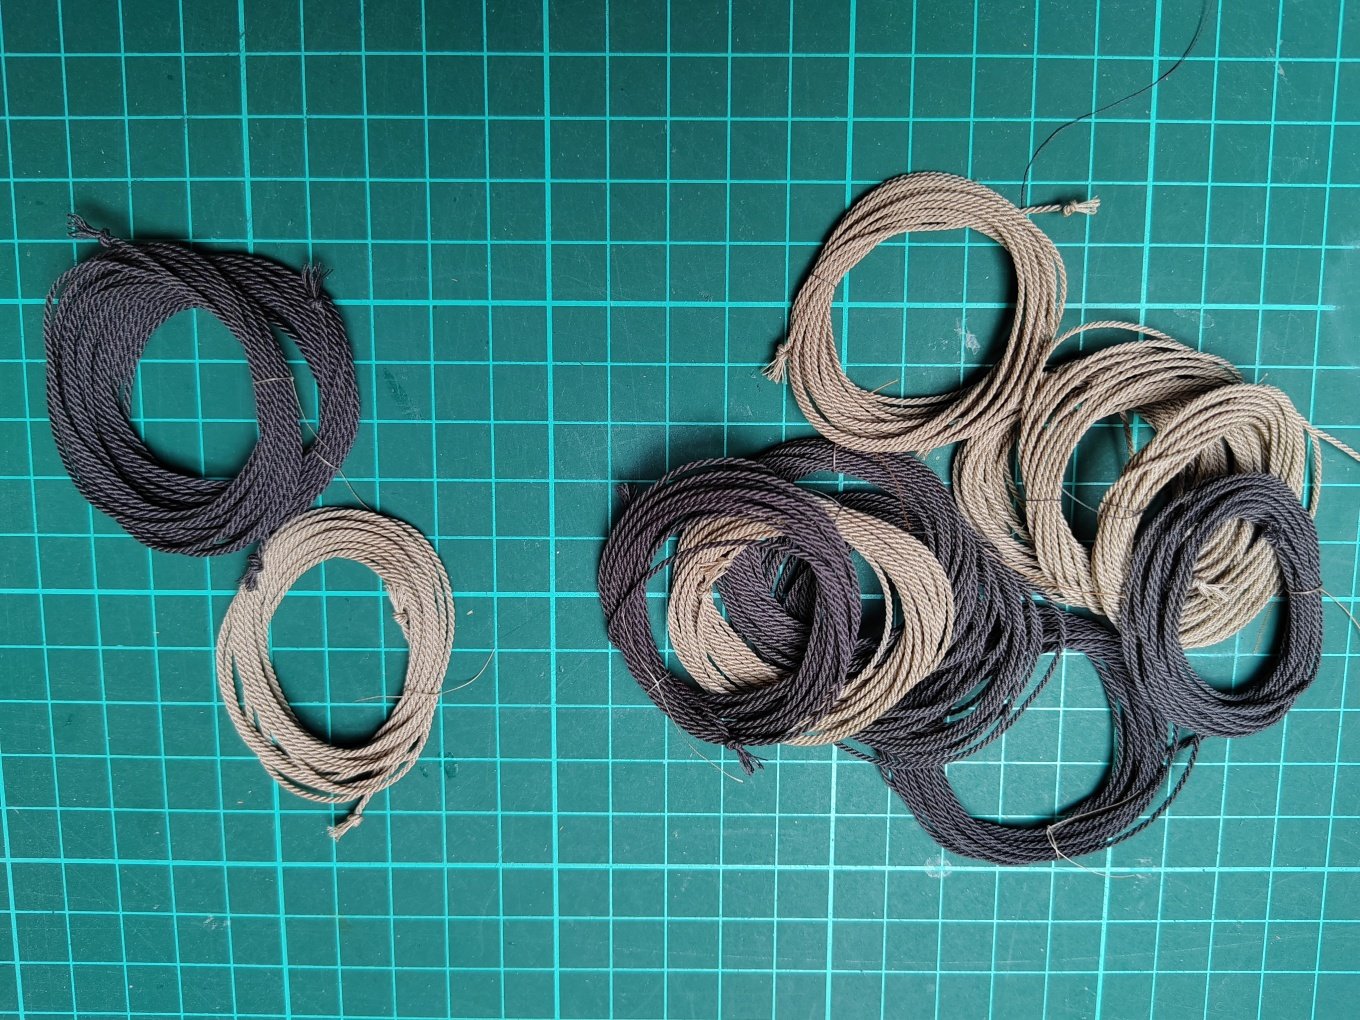
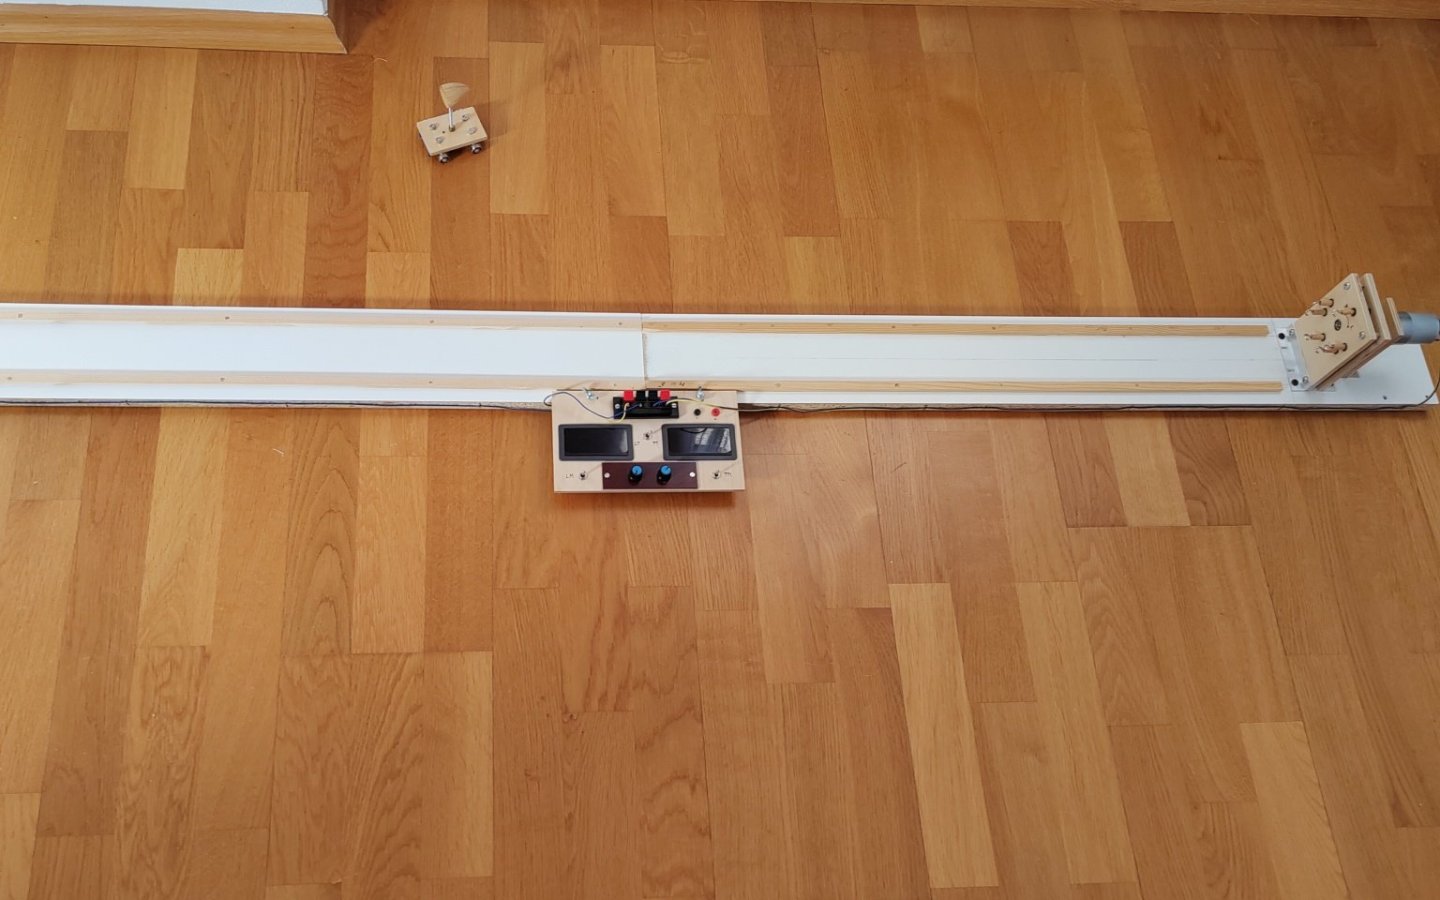
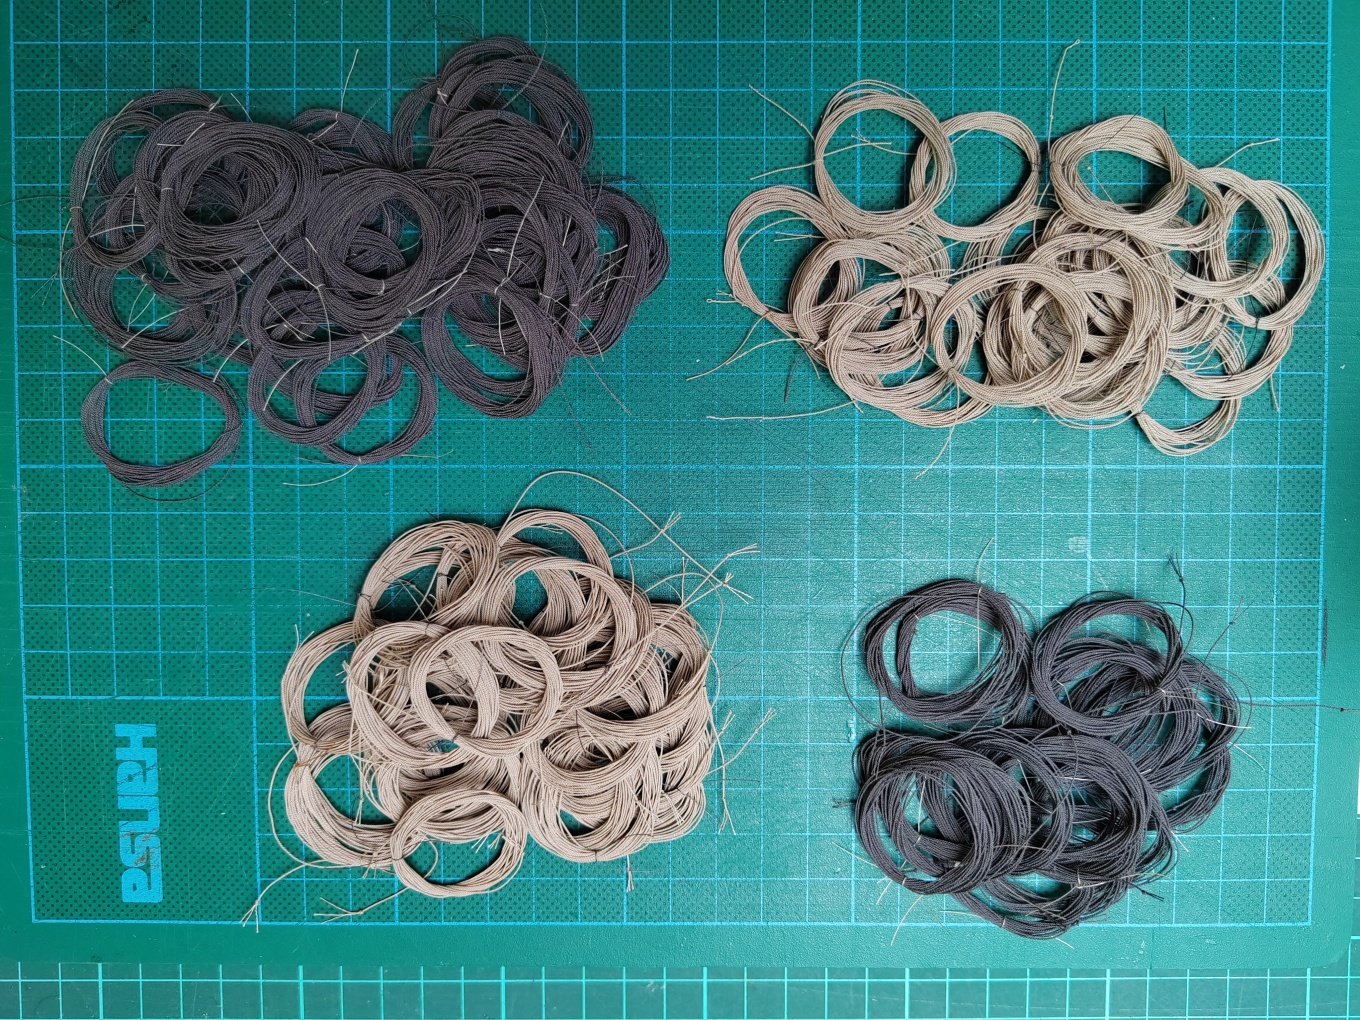
The last batch of ropes is finally finished. In total, I wound about 260 ropes of various thicknesses, the length of the rope is about 180 cm. And now I can start working with wood again.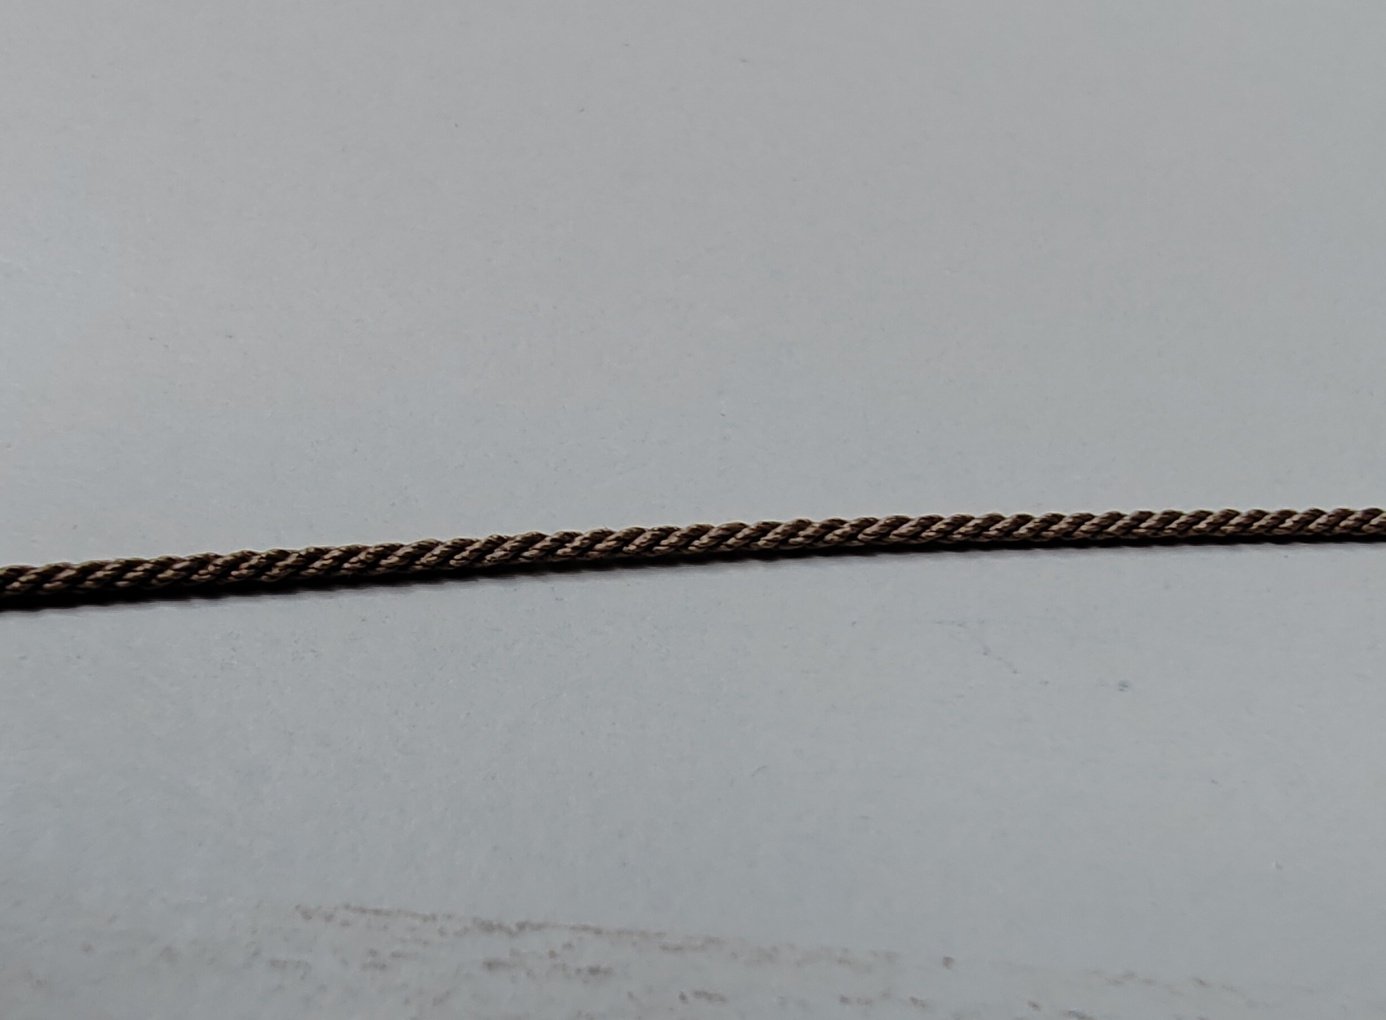

-
Fantastic work.
-
L'Amarante by marsalv - 1:36 - POF
marsalv replied to marsalv's topic in - Build logs for subjects built 1501 - 1750
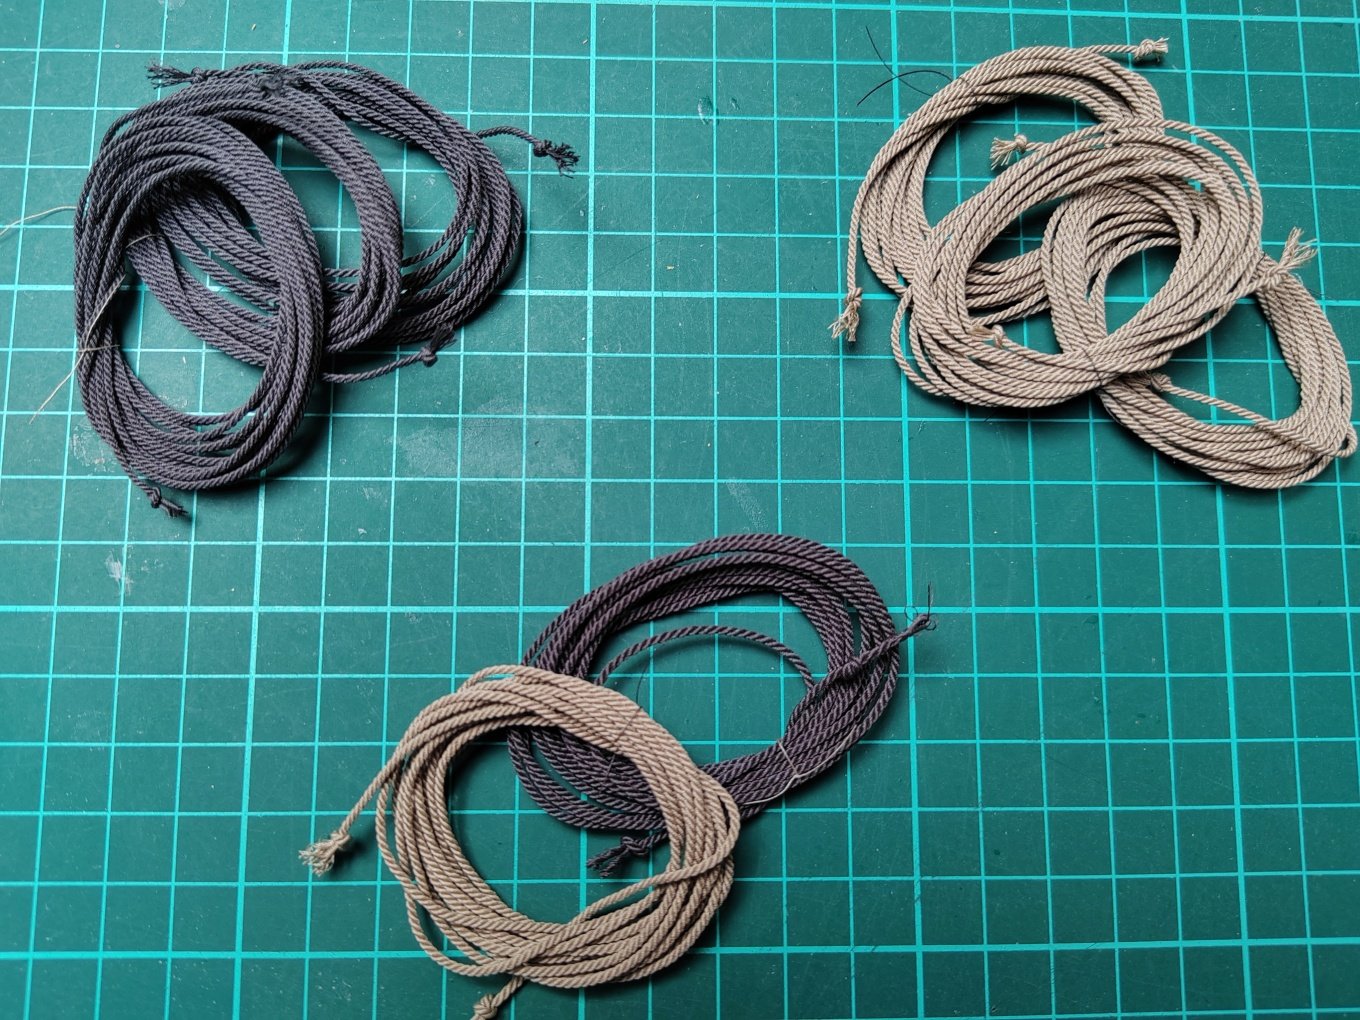
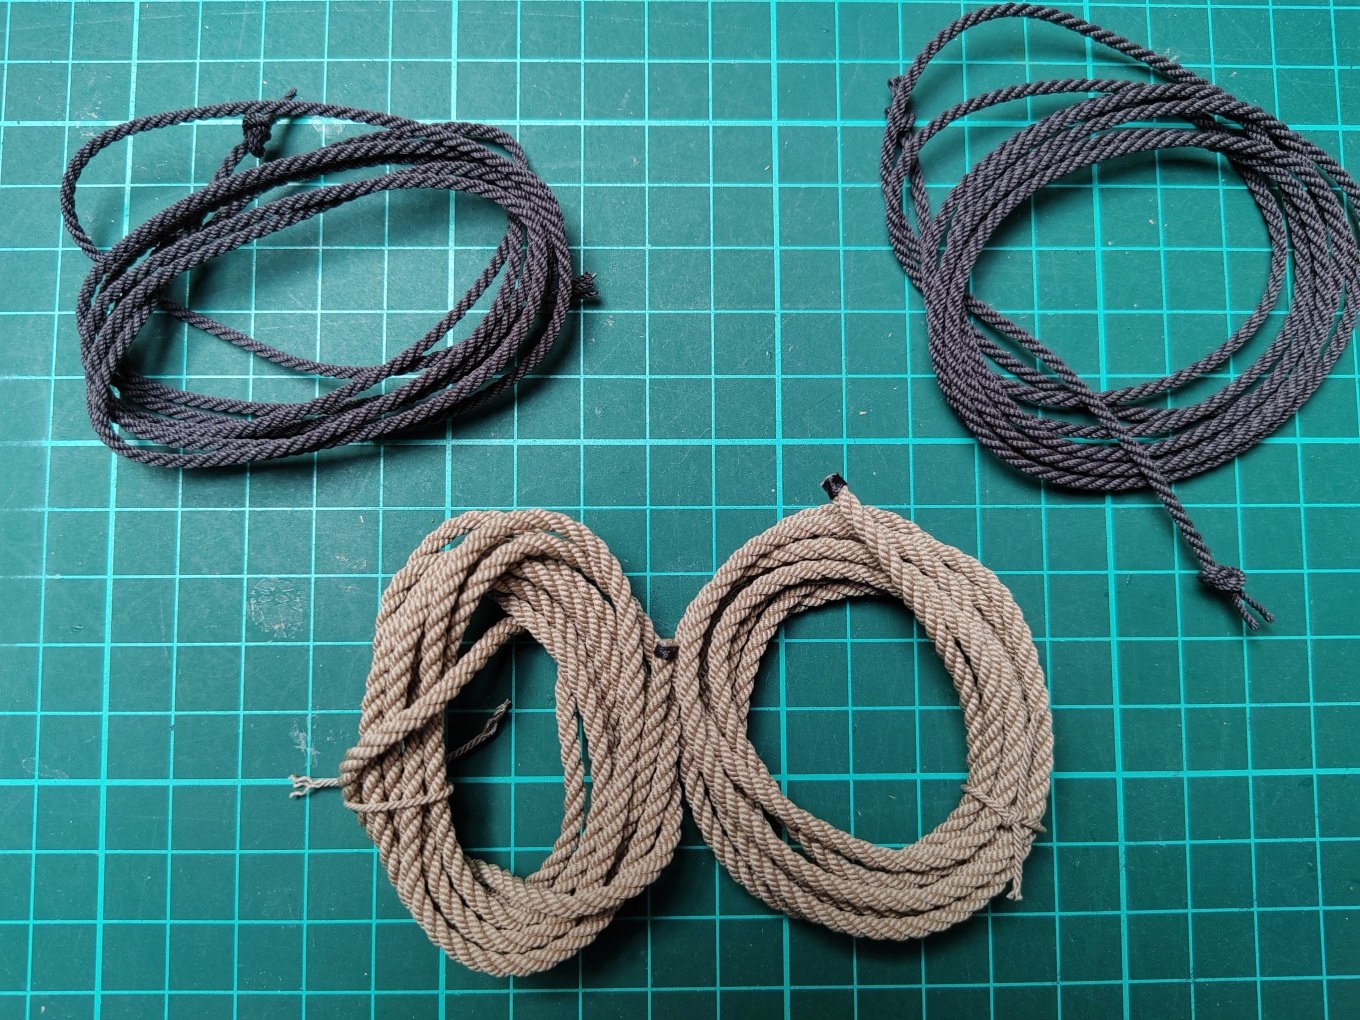
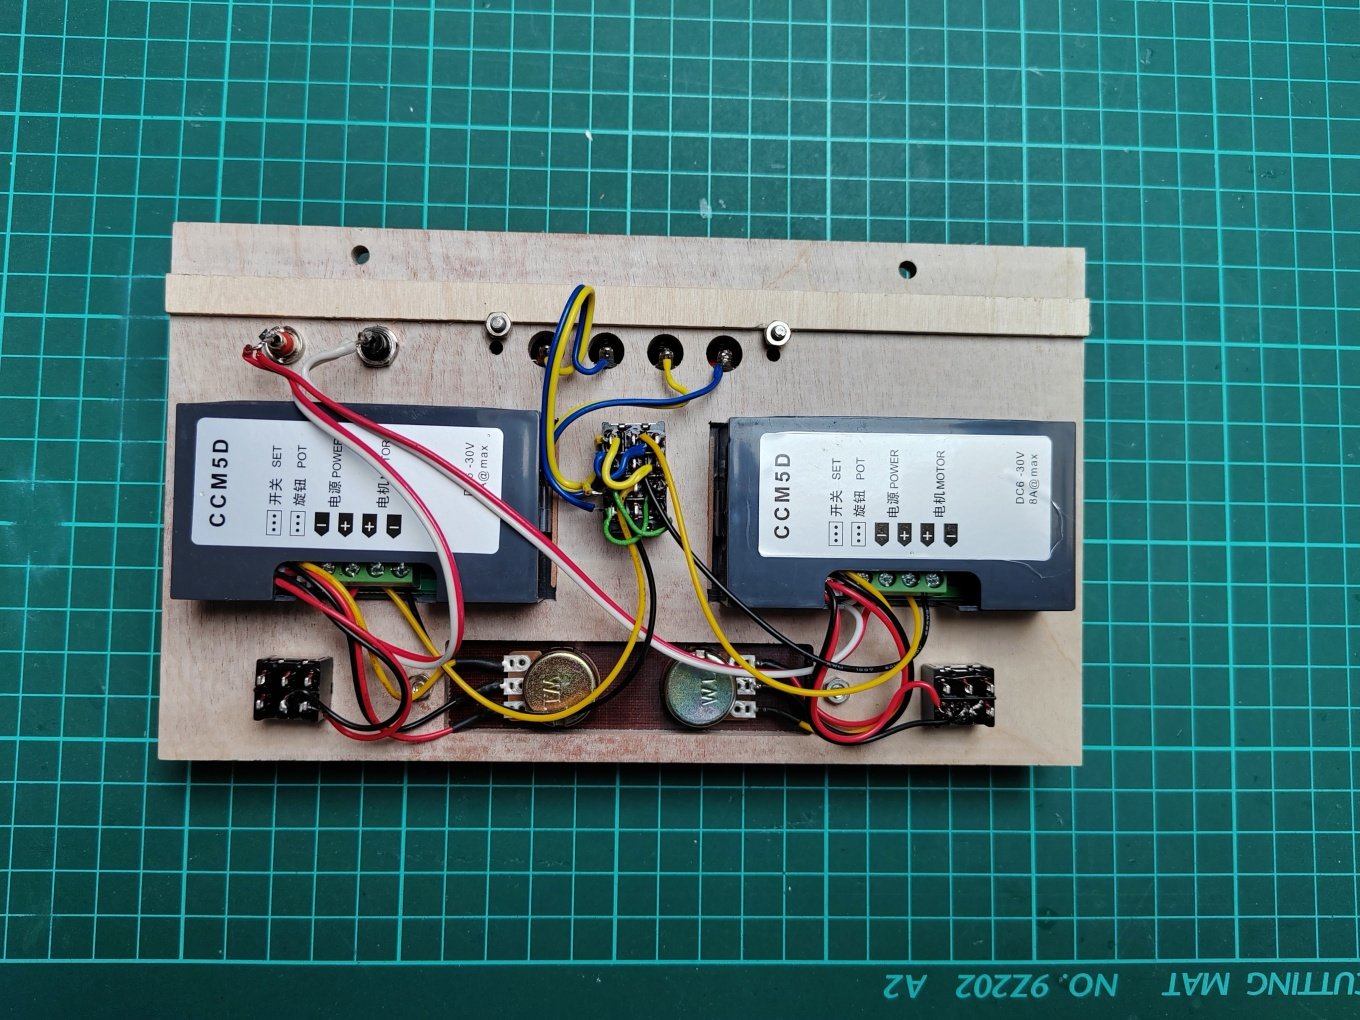
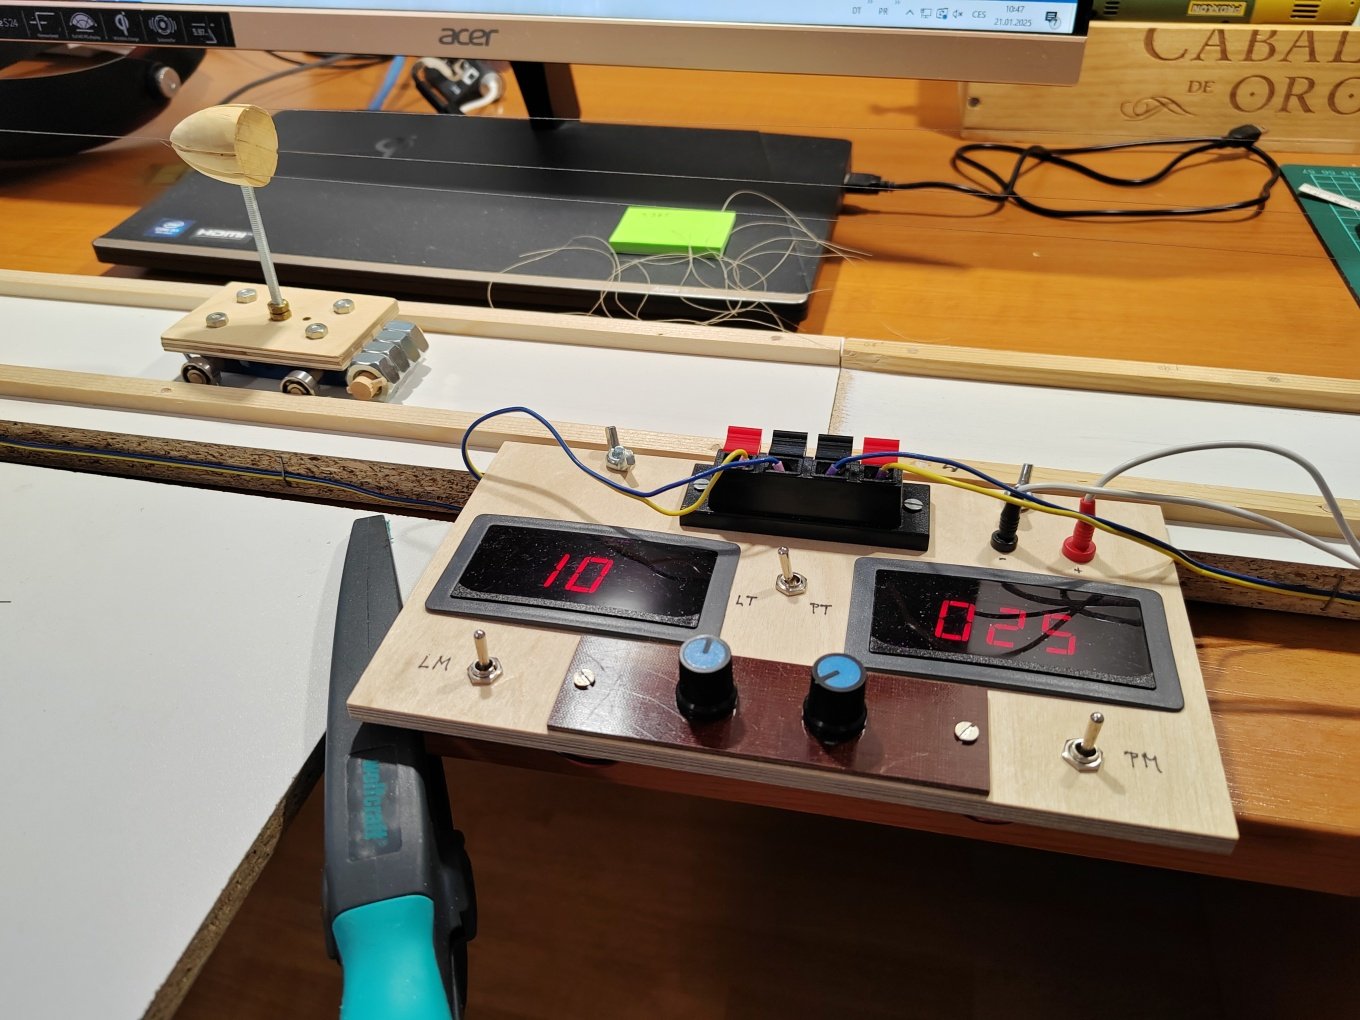
I adjusted the controls on my ropewalk and started winding the ropes. I started with the weaker ones, which are easier to wind, but there are a few more of them. The first batch is done.
-
L'Amarante by marsalv - 1:36 - POF
marsalv replied to marsalv's topic in - Build logs for subjects built 1501 - 1750
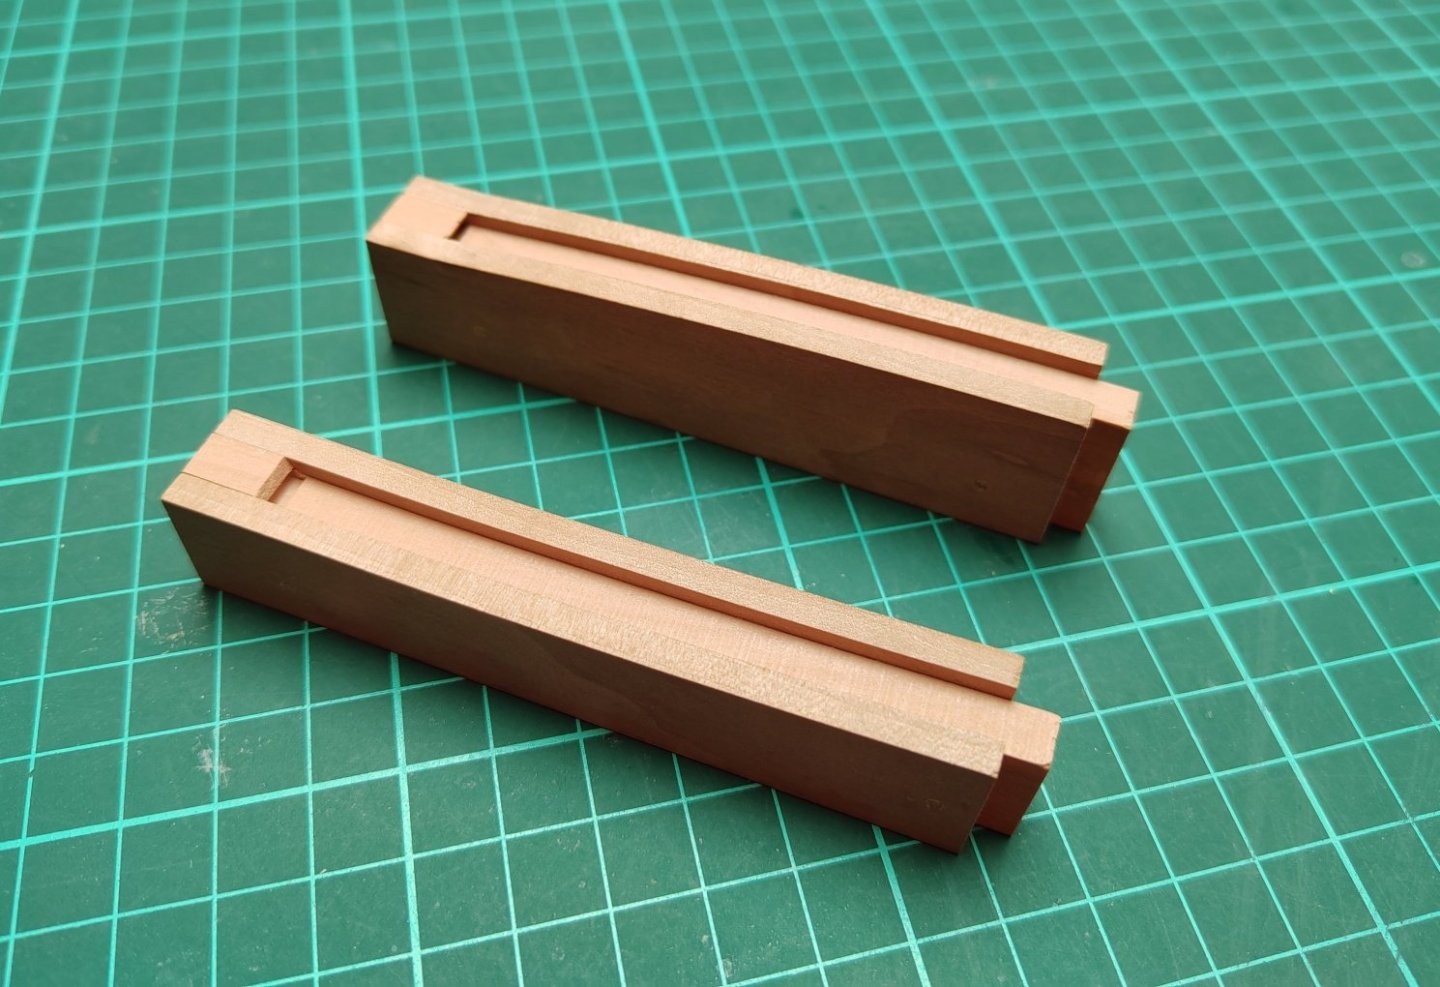
Thankl you No Idea for the reply. Christmas holidays are over, so I'm back to work. I'm continuing with the production and installation of the main mast step.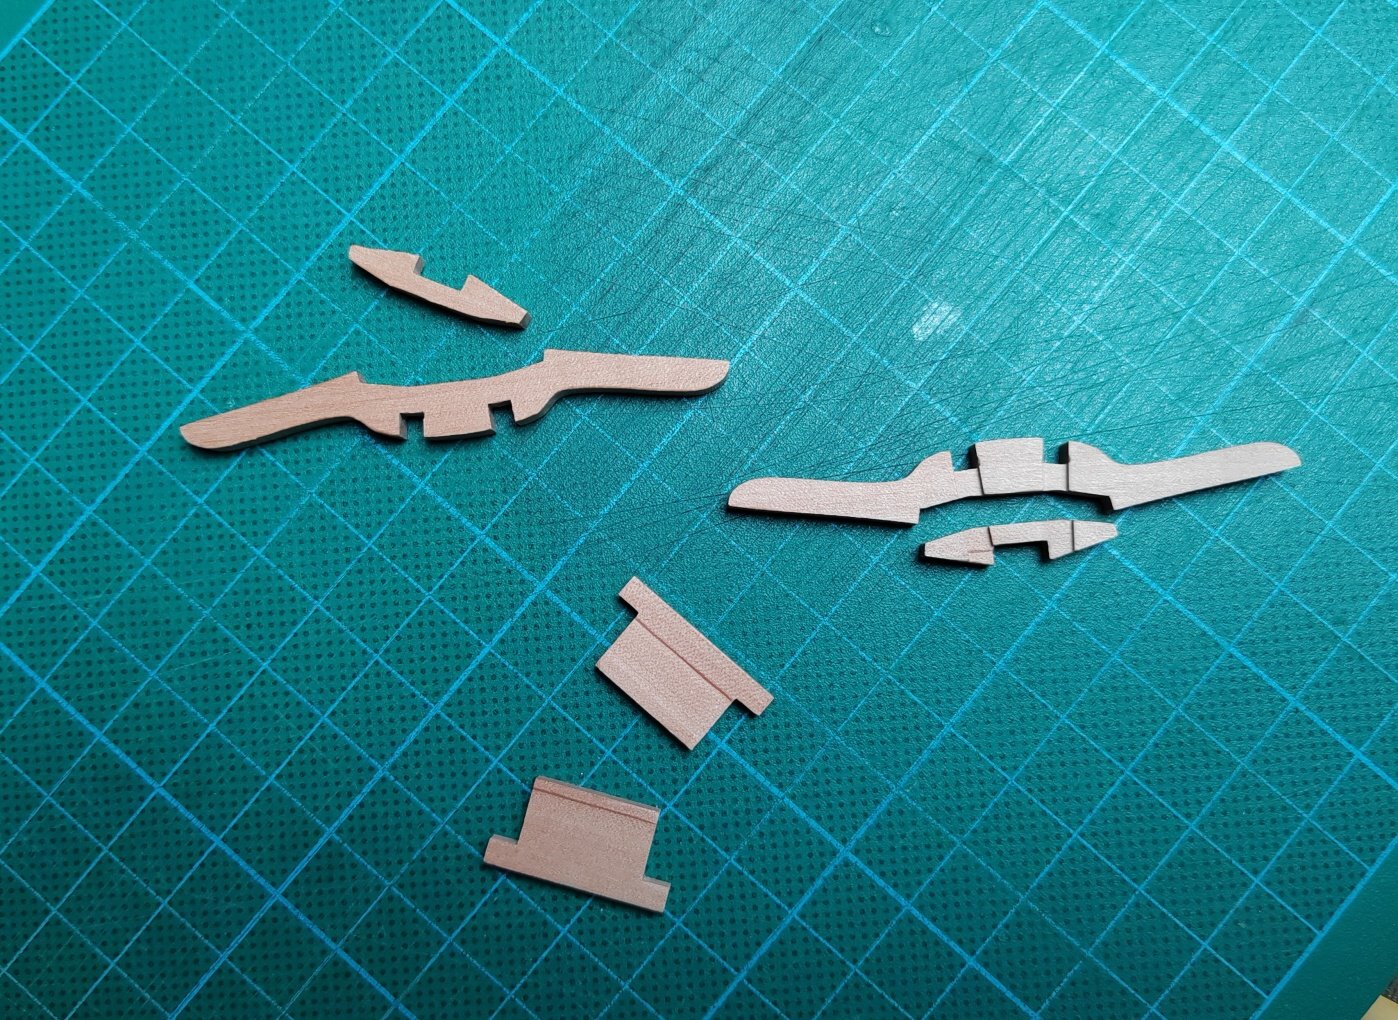

-
L'Amarante by marsalv - 1:36 - POF
marsalv replied to marsalv's topic in - Build logs for subjects built 1501 - 1750
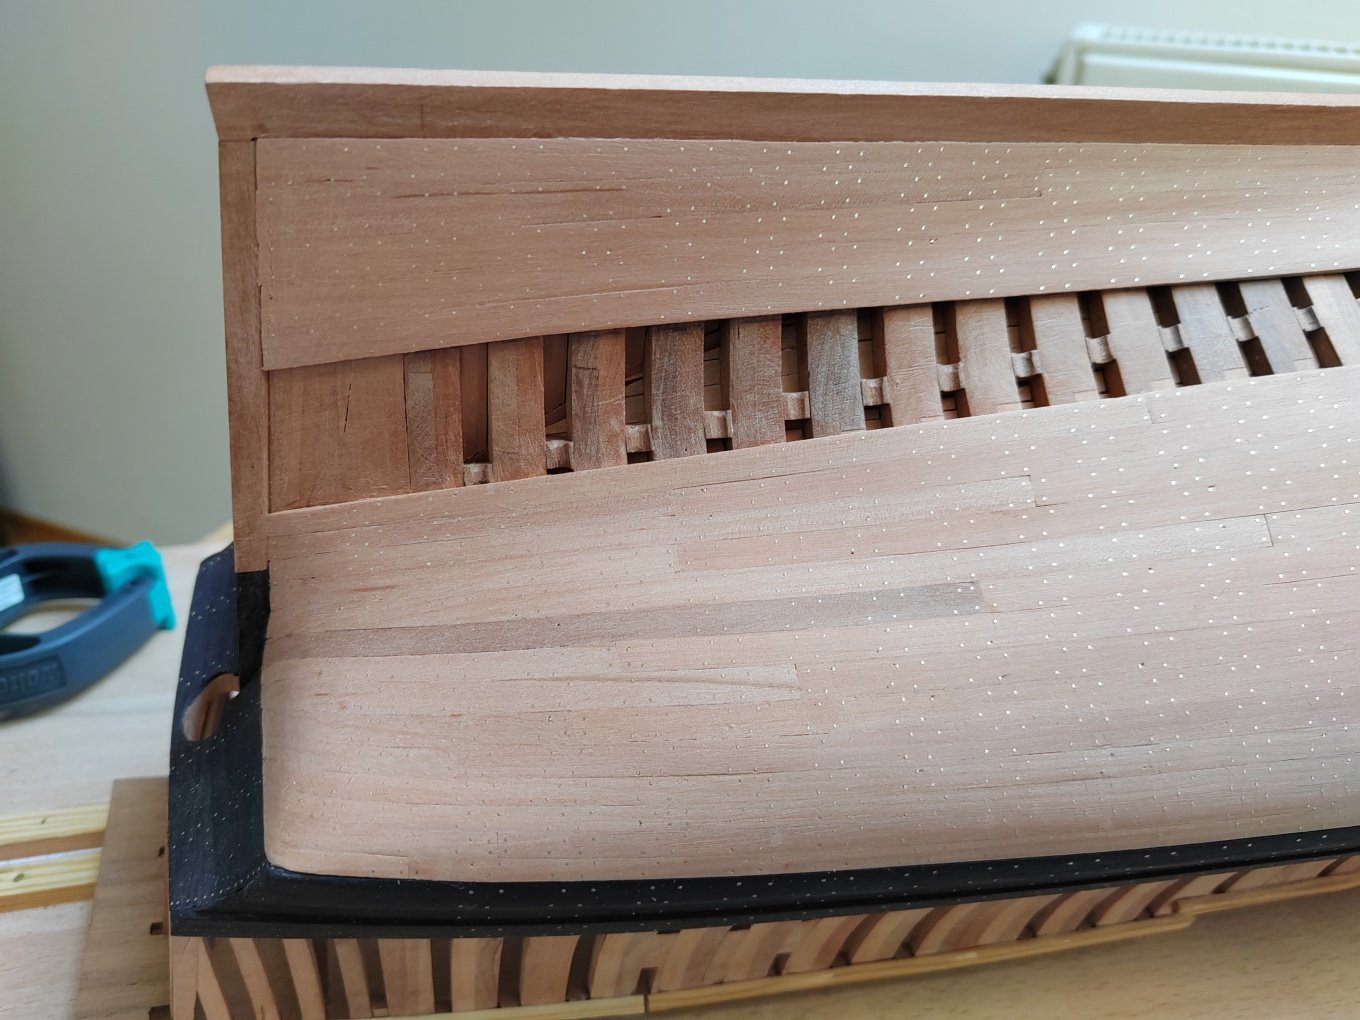
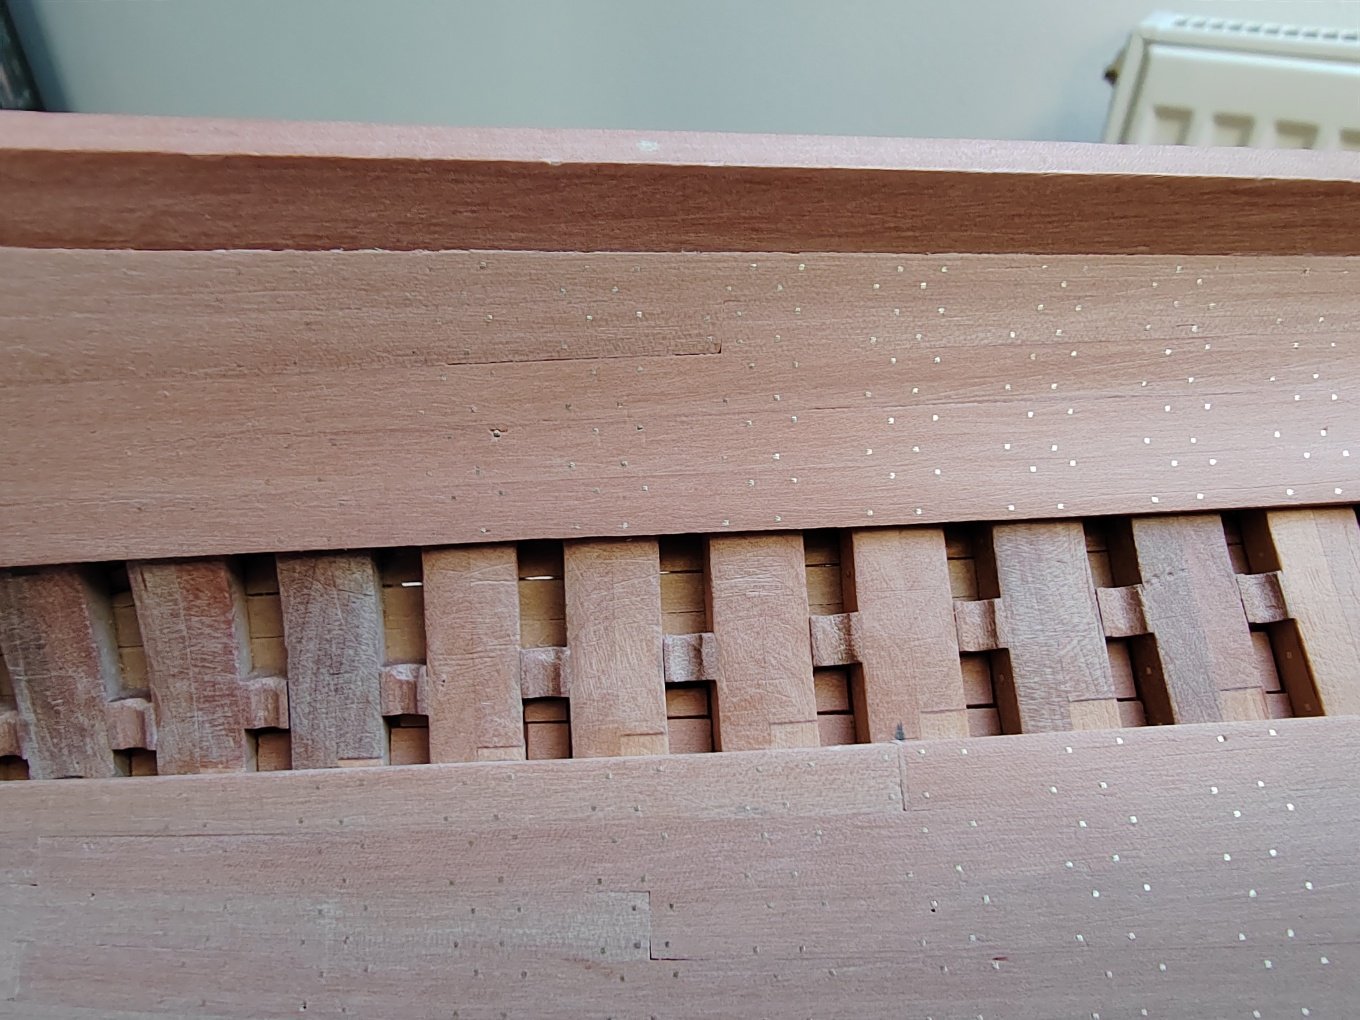
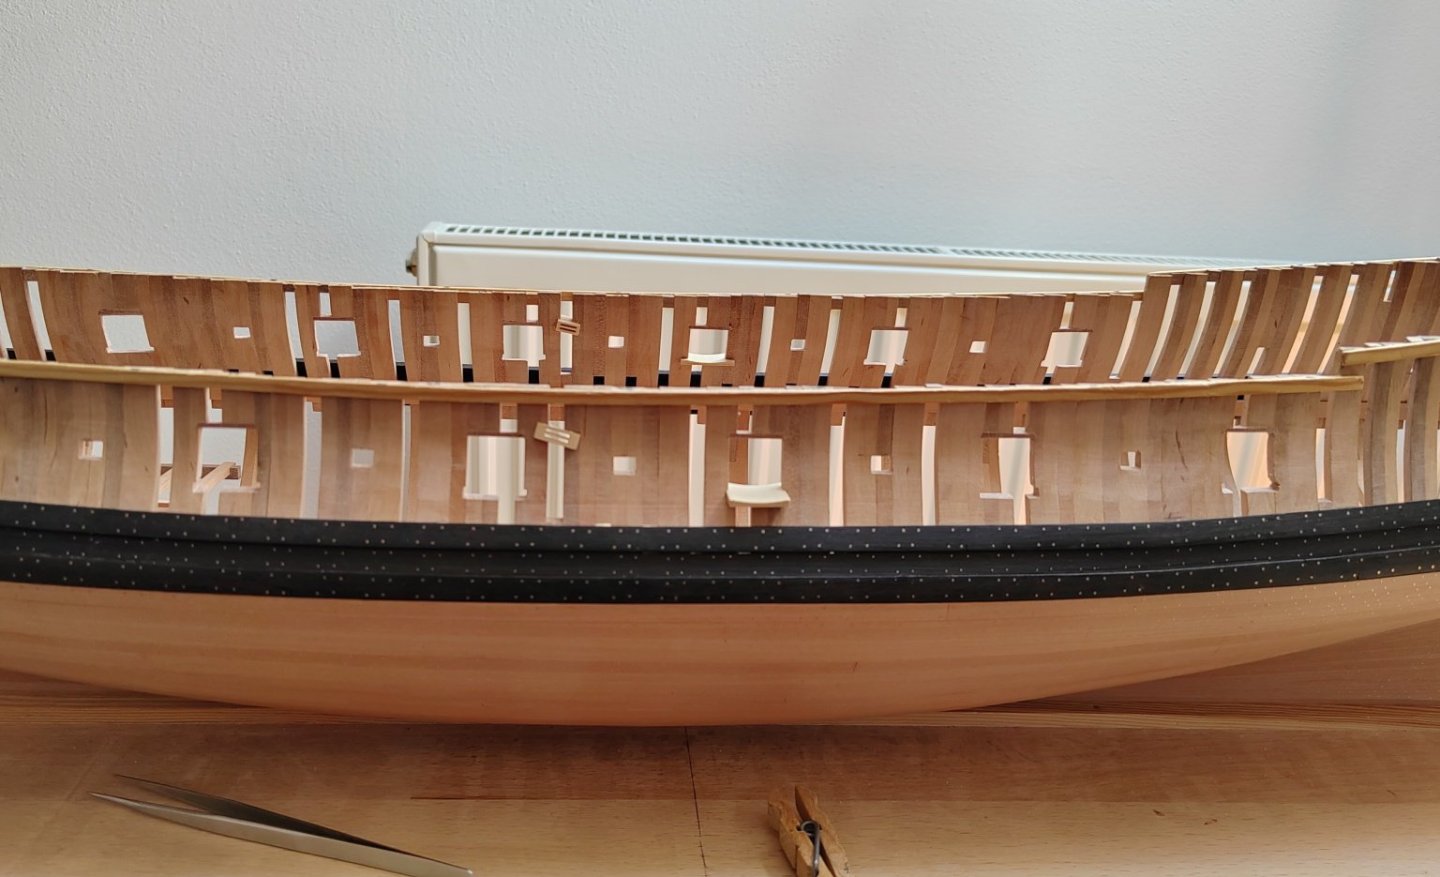
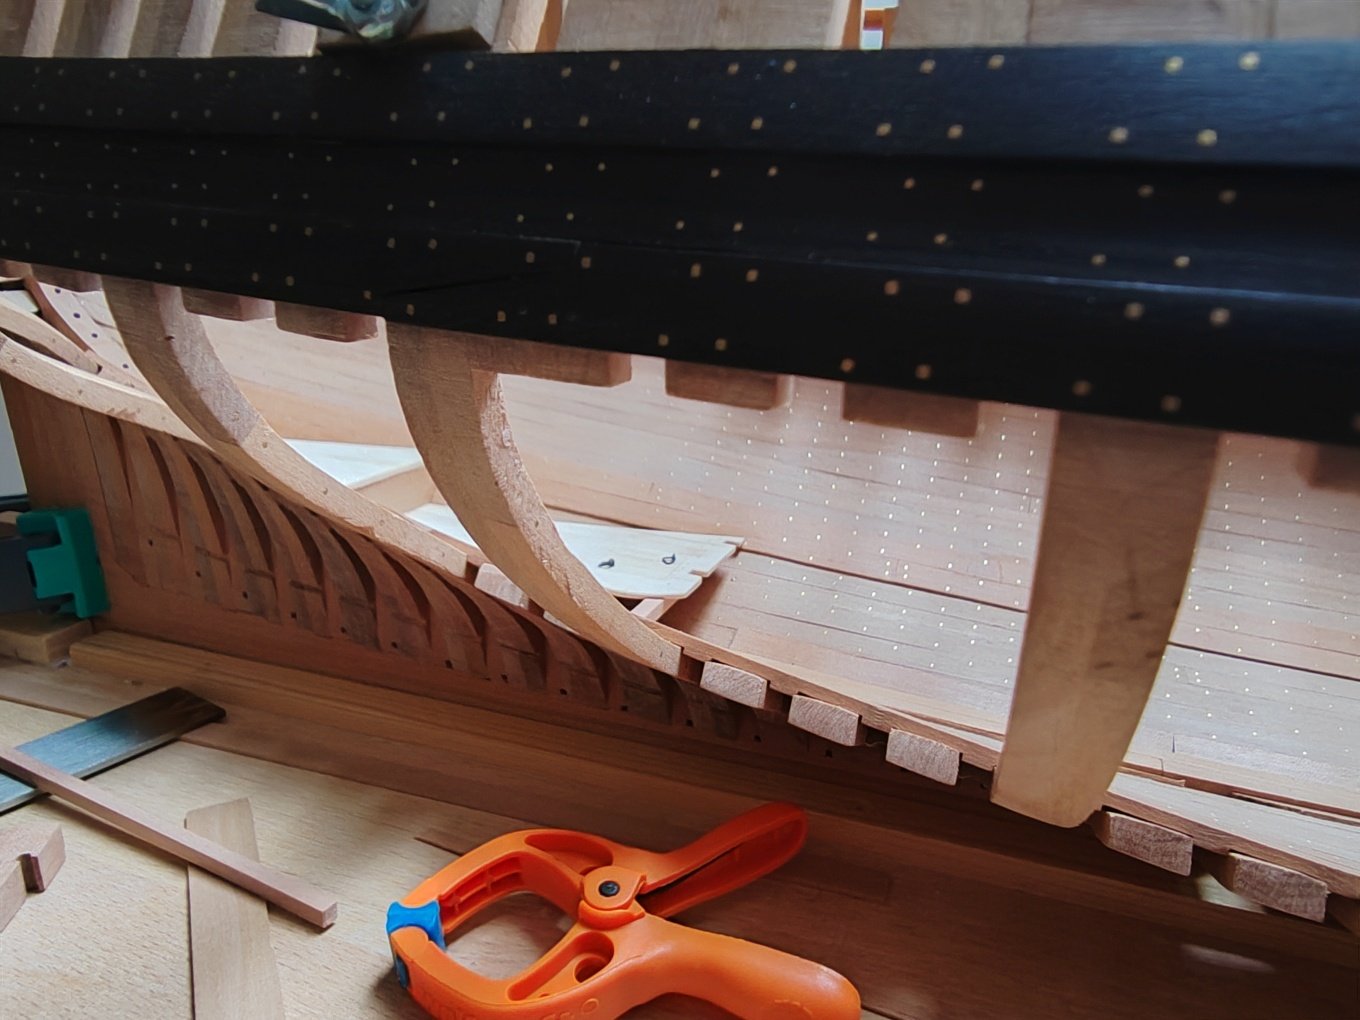
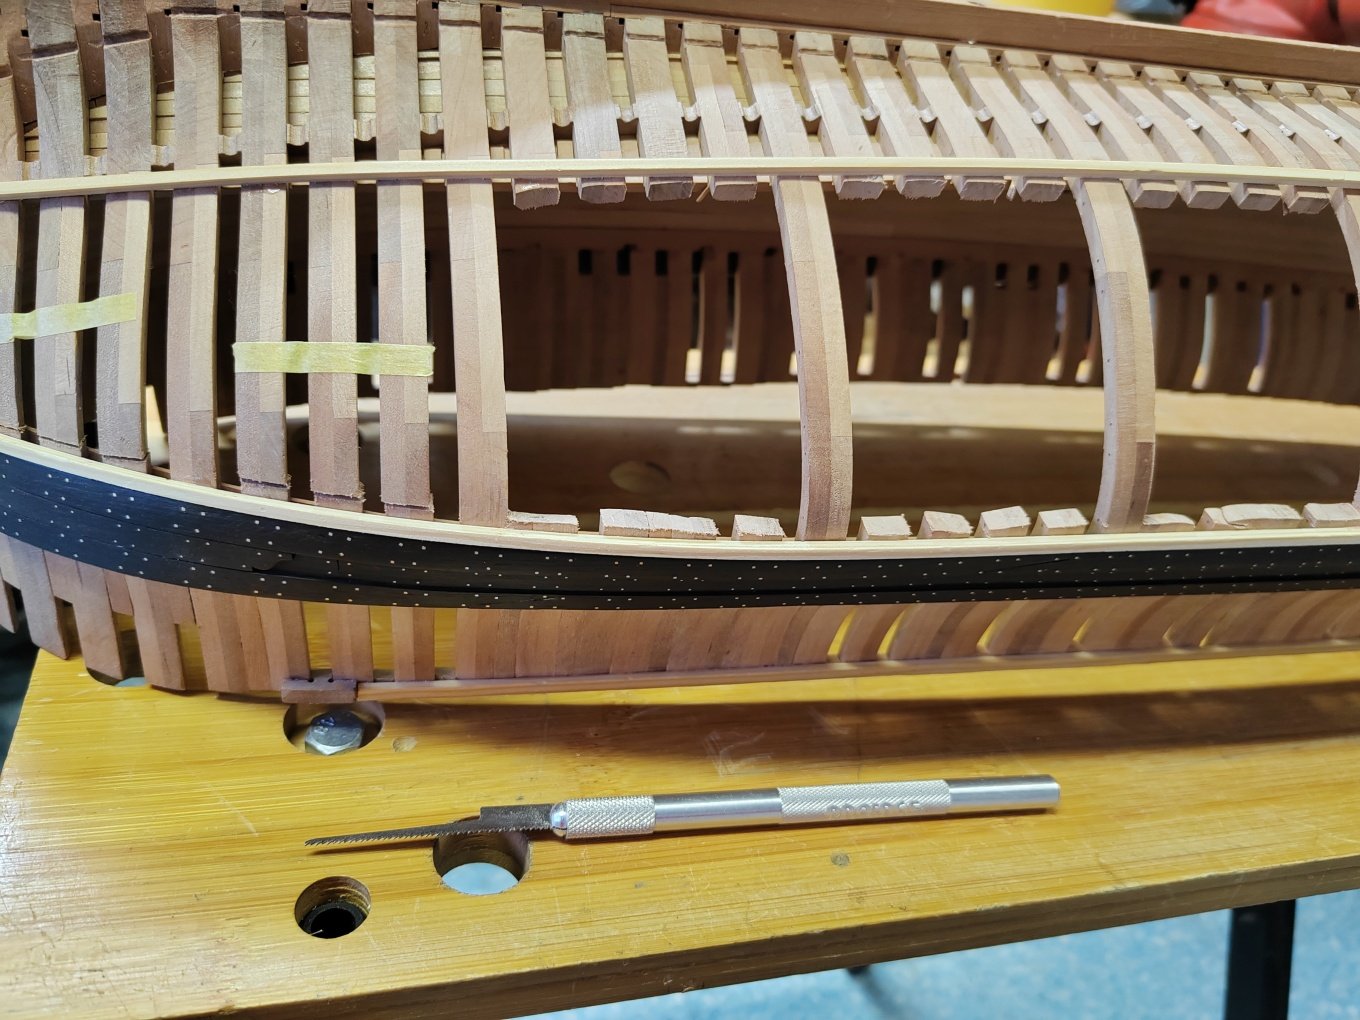
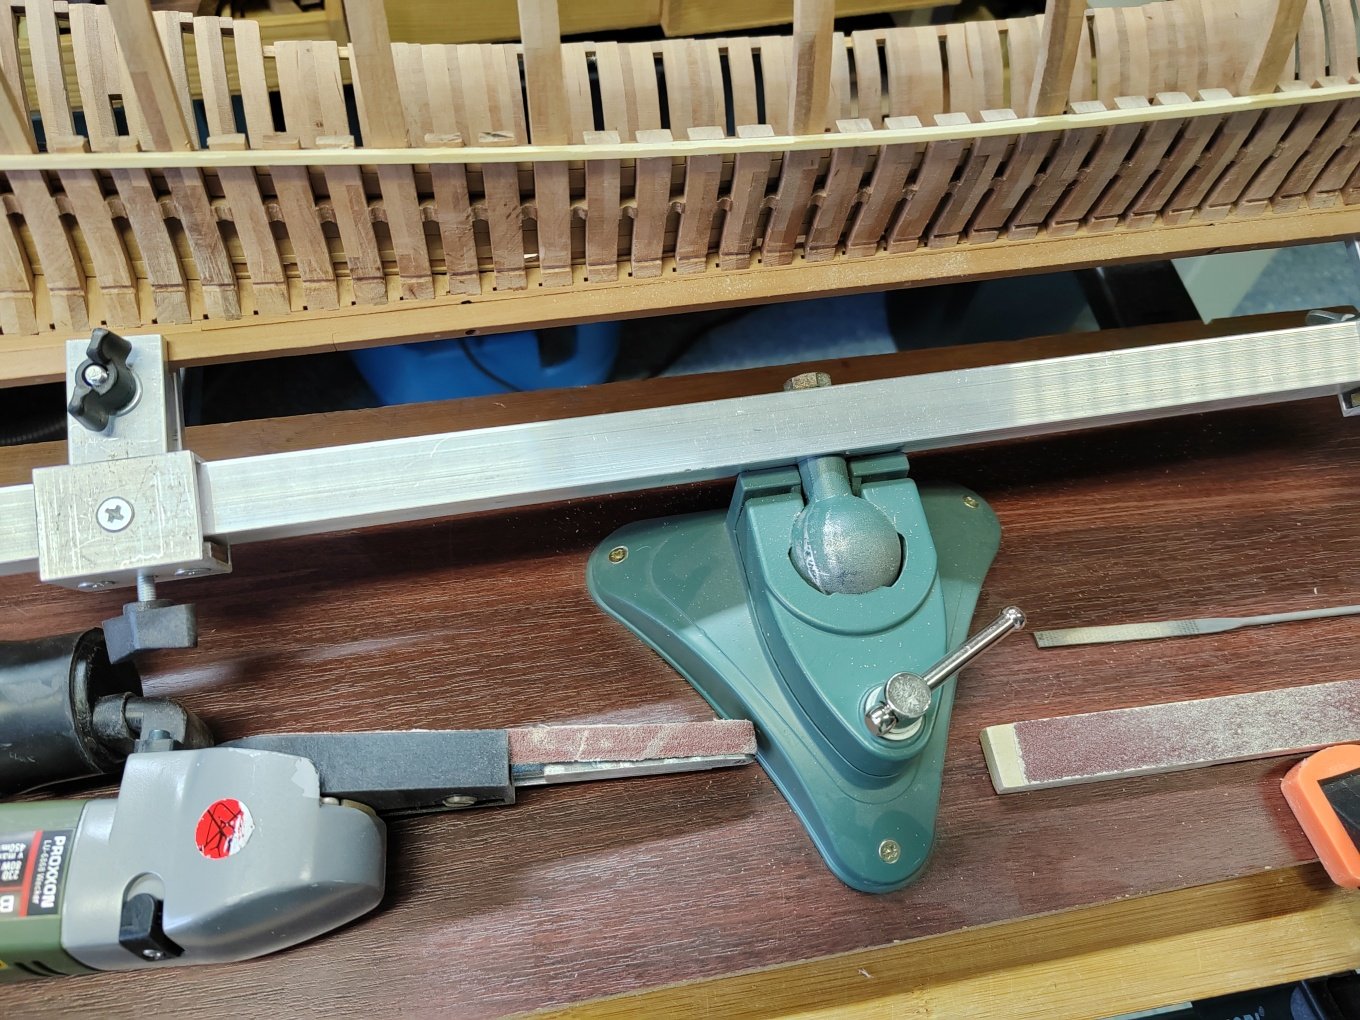
It's time to cut out the "windows" in the unplanked half of the hull. And since Christmas and the end of the year are approaching, I would like to wish everyone a Merry Christmas and a Happy New Year 2025.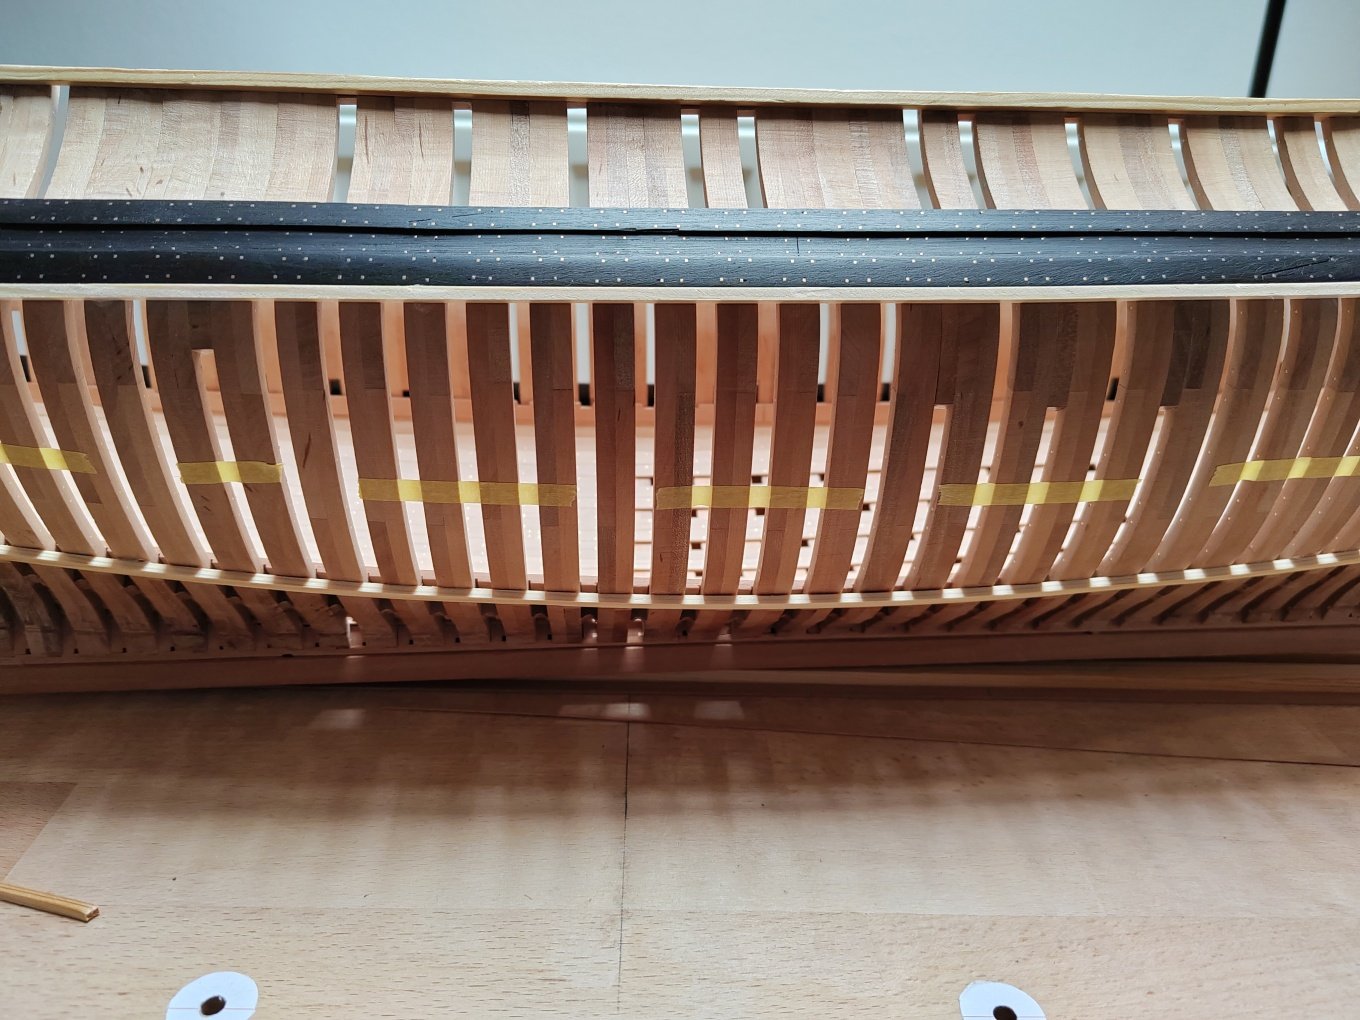
-
L'Amarante by marsalv - 1:36 - POF
marsalv replied to marsalv's topic in - Build logs for subjects built 1501 - 1750
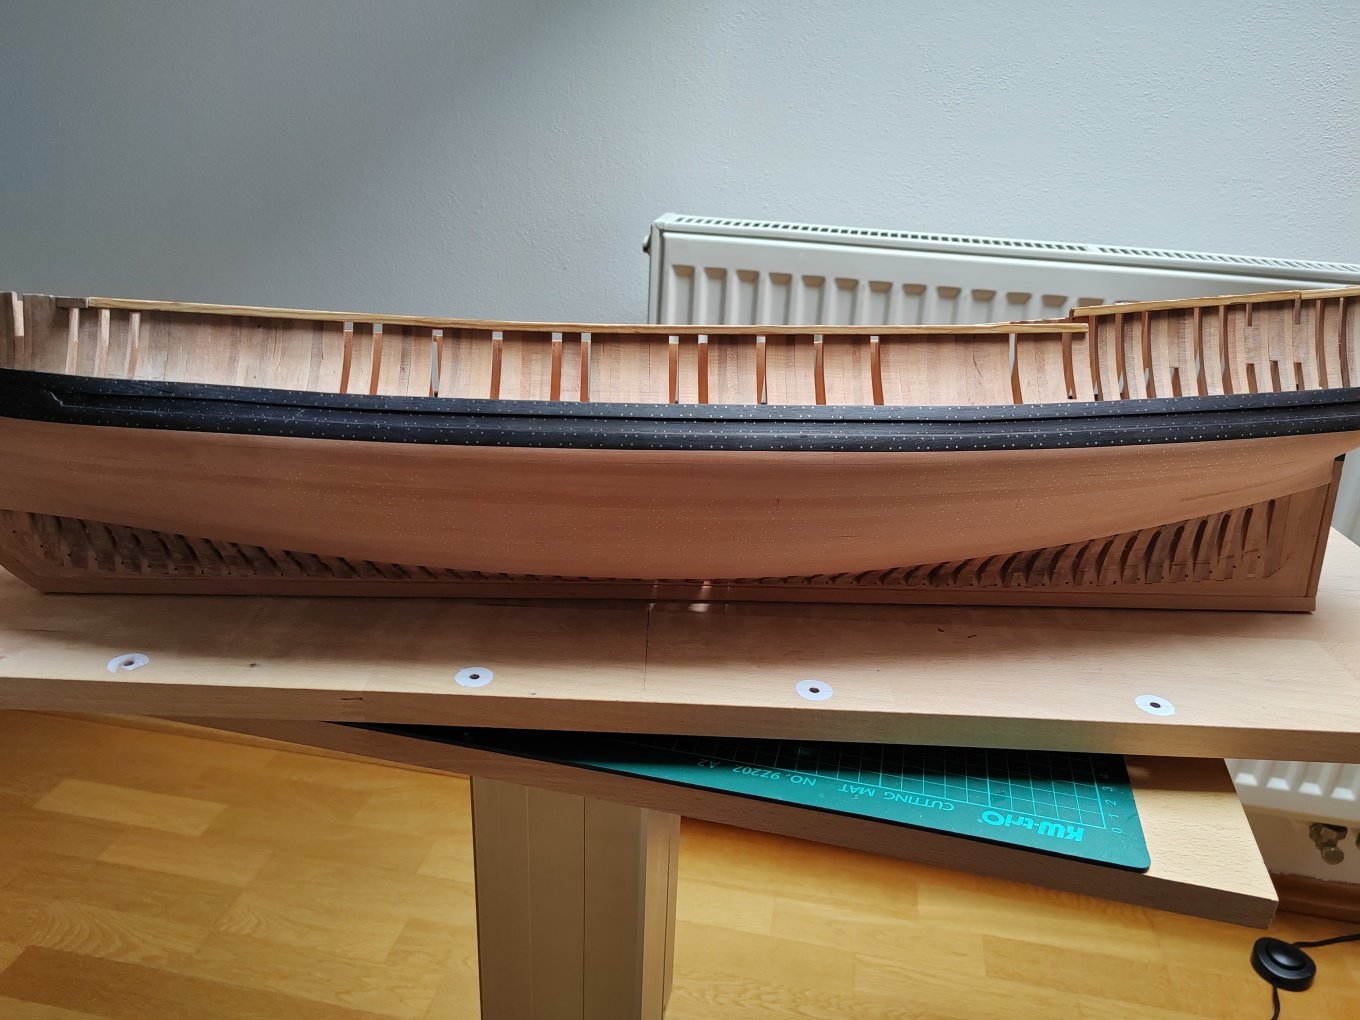
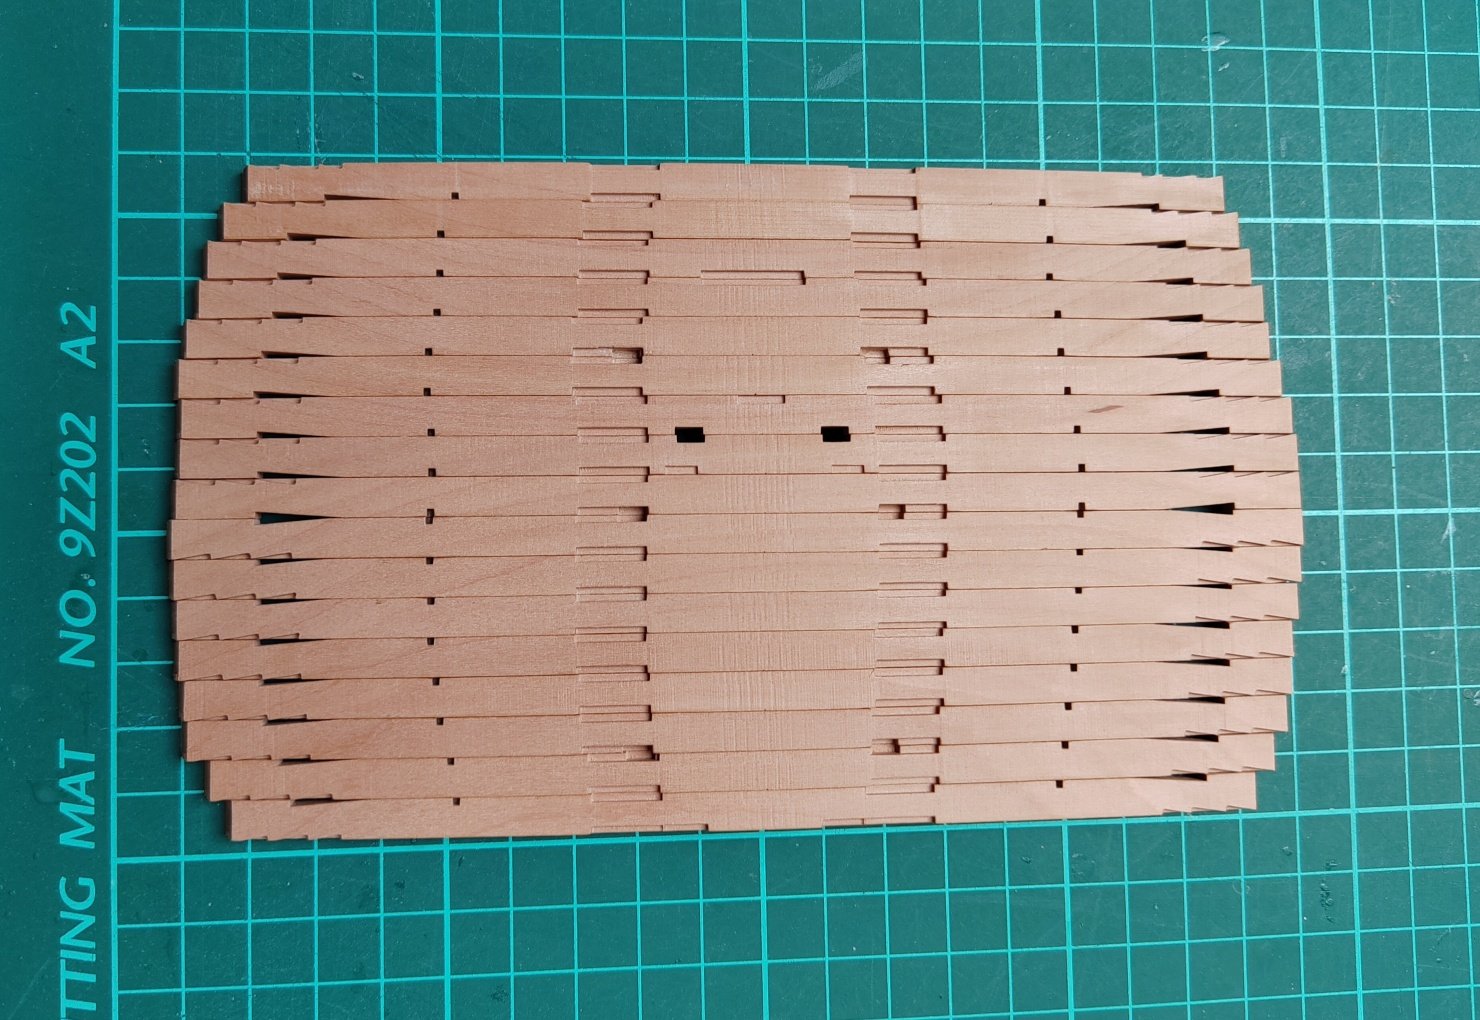
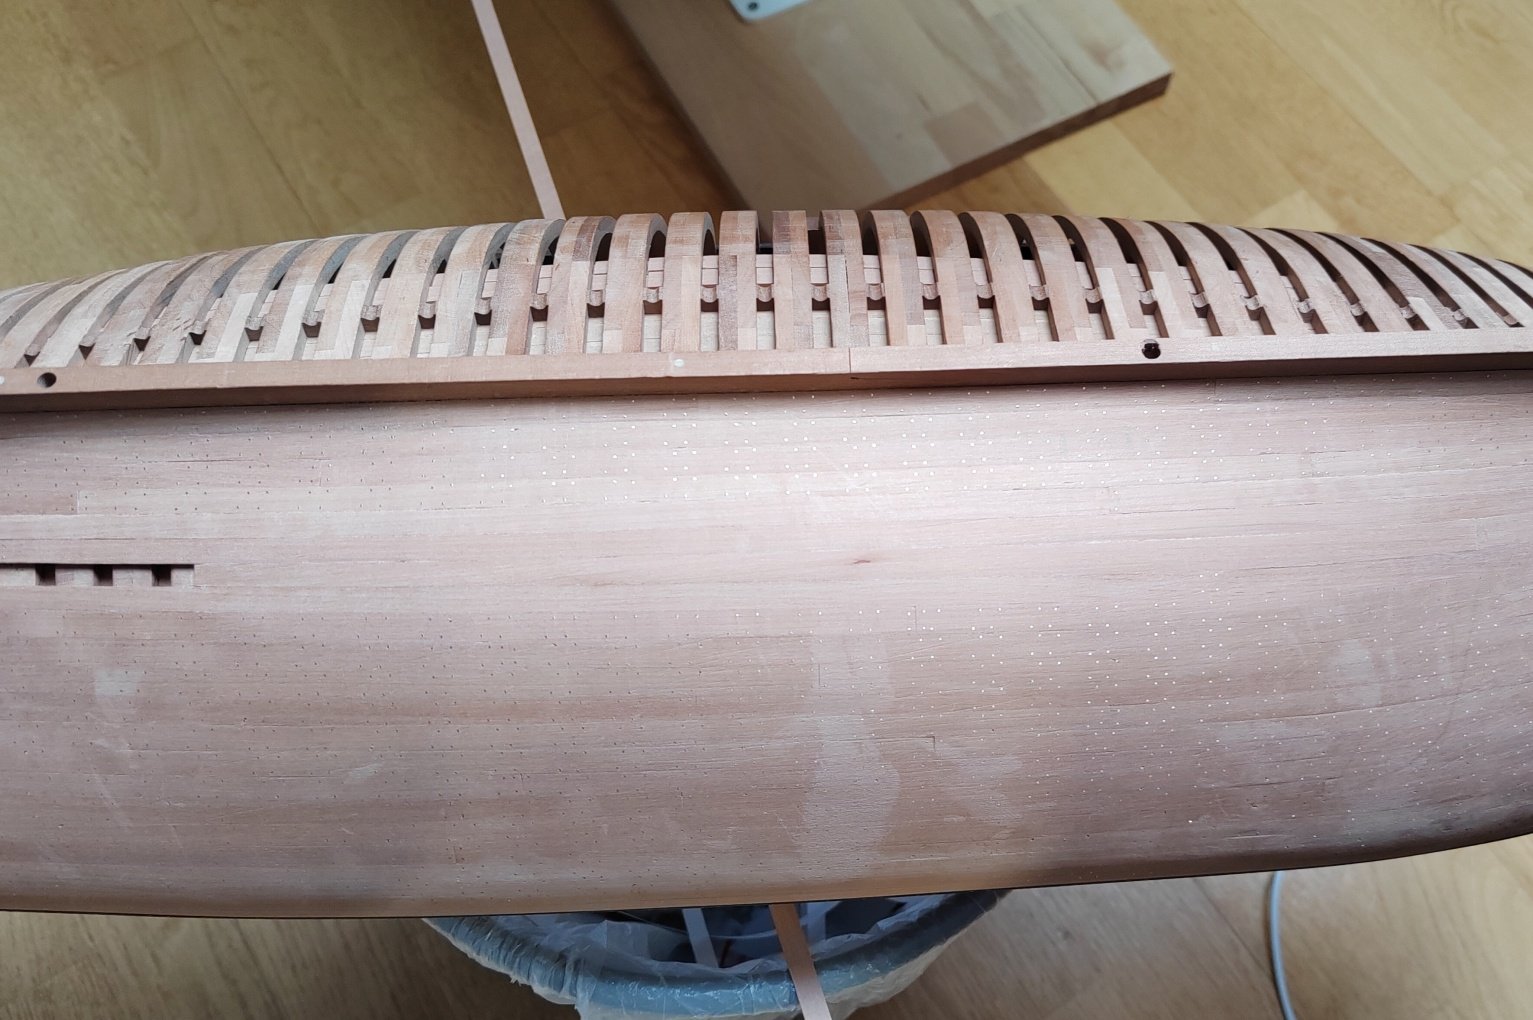
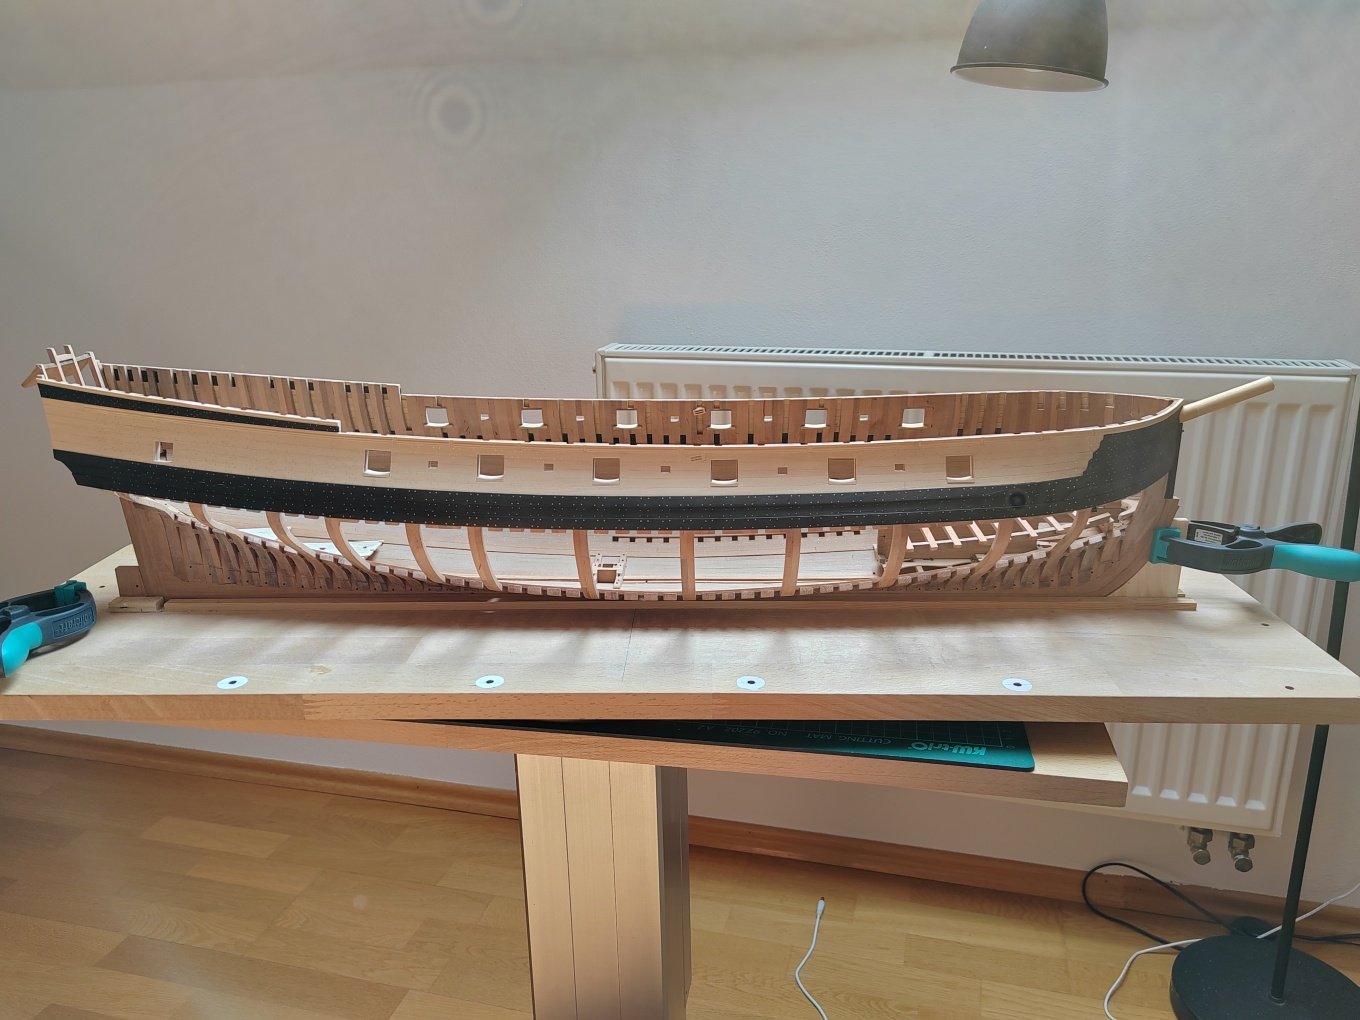
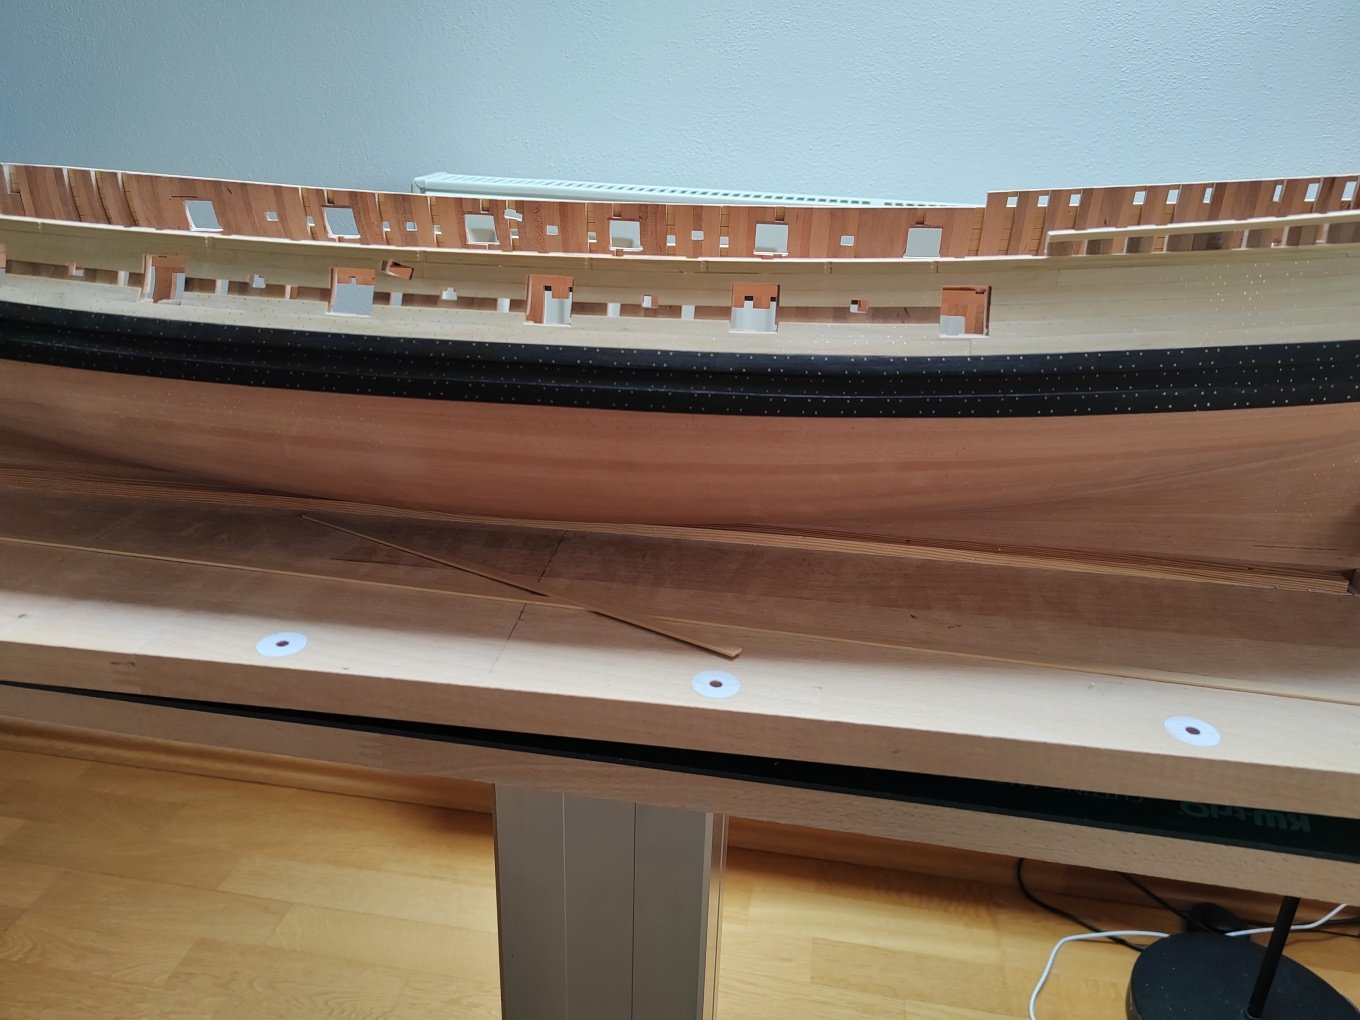
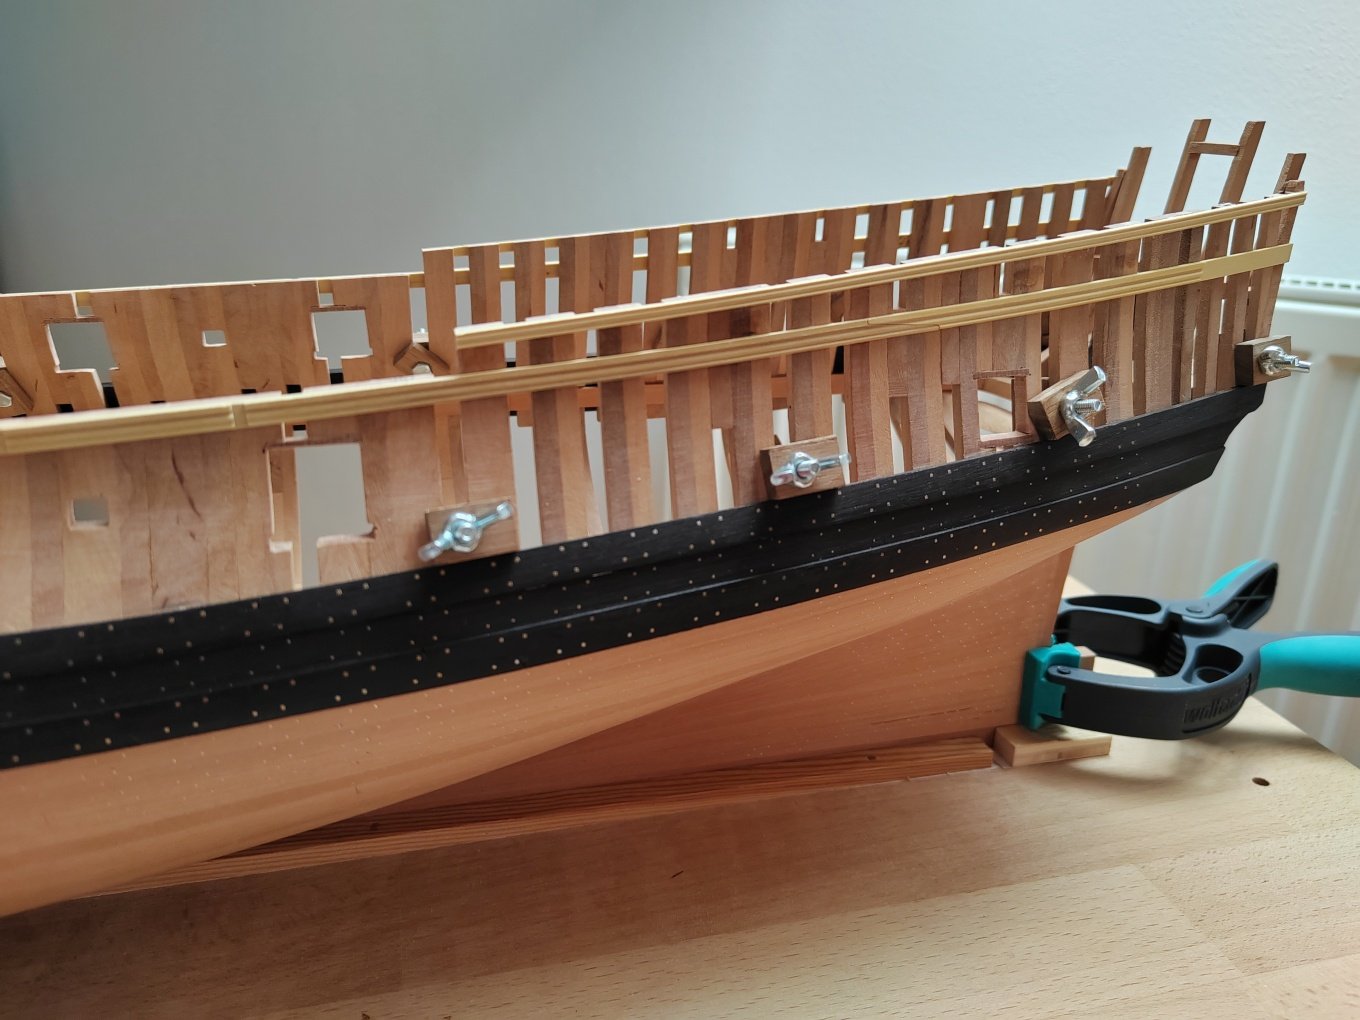
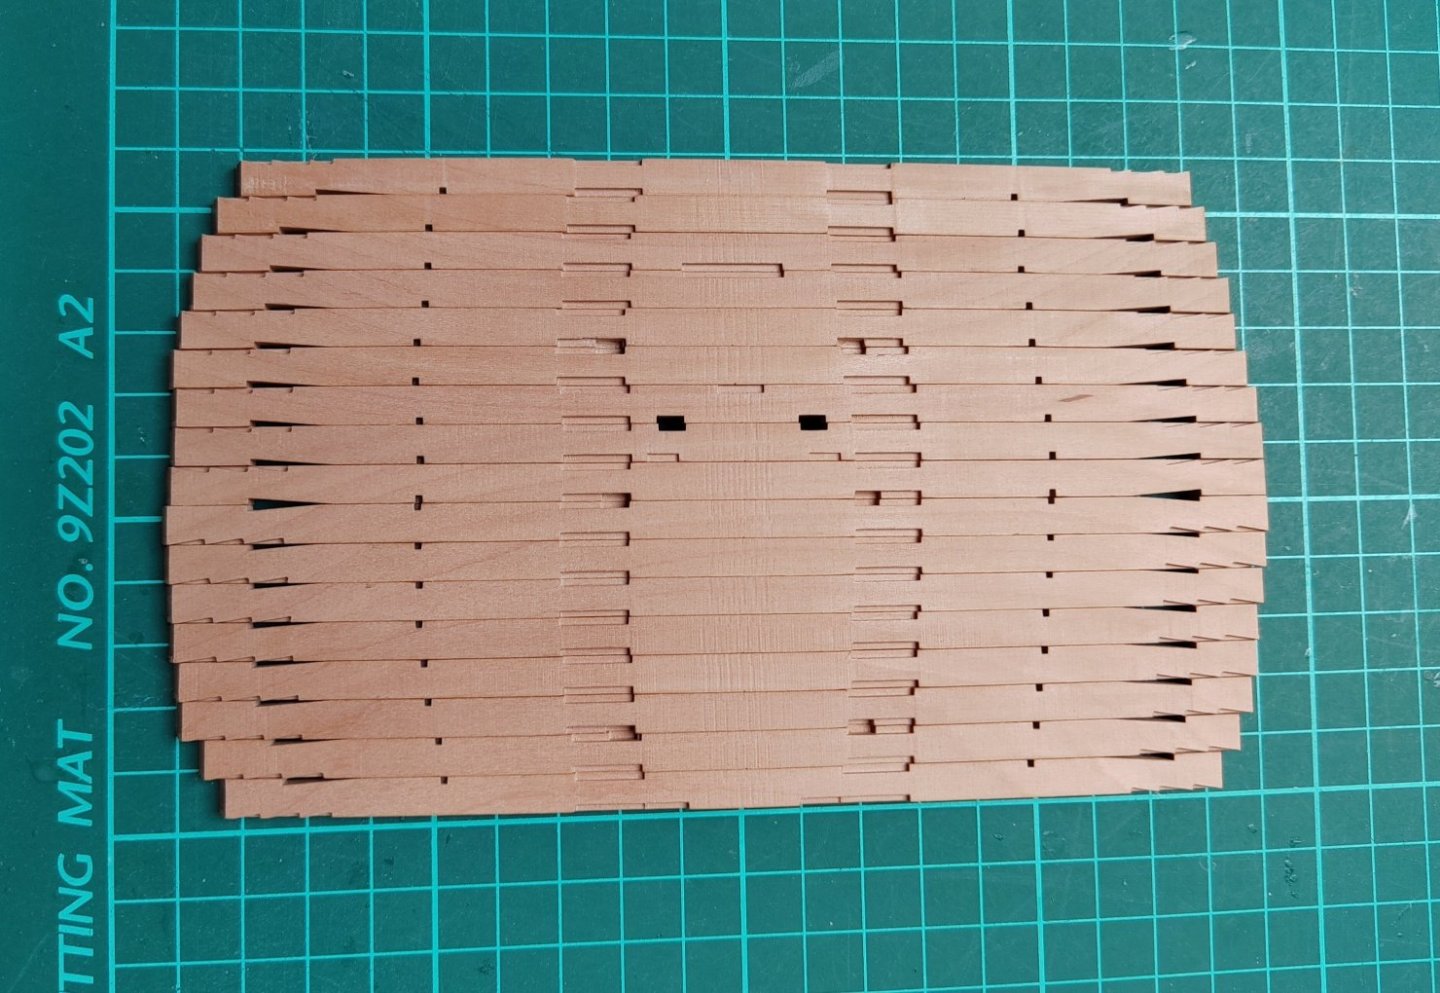
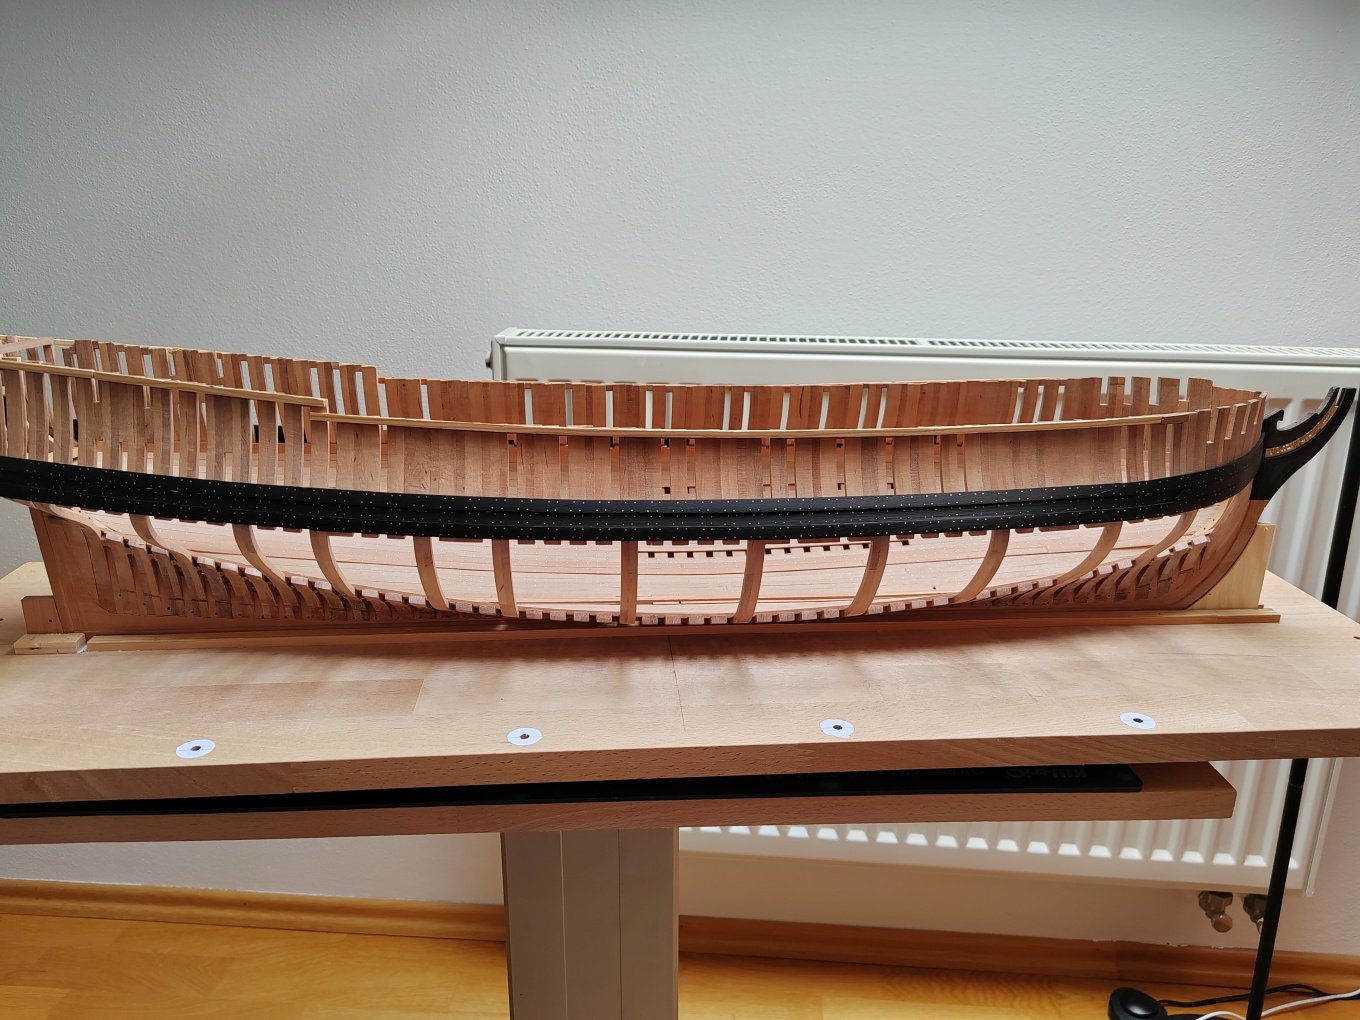
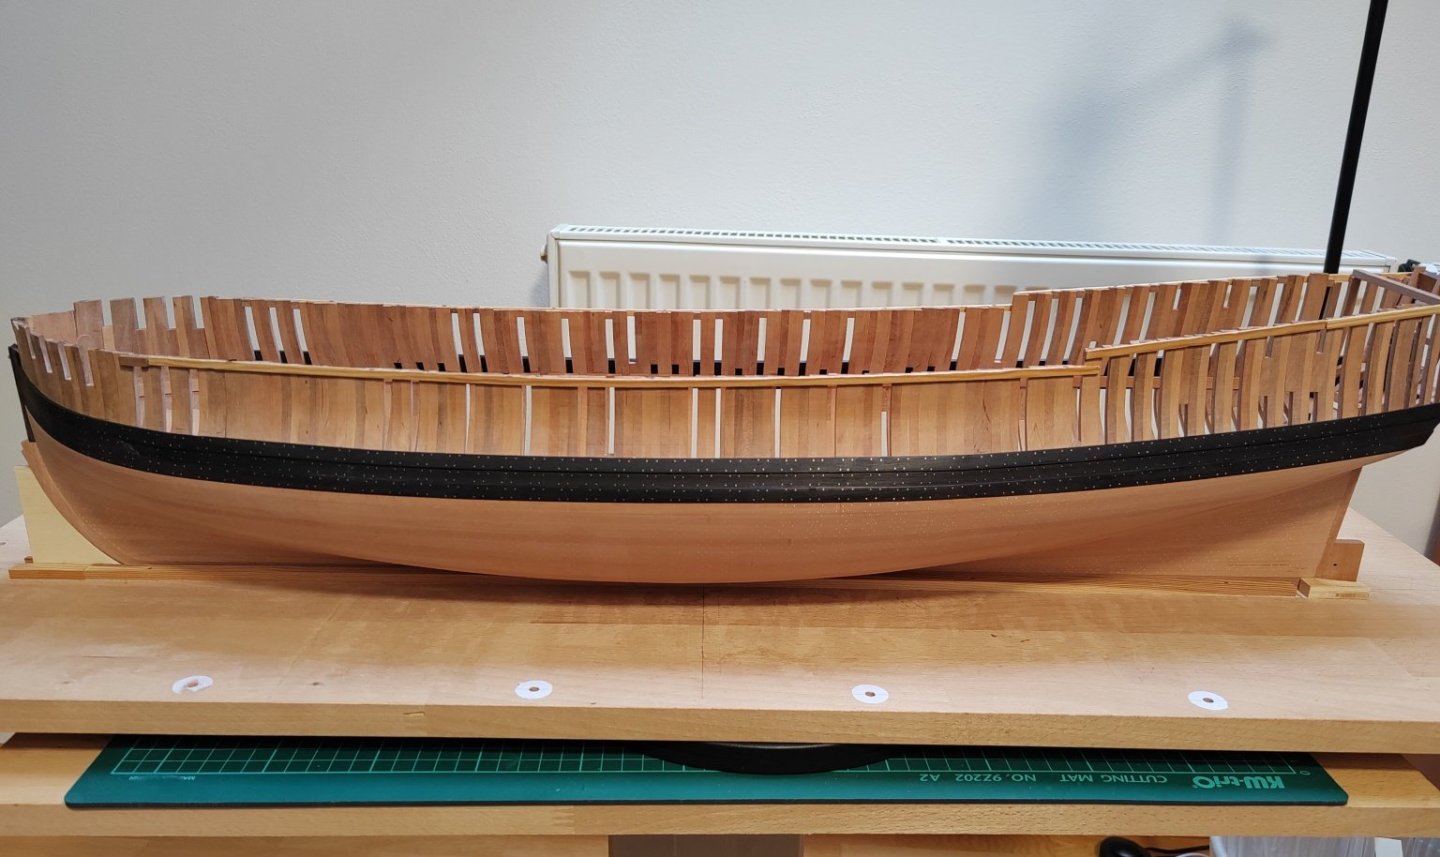
The hull planking is finally done. I'm glad to have it done .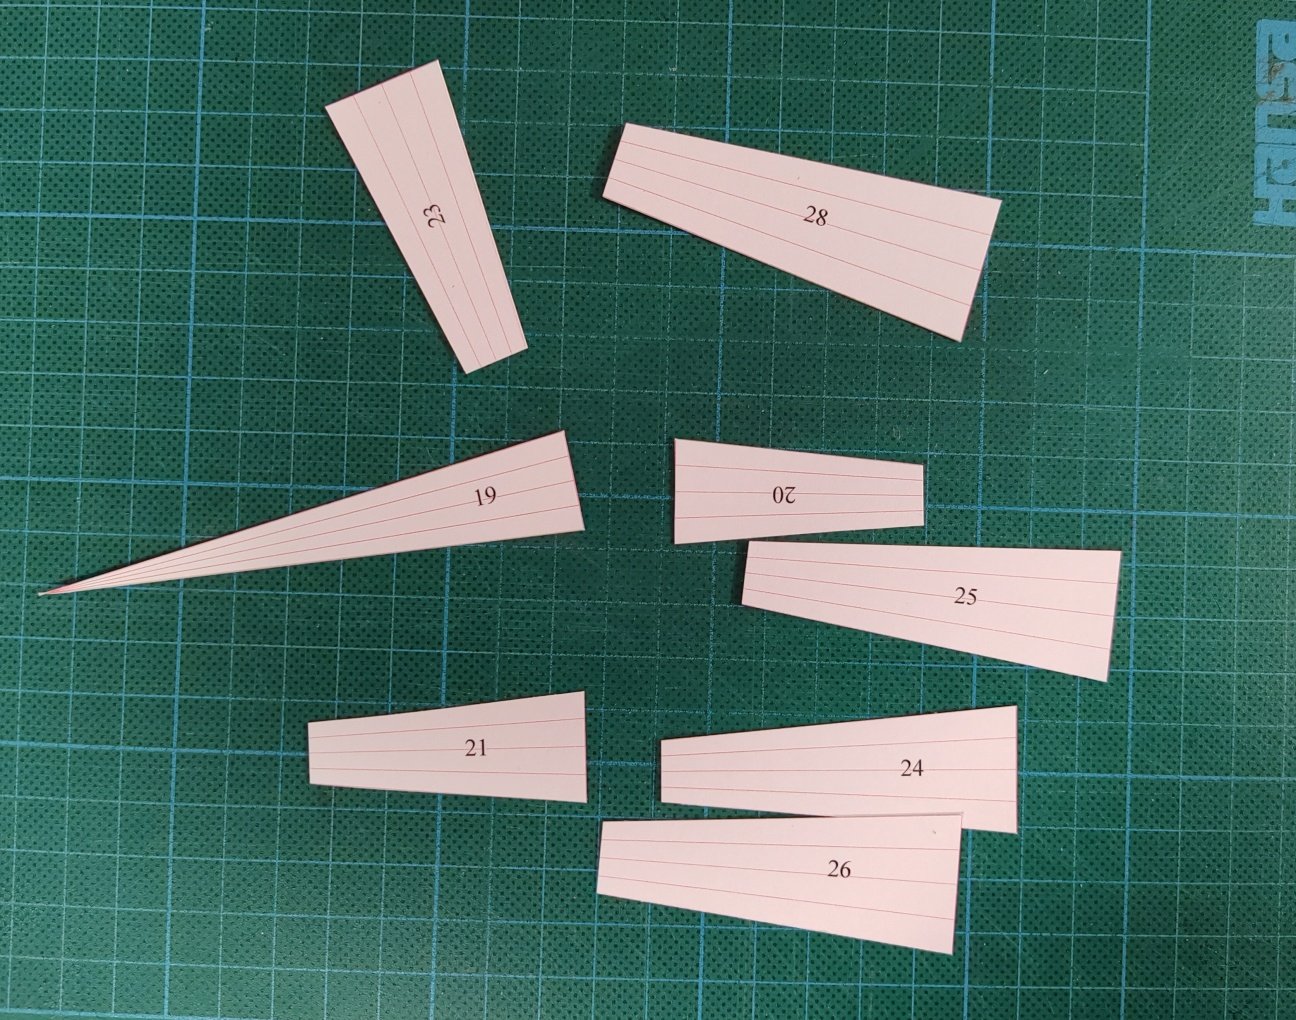
-
L'Amarante by marsalv - 1:36 - POF
marsalv replied to marsalv's topic in - Build logs for subjects built 1501 - 1750
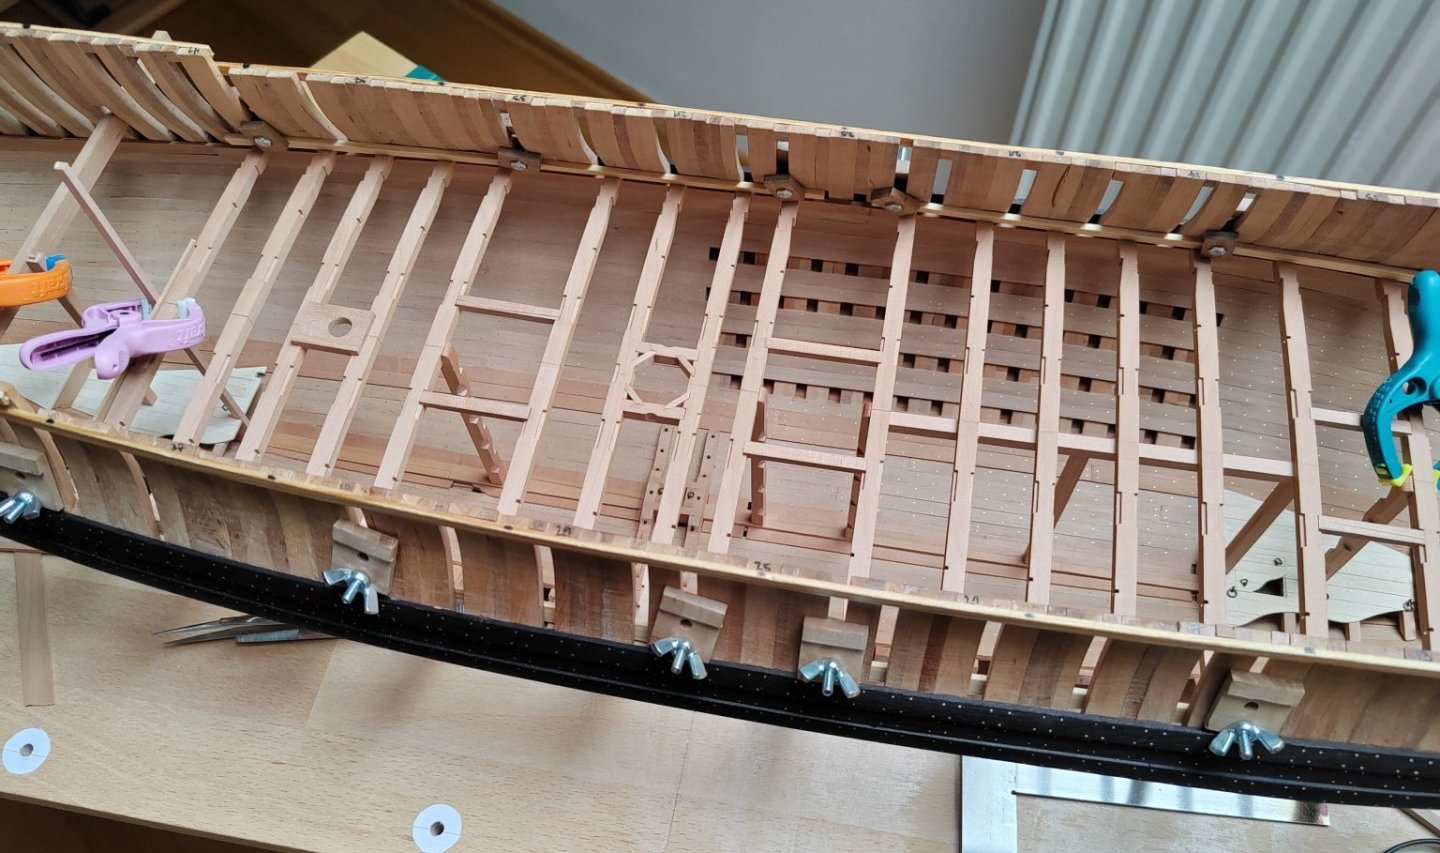
Don't worry, the other side will be without planks and partially open, so the inside of the hull will be visible. -
L'Amarante by marsalv - 1:36 - POF
marsalv replied to marsalv's topic in - Build logs for subjects built 1501 - 1750
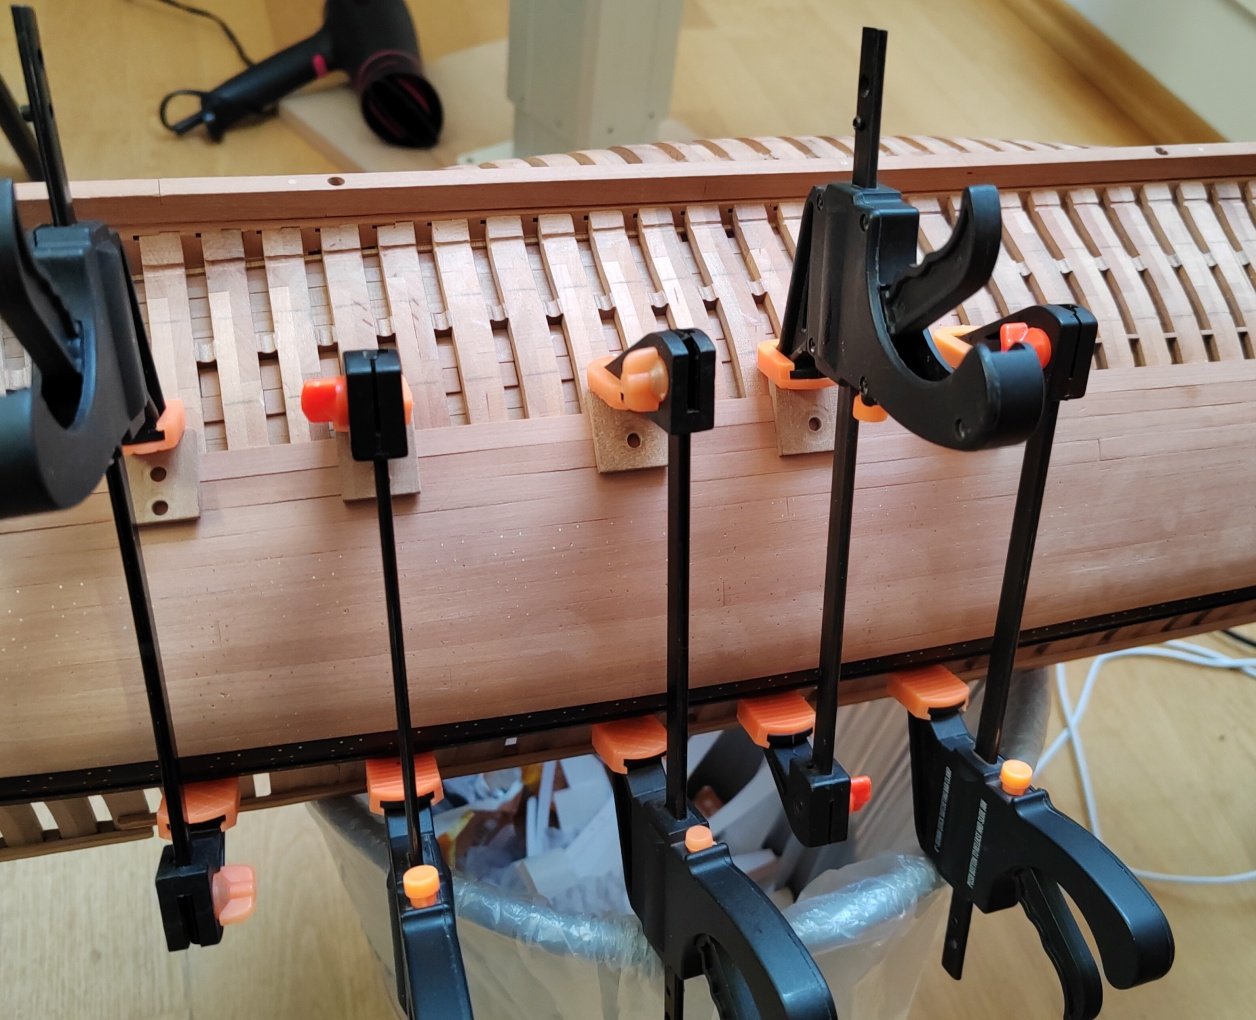
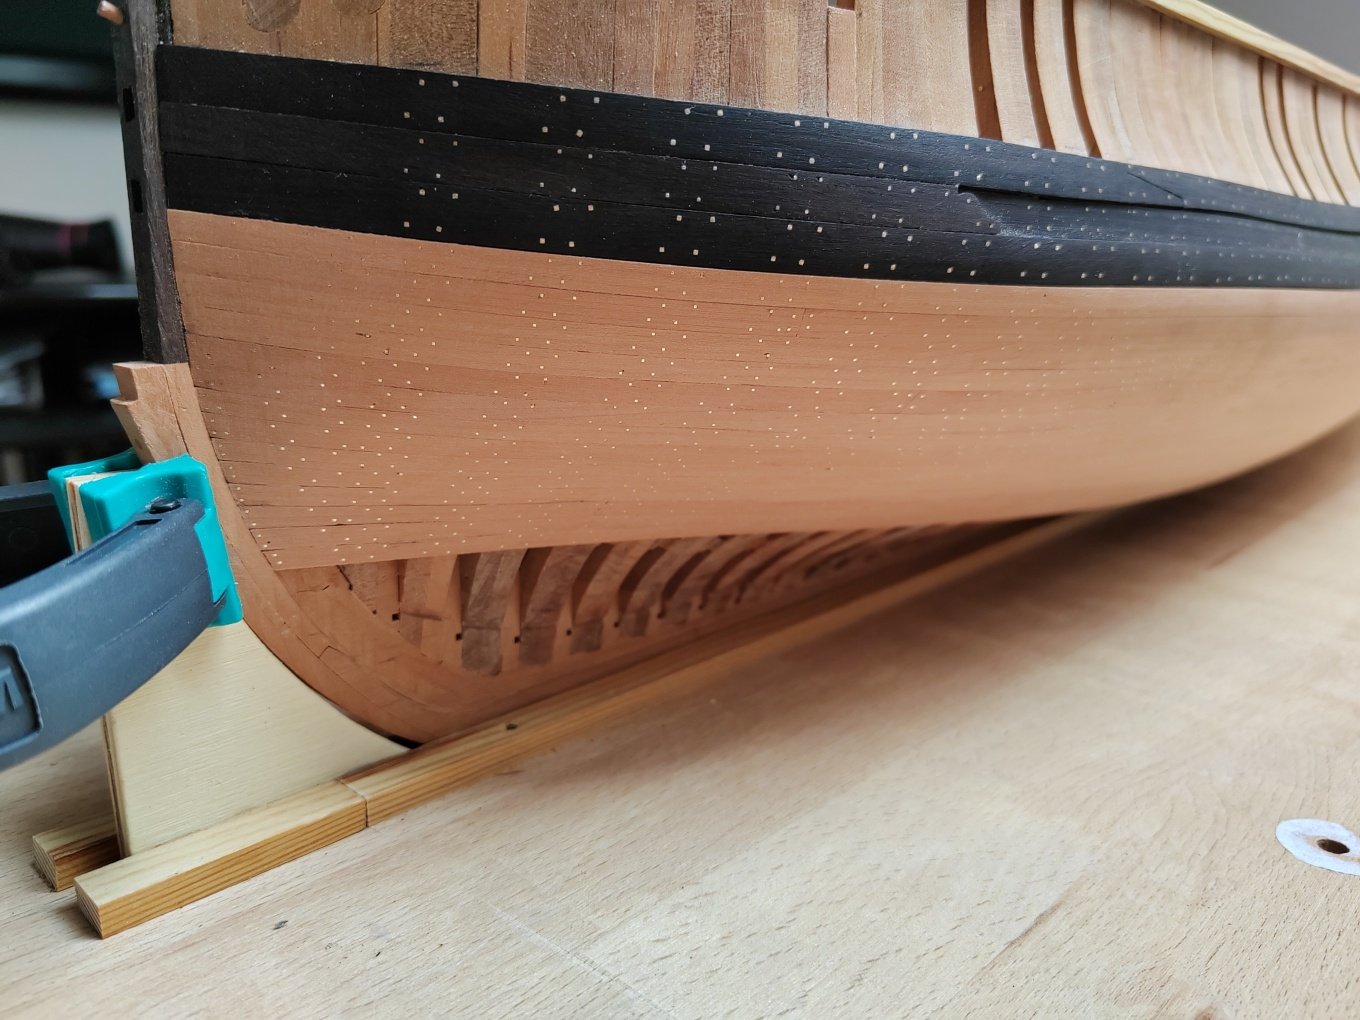
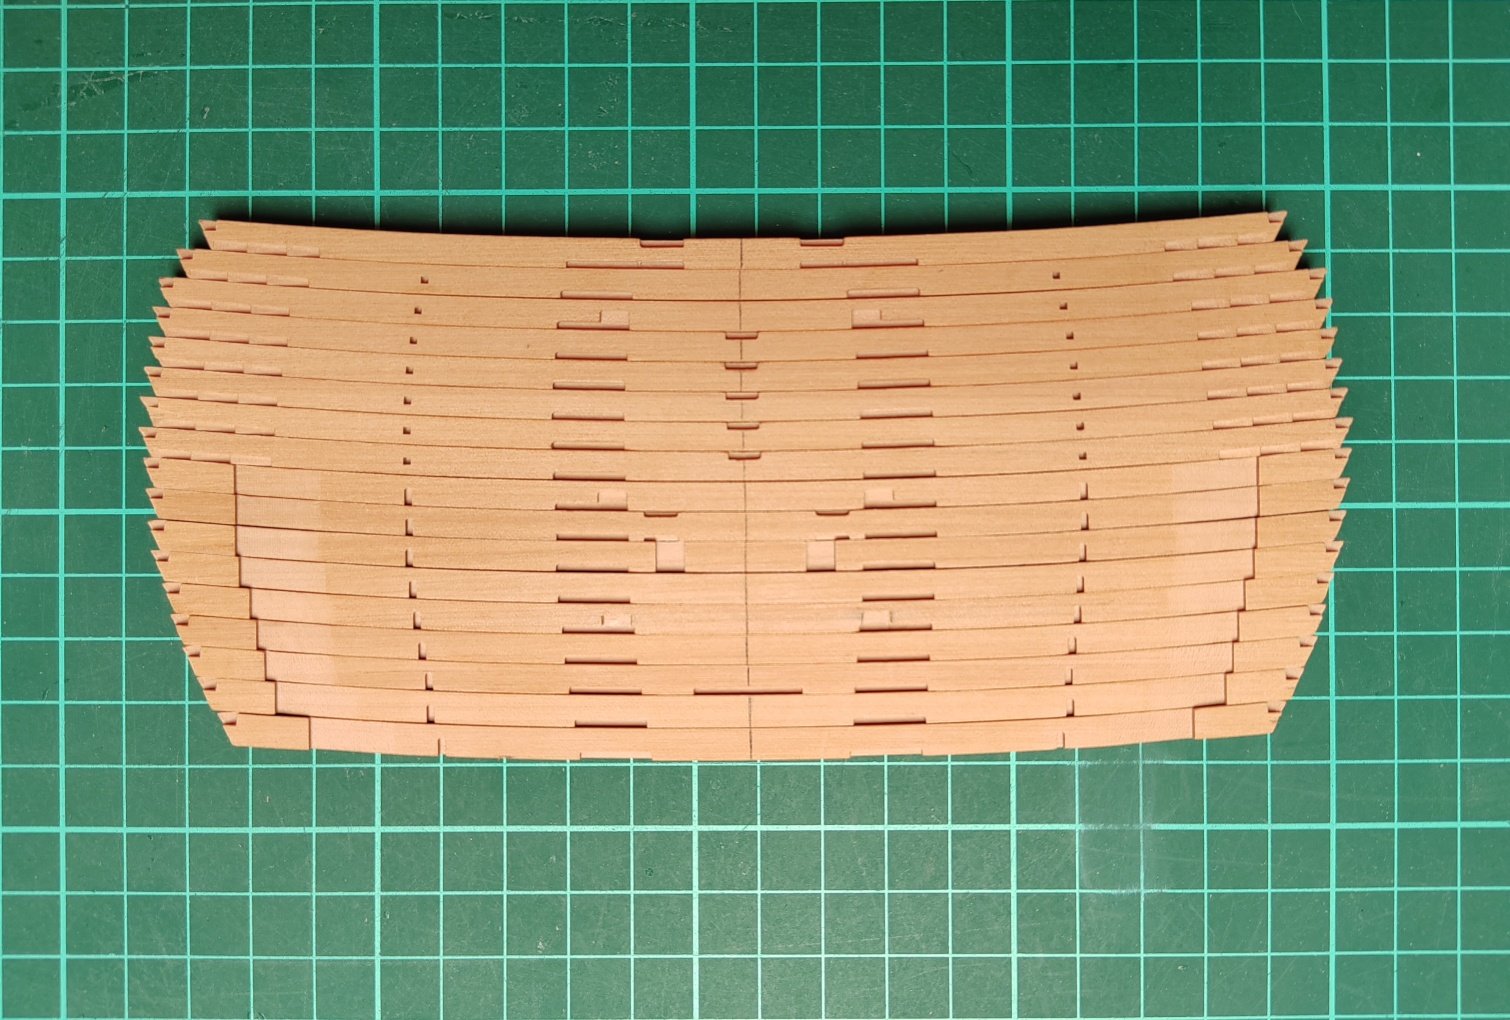
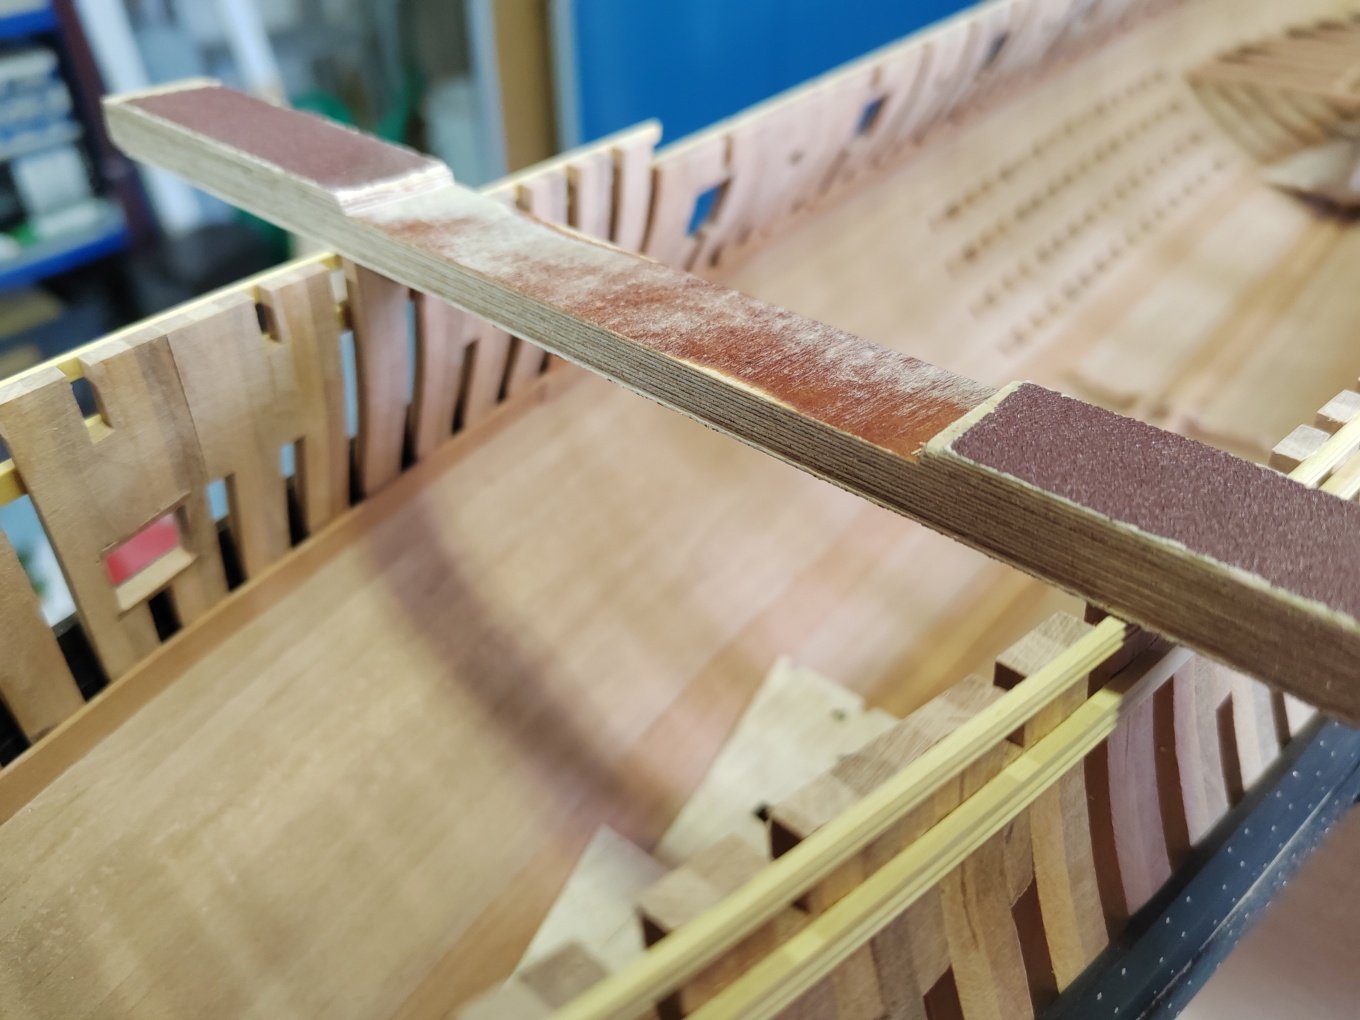
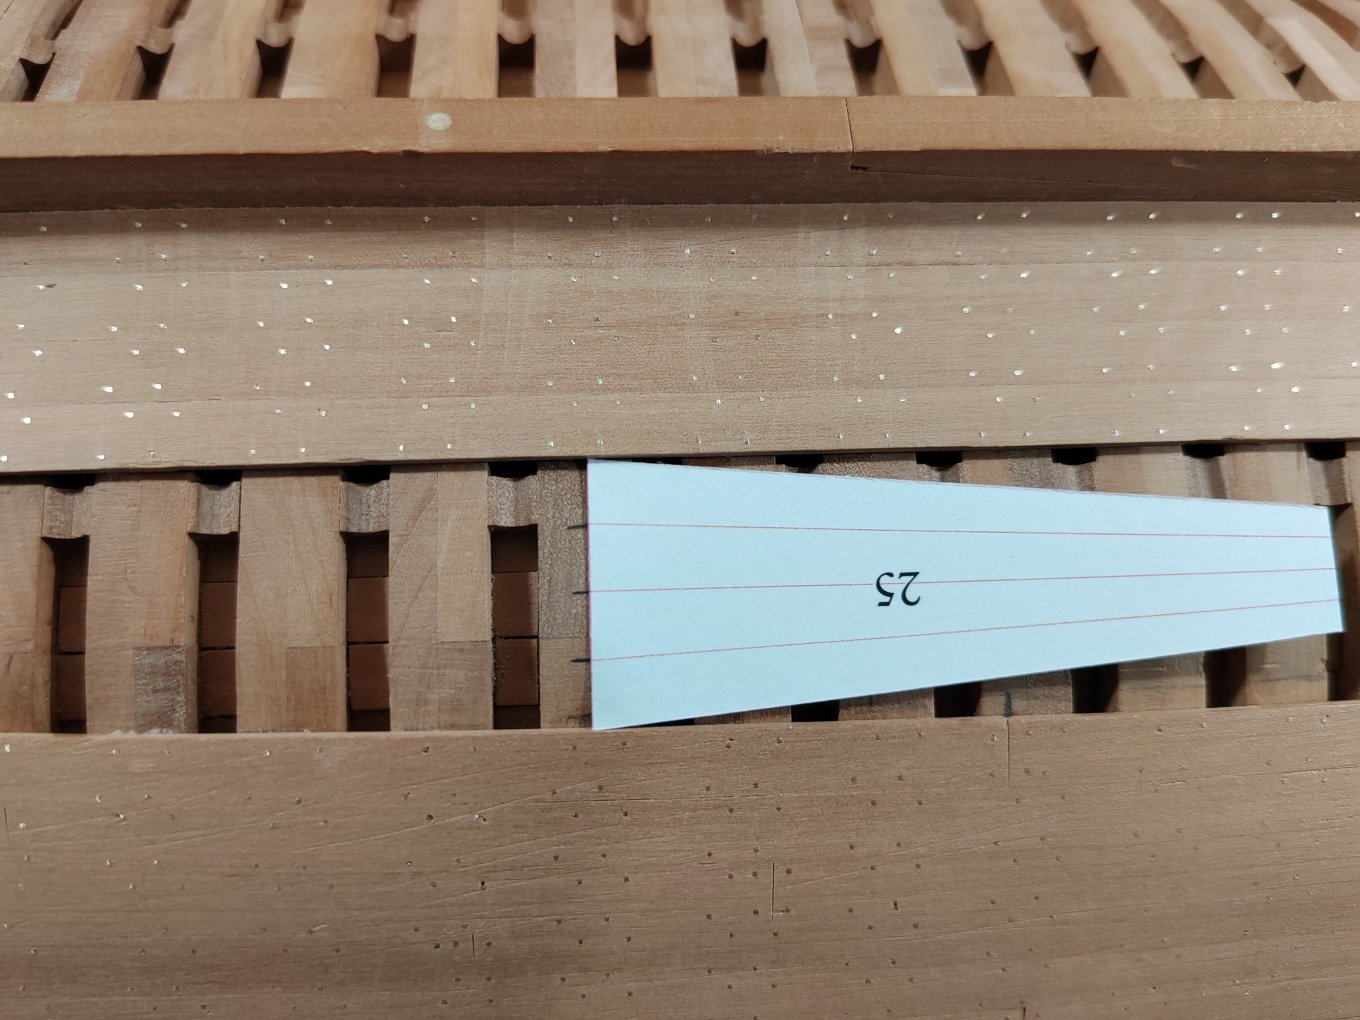
I continue planking and nailing the hull. All that remains is to glue the last 4 planks and make the final sanding.