DaveBaxt
-
Posts
1,324 -
Joined
-
Last visited
Content Type
Profiles
Forums
Gallery
Events
Everything posted by DaveBaxt
-
Thanks for you very kind words Jerry. However I still feel I have lots to learn especially when it comes to the rigging. It is a bit monotonous doing the second planking straight after the first planking and sometimes think I would like to do something else on the model. However I think I will stick with it while I have the hang of it and I have a bit of a routine going . Hopefully I can continue with the same progress and hopefully I don,t make too many mistakes. Shortly after the Wales followed by the deck planking.More planking to do. A question regarding the wales. Do fit the wales before or after applying the sand and sealer.? Thank you again for you input Jerry,best regards Dave
-
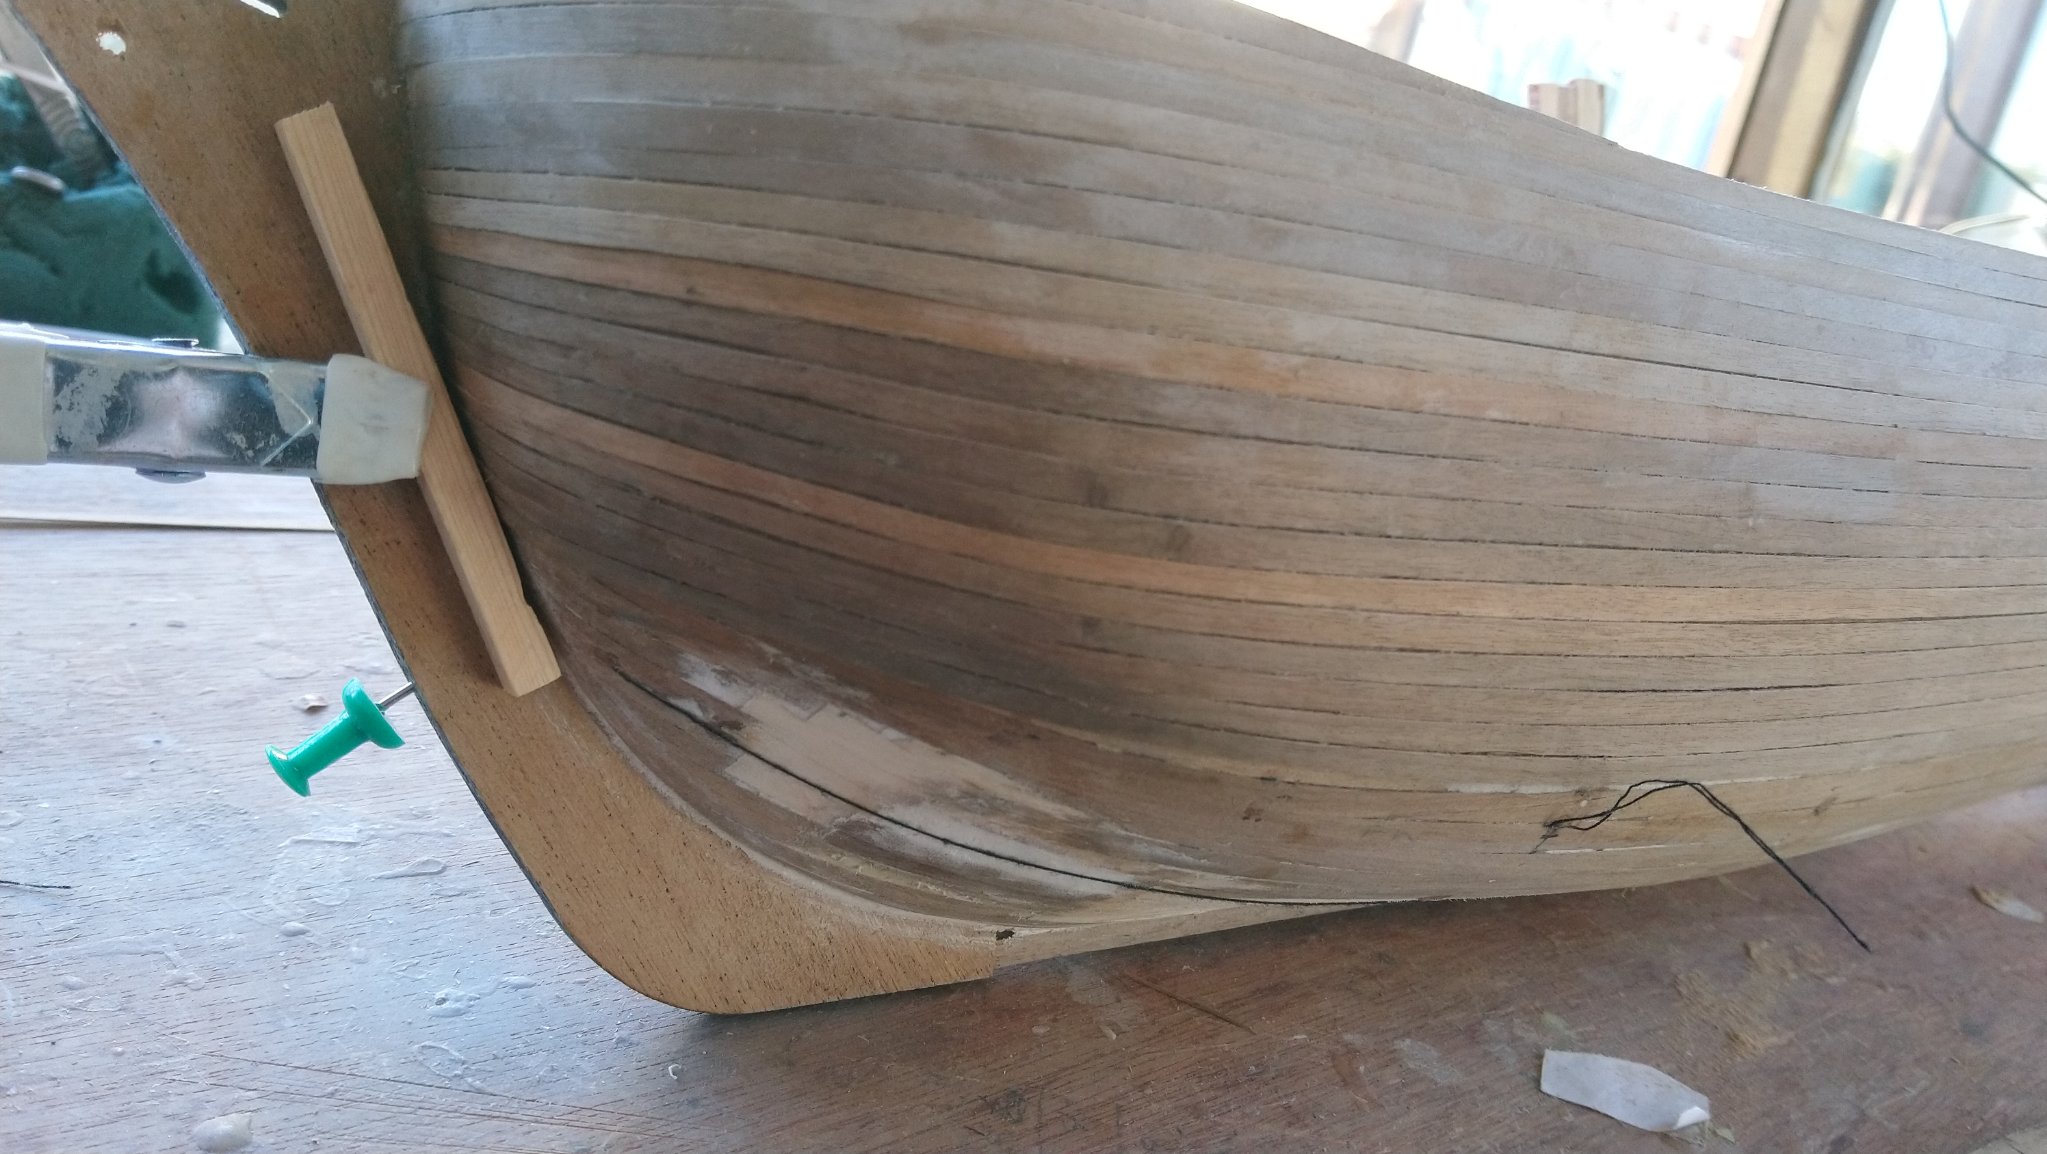
50% of second planking completed. Changed tack after struggling using CA glue as I used this on the first layer of planking the two pieces at the bow where the planks raise above the deck at the cut water or stem post came away. Probably my fault and should be more careful. As I say it wasn,t going as well as I would have liked so I then tried using Speed Bond which is what I used on the first layer of planking but I needed something to secure the planks while the glue was setting . This worked with using large elastic bands the elastic wrapped around the hull but ihought they were getting in the way a bit when wiping off the access glue.Eventually I ended up not using them but I started shaping the planks on the model itself and after soaking overnight I used my electric plank bender to shape the planks on the model. This seems for me to be the easiest way. Once I put the glue on the model and wait a few minutes before placing the planks in position it does not take very long for the glue to hold the plank. Here is a couple of photos of my first attempt at second planking,although far from perfect, I feel with a bit of light sanding will remove any lips that have appeared at one or two edges. There are also one or to cracks which hopefully I will be able to fill with sanding dust and glue.Let me know what you think


-
Thanks for the kind offer,however I think I am sorted. There are only a couple of planks ,where they show so might get away without, Once they are on the model it doesn't show so much so perhaps they are drying out a bit.Best regards Dave
-
SpyGlass thanks for that very kind offer. I ordered some from Cornwall Model Boats which is where I got the model from as I thought I better get some for the deck, although I could possibly get a way with using one end. I only ordered it a few days ago and it has just come in the post. Great service. Thanks again for the offer. Best regards Dave
-
Amati. I agree it looks that way. I will probably complain, although I don,t think they are too expensive for say another 10 or so. Maybe it will fade with time. I have tried staining a few of the planks but they are way too dark. I might have to live with it as I don,t want to be held up, especially as we are in lock down due to covid and I have so much time on my hands.
-
Yeah I tried that but still no Joy.
-
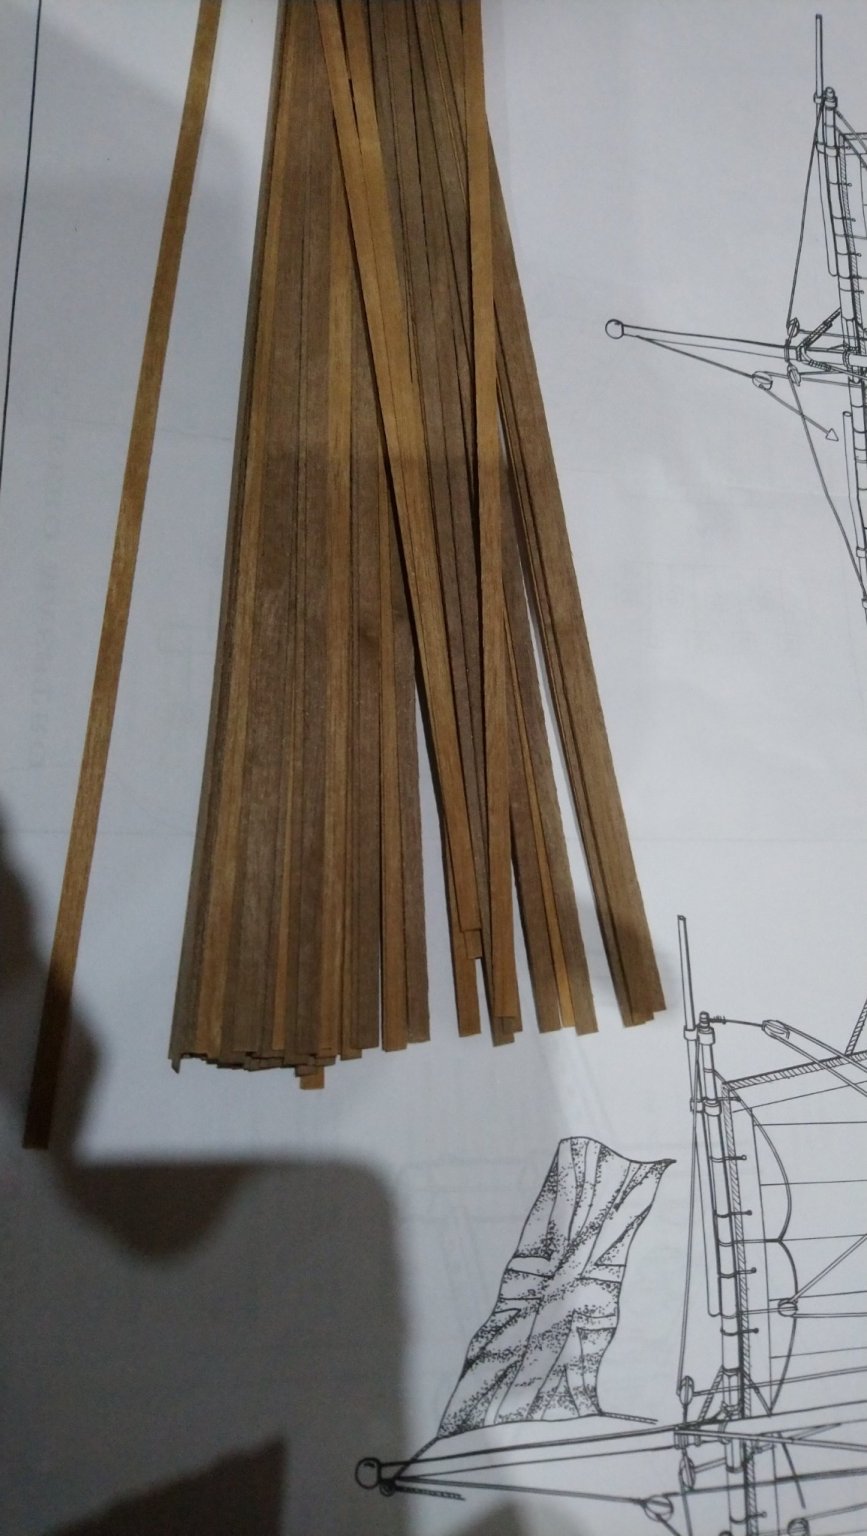
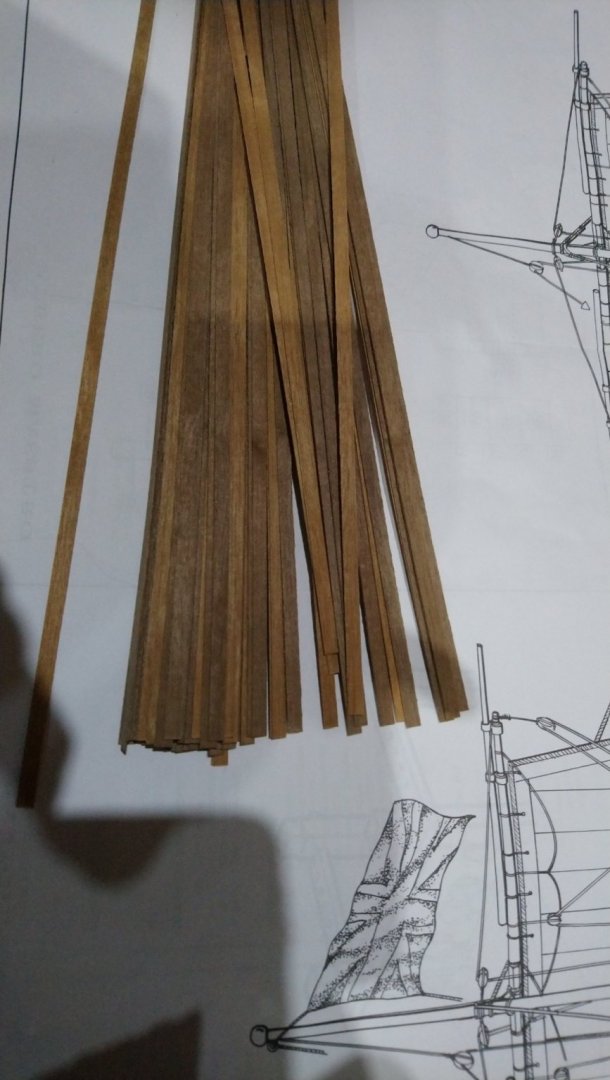
After opening up my bundle of second layer of Walnut planking the difference in the shade is quite extreme. I understand that difference in the planks is normal, however the difference is in every one of the planks and is 50% of each plank. Fortunately I have a few spare and managed to use these for most of what planking is not painted unfortunately I few will be seen.. I have an idea of perhaps staining the hull of the ship that is not painted but will try a few planks first. The other thing so I carry out the staining before using the sand and sealer? Any thoughts would be much appreciated. Here is a photp of the planks in question.

-
Wood filer
DaveBaxt replied to Andre Gotty's topic in Building, Framing, Planking and plating a ships hull and deck
Roger if I may ask what is Durham water putty like for sanding and painting? I like the idea of just mixing what you use. Sorry for asking a question on someone else post.I not sure if this is allowed. -
Good morning Jerry .We are 5 hours ahead of you I have just finished my lunch after laying a number of second planks which seem to be going ok but not perfect. I have also tapered one or two which seem to be tight next to each other. I have also manged to finish the bulwarks but I am almost out of planks. Unfortunately the ones I received with the kit do not improve with sanding. I may need to use a few before I get to an area which will be covered in paint. Otherwise I have or ordered a few spares which weren't expensive but it will be sometime before I receive them.
-
Just been to the local hardware store to pick up some bits and pieces (pipework) to make a pipe soaker . Thanks to Jerry and Rob for recommending which I will probably need for the second planking . It will definately make life easier if I ever need to do another model with the first planking 6mm x 1.5 mm. Here is a photo of the finished job, secured in place and in easy reach.

-
Jerry I think that works out at 5 hours behind us. Not much difference .Are you on the same time as New York? My wife and I found tough when travelling to the west coast, The east coast was always a breeze and once we went to Hawaii getting there was a nightmare but well worth the journey.
-
Wow I never thought of that Jerry I will give it a go once I finished my cup of tea. Thanks for your help and quick reply. I am kind of guessing you are anyway between 6 and 10 hours behind us depending up what coast you are on, correct me if I am wrong.
-
Morning guys. I have made a bit of an error and did not check the condition of the second planking when I first received the kit. Upon opening the bundle of second planking I have noticed the colour has faded at one end and looks a bit strange. If they had of been slightly different colours then this would have been not to bad but when all the planks are 50% faded at one end and on both sides, this is a bit much. Fortunately I do have some spare stock and think I have enough for the areas which are not painted, Here is a photo of the planks supplied by Amati. I am wondering if I alternate the different ends forward. Then perhaps it would not look too bad. I am really annoyed with Amati and will probably complain to them at some point.
-
Welcome aboard Rob and thanks for your input. I have exactly the same electric plank bender and will definately have to make myself a pipe soaking tube. Yours looks to be just what I need and should be relatively inexpensive to put together. Unfortunately the UK has just gone back into lock down but hopefully there are still some hardware shops open. Best Regards Dave
-
Jerry Thanks for your quick reply and clearing that up for me. Your photograph showed me exactly what you mean. Also thank you for your kind words as it gives me the confidence to proceed. What I meant regarding the sanding of the second layer was the edges of the planks to ensure a tight fit and wondered if this is even possible. I also see by your photo that the rudder hole is in fact a slot rather than a hole which looks very neat. When did you actually cut the slot? Was this cut at the same time as the rudder post or later as per instructions. I have just gone off the Amati video and the rudder post was fitted in between the two layers of planking but does not mention when the hole for the rudder is made. Thanks again for your input Jerry it is really great that you can help me having the experience of this actual model . Best regards Dave
-
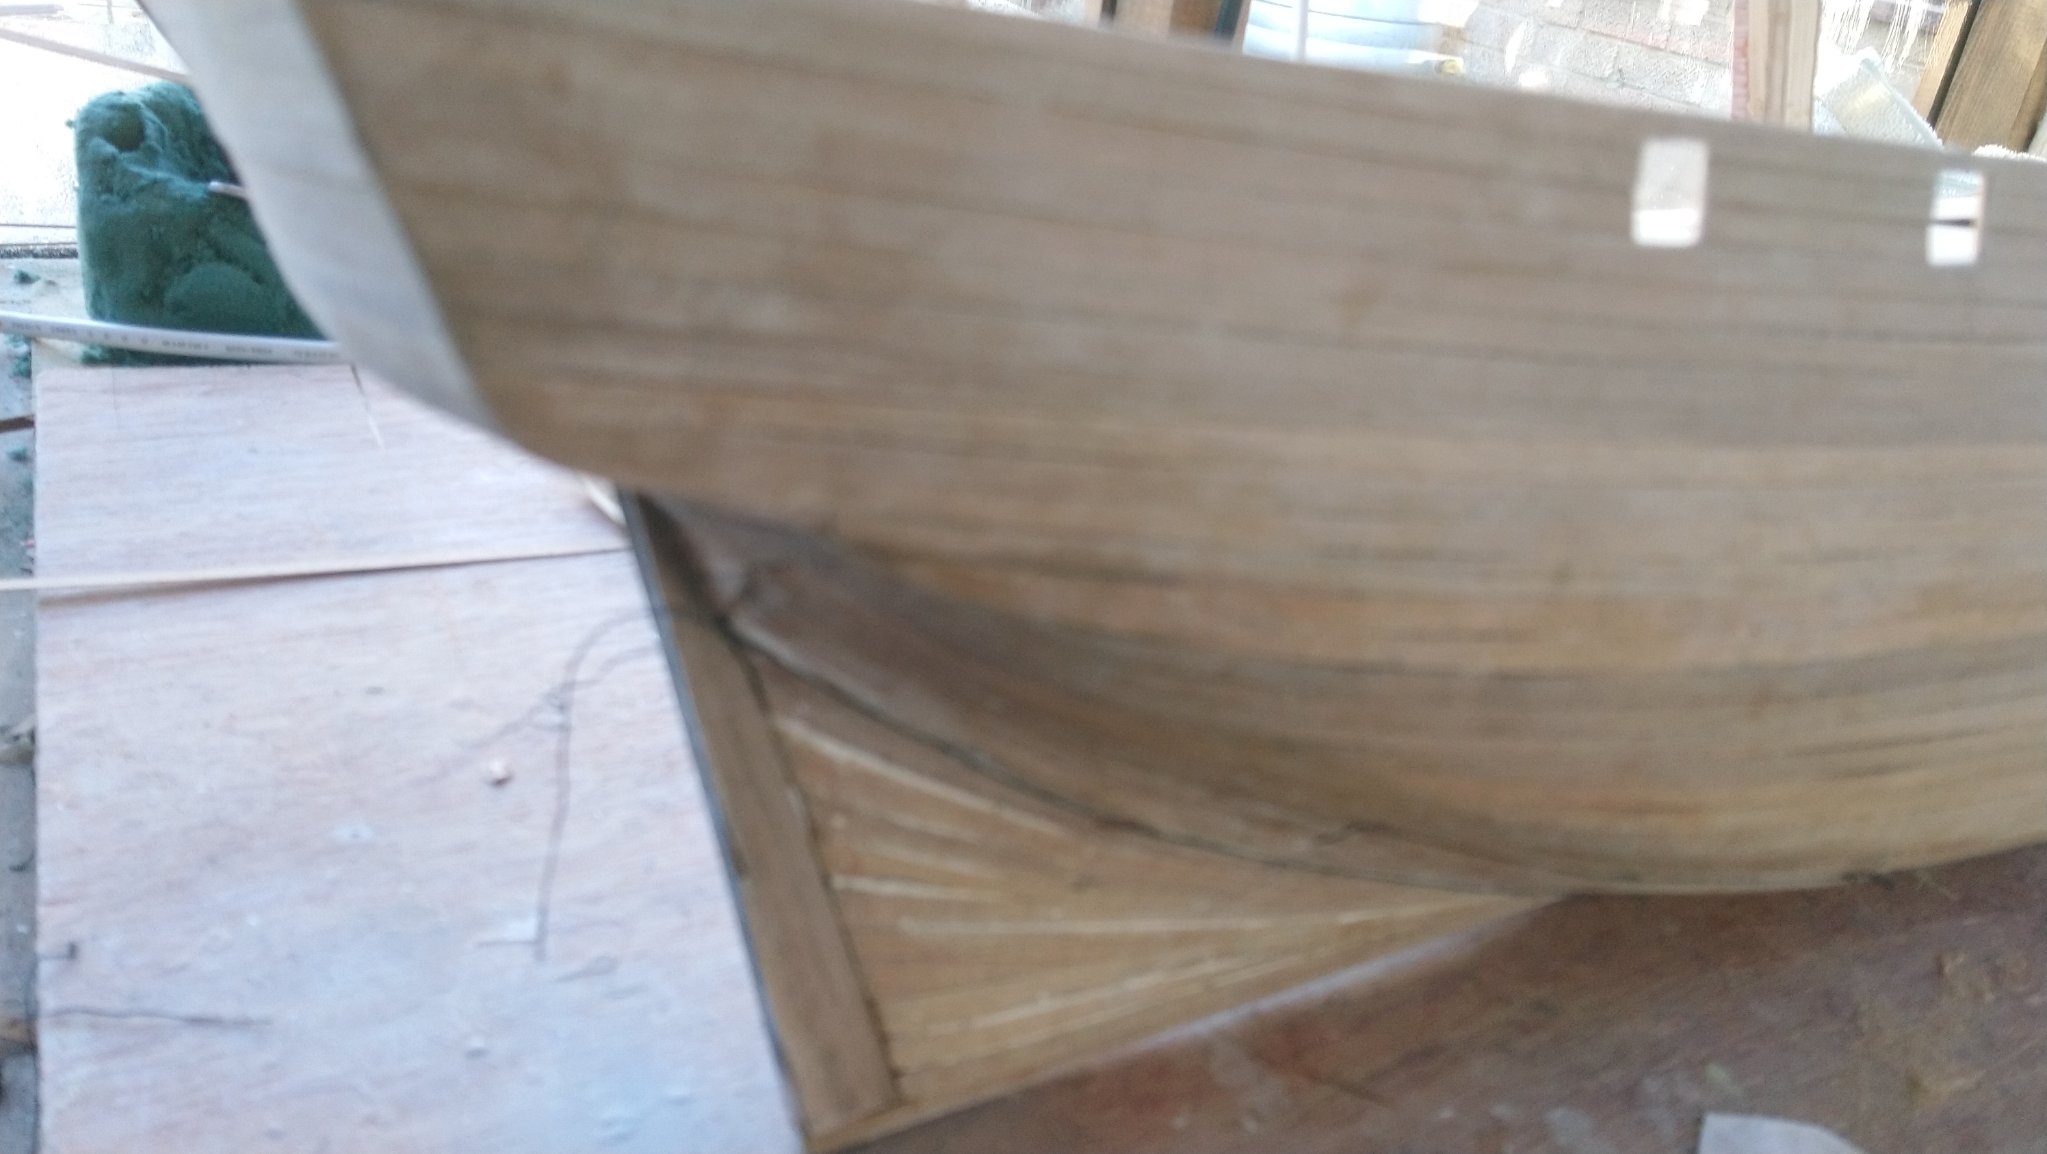
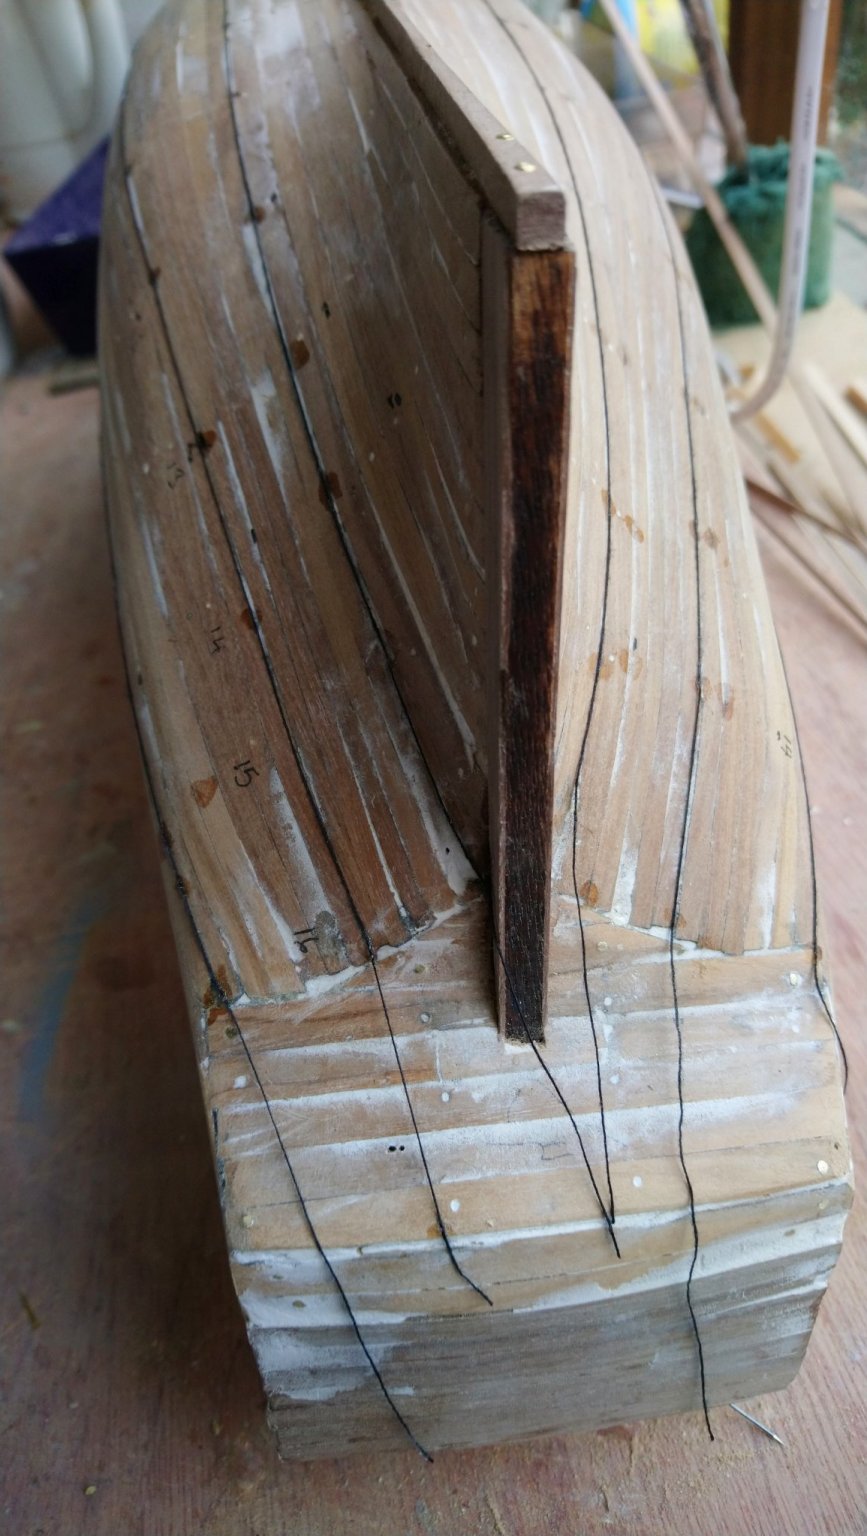
Update. First layer of planking completed and gaps filled in with sealer. More sealer than I would have wished however the main thing is I have got what I think is the shape without any bumps or dips. I have also fitted the stem and stern posts and the keel. I now think I am ready for the second planking and here is a couple of photos of my attempt at lining off the hull and once again dividing the hull into 4 bands. I have a couple of questions regards when laying the second planks at the stern. You can see where the first layer of planking stops at bulkhead 15 where it meets the underside of the transom. (First photo) I am thinking of laying the second layer past this join and onto the transom but wonder if any gaps might open up in which case I would have to increase the width of the planks at that point. Another question is ,is there a need to sand these planks after cutting the taper with the a knife. Seems to me it would be be difficult as they are only 0.5mm wide


-
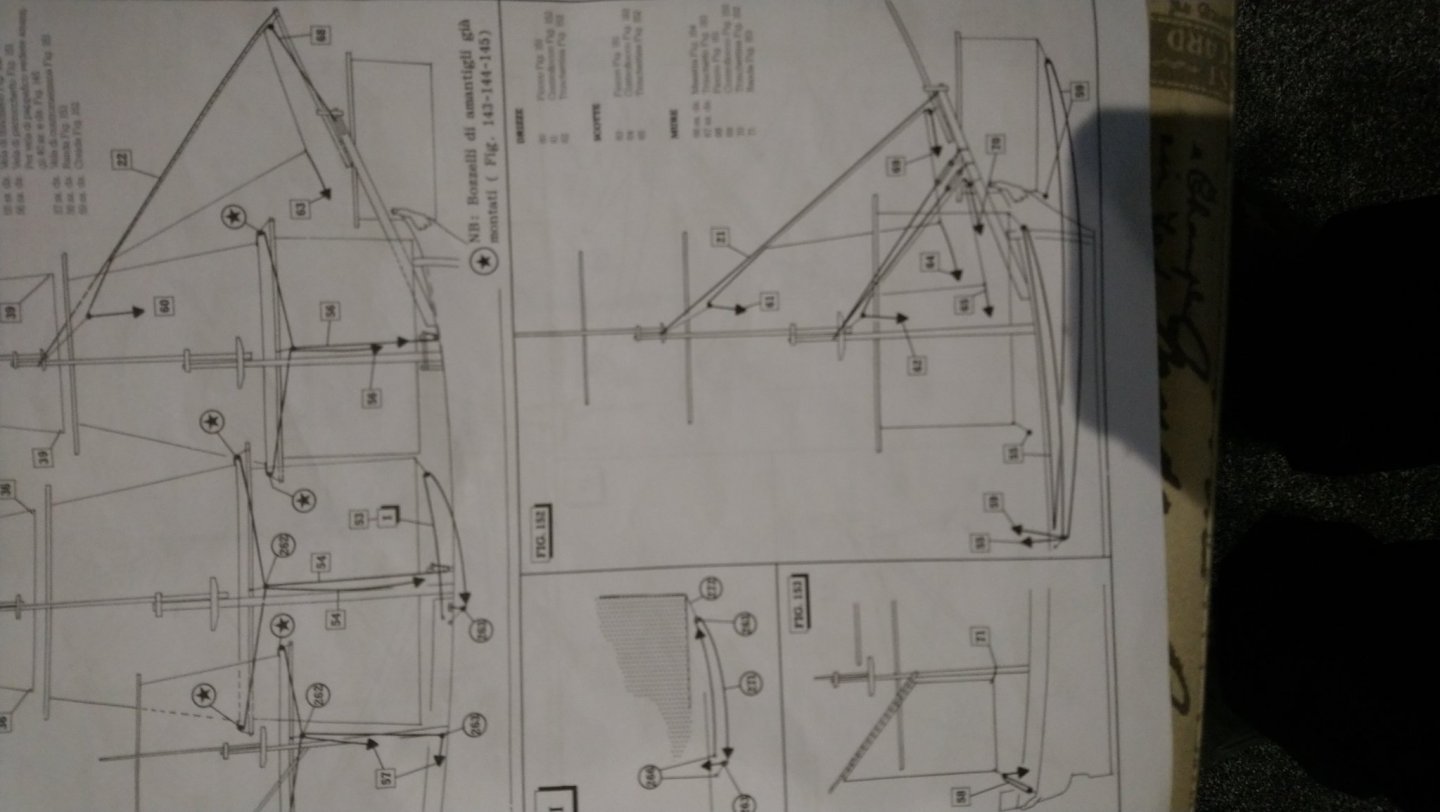
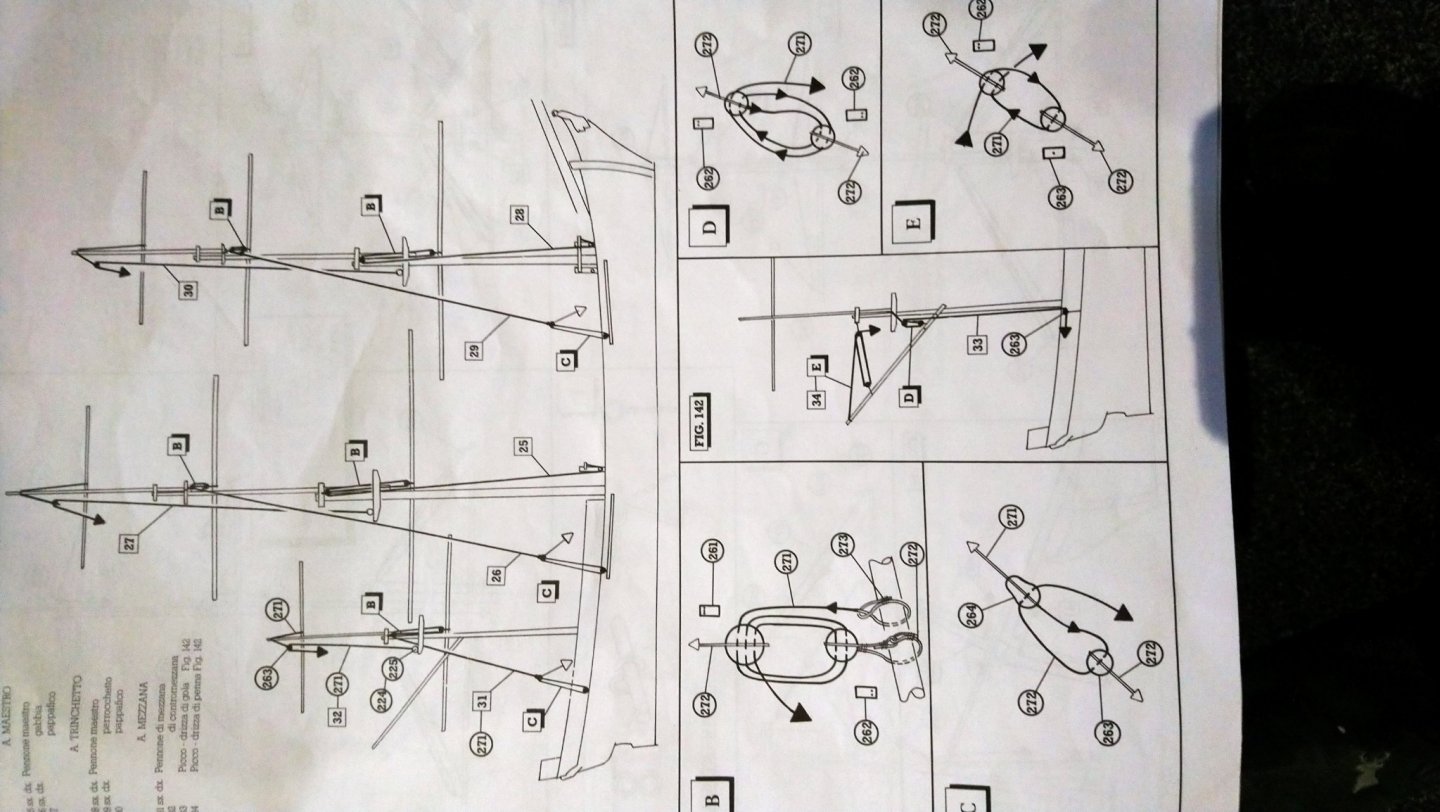
Jan The black triangle I think is an arrow. There is also a white or clear arrow which is where I thought would go to the belaying pin I too can,t figure out which belaying pin the black arrow goes to. Best regards Dave
-
Phew! I thought I was going crazy. Thanks for clearing that up and its starting to make a little bit of sense. It would be easier if each mast had the same rigging or if I had a list. Perhaps when I know the names of what each rope does perhaps it will become easier. I have figured out that when a number has a P in front it is the start point and then the same number I am assuming where it ends os the belaying pin.Finding where it is. Once again I thank you for your help and I am slowly getting there. Best regards Dave
-
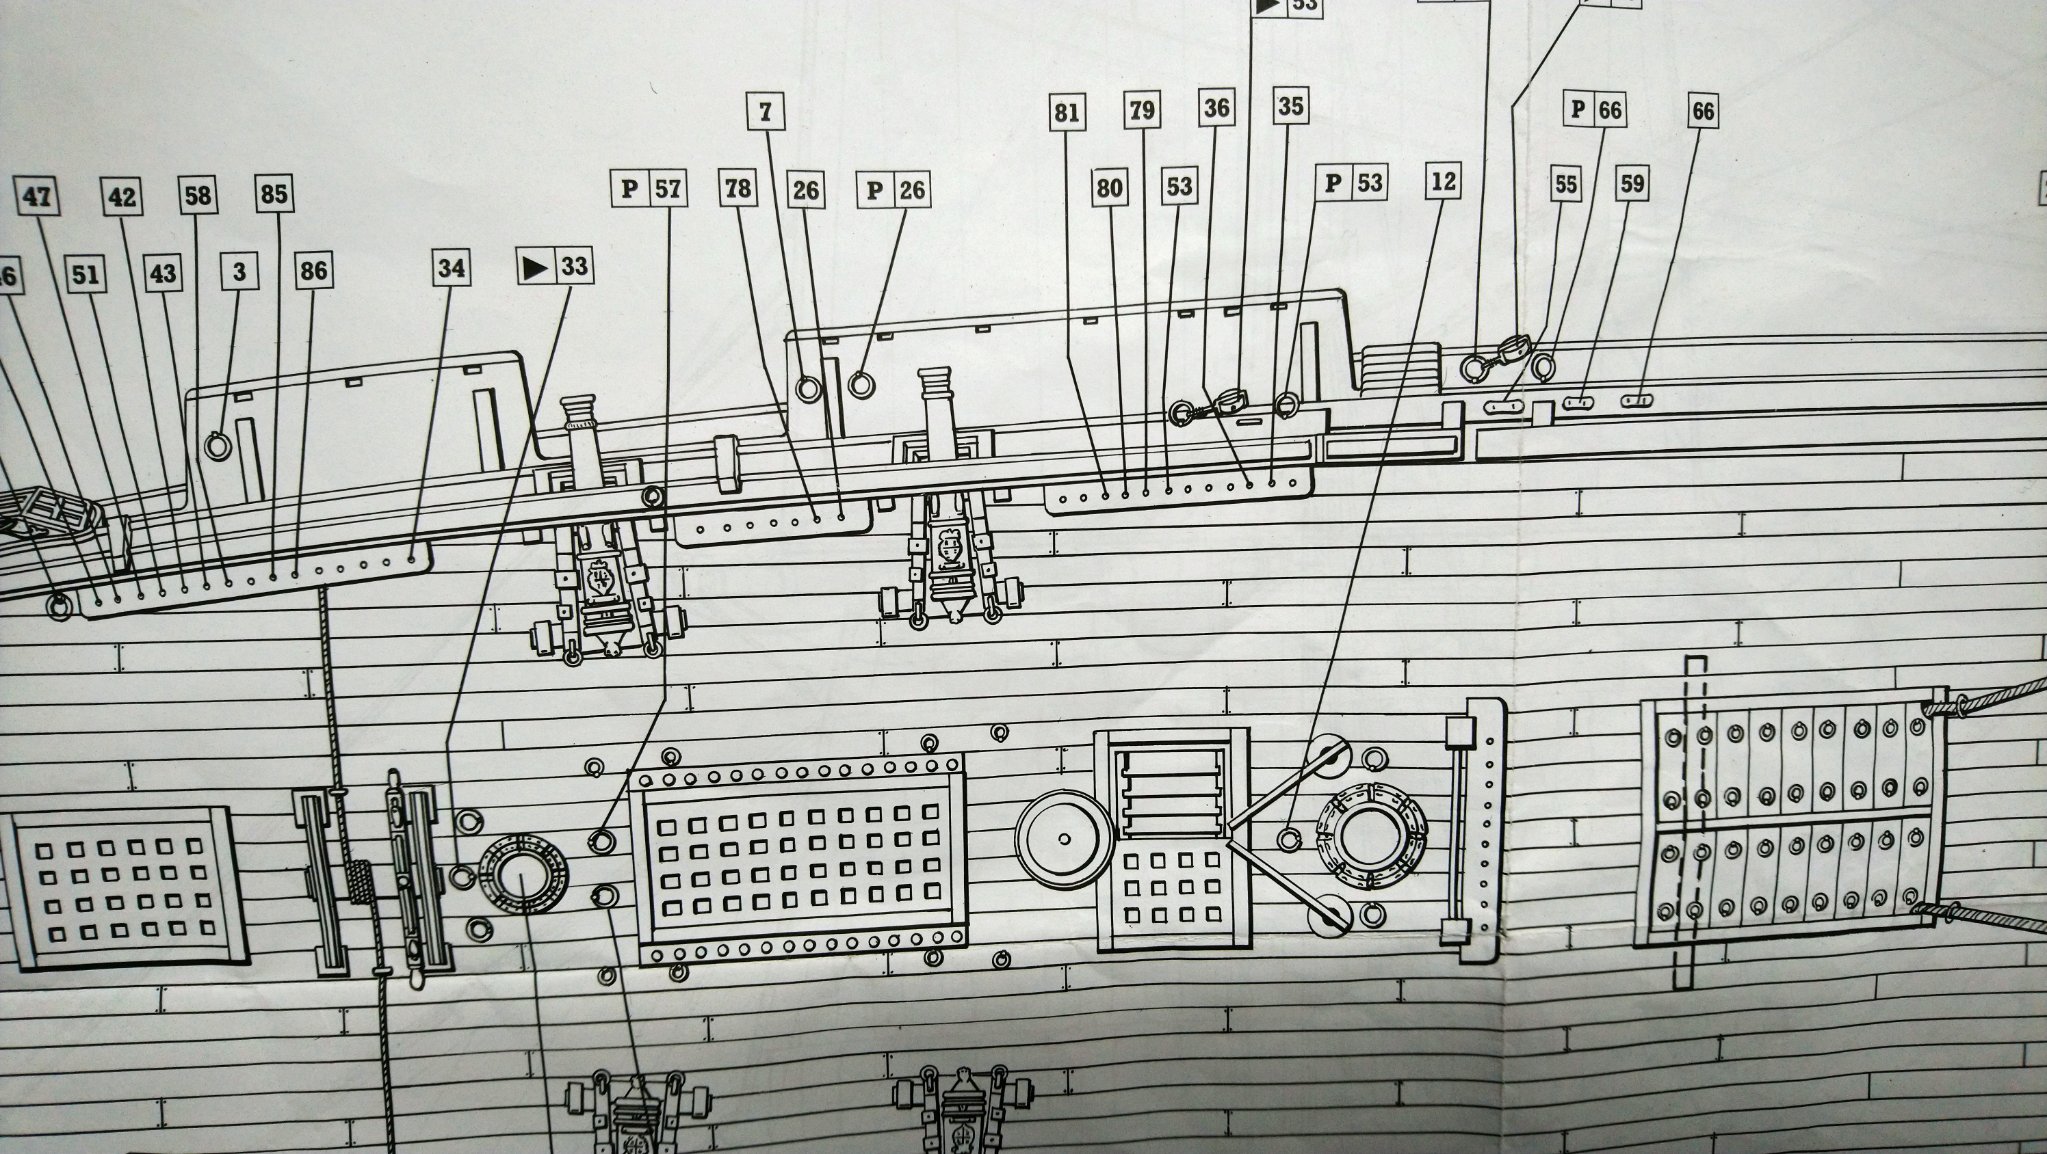
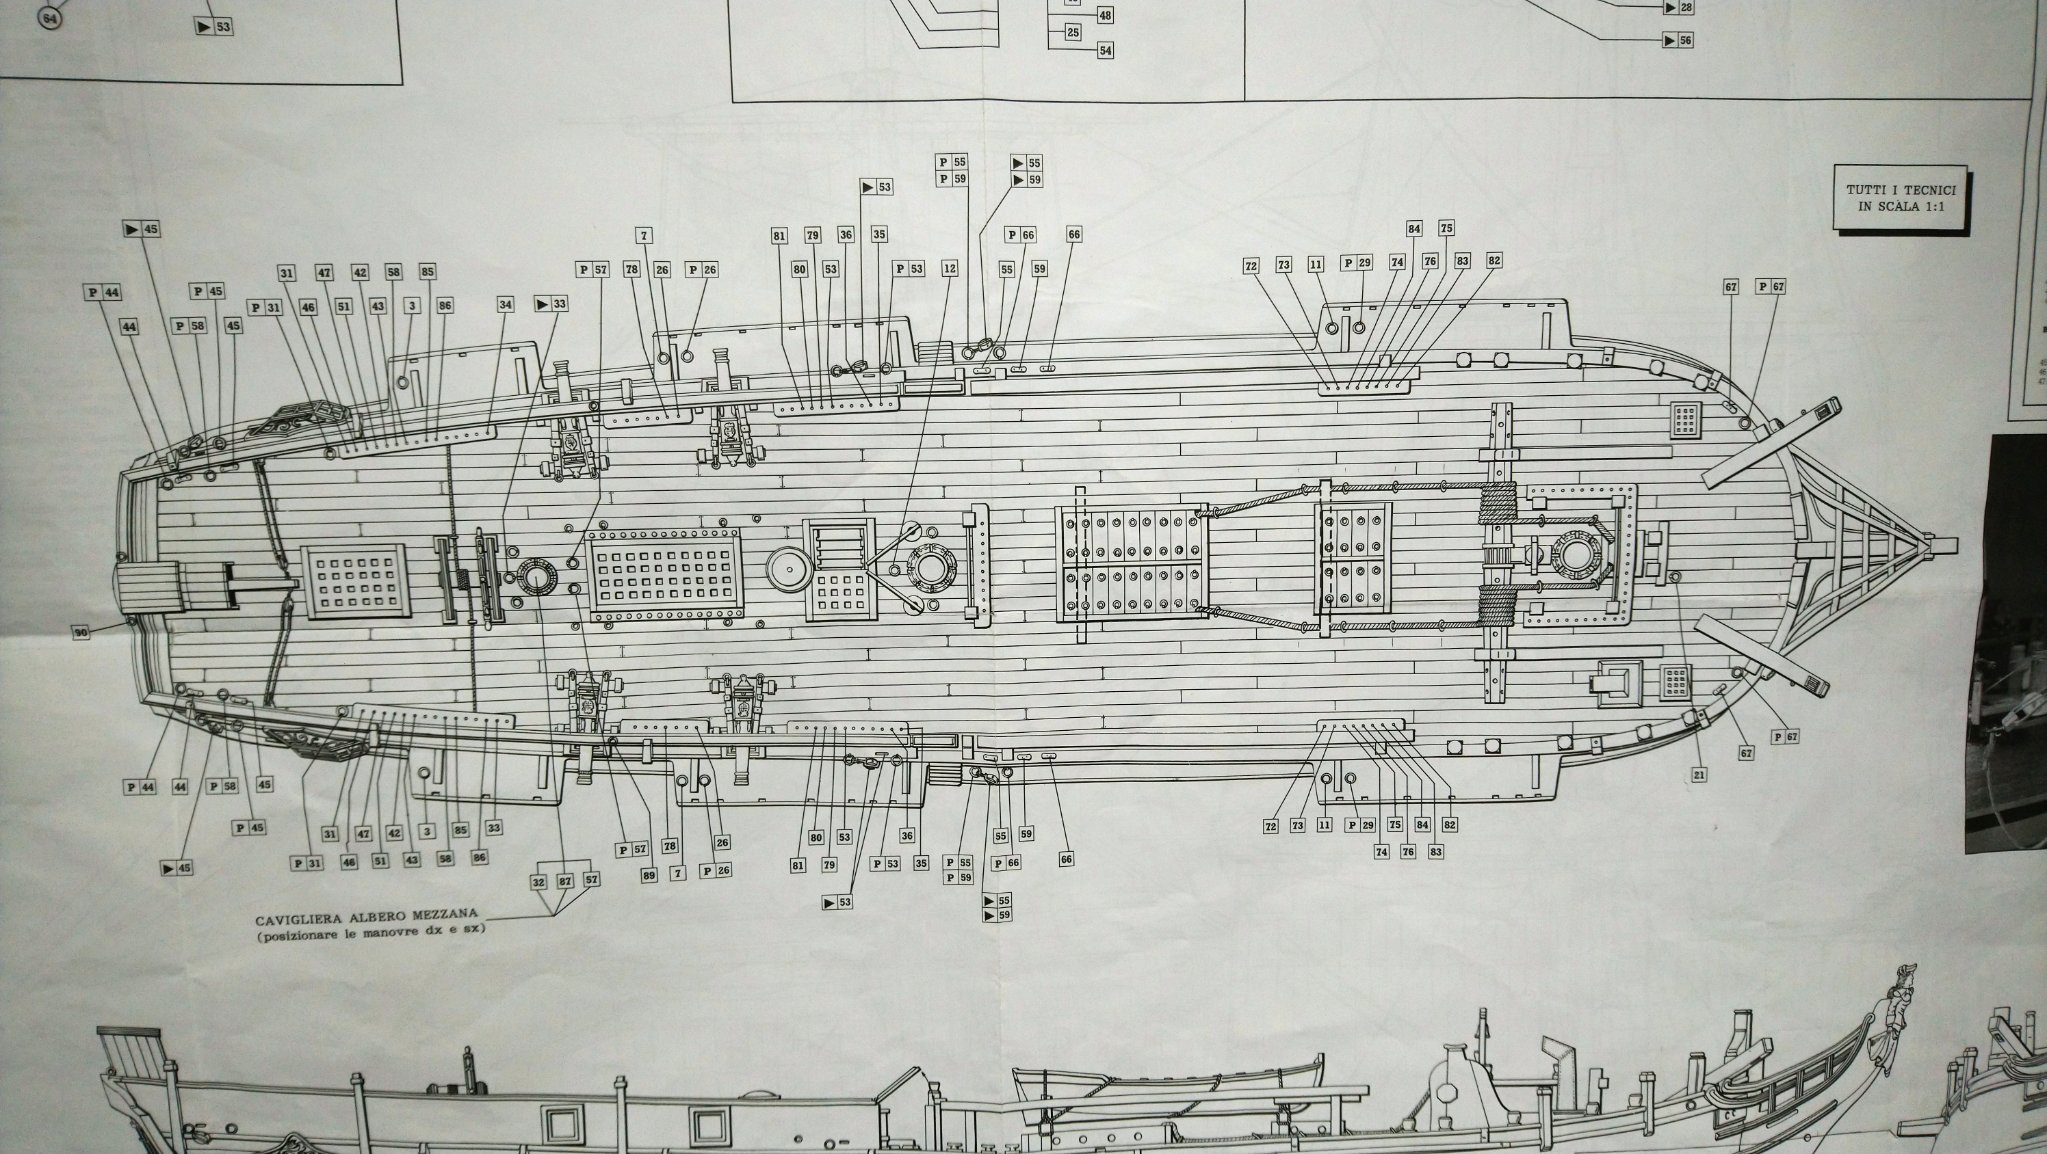
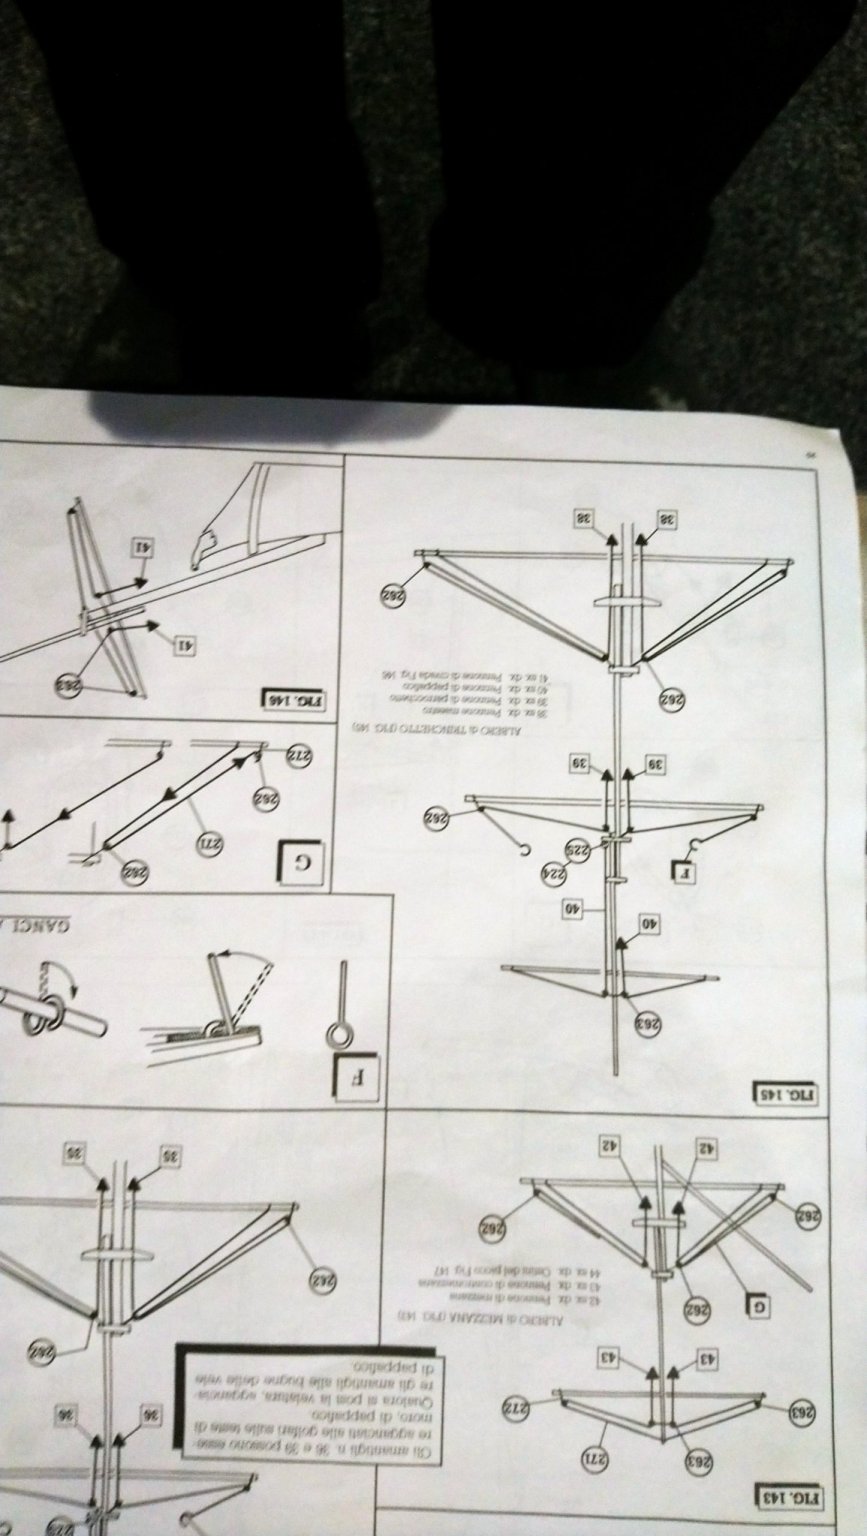
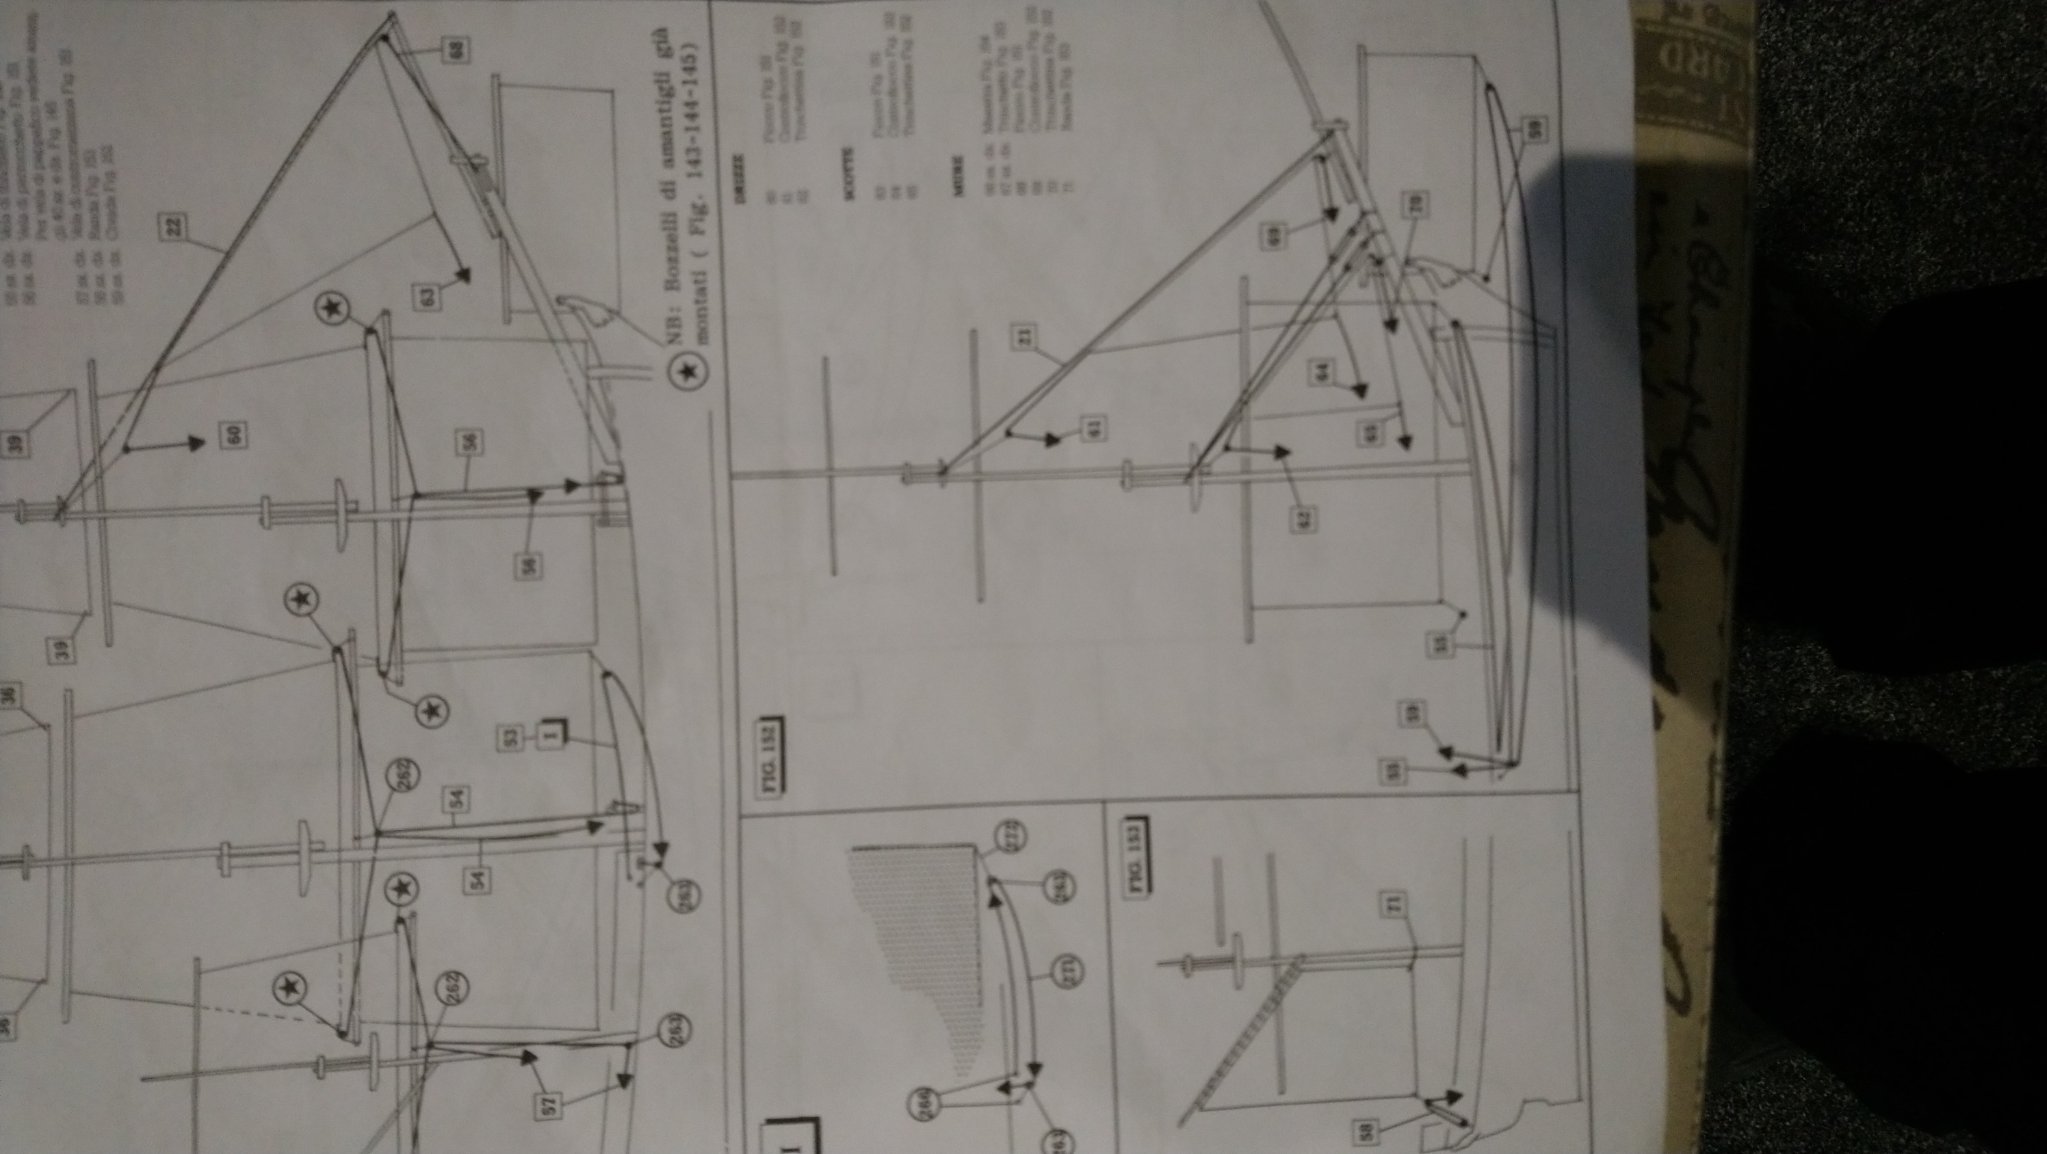
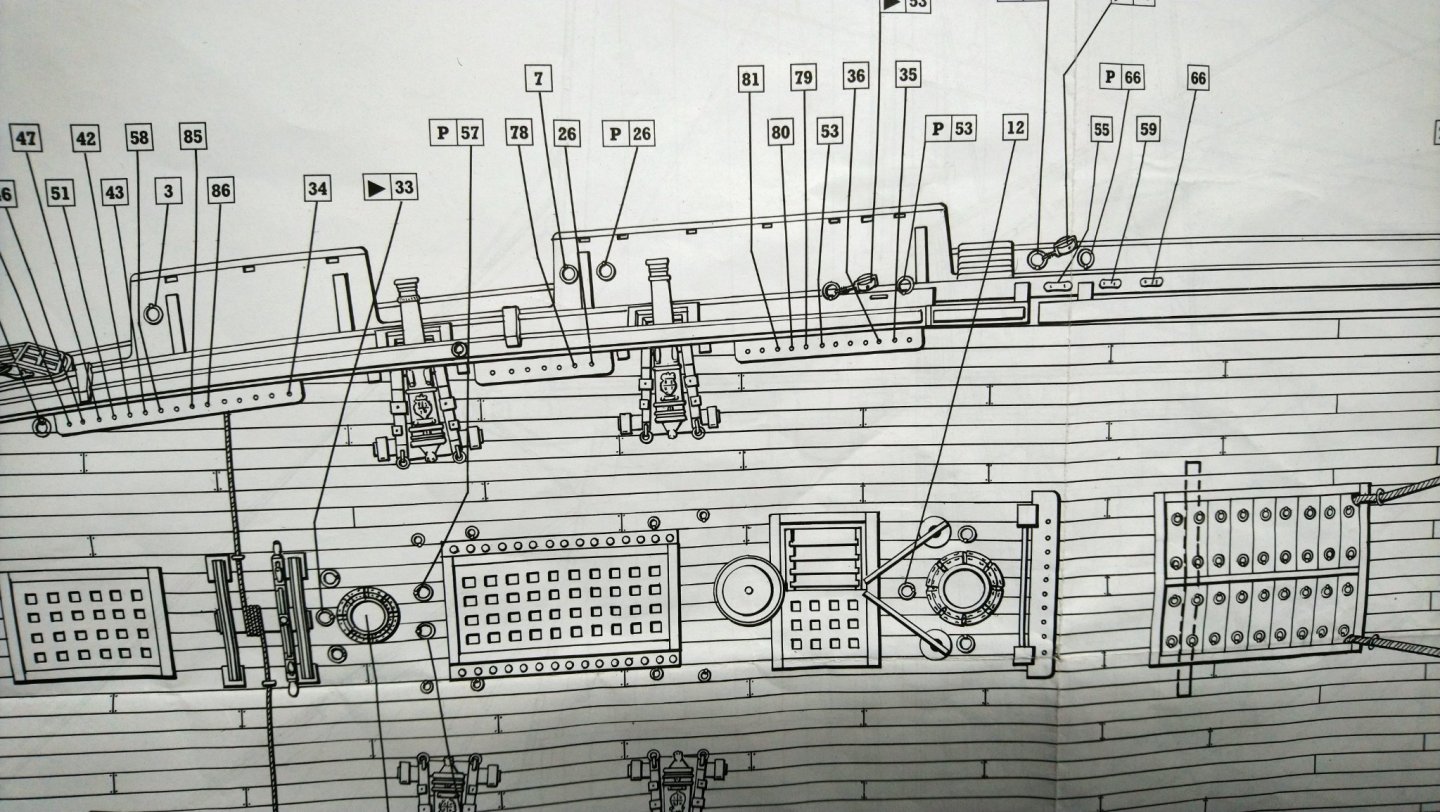
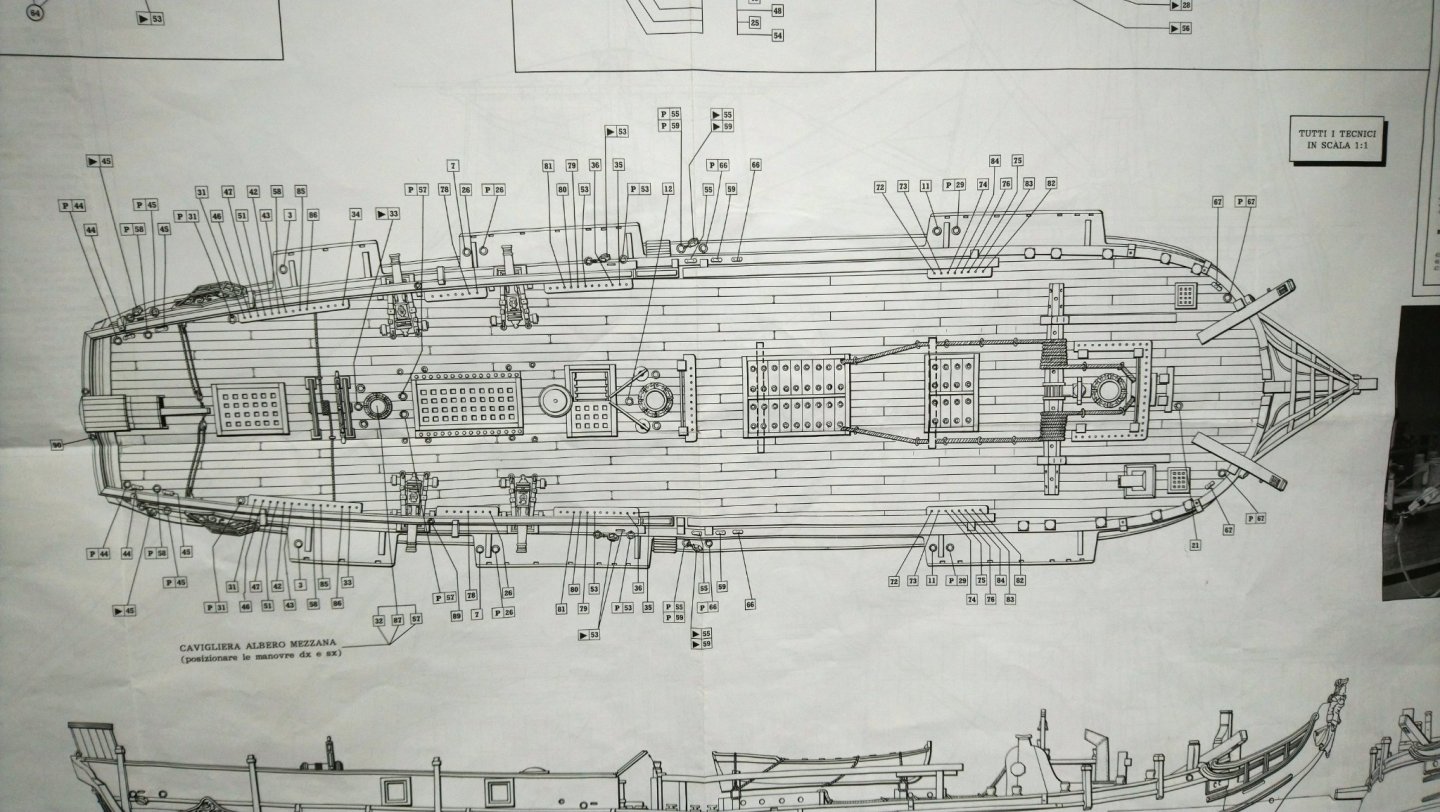
The model I am working on is the HMS Bounty. I have just finished the first layer of planking so a good while away from the rigging but just trying to get my head around it all. Here is a couple of photos of the belaying pin diagram so hope this helps . Sorry if these photos are not great. The ones of the masts and rigging I notice they have arrow heads which I am assuming go to the belaying pins. However I can,t find the corrisponding numbers on the belaying pin diagramm, some are not even numbered. I am obviously not seeing the obvious so what am I doing wrong? Thanks for everyones input which is much appreciated. Best regards Dave

-
A beginner here trying to make sense of the drawings. I think I am following the instructions on where to fit the blocks, dead eyes but struggling where which ropes go to the belaying pins. I have been trying to work out what some of the numbers mean as they don,t seem to correspond with the drawings in the the instructions. I am assuming all the belaying pins are for running gear, however there are some ropes that start at a block or ring, on deck and wonder do they then end in a belaying pin or am I getting mixed up. I think the standing rigging is straight forward and I think I can follow the instructions, however I am struggling with the running rigging. This will be my first attempt at rigging and hoping someone can help me make sense of it!
-
Sorry for the delay in thanking you for your input and can see why making the rabbet might be a very good solution, so thanks for your input. Best regards Dave
-
Bradley .I will definately give the PVA glue a go. I used speed bond which is a PVA glue which drys clear I did find that if I use it sparingly it does start to hold quite quickly and wipes off if I over do it a bit. Thanks again for your advice.
-
Bradley .Thanks for that reply and I thought there would be a few reasons why this method is not normally used. I have managed to carry out the first layer of planks by the method you use ie lining off the hull and tapering the planks, hopefully I will get similar results using exactly the same method on the second layer. In your experience would you also use the same glue on the deck planks? Best regards Dave
-
I will be attempting second layer of planking for the very first time and in Walnut 0.5mm x 4mm and wonder if anyone has tried this and if there are any draw backs. I have found a video of a guy doing exactly this and looks to have made a decent job of it. Let me know what you guys think. He also uses a similar procedure for his deck planks.He makes it look easy . However............. Sorry if this has been discussed in the past.