DaveBaxt
-
Posts
1,324 -
Joined
-
Last visited
Content Type
Profiles
Forums
Gallery
Events
Everything posted by DaveBaxt
-
That might be worth a try. Just a thought I am finding it very difficult to work with 2mm blocks, It must be an age thing. I am kind of hoping it will be easier to work with the copper wire. Probably all the wrong reasons but thought I would give it a go. Some of the blocks do not require this extra loop so do I still need to do them all for the cannons that is with copper wire or can I mix and match. Thank you for your input. Best regards Dave
-
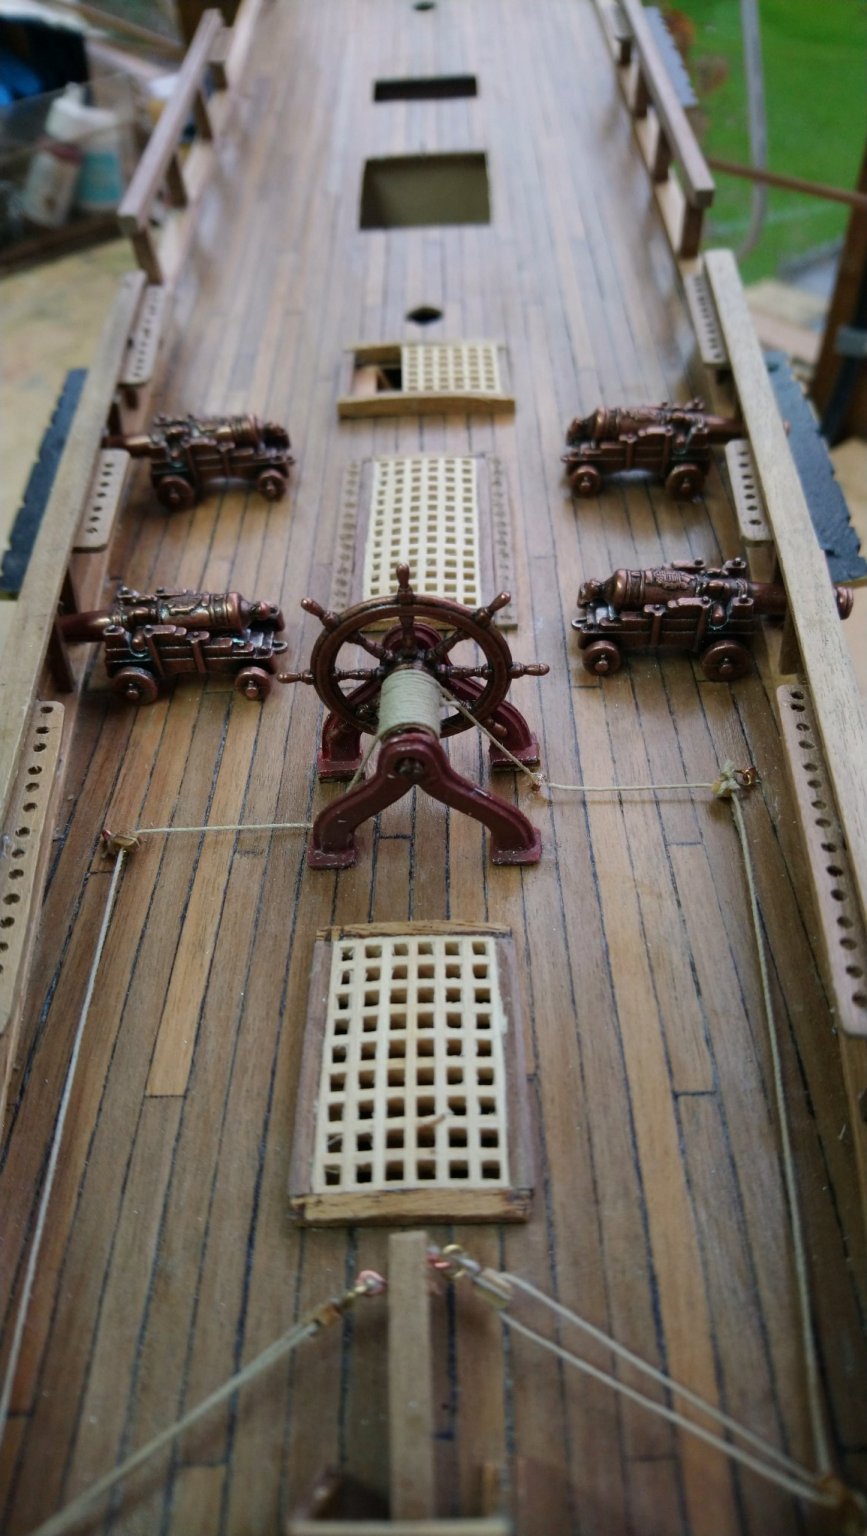
Made up a few of the hatch cover using a mixture of glue and water brushed onto the assembled strips. I thought it would now be a good idea to move onto the cannons before the decks get too cluttered with other things like the capstan and bilge pumps. It has taken me all day to get the cannon barrels to fit into the carrages low enough so they would fit through the gun ports.Here is the job complete ready for attaching those ropes and tiny blocks, All 32 of them. Hate to think what it would be like doing the Victory Jerry especially if they are all 2 mm. I can,t make my mind up whether or not to paint the cannons or the carrages or to leave them alone. I quite like the look of the cannons as they are but do wonder how realistic they look.

-
Here is a photo of my Cannons in place. To paint or not to paint? That is the question.

-
You Have me worried now the wire I ordered just says copper wire. It comes in a roll and looks like copper. It comes from a well known electrical supply shop RS componants. Its not sold from a craft shop so I suppose I will just have live in hope.
-
Its definately copper. I also have ordered some liver of sulfur. See my post on painting cannons. Your comments would be greatly appreciated. Best regards Dave
-
Thanks Gregory for your reply which is much appreciated. Its definately copper which is 0.25mm but not sure what 20 gauge wire is so will have to google it. I have also ordered some liver of sulfur so should be fine. What are people using to darken brass? I have just managed to get the cannon to fit in the gun ports and I am now wondering whether to actually paint them I quite like the metalic look that came with the kit. I am trying to upload a photo from my phone but having a few issues. Any thoughts on painting cannons would be appreciated. I do not have air brushing equipment at this point.
-
So I also need something else for the brass or do I leave alone. What sort of thickness wire do I need to make it look like rope? I do have some 0.2mm at hand and could use a few strands put together to make a thicker looking rope. Also I just been mounting the gun barrals into their stock ( not sure what the correct names are for these) and when placed up to the gun ports they are way high. I was pretty sure that when I fitted the bulwarks, I fitted them to the correct height. I have had to file out the holes where the pins fit and the middle of the carrage where the gun lies. This has now allowed the gun to lie horizontal rather that at an elevation. Just wondering if this is correct? It looks ok however it is probably not historically correct.. I don't know and can't think of any other way to put this right.
-
Thanks again for helping me with that Allan because I have been search for a product called Patina but couldn't decide if this stuff actually blackend Copper or does it do brass as well. I have also seen on ebay some stuff called Liver of sulfur. Does this stuff also darken brass assuming brass is made up of copper and tin? Whilst we are on thus subject I also watched a video of a guy using this stuff on the brass links securing the shrouds? This hobby takes so many directions .Just when you think you have everything at hand.Best regards Dave
-
Thanks for the info on Blackening copper.Something I will definately look into. Much appreciated.Best regards Dave
-
I am more or less ready to secure the Cannons to the deck. I am working on HMS Bounty by Amati. I think I have the general layout of the ropes and block configuration, however as there is little room and will be working with 2mm as I did on the steering, There is a video by Amati which the guy uses electric wire on the single 2 mm blocks to form an extra loop. Is there any problem with using this or should it be brass wire. If using copper wire around the block would it be neccessary to then paint the wire. Best regards Dave
-
Gratings
DaveBaxt replied to DaveBaxt's topic in Discussion for a Ship's Deck Furniture, Guns, boats and other Fittings
Thanks everyone for all your help. I have managed to fit 3 hatch covers today without too much trouble and the tin foil worked a treat. I also managed to make sure that there was white wood all the way around although I has to sand these quite thin to fit. The comings came with parts pre made so were quite a tight fit. All in all a successful outcome. Best regards Dave -
Update I have just received an email from Hobby zone. The re was two answers to my question. All orders to the uk are currently suspended due to the Brexit transition period ( As far as I know.this finished on the 31st December). Two they are currently not sending any orders for the professional slipway anywhere but they are working on it.Please check retail shops for updates. This does sound a bit more promising . However this looks like I might have to make one or at least come up with something similar. Perhaps some of you more experienced guys can come up with some ideas as we could be waiting on Hobbyzone for some time,especially here in the UK. Thanks guys for all your suggestions it is much appreciated.
-
I am hooked jerry .I really can't put it down. Next thing up is the hatch comings and gratings. I intend to soak the assembled grating strips into a mixture of water and PVA glue for a few miniutes but not sure what the ratio is? 60 water 40 glue maybe Also after I remove them I need to lay them on something so they don,t stick to the surface.Maybe tin foil but not sure if that would work. Whats your take on it Jerry?Once again Jerry thank you for your encouragement.Best regards Dave
-
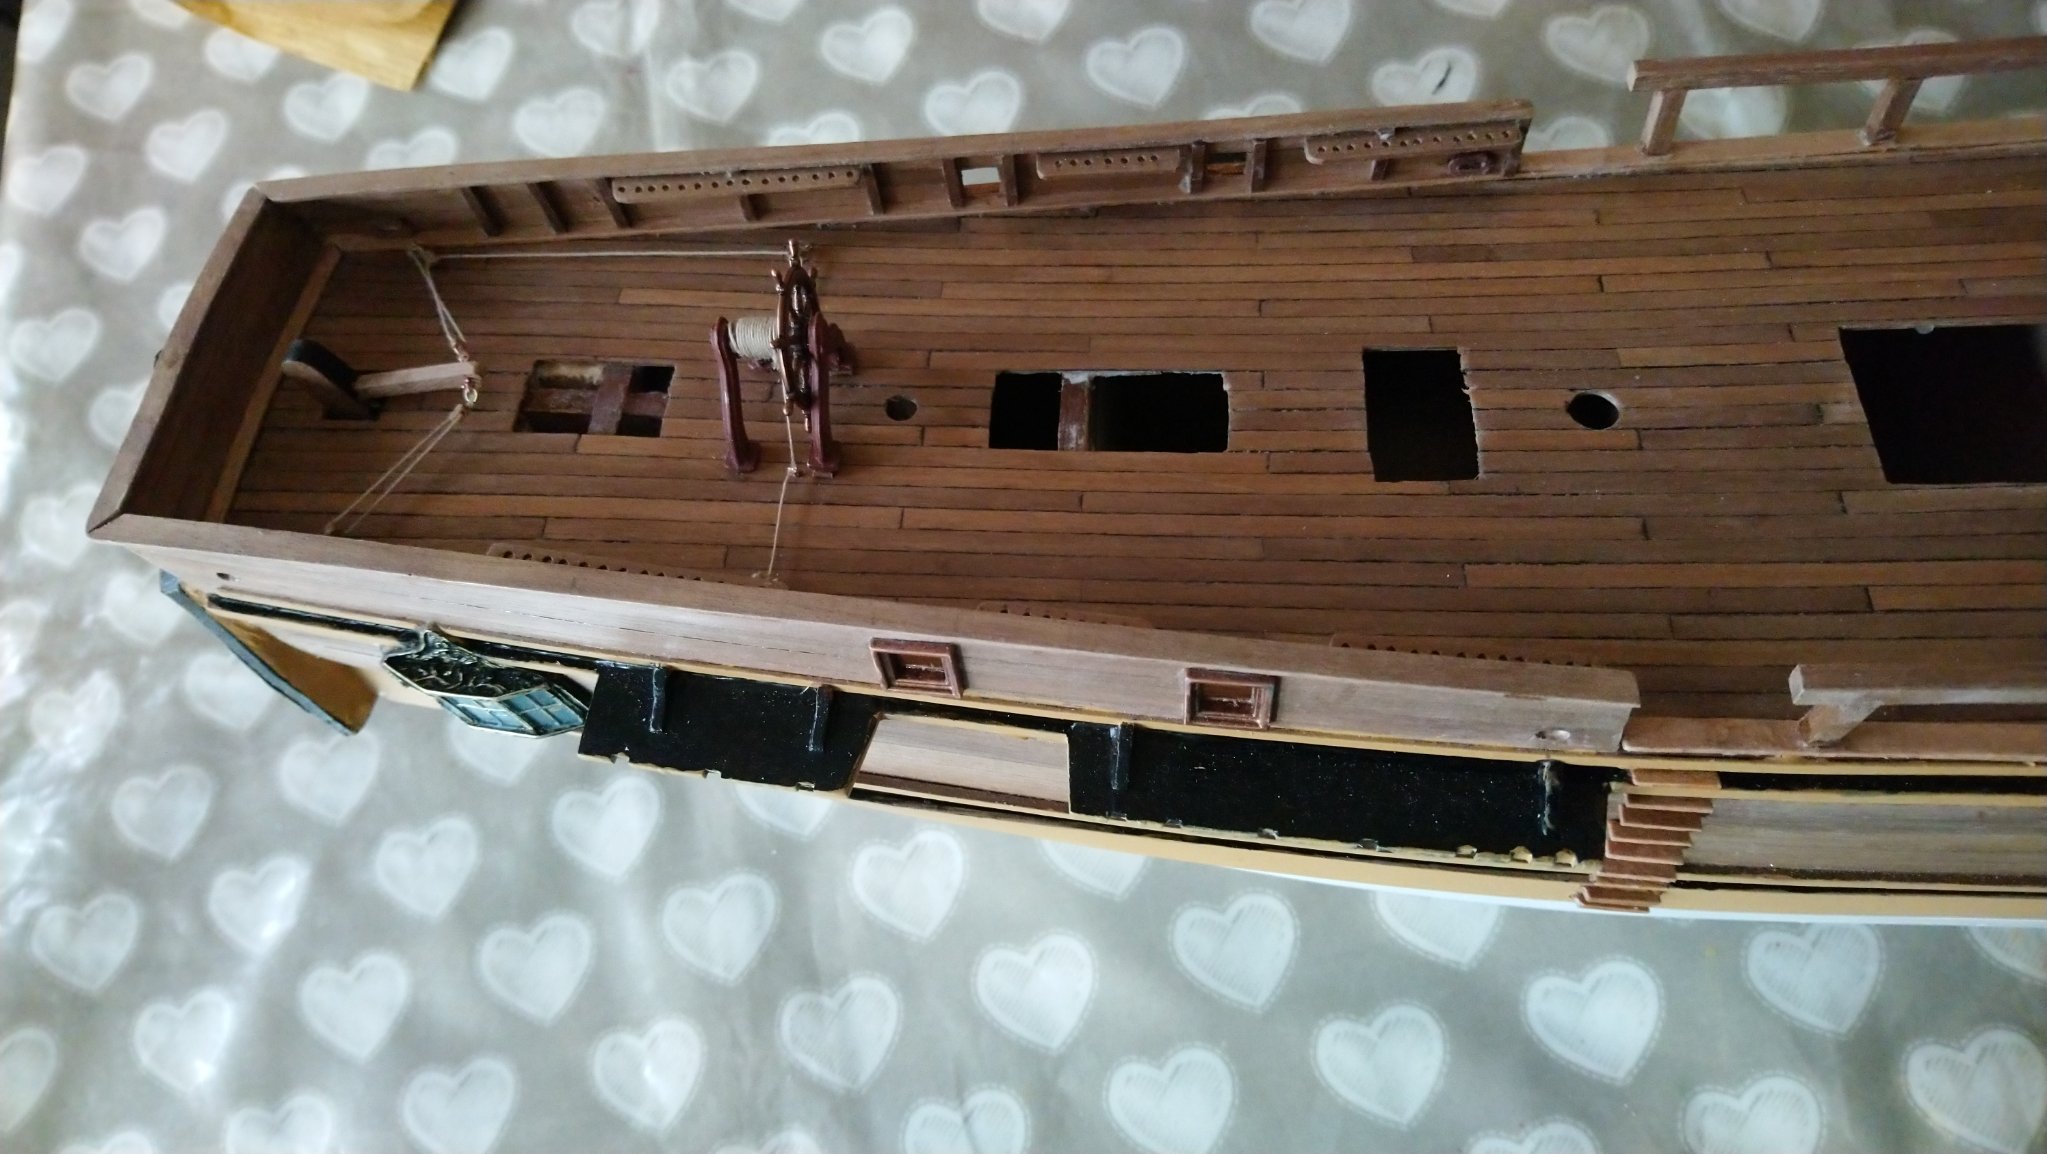
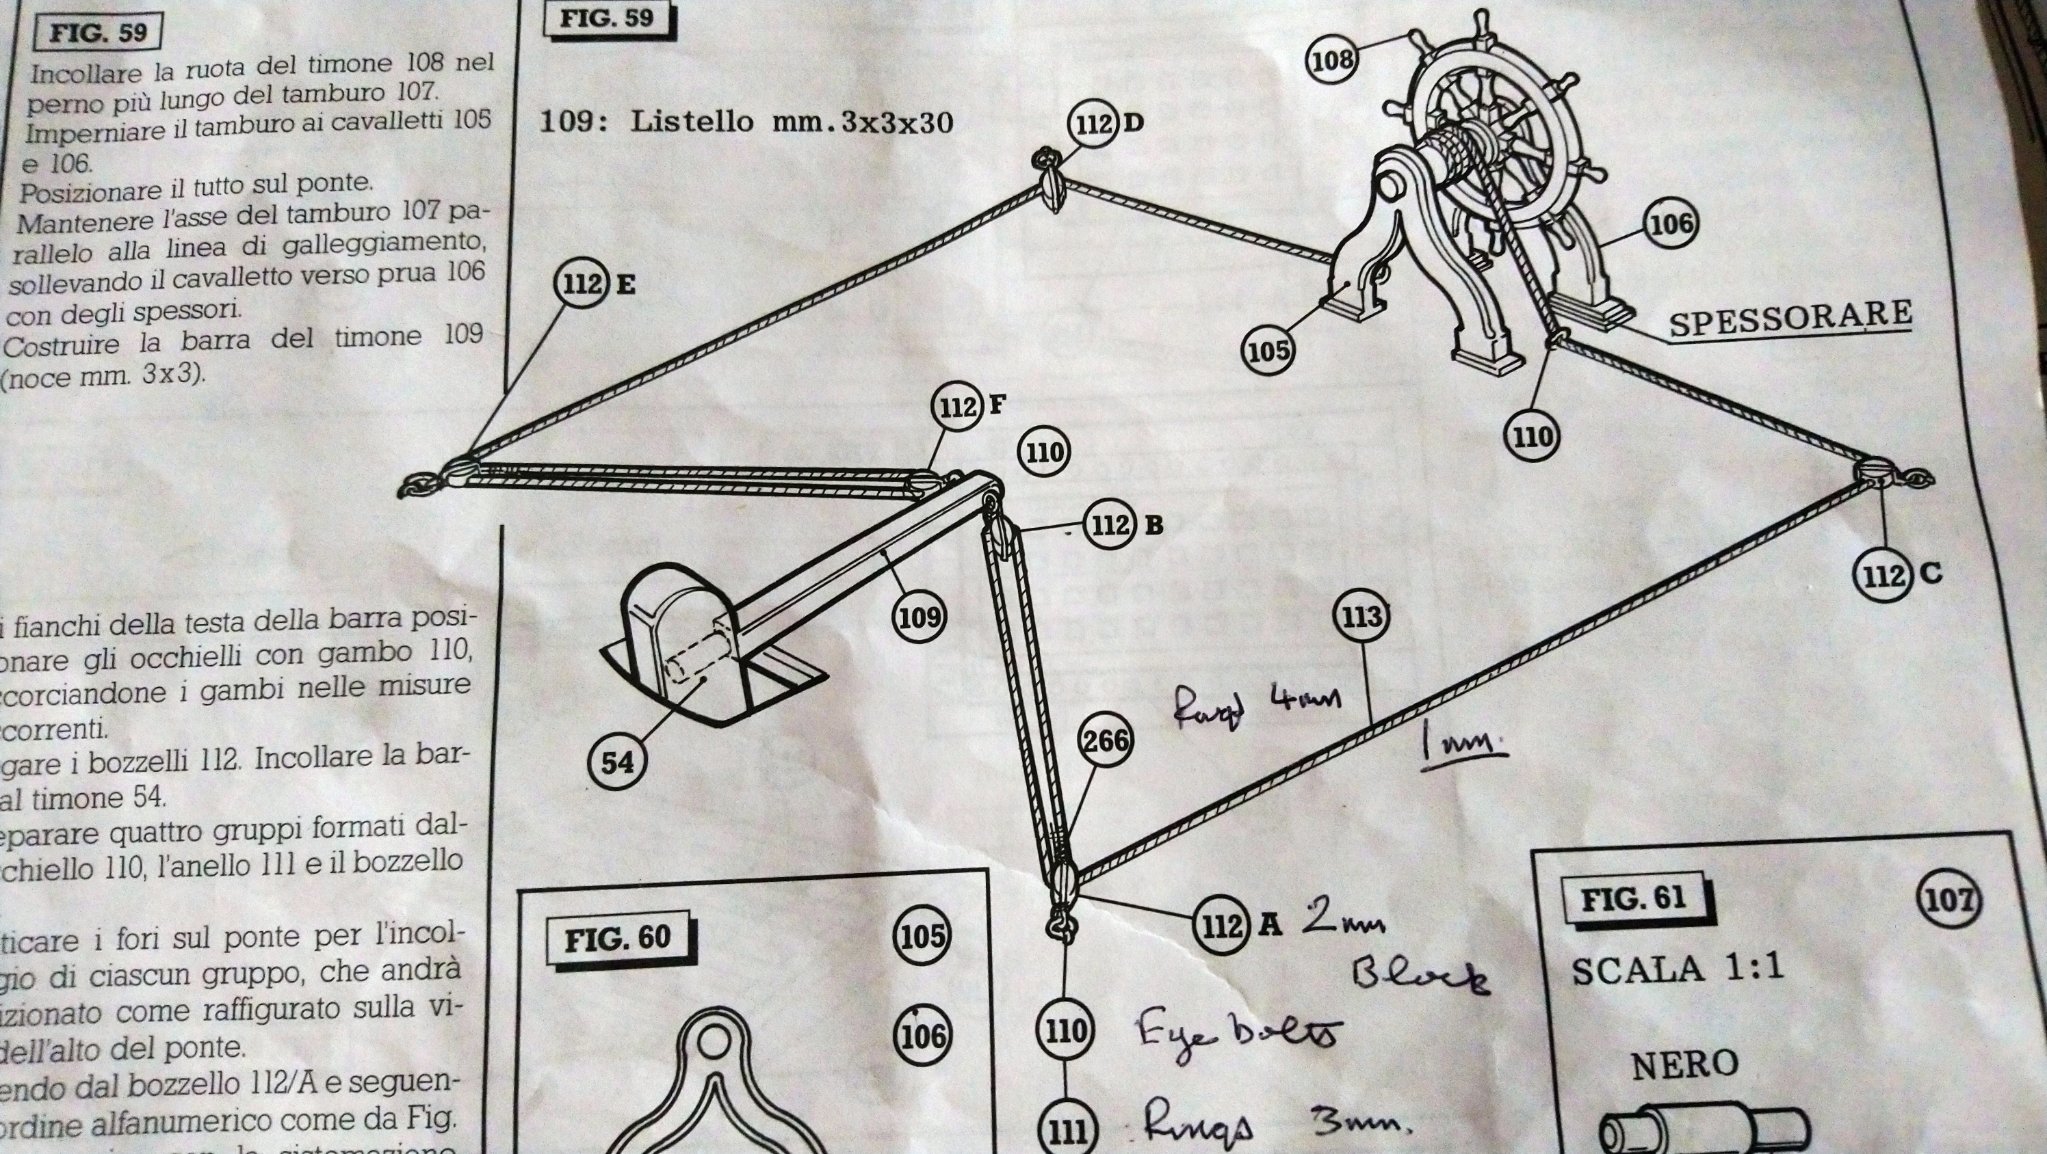
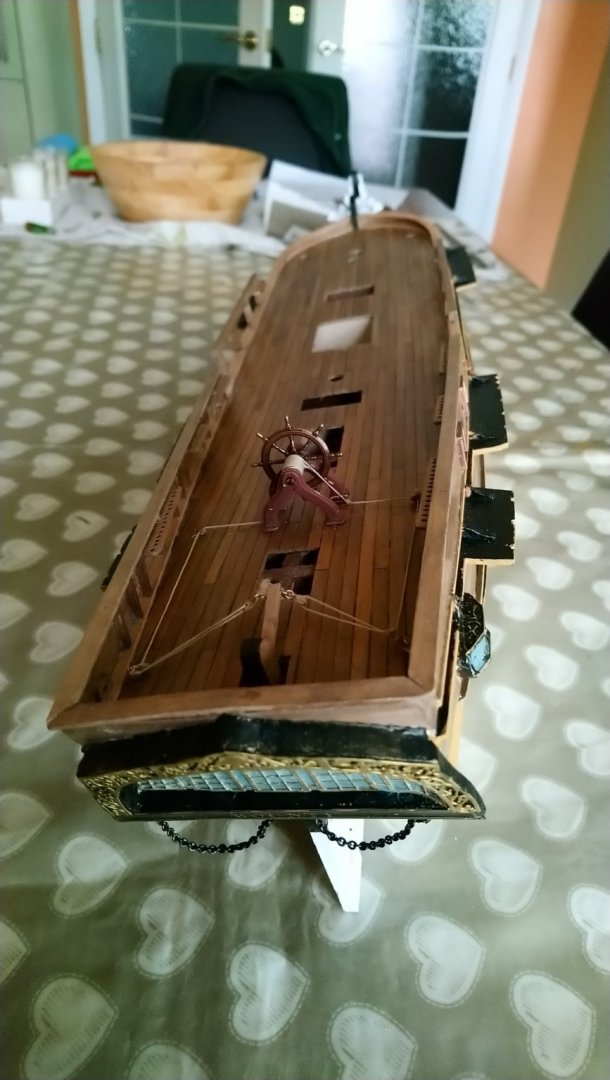
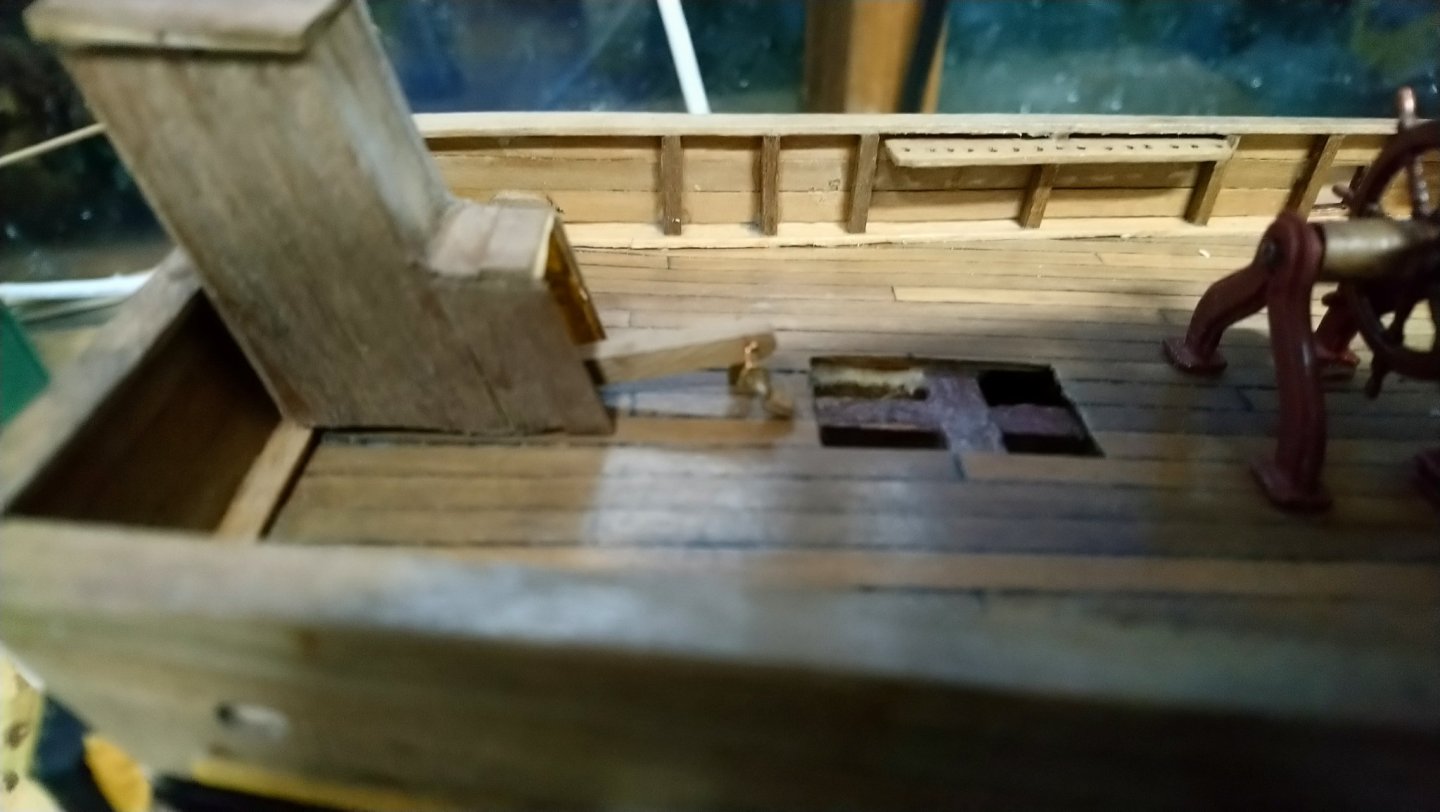
Update on the steering mechanism. Well after several attempts at drilling the 2 mm blocks a 1 mm hole which is the size on the instructions, I decided to make the holes smaller and hence make the running rope smaller. I also lost quite a few 3 mm rings but lucky I have a few spares. I got very frustrated trying different ways to do this including fitting larger rings and splicing the ends by seizing but just ended up tying the ends to the larger ring using a reef knot and a drop of glue. I eventually got the hang of tying the blocks but still found difficult handling the very small rings and eye bolts. I do believe I have these small blocks to look forward to again when building the cannons.Here is a couple of photos of my progress. I found this the most difficult part of the build so far. It is far from perfect but it is the best I can do


-
I have fitted together the gratings to what will fit the comings and intend to glue these grating strips together by dipping the assembled grating strips in a mixture of PVA glue and water and not sure what the mixture ratio should be and any ideas would be appreciated. Also how long do these need to be immersed in this glue/water mixture. Last question. Is there anything I can use to lay these assembled grates on whilst the glue dries which will not stick to the gratings once they are dry. Thank you.Best regards Dave.
-
Yeah that dosn,t sound good does it. I assume the Hobbyzone in the USA is supply only or do they just don,t make the slipway we want. Wonder if we could get the plans to make one ourselves?
-
The problem I am having is sourcing this! I understand that Hobby zone are no longer making these. That is what I was informed by model boat shops here in the uk.
-
Yes Jerry I was looking at them early tonight , but even though they are fantastic photo swith excellent quality photos ( Great photographer by the way) I just can,t make them out 100% .However I can see that the main running rope (lanyard ?) looks to be going back to the where the block is secured to the deck possibly the ring. However the instructions do say there is another ring in there. Here is the Amati video where the guy uses an electric wire to form a extra loop on two of the blocks but not sure if this is a bit complicated for what it is. Take a look if you have the time Jerry at about 5 mins in. Perhaps I am getting to hung up on whats happening as either of these solutions would work so will just go with what I think is the best and splice the main rope to a larger ring and connect that ring to the smaller ring. which is secured to the deck Thanks again Jerry this is getting me in knots, please forgive the pun. Best regards Dave
-
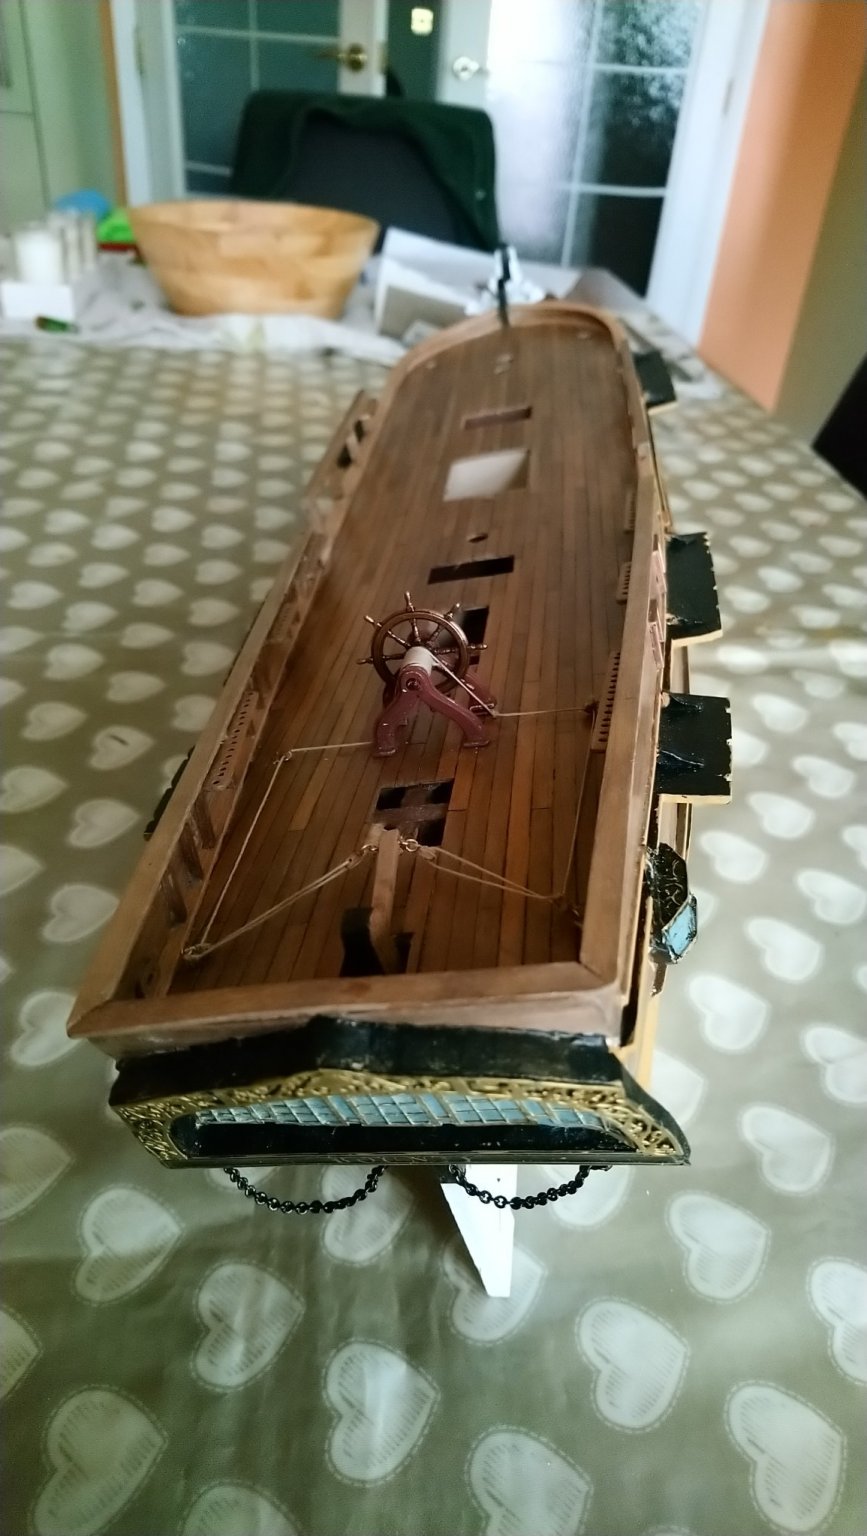
Thanks for that explanation Jerry and now I know what you are getting at and I have managed to fit a couple of blocks to rings and then attach these to the tiller via very small eye bolts. I think the hardest part for me was attaching the eye bolts to the rings.They are so small. I have attached a photo of my work so far .The little cabin over the tiller is not attached yet as there is still some work to do on this yet. I am still stuck on how to proceed with the blocks A and E where I believe is where each end of the main steering rope is attached via a ring 266. Can this be done like the guy in the video by substituting the mast for ring 266 or is there another easier way. I appreciate your patience with me and it must be frustrating for you tying to explain something thats so obvious to you. So I must thank you once again. Best regards Dave
-
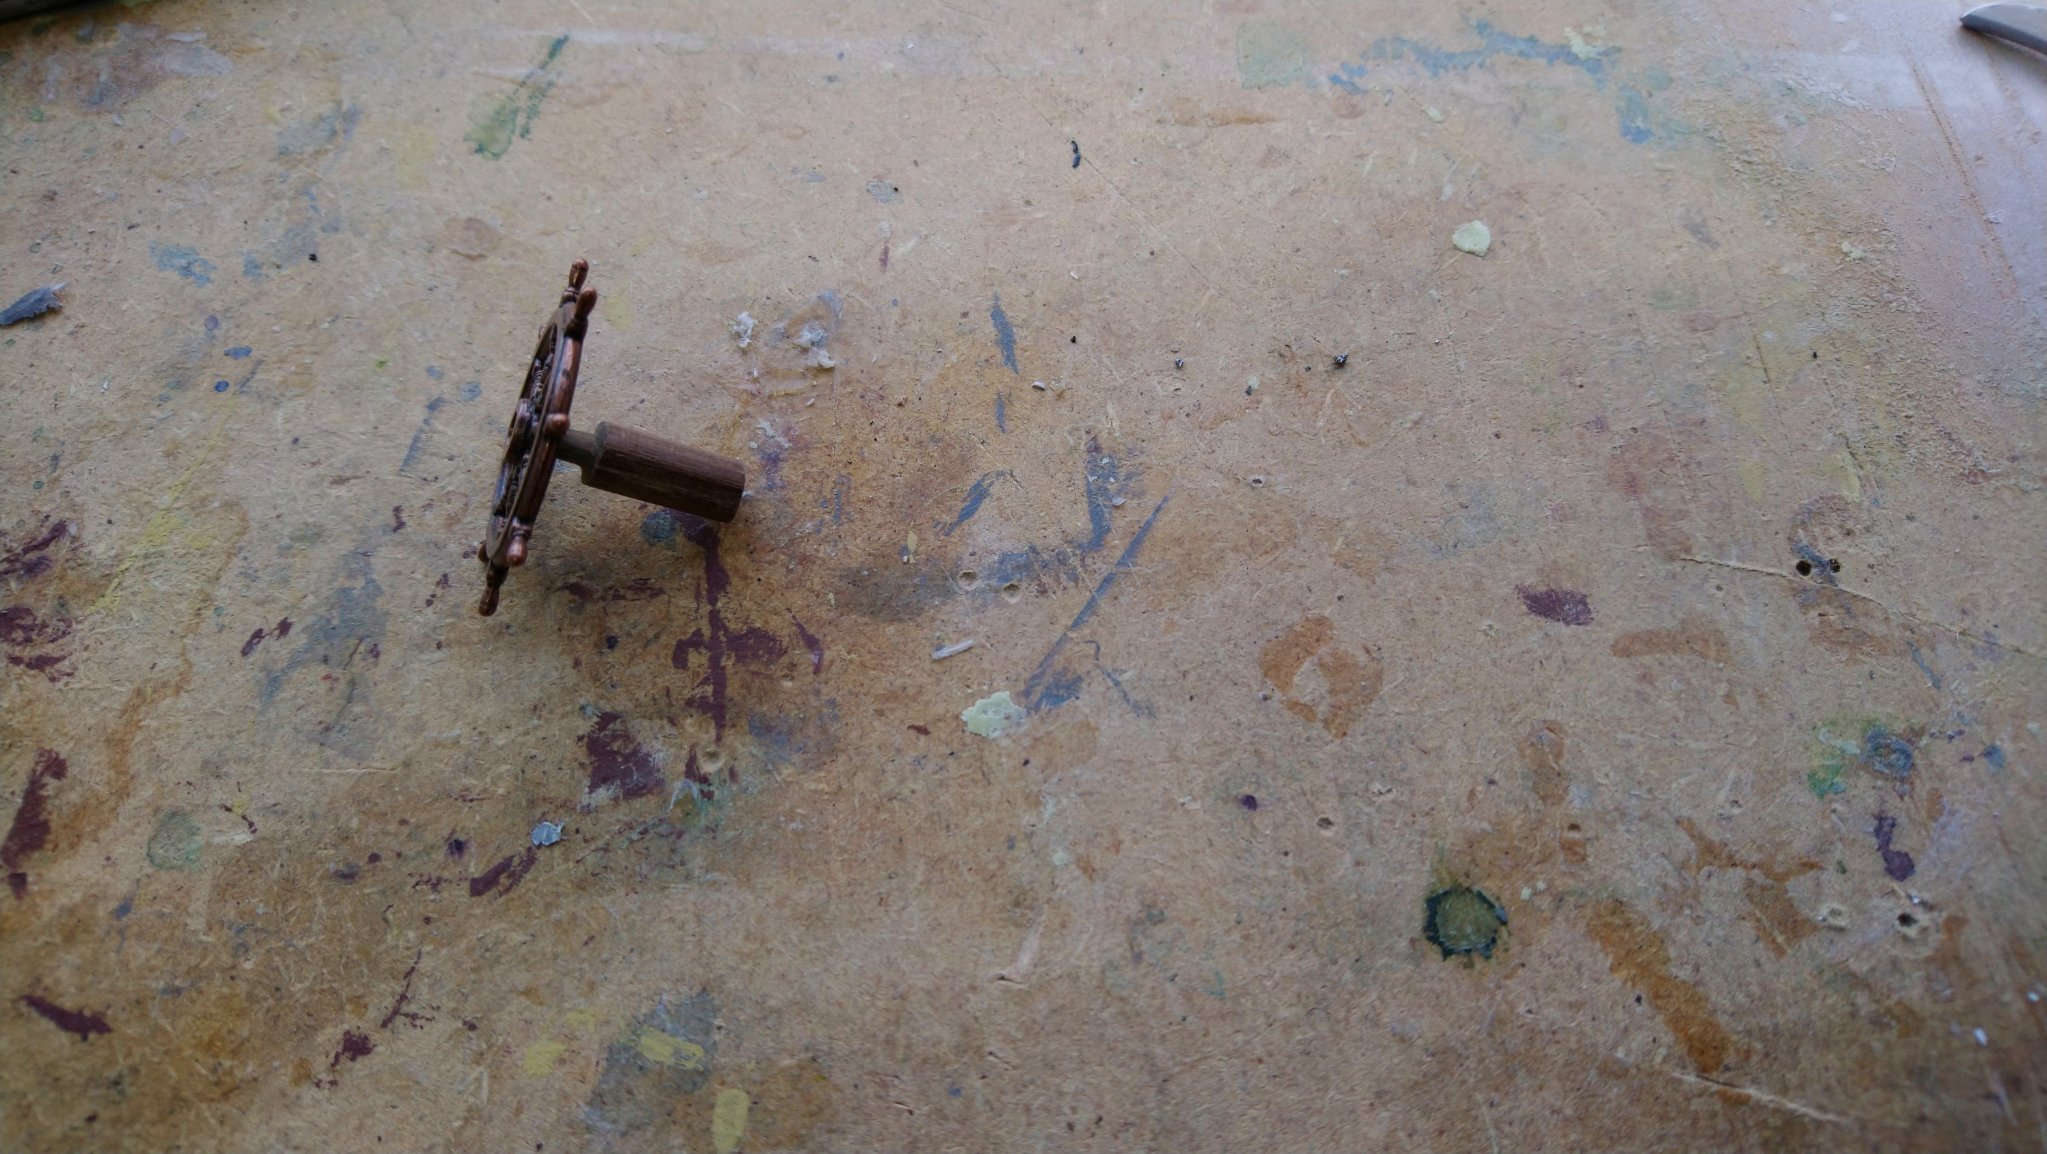
Thank you Jerry for confirming what I was starting to suspect. Strange how everything in the box was in sealed plastic bags except for the ships wheel which was on its own and not in a bag. Anyway what I have learned whilst my life at sea was we never carried enough spares and it was always the thing that broke ,there was never a spare for it. So we just had to make it. Fortunately I have some spare 5 mm Walnut dowel and I have a few ideas on how to make it. Also I need to get some practice in with seizing those blocks for the steering mechanism. Just for the record .Do the crew always face aft when steering the ship and in a position where there is very little room between the mast and the steering. Be in no doubt this is probably factually correct but it is the first time I have come across this in a ship without duel controls ( where they have both Fwd and Aft facing controls which are used for manuovering the vessel in port) Sorry but I just found this very strange. Regarding those really tiny 2 mm blocks which I believe are the smallest in the kit . I think I will struggle to work with something so small. However I will give it a go and will let you know how I get on. Best regards Dave
-
I have been looking at the next part of the build and see it is the rudder and wheel mechanism with really small blocks (2mm) According to the instructions the wheel drum which the ropes are wrapped around is part no107 and is shown on fig 59. As I can,t find this in the kit I am assuming it will have to be made. It is basically a drum ( a 5mm diameter pin ) with a smaller diameter pin on either side (3 mm ). I am wondering if you can remember making this Jerry ? and if so how.? I have thought about using two different size dowel and drilling the larger one at both ends 3 mm and fitting the smaller dowel into the holes. Another way would e to just use 5 mm diameter dowel and file both end down to 3 mm whilst being rotated in a drill. I will take a look at your blog and see if there is anything on there. I think the colours I chose for the Bounty are the same as is on the box and probably nowhere near what is accurate, they may not be to every ones taste either but I quite like them. I think on my next model perhaps I will research the colours before buying paint.I still have one or two areas to touch up which I can see. There is also the lower masts to paint white and some of the yards are black too. It does look very striking but sometimes think it is a shame to cover up that lovely walnut.Best regards Dave