DaveBaxt
-
Posts
1,324 -
Joined
-
Last visited
Content Type
Profiles
Forums
Gallery
Events
Everything posted by DaveBaxt
-
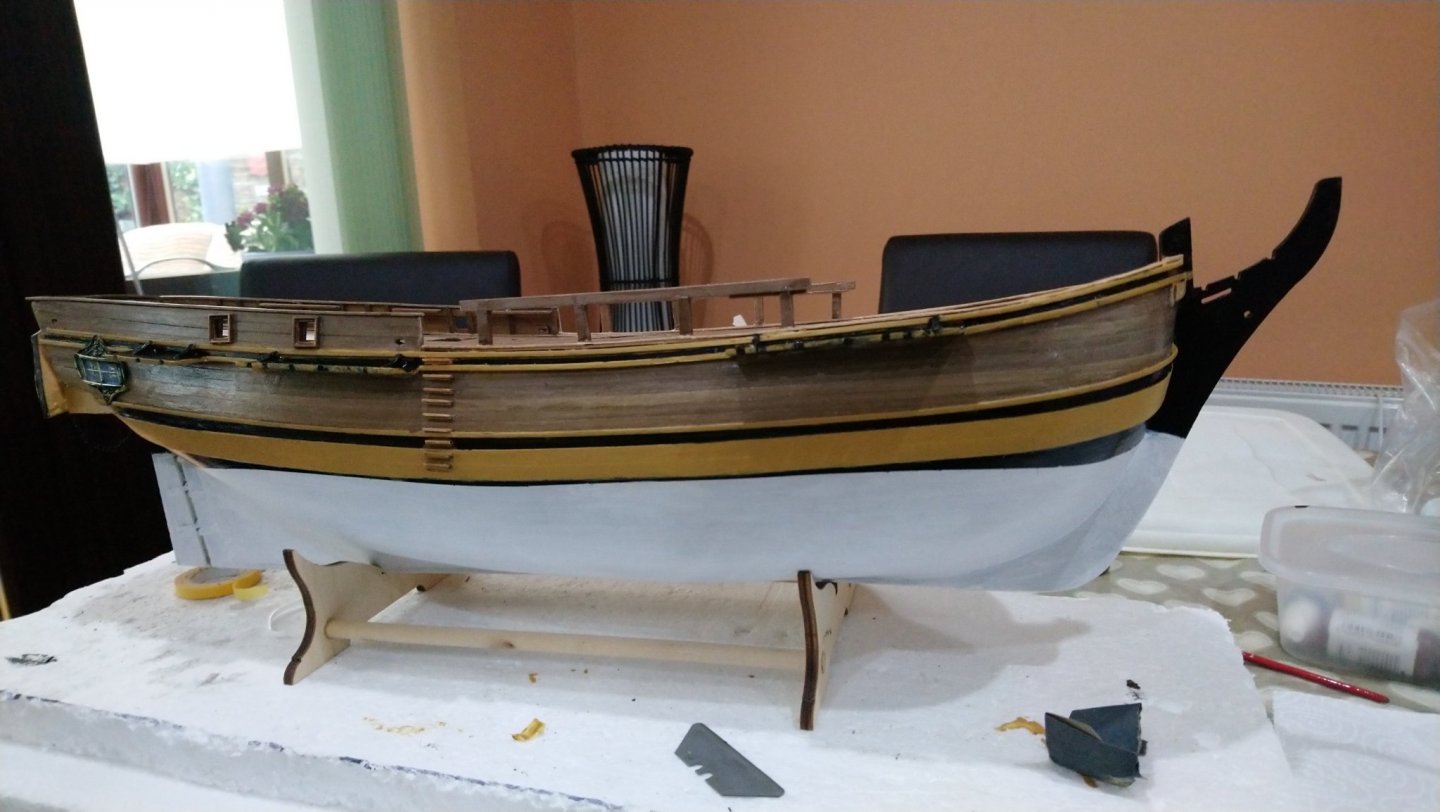
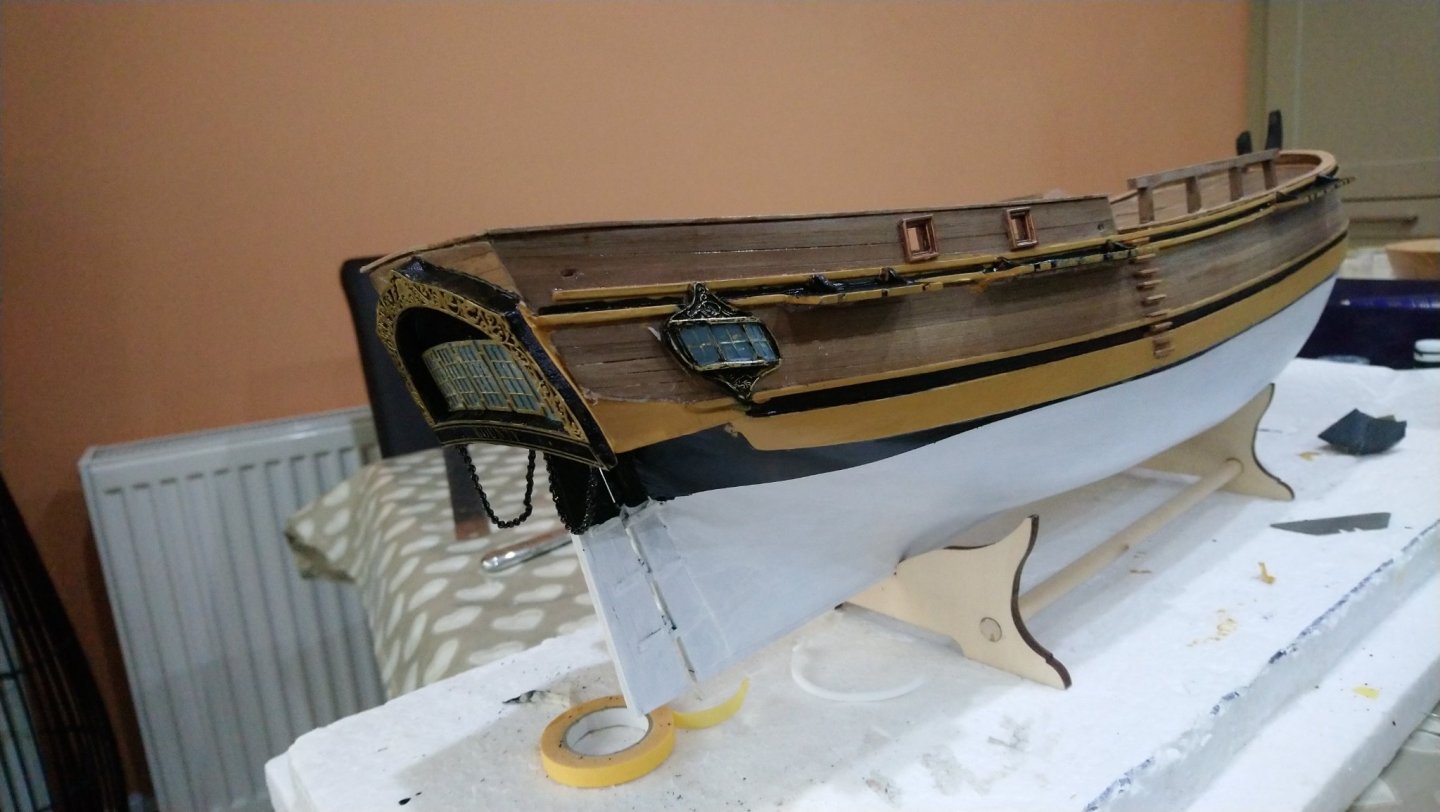
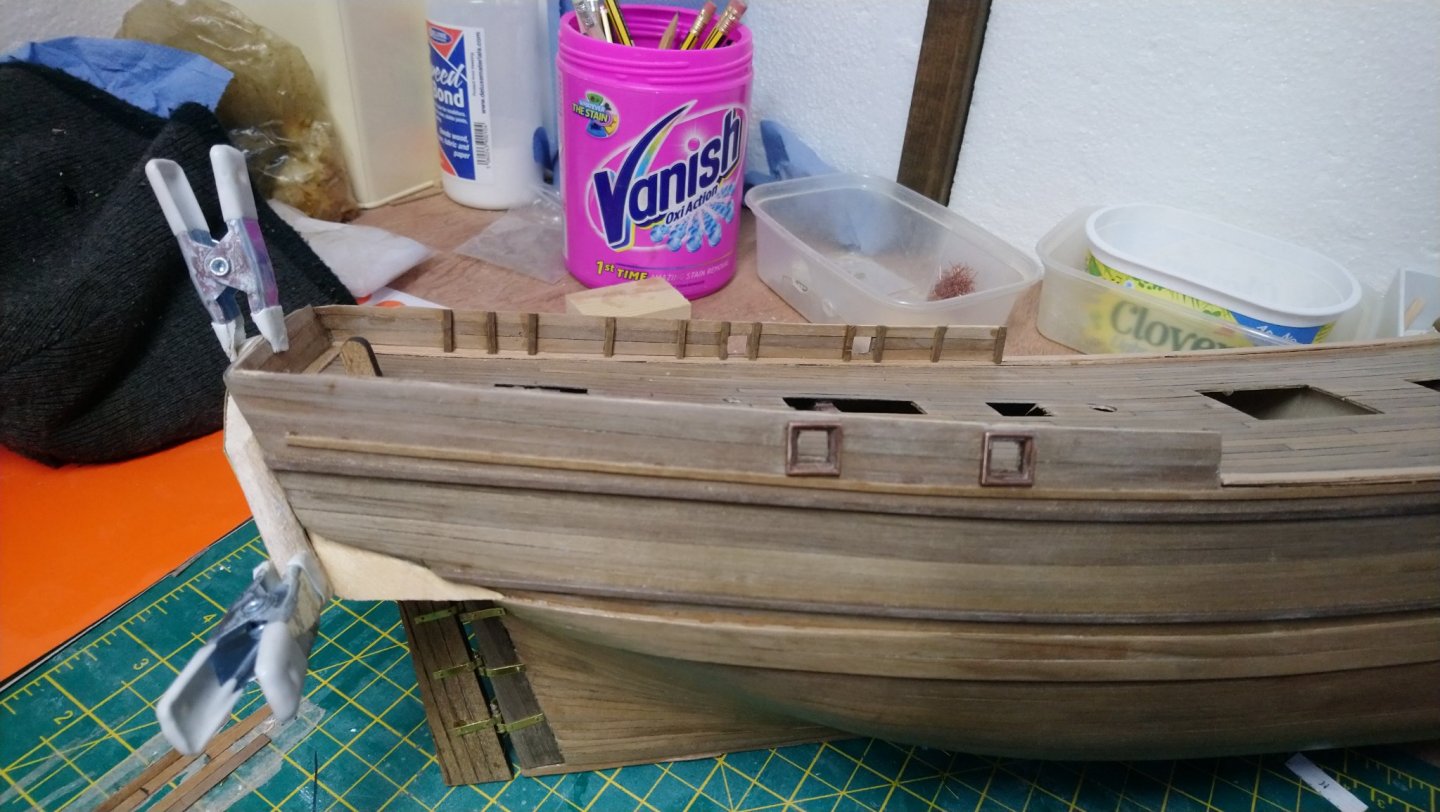
Sorry to hear your struggling with sleep.It is always difficult when that happens. Anyway thank you for your advice regarding the display cases. I have found a company in the uk and makes exactly what you have discribed for maybe $300 . So will probably go down that route if the model turns out good enough. I am still making silly mistakes which are very frustrating. Here is a few photos of the painting of the hull. I tried to paint the side castles and then scrape the paint off the high ridges but was not totally happy with the outcome . Fortunately I can have another go at a later date if I feel like it.
-
Jerry I know I am probably looking too far ahead but regarding the display case. I am assuming this is something we put together ourselves in which case is it toughened glass and what sort of dimensions? I have just found a display case maker here in the uk and as a rough guide lets say $300 depending upon the exchange rate. Thats not inexpensive. Can we make these ourselves with a cheaper material such as plastic?
-
Thank you again Jerry. I too am looking forward to the rigging and hopefully I can manage ok with those very small blocks,eye bolts and rings. In my spare time when I am not working on my model I have been famiiarising my self with some of the rigging and trying to figure out what goes where. I have managed to identify each mast and there associated tackle and have a bag for each mast. ( mainly the standing rigging) Perhaps when we get nearer the time, I could lay out the contents of one of the bags and send you a photo of the contents. That way you would be able to let me know if anything is missing. What do you think of this approach? The fact that you have stayed with me throughout my ships blog has been very helpful and your encouragement has kept me going when I have wobbled a bit. Take care Jerry and I will give you another update probably tomorrow.Best regards Dave.
-
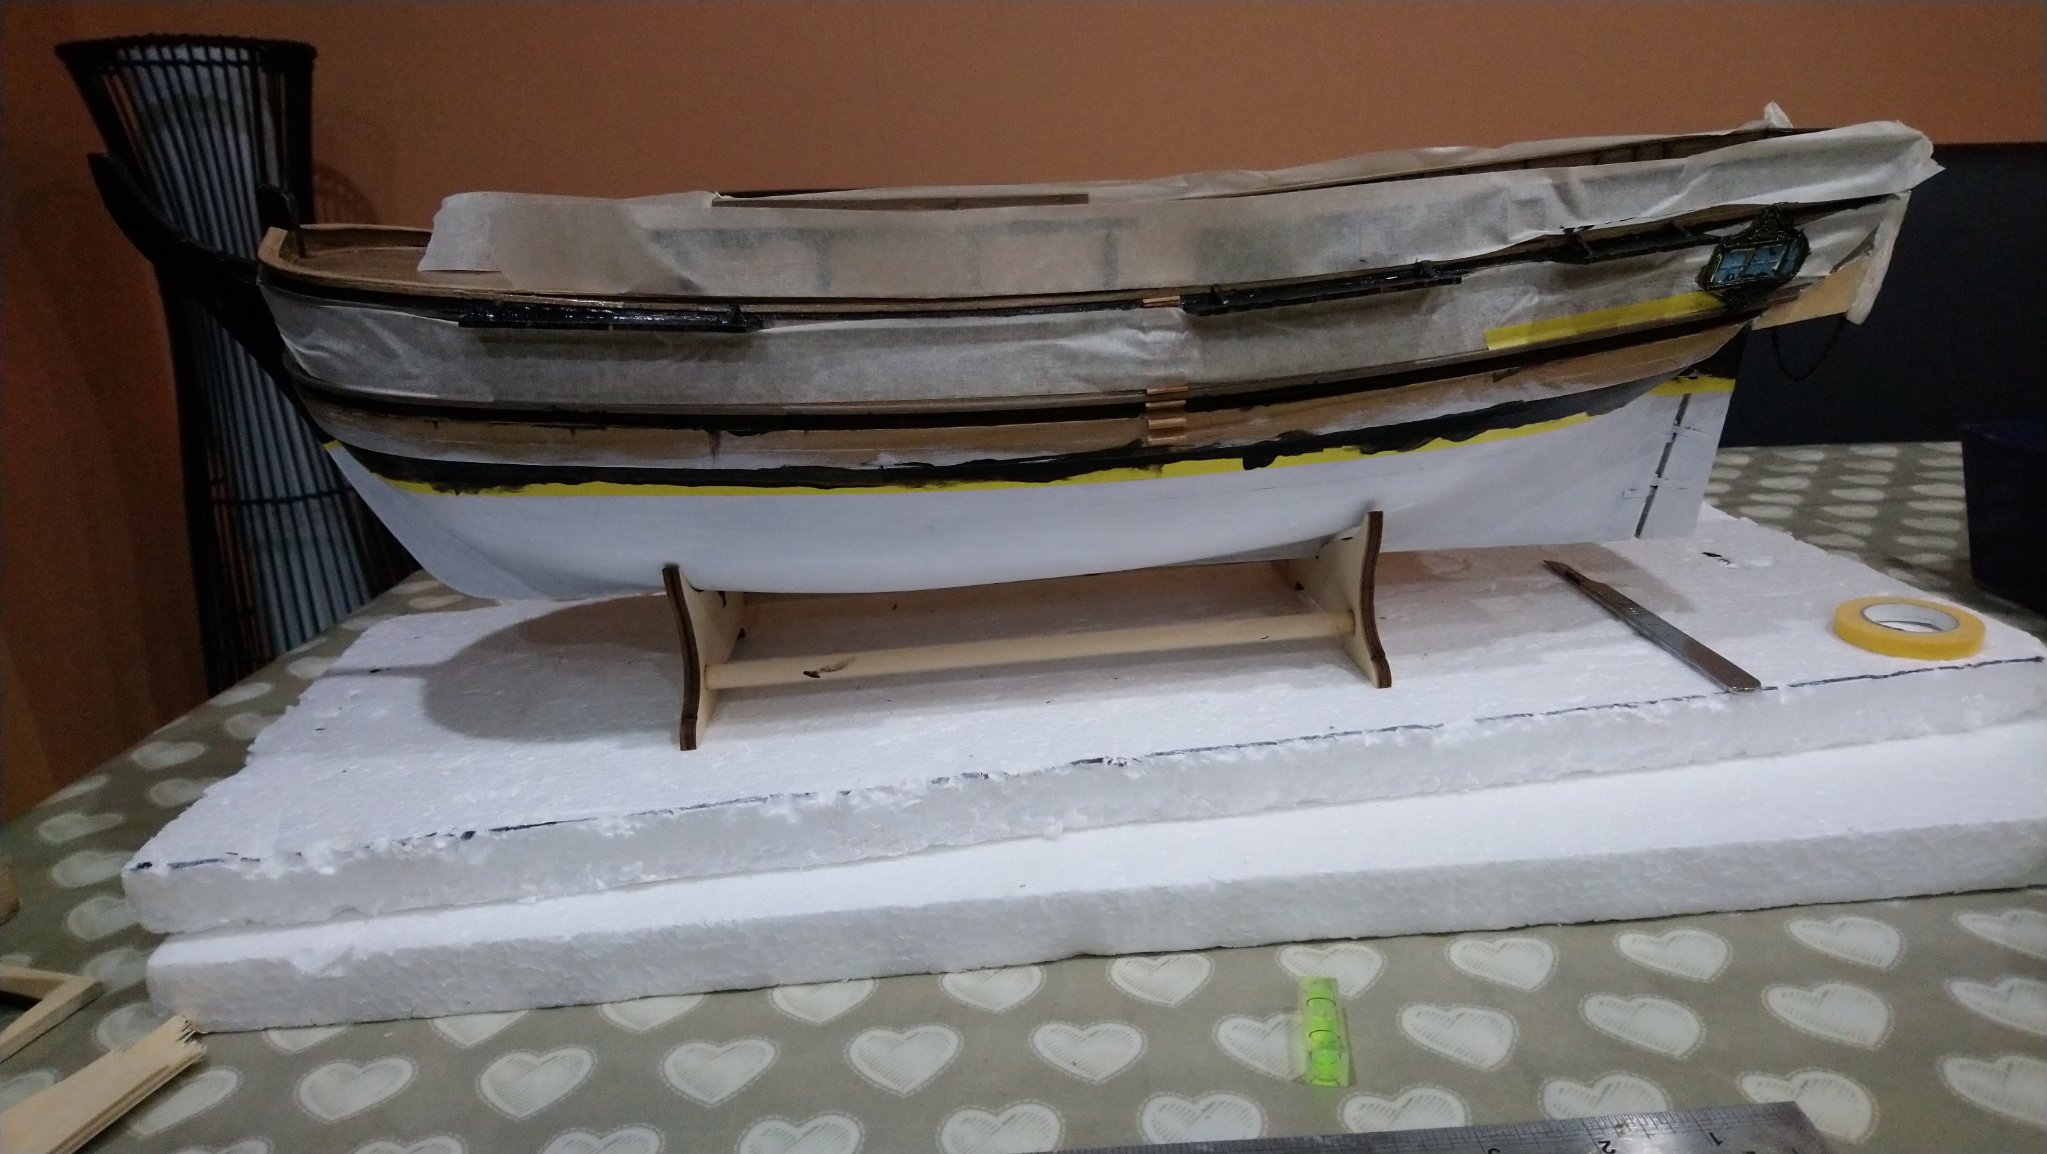
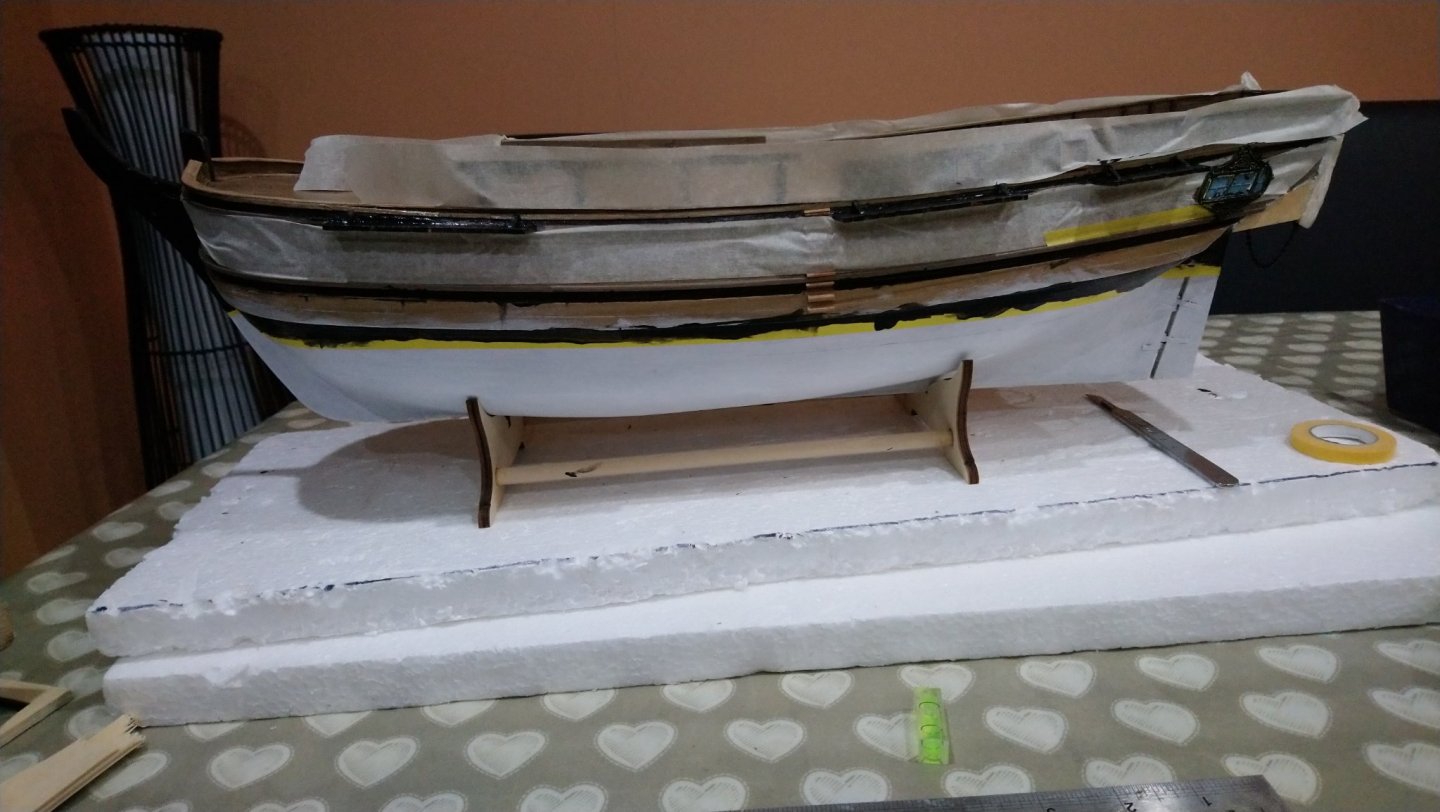
Final coat of sand n Seal then masked where I didn't want any stray paint going.Firstcoat of white acrylic paint followed by another 2 coats,all very thin coats. Marked off waterline after securing the ship in a level position and longitudinal and athwartships . Commenced applying first coat of black to stern castle,cut-water, channels and in between wales. Shame to cover up all that hard work on the planking.Ha ha.

-
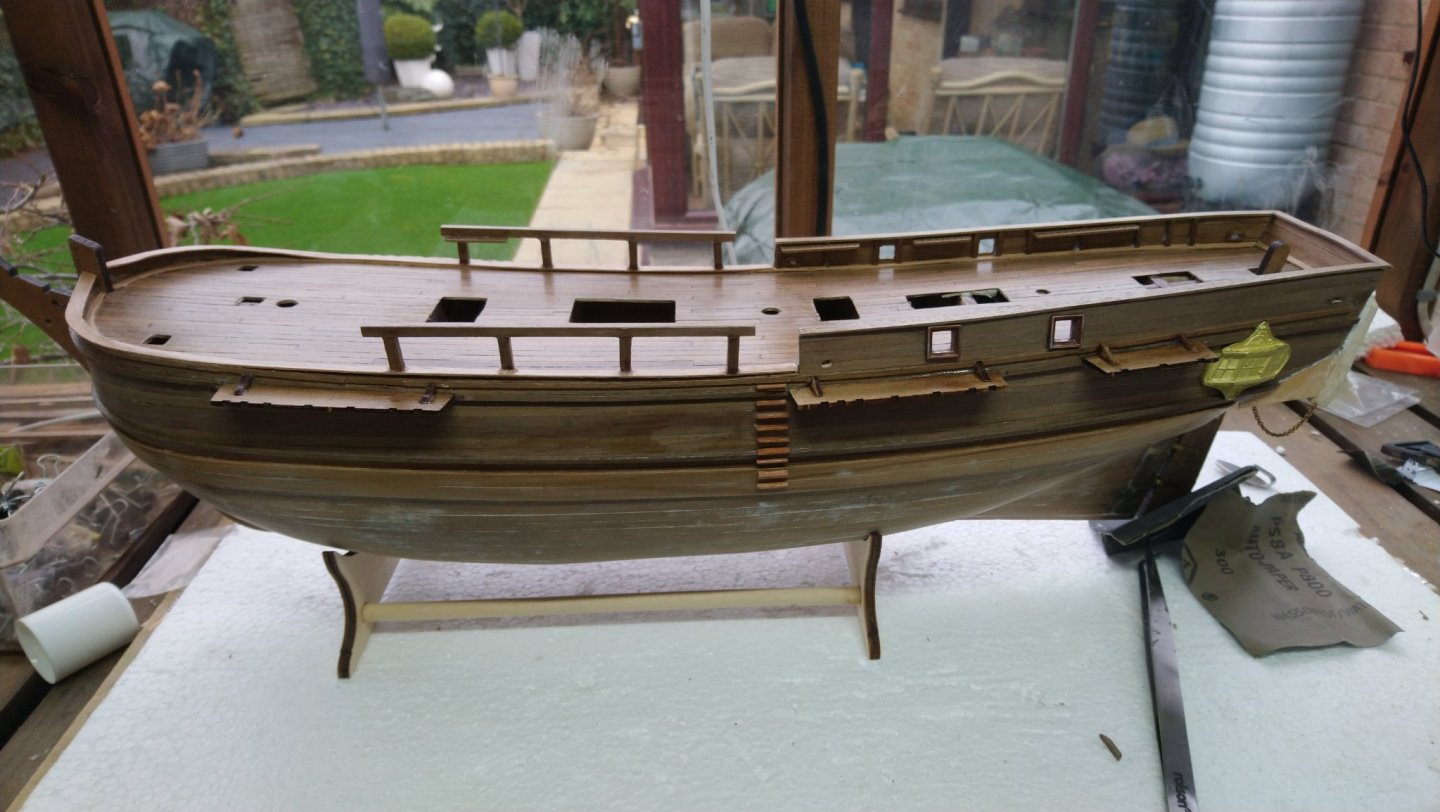
Jerry thank you again for your kind words of support and its help me a lot. I have had a bit more success today and have managed to put right some of my mistakes. Unfortunately I am have a few problems getting my photos on line. Not being an expert at IT I am taking the photos with my phone in my workshop and sending them via email to myself ( I know it sounds a bit weird but it did work for a while) I then open my email with my lap top and upload them to the website. For some reason I am not receiving the emails on my laptop. Anyway I have just finished giving everything a final coat of sand & sealer then after a very light sand I am pretty mush ready to paint. I understand as I have used sand & sealer I do not need to use an undercoat but go straight onto the top coat using the acrylic paint supplied with the kit. The only thing which I have not glued to the hull so far are the metal pieces which fit onto the cut water and the brass parts which go onto the stern castle. I believe these areas need painting black and the the parts attached afterwards. So now I will try and sort out those photographs. Best regards Dave PS. You are definately turning into my Mentor Jerry so thank you very much indeed! Here is one of the photos after corrective surgery prior to painting
-
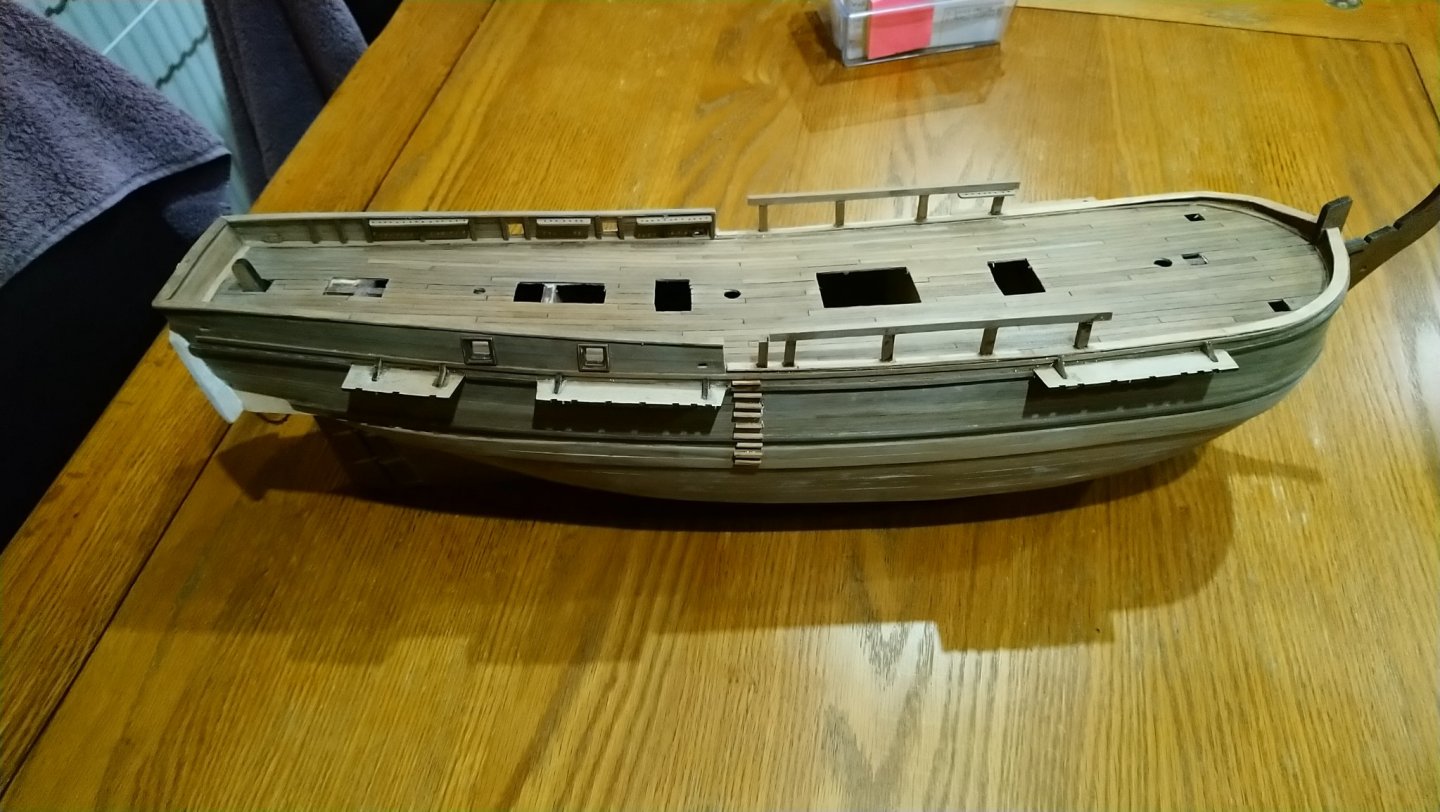
I have not updated this blog for a few days due to encountering a few problems with fitting the stantions that the remaining pin racks are fitted to. I must of glued the stantions quite a few times but was never 100% happy with there position. Then as I am planning to paint the hull, after filling in some gaps and sanding down smooth again ended up accidentily knocking the stantions off. I then Eventually ended up using CA glue and getting them onto the correct position I then moved on to the channels. I then went on to take my measurments from the main drawing and using the position of the masts as a datum. So far so good. I removed the section of the wales so could then glue the channels onto the hull. So far so good. Unfortunately No . I then realized that one of the channels could not possibly be in the right place as I then realized that the shrouds would be over the holes for the cannons. ( Ar this point I am starting to get annoyed with myself) I then had remove the channels in question remove the old glue. Remove a section of the wale and fit a new section of wale. Then re position the channels so the gap in the the shrouds would be over the cannon hole. All in all I have had a very frustrating time and dare I say the first signs of doubt started to creep in. I have decided next to spend my time removing any evidence of glue which ended up in several places I did not want them. I have now realized that it is inevitable that I will make some mistakes as this is only my second model and my first of this type of ship. I made mistakes on my first ship but did a better job of the planking on this my second ship. Anyway here is a few photos of my work so far. Please do not look too closely. Hopefully I can proceed without too many errors.
-
Thanks for the heads up regarding the painting. AS I bought the painting kit for that particular model I will probably stick with those colours,, which I think is the same as on the front of the box. although I do like how Charlene has painted hers. Always a good idea to go with a womans touch.I always let my wife pick the colours for decorating. Anyway I managed to fit the forward rails and the other pin racks this morning and thats me done for the day. I usually watch football on a saturday afternoon,so I am having an easy day today. I will start on the ladders in the next couple of days before painting but first I will fit the channels which I understand the positioning is very important. So will make sure they are where they should be. The instructions also say that the channels should be fitted to the hull and not the wales ,Just wondering if I could use CA glue for that as it would make life a bit easier,especially now I have the accelerator? Hope you are now feeling well Jerry and in the moodeto continue answering my questions. Thanks again for your help. Best regards Dave.
-
I am now taking stock of where I am with the build and what to do next. After looking at Jerry's blog of the Bounty and thinking before I go much further its time to maybe paint the hull before I add too much more to the hull. However before that I need to add the channels and the forward pin racks. For some reason the guy in the Amati video does not start painting the hull until he has glued on the pilot ladders and the metal attachments to the break water. Surely it would be easier to paint everything before attaching these items or does the glue hold better before painting ? Just a few things to think about before I start the day.
-
Jerry I am sure you are correct but it must be different for me as that is exactly what I did, I even put a wooden guide along the edge of the drill so it would not wonder about. However I always seemed to get one or two that strayed. I am not trying to make excuses but do suffer from arthritis but I did start to get the hang of it after several goes. After using the bradawl I did not always find it with the drill so perhaps I need some better drills? Anyway hope it doesn't look to bad once the pins are in and the ropes are attached. Just been working on the hinges which are really tiny and are impossible to see whithout a magnifying glass.Thanks again for your input. Best regards Dave
-
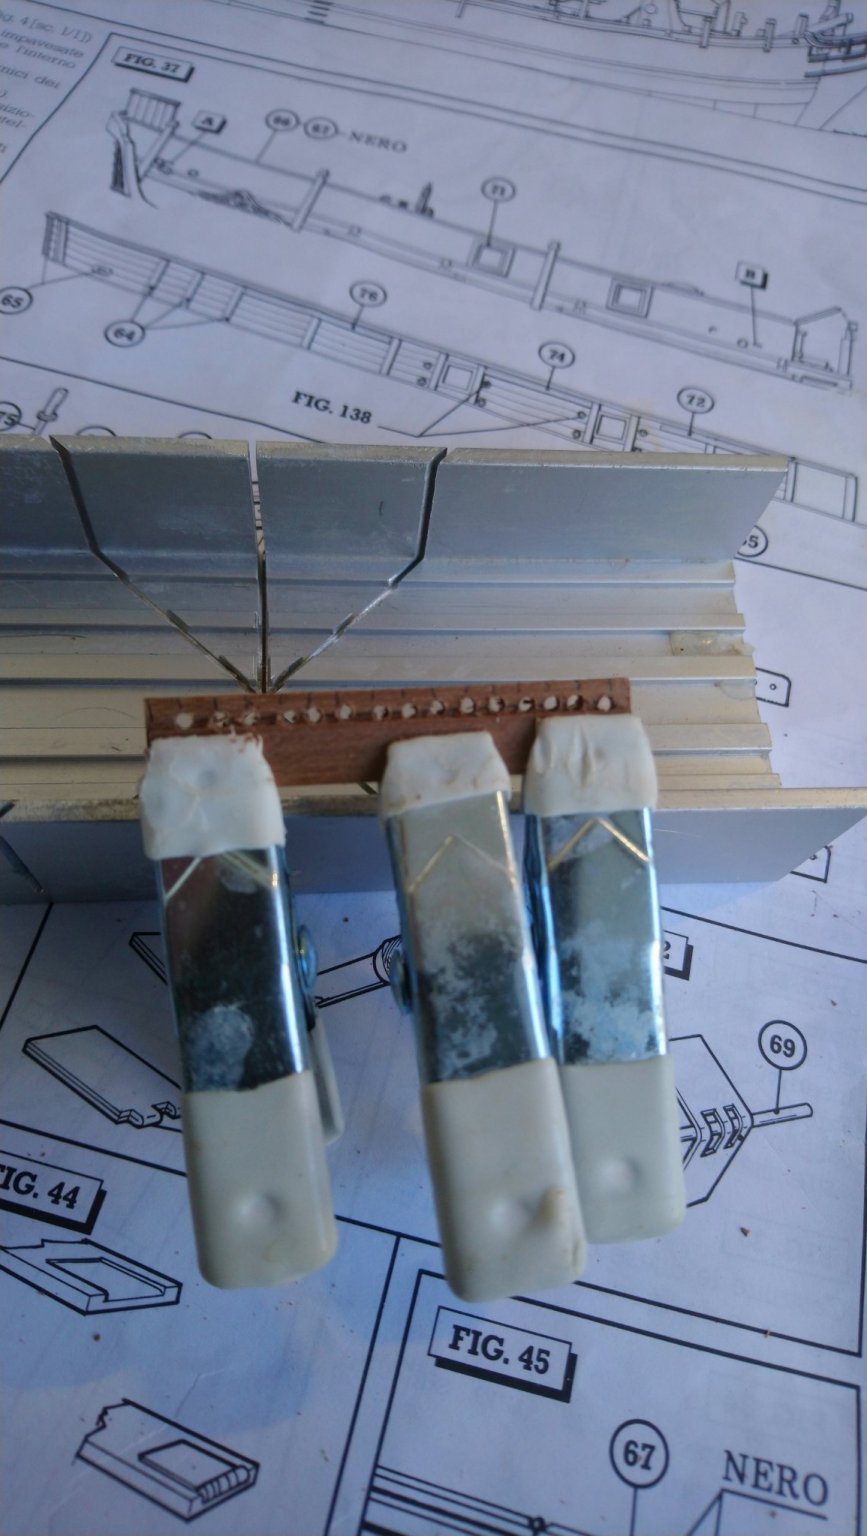
Jerry you are so quick with your replies and I am truely thankful for it. Yes I have been reading your blog and the photos show rhat charlene's pin racks are excellent . After 2 days of trying I have finally got them made but persevered with walnut but they are not as good as Charlene's. Even with the use of a guide I still managed to get one or two holes go astray. By the time I finished I was just about getting the hang of it. Here is a photo of the racks eventually glued in place.

-
Jerry. I have decided to make new pin rack as I wasn,t happy with the once I made using the plywood. I used some walnut sock which I had spare and supported the piece whilst drilling and this stopped the wood splitting and also acted as a guide to get the holes more in a line. Here are a couple of photos of the 15 hole rack. I have been looking at your blog to see how you managed to do the hinges as I can,t find any 1 cm wide metal strip in the kit to make the hinges. I can see that you have made something different and wondered if you used the same copper strip that is used in some of the yards. ( It looks to be about 4 mm wide or something like that) to make your hinges .


-
I have just checked and you are correct. 15,7 and 12 . Thats what I meant to say.Its been a long day. So I will continue the way I am going. I have managed to also firtted the chains to the rudder and the little sheave holes in the bulwarks and fitted the bottom bulwark caps. Thanks for clearing that up for me. I can now proceed with a bit more confidence. Catch you later. Best regards Dave
-
Jerry. I need your help regarding the belaying pin racks. Would you be so kind to let me know how many holes are in each rack. Not to worry if you cannot make them out properly .On the main drawing I have counted 15, 12 and 8 holes working from aft. When I checked the Amati video the guy has one less in each rack. It also states in the instructions that the racks are 1 mm x 5 mm. This is very small to get the 15 x 1.5 mm holes and there is very liitle space between the belaying pins. I am also having a problem with the 1 mm x 5 mm strips splitting whilst trying drilll holes so close together. I have resorted to using 1 mm plywood which has solved the problem but the plywood is much lighter than the walnut. However I do have some Walnut stain.Looking at the belaying pin drawing there are a few spare holes so do I need to drill the exact amount on the drawing. I made the holes 1.5mm as this allows the belaying pins to slide in quite easily but wondering if these need to be tight, in which case I could make the holes a bit smaller.
-
Thanks again Jerry for your kind words. I still think the stern castle looks a bit odd,but perhaps it will look better when its all painted. Unfortunately I cannot see the colors from the photograph on the box the model came in,so will just have to go off the photos you have gave me and the Amati video. I see the back drop to the stern castle is black. I also quite like the colours on the Amati video which seems to be mainly black & white but with some areas a Yellow ochre. Whwn I bought the model I also bought the paint kit as well so will see what colours are supplied.Take care jerry and thanks again for your input.
-
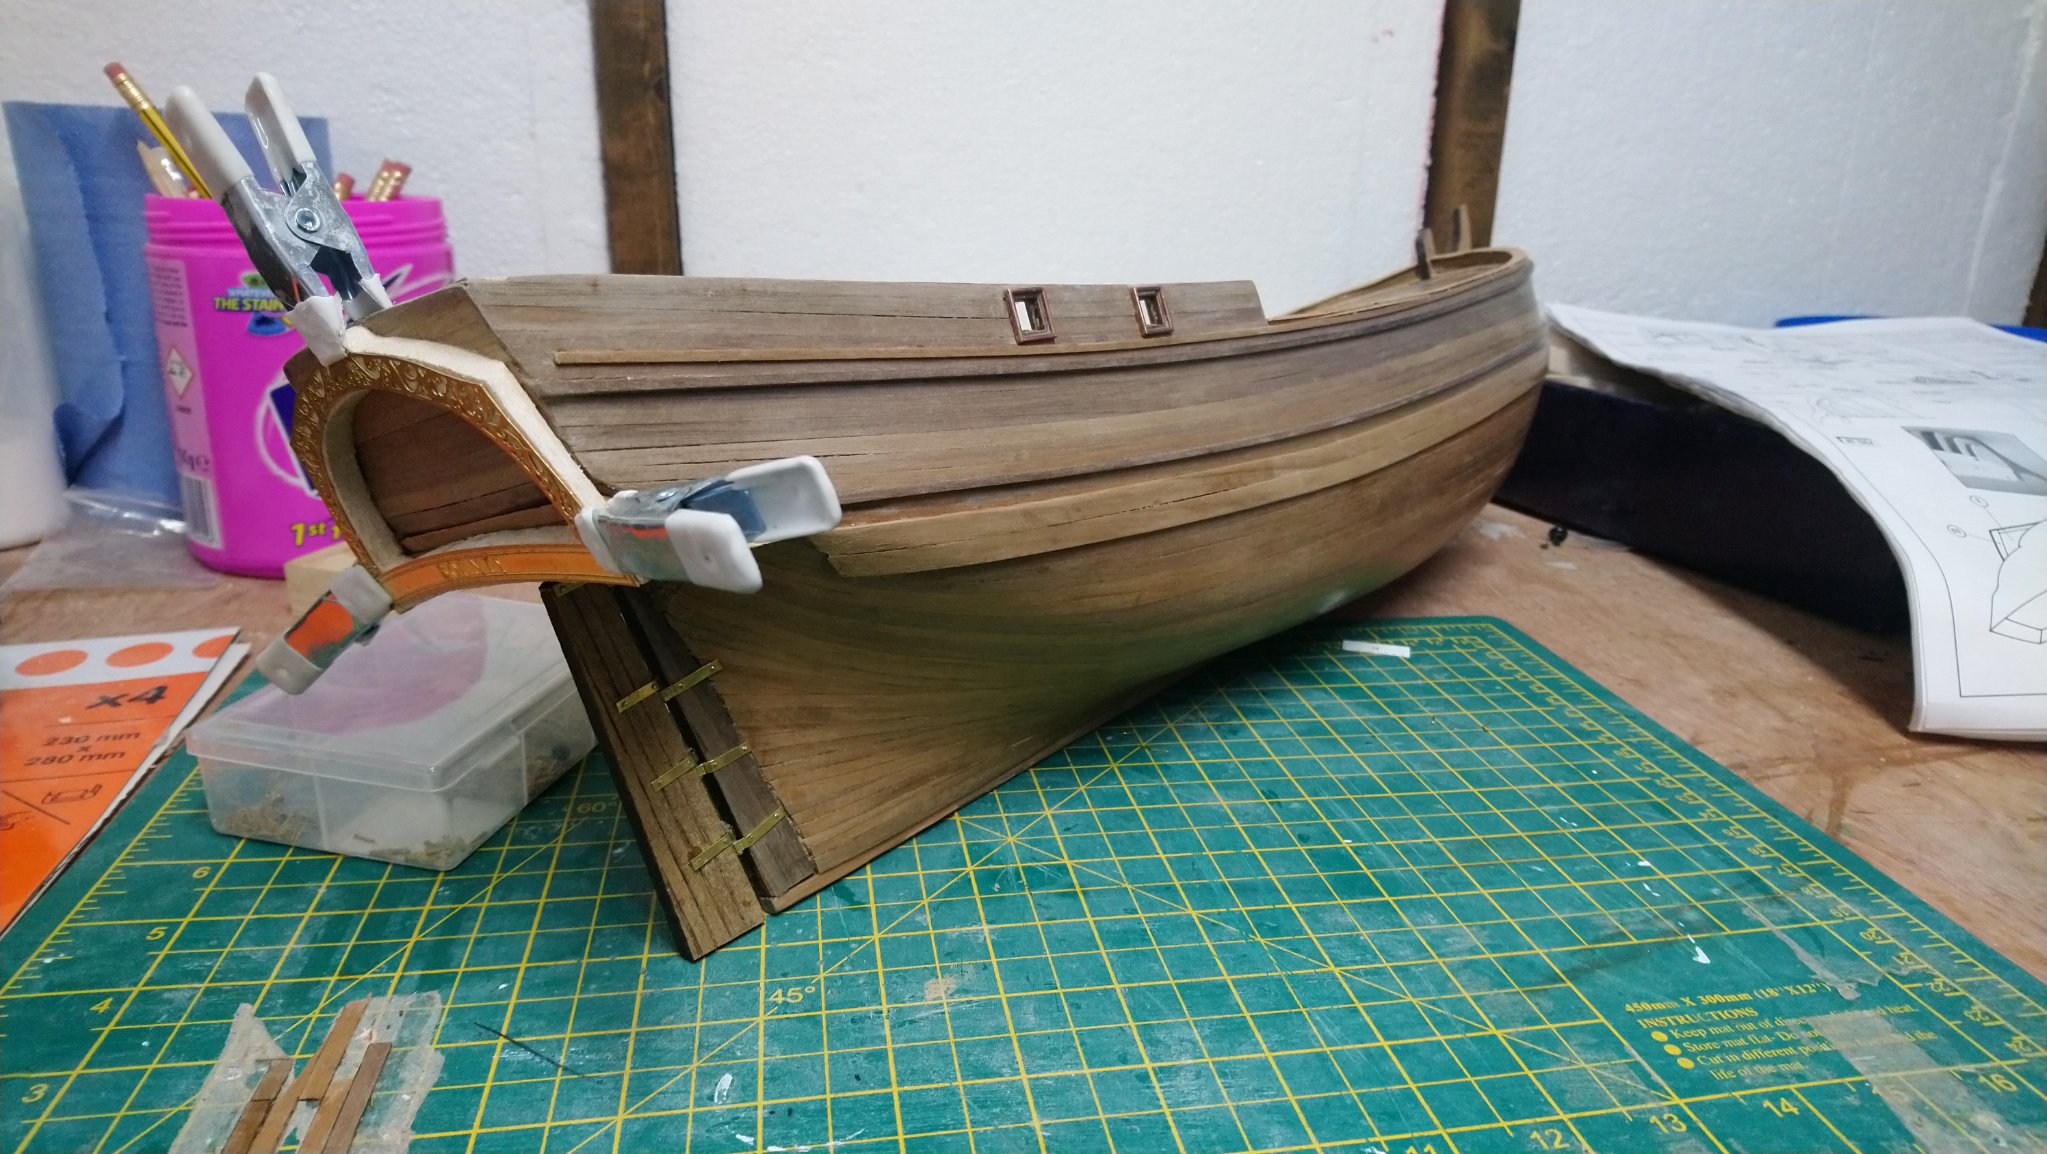
Today I finished off the pieces of wood to mount the stern castle to the hull. I then fitted the hinges to the rudder and mounted the rudder to the hull. I found this very tricky indeed. The brass plates did not fit and had to be widened so as to fit the rudder and rudder post. I managed to do it but ended up gluing the pins to the bushes so as to hold it all together whilst pining the hinges. This therefore means that the rudder will be in a fixed position but found this the easiest way forward.It has taking me nearly all say to fit the rudder but got there in the end. Yesterday I completed the internal planking to the Bulwarks and fitted the upright stantions to internal Bulwarks


-
Jerry looks to me that you build yours up with something as well. Looking at the windows can you see if they are sat back from the suround and the name, if so then you have done the same. I wonder if this is a common theme with this type of kit or type of ship. Anyway I have just managed to glue it all into place so no going back now. I have also been looking at the rudder bearings and they don,t seem to be a very good fit and will probably need some adjustment. I am now finished for the day.Best regards Dave
-
Thank you Jerry hope you are feeling better and for your kind words. I still believe that I need to a give everything another rub down with very fine sand paper just to smooth the tiny hairs which I understand is what happens after using sand & sealer. Then one i am ready to paint give every thing another coat of sand and sealer. I also understand you can use varnish on top of it if you feel it is necessary. I am currently sorting out the balsa wood required for the stern castle which is looking a bit odd. However I am just going off the Amati video which is what the guy makes on his model. I have to agree with him I can,t see for my life how the pieces supplied in the kit would fit. Here is a link to the video. Look at about 6.5 minutes in. Regards the slip. I have saved the money towards my next ship which I am thinking of the Endeavour by Caldercraft, however it looks very much like the Bounty so not sure whether or not to try something different like the HMS Snake or something with a lot of guns. Eventually I would like to take on the Victory, but feel I need to learn a lot more before I tackle anything so grand. Best regards Dave
-
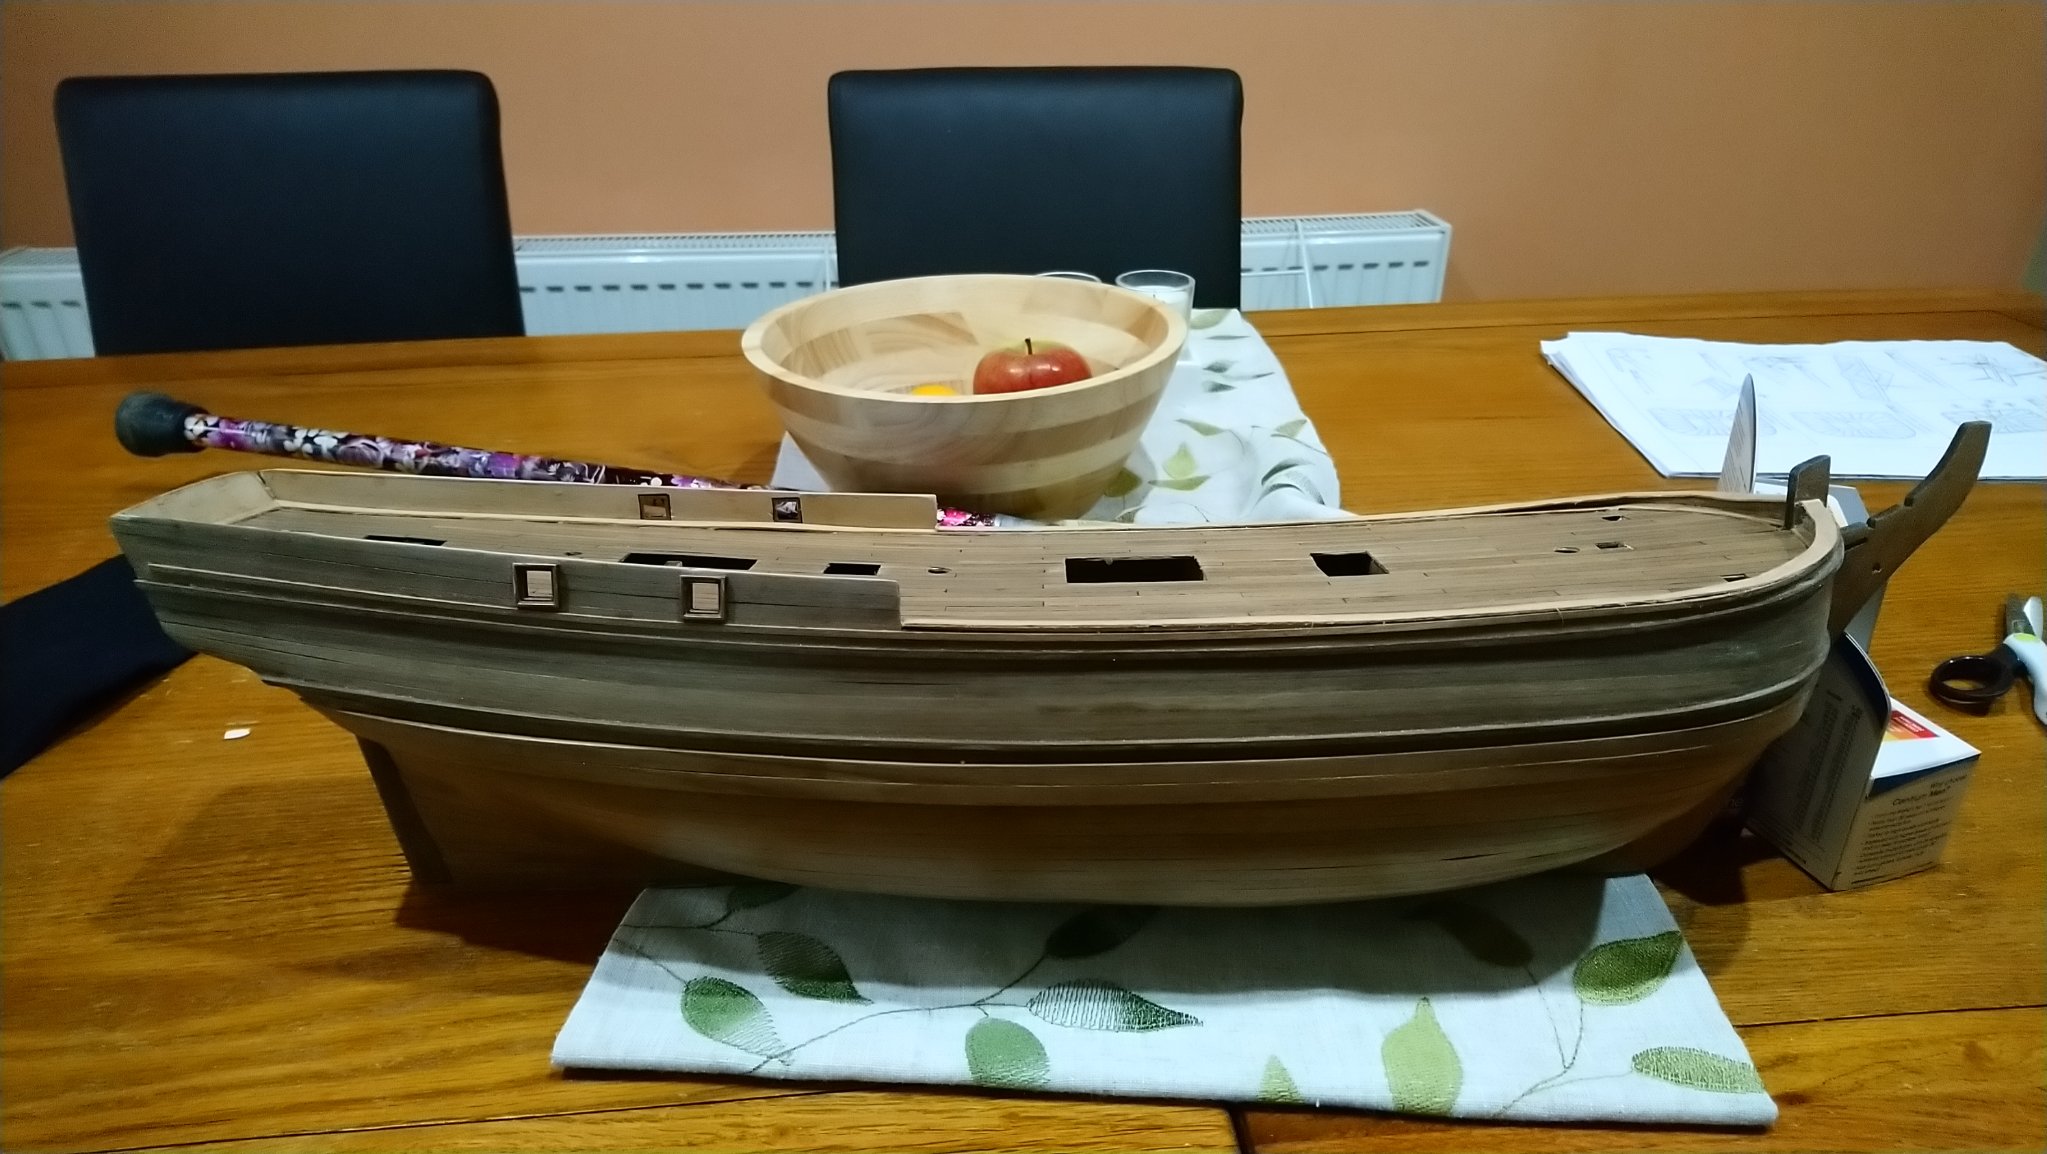
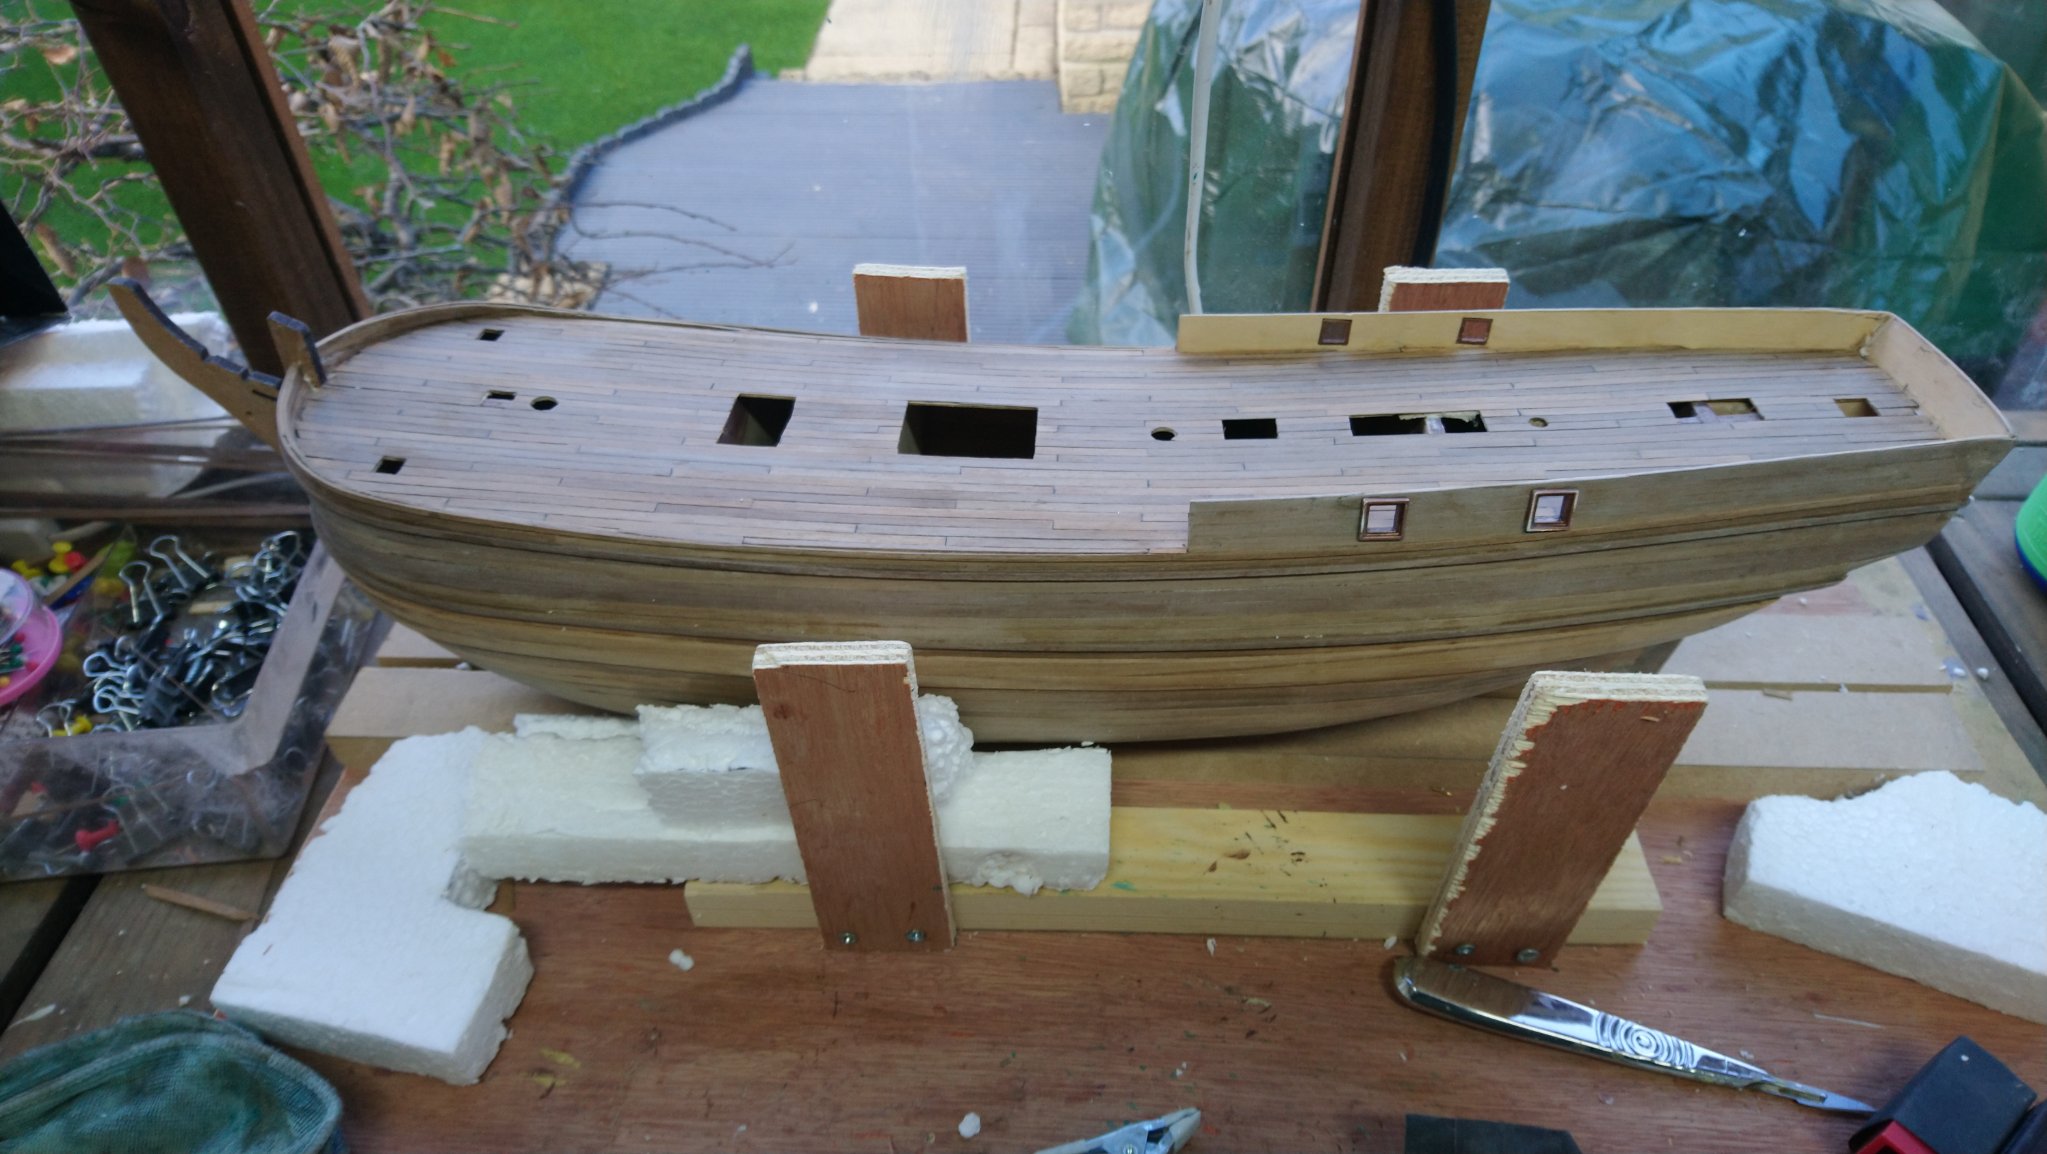
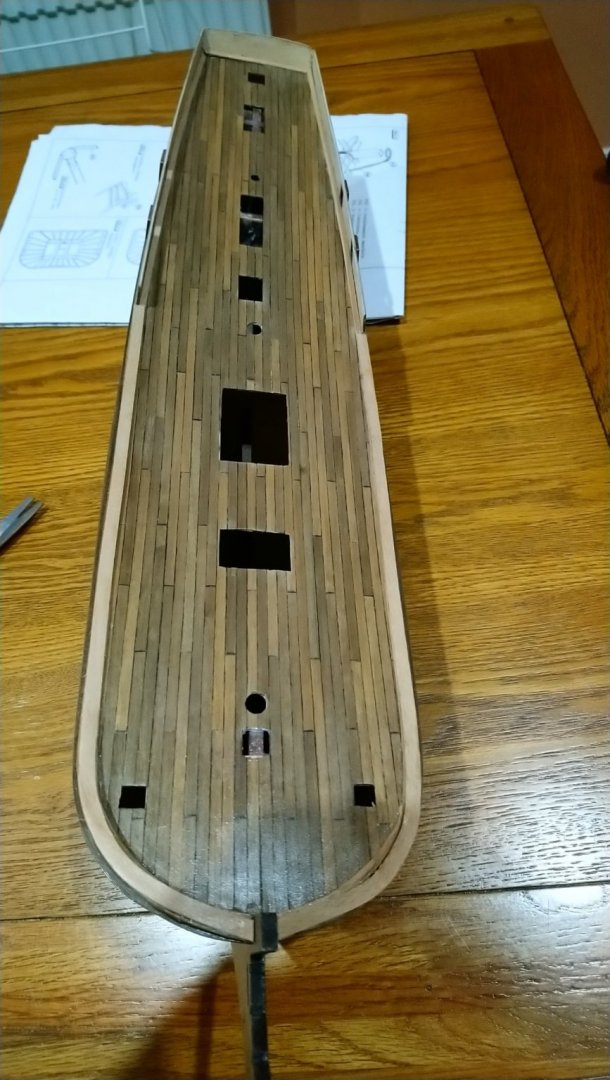
Internal stringers completed and cap rails at the bow fitted. I think the 1mm x 5 mm walnut cap rails would be impssible to fit without a combination of soaking for 24 hours, roughly shaping to the hull and finally using CA with the accelerator to help. Here is a few more photos after treating the hull and deck planking with sand & sealer which has definitely enhanced the wood grain. Next step I believe is fitting the rudder,planking the internal bulwarks and mounting the stern castle. Now it gets to the interesting part .Although so far there have been parts that have got me thinking.

-
Hello jerry. Sorry to hear you are still a little under the weather. I live in the North East of England and fairly near the border with Scotland in a town called Washington which has historical links with George Washington's great grand parents De Wesstington .There home ,Washington old hall is in our village. Hope you enjoyed your visit to our little country as much as we have enjoyed our many visits to the states. Hope you recover soon Jerry.Take care best regards Dave
-
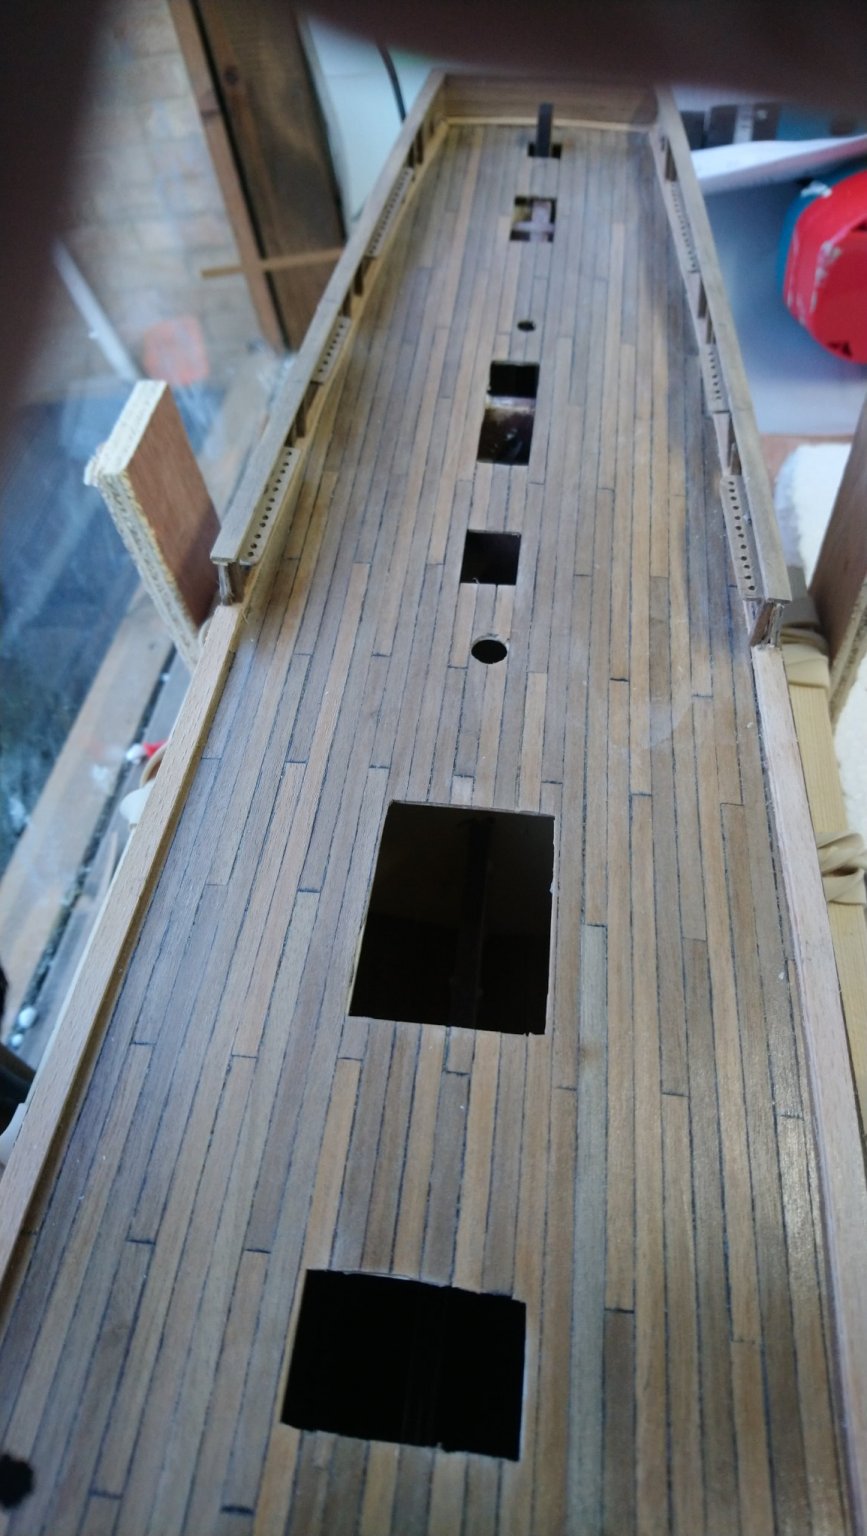
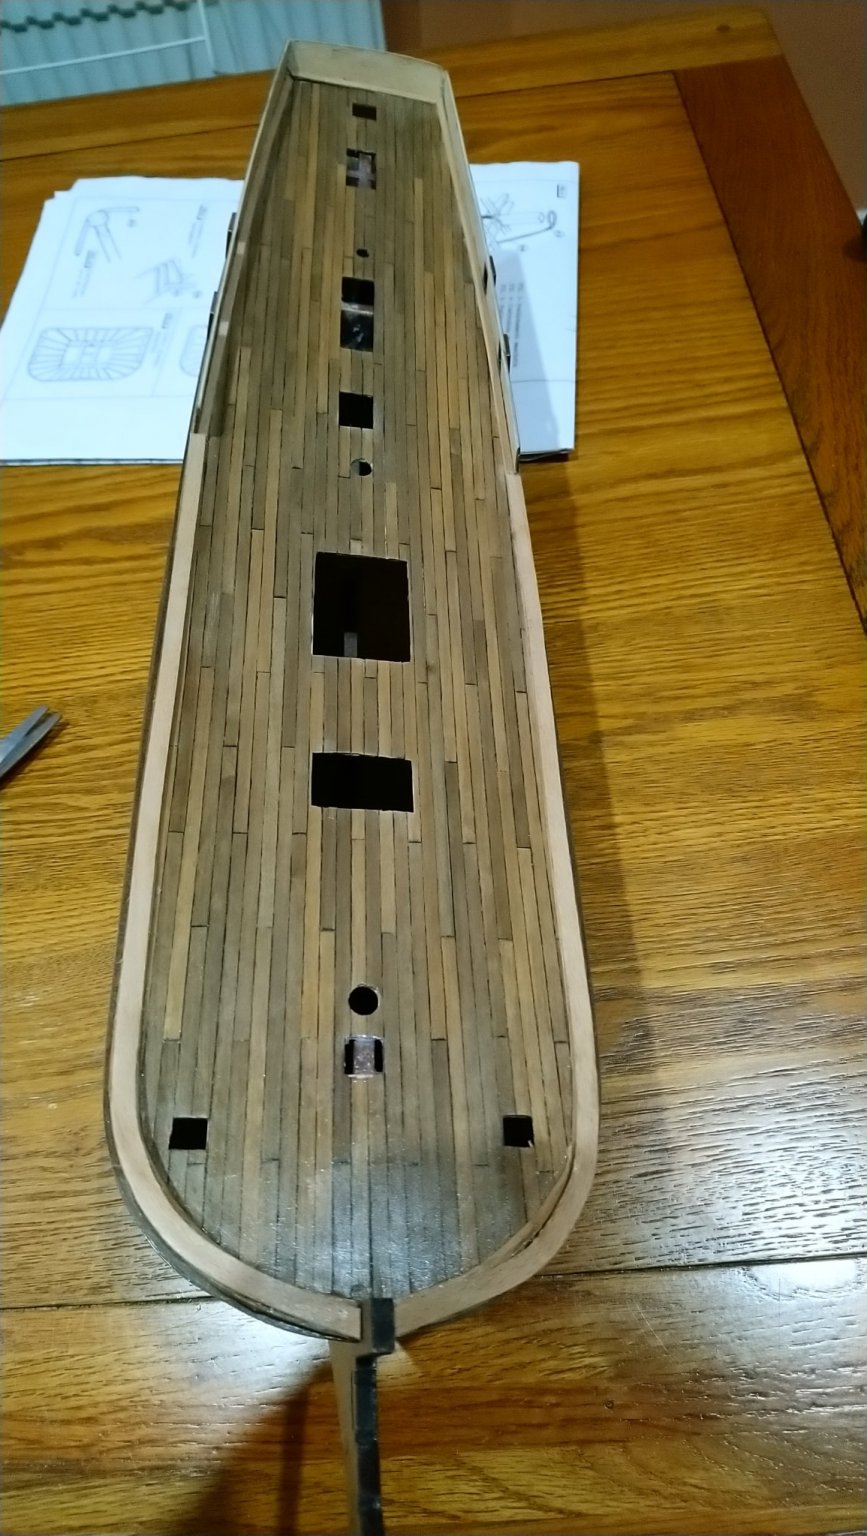
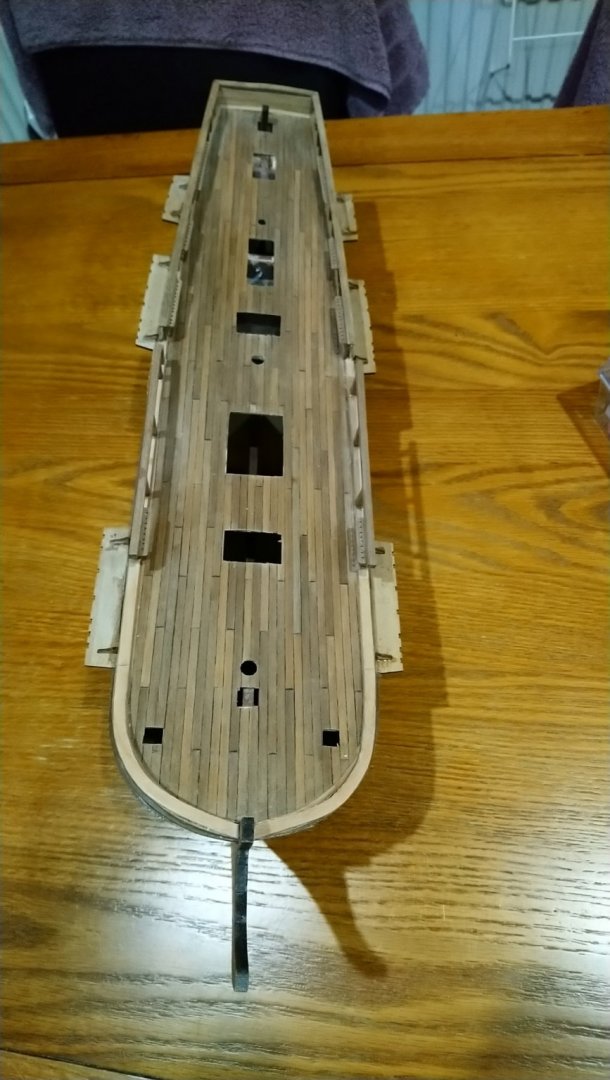
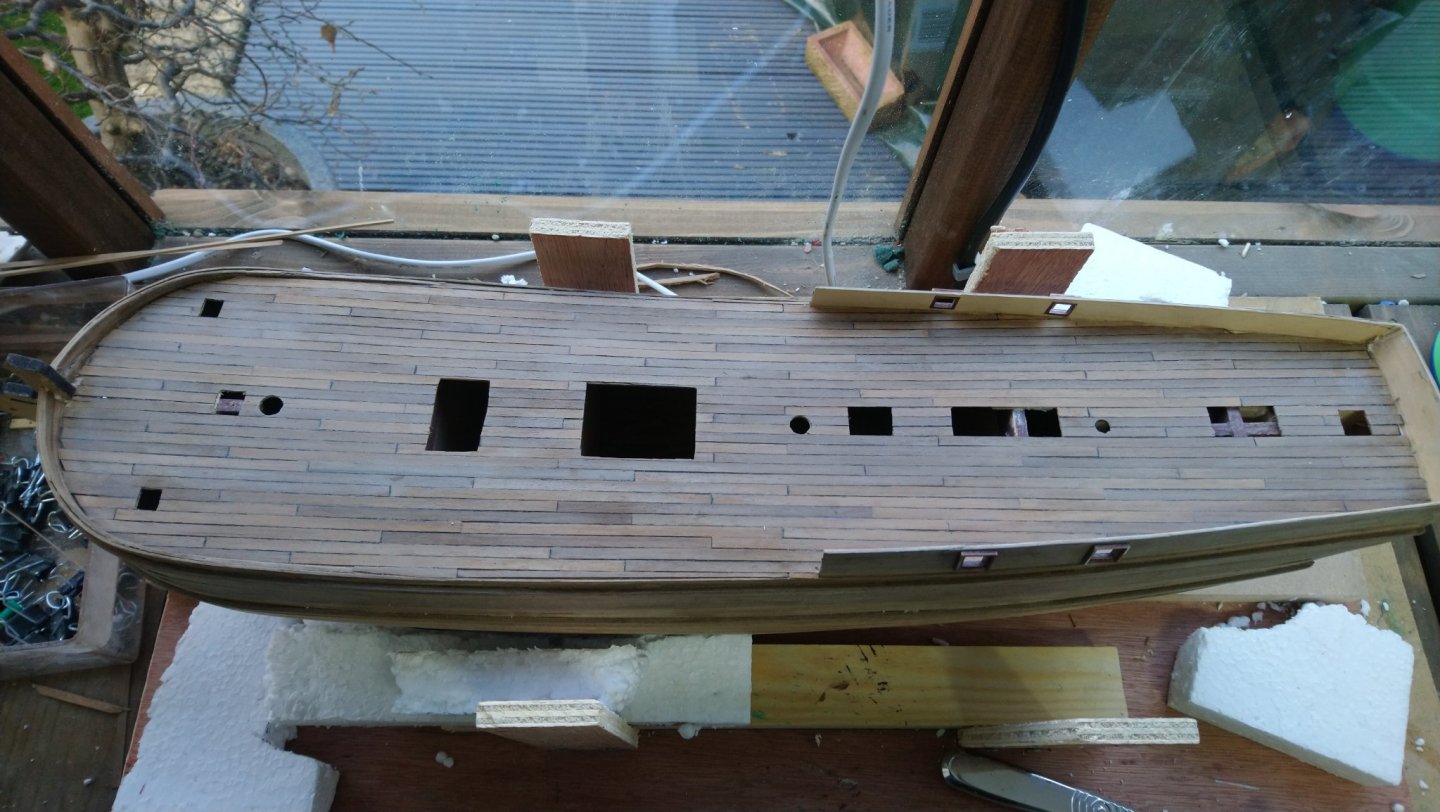
Deck planking completed and holes cut out . Not too shabby. Decided to just go with the planks supplied in the kit so quite a variation in colours. The planking still requires sanding a little bit and stringers fitted. I think I have done a reasonable job but will take a bit more care with marking the edges .Planks were a 4 plank configuration and 120mm long. Seems to me a reasonable pattern but not sure if they are of scale and maybe I should consider 100mm length. Just received the CA accelerator and what a difference. I would like to thank yo Jerry for pointing me in the right direction.. I have managed to fit the 3 x 1mm internal stringer although still difficult due to bending edgeways It was a lot easier than without the accelerator.I have left the capping rail 1 x 5 mm until tomorrow and allow the thicker walnut strips to soak over night.

-
Cheers jerry I am still waiting for my accelerator but shouldn't have too long to wait.I can always get on with something else while I am waiting. The instructions say the rudder next job after the internal stringer or I could give the hull a coat of sand N Seal.Hope you are feeling better.
-
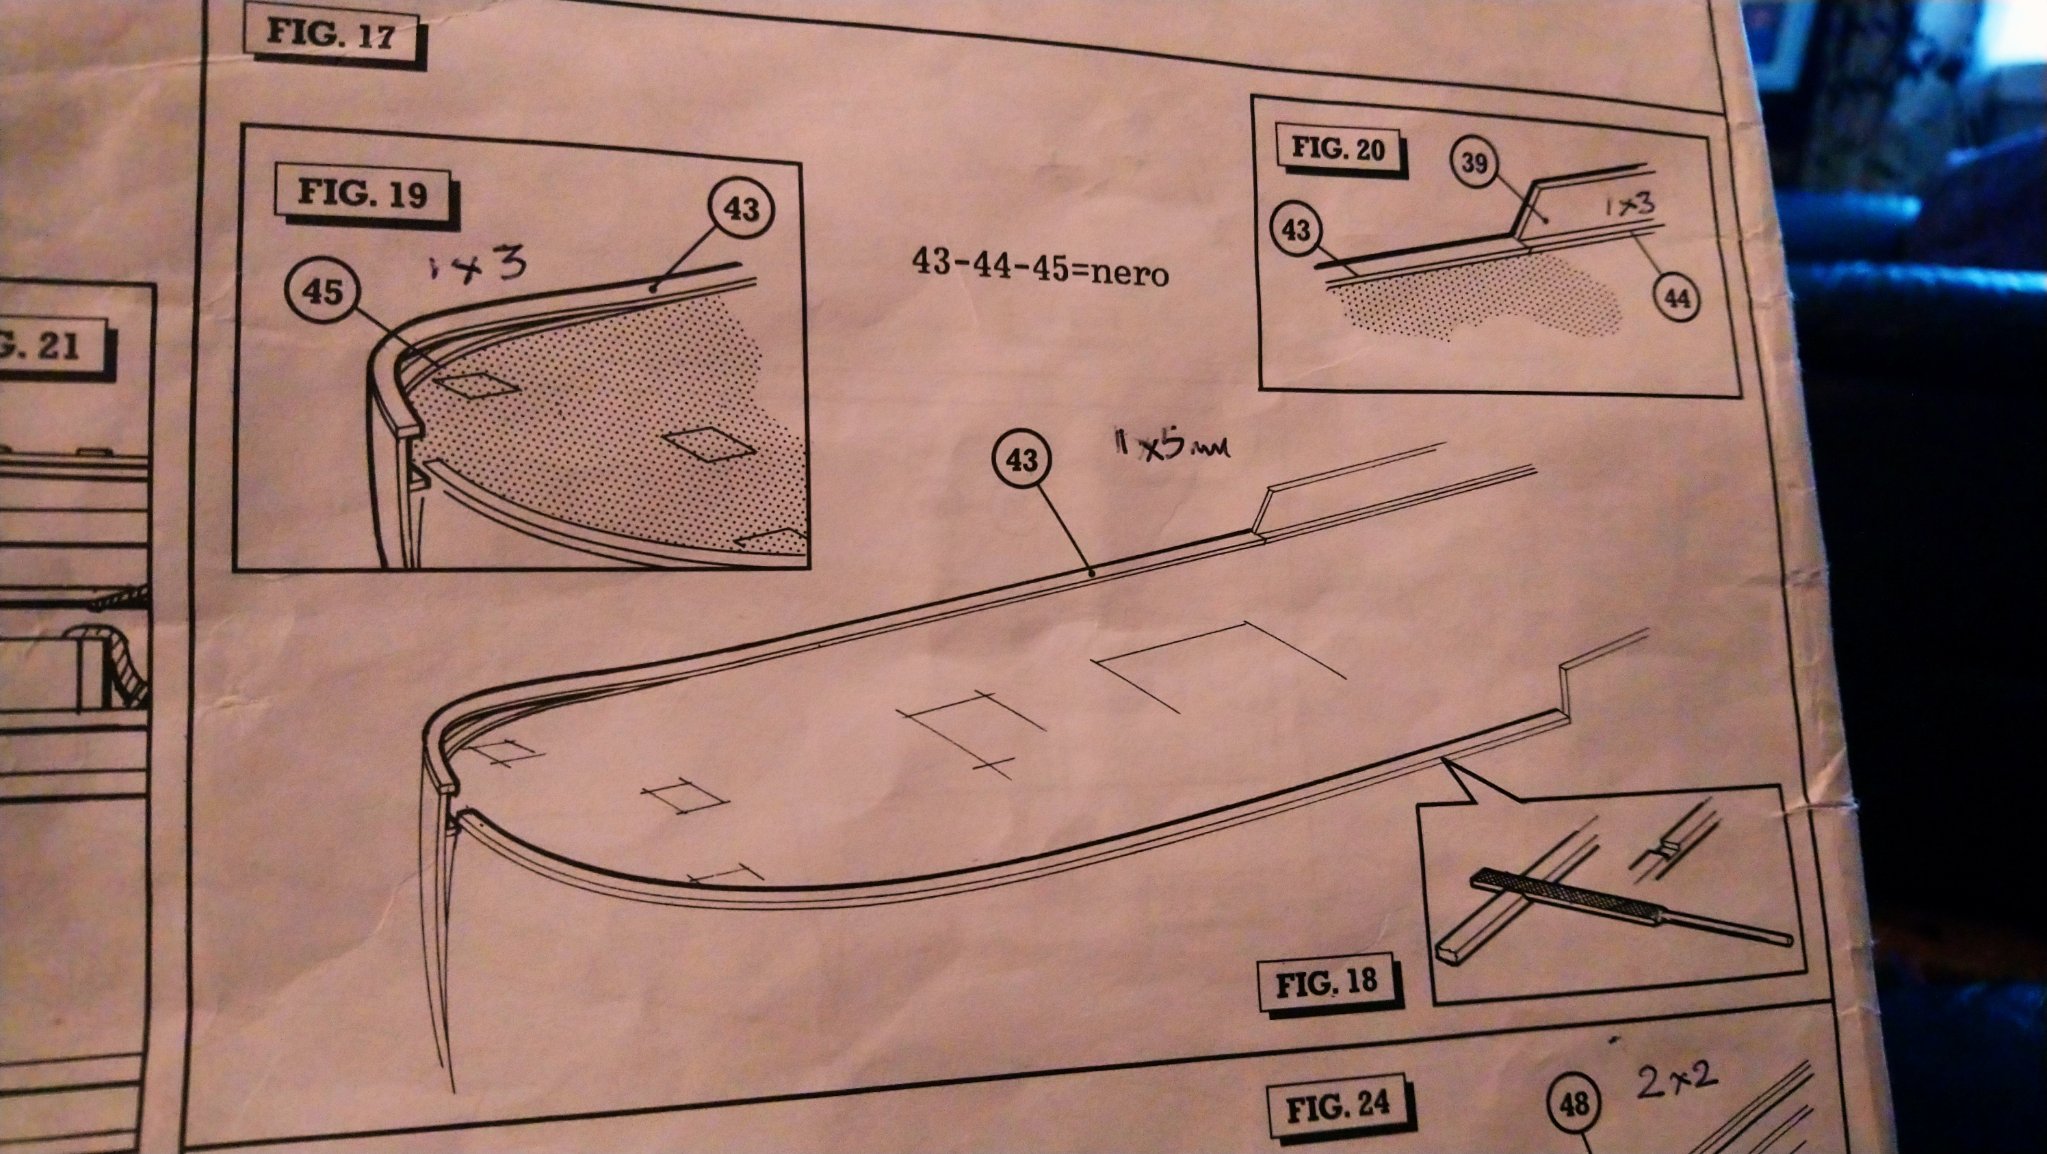
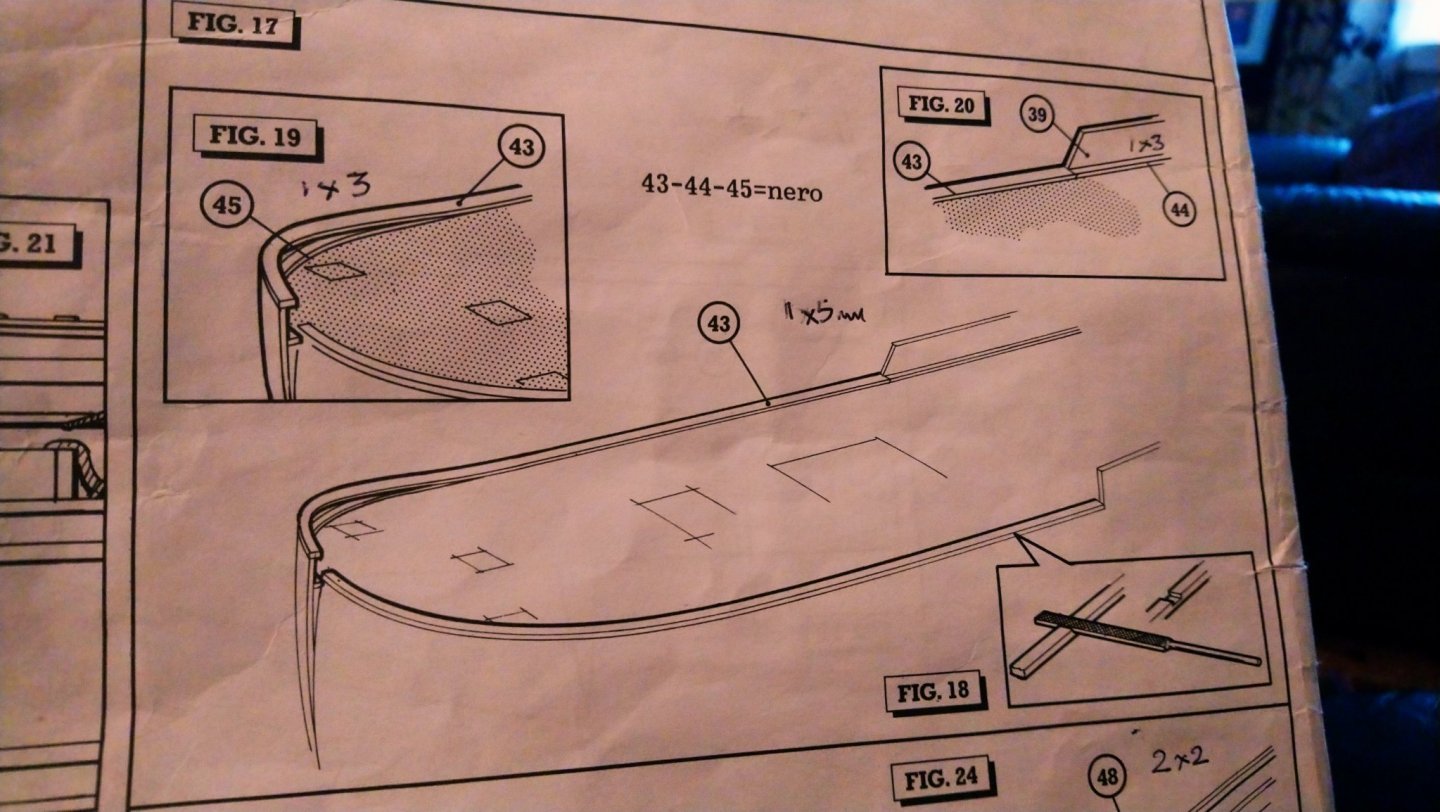
Jerry thanks for your comments regarding the varnish and will now use a water based varnish on the deck planks which I have some from my last model. I am sorry to hear you are feeling unwell and hope it is nothing serious . I also hope you recover quickly. Please do not worry regarding replies as I am already thankful for you help. I almost at the stage of planking the deck after making all deck strips in one go. Perhaps I would have made a better job doing one at a time and will discard any that are not up to scratch. I just need to mark the deck for the planking. Jerry here is a photo of the internal stringer and capping rail from the instructions. As this is the next thing do do I wonder if you managed to part no 43,44 and 45 just by soaking the planks. no 44 looks to be straight forward, hoever parts 43 & 45 look to be very difficult considering they are bent edgeways and are 1 x 3mm and 1 x 5mm or did you make some kind of jig to help you get the curve. Best regards Dave.
-
Jerry thanks for your comments regarding the varnish and will now use a water based varnish on the deck planks which I have some from my last model. I am sorry to hear you are feeling unwell and hope it is nothing serious . I also hope you recover quickly. Please do not worry regarding replies as I am already thankful for you help. I almost at the stage of planking the deck after making all deck strips in one go. Perhaps I would have made a better job doing one at a time and will discard any that are not up to scratch. I just need to mark the deck for the planking. Best regards Dave
-
Jerry .Thanks for the tips which I am really grateful. Regarding the deck planks , are you doing one at a time or a bunch of them clipped together? I will have another practice and try your method with the marker pen. I have decided to concentrate on the decking and not sand & seal the hull yet as I now understand ( after googling lots) that glue does not take too well to sand & sealer unless sanded down to the wood again. So I thought I would do most of the gluing first including the channels and bulwark caps etc. I might have to hold back on sealing the deck as there looks to be lots of things to be glued to the deck.So waiting to do the sand & sealer until almost ready to paint. No doubt I will change my mind at some point and do it differently. Ha ha I am not sure following the instructions is necessarily the best way forward. Jerry may I ask, what glue did you use to glue things to the deck especially the metal items? On my last ship I tried using an epoxy glue but ended up using CA glue. For anything made of wood I used PVA.
-
I have some acetone so will be ready next time. Thanks for another tip. I am learning all the time. Best regards Dave