Procyon74
-
Posts
12 -
Joined
-
Last visited
Content Type
Profiles
Forums
Gallery
Events
Everything posted by Procyon74
-
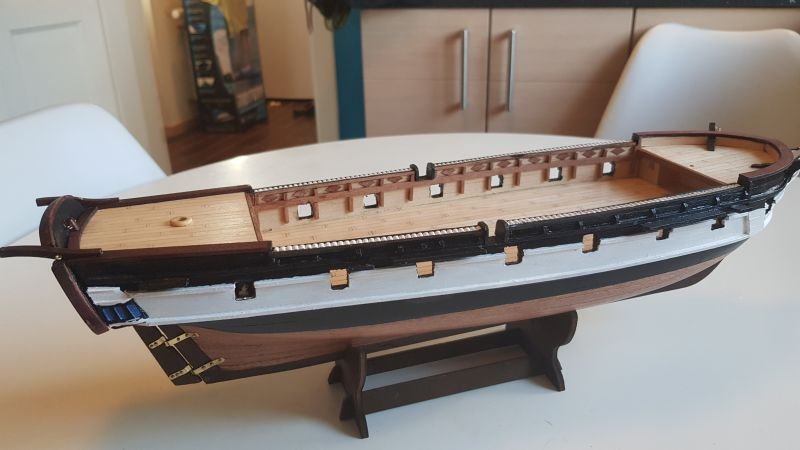
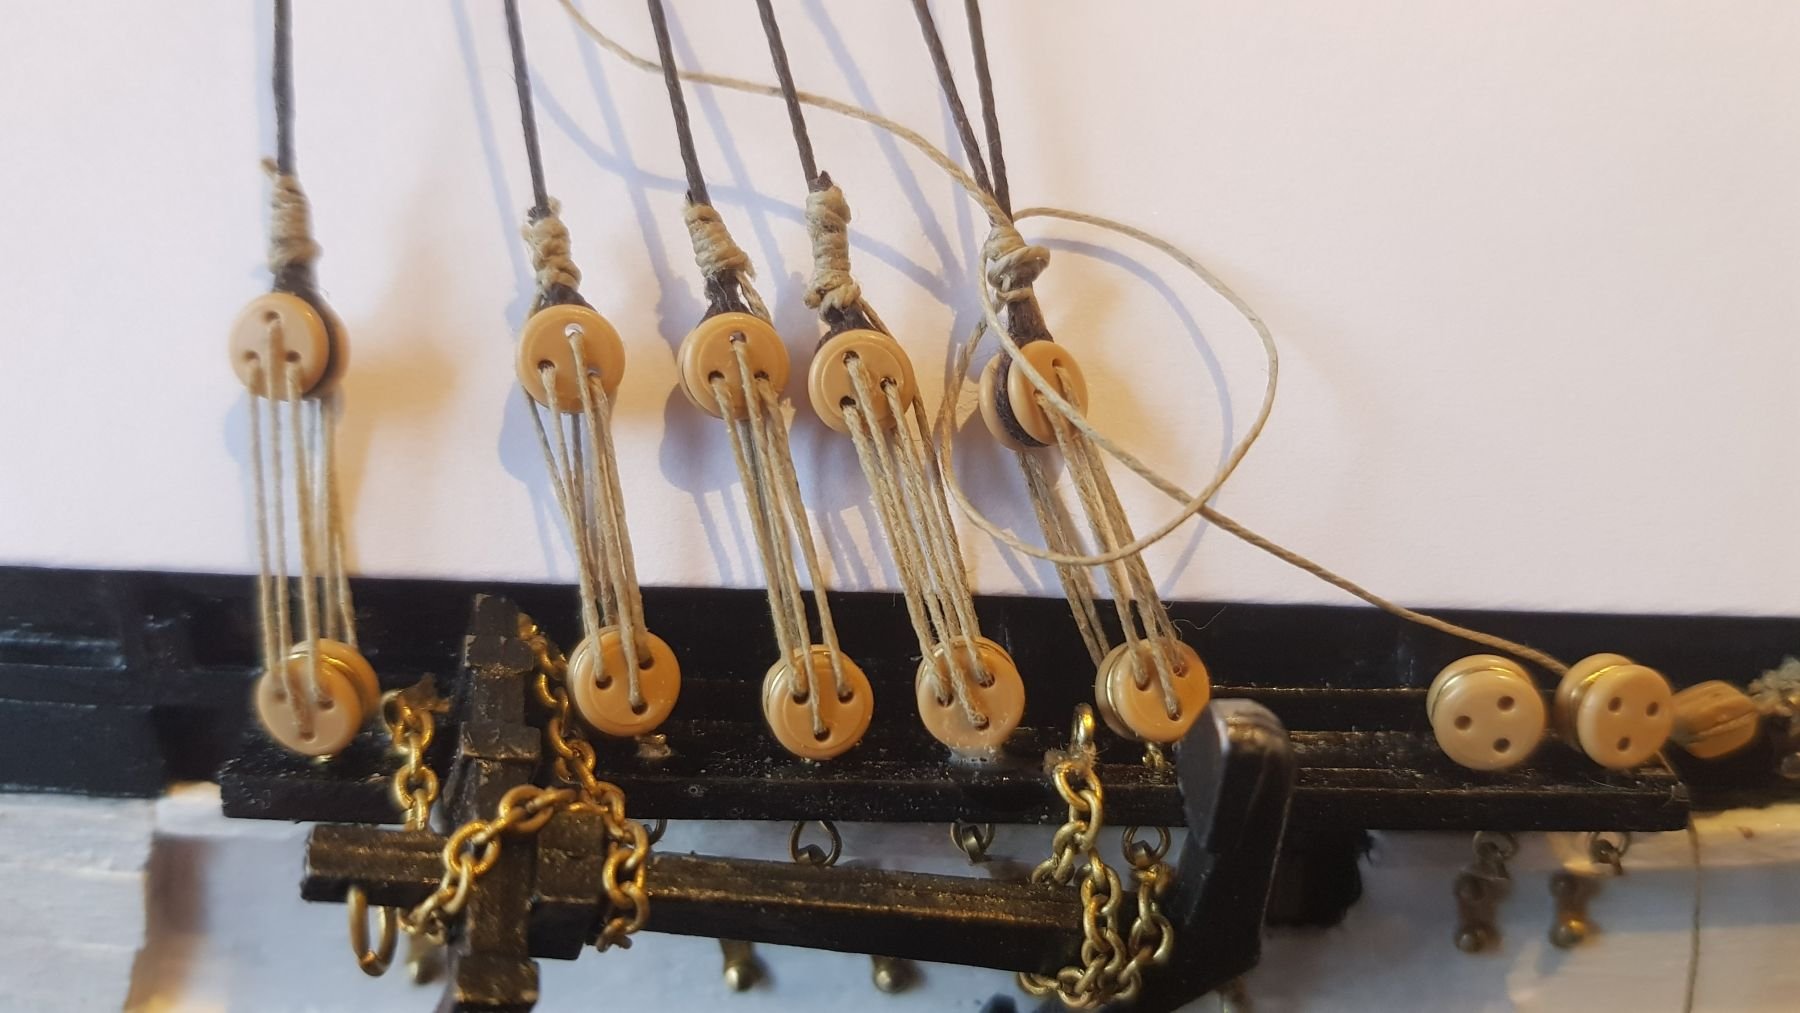
Hi. I'm just wondering. I think they have changed some of the content in the box. The kit that I have bought summer 2020 has plastic blocks, deadeyes and belaying pins. They certainly wasn't wood. Se for example this picture from my build: Kind regards Lars

-
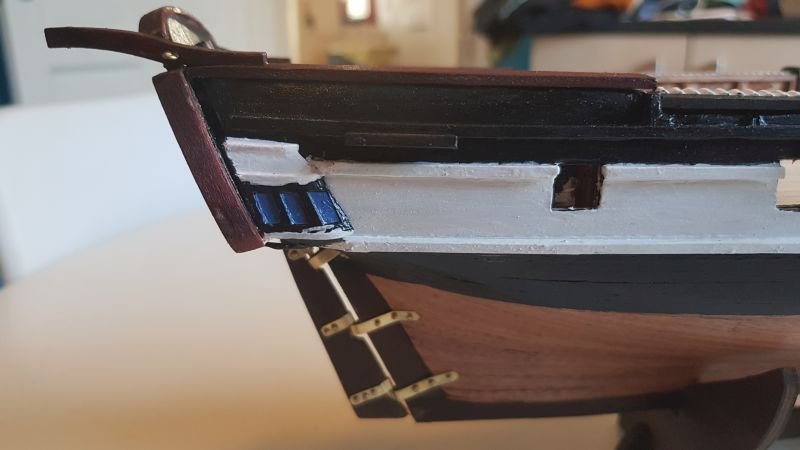
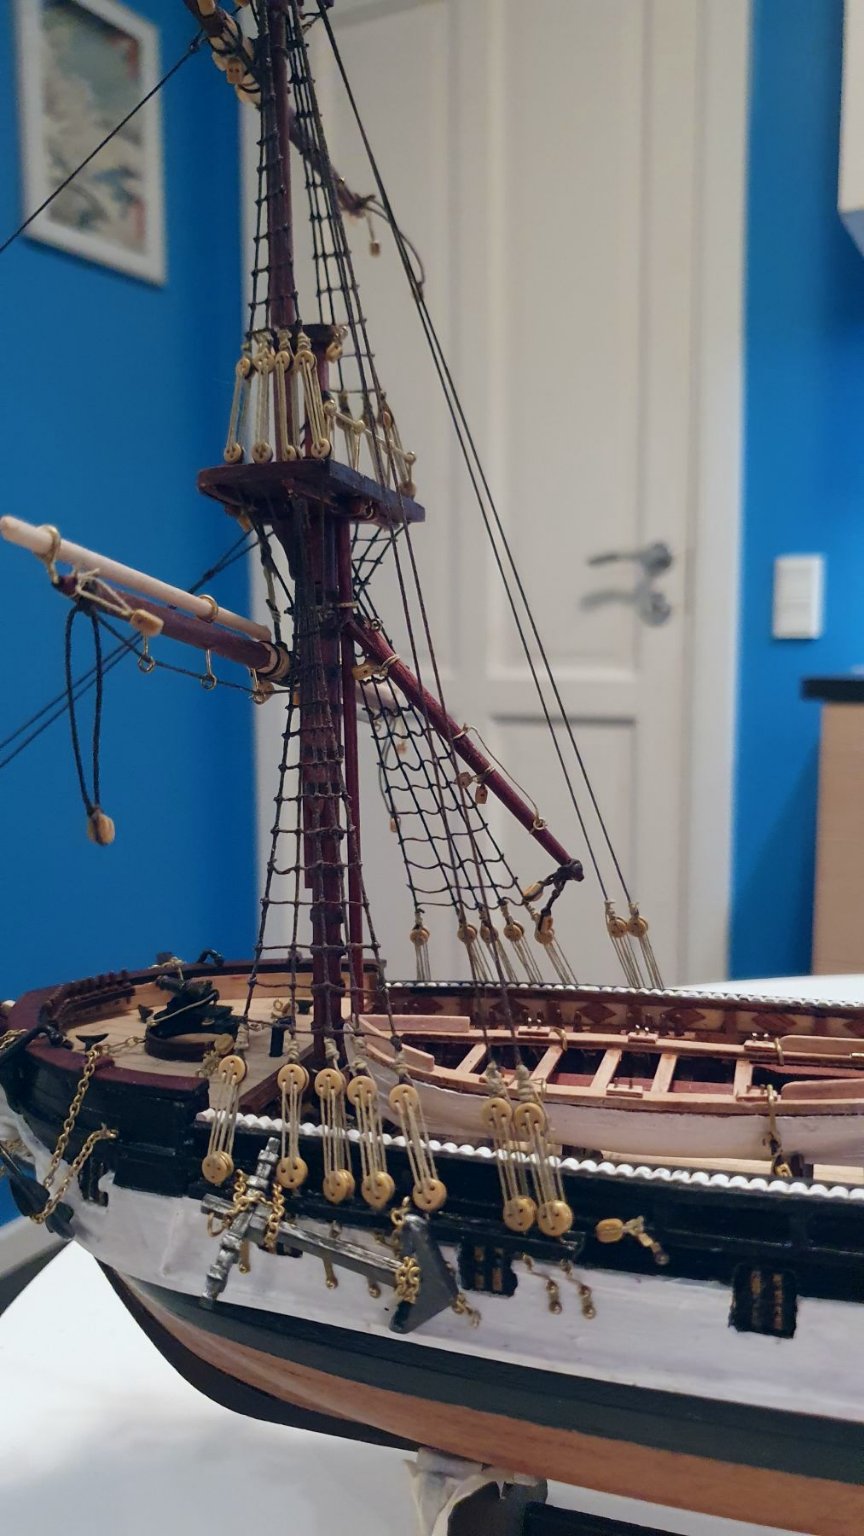
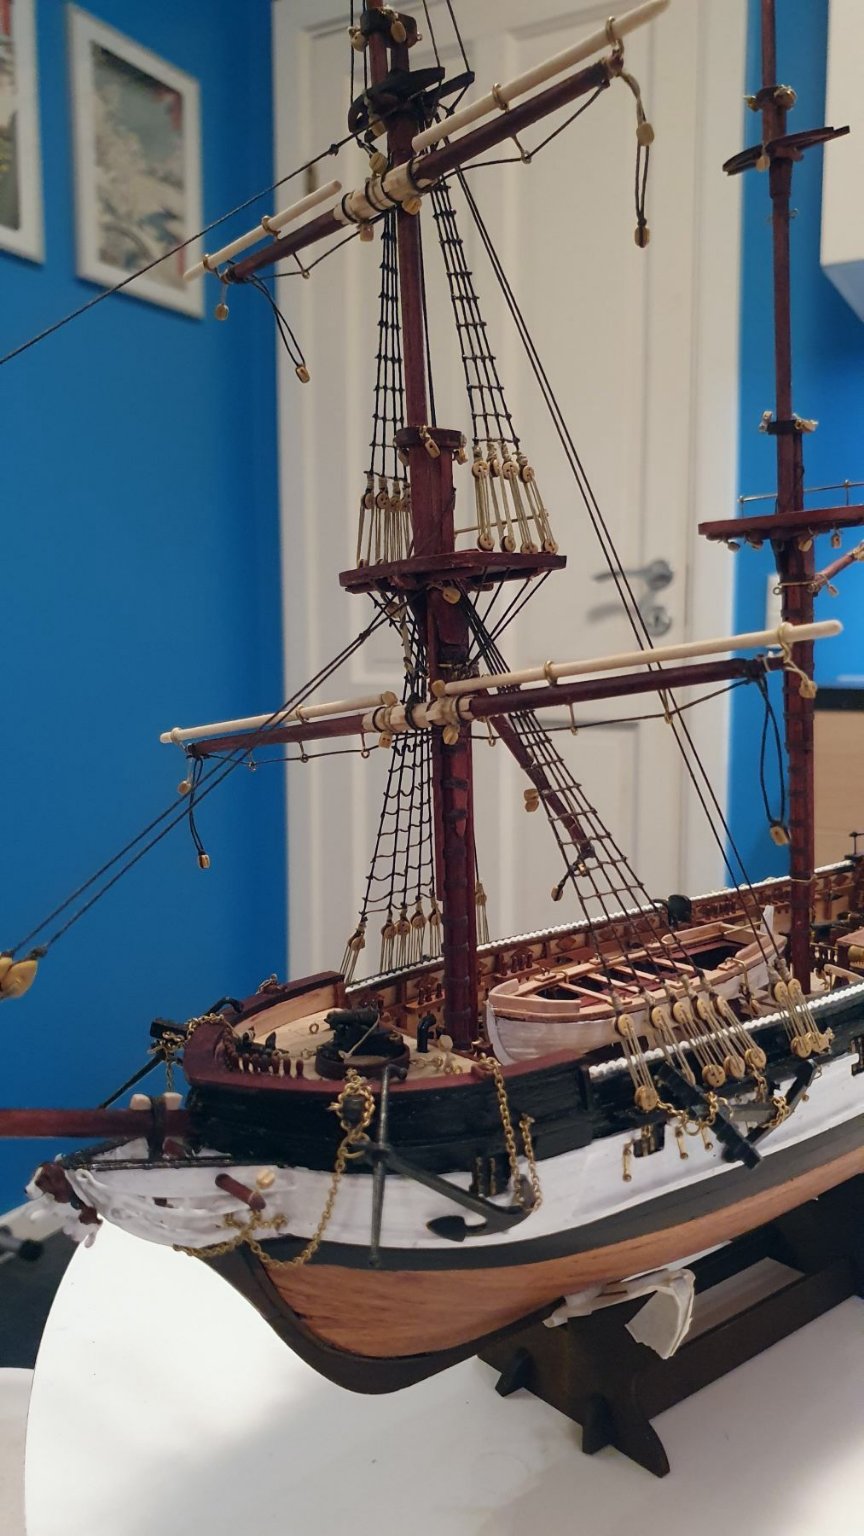
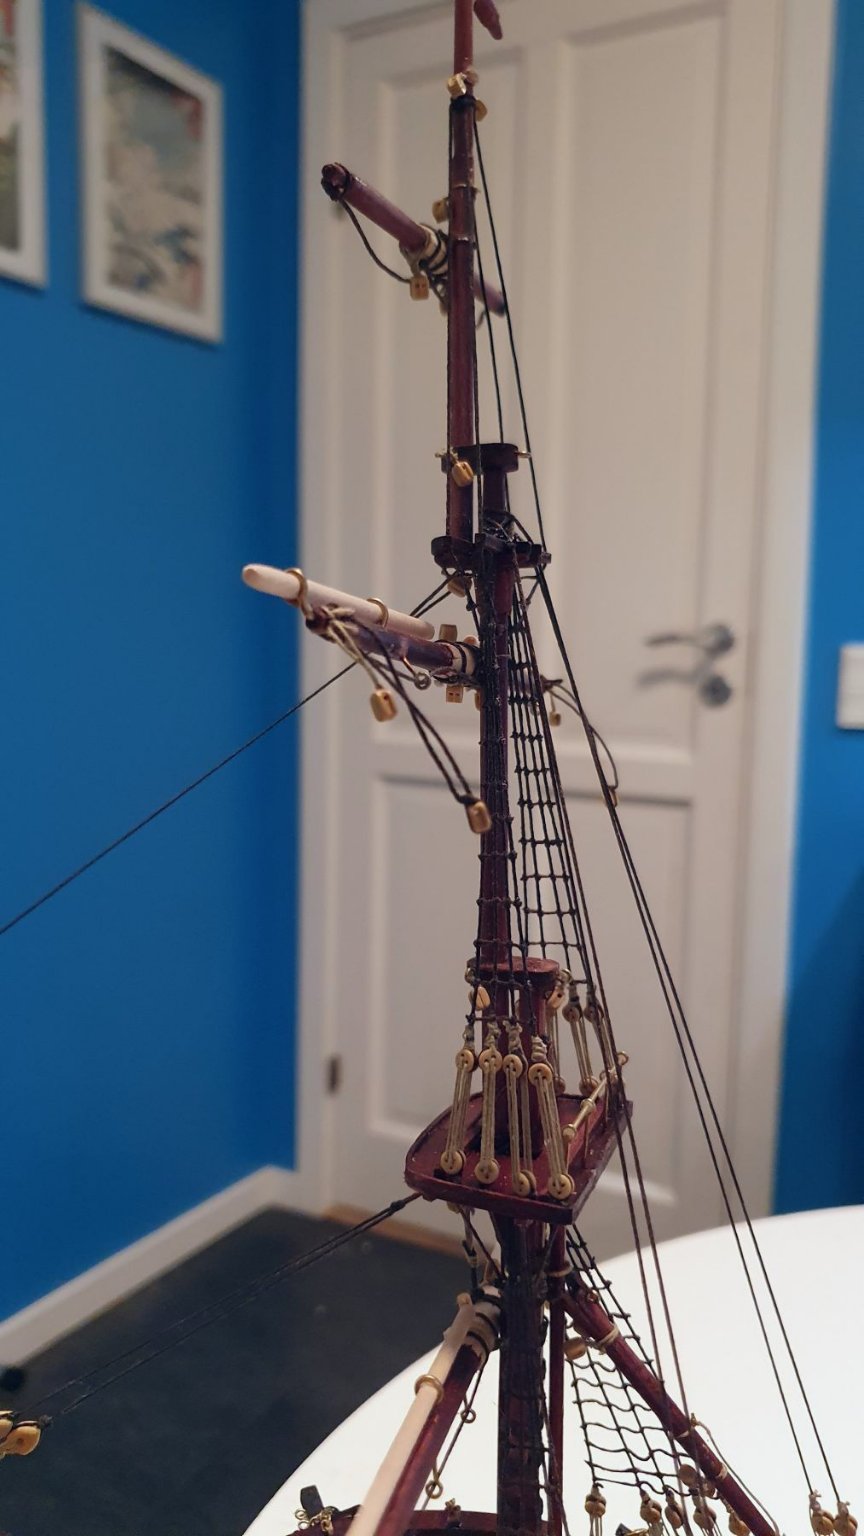
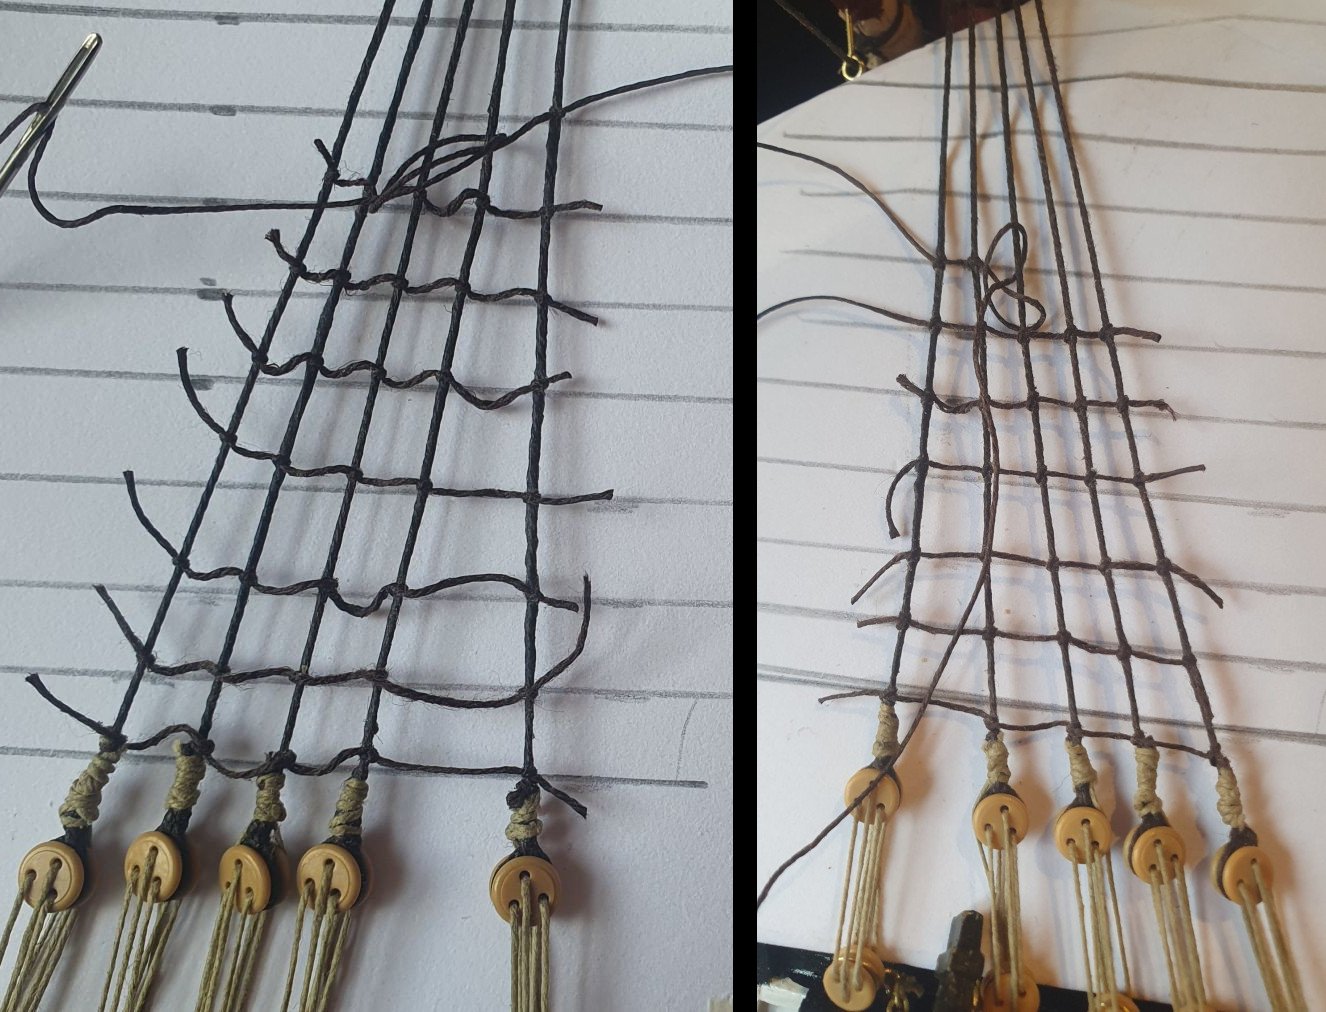
Hi again. Thanks Cathead and Bill for the nice comments and feedback. And thanks for all the thumbs ups from everyone. Cathead: What awesome photos. I saw elsewhere some photos from the museum in Chile that you have visited. But your photos are perfect! Especially on board the ship, the entrance canopy really made my day. I could wrap my head around the smallness of it on the model, and of course your photo just clears everything up. It is a rather small ship to circumnavigate the globe with I'm thinking. What brave souls they were. Thanks Bill. Indeed I have touched up the galleries as you mentioned. At the time of the photo I was still a bit annoyed that I hadn't realized that the attached white planks should have been set to be more aligned with the galleries. (As Cathead's photos clearly show!). I am very glad that you find the hull and deck good. I completely messed up the first layer of the hull planking, but luckily the second layer covers that 🙂 So I have started on the rigging. I've never done anything like this before. My first ship was the Polaris from OcCre, and that only has a few stays(?) to hold the mast. Nothing like the proper rigging on two full rigged masts. So starting with the shrouds I seem to find a good way around this. Both the tutorials on this forum, many posts around and the good book by Mastini (Ship Modelling Simplified) have been awesome sources for info. So here is a closeup of attaching the shrouds with the deadeyes. When I saw this photo I decided there and then, that my next ship, whatever that will be, I will absolutely have to replace the kit plastic items with wood items. I hadn't really noticed before, but the zoom on my phone just reveals the plasticness! Well, when I tied the line I also decided on wrapping the lighter thread (seizing?) which I found more pleasing than just cutting it off per the instructions. Later I have noticed that some people emphasize three separate seizings up the shroud. Well on to the ratlines. I tried first on the starboard shrouds. Tied the same as the video instructions from OcCre where they used a normal overhand (is this the right term?) knot. I really struggled with this. I came out pretty bad I think. I could simply not tighten the ratlines properly so they are all hanging too much. Then I tried with a clove hitch - and that I should have done from the start. Here are the two side by side. Now I am debating whether to redo the starboards side again or leave it as a reminder for my learning! Then again! I completed the shrouds and ratlines on the foremast and have started to attach the front stays on the mast. I must say it is quite rewarding to see the ship come alive like this. Kind regards Lars


-
Hello Cathead. I think your viking ship build is an inspiration. In spite of all the difficulties you carry on, and carry on to very beautiful results. I also hope to someday build a viking ship. As a dane brought up with lots of stories and tales of Vikings it is something close to my heart. A few years ago a was strolling along the coast in Denmark, and suddenly the replica Havhingsten (Sea Stallion) of Glendalough appeared with full sail. That was an awesome sight. Apparently, the museum where the replica of Havhingsten was build has a model kit available in the shop. Som 12 hour build instruction video is also available from the supplier. https://tallshipmodelsnorway.no/ship-models-building-instructions/havhingsten-fra-glendalough/ These videos are just crazy - I don't understand how this is possible. I will be following your progress on your ship with keen interest. Kind Regards Lars
-
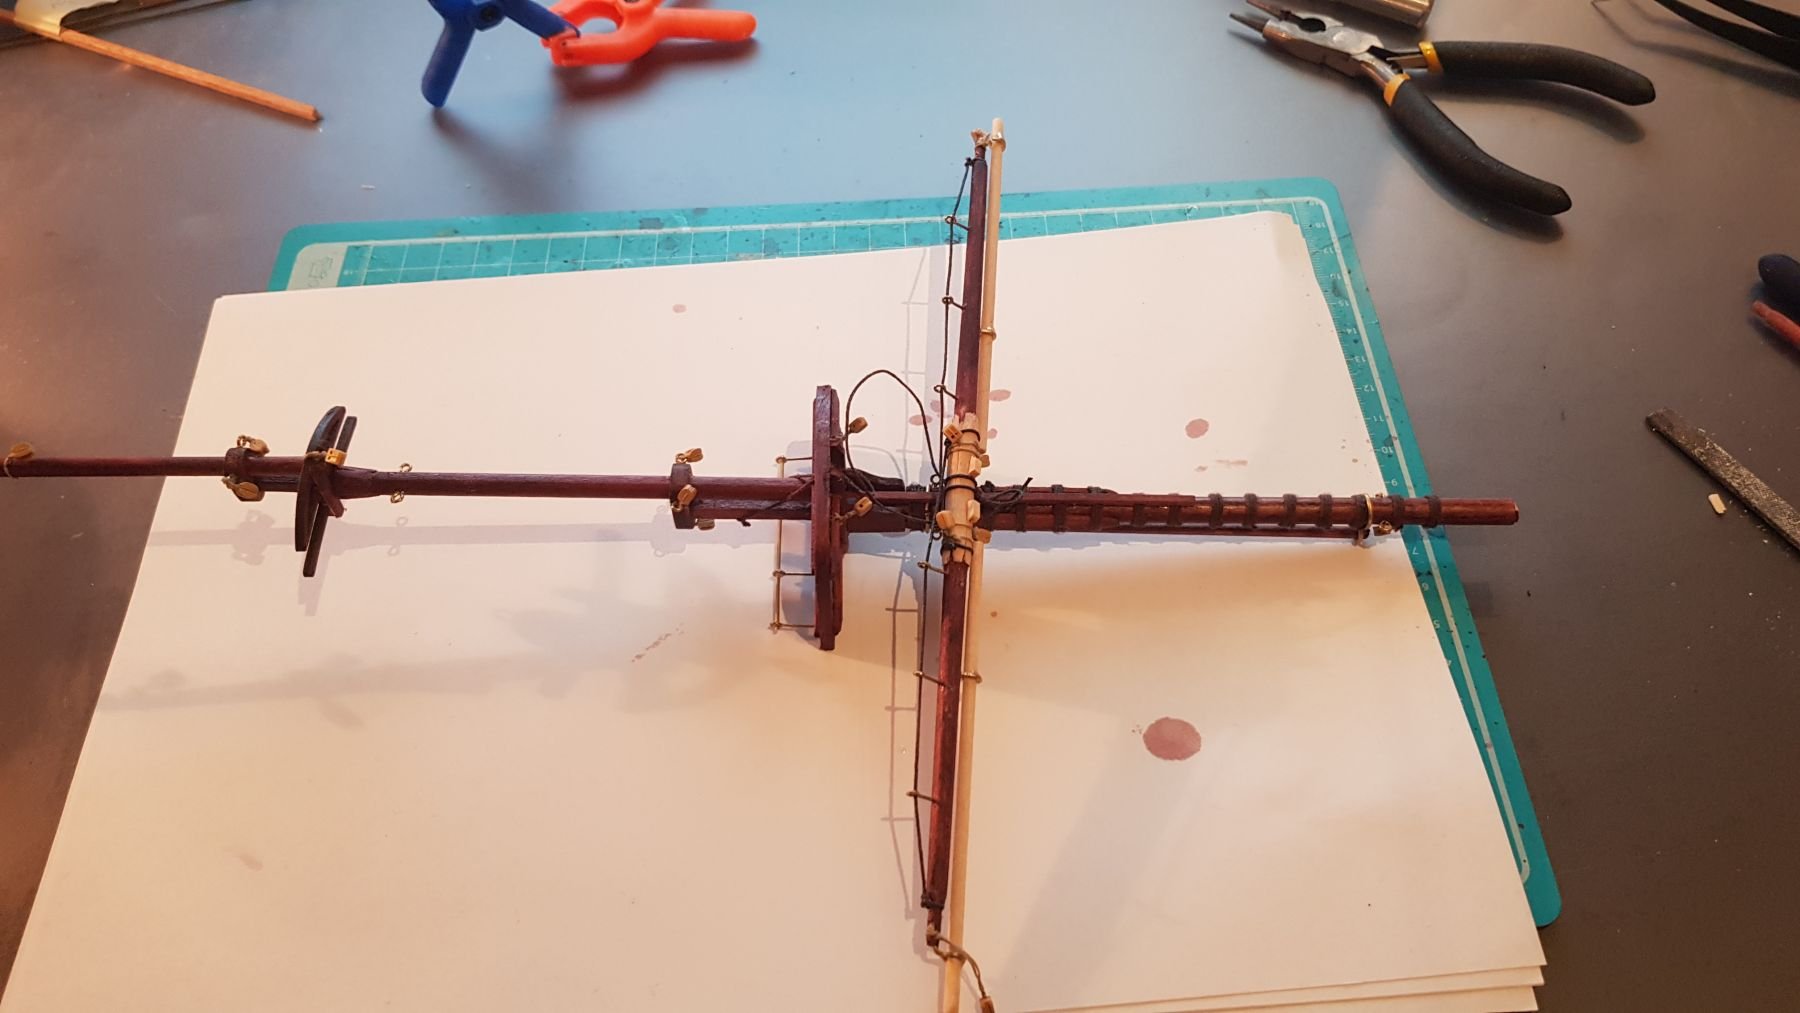
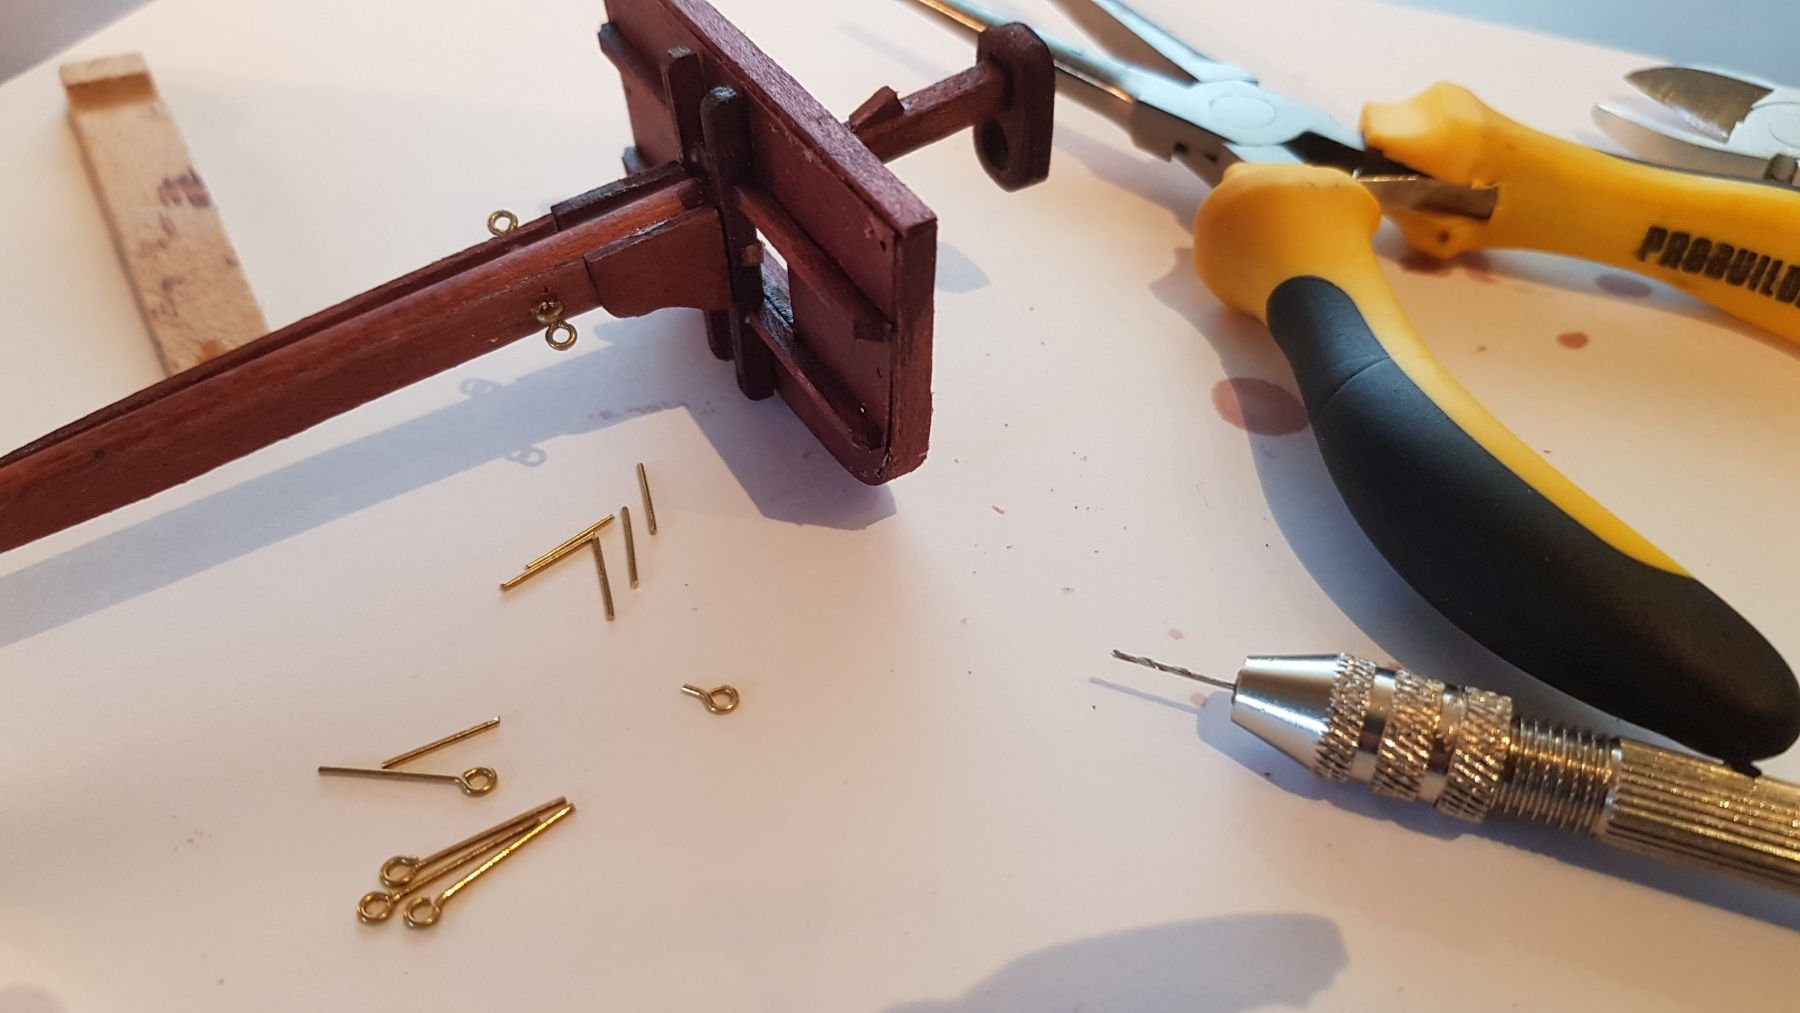
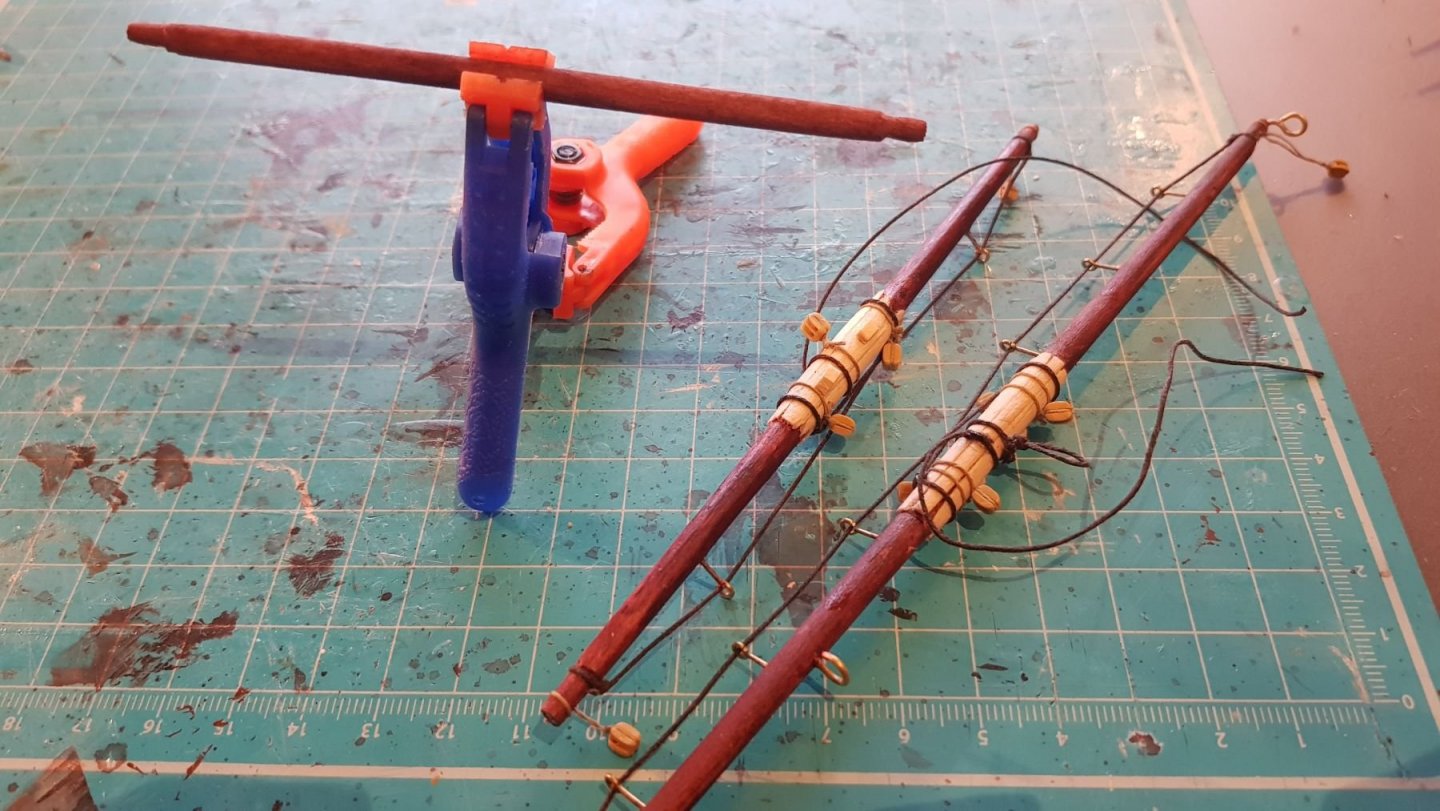
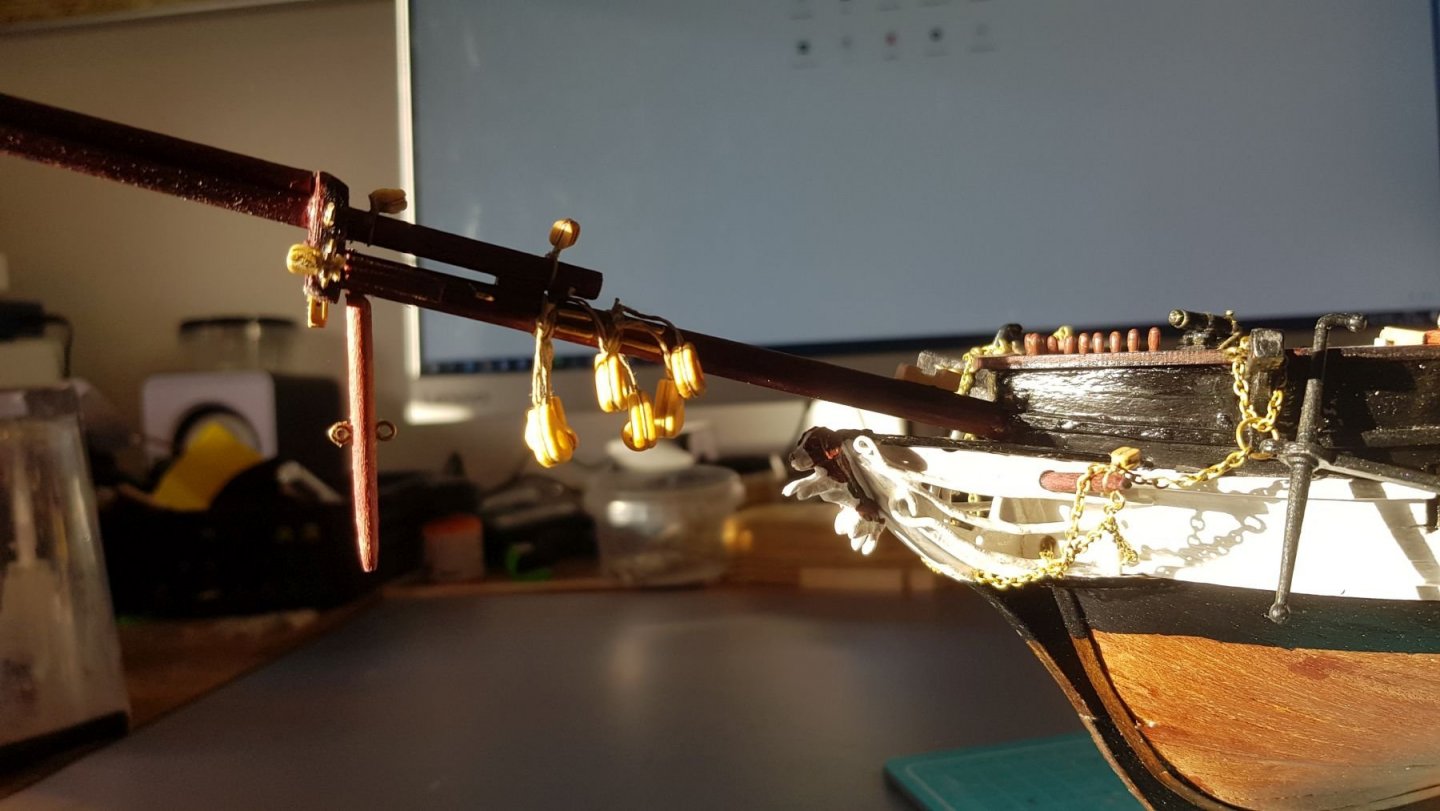
Thanks for the likes and comments. Yes it is a lot of fun. And as you all know time flies while building so don't do as much other stuff as I use to. Because of the corona situation I am forced to work from home, and my desk is also my work area for Beagle. So I have to admit I do a little building while attending teleconferences. It's amazing what you can do while listening to neverending meetings. I have attached the bowsprit with the many attached blocks. I am a little bit anxious if I have them all correct when time for rigging approaches. Next up is the fore mast. The masts takes surprising long time to assemble. Lots of small pieces to set together. In addition, following the guide I stain the wood, but this adds quite a few steps in preparation before assembling can be done. Especially since any glue will reject the stain and sanding afterwards has to be very light. But the yards need an extra fitting of light wood on top. That has to be attached and sanded down after the yard itself has been stained, otherwise the light wood sucks in color. I truly find this a mess. Wonder if there is a better way to do this. Well, beginning to attach the yard to the fore mast Regards Lars


-
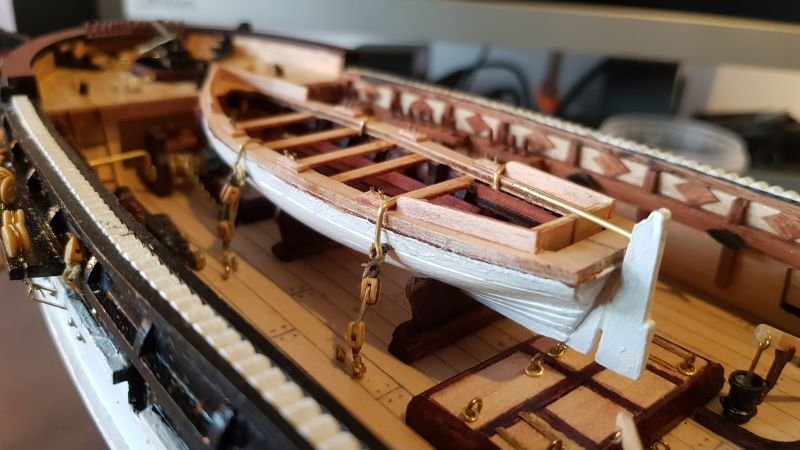
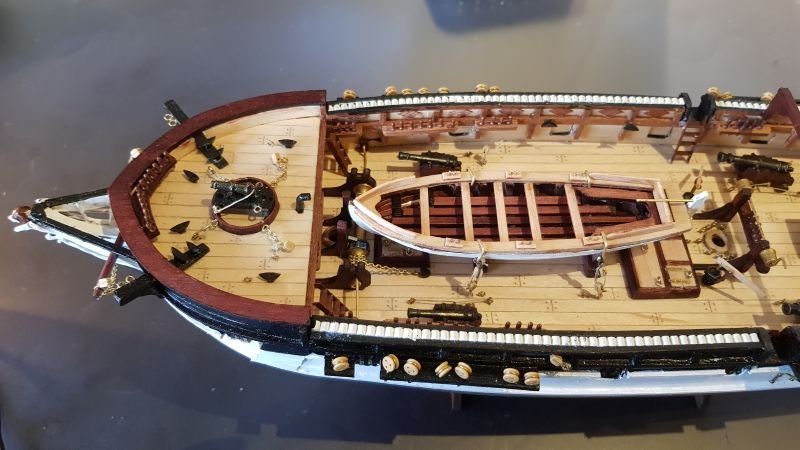
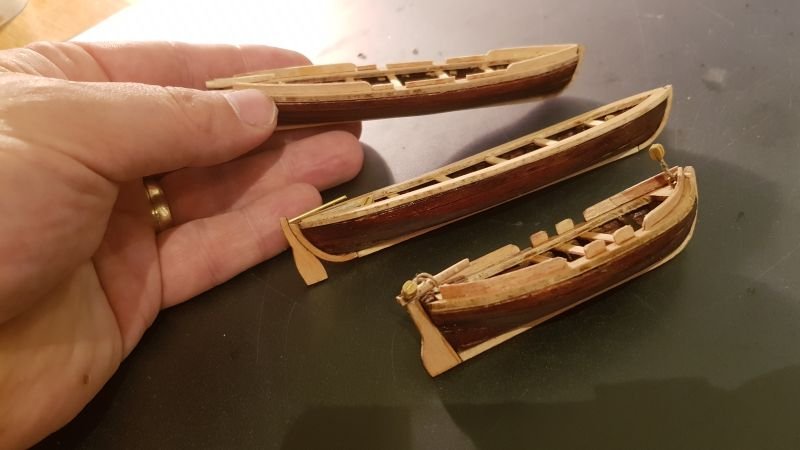
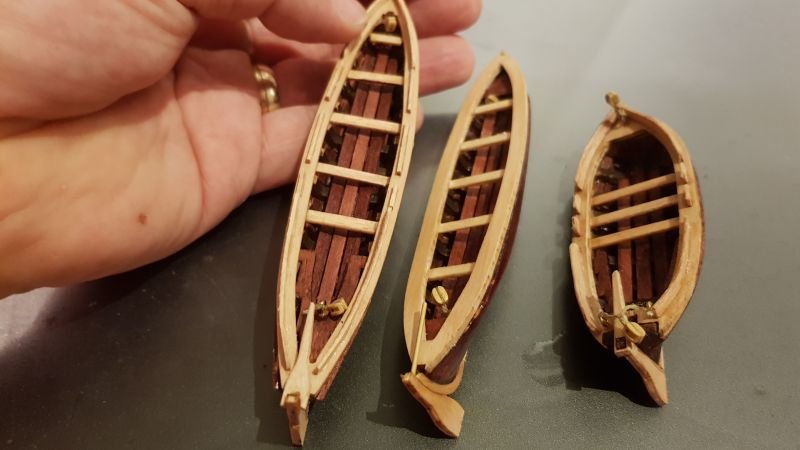
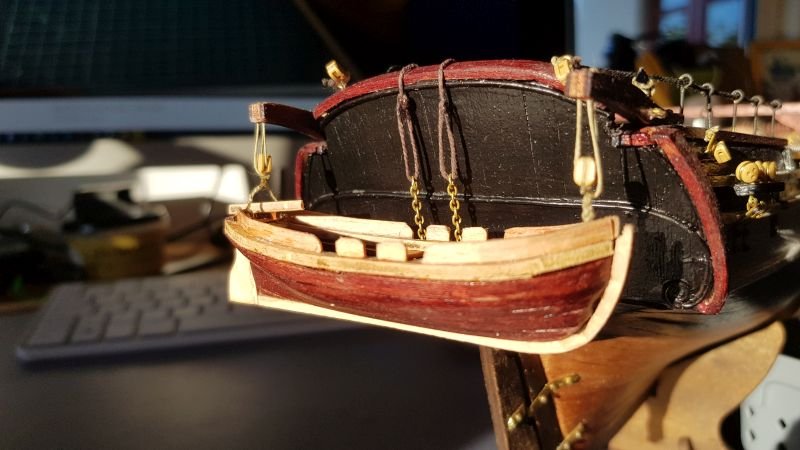
Moving on to the longboats. The Beagle has four longboats attached. One white in the middle and three brown hanging. So now I had to do planking again, but now only only one layer, so I had better get it right. So starting with the white launch to be attached midships. A very hard planking job and it took me ages. I was completely covered in CA afterwards. Not the cleanliest affair. And with CA glue on the fingers I keep happening to smear large fingerprints on the planks. Somehow the planking succeeded, and I got so happy that I continued too fast with attaching the small boats gunwale befor adding benches inside. Had to force disassemble there. Not good. Here with the final painted boat attached midship. Even though I measured a lot, I am still a little worried that the bow will crowd the fore mast. I have tested it, but I know the mast is not just only the mast - it has fittings that I can't determine if they will be messed with by the boat. The other three launches went more smoothly - but know the kit's supplied wood is running out. This is annoying. It is a matter of maybe five sheets of thin timber I am short. Now I have to cut other wood into thinner planks and attach. The stern boat could now be attached. The other two boats will have to wait till after the rigging is completed. Otherwise there will be no room for tying the rigging to the deadeyes for the mizze mast. Regards Lars
-
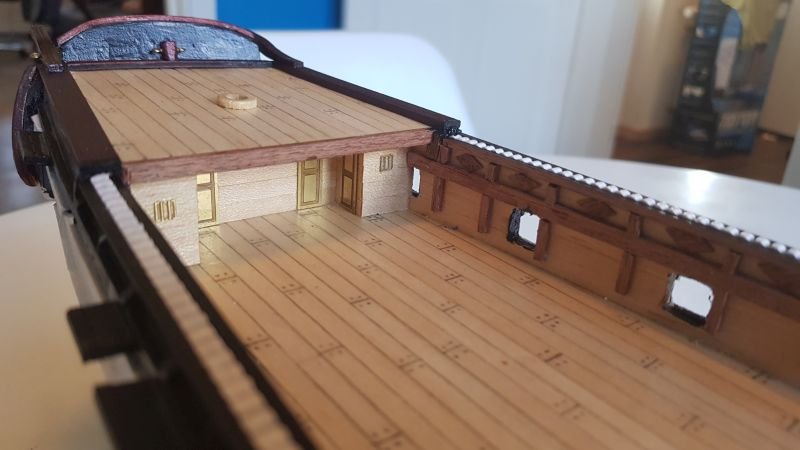
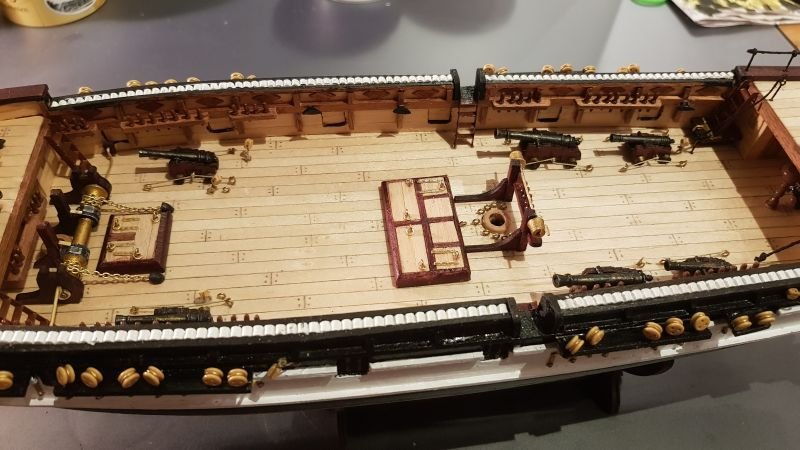
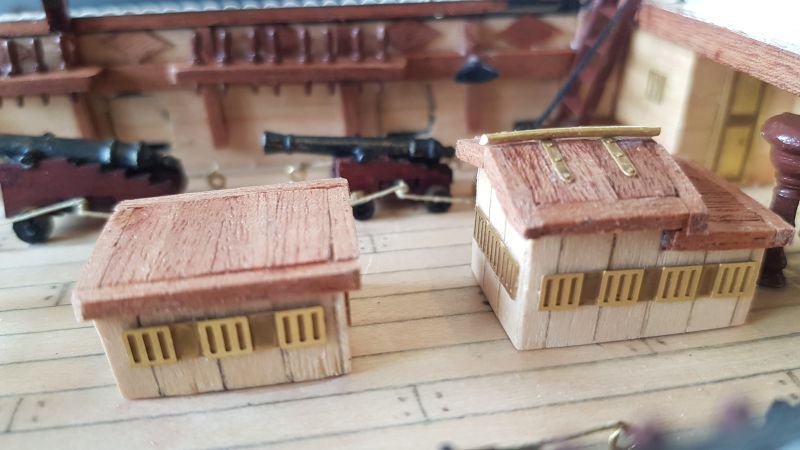
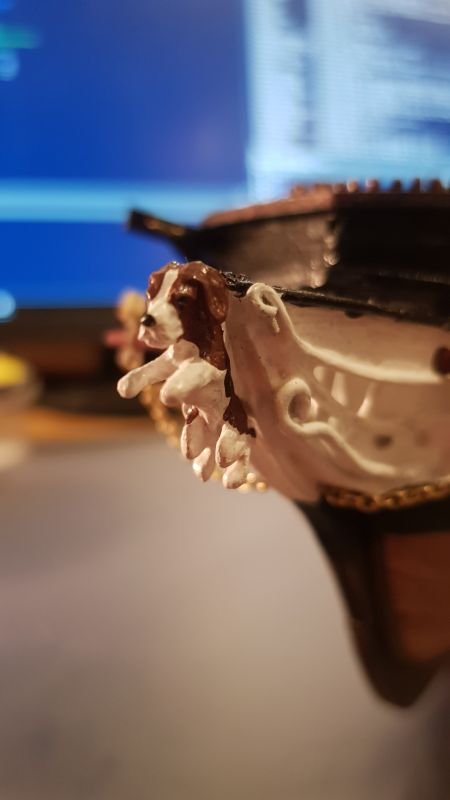
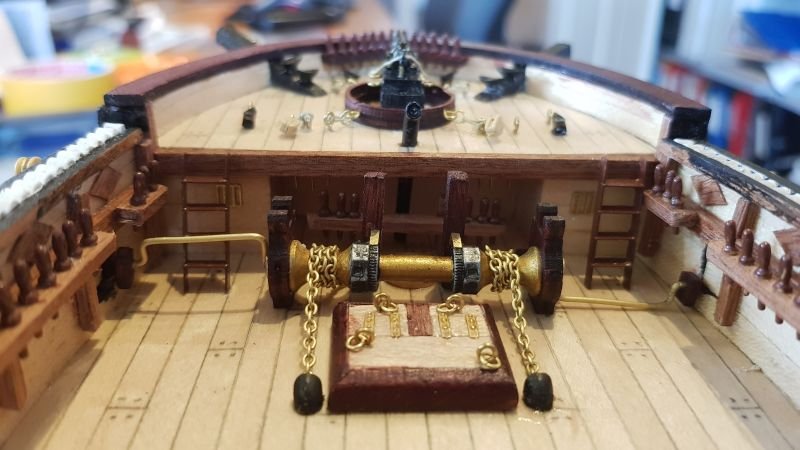
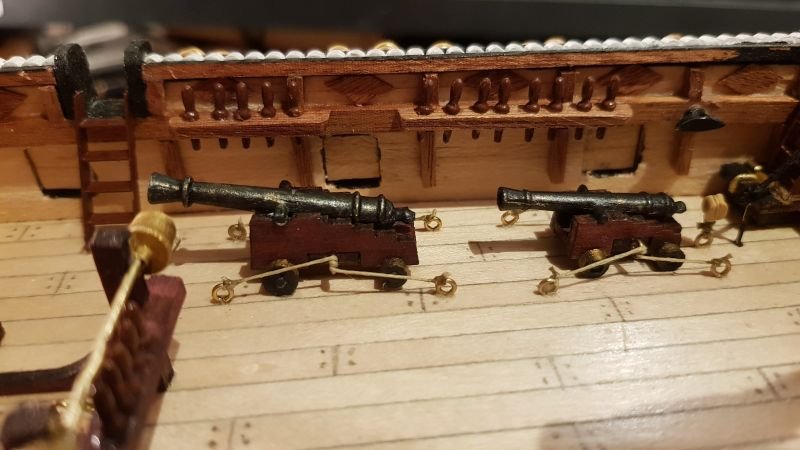
Hi Now I got all the cannons installed as well as the hatches. The big one in the middle caused me a lot of problems. Each sqaure is cut out from plywood, then applied the fine wood on top. Then they were to be glued together. No chance! The cutouts did not match at all. The four squares next to each other was much longer than the two pieces opposite. So the big hatch I had to scratch build completely. Here is a closer look where the pumps also have been attached. What also can be seen are the small deck houses. Here I happened to attach the wood sapelli first and the realised that the side boards would then be visible from the top when the roof side beams are attached. So note to do the walls first and the do the roof. That is much easier Finally I have the figurehead. This of course is a beagle dog. The instructions said to paint this black. No way. I fantasize that the sailors were proud of the ship and the figurehead if not even a little superstitions. Of course this has to painted like the real thing. Constantly touched up by sailors for good luck! Kind regards Lars

-
So I guess the order of photos also changed. Now I learned to also preview my posts 🙂
-
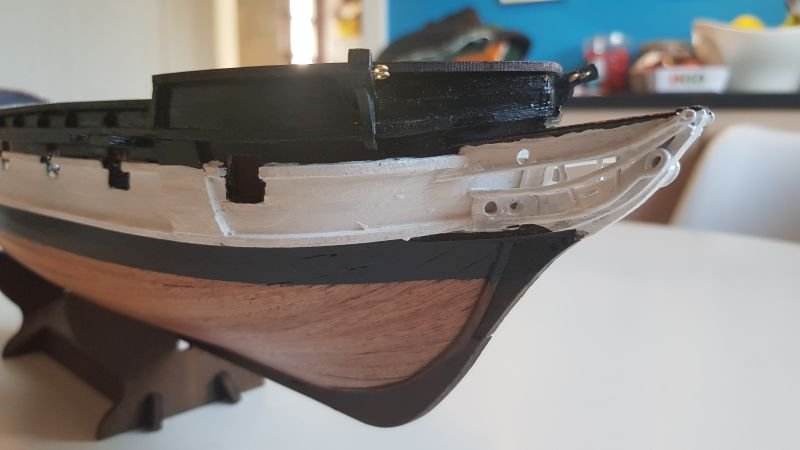
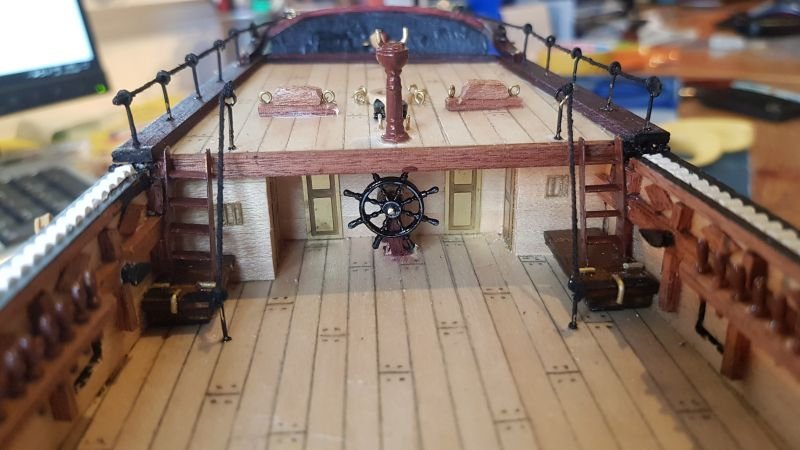
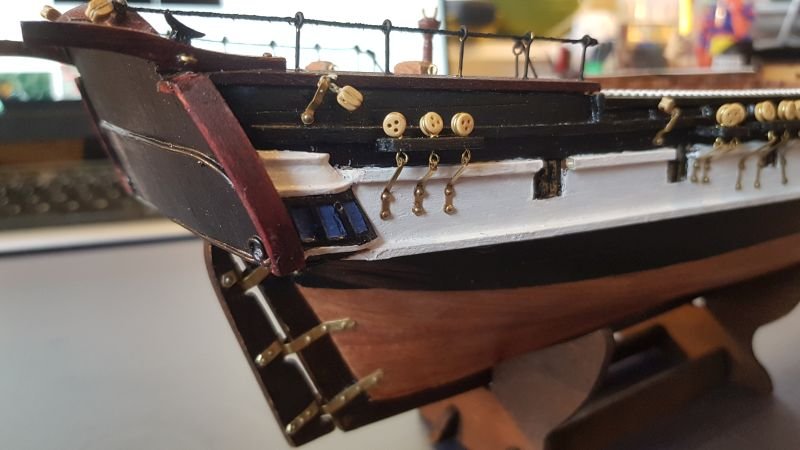
Hi. Thanks for all the thumbs ups! After the Hull was finished I could continue on adding the deck elements. I decided the supplied belaying pins looked too plasticky and painted them. They seem terribly small, I hope I will be able to tie the rigging correctly onto them. First photo: I was looking forward to building the swiwel gun for the front. My first model ship gun! yeah. And a great day when I attached it. Although my son (6 years) was not impressed that it was stuck and couldn't turn. I was quite pleased with the anchor chain and glued it in place. Although carefully checking the plans for placement, I still had to rearrange it afterwards, as the both staircases, the mast-hole and stand for belaying pins became too crowded. I need to learn to check quite far ahead in the build instructions to see if an element will crowd later element. Second photo: Here the wheel and aft part of the decks. I must say the staircases where very difficult to glue together, and still keep at close to right angles and straight. Third photo: All the dead eyes attached along the gunwale. This went far more easy than I thought it would. You know dead eyes are called "jomfruer" in Danish which directly translates to "virgins". And I struggled a bit with the casting of the windows. They needed to be fitted to the hull, which I should have paid more attention to even before starting to plank. I should have paid attention when sanding/fairing to not take too much wood away, and then when planking not turn the planks inwards too early. Although it looks ok, but very educational. Fourth photo: Finally adding some more guns. I painted them black and dry brushed with gunmetal and a touch of brass color. Again my son complained the guns where not sticking out of the gun ports ready for action. Well he has a point I guess. Regards Lars BTW can I insert pictures inline the text here. I only seem to add my photos at the very end of my posts?
-
Hi I am fairly new to the ship modelling hobby. I was "tricked" into this as my 6 year old son insisted we visited a hobby shop to buy a plastic viking ship. I am Danish after all. But I couldn't believe all the wonderful boxes of wood model ships on the shelves, and I was instantly transported back to my early teens, where my dad had a Wasa kit (incomplete) lying around which I fruitlessly started to build. All the daydreaming of a mighty warship just came back. So I started with the beginners ship Polaris from Occre just to see if I could do it. And I was pretty satisfied and more importantly more hooked. It was actually doable. I am now in the process of doing the Beagle from Occre, and I think it is going good. I have started a build log here: Let see where this takes me. My son asks me daily, when I am finished 🙂 and what ship I will build next. He also likes to sit with me while doing a little building, although he is a bit annoyed that there isn't many moving parts. Only the rudder moves a little. Regards, Lars
-
Hi all. I am a newcomer to the modelling hobby. I am Danish and live in Copenhagen. My English is ok, but I am struggling with all the shipwright terms in English (They are hard enough in Danish!) so please bear with me. After building my first wood ship model (The beginner model Polaris from Occre) I decided to go ahead and move on to HMS Beagle also from Occre. After Polaris was pretty succesful I thought I would just go ahead and try. The videos Occre has published are awesome, and gives a feeling of "How hard can it be". It was a pretty horrible experience in planking my Polaris model the Occre way, but rather satisfactory after sanding it down 🙂 So I dived into studying heaps of tutorials on how to do the planking a better way. The Occre model has two layers of planks, I thought I could try and learn the most by doing my best with the inner layer - in preparation for a larger model with only single planking. Well, that did not go well! After rereading and rereading, I seem to prove that one learns the best by doing. Reading is not enough. Sanding saved me again. Unfortunately I can't find the photo of that. I have also started this build log at a little late stage. So my first posts will seem like I am a fast builder. I am not. I just want to show the progress. So I finished the hull. Struggled with the rudder - the small pins were a mess I think. Too small really to insert. I painted it and started on the first few doors. At this stage I was very stringent on following the manual. Here the manual said to paint (the Gunwales?) all black and then white on top. My first thought was "That won't cover and be completely white" but I managed after several coatings, and I learned not to follow instructions too rigid. So far I am pretty satisfied after a very bad beginning with the first layer of planks. I am a bit unhappy, though, with my wood dye. I have only been able to find a dark color, which does NOT look like the Sapelli wood that the model comes with. (In Danish this is mahogni - I think anyways) Thus, it looks awfull when mixing dyed lime wood with sapelli wood. I have to dye the original sapelli as well. But now I am sticking with this darker color compared to the manual and video tutorials from Occre. Regards, Lars