AdamA
-
Posts
178 -
Joined
-
Last visited
Content Type
Profiles
Forums
Gallery
Events
Everything posted by AdamA
-
HMS Bounty by AdamA - 1:48
AdamA replied to AdamA's topic in - Build logs for subjects built 1751 - 1800
-
HMS Bounty by AdamA - 1:48
AdamA replied to AdamA's topic in - Build logs for subjects built 1751 - 1800
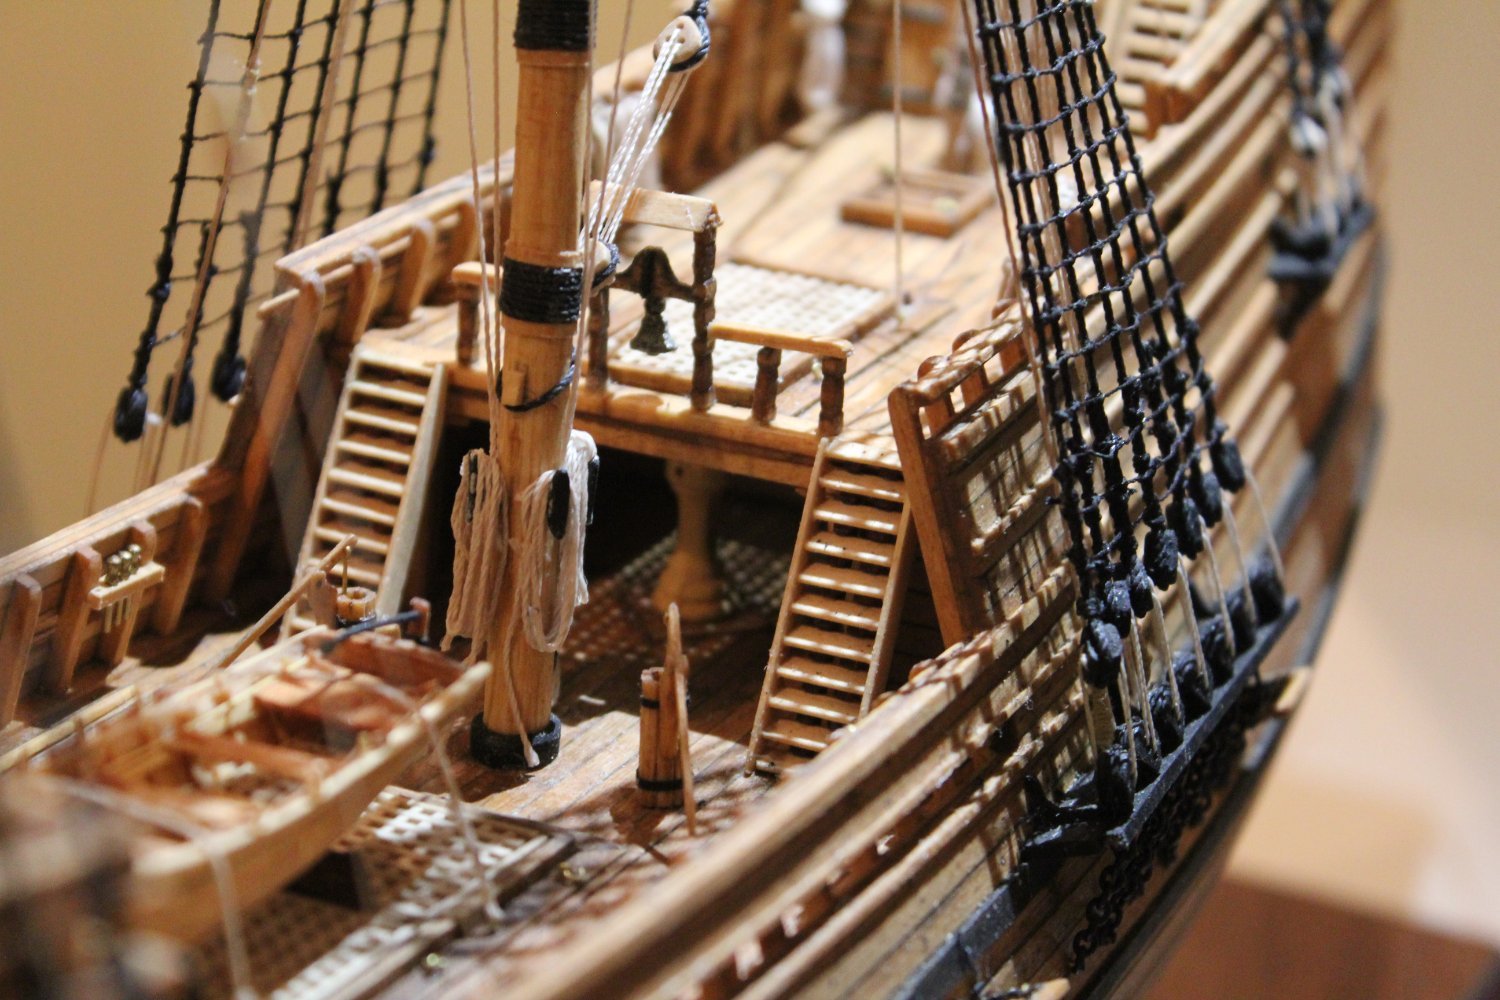
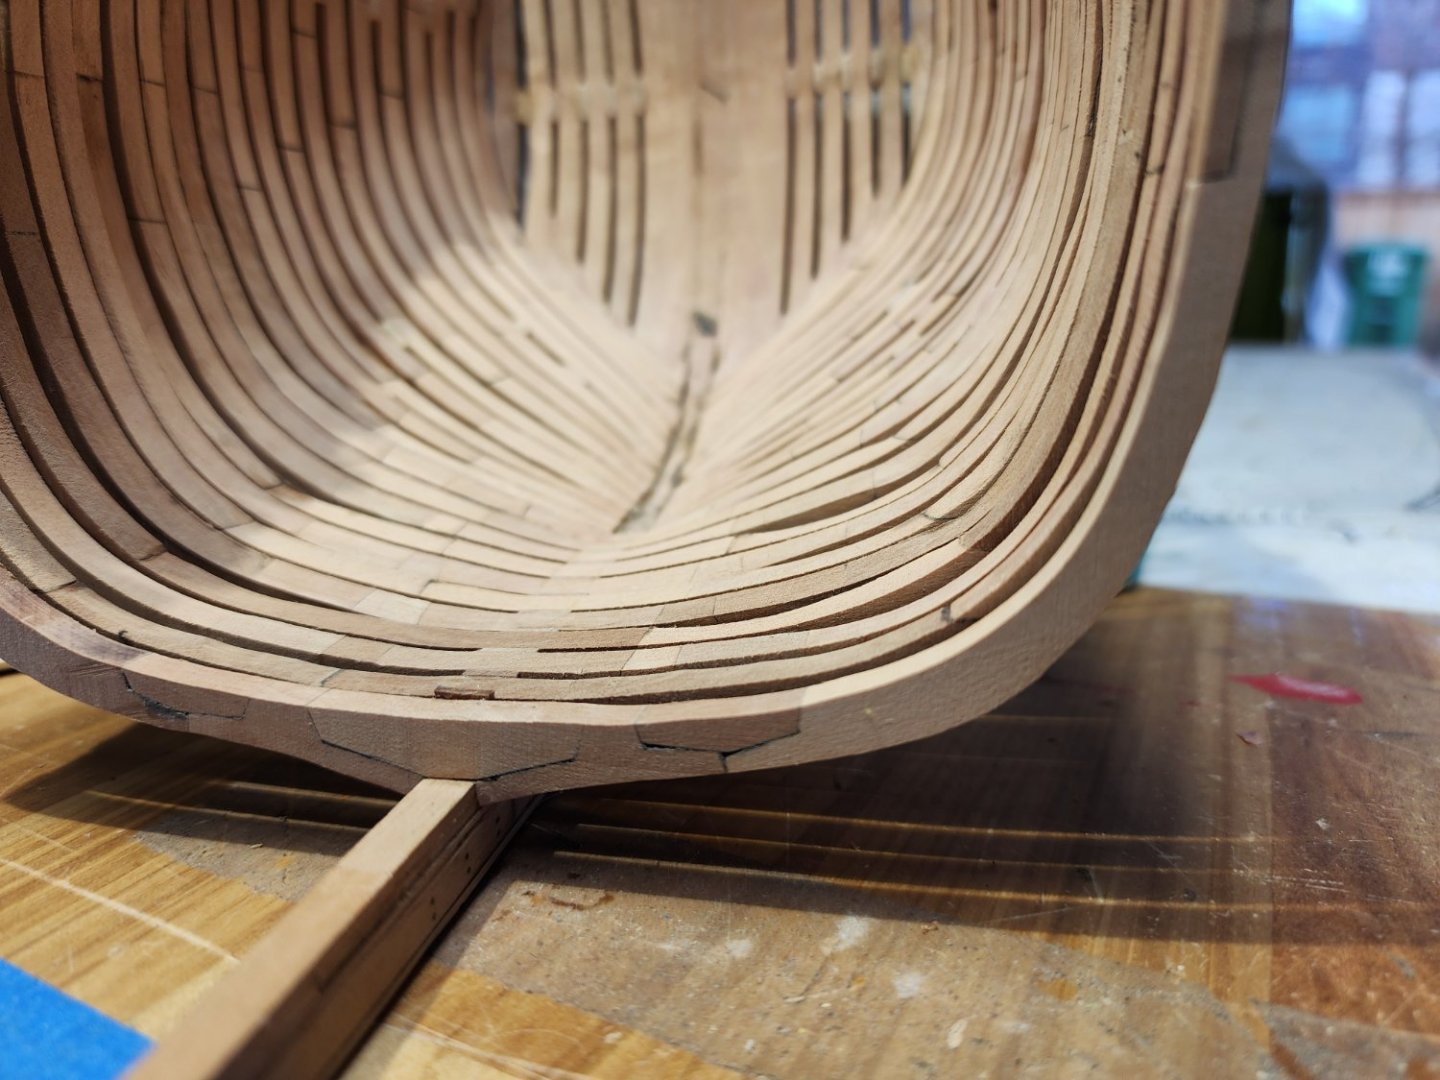
I haven't sanded or polished but this is where I left off.
-
HMS Bounty by AdamA - 1:48
AdamA replied to AdamA's topic in - Build logs for subjects built 1751 - 1800
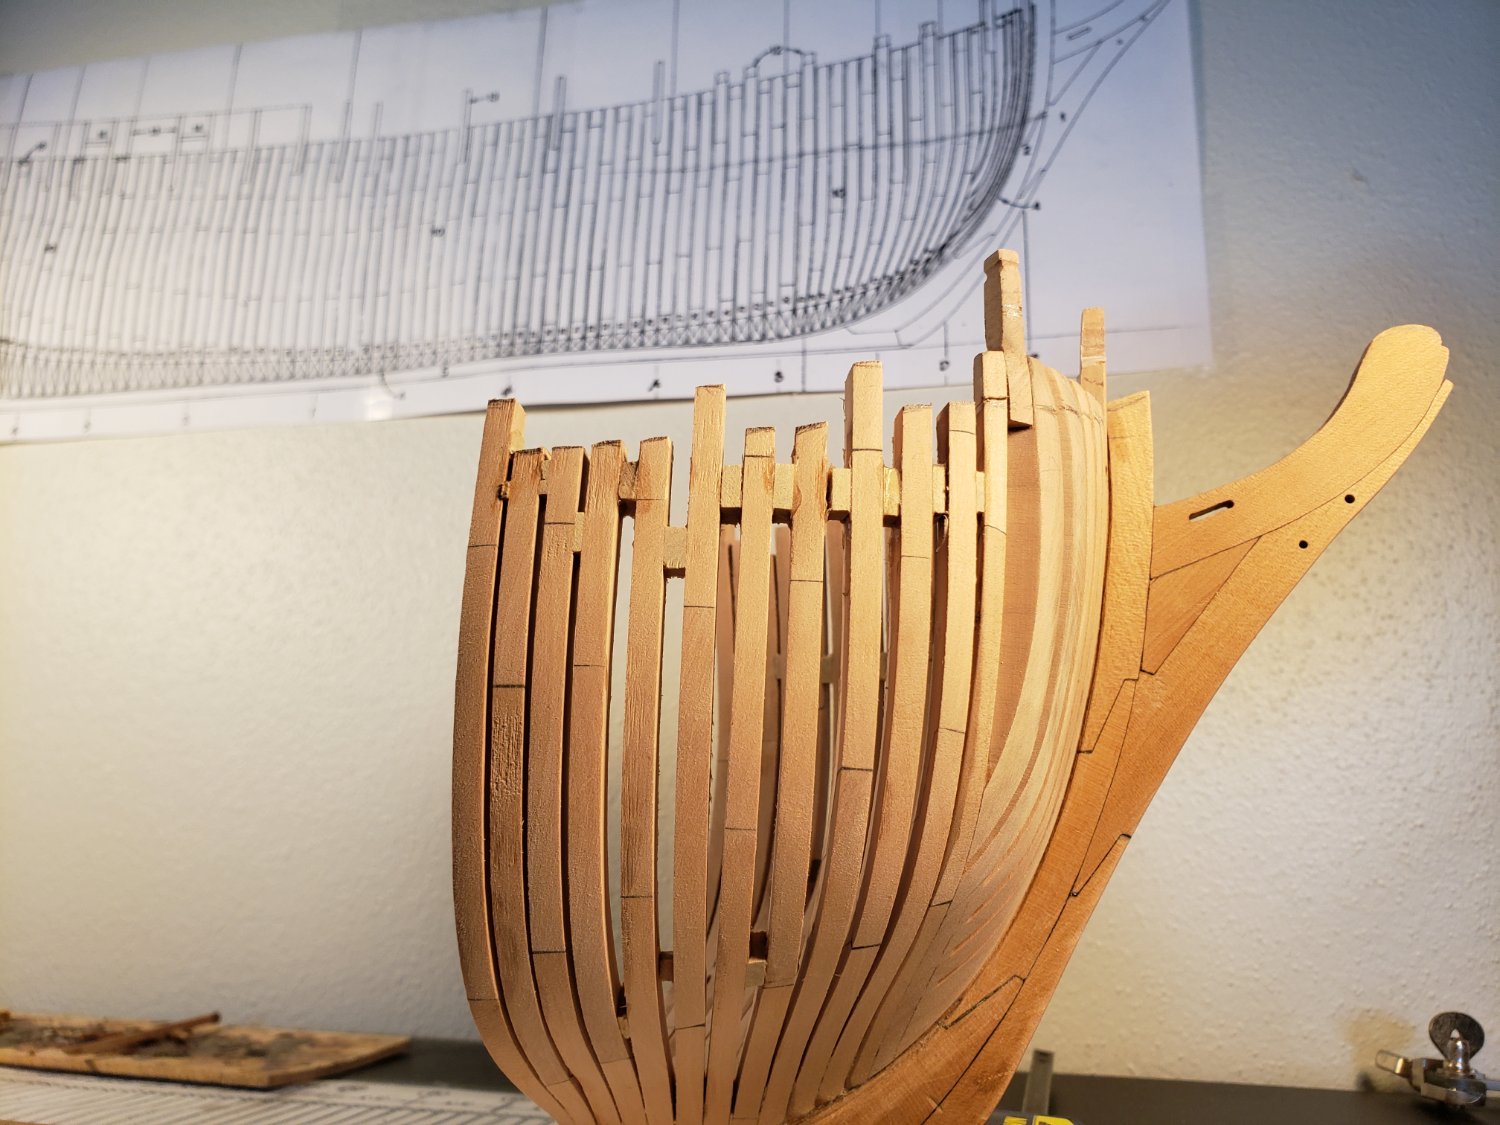
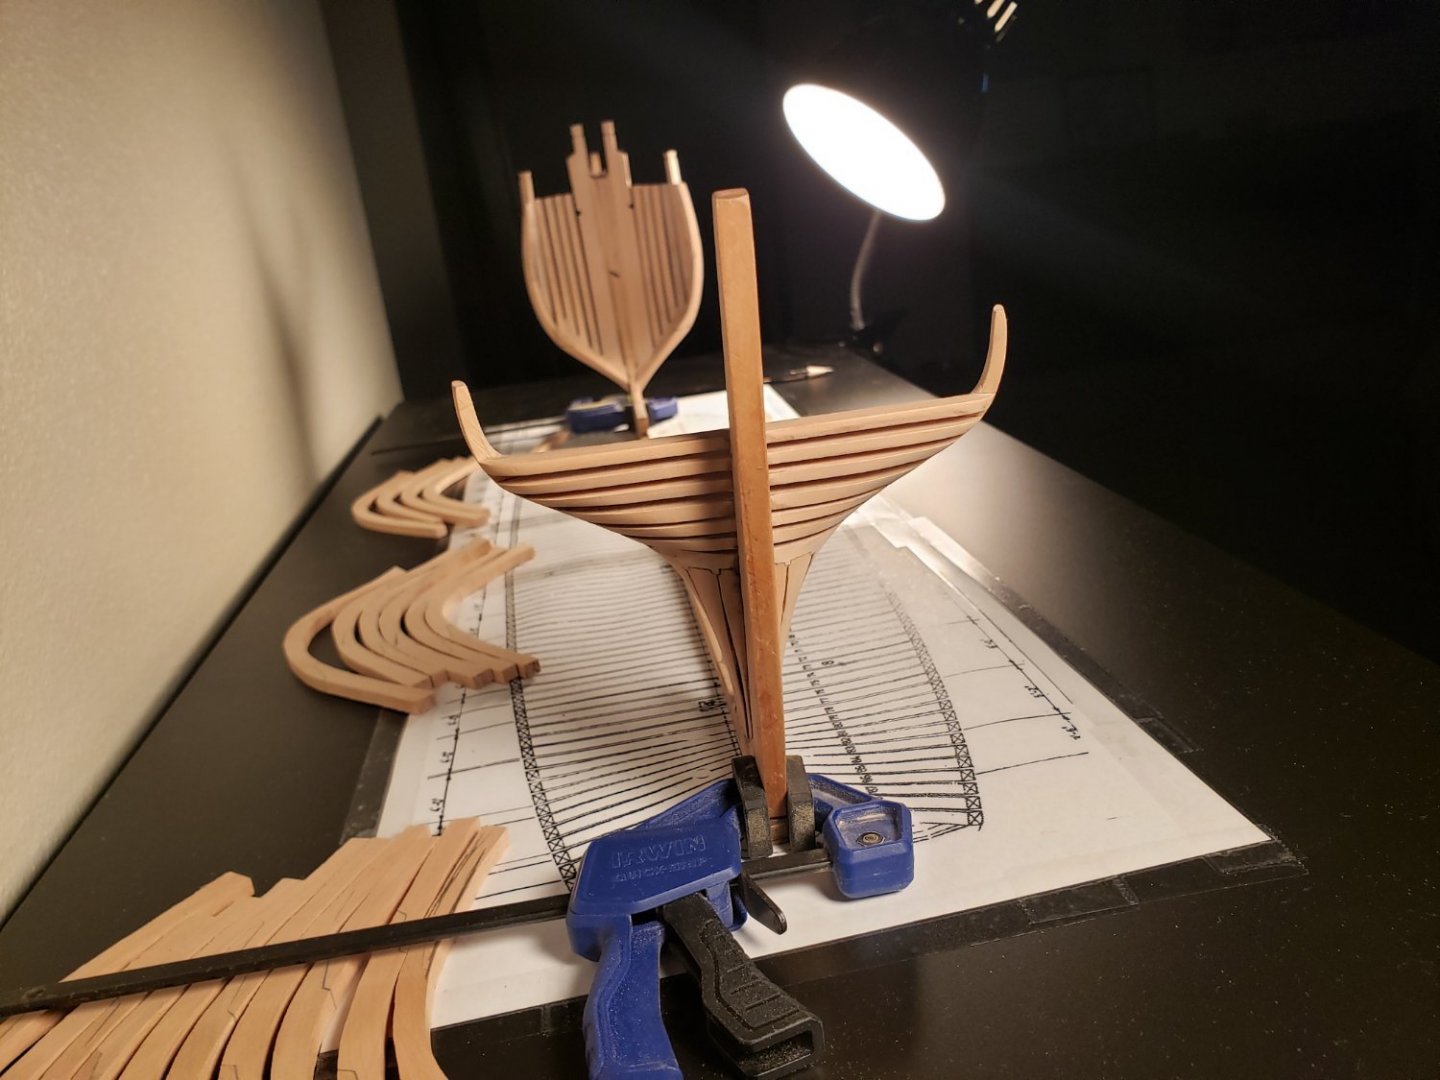
Time for more framing. I'm still using this board of Swiss pear, but now it's much dryer.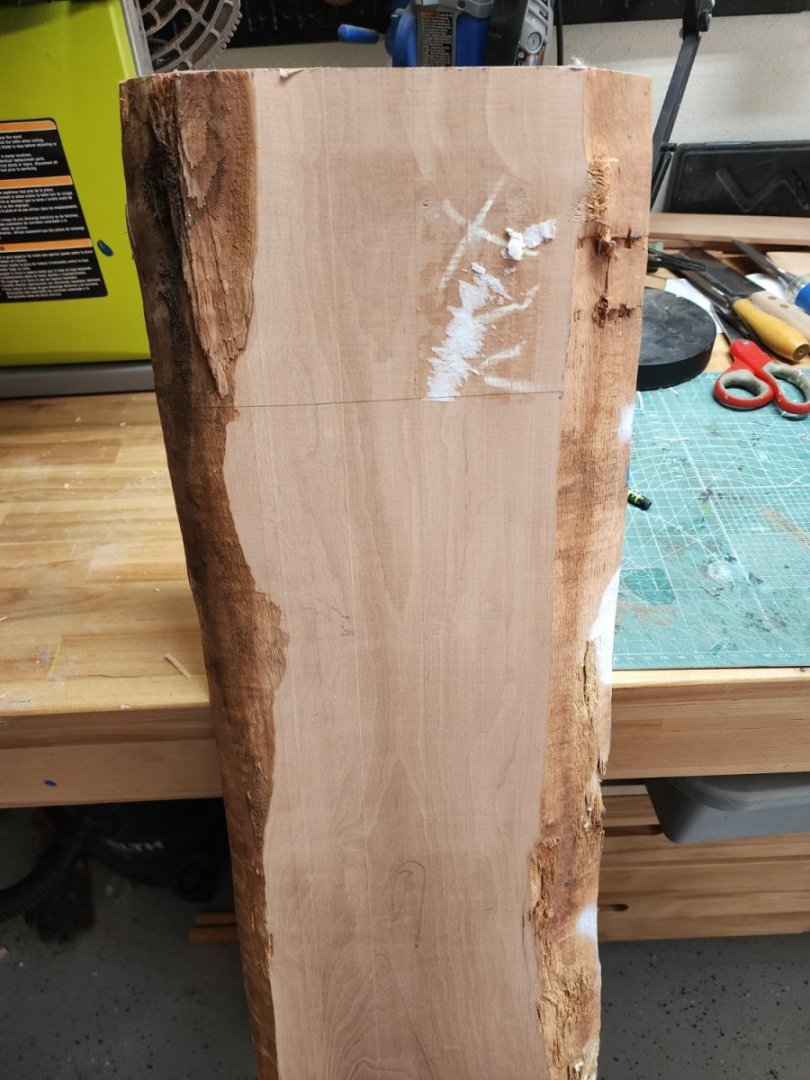
-
HMS Bounty by AdamA - 1:48
AdamA replied to AdamA's topic in - Build logs for subjects built 1751 - 1800
-
HMS Bounty by AdamA - 1:48
AdamA replied to AdamA's topic in - Build logs for subjects built 1751 - 1800
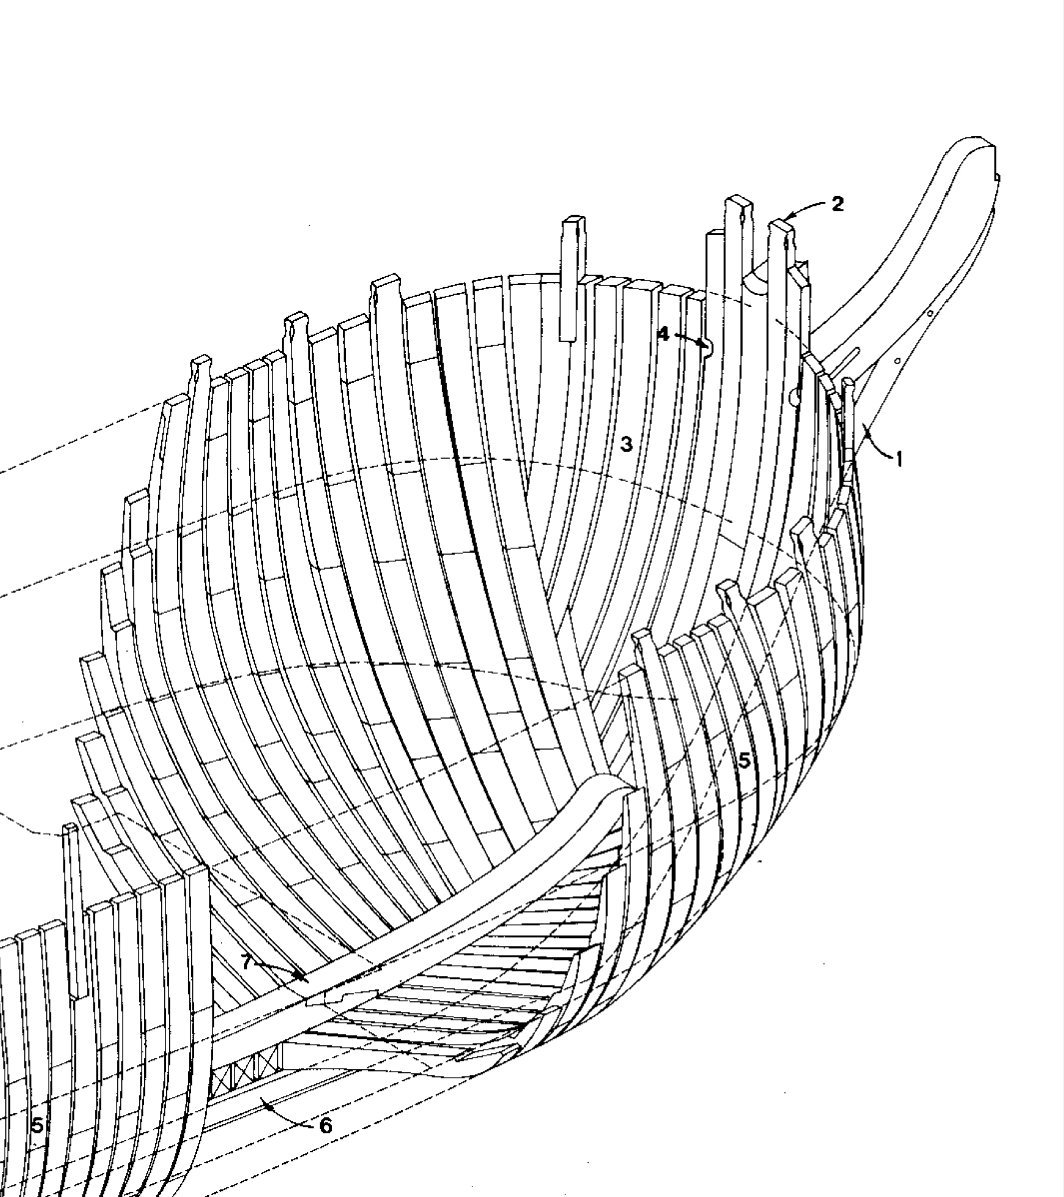
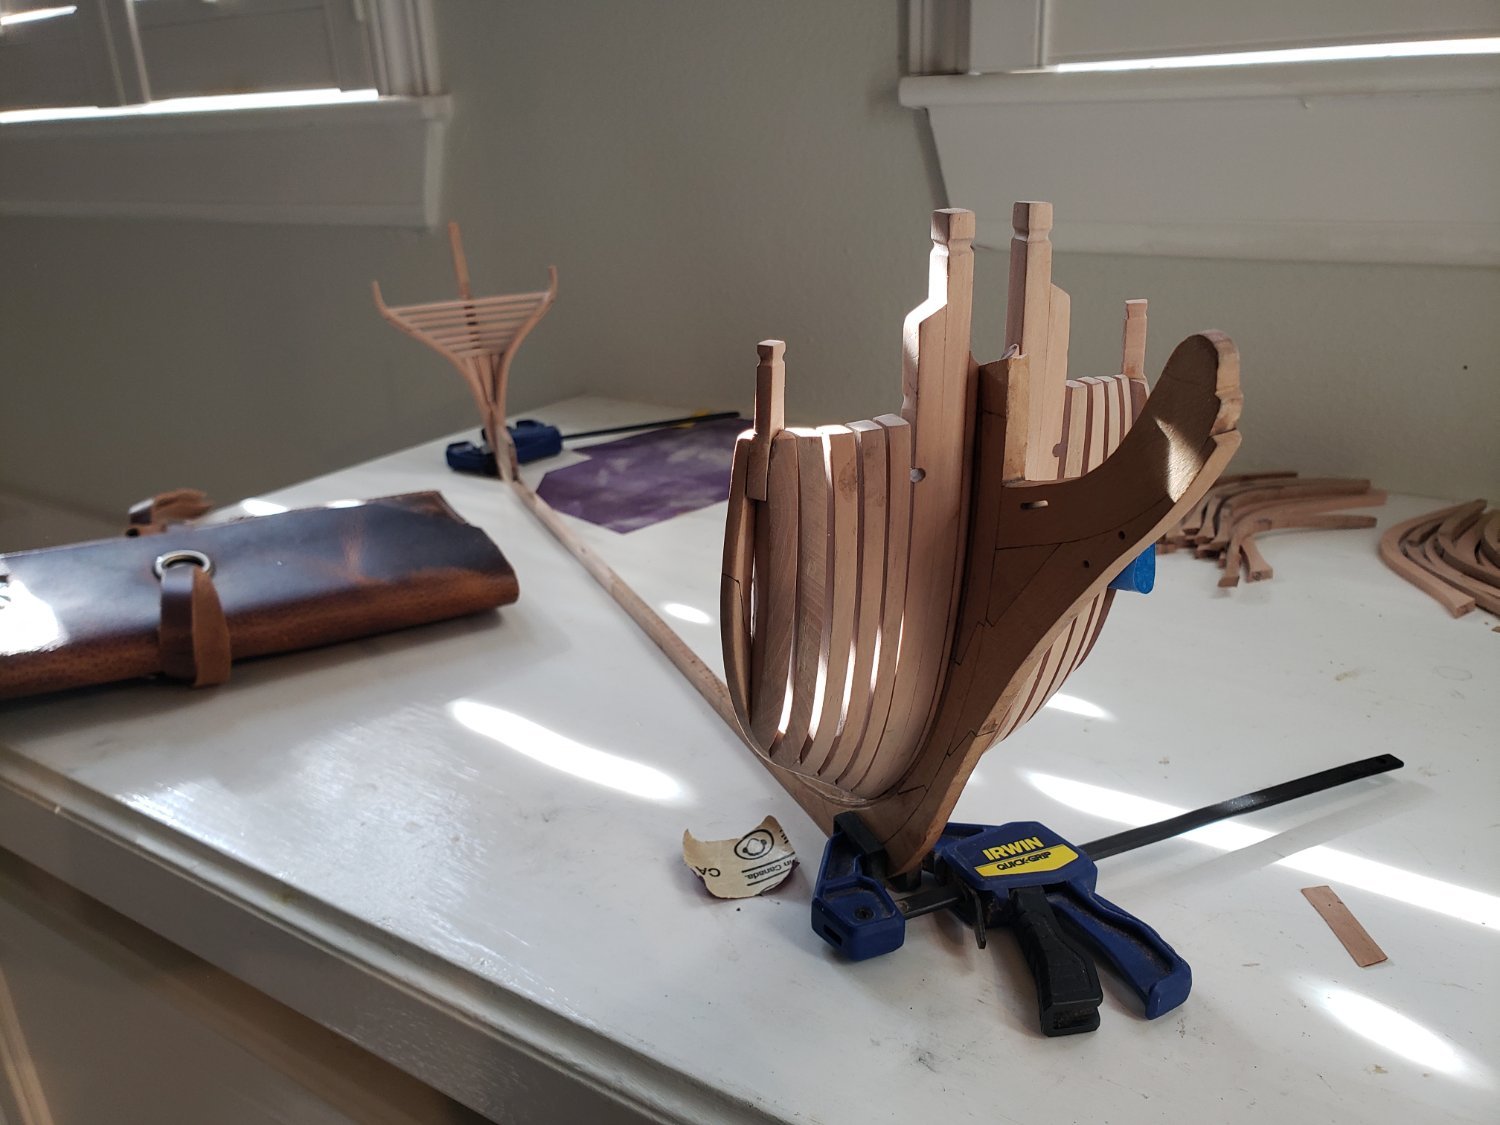
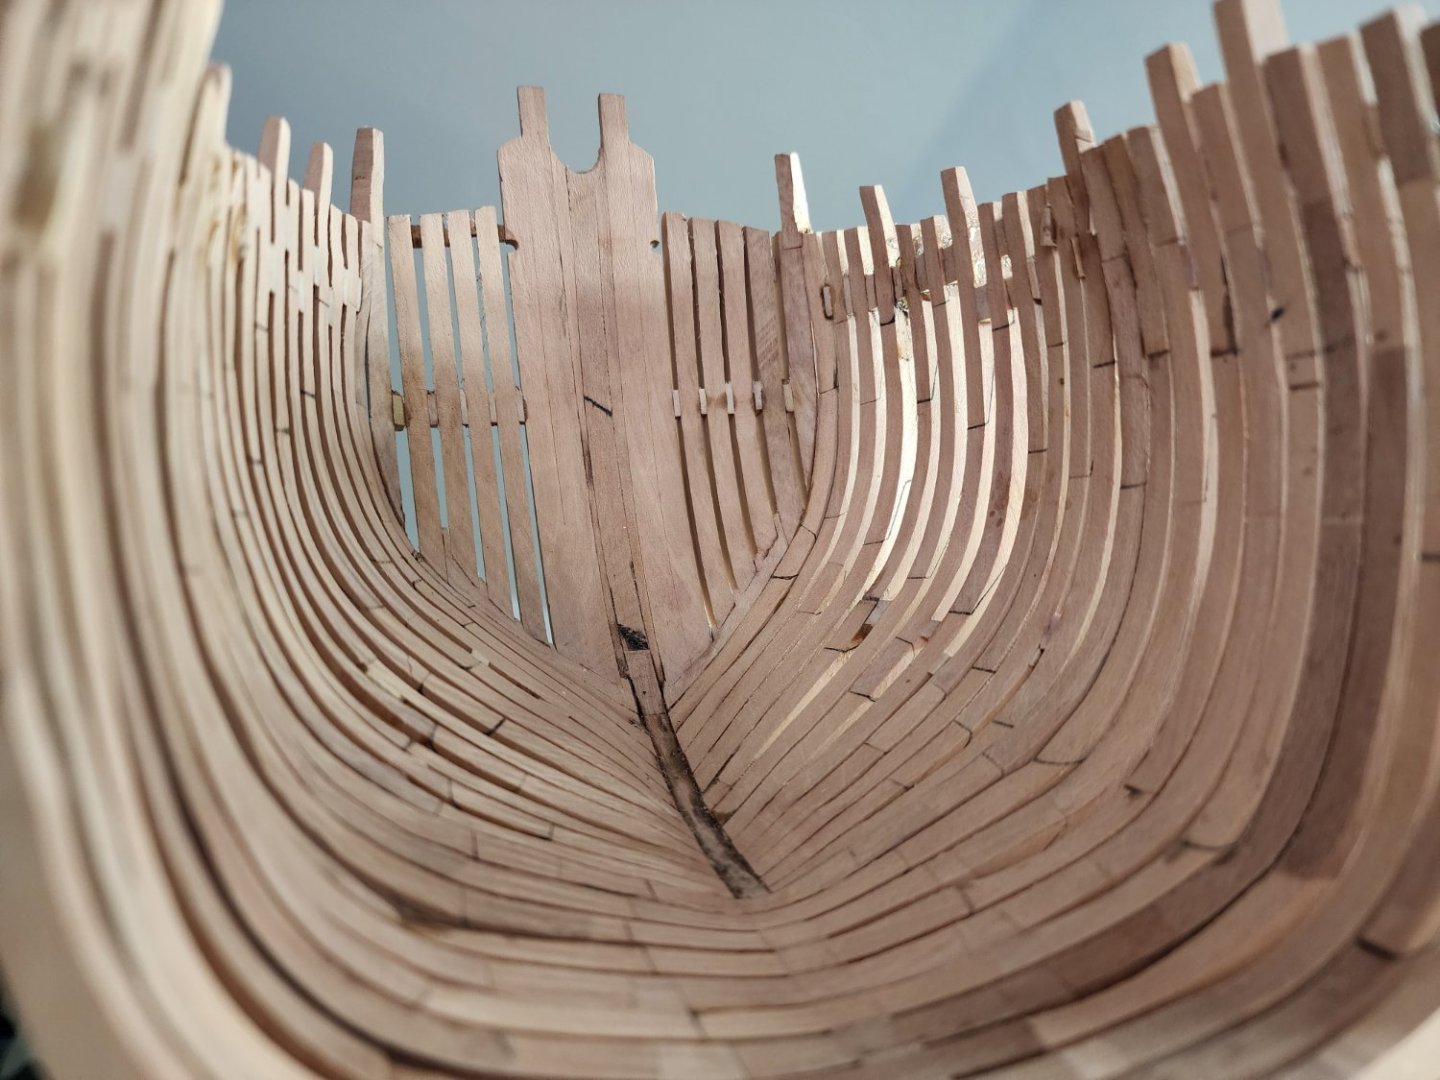
Frame 20 (the first full frame) on the keelson. I had to re-do this frame because I drew the first one with its chock in the wrong place.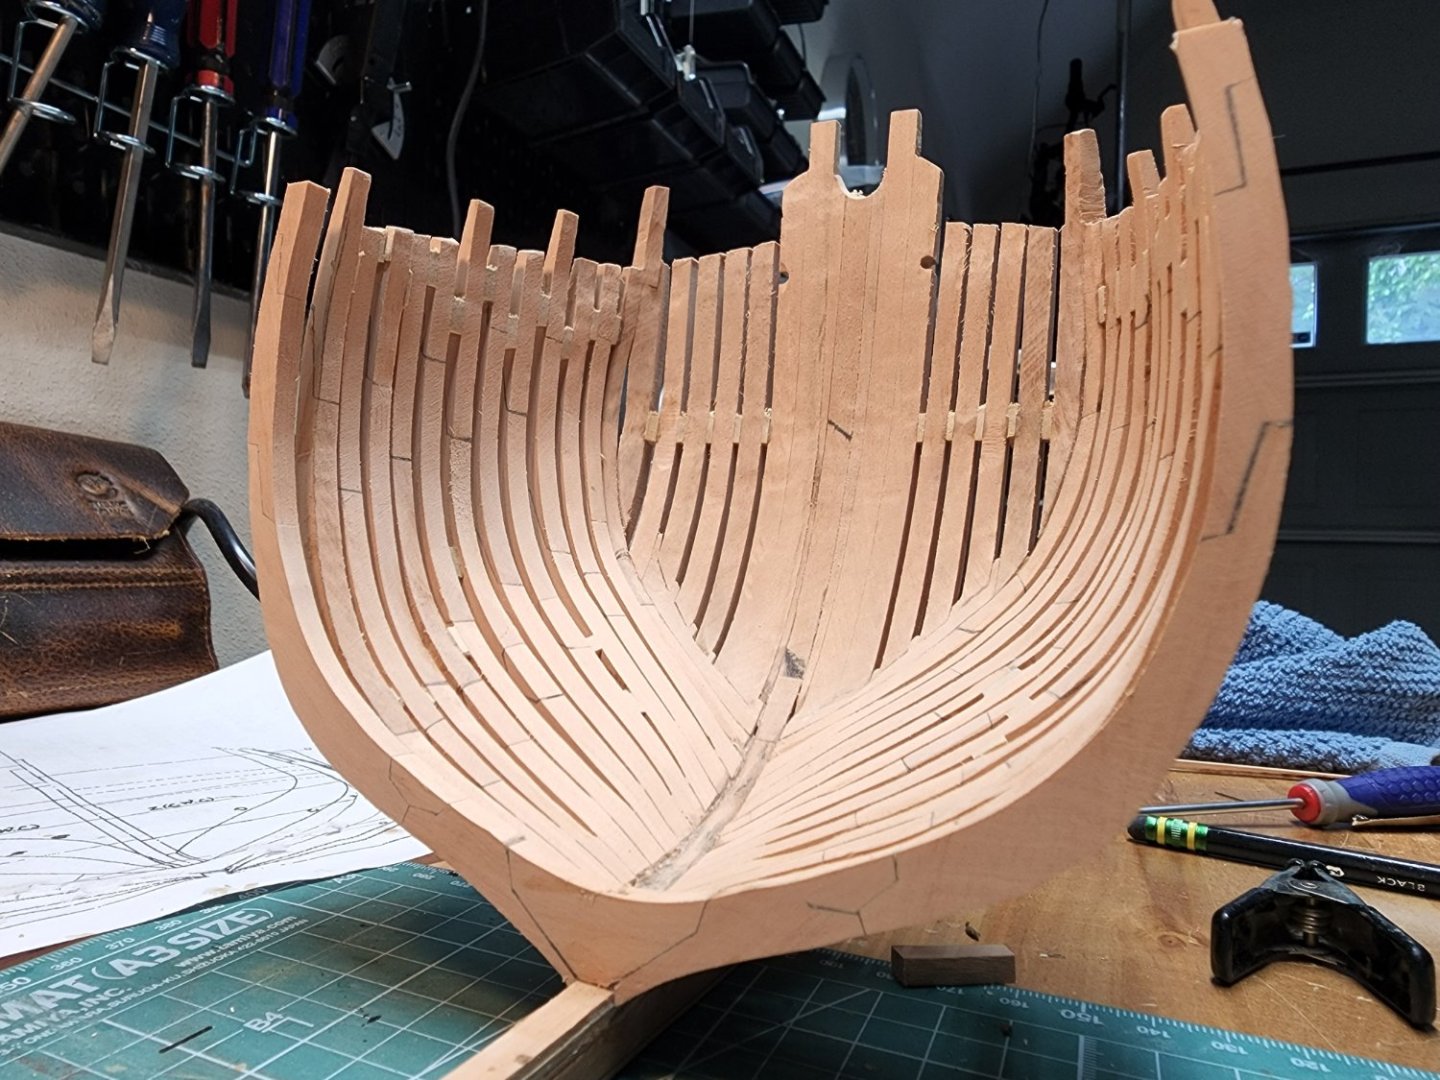
-
HMS Bounty by AdamA - 1:48
AdamA replied to AdamA's topic in - Build logs for subjects built 1751 - 1800
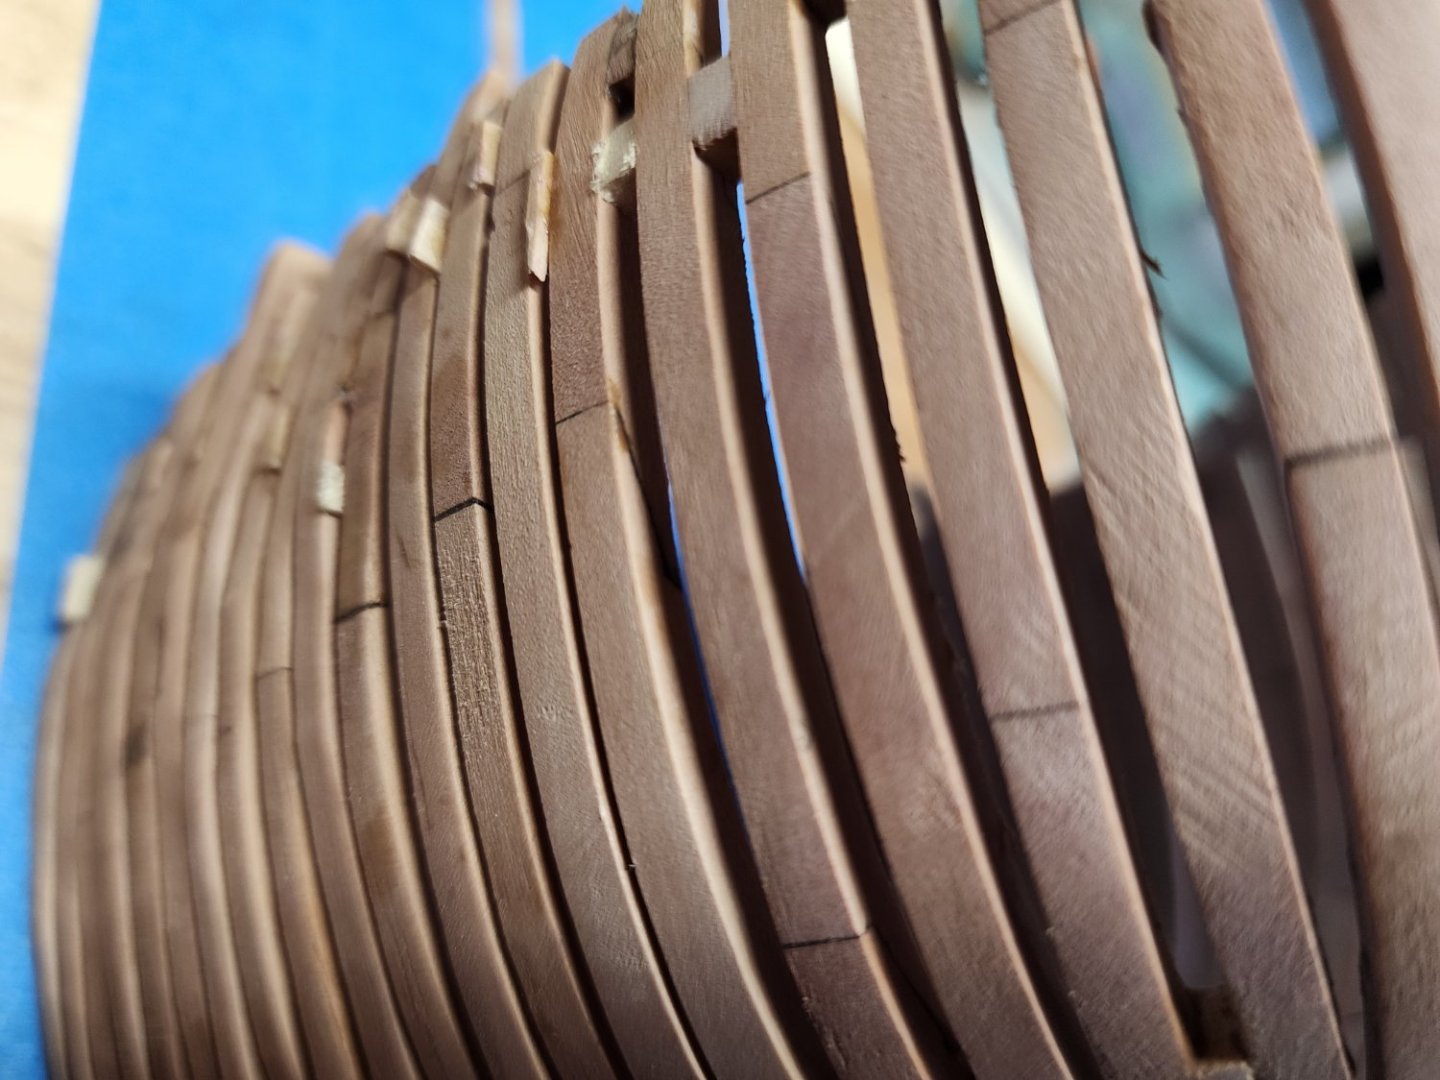
I took your advice to put weight on these while drying and used a sharpening stone with wax paper to sit on top of the frames as they dry to keep them flat. Then to the Byrnes Thickness Sander (equipment show off incoming)

-
HMS Bounty by AdamA - 1:48
AdamA replied to AdamA's topic in - Build logs for subjects built 1751 - 1800
I have my new work area set up so here we go.
-
HMS Bounty by AdamA - 1:48
AdamA replied to AdamA's topic in - Build logs for subjects built 1751 - 1800
This is the launch I built for the Mayflower. I didn't have any detailed plans so I "winged it." As a result, it tuned out to be about 100 years too modern for the sloop on the actual ship.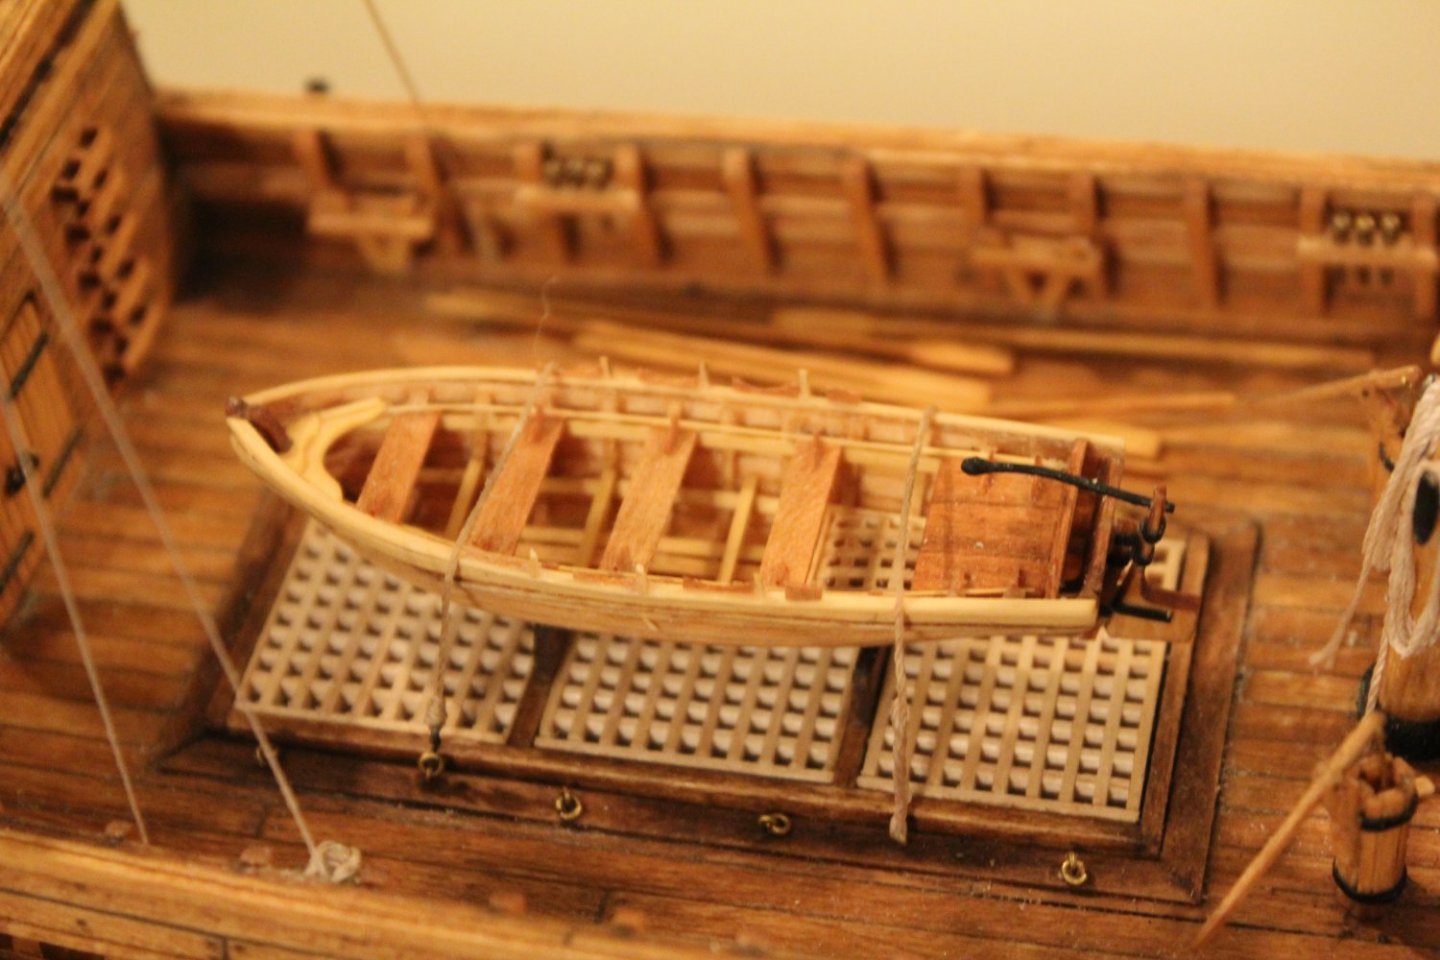

-
HMS Bounty by AdamA - 1:48
AdamA replied to AdamA's topic in - Build logs for subjects built 1751 - 1800
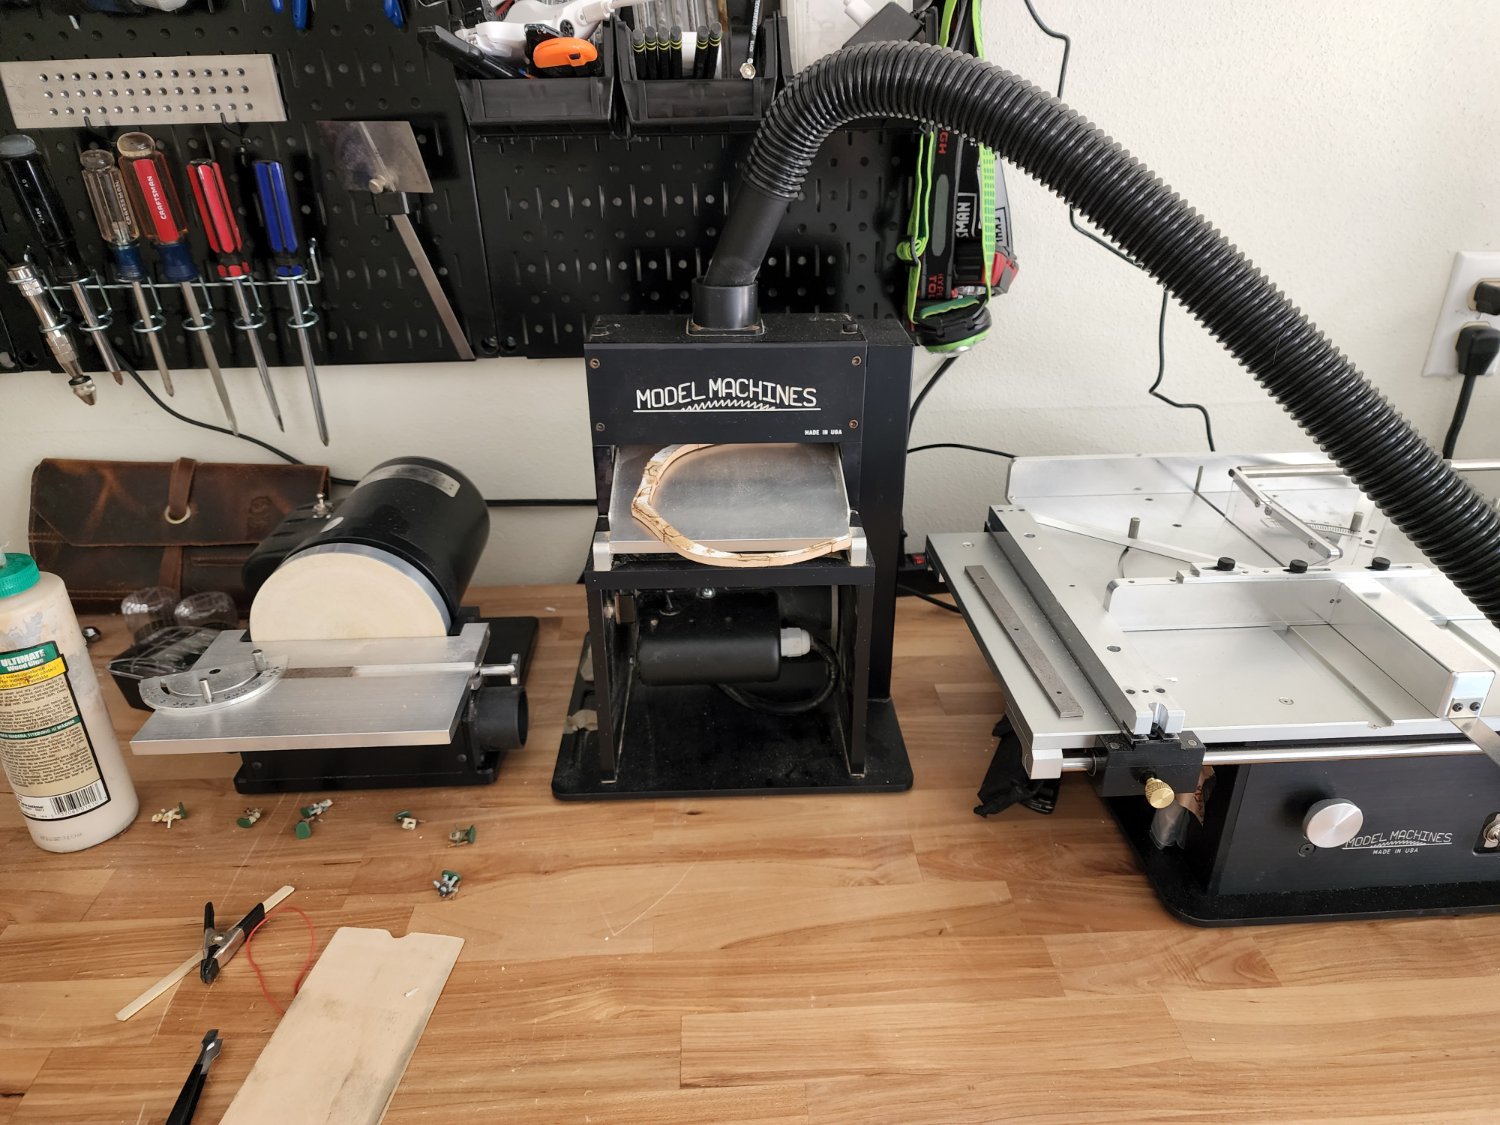
I just unboxes Byrnes' Model Machines disk sander and table saw. They will replace my standard size sander (which sounded like a boat motor when turned on) and my Microlux tilt table saw (which I've had since 2006). A word of advice to anyone who feels they have lost their childhood amazement and wonder and want to keep it that way: don't buy this table saw and open the box. My gosh. The adjustments are so smooth. Its beautiful.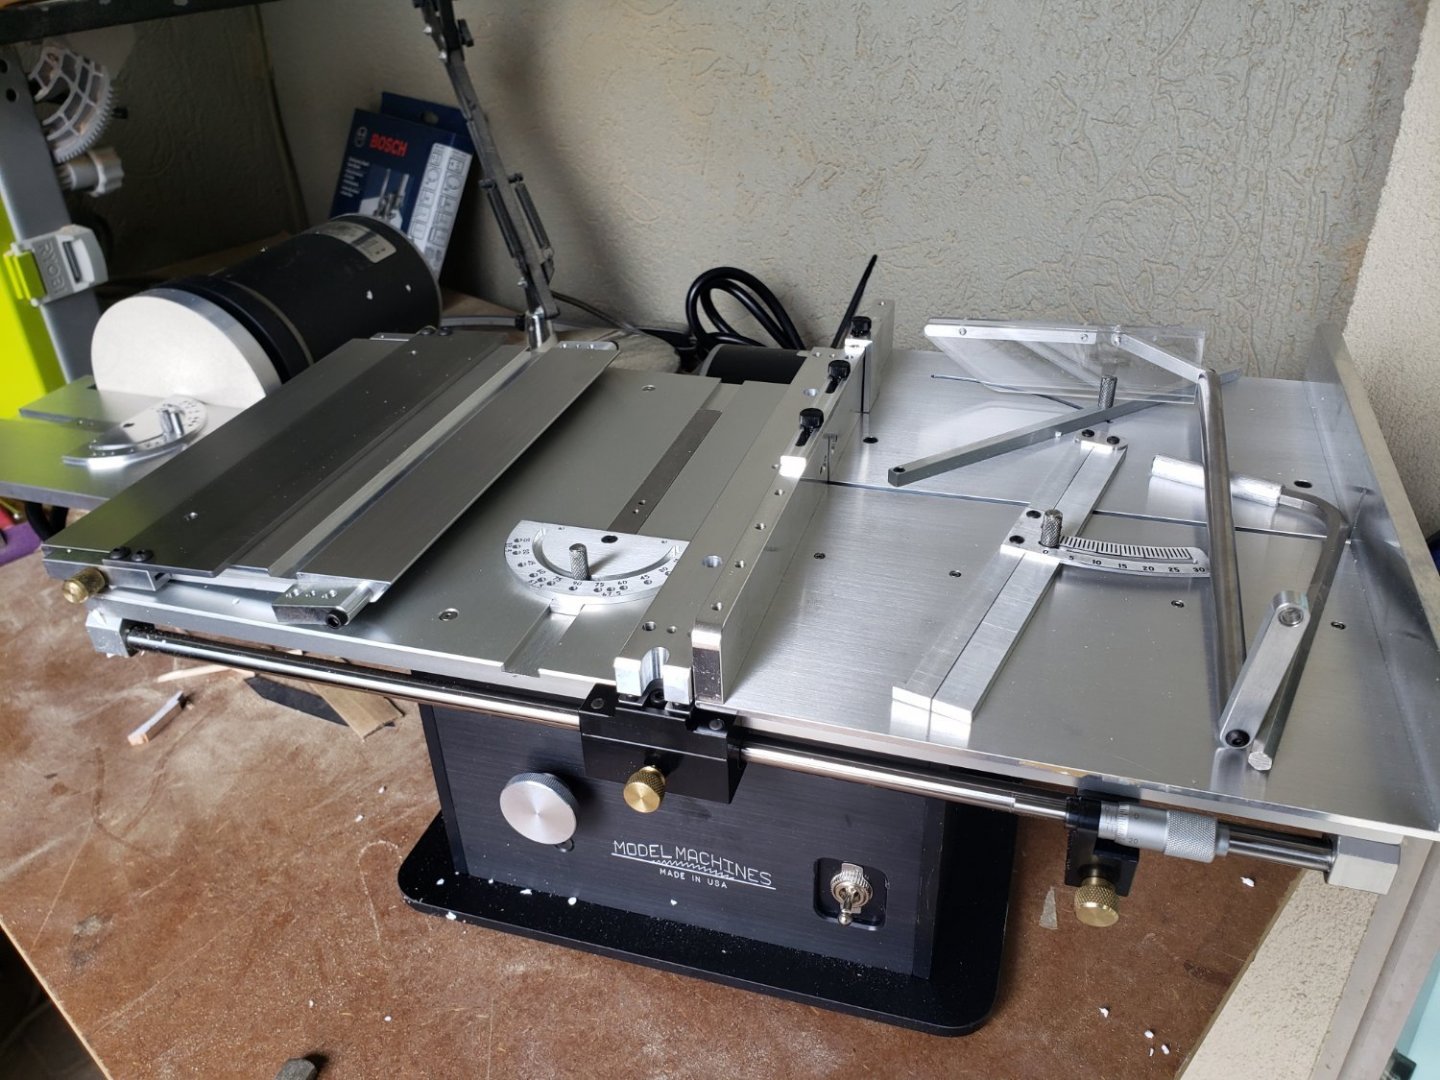
-
HMS Bounty by AdamA - 1:48
AdamA replied to AdamA's topic in - Build logs for subjects built 1751 - 1800
Allan, I haven't decided much farther than frames yet. I'd definitely be interested in your drawings. I scratch built the launch for my Mayflower blindly and it may have become a bit too modern by accident. I used a jeweler's saw to start getting the frames to the correct height: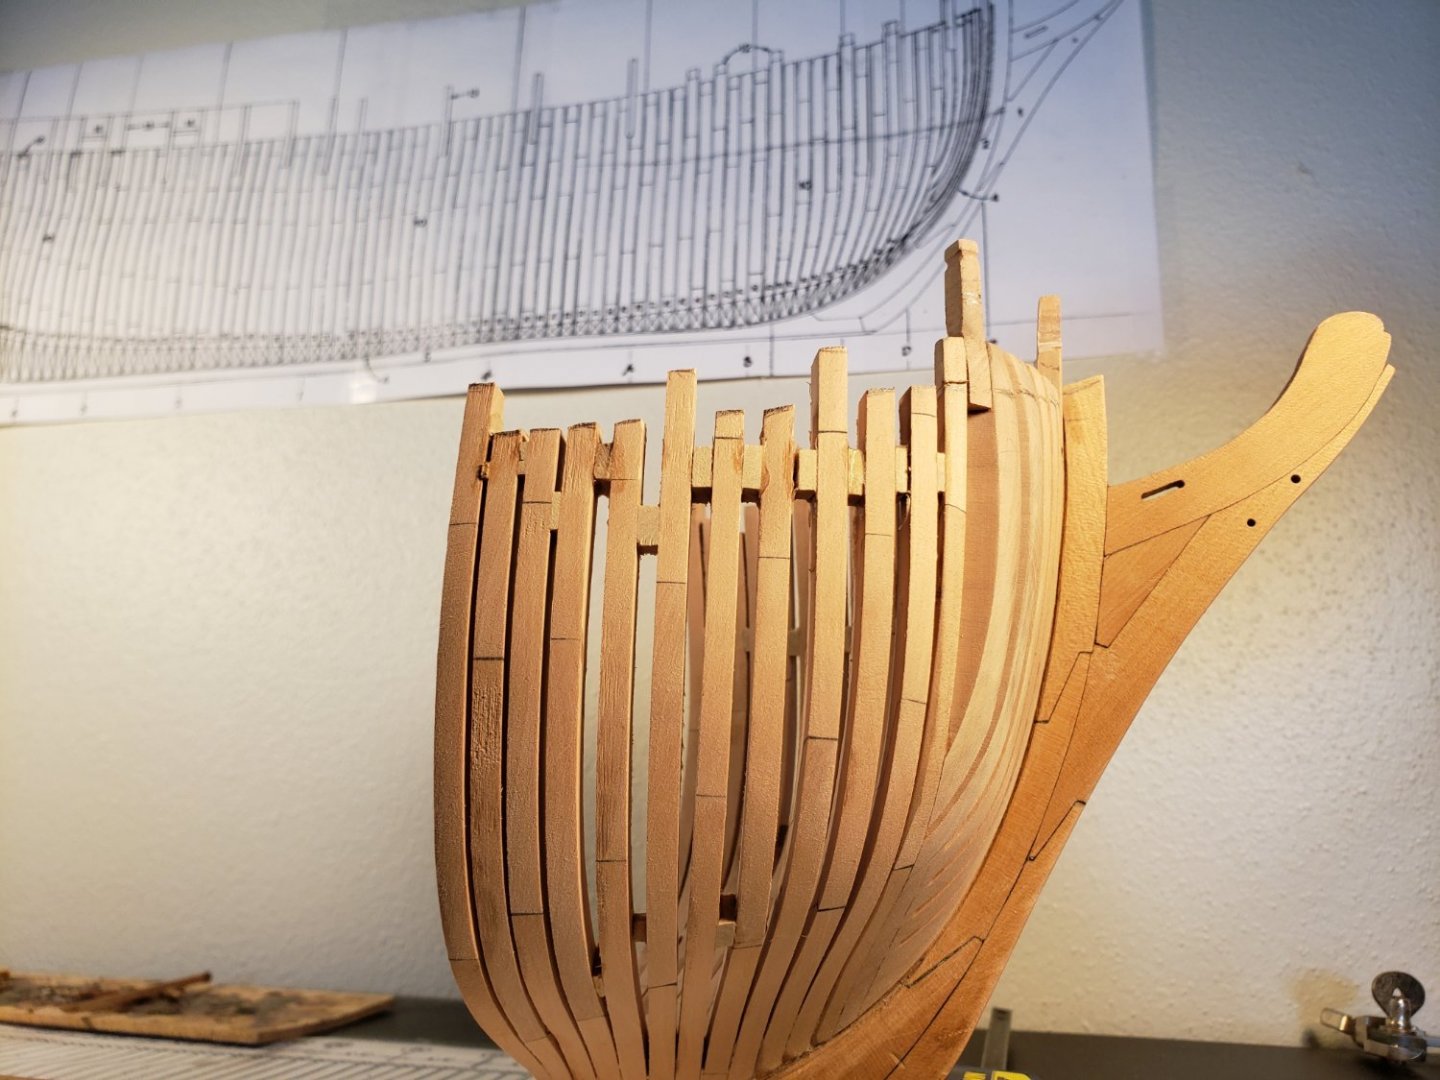
-
HMS Bounty by AdamA - 1:48
AdamA replied to AdamA's topic in - Build logs for subjects built 1751 - 1800
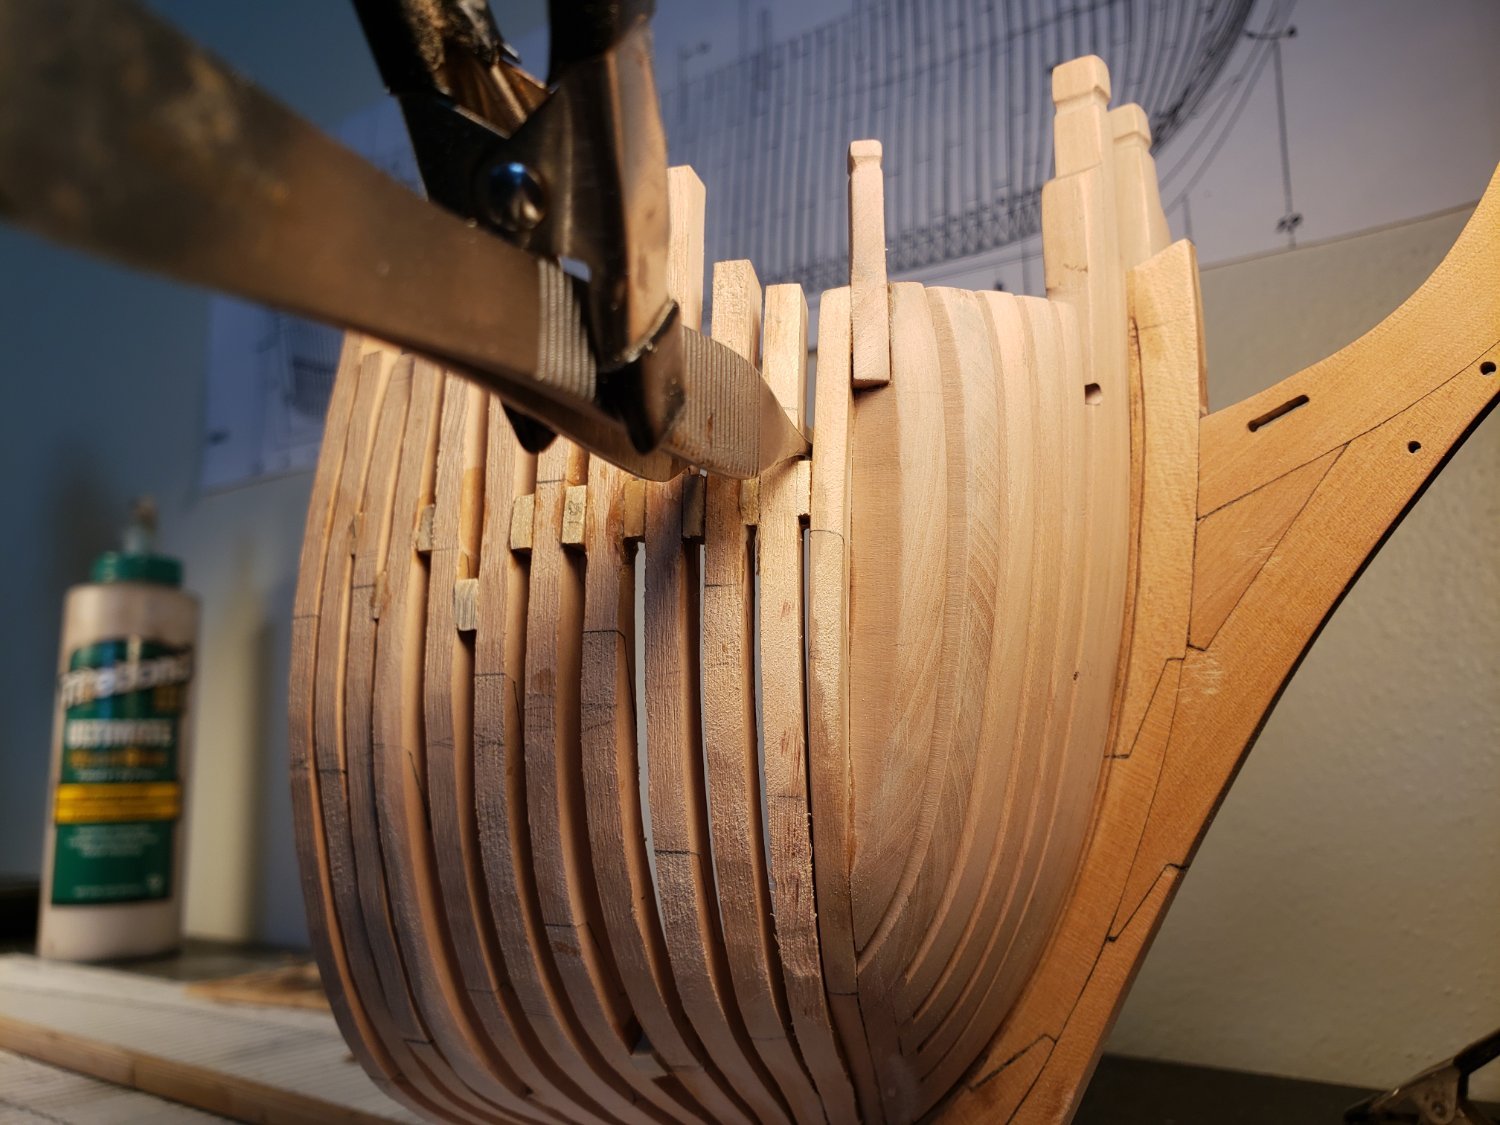
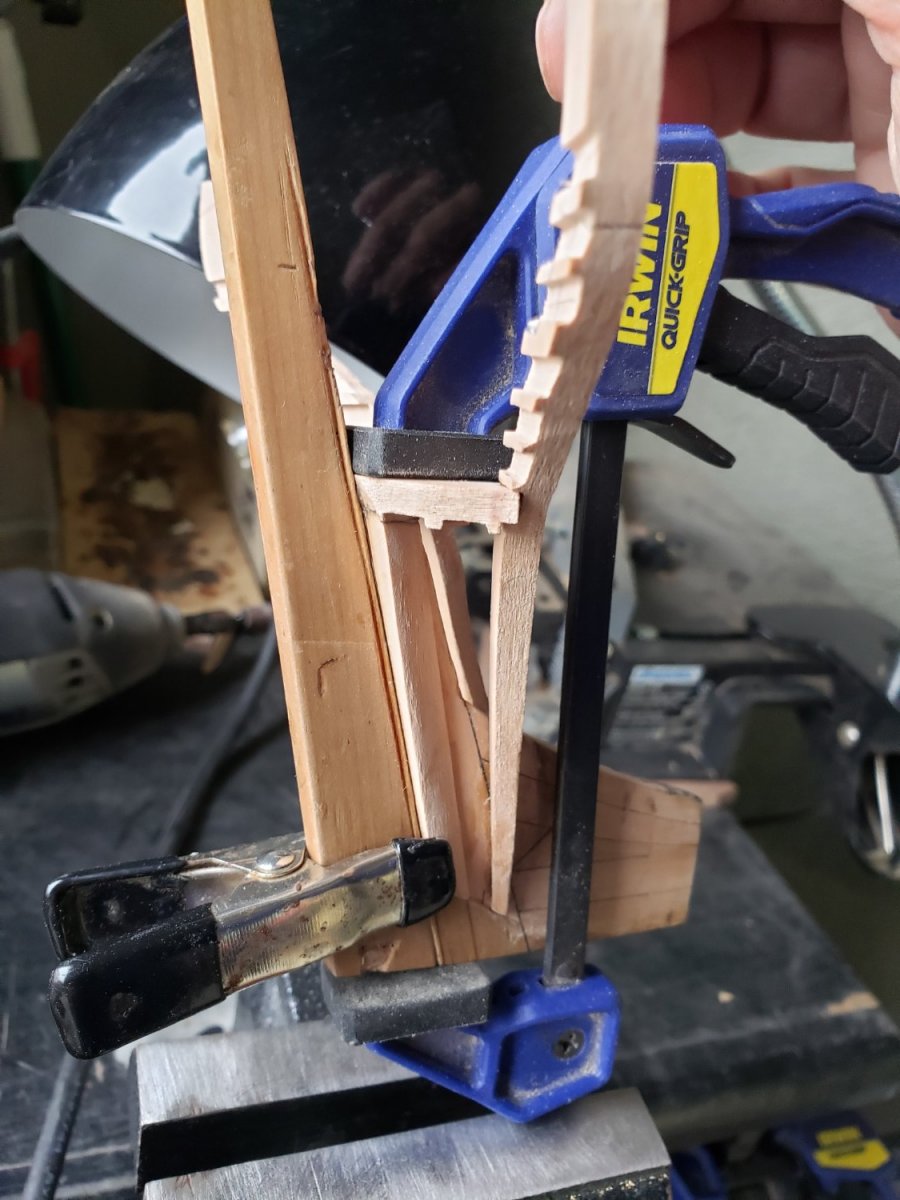
I need some small clamps that won't damage the frames. As a stop-gap measure I use tweezers with these clamps attached a short distance away from the business end. It allows me to adjust the power downward. These clamps are so strong they can actually break these frames so this is my solution.
-
HMS Bounty by AdamA - 1:48
AdamA replied to AdamA's topic in - Build logs for subjects built 1751 - 1800
The rope machine will be the only thing I don't have from his website. If it was available without a phone call I would have added it to my latest purchase. It looks really nice. -
HMS Bounty by AdamA - 1:48
AdamA replied to AdamA's topic in - Build logs for subjects built 1751 - 1800
I have never had any problem removing CA after a day or two for quick holds. Is it supposed to be permanent? Hmm. In the meantime I just ordered all the rest of Byrnes tools. I got the thickness sander last year (and it is a perfect piece of machinery) so I ordered his table saw and disk sander. It's going to be fun opening those boxes in a few weeks. -
HMS Bounty by AdamA - 1:48
AdamA replied to AdamA's topic in - Build logs for subjects built 1751 - 1800
I attached some spacers temporarily inside these frames with CA glue before I sand these.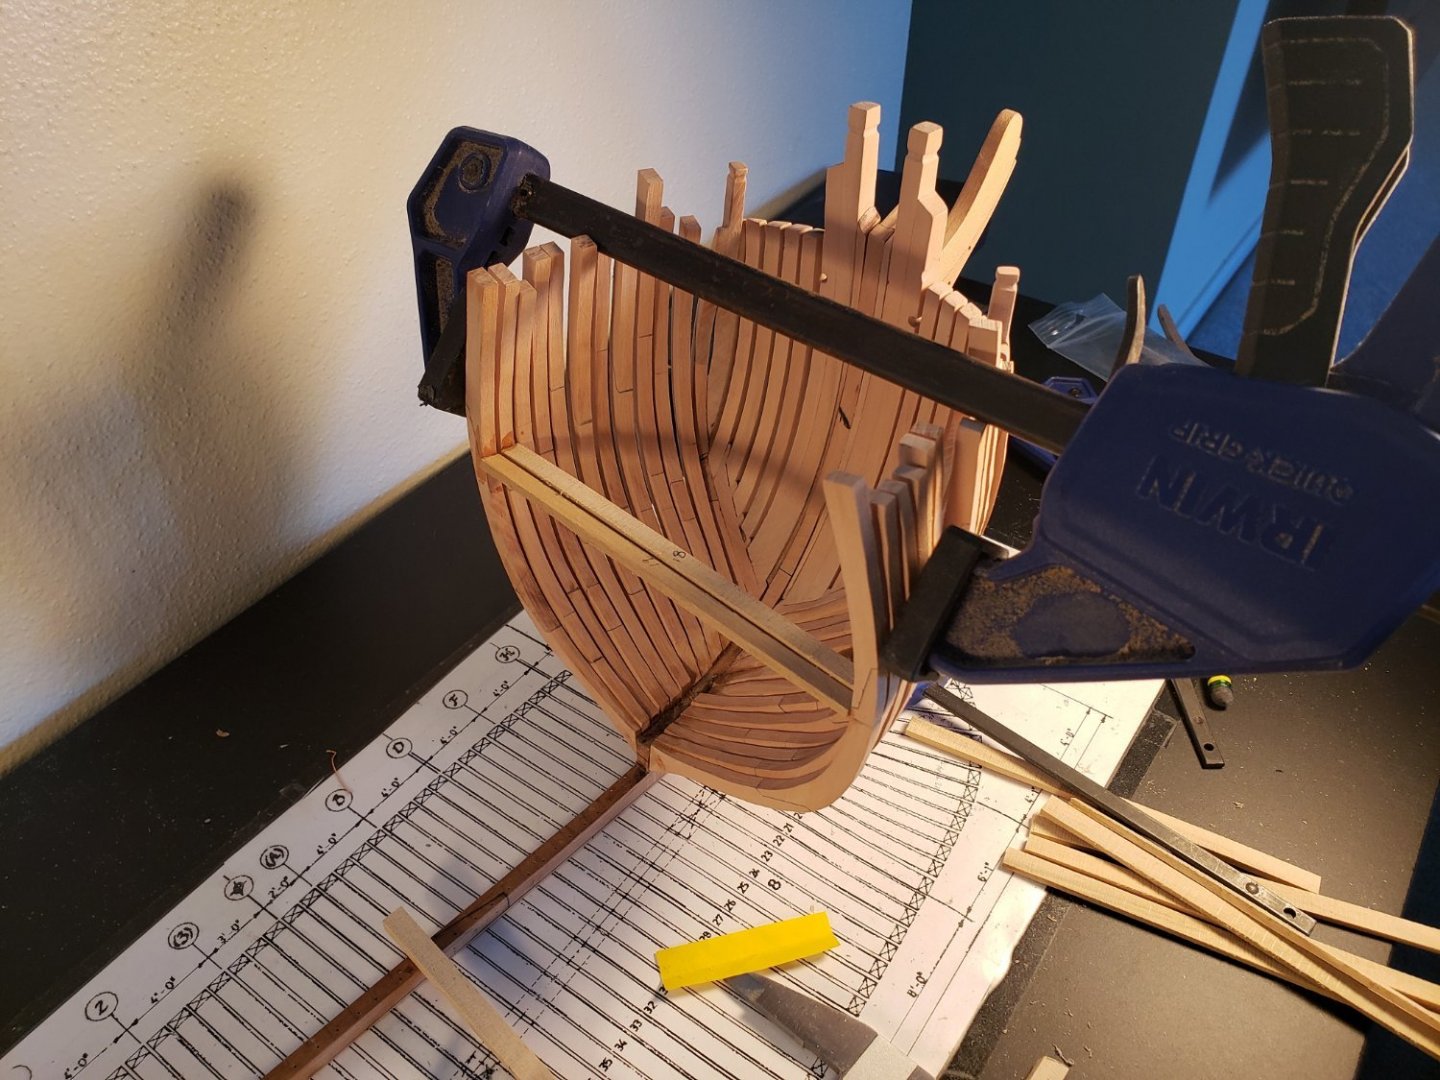

-
HMS Bounty by AdamA - 1:48
AdamA replied to AdamA's topic in - Build logs for subjects built 1751 - 1800
I finally decided to get this ship her own table inside. I usually work outside on my third floor patio that I converted to a workshop (because we had a baby and the nursery is on the first floor adjacent to the garage where I would probably prefer to work). I couldn't run any machinery if he was napping. So I got a cheap table so I can drill into it as necessary.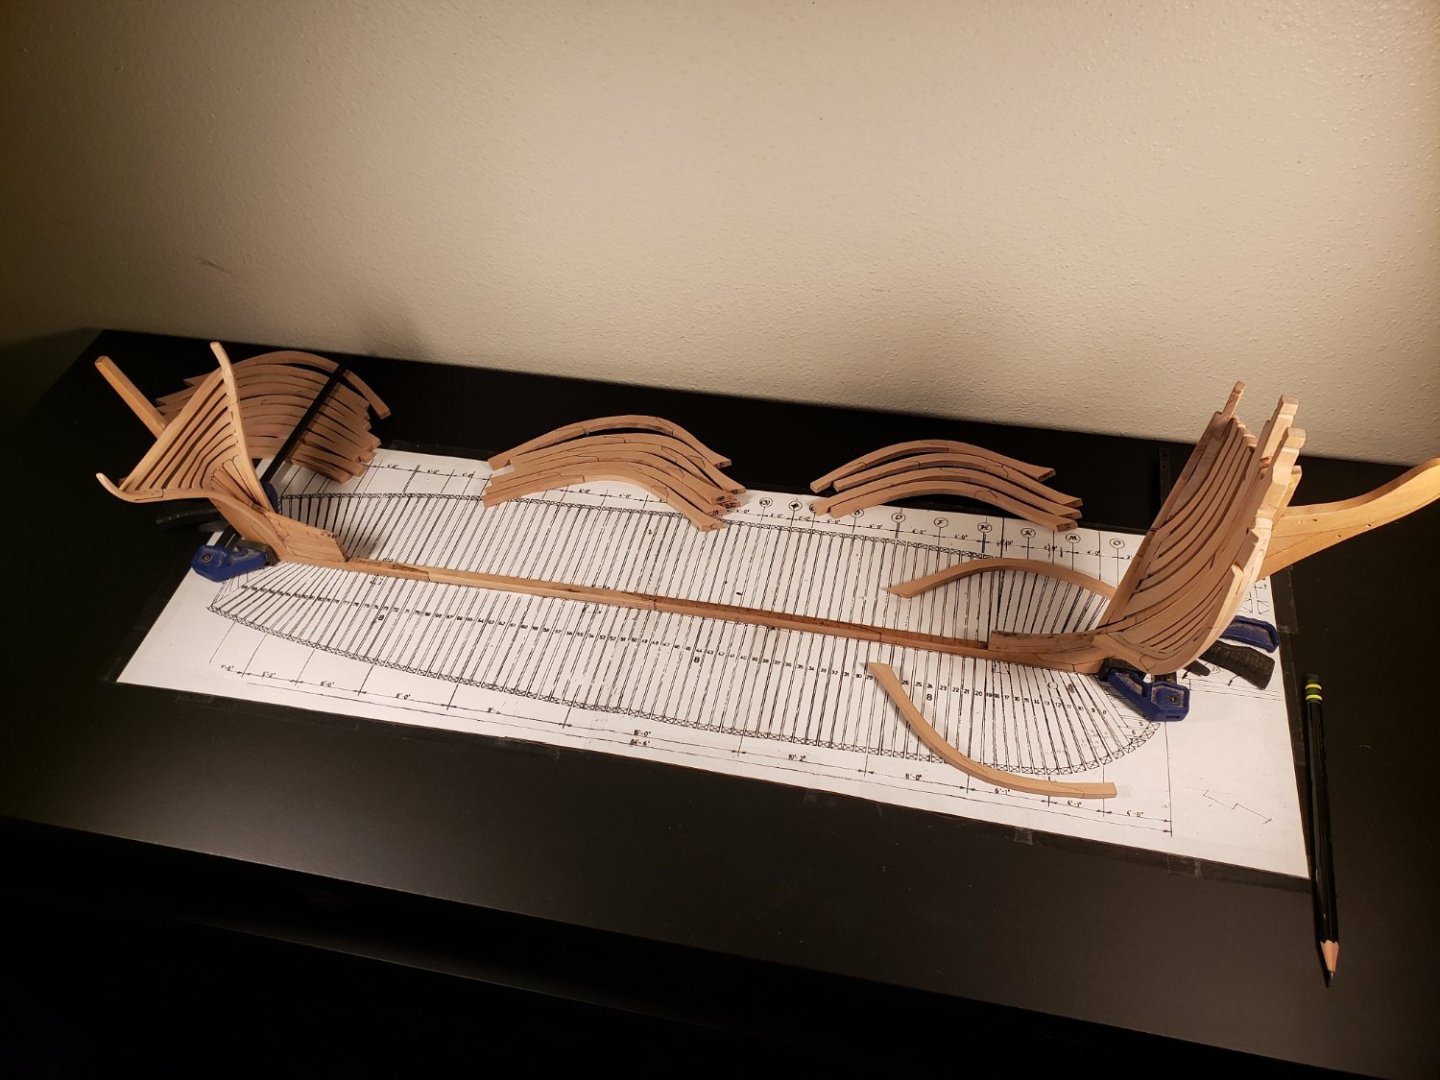
-
HMS Bounty by AdamA - 1:48
AdamA replied to AdamA's topic in - Build logs for subjects built 1751 - 1800

-
HMS Bounty by AdamA - 1:48
AdamA replied to AdamA's topic in - Build logs for subjects built 1751 - 1800

-
HMS Bounty by AdamA - 1:48
AdamA replied to AdamA's topic in - Build logs for subjects built 1751 - 1800

-
HMS Bounty by AdamA - 1:48
AdamA replied to AdamA's topic in - Build logs for subjects built 1751 - 1800

-
HMS Bounty by AdamA - 1:48
AdamA replied to AdamA's topic in - Build logs for subjects built 1751 - 1800
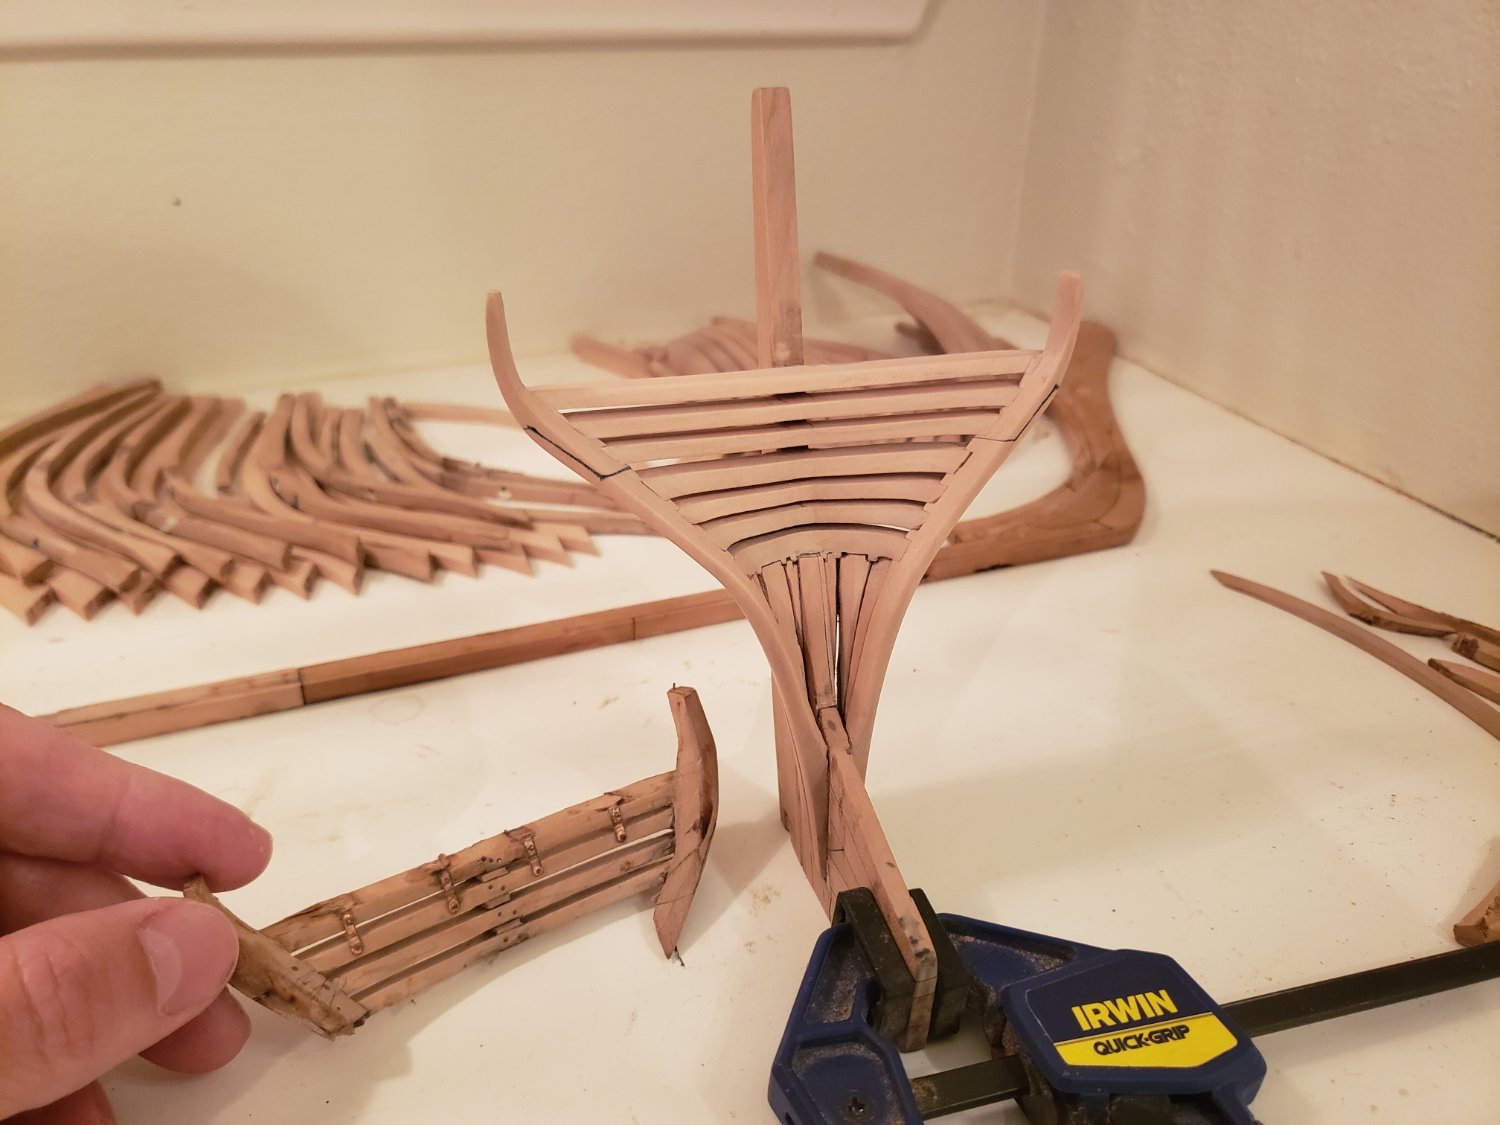
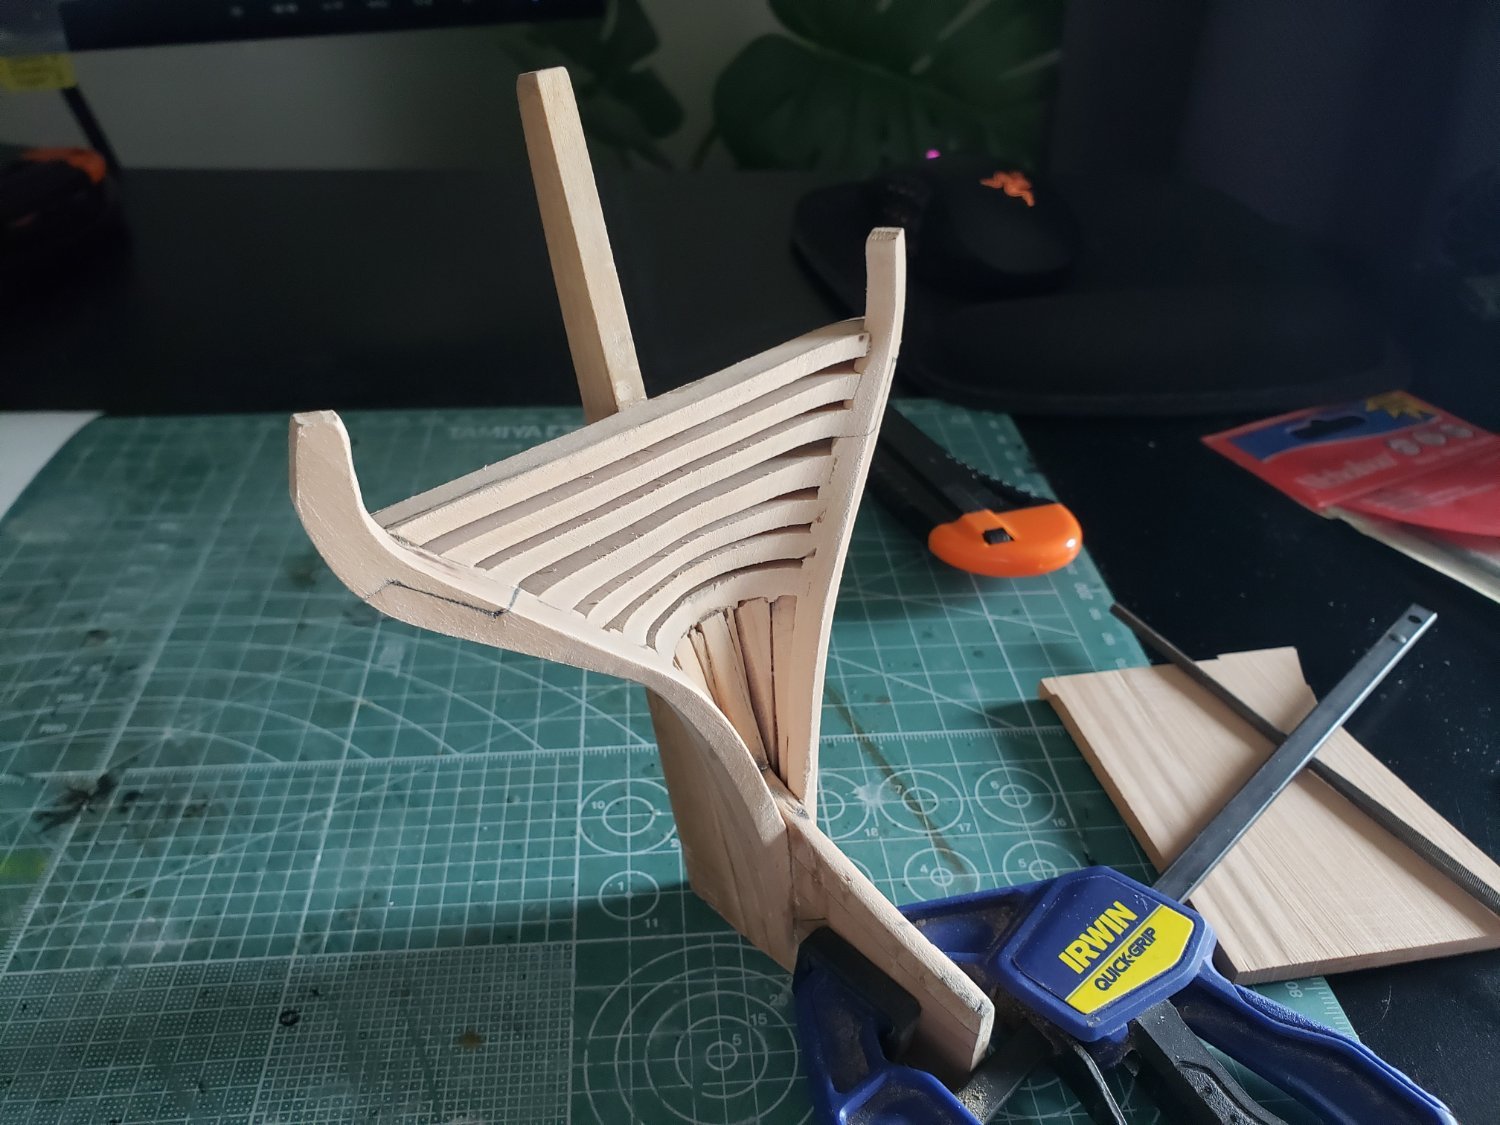
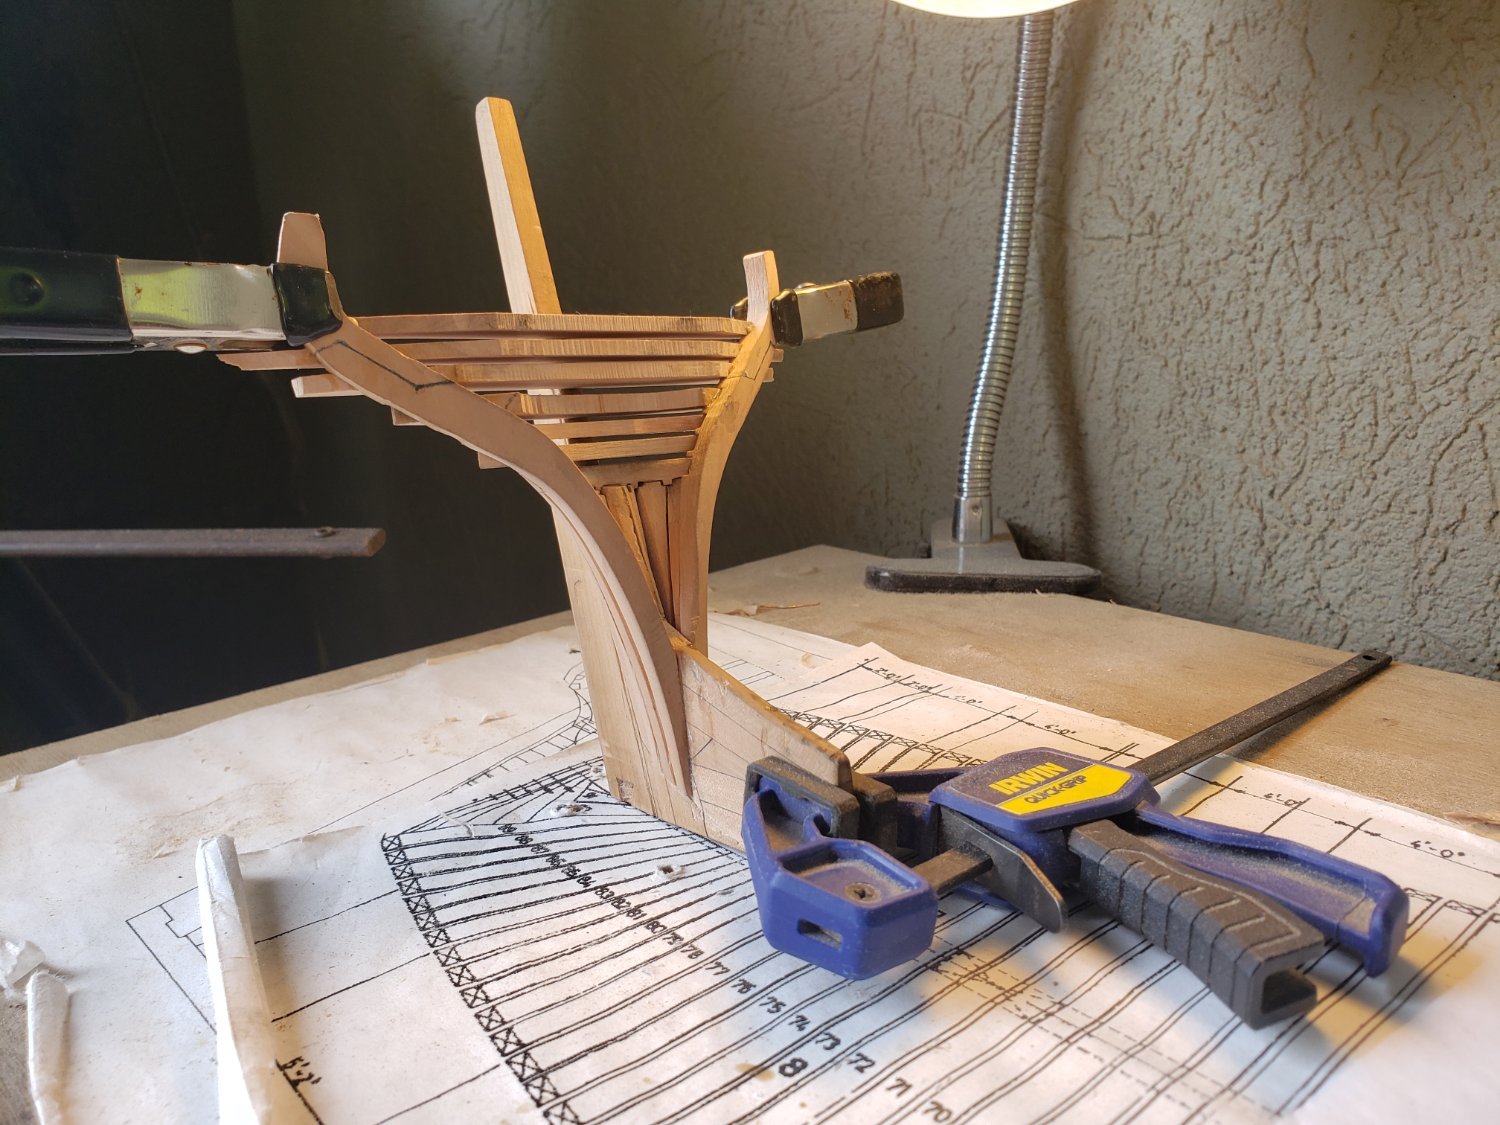
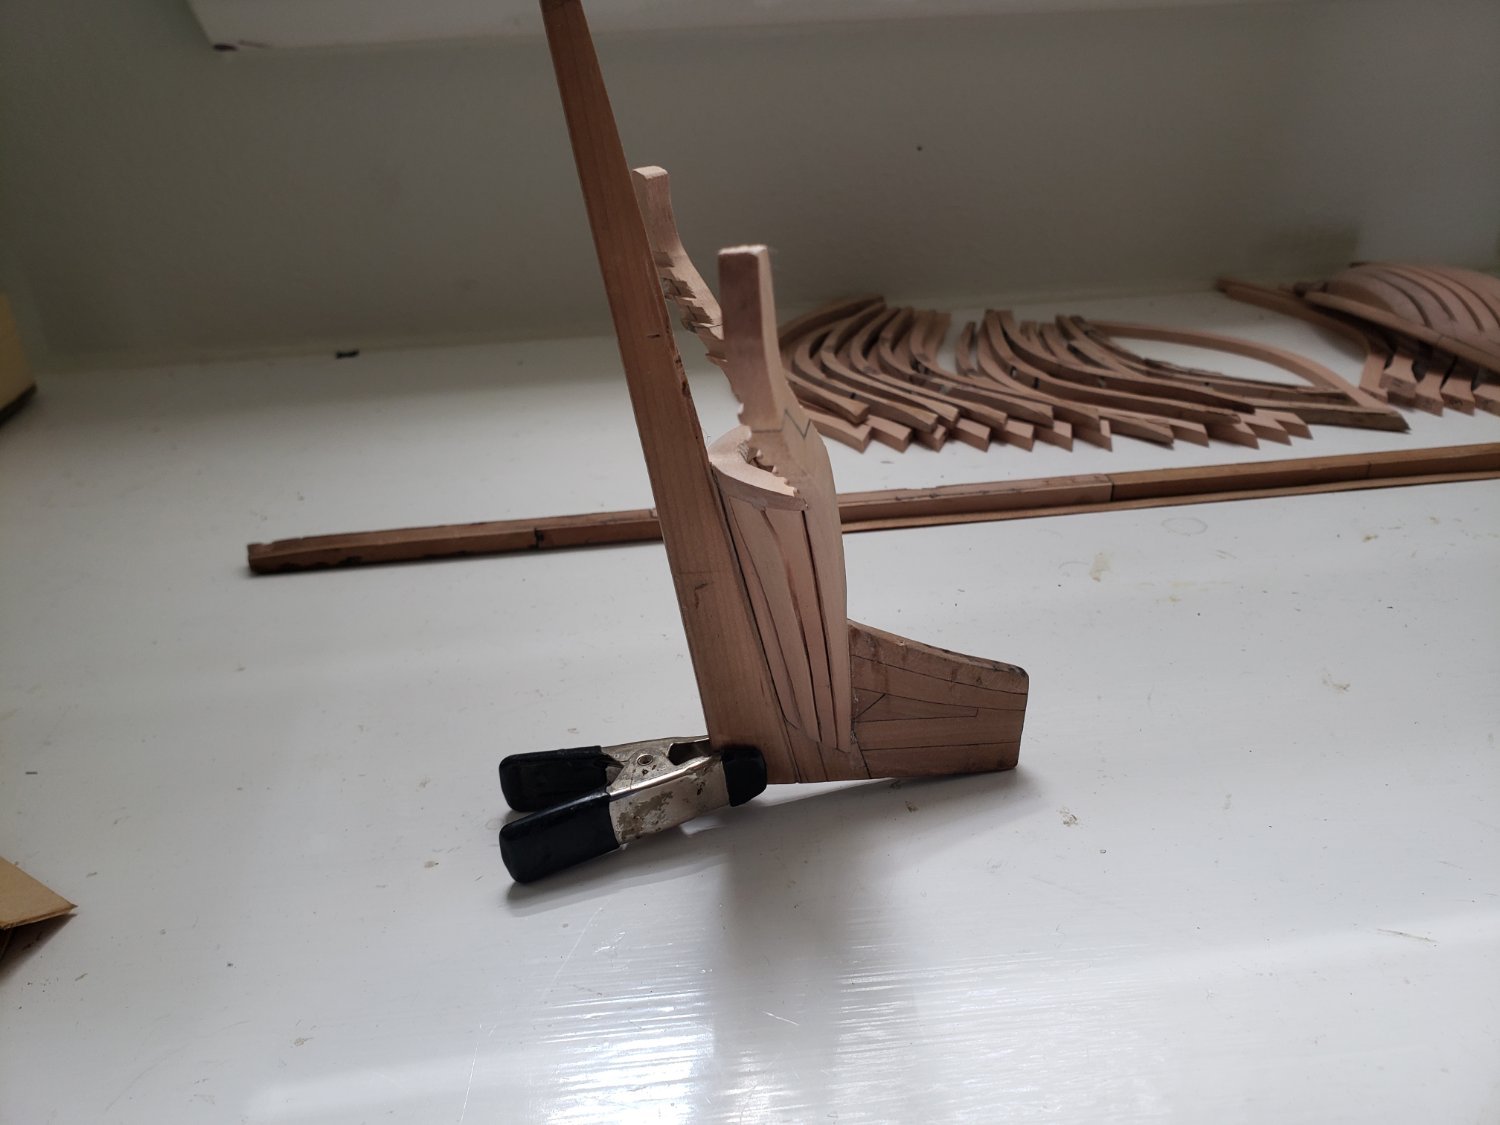
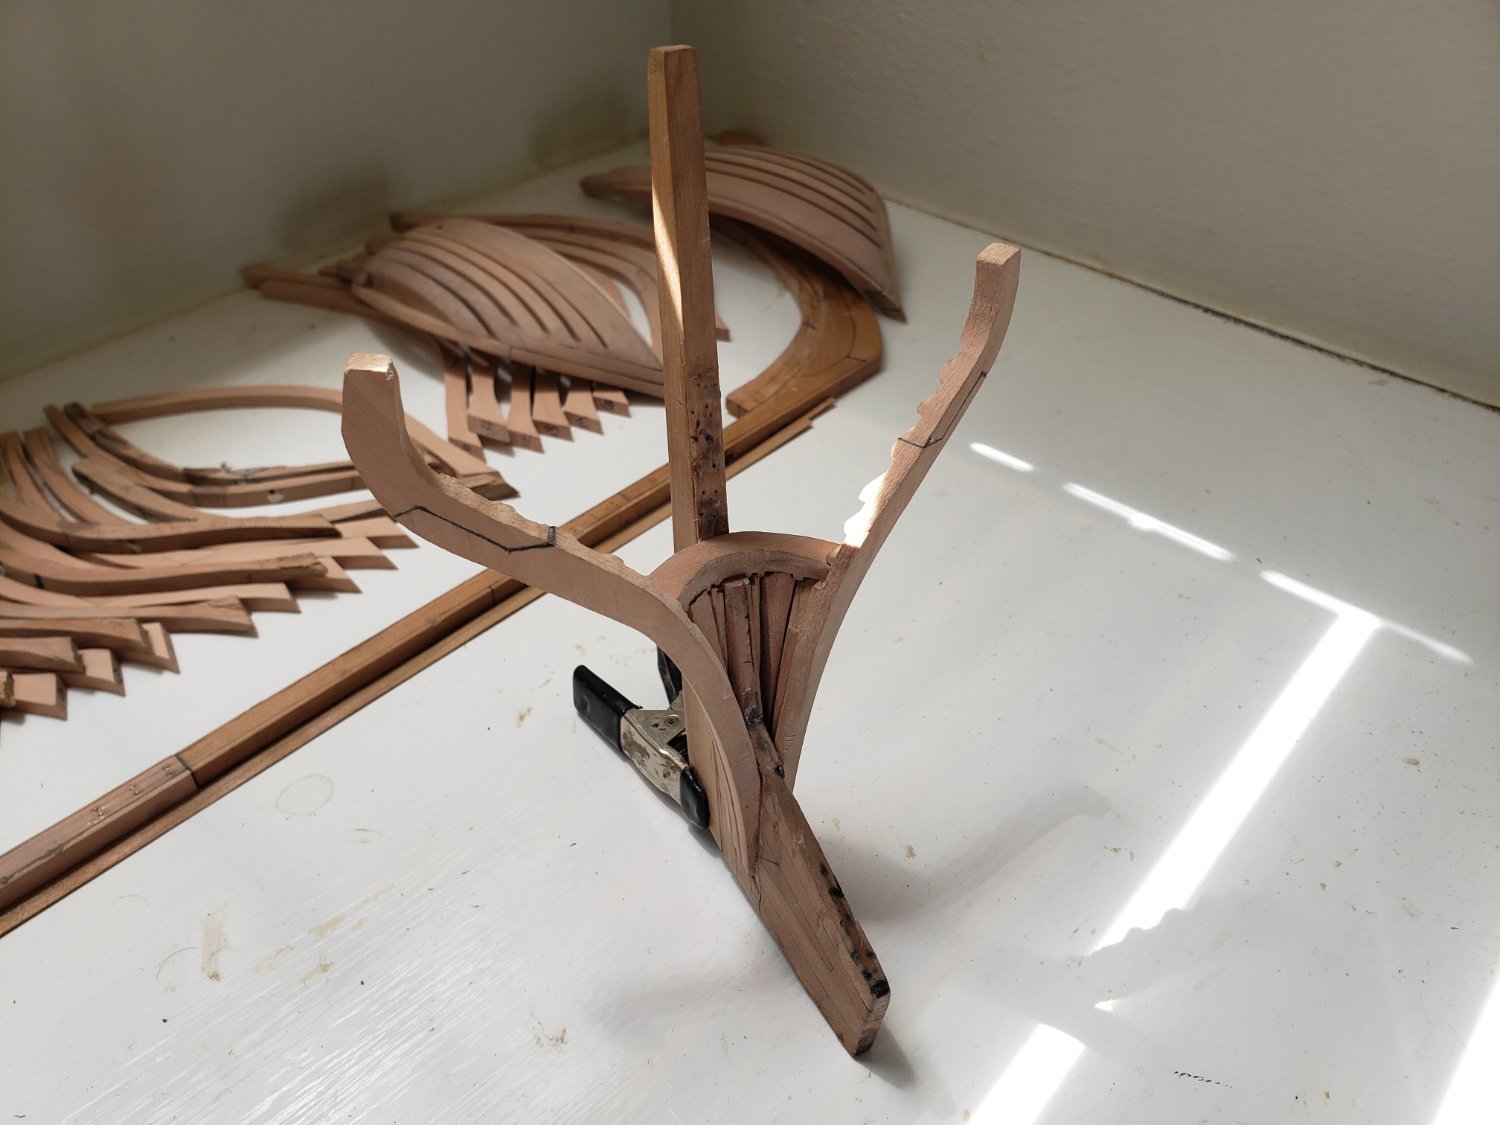
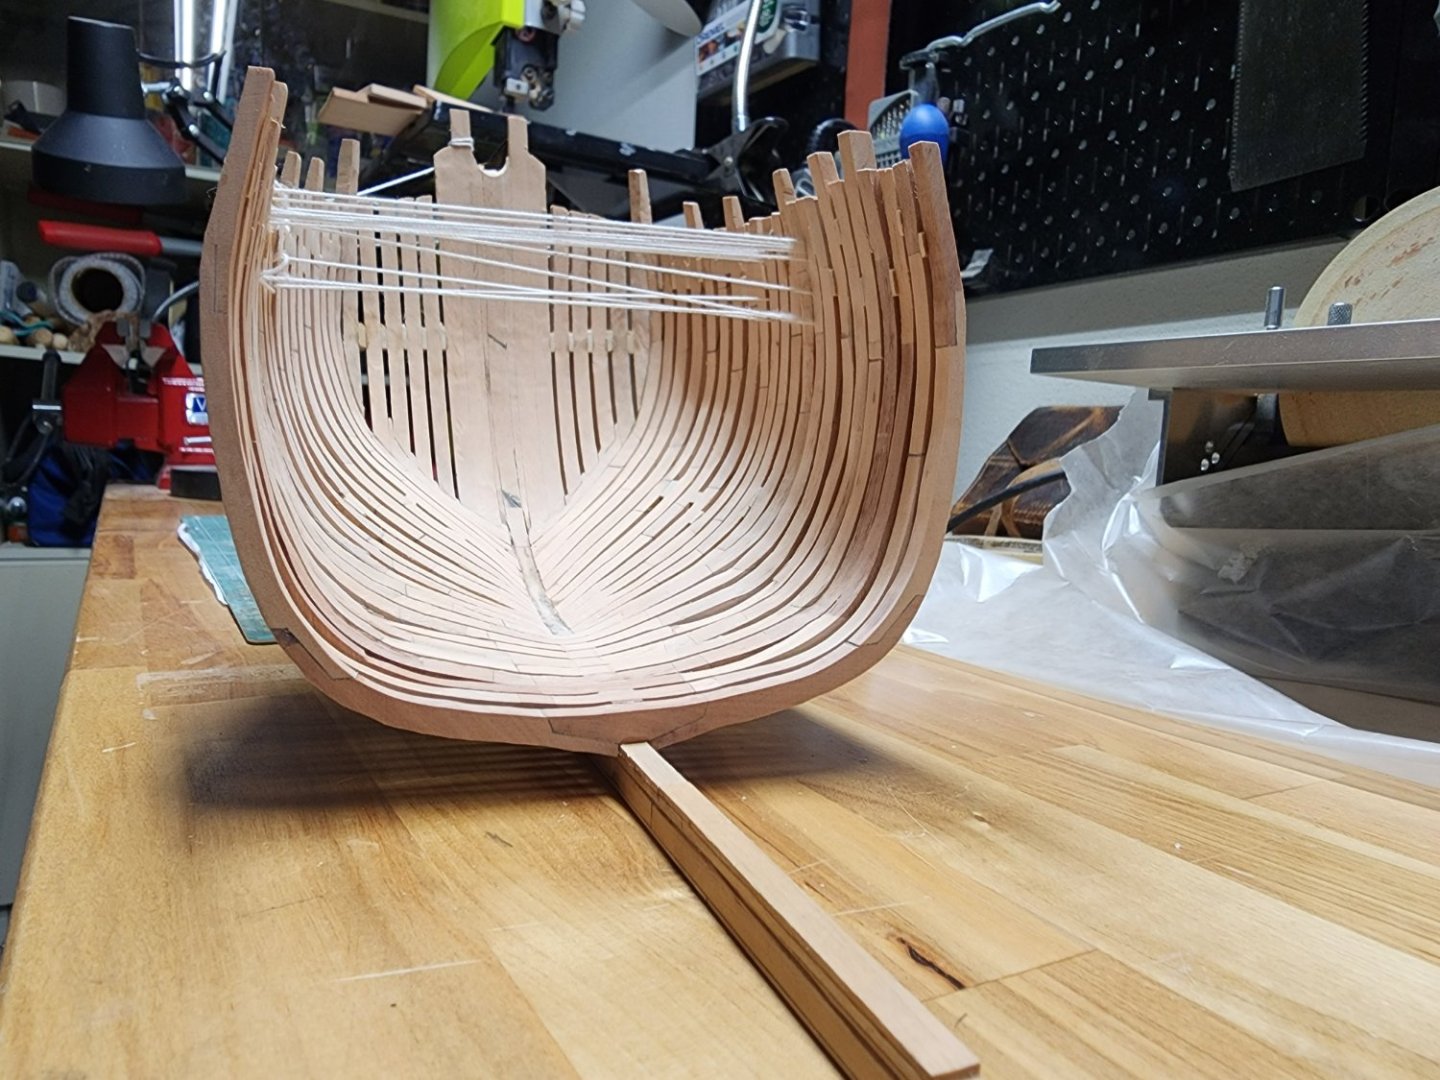
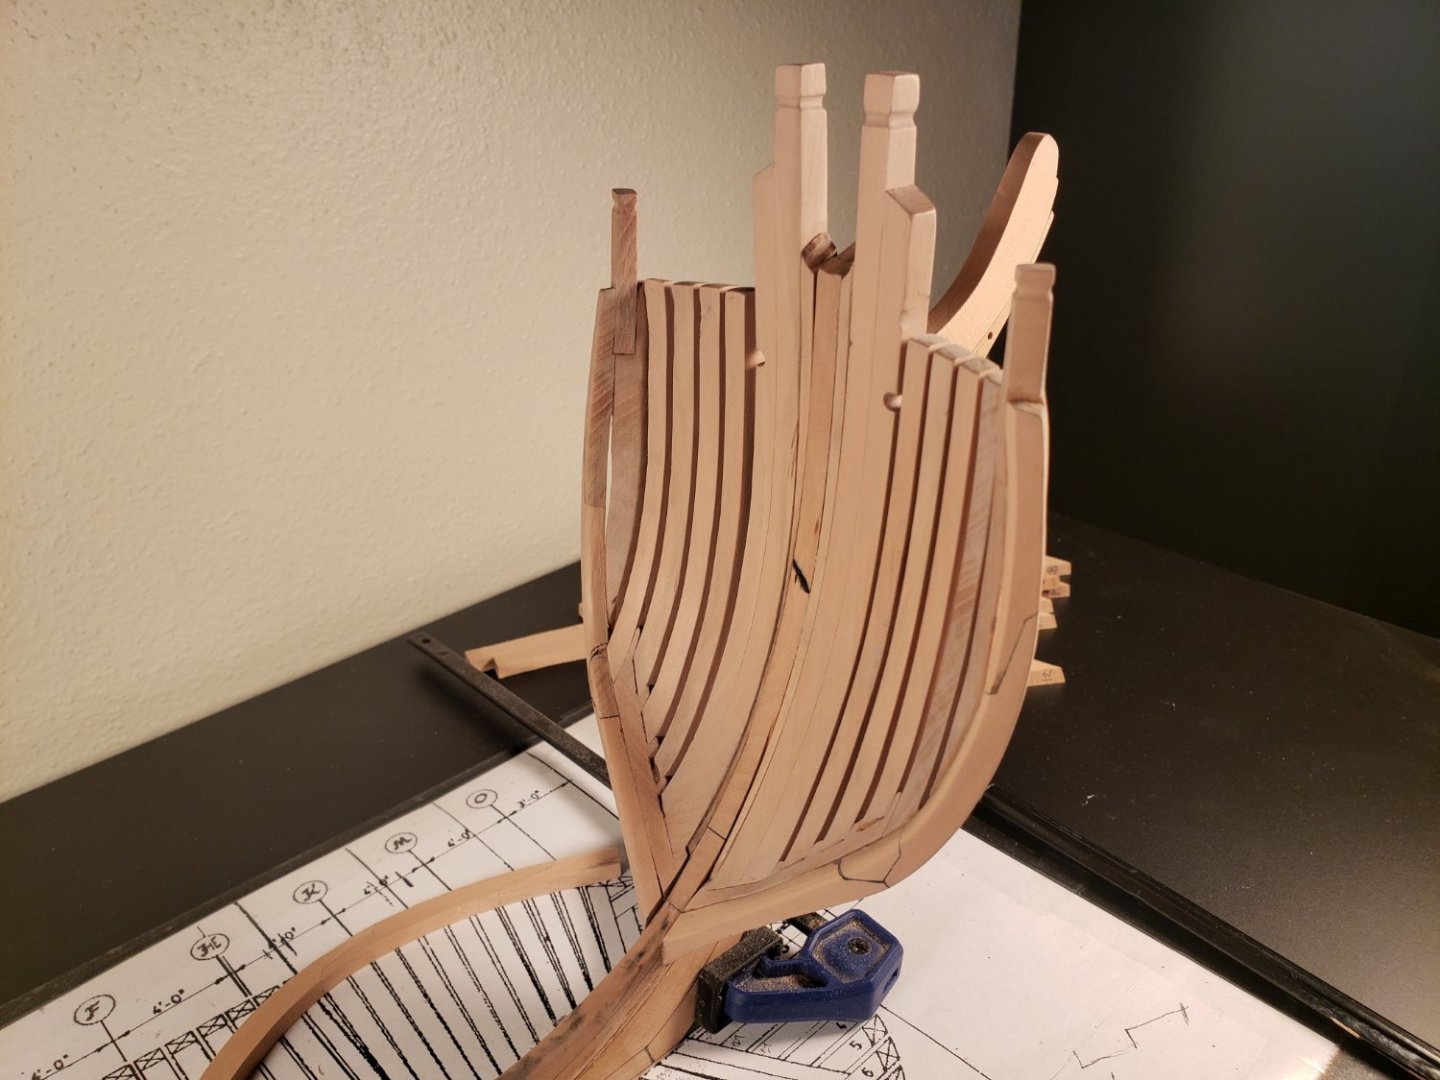
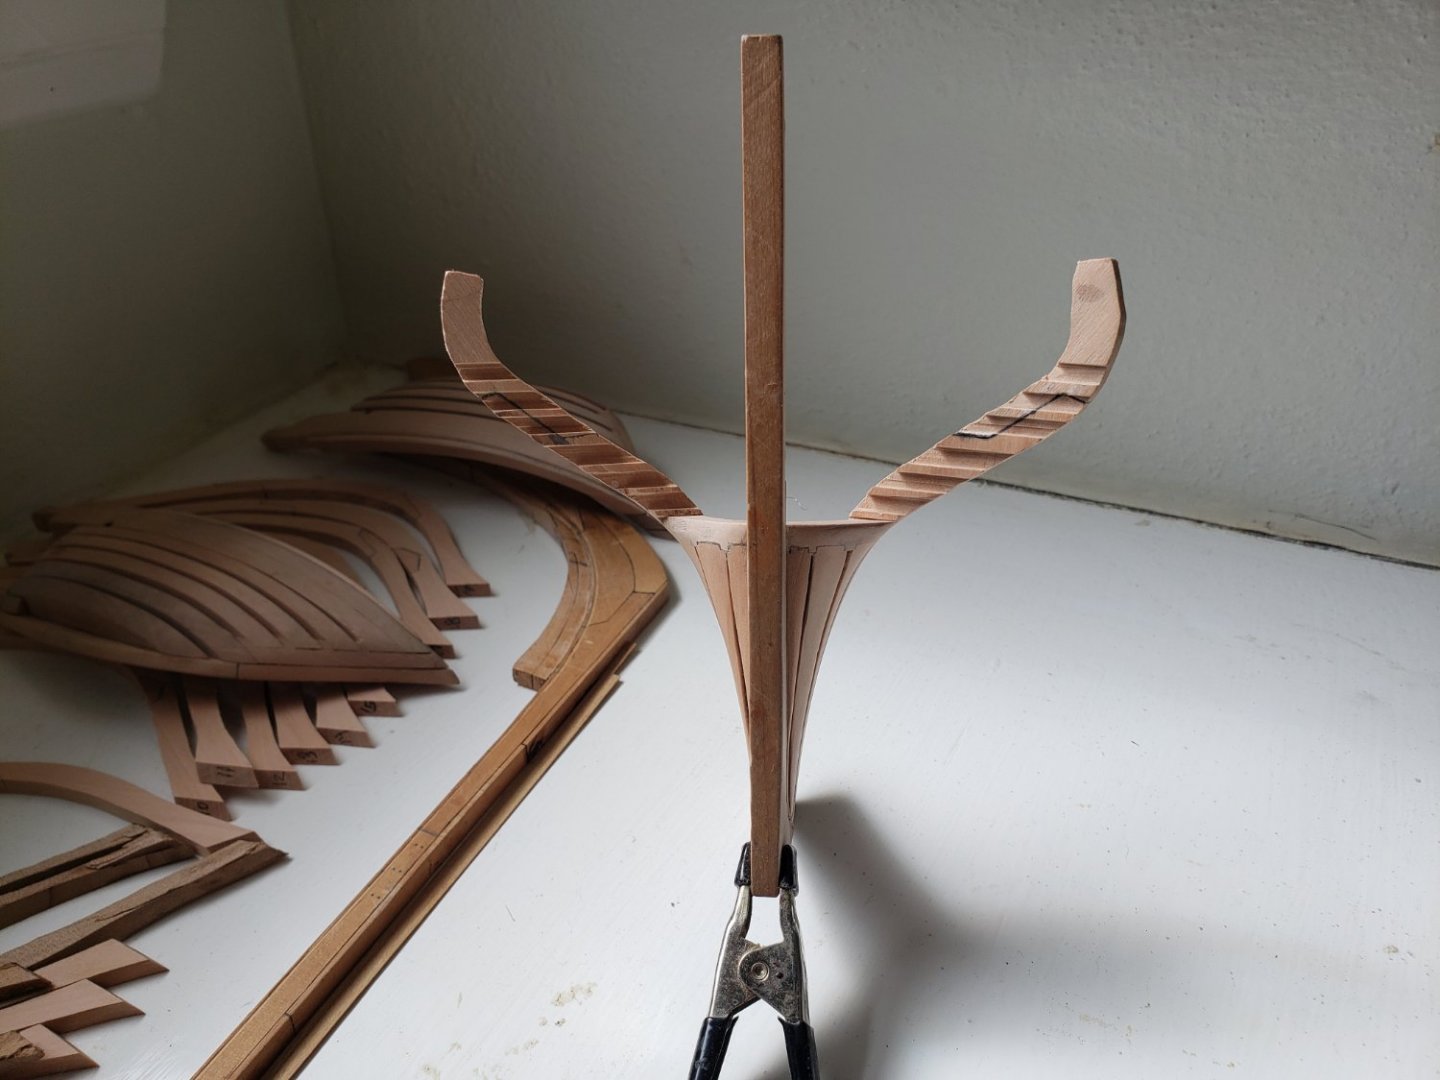
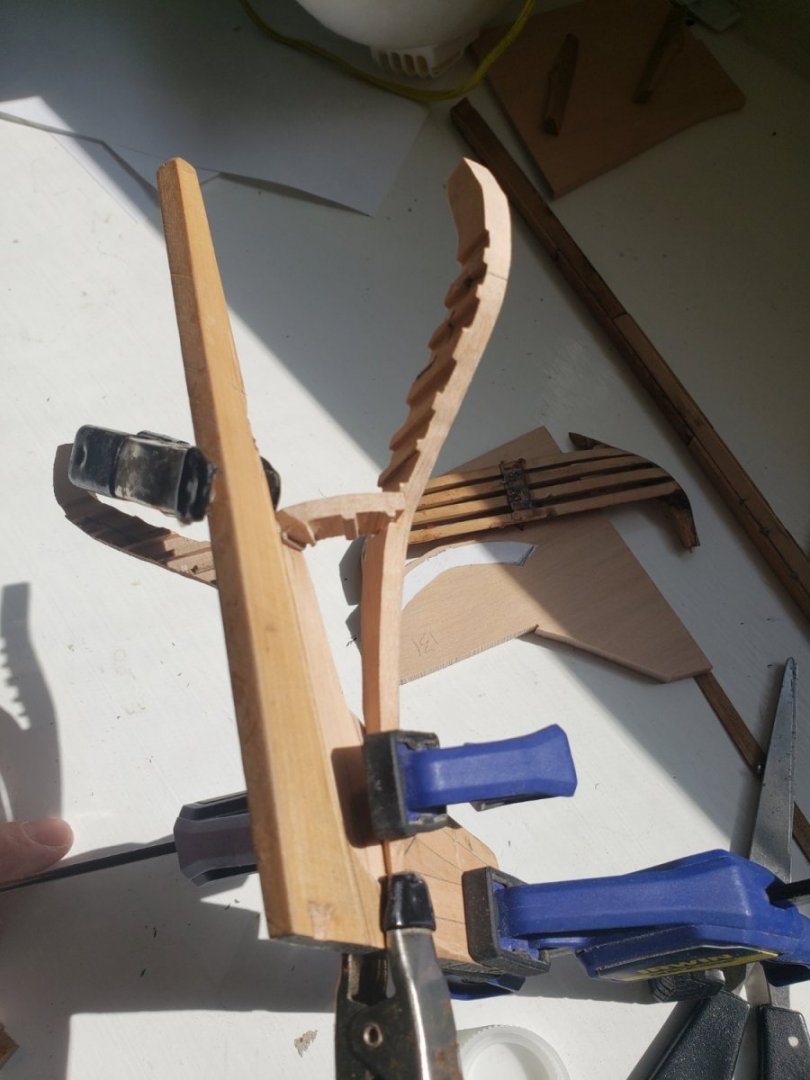
Fashion pieces and filler pieces in. I haven't chiseled, filed or sanded the inside yet. Also I'm going to add bolts since I've decided to leave one side unplanked.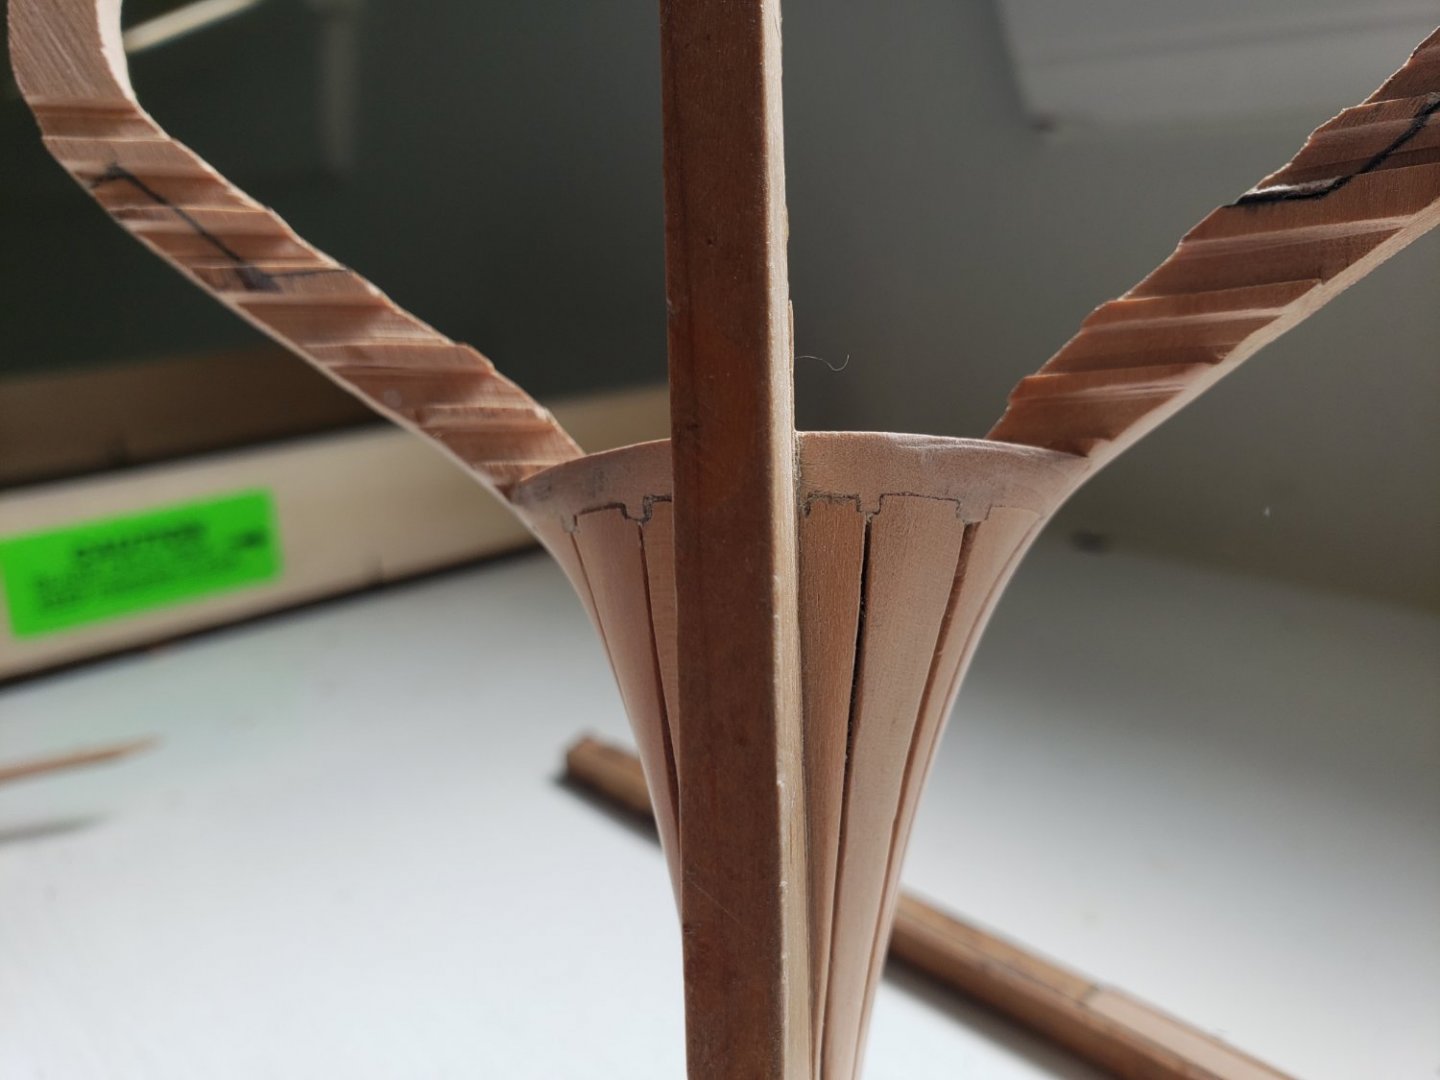

-
HMS Bounty by AdamA - 1:48
AdamA replied to AdamA's topic in - Build logs for subjects built 1751 - 1800
-
HMS Bounty by AdamA - 1:48
AdamA replied to AdamA's topic in - Build logs for subjects built 1751 - 1800
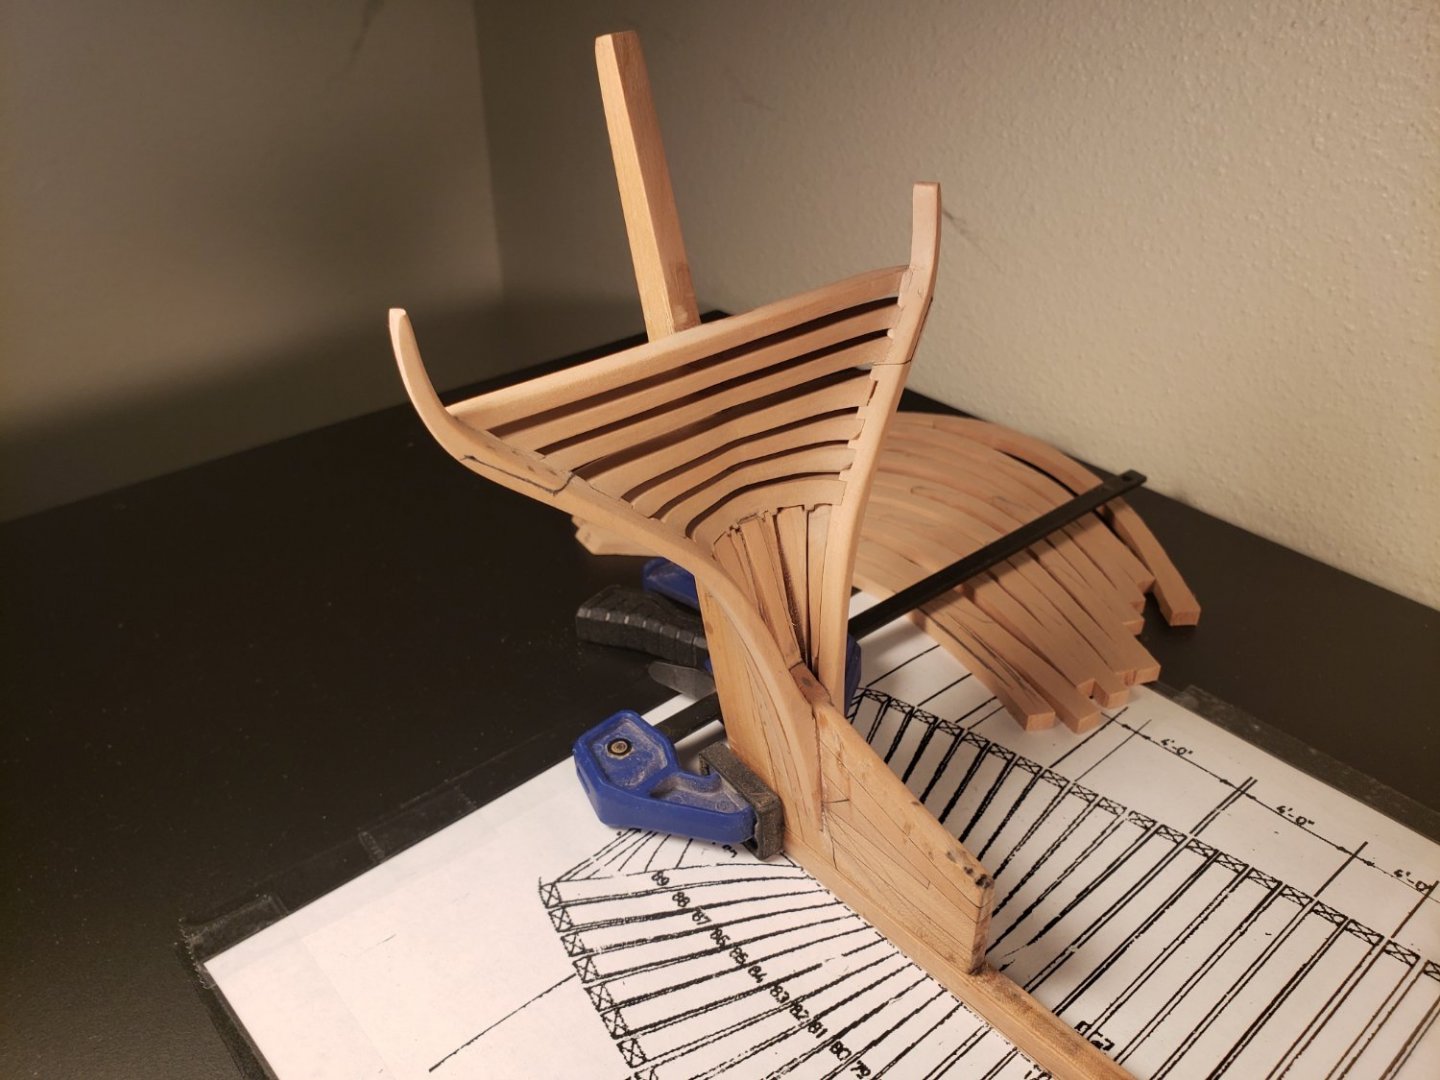
Aaaaand she's in. Starboard fashion piece glued. -
HMS Bounty by AdamA - 1:48
AdamA replied to AdamA's topic in - Build logs for subjects built 1751 - 1800
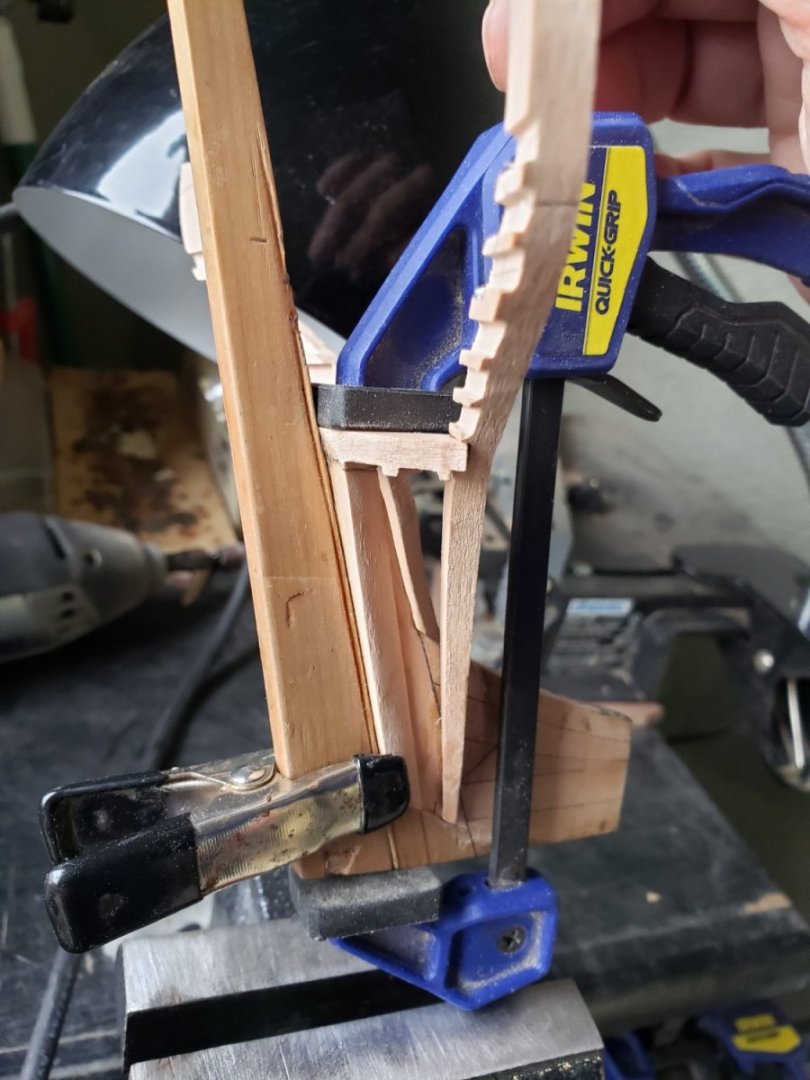
Now that I have the first transom and can't frames in place, I can cut the rest of the fashion and filler pieces so they fit into their slots.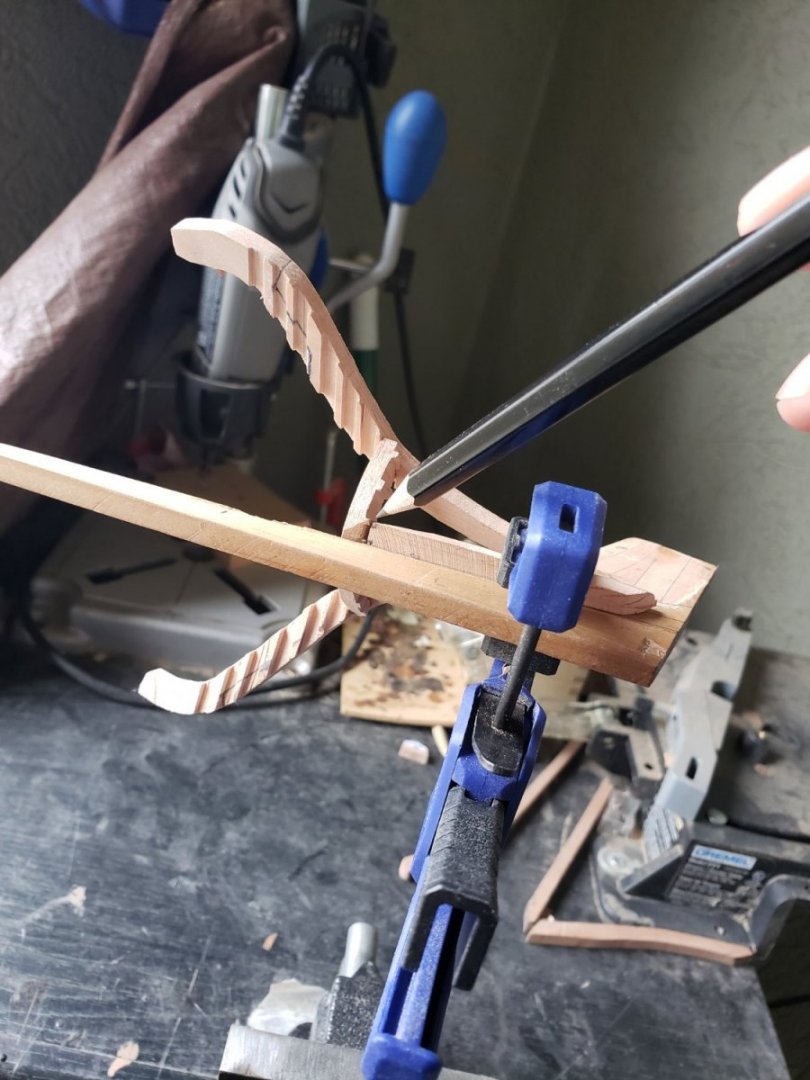
-
HMS Bounty by AdamA - 1:48
AdamA replied to AdamA's topic in - Build logs for subjects built 1751 - 1800
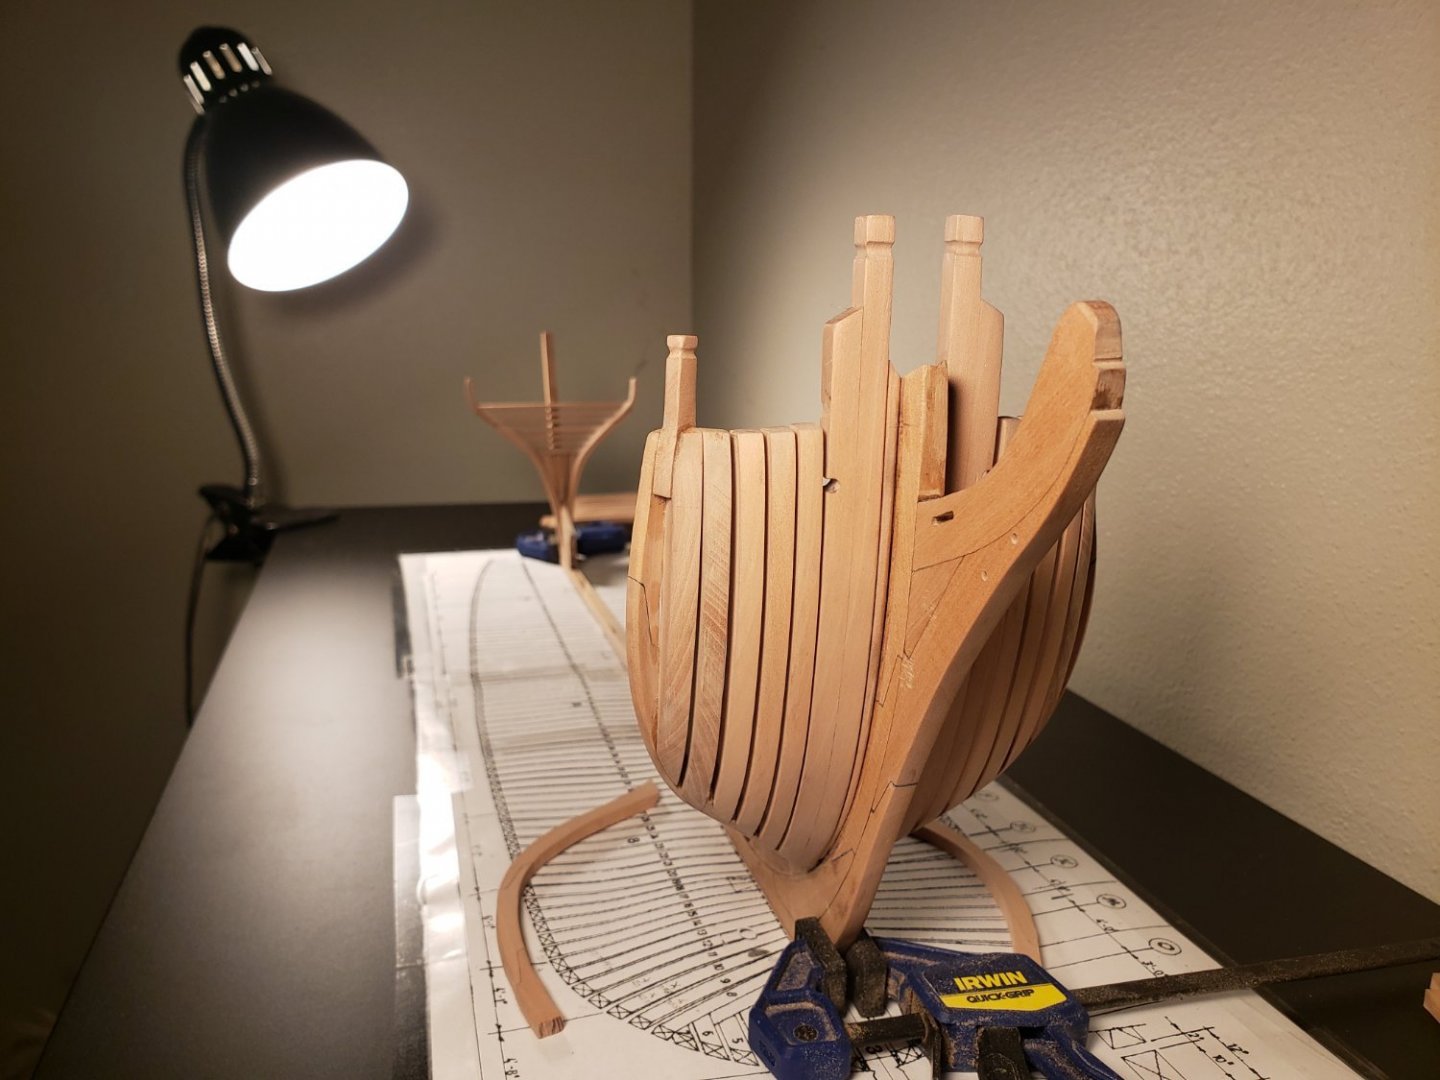
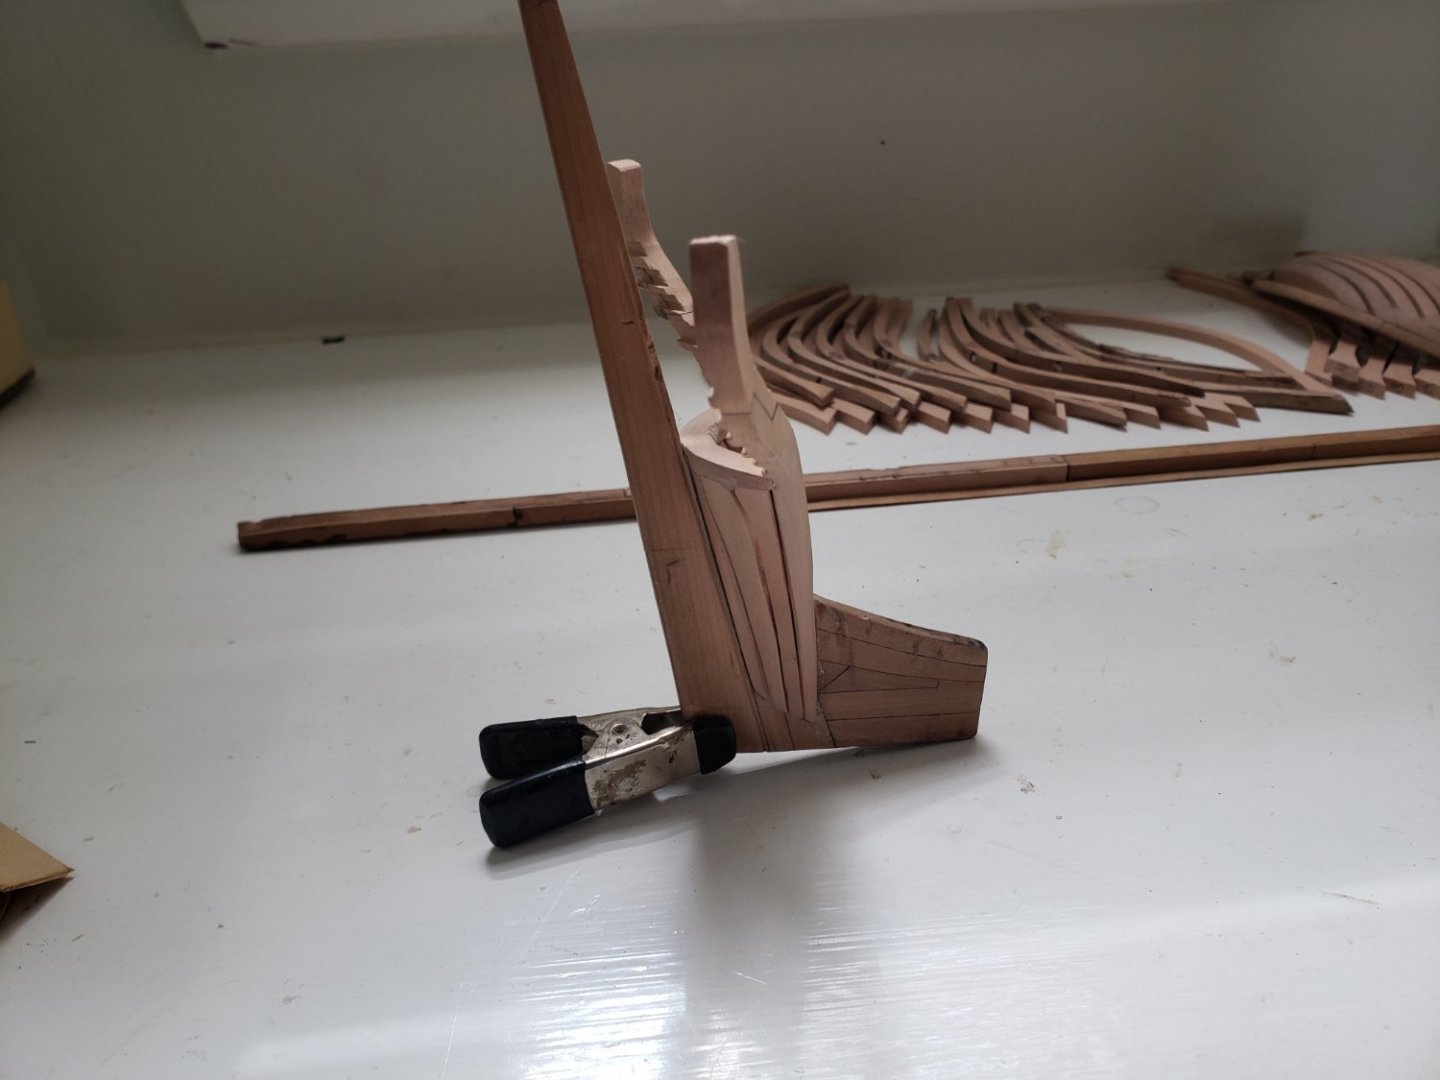
It took some patience but I think these pieces are all seated well enough to glue up.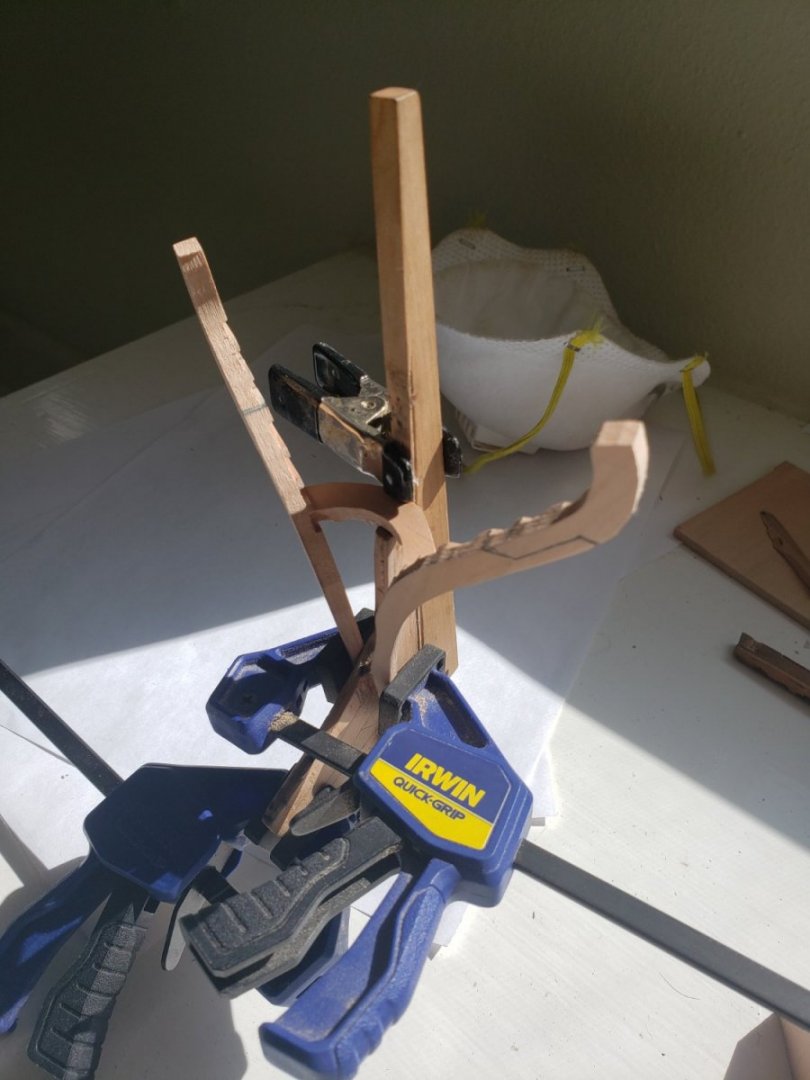
-
HMS Bounty by AdamA - 1:48
AdamA replied to AdamA's topic in - Build logs for subjects built 1751 - 1800
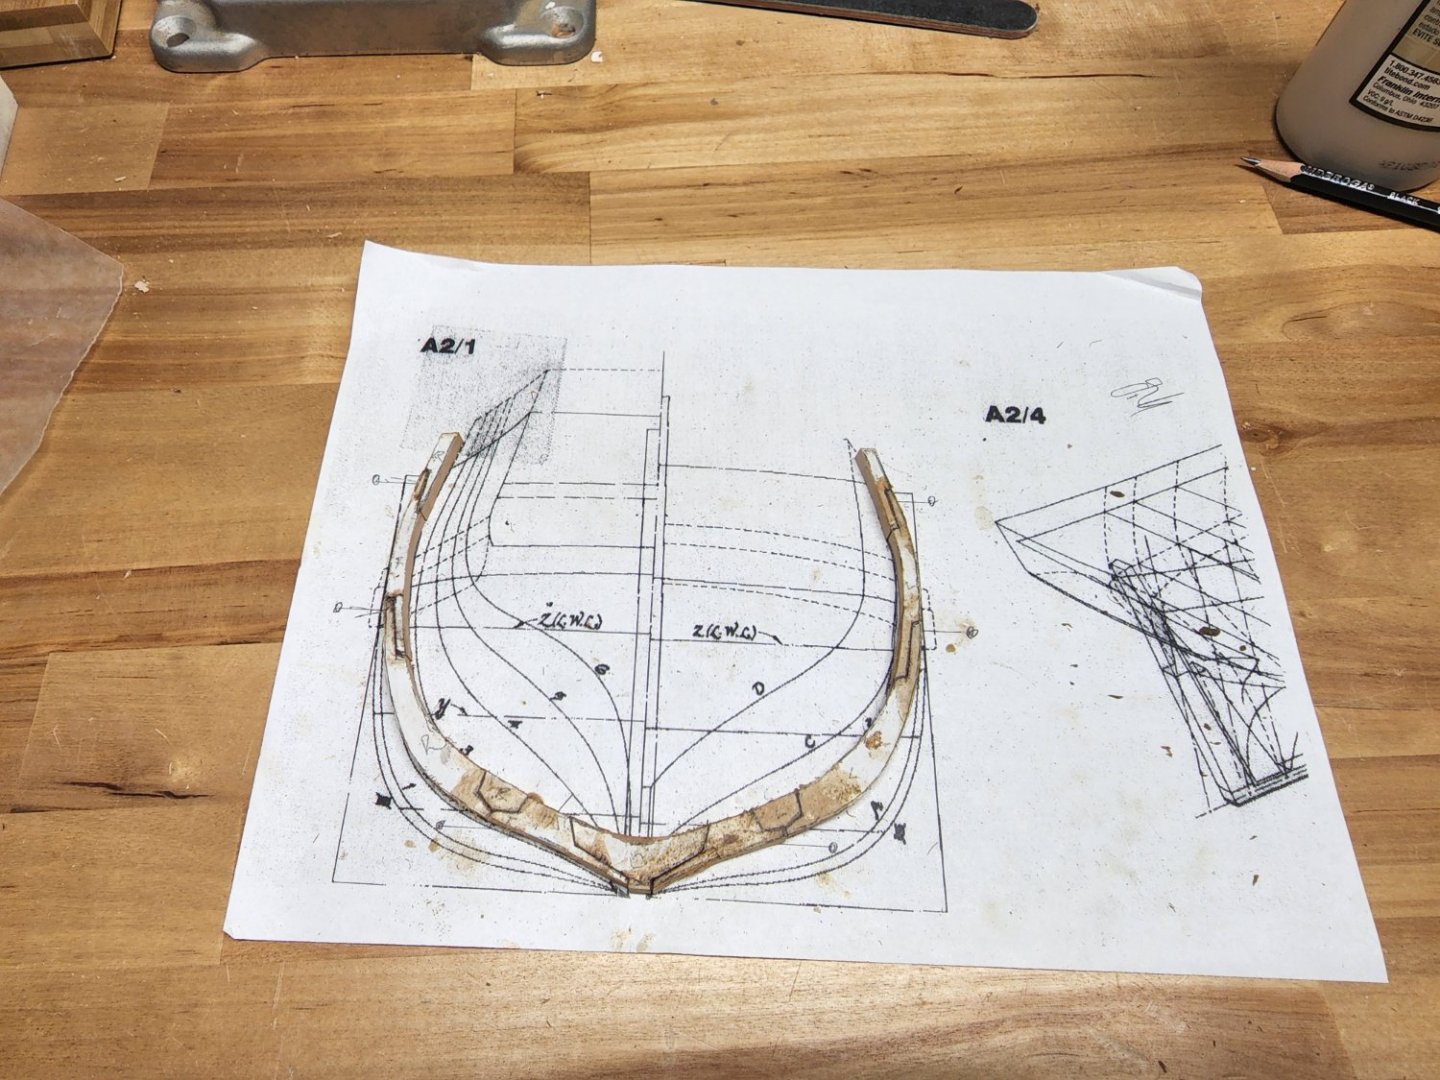
I'm rebuilding the transoms so they all fit into their groove on the aftmost stern cant frames. This will be transom number 1 (replacing the one next to it) and it is going to have its own grooves to accept the fashion and filling pieces that lay up against the inner stern post and deadwood.