AdamA
-
Posts
178 -
Joined
-
Last visited
Content Type
Profiles
Forums
Gallery
Events
Everything posted by AdamA
-
HMS Bounty by AdamA - 1:48
AdamA replied to AdamA's topic in - Build logs for subjects built 1751 - 1800
-
HMS Bounty by AdamA - 1:48
AdamA replied to AdamA's topic in - Build logs for subjects built 1751 - 1800


-
HMS Bounty by AdamA - 1:48
AdamA replied to AdamA's topic in - Build logs for subjects built 1751 - 1800
-
HMS Bounty by AdamA - 1:48
AdamA replied to AdamA's topic in - Build logs for subjects built 1751 - 1800

-
HMS Bounty by AdamA - 1:48
AdamA replied to AdamA's topic in - Build logs for subjects built 1751 - 1800
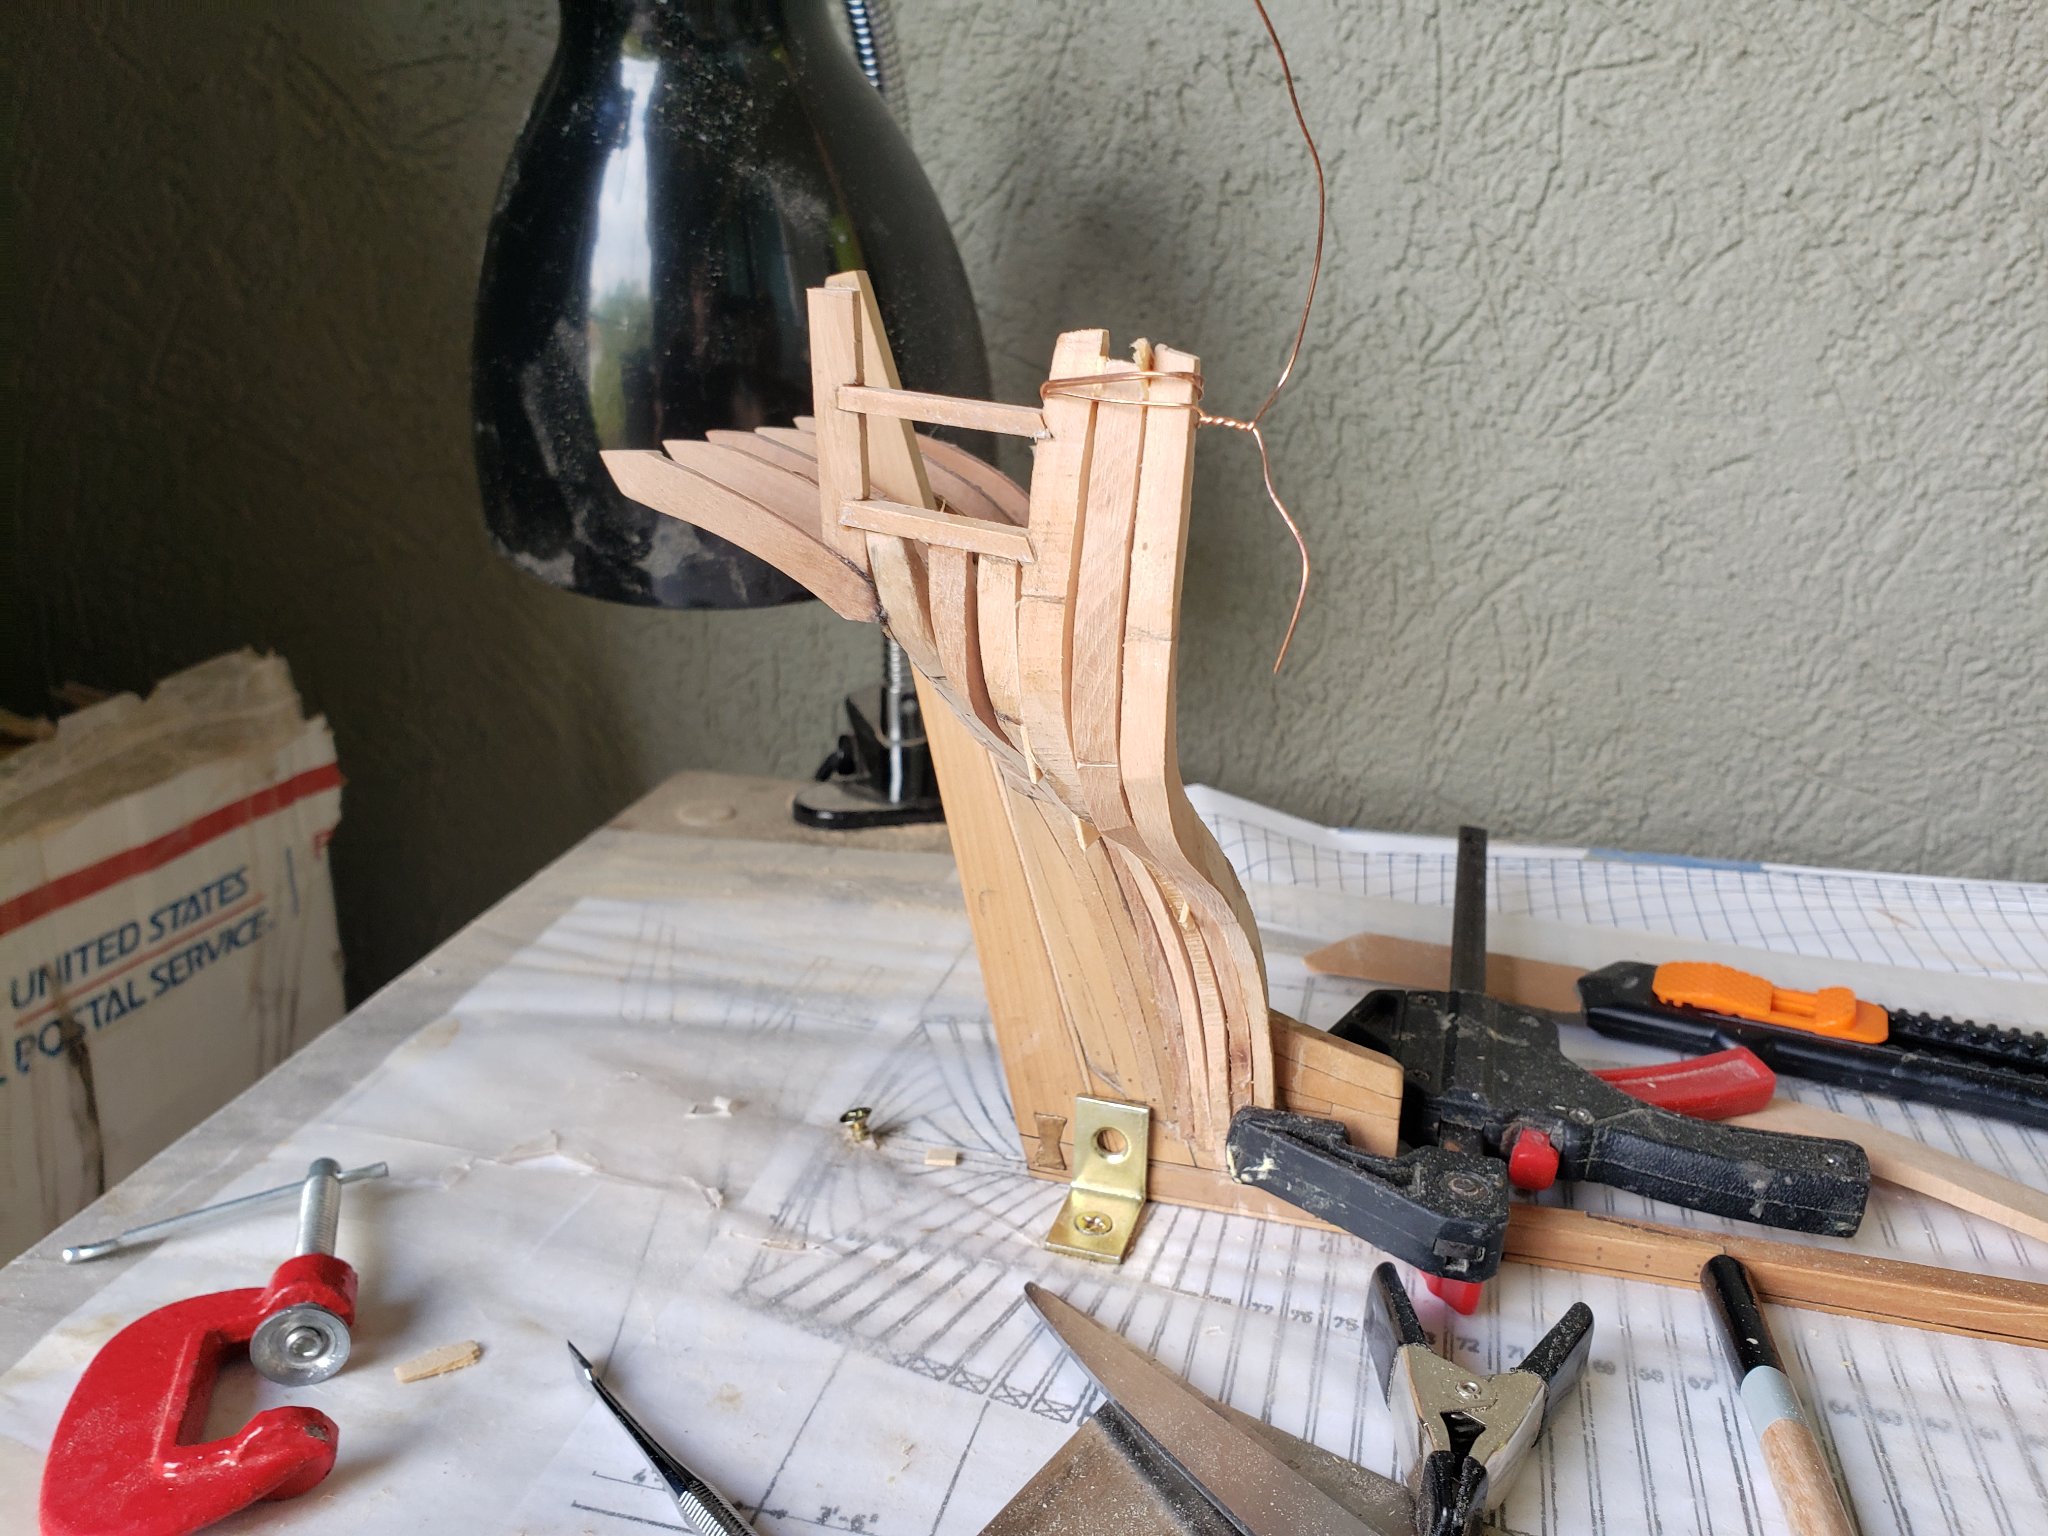
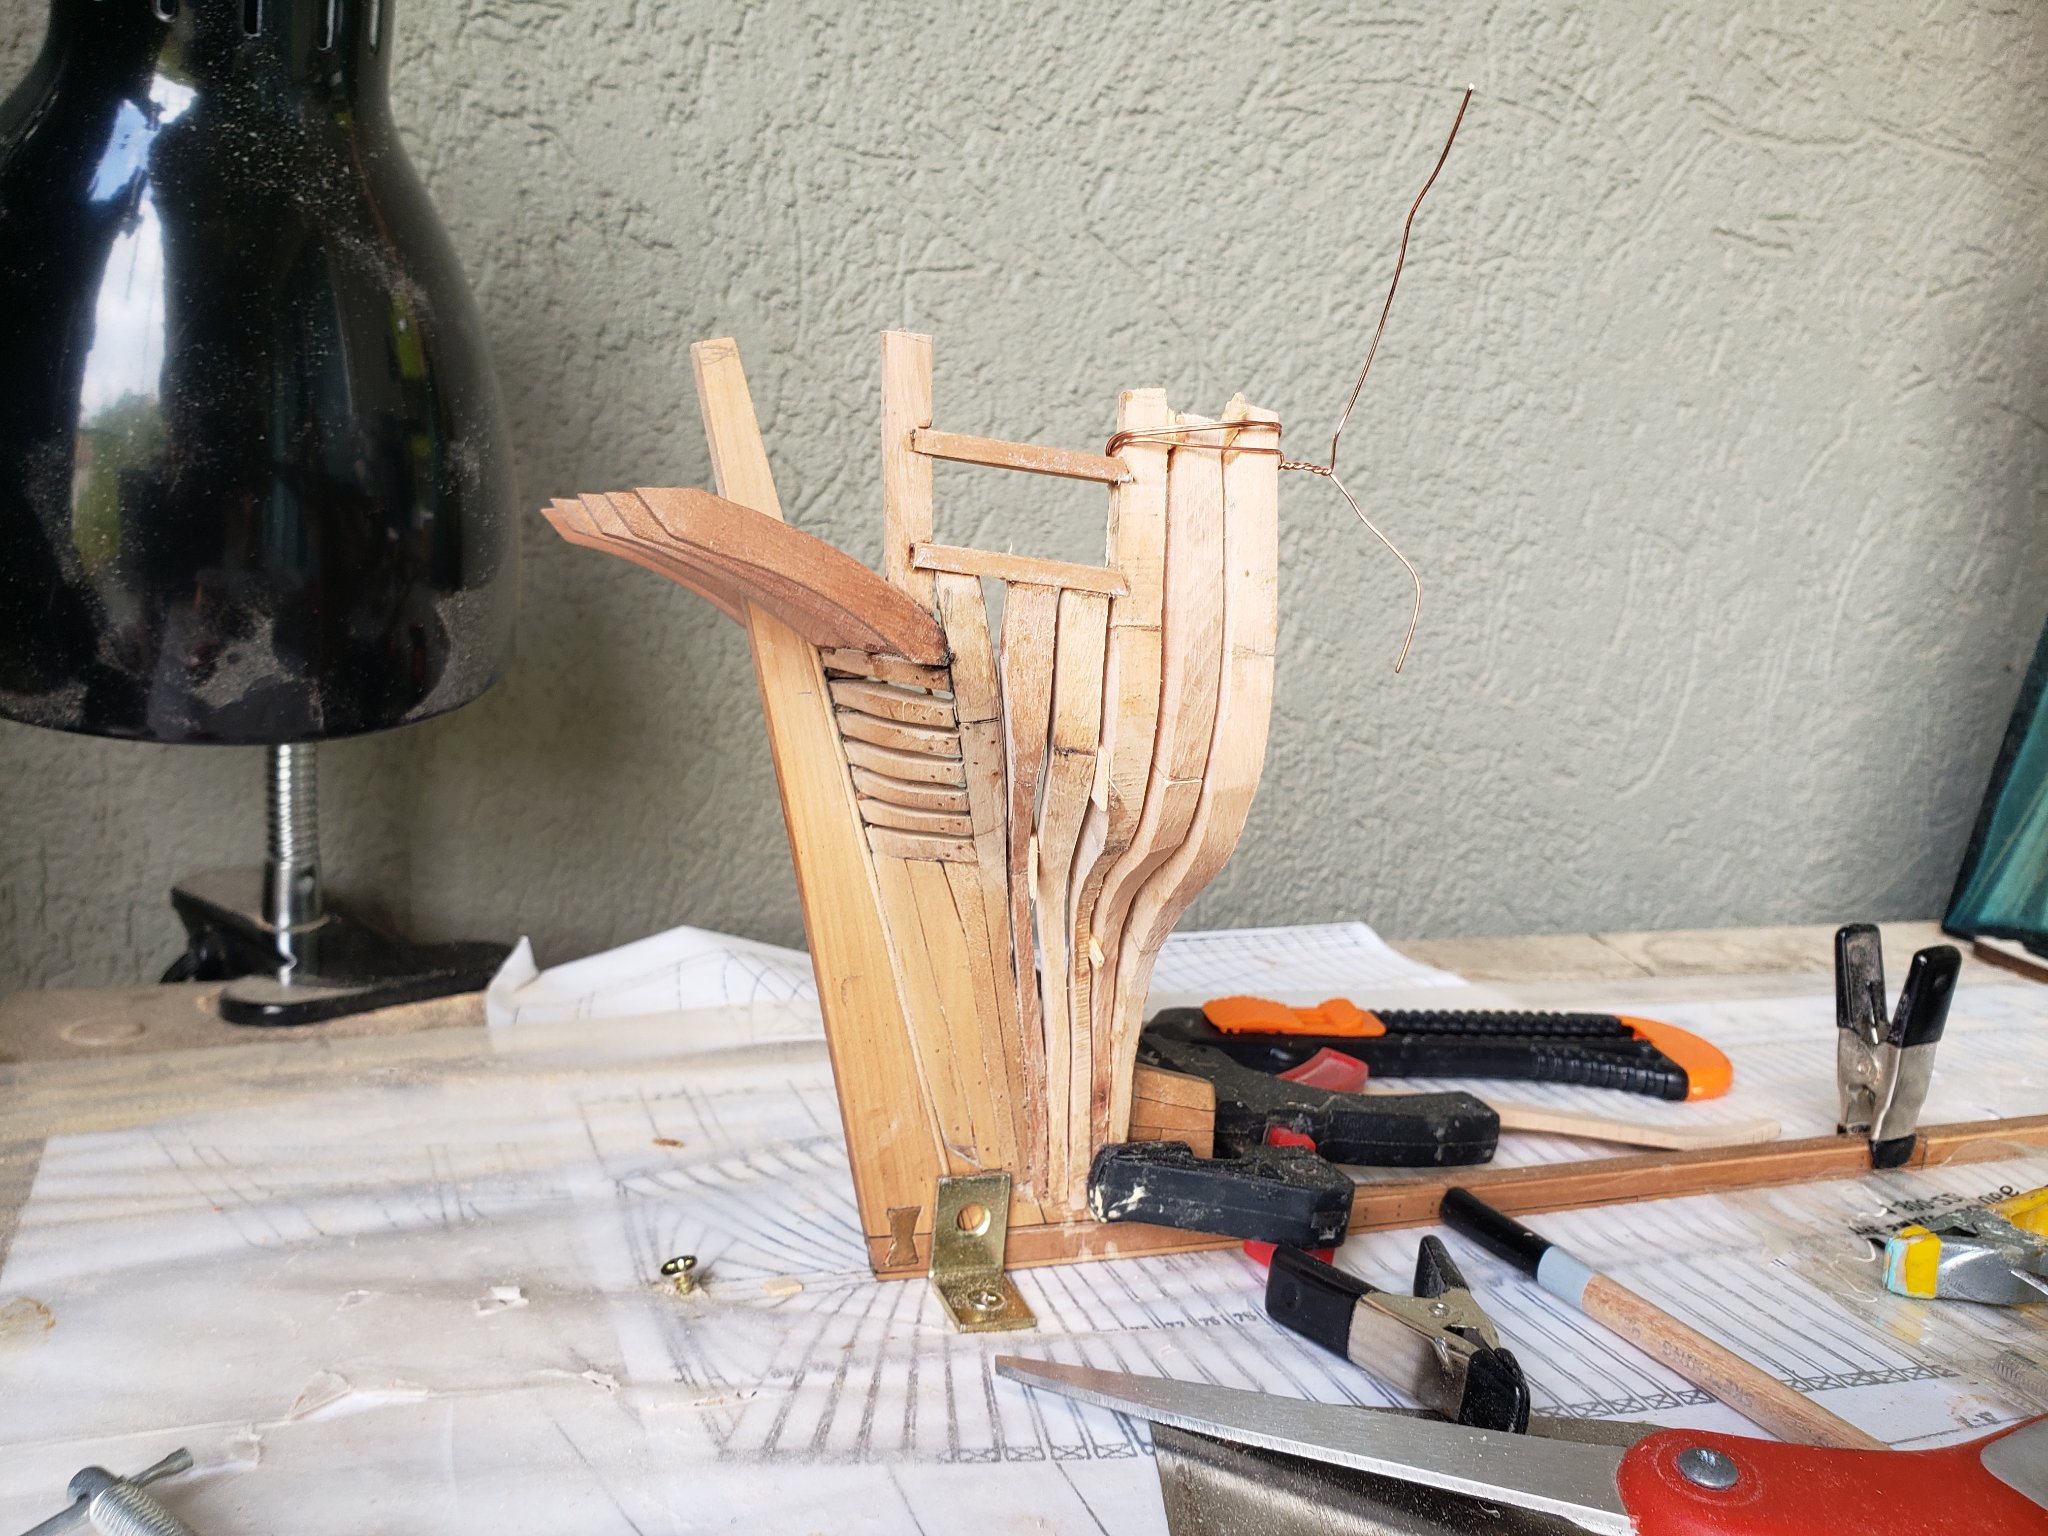
I put copper bolts through the counter timber and into the aftmost cant frame because I really don't want it to move. The "bolt" is 24 gauge wire pushed into a 0.5 mm hole with super glue.
-
HMS Bounty by AdamA - 1:48
AdamA replied to AdamA's topic in - Build logs for subjects built 1751 - 1800

-
HMS Bounty by AdamA - 1:48
AdamA replied to AdamA's topic in - Build logs for subjects built 1751 - 1800
-
HMS Bounty by AdamA - 1:48
AdamA replied to AdamA's topic in - Build logs for subjects built 1751 - 1800
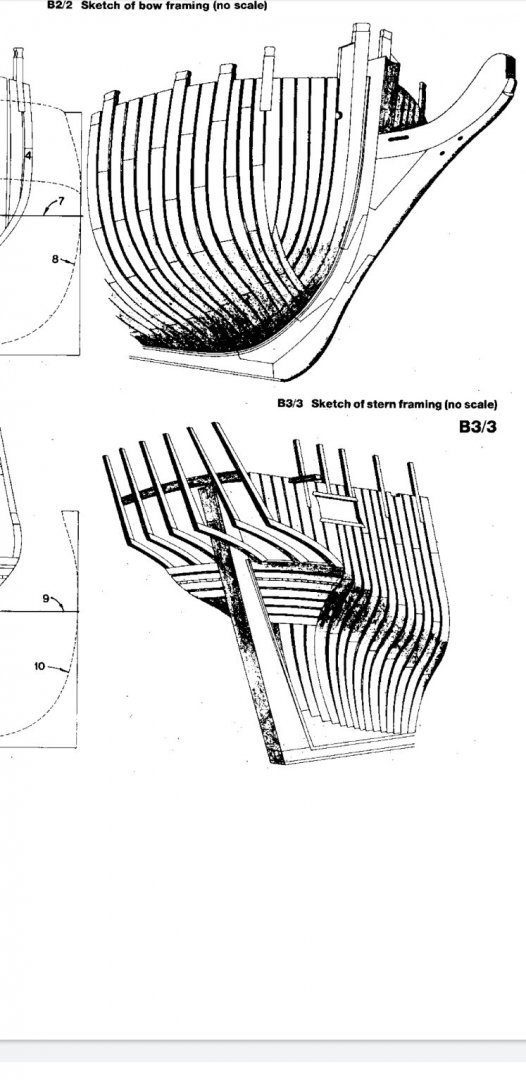
I used the pictures from McKay for the stern. You already have those I believe. Hahn's stern has fewer if I recall correctly. Your boat is looking good.
-
HMS Bounty by AdamA - 1:48
AdamA replied to AdamA's topic in - Build logs for subjects built 1751 - 1800
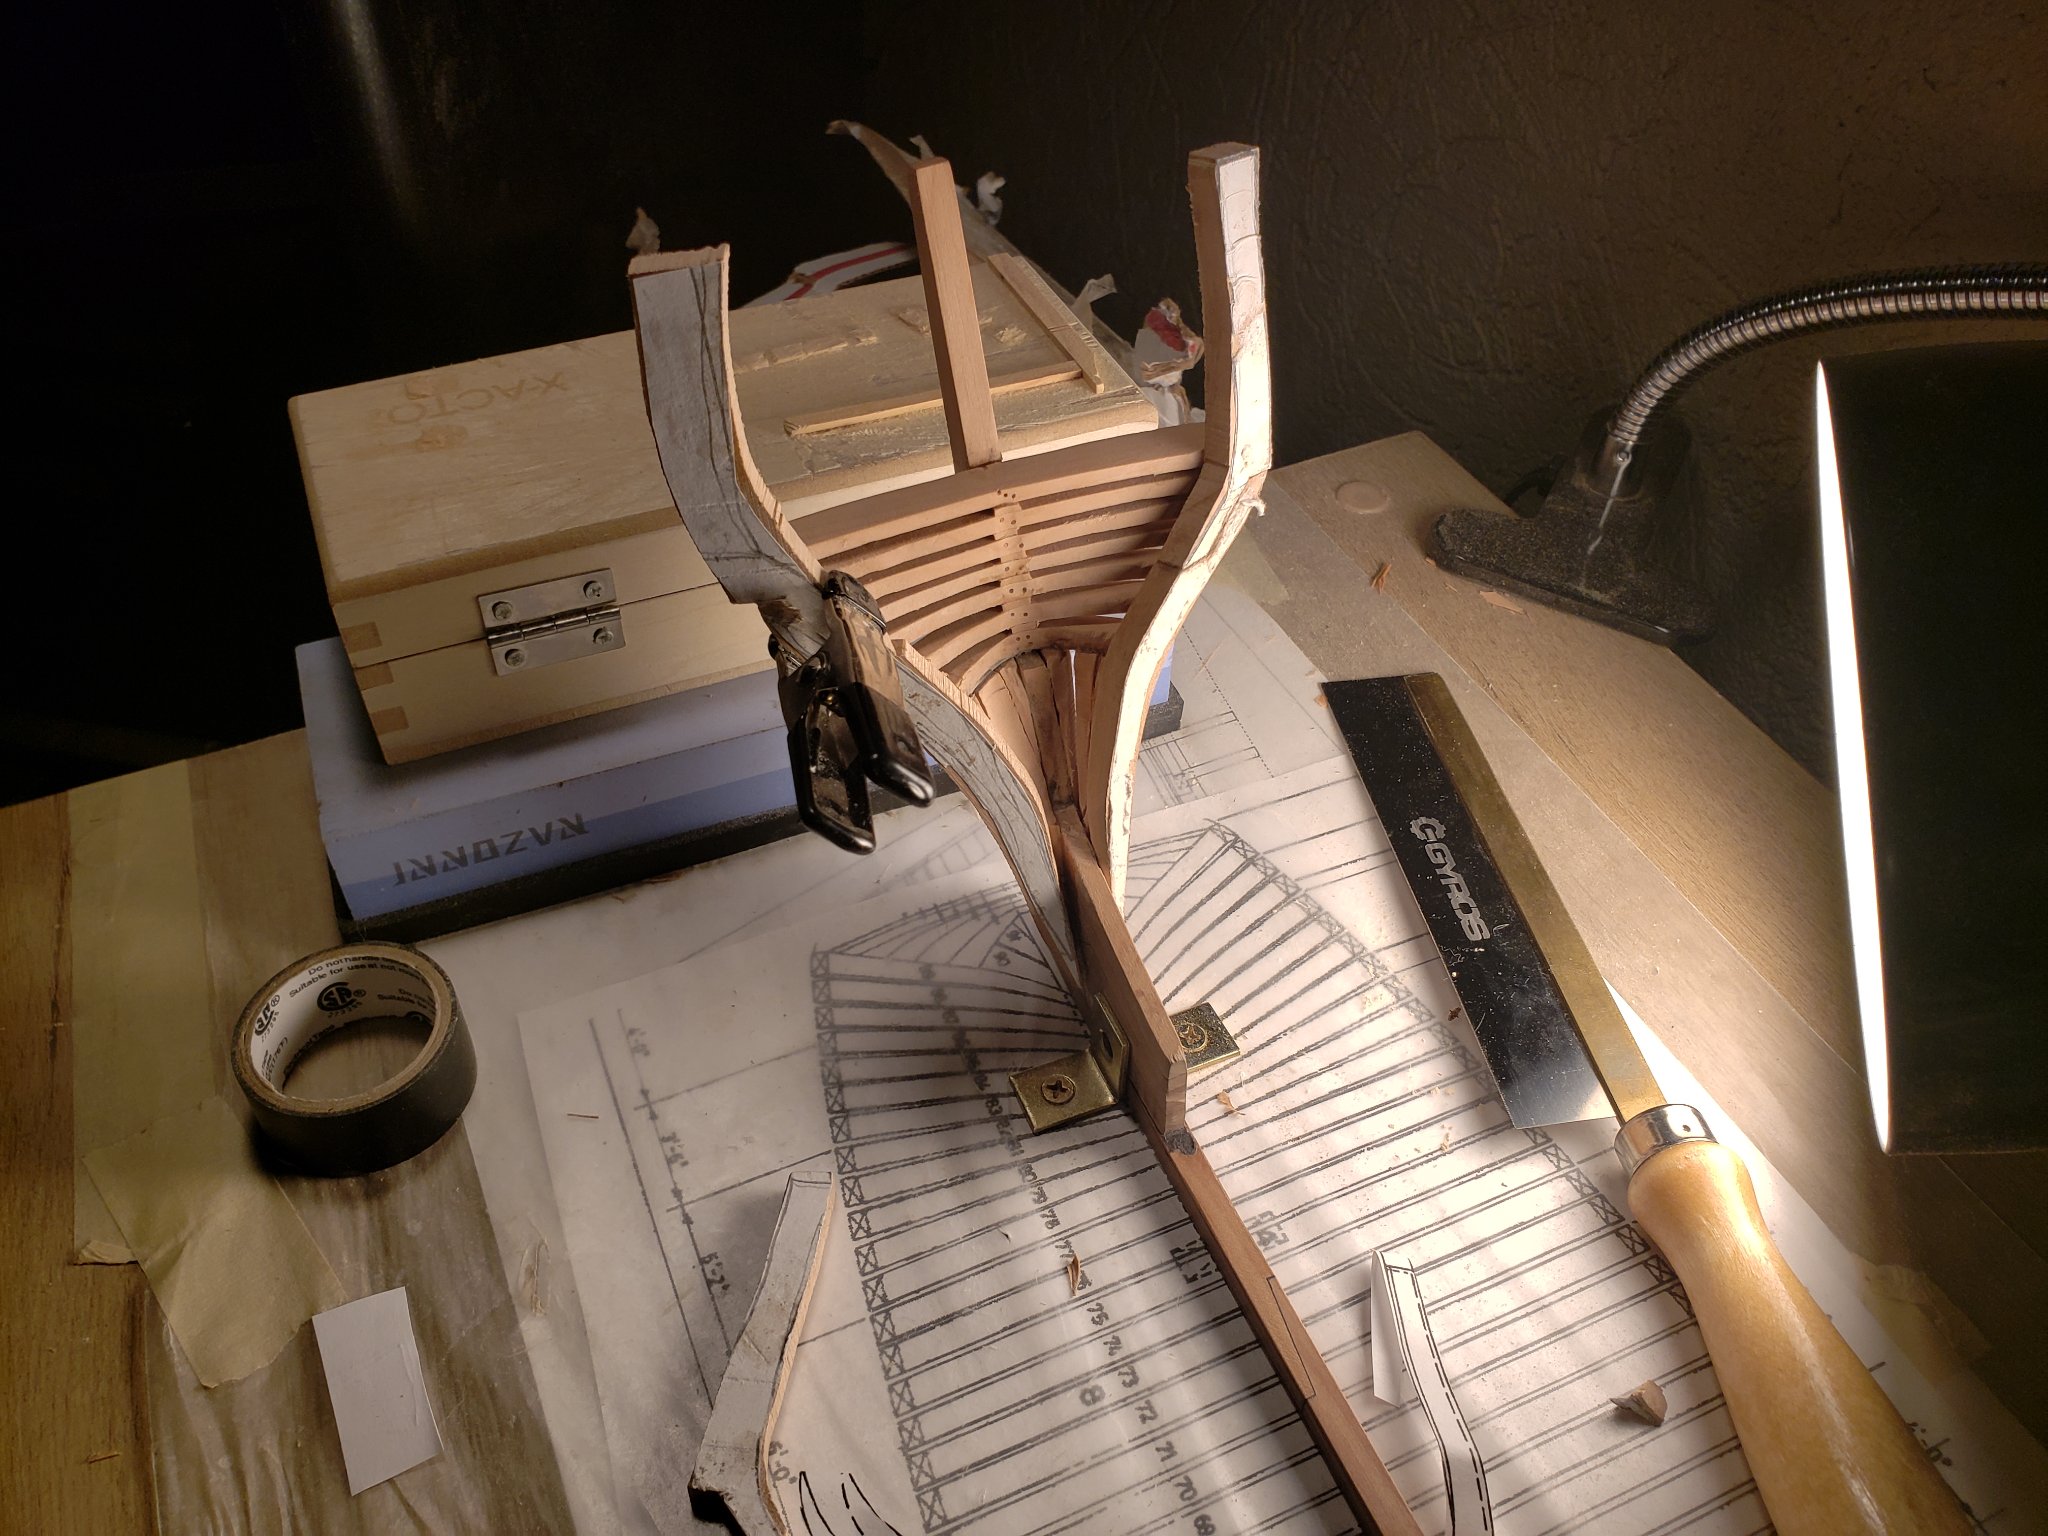
Its good to see the hull beginning to take shape. There's some variation in the color of Swiss pear I purchased thats evident from the three frames roughed in.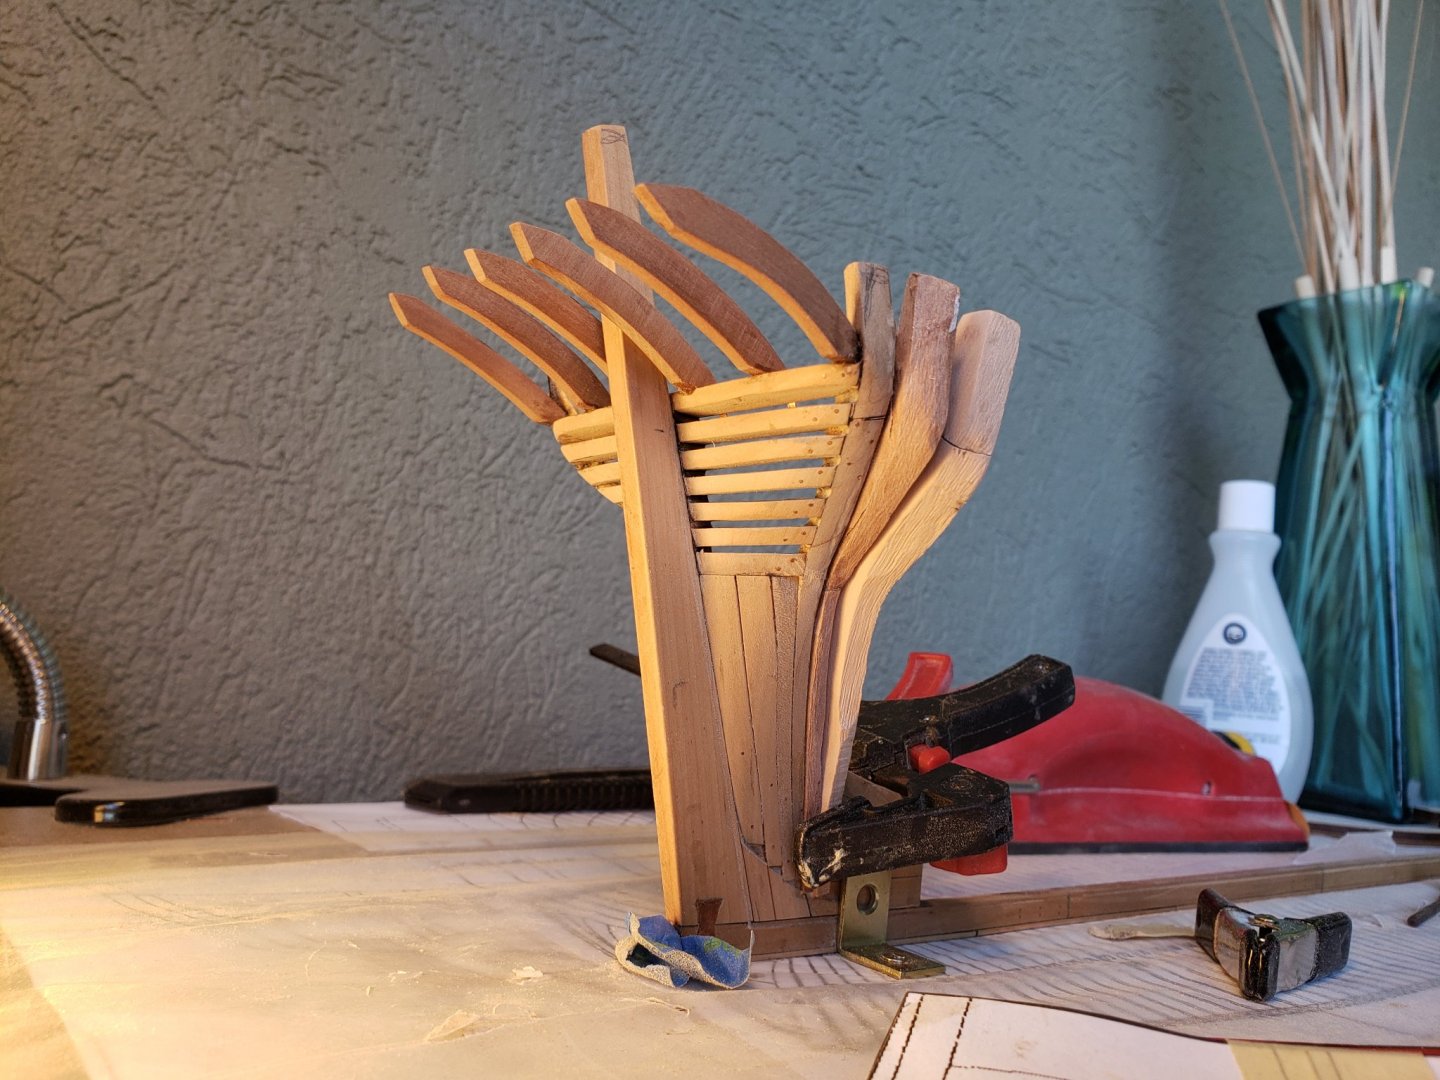
-
HMS Bounty by AdamA - 1:48
AdamA replied to AdamA's topic in - Build logs for subjects built 1751 - 1800
I have the book to pull the images from. -
HMS Bounty by AdamA - 1:48
AdamA replied to AdamA's topic in - Build logs for subjects built 1751 - 1800
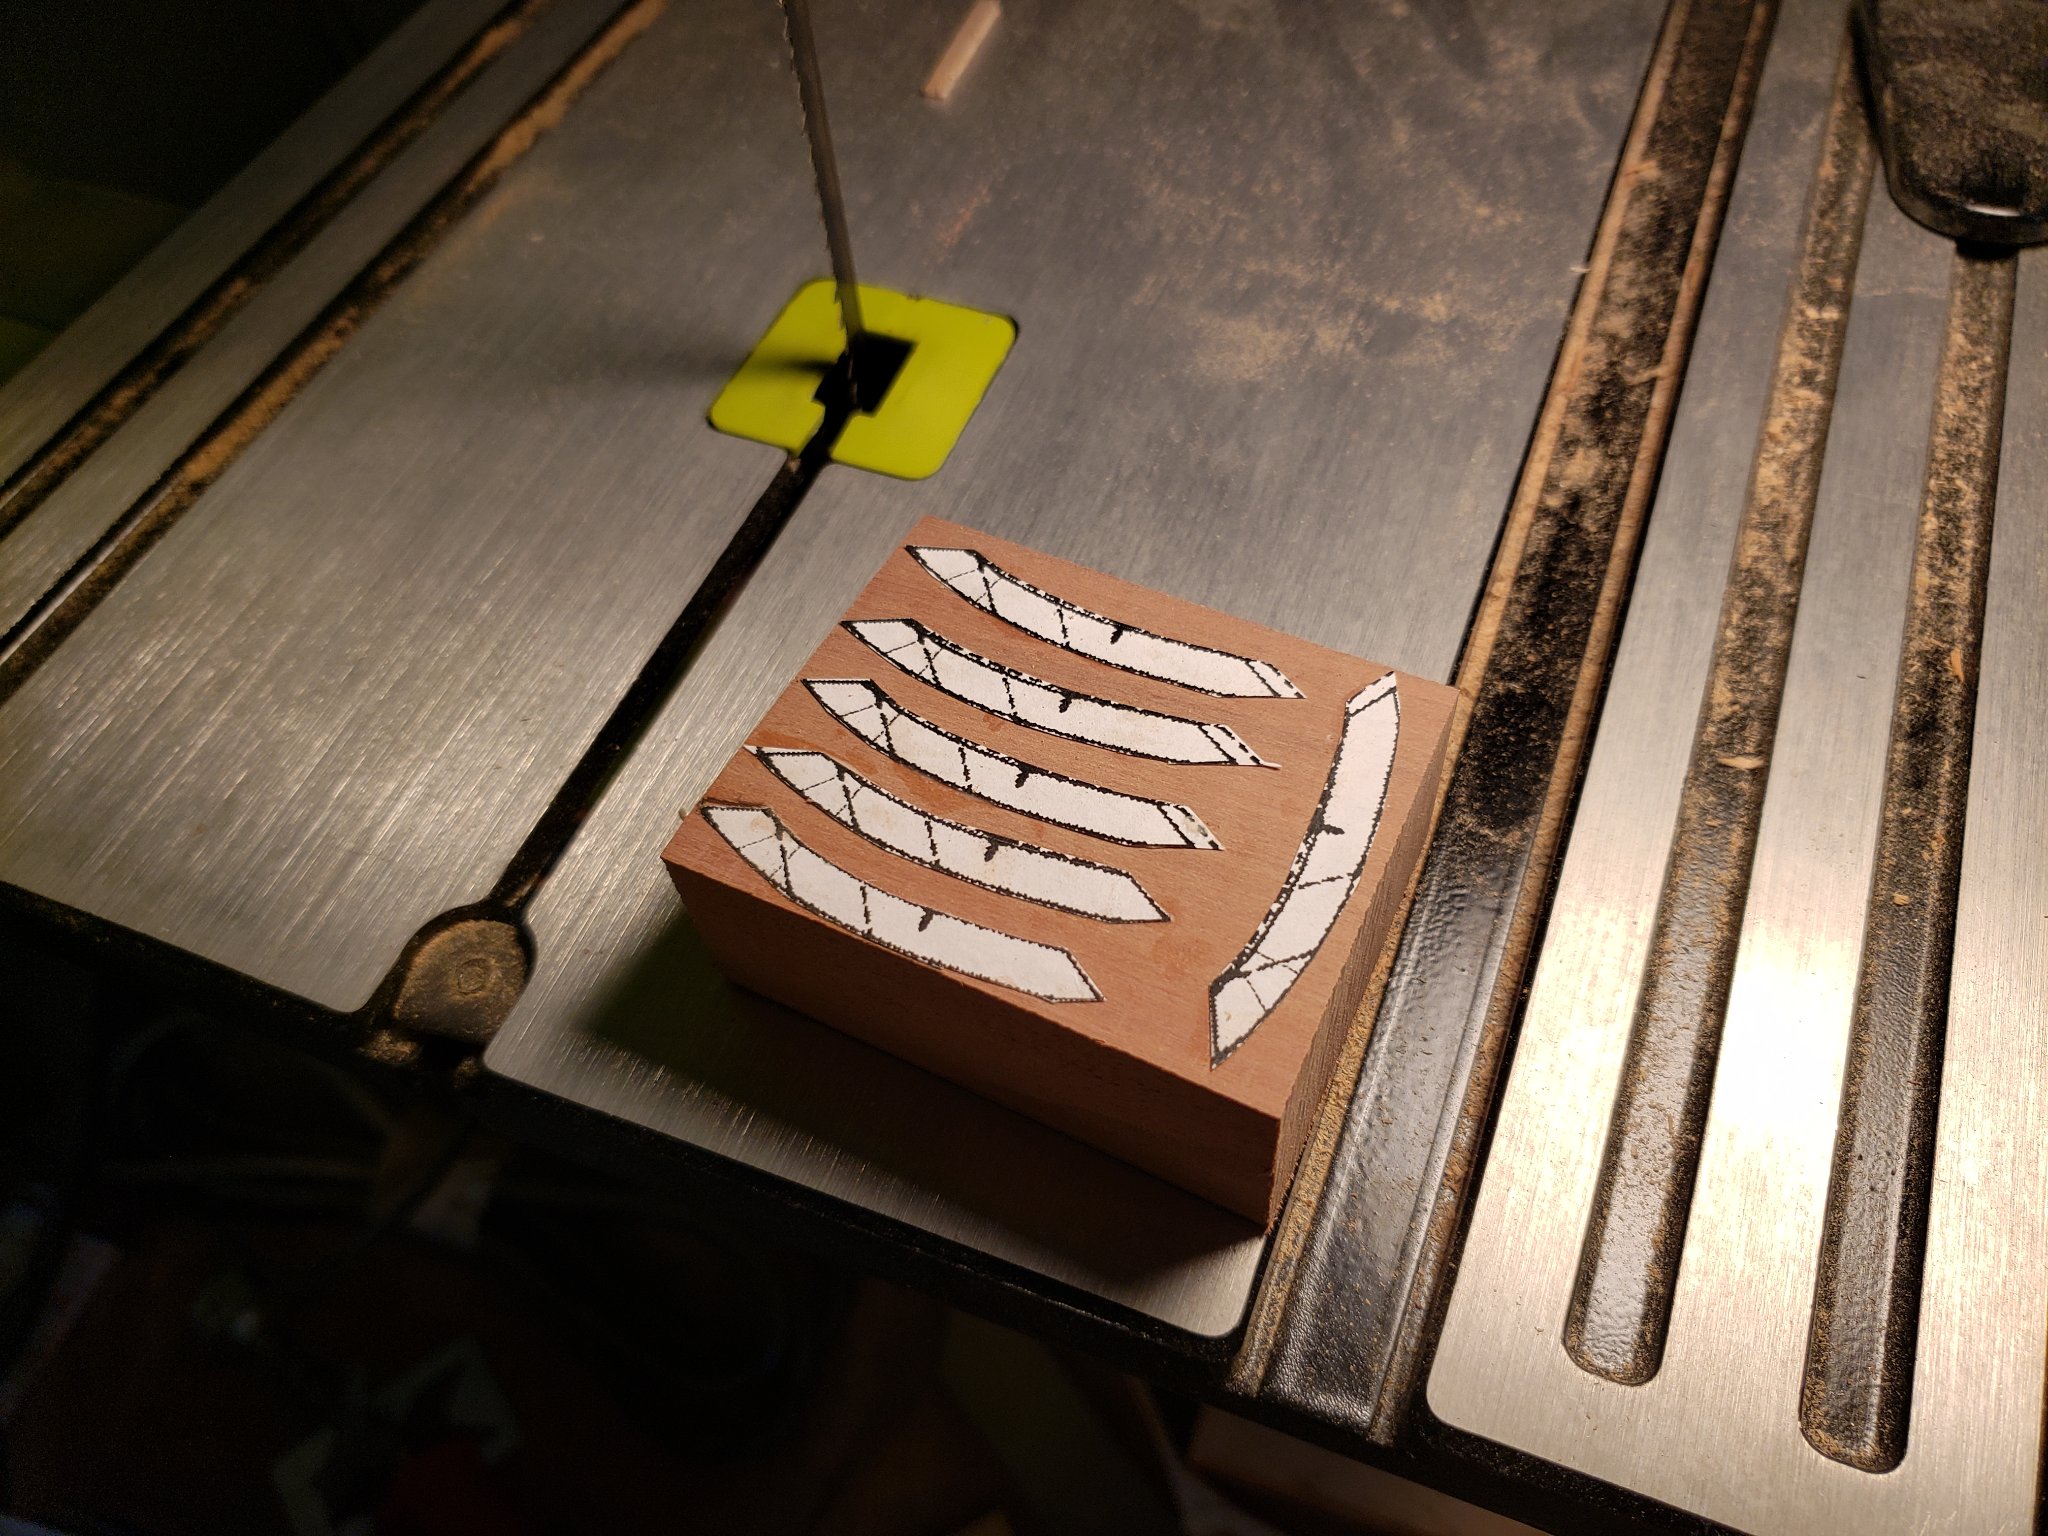
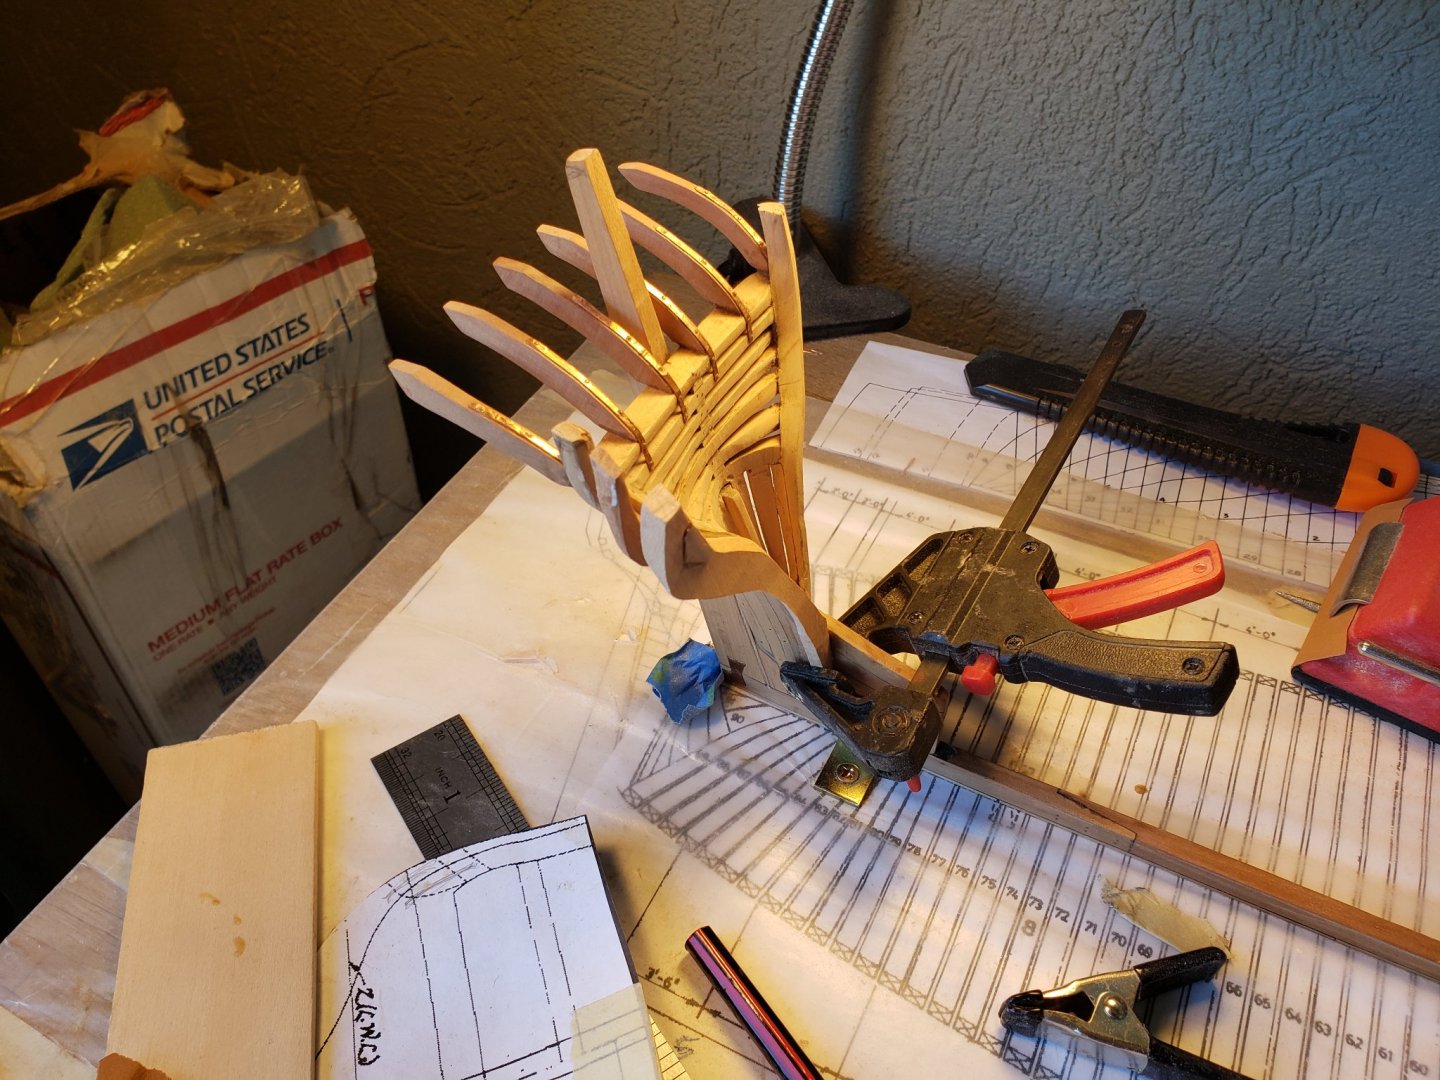
I don’t know how to use software to lift and loft these frames so, for now, I'm gluing the profile for each piece onto the wood and cutting them out on the bandsaw, careful to ensure each piece is wide enough to account for the frame's shape. I'm sure that's clear as mud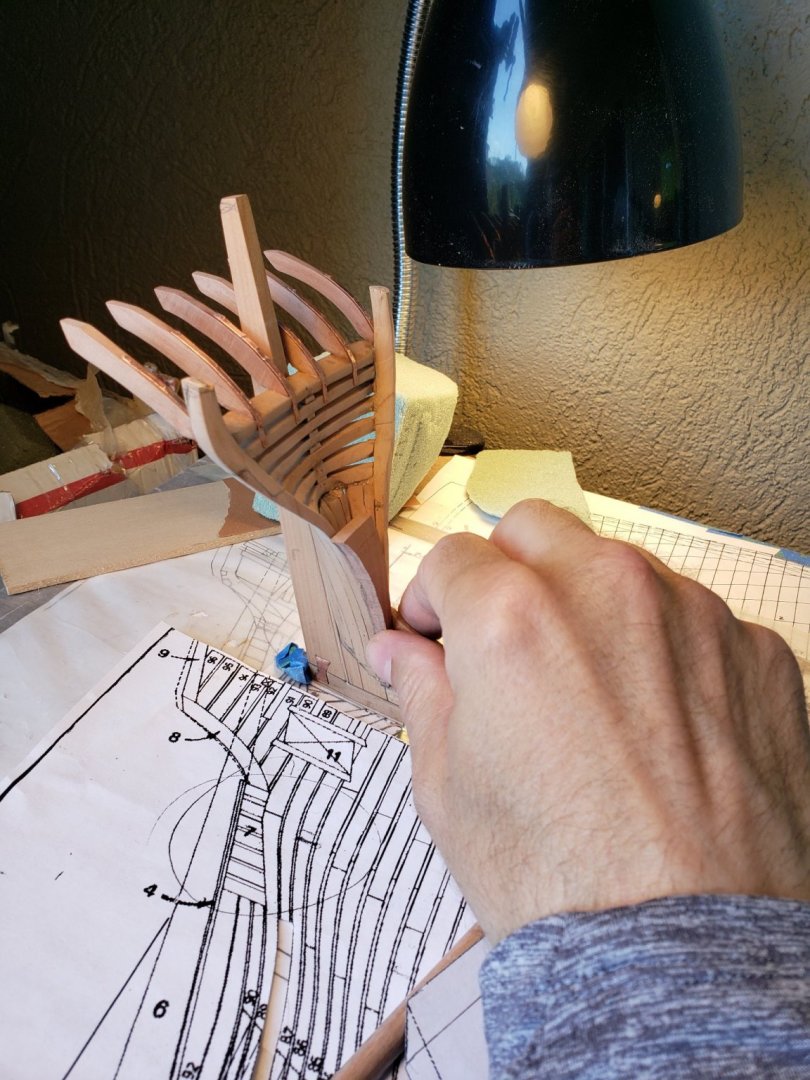
-
HMS Bounty by AdamA - 1:48
AdamA replied to AdamA's topic in - Build logs for subjects built 1751 - 1800
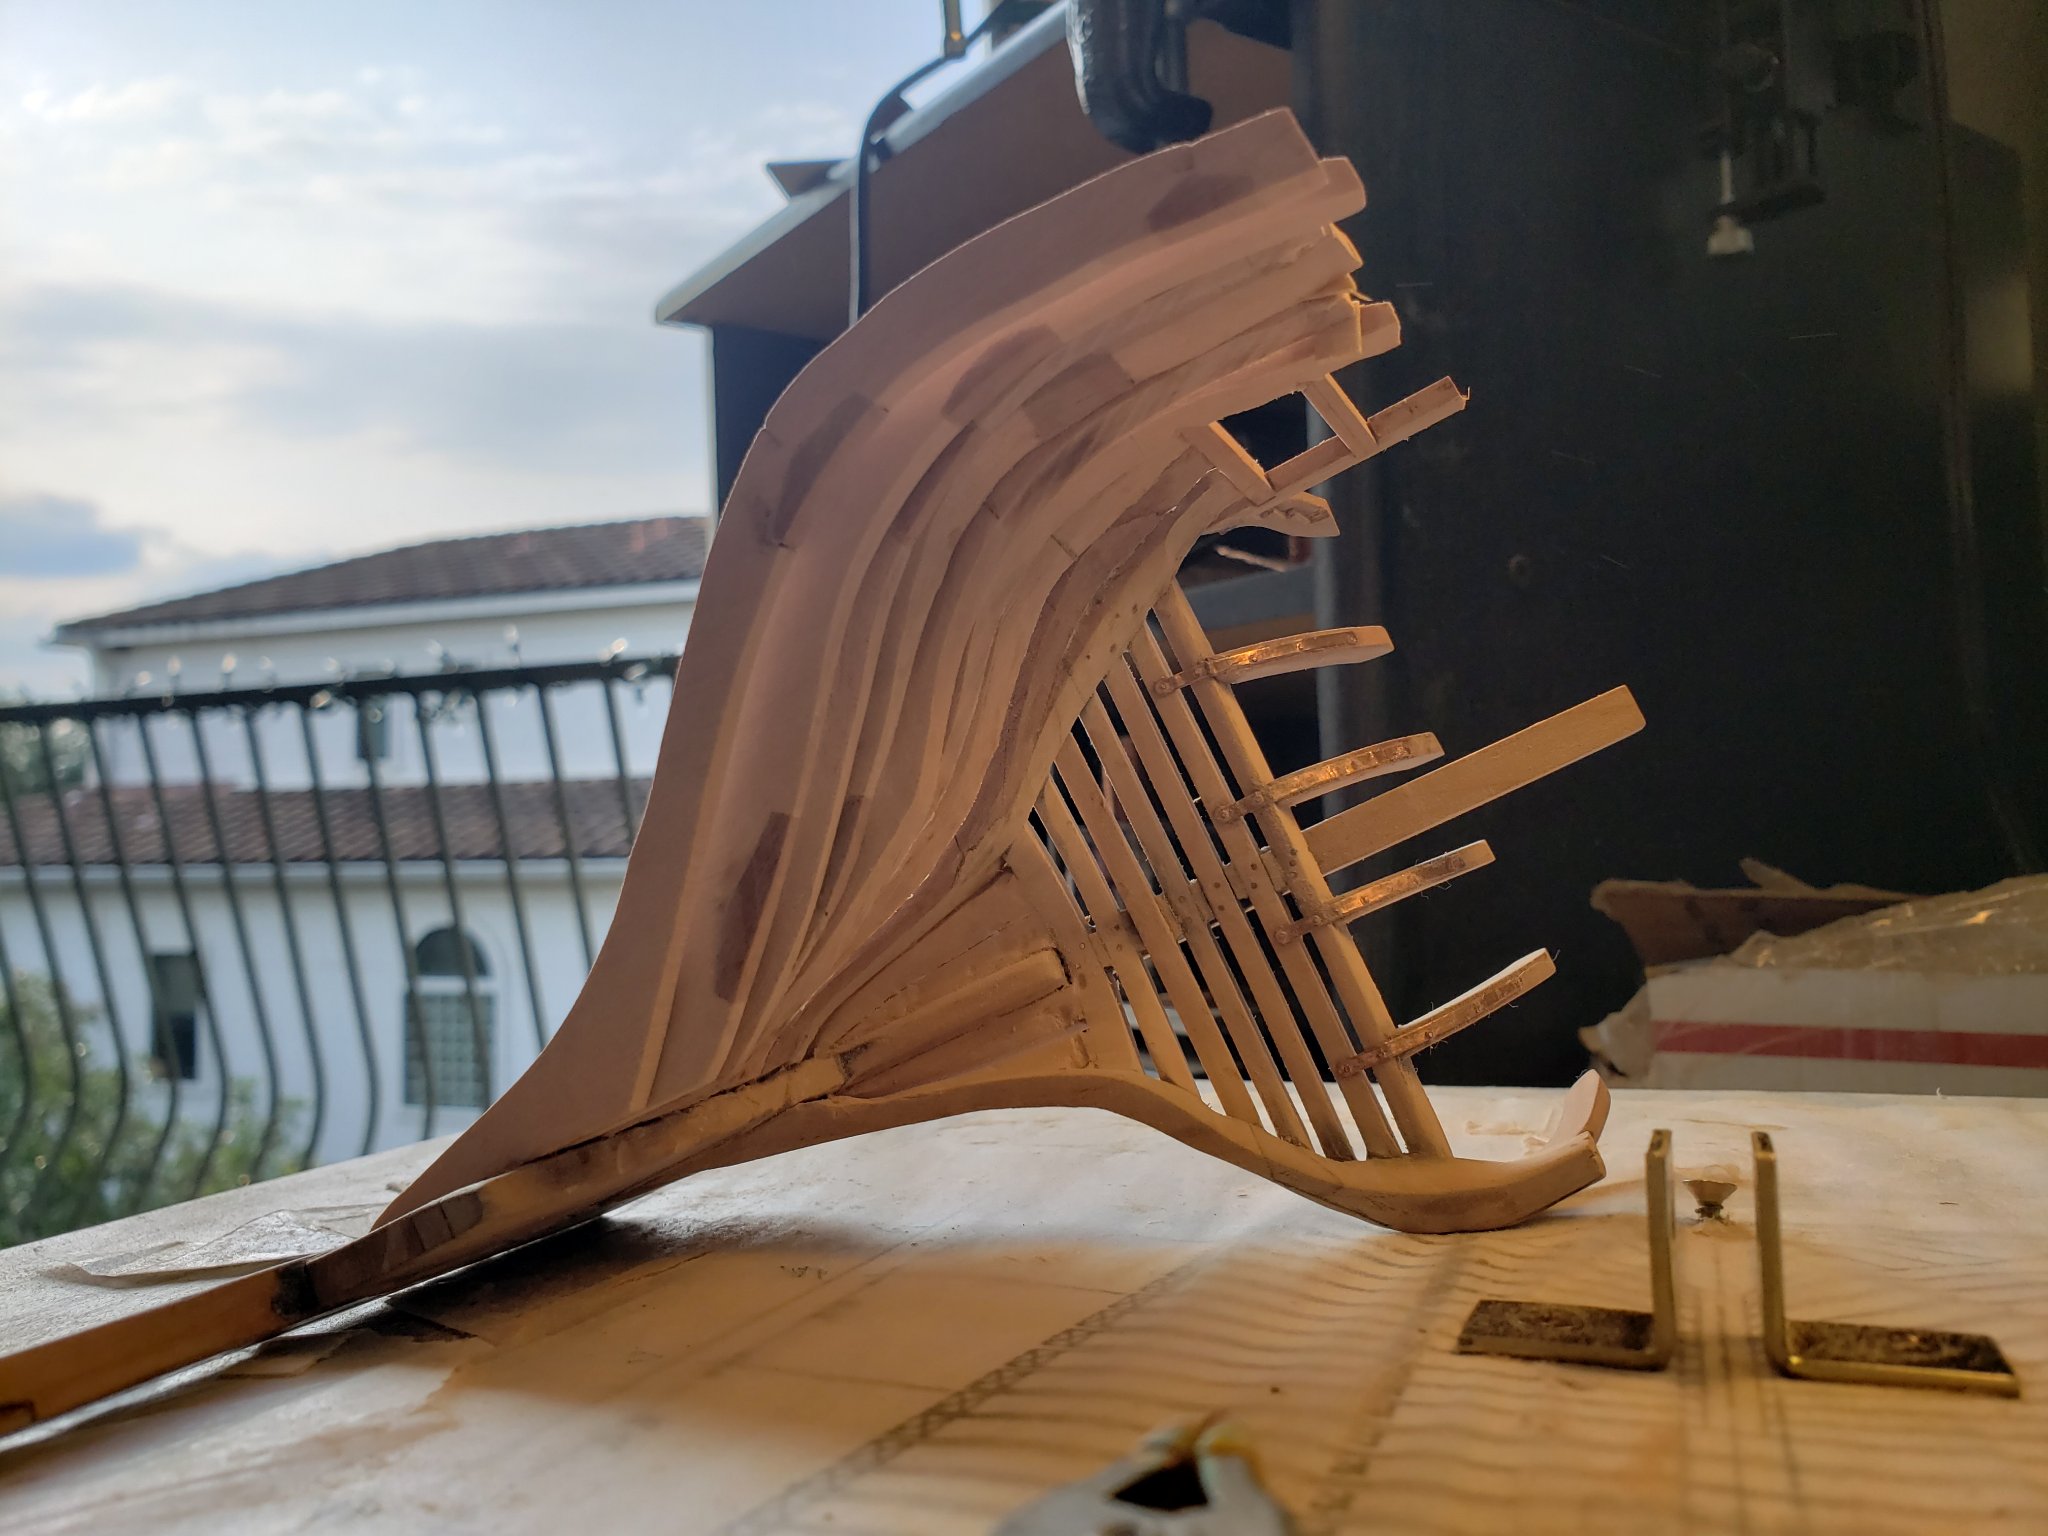
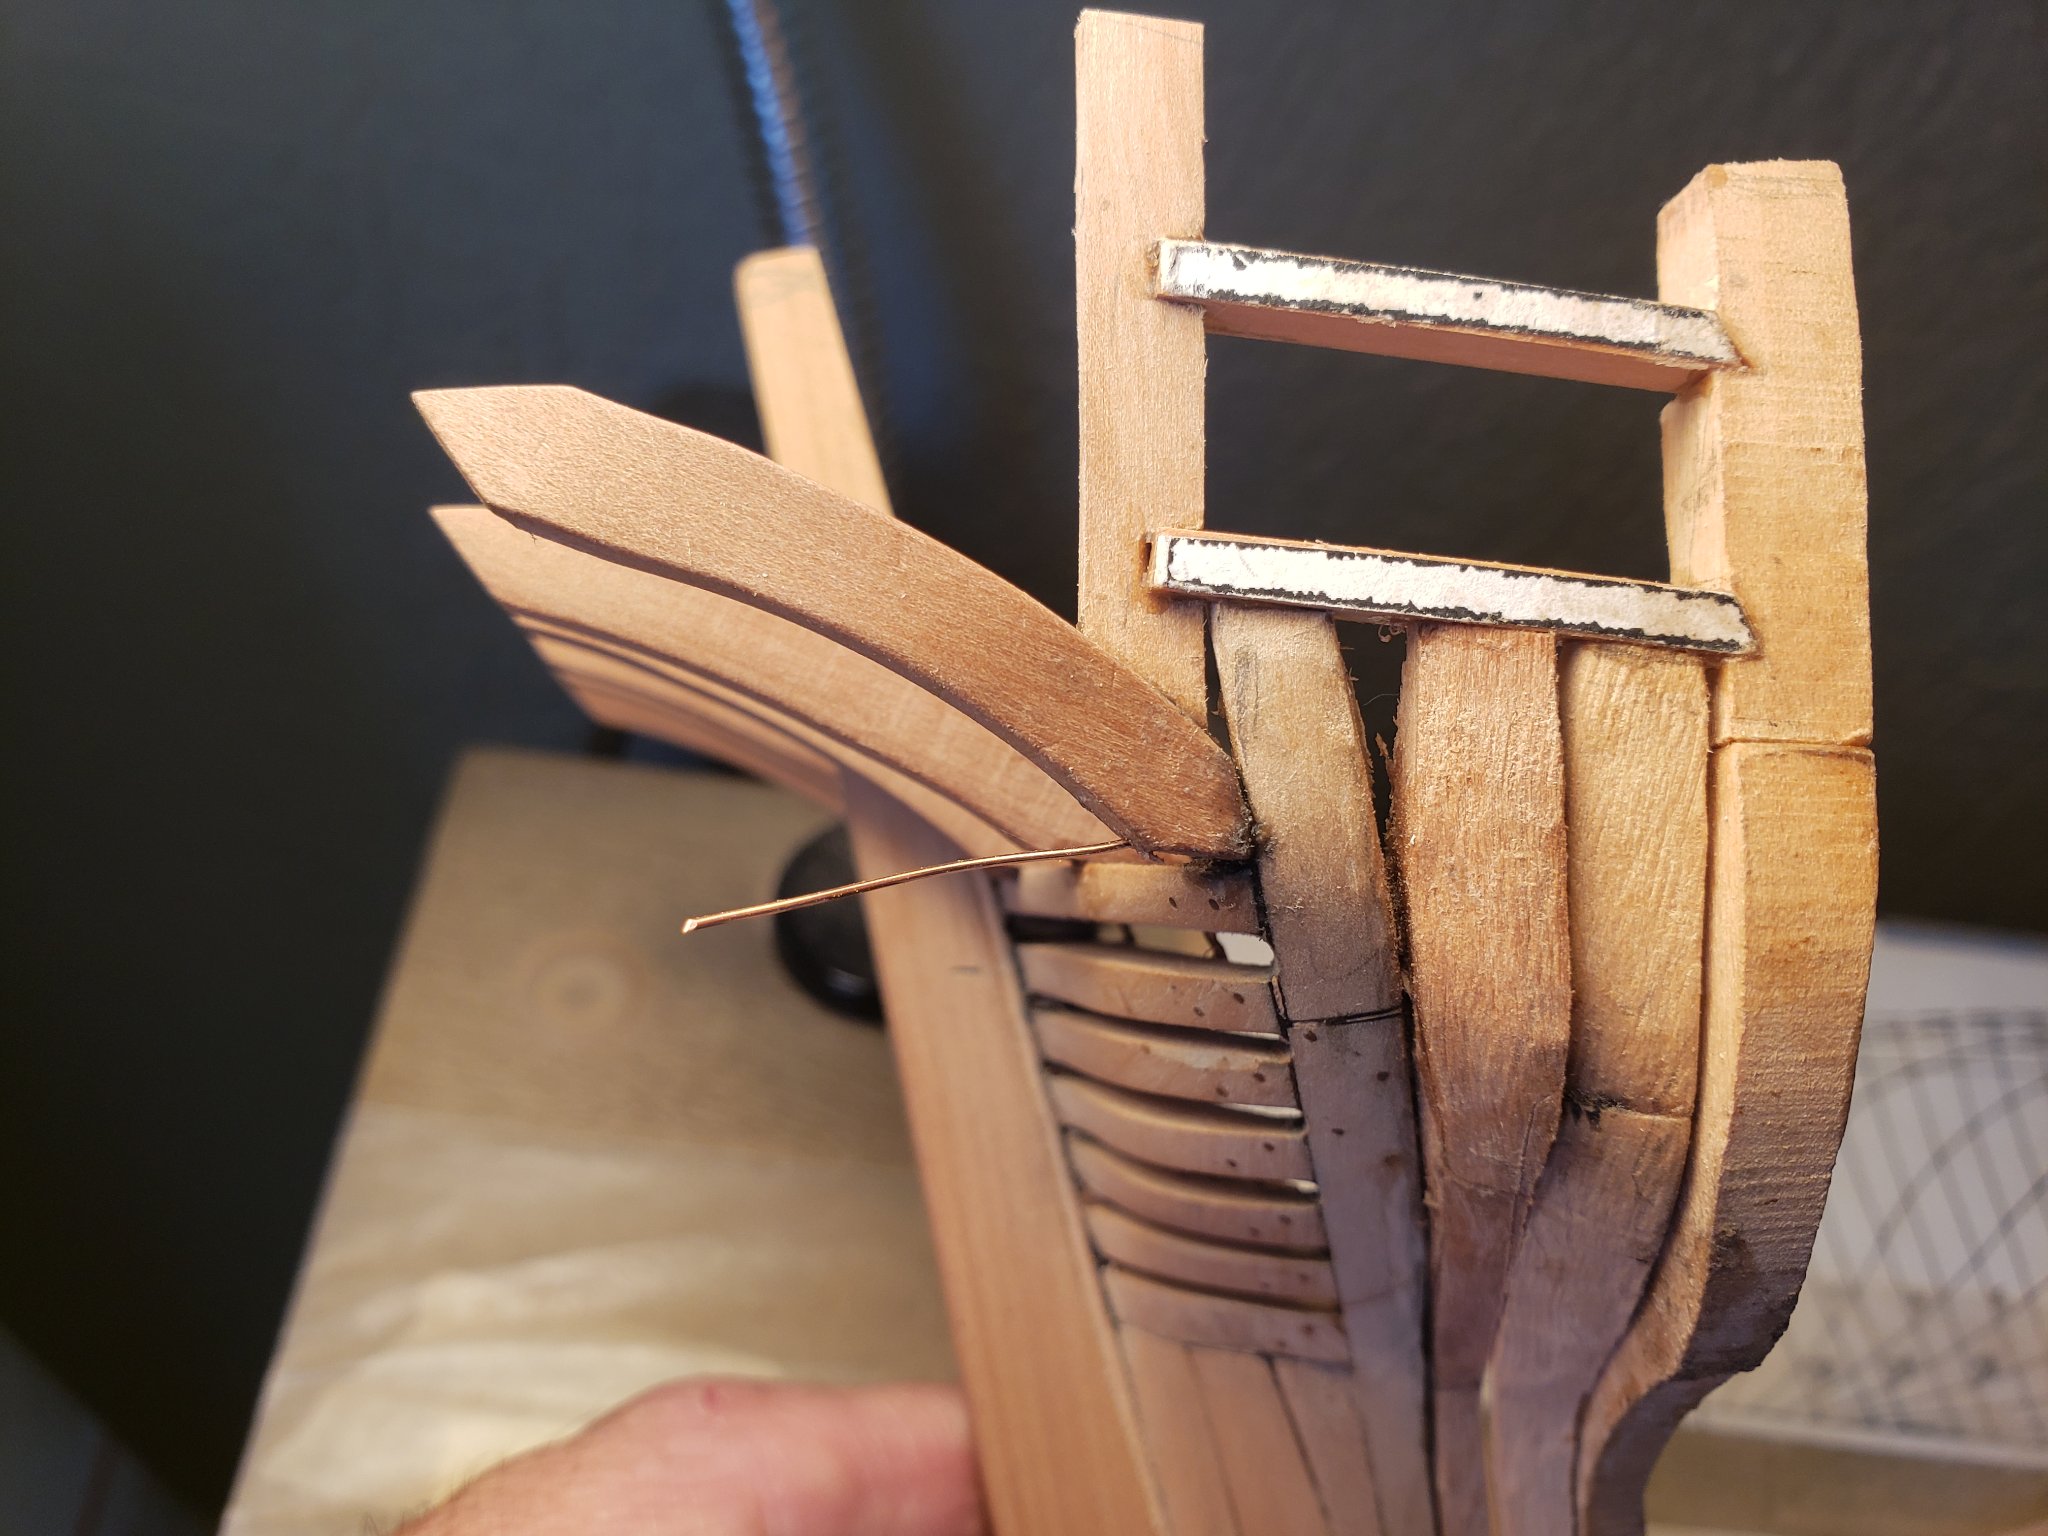
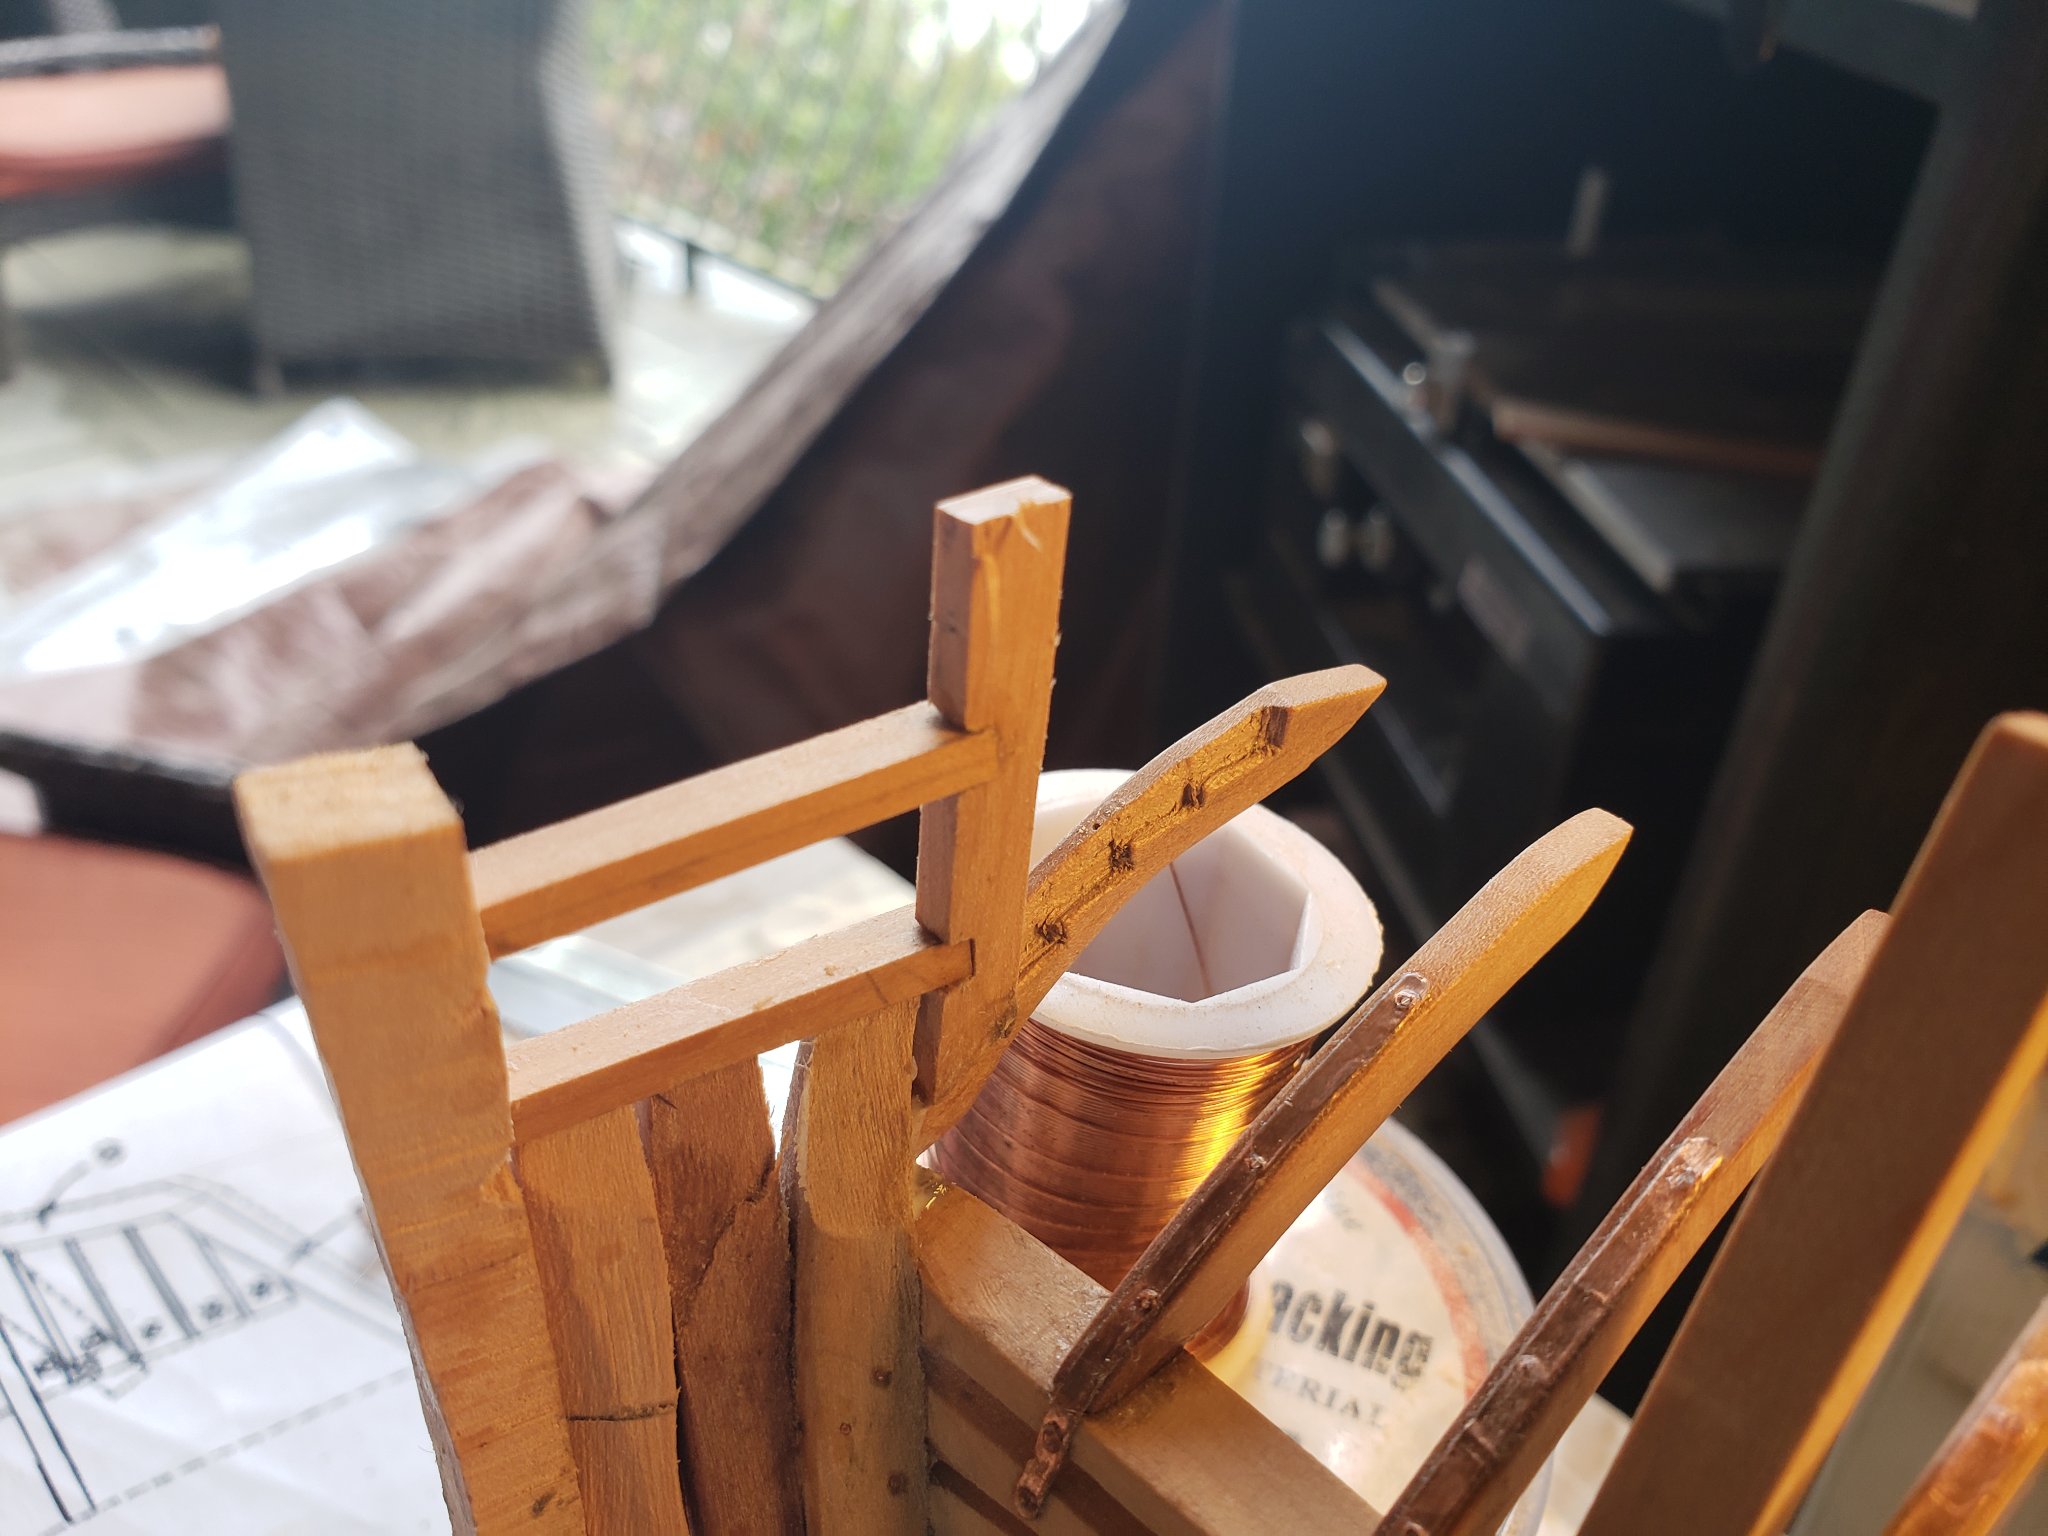
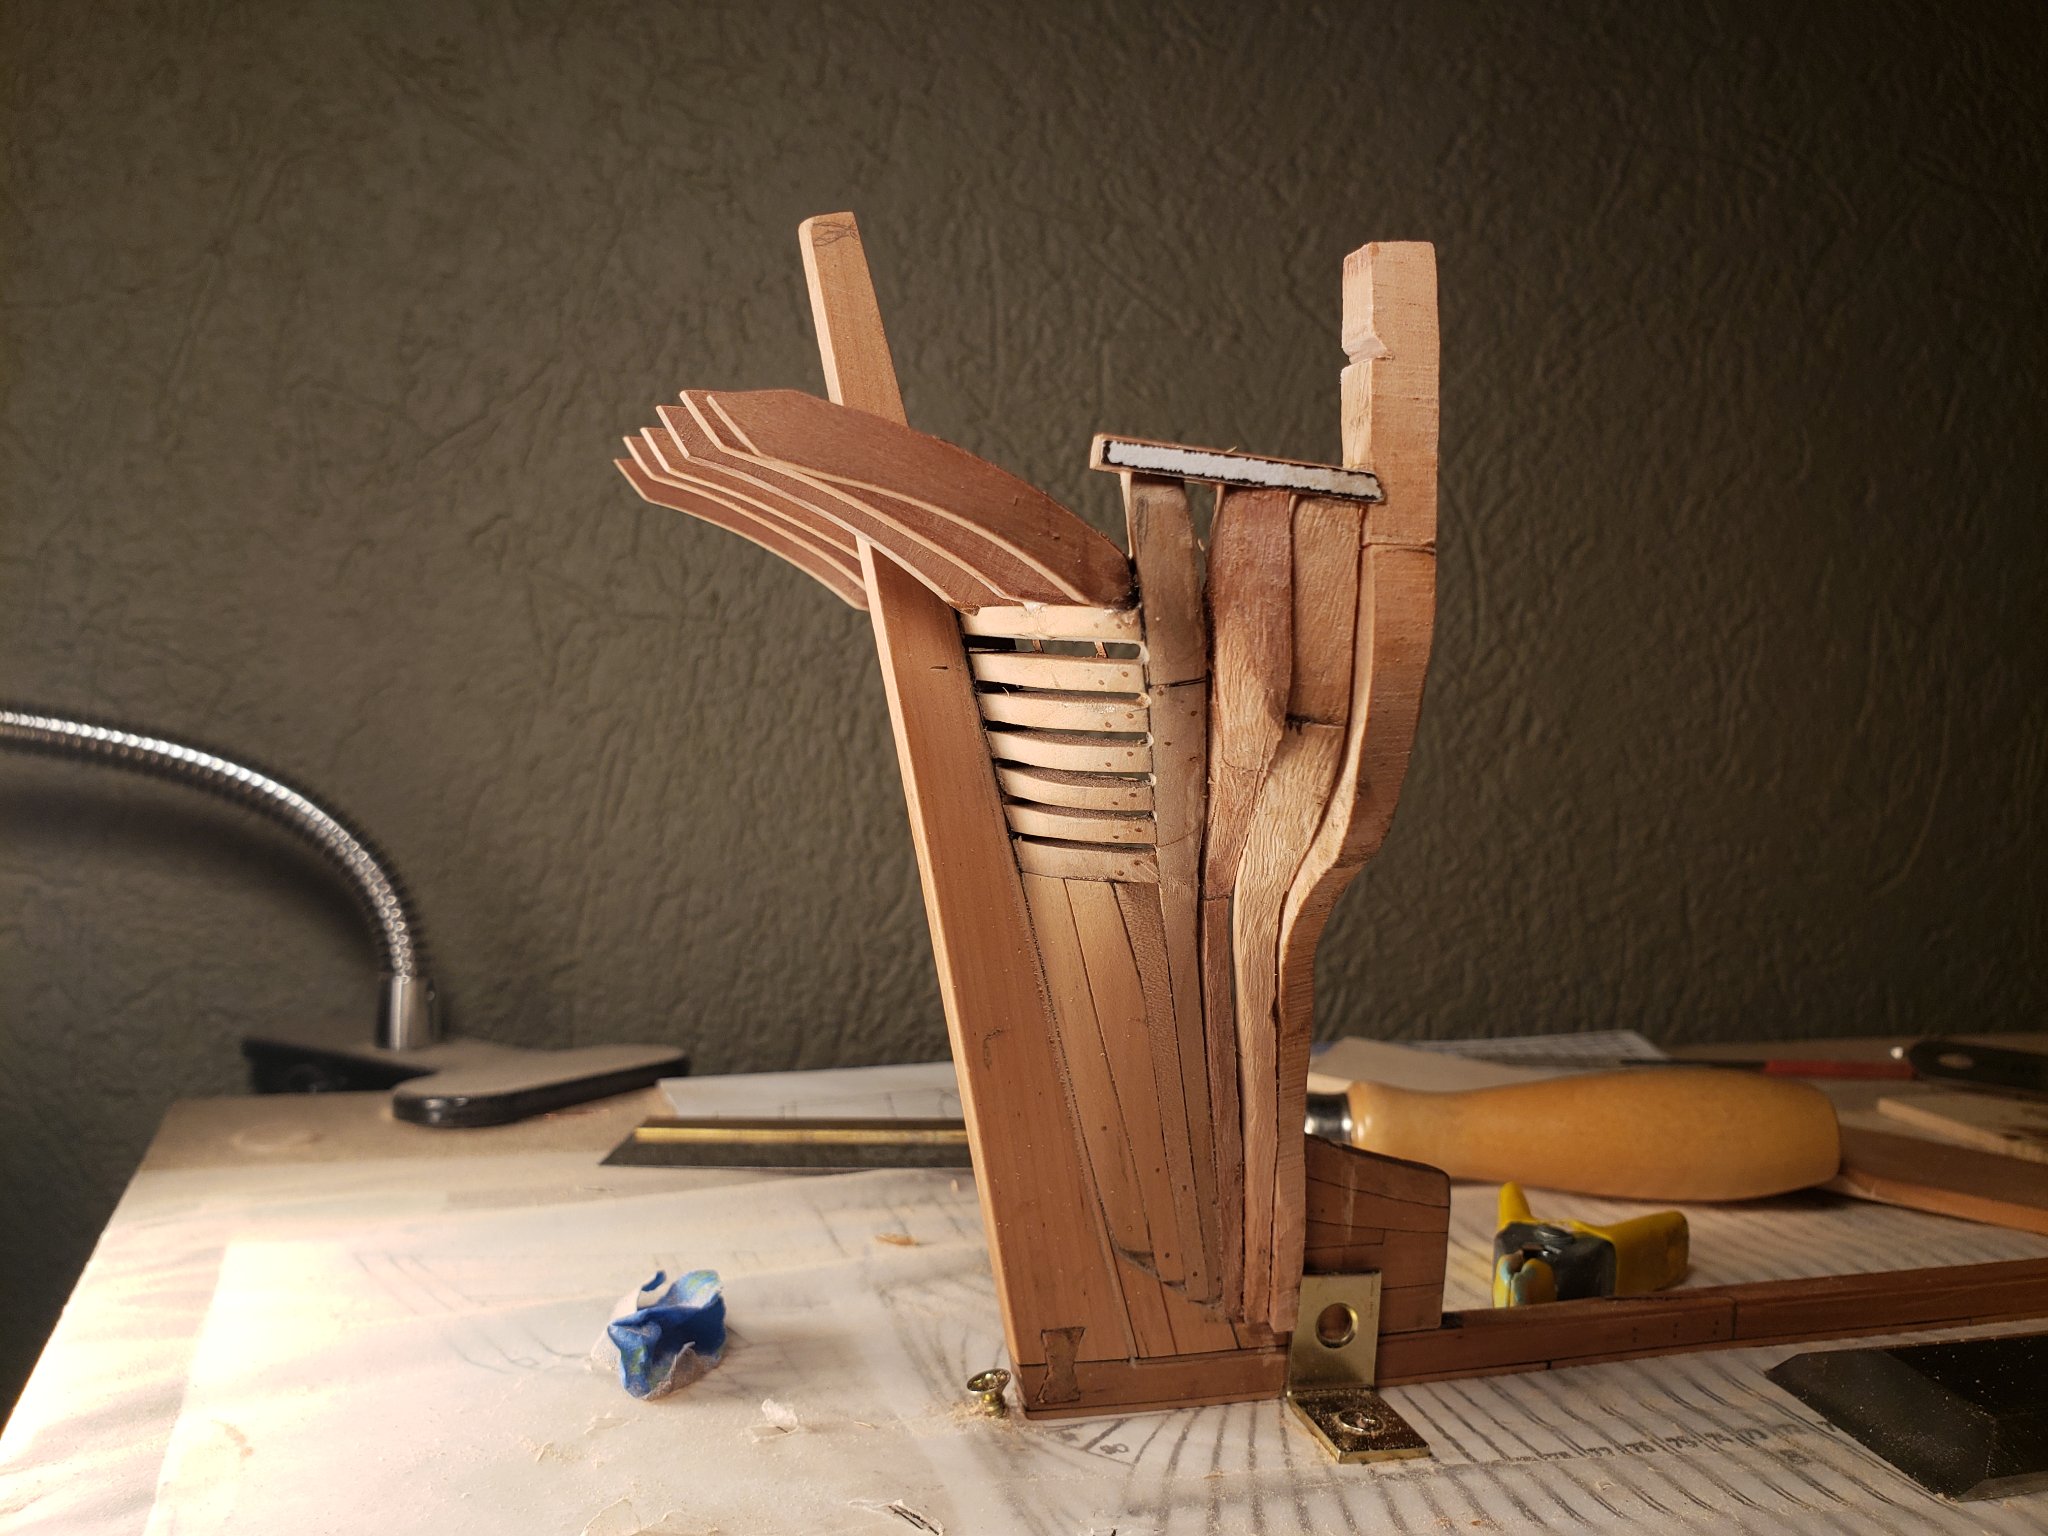
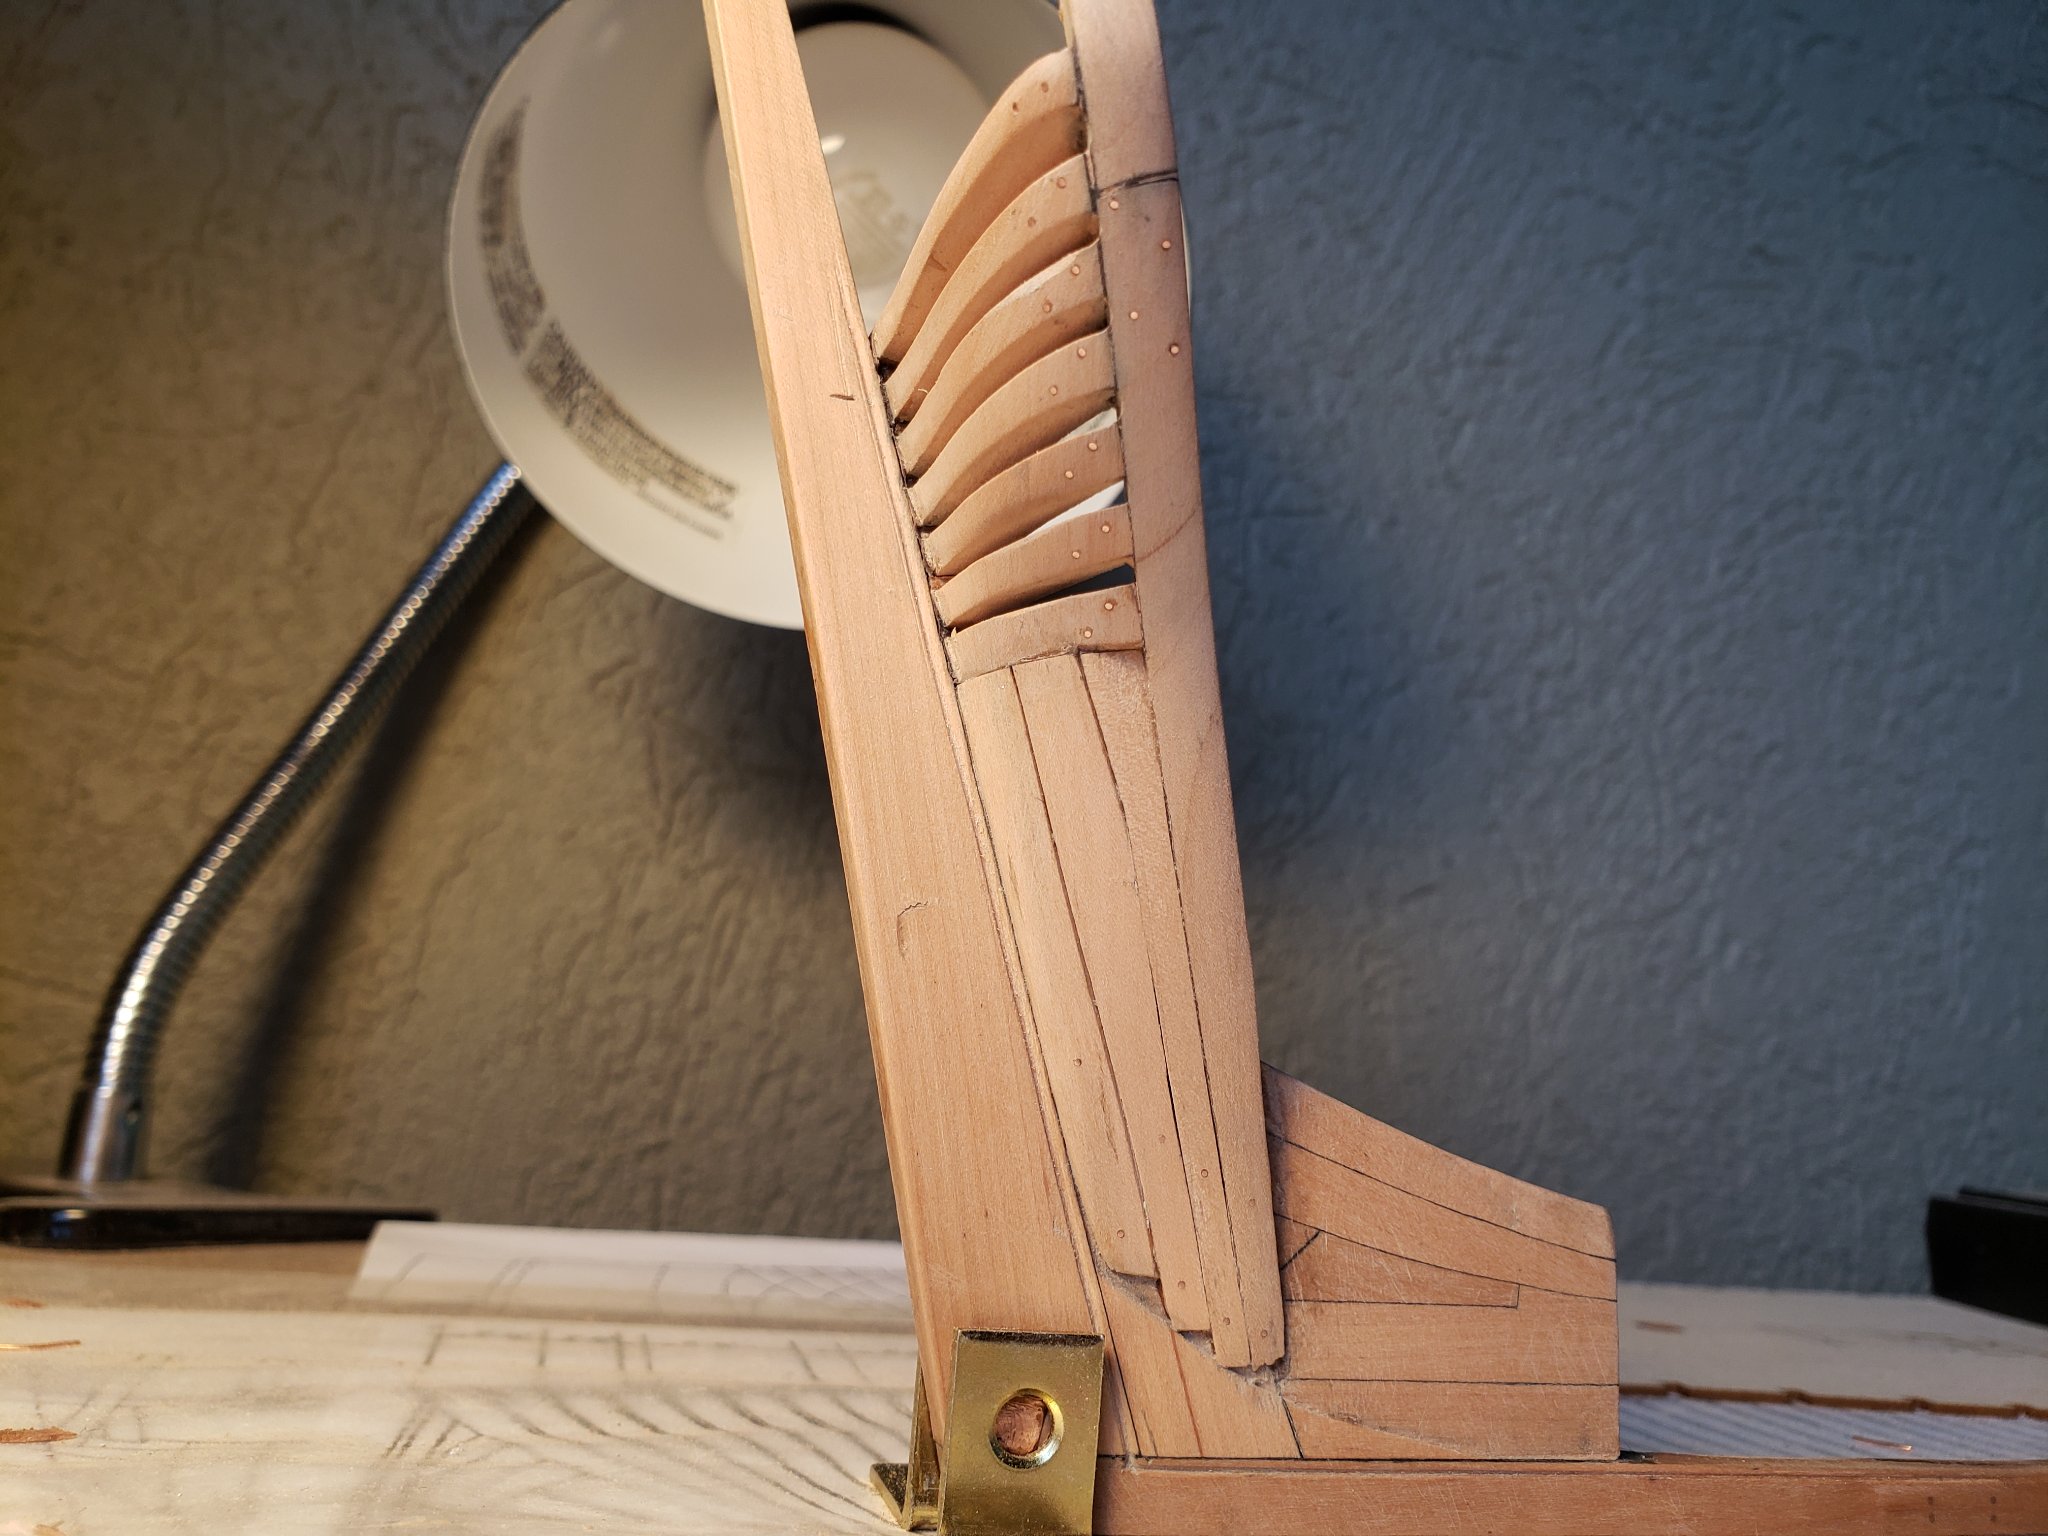
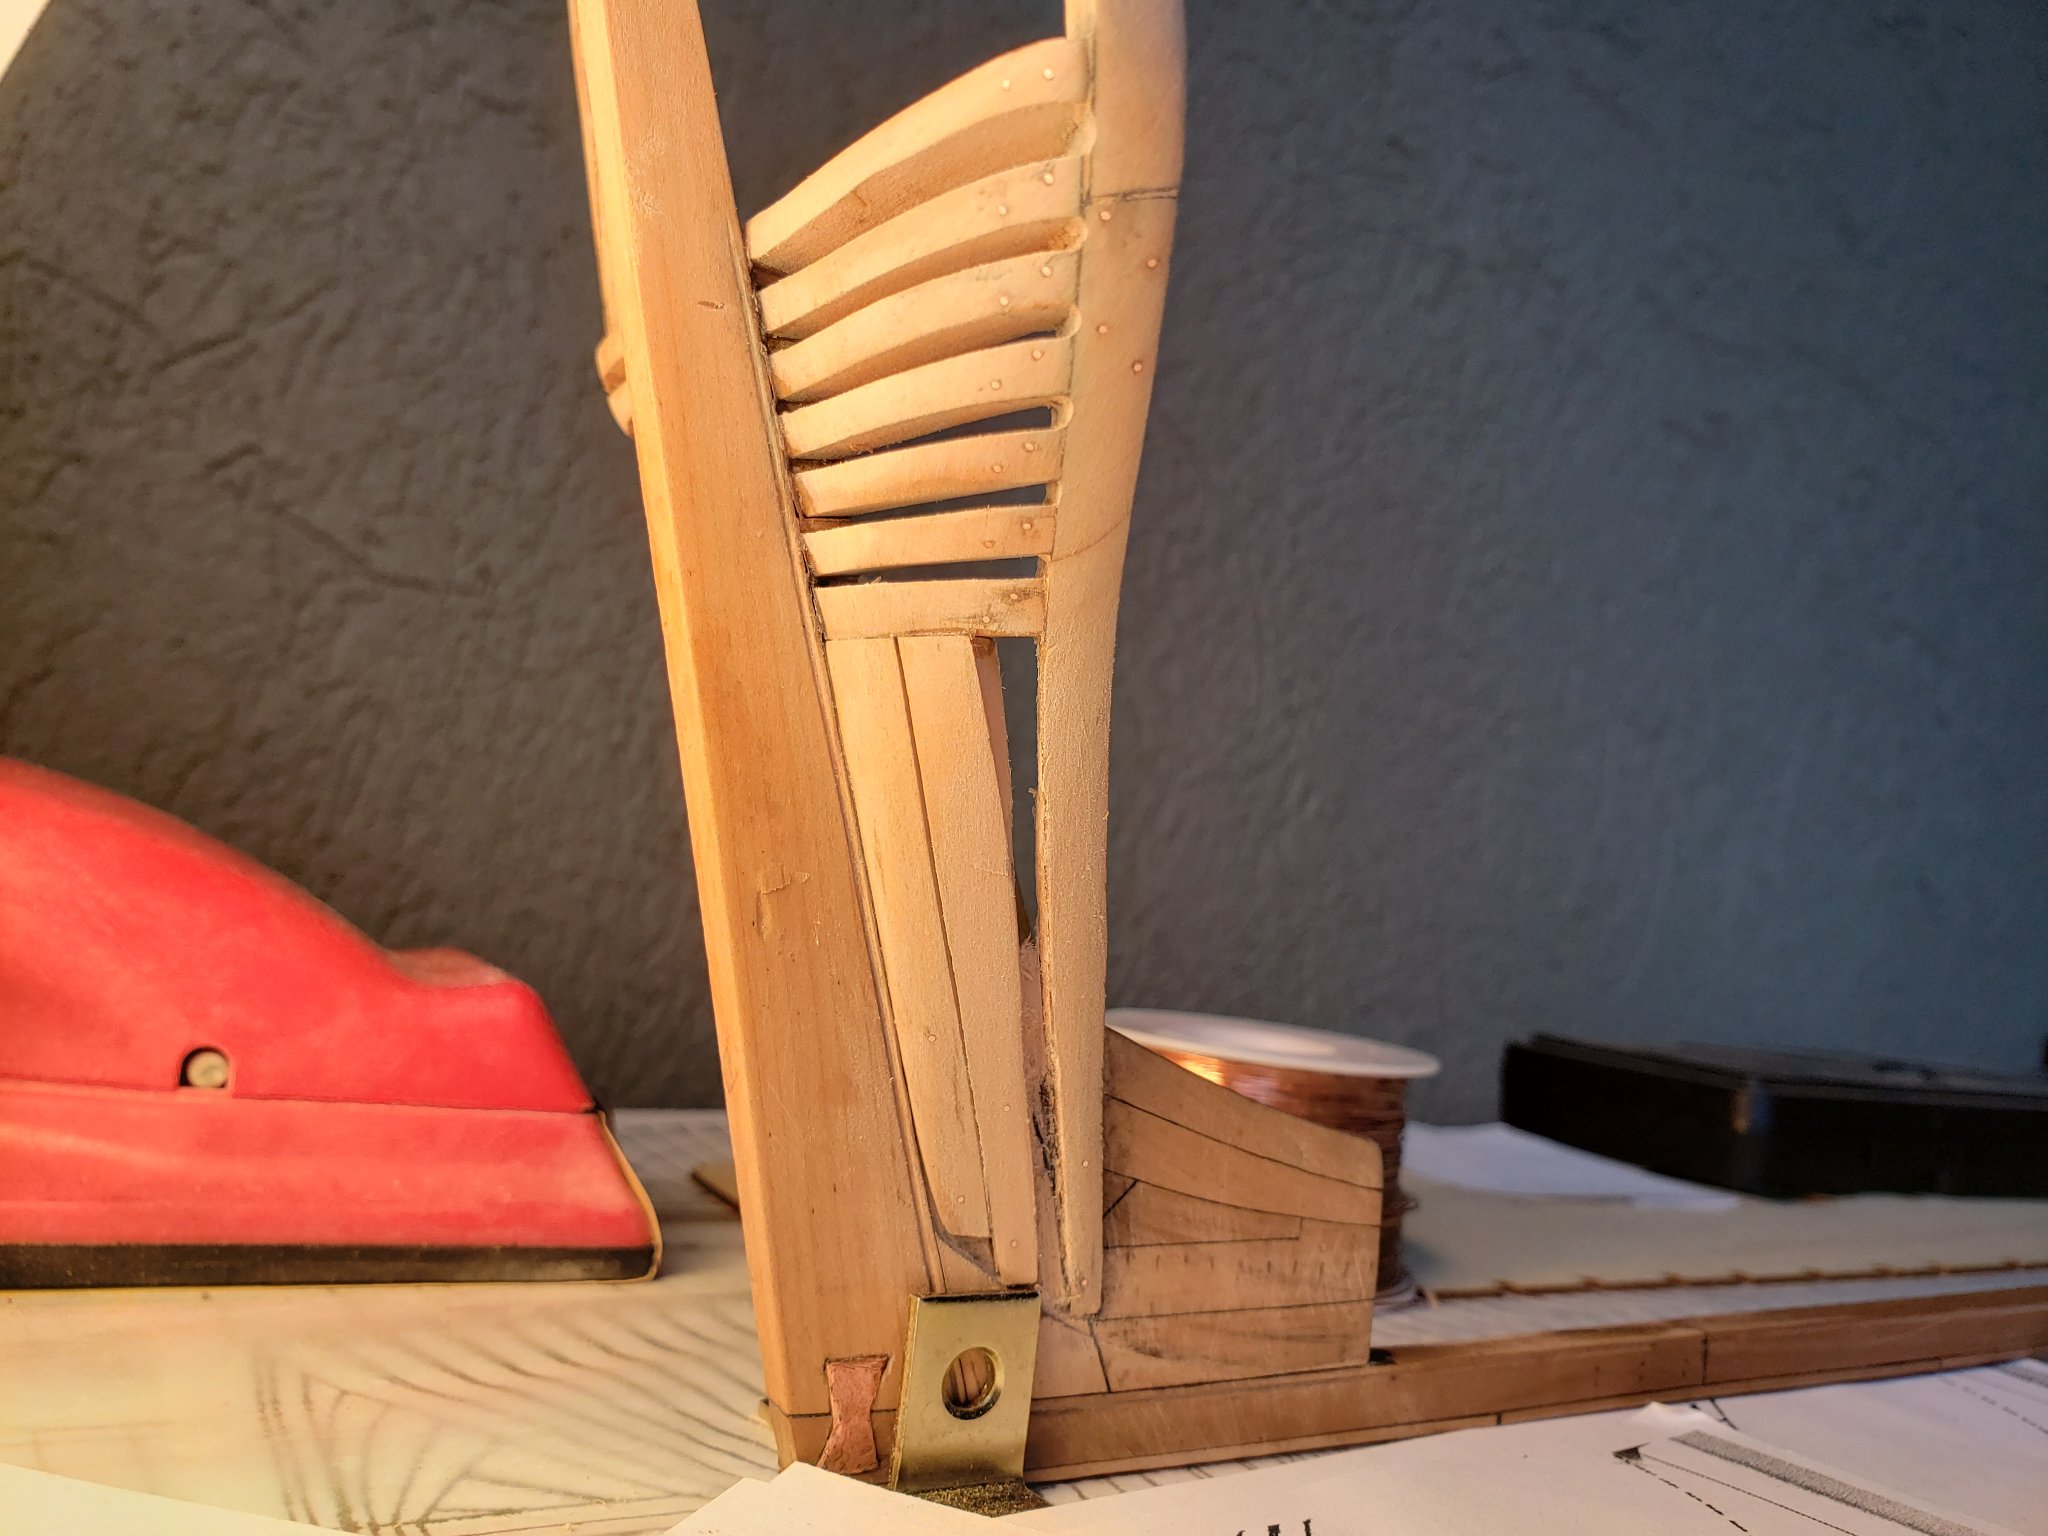
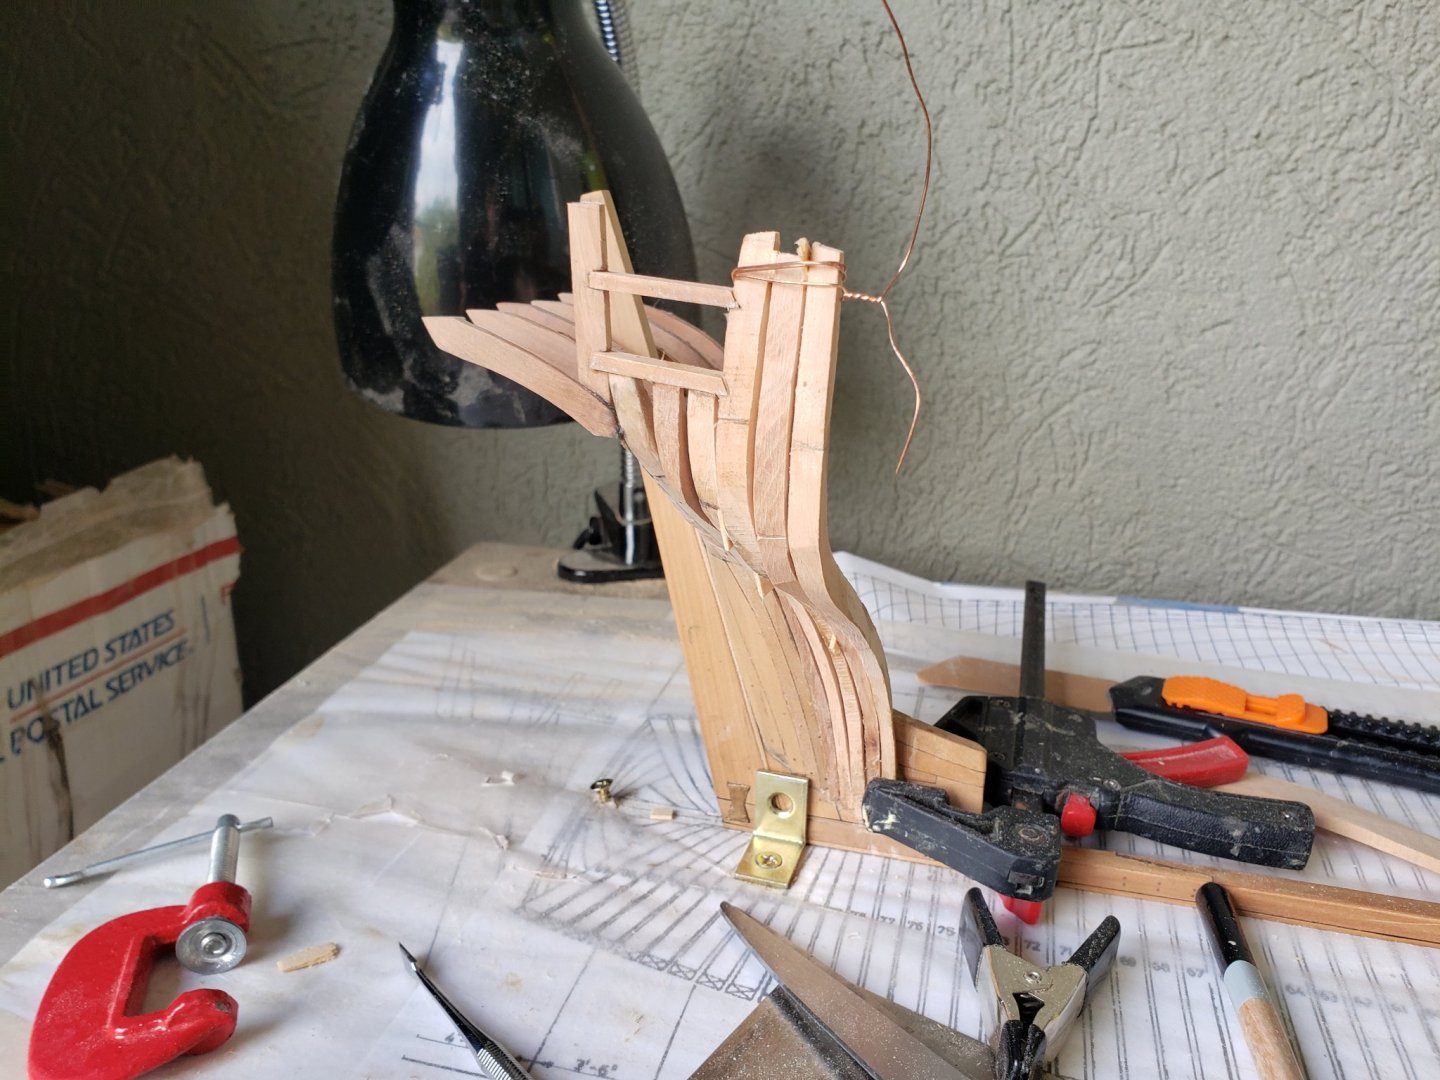
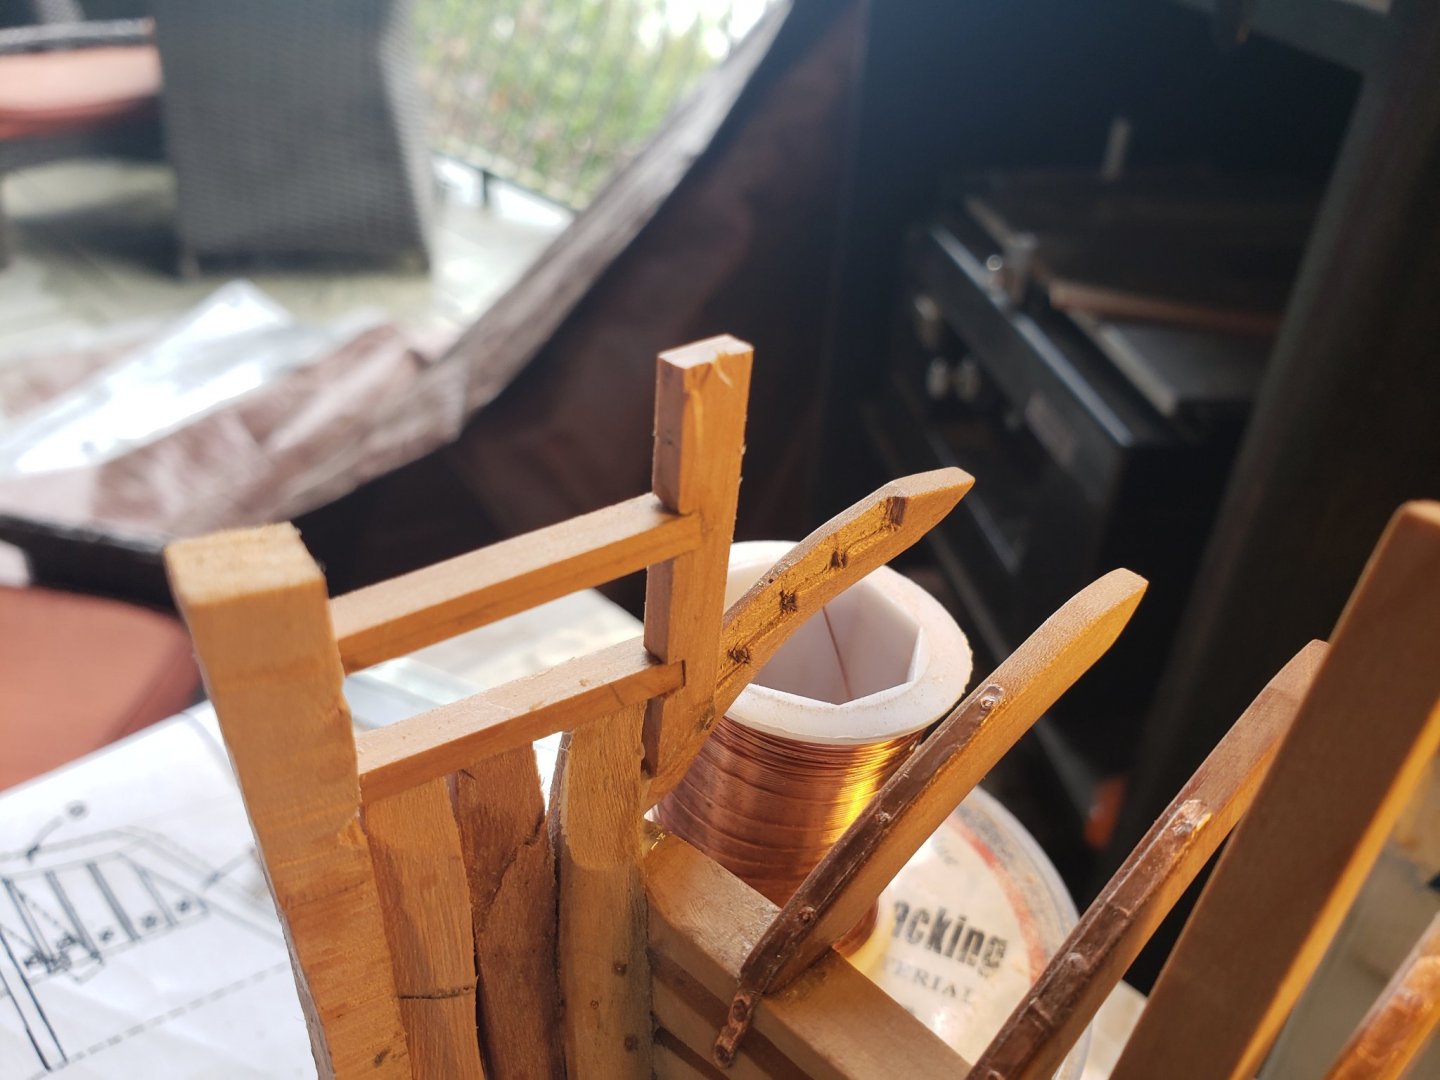
If anyone else has come across these straps let me know how you handled them. These are made from three layers of copper tape with 24 gauge copper wire for the bolts. All CA glued down.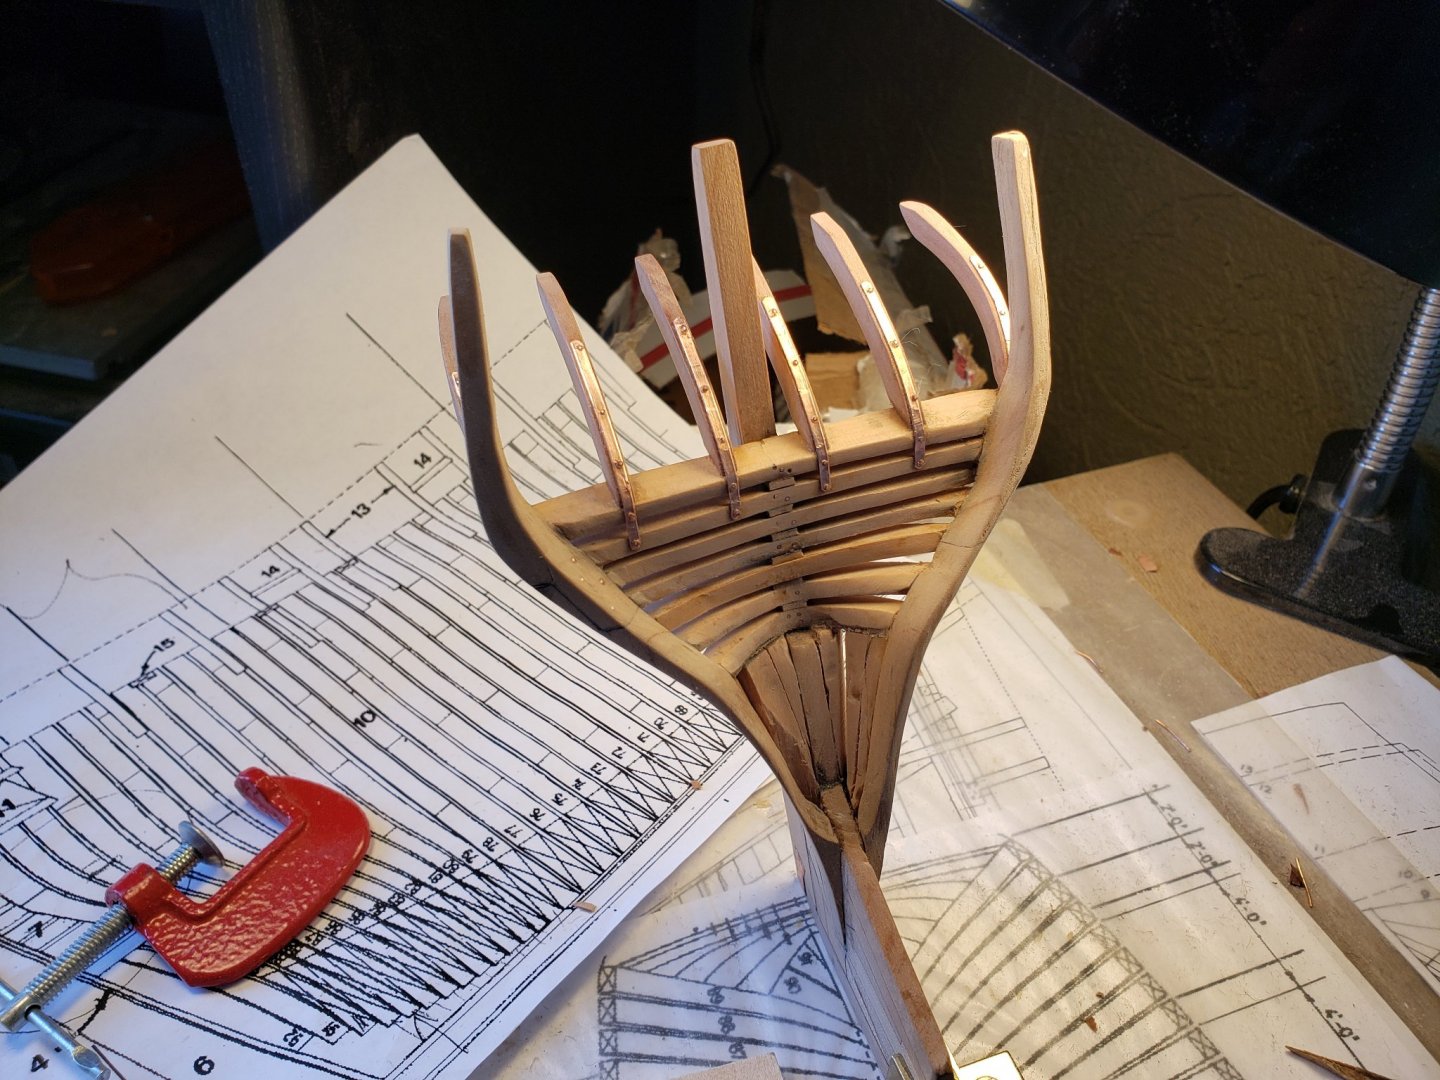
-
HMS Bounty by AdamA - 1:48
AdamA replied to AdamA's topic in - Build logs for subjects built 1751 - 1800
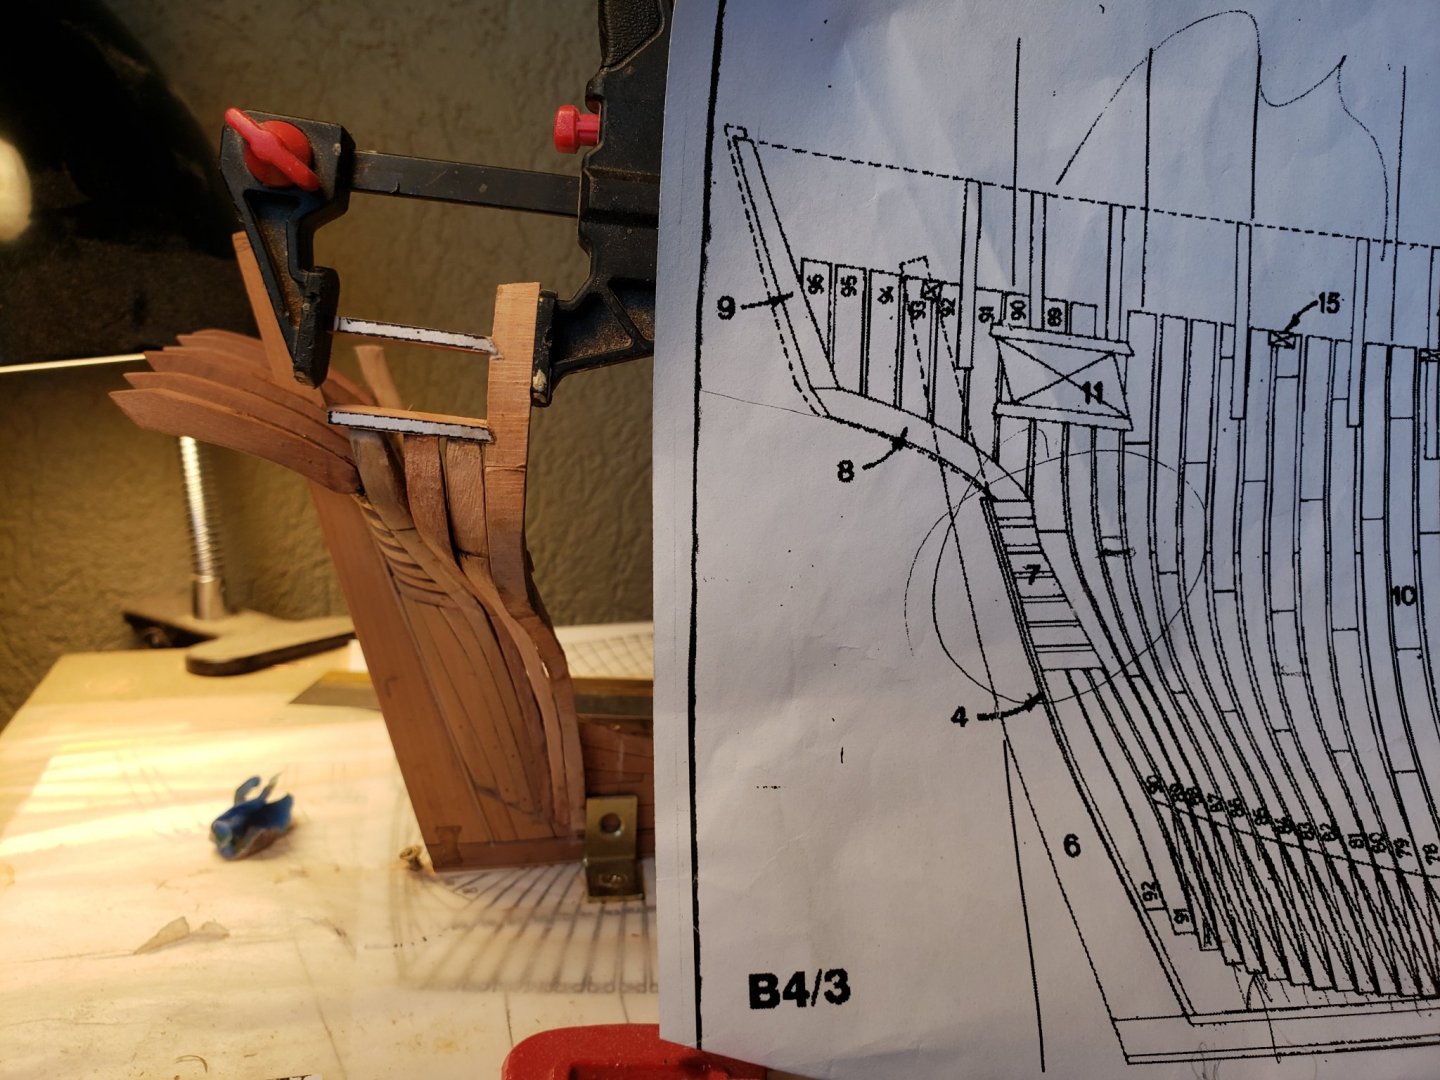
I noticed these six straps connecting the stern timbers to the top two transom pieces in the pic below. They aren't labeled and they are missing in all the other pictures so I'm not sure what they were made from. Considering the Bounty had to have all its iron fittings replaced by brass or copper when it was coppered by the royal navy (something they did apparently to keep the iron fittings from reacting with the copper plates, I'm going to use copper for them and for the five bolts in each.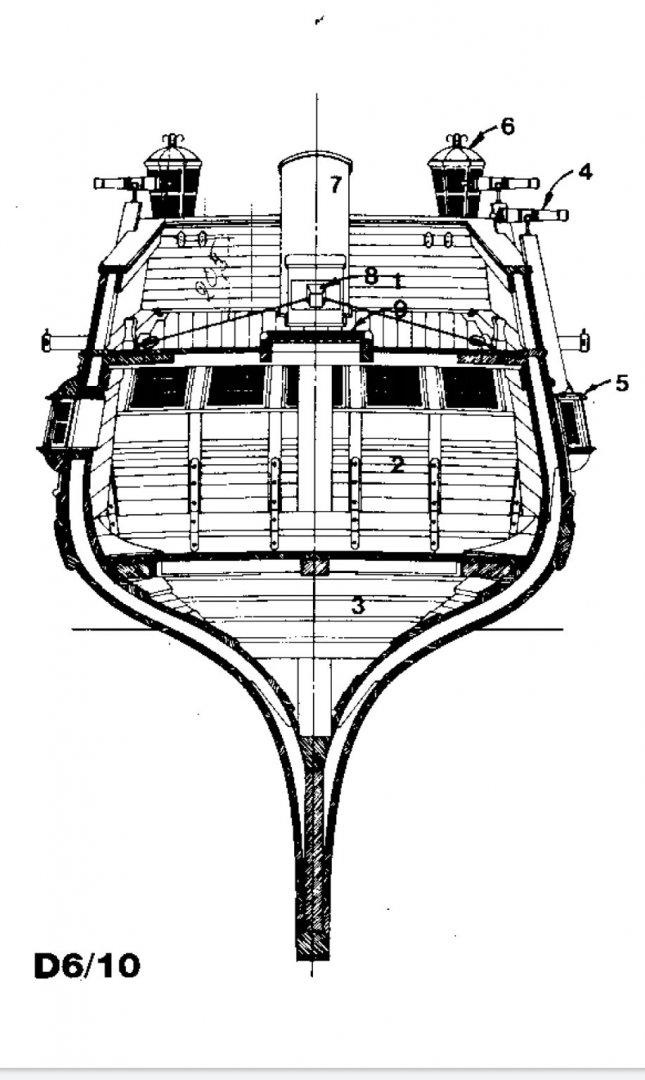
-
HMS Bounty by AdamA - 1:48
AdamA replied to AdamA's topic in - Build logs for subjects built 1751 - 1800
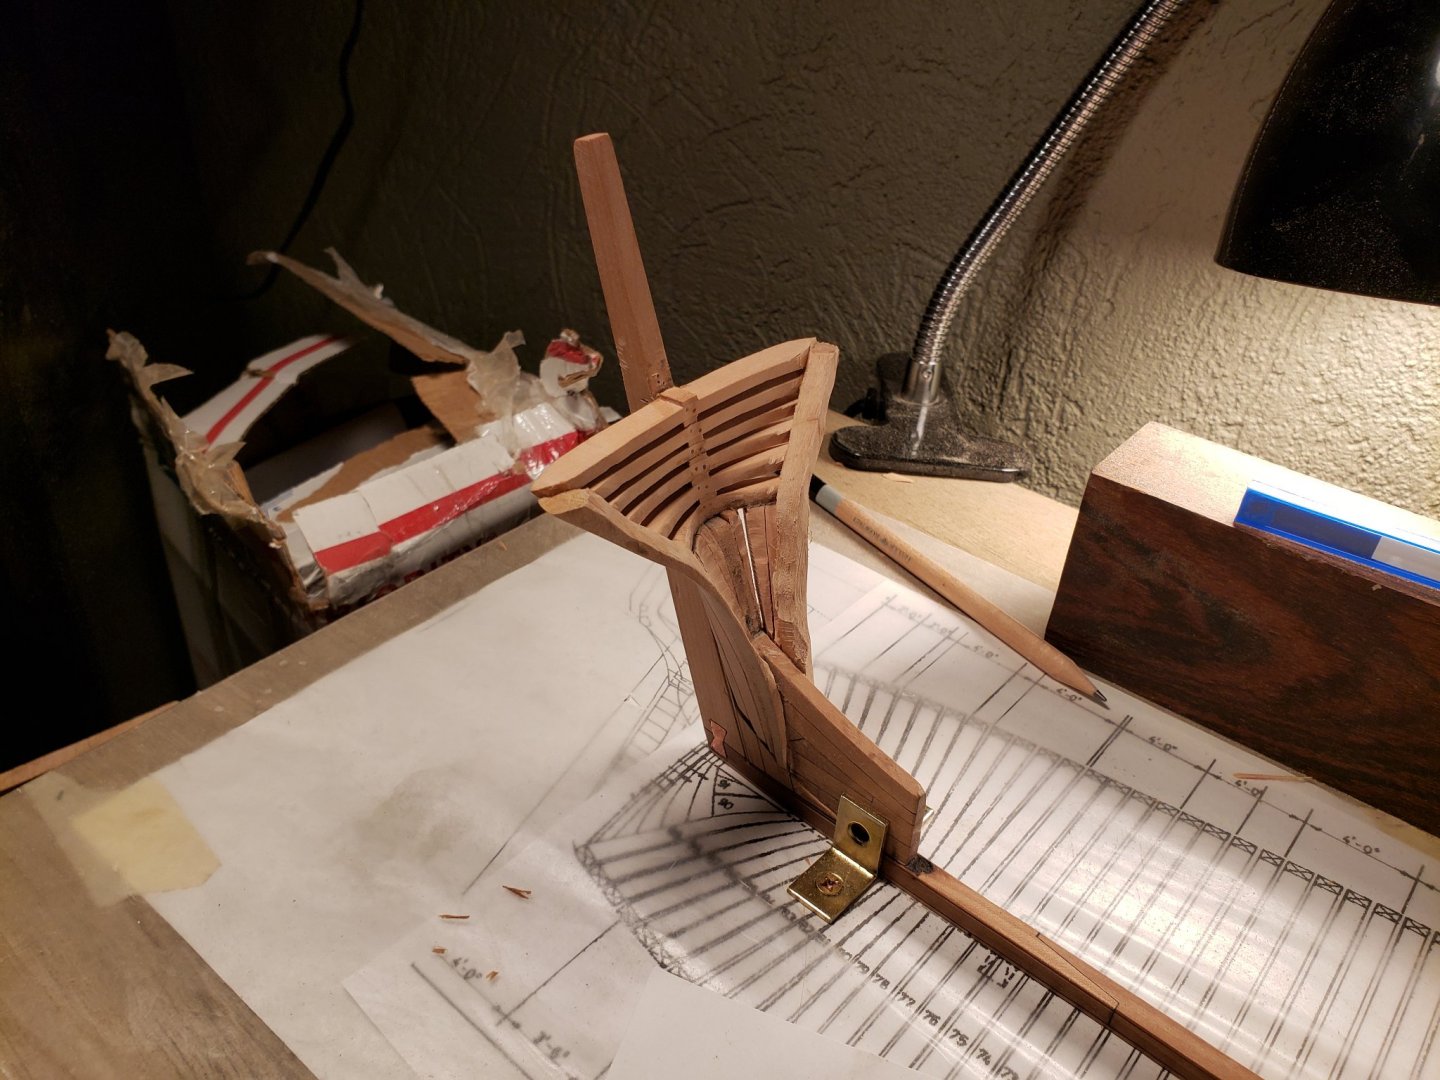
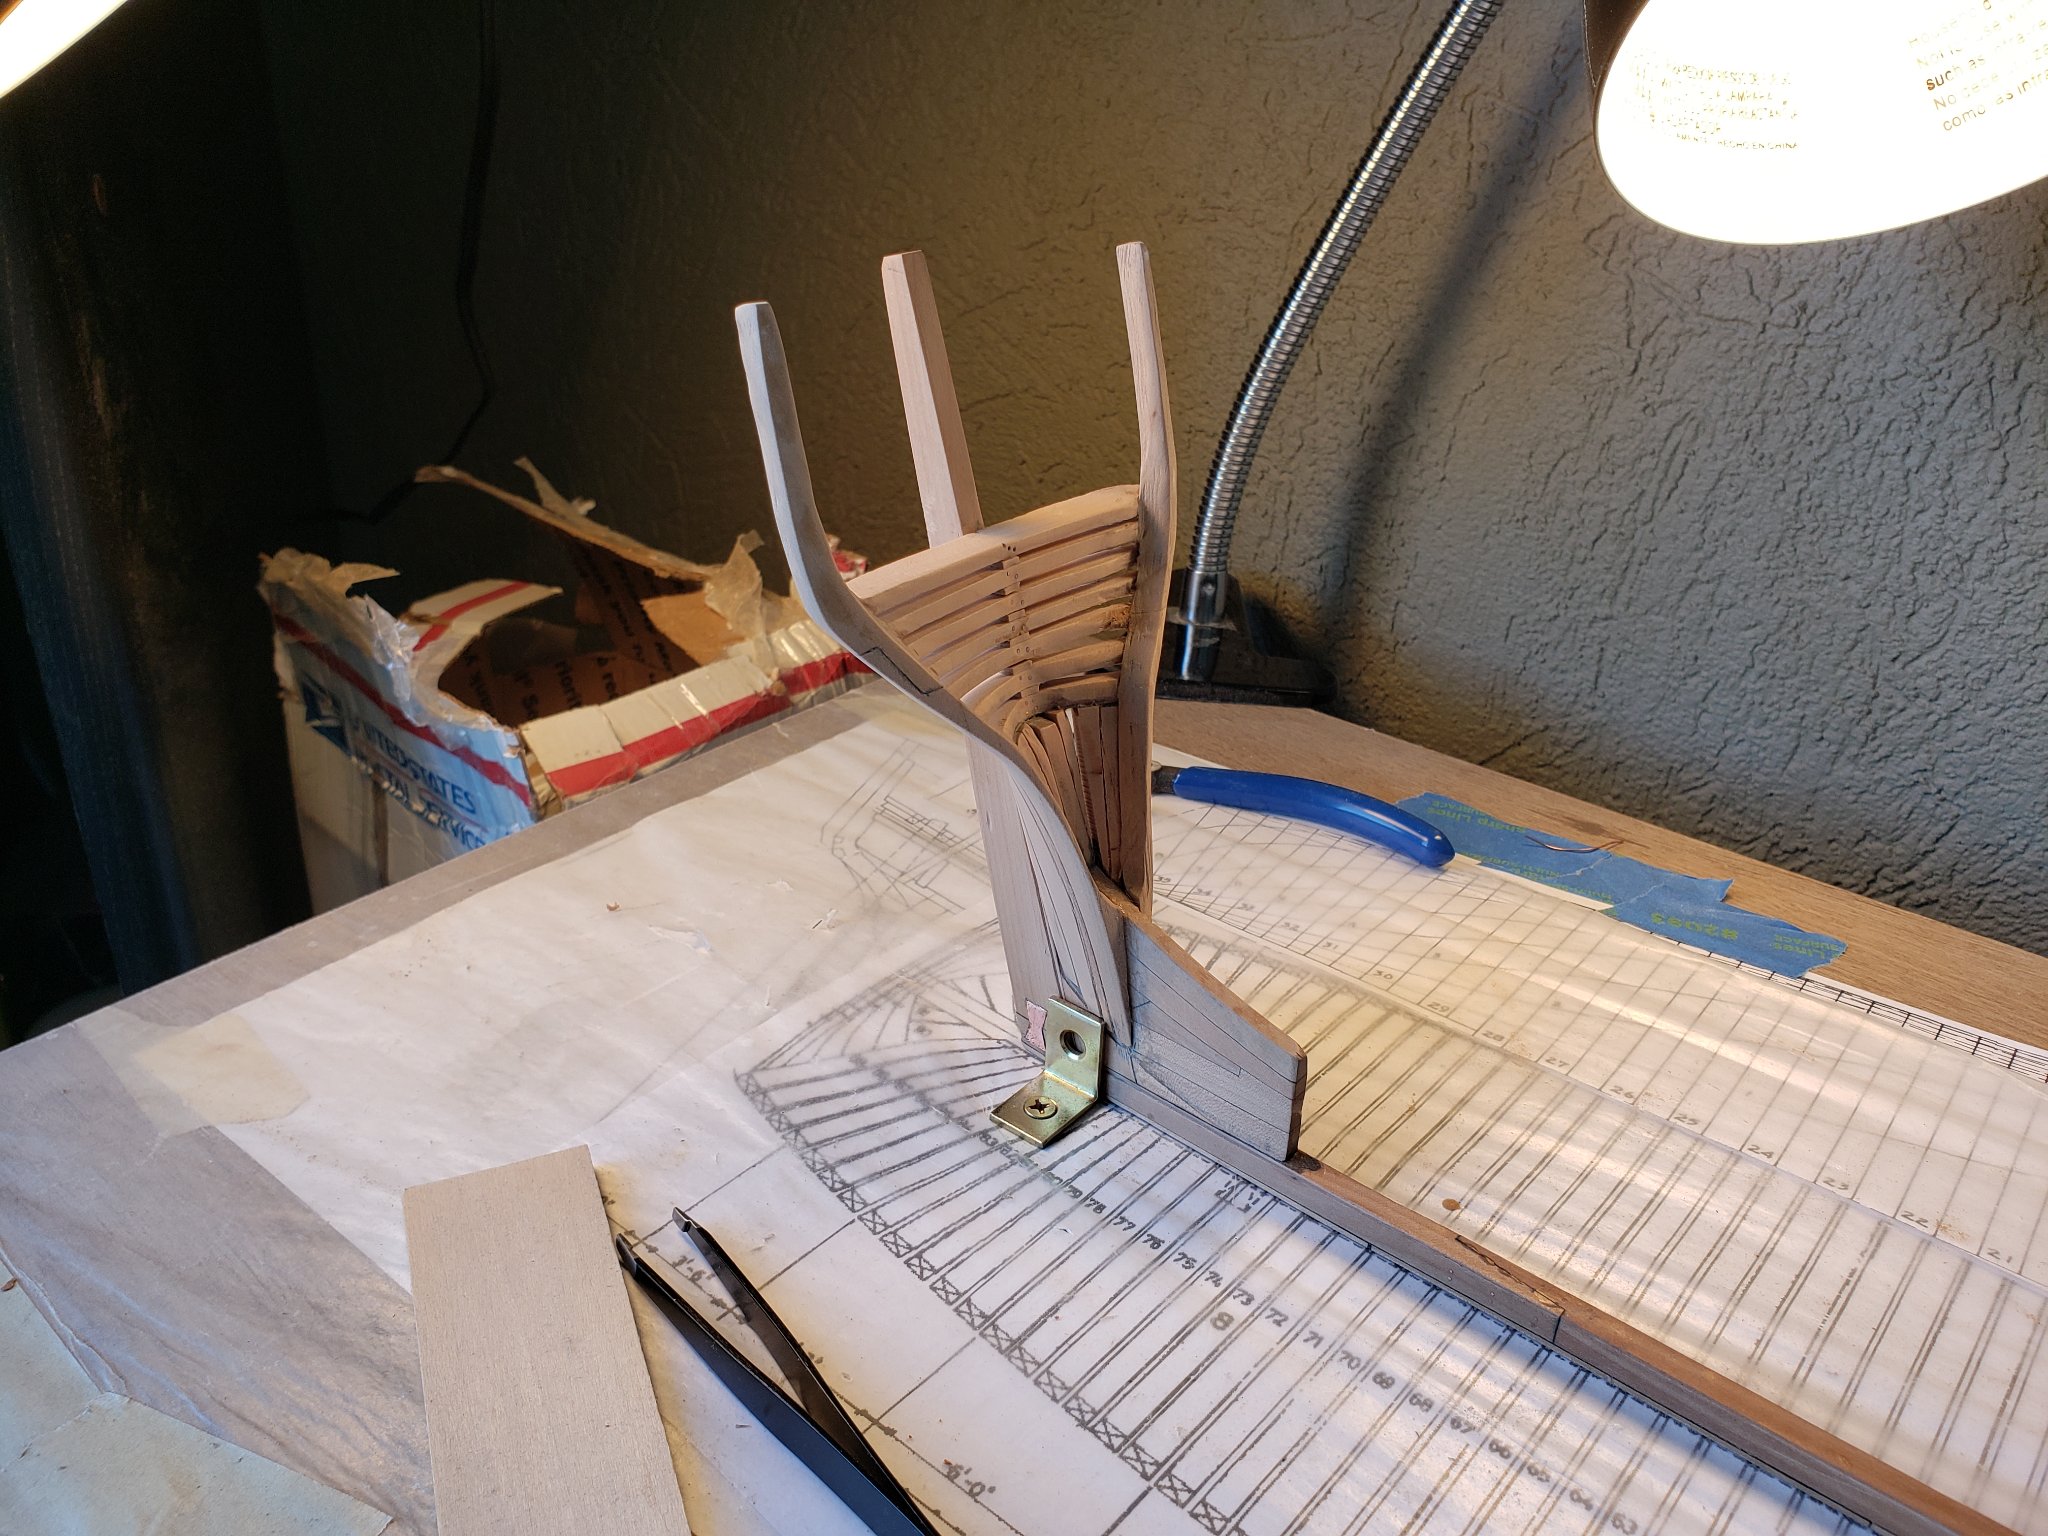
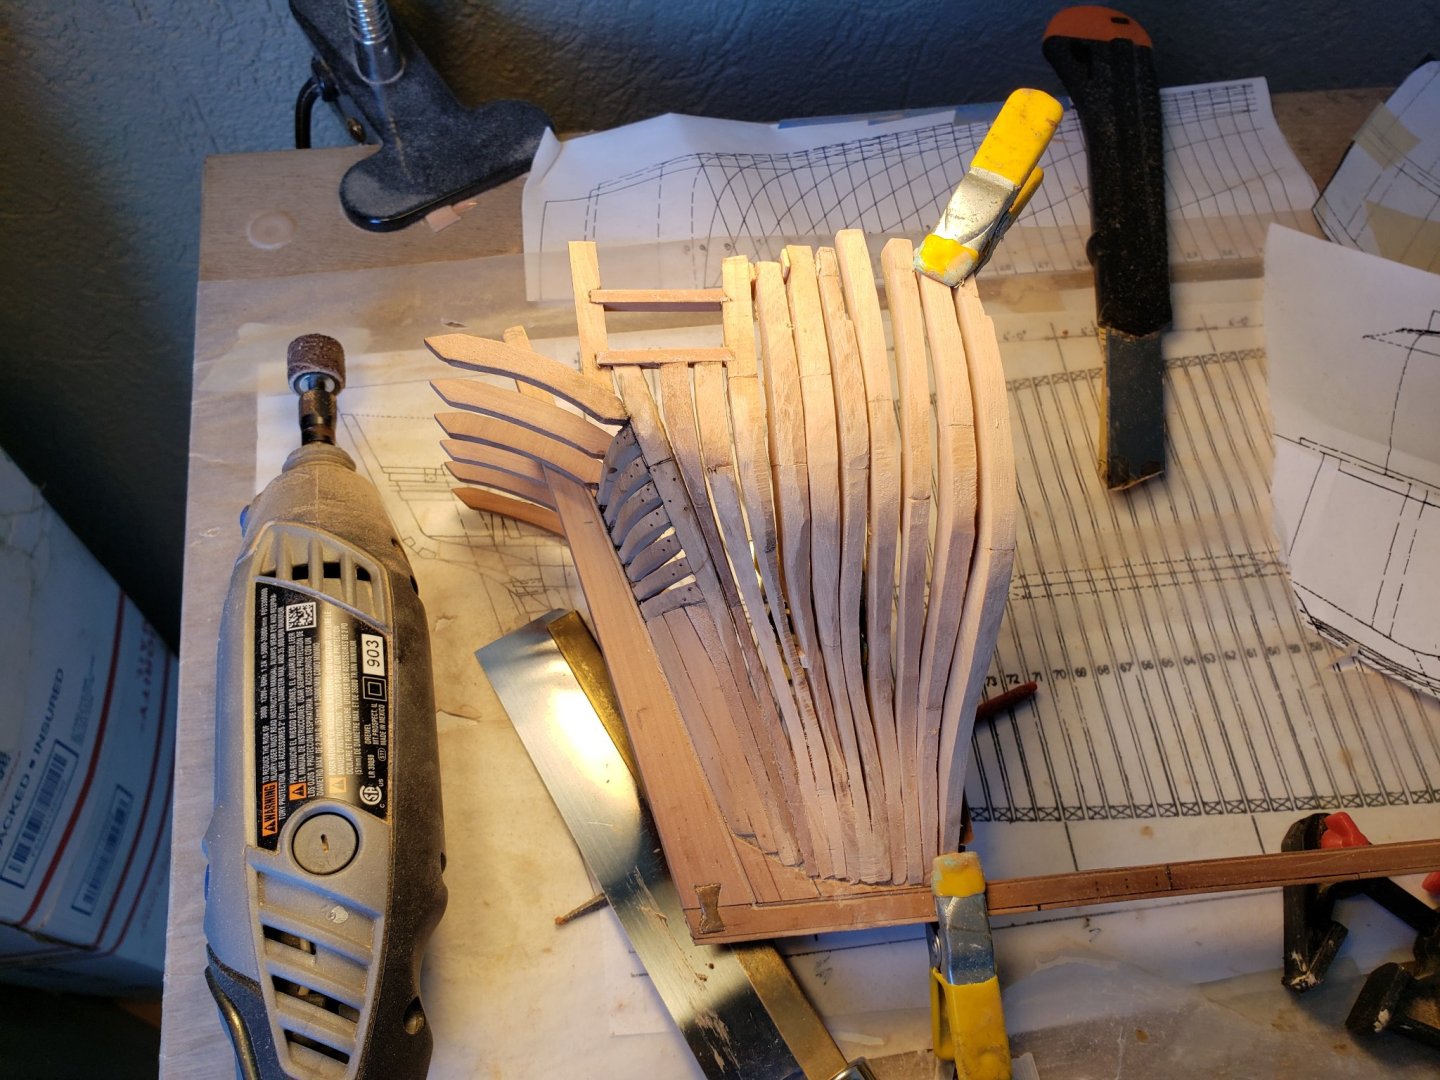
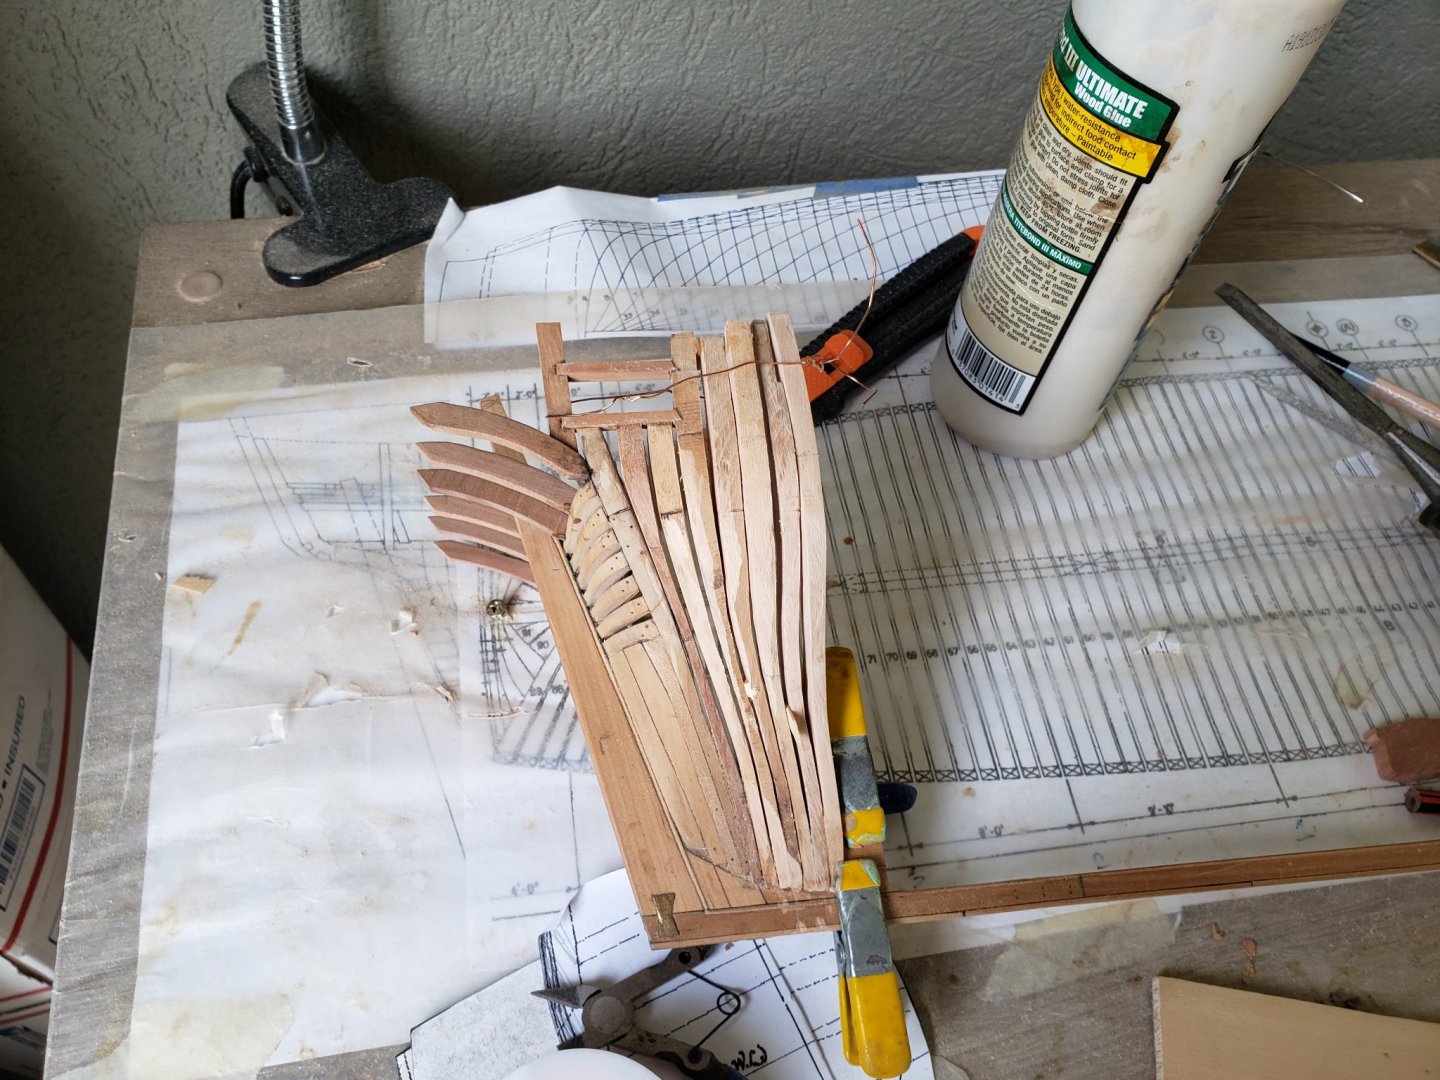
Stern timbers going on: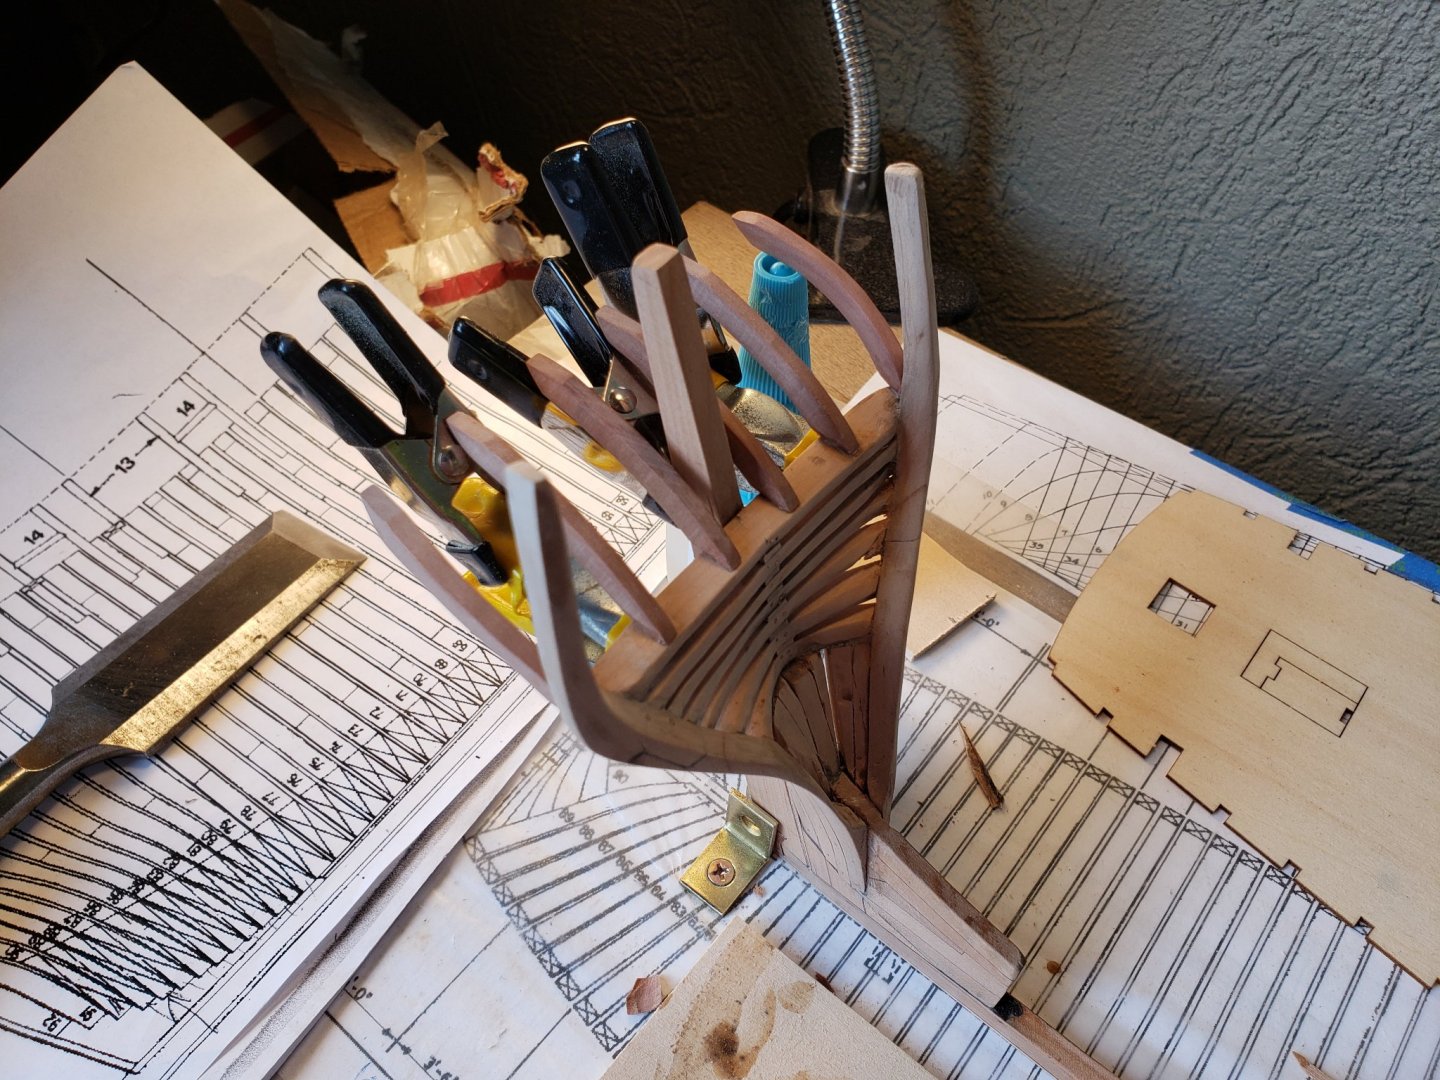
-
HMS Bounty by AdamA - 1:48
AdamA replied to AdamA's topic in - Build logs for subjects built 1751 - 1800
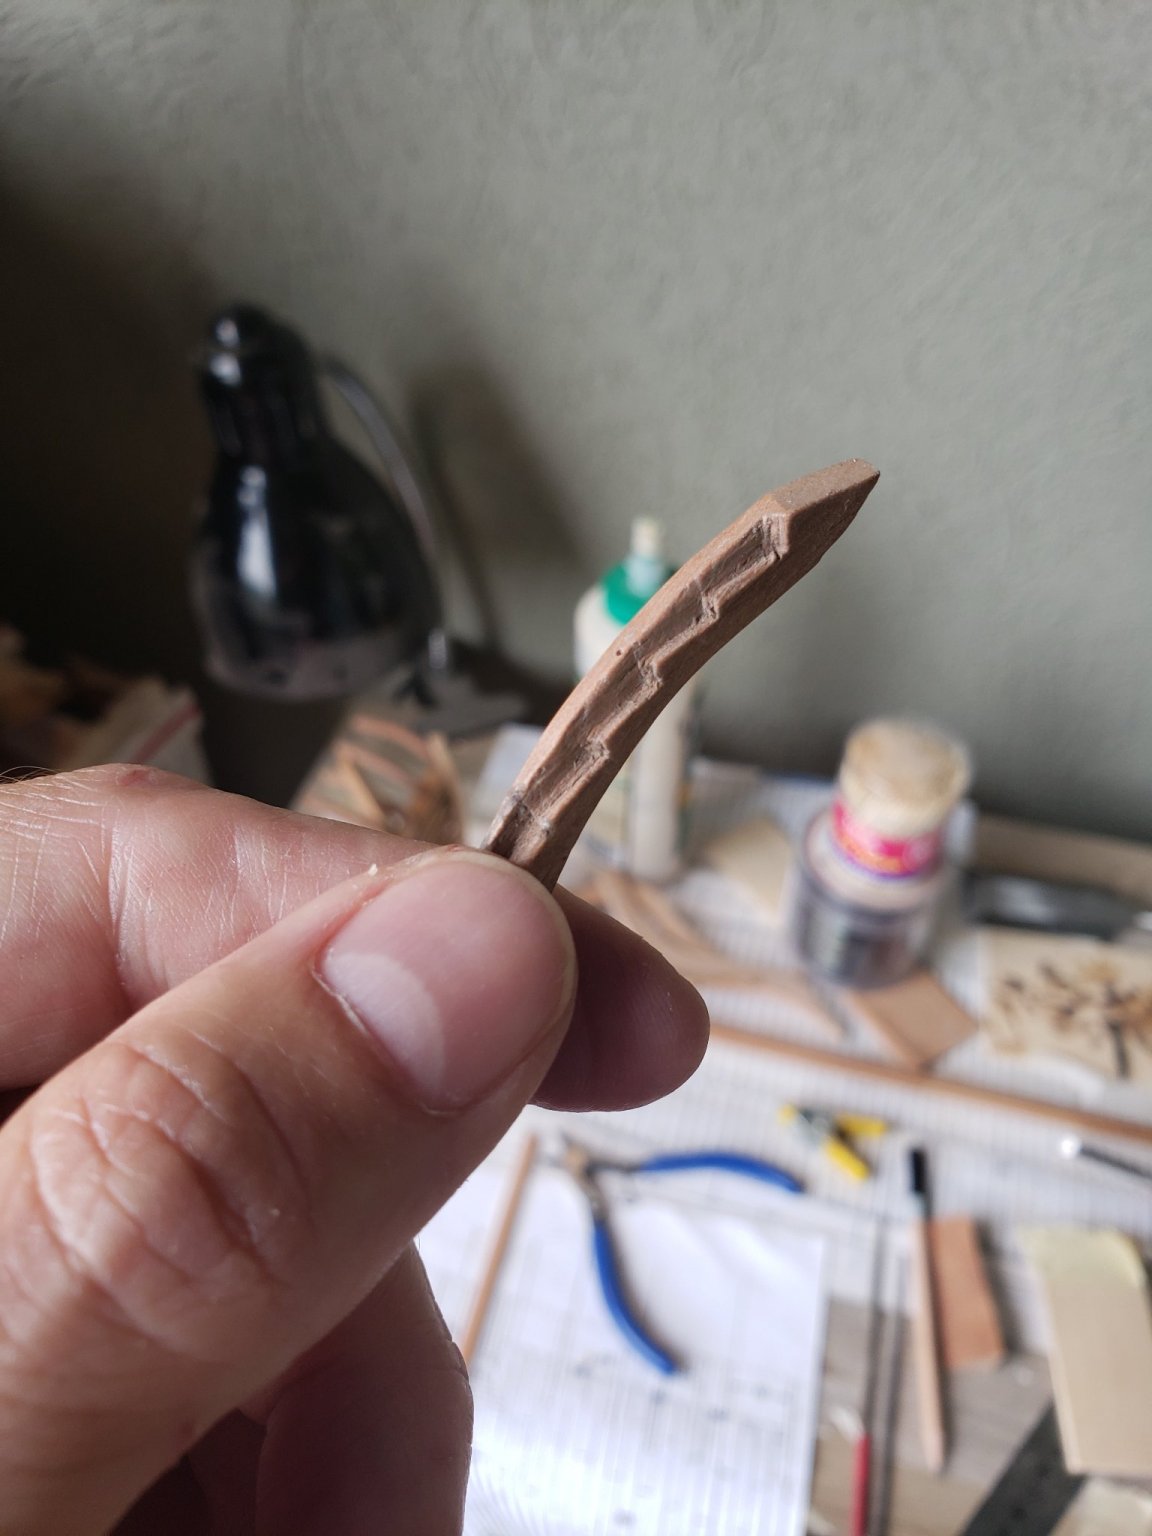
I'm ok with this repair.
-
HMS Bounty by AdamA - 1:48
AdamA replied to AdamA's topic in - Build logs for subjects built 1751 - 1800
I cut a piece to fit into the hole. Its thin enough to twist along the curve where the original piece was.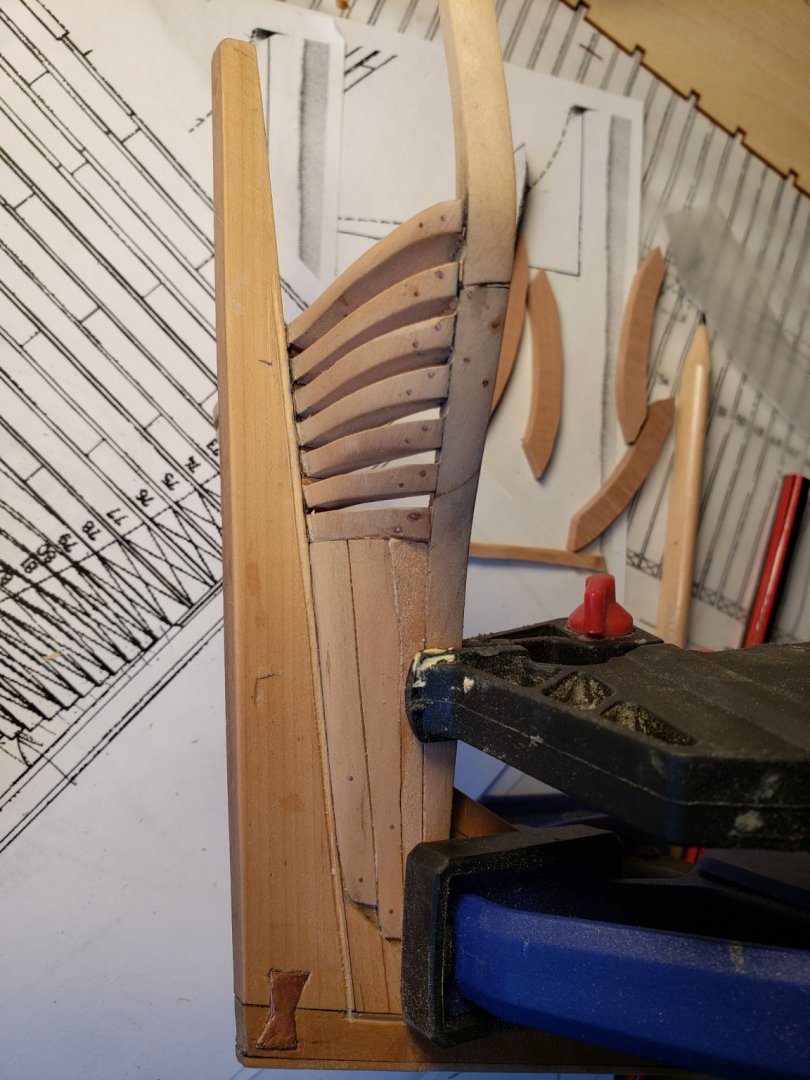
-
HMS Bounty by AdamA - 1:48
AdamA replied to AdamA's topic in - Build logs for subjects built 1751 - 1800
More surgery was needed. When I added bolts to this fashion piece I noticed it was shredded along its aft length. It must have happened when I originally cut it to shape. The shredded area was waiting for me to sand it down then it said "hello." I chiseled it out and will replace it before I move on.
-
HMS Bounty by AdamA - 1:48
AdamA replied to AdamA's topic in - Build logs for subjects built 1751 - 1800
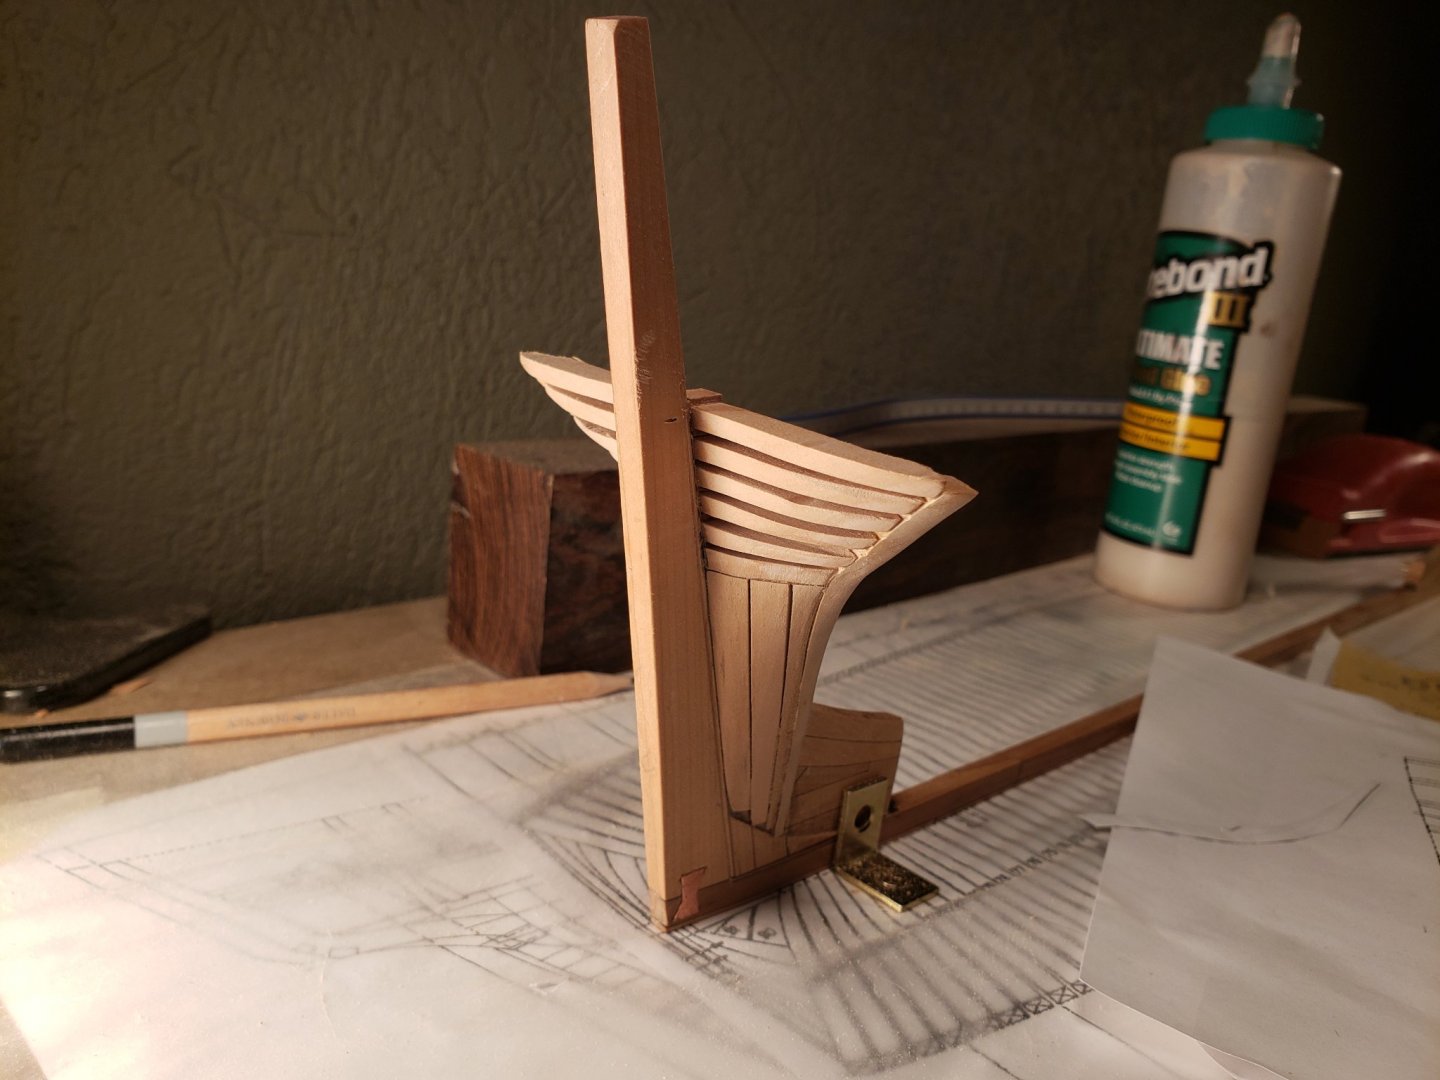
I'm back at it. These will be the counter timbers.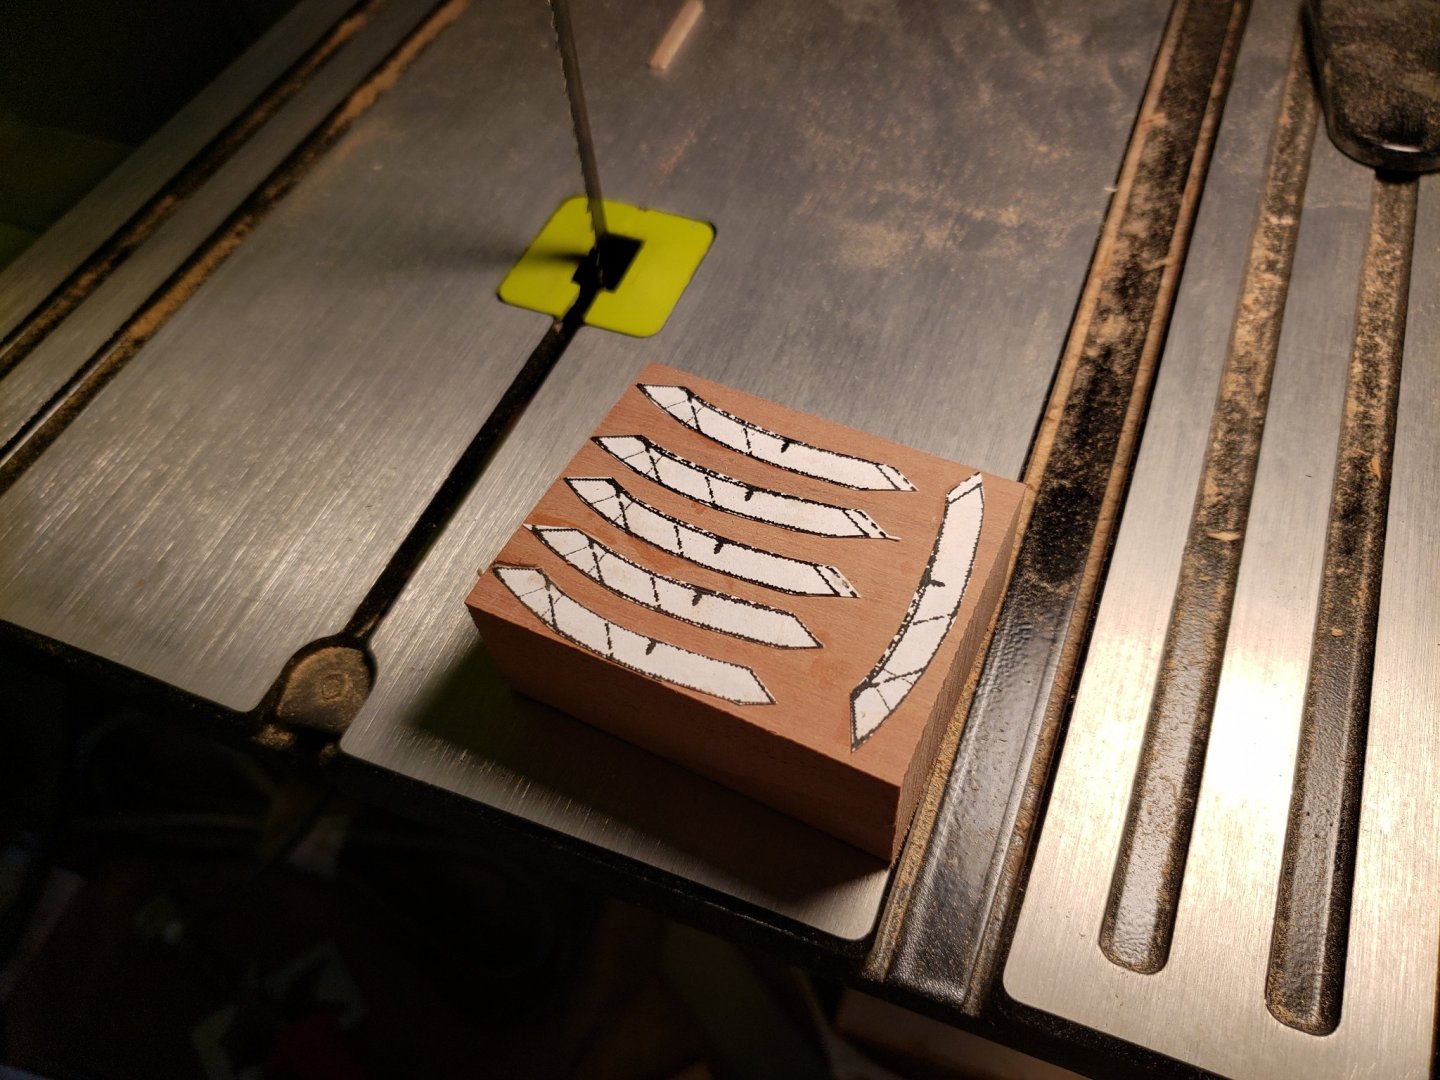
-
HMS Bounty by AdamA - 1:48
AdamA replied to AdamA's topic in - Build logs for subjects built 1751 - 1800
Ok. That's got her evened out. Ignore the rough spots!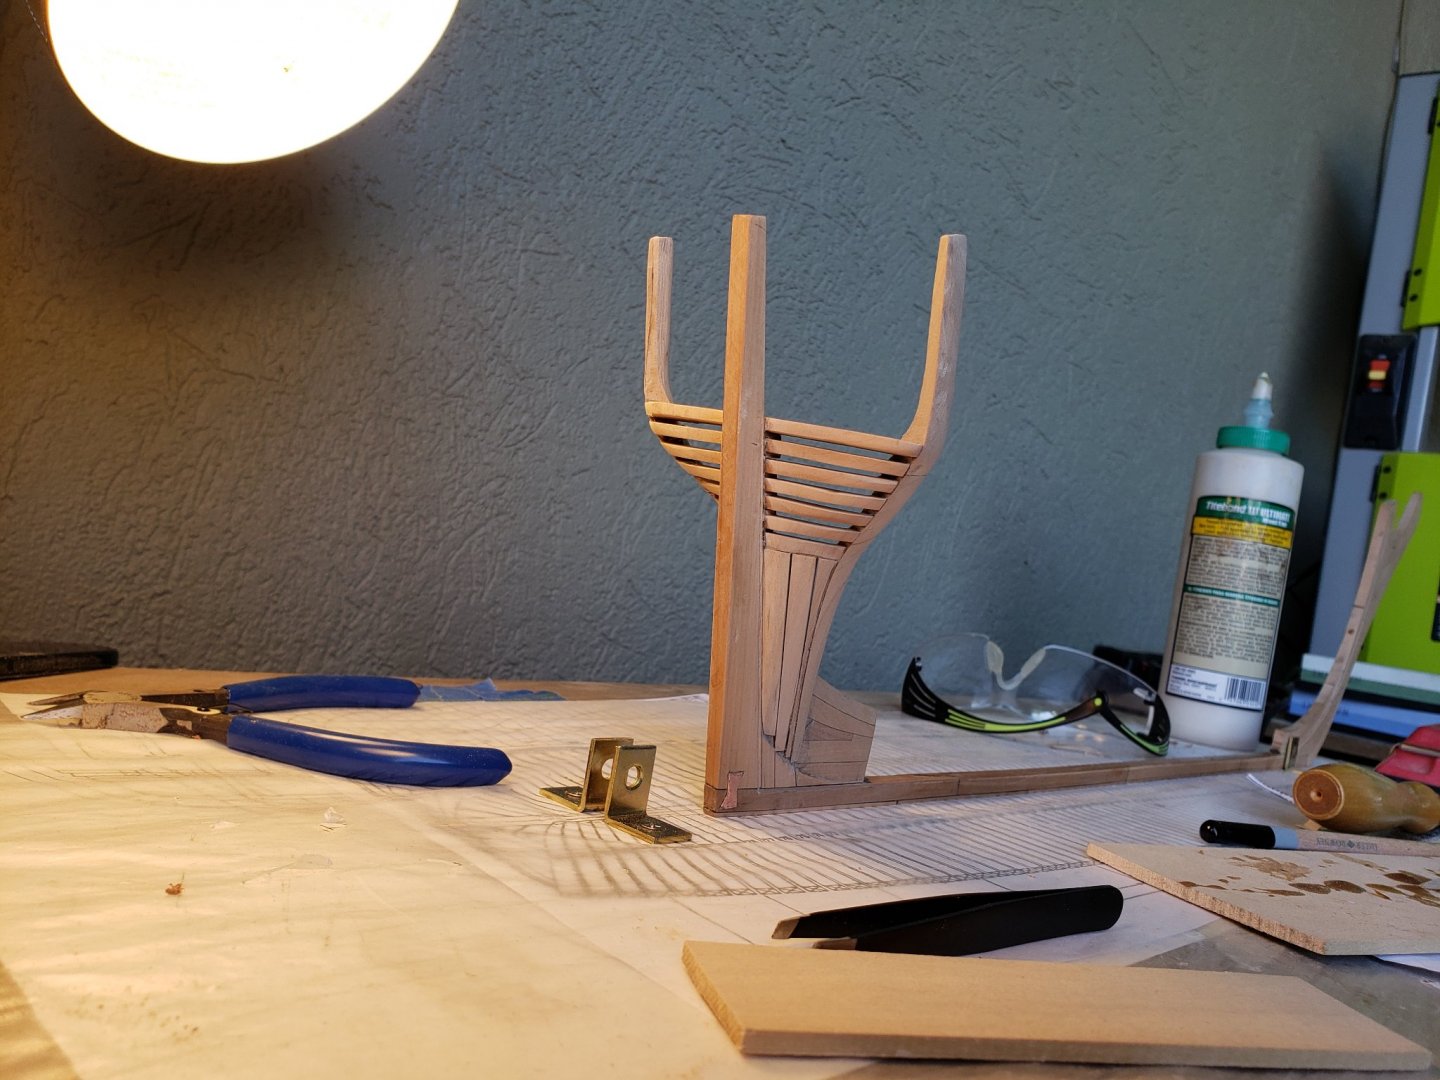

-
HMS Bounty by AdamA - 1:48
AdamA replied to AdamA's topic in - Build logs for subjects built 1751 - 1800
Same goes for frames. I'm doing surgery on the port side aft cant frame.
-
HMS Bounty by AdamA - 1:48
AdamA replied to AdamA's topic in - Build logs for subjects built 1751 - 1800
Welp. I learned a hard lesson about transoms. They like to wander off if you're not paying attention. I'm realigning them lol.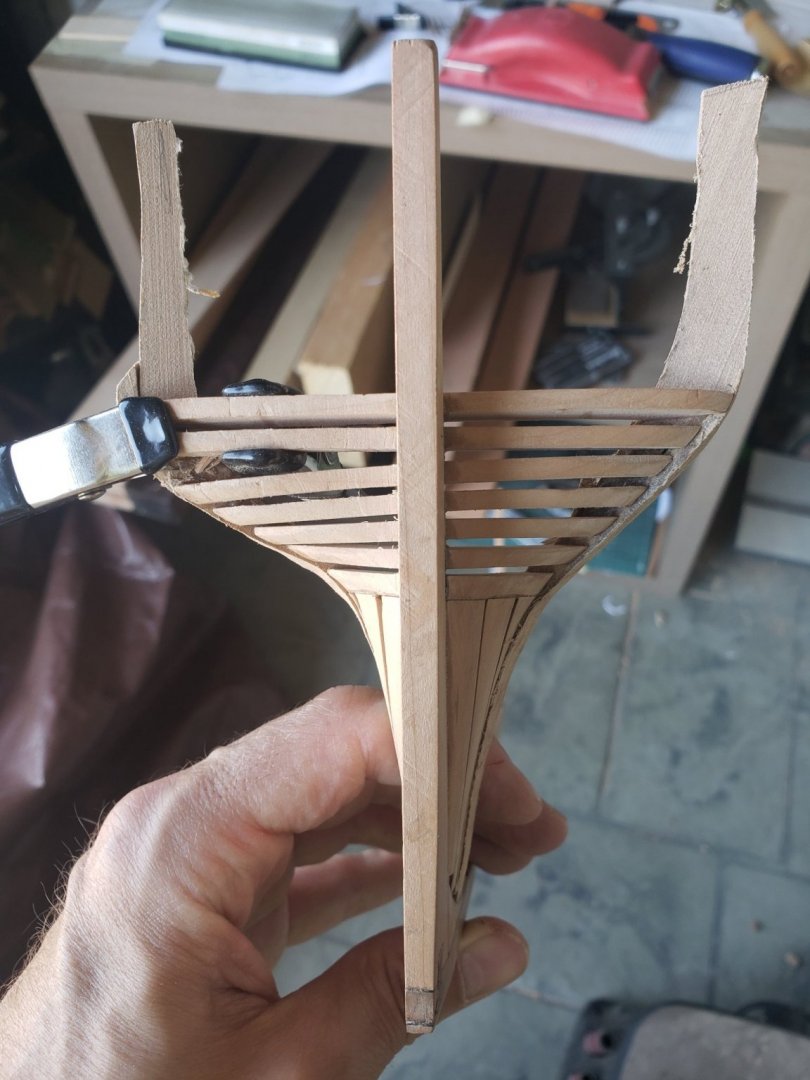
-
HMS Bounty by AdamA - 1:48
AdamA replied to AdamA's topic in - Build logs for subjects built 1751 - 1800
Ok. I had to remove the lower halves of the most aft cant frames so I could cut the scarph joints. Then I had to remove and recut them a second time. Here is the very rough draft of that frame:
-
HMS Bounty by AdamA - 1:48
AdamA replied to AdamA's topic in - Build logs for subjects built 1751 - 1800
On second thought I'm going to cut those scarph joints. I just cut the first one and I'm feeling good about the ease of doing them using a paper template. -
HMS Bounty by AdamA - 1:48
AdamA replied to AdamA's topic in - Build logs for subjects built 1751 - 1800
Ok I may have underestimated the amount of work that McKay's drawings entailed. He has scarph joints in every joint in the frames. No chocks. No overlapping single angled joints. All scarphs... I may make an executive decision to use chocks for all the frames. -
HMS Bounty by AdamA - 1:48
AdamA replied to AdamA's topic in - Build logs for subjects built 1751 - 1800
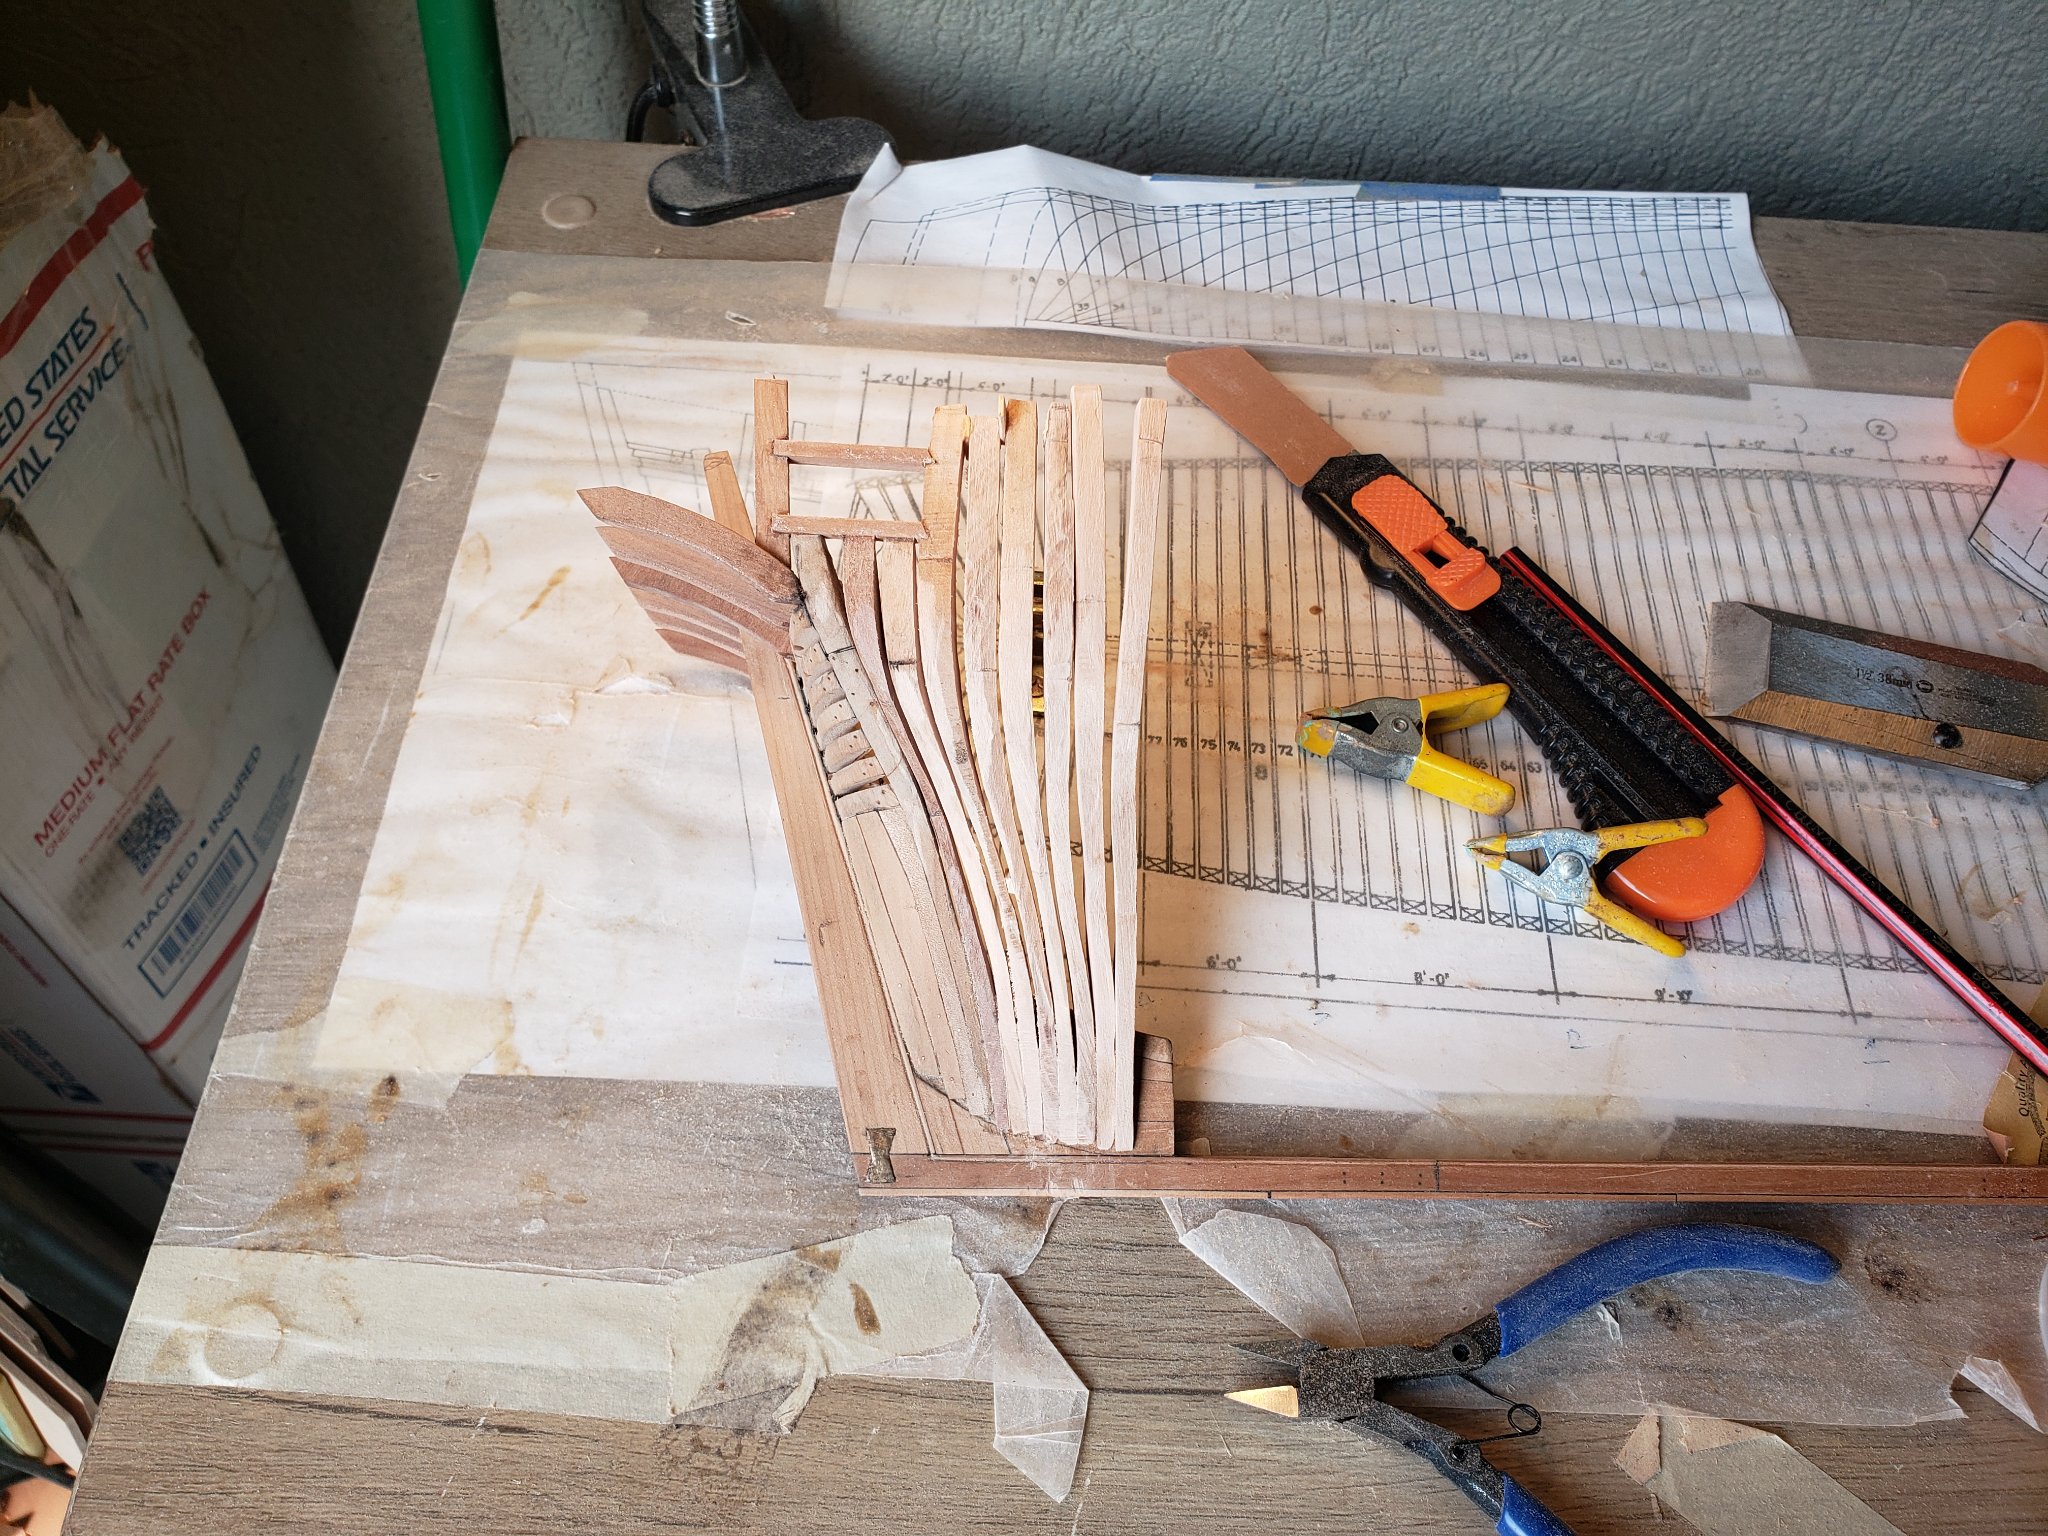
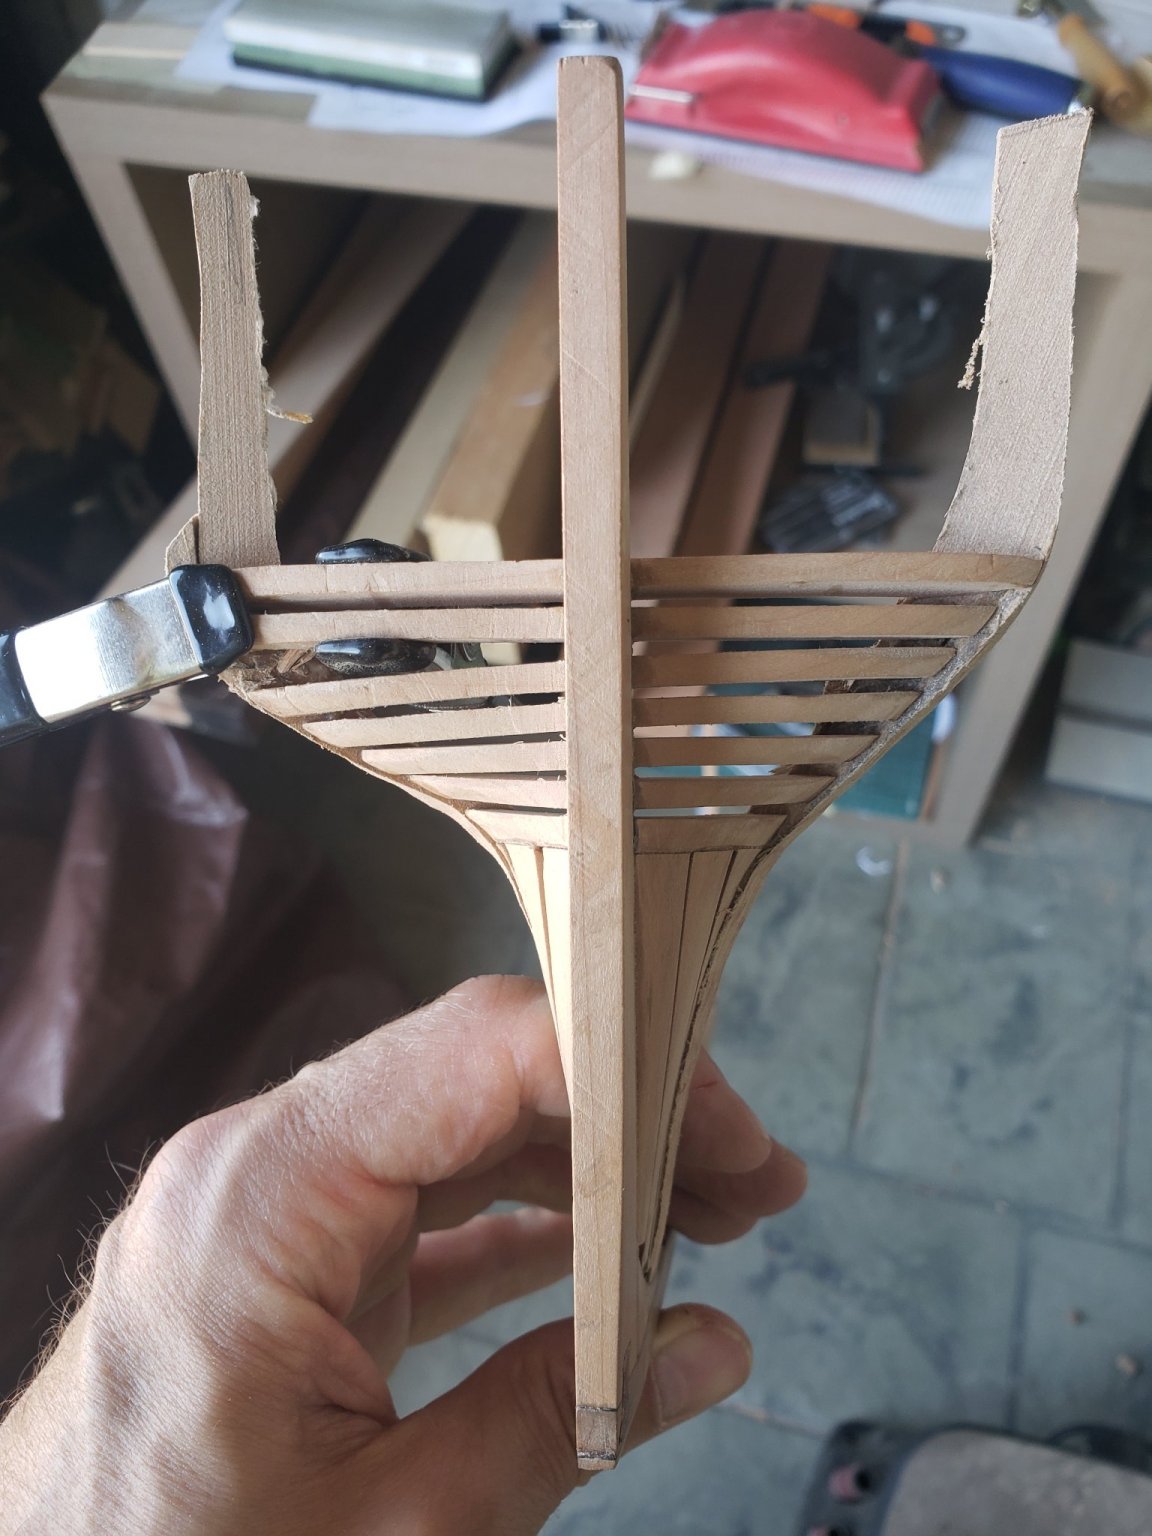
These two can't frames will be sanded.