AdamA
-
Posts
178 -
Joined
-
Last visited
Content Type
Profiles
Forums
Gallery
Events
Everything posted by AdamA
-
HMS Bounty by AdamA - 1:48
AdamA replied to AdamA's topic in - Build logs for subjects built 1751 - 1800
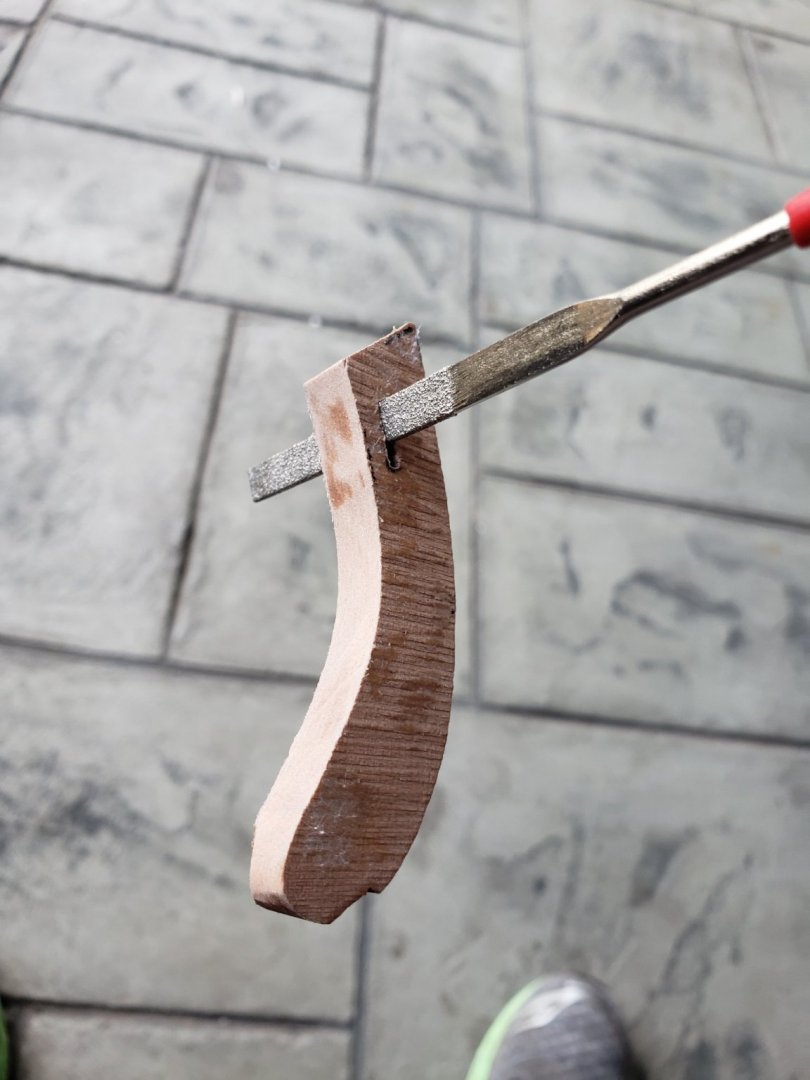
Cutting in the Rabbet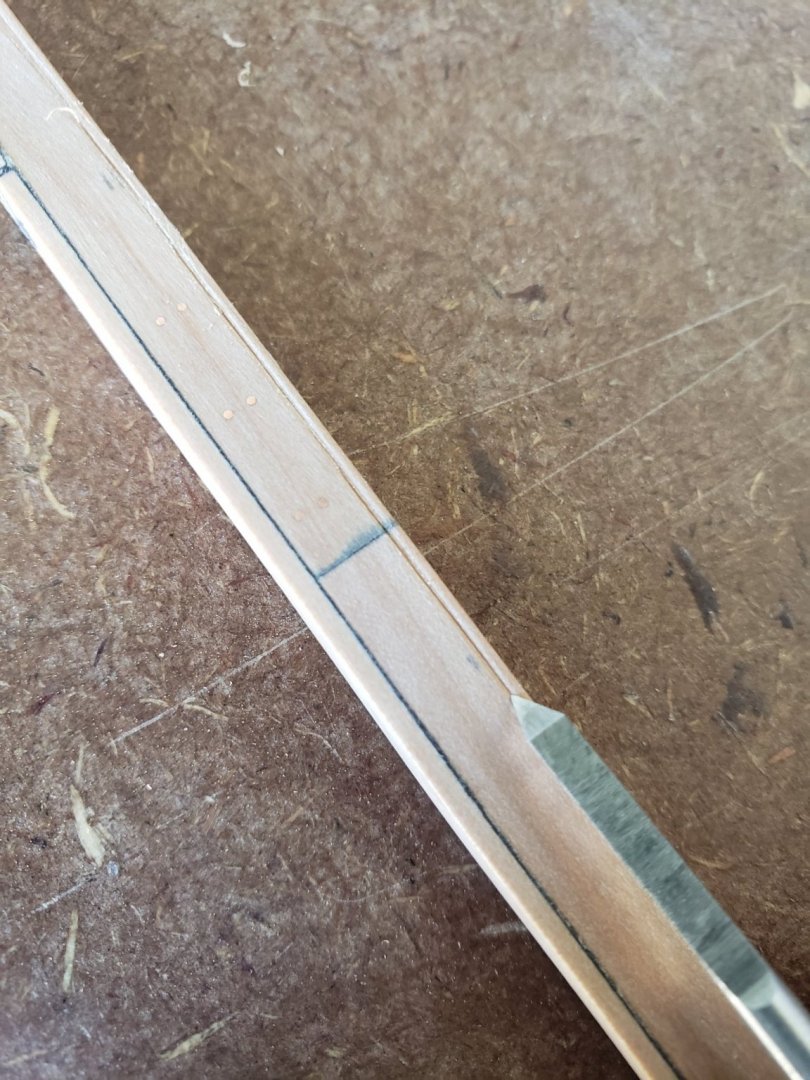
-
HMS Bounty by AdamA - 1:48
AdamA replied to AdamA's topic in - Build logs for subjects built 1751 - 1800
I added the false keel pieces and the simulated tar as well, then sanded and polished everything.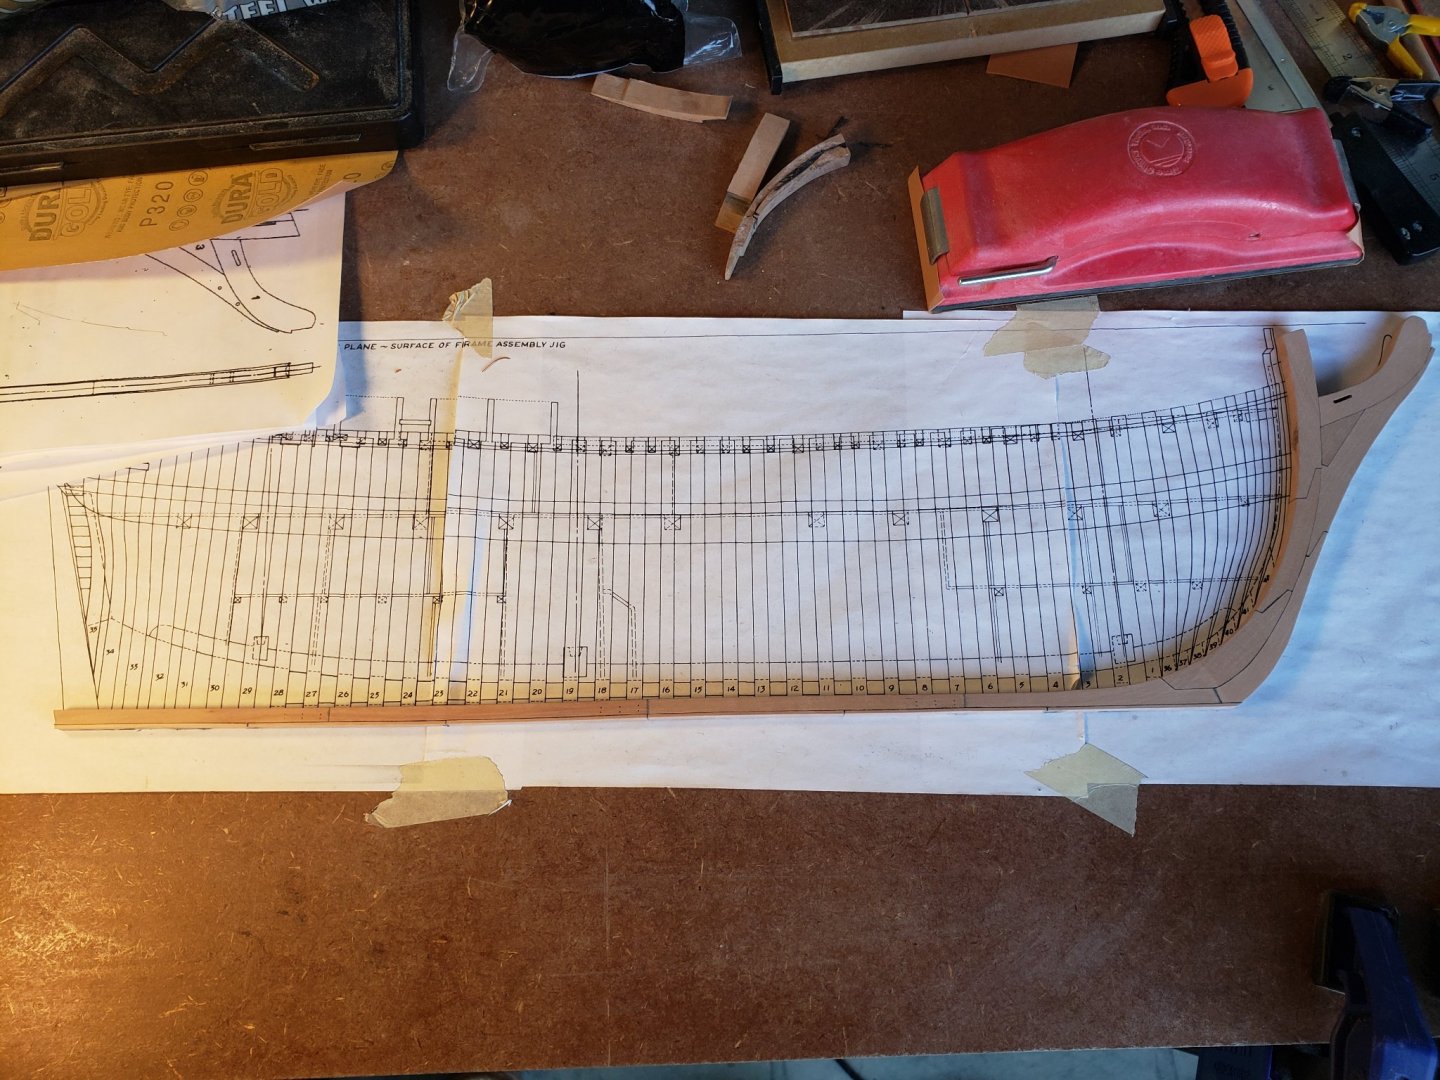

-
HMS Bounty by AdamA - 1:48
AdamA replied to AdamA's topic in - Build logs for subjects built 1751 - 1800
I sanded the outer sections before I attach the inner pieces so I can add the rabbet along the curve and keel more easily.
-
HMS Bounty by AdamA - 1:48
AdamA replied to AdamA's topic in - Build logs for subjects built 1751 - 1800
She's taking shape.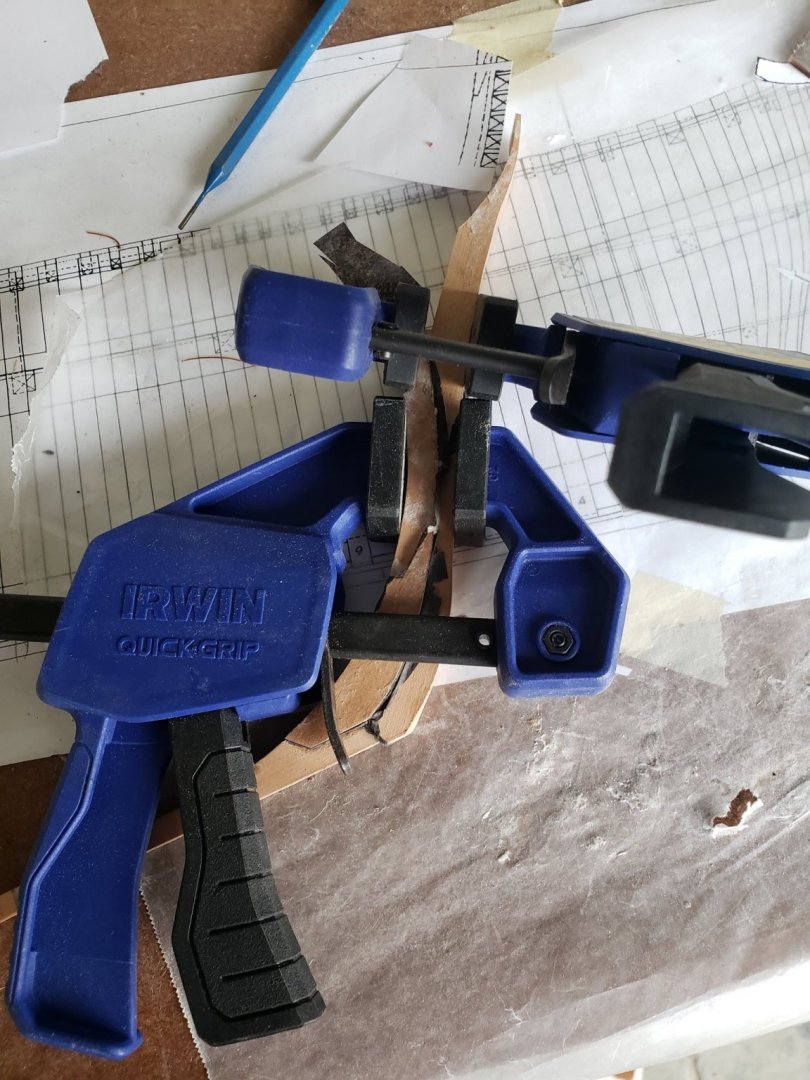

-
HMS Bounty by AdamA - 1:48
AdamA replied to AdamA's topic in - Build logs for subjects built 1751 - 1800
It was funny because I had to remake the Gripe ha. -
HMS Bounty by AdamA - 1:48
AdamA replied to AdamA's topic in - Build logs for subjects built 1751 - 1800
I downloaded those. Thanks. I also added some bolts to the scarph joints on the keel.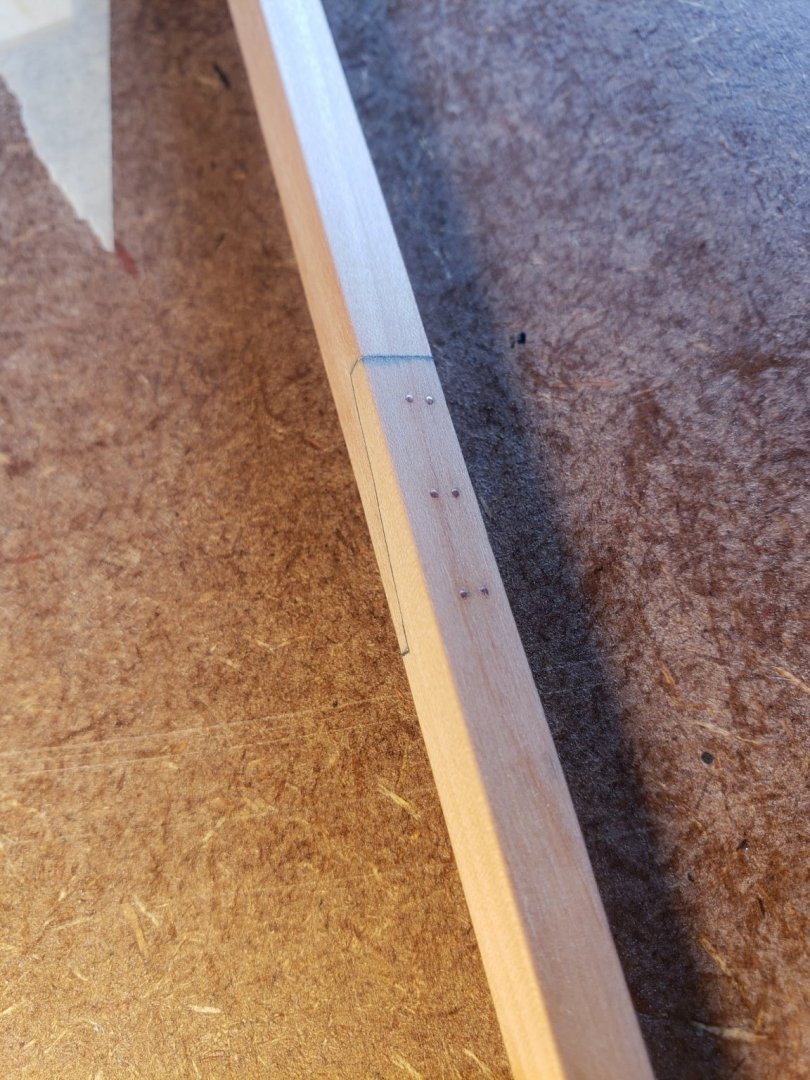
-
HMS Bounty by AdamA - 1:48
AdamA replied to AdamA's topic in - Build logs for subjects built 1751 - 1800
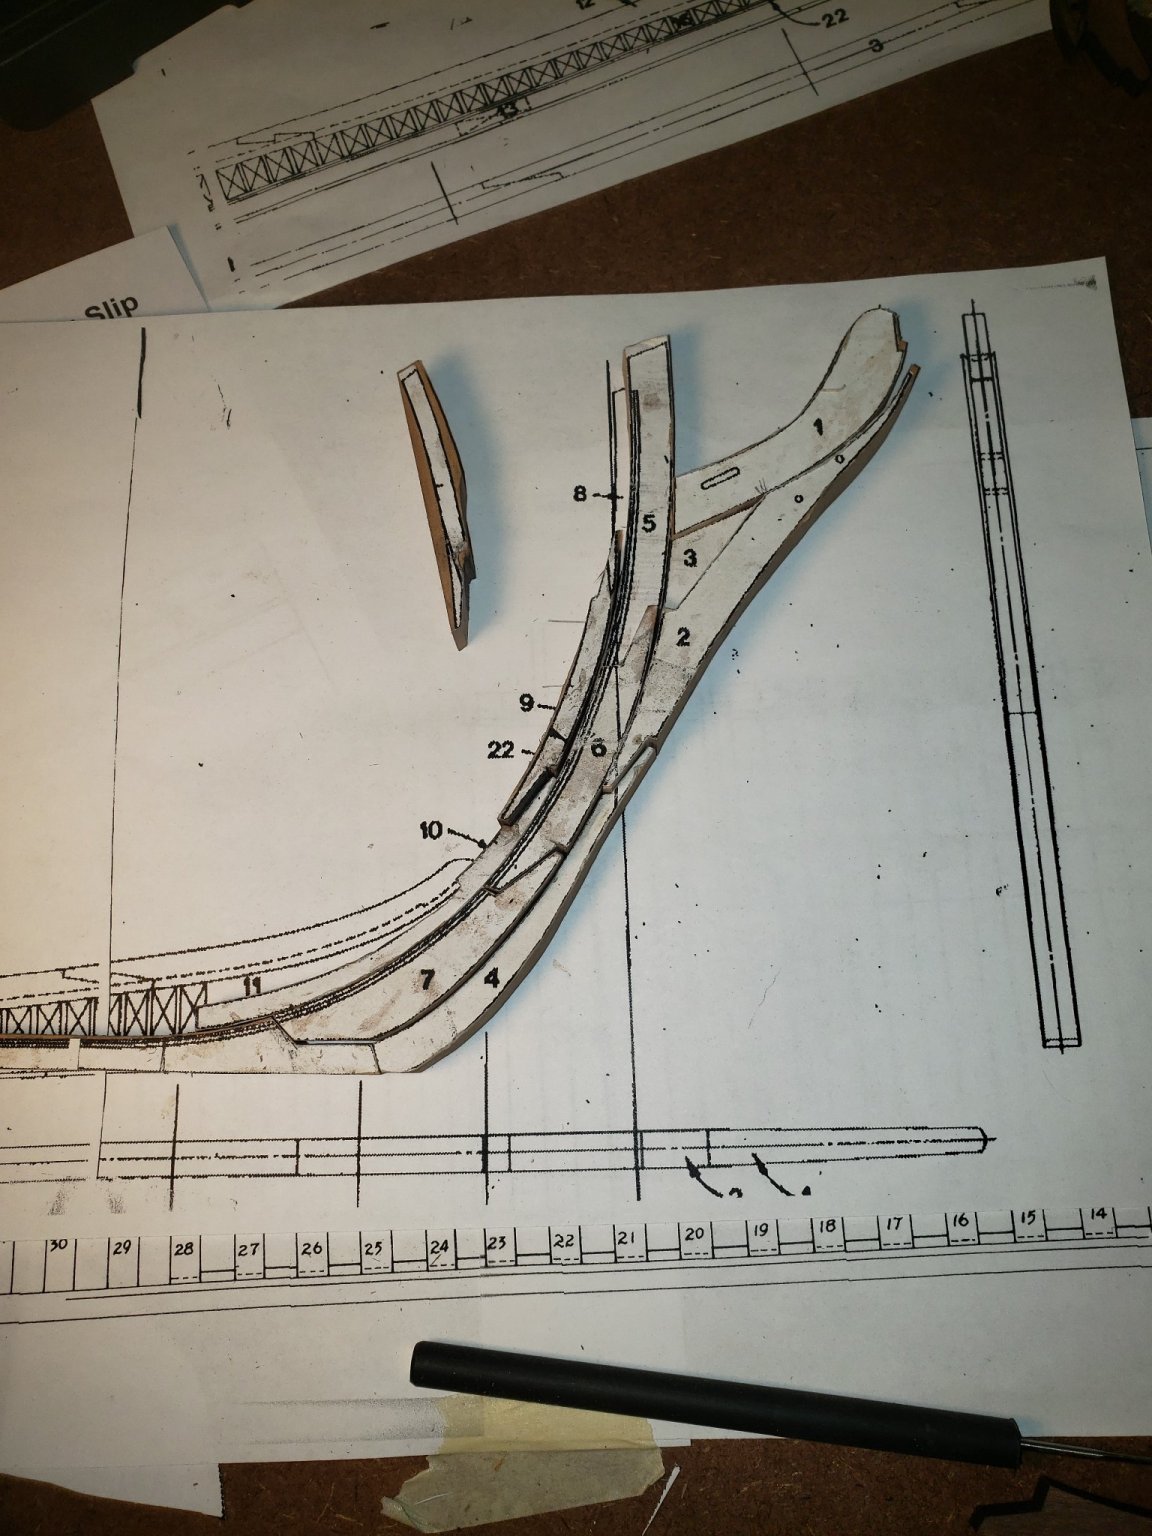
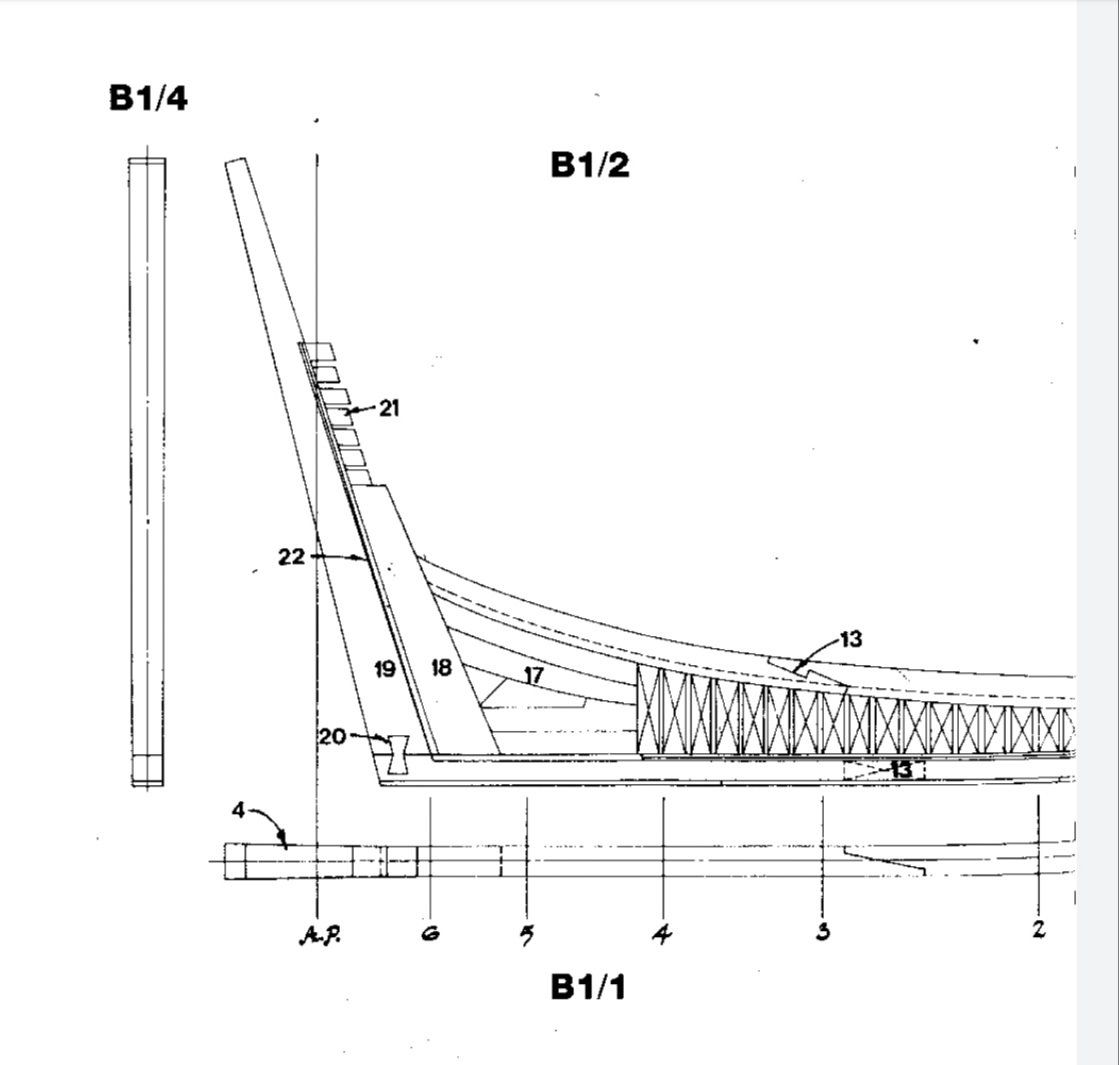
These are McKay's designations: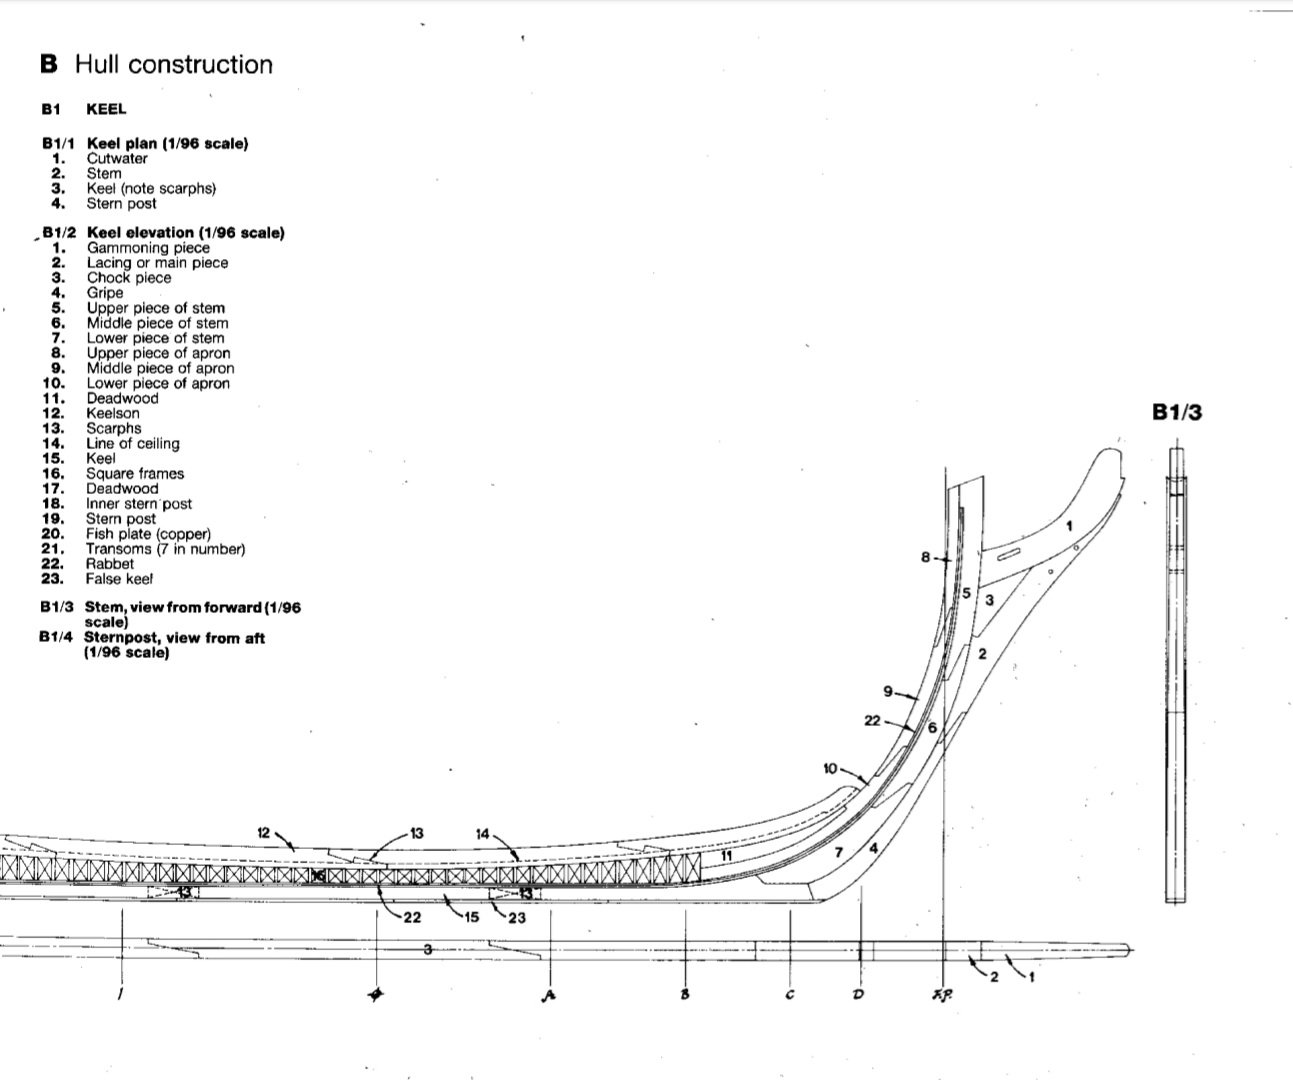
-
HMS Bounty by AdamA - 1:48
AdamA replied to AdamA's topic in - Build logs for subjects built 1751 - 1800
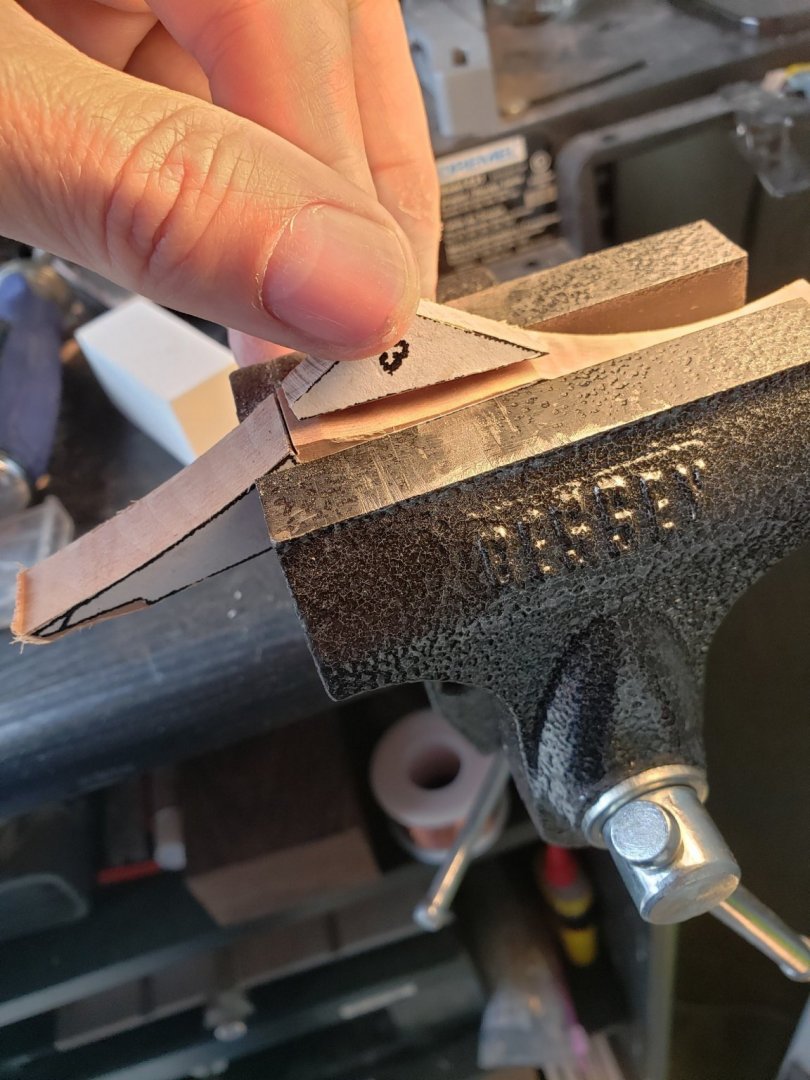
Well sure enough my stem didn't meet my apron well enough to ignore. I had to cut #4 from #7 and remake #4. If I didn't enjoy this so much this would probably annoy me. -
HMS Bounty by AdamA - 1:48
AdamA replied to AdamA's topic in - Build logs for subjects built 1751 - 1800
The stem pieces are oddly shaped. It will be a miracle if they go together without any issues.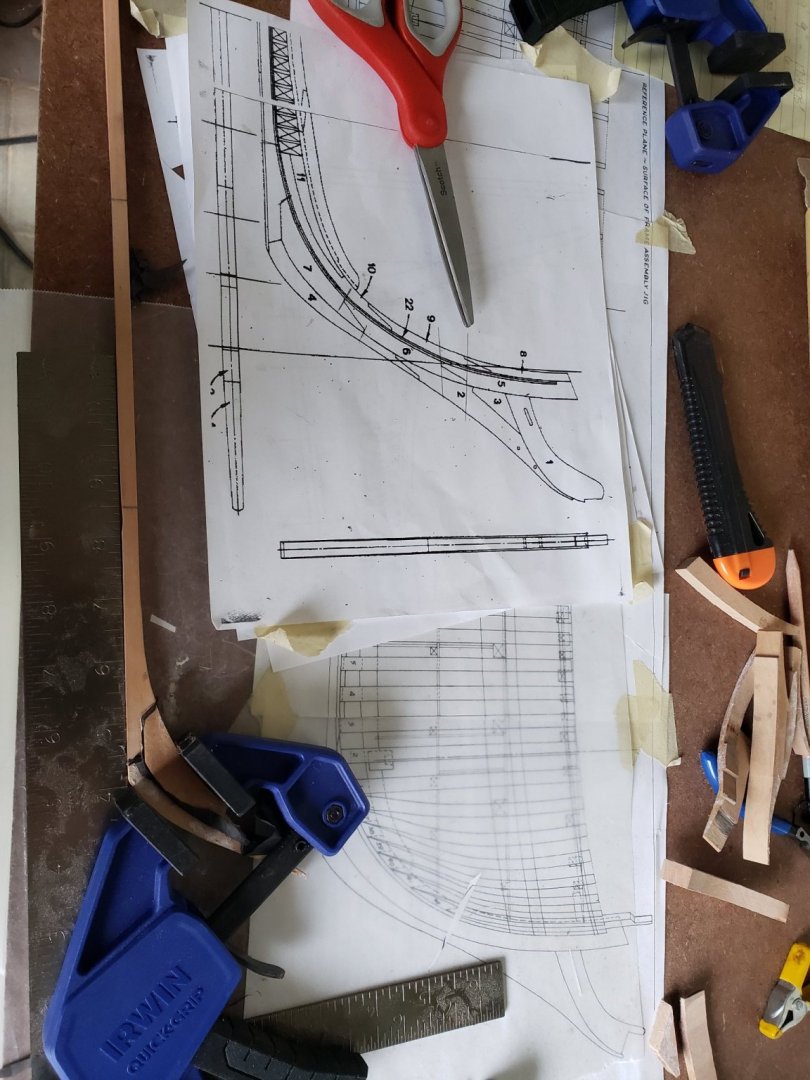
-
HMS Bounty by AdamA - 1:48
AdamA replied to AdamA's topic in - Build logs for subjects built 1751 - 1800
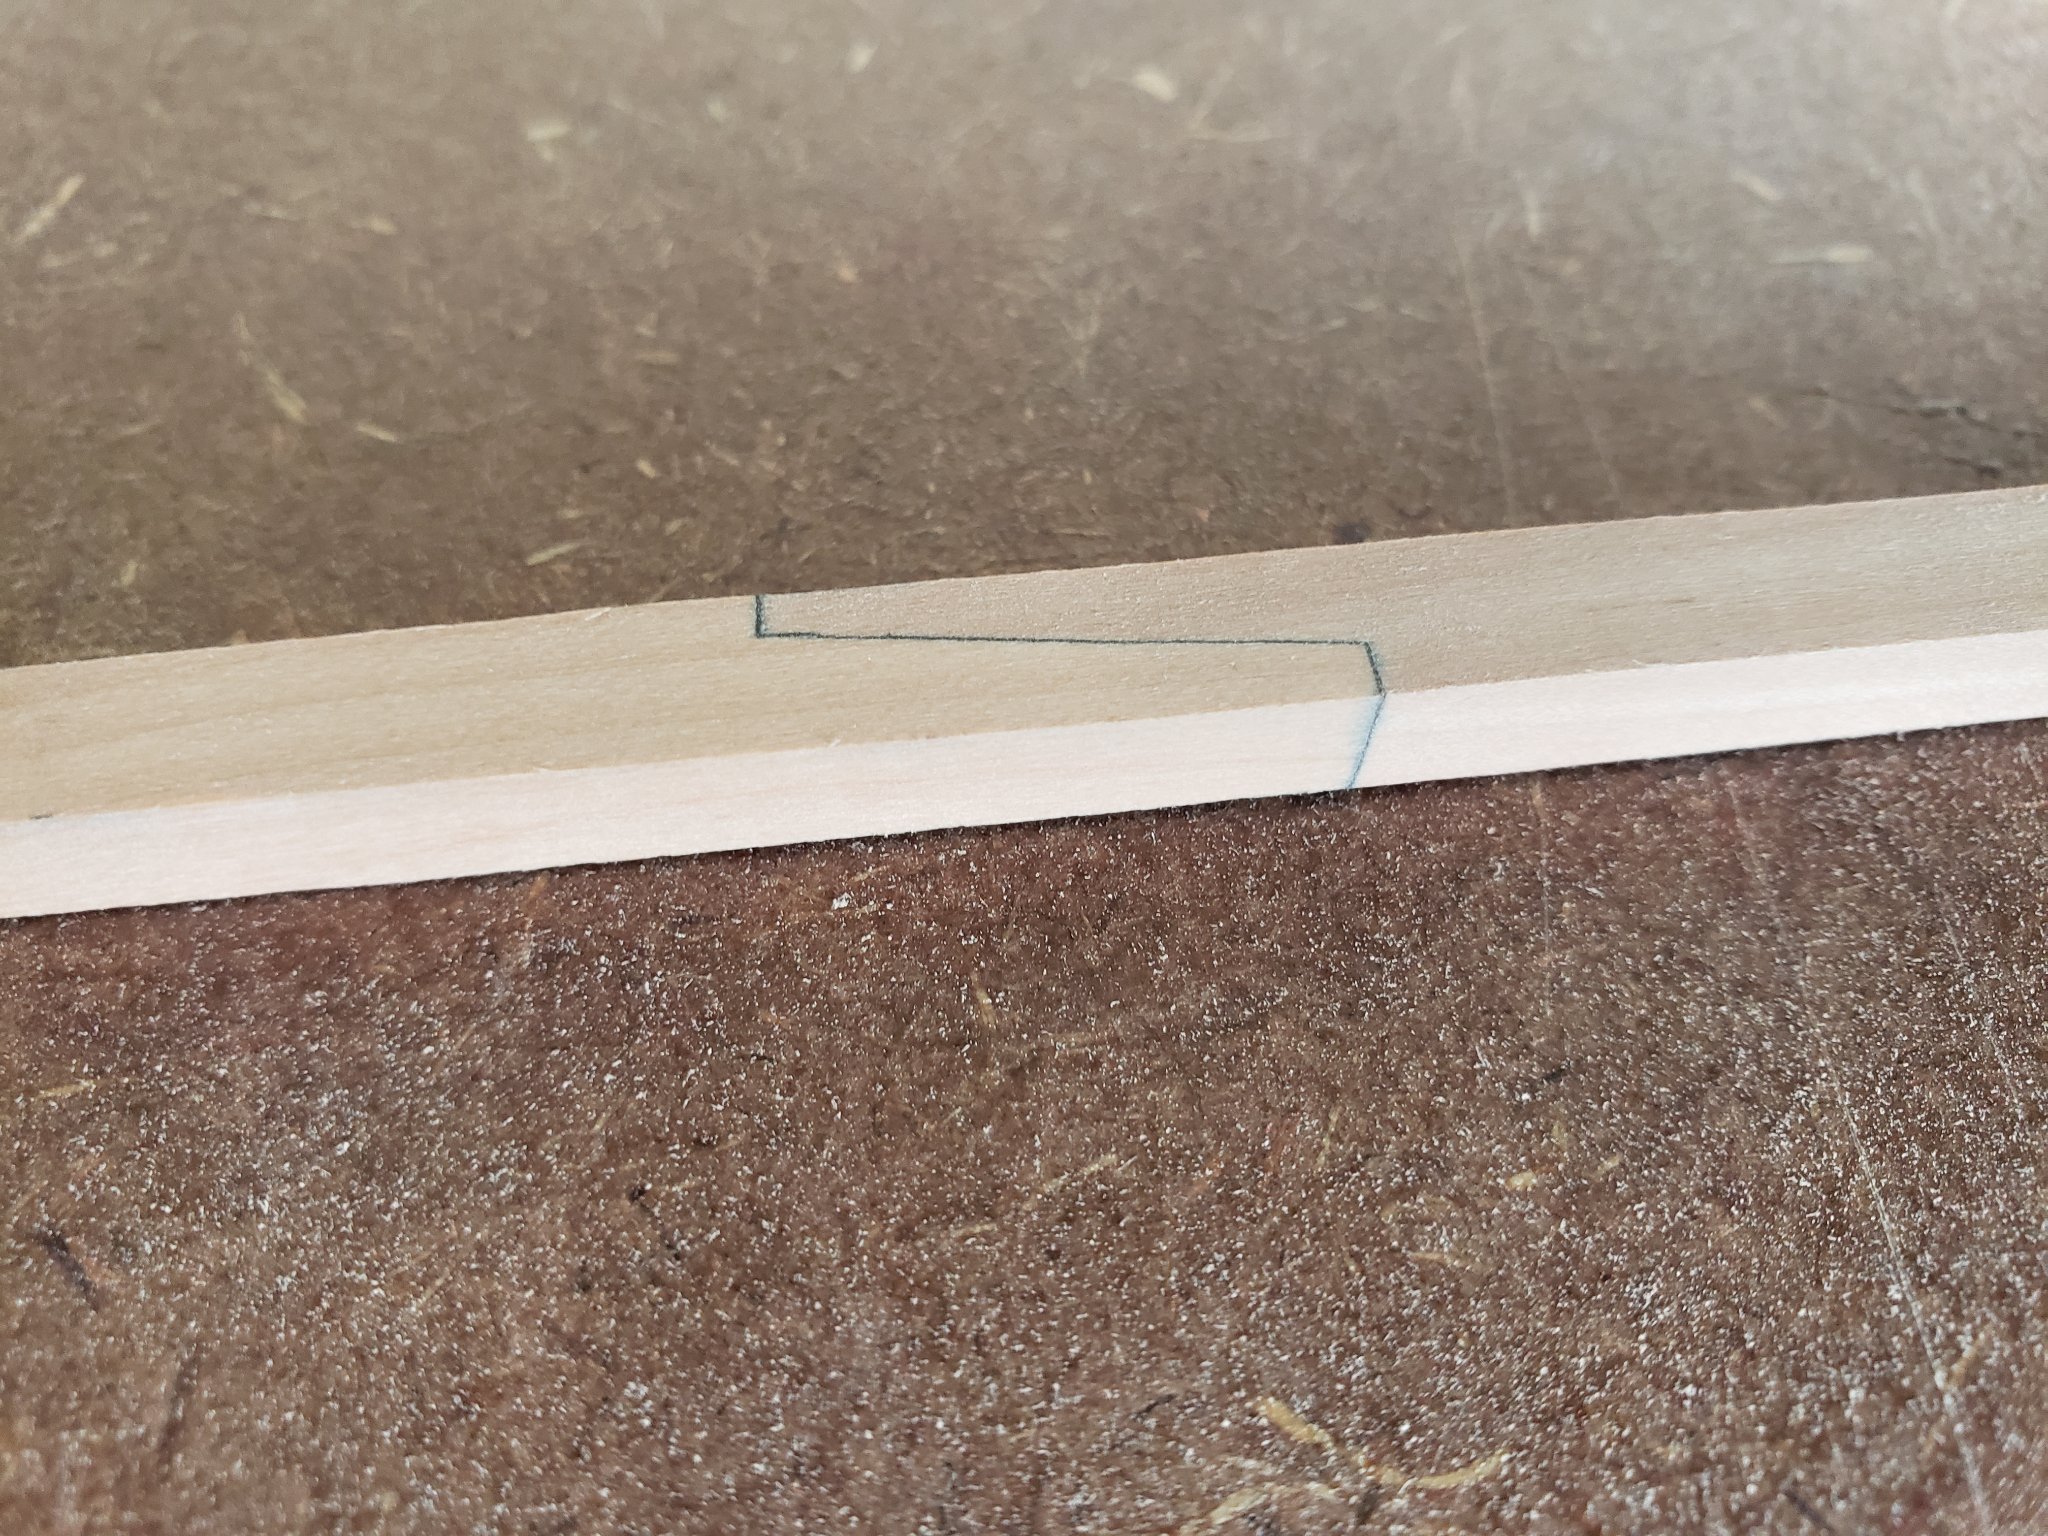
The Byrnes thickness sander does a great job on keels. I used gift paper in the scarph joints to simulate the tarred wool instead of darkened glue.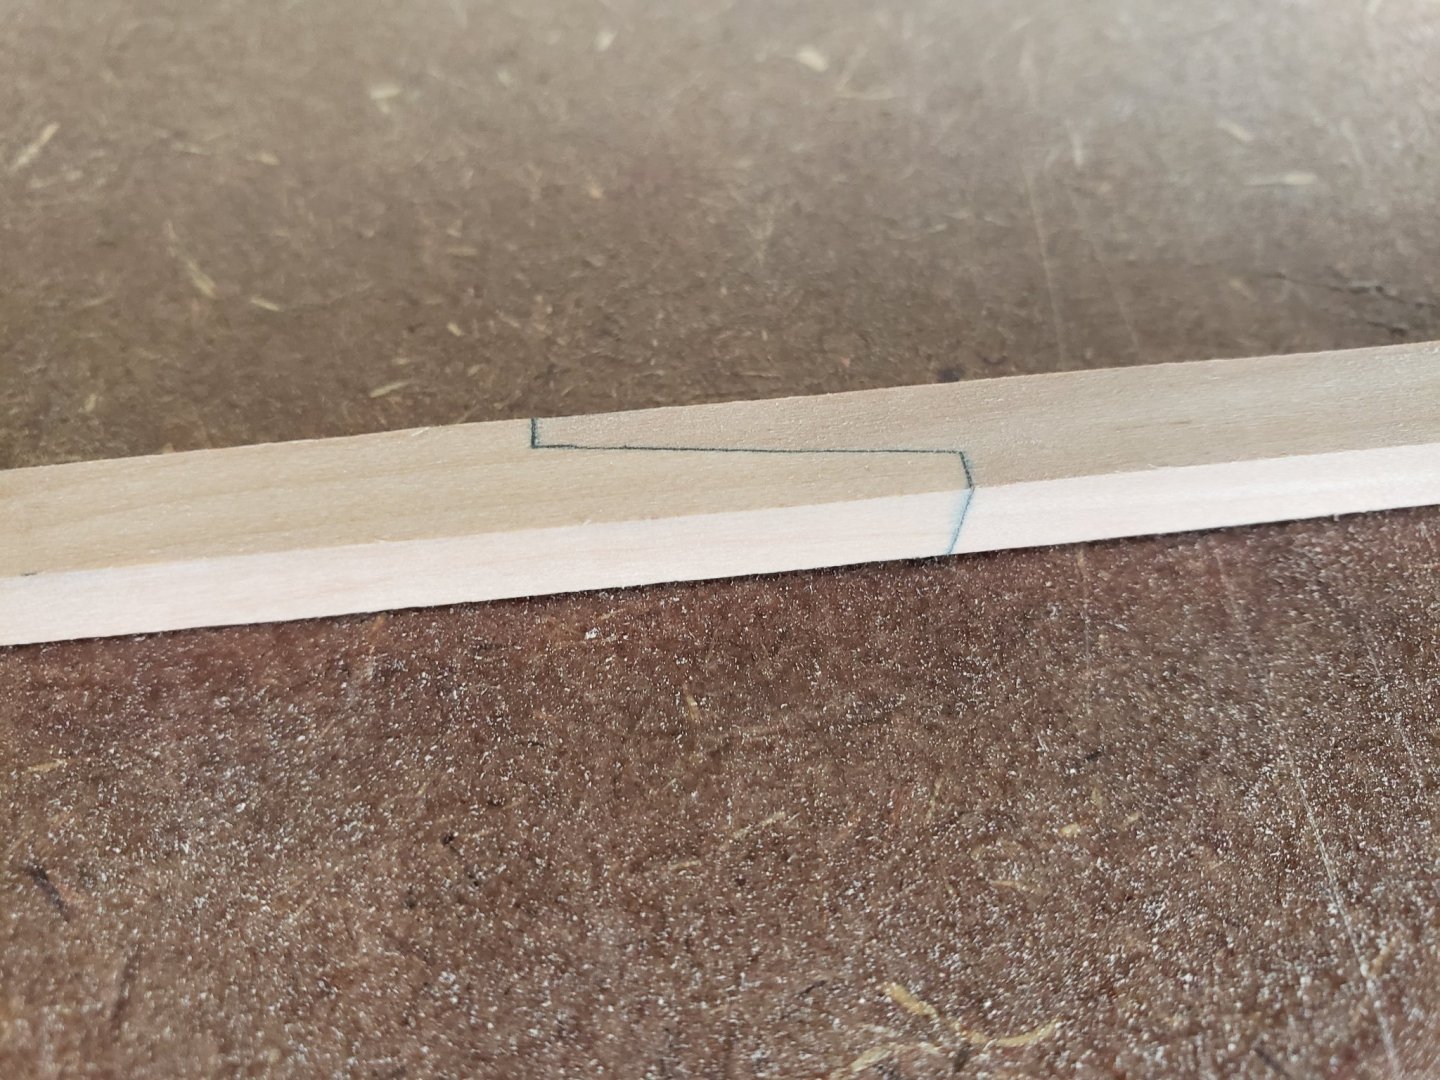

-
HMS Bounty by AdamA - 1:48
AdamA replied to AdamA's topic in - Build logs for subjects built 1751 - 1800
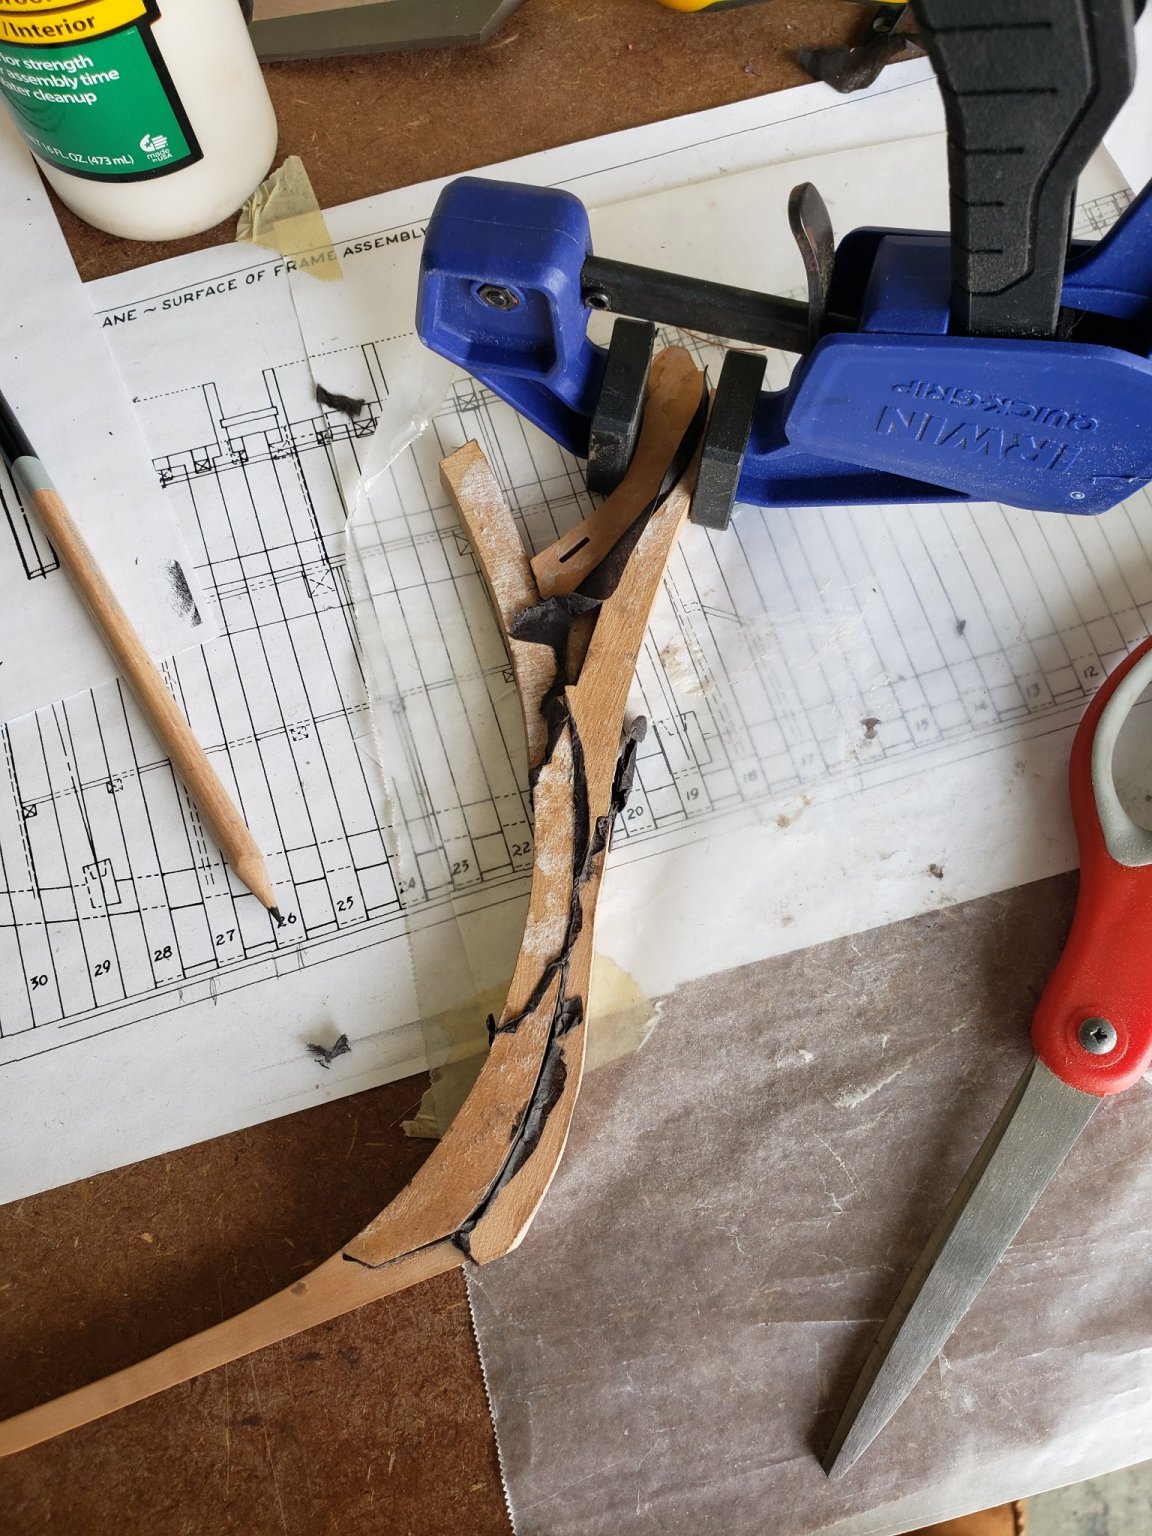
I'm going to use Van Dyck Crystals to darken the pva wood glue for use in the scarph joints to simulate the tarred felt they would have used in those joints.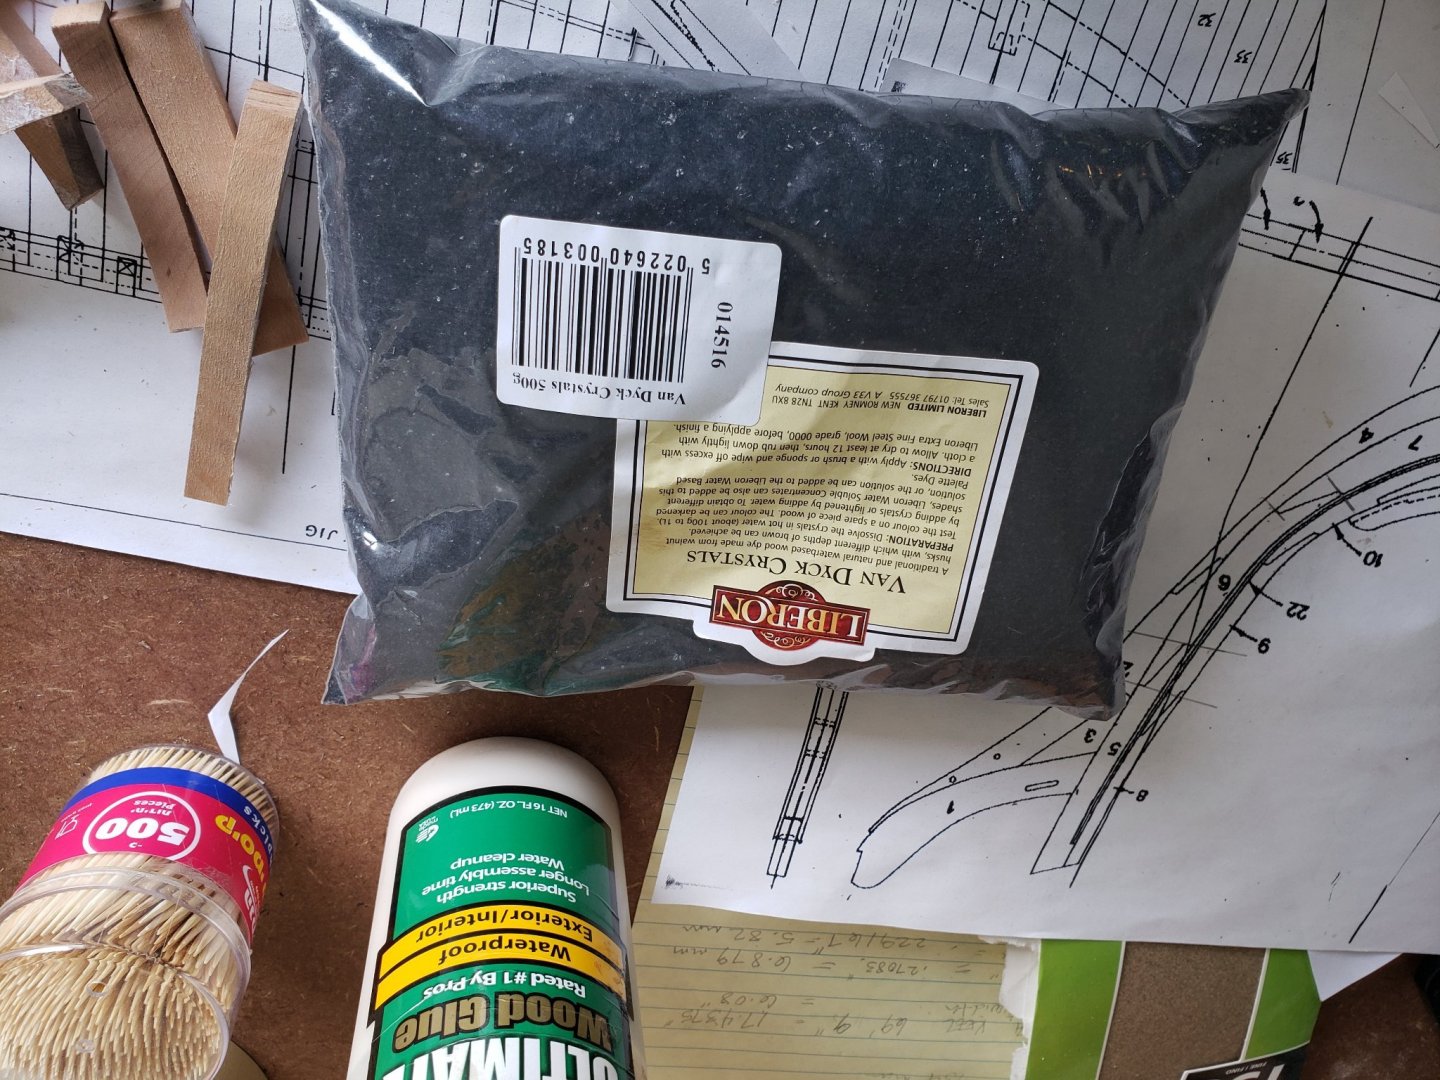
-
HMS Bounty by AdamA - 1:48
AdamA replied to AdamA's topic in - Build logs for subjects built 1751 - 1800
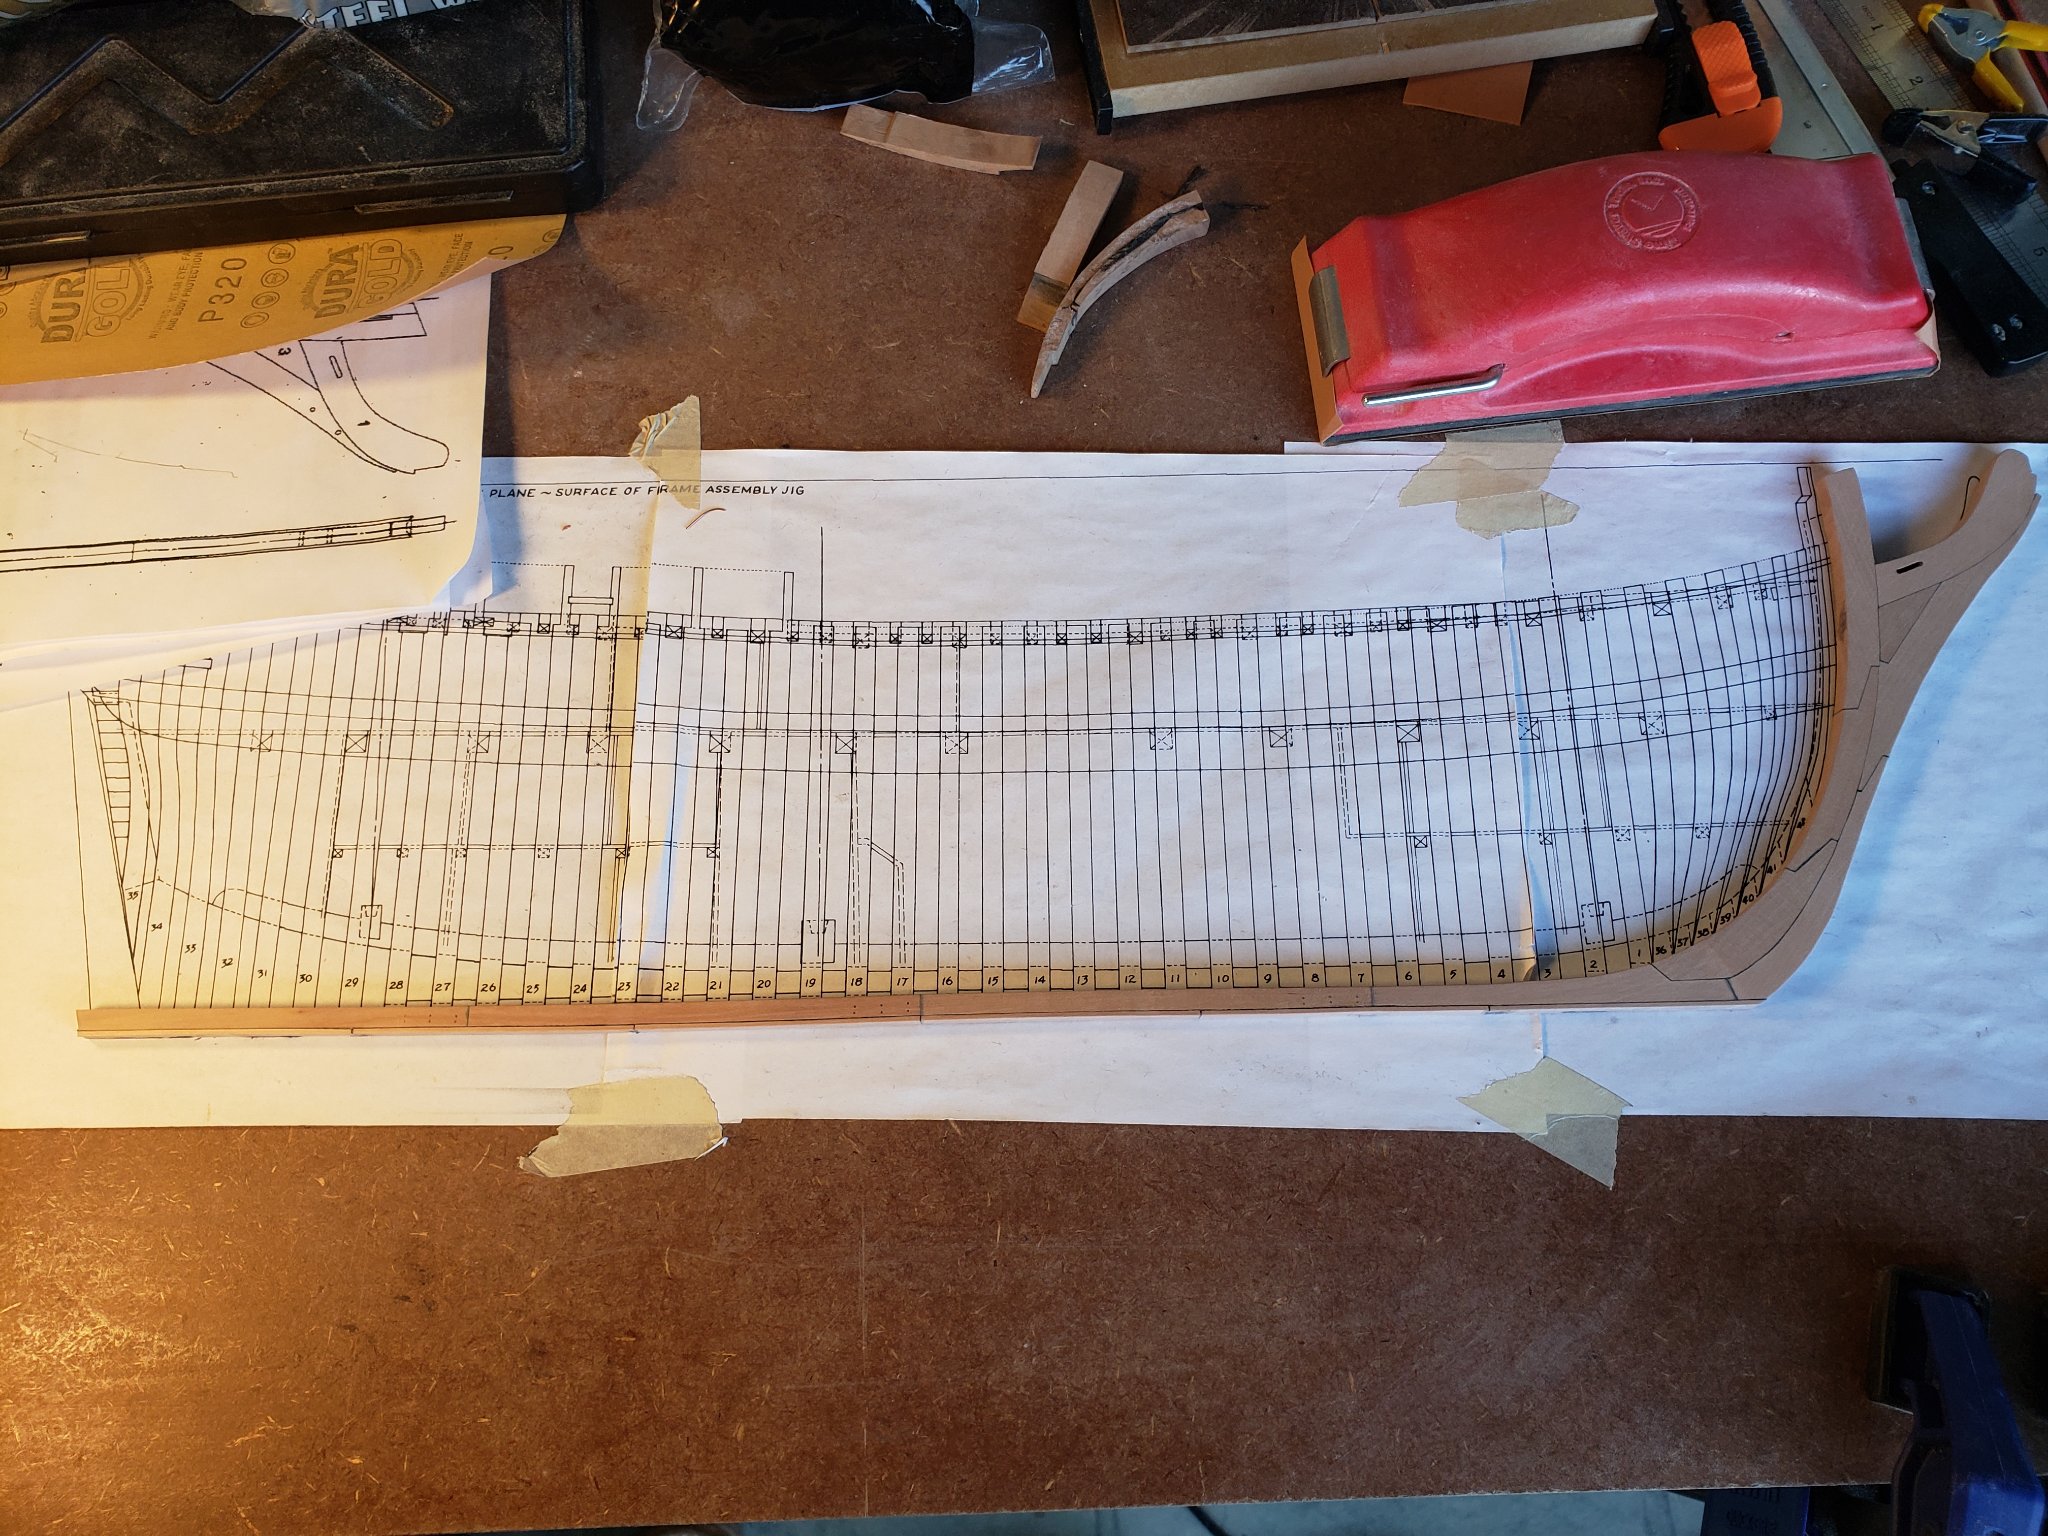
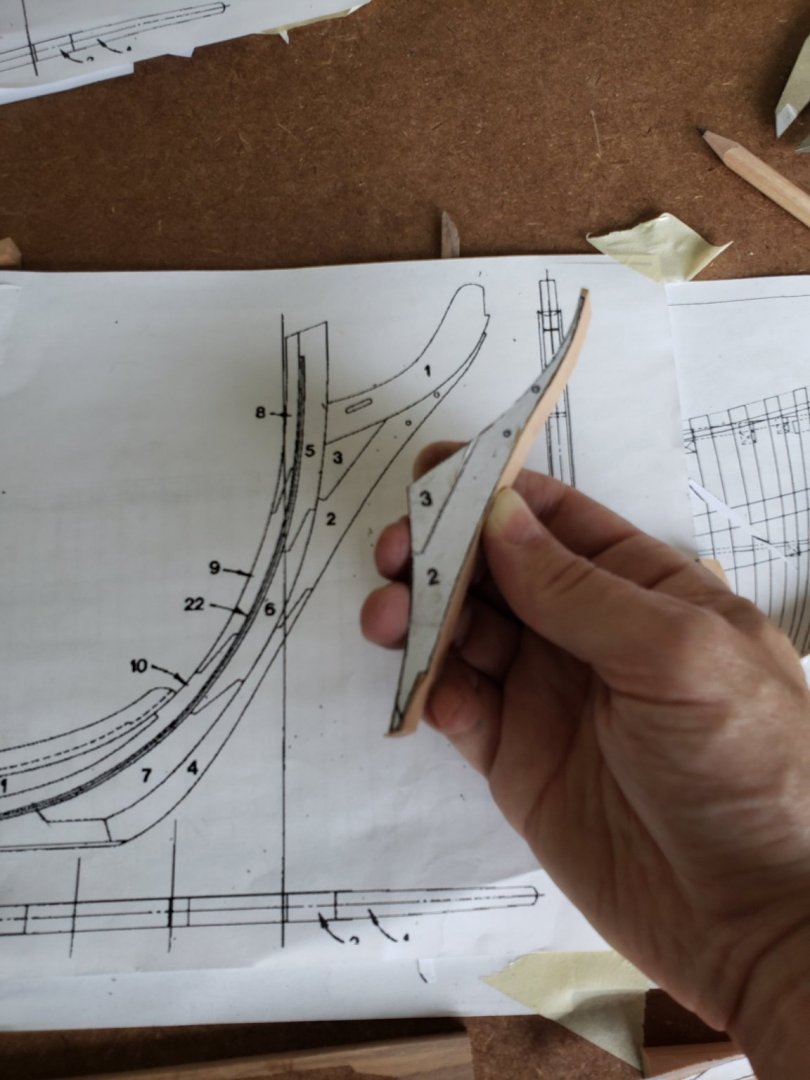
These are the four sections of the keel shown in McKay's drawings. They meet at scarph joints. This was the first time I've cut these kind of joints. The Mayflower kit I built was plank on bulkhead with one long piece for a keel.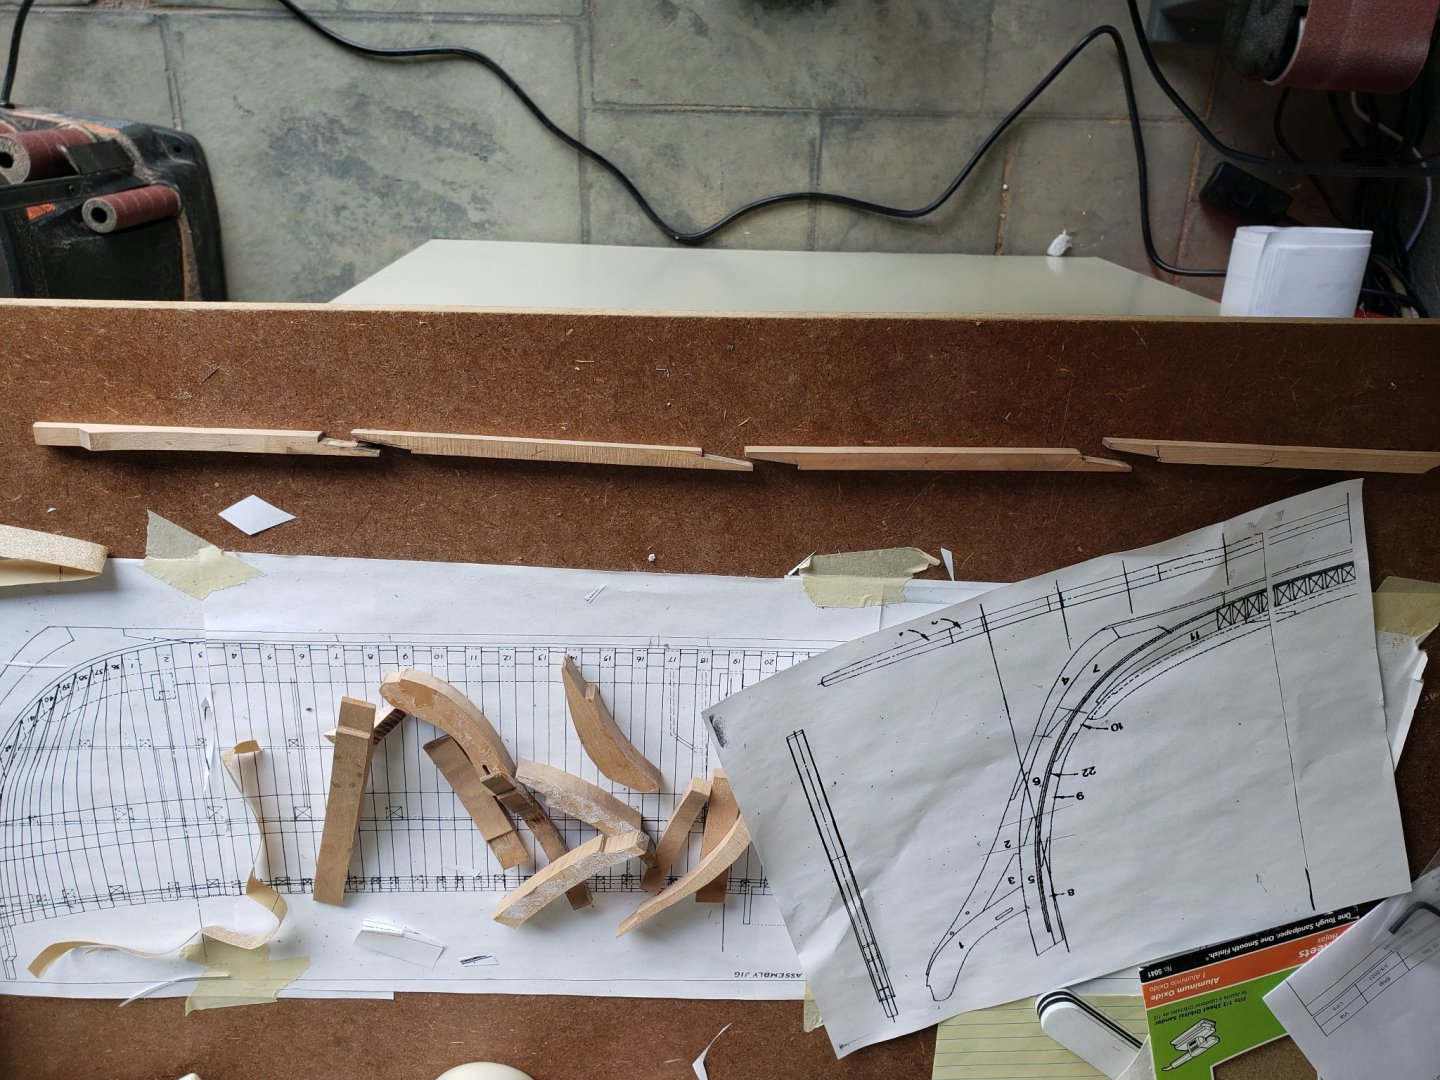
-
HMS Bounty by AdamA - 1:48
AdamA replied to AdamA's topic in - Build logs for subjects built 1751 - 1800
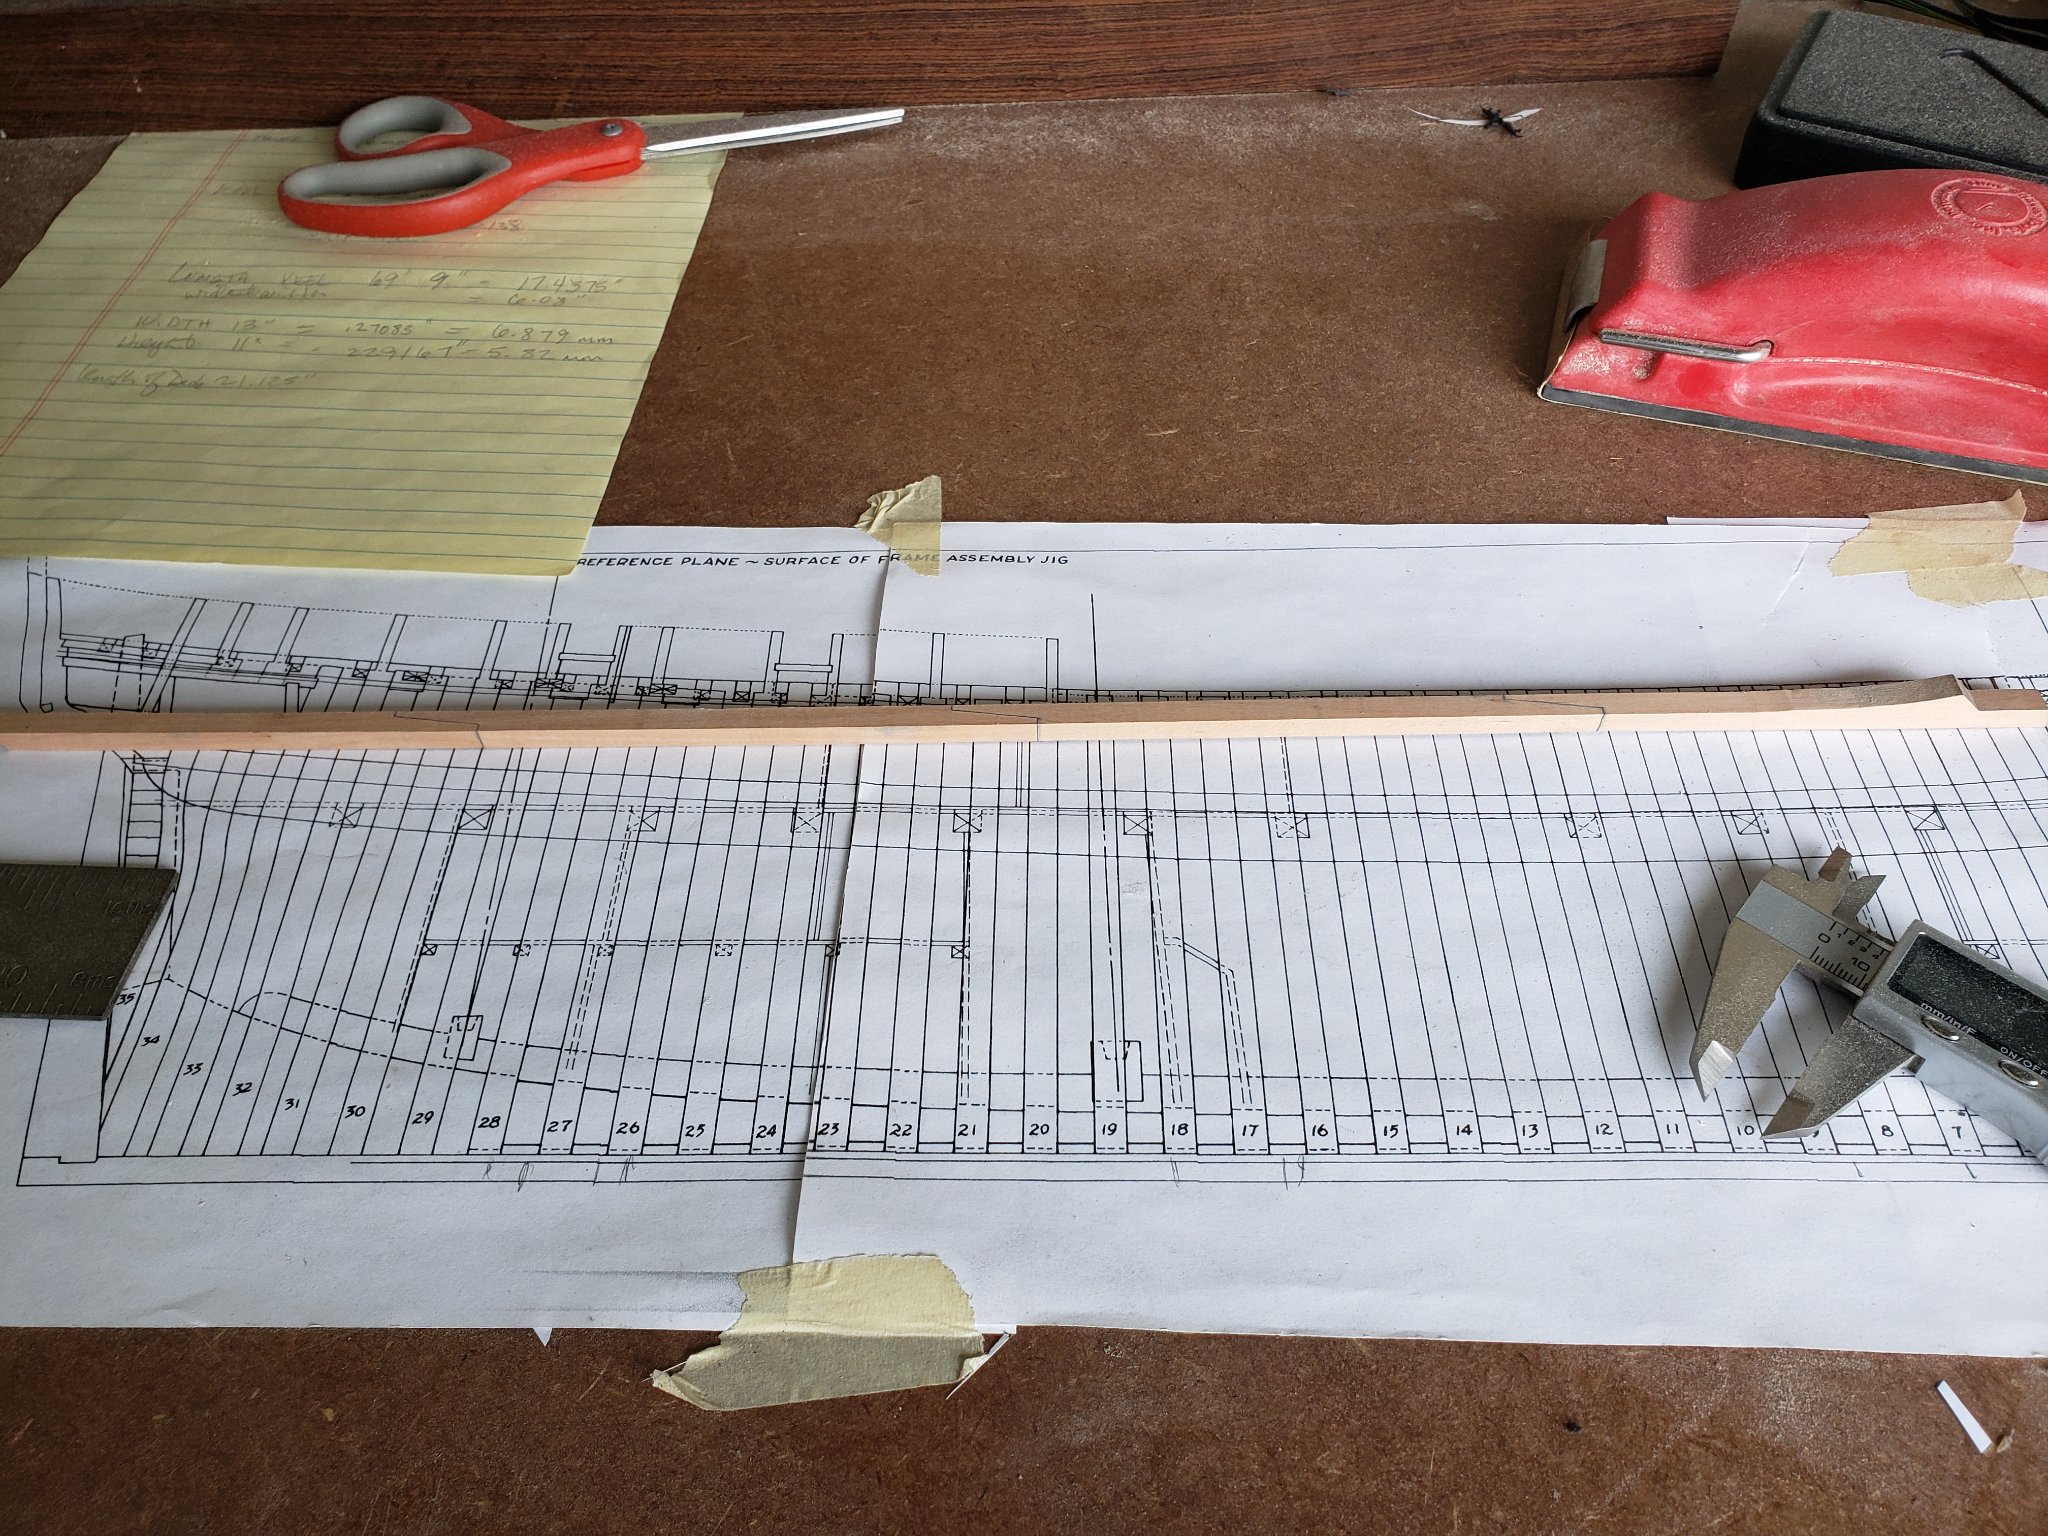
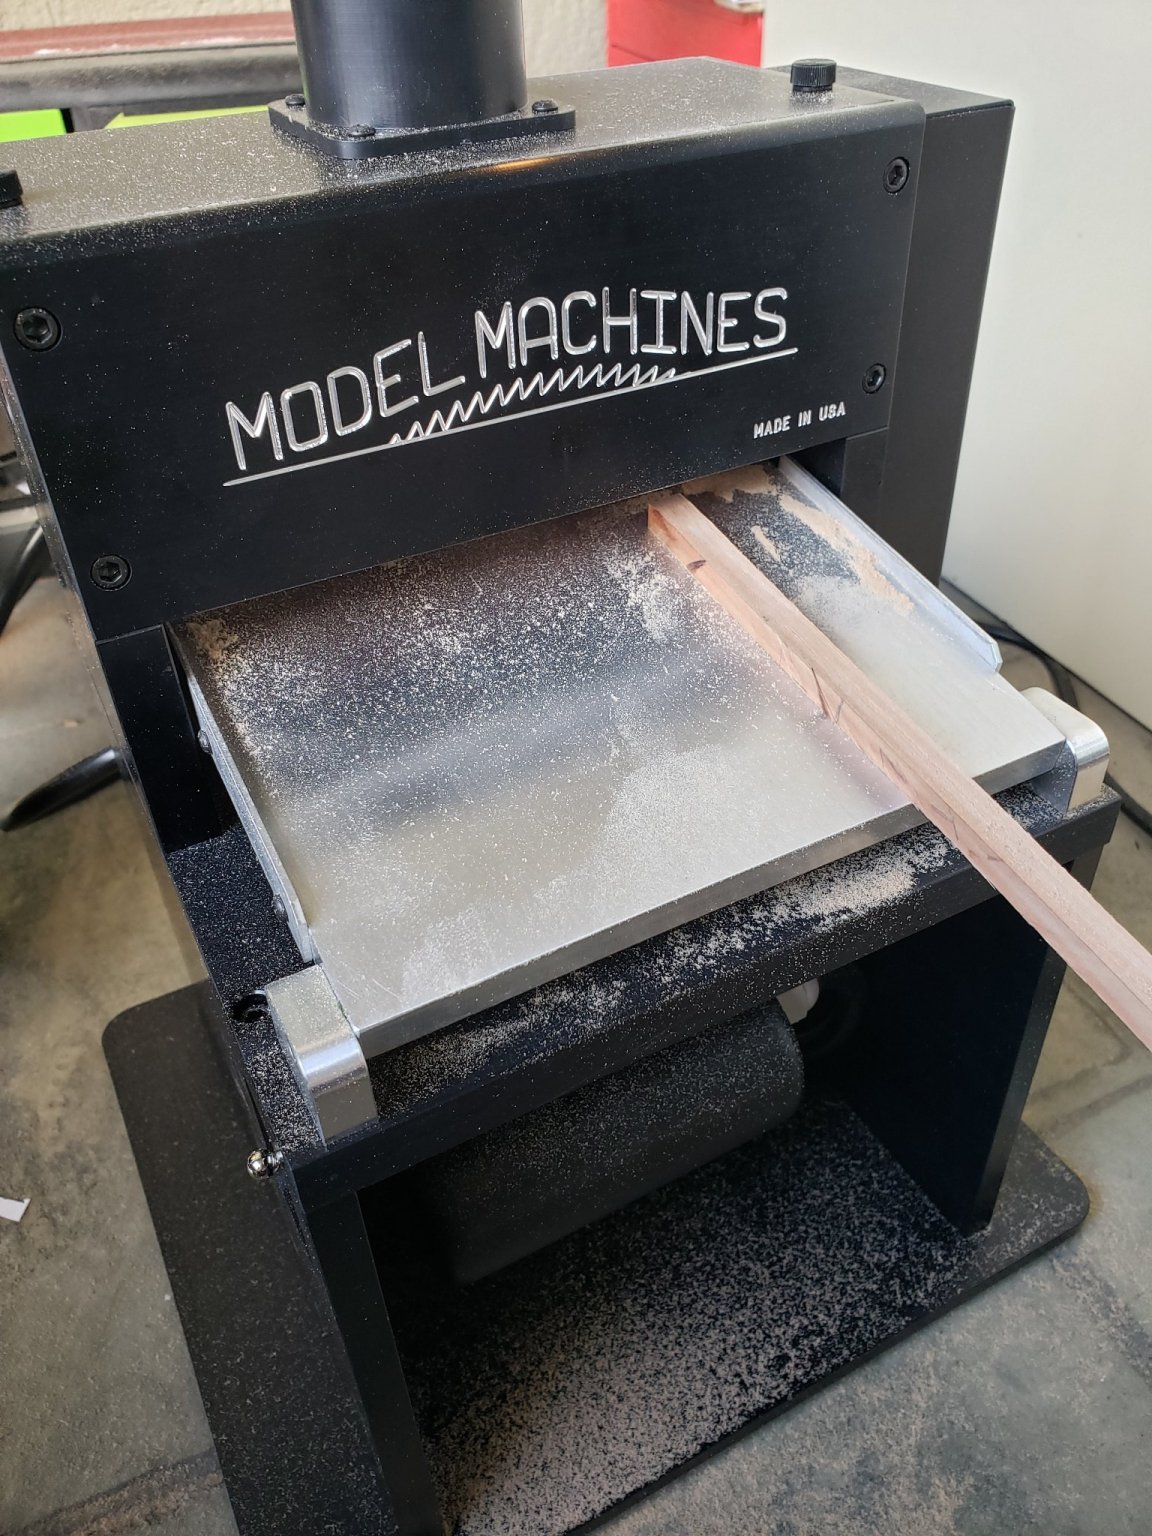
This is my first time using the Byrnes thickness sander. I'm sanding the width of the keel to 13 inches (which is 6.879 mm at this scale). It works well but you have to remember to stop before the final width so you still have extra width do a final sanding with the finer paper.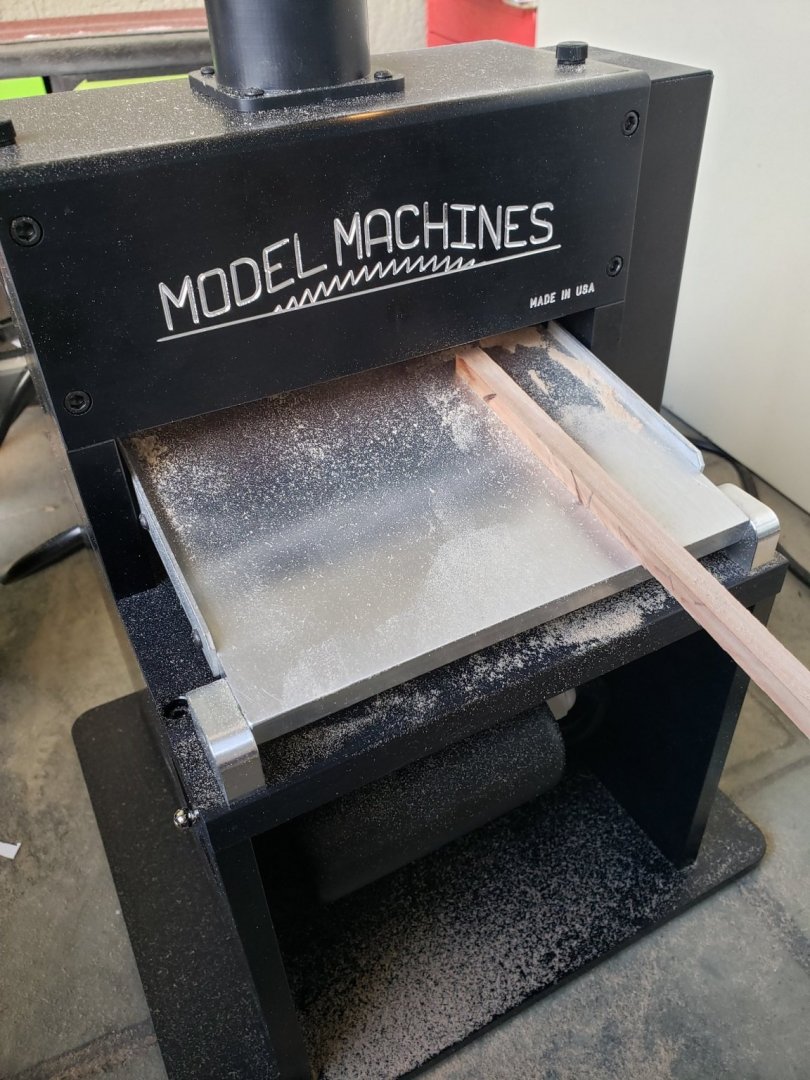
-
HMS Bounty by AdamA - 1:48
AdamA replied to AdamA's topic in - Build logs for subjects built 1751 - 1800
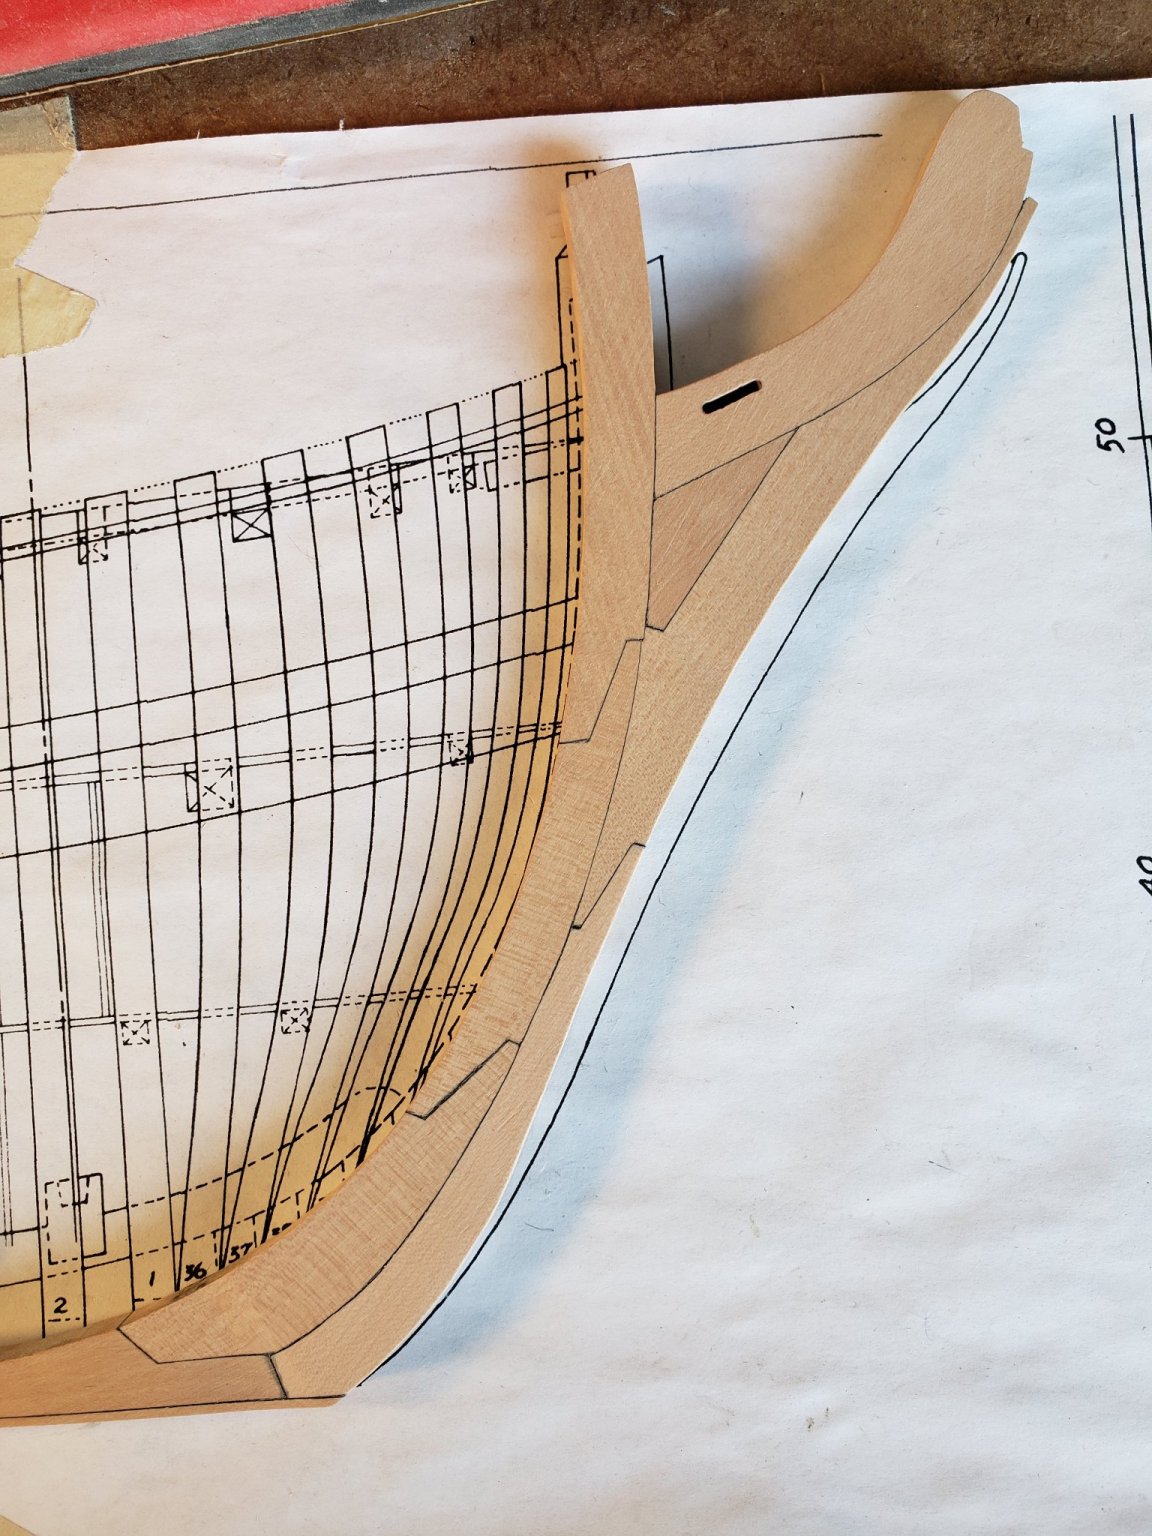
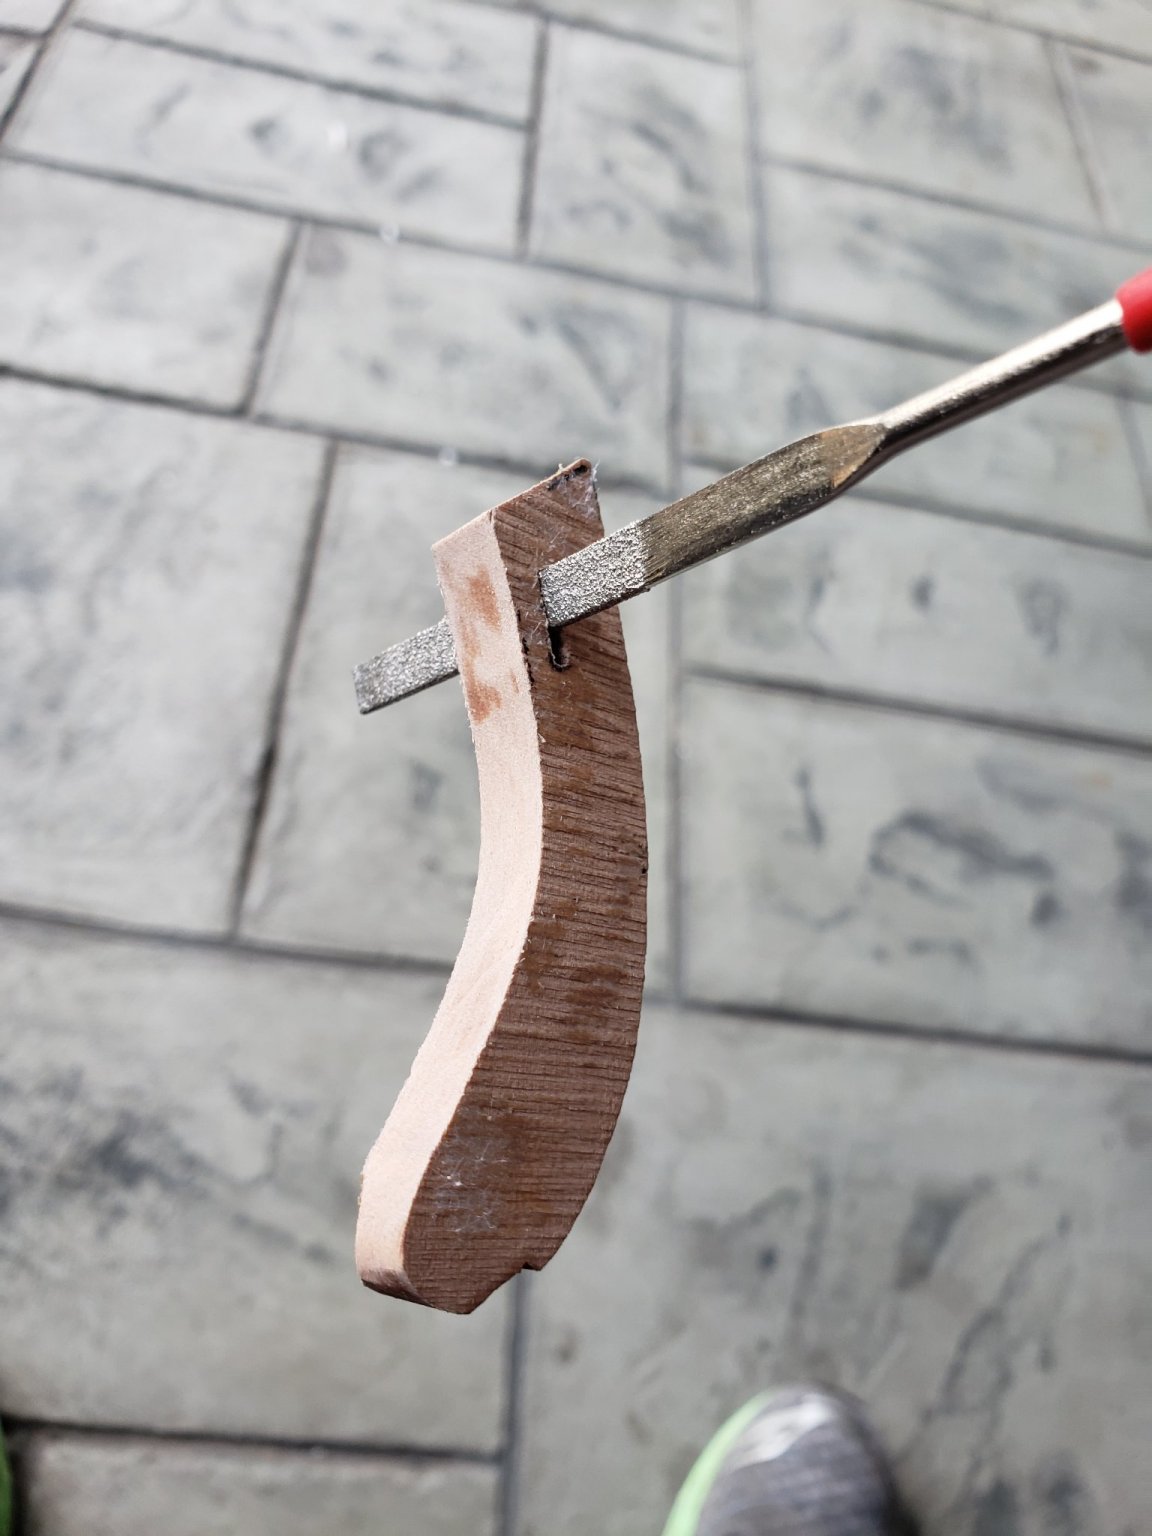
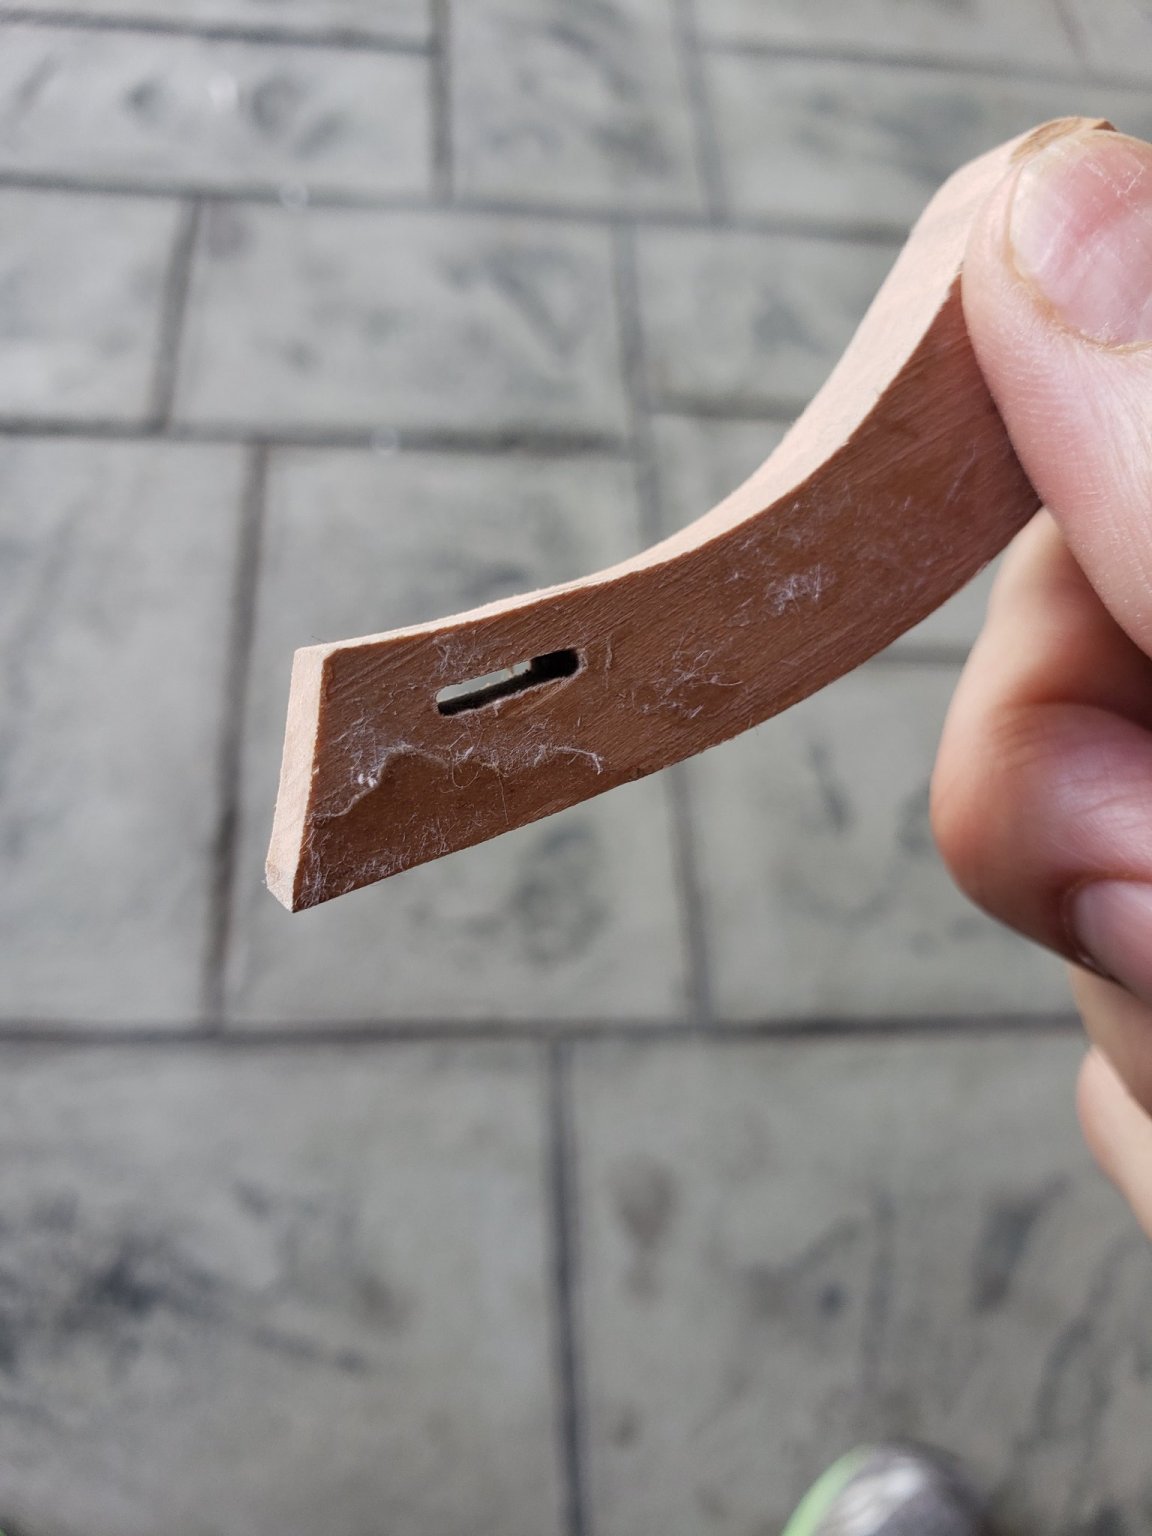
I drilled a few holes in the place marked for the gammoning slot and then used a diamond file to connect the holes. The holes went straight through with very little movement (to my surprise).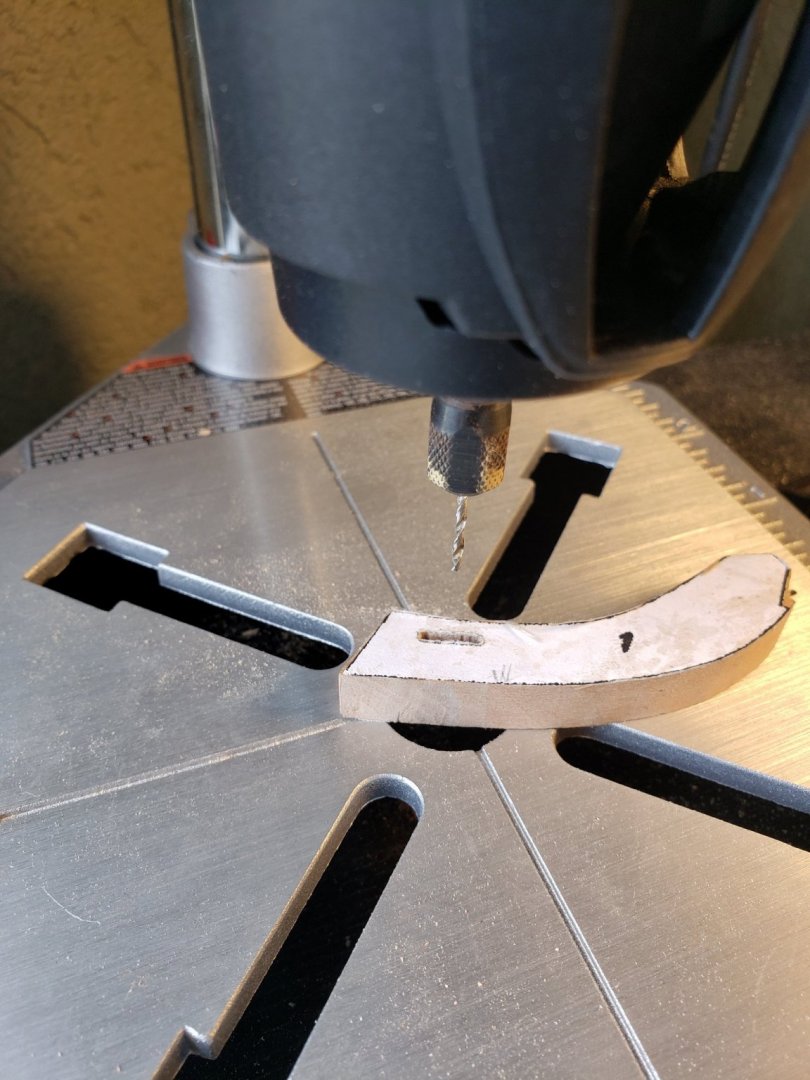

-
HMS Bounty by AdamA - 1:48
AdamA replied to AdamA's topic in - Build logs for subjects built 1751 - 1800
The stem is coming along slowly. I've had to re-do every piece to accommodate all the sides that have to fit. When I get them all to the right shape I will sand them to the same 13 inch width of the keel (or .2078 inches in 1:48 scale).
-
HMS Bounty by AdamA - 1:48
AdamA replied to AdamA's topic in - Build logs for subjects built 1751 - 1800
This little fella arrived today to help out.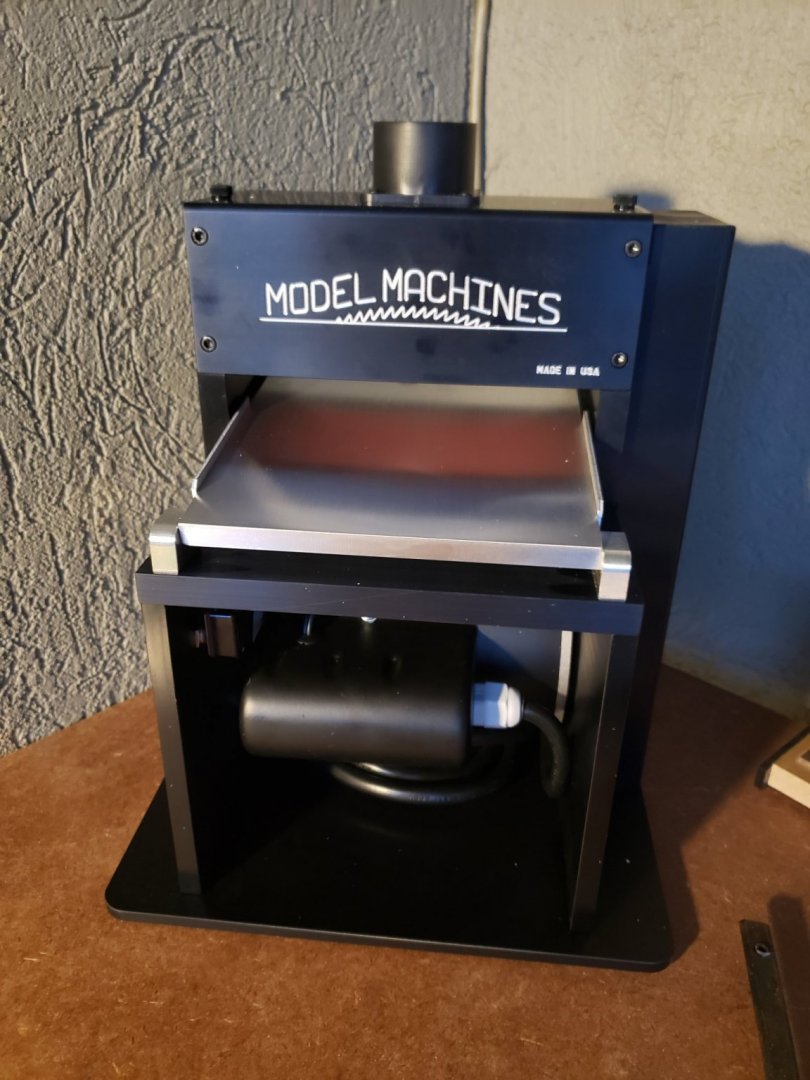
-
HMS Bounty by AdamA - 1:48
AdamA replied to AdamA's topic in - Build logs for subjects built 1751 - 1800
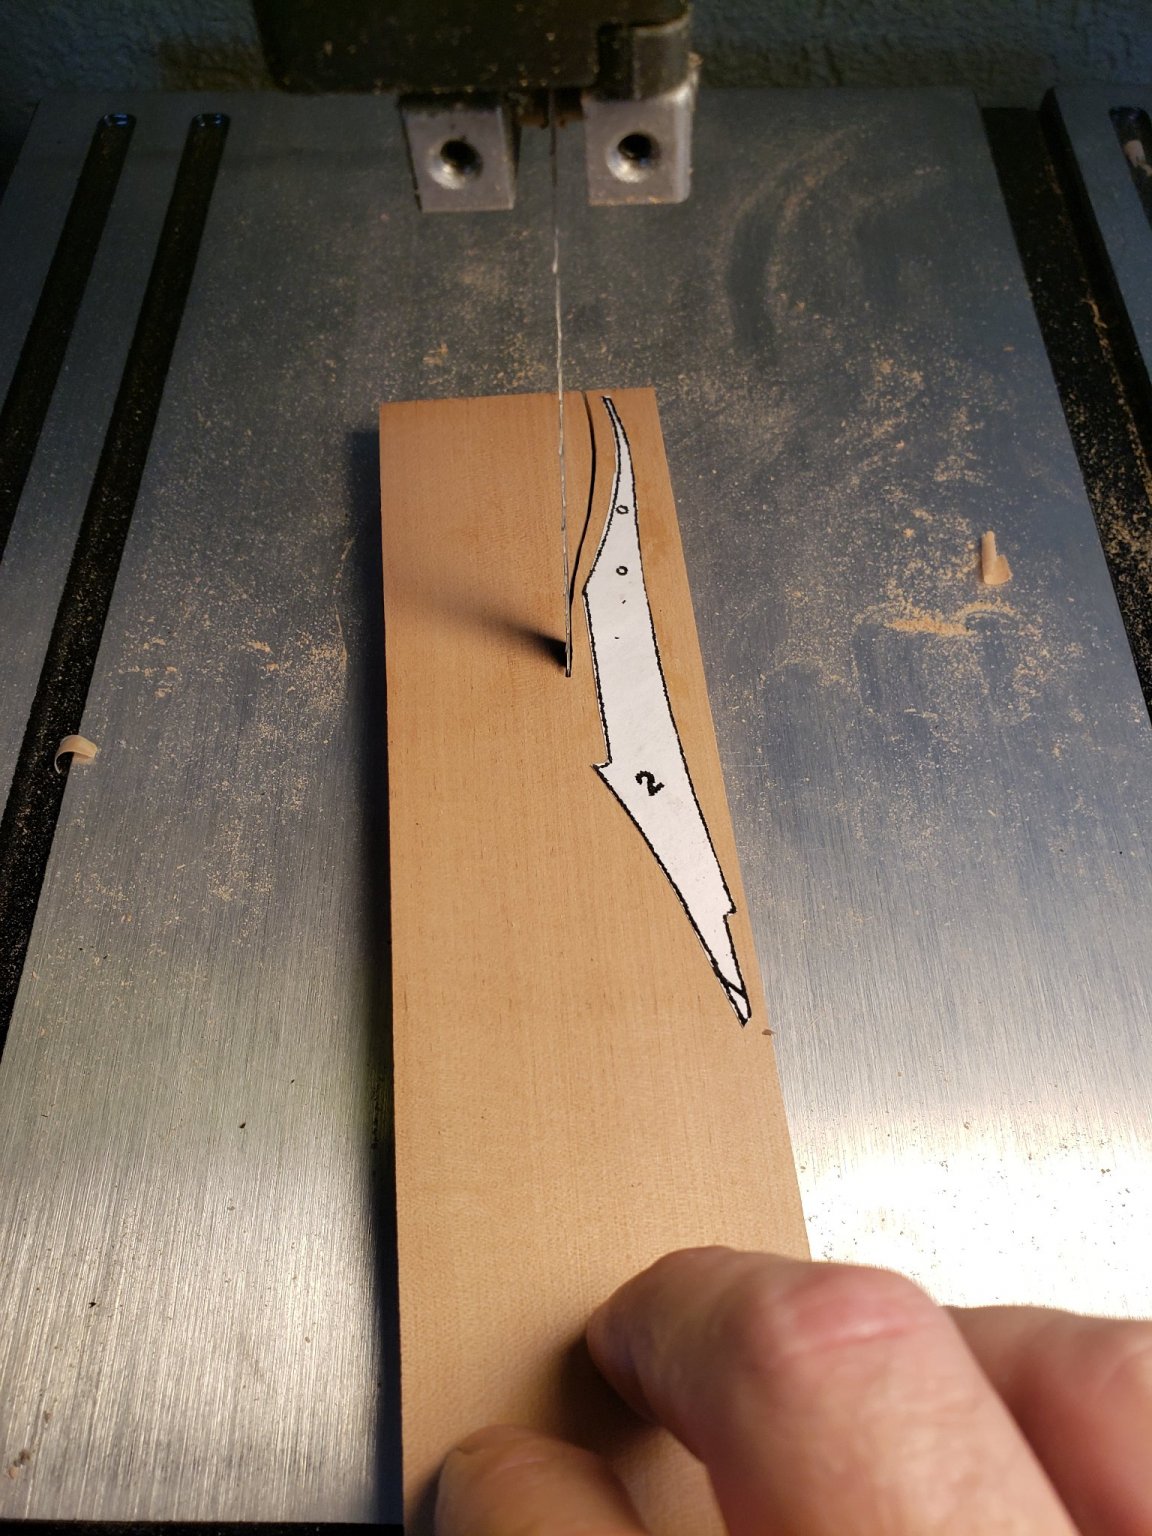
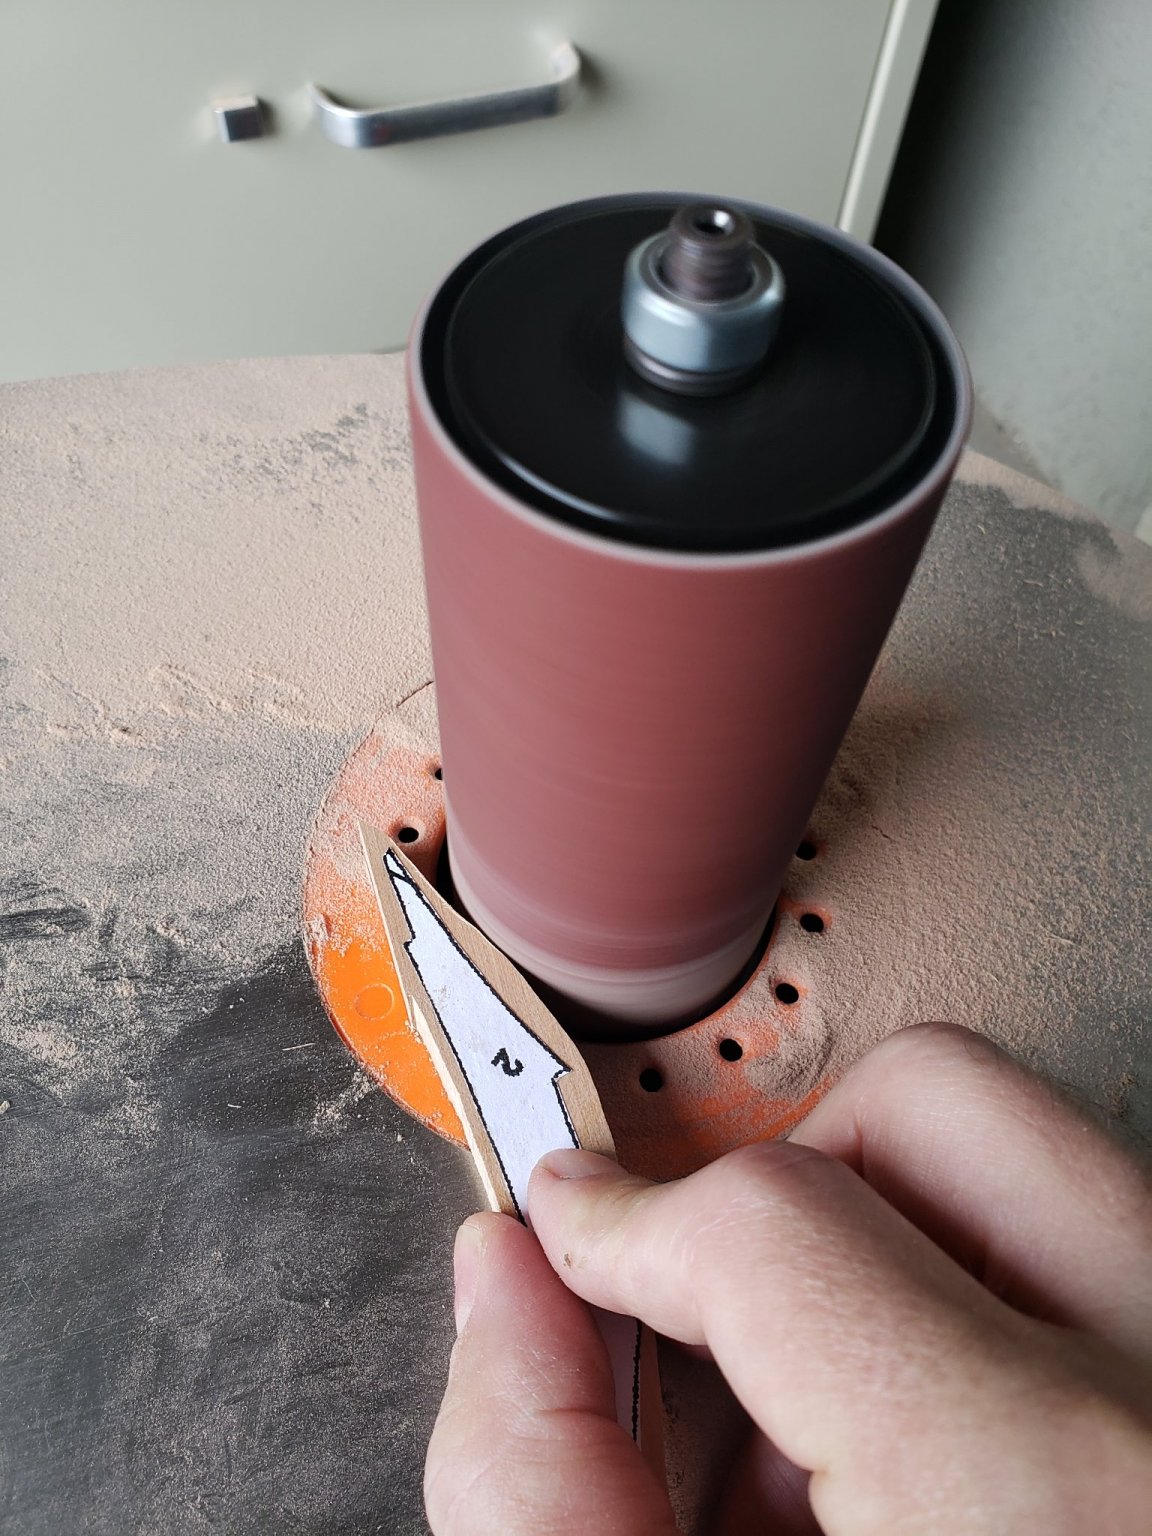
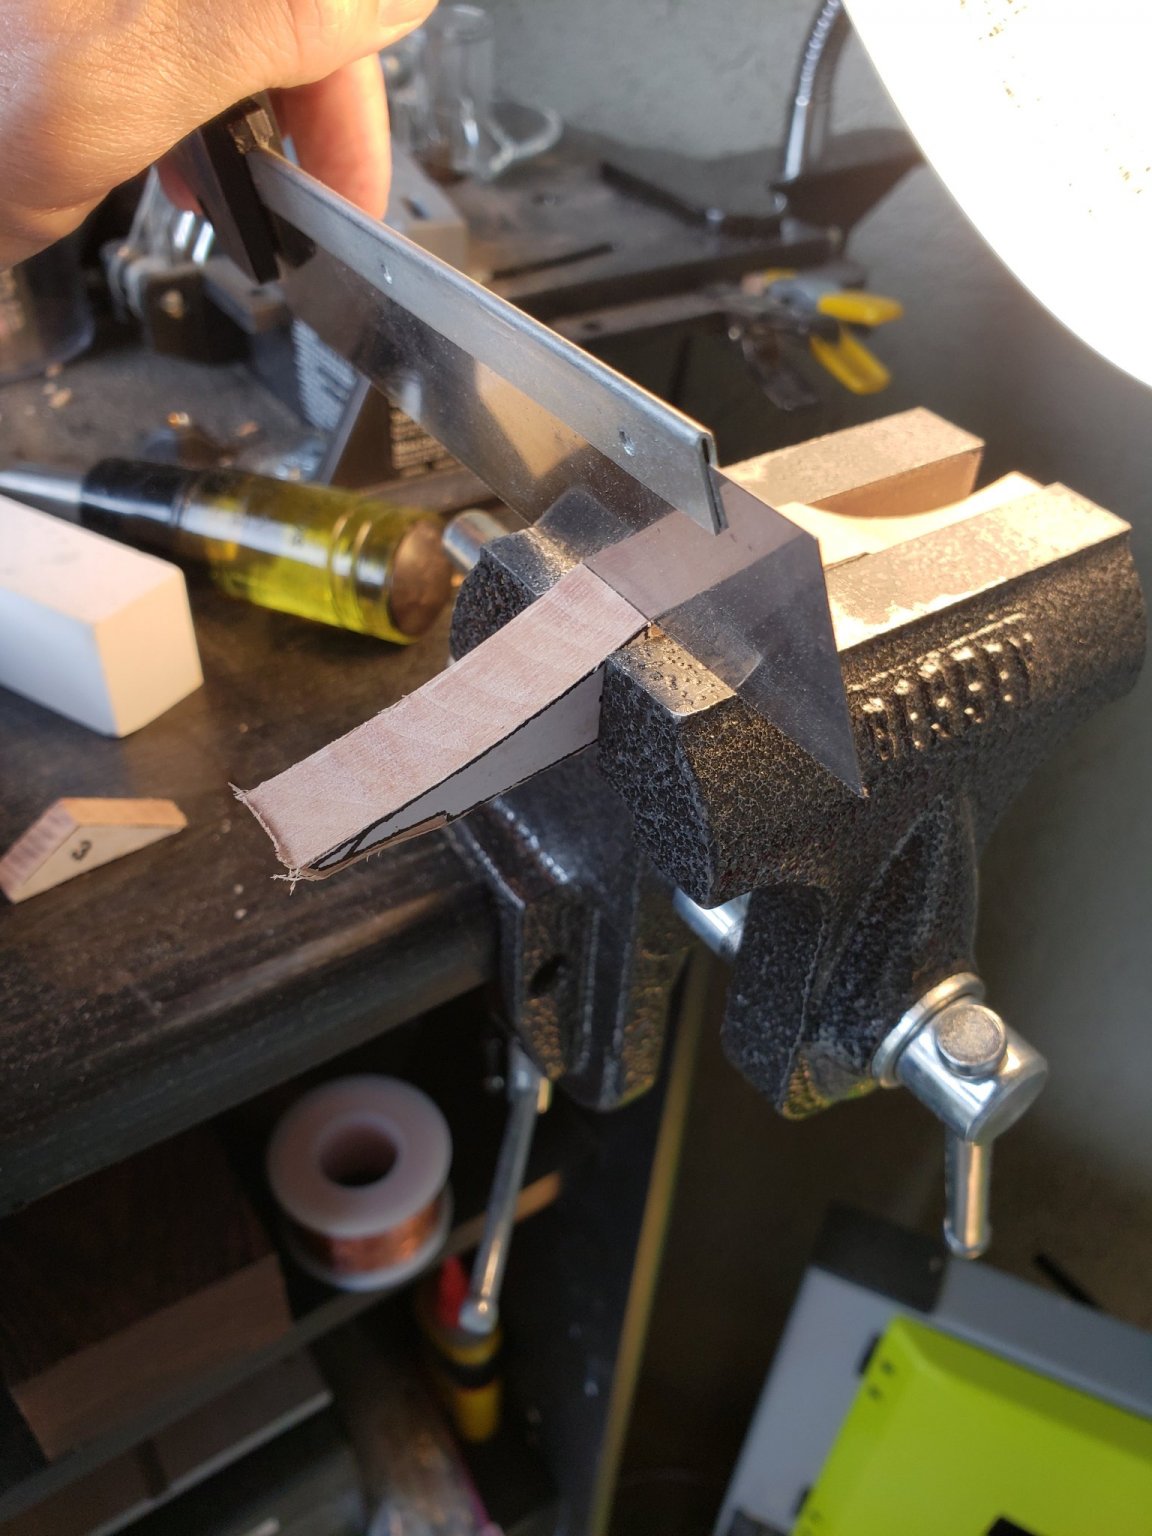
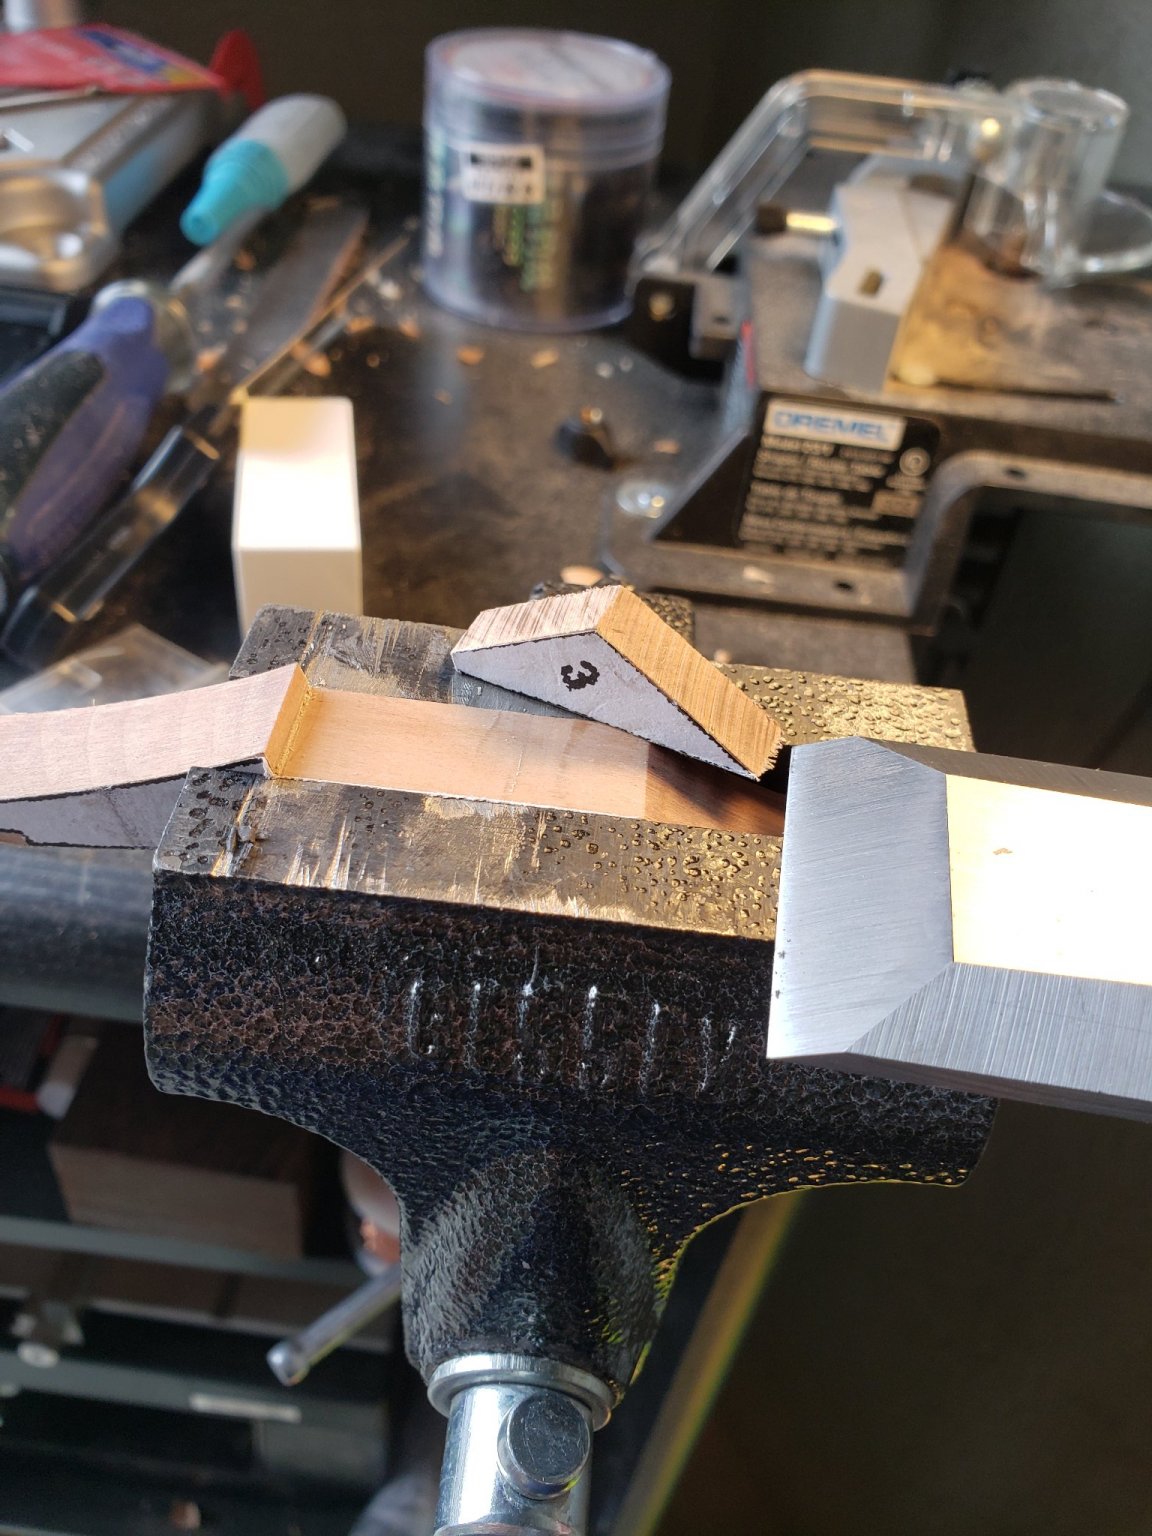
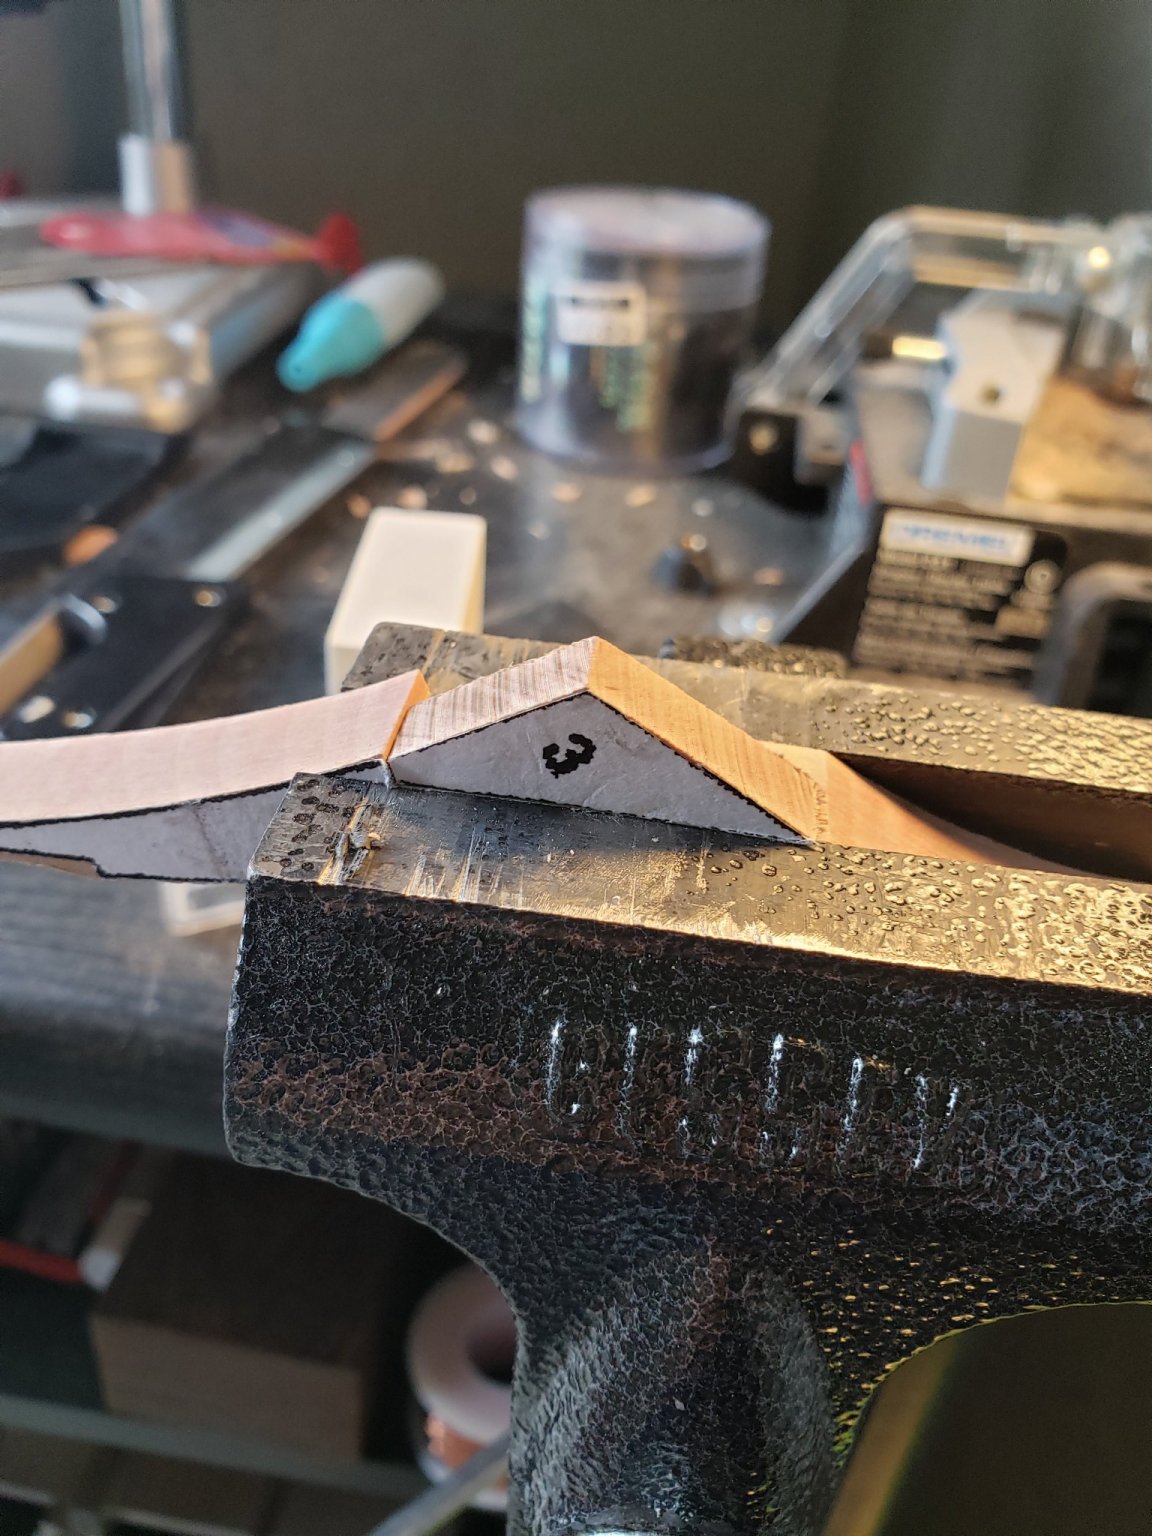
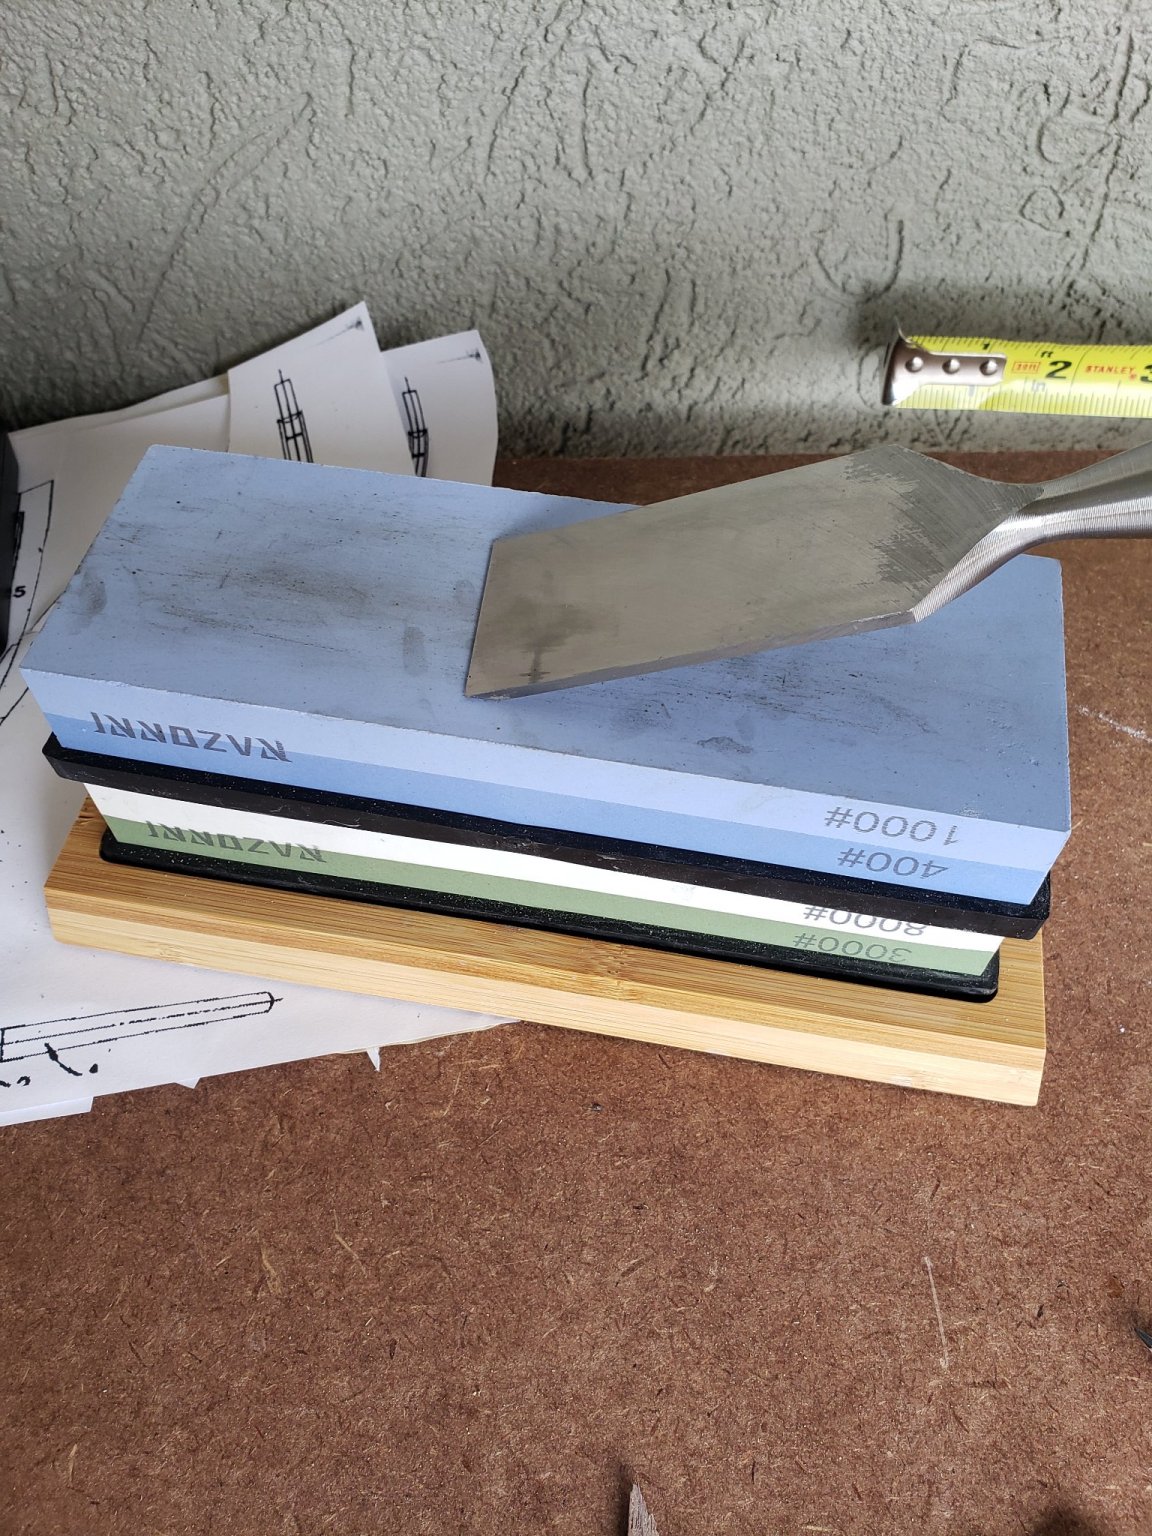
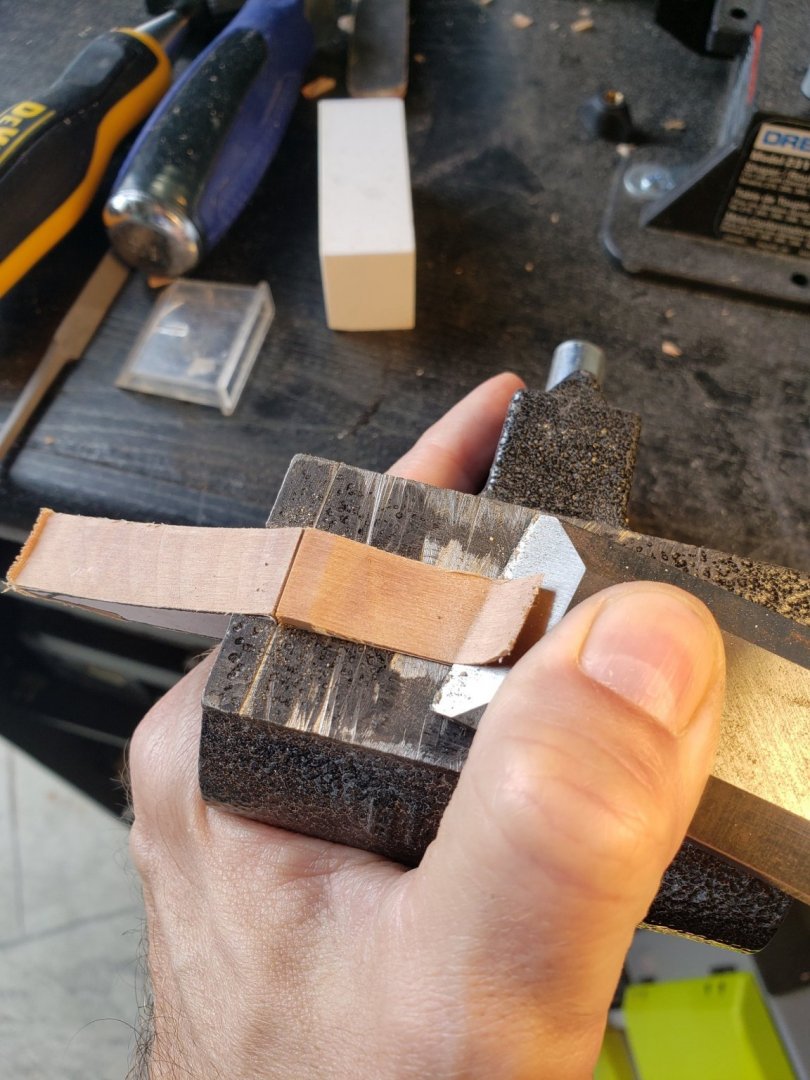
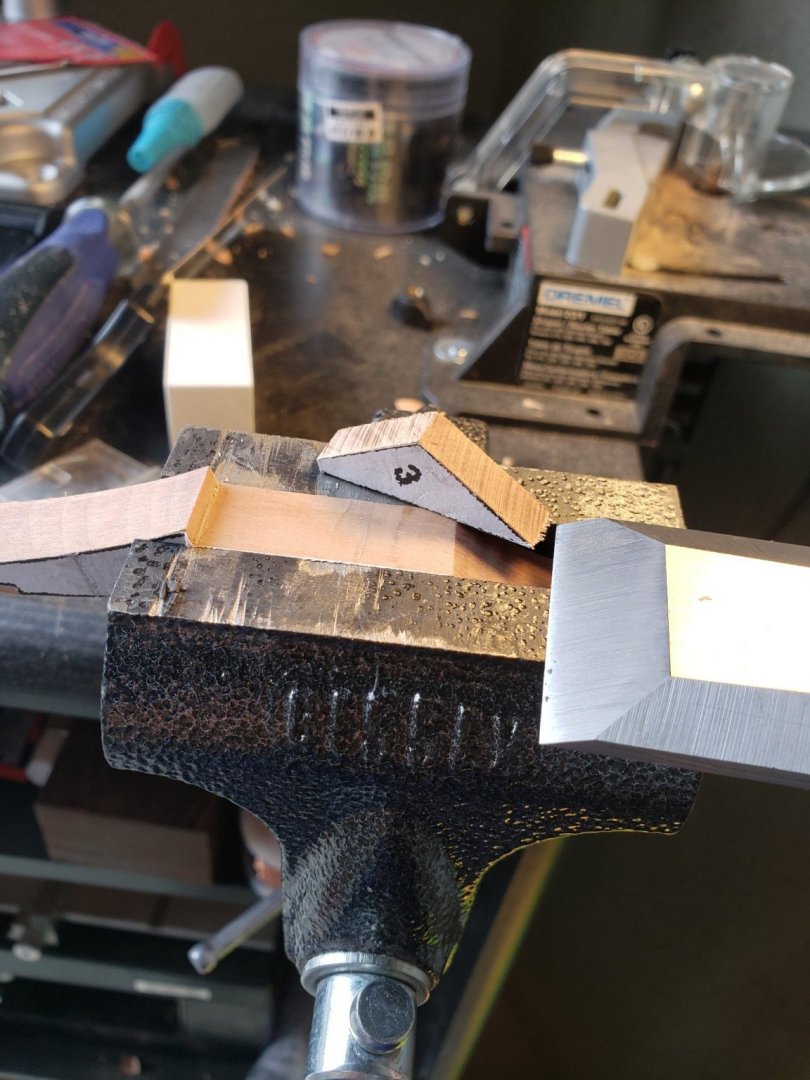
Since this is the first time I've built one of these from scratch I was not thinking about how close the tolerances were for the sides that meet. As a result I'm on my second attempt for all the pieces of the stem. First I'm using the band saw to get the piece roughed out. Then I shape them to the line on the drum sander. Then I use a razor saw and chisel on the angled areas, very carefully using the neighboring pieces to be sure I've got the angle right. This is a deliberate process that. If you rush and "hope for the best" you'll be redoing it haha. I rely on the bench vice to stop my razor saw at the correct point and to stop my chisel at the right depth. As an aside, you MUST keep your chisels sharp. Doing it dull causes the chisel to jump and pull chuncks of wood out. I added a picture of my wet stones.


-
HMS Bounty by AdamA - 1:48
AdamA replied to AdamA's topic in - Build logs for subjects built 1751 - 1800
I finally got my new drum sander so off we go getting these pieces shaped!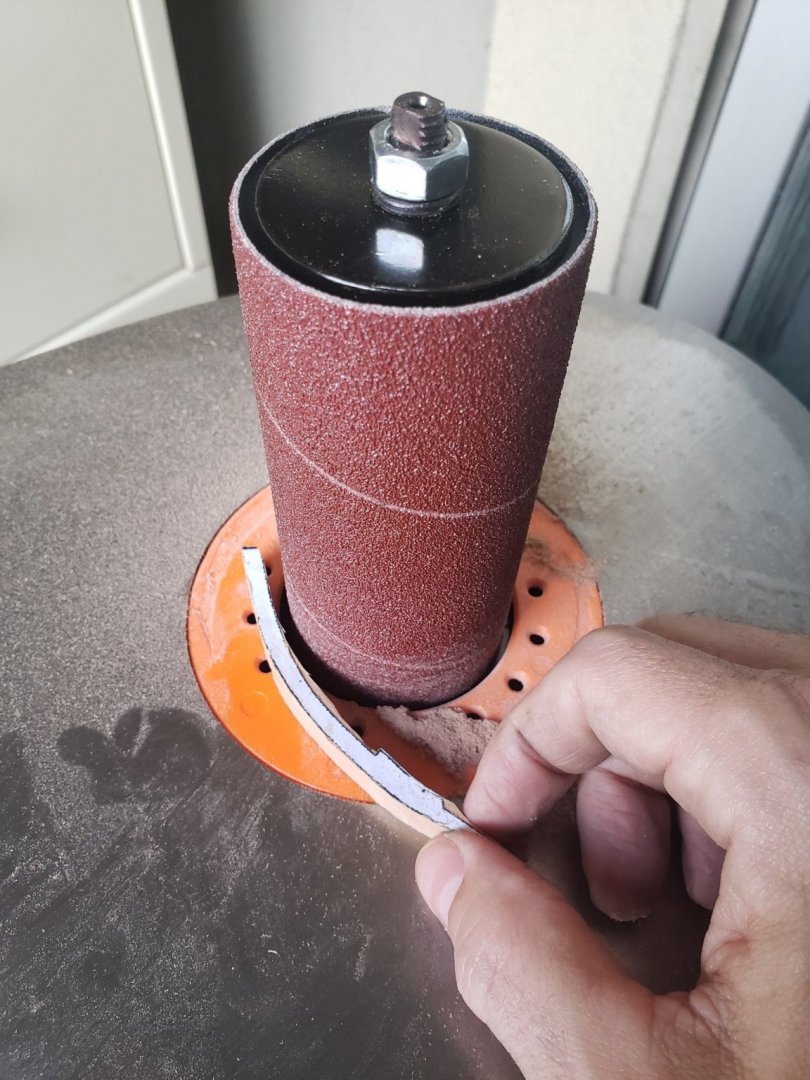
-
HMS Bounty by AdamA - 1:48
AdamA replied to AdamA's topic in - Build logs for subjects built 1751 - 1800
Hahn's has fewer parts.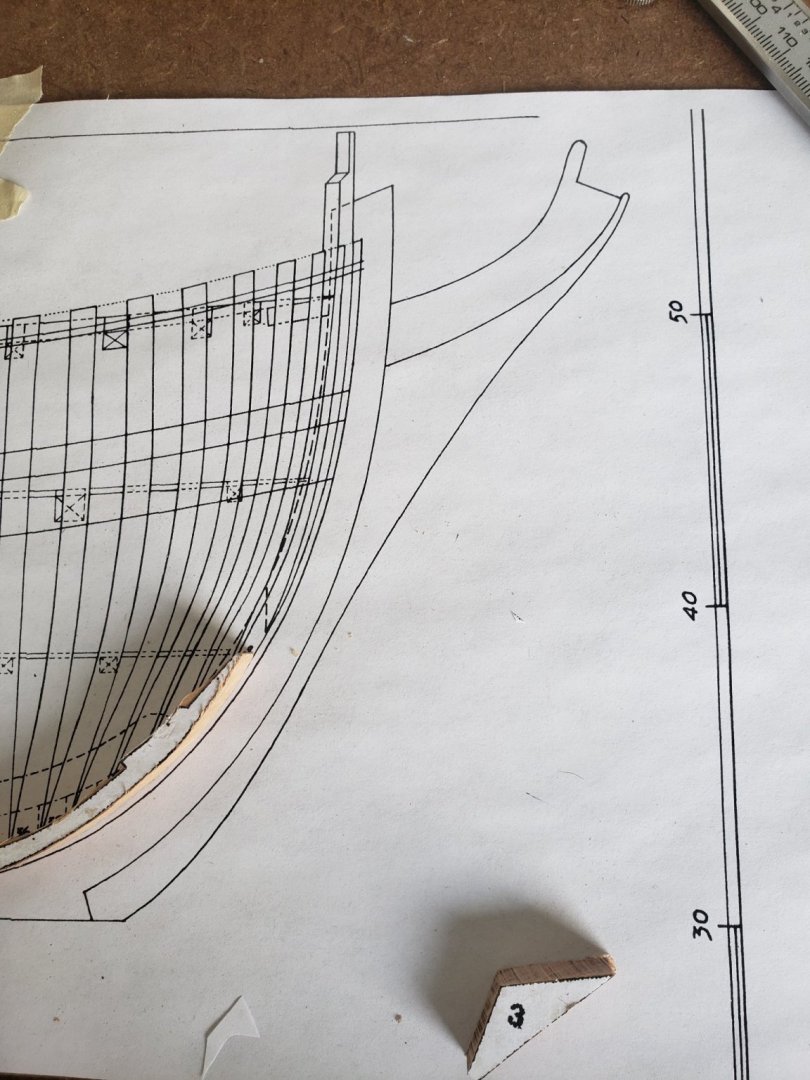
-
HMS Bounty by AdamA - 1:48
AdamA replied to AdamA's topic in - Build logs for subjects built 1751 - 1800
That drawing is from John McKay's book "The Armored Transport Bounty." Hahn's has the same layout. -
HMS Bounty by AdamA - 1:48
AdamA replied to AdamA's topic in - Build logs for subjects built 1751 - 1800
I'm using McKay's drawings but I also printed Hahn's out for reference. Hahn's plans came out a tiny bit under the scale they were supposed to be for whatever reason so I had to increase them 1%. Here's a few pieces of the stem fresh off of the band saw. I'll reduce them on the drum sander then hand sand and chisel on my bench vice for the final fit.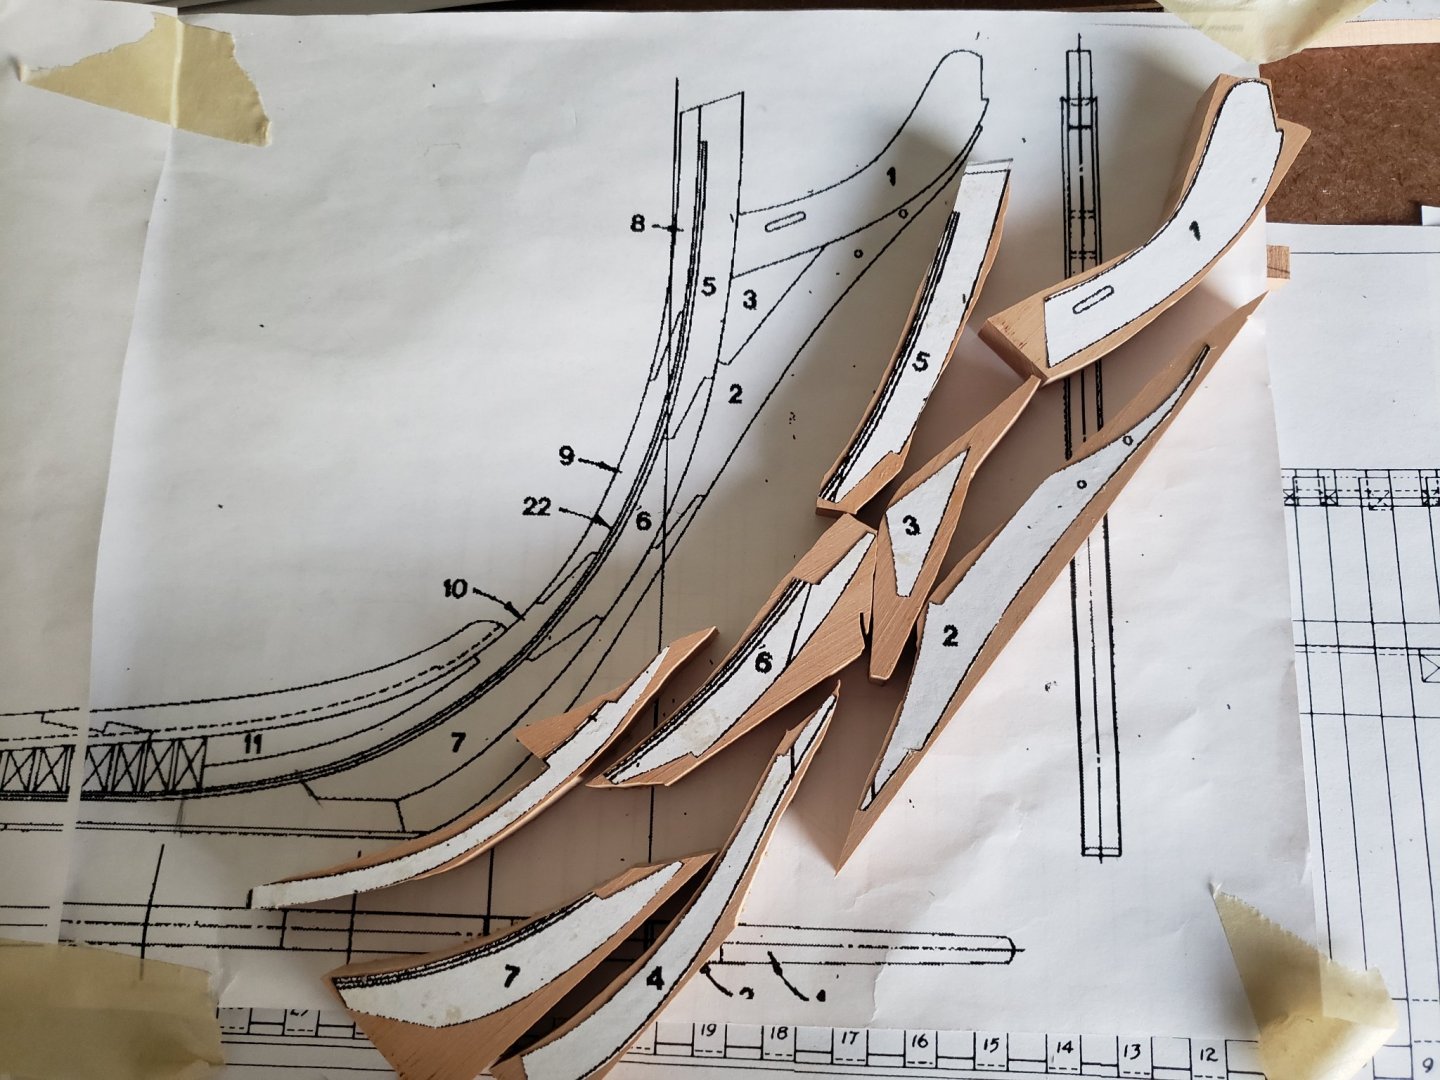
-
HMS Bounty by AdamA - 1:48
AdamA replied to AdamA's topic in - Build logs for subjects built 1751 - 1800
I found a website with free 3d files for Bounty so I may use it to round out the McKay drawings.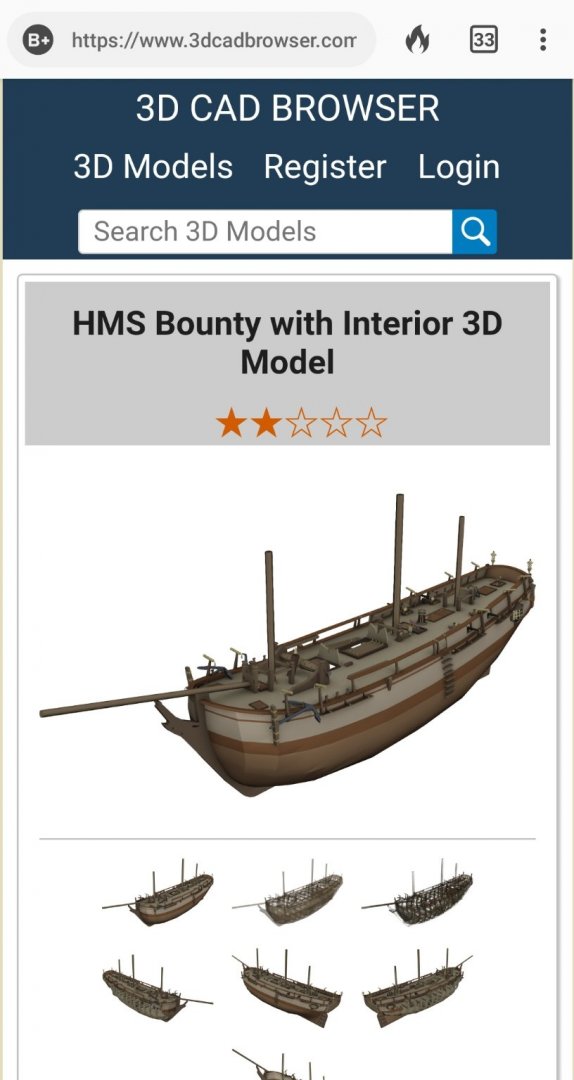
-
HMS Bounty by AdamA - 1:48
AdamA replied to AdamA's topic in - Build logs for subjects built 1751 - 1800
That wood came from Rare Woods USA, and they have a lot of them if you need some. -
HMS Bounty by AdamA - 1:48
AdamA replied to AdamA's topic in - Build logs for subjects built 1751 - 1800
And here is the Swiss Pear that just arrived!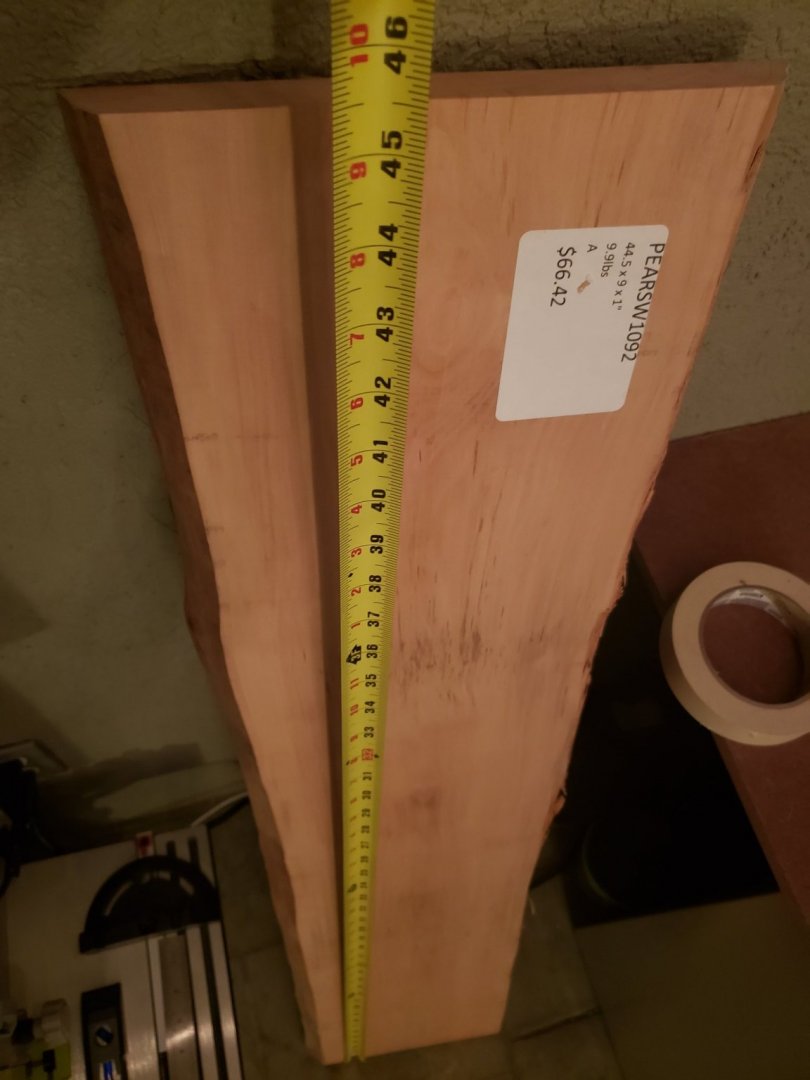
-
HMS Bounty by AdamA - 1:48
AdamA replied to AdamA's topic in - Build logs for subjects built 1751 - 1800
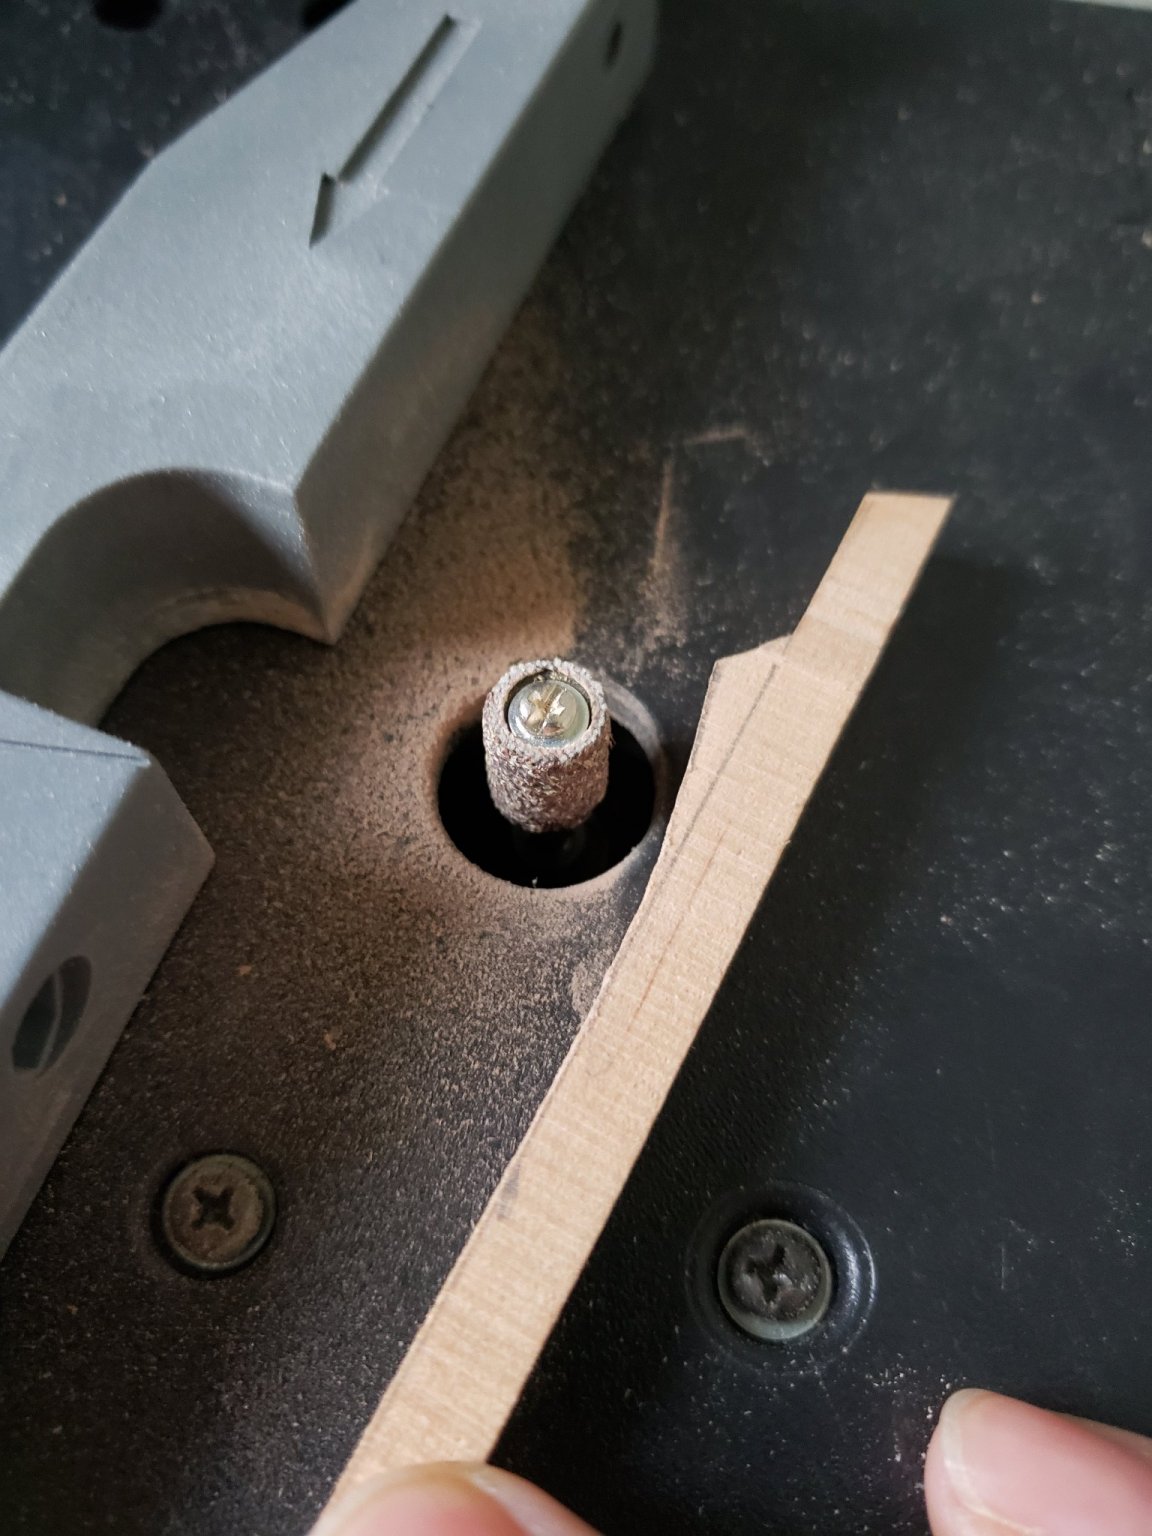
This nub was a bit too high. Using the drum sander took care of that.