HOLIDAY DONATION DRIVE - SUPPORT MSW - DO YOUR PART TO KEEP THIS GREAT FORUM GOING! (Only 24 donations so far out of 49,000 members - C'mon guys!)
×


Ken_2
-
Posts
150 -
Joined
-
Last visited
Content Type
Profiles
Forums
Gallery
Events
Everything posted by Ken_2
-
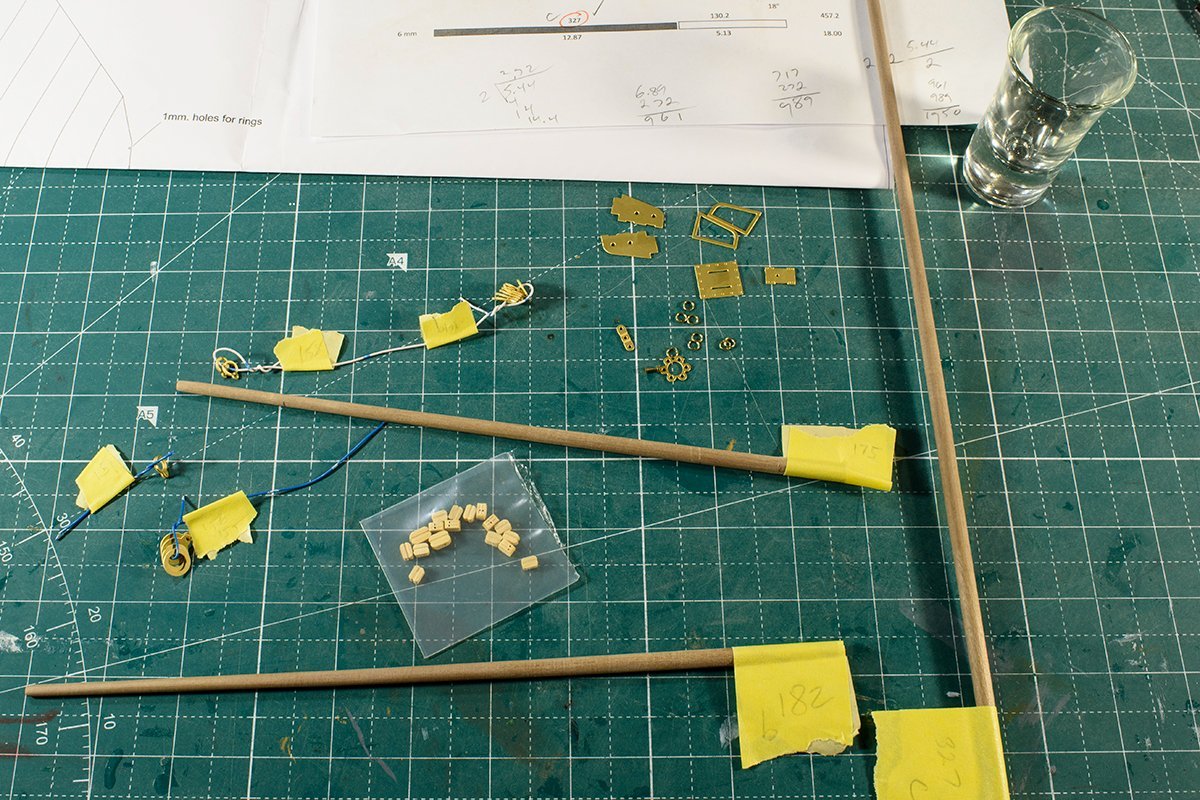
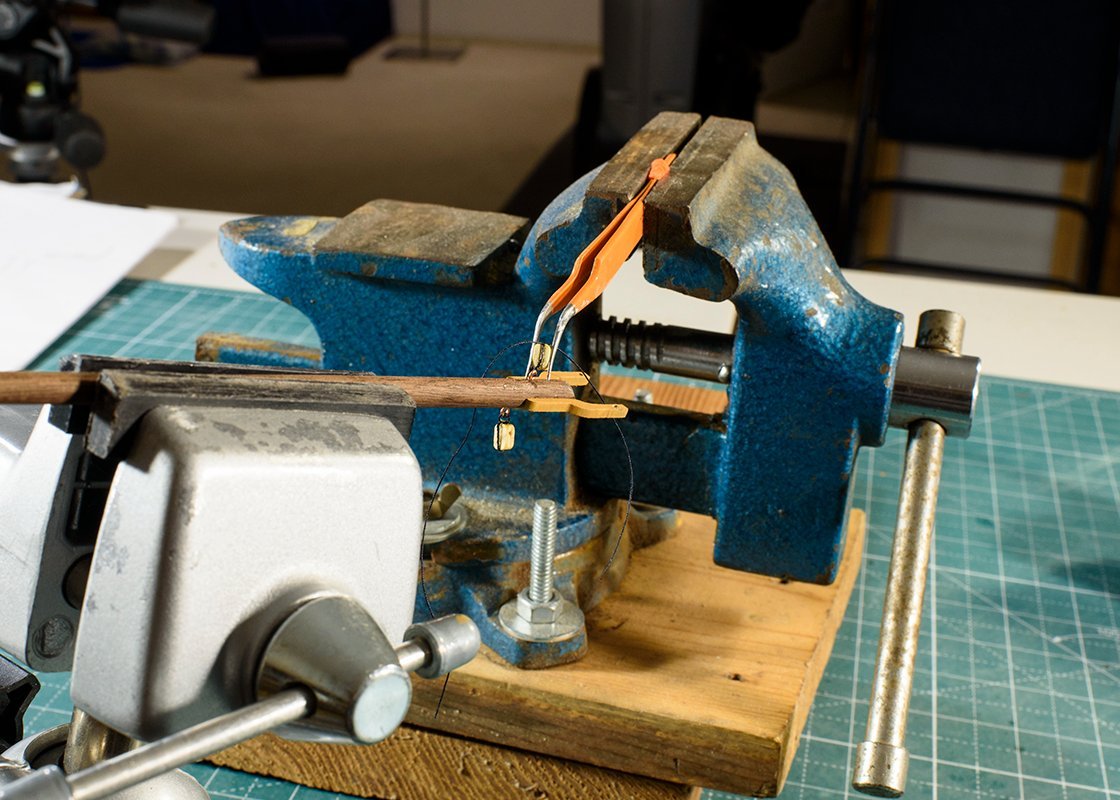
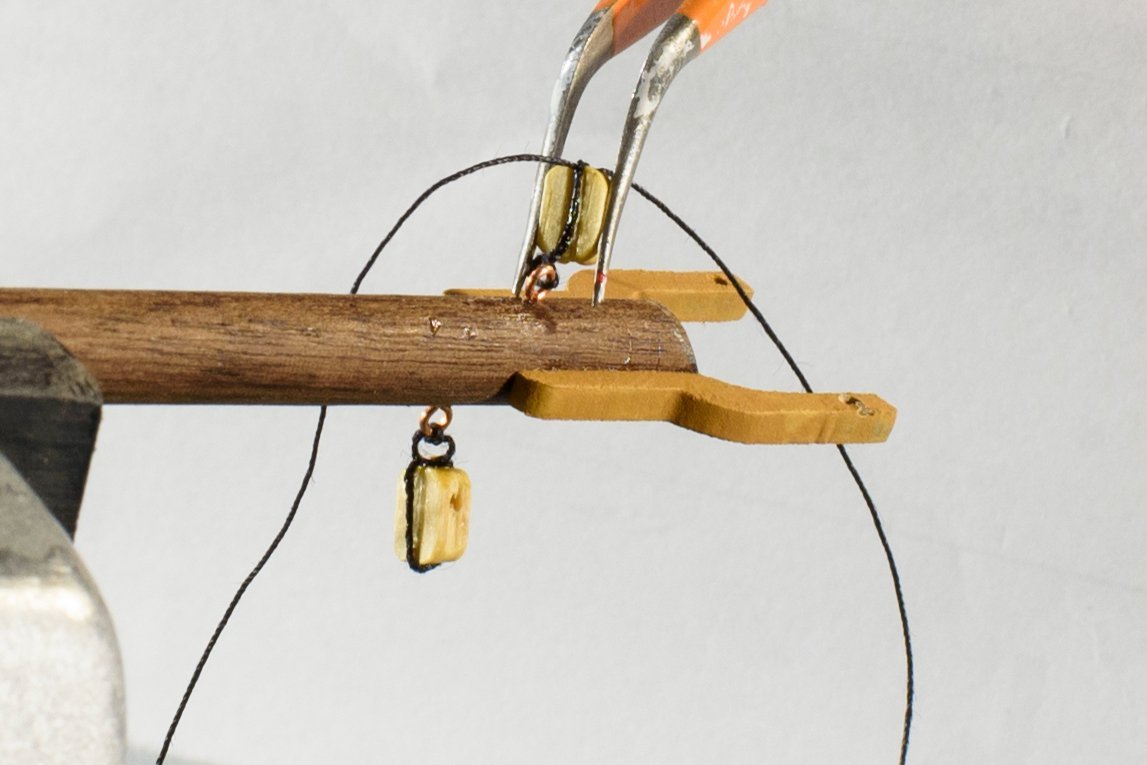
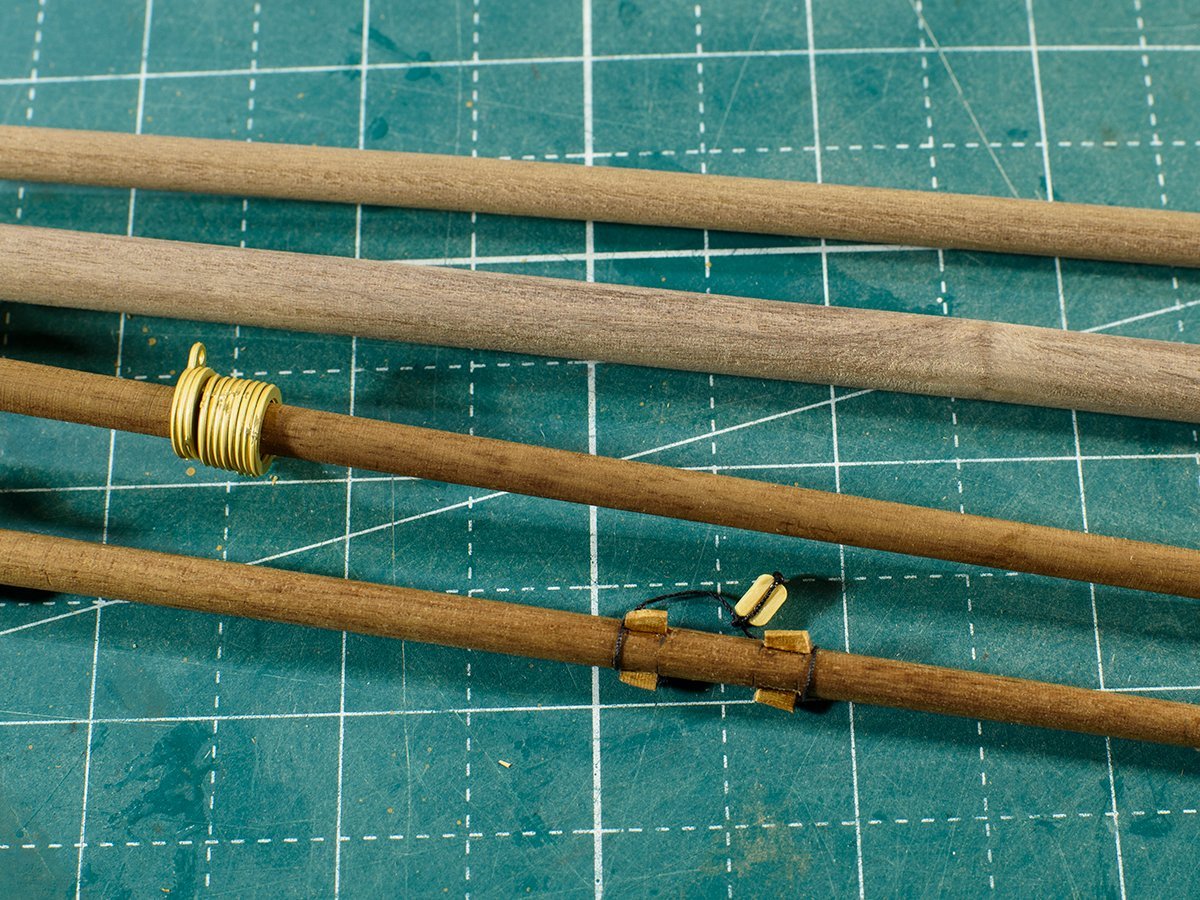
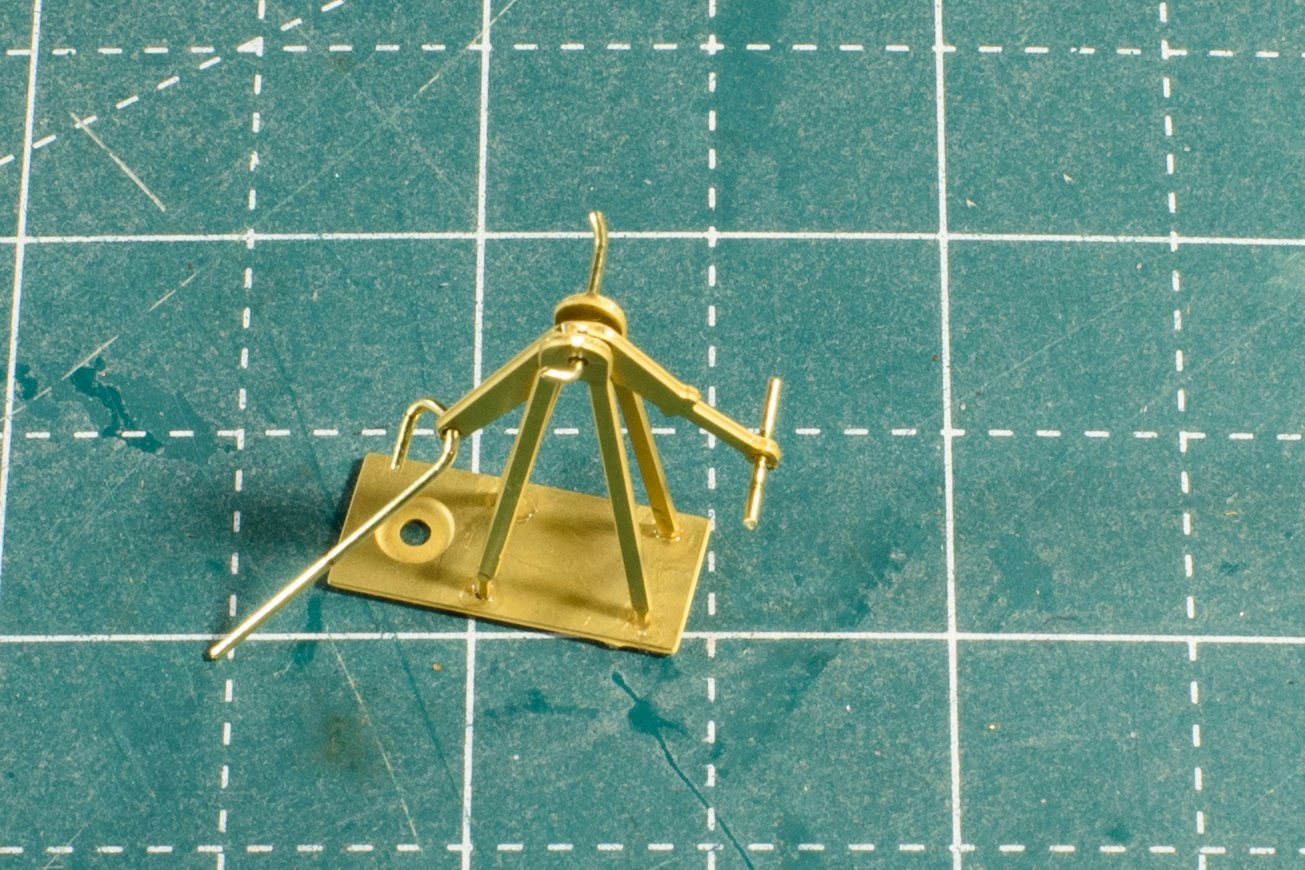
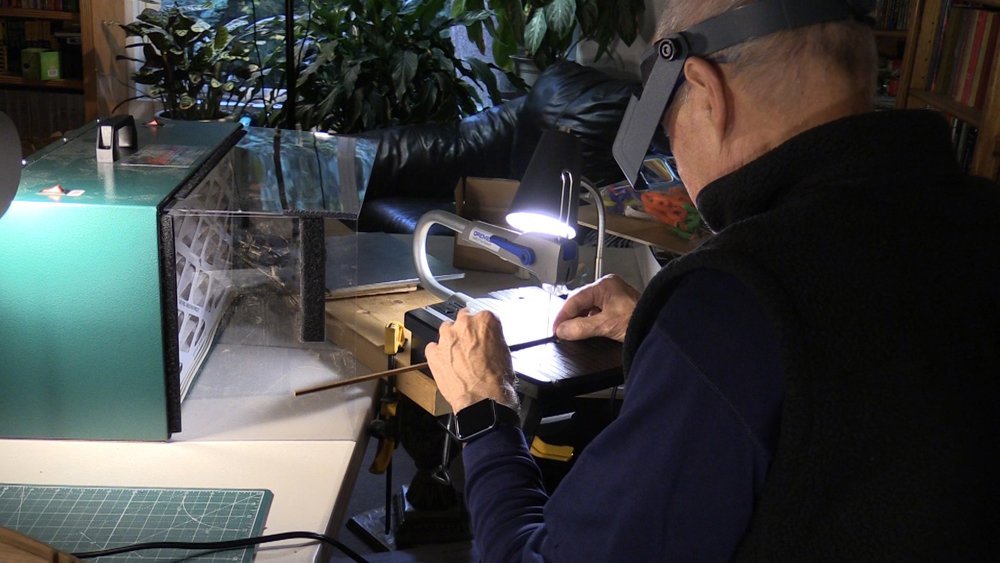
I tapered the aft mast and spars and collected all the hardware. There are many parts, but nothing seems to be complex except the skill to rig a block to a yard (there is nothing like practice). Also, the sequence of assembly is not defined. However, the instructions provide pictures that clearly define the result. I am thinking I will hoist the aft sail, but not the foresail. This assembly remined me that my skills for handling small blocks and thread need improvement. I spent time studying YouTube and several “writings” I have. But for me, practice is the main way I learn. My rigging, stropping, and seizing improved as I went along. But. I am sure this is a skill I still need to study and improve. I struggled to like the color of the tapered plain walnut dowels for spars. The various acrylic colors I painted onto the spars only made things look worse, so I tried a couple of stains. I ended up using a semi-transparent golden oak. I brushed it on, and then wiped it off quickly. This seemed to enhance the look.

-
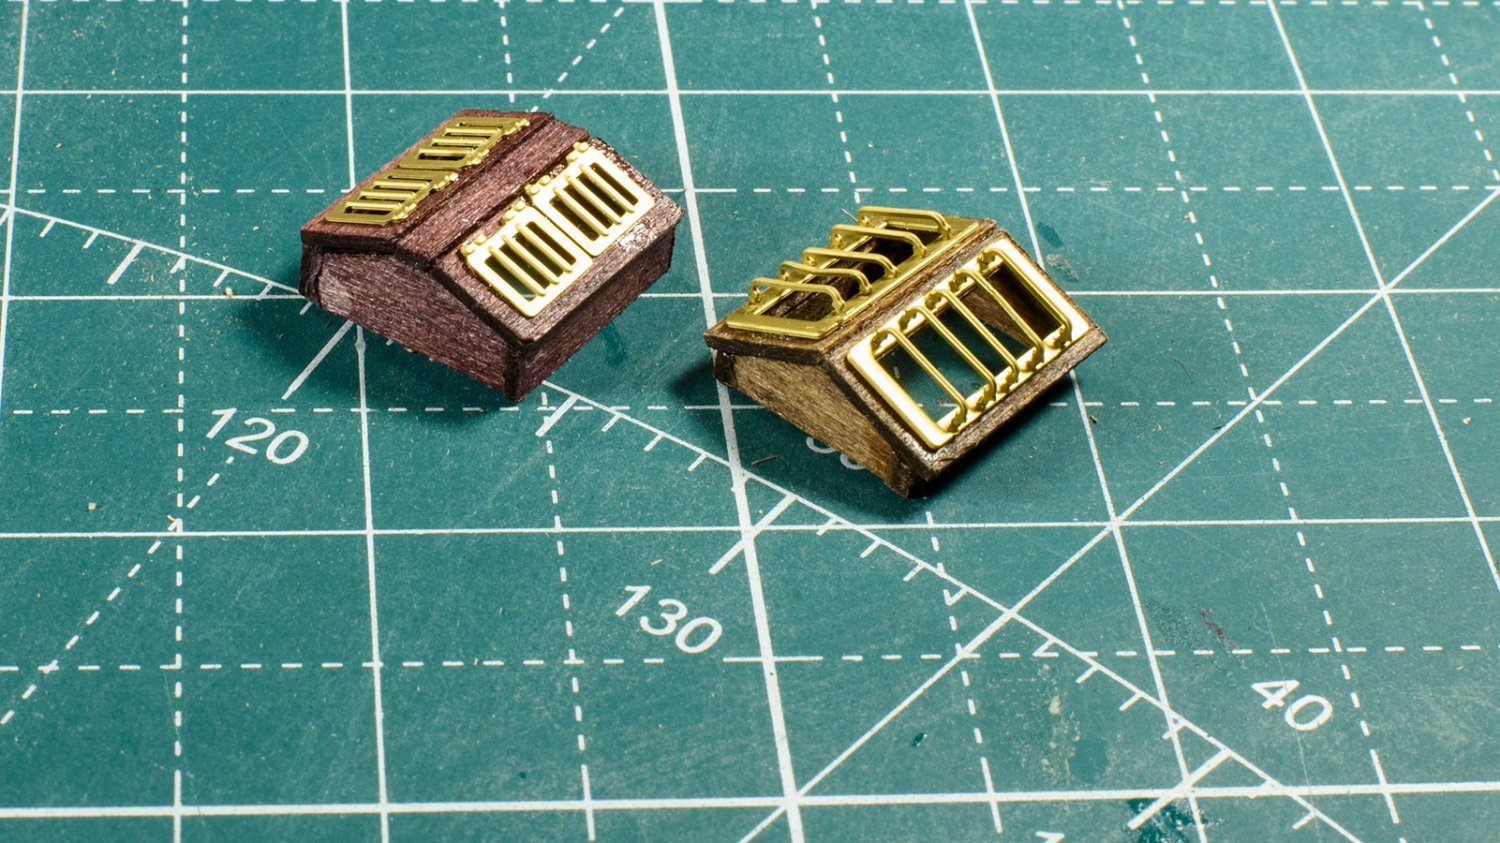
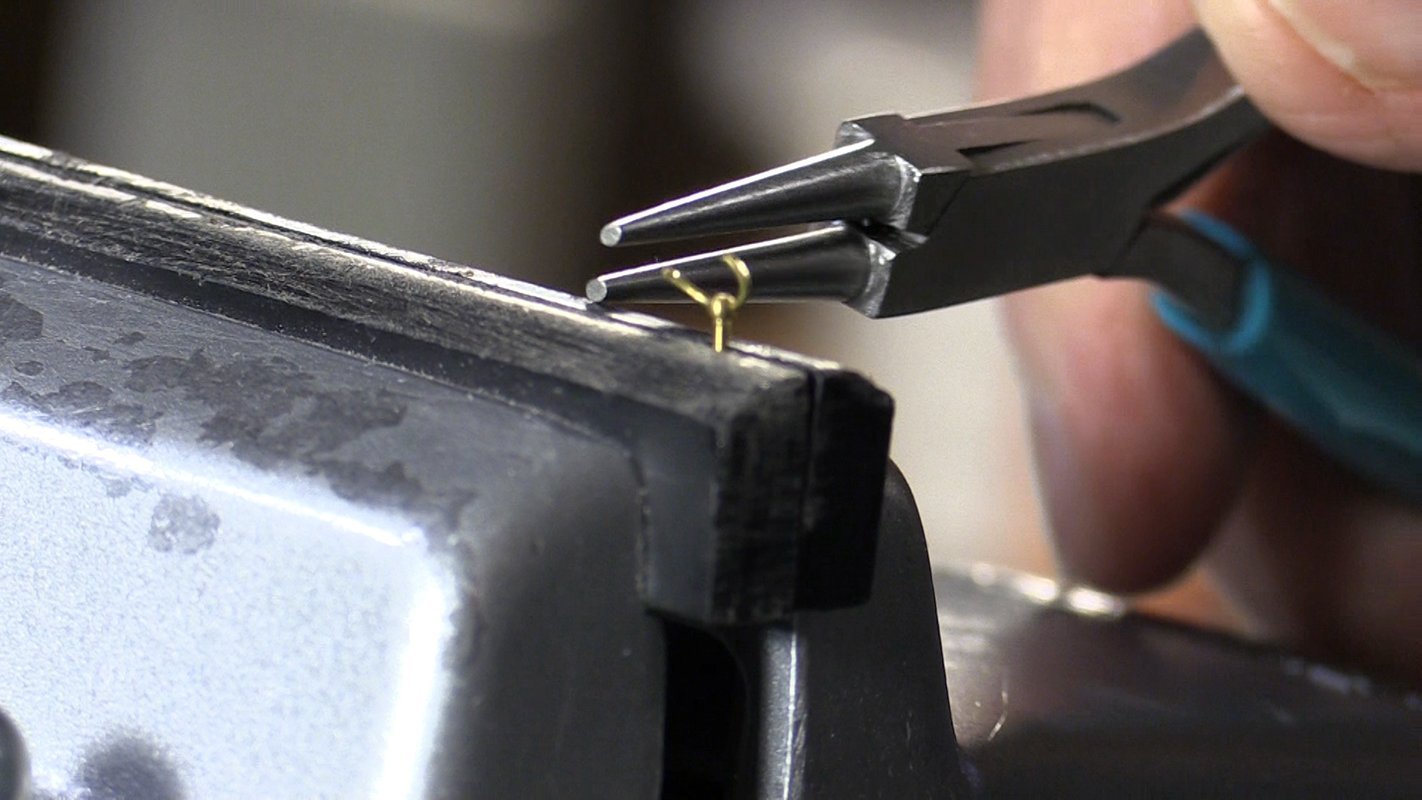
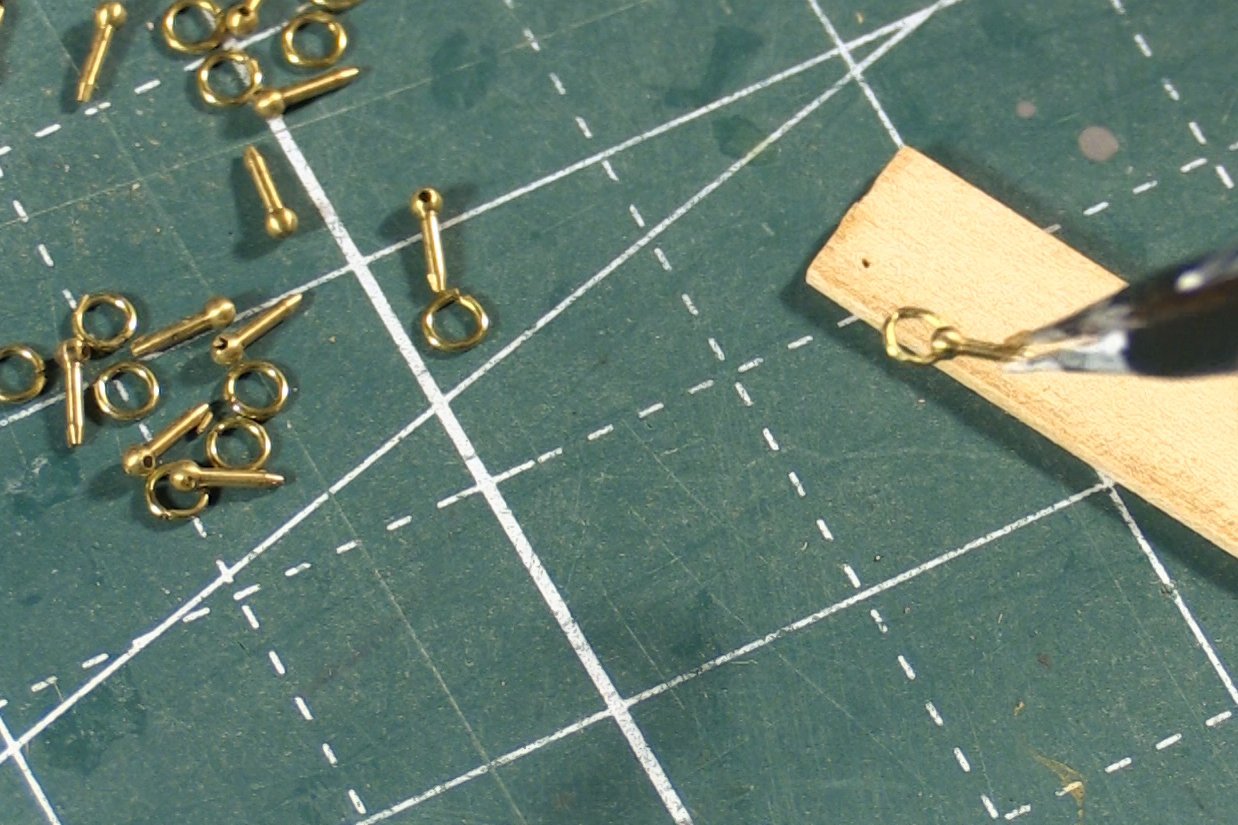
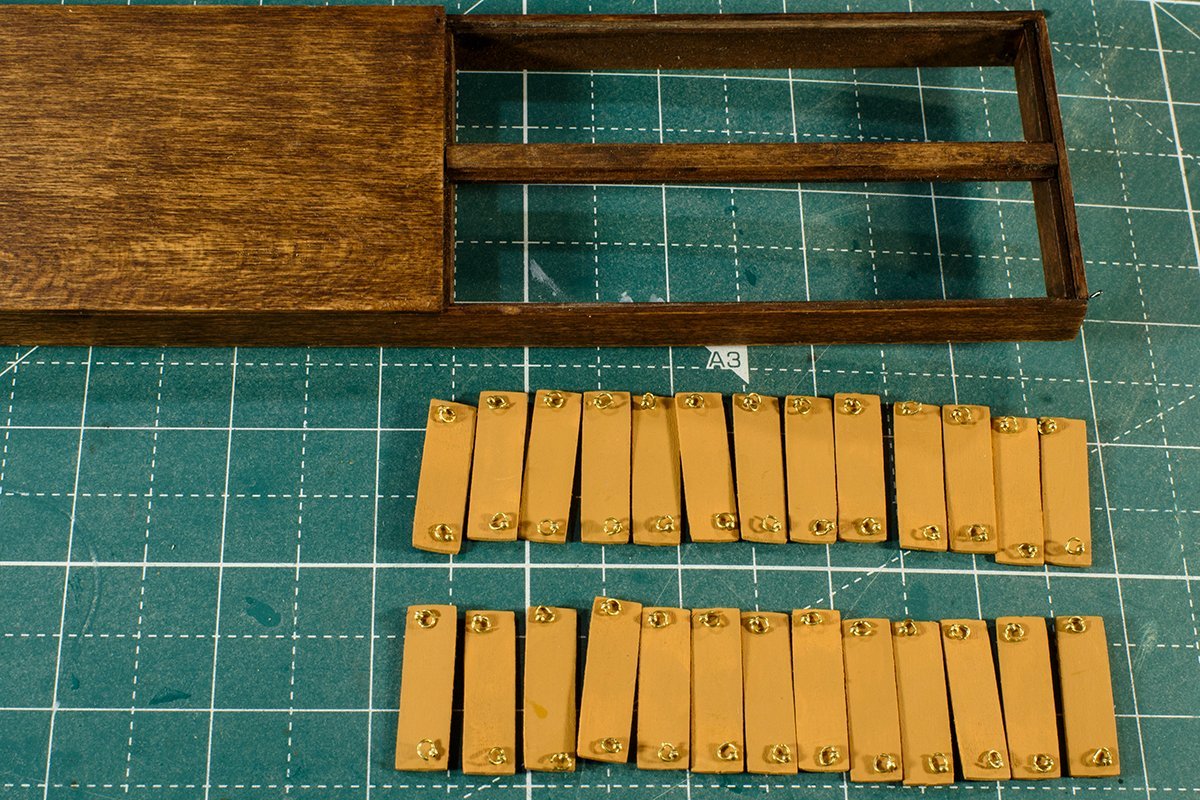
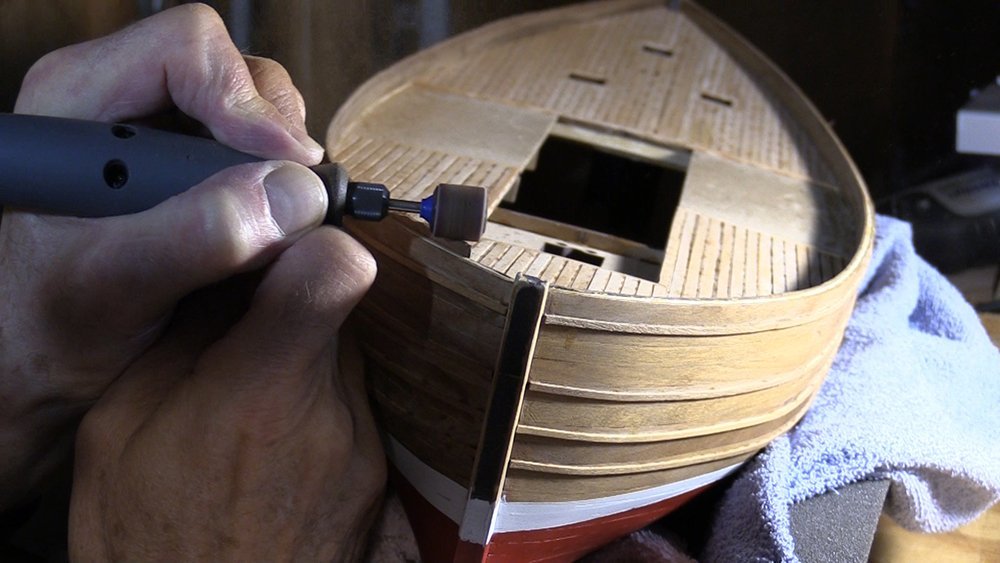
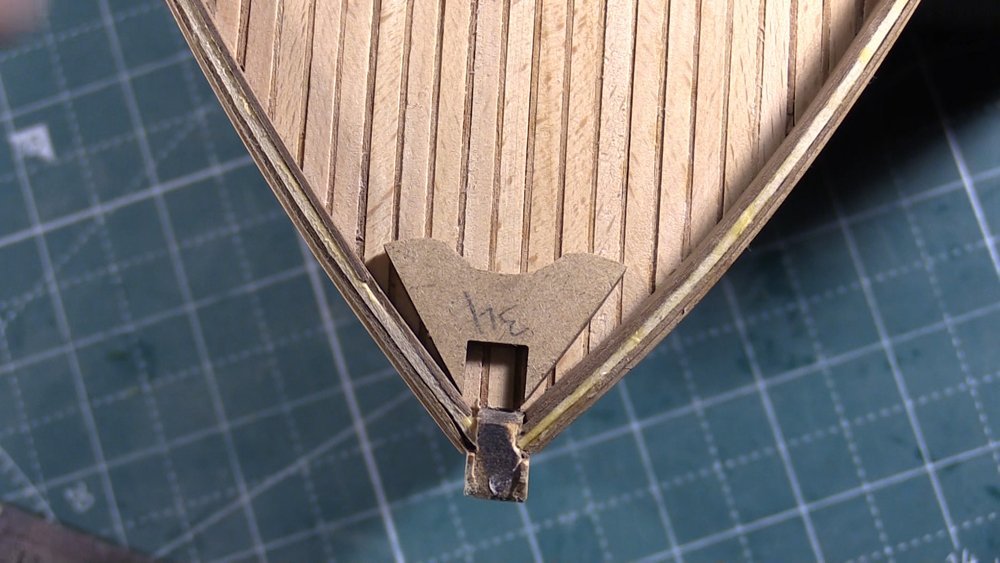
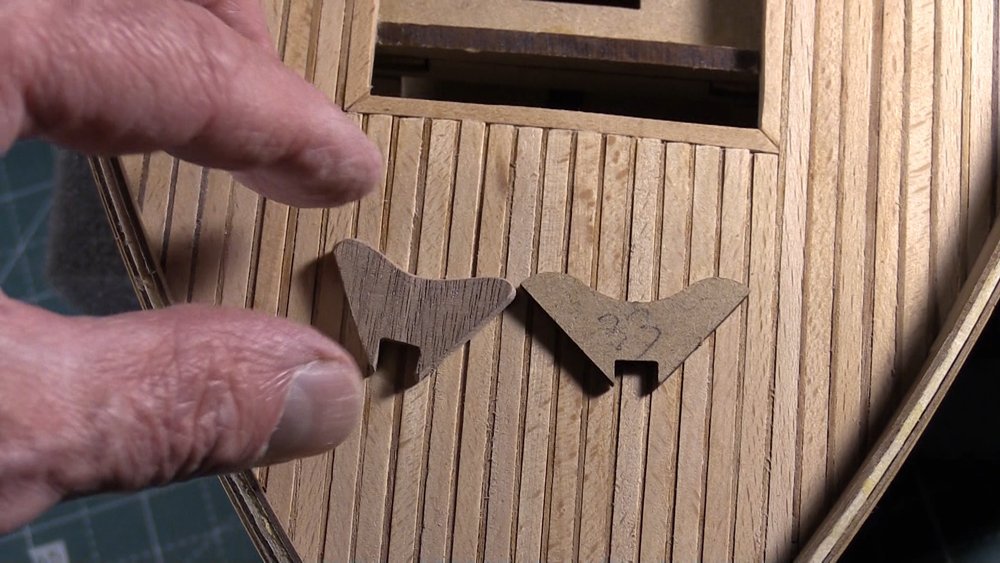
It took some time to finish the fish hatches. I had to narrow each hatch since they were a bit too long and wide. Then I enlarged the holes provided for the post with rings and painted all sides of the hatches. The real time was spent figuring out how to install the rings onto the posts – (the holes in the post are 0.5 mm). Once all 52 rings were on the posts, I added them to the hatches.
-
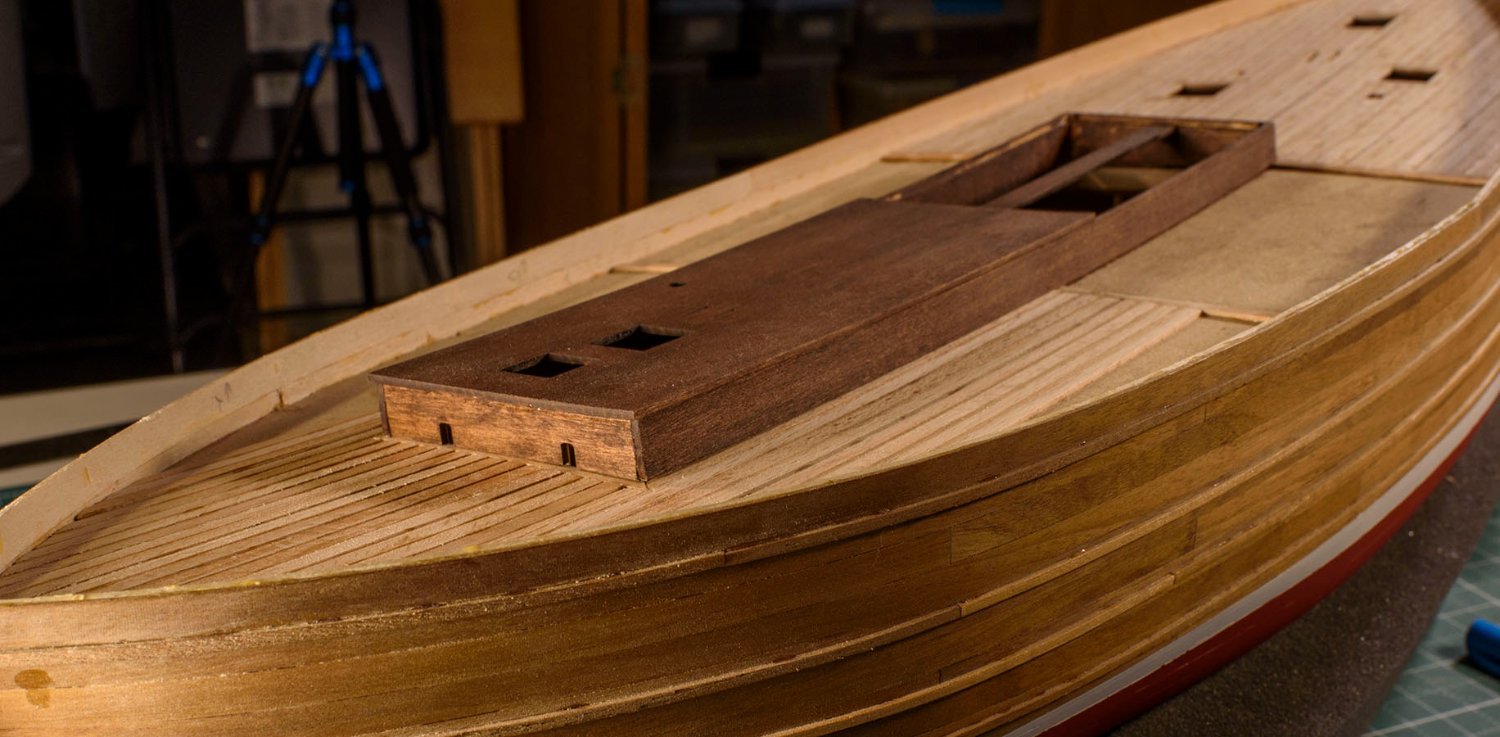
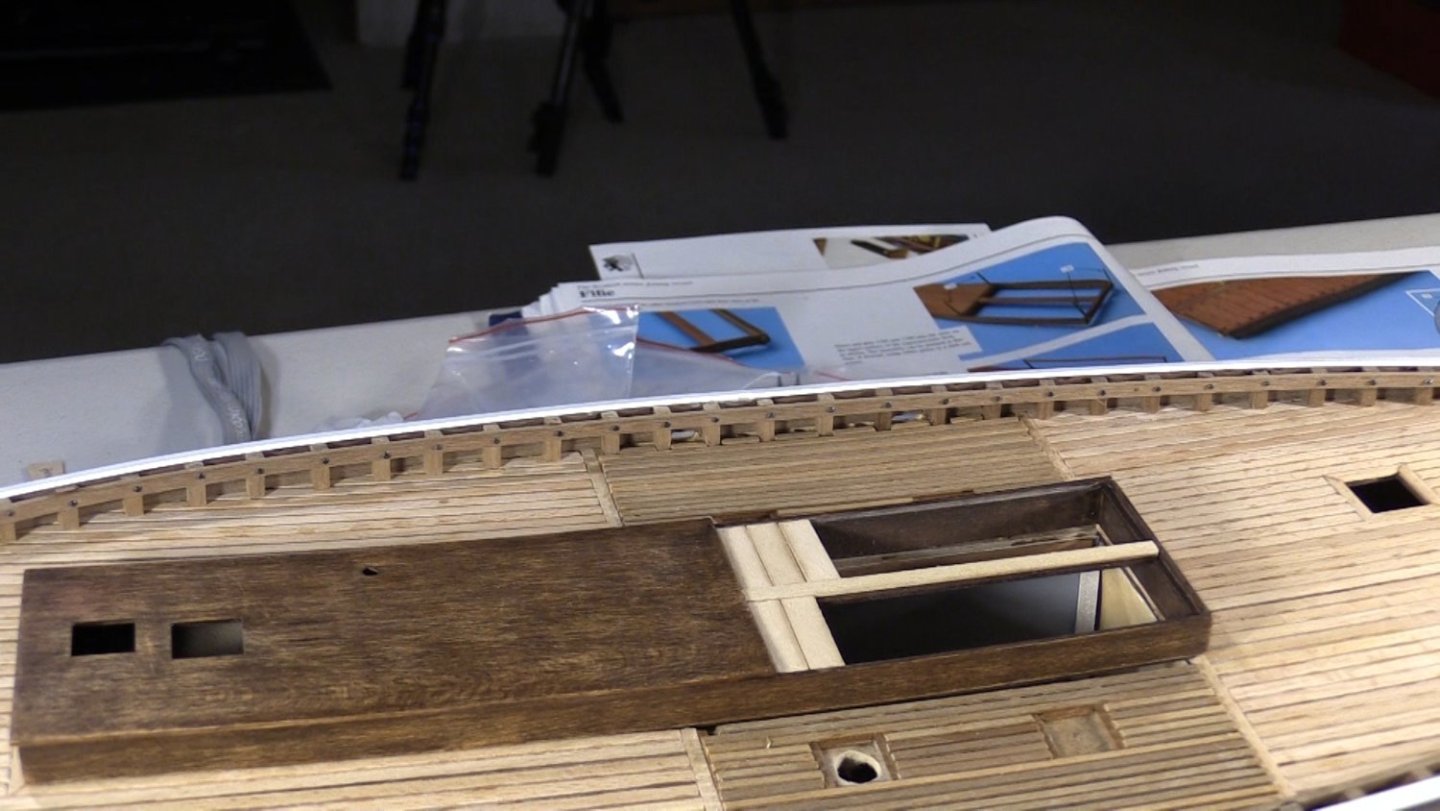
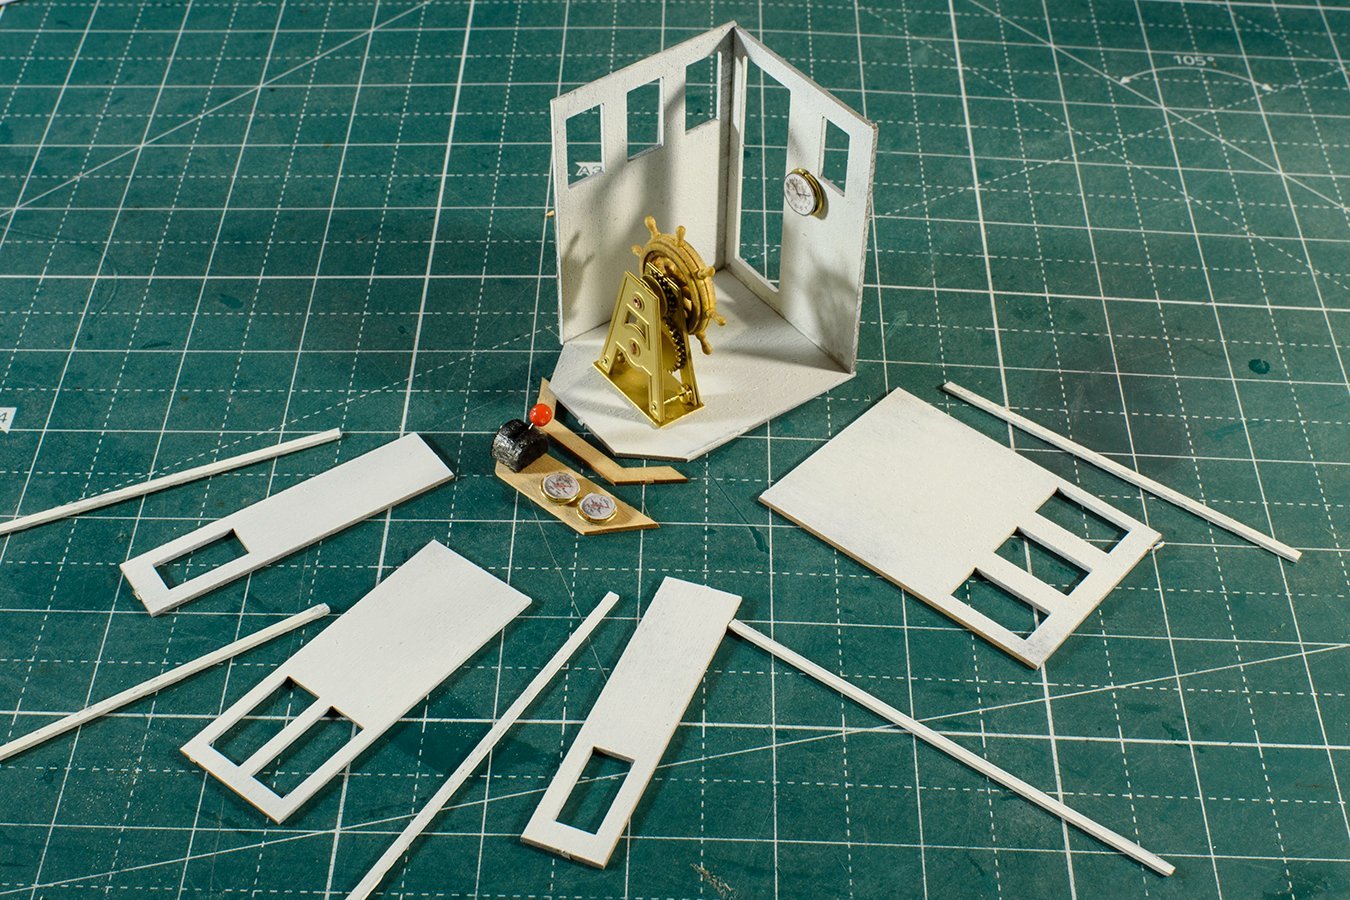
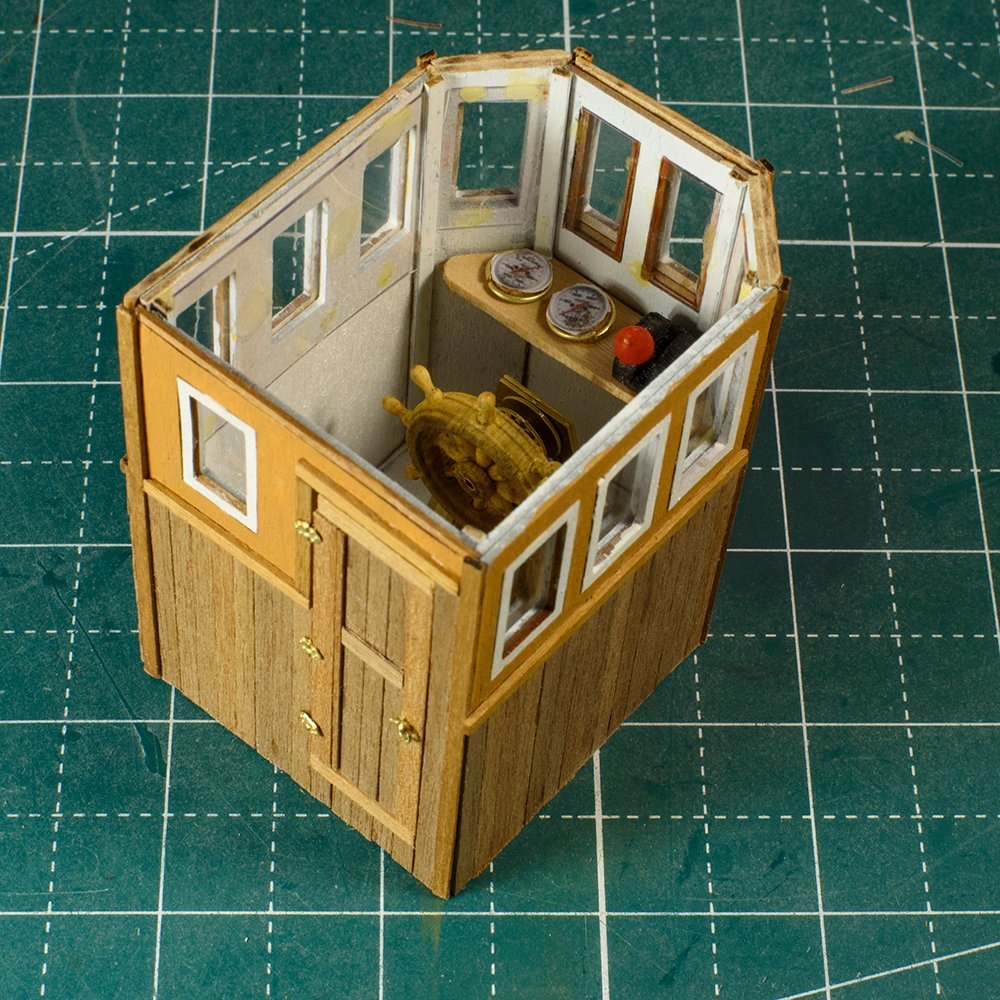
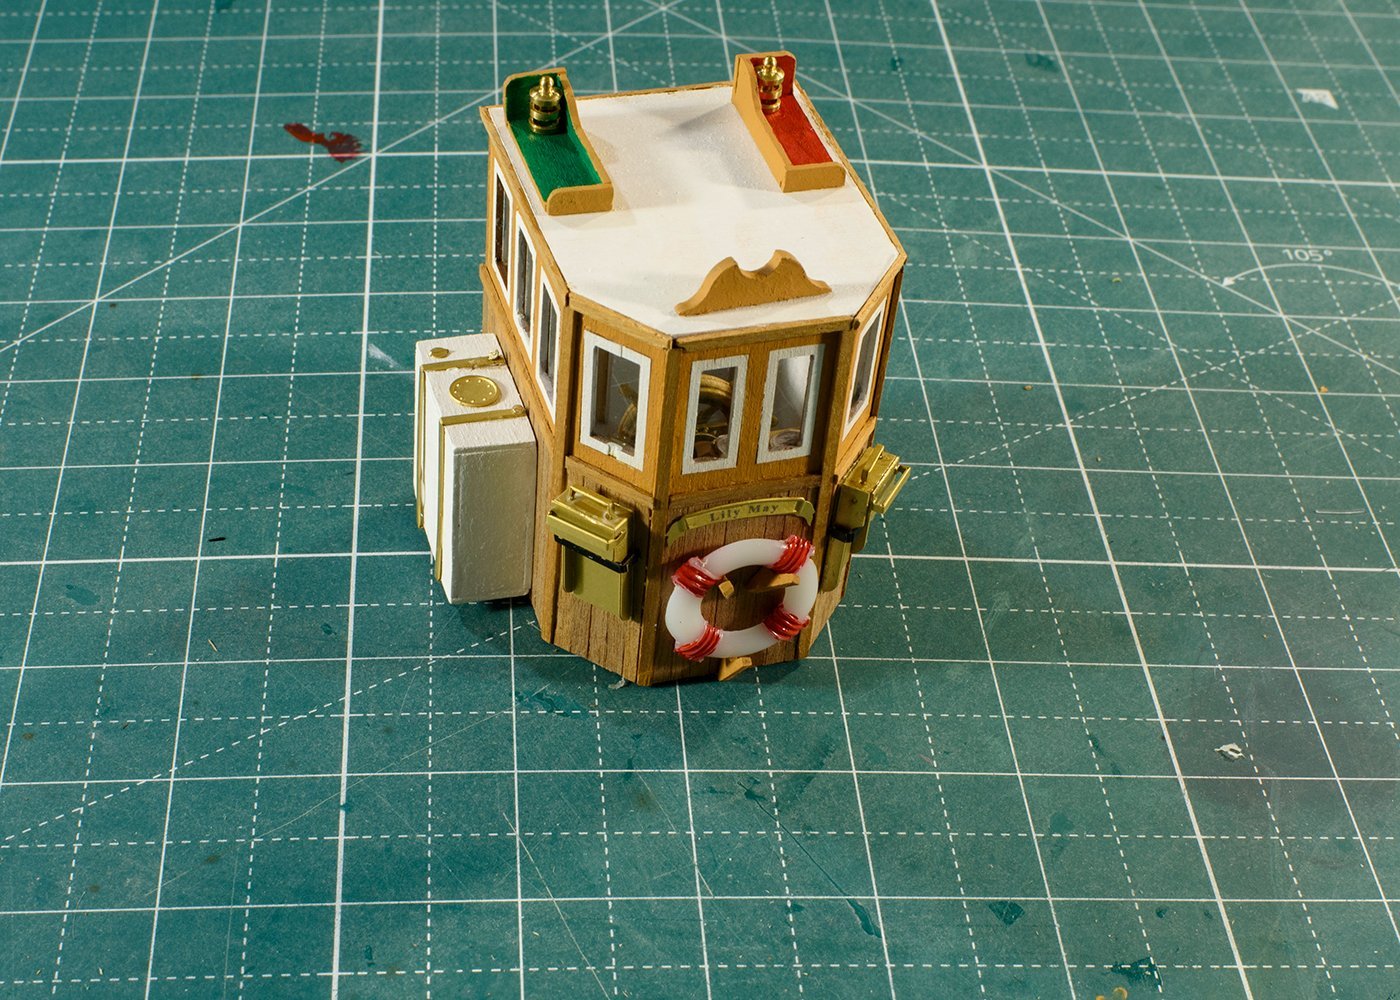
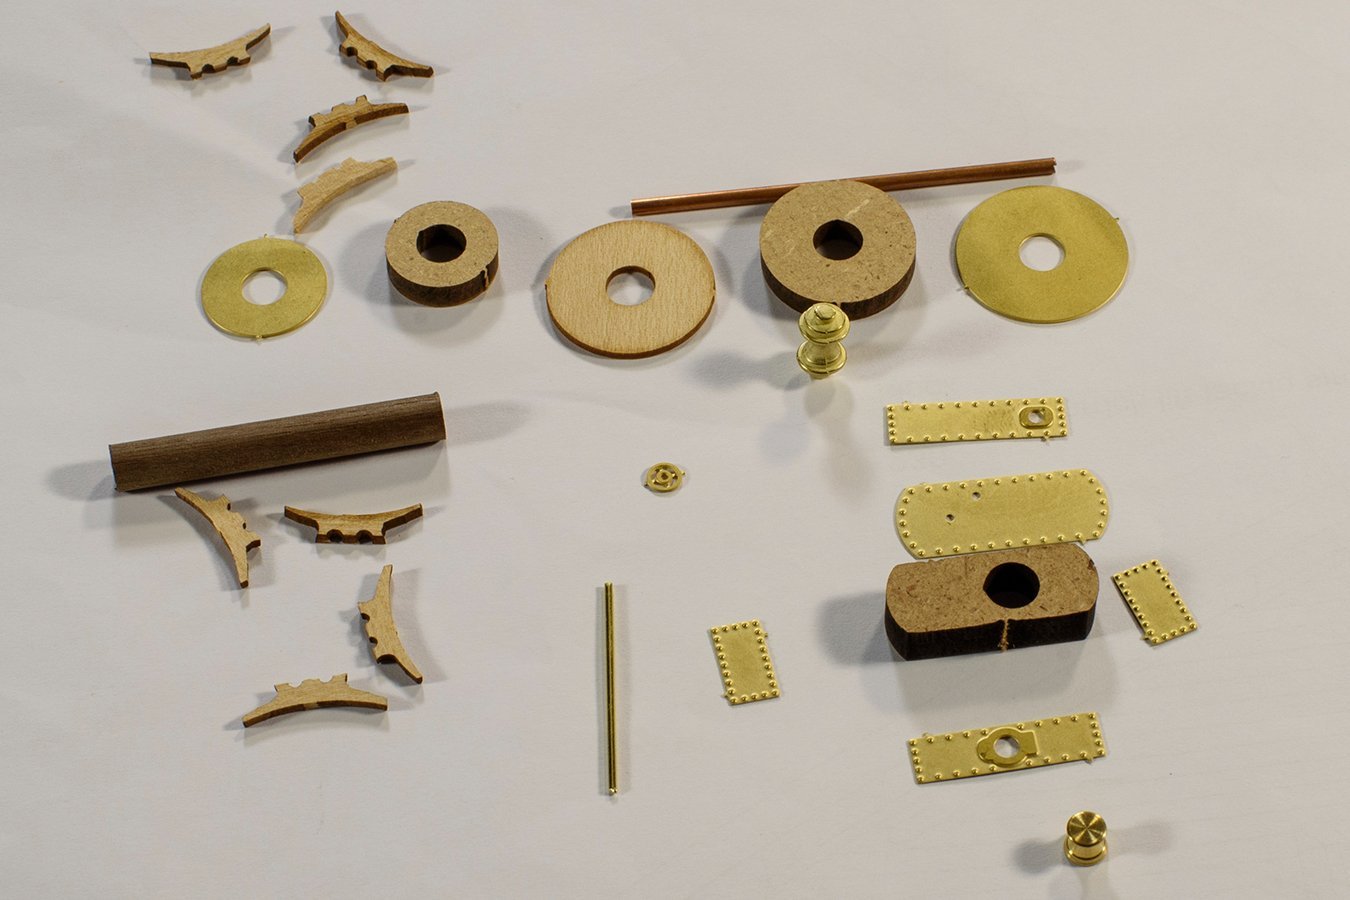
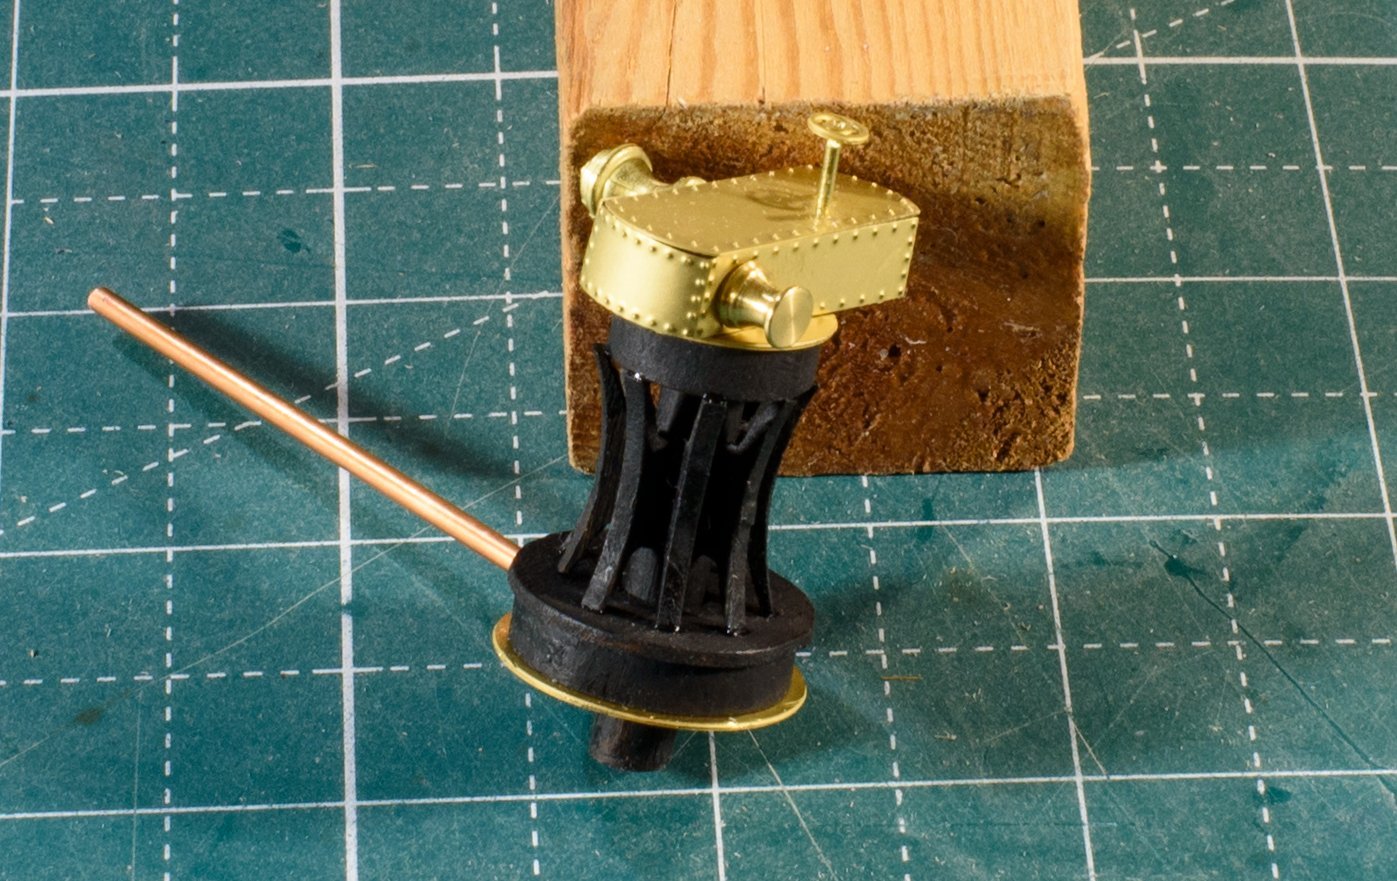
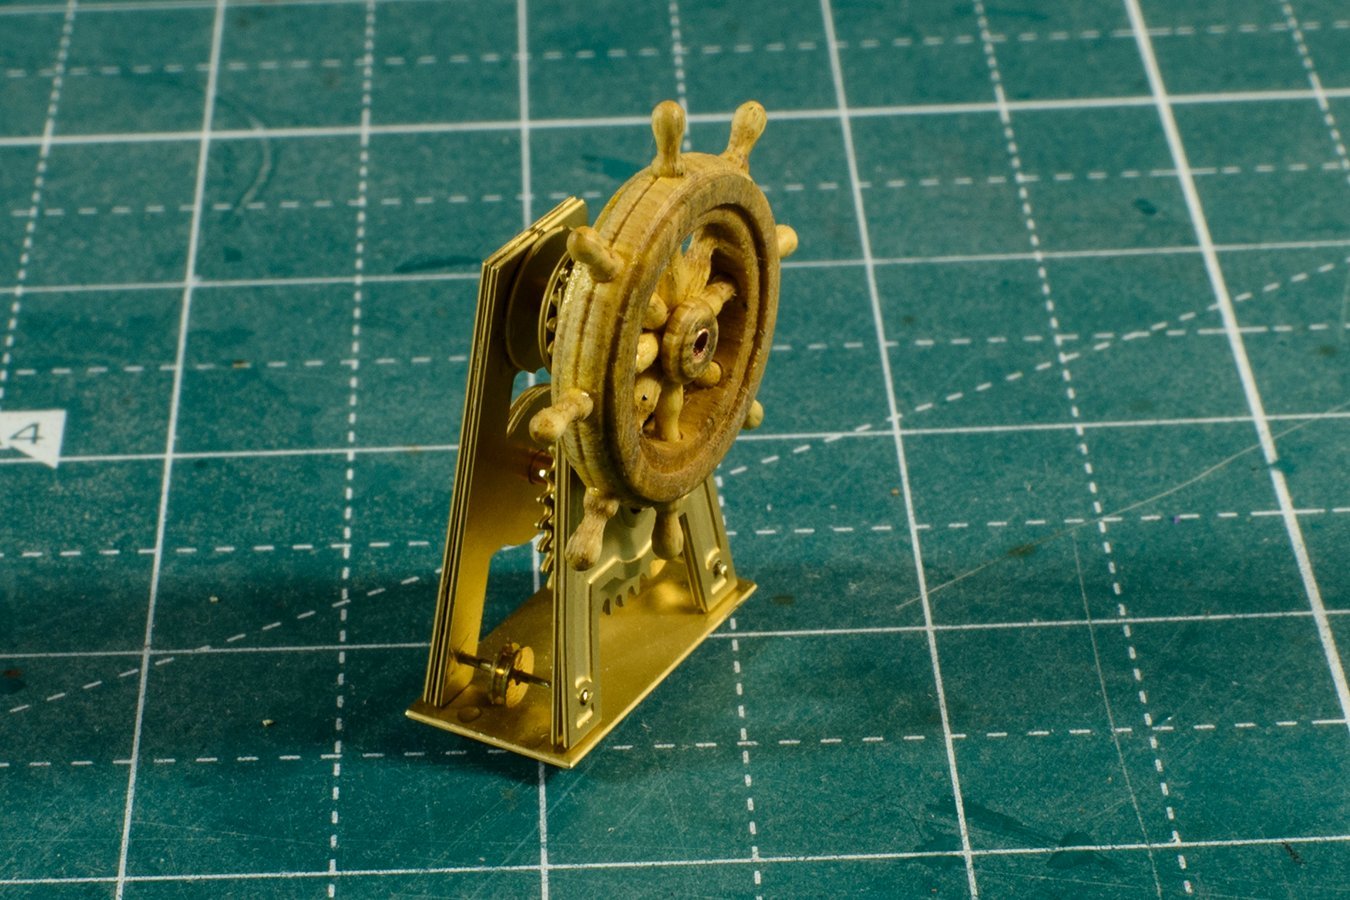
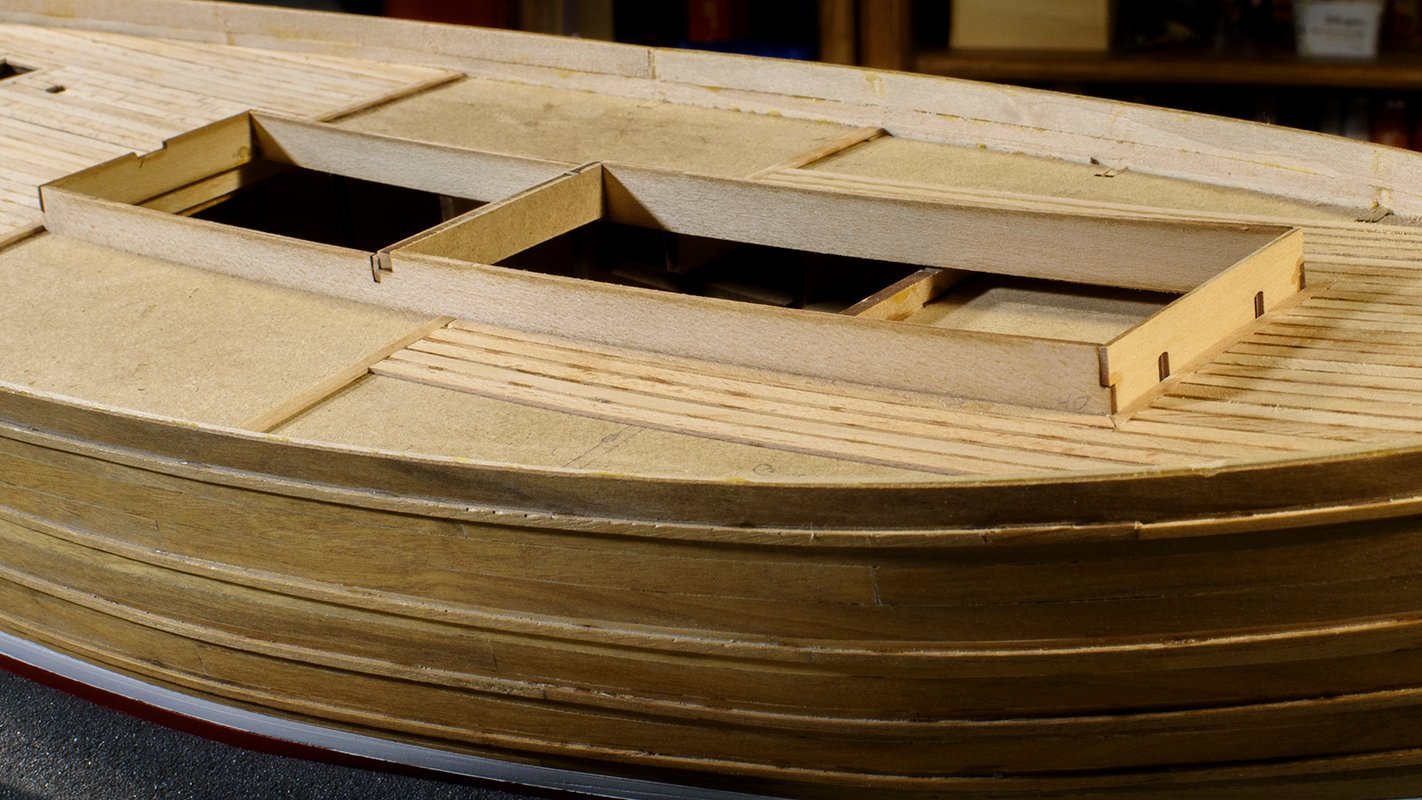
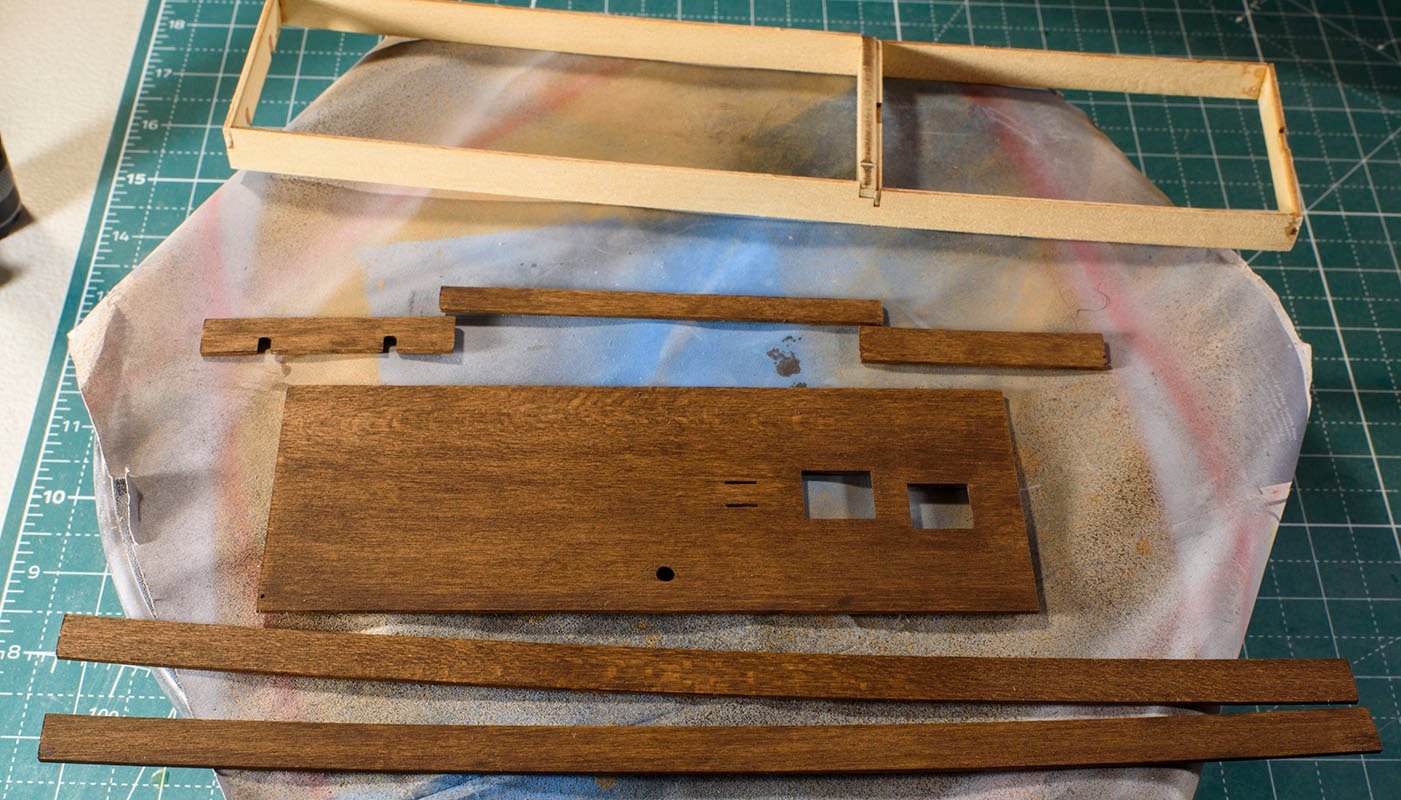
The pilot house or wheelhouse was more complicated than I expected and is an assembly by itself. This assembly took some time! I stole the idea of adding controls from Ras Ambrioso’s Fifie – Thanks Ras.

-
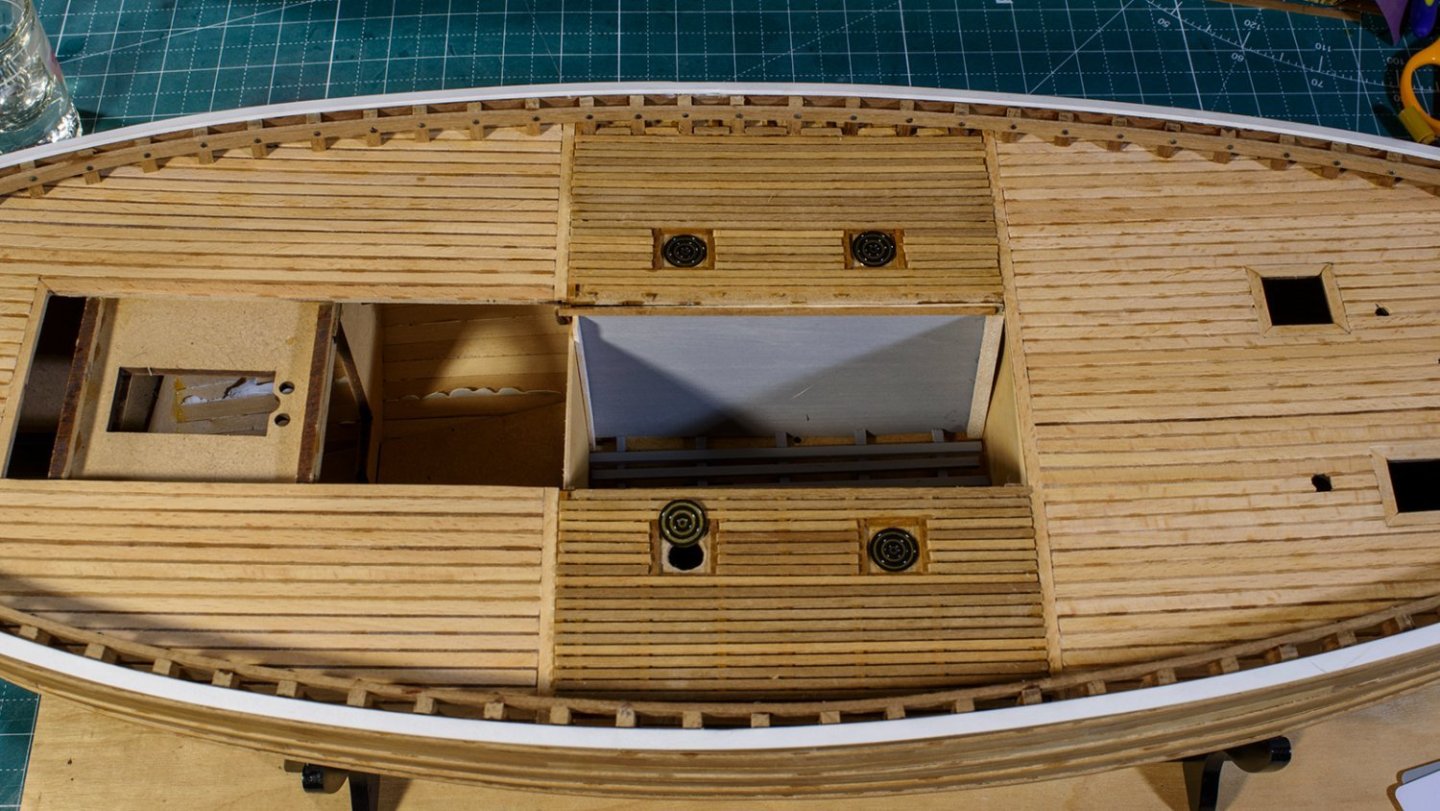
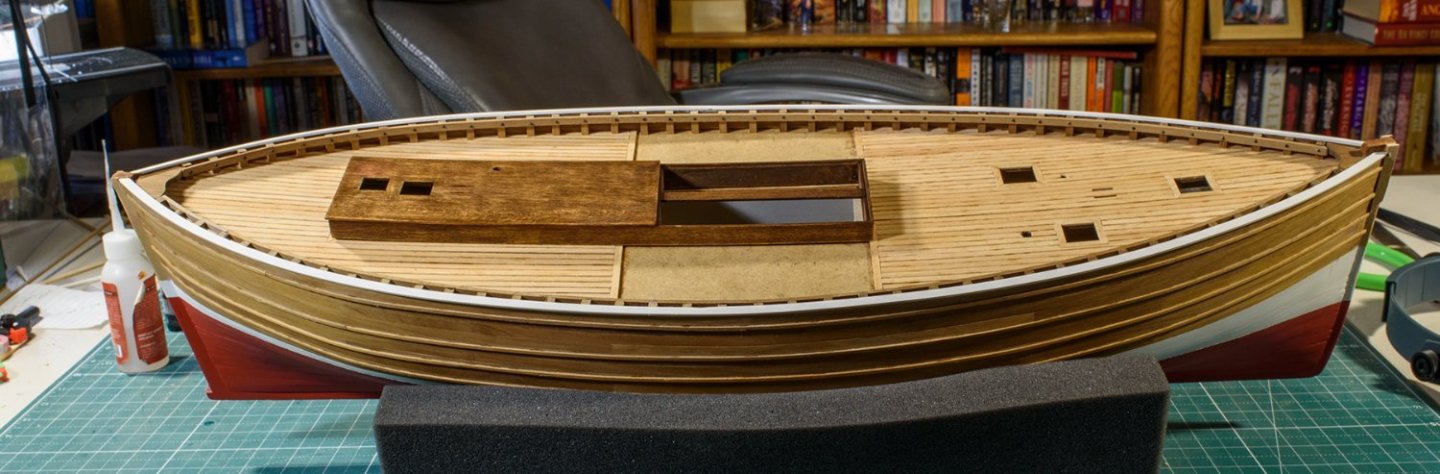
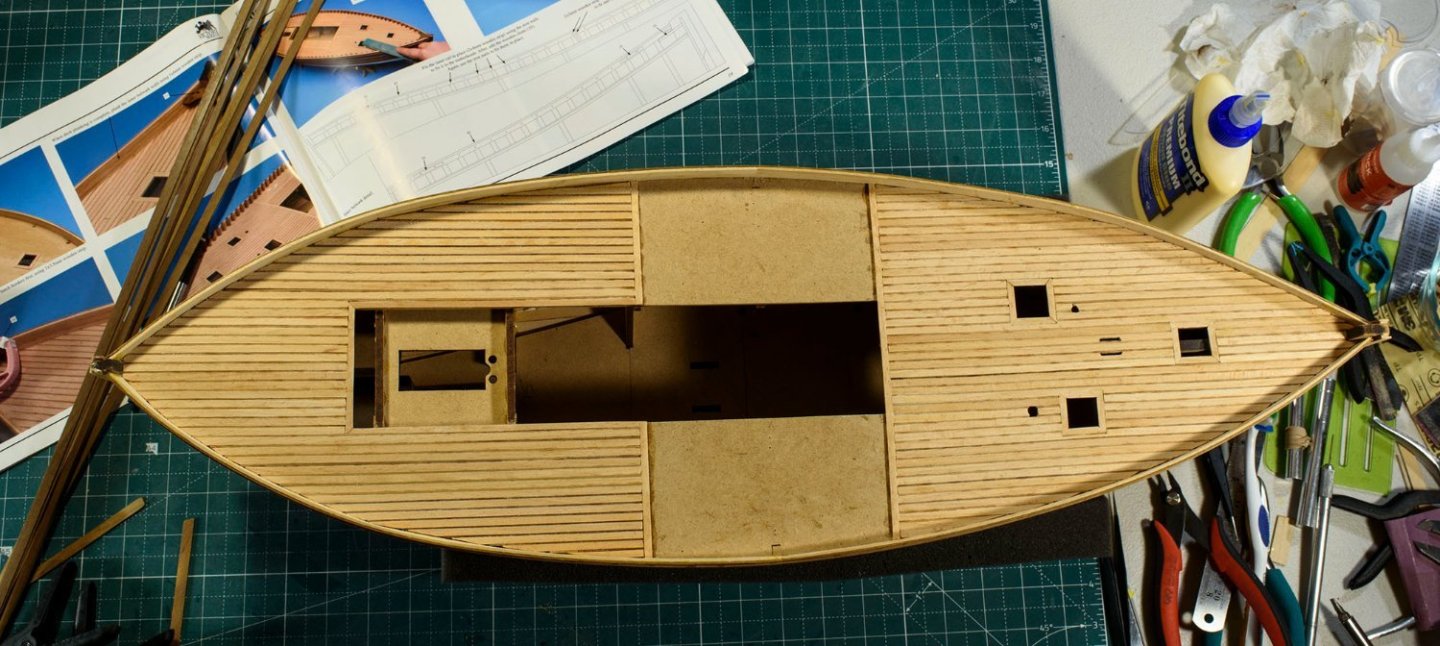
I've been preassembling many of the deck parts in preparation of installing them on the deck.
-
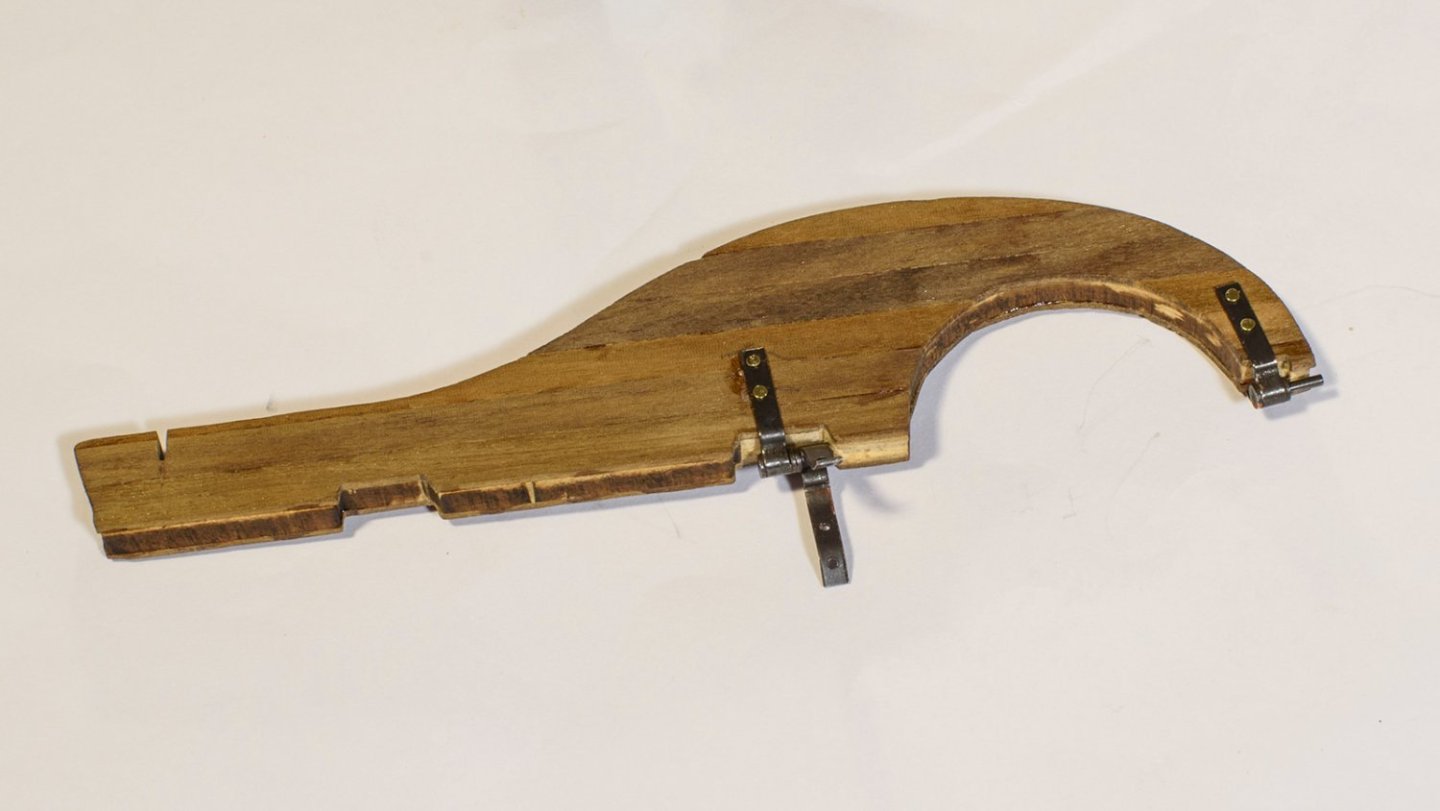
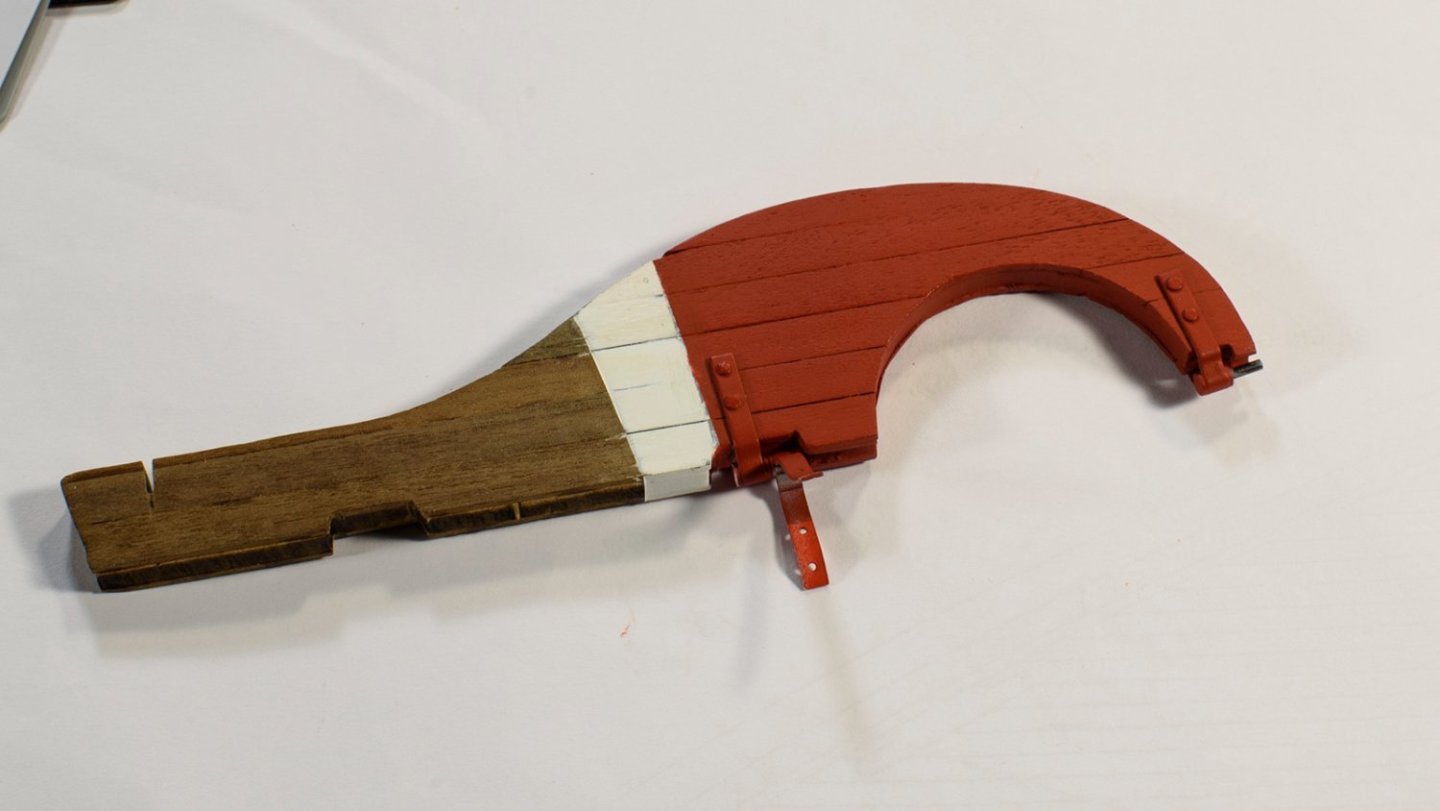
The holidays really slowed my boat work, but I sure enjoyed the family time. I am now back working at my slow pace. My next task was to turn my attention to the rudder installation. I planked the rudder and sanded the planks to align with the hinge cut-outs and propeller cut-out. As I installed each hinge on the stern post, I bent each hinge arm so it would conform to the stern post. I installed the lower hinge on the stern post as low as I could get it and installed the corresponding hinge on the rudder. The middle hinges were more of a problem. First, I wanted the middle hinge to be below the white waterline mark. So, I had to lower the cutout on the rudder a millimeter or so. Second, I could not figure out how to add the hinge parts separately; one hinge to the stern post and the mating part separately to the rudder. Just not enough room. So, I added the assembly to the rudder. I then “dry fit” the rudder to the boat, marked where the red and white paint should be and then painted the rudder. Next, I added both top hinge components to the rudder and nailed the hinges to the boat. Sometimes I used my plyers wrapped with electrical tape to squeeze the nails into the holes and other times I used a 4 oz hammer and pounded them in. I used a short nail in 1 or both of the provided holes. But where the 2nd hole was close to an edge, or the nail interfered with other parts, I cut the 2nd nail very short and glued the top of the nail so it looked like it was nailed.

-
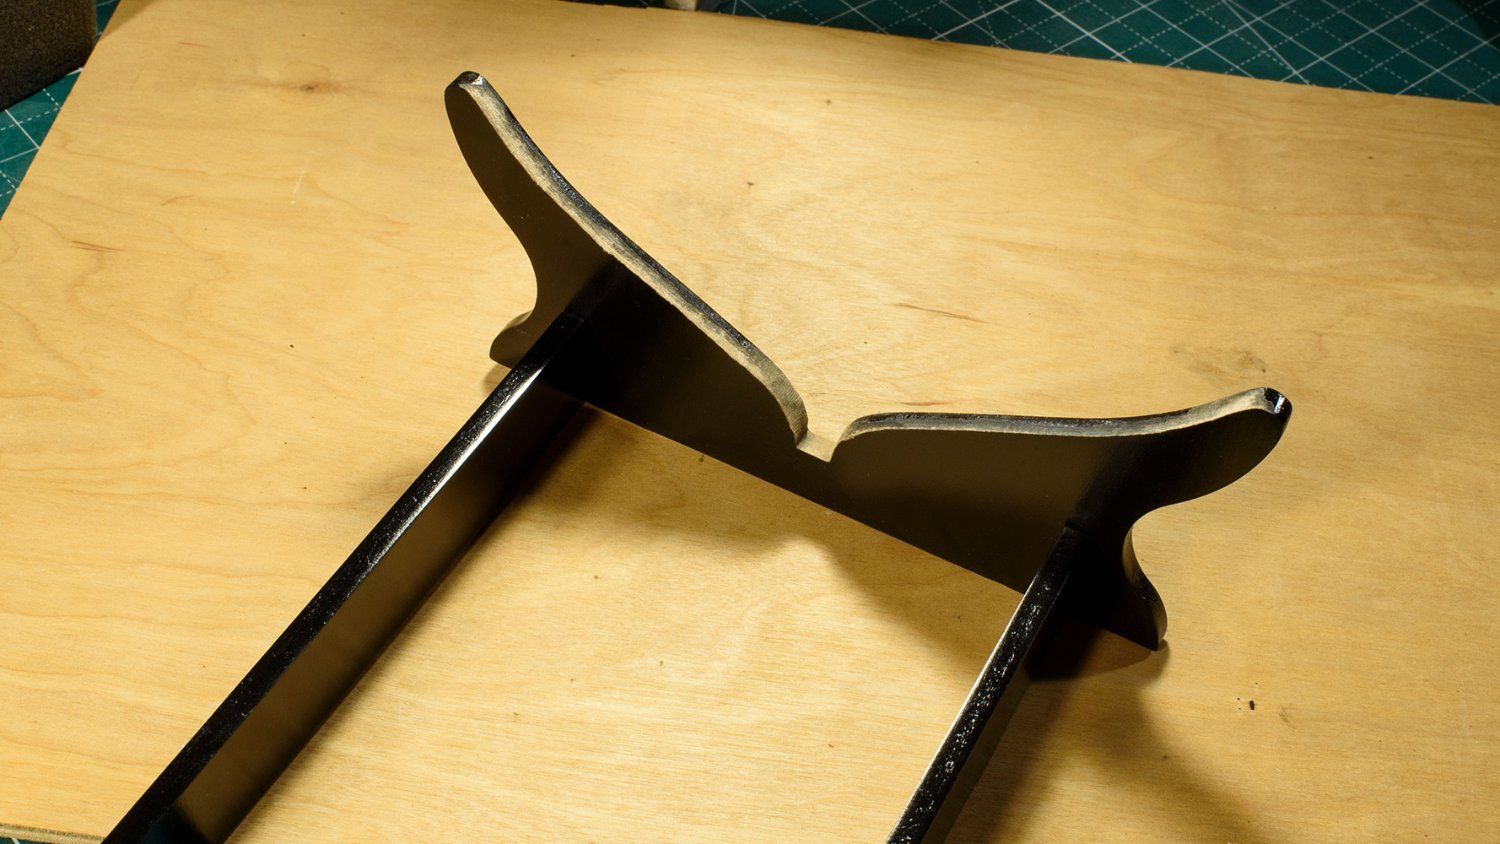
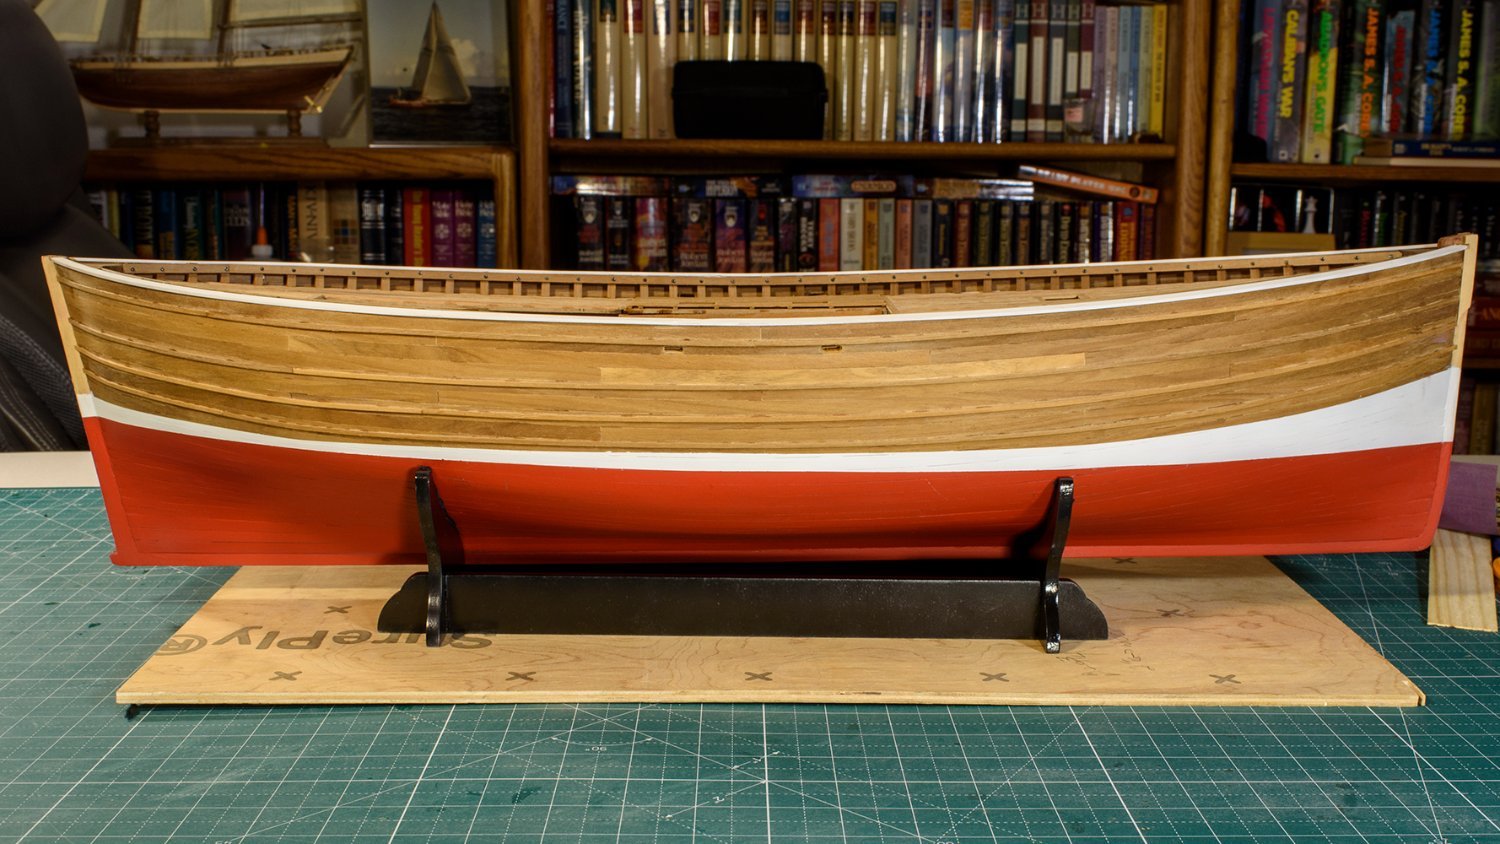
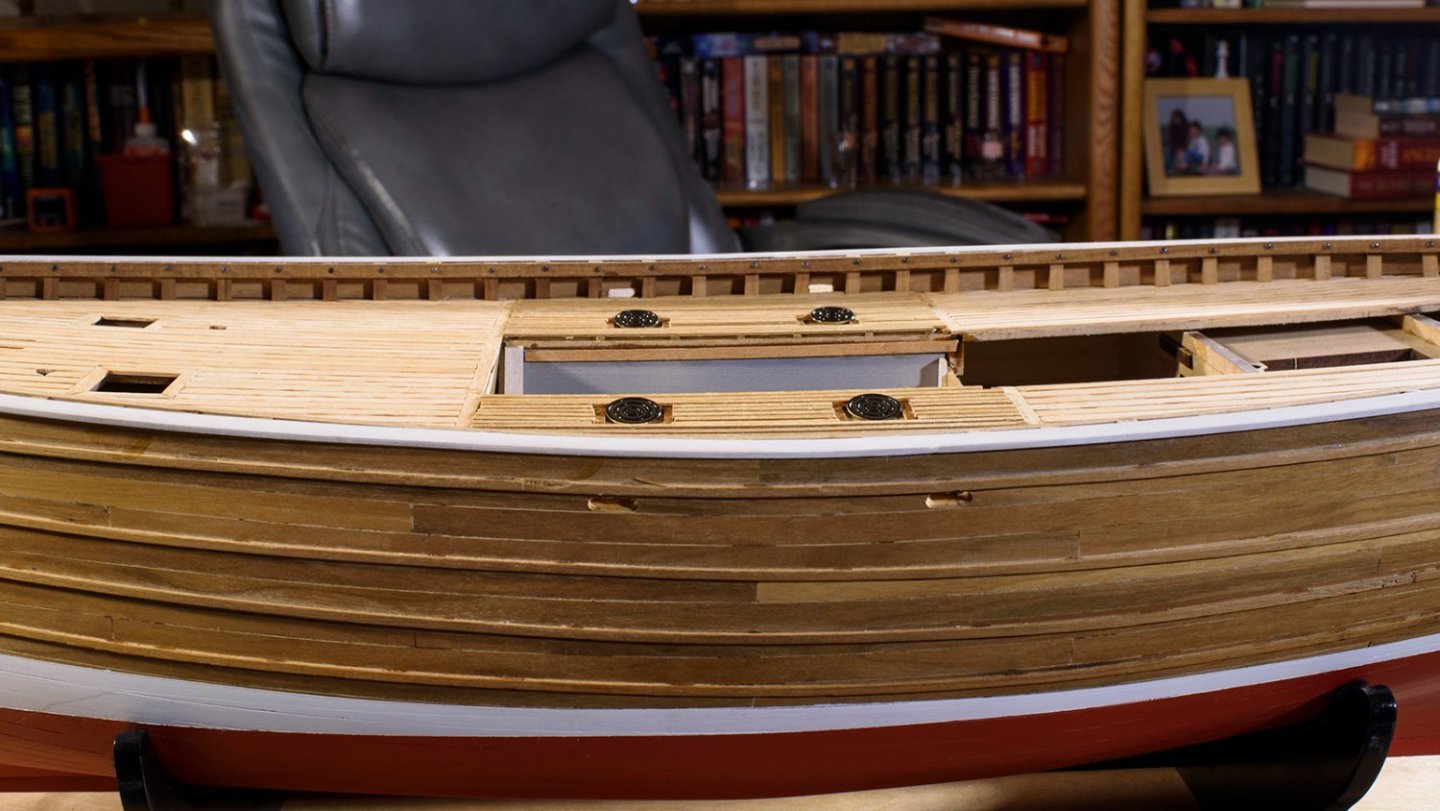
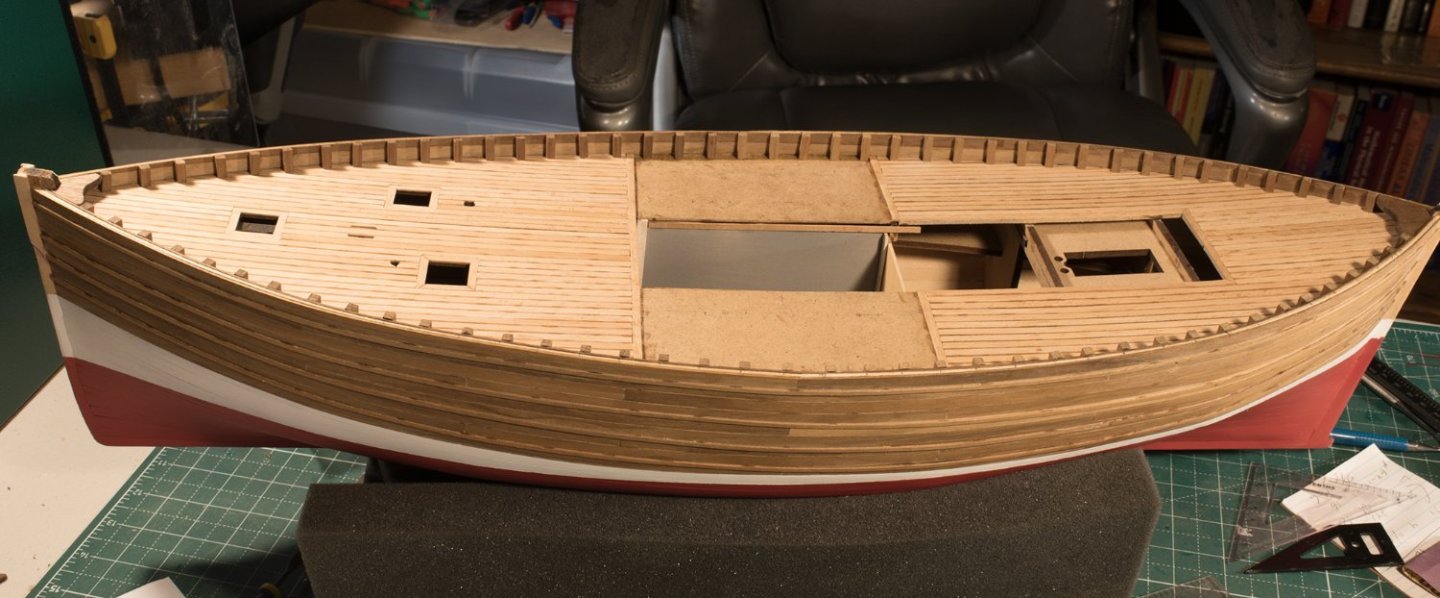
I added the grating and the scuttles as well as a few scuppers. I assume the nets are emptied on the grating, and the fish are tossed in the open scuttles and/or down the superstructure hatches. The kit does not provide instructions for scuppers to drain water from the deck, but it was not too hard to add 4 token scuppers. I finally got around to building the boat stand. This was a complex task that has taken a lot of time. 1) All the painting on the boat has had flat finish. I think a black gloss finish would look nice for the stand. I sprayed several coats of gloss black enamel on the 4 pieces, but the result was not glossy. Especially on the edges of the MDF wood, which kept soaking up the paint. So, I re-sanded the wood smooth, and used Tamyia grey sealer – two coats. The result was much better. Except some of the curved end pieces of the stand only received a light dusting of paint due to the angle. So again, I sanded, sealed, and sprayed, waiting a day or more in-between painting for curing. I learned a lot about gloss painting. Sanding and sealing are most important for a gloss finish. My final paint job is not perfect, but good enough. I now know how to do better next time. 2) I set the boat on the stand, and the “pitch” of the boat was not correct. The bow set too low. … So I sanded the middle edge of the rear frame since it held the stern too high. Which of course means I need to repaint these sanded spots: - again. 3) With all this boat “on and off” of the stand, the paint job on the hull is getting scuffed. I may need to retouch the paint on the hull when I am completed. Hopefully this is just dust from sanding. 4) I decided to place a felt cover on part of the stand that holds the boat. Such coverings are common on trailered boats, so this is not too weird, other than the 70’ Fifie is not trailed. After spray painting the sanded portions of the boat stand, assembling the stand, and gluing on the felt, it seems the stand presents the boat’s water line correctly.

-
Thanks to Dsmith's suggestion, I will post a link to my youtube channel. The following is a post to my 3rd video of building the Scottish Fifie (planking the deck). (Thanks Don). If you click on my channel in YouTube, you can find all three parts of the assembly of the Fifie, and several other boats I have built. Ken - YouTube
-
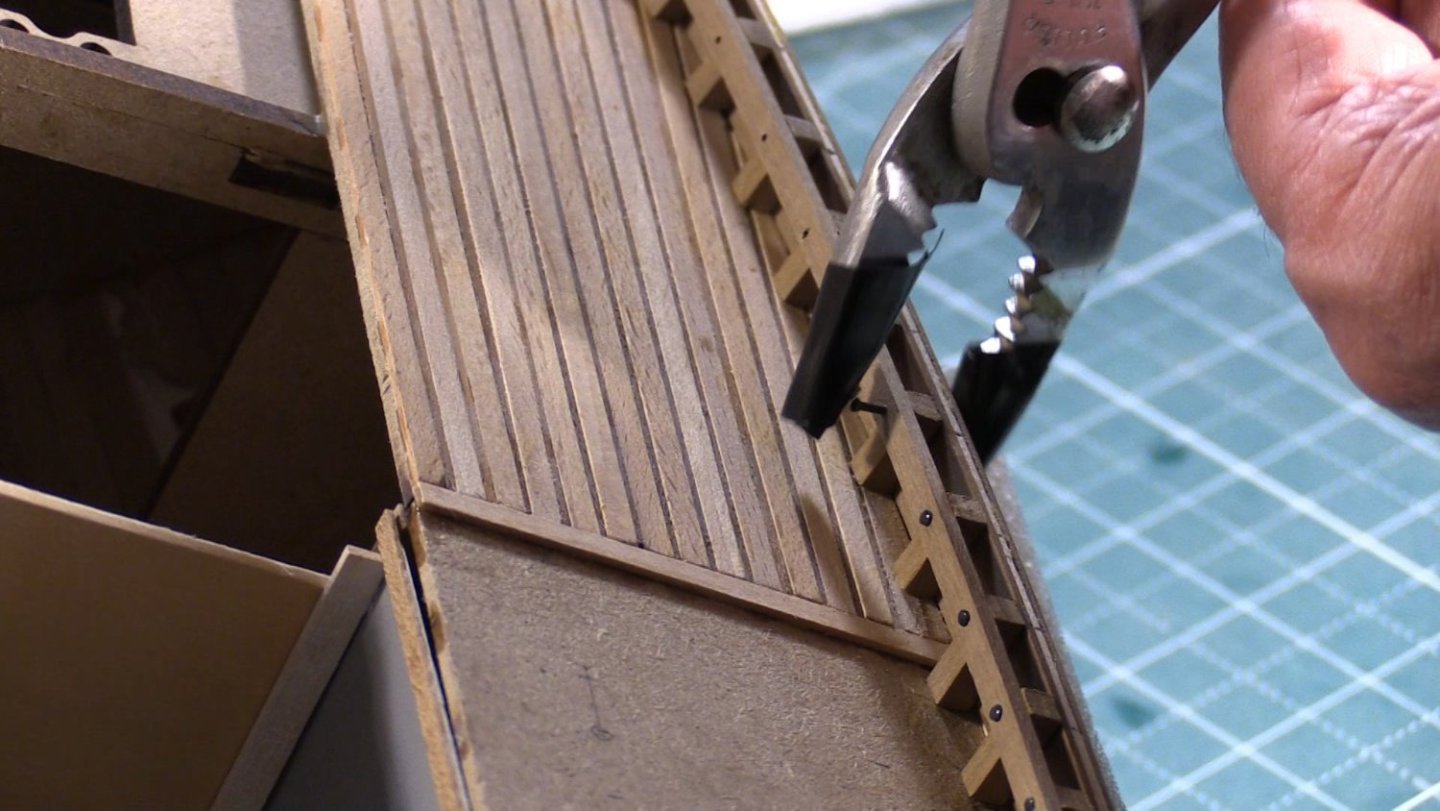
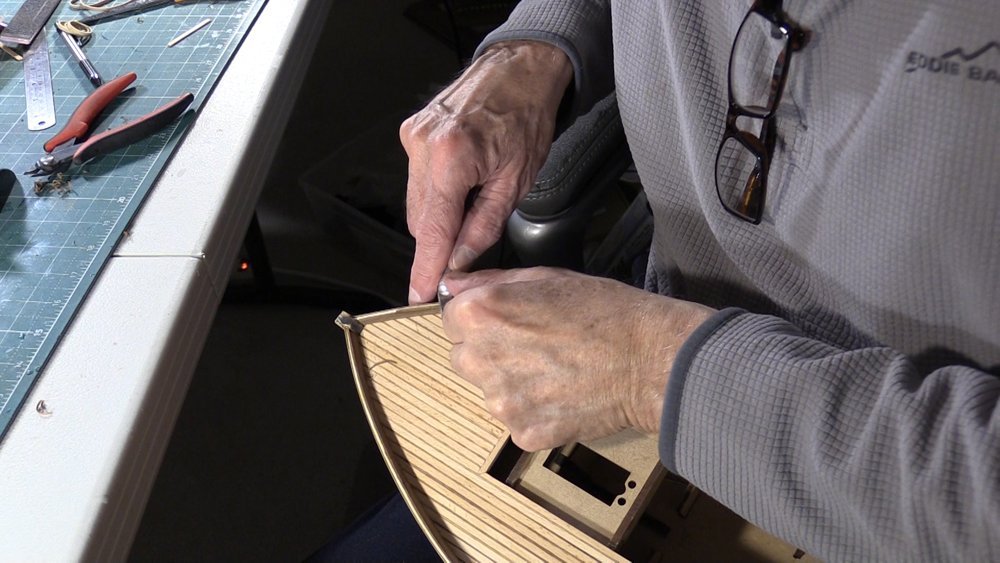
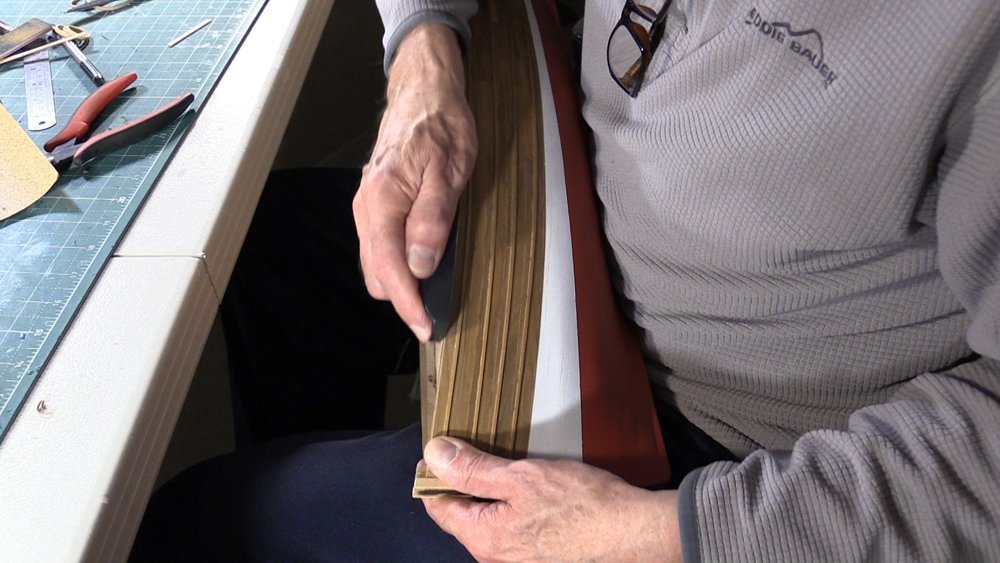
I drilled 1 mm holes in the timbers and pushed the nails in the hole. I tried a nail pusher, which exerted a fair amount of force and created a chance for a bent nail or worse, a slip which would gouge the surrounding wood. Hammering the nail also presented similar risks. My nylon coated plyers were not wide enough to squeeze the nail in squarely, so I wrapped some plyers with several layers of electrical tape. This cleanly pushed in each nail. After dry fitting the top rail, I trimmed the stem and stern. Then I painted the 4 parts of the top rails and glued the front portions on the boat. Then trimmed the aft portions of the top rails so they would fit and glued them in place. I used white wood filler where the 2 halves met and sanded them smooth and brushed on more paint. As you can see, there are still a few gaps to fill where the top rail meets the bow and stern. I will experiment with wood glue and sawdust or mixing white and walnut wood filler or if I can cut and fit a piece of wood to see which hides the gaps best.
-
David: This boat has stretched my planking skills, since there are so many planks. Each with a different bend. - Ken
-
Diver: I looked up the Sanson tug kit, and it looks like a beautiful boat. are you going to do a build log for this boat? I hope so. - Ken
-
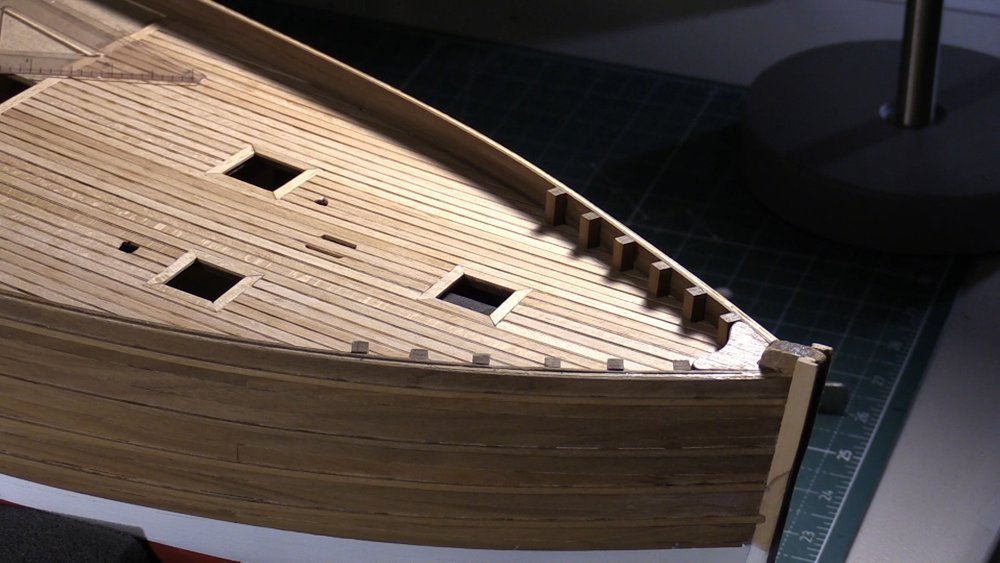
Next, I cut and placed the timbers. There were many timbers, each at a different height. I created a 12 mm spacer to mark distance between the timbers and cut each one to the correct height. 80 timbers later I am ready for the next task.
-
The next task is to plank the inner bulkhead and trim the side rail. The provided planks were not as long as the boat and required 2 planks for each side. The 2nd bulkhead plank requires the width to be trimmed. The bow on my boat required most of the 2nd plank to be trimmed away. I started sizing and trimming this top plank using a pencil to mark what has to be trimming. I used an X-Acto blade to remove any areas that were large. Then I used a Dremel, an X-Acto as a chisel, a mini-plane, and sandpaper to get the side rail smooth. As well, the bow and stern caps did not fit, so I cut my own from some left-over cherry wood.

-
Next I started on the super structure. I used squares to hold the first 2 pieces together, then the next 2 pieces, and finally the assembly. I fit the partial assembly in the deck and found the superstructure was a bit too large. A little sanding on the superstructure and then on the deck itself was required. Nothing more than a half of a mm, except in the middle where the perpendicular plank overshot the hole. I stained all the parts, glued them together. A little more sanding, and a little more staining was required, but now it fits. Next, I will seal this super structure. After that, I worked on the companion ways. And finally, my new wood arrived, and I finished the deck.


-
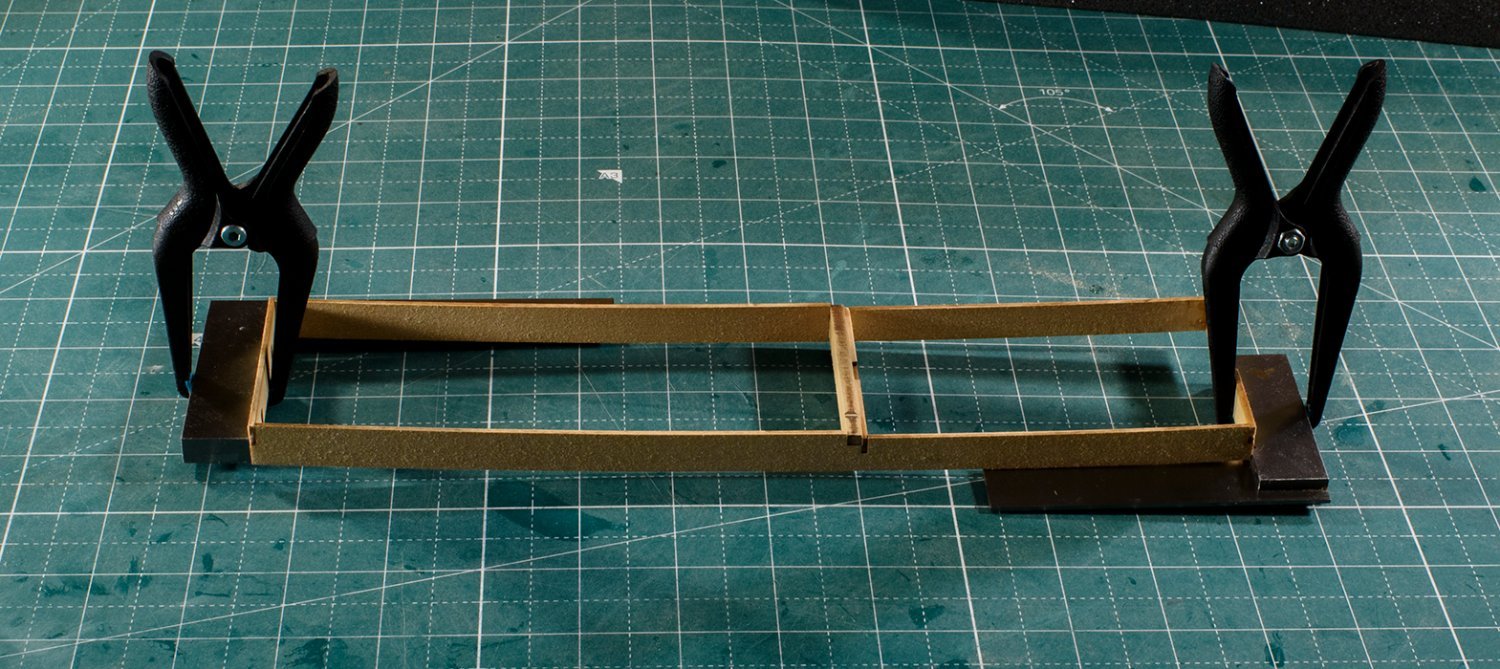
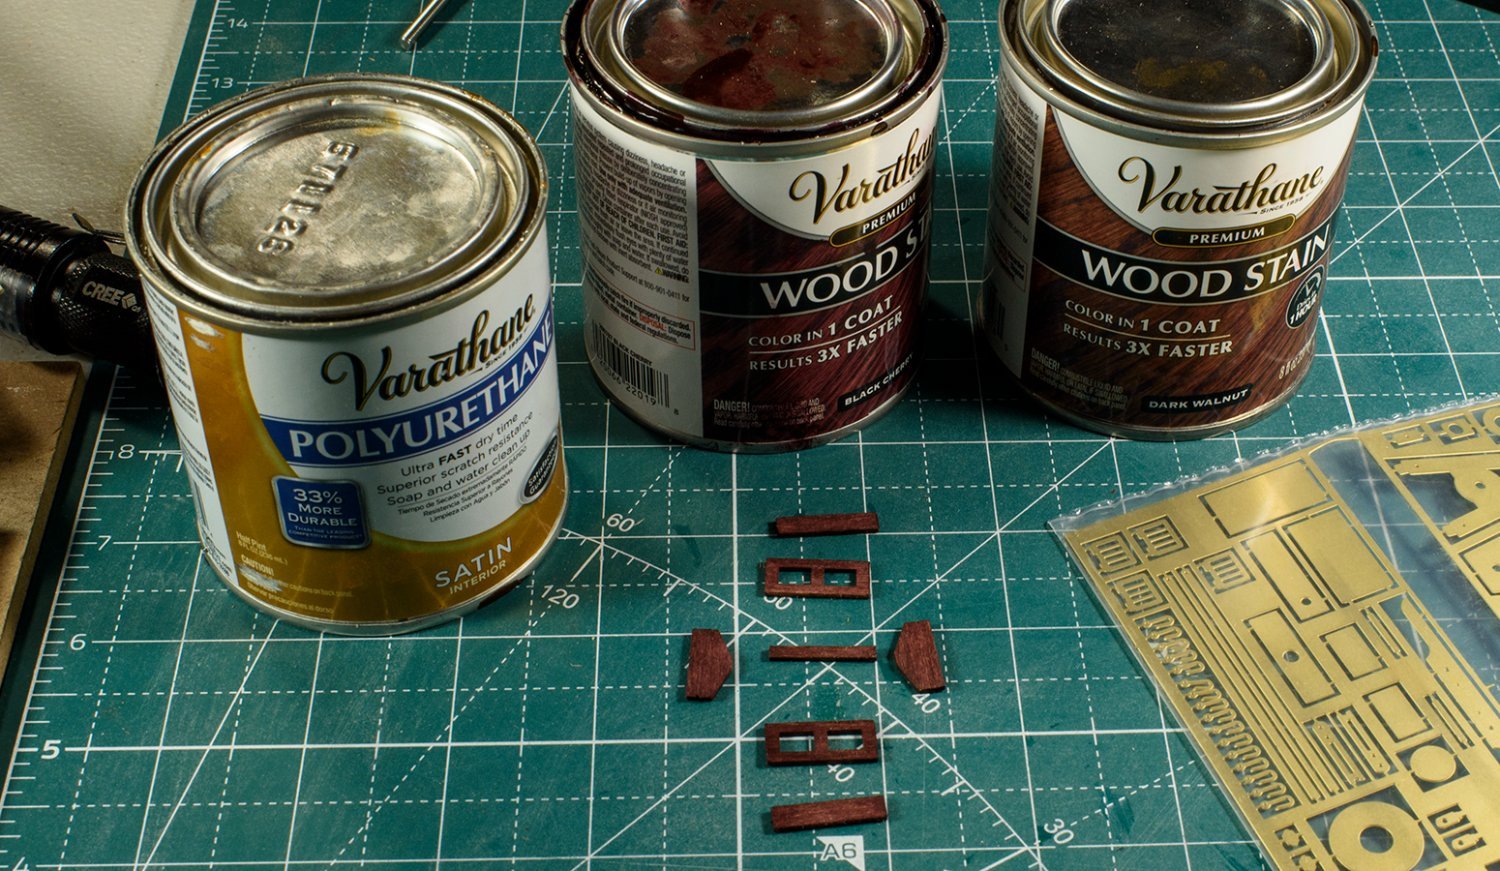
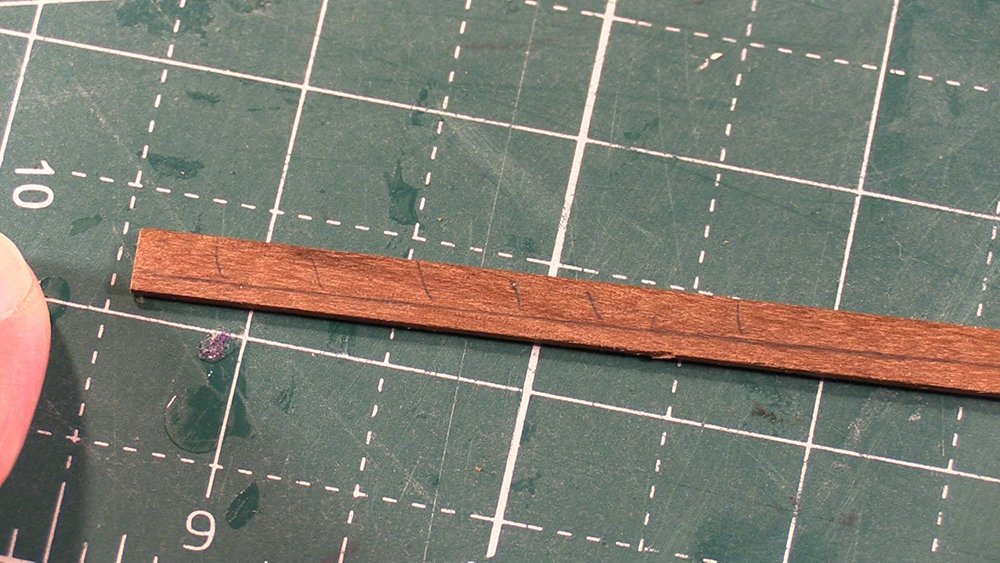
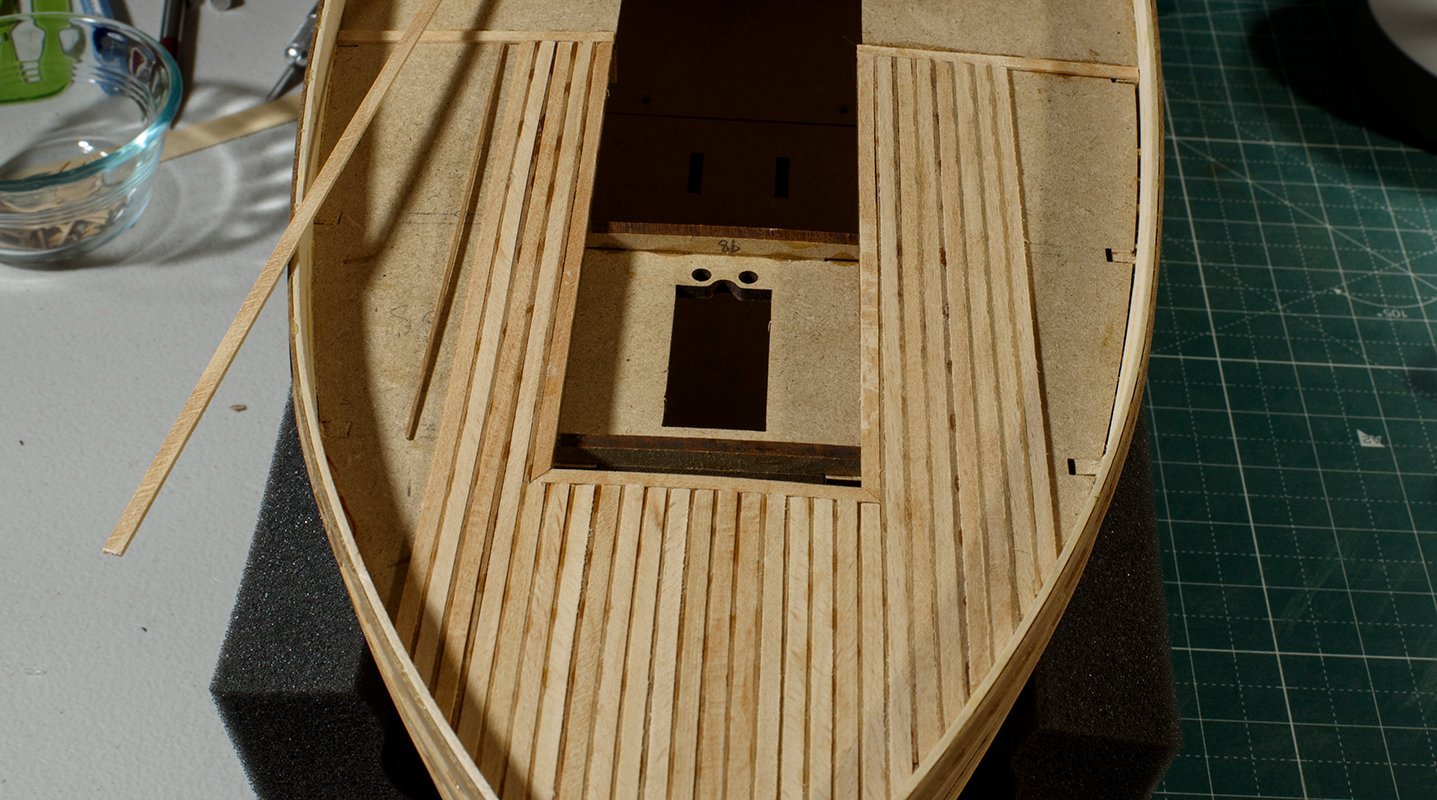
Like some other people, I have run out of 1mm x 1mm walnut planks used to simulate caulking. The picture below shows how close I was before I ran out of wood. The one skinny piece is the last of the caulking wood. I ordered more wood from another source which will get here in a week or so. In the interim, I have started working on the deck equipment. I cut out the parts for the skylights, sanded the char and tabs off each piece. Then stained them and sealed them with polyurethane. I used a black cherry on one skylight and a dark walnut on the other. Previously, I had purchased these mini-corner clamps just for this boat, hoping they would make it easier to keep my “dog-houses” square. It was hard to keep these small parts in the clamp while I adjusted the clamps to the correct size, and slightly difficult to remove the wood to apply glue and put them back in the clamp for drying. I’m not sure if these clamps will improve my quality of work, but the finished skylights do seem square after all that work. I guess time will tell if I like these.


-
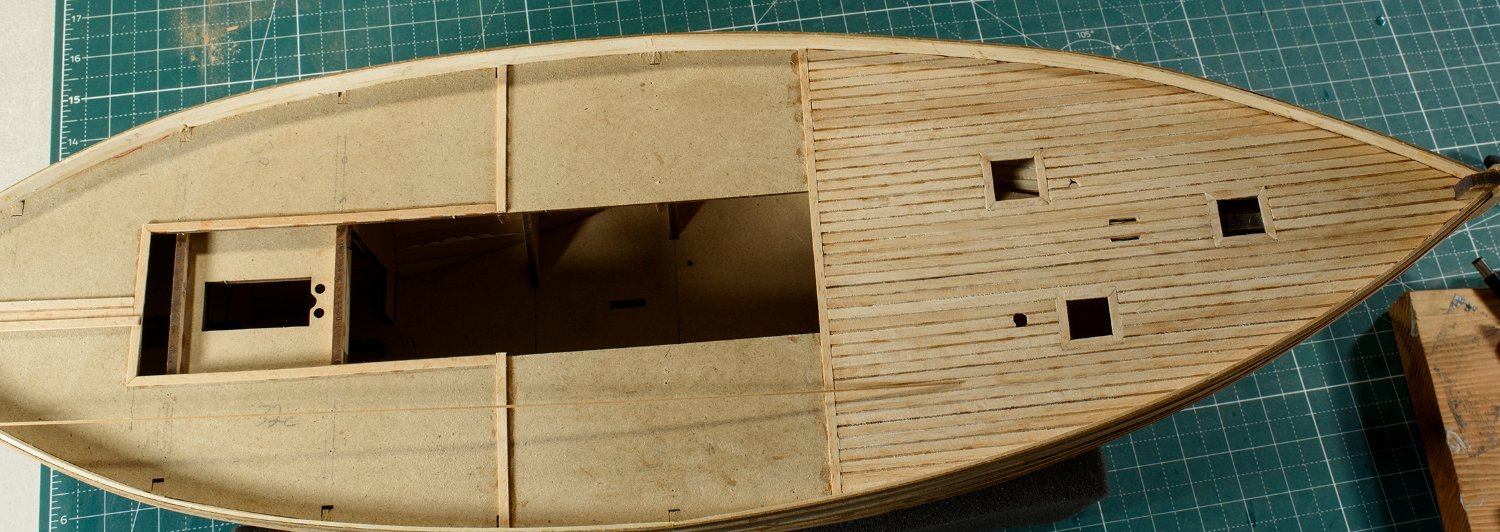
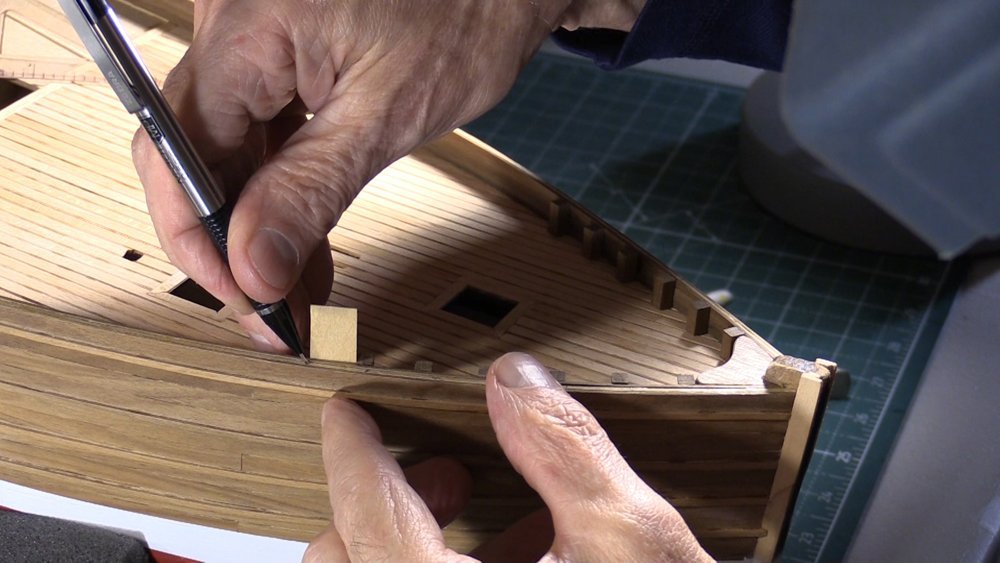
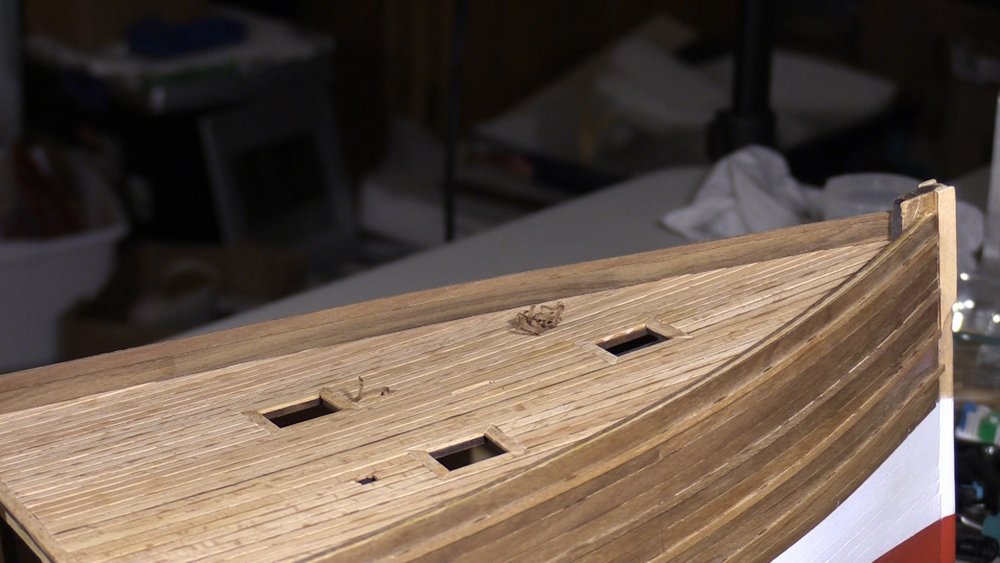
Planking the deck seems a bit easier than the hull. The deck consists of ~ 200 individual planks and is very repetitive like the hull planking, but the contours and planking shaping are straight forward – i.e. cut to length. The one wrinkle was trying to find straight lines on the sub deck. The deck is like a saddle. The stern and bow are higher than mid-ships. And port and starboard edges are lower than mid-ships as well. I had to pry off and re-glue several of the trim pieces around the hatch holes to gain a square alignment. Other than the initial alignment - it is cut and paste.


-
Wow! You have made great progress! I like the detail of your photographs good color and good lighting - very nice. They show your attention to detail. I struggle with my selection of a color scheme. I have chosen one for my build, but I like the colors and finish on the wood that you have chosen. It is a beautiful boat. Ken
-
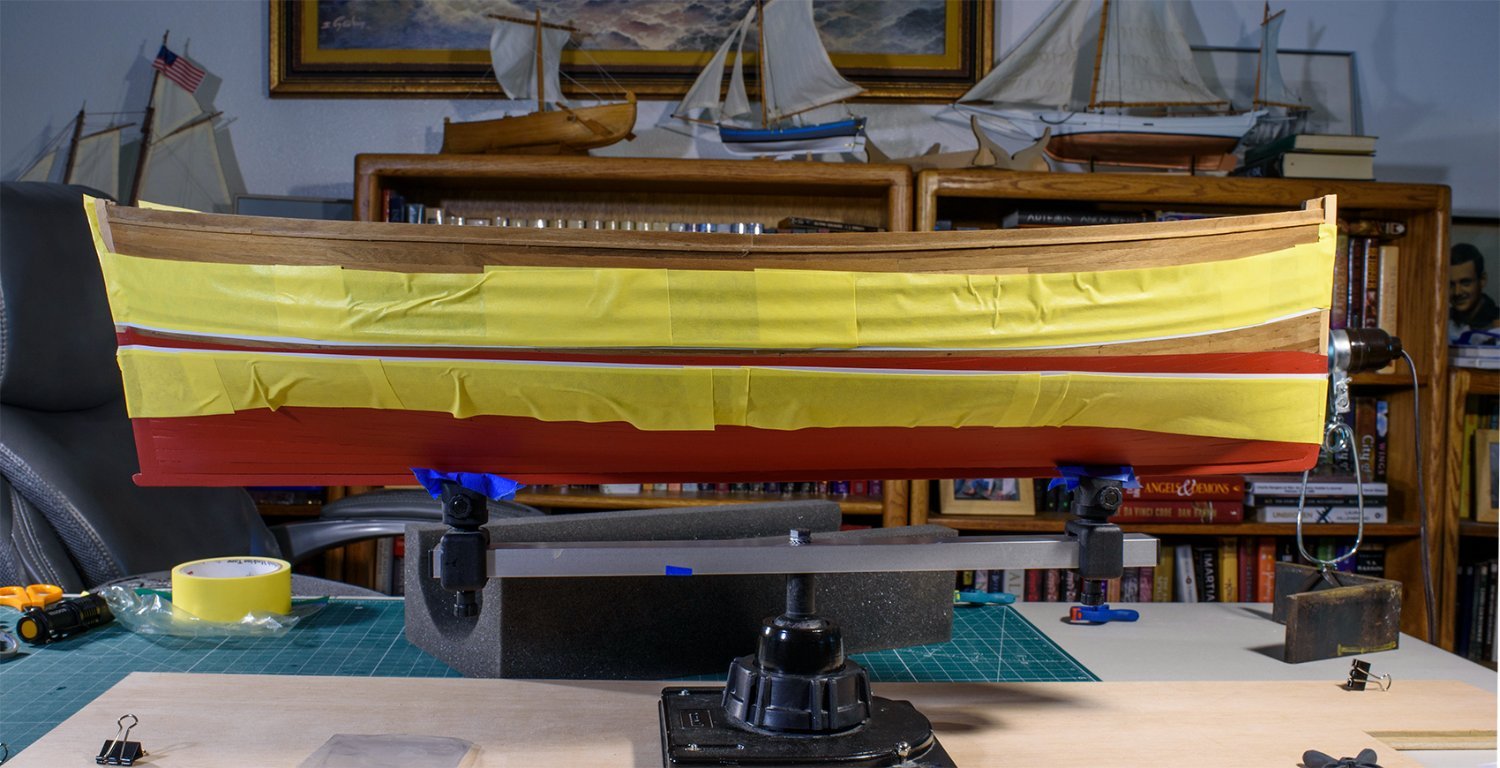
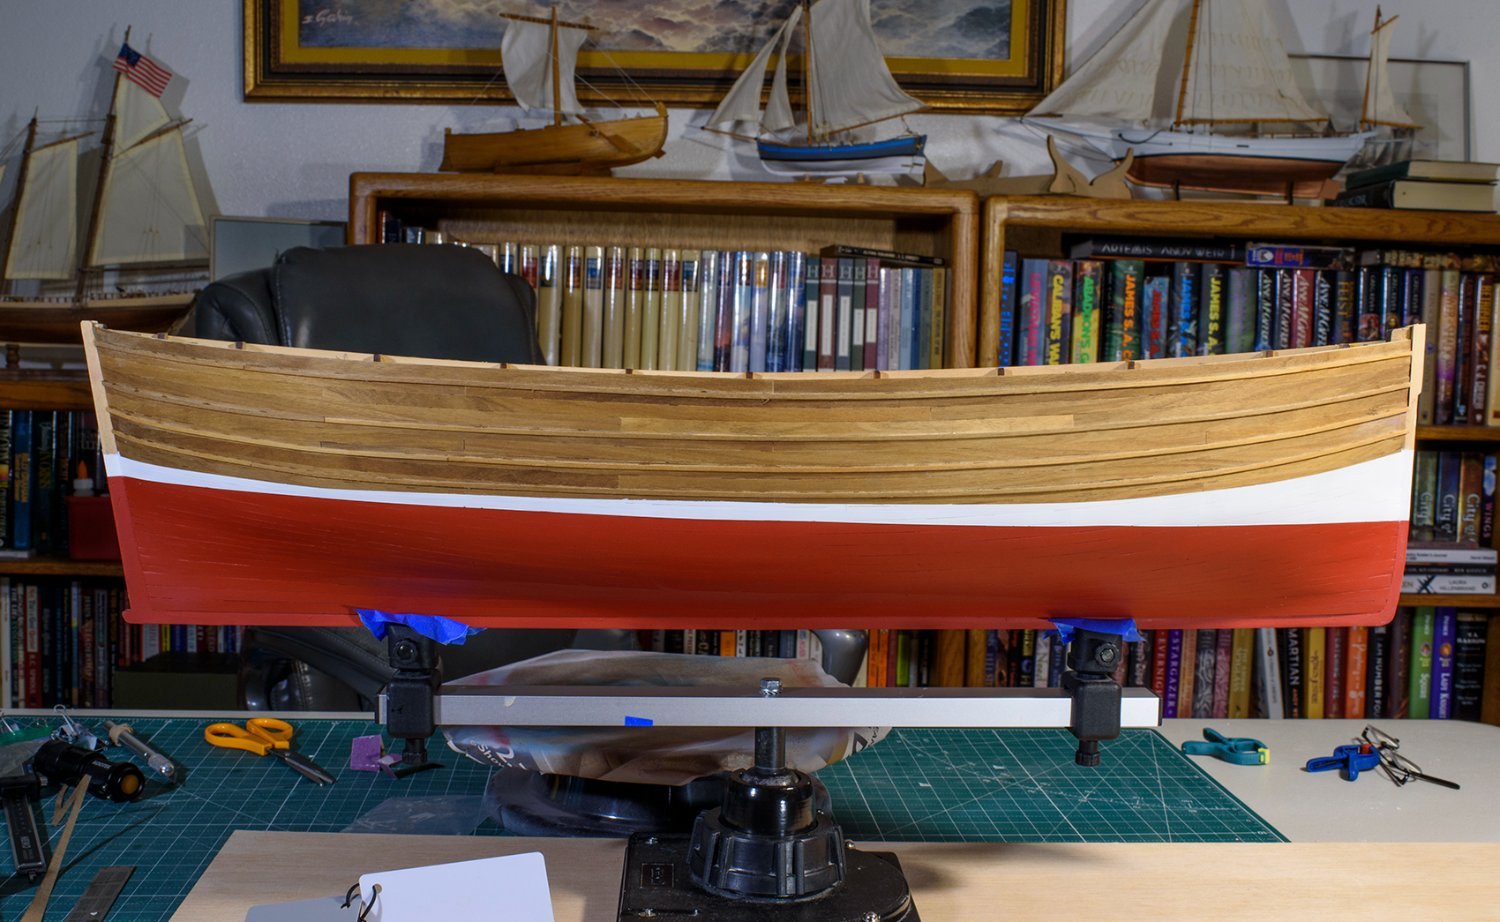
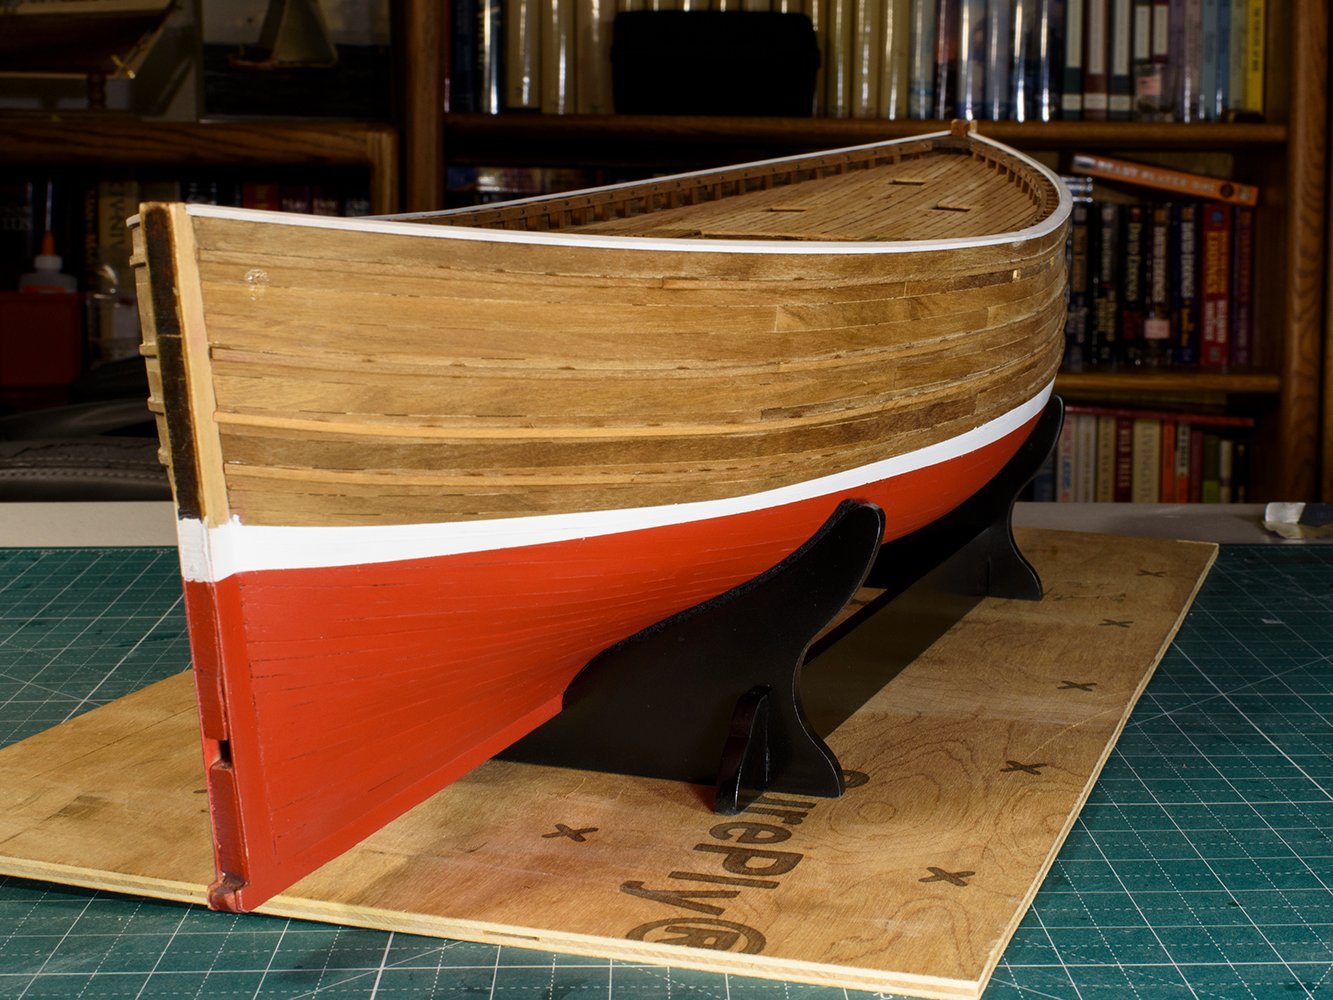
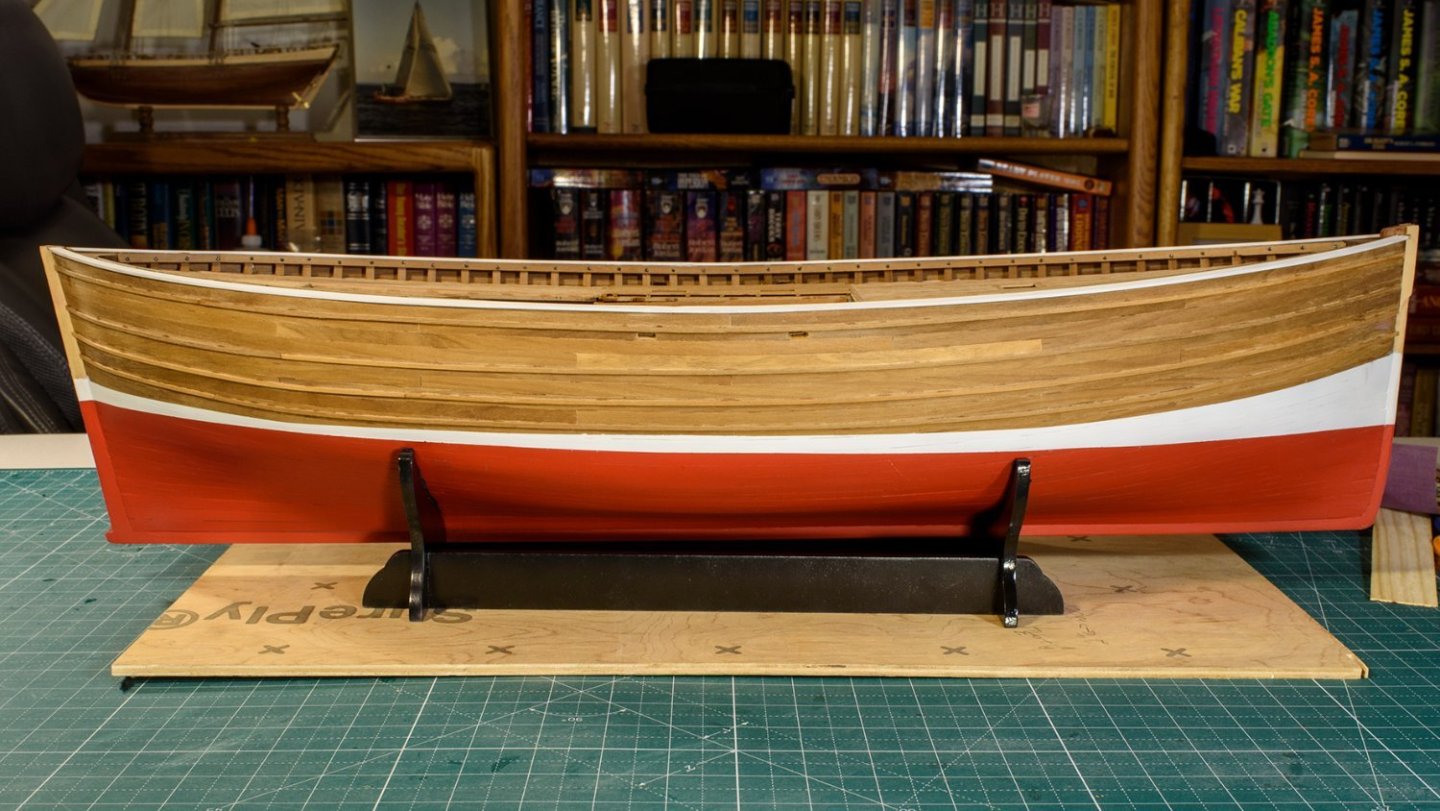
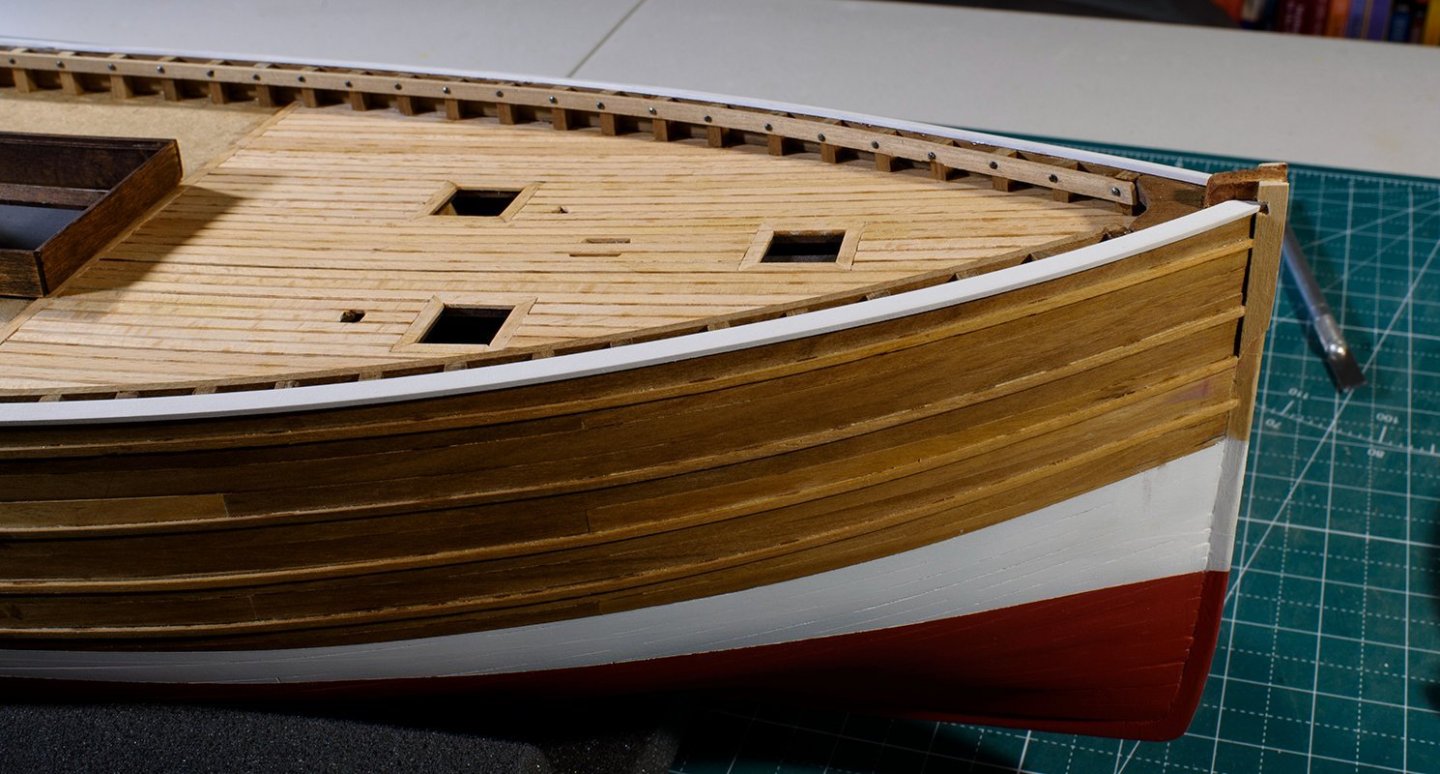
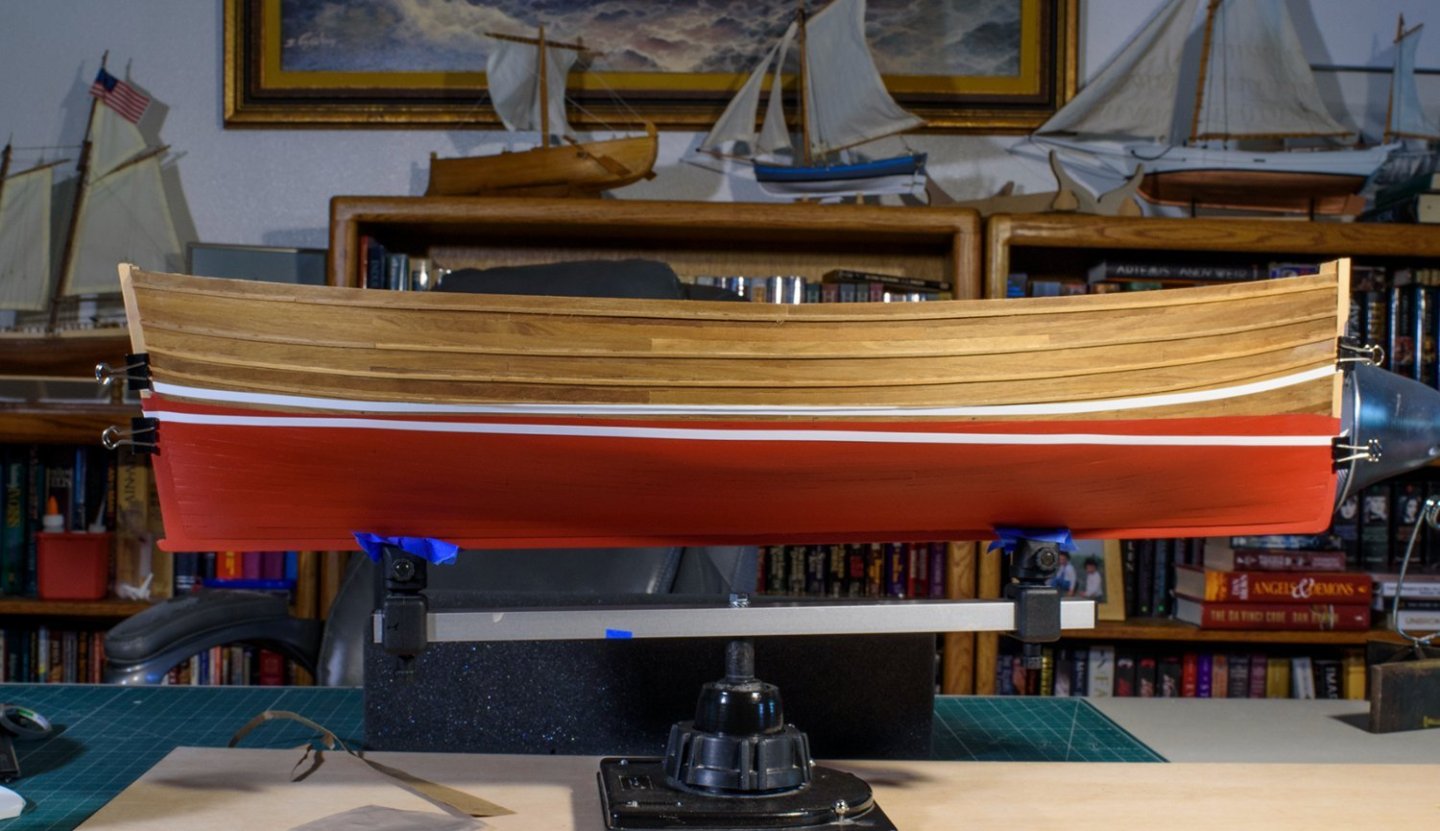
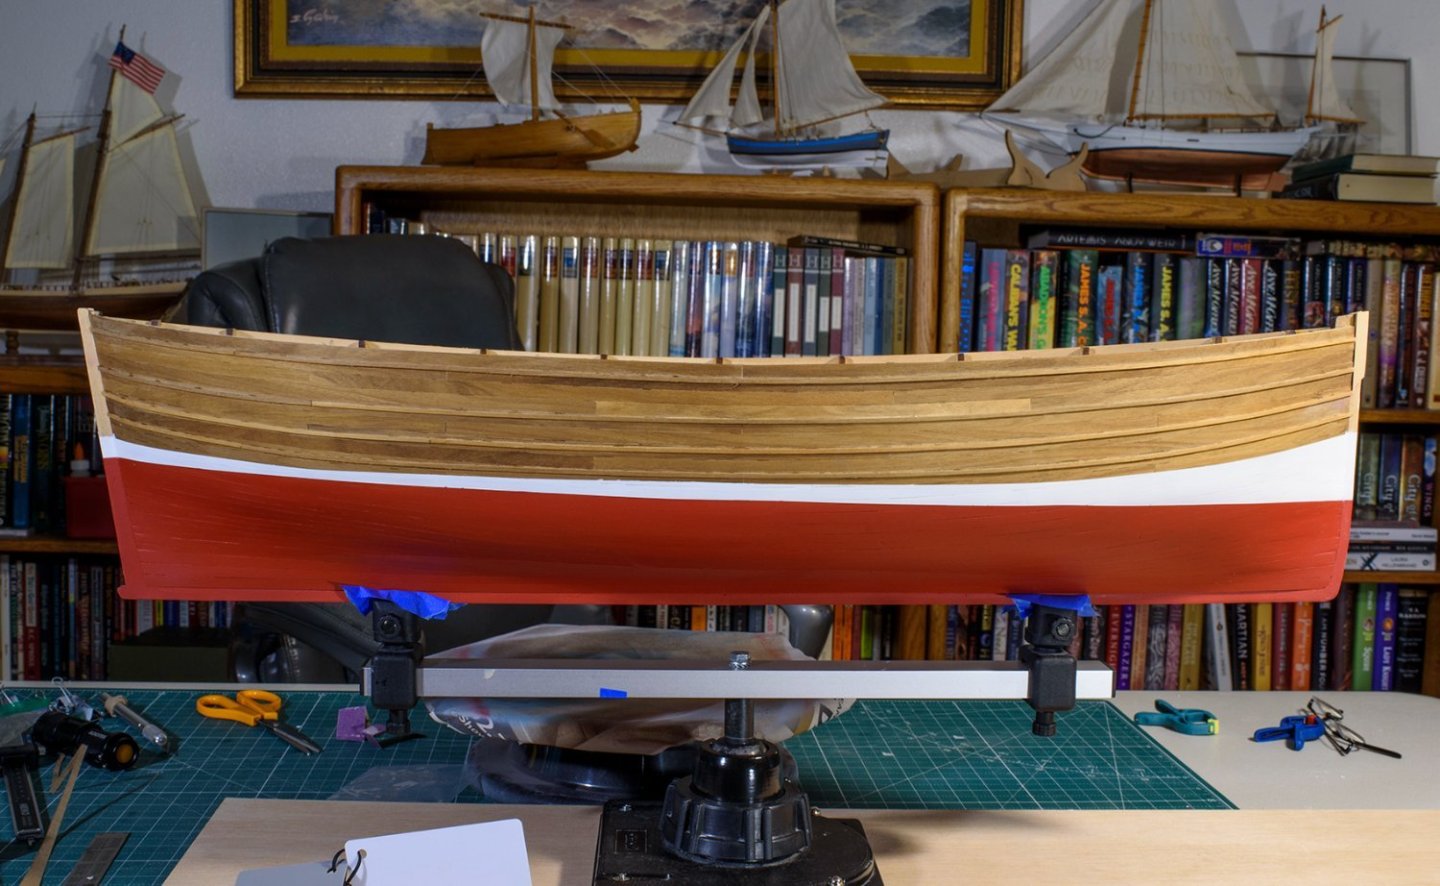
Google states that the boot strip is usually positioned a few inches above the waterline as an aesthetic touch and defines the separation between anti-fouling paint (below) and the topside paint (above). I found the distance from the bottom rub strake to the top of the boot stripe using the drawing. I added 2 mm to this measurement and placed a pencil mark on the hull. I then laid the white curve tape along the top of the boot stripe and carefully pressed the white tape down along the hull so no paint would seep under the tape. I then used my laser level and bubble level to “square up” the hull. That is, no starboard nor port list, and the stern was 20 mm lower than the bow. I raised the laser level to mark the bottom of the boot stripe and placed pencil marks on the hull 2 mm inside the laser line. I took the boat off the stand and carefully placed the curve tape along the bottom of the boot strip and pressed the tape down to stop paint seepage. All of this was done for both sides. Both the top and bottom pencil marks are inside the painted areas. I placed the yellow tape on half of the white tape and above and carefully masked the remaining boat. Then I sprayed 3 coats of white paint.

-
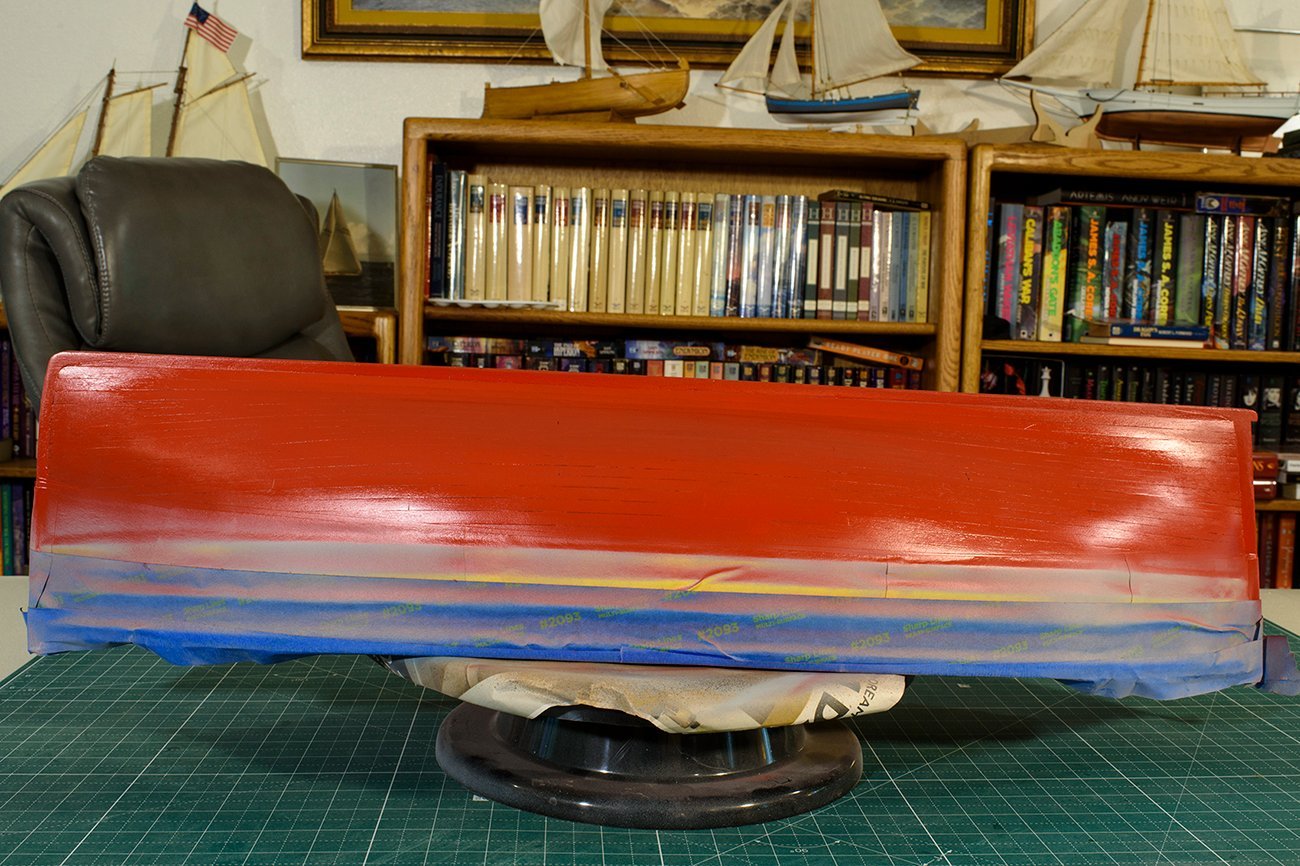
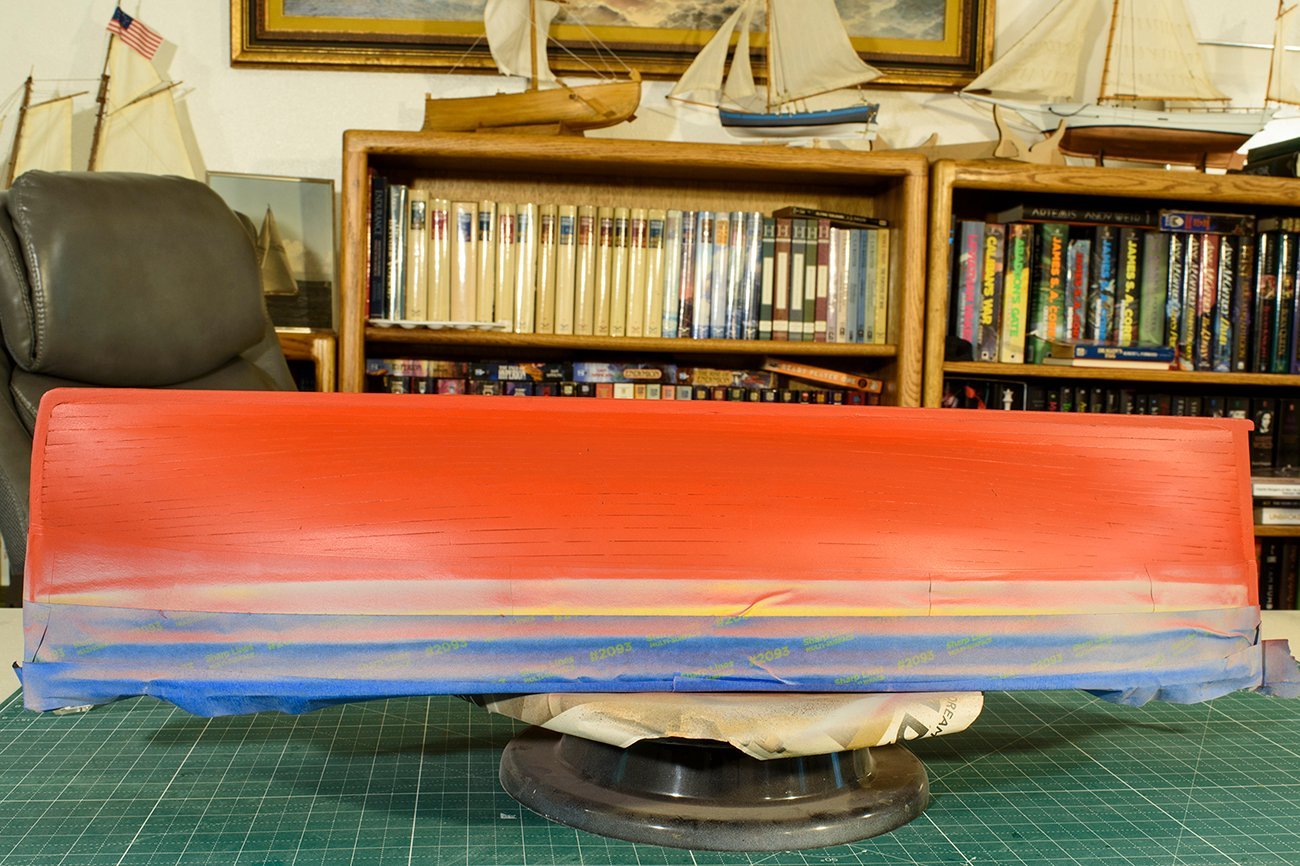
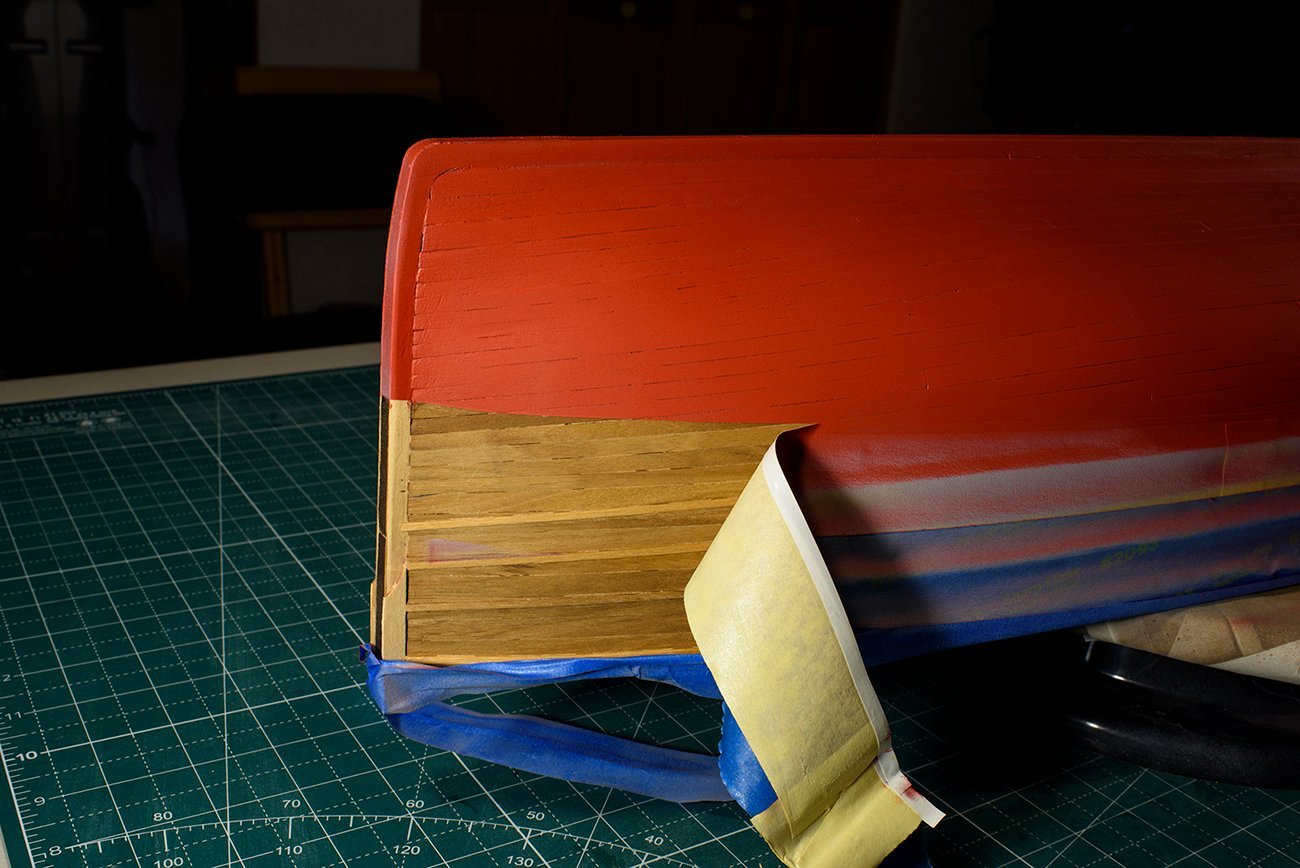
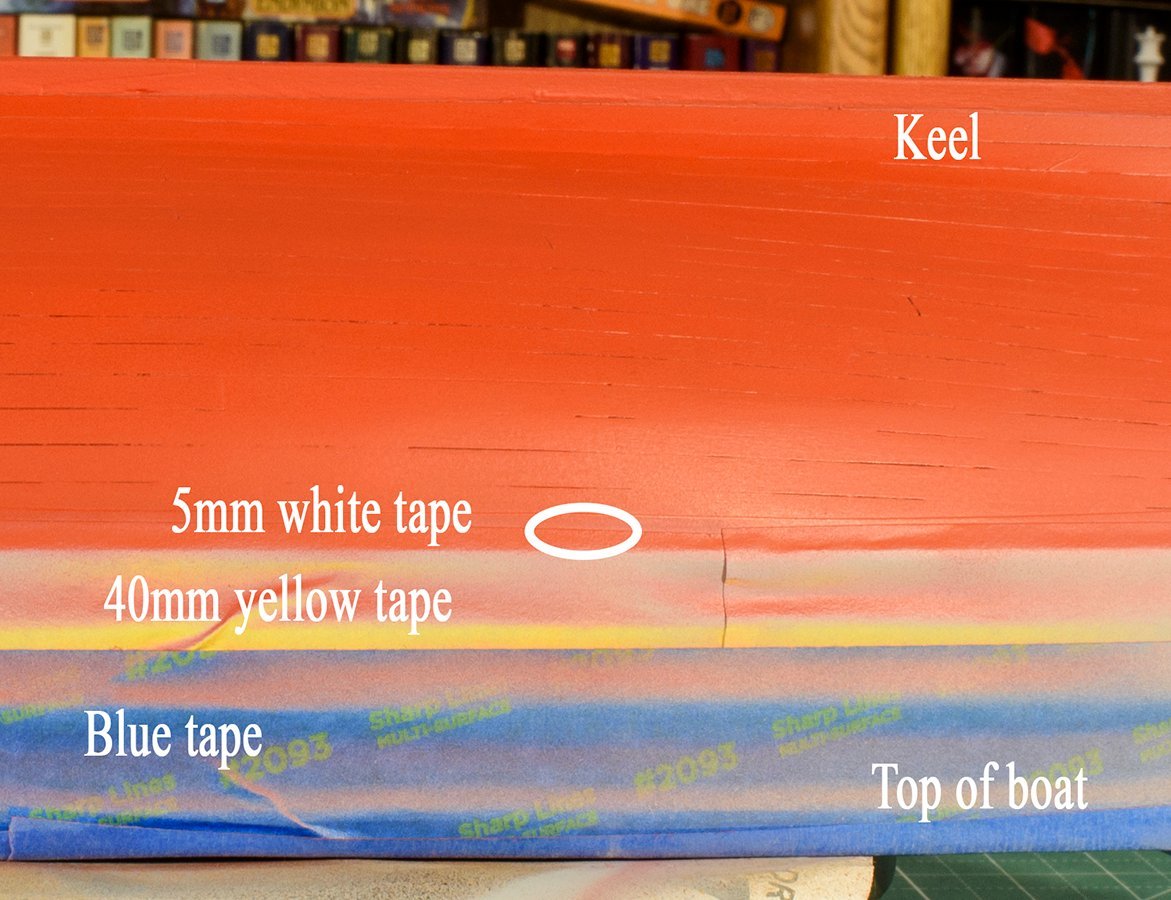
I then used my airbrush and painted the hull Red. I was having trouble getting a red coat that uniformly covered the hull. There was originally a lot of bare wood color variation that was showing through. I think I thinned the paint too much. In any event, I used a spray can of gray sealer for an undercoat, followed by 2 more coats of paint. That worked and now it looks nice. The enamel paint was labeled red, but come to find out, if it does not say matte, the paint is gloss, which is not my preference. Thus, I added two more light coats of Testors dullcote Lacquer. After the paint dried, I removed the tape. I found where some of the spray went under the blue tape. I expect this was due to the fact that painting took several days to allow for drying and recoating, and the blue tape just let go over time due to stress in some of the tight corners. Nothing that can’t be sanded. But from now on I will use good tape over newspaper to cover large areas which are not to be painted, such as covering the red hull while painting the white strip.
-
I laid white Tamiya “curve tape” along the water line. I pressed this tape tightly onto the boat, especially along the outside edge, so no paint would seep under the edge. Then I laid wide Tamyia yellow tape on this white tape and pressed it down tight as well. The yellow tape cannot follow the curve of the boat, since it is so stiff, so I used several lengths, relying on the “curve tape” to define the waterline. Then I laid blue painters’ tape on the yellow tape. Painters tape is cheaper but does not seal as well as the Tamyia tape. I figured the blue tape was far enough away from the airbrush that there would be very little overspray, and it was used just as insurance to catch any overspray. However, there was more overspray than I thought and there were a few spots where paint went below the blue tape and got onto the boat. I’ll sand it off.

-
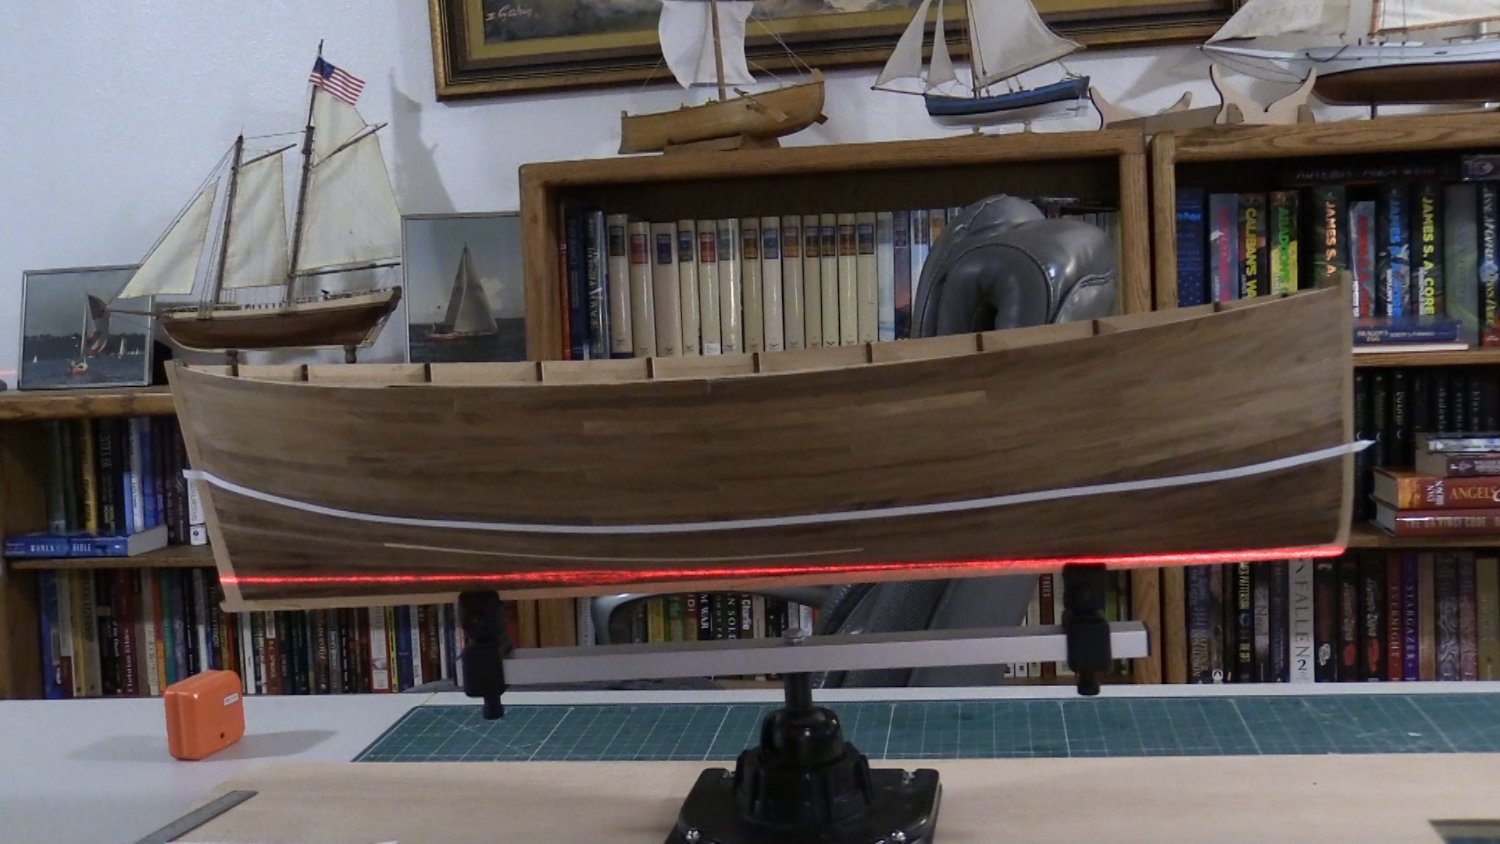
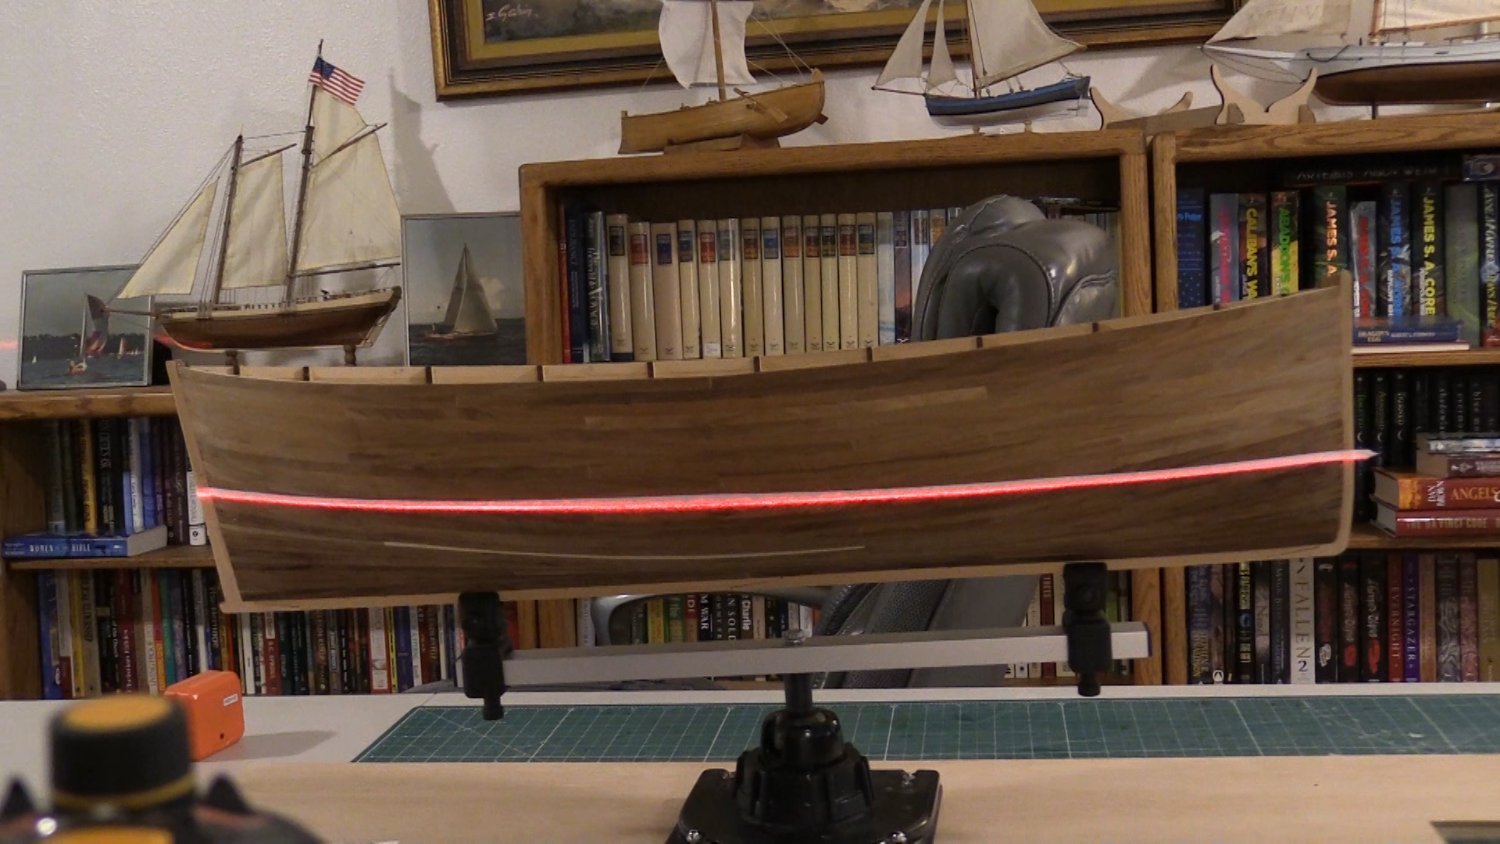
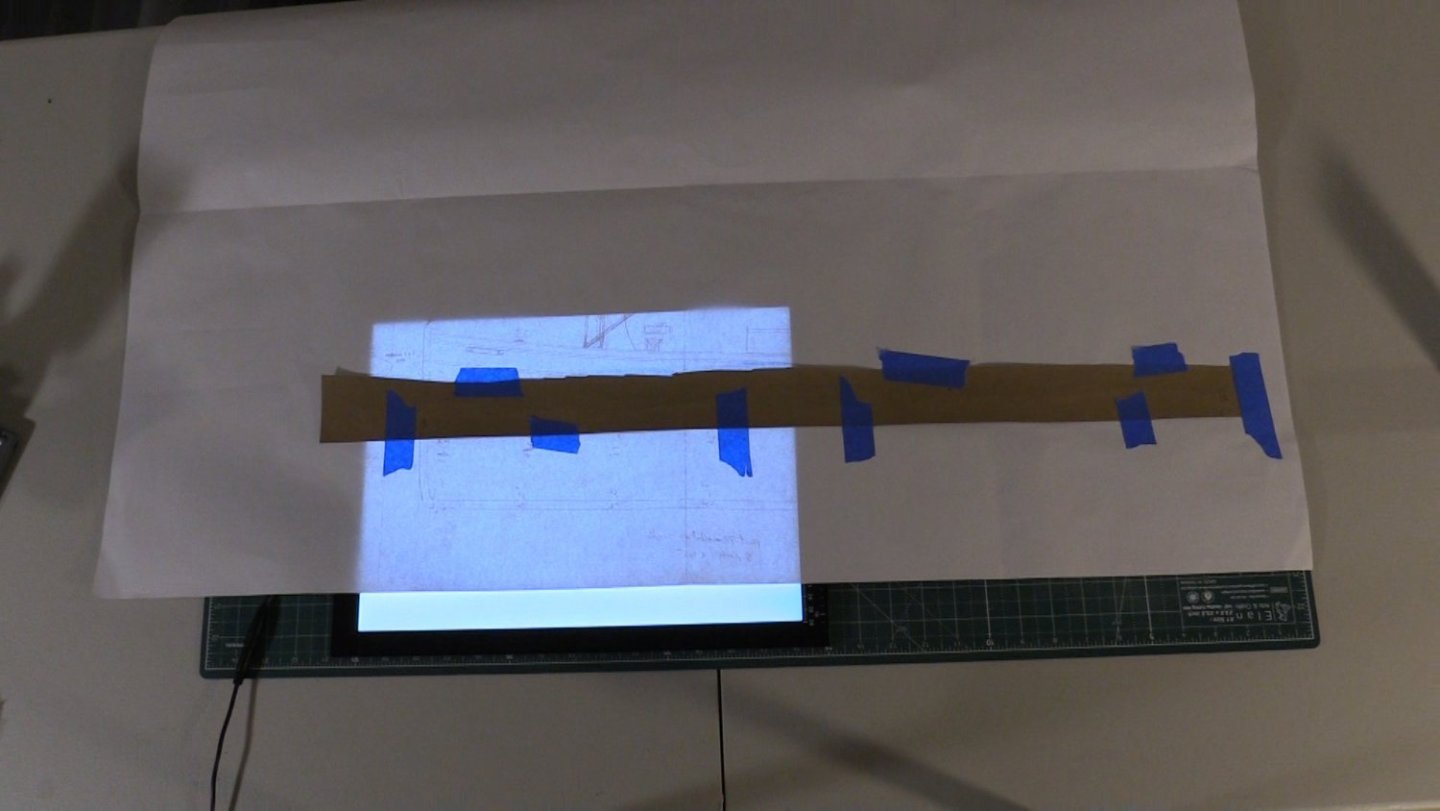
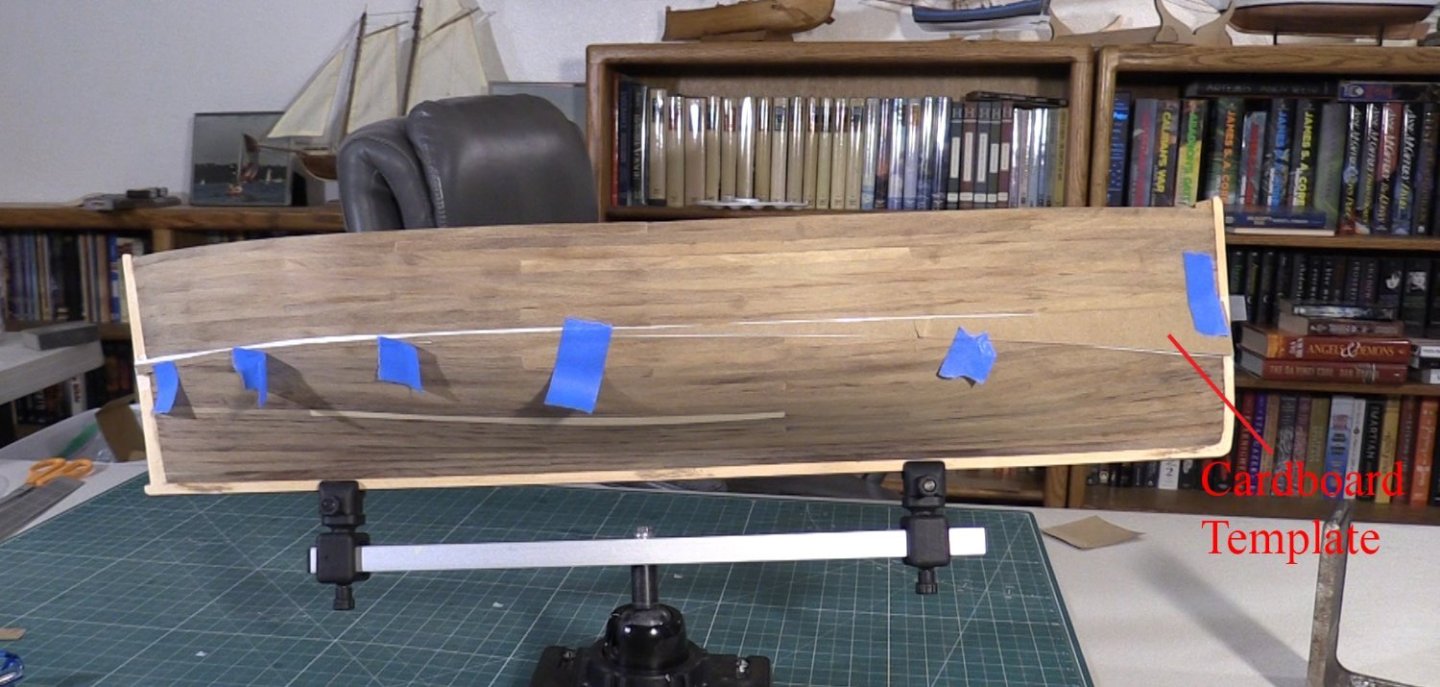
I placed some Tamiya “tape for curves” marking where the hull water line will be. I then placed some tape representing the top of the hull white line. I estimated this location “by eye”. But since this white line would be used to set the location of the 3 rub strips, and the shape would likely not be repeatable from port to starboard, I decided I needed a better method for rub strip location. I placed the 1:1 drawing face down on my light table and taped a thick brown wrapping paper along the bottom straight edge. I then flipped the drawing over and used a tack pin to poke holes along the top curved edge through the drawing onto the wrapping paper. These punctures denote the of top of the white line. I removed the brown wrapping paper and cut along the holes. This gave me a template for the hull white line which I could use on each side of the boat. I taped the template onto the boat and marked where the top of the template was on the hull. This gave me a reference where I wanted the bottom rub strip to be added to hull. The location of the rub strips and their curvature is not perfect, but it is a lot better than my earlier “by eye” estimate. I am hoping this will look okay after painting the bottom of the hull red and adding the white line. I often lose confidence that my planning is correct, expecially when some steps cannot be undone. I have learned that whatever the outcome - it all looks good. And if some stuff is wrong, typically I am the only one who notices. And further, where there are mistakes – oh well … they provide me with another lesson learned. Next, I will sand the whole hull one more time with 400 grit, specifically looking for blemishes from the rub strip installation. Then I start the hull painting process.
-
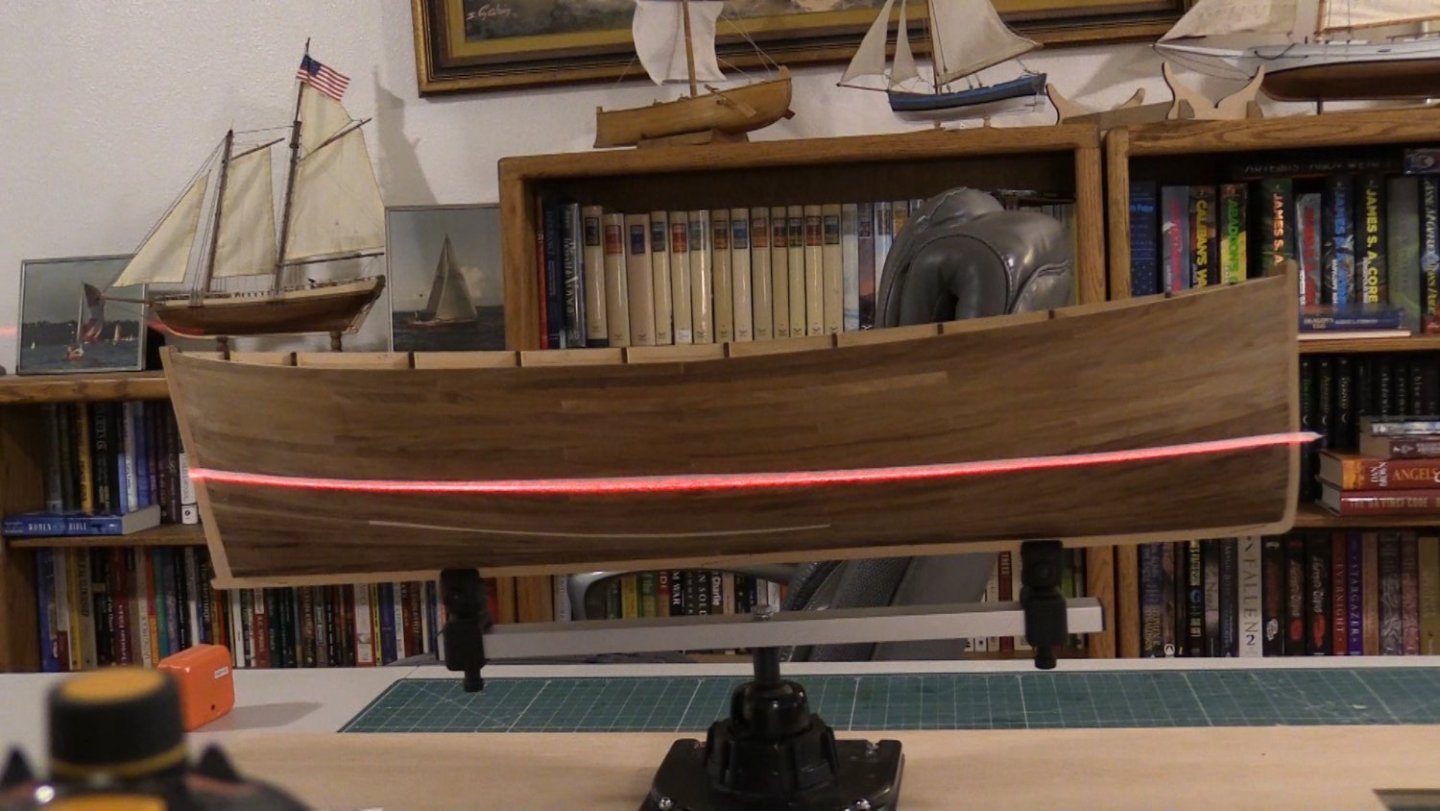
My next task is to lay the rub strips. In order to place these, I need to know there the white painted hull strips will be located. It took me some time to figure out the drawing shows that the stern keel sits lower in the water than the bow part of the keel (offset from the water line). Since the bottom of the hull white line represents the water line, it is not parallel to the keel. I used a laser level to mark the stern’s tilt from the waterline and transferred this offset to the bottom of the hull white line.

-
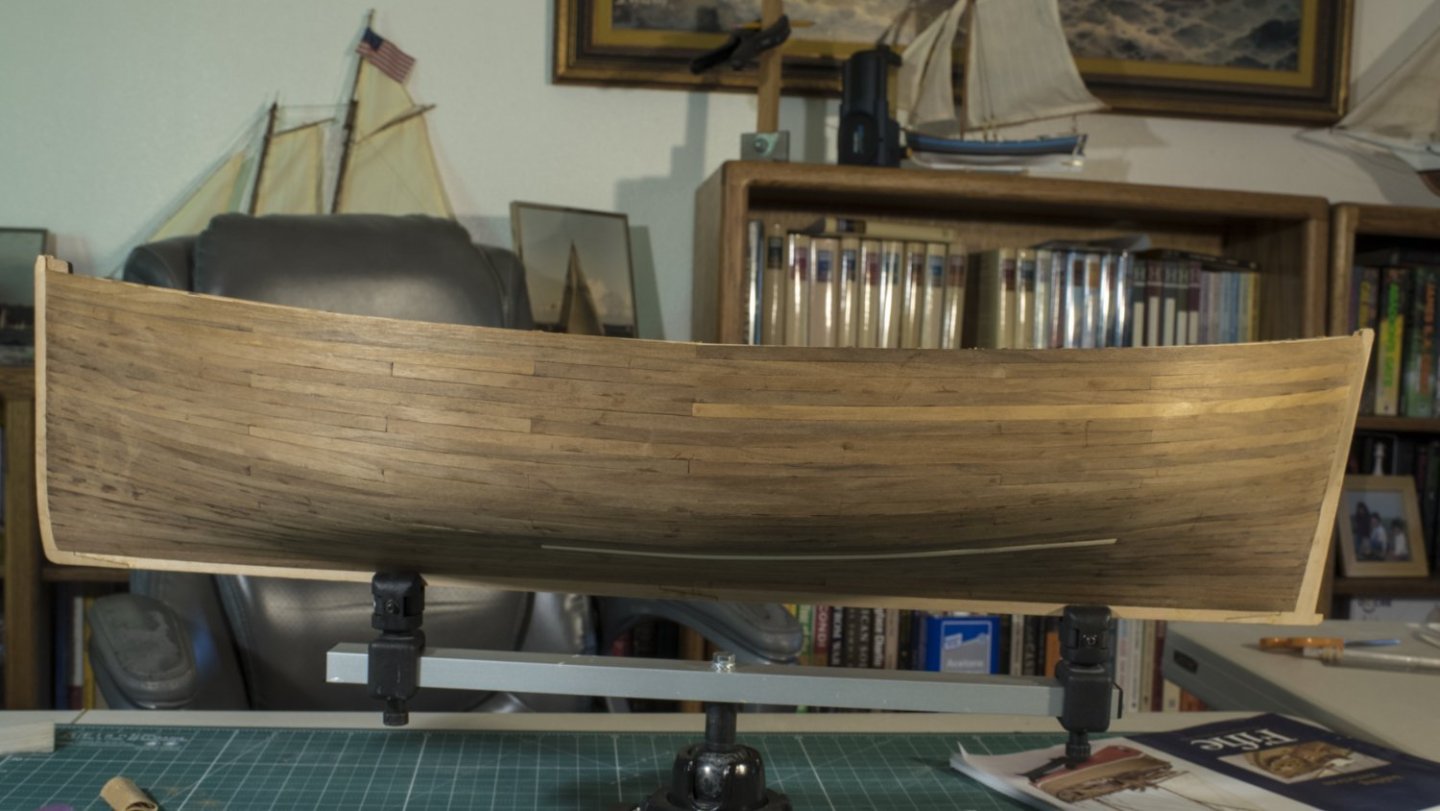
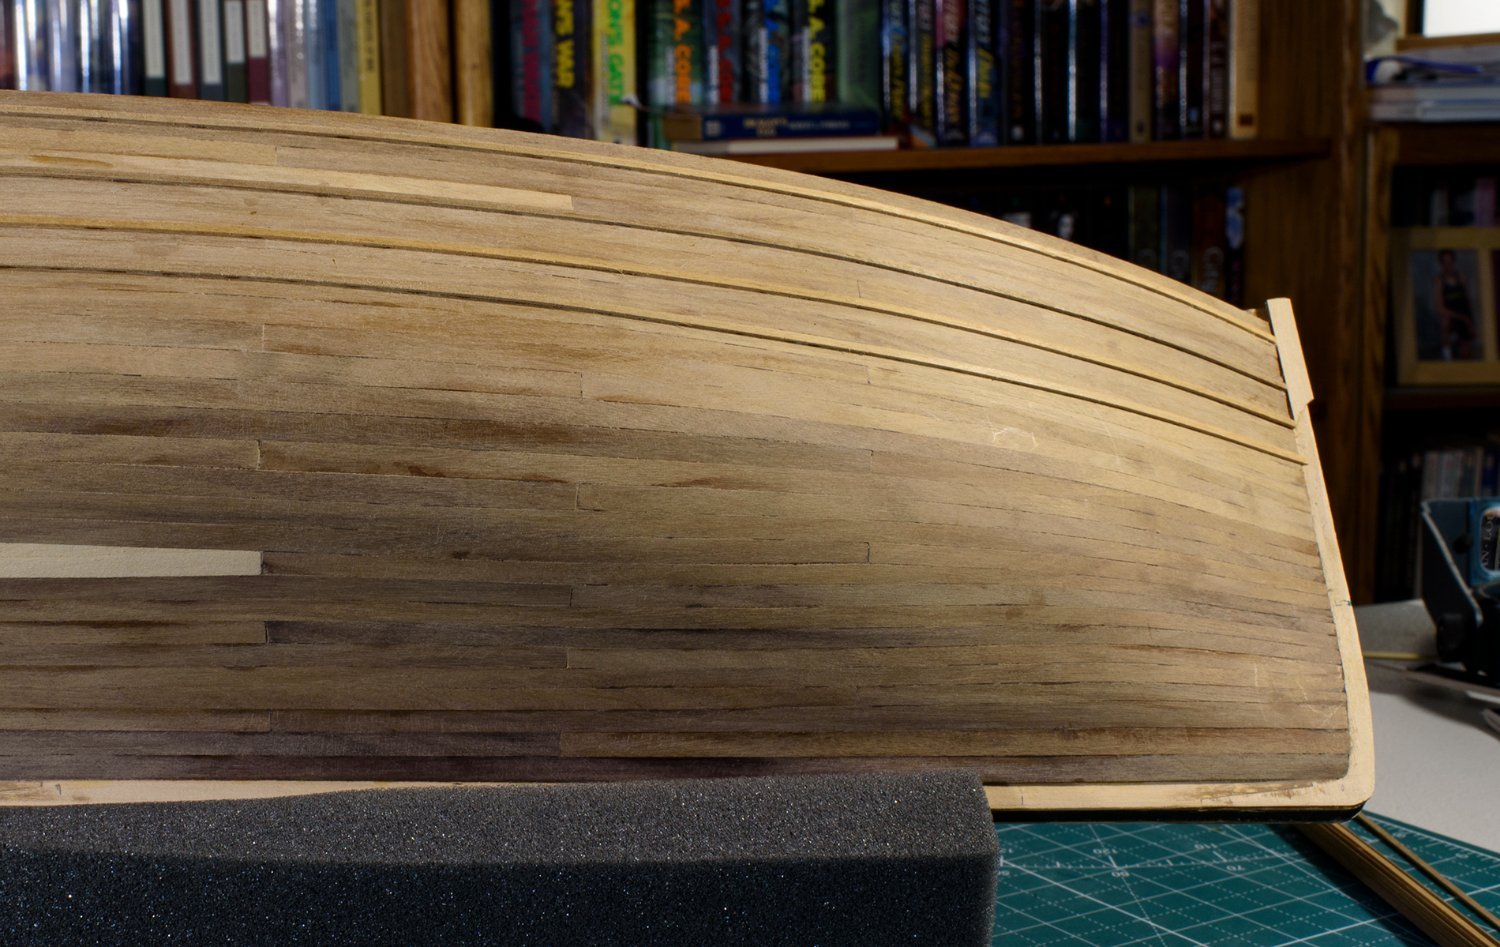
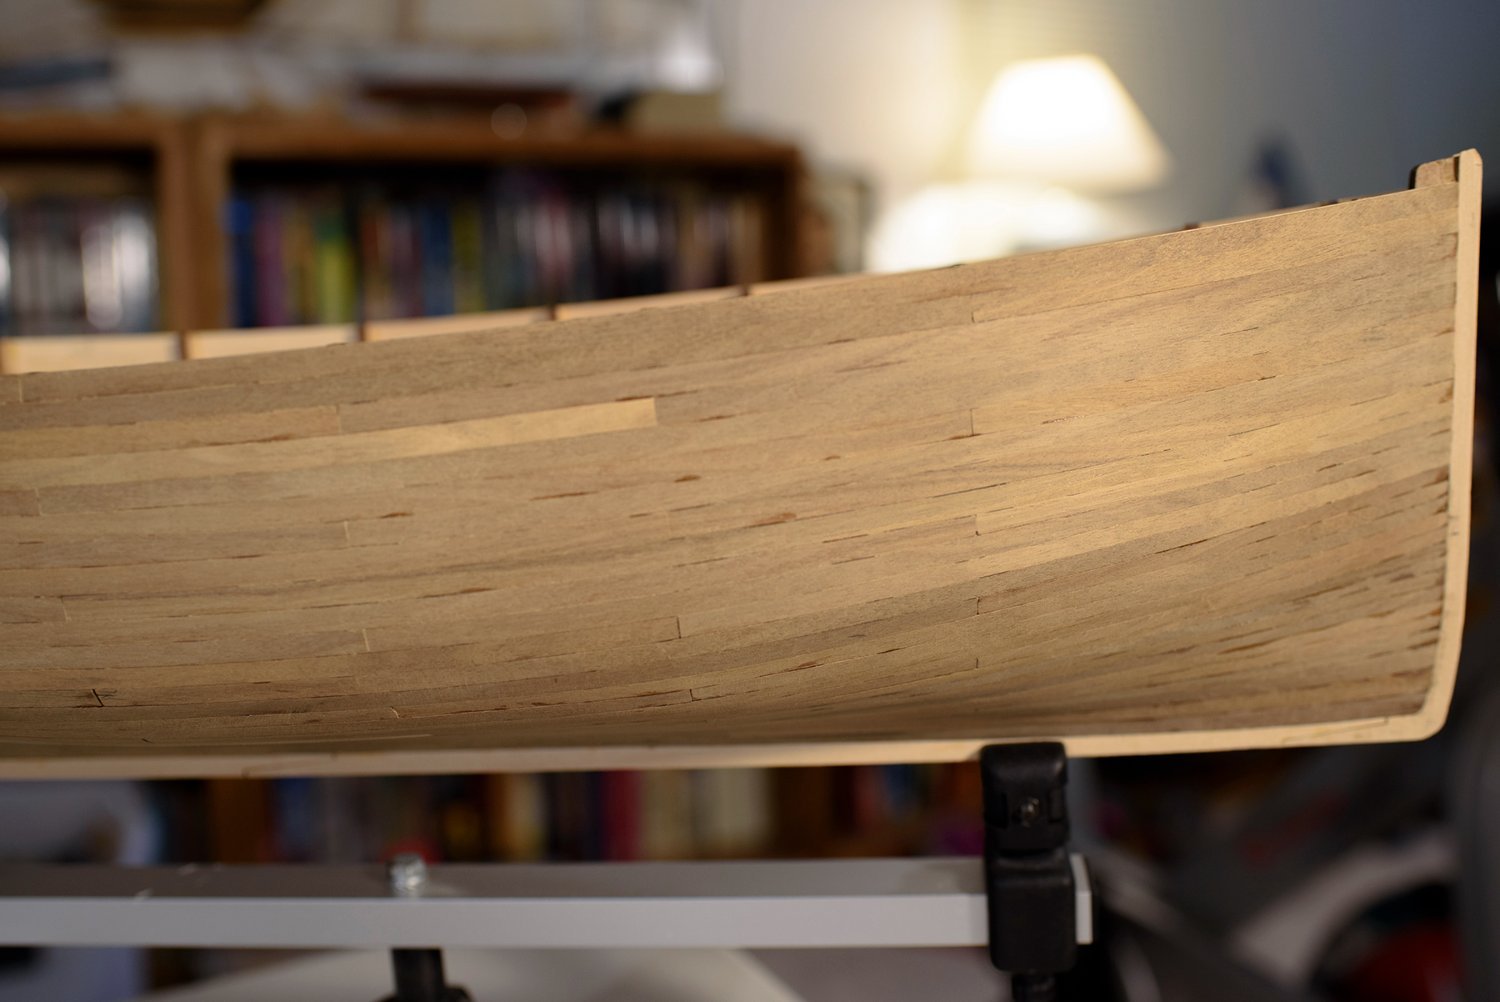
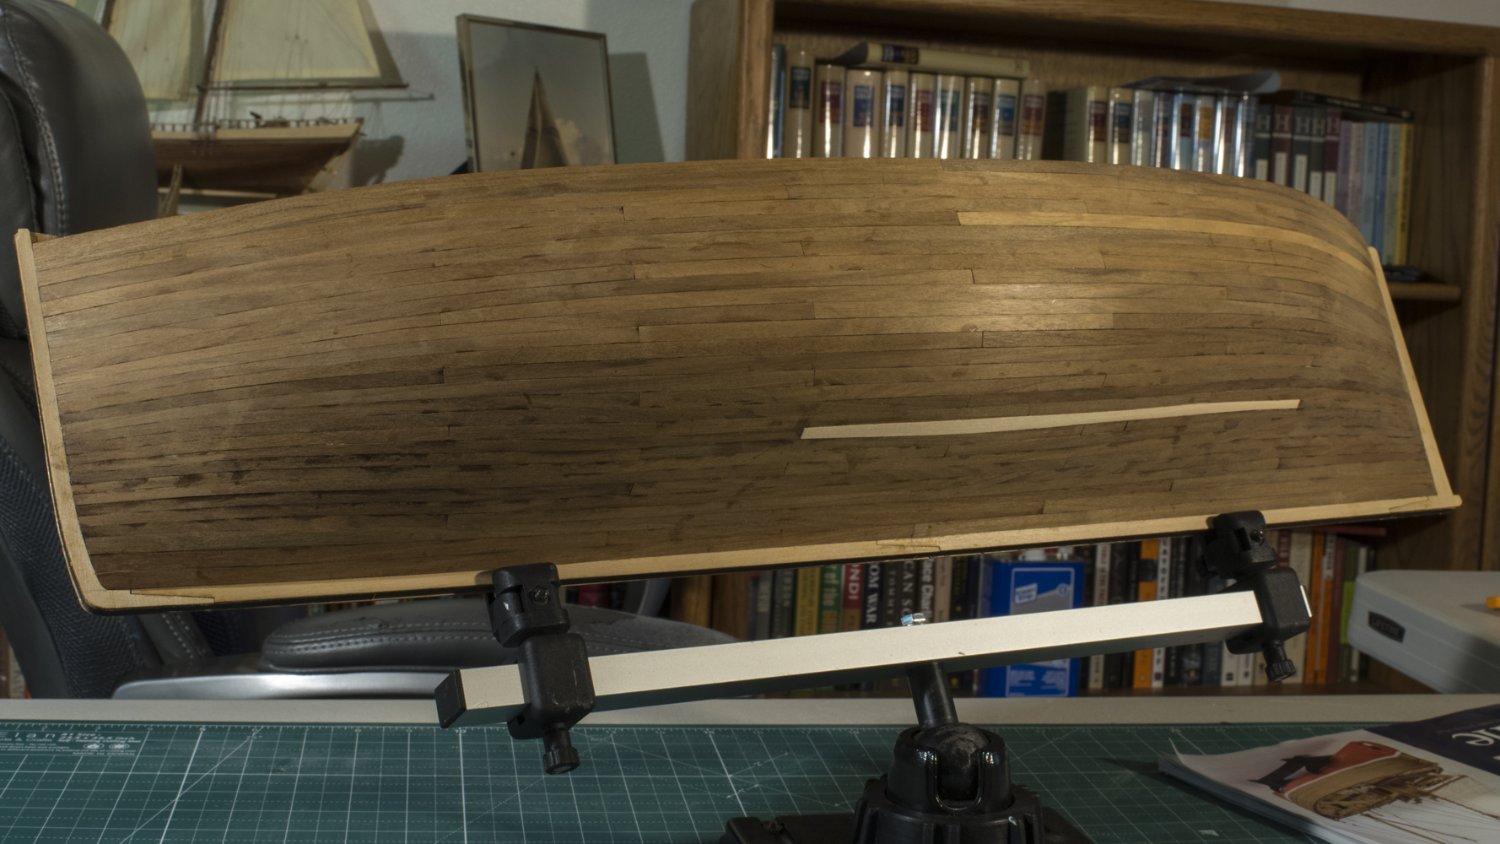
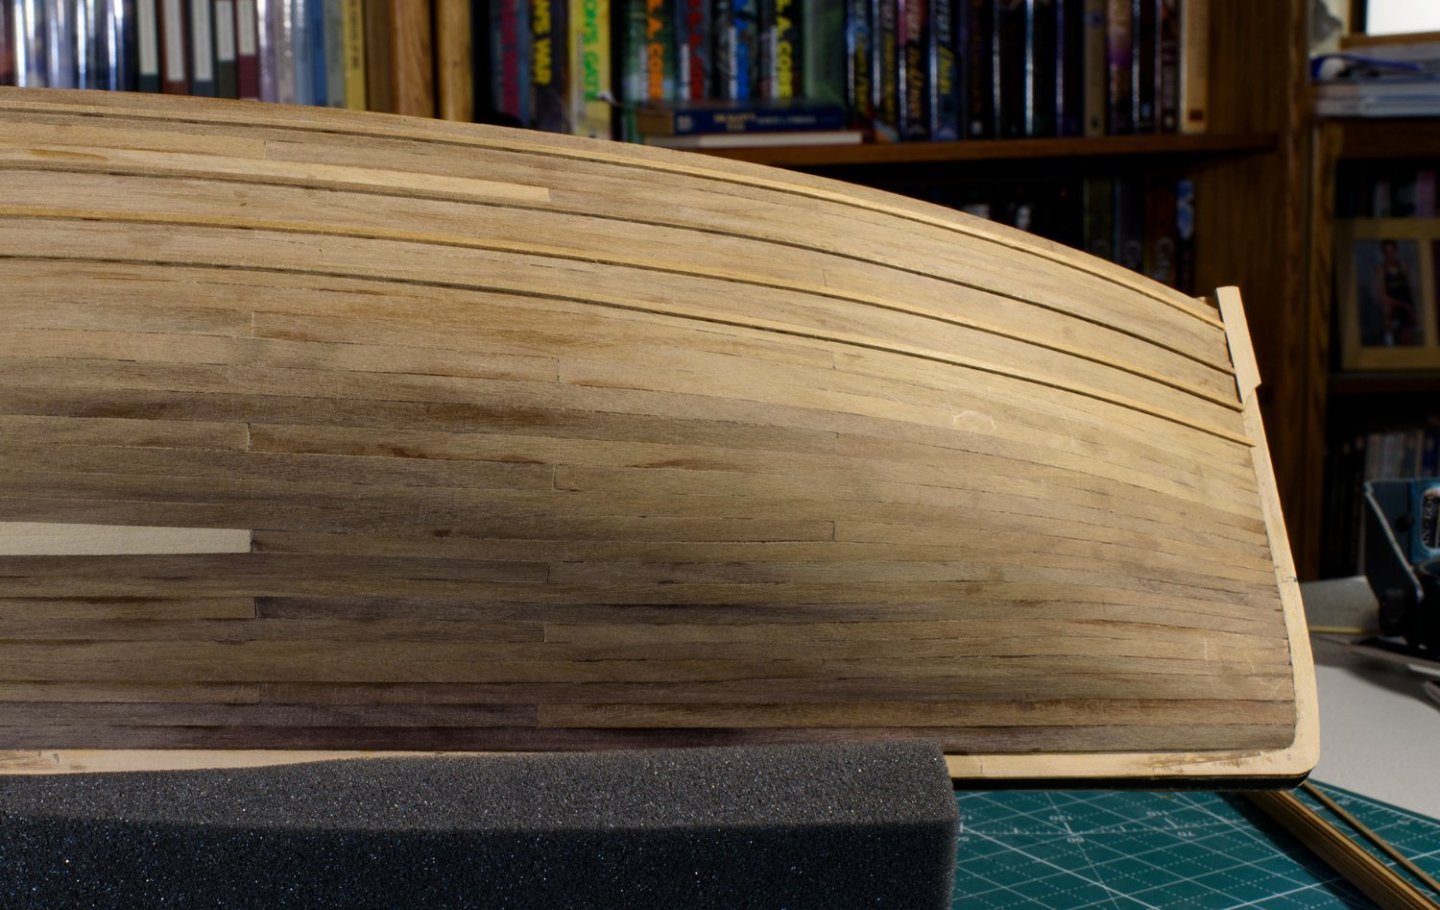
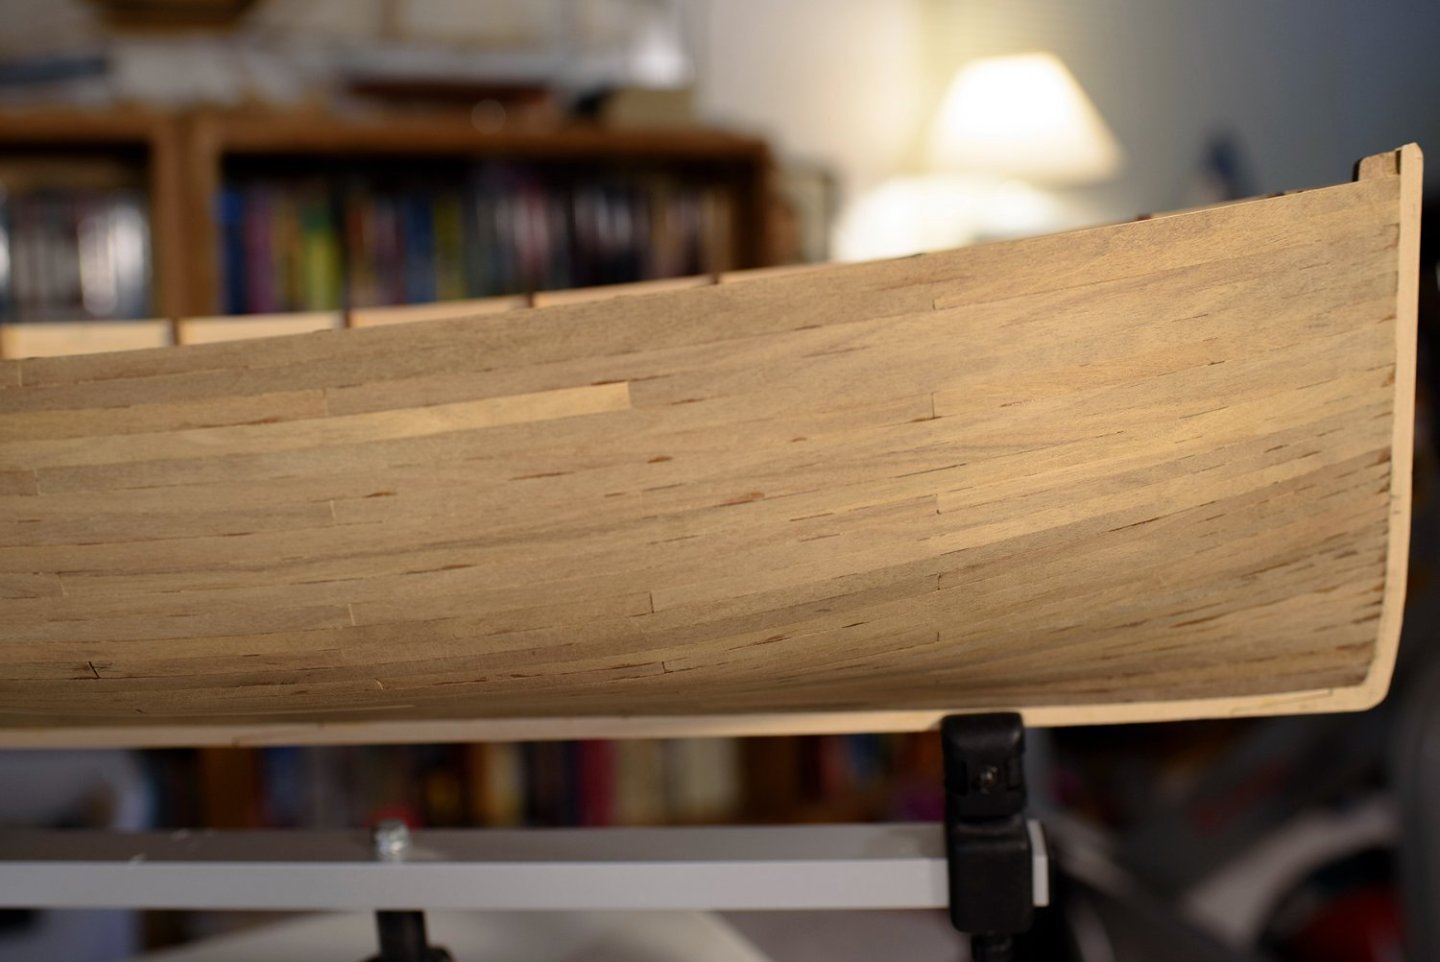
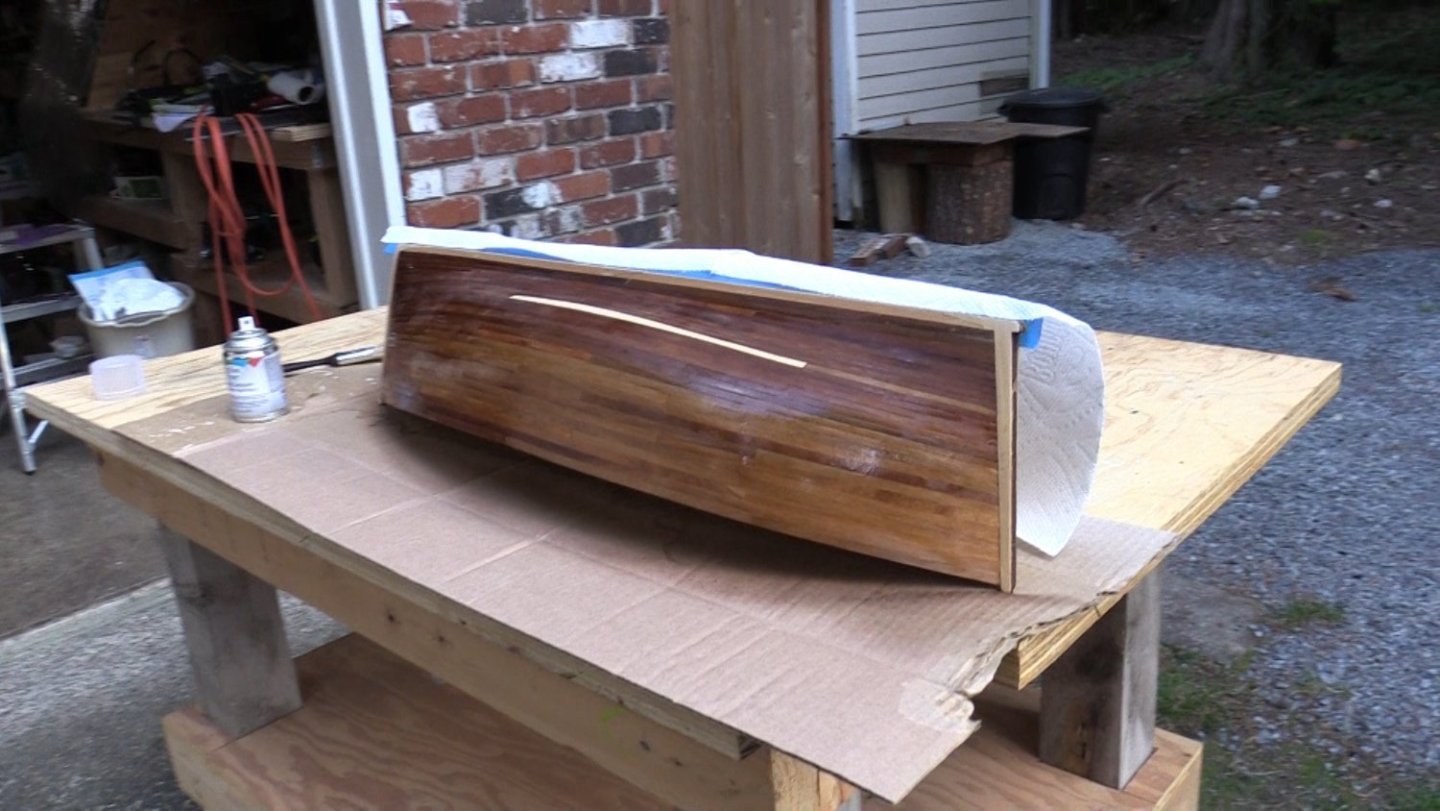
I am back working on my boat (finally). I took a brief time off in April, which turned out to be much longer than I planned. I had a few house items to be fixed, then took time to split a few cords of wood. The weather turned warm, and I started hiking longer and steeper hikes. My family welcomed another grandchild who was born in July. All good things! Then I sprained my knee hiking in late July. I started PT a few weeks later which further delayed my start. I finally resumed work on the Fifie early September. It took a while to setup my workspace and figure out where I left off. The first thing I noticed was that there were ridges between many of the planks. So, I spent time sanding the hull smoother, starting with 100 grit sandpaper, and working down to 220. I cleaned the wood with tack cloth, a wet cloth, and finally some mineral spirts. I filled gaps where necessary. I was surprised that the planks lost so much of their color due to sanding. I don’t understand this!! Were they originally colored with a dark finish? As an experiment, I sprayed on some clear lacquer on one side of the boat, which brought out some of the wood grain color. I sanded it off and finished sanding the hull with a 400 grit sandpaper, which hopefully will make the grain color even look better.
-
Yes Don: I became distracted for longer than I expected, but I am back at it! I am about to post again. 🙂 I see you have progressed much further in my absence. Your boat looks very good. I will study what you have accomplished. Thanks Ken
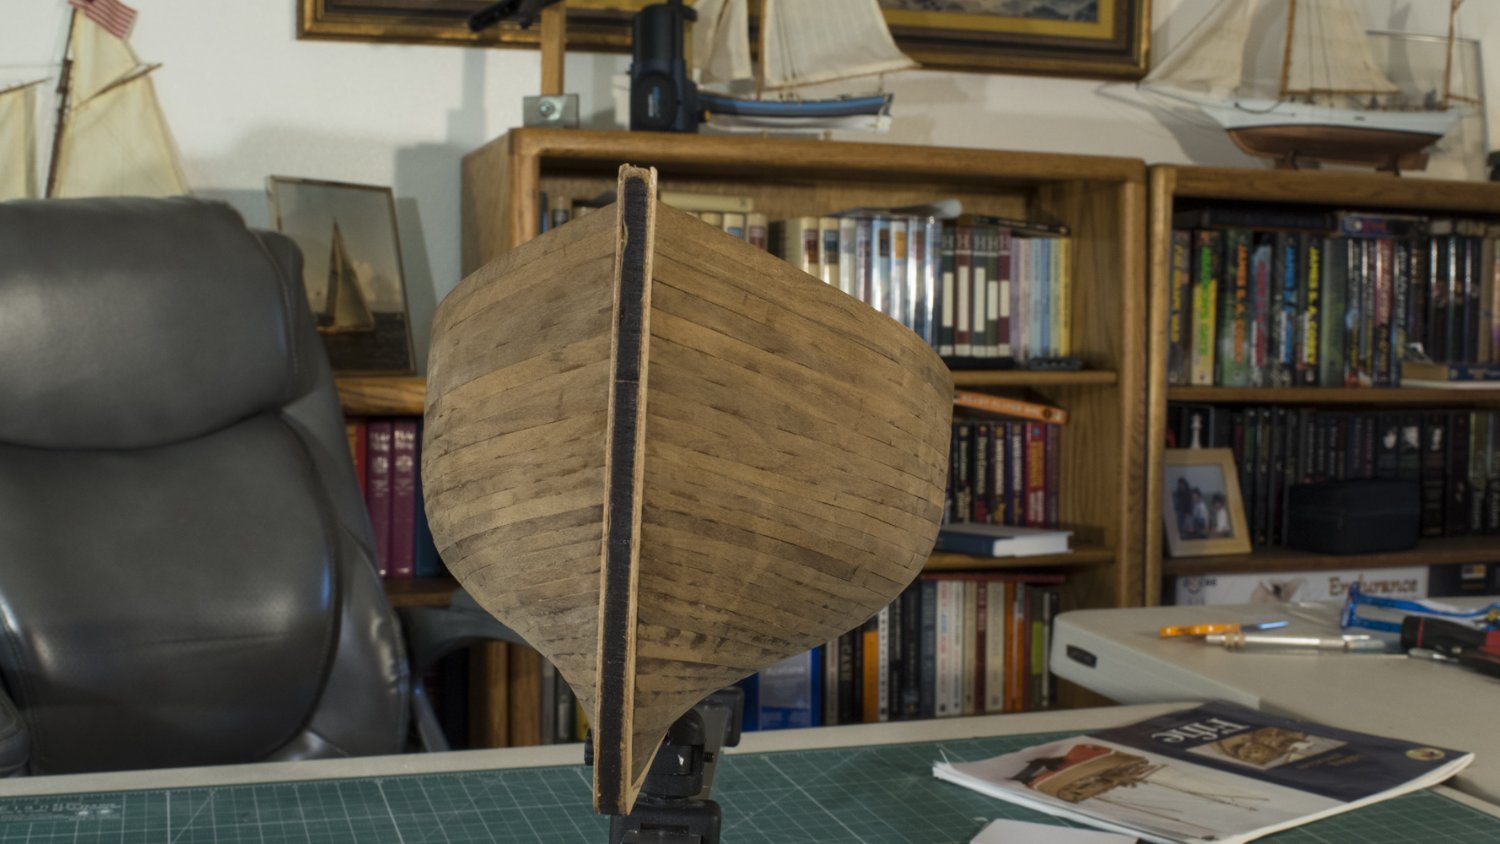
-
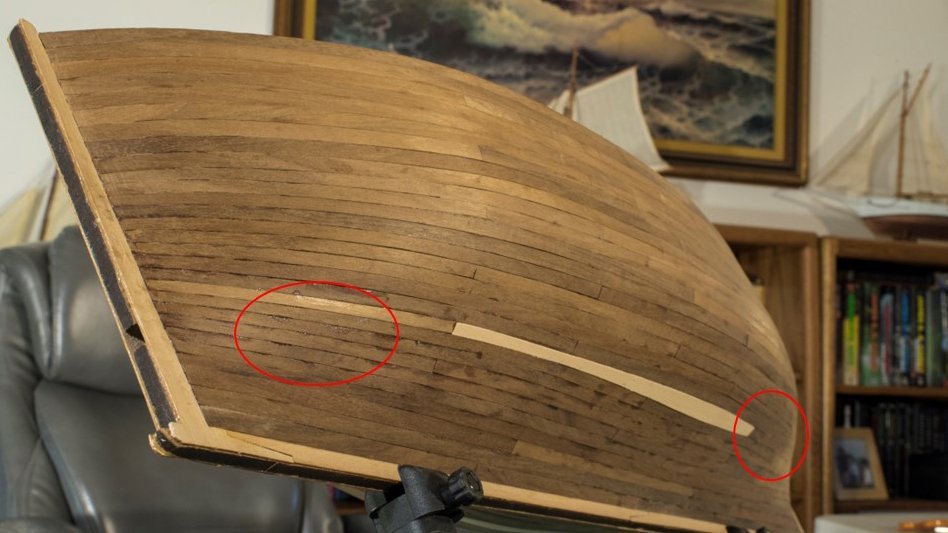
There was, however, another cause of gaps that I could not quite figure out for the longest time. Towards the end of planking the second layer I begin to understand the cause and solution. I will address this issue better in future boats. This problem occurs where the curvature of this hull causes the plank to twist, close to 45 degrees in this boat. The bow and stern planks are almost straight up and down, whereas at the middle of the beam of the boat - the planks twist towards being parallel to the water. Couple this twist with the sharp narrowing at the bow and stern and the narrowing of the planks, as well as “edge bending” makes trimming the planks in these specific locations difficult to mate adjacent planks. It is at these places where my gaps are most pronounced (see picture below with the red circles). The saving grace is that these small gaps are below the water line, which will be painted. Thus, I can use filler which I hope will hide any effects. And lastly, one plank on each side required a width wider that the provided planks. I worked hard and kept my trimmed widths under control. I finally realized I would have to cut a walnut sheet to make a plank > 7mm in width. And when I went to the stores in my area to get the wood (walnut, mahogany, or whatever) there was no stock anywhere! Amazon had something, but the color on the screen was too different from what I wanted, and the delivery time was too long. So, I used the Bass wood I have, which was of a similar thickness, but softer and white. It looks kind of funky in the pictures below, but it will be painted.