HOLIDAY DONATION DRIVE - SUPPORT MSW - DO YOUR PART TO KEEP THIS GREAT FORUM GOING! (Only 53 donations so far out of 49,000 members - C'mon guys!)
×


Ken_2
-
Posts
150 -
Joined
-
Last visited
Content Type
Profiles
Forums
Gallery
Events
Everything posted by Ken_2
-
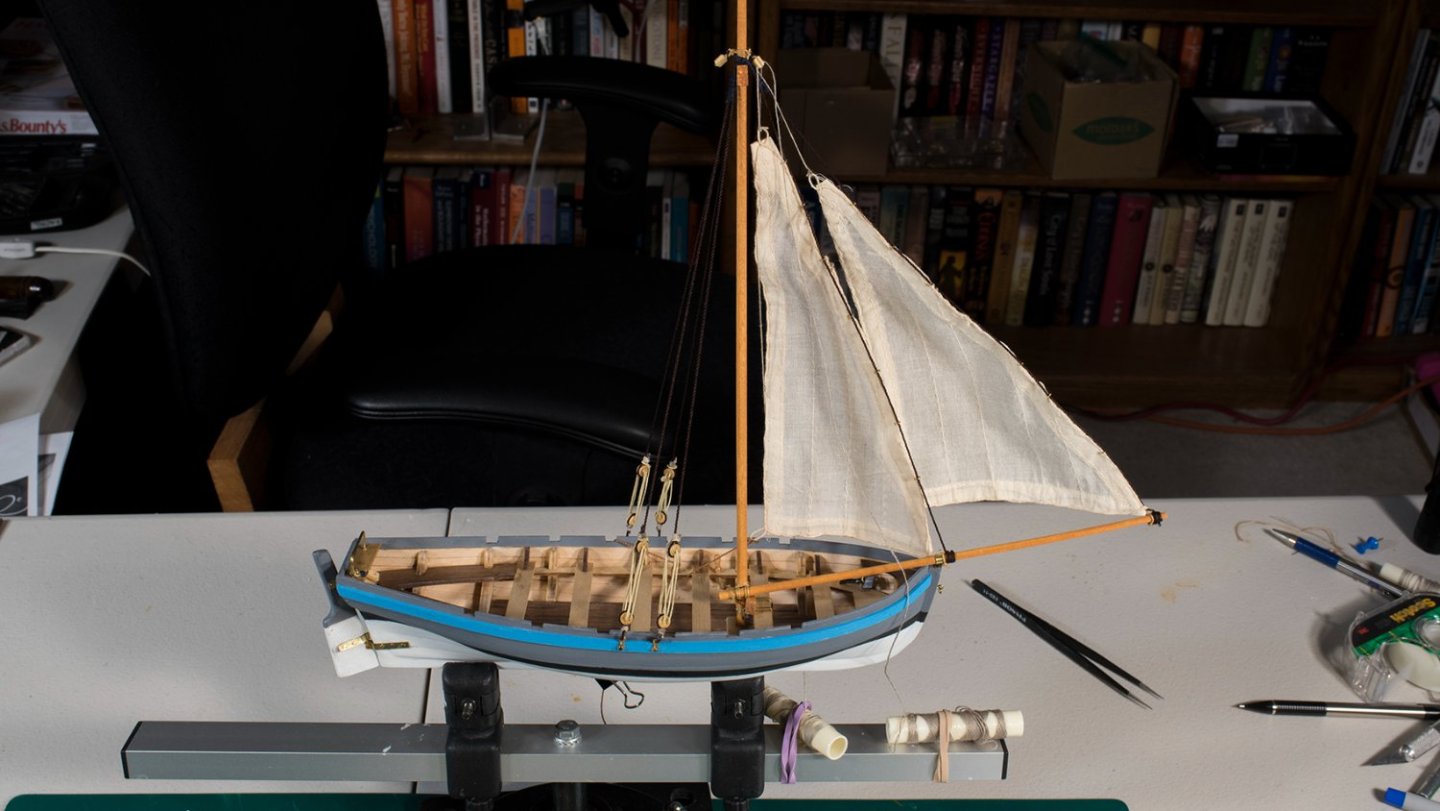
I added the foresails. These were straight forward, but it required a bit of dexterity. There were just enough of these 2 mm rings, which of course I dropped several times while added them to the sails. I then linked them on the forestays, added halyards, and added belaying pins for the sheets and halyards.
-
The rigging is done for now. On to the sails.

- 62 replies
-
- 3
-

-
- Bounty Jolly Boat
- Artesania Latina
- (and 1 more)
-
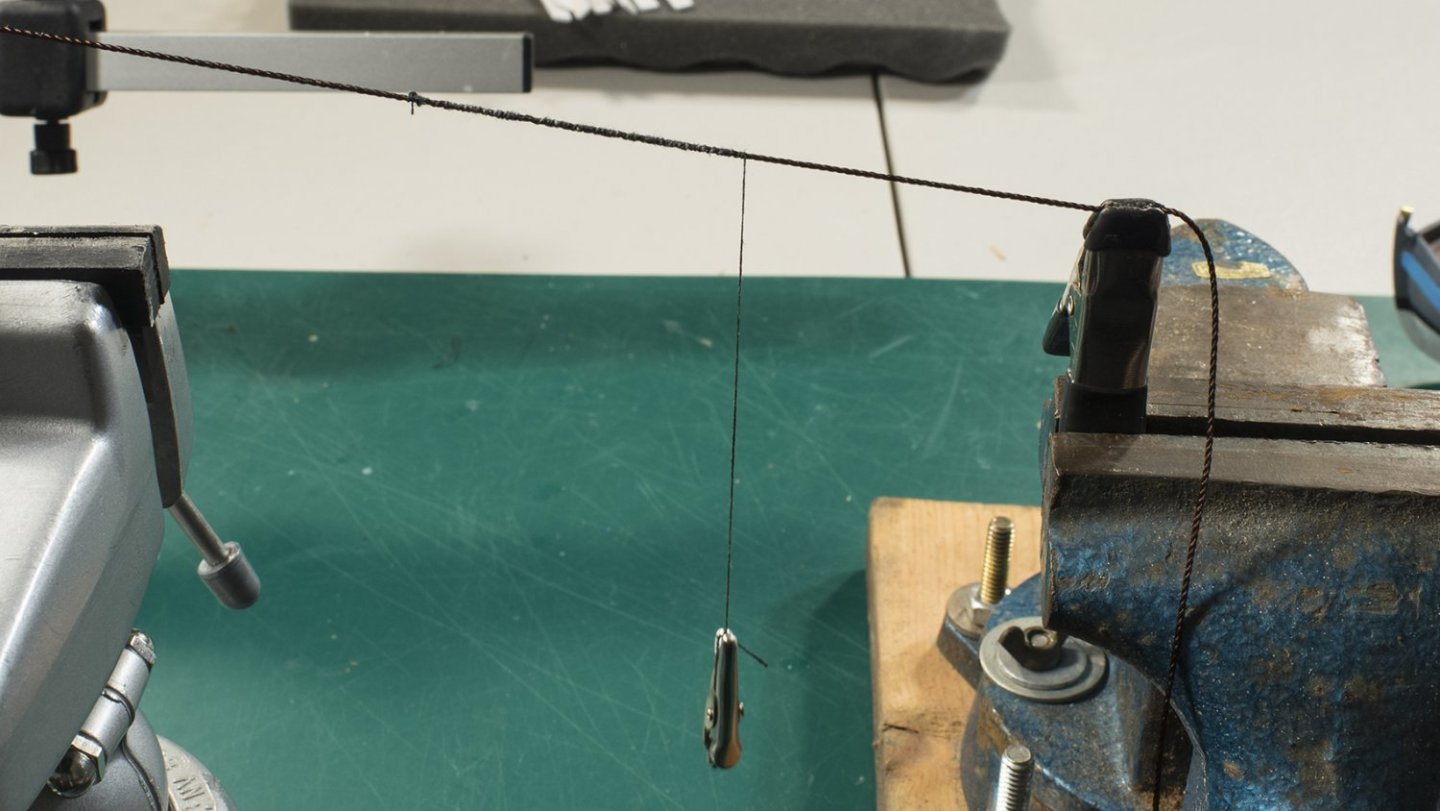
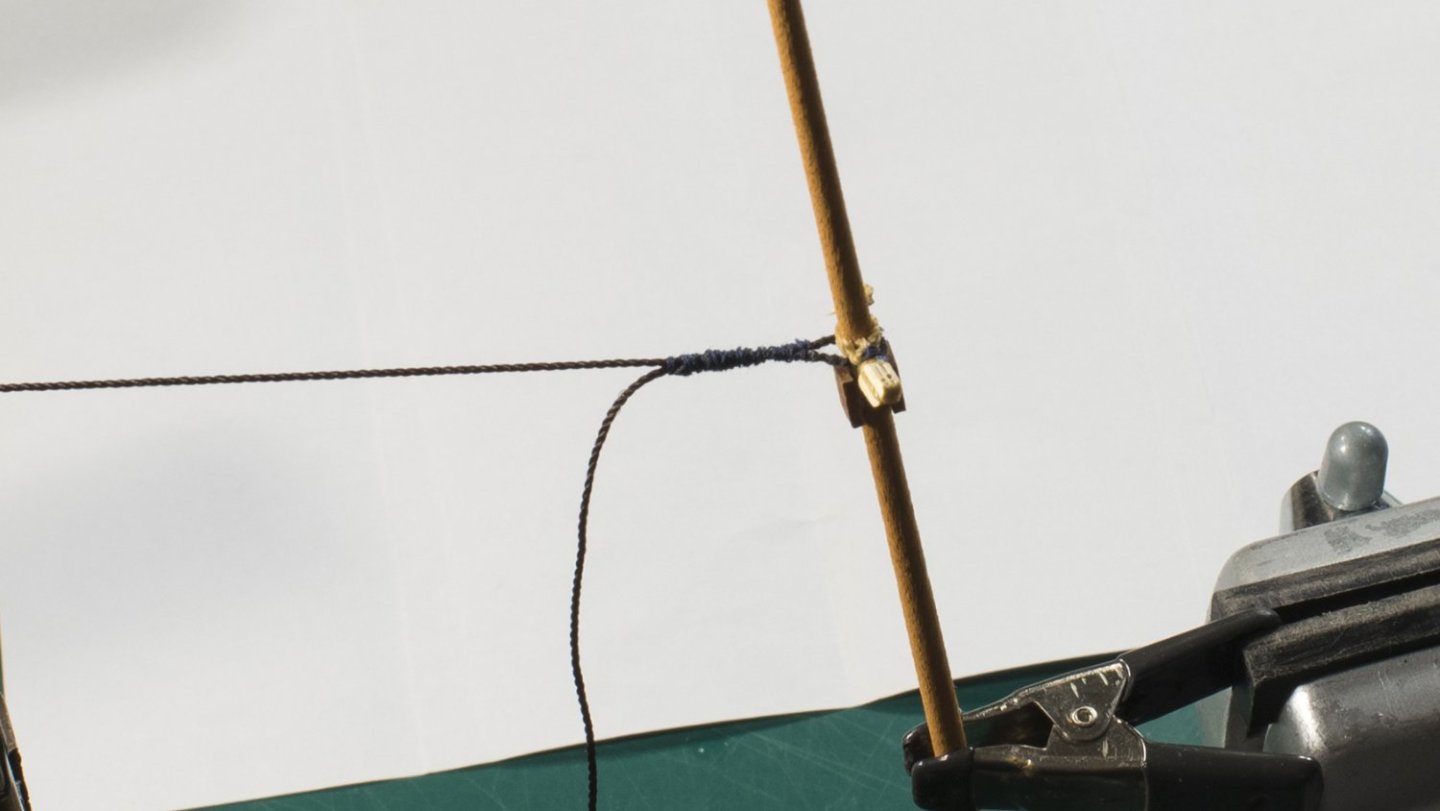
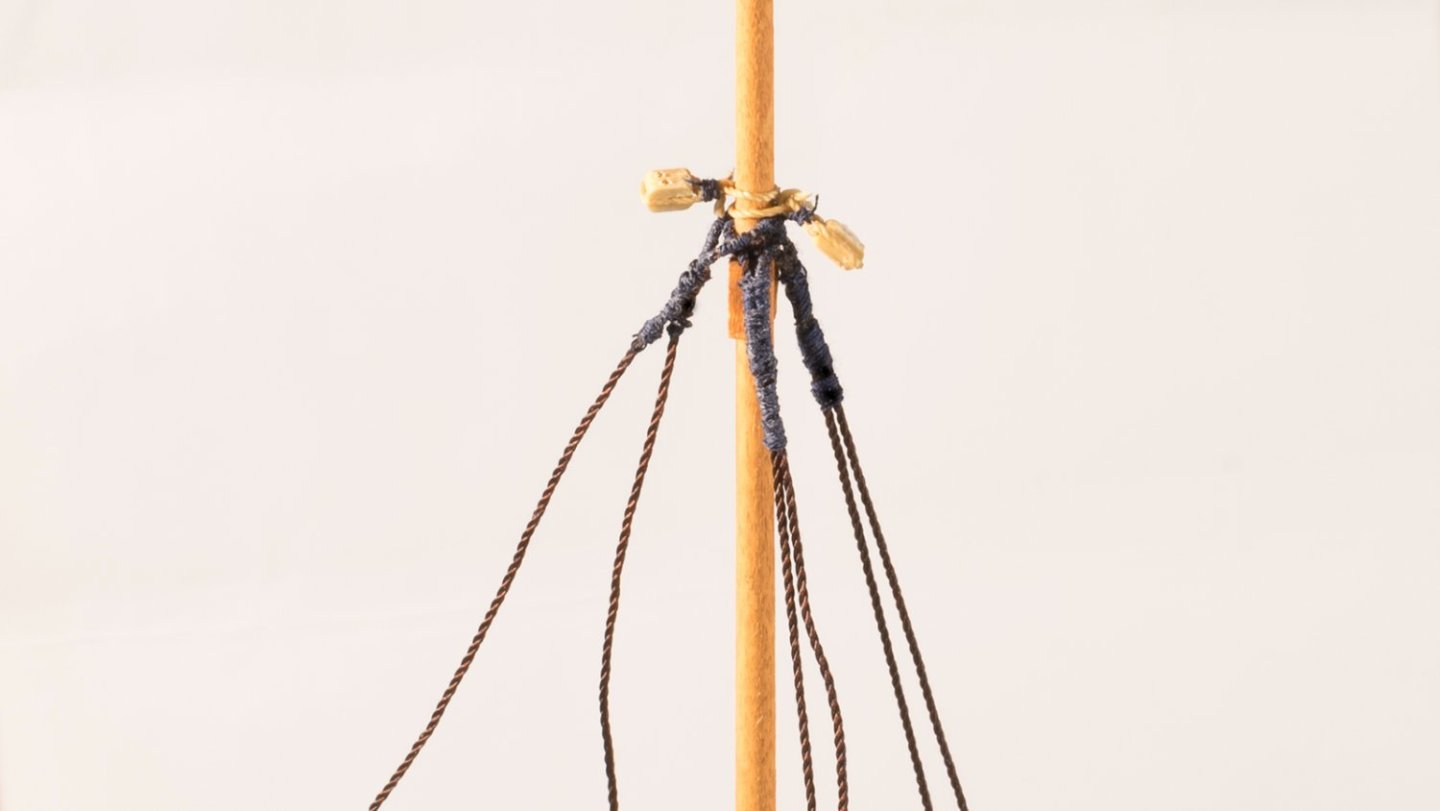
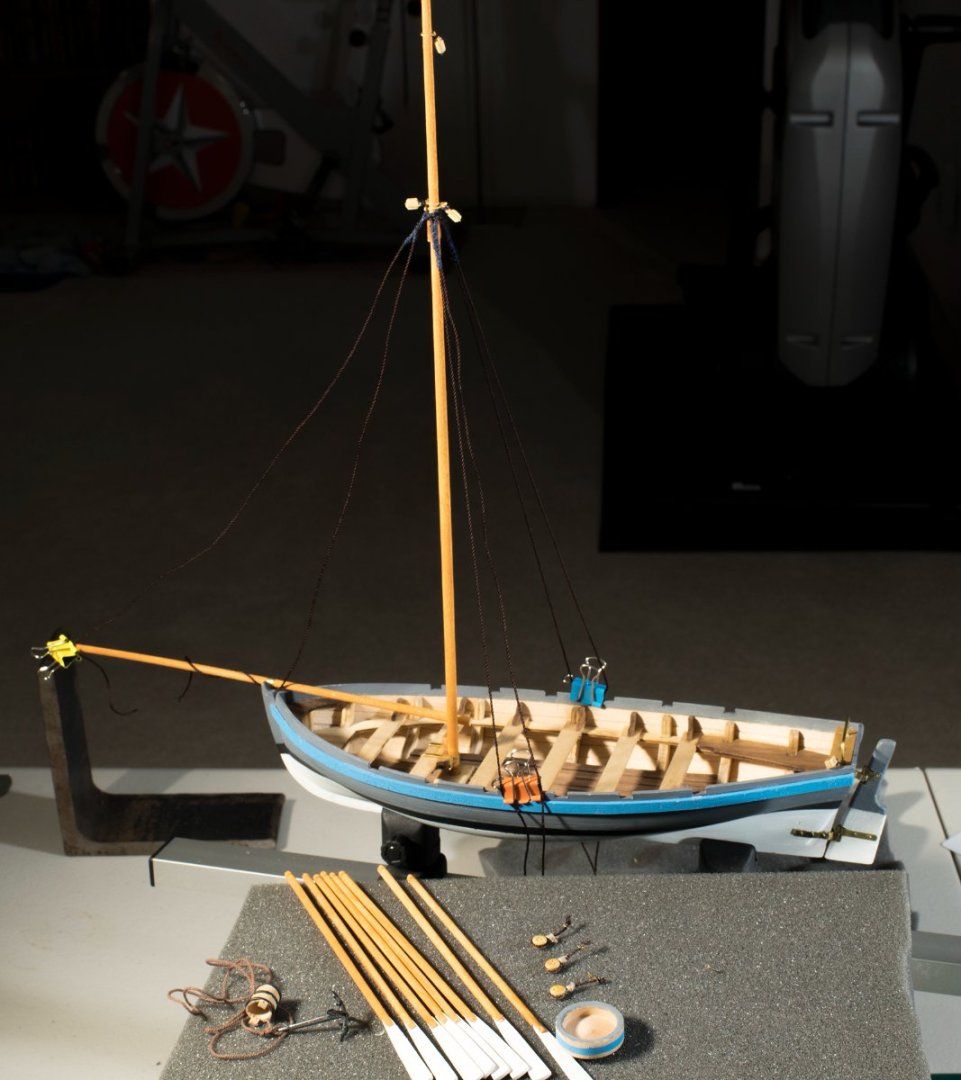
My next steps were to install the rudder, the mainsheet block, the axe, bowsprit supports, and chainplates. It took a while to get the rudder installed. I see I still need to improve my skills at working with brass rudder straps. I will leave the tiller off until last, so it won’t get knocked off a dozen times during boat assembly. Next, I glued the mainsheet block onto the deck, and then dry-fit the tiller in place. This is where I noticed that the sheets for the mainsail would interfere with the tiller operation. So, I had to either shorten the tiller, move the mainsheet block forward, or install a traveler bar. I choose to install the bar, as I had seen these in other boats. I installed the axe, mast truss reinforcements, and the fore and aft bowsprit supports. I added blocks and those cleat looking things to the mast. Now, to rig the mast. I found several YouTube videos about Rigging the Shrouds, and about tying deadeyes. As I worked my way through what to do, I looked at other boats, I decided I do not like the cotton thread provided in the kit, and I decided to use some very nice leftover 0.75 mm rope from another kit. But the provided deadeyes are too small for this larger rope. I ordered new, smaller lines from “Ships of scale”, and 4 mm and 5 mm deadeyes from Model Shipways. While I waited for parts, I shifted to assembling the oars, bucket, and anchor tub. I will have to retouch the paint job on the bucket and tub for the anchor line at a later date. Next, I focused on the “chainplates”. The little brass parts (# 65) that are provided are really a poor representation of how the shrouds should be attached to the side of the boat. We need 4 of these and they provided - just 4. No spares for these tiny parts – wow. I am having fun building this boat and I’m trying to say within the kit provided parts, but some of the kit parts are rather weak. I assembled two of the chainplate and deadeye assemblies, and I found that the knot I used between the “so-called chainplate” and thread, it caused the deadeye to turn 90 degrees to what I wanted. So, I disassembled the two chainplates and had to figure out what other another knot to use. I elected to use a half hitch knot on the backside of the brass thing, along with a touch of glue. Since the deadeyes arrived a week before my smaller/thinner line was due to come, I will start rigging the mast now using my existing 0.75mm rope and new 5 mm deadeyes for the forestays and shrouds. I looked at several YouTube videos on how others attach the shrouds. All of these videos were for 3 masted boats. But I liked the techniques and thought it would be good practice. First, I seized about 3 cm in the center of the shroud, the part that will be going around the mast. Then I wrapped the center of line (the seized part) around the mast and again seized the two lines together at the mast (see pictures below). For seizing, I only have sewing thread. I used bees wax on the thread, but thread was a bit thin, and still was fuzzy, so it doesn't look as good as seen on YouTube, but I'm happy with it.
- 62 replies
-
- 2
-
-
- Bounty Jolly Boat
- Artesania Latina
- (and 1 more)
-
Funny you should ask, Kev. I just had one pop off! I have one hook (bend in the brass strip) that faces towards the stern. I used CA glue between the brass and the rear facing mast reinforcement (items 25 and 26). As well, I placed CA under the strap in the front (both dabs are intended to be under the strap out of sight - intended). I just carved off the old glue and re-glued the offending strap back on. I am thinking I stressed the straps while "messing" with the mast. If one pops off again, I will do as you have done and bend two more straps, a bit longer and both with hooks. I think I will have access do this if needed, even after all is installed. Ken
-
Sarah: Very nice-looking boat. You have excellent craftmanship. I will be studying the detail of your work so I can learn how the experts do it! Ken
-
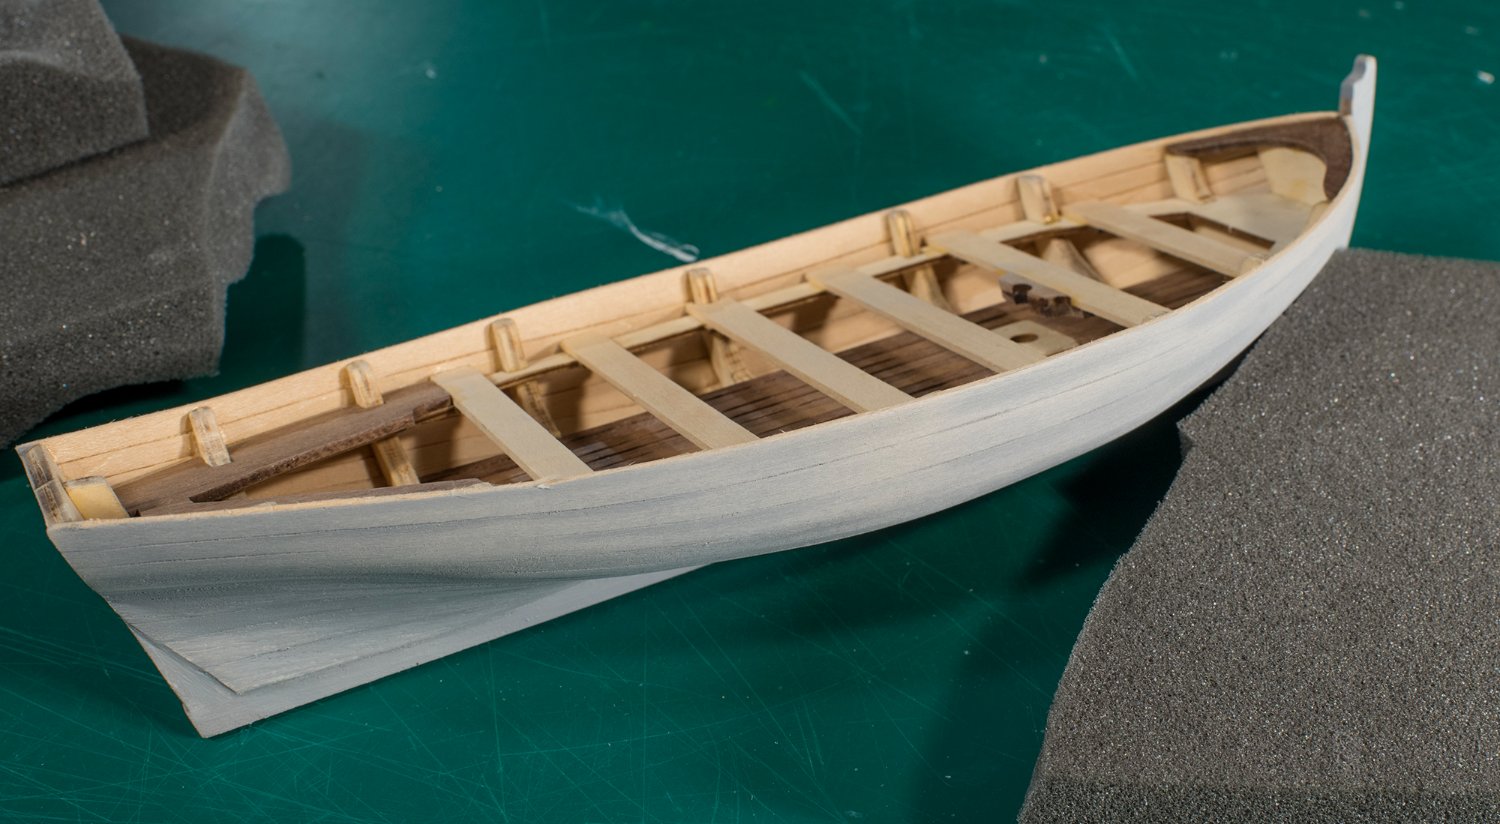
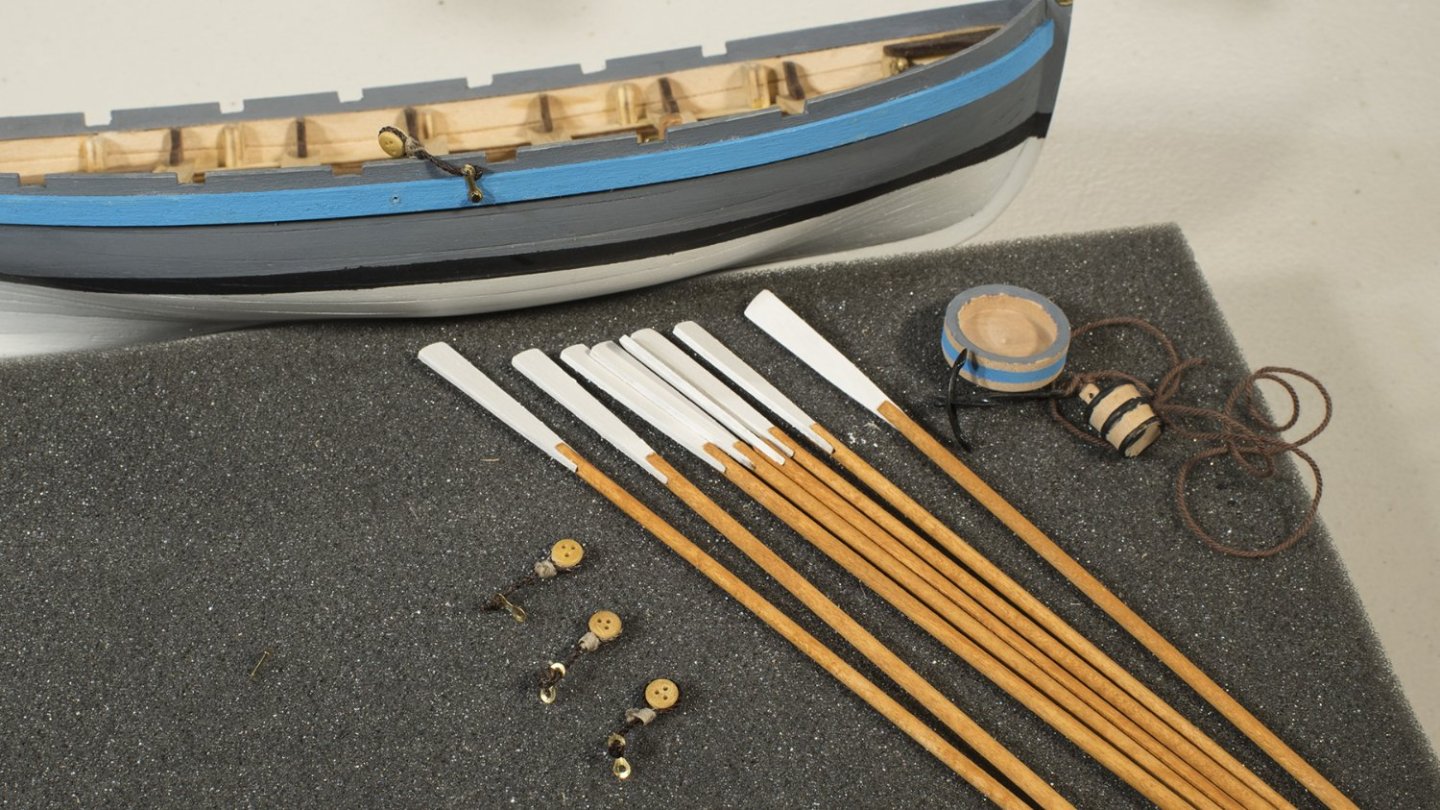
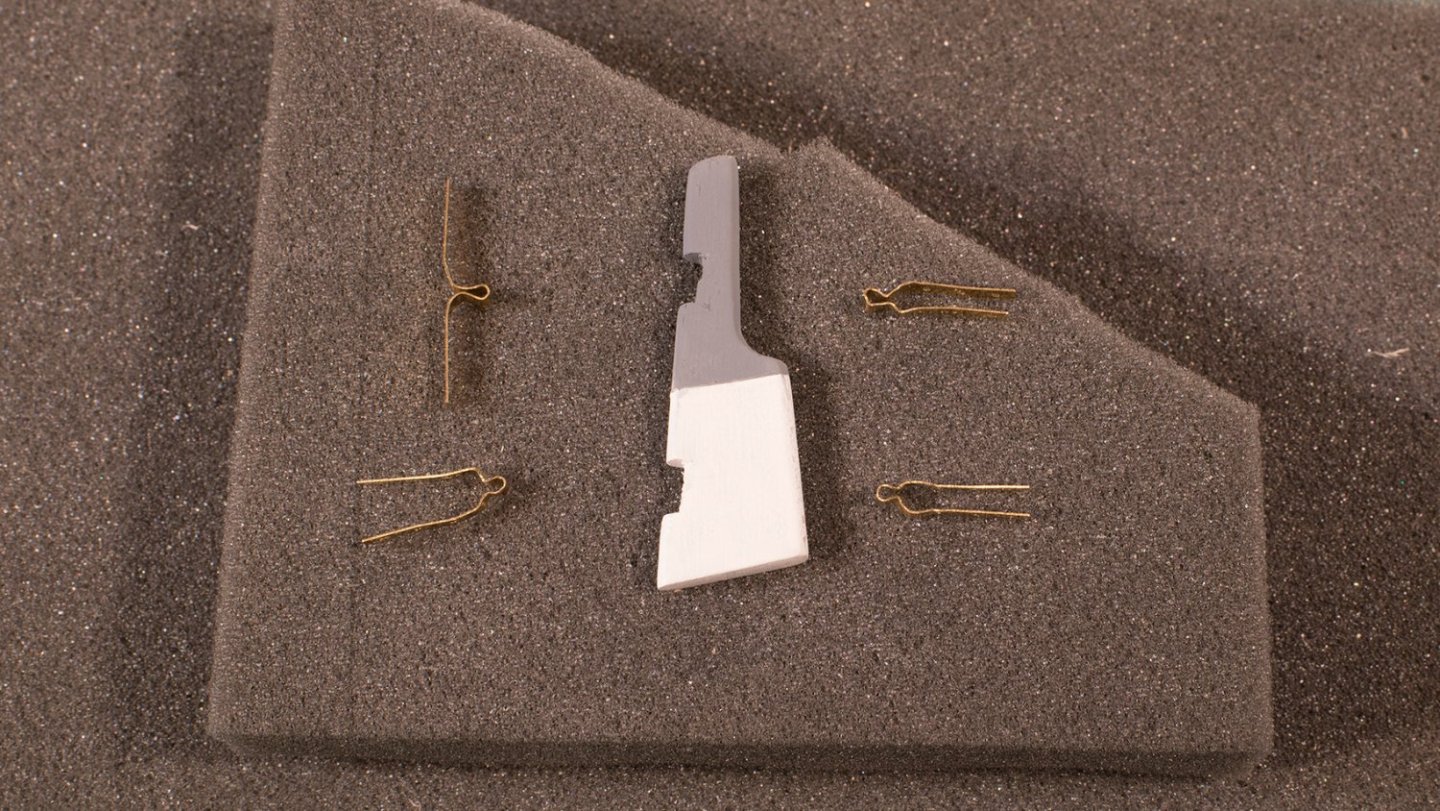
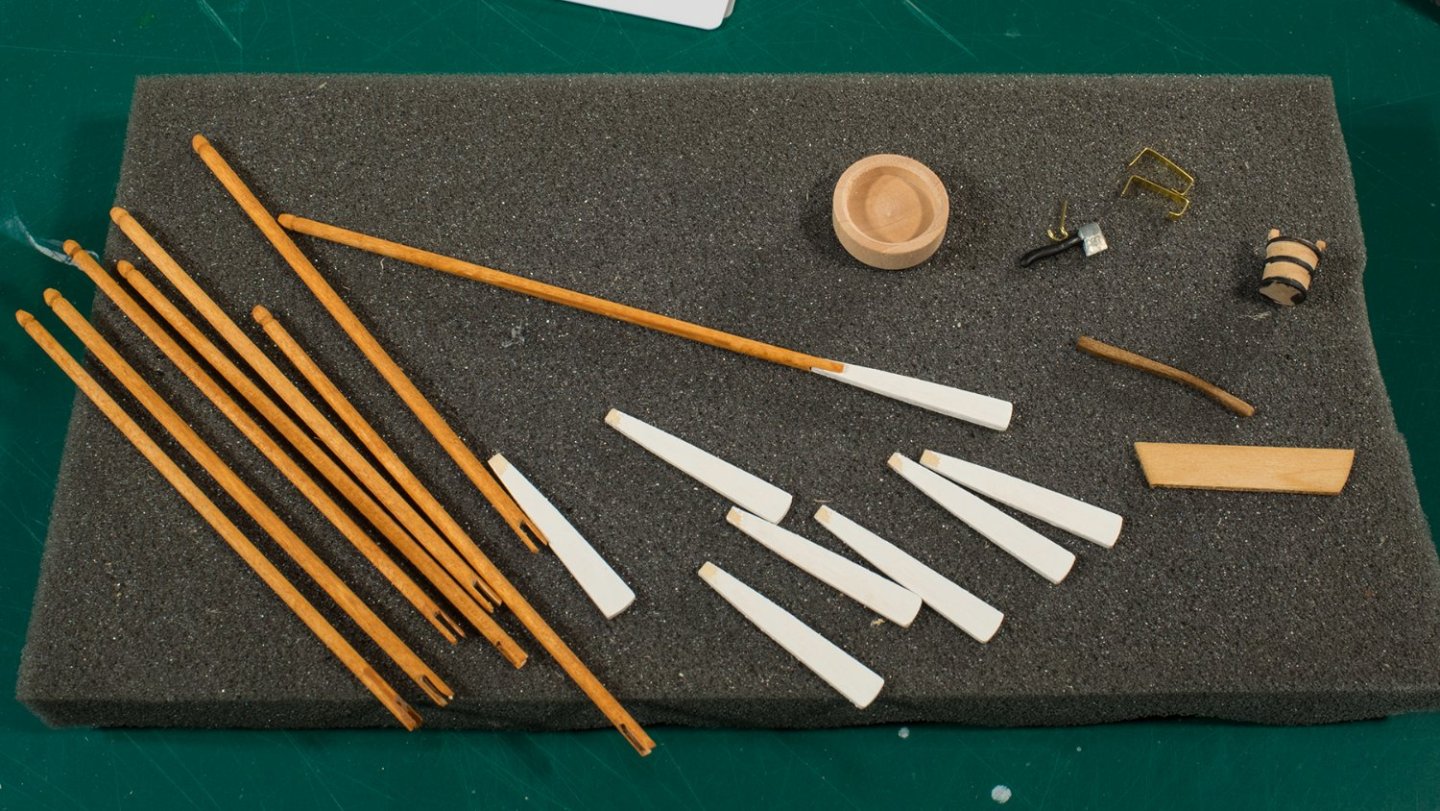
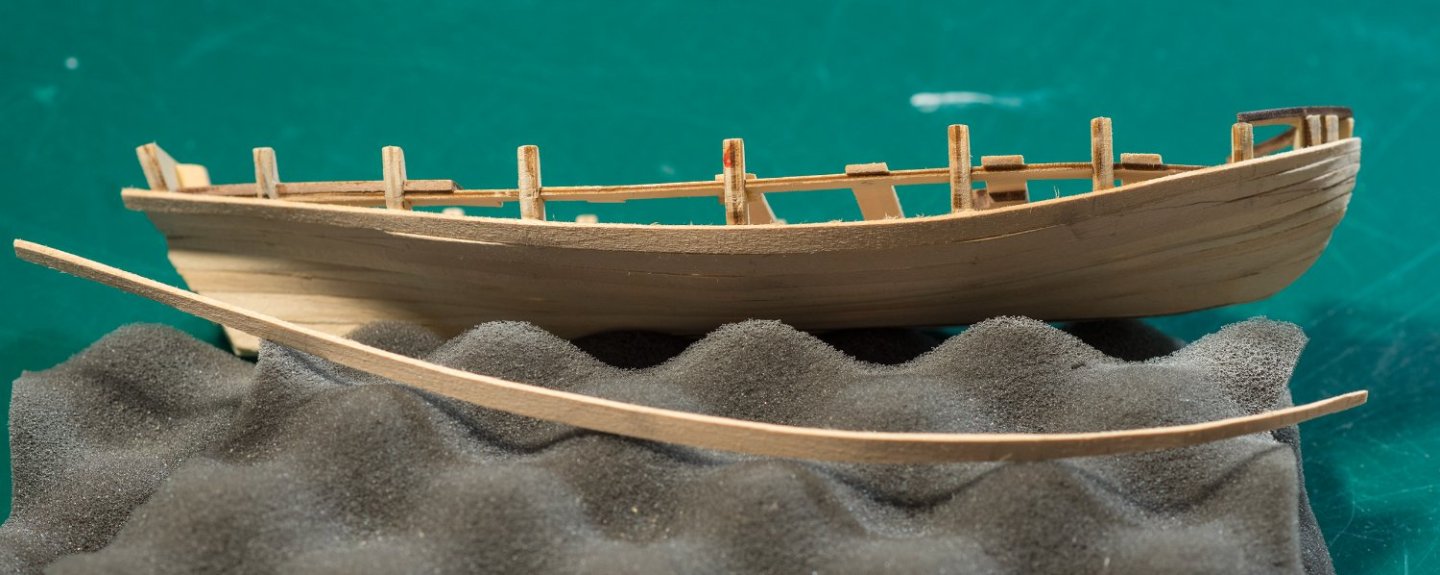
I started the rudder assembly by looking at Duanelaker’s example found in his build log. Thanks David. Your pictures are worth more than a 1,000 words! I found it difficult to bend these straps such that they mount flush with the rudder and stern as shown in the instructions. Bending and working these seemed to leave wrinkles and scratches. When I decided the straps were shaped adequately, I polished them with my Dremel. After the fact, I bought a pair of nylon jawed pliers which really helped with the remaining brass bending and would have been the tool to use for these rudder straps. These brackets are ready to install on the rudder and boat, but I will wait until the last minute (I think just before the masts are ready to install). Handling the boat while the rudder is installed seems like a good way for me to damage the rudder assembly. I also cut the bulwarks for the oars, and repainted the freshly cut wood, installed the thwart brackets, and cut and stained the stern plank. I bought some 1/8 in dowels for the oars, since there were no spare dowels provided in the kit. I found that the new $1.98 - 36” dowel I purchased was superior to the junk provided in the kit. I sanded and painted the oar blades. I painted the bucket, painted the axe, bent the mast truss reinforcement, and cut a tiller bar for the rudder. Once I have installed all of these, It will be time to step the mast, rig the spars, sails, and sheets. I have a feeling this sounds easier than it will be!
- 62 replies
-
- 1
-
-
- Bounty Jolly Boat
- Artesania Latina
- (and 1 more)
-
Kev: I just read through all the work you've accomplished since I last read it. You're on fire! and getting a lot accomplished. Your results look great. You are way ahead of me. You are doing so well I have little/no advice for you. I struggled to get my rudder straps bent to match the instructions. Yours look professional. I think it is very hard to get everything perfect. But as you build each boat, one becomes more familiar with the tricks and skills (i.e. experience). I will be very good in another 20 boats (ha), but it seems to me you will be an expert much sooner. It does not seem to me you are a beginner. Have you given any thought to your next boat? Ken_2 (Ken)
- 129 replies
-
- 3
-

-
-
- Bounty Jolly Boat
- Artesania Latina
- (and 1 more)
-
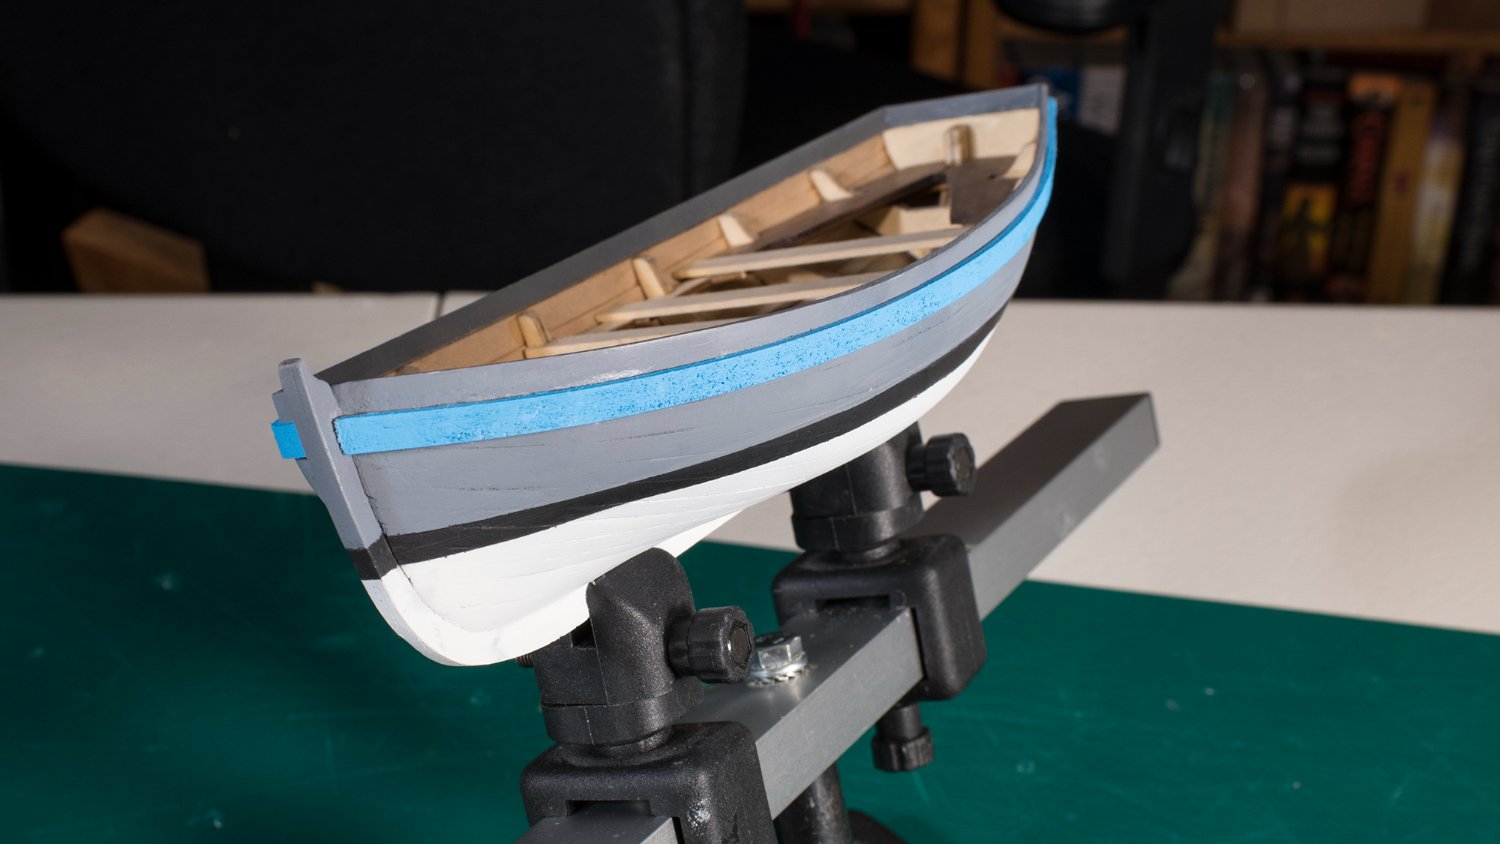
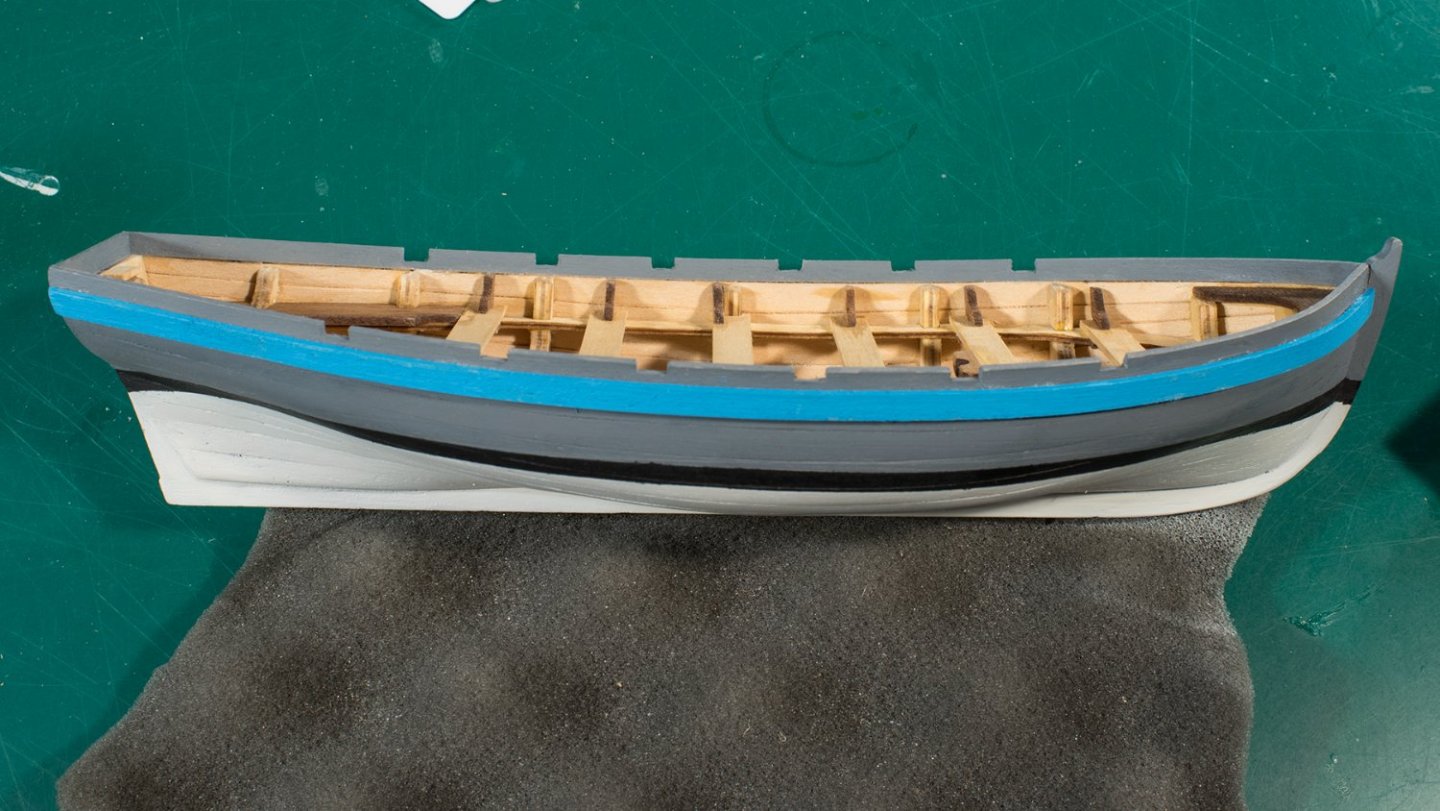
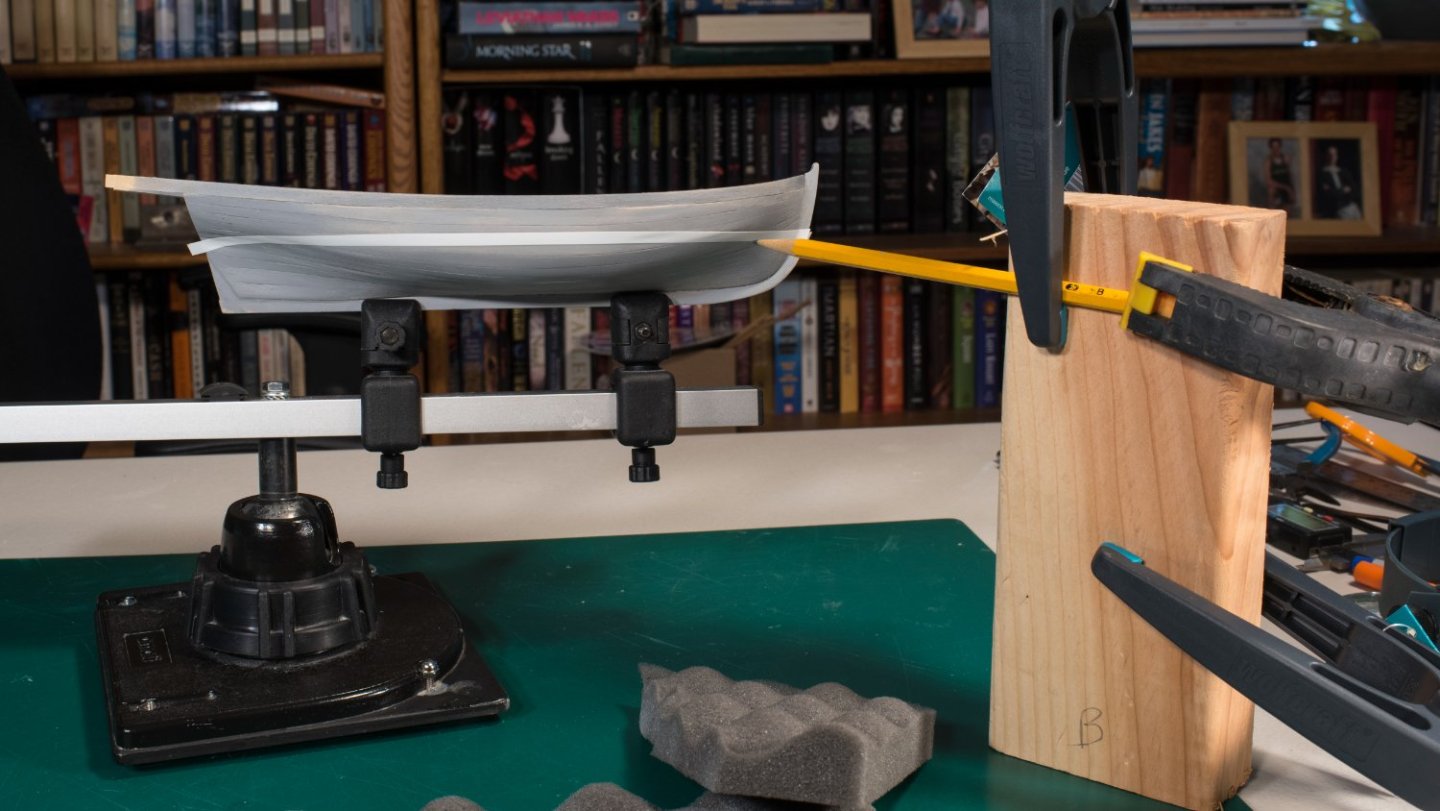
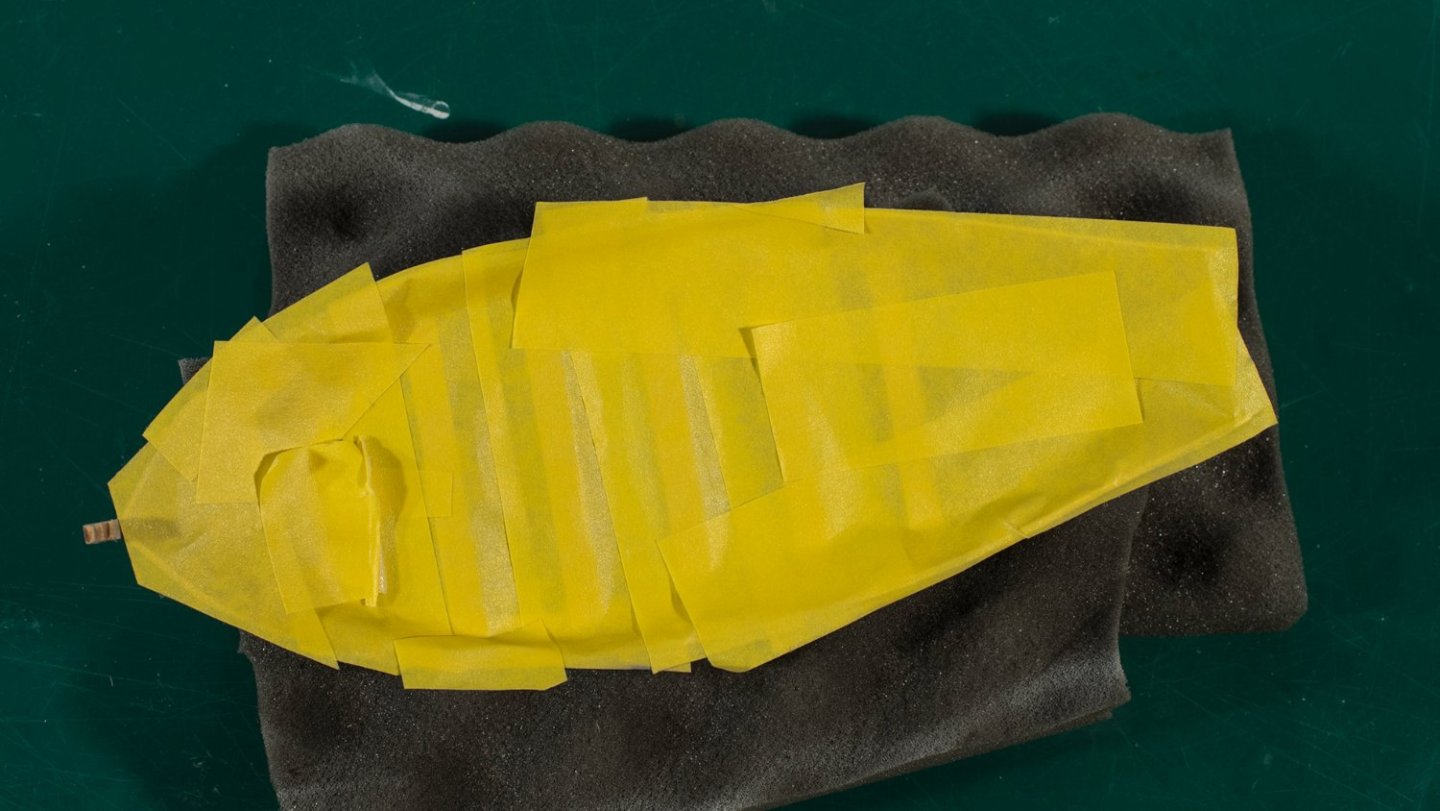
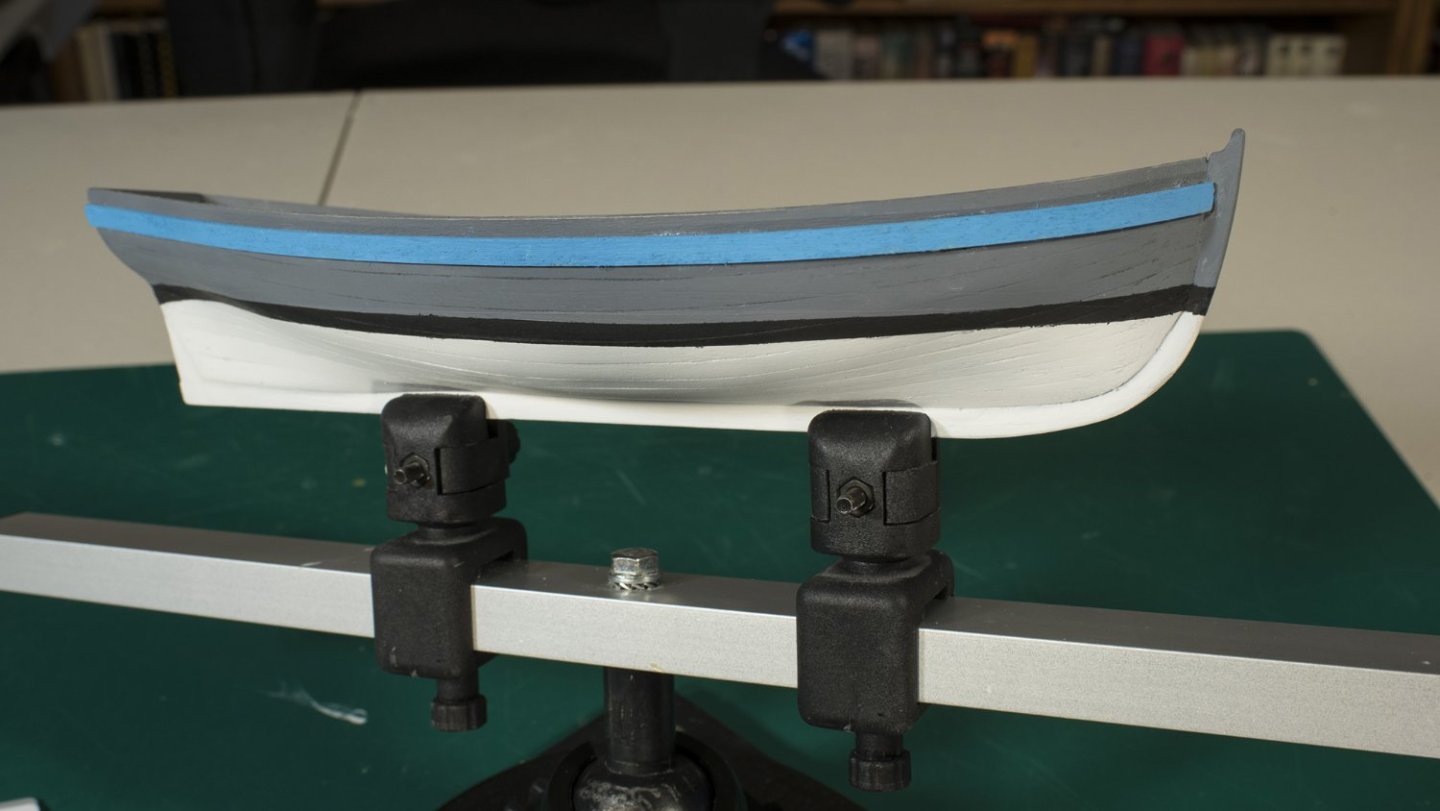
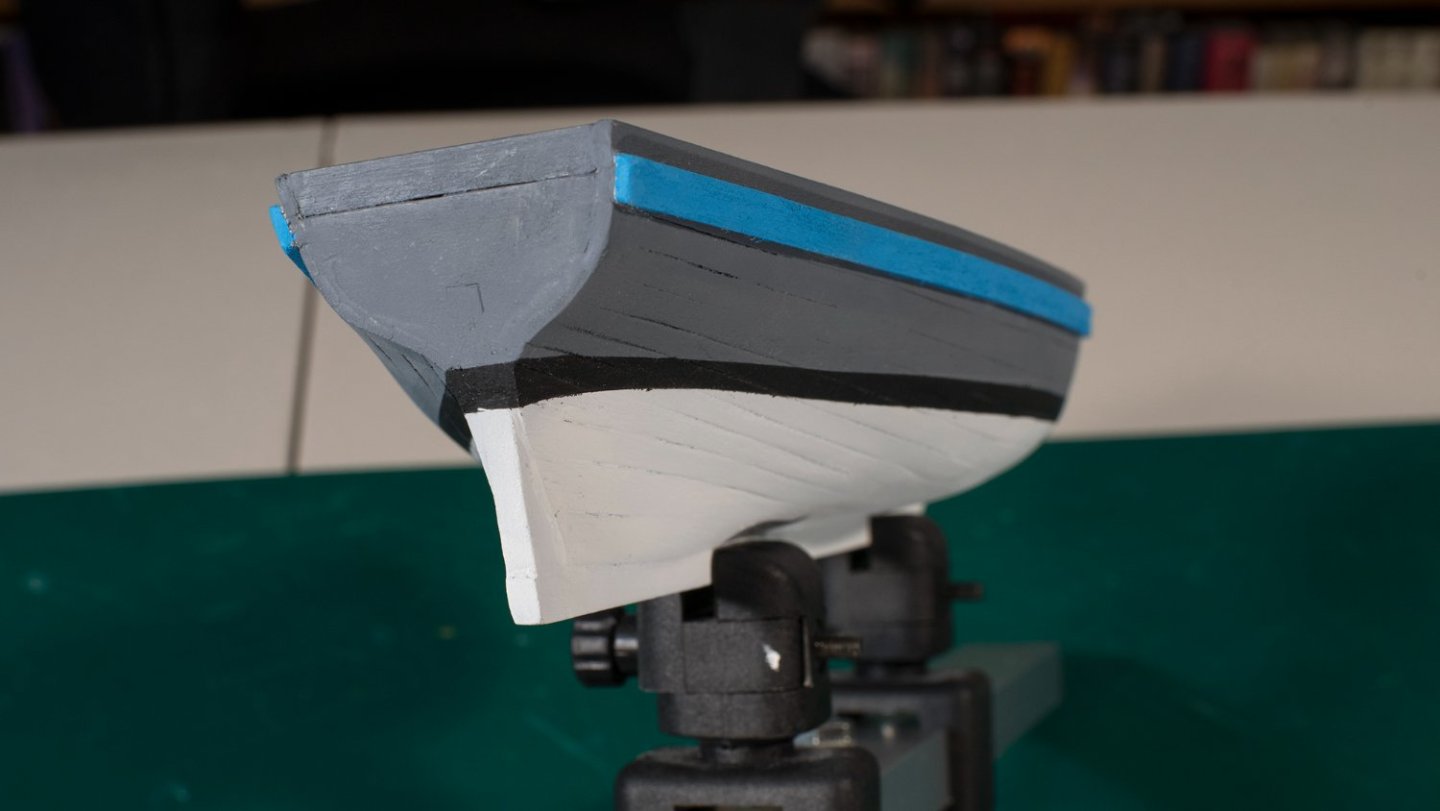
It took me a long time to find the colors I eventually selected. These are different than I originally imagined, but are historic marine colors, hopefully found in the period of the Bounty. In addition, all that I read says grey goes with everything. So, I have experimented by using these colors, and now that I have painted the boat, I will have years to look at it. Over time, I will evaluate these colors to see if I still like them. But for now – I do. I wanted to purchase paint from the local stores so I could see the colors. I have experience with using Enamel paints but there was a limited selection of flat enamel colors (the stores said the poor selection was a result of a supplier sourcing problem). I considered switching over to using an acrylic paint, but I decided not to at this time. Using acrylic paint would be a significant effort on my part (different thinner, paint cleaner, mixture ratios, etc. Plus, I would need to conduct more experiments with painting and evaluating the resultant colors.) Once I had the colors “in hand” the next thing was to figure out where the water line will be. As shown in the photos below, I used a stationary pencil and rotated the boat around. The trick was figuring out if things were level and stayed level while drawing. After this, I used a laser level to confirm the water line. Then I masked off the bottom part and the interior and airbrushed the top part of the hull flat Grey. When dry, I masked off the interior and the top part and airbrushed the bottom flat white. Next, I used a process from my recent build of the “Spay”, and masked off an area for the flat Black water line. As well, I airbrushed grey on the top bulwarks (sides and stern planks), and blue on the side bulwarks. Once all the paint was complete and dry, I glued the bulwarks to the assembly. I still have a little glue showing and a few paint anomalies that I need to clean up, but I will do this at the end after everything else is completed. I think I will deal with the rudder next.

- 62 replies
-
- 3
-
-
- Bounty Jolly Boat
- Artesania Latina
- (and 1 more)
-
So far, I have abandoned the kit planks and spiled my own planks to have a “smooth hull”. I have selected a color scheme and practiced with a partial paint job. Next I will bend the top plank, paint it, install it, and paint the hull and interior. I am sure the hull will require some touch up work, but after that, I should be complete with the hull. Hooray.
- 62 replies
-
- 1
-
-
- Bounty Jolly Boat
- Artesania Latina
- (and 1 more)
-
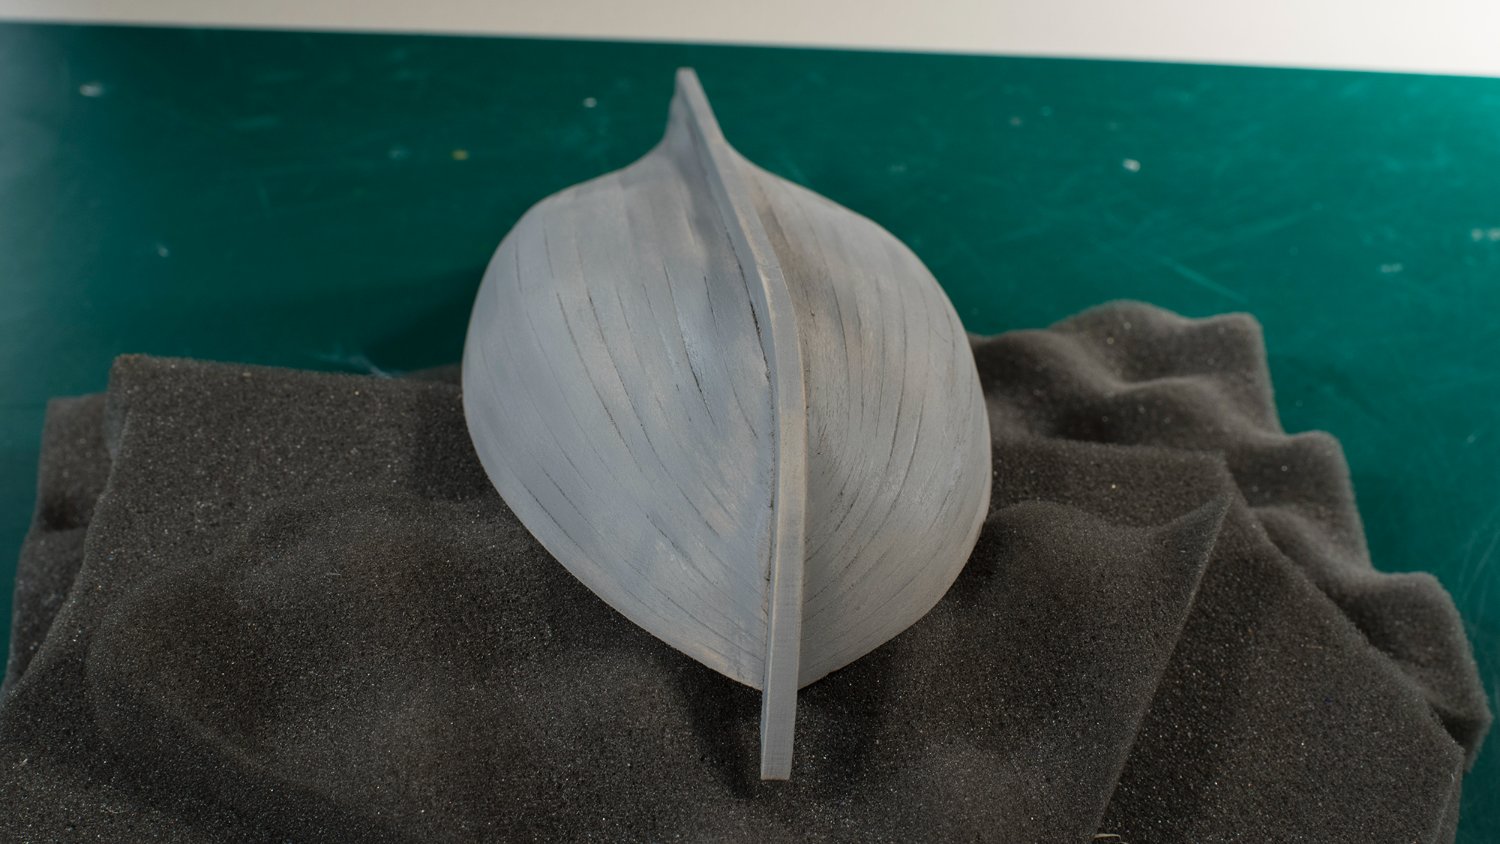
Once the primer was dry, I took the boat upstairs in better lighting, and found that my hull was not as smooth as I thought. The black lines in the following first photo are shadows from the raised ridges between planks (not smooth). So, I sanded again, outside, with 150, 220, and then 400 grit, the result in the following second photo. The low spots on the wood remained covered with sealer, while the high spots were sanded down to bare wood. Once I re-determined it was smoother, I sprayed sealer on again. There are still some indications of it not being perfectly smooth (grey shadows). I’m not sure when enough is enough. These latest indications are mostly found in a bright light and especially noticeable when looking from the keel up towards the deck. So, I am hoping that 2-3 coats of paint will partially smooth these ridges, and they be less noticeable on the final stand, since the viewers will have a top down look. If this is not good enough, I will know better for my next boat.


- 62 replies
-
- 2
-
-
- Bounty Jolly Boat
- Artesania Latina
- (and 1 more)
-
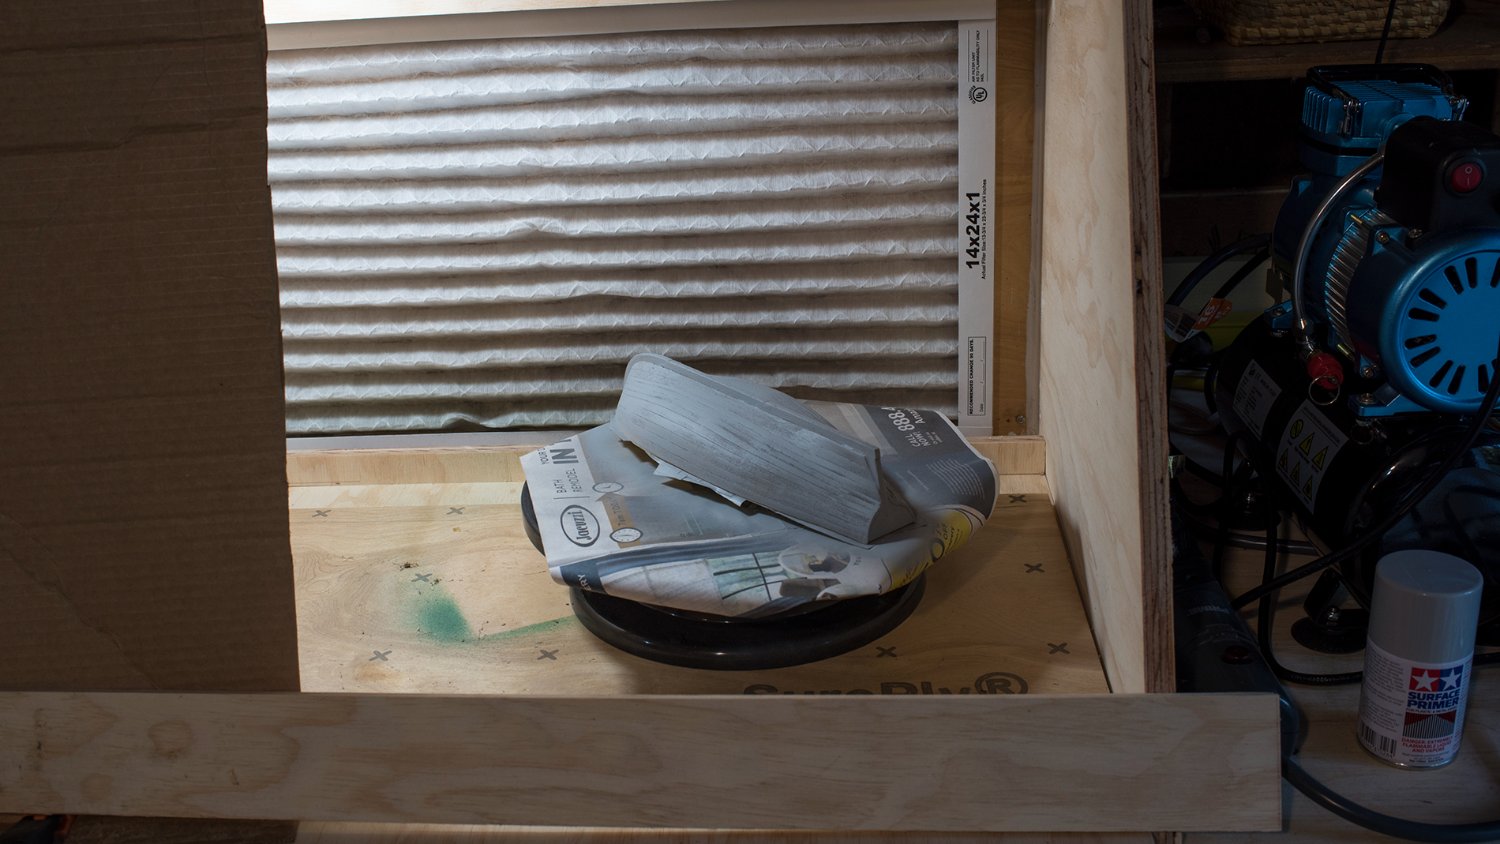
Now that I have selected the decking finish, I spent time on selecting a color scheme for the hull. I found several references describing which colors were used in the time frame of this boat, and I looked at photos and examples of other boats. I could not make up my mind on what I wanted. So, I bought a color wheel which shows complimentary colors. Eventually I just guessed at a color scheme I liked and purchased some paints. Now that I have a plan for the top deck and hull color scheme, I decided to seal the hull before I proceed further. This will help me decide if I have the right paint, tools and will refresh my painting skills. I may color both sides of the top plank I have yet to install, so I figured it would be easier to shape the wood, cut the oar locks, and seal the top plank while off of the boat. I used a Tamiya surface primer out of a rattle can (spray cans). This has always given me a good base layer for brushing or airbrushing my other boats. But the propellant for these cans is really noxious. This is the main reason for building my spray booth with an external exhaust vent through the window. This booth also provides a more controlled environment than an open garage, especially in the winter. My 200 CFM fan evacuates the fumes from airbrushing enamel paints quite well, but it struggles with the rattle cans (spray cans). So, I reduced the size of the opening of the spray booth to increase the draw which achieved no smells in the garage.

- 62 replies
-
- 2
-
-
- Bounty Jolly Boat
- Artesania Latina
- (and 1 more)
-
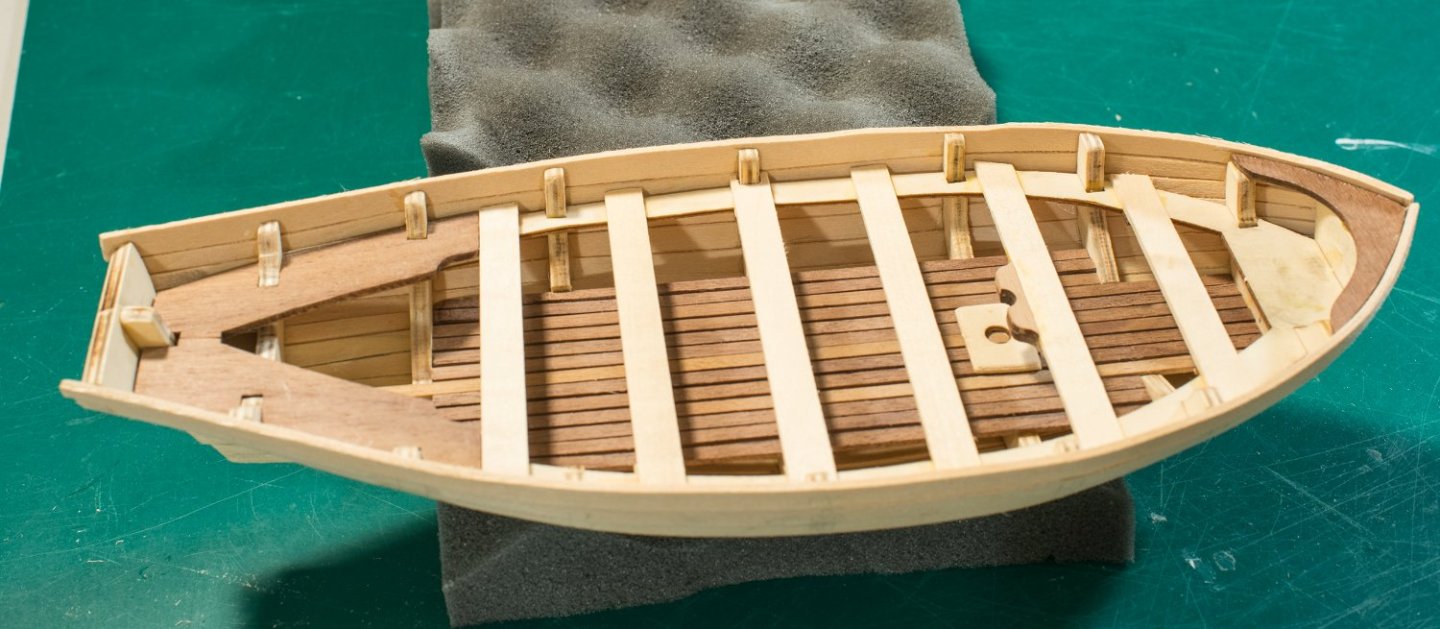
I filled a few gaps with filler and sanded again. Rather than paint the top deck, I have decided to stain it. It would have been better to address the color of the interior planking and frames before I installed the deck and seats, but it is what it is. So, I performed an experiment on some scrape wood. · I applied 2 coats of a clear matte finish to some sample wood (which hardly did anything to the color). · I then tested a tan “wood finish” acrylic paint (which only put a tan coating down and did not improve the look) · Next I used a clear polyurethane finish, which provided some color but was not as good as the last test). · Lastly, I applied a coat of minwax Golden Oak semi-transparent wood stain. This is what I have selected for the mahogany wood, seats, and deck. I applied this to another set of sample wood and wiped it off quickly. This provides a color effect that is light but has a good color accent. In another test, I diluted the stain with mineral spirits. I liked the “full strength” stain on the mahogany, but the bass wood looked better using a 1 part mineral spirits to 2 parts stain on the seats and deck. I will not attempt the interior planks nor frames, as I think the effort to the stain or paint these while assembled will be time consuming, risks staining wood where I do not want it, and the overall effect of unpainted surfaces on the boat interior hopefully, will be minimal.

- 62 replies
-
- 1
-
-
- Bounty Jolly Boat
- Artesania Latina
- (and 1 more)
-
I removed a duplicate post
-
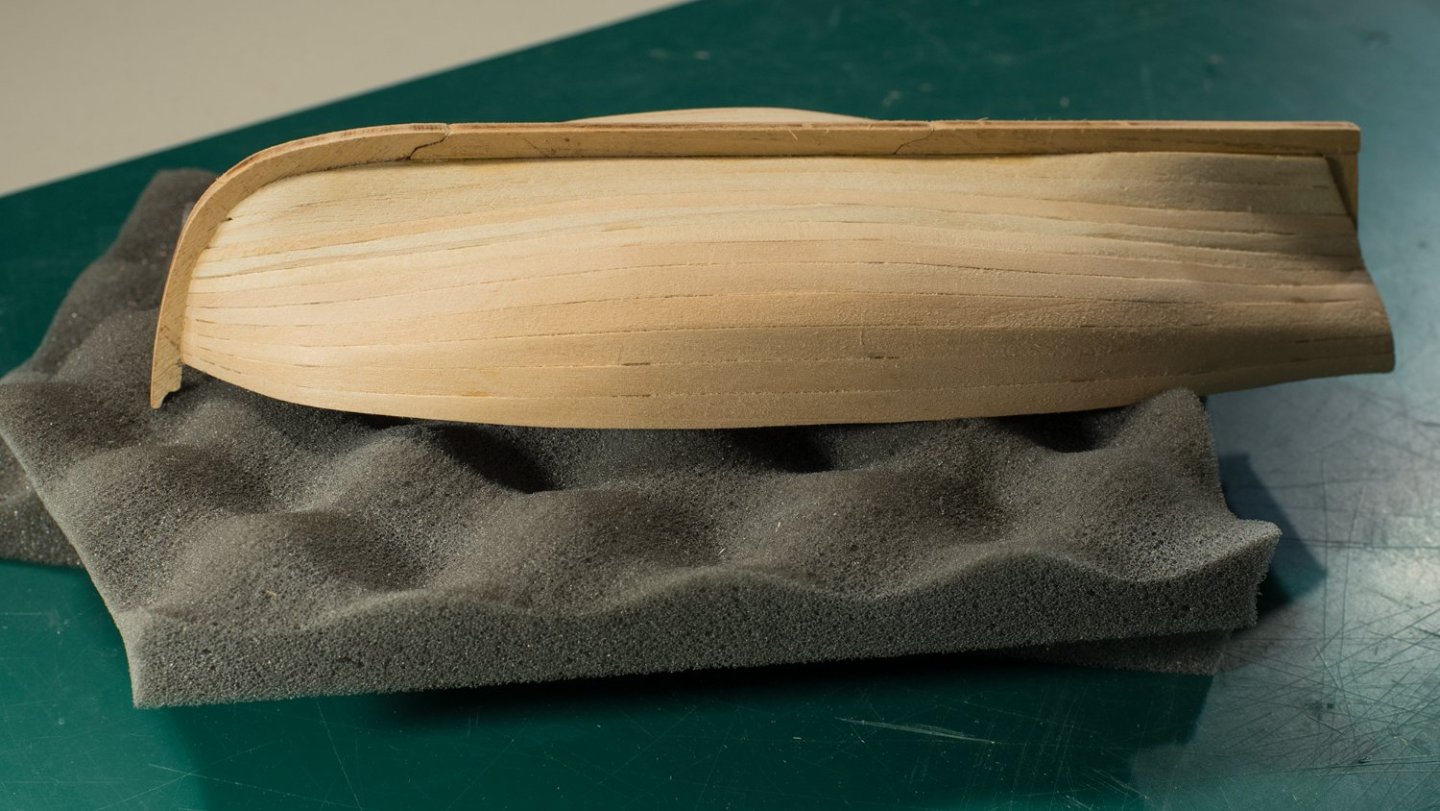
I thought the planks had been sanded smooth, but from the following pictures, I see many “non-smooth” features, mainly highlighted by the lighting. So, I will spend a little more time sanding. As well, I think now is the time to paint the hull before I go further.
- 62 replies
-
- 1
-
-
- Bounty Jolly Boat
- Artesania Latina
- (and 1 more)
-
Me too, Kev. File, fit, repeat multiple times. I used superglue to install the bow piece, since I did not want to mess up the planks when taking it off. So, I was committed to a one-time install. But I used wood glue for the remaining pieces, which are drying now. There are small gaps here and there, which I may eventually cover with filler - depending.
- 62 replies
-
- 2
-
-
- Bounty Jolly Boat
- Artesania Latina
- (and 1 more)
-
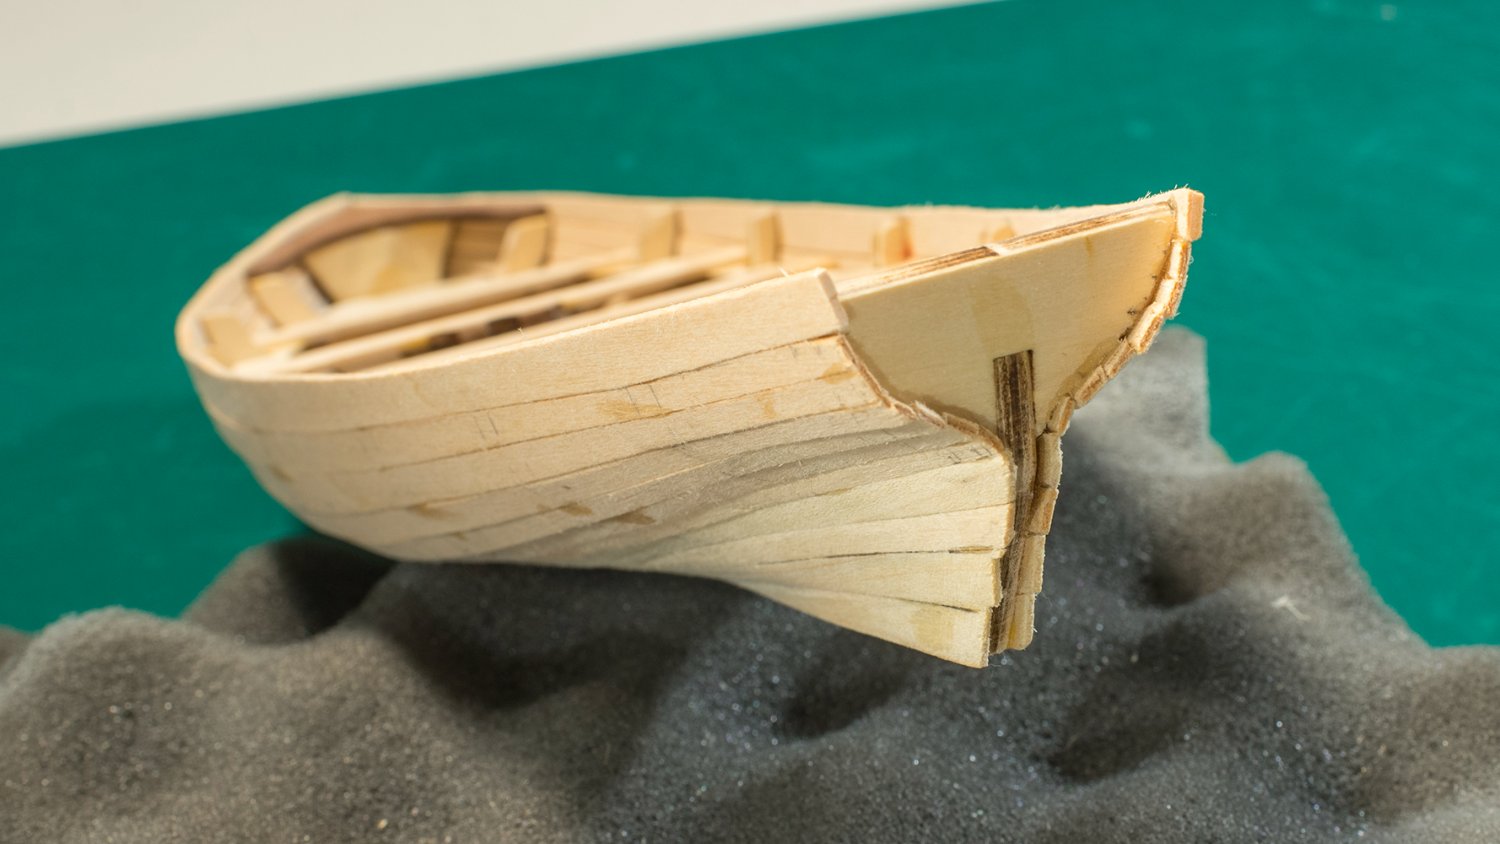
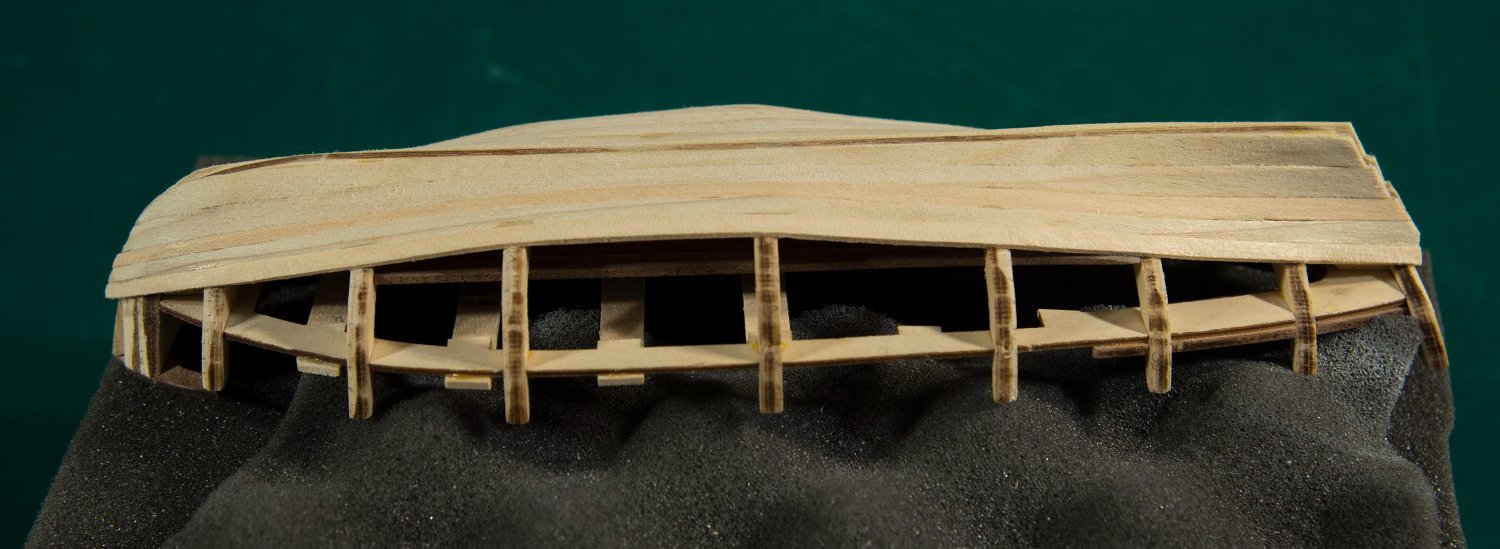
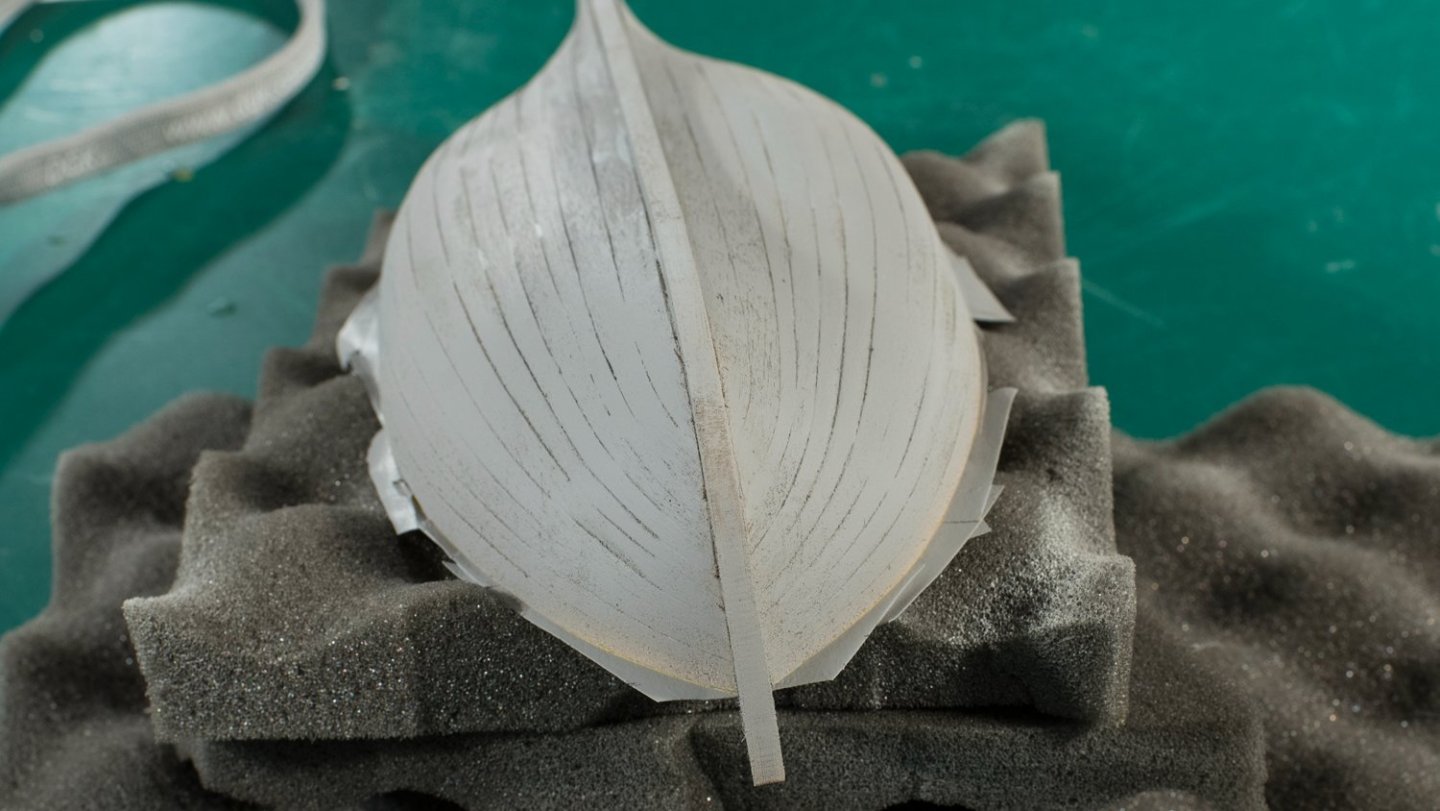
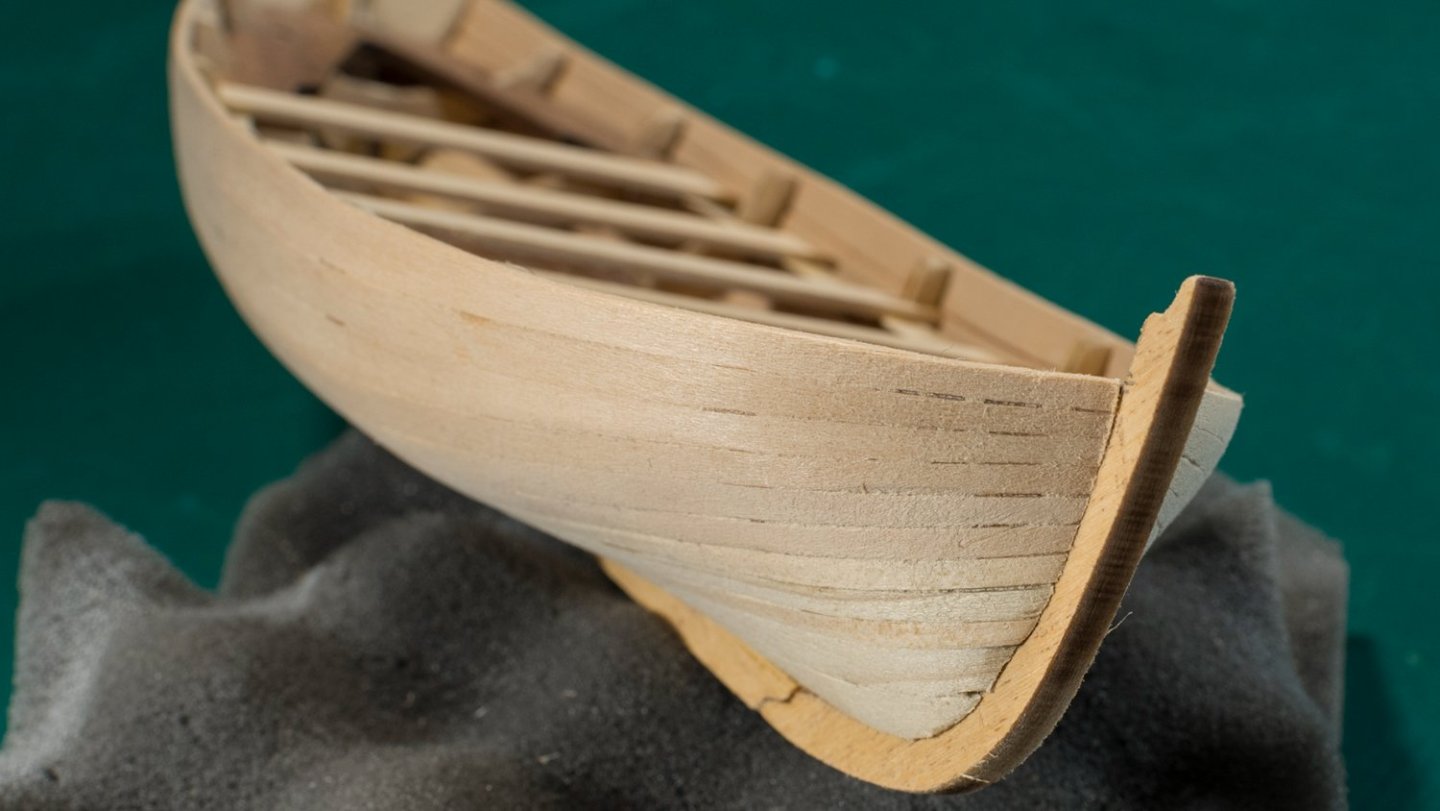
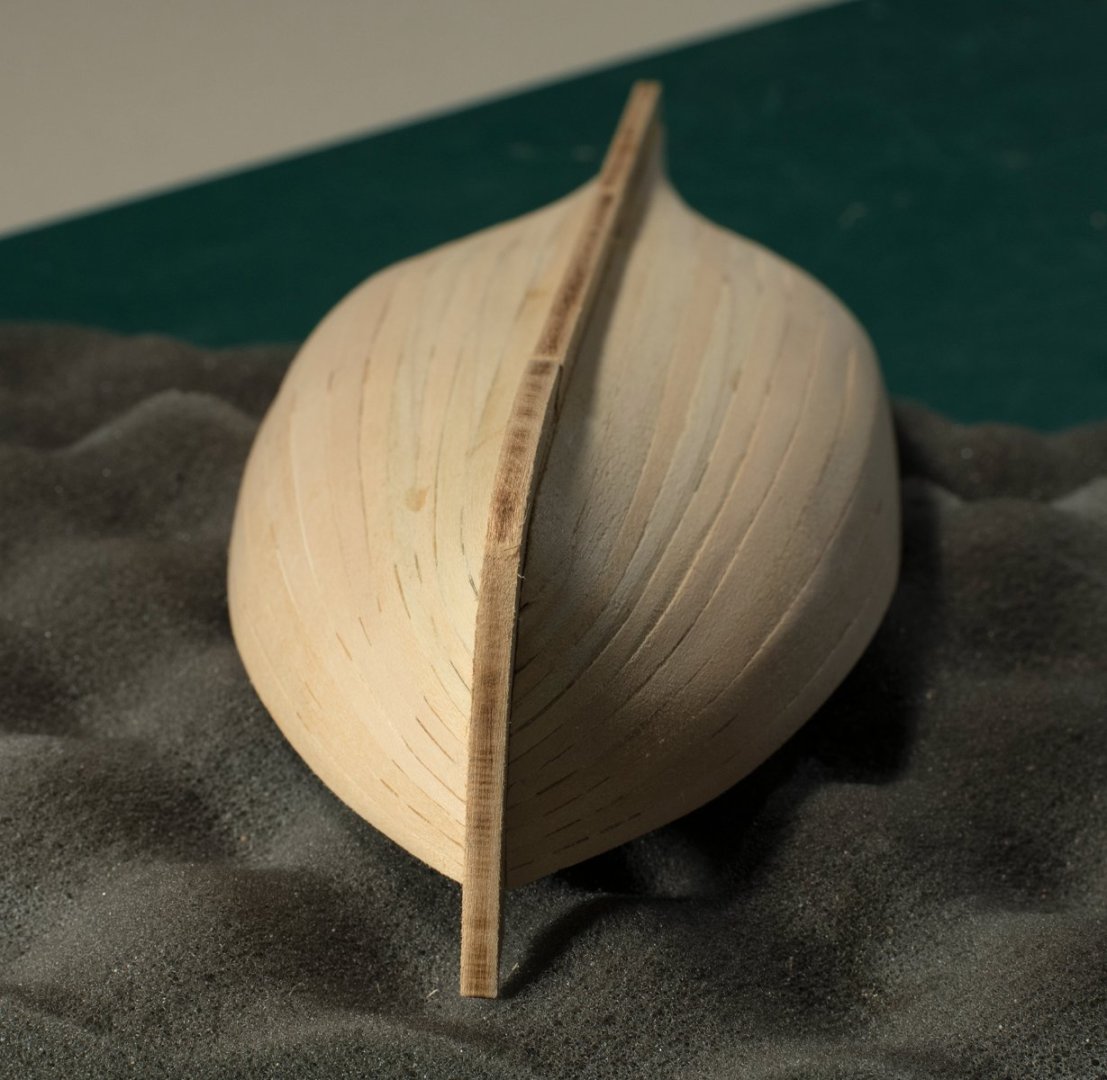
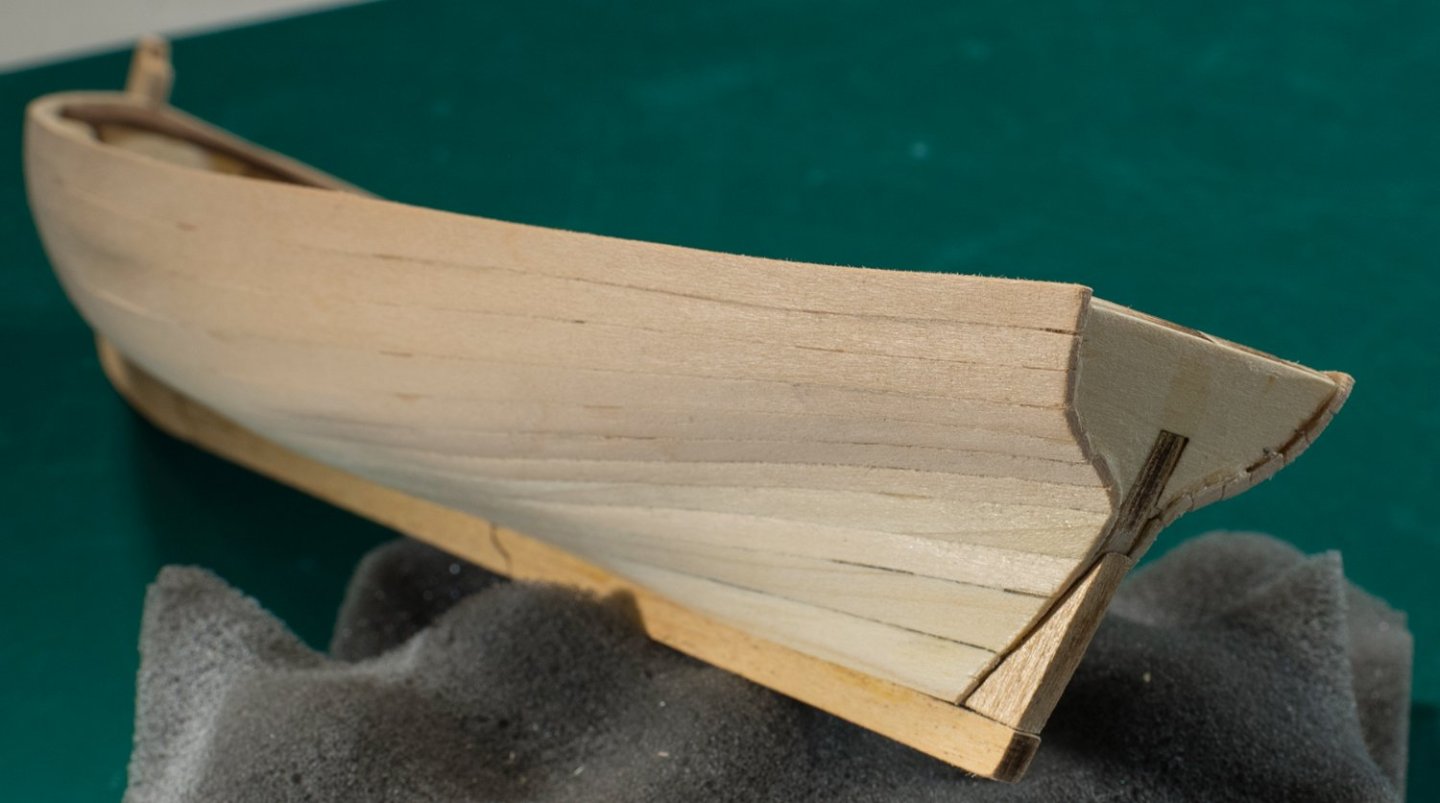
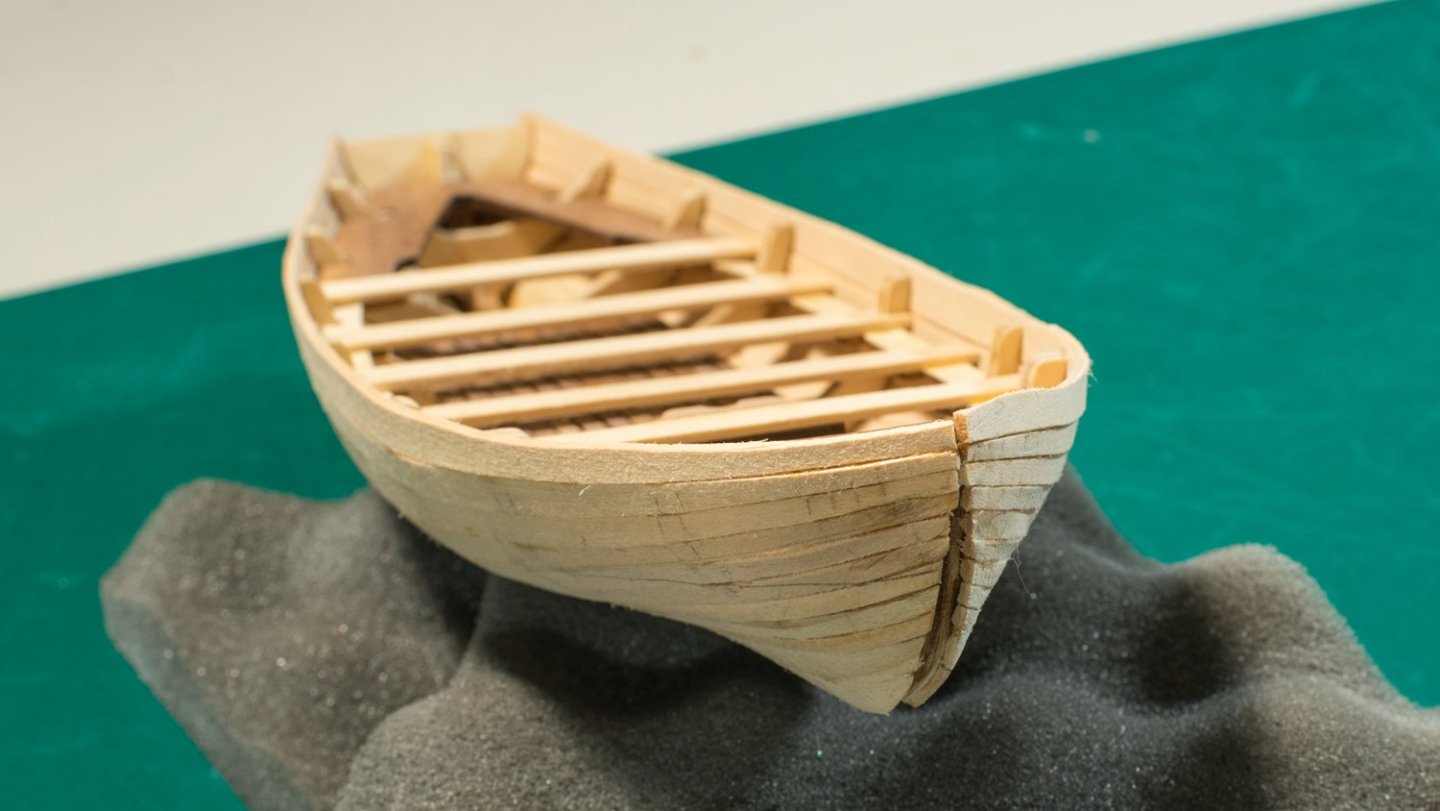
For me, the planking has always been the most difficult task, and my results always seem to be somewhat lacking. So last year, I purchased the "NRG Half Hull Planking Project" (https://thenrgstore.org/). The Planking tutorial provided good instructions, many new concepts, and allowed me to focus solely on planking and provided lots of practice. Although the work accomplished on this Bounty Jolly boat is still far from museum quality, it is the best I have done so far. The following 3 pictures show my progress in this kit. The next steps will be to sand the hull smooth, lower the top plank to be even with the frames, and trim the planks and the stern and bow.

- 62 replies
-
- 4
-
-
- Bounty Jolly Boat
- Artesania Latina
- (and 1 more)
-
Once the plank is dry, it retains the shape, so I am able to sand the edges once more for a better fit. Then I glue it on.
-
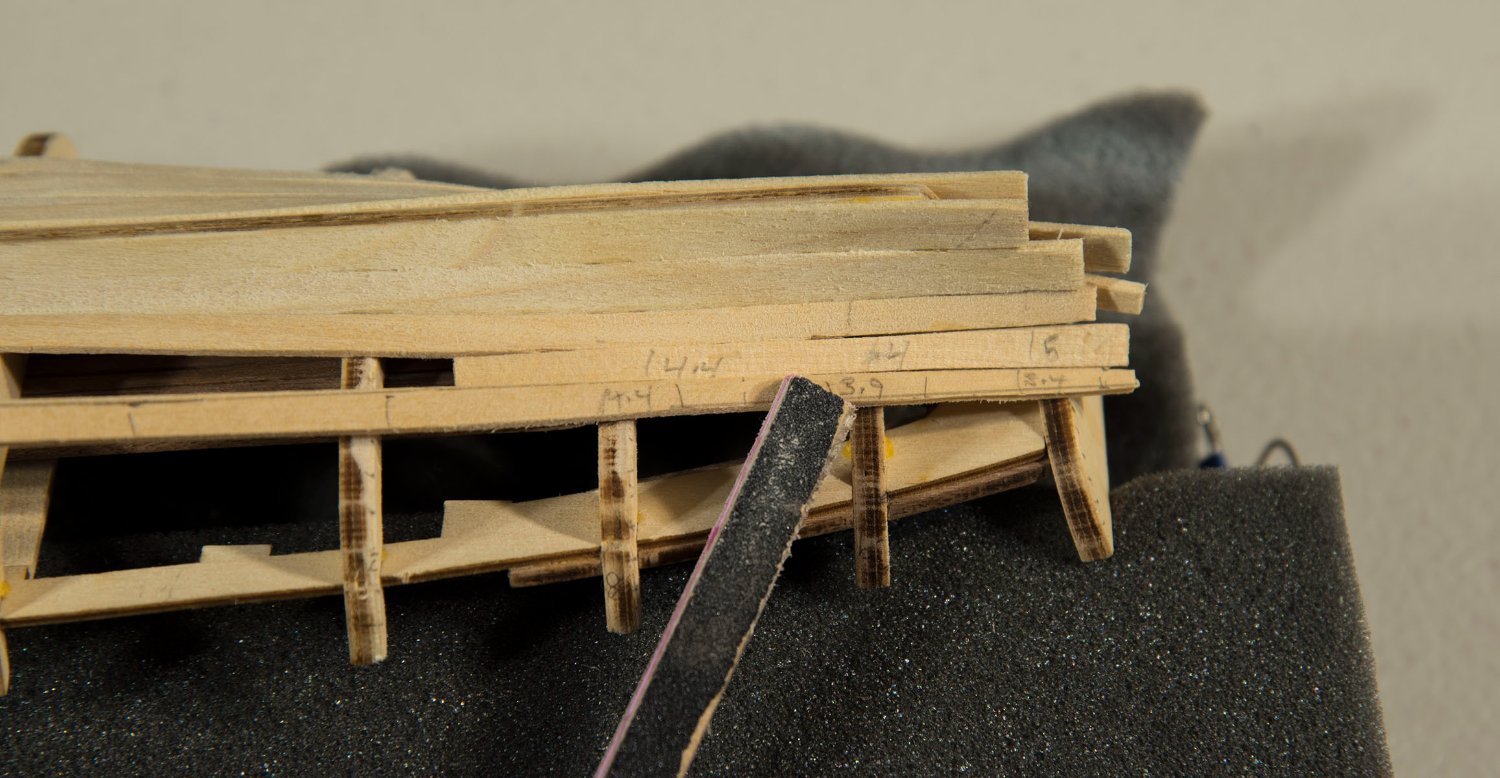
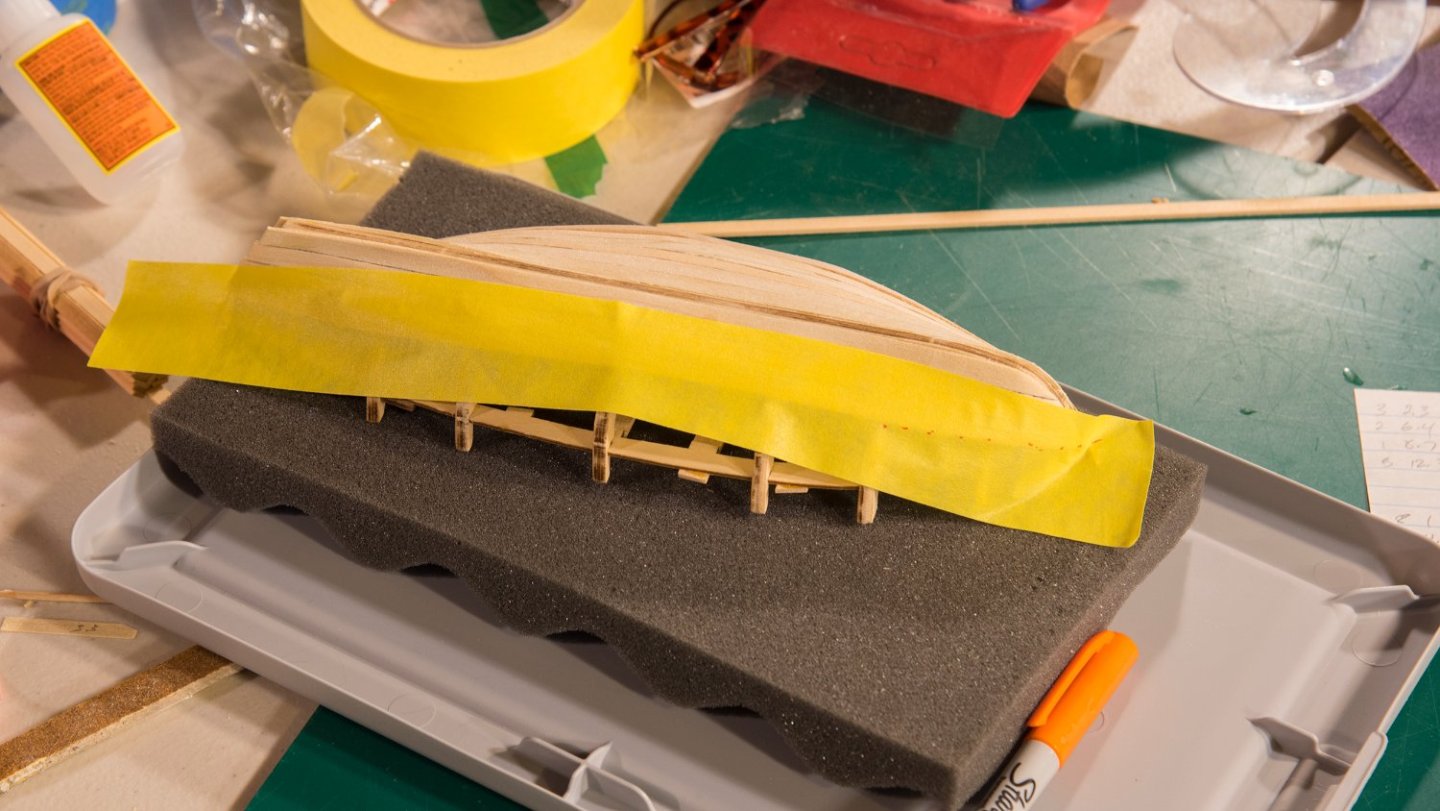
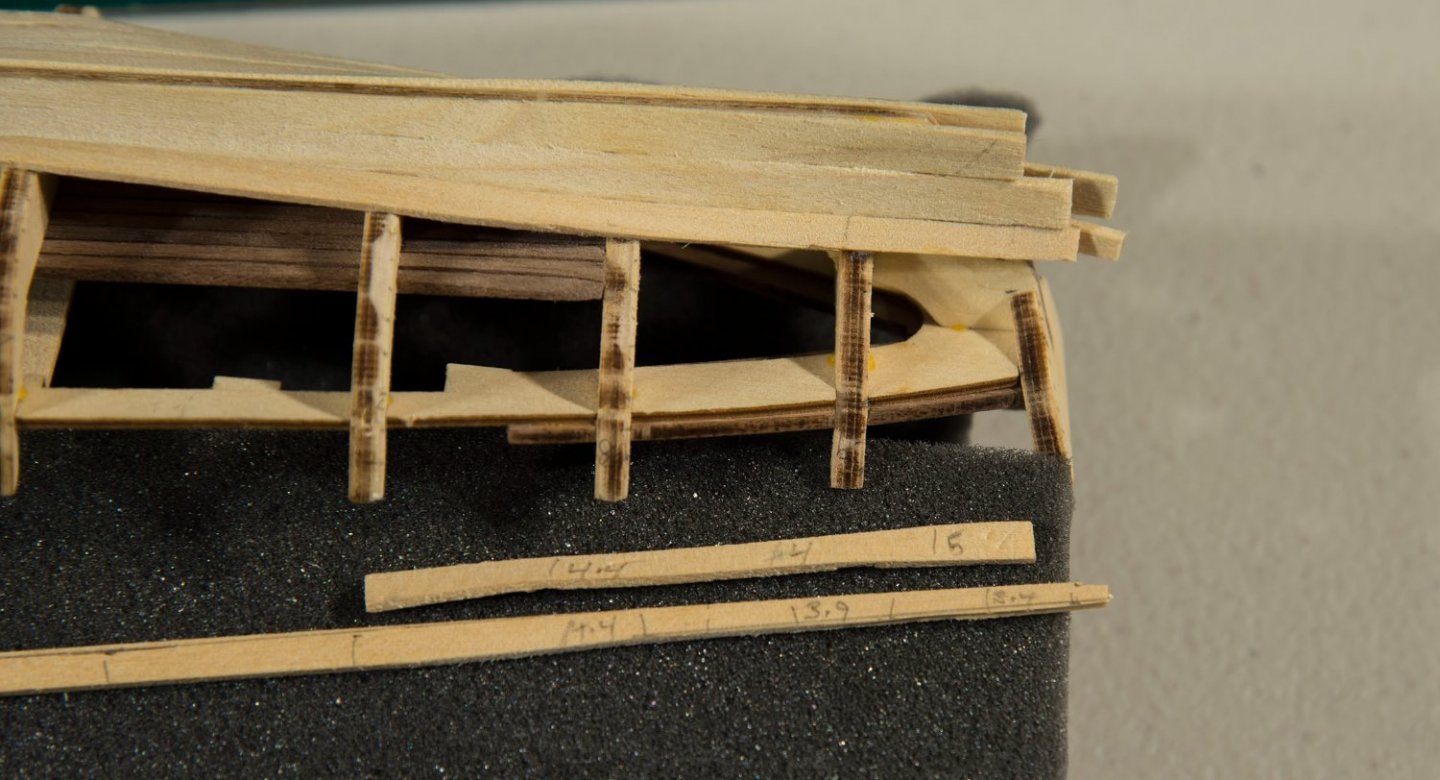
I spile the wood by laying tape on the boat and mark the tape where I want the next plank to lay. I remove the tape to a sheet of wood and cut the next plank, whose width is bit thicker than needed, so I can “tailor” it to fit on the boat. I sand one side to fit close to existing wood, and then sand the other side to have the proper width of the plank, as determined by excel measurements. When the resultant plank fit, I then soak the trimmed plank in hot water for 5 minutes and clamp it in place and let it dry overnight. Once dry, I dry fit the plank in place, make few more sanding adjustments, and then use superglue to install the plank. When clamping the wet wood, and gluing the plank in place, I aways start at the bow, as it is easier to deal with the sharp curve first rather that after the other parts are clamped/glued. And when gluing, I start by gluing only a few frames at a time. Once a plank is installed, I repeat the same process for the other side. I will spile several more planks until my leftover planks from another kit can be used (sanded to fit without spiling.

- 62 replies
-
- 2
-
-
- Bounty Jolly Boat
- Artesania Latina
- (and 1 more)
-
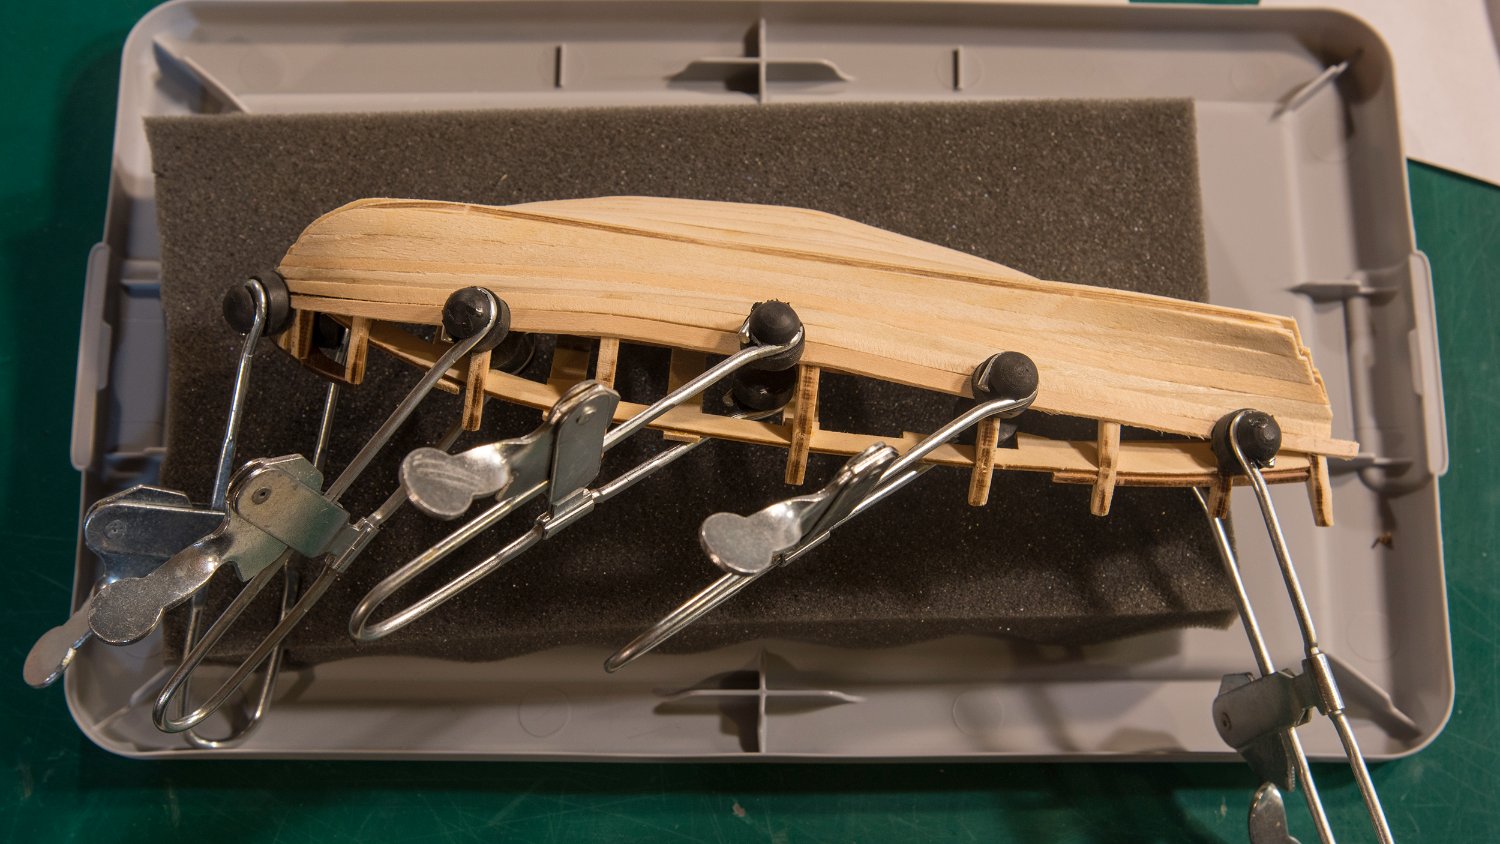
I moved my workstation to the garage last spring and continued planking. But after working in the garage, family activities overtook me, and I was only able to work a month or so before summer completely took my time. (I like to sail on rented boats, hike, and cut wood for the winter. I also have been working on outside chores around the house). The following was prepared for my next post a while ago, but it was never posted, until now. This post is from last spring, but since I am back “at it”, I’m hoping more will follow on a regular basis. It seemed to me that the next planks will require a significant bend sideways (edge setting) at the bow and stern to keep the planks laying straight when running forward and aft. (See the pictures below). Thus, I decided to spile these next few planks until I could use the kit provided straight planks again.

-
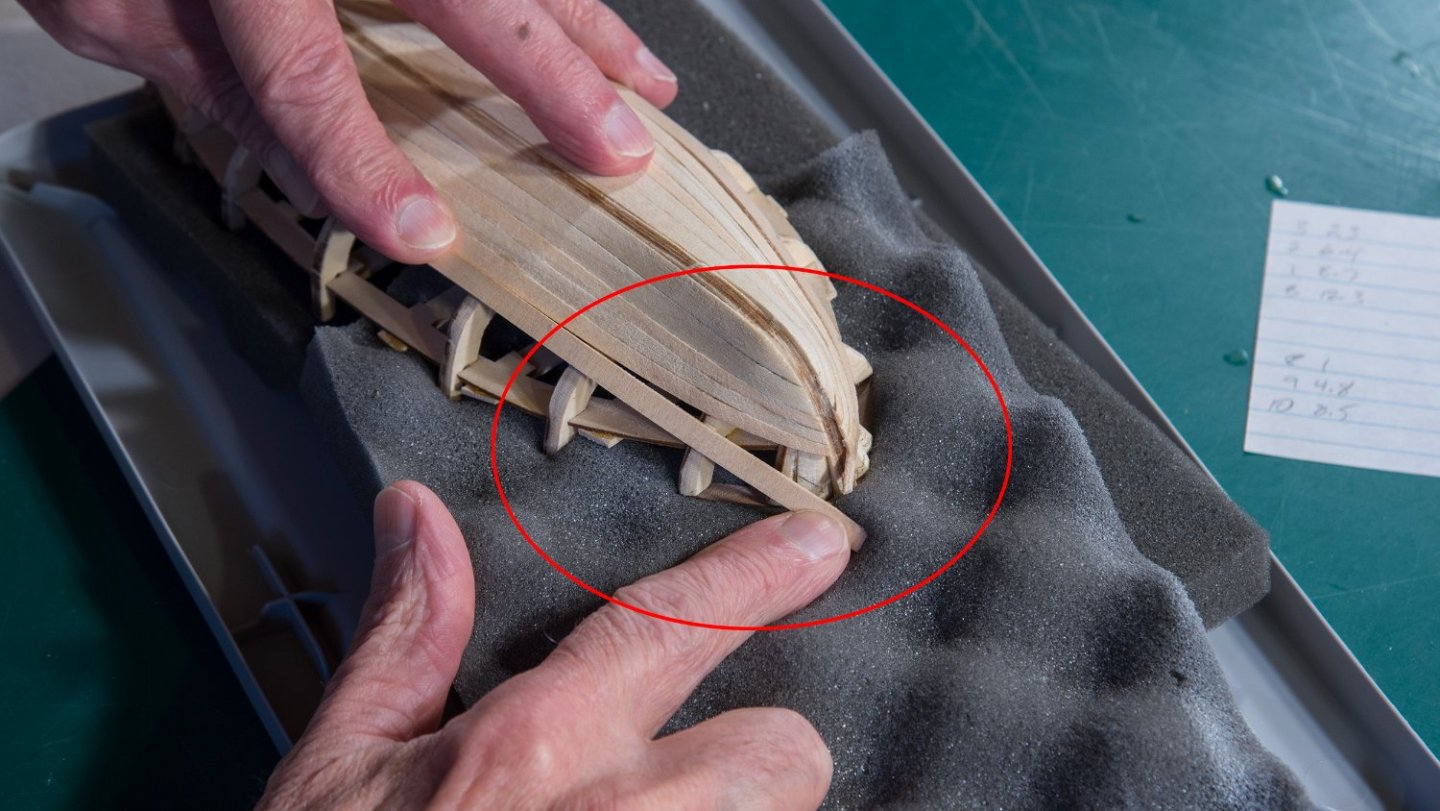
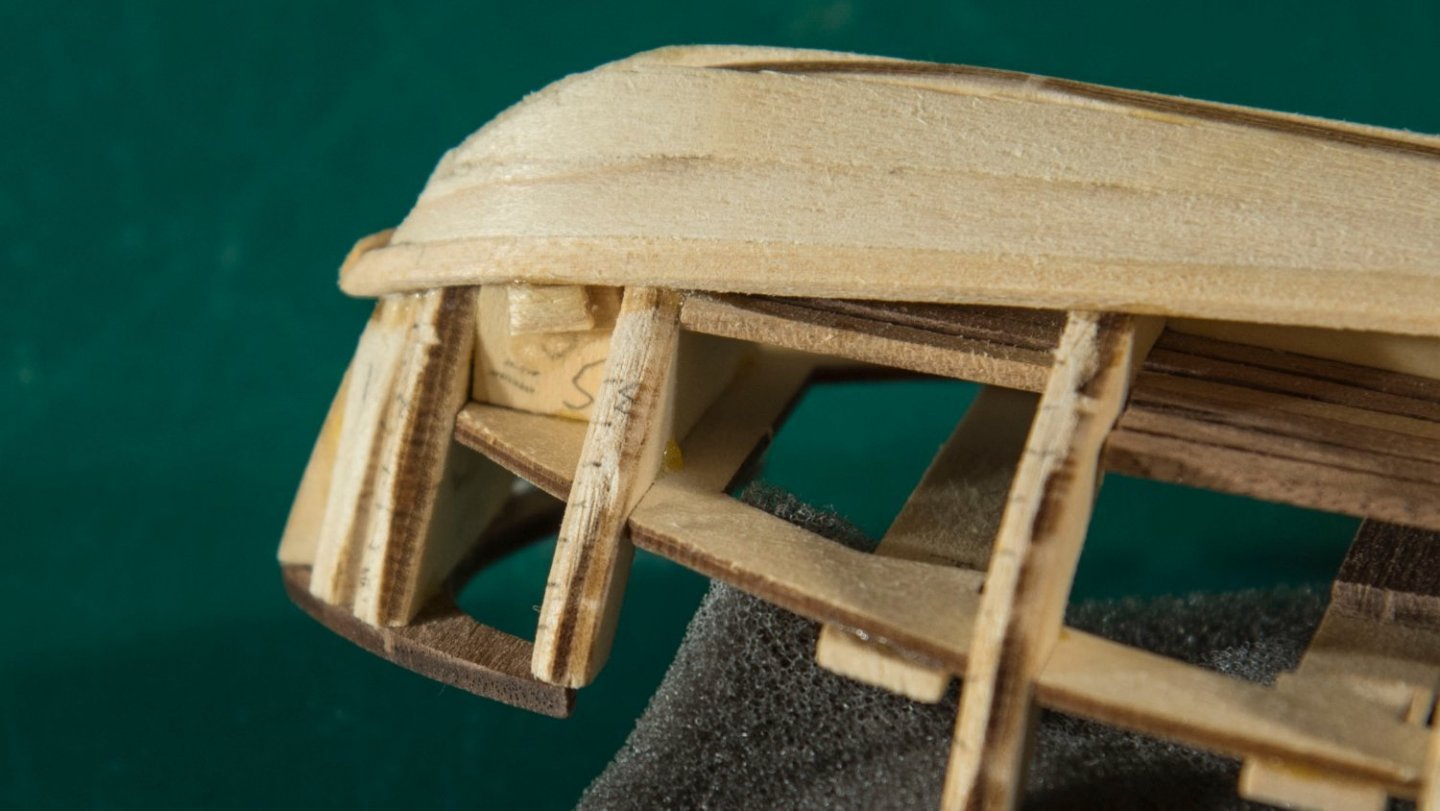
To address the bonding surface, I beveled the frames to match the curvature of the planks (I do this as I go). And I added a bonding pad at the front and stern to ensure adhesion.

- 62 replies
-
- 2
-
-
- Bounty Jolly Boat
- Artesania Latina
- (and 1 more)
-
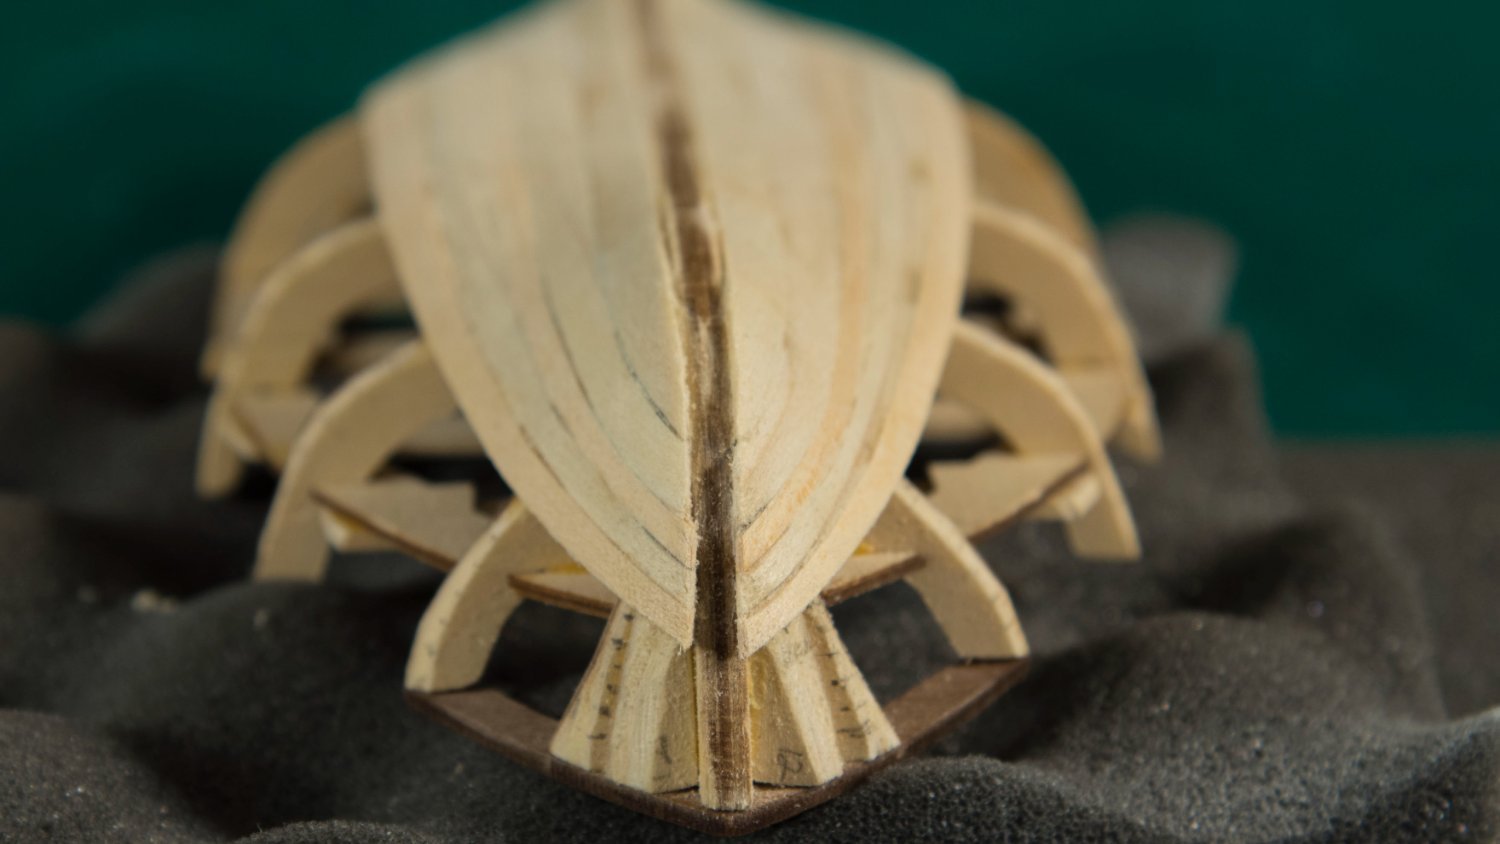
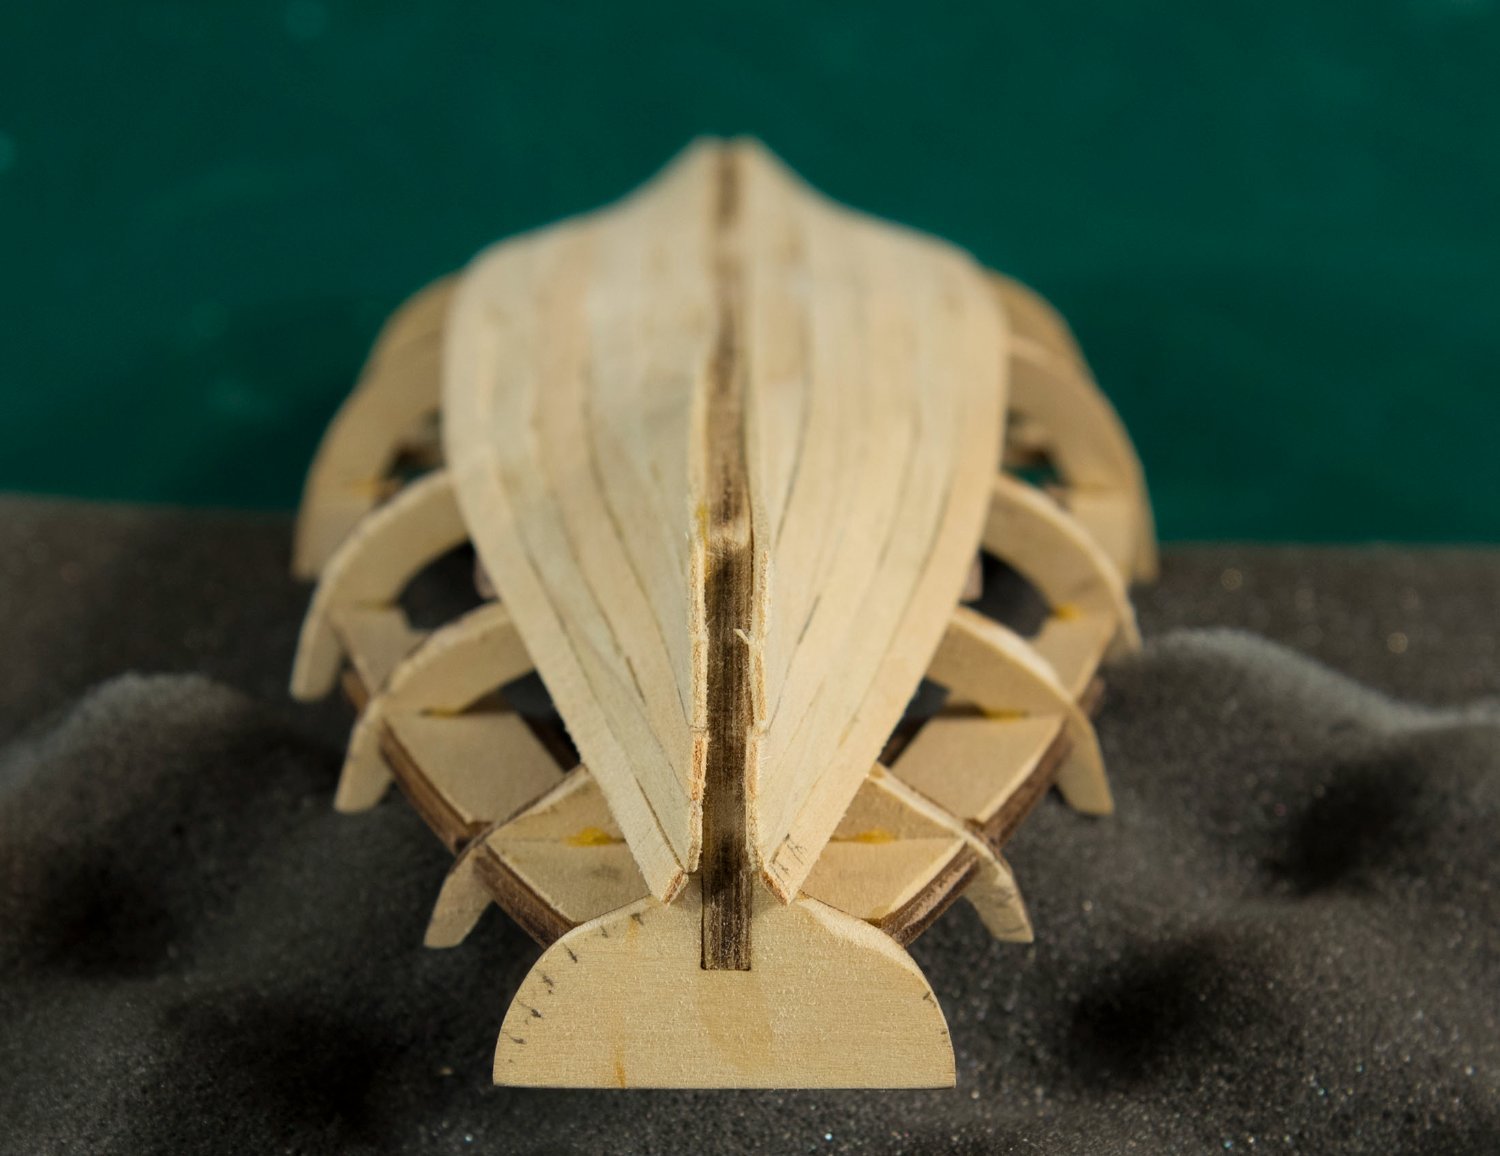
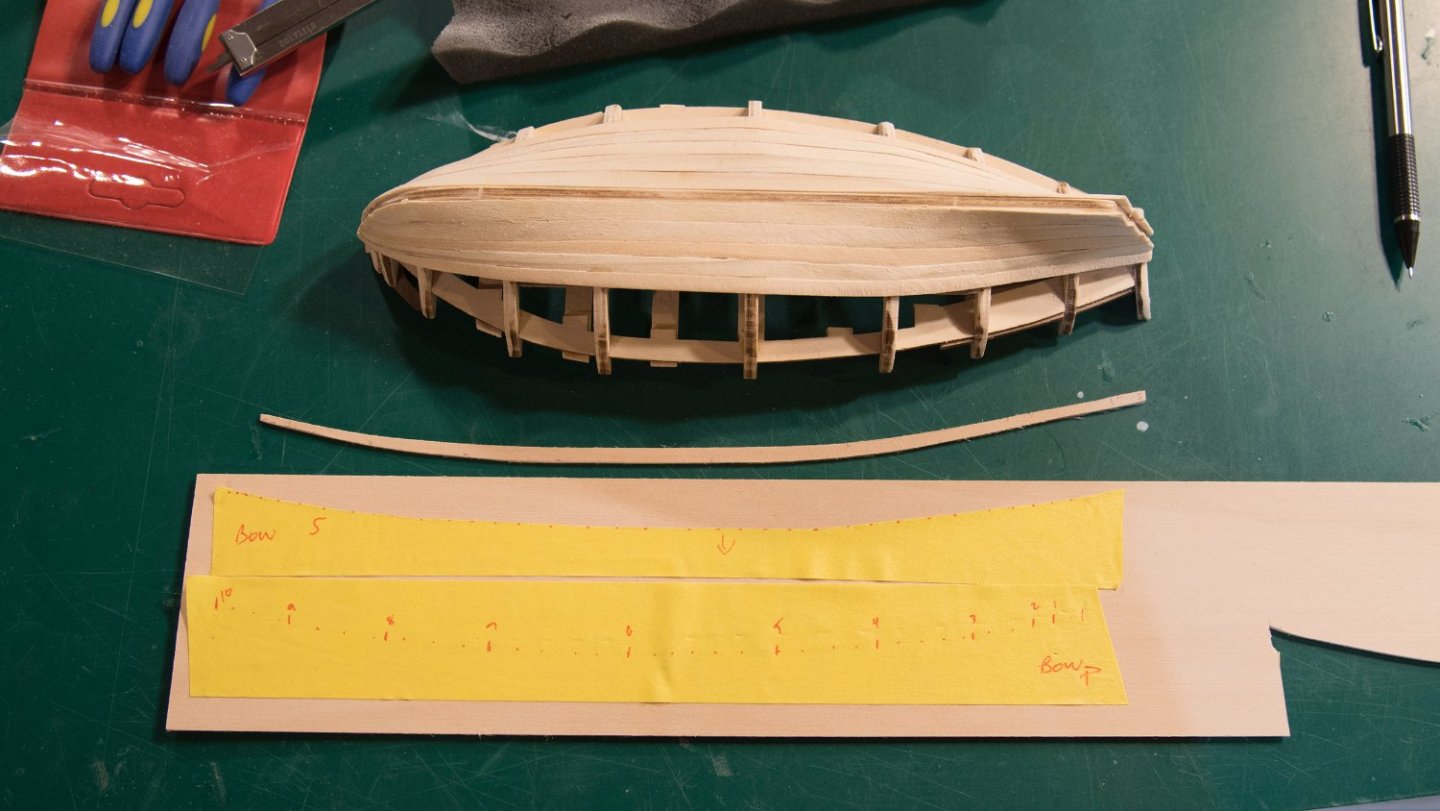
Thanks Kev, for the heads up on the complexity about how the planks fit in the stern as they transition from the keel to the last frame (i.e. there is a small bonding surface). I studied this and modeled the assembly with a few left over planks (picture below). I decided to make the aft portion of plank # 4 flair to 5 mm so that it filled the last of the keel. And sized the 5th frame per my excel (i.e. 3.4 mm). this seemed to make a smooth transition. I then placed the prototypes in position and they seem to fit.

- 62 replies
-
- 1
-
-
- Bounty Jolly Boat
- Artesania Latina
- (and 1 more)
-
Very interesting. This seems to be a short coming of the kit
-
That’s all for this week.