HOLIDAY DONATION DRIVE - SUPPORT MSW - DO YOUR PART TO KEEP THIS GREAT FORUM GOING! (Only 53 donations so far out of 49,000 members - C'mon guys!)
×


Ken_2
-
Posts
150 -
Joined
-
Last visited
Content Type
Profiles
Forums
Gallery
Events
Everything posted by Ken_2
-
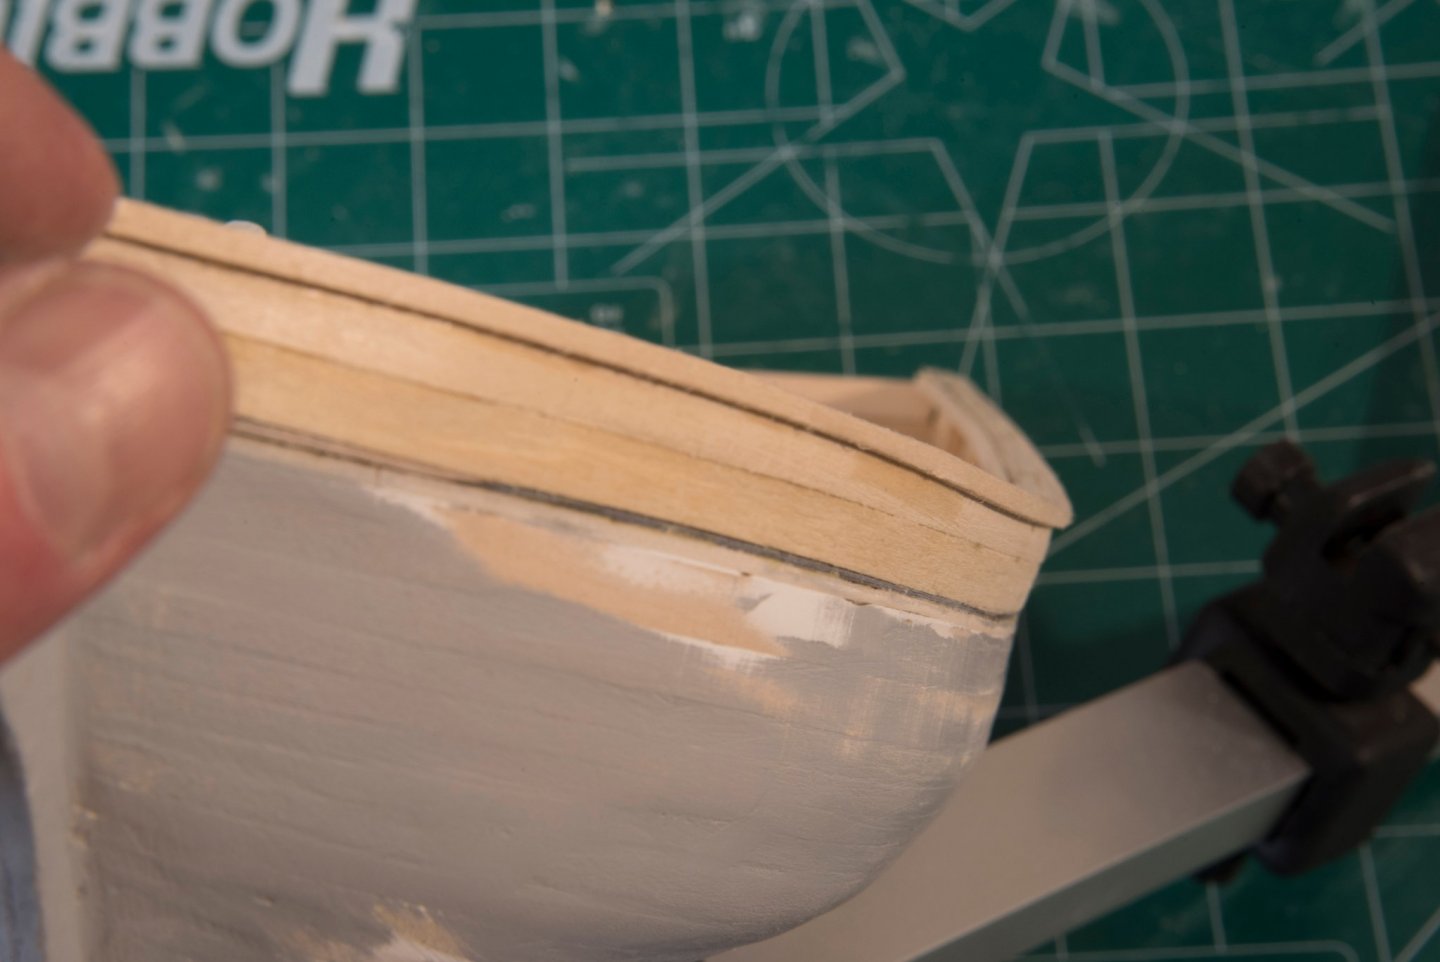
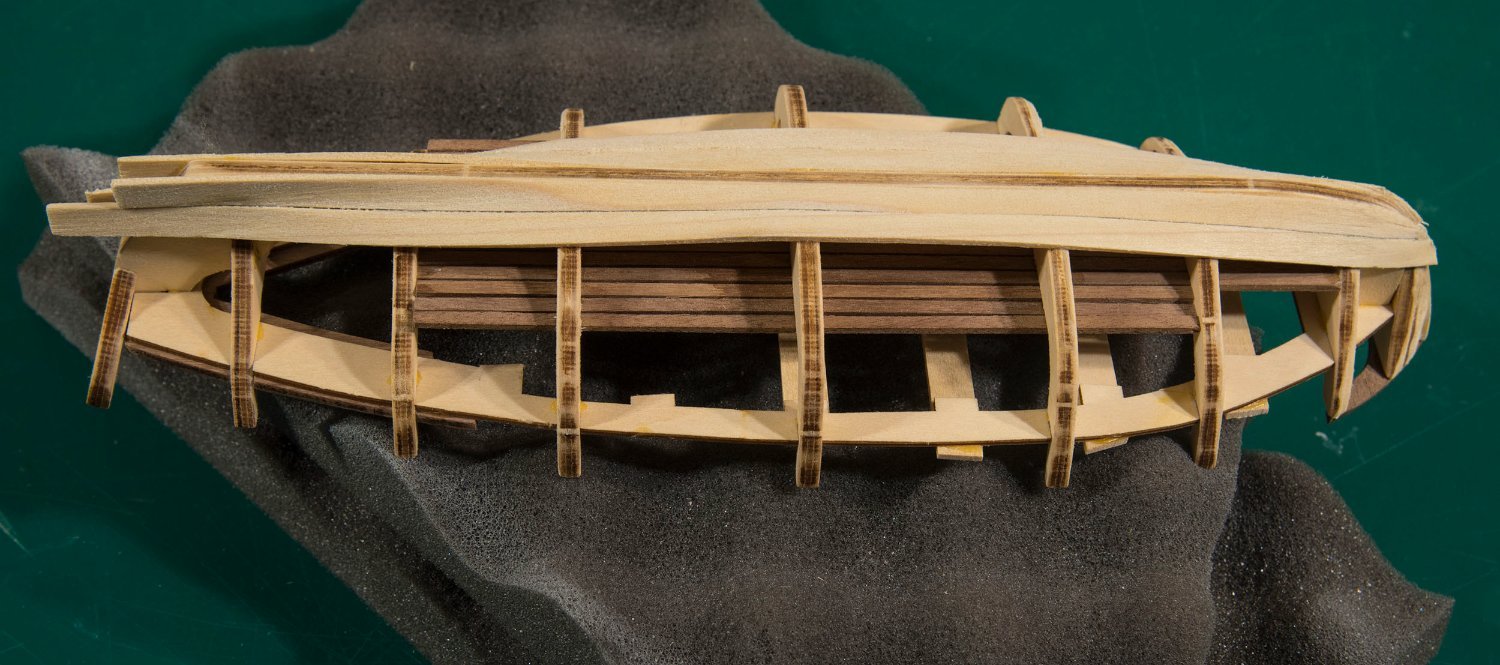
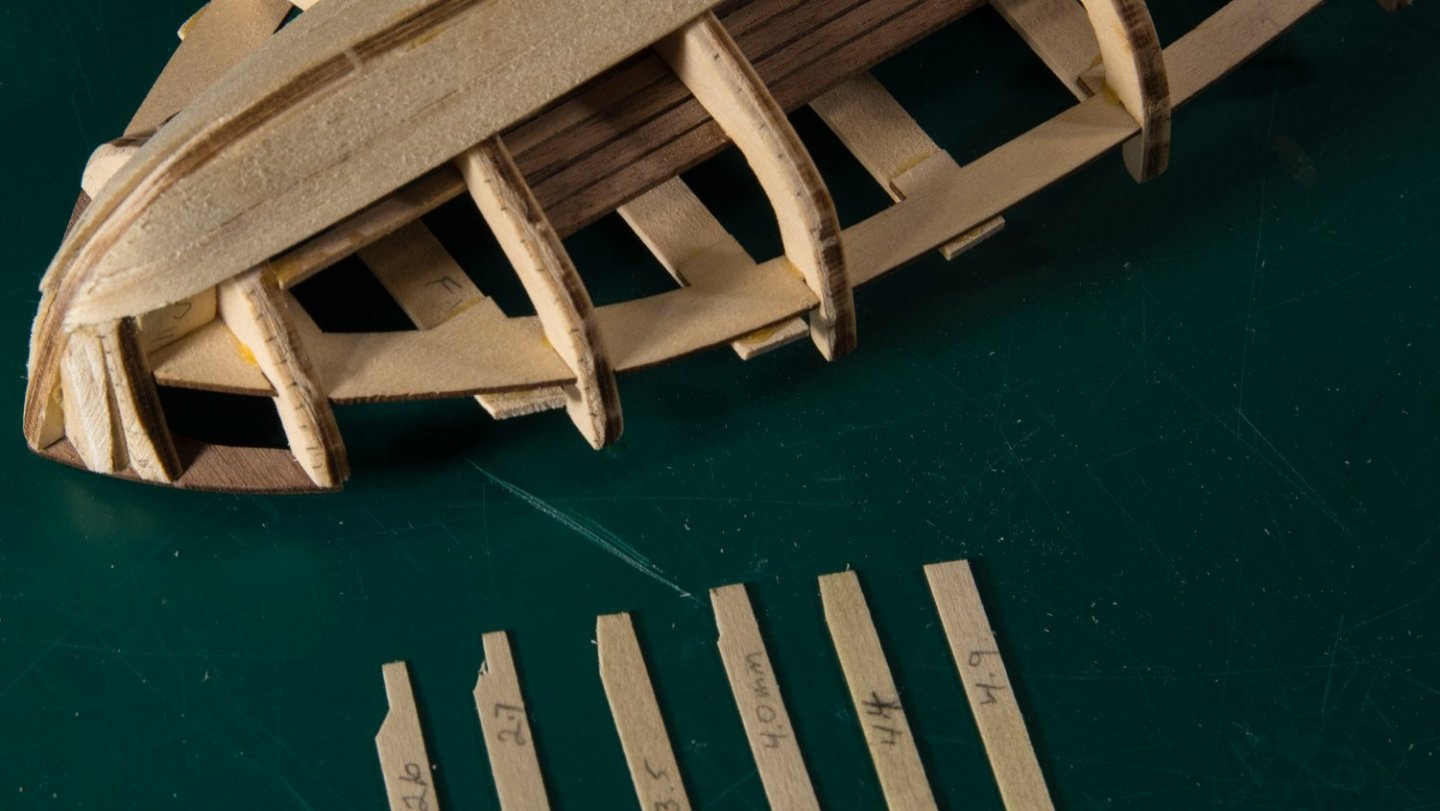
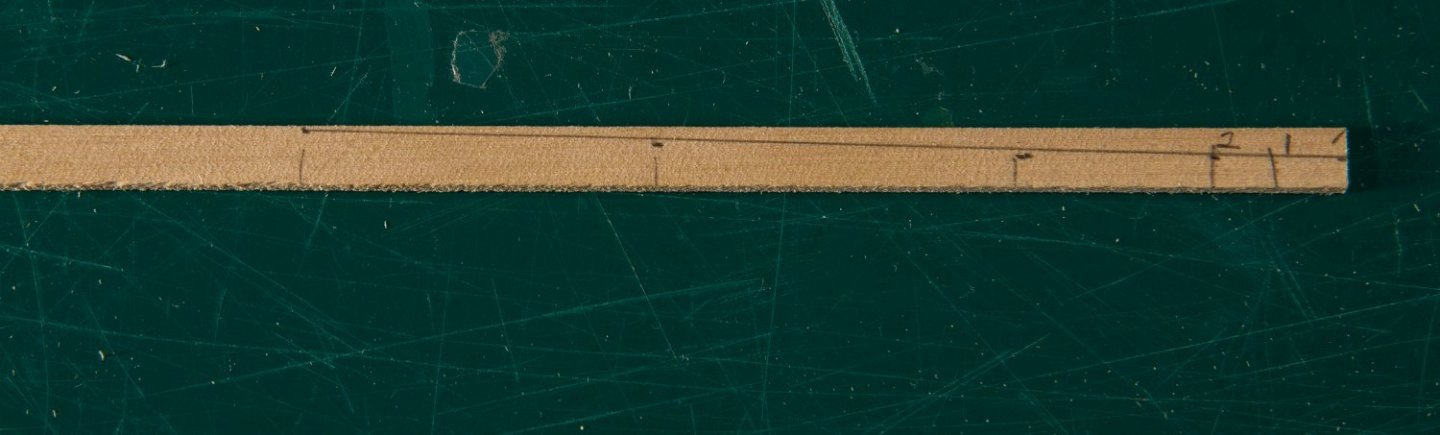
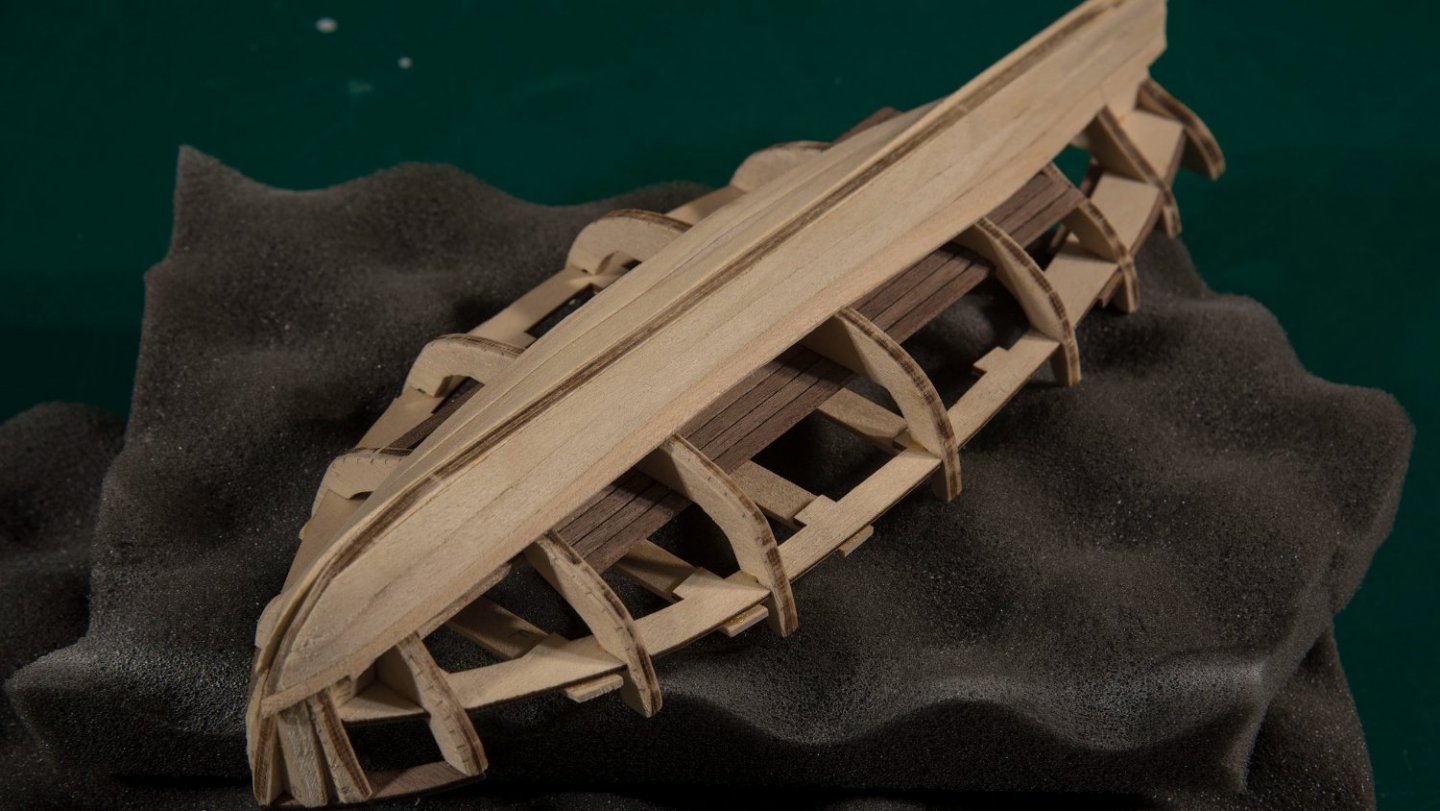
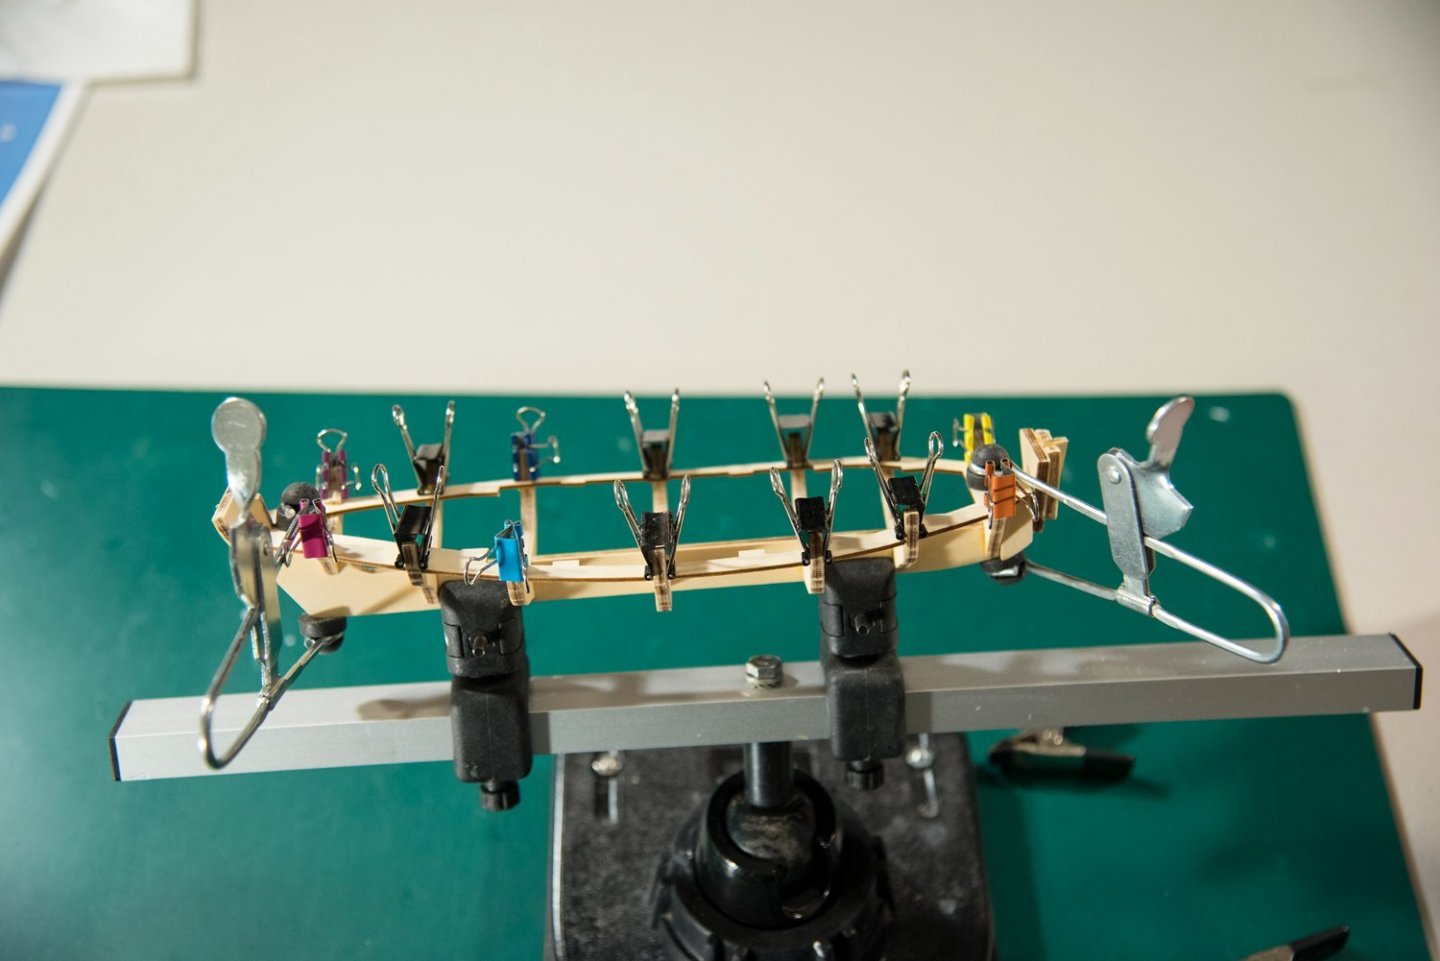
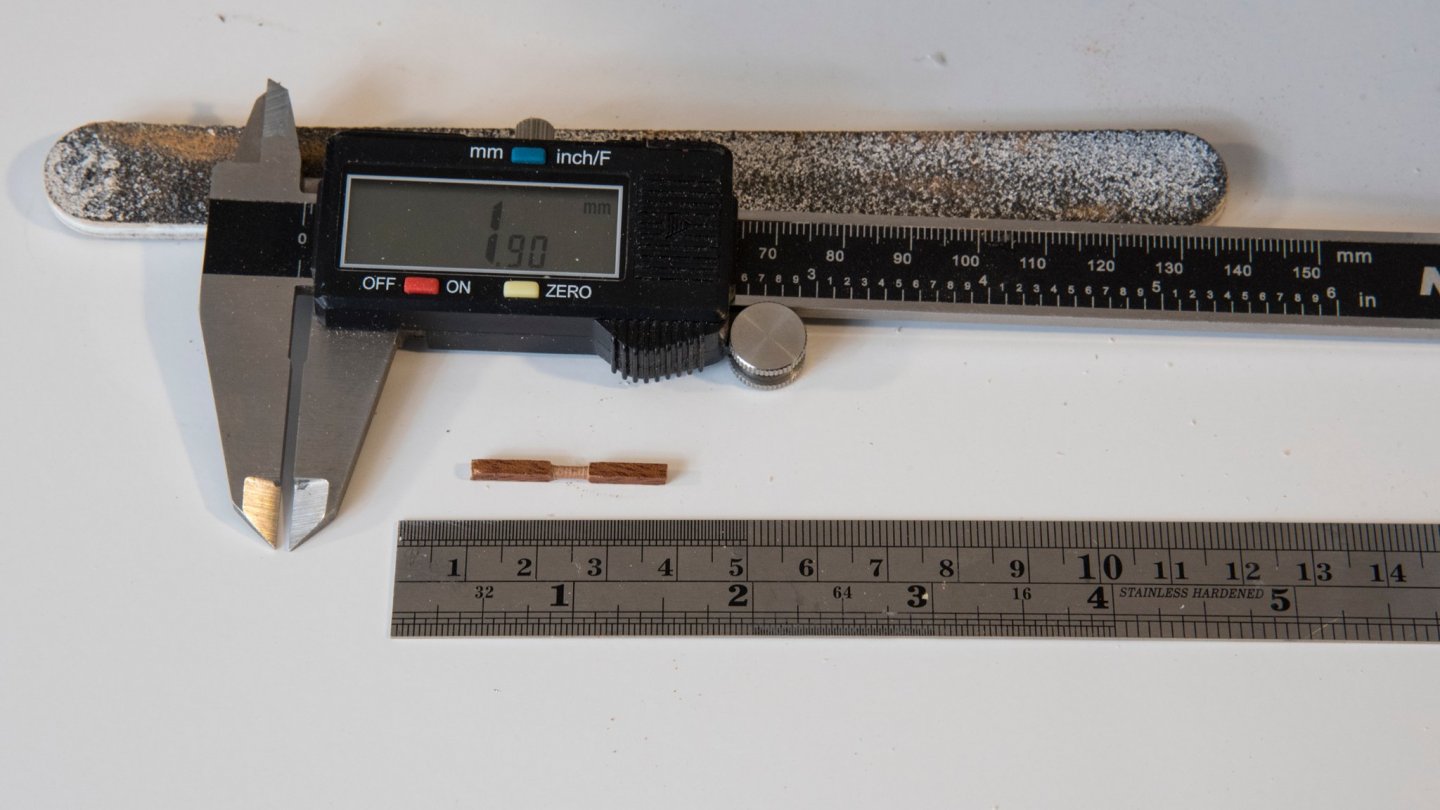
I faired the frames and installed the 6 mm garboard and the broad strake planks on each side. These first 2 planks did need a bit of narrowing at the bow, to make a close fit to one another and to allow for the false keel. I can’t tell if they are too wide, which will cause more curving than the top sheer. Once these were installed, I remeasured the remaining open frames to ensure I had the right distance to place the remaining ten 5 mm planks. Then I cut 10 strips of wood, each with the width of a plank for each frame as noted in the Excel sheet above (e.g. 2.4 mm). I then use a pencil mark on each frame with that same width. This, to ensure I had the right measurements, and to measure progress as I add planks to the fames. Then marked the first 5 mm plank with the desired width, in preparation for narrowing. And installed it.
- 62 replies
-
- 5
-

-
- Bounty Jolly Boat
- Artesania Latina
- (and 1 more)
-
On to planking. I’ve decided not to use the taper planks that were provided in the kit. I’m going to use the lessons from the NRG Half Hull Planking Project. I measured each frame and calculated how many planks I will use, and how much to taper them, and if I will need drop planks and/or Stealers. The picture below is my first draft of the planking plan. I renamed the first 2 bow frames 1 and 2. I found the leading edge of the 1st frame was 24 mm long. Frame 6 is the widest at 62 mm. The provided planks are 5mm. The picture below, of my excel, is what I used to start my planning. It is not obvious what I have done. Still, I am learning and this is my best. The resultant “tailoring of planks” is in the Red text. This red text is to be the adjusted width of each plank at each frame (except the first two planks. These slightly adjusted after installation and started with a 6 mm width). A summary of the Excel: The Excel is intended to: 1) keep the planks from getting too narrow at the bow, 2) to keep them in line with the sheer of the boat, and 3) provide me a starting point for shaping the width of the planks. The garboard and the broad strake are at a fixed 6 mm width. The rest of the planks start at a 5 mm width and are to be shaped. The Red text below applies to these 5 mm planks and is the final width after “narrowing” of these planks at each frame.

- 62 replies
-
- 1
-
-
- Bounty Jolly Boat
- Artesania Latina
- (and 1 more)
-
I cut and glued the seats in place with the wood provided, and now I am ready to start the planking process. But as I measure and plan for the planks, I can’t help thinking that the appearance of the Ramin wood seats could be improved. I am committed to not painting the interior, so all that is left for a different seat “look” is to use a different kind of wood. Since I have a large sheet of Cherry Wood laying around, I cut a strip of wood 8 mm wide, and I like that better. I also have a sheet of Oak. I will unglue a few Ramin seats and set them aside. I will proceed to start the planking process, and at some future point, I will select which wood I like and re-install the seats. Who knows, maybe I will paint after all!?

- 62 replies
-
- 2
-
-
- Bounty Jolly Boat
- Artesania Latina
- (and 1 more)
-
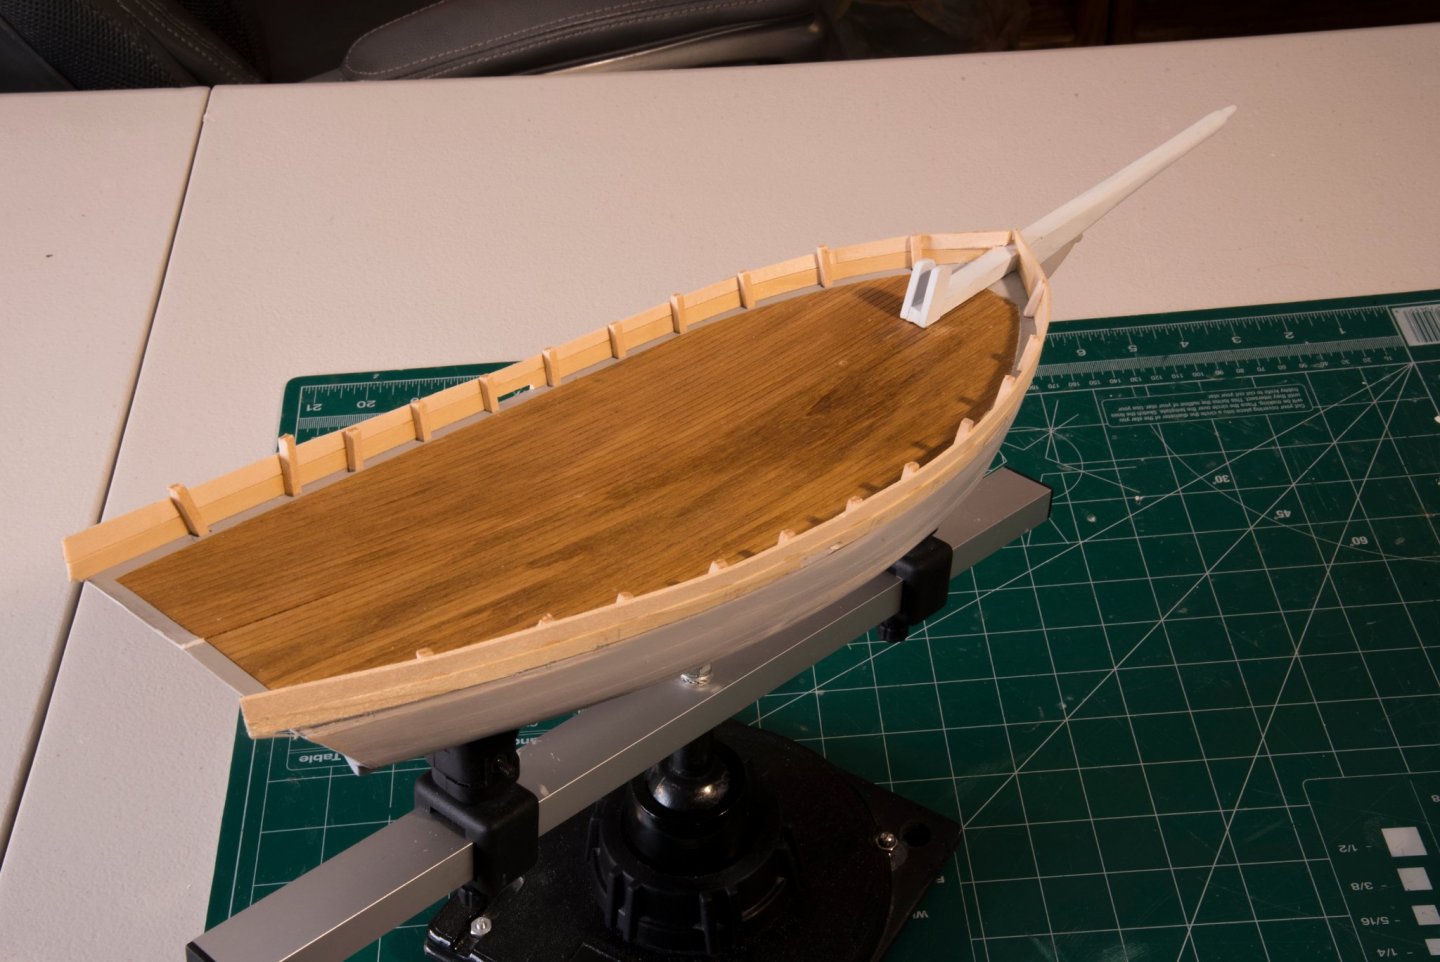
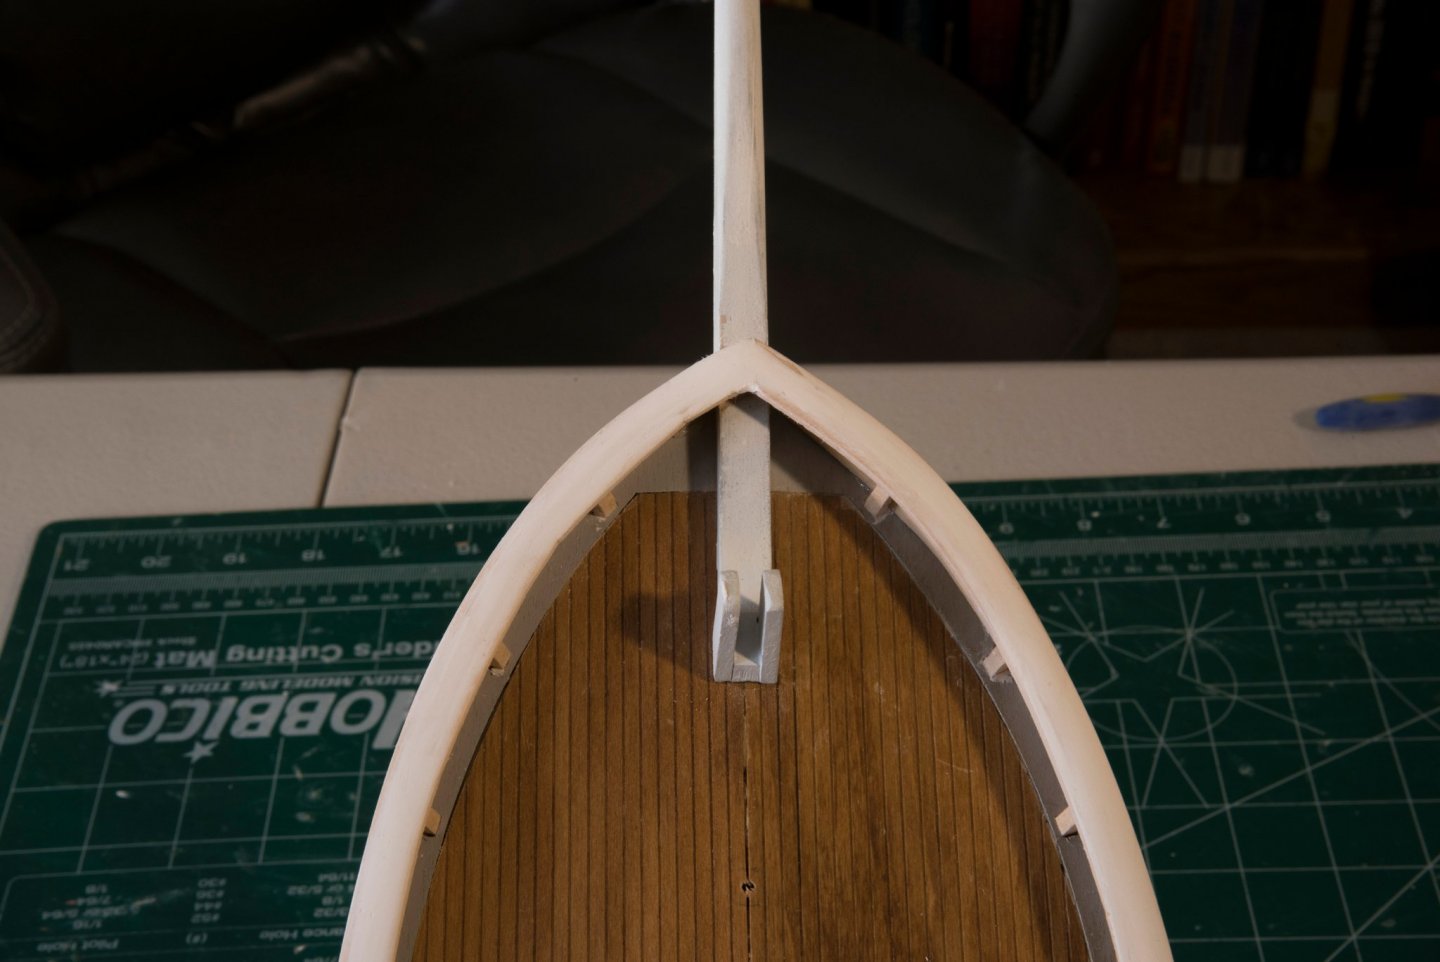
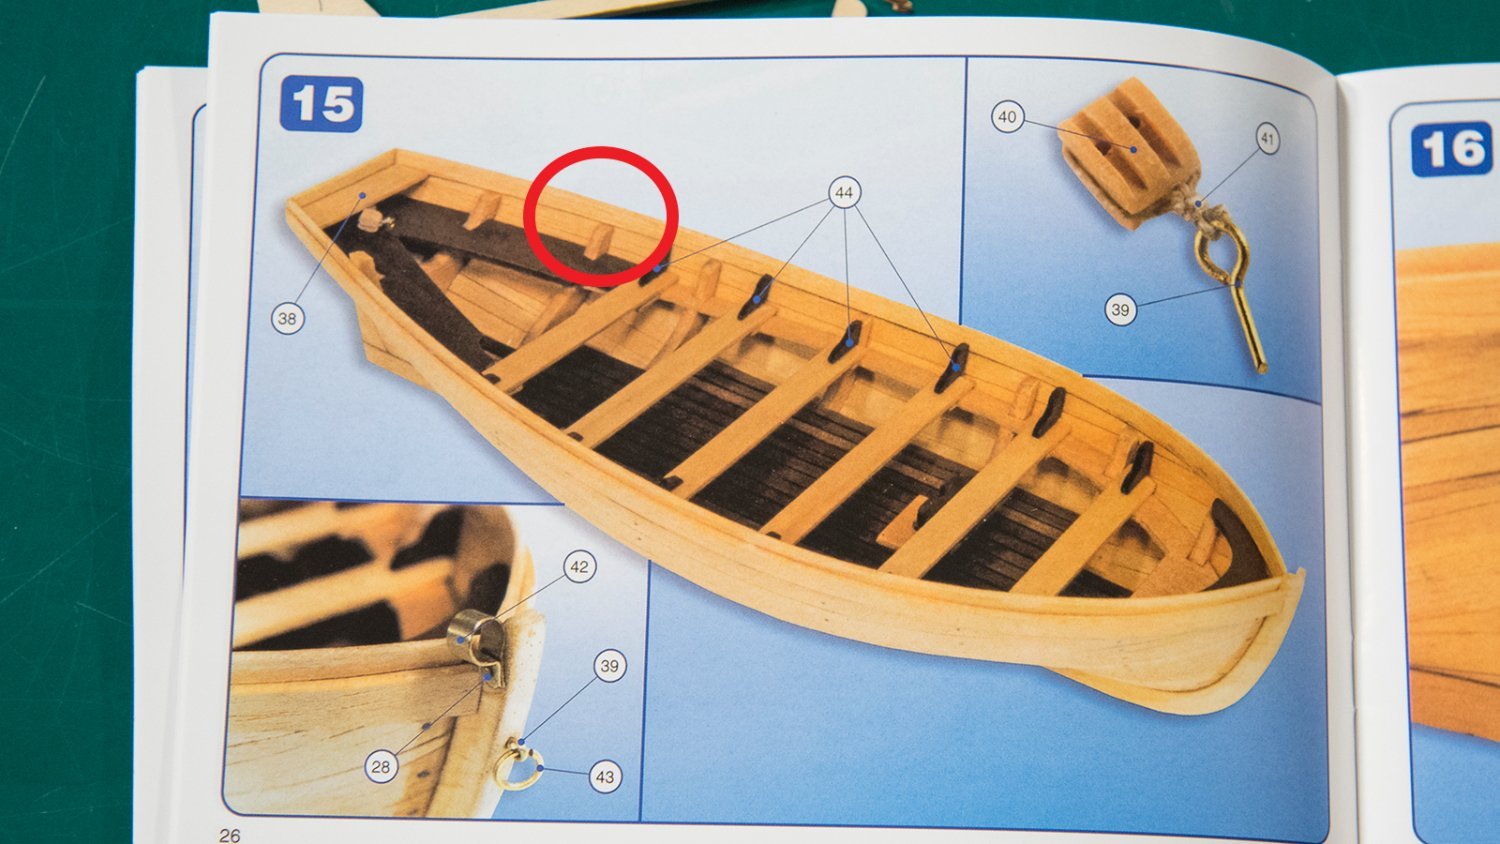
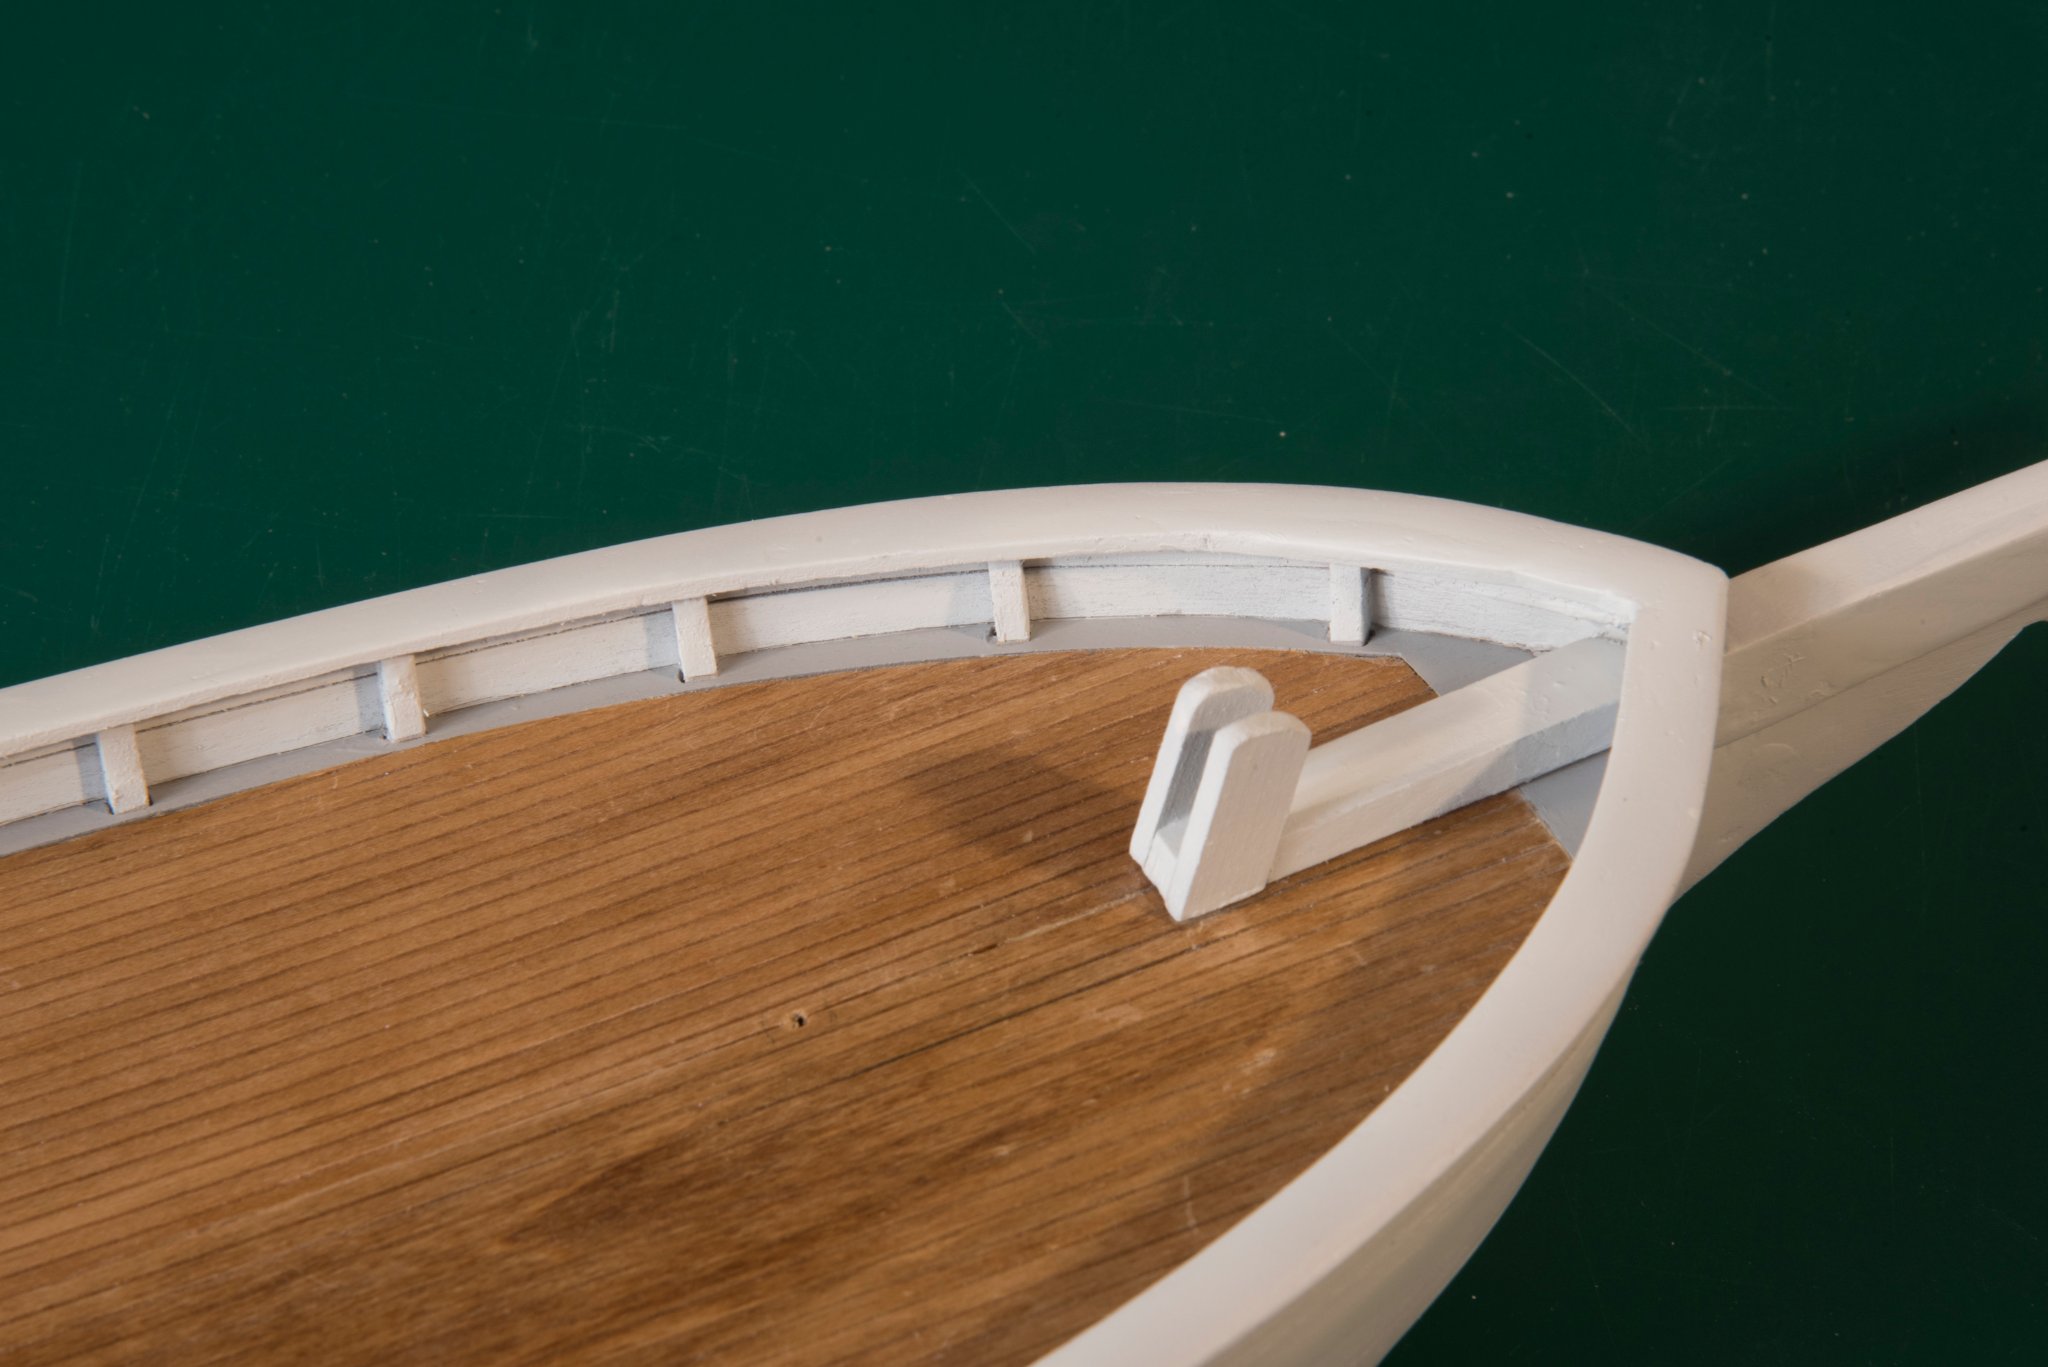
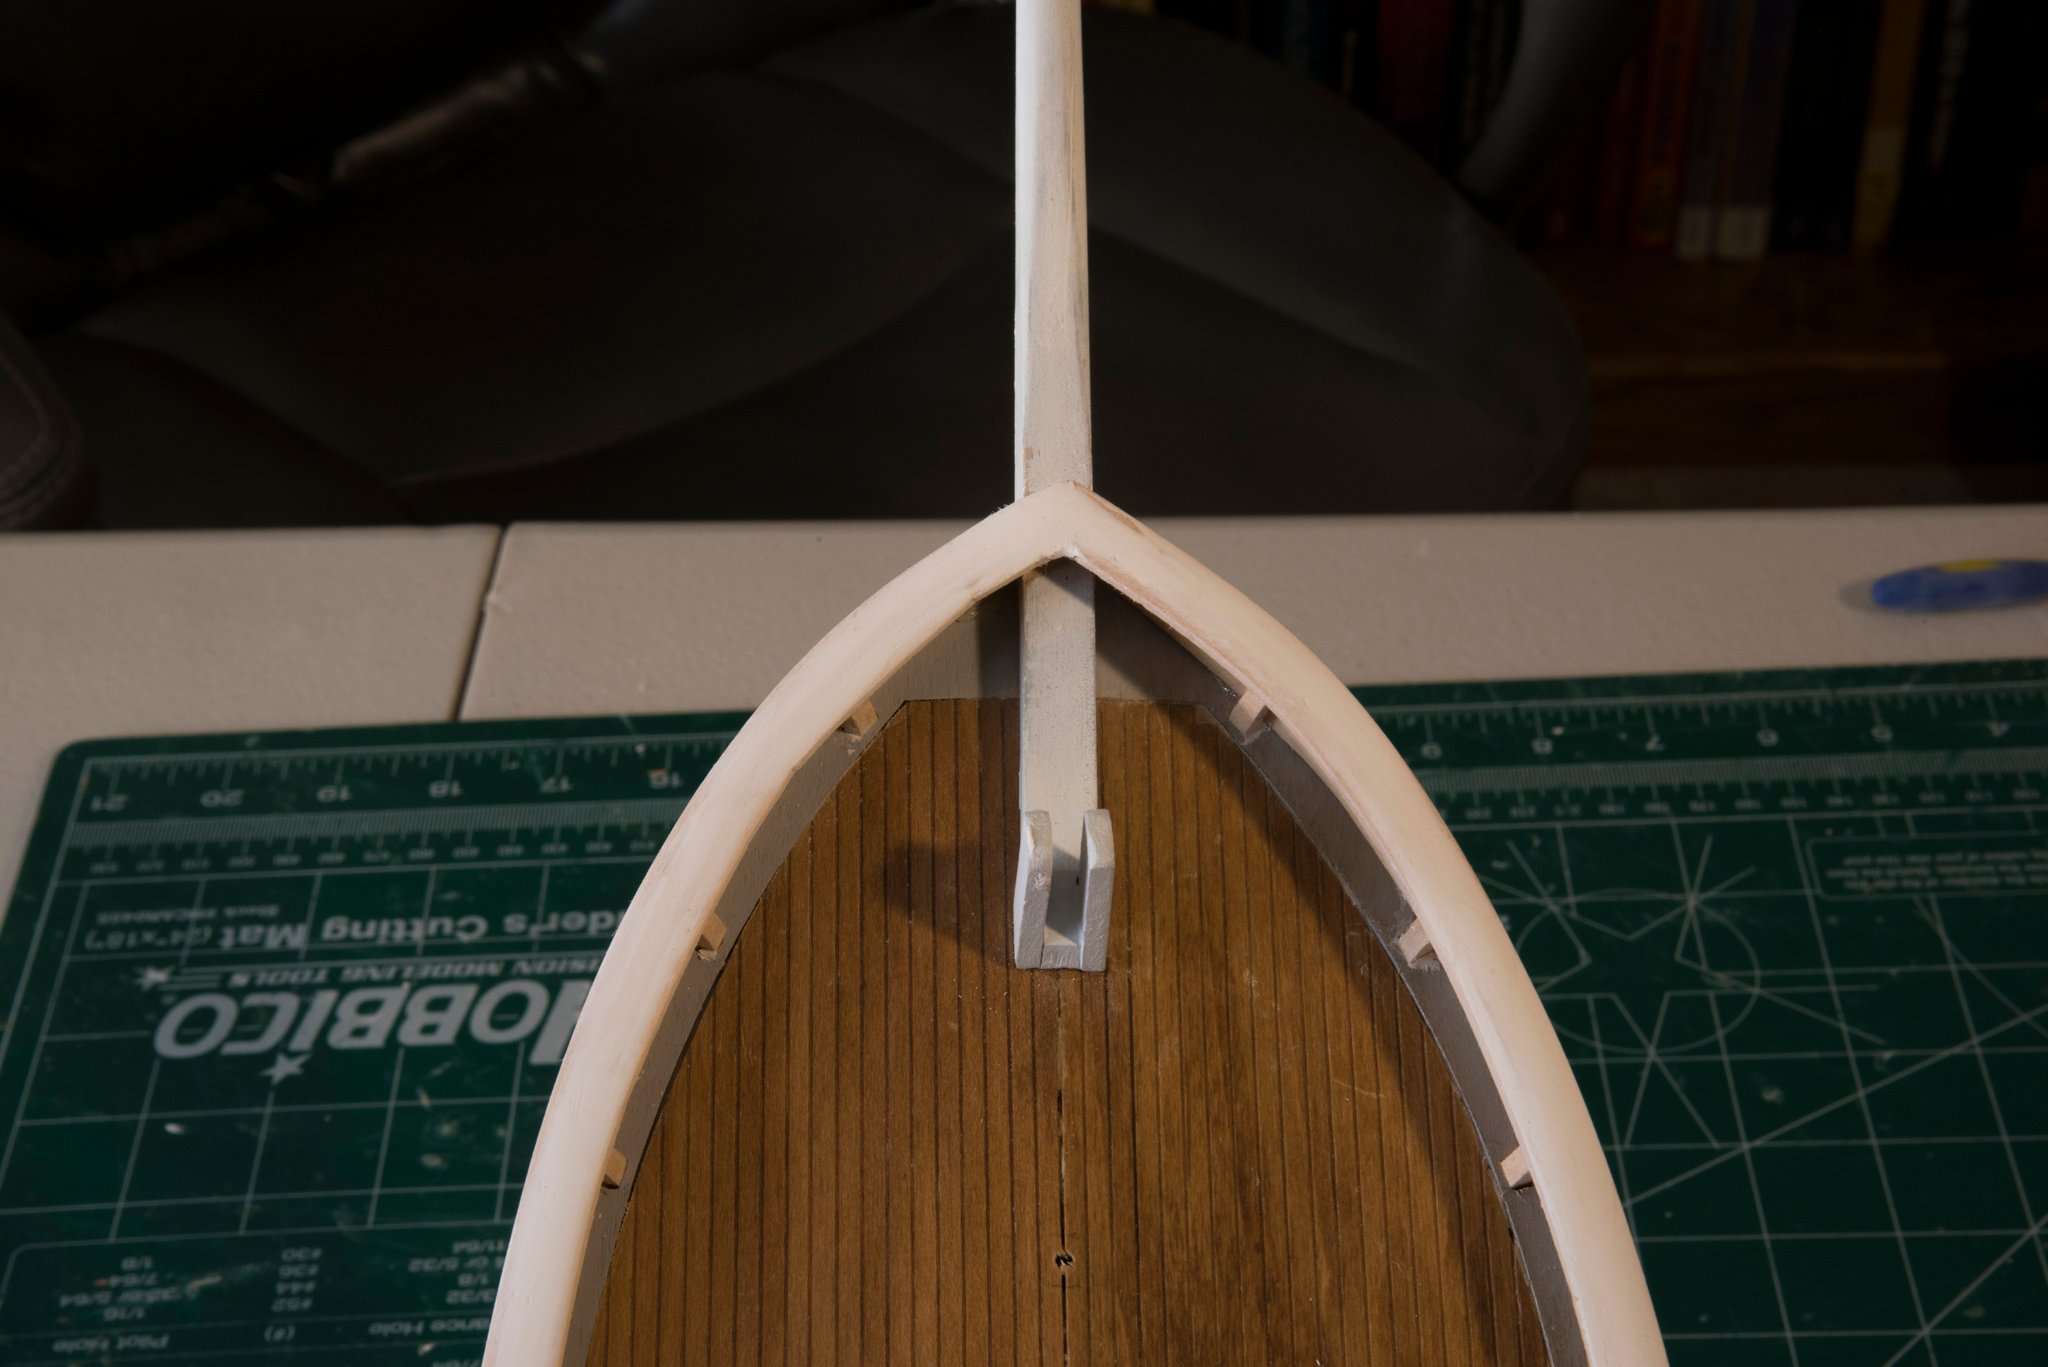
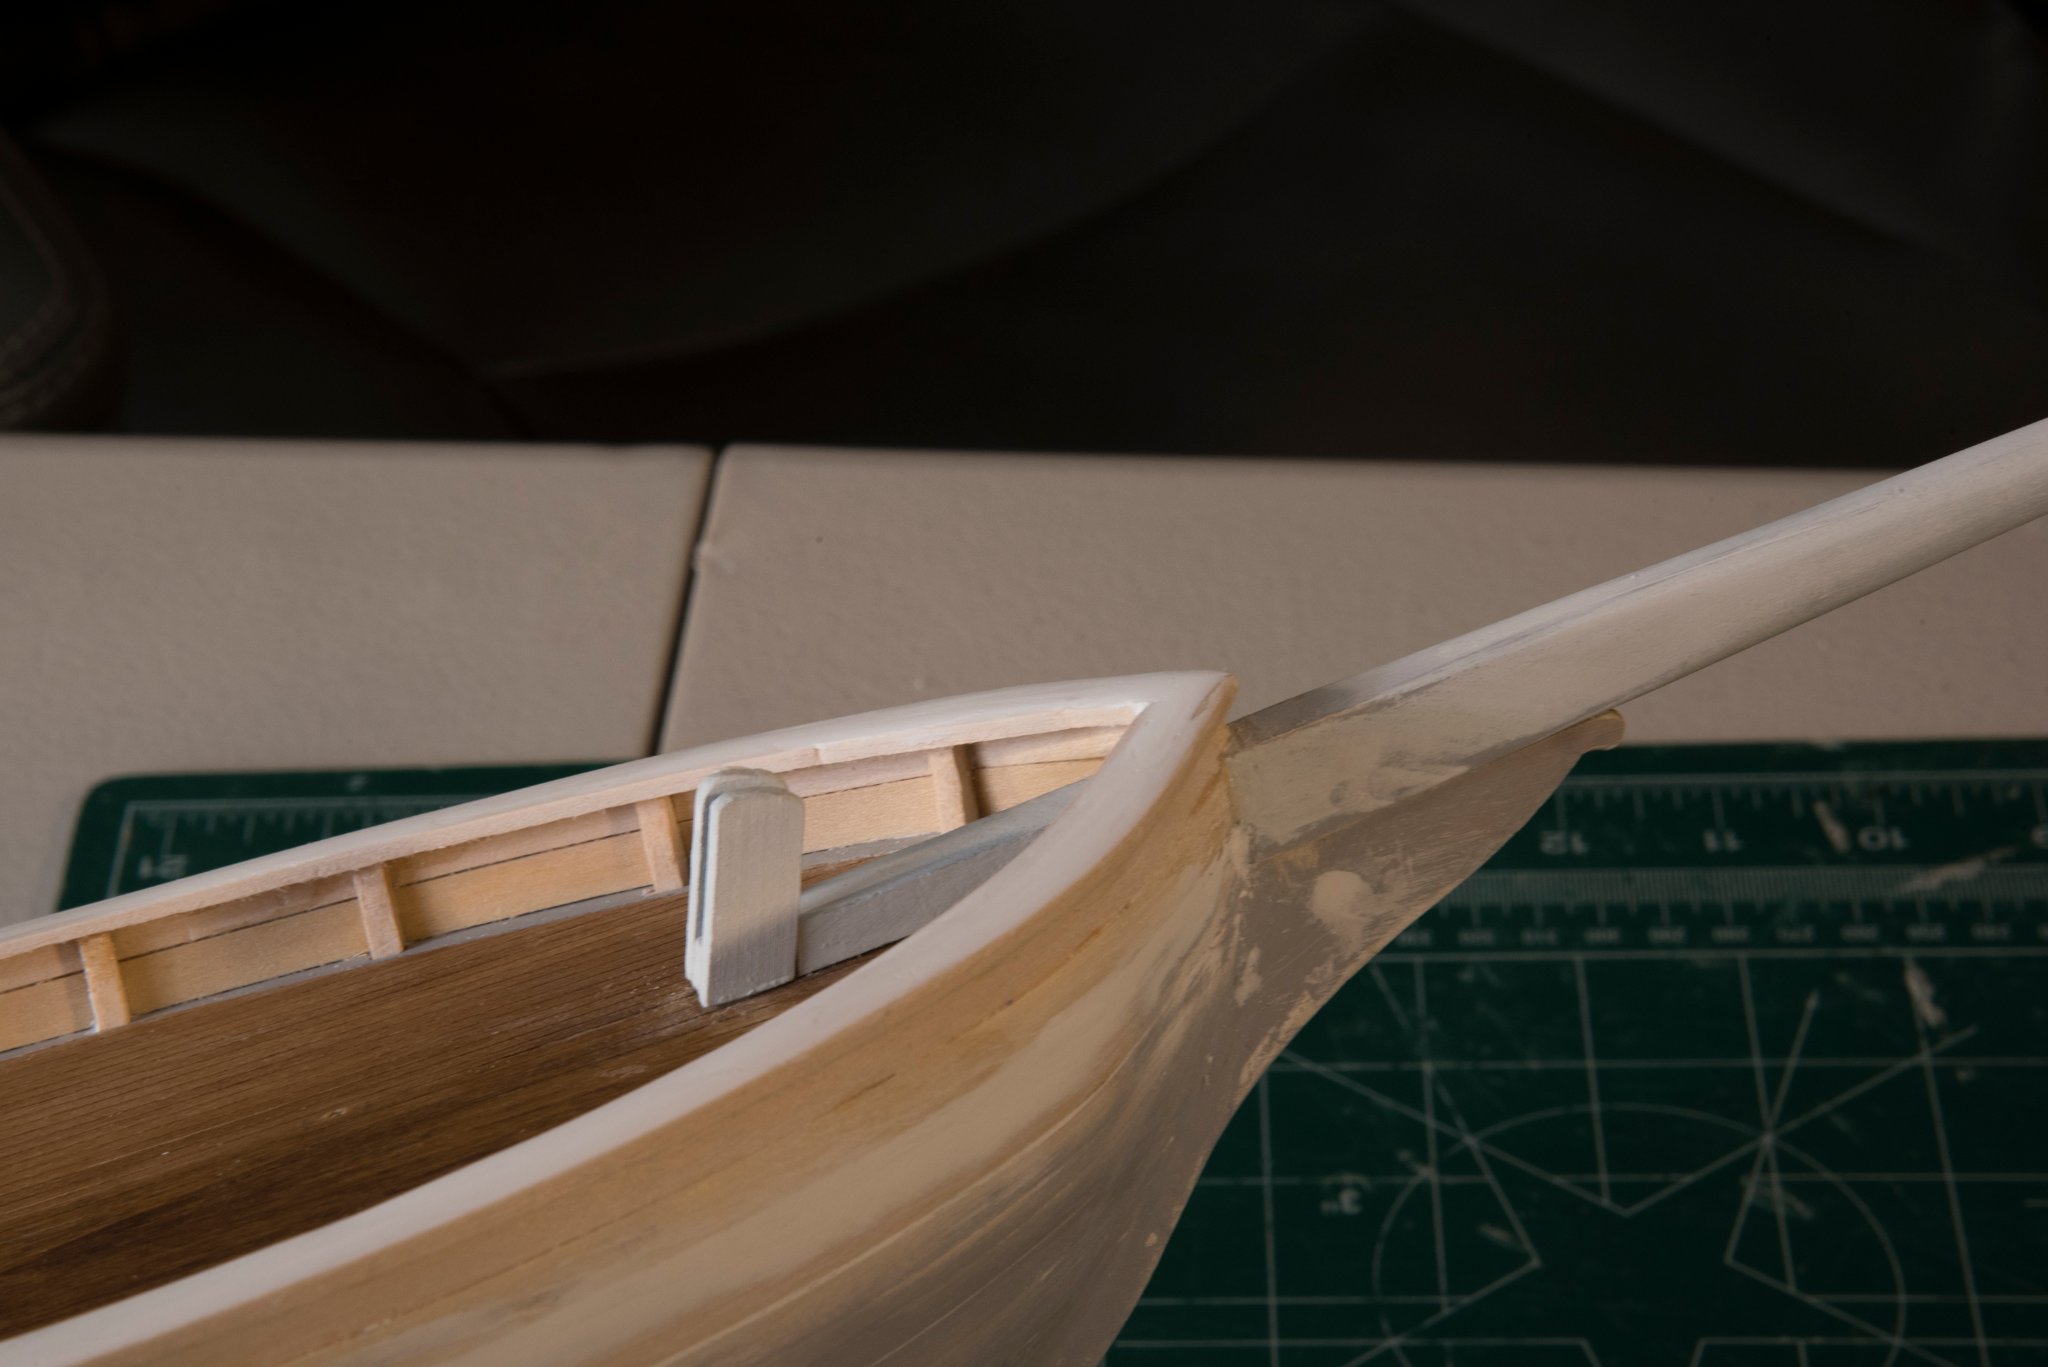
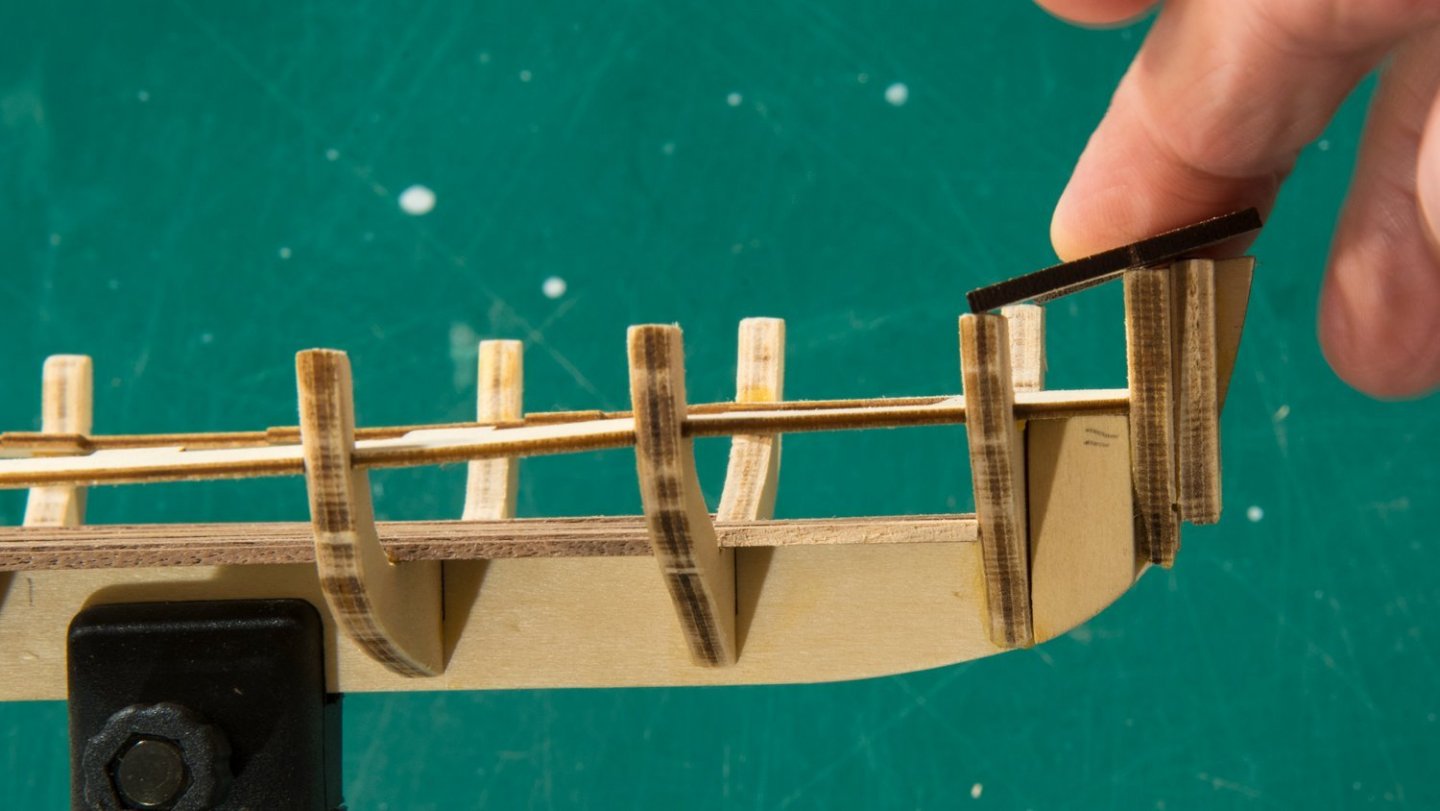
Next, we are to attach the stern thwarts and batayolas (or bow rail). I struggled knowing how to “fit” the bow rail until I looked at the large illustration and Peanut6’s build log (nice build log Kev, lots of helpful information). It is supposed to be at an angle.
-
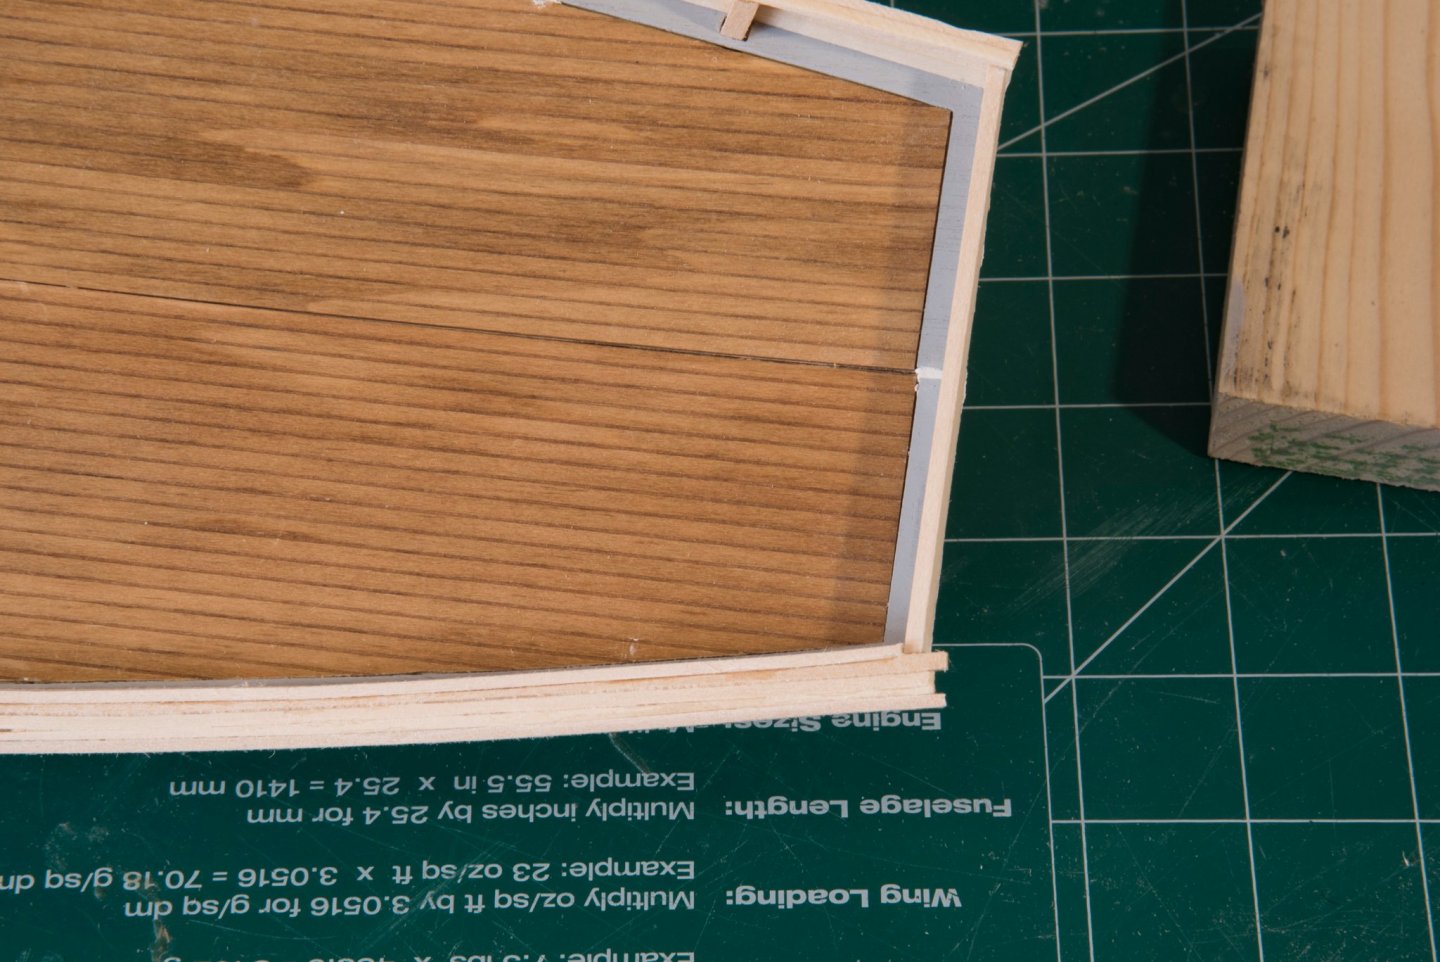
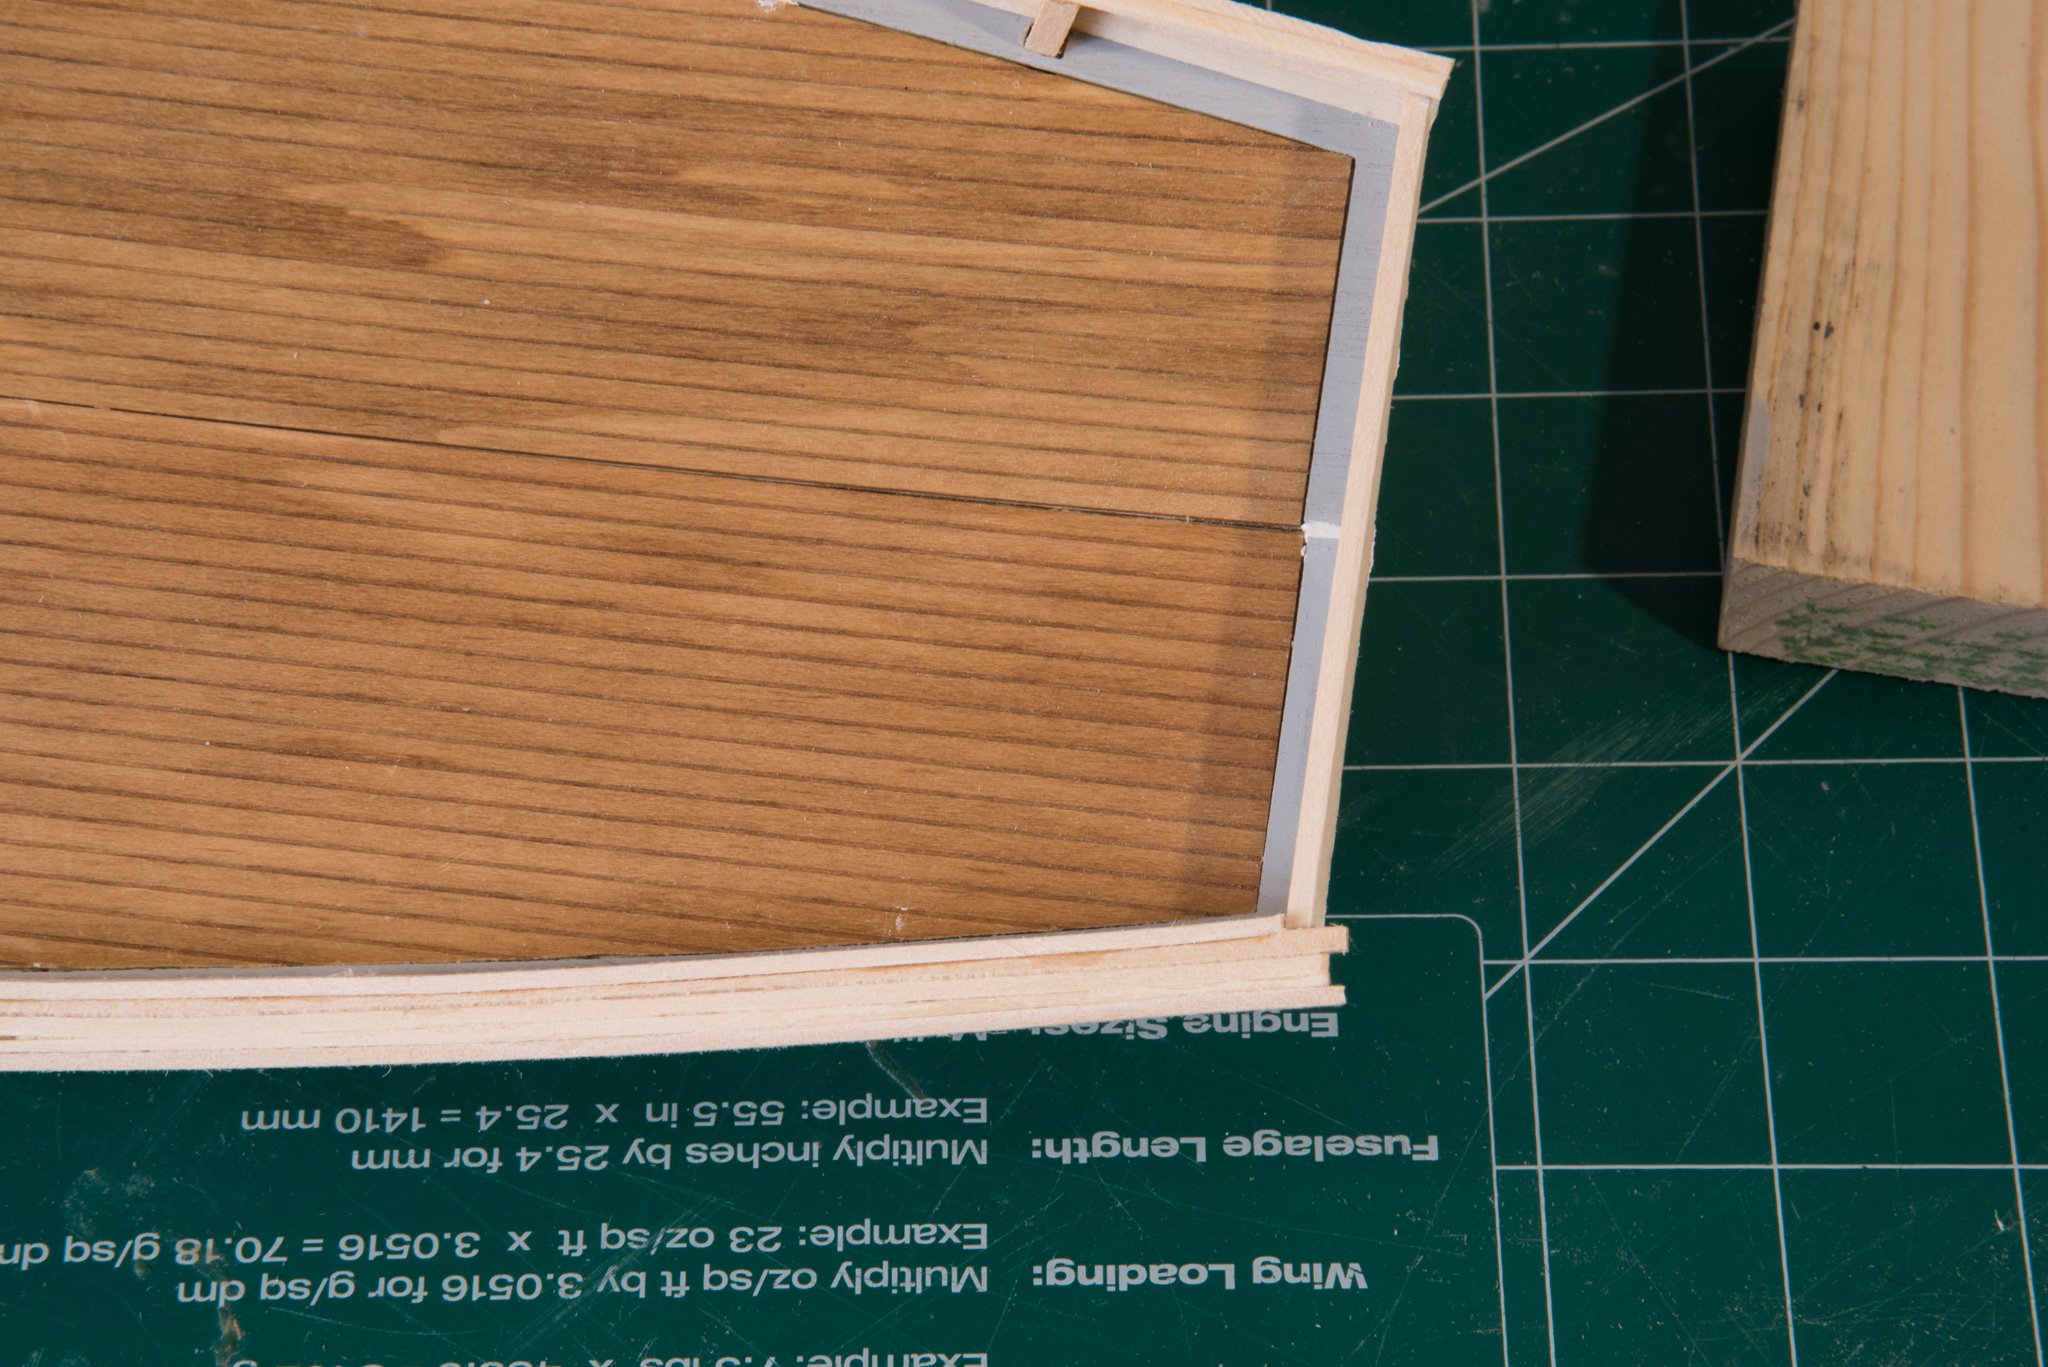
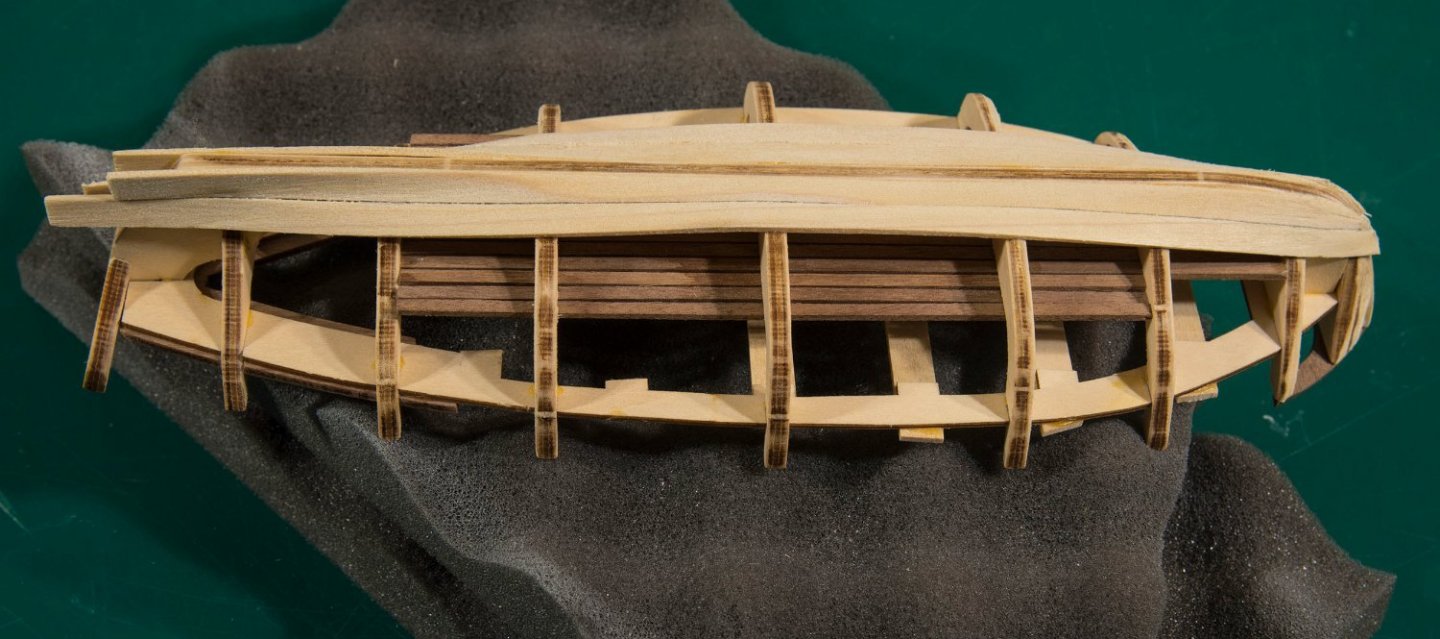
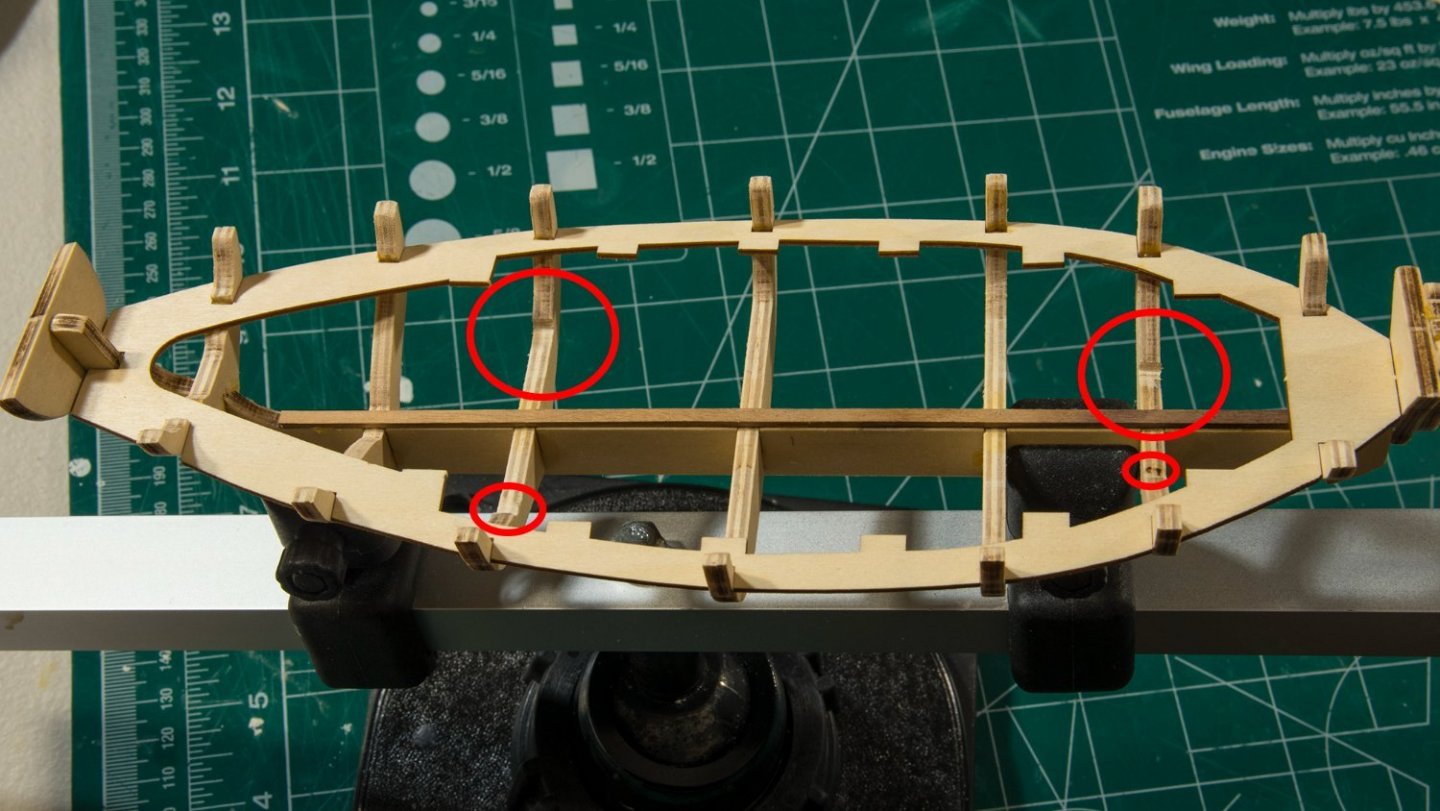
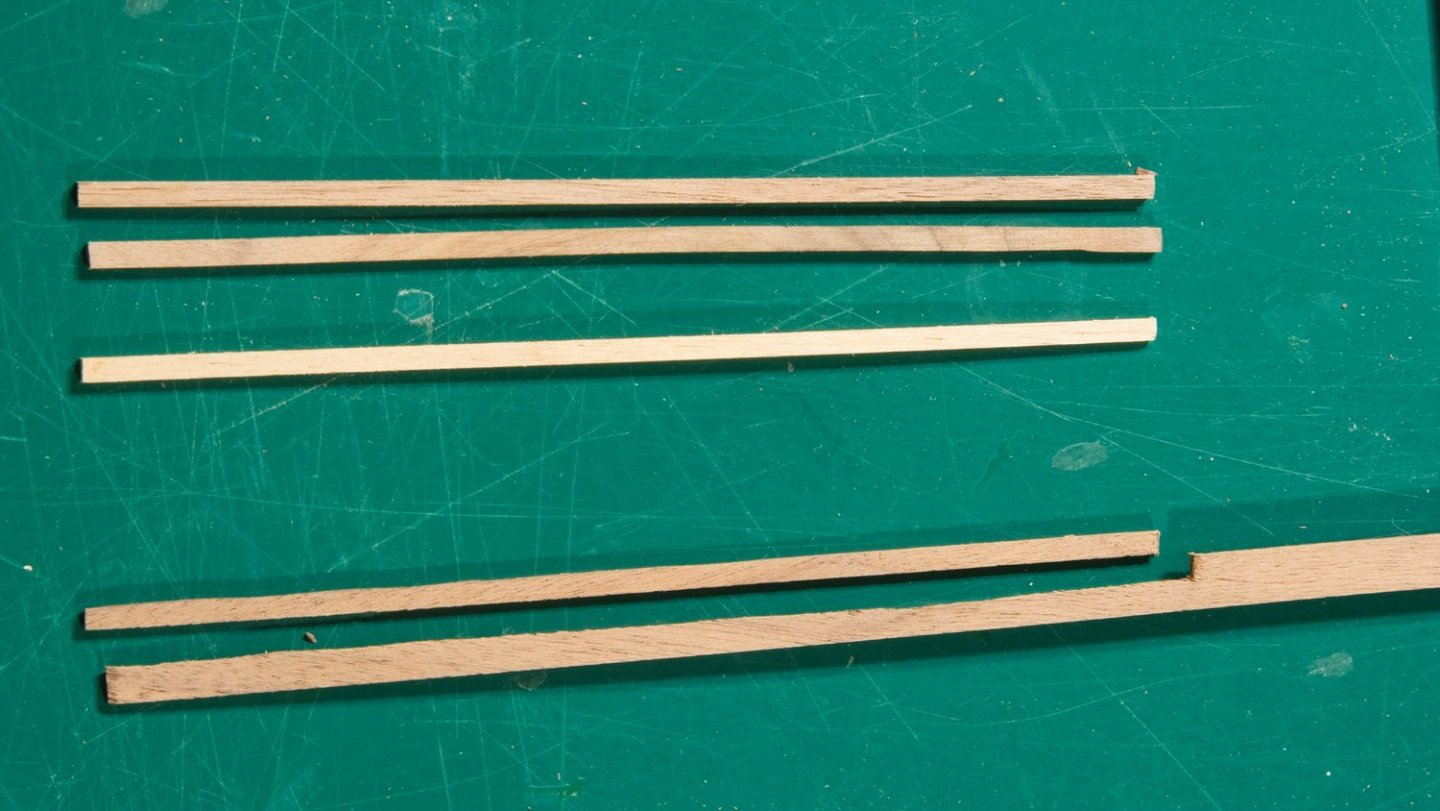
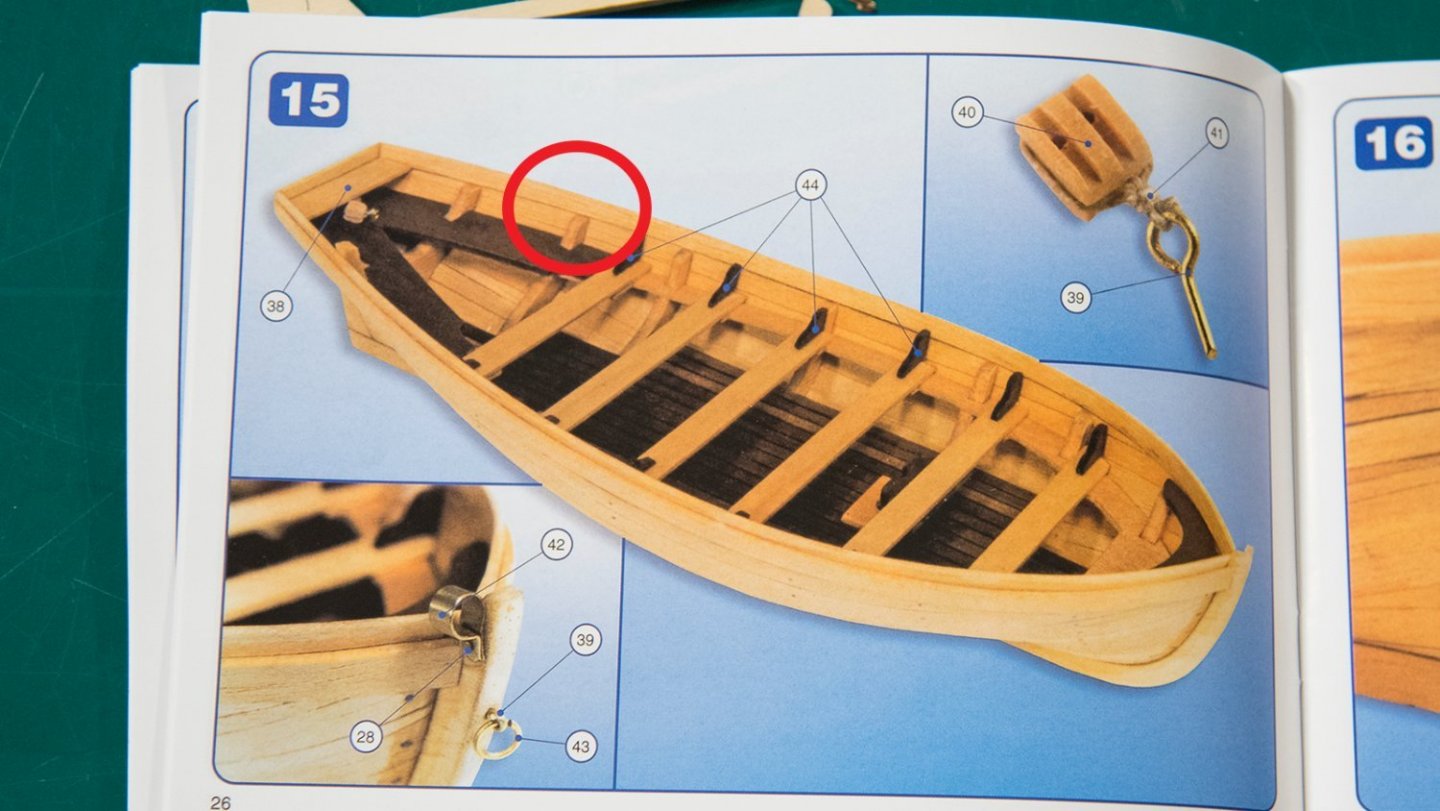
I am still studying my color scheme, but I have decided to keep the interior of the launch as natural wood. Thus, I can go back to working on the boat now. I will only paint the hull, rigging, oars, and other deck equipment. But one lesson learned is that I need to identify a color scheme before I start building my next boat, rather than pick my colors part way through the assembly process. With all this garage stuff out of the way, I am now proceeding to add the floor boards to the Jolly boat. I had previously cut all the floorboards, before my garage upgrade, but as I went to place them in, not all of these fit on the frames as shown in the instructions. I had to “widen” the upward curve of 4 of the frames, in order to lay all the floor boards flat (see red circles below). In addition, not all of the seven strips of apparent mahogany were of the same color. One of one of the seven strips was whitish. Rather that trying to paint or stain this wood, I decided to cut a new floorboard from another mahogany strip that was left over from another boat.
-
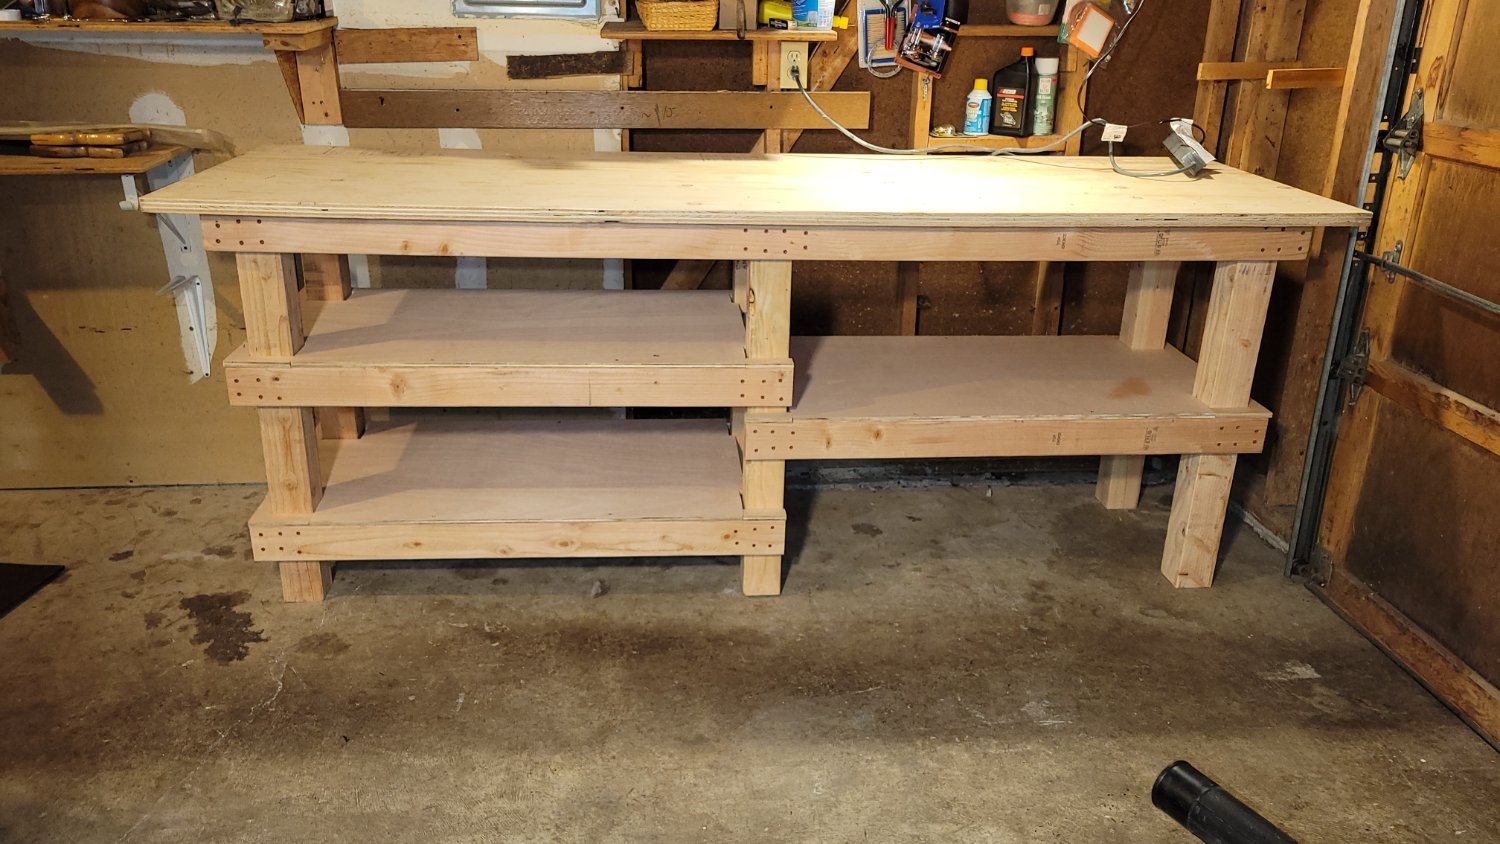
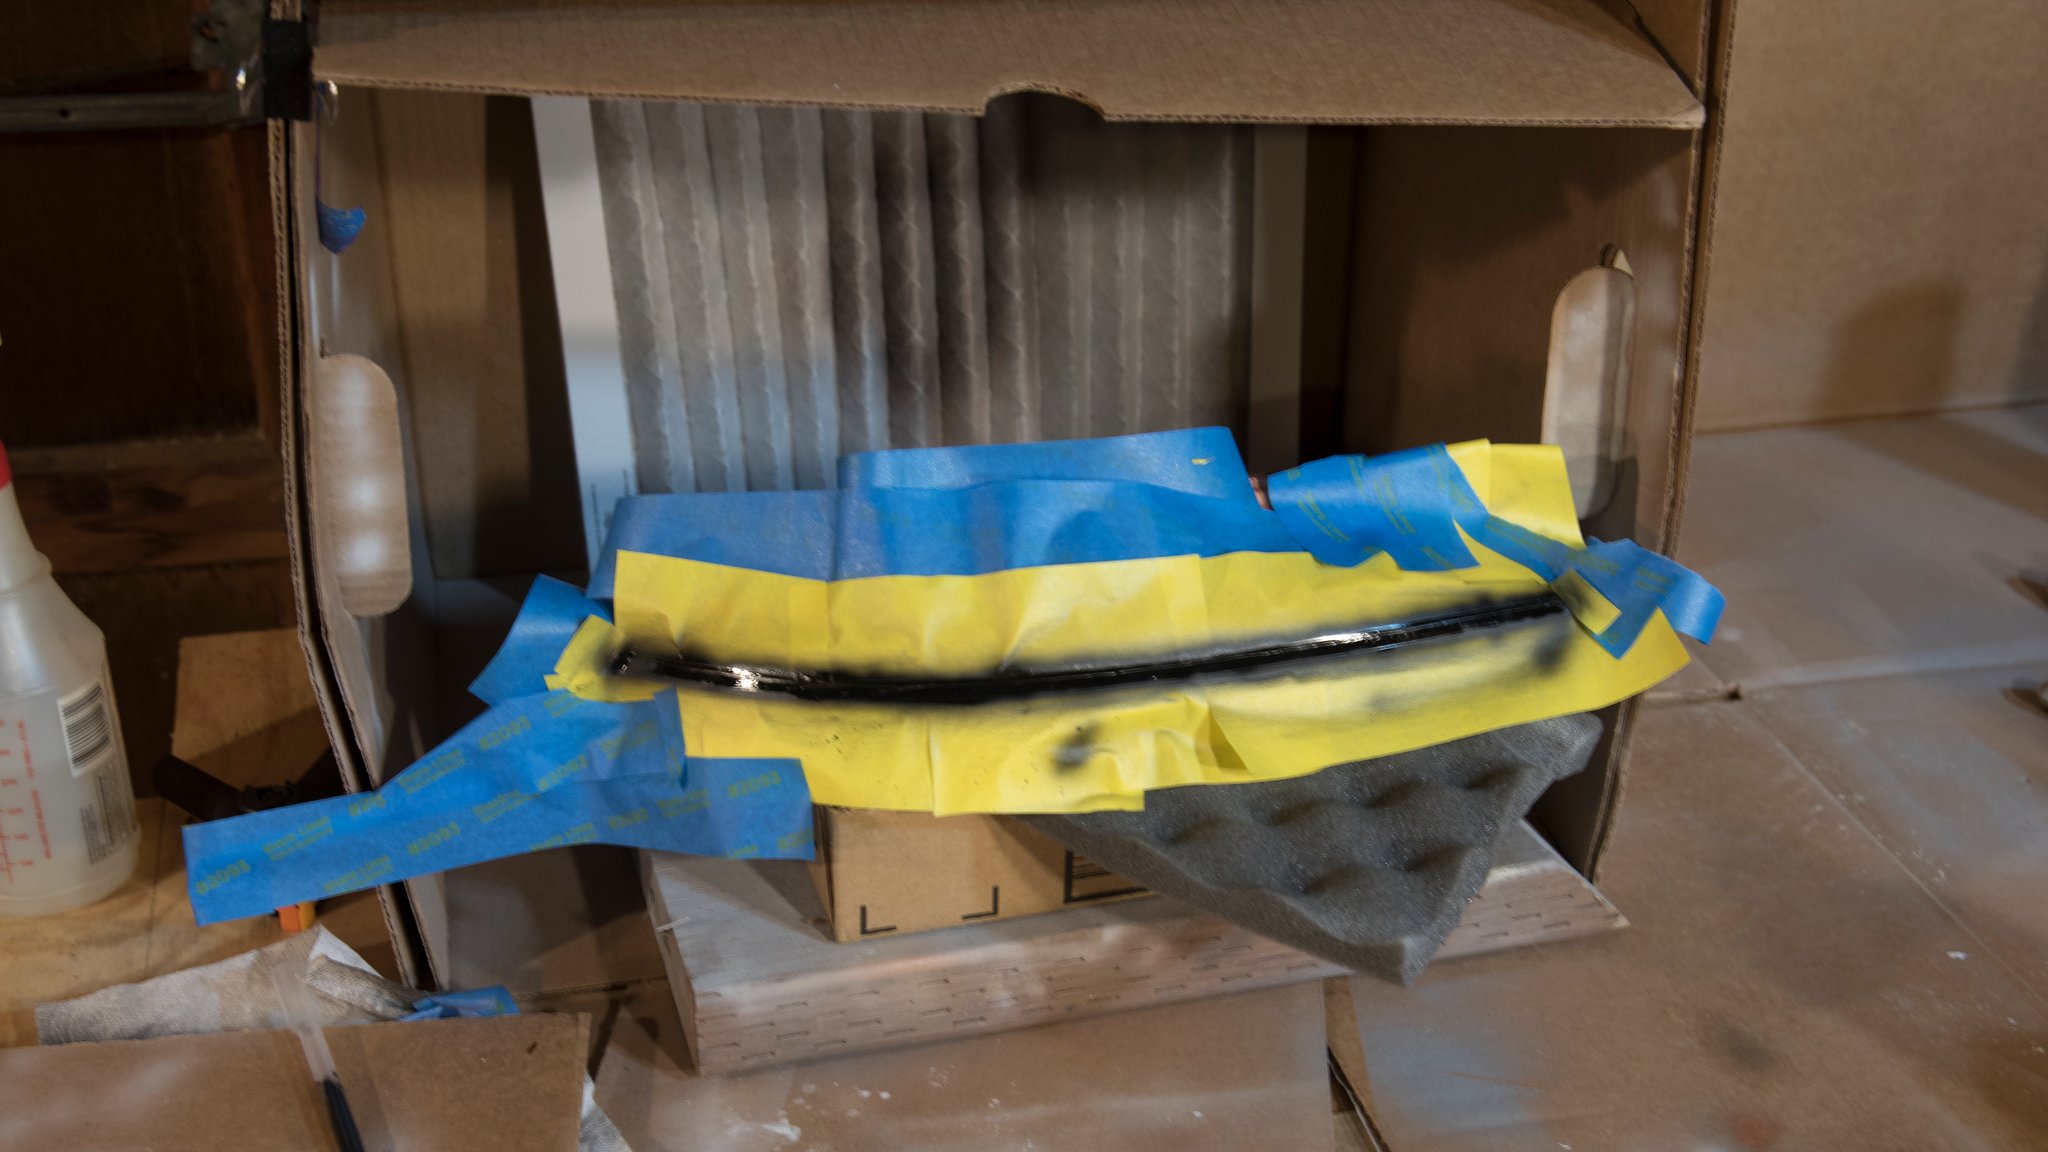
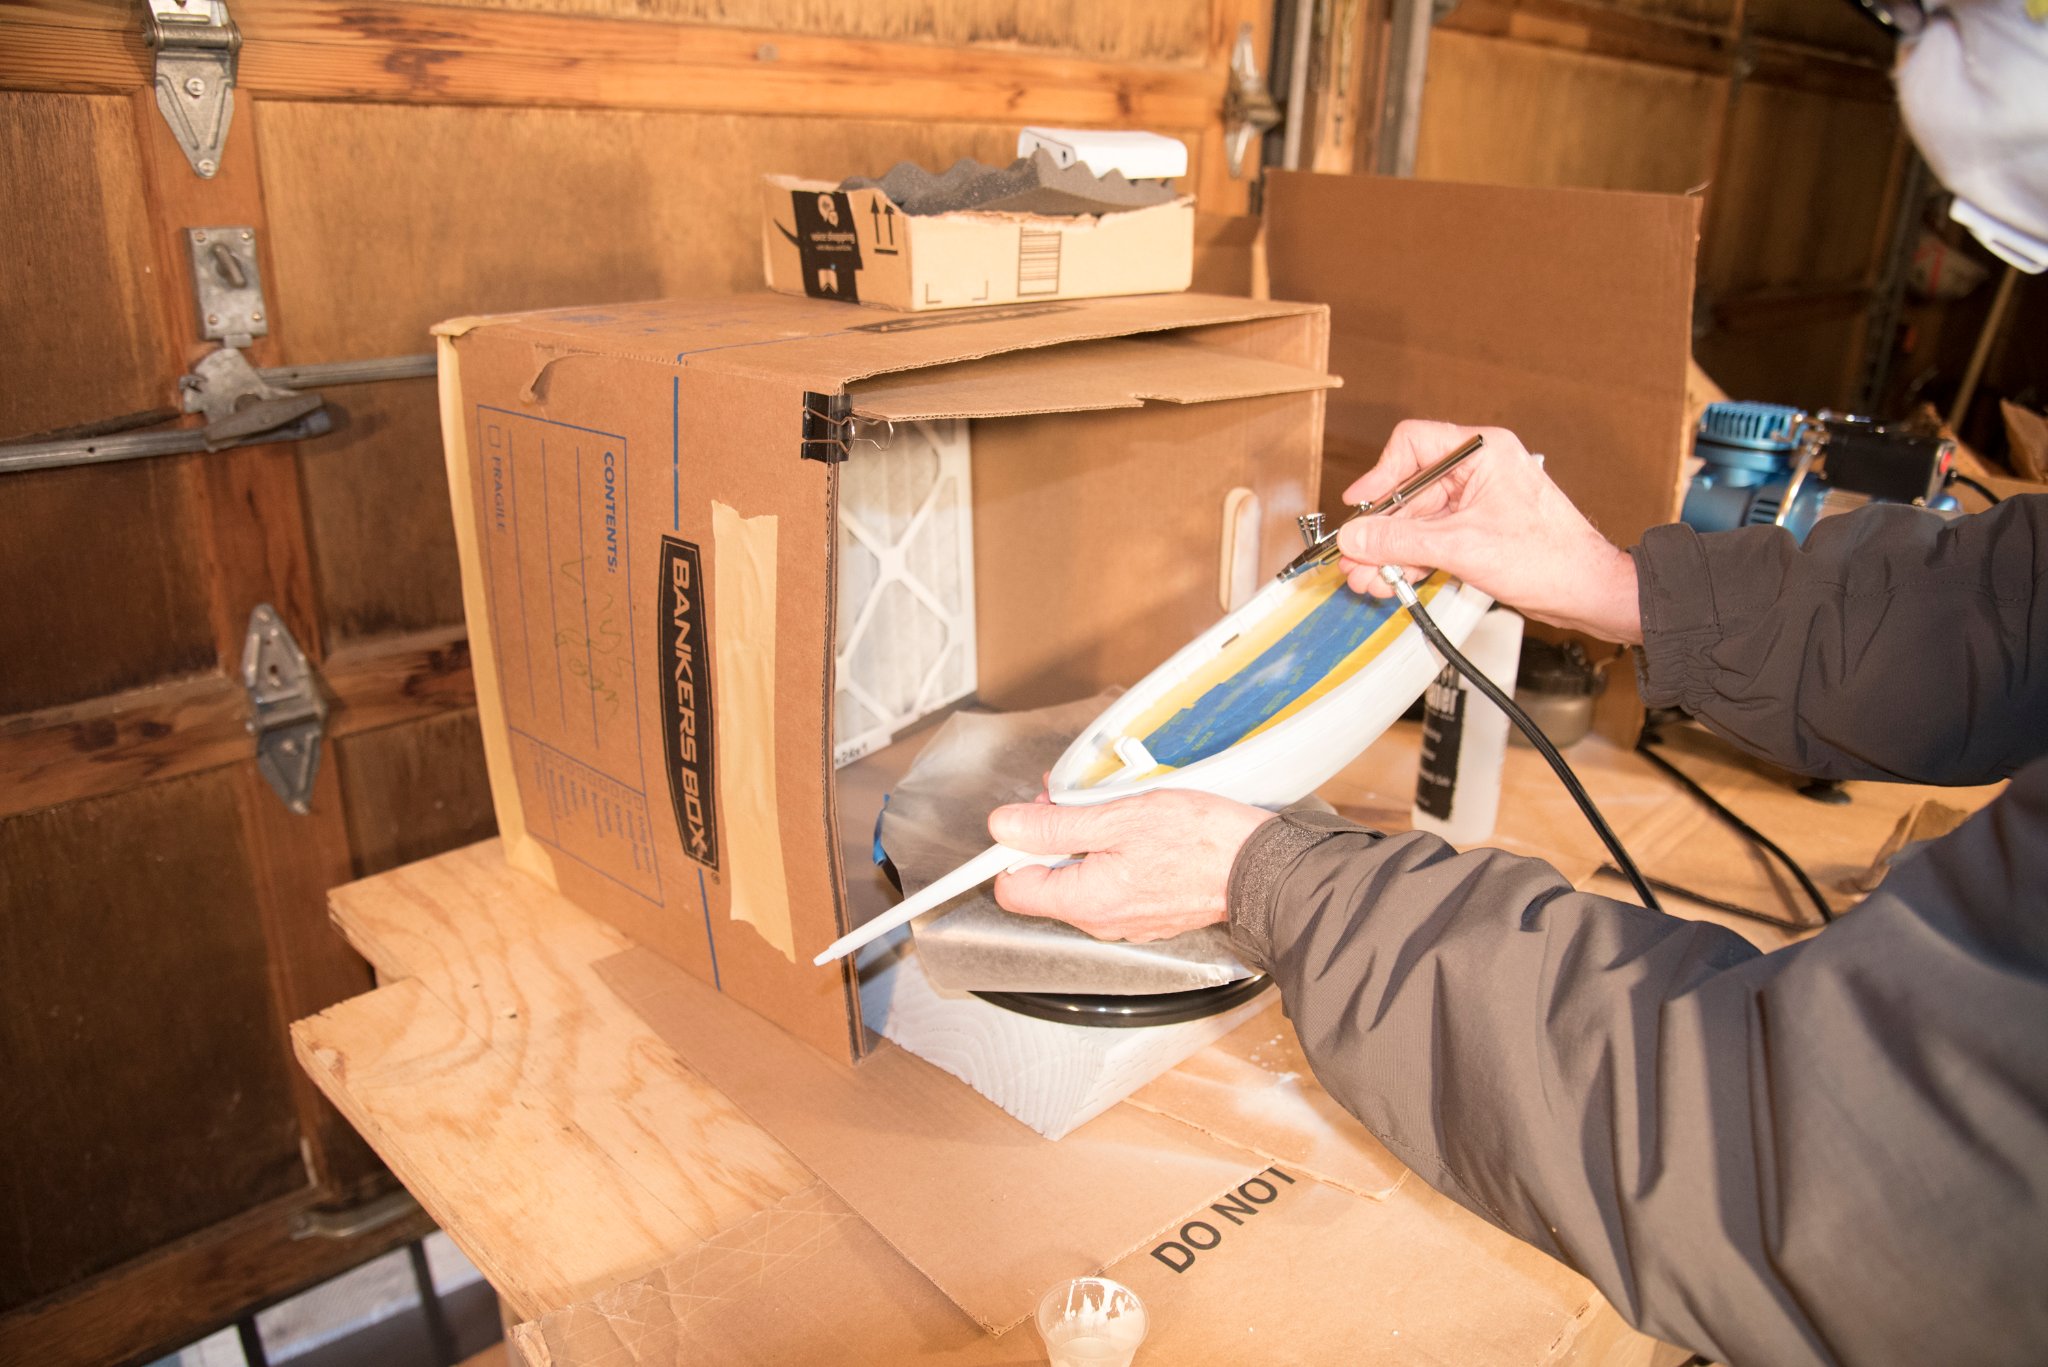
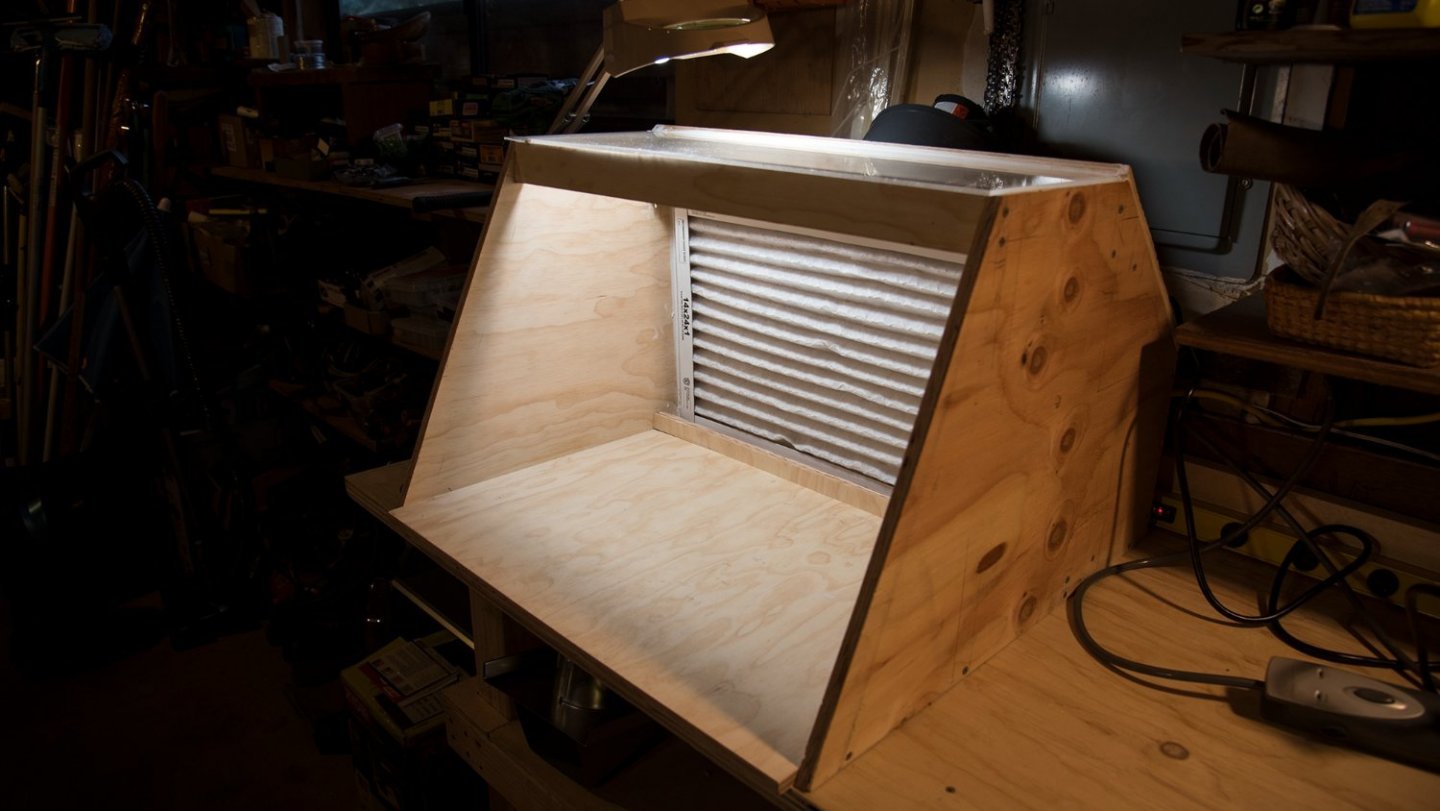
As I progress through this build process, I realize I need a paint color scheme for the boat, and a better airbrush station than my cardboard box. I’ve been meaning to upgrade my workspace in the garage, so I took this time to pause work on the boat and built a new work bench. I also took time to filter all the junk that I have collected over the years, and store it better, or throw it out. Now that most of my junk has been organized, I then built a new spray booth.

- 62 replies
-
- 2
-
-
- Bounty Jolly Boat
- Artesania Latina
- (and 1 more)
-
Allan Thanks for that link. I will find examples of launches in that link and study them carefully. This will be very useful. I seem to learn best by not doing what I'm told and finding out later why the right way is best. So, whether i can learn from these ships plans before I assemble this boat or after I assemble it, I will be better for the link - Thanks. I am currently struggling for a unique but somewhat period correct color scheme. I think I have one, but like i said I, may find it is not quite right after I have painted the boat. Ken
-
Kev: Thanks for tagging along. I need all the advice and help I can get. I know what I am doing, and just can't do what I know! ha! Now that I think about your lesson about delaying the "attachment of the deck" advice, I see it would have been better for me to not attach it either. I've been absent for a while building a new work bench and spray booth (pictures to follow soon). but now I am getting back into working on the boat. I am currently stuck on what colors I will use and where. I wish I had thought of the color scheme sooner, but thankful I thought of it before I progress further. All of the completed Bounty jolly boats look so good. From wood to wonderfully colored boats. I'm thinking my frames and deck will be a wood color, and the hull will be a combination of mostly white with some trim colors. I may use the frames as it, or paint them somewhat darker, like yours. If I elect to paint the frames it will be difficult to paint with the deck attached. I can tape everything off and paint. Thats a lot of work, but good practice on my taping skills. These days I use wood glue which can often be taken off with warm water. So, once I get back into the "harness", I'll make a choice on the color scheme, make a little more progress, and then post a few days' worth of work. I say days, ... when really, I mean evening and weekends. We are providing full time day care for our grandchildren 1, 2 and 3 yrs old. This is a full-time job! Thus, I am progressing pitifully slow. I'd apologize, but my wife is teaching me so much about children, I have come to believe that being a positive influence on these wonderful kids has become my 1st hobby, and modeling is now my 2nd hobby. So "ahead slow" it is. 🙂 Blog with you later Ken
-
kev: I just started a build of this boat, and I am finding your build log very helpful. Thanks. Your planking job looks stellar. I am hoping I can do half as good as you did. Looks sweet! Ken_2
- 129 replies
-
- 2
-
-

-
- Bounty Jolly Boat
- Artesania Latina
- (and 1 more)
-
I glued the deck on the frames using wood glue (not instant glue as recommended). Next I cut the floor boards. There is no extra wood provided, only seven 310 mm lengths of floor board. One 310 mm piece for the 187 mm center board and six 310 mm pieces for the six 140 mm boards and six 167 mm boards

-
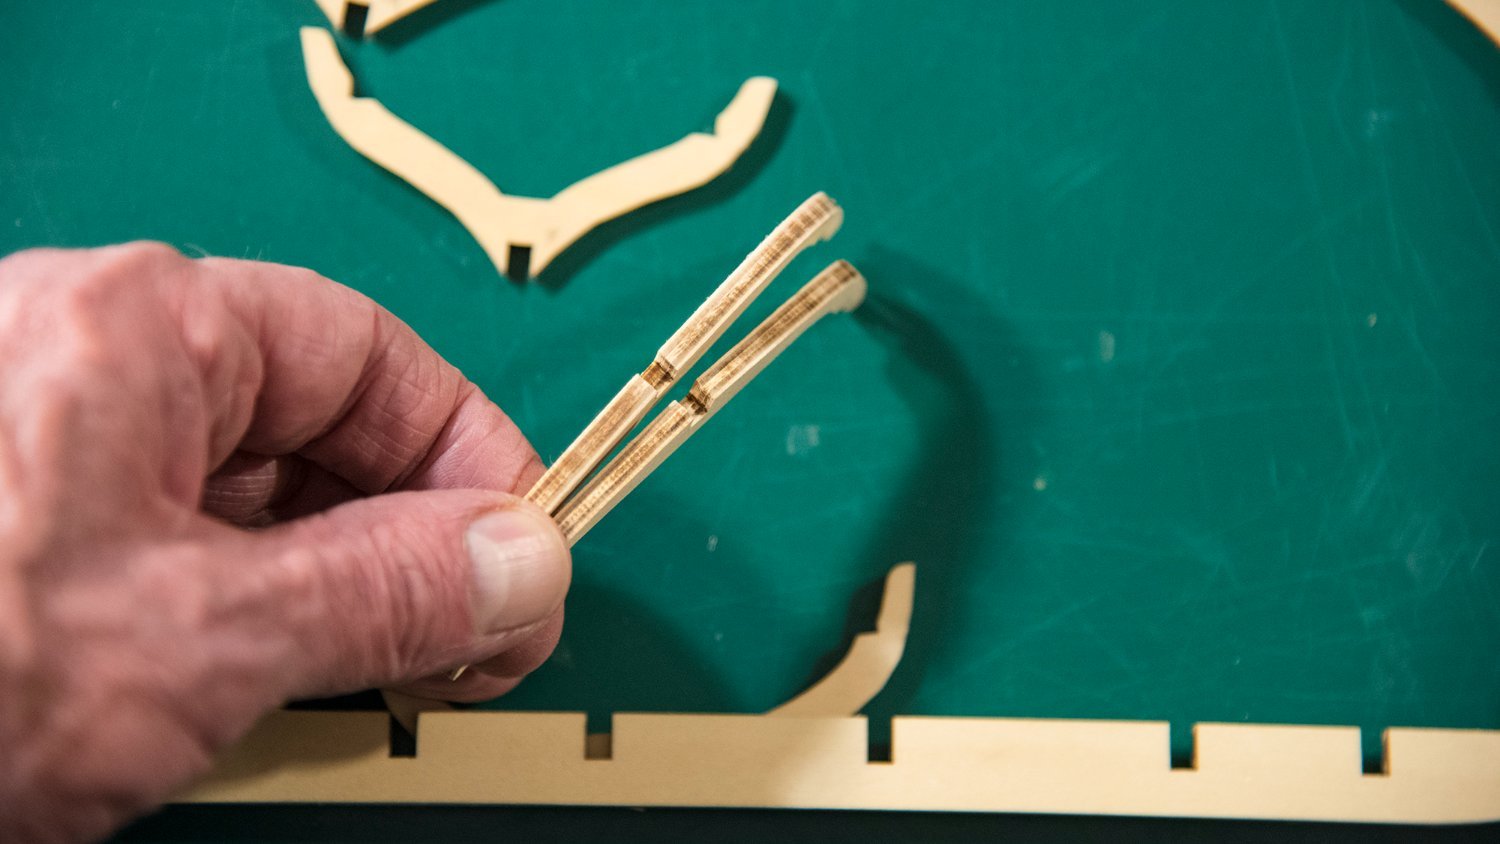
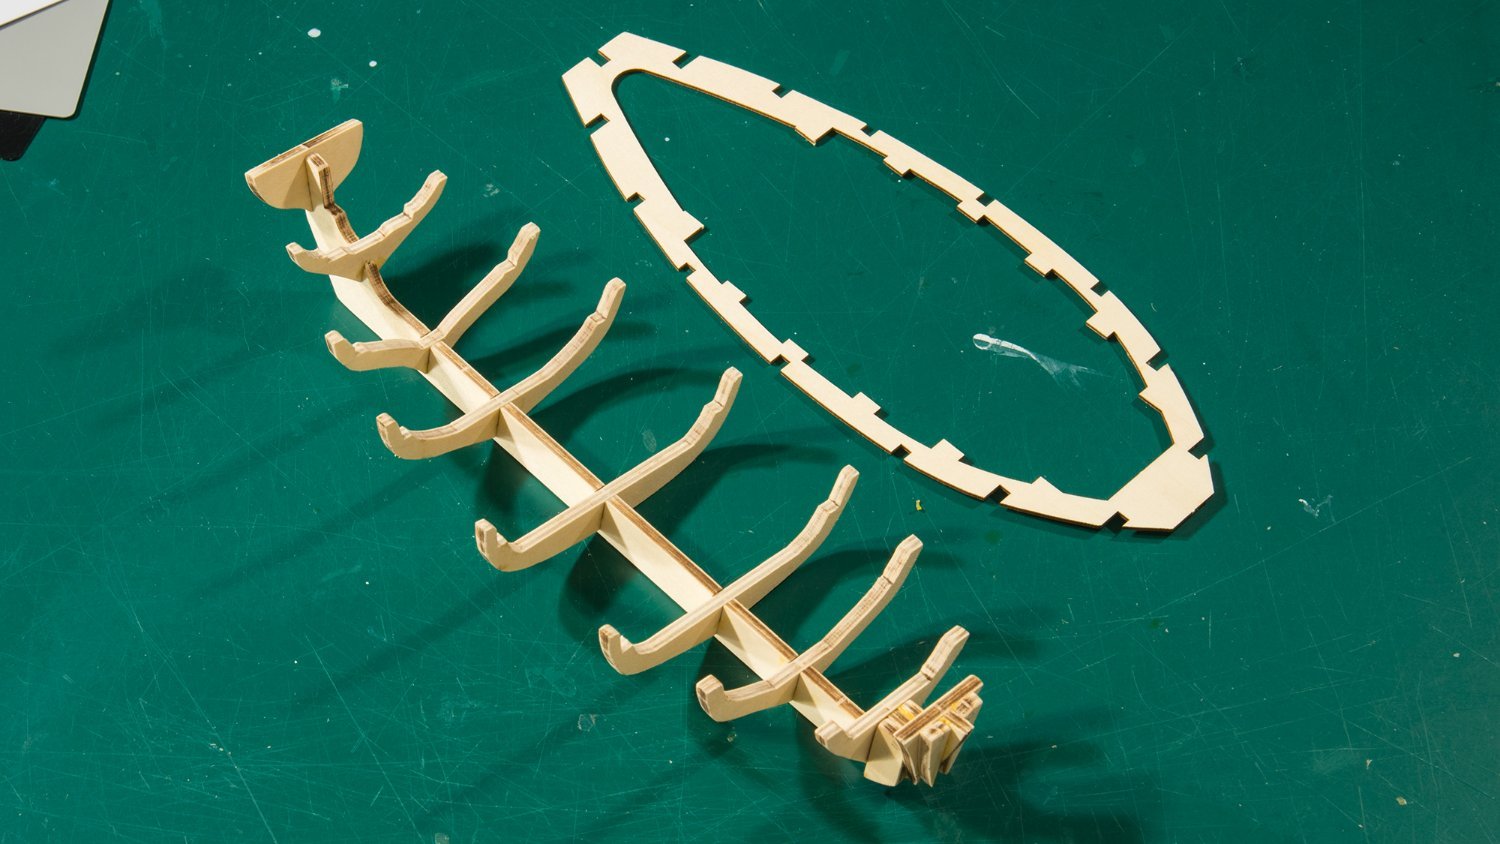
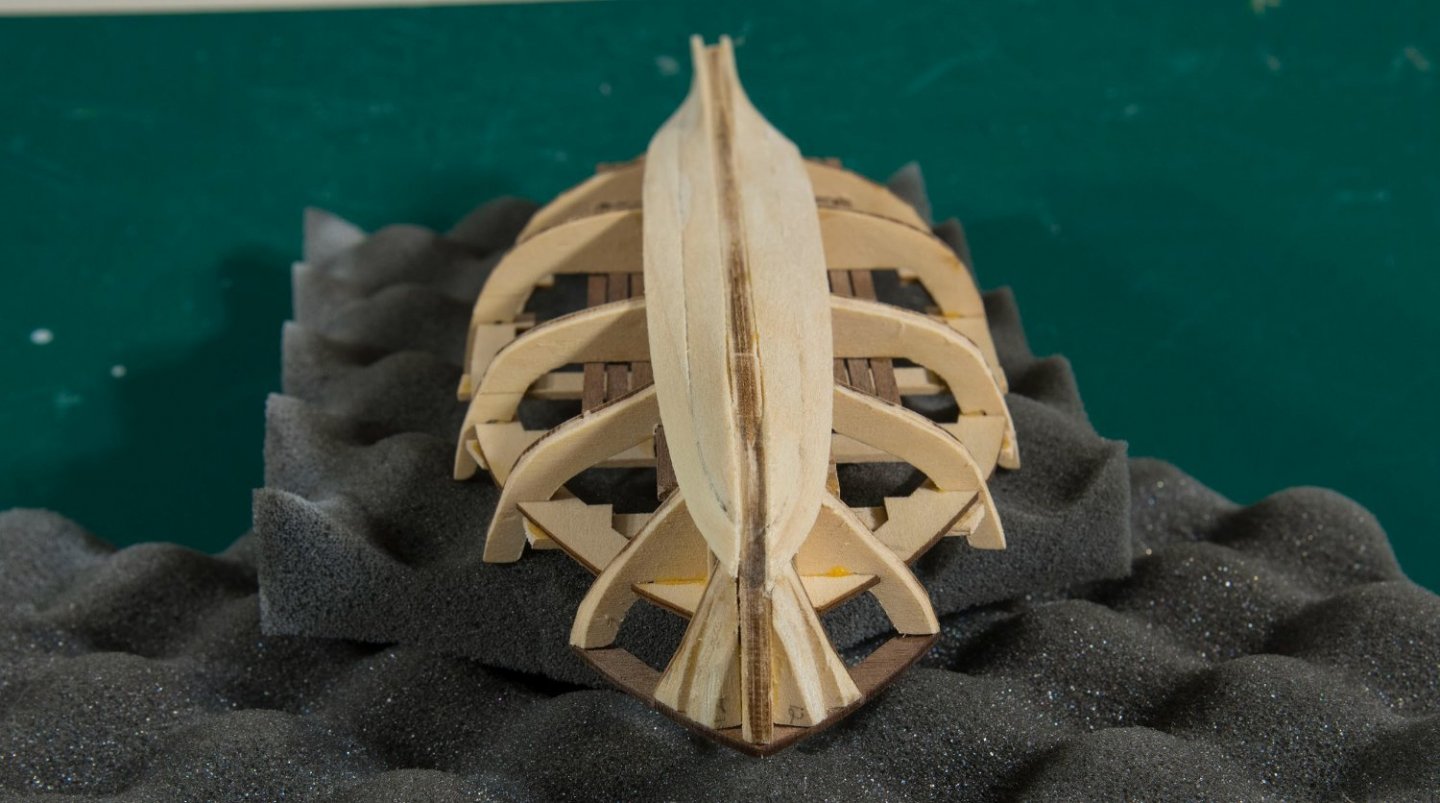
Then I removed the laser char. The char (the effects of heating the wood while cutting for later assembly) leaves a wood surface that looks burned and is a rough surface, both of which can hinder surface bonding with glue. I spent some time studying the best way to remove this char. As best I can tell, one does not need to remove all the darkened wood for gluing, but only smooth it. So, I sanded all charred surfaces with 220 grit sandpaper to smooth it out. Further, if the surface is to be seen, one needs to sand it further, such that all darkened wood is removed. Some people did this even if it was to be painted, since the darkened wood has a different finish, which may show in the finish of the paint. For this part of the boat, I think most of the wood will not be showing. Thus, I just used 220 grit to smooth down all the char. By looking ahead, I see a portion of the frames will show (as seen in the red circle below). After dry fitting and before I glue these frames on the keel, I did a more careful sanding of the parts of the frames that will show, and I will study the keel more carefully. I think the false keel will hide the charred surfaces.


- 62 replies
-
- 1
-
-
- Bounty Jolly Boat
- Artesania Latina
- (and 1 more)
-
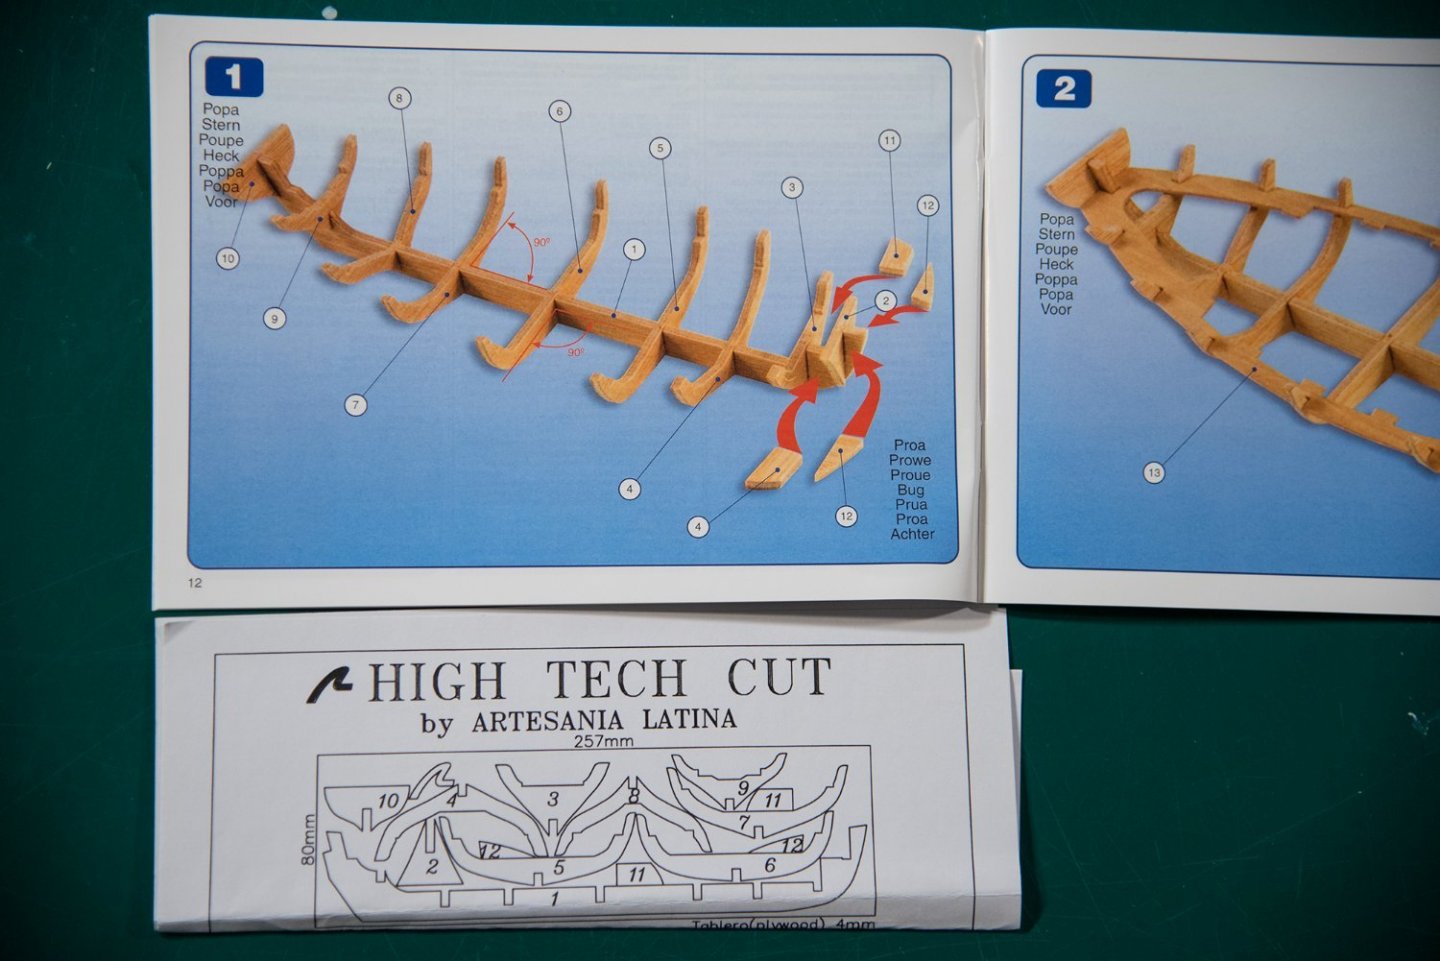
Step 1, assemble the outer keel, frames, and bow reinforcements. I removed all the parts.

-
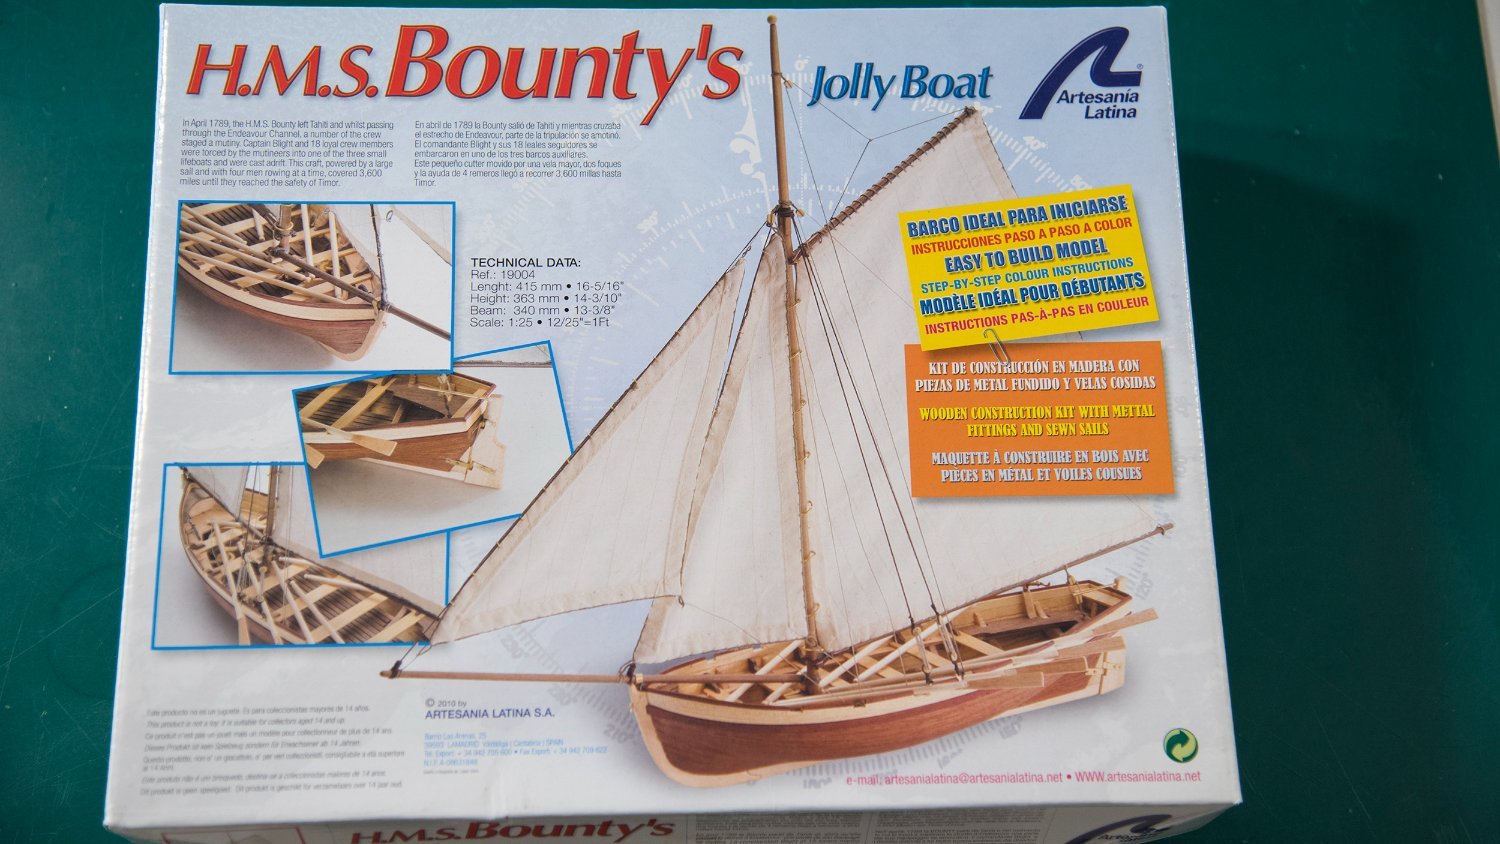
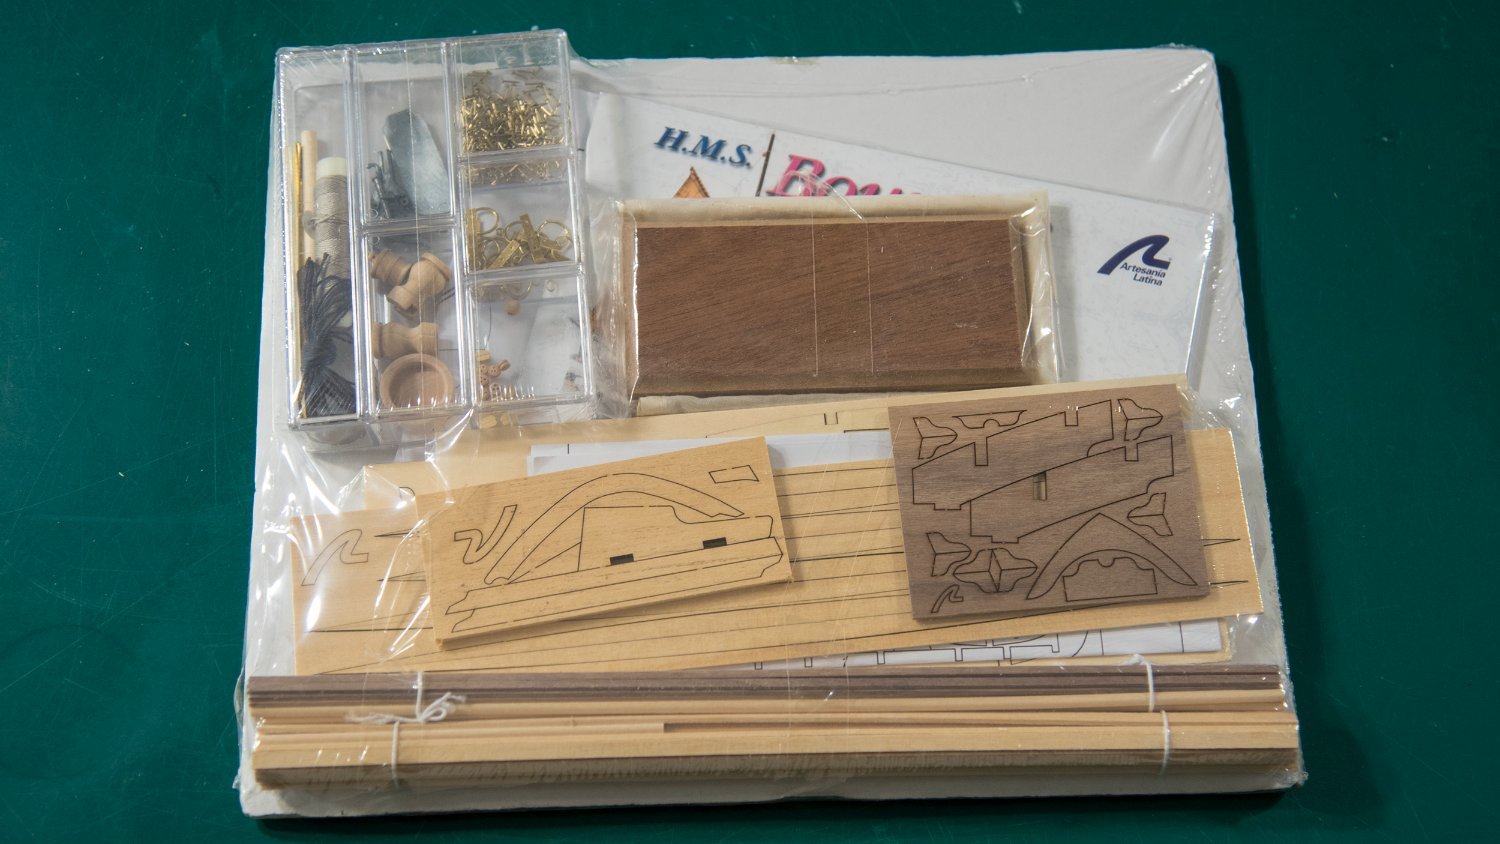
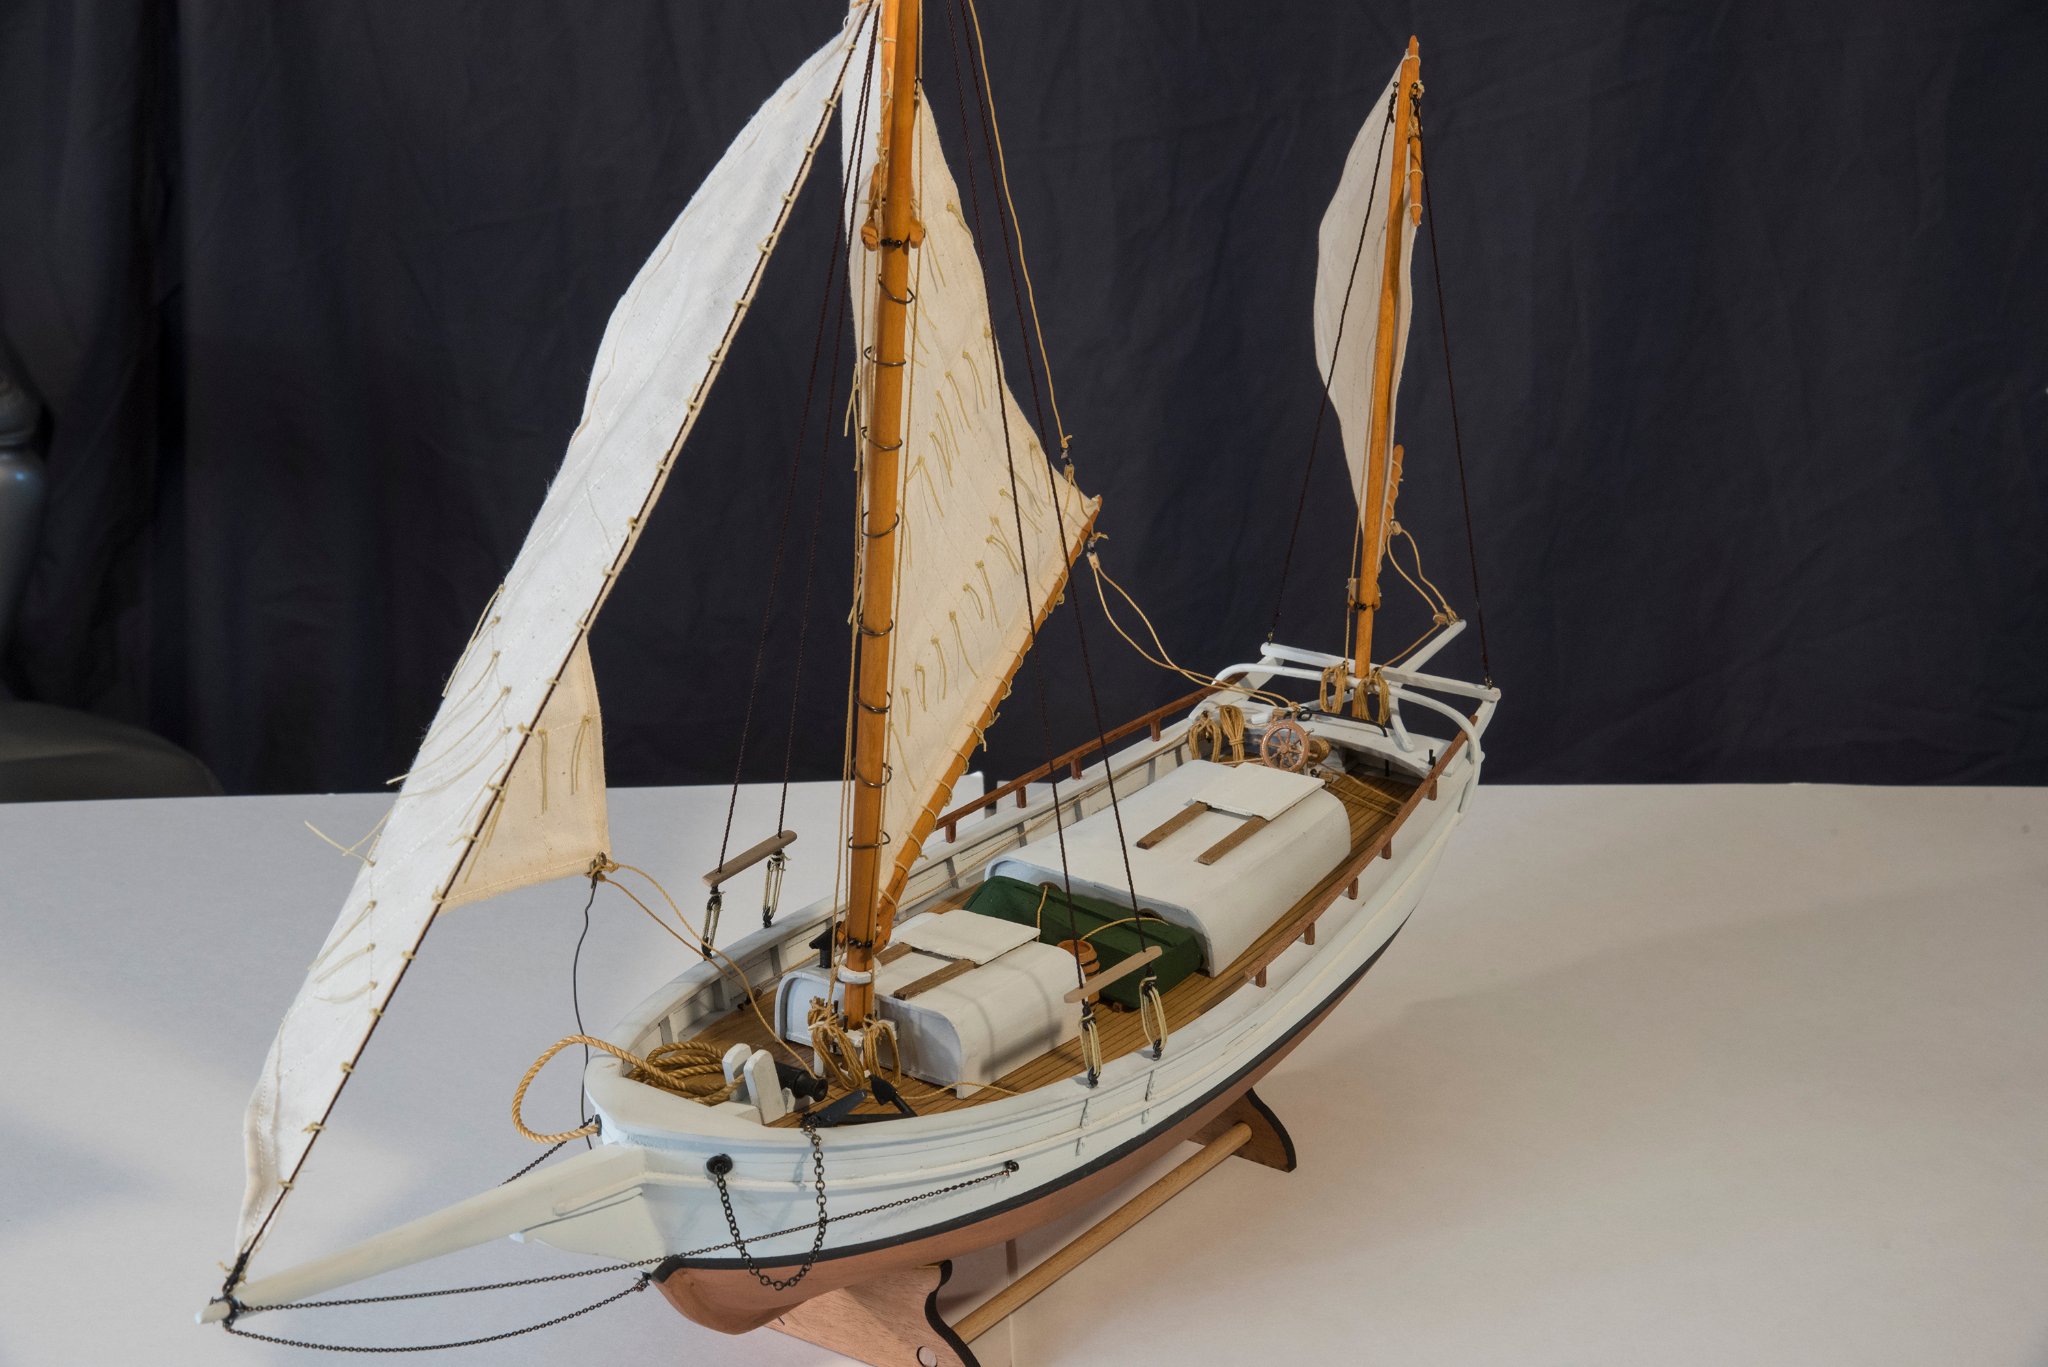
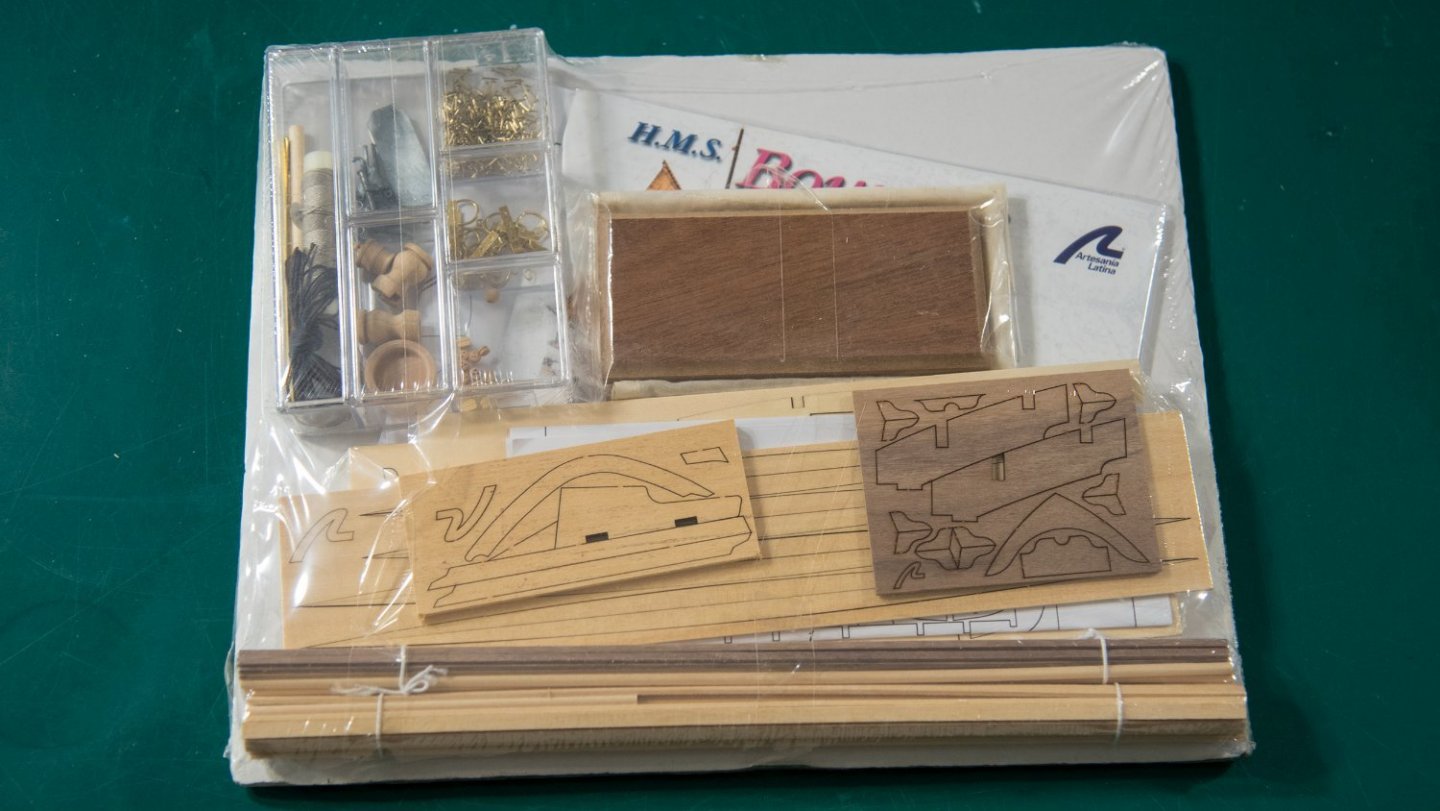
The HMS Bounty set sail from England in August of 1787 on a Botanical mission. The famous mutiny occurred in July of 1789, nearly 2 years later. Captain Bligh and 18 other sailors were set adrift in the Jolly Boat designed for a maximum of 15 people, and not designed as an ocean going vessel. They were given minimal supplies. Captain Bligh and his men sailed the subject open boat 3,618 nautical miles to the Dutch settlement on Timor, part of today’s Indonesia. This boat was 23 feet long. They were provided with 5 days provisions, water, a sextant, nautical tables, charts and at the last minute 4 cutlasses were provided. I have had this kit in my closet for some time, and I thought I would assemble it since, 1) summer is fast approaching and I do not want to get involved in a complex boat build until next fall, when I may have more free time, and 2) but, if I wait until next fall, some of my newly acquired modeling skills may be forgotten. So, it seems like this is a good way to stay current, empty my closet, and be ready for something more challenging, later. The quality of the instructions and materials are typical of Artesania Latina. The instructions are to look at all the photographs and read all the documentation provided in the kit. I have done this, and I am ready to begin.

- 62 replies
-
- 1
-
-
- Bounty Jolly Boat
- Artesania Latina
- (and 1 more)
-
Thanks for those great suggestions. I will look at each kit or strategy suggested. Ken
-
I finished the NRG Half Hull Planking kit, and it was wonderful. Now I want to put those lessons to work. But which kit would be best? I do not want to spend a year or two on a 3 masted sailing ship. I want to mostly focus on an advance planking project. The kits I have been looking are either clinker style or are solid wood or are too simple. I have built the HMS Victory Launch - which has lots of planking, and is a great boat, but I already built it (before I acquired my newly learned skills). This is similar to what I am looking for. Maybe a small sailing boat or fishing skiff, which require lots of planking - to practice my skills. Any suggestions? Ken
-
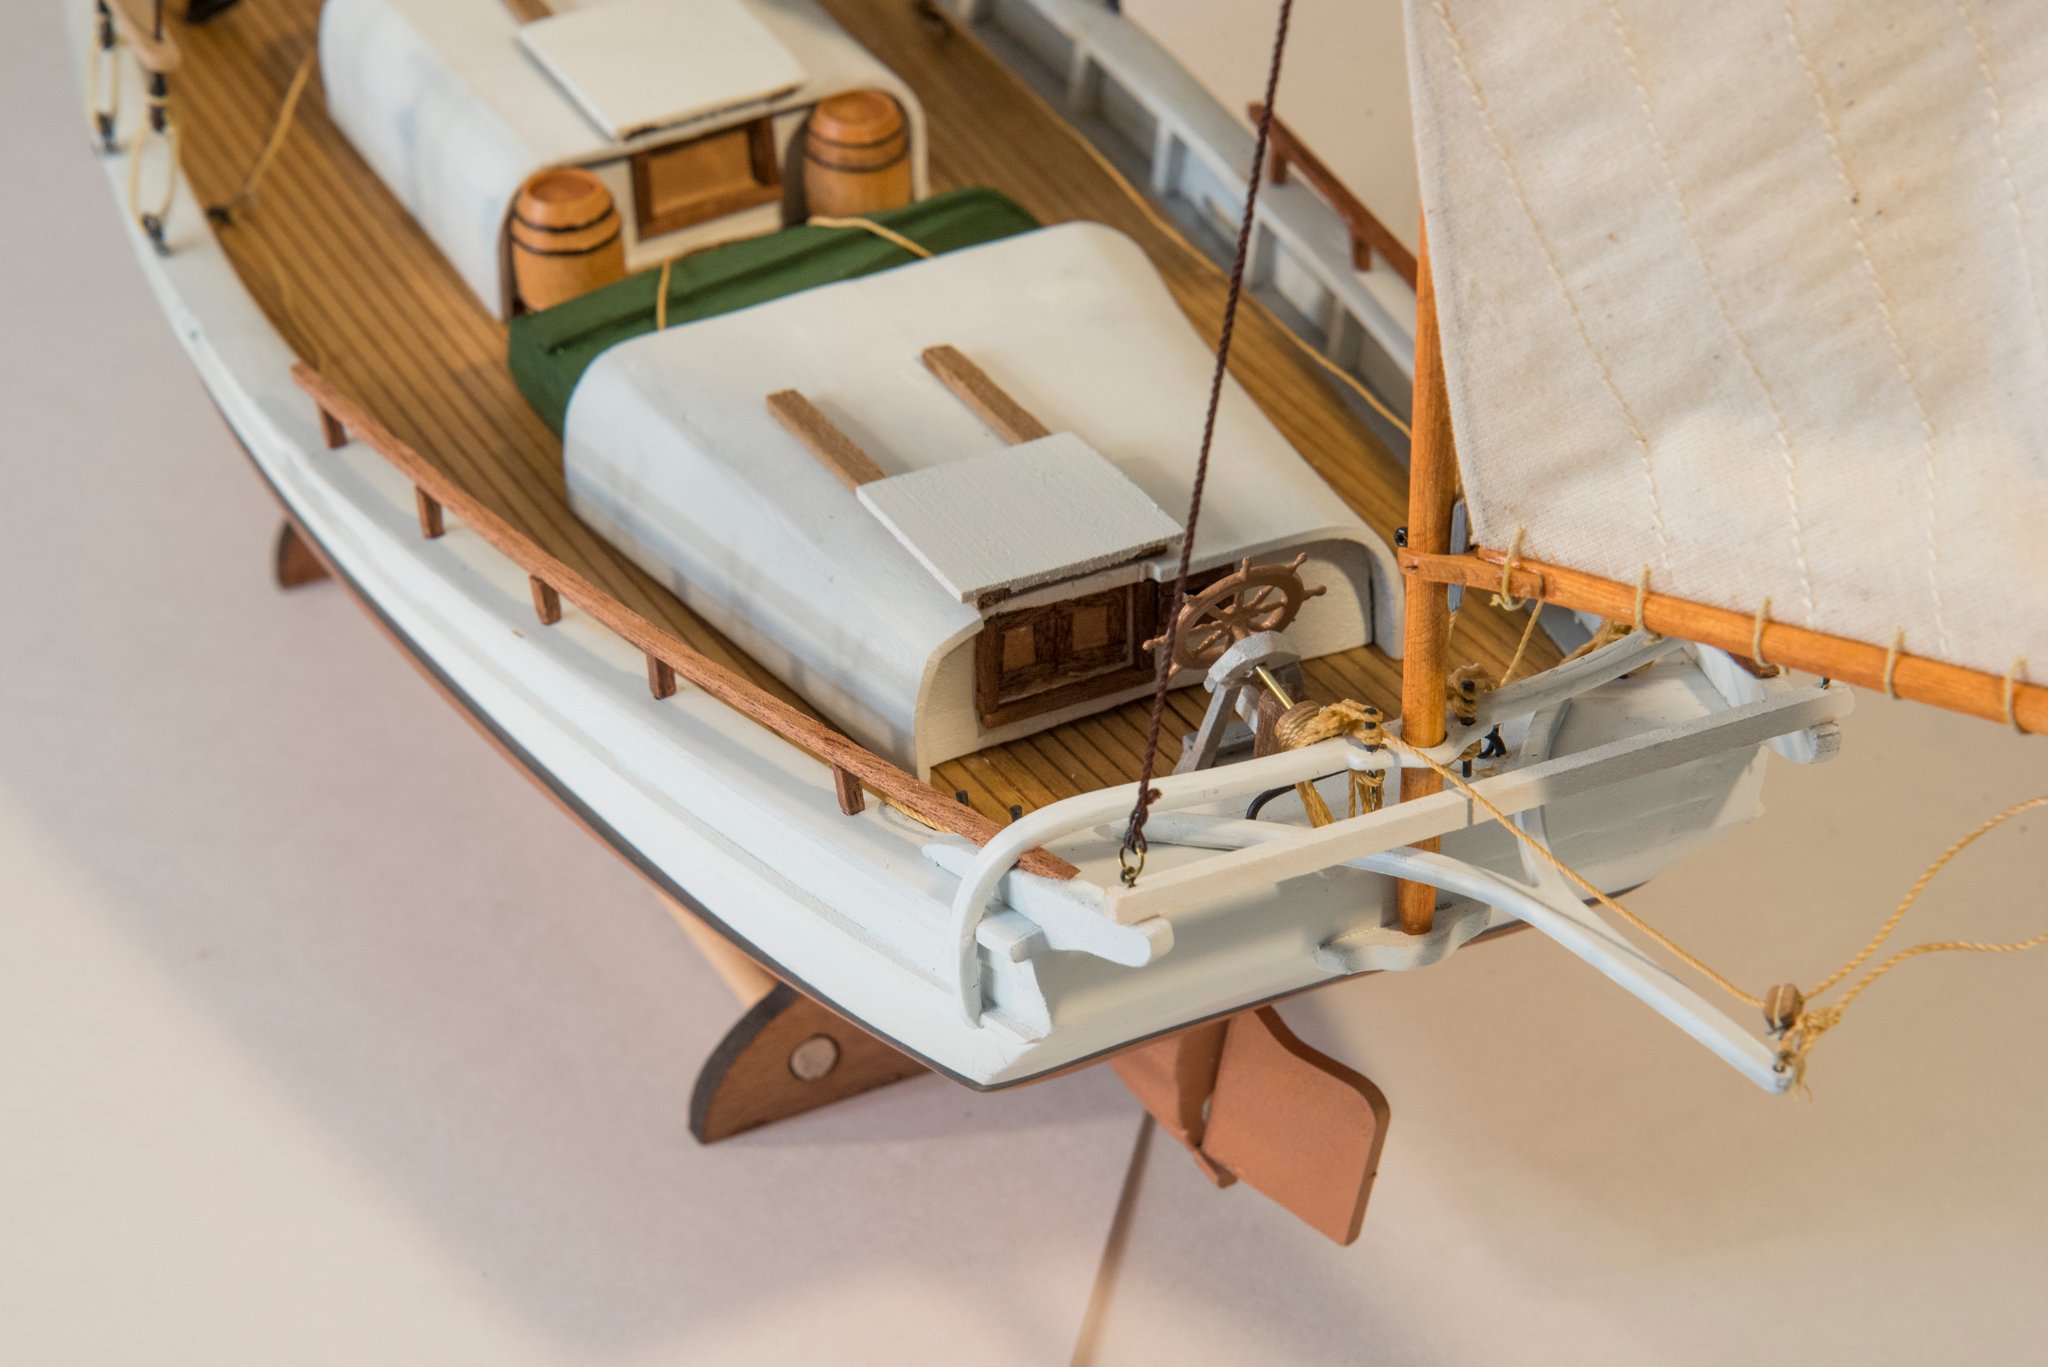
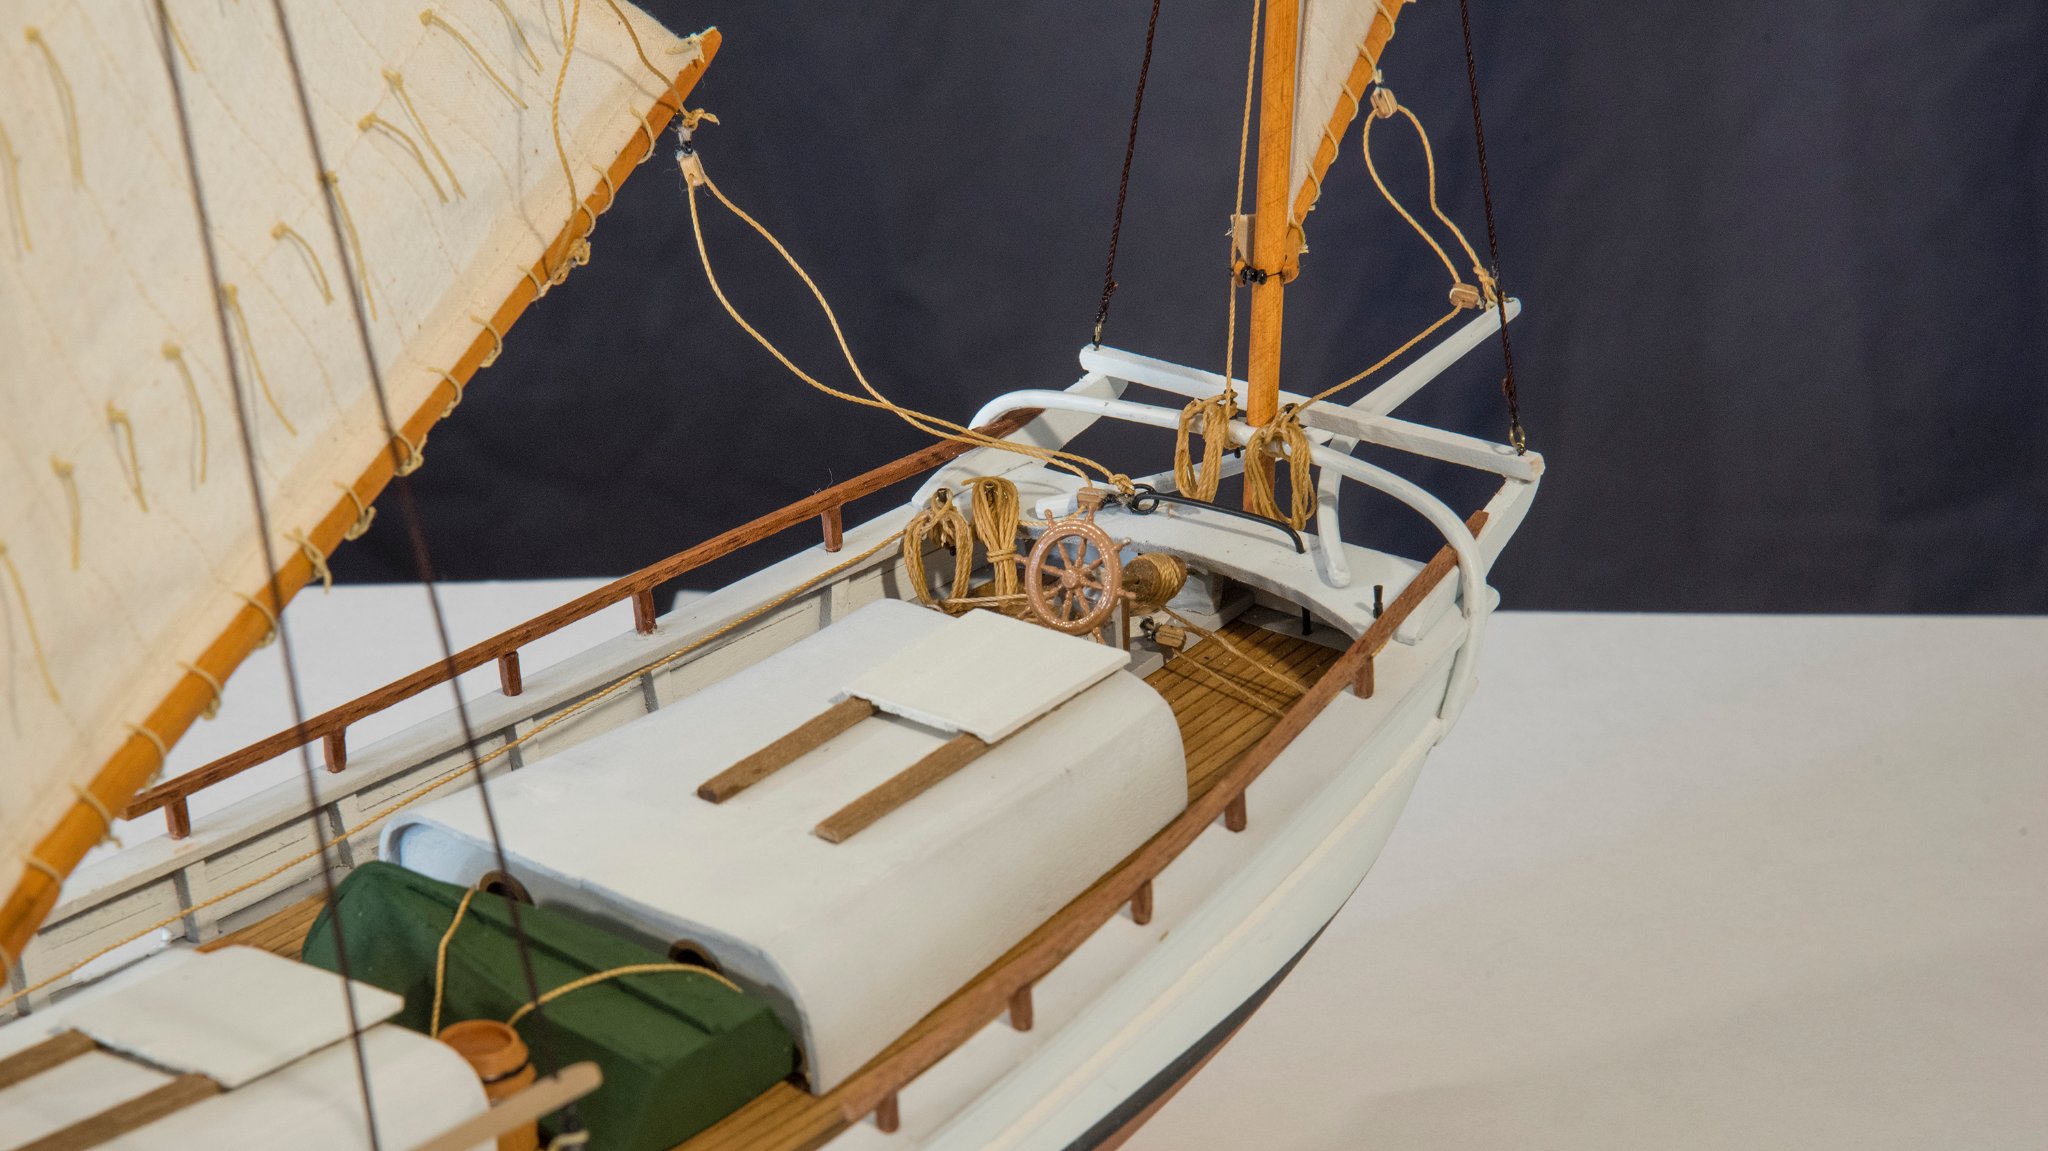
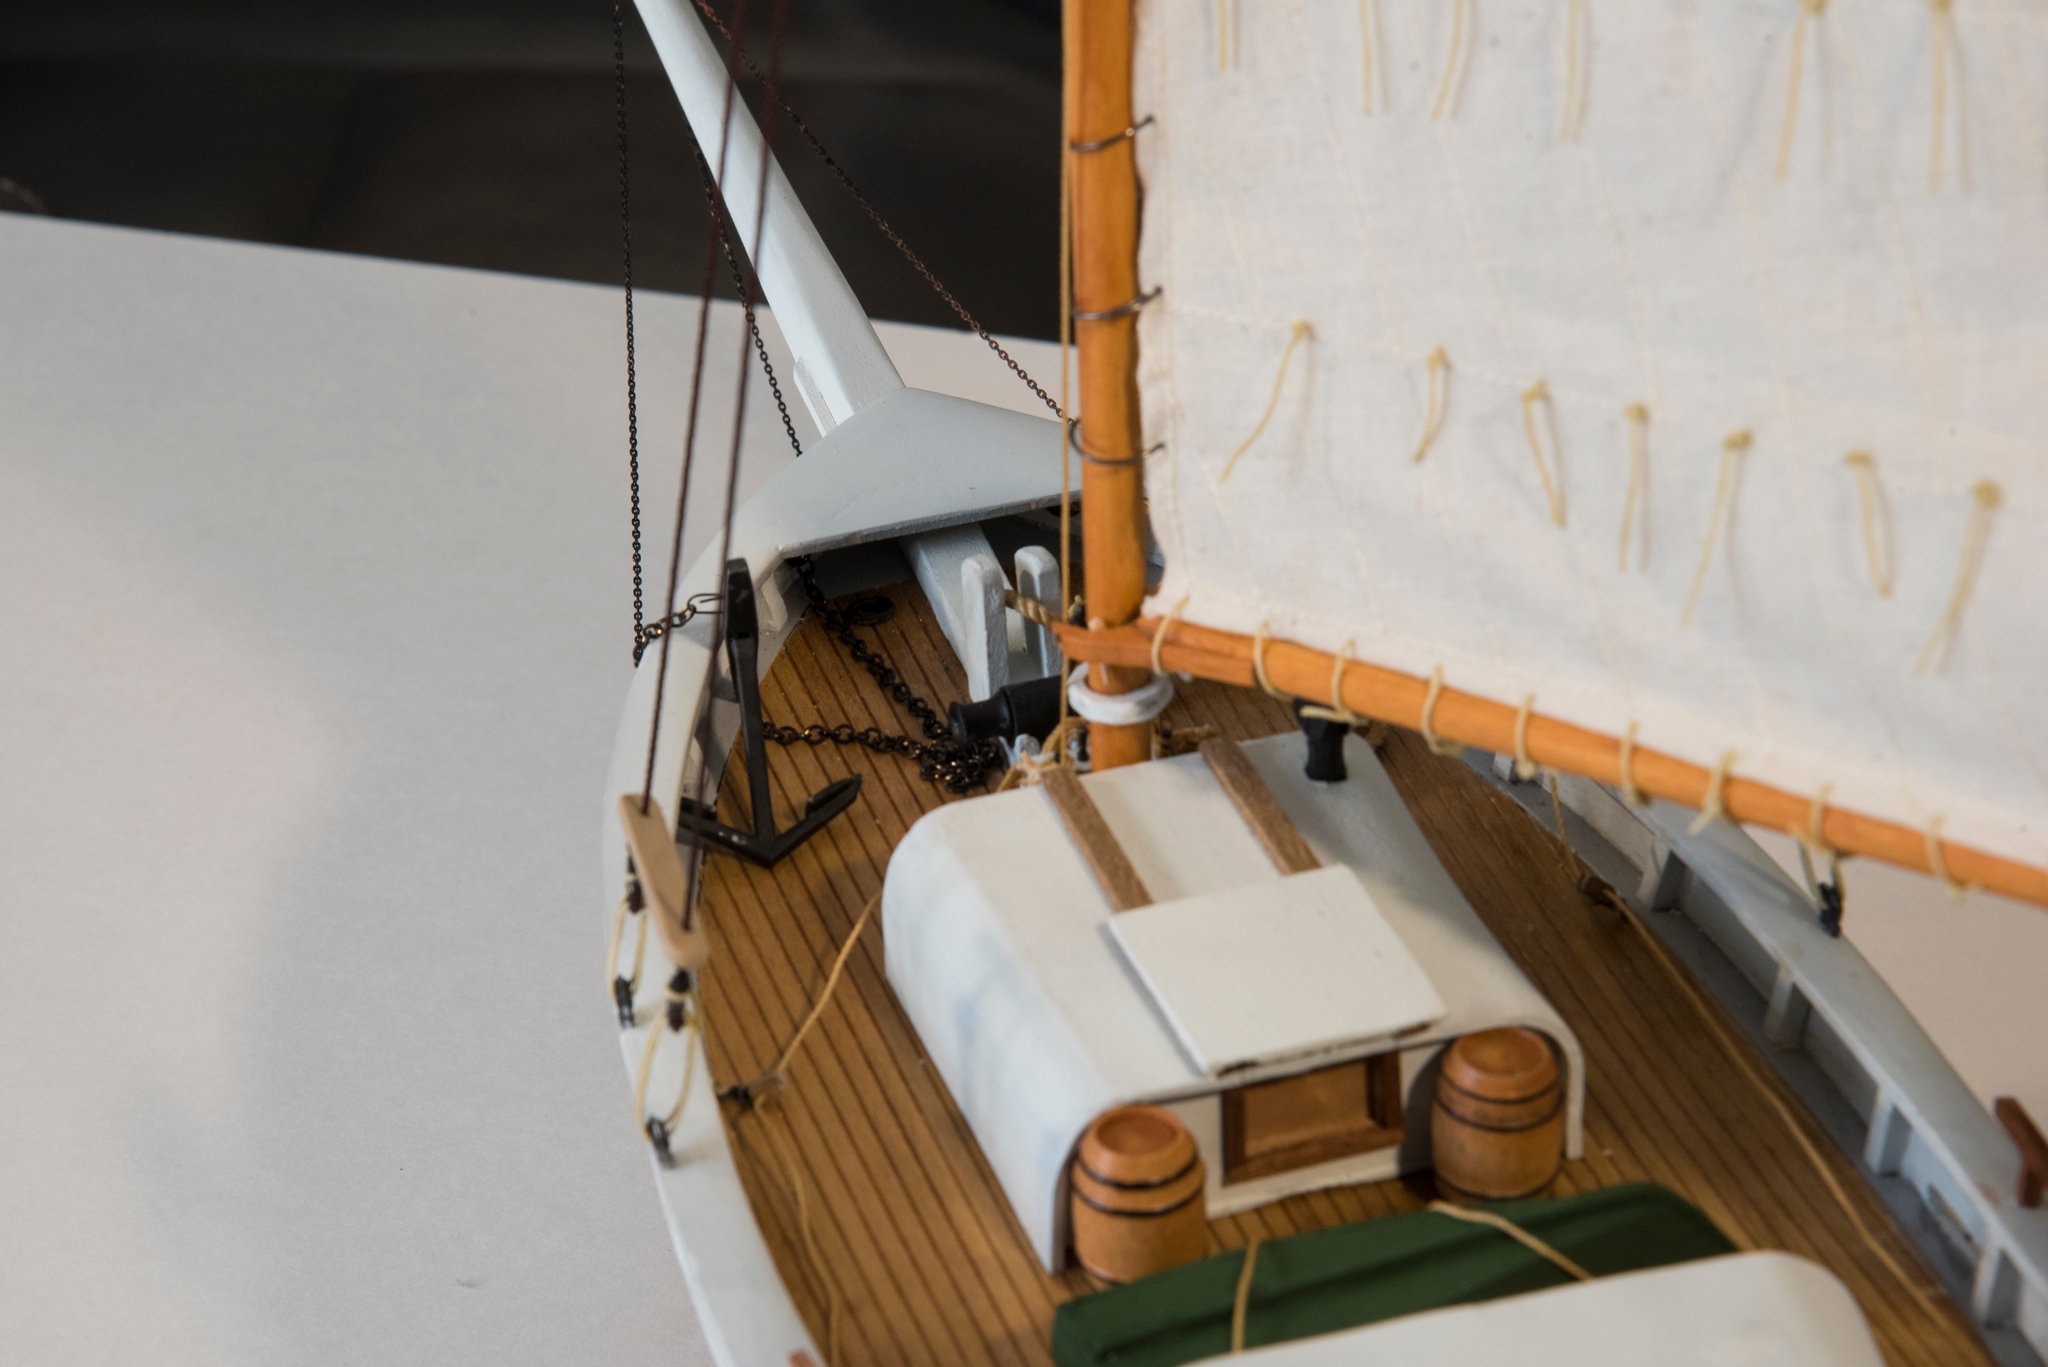
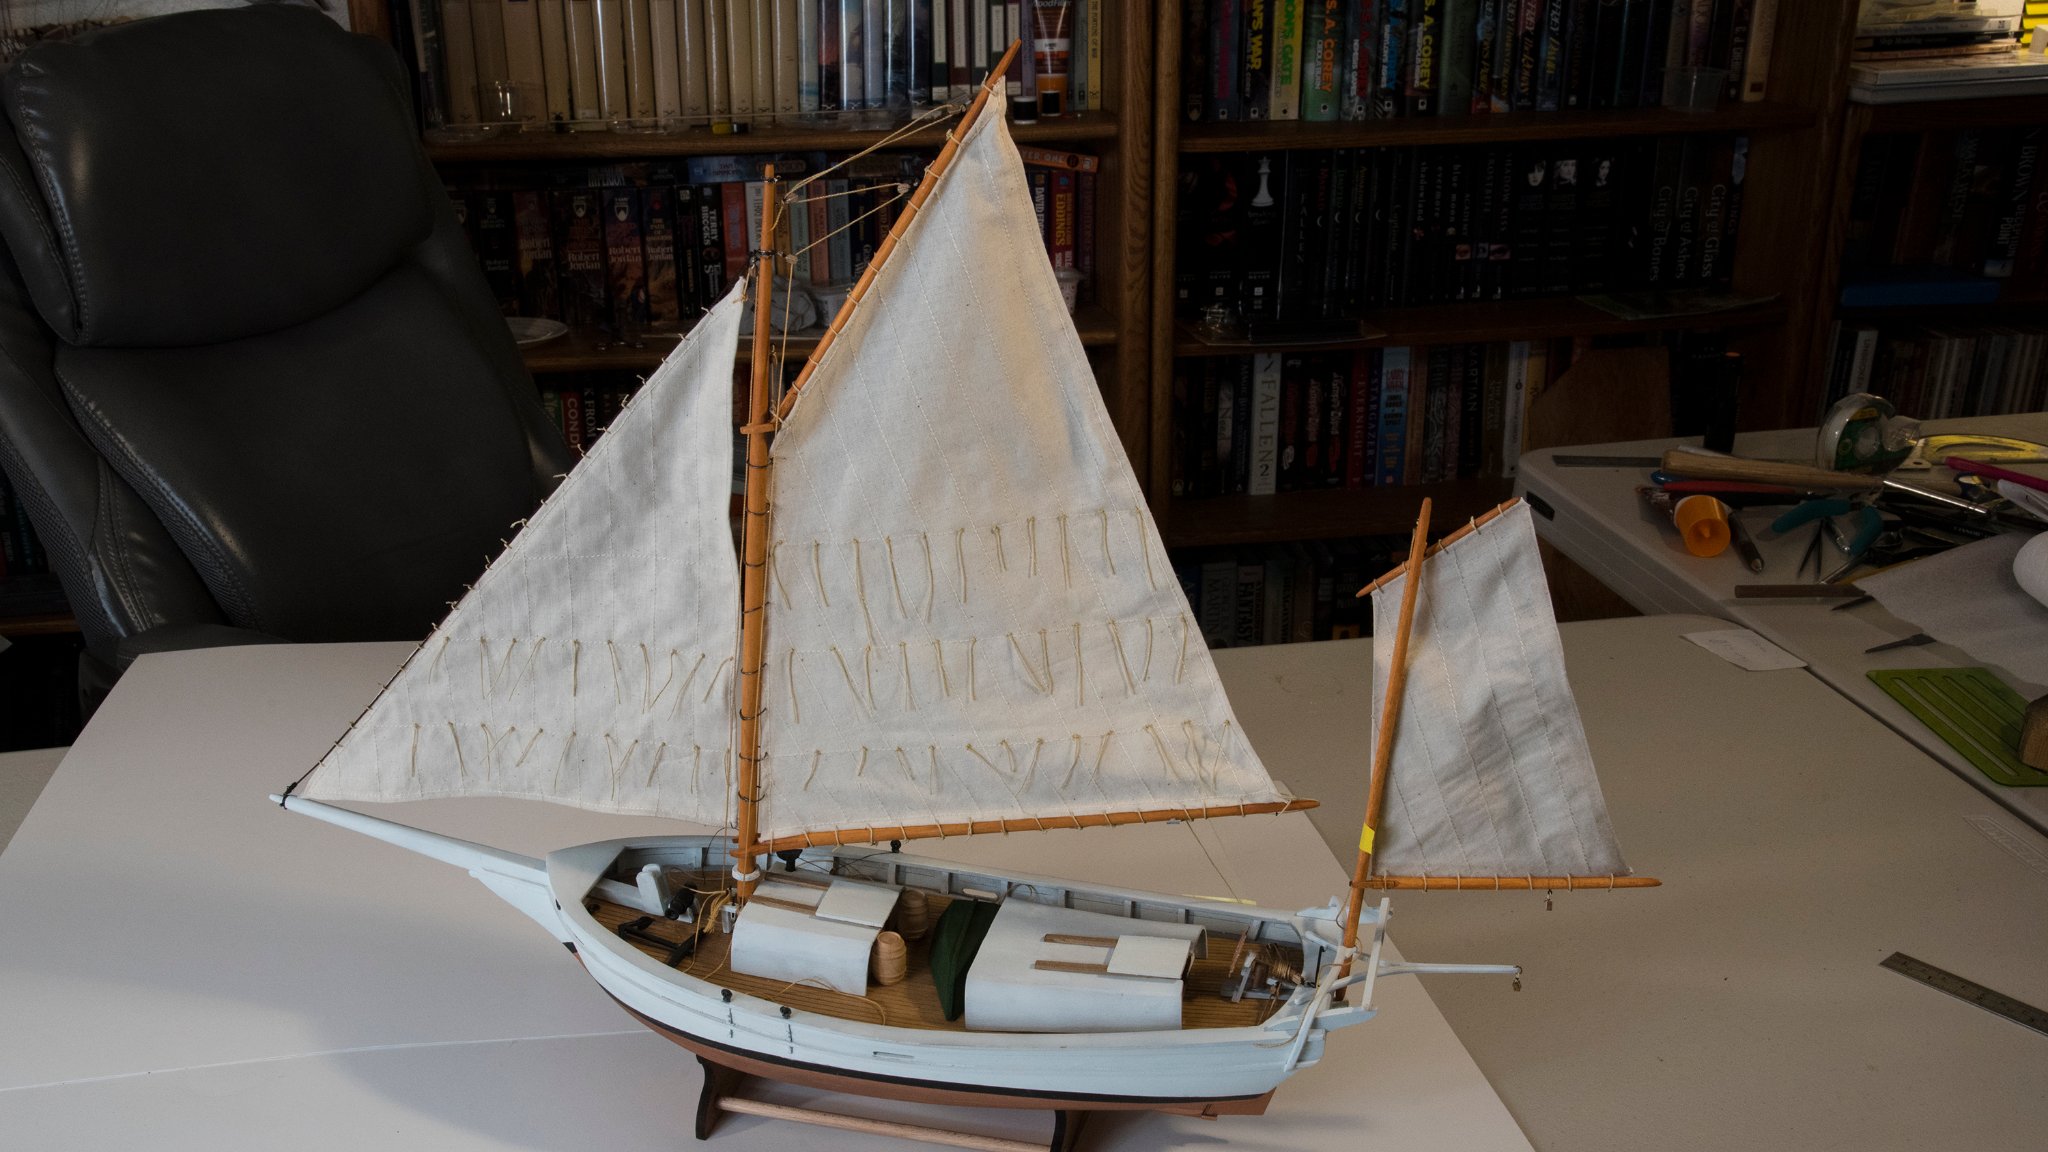
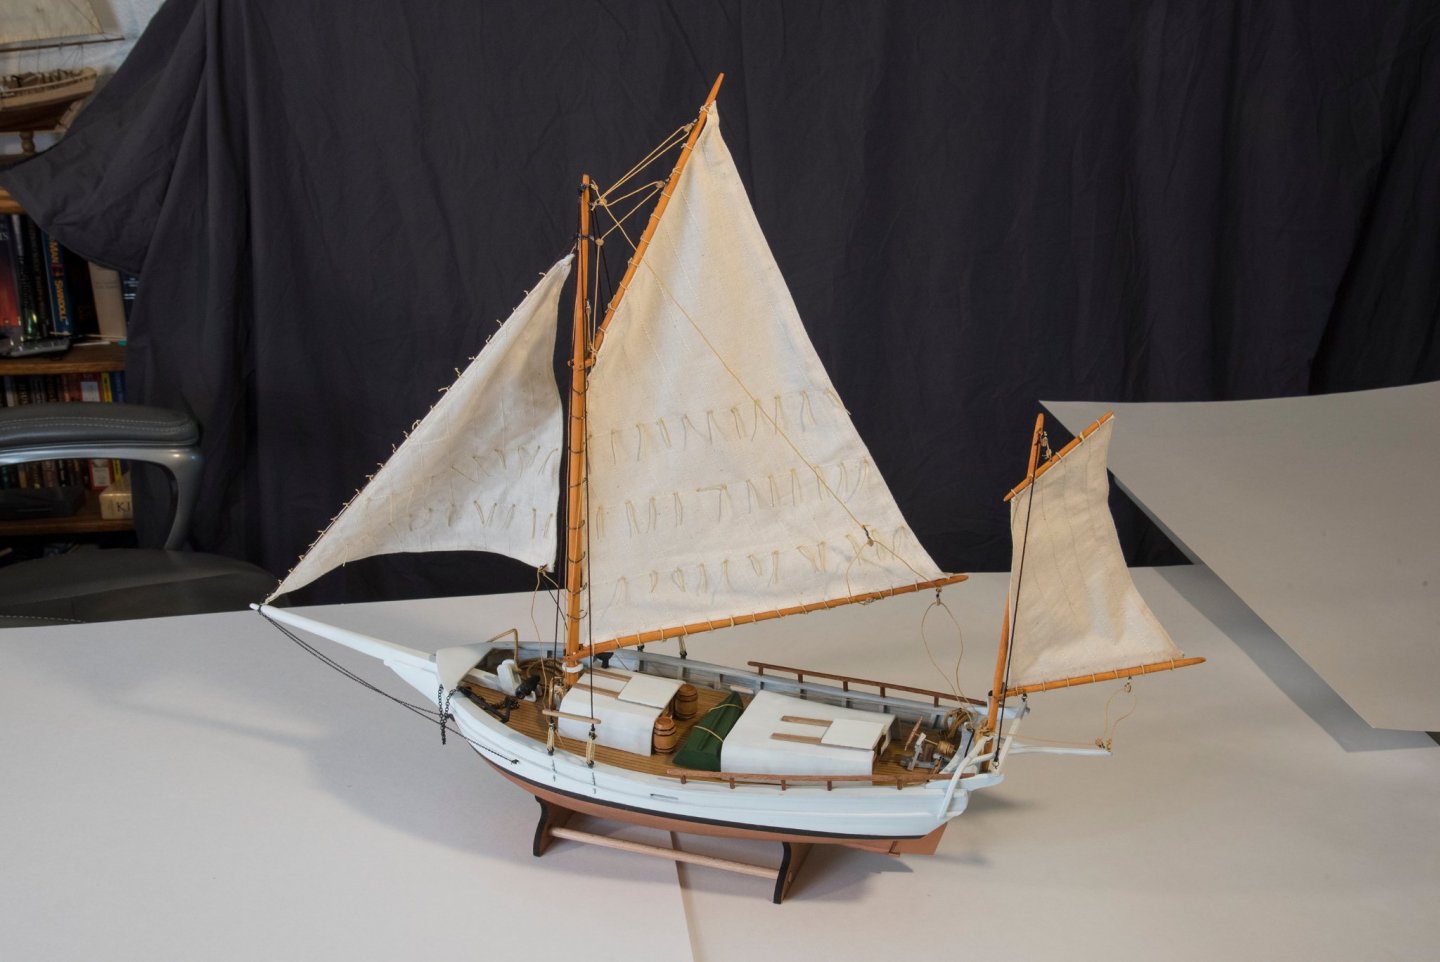
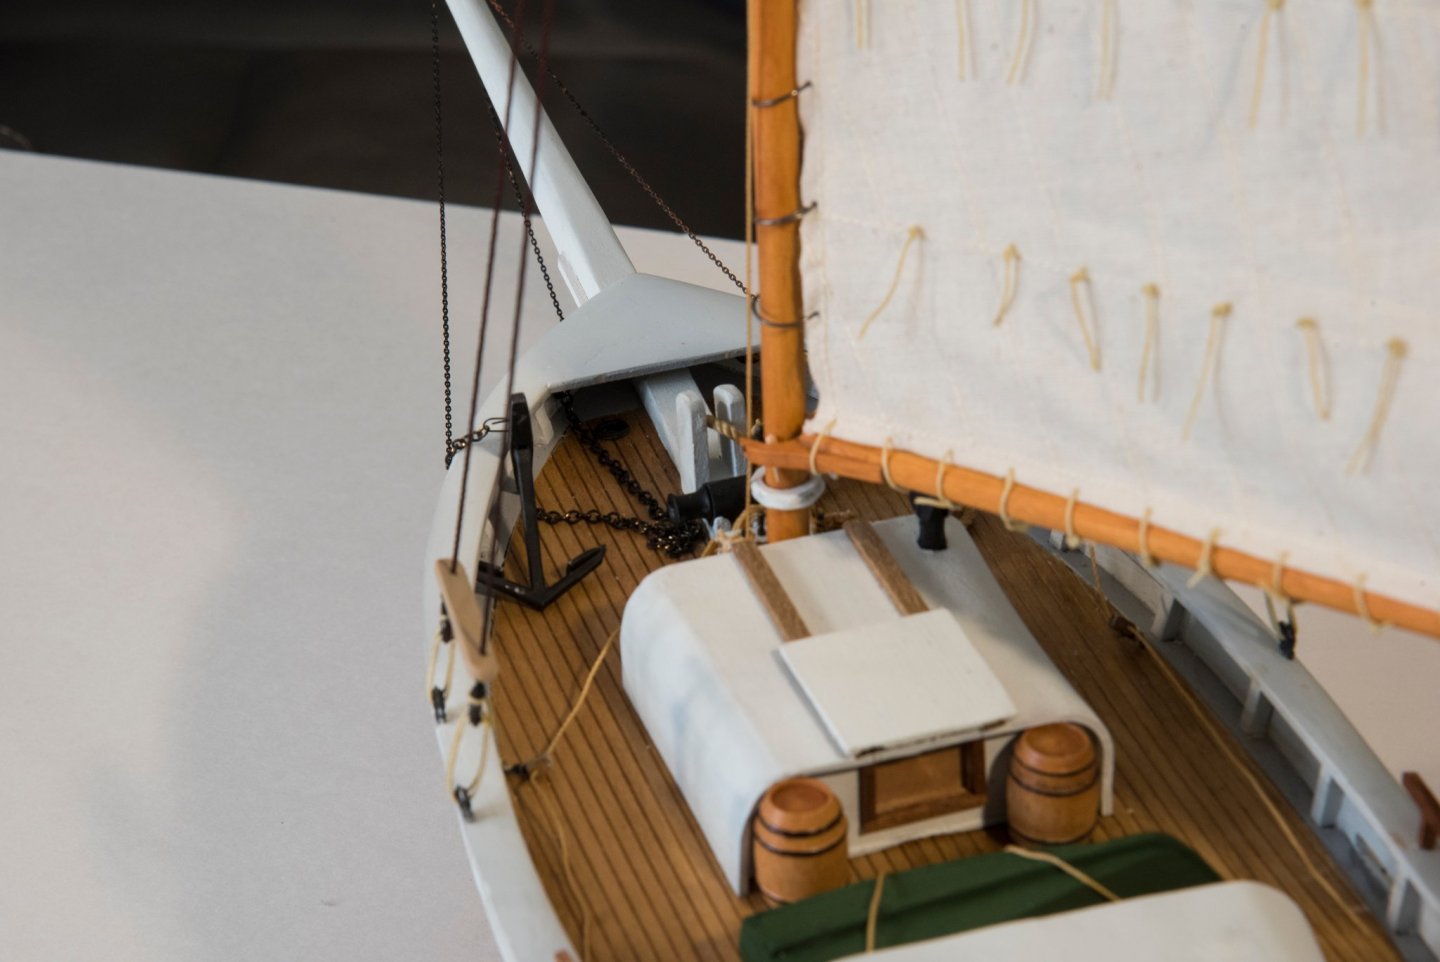
Well, there were a few things I wish I had completed before I installed the masts and sails. I forgot to add the parrles (beads and line holding the boom and gaffs onto the masts), drilling holes in the metal mizzen mast yoke for the belaying pins, and a few other assorted tasks that were more difficult because of mast assembly. Next, I installed the hand railing. I added the shrouds, cabins, boat, anchor and chain. I underestimated the remaining work needed to tie off the various halyards, sheets, docking line and associated coiled lines. My date for completion keeps on sliding. I have yet to add Spray’s name and harbor to the stern, but with this exception, I am declaring that I am finished. This has been an excellent kit and fun boat to build. I will have to read Joshua’s Slocum’s adventure again expecting to have a new appreciation of his descriptions of the boat. And I especially appreciate all the previous build logs of the Spray and the tips and build information found within Model Ship World, as well as the support from BlueJacket and especially Nic. Thanks. Ken


-
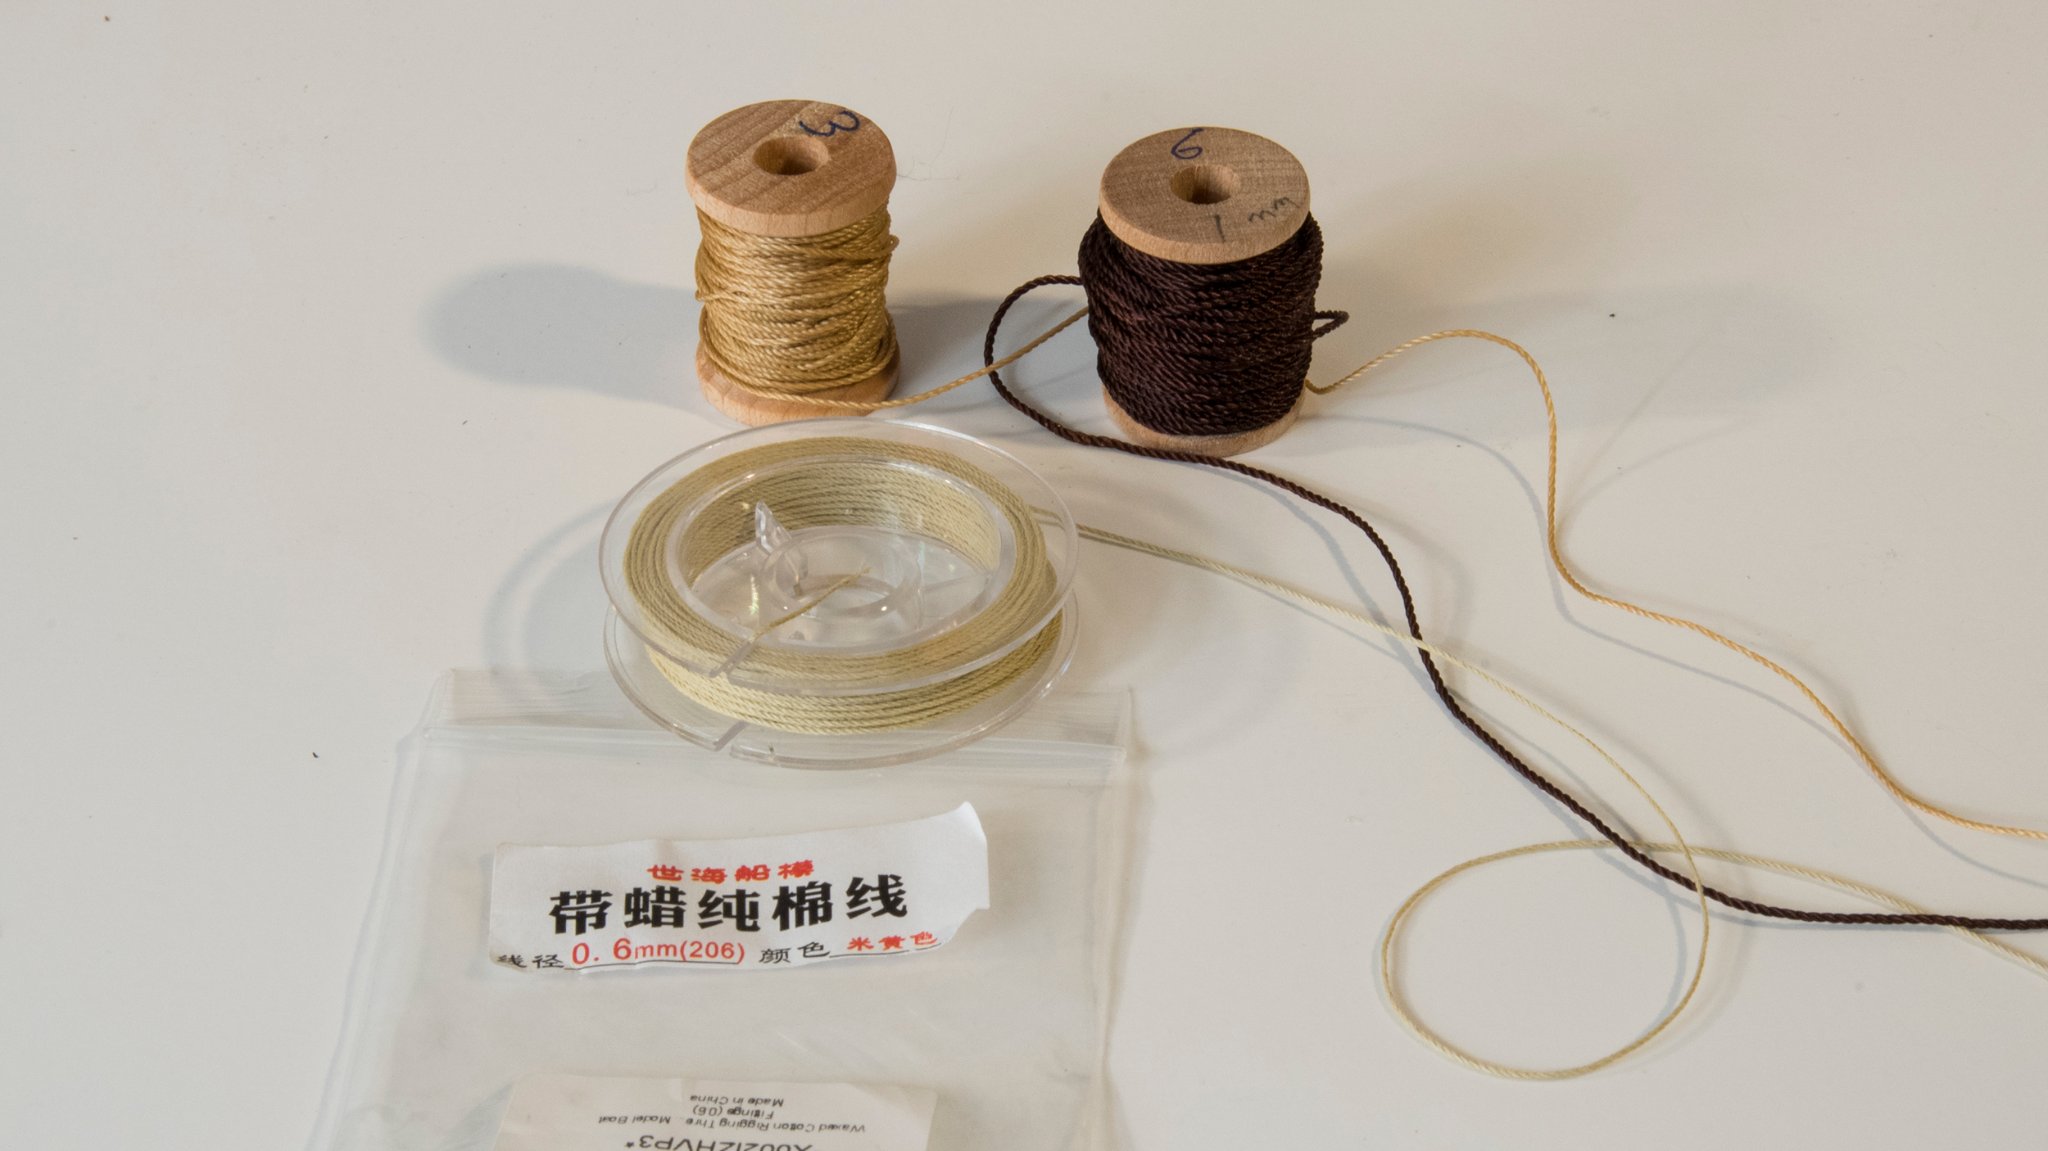
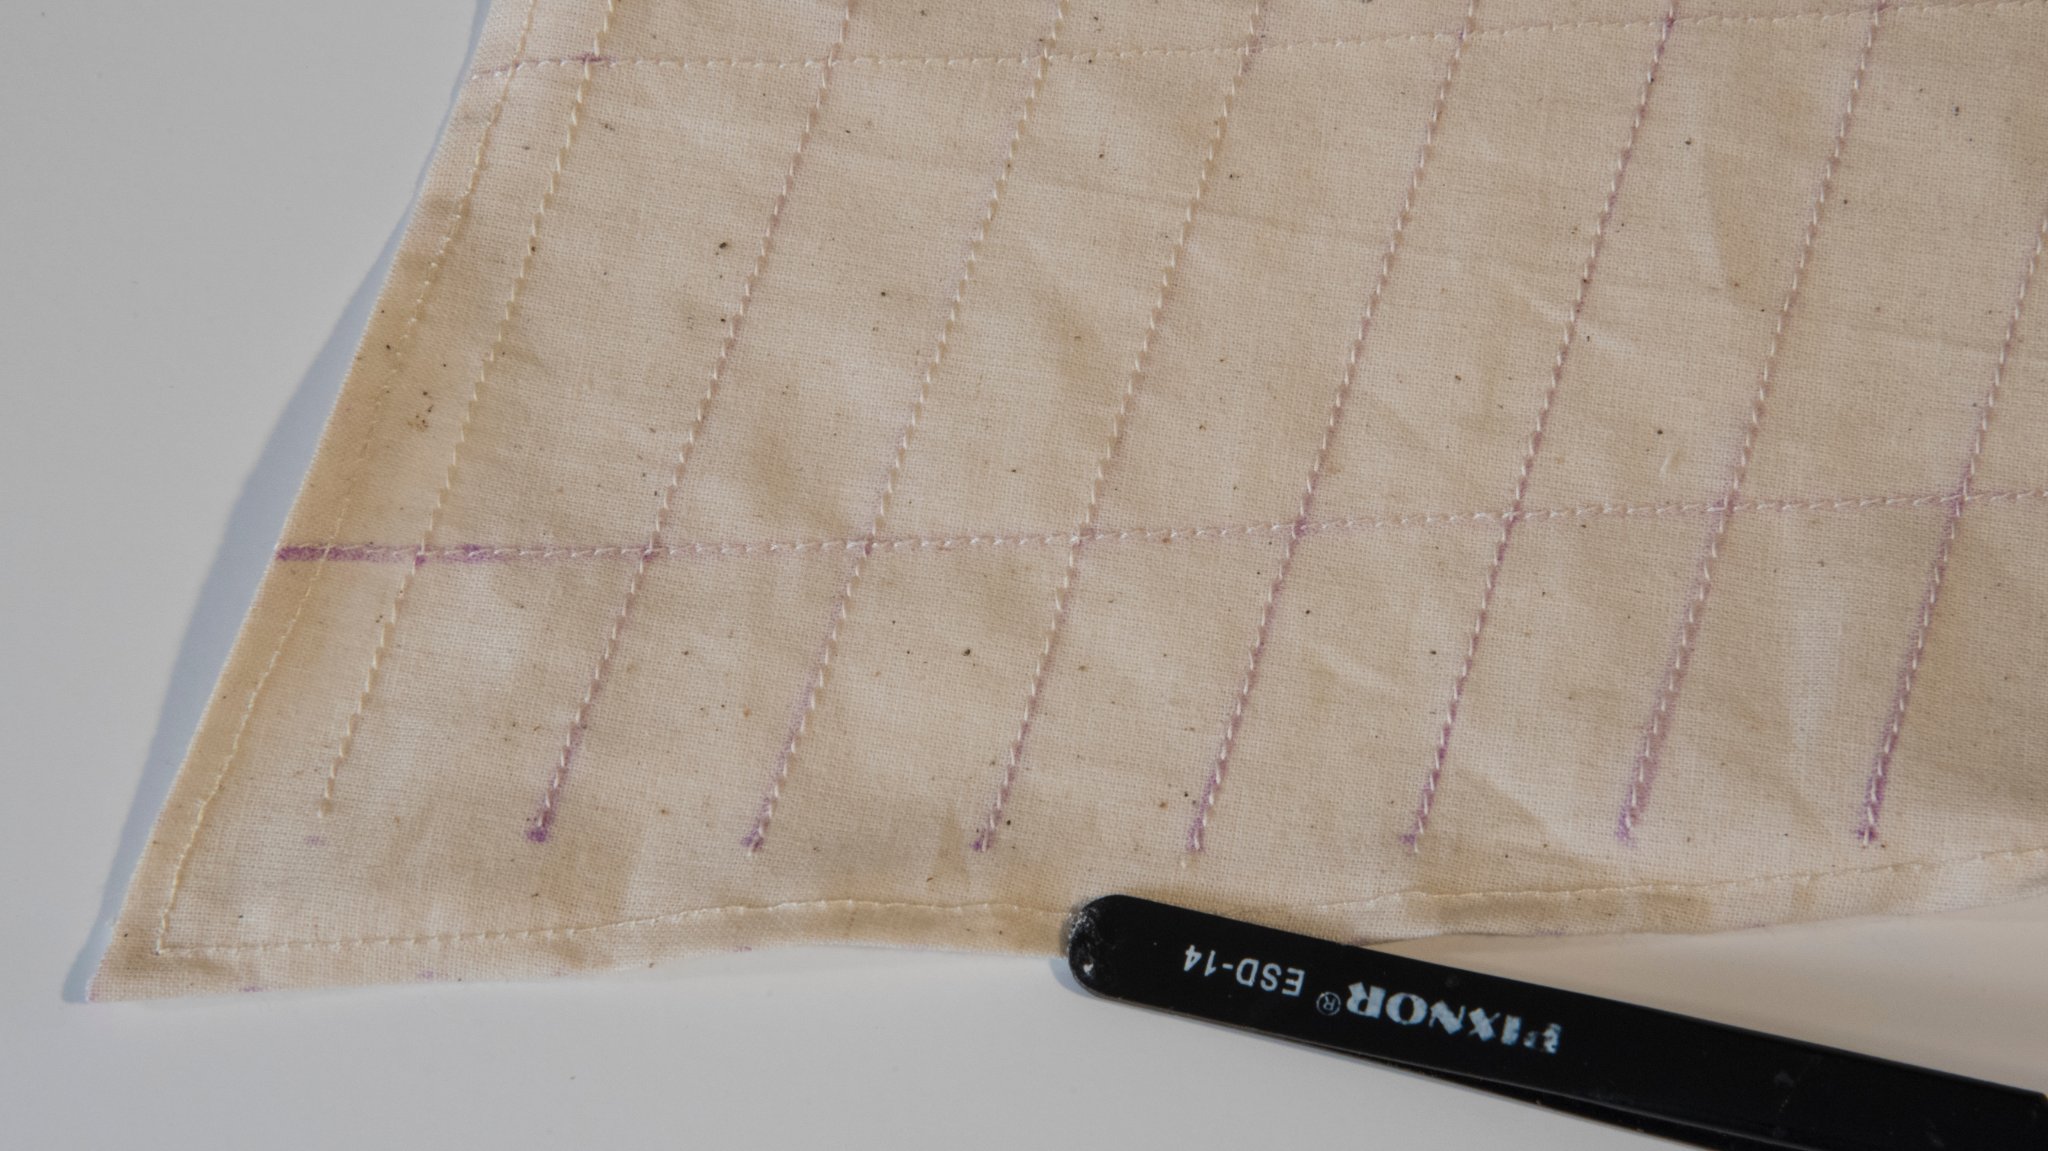
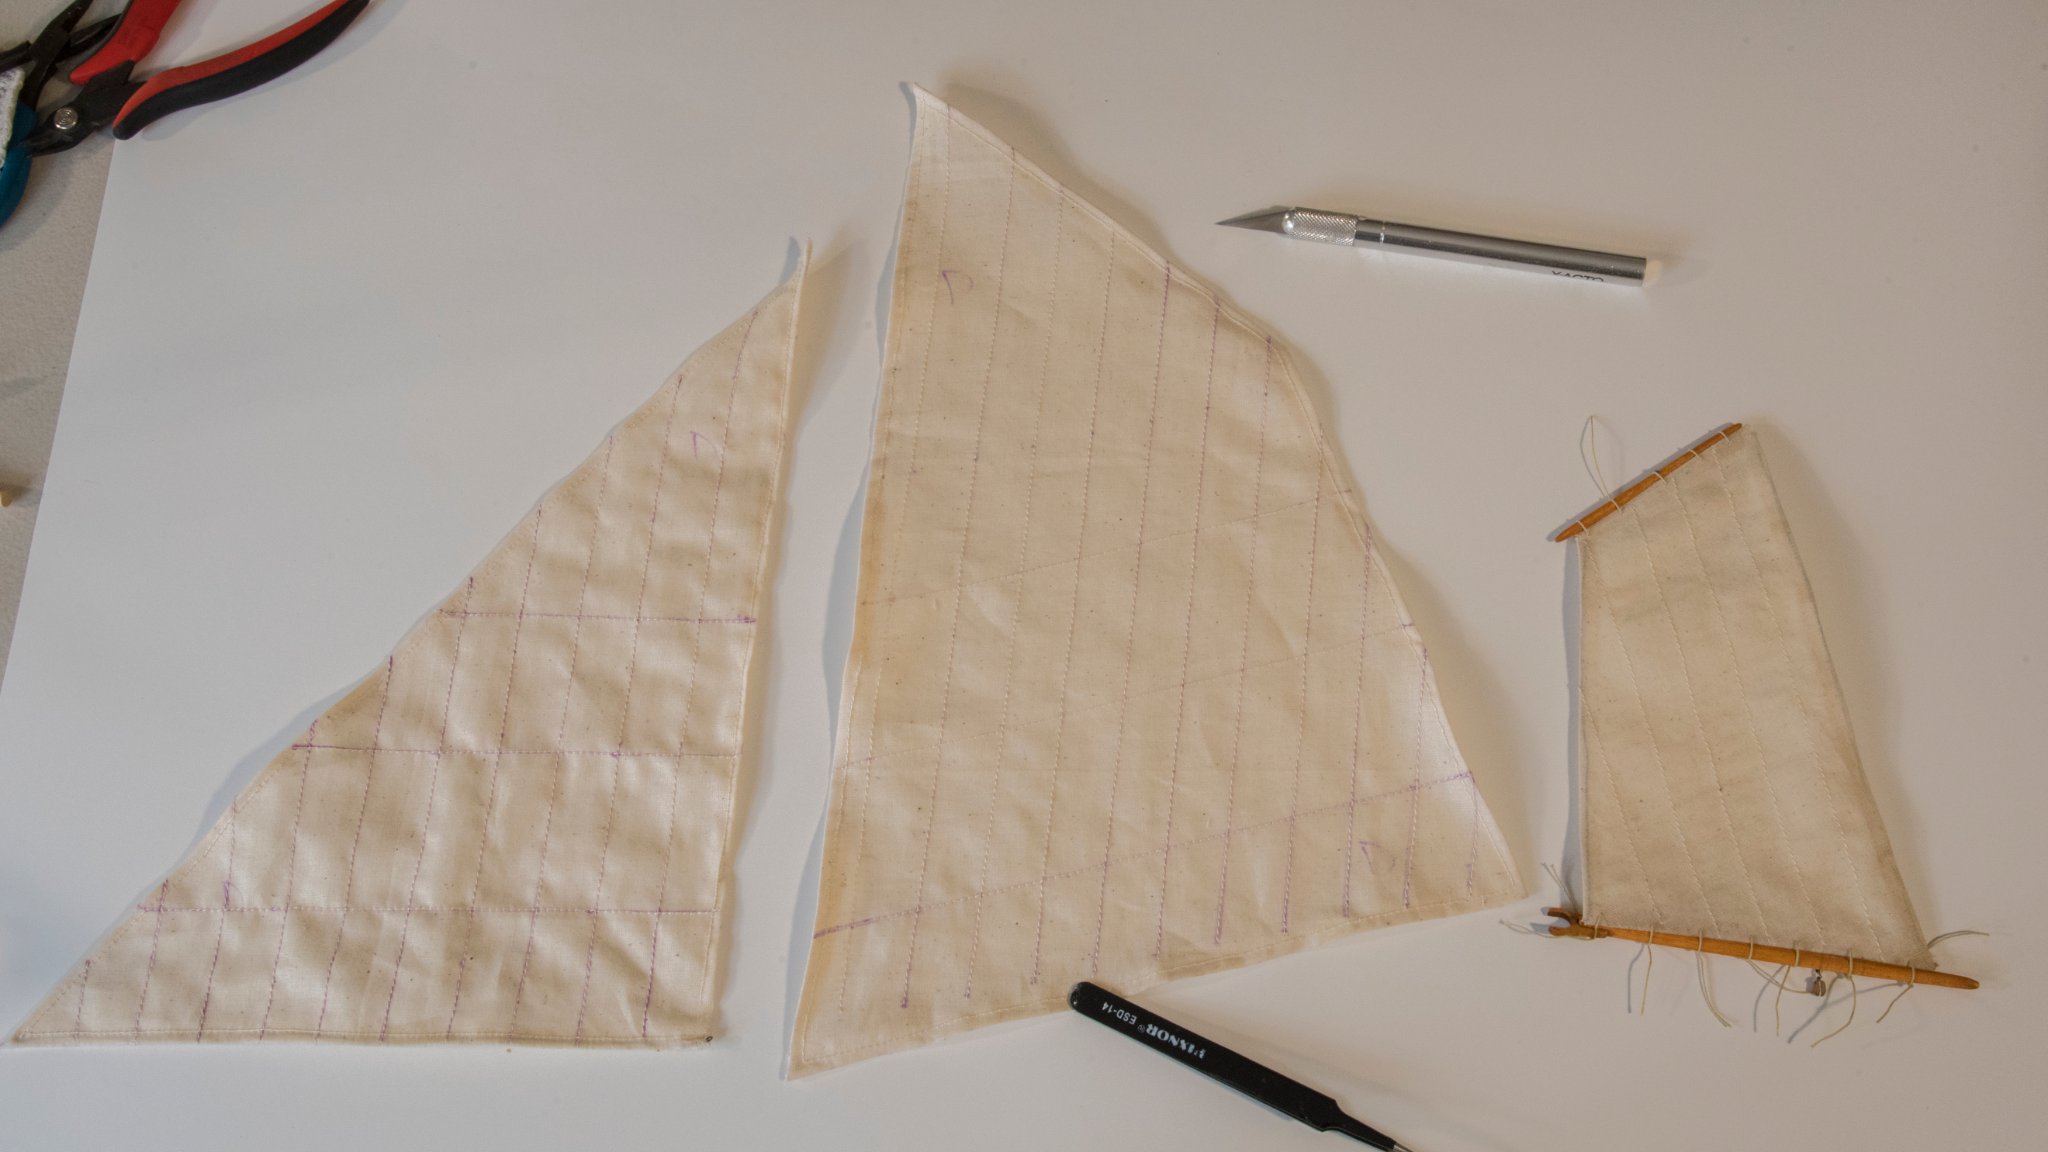
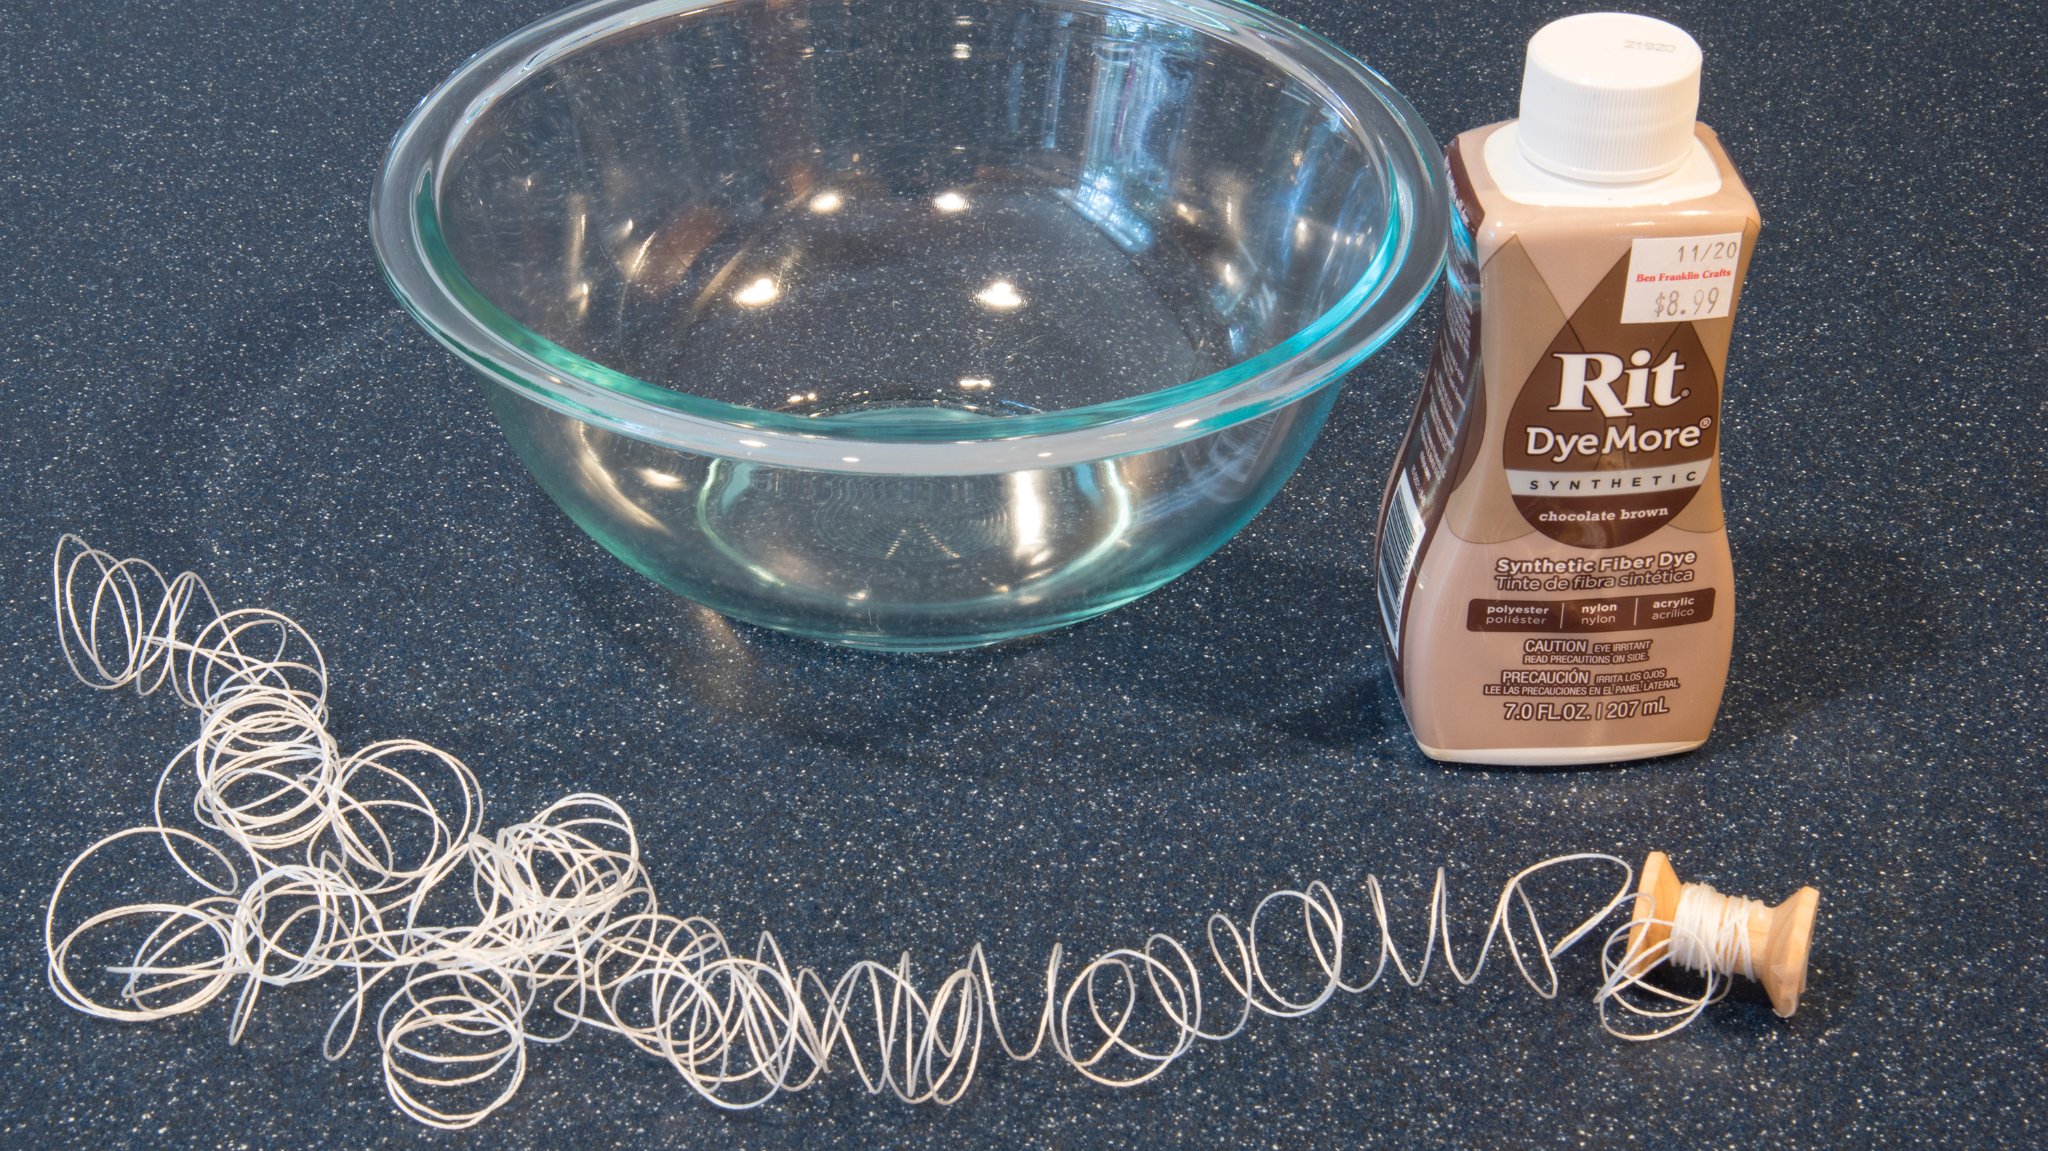
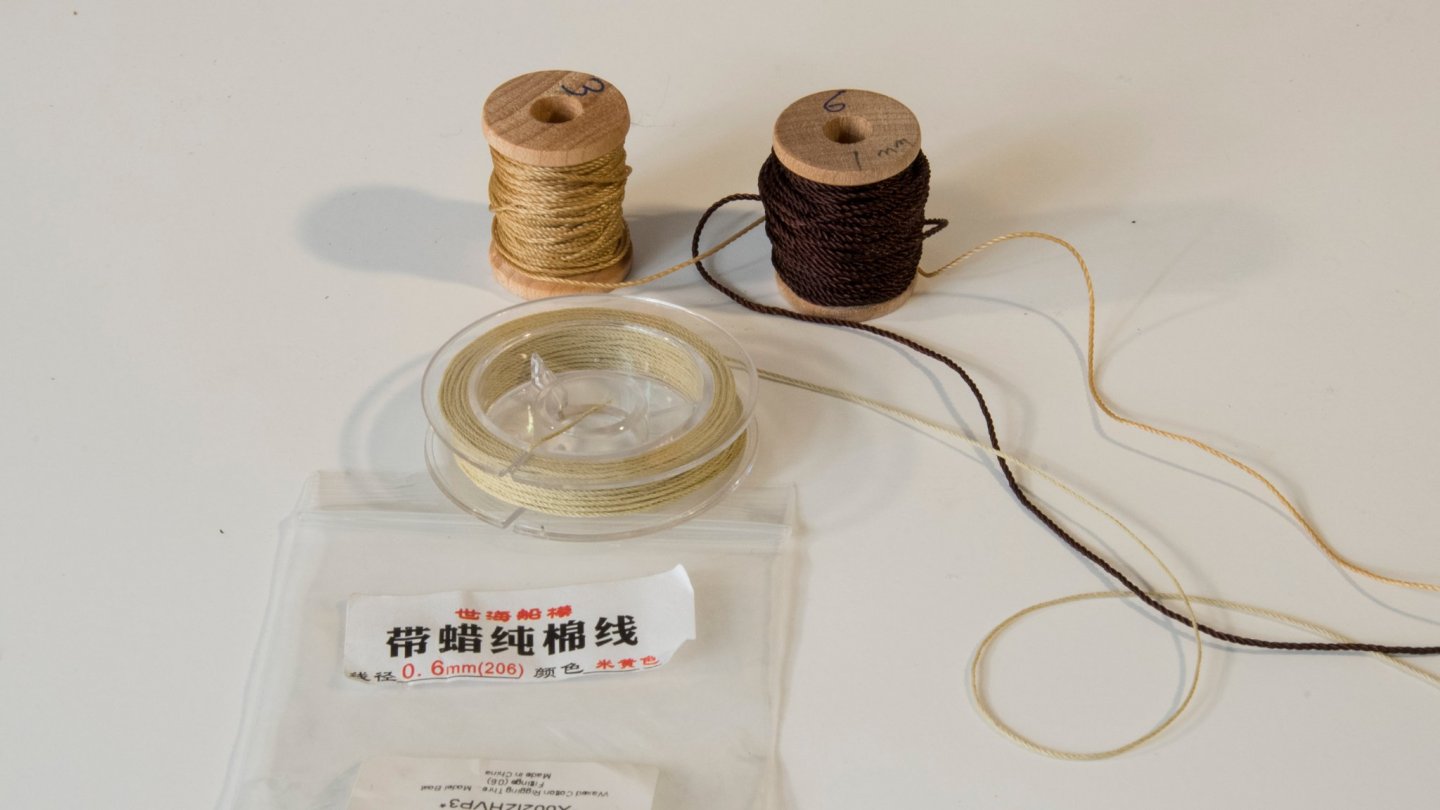
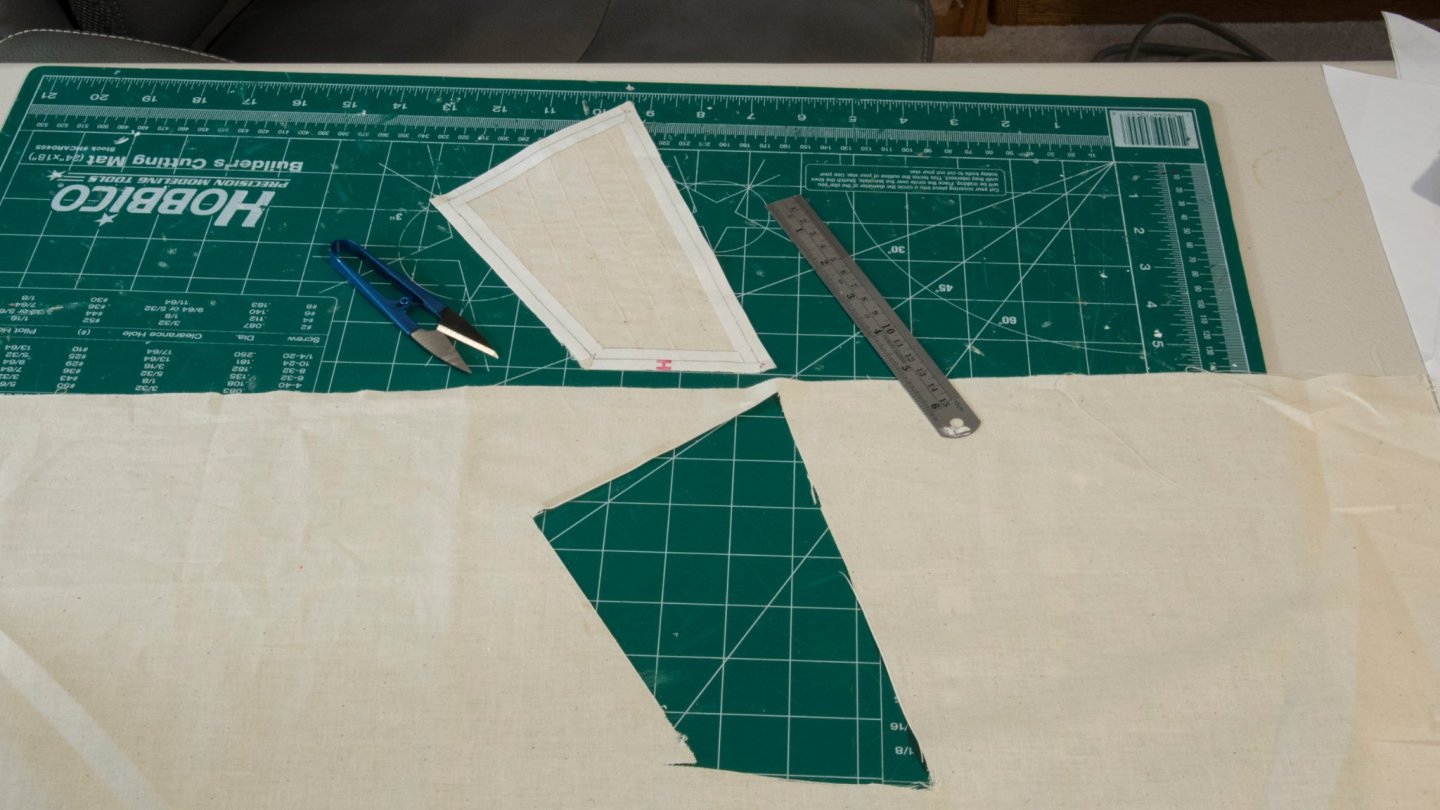
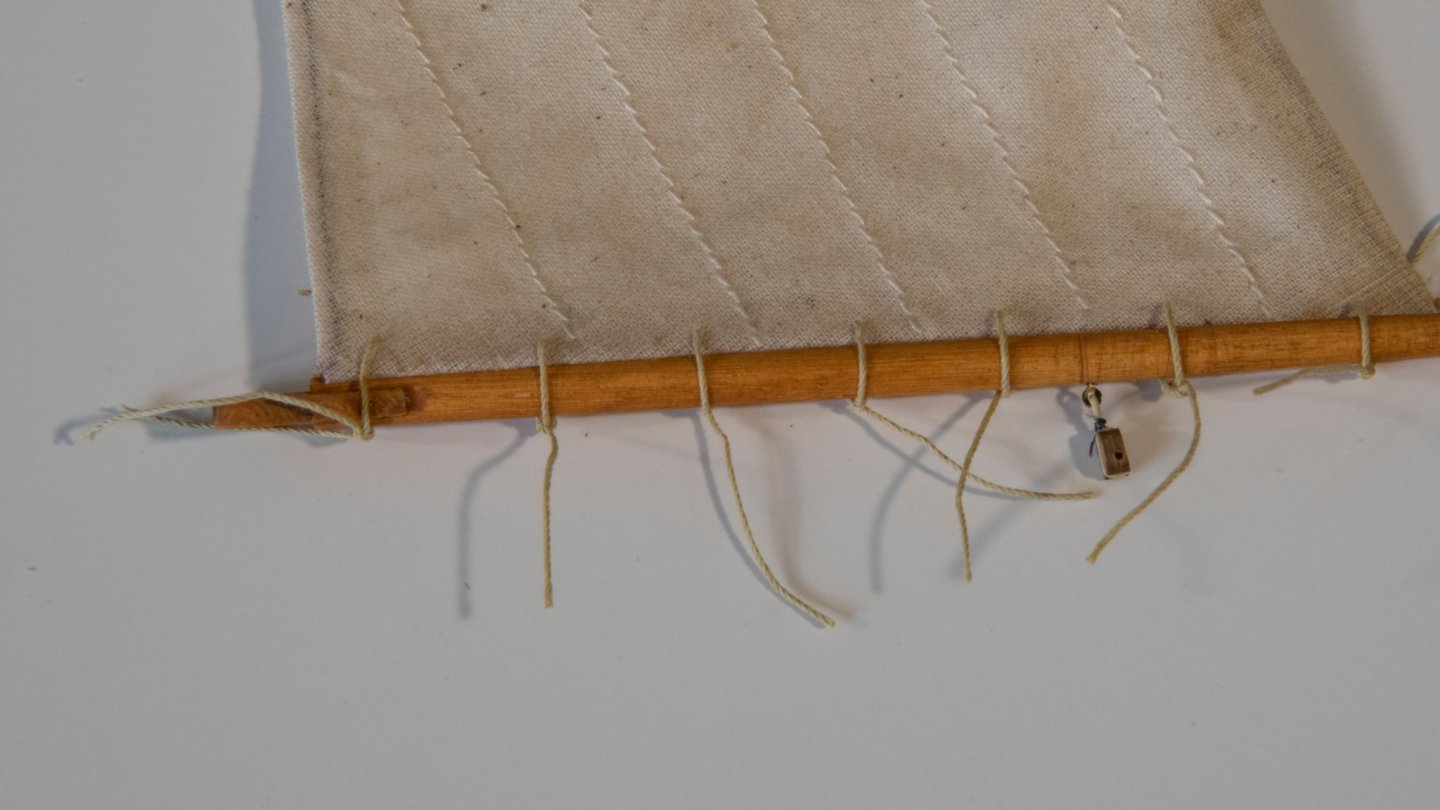
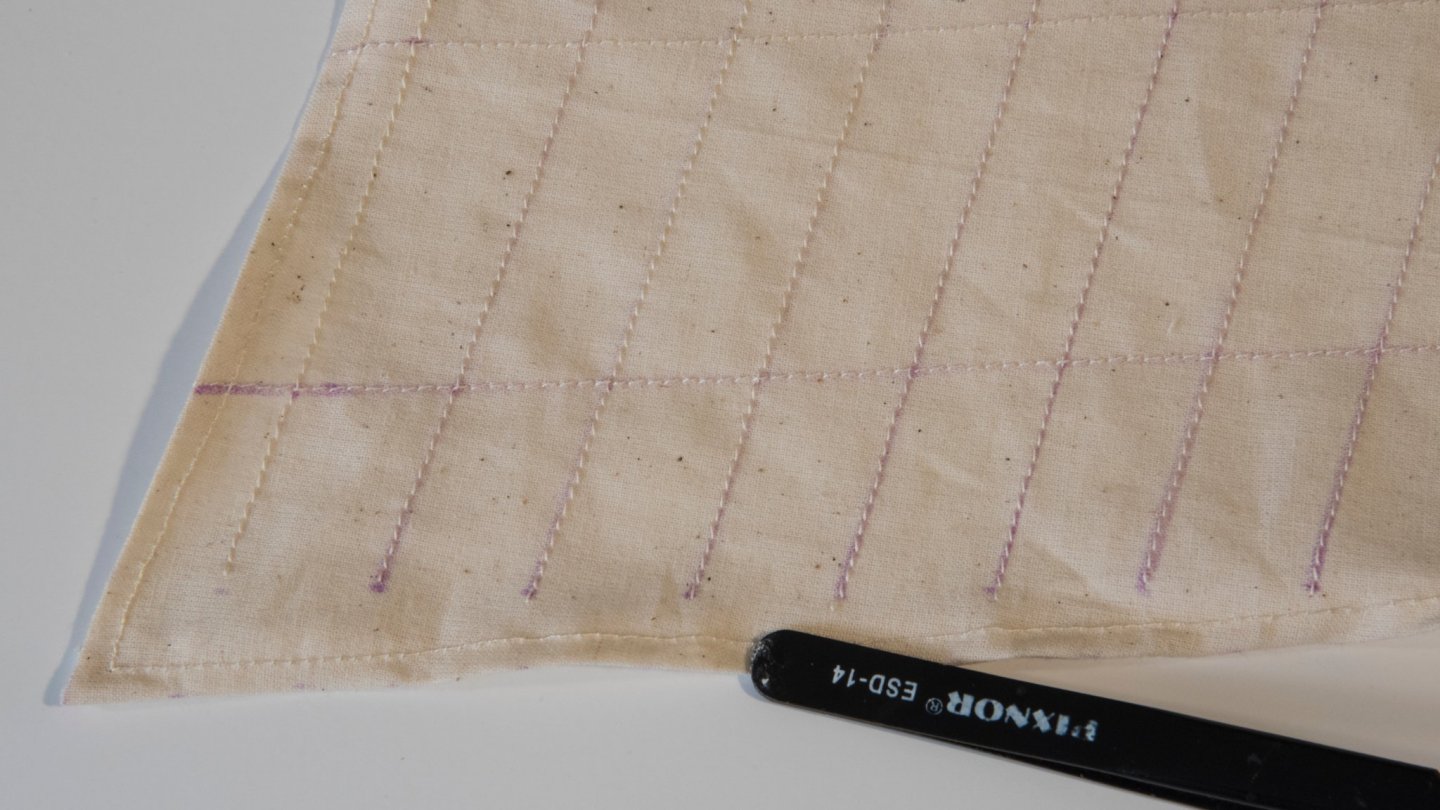
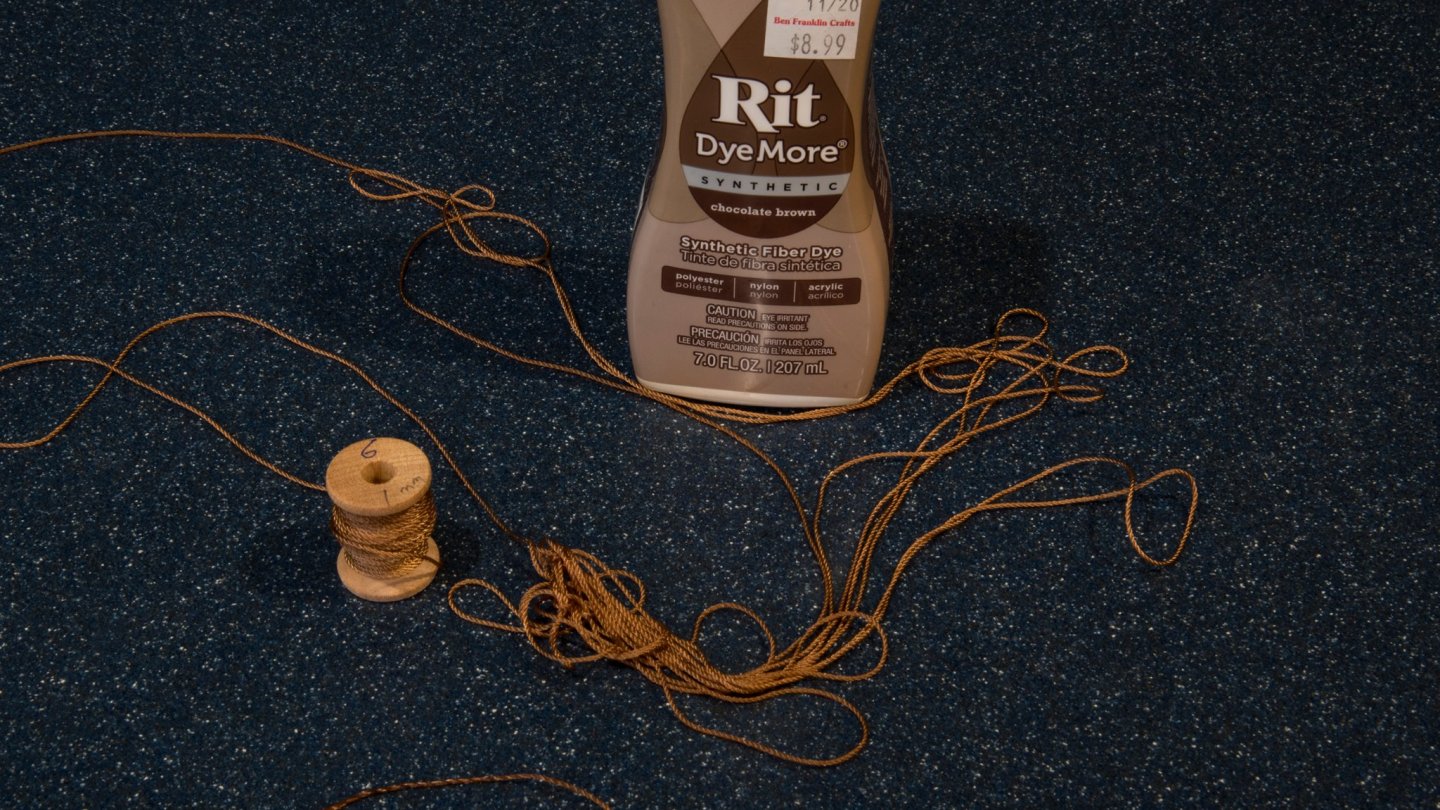
I found that the #6 thread I stained dark for standing rigging was not dark enough, so I had to dye it again. And when my new #3 running rigging line came, I dyed it tan, but looked like the brown of the standing rigging. So, it also was not dyed correctly. I read that bleach does not work on this dye, but that Rit dye remover does work, so I bought some and put the #3 in the dye remover for a short time, trying to get the brown to turn tan, but instead it turned yellow. Holy Moley, what a mess. I studied what color tan is, online, and tried again. I took the yellow line and dipped it in a less dense tan dye for 10 seconds. And then rinsed. It came out a nice tan! This is very complicated. First the Rit instructions are for clothes, and second I don’t know what the #6 or #3 line is made of, but the type of material really impacts what strength of dye you use, and how long you let it soak. I did test 18” of line the first time and during all these experiments, but the pieces were small enough I guess I missed the true result. At one point I gave up and looked for tan line on Amazon. None of the line I could find seemed as nice as that provided by BlueJacket, so I tried coloring one more time. I’m glad I did, and I am now happy with the result. I used a 0.6mm thread for lashing the sails to the spars. I trimmed the cardboard sails and re-mounted them with sewing thread and tape, and I had to do yet another trim to get it right. I then traced the cardboard outline onto the sail cloth and cut the sail out. I used two different methods. First, for the mizzen sail, I used Heat and Bond UltraHold, as shown/discussed in Tom’s build. I liked the results. One nice thing about this is that I did it myself. Having done it once, I think I could do it again better than the first time I did it. One cuts a strip of Heat and Bond ½” wide and lays ¼” inside the outline traced on the sail cloth, and ¼” outside. Then iron the tape, which deposits glue onto the sail cloth. Then using an exacto blade cut along the outside of the tape, making the cut sail ¼” bigger on all sides. Pull up the paper from the Heat and Bond, fold the extra ¼” extra cloth over and iron again. The result is a sail the size of the carboard, with a good outside seam. I also used Tom’s great idea of a thin wire for all three sails, which I plan to use later when “posing” the sails. My explanation is a bit of an oversimplification. for example, overlapping corners should be avoided, and caused me no end of analysis and adjusting. I saw Josh sewed the seams of his sails. My wife generously offered to sew my sails if I cut them and marked them. She assured me that sewing a seam on each side and a straight line simulating where sail cloth is joined, and where reefing lines are reinforced would be easy. Again, I used the cardboard sail as a template and added ¼” extra on all sides. She suggested I use a disappearing ink pen to mark where the sail was to be folded, and where the lines were to be sewed. I was somewhat worried having permanent pink lines on my sail would be a detraction. But on the contrary, the ink disappeared so fast I had to remark them again. And where I was too aggressive in re-marking the sailcloth the ink did not disappear after a day. But I found a damp cloth dabbed on the few remaining spots cleared all traces of the marker. I tried to explain my findings about the corners and other helpful tips to my wife, but she told me to leave her alone – she knows how to sew (haha). I am learning a lot with each boat I build, but after watching her sew, I realize sewing is not something I want to take the time to learn (at least at this time). We fixed the lines that terminated before the seam. What you see in pictures above and below are the display side of the sails (folded seam in back). But when I went to mount the sails I found somehow I reversed the markings such that the folded seams of the main were showing on the display side. I told my wife it was OK, no need to change, but she took all the stitching out and re-sewed it correctly. I like the sewed sails as well as the glued sails. If I ever build a large boat with lots of sails, I wonder if she will be willing to sew all of my sails again for me? I fitted the sails on the sticks and they looked good. But I had to think a lot about the sequence of permanently mounting them using my newly tanned #3 line and double dyed #6. Some things are easier to add while off the boat. I think I got most of it right. I had lashed the sails to the booms and gaffs, and made my own rigs attaching the main to the mast, and added threaded loops to attach the jib to forestay. I added reefing lines to the sails which I will trim to length later. I glued the forward cabin and belaying pin rack. I then seized the top of the forestay to the mast (first time I’ve done this). I then added the sails in their final configuration.


-
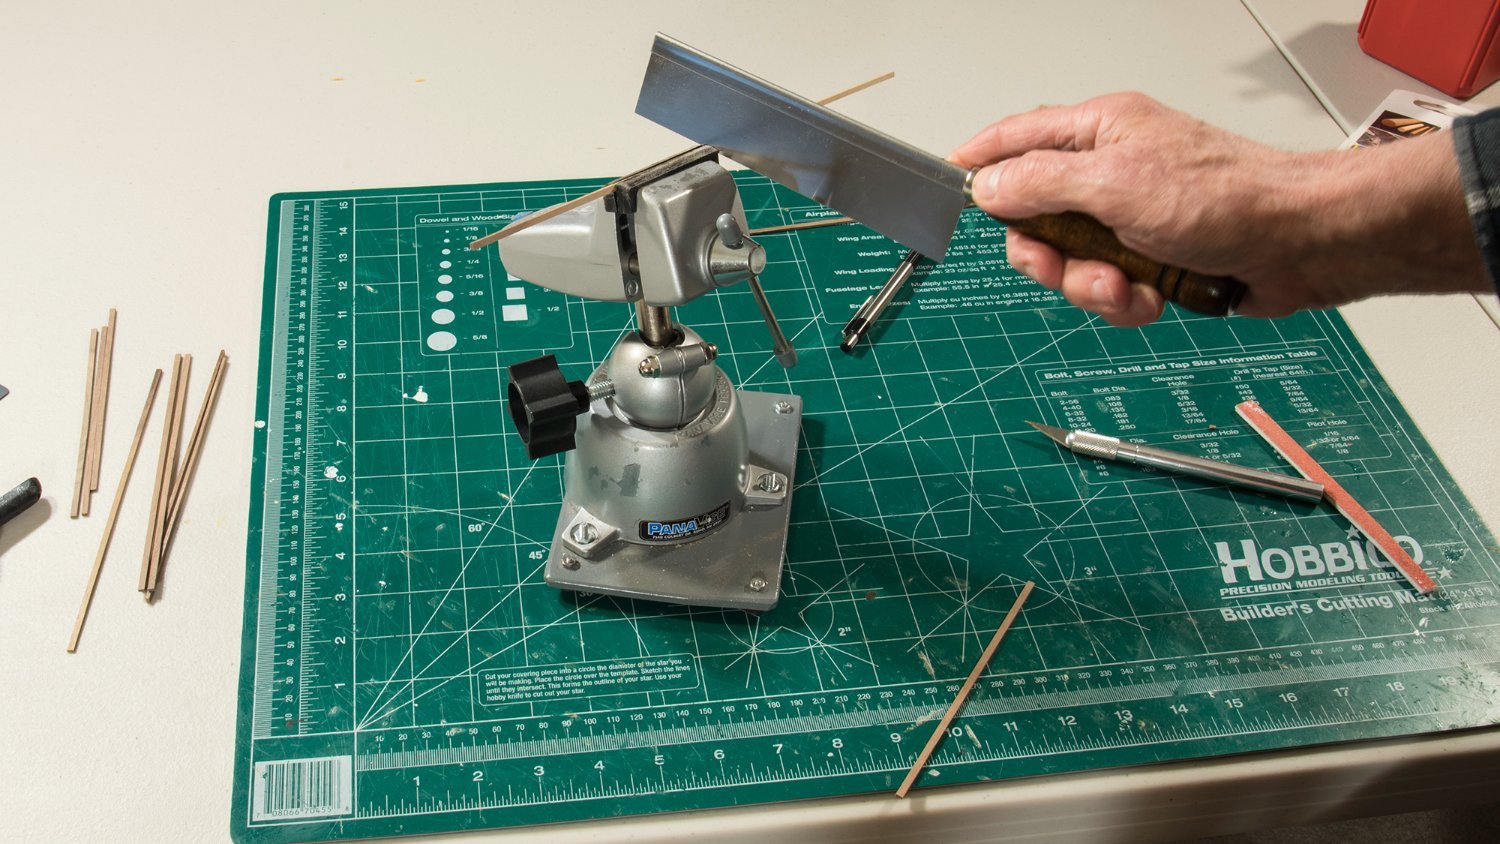
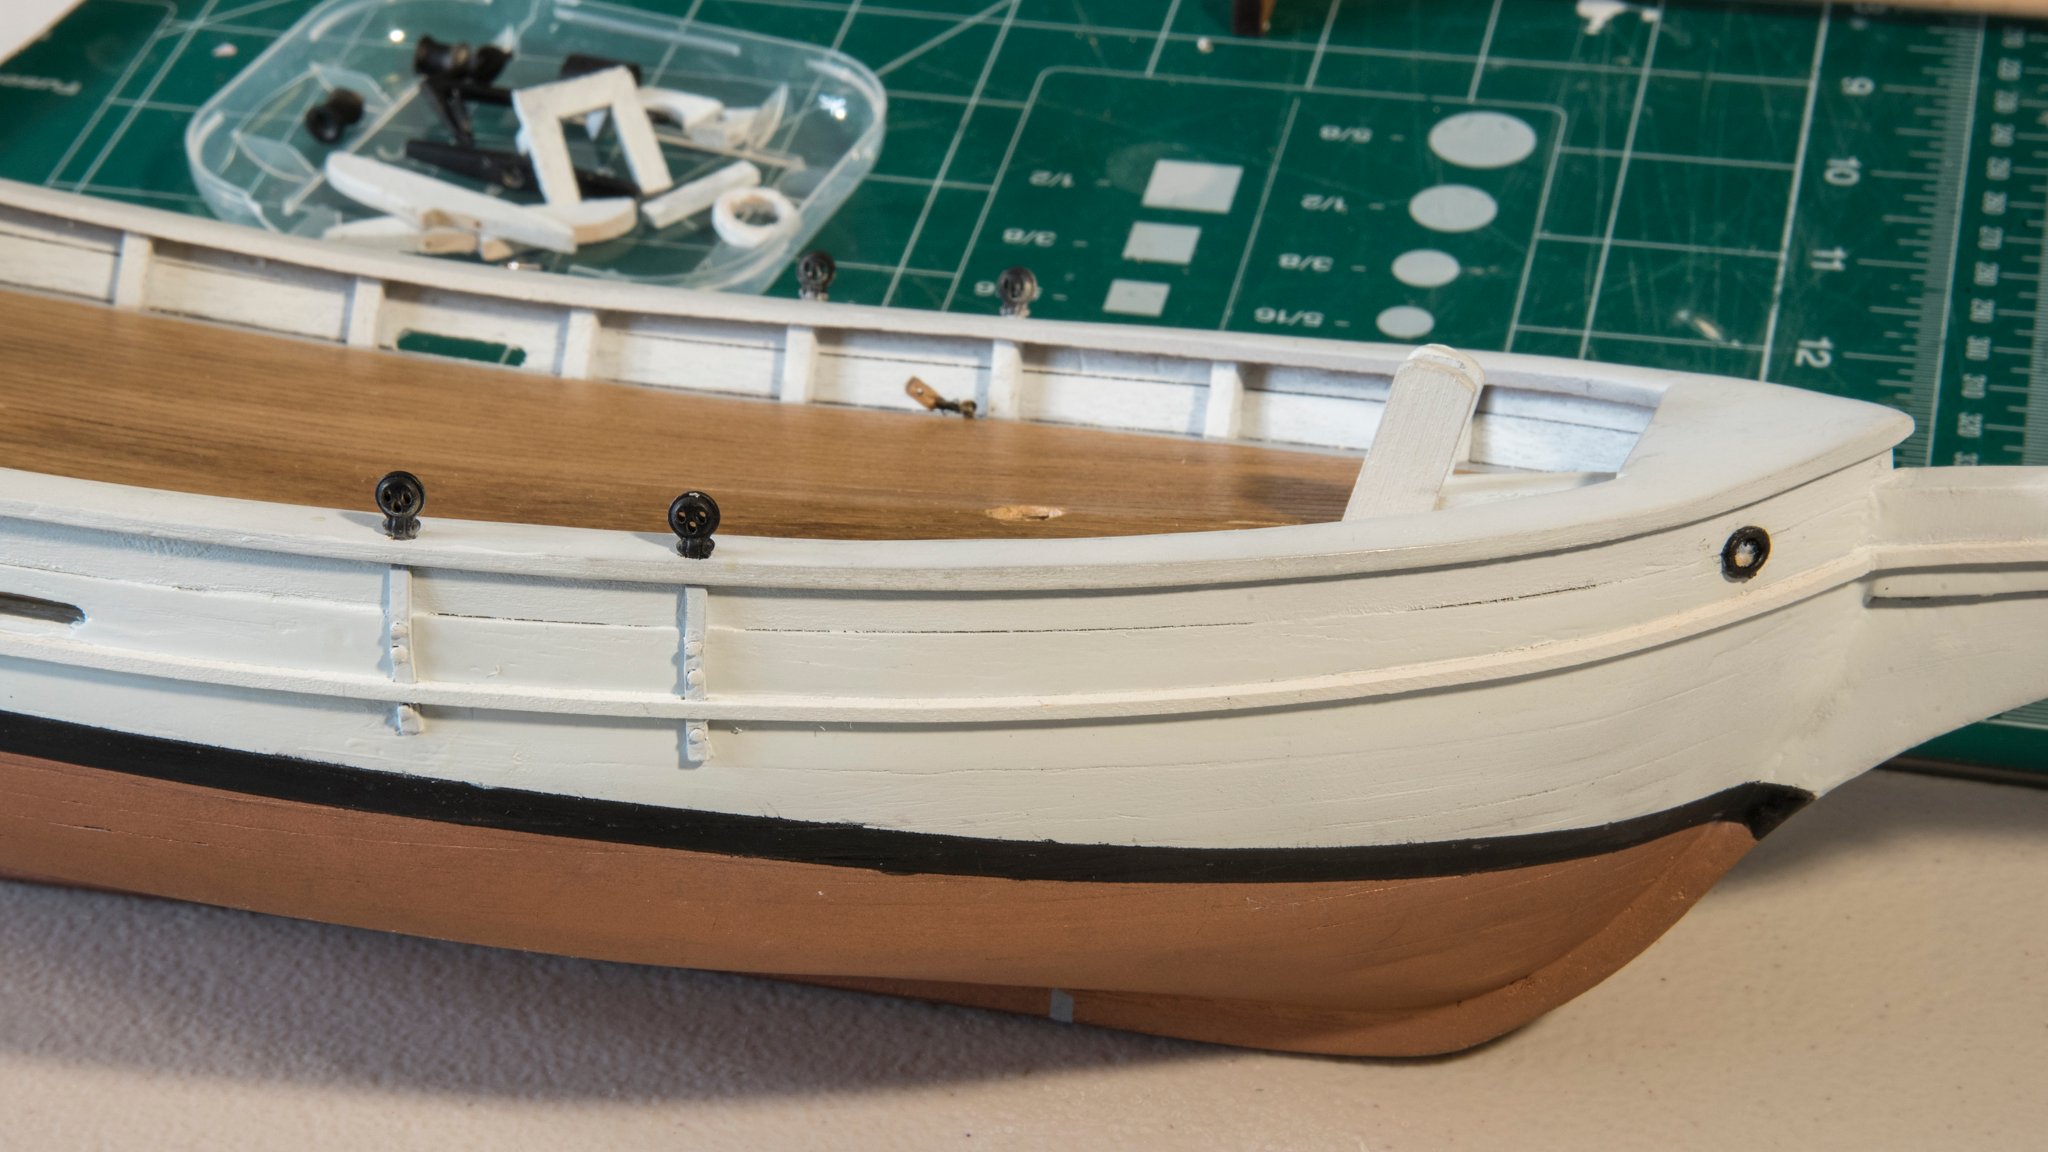
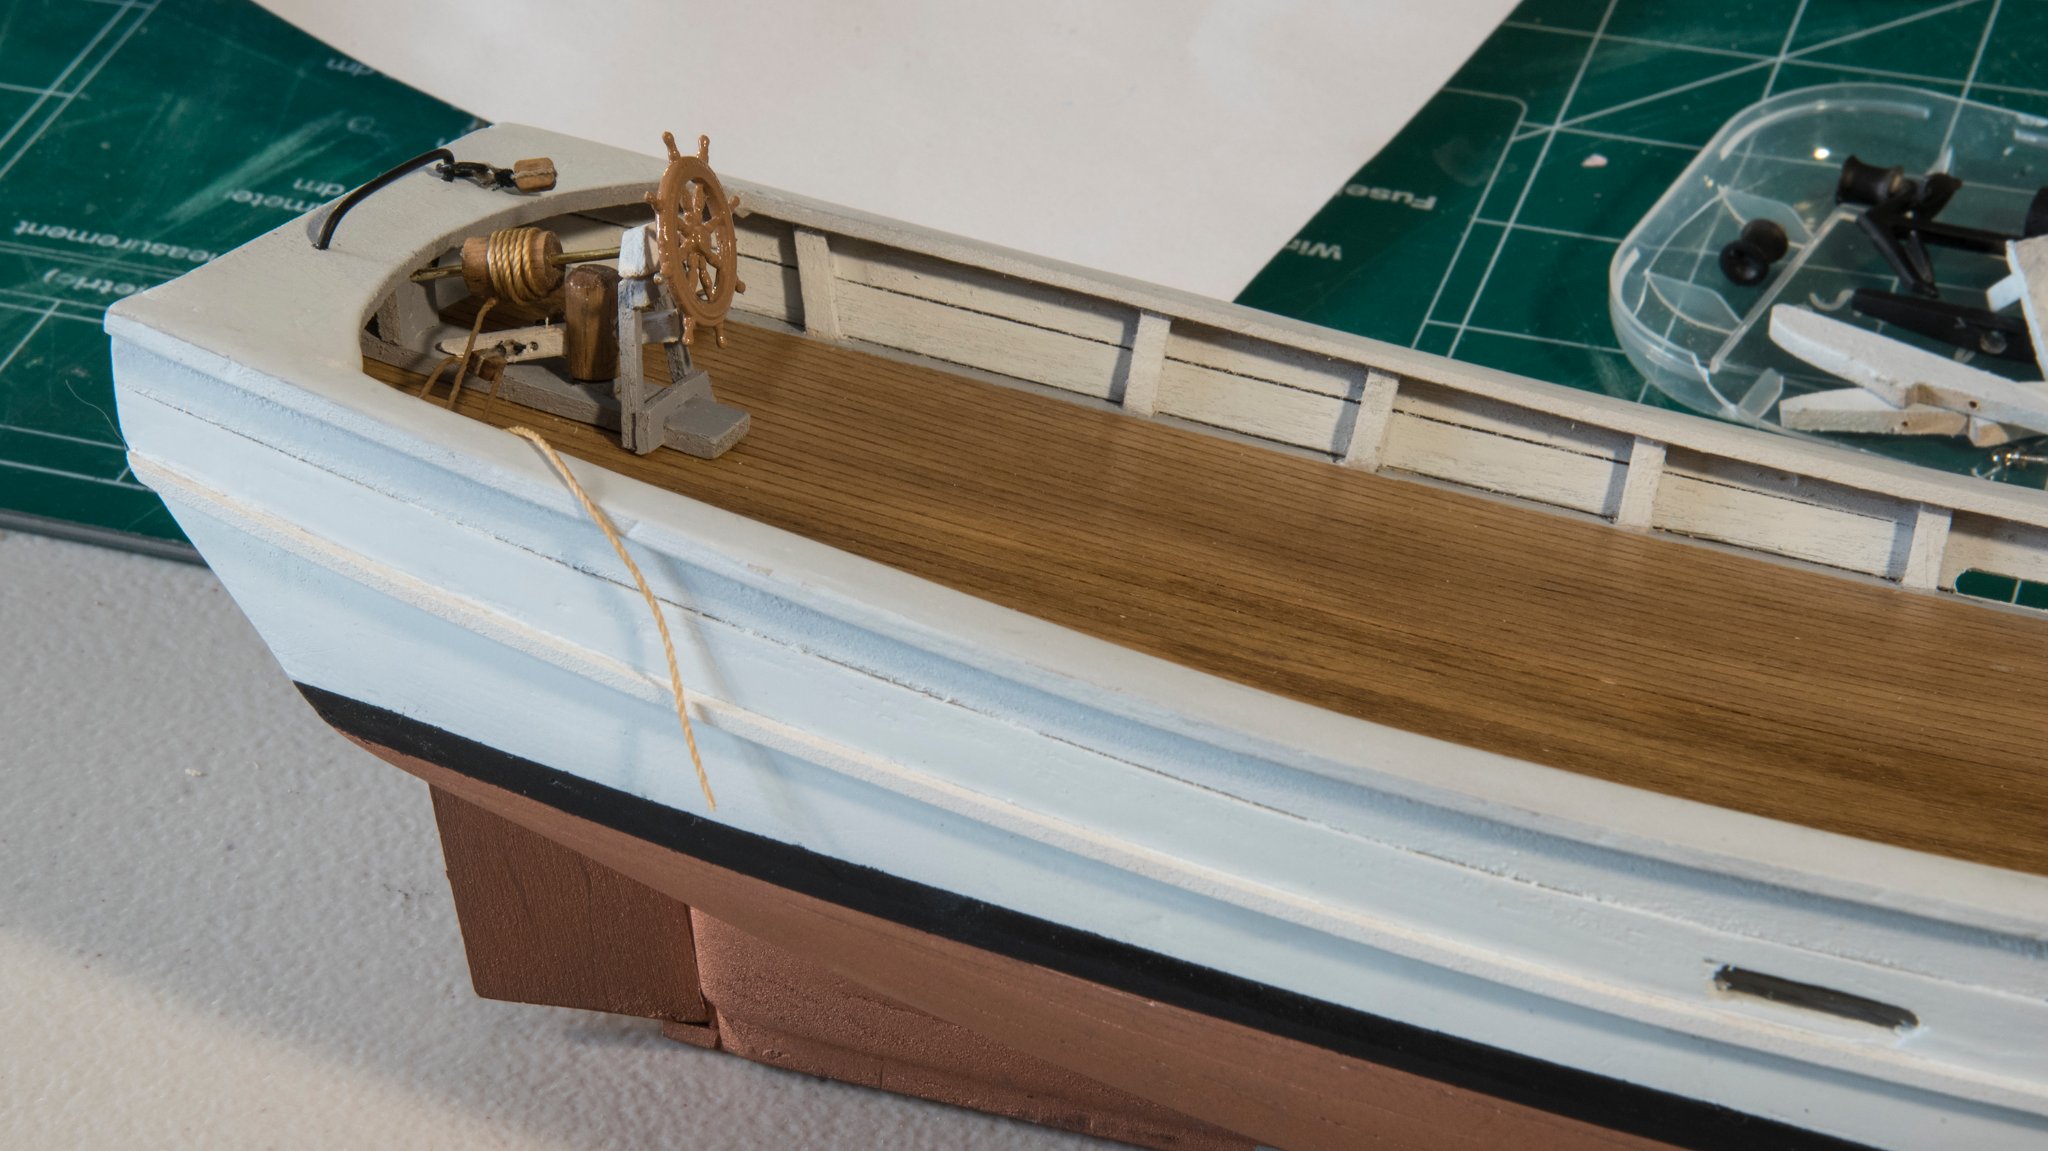
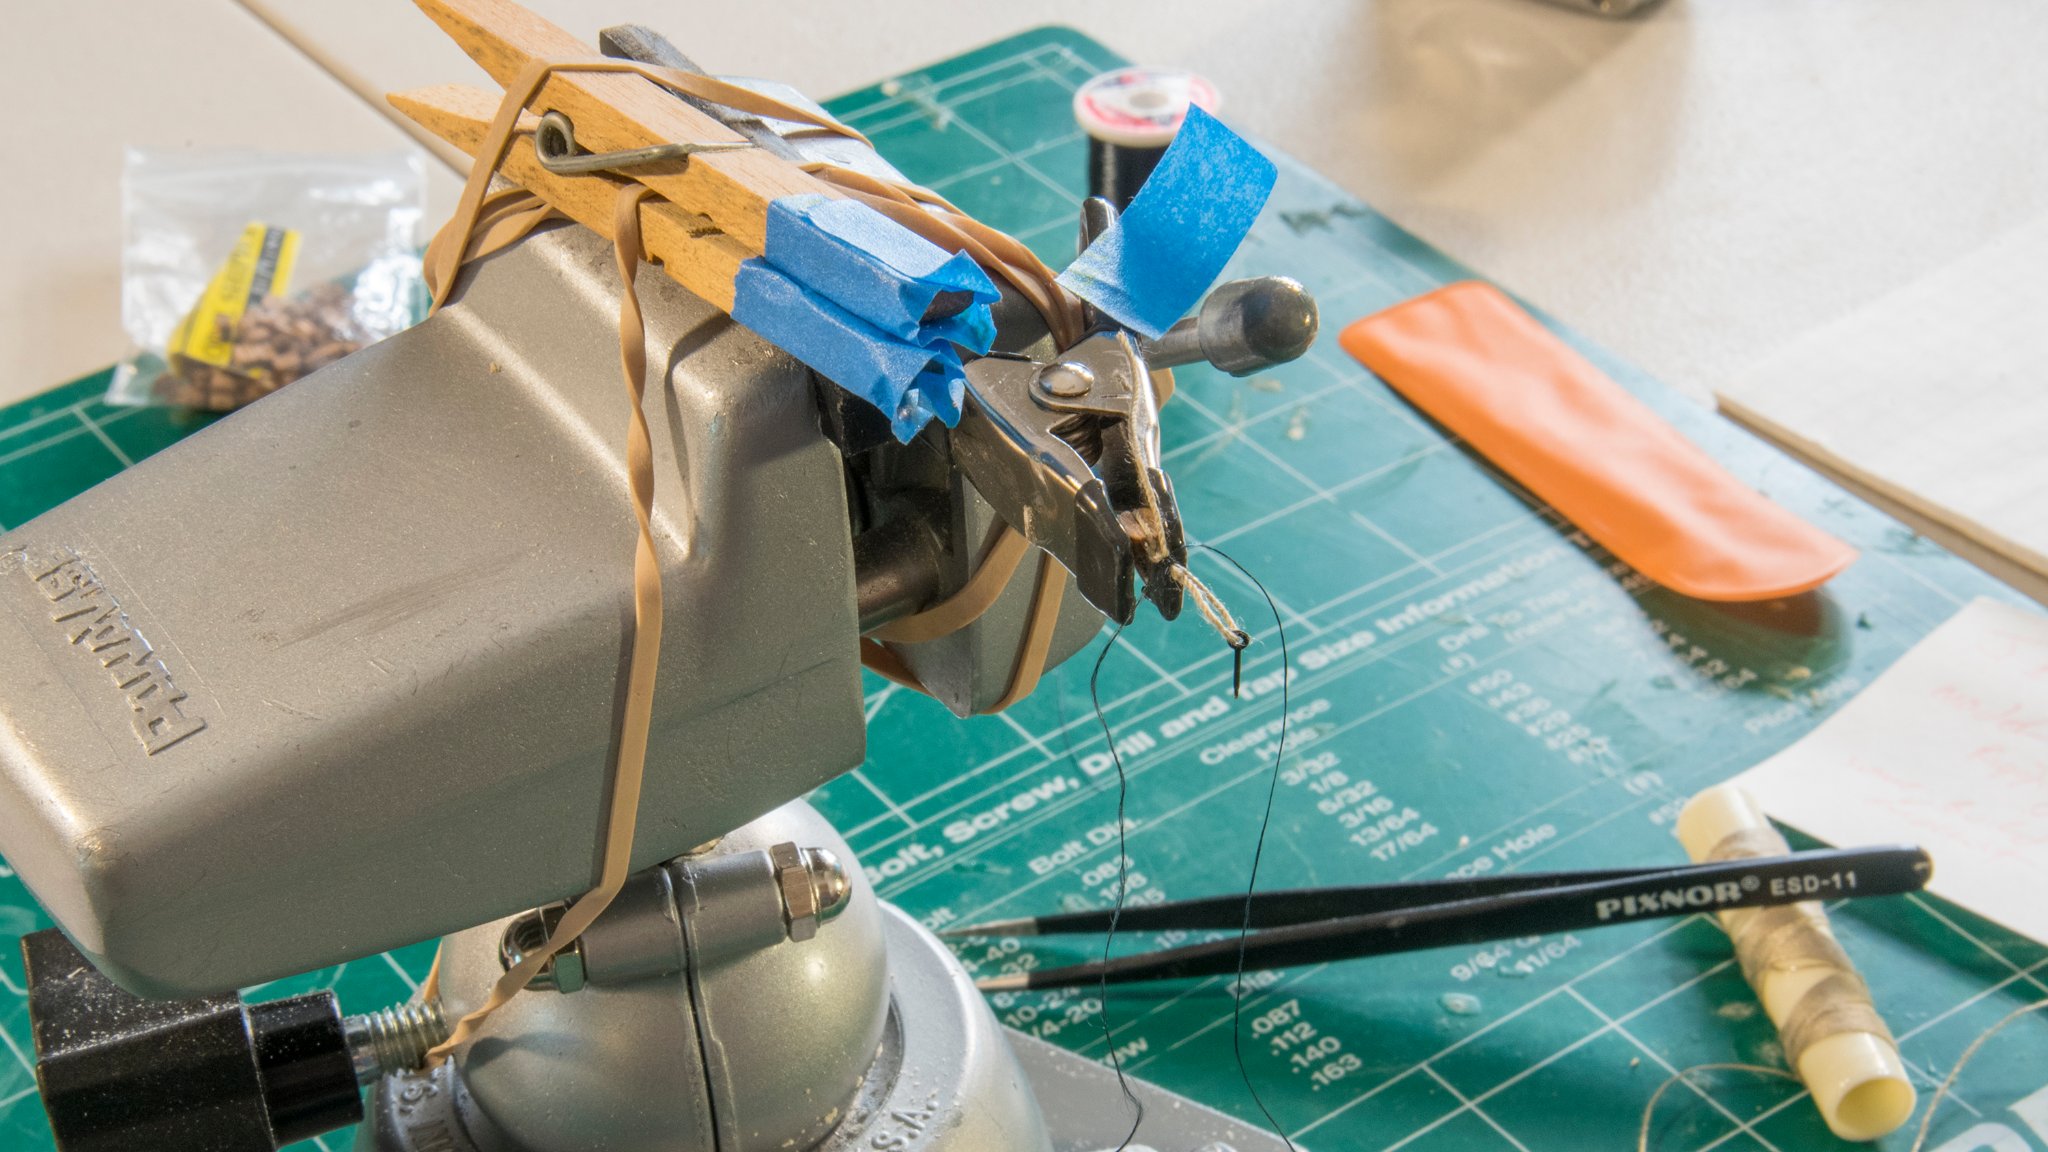
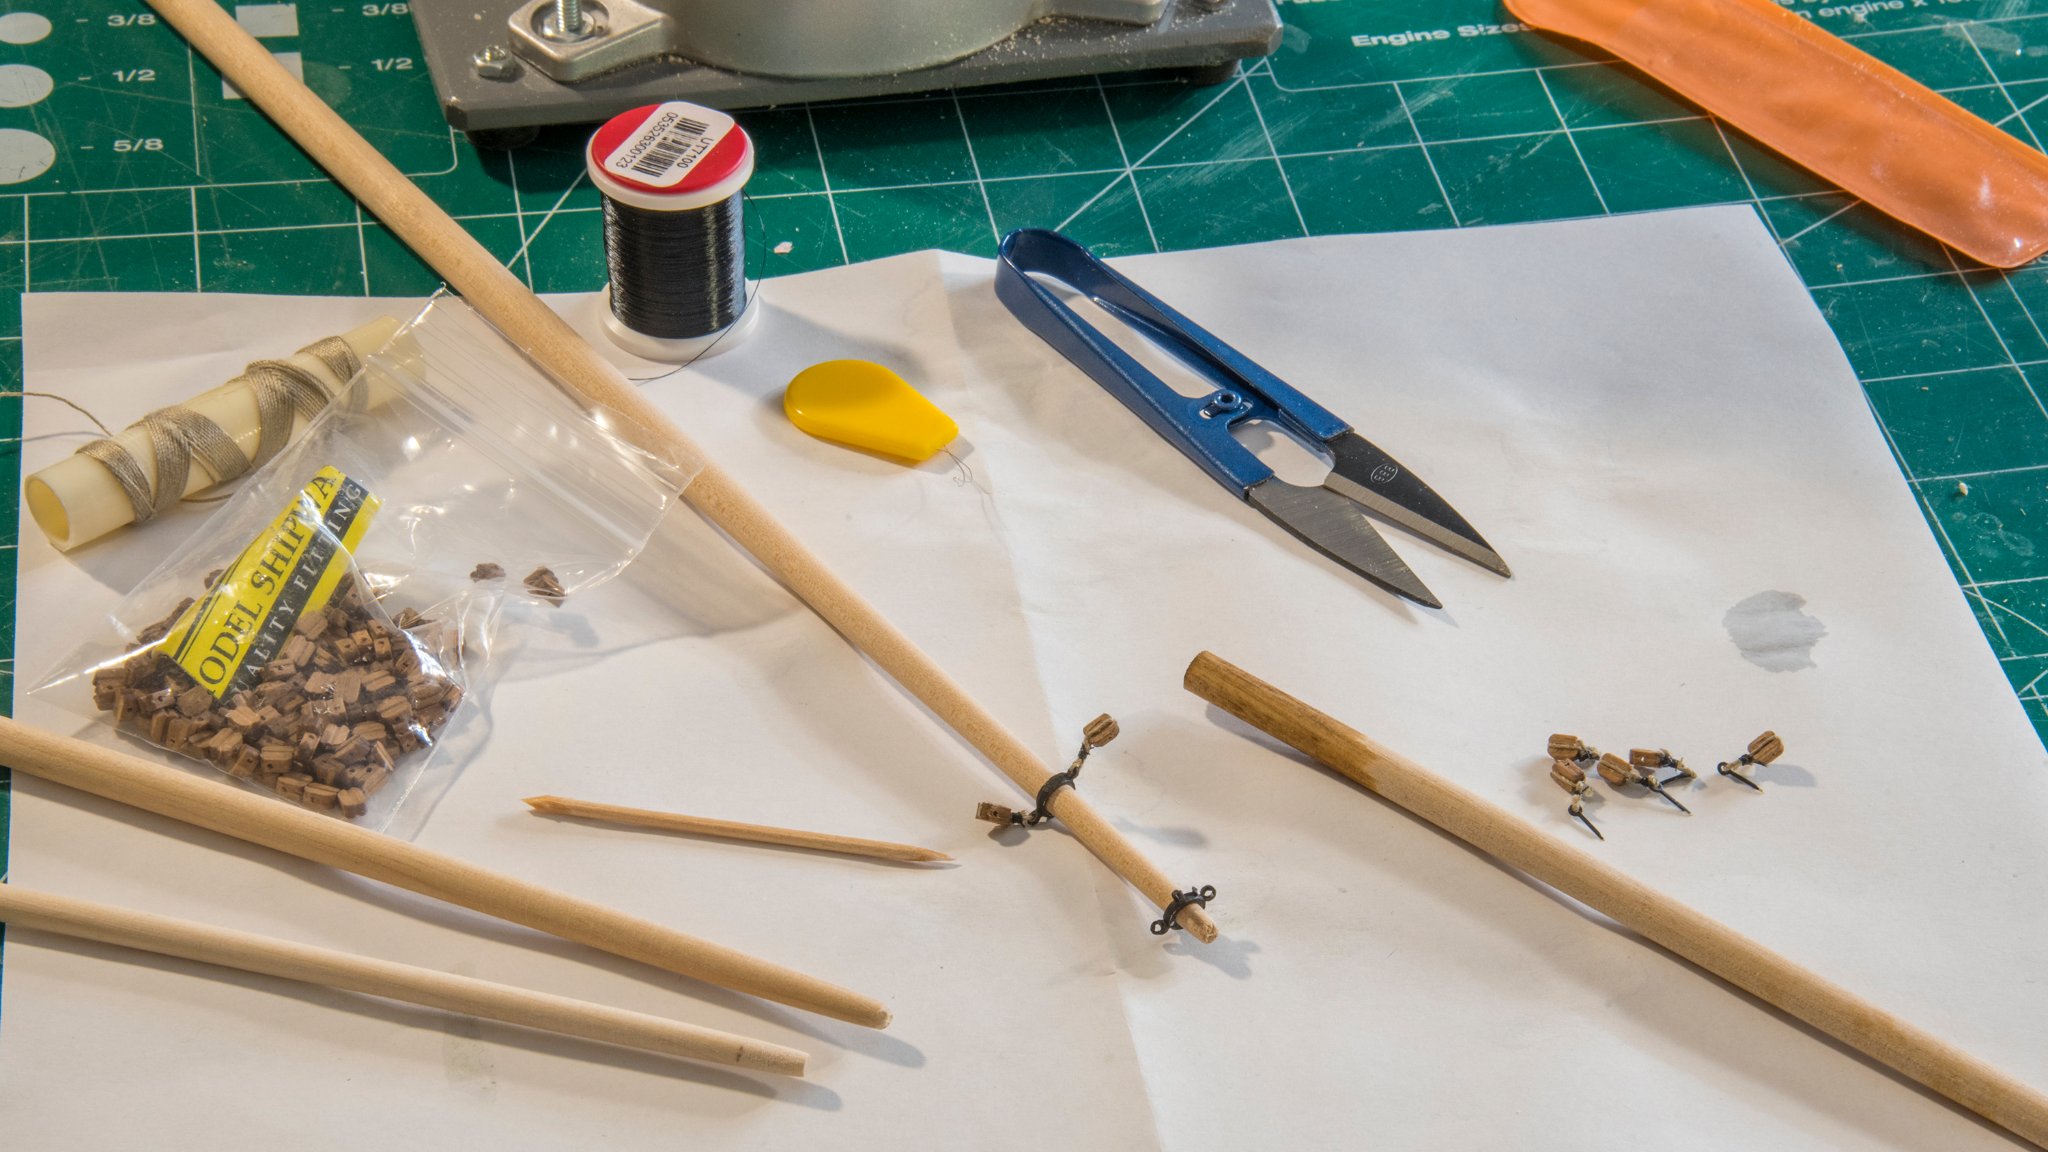
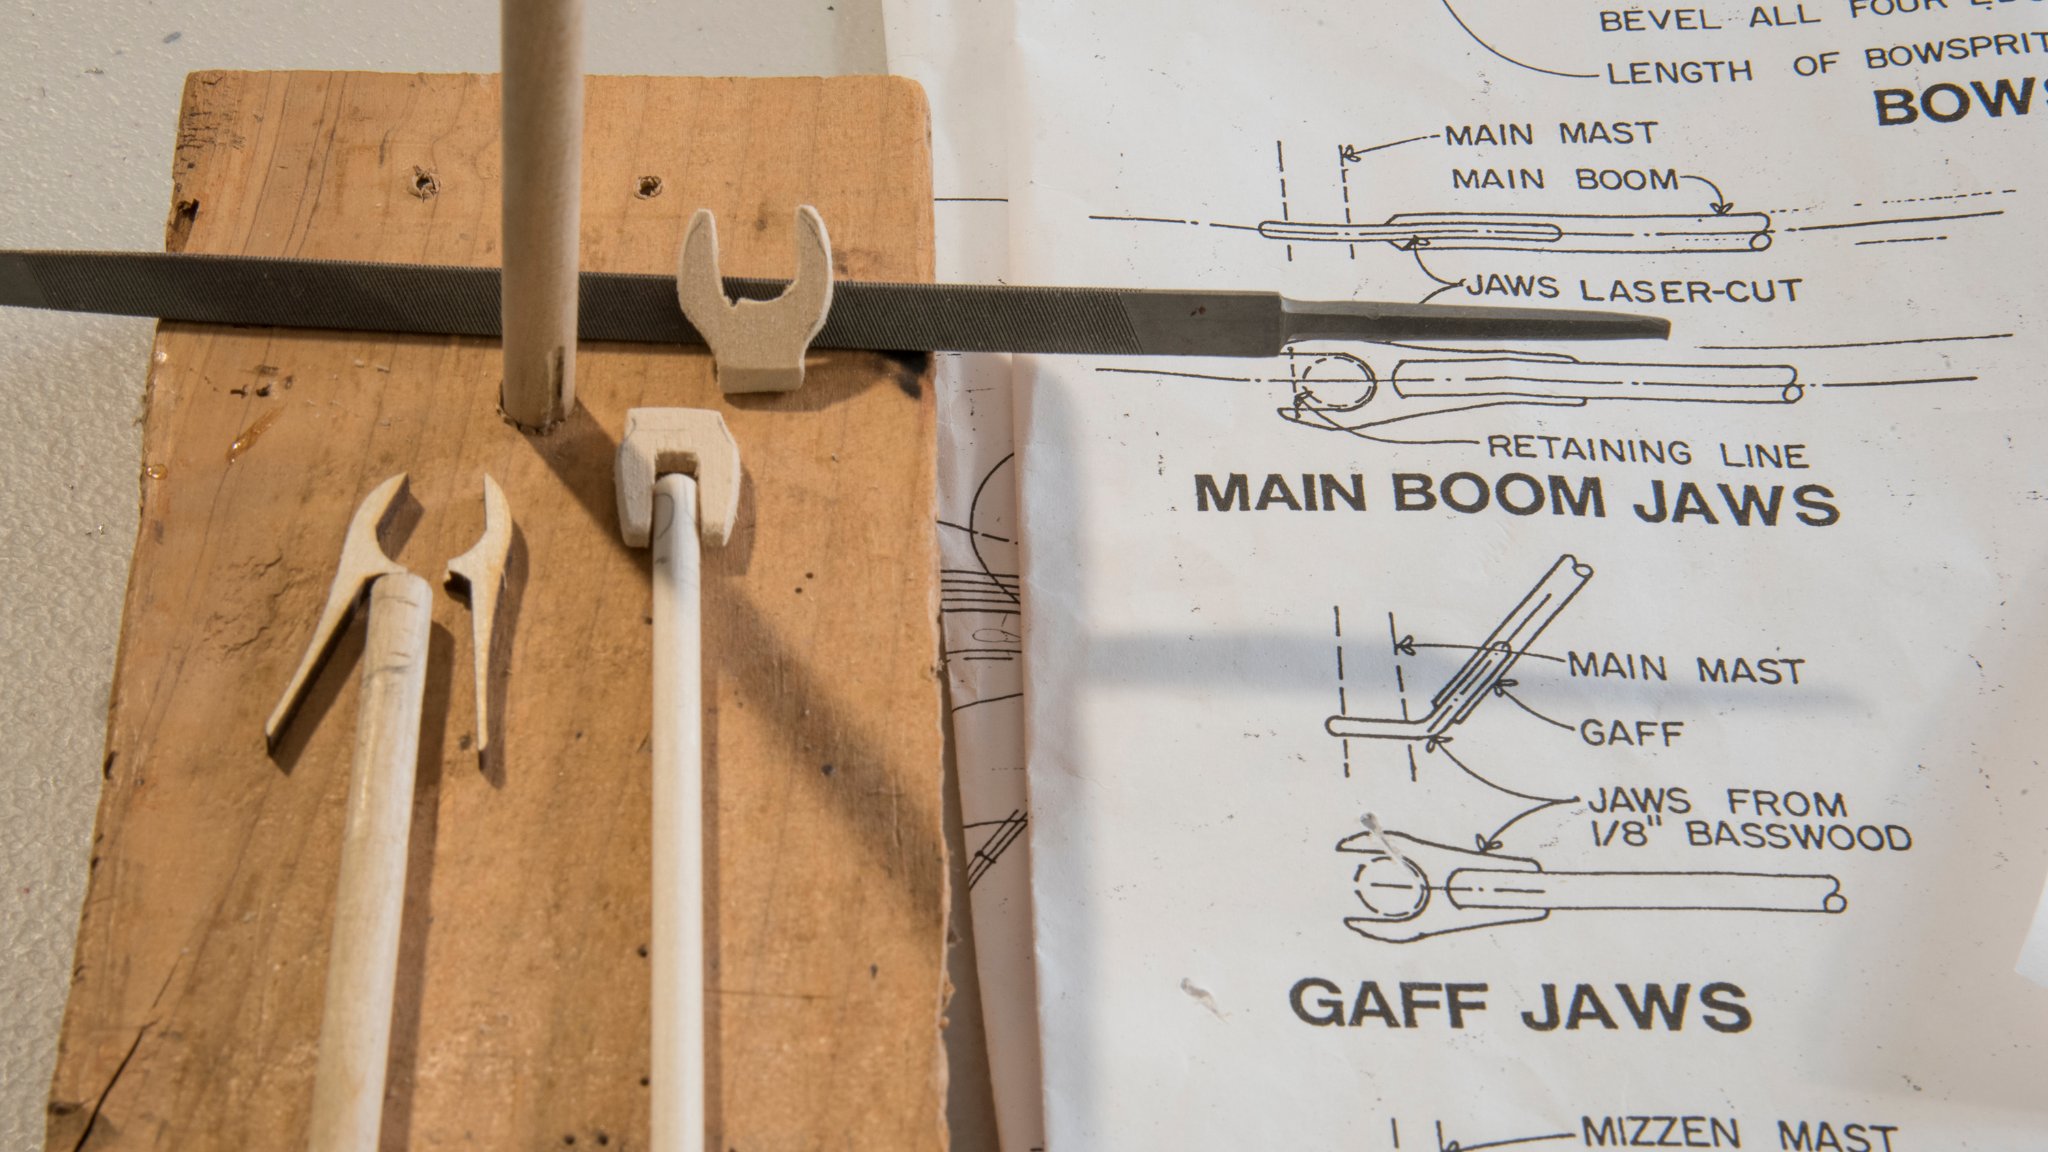
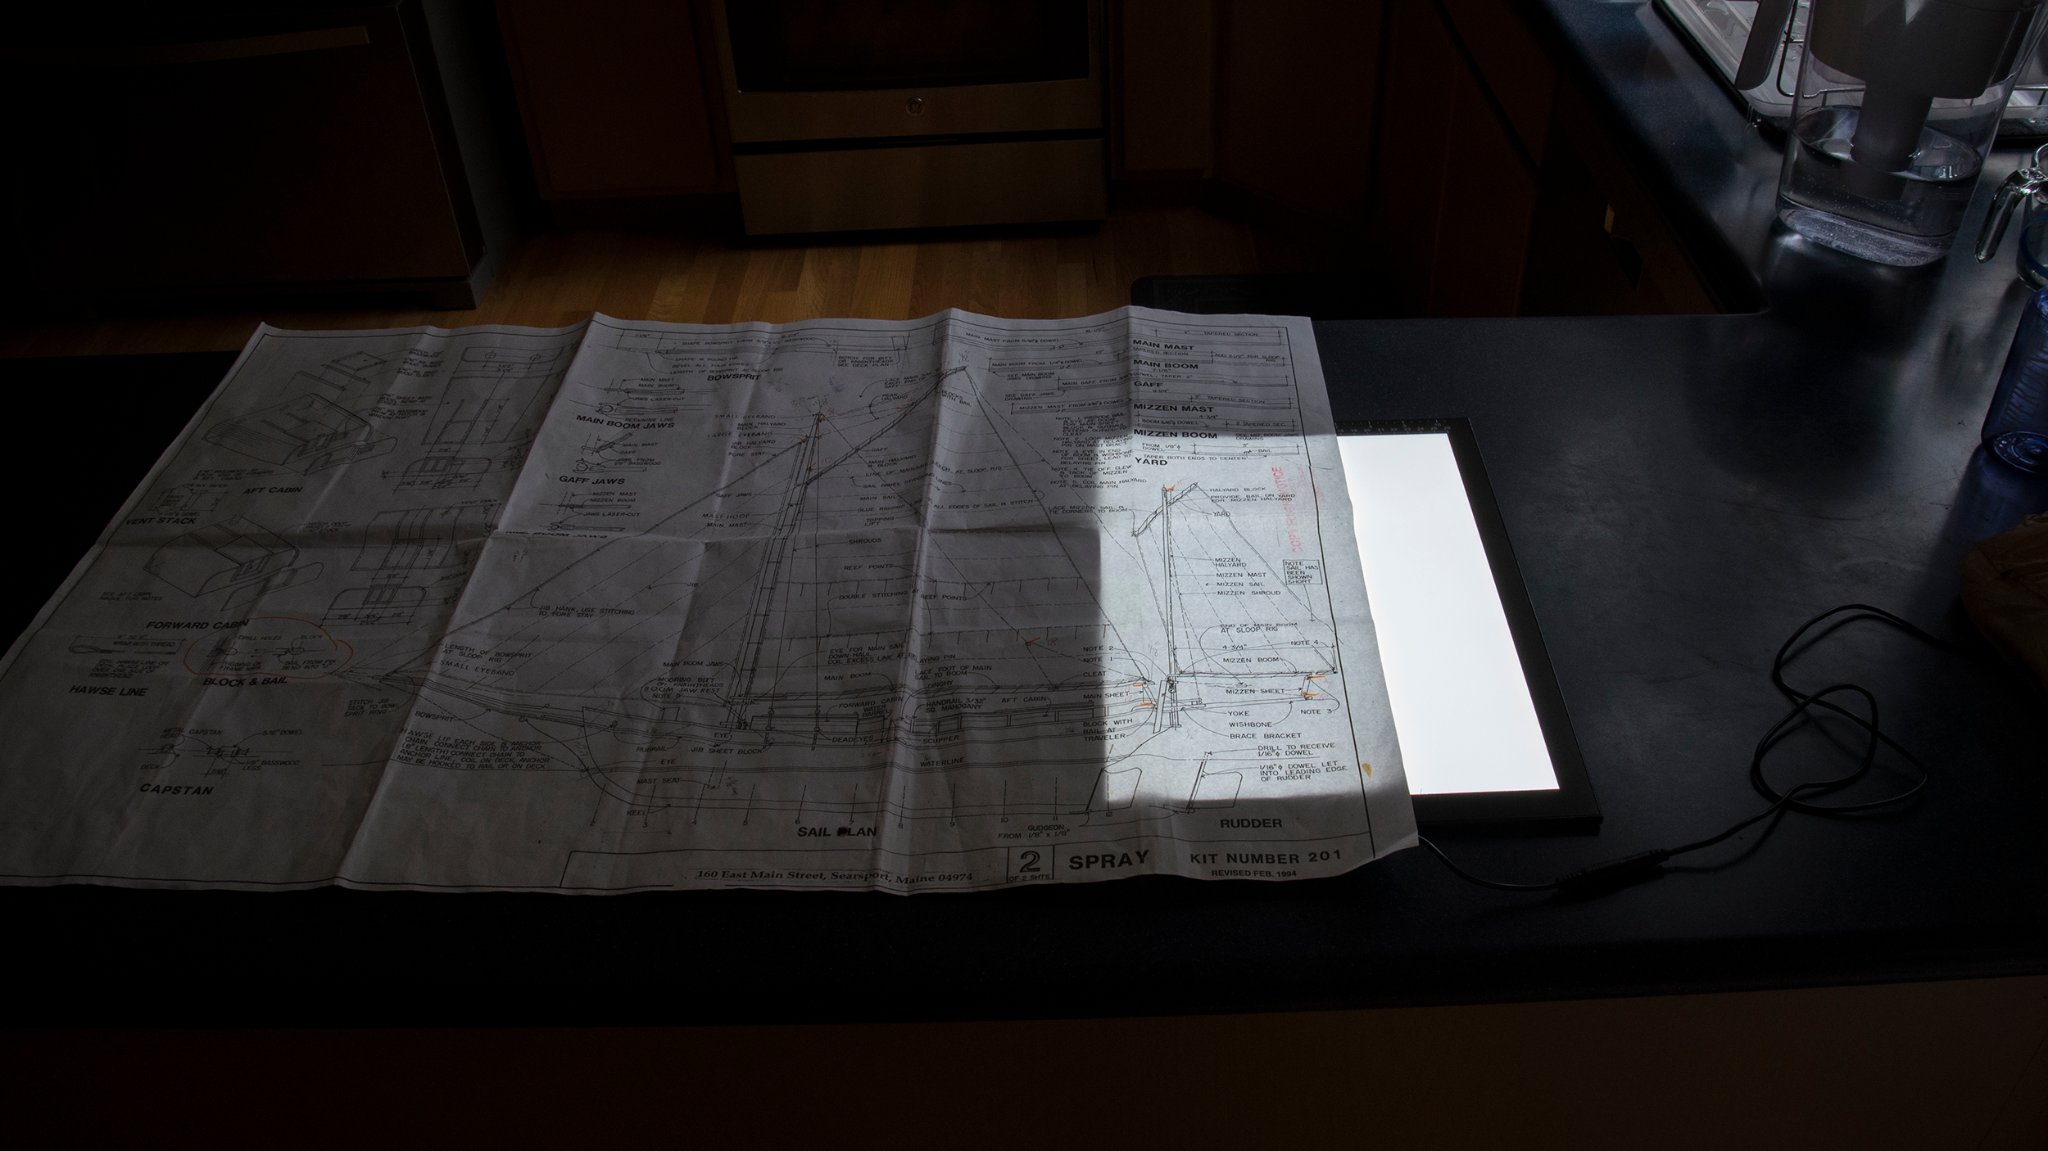
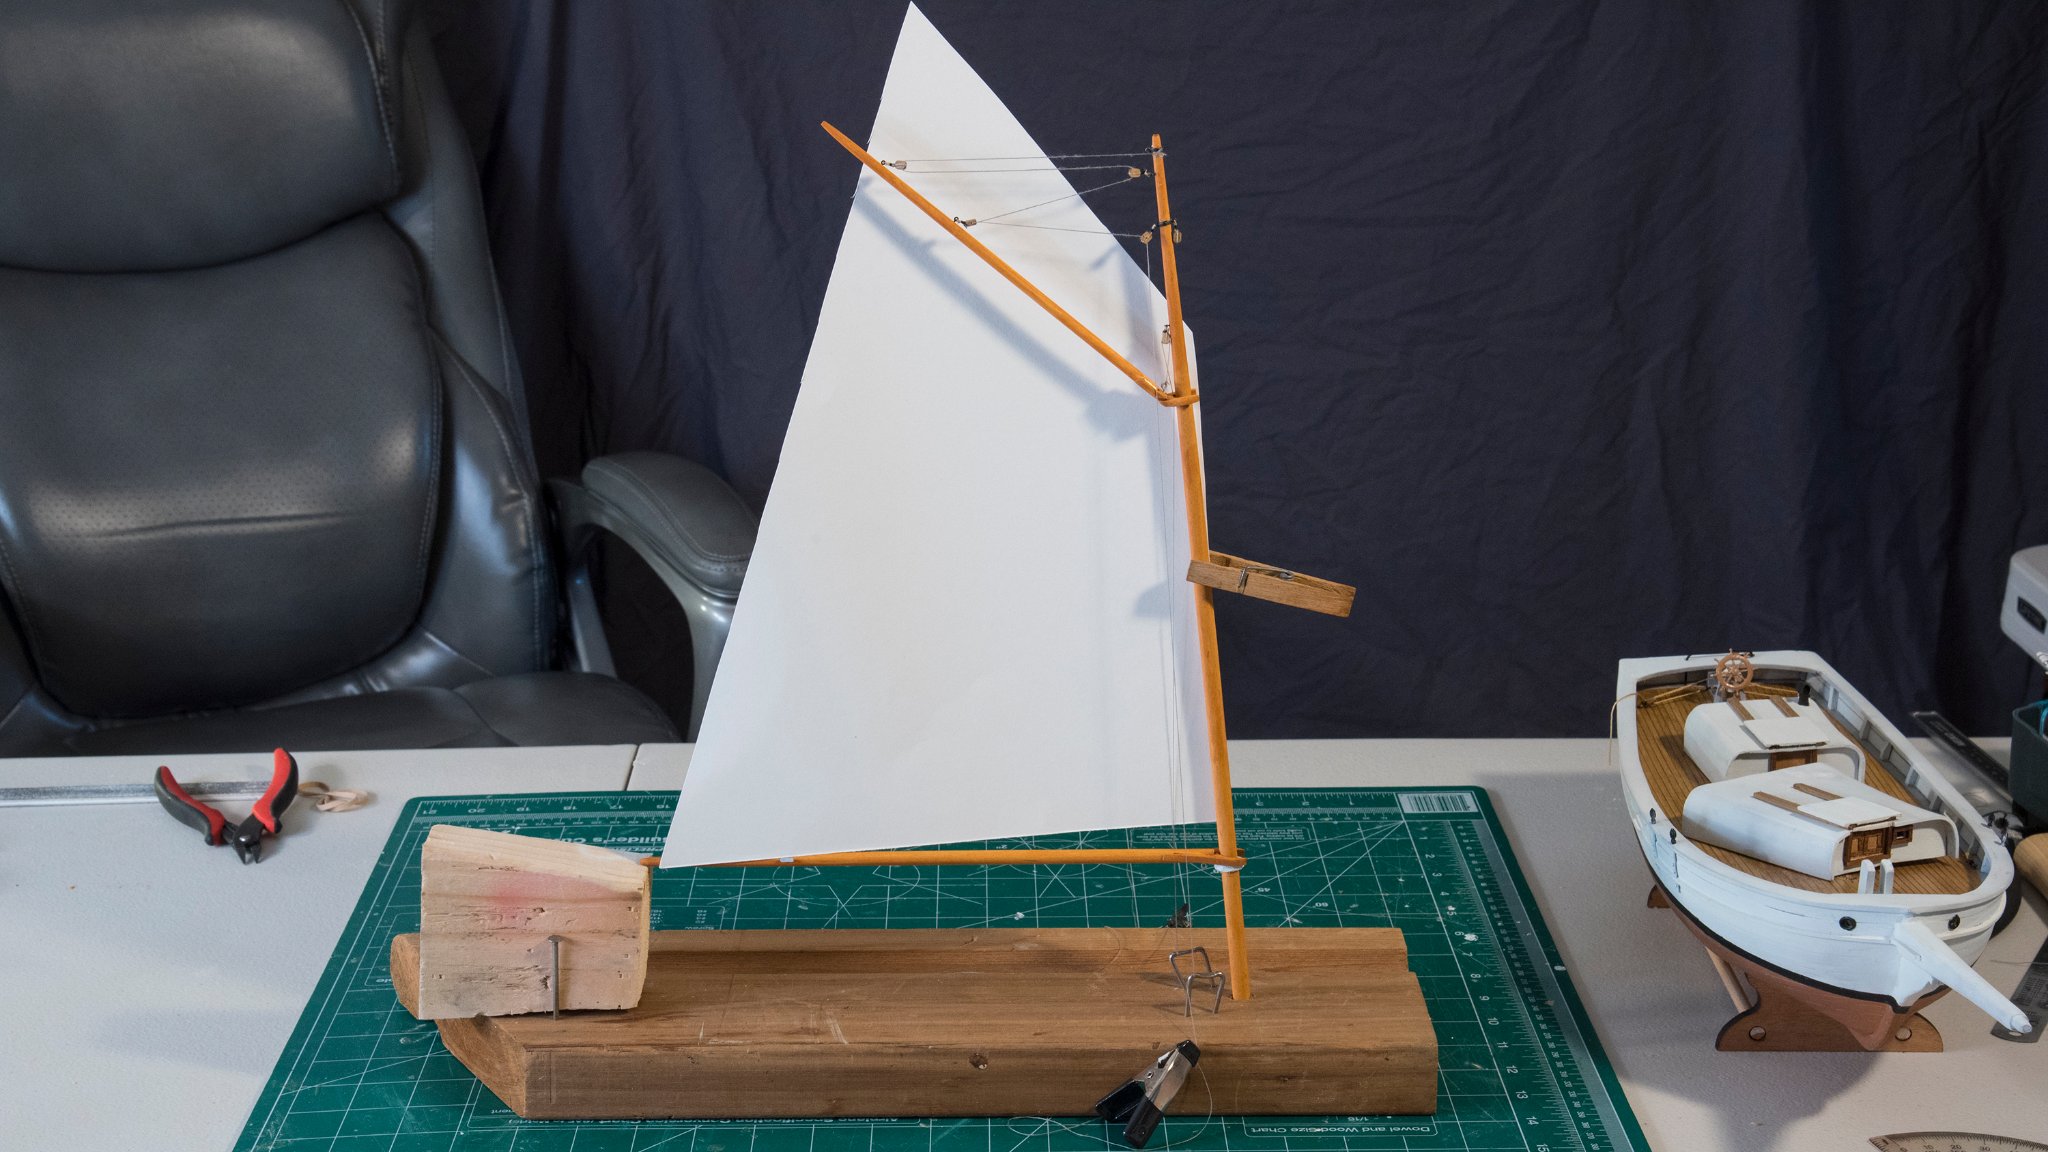
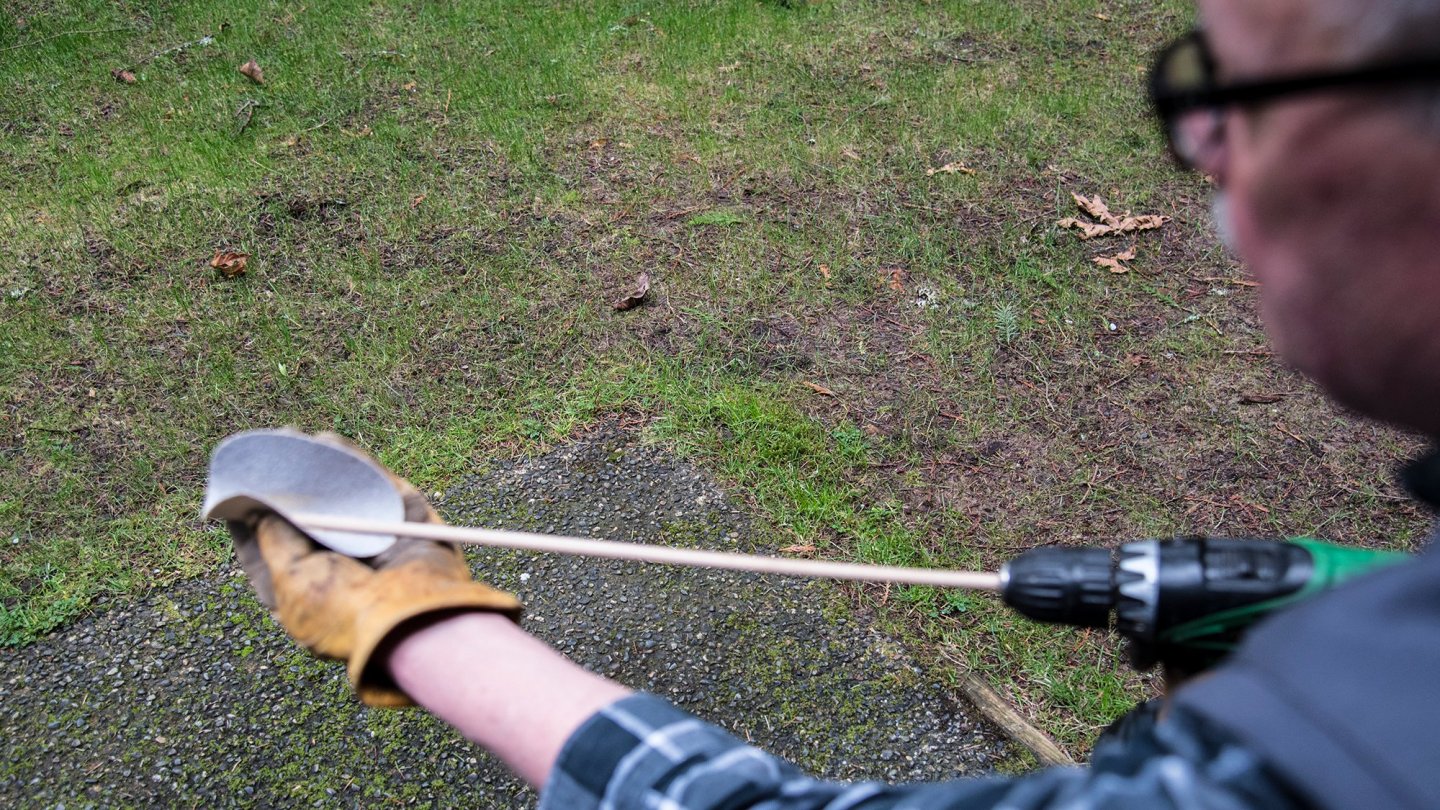
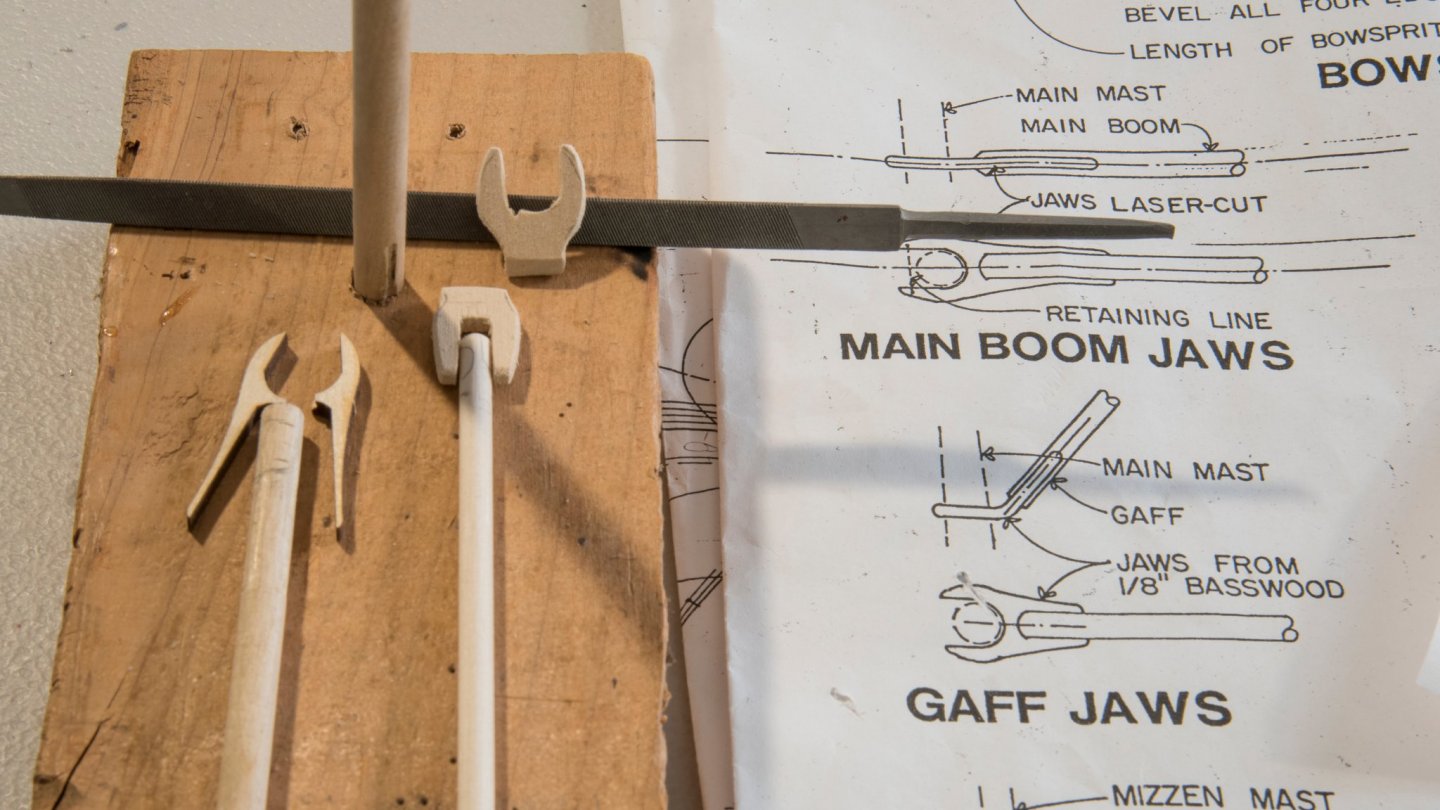
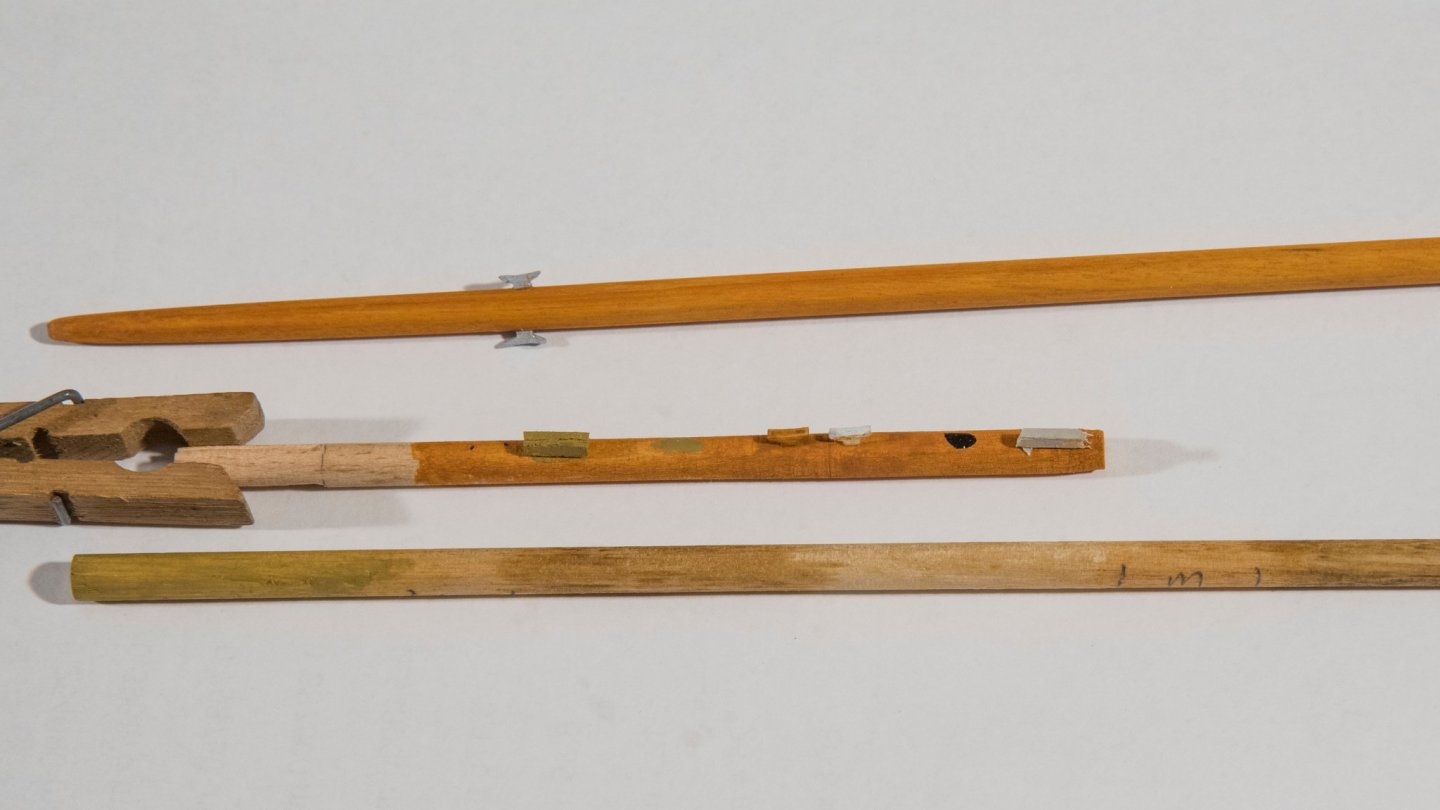
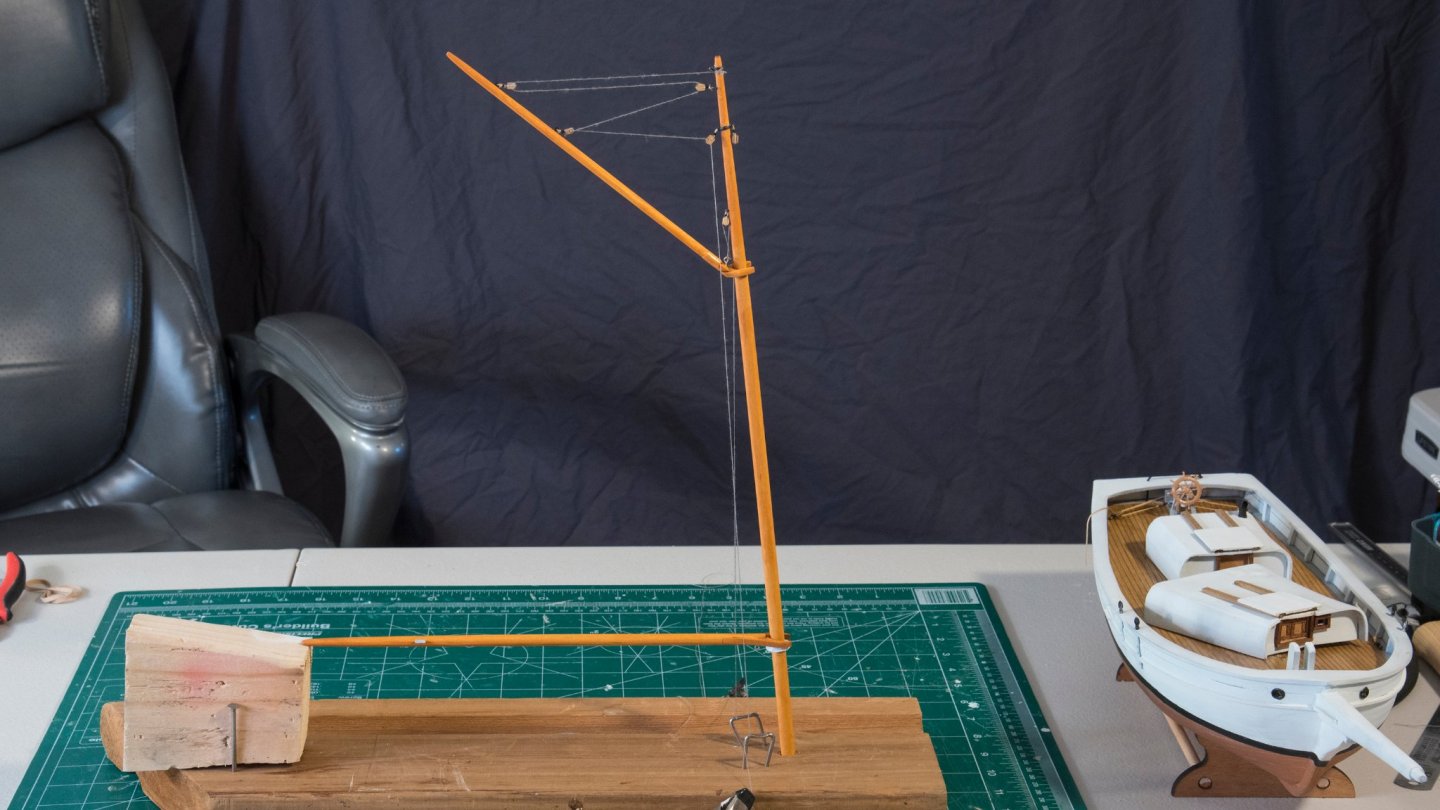
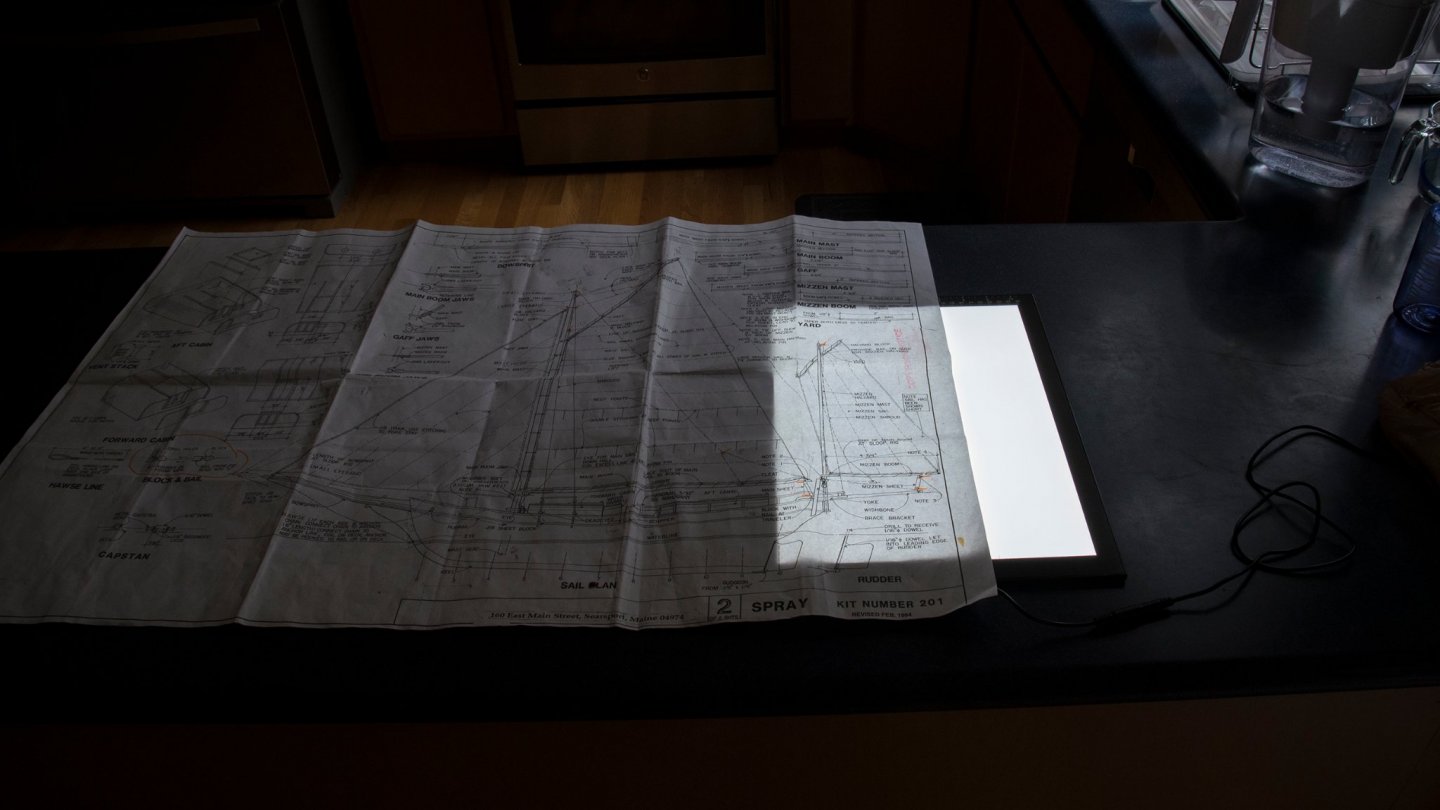
I have been working to finish most of the hull by installing the steering gear, drilling and painting the hawse holes, installing the 4 lower deadeyes painting the chainplates, along with a few other cleanup tasks. Now I change my focus from the hull to the rigging. I started by tapering the main mast, Gaff and Boom. I used my drill, and started with 60 grit, then 100 grit, and ended with 220. I used my calipers and ruler often to taper only as far as the drawing specifies. The instructions call for using the stropping wire to strop 15 single blocks. But I like the look of seizing a line to beckets. I’ve never done this but thought now is the time to learn. I hope they come out good, as this is taking a lot of time. I found instructions on MSW, and on YouTube: https://modelshipworld.com/topic/22783-hms-speedy-by-delf-vanguard-models-scale-164-master-shipwright-edition/page/15/ https://www.youtube.com/watch?v=nzDl5MYOgmQ&feature=emb_logo Following the examples in the above links, I wrapped a line around the block and seized it. I trimmed the line and then added another line and seized it to the eyepin or mast ring.. I used a sharpened toothpick and carefully placed CA glue between a small part of the thread and block and added glue to the seizing knot so they would not come loose, but such that the body of the thread remained somewhat flexible and the eyepin was wholly free to move. For the next blocks, I will try diluted white glue, as the CA glue runs into the threads more than I like and becomes very hard. I had to practice for a while. I bought some thin fly fishing thread (70 denier ~ 8/0) for the seizing line. I made 5 blocks seized to the eyepins provided, and 2 more blocks seized to the large metal eye ring provided. The holes in the eye rings were filled with metal, and I had to drill them out very carefully. The next step is to look at the laser cut boom jaws. I knew to be careful, but I still pushed the boom into the jaws too hard, which broke them. Dooh!. I will glue the jaws back together. I made the main gaff Jaws per the drawing. I will refine these jaws later in the build The instructions state to paint the spars tan, buff, or grey. I painted a spare rod with the 3 colors. I am not used to these colors. So, I coated the main mast with varnish like my other boats. Nope, the varnish did was not colorful enough, so I sanded and tried a pecan stain. Even with the warmer color, the finish was just not to right, and the rods (spars) were plain looking. So I searched YouTube and found that Tom Lauria used a heavy body acrylic, colored Raw Sienna, which I liked. I ordered it. It took me a while to find the right paint consistency. The longer you leave it on the darker the wood gets. So I found the time I like before wiping it off. I stayed with the Raw Sienna. I have some small cleats for the main boom, so again I had to determine how to finish the cleats. (Stainless Steel was not invented in the days of Mr. Slocum). The following picture shows some of my trials. And the spar at the top of the picture is the final configuration. Next I colored my white rigging line, #6 and running line #3. Again, I found one of Tom Lauria’s YouTube videos (Tips) to be useful. Between his advice and the Rit dye instructions, I colored the line and it looks very nice. I also bought a tan dye for the #3 running line. But you know the old saying, “Pride goes before the fall”? Well, it was all going great. I got out the running line, cleaned all the dishes, and dyed the running #3 line, but I used the dark dye again, not tan. Dooh! I could not bleach the line white, so I had to order another spool. Until it comes, I used sewing thread. Which is a good thing, because as I rigged my blocks and spars I took the line on and off several times. Now that I have done this, when it comes time for the final rigging, I will be able to use the thicker line with more experience :-). Next I rigged the main mast, boom and gaff. Then I traced out the 3 sails per the drawing. I have a small light I tablet use for viewing negatives and slides, and is also handy for tracing. When I put the prototype sails next to the yards, they did not fit! The 2nd picture below shows the mismatch. The mismatch was not as bad as indicated in the picture because the boom was set too high, and the gaff is a bit too low. But, still, it did not fit. It took me a while to figure out what the problem was. My mast is leaning slightly more aft than shown in the drawing. This also affected the jib which did not fit properly either. I was going to rerig the mast, but I realized I could just recut the cardboard sails instead. It was only a small trim, so I suspect the deviation from the drawing will not be noticed when assembled. Before I make the sails, I thought it best to finish all the spars and masts and install the blocks. Then fit all the cardboard sails to ensure I am on the right path, before I actually cut cloth. So I am now cutting, and painting the final parts for the mizzen mast. The assembly onto the boat will require cutting slots into the railing and rub strip. So, completing this task this will take a while.


-
What an awesome looking boat, Tom. It is an absolutely great build. The details of the deck and especially the sails show the great workmanship. Congratulations. Ken
-
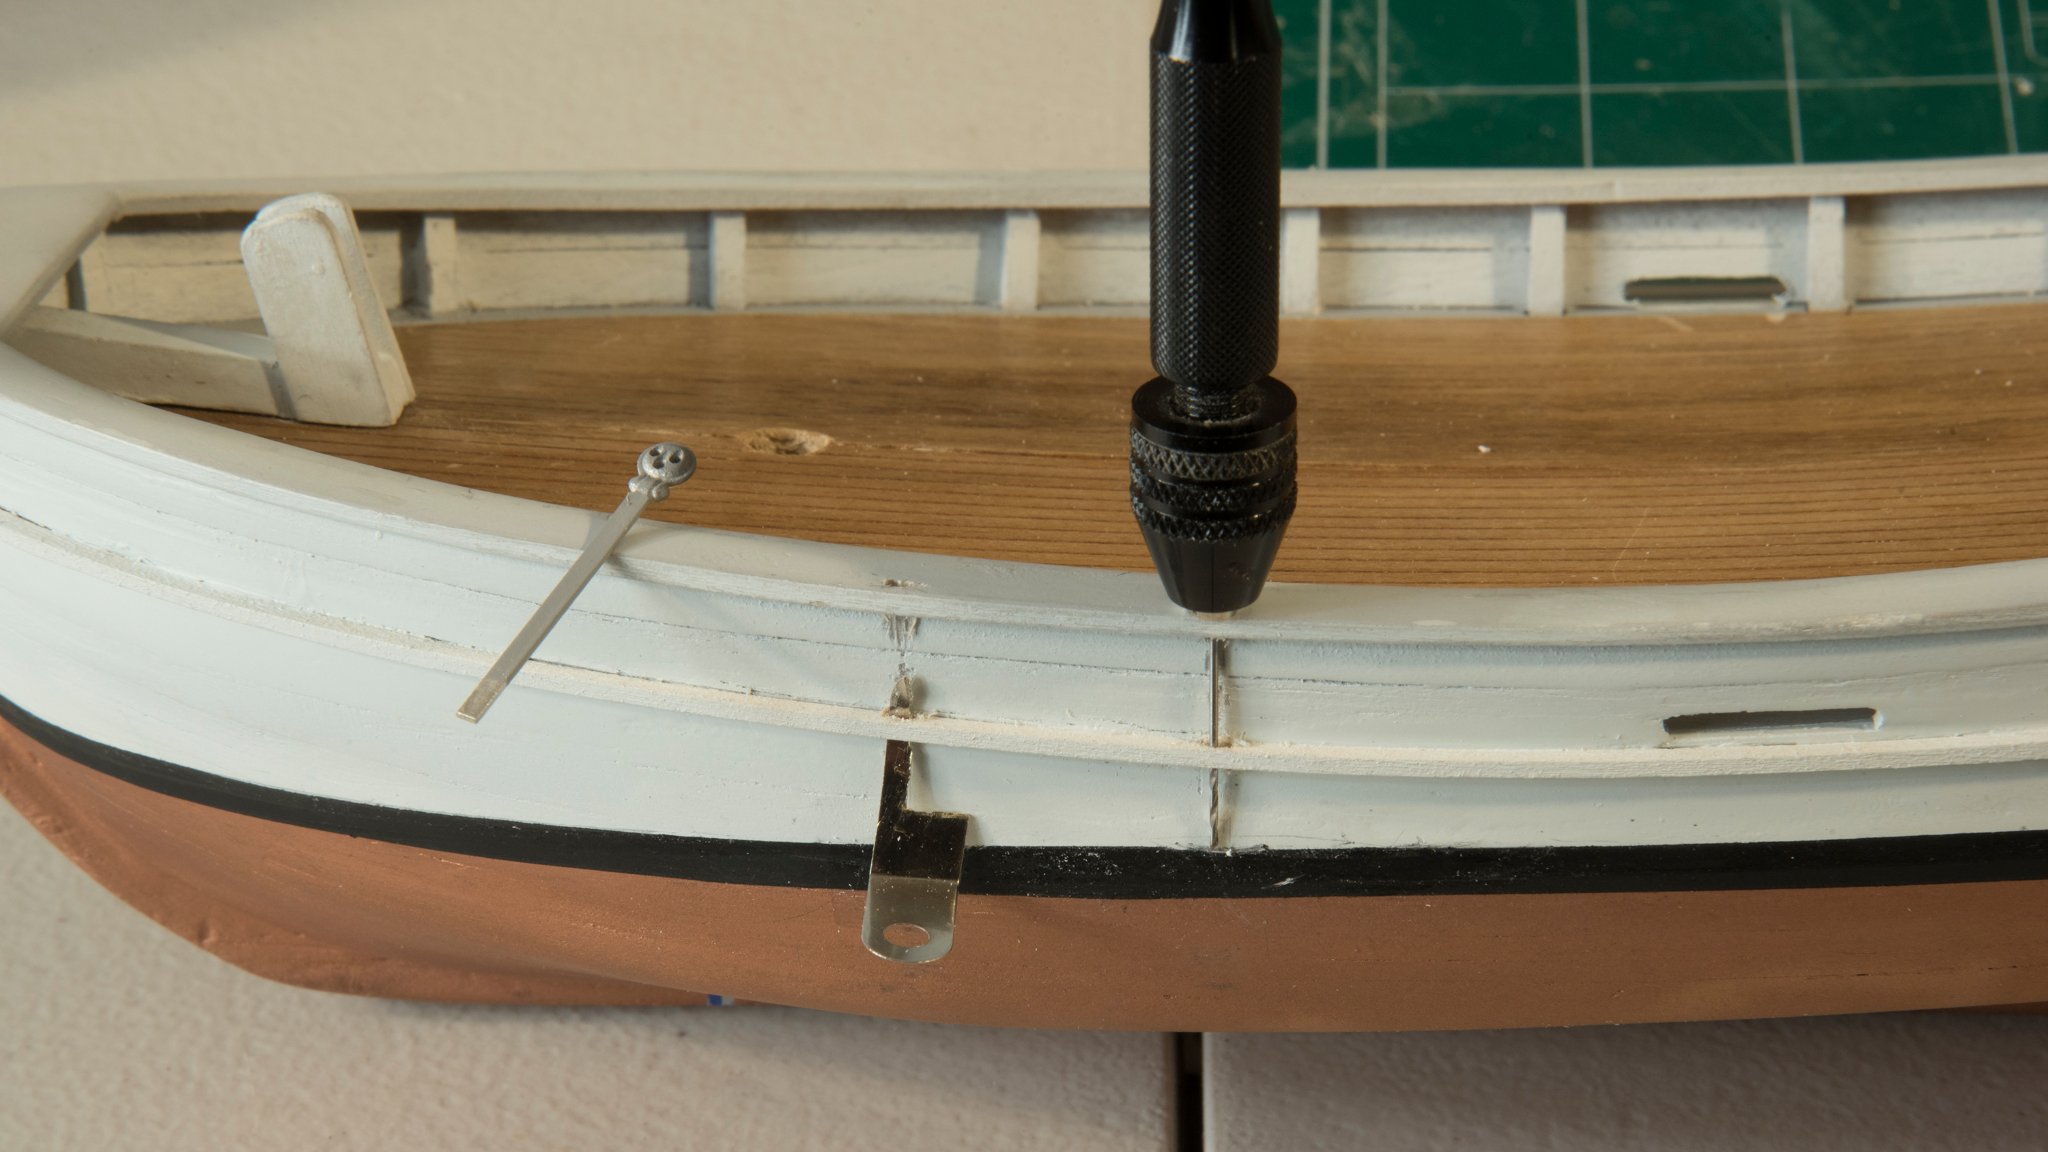
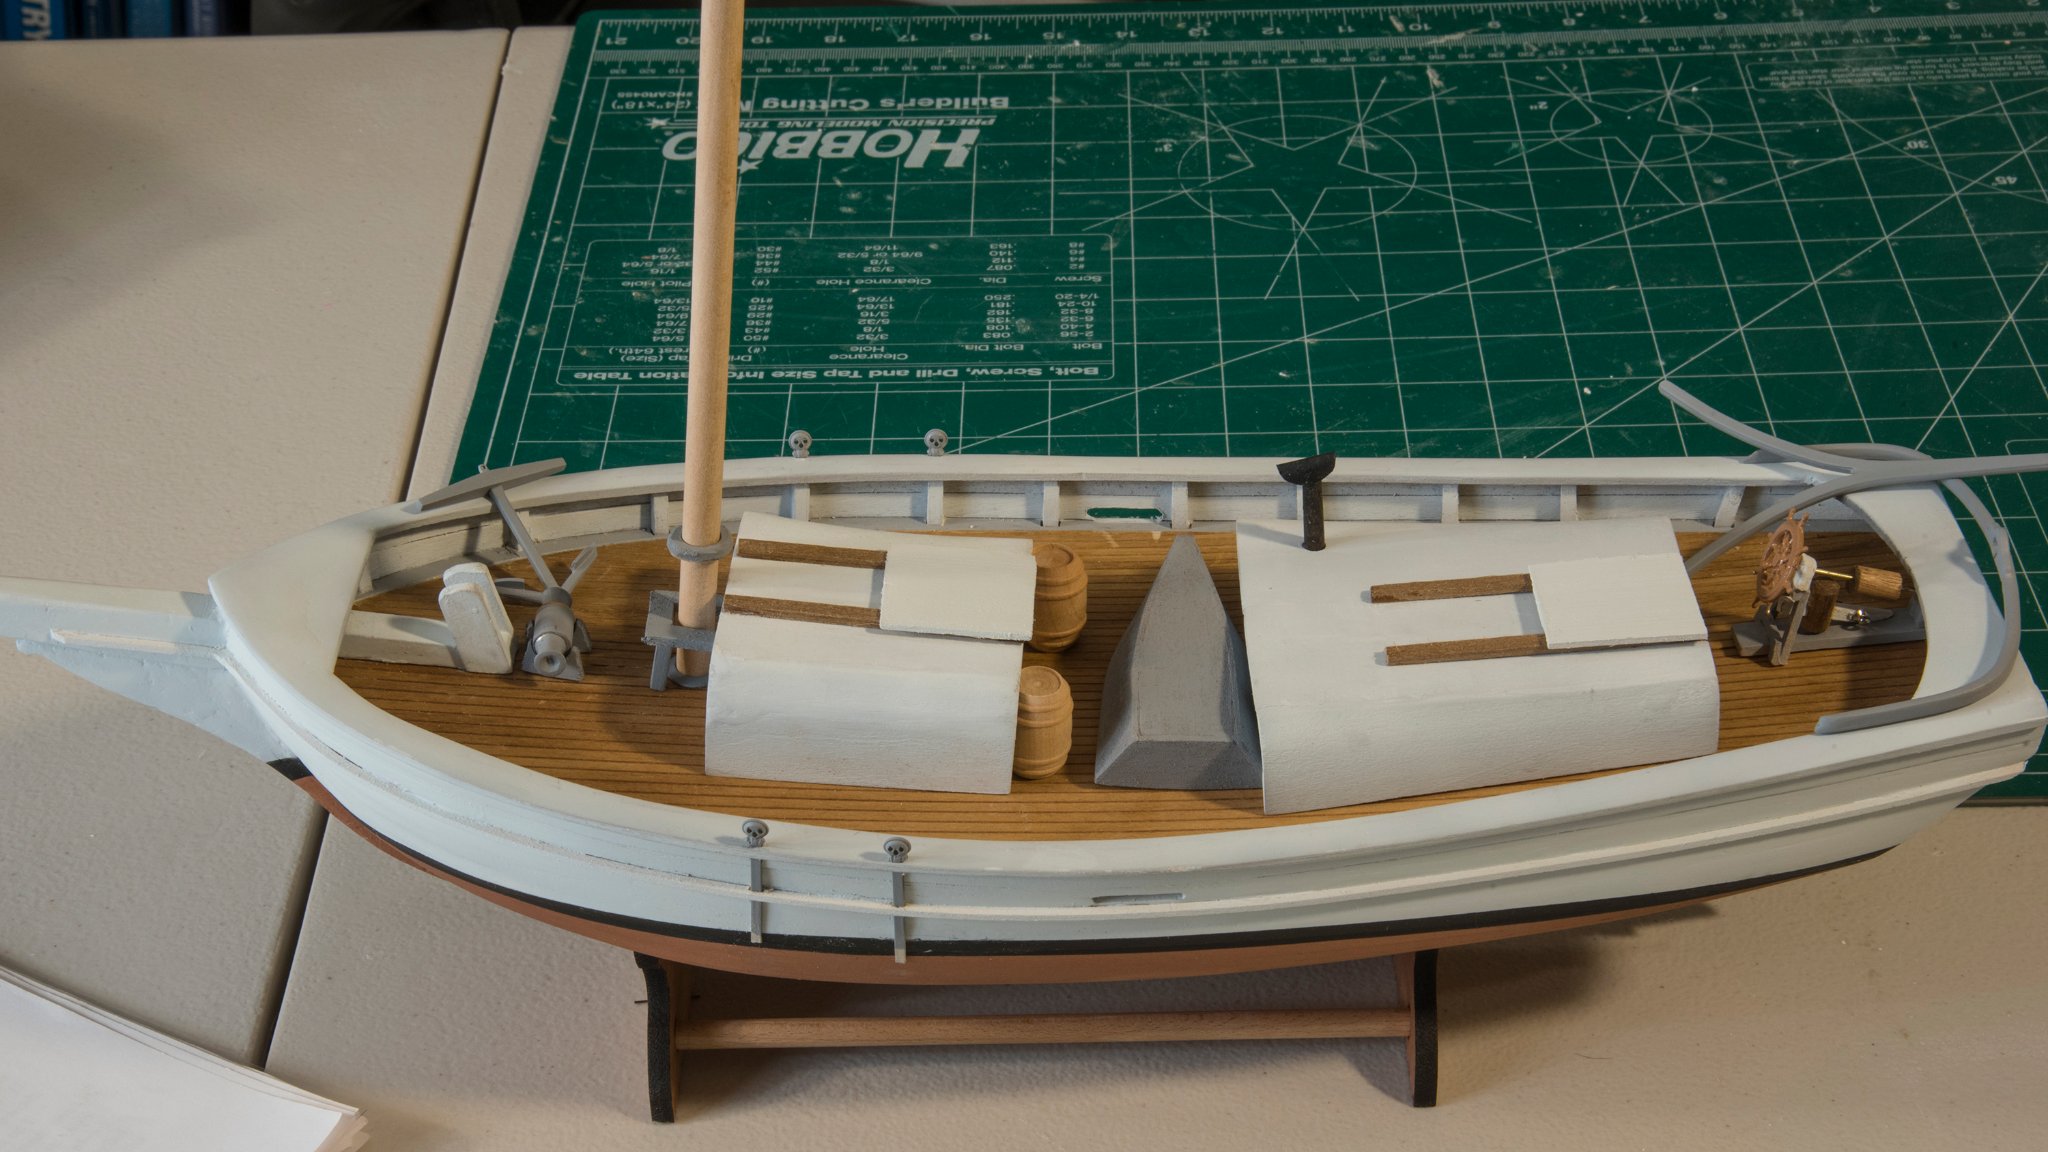
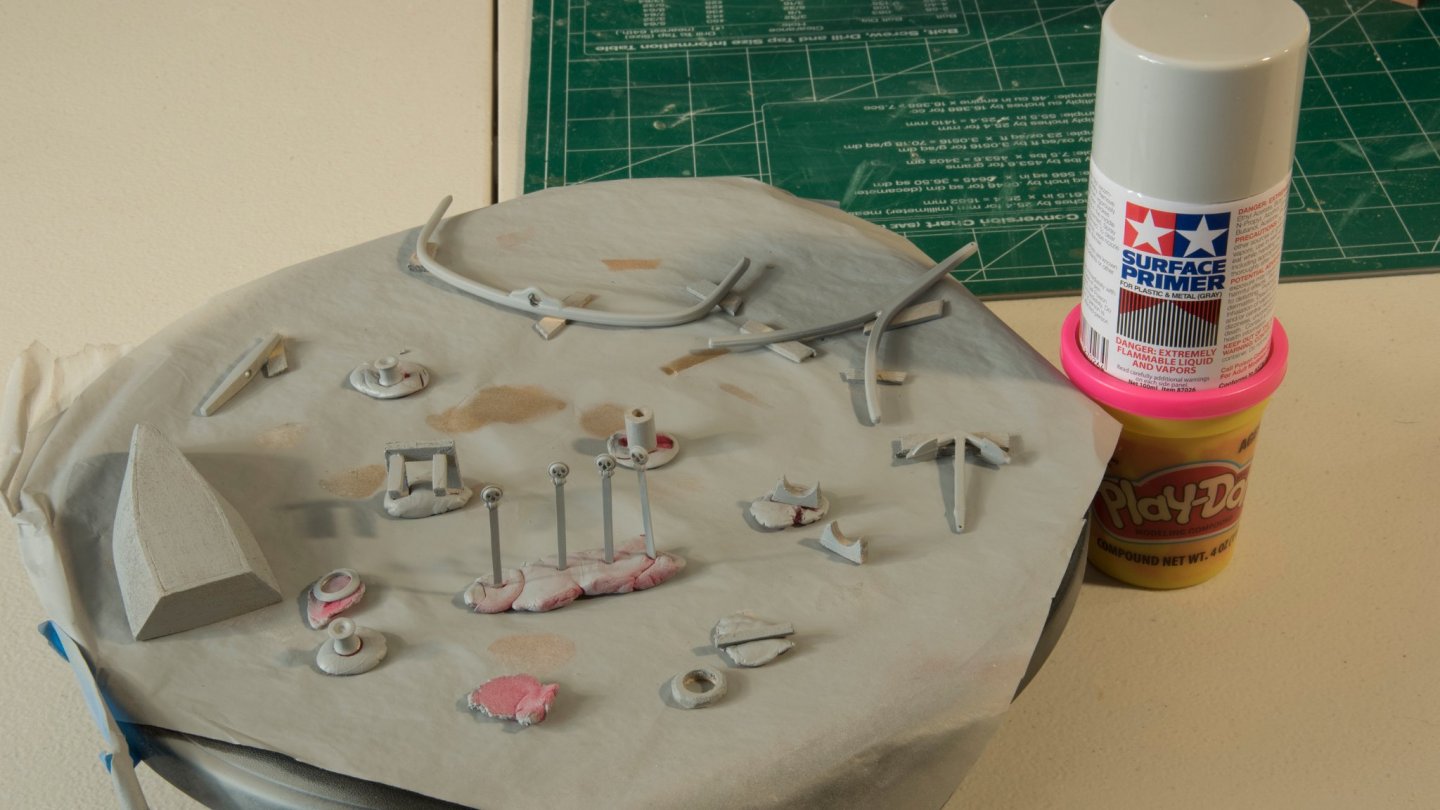
Now I turn my attention to the deck gear. I am looking to finish as much of the deck gear as I can before I start the rigging and sails. The picture below shows a “batch” of gear placed on my turn table for painting at my spray booth. I am starting with primer. It comes out of the can with some force, so I am using play-doh to hold the lighter parts in place. Also, the primer stinks of chemicals. The fan in my prototype spray booth (130 CFM) pulls most of the odor outside, but not enough! When I build my next spray booth, it will be bigger to accommodate a larger boat, and will have a much stronger fan. Tomorrow, I will airbrush the flat white on most of these parts, and later airbrush Black on the rest. I have been postponing the installation of the lower deadeyes on chain plates, but now is time to attempt this feat. I measured and started with a pin vise drill. It worked. It required drilling several holes, sometime using the drill bit as a file. Each time I fit the soft chain plate in the hole it bent. So, I cut a thin piece of metal to the width of the chain plate and used this to “fit” the hole before I did a final fit of the kit chain plate. Here is the total of my work so far.

-
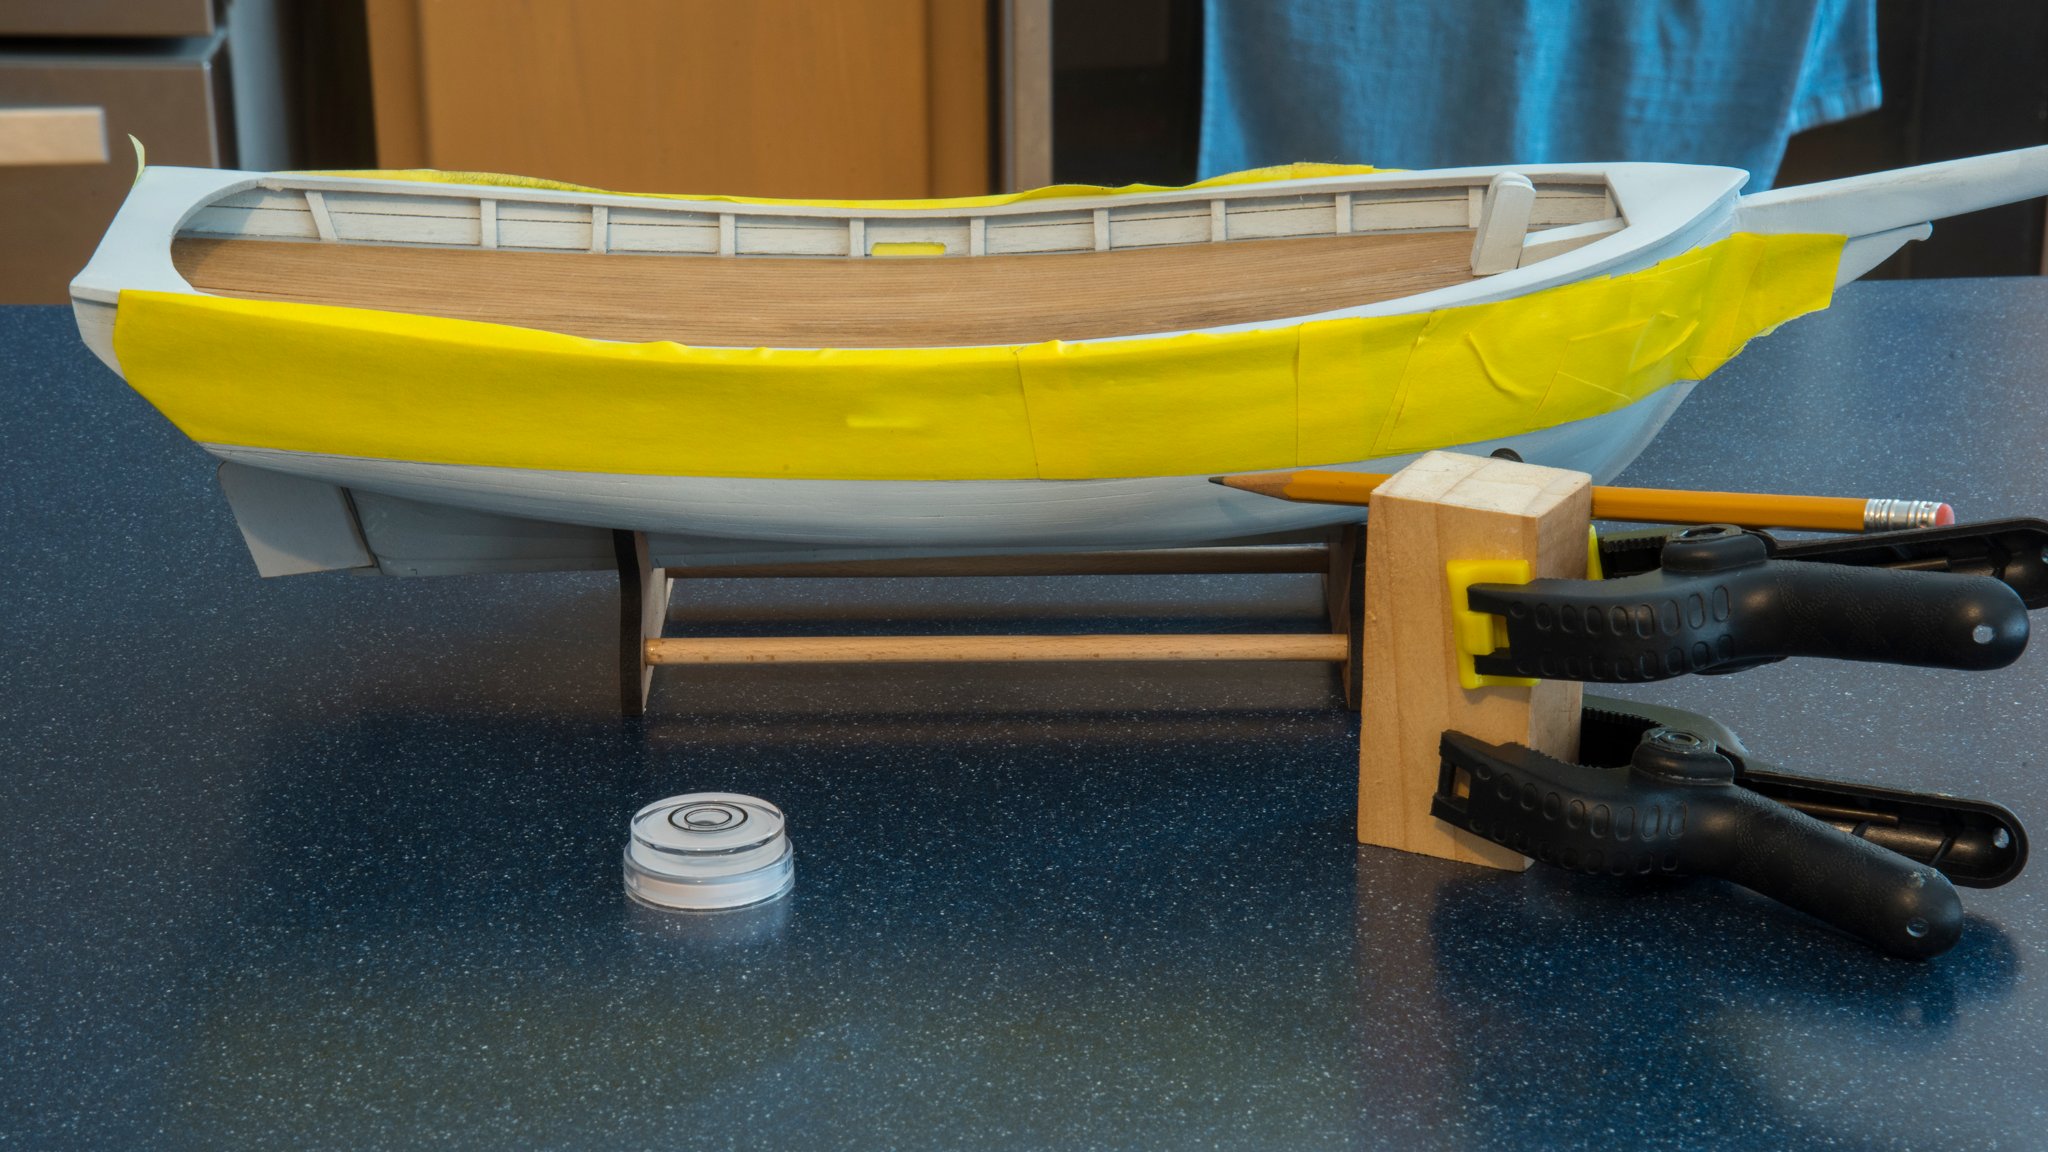
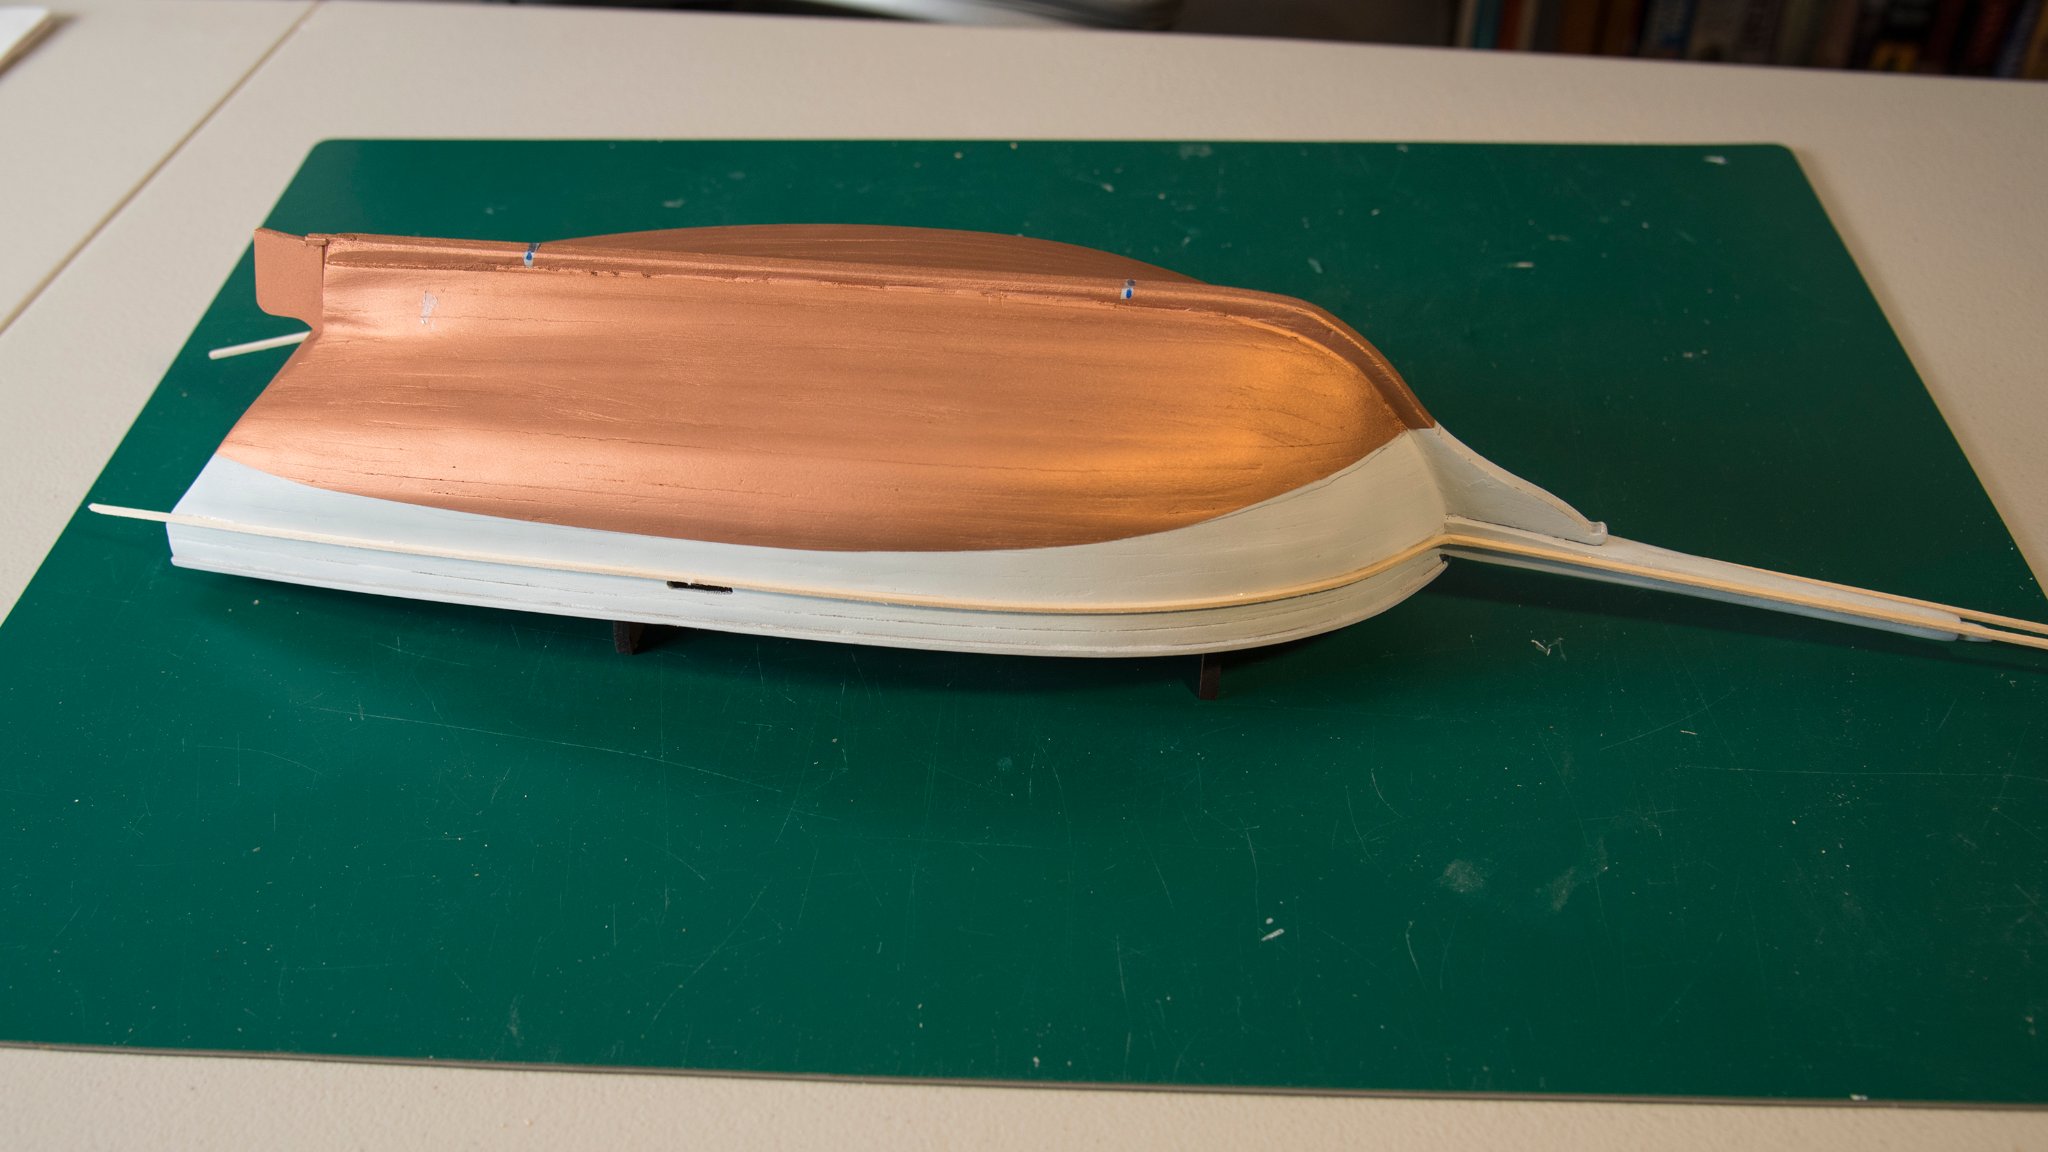
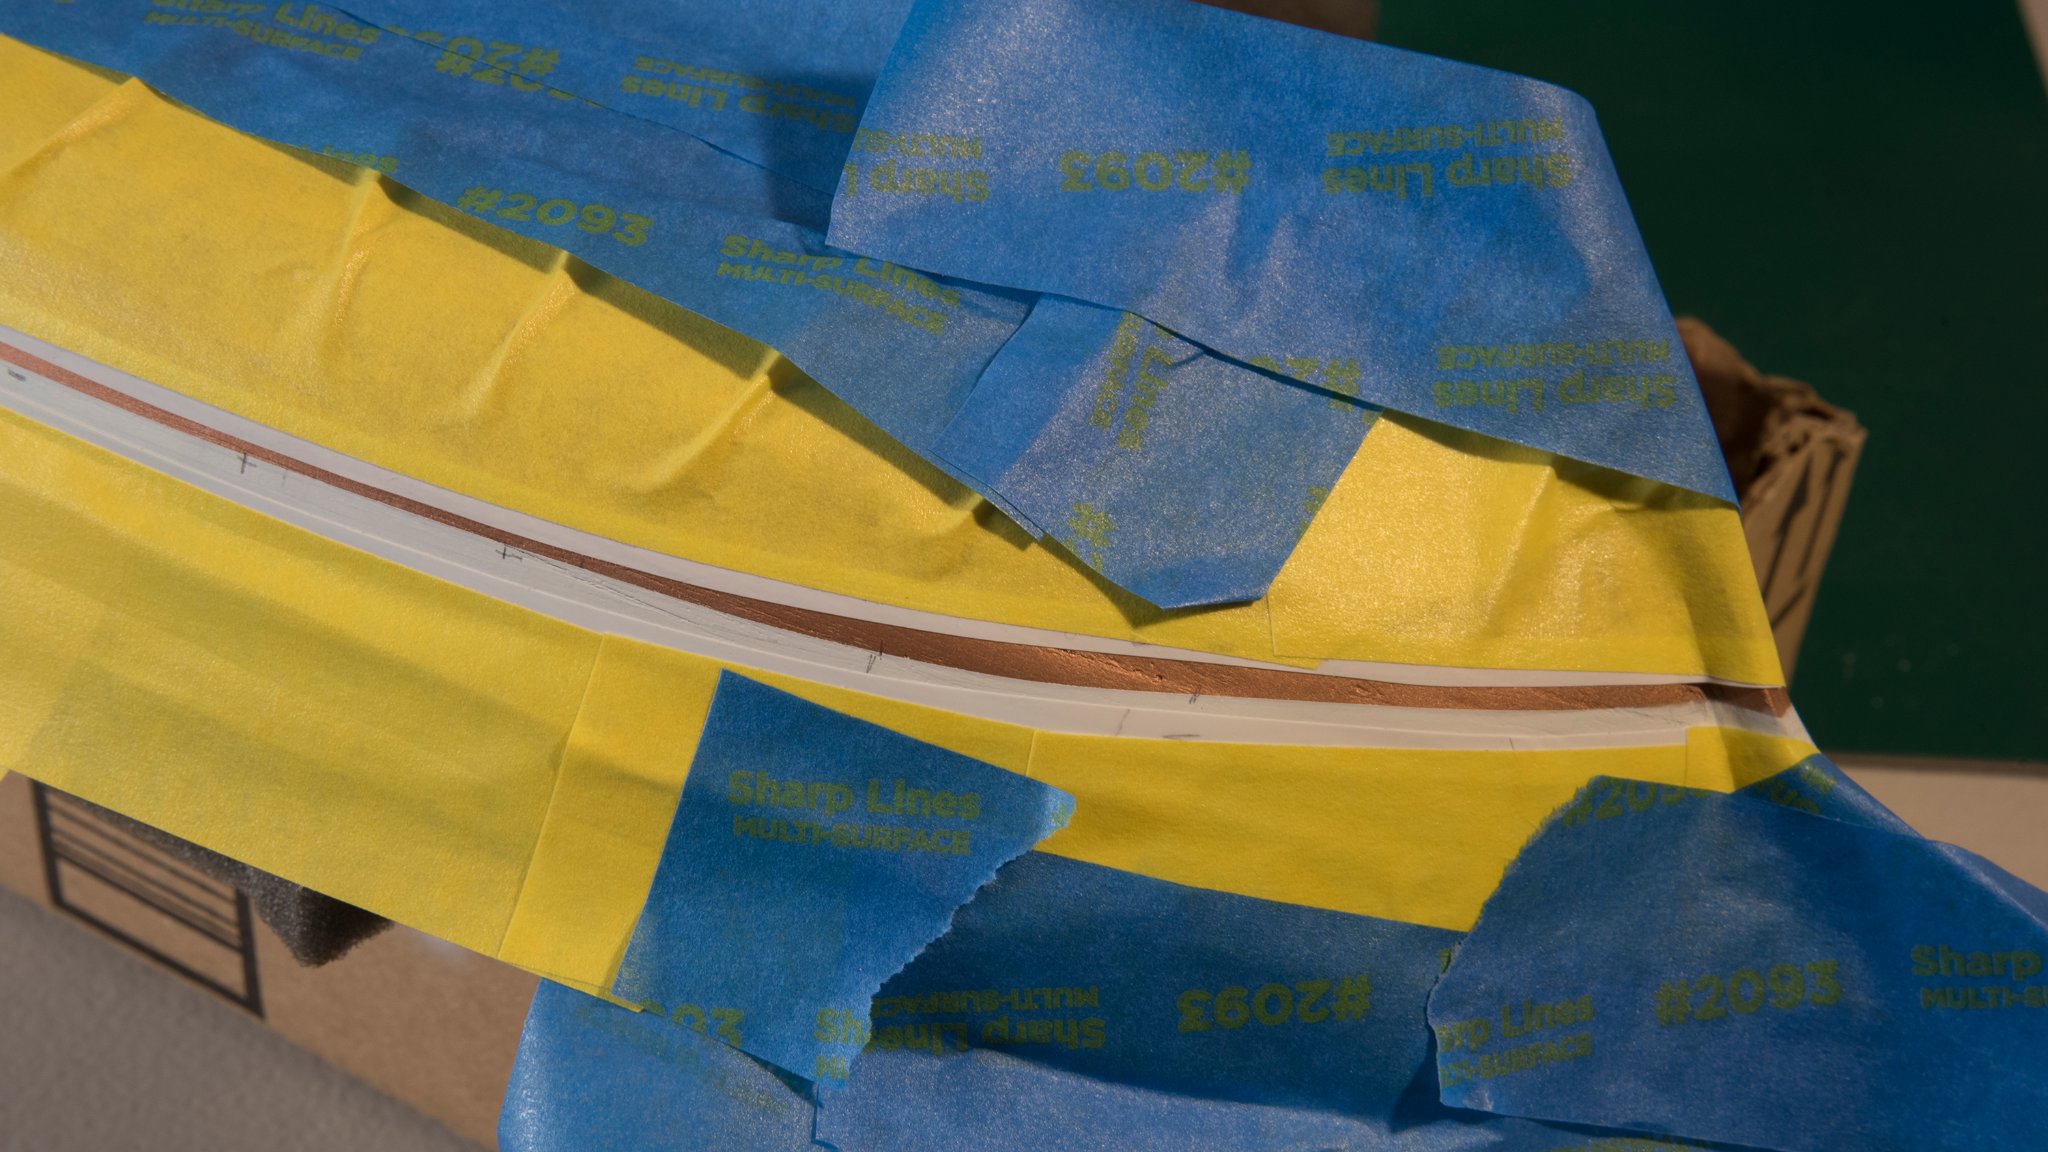
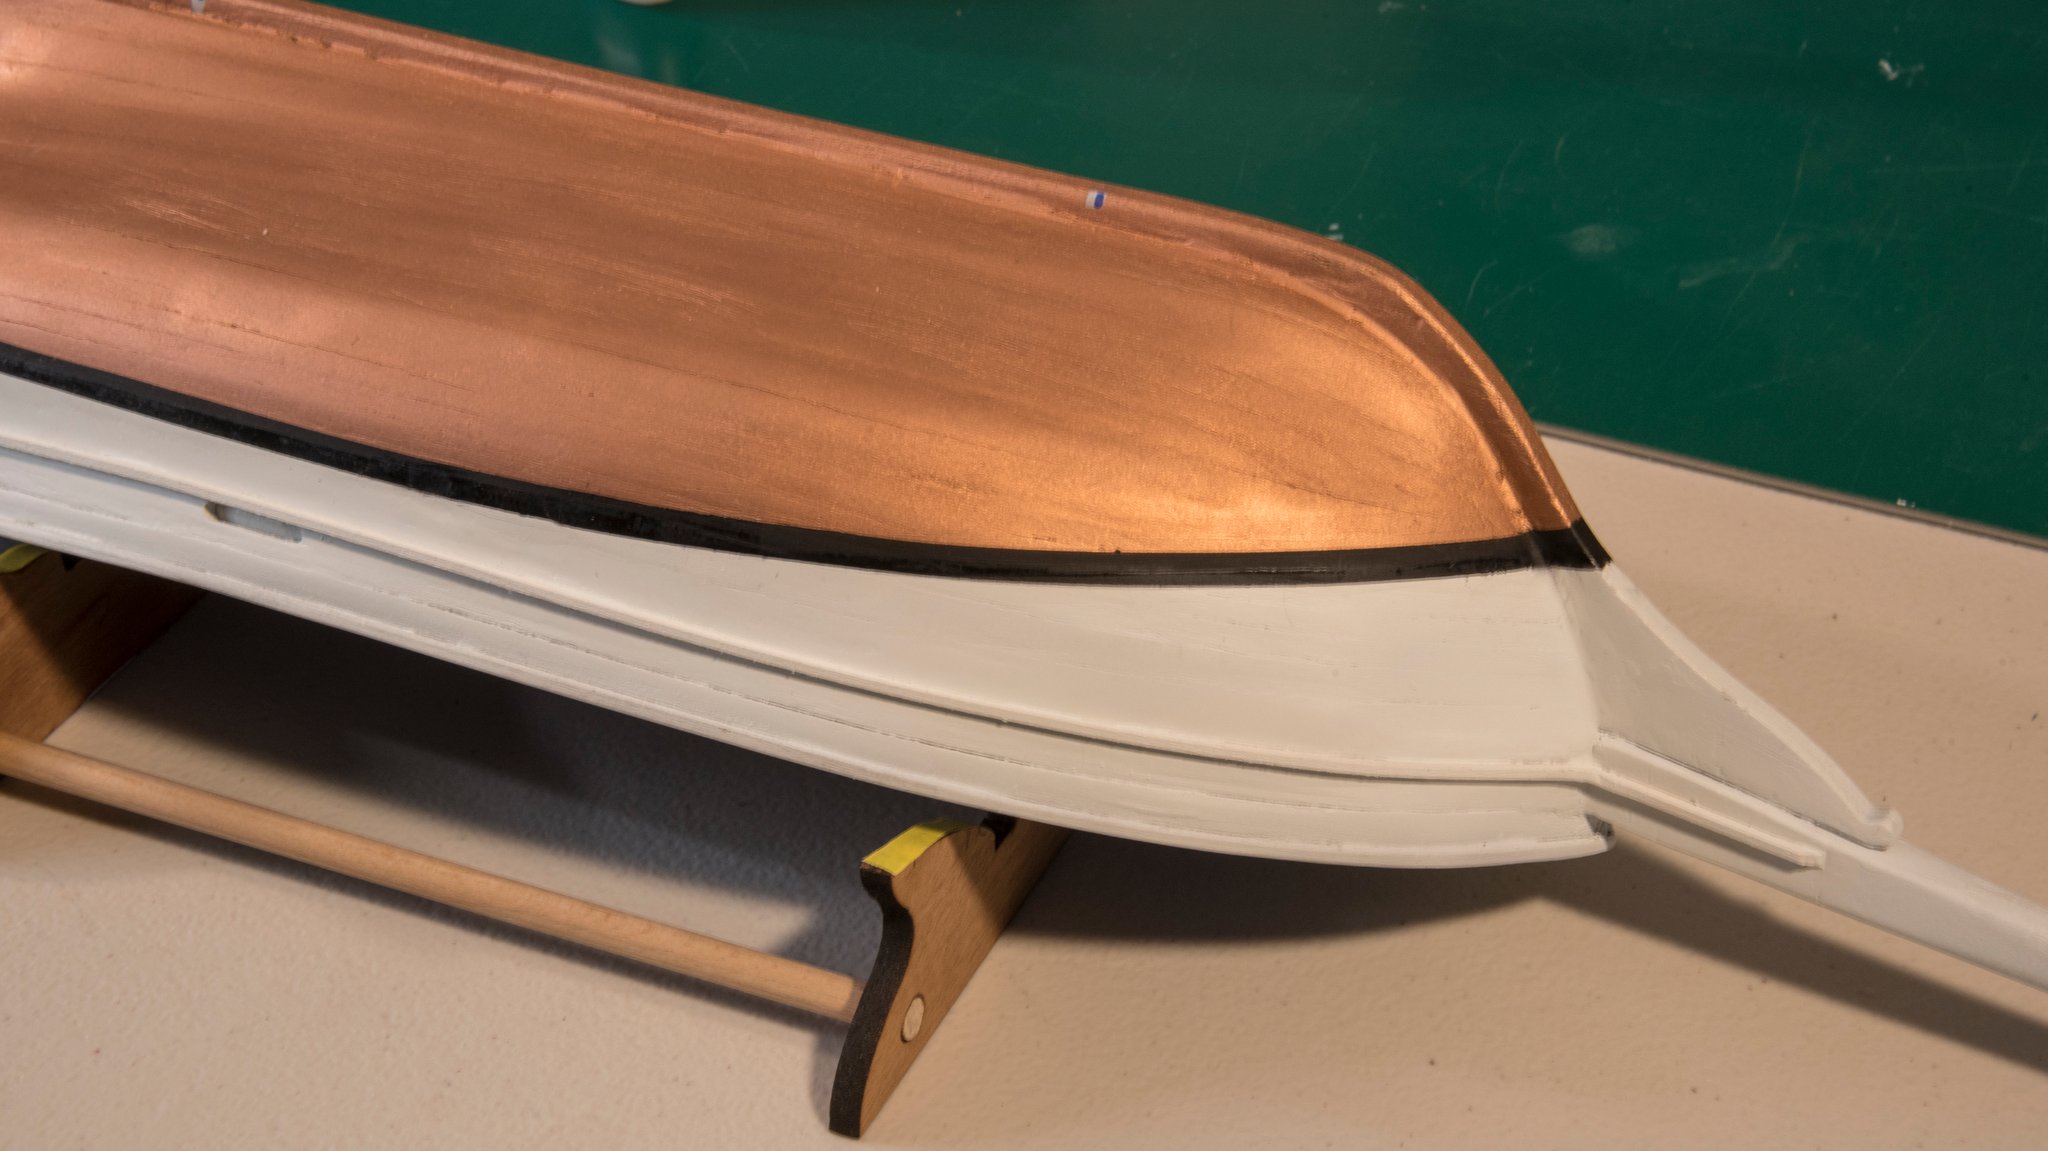
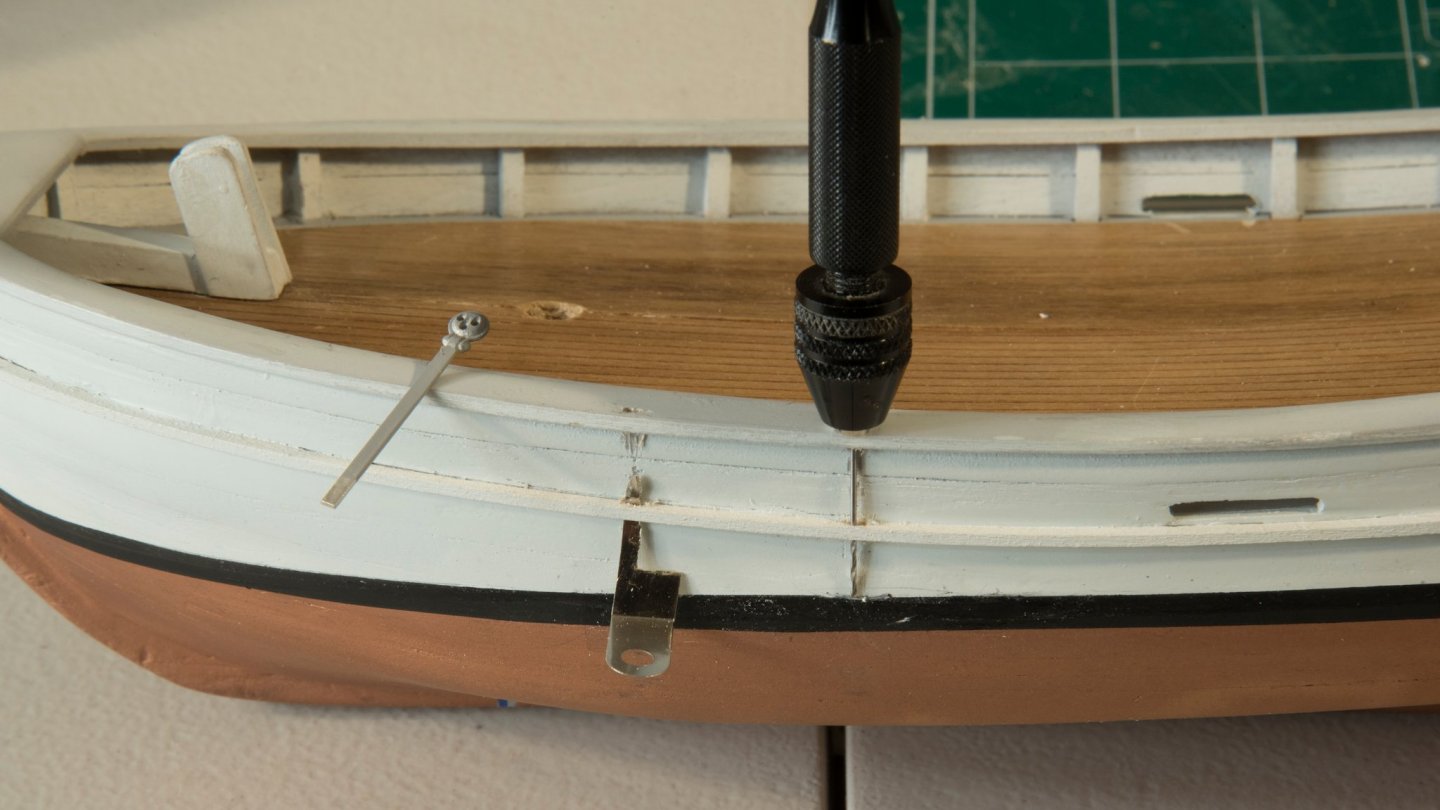
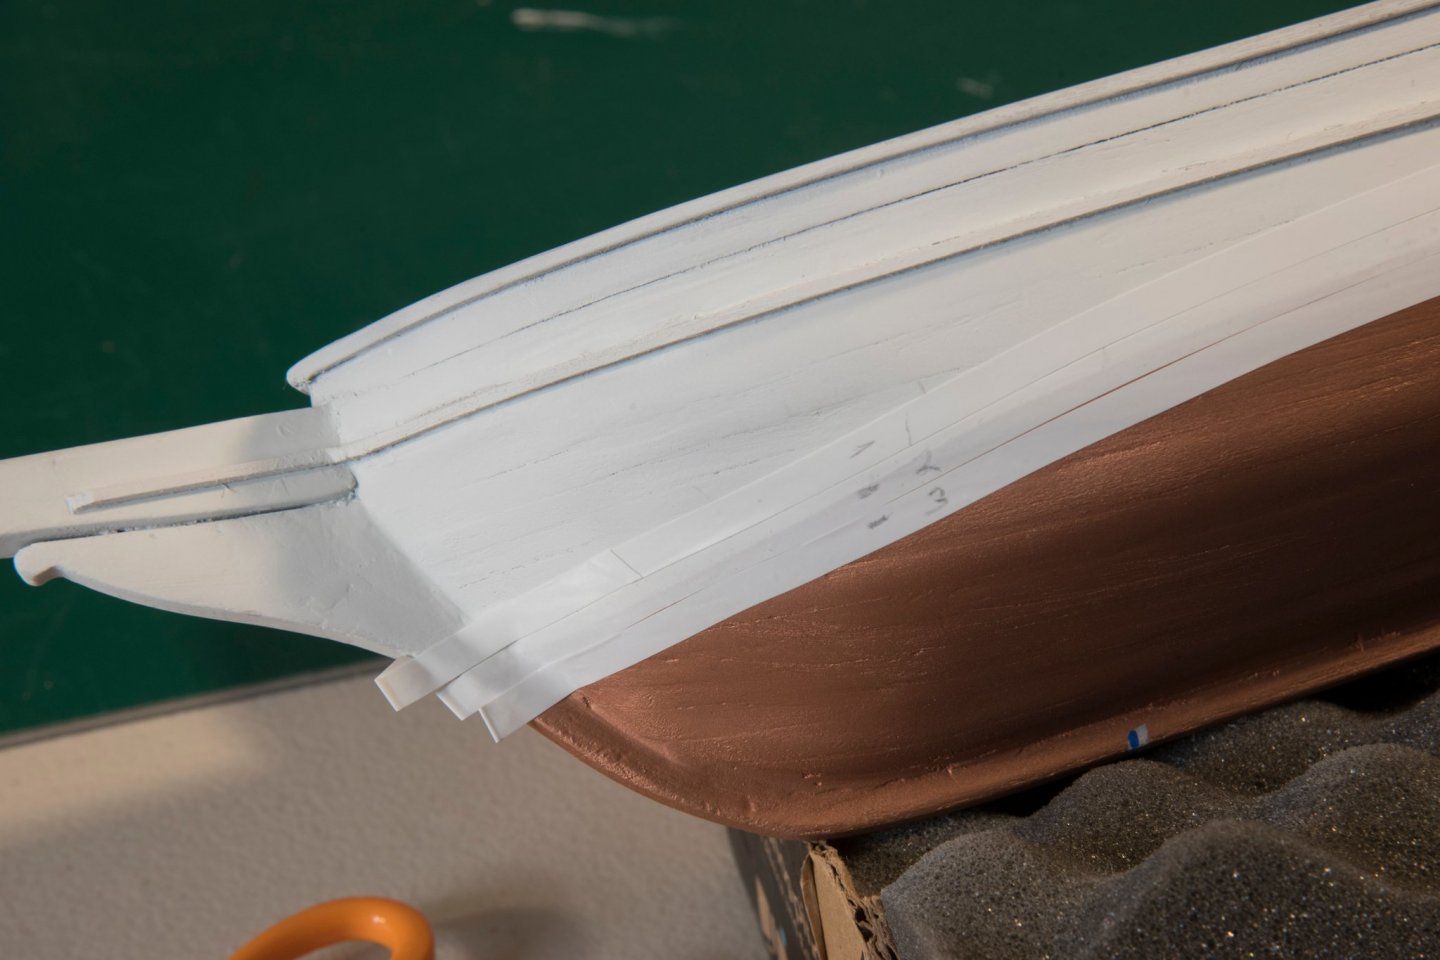
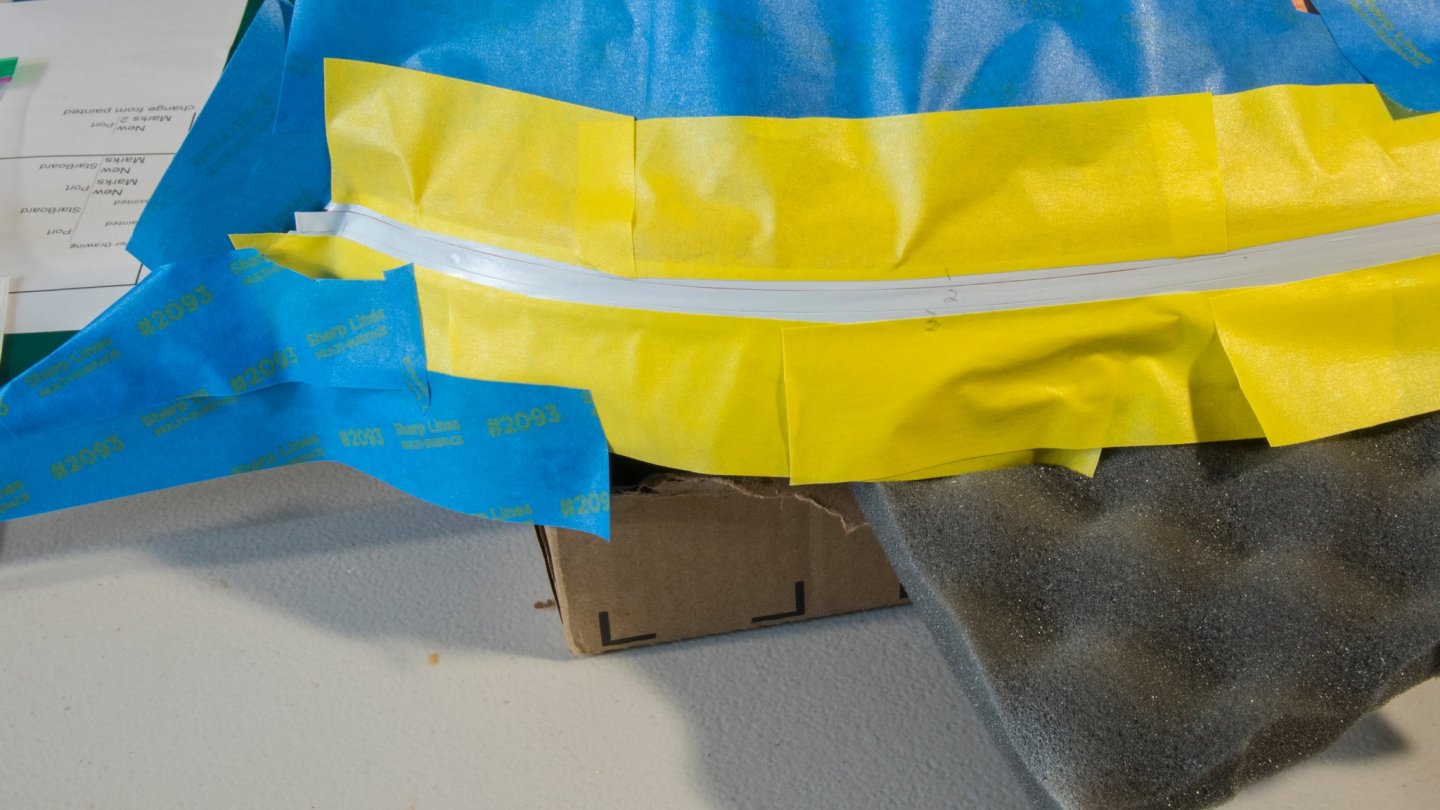
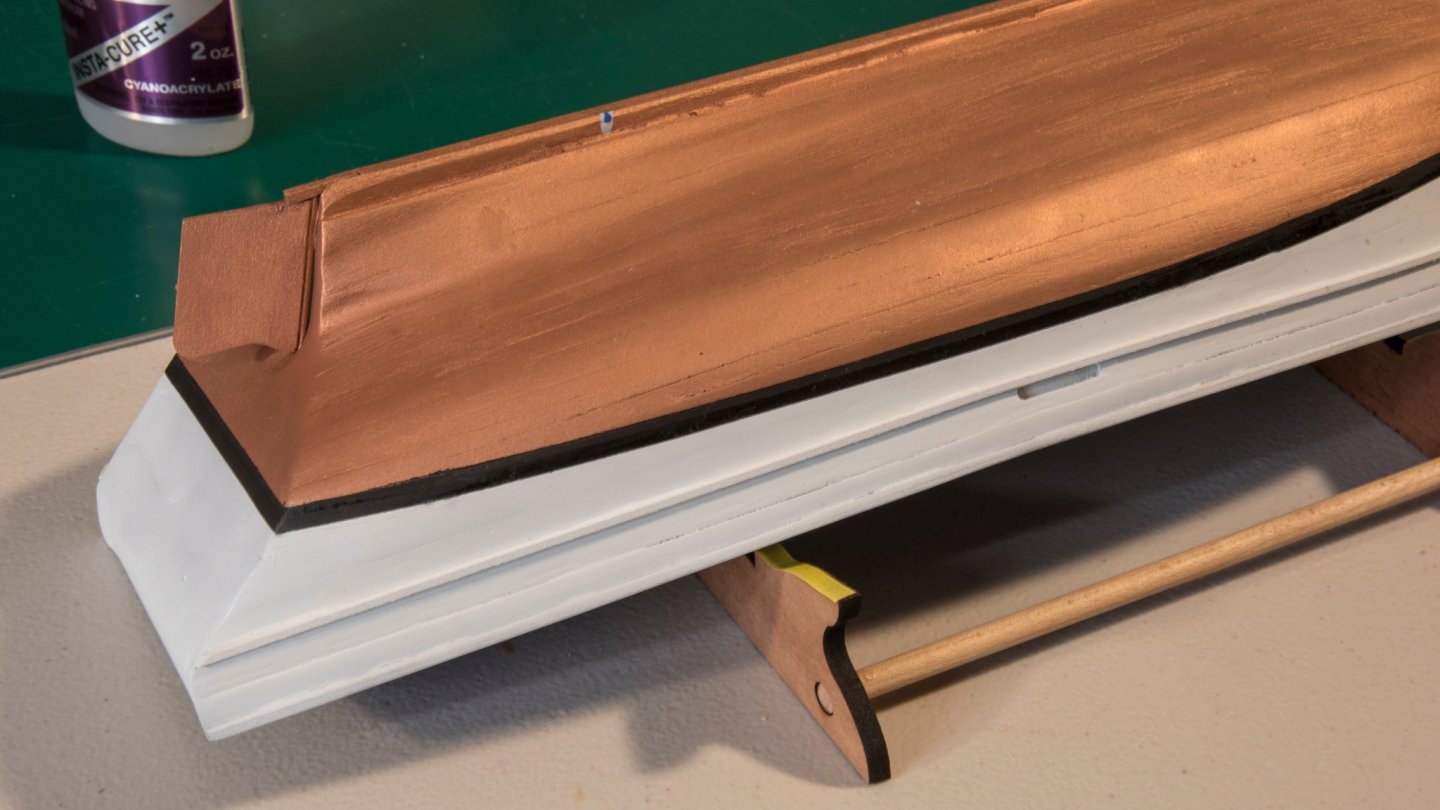
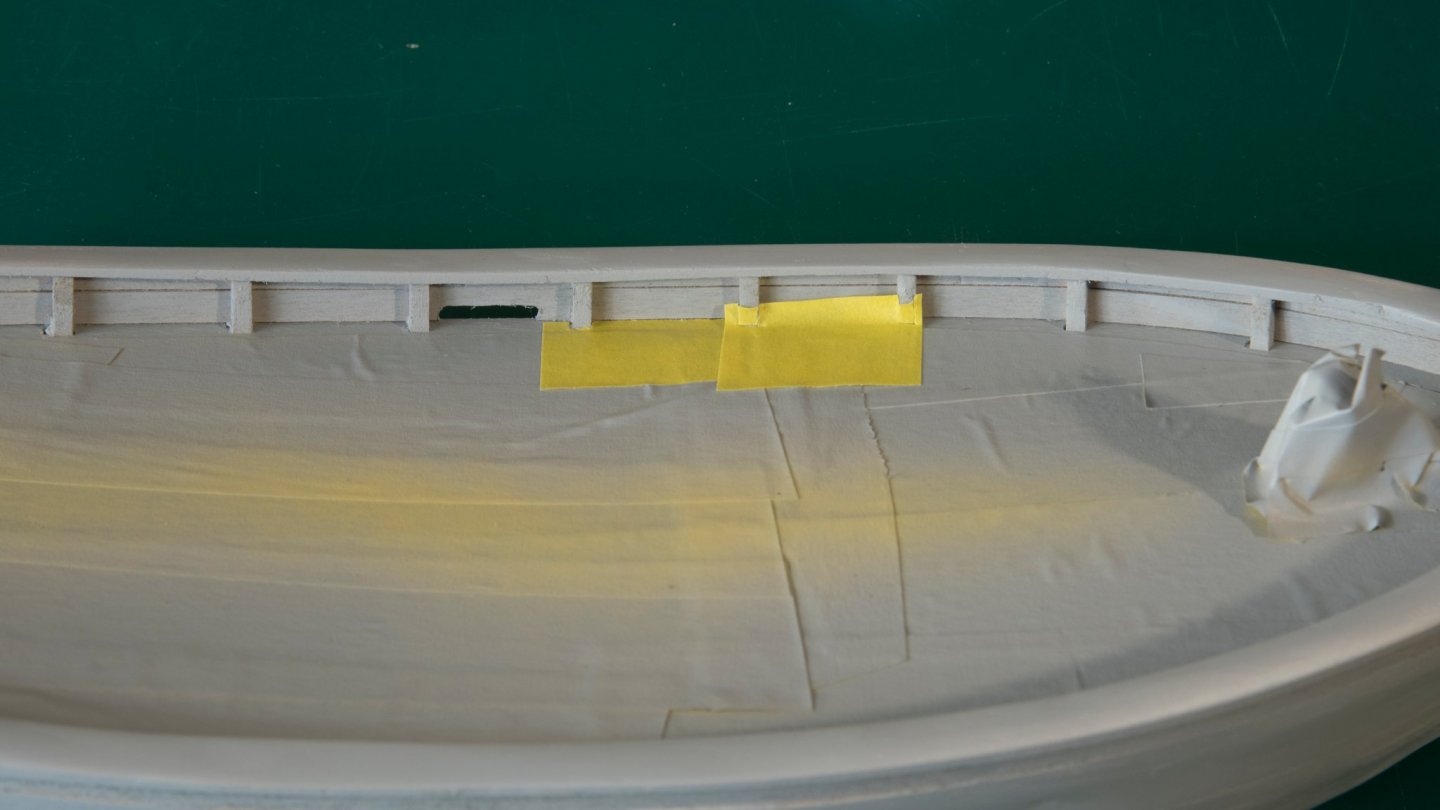
I installed the rudder and I am ready to paint the bottom copper. I’ve always painted using a brush on previous models. But airbrushing seemed best to me especially when making the boottop stripe. I marked a straight line on the hull by finding a level spot on my countertop and spun the boat around as I marked the line. As I lay the wide yellow Tamiya tape, I found it curved up and did not follow the pencil mark. There must be some kind of topology involved that I did not consider. As the boat curves, the tape does not. Making the tape follow sheer line causes the tape to wrinkle, which breaks the seal and will let paint go underneath. At the bow, I started laying shorter pieces of masking tape to follow the pencil line. But then I found as I stack these shorter pieces of tape, the seal between the boat and tape is not secure (too thick). I looked at some YouTube videos on taping. I found there is such a thing as masking tape for curves, which worked very well. Since I will overlay the boottop black stripe on the white/copper boundry, I went ahead and used the yellow tape and ordered the 5mm tape for curves. Below you can see I am almost ready for the copper paint. I added some more blue masking tape to keep the overspray from going where I don’t want it. I like this True North paint provided by BlueJacket Shipcrafters It looks nice. After the paint dried, I added the rubrail. I will sand the hull in a few more places one more time. Then mask the lower part and paint the upper hull white again. As you can see in the pictures below there are 3 rows of this masking tape for curves. The center tape, marked #2, is where I will paint black. It is centered between the upper white and lower copper. I then place yellow tape halfway on the upper and lower tape, and remove the center tape. The white tape (#1 and #3) provides a clean edge and good seal to bound the black paint. The yellow tape continues this good seal, but is not used to provide a smooth curved line. I continue to mask all the upper and lower portions to minimize overspray. As a note: as I got better at using the airbrush, I found there was not as much overspray as I thought, and I masked less in later uses. The result was good (as shown below). There are a few blemishes. Some I corrected with hand painting, but it was not easy to keep a straight fine line. So others I left. I will look at the boottop on the bow more carefully – later.


-
It takes a long time to get where you are in the build process. Your hull is looking very nice. I'm looking forward to seeing the finished hull and deck.
-
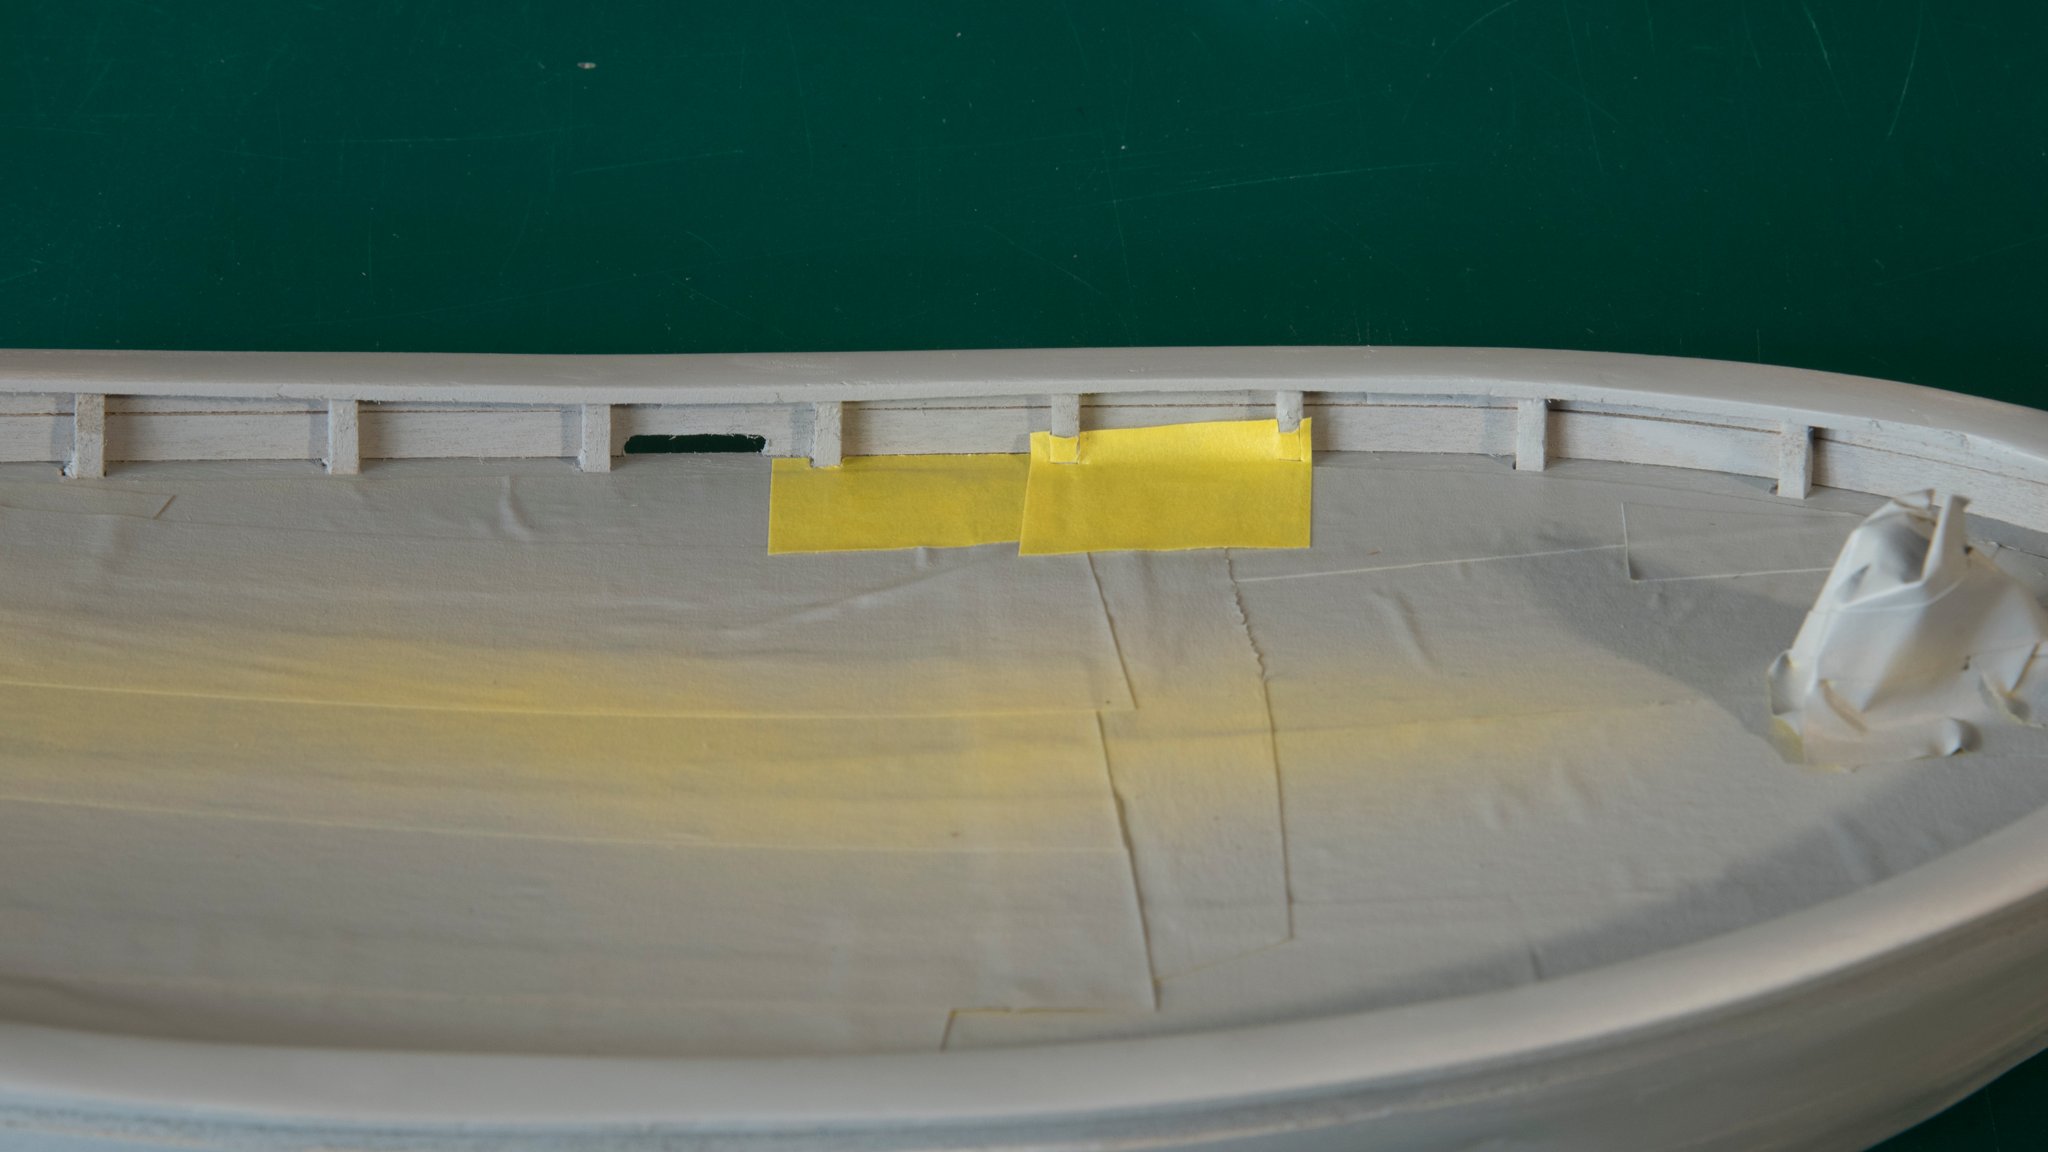
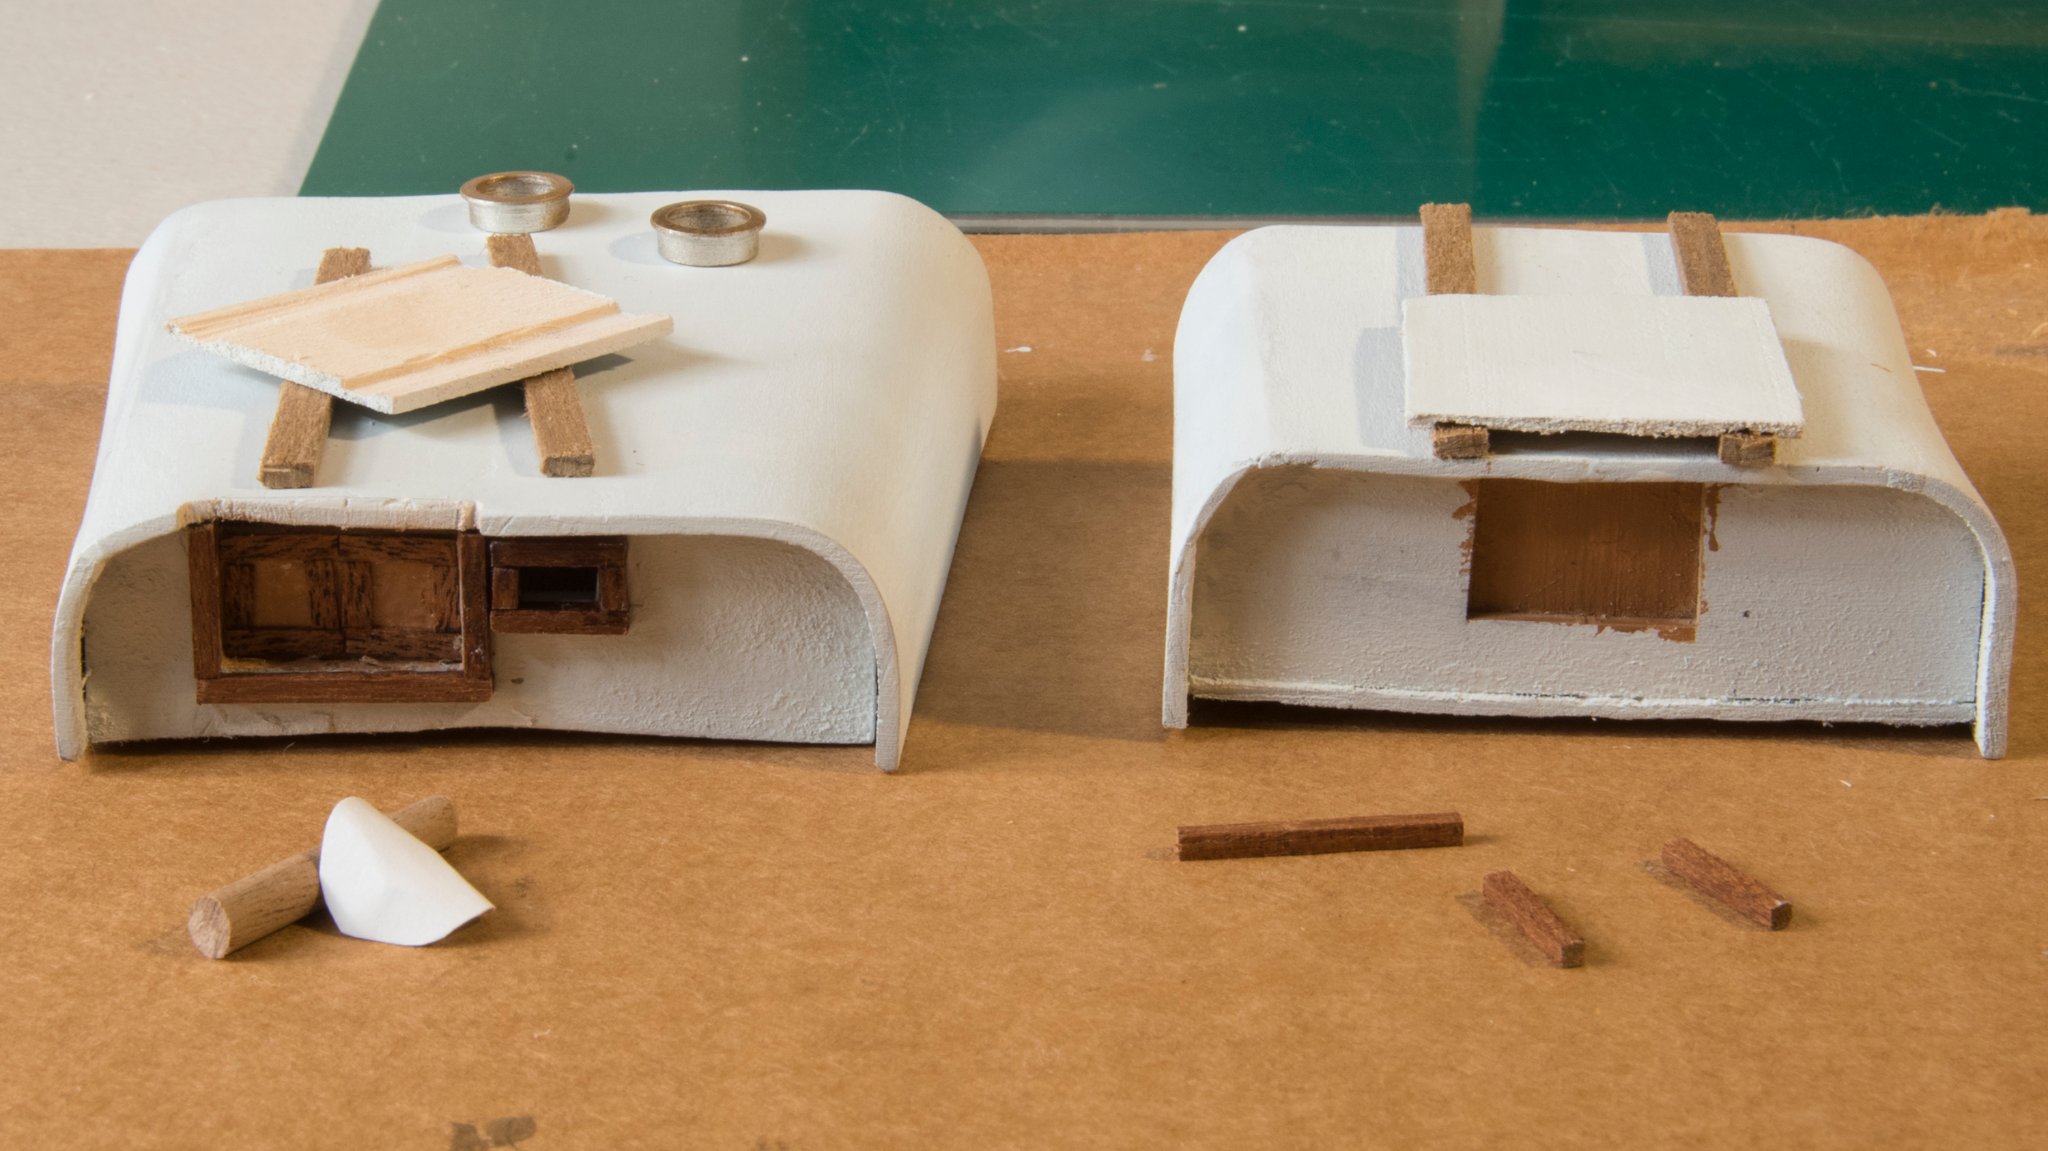
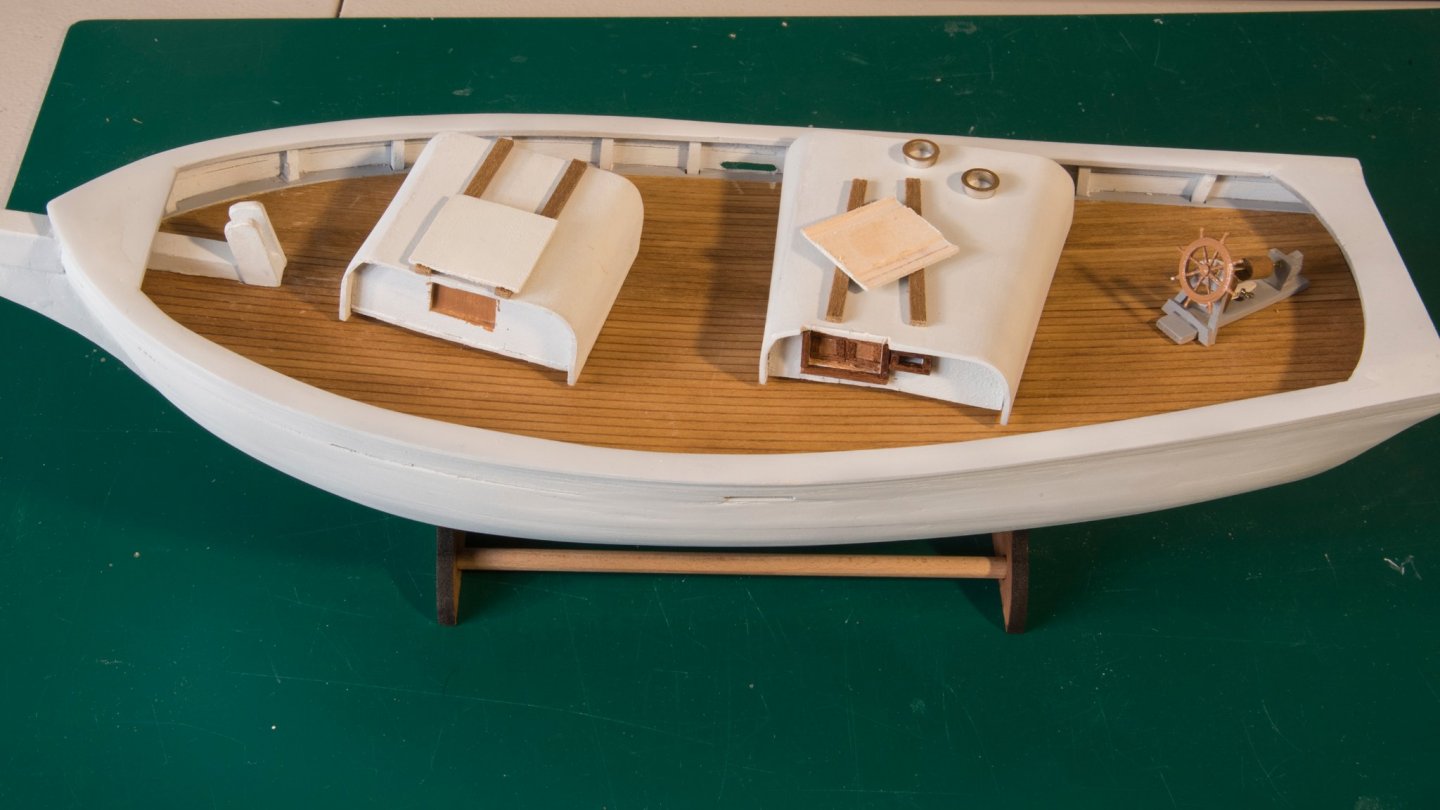
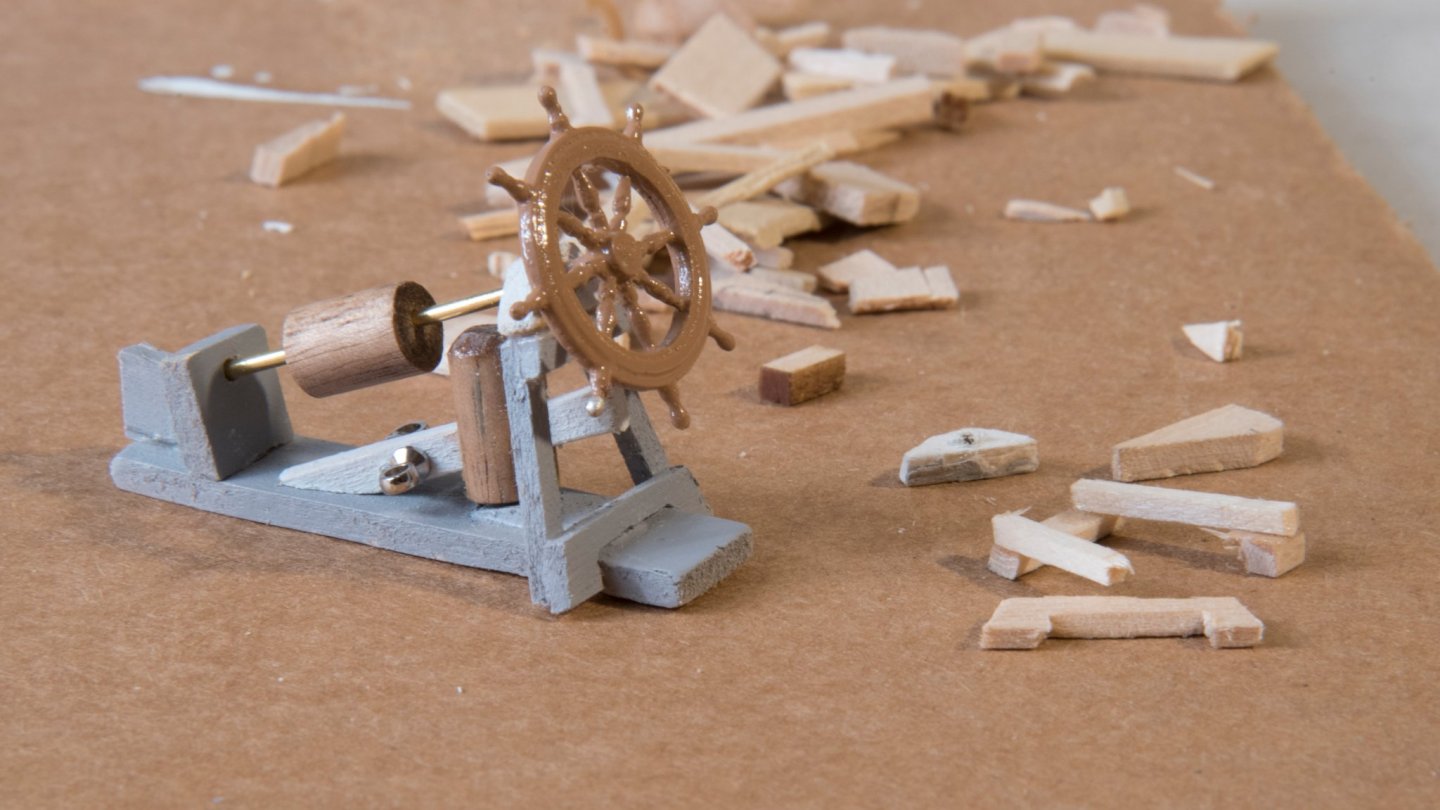
I masked the deck and airbrushed primer on the margin planks, inside bulwark planks, caprail and outside hull. Then added more yellow masking tape to the margin planks and airbrushed flat white enamel paint. I can’t tell if I thinned the enamel too much, or it takes 4 -5 coats of paint, but I sprayed several coats of the flat white paint and removed the masking tape, only to find a lot of the primer was still showing through. So, I re-masked everything again and sprayed a 2nd time. Up to now, I’ve delayed putting on the rub rail, rudder assembly, bow block and taffrail. So, the time has come to put these on and finish painting the hull. I started with the Bow Block and Taffrail. This gave me a chance to redo the sanding of the cap rail one more time. While I’ve been waiting for the wood filler, sealer and paint to dry, (fill, seal, paint again …) I have started on the cabins and steering gear. Each of these items took much longer that I anticipated. I am not done with them yet, as I need to glue the final parts together and touch up some paint. It is not museum quality, but it is better than I have done before. Notice all the scrap pieces around the steering gear. This is what happens when working with really small parts and the resultant assembly is not good enough. You try to fix it and it all breaks. So, you start again. At some point you say to yourself this is good enough!


-
Your attention to detail is inspiring. Your detail on the cabin trim is setting a higher bar for me. I've not yet started the rigging, but I am sure your example will increase my skill when I get to that part. I hope to achieve half of what you have done! Thanks Ken
- 82 replies
-
- 1
-
-
- spray
- BlueJacket Shipcrafters
- (and 1 more)
-
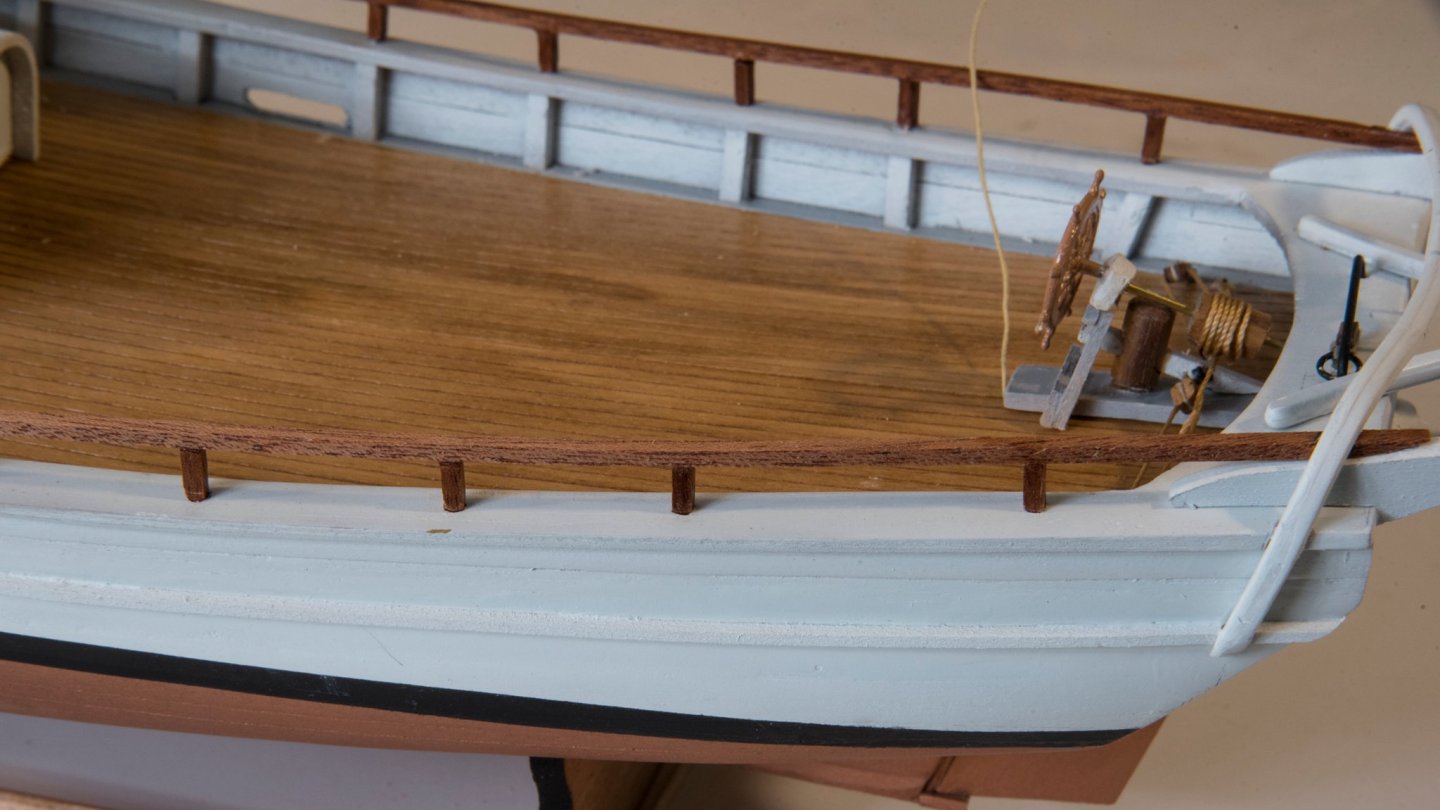
I finally feel like I am making some progress. I’ve successfully installed the stanchions, airbrushed the cabins and bowsprit, and installed the bulwark planking. After gluing the bowsprit on and 2 of the bulwark planks I found the bowsprit was crooked. Not by much, and I tried to ignore it, but was unable to. So, I used mineral spirits and a small syringe and removed the bowsprit, sanded some more and re-glued it. It is much better. Next I added the cap rail by bending the 5 narrow strips onto the tops of the stanchions. Then I put the final coat (I hope) of wood filler and sanded the cap rails, hull, stern, and deck.