


Matrim
-
Posts
1,401 -
Joined
-
Last visited
Content Type
Profiles
Forums
Gallery
Events
Posts posted by Matrim
-
-
Looks like good work!
Joss
-
You were given access yesterday.
-
Did you enjoy making them? I hated making these more than I did sanding I think
Joss
-
Cool, I was going to buy a Byrnes when I have the cash but making one of your own make is great.
Joss
-
All credit to those who treenail the outer hull. As I was copper plating I did not.
Joss
-
That looks great, nicely posed photo as well
Joss
-
It's always good to push yourself and you will be happier with the results - though don't reach for such height that you cannot attain them and stop either.
Nothing like giving with one hand and taking with the other....
Joss
-
Danish does bring the warmth of the wood out nicely - looks great
Joss
-
Lets not start introducing politics please otherwise the thread will be locked.
-
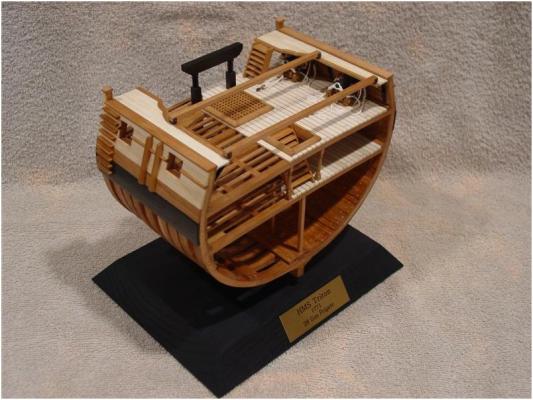
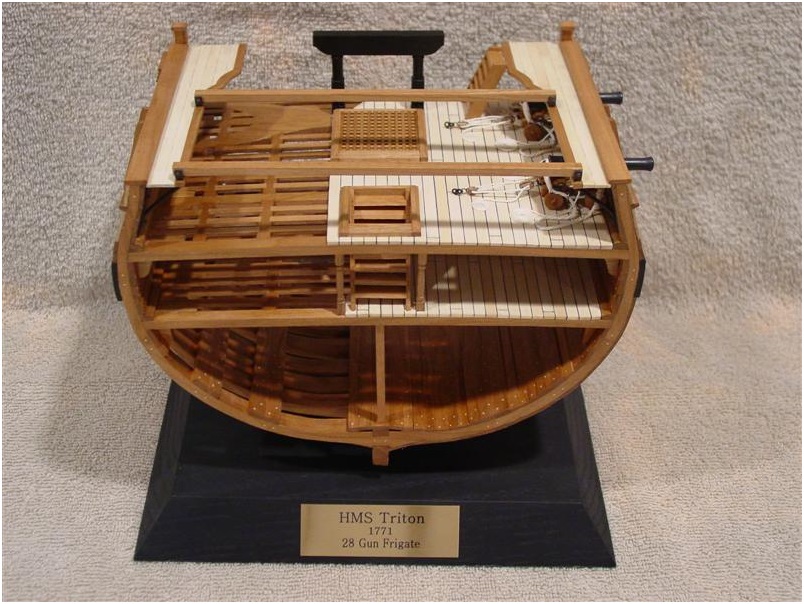
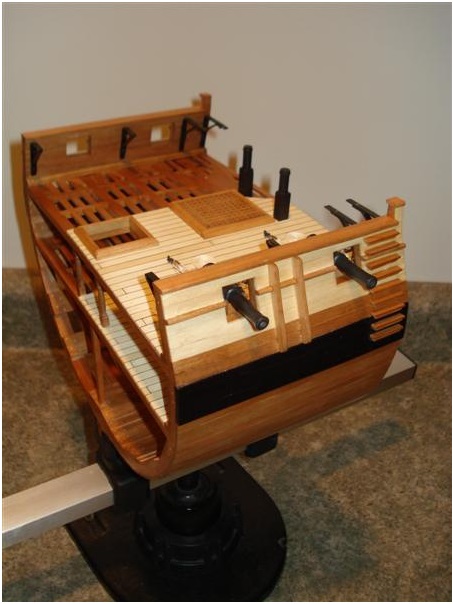
Here are the final photos of the build. I would like to thank the draftsmen and organizers of this online build for all of your efforts to make this cross section a reality. I'd also like to thank all of you who wrote encouraging comments along the way It's been a lot of fun to build her and I've learned quite a bit that I can incorporate into future projects.

-
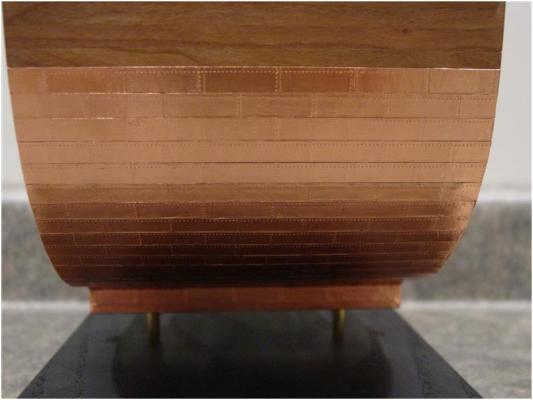
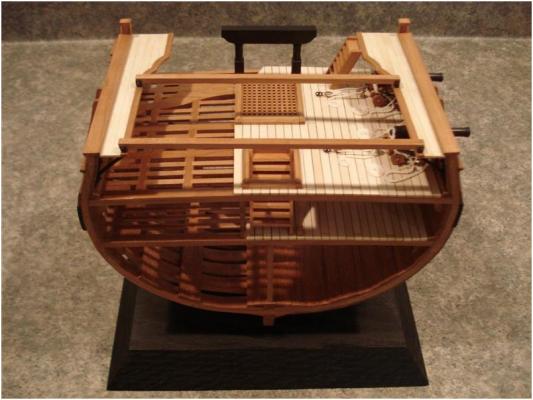
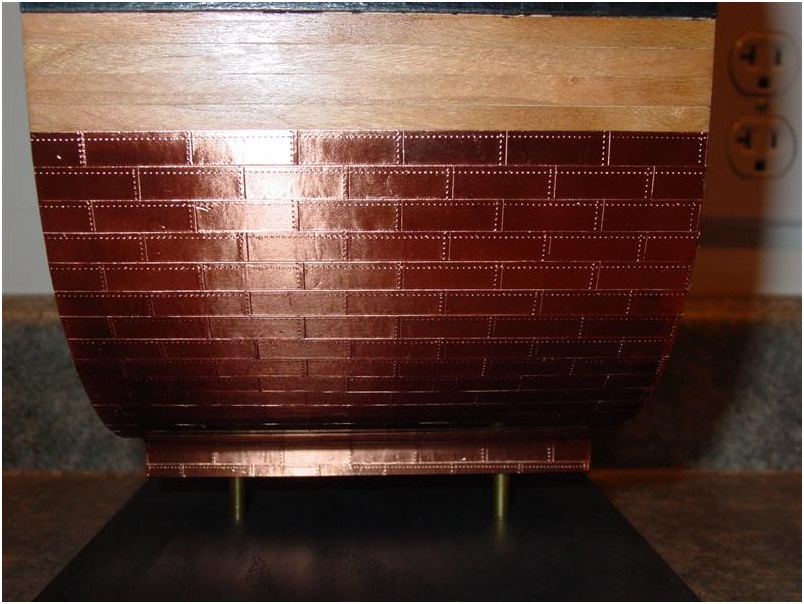
Here are a couple of photos of the coppering while I wait for the name plate to arrive. The first was shot with flash and shows the surface details.
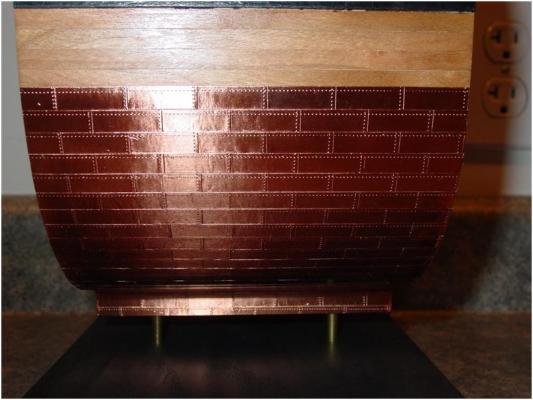
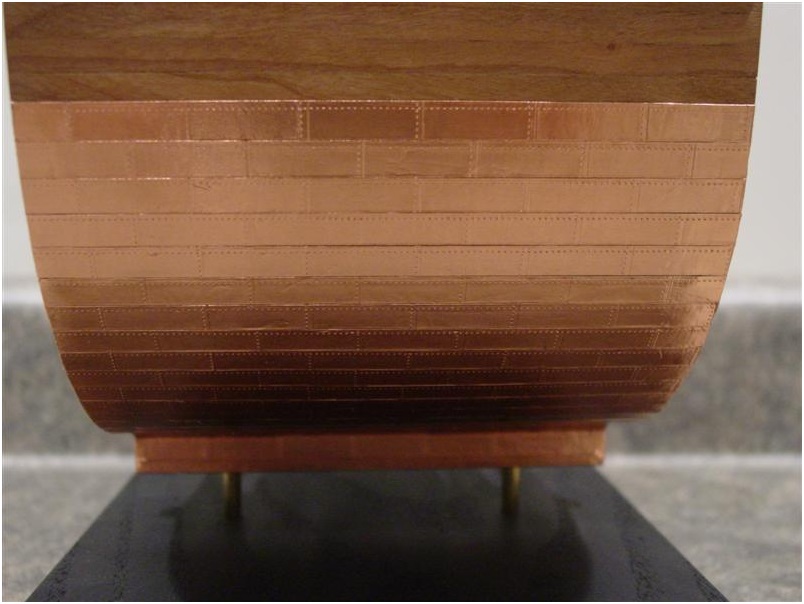
The second was shot without flash to better show the color tones.
The book that I have says that coppering starts aft and above so the nail heads should be on the top edge of the tape (plate below overlaps the plate above) and the rear of each plate (fore overlaps aft). The fifteen feet of tape that I got from MS covered the hull with the innermost 2 feet thrown away and three or four pitched tape lengths tossed also.
Scott- aykutansin and fatih79
-
 2
2
-
Thanks Dirk, Jim, Lee and Uwe for the positive comments 8) .
I thought you might like the little t-square Lee.
Uwe, the ponce wheel was run on the front of the plates, like you thought, because of the backing tape. So, instead of nail heads protruding from the metal, they are divots from the front side. You are also right about the cross section being a great learning experience. I've learned an awful lot from this build and highly recommend it to anyone interested in getting a start in scratch building.
The hull and model are complete but I am waiting for the name plate to be made before shooting the final wrap up photos. The coppering turned out pretty well but there are some minor irregularities in the tape that came from imperfections in the tape itself. That is why I think that it would be best to get tape that has not been tightly coiled on itself in the packaging process. I believe that this tape is meant for stained glass work and people working in this medium probably don't care if there are minor creases or other irregularities in the material. I left the tape bright and covered it with clear gloscote lacquer after a careful cleaning with alcohol to remove any finger print residue.
Scott -
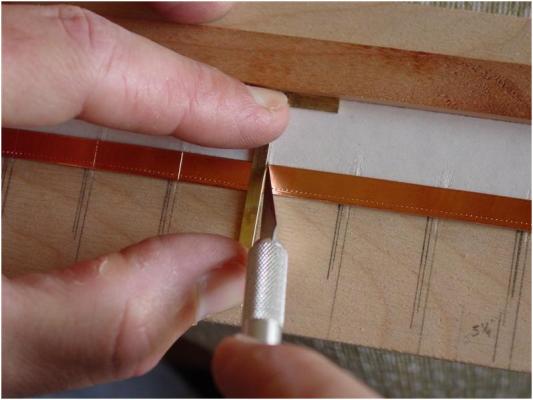
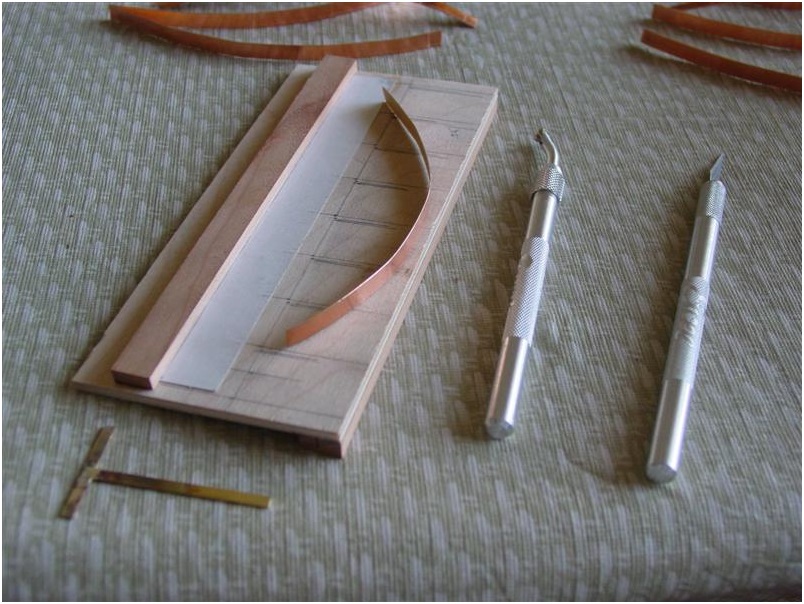
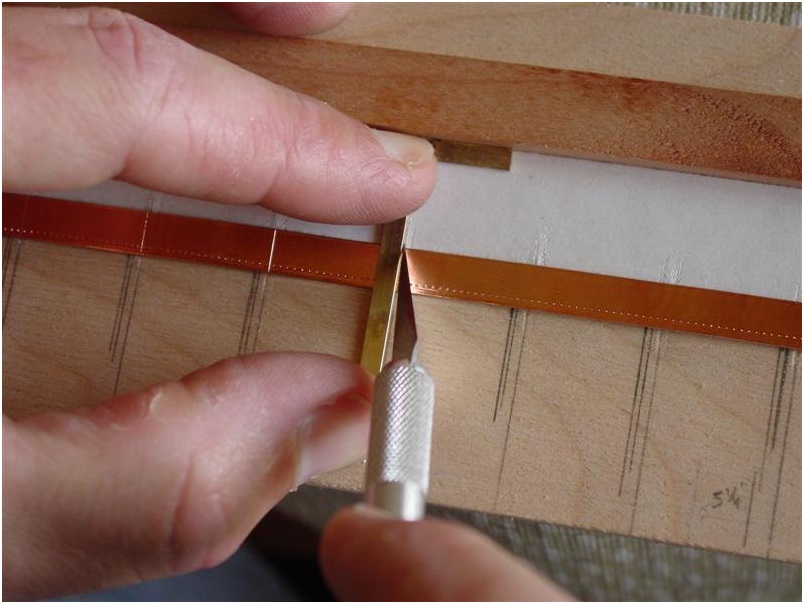
I wanted to copper the hull so I followed the excellent technique that Reklein showed us in his post. I used his technique with a few minor changes. Here are the materials that I used: 1/4 inch copper tape, a jig with a card stock off set of the same thickness as the copper tape, ponce wheel, dulled 11 blade, metal ruler and a small brass t-square that I made and silver soldered together. The jig has a base plate attached to the bottom so that it can rest against the edge of a table so that it stays in one place when in use.

The first step is to lay the copper tape against the card stock offset and place the ruler over it as a guide for the ponce wheel.
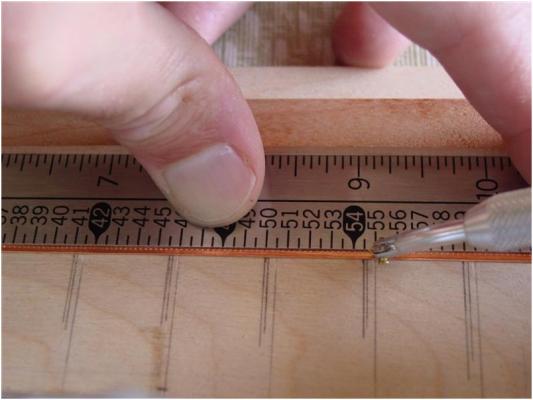
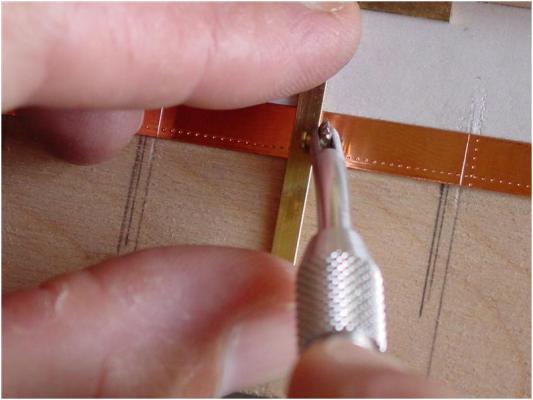
Next the back edge of the dulled 11 blade was used to score the individual plates. The t-square assures a straight line (that is when I don't screw it up) and the index lines on the jig allow for precise spacing.
The t-square is adjusted to the lines for the side nails and the ponce wheel is run over the tape to make these.
Here is what the finished tape looks like.
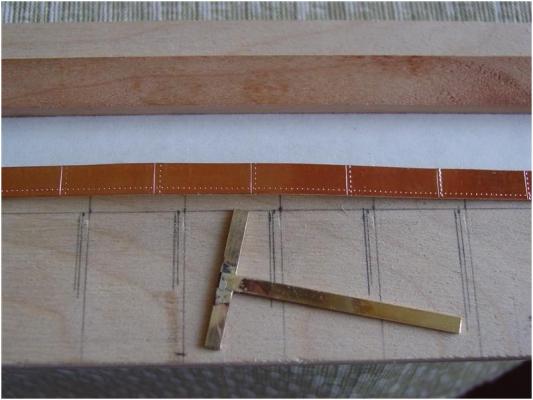
According to my sources the plates were around 4' by 1'3" so my scores were about 3/4" apart. Two different types of plate were made to allow for a one half offset for each row. I debated about putting the nail heads on the plates. They would probably be difficult to see in this scale and would be closer together than my ponce wheel would allow but I liked the effect so much that I decided to incorporate them anyway.
This is the first time that I have coppered anything and I found a few things that worked for me on this cross section. You have to bear in mind that this is probably the easiest portion of a ship's hull to copper and there are two free edged to trim the plates against.
1) Make the tapes a little longer than the hull and trim them in place rather than try to get them just the right length on the hull. This also gives you a little extra area to hold the tape with when putting it in place.
2) The tape is fairly delicate to be sure to keep it as flat as possible when removing the backing paper. Double the backing paper back on itself as you remove it and be very careful with the lat quarter inch or so so that the tape doesn't get a crease in it.
3) The length of tape that I got from Model Shipways was 15 feet long. The inner most part of the roll was not usable because of creases in it. The best portion of tape was the first several coils on the spool. If you could find tape that hadn't been coiled fairly tightly it would be best. I sorted the tape plate and put the worst of them on the ares least likely to be seen (the portion of the hull that sits parallel to the base).
4) Only run the ponce wheel once over the tape. A second pass back over the tape turns the circles into slots (at least with my ponce wheel).
Scott -
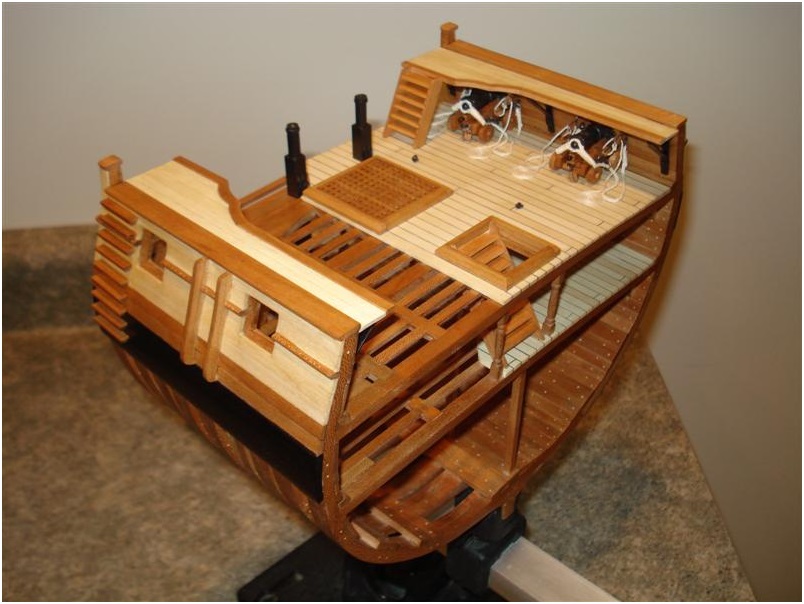
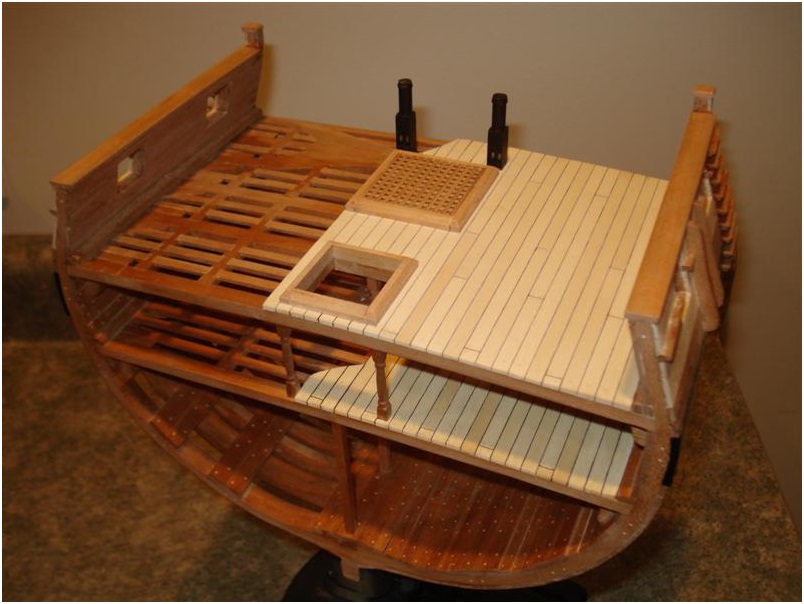
The sheet bit cross piece, the gun haul tackles, the skid beams and the base has been roughed in.
Coppering the hull and finishing off the base are about all that is left to do.
Scott -
Thanks Tweety, your cross section turned out very well!
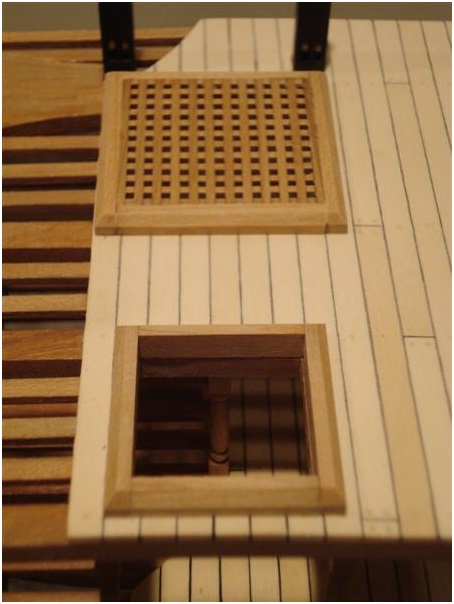
The walk ways are now in place and the ladders are also built and in place. I made the walkways off of the model for easier finishing and installed them with epoxy onto the iron work. Once installed I realized that the rope coils for the gun hauls were going to be in the way of the landing for the ladder. No matter how much I try to plan ahead it seems that little mess-ups are unavoidable
Here are the photos with the new installations and the removal of the offending coils!
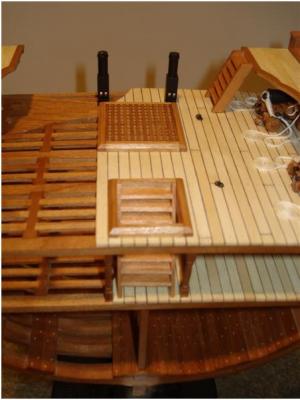

The ladders went together fairly well. I used the miter on the table saw to cut the angles. The thickness of the treads is the width of a single pass with a saw blade. A small scrap piece was used as the index for spacing the slots for the treads.
We are getting close! Only replacement of the coils, manufacture of a stand, the top of the sheet bits and coppering of the hull and we are done.
Scott -
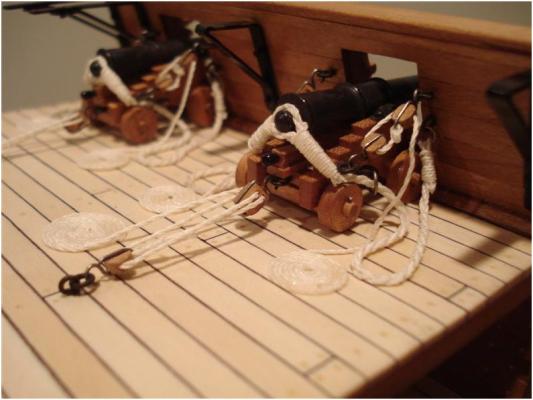
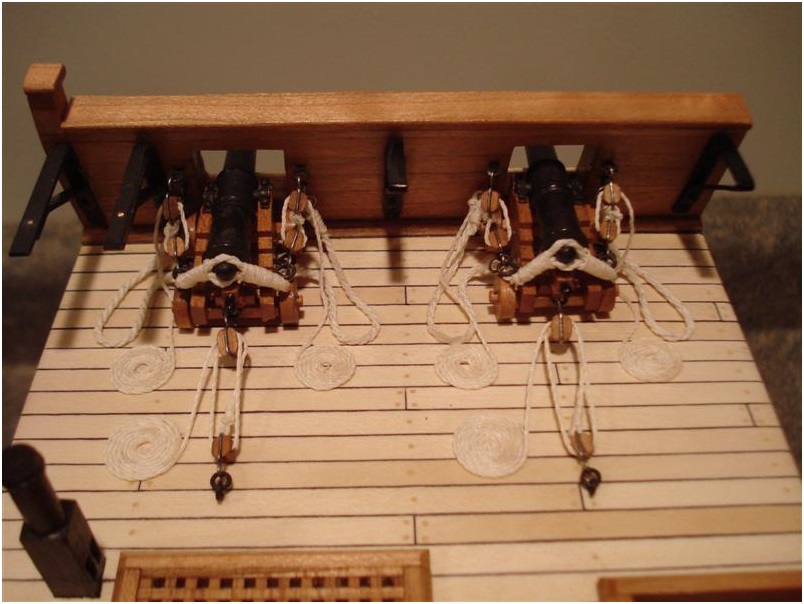
All of the blocks and tackles are in place and the guns are pinned to the deck. A dilute white glue solution was used to set the lines in place and the coils were made using Bosco's masking tape trick.
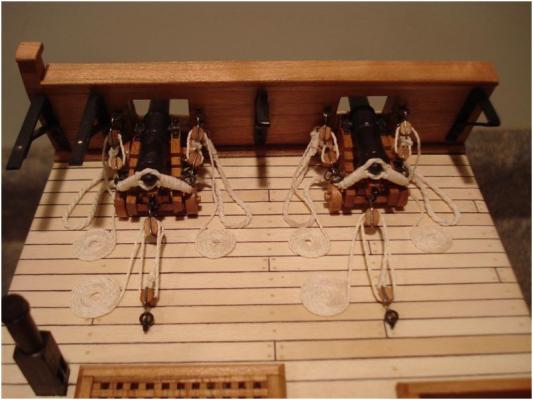
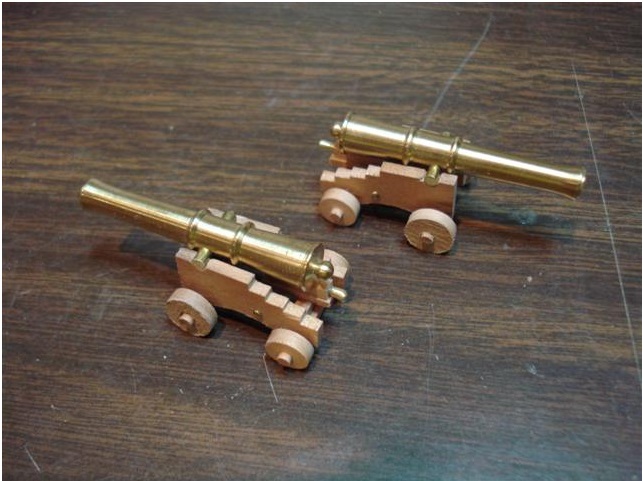
Here are close ups of the two guns.

-
The Triton now has some teeth!

-
Thanks Lee 8)
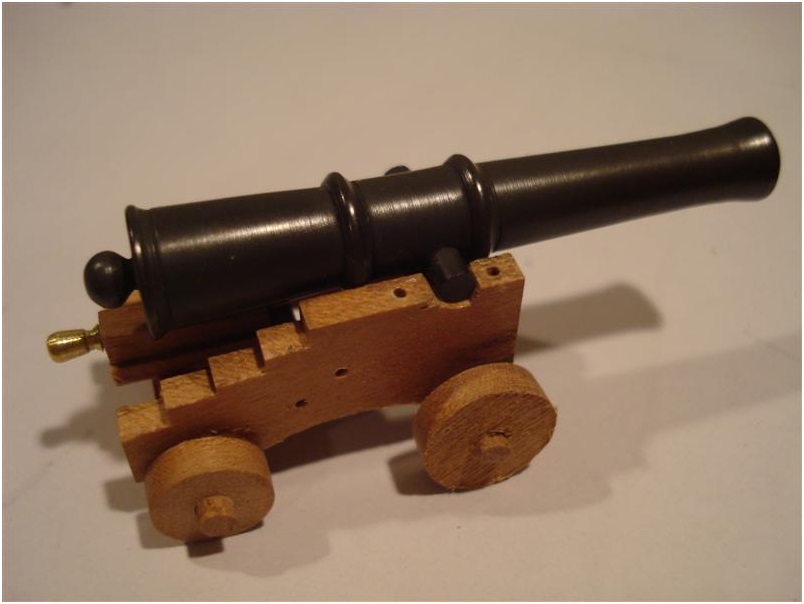
Good question Jim, I guess the thing to do is try it out an a piece of scrap brass. The india ink is probably not as durable as the blackening but I was surprised at how nice the result looks. It took me an afternoon to blacken all of the pieces with blacken it, but it would take a fraction of the time to paint them with india ink. Having said this, I really like how the cannon turned out with the blacken it. I was able to buff the finish with a soft rag and (as you can see in the photo) it turned out really nice looking.
Scott -
Thanks Druxey for the information on Blacken-It dilution!
She now has a coat of finish on all of the wooden surfaces and the brackets are in place held by one nail and epoxy. In the process of predrilling the holes in the gunwales for the braces I dinged up the black on some of the brackets. I used a little India Ink as a touch up and it blended very well, especially on the nail heads.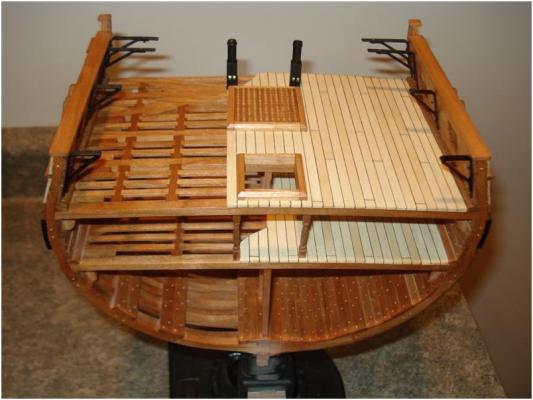
-
Thanks all for the comments! I noticed that some of the pieces that were blackened seemed to have a bit of shine in one area or another and when wiped off a little brown was seen on the paper towel. I was pretty tired when I finished up and didn't check all of the pieces over very well. Yesterday morning a few of the pieces had some bronze blotches and I assume that it was because of residual material (acetone, Blacken It or water?) that was left on and marred the finished surface. Yesterday I re-blackened the damaged pieces and they turned out well. A coat of flat lacquer was applied which didn't change the appearance of the pieces.
I should mention that the blacken it worked much faster on annealed steel than on brass. I also tried the 1:8 dilution which also worked well but much slower (at least at first). Once a few of the grains appeared in the bottom of the solution it seemed to blacken faster almost like a catalyst.
Scott -
Your photo-essay on blackening is well done. I should like to point out a couple of things that you may wish to consider. One is that the 'Blacken-it' works well at 1 part to 8 of water. (Used distilled water if you can.)
The second is a safety question. I don't know what kind of filter and fan your spray booth has. If the booth vents to outside and the motor is spark-proof, then no problem. Otherwise it will be dangerous to your health if using acetone or other volatile, flammable solvents. -
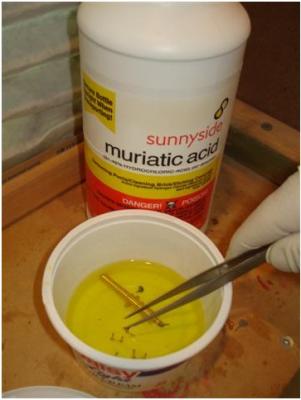
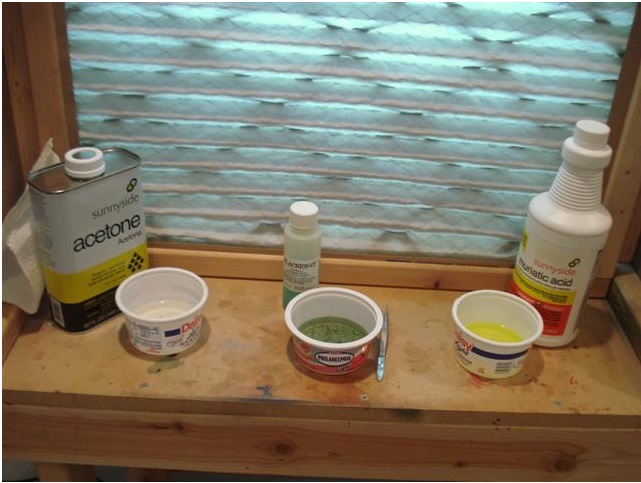
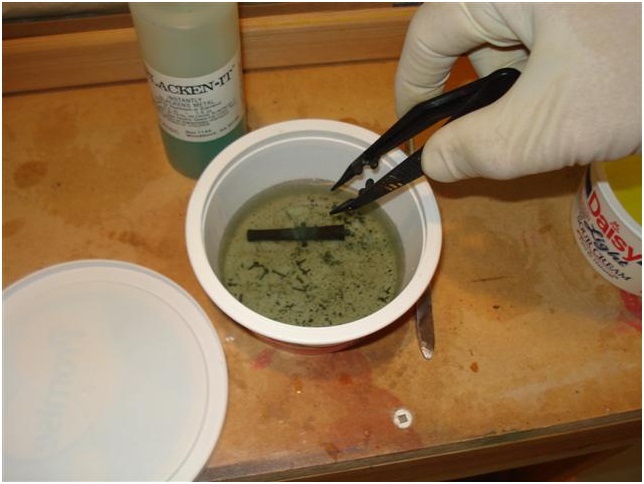
I managed to get all of the braces silver soldered and set up for blackening all of the brass and iron on the build. The first thing that I did was re-read the excellent "Metal Blackening" tutorial by Pat Majewski at MSD. I set up my materials in my spray booth which doubles as a "chemistry hood."

The brass was first run through a Hydrochloric Acid bath to clean off the oxidation.
Next the brass was washed with clean water.
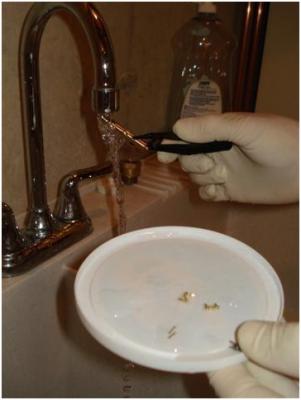
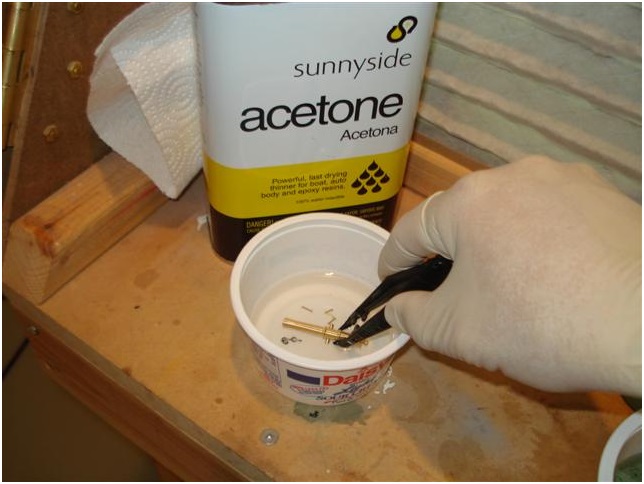
Then into the Acetone bath to remove any organics.

When removed from the acetone the brass gleamed like new even though this cannon was turned quite some time ago.

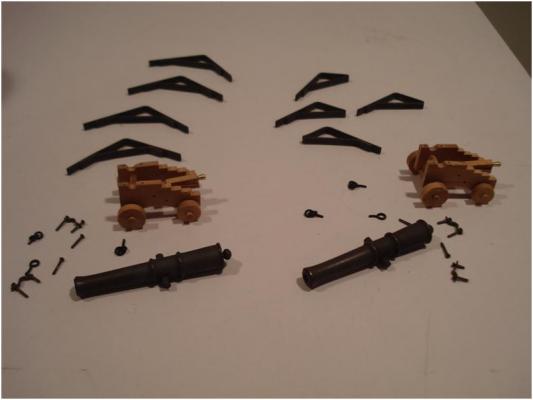
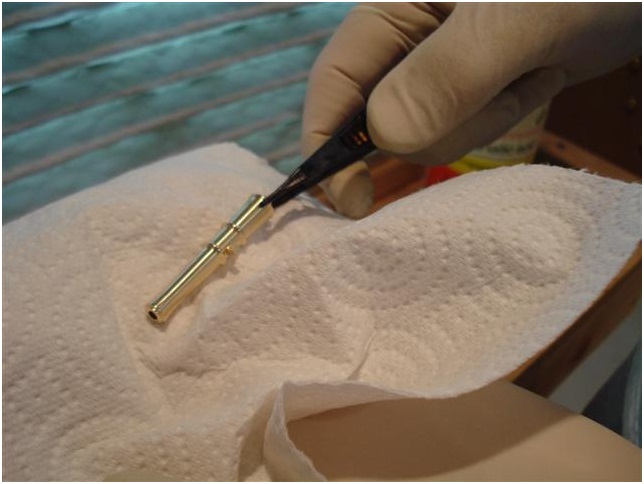
Next "Blacken It" that was diluted 1:1 with water was used. The little flakes are tiny pieces that fall off of the brass and grow like crystals over the course of hours. The bath worked as well for these last pieces as it did for the first in spite of the flakes.

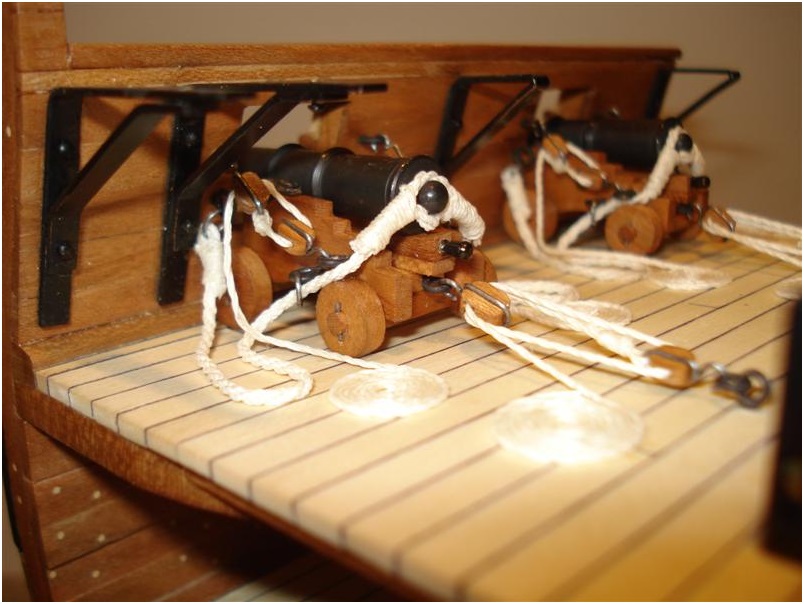
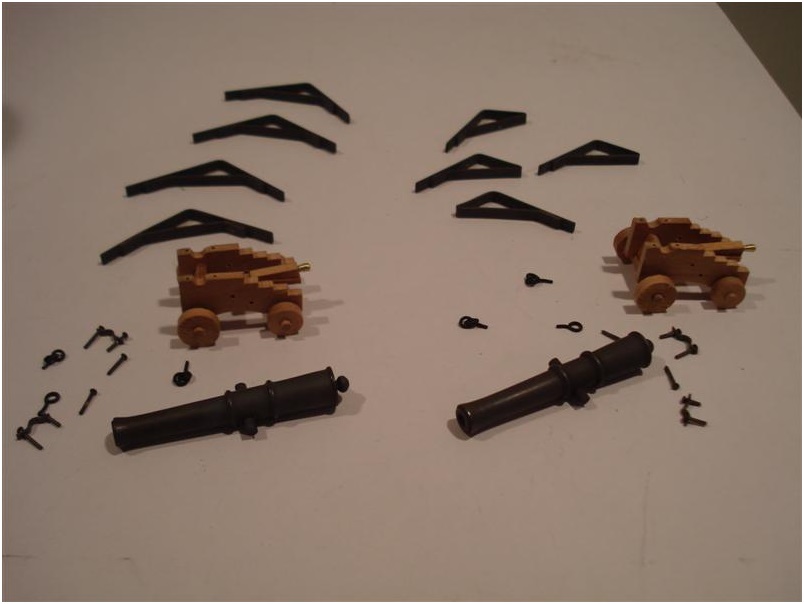
The Blacken It was washed off with water and a final acetone bath was used to remove any residual water. The pieces were buffed with a paper towel. Here is what the assortment of blackened pieces looked like when finished.
Here is a close up of the cannon. The handle of the quoin was glued on so I'll paint it later. It shows a good "before and after" effect for the cannon.
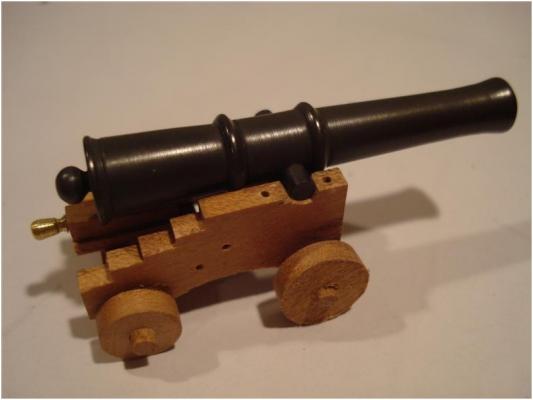
The tutorial speaks of covering the blackening with matte lacquer. I'll take a look at doing that tomorrow.
Scott -
Here are the most resent photos of the build. The grating and hatch combings are now made and placed on the deck.


I am now working on silver soldering the braces for the walk ways (with various levels of success. When I silver solder pieces that are well fitted together and hold together by themselves (like rings and eye bolts) it goes well. My problem with the braces is that I have one "L" shaped piece and a second piece that fits in as a crutch in the "L".

I have held them together with alligator clips and place a small bit of solder/flux paste in the gap. I think the clips act like heat sinks and keep the joint from getting hot enough to completely melt the solder. I will try holding the pieces together with wire and see if that works better.
Scott -


TRITON Cross Section bbrockel
in Cross Section Build Logs for HMS TRITON
Posted
Alternately copper plate (even just one side). Plus that is something that no-one will notice. If it bugs you then you'll have to get it done but it is not a hanging offense..