
Moltinmark
-
Posts
118 -
Joined
-
Last visited
Content Type
Profiles
Forums
Gallery
Events
Everything posted by Moltinmark
-
I am a assembling a kit of the clipper Sea Witch. A plastic model and out am now at the point where I have to decide to put sails on or not. the kit came with thermoplastic sales and I would like some input as to whether that I should use them. I understand that making sails is a whole nother endeavor and since I'm new at this I'm thinking of putting the thermal plastic sail on it. can I have some pro and con input or maybe some tips on how to do this. the scale is 1/96 so there's not a lot of room for the halyards. So I'm thinking of only running single lines on the halyard and cheating a bit or do I just do it is standing sales and try to figure out a way to do furled Sails.

-
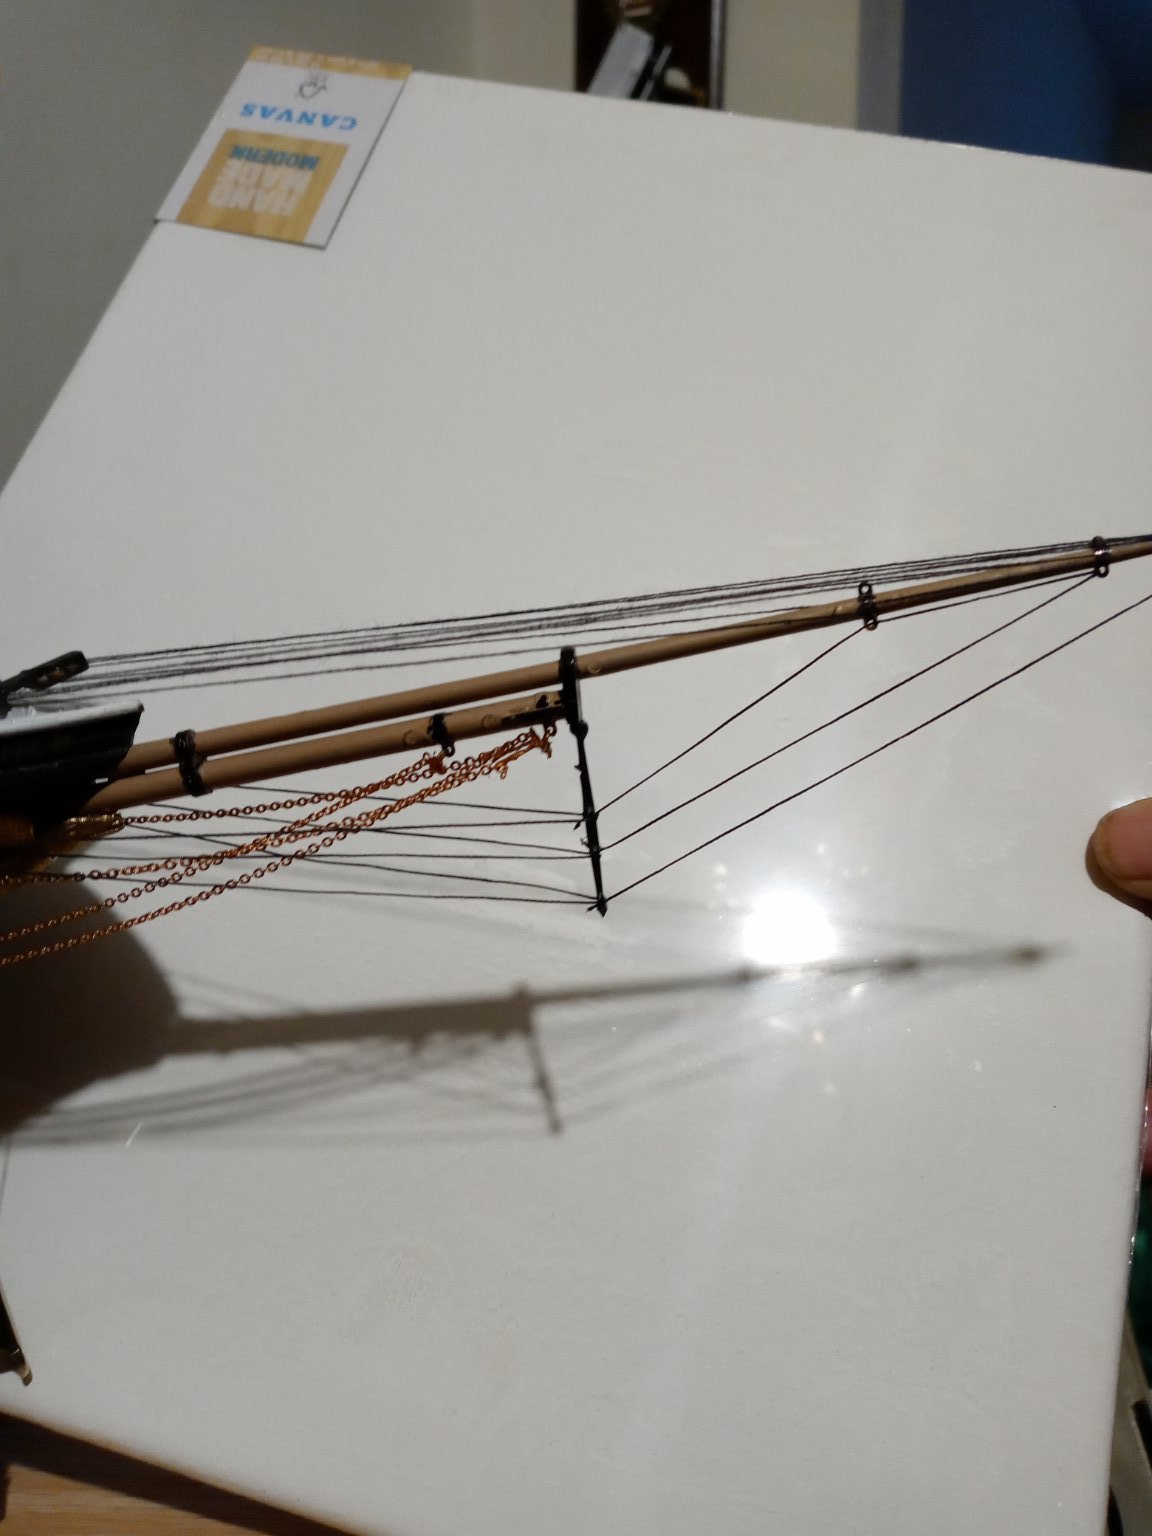
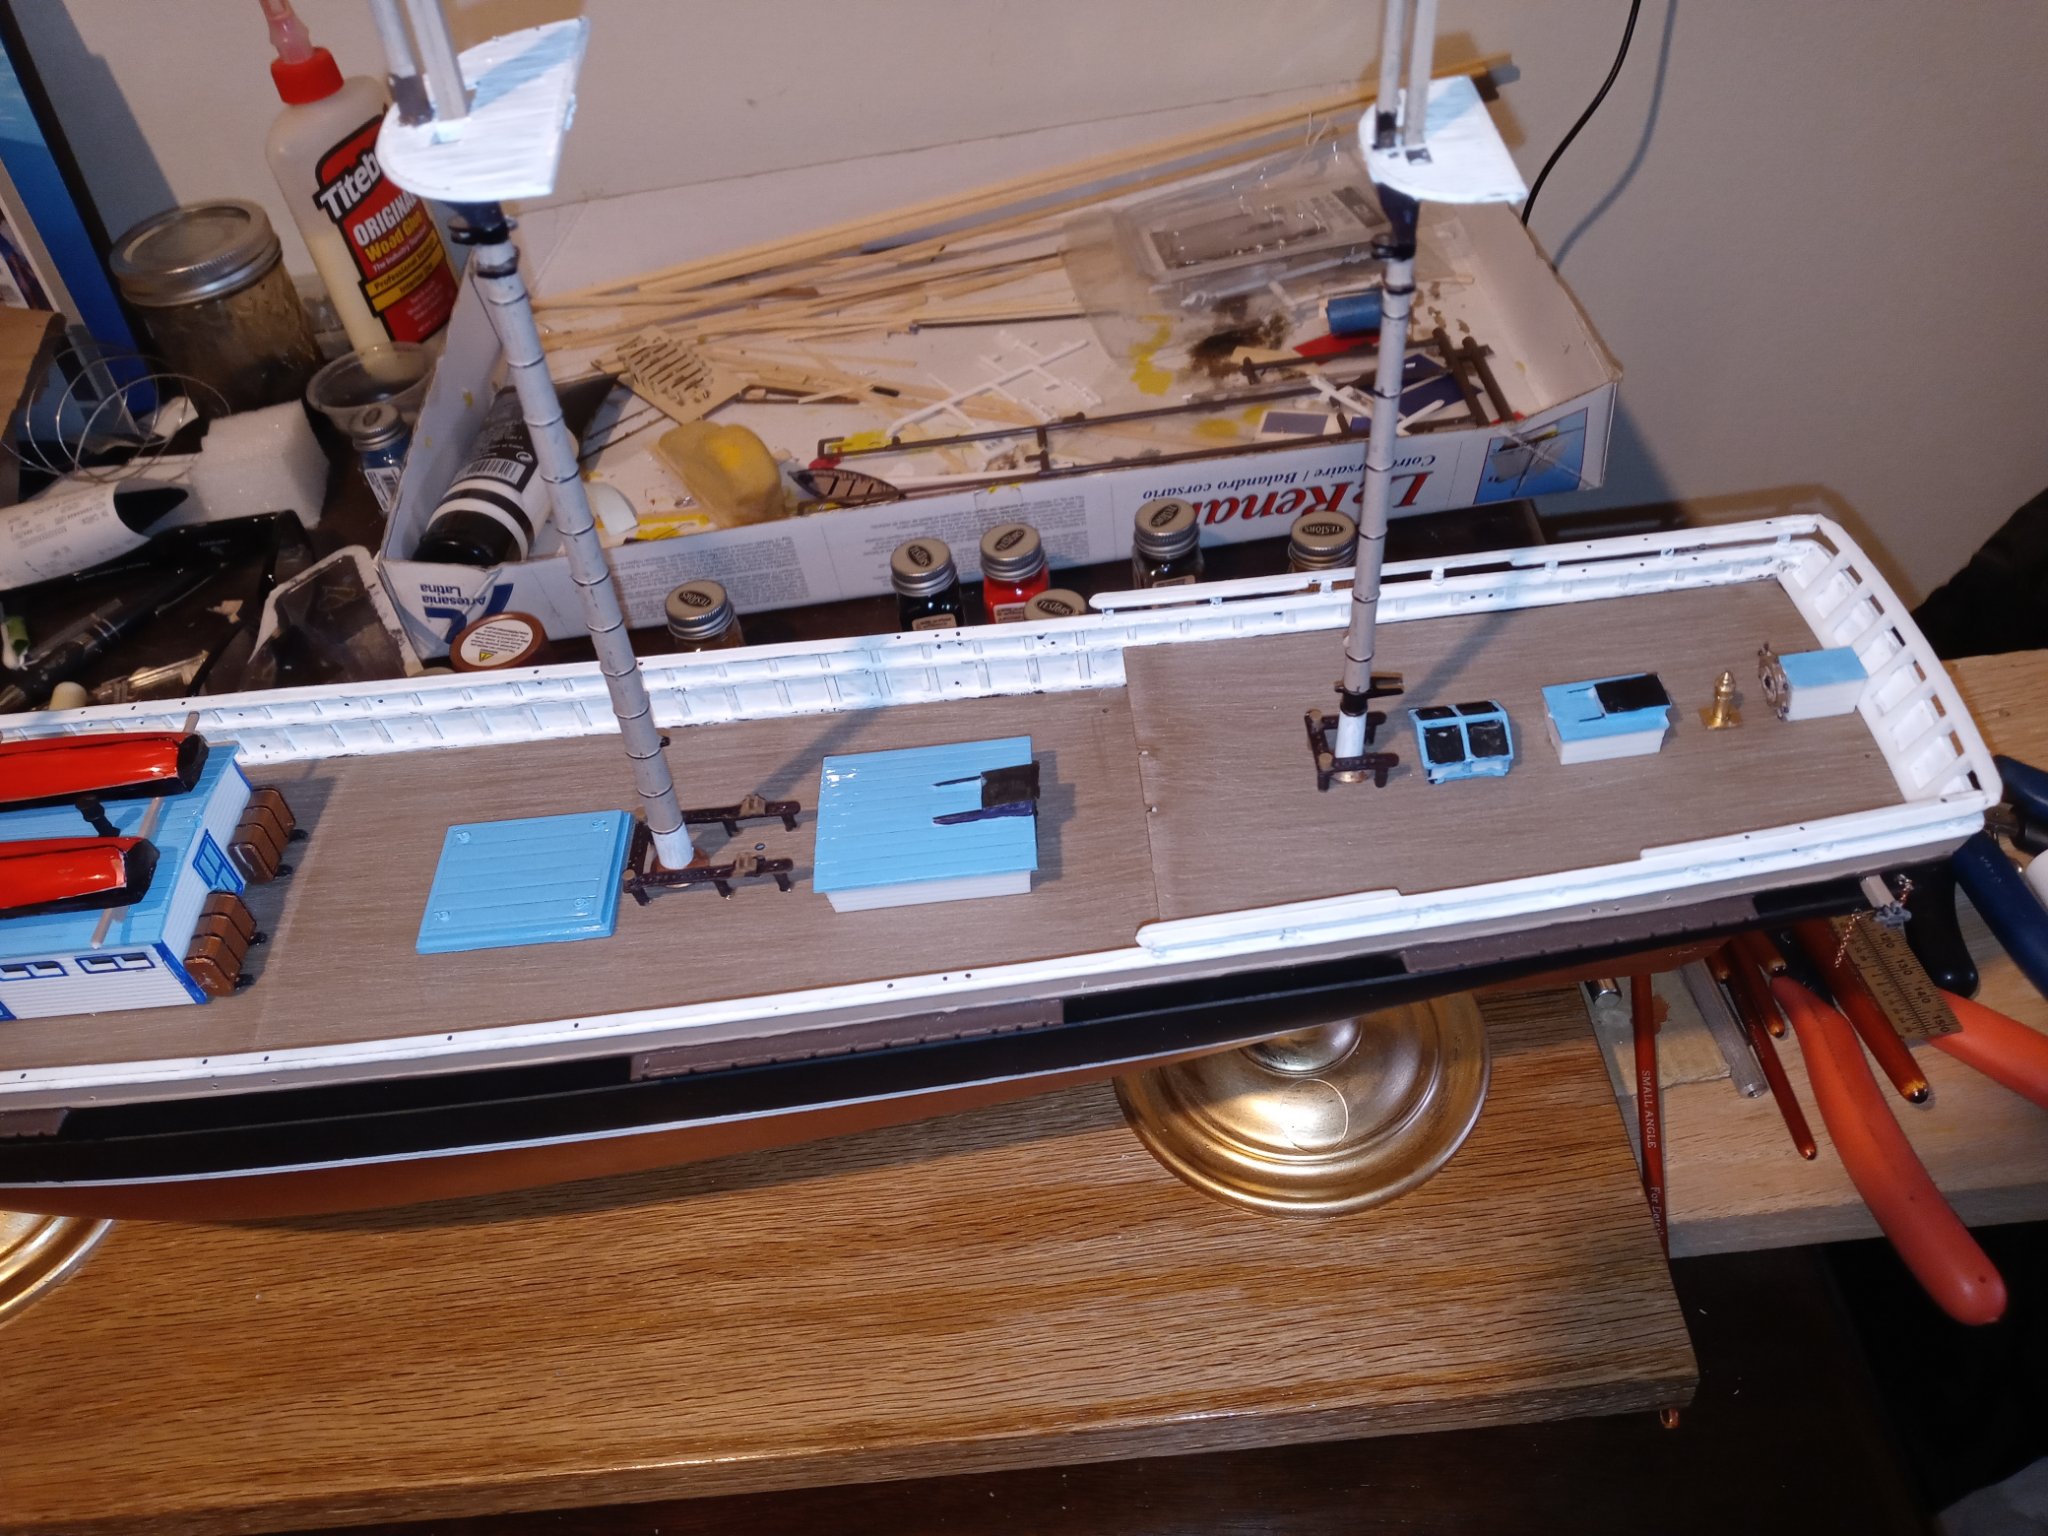
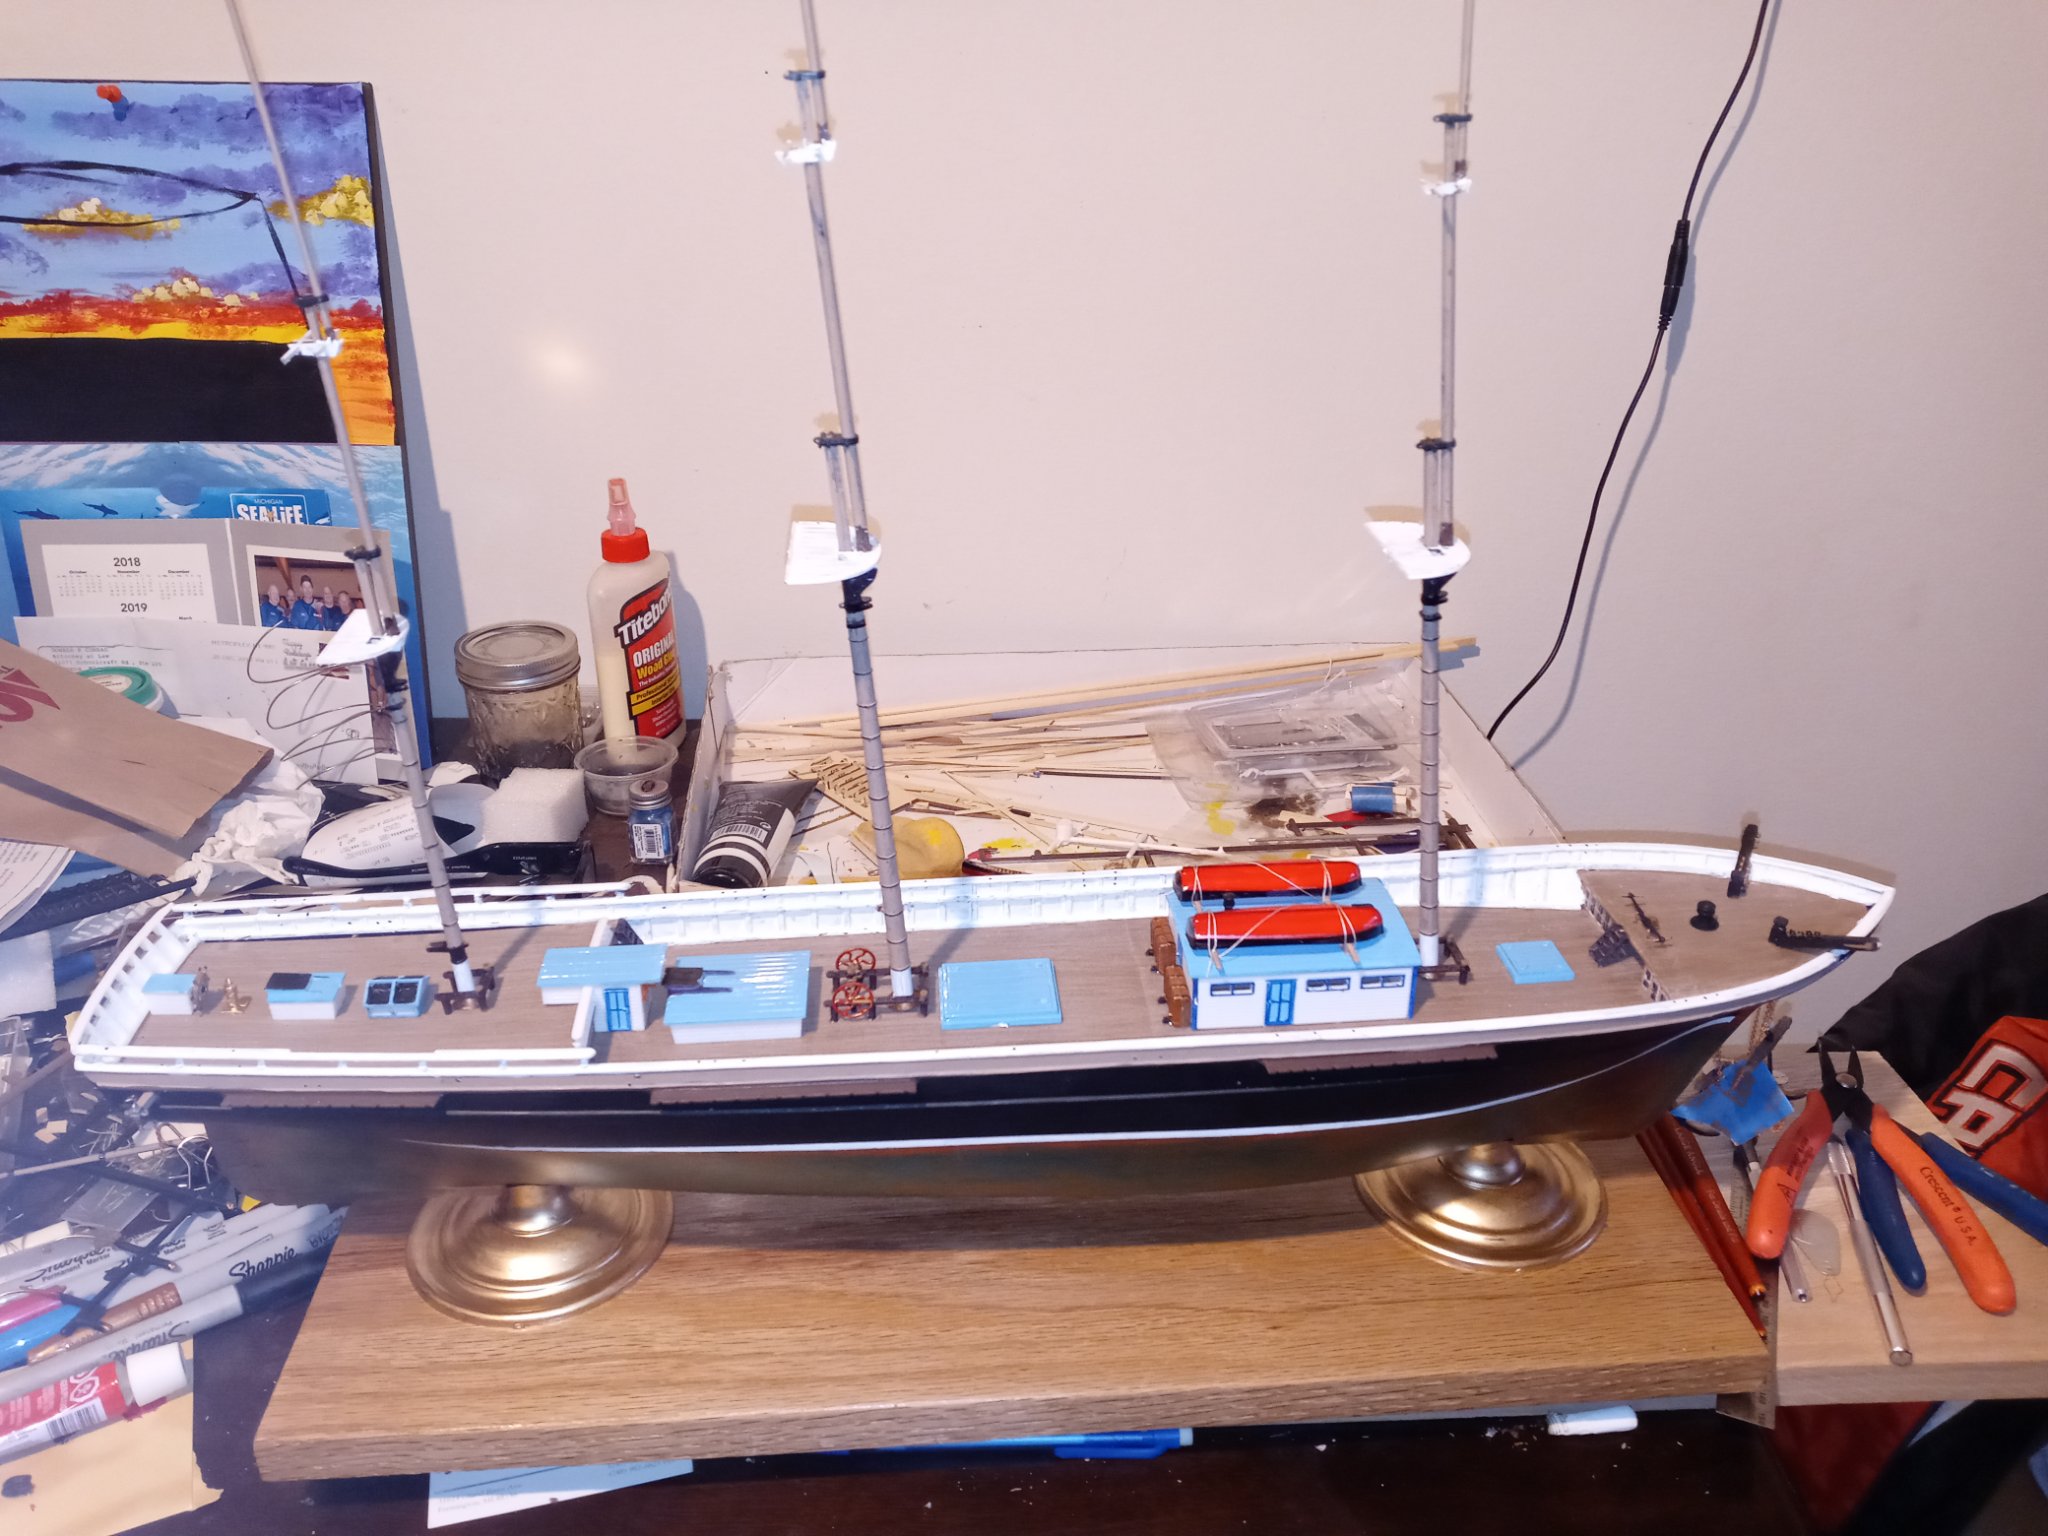
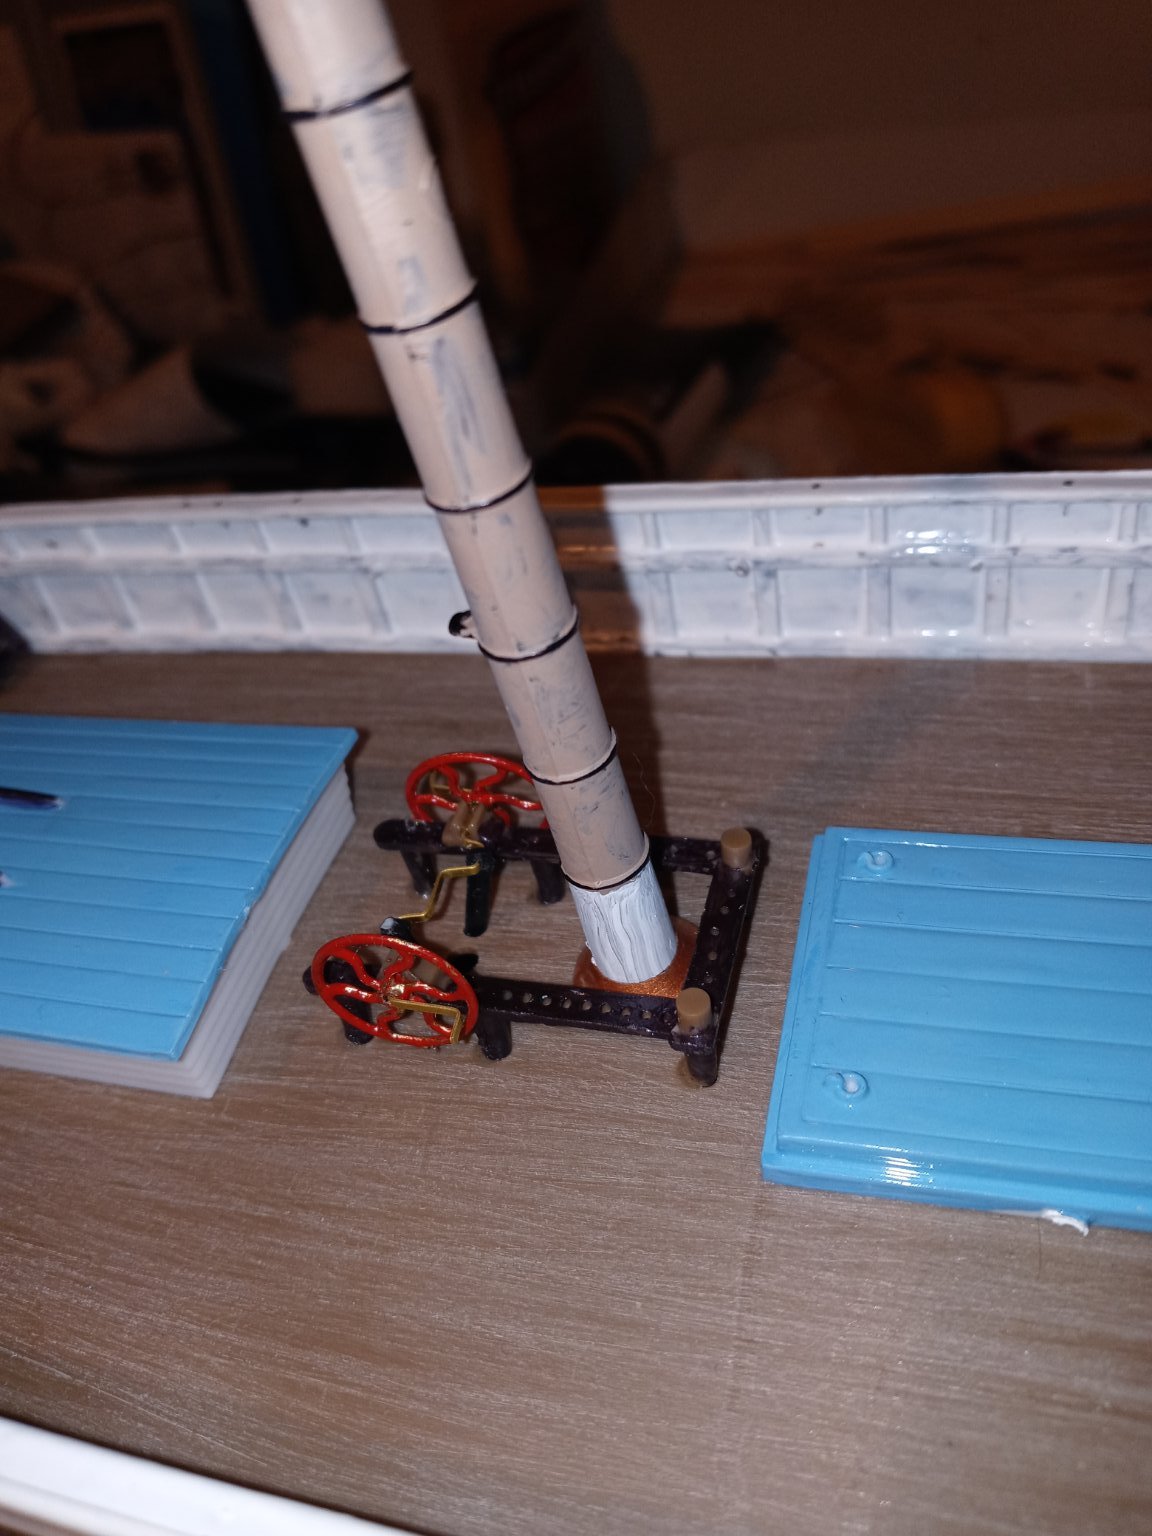
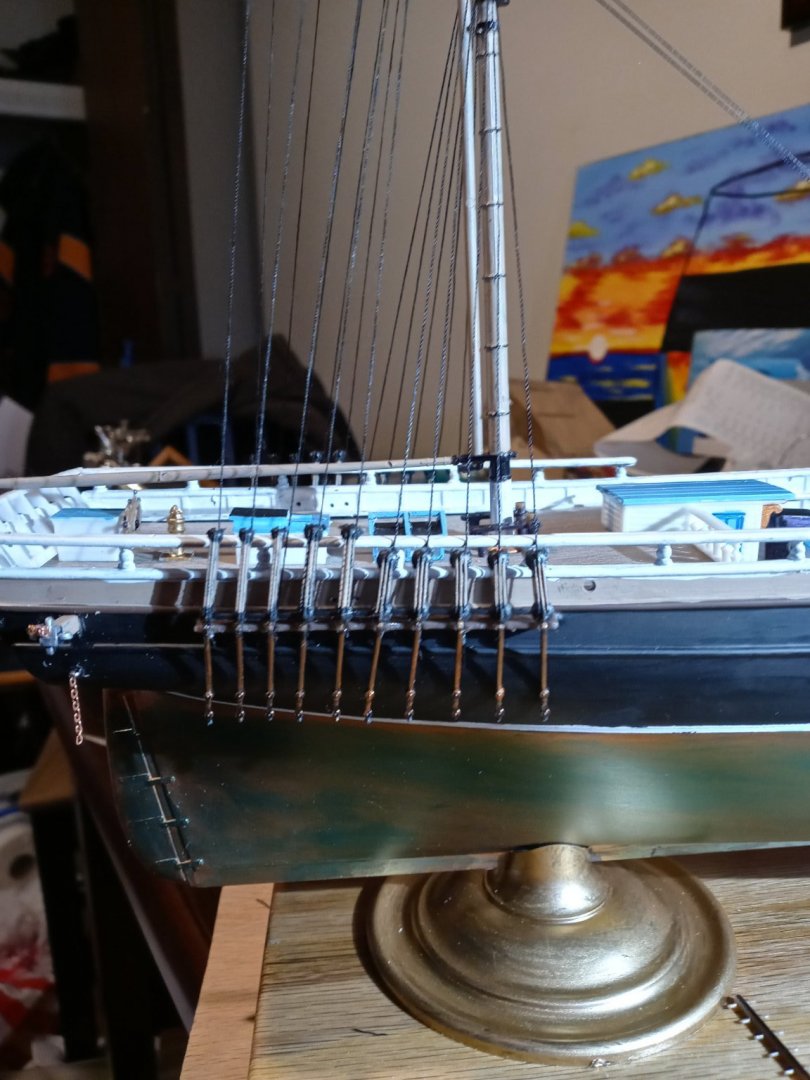
Work continues on the standing rigging. Running one line at a time on each side and clipping a heavy duty paper clip on it to create tension and then gluing them in place. And when I put the four stay lines on the tighten up and stiffen the masts. I then glue the false Deadeye assemblies over the top of the backstay lines as you see in the aft of the ship in the picture

-
I am amazed at how stiff the mizzen is already without the back stays. I was worried about how flexible the plastic was but it is going to tighten up nicely
-
Started rigging the shrouds and stay lines and the bowsprit. Heavy black .070 stay lines nylon that came with the kit. Light .40 black shrouds core. Is there any quick reference guide on the types and characteristics of the commonly used products in modeling?
-
Experiments in Card/Paper Modeling
Moltinmark replied to John Fox III's topic in Card and Paper Models
I have been looking a glowforge and am wondering if that is what your laser is? -
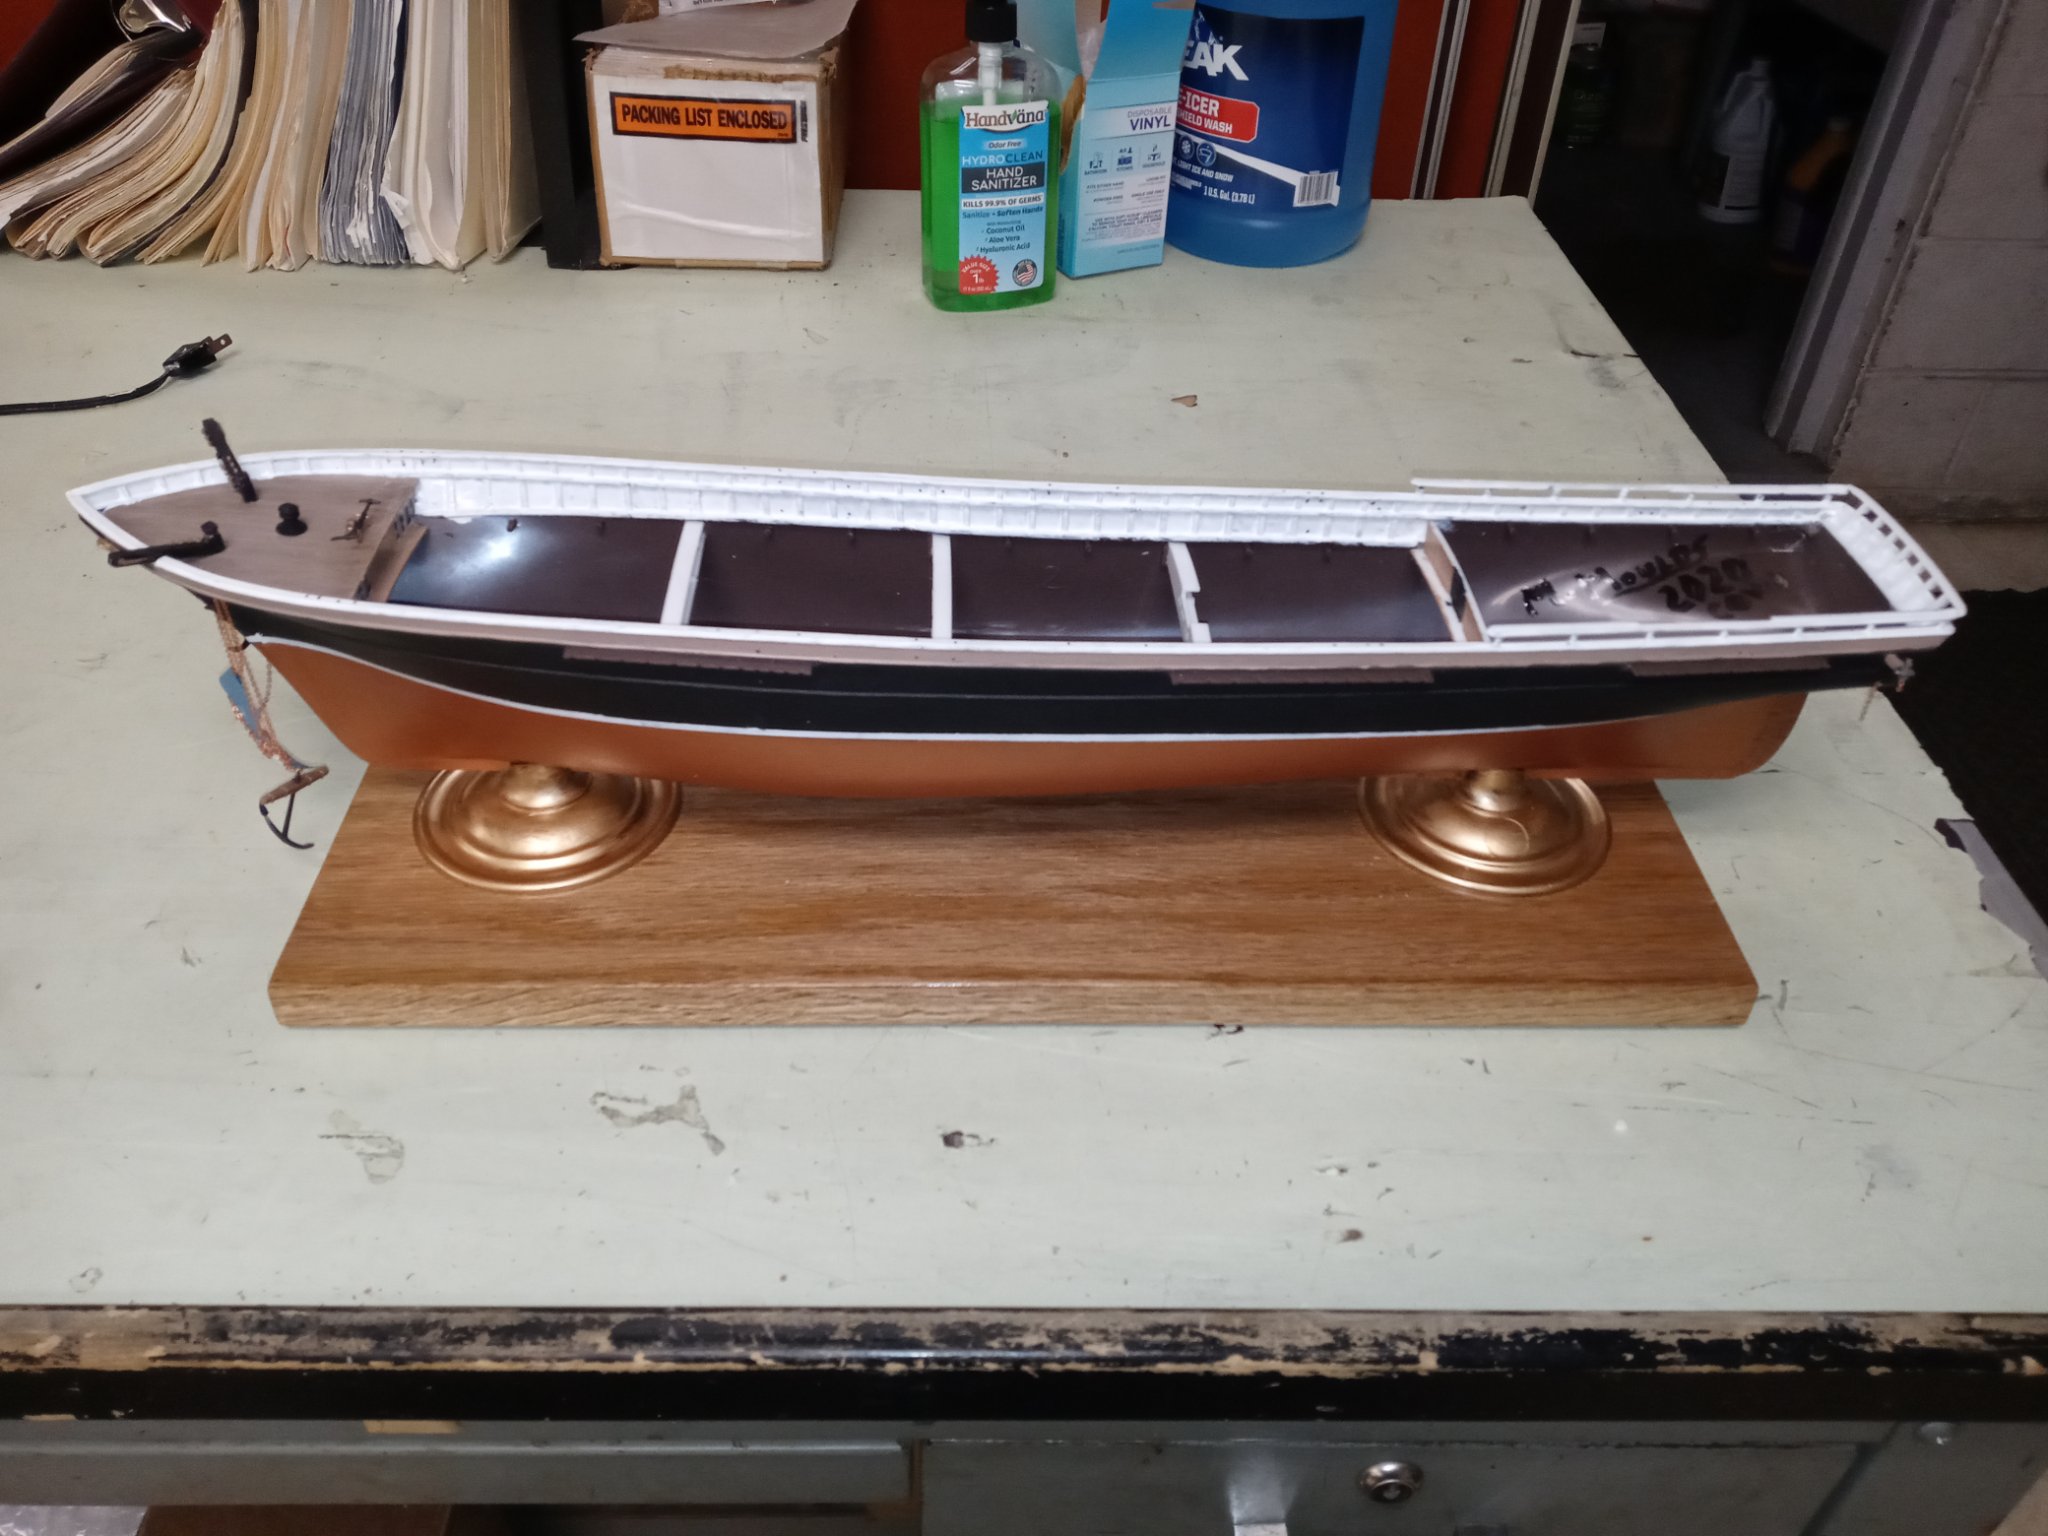
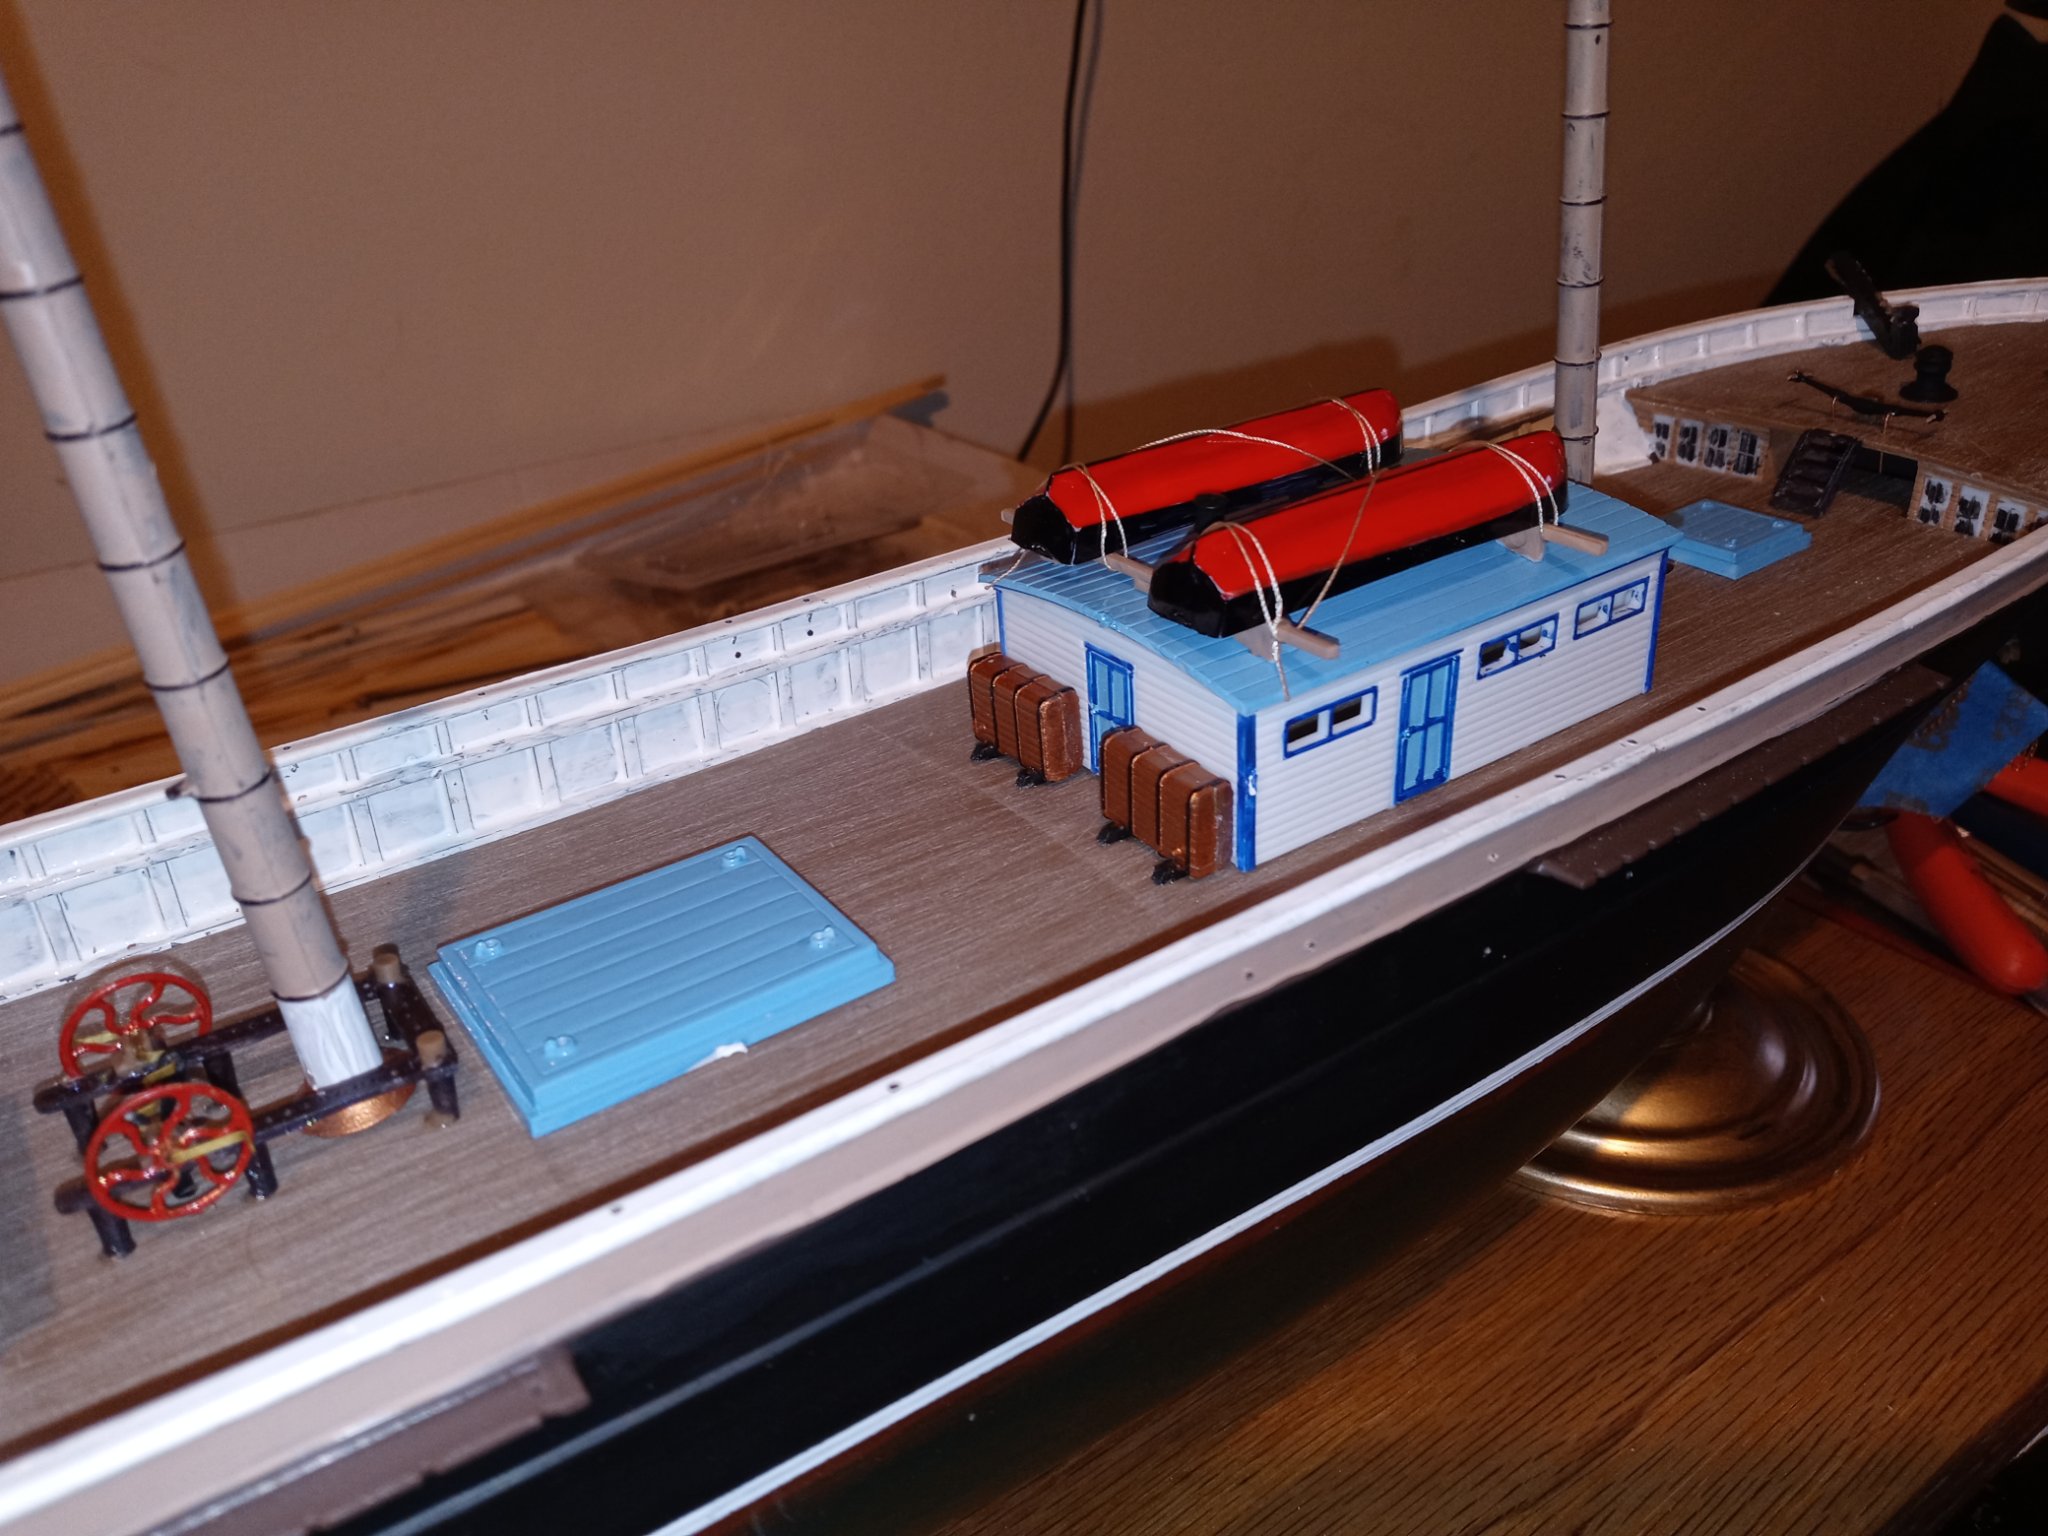
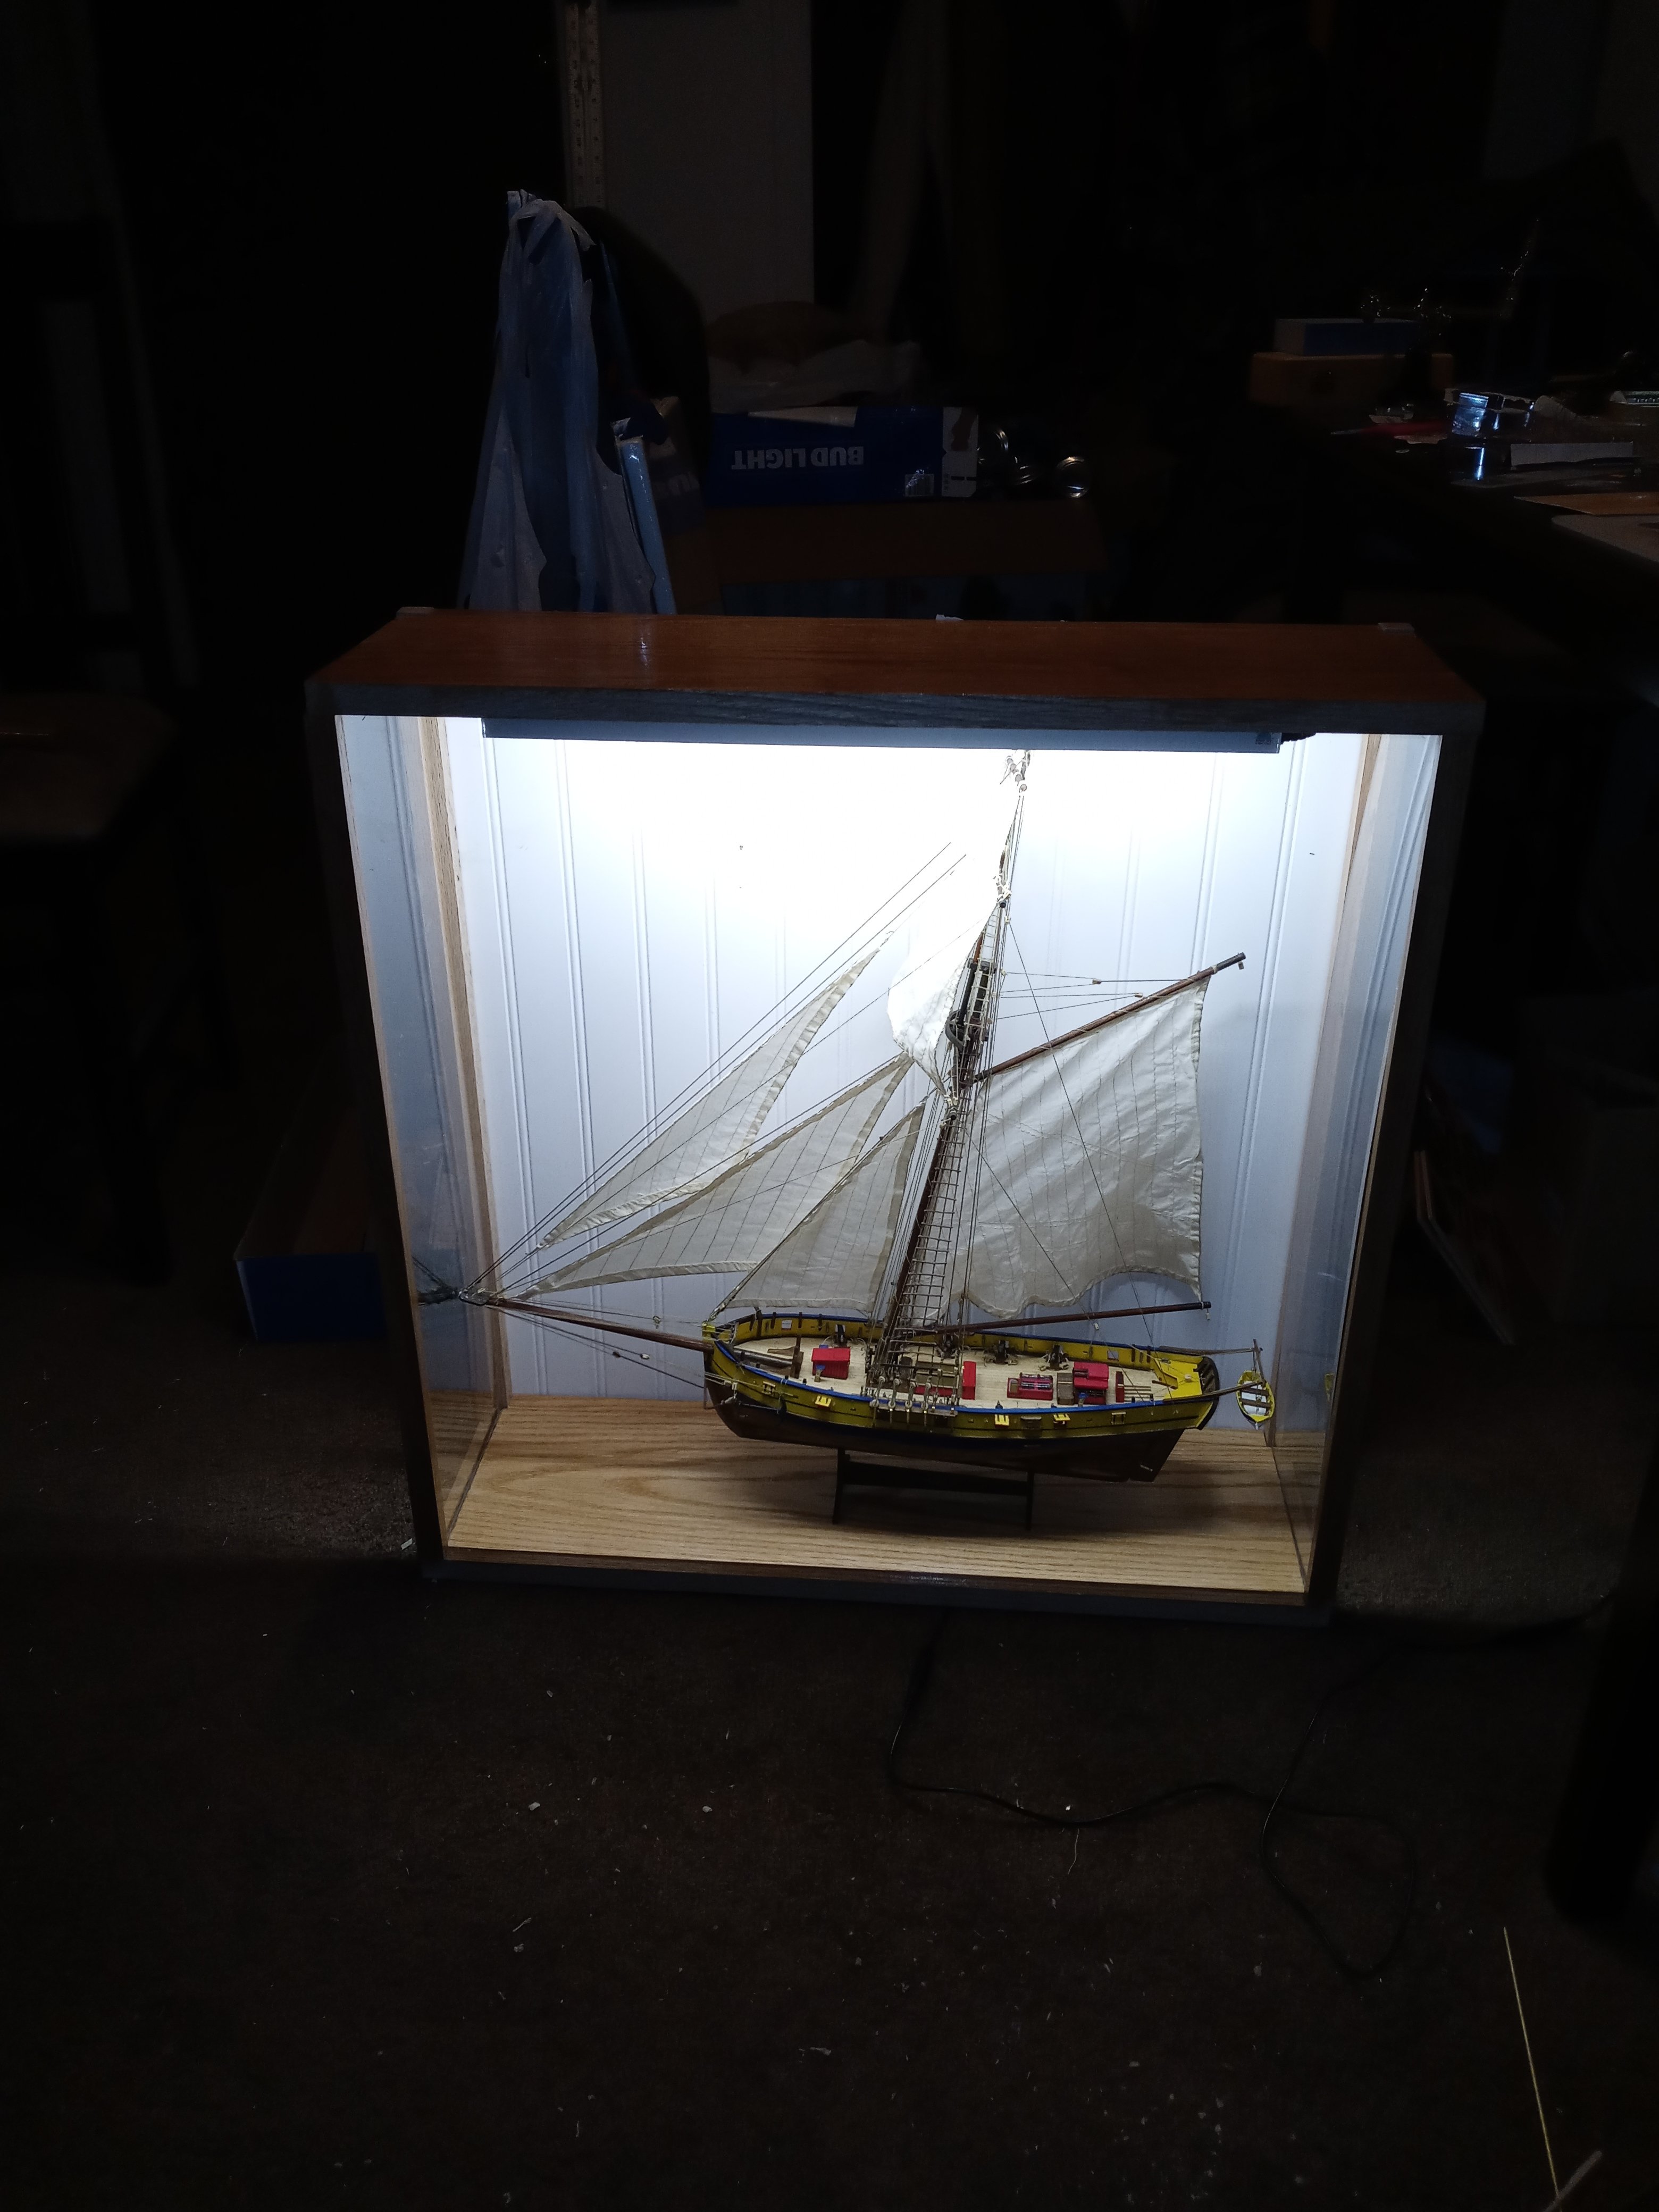
Well I finished final paint touch ups on the hull and mounted to the oak plank I had left over from my first ships (Le Renard) display case. Installed the decks and populated it with the furniture


-
I think I can get another kit and that one will use wood on the decks, buildings, fifes masts ect since this one is fairly close to being done. When I got this I was thinking it would give me experience in rigging a multiple mast ship. Thanks Hoss
-
Thank you Kurt. Knowing the proper term helps.
-
I am building this kit with out sails and thought about maybe putting linen sails gathered (lack of better term) or stored on the yards ? I've looked all through logs and forums for pics and tips on doing this with no luck! Any suggestions or help would be appreciated

-
Had to drill 50 some odd 1/32 holes for the masts assemblies and their caps. Assembled the foremast, main mast and the mizzen mast. They look pretty good. Painted one coat of flat tan so that the darker brown showed through and brushed them with small brass brush. kind of looks like wood I think.


-
Hello from the Mitten from moltinmark
Moltinmark replied to Moltinmark's topic in New member Introductions
Thank you. -
Thanks Hoss Have seen that mentioned a few times in my research. Was there a specific reason you would use wood? Looks or over coming plastic's non stiffness and creating rigging problems? Some say if rigged correctly no problem with plastic. Thanks again for your input
-
What a fantastic site. Spent the morning looking around to see if this model had any logs to reference. Did find a review of the kit that seemed positive and that JFK had a sea witch model in the oval office. There were quite a few references to " bright" work on the masts and yards. Am I correct in assuming this to mean light colors in the topside and masting?
-
Hello my name is Mark and I saw on model ship world that you are working on the sea witch by Lindbergh 196 scale and I have that same model and was wondering if you have a build log or would be willing to have a discussion as to how you did certain things thank you
-
Really nice job. I like how you kept a lot of the natural wood exposed. I just built this model as my first ship to occupy myself during the pandemic 2mo lockdown. Now I want to go back and start it all over again and take much longer than the 2 months I spent on mine after looking at yours. I going to take my time on my next one great workmanship
-
Hello from the Mitten from moltinmark
Moltinmark replied to Moltinmark's topic in New member Introductions
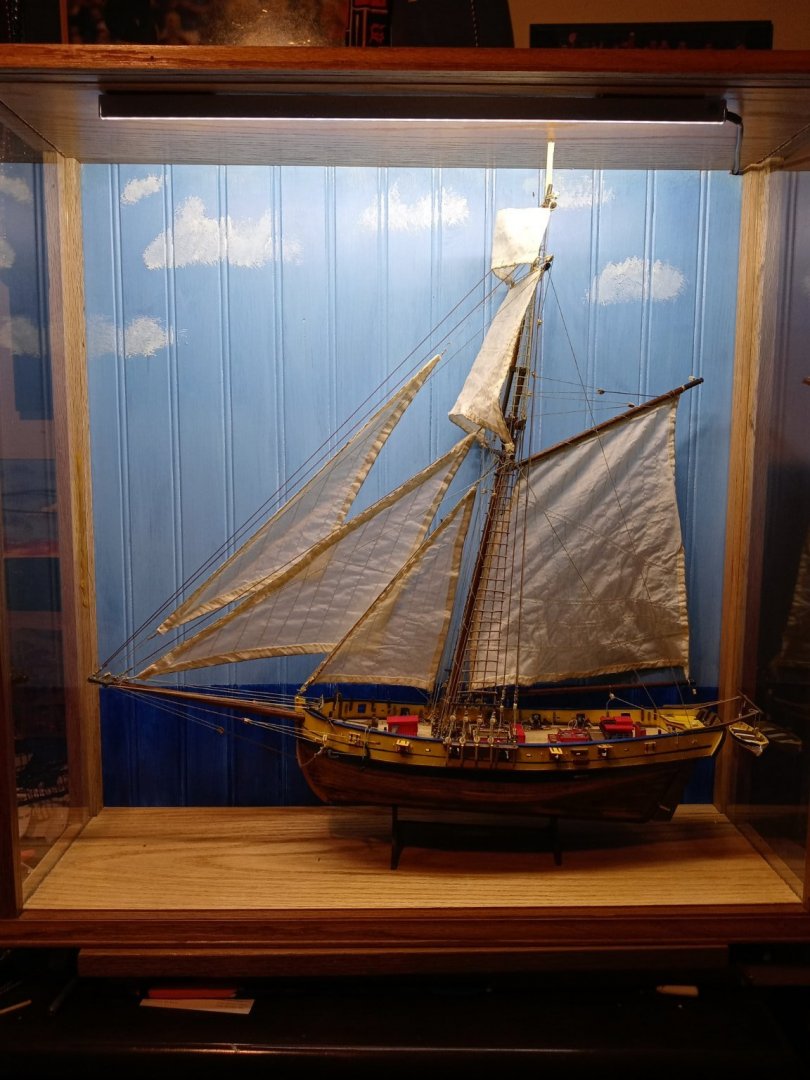
July 2nd finished. I've gotta dig up my last phone to confirm the start date but I think it was around the 20th of April. I think I'll name her "Corona Bound" as this was the cause of my building my first wooden model ship and finding a new hobbie for my golden years. Any suggestions on what my next waning years of the age of sail project vessel should be would be appreciated. A US ship or a more ornate all wood type combining different woods and brass. Thanks for looking and any critiques that will make me better. One day I think I will build this one again and take more time lol and more historically correct. By the way how long should this have normally taken if I was working full time and like being outdoors golfing, hunting ect like pre pandemic, you know live normal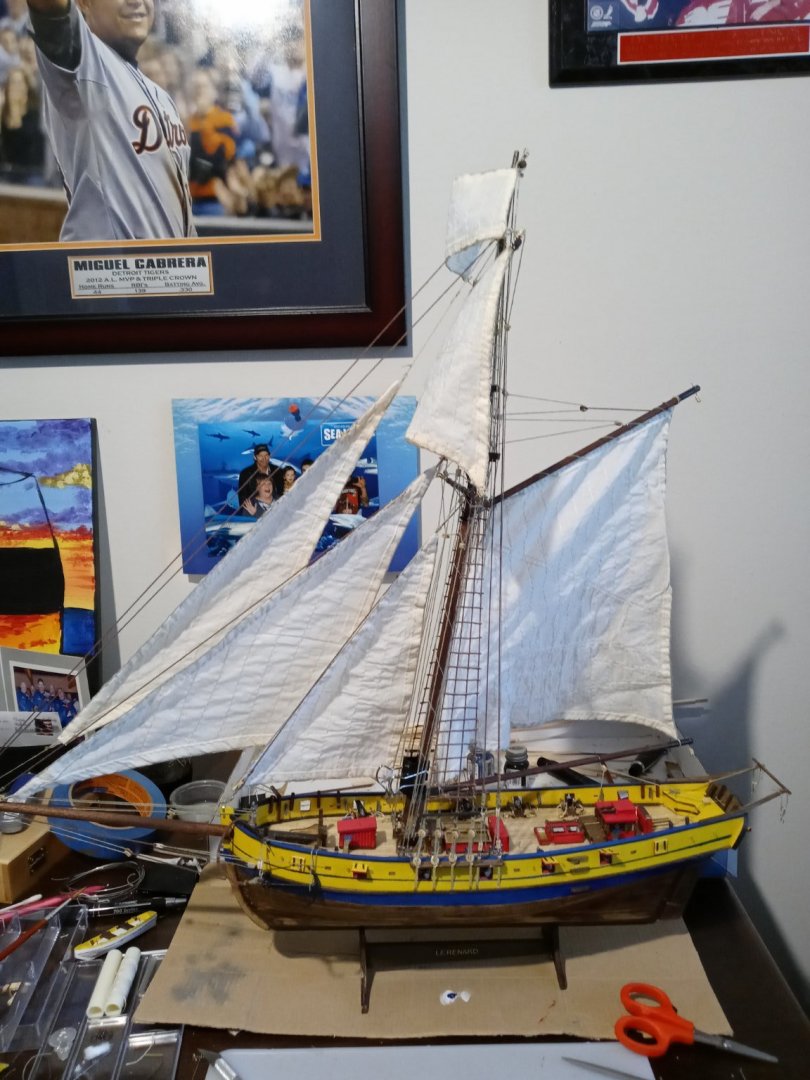
-
Hello from the Mitten from moltinmark
Moltinmark replied to Moltinmark's topic in New member Introductions
I really believe i could still turn this into a much bigger and longer project by adding rope coils and like details. Maybe mount the hull in Plexiglas at the waterline and create a diorama. Maybe add the other blue stripe too. Ooops
-
Hello from the Mitten from moltinmark
Moltinmark replied to Moltinmark's topic in New member Introductions
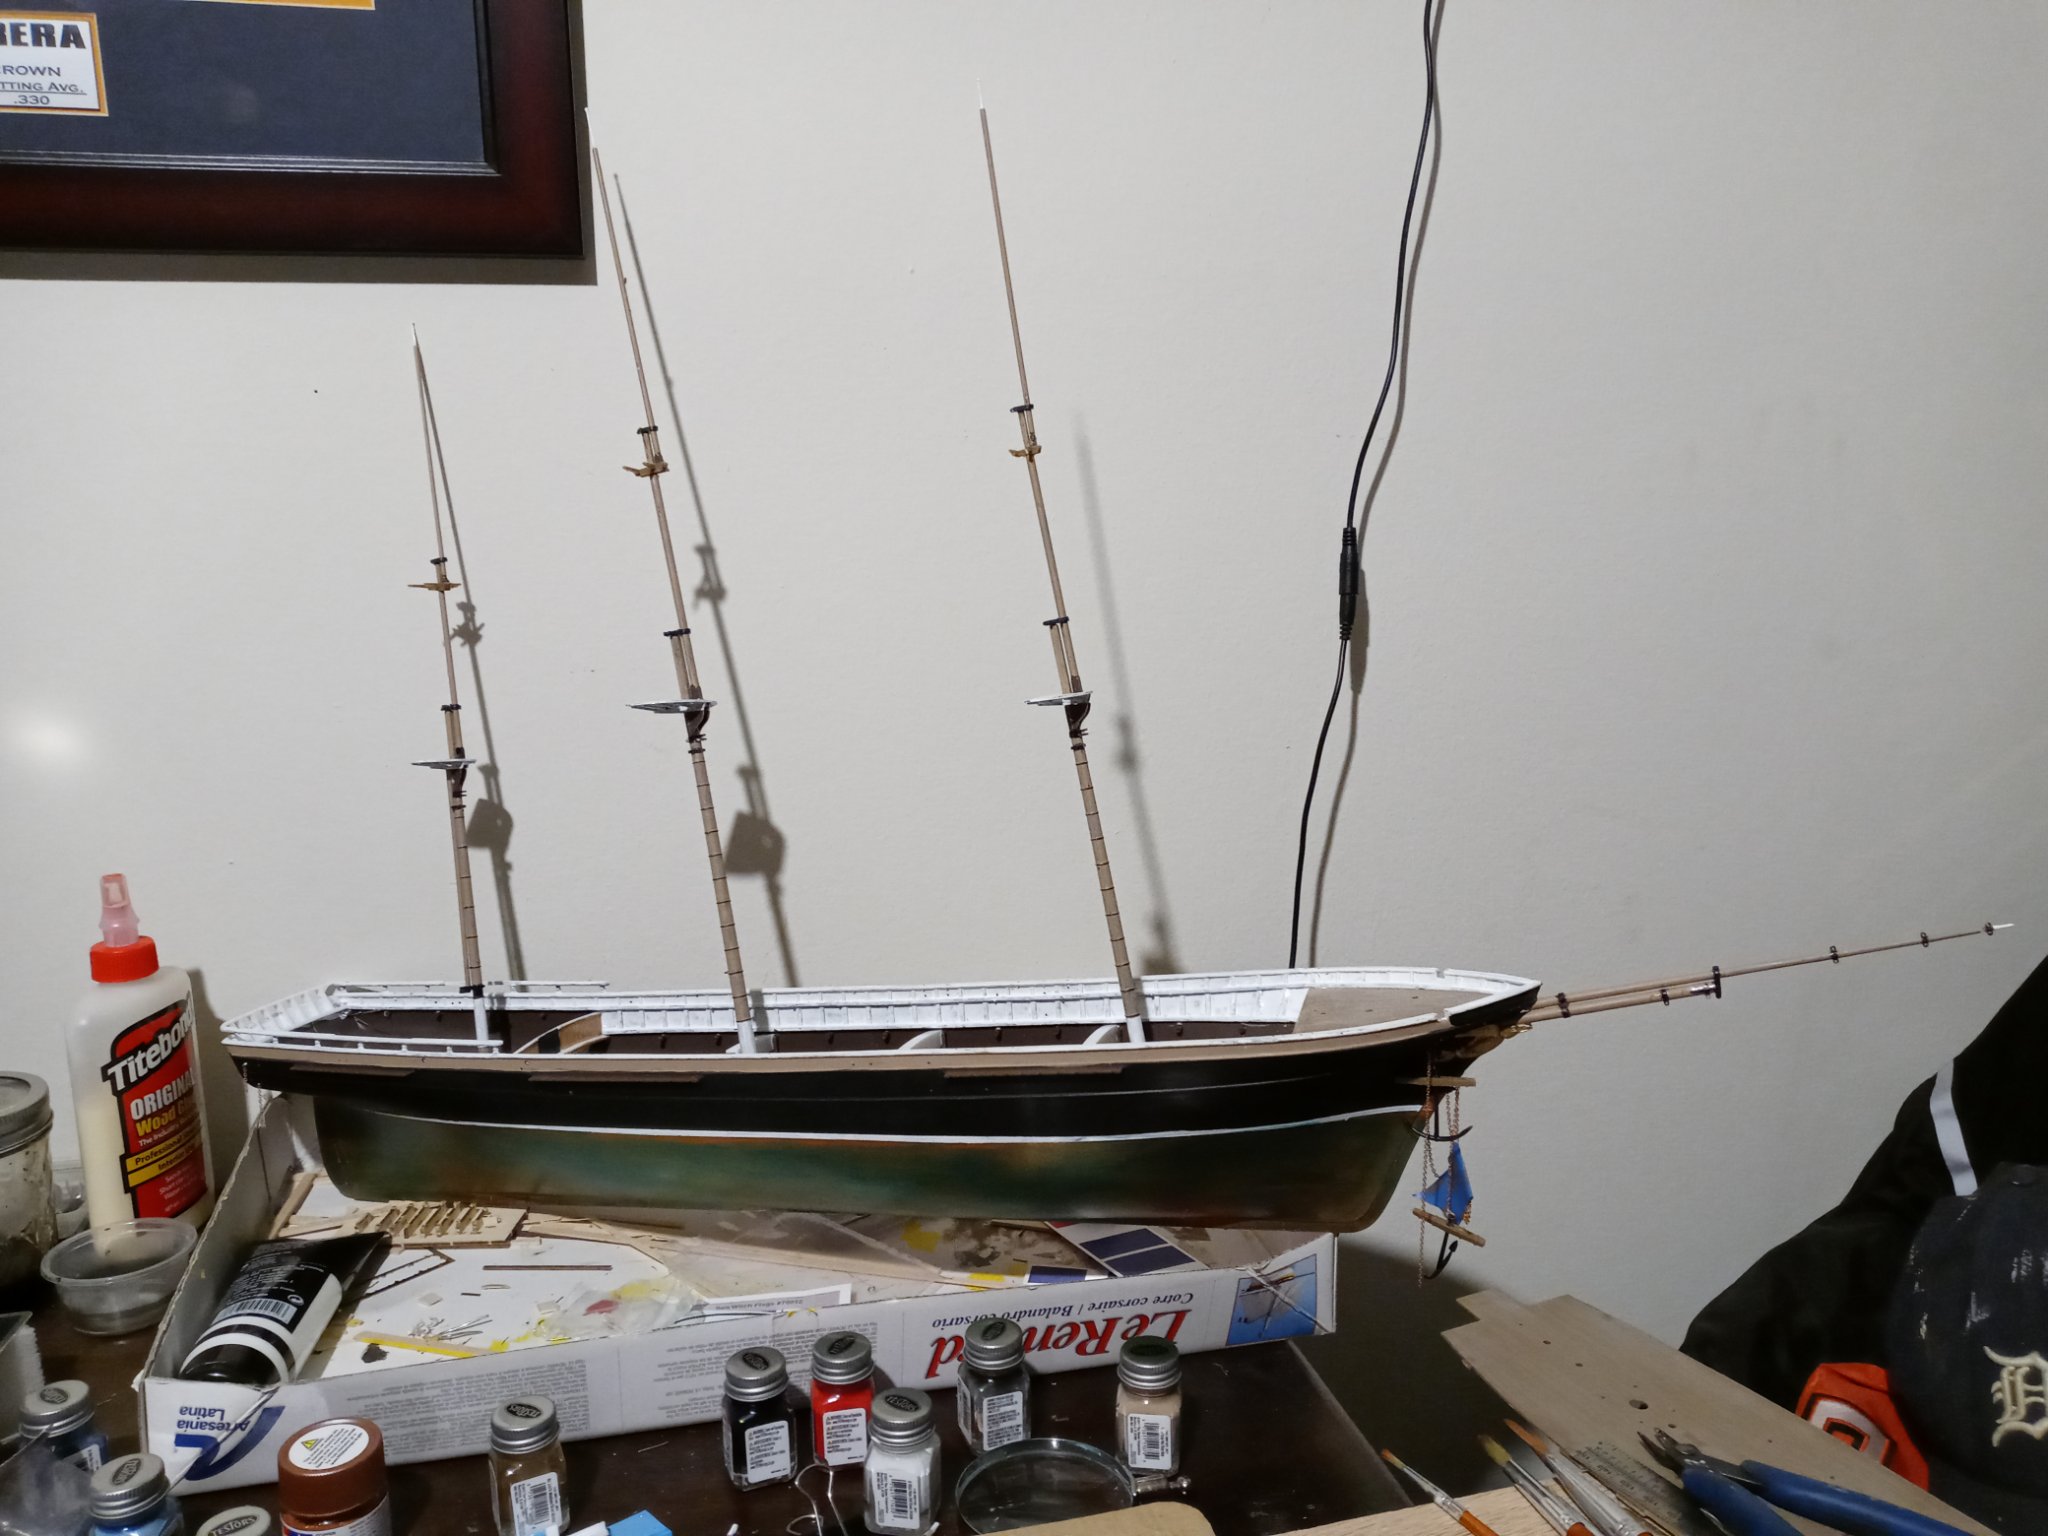
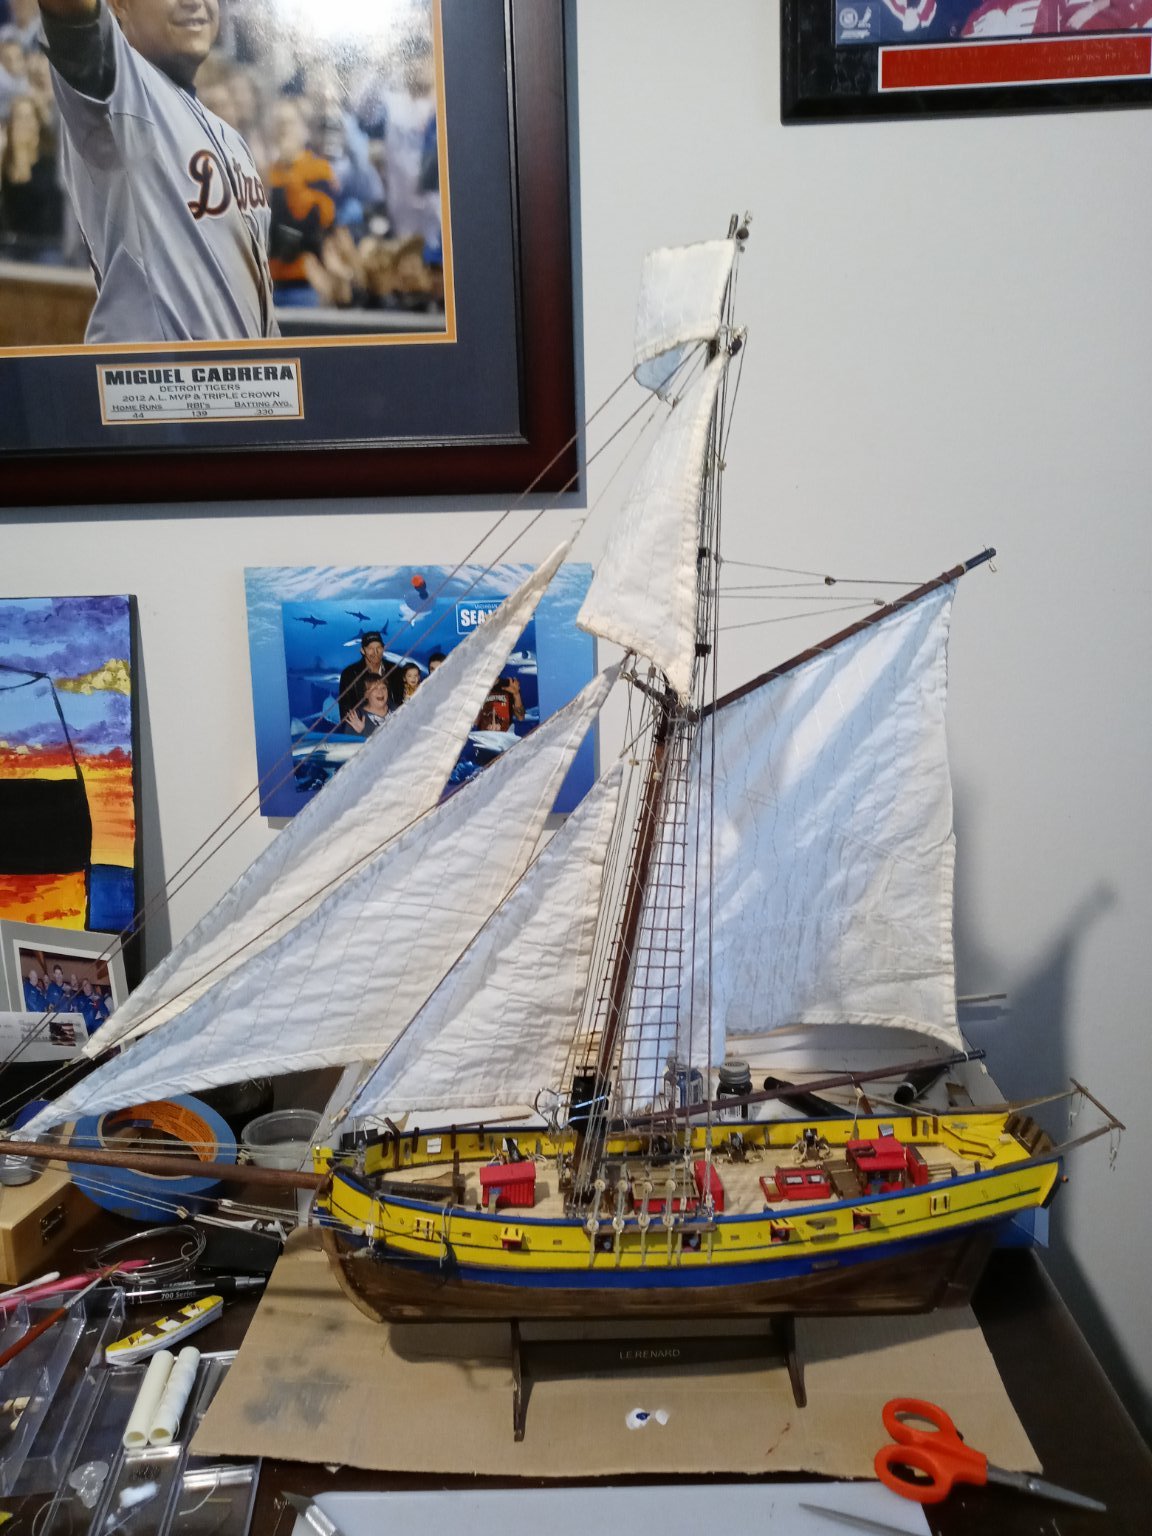
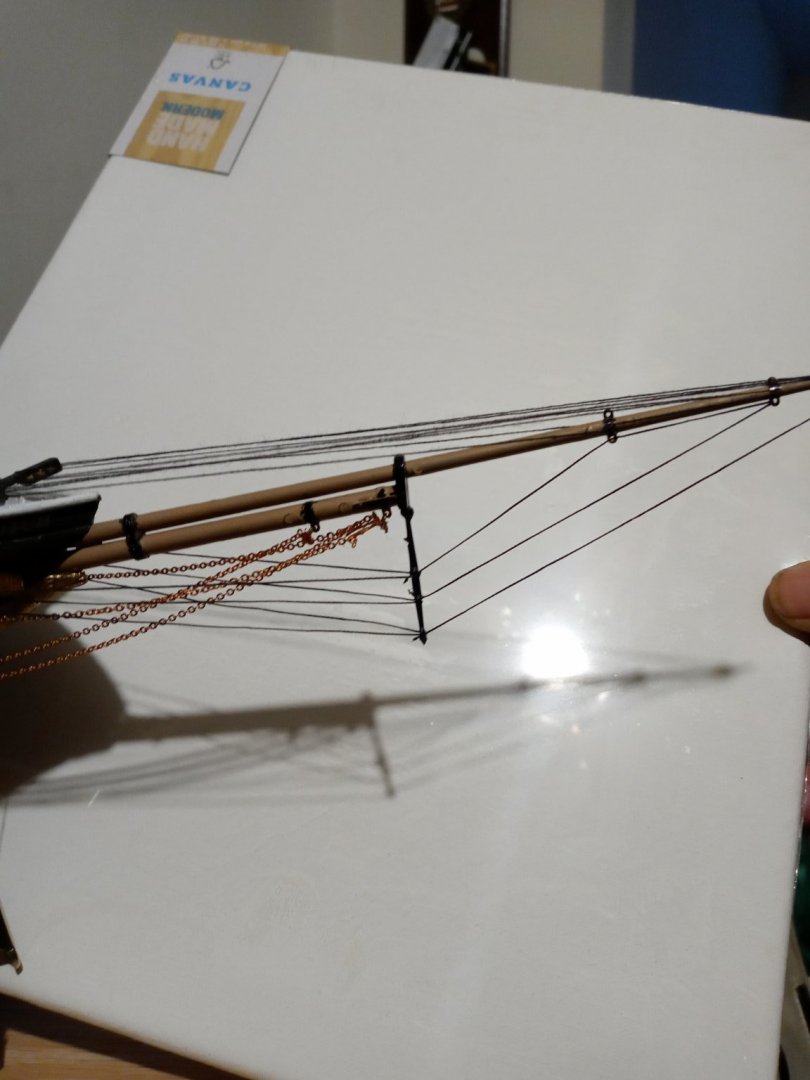
More upper ratlines and rigging. The yards are all suspended by their rigging. I sprayed the sails with heavy duty hair spray to try to give some form. The upper and lower boom move as they should
-
Hello from the Mitten from moltinmark
Moltinmark replied to Moltinmark's topic in New member Introductions
I did make a jig to get the correct 10mm spacing for the dead eyes. I learned on this site that maybe I should have probably greened those brass parts to make it look a little older. After tying off at the top and pulling down tight threaded each one of these by hand tightening them down as they would in reality to the top of the two 5mm board jig. They recommended painting all rigging lines and threads with a glue water mixture after final positioning
-
Hello from the Mitten from moltinmark
Moltinmark replied to Moltinmark's topic in New member Introductions
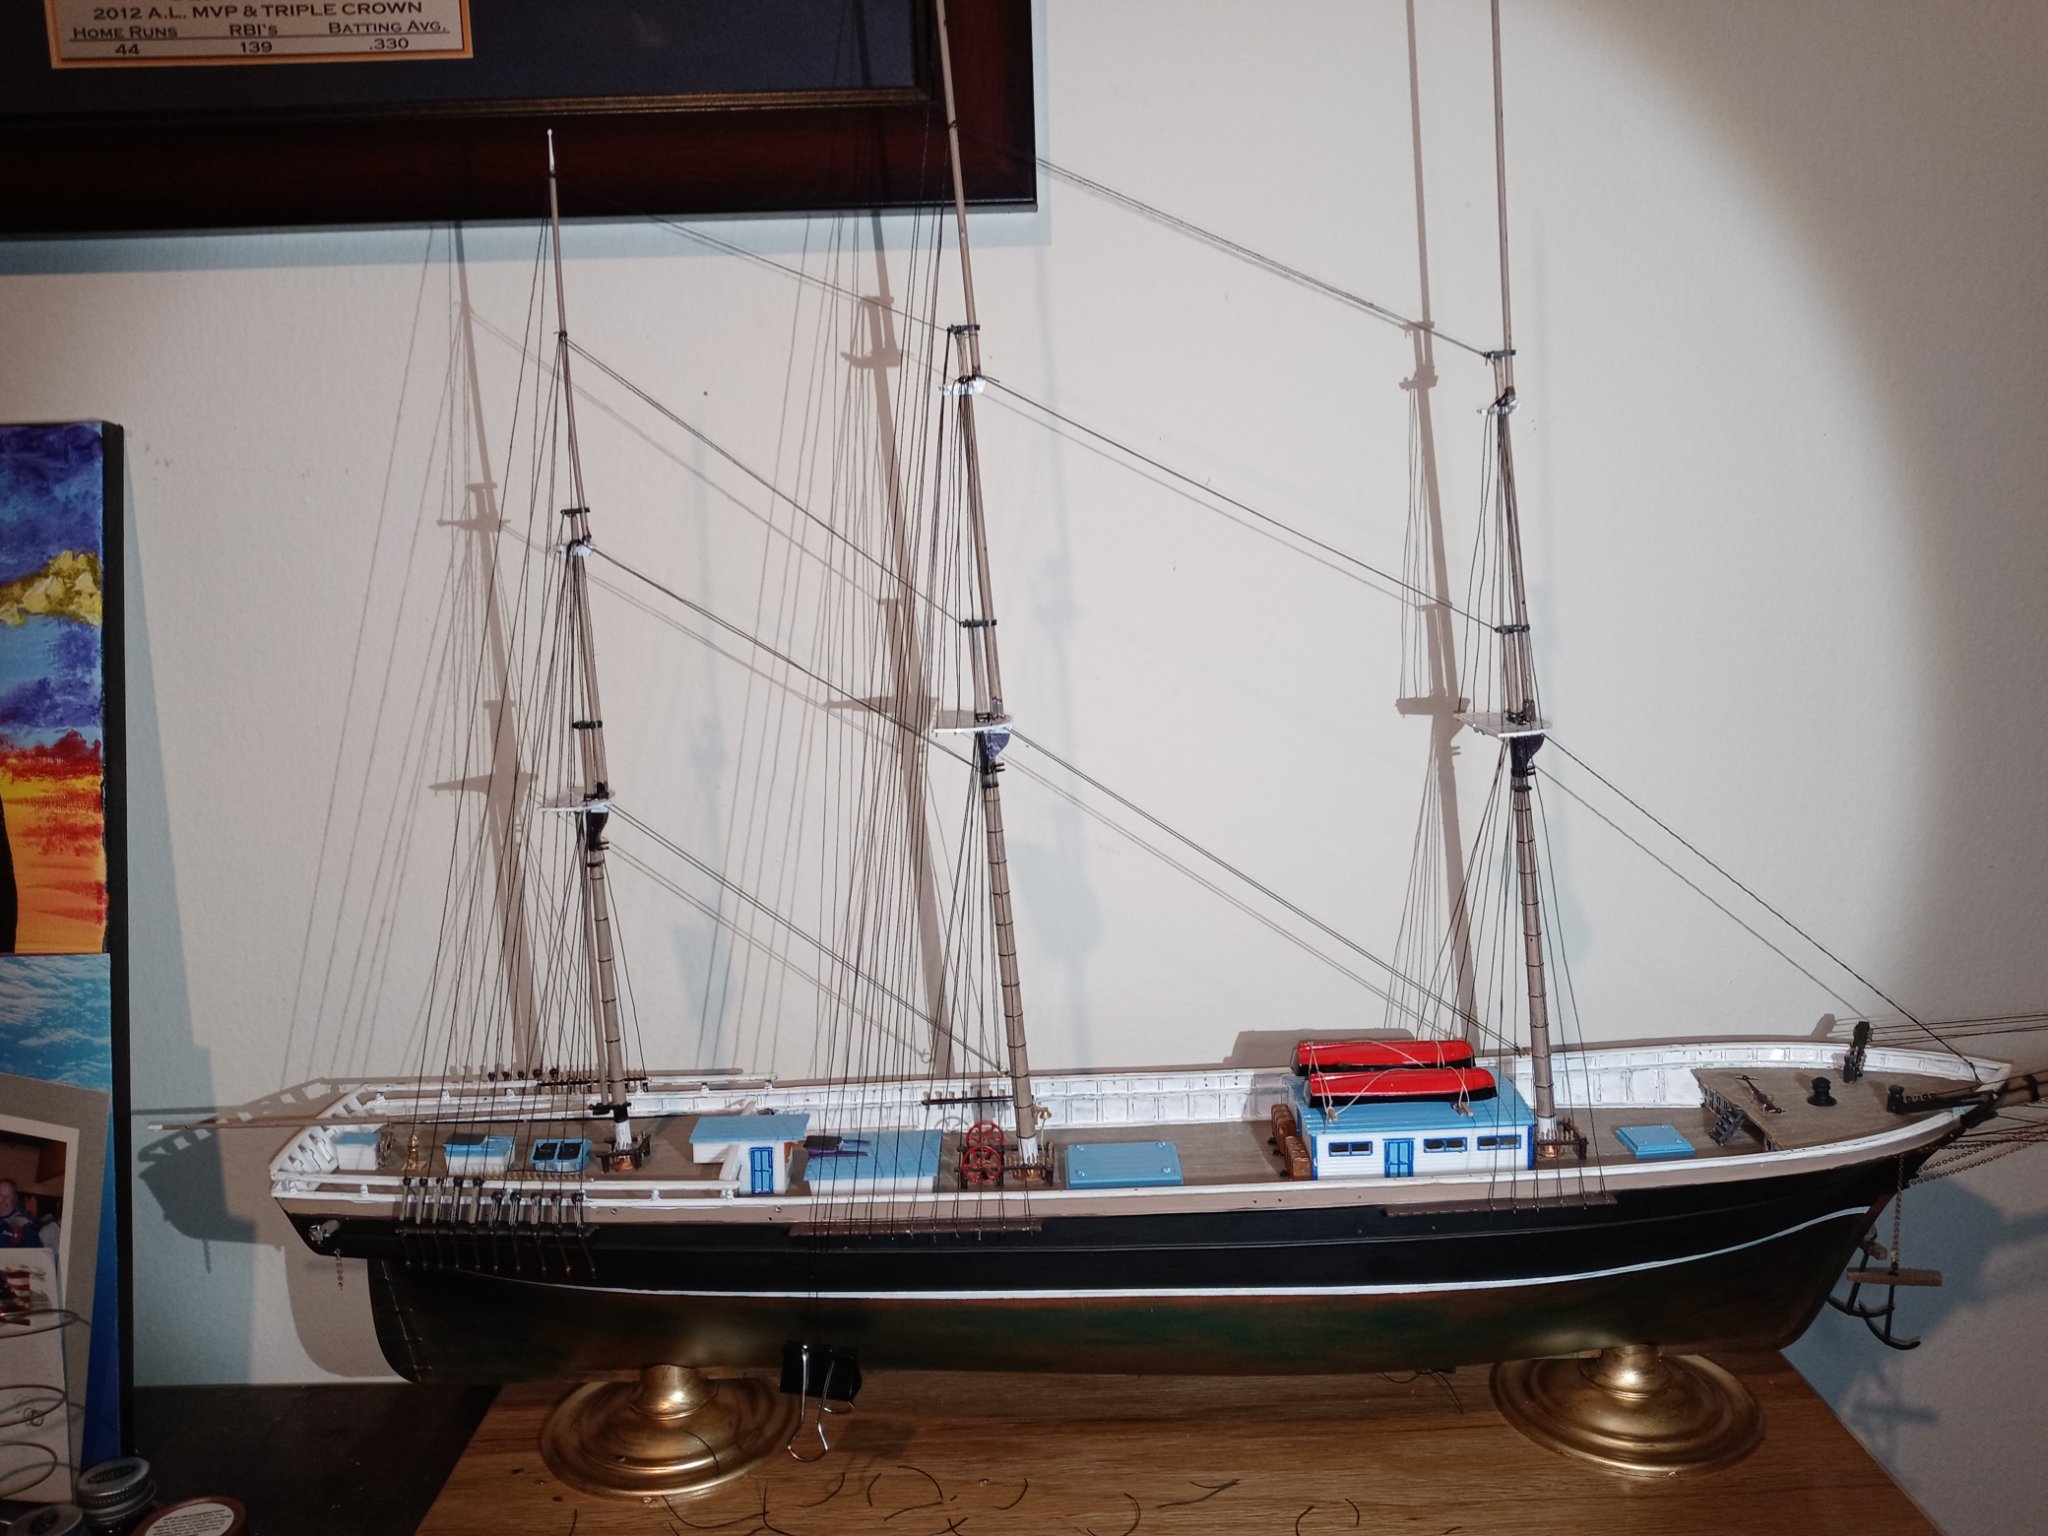
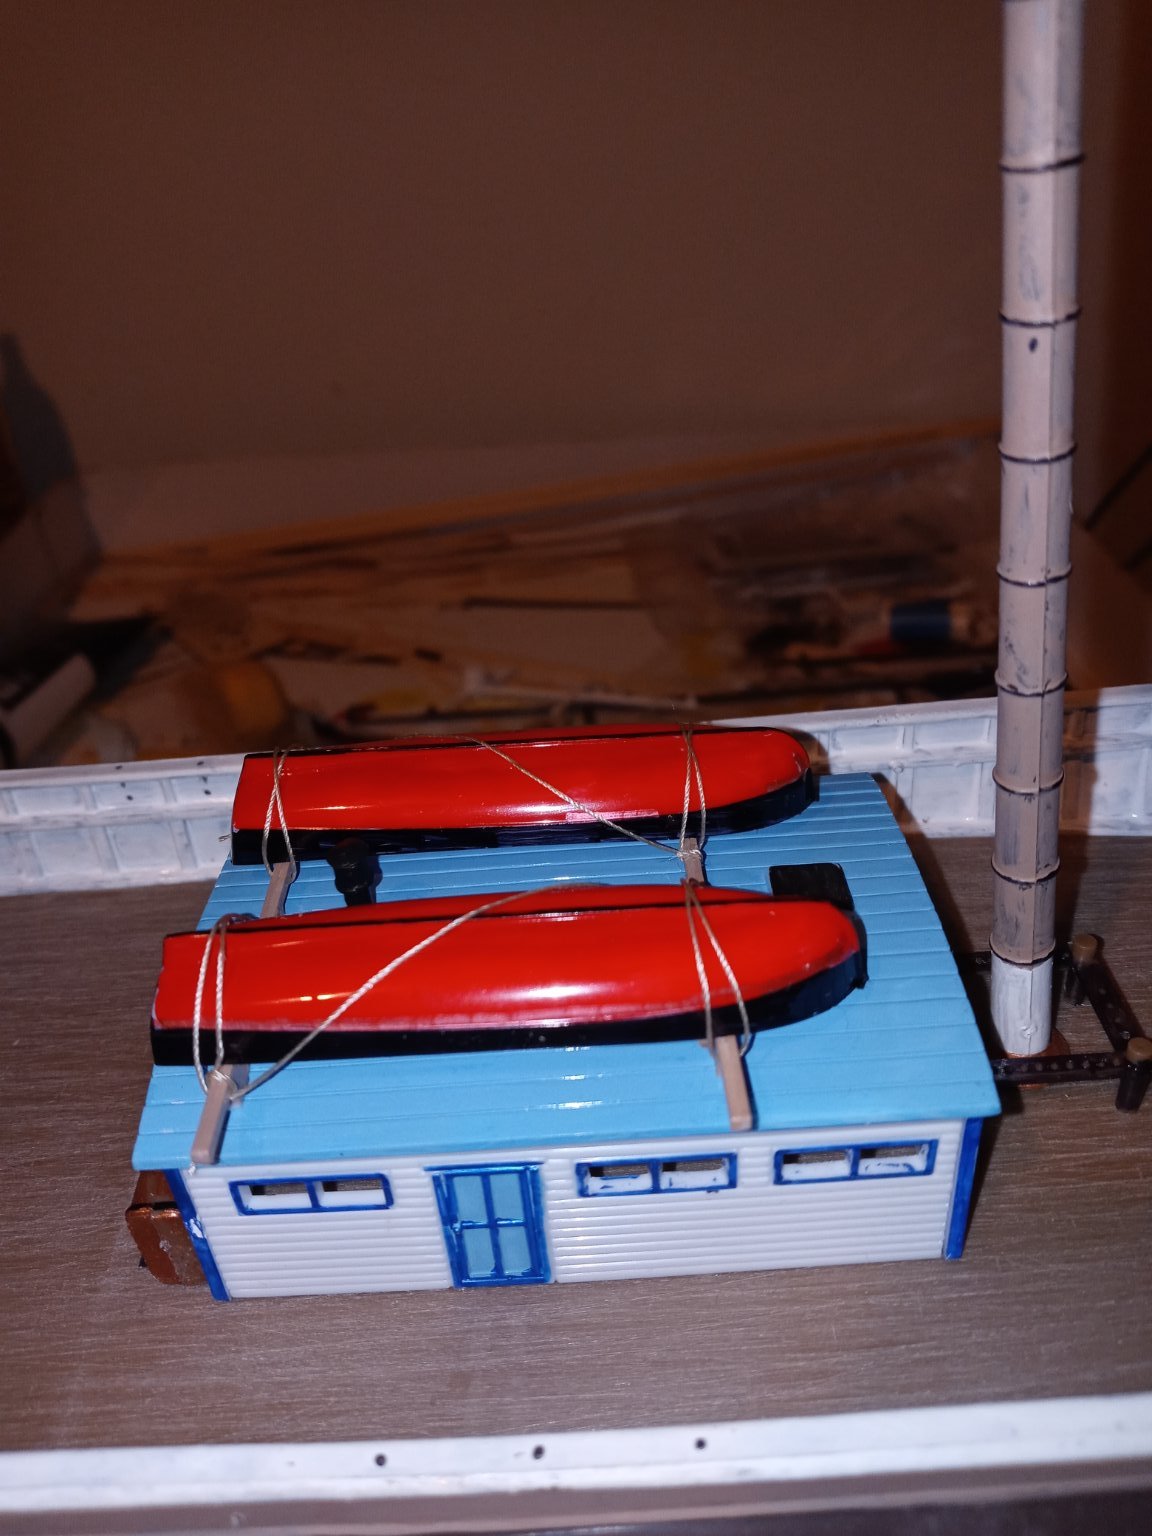
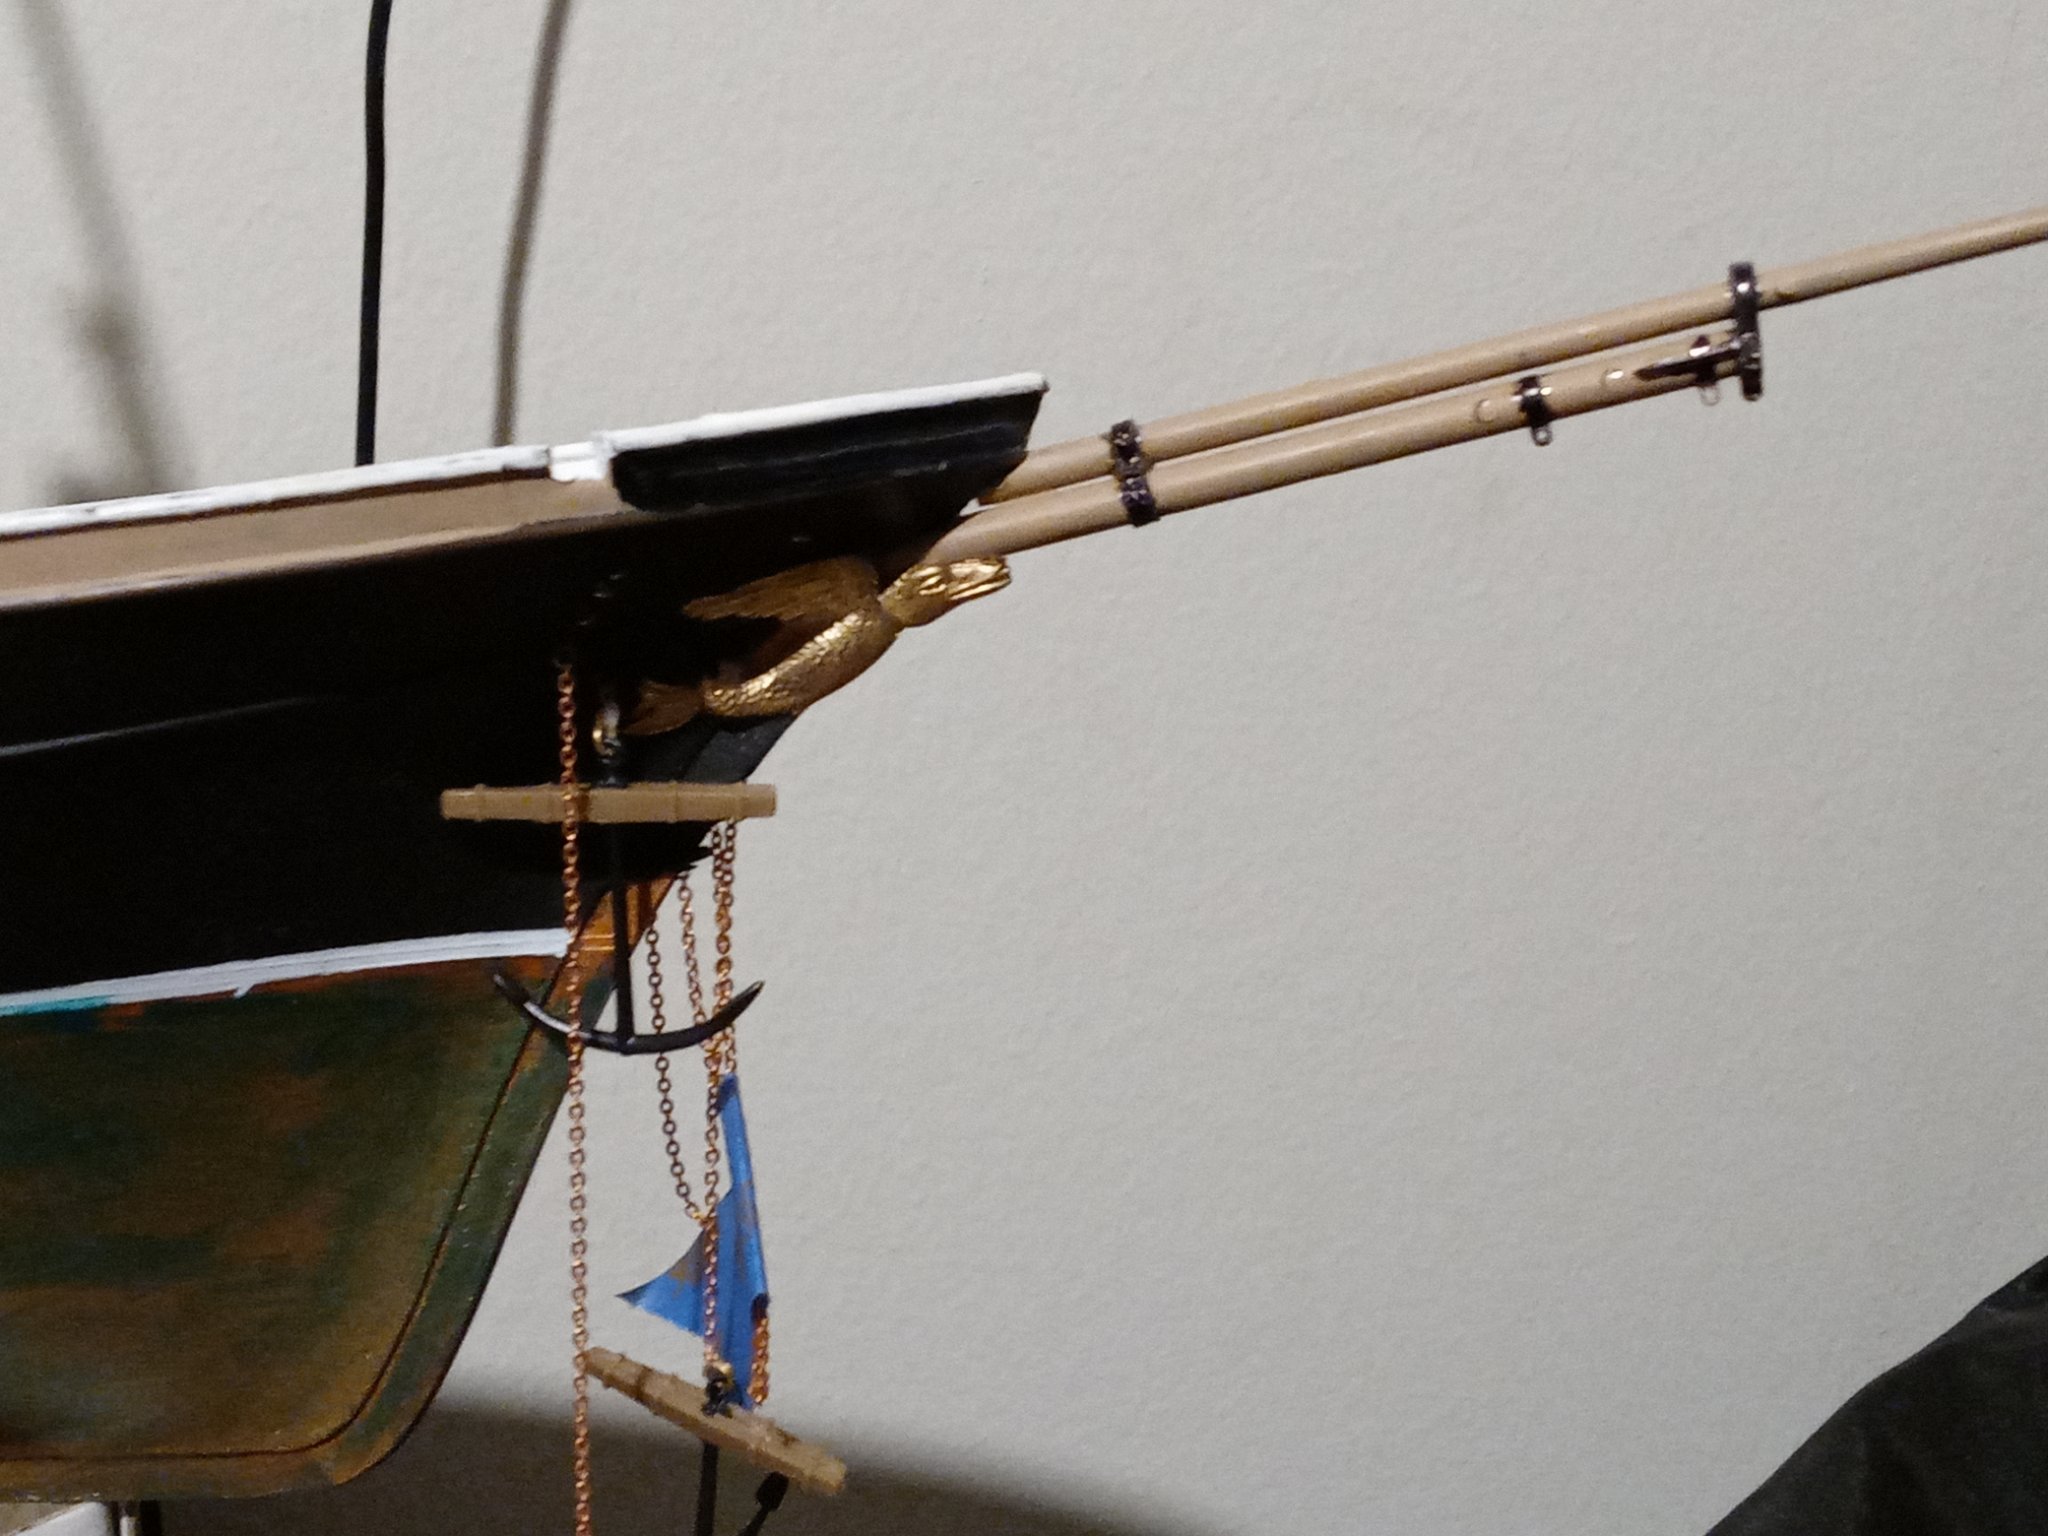
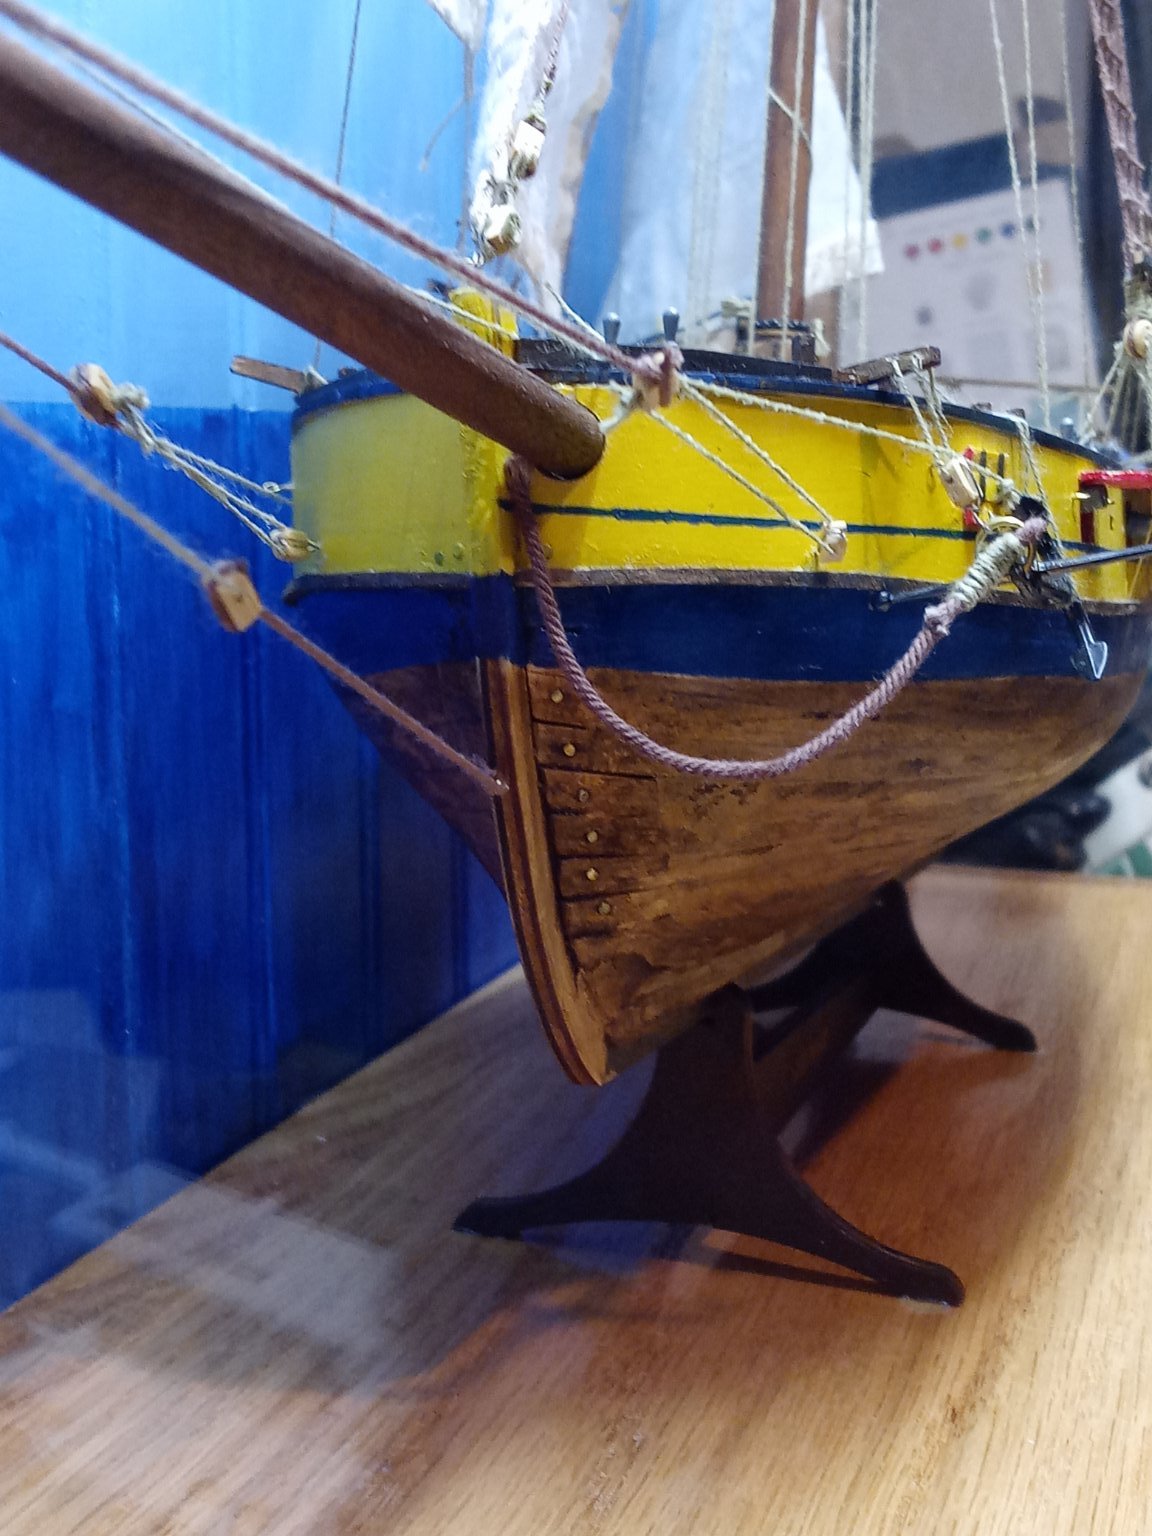
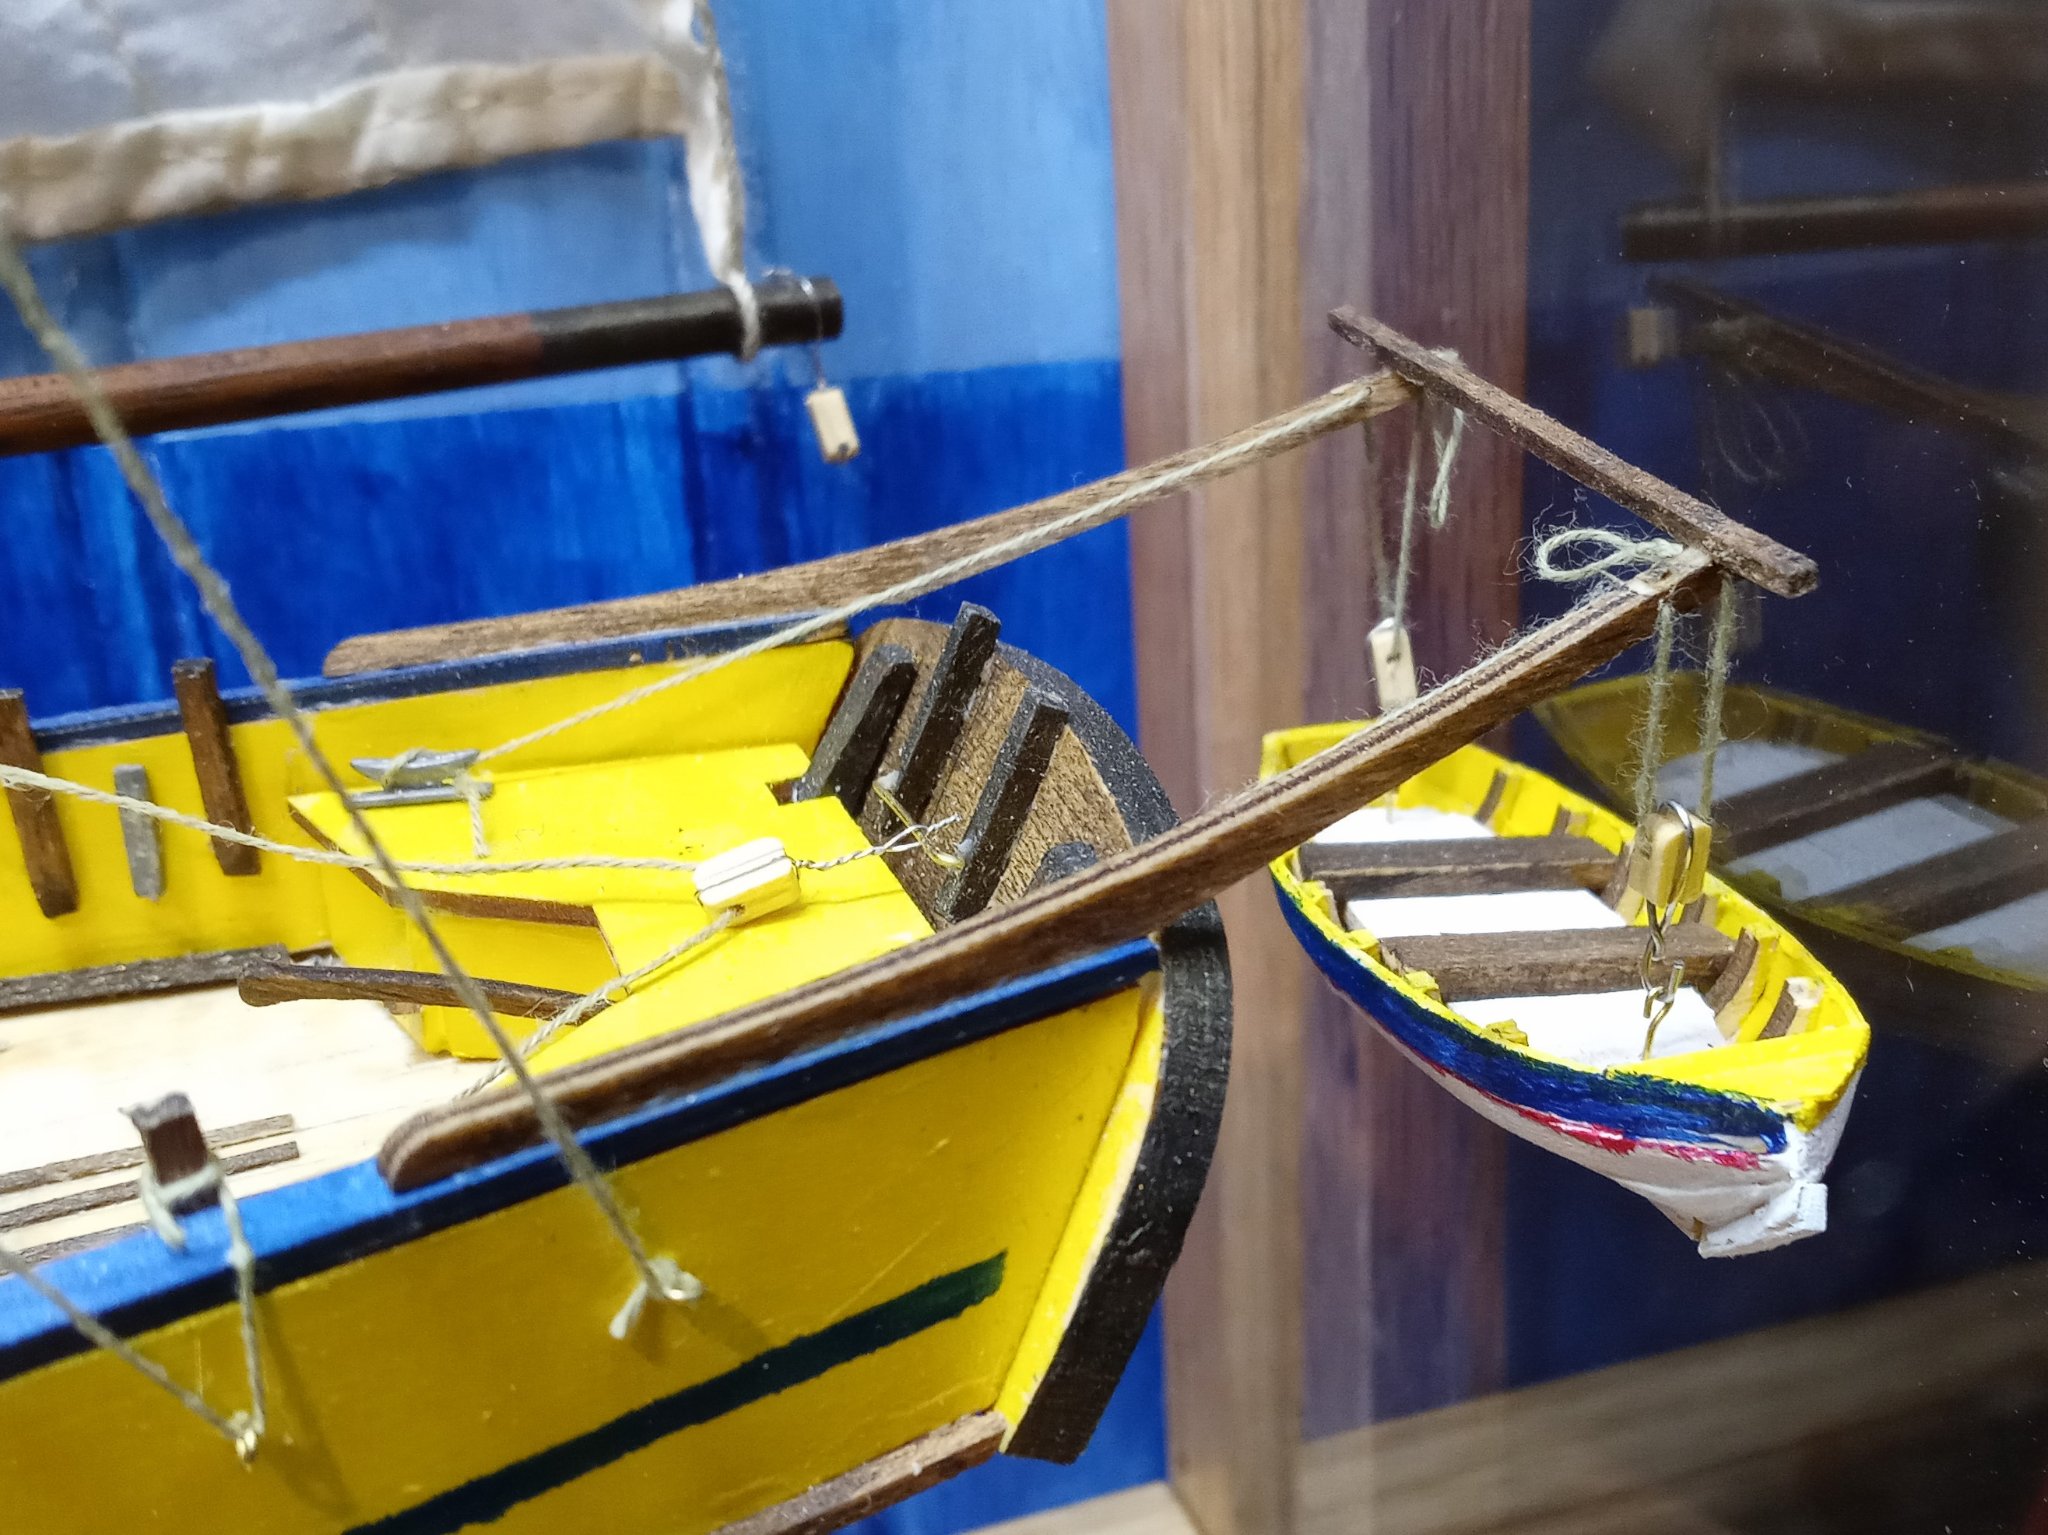
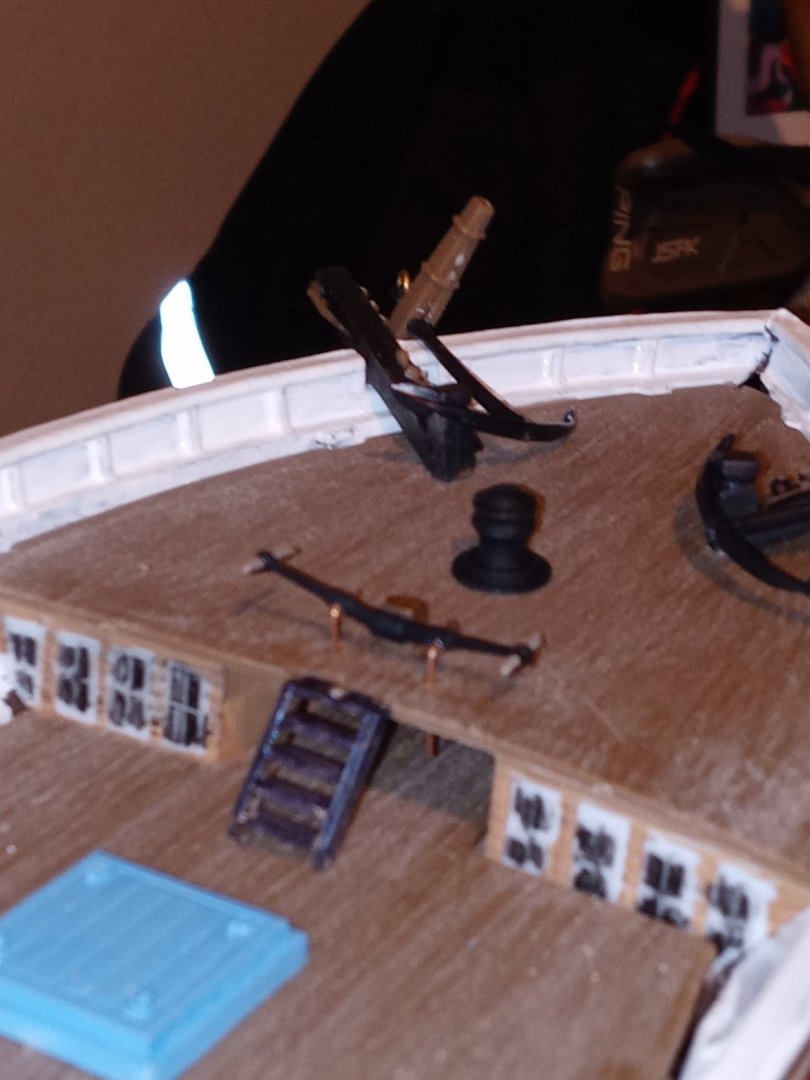
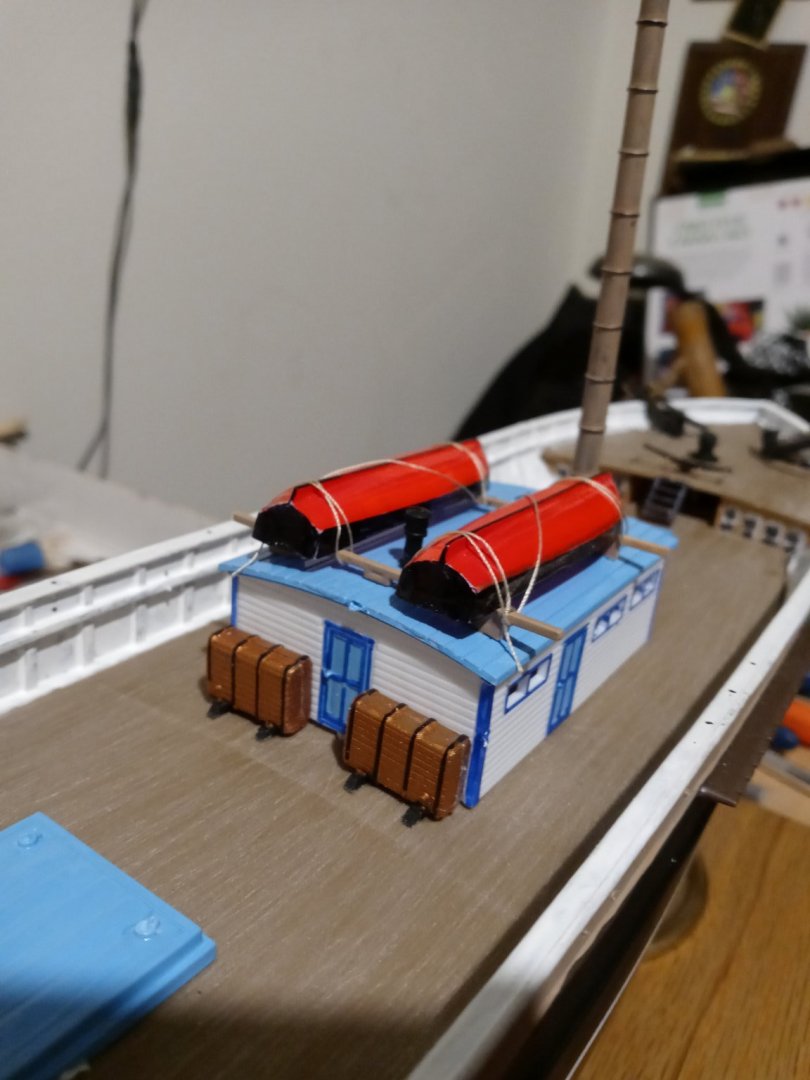
I'm pretty sure that the real thing wouldn't had a Lifeboat hanging out back like that would it? I stained the boat Davits. Wouldn't you pull the boat uptight to the davits to secure and not block the brass name plate
-
Hello from the Mitten from moltinmark
Moltinmark replied to Moltinmark's topic in New member Introductions
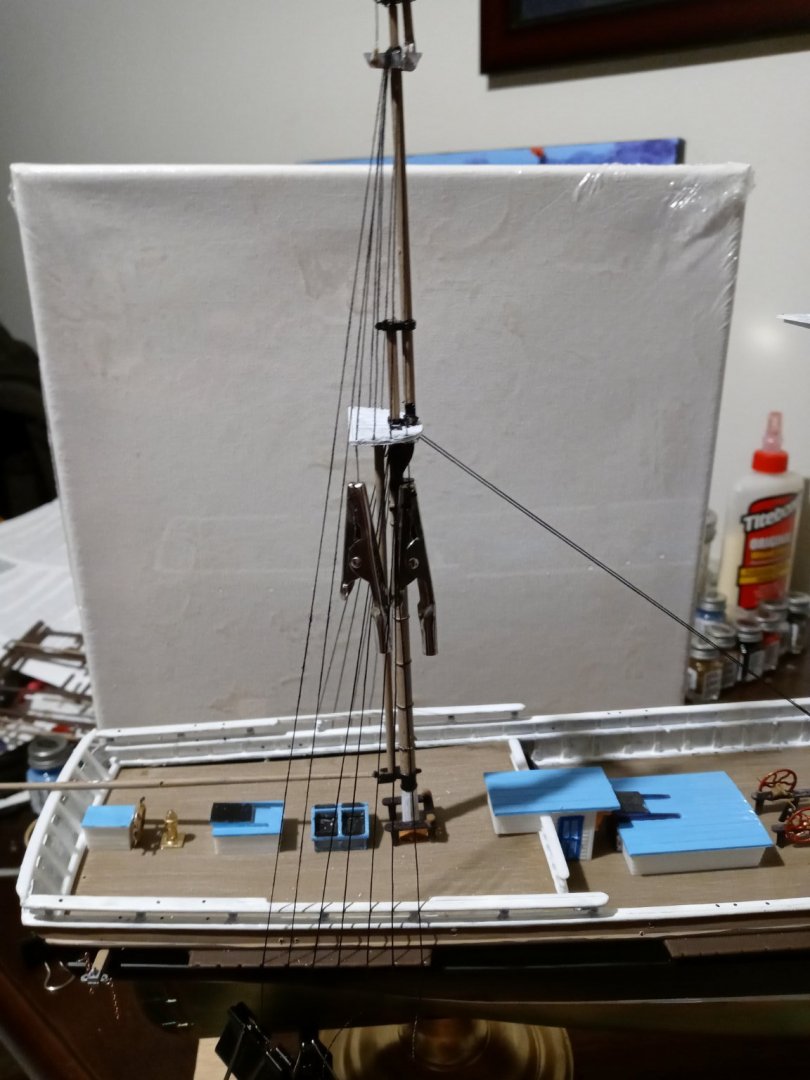
Those wires were a bugger I tried to stain the wire holders. I love the Precision laser cuts and etchings of the kit I also stained the toolkit in front of the house Shack. The one thing I wish the instructions would have used the proper names of all these parts instead of referring to the part number all the time. Still I learned a lot about the age of sail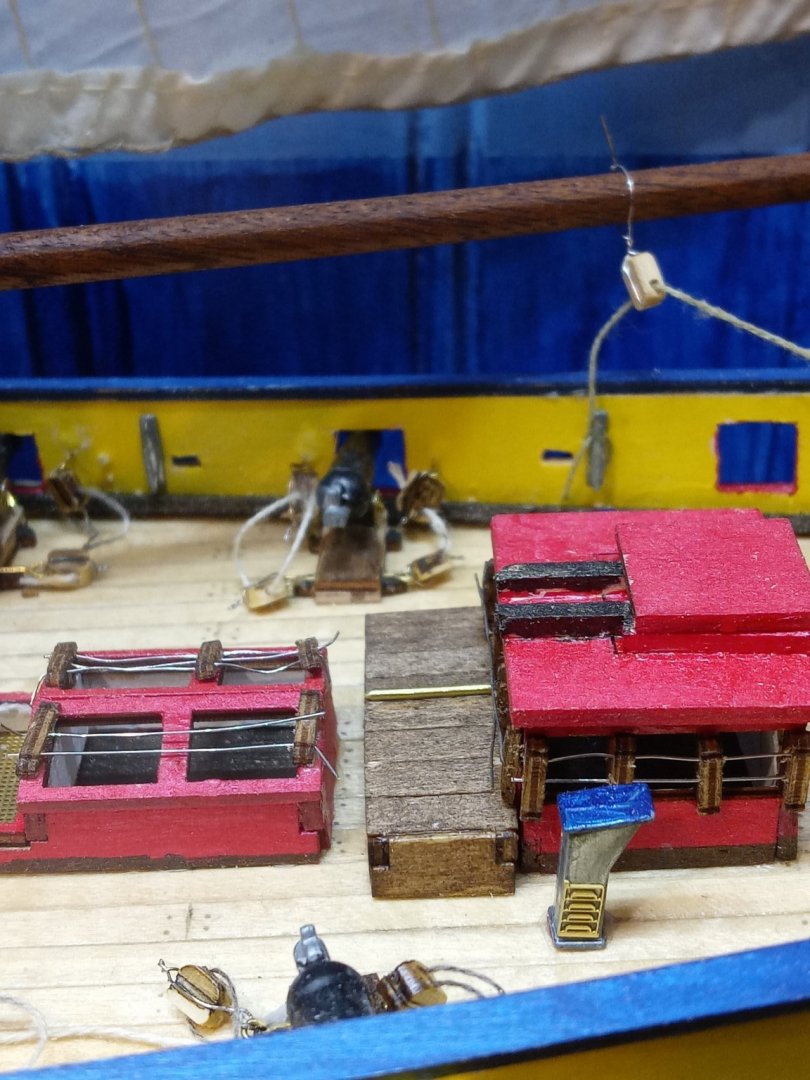
-
Hello from the Mitten from moltinmark
Moltinmark replied to Moltinmark's topic in New member Introductions
The deck was plywood with a thin plank layer on top. Used a golf pencil for the nails and the board edges. Topped with shellack. This pic also shows the deck furniture as i think their referred. I stained the top of the hold and the deck edge molding here. Every thing else was acrylic paint I got with brushes at Target art kit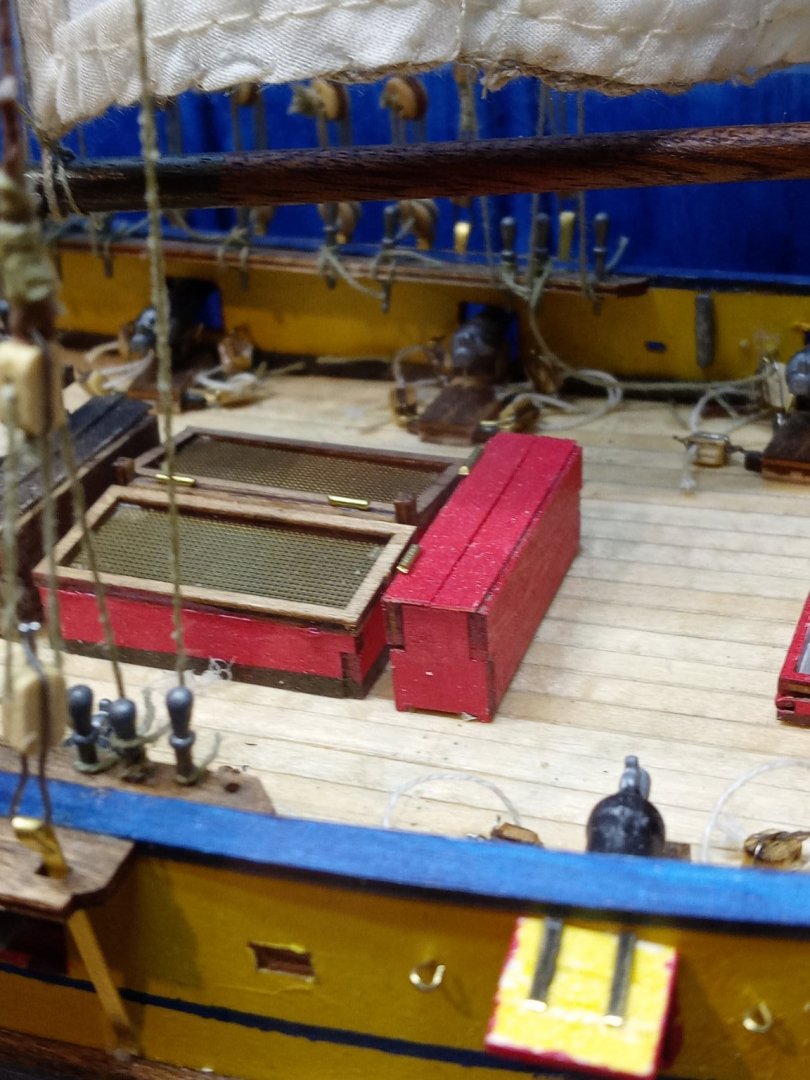
-
Hello from the Mitten from moltinmark
Moltinmark replied to Moltinmark's topic in New member Introductions
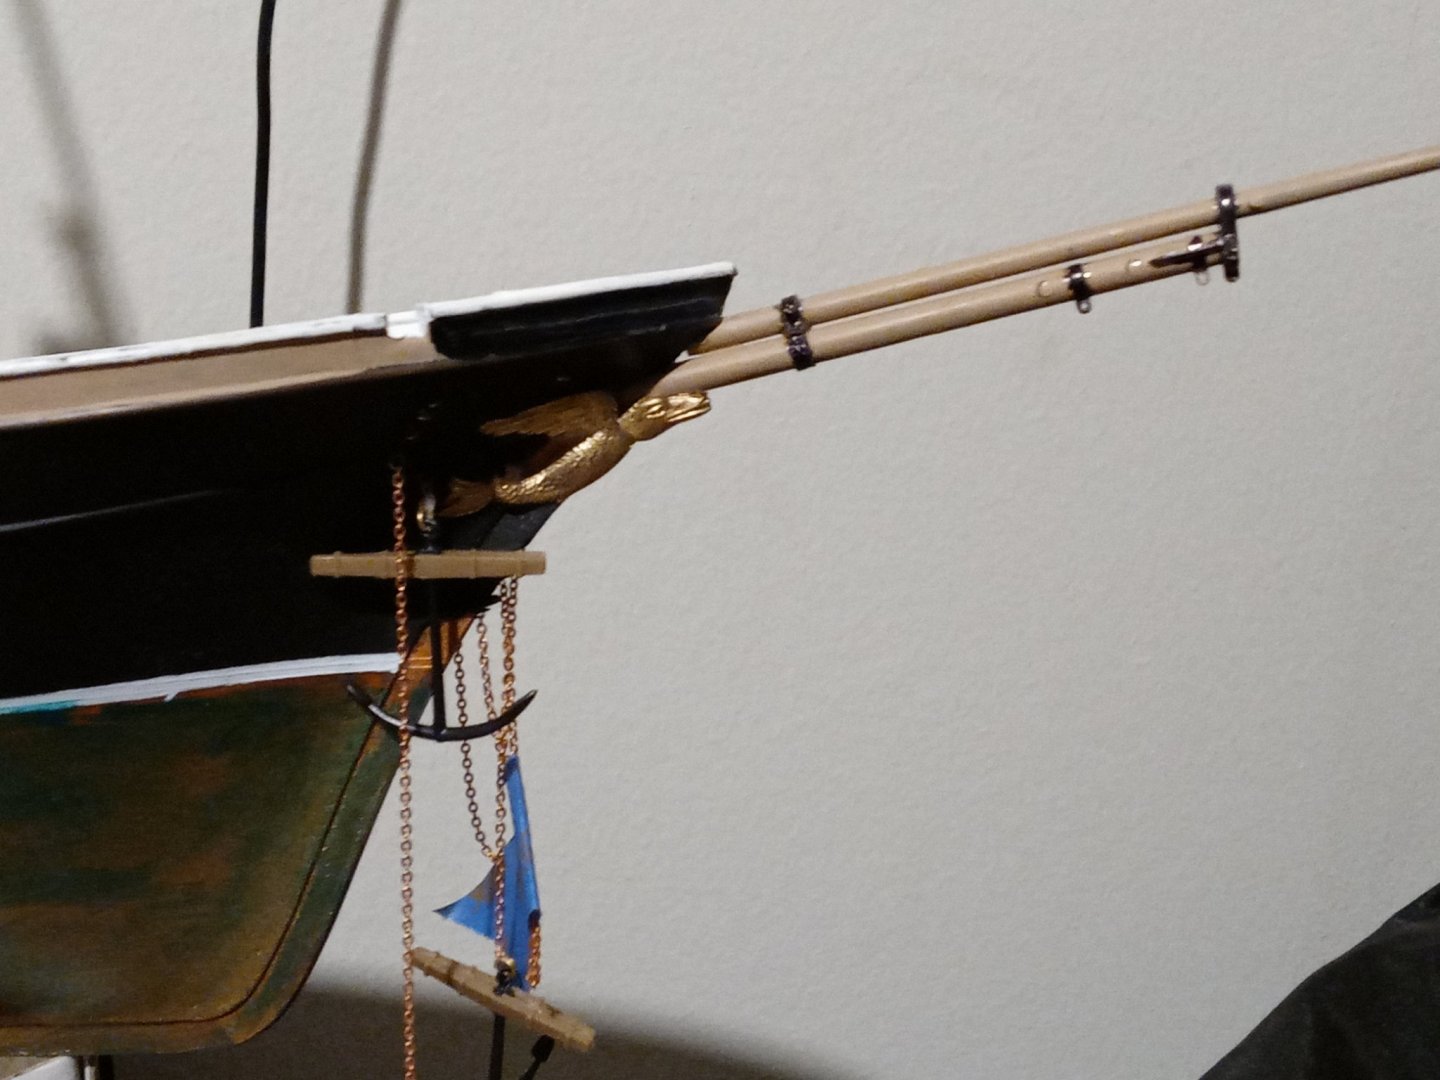
Here on the Hull I use the stain and the brass nails that came with the kit. This was a single plank on bulkhead Construction. I bent the boards in hot water in a pan on the stove and then clamp them to the inside of the gunwhales 4 boards at a time fairing them as I went. Glued and nailed at each bulkhead. I didn't painted the recommended white as I didn't want to cover up all my hard work. I was actually thinking and wondering whether they really painted the Hull in them days.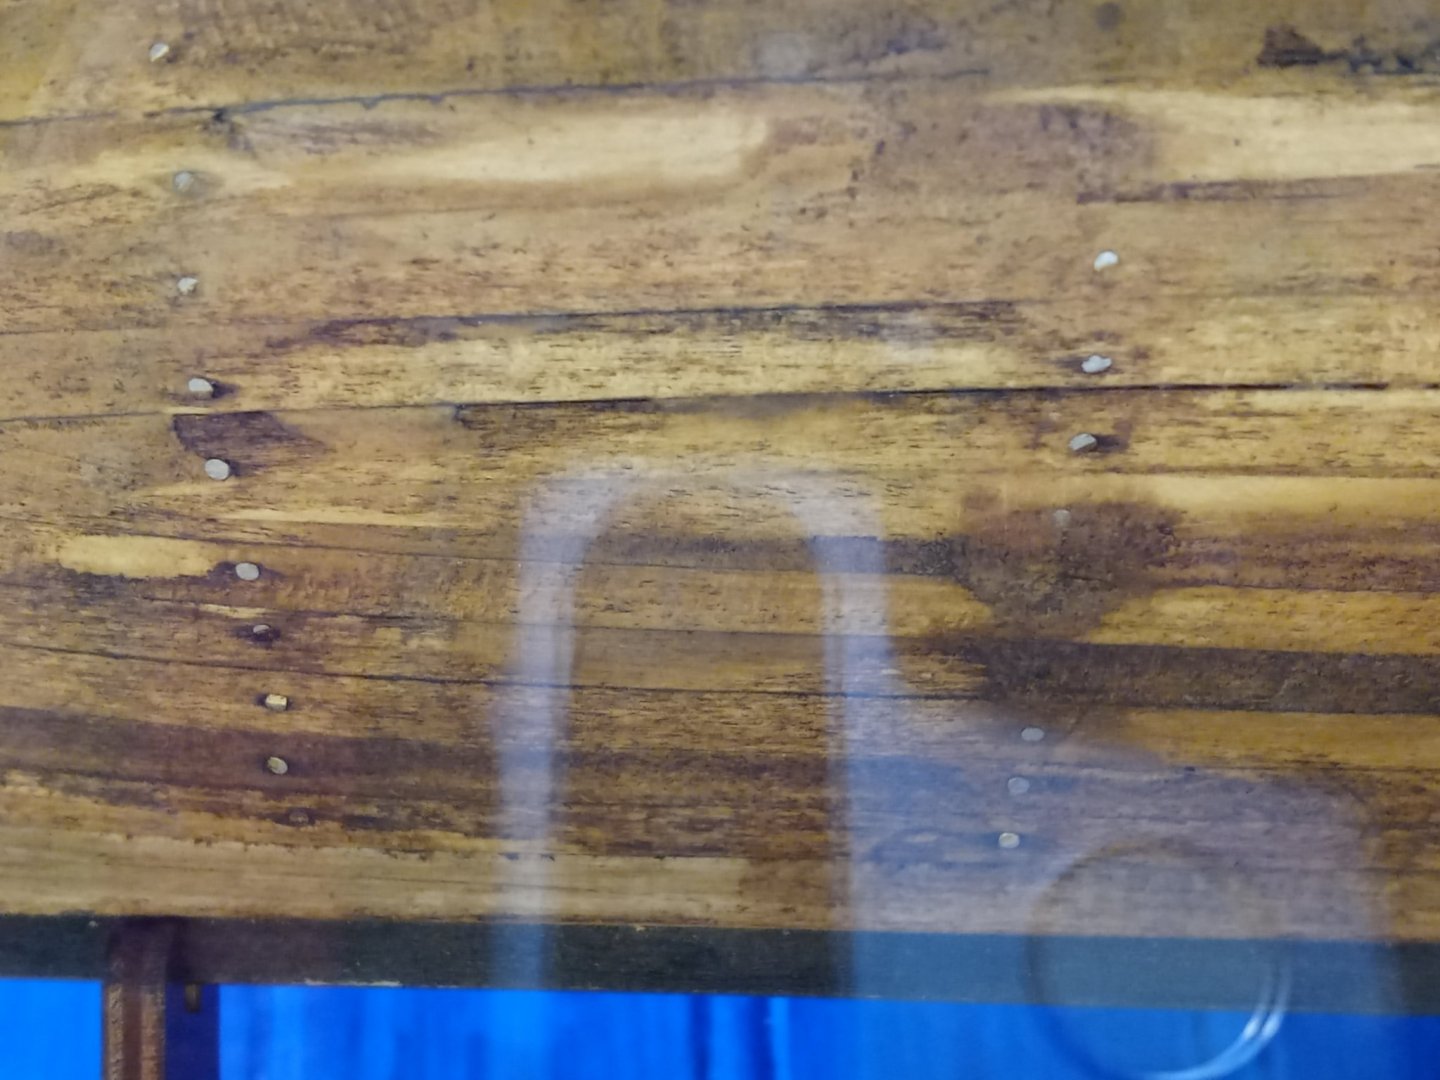
-
Hello from the Mitten from moltinmark
Moltinmark replied to Moltinmark's topic in New member Introductions
After reading thru the forums I realized that I rushed through this as I had planned to do this in what at the time I thought a two or three month shut down for the pandemic. this whole model was done hand made with basically just exacto knives and paintbrushes all hand painted and followed the directions as closely as I could understand them. Even making my own stain with paint thinner and asphalt that was suggested in the instructions.
-
Hello from the Mitten from moltinmark
Moltinmark replied to Moltinmark's topic in New member Introductions
I would very much like to review my build and how I went through it and maybe learn what I did right and wrong. Fell in love with wooden ship building how I did things, mostly per the instructions, excepting paint schemes, whether the pros and cons of what I did? Again mostly per instructions, to improve techniques and get what tools are needed for my next wooden ship. Told ya I'm hooked!! I'm not sure whether this goes here or goes to the Finished gallery ? here's as good as any place