Nathan559
-
Posts
15 -
Joined
-
Last visited
About Nathan559

Recent Profile Visitors
618 profile views


-
 mtaylor reacted to a post in a topic:
Victory Cargo Ship by Nathan559 - Bluejacket - 1:192
mtaylor reacted to a post in a topic:
Victory Cargo Ship by Nathan559 - Bluejacket - 1:192
-
mtaylor reacted to a post in a topic:
Victory Cargo Ship by Nathan559 - Bluejacket - 1:192
-
mtaylor reacted to a post in a topic:
Victory Cargo Ship by Nathan559 - Bluejacket - 1:192
-
Canute reacted to a post in a topic:
Victory Cargo Ship by Nathan559 - Bluejacket - 1:192
-
The discussion of acquiring modern instructions from bluejacket stuck with me, so I ended up creating an excel sheet based off the fittings list posted on their website for the kit. After taking an inventory of what I have vs. what the new kit is supplied with there is only a couple discrepancies. - Searchlights: The new kit includes cast searchlights, mine does not seem to. I will probably scratch build these, with a strong possibility that I'll just end up making a quick solid works model and 3D printing them. - Small and Medium Goose Neck Vents: The modern kit has three sizes of goose neck vents, while the one I have only has the large size. Being that they are simple I will certainly scratch build these. Probably will take some square stock and bend it to the correct profile under heat or 3D print them. - 48 Star flag: Obviously I will just print this on some good quality paper. There are a couple fittings I have but am thinking about replacing: - 3/32 and 1/8 single blocks: I have cast versions of these in the amounts I need, but I am considering replacing them with aftermarket blocks. Hard call on that one. - Anchor winch: I may end up scratch building a new version of this rather than use the cast version I have. Any insight on making these items is appreciated. Always good to hear other perspectives. On the topic of hull shaping, coming along well but slowly. I wish I had the stamina to sit down and sand for 3 or more hours at a time, but about an hour seems to be where I max out with patience. Final question, what are people's preferred primers? I mostly use true north paints for modelling ships but if someone has an idea for a larger quantity vessel of nice quality primer I would be happy to hear about it.
-
Canute reacted to a post in a topic:
Victory Cargo Ship by Nathan559 - Bluejacket - 1:192
-
GrandpaPhil reacted to a post in a topic:
Victory Cargo Ship by Nathan559 - Bluejacket - 1:192
-
yvesvidal reacted to a post in a topic:
Victory Cargo Ship by Nathan559 - Bluejacket - 1:192
-
Nathan559 reacted to a post in a topic:
Victory Cargo Ship by Nathan559 - Bluejacket - 1:192
-
schooner reacted to a post in a topic:
Victory Cargo Ship by Nathan559 - Bluejacket - 1:192
-
Harvey Golden reacted to a post in a topic:
Victory Cargo Ship by Nathan559 - Bluejacket - 1:192
-
Nathan559 reacted to a post in a topic:
Victory Cargo Ship by Nathan559 - Bluejacket - 1:192
-
Nathan559 reacted to a post in a topic:
Victory Cargo Ship by Nathan559 - Bluejacket - 1:192
-
Indeed they did, though the contours are not very close to where they need to be. I reached out to bluejacket to see if they had a model of the ship in their showroom, I will inquire about instructions as well. Not super necessary, I have 2/3 of an engineering design degree under my belt so blueprints and pictures alone should be enough. More information is always a good thing. Thanks for the leads, I did a fair amount of research before starting construction from which I have a large compilation of images both old and new. My goal is to do no less than 1 hour of labor per day which should help things progress quickly.
-
Canute reacted to a post in a topic:
Victory Cargo Ship by Nathan559 - Bluejacket - 1:192
-
Thanks for the feedback regarding where to post images. Here is a second go at it, hopefully formatted correctly this time.

-
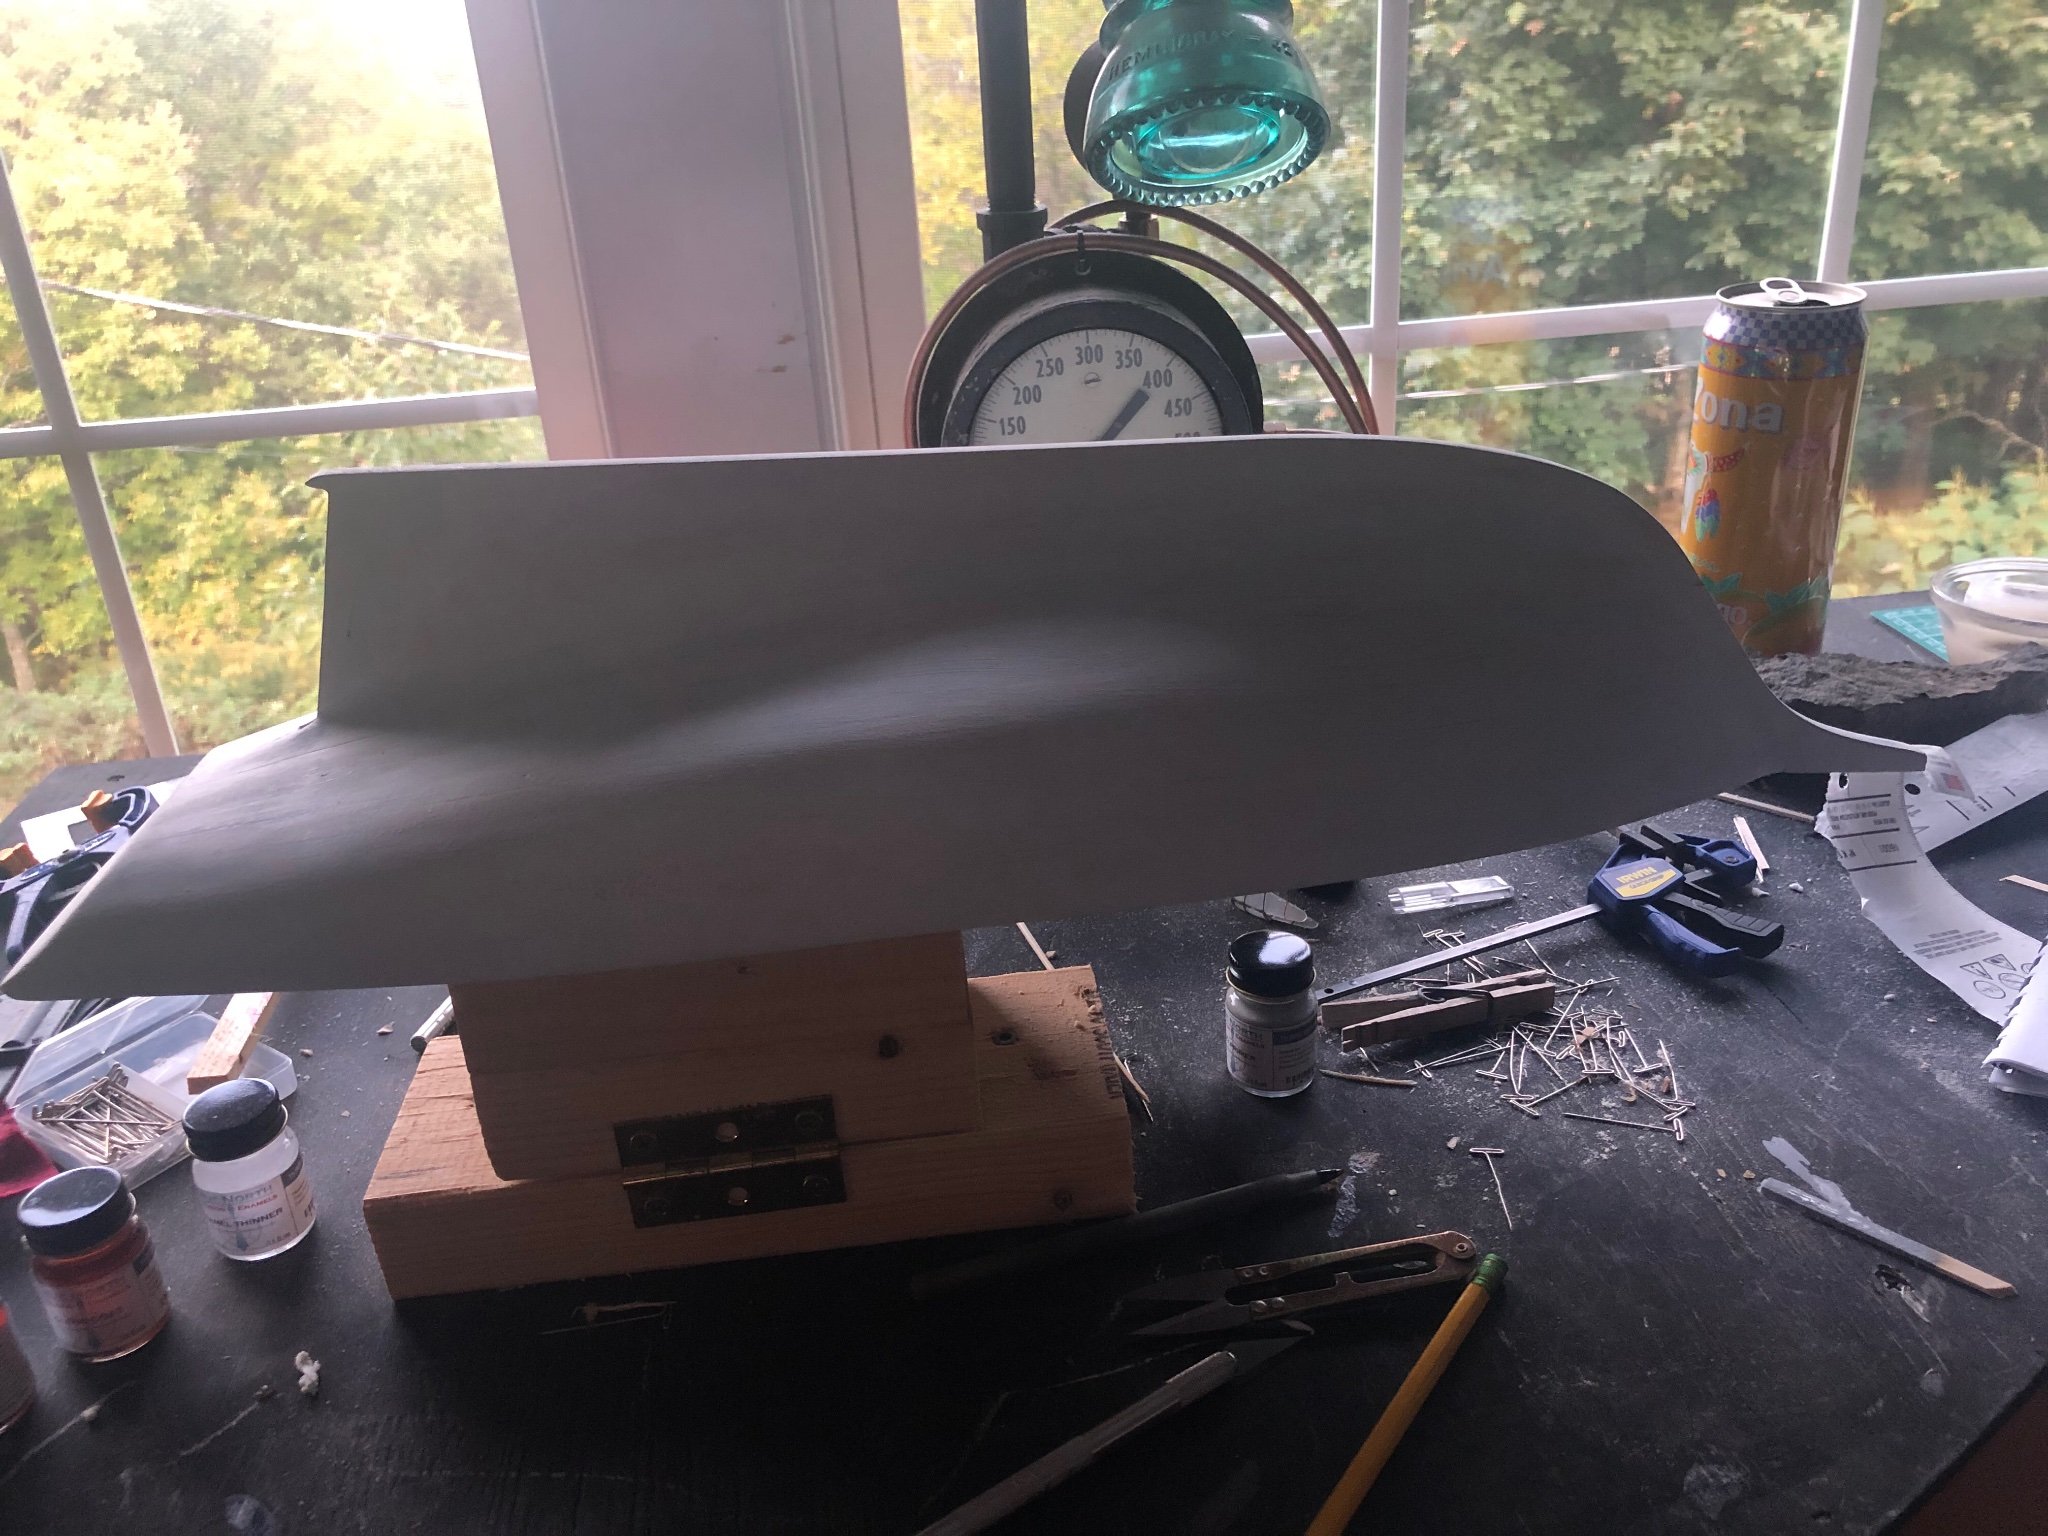
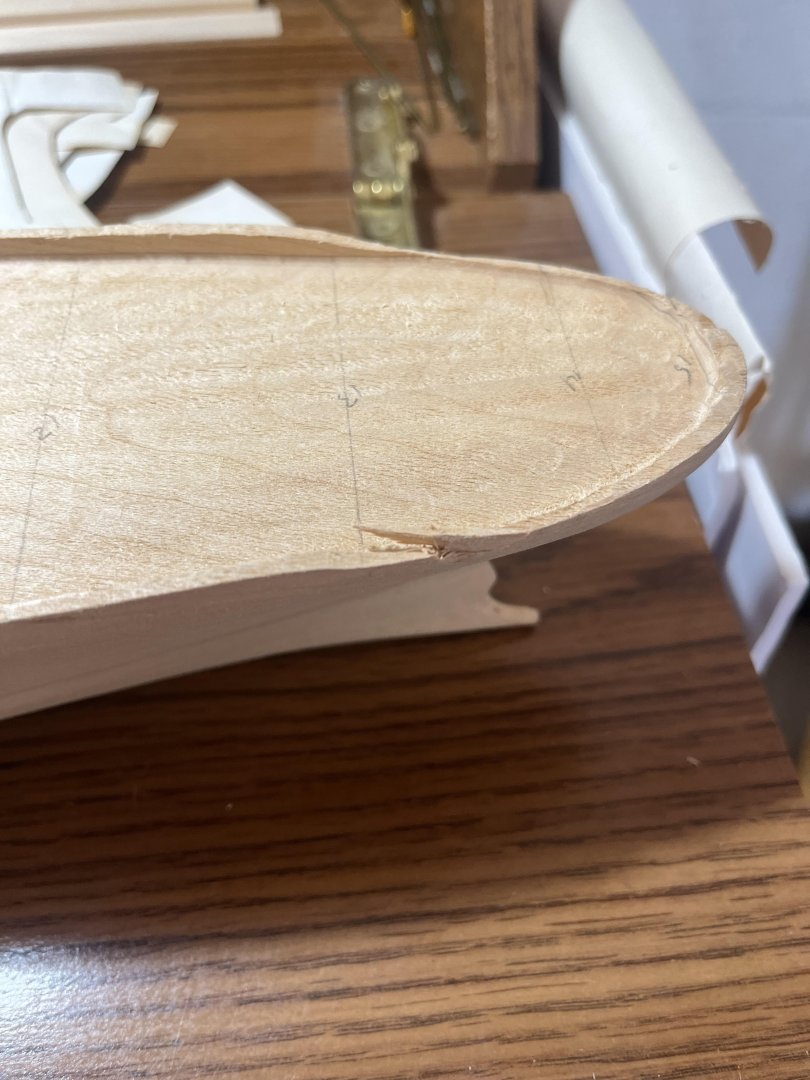
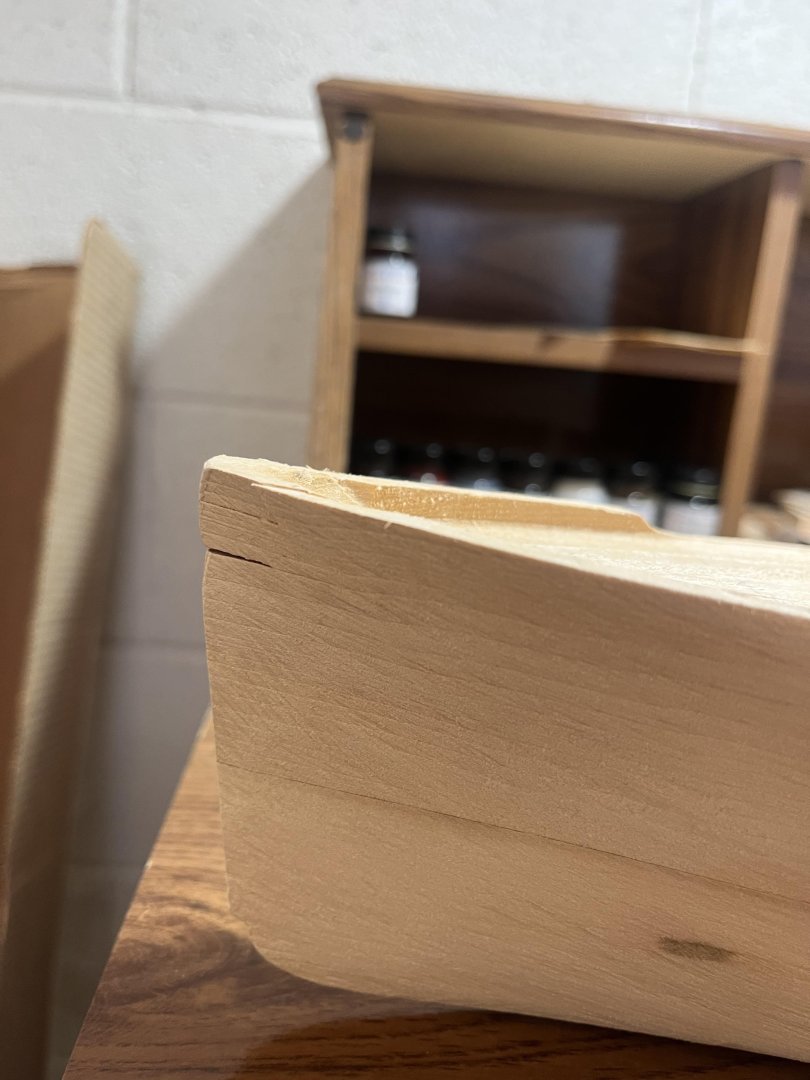
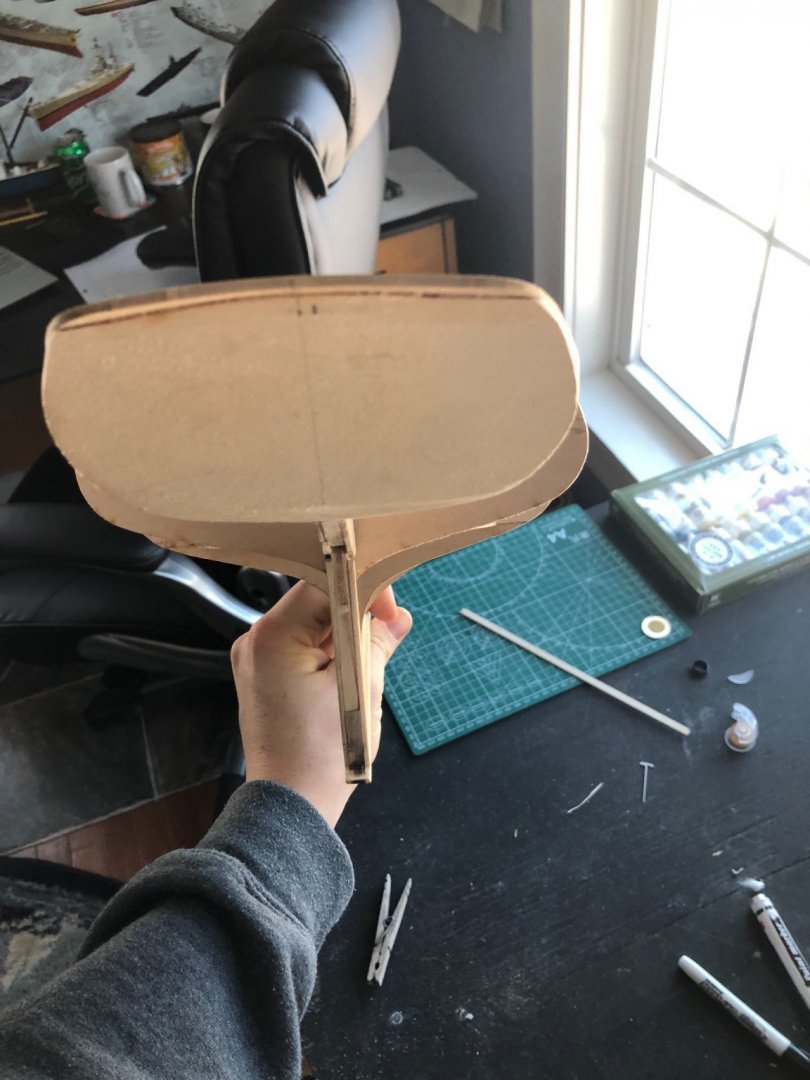
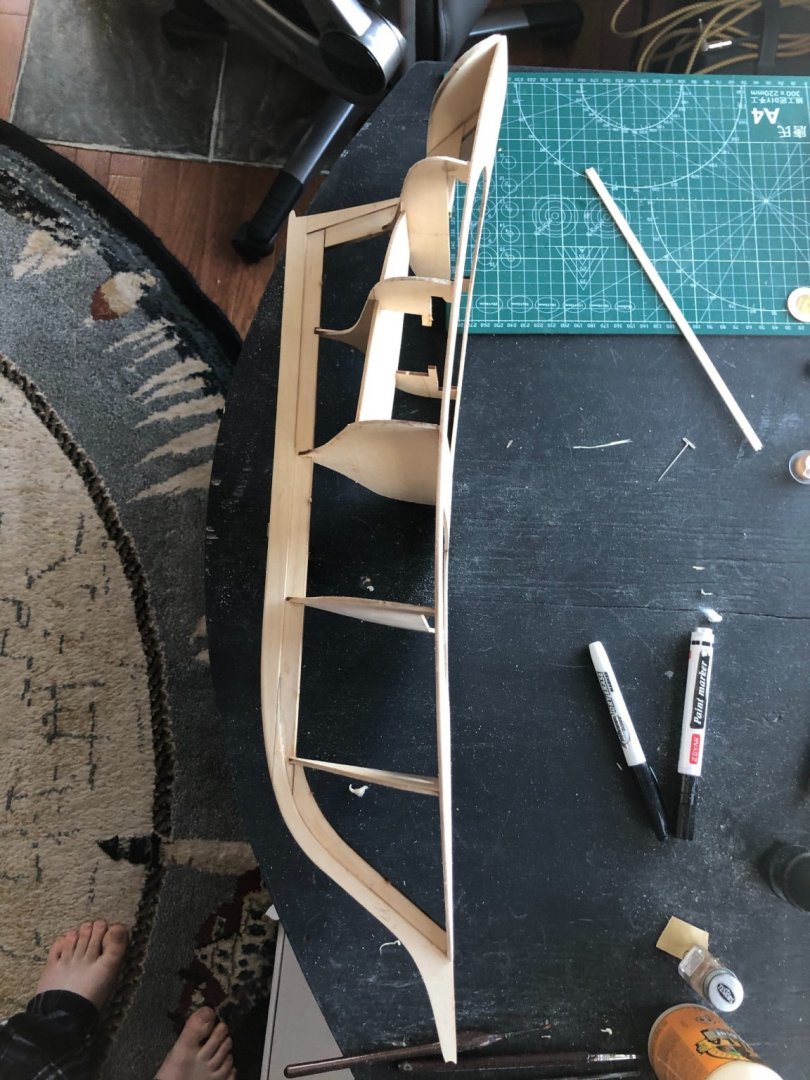
Good day to all! I am now starting my second ship model build. The first one I built was a bluejacket friendship sloop. I started it while in high school and did not finish until my first semester in college so admittedly I fell off the build log and did not update it as I should have. I gave it to my grandfather and it now lives in a beach house in Canada so I will not be able to post a completion update until I visit there again. Now that I have gotten my explanation of my negligence out of the way, time for the good part. The model I am building will be of the SS Frostburg Victory utilizing an old bluejacket kit I purchased from the used section of their store in Maine. The kit is complete, but lacks instruction so this one will be a challenge. The reasoning of a seemingly random choice is purely sentimental. The ship will be in a non combat configuration because that is how the kit is and I want to gain more experience before completely running away kit-bashing (though that will be my next project). Here I have a photo of the work area I set up in my garage. It isn't much but for a college student I think it is just fine. The blueprints I have to use are original to when the kit was first produced in 1946. A letter from bluejacket in the box claims a liberty ship instruction booklet was provided to supplement, the issue is I only have half of that somehow. The first issue I come to is an issue of circumstance. In shipping the box out to where I go to school, 2 places were unfortunately damaged. My first order of business will be to finish shaping the hull to its proper dimensions as well as repairing the two shown damage places. Hopefully in the next week I can accomplish this.
-
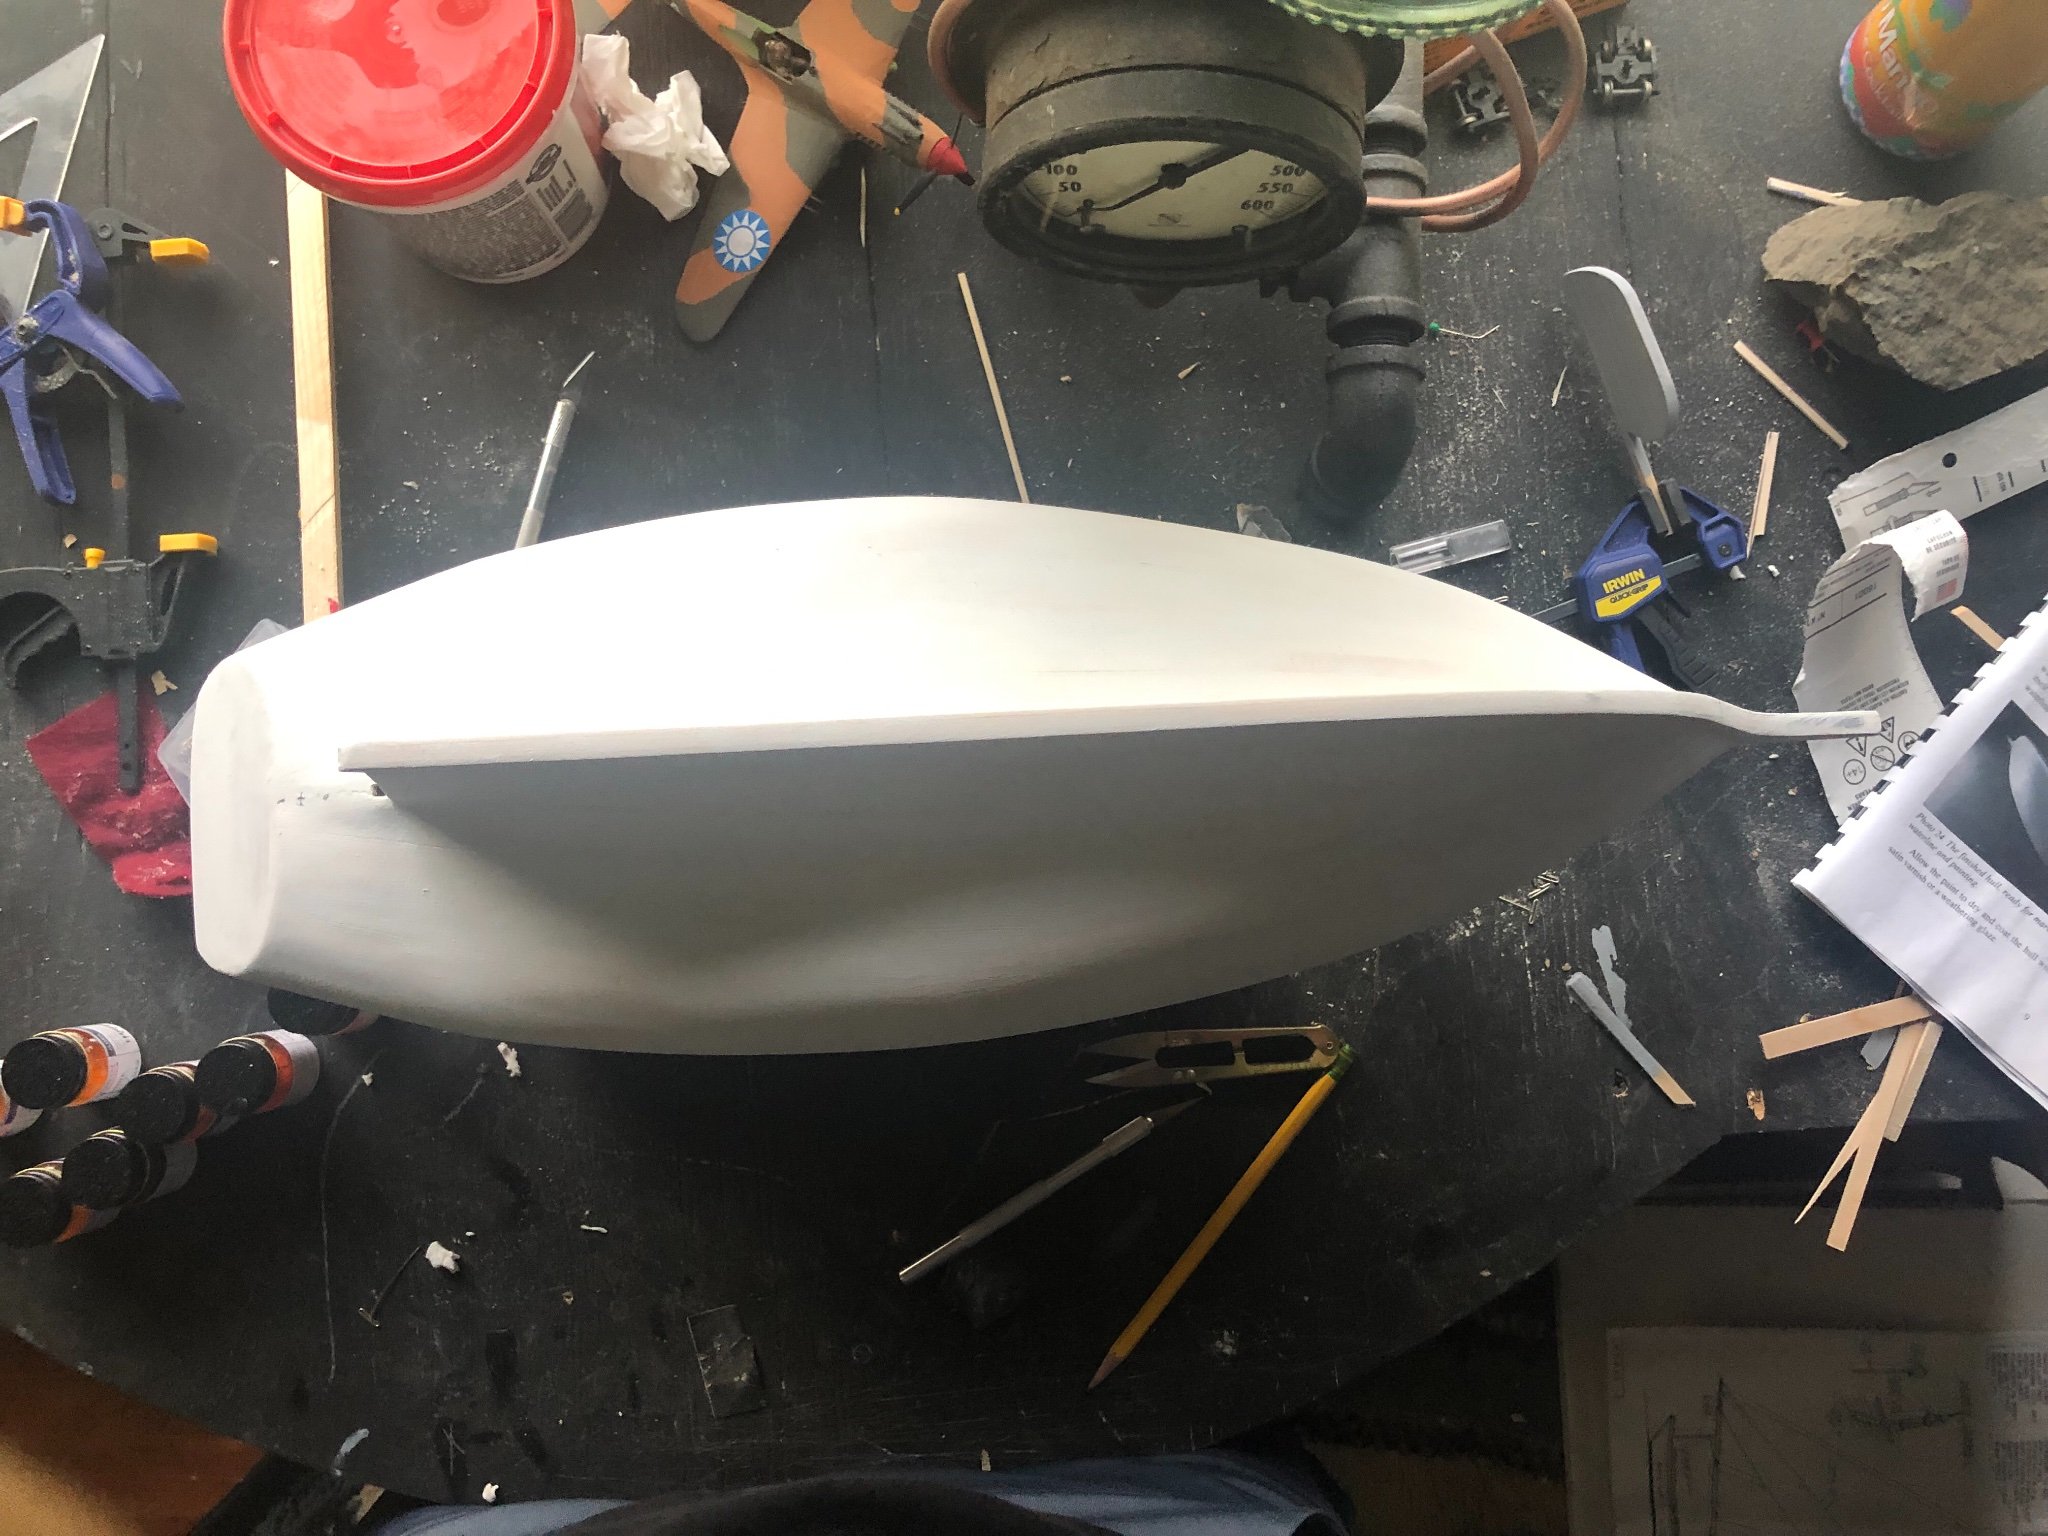
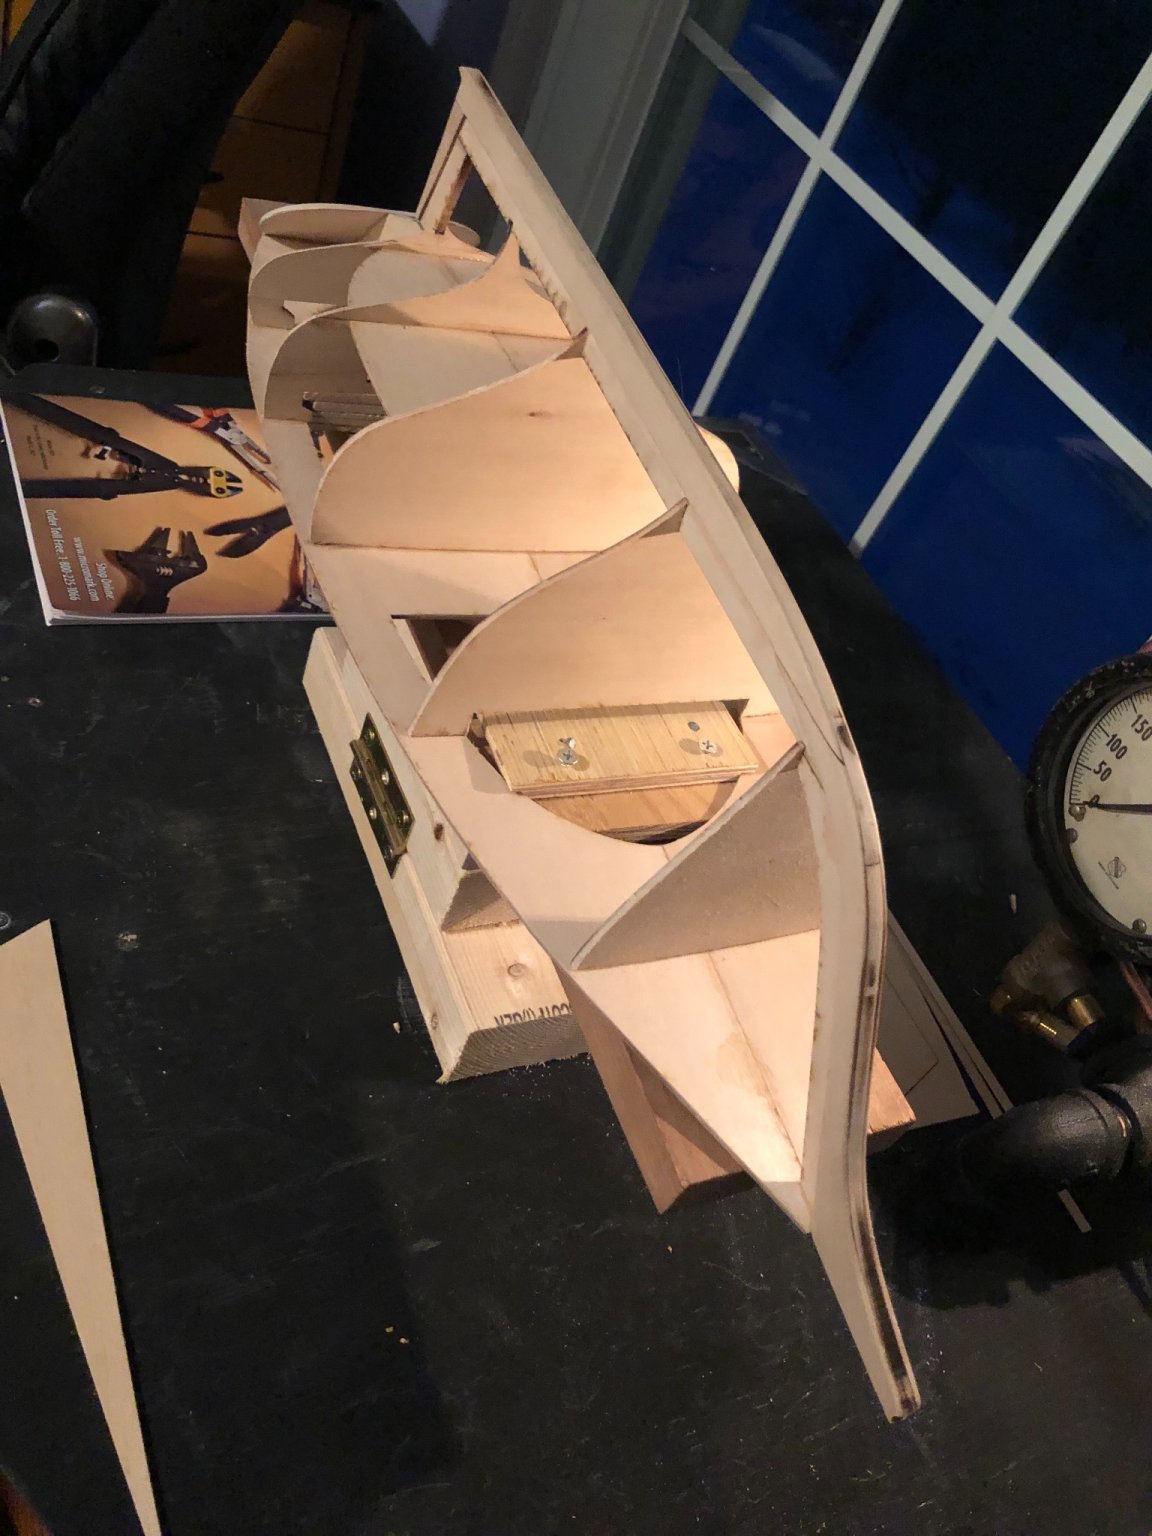
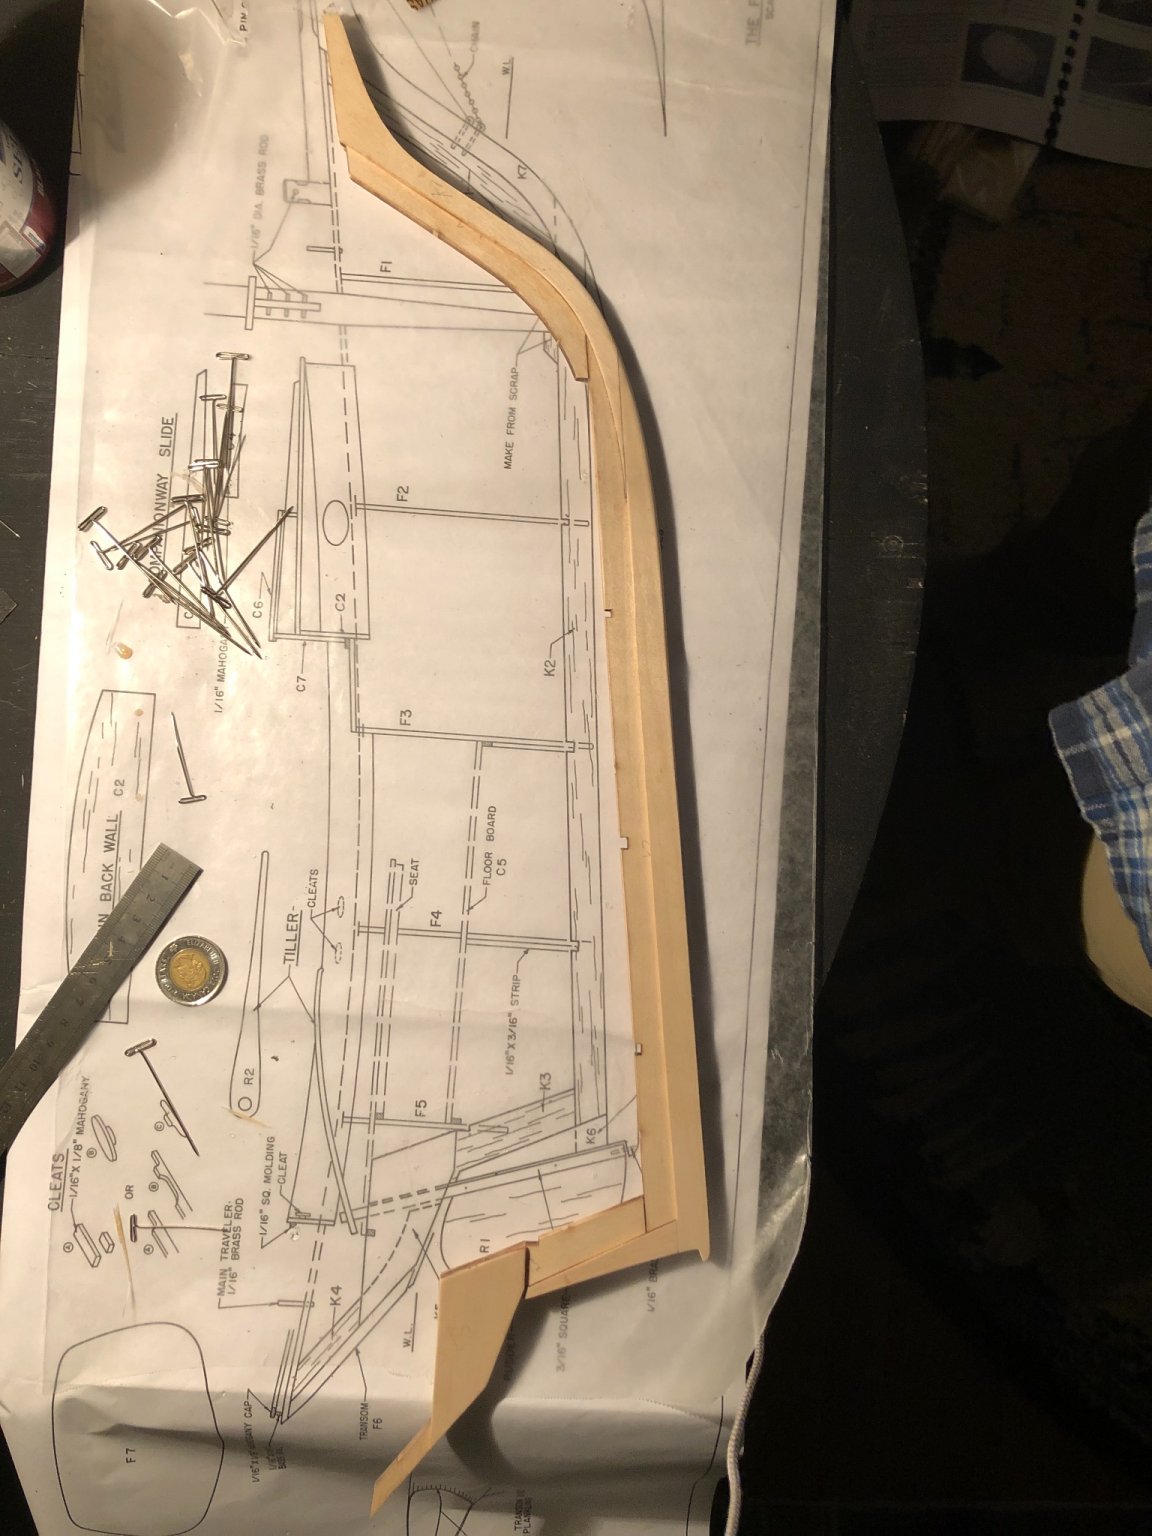
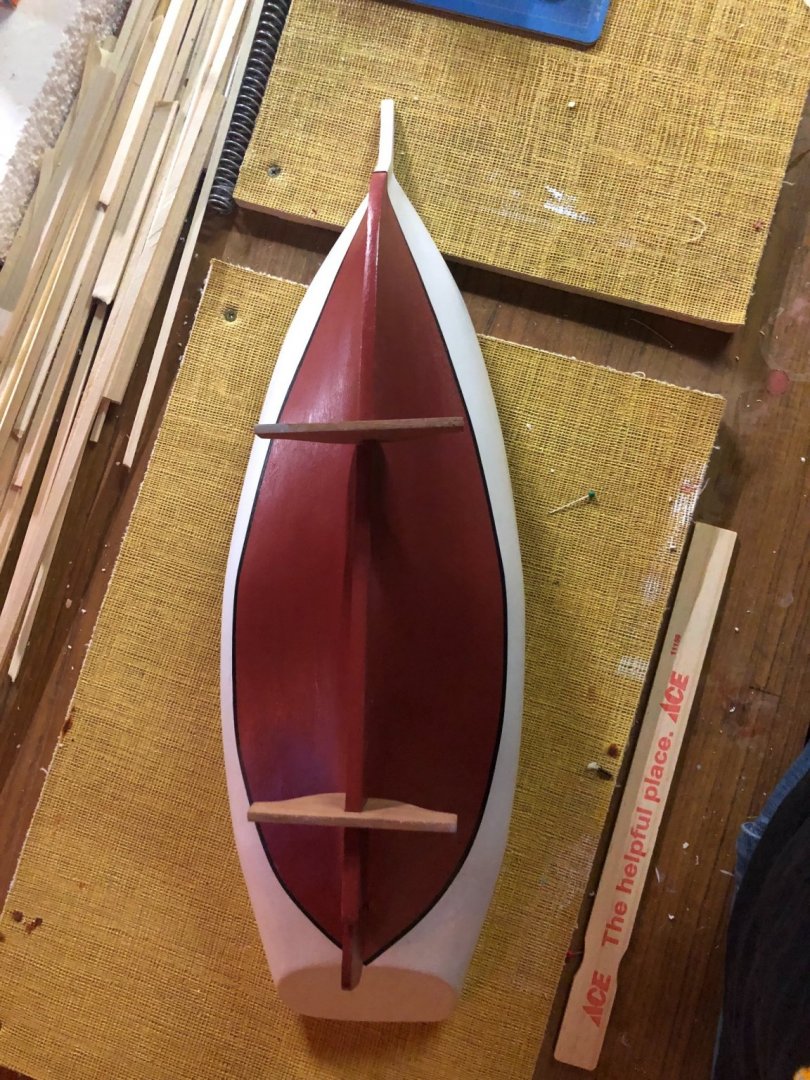
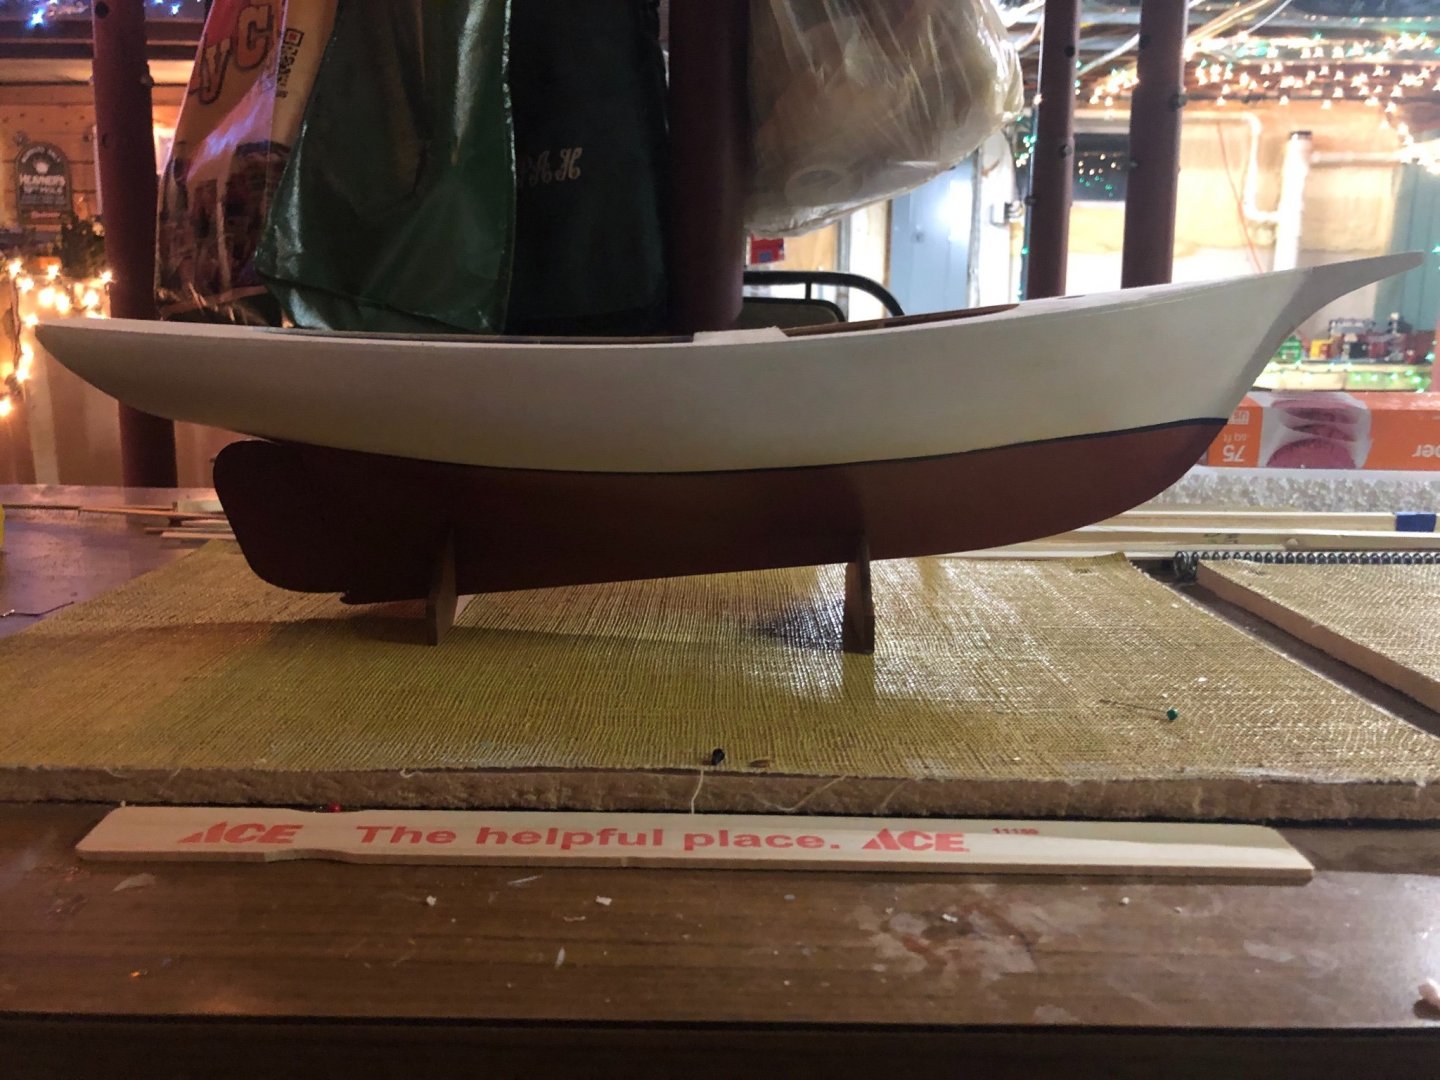
Finished the hill painting, attached the rudder, and mounted it to its cradle. The directions show it being mounted to a baseboard, but because I’m going to make that myself I am waiting until later to do so. It seems to be turning out well so far. On to the upper works.
- 15 replies
-
- 2
-
-
- Friendship sloop
- BlueJacket Shipcrafters
- (and 1 more)
-
At this point I have sanded the model down and put a base coat of white paint on it. First I sanded it using a mouse sander and 100 grit sandpaper to get the majority of the material off. Then I used 150 grit on the mouse sander to get it to a nicer finish before using wood filler. Then I used a light spackle to fill gaps in the hull and smooth out a few sections, and finally I sanded it smooth with 300 grit by hand. I ended up applying some more spackle and sanding it again with 300 before putting the paint on. Now that the base white coat is applied I am going to lightly sand it to take out some inconsistencies then paint the section above the waterline with a couple more coats of white until I am satisfied with the finish. Then I will draw the waterline and tape it to do the red below the waterline. Once the red is done I will use 1/8 inch black tape to put over the waterline to cover up any waviness and give it a nice sharp finish. Finally I will use varnish or some similar product to put a final finish on the hull before I move on to the upper works. I will be installing the rudder along the way as well. I’m hoping to make progress in a timely fashion, however I have a significant school work load so I cannot guarantee any timeline. I think it’s turning out well so far, and I am excited for the rest of the build.


- 15 replies
-
- 2
-
-
- Friendship sloop
- BlueJacket Shipcrafters
- (and 1 more)
-
Thanks for the recommendations Nic! I ended up using the light spackle and I think it came out well. Progress has been slow due to a large workload in school, but I should have an update up in the next day or two. Nathan
-
Nathan559 reacted to a post in a topic:
Friendship Sloop by Nathan559 - BlueJacket Shipcrafters - first build
-
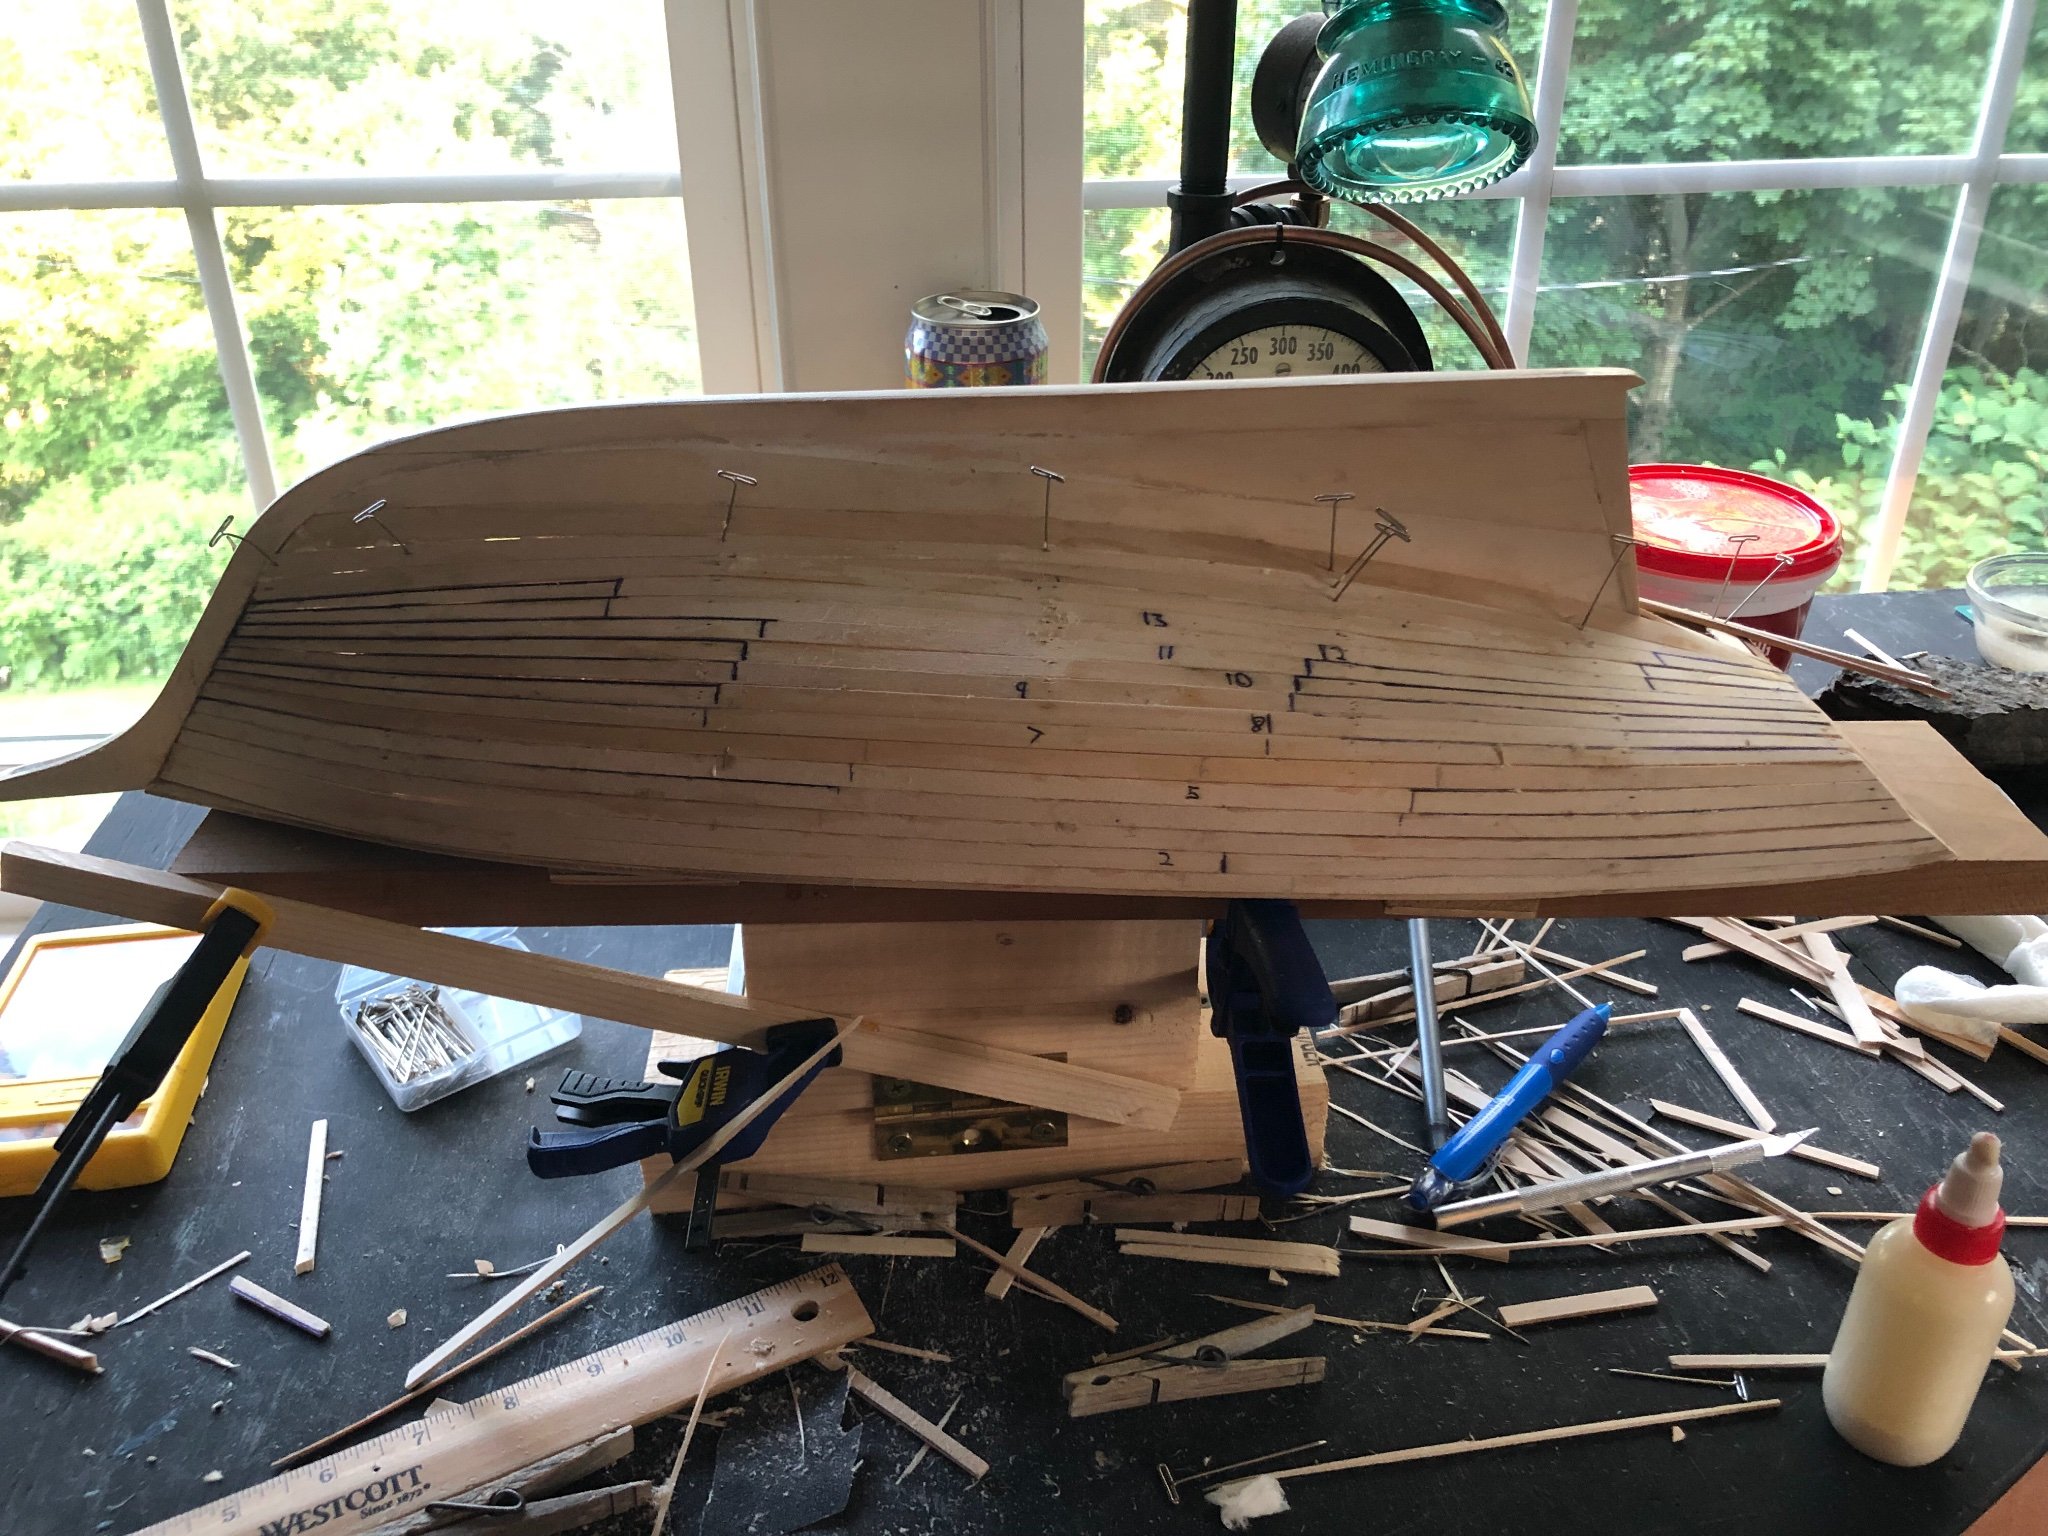
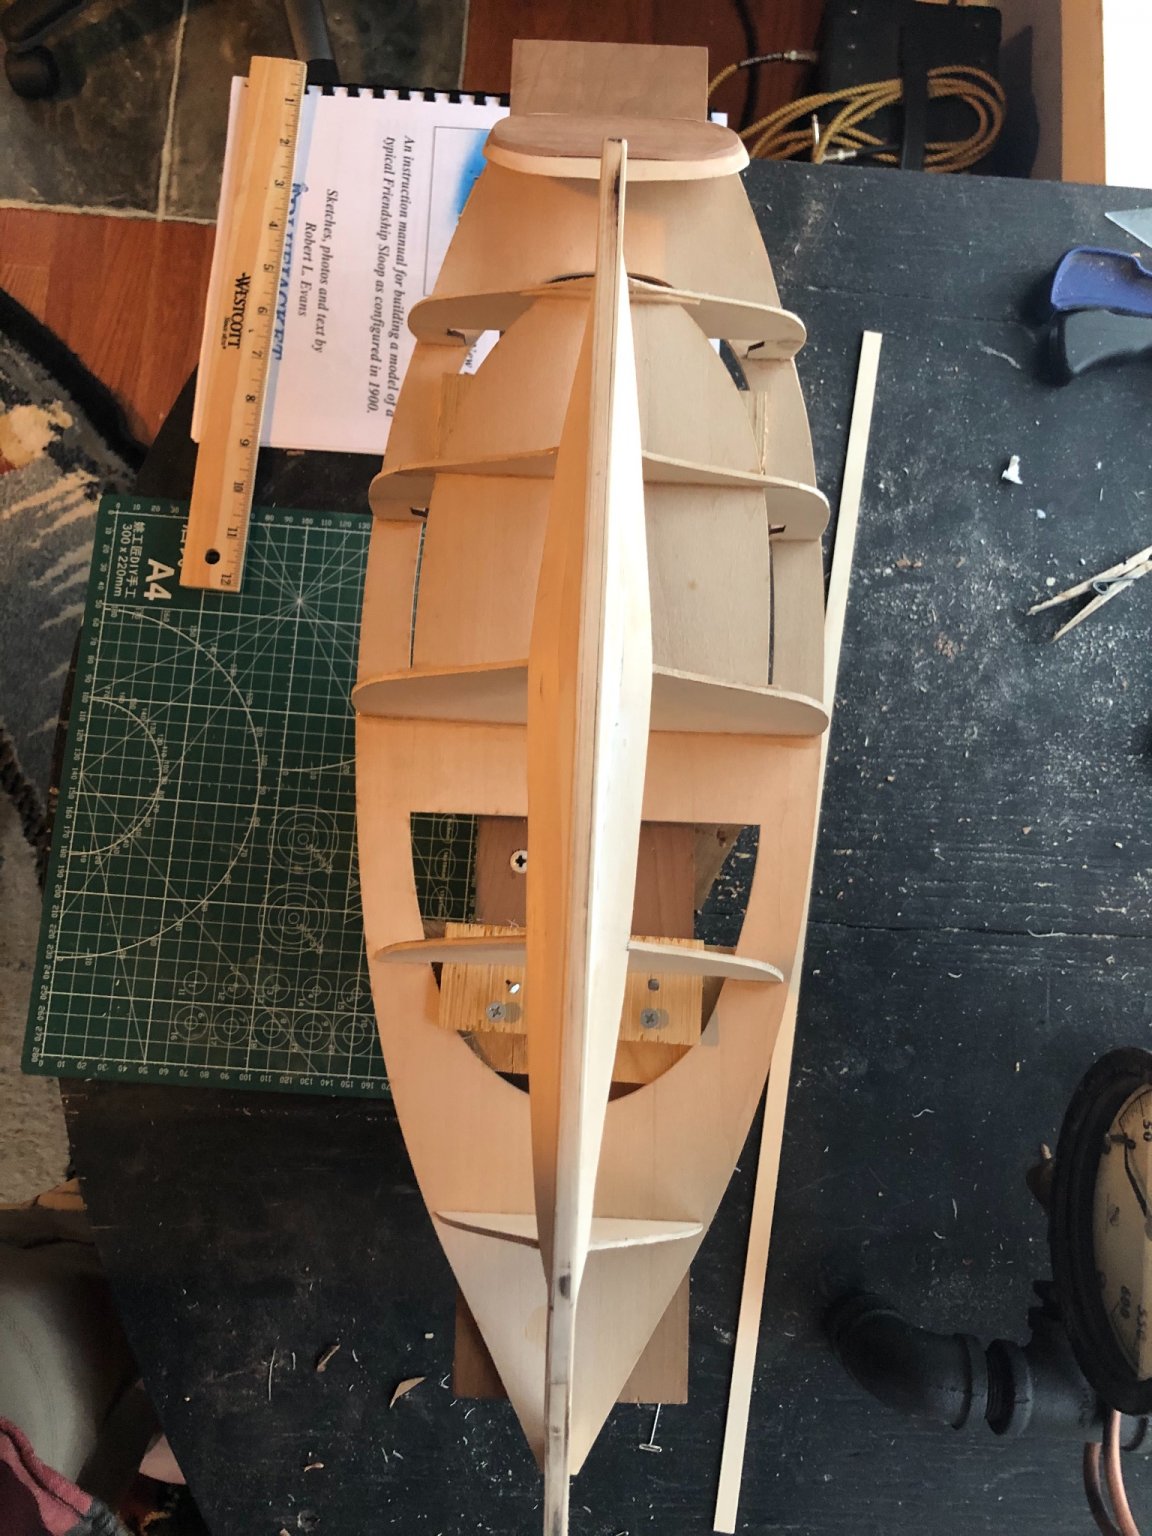
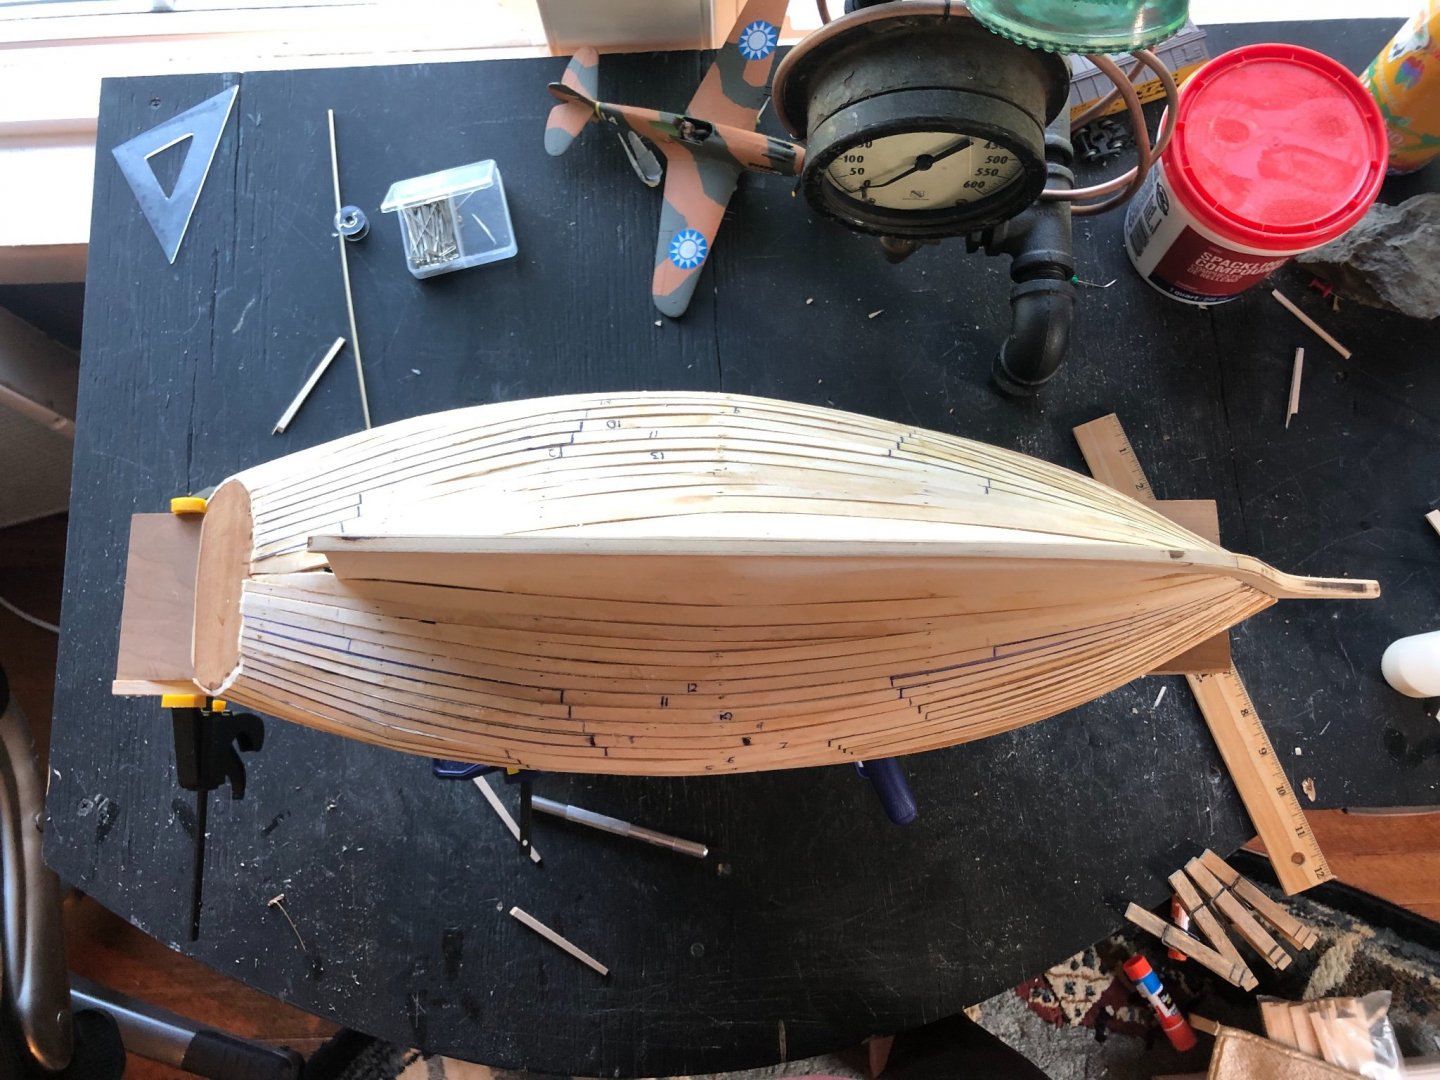
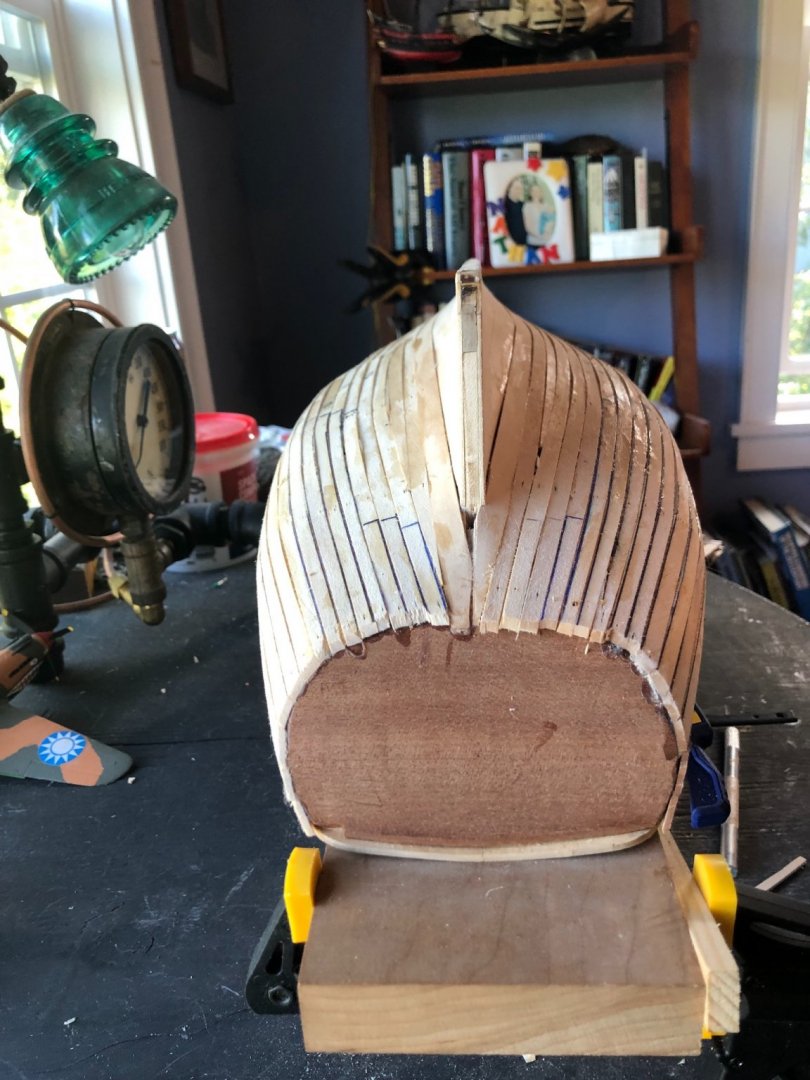
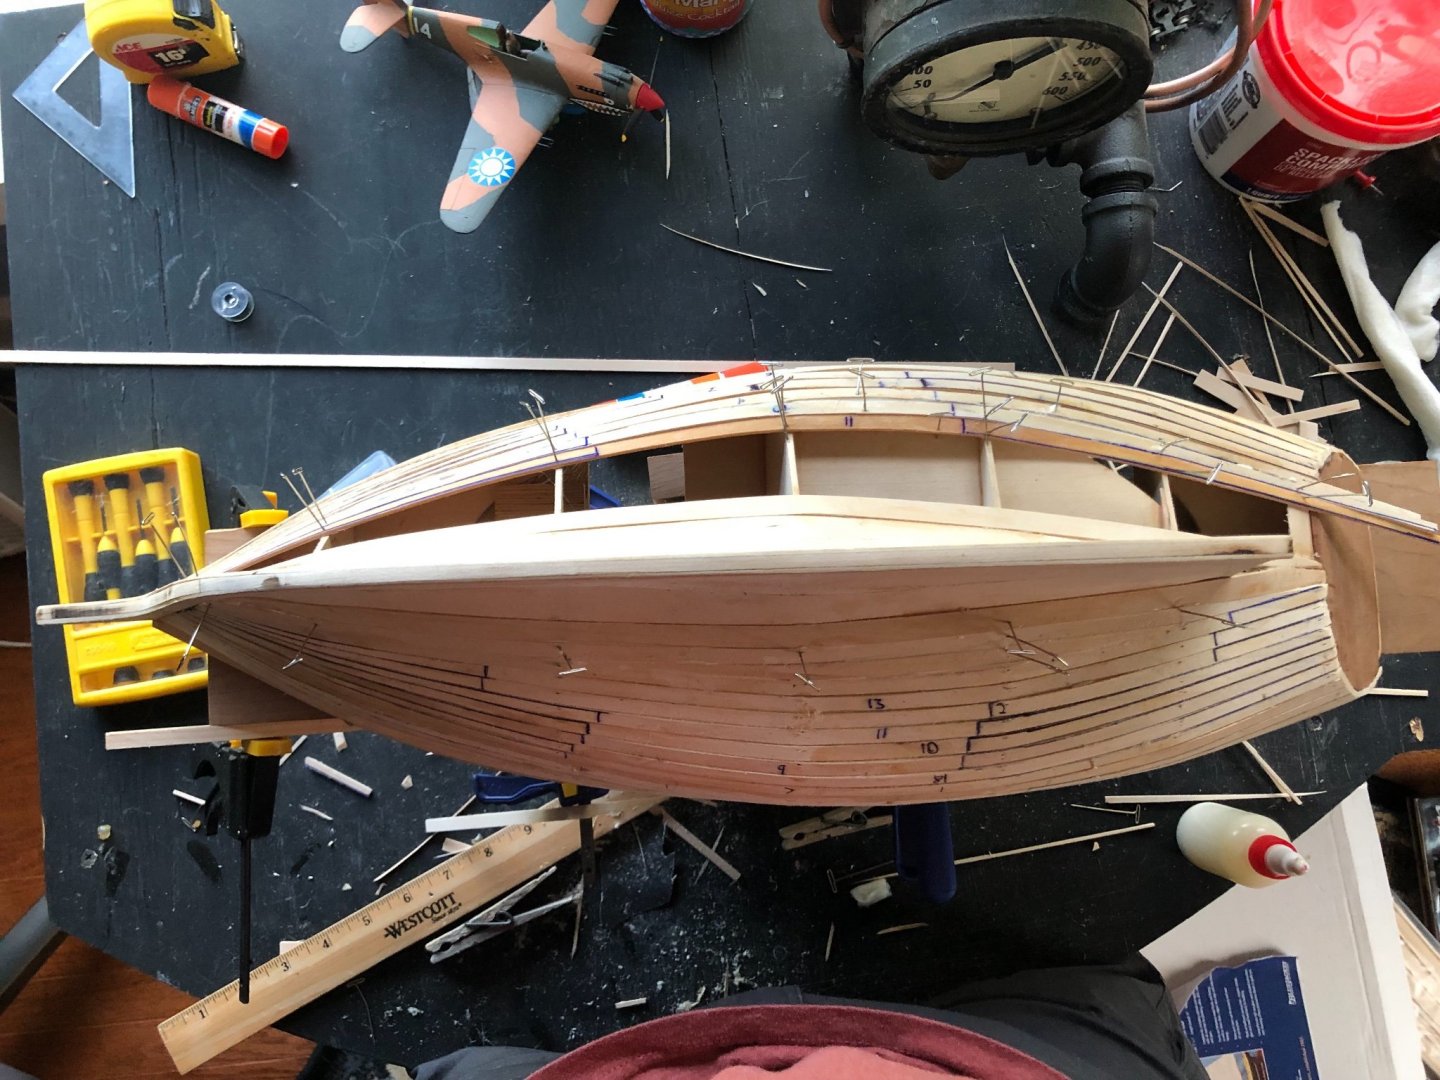
The planking is done! It took me a while, mostly because I didn’t work on it steadily, but it’s complete. Moving forward it’s going to be time to sand and fill the little gaps then apply the primer coat. I am quite pleased with how the planking came out considering this is my first model.

- 15 replies
-
- 4
-
-
- Friendship sloop
- BlueJacket Shipcrafters
- (and 1 more)
-
Nathan559 reacted to a post in a topic:
Friendship Sloop by ZackP - BlueJacket Shipcrafters - 1:12
-
It’s been a while, I got quite busy nearing the end of the school year and my progress slowed. July allowed me to make much better progress however. At this point I have finished the planning on one side of the boat and am only a few planks away from being complete on the other side. Hopefully soon I’ll be able to sand it smooth and get the primer coat on.

- 15 replies
-
- 2
-
-
- Friendship sloop
- BlueJacket Shipcrafters
- (and 1 more)
-
Nathan559 reacted to a post in a topic:
US Constellation 1798 by Jack12477 - Artesania Latina - 1:85
-
Nathan559 reacted to a post in a topic:
Revenue Cutter by Josh Williamson - FINISHED - BlueJacket Shipcrafters - Scale 1/48
-
Nathan559 reacted to a post in a topic:
Friendship Sloop by by tdimock – BlueJacket Shipcrafters - ½” = 1'
-
Nathan559 reacted to a post in a topic:
Friendship Sloop by by tdimock – BlueJacket Shipcrafters - ½” = 1'
-
Nathan559 reacted to a post in a topic:
Friendship Sloop by by tdimock – BlueJacket Shipcrafters - ½” = 1'
-
Thanks for the support! Yes this is the 1” = 1’ model, when I was at bluejacket’s store I decided I liked the larger one more. And as for the screws I am planning to run some longer ones from up underneath the piece of wood it is fitted on so I can remove the model at the end. Thank you for pointing it out though!
- 15 replies
-
- 1
-
-
- Friendship sloop
- BlueJacket Shipcrafters
- (and 1 more)
-
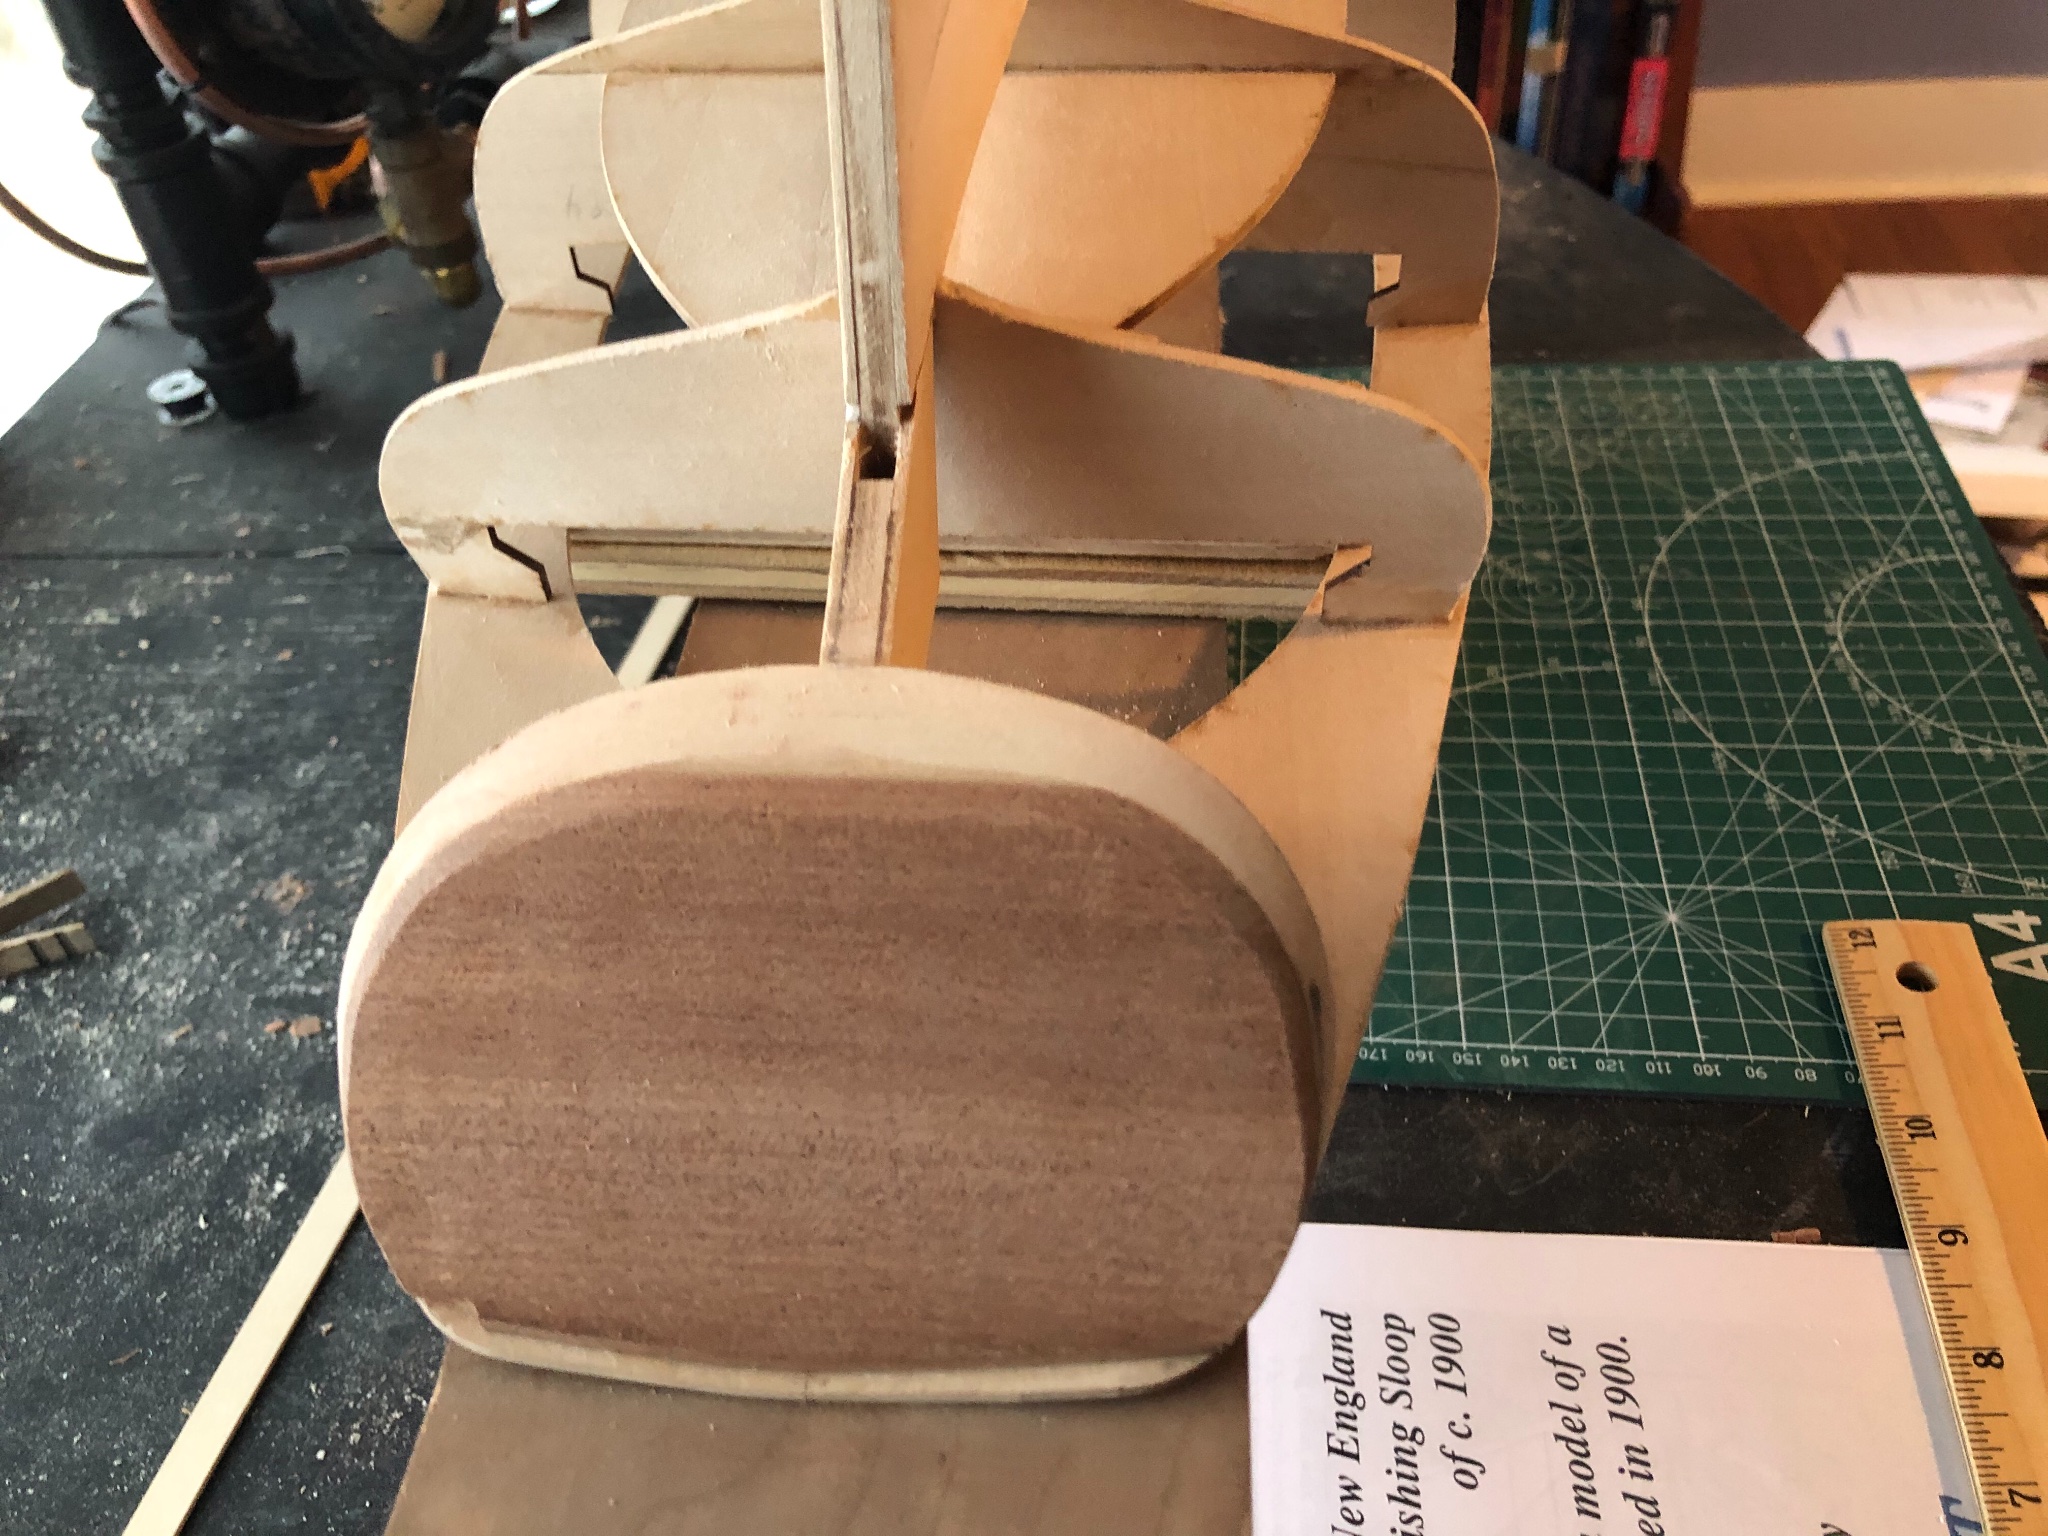
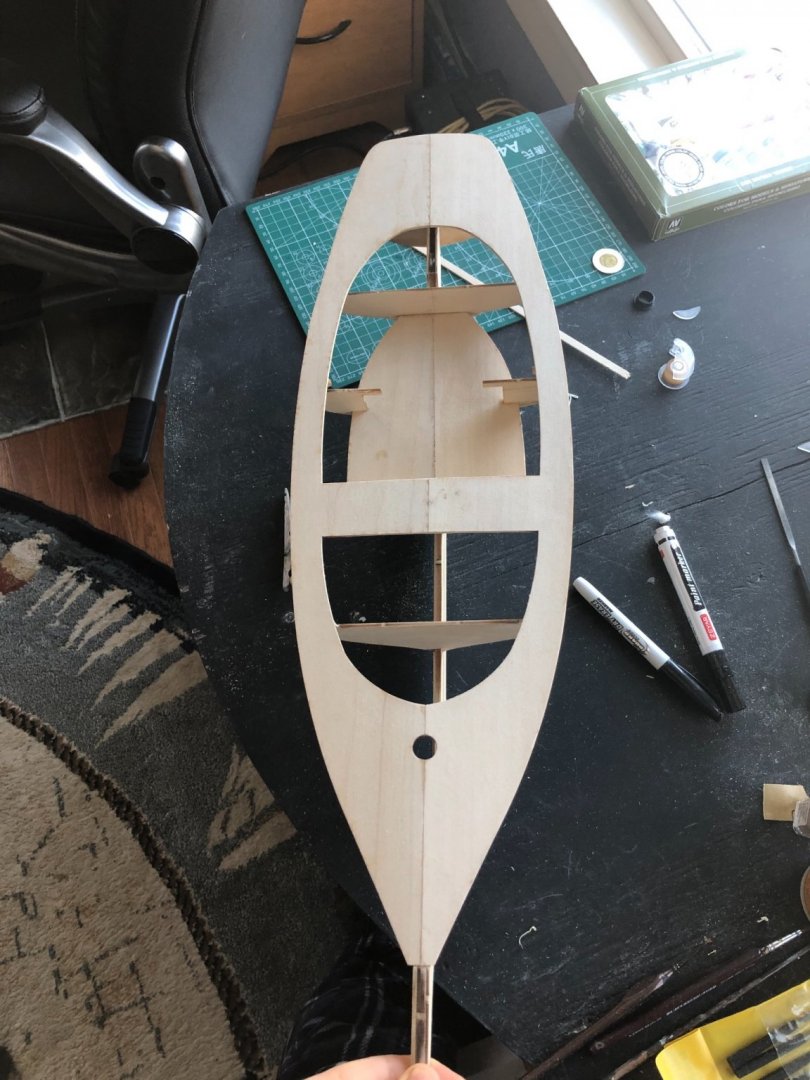
At this point I’ve put in the garboard planks and the mahogany piece at the back. I used a bit of lightweight sparkle to fill in some gaps and I’m quite pleased with how it’s coming. Moving forward I will be continuing the planking process.


- 15 replies
-
- 1
-
-
- Friendship sloop
- BlueJacket Shipcrafters
- (and 1 more)
-
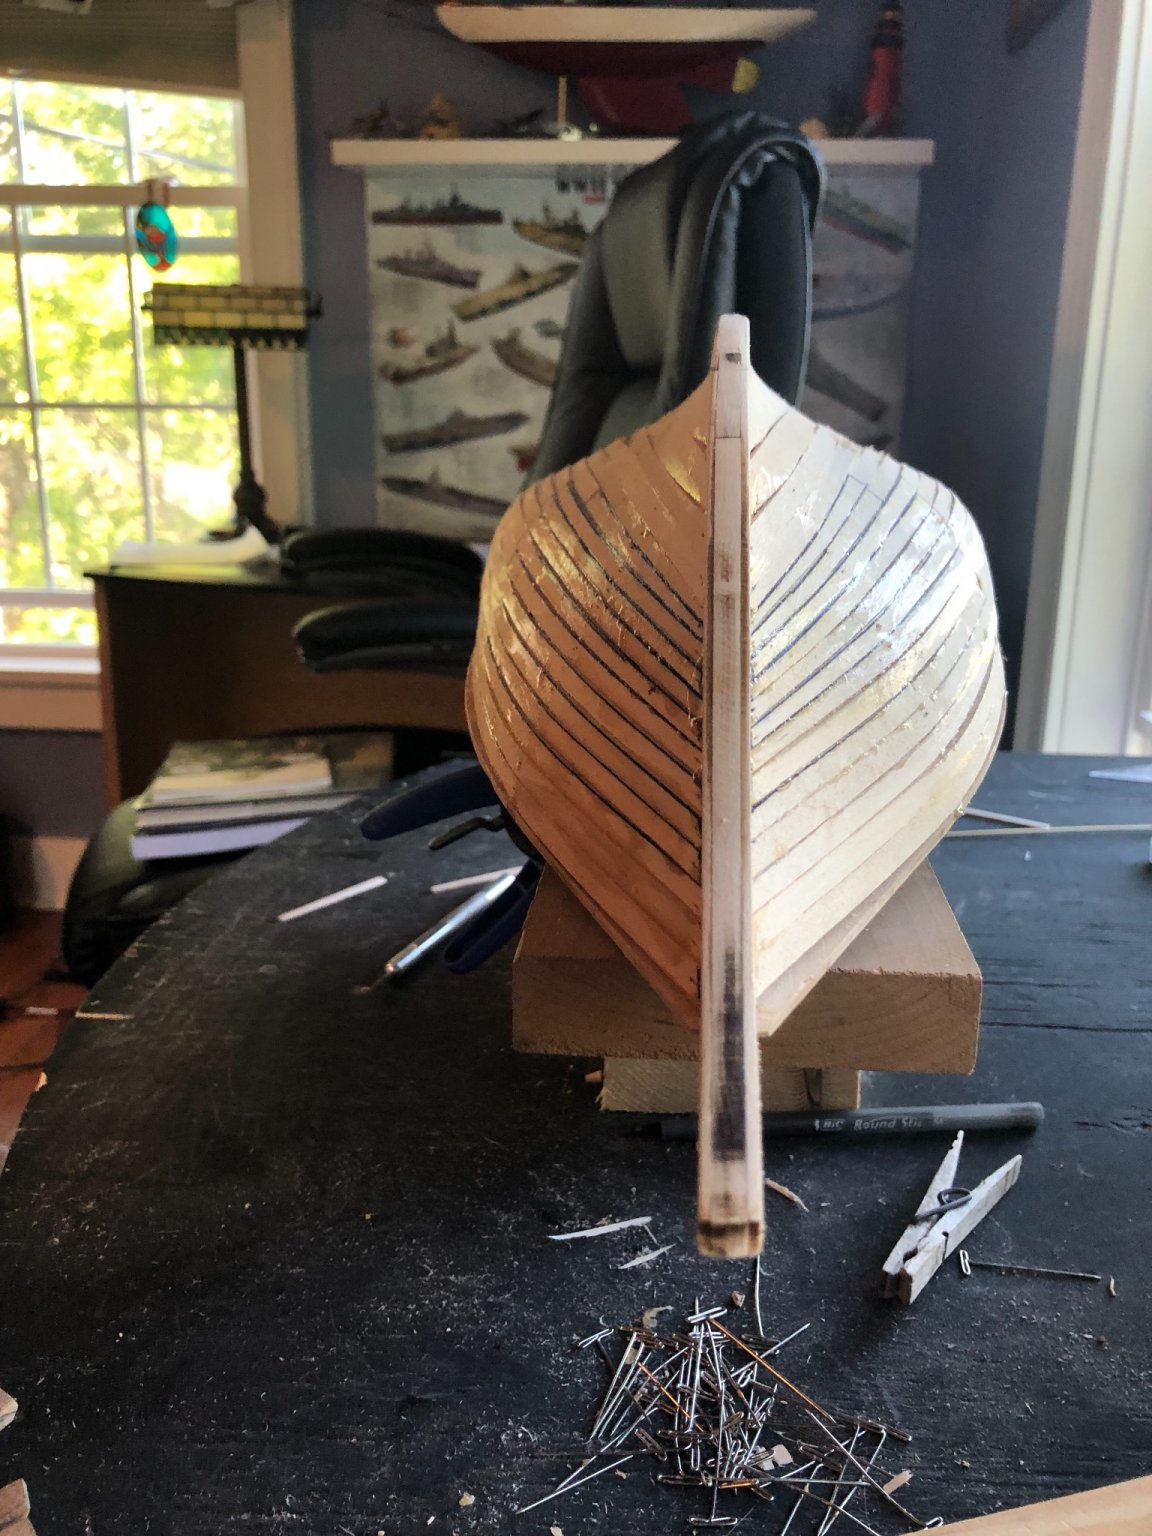
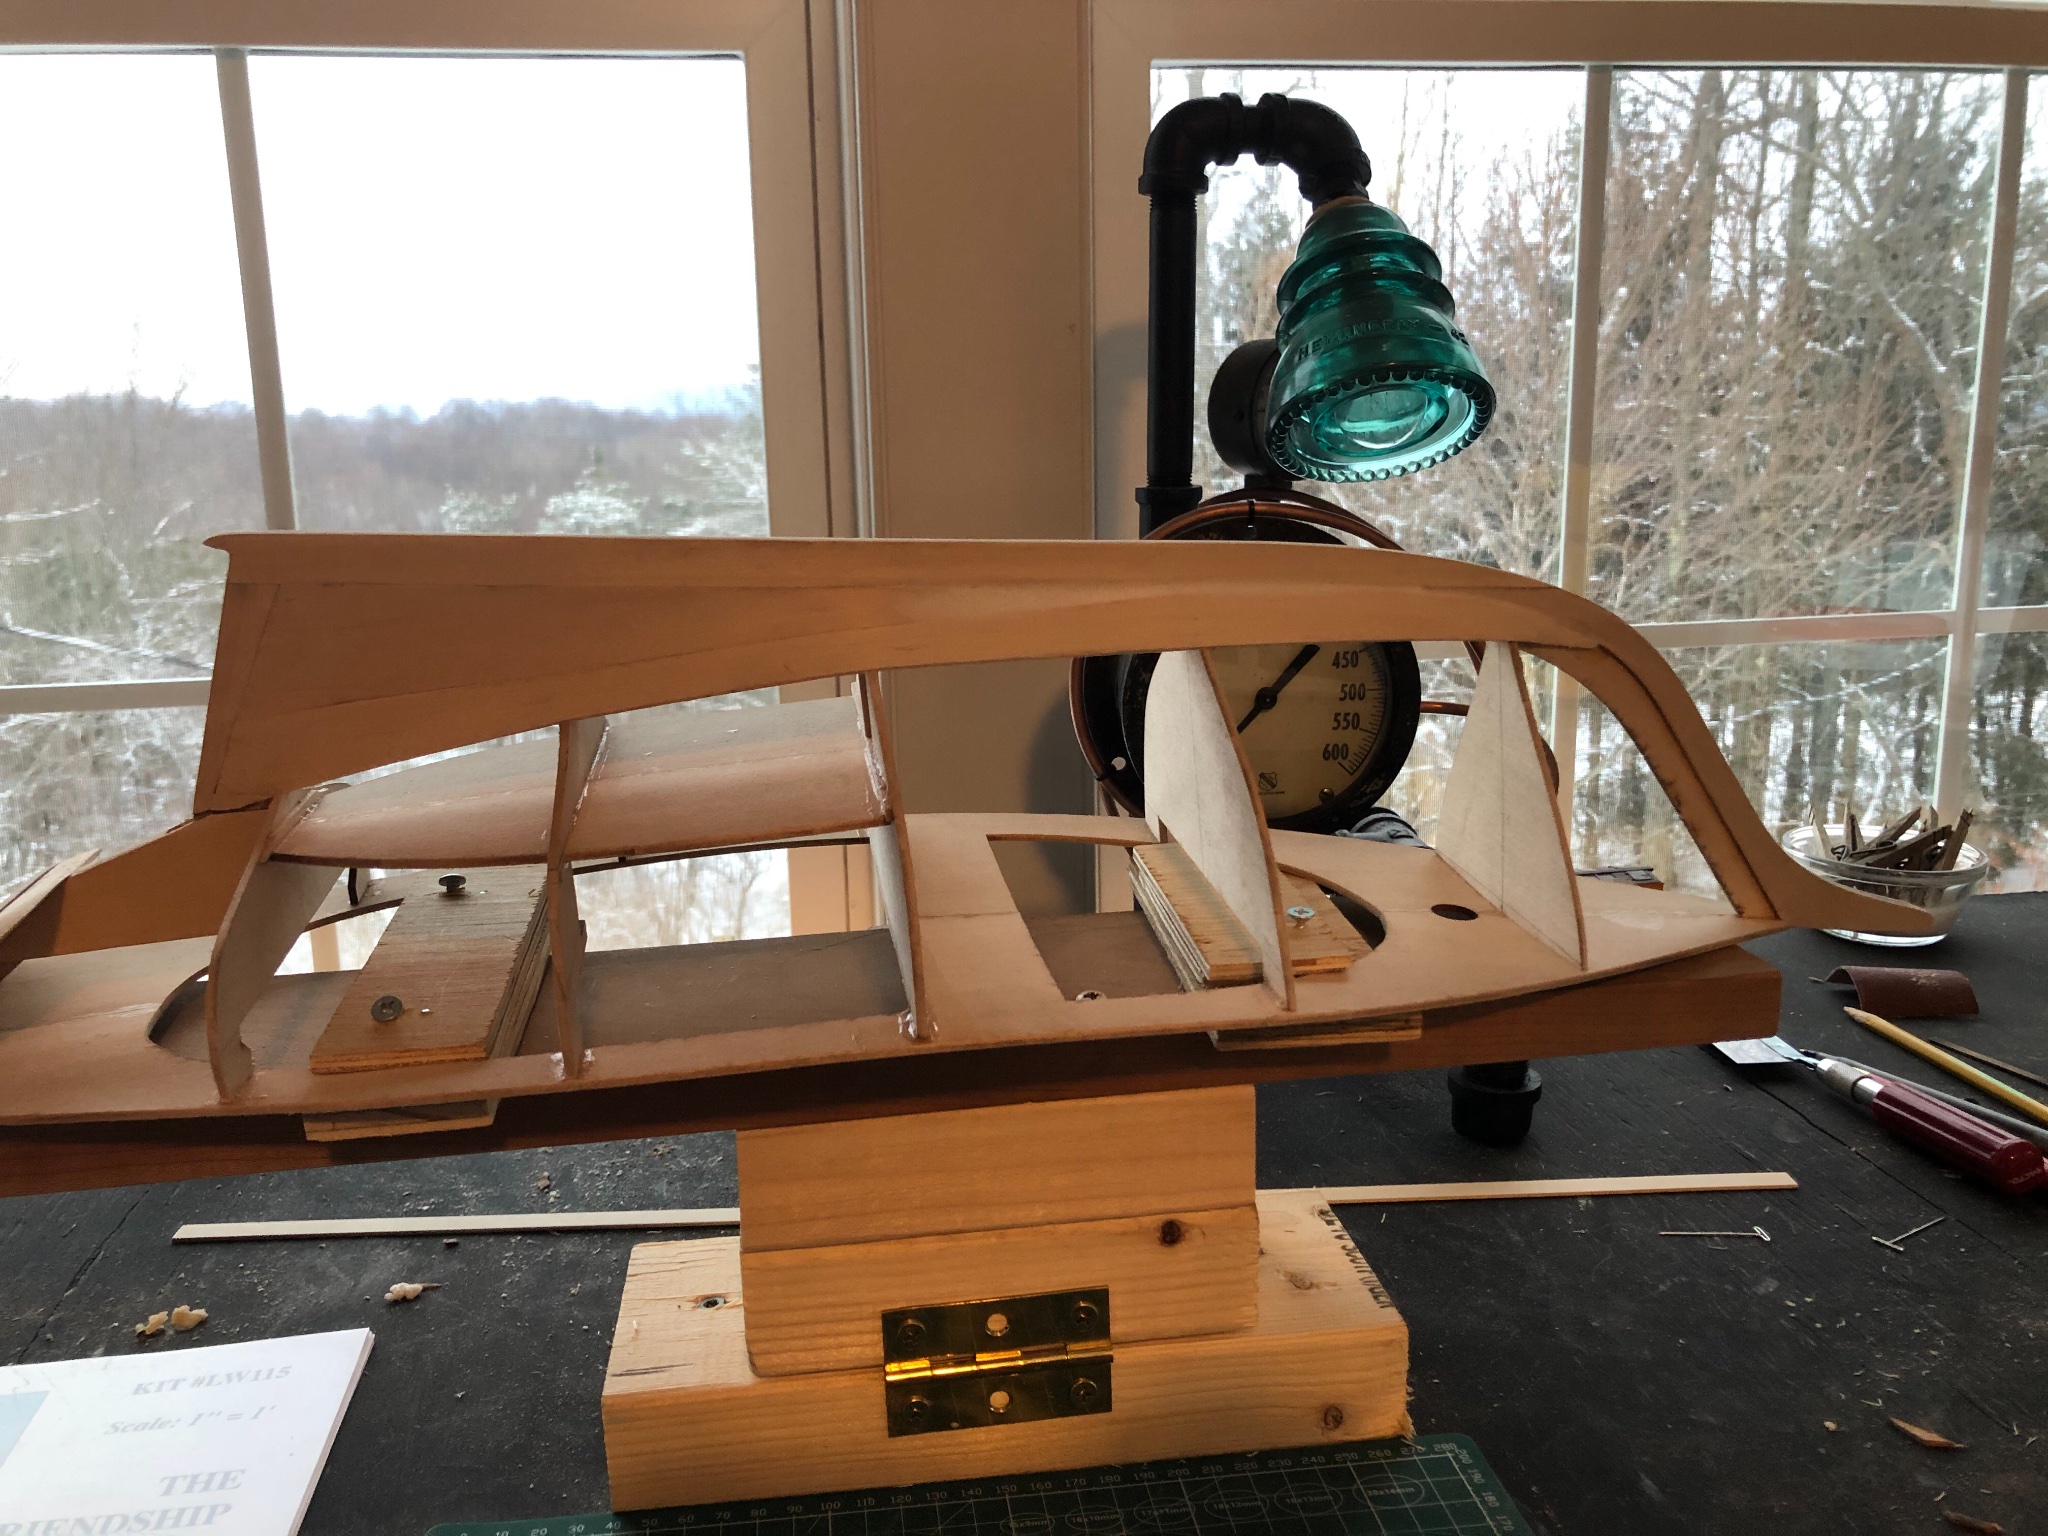
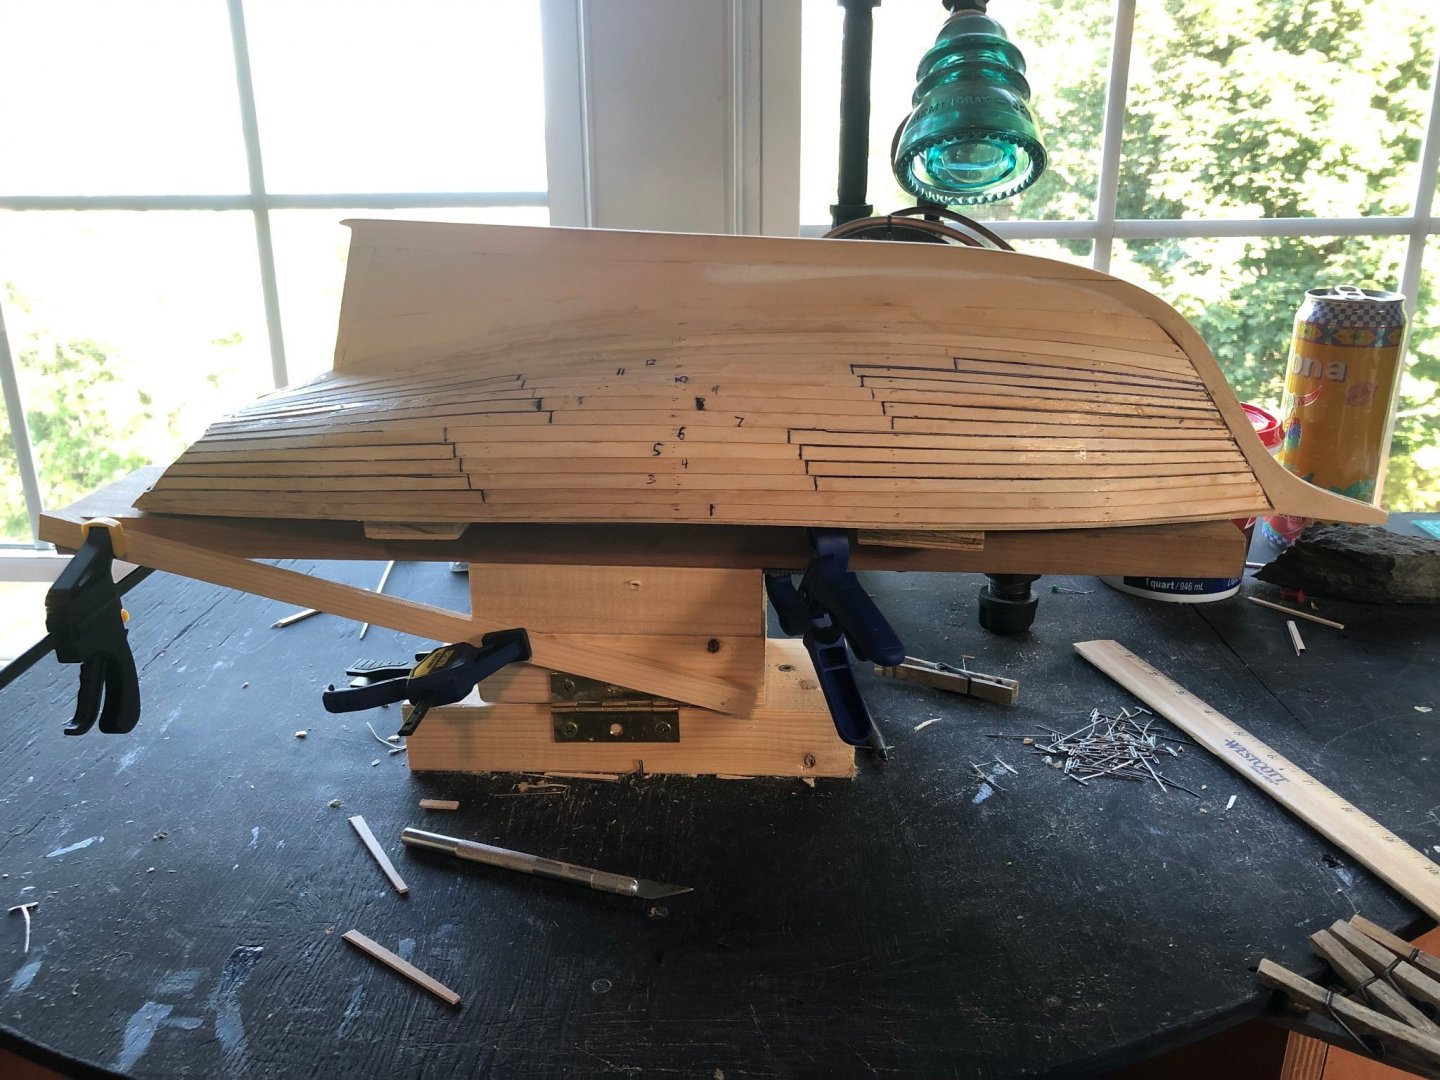
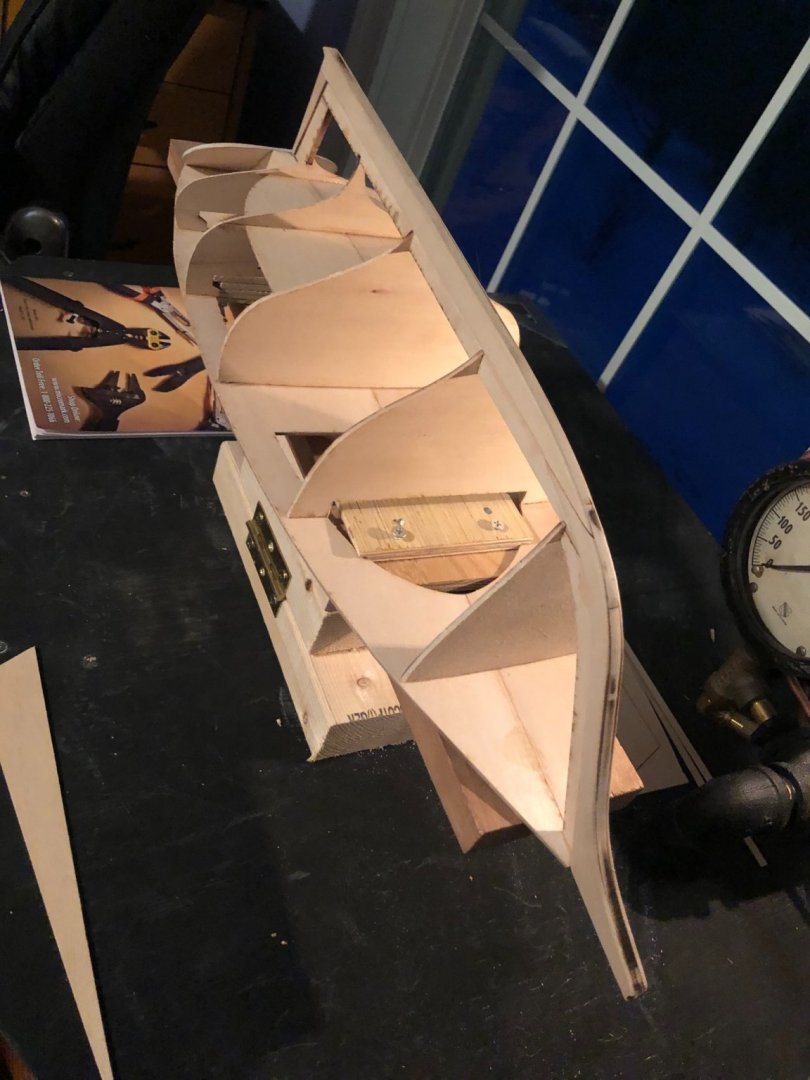
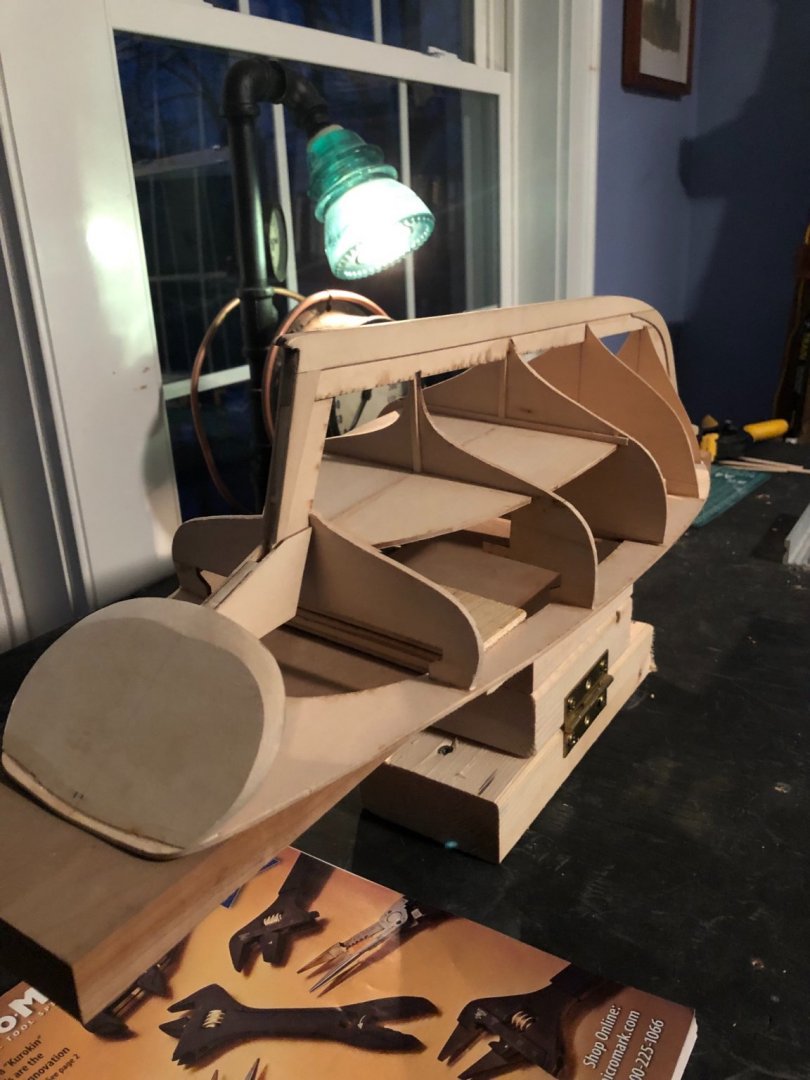
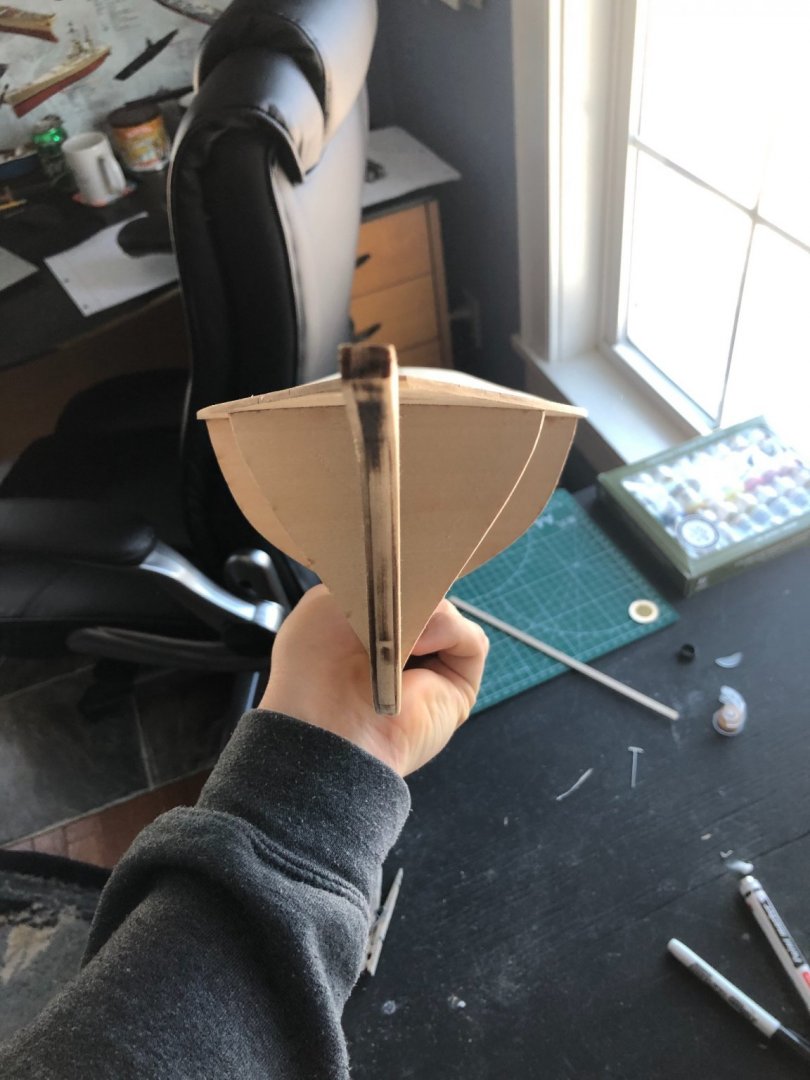
I finished beveling the model and it is ready for planks. I will have to read up on the specifics of bending planks, so it may be a while before I actually get started. For now I made a jig to hold the model while I plank. It is hinged so I can tip it if need be. There is a screw in the back that secures it from moving without permission.
- 15 replies
-
- 1
-
-
- Friendship sloop
- BlueJacket Shipcrafters
- (and 1 more)
-
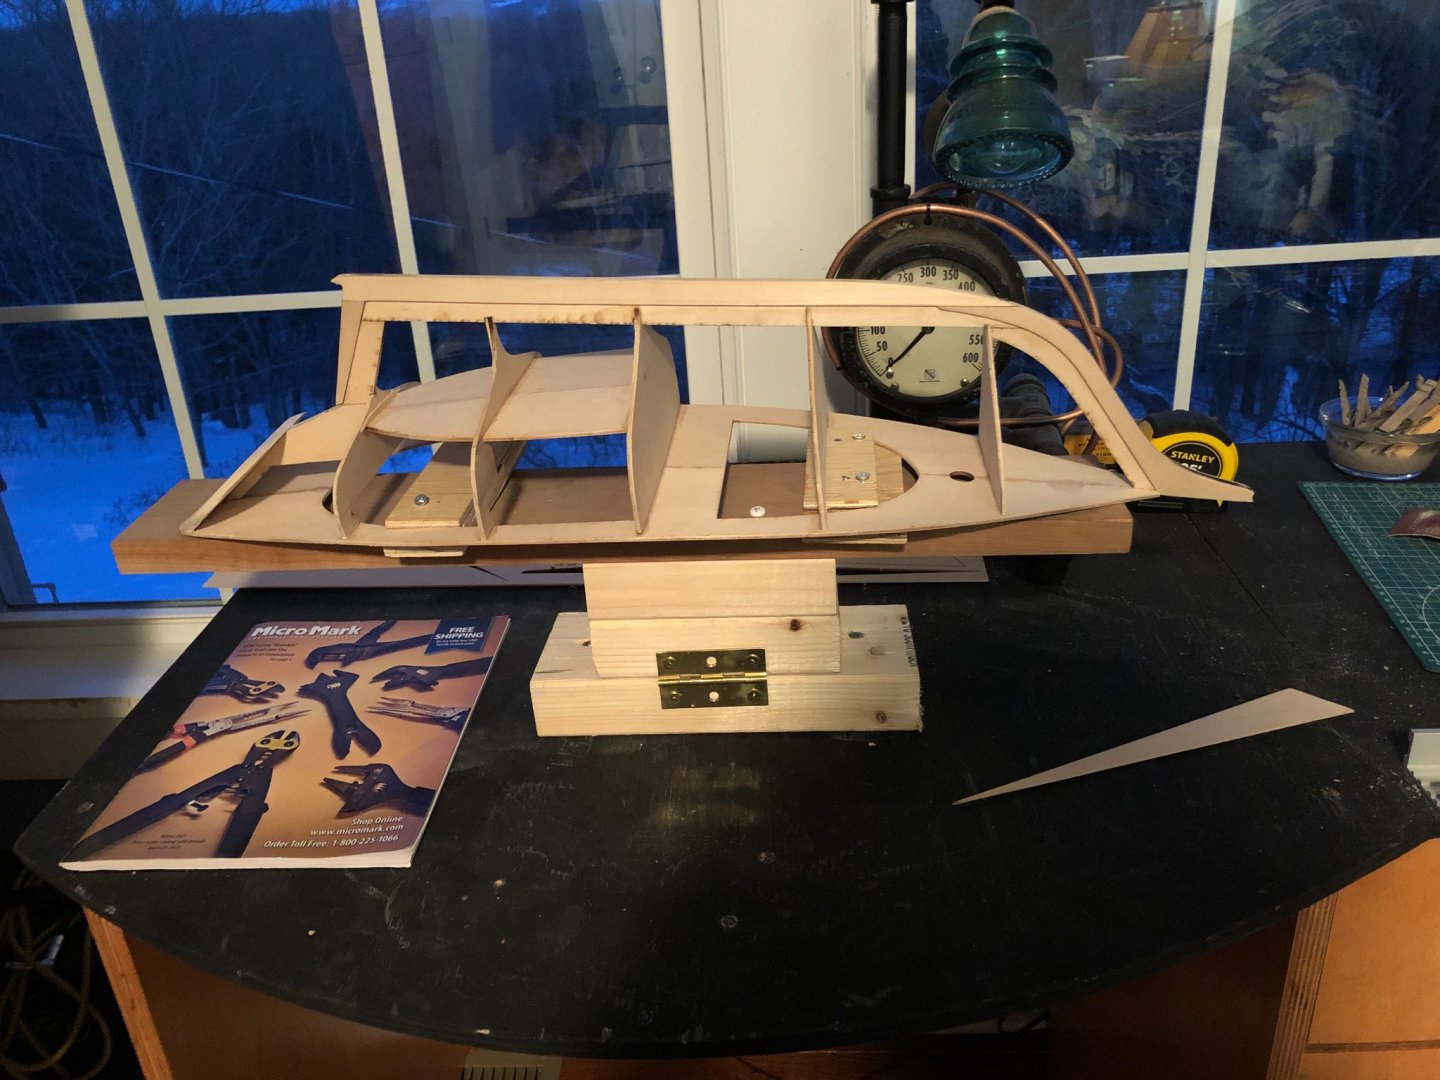
Sorry it has been so long since my last update, I have found myself quite busy with school over the last several weeks. Currently I am working to sand the bulkheads to accept the planking. Since the last time I posted I have glued the bulkheads as well as the deck and cockpit floor pieces in place. Hopefully in the next couple weeks I will start to apply planking to the hill.

- 15 replies
-
- 1
-
-
- Friendship sloop
- BlueJacket Shipcrafters
- (and 1 more)
-
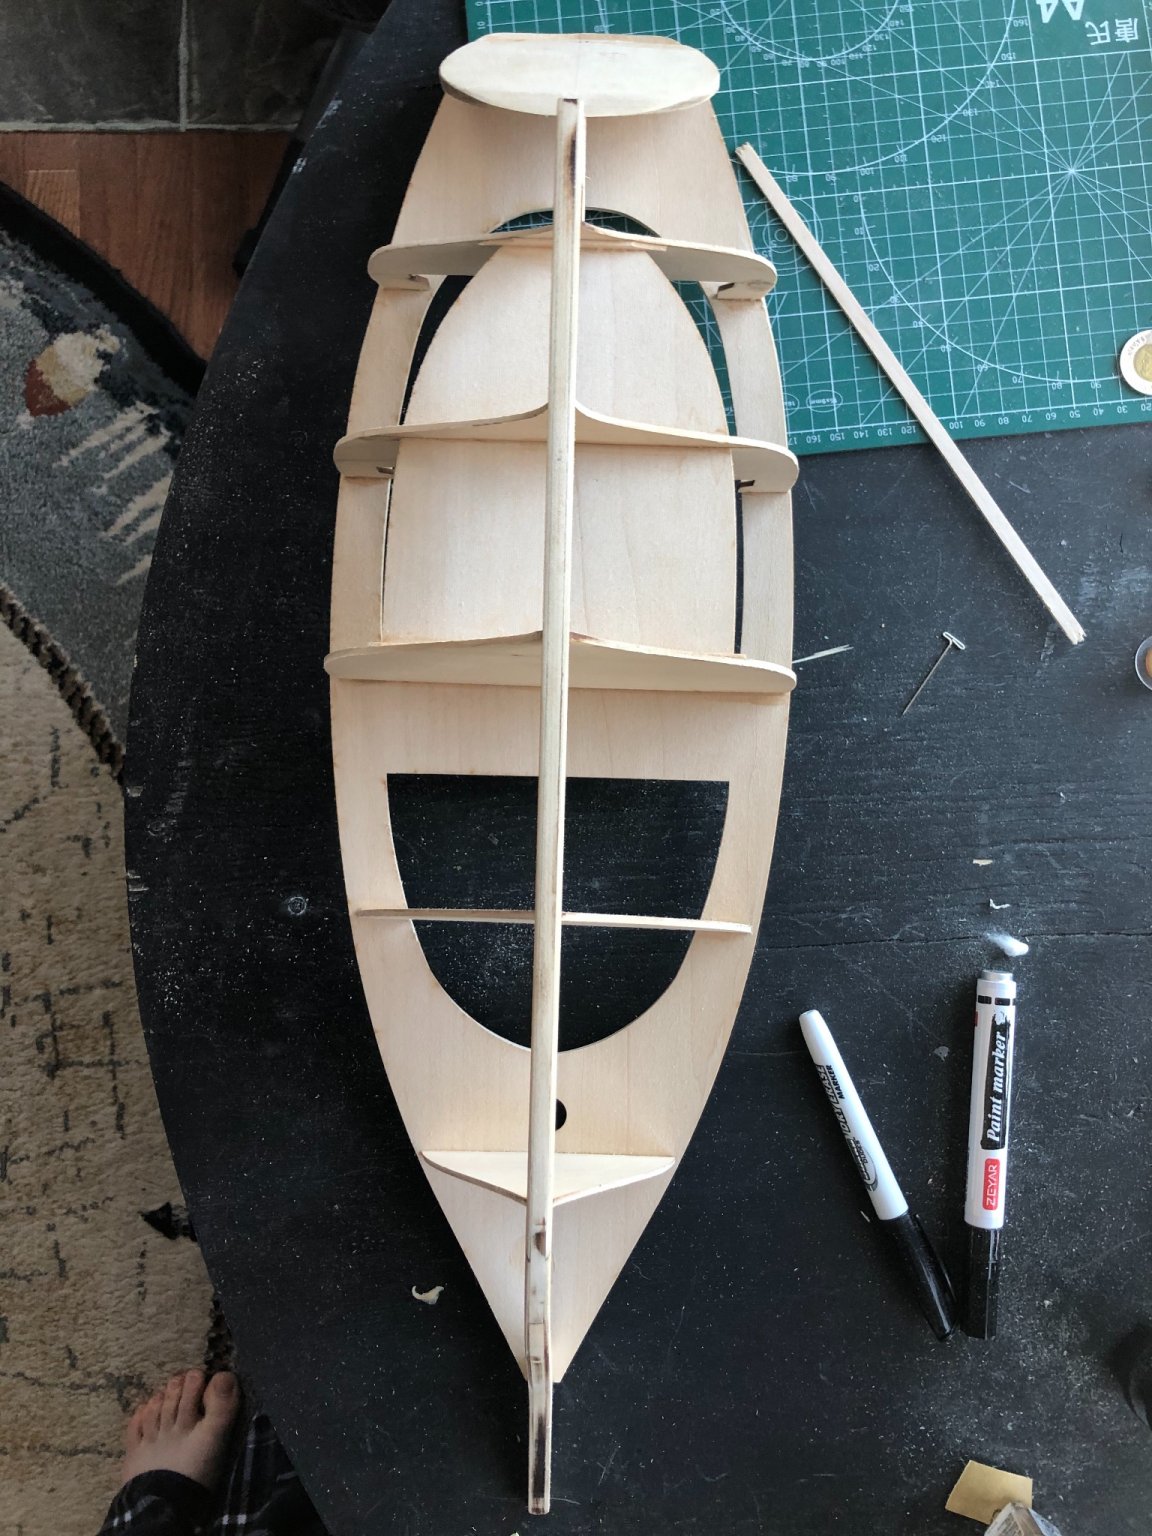
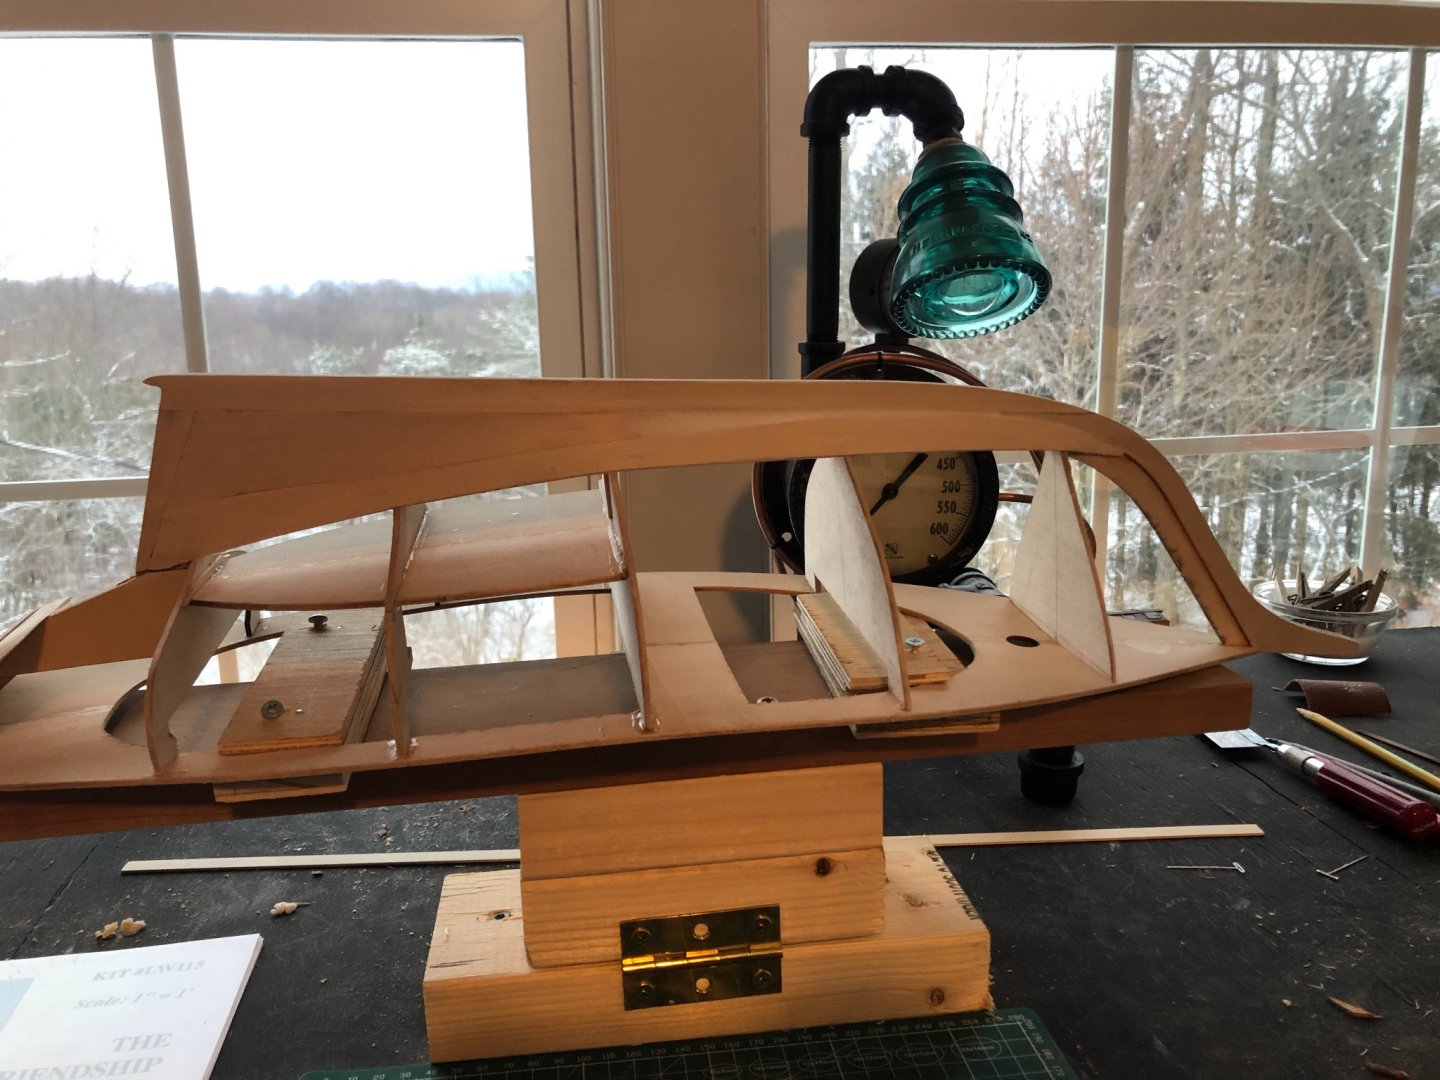
The keel assembly is finished and sanded. Moving on I will be fitting the bulkheads. All things considered I think I am making decent time, but that’s not really a big concern as I’m more interested in doing it right than doing it fast.

- 15 replies
-
- 4
-
-
- Friendship sloop
- BlueJacket Shipcrafters
- (and 1 more)
-
This is a thread of my first model ship build. It is the bluejacket shipcrafter’s kit for the 1” scale Friendship Sloop. It is a plank on bulkhead model. I am new at this so bear with me as it will take a while. So far I have completed the first steps on preparing the framing pieces, currently I am working on the keel assembly.

- 15 replies
-
- 4
-
-
- Friendship sloop
- BlueJacket Shipcrafters
- (and 1 more)