GGibson
-
Posts
1,086 -
Joined
-
Last visited
Content Type
Profiles
Forums
Gallery
Events
Everything posted by GGibson
-
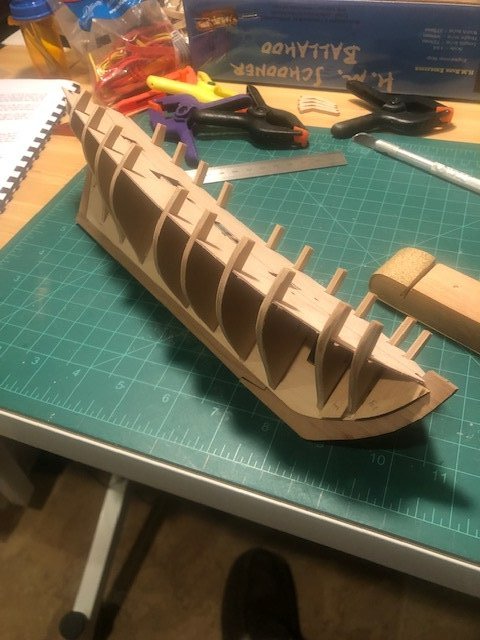
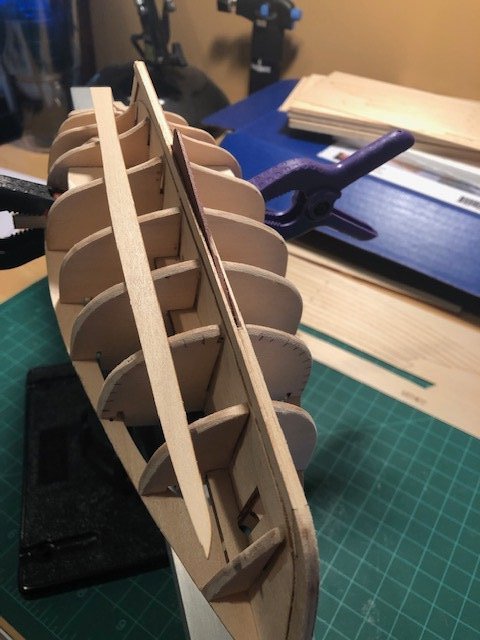
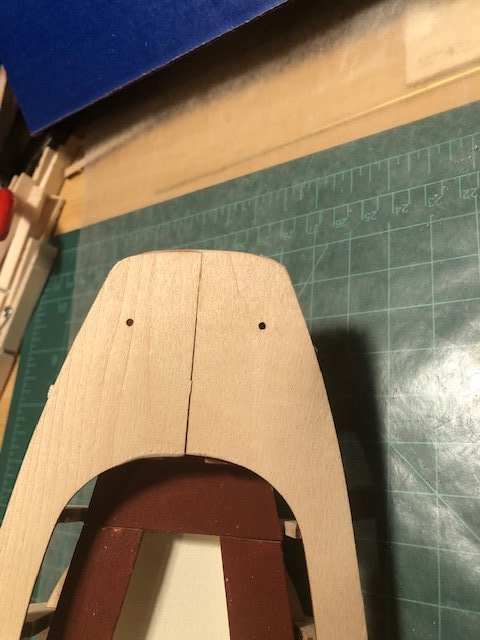
 OK, so I do have a question and looking for advice... I made a previous comment on how well the false deck fit around the bulkheads, but now as I am sanding the bulkhead edges to be flush against the deck, I am noticing gaps between the false deck bottom and the outside tops of several of the bulkheads. When I glued the deck down, the center obviously glued securely, but because of the slight curvature in the bulkhead tops, the deck is not touching the bulkheads on the edges. I should probably go around and spot-glue those areas, correct? This will probably have an effect on how the gunport bulwarks and the hull planking fit? Thanks in advance for any advice! Gregg
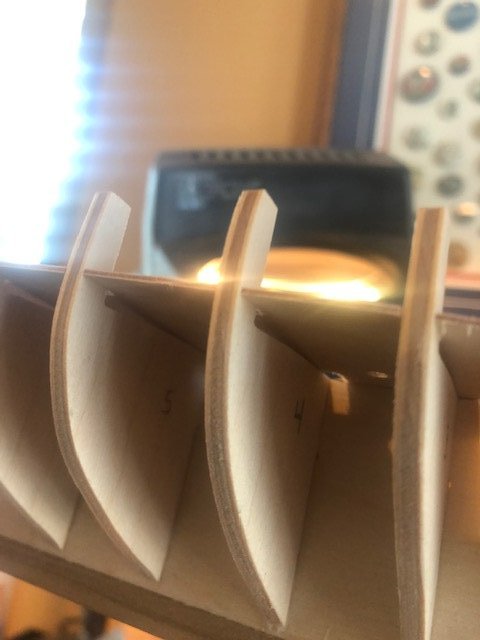
- 65 replies
-
- 2
-

-
- Ballahoo
- Caldercraft
- (and 1 more)
-
Thanks for the feedback, George! And for the advance warnings on the masts, carronades and anchors. I'll watch for those concerns and report back! Thanks!
-
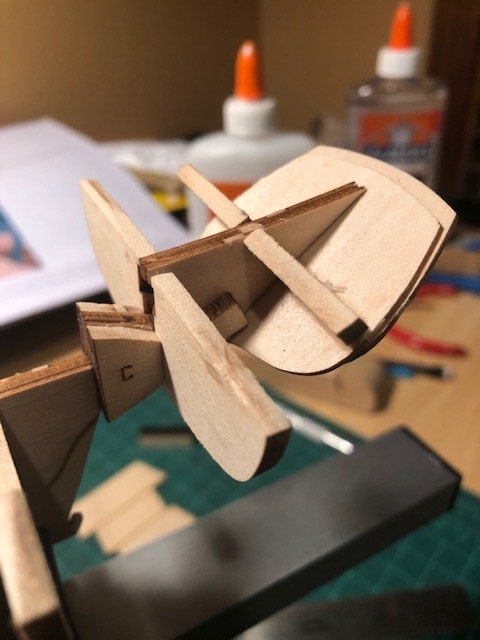
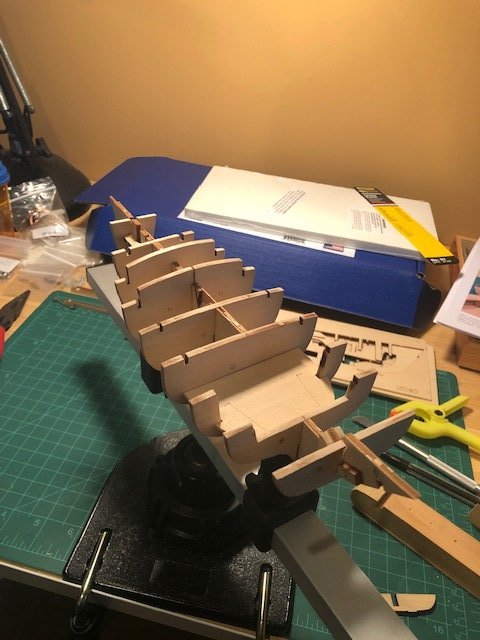
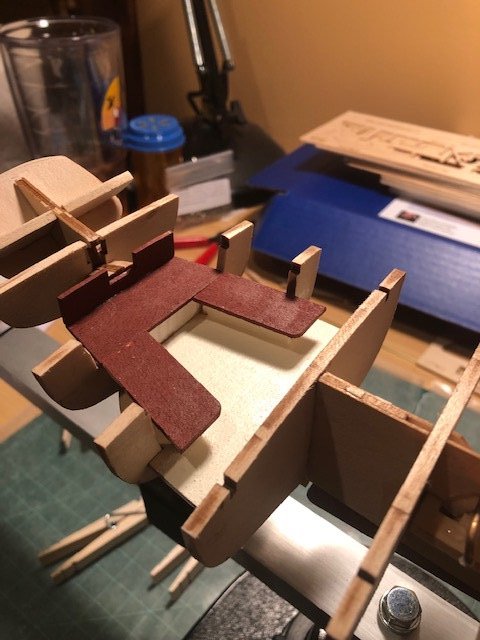
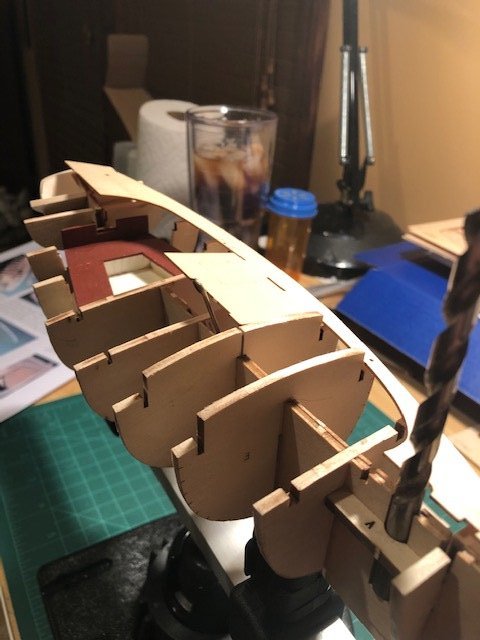
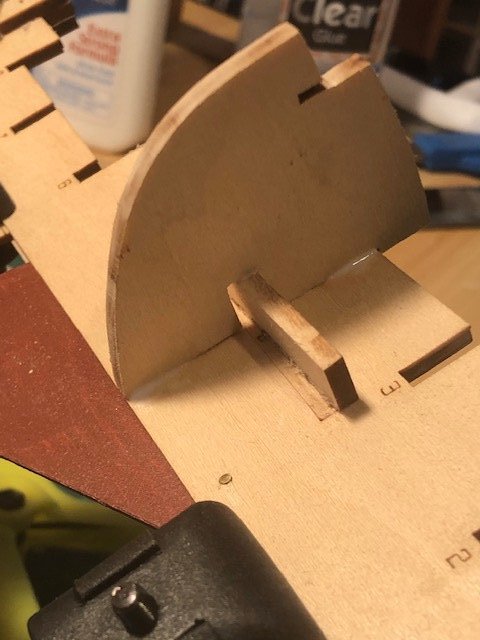
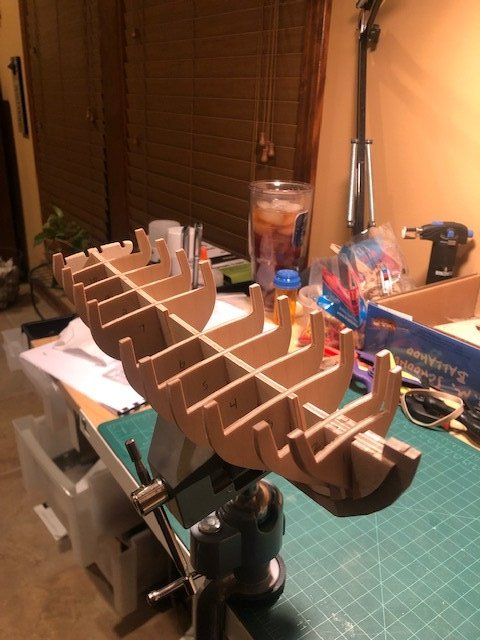
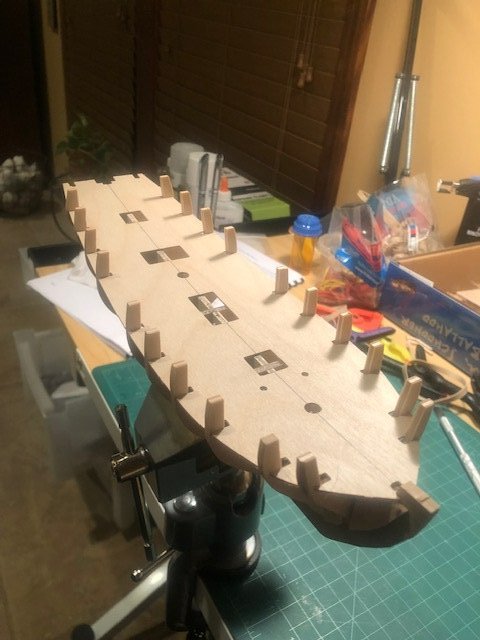
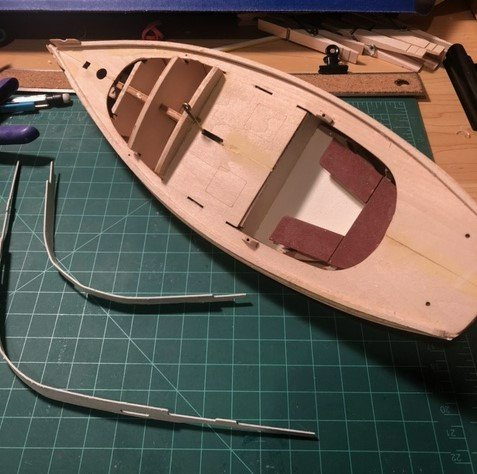
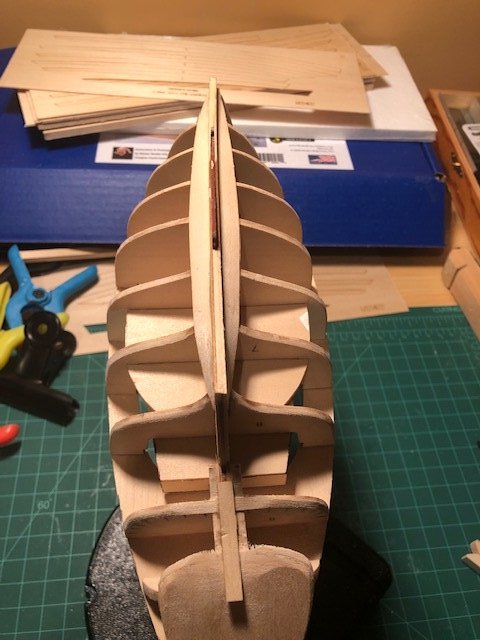
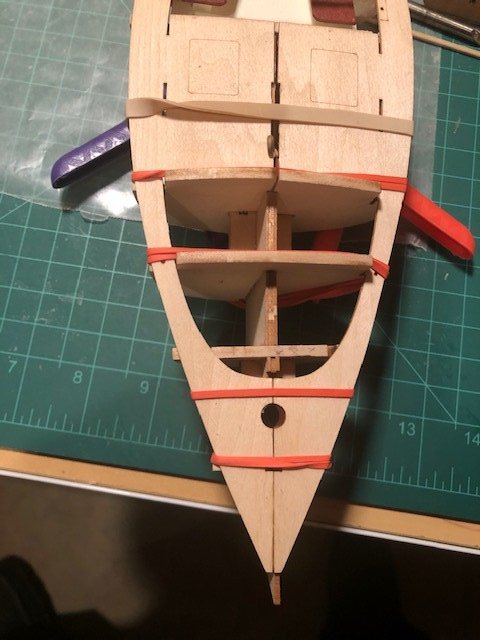
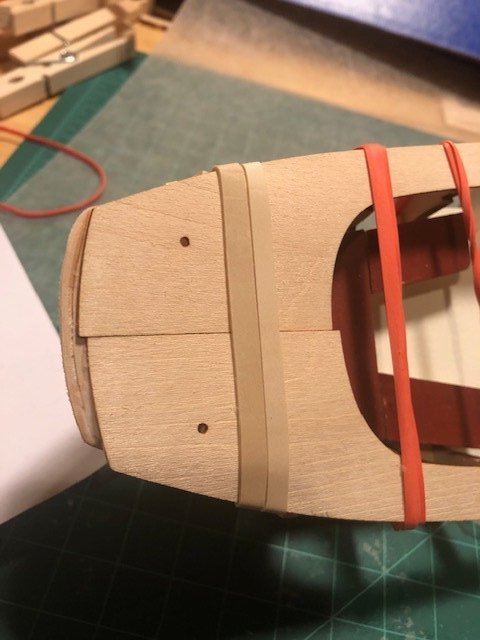
Started with the hull construction. Pleased so far in how the bulkheads fit into the keel and how the false ply deck fit down onto the tops of the bulkheads. When dry fitting the bulkheads, I needed to sand almost every one of the bulkhead slots so that they slid firmly in place, without being so tight as to be stuck but yet not so loose as to be wobbly. Was careful to use my mini square tool on each bulkhead (something I did not do well on earlier builds) to make sure they were at 90 degrees to the keel. This work paid off in having the false ply deck fit perfectly on the bulkheads. Other than Bulkhead 11, I did not sand or bevel any of the bulkhead edges prior to placement and gluing the deck, so working on doing that now. To make it easier to handle as I do this sanding, I am waiting on placement of the stern counter frames and the stern counter and fascia pieces, so that I don't accidentally snag them or break them. As everything fit pretty nicely, really only Bulkheads 1, 2 & 10 really need great attention. Yay! As I placed and glued the walnut bow and walnut keel, they didn't come together exactly perfectly, and there is a small gap at the join, so I will need to do some fill there. Once I am done with the bulkhead sanding to where they are all flush with the deck, looks like it's on to the gunport bulwarks and planking.
- 65 replies
-
- 3
-
-
- Ballahoo
- Caldercraft
- (and 1 more)
-
Thanks, Chris! I recall seeing your comments on those other Ballahoo build logs, as well, so look forward to your follow on this one!
-
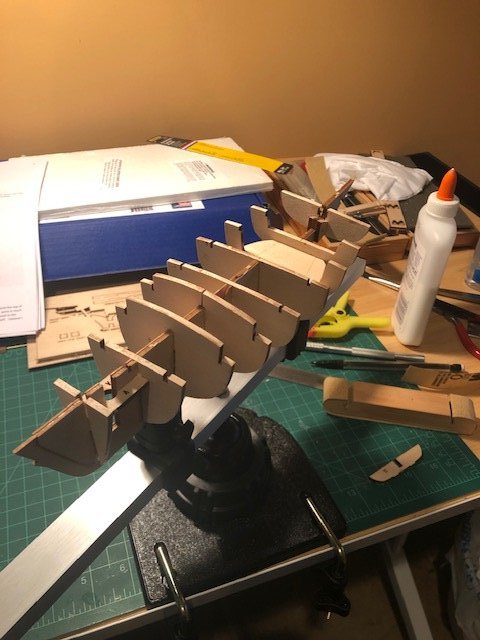
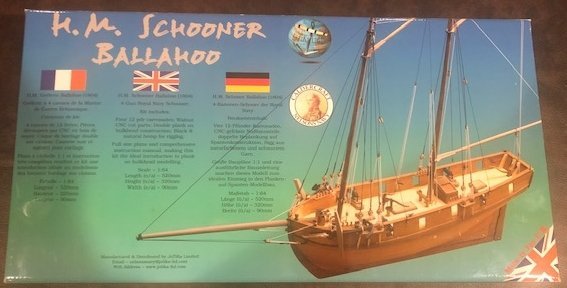
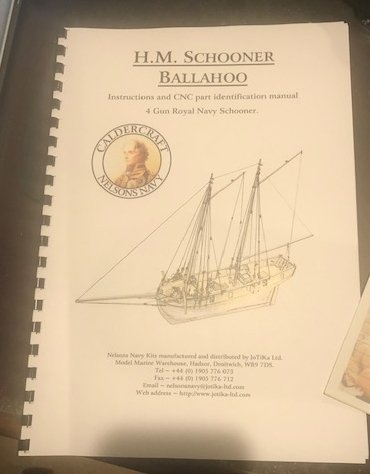
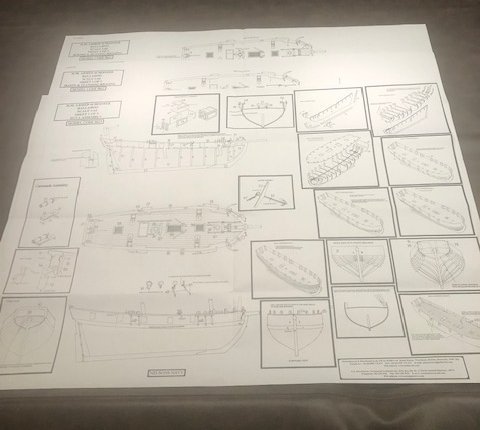
Still trying to finish my Muscongus Bay Lobster Smack, but waiting on some more rigging line in order to finish rigging the sails, blocks, etc. So... while I am waiting on USPS to deliver that line, I thought I would begin my next project waiting in the shipyard. Decided to work on the Ballahoo. This one is going to be very much different than my first two builds... the Norwegian Sailing Pran or the Lobster Smack... in that the instructions are definitely not as detailed as those first two, which were specifically designed for the "novice" first-time shipbuilders. The Ballahoo comes with a 10-page instruction and part ID manual, as well as three (3) large 33" x 24" plan sheets. This Ballahoo ship has been sitting in the "shipyard waiting room" since last March when I purchased it, and I hadn't opened it until now. But, with an inventory check, it appears everything is in order. I've already reviewed a couple previous build logs for this Ballahoo, and will be referring back to them often as I progress through my own build. I welcome other comments, suggestions and advice, as well! Have started removing the bulkheads and keel from the sheet and sanding all the edges smooth. I'll update more as I move forward on this, with a brief pause to finish the Lobster Smack once I get that new rigging line. Thanks! Gregg

- 65 replies
-
- 4
-
-
- Ballahoo
- Caldercraft
- (and 1 more)
-
Thanks for your input, as well, Dan! Yeah, I just looked back at the line I used for the Norwegian Sailing Pran, and I definitely have too thick of line for this run. Looking through my stash of leftover line, I think I've got enough to complete this, but have ordered some more line from Syren, which looked pretty good and should ship fairly promptly. Looking forward to watching your progress, Dan!
-
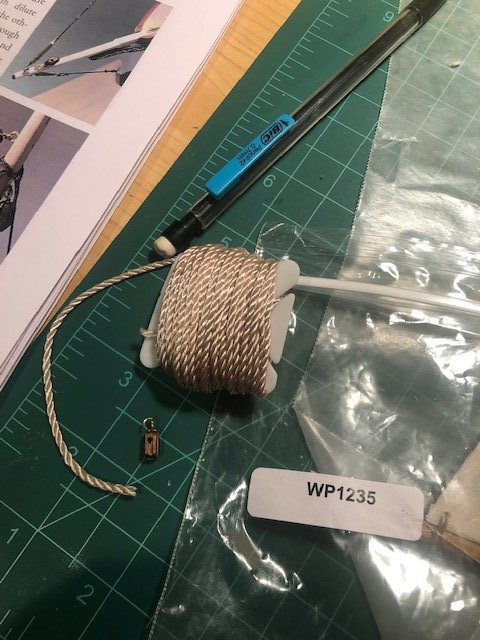
Thanks for the reply, Chris. Yeah, for the Lobster Smack, these were the only size blocks provided, and the 0.7mm line is what was in the marked bag. I may send an email query to the folks at Model Expo, but otherwise think I'll find a size of line that will fit the block and look good. Appreciate your input! On a related topic, is anybody buying bulk rigging line? If so, where? I like the Ropes of Scale site, but wondering what shipping delays we might experience from Canada.
-
Hi All - Not sure if anyone is still following me, as I have had some real life stuff come up this year at various times that have put my Lobster Smack build WAY behind. The other shipbuilders that I was tagging along with on this build have long finished their projects. Anyways, I have been working on the sail and the rigging, and have another silly question. The instructions for running the lines for the throat halyard, for example, suggest using the 0.7mm beige line included in the packet. How did everyone squeeze the 0.7mm line through the smaller holes on the blocks? Am I using the wrong size lines? Hope to get this completed in the coming weeks and start a new build soon. Not sure which boat I will do yet. Appreciate those of you still following, and hope your builds are going well! Thanks!
- 29 replies
-
- 1
-
-
- Model Shipways
- muscongus bay lobster smack
- (and 1 more)
-
So, here's how I painted the deck, the roof, and other top-side pieces. Working on painting the hull now.
- 29 replies
-
- 4
-
-
- Model Shipways
- muscongus bay lobster smack
- (and 1 more)
-
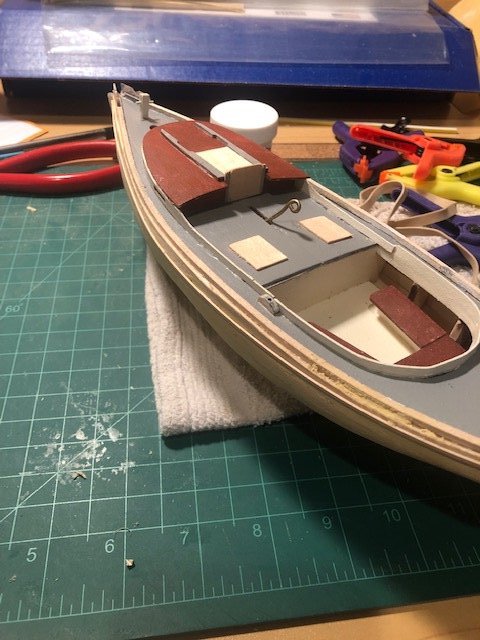
Your stained deck looked awesome, @SkiBee..! I was impressed! My color scheme on this boat is... different. I'll share a picture with you in a day or two how I painted the deck, the cabin, the doors, etc. Not what I had originally planned, I messed up on what I wanted to do with the deck, so I'm improvising the rest... Ha! I was out of practice for too long this summer! Thanks for checking in, sir. I need to peek at your Phantom New York Pilot Boat progress.
-
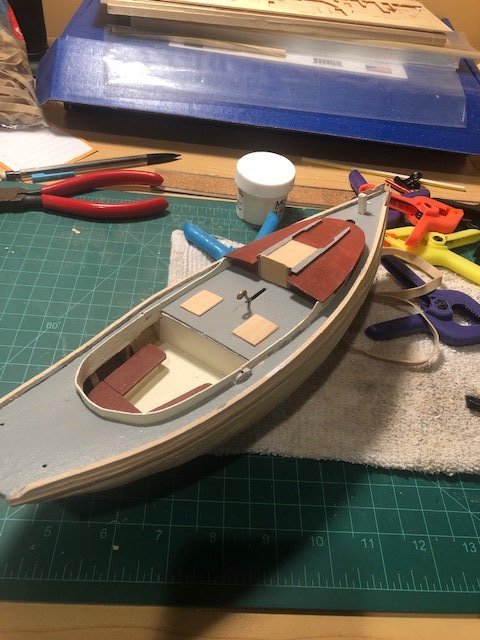
Hello all! Well, I took the whole summer off from the "shipyard", enjoying the grandkids, doing some traveling, and other general summertime stuff. I'm now getting back to this Lobster Smack. And, I have noticed that fellow modelers who I was following like SkiBee and bobandlucy have long finished their Lobster Smacks. I will use their great work and documentation to help complete mine. With that said, it's time to go to work... I finished the bottom planking, and did my best to fill, sand, sand more, and sand more to make the strakes as smooth and seamless as possible for when it's time to paint. I then worked on the toe rails, rub rails, fairleads and oarlock pads. As suggested in the instructions, I soaked the coaming and the cabin sides in boiling water for several minutes each in order to soften for the curves. It seemed to work fairly well, although the basswood did crack a bit on the coaming, which I've tried to seal using some super glue. It seems to have worked satisfactorily. As also suggested in the instructions, I have painted the coaming and the cabin sides prior to placing them on the deck. I am seriously contemplating painting the deck, as well, before putting the coaming and cabin sides on, as I think it will be much easier to do it now than to use the flex tape, masking, etc. Any thoughts? Excited to get back in the shipyard! Hope there is a group of additional modelers that are working on the Lobster Smack now, too, so I can continue to share thoughts and concerns. Appreciate your time!

- 29 replies
-
- 1
-
-
- Model Shipways
- muscongus bay lobster smack
- (and 1 more)
-
Your Lobster Smack looks really great, Bob! Congrats on its completion! I have been away from modeling for several weeks now, as we are in the middle of a kitchen remodel and all of the summer activities with grandkids. Left off at sanding the hull and will get back to it after the first of August. You guys will be well on to your next project by that time. Will try to catch up with you all sometime soon!
-
Peeking in to your progress, Bob. Looking really good! I am getting towards the tail end of my planking process. You may have already considered this, but I might suggest painting/staining the seat before you put the deck on, as it will be more accessible beforehand. Also, when putting the deck on, make sure you line up the two halves so that the notches toward the outside of the frames are still accessible, as you will need those exposed when placing the coaming and cabin sides. Looking great, though, at this point!
- 52 replies
-
- 2
-
-
- Model Shipways
- muscongus bay lobster smack
- (and 1 more)
-
Thanks, SkiBee. Appreciate the peek in. Yes, using a bunch of clamps (both the metal ones and the plastic ones), clothes pins, rubber bands... Seems to work fairly well. I am now on Strake 7. My "creep" isn't too bad as I look at the guidemarks on frames 3, 6 & 9, although they seem to be running a bit short. Not sure how to make that up without some significant gaps, but may not be as bad as I am perceiving. Just looking at it in a "worst case scenario", I suppose. As I recall, though, your fill came out looking really good. Probably won't finish the strakes before I'm taking a week to visit granddaughters. I'll check back in after I'm back and I get the bottom planking finished up. Again, thanks for checking in. I need to go over and check your progress in your log, as well!
-
Been a few weeks, so thought I's give quick update (although I said I was going to wait until all the strakes were installed)... Been doing some outside things as much as I can lately (I think it's finally spring in Kansas City!), but finished the 2nd strake on both sides today. After soaking them in super hot water for several minutes, the planks are forming pretty well next to each other, especially on the two ends. While I may end up with a few small gaps in the plank seams, a little filler in those spots should work well. They are not very big at all (so far!). So, I'm continuing to move forward... SLOWLY!
- 29 replies
-
- 3
-
-
- Model Shipways
- muscongus bay lobster smack
- (and 1 more)
-
Quick update... Formed and glued both of the garboard strakes. Seemed to fit well and bend well where needed, especially at the aft end. Did a dry fit then on the first starboard side strake 1, and it will need a bit of a bend at both ends, but looks like it will fit snug against the garboard along the whole length once it is softened and formed slightly. Going to work now (slowly) on the remaining strakes. Unless I have a question/comment during this process, I'll check back in once I complete the sheer strakes at the deck level. Exciting, huh?!?
- 29 replies
-
- 3
-
-
- Model Shipways
- muscongus bay lobster smack
- (and 1 more)
-
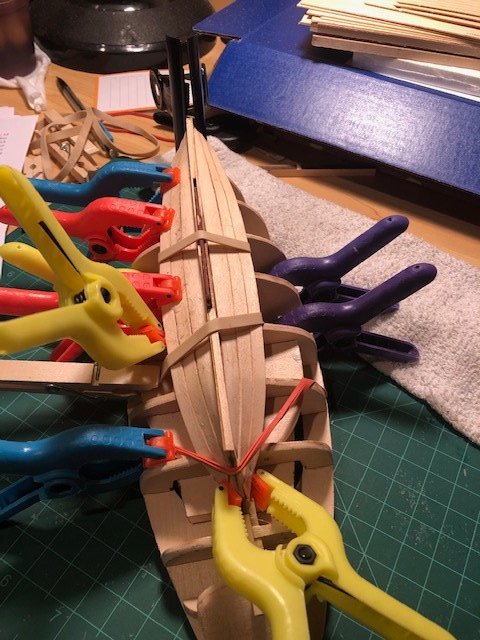
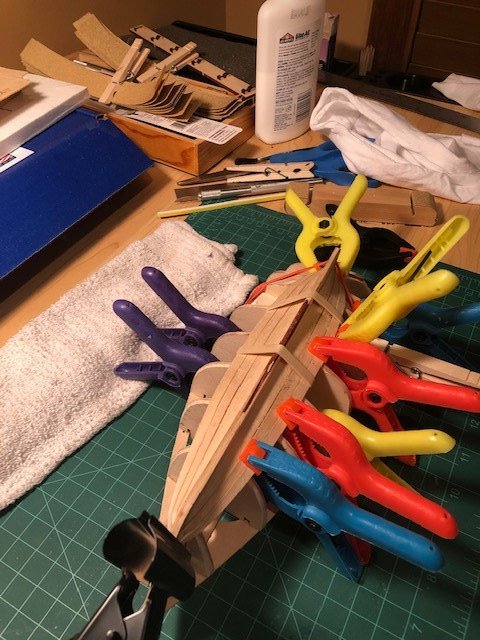
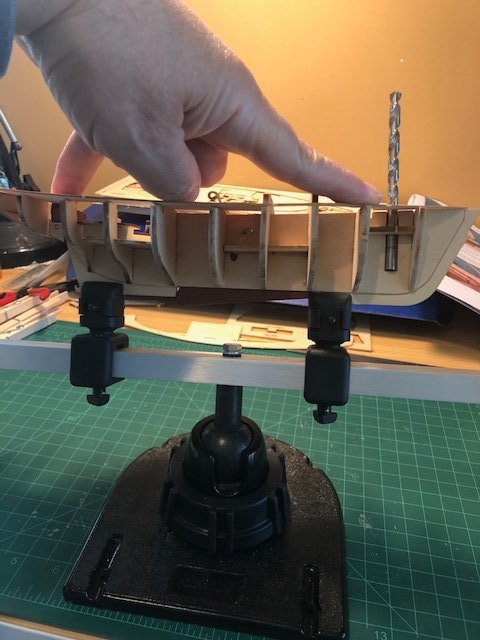
Well, a brief, quick update. I think (I hope, anyways) that I spent a decent amount of time fairing the hull, prepping it for the planking. There were also several of the frames that stuck out past the edge of the deck, so I sanded those spots down, as well. A birds-eye view of the boat now doesn't reveal any frames, so I think I am good. The fairing was a process, getting spines beveled so that the planks fit nicely. I think as I mentioned in my last update, if I had to do it all over again, I would probably place the deck so that all of the frames were completely under the deck and would fill the gaps between the two deck halves with wood filler after-the-fact. I have also added the stem, keel and sternpost pieces along the bottom of the central spine on both sides. They went on pretty well. Before placing and gluing the central plank, though, I had to do a considerable amount of sanding on the bottom part of the transom so that the plank set flush against the spine. Now, time for planking. I am going to take my time with this process, as well. I have looked at the port-side garboard strake to see how this is going to fit, in order to start out well. The instructions state that the garboard strakes will have the most extreme twist to them. In dry-fitting this port-side strake, though, so it fits nicely in the rabbet along the keel, It doesn't seem like the twist at either end is TOO terrible, but we'll see how it goes. When I planked my first boat, the Sailing Pram, I soaked the planks and shaped them in a curve to dry quite a bit more than what it appears I'll have to do here. Anyone have comments on how this "plank-shaping" compared to other builds? What did you use to shape the planks? I have a large wire basket, probably about 18" in diameter, that I used to help me shape the Sailing Pram. Will probably use it again in shaping these planks. There was planking overlap on the Sailing Pram, but there won't be on this Lobster Smack, so hopefully everything will fit snuggly and smoothly. EDIT: OK, so I realized as I was getting ready to soak the first garboard strake that I "form" it across frames after I take it out of the hot water while it's still pliable. It did have a pretty noticeable bend to it on the aft end when forming, and I think it came out well, as it fit nicely in the rabbet. Glued it in place and will let it dry overnight. Will work on the starboard side tomorrow. Thanks to everyone who reads this. Appreciate your comments/suggestions/critique.
- 29 replies
-
- 1
-
-
- Model Shipways
- muscongus bay lobster smack
- (and 1 more)
-
Congrats on the completion, Bob. Looks really nice! Know the feeling of being finished... So... what's next?!? lol
-
Thanks, Jim! Thanks, Jack! I'll look at those vendors' websites. Appreciate the guidance. Gregg
-
Somewhere on the internet (I think it was on somebody's thread here on MSW), I saw a picture of someone holding a mini rafter square. It was small enough to be useful in squaring bulkheads, etc. Anyone use such a tool? Where did you get it?
-
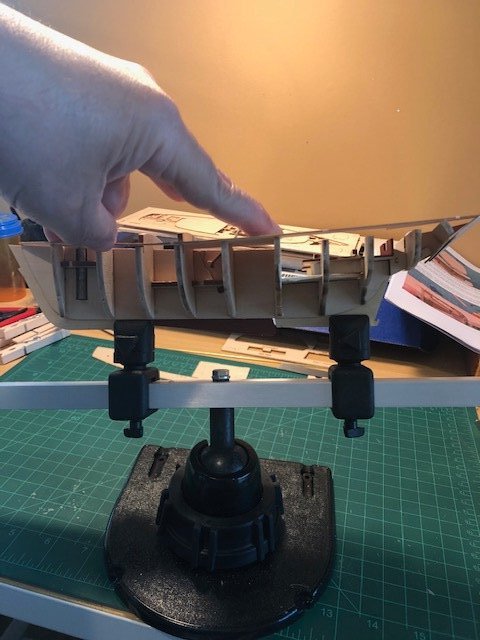
Thanks @SkiBee, for the advice on the bulkhead frame notches and how they relate to the coaming and cabin sides. Wish the instructions would have been a bit clearer at this point on the purpose of the notches. And, you really can't tell from the pictures of when the deck is installed/glued that there should be some type of "line-up" with the notches and the placement of the deck. There are spots on mine now where they line up fine on some of the frames but not others. I'll try to use a knife on the frames where I can to allow the cabin sides to fit decently when I get to that point. Can't deny that this is getting frustrating. One of those "wish I could start over" feelings, as I look at just enough tweak in the 90 degree settings of several frames and the placement of the deck just not perfect, creating gaps and mismatches in spots. I will now need to sand down several of the bulkhead frames where they overhang past the deck width, as I also fair the hull to prep it for planking. I have used some wood filler to clean up those gaps down the center. I also had some mismatch and quite a bit of overhang where the deck meets the transom. I think I was able to sand it down adequately, though, as well as fix most of the mismatch where the two deck sides meet above the cockpit seatback. Wow, tons of lessons I have learned from the short time on this build, compared to how I worked on the Sailing Pram. I've got read way ahead in the instructions to see exactly how things are supposed to fit. And... probably most importantly... TAKE MY TIME! Work slowly and deliberately. I am going to work more slowly on the fairing process, and see if I can get these frames sanded back down so they are under the deck, and so that the planking goes more smoothly. This long task of fairing will hopefully give me time to become less frustrated and get my excitement elevated once again. Thanks for the follow, comments and critique... Gregg
- 29 replies
-
- 2
-
-
- Model Shipways
- muscongus bay lobster smack
- (and 1 more)
-
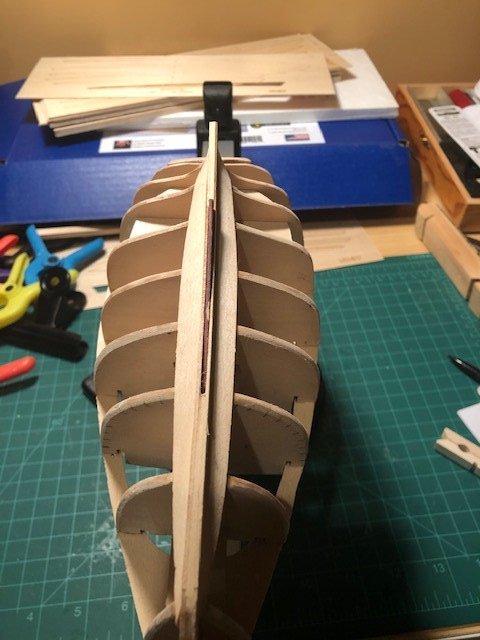
Moving on from my concerns about the notches on the bulkhead frames and their significance. Everything seems to indicate that, at least for this particular build, they don't have any specific function and will get covered up with the deck. Now, my next concern regarding the deck. When I dry-fitted and ultimately glued each of the bulkhead frames to the spine, I paid pretty darn close attention (I thought) to making sure they were centered and balanced. But now, when I am looking at placing the two-piece decking on top of the frames, there seems to be a pretty noticeable/significant gap between the deck and the port side frame #7 (at the edge of the cockpit seat on that side). I know there will be some bend to it when I dampen it, band it and glue it, but it doesn't appear to have near the gap on the starboard side. The frame looks pretty level on the spine compared to the others, but there is obviously just enough of a twist to make a difference. Will this make a difference when I begin the planking or when I do the finish work around the cockpit? Should I shim up that side in order to minimize the bend needed in going from frame #6 to #7 and then #8? Anyone have similar issues with the decking fitting a bit awkward? Appreciate the follow and the comments!
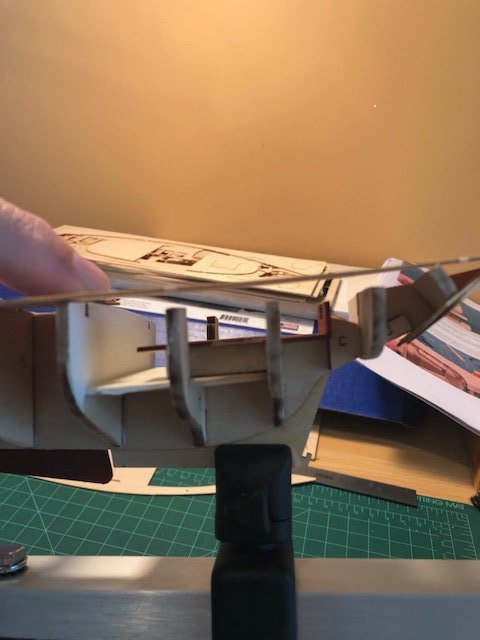
-
Happy Pi Day, all! Well, made some progress on the Lobster Smack the past day or so. I worked for a few days on dry-fitting and ultimately gluing the bulkhead frames. As Skibee noted in his build log, I had issues in fitting both sides of Frame 4 around the Part B reinforcing piece. I had to increase the depth of the cut-in by about 3/16". Also, when I glued the starboard side Piece B, the piece slid up a bit and dried before I noticed, so my best guess remedy was to not only make the cut deeper as I noted above, but also had to widen the cut so that it fit properly against the top and bottom of the spine. I continued on with the frame assembly, and noted that, while almost all of the frames required some light sanding in order to fit their grooves in the spine slots, Frames 6 & 8 fit pretty loosely. I wasn't sure if I would need to shim the gaps or just carefully glue in place. I chose the later solution, which seemed to work ok for both of those frames. I hope I did everything well, as I proceed to the decking, fairing and planking! I then worked on the bulkhead frame 10 and transom. Directions were pretty straight-forward but, again like SkiBee experienced, I had to sand off a good 1/8-1/4" from the top in order for it to get flush with the top of the spine. The picture below might be a bit deceiving, as the transom still looks higher than the top of the spine, but it is due to the camera angle. I had not glued Frame 10 yet, so I took it and the transom off the spine to sand. I was too afraid of breaking the transom if I tried to cut/shave, so I spent the time to sand the curve down to the proper level. Once I hit the mark, I glued Frame 10, as well. As the instructions suggested, I decided to paint the cockpit floor area and cockpit seats before this area gets closed up with the decking. I used the MS4814, Hull Copper Red to come close to a mahogany look for the seats. In retrospect, I have seen several others use some type of stain/varnish on their boat seats, and it really looks sharp. I made that mistake on the NSP, as well. I am now to the point of installing the deck, but I have a stupid/silly question that I need other experienced readers' help with! In the picture below, you can see the notches on the port and starboard sides of each of the bulkhead frames. The way they line up, they seem to hold a purpose, but what is it? It looks like, once both halves of the deck are fitted and glued, the notches become hidden and inaccessible. Are they used for assistance in spacing the frames at proper distances when dry-fitting and gluing? This novice builder is at a loss, but don't want to mess up this early in the process. In reading the instruction book, I'm not seeing any reference to this sequence of notches. OK, enough said. Appreciate your input! Thanks again to everyone who reads this log. I appreciate your follow, your comments, and your advice! Hope everyone enjoyed their Pi today! Gregg