

MichaelW
-
Posts
69 -
Joined
-
Last visited
Content Type
Profiles
Forums
Gallery
Events
Everything posted by MichaelW
-
Thanks Bill. Do you have any issues with pulling up the tape?
-
Thank you Barkeater! I hope to get more work done during the week. Still have some snow to remove........
-
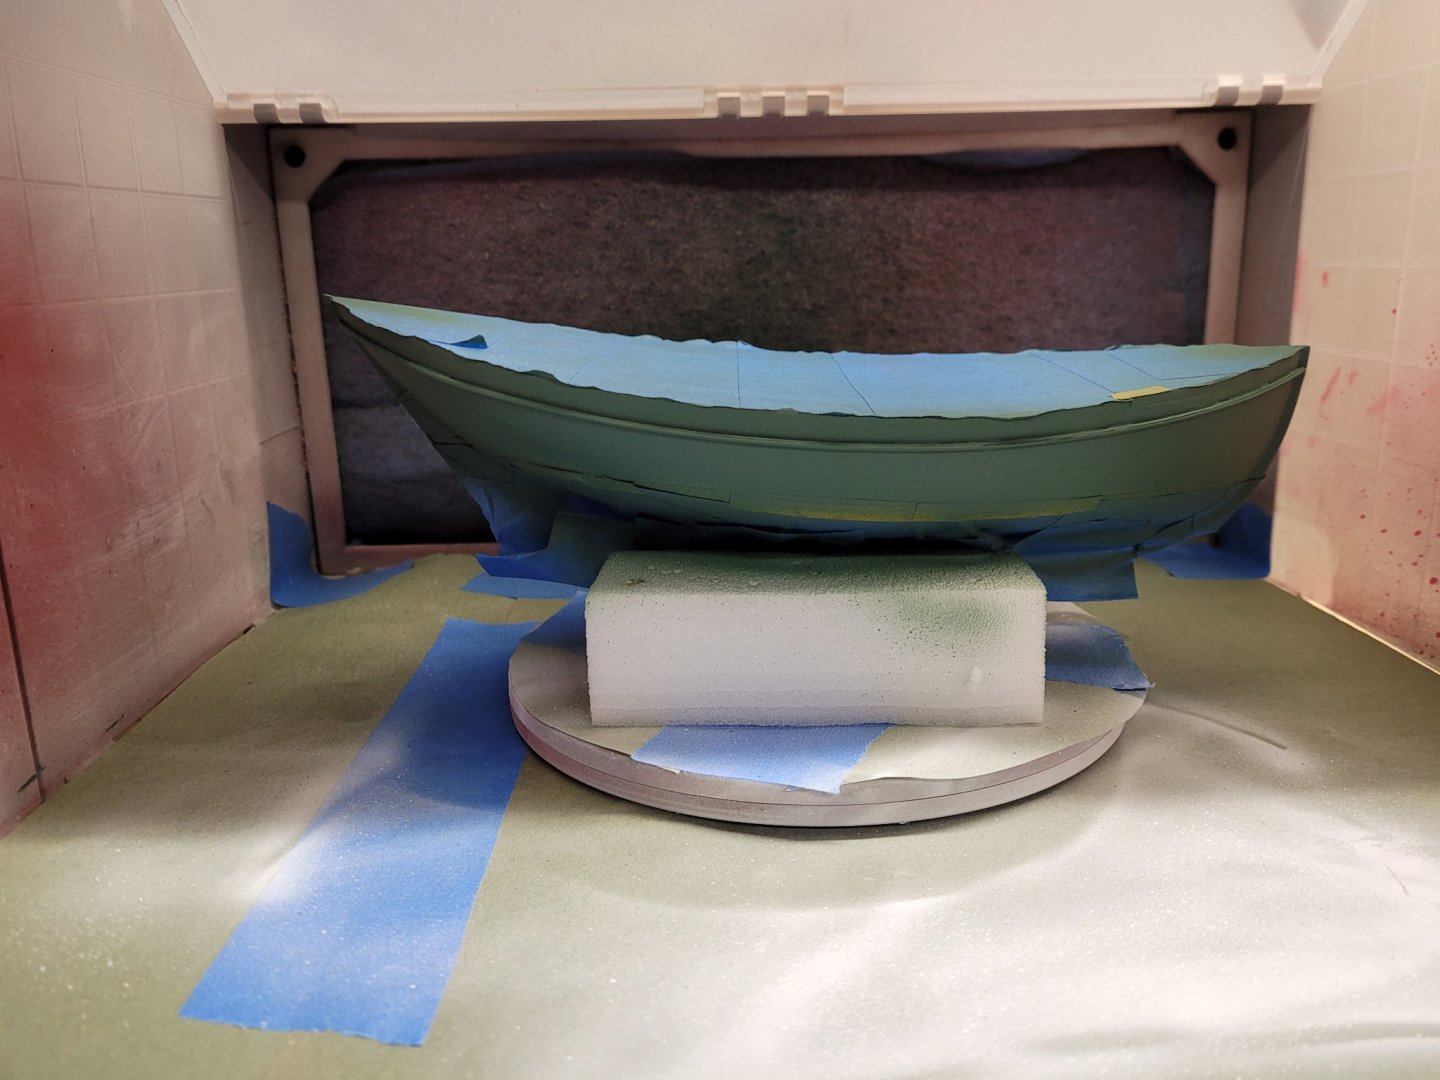
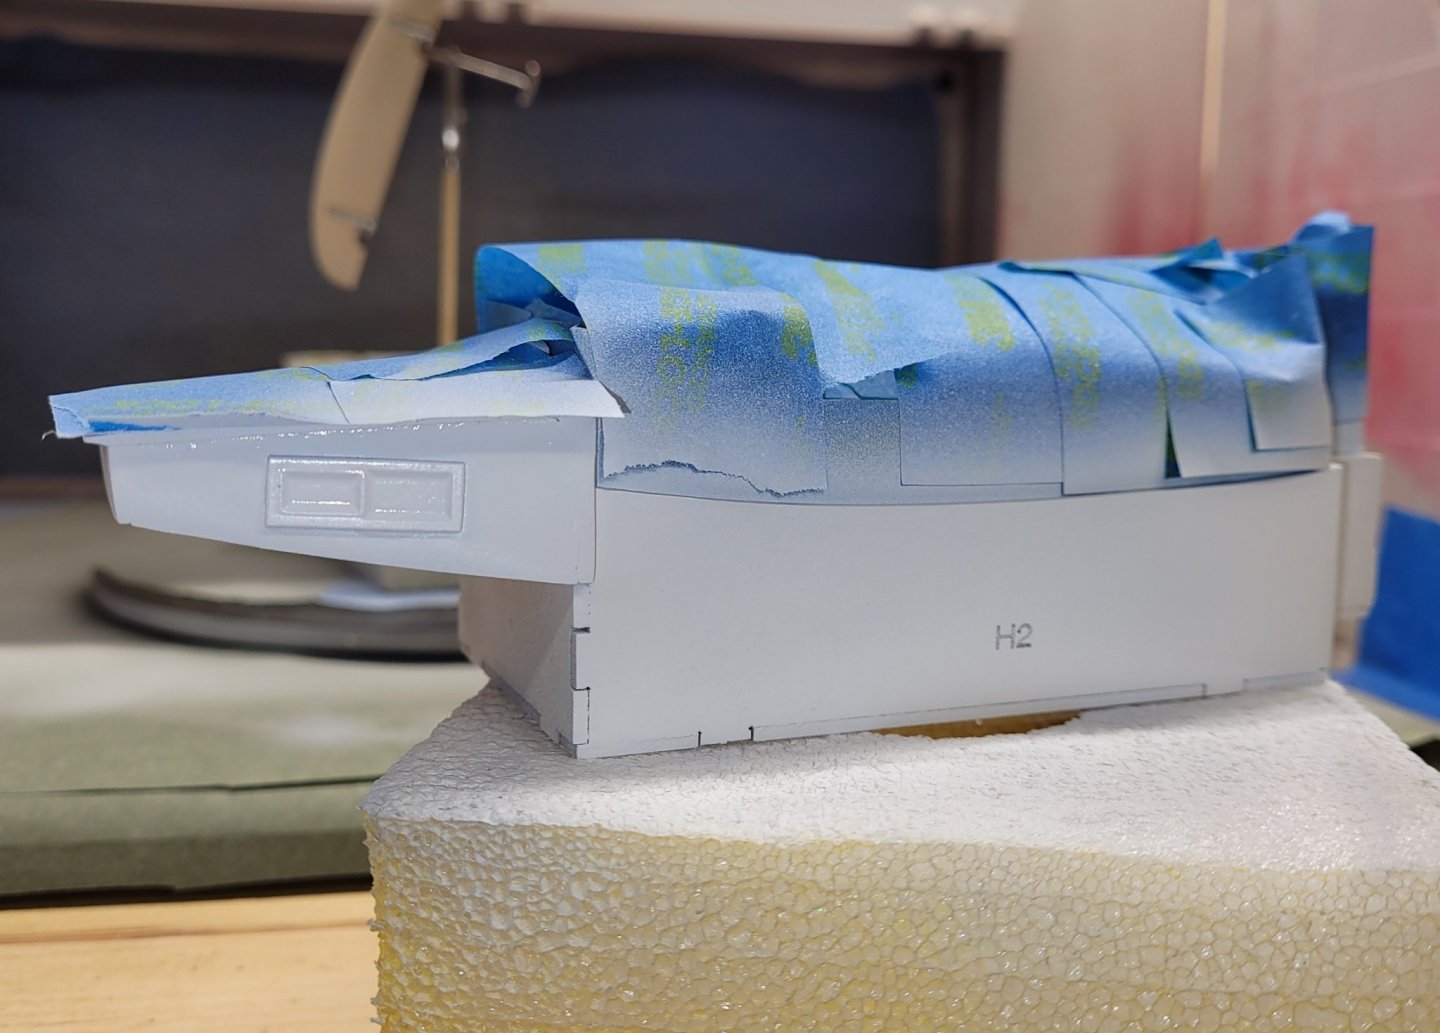
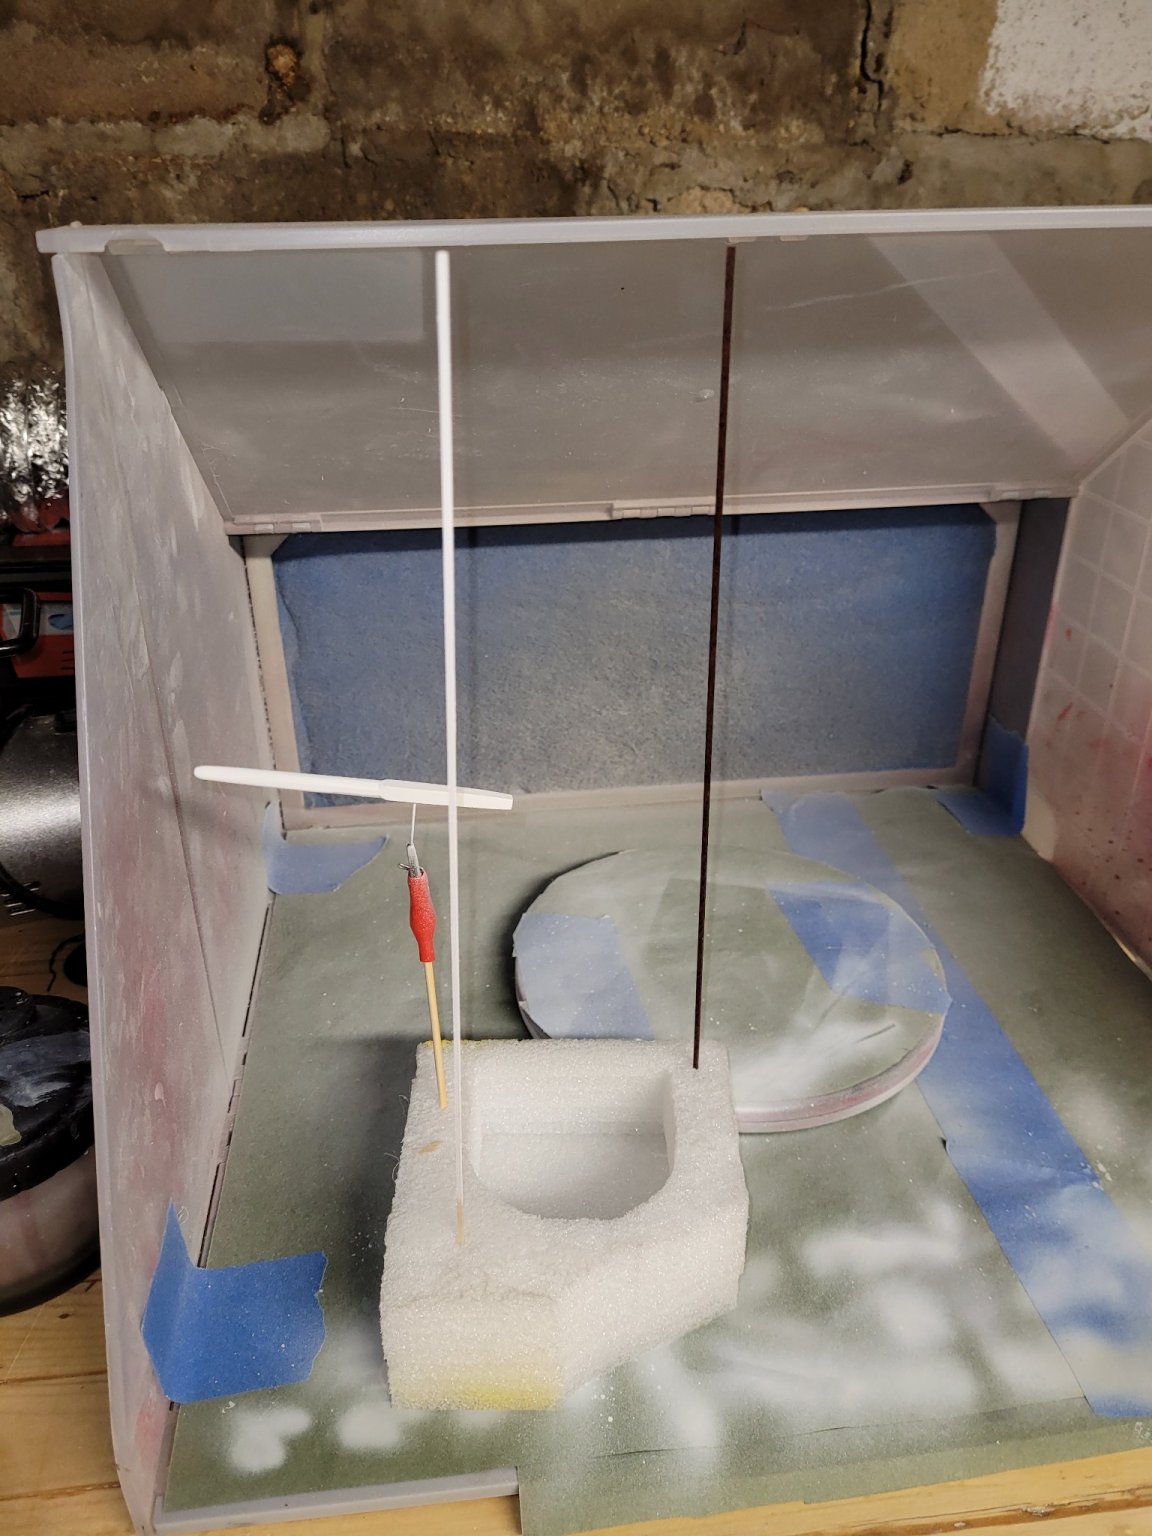
Thanks Nic. I did that when I built the Red Baron. I don't know why I did not follow that plan for this boat. Making some progress while the snow falls. We received another 8 inches of snow; so, I went to painting the hull. I carefully masked the bottom of the hull and painted the top part green. I purchased thin masking tape (orange) from Hobby Lobby, which worked very well at the water line. I waited about 20 minutes between the coats. The tape at the water line performed very well. Unfortunately, the guy in charge of masking the bottom part of the hull missed a small gap in the tape and I wound up with a squirt of green near the keel. Also, when pulling off the masking tape on the hull I pulled off two small chips of paint. I do not think that's a function of the tape, but two flaws in the paint. There must have been dust or something that affected the paint adherence in those two spots. The over spray and chips can be handled with some very fine sandpaper and a few swipes with the air brush. I think I will add the ship's name and home port before gluing on the toe rails. It should be much easier to rub on the words without the toe rail in place.
- 81 replies
-
- 2
-

-
- Bluejacket Shipcrafters
- Yankee Hero
- (and 1 more)
-
Looks good. This is my next kit....looks like I need more clothes pins and clamps!
-
I don't know about the copyright restrictions, but I'm looking forward to photos of your build.
-
Beautiful craftsmanship - great work. I am wondering....will the gimbaled stove boil water for tea?
-
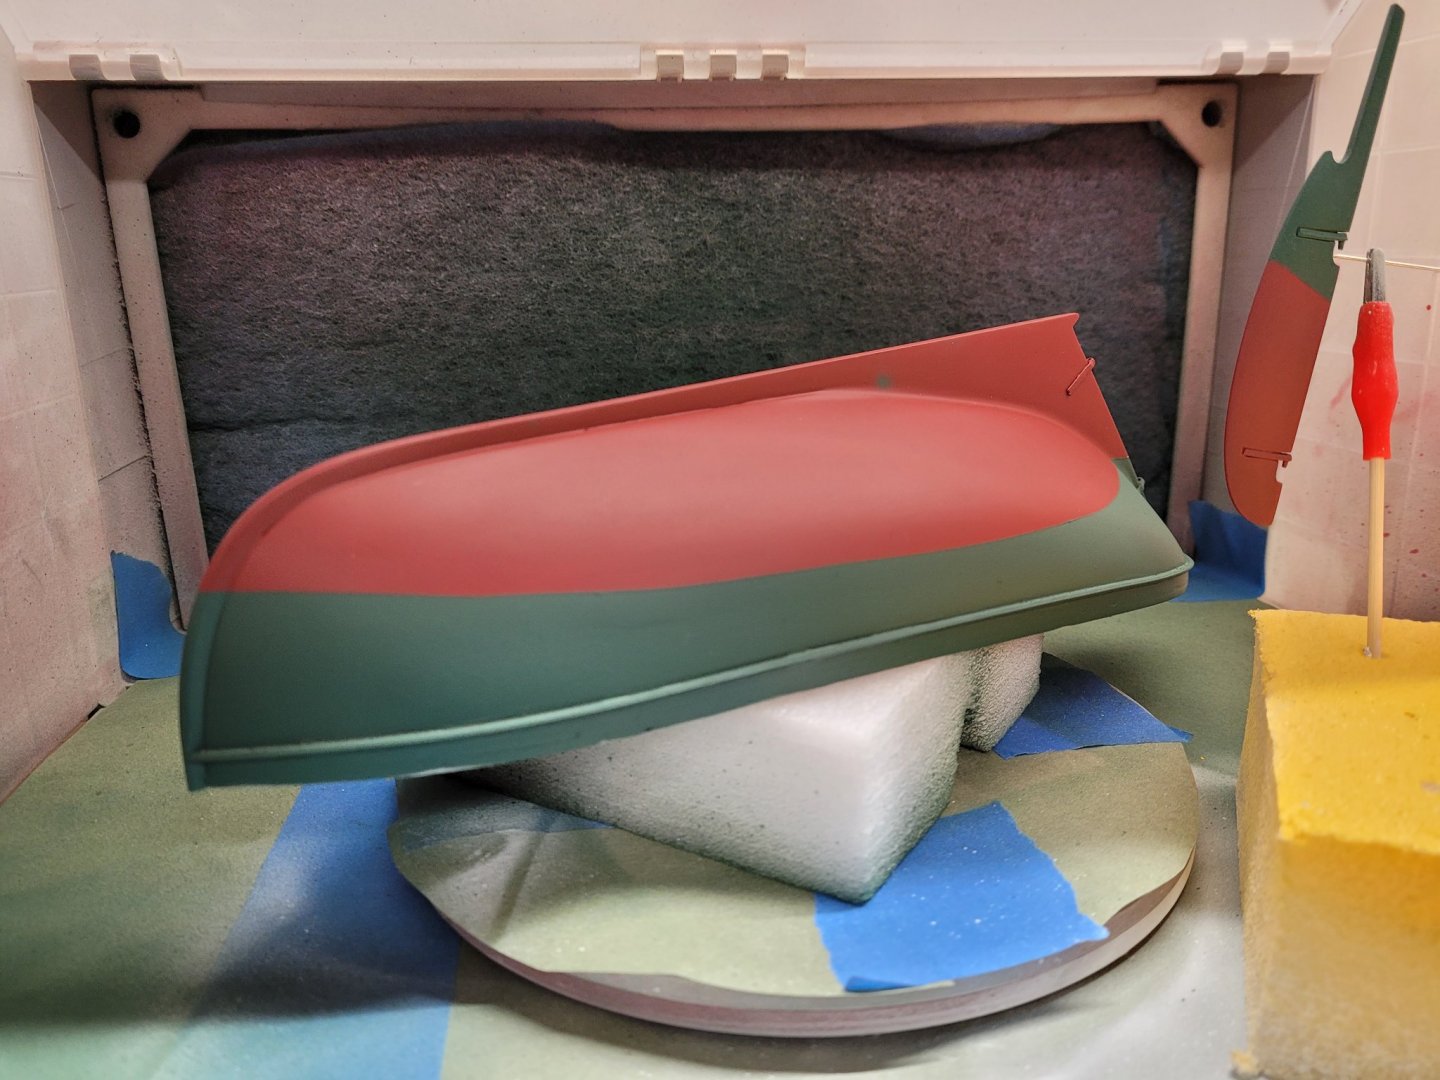
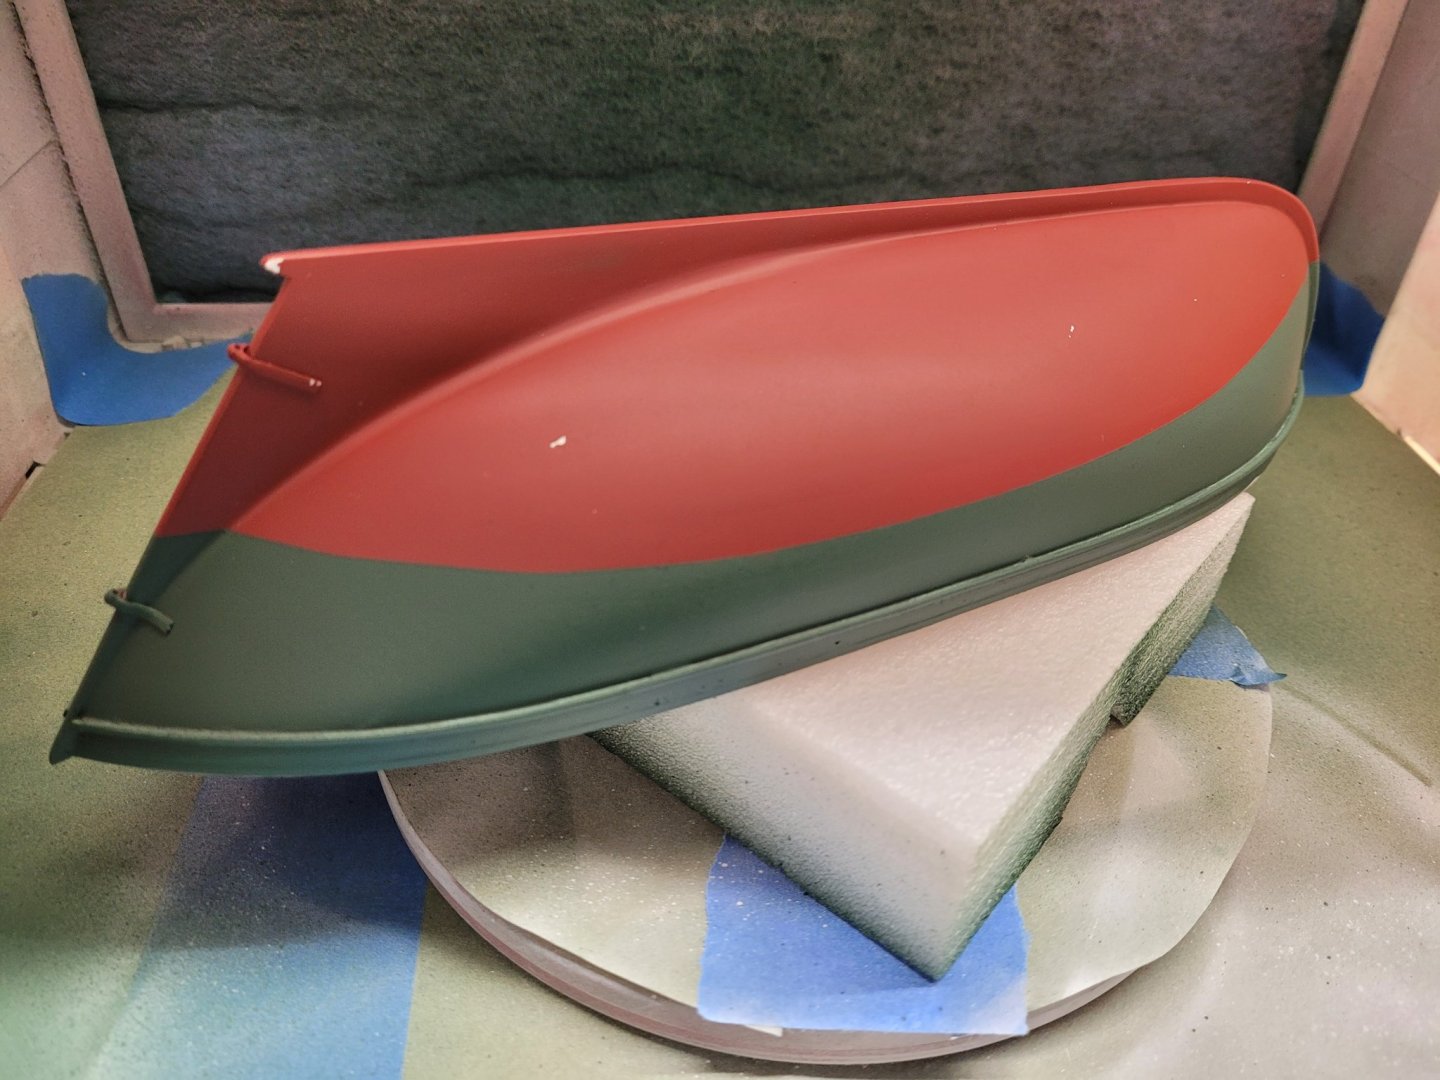
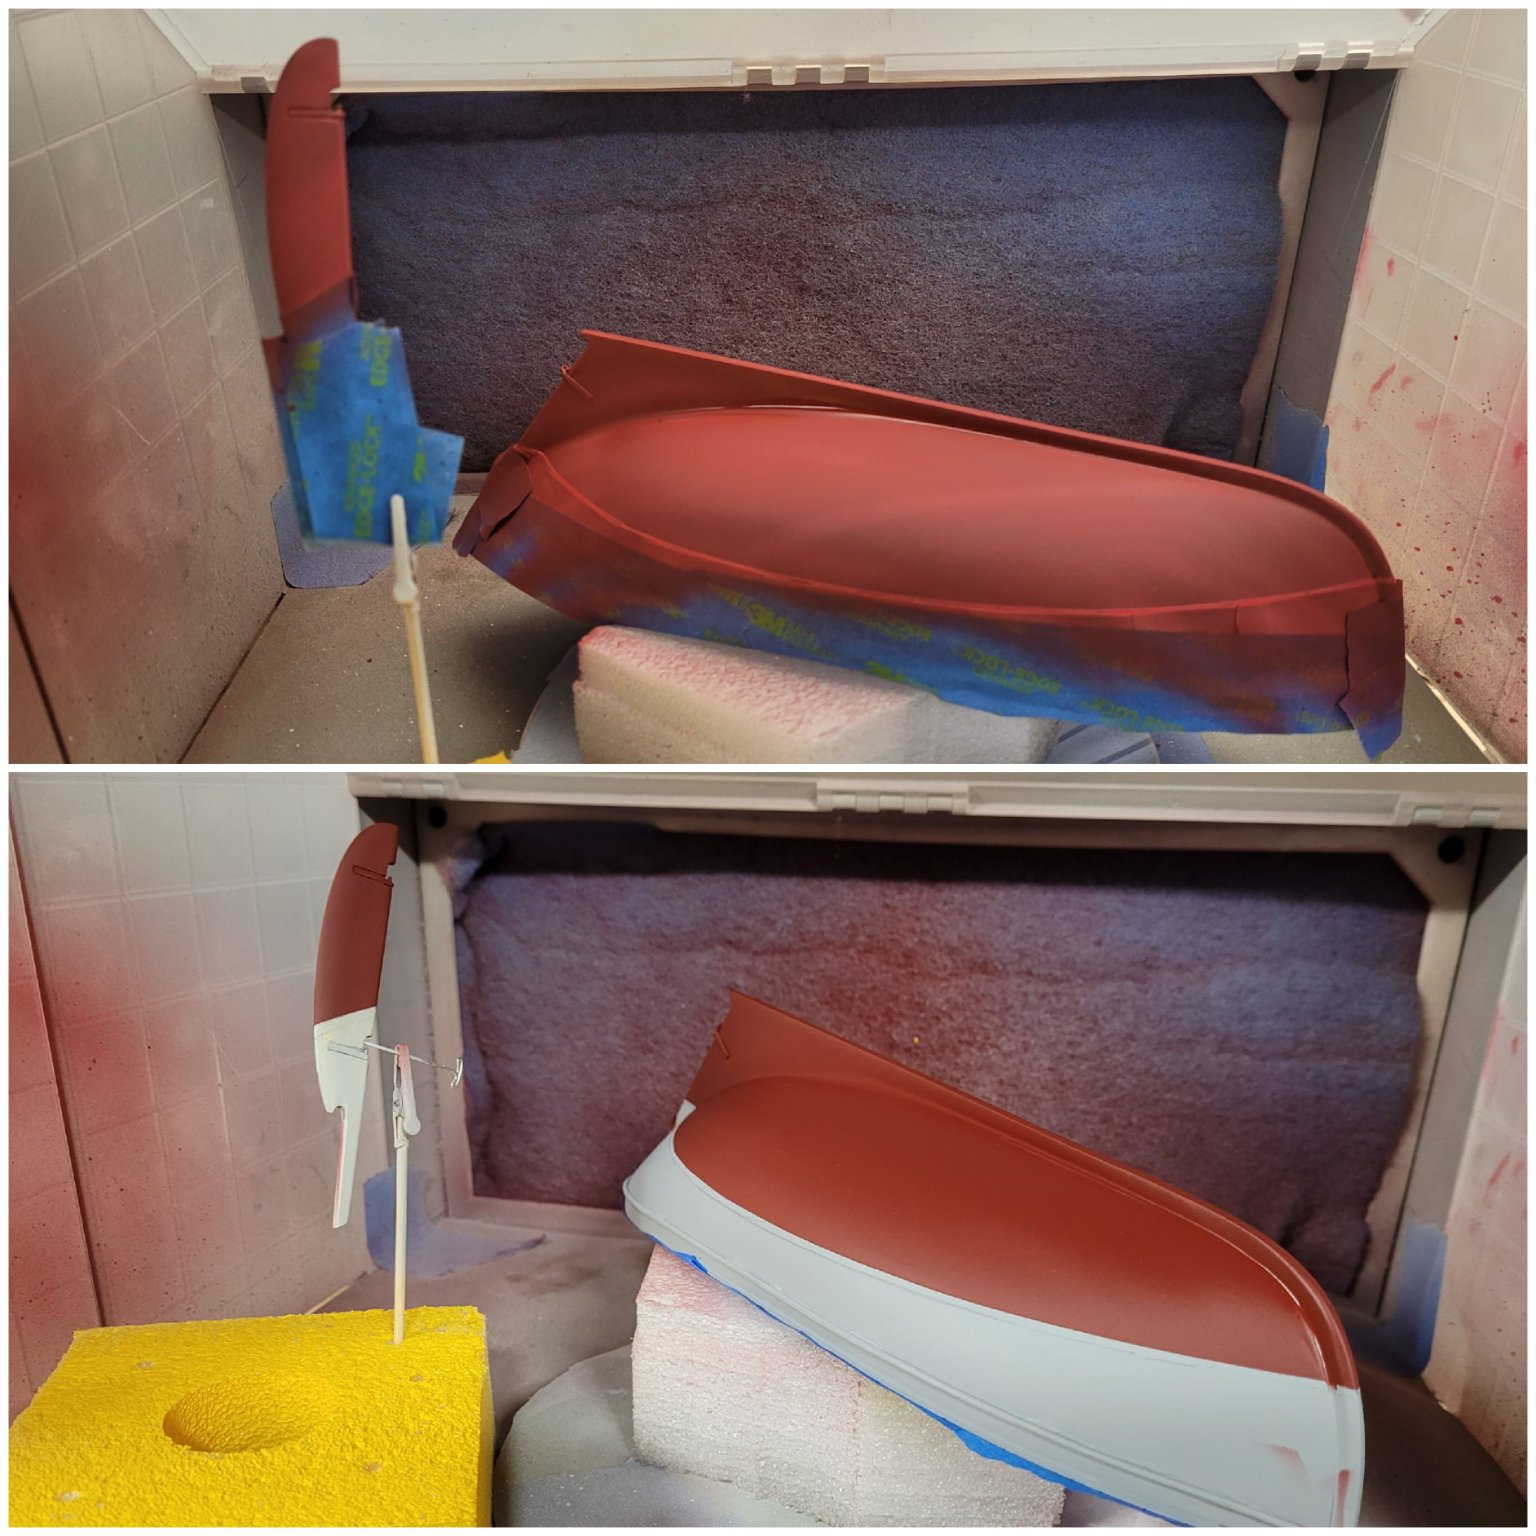
Wow, the recent photos of the completed HM Alert are just inspiring. Well, back to my Yankee Hero. With snow and work I missed a few hobby days. I was able to put the first color on the hull and rudder. I painted the red first - I seem to remember a suggestion that one should paint lighter colors first because dark always cover lighter colors. I think the green to be applied up the hull is darker than the red. I carefully masked the water line and put two coats of paint on the bottom. Unfortunately my masking job wasn't perfect and some overspray worked its way up the hull. I do not like to leave the masking tape on any longer than absolutely necessary. I'll leave the paint to dry a day or so for it to really set, then I'll start masking for the green. I also put a coat of white primer on the toe rails. I'll hit those with 500 grit or higher sand paper to take the fuzz off and put the finish coat on those this weekend. Still making some progress.


-
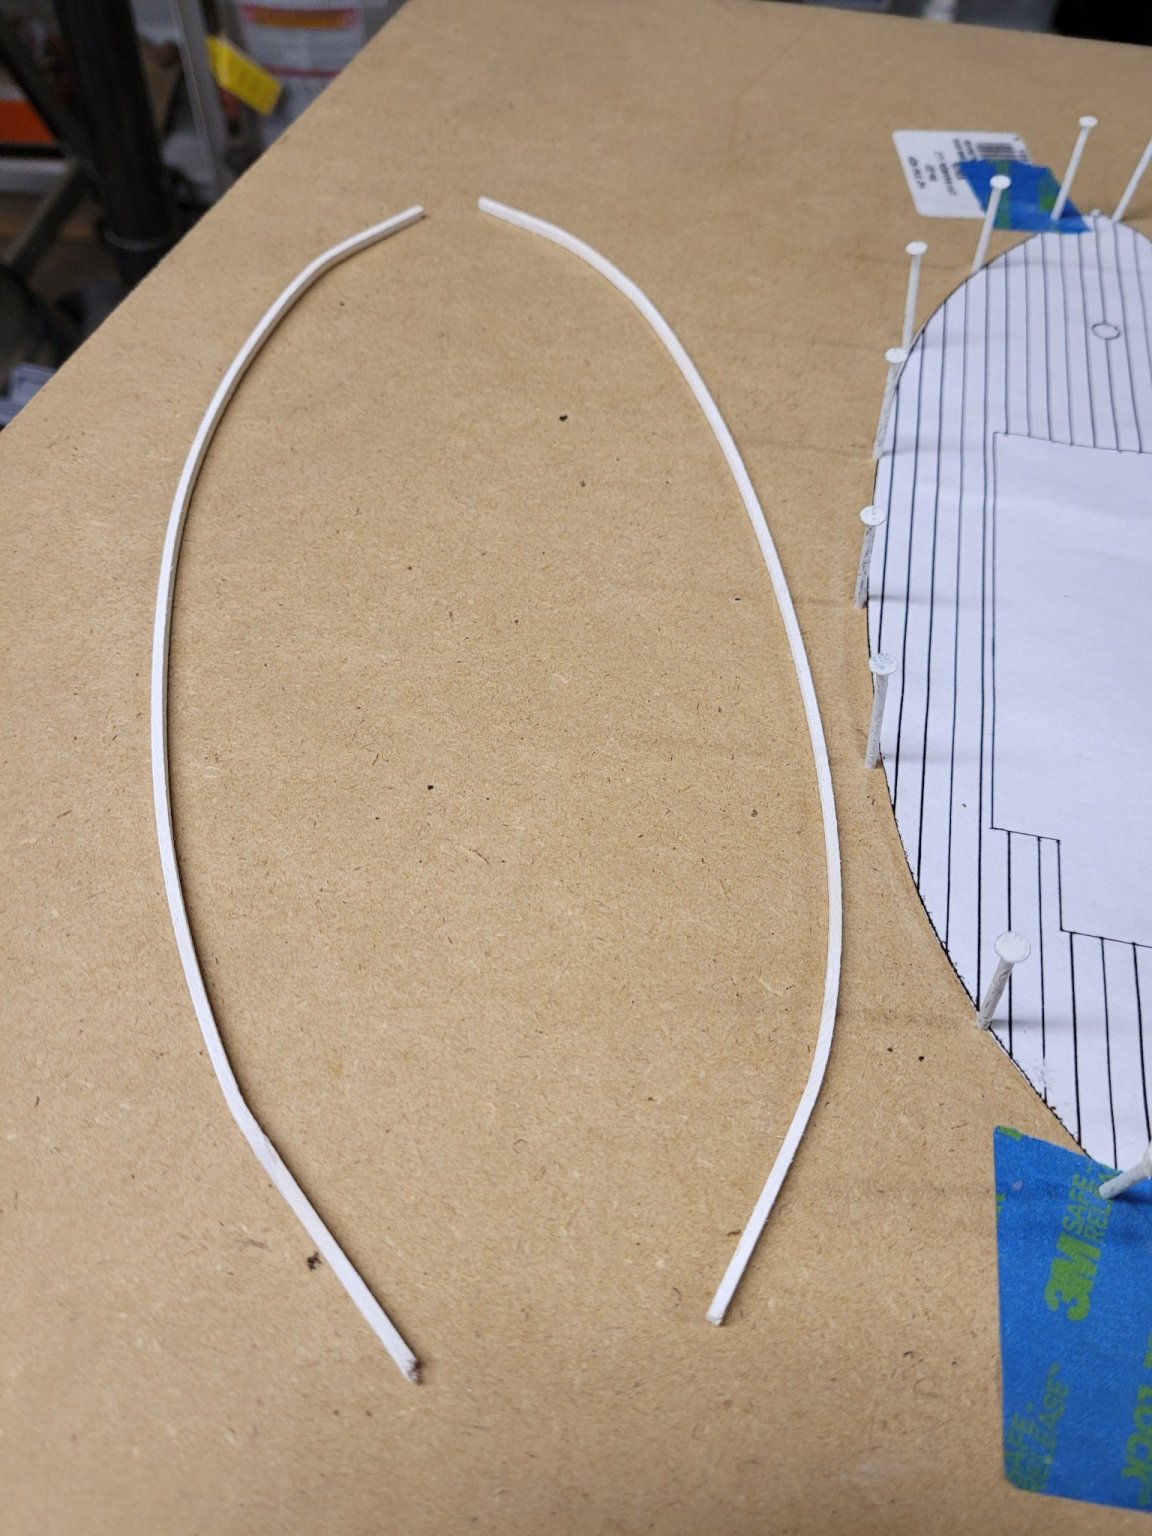
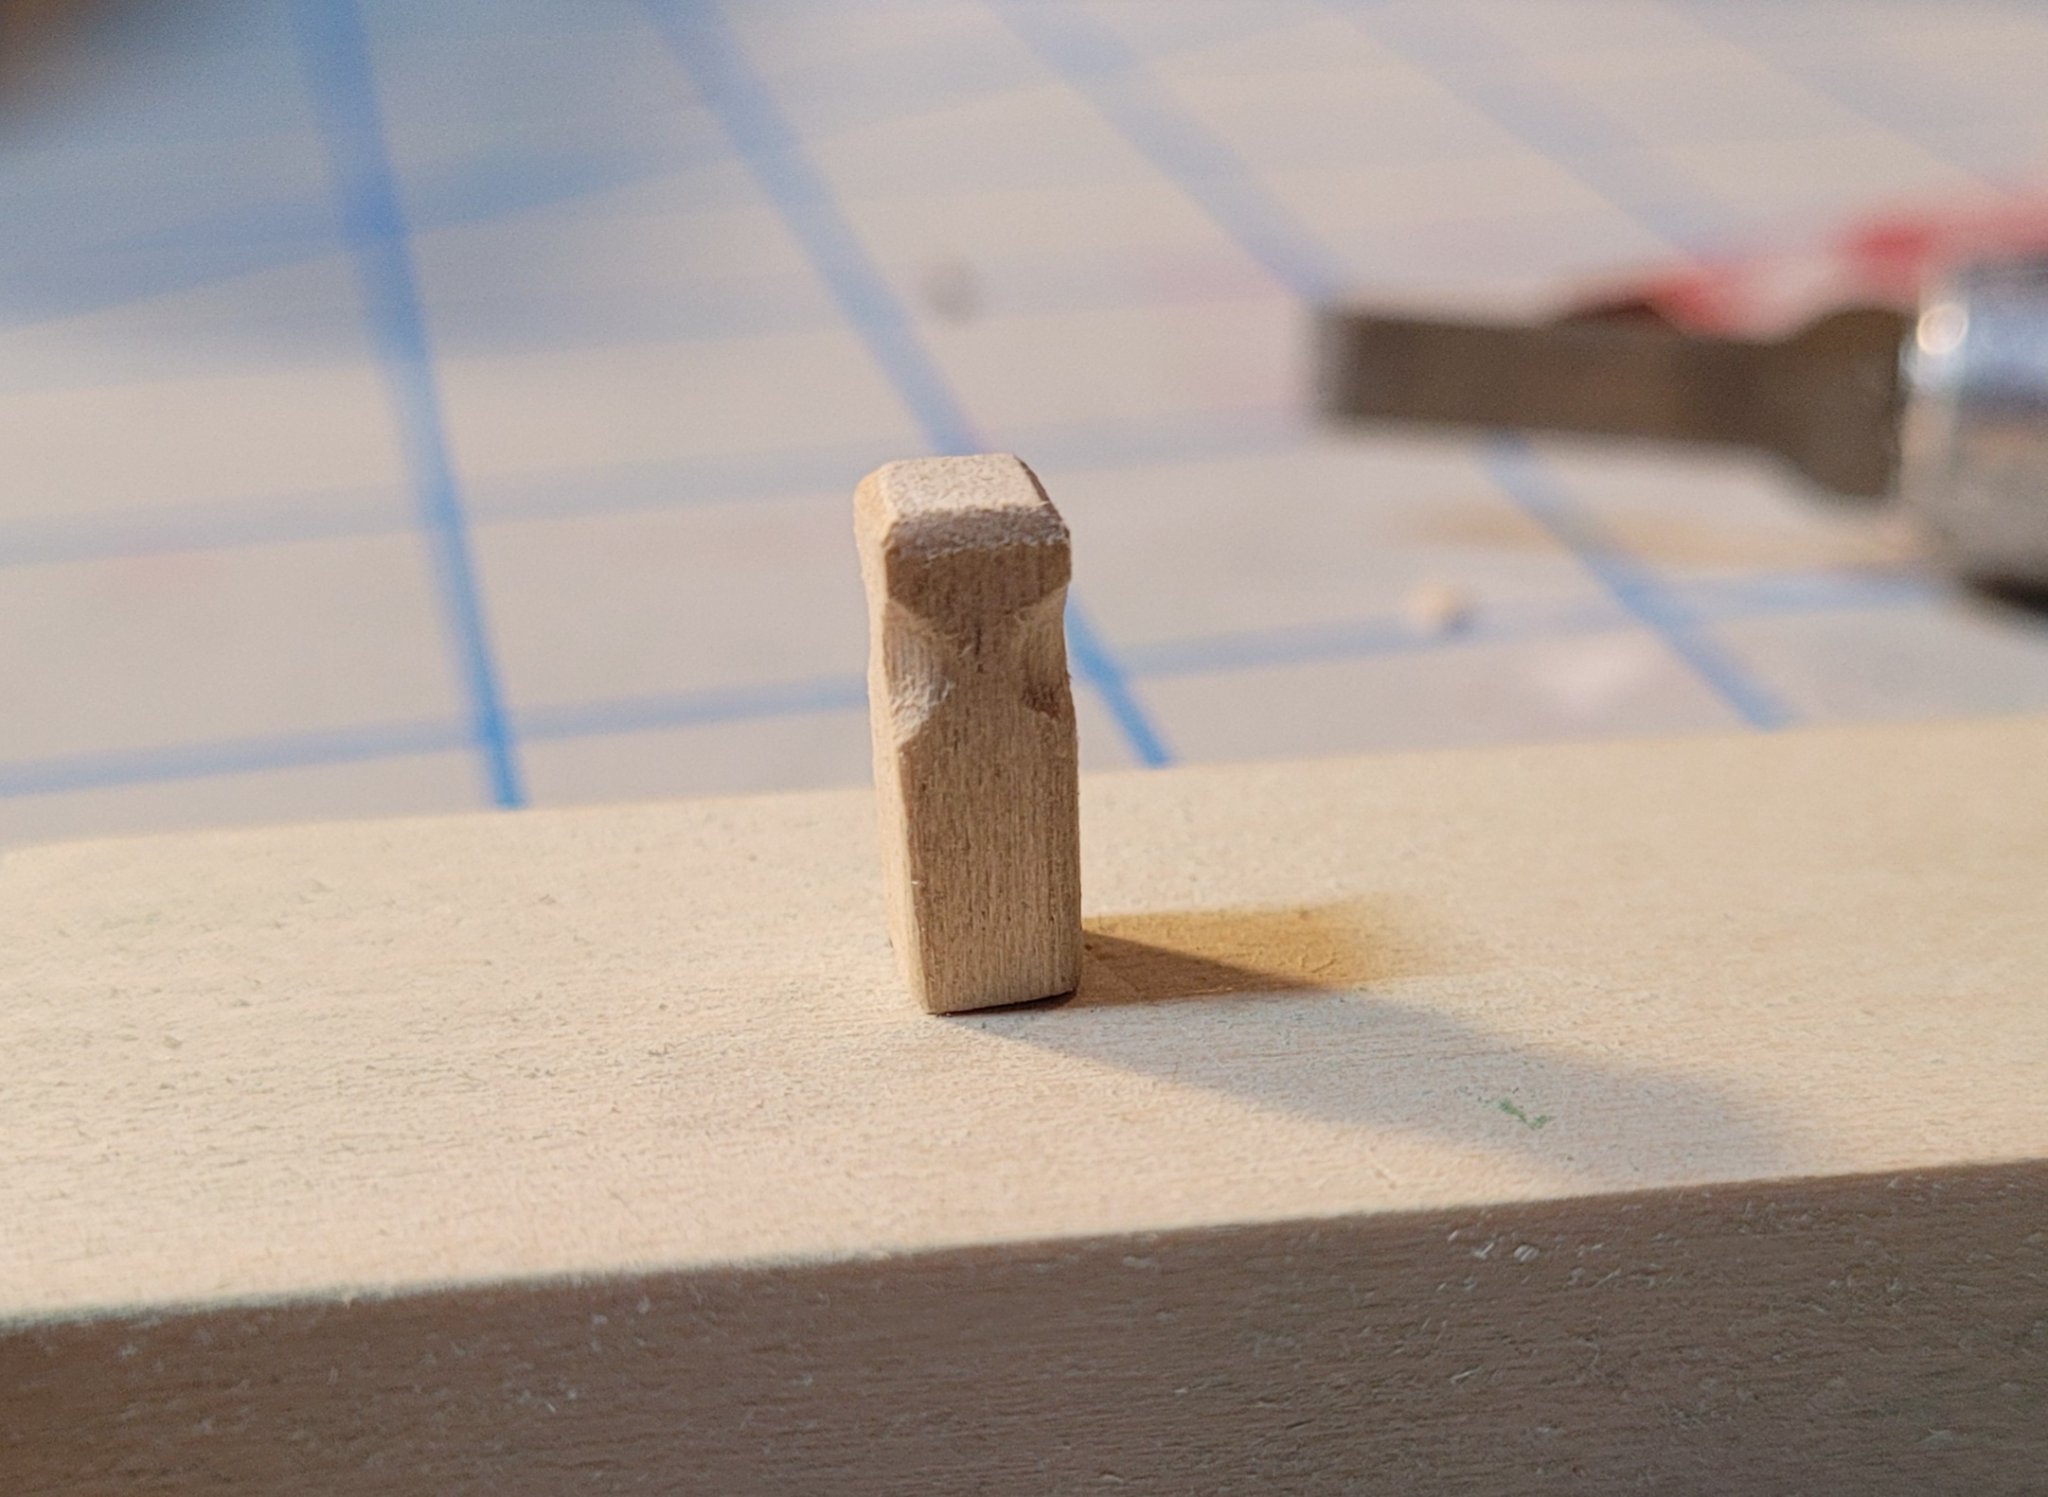
Thank you Bill! Still making a little progress mid-week. I put what I hope is the last coat of primer on the hull. The next steps for that are re-finding the water line, then painting the final colors. In the meantime, I made the samson post. I used the plans to find the correct height of the post. I then chamfered the top and let in the sides. Picking up on a technique I saw on this site, I made a bend board to pre-bend the toe rails. Using the board was much more effective than trying to use rubber bands on the curved sides of the hull. Unfortunately, due to an accident on my work table, I broke one of the toe rails. I carefully glued it back together with CA. After soaking, the toe rail bent easily and I faced the split inward to keep it from re-breaking. I think it worked. I'll paint them next.


-
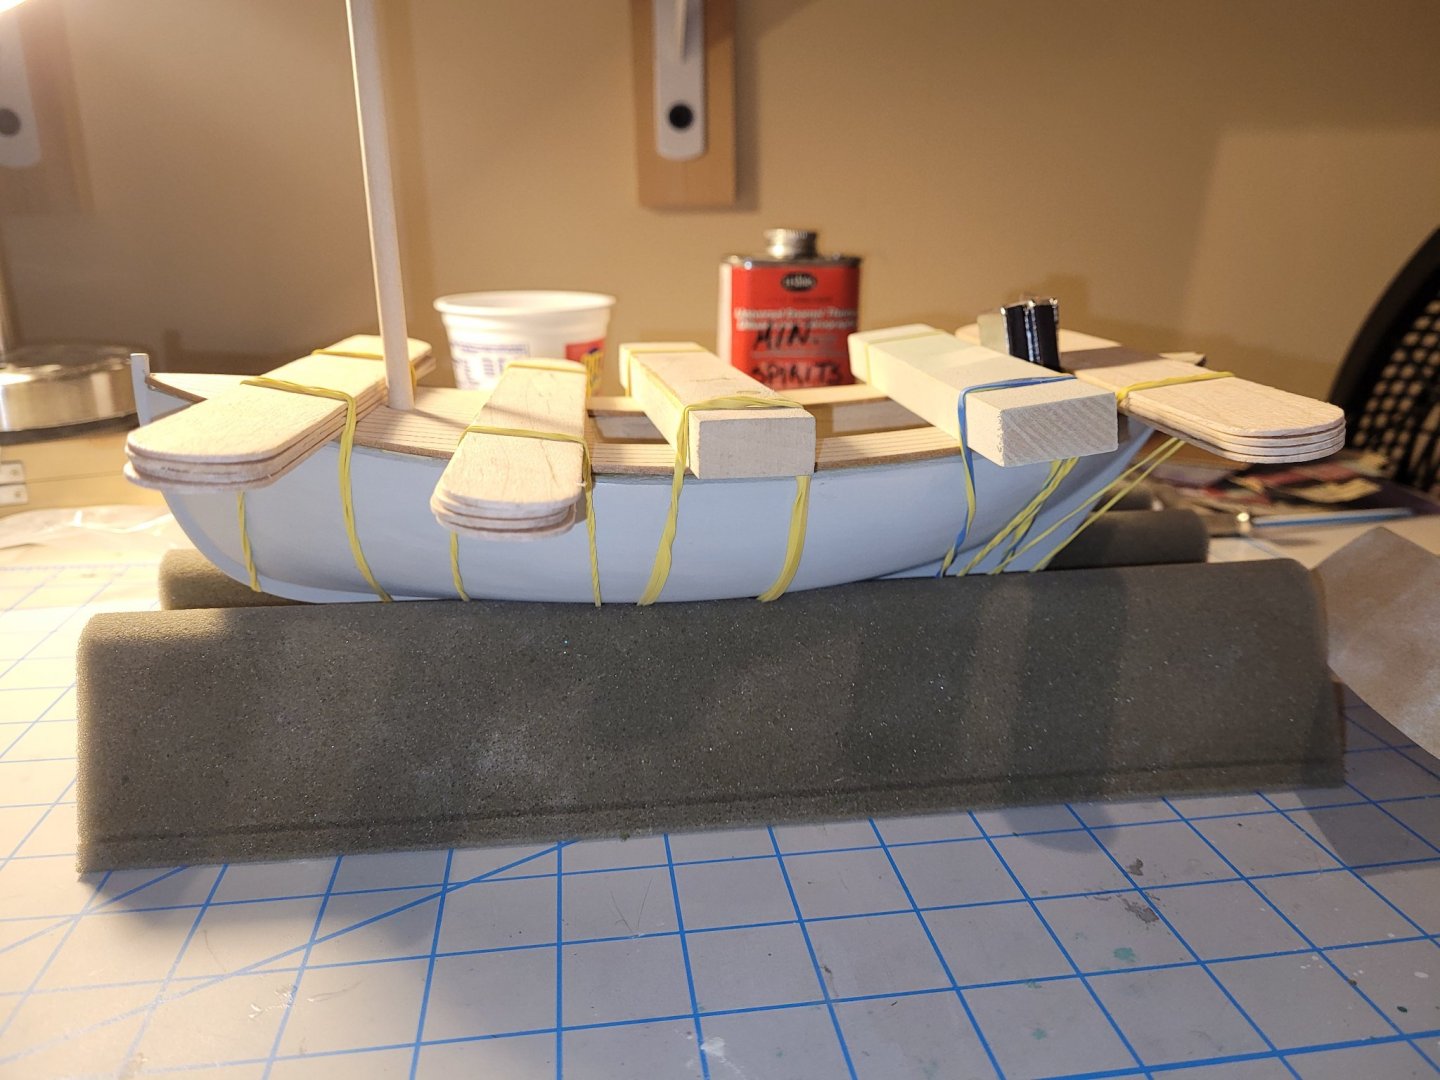
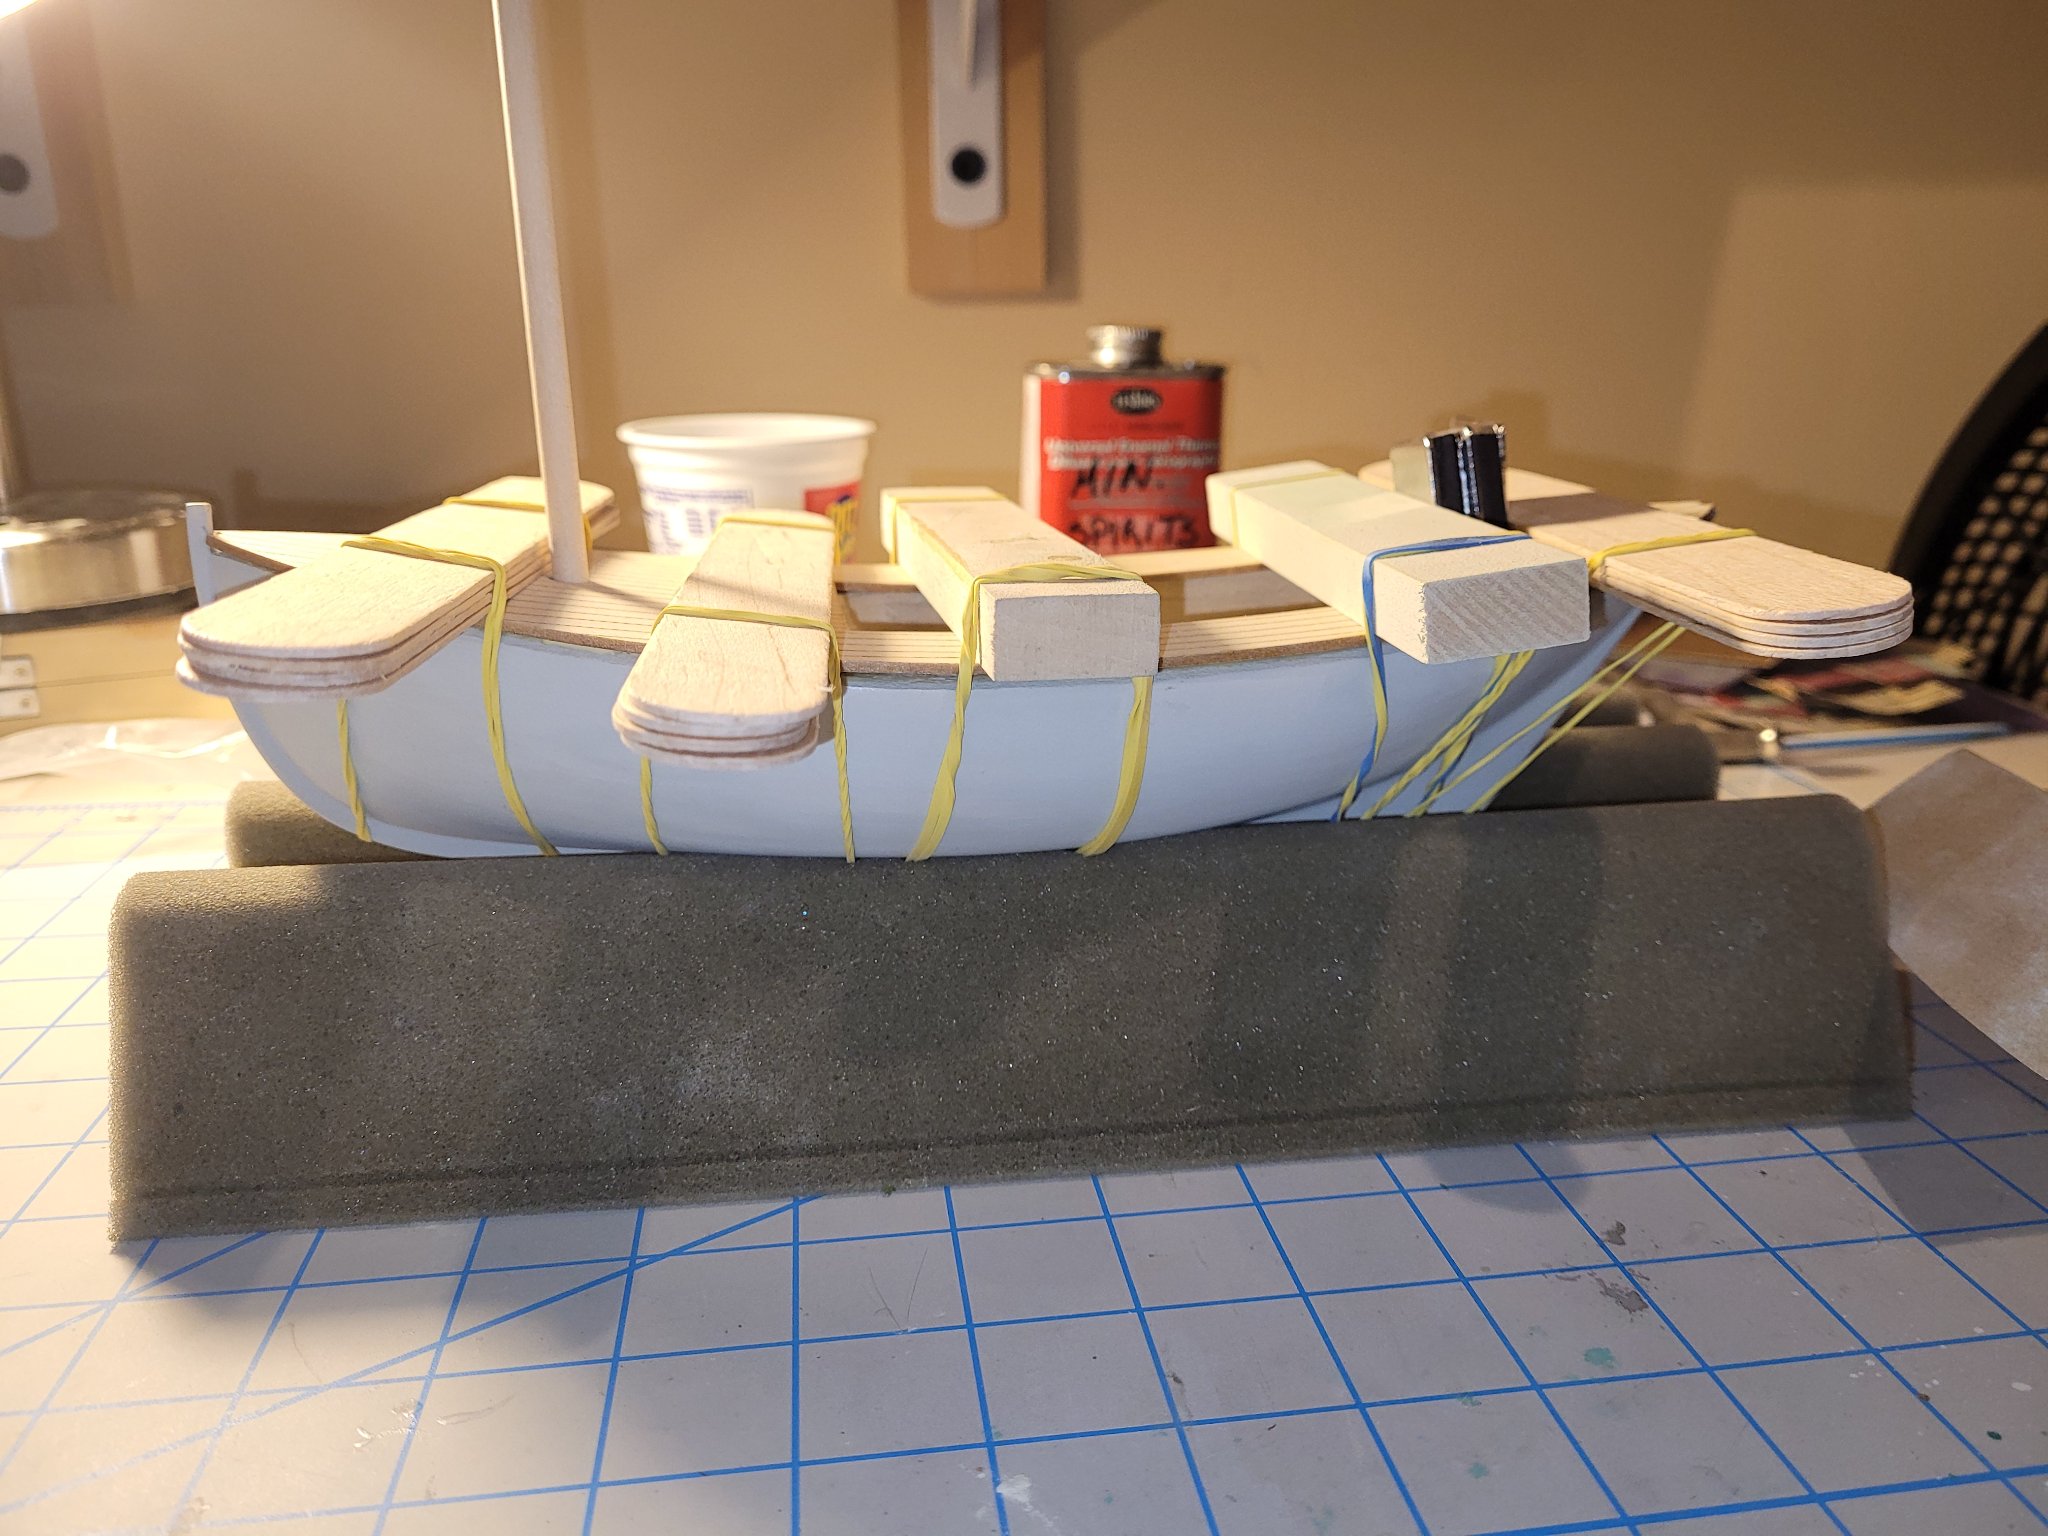
Not much progress, but I a still moving forward. This build blog and the great modelers here are keeping me motivated! I sanded down the contour putty at the deck line and put another coat of primer on the hull. The instructions call for the rub rail to be installed 3/16 of an inch below the top of the deck. That seemed a little close to the bottom of the toe rail for me; so I added another 1/16 of an inch and put tick marks around the hull 1/4 of an inch below the deck. I then carefully glued the rub rail to the hull using CA. I moved in increments - putting glue down along the tick marks a few inches at a time, pressing the rub rail down until the glue grabbed, then moving on. It worked well. I didn't like the look of a few scratches on the hull so I touched them with a little contour putty. I'll lightly sand the hull one more time and add the last coat of primer (mainly to cover the rub rail).
.thumb.jpg.ed73e41f32f67d77fc62565a0ac181b2.jpg)
- 81 replies
-
- 2
-
-
- Bluejacket Shipcrafters
- Yankee Hero
- (and 1 more)
-
Thanks Rich. I negotiated and obtained trackage rights for a layout that's 18" wide and about 15 feet long. It's a point to point line, but it keeps me modeling buildings and landscapes and running the occasional lash up. "See" you tonight.
-
Thank you Eric and Joshua! I'll ask to join the New Jersey group - looks like I'll need a sponsor. You know, I've never been to the Battleship.
-
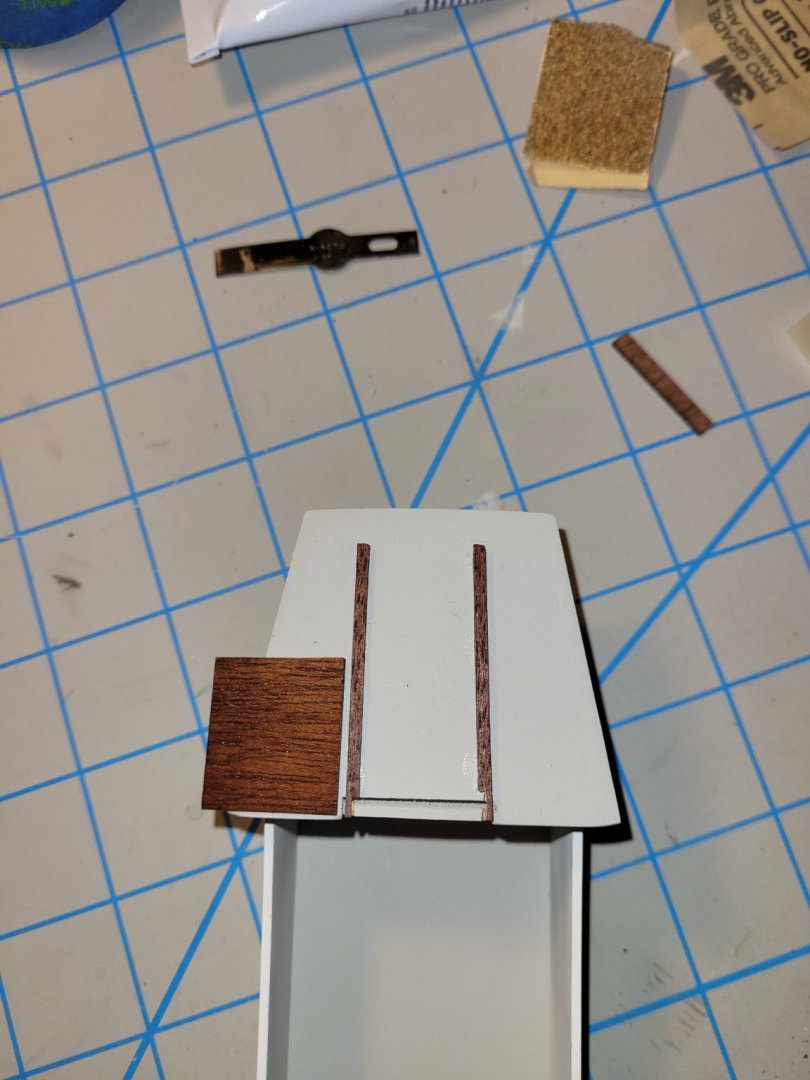
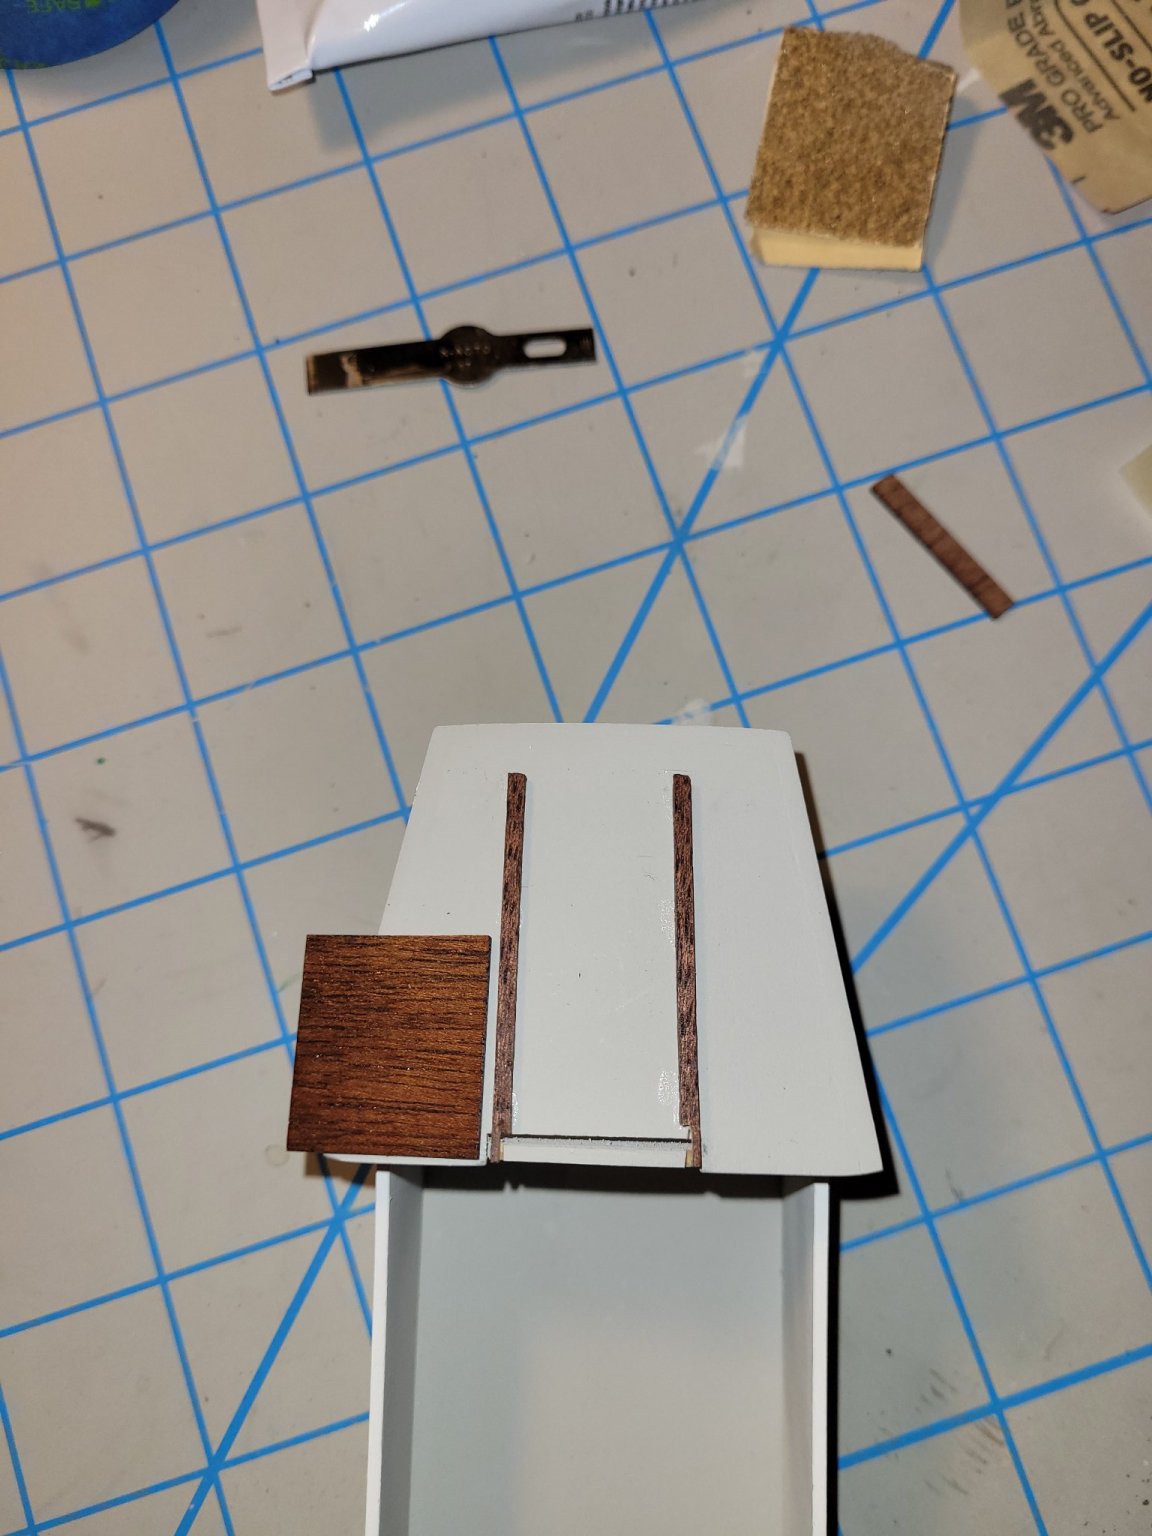
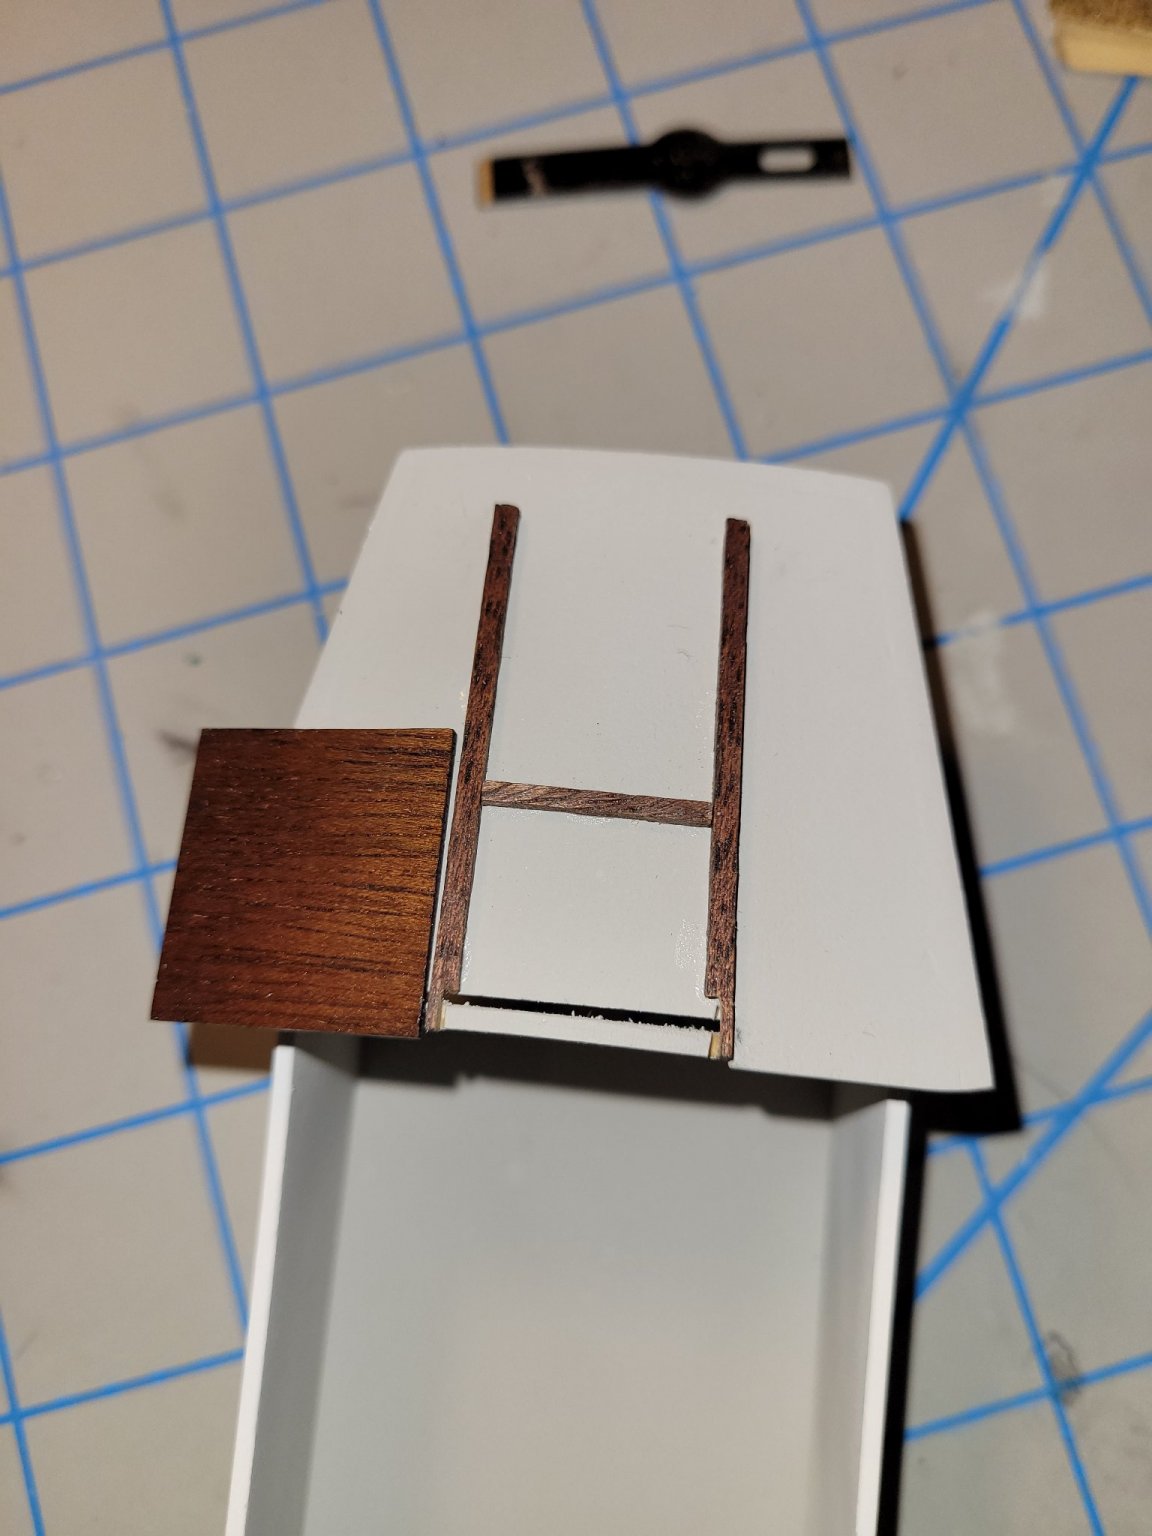
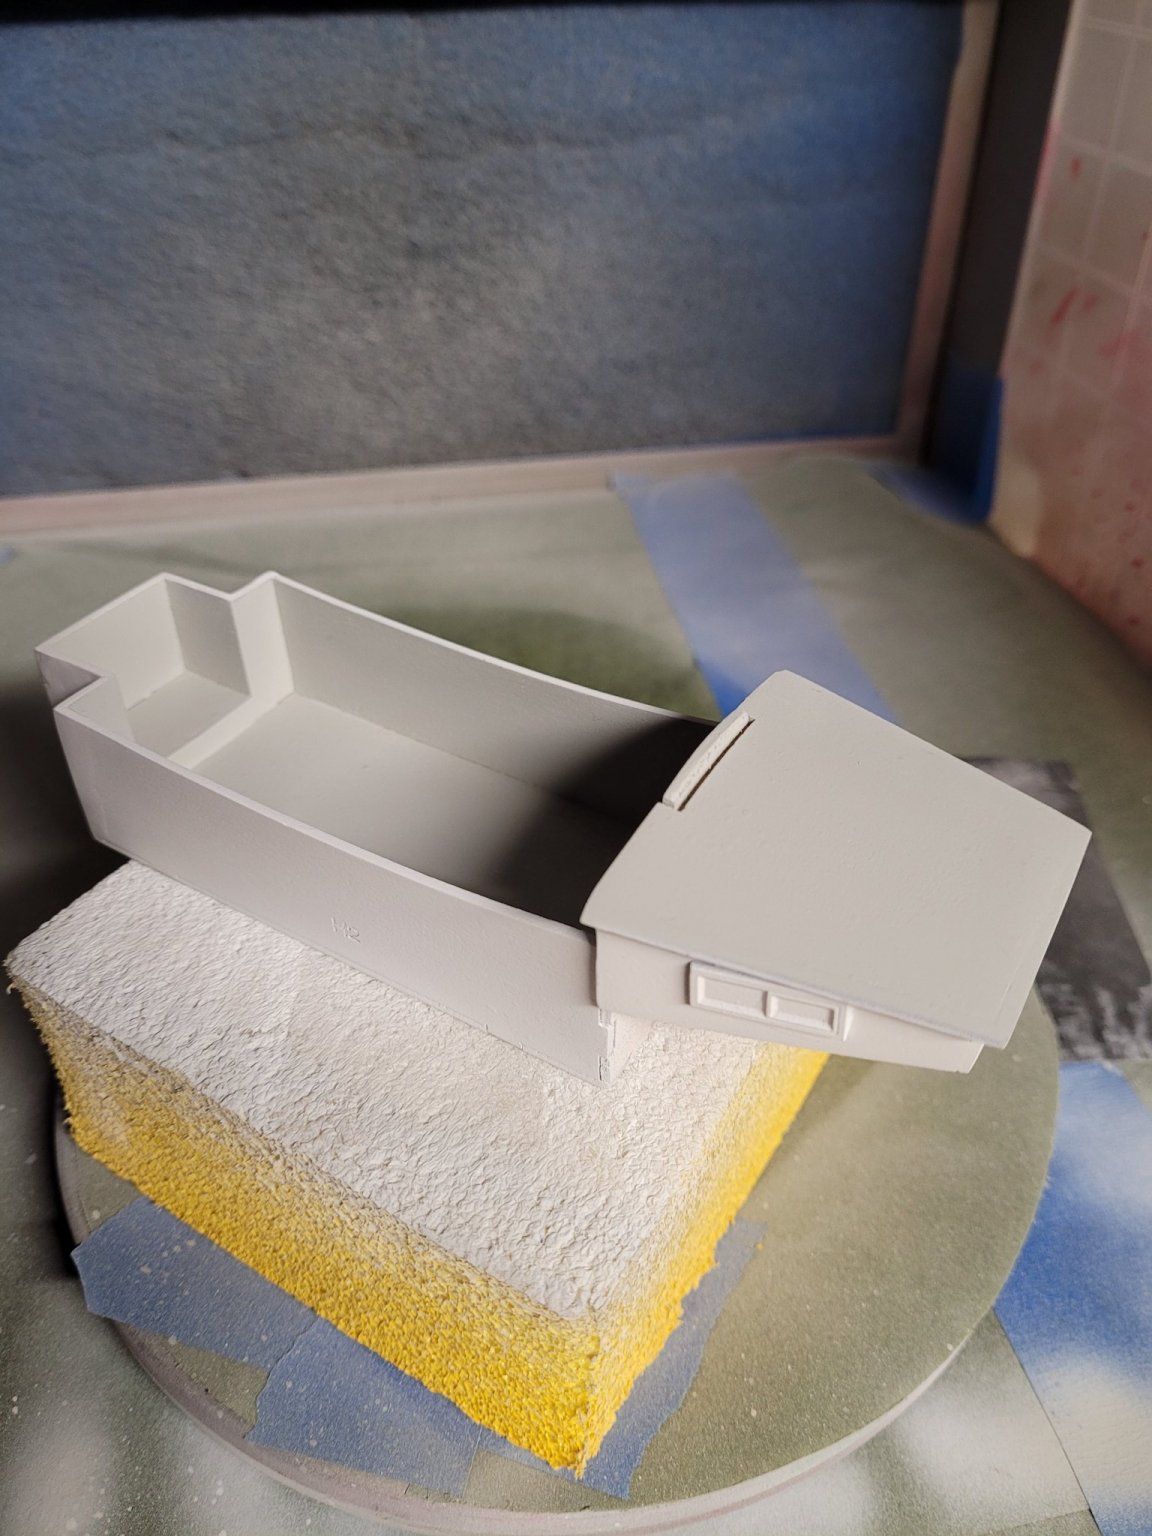
Because I used a heavy coat of contour putty along the hull/deck line, I am letting it sit another day to make sure it will stand up to sanding. In the meantime, I worked on the cabin. I first cut the hatch rails to length as measured from the plans. I then laid them out on the cabin roof. I used tick marks on some tape I placed on the forward end of the cabin roof to indicate where the forward end of the rails need to be. I dry fit the cabin hatch on the slides and noticed the slides were too far apart - the hatch barely touched the inside edges of the slides. So, I removed some wood from the center tab of the cabin to bring the slides closer together. I did not want the sides of the tab to show so I cut a rabbet on the ends of the slides so they covered the tab sides. Once I was happy that the hatch fit over the slides, with some hang over, I glued the slides in place. While the glue was drying, I made a sub-assembly of the cabin drop boards, side trim, and sill. I cut the sides and sill pieces to length and glued them to the drop board on my work board (I made sure not to glue them to my work surface!). I then had a nice sub-assembly to glue on straight and true to the cabin. I think that was a lot easier than trying to glue those pieces separately onto the cabin. The instructions mention the water stop between the slides, but that part is not provided. There is also no guidance on how to make that part. I used the same material I used for the drop board sill. I cut the piece to fit between the slides and filed the bottom to match the curved roof of the cabin. when the piece fit flat and even with the slide tops, I glued it in place (just short of the length of the hatch (so the hatch would extend slightly over the water stop). I used the microwave technique detailed in the instructions to "steam" the hatch cover and quickly glued it onto the slides. I made sure the hatch extended over the top of the drop boards and water stop. The next project is to sand the contour putty at the deck line and fit the toe rails. I note the instructions suggest one could paint the windows black to make them look like they are open. I may do that.
.thumb.jpg.6feee7b79465d5adca8b85f13245bb76.jpg)

.thumb.jpg.813513984e1f95a36e3949336e70f751.jpg)
- 81 replies
-
- 3
-
-
- Bluejacket Shipcrafters
- Yankee Hero
- (and 1 more)
-
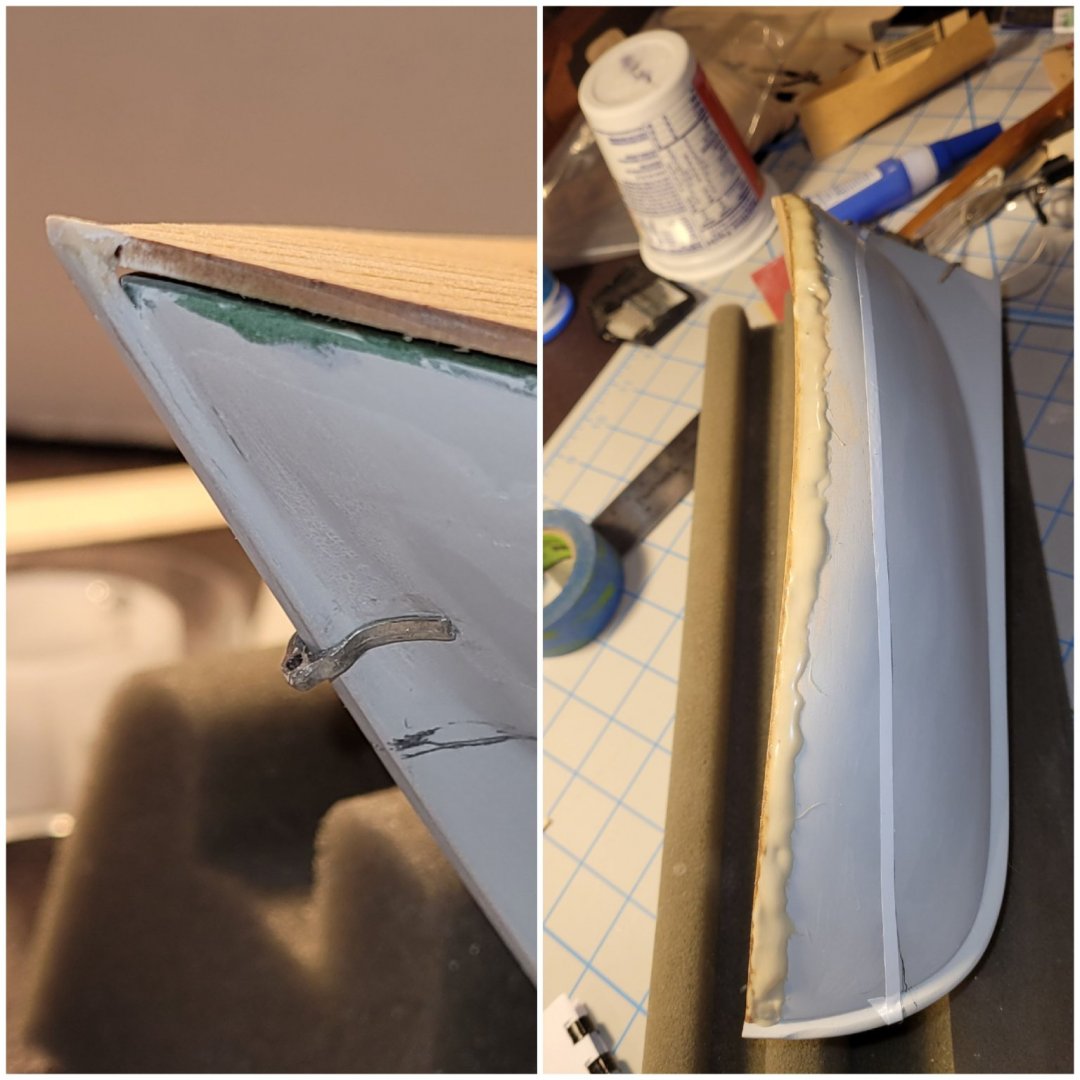
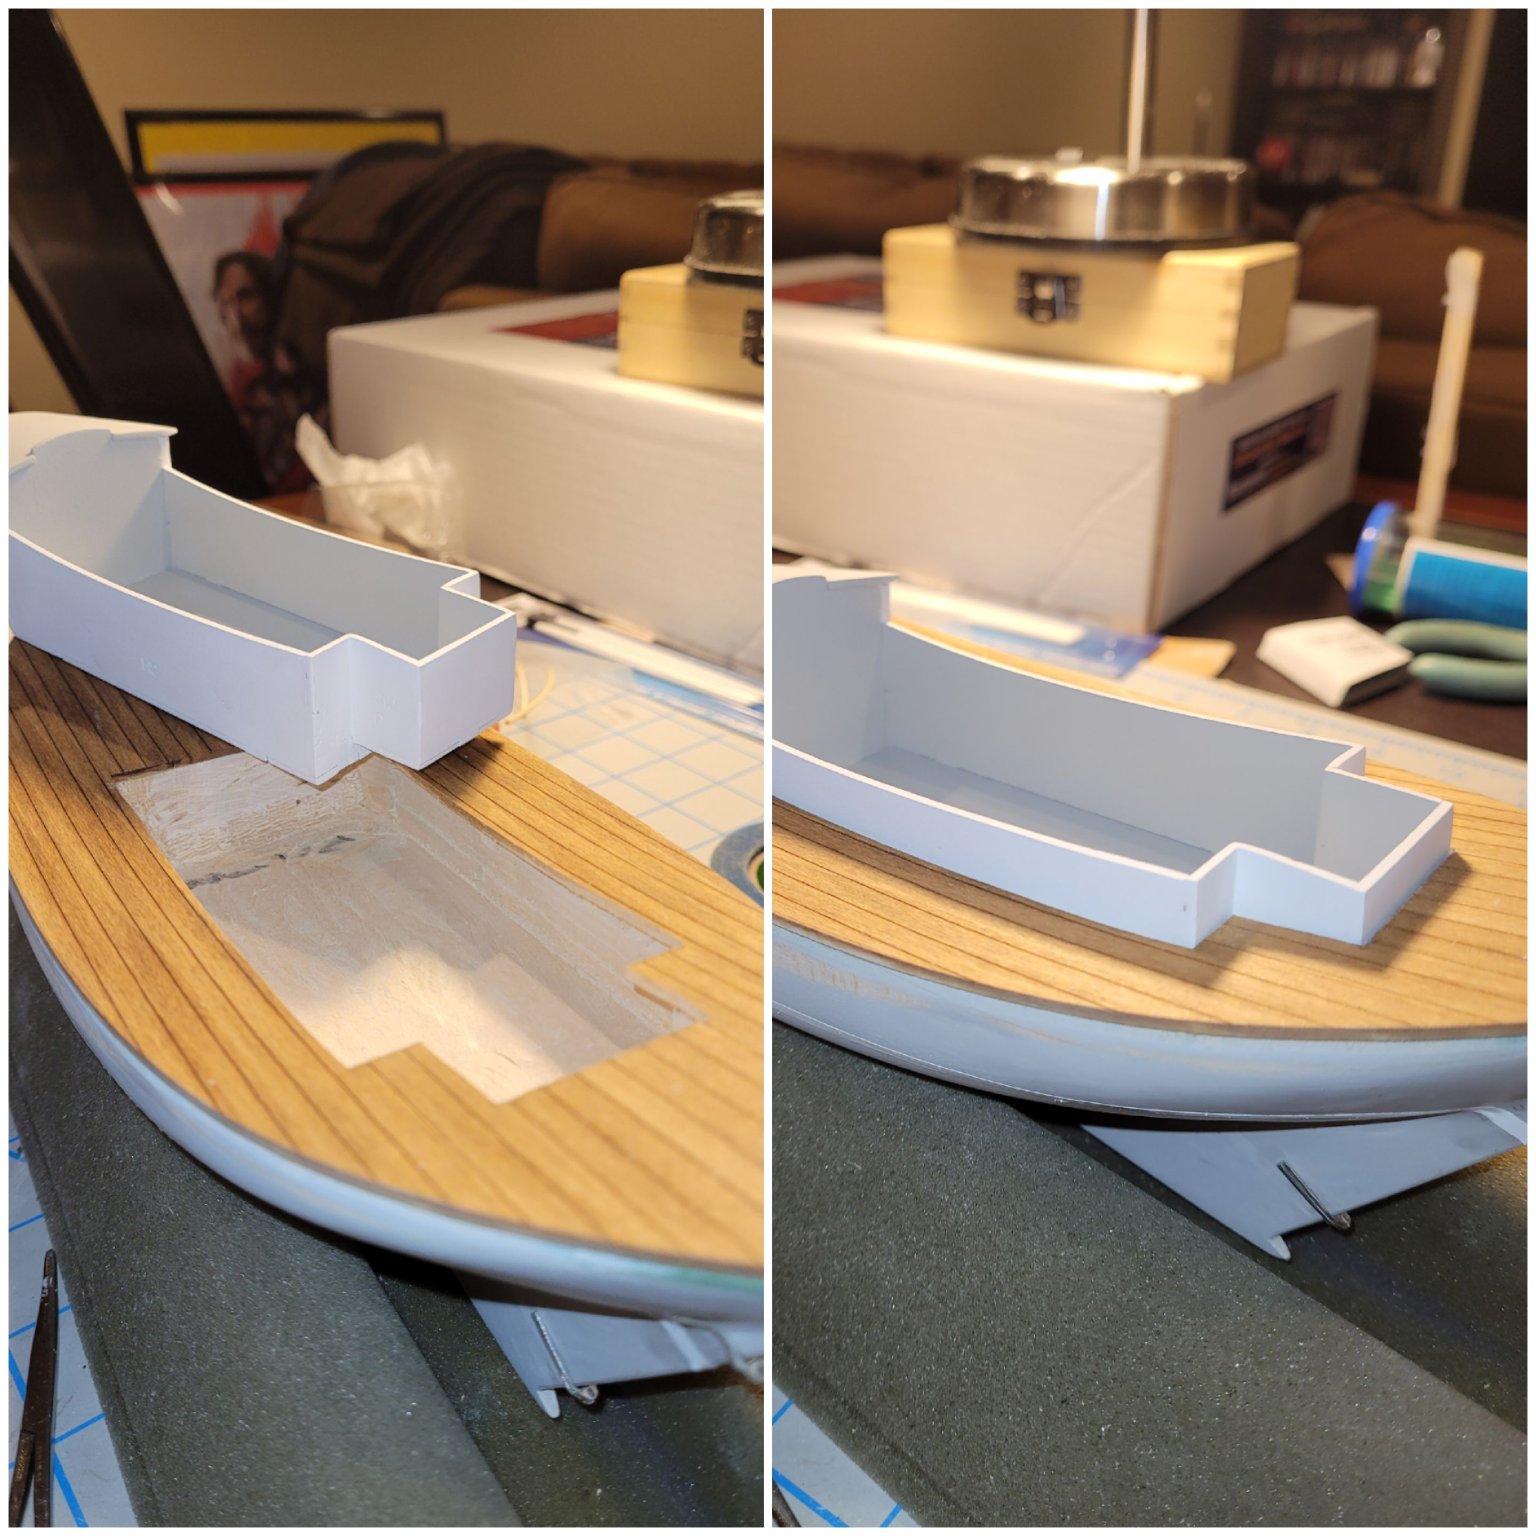
For some reason, the stern post did not make it all the way up to the deck. I don't know where I went wrong. I added a small piece of wood to bring the post up level. I then realized that I really didn't like the gap between the hull and the deck, particularly on the port side. My thinking was that the toe rail would cover the gap. As I started to fit the toe rails I realized the gap was too large. So, I added some contour putty. I'll let the one side dry and see if I need any on the starboard side. I'm using Squadron Products white putty. It seems more fluid than the green putty; so, it flowed nicely into the gap, filling it completely. I'll sand the putty and deck edge flat as I fit the toe rails. My hold/cockpit assembly was not sitting level in the cutout in the hull. The aft starboard corner of the assembly was sitting higher than the port side. I used my Dremel with a small router bit to level out the bottom of the cutout. I also eased the sides so the assembly fit easier into the cutout. When I was done the hold assembly sits nice and square. I started out sanding the bottom of the cutout, but that was awkward and would have taken a month of Sundays to get level. The Dremel did the trick. Last, I put a final coat of white paint on the bow sprit and put the first coat of white on the trim piece I'll use to frame in the cabin door. I also put a quick coat of Mahogany stain on the piece of Mahogany used for the cabin door sill and hatch rails. It's coming along. I hope to make some progress this weekend.


- 81 replies
-
- 1
-
-
- Bluejacket Shipcrafters
- Yankee Hero
- (and 1 more)
-
Thanks Bill T - for comments and your tips. Hmmm ..... flat lacquer on the hull, I like that! I'm a big enamel fan: (1) it adheres to the piece better, and (2) settles down in the details better than acrylics. I've got the fabric ready to glue to the cradle. Thanks Nic for info on the rigging class. I'll have to check if Searsport Shores campground is open then!
-
Picking away at smaller projects. I put a second coat of lacquer on the cradle. After staining the companion way hatch and drop board with Minwax Mahogany stain ,I put a coat of lacquer on those parts as well. If I re-learned something, it's to be gentle with the smaller parts. I managed to snap the drop board in half. I carefully glued the part back together using a needle to apply the CA. I hope I'll be the only one who notices when the boat is finished.

.thumb.jpg.ca1e67ed7e3d8f6602e864251ff42e7b.jpg)
- 81 replies
-
- 2
-
-
- Bluejacket Shipcrafters
- Yankee Hero
- (and 1 more)
-
Hi! I've recently started building ship models. I've started with the "Ensign" level of kits from BlueJacket Ship Crafters of Maine. I've included a link to their website below. I've built the Red Baron lobster boat and I'm now working on the Yankee Hero. The kits are very complete with detailed instructions, paint, sand paper, and you can even purchase a kit with some tools you'll need to get started. Plus Nic (the owner) and his crew are super helpful. Good luck. http://www.bluejacketinc.com/
-
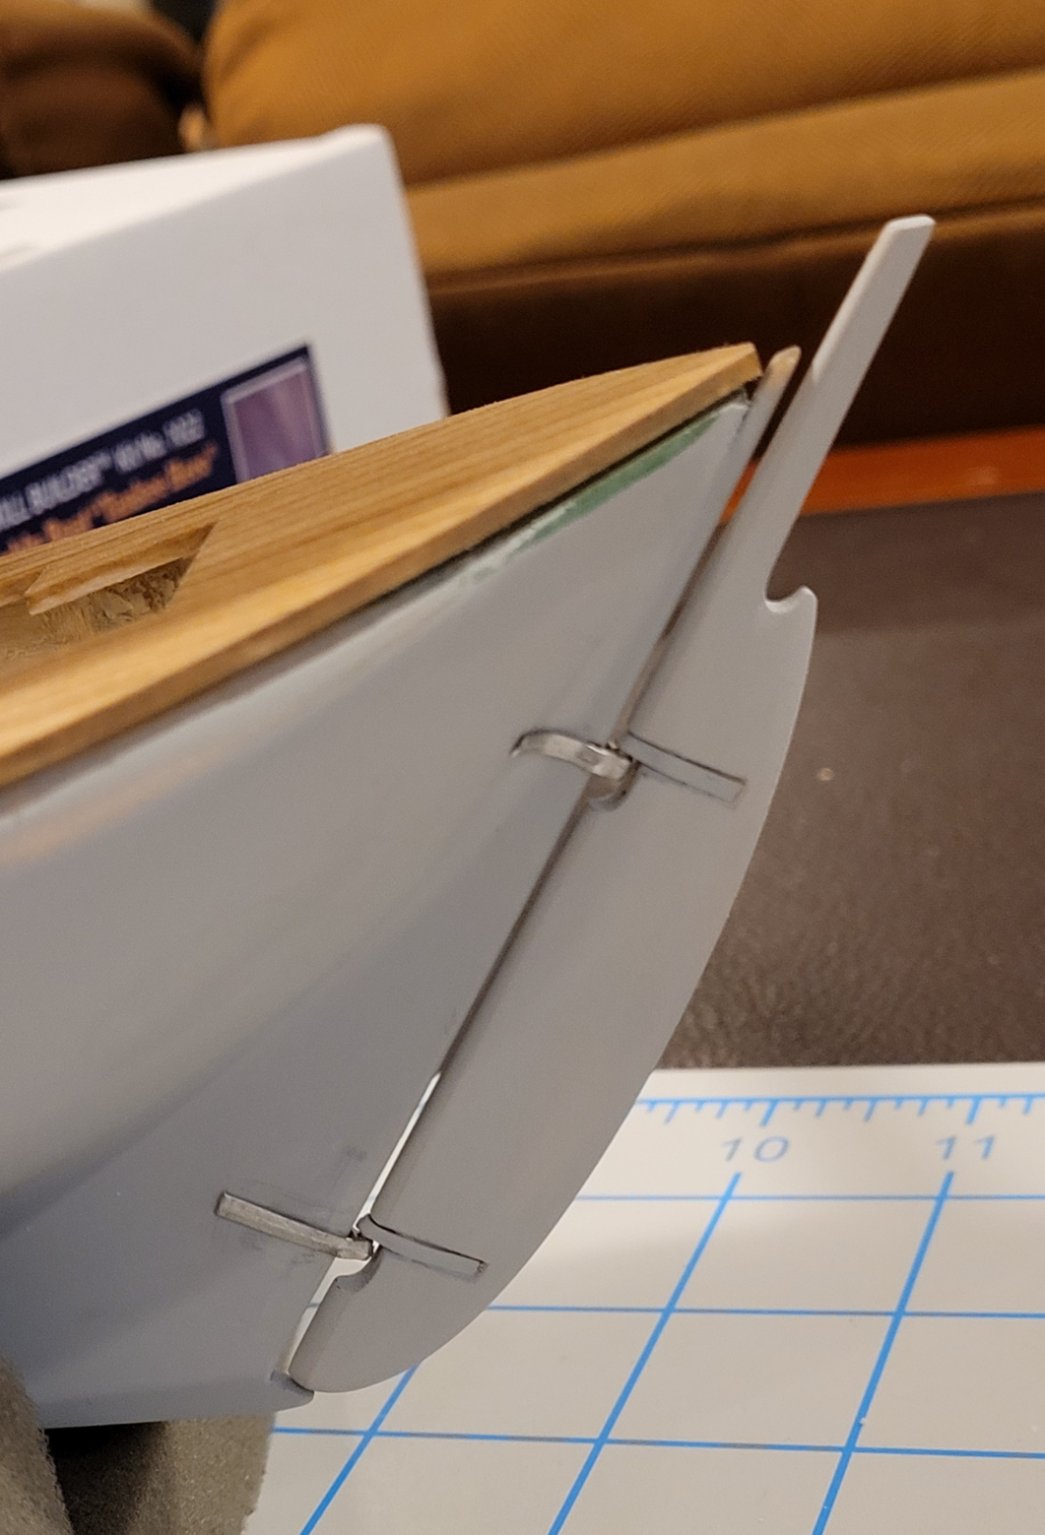
Hi all. I didn't make much progress this weekend. I took my time and fitted the rudder to the stern. I used the measurements on the plans to cut and fit the grunions and pintles. I noticed some blemishes on the cabin/hold assembly. After some contour putty and sanding (always sanding) I put another coat of paint on that part. I also added the waterline to the hull and rudder. I'll stare at that line a while to make sure I got it right. I sprayed the first coat of lacquer on the cradle. Next up is the bow sprit - still trying to figure out where each shape begins and ends (square, octagonal, round).

- 81 replies
-
- 2
-
-
- Bluejacket Shipcrafters
- Yankee Hero
- (and 1 more)
-
Outstanding! I really appreciate the tips and directions. Thanks again Bill T. I'd love to attend a rigging class in Searsport! Nic and I met and spoke each time I purchased my kits. It would be good to see him again.
-
That's very helpful! Thanks so much. I feel better already. I know when the time comes I'll probably have more questions.
-
Looking nice. I though this might be my next kit, after the Yankee Hero, but I went with the Swampscott Dory. How do you like the Proxxon tools? I was thinking about their small belt sander.
-
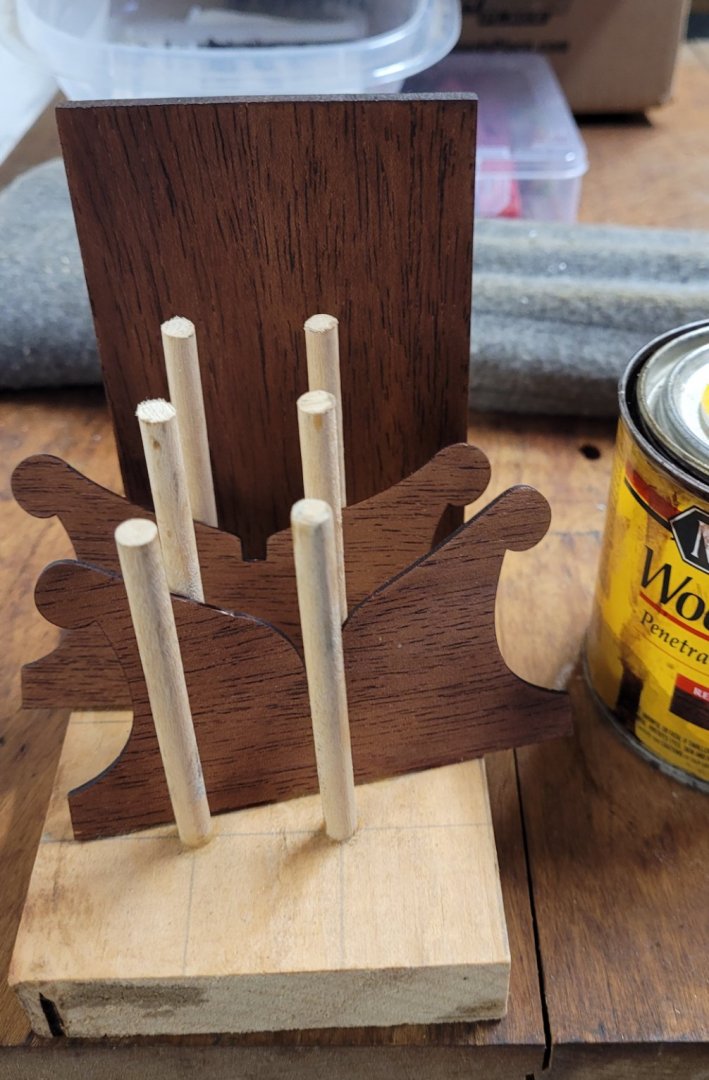
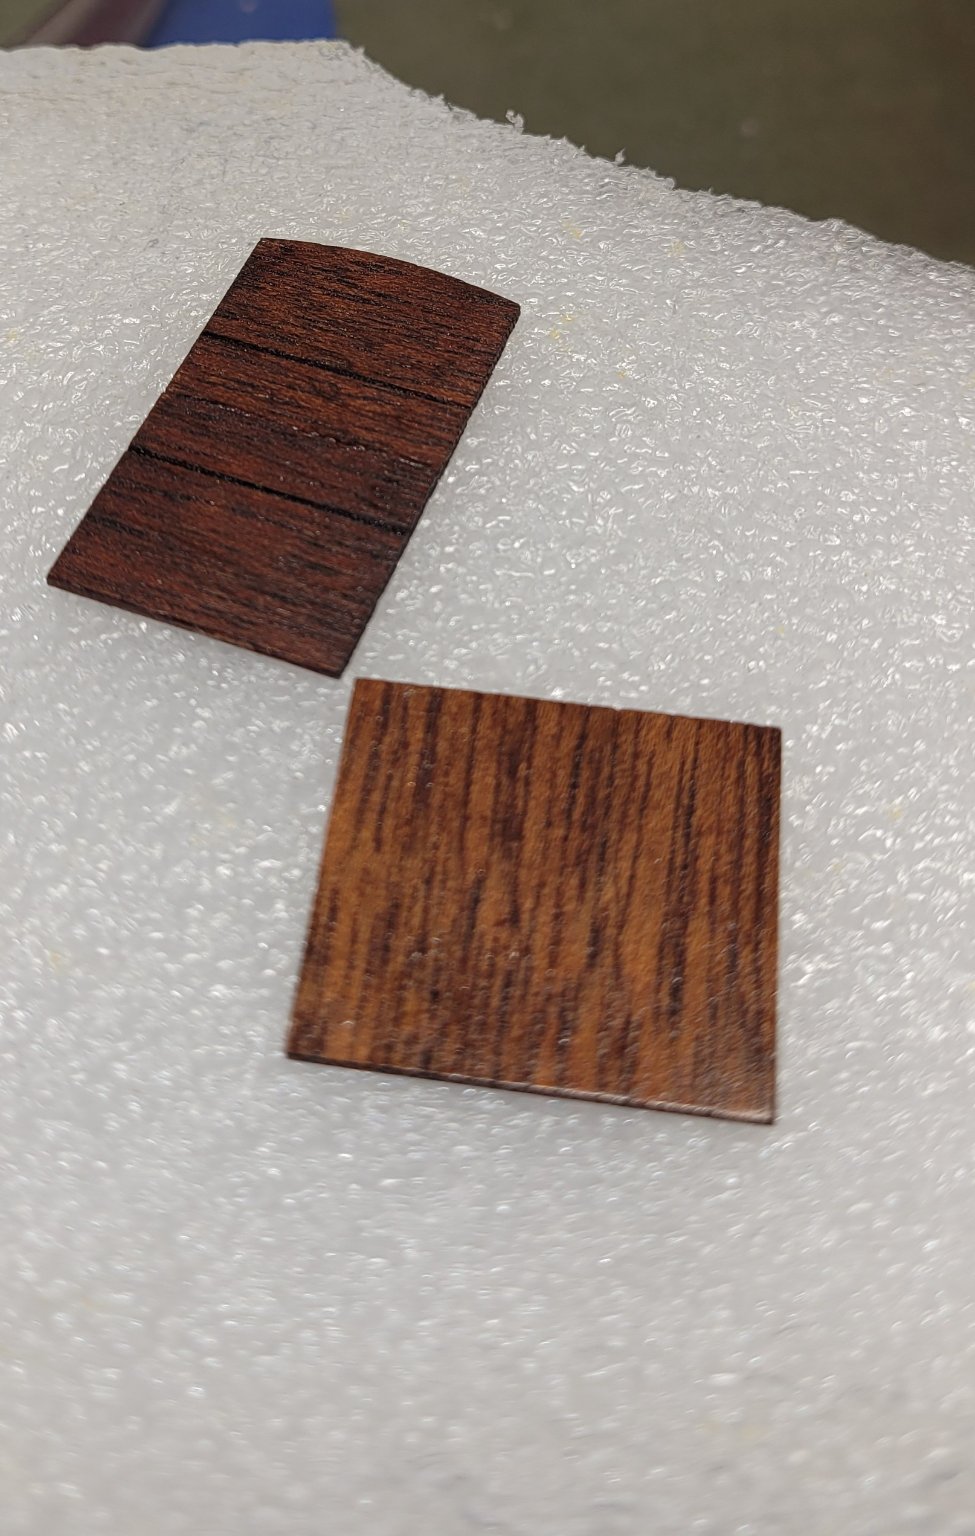
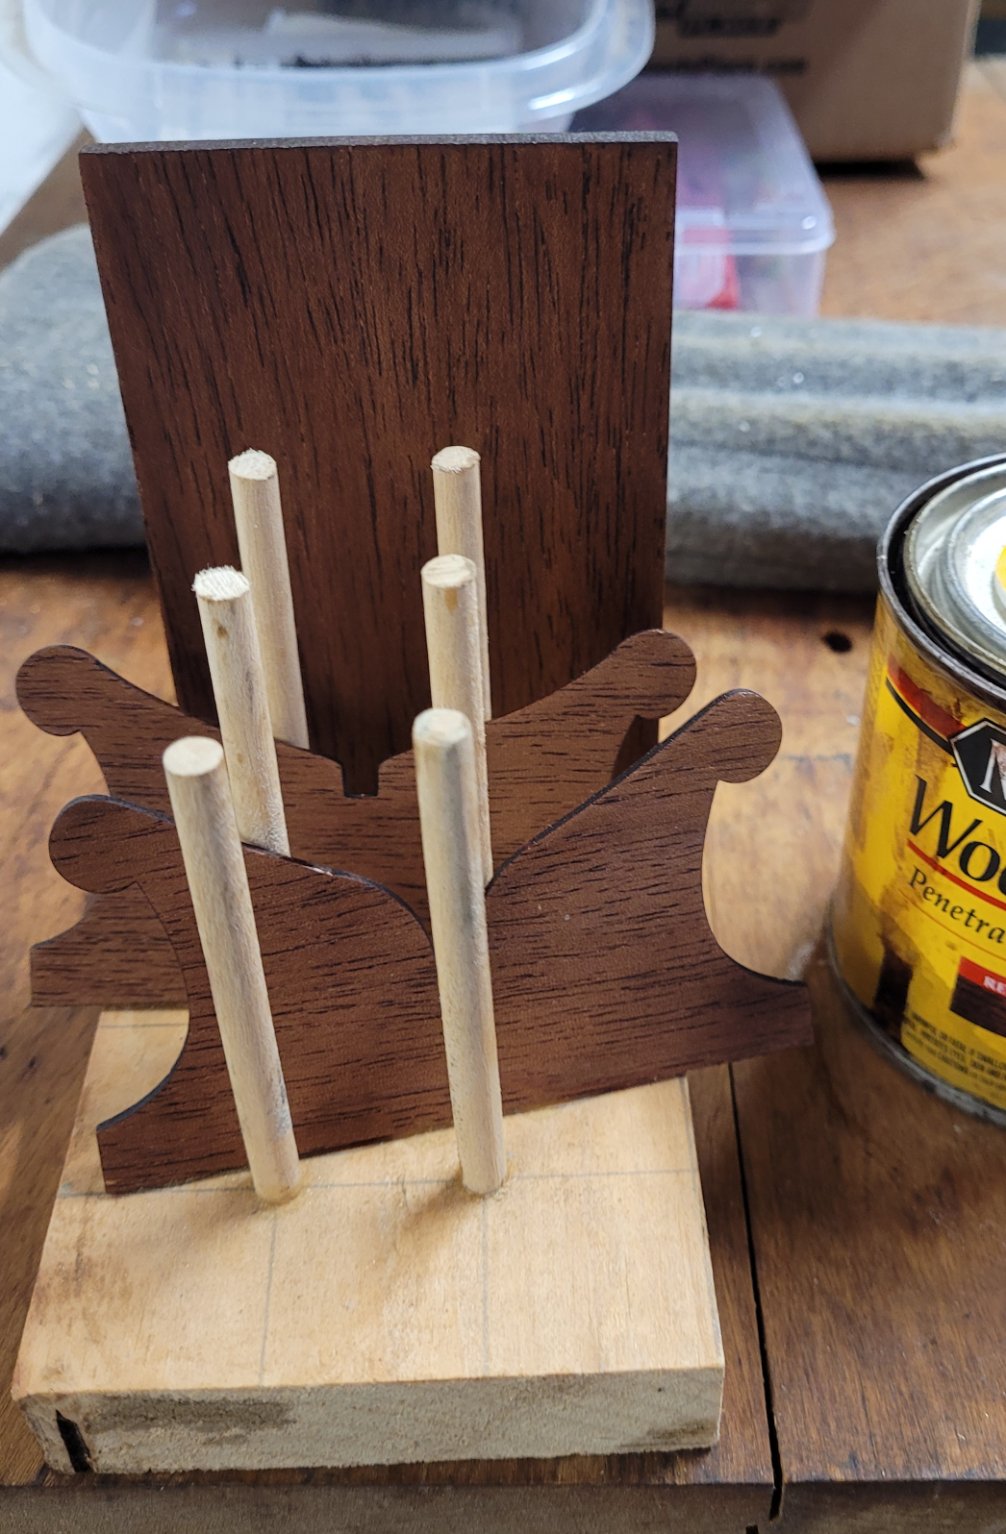
Thanks Bill T! But there is a lot more to do - I'm already sweating the rigging! I read a comment in one of the build logs about using a system, jig, or rig to handle rigging. If you (or anyone) has tips or a place to go to get pointers, I'd appreciate the direction. Keeping busy these days is keeping me from going bonkers. I put the second coat of white on the outside of the cabin and hold assembly, then painted the cabin top and inside of the hull light gray. I checked all my cans of wood stain and didn't find the color I wanted; so, it was off to Lowes to get a small can of Puritan Pine (Minwax). A good swipe, wait a few minutes, wipe off, and I had the color I was looking for (which, I think, is the yellow pine referenced in the directions). Last, I decided to darken up the Mahogany used for the cradle. I stained that with some Minwax Mahogany stain. I'll glue that together after the stain dries, then spray it with lacquer.

- 81 replies
-
- 3
-
-
- Bluejacket Shipcrafters
- Yankee Hero
- (and 1 more)
-
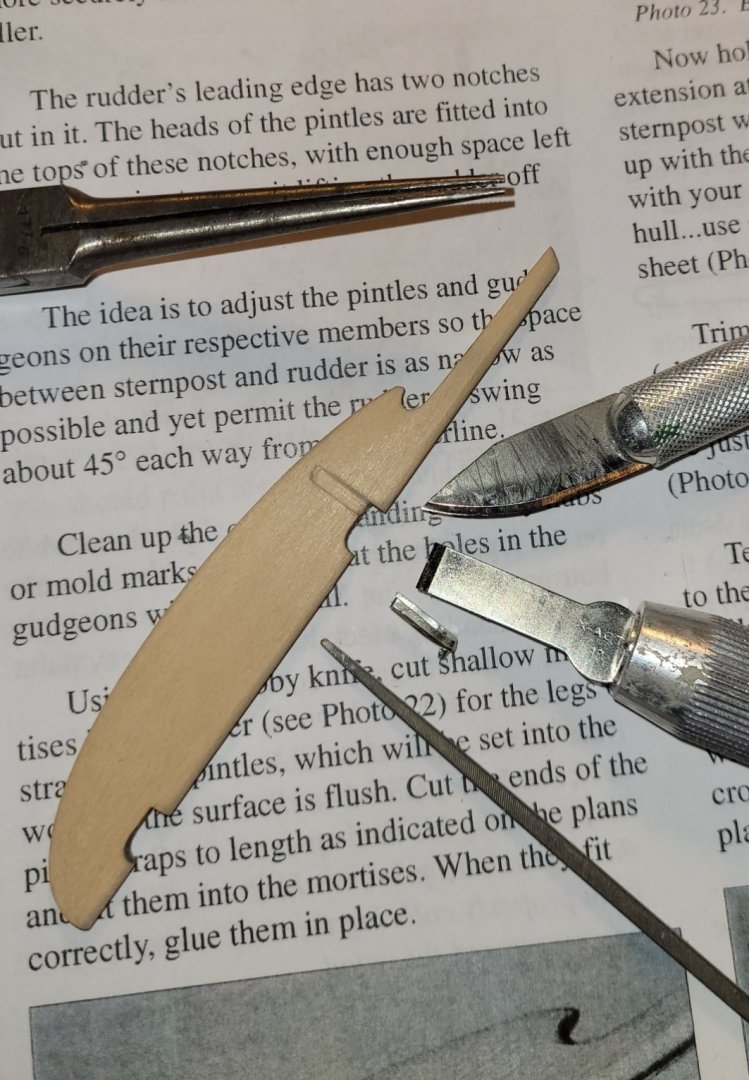
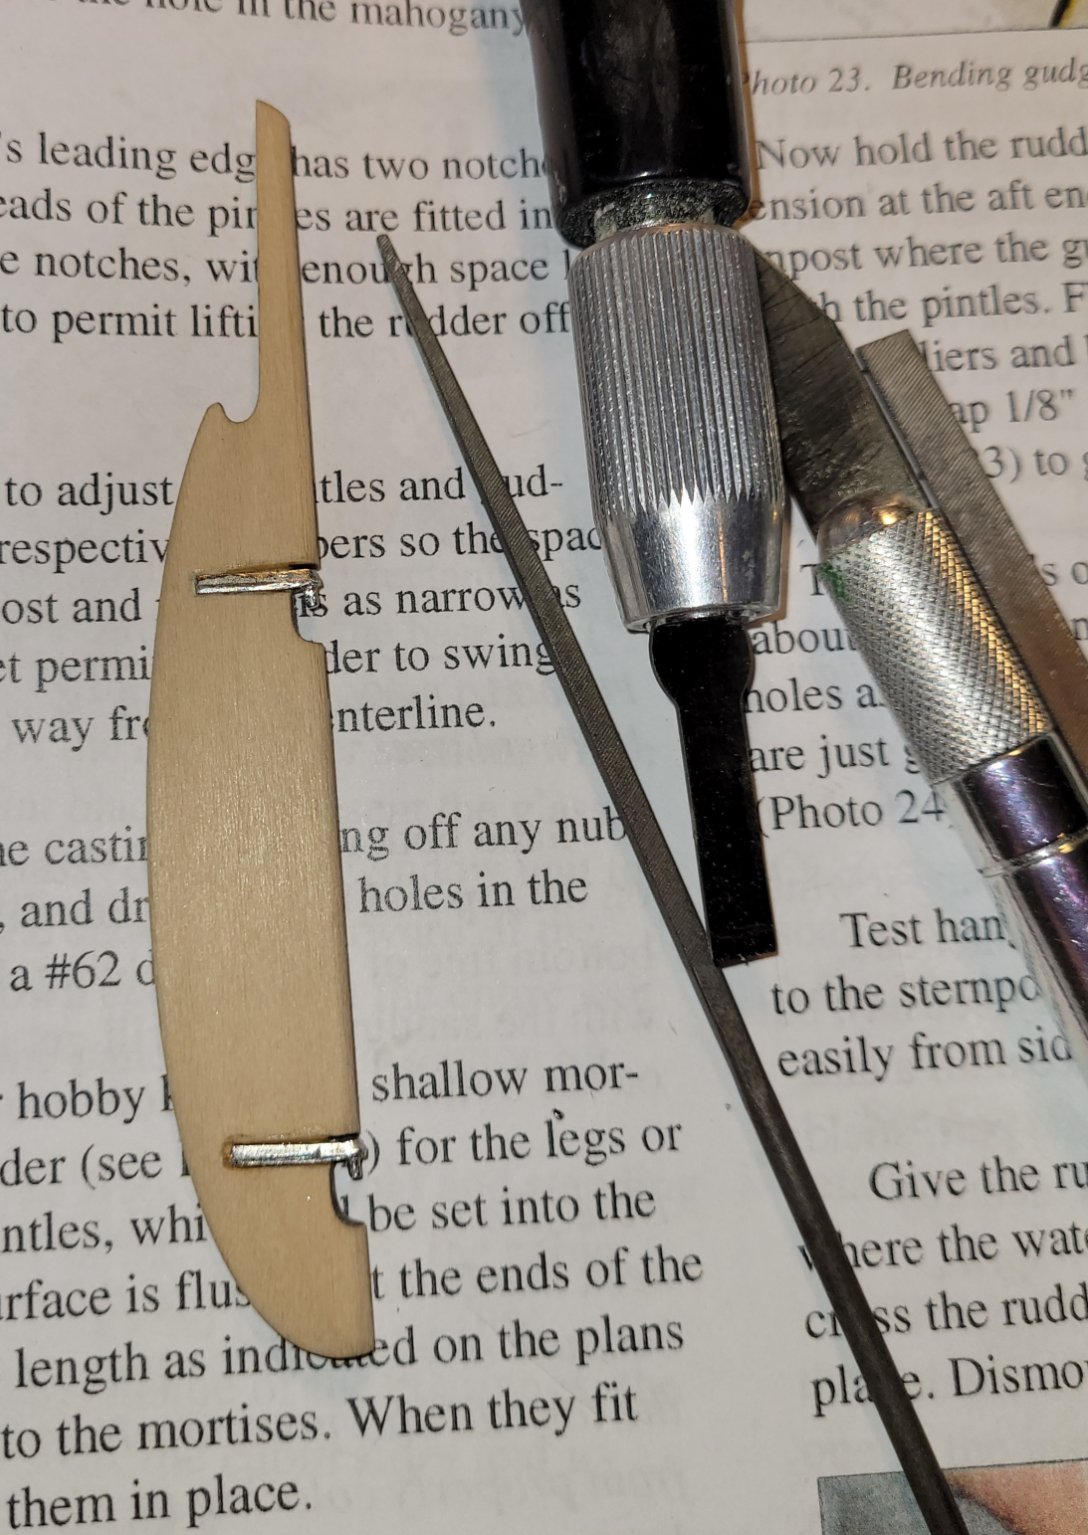
I tackled the rudder next. I filed off the extra metal and mold marks on the pintles and cut them to length as shown on the plans. After marking the location and size of the pintle recesses on the rudder, I then carved out those areas. I marked the edges with a knife, but removed the wood using a small square file. I did not want to take too much wood out and found I could monitor that much easier with the file. I then used my Exacto chisel to square up the sides and corners. When I was satisfied with the depth of the groove, I glued the pintles in place. I then put a gray primer coat on the rudder. While I had the air brush out, I put the first coat of flat white on the cabin and hold sides.


- 81 replies
-
- 2
-
-
- Bluejacket Shipcrafters
- Yankee Hero
- (and 1 more)
-
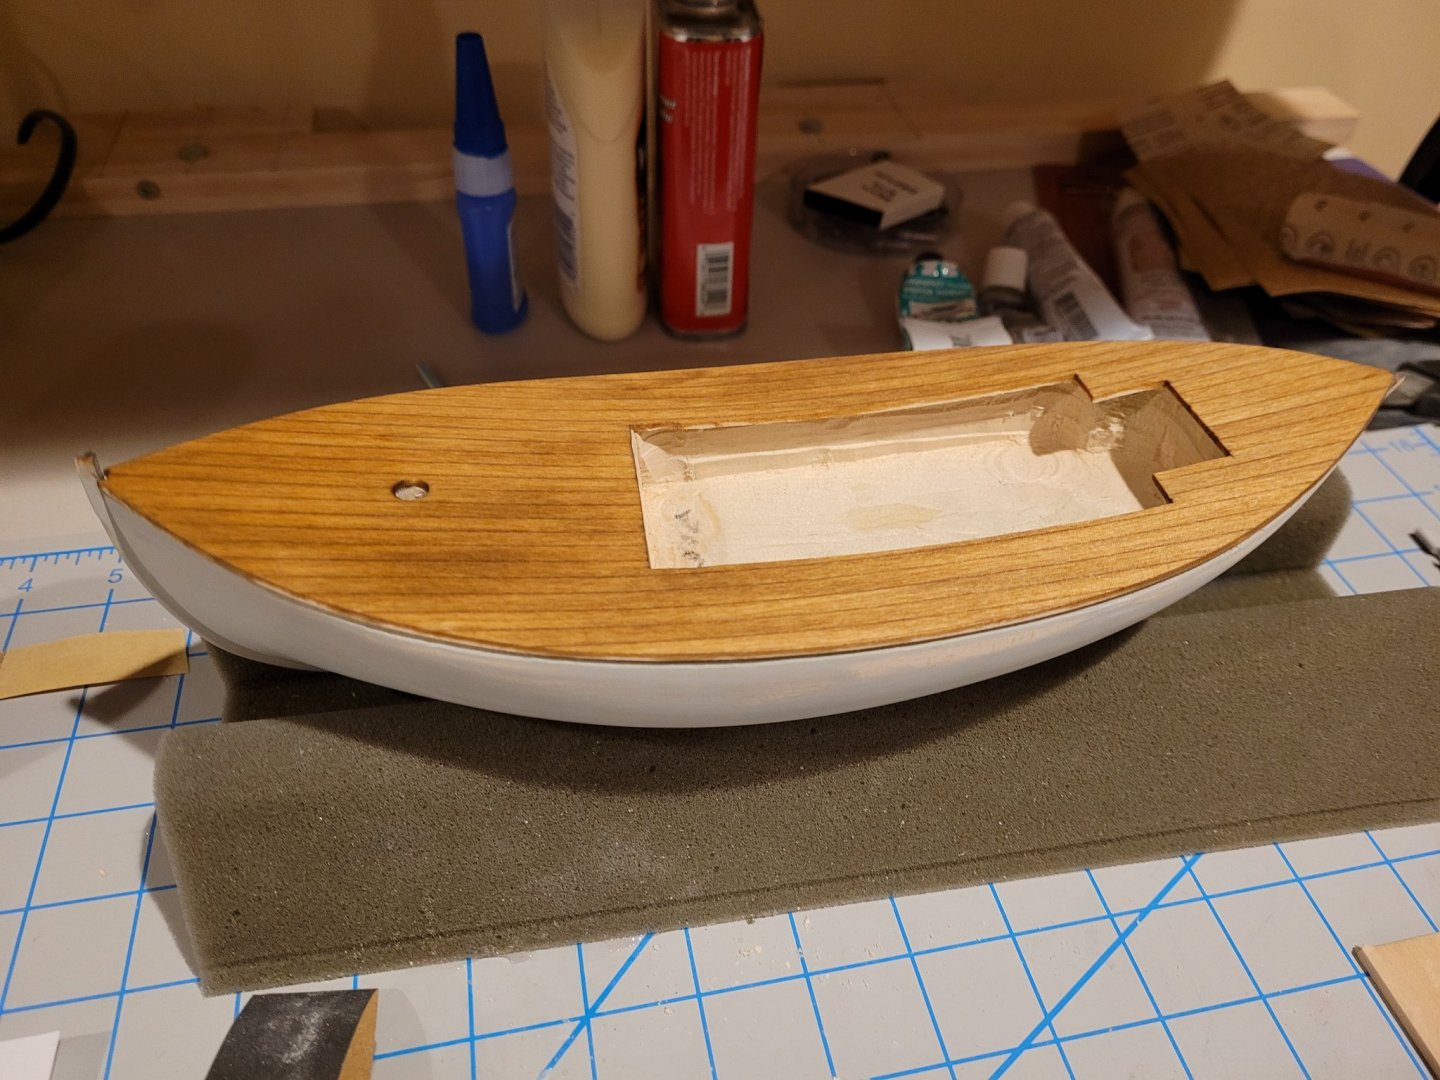
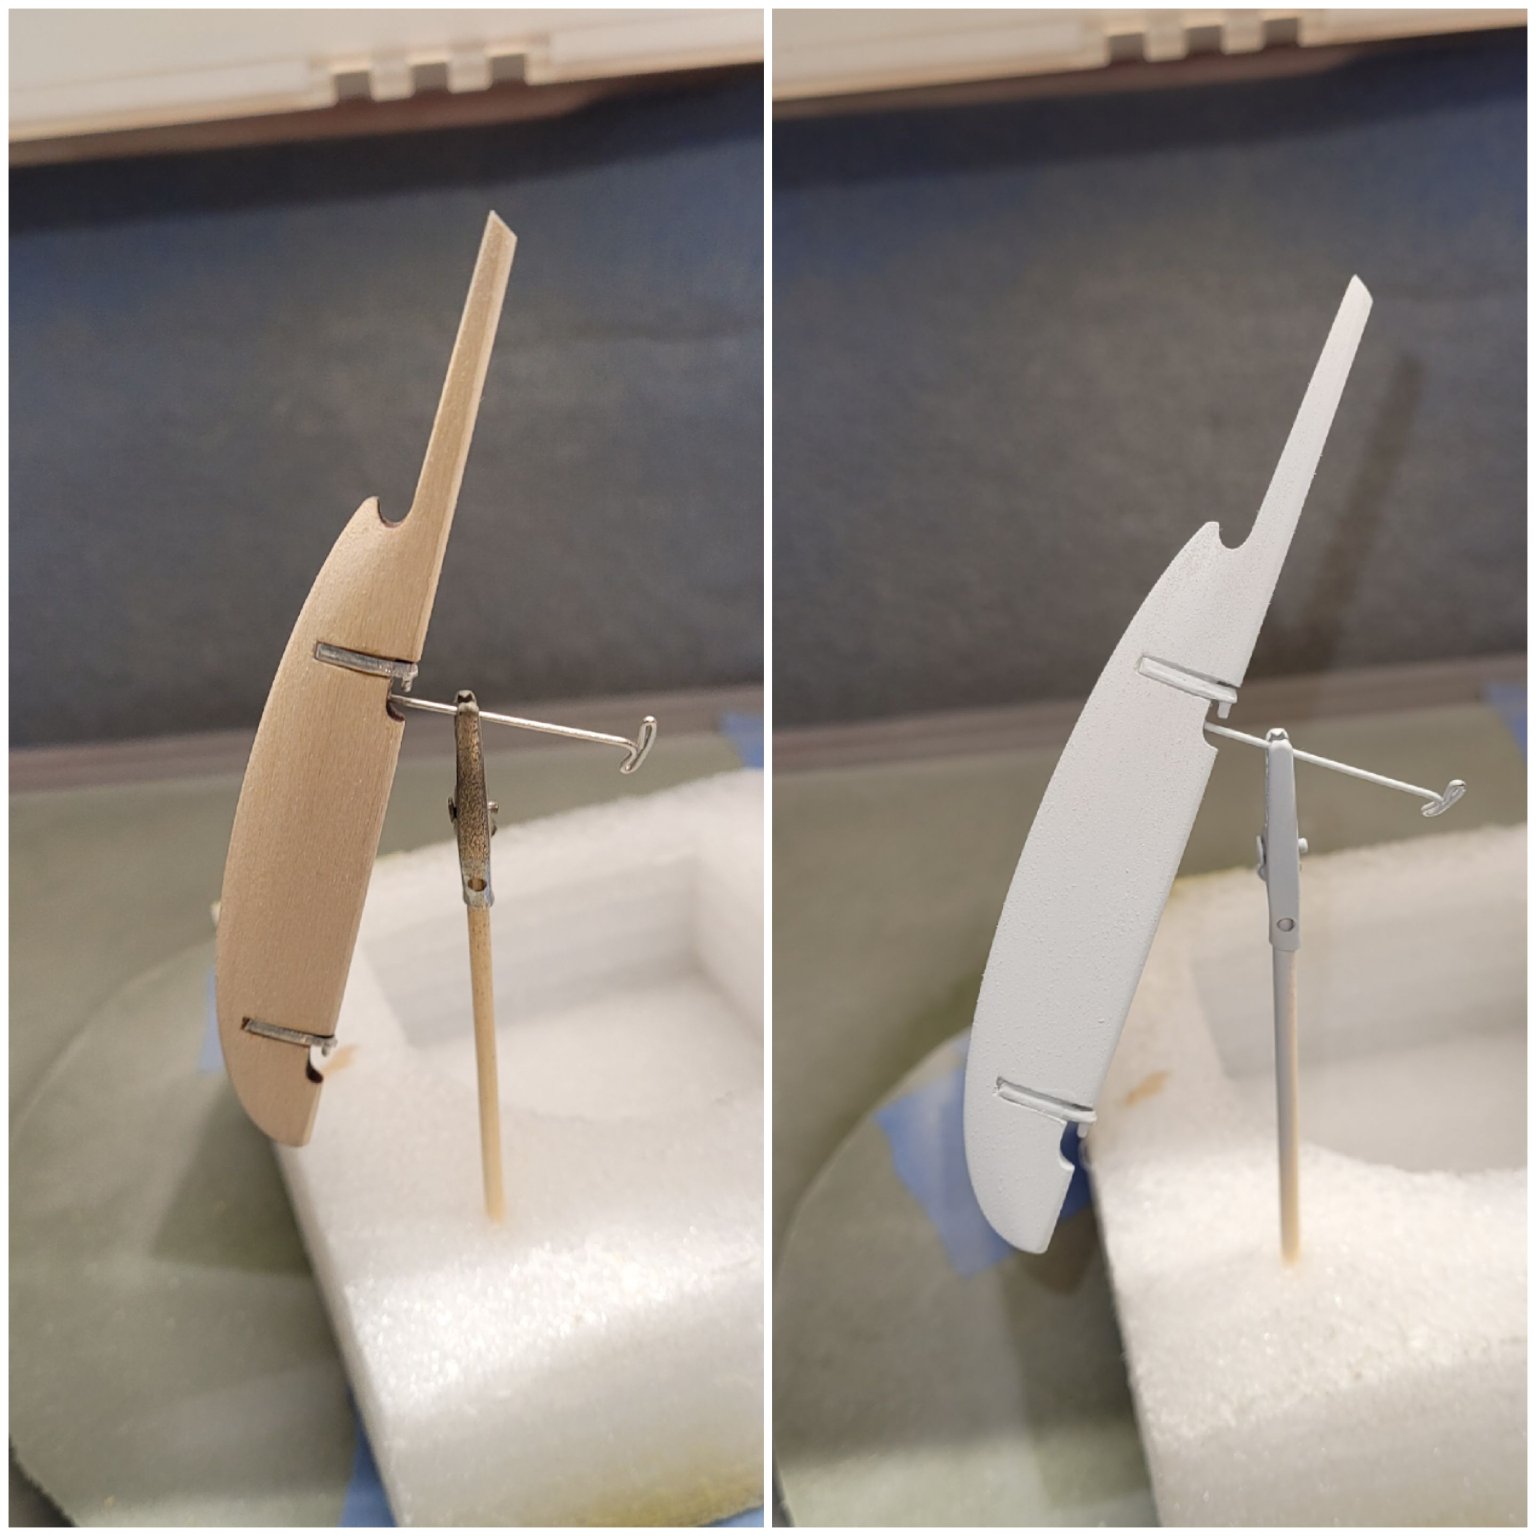
I lightly sanded the gray paint on the hull with 800 grit paper to prepare it for the finish coats. I then did the final fit of the deck and glued it to the hull. I used regular Elmer's wood glue. It provided a lot of time to move the deck into position. I stayed away from putting glue close to the mast; I didn't want to set it prematurely! I liked the use of tongue depressors by Bill T in his build log for this boat, so I did the same. I used some shims to make sure I had adequate pressure on the deck at the stern. I will look for some pine stain to use on the deck. I also took the opportunity to shape the rudder. I used fine sandpaper. It took a while, but it was easy to control and keep the rudder symmetrical from side to side. I drilled a small hole in one of the hardware pockets for a "t" pin. I'll use that for painting. I think next up is final painting of the hold and cabin assembly and carving out spots on the rudder for the rudder hardware. I am still scratching my head about the instructions to shape the bow sprit..........
.thumb.jpg.802a7a7586b8edd77364d5a0b8854623.jpg)
.thumb.jpg.b460774ee1aa1c329a4f966c95732ca5.jpg)
- 81 replies
-
- 2
-
-
- Bluejacket Shipcrafters
- Yankee Hero
- (and 1 more)
-
Thanks Barkeater and Eric. I had to build up the bow a little bit with Squadron Products Putty - it looked like it was nicked with the forming router. I also sanded down and re-primed the hold and cockpit assembly. I fixed a few more hollows in the hull and sanded it again (and again). I beveled the stem and stern post as specified in the instructions and just painted it with a light coat of gray. It's moving along. I like the trim color Bill T added to the windows, I'll probably do the same. The next step is gluing on the deck.
.thumb.jpg.60d6e712805e4bfdecc541ef7b50dea6.jpg)
_LI.thumb.jpg.d9af7192918fb48b45b524de5571c538.jpg)
.thumb.jpg.6e8d1fab6afaf1b6be0fac51273fd35f.jpg)
- 81 replies
-
- 3
-
-
- Bluejacket Shipcrafters
- Yankee Hero
- (and 1 more)
-
Good luck! That's my next build. I am currently building the BlueJacket "Yankee Hero." I'll be watching your build.
- 25 replies
-
- 1
-
-
- Bluejacket Shipcrafters
- Swampscott dory
- (and 1 more)


.jpg.bc48648d52880b4494ffc9e3825d2466.jpg)
.jpg.d036ee2e4c5faaec929c3569e72d25e3.jpg)
.jpg.346f4c2474e51a7c418da22dc366a469.jpg)

.jpg.34b434c245afd8c25697ed05f64cb69d.jpg)


.jpg.77f9ba108c474e1597ab1b8383e5ea2b.jpg)
.jpg.9e92b0ef277f2e5ced5f33c99108da96.jpg)
.jpg.fe8283a6d7bca101f121be4e997a8c35.jpg)
_LI.jpg.d198490440f7bce56c16ba9529e22b68.jpg)
.jpg.2783728dfb1aa0880e2f9809f47bb36f.jpg)