


robbl
-
Posts
74 -
Joined
-
Last visited
Content Type
Profiles
Forums
Gallery
Events
Posts posted by robbl
-
-
Hi Allan and Wayne
Volume II arrived in NZ yesterday, great work.
I had a quick scan through the text and diagrams, drooled over the colour photos, then ripped open the plan package......
1:12 cannon and carronade plans .....I detect a distracting side project

Not to mention the masts and ship's boats.
Thanks for your hard work guys.
Cheers
Rob
-
Hi all
I made a mistake typing up my last update and used the wrong numbers for the widths of the floorhead planks, so I corrected them in the text. The planks on the model are the correct dimensions, it was just a case of me typing without checking

Cheers
Rob -
Egen, I was going to mention the dust and scratches.......honest

I have a Canon 550D SLR. A couple of the photos have been done on the phone camera, but the Canon is the "go to" camera, and as you say, it is very useful for highlighting things. There have been a few times that I have dismantled frames after taking a photo.
And I have a macro lens that I sometimes regret buying as well - it is veeeerrrrry sharp......
There is a program called helicon remote that is worth looking at which lets you take a series of shots at different focal distance, then merge them into one for a fantastic full length shot of a long subject like the ships. I must dig out a test I did and post it.
Cheers
Rob
-
Hello again.
The last while has been busy with all the unimportant things in life, like the dreaded work, so I have not made much progress at all. After seeing Egen's last update, I have to resist the urge to jump ahead of myself .....
After running the floorhead thickstuff along the wrong lines, I ripped them all off and started relaying them. Most of the damage done by my wild flailing about with my chisels is now conveniently hidden by the new planking, but I do have a little cleaning up to do.
These consist of two runs of
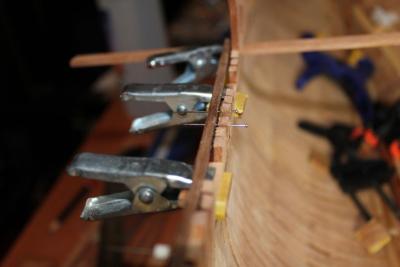
1211 x 5 inch (22 inch total) with 2 runs of1110.5 x 4 inch (21 inch total) each above and below.Midships this totals 6 planks wide, reducing to 4 planks at the ends. Midships and aft, there is little curve, so I just steamed the planks and clamped them while gluing. Where the planking meets the keelson at the bow, it was easier to spile the planks than bend them.Where the number of planks reduced from 6 to 4 at each end, I used a drop strake on the thinner planks above and below the two main planks to merge the two into a single plank running to the ends.
The photos are not very good, so I hope to replace them later this week with shots taken outside in natural light.
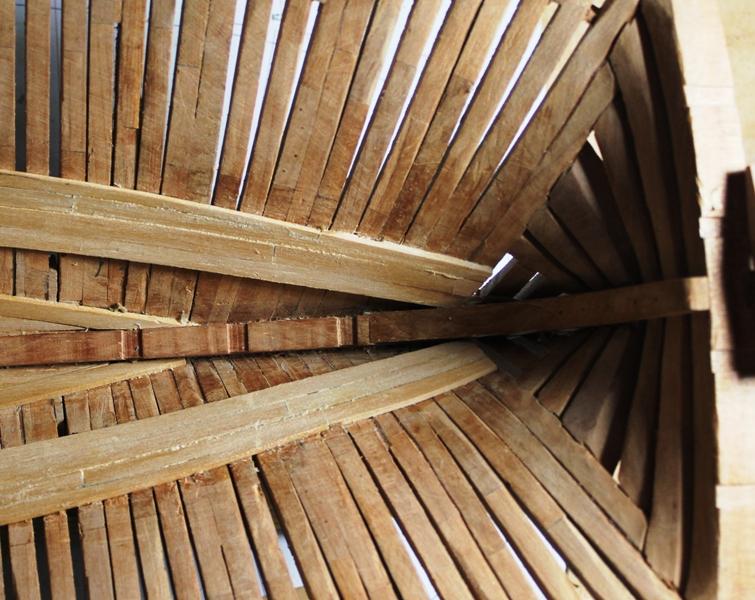
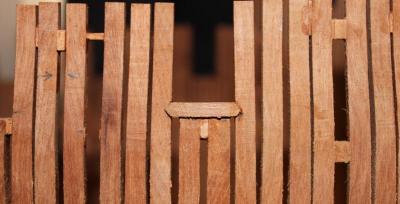
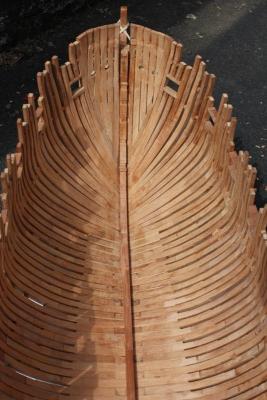
Midships, middle two runs of thickstuff done, the first run above that being clamped in place.
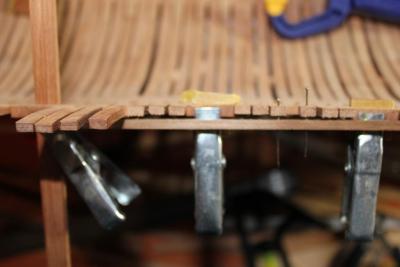
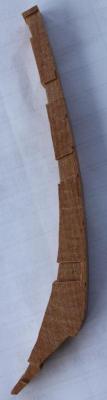
Towards the bow, and both the top runs are being fixed in place. The last planks at the bow are spiled as the curve was too great to bend the planks.

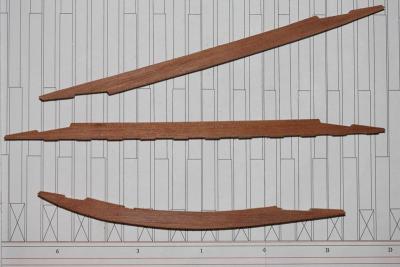
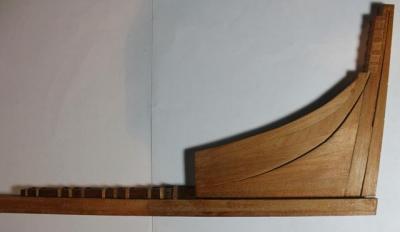
At the stern, the lower of the two top runs is cut to allow the top run to "drop" into it forming .....
.... a single plank to terminate at the aft fashion piece. The same happens forward, and a variation happens to the lower two runs at each end below the main thickstuff.
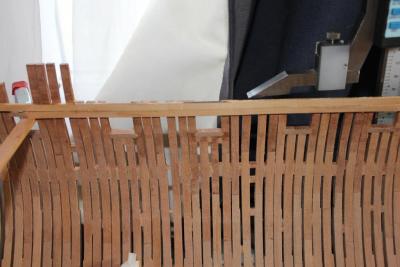
And so far, the planking is done except for 4 lengths which "drop" into the last planks at each end.
Cheers
Rob
- Jeronimo, harvey1847, WackoWolf and 4 others
-
 7
7
-
Egen, that looks absolutely great!

What are the woods you are using? - I like the contrast.
You are progressing really well.
As to my log - slow going at the moment but I'll put some pics up today
Cheers
Rob -
Hi Egen
Those limber strakes and floorhead thickstuff look great, as do the platforms.
She is coming along nicely.Cheers
Rob
-
Welcome back again Egen. Those photos sure show how much effort goes into the frames.
Looking forward to more.
Cheers
Rob
-
Welcome back Clay....you'll have volume 2 soon

I expect a review while I wait for mine.
Cheers
Rob
-
Beautiful, Rob.
The wood colors look very good. Is that the Kauri for the limber strakes?
Ron
Hi Ron
Yes, the limber strakes are Kauri. I'll be doing most of the inboard planks in that. When I get to the platforms, I'll probably be using a darker red Totara from some blocks of wood I have.
Cheers
Rob
-
Thanks all and nice to see the logs coming back too.
nice job
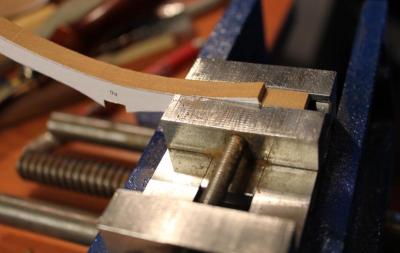
maybe you have mention this before but how do you build the small black clamp? I think is just so cool
That's a bought clamp, called a Machinists Style Clamp and is similar to the wooden handscrew clamps. I can't remember where I got them from, but I see Lee Valley has them listed in its clamp section. Ed Tosti's Naiad book describes how you can make these out of wood and a bit of brass.
Cheers
Rob
-
-
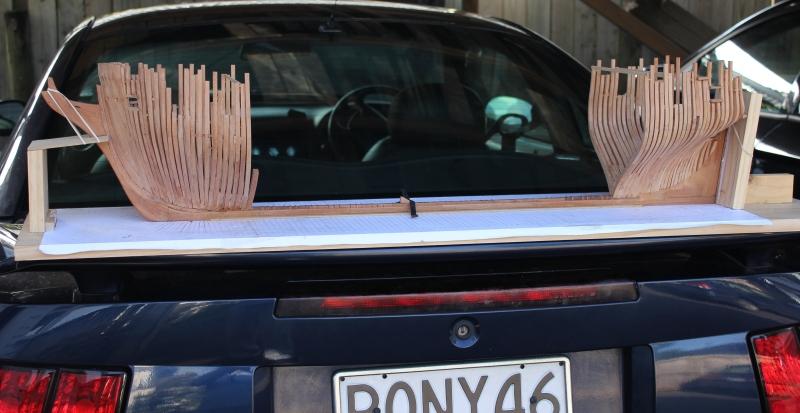
That's a lovely build Robbl, it will be hard to put her in the back seat of your car if you need to move her
Nothing fits in the back seat of my Mustang Cog!
-
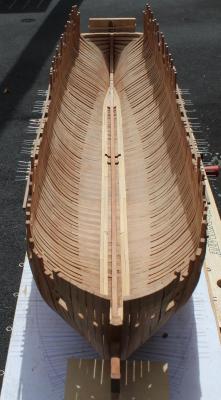
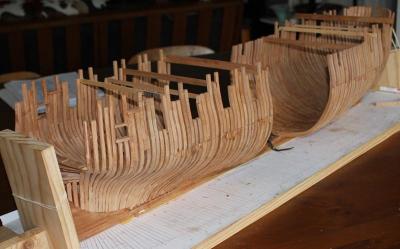
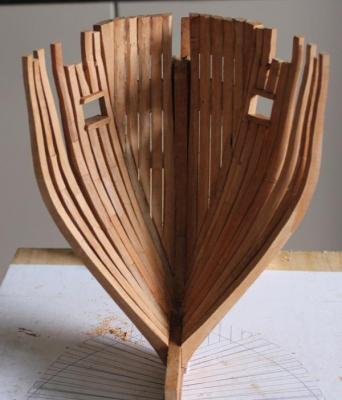
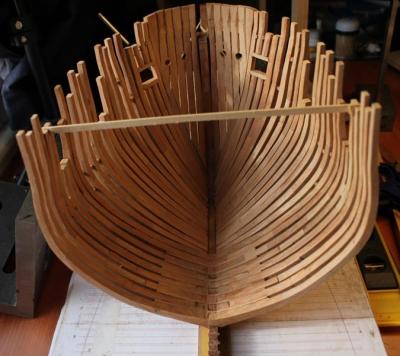
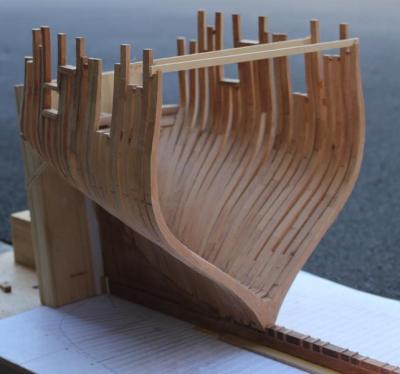
So, where it is now:
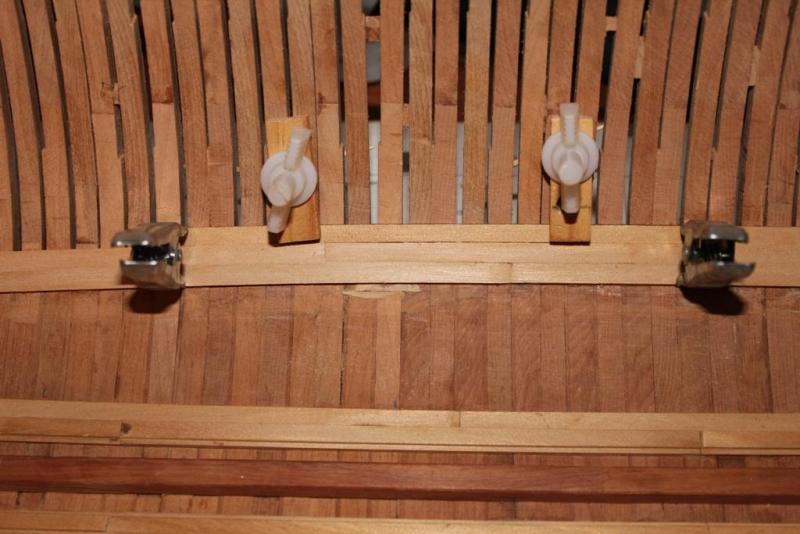
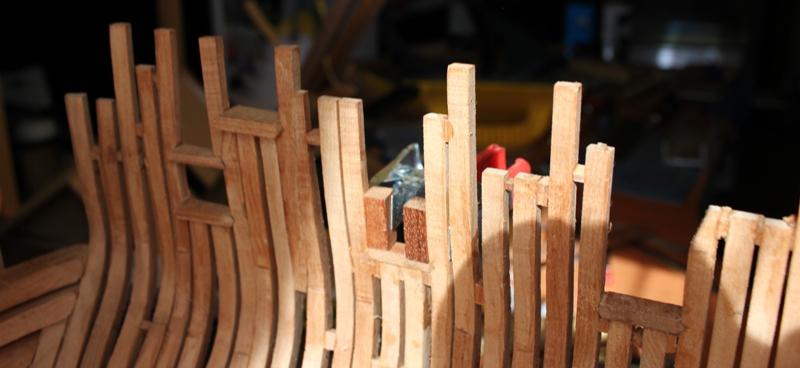
I have added the waist strings to give some strength to the upper timbers in the waist. To align the planks to the bottom of the upper sills, I clamped small blocks to the upper sill so that the planks sat onm these at the correct height.
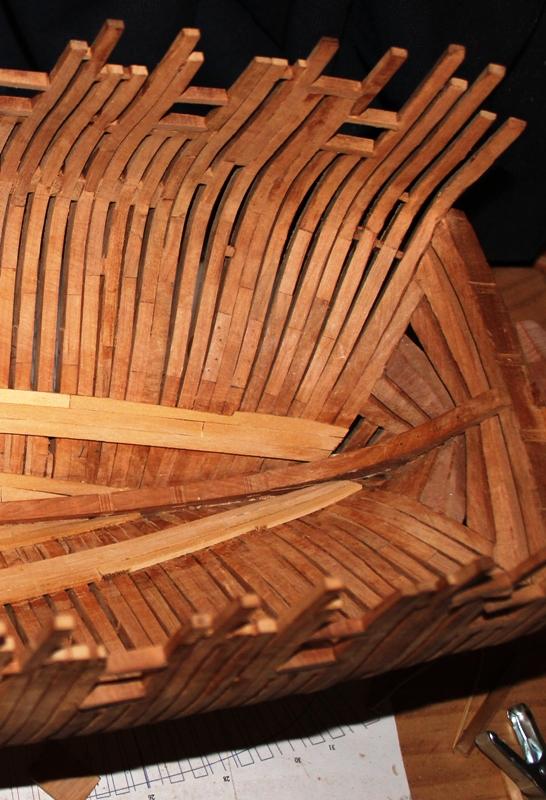
I laid the floorhead thickstuff by first working out the line of the planks where the two thickest (the middle 2) planks run along the hull. I then laid the lower of those two planks from stem to stern until they met the keelson. Then I looked at what I had done, and realised I had run them to meet the keelson where the top plank should have met .... arghhhhhhhh
Naturally, I had managed to run several of the planks adjacent to these, so everything needed to be removed. I commented before how strong this hull is.....very little damage has been done even after rough abuse with chisels.
One thing I have noticed - every little scrap of wood in the hull ends up in the limber channel or the pump wells. It is almost as if it was designed with this in mind!

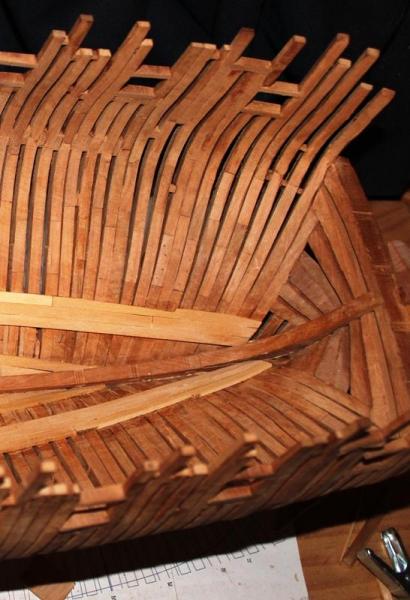
Ripping out the bad ....
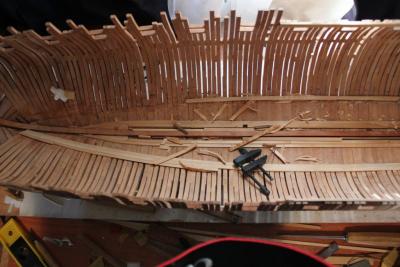
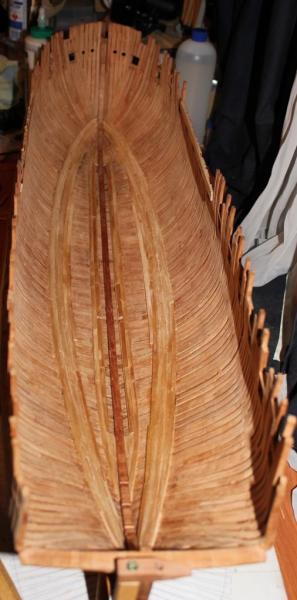
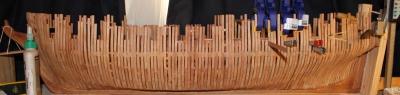
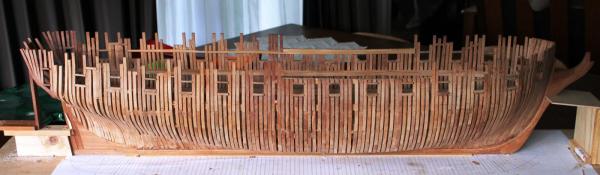
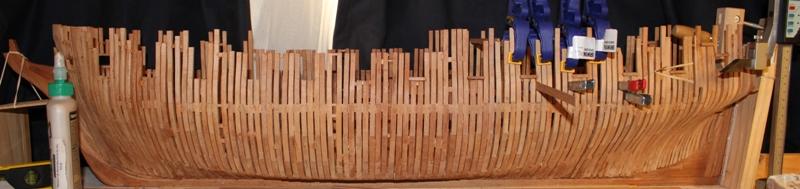
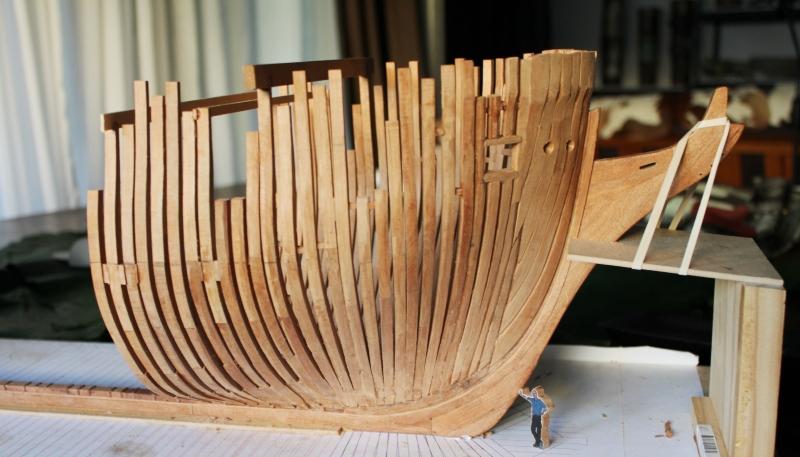
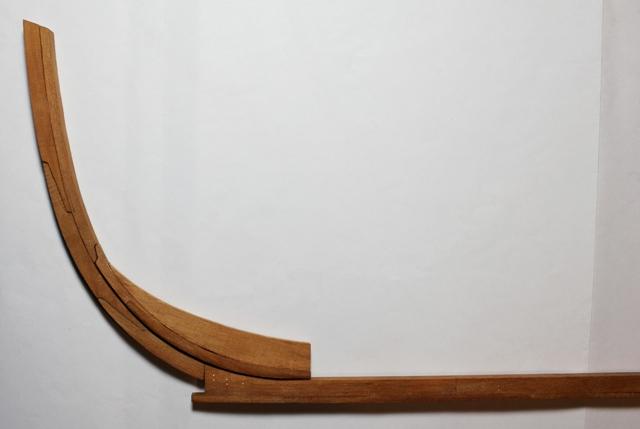
But to finish this summary - I'll use this tidy picture

- fatih79, Mirabell61, Jeronimo and 3 others
-
6
-
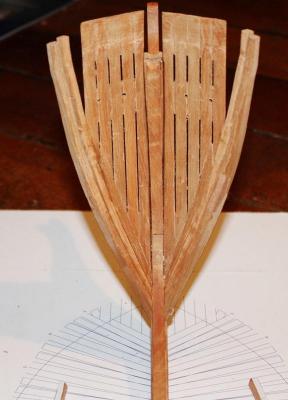
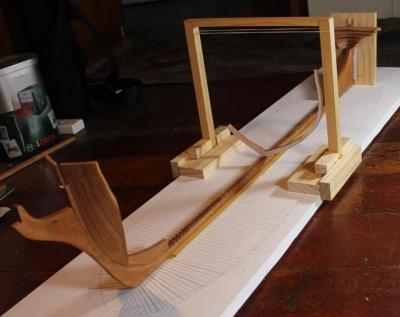
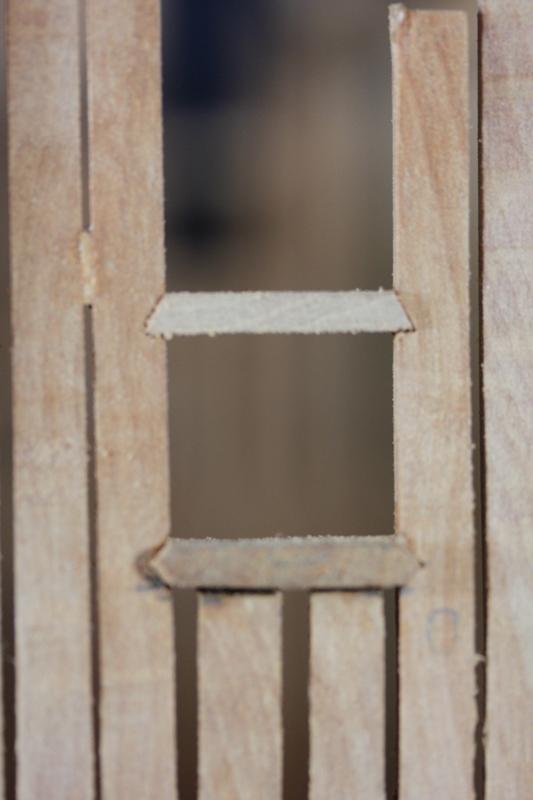
Cutting the gun ports went ok, up until I realised I should recalibrate the vertical gauge more often


Keelson went in no problems:

Followed by the limber strakes:
- dj.bobo, fatih79, billocrates and 1 other
-
4
-
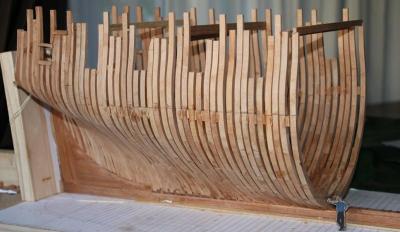
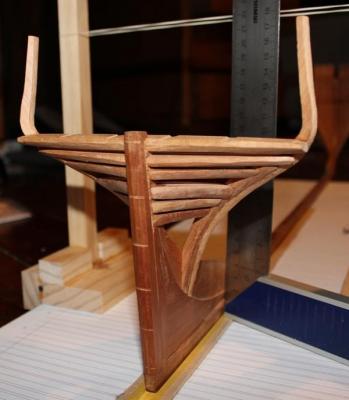
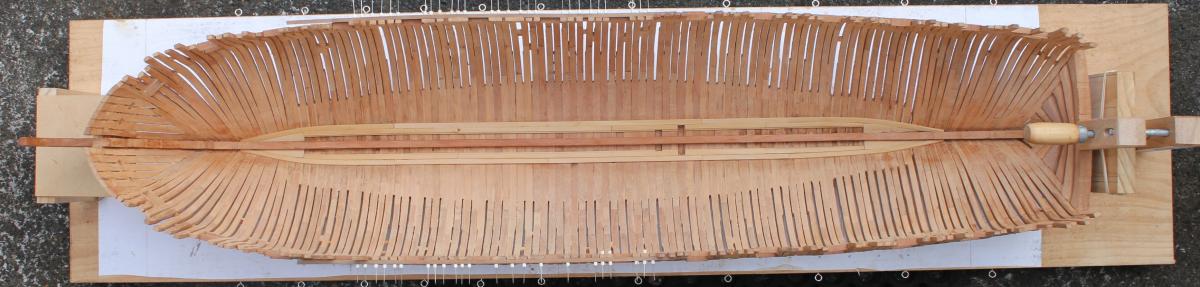
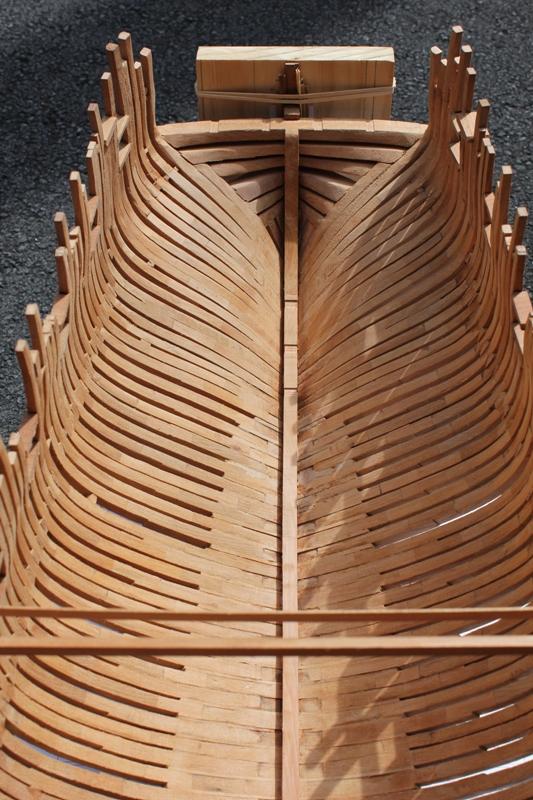
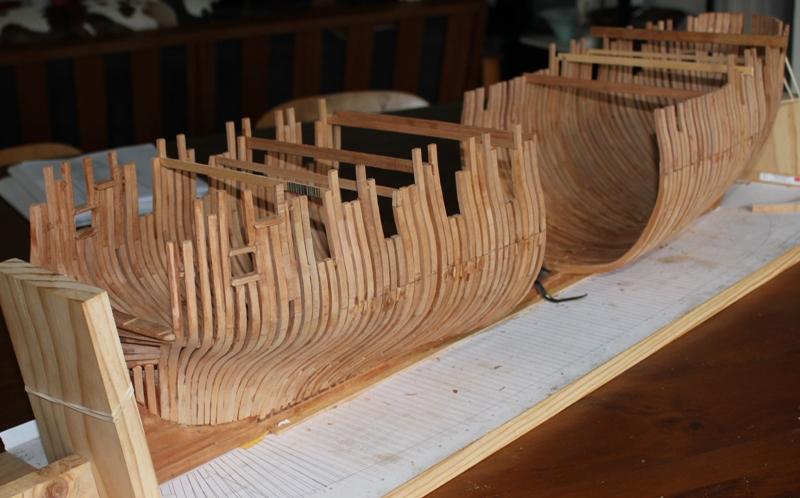
And so onto the square frames. These I found easy and work rate accelerated during this phase as the ends came together.

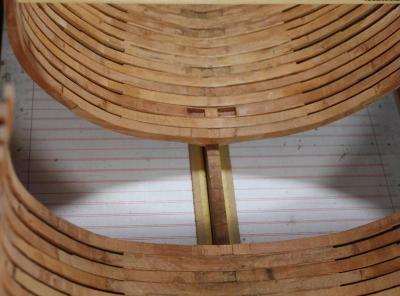
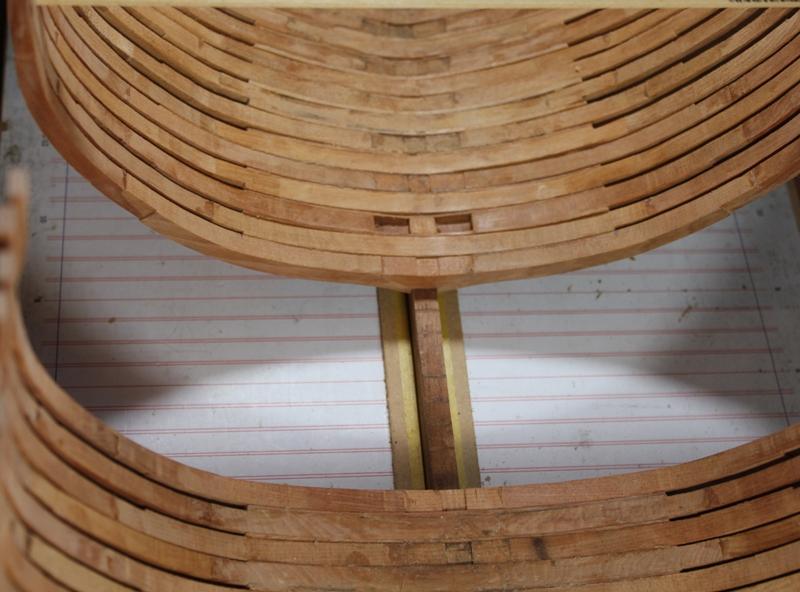
Close up of the pump wells
And done ....
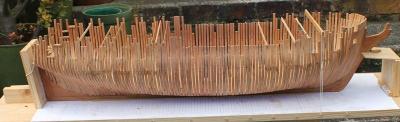
So with the framing done, time to get on with the gun posts and keelson.
- dj.bobo, fatih79 and billocrates
-
3
-
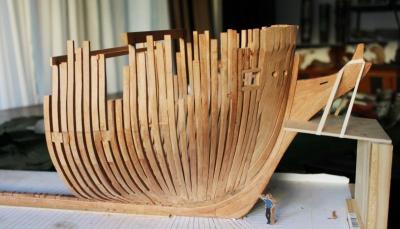
Hi Allan, same to you! You'll be able to post your Euraylus log now!!
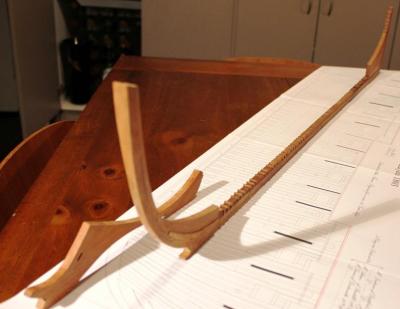
So - on with putting the bits together and making it look like a ship.
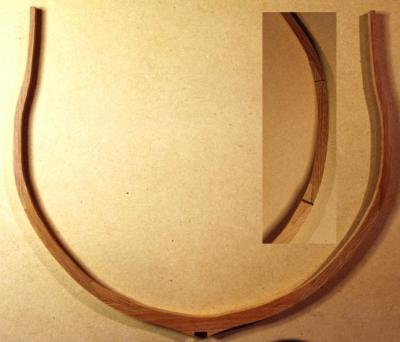
The fore and aft cant frames were the first to go up. At the beginning, I ignored all the sage wisdom of the site and authors, and was going to cut the gun ports as I went. That idea was short lived....
The cant frames were straight forward. When I do this again, however, I will build square frames off the ship to get "into the groove" before doing the more difficult cant frames.
- harvey1847, billocrates, jansmiss and 3 others
-
6
-
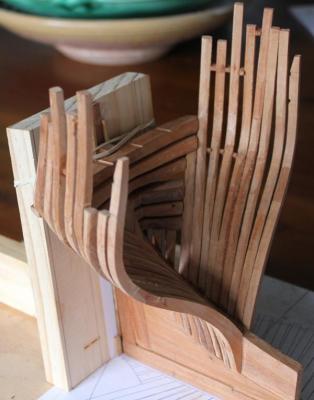
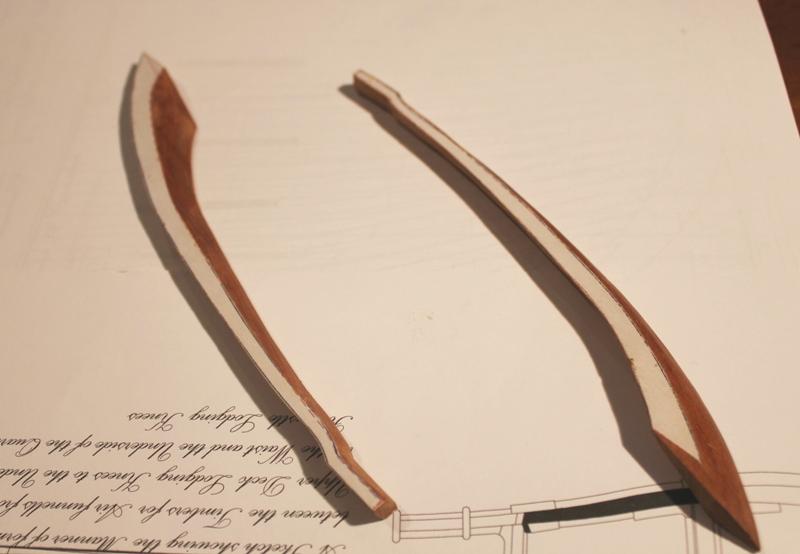
First up, the beginning of the build.
The keel: This was straight forward, although I now have 3 keels, 2 stems and 3 stern posts and deadwood.

The Hawse Timbers and Transoms: Surprisingly, these actually went to gether very well. Ok, I admit I have two sets of hawse timbers ....


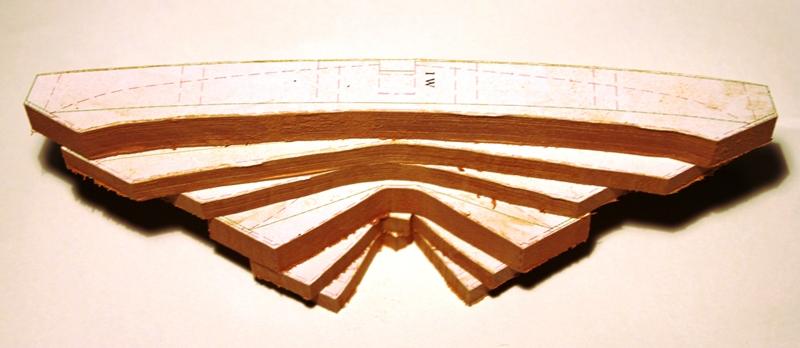
The frames: I tried a few ways of building the frames, but in the end settled on doing the job as it was done in the yard, by using chocks. This has resulted in a strong frame (I can attest to the strength
 )
)This is some of the Totara being used.
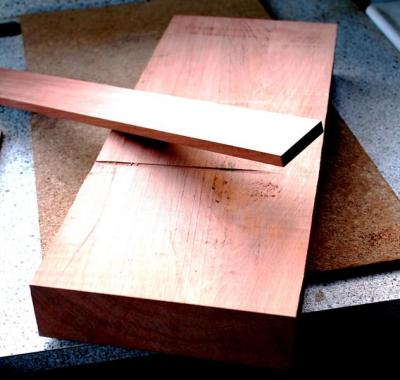
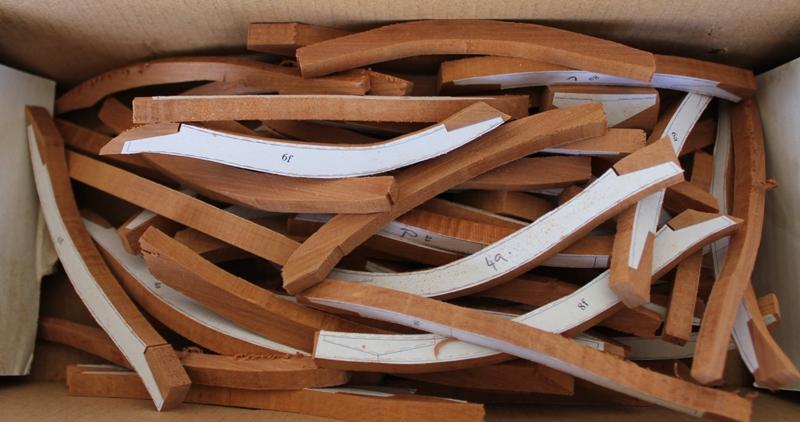
And some shots of the frame making process:
- billocrates, fatih79 and Jeronimo
-
3
-
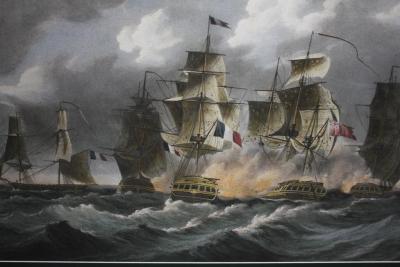
As my first scratch build project, I chose to build the frigate HMS Blanche (1800), one of the 27 Apollo class frigates of 36 guns built to the design of William Rule (see wikipedia).
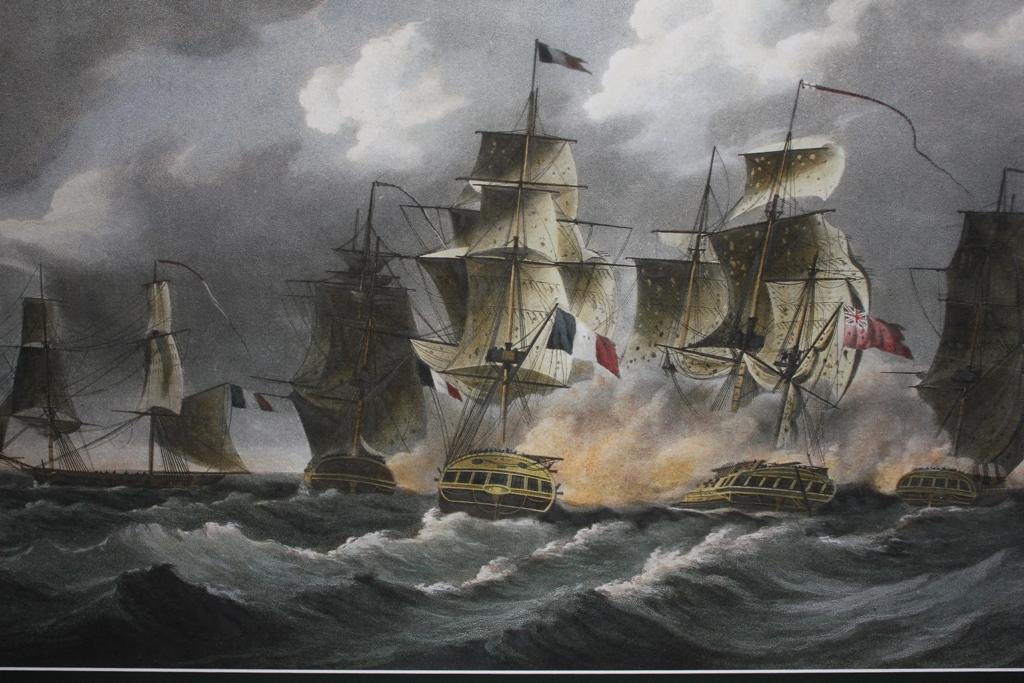
The Blanche was built at Deptford by John Dudman and launched in 1800. In 1805, after some success in the West Indies, she was captured and burnt after a battle with 4 French vessels.
One reason I chose to start this build was the book Frigates of the Royal Navy, HMS Euryalus by Allan Yedlinski and Wayne Kempson. Without this book and the accompanying plans, I would not have even contemplated a start. Along with the book, this site and the logs on it written by extremely skilled modellers is a fantastic resource.
This will not be a fast build, and there will be some work done over a few times, but a after year into the project it remains a lot of fun.
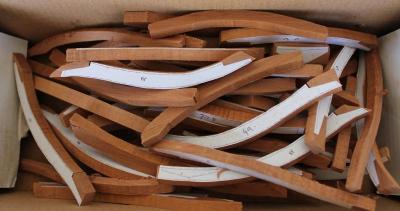
Thus far, I am using Totara for the keel and frames, Kauri for the inboard planking and intend to use Rimu for some internal work. All these are New Zealand native and are sourced from old floor boards, church pews and scrap fence posts.
I have the plans from Greenwich (although Wayne's plans are superb and all that is required), and also got a print from them.
So, here is my Blanche .....
Cheers
Rob
Current build status
- billocrates, fatih79 and daHeld
-
3


oars for ship's boats
in Discussion for a Ship's Deck Furniture, Guns, boats and other Fittings
Posted
Taken from a table in Euryalus Vol II, quoting the same book as Blue Ensign
(I'm not sure what all the numbers mean, just taking it from the table in the book )
)
30 foot barge
Sweep 21 foot
Handle 1 foot
Loom 8 foot 6 inch
Body 4 foot 6 inch
Blade 7 foot
Loom: Blade 7 foot, 4 inch square
Blade:
broad - innner 3 1/8", outer 6 1/4",
Thick - inner 2 7/8", outer 7/8"
Handle 1 3/4" diameter