


Avi
-
Posts
323 -
Joined
-
Last visited
Content Type
Profiles
Forums
Gallery
Events
Everything posted by Avi
-
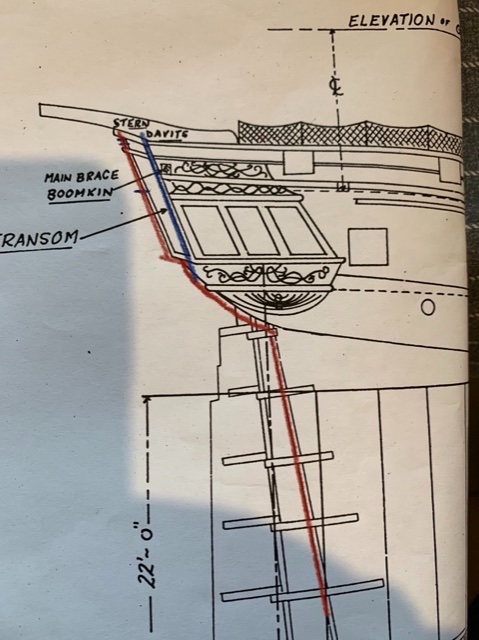
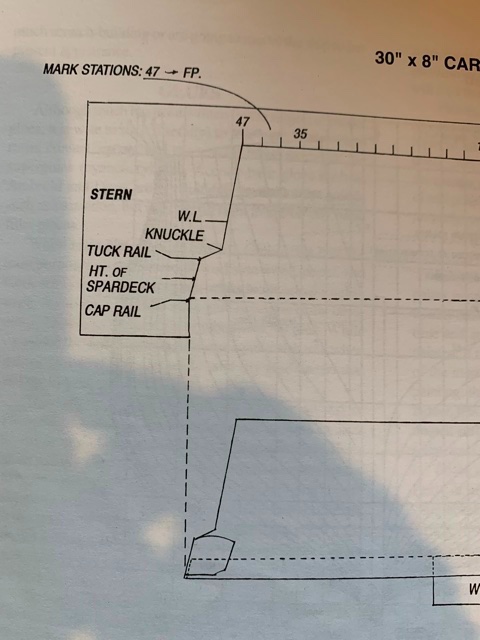
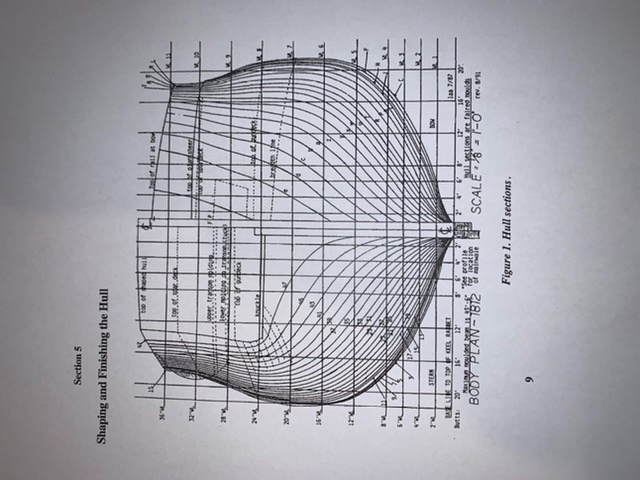
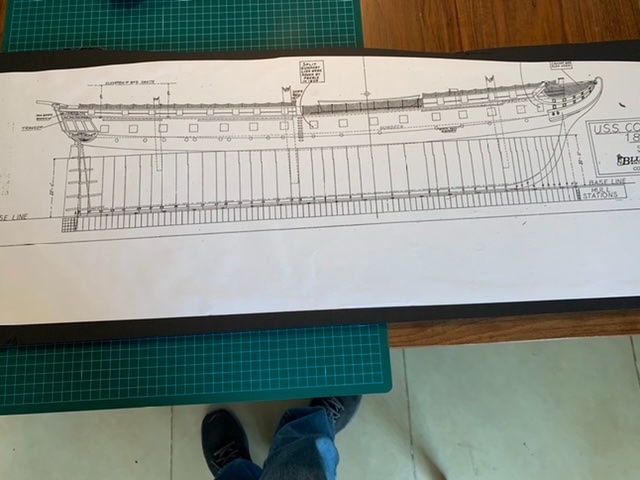
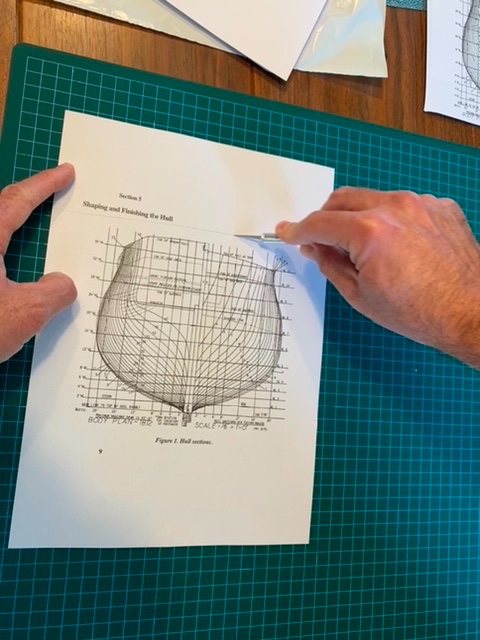
Another quandary, fairly early on. These two pictures show the scale profile used on cut out the board and use as a template to shape the hull, as well as the not-to-scale outline from the book. It looks from the plan like the proper place for profiling is the red line I added above, but I’m uncertain for several reasons: - the book outline shows more straight lines than curving, implying that the curvature I have under the counter is incorrect - the picture of the shaped hull by @jfinan here also looks like that, with the part coming up from the keel, just afore of the sternpost, hits a sharp angle which goes straight out to the stern, then another angle up at the transom - the directions indicate marking the height of the caprail and spardeck, both of which, in the scale plans, terminate at the blue line, ahead of the transom. For now, I’m leaning towards sticking with the red line, as I always can cut more later, but happy for advice.
-
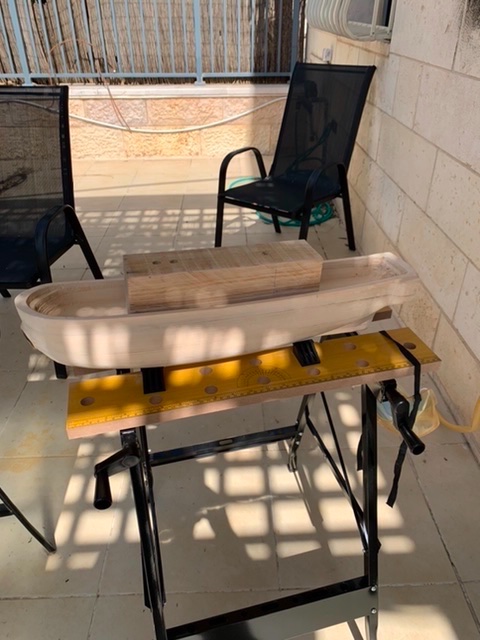
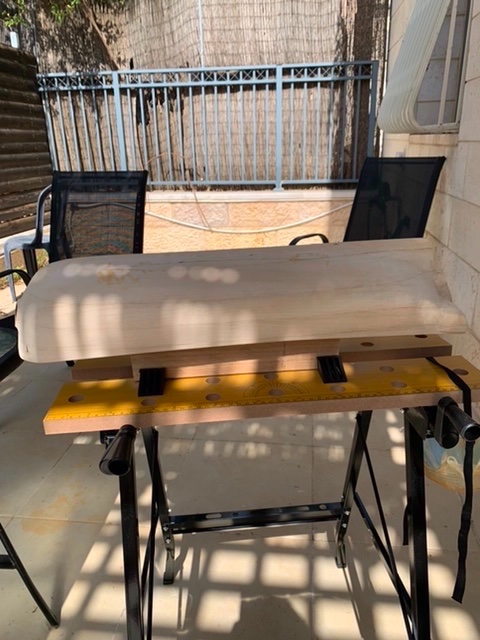
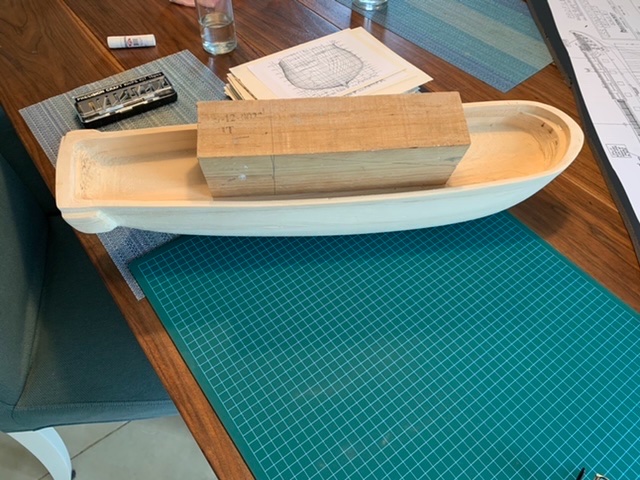
I also discovered that the block was about 4" height, but my longest nails (left over from a drywalling job a few years back) were 3.5". So I took a drill bit slightly wide than the screw head, drilled 1.5" into the block, then a pilot hole 0.5" below that, and was able to get the screw through the block, sticking out the bottom just enough to hold the hull solidly. You can see the wider holes in the upper picture above. As for the three holes? The screw went in on an angle in one of the holes, so I just did another, with a deeper pilot hole. No problem.
-
My new workbench arrived, as did the dewalt hand sander. Finally found time to sand down the block of wood (it shouldn’t matter, as it’s only temporary, but a few splinters convinced me otherwise), then drill the screws in. Needless to say, we had to take a detour. The battery on my drill ran down, I put in the replacement, and it was dead. Charger didn’t light up. Turned out to be the charger, not the batteries, so I got that replaced and finished the job. Looks like I’m ready to start shaping and sanding the hull.
-
Something nice just showed up in the mail.
-
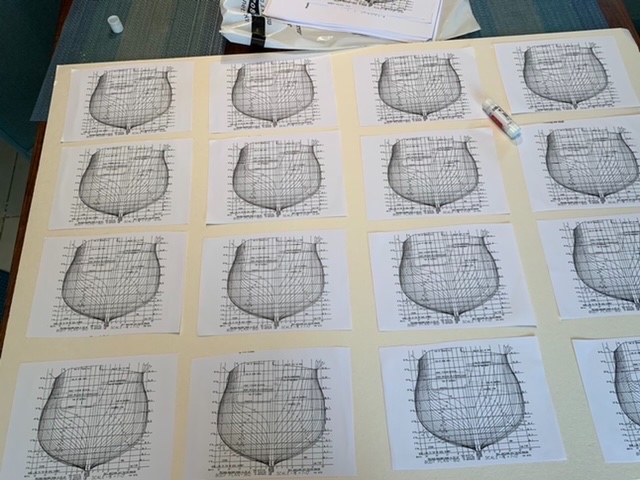
Hmm, I have finished the hull templates, but find myself somewhat confused by the lowest number ones. It is nearly impossible to tell the differences between 3, 5, 7, 9, 11, 13, and while when you look at the bottom, 3 is clearly the outermost, at the middle it looks like they cross over, and at the top, it looks like 15 is the outermost? I’m quite confused. I’ve attached the layout to hopefully help. Sorry for the sideways pic; I have no idea why the forum did that. anyone know? I think Nic is here at @MrBlueJacket
-
Like these @mort stoll? That’s a great idea. Thanks!
-
I also found some “styrofoam board” when I got the Bristol board. That’s going to have more stiffness than the Bristol, so I’m using it for the hull profile template. I’m not sure how well I can cut it precisely, especially on curves, but my daughter says she can. Who am I to argue? 😄
-
Made lots of copies of the hull station templates, cut them down to a normal size (why waste the outer white space), simple stick glue gets them on Bristol board, and then cut into 20 squares. All of this so far is crude work; will need to be precise when actually cutting the templates. Actually that kind of concerns me. Cutting a straight line on cardboard with a #10 or #11 blade is easy with a straight steel ruler. Cutting the curves of the hull, not as much. I’m happy for suggestions.

-
Lucky me! My neighbour just finished home renovations and had a perfect block of wood left over.
-
I’ll be happy with “home presentable quality”, @jfinan, but I’ll do my best. just got enough copies to make my templates tomorrow, and some wood I can shape into the block to grasp it while I carve and sand away.
-
שלום Jerry! Thanks for the kind note. It looks to be very challenging, but I am thrilled to do it.
-
You are right, it isn't. If my wife had asked me, I might have suggested something else first. Then again, I might not. I love a good challenge, I am in no rush (I am fine with this taking literal years), and I truly love the Constitution. Your list of builds is quite impressive @schooner, and thanks for the encouragement! 🙂
-
And the only picture you’re likely to see of me in this thread. All of the rest will be of the ship and work (maybe my hands will slip in at some point).
-
Oh yeah, almost forgot. @KHauptfuehrer recommended "Anatomy of the Ship", which of course I immediately ordered. I never argue with another book.
-
Hi folks. My name is Avi Deitcher, finally starting my build log. "Old Ironsides" is my first build. I went camping up in Maine with my wife a very long time ago (Toddy Pond, for those who know the area), long enough that it was a year before our first kid, who recently finished college. On the way back, we stopped for a break and wandered into a store that had my jaw open the whole time, BlueJacket. I have wanted that Constitution ever since, and my wife just surprised me with the model. It took a few weeks of going through the manual, including pulling out my old copy of "Sea of Words" to remember what half the terms meant (half being generous, more likely ¾ 🙂 ), slowly figuring out what paints to get, where to get tools, whether or not to get the topside planking and copper plates, not to mention going through the parts list. I needed calipers to tell which wood part is which! I finally am just about ready to get started. To make things more interesting, I live in Israel, so while some of what I need is readily available here, not everything is. I have an order from a local modeling place that arrived yesterday (he imports Vallejo paints and some tools), Amazon UK coming next week (mostly tools and sandpaper) and one from BlueJacket (planks and copper, etc.). Heading off today to the copy shop to make copies of the profile so I can cut it and start to shape it. I have been looking especially at @KHauptfuehrer's amazing log here (who kindly responded to some of my questions in thread; I hope I stopped before really hijacking it), @jfinan's here (I really like your idea of staining the topside planks instead of painting them, and staining them before gluing them on), @JSGersonkindly welcomed me in the thread and linked to Ken Forman's build and Bill Edgin's build. So many capable and helpful people here, I really am looking forward to this. Yes, I know the build is likely to take me years; I work full time doing technology business consulting. I will post some initial pictures soon.

