HOLIDAY DONATION DRIVE - SUPPORT MSW - DO YOUR PART TO KEEP THIS GREAT FORUM GOING! (Only 72 donations so far out of 49,000 members - Can we at least get 100? C'mon guys!)
×


End Of The Line
-
Posts
35 -
Joined
-
Last visited
Content Type
Profiles
Forums
Gallery
Events
Everything posted by End Of The Line
-
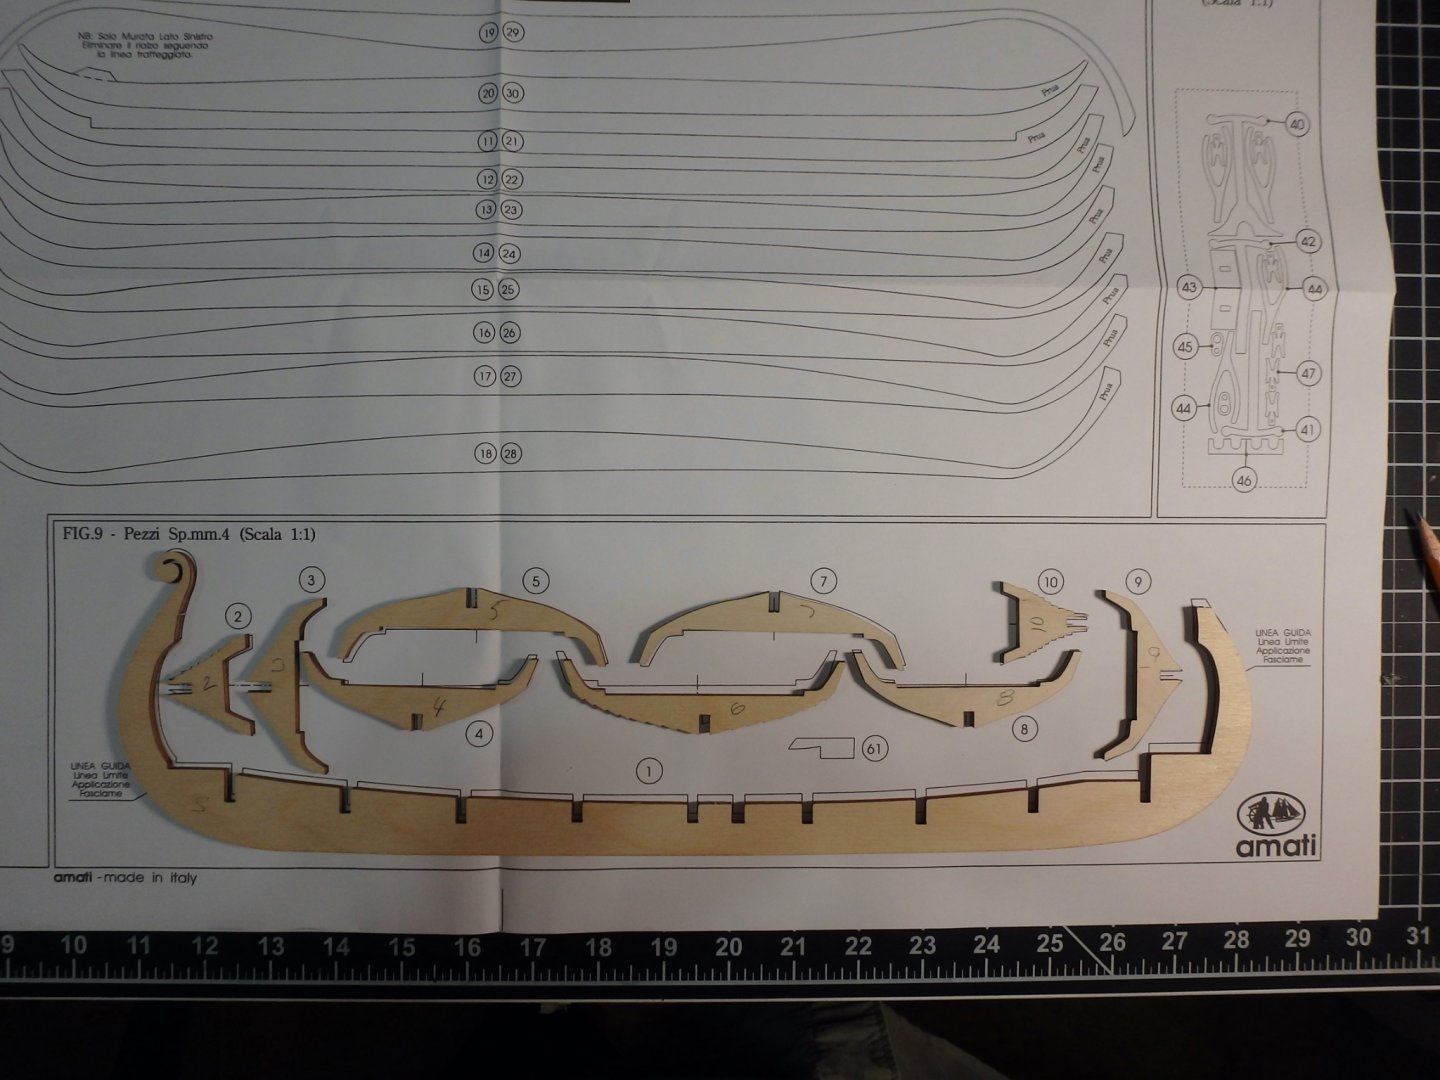
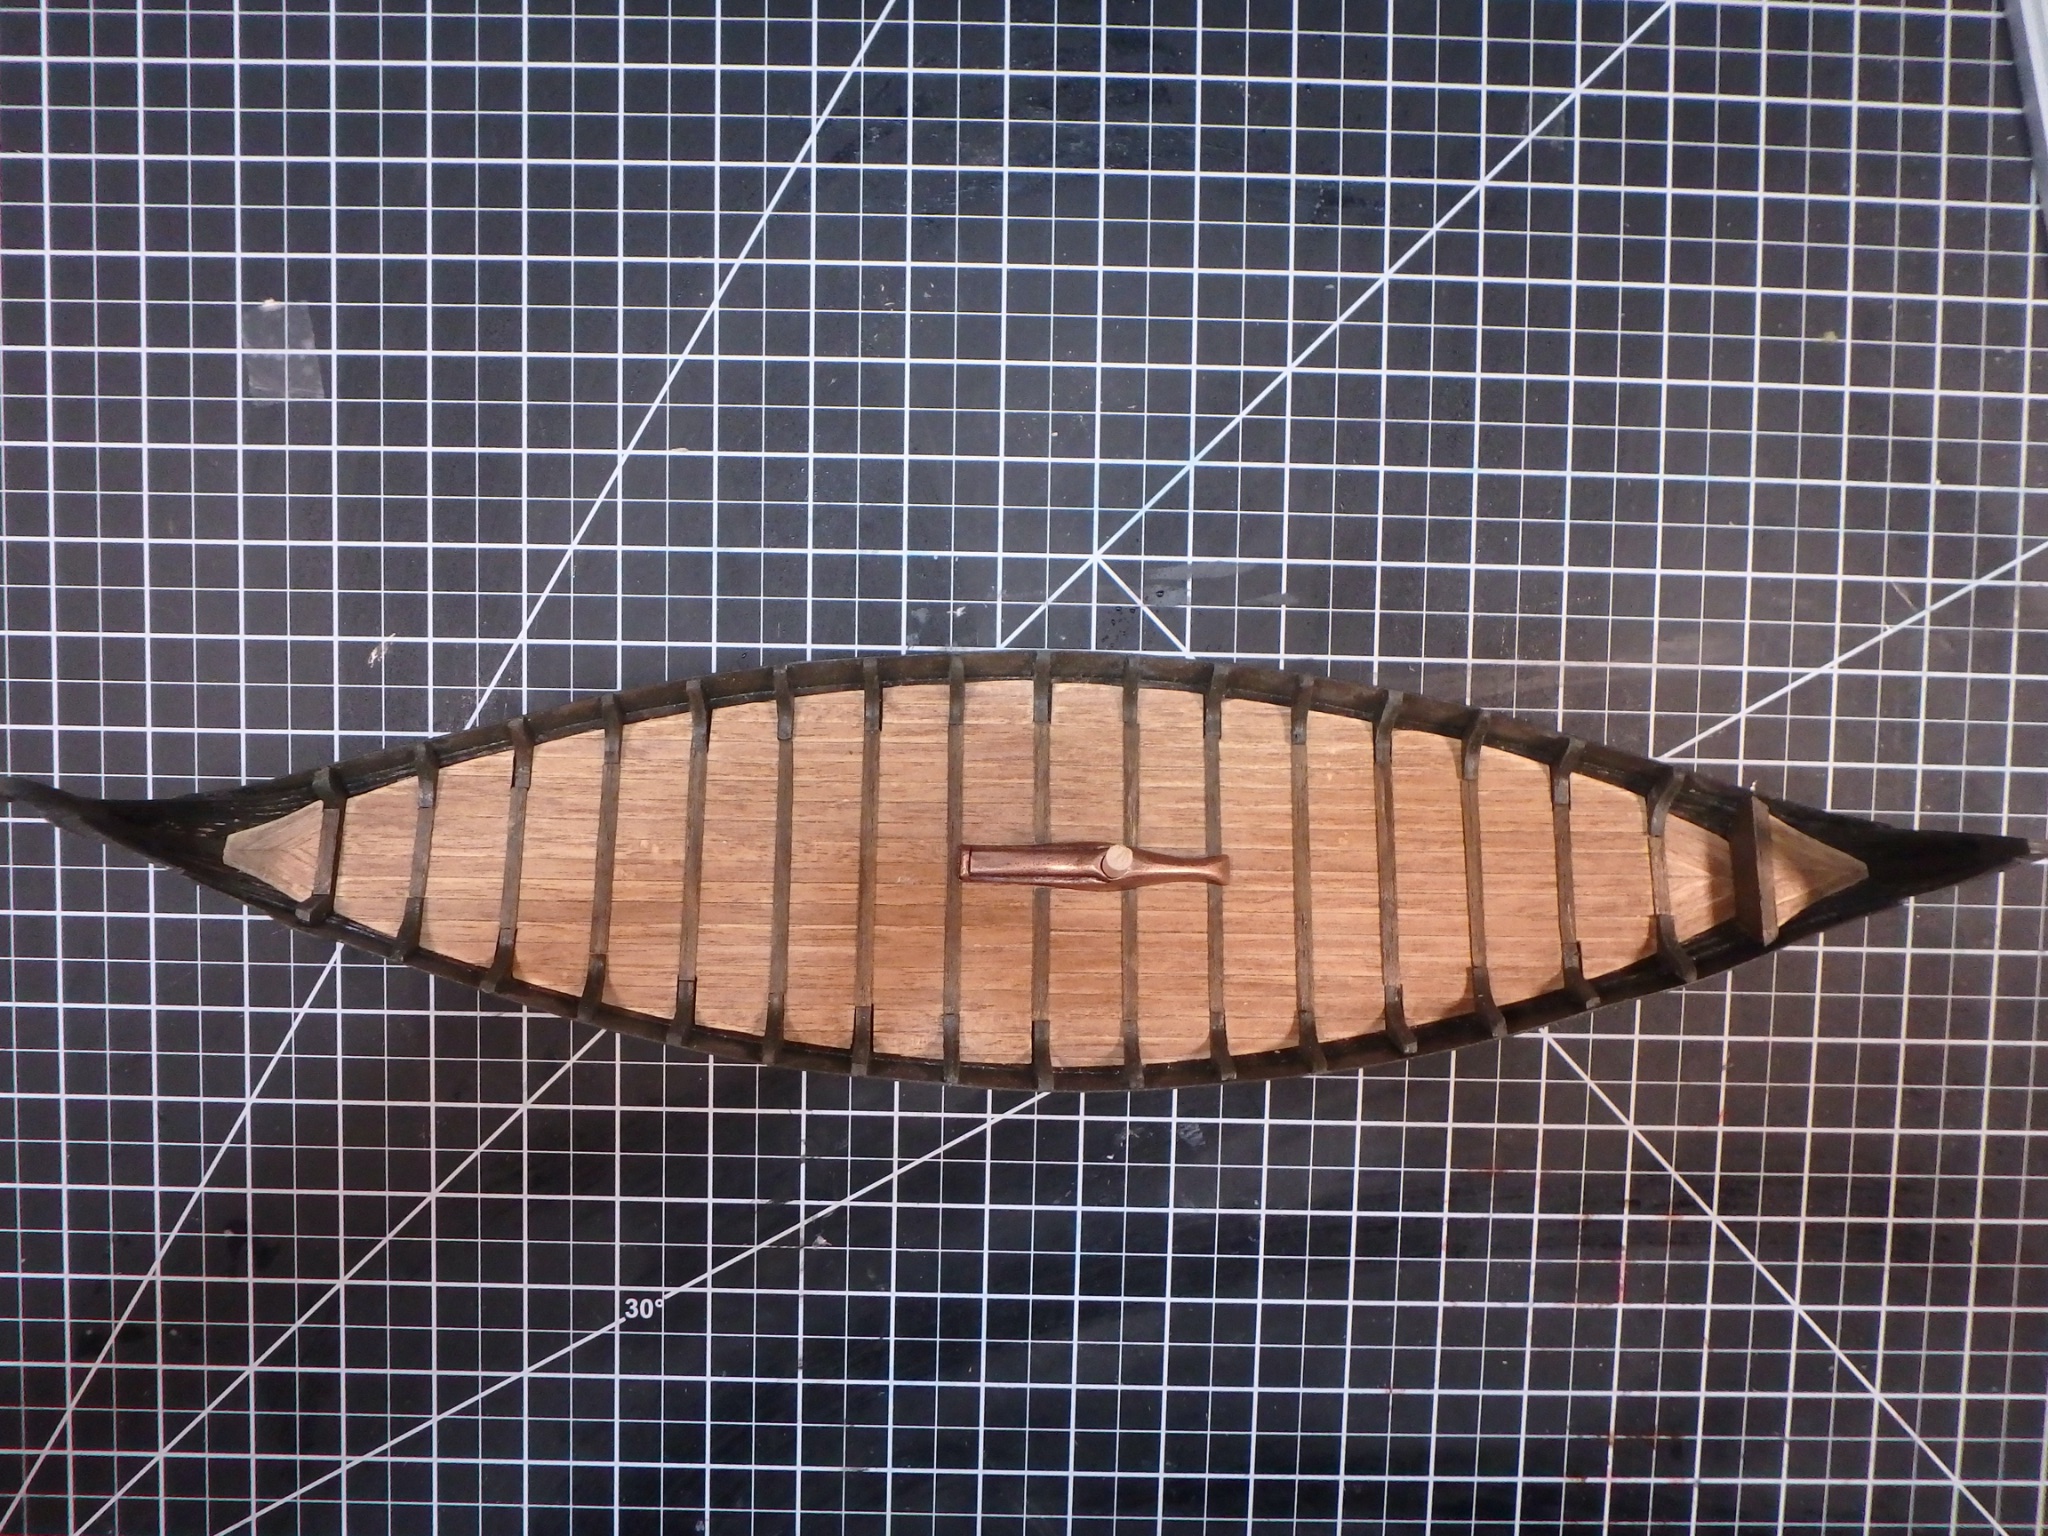
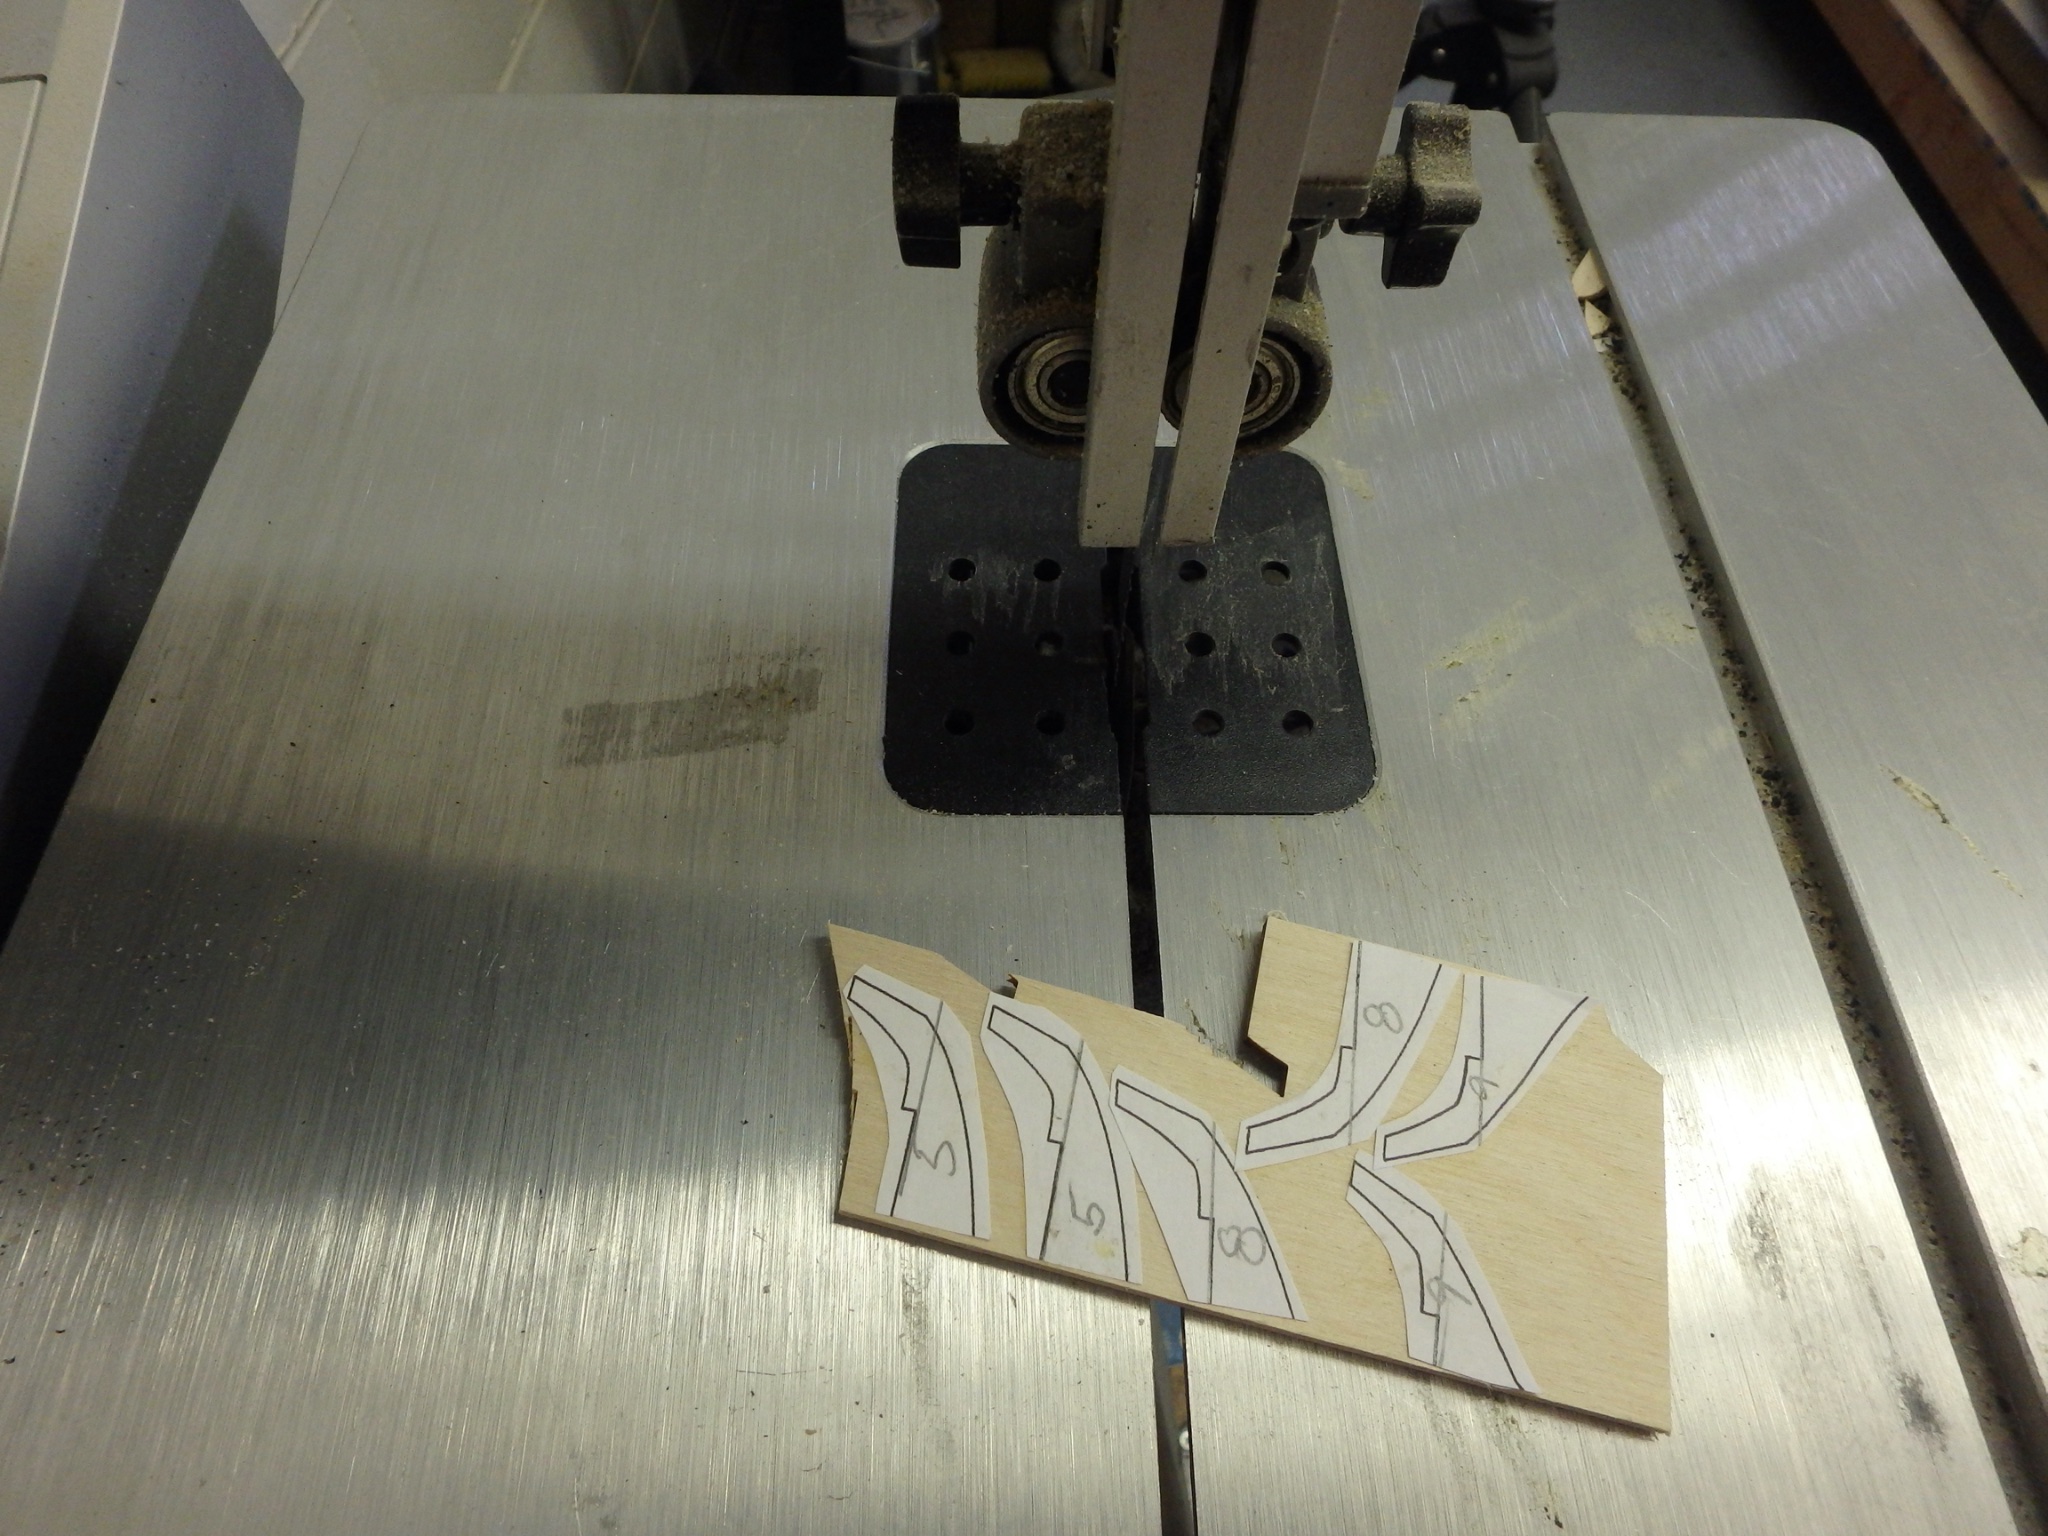
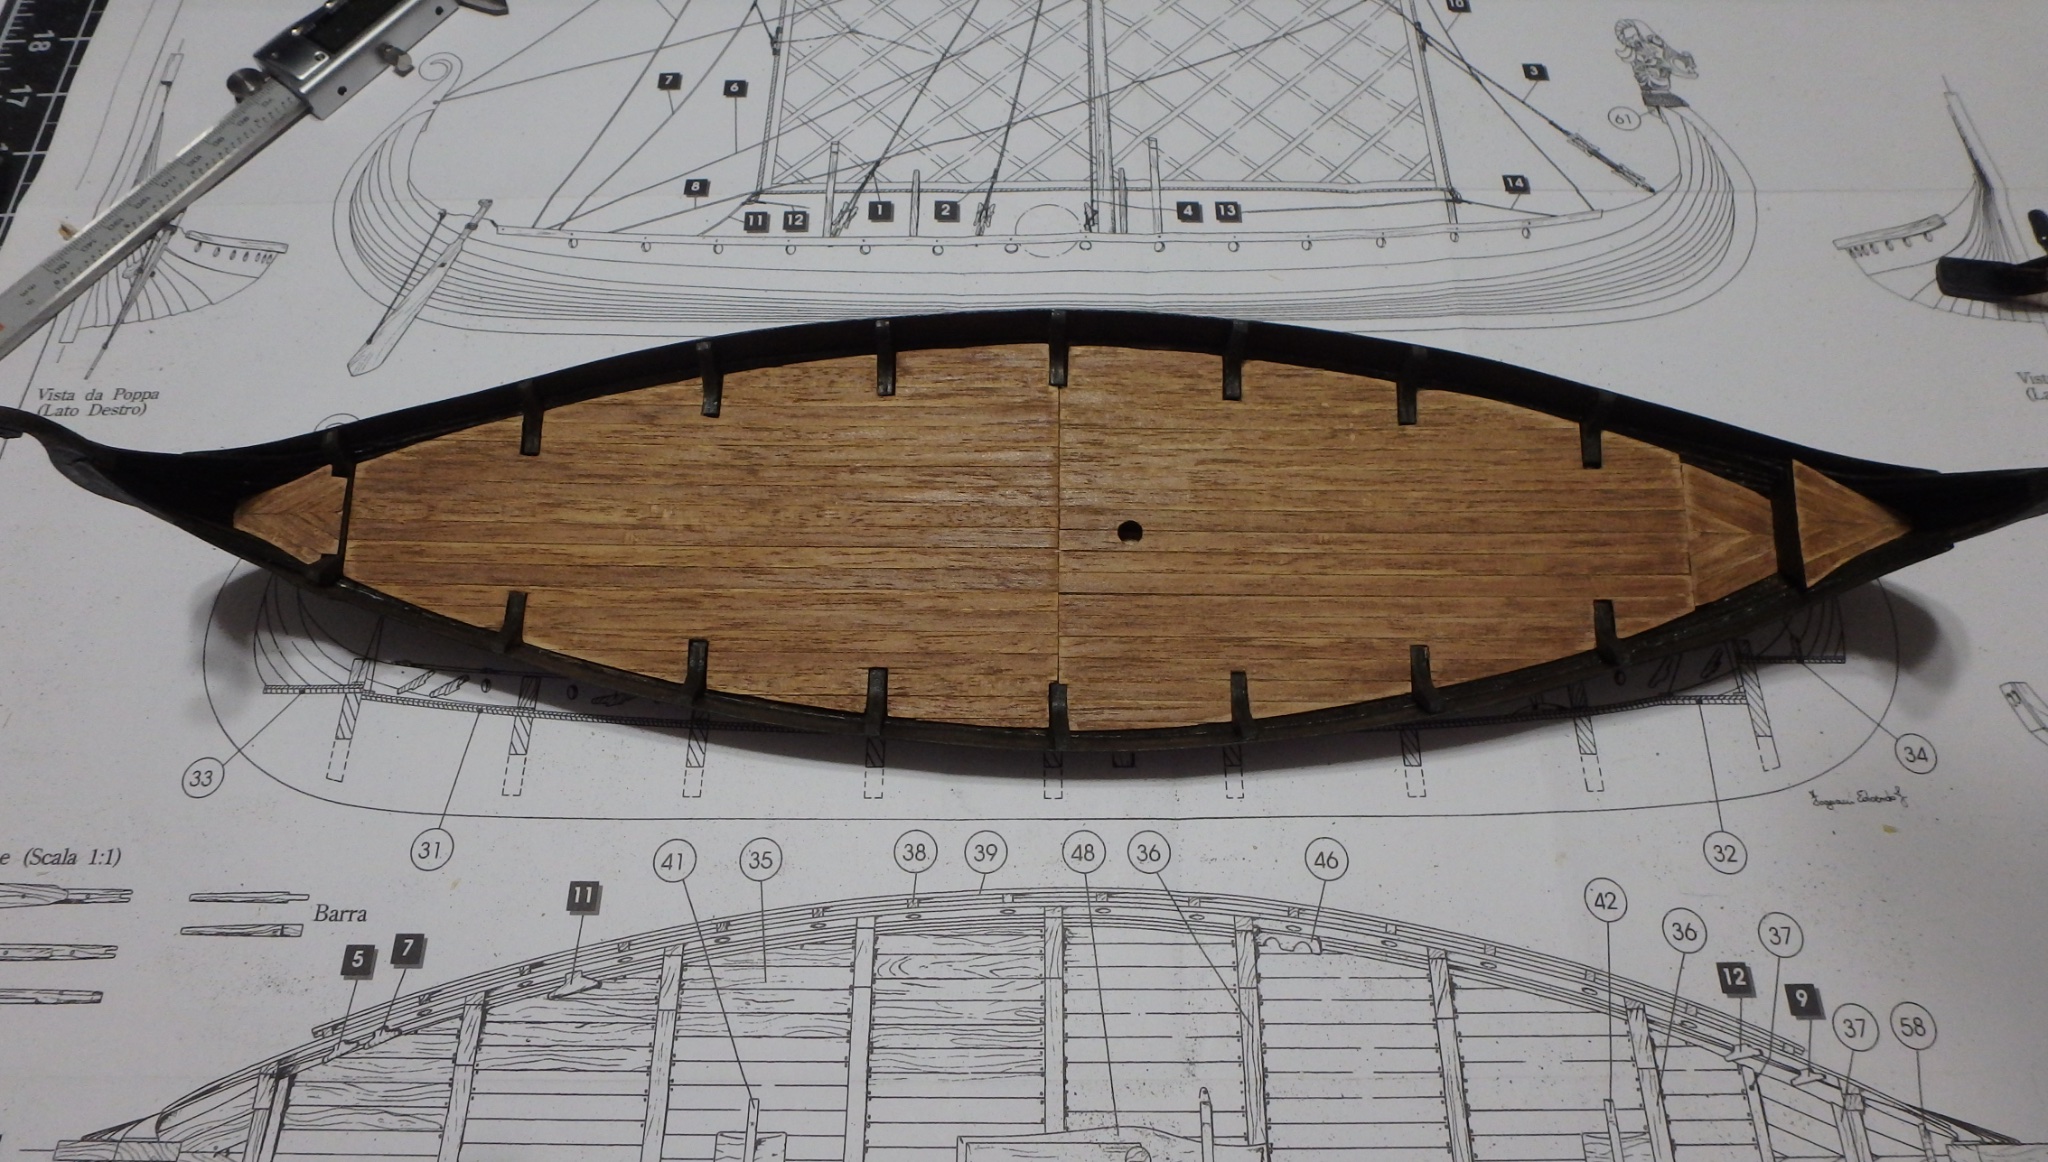
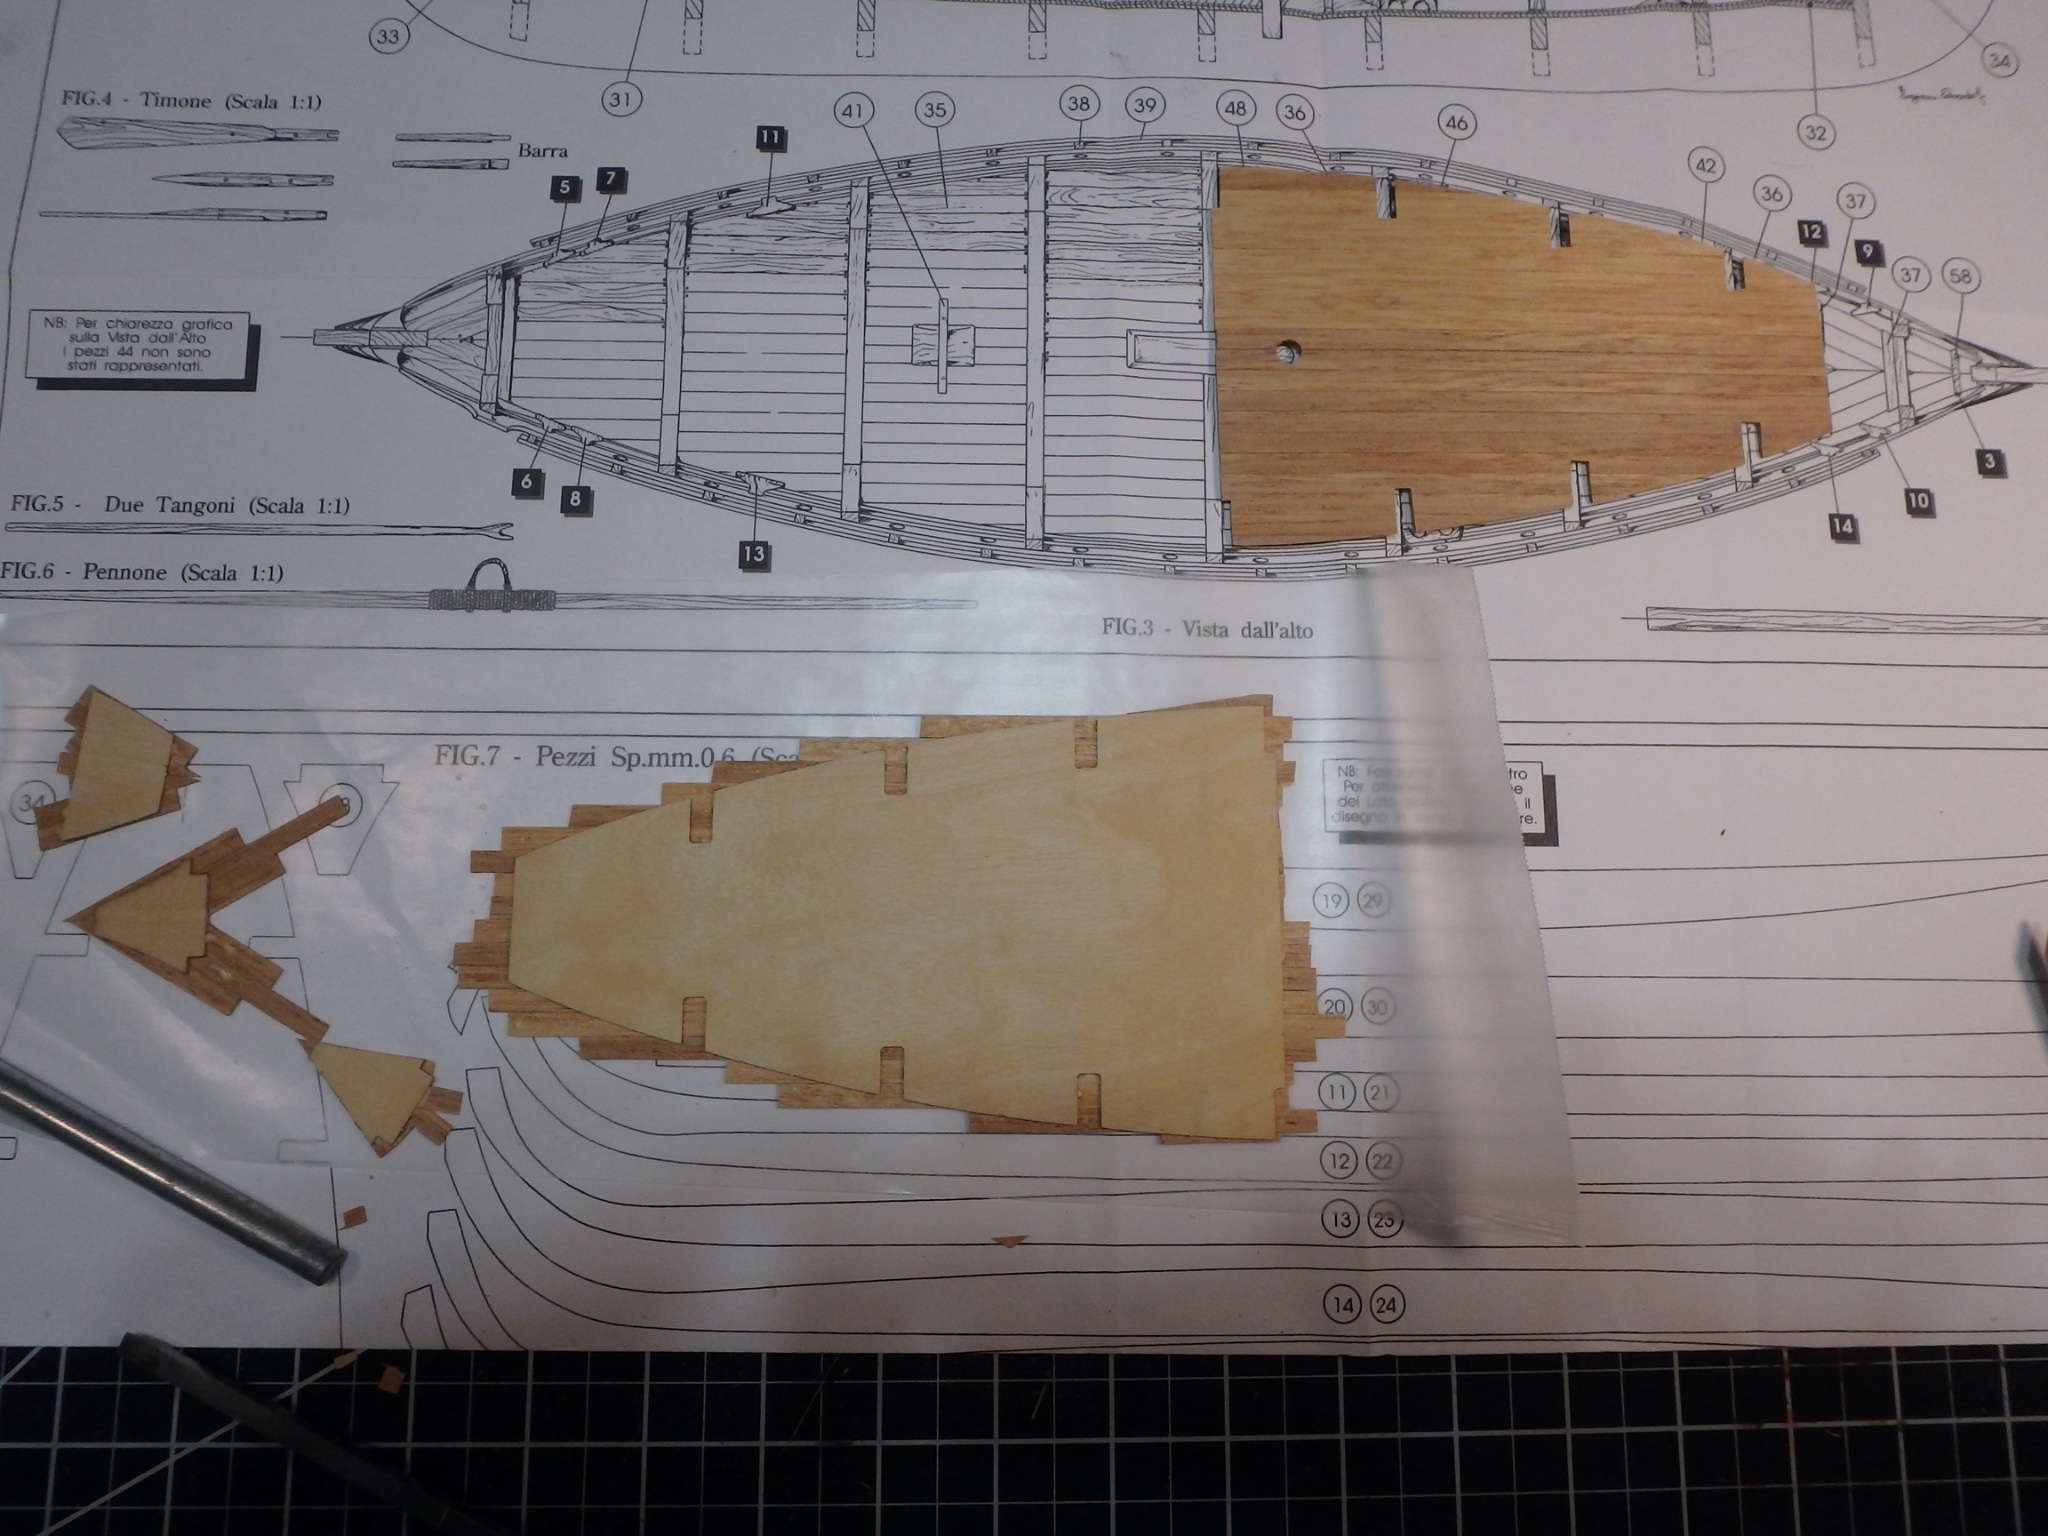
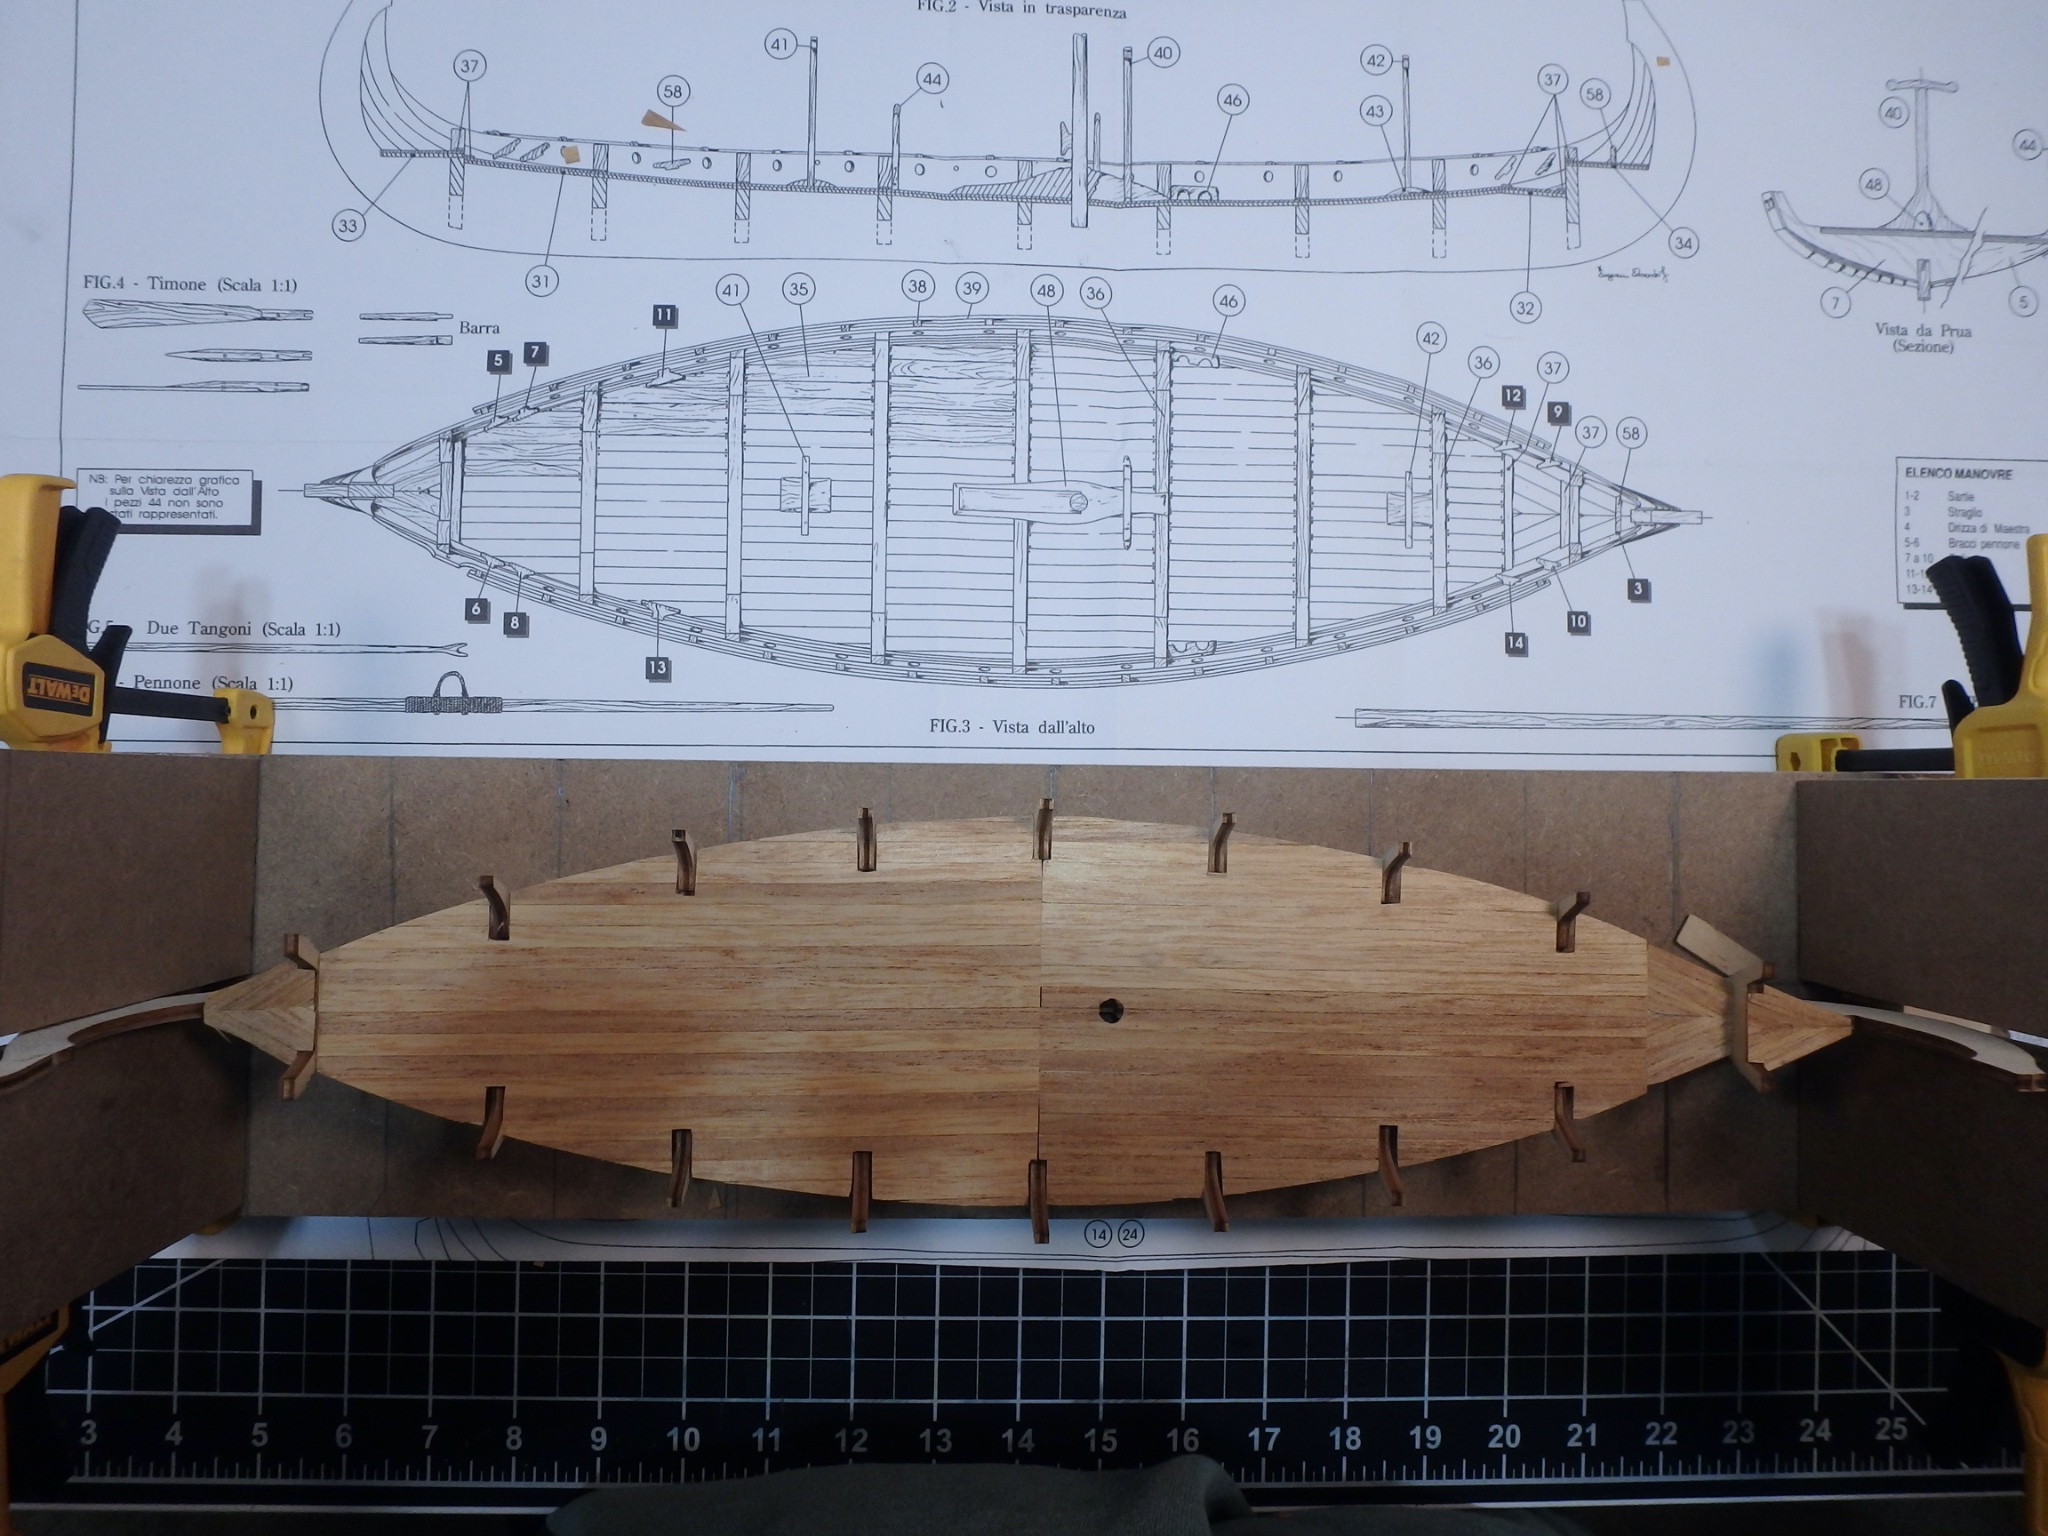
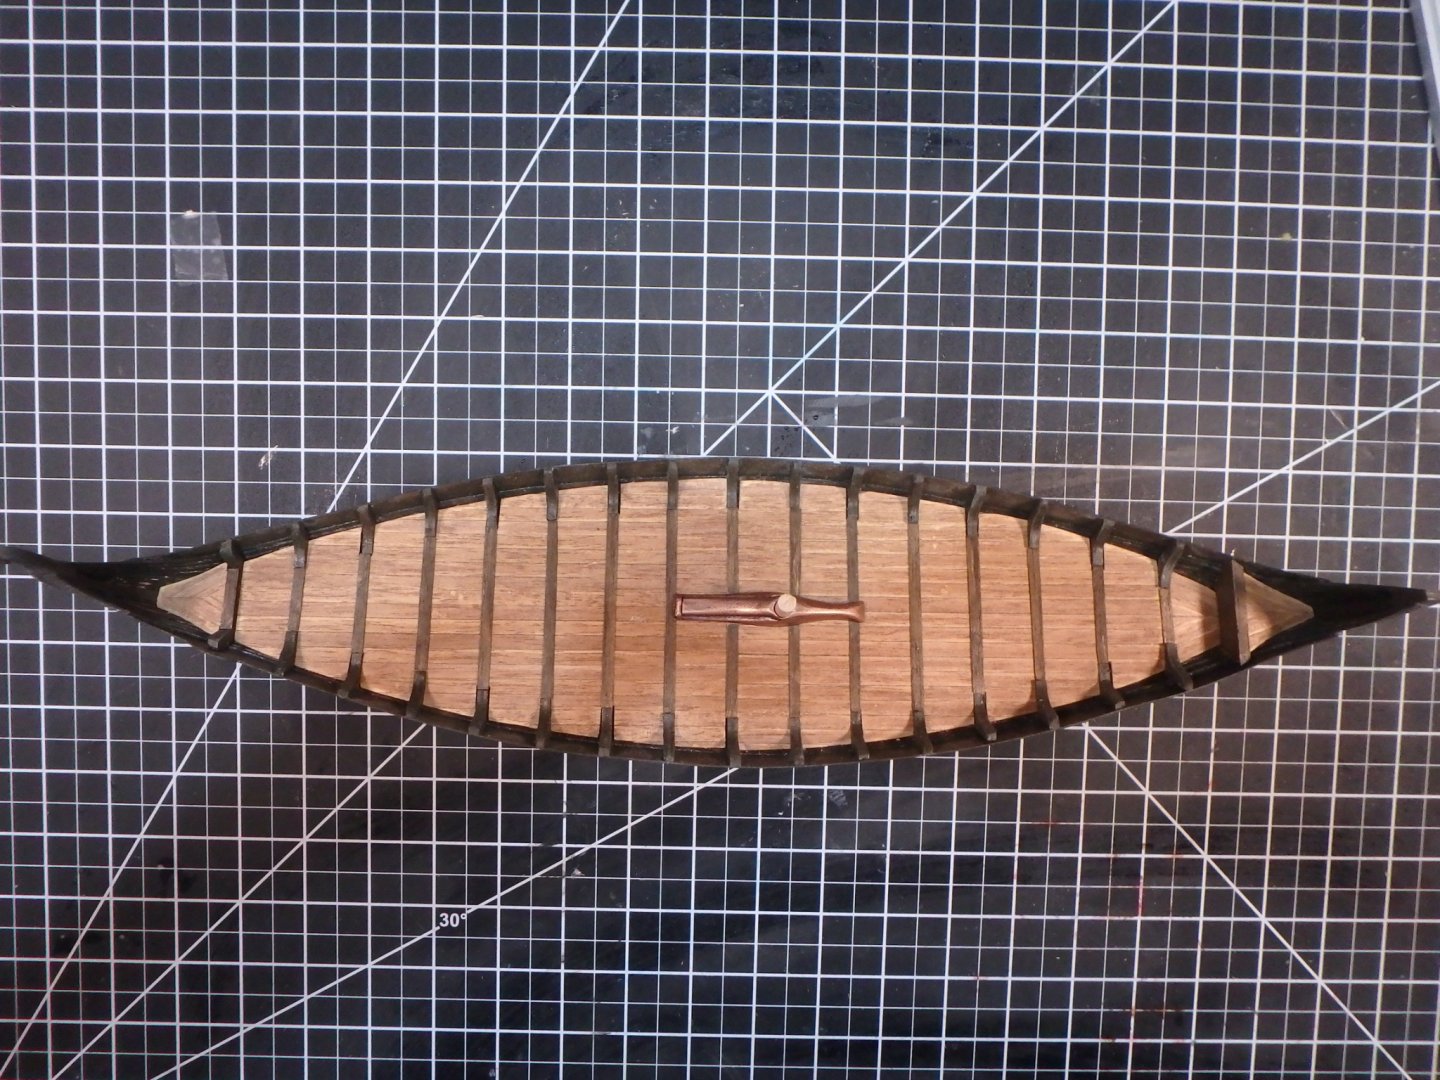
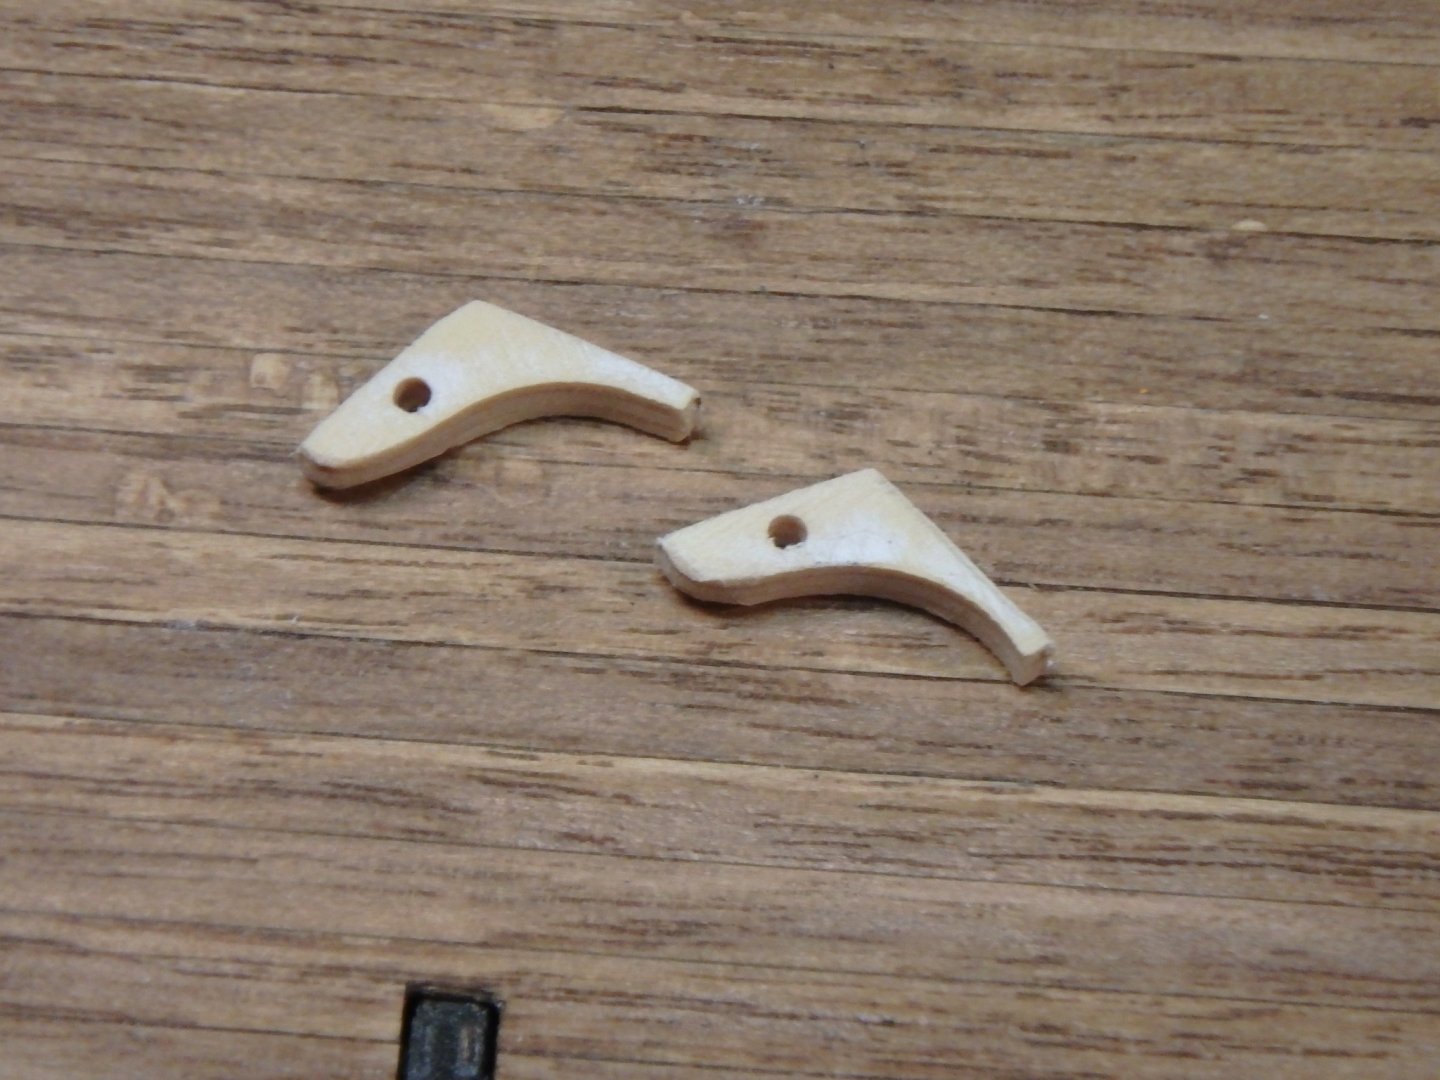
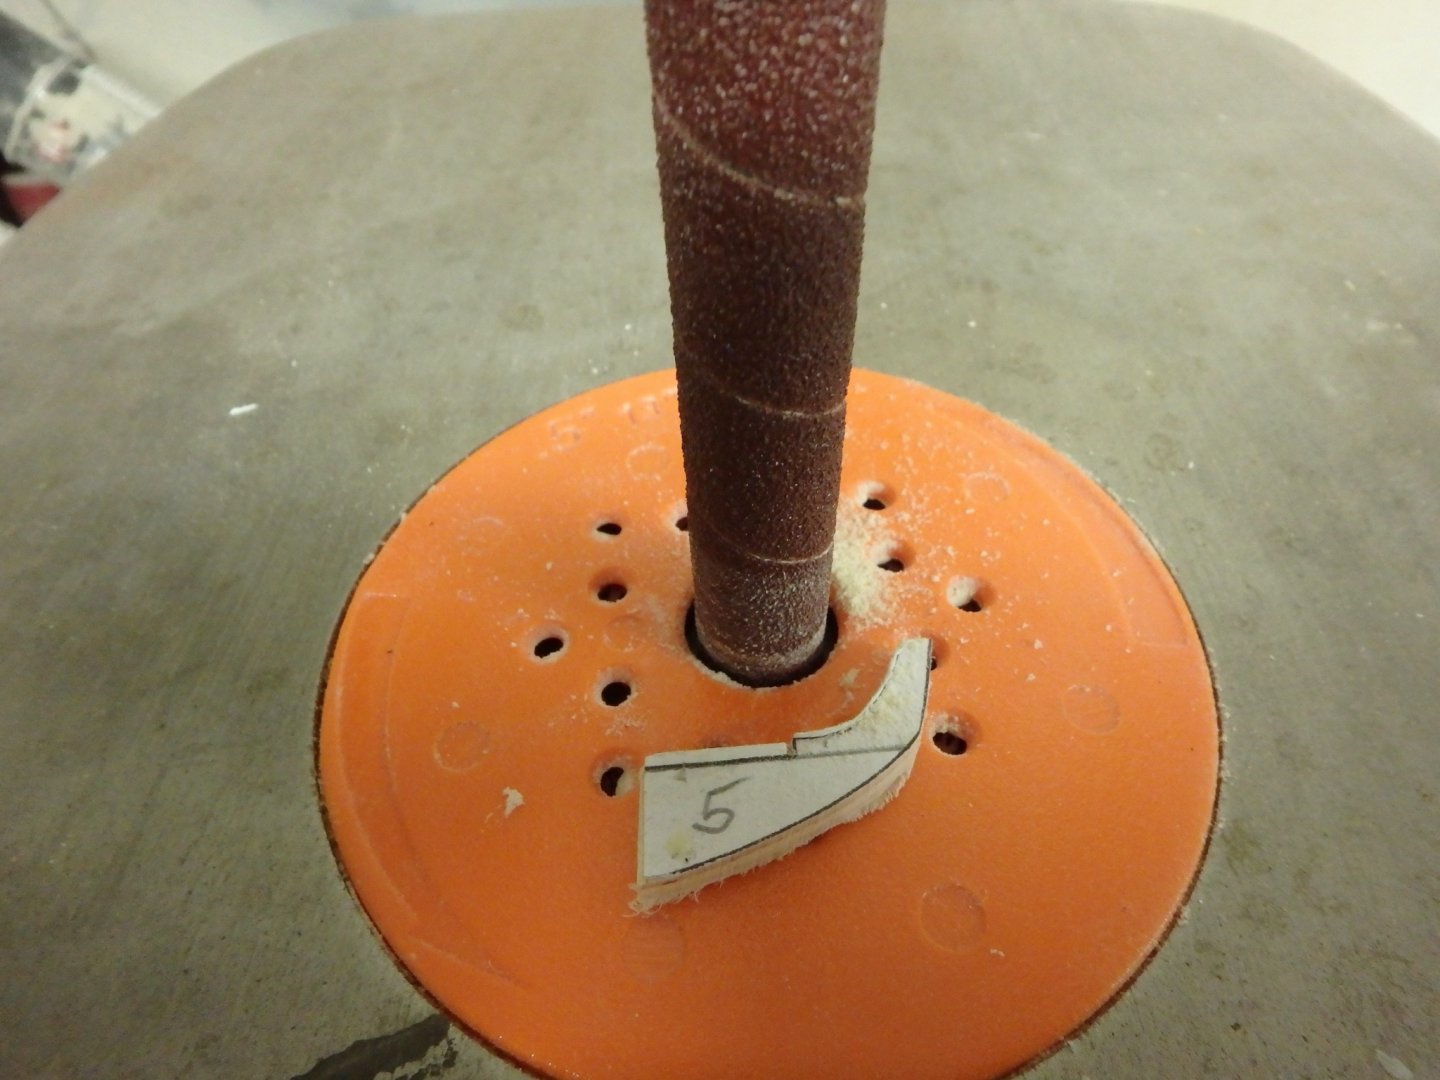
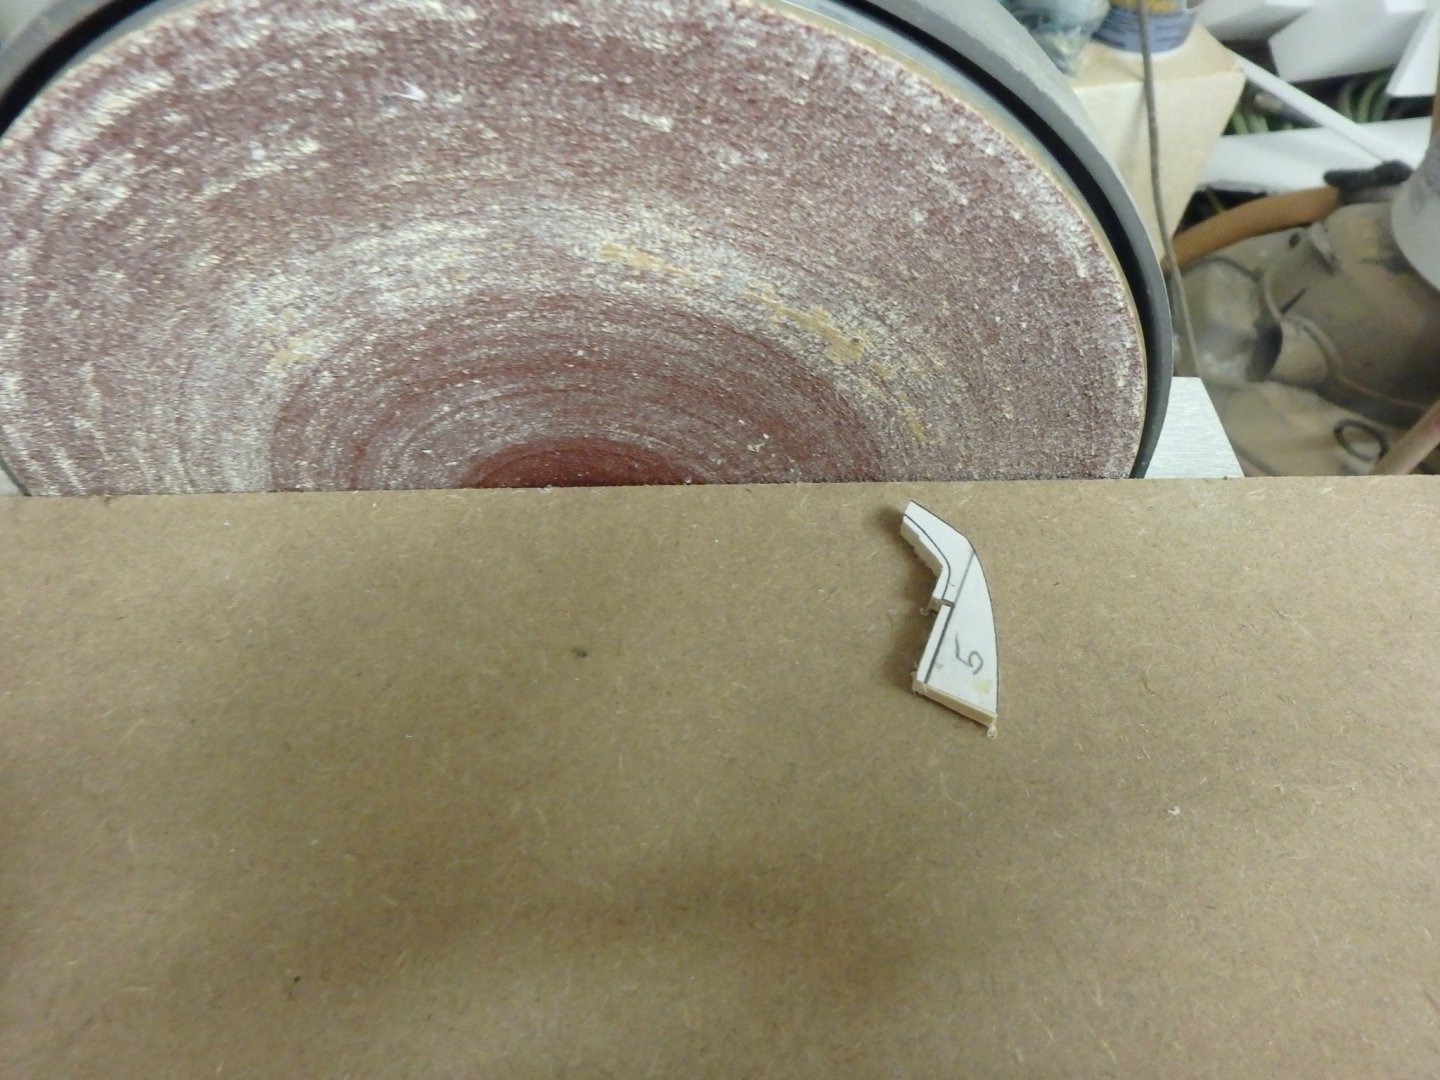
 Here goes with another update. The Oseberg and Gokstad Ships both have closer spacing for ribs than this kit, so I decided to add more ribs to make the model appear closer to the historic ships. The existing ribs were a good starting place, so I printed the plans, and glued them to scrap plywood from the Keel and ribs. Working my way from amidship toward the bow, I used forms 6, 7, 8, & 9, and 6, 5, 4, 3 toward the stern. I used a bandsaw to rough cut each rib. Then I used a disk sander and spindle sander to bring the parts to profile. Power sanding such small parts is not for the faint of heart. I clamped an MDF surface to the sander table, so the small part wouldn't be thrown down into the gap between disk and table. Each part was hand sanded to fit it closely into its location. These have been drilled for shroud rigging. And here is the finished deck with all ribs and crossbars. The mast fish is dry fit only. It will be painted to simulate wood. Not sure why this image is here. I keep editing it out, and it keeps reappearing. Thanks, Steven
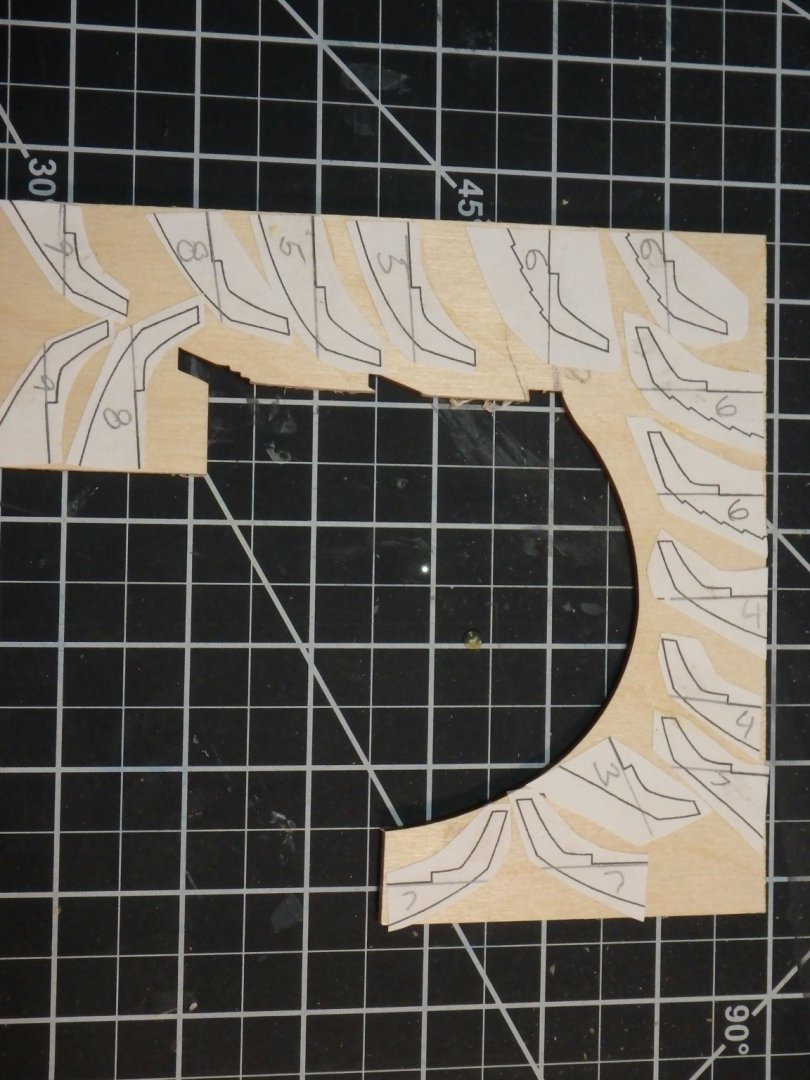


-
Since, I mentioned cheap wood in my previous post, I’d like to comment on the wood quality of this kit. I was pleasantly surprised. Perhaps because of some of the negative comments about wood quality on some other threads, I had low expectations. I found the plywood for the keel and ribs to be good quality with three equal thickness veneers and good hardwood density. I couldn’t dent it with my thumbnail. The planking is thin basswood plywood, but it flexed well and showed no signs of separation between veneers. I didn’t recognize the species of wood used for the deck planking. It was a reddish open grain hardwood. The pieces supplied for the shield rail appear to be a type of walnut, and the round stock for mast, yard and oars is fairly standard hardwood dowels. I haven’s separated the small parts from their sheet yet, but the wood appears to be a dense chocolate colored hardwood. Long story short, the wood all seems excellent for it’s intended purpose. Was it hand split oak as used on the originals? Of course not, but at least for this particular example of this kit, it seems to be of good quality.
-
Thanks. It is important to note that it was a water based stain over a water based glue, and I did lightly sand the surface before applying stain. Fair warning, no water based stain will provide the penetration of oil or alcohol based stains, but I don’t have a problem with that. My attitude toward stain is: if you stain cheap wood it looks like stained cheap wood. This is especially true with plywood. So I prefer to choose where and how much of the grain shows through. Back in the day, like 17th and 18th century, it was not uncommon to bleach away the color and grain of walnut and mahogany on fine furniture and use transparent glazes to paint on better looking grain.
-
This build is looking fantastic. Thanks for going through your decision making process on the rigging. This board is so helpful to those of us following behind.
-
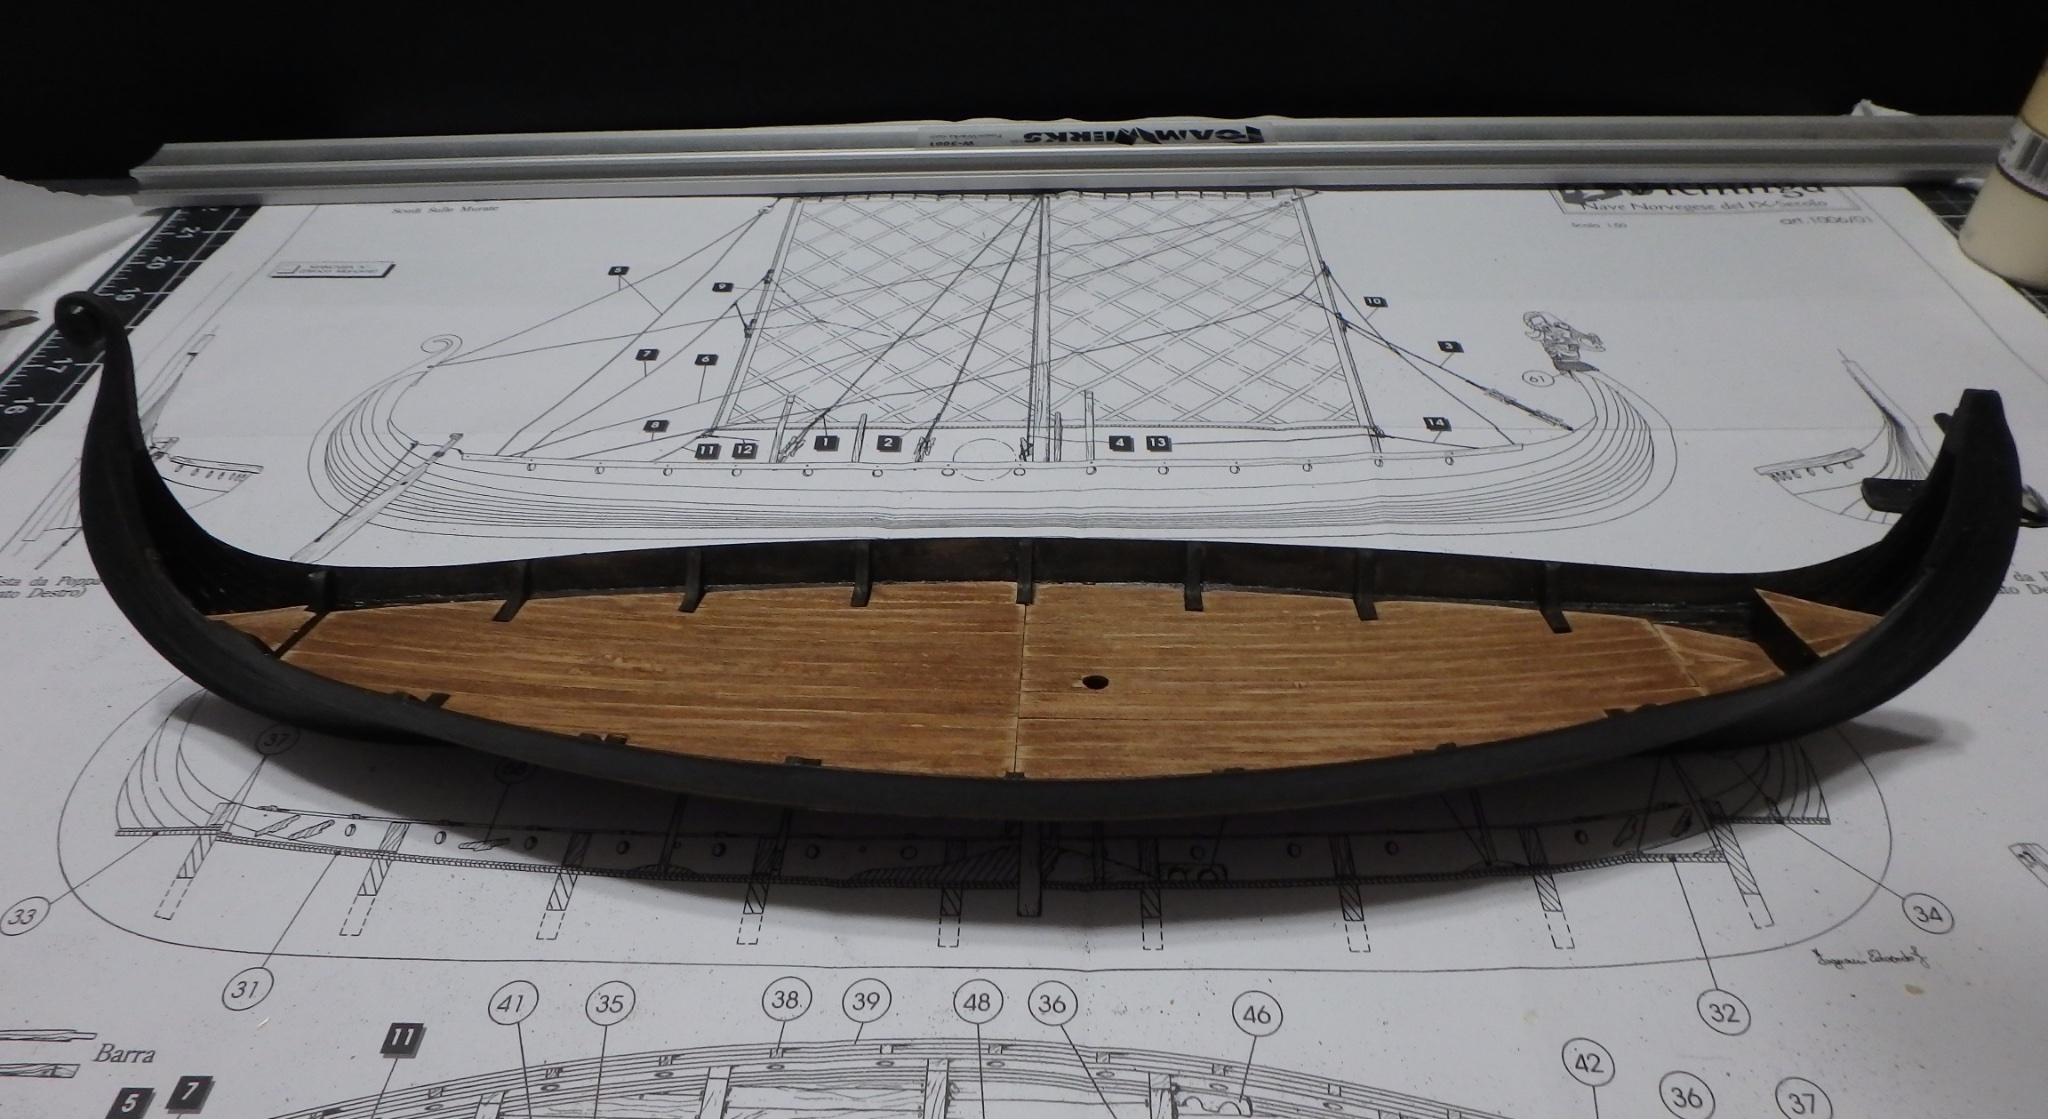
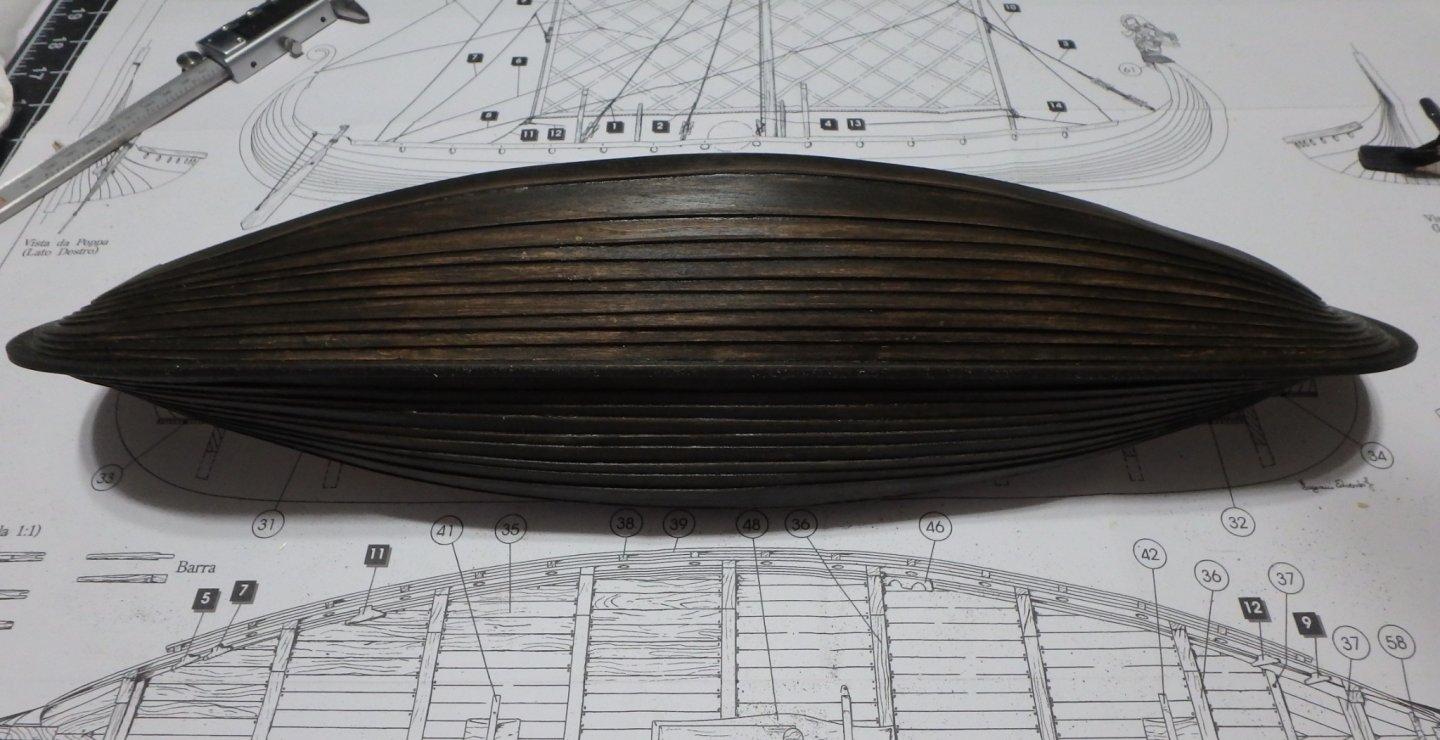
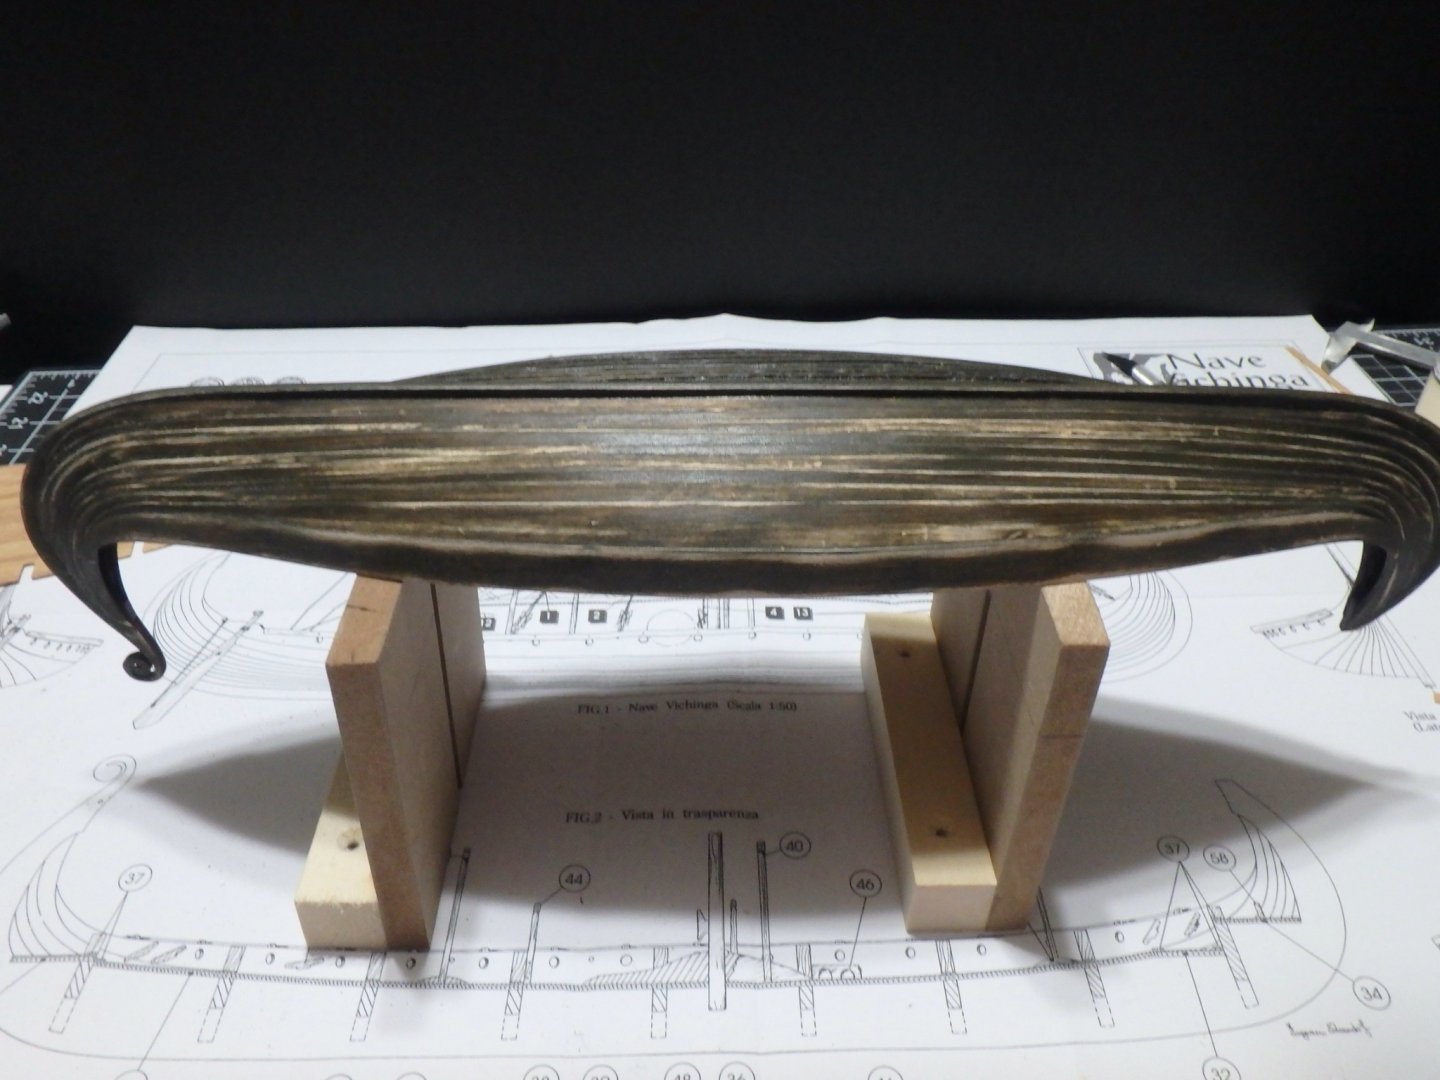
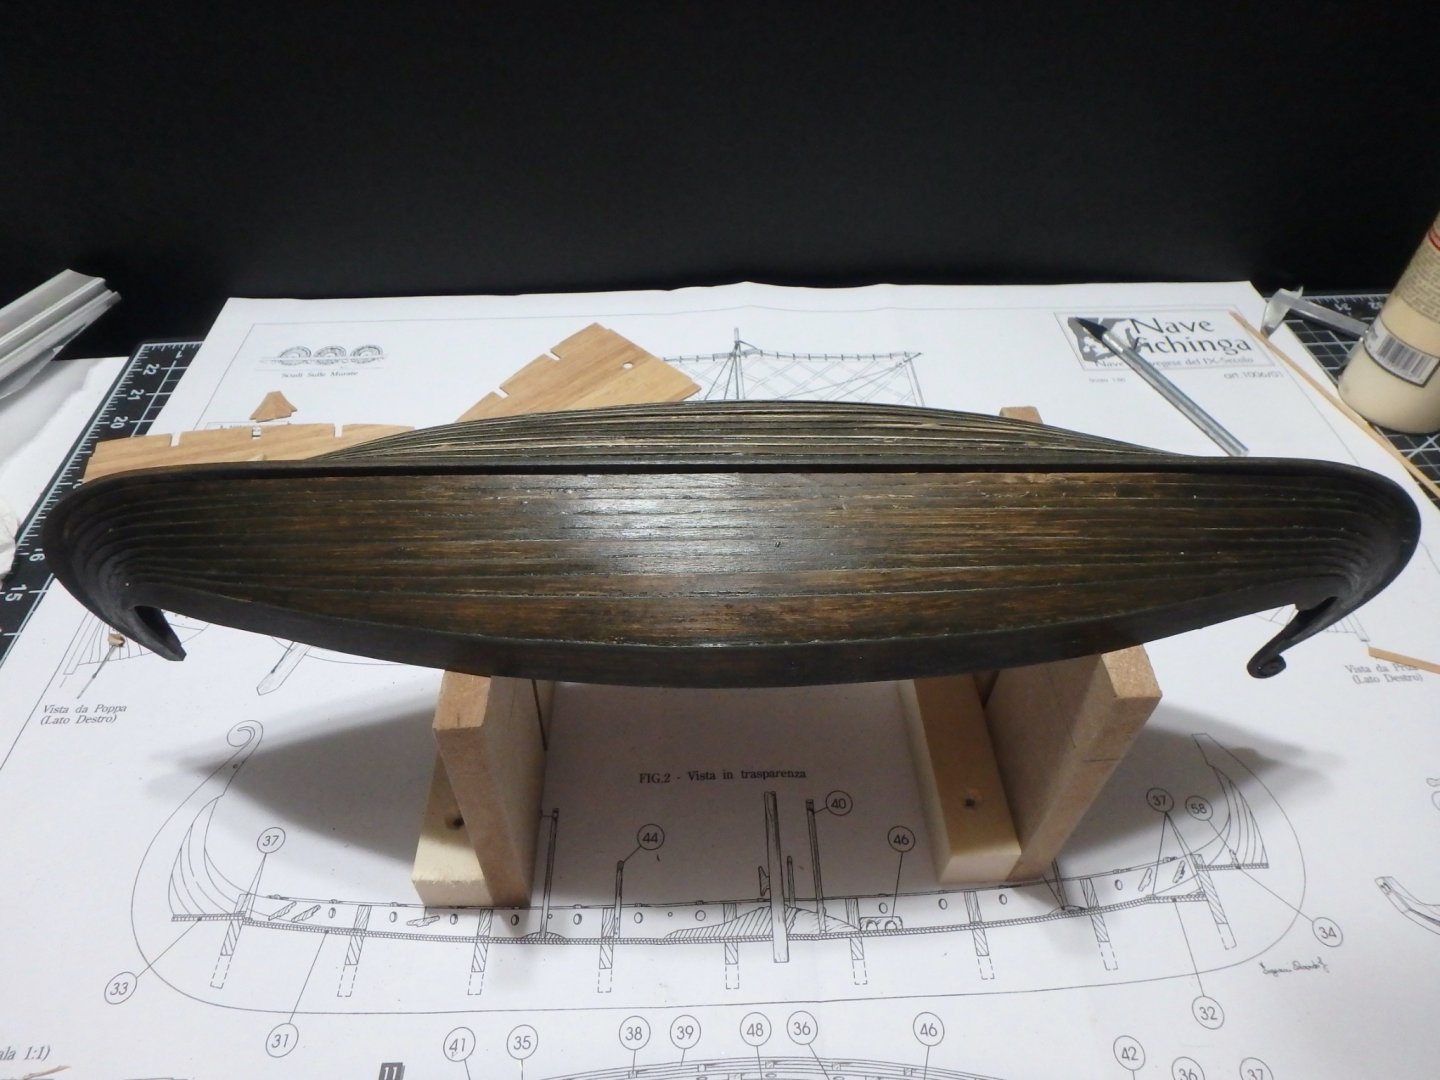
On to staining the hull and deck! I used Minwax water-based semi-transparent stain in dark walnut for the hull. I applied two coats wiping after I allowed the stain to penetrate the wood. This left the hull uniformly dark except for the bits of glue that I missed in preparation for stain. Oh well, it was all part of my plan. I cleaned up the glue that I had missed in round one. I sanded the hull to create light areas that will be highlights on the finished hull. I finished the hull color by wiping on a layer of the stain. For the deck, I started with the dark walnut stain, but warmed it up with some burnt sienna acrylic paint. I thinned with acrylic airbrush medium and a bit of water. I applied one coat and sanded it to create highlights, but with the stain emphasizing the planks and grain. After a second round of stain and sanding here's the result.


-
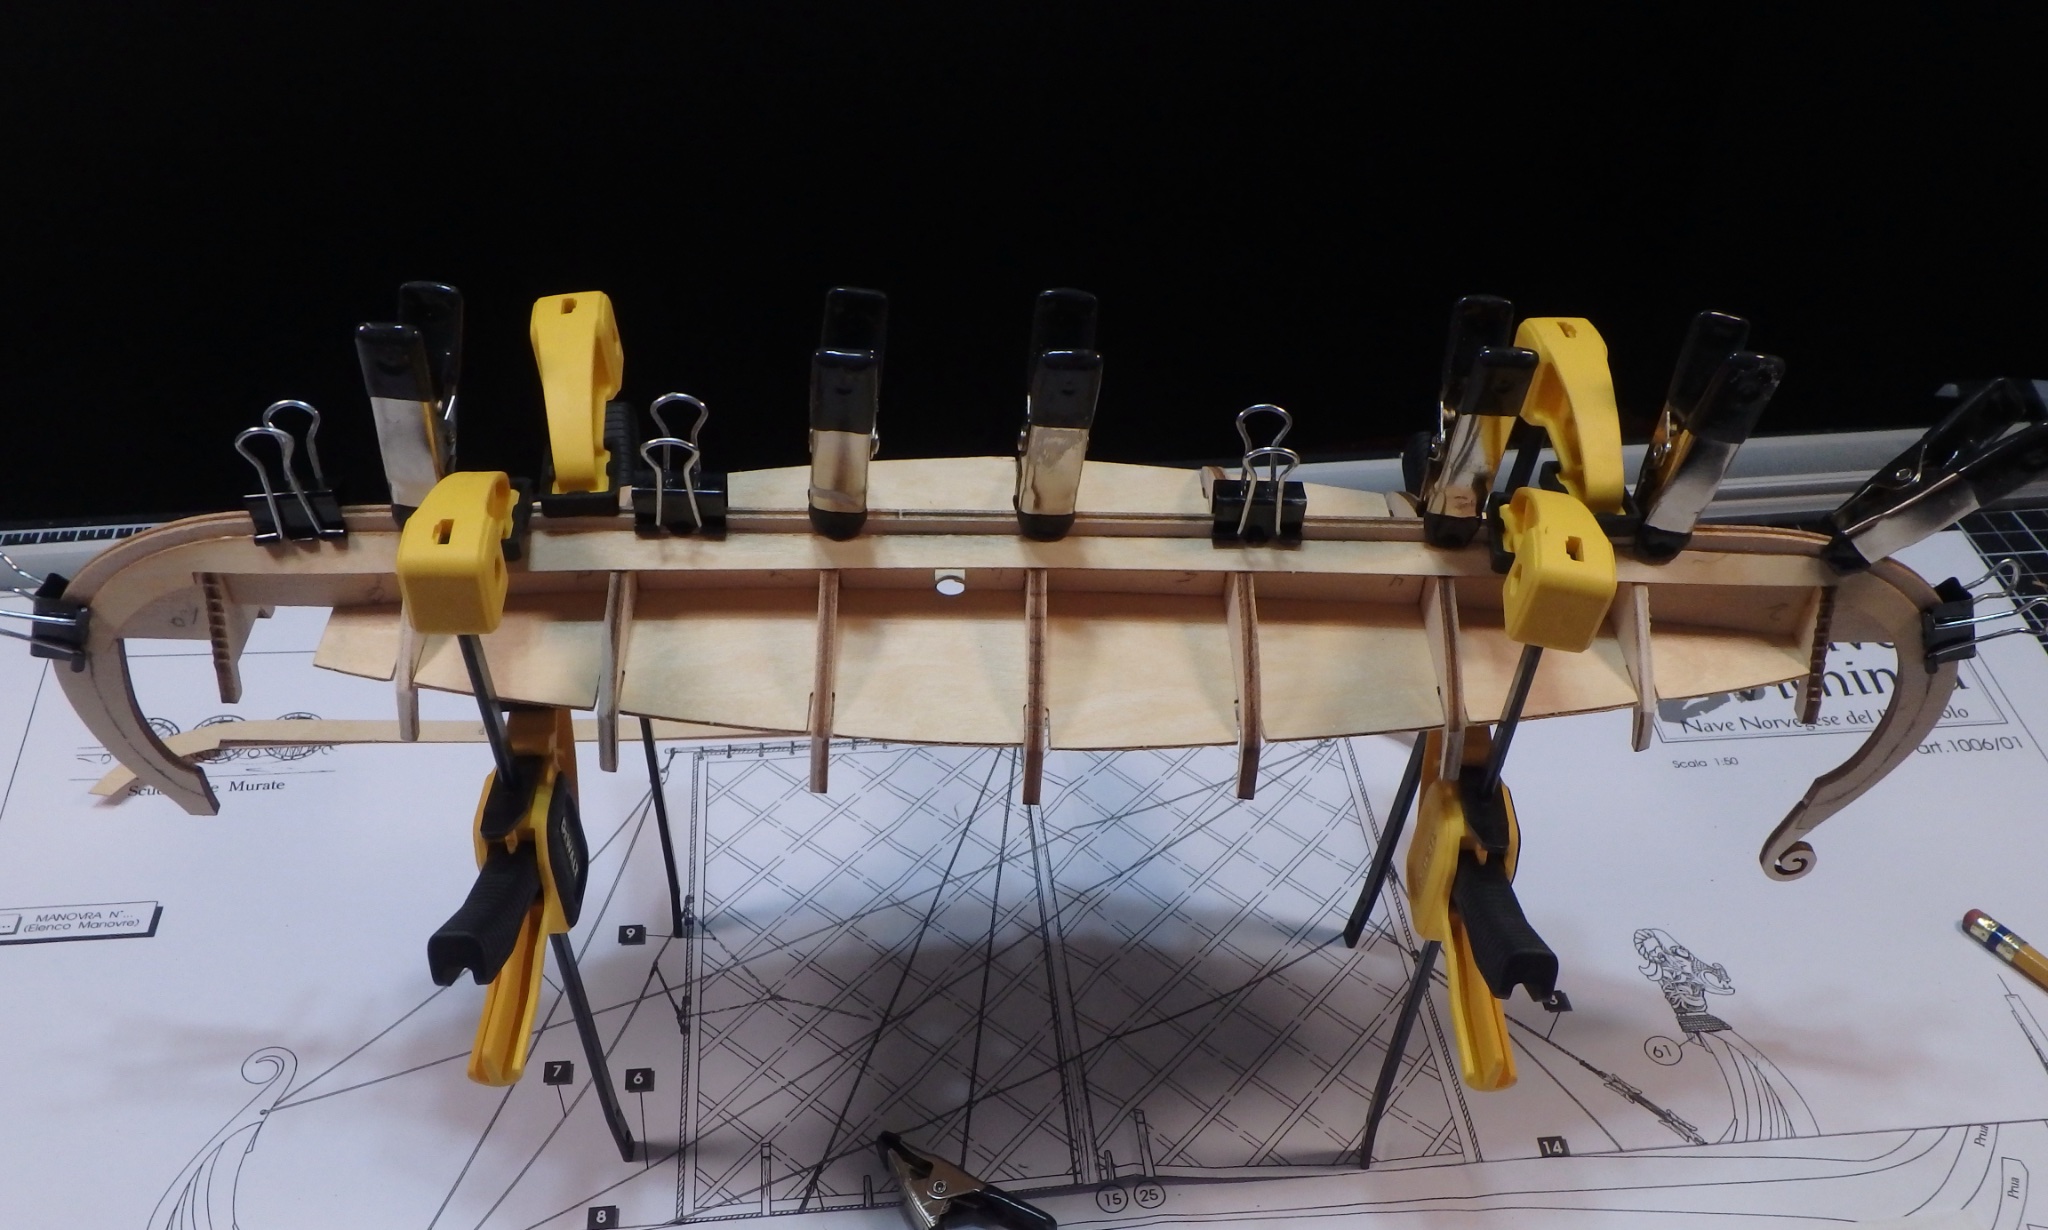
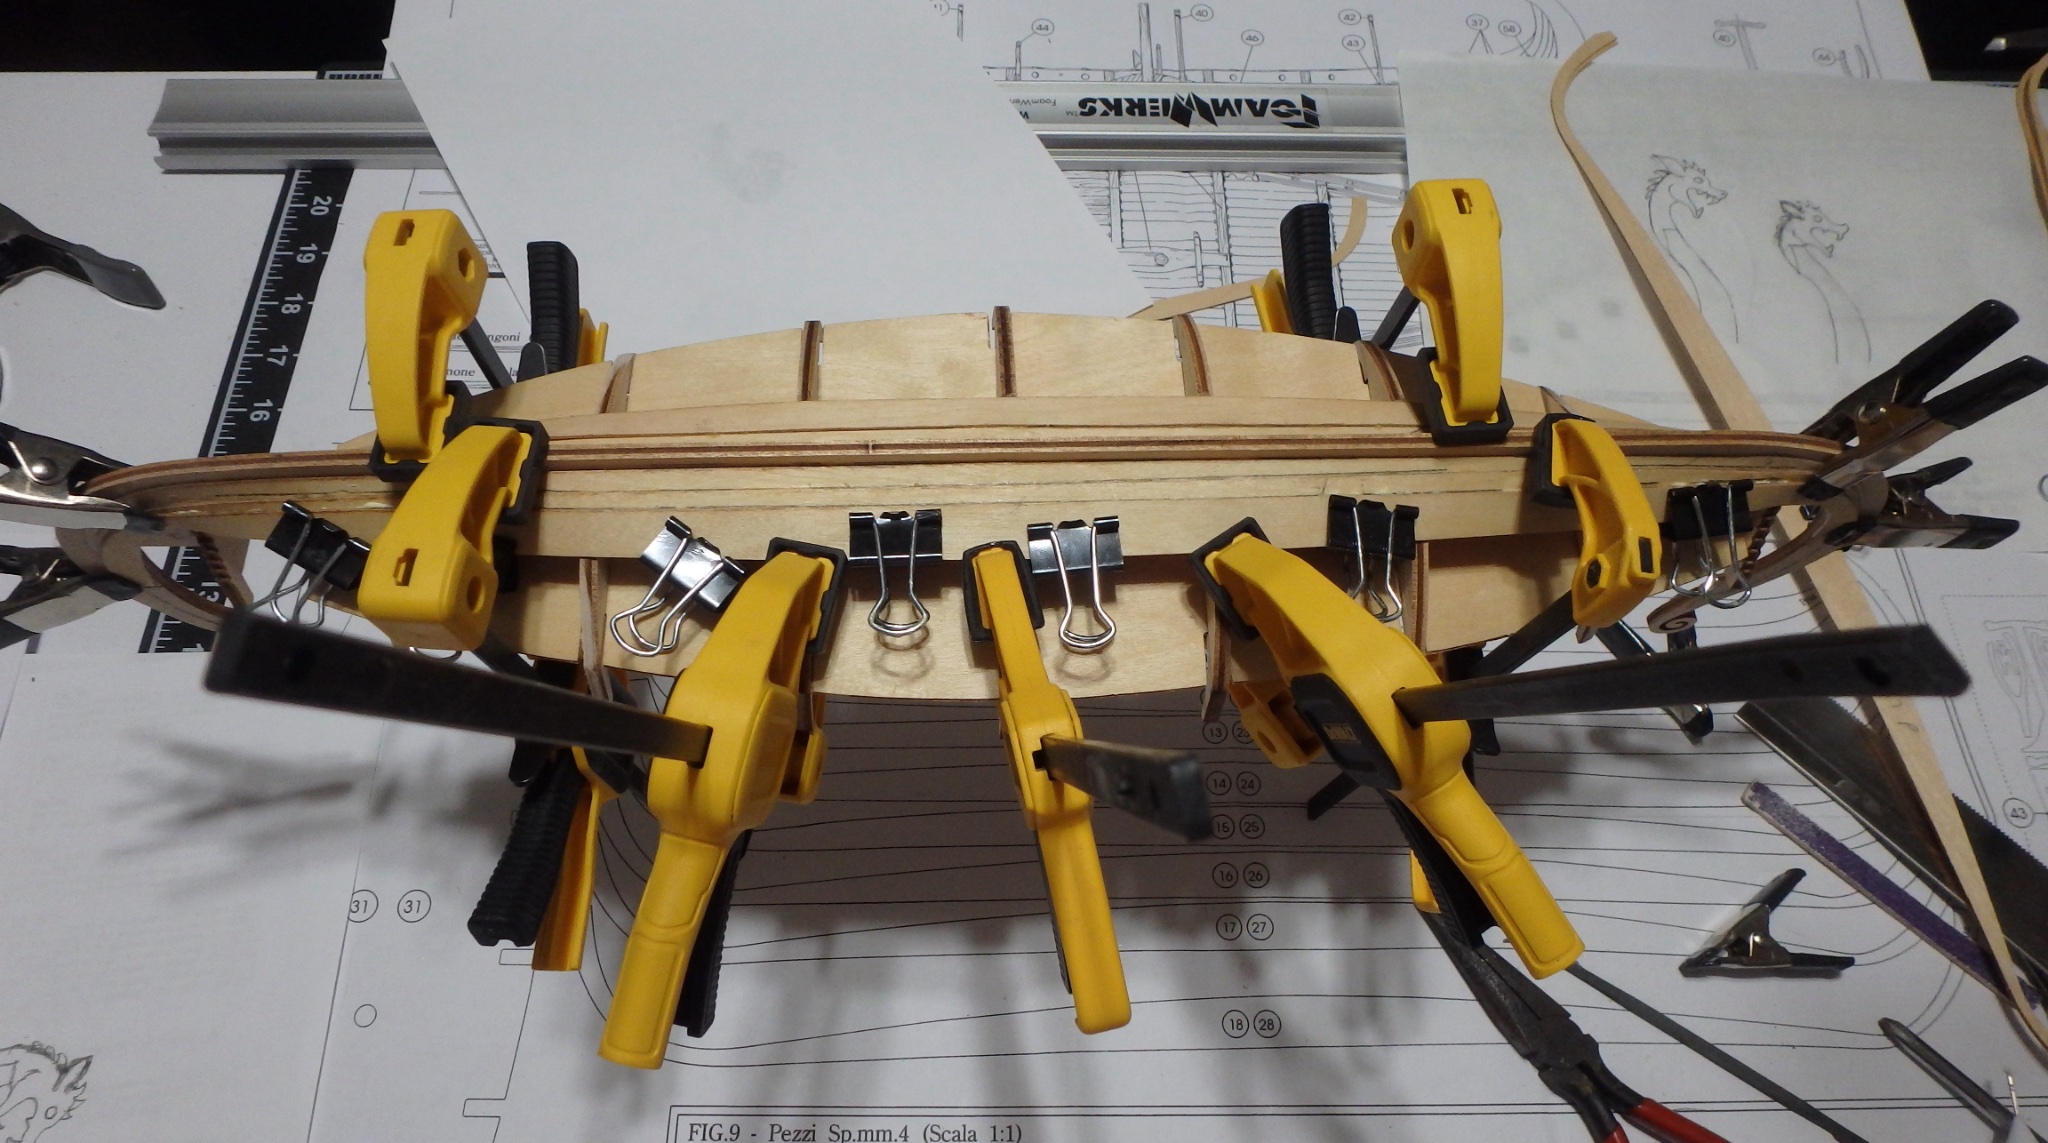
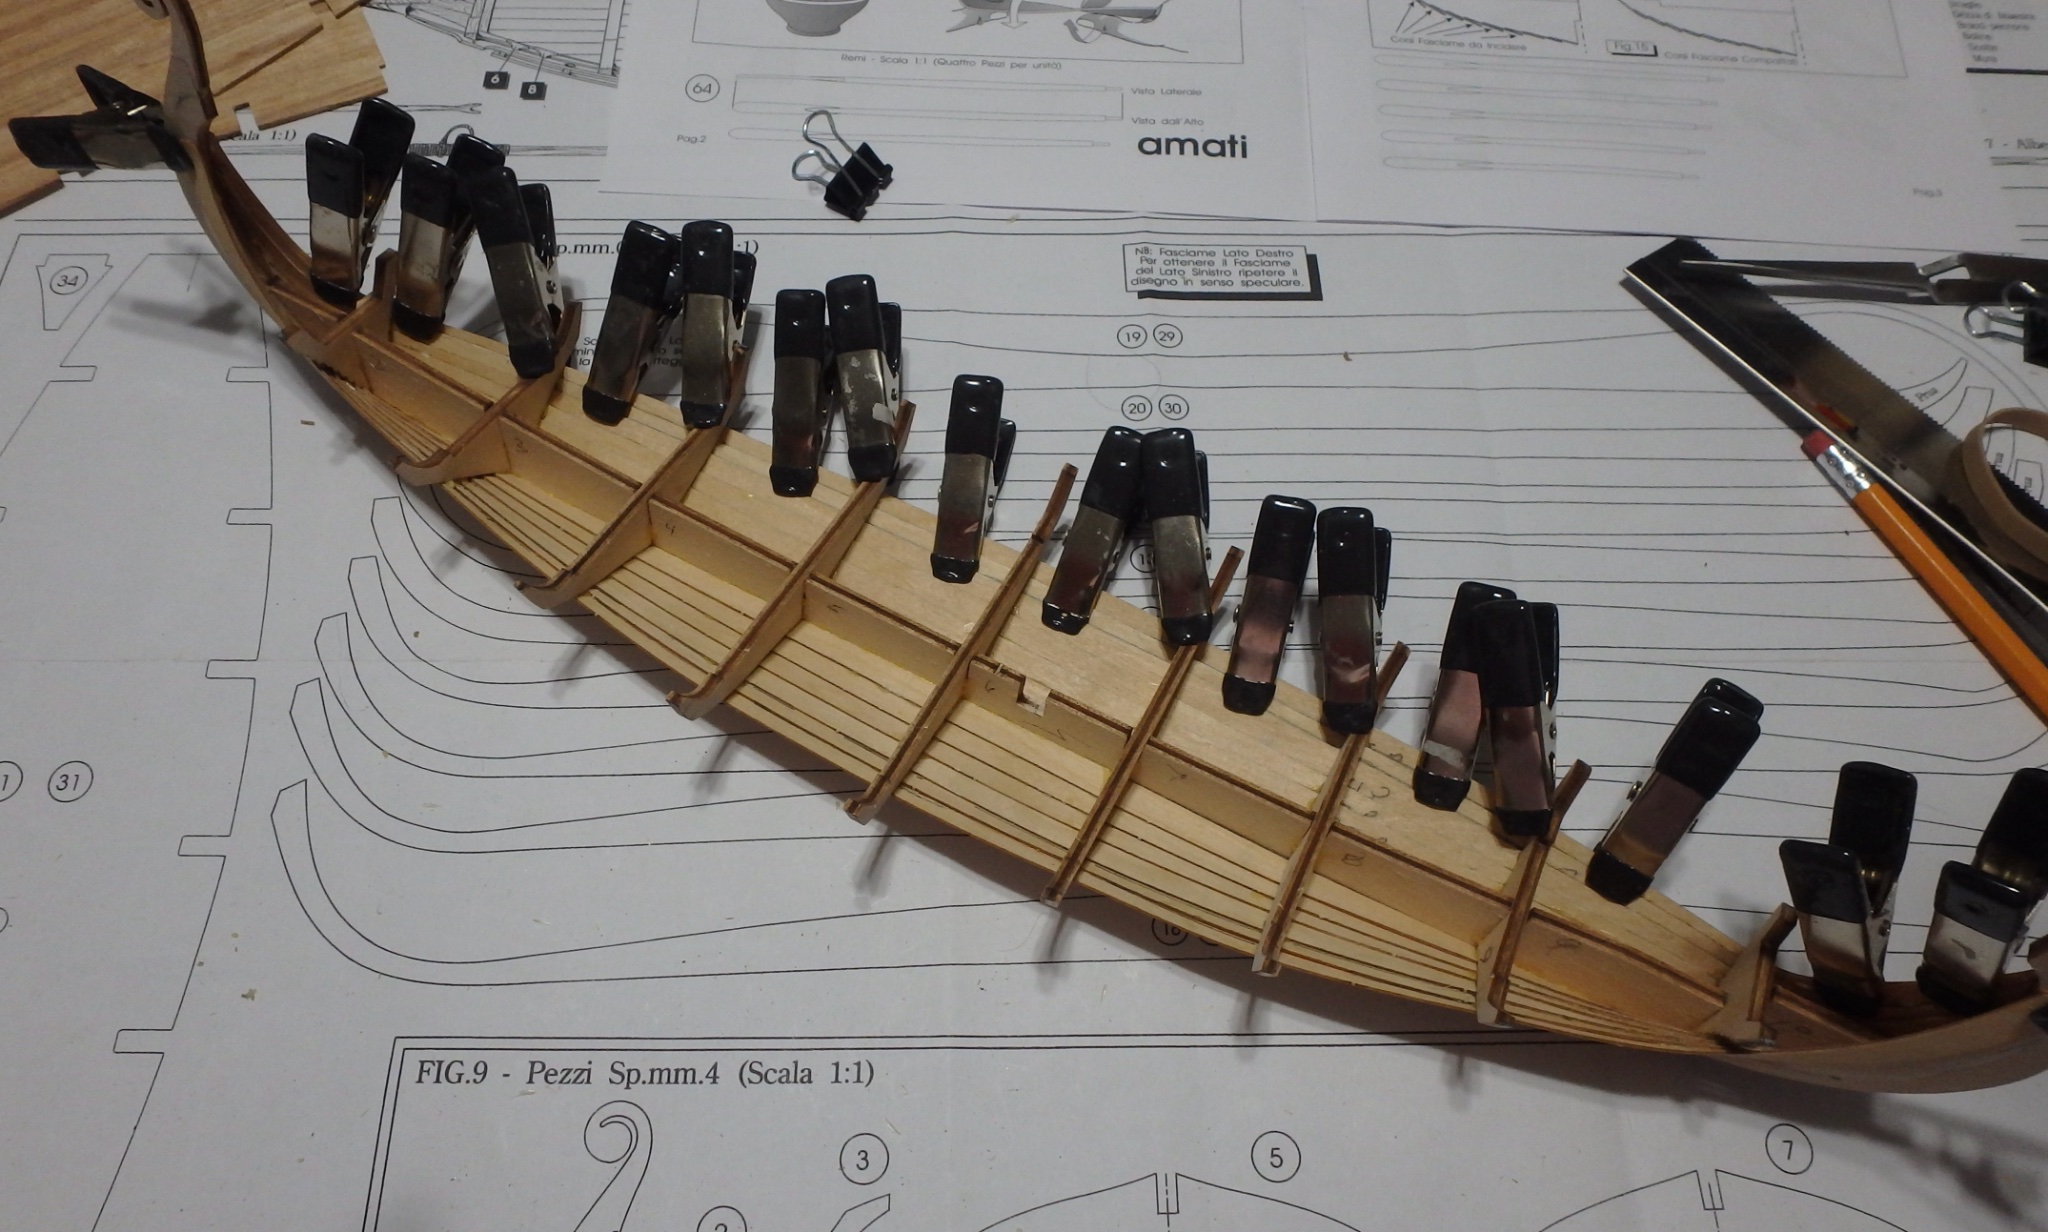
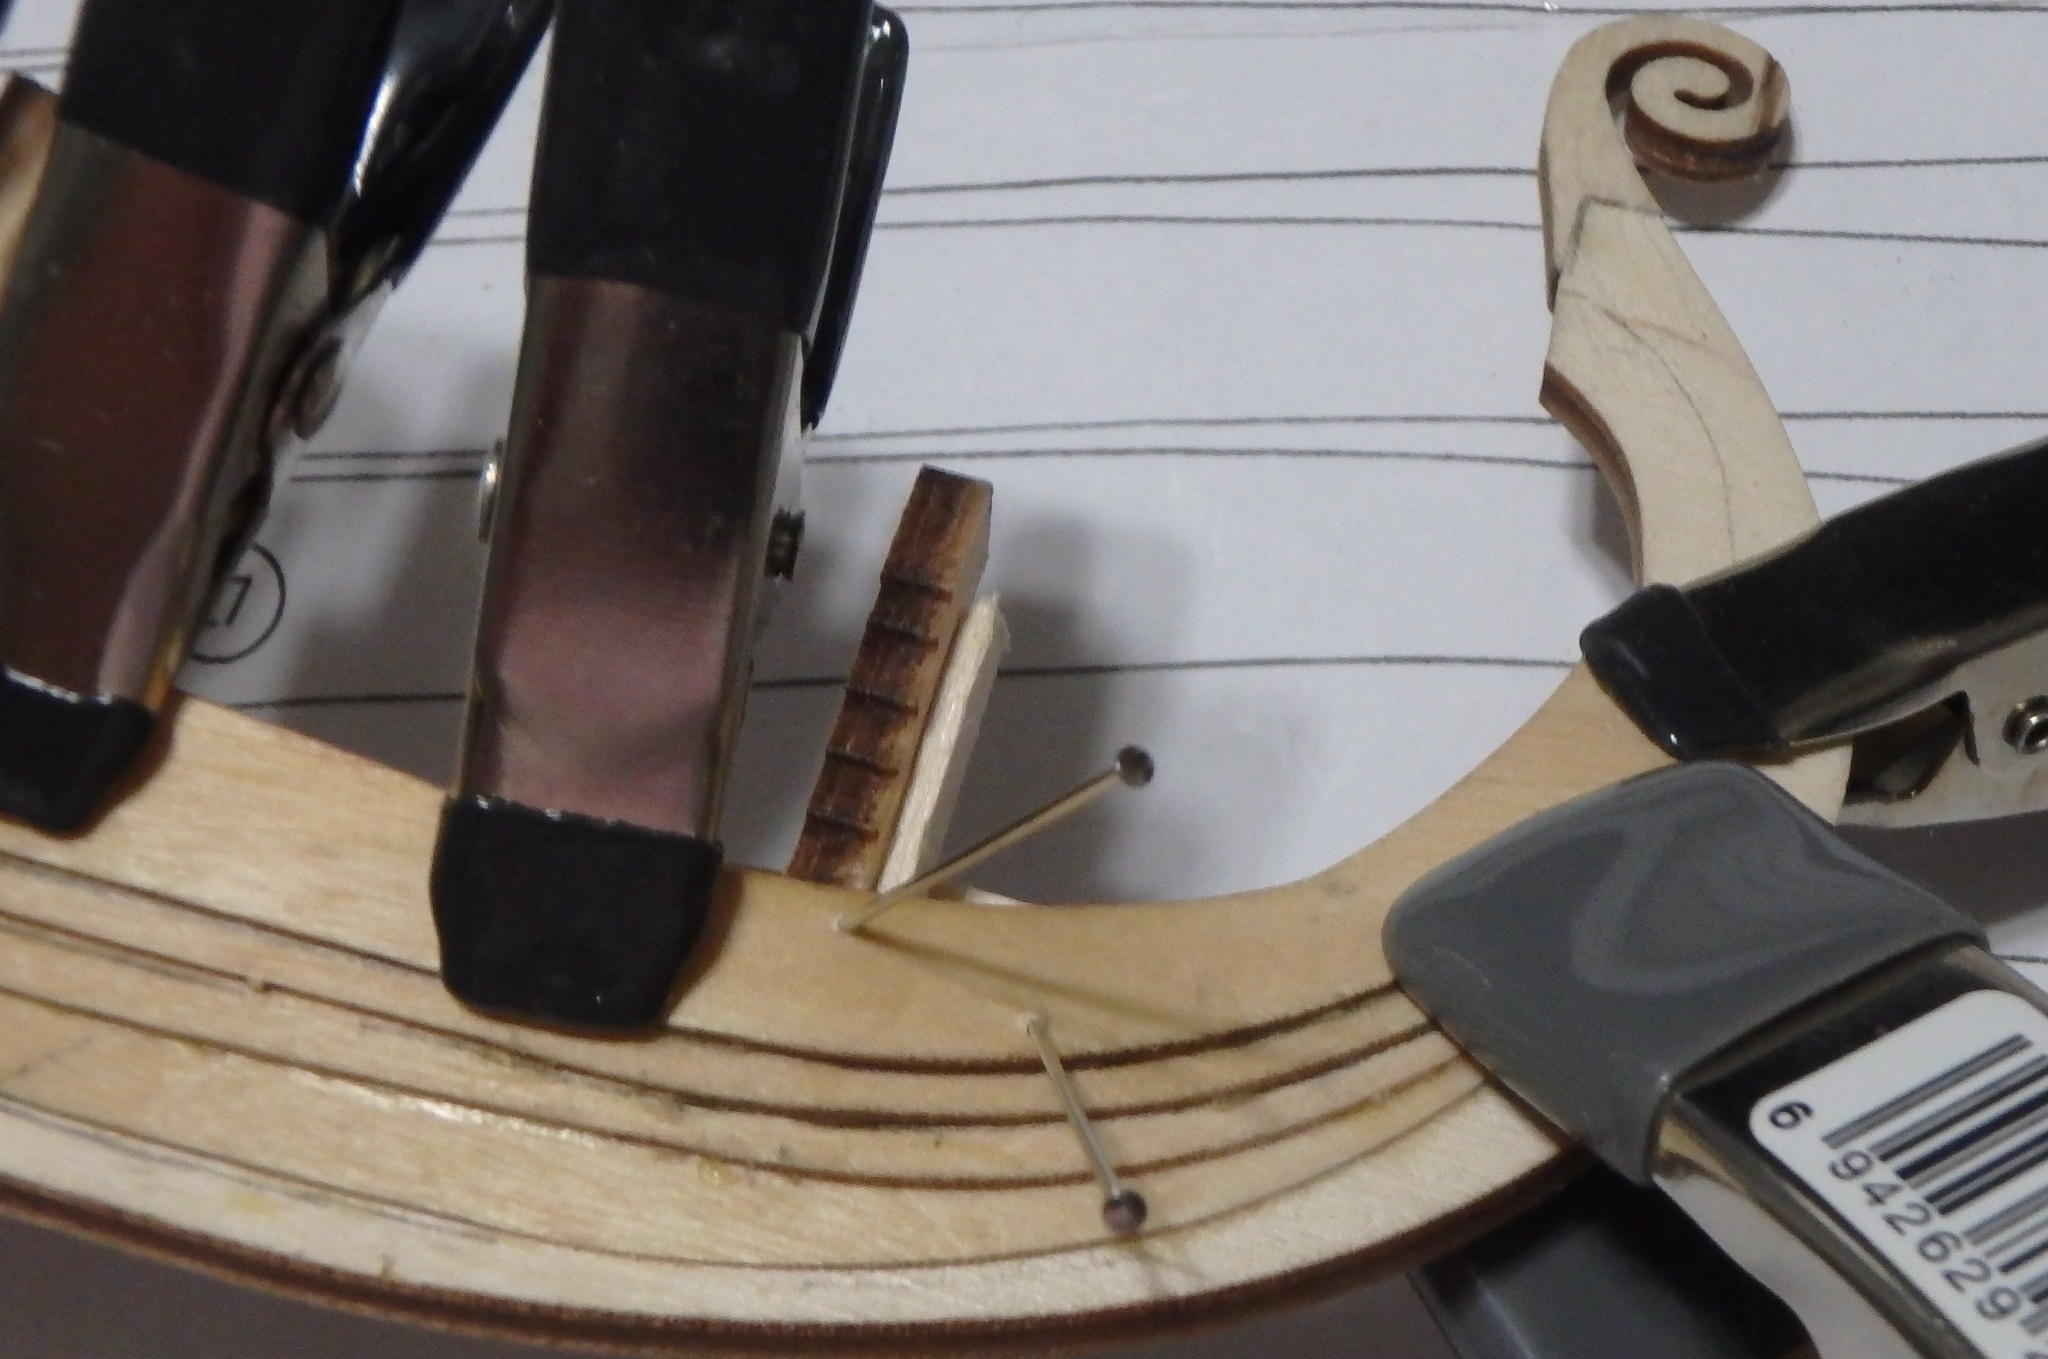
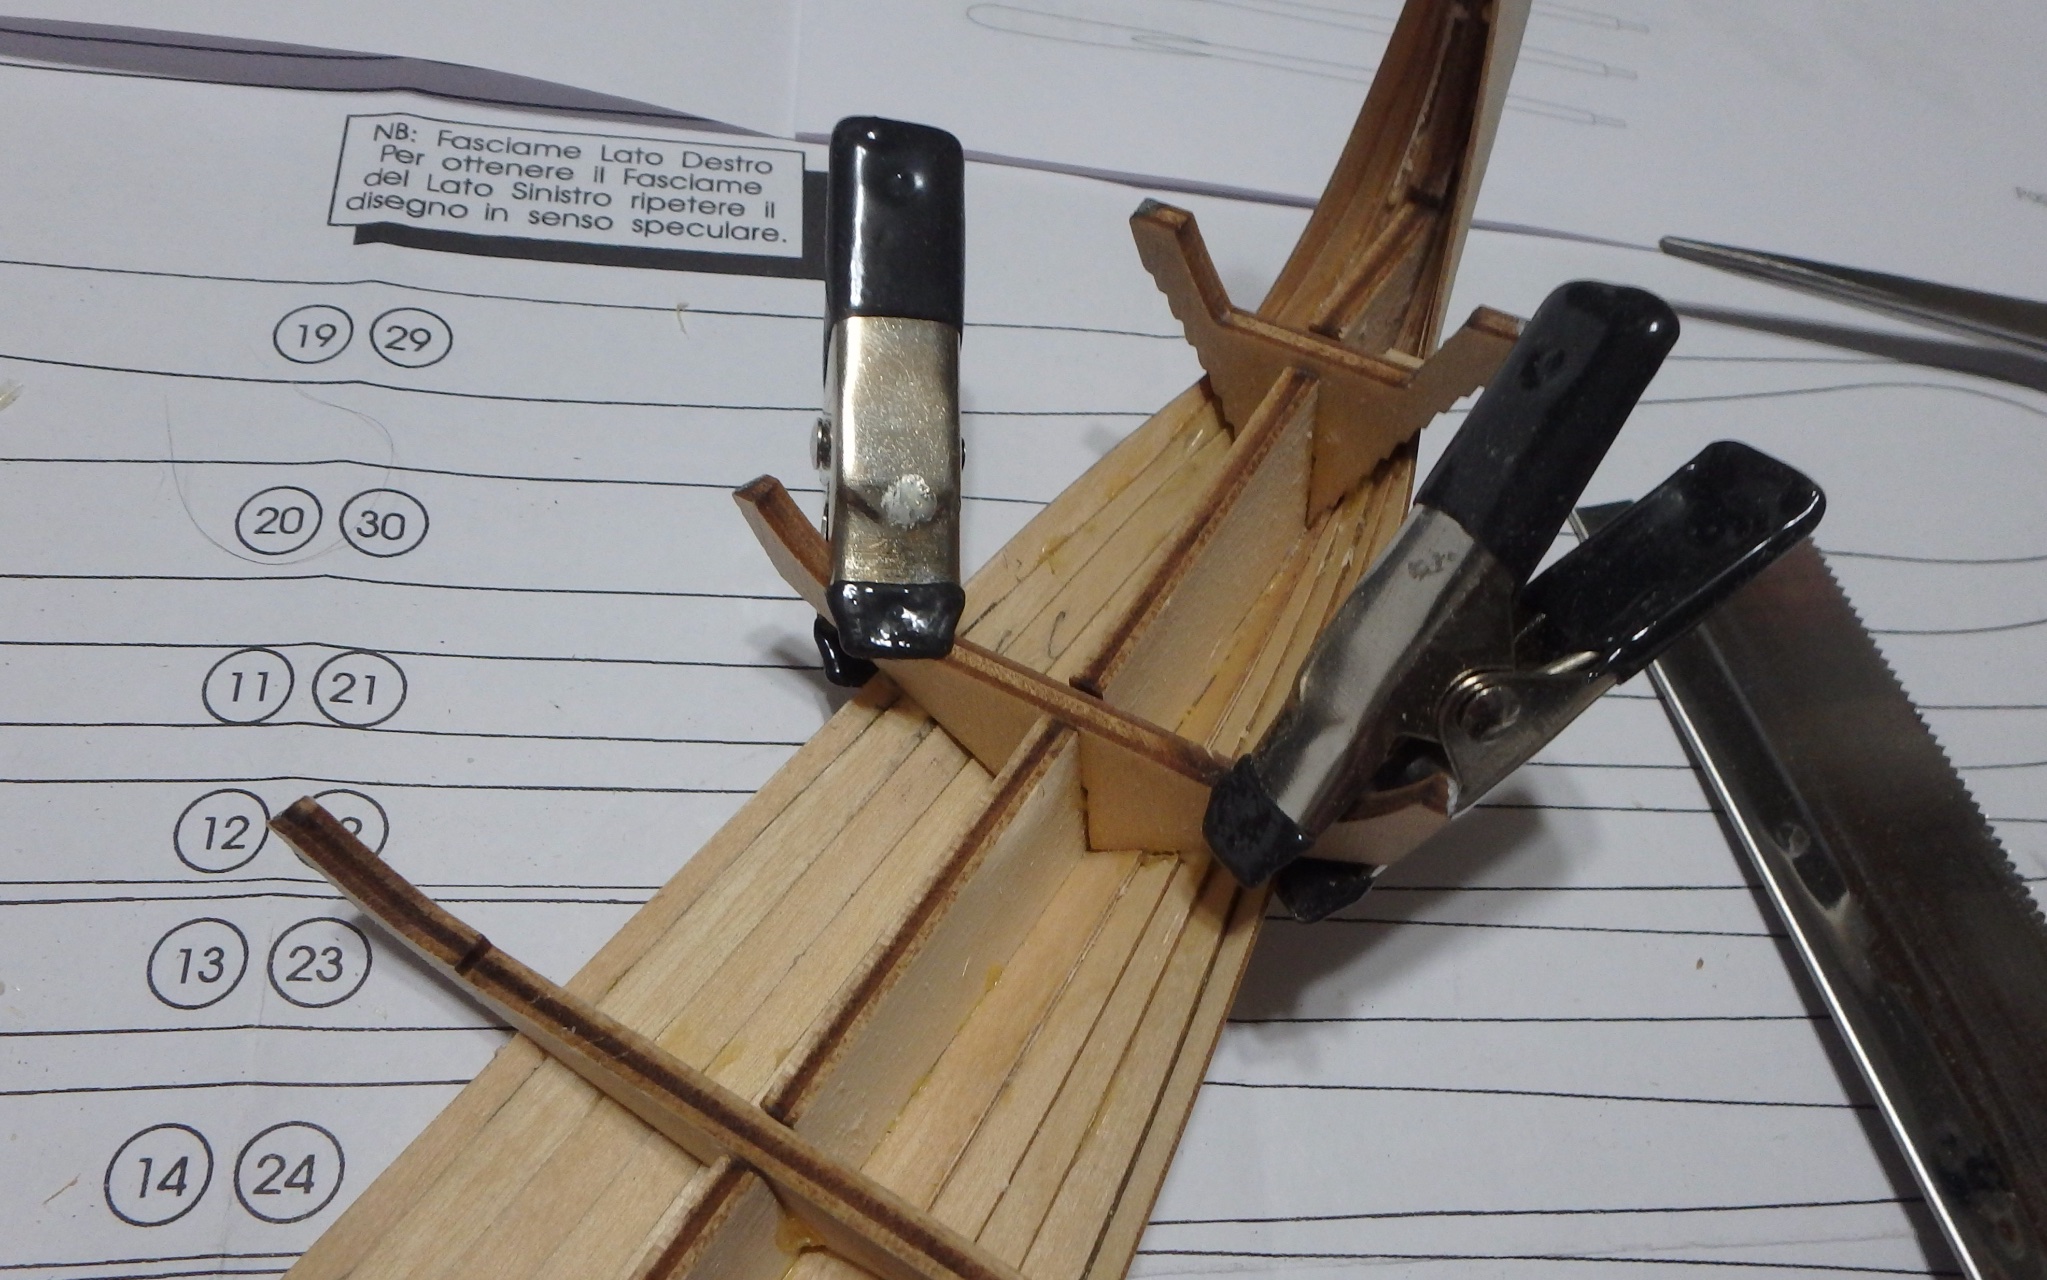
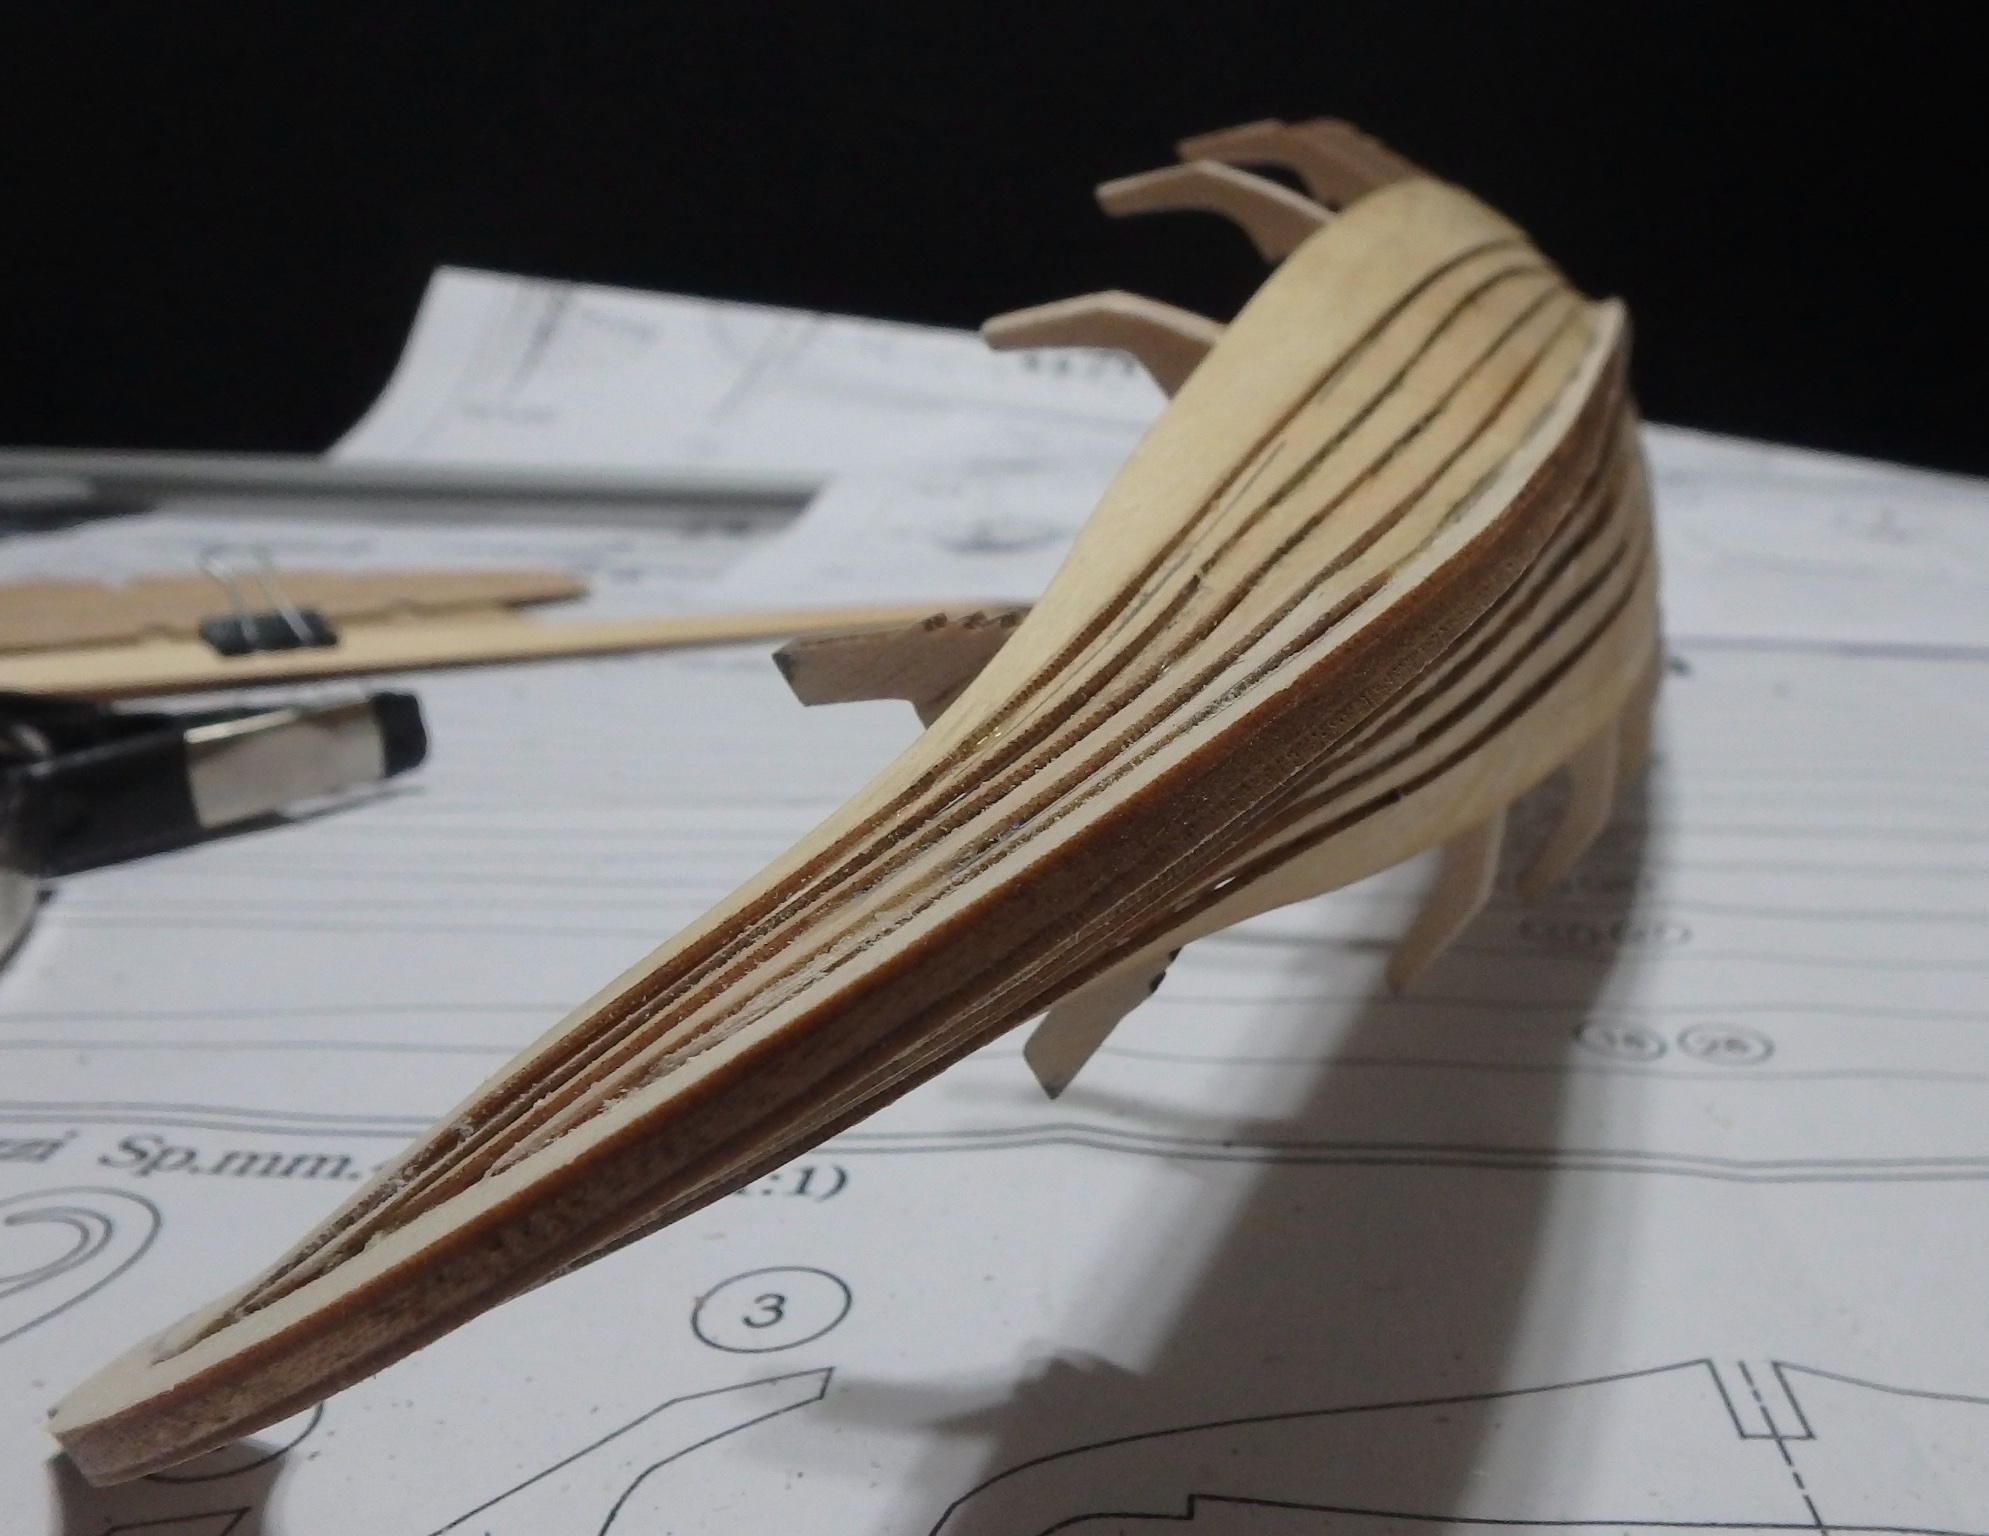
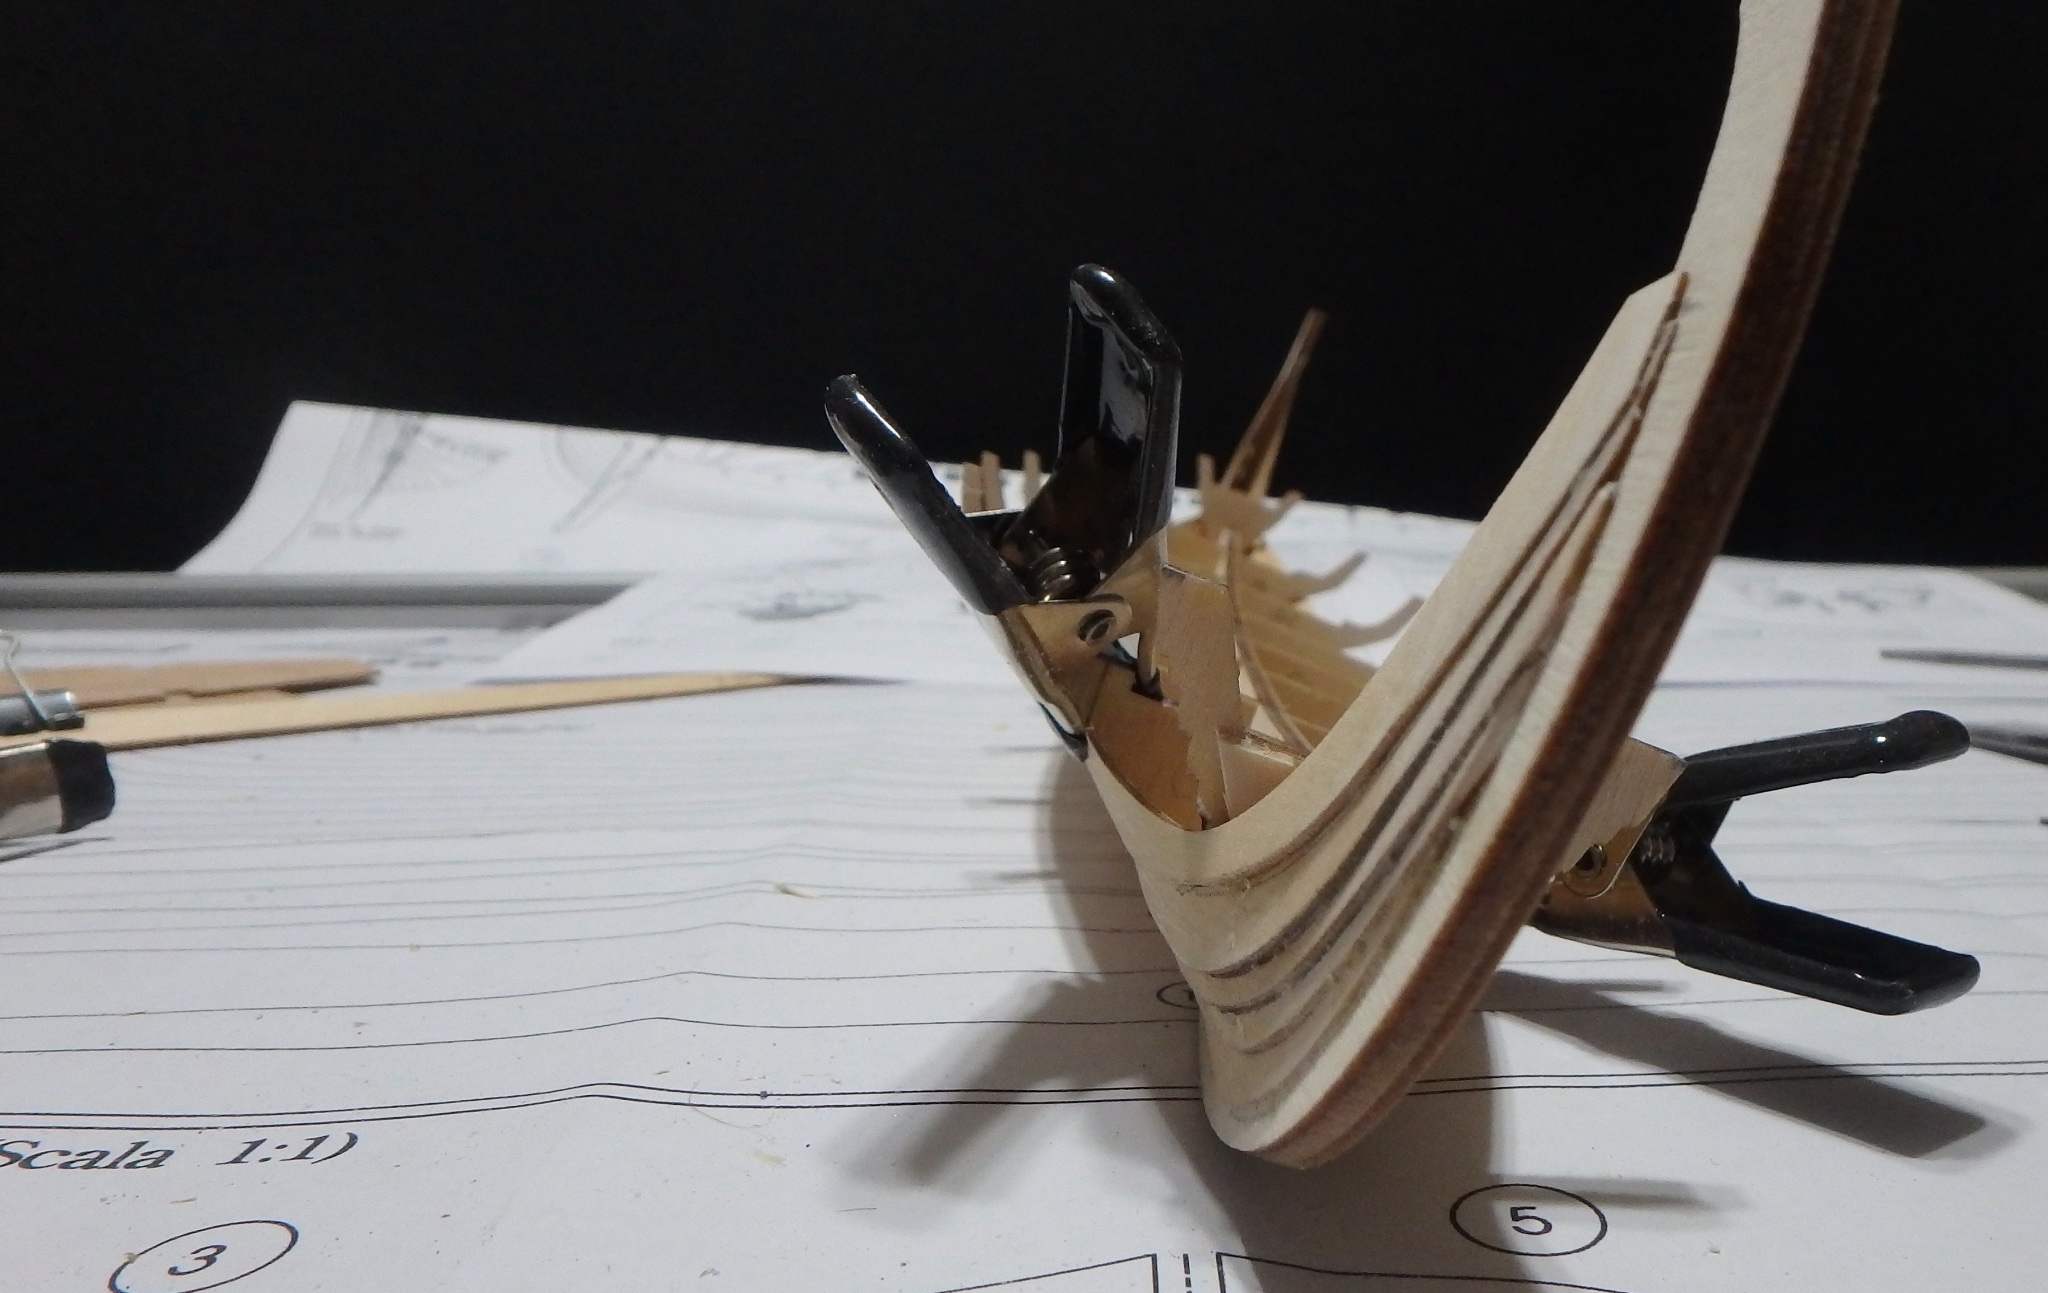
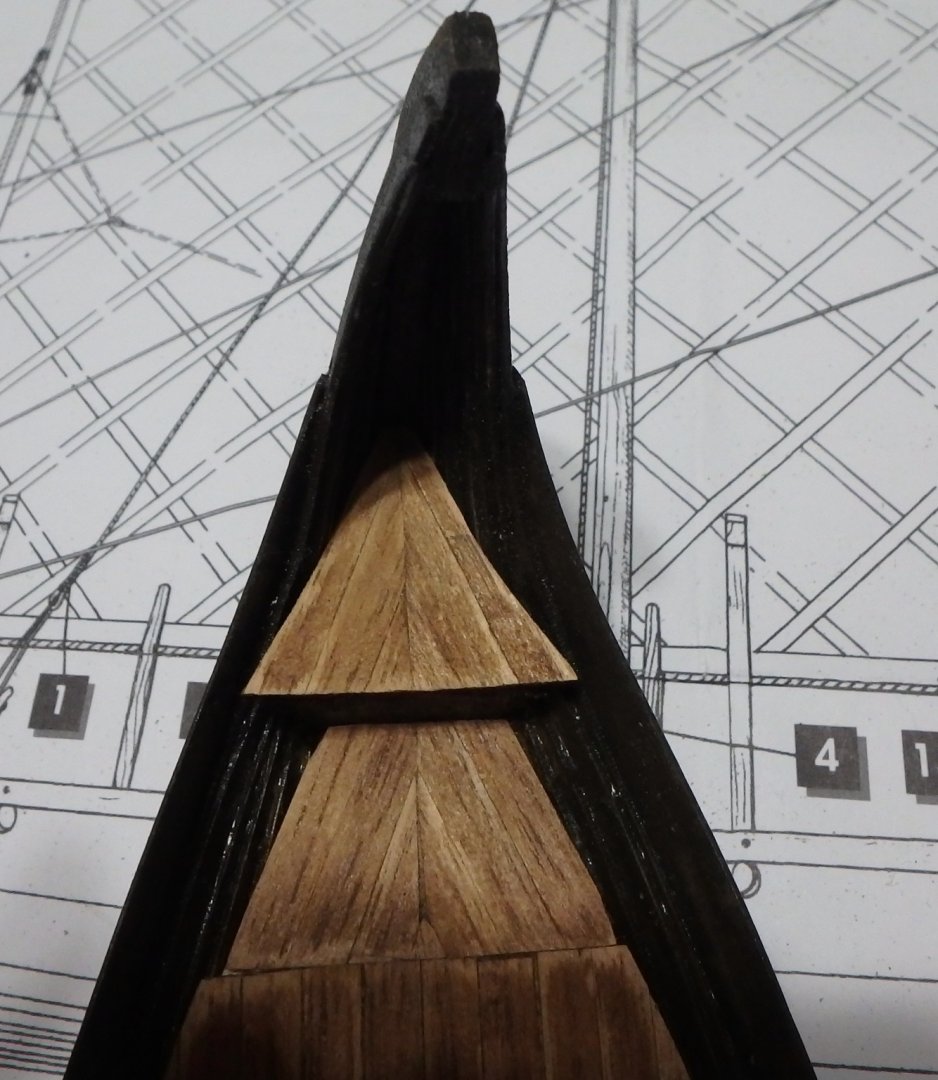
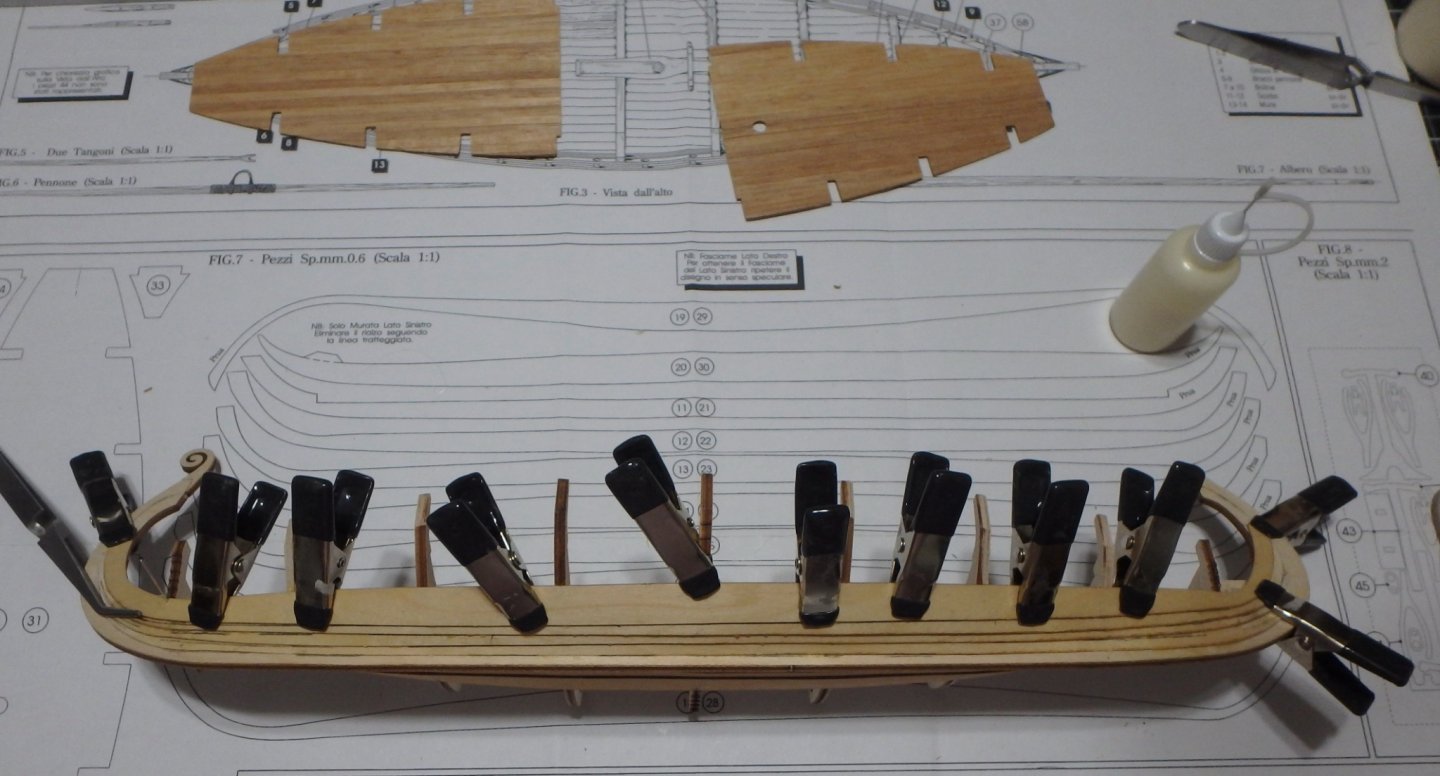
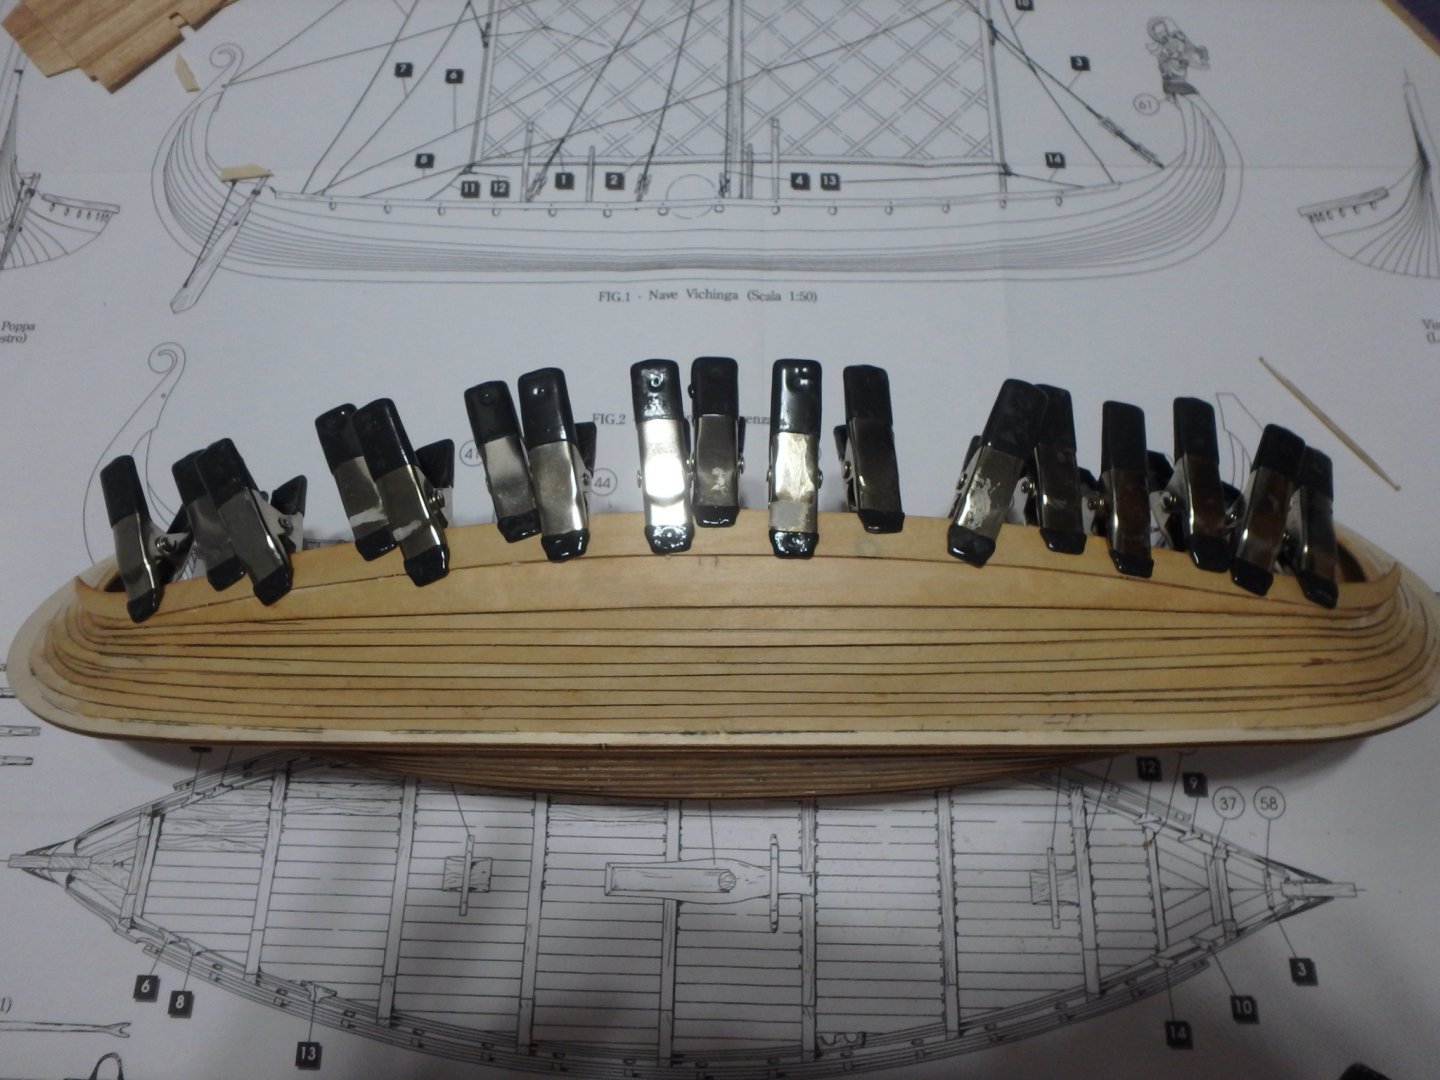
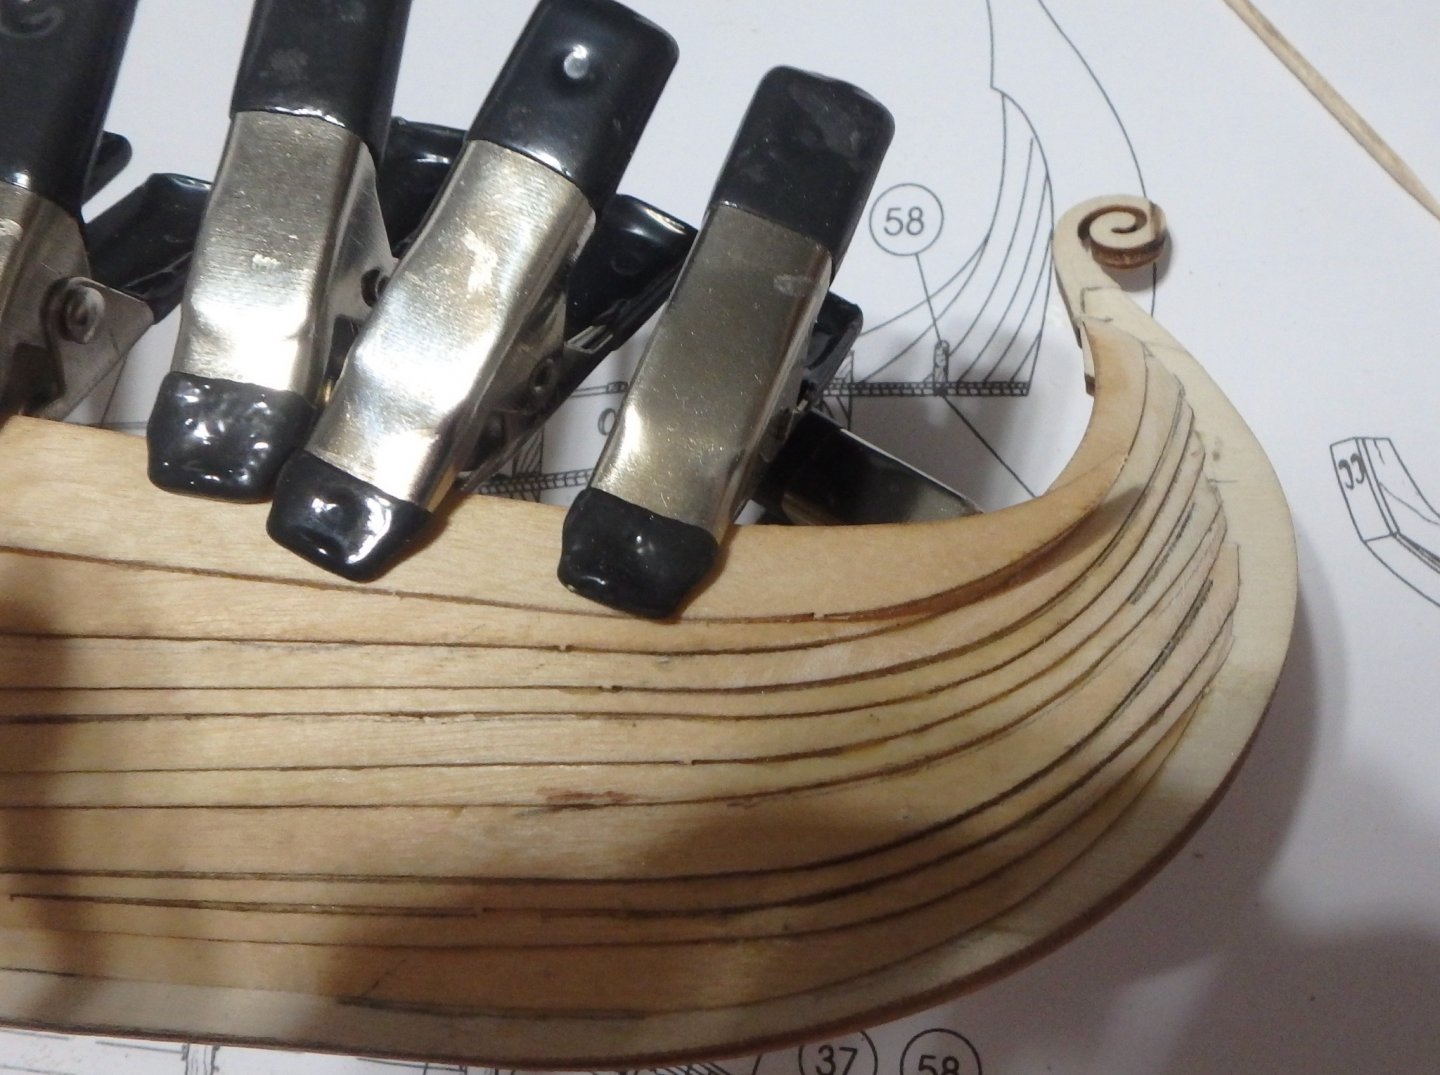
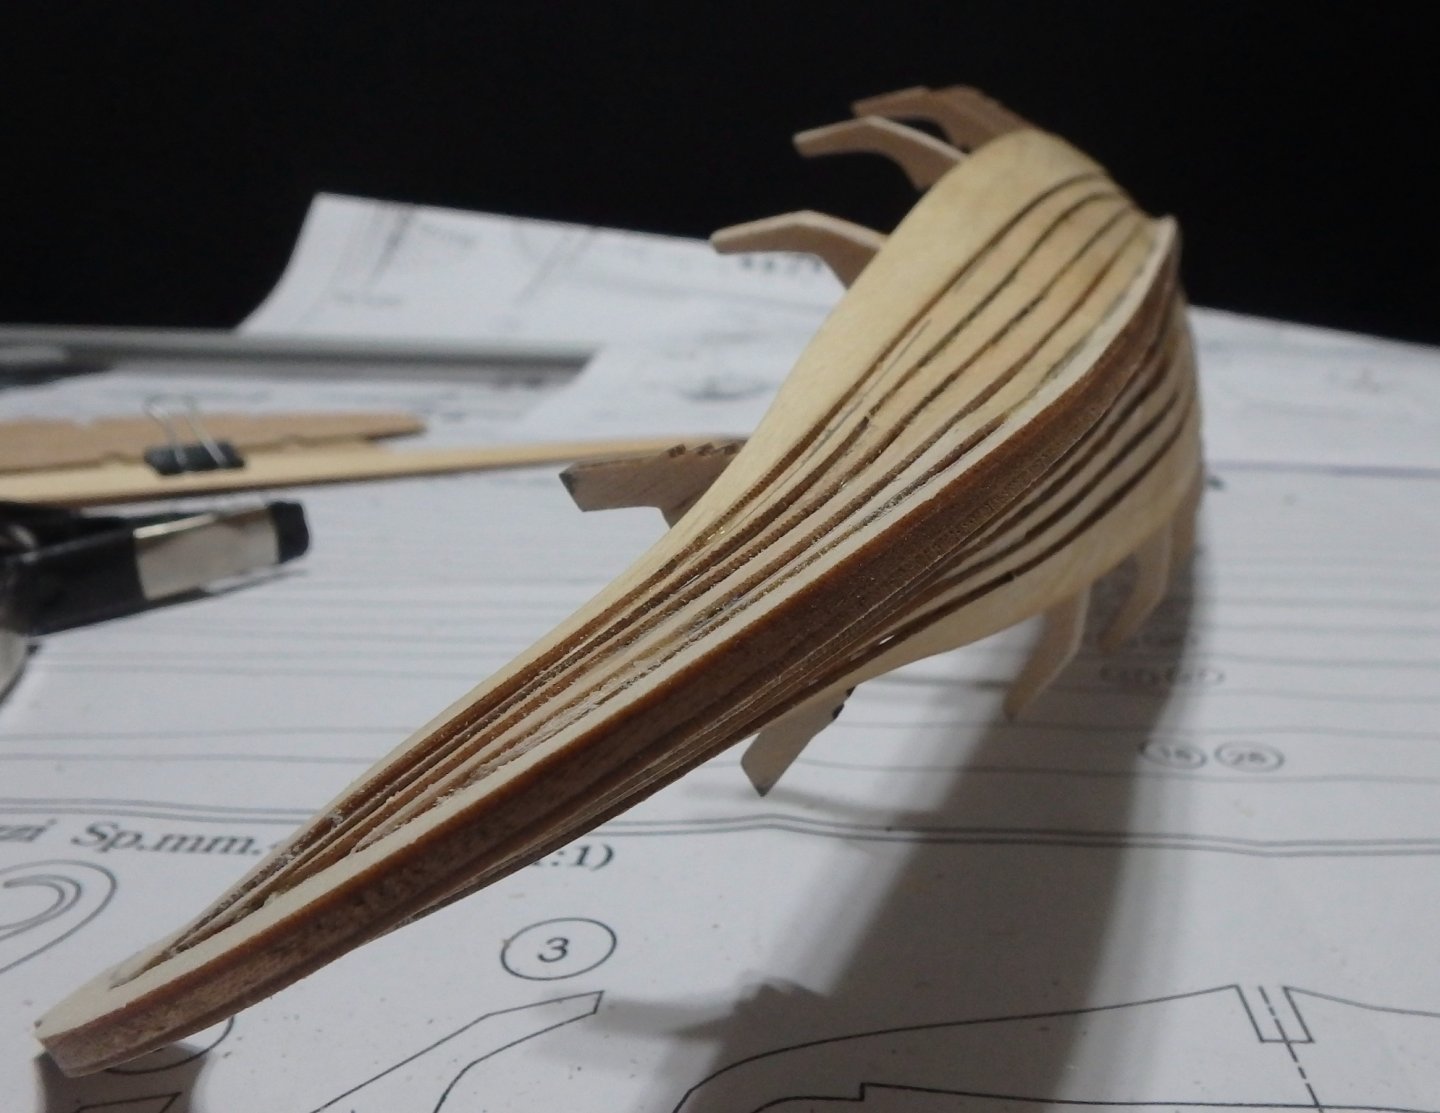
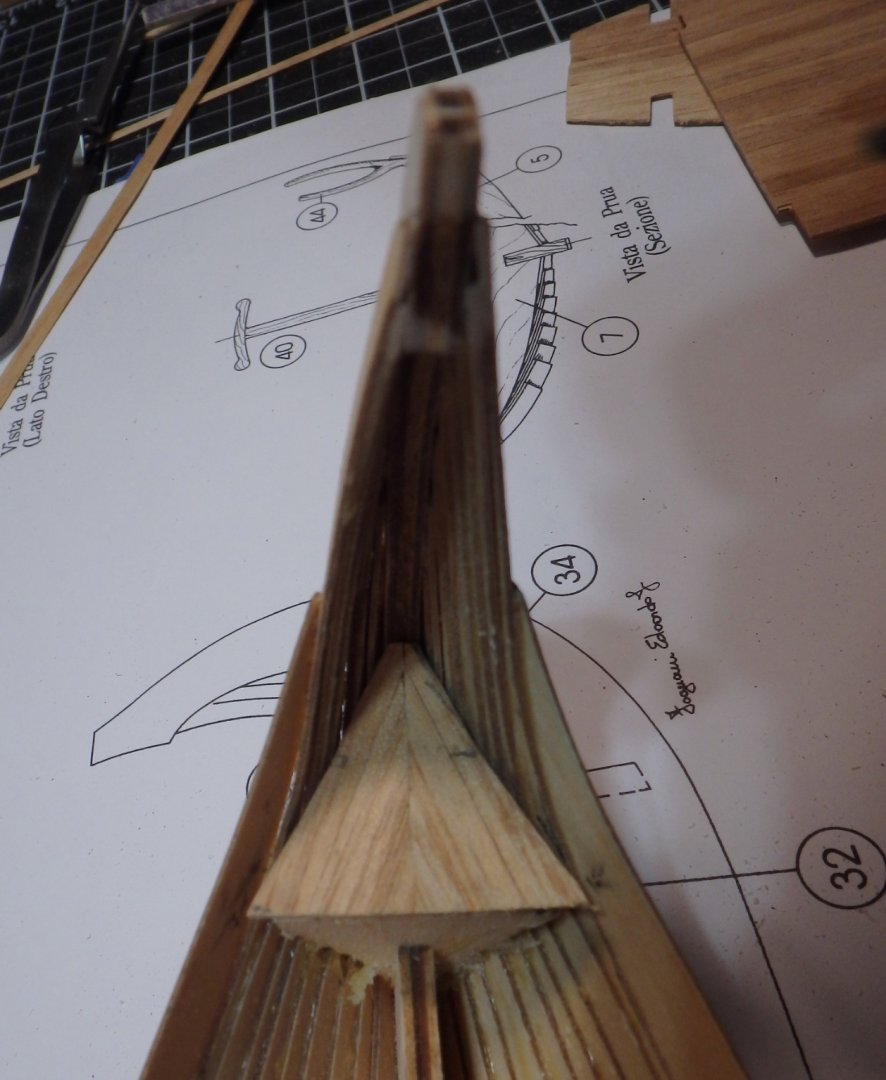
Planking has been an adventure. Each plank, and even the same plank on port or starboard, presents its own unique challenges. I followed the directions and brushed the planks with a 50/50 mix of white glue and water. I wanted to keep the ribs and keel in alignment, so I clamped the main deck pieces in place for the first 3 rows. The garboard strakes are in place. I kept the deck pieces in place until they interfered with clamping. That was 3 rows. It helps to have lots of clamps. I also chose to follow the directions and score the wood for the upper planks. This was a bit intimidating, but I dry fit the plank and used a pencil to mark a line at the point of overlap. I scored the inside of the plank approximately 1/16" above my pencil line applying light pressure with the knife and repeating multiple passes until the score depth seemed right. I applied light bending pressure to curve each plank. There would be light cracking sounds, but most did not break through. Any minor cracks were covered by the next plank. By the time I got to there last plank on each side, I had developed a feel for it, so they shows no cracks. There were some problem areas that required some extra finesse. For some areas, I used a strait pin chucked in my Dremmel tool to pre-drill holes for pins to hold things in place. I tried to position the holes in a location where the next plank would cover the holes. I also discovered that for the upper planks, and especially the shear clamps, it was best to glue the plank, but leave the ends unattached. After the glue ad dried, I could manipulate the ends into place. Now, the problem: As the planking progressed, the bow developed an unfair curve. Trying to pinch the bow strakes all the way into the form produced a pinch and a bulge. I decided that fair curves were more important than hitting the form, so I steamed the planks with a kettle until they were soft enough to manipulate into a fair curve. It took multiple tries, but the heat and moisture softened the glue and allowed the planks to conform to a more pleasing shape. The stern was no problem, and I think that copying form number 2 for the bow, may produce better results. After the steam, the bow was fair, but the deck and ribs no longer lined up with the hull. I cut the ribs off the form, and fitted a new deck. When I fit the extra ribs, I'll fit a set for this location too.


-
I’m looking forward to your update on this build. I’m working through the planking on my Drakkar, and finding that it’s a matter of solving one little problem after another. You’ve done well to work things out.
-
My experience (not from ship modeling) is that you can apply paint over varnish as long as there have the same type of base. Water based paint over water based varnish or oil based paint over oil based varnish. Lightly scuffing the surface with fine sandpaper helps improve adhesion
-
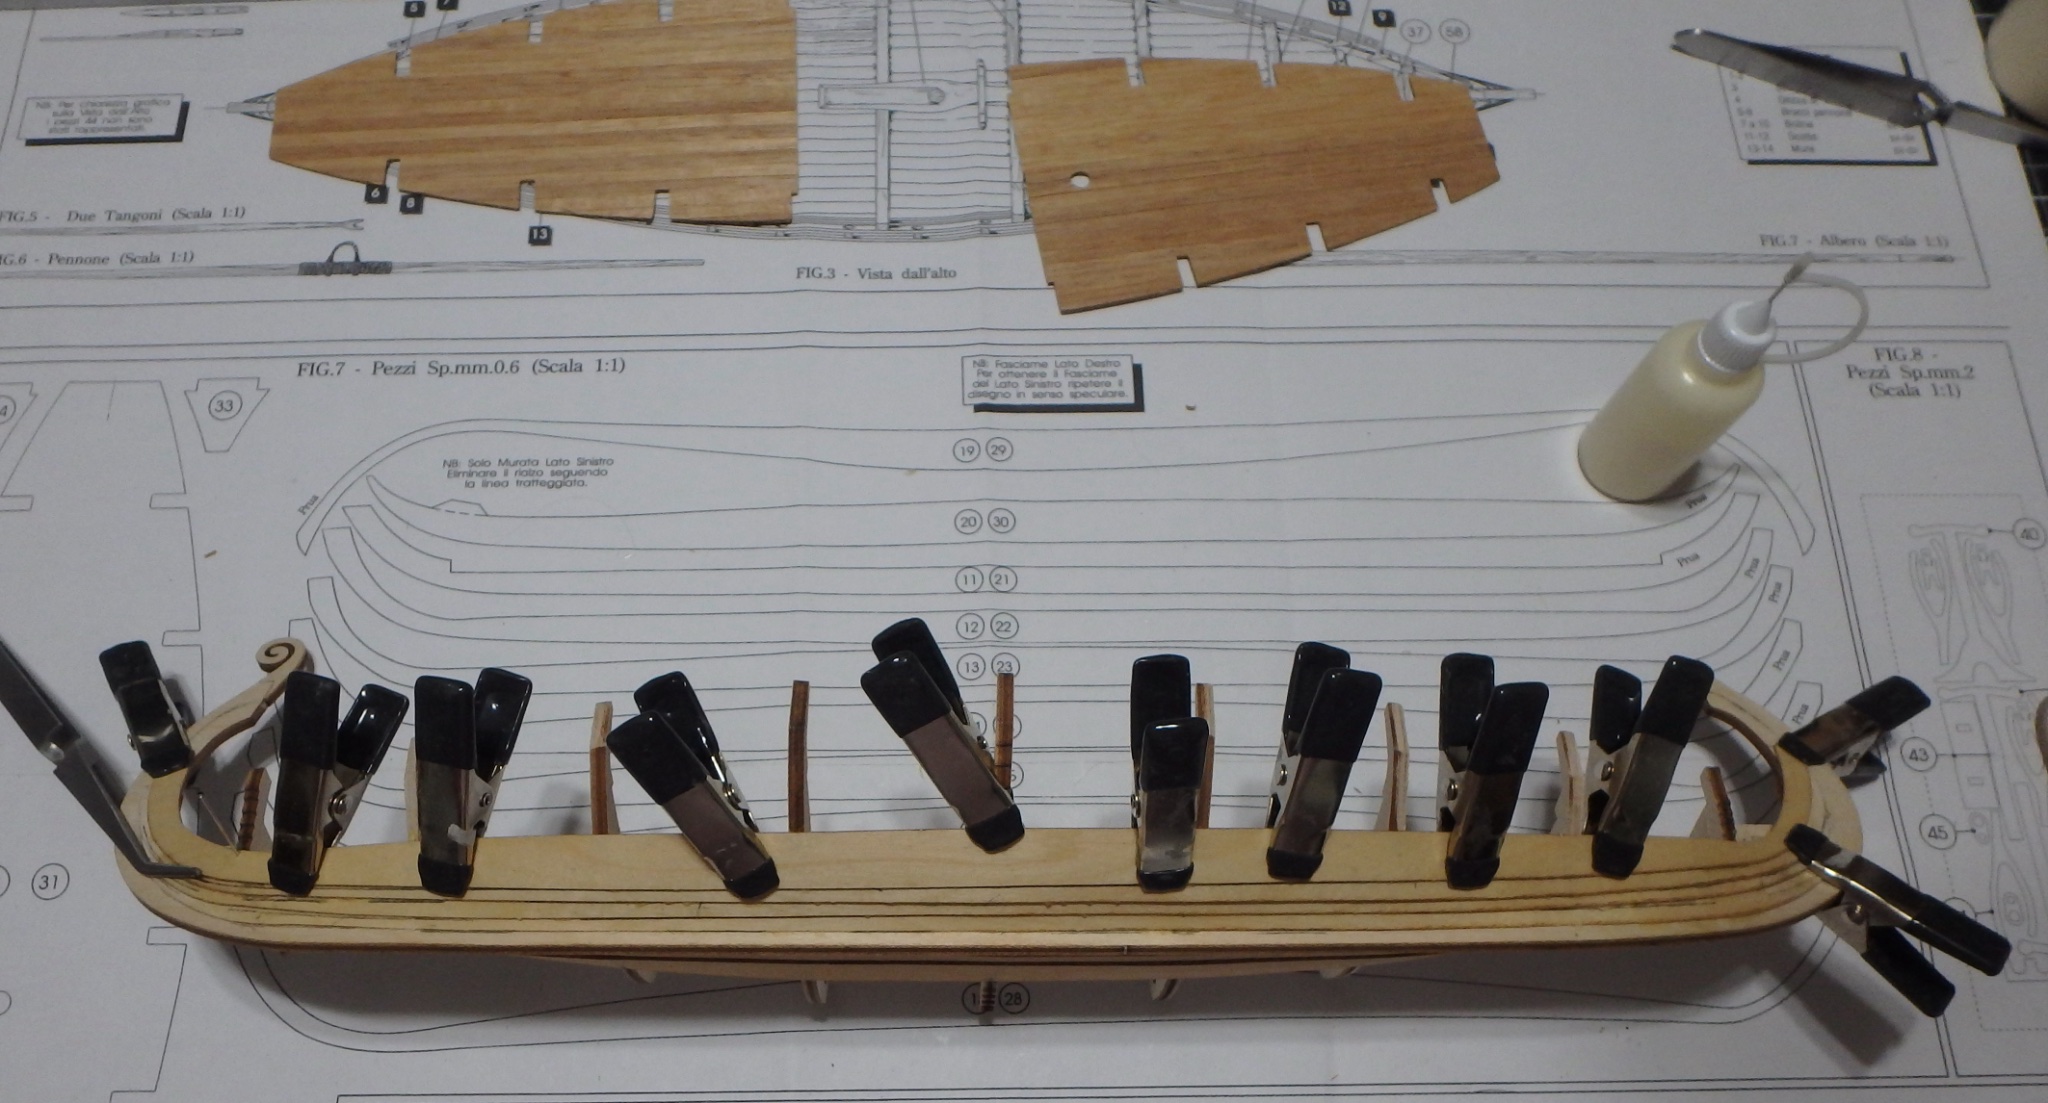
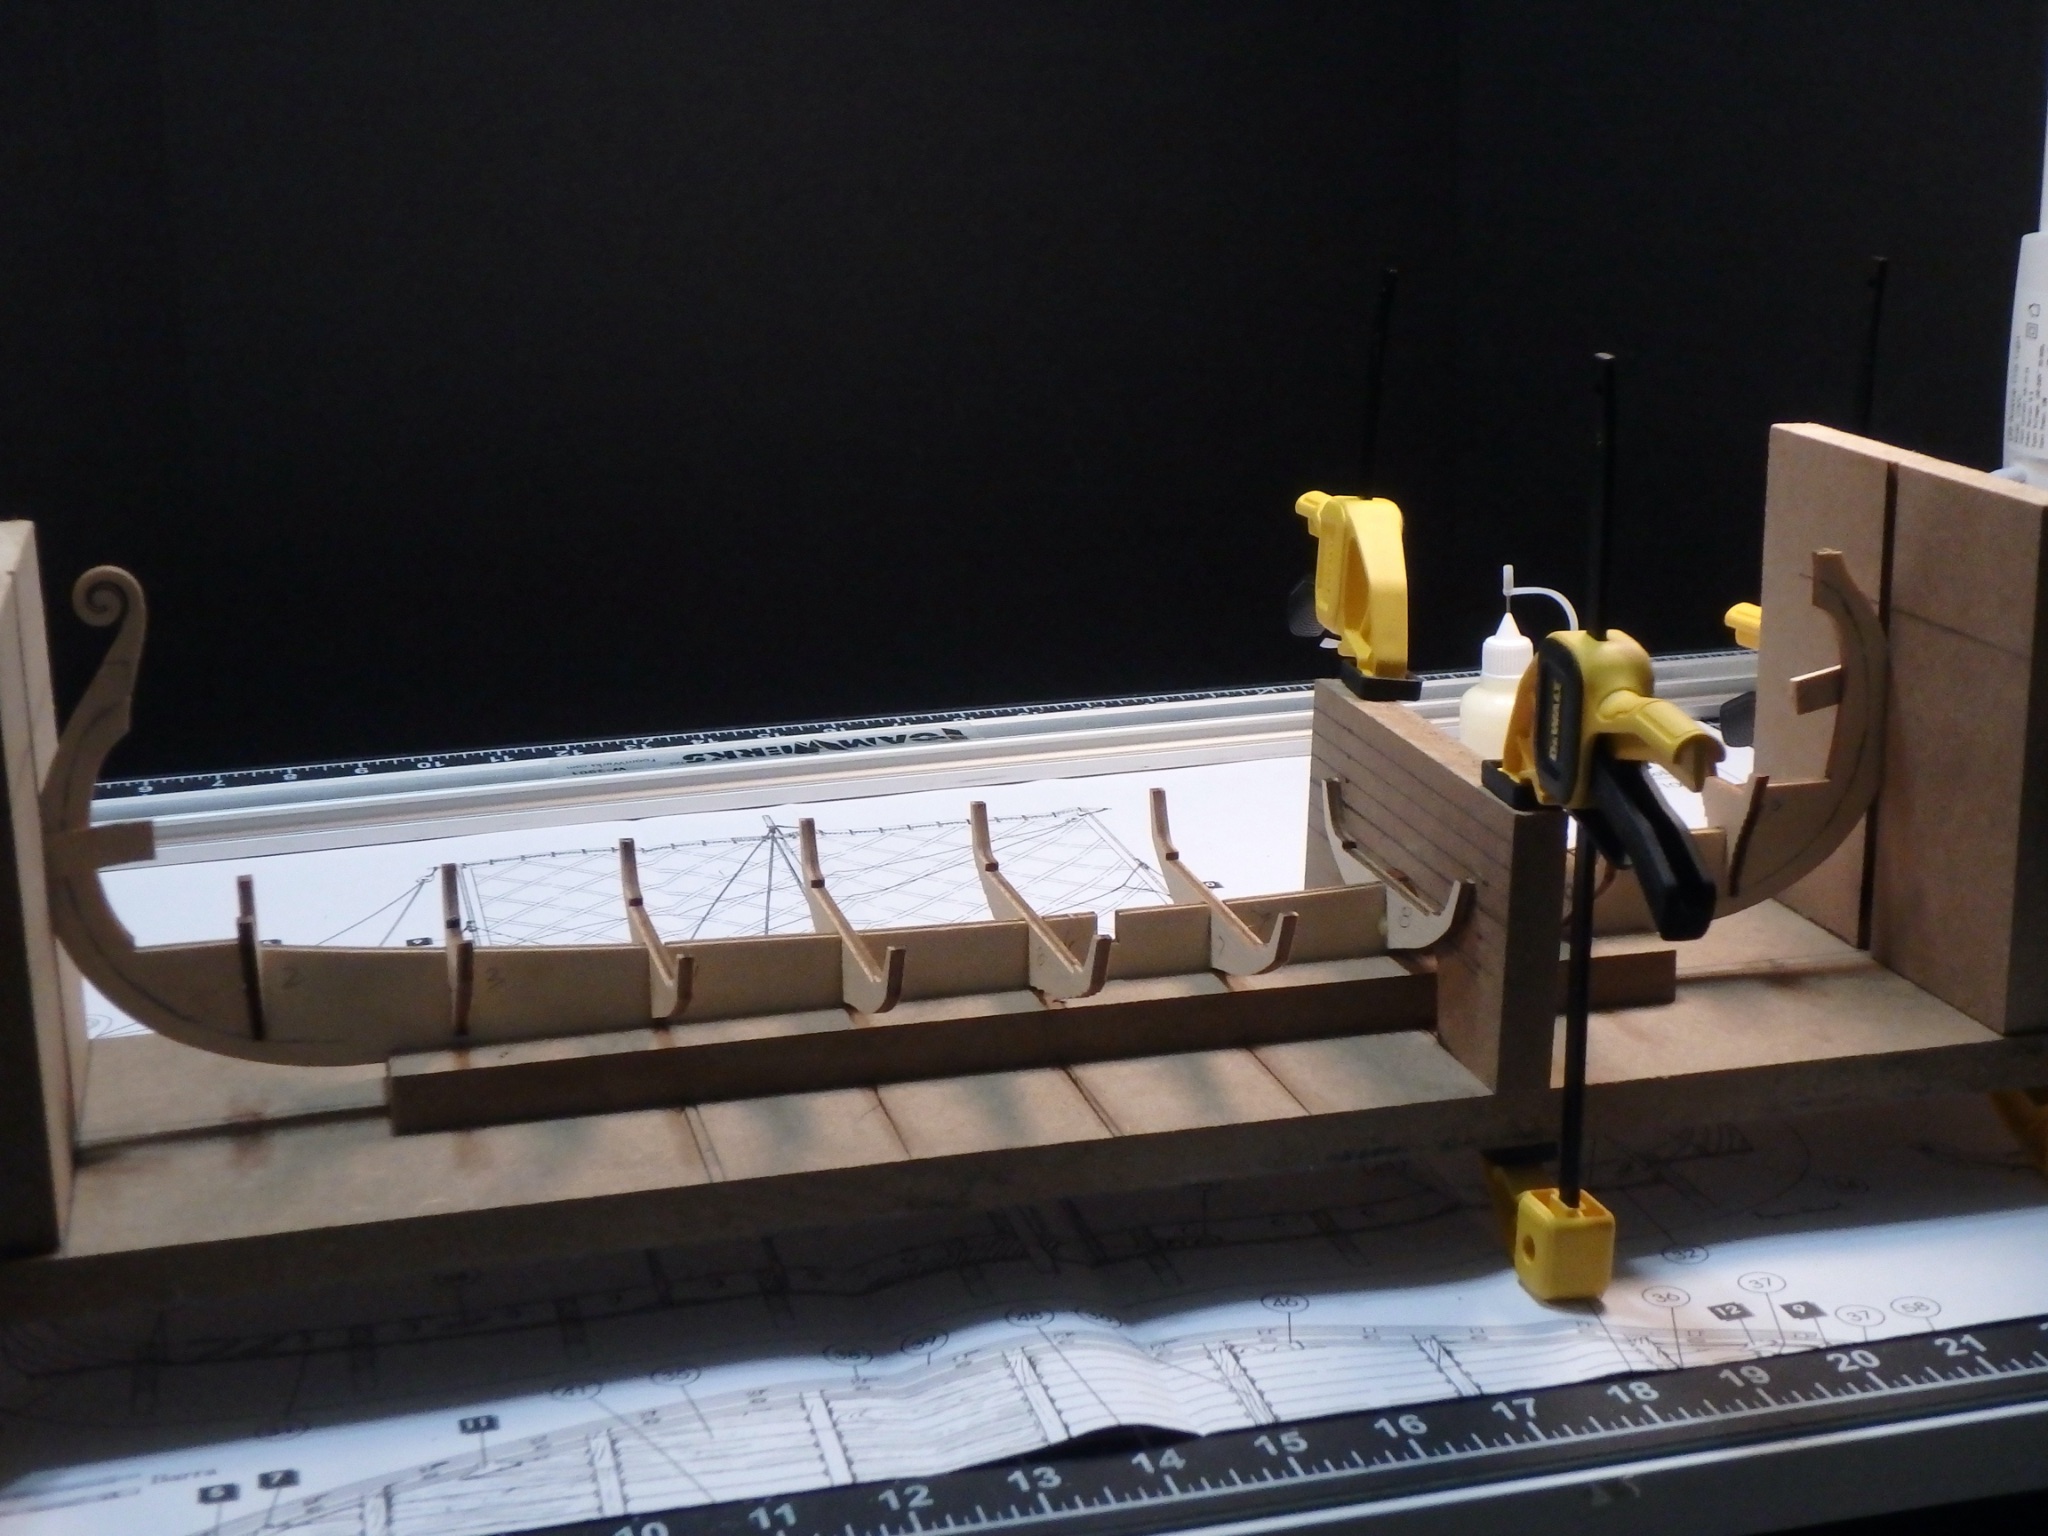
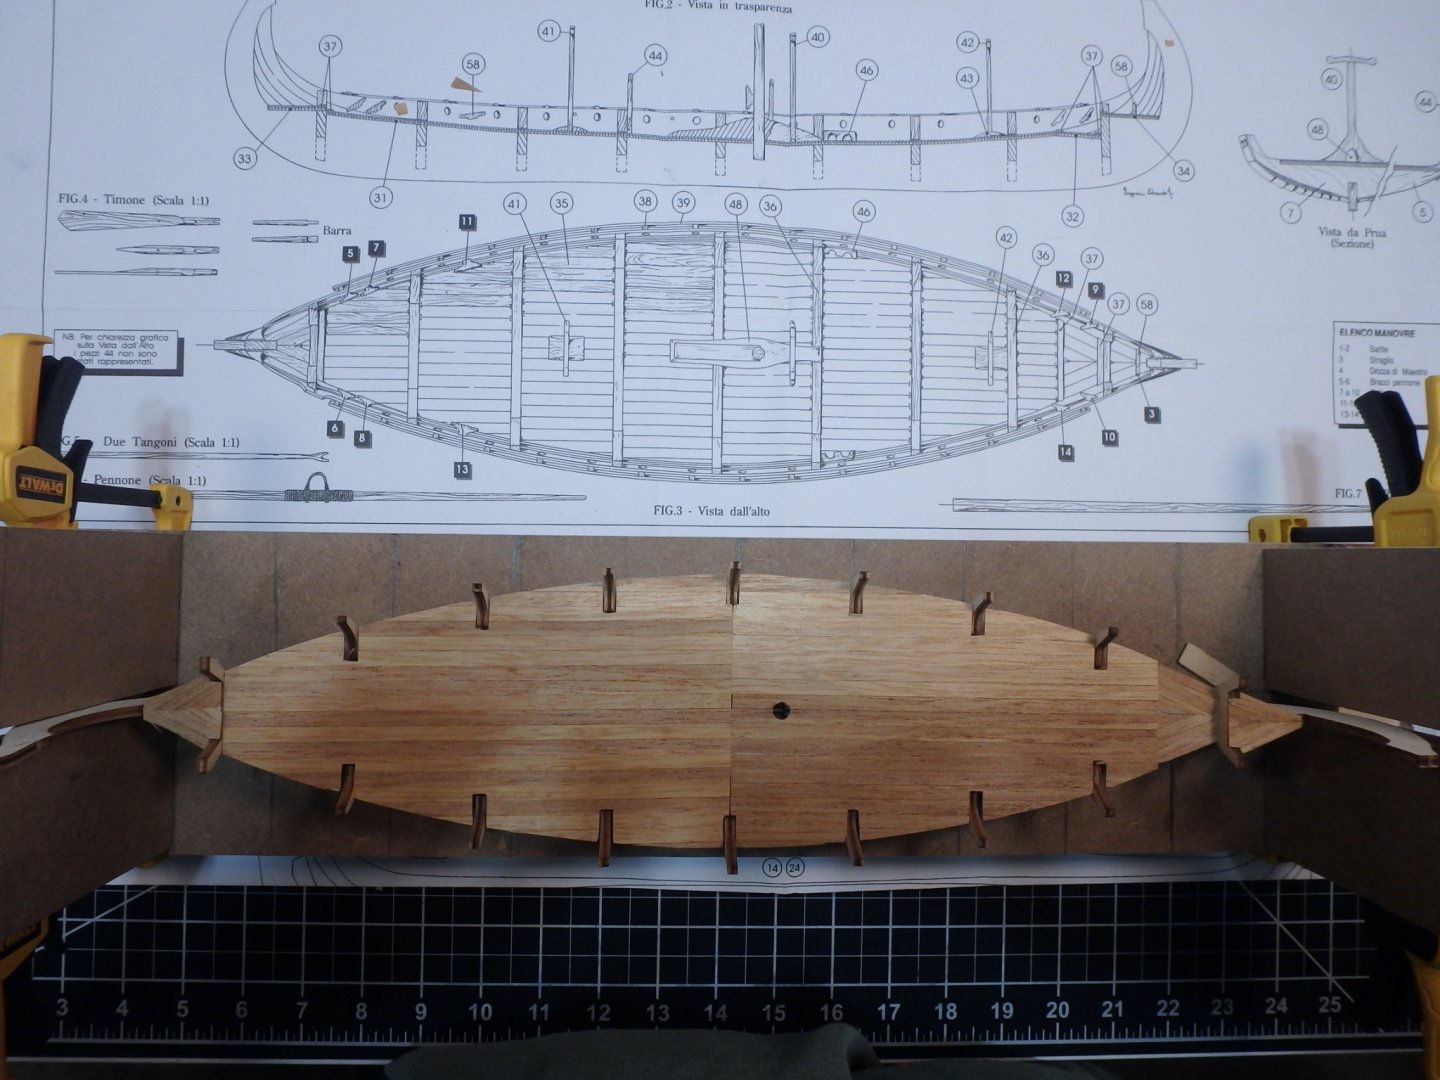
I had some scrap MDF, so I cobbled together a Jig, and glued the ribs to the keel. While I waited for each ribs to dry, I started planking the deck sections. Since, I'm adding more ribs, the staggered planking posed questions: Should I stagger the planking between the added deck beams too? If I didn't would it look wrong? In the end, I decided not to stager the seems and to plank the deck sections before assembling the deck to the hull. It made planking simpler, and allowed me to trim the planks to the sub deck. One downside that I discovered when I dry fit the decks was that the fit around the ribs is a little loose, but I think the gaps will get lost in the dark tar-stained hull color.


-
I'm not sure how much appetite there is for another Drakkar, but here goes. I chose this model because I thought it would be a manageable first ship build, and I've long been interested in Viking history and lore. I do plan some modifications. Looking at the Oseberg Ship and other surviving examples, the rib spacing appears to be too wide, so II'll be adding ribs above deck to make the spacing look more historically correct. I also plan to make some changes to the rigging. The cleats riveted to the hull planking, to my eye at least, aren't mechanically sound, and don't appear historic. I'll most likely go with attachment similar to that used on Draken Harald Harfagre reconstruction with shroud pins for the standing rigging. I'm sure there will be other small mods, but perhaps a bit controversial will be replacing the dragon figurehead. The included figurehead looks a bit cartoon-like for my tastes, so I'm thinking of carving something up based upon a Viking era dragon head pin.