Dan Vadas
-
Posts
3,261 -
Joined
-
Last visited
Content Type
Profiles
Forums
Gallery
Events
Everything posted by Dan Vadas
-
That's quite a feat of scaffolding/engineering happening there Eddie . Should turn out nice and square. Danny
-
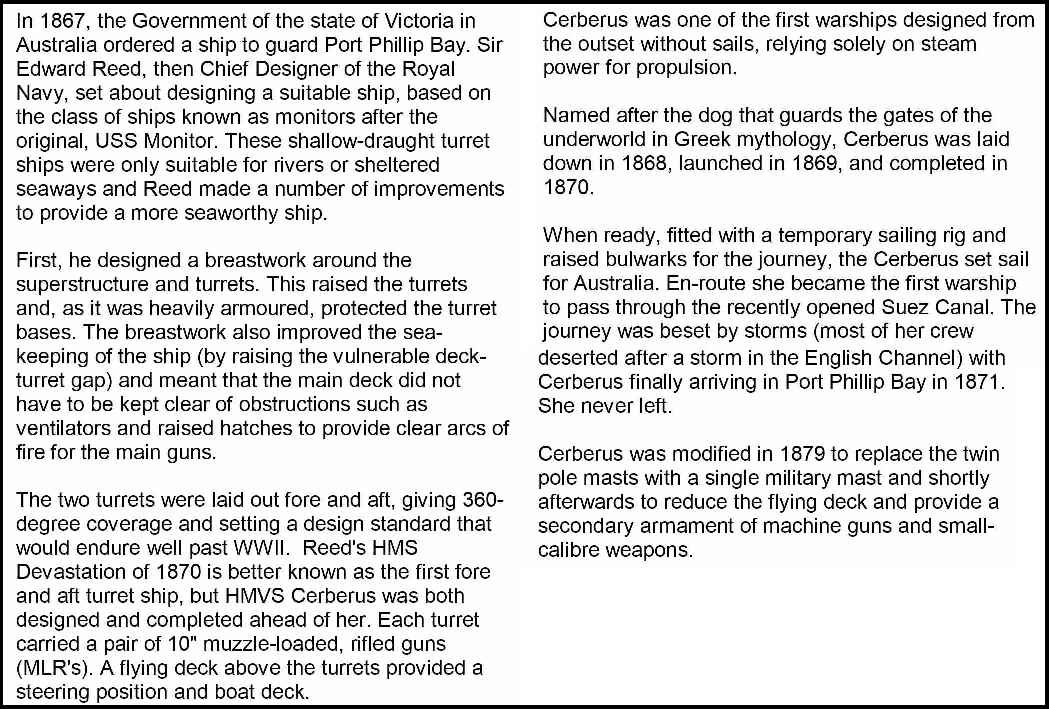
I was a little puzzled about how these R2D2 shaped pieces had to look (the instructions were completely silent about them ) until I cut them out and started rolling them. Of course - the deck fresh air supply pipes (can't remember their actual name). Thanks again to Slog's build log I got the tip on how to roll a cone using my diamond coated round needle file. You'd think that this file was actually invented for the job - the rough surface stopped the paper from slipping and the tapered shape was also a help. I rolled the lower section around a 1mm drill bit : Next up were the Supports for the Flying Deck. This piece of card gets folded in half and glued together to double the thickness and add a printed centre piece. I use 3M 90 High Strength Spray Contact Adhesive as it won't distort the paper when used over a large area. When dry (about 15 seconds ) the support posts are cut out. A little cleaning up will be needed : Danny
.JPG.ff799fe1091a30d27d28ad81a6873d00.JPG)
.JPG.c1d14d352df7ce33053fdcfe590f4e59.JPG)
.JPG.d0271c9a2d98889dfe547224e50bd7cd.JPG)
.JPG.3509f9f2f8e8e01aedbda78374c7d838.JPG)
.JPG.75e6620e3abb76a8eda62cd4c1e12078.JPG)
- 193 replies
-
- 13
-

-
- cerberus
- paper shipwright
- (and 1 more)
-
I had another 12 tiny circles to cut for the Turret Vents, so I tried Slog's Method. It works really well - you are in total control of exactly how much to take off with each cut . Thank you Slog, I'm getting a lot of good tips from yours and Chris' Build Logs (so much still to learn ). I also made and fitted the other six Vents (I'm calling them that for want of a better description. I think they may actually be Viewing Slots) : Danny
.JPG.097844c32942625bc9c837ae0da11a48.JPG)
.JPG.e65c1fbaa9200f22449ae8a02f2be348.JPG)
- 193 replies
-
- 14
-
-
- cerberus
- paper shipwright
- (and 1 more)
-
I tried that (briefly) - no go . Maybe I should have left it in the Isopropyl a bit longer, but I'd rather not wreck a brand new pen just yet. Danny
- 193 replies
-
- 2
-
-
- cerberus
- paper shipwright
- (and 1 more)
-
Thanks Popeye, I've used nail clippers on the odd occasion before. I've made the two Gun Turrets. I used a piece of scrap Castello to make a support for the base. This is slightly smaller than the finished diameter as I want to wrap the sides under the top for a better finish on the join : I cut two slots into the timber to house the gun barrels, which I made from some aluminium tubing I had lying around. These were painted matt black after this pic was taken, and then glued to the base with PVA : After gluing on the side and top I trimmed off the slight overlap using a variation on Slog's method whereby I rested the TIP of the blade on the cutting mat and chopped off tiny slivers while rotating the turret. It was a bit easier to do this way as I couldn't see the piece I was cutting with the BASE of the blade on the mat due to the height of the turret : Not too bad at all . Note the Vents have been fitted UNDER the top for a bit of depth : One turret fitted to the deck. The ventilators etc will be fitted next - they would have been badly damaged if fitted at an earlier stage : Here's a question, probably for Slog - I've used a Faber Castell PITT marker to edge colour the sides of the hull/deck joint. It all worked fine until I got just over one side done and the tip dried up. Any tips on getting the ink running again? Danny
.JPG.c46223d445b932f090f3388fa5bfa536.JPG)
.JPG.89da3f72ed9d86b849767d1adf2696be.JPG)
.JPG.c56ac755e21175f36effe3e1022b1f5c.JPG)
.JPG.011b354b2eb6a81eec4e72d85702774a.JPG)
.JPG.0cb02a0e5cd4d20d94b0d04b5c472caa.JPG)
- 193 replies
-
- 13
-
-
- cerberus
- paper shipwright
- (and 1 more)
-
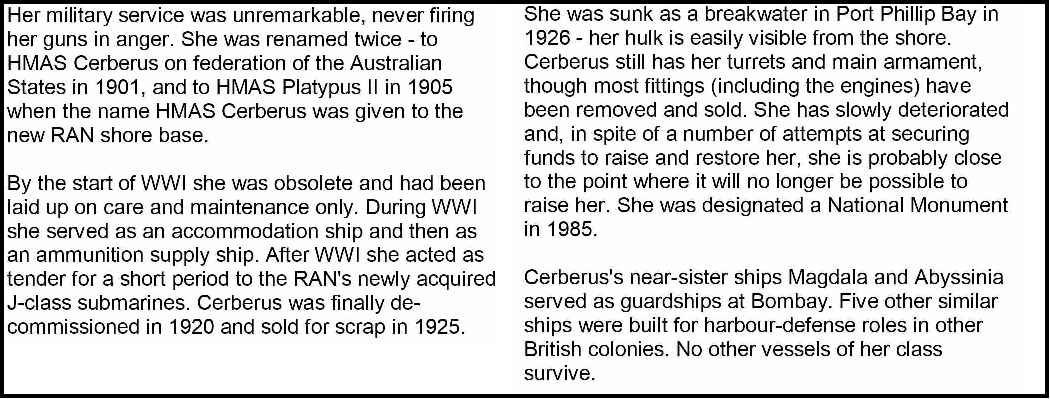
It took me about 1/2 an hour to punch out the 1mm circles and cut the 2mm ones using Chris' tip. I settled for octagons - near impossible to see they aren't actually circles . Now to glue them on, won't take very long : Danny
- 193 replies
-
- 11
-
-
- cerberus
- paper shipwright
- (and 1 more)
-
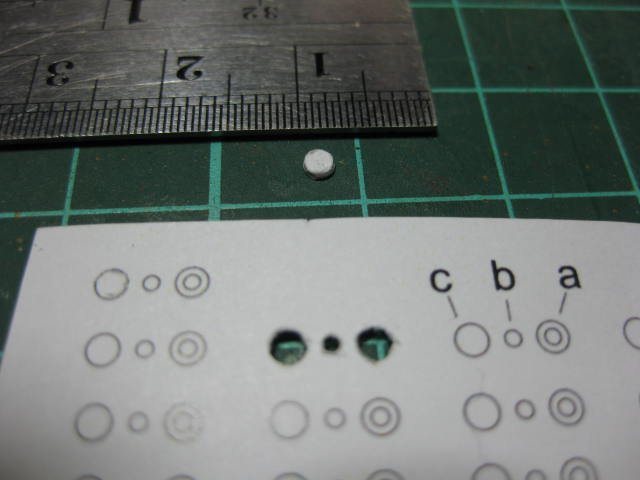
Popeye - hah . I thought the exact same thing while I was driving home 10 minutes ago. Soon as I got home I checked what little brass tubing I have left - out of luck. Smallest is 3.0mm ID . I'll buy some smaller tube next time I'm in town. Eddie - I checked out the punch set, beyond my price range at the moment but on the wish list . Seeing the pic on the site gave me an idea though, which WORKS for the 1mm pieces (actually 1.2mm because I'm also out of 1mm wire ). I used my Byrnes Drawplate to punch out a piece, only a dozen to go : Chris - some great tips in your Log, I'll read it all shortly. I'm going to use your technique for the 2mm circles. Danny
- 193 replies
-
- 9
-
-
- cerberus
- paper shipwright
- (and 1 more)
-
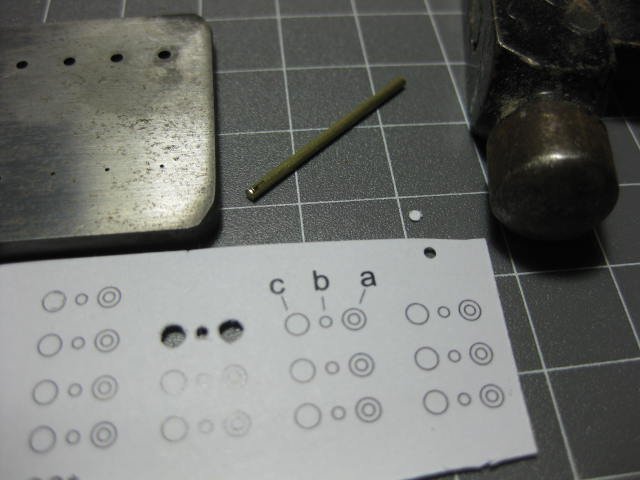
Thank you John. Now we're getting ridiculous . There are 13 Ventilators to make - these consist of two 2mm circles with a 1mm circle sandwiched between them. The one I've made so far took me about 15 minutes, not counting glue drying time. I've got to come up with a better way of cutting them out. I've checked the Interweb for precision hole punches, but the only set that would do the job is from Waldron and costs £55.60 ($AU97.00) . There's also this lot from Historex (UK), couple of Pounds dearer. I'll probably get a set, but not until I win Lotto : Danny
- 193 replies
-
- 10
-
-
- cerberus
- paper shipwright
- (and 1 more)
-
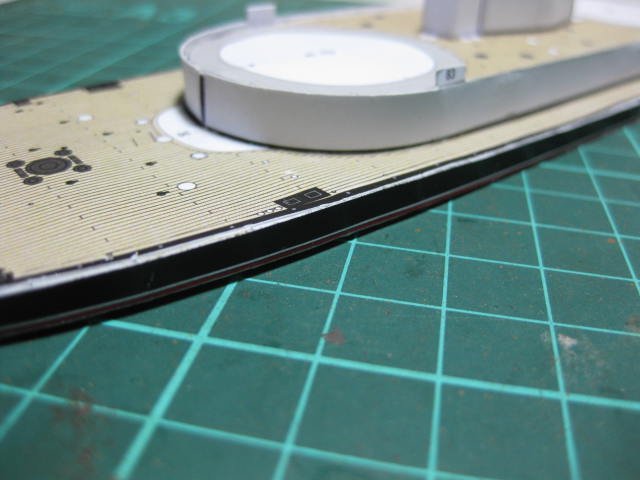
Be my guest Ken . The sides of the hull fitted up pretty well, but there's a fair amount of thouching-up to do where the stark white edges of the paper join the black of the sides of the deck : The damage to the paint here was caused by attempting to get a hollow out of the superstructure deck : I'm using an Archival Ink pen to fix the problem. I've done a bit around the top of the stern bulwark and it looks like it'll do the job : Most of the Superstructure fitted : Danny

.JPG.9fe3a40937d1d1c211b327522e9434a8.JPG)
.JPG.70a67d879e3a6dcb9cdf97ac14ceb676.JPG)
.JPG.d06e763aed361c8256c8fc59cf716635.JPG)
- 193 replies
-
- 17
-
-
- cerberus
- paper shipwright
- (and 1 more)
-
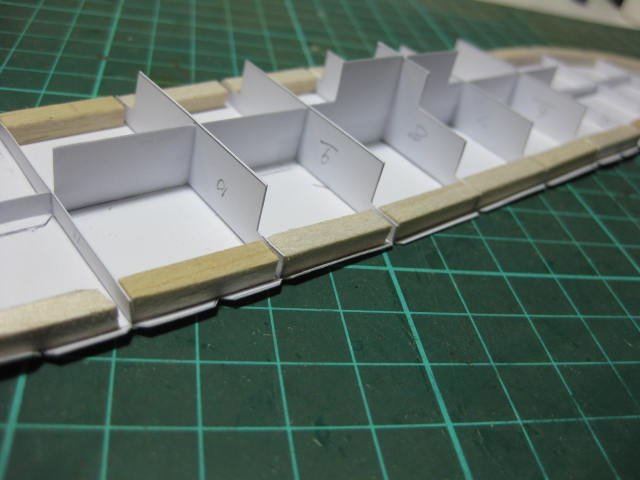
Welcome Grant and Rick . Folding and gluing the tabs took me 2 hours on the base. I let it dry overnight. The deck only took me an hour, maybe I'm getting better at it . They look rough in the closeup pic, but it's only shadows - they are all perfectly flat, which would have been impossible or at least VERY difficult without the balsa fillers. When the deck dried there was a very slight amount of "hogging" - with one end flat on the table the other end was about 1.5mm high. Very easy to bend flat, I'm sure that when I fit the side panels it'll all be good : Danny
.JPG.451fbfe7f57b49ba1d111fa060785a02.JPG)
.JPG.a014438897b430acdcf2fa9e77c49eb6.JPG)
- 193 replies
-
- 17
-
-
- cerberus
- paper shipwright
- (and 1 more)
-
Thanks Eddie. I've shaped and glued in all the balsa filler blocks. I only glued them to one side of each bulkhead in case they pulled the base out of alignment : Danny
- 193 replies
-
- 18
-
-
- cerberus
- paper shipwright
- (and 1 more)
-
Thanks Hornet, John and Slog. A reasonable afternoon's work, after puzzling for an hour or so about what goes where, and what to cut etc . The bulkheads are glued to the base, and all tabs are scored and folded. I'm going to glue some balsa between the bulkheads along the edges to make gluing the sides on easier. I can forsee that I'd have a few problems with getting a sharp fold on some of the deck tabs otherwise. Danny
.JPG.c852ebdf62eb828dfb74ce9f8bd34d08.JPG)
.JPG.d636a17ad9c73ca1c6f526cec10d82df.JPG)
- 193 replies
-
- 23
-
-
- cerberus
- paper shipwright
- (and 1 more)
-
HMVS Cerberus - History To save a lot of typing when I'd rather be modelling, here is the page from the Kit : Danny

- 193 replies
-
- 11
-
-
- cerberus
- paper shipwright
- (and 1 more)
-
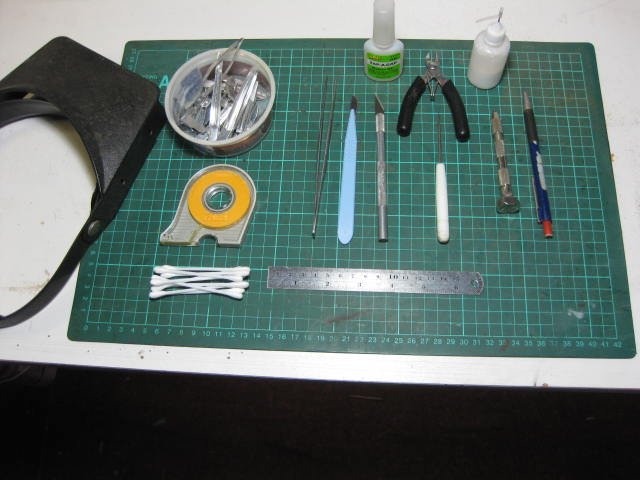
Hi all, With my small distraction (the Concord Stagecoach) finished and out of the way, it's time to get back into SHIP modelling . I've decided to go in a new direction, both in the Period of the Ship and in it's Construction. I've decided to try my hand at Card Modelling, something I haven't done since I was in my early teens when I built a number of Card models of buildings for my model railway. It was fun at the time, the models turned out OK, and it will hopefully be the same again . For my first I've downloaded a freebie from Paper Shipwrights of the HMVS (Her Majesty's Victorian Ship) Cerberus. A pre-printed version is available for £8.50 plus p&h, but I had mine done at a local Photocopy shop for around the same price. They used the equivalent thicknesses of paper needed, and I got two copies of each page to cover the inevitable Oopsies. I also have a Swann-Morton scalpel handle and 100 blades on it's way. The rest of the tools needed I already have : A small steel rule, a cutting mat (although i might update that, I bought it 10 years ago and it's seen a bit of work ), good tweezers, Q-tips, a glue bottle of PVA, CA Glue for the PE, small side-cutters, pin-vices and micro-drills, a mechanical pencil, hairclip clamps, headband magnifier, a small awl and Tamiya masking tape : Beats the hell out of the thousands of dollars worth of tools and machines I've accumulated over the years for Wooden Ship Modelling. And .... there's NO sawdust . If I make a success of this one, I might try my hand at something a little more difficult - either a Bismark or a Yamato . The Build Log starts in the next Post. Danny
- 193 replies
-
- 13
-
-
- cerberus
- paper shipwright
- (and 1 more)
-
It's all-inclusive Jack. A lot has to do with the size of the package I suppose. Lucky I wasn't in a hurry and went with Express Delivery - it would have raised the bar even higher . Danny
-
Thank you Jack, Bug, Eddie, Mark and Grant - much appreciated. As Kits go this is one of the better ones, especially at the price . I found my Invoice which I'd left in the bottom of the box - $AU145.00 (plus Postage from USA of $AU190.00 - the cross we bear in the Colonies ). The Laser Cutting was superb, except for one small piece of 1/32" ply which was a bit "how ya goin' " compared to the rest but still better than most laser cutting I've come across before. The Plans - 4 large sheets with to-scale drawings on most stages plus a lot of Isometric Views, a separate sheet for the wheels, 5 smaller sheets to identify the parts, and a 31-page full colour booklet containing the step-by-step Building Instructions - written in PERFECT ENGLISH BY A MODEL-MAKER . Most parts fitted together with a minimum of extra work needed. My only complaints are minor - 1. A couple of pieces of the Roof Sheeting timber missing, and nowhere near enough of the 8-gauge brass nails from which to make the Suspension Pins etc. 2. The PE for the Rooftop Seat Brackets is far too flimsy and bends easily without a lot of care. A thicker material would have been more suitable. I give the kit a 9.5 out of 10 . Danny
- 151 replies
-
- 11
-
-
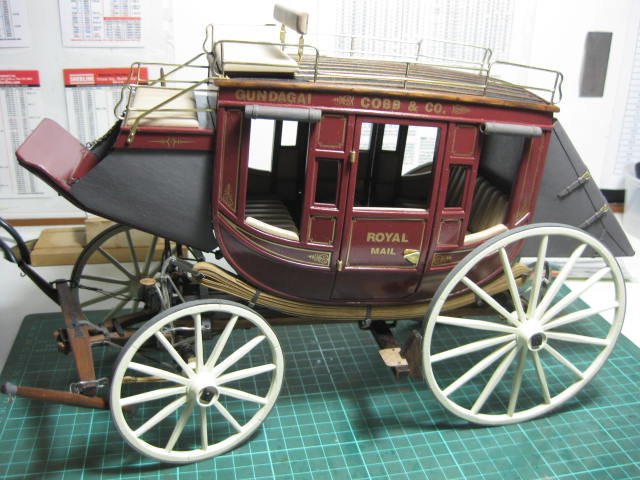
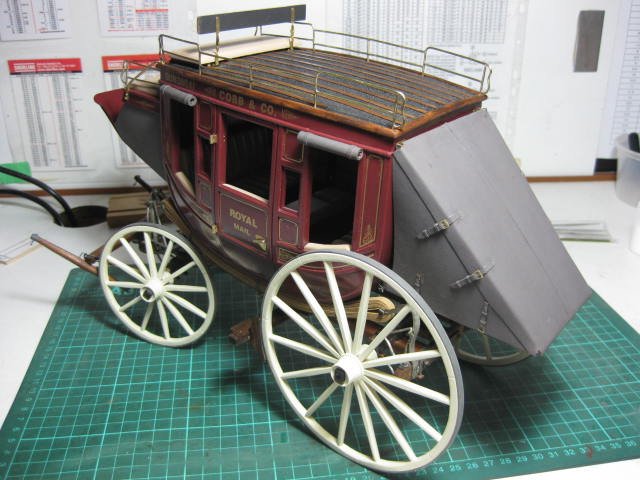
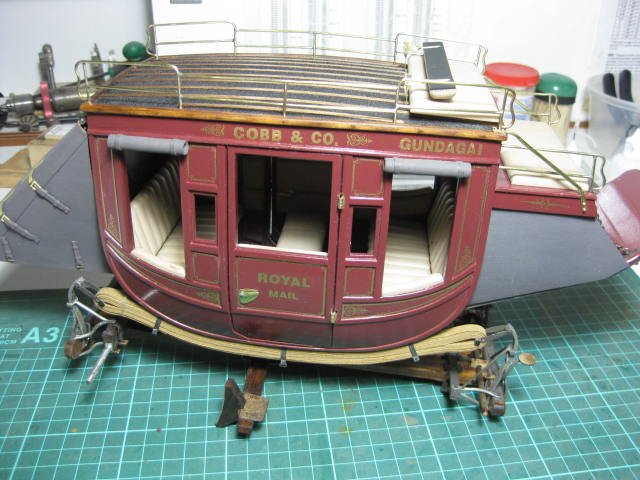
A few minor things added, like the Running Gear, Brake Lever and Wheels and she's all done and FINISHED. I'm pretty happy with the way it turned out : Danny
- 151 replies
-
- 34
-
-
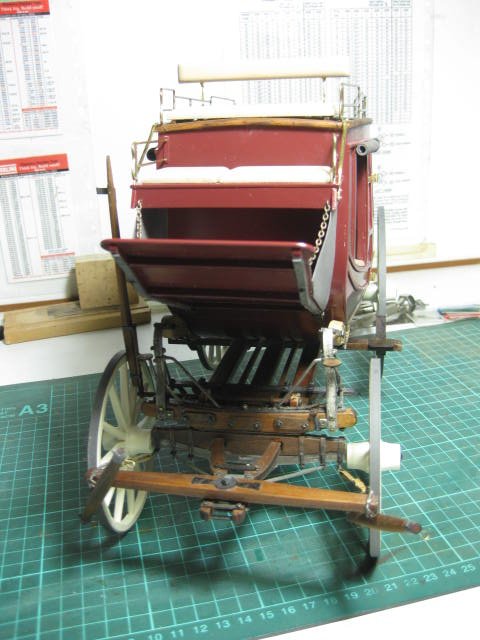
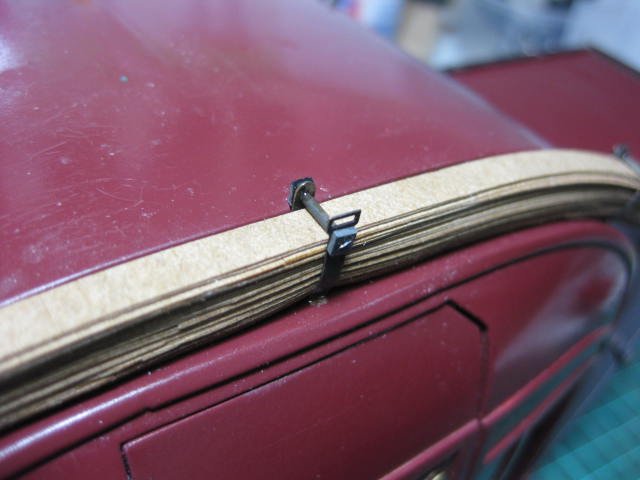
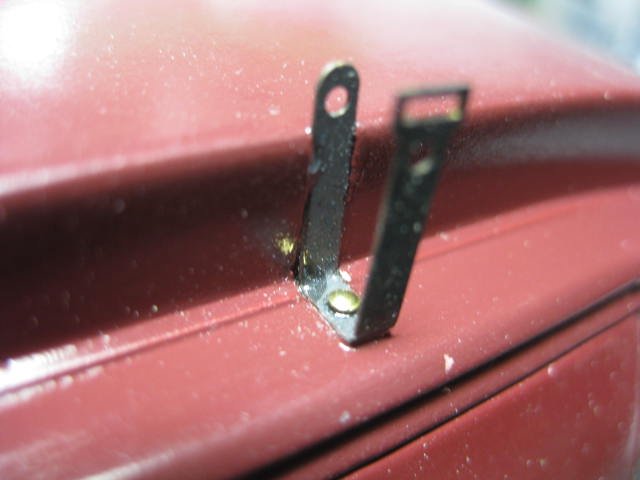
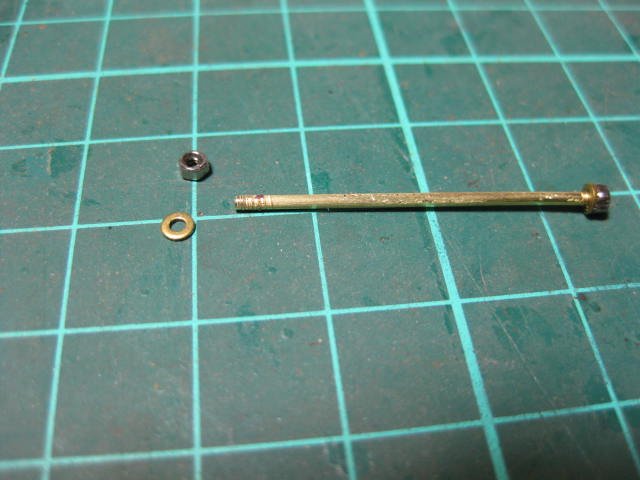
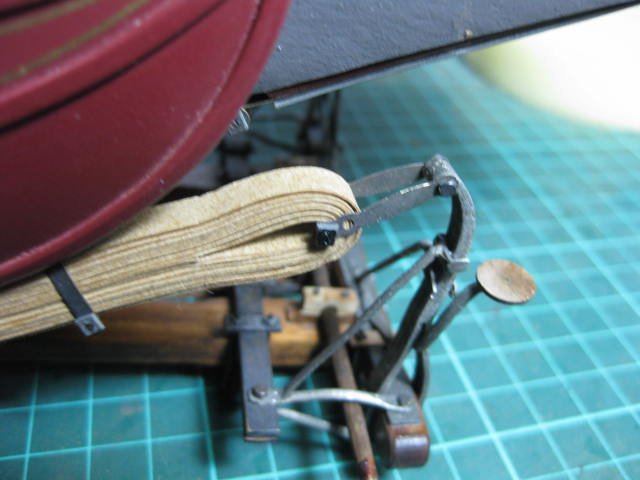
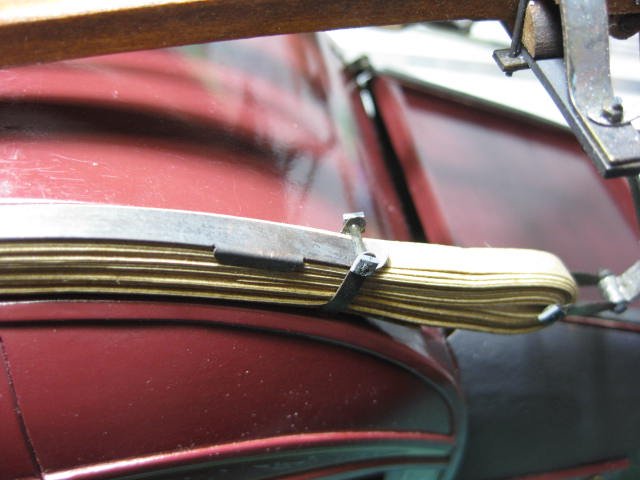
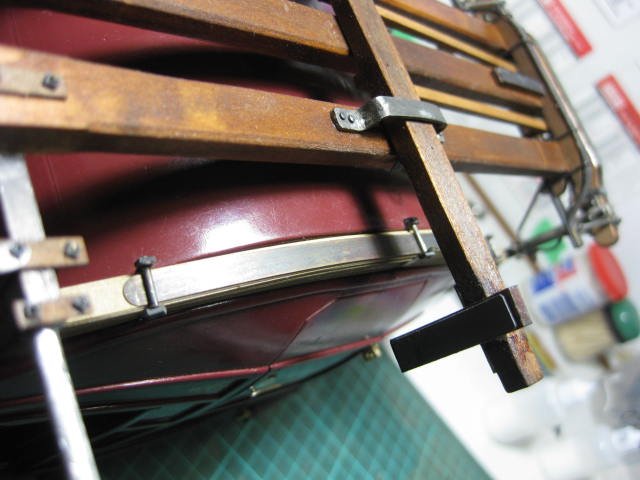
Thanks guys . On the home run now - fitting the Thoroughbraces to the body. They went on a lot easier than I was expecting : The brace brackets pinned and expoxied with slow-set : Somehow I managed to lose the threaded bar for the main swivel that attaches the Running Gear to the Chassis . I made a new bolt by cutting two threads with an Xacto blade, while rolling the bar at a slight angle. It took me about 1/2 an hour, but it worked : The Thoroughbraces were then attached to the stirrups : I'd forgotten to fit the two Brace Irons - not as bad as it seemed at first, I only had to remove the centre pins and managed to slip the ends under their pins : Danny

- 151 replies
-
- 19
-
-
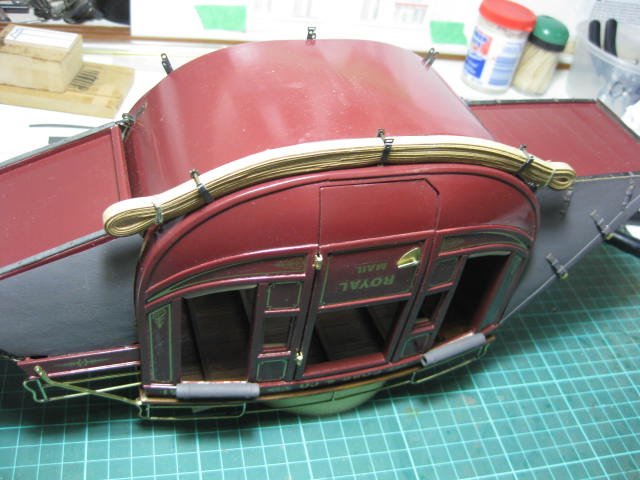
I've fitted all the Brasswork. I know it looks a bit "blingy" (the pics don't do it justice), but my grandson should like it. He's only 5 years old, and not all that into historical accuracy yet : Danny
.JPG.276f08eb6c449b9da25442fce34e125b.JPG)
.JPG.d8dd59fb30b3ae7315fec2afb18ba33f.JPG)
.JPG.a1b070bb8b9738f41dcf476ed17ea0df.JPG)
.JPG.f3067d03dc41f85d432eeea27daaa4c1.JPG)
.JPG.54ea306d14e7cf558a44b0edc41f3e82.JPG)
- 151 replies
-
- 20
-
-
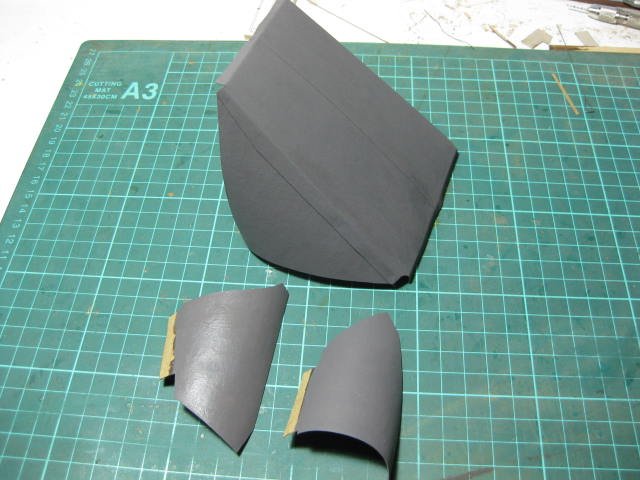
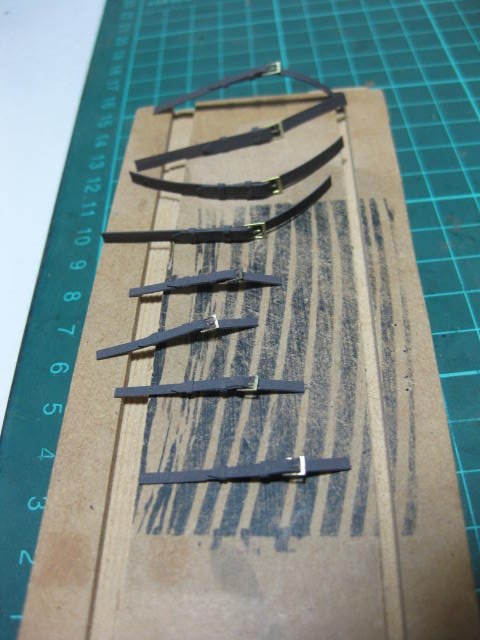
I've made up the Boot Leathers, using the kit-supplied "leather" material. Wayne and Mike, I see what you meant about the stuff curling when painted . I'm hoping I can rectify the situation. I've also made the various straps. The buckles came in the PE set : I painted the boots in a colour called Koala Grey. I think it will look quite good when all is completed - the kit pics show a similar colour, though they claim to have given the "leather" a wash of dilute Burnt Umber. I chose the colour because it's about the same colour as our Koala Bears. It was a little publicised fact that Koala Bears were used to make the boot leathers - they were a lot cheaper than cattle and tasted foul to boot. If word of this had got out the Wildlife Conservationists of the time would have been up in arms . Danny P.S. I'm pulling your leg about the Koalas being used for the Leathers - none were harmed either in the original production run, or in the making of this model . Although I'm not kidding about their taste (I prefer cow any day). Lucky for the Koalas, or they would have gone the way of the Dodo .And I don't think there would have been a single Wildlife Conservationist anywhere in the world back then .
- 151 replies
-
- 14
-
-
Thank you John, I hope so . Eddie, wagons and coaches of some description were either built locally or imported (mainly from England) since the early days of settlement. The first ones were pulled by convicts. The English coaches with either no suspension or steel springs proved unsuitable for the majority of what passed for "roads" back then, as they would break down too often. The first American-built Concord coach, with it's tried and proven leather "Thoroughbrace" suspension arrived in Melbourne in March 1853, due mostly to the demand for transport during the Victorian Gold Rush. Eventually they spread throughout the country, with local firms building them here based on the original design which proved well suited to Australian conditions. The bodywork of the coaches varied a lot, depending on who built them. Most Australian ones had a much "boxier" body as it was probably easier to construct. Danny
-
Hi all, I just came across THIS TIP for holding small parts while Silver Soldering as I was looking through another website. I haven't tried it myself yet, but it looks like it should work. Pretty simple . (Click on the pics to see a larger image) There are a couple of tips in the posts below it that also make a lot of sense. Hope someone finds this useful. Danny
- 3 replies
-
- 13
-
-
Pav, the only problem with bamboo is that you can't taper it all that well. Bamboo being a grass has coarse parallel fibres that run the length of the piece, so you are always going to be cutting through the grain. Strength-wise it's among the best (maybe that should read "flexibility wise"?), as you can draw it down to minute diameters with a Drawplate. My Byrnes Drawplate has a smallest diameter of 0.0135" (0.35mm or #80) and I've drawn bamboo through it quite a few times . Danny
-
Yeah, Crown Timber are about the best around now. I got some timber off them a while ago, good stuff and didn't take long to arrive. I'll have a look if I have any Ebony left - should have a couple of sheets if you really want to go down that road. I still advise against it, but you're welcome to them as long as you pay the freight (shouldn't be much). Danny