Rock_From_Korea
-
Posts
315 -
Joined
-
Last visited
1 Follower

Recent Profile Visitors
1,558 profile views


-
 Rock_From_Korea reacted to a post in a topic:
Mary Rose by Baker - scale 1/50 - "Your Noblest Shippe"
Rock_From_Korea reacted to a post in a topic:
Mary Rose by Baker - scale 1/50 - "Your Noblest Shippe"
-
Rock_From_Korea reacted to a post in a topic:
HMS Bellerophon 1786 by AON – scale 1:64 – 74-gun 3rd Rate Man of War - Arrogant-Class
-
robert952 reacted to a post in a topic:
Golden Hind by Rock_From_Korea - 1:48
-
Rock_From_Korea reacted to a post in a topic:
Roter Löwe 1597 by Ondras71
-
GrandpaPhil reacted to a post in a topic:
Golden Hind by Rock_From_Korea - 1:48
-
GrandpaPhil reacted to a post in a topic:
Golden Hind by Rock_From_Korea - 1:48
-
GrandpaPhil reacted to a post in a topic:
Golden Hind by Rock_From_Korea - 1:48
-
Rock_From_Korea reacted to a post in a topic:
Golden Hind by Rock_From_Korea - 1:48
-
 Baker reacted to a post in a topic:
Golden Hind by Rock_From_Korea - 1:48
Baker reacted to a post in a topic:
Golden Hind by Rock_From_Korea - 1:48
-
 Hi Patrick~ As always, many thanks for your kind comments and Happy New Year!!
 -
Siggi52 reacted to a post in a topic:
Golden Hind by Rock_From_Korea - 1:48
-
Baker reacted to a post in a topic:
Golden Hind by Rock_From_Korea - 1:48
-
Baker reacted to a post in a topic:
Golden Hind by Rock_From_Korea - 1:48
-
 Baker reacted to a post in a topic:
Golden Hind by Rock_From_Korea - 1:48
Baker reacted to a post in a topic:
Golden Hind by Rock_From_Korea - 1:48
-
robert952 reacted to a post in a topic:
Golden Hind by Rock_From_Korea - 1:48
-
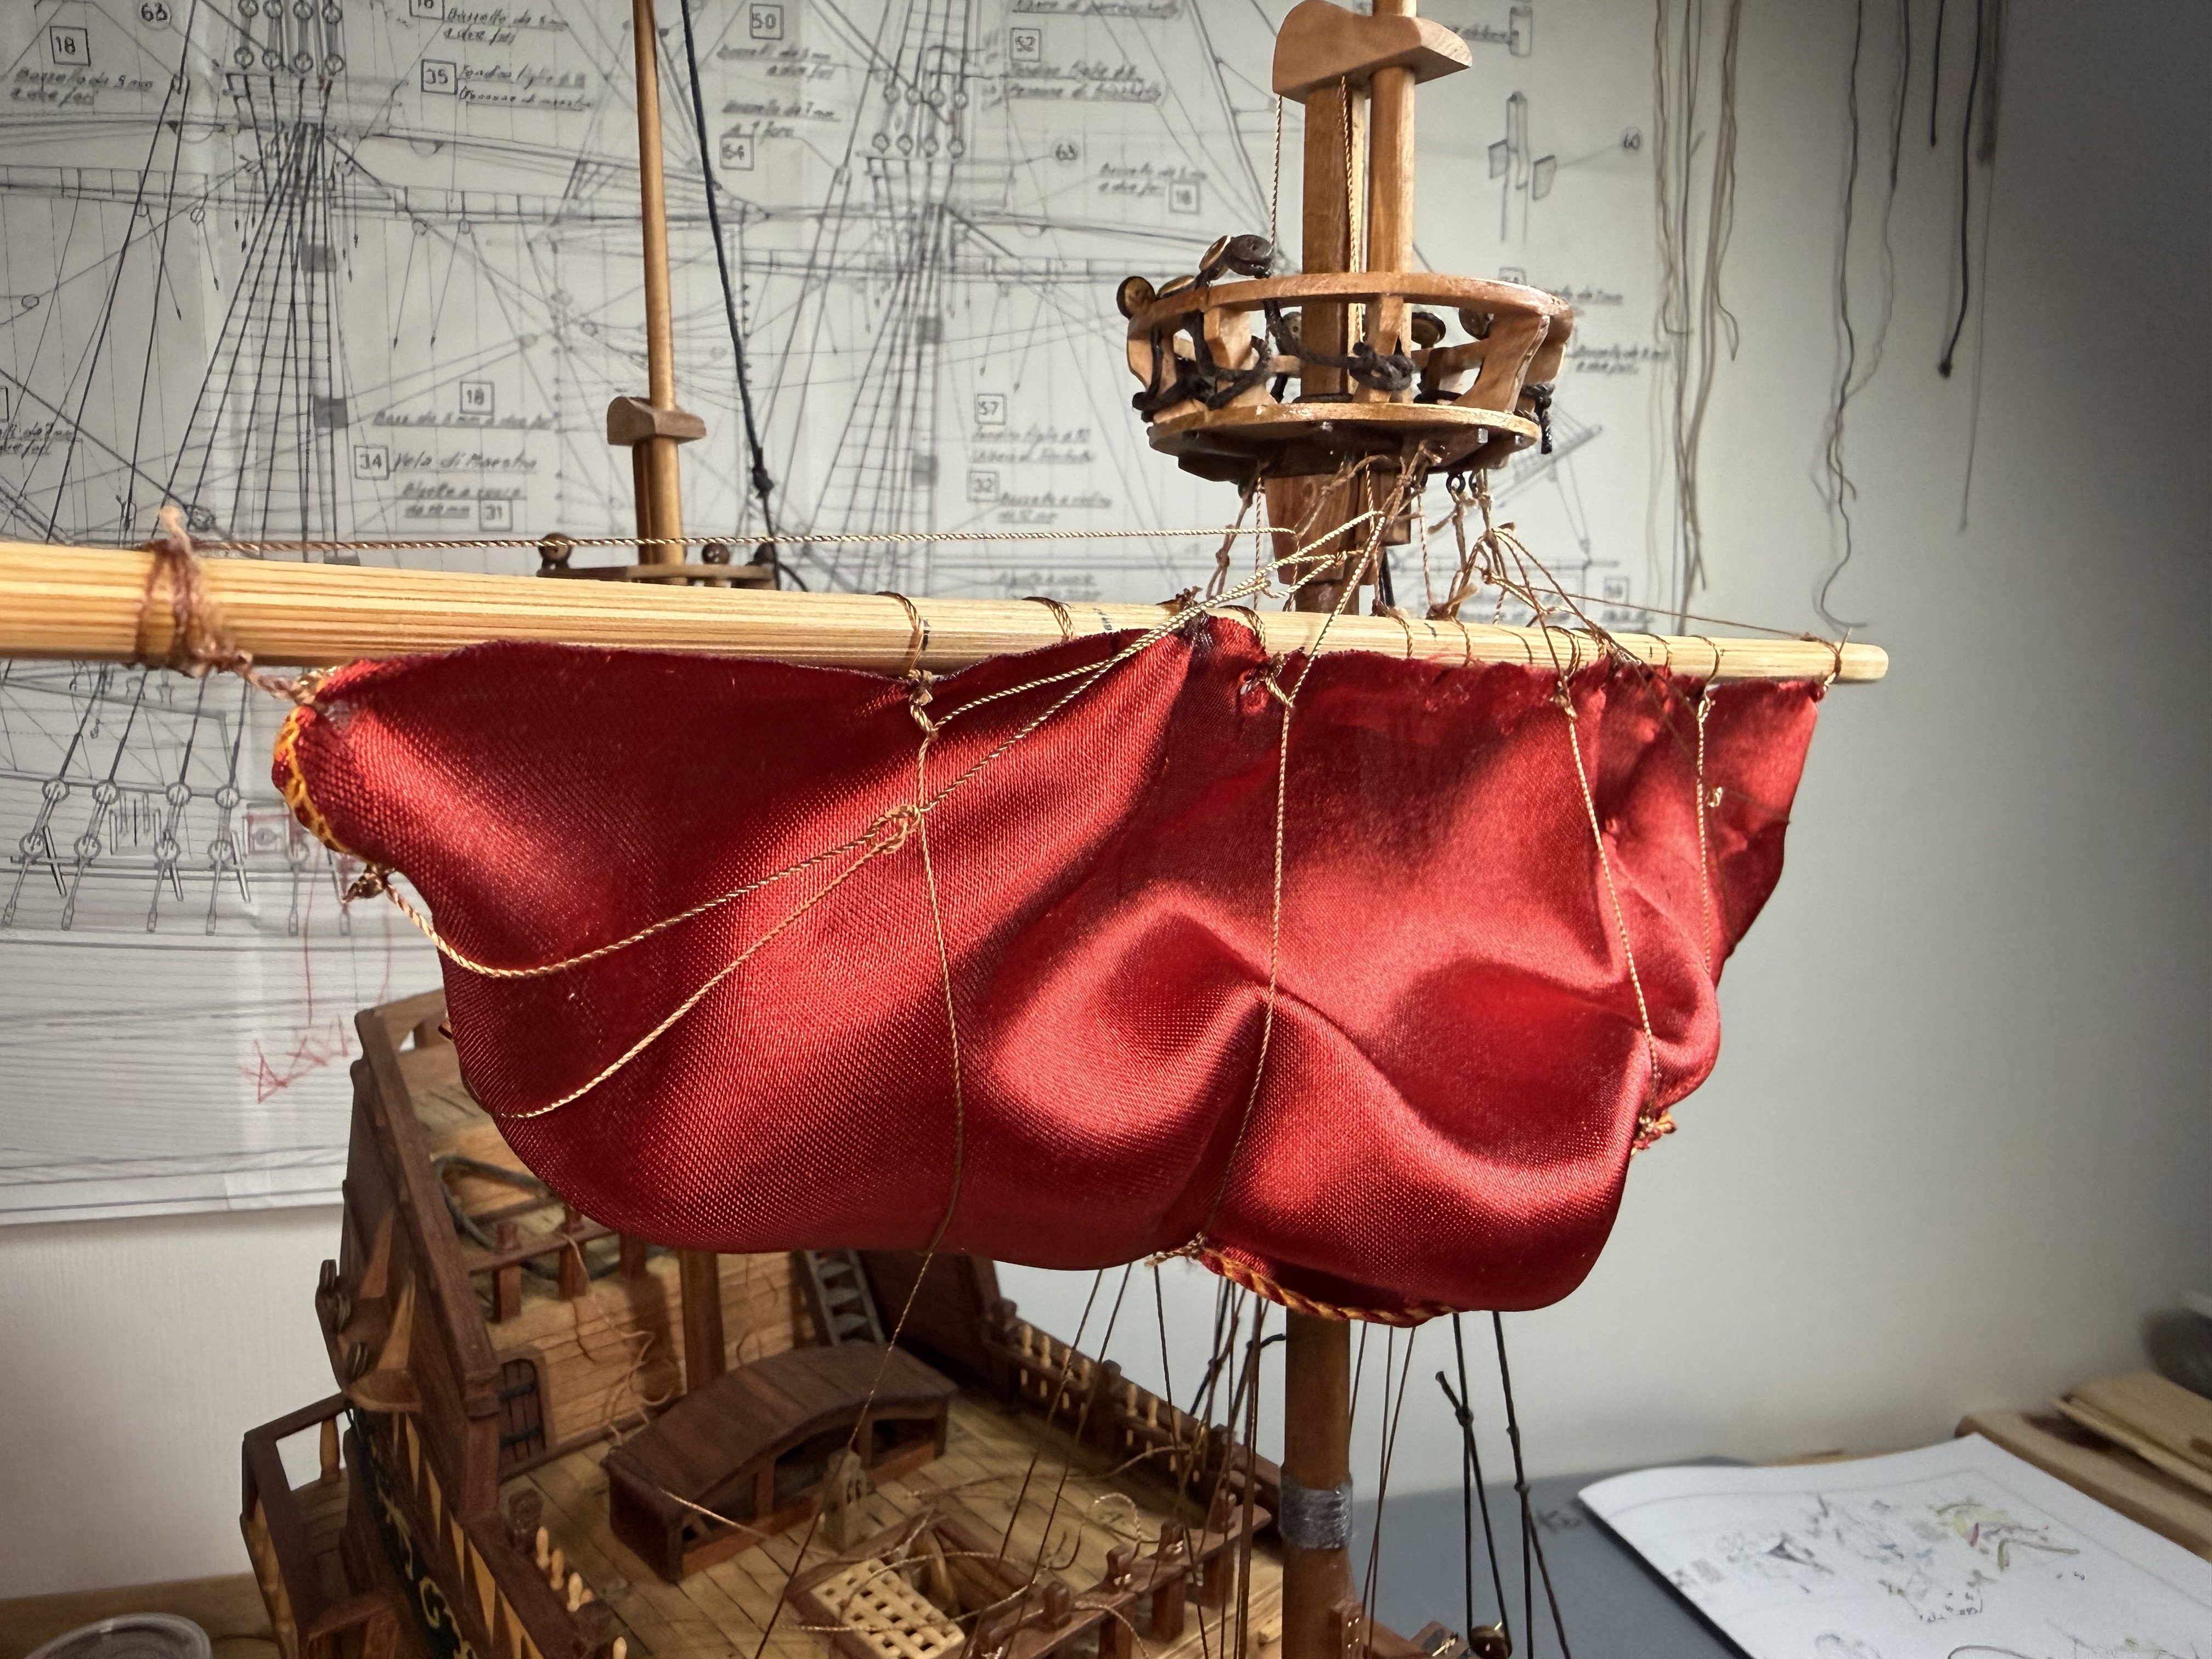
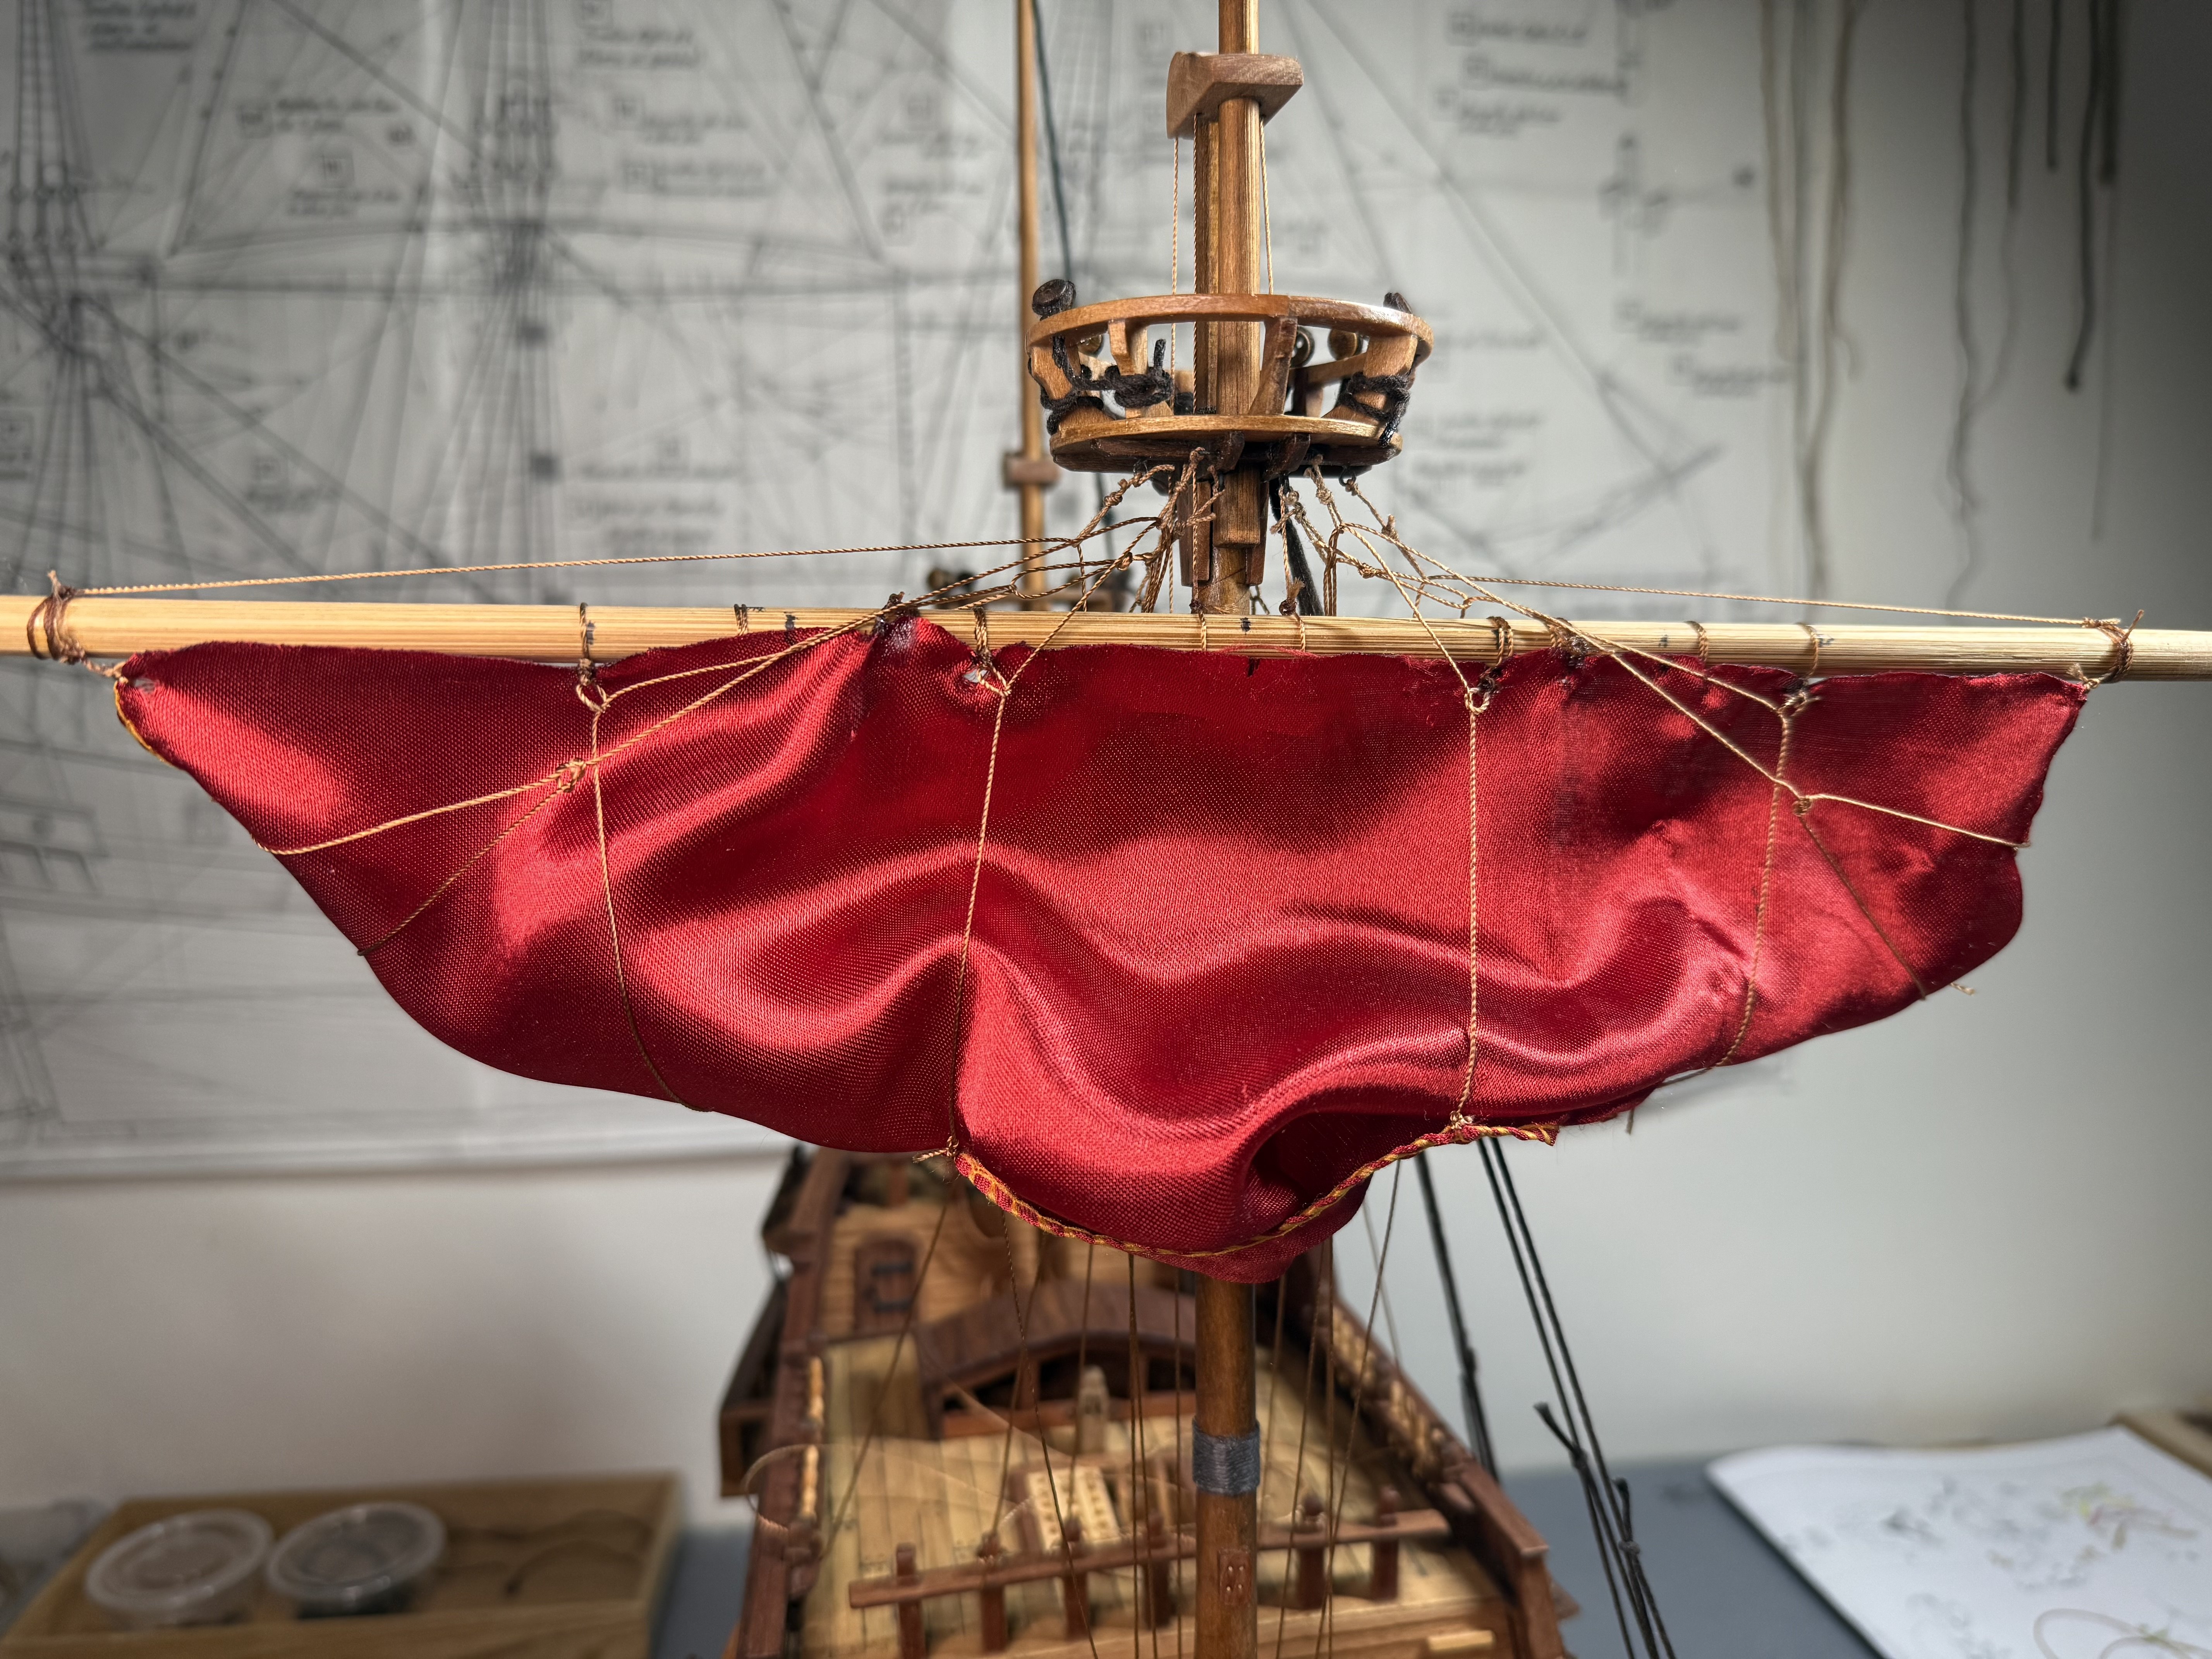
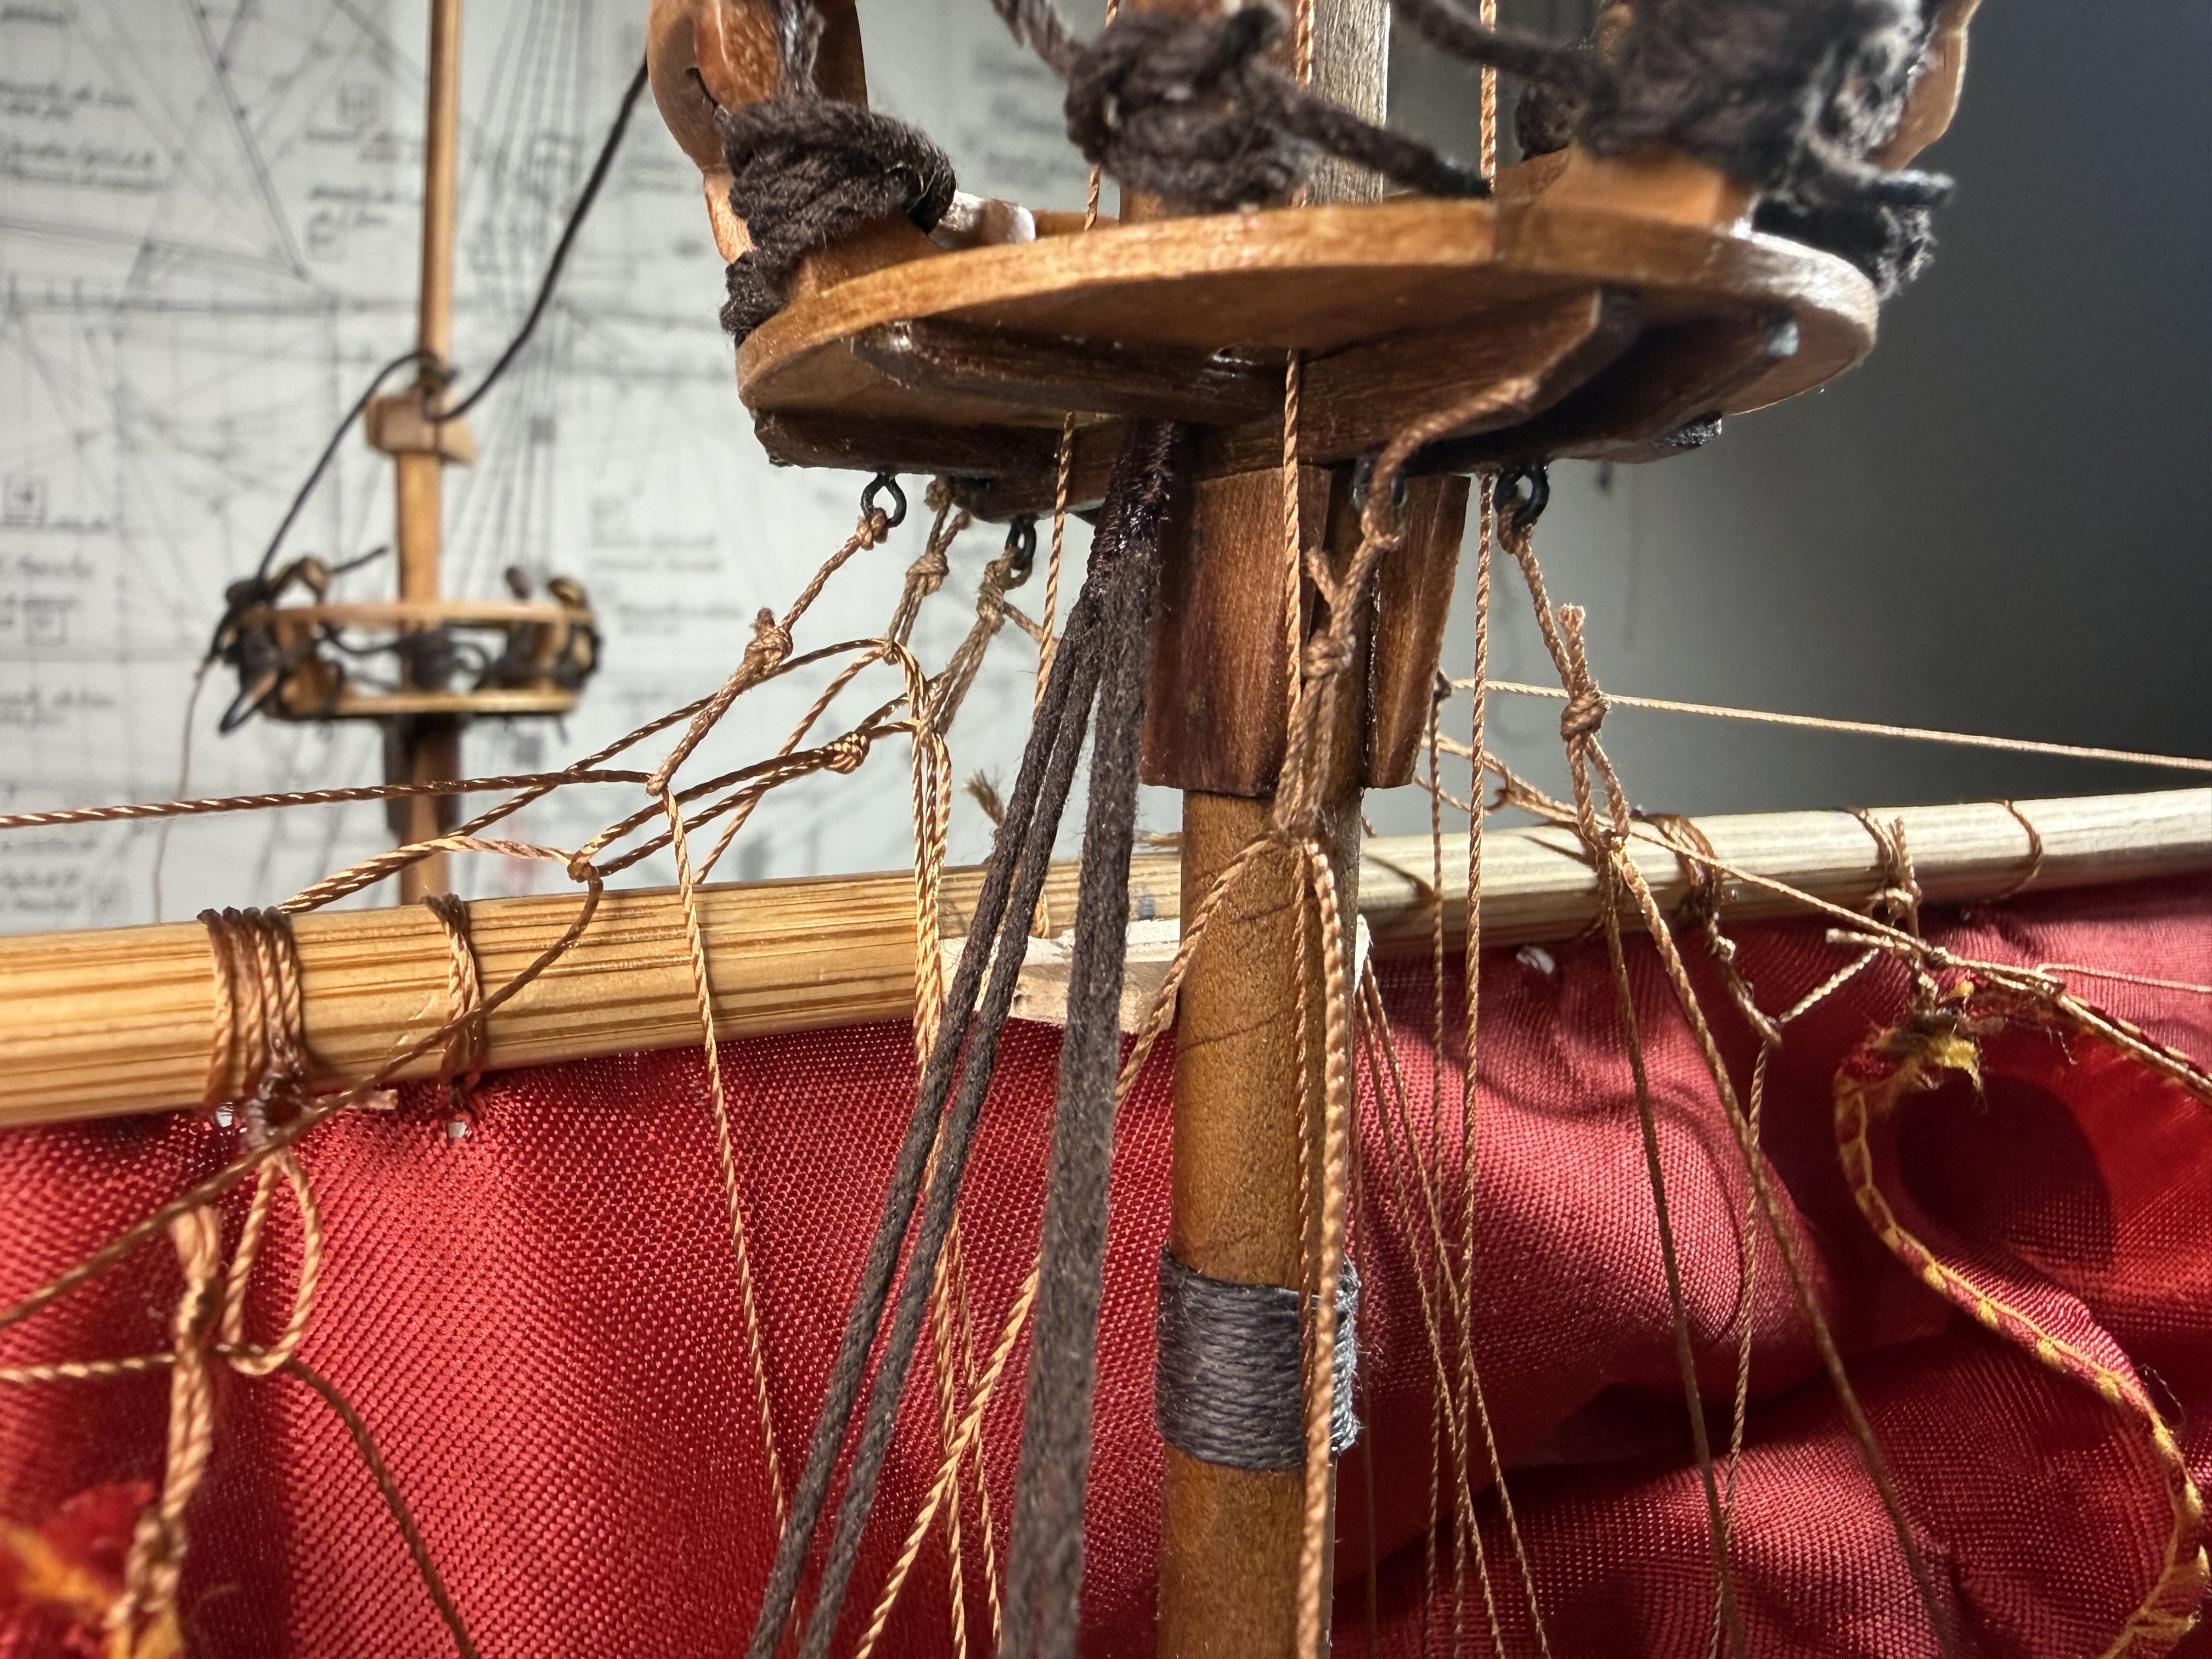
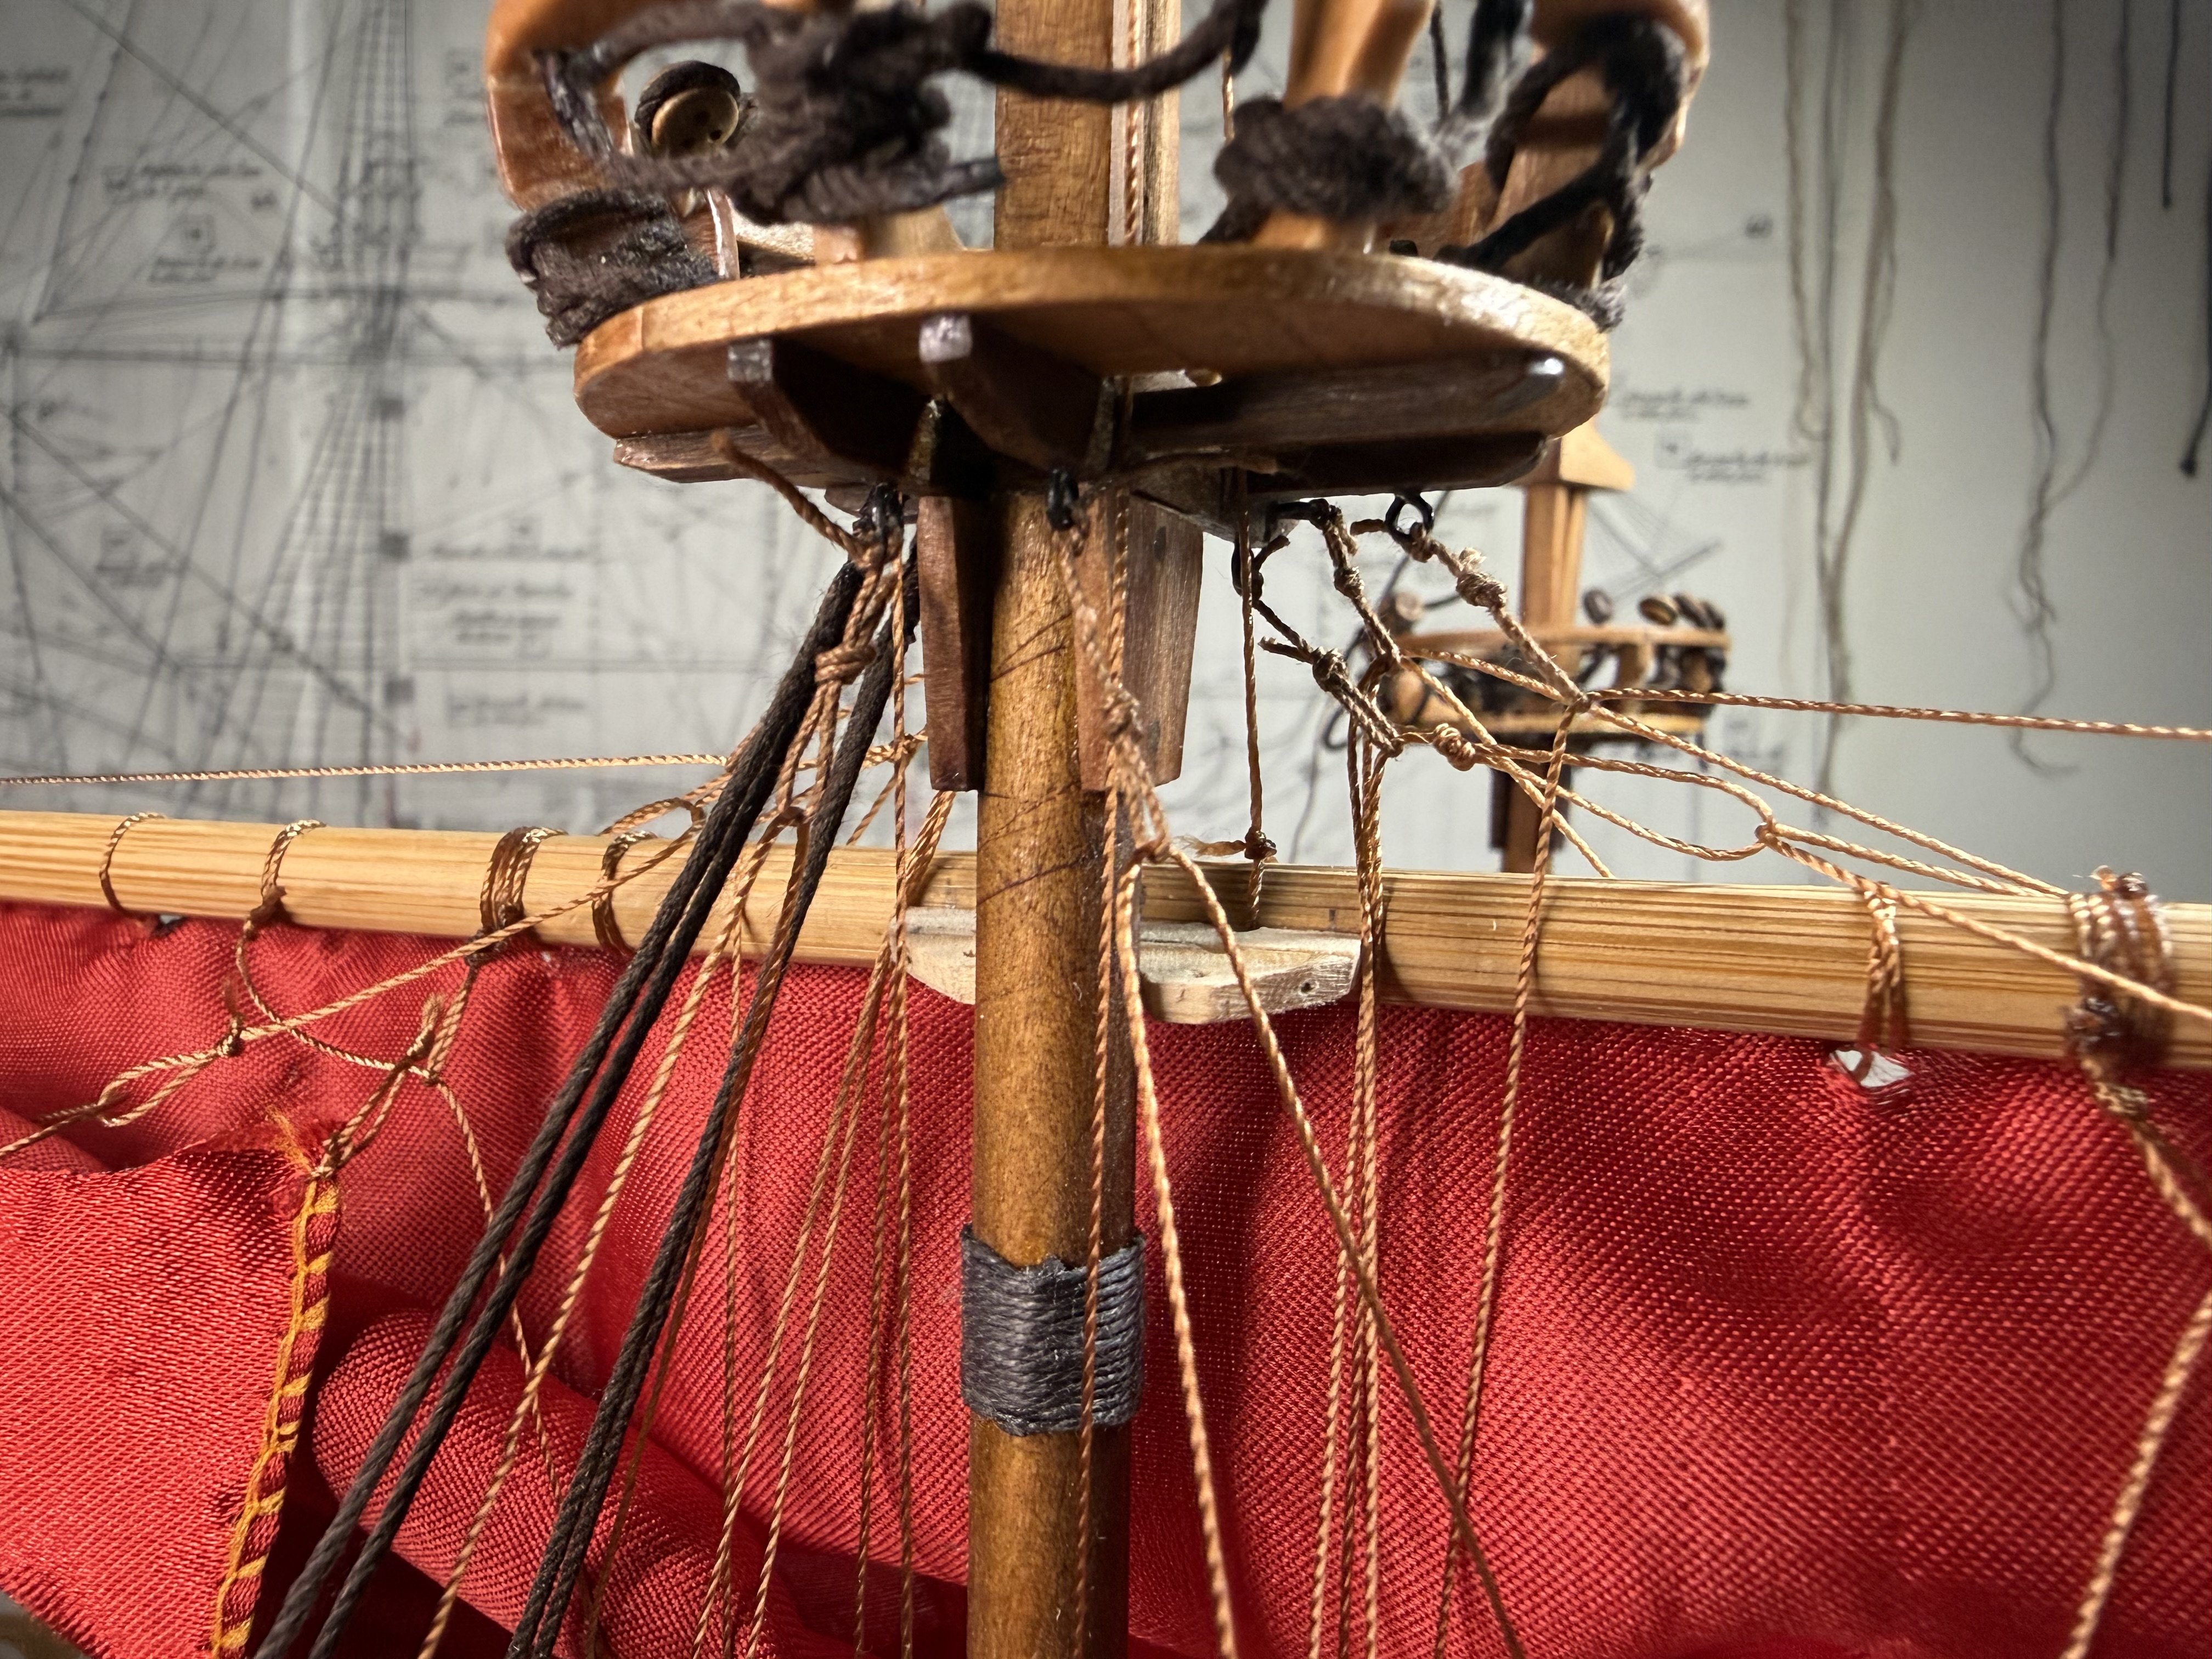
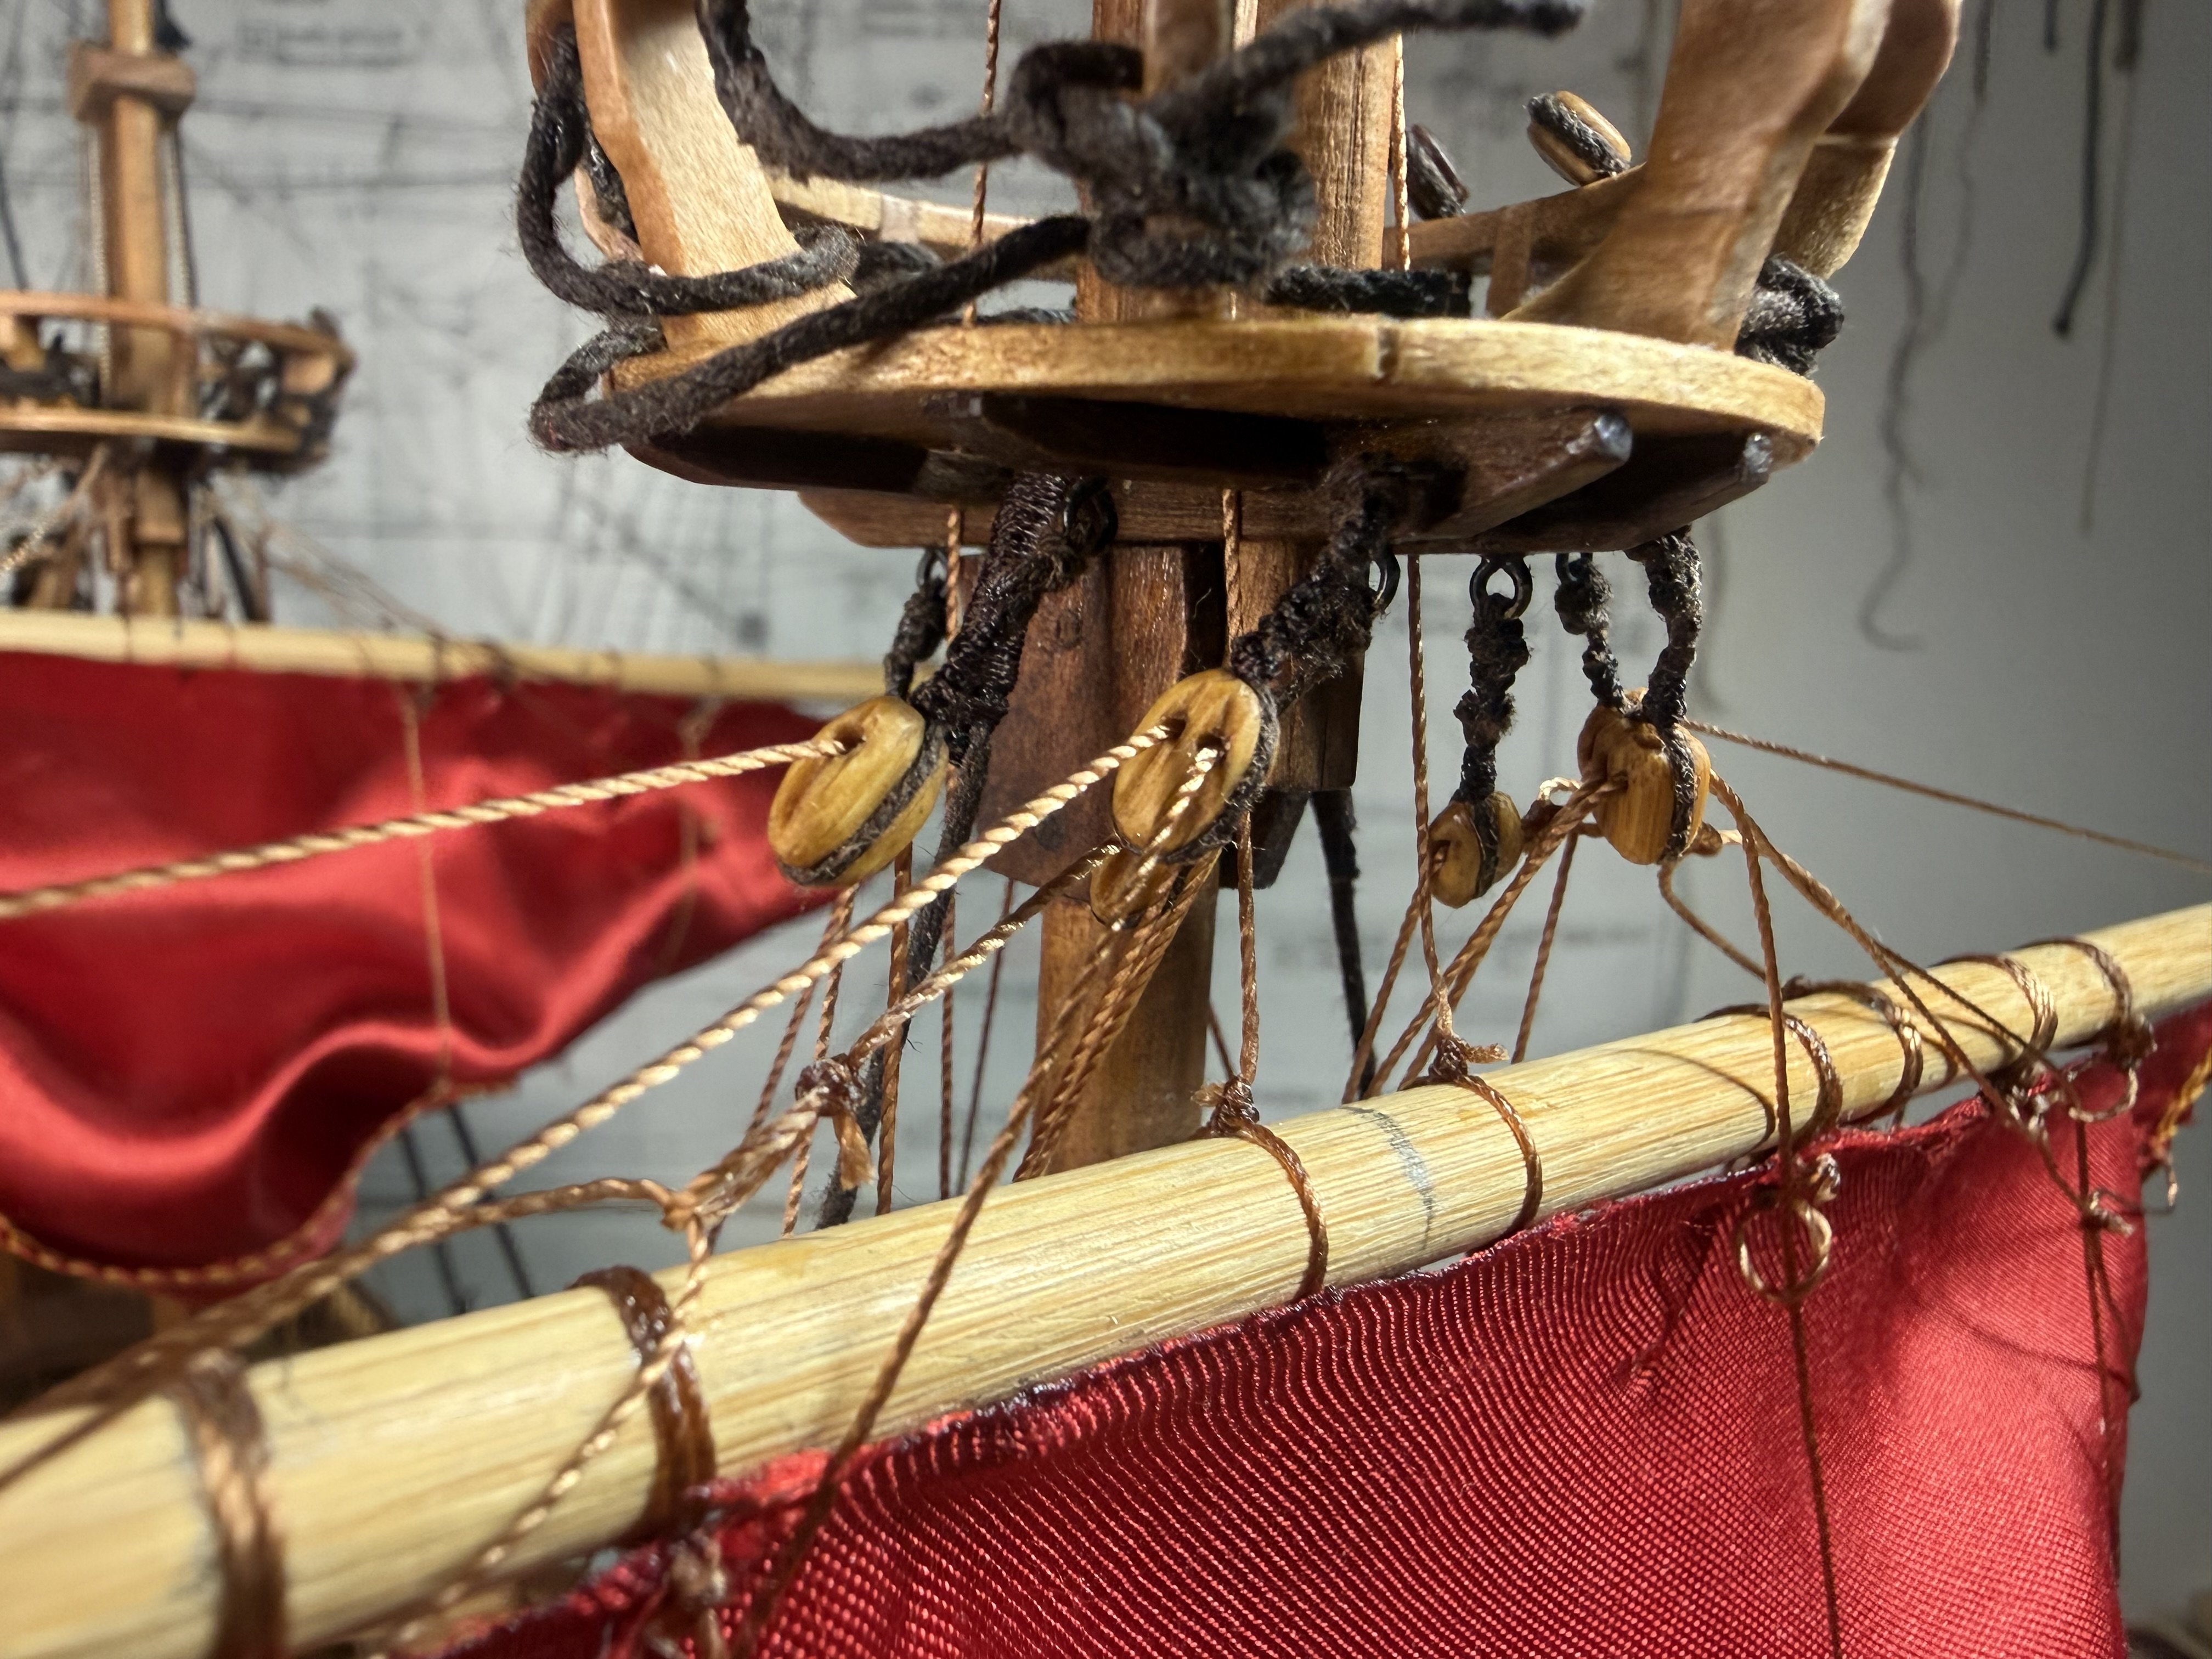
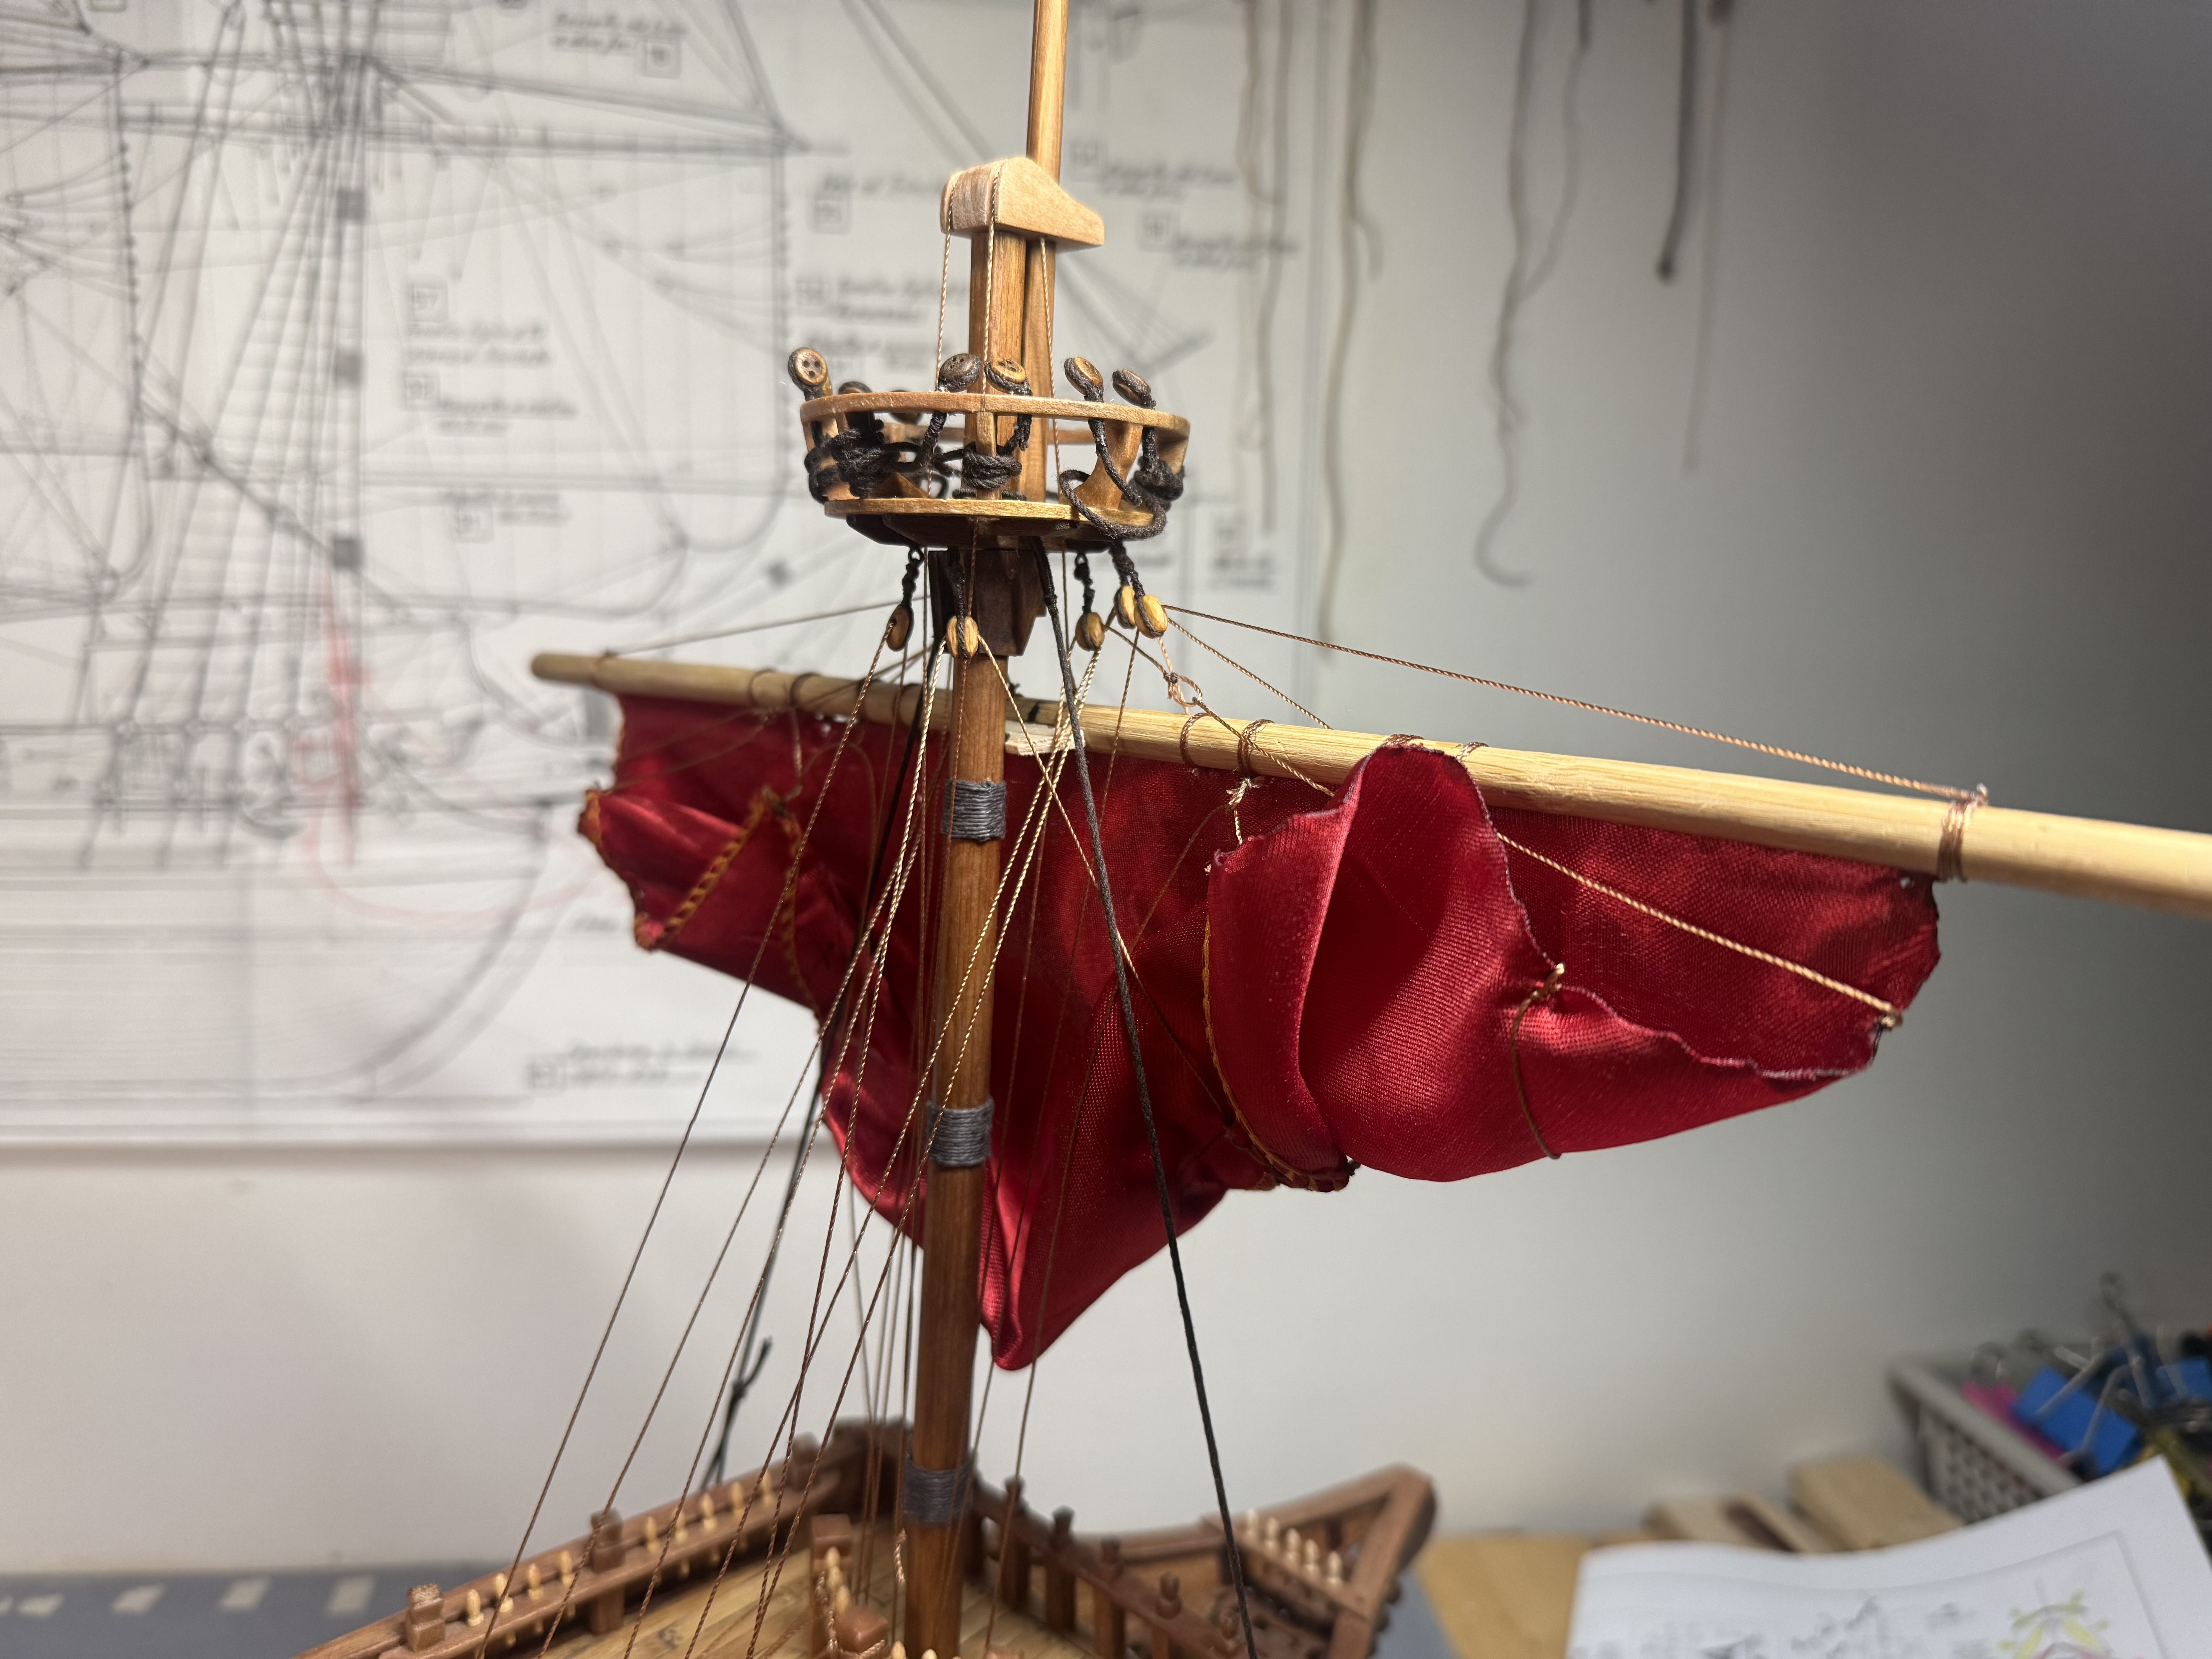
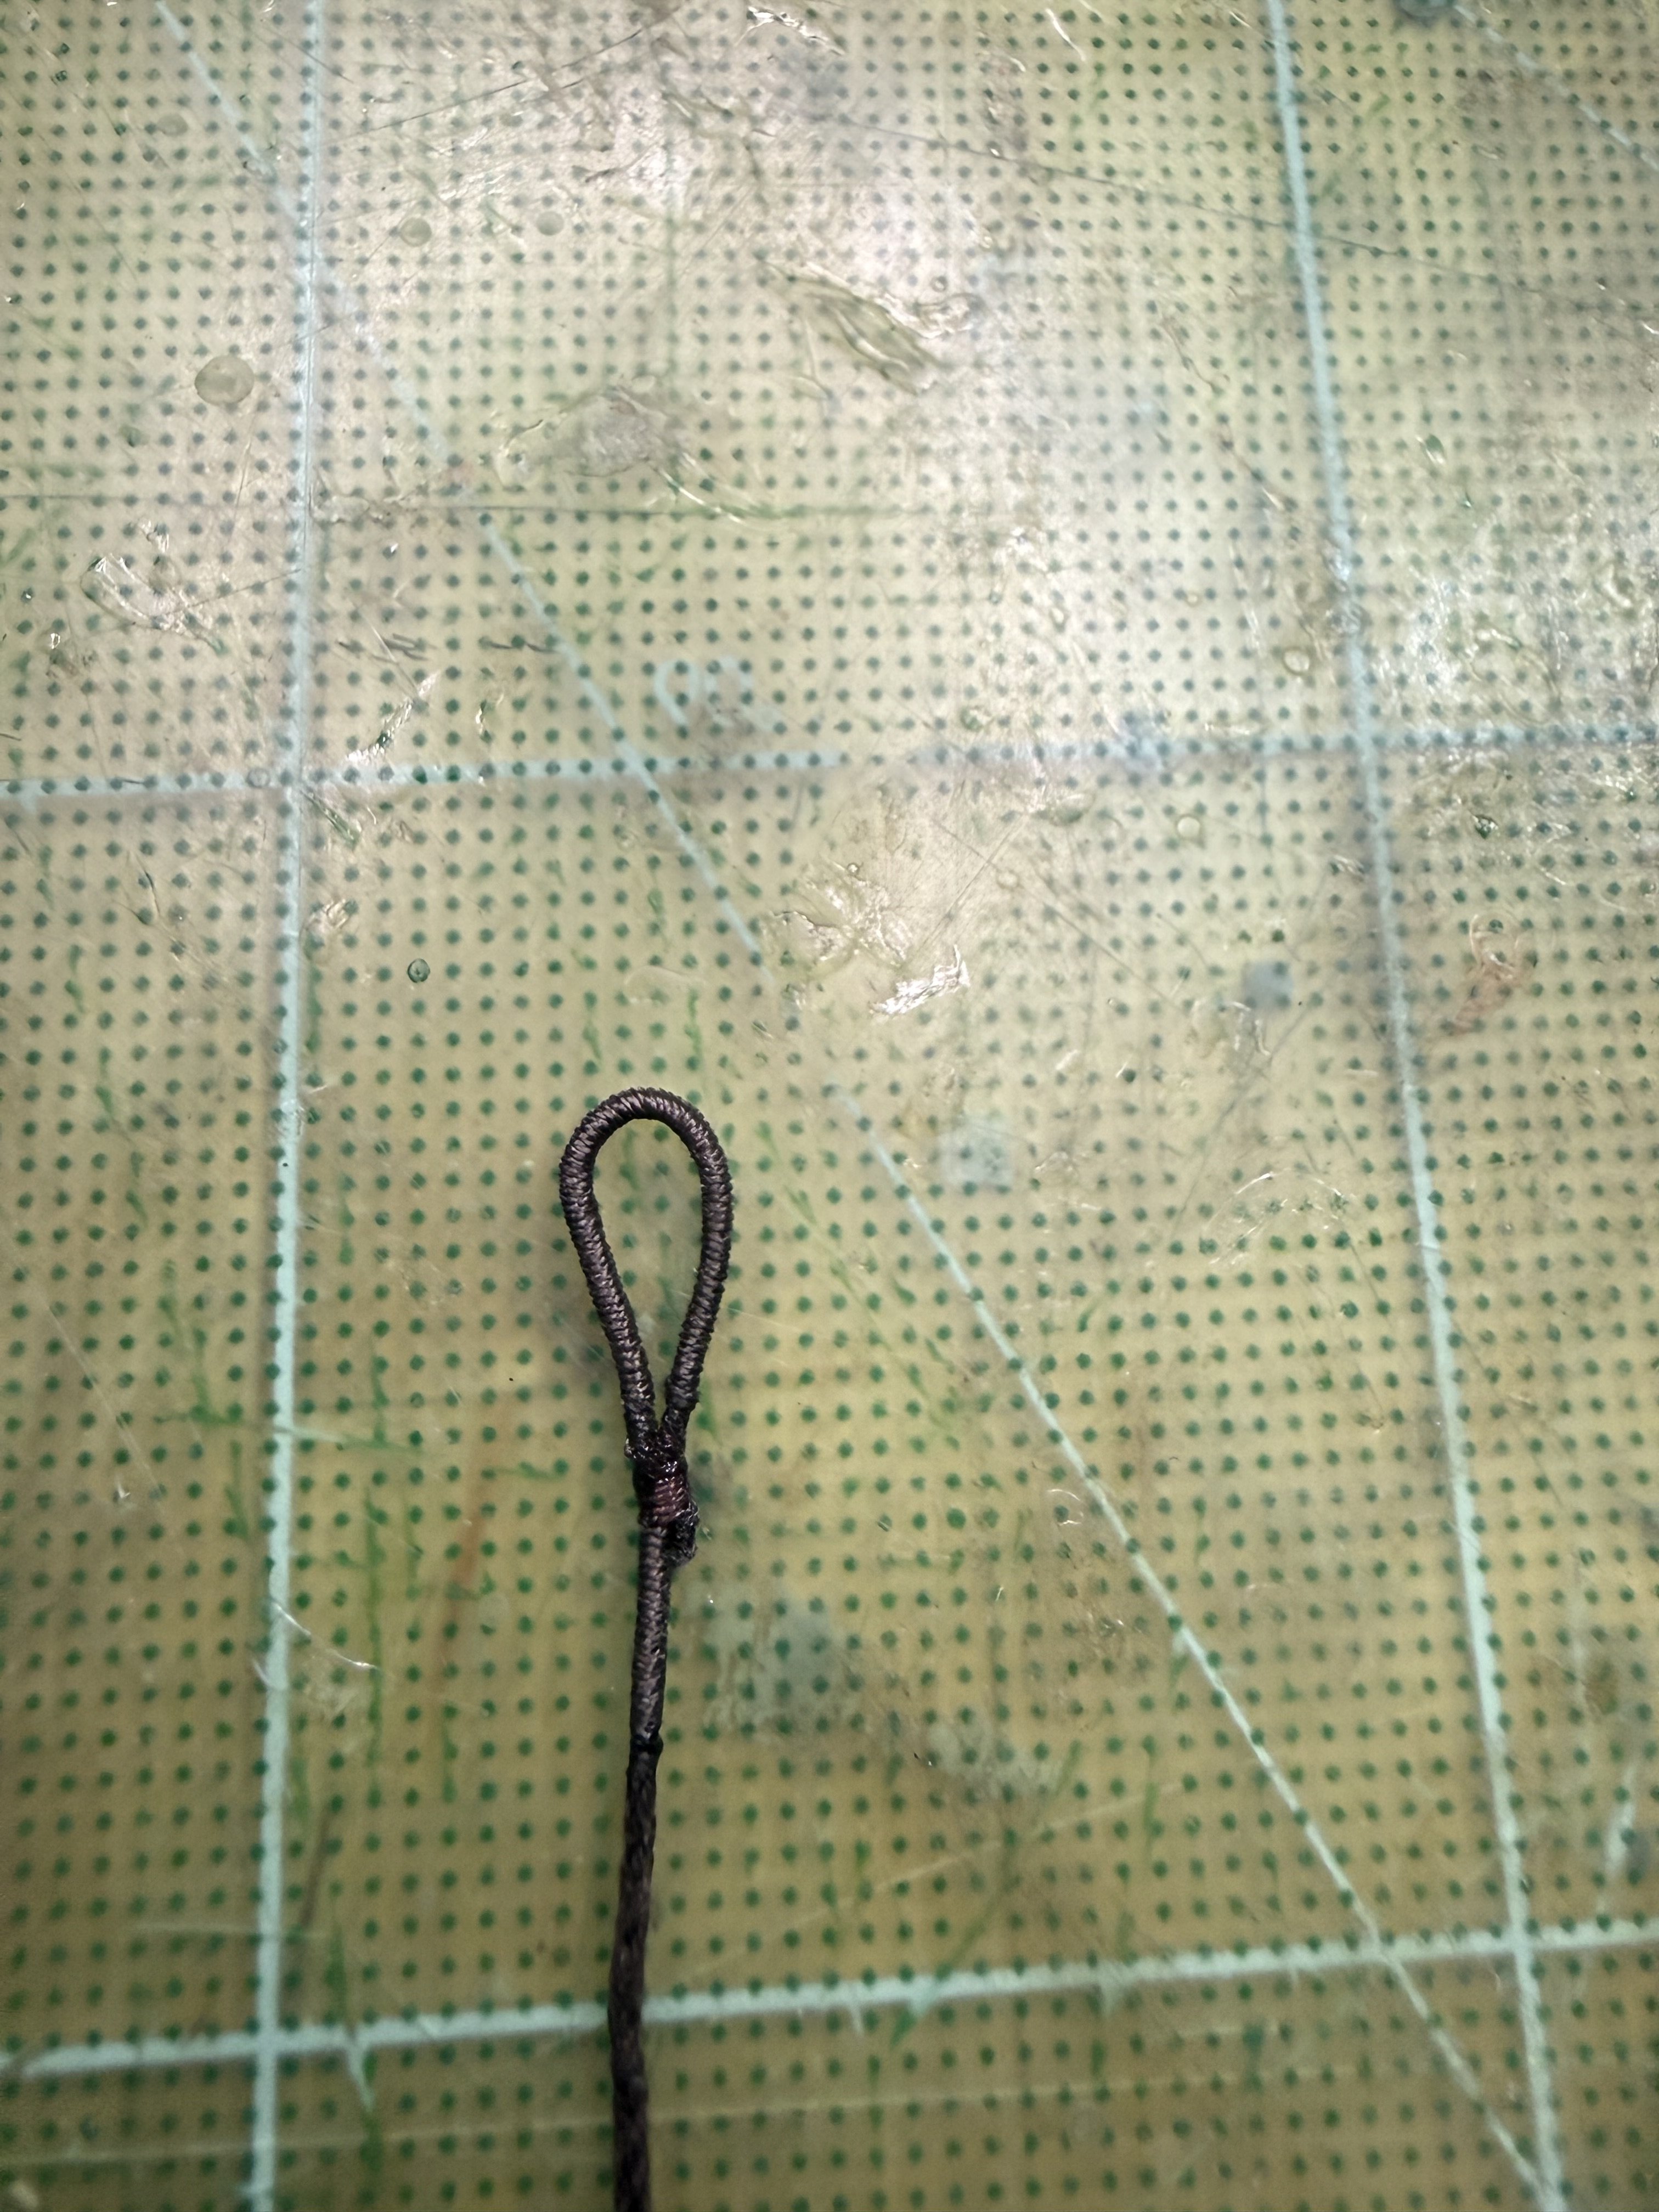
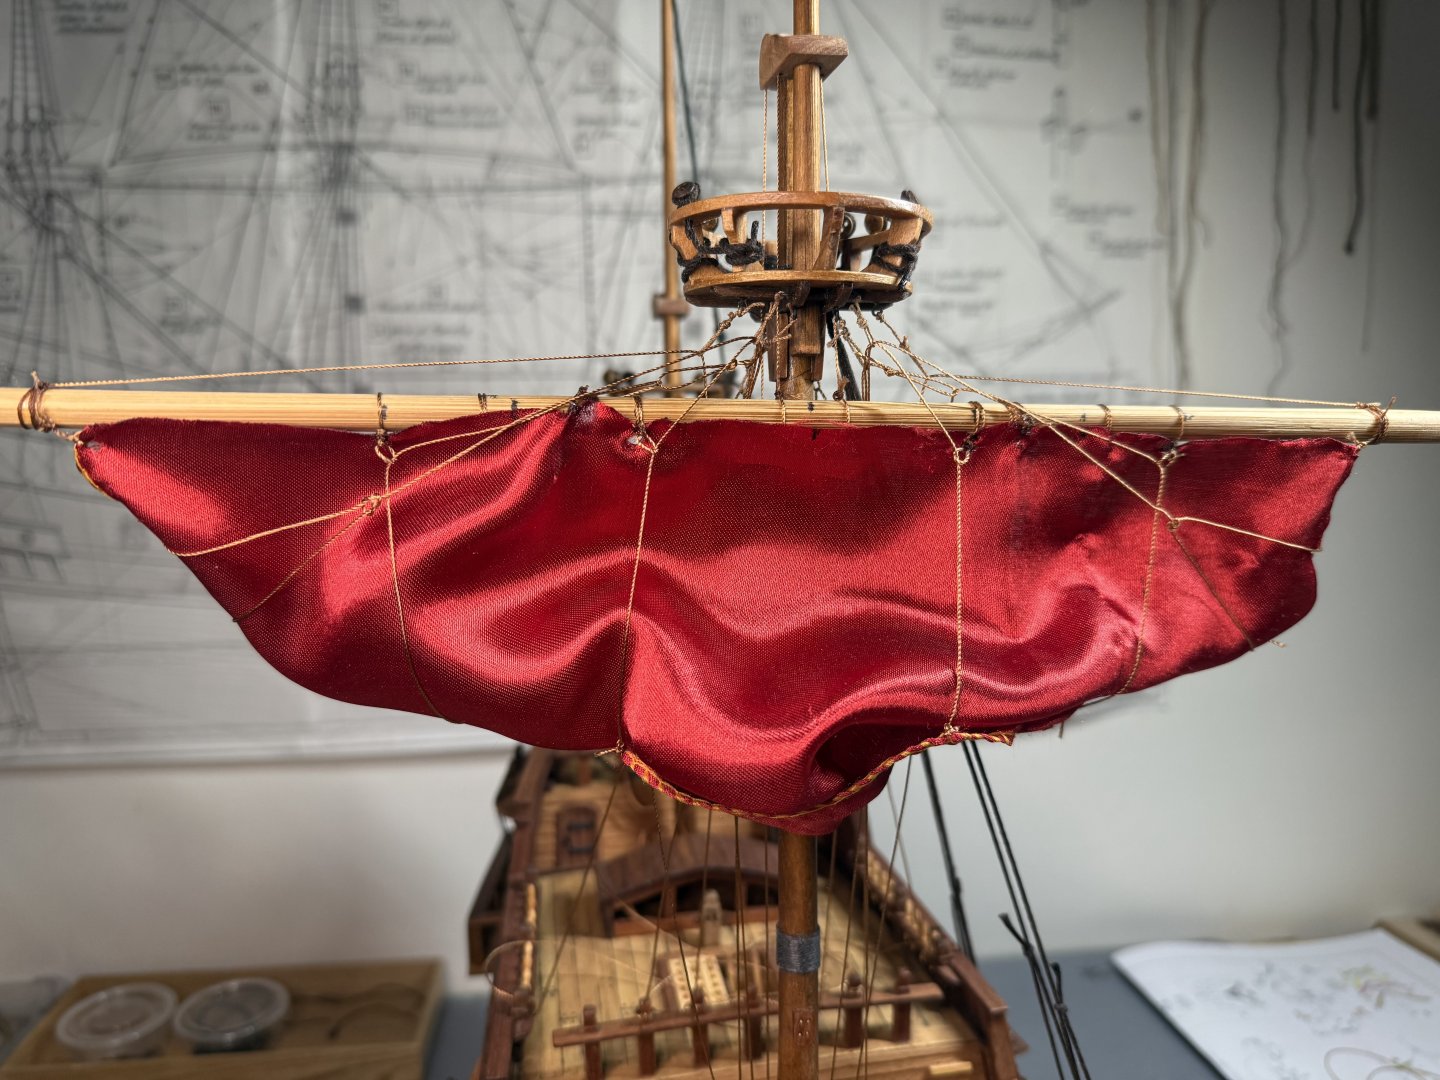
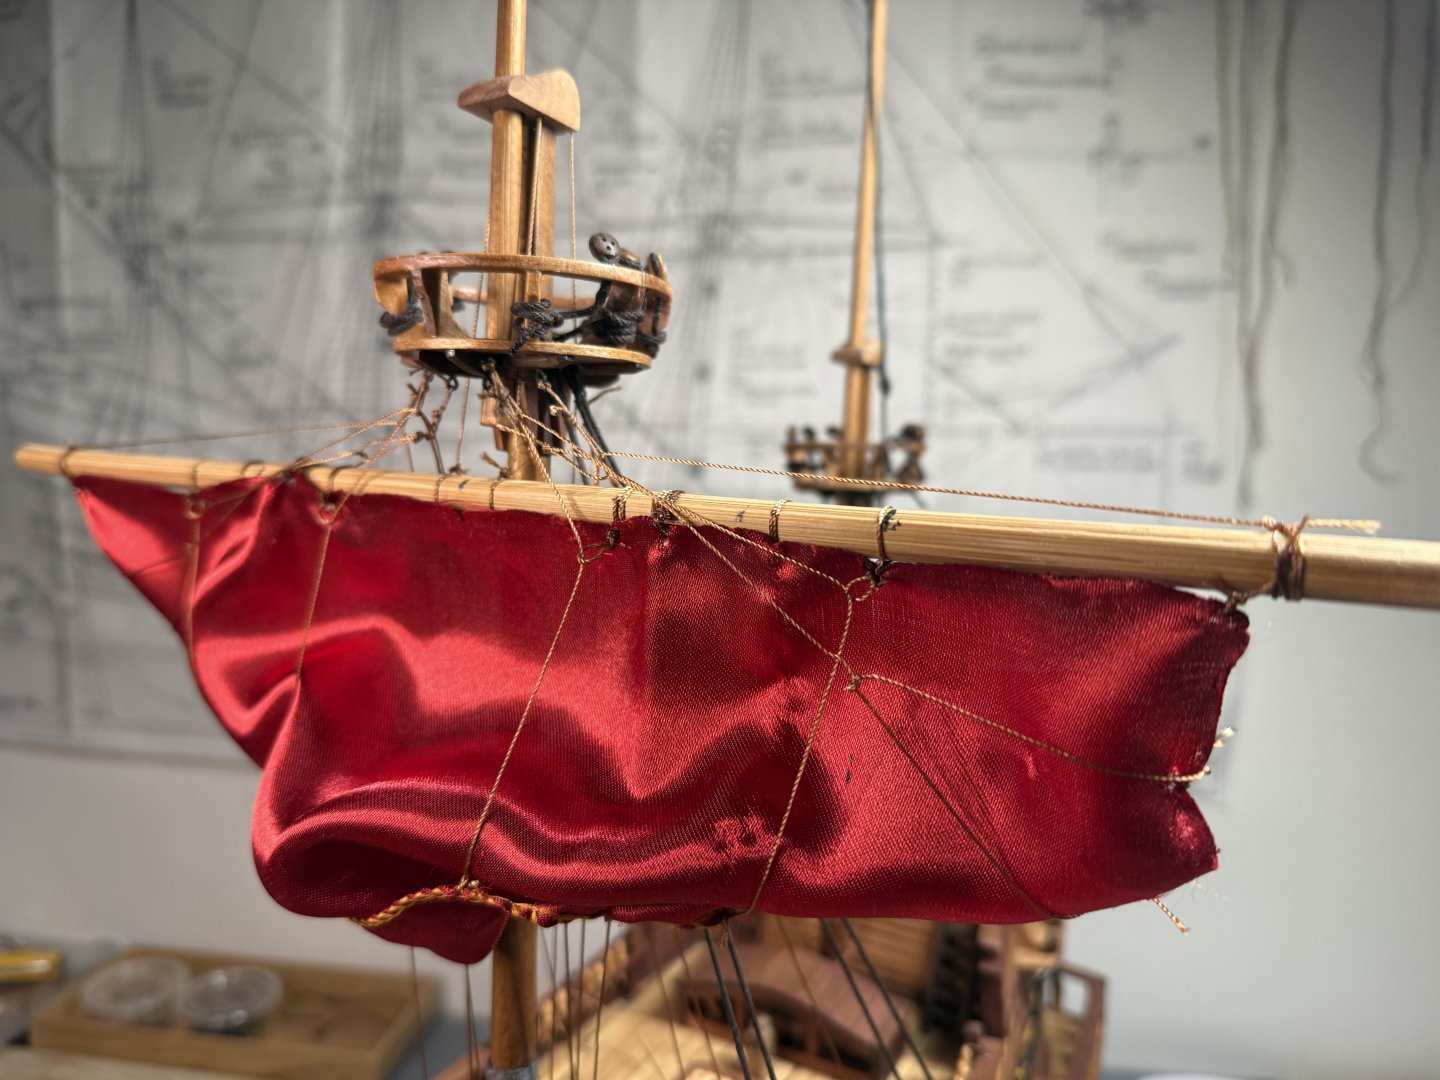
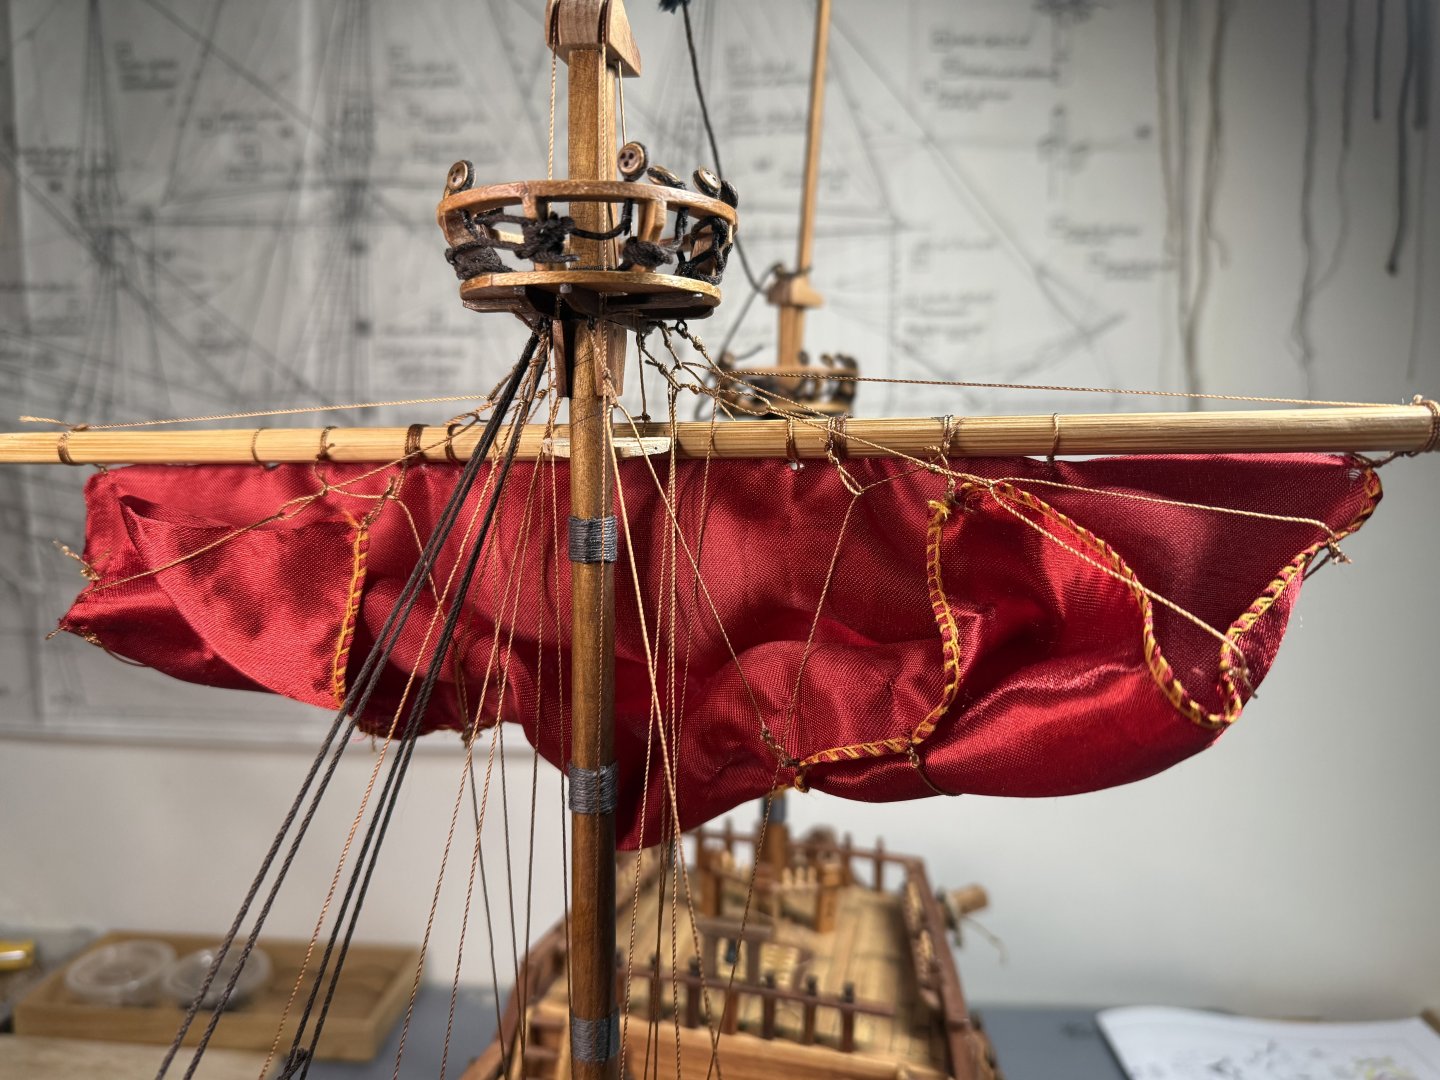
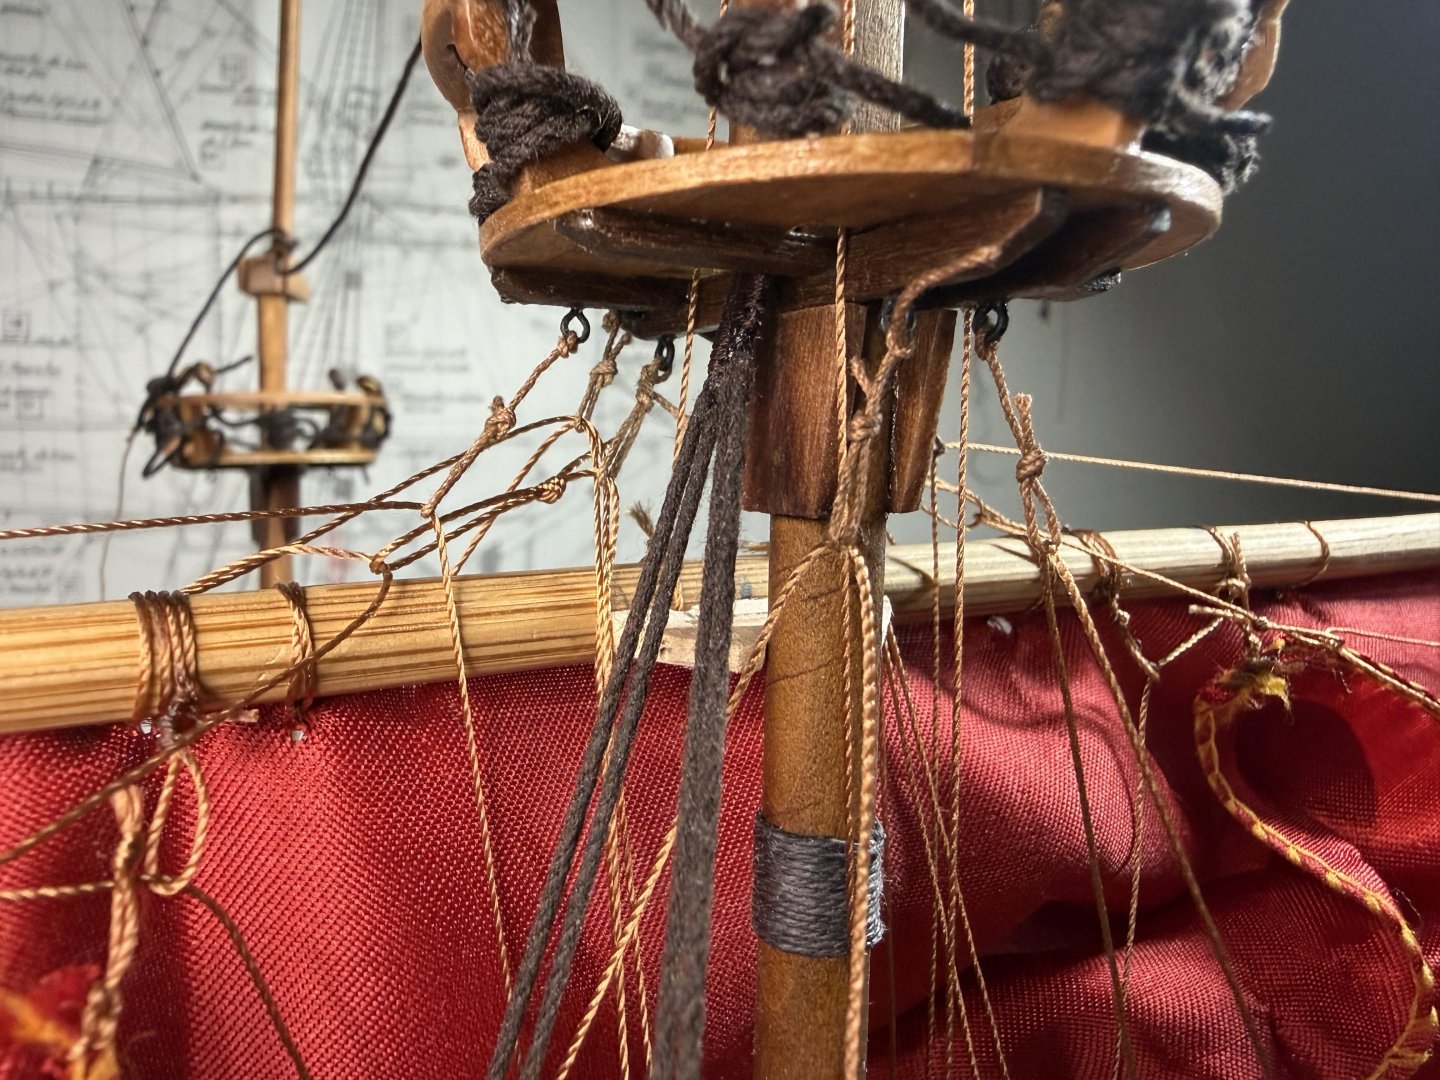
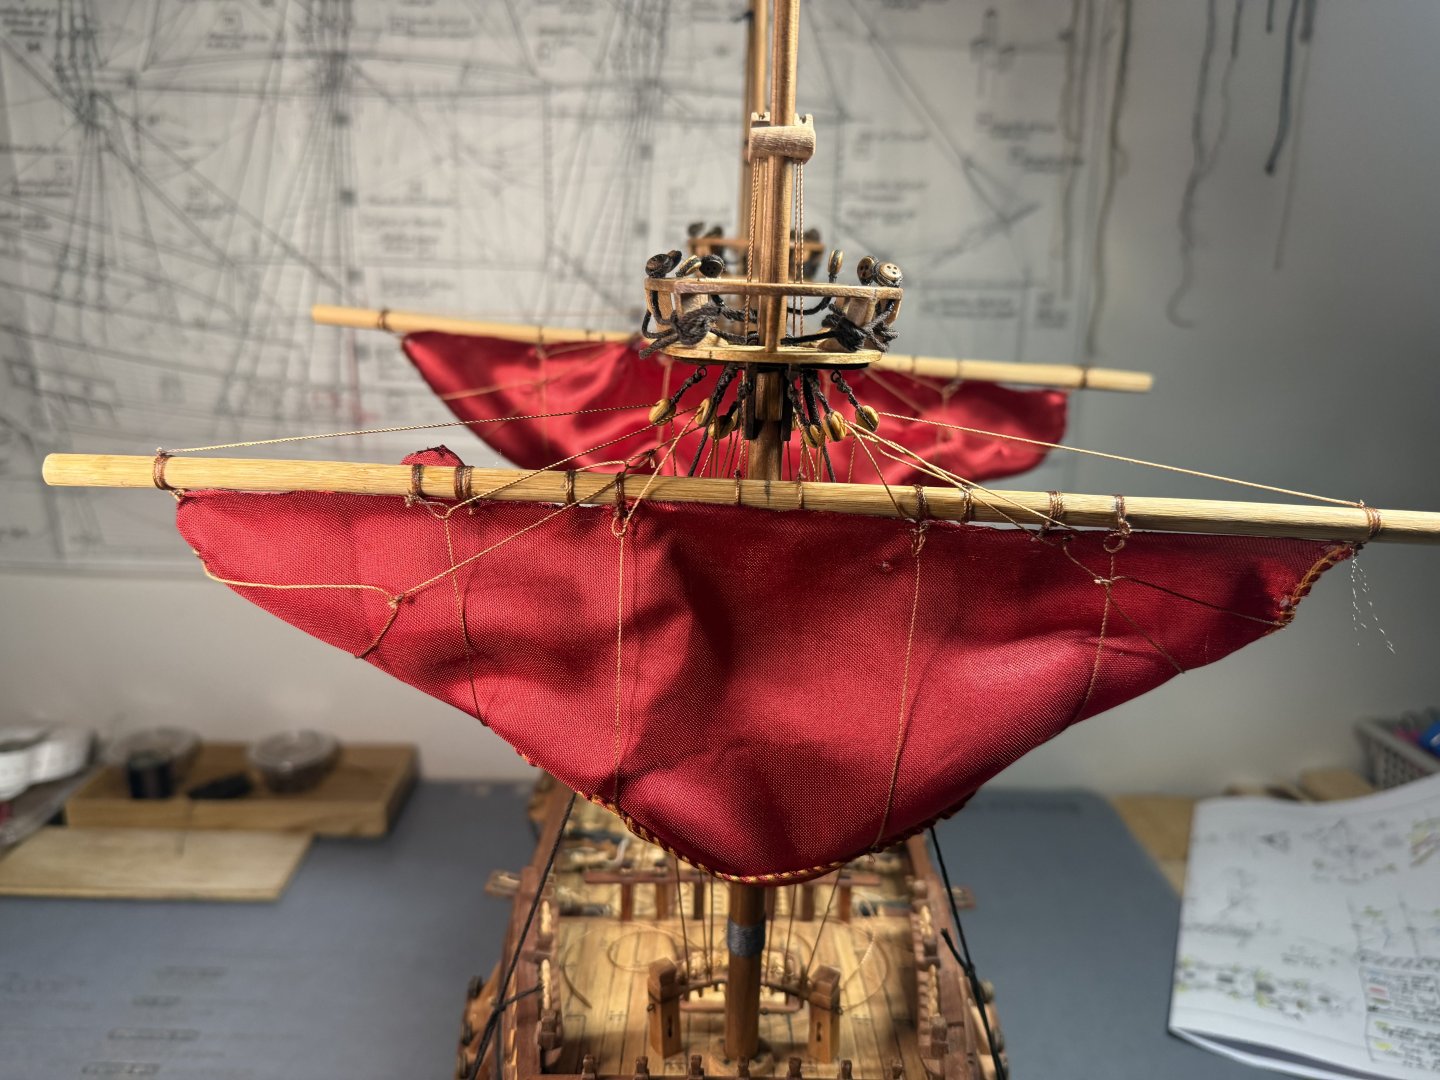
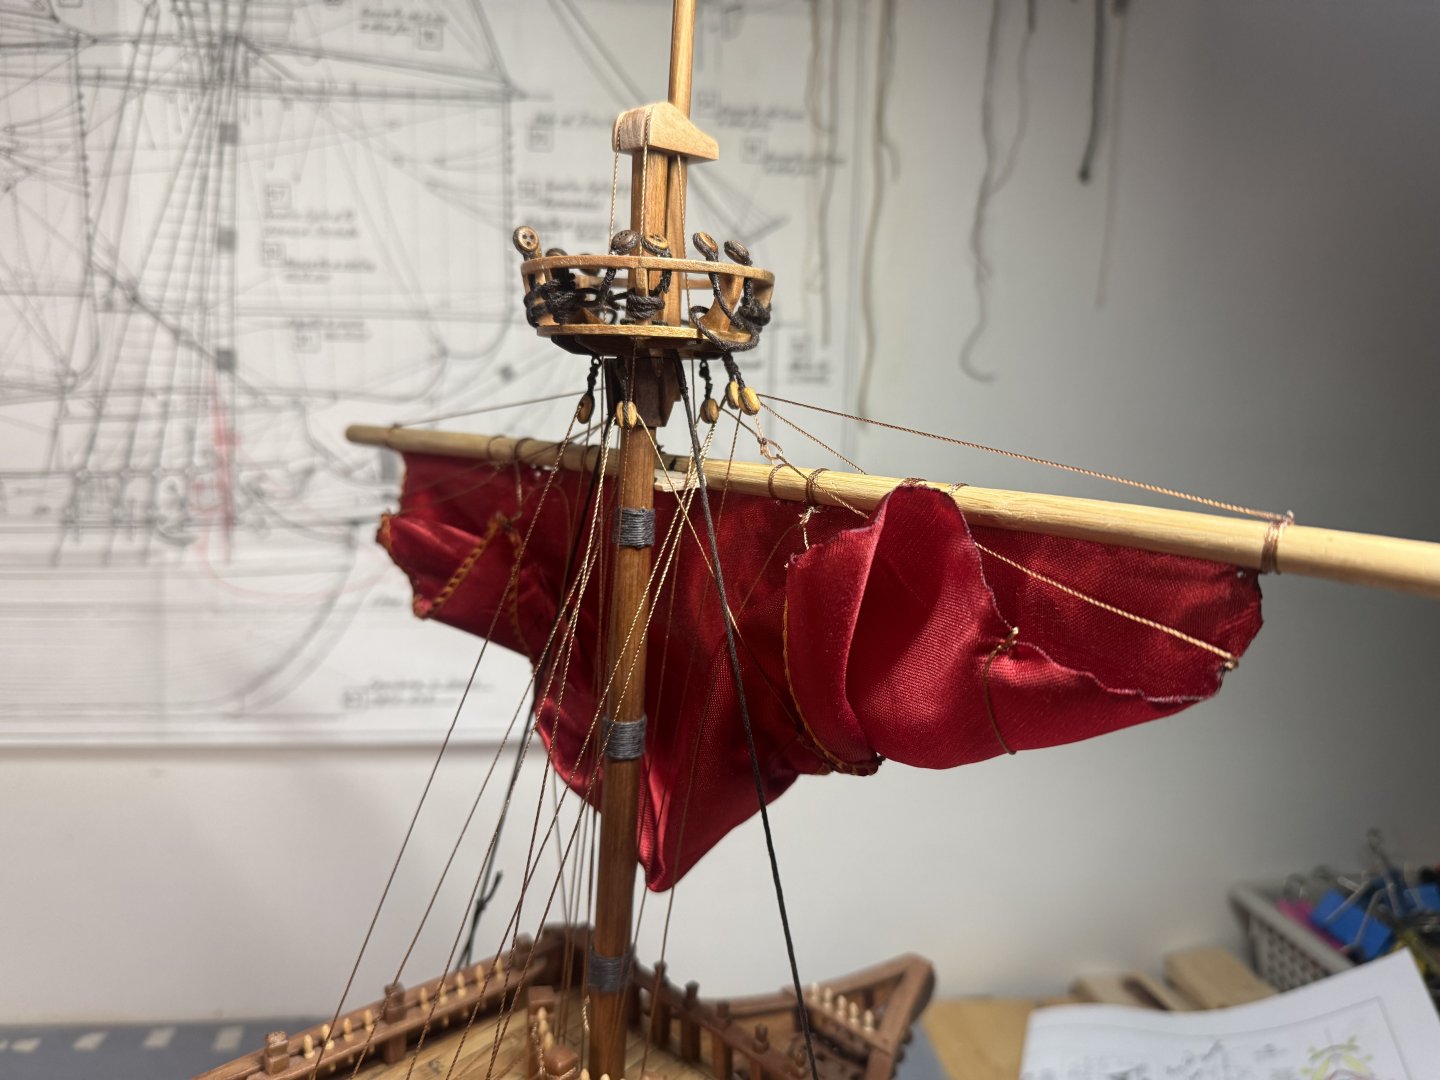
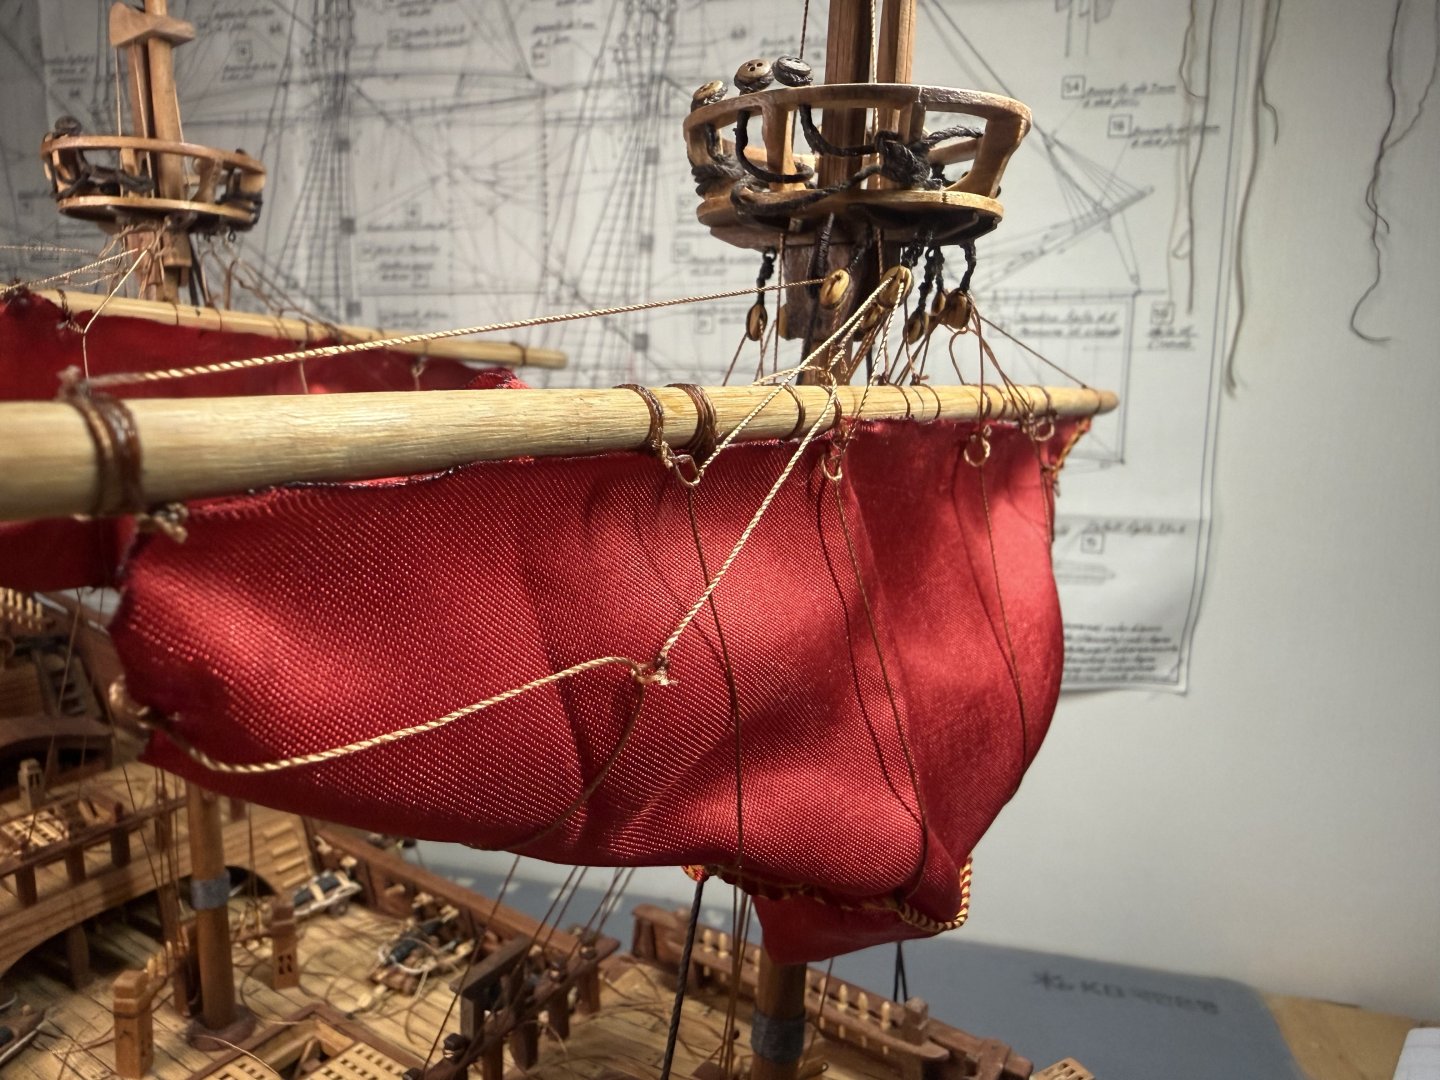
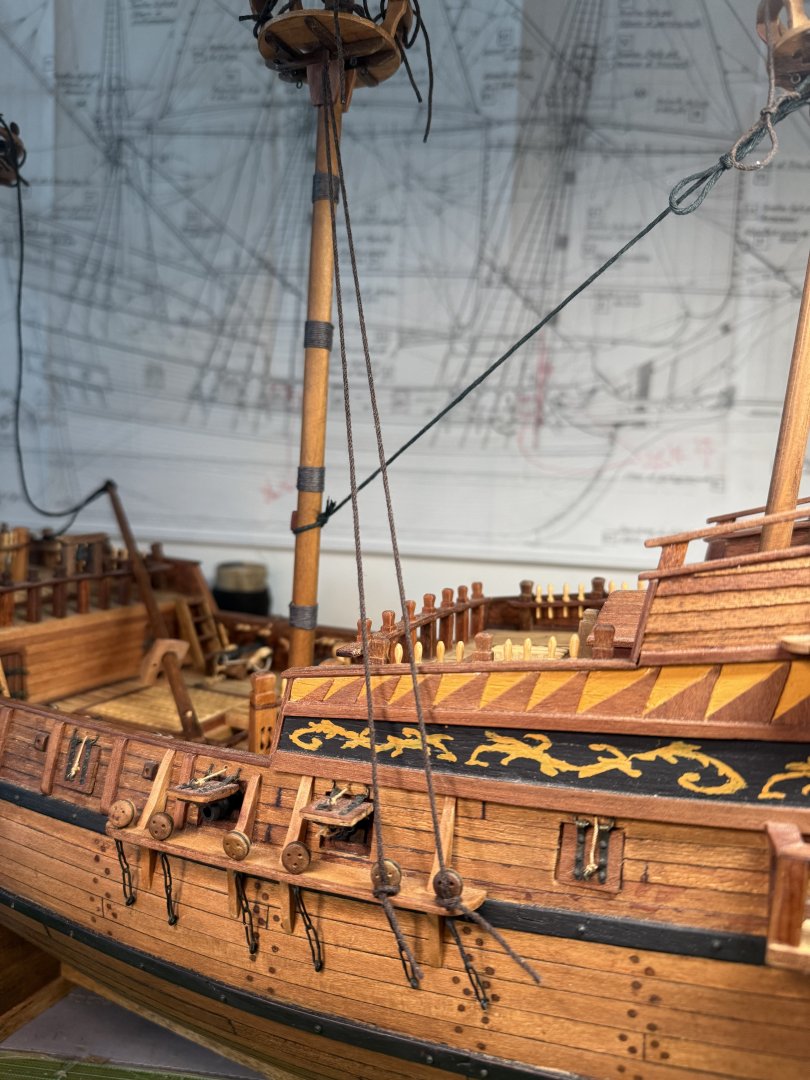
Lastly, I decided to go through a dry run of rigging on main sail and fore main sail as the Aeropicola plans do not provide much rigging details. I did substantial research on this through internet and YouTube - quite helpful. However, regarding the belaying positions on the deck level, I had to combine my common sense (or imagination) with the belaying plans of my previous build (Corel Endeavor). Forgive my choice of using red colored material for the dry run sheets. This red Korean traditional silk fabric was the most similar material (in terms of thickness and softness) to the ultra thin cotton fabric that I intend to use for the actual sheets. Below are the pictures of main sheet trial without blocks (with just temporary threads in place of actual blocks). Initial proof of concept on main sheet done and moving on to fore main sail dry run, this time with blocks attached. As you can see from below pictures, I employed two buntlines that run through single blocks (here represented by thread loops) attached on the yard, and passing through double blocks attached underneath the crow's nest. I also applied a slab line (at the point between the two buntline positions) on the back side of the sheet, running directly through a single block beneath the crow's nest (on the stern side). Which is then belayed to the rail behind. Let me know if this method should be reconsidered for a better and more historically accurate one. That's all for this update!


-
Rock_From_Korea reacted to a post in a topic:
Golden Hind by Rock_From_Korea - 1:48
-
Continuing with the shroud and stay try-outs. I decided to deviate from Aeropicola’s topmast stay related plans as they do not seem reasonable. For this change, I had to reshape and rearrange the topmast stay stoppers. Below are the pictures related to these work streams. Some more testing and try-outs on shrouds as below. Repeating these try-outs with GH2 as well.


-
As always, thanks a lot for your encouragement Alan! Just bear with me a bit more on this update as this update will include two more threads.
-
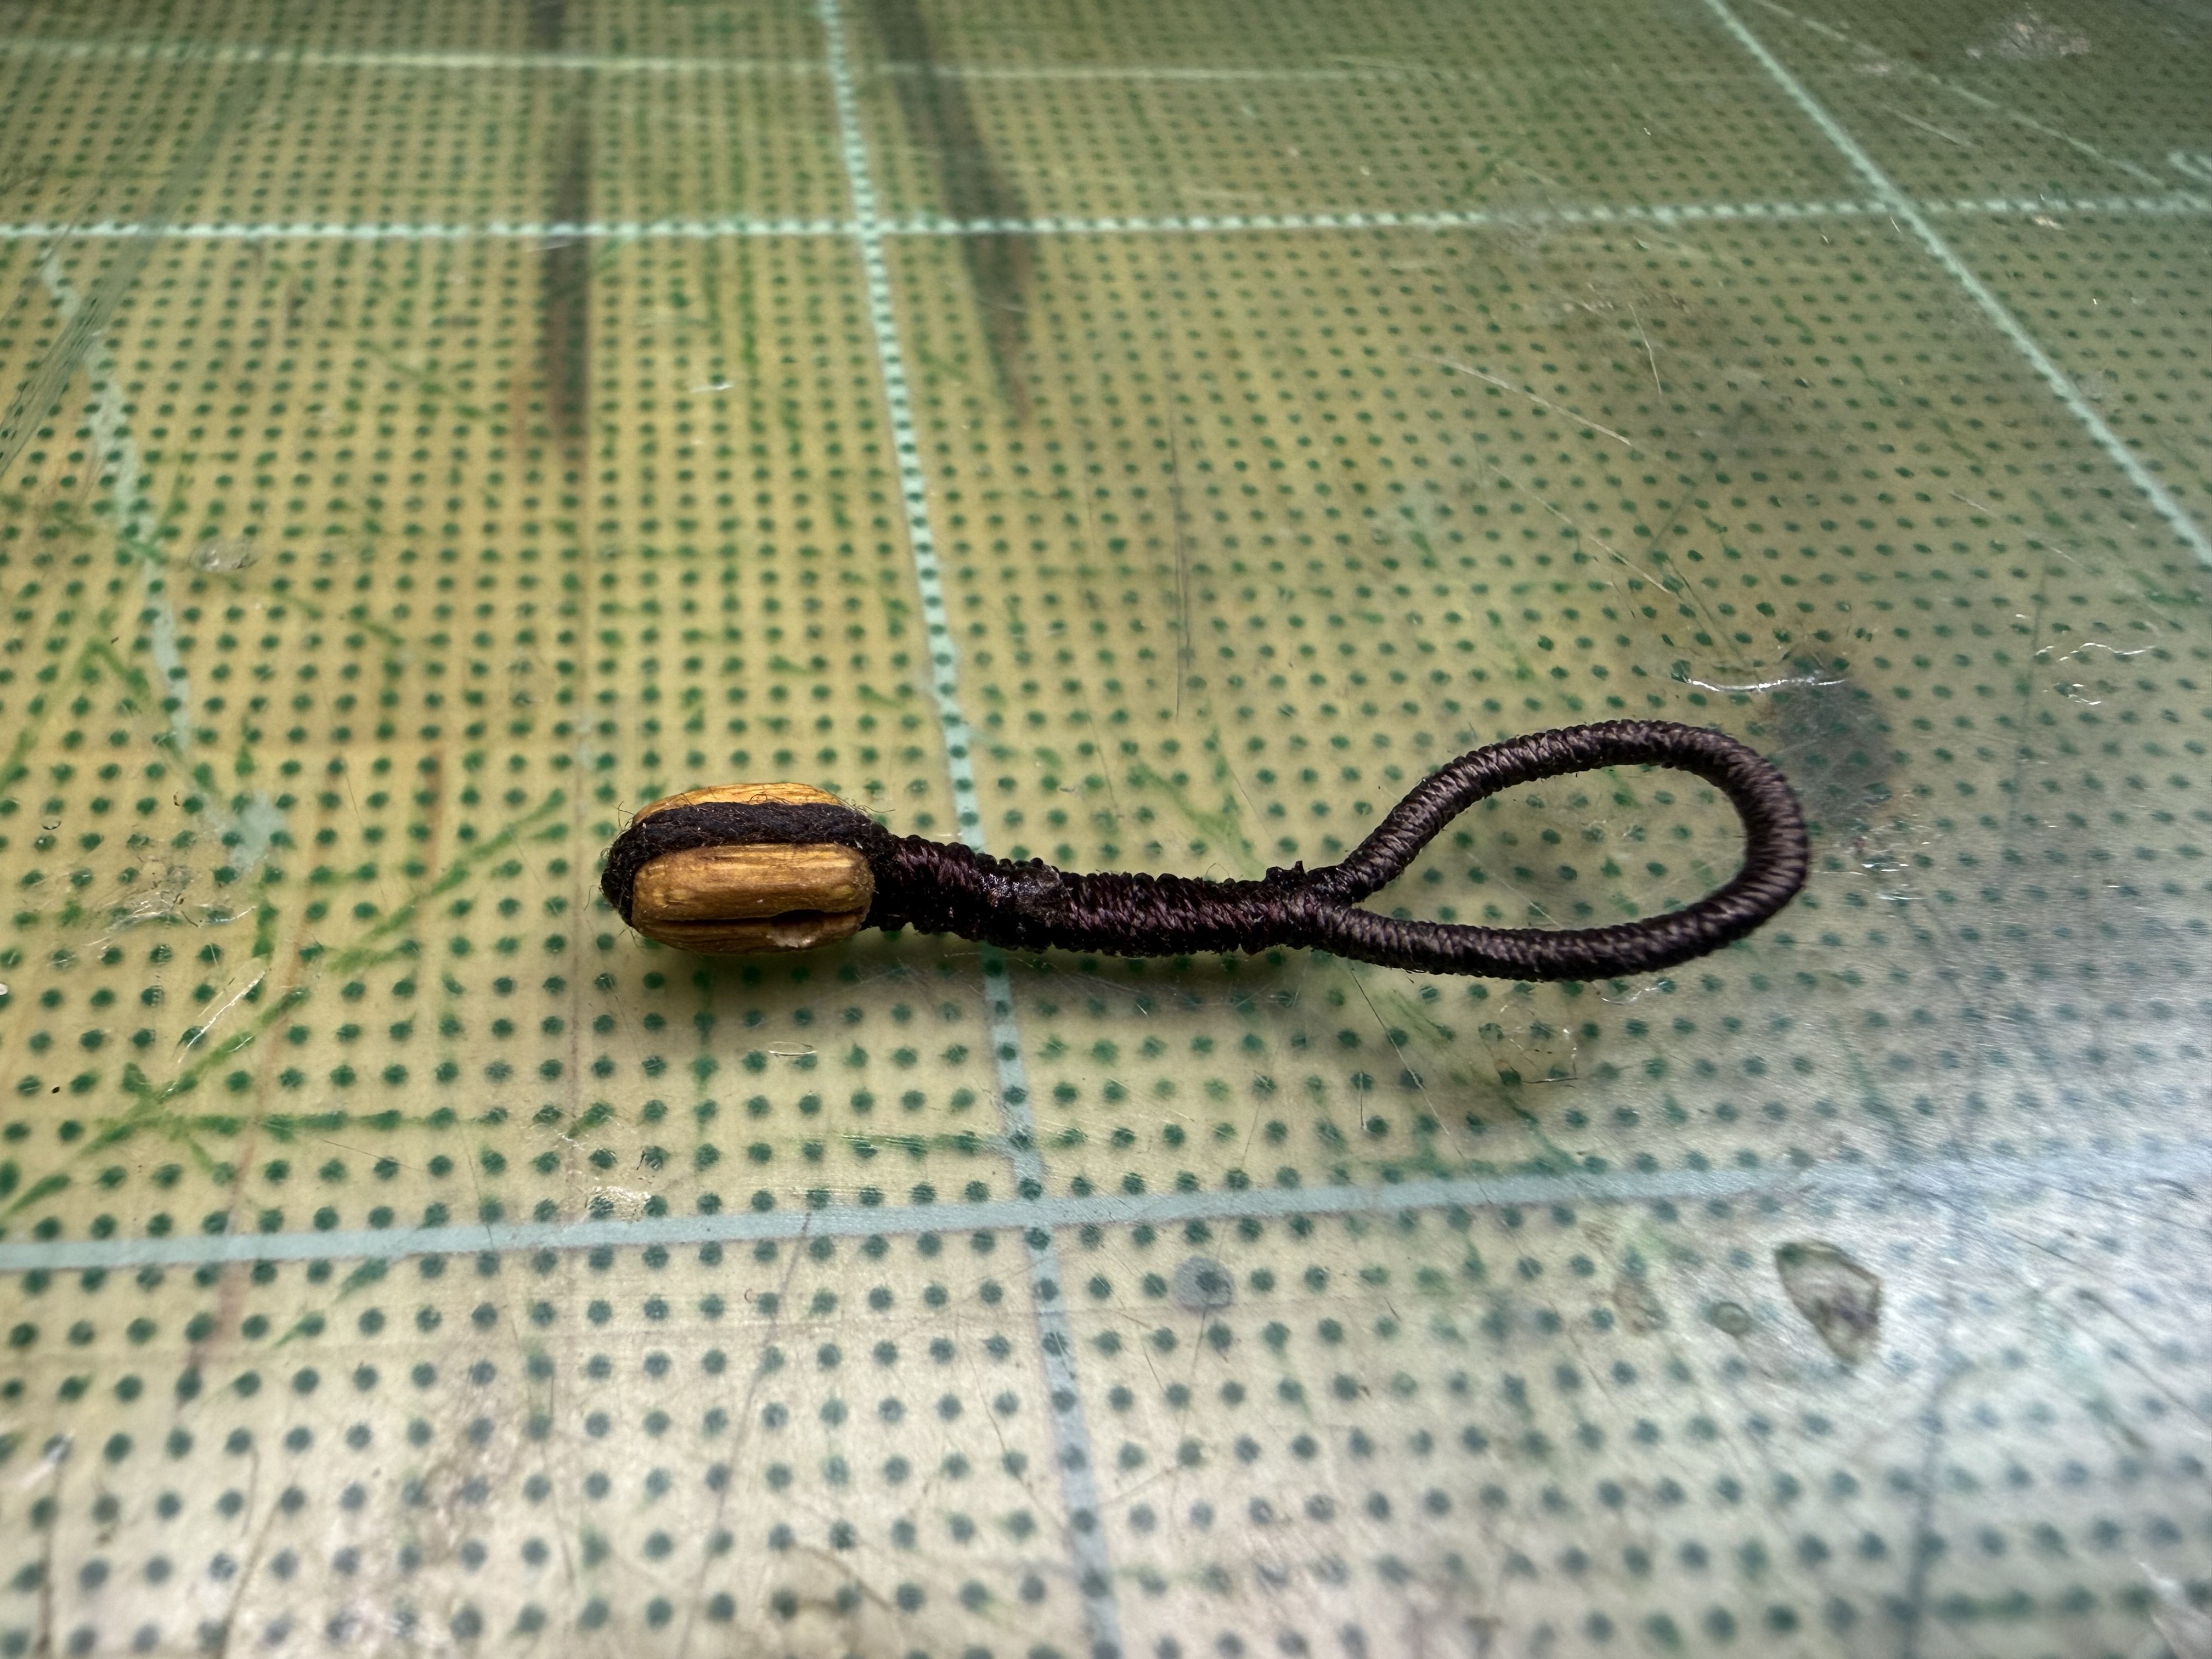
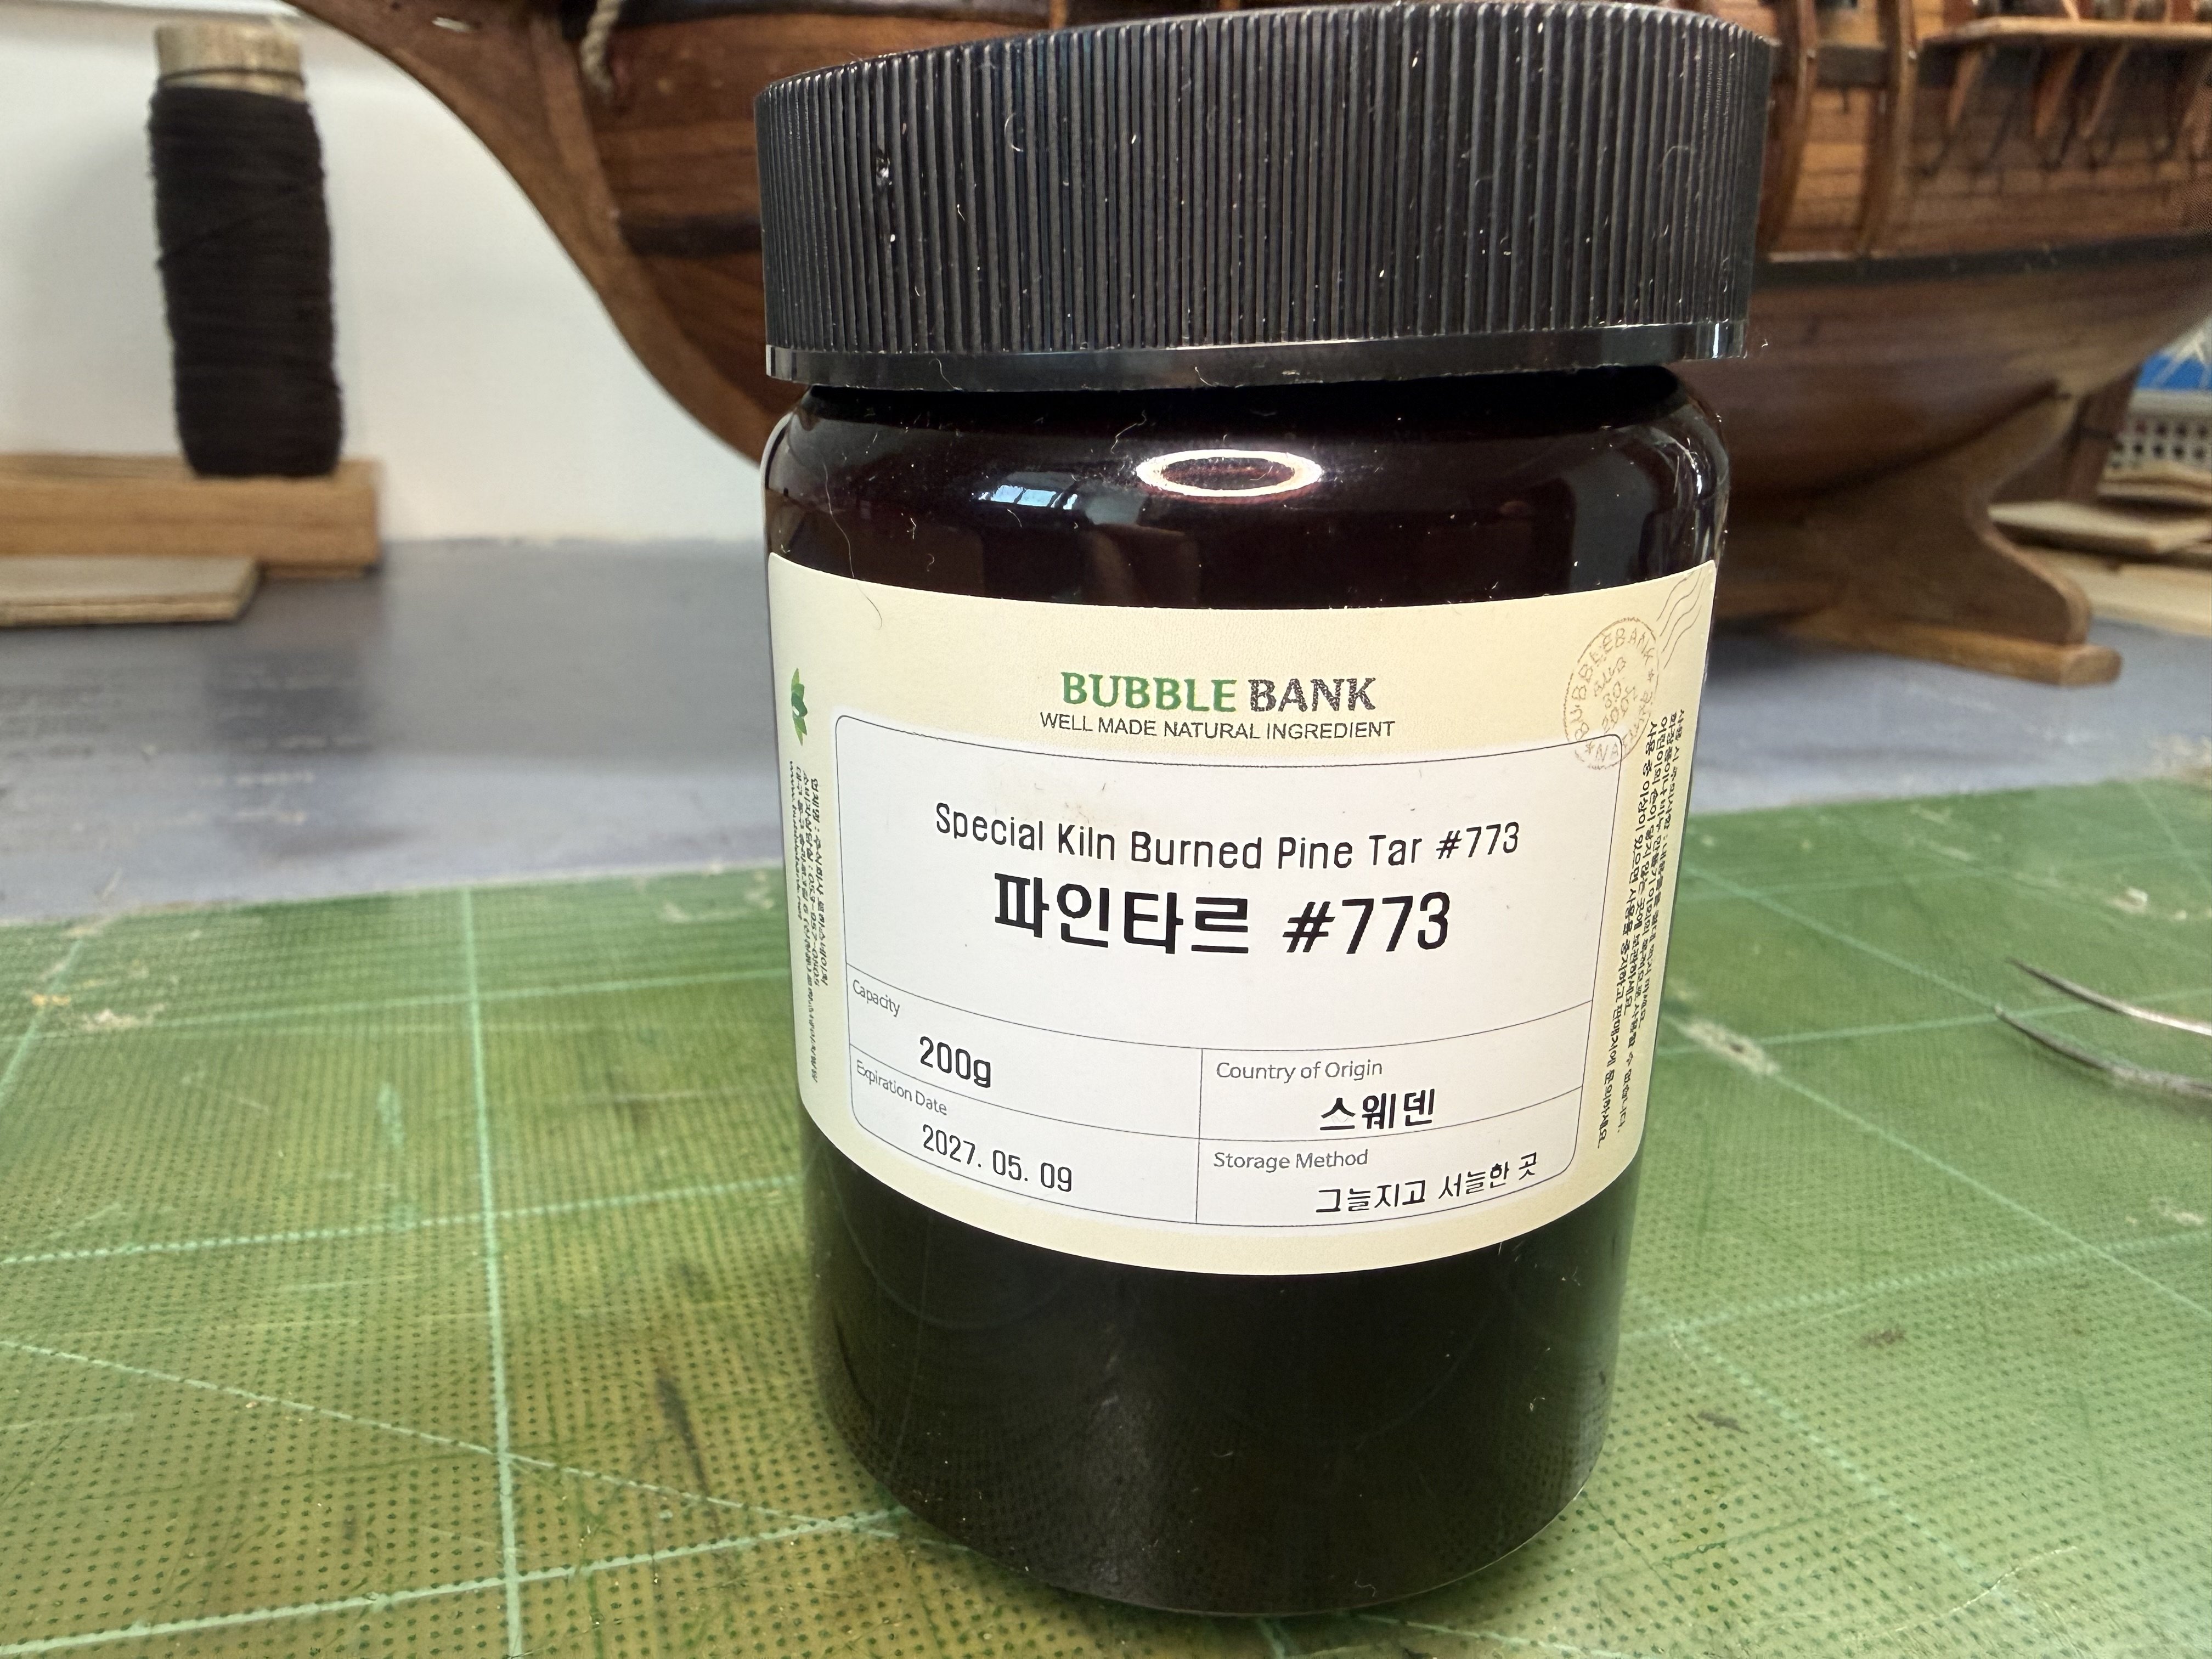
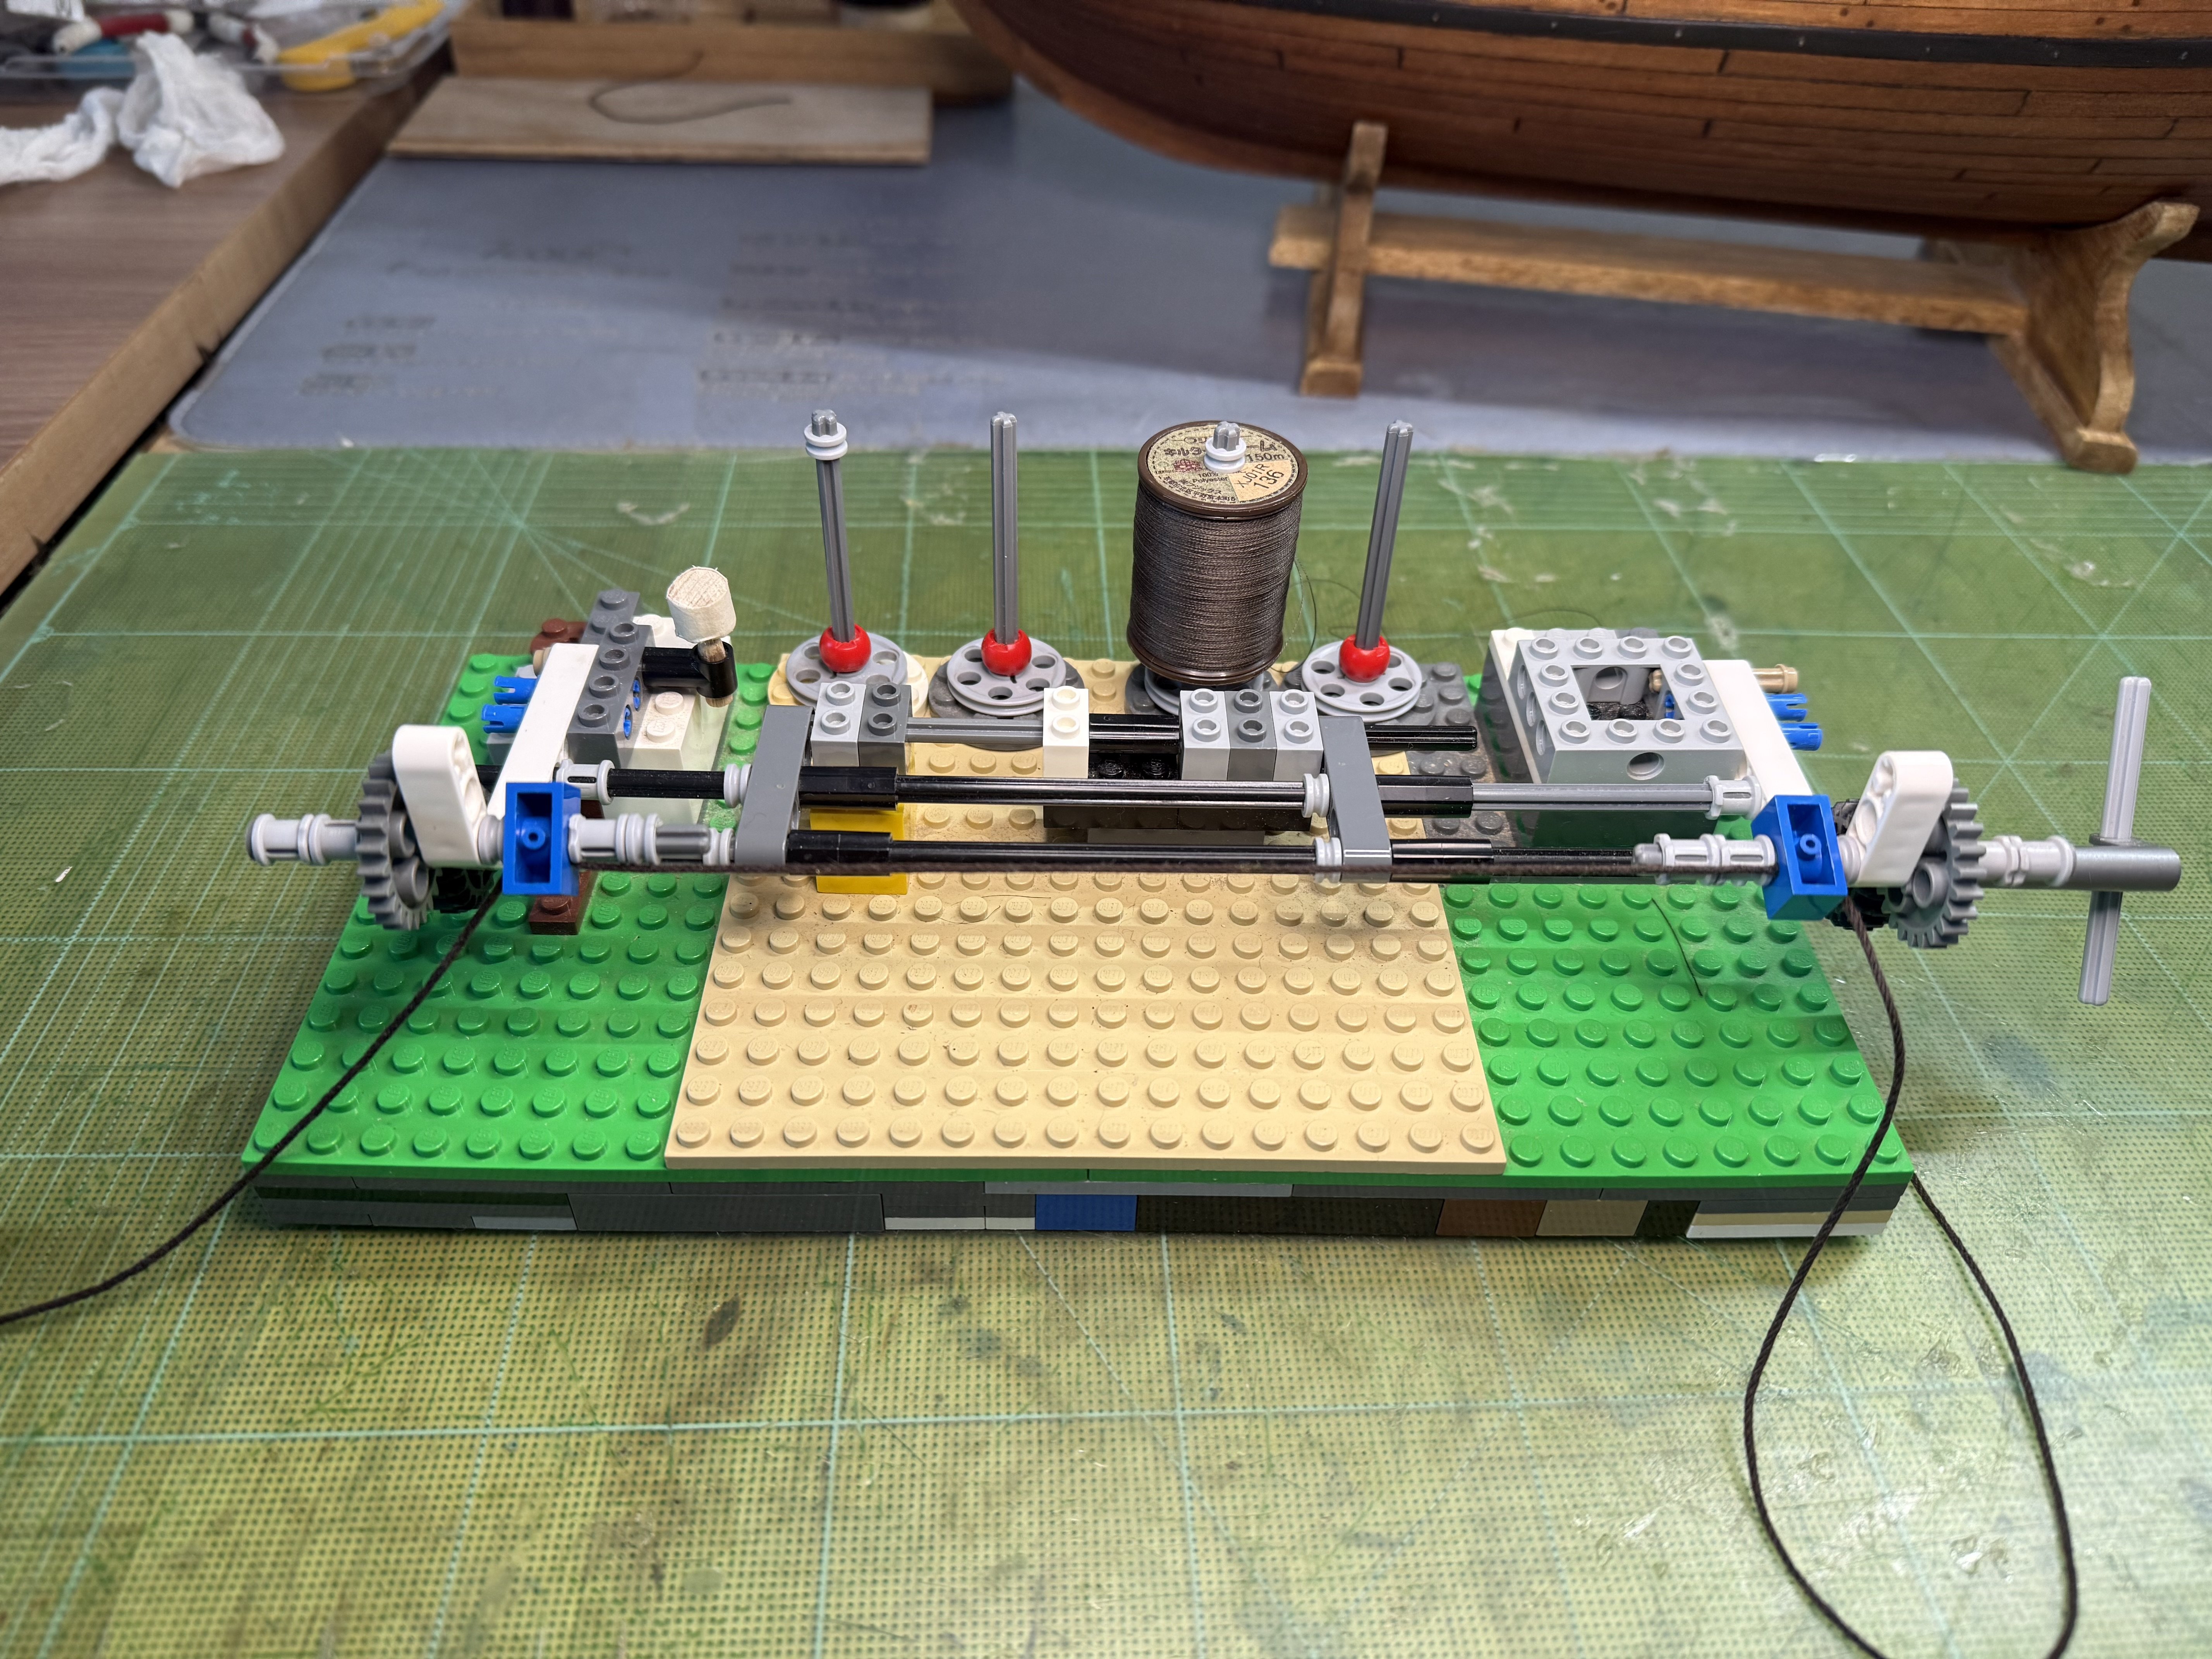
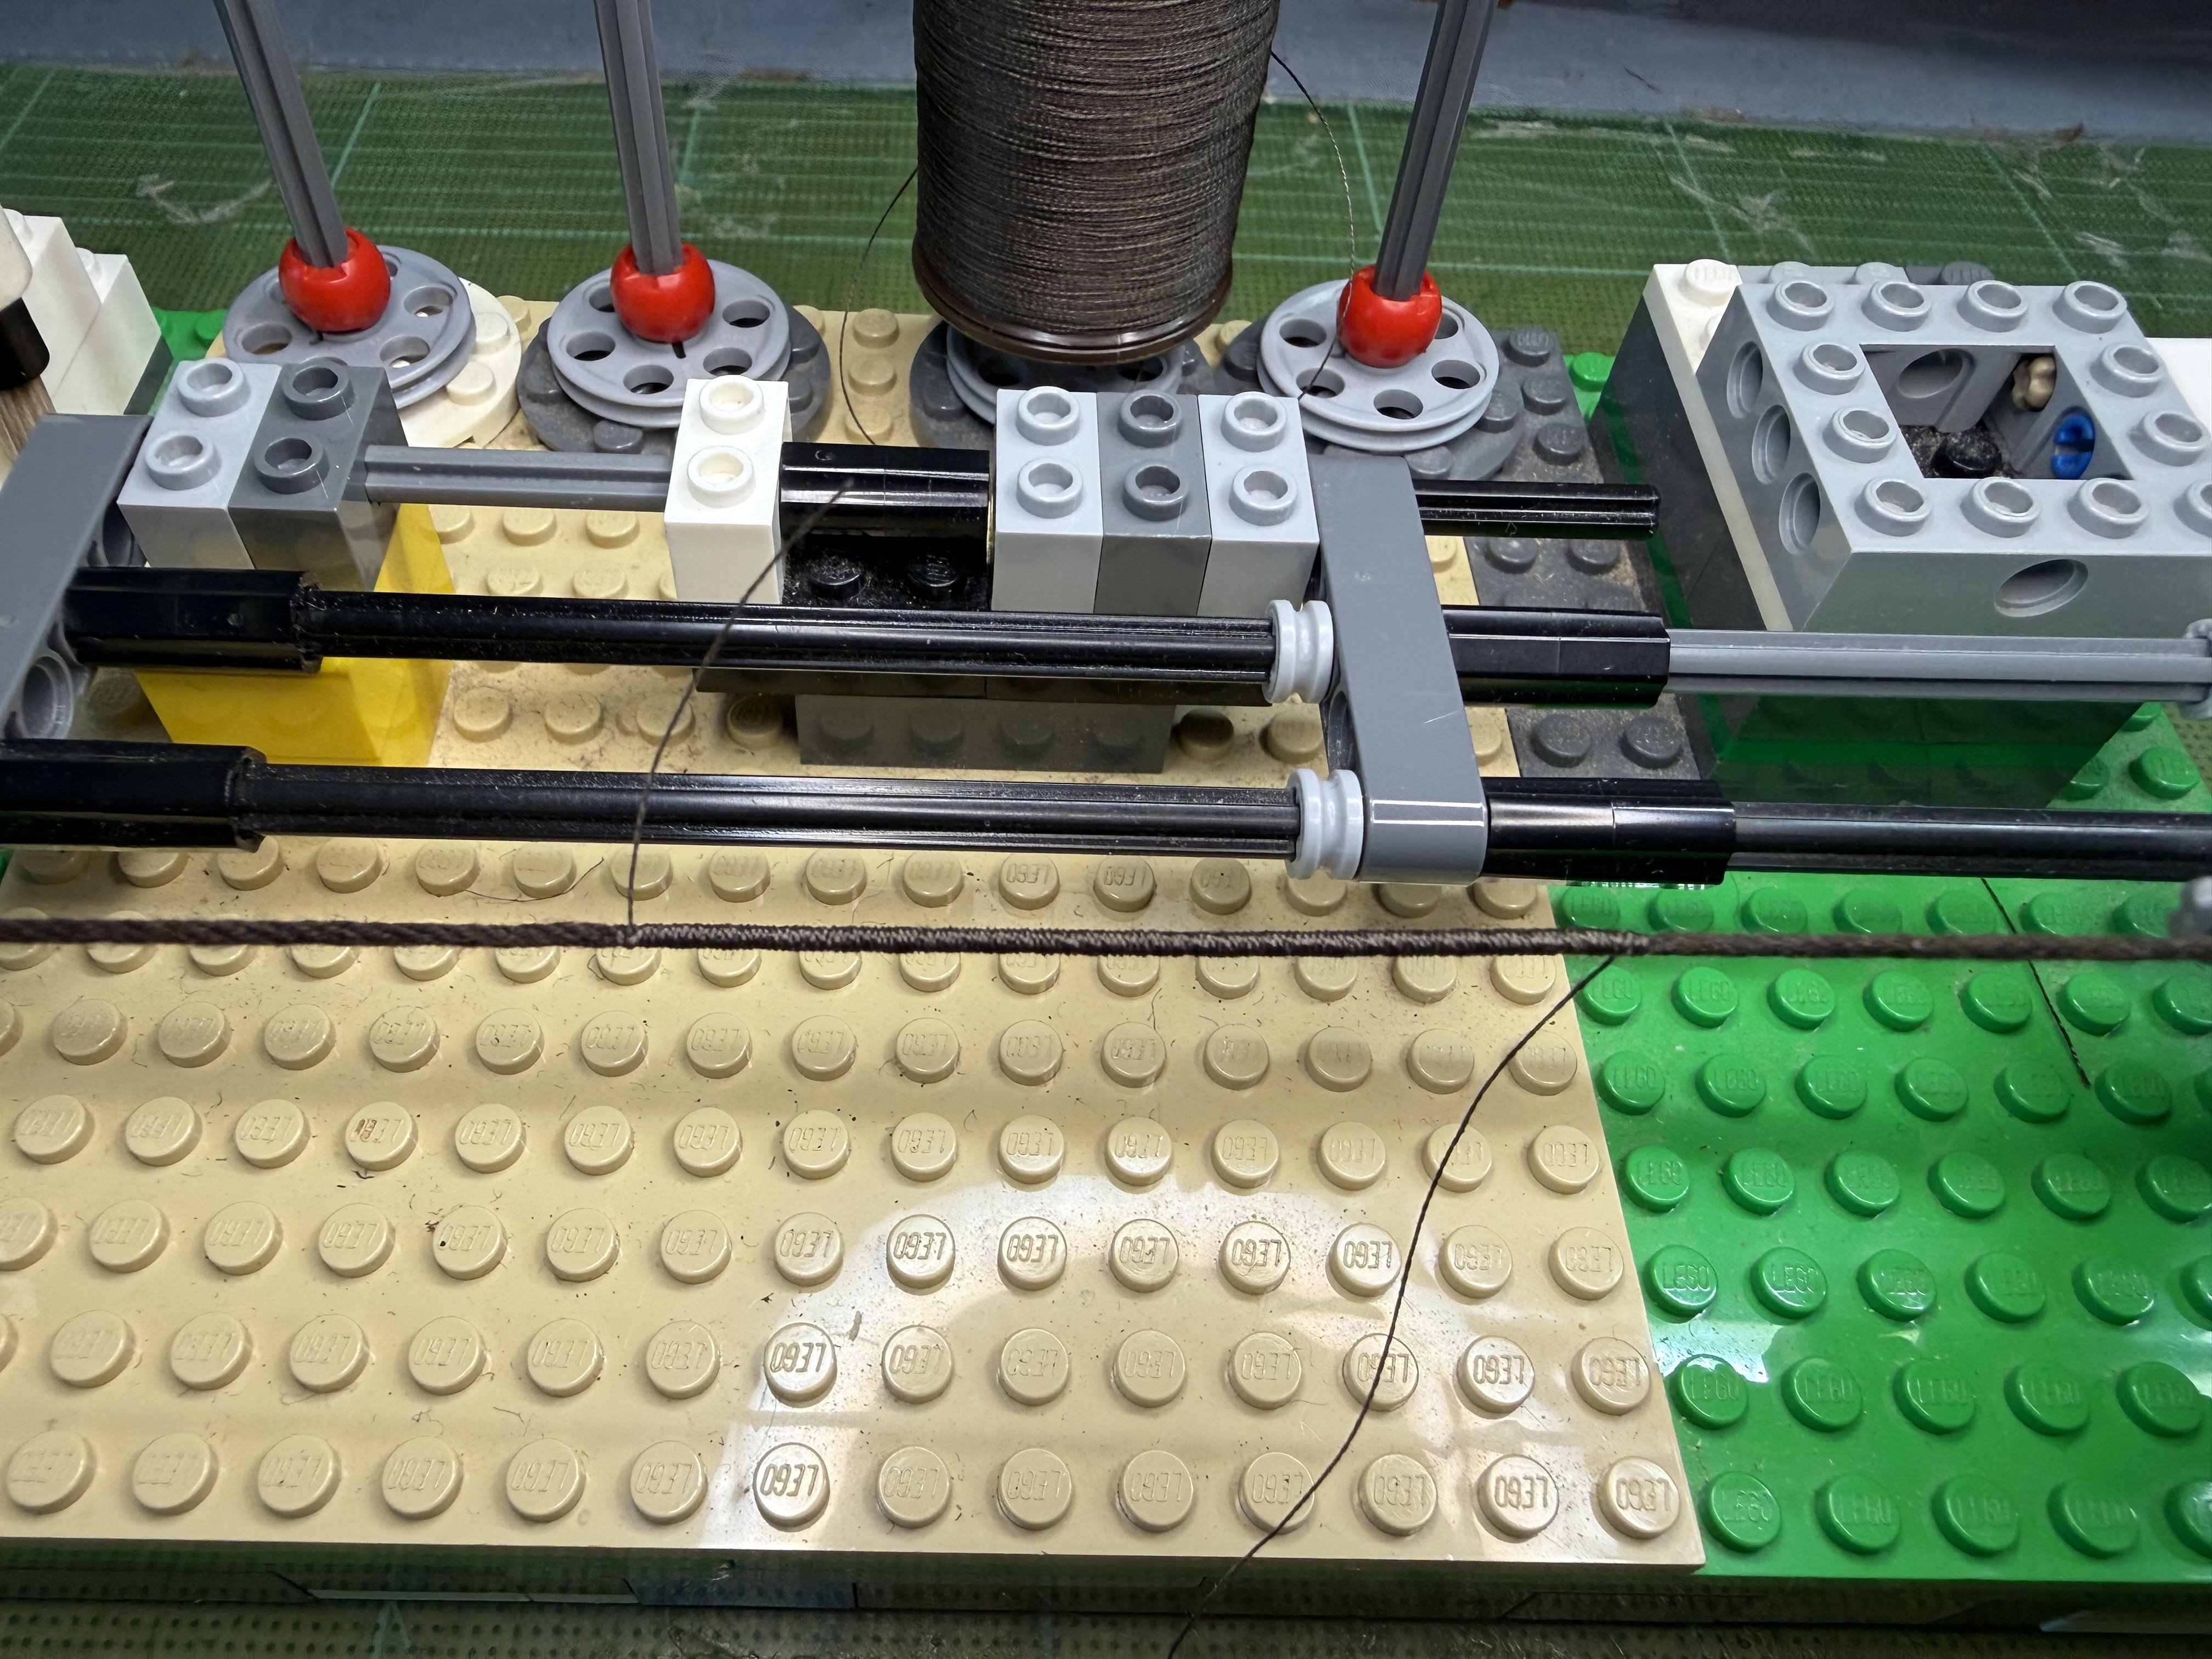
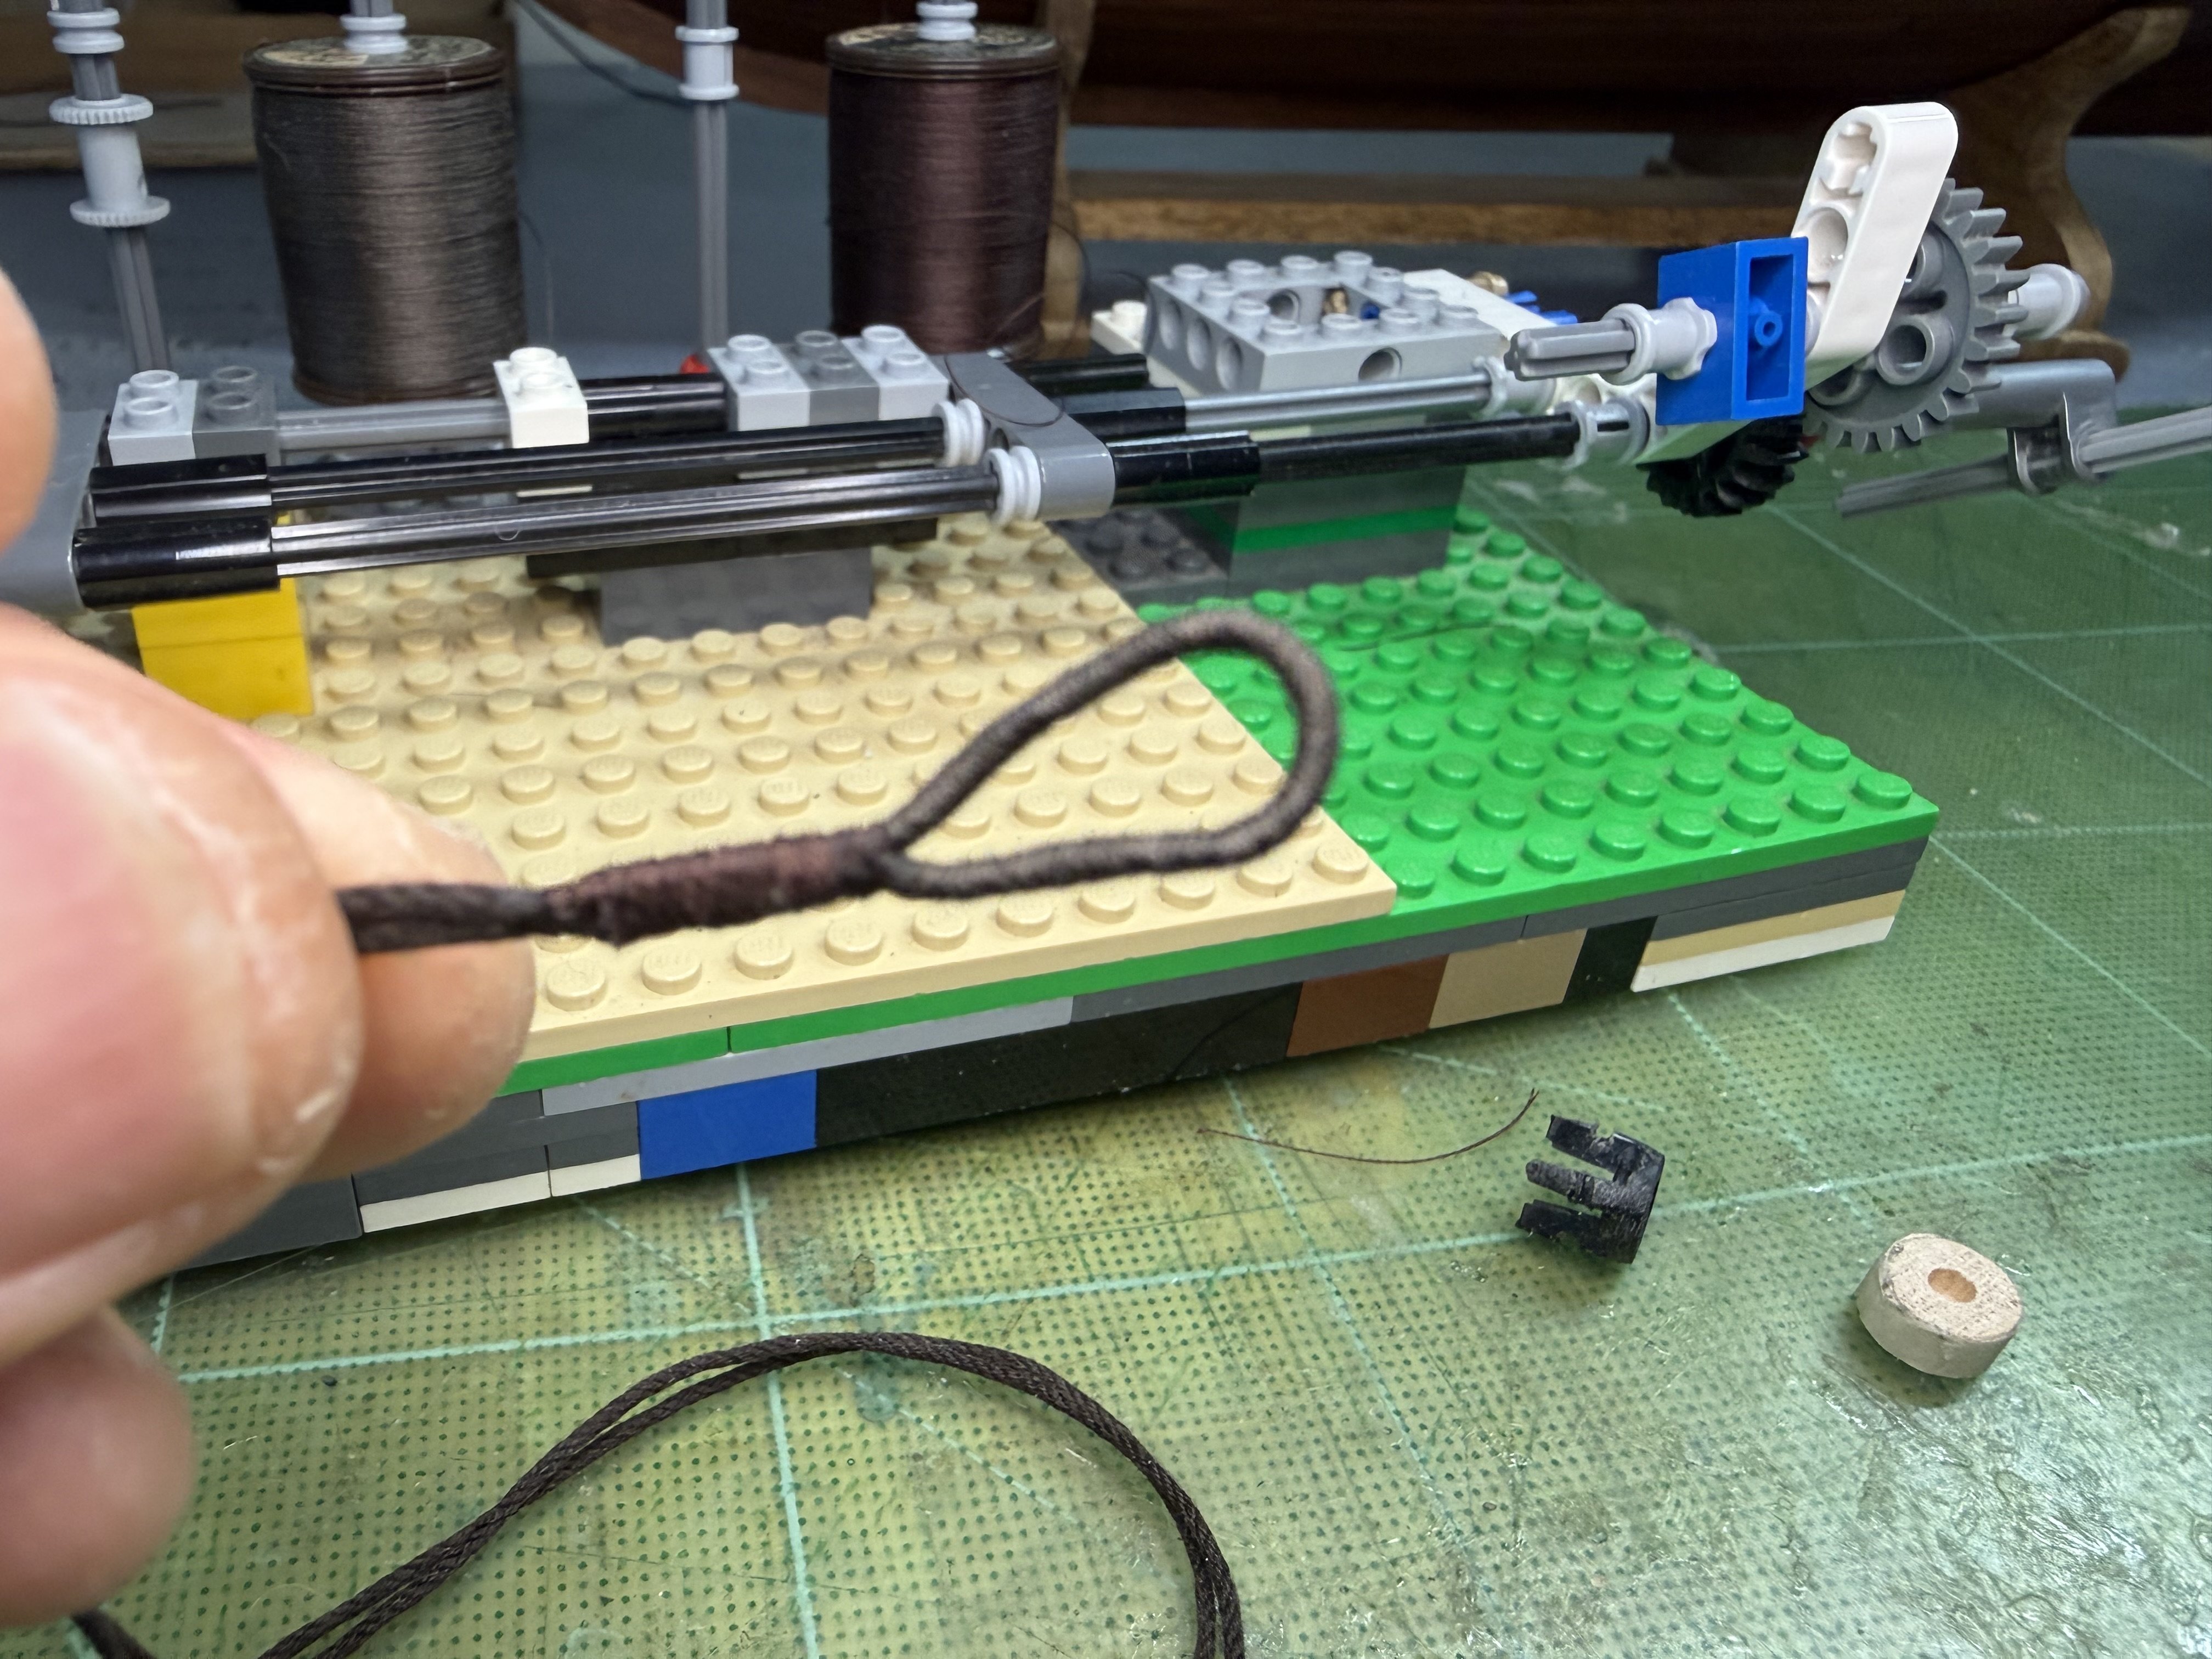
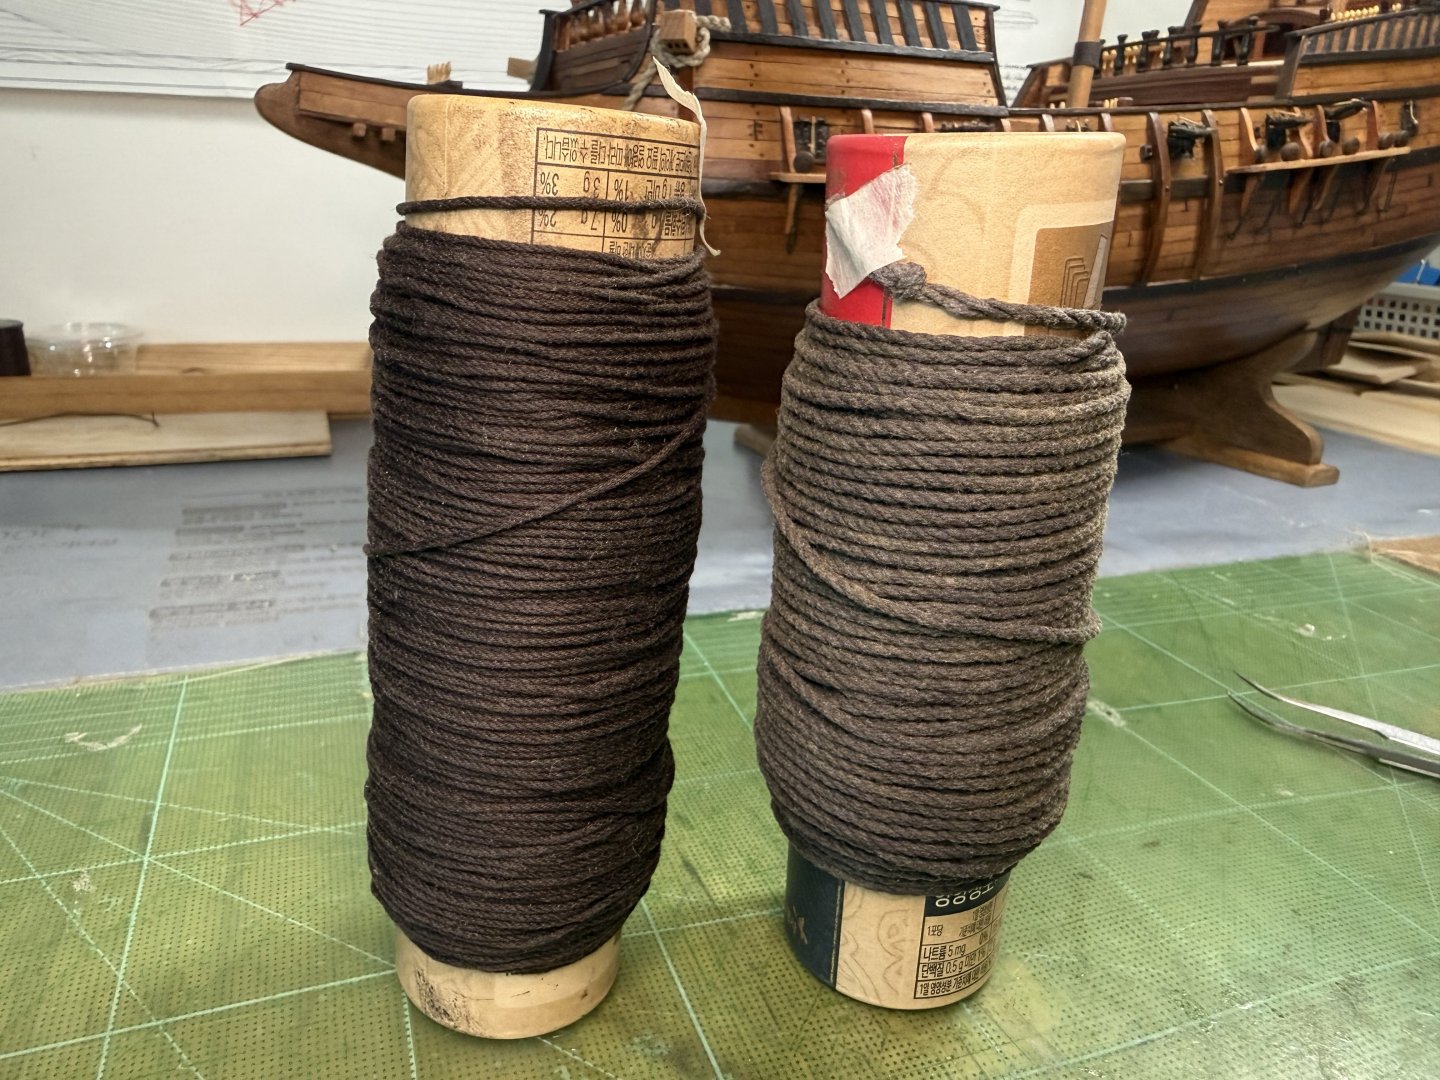
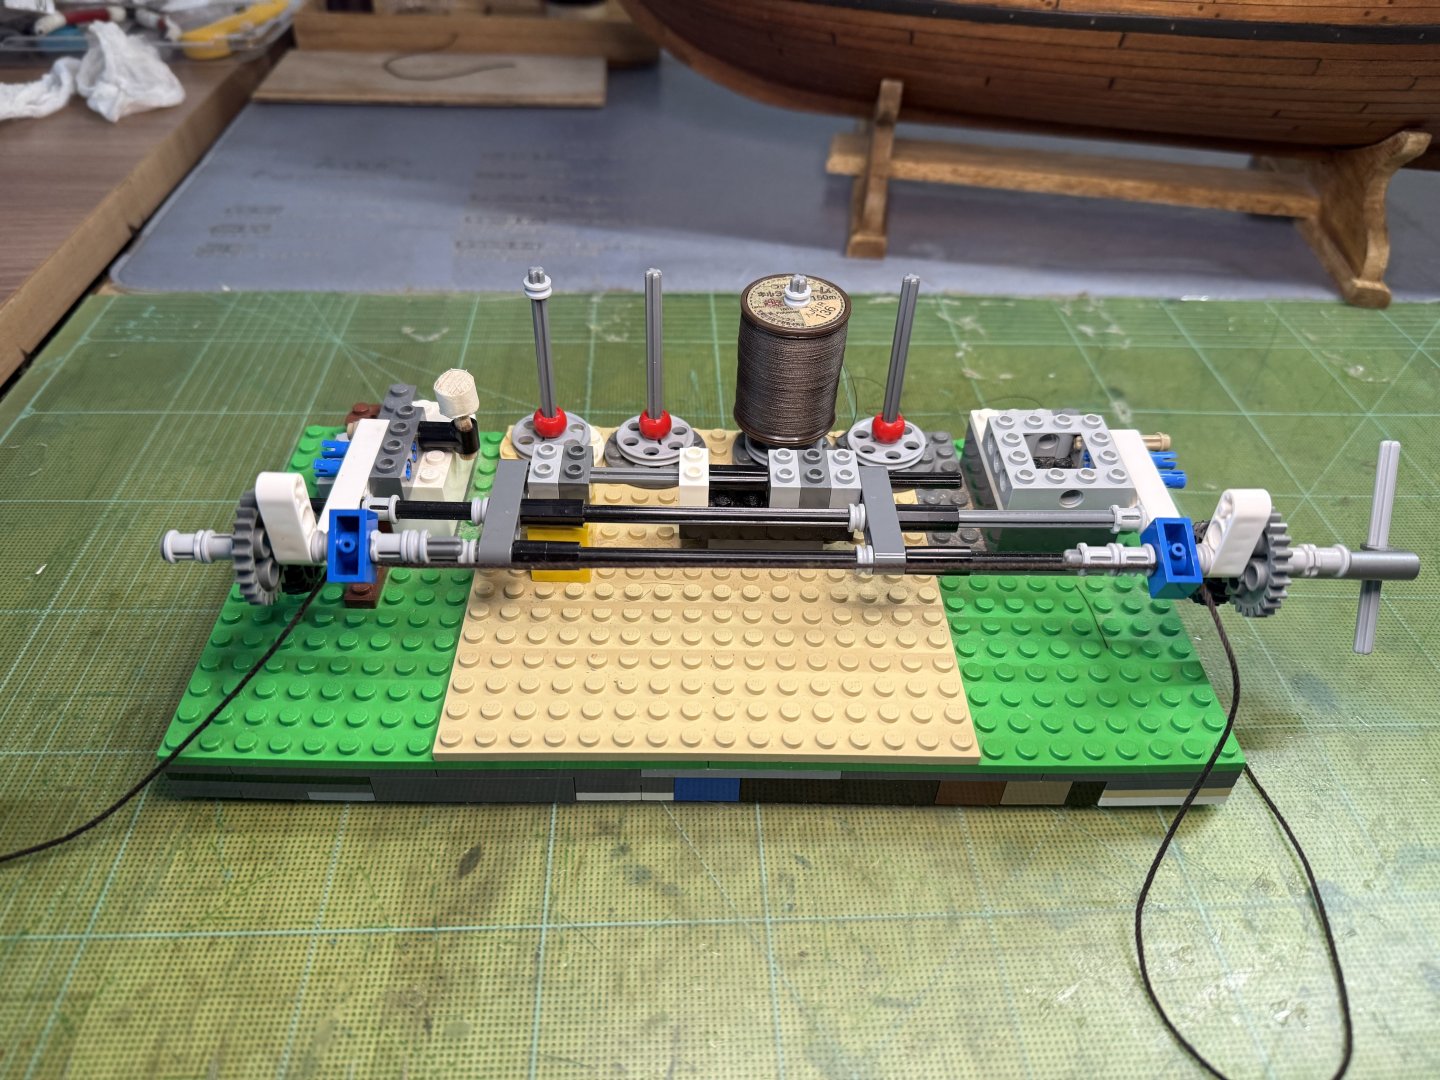
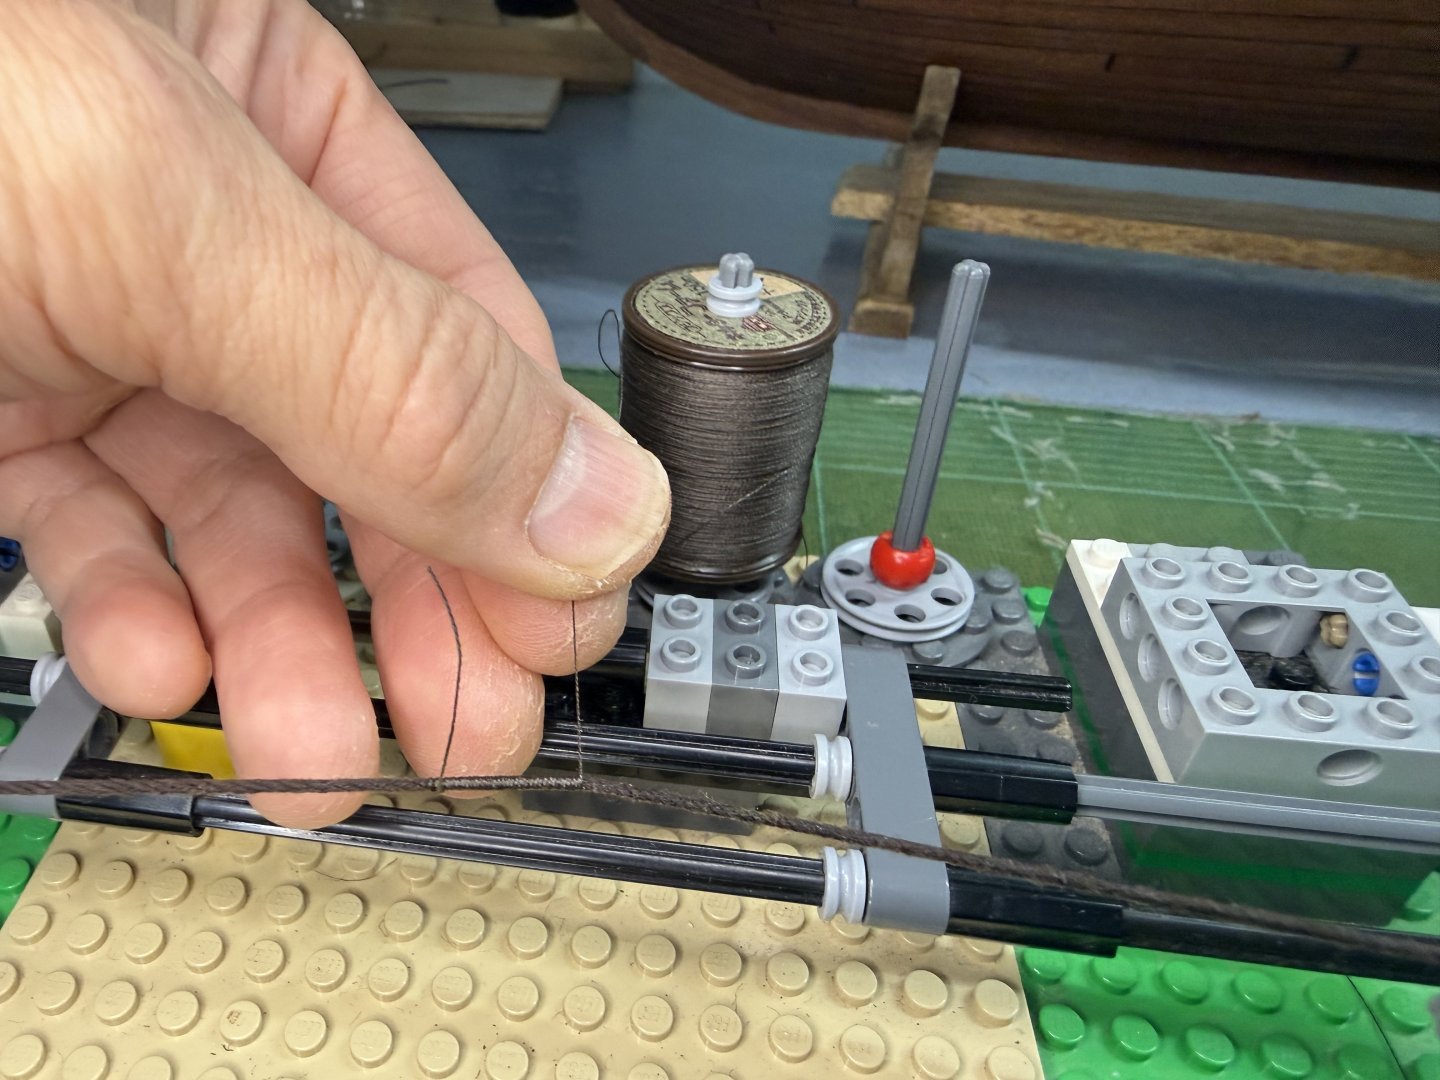
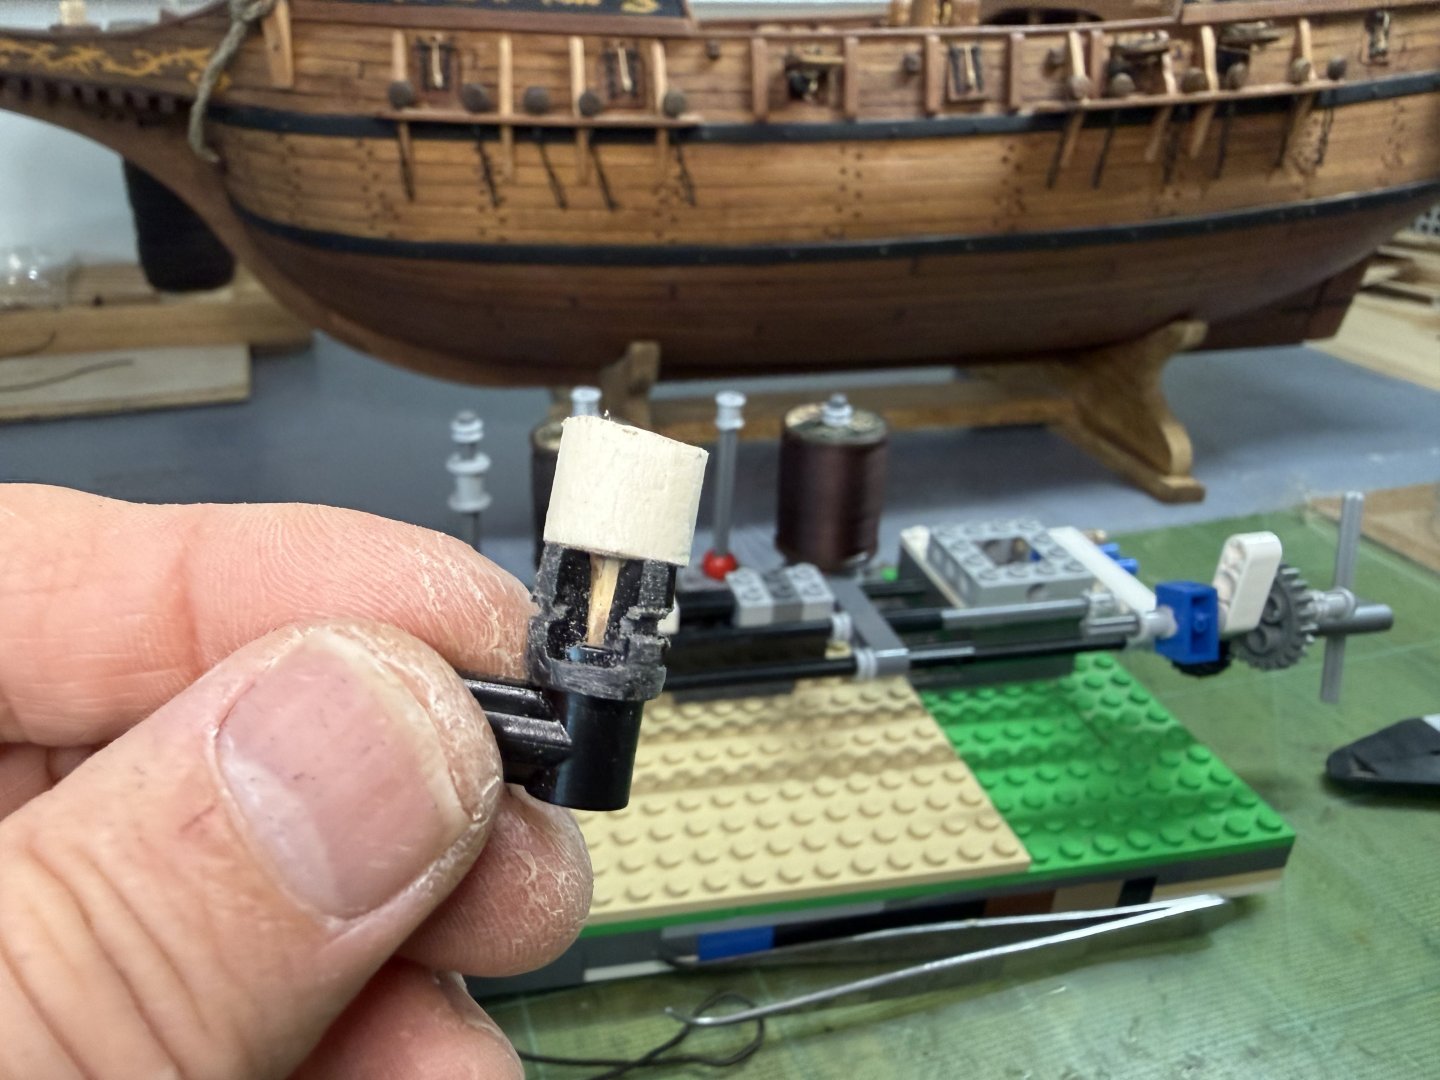
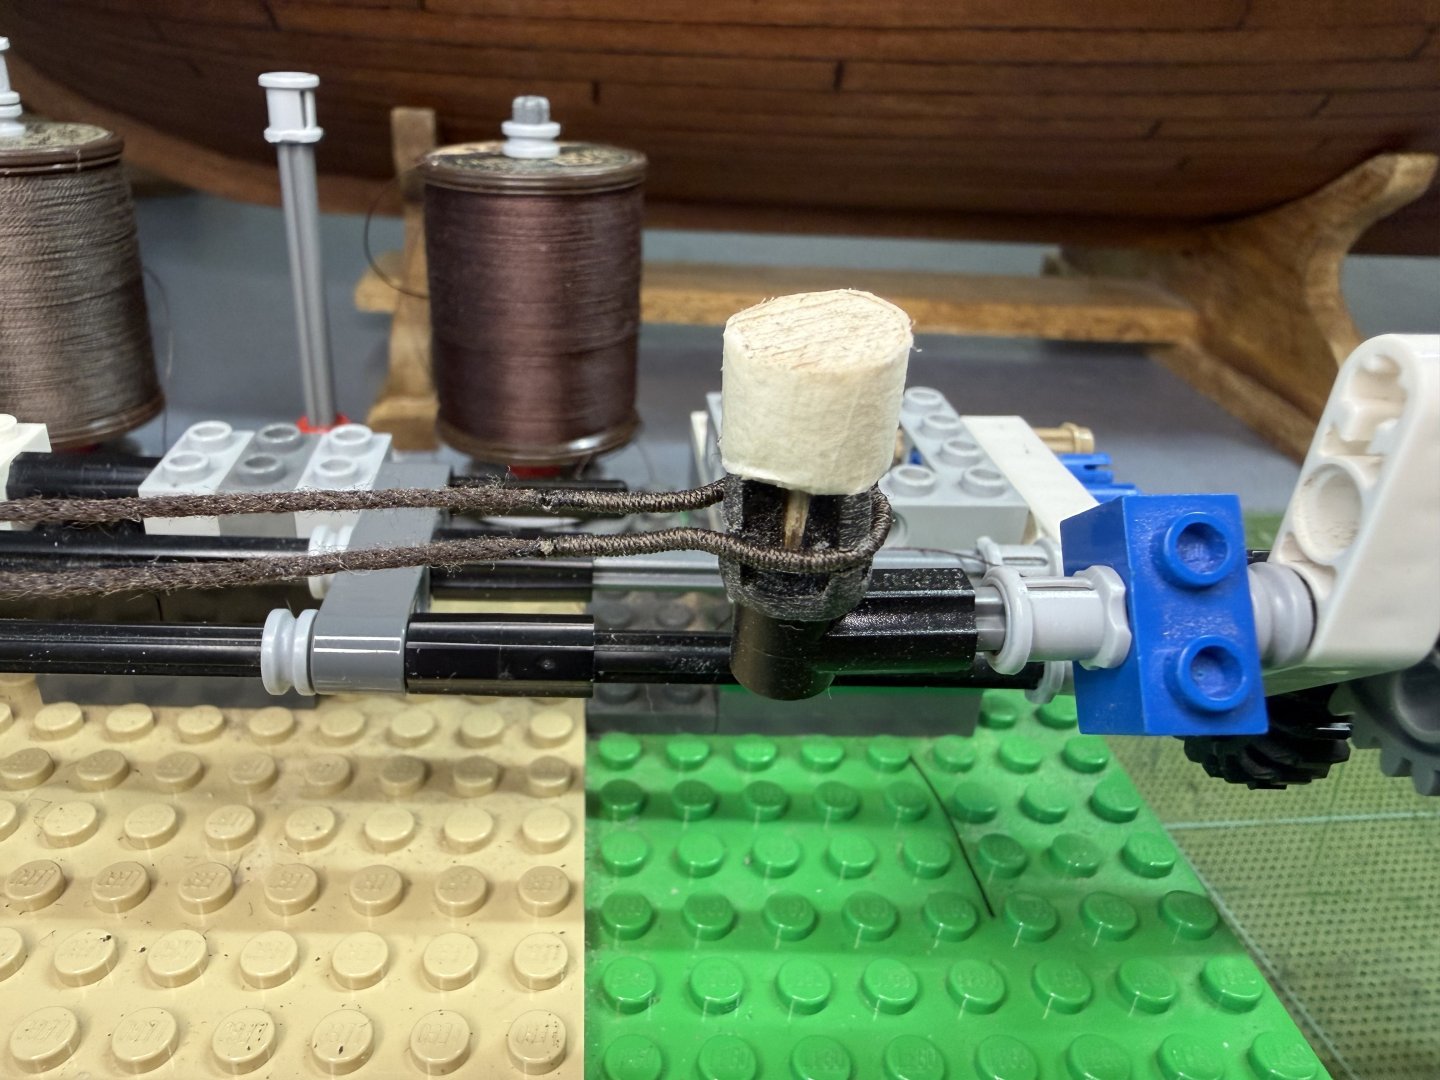
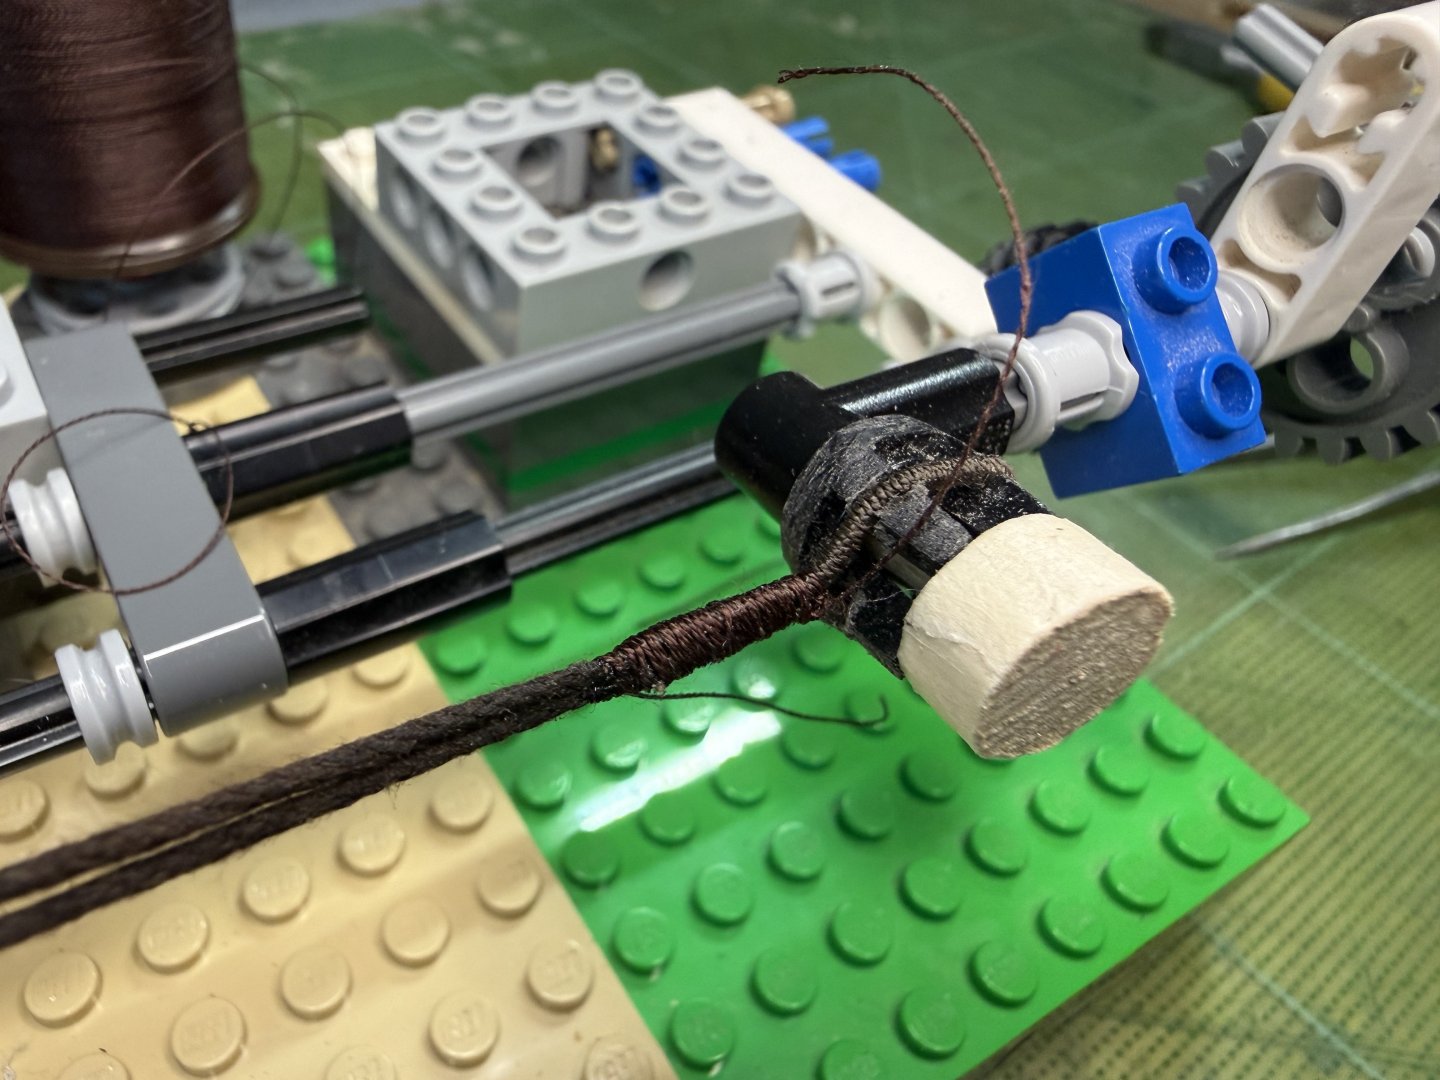
Hi All~ Progress report on GH1 & GH2 : quite a lot of testing, trying out various stuffs, proof of concept kind of activities were carried out since my last update. These include 1) trying out pine tar treated threads for stays and shrouds (vis-a-vis the appropriateness of color, thickness and ease of serving with my newly procured dark brown polyester thin threads and etc.), 2) trying out various methods and positions for the stays and shrouds, 3) dry runs in regards to the rigging of some sheets for the purpose of pre-determining overall belaying positions and also to assess (to some degree) if the current number of belaying facilities are enough or not. The below pictures show the end results of pine tar dyeing of two types of threads. Thinner one (about 1 mm in diameter, for shrouds and upper mast stays ) was originally light brown cotton thread - dyed using 1:1 (pine tar : thinner) proportion. This one took about a week to touch dry. The thicker one (about 1.5 mm in diameter, for lower mast stays ) was originally white cotton thread - dyed using 2:1 (pine tar : thinner) proportion. This one took about 3 weeks to touch dry. Testing serving on couple of samples (shroud lines and stay related blocks) on my Lego serving machine- to which I added more function to enable other tasks. First try-outs of the served threads.


-
Rock_From_Korea reacted to a post in a topic:
Roter Löwe 1597 by Ondras71
-
Rock_From_Korea reacted to a post in a topic:
Roter Löwe 1597 by Ondras71
-
Rock_From_Korea reacted to a post in a topic:
HMS Bellerophon 1786 by AON – scale 1:64 – 74-gun 3rd Rate Man of War - Arrogant-Class
-
Hi Bob~ Thank you very much for your compliment! I am not sure your high level of praise is deserved, nevertheless much appreciated!
-
Rock_From_Korea reacted to a post in a topic:
Golden Hind by Rock_From_Korea - 1:48
-
Thanks very much for your encouragement, Patrick!
-
Rock_From_Korea reacted to a post in a topic:
Golden Hind by Rock_From_Korea - 1:48
-
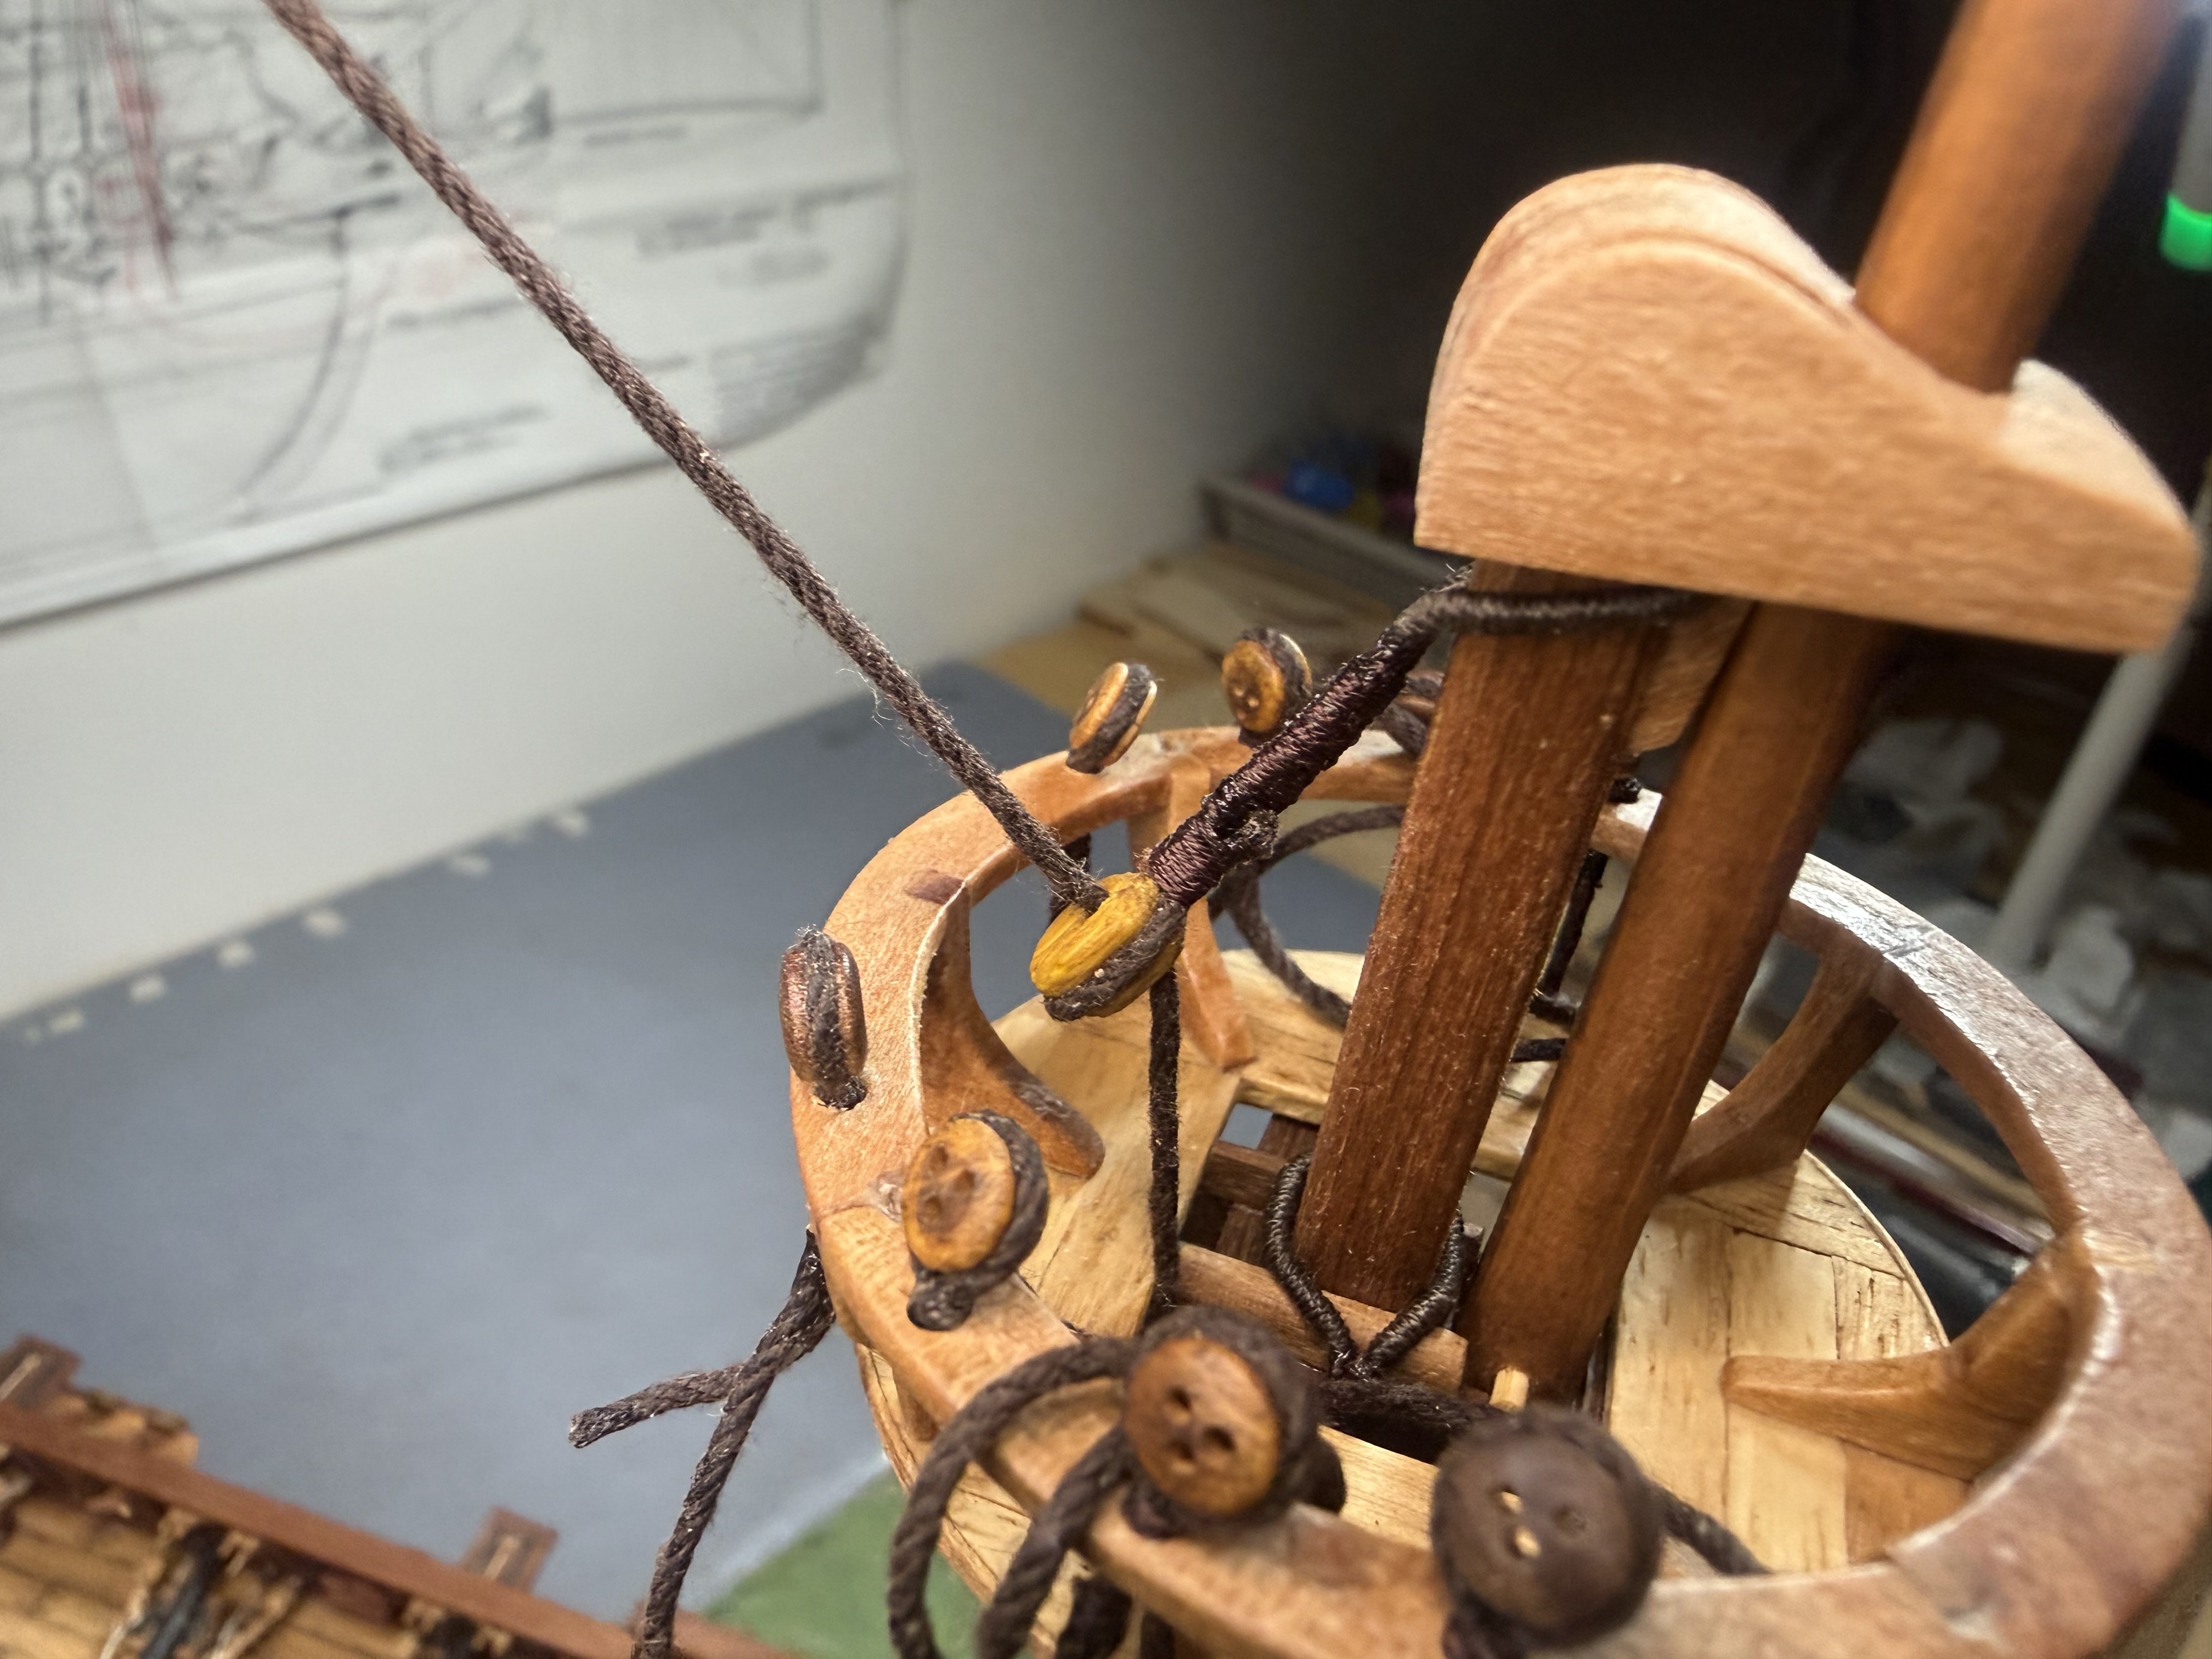
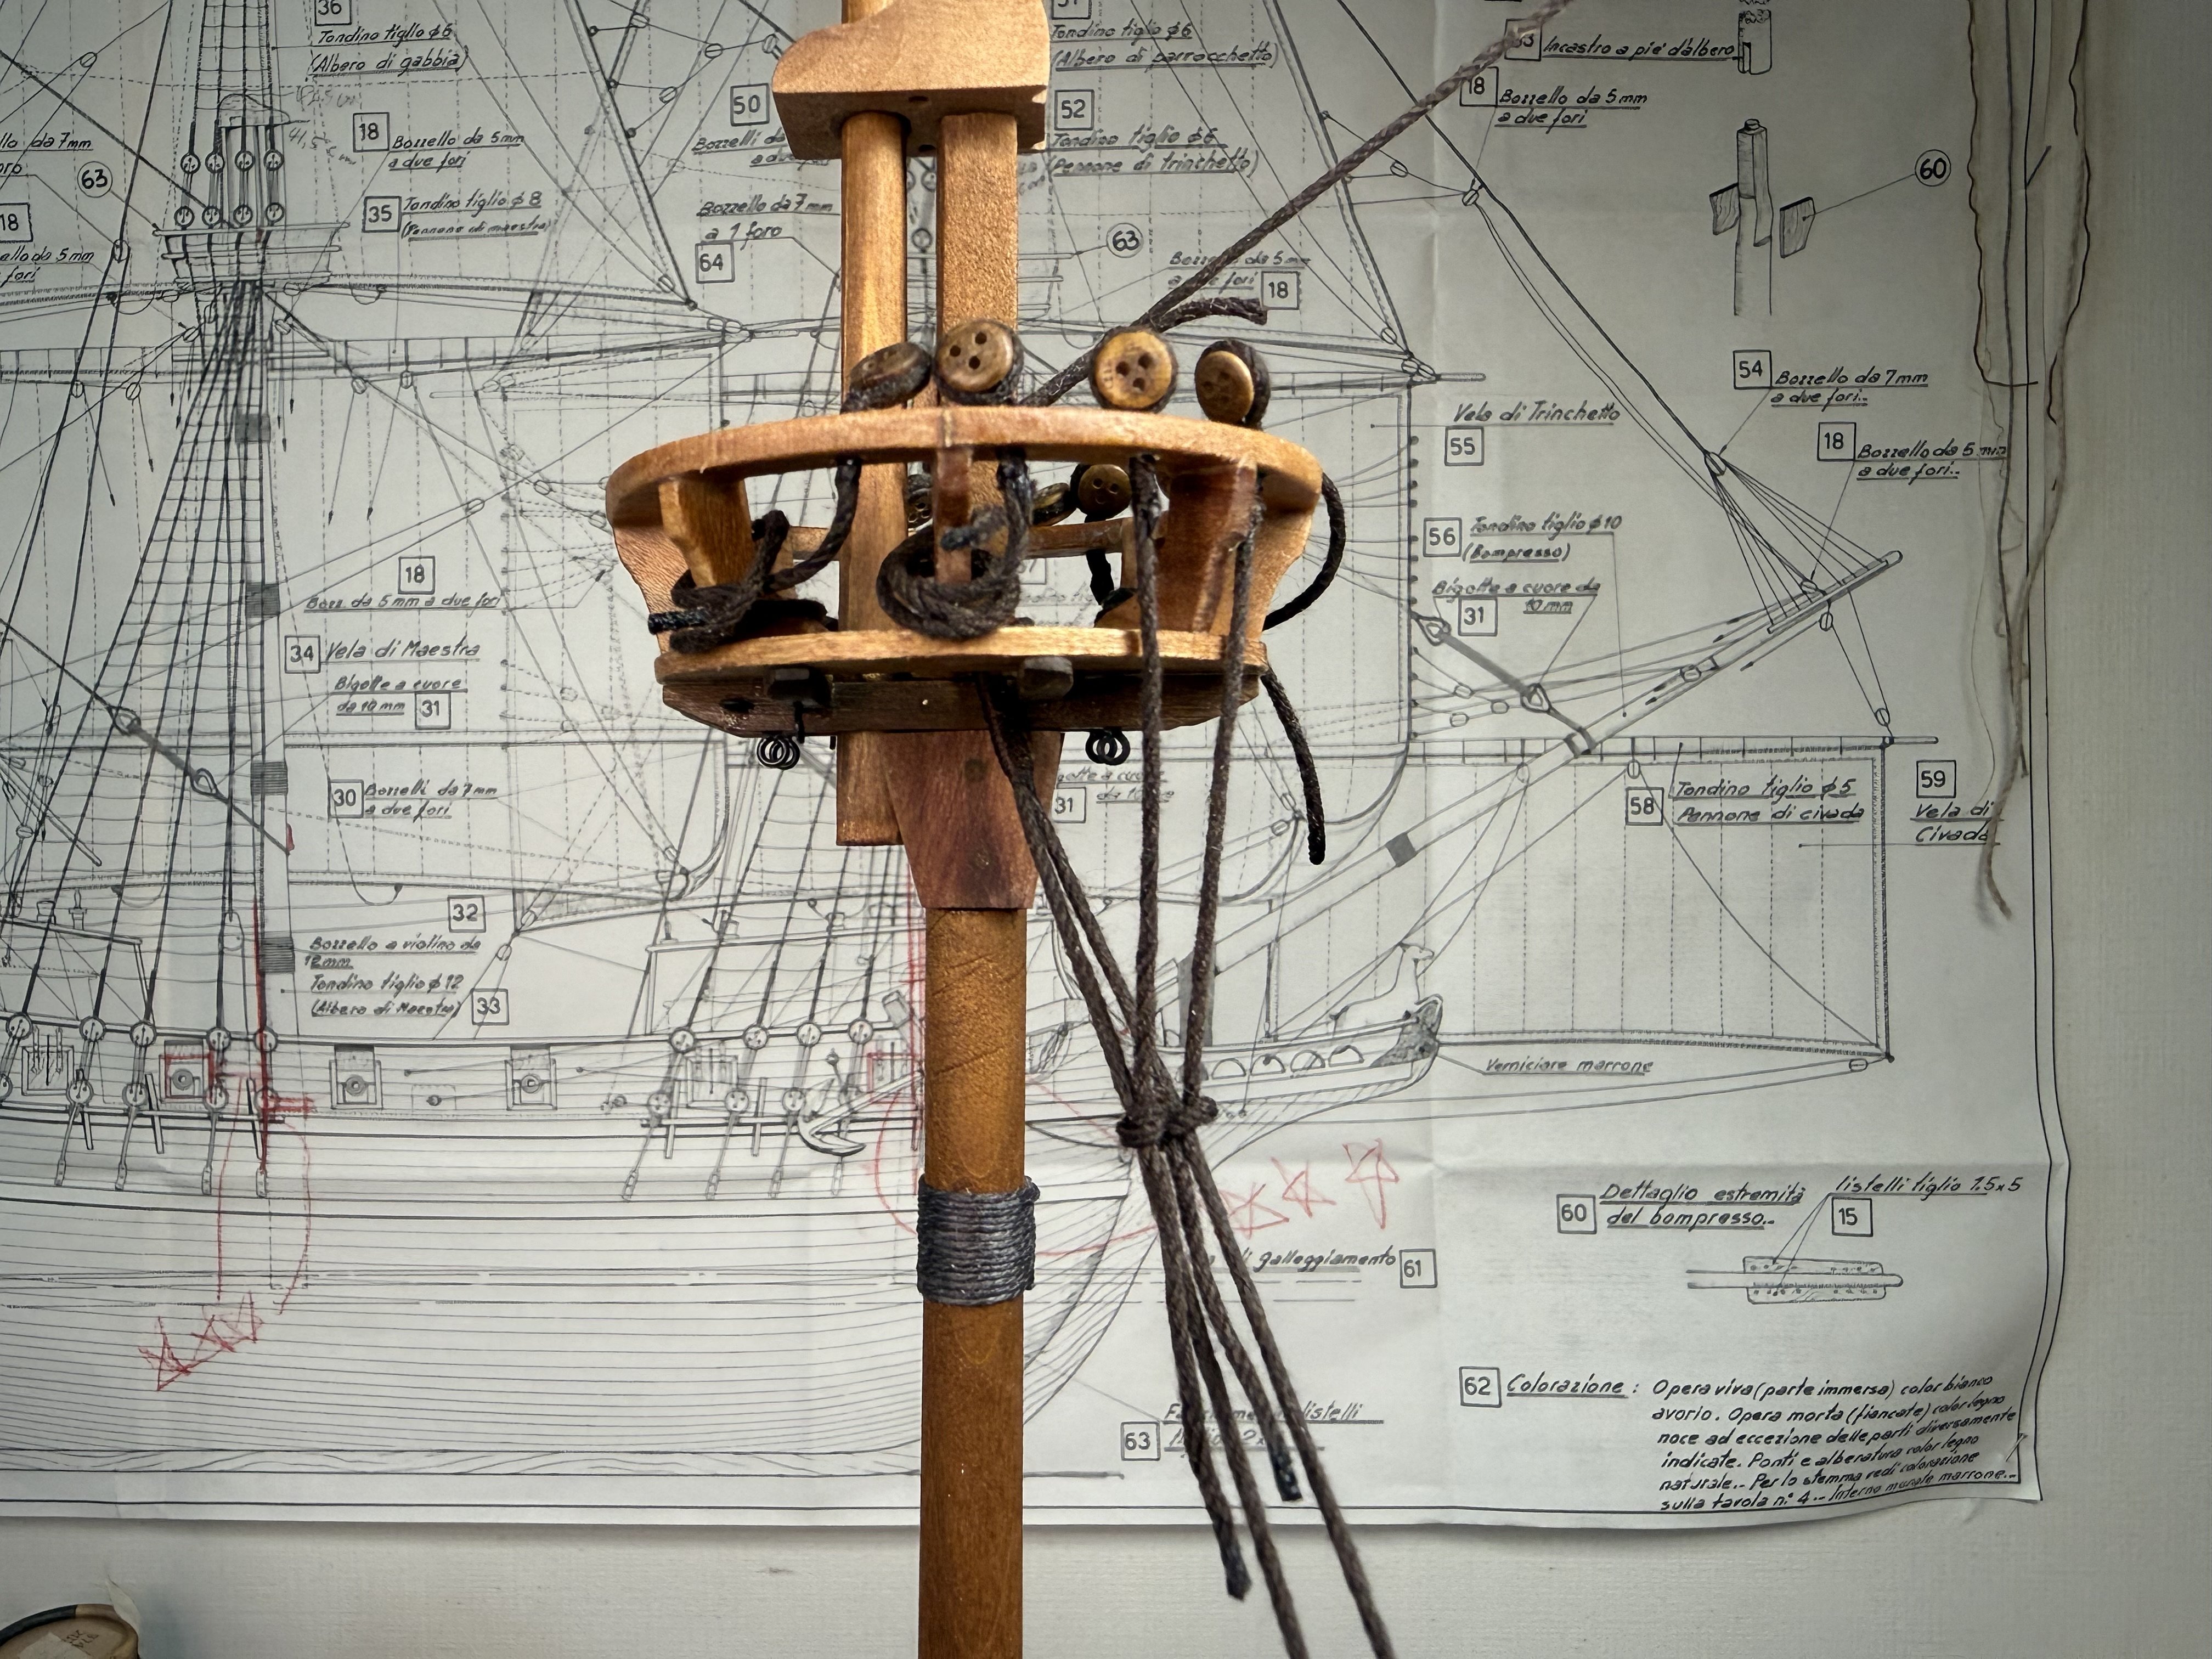
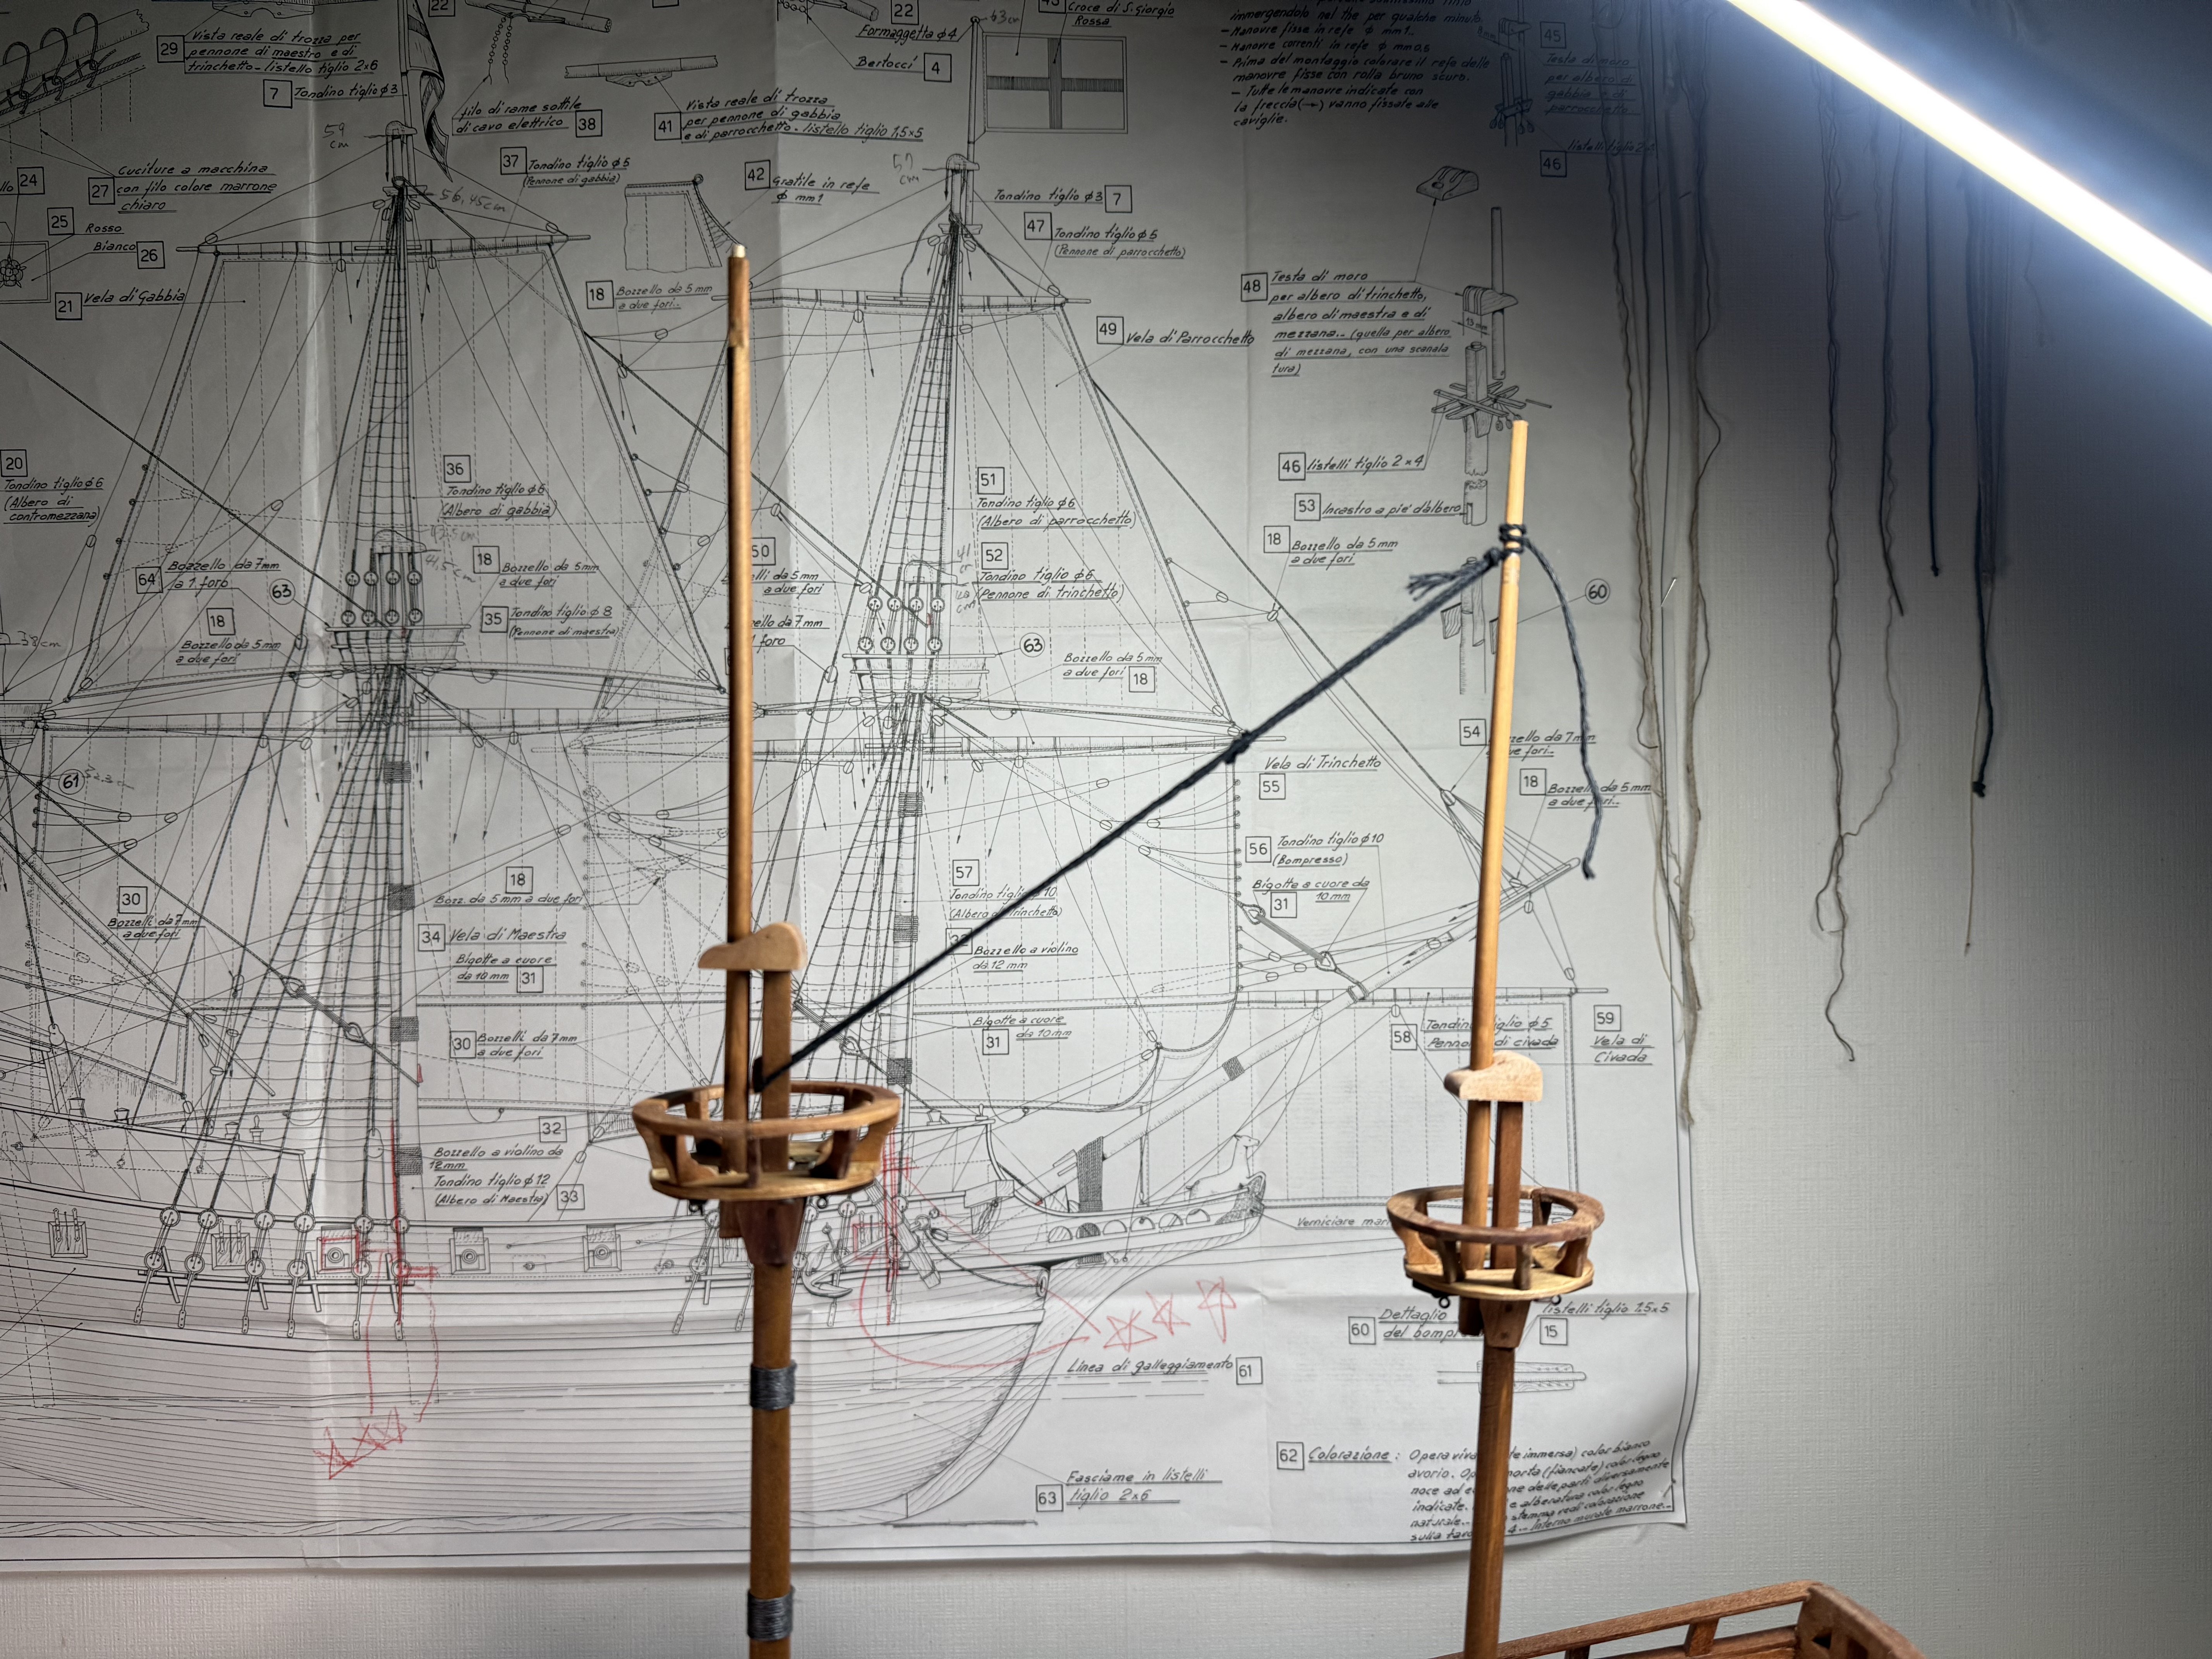
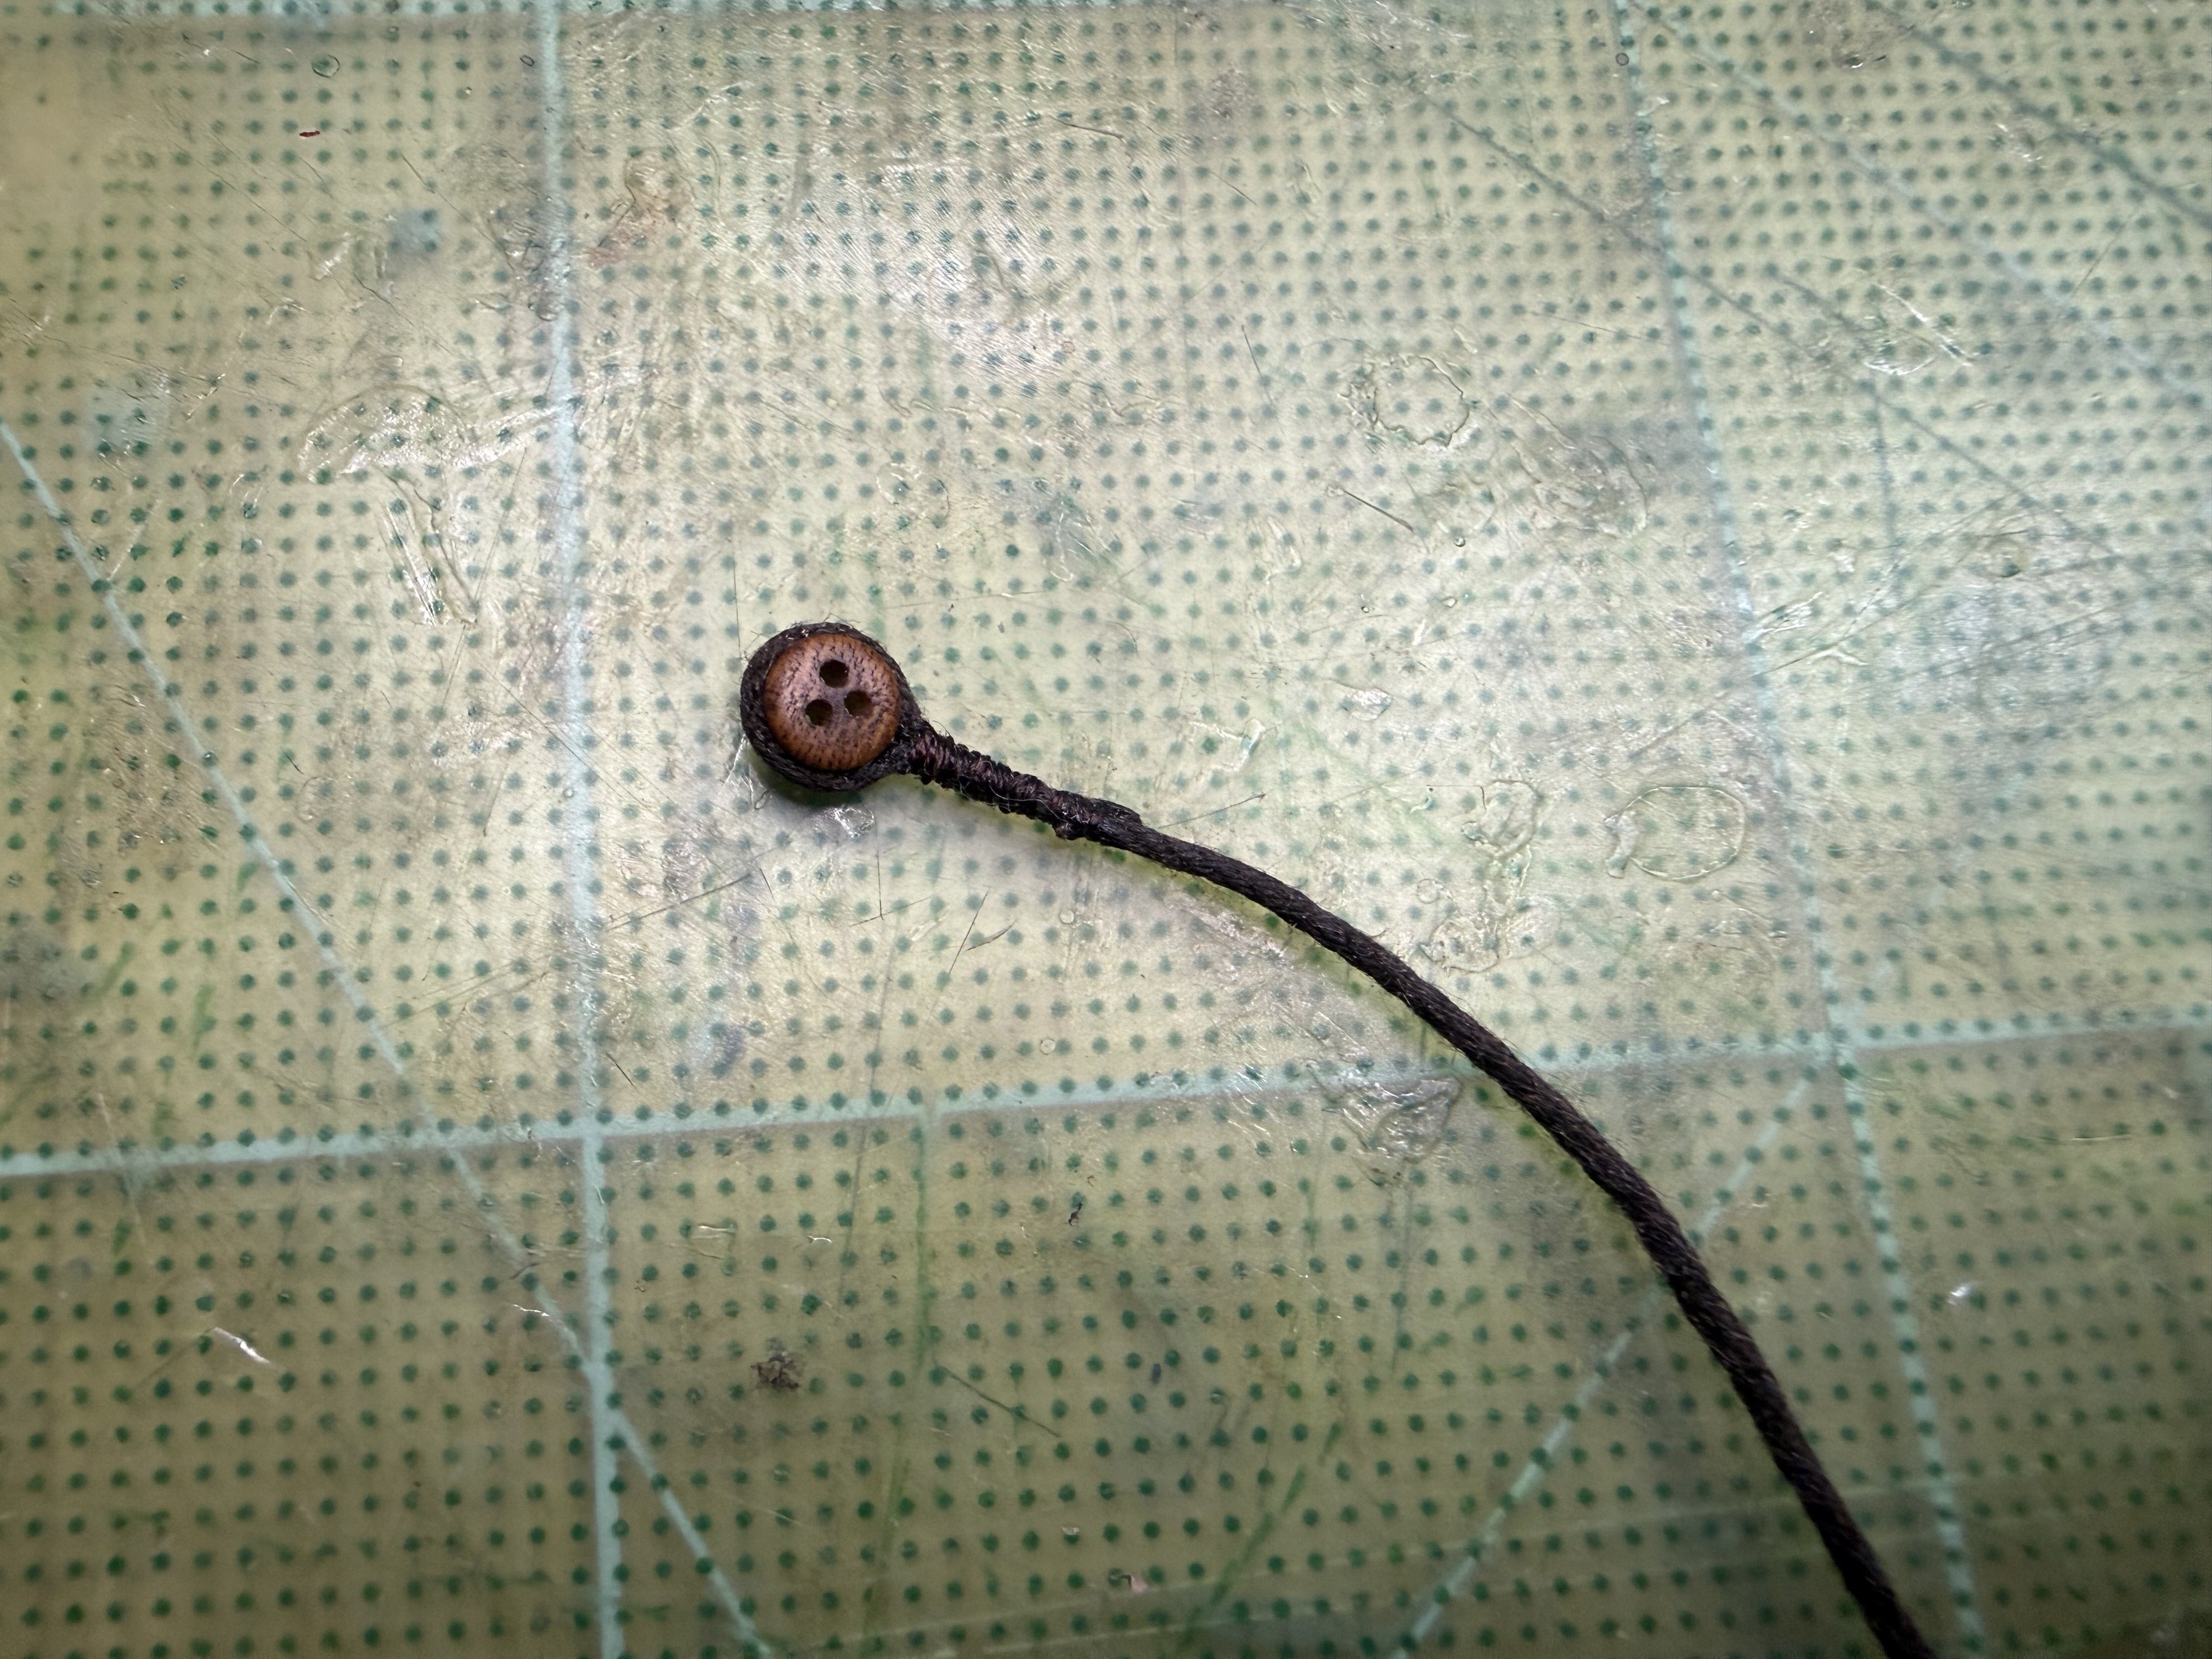
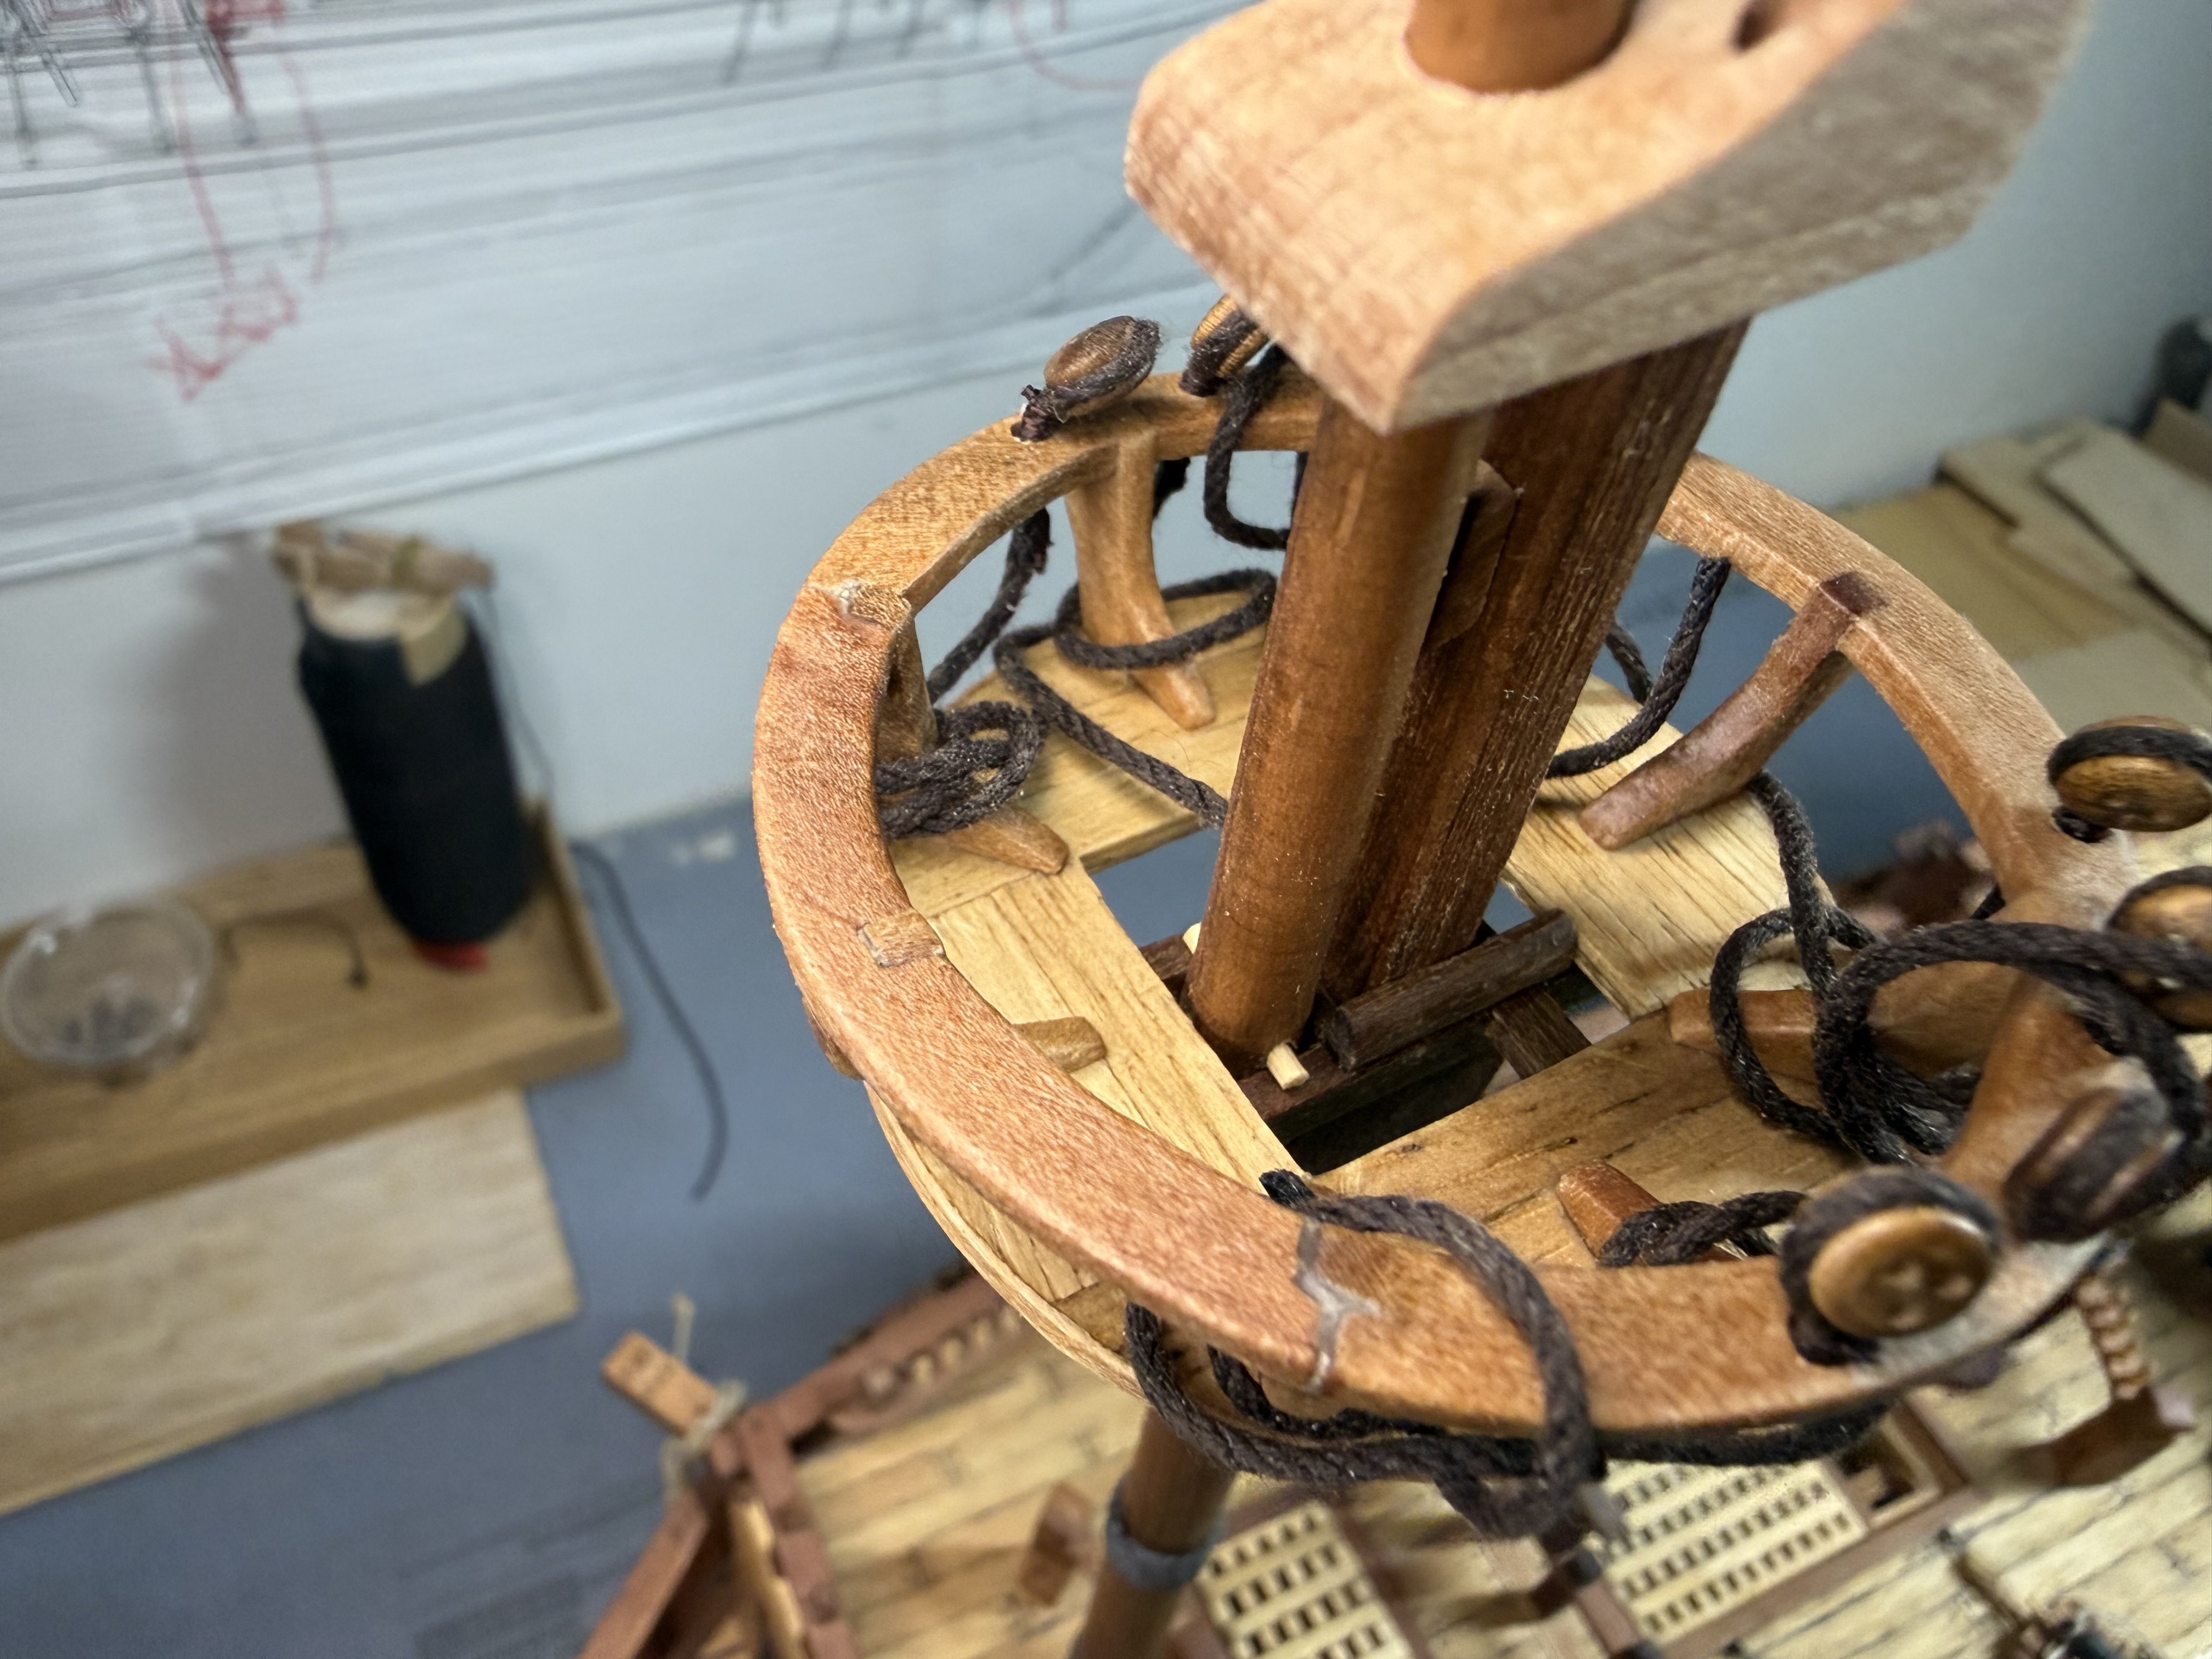
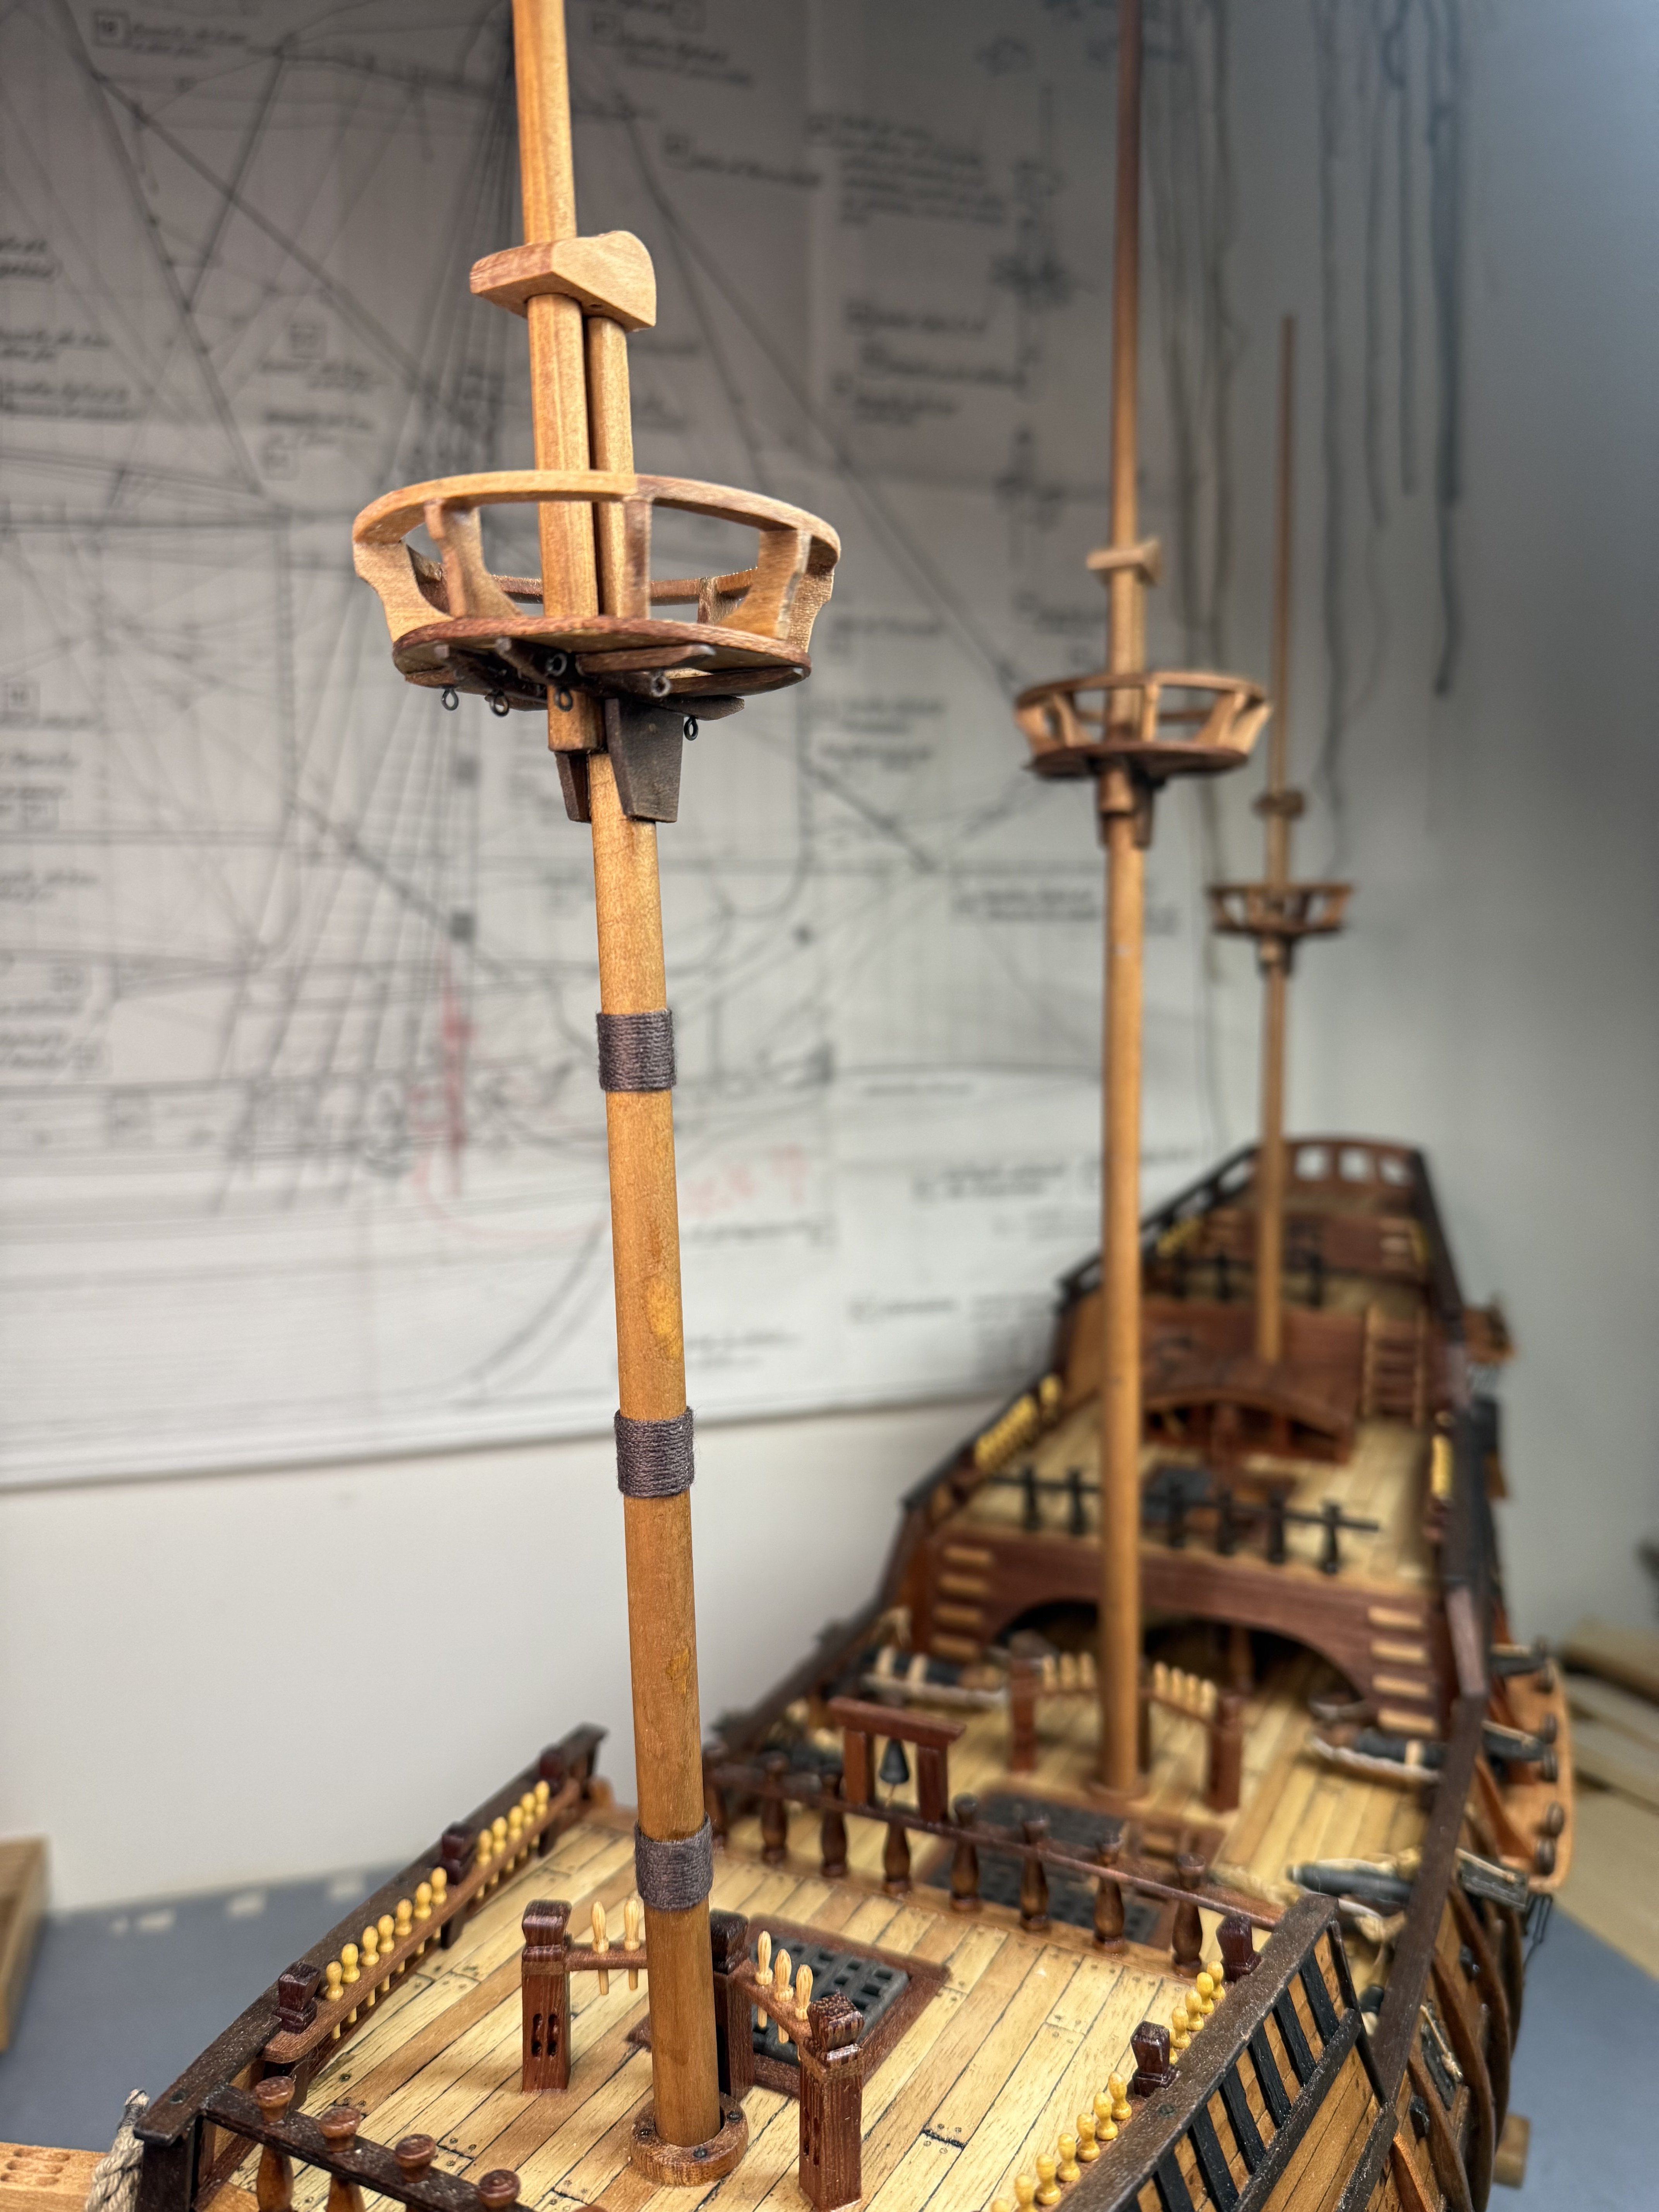
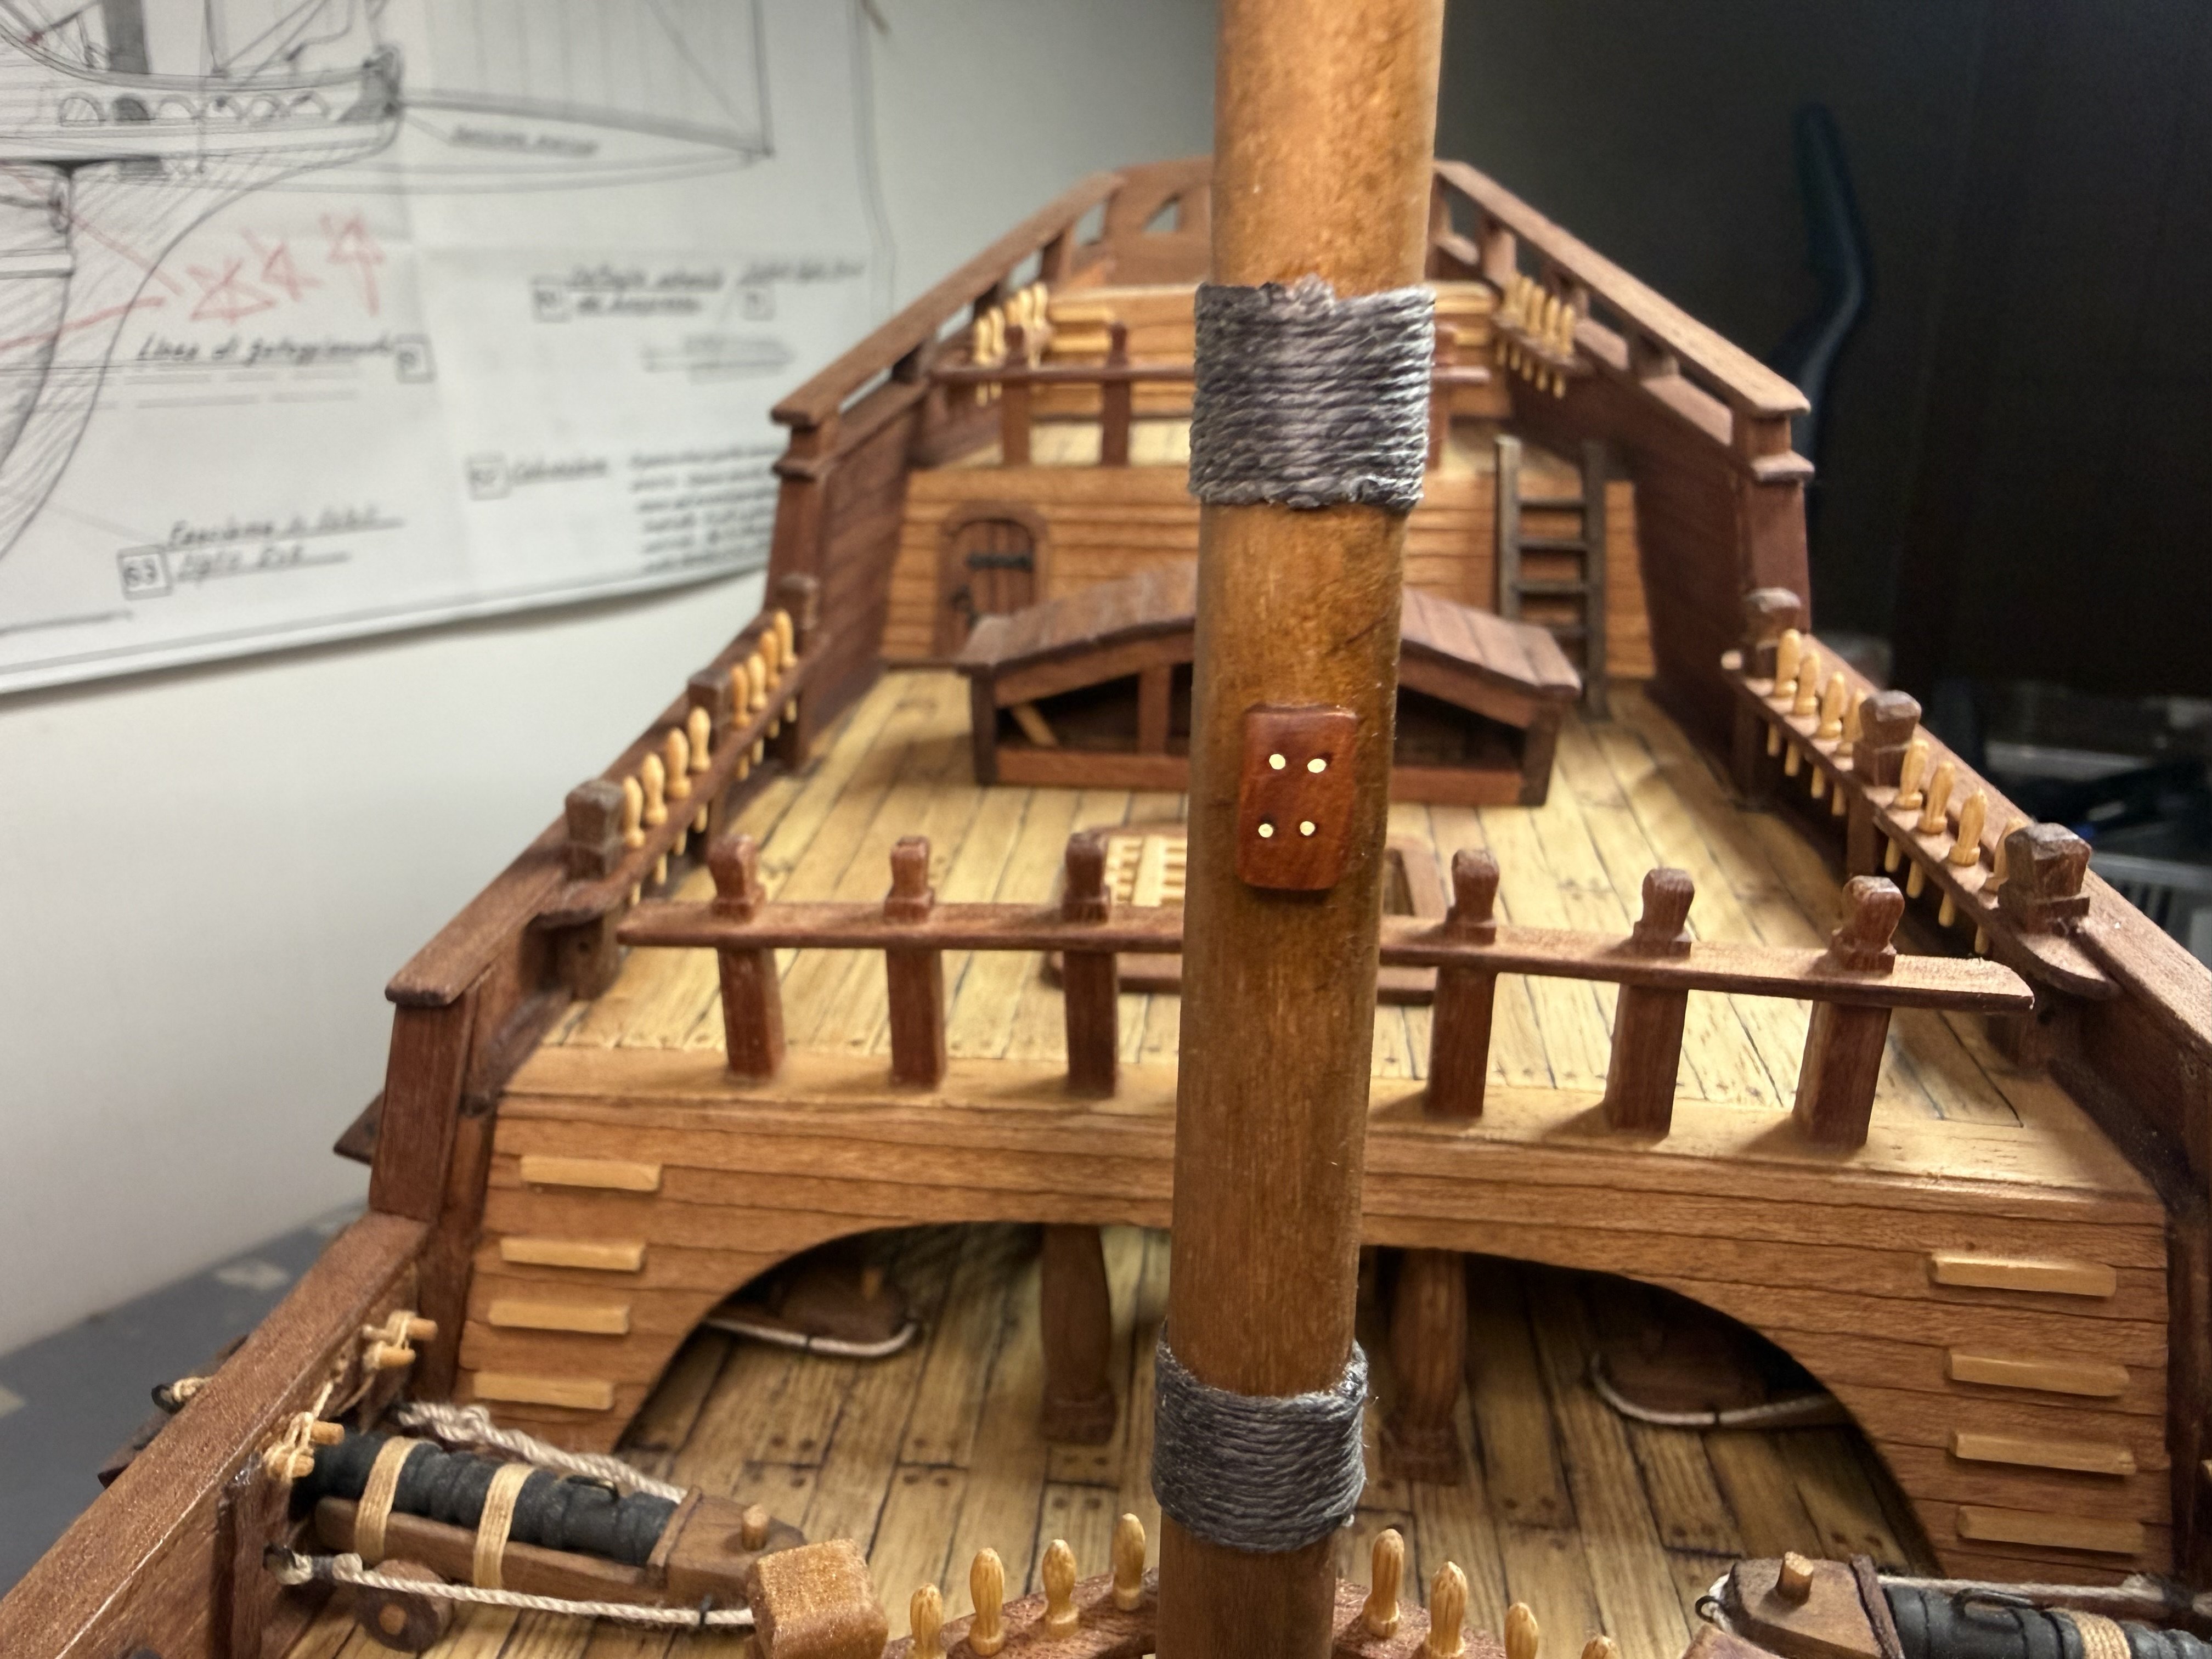
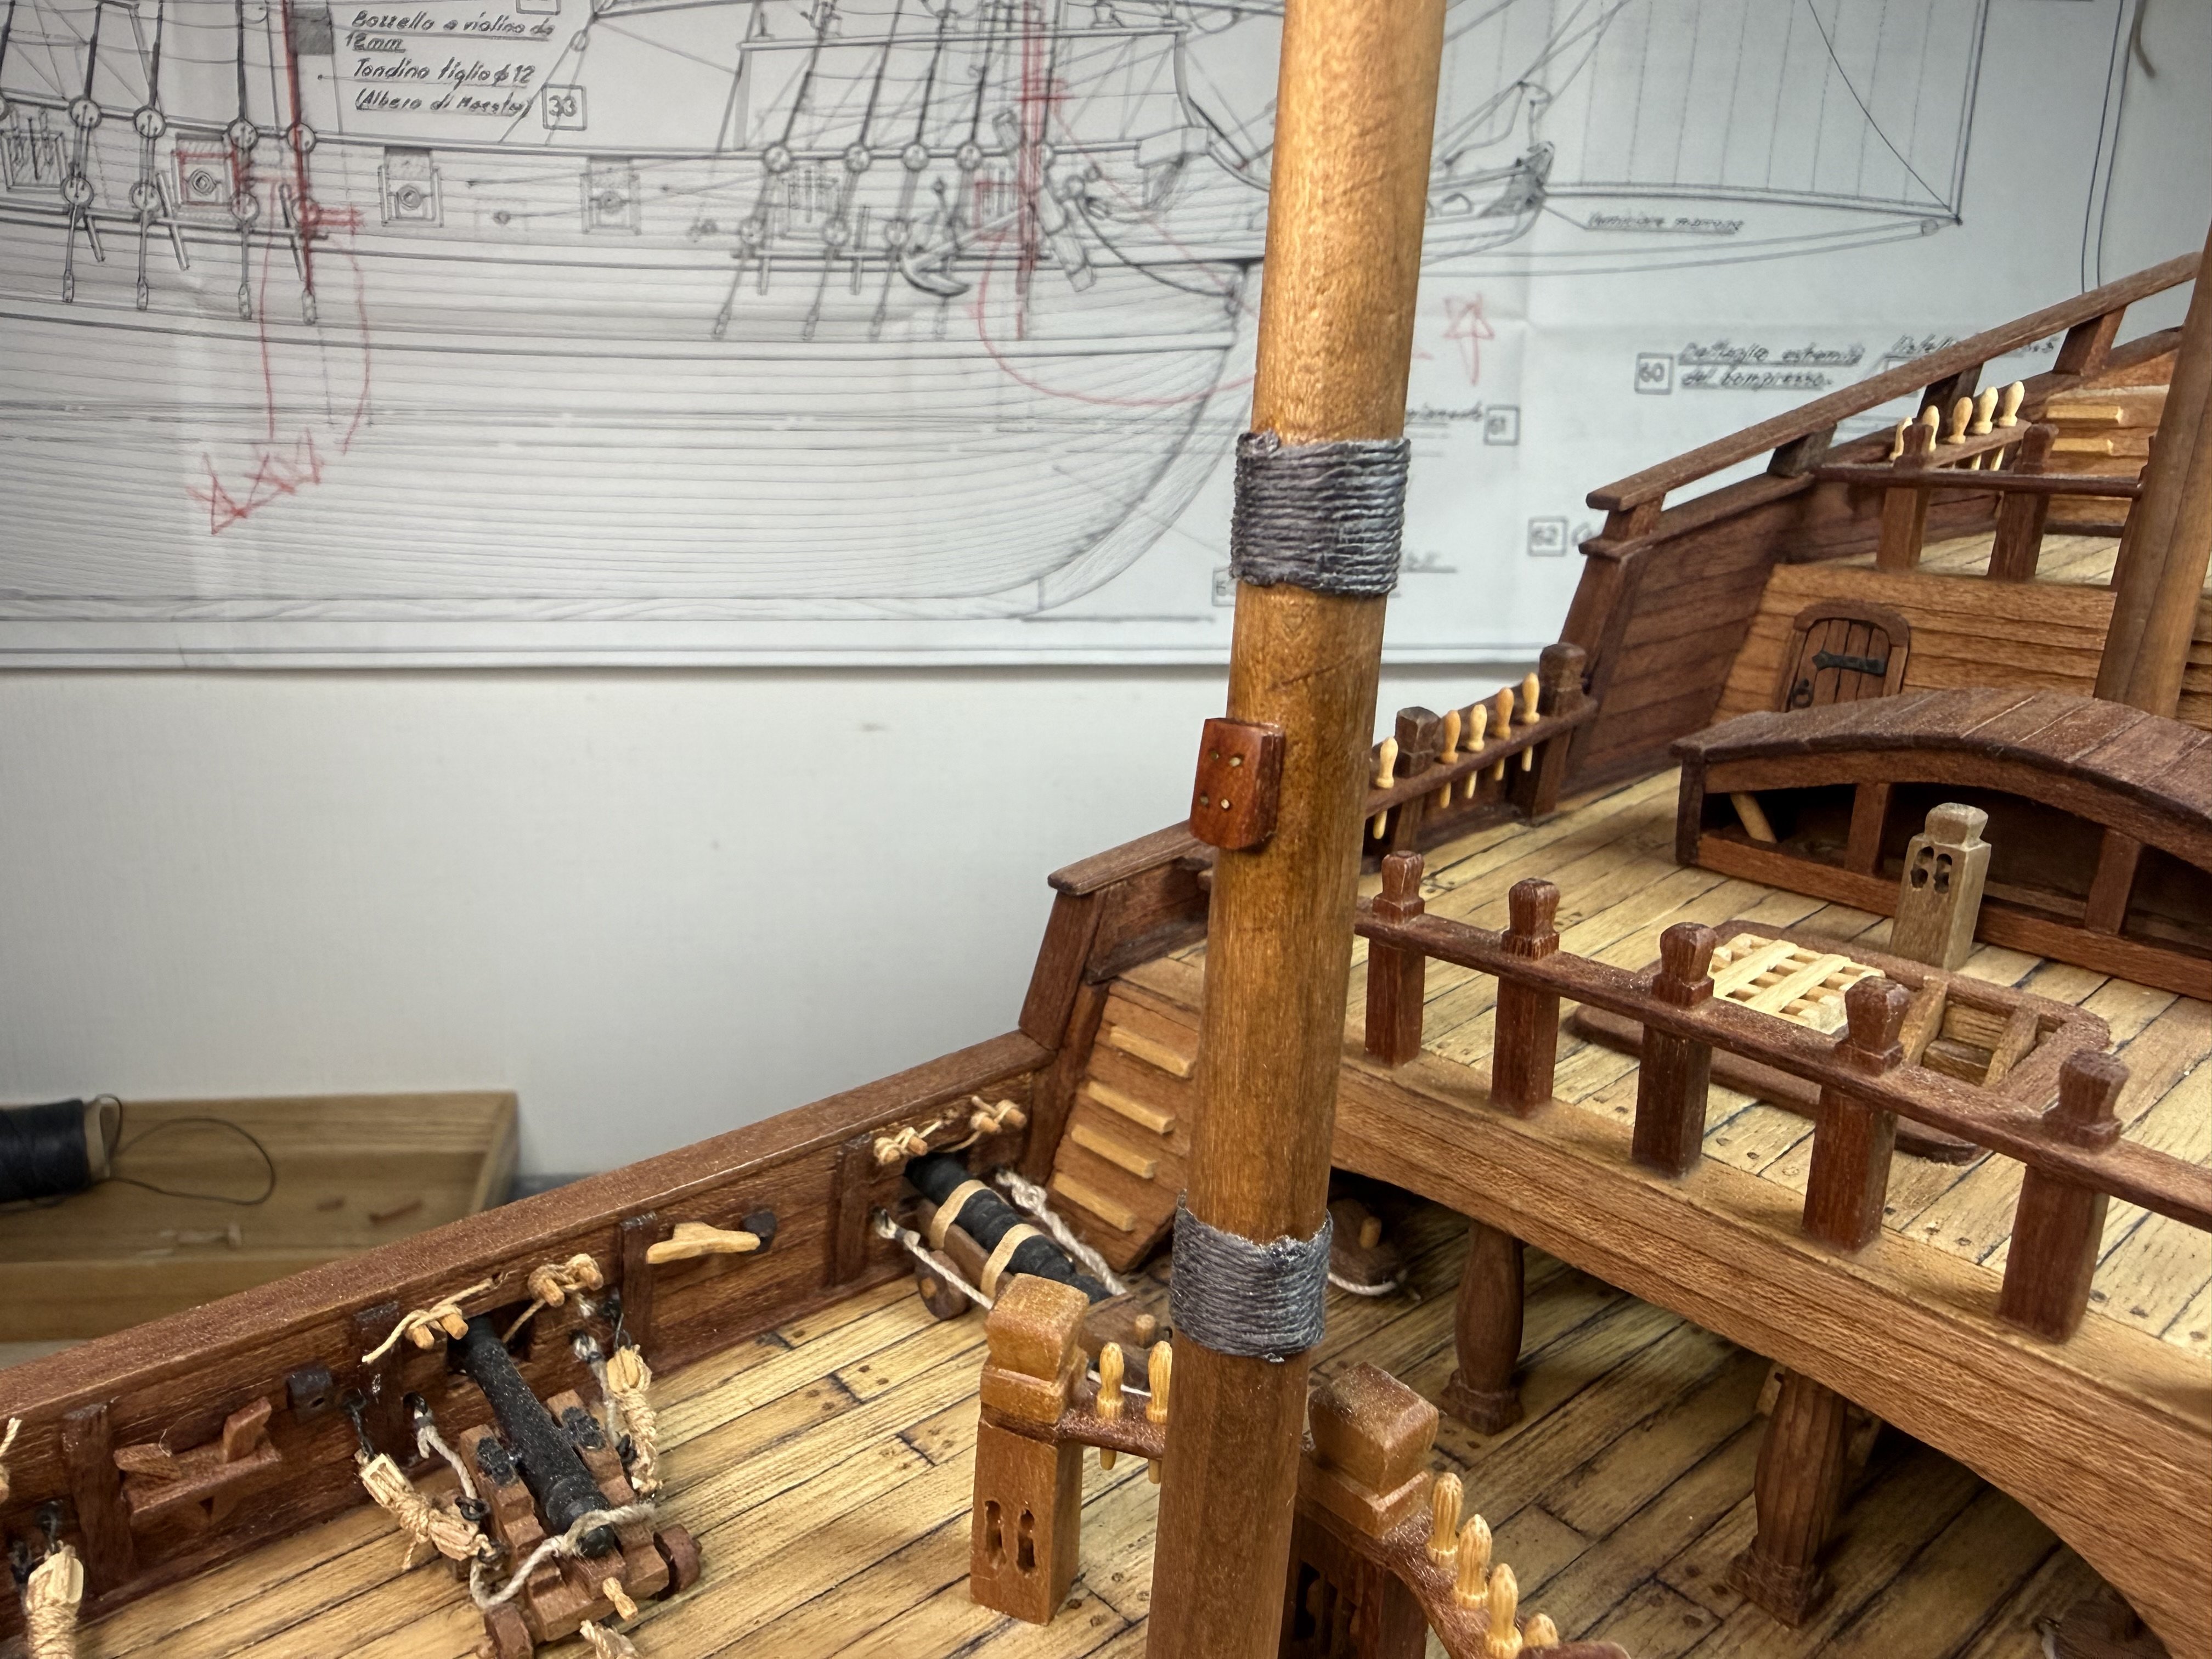
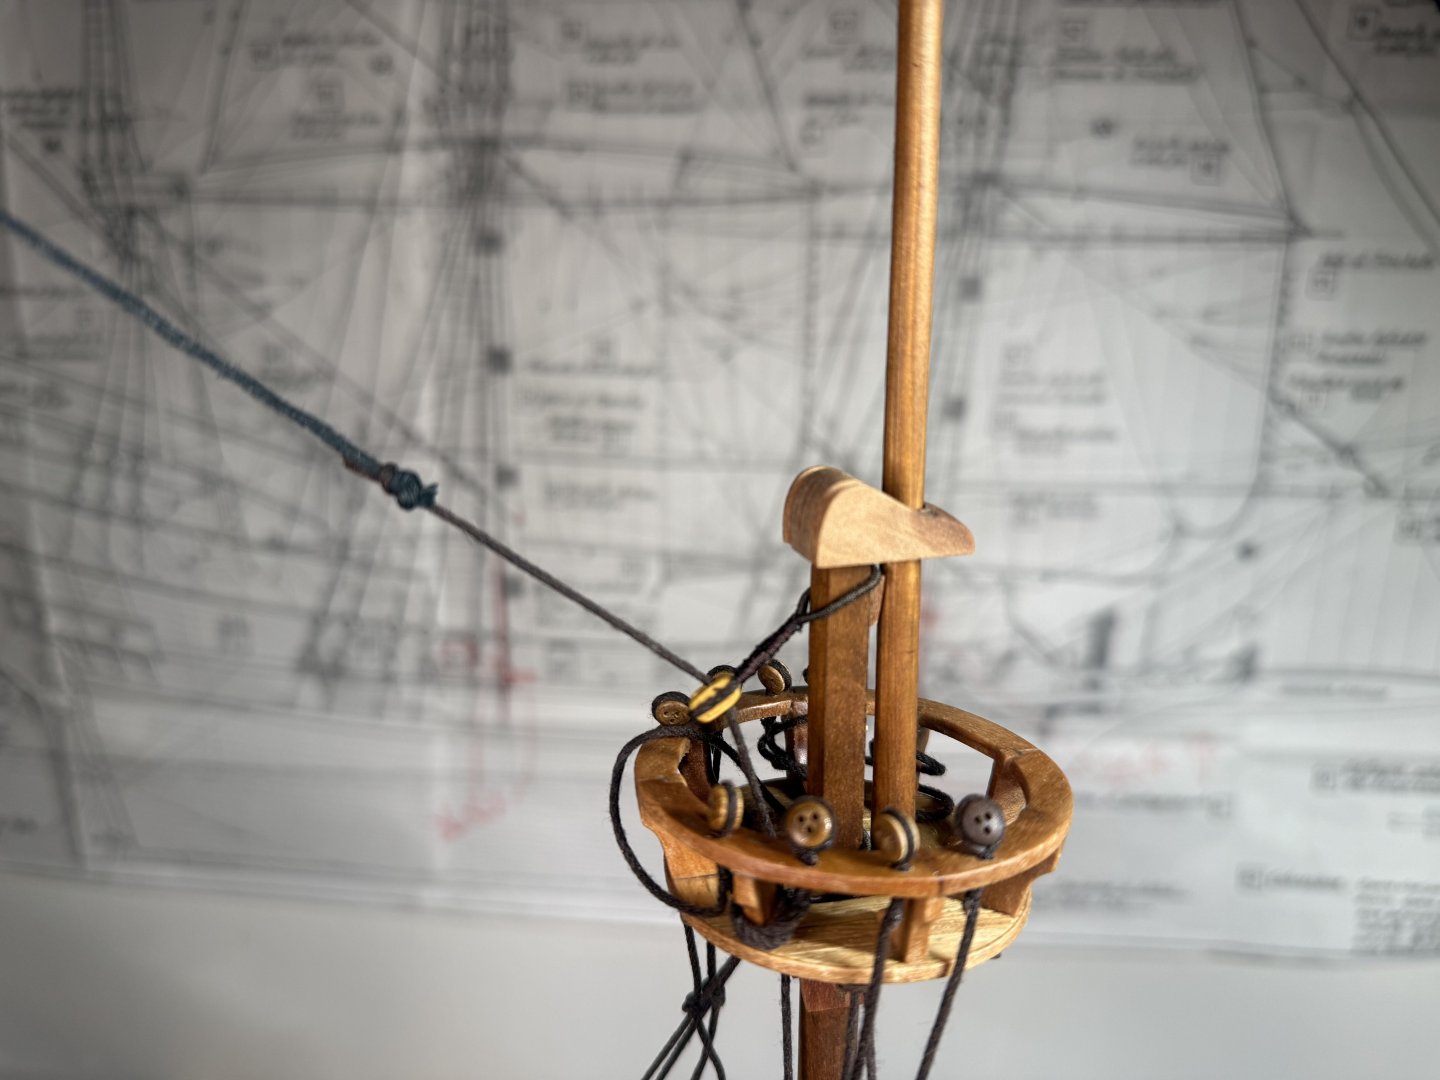
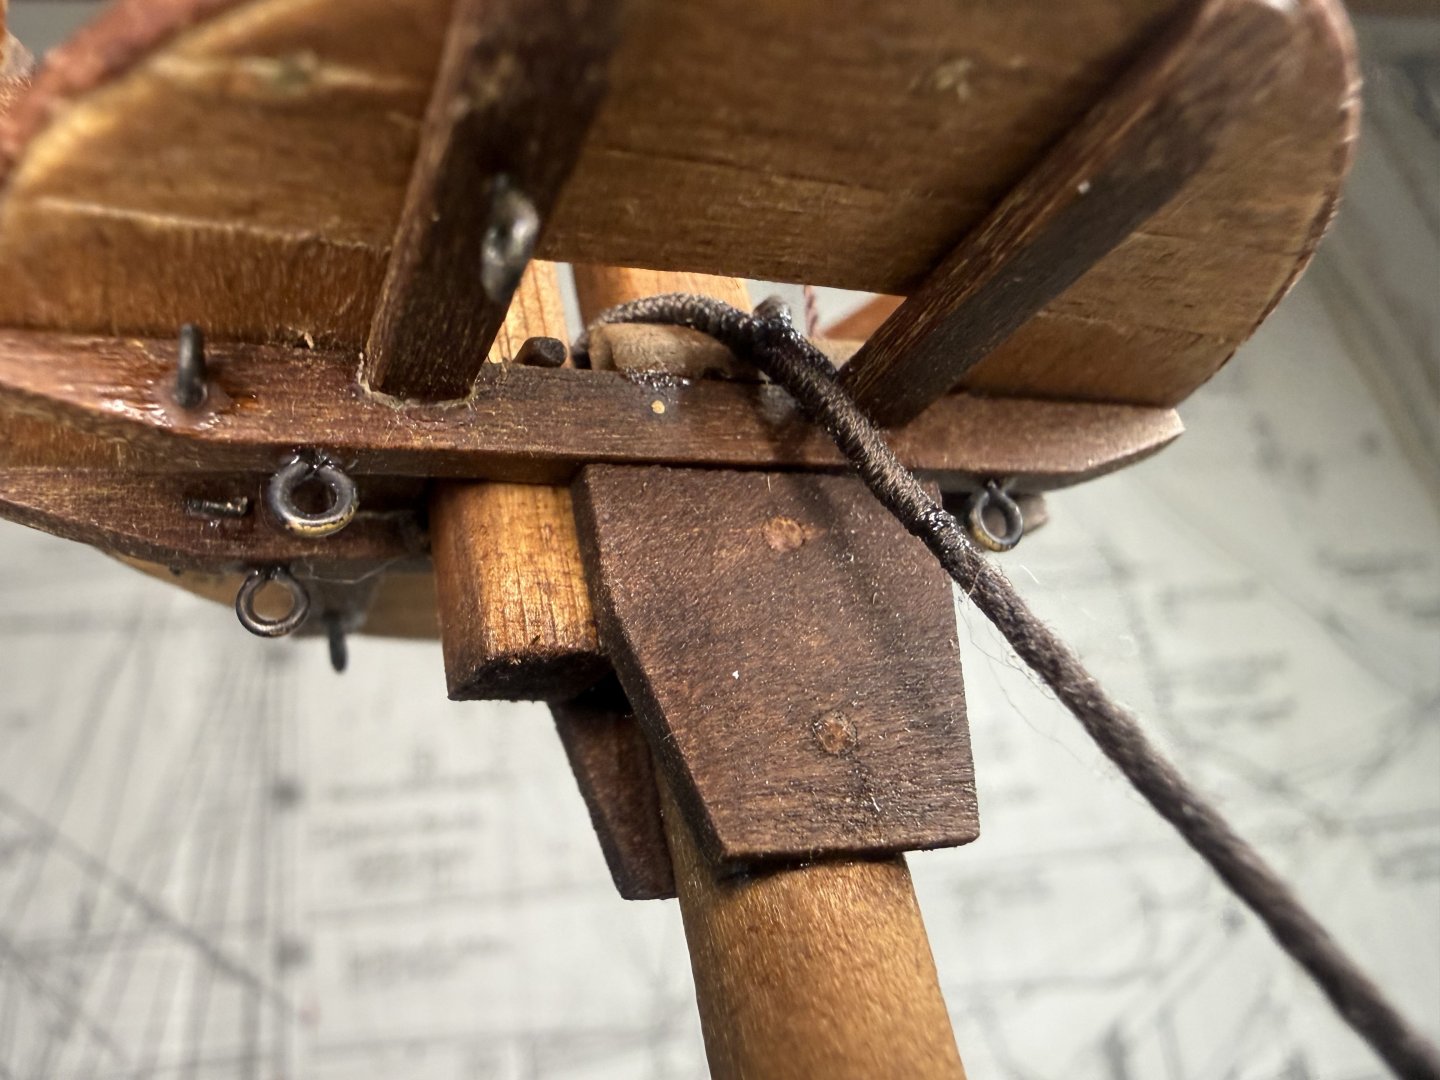
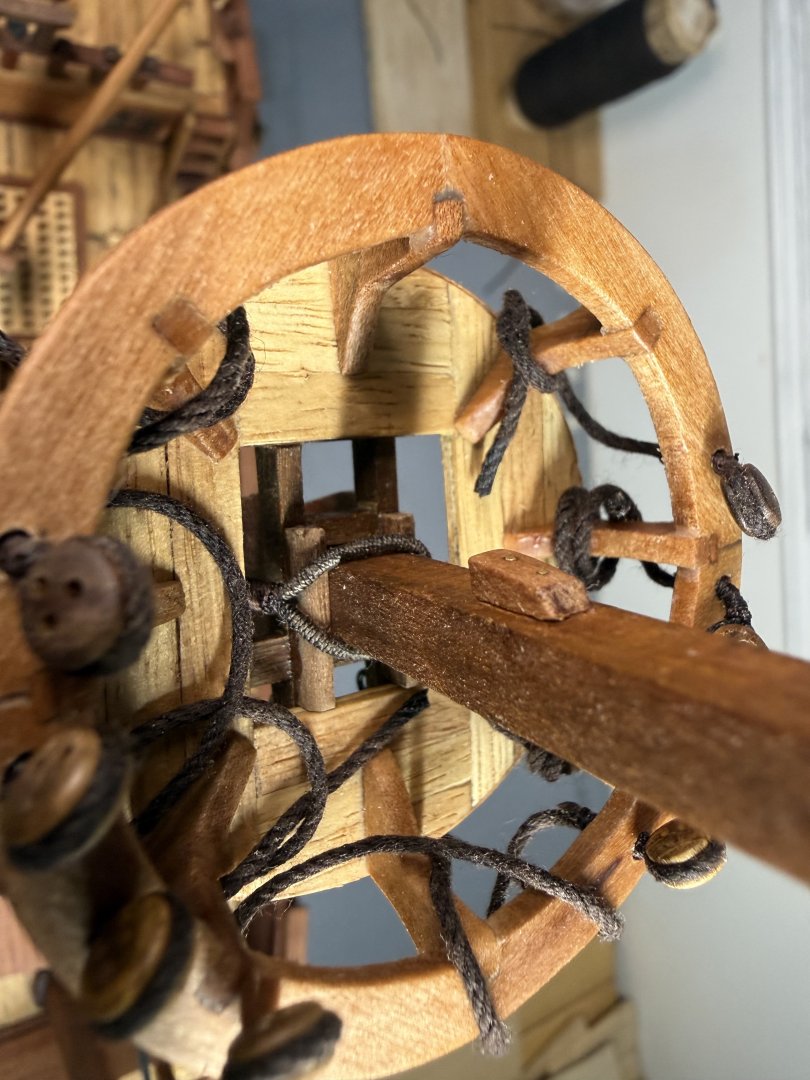
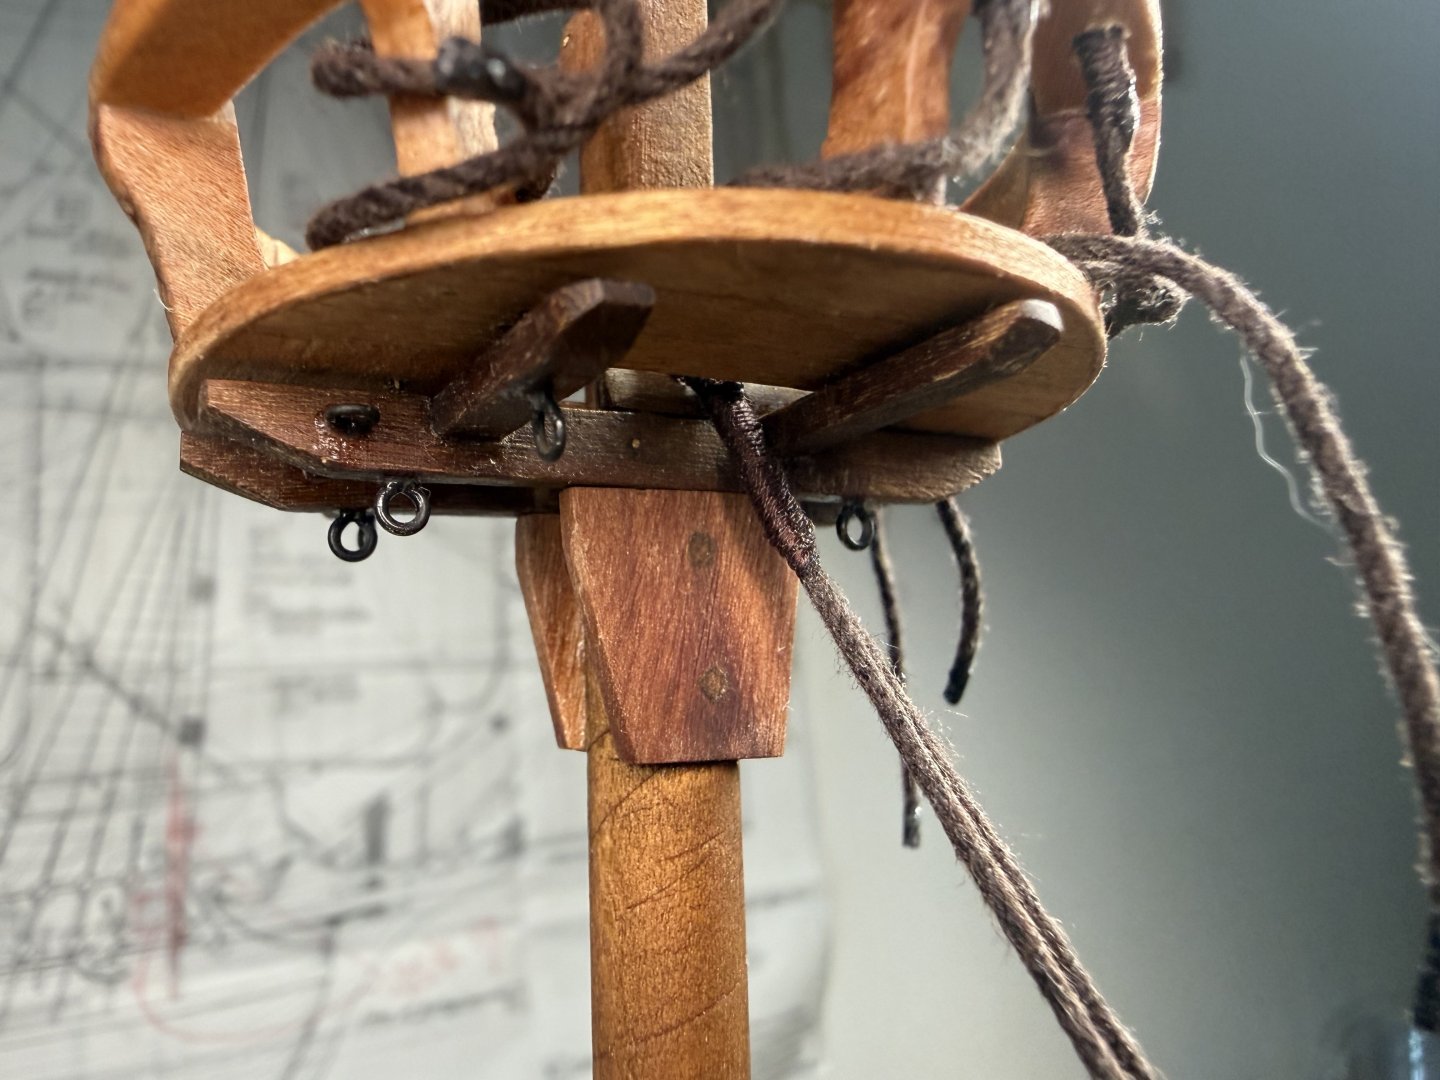
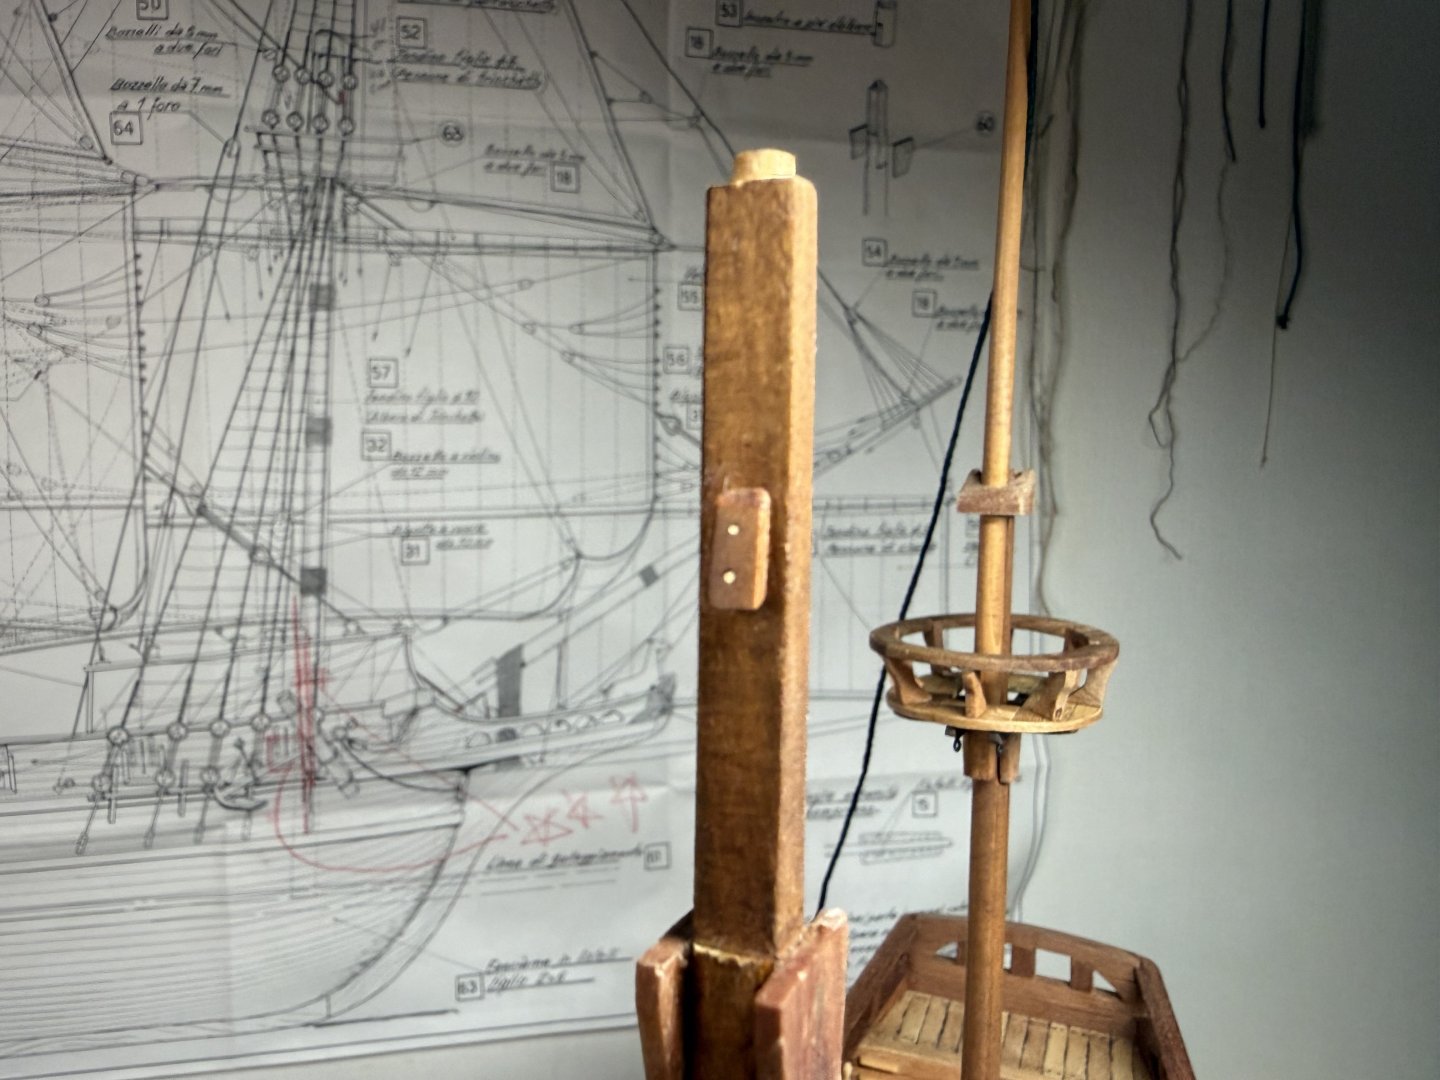
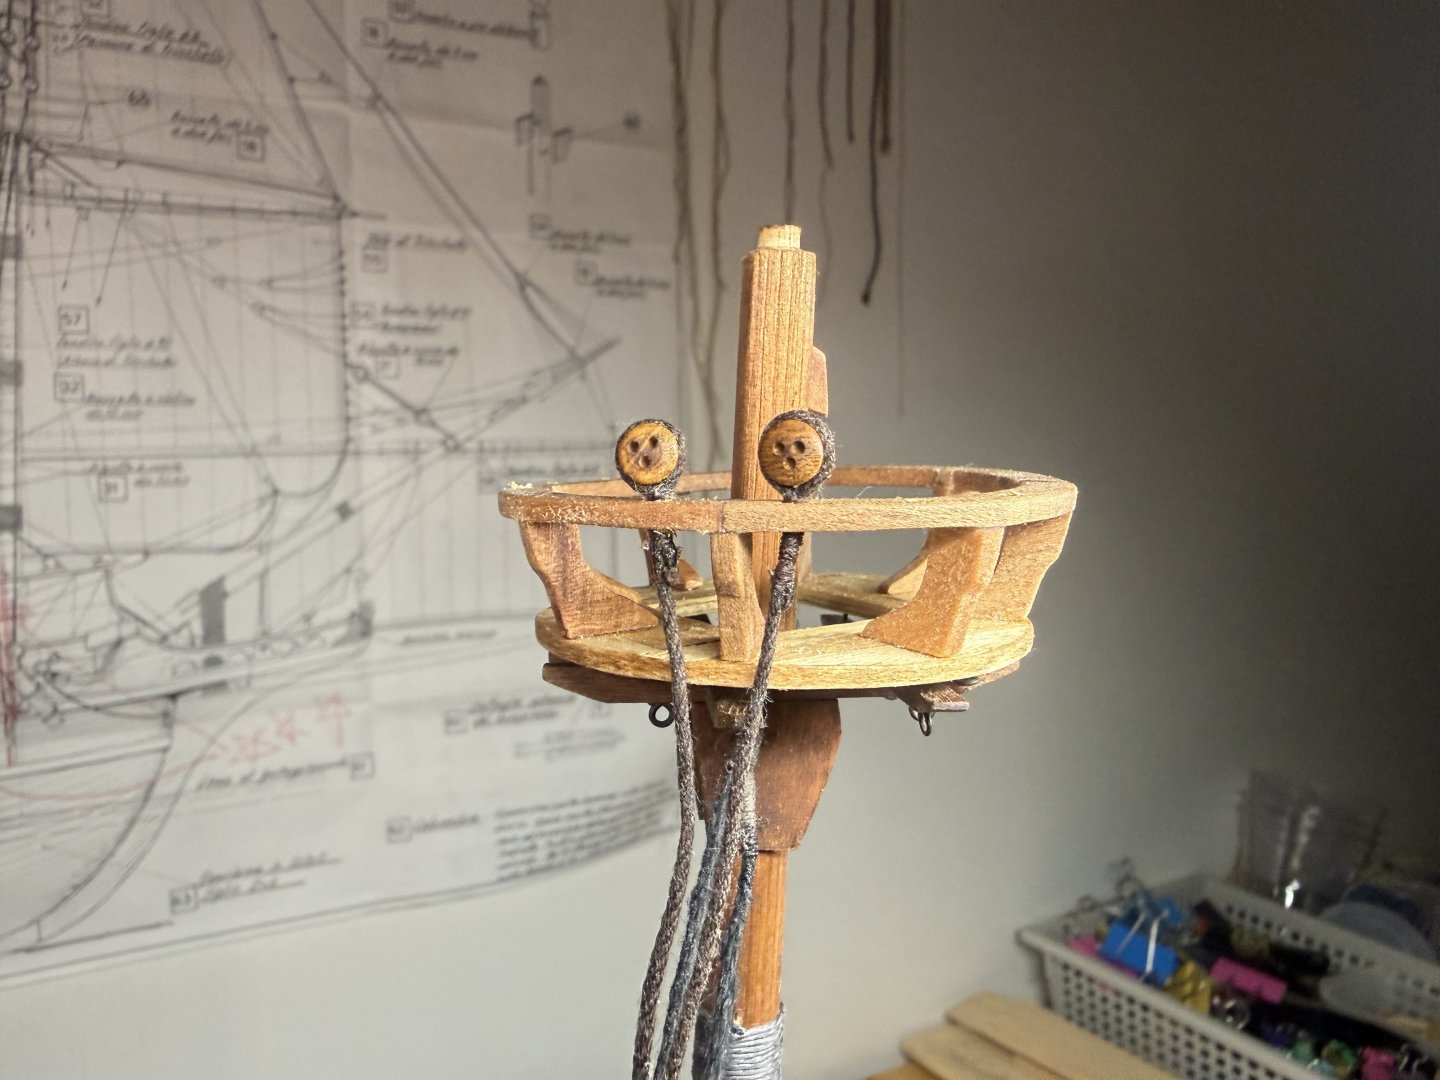
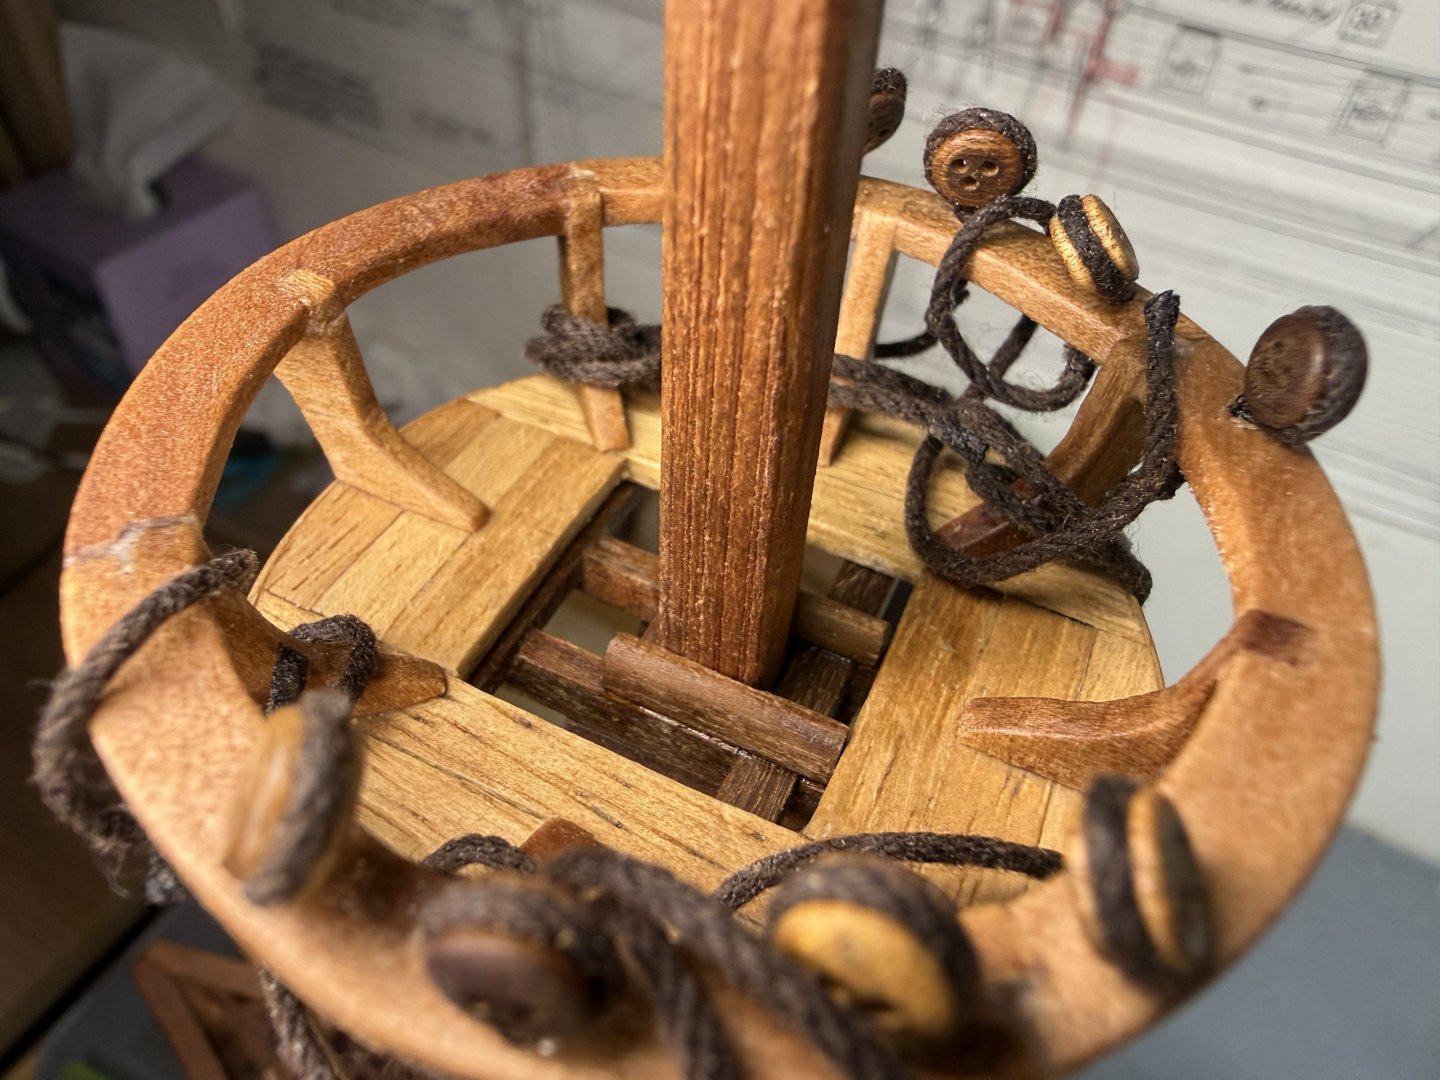
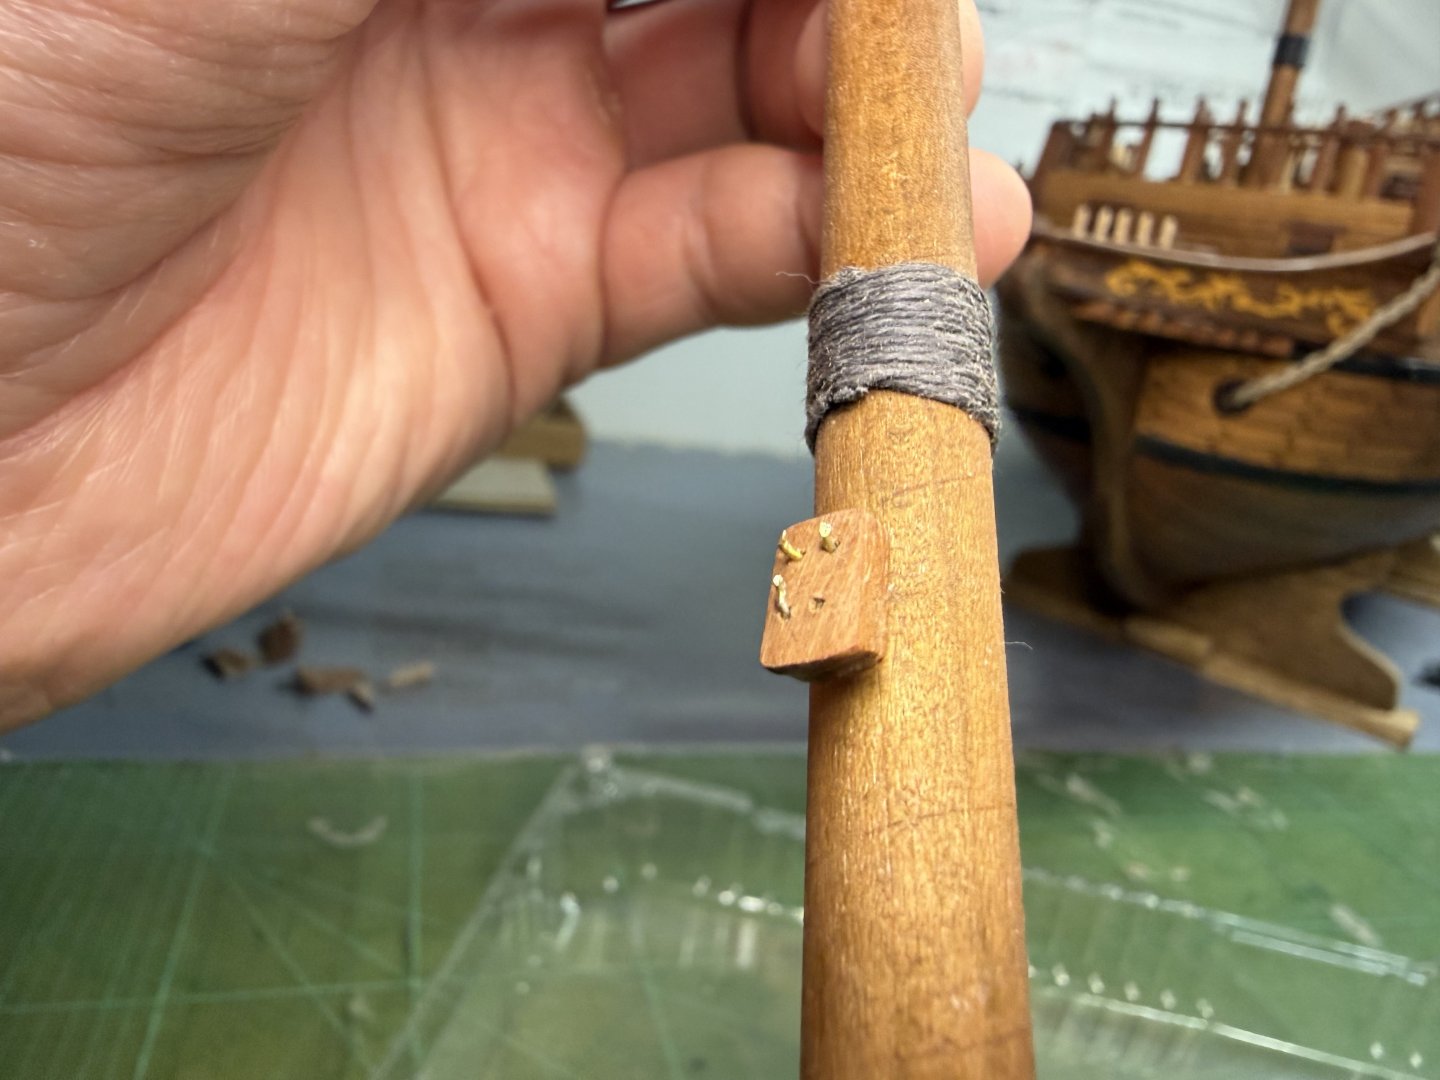
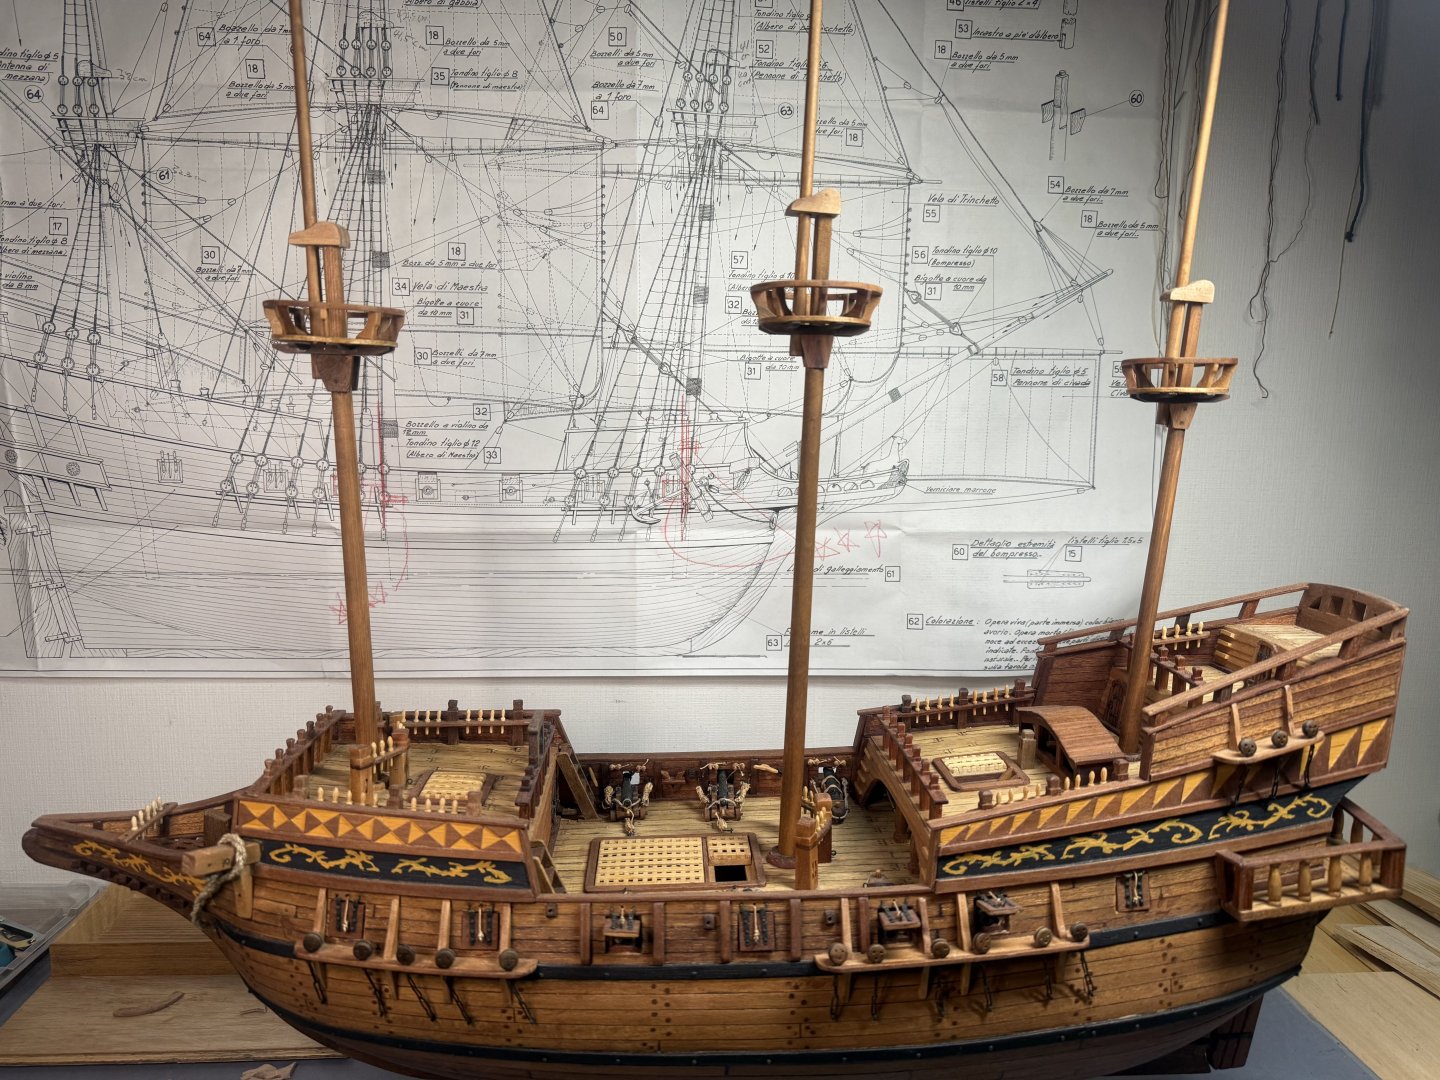
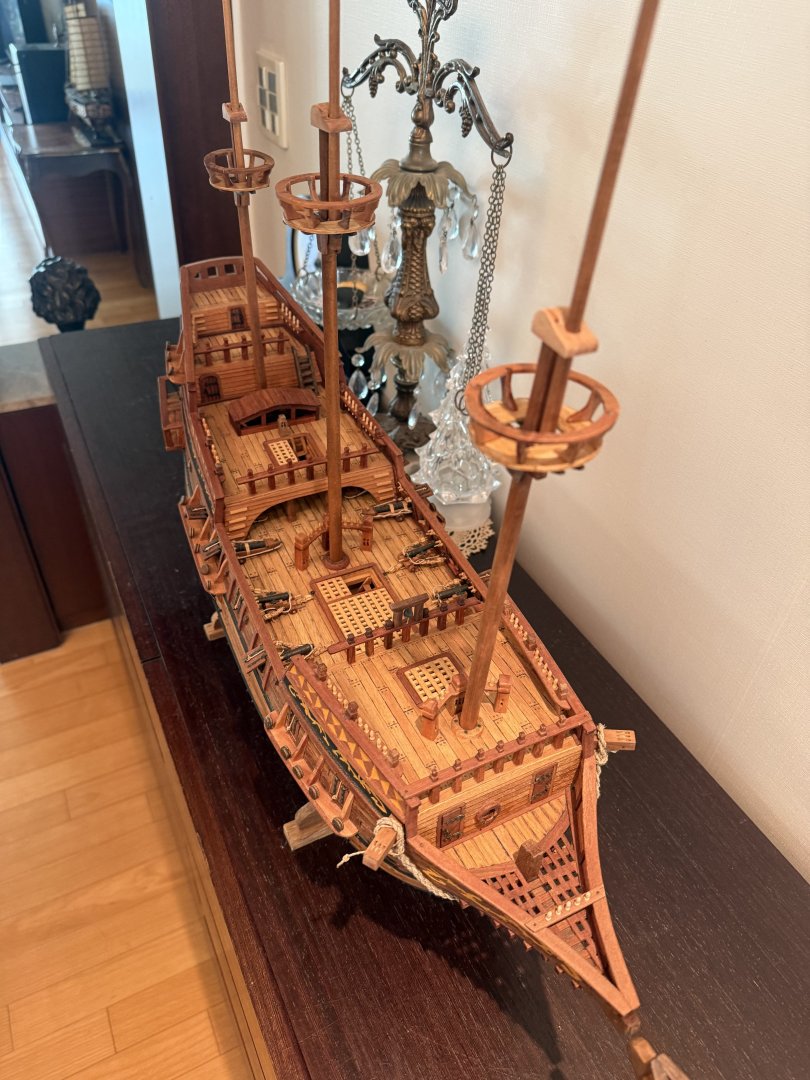
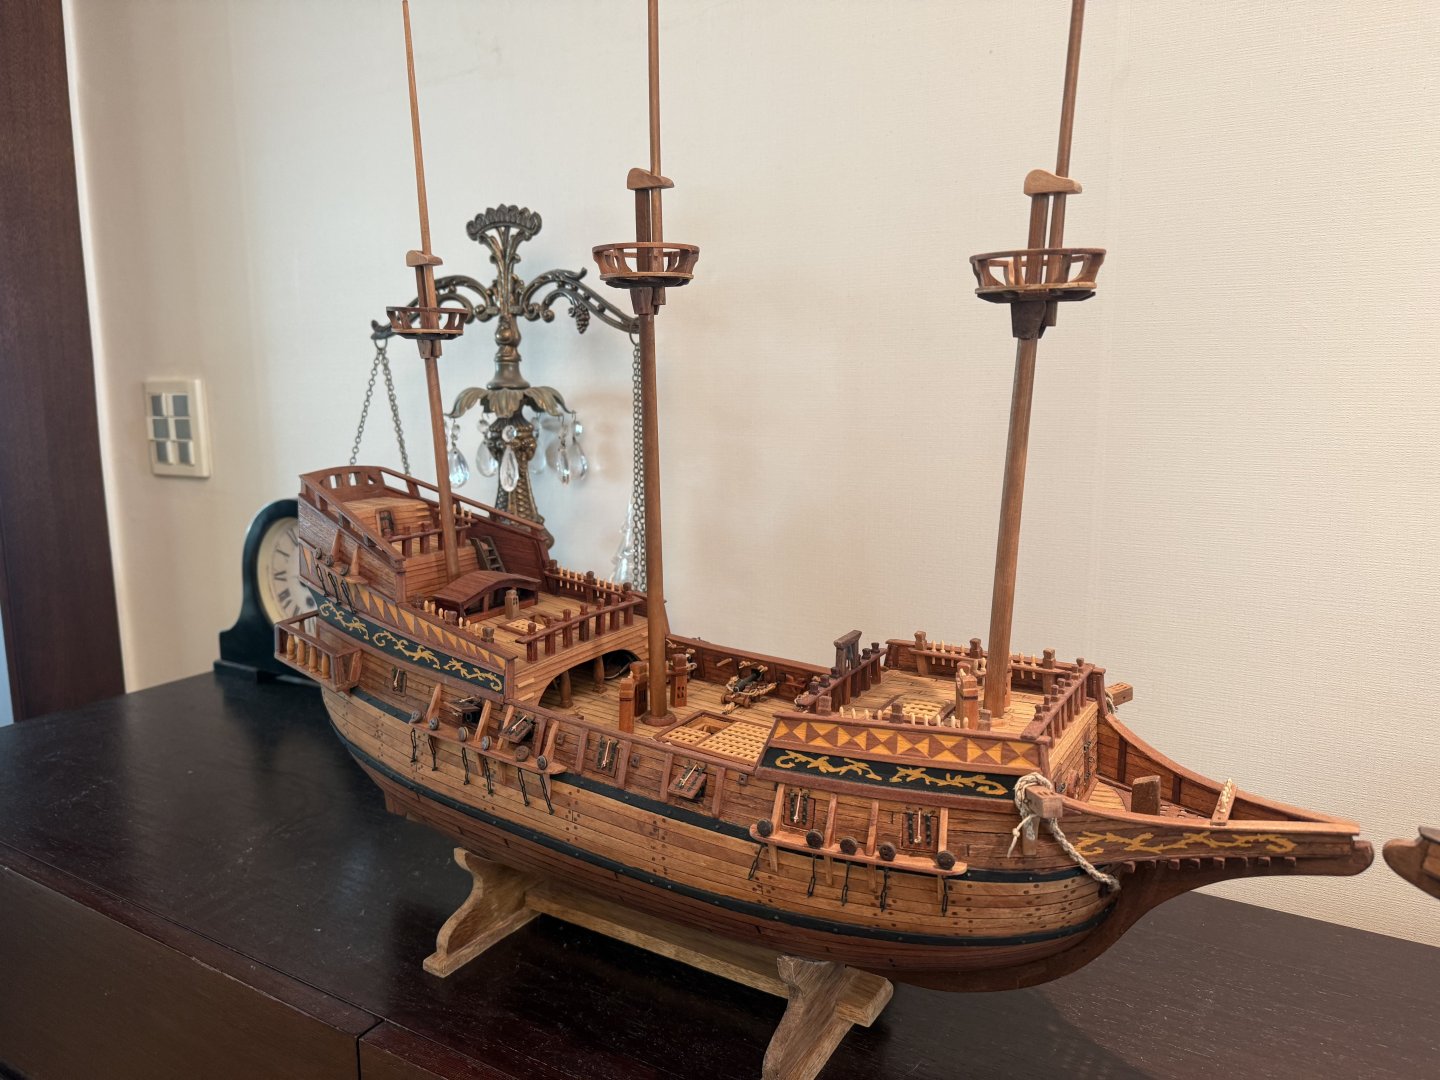
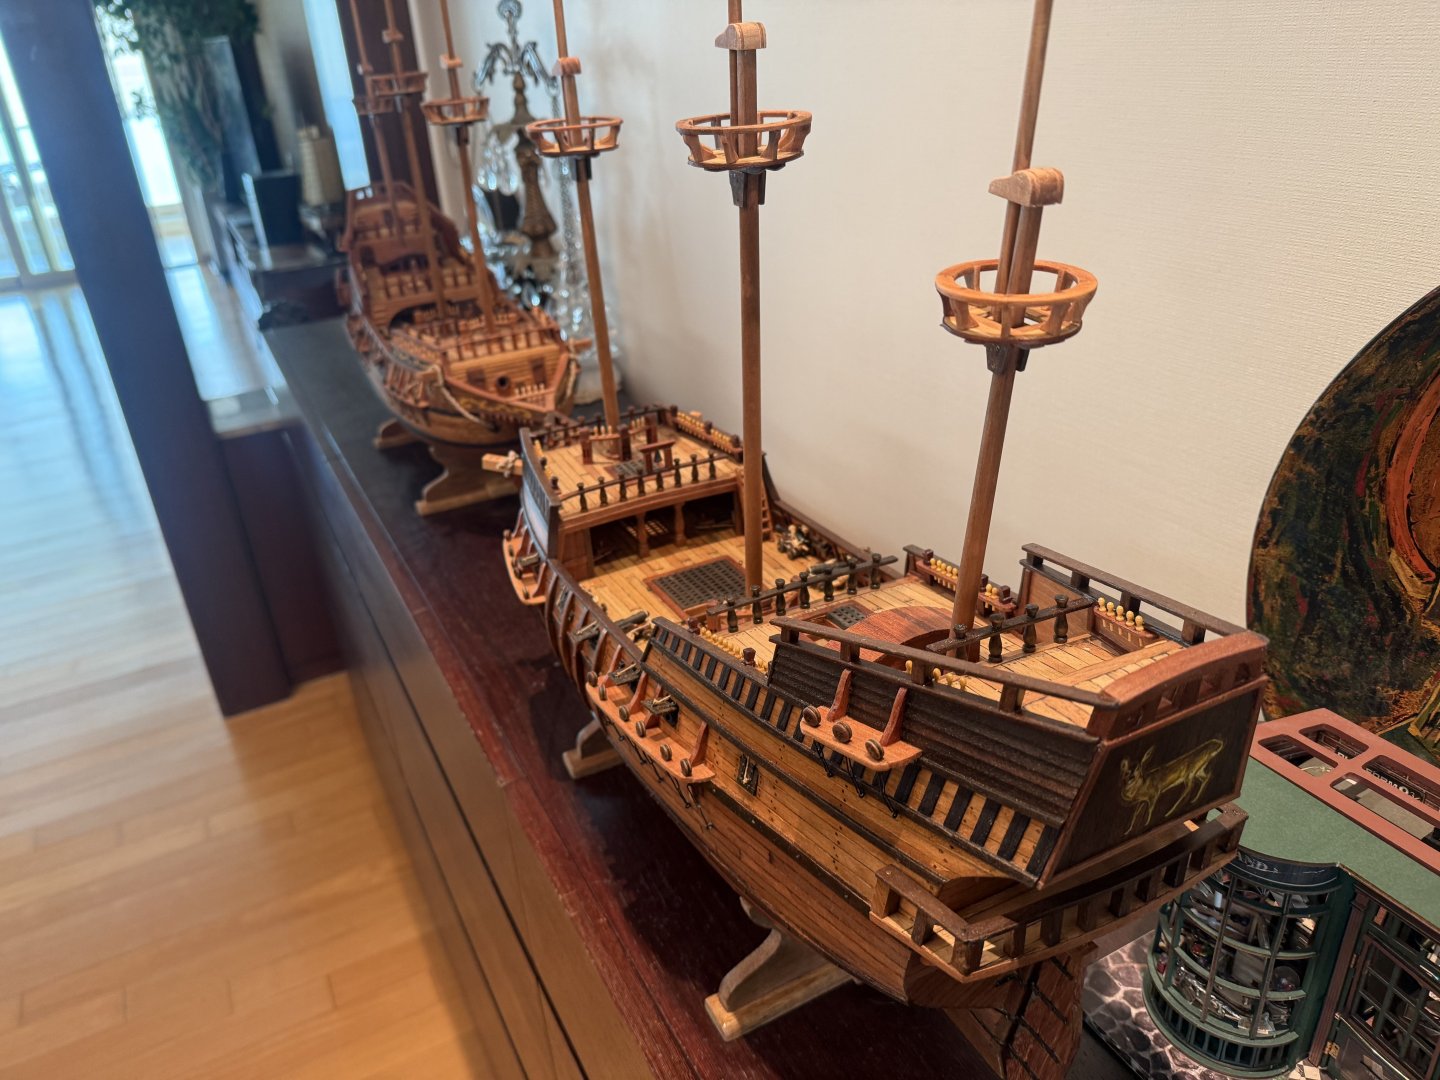
Next, the fore and main upper stay stoppers : small single stoppers applied. Now the dead eye fixture on the crow’s nest. I decided to follow the original plan - fixing the 5mm dead eyes with cotton thread instead of bronze. Finally, minor additions to crow's nest supporting structure.


-
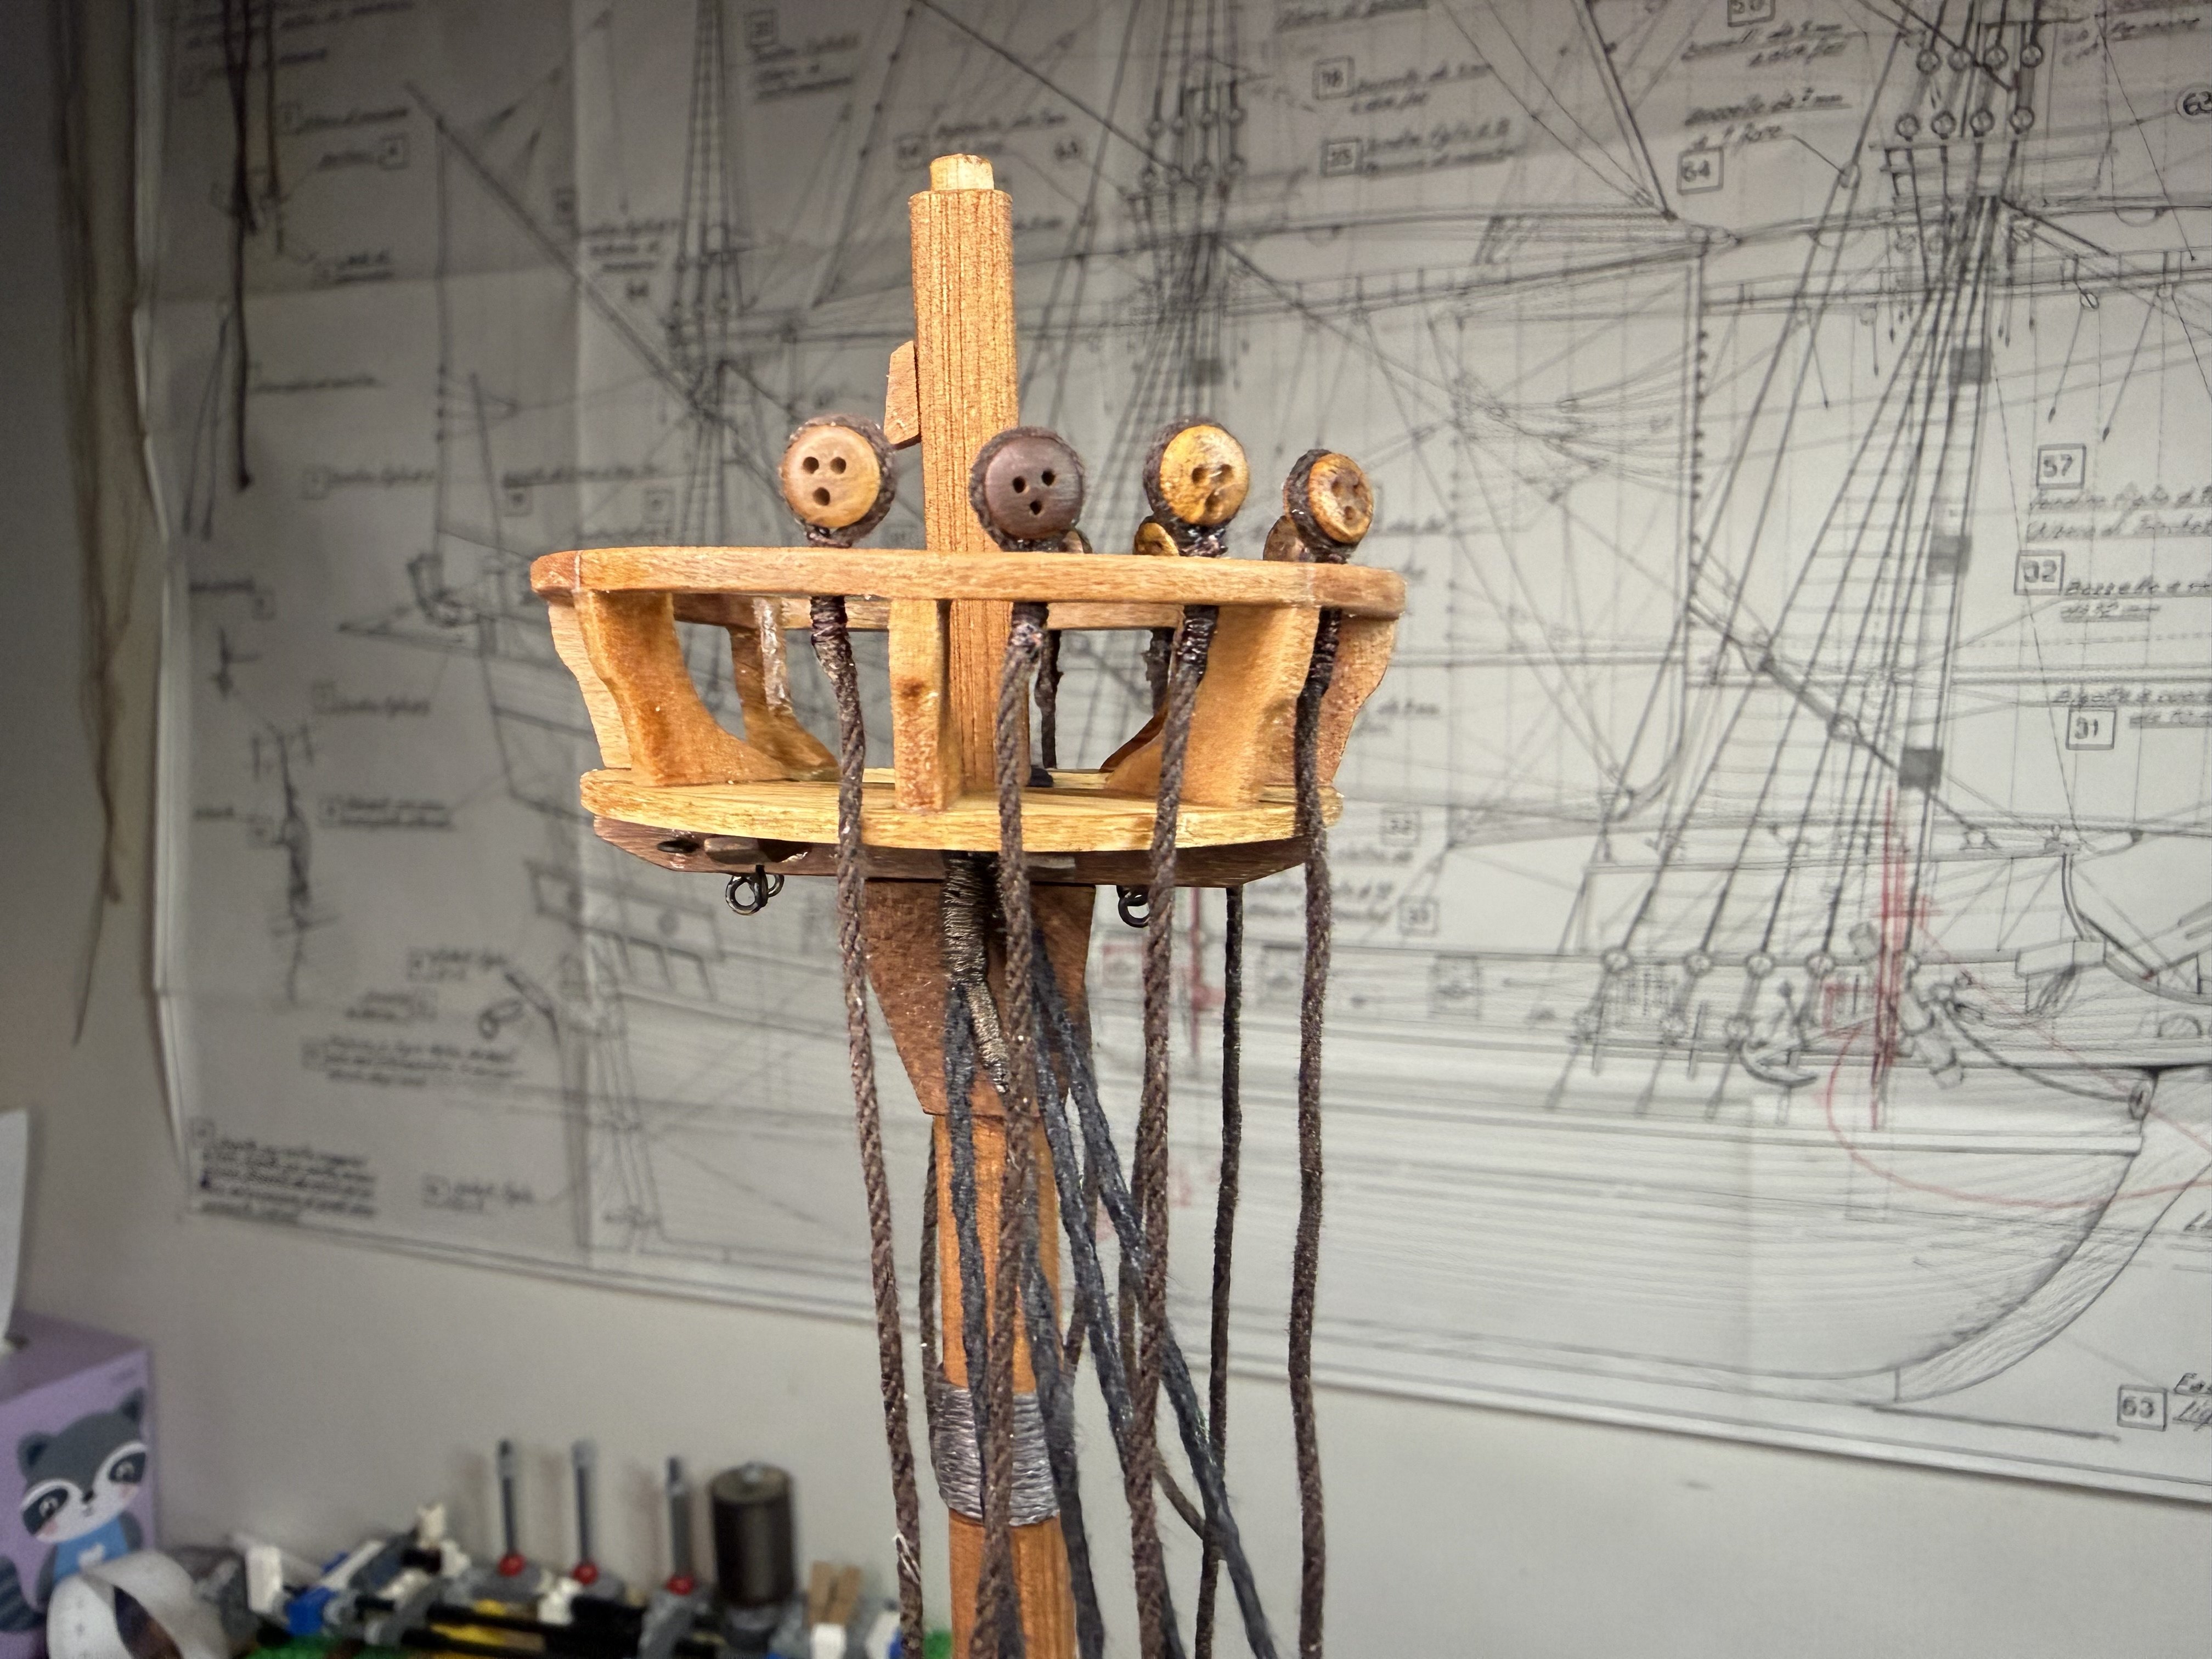
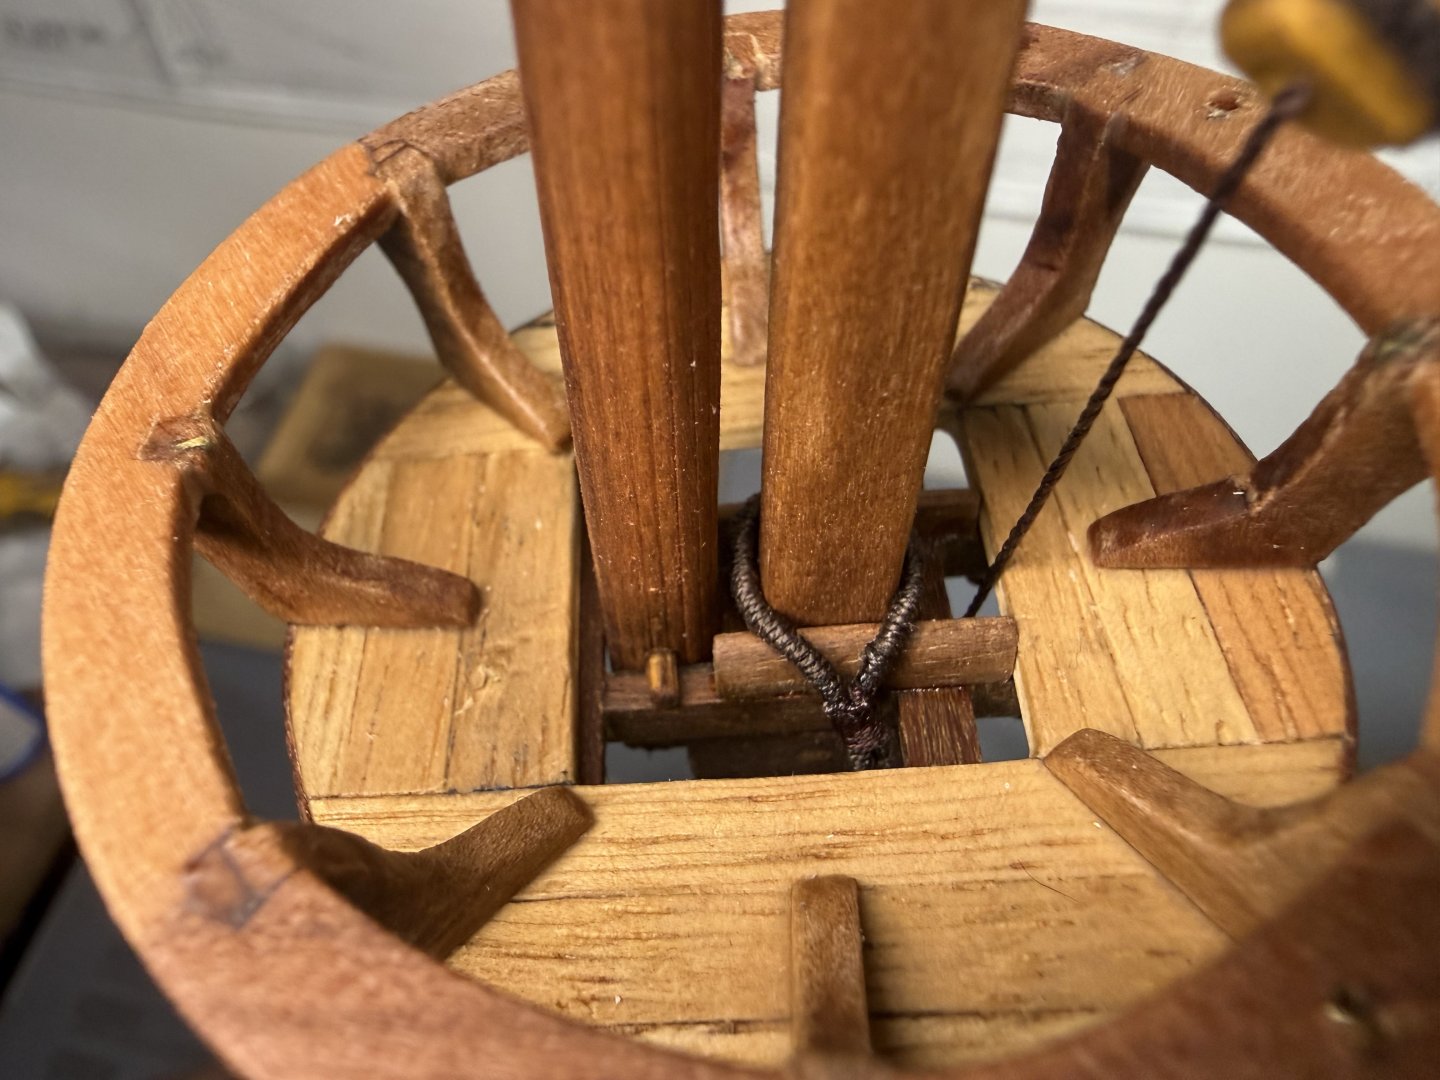
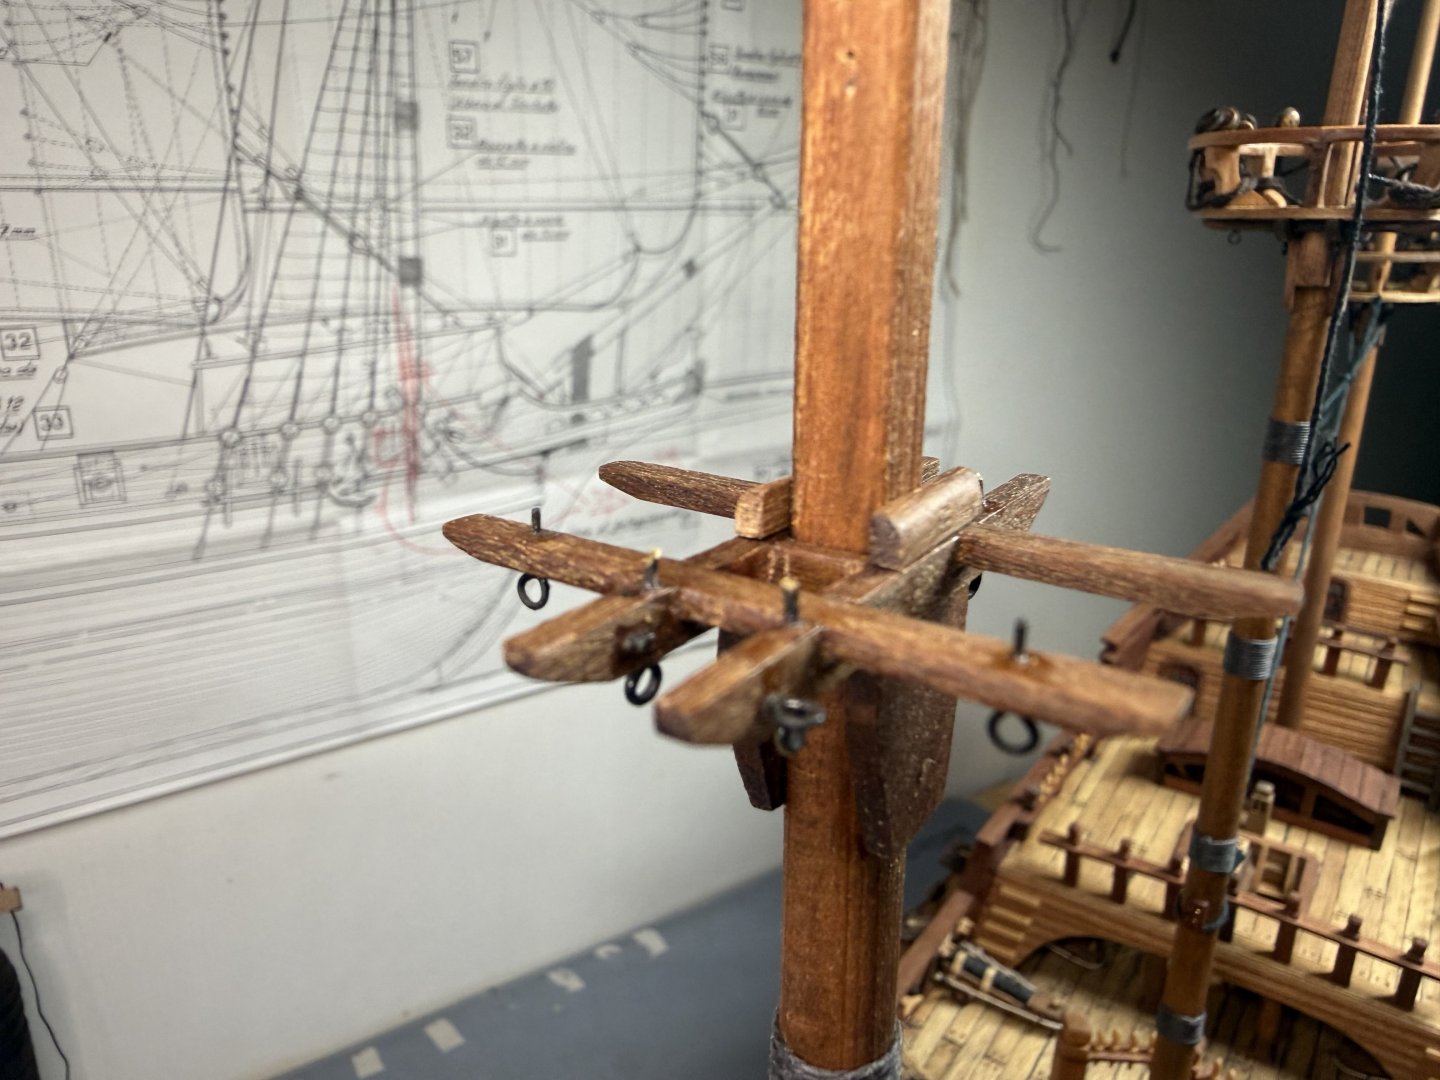
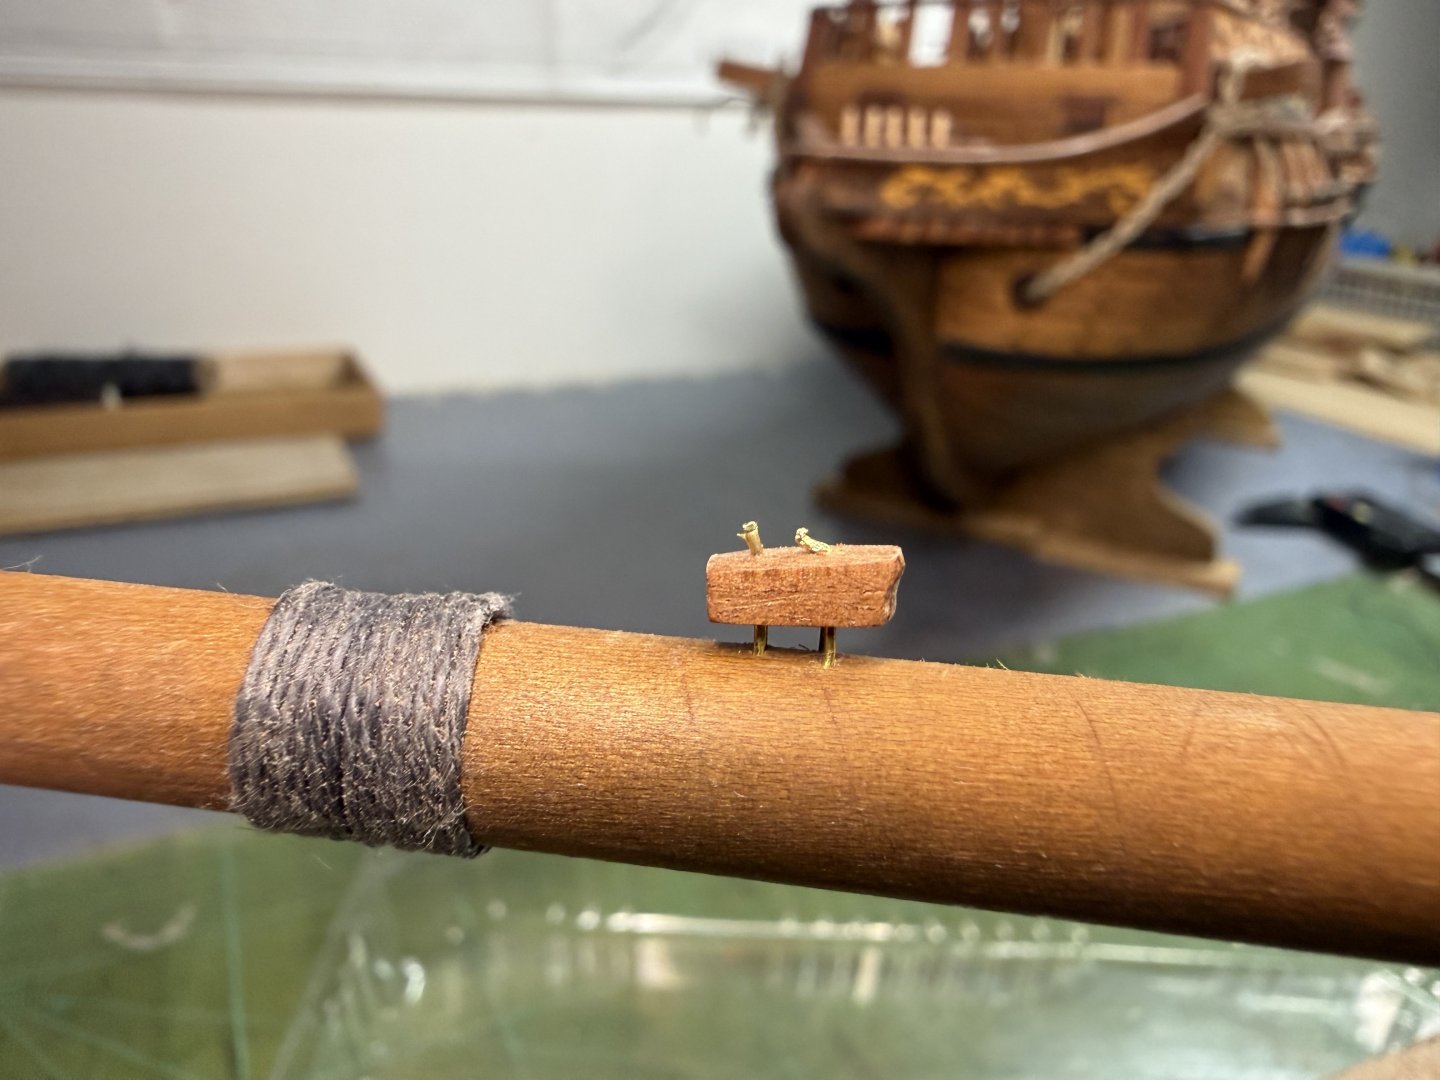
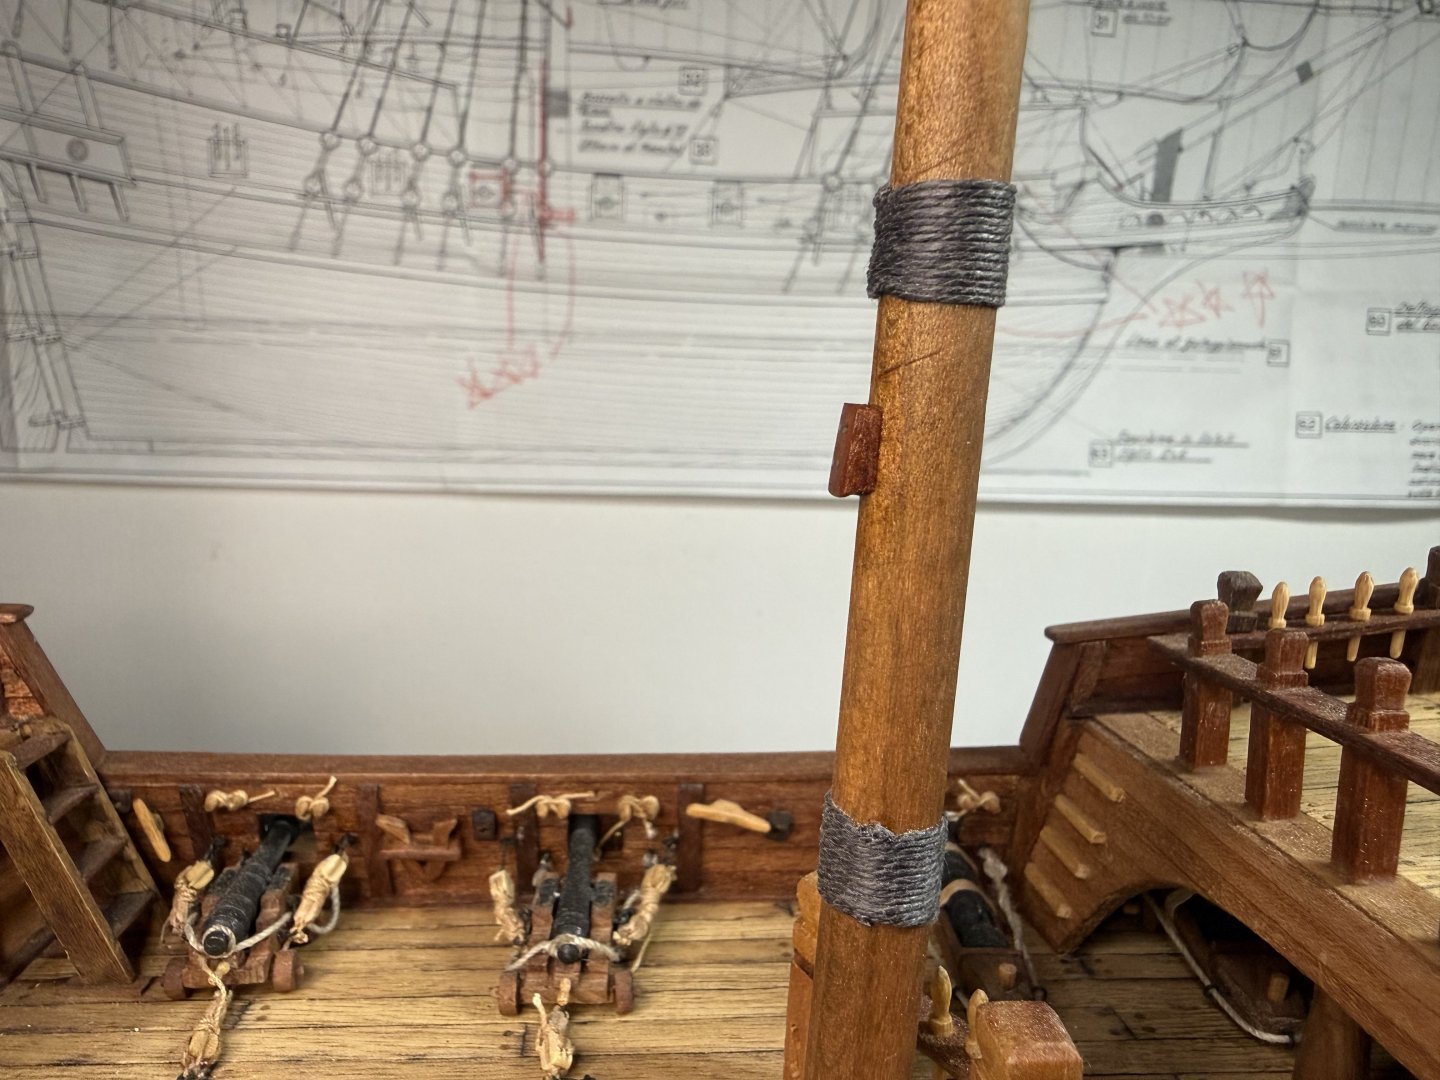
Hello shipmates! Latest progress report on GH1 & GH2: prep work for crow’s nest underbelly rigging (installing bolts for block attachments), installment of stoppers for stays, deadeye fixture on the crow’s nest, and some other minor additions. First the bolts on the underbelly of the crow’s nest. I started our with 4 (2 on the front, 2 on the back), but later I decided to add 4 more bolts on the front side (just in case). Next, the stopper for stay (between lower part of main mast and mizzen mast) For this one, I devised a larger and wider single design instead of applying multiple small stoppers. Same procedures applied to all masts for both GH1 & GH2.


-
Thanks for your comments, Robert!
-
Thanks Patrick! I am always referencing your build logs anyway~ At the moment, I just need something specific and more detailed pertaining to fighting top (base and bottom part) only. I am currently going through similar builds including your Pelican.
-
Thanks very much for your kind words,Alan!
-
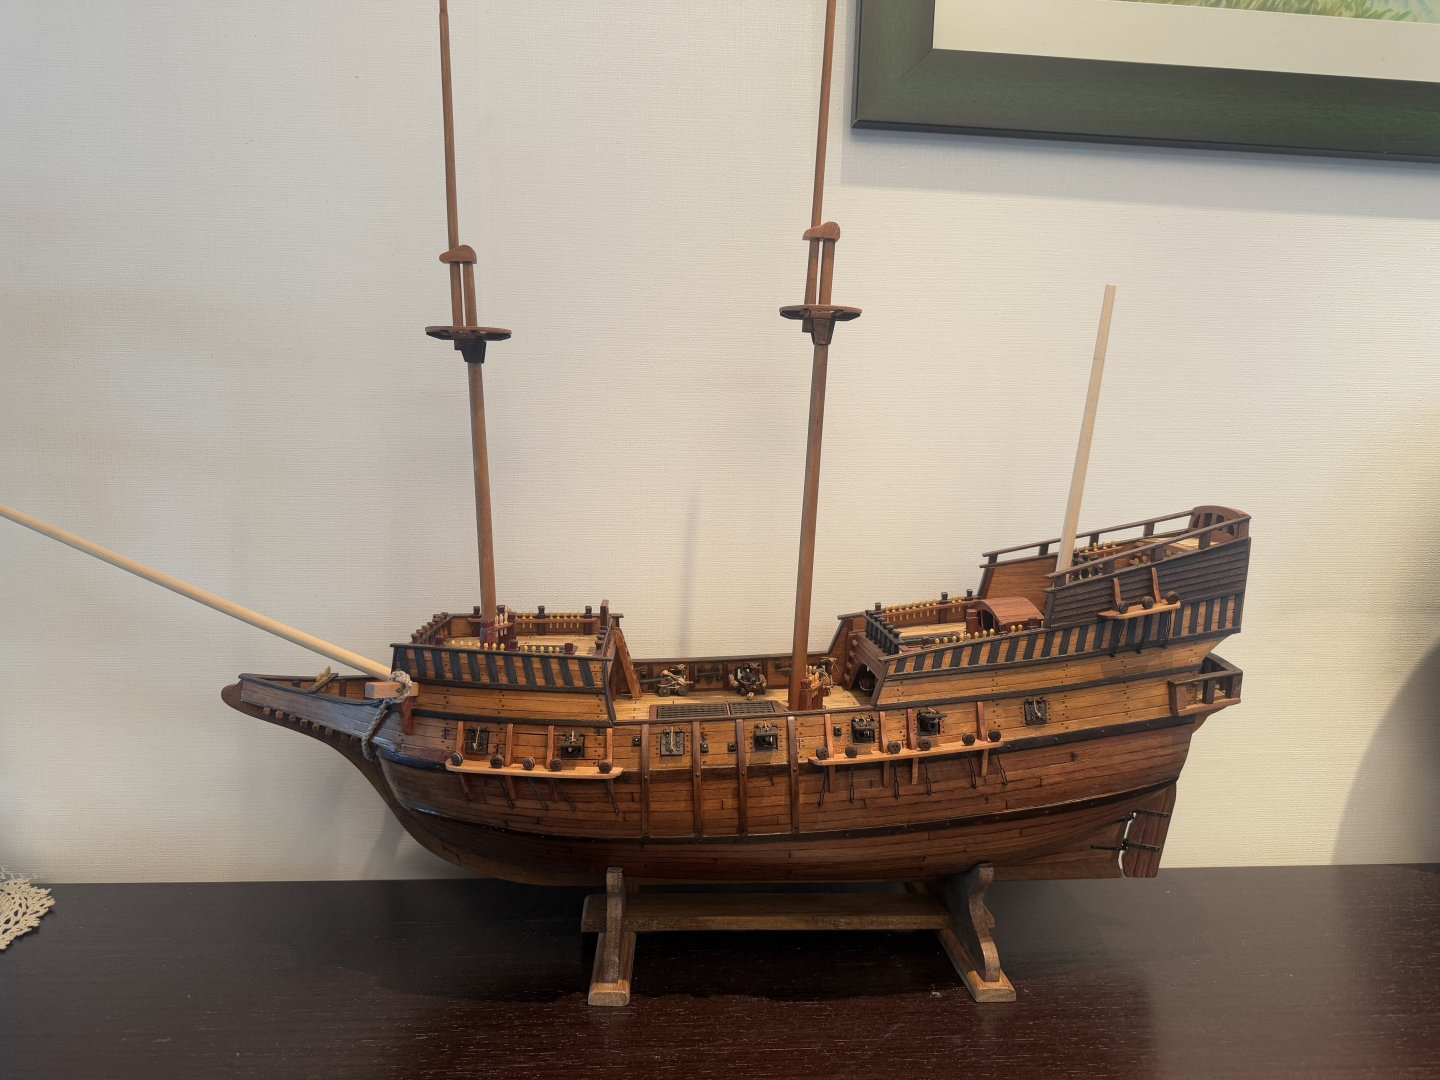
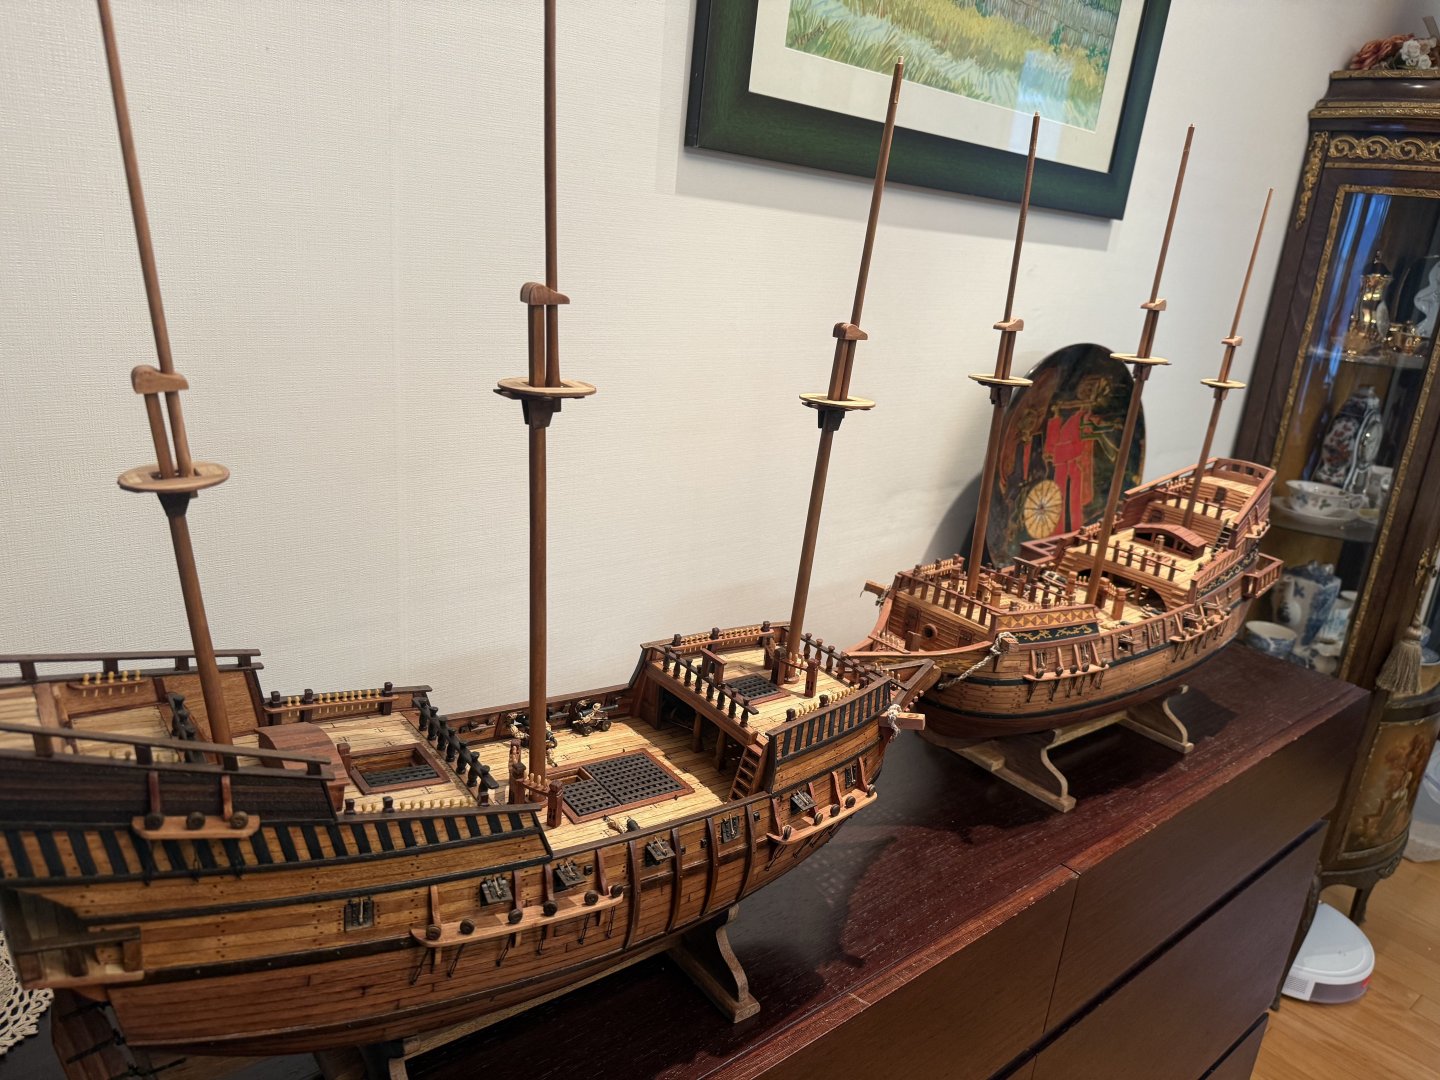
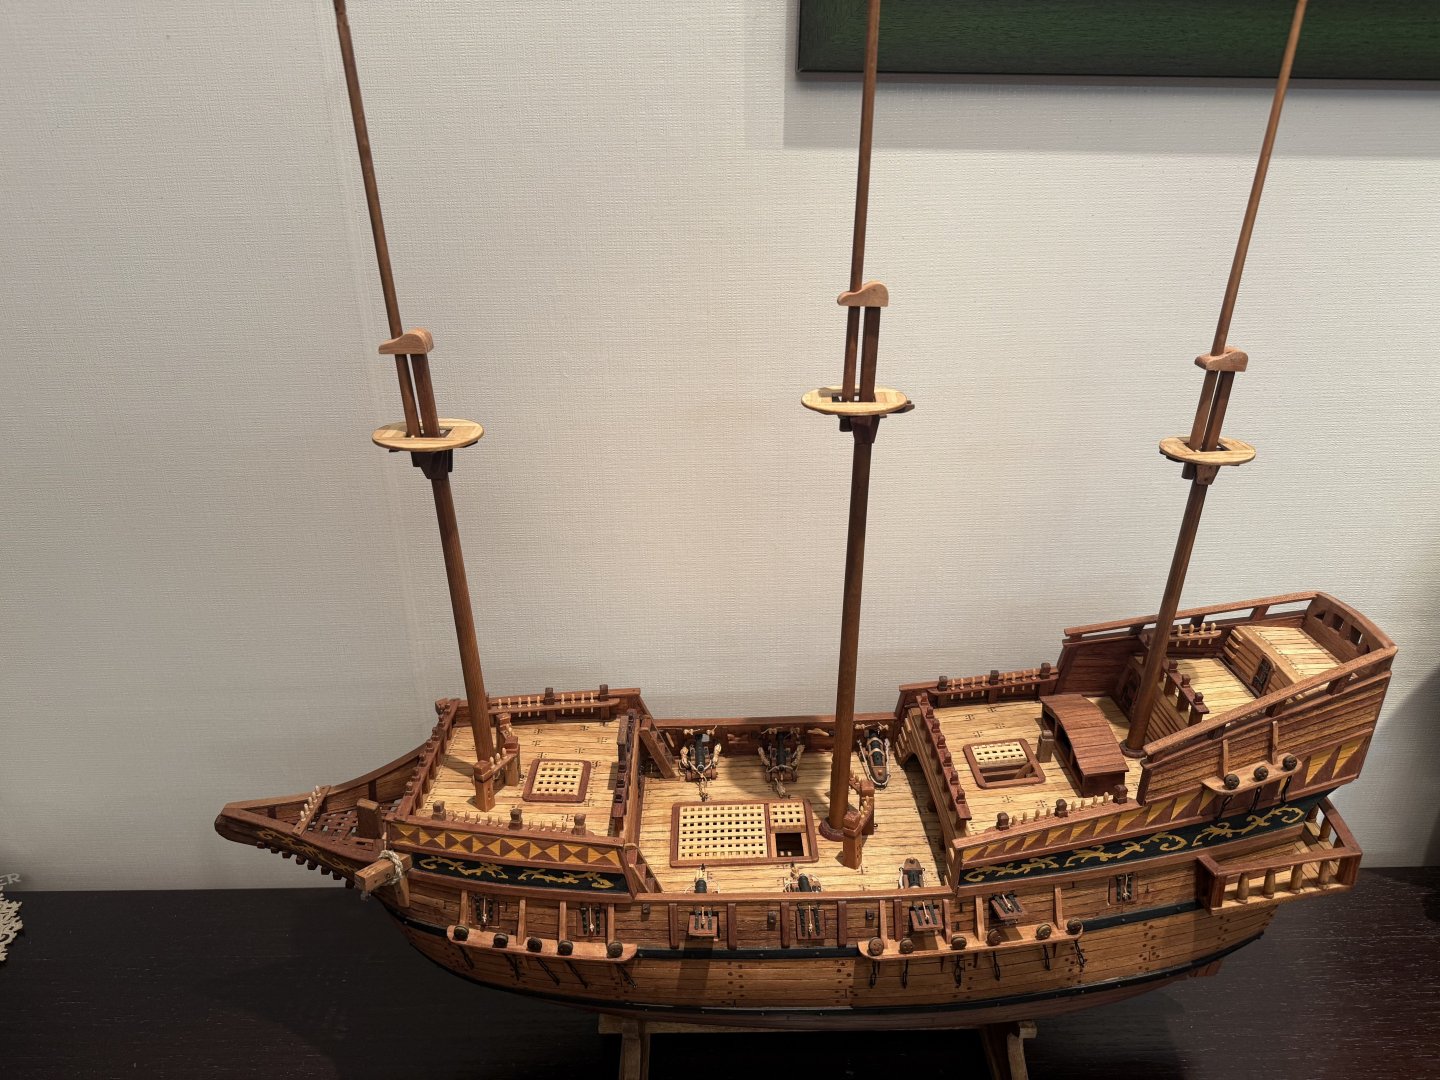
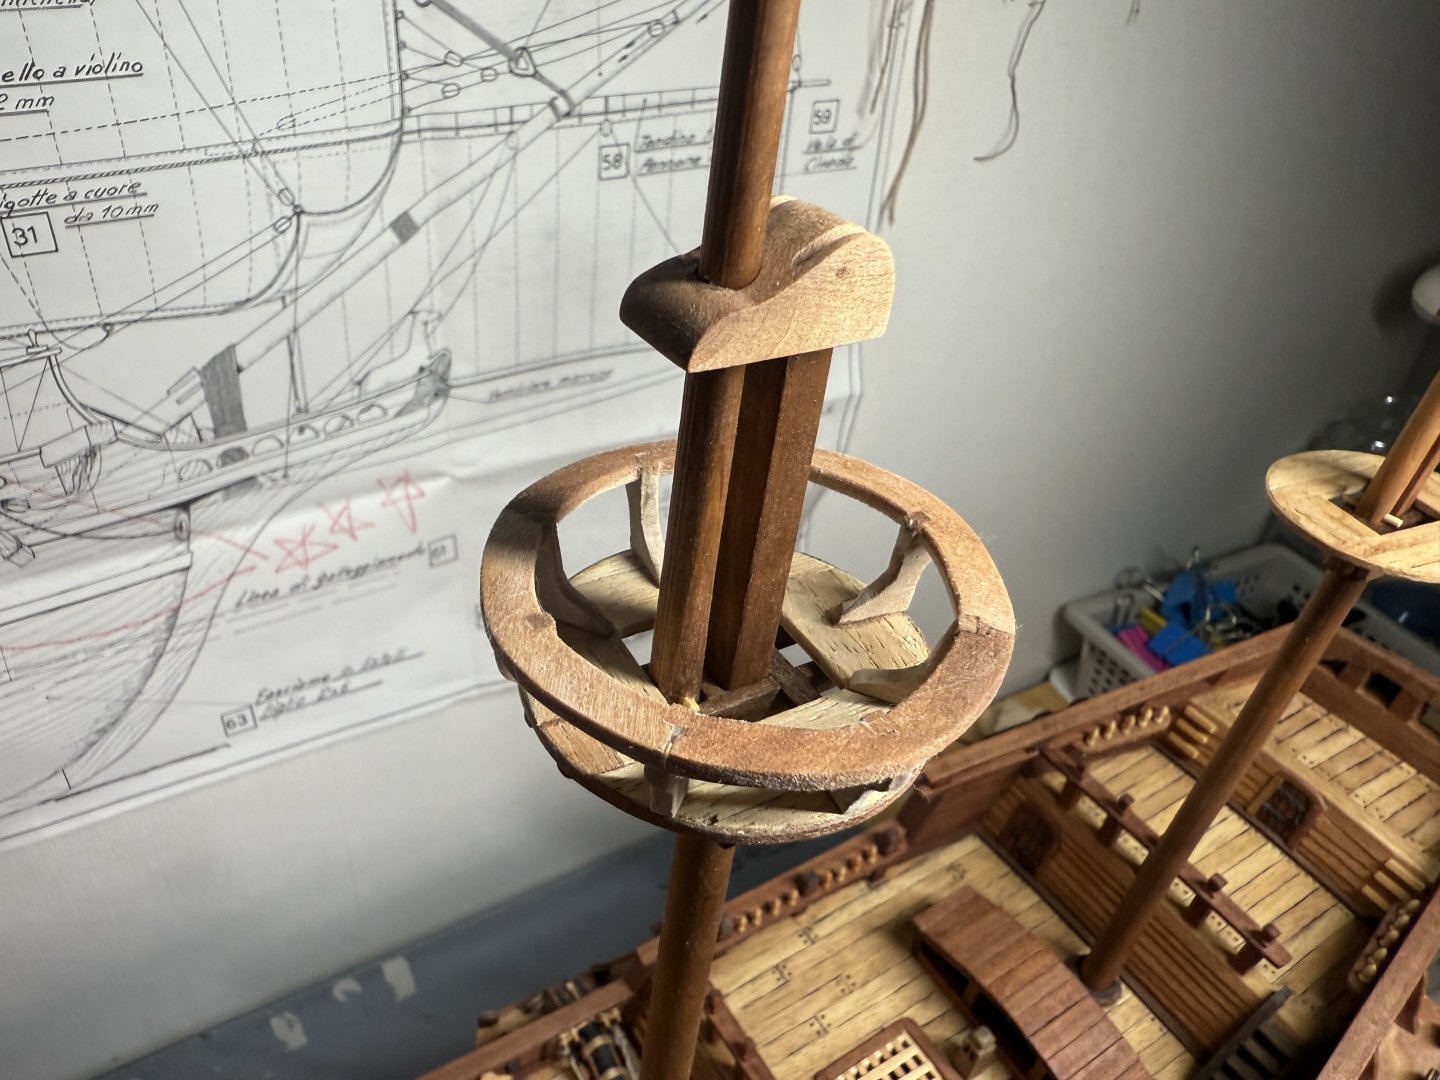
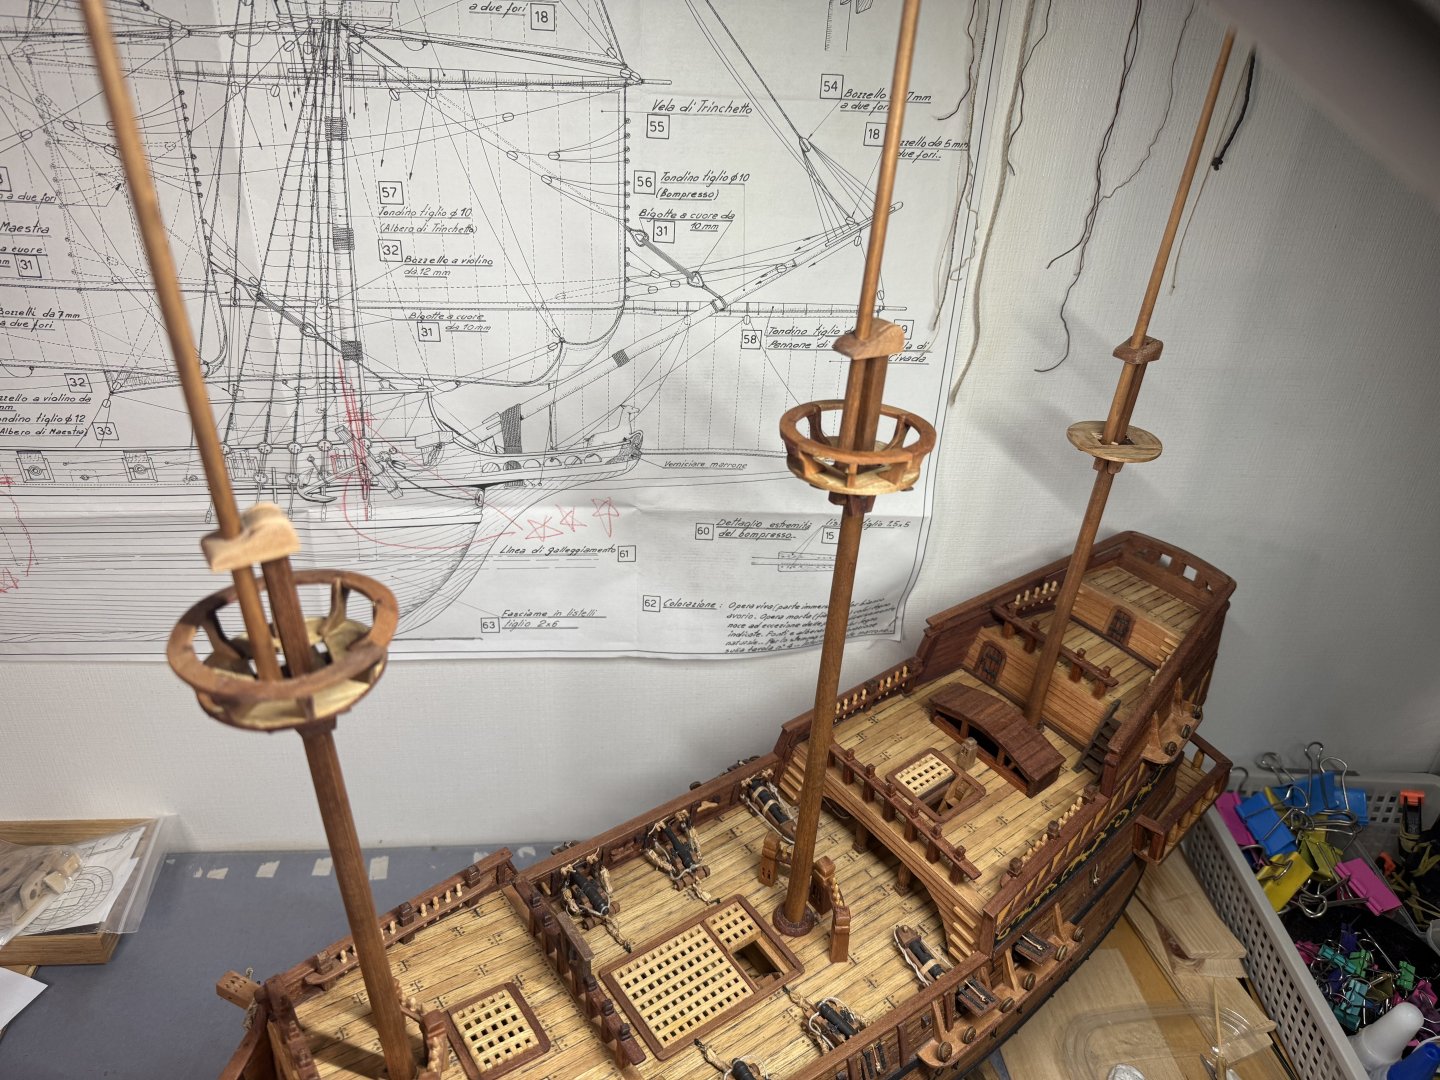
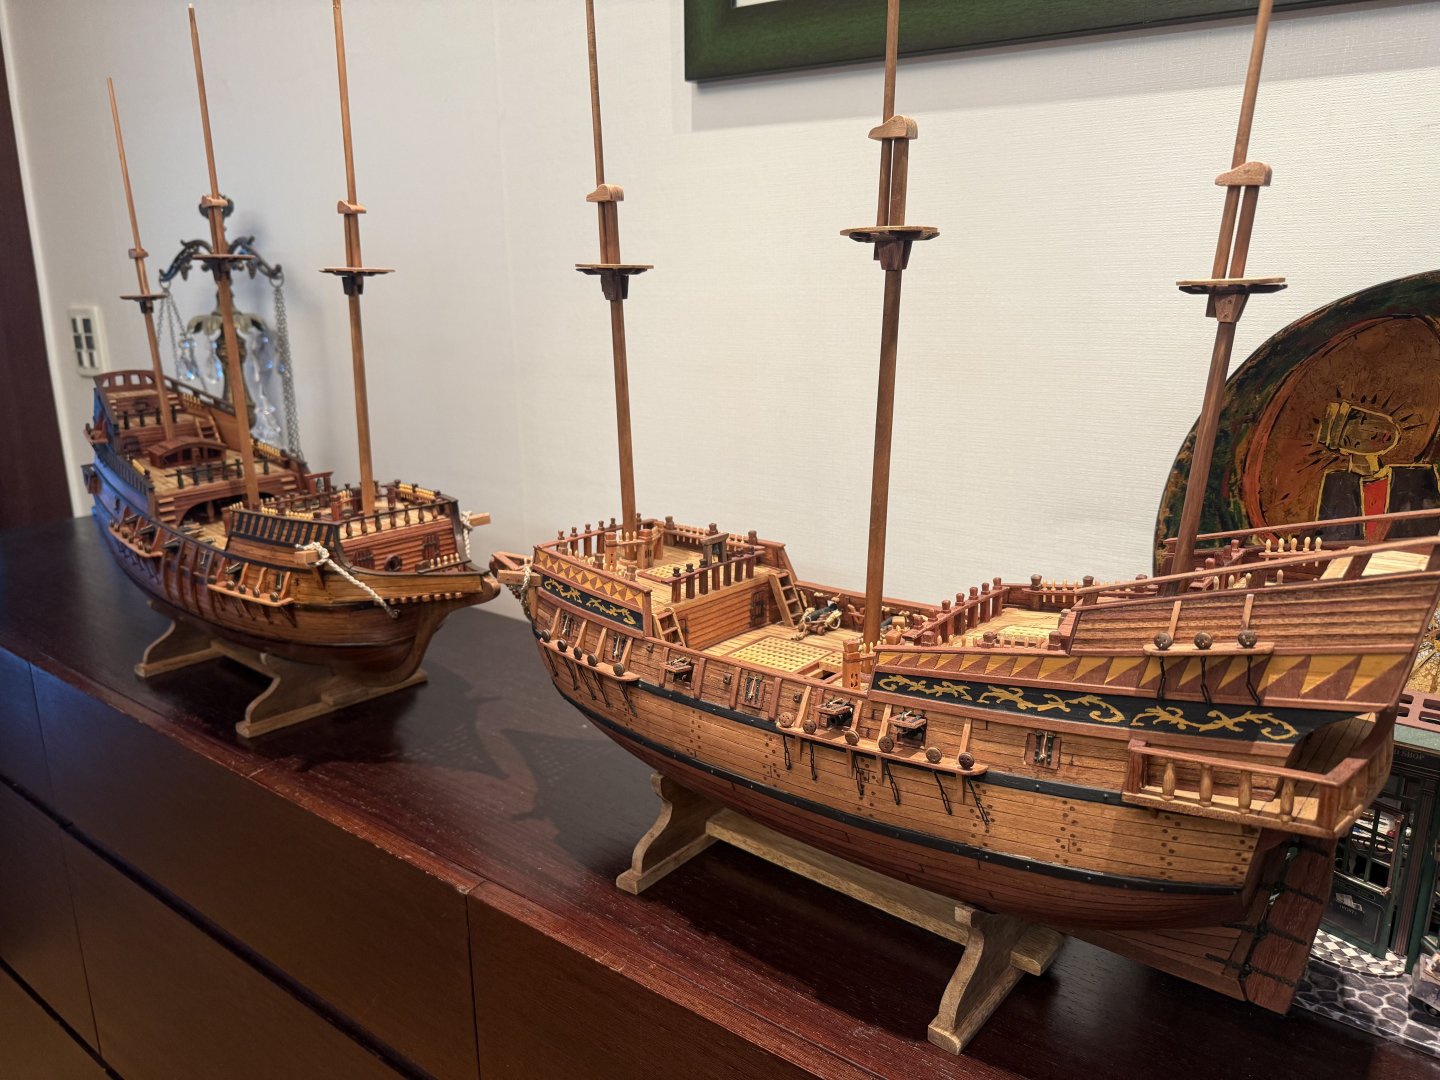
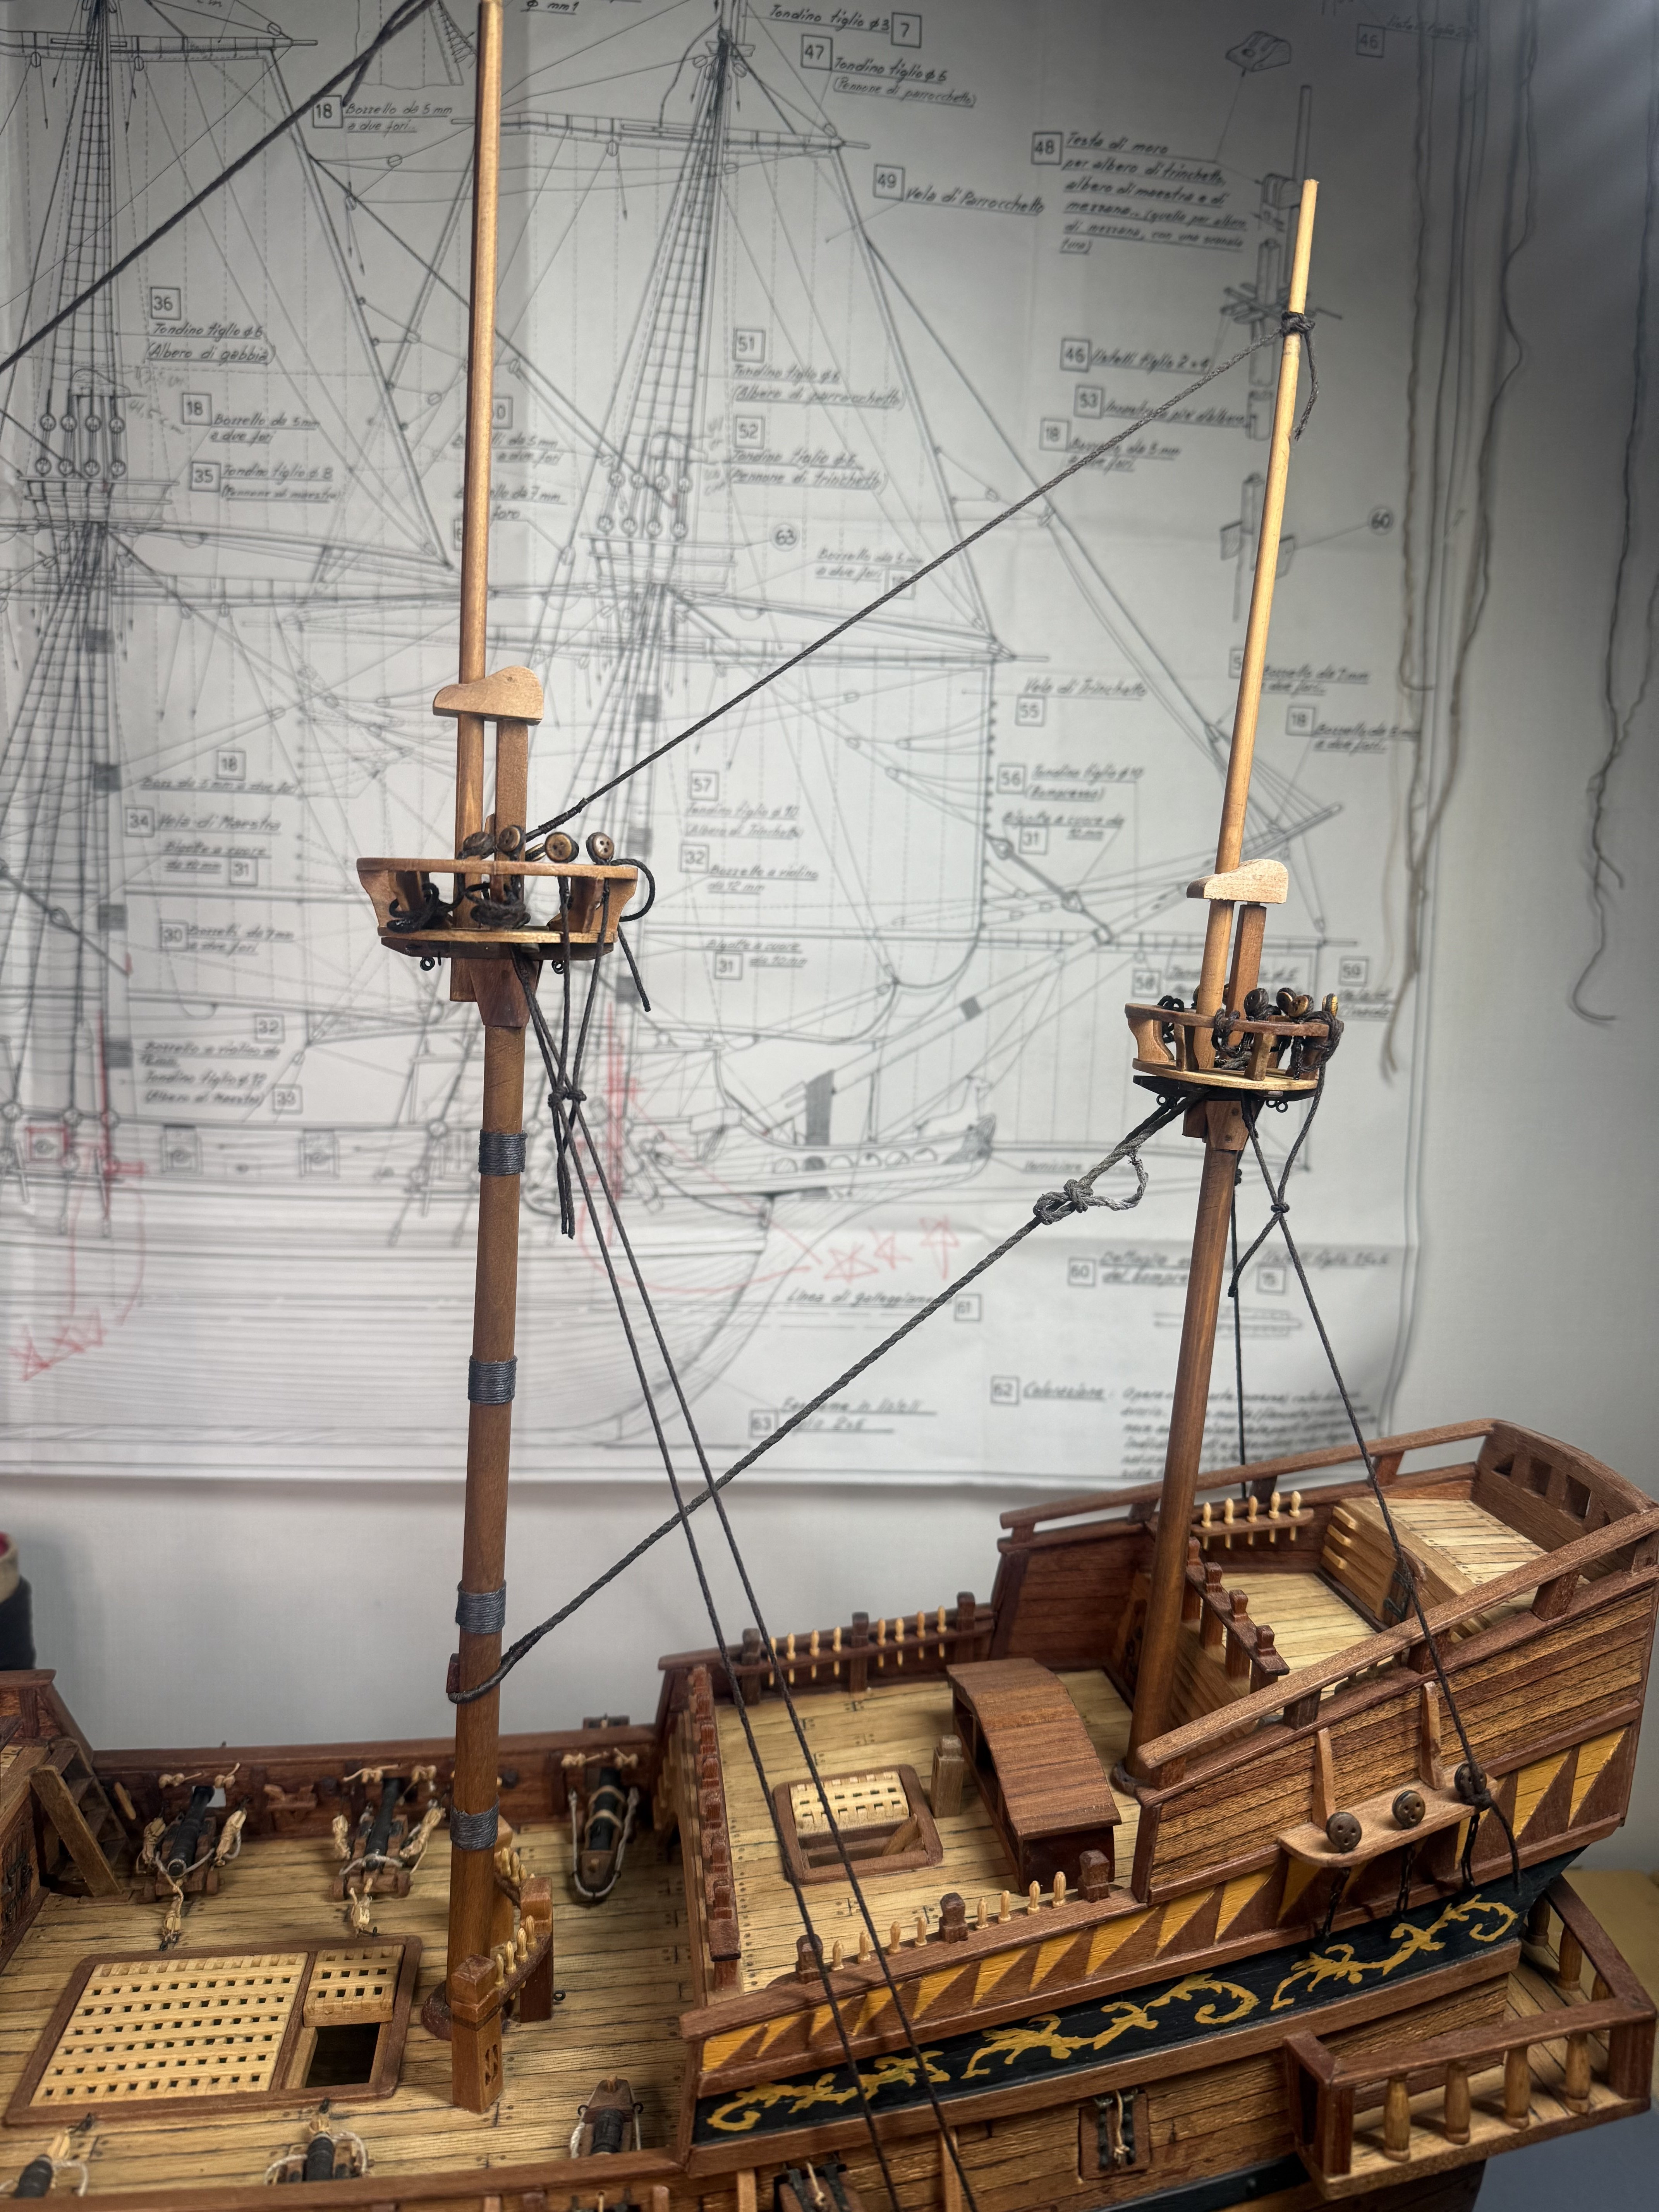
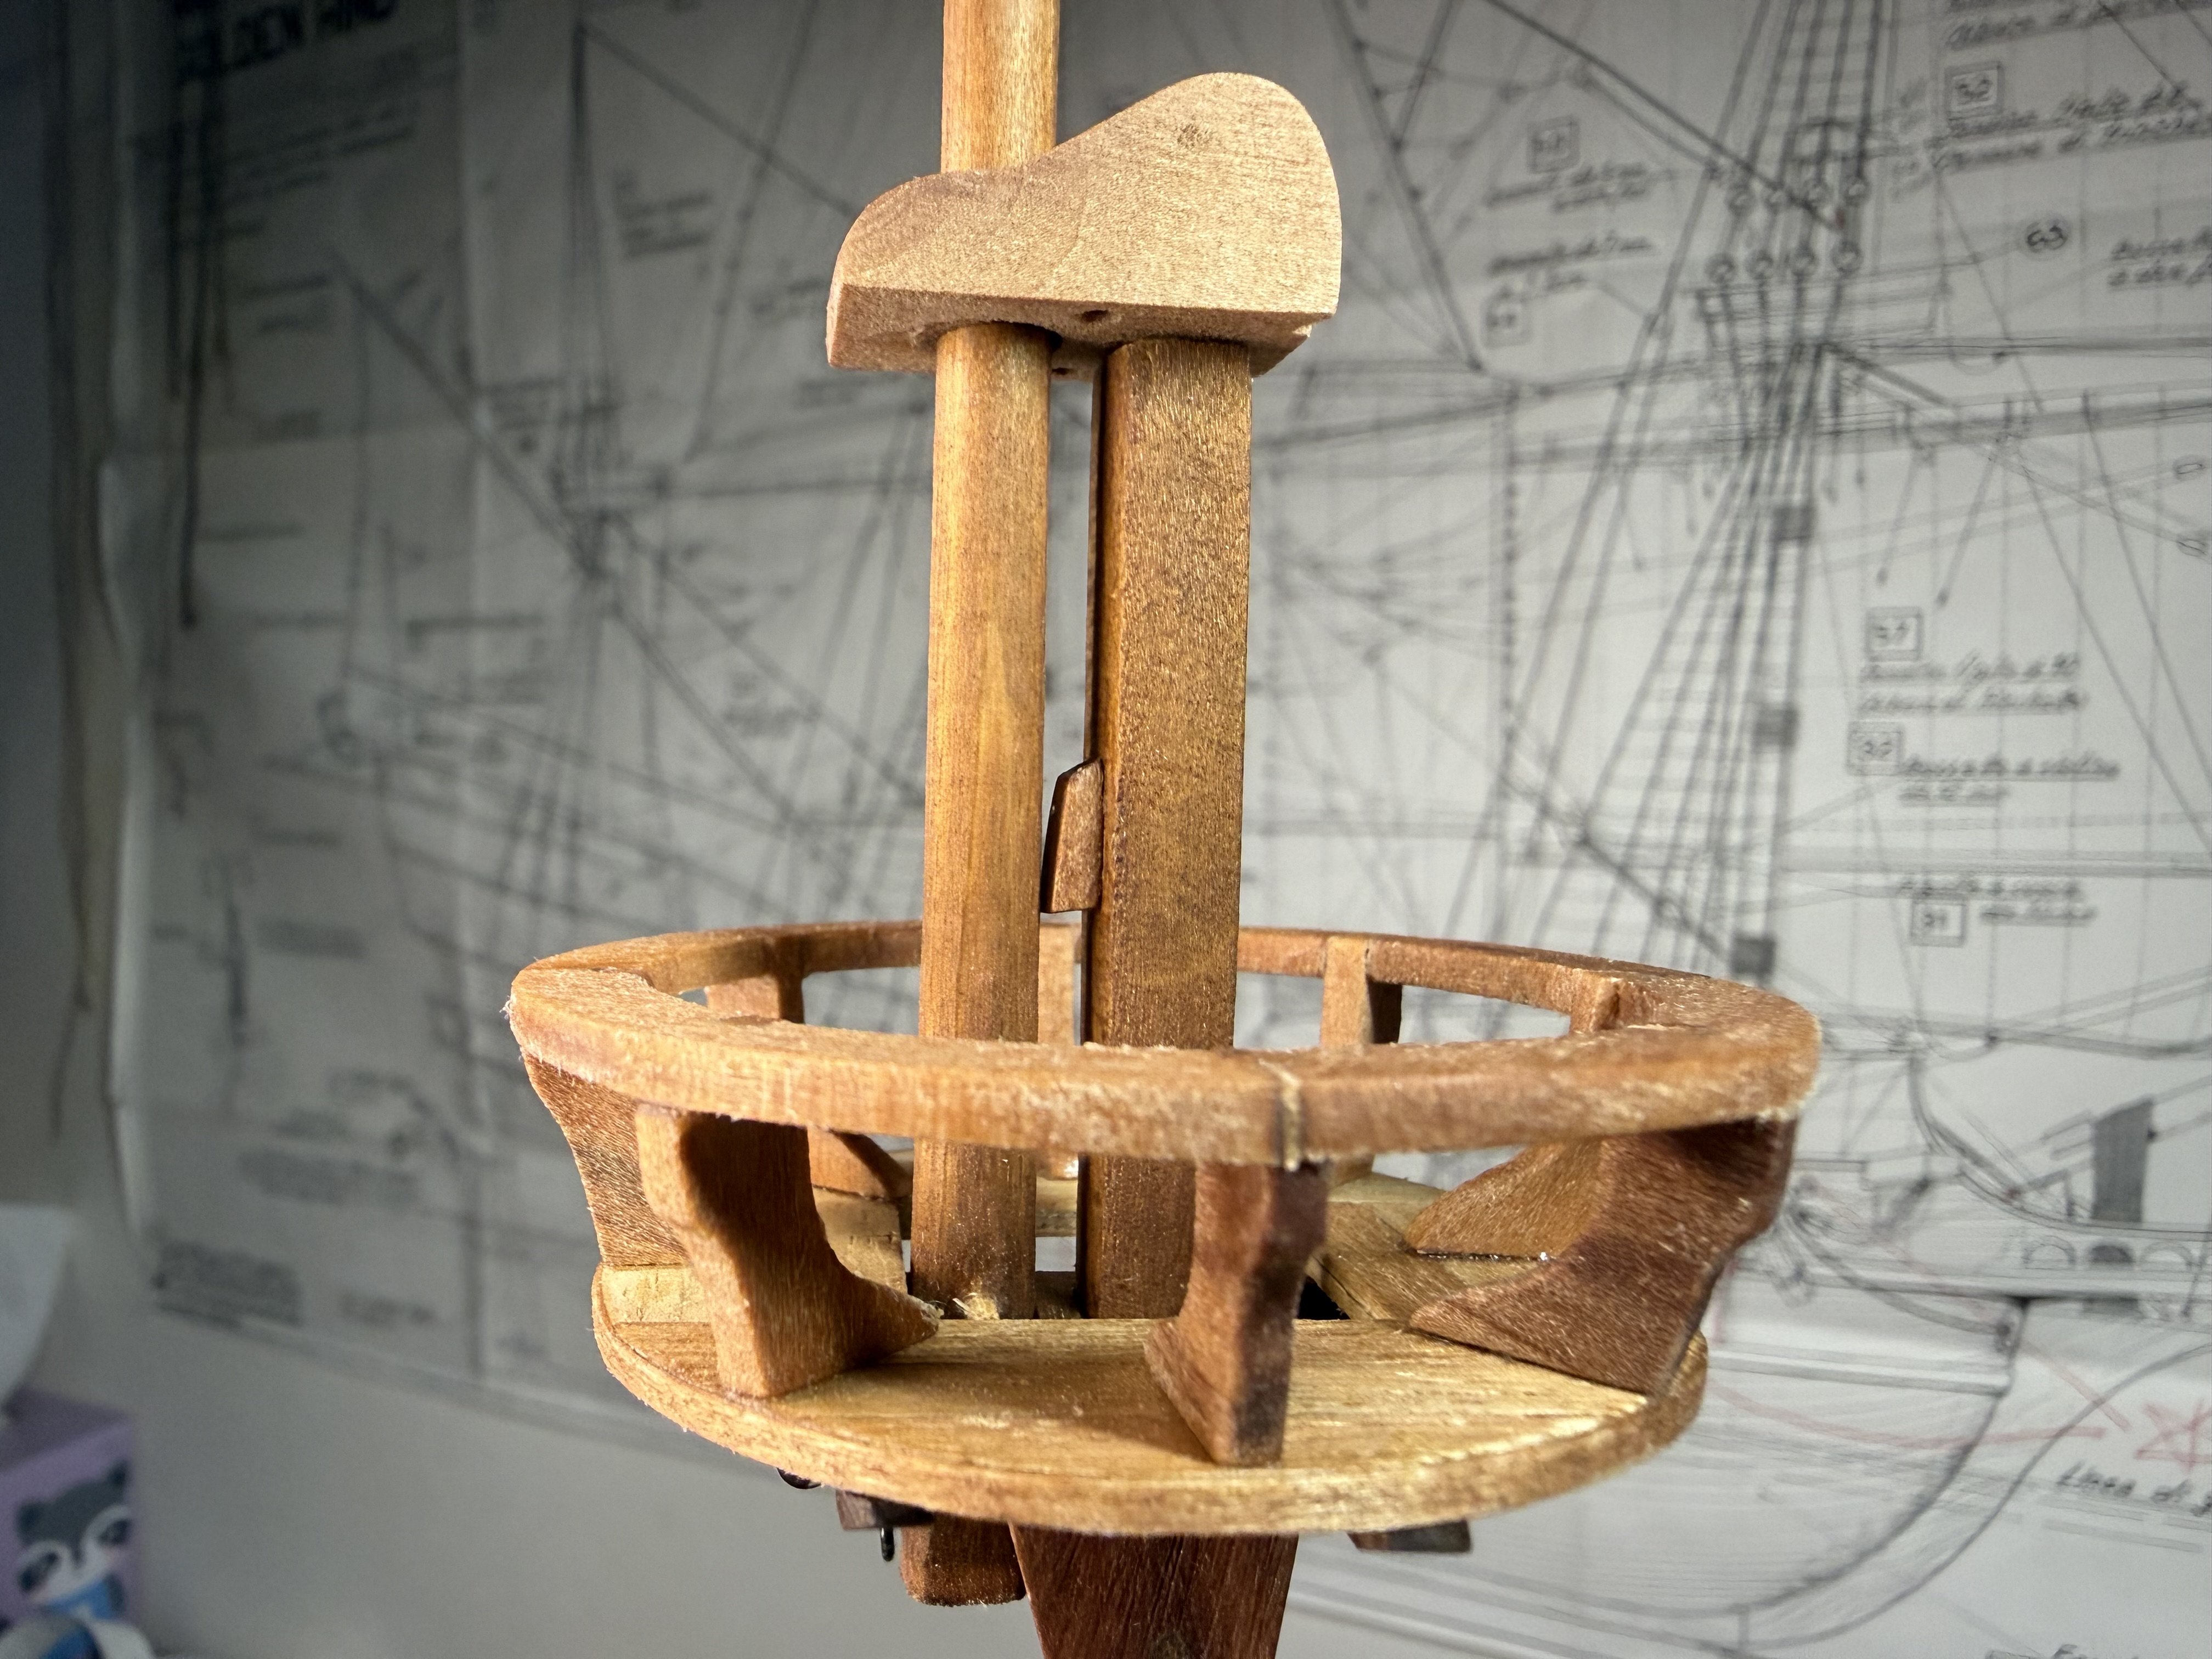
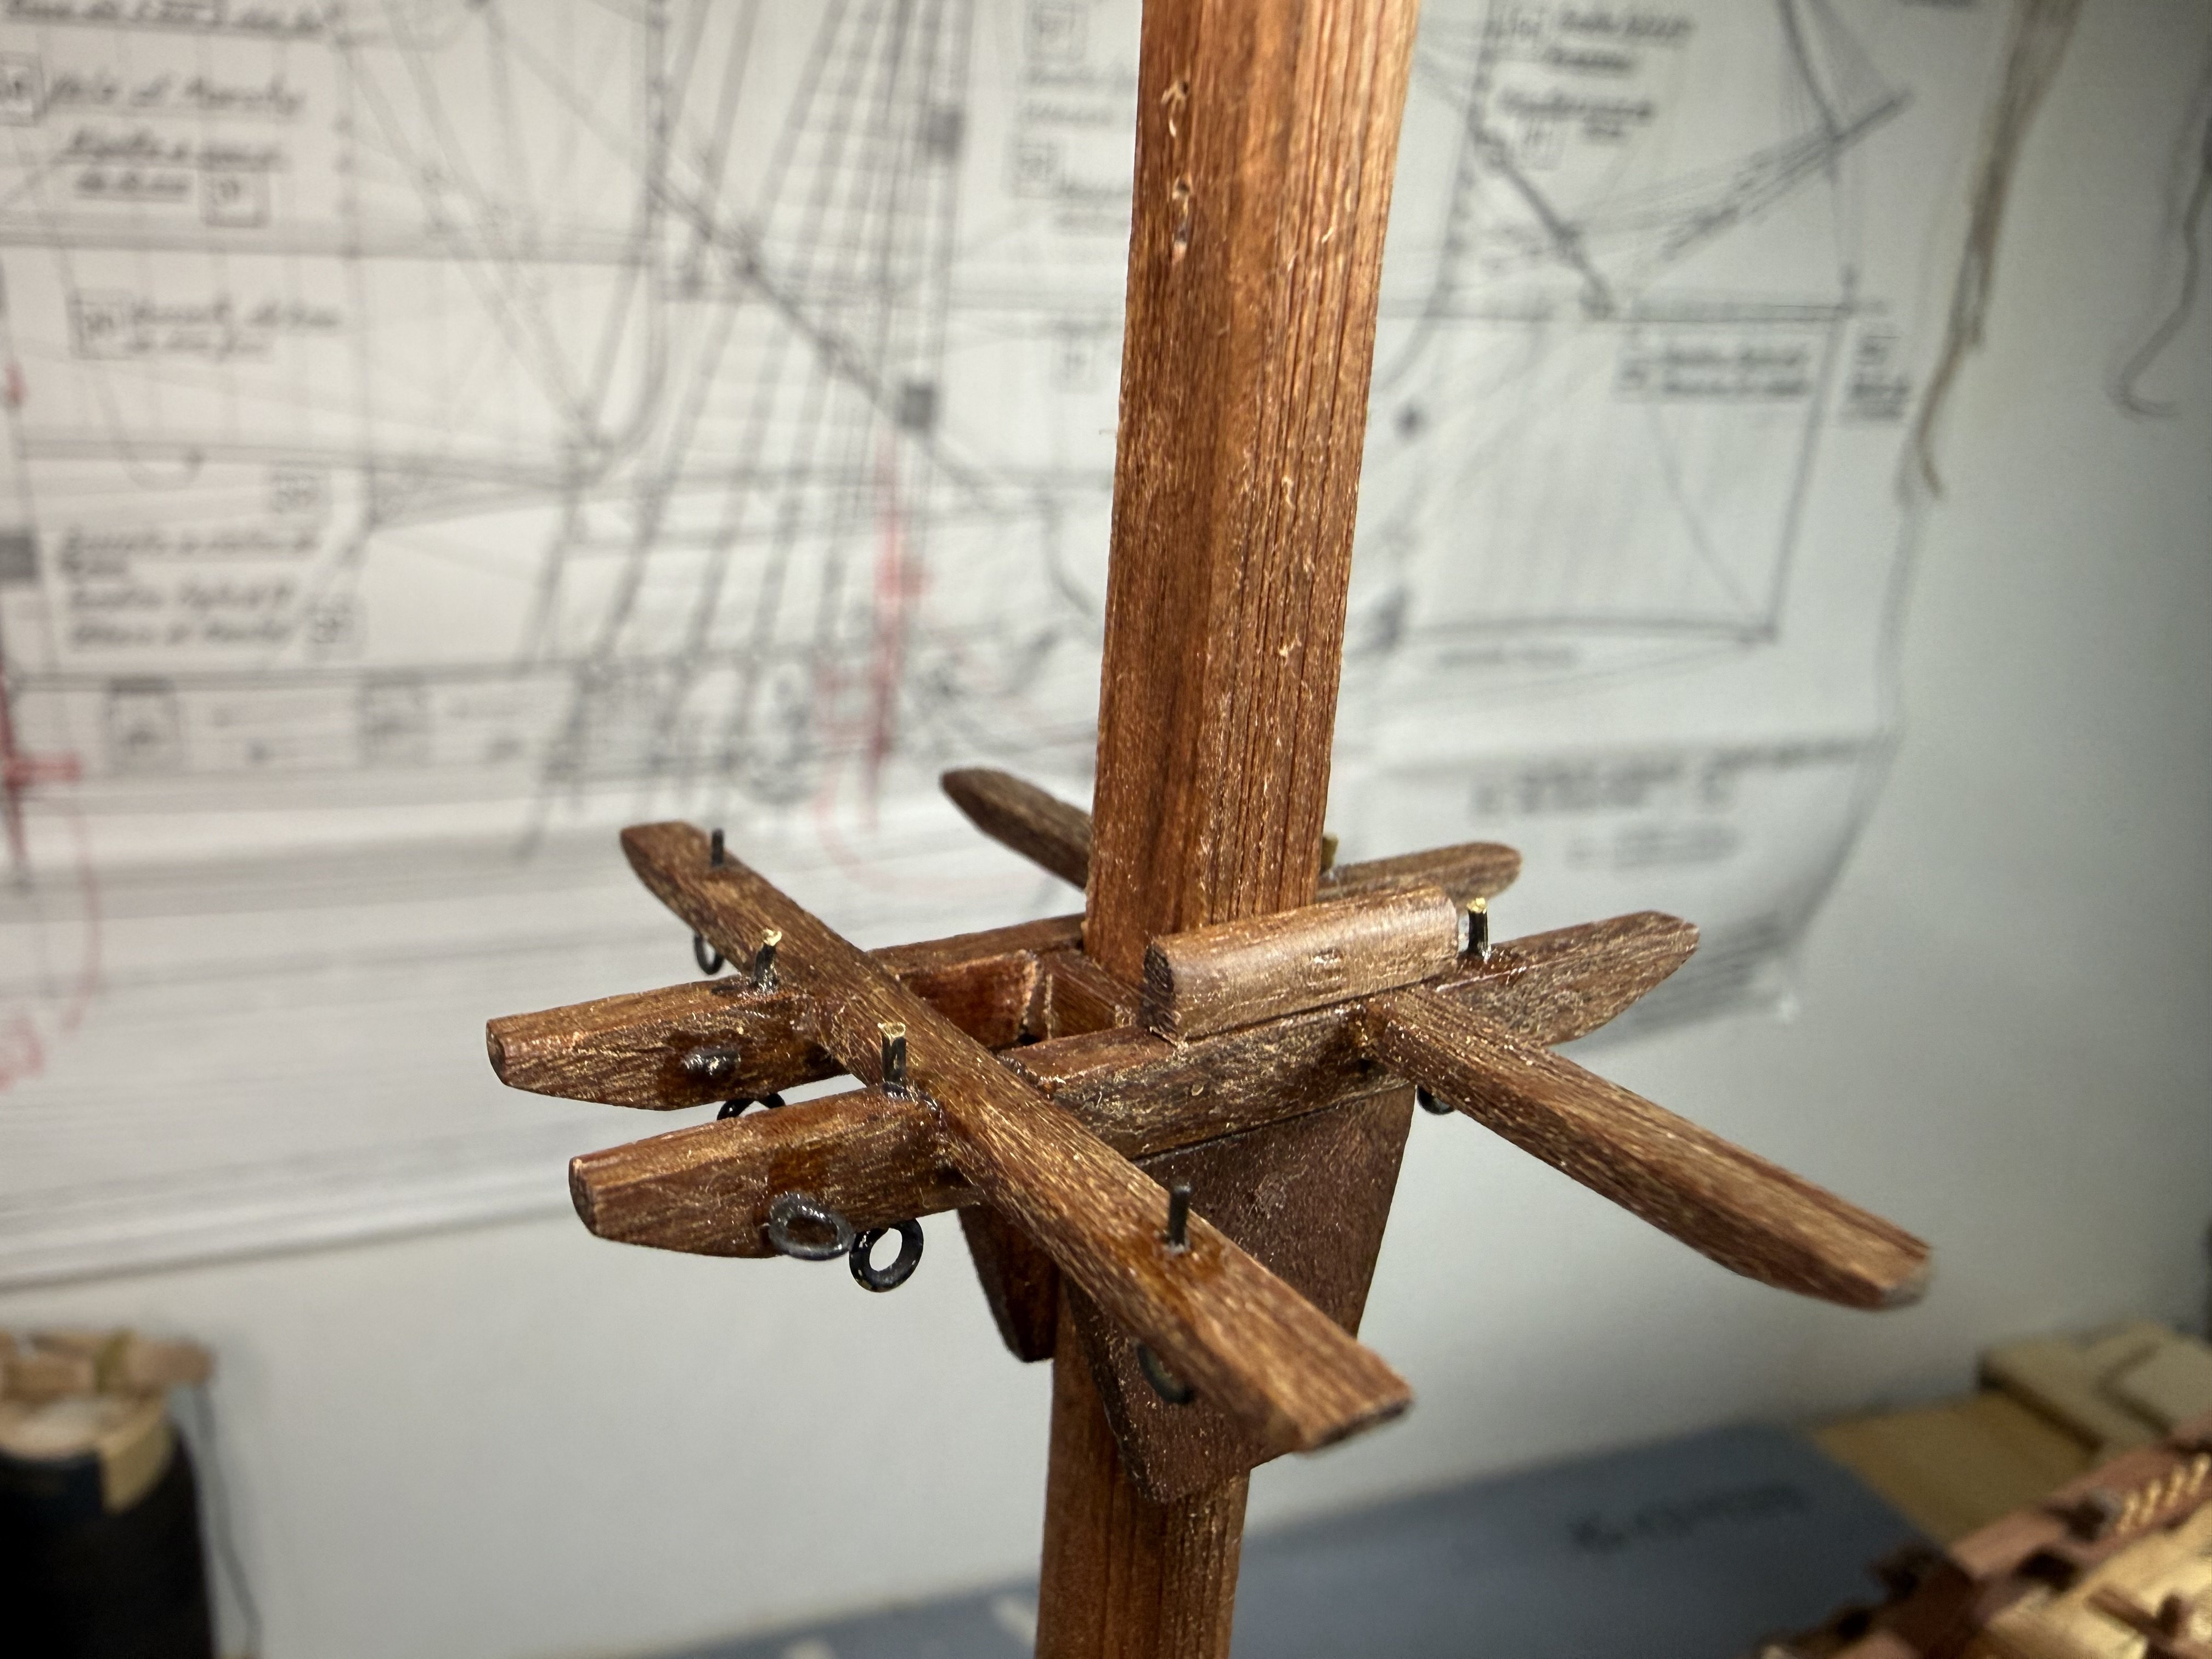
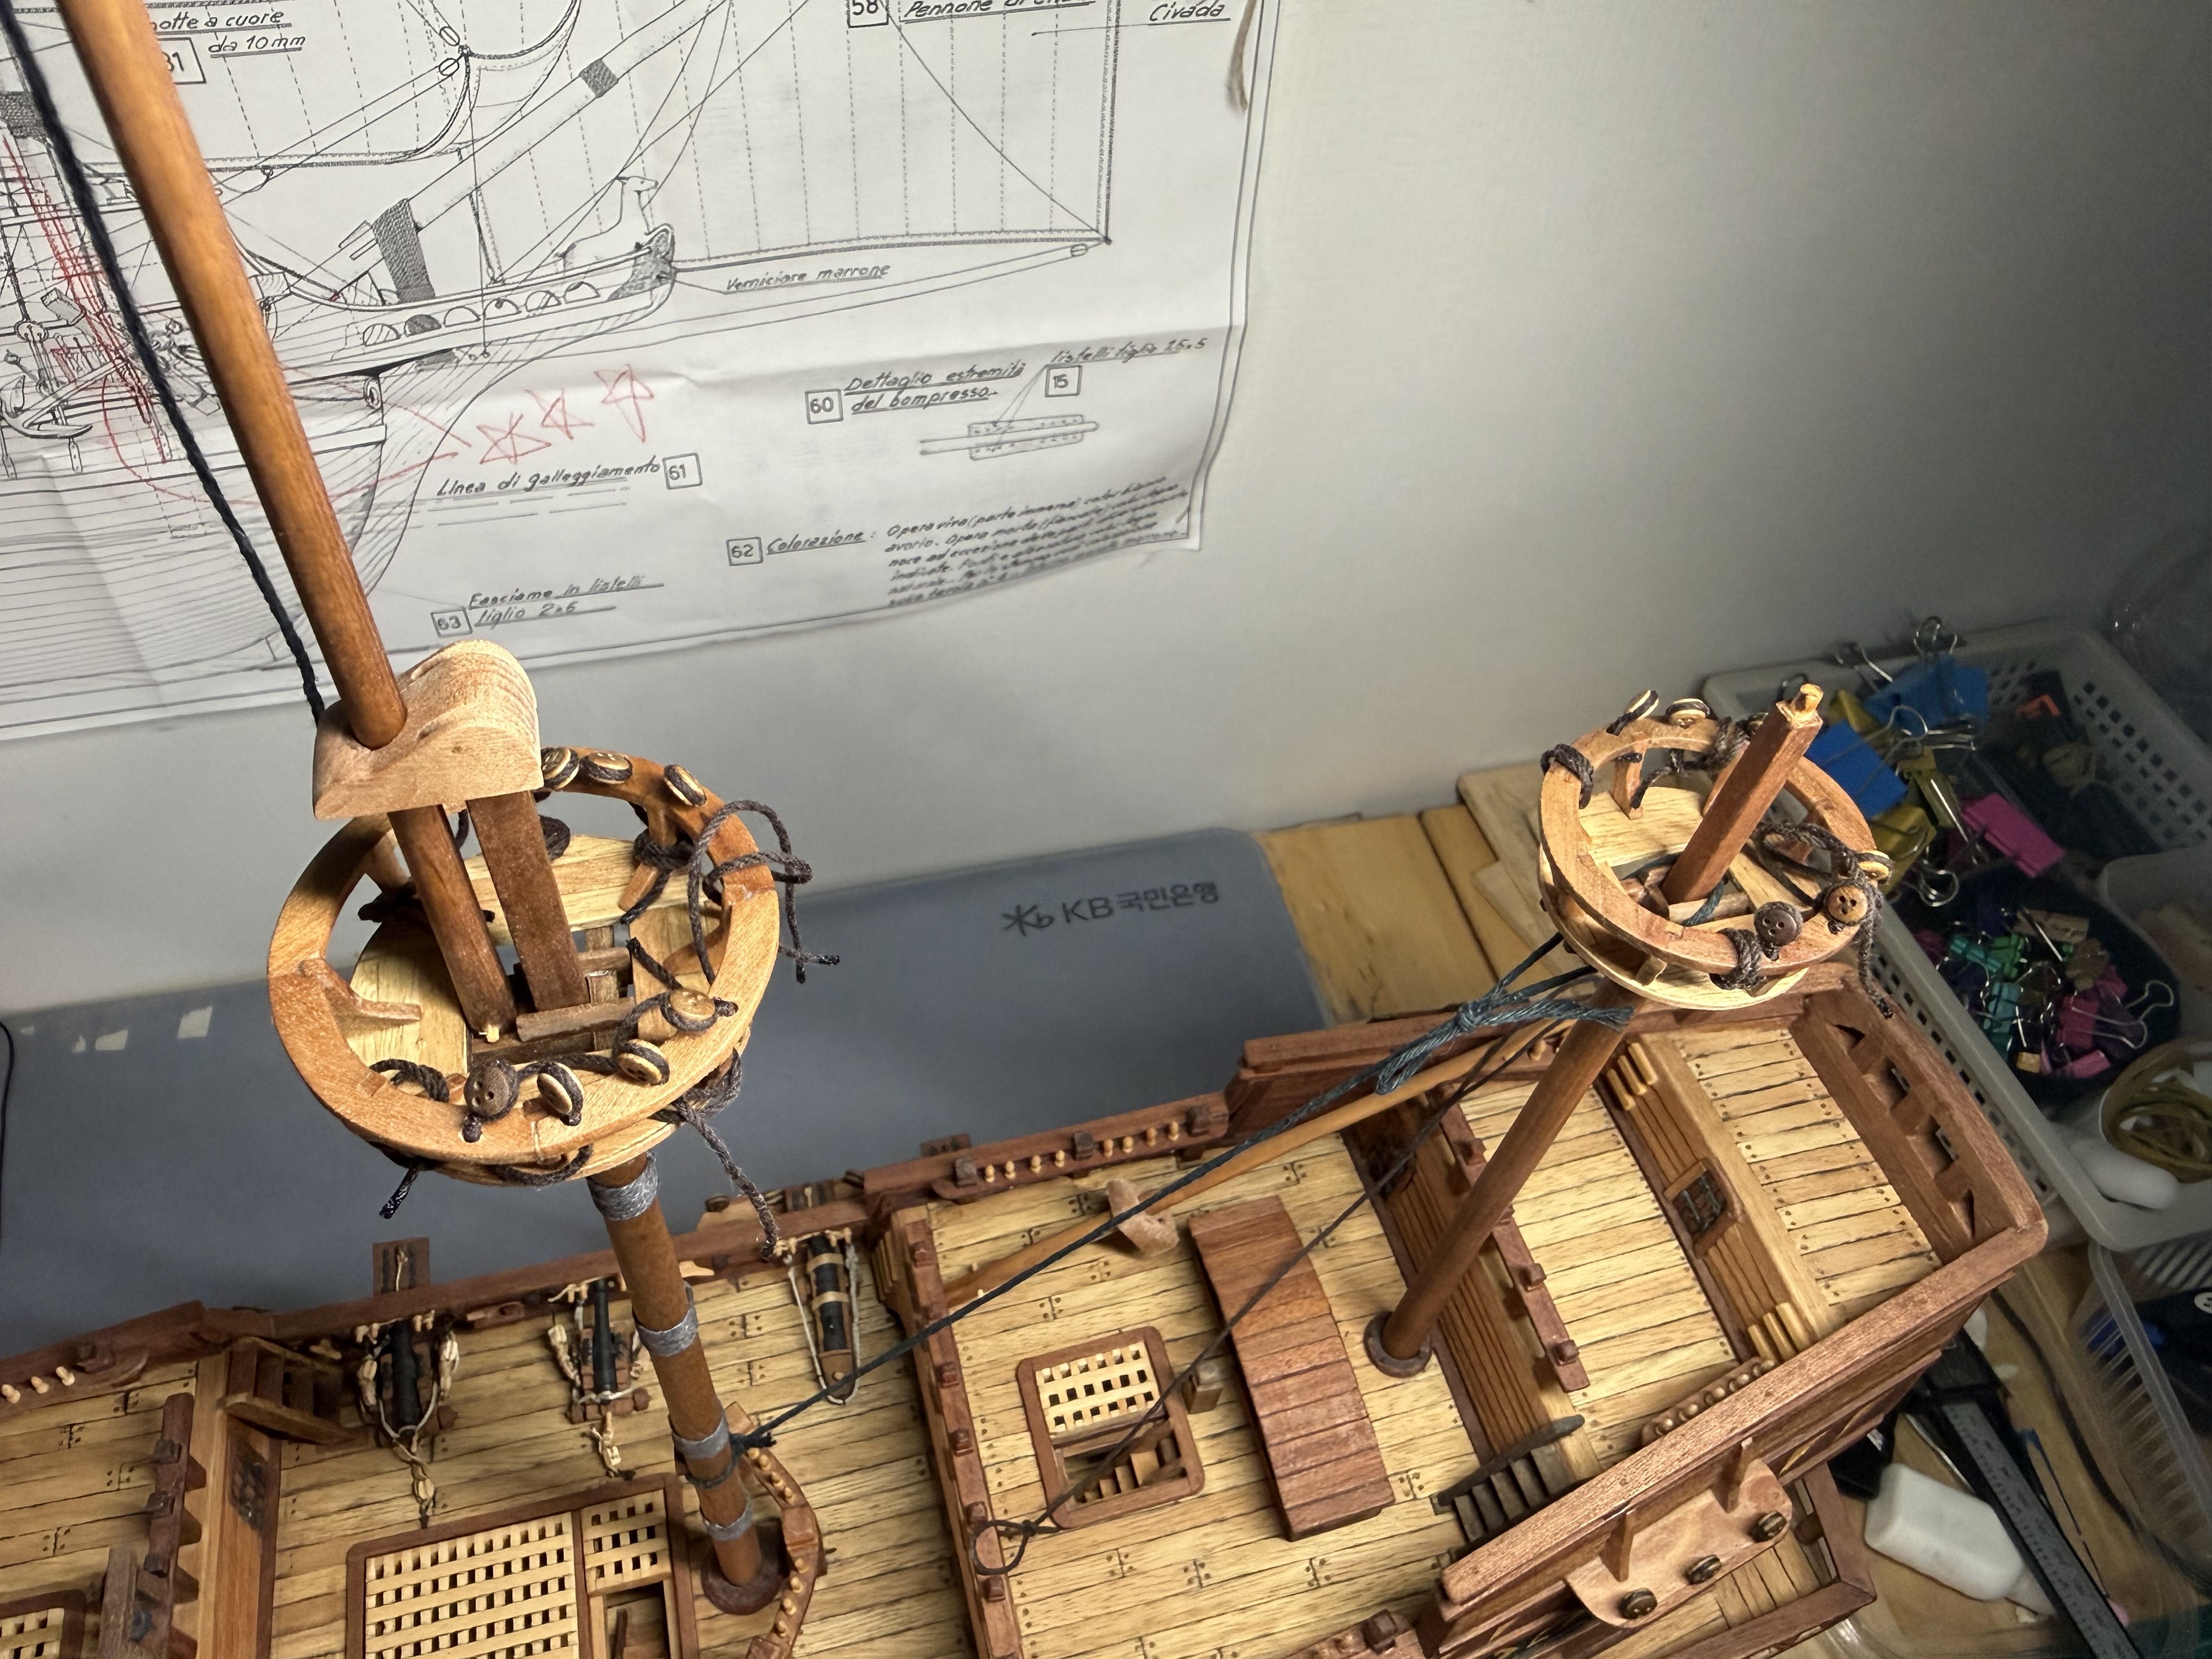
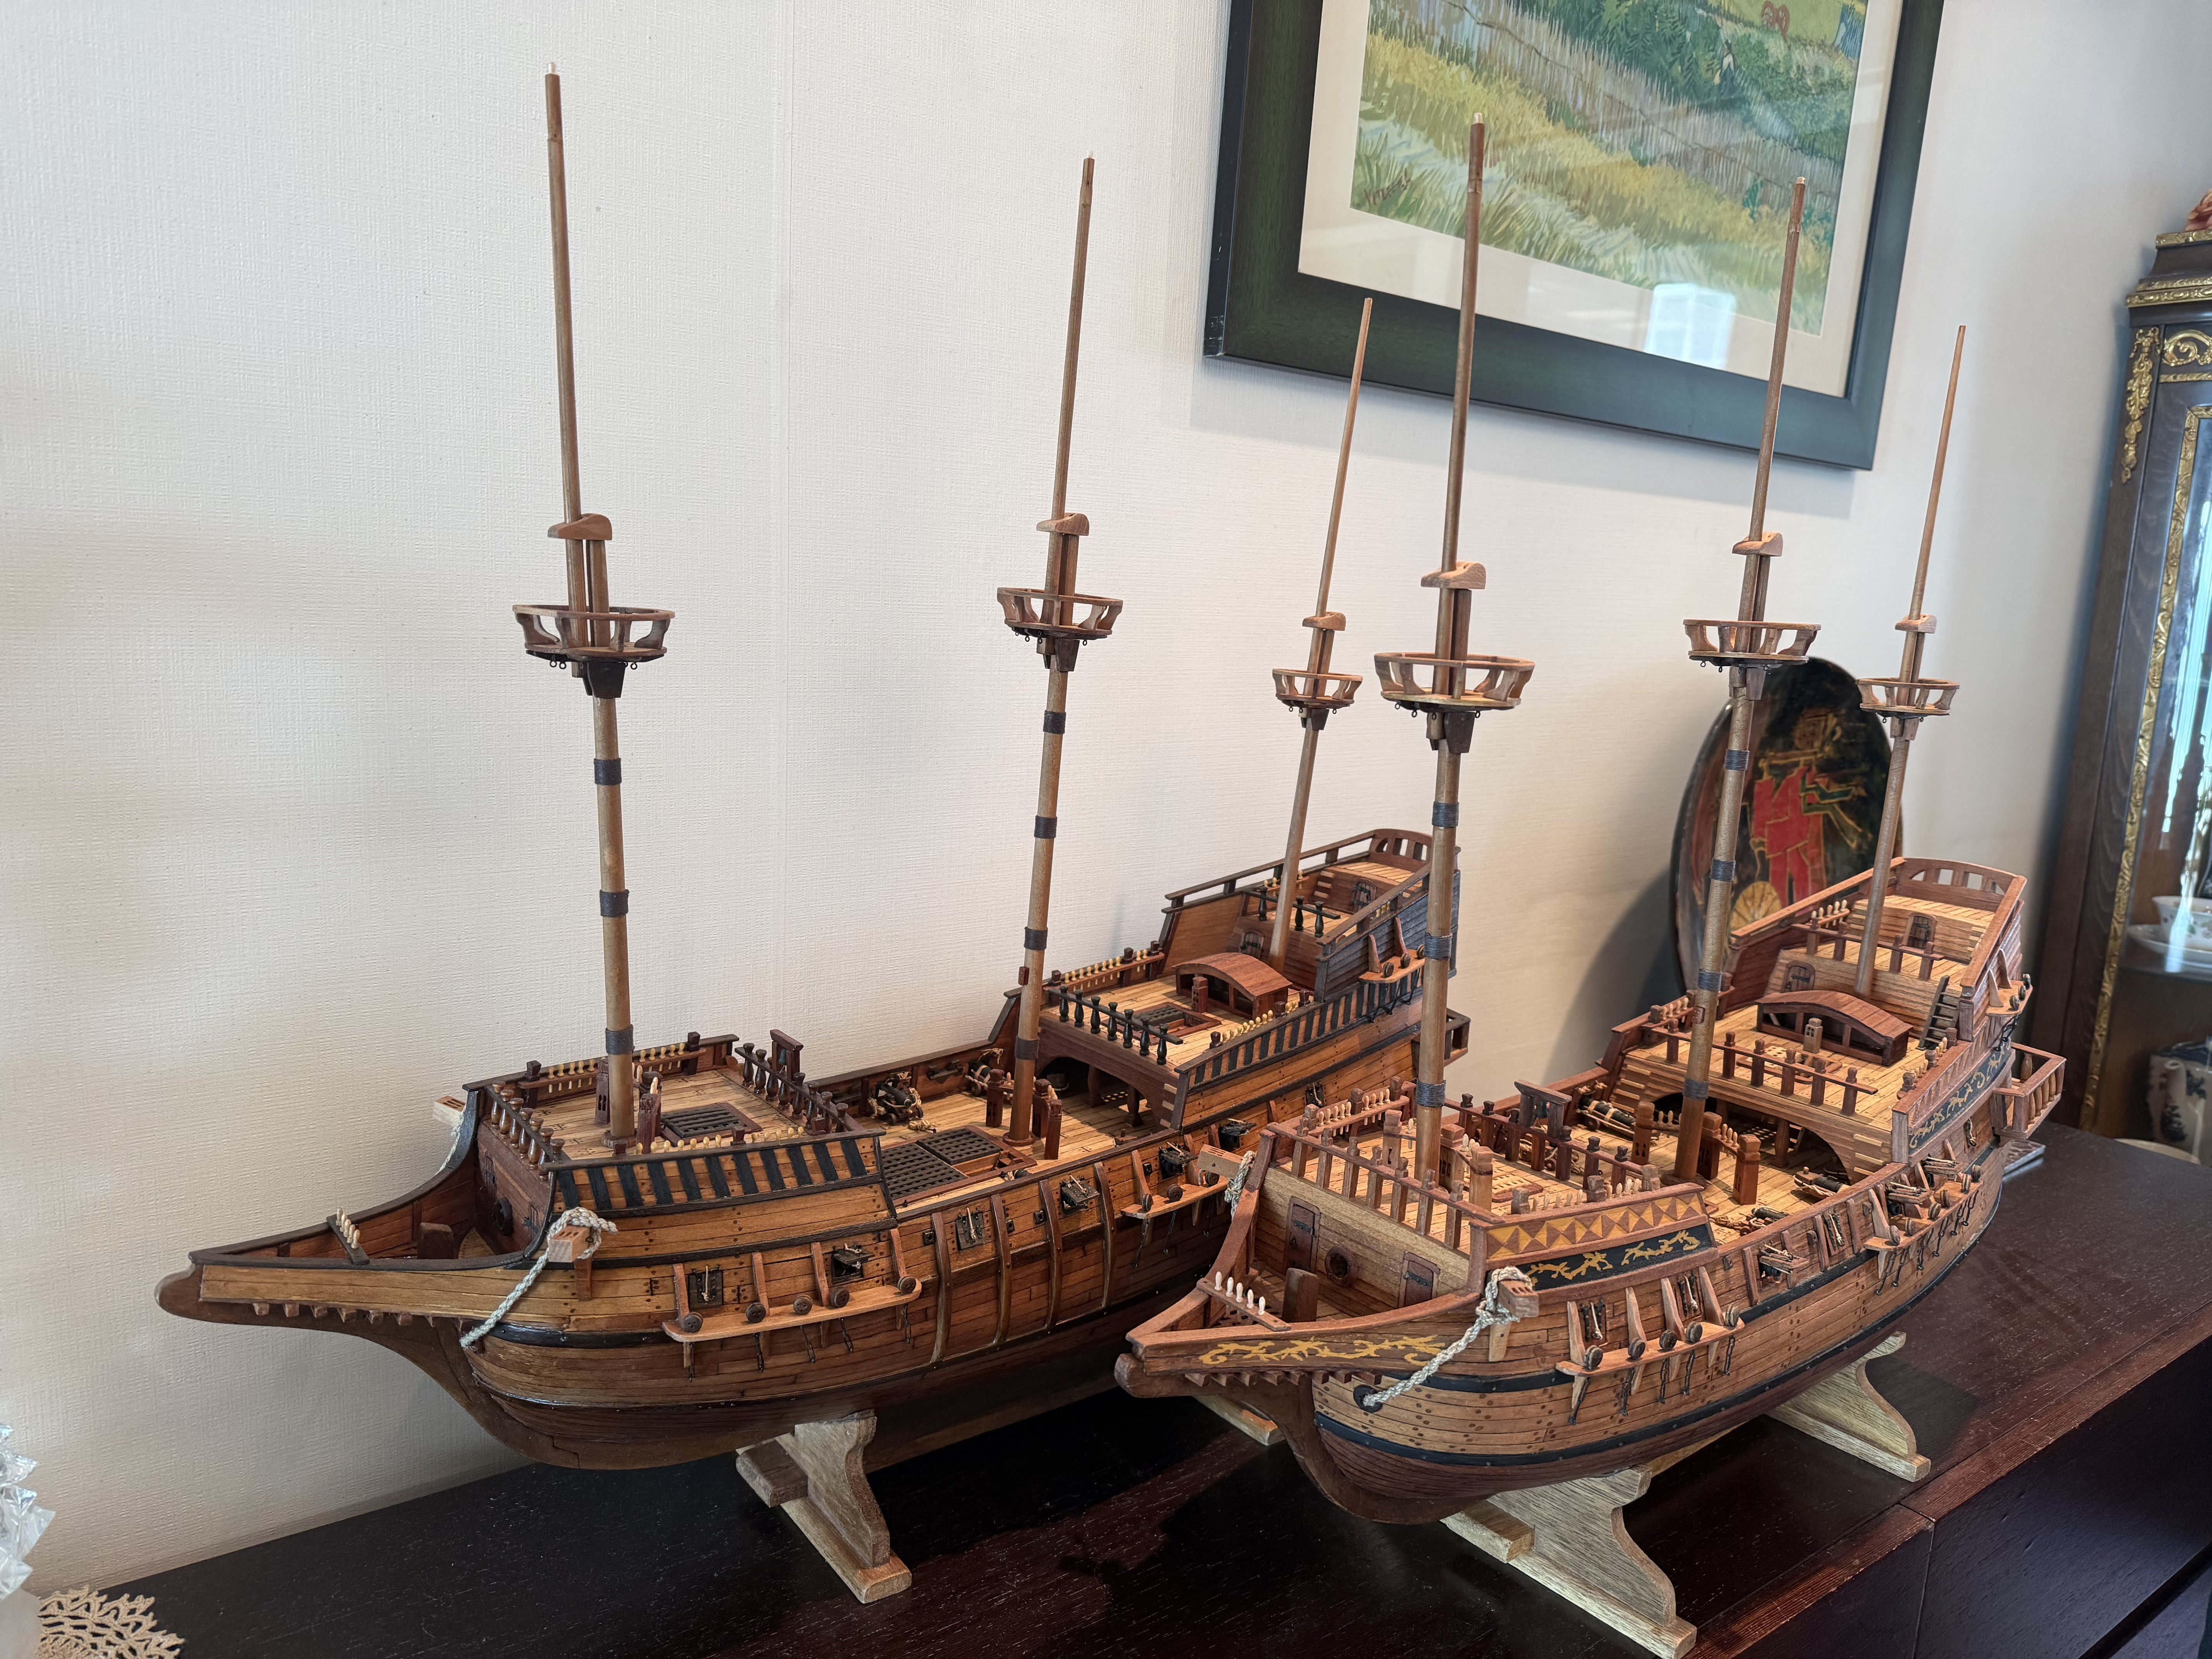
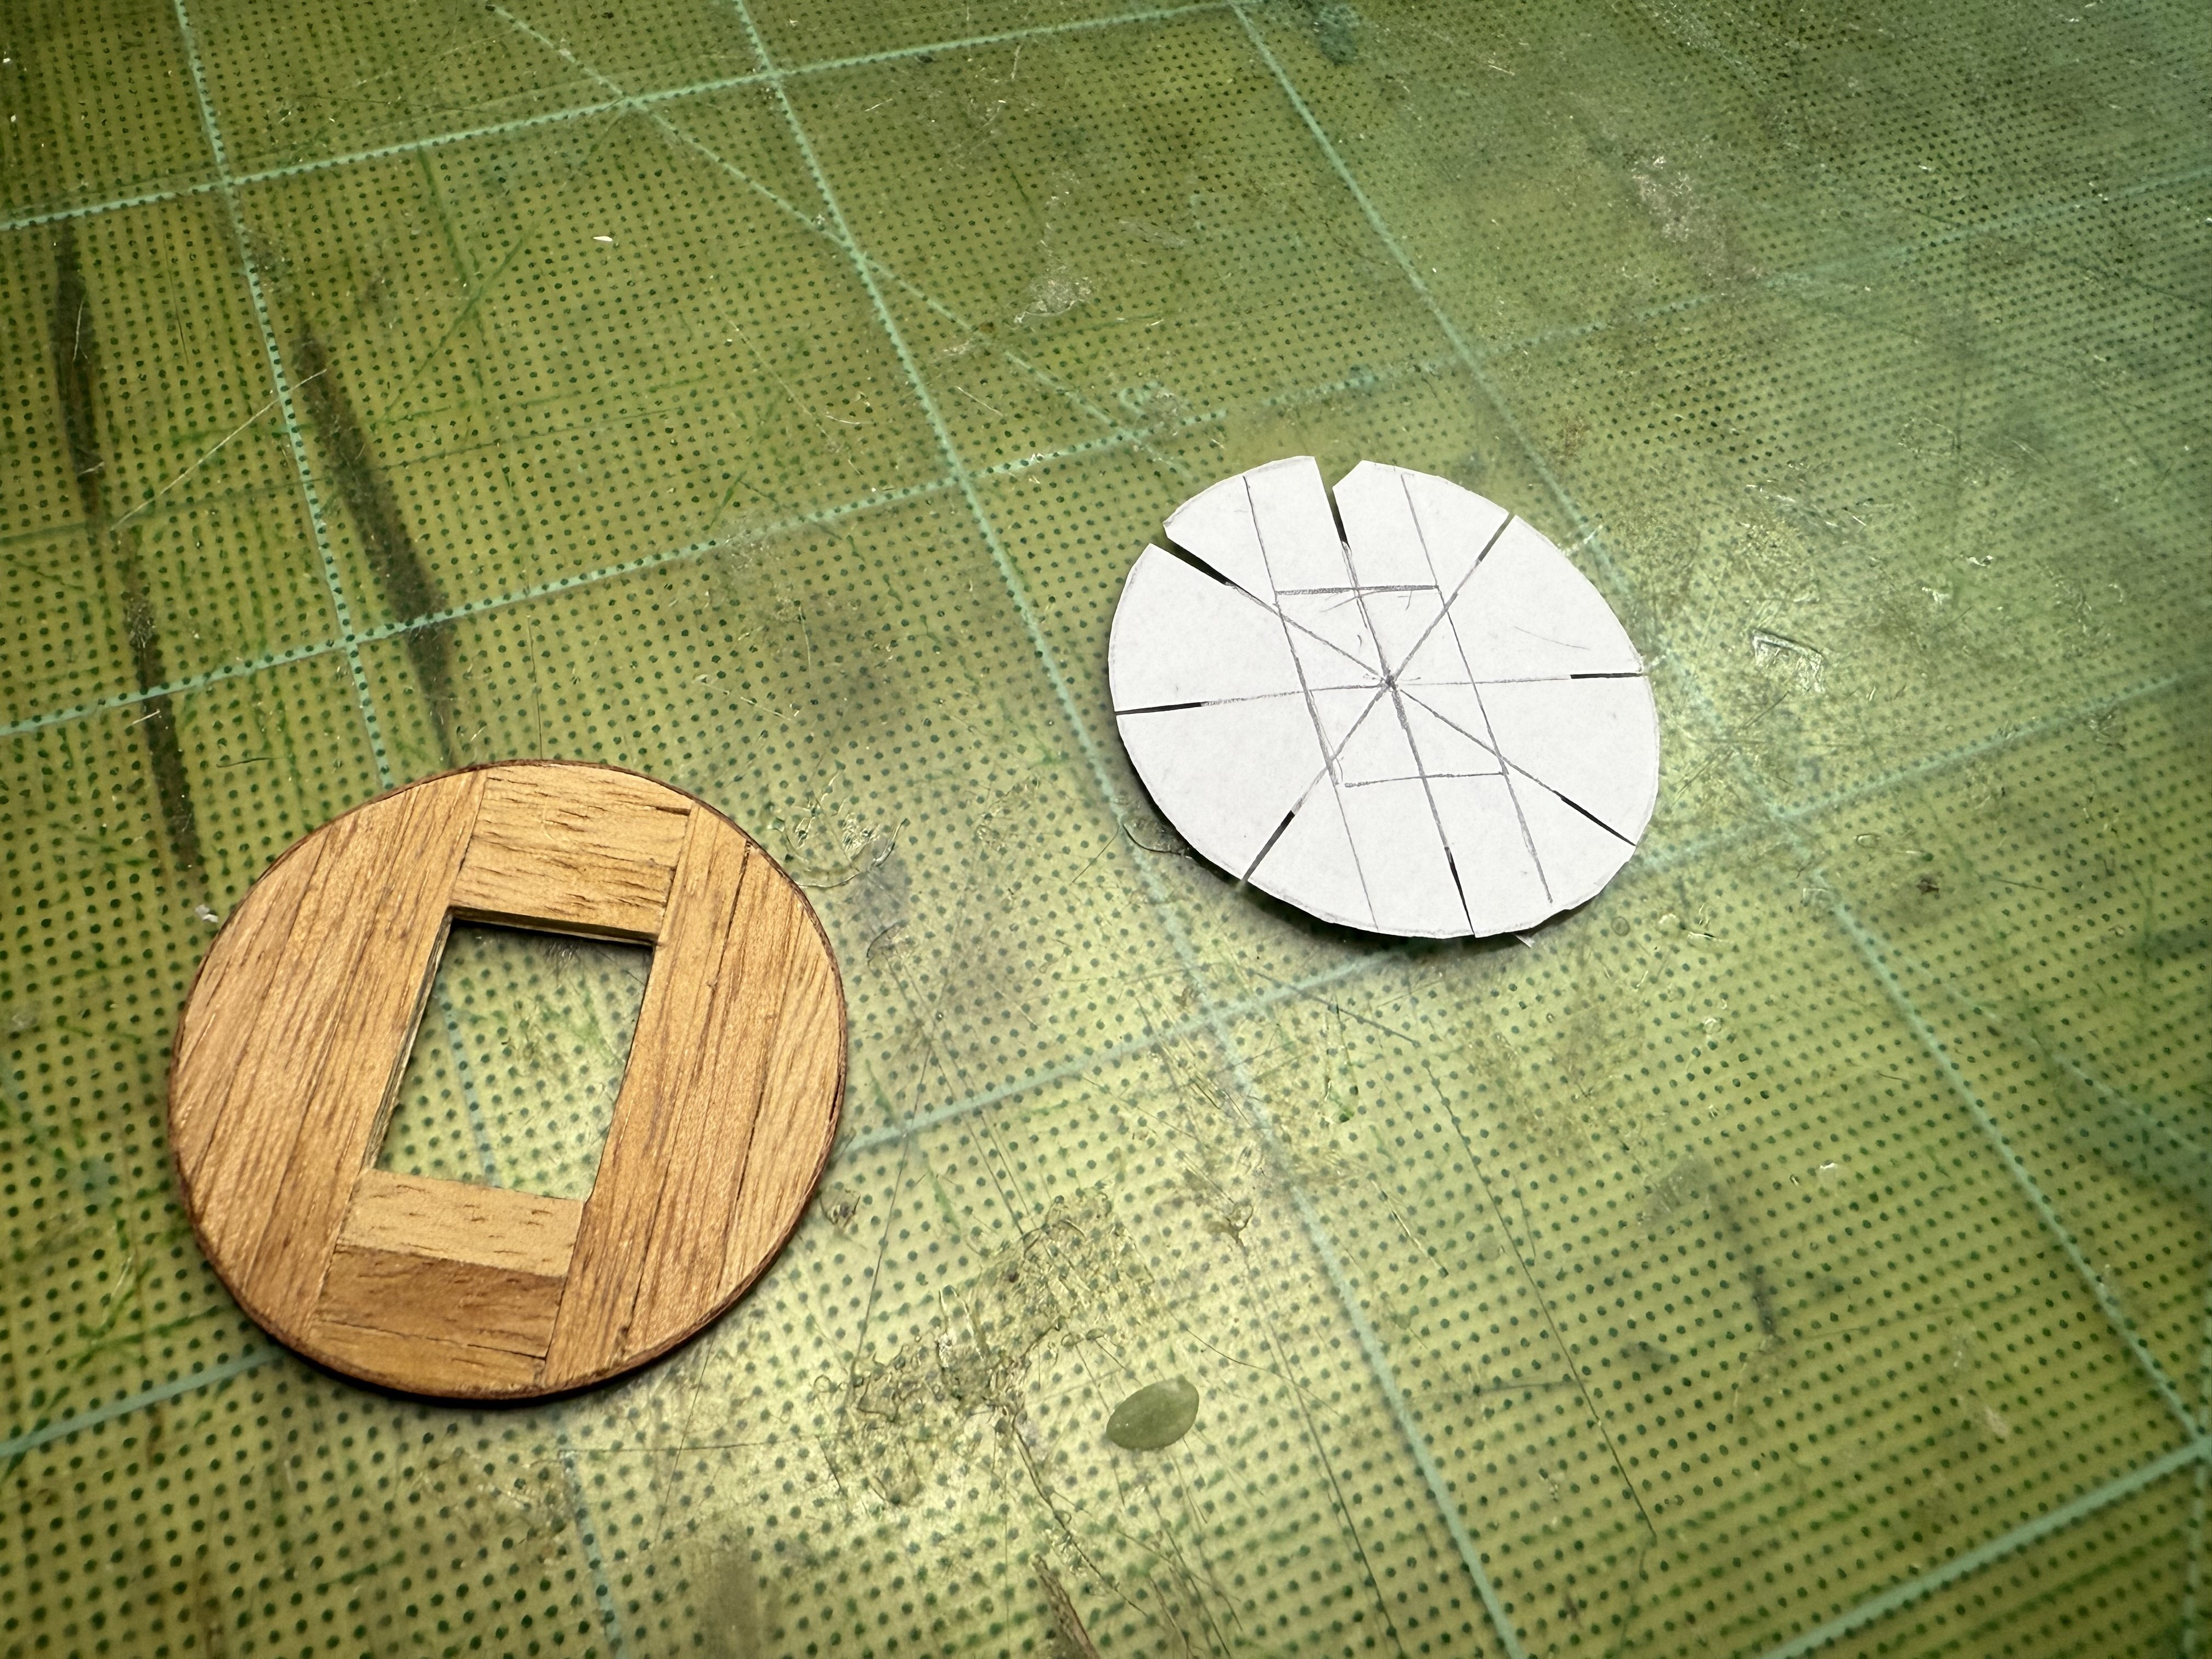
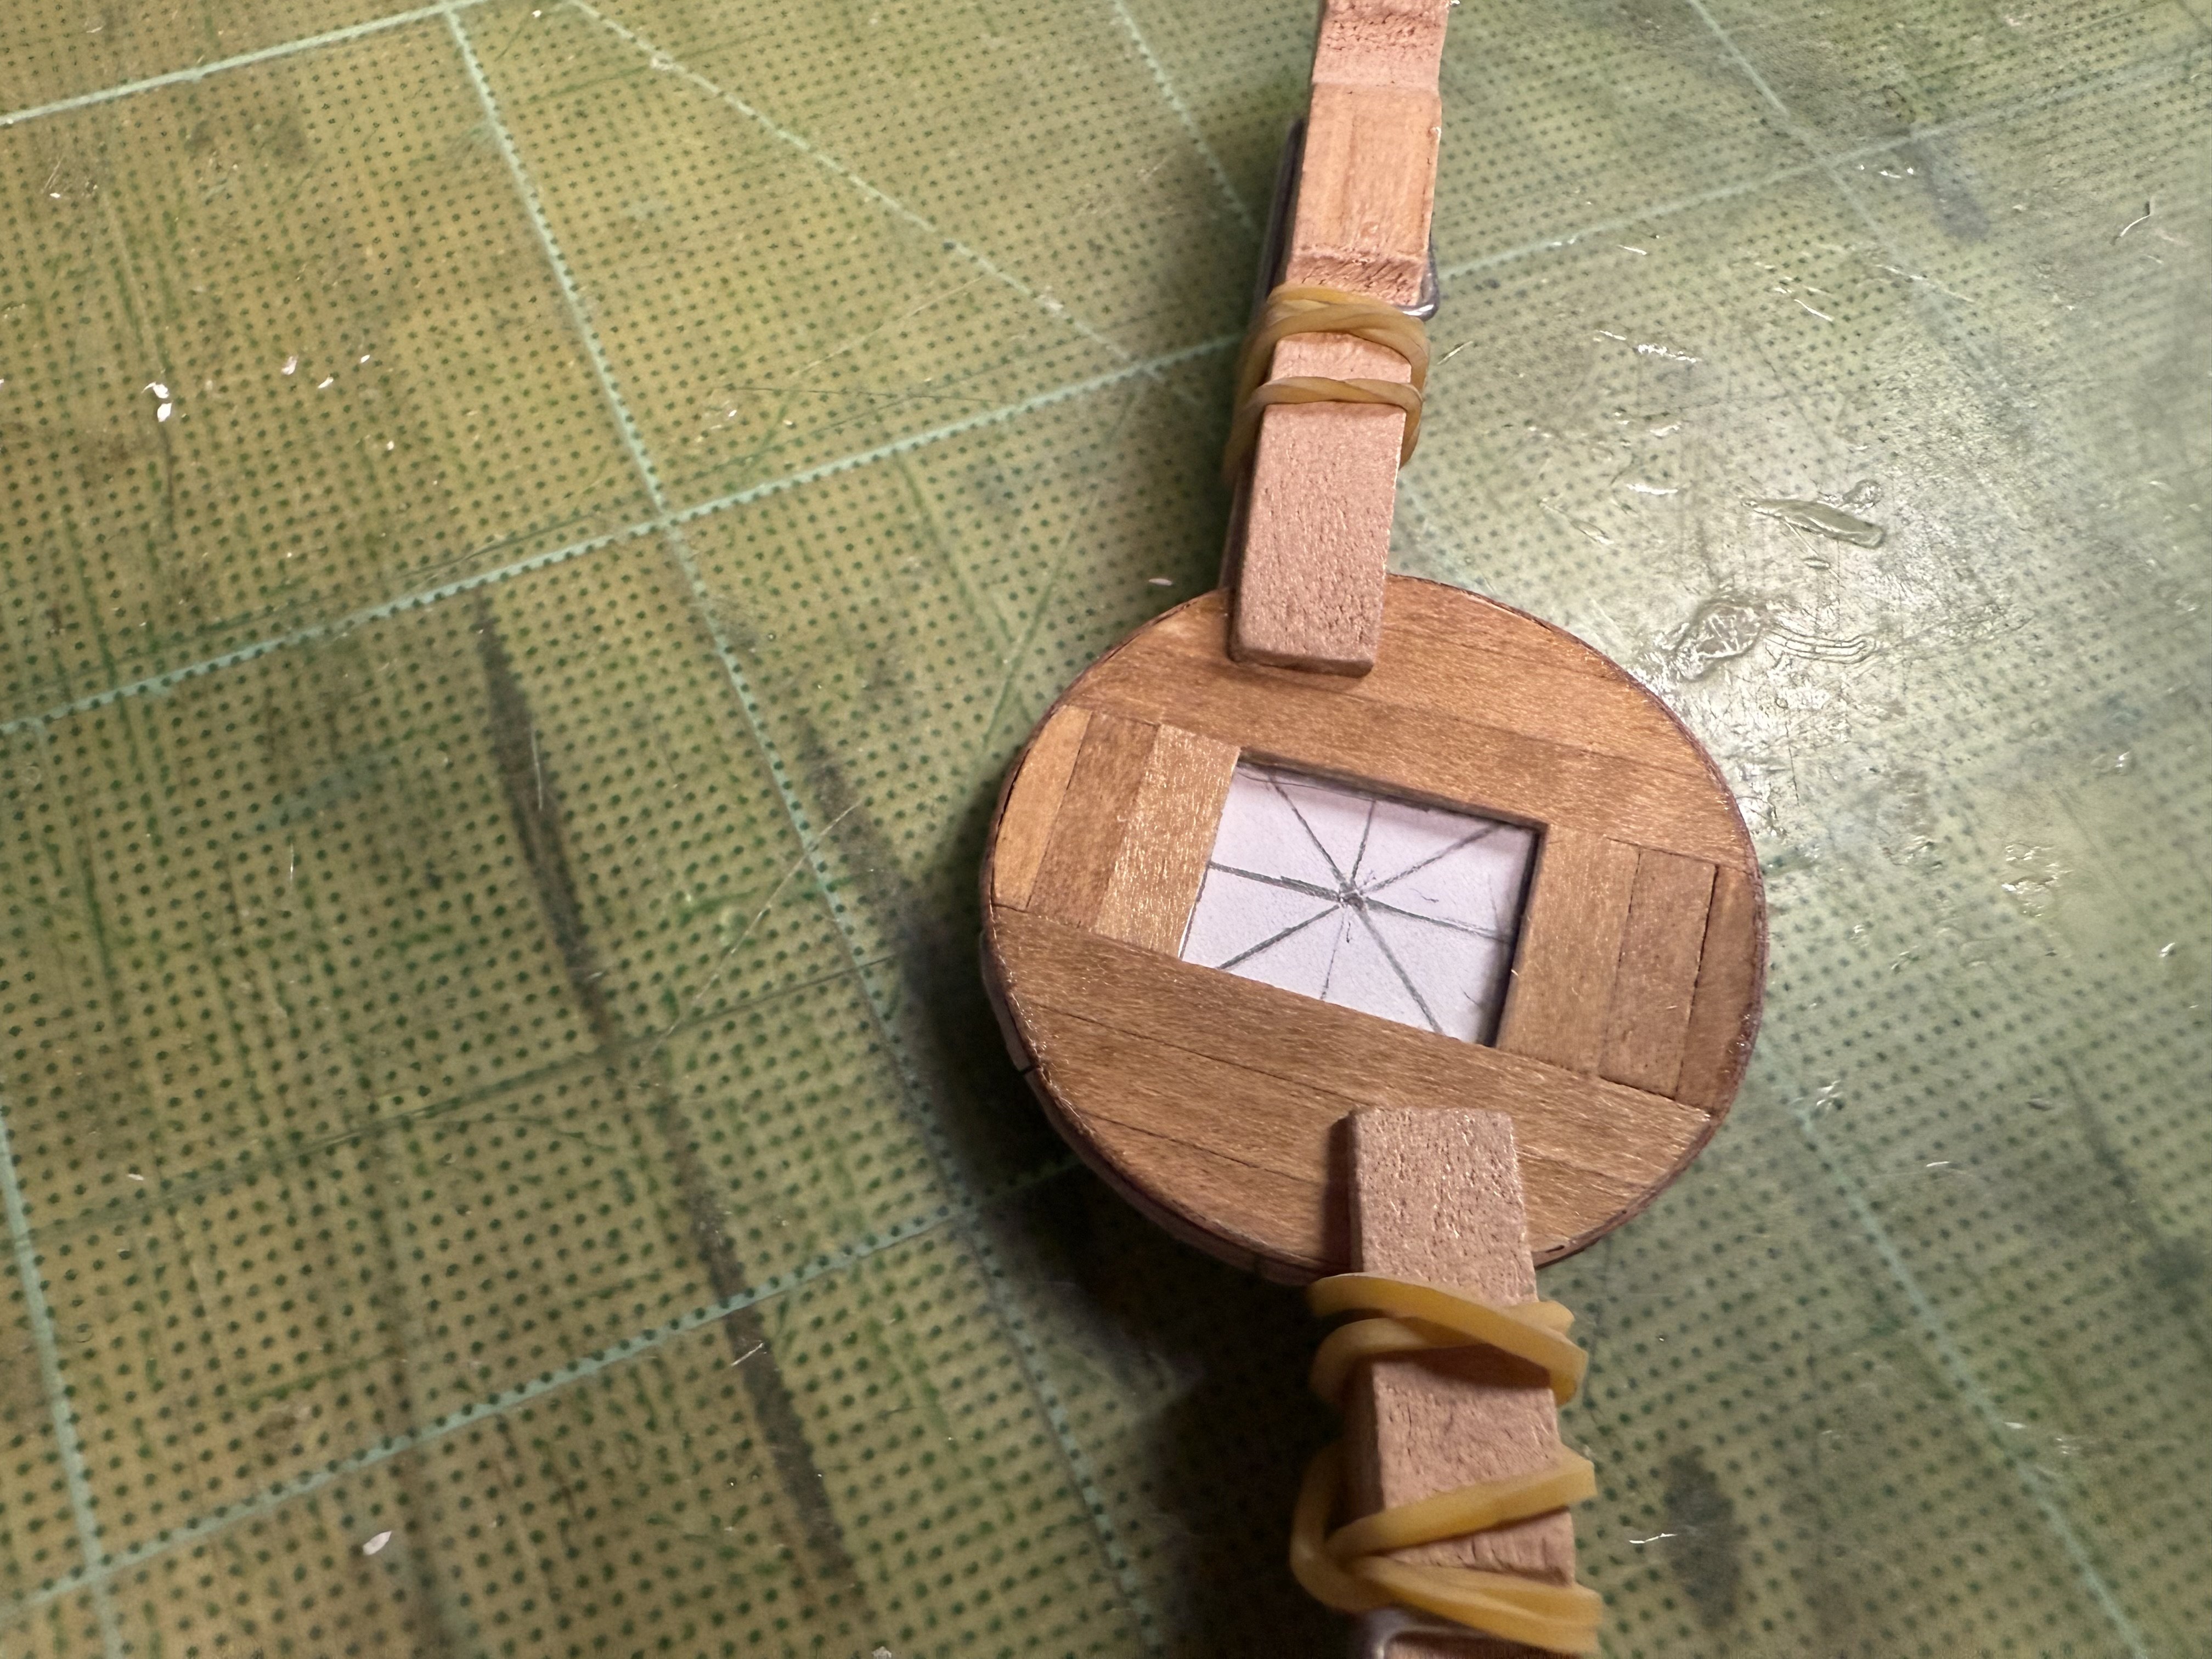
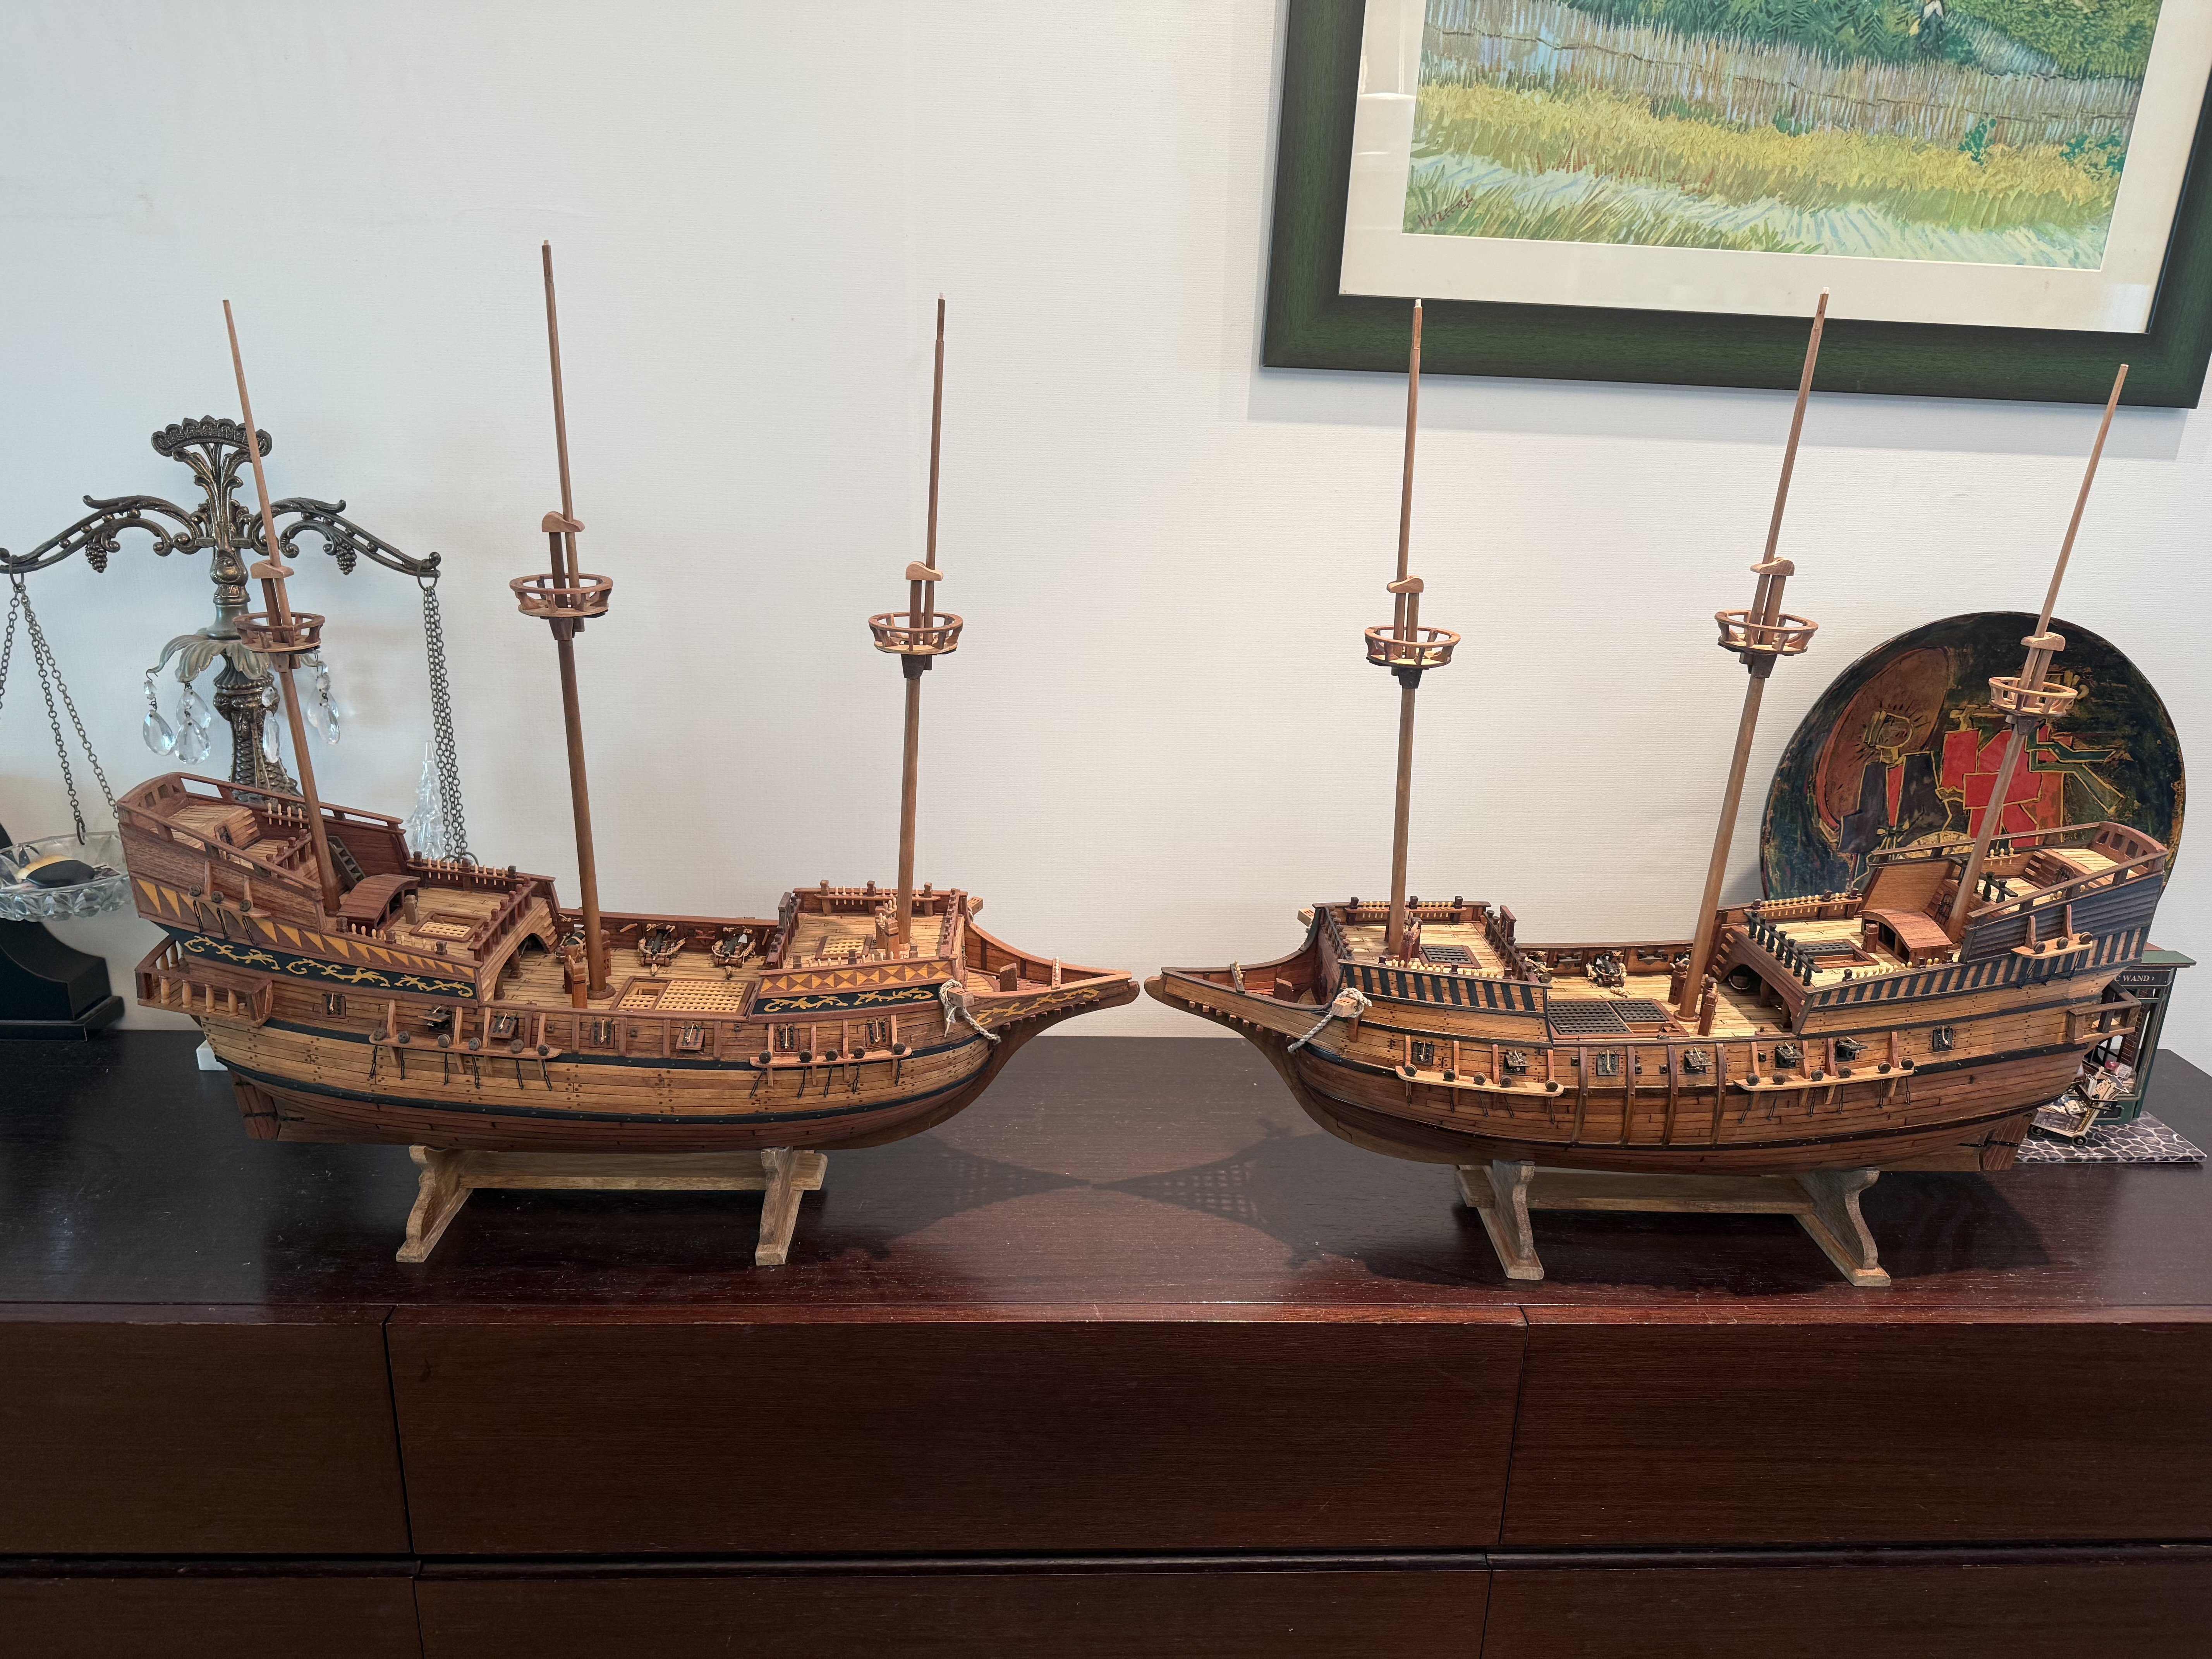
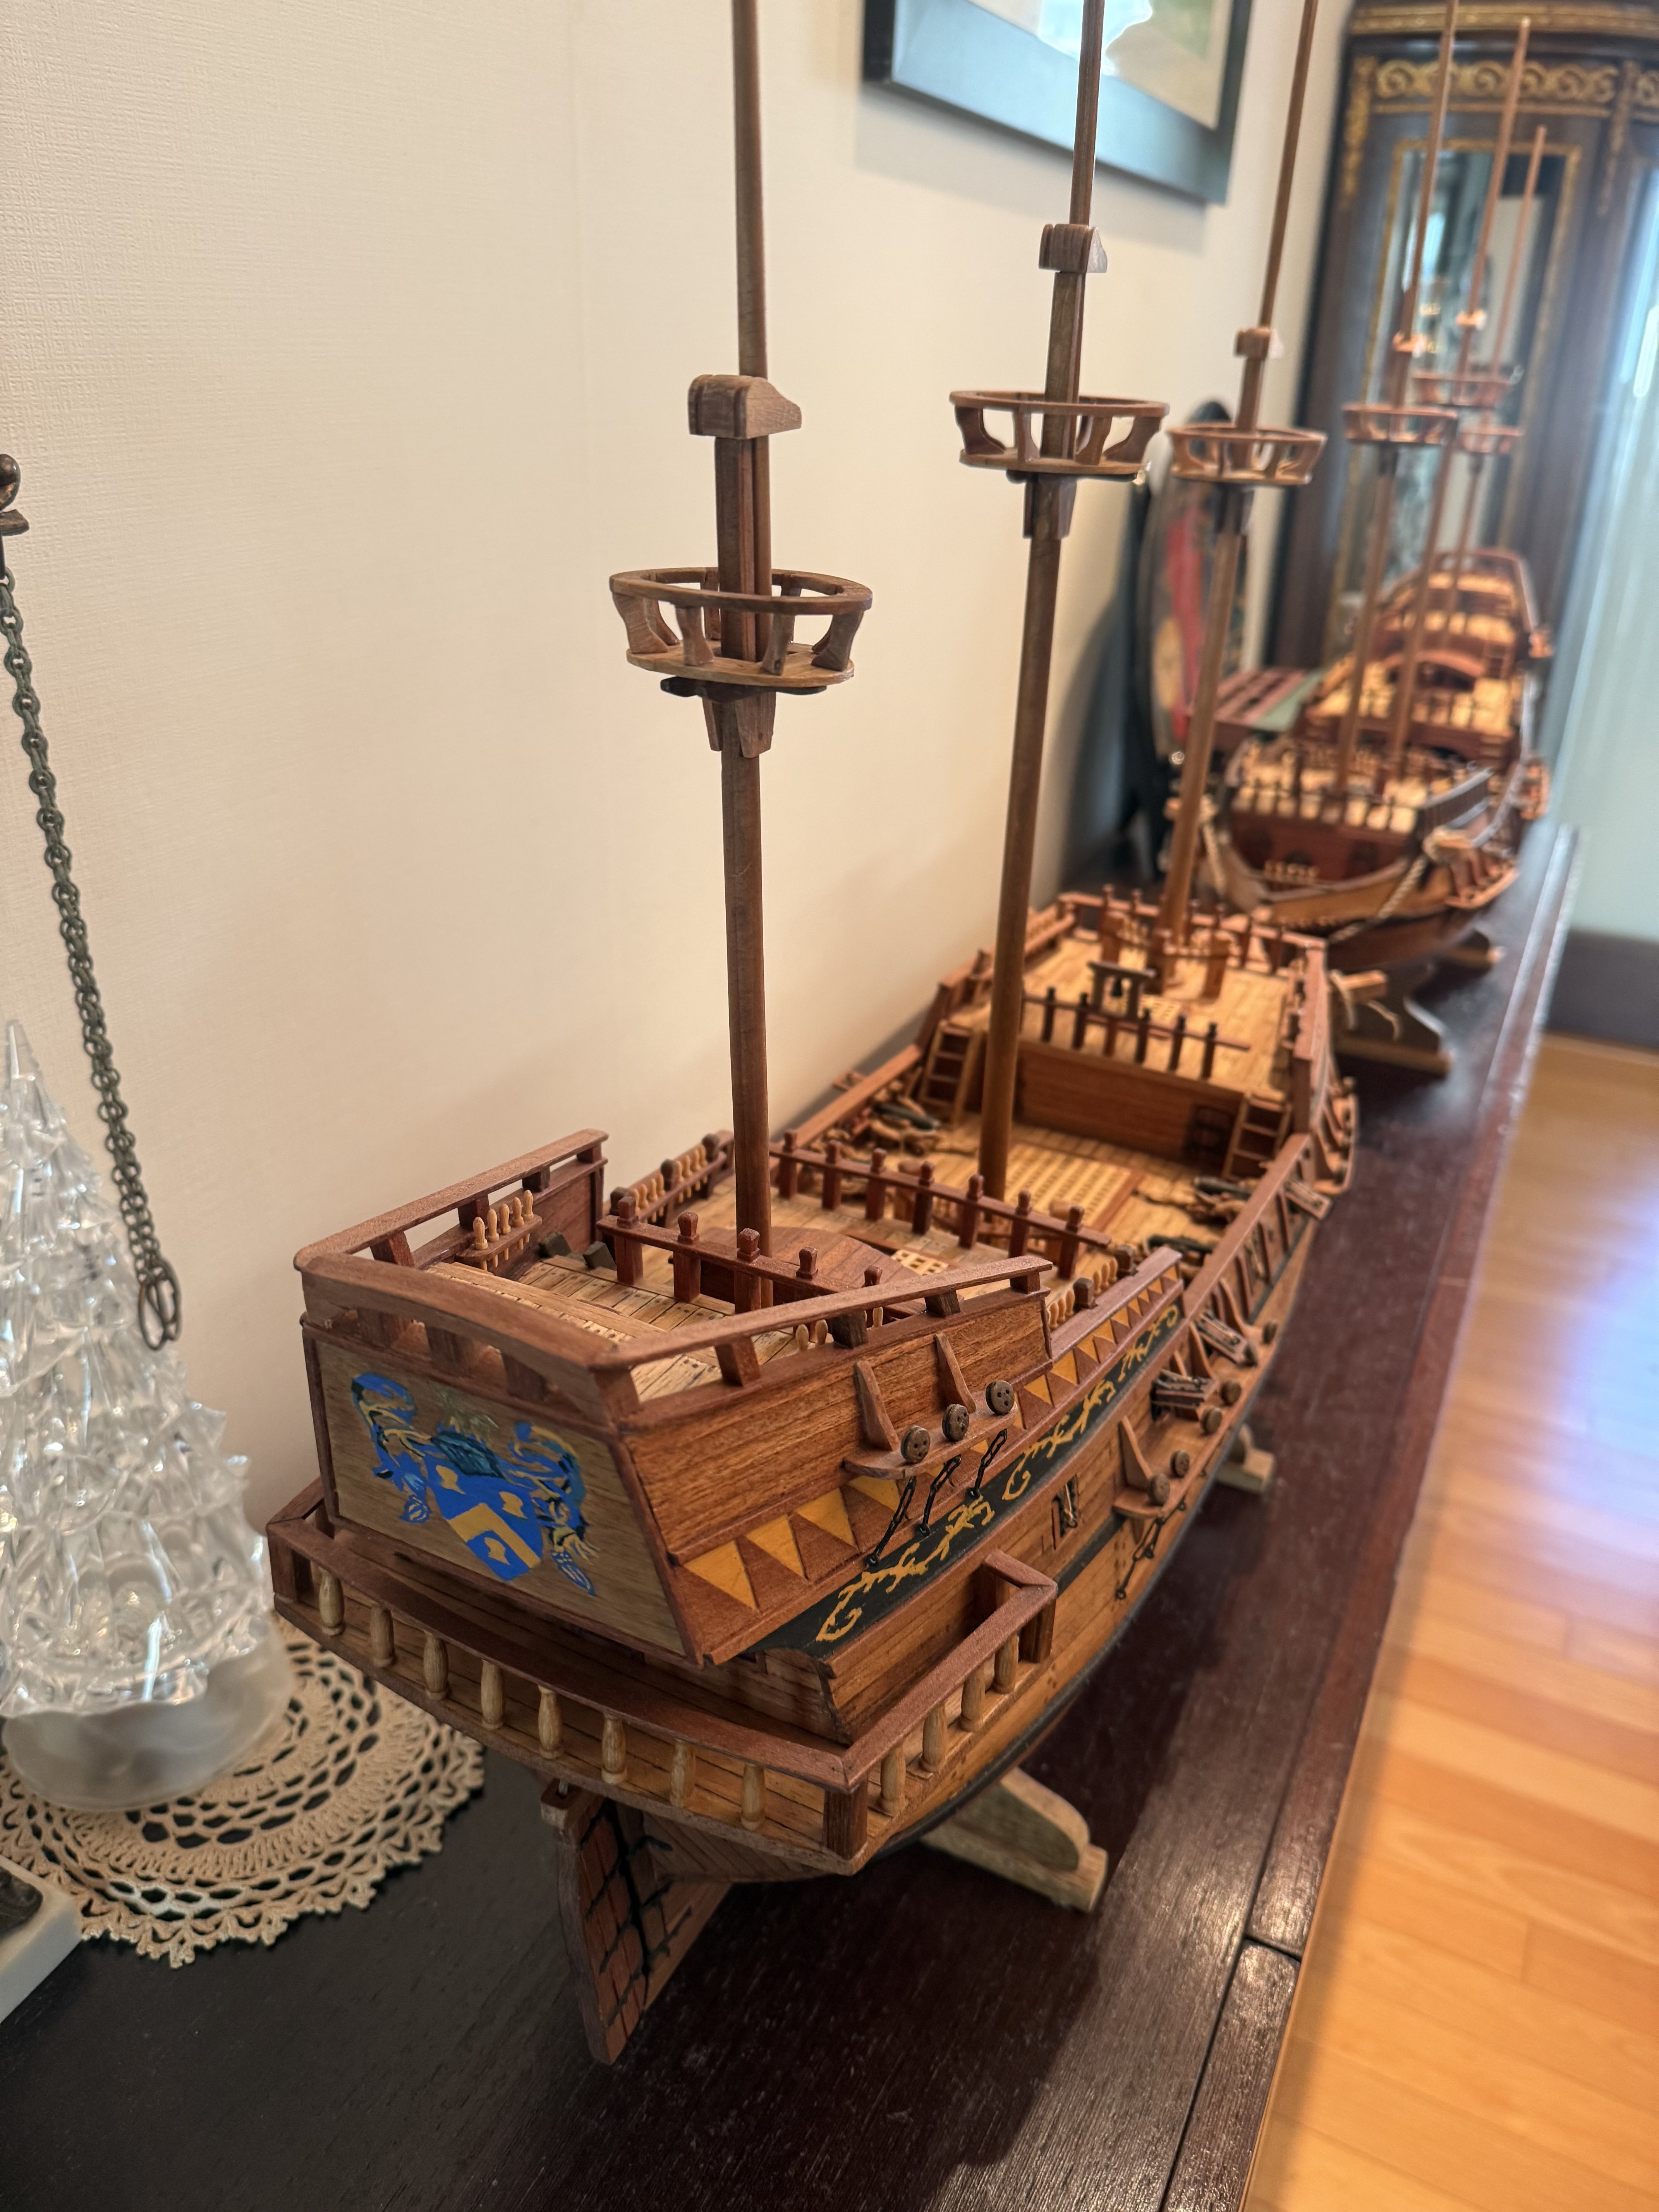
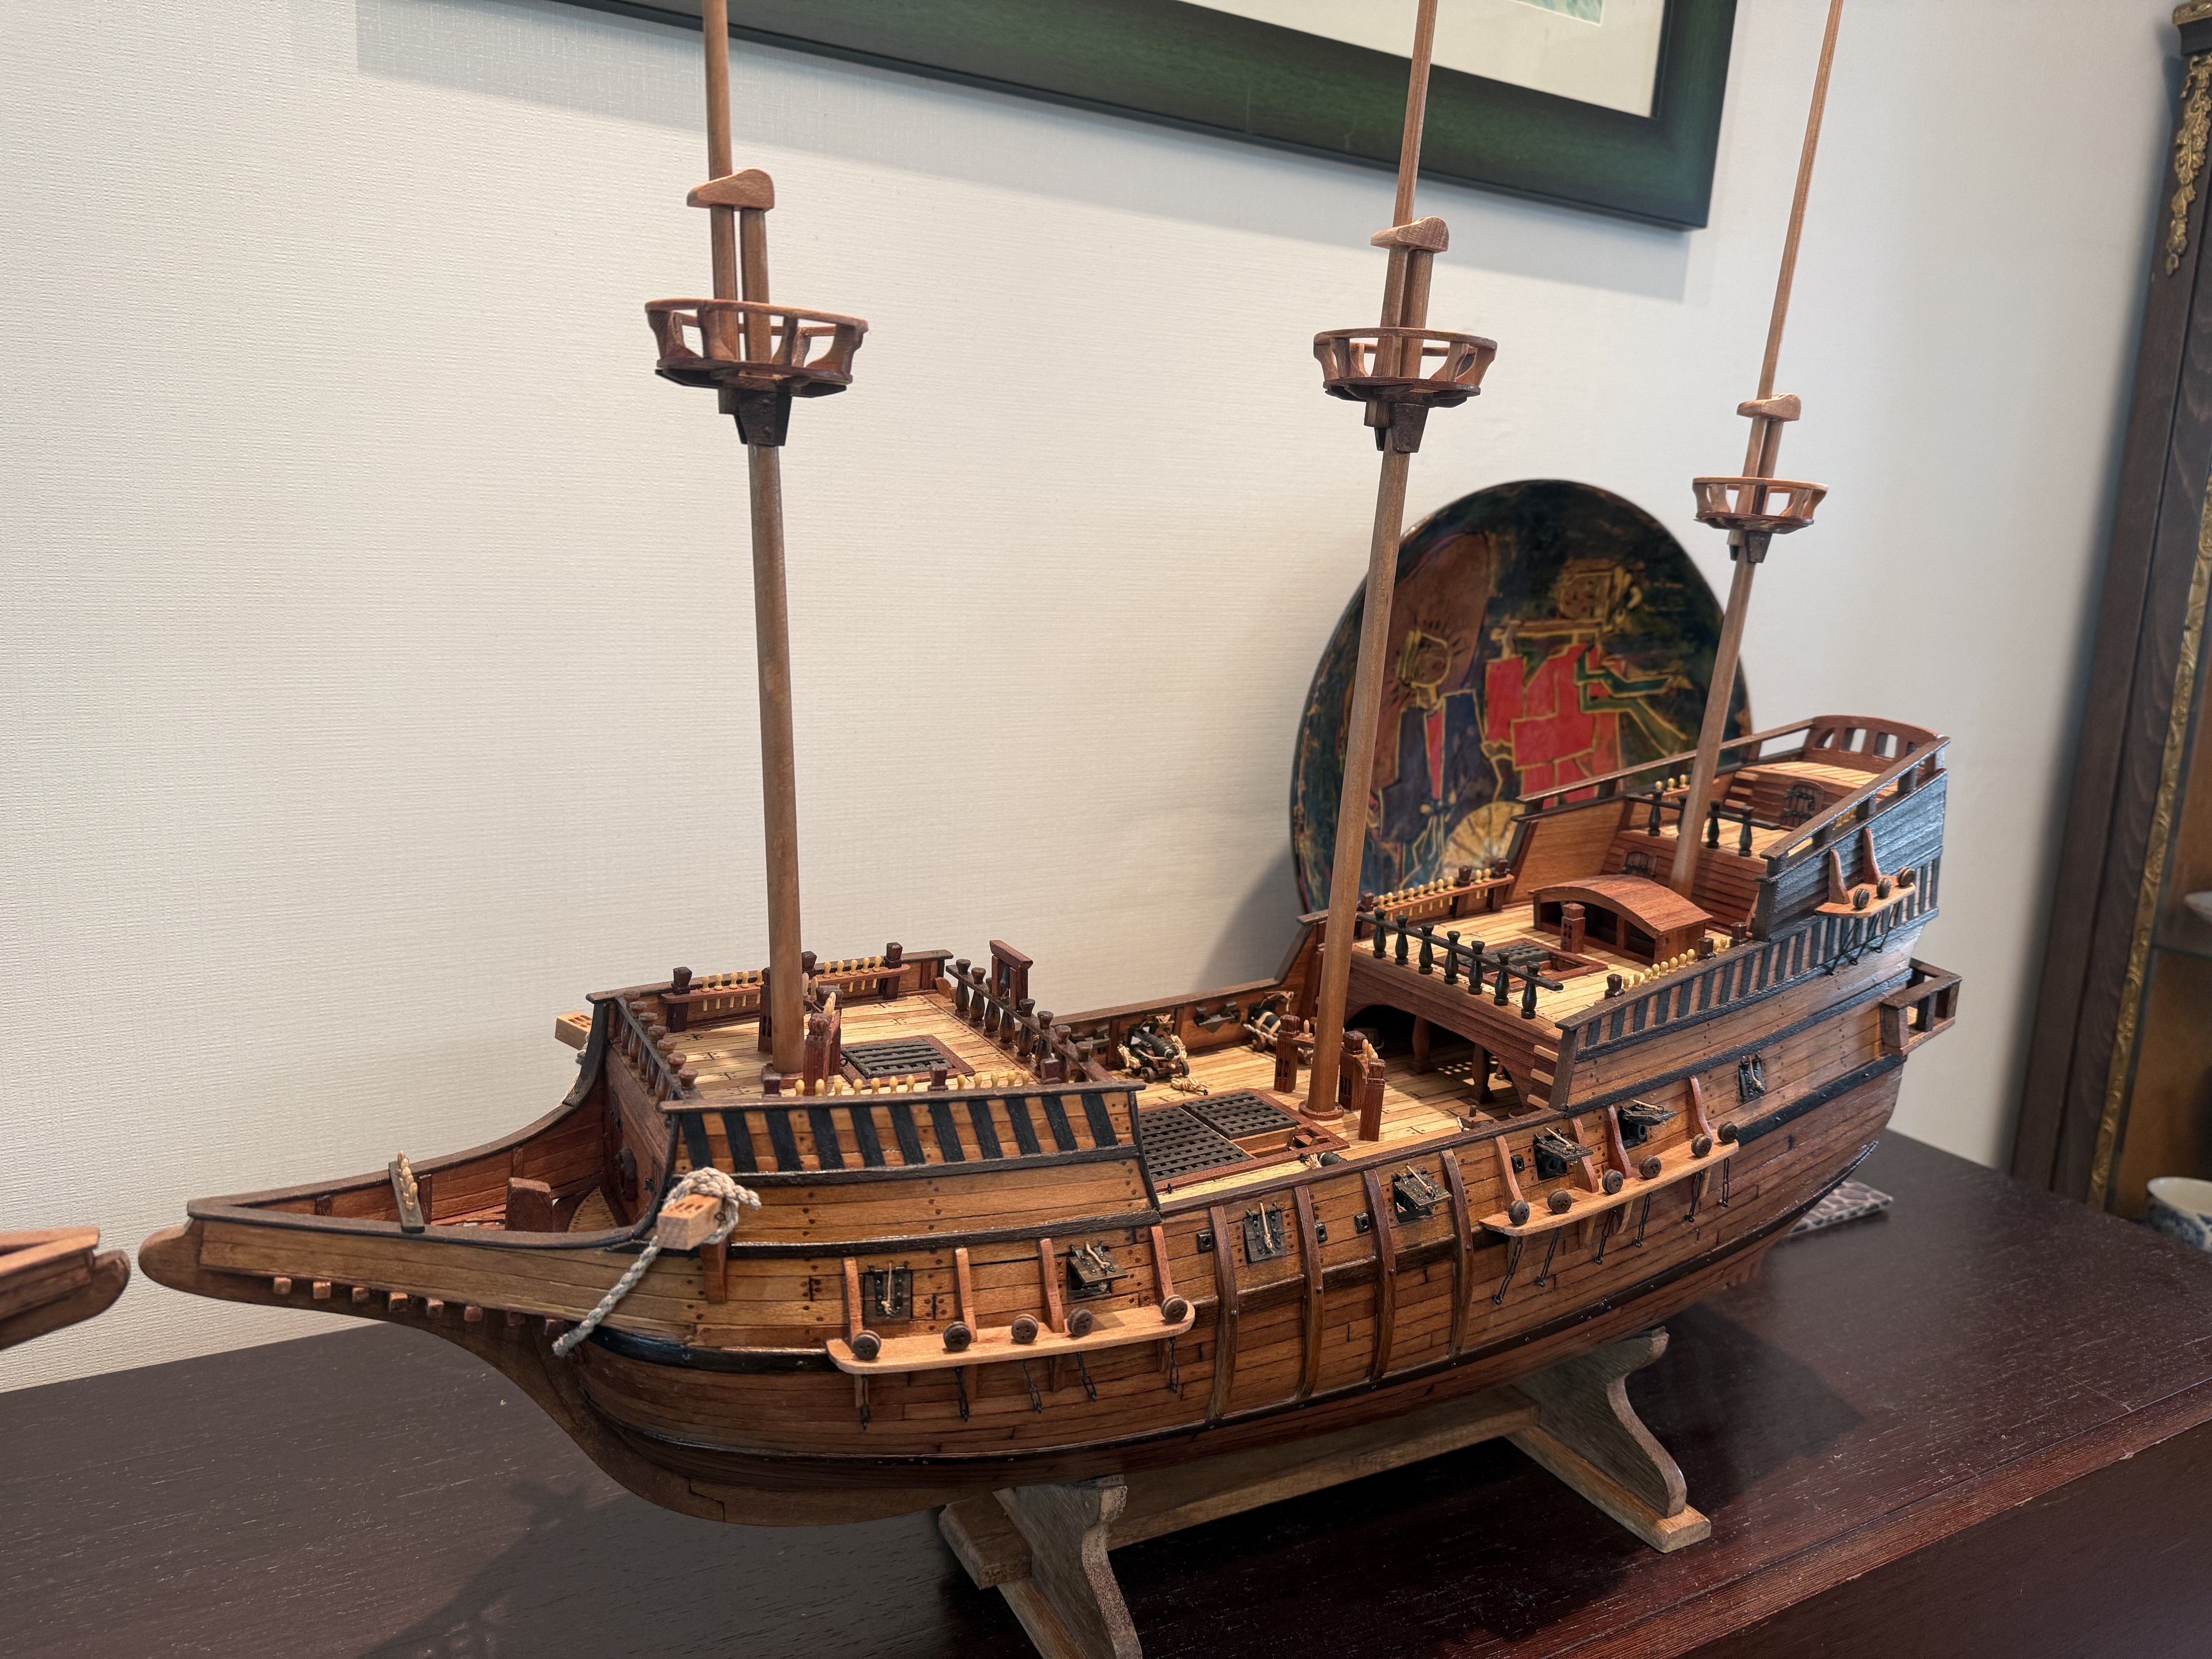
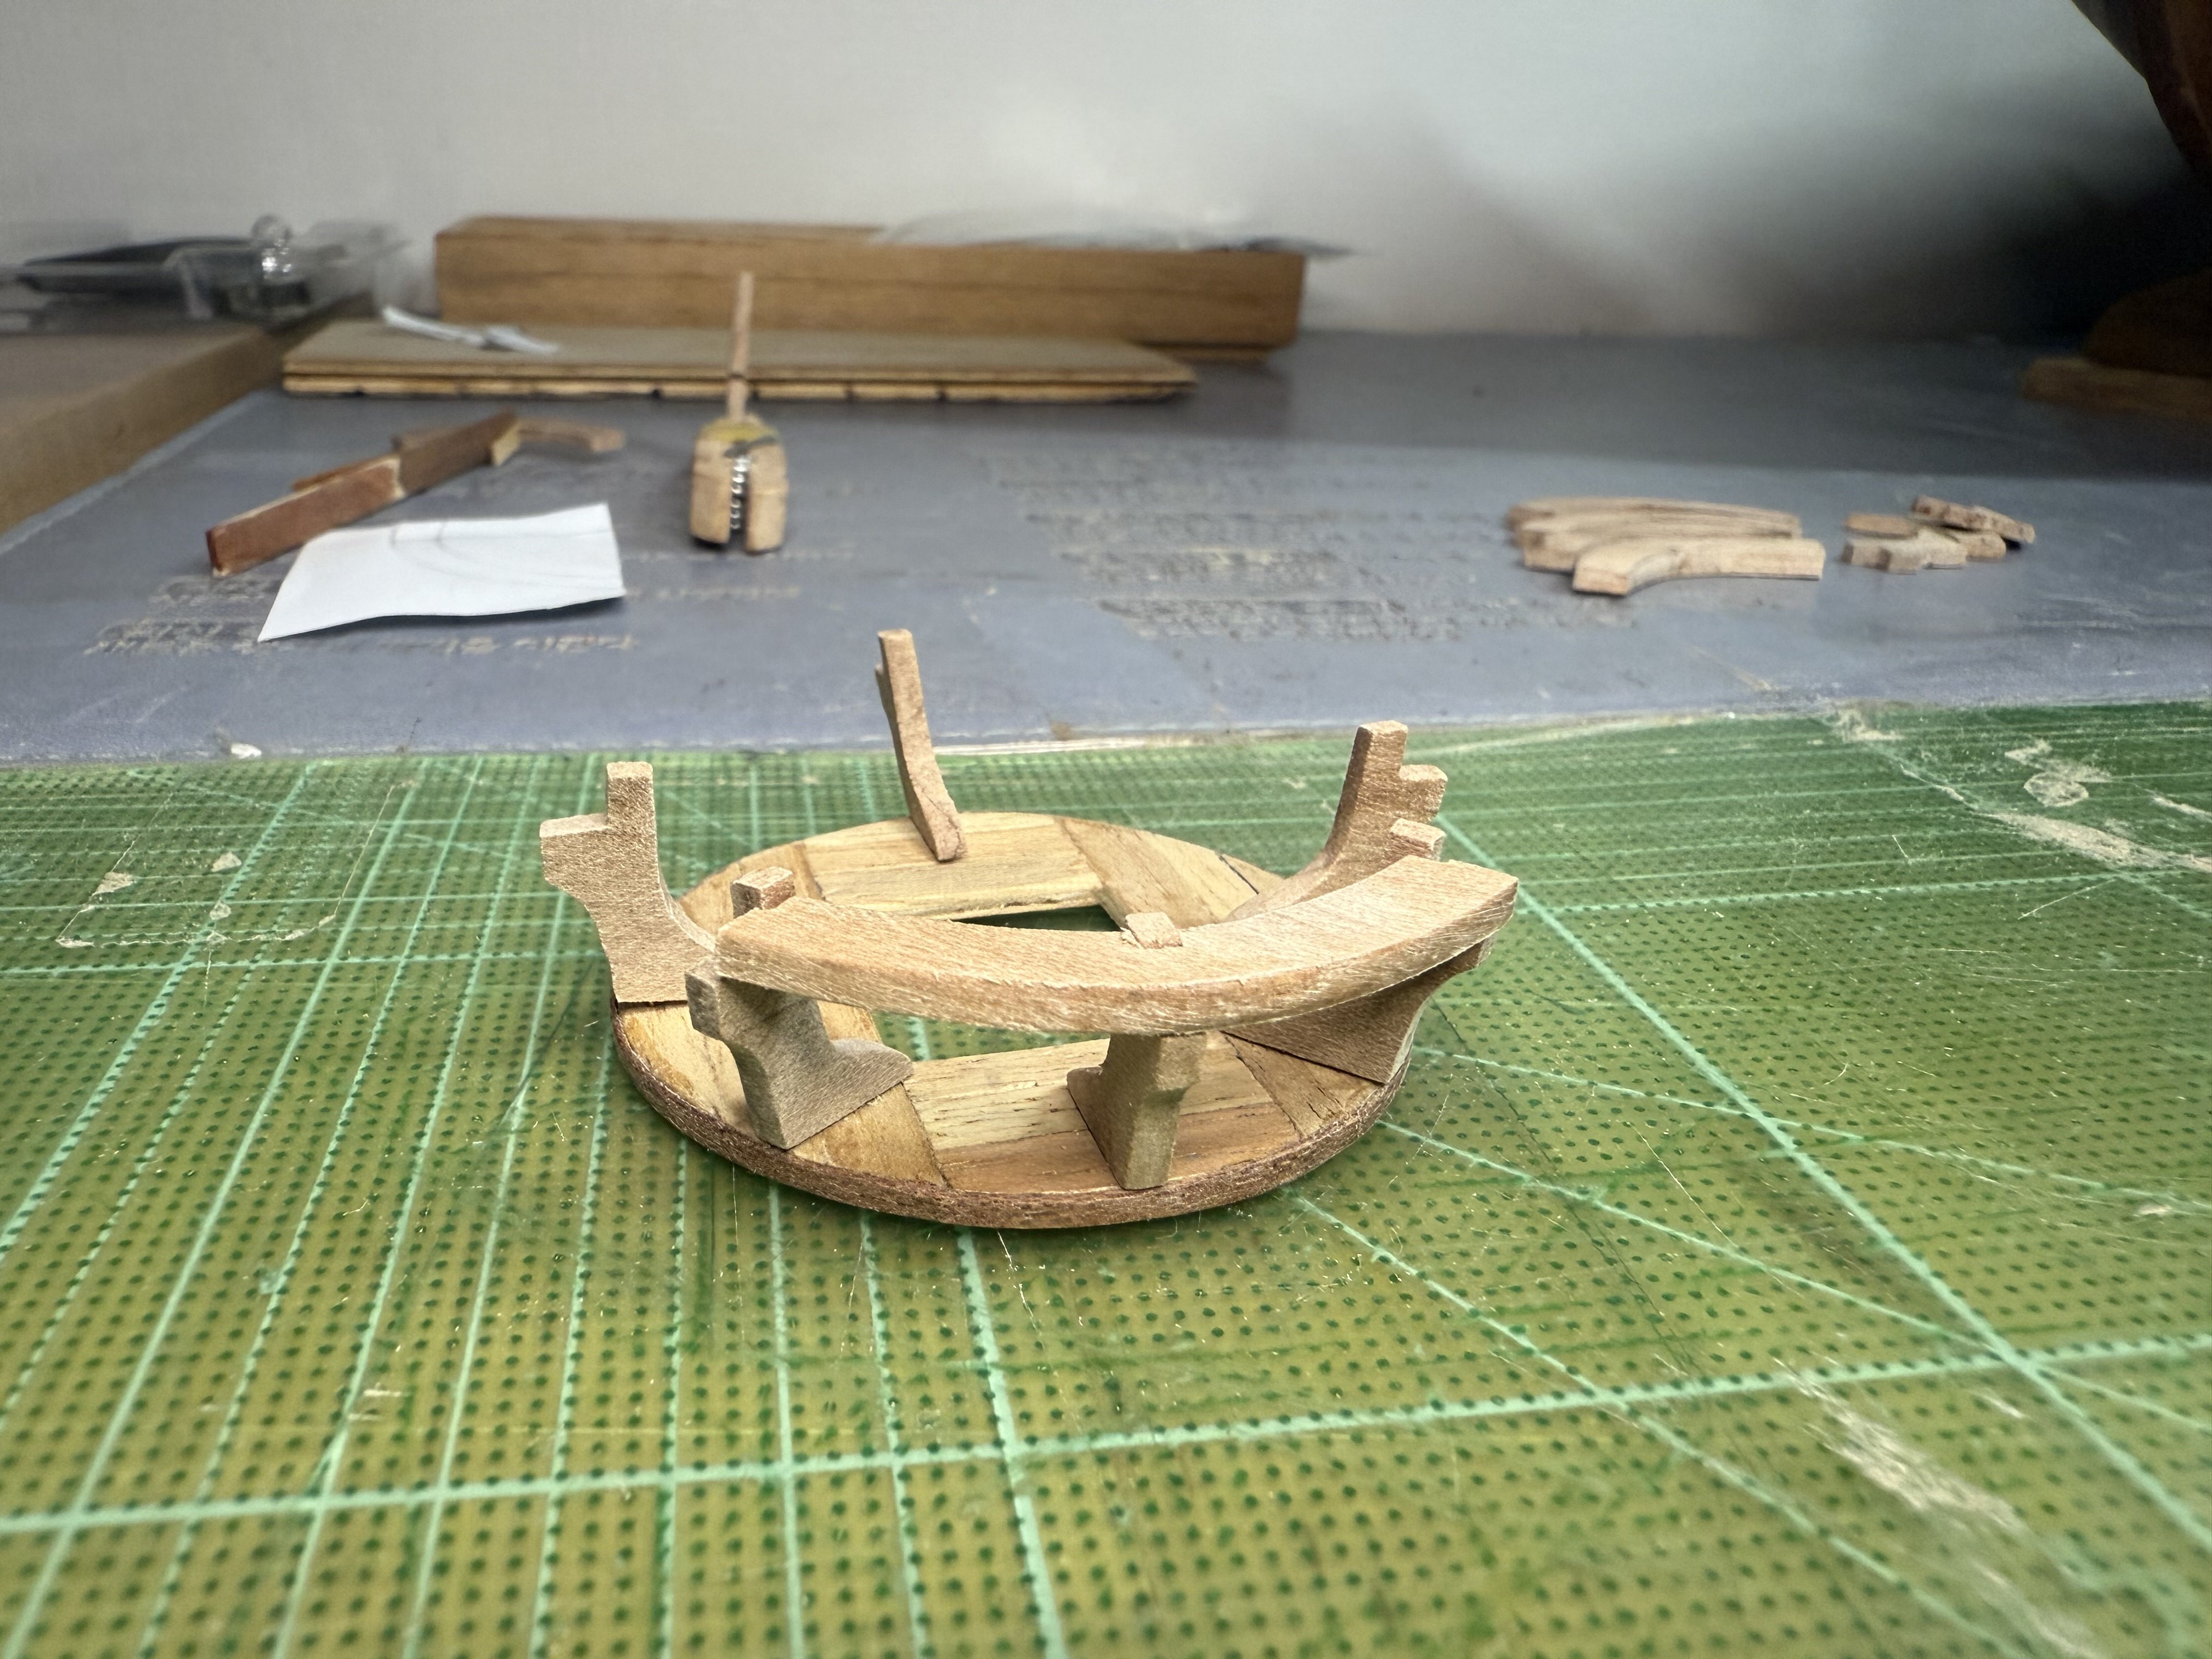
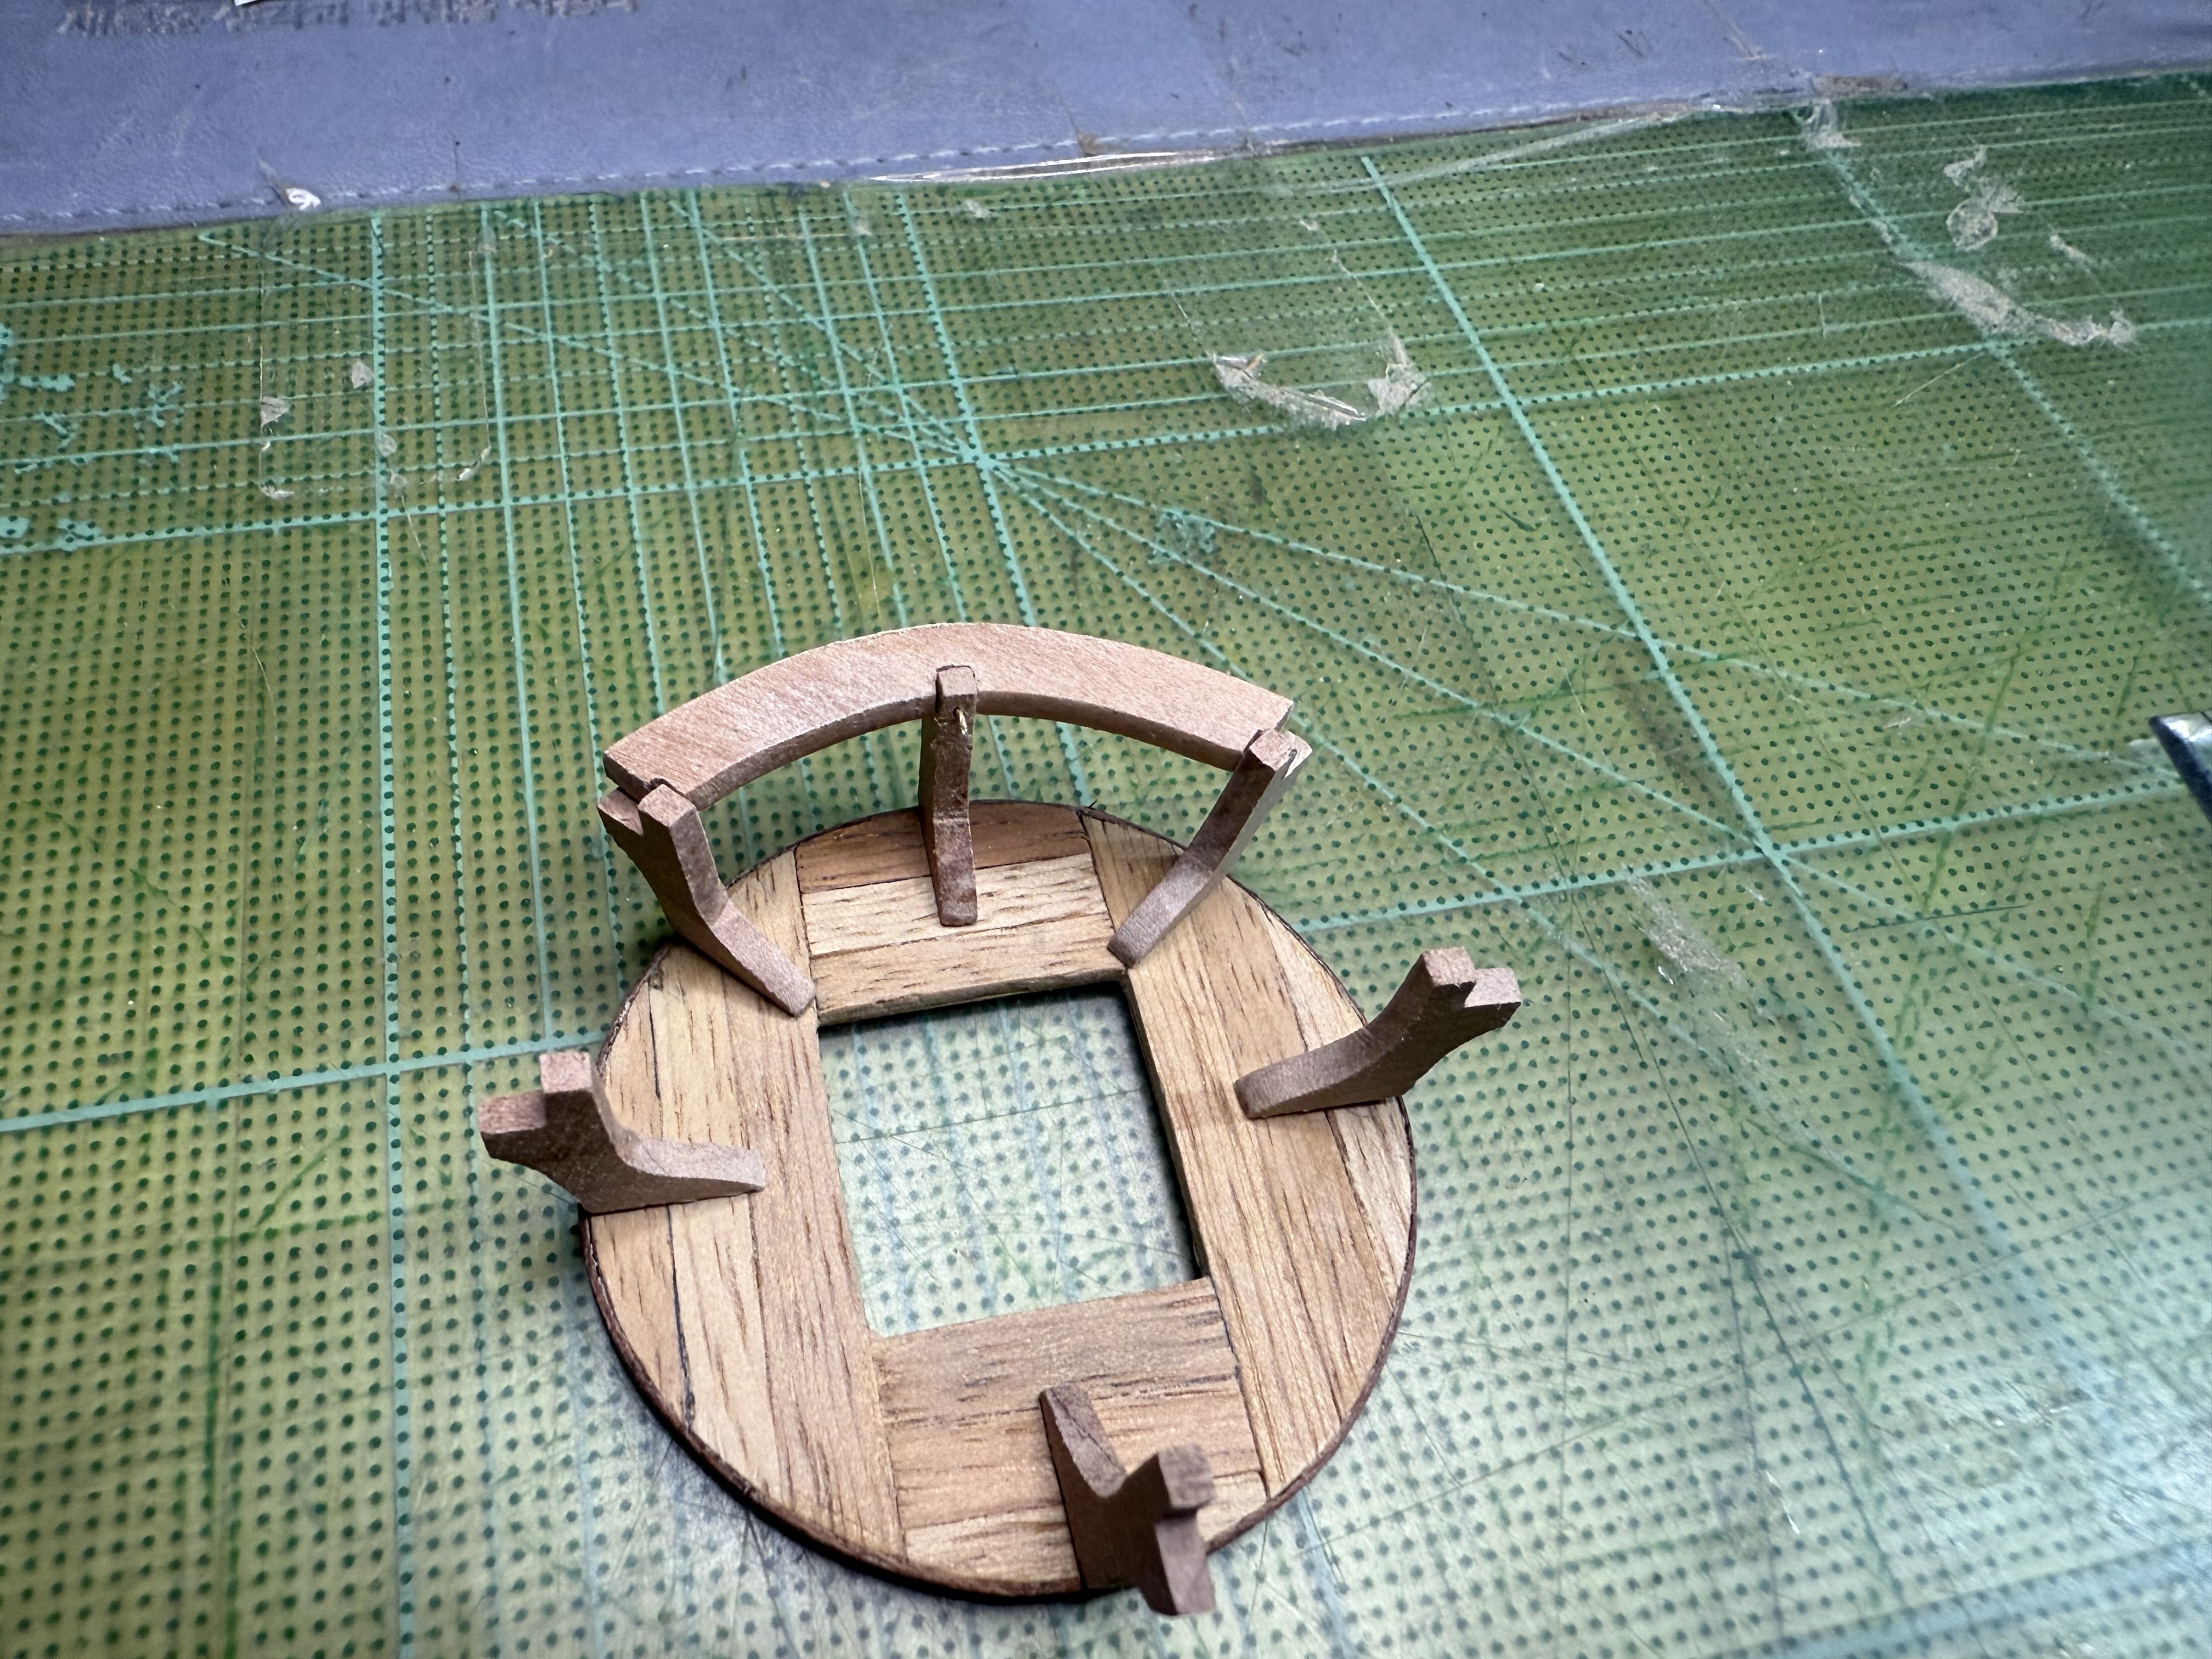
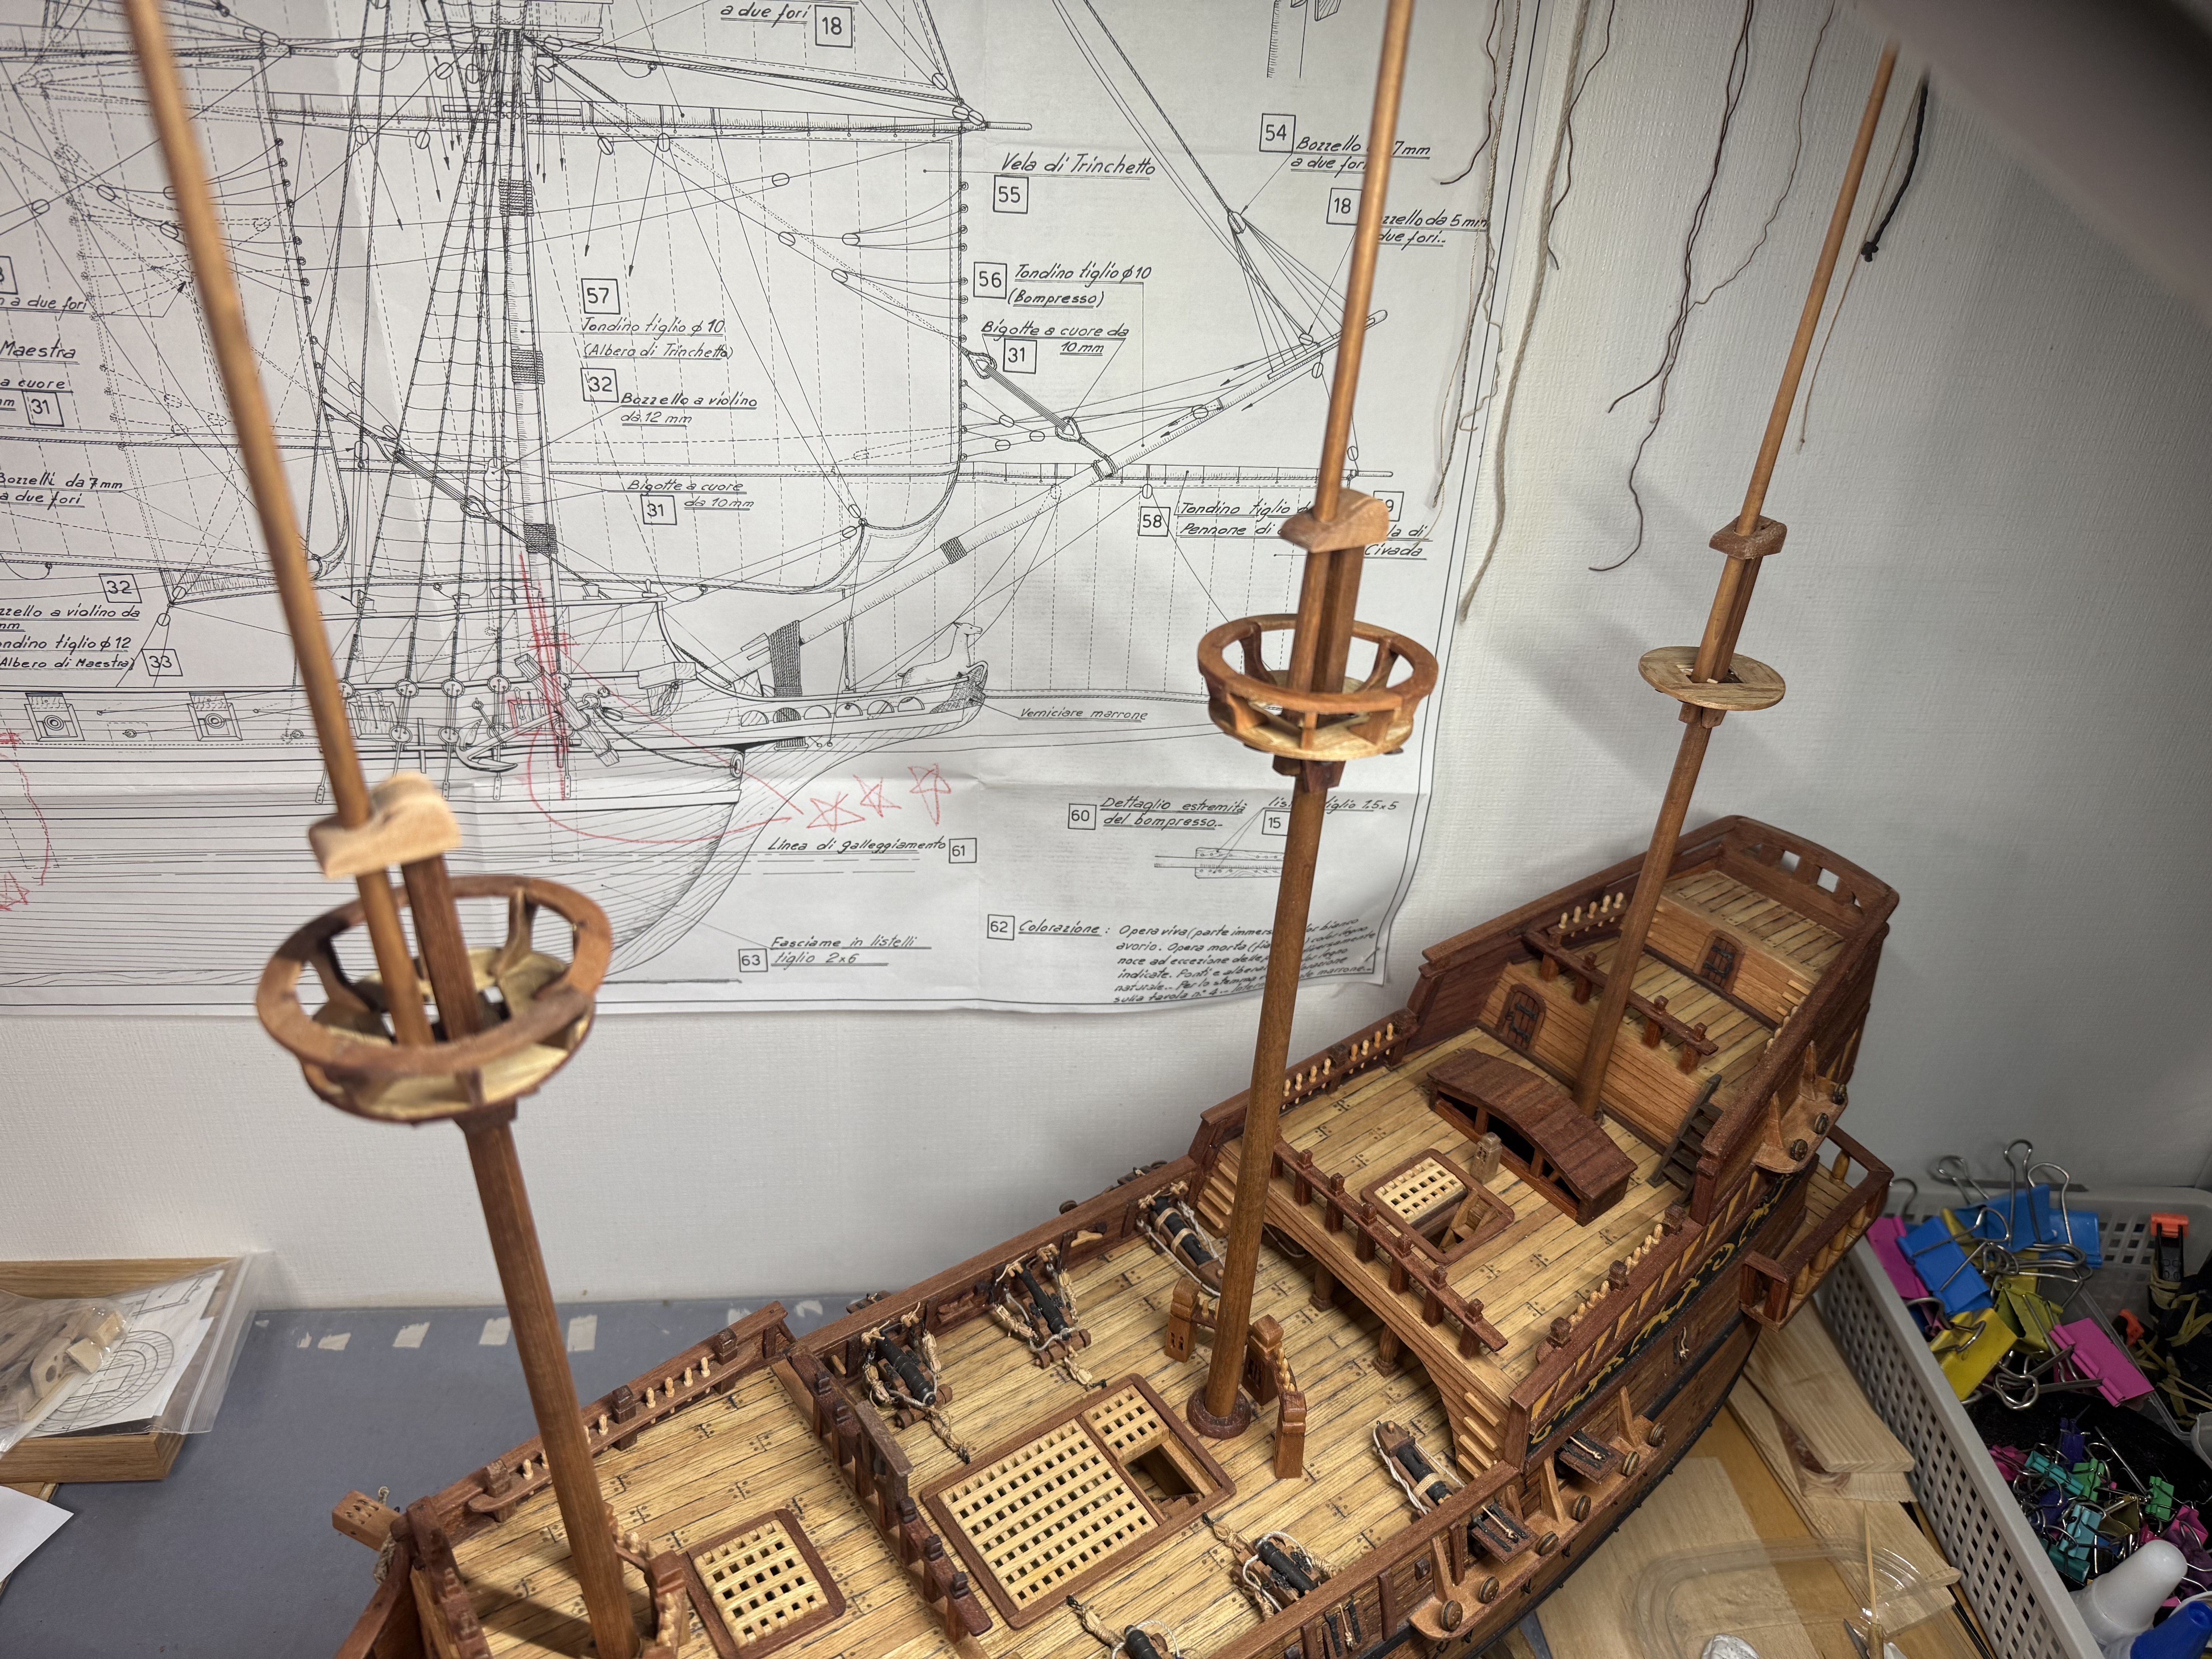
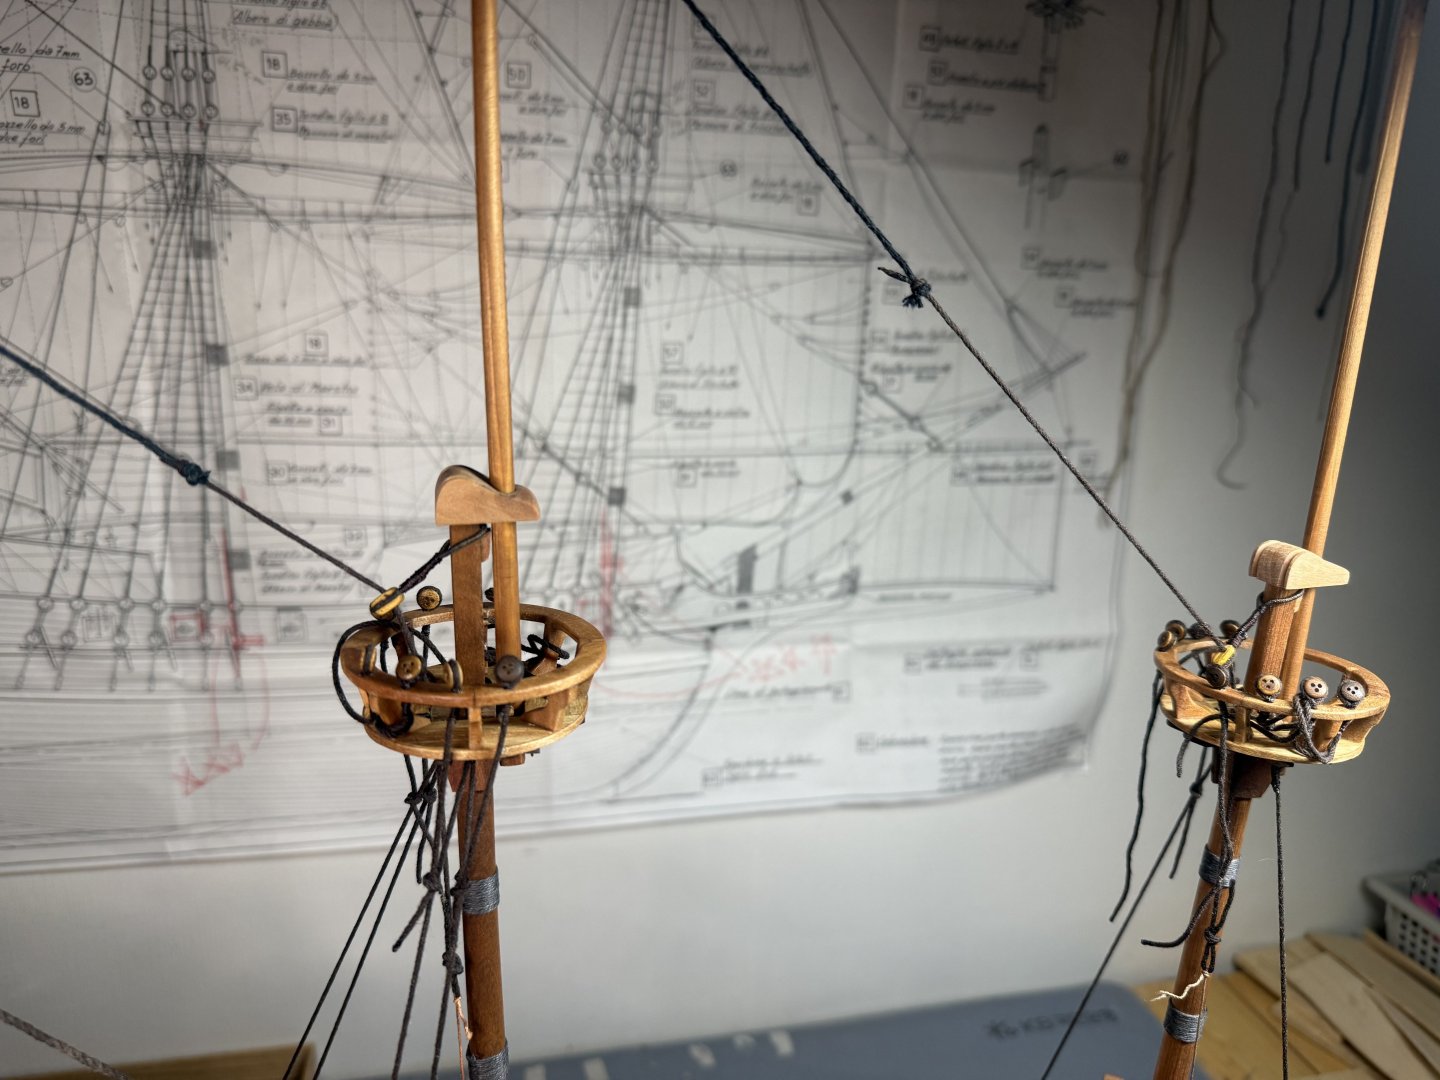
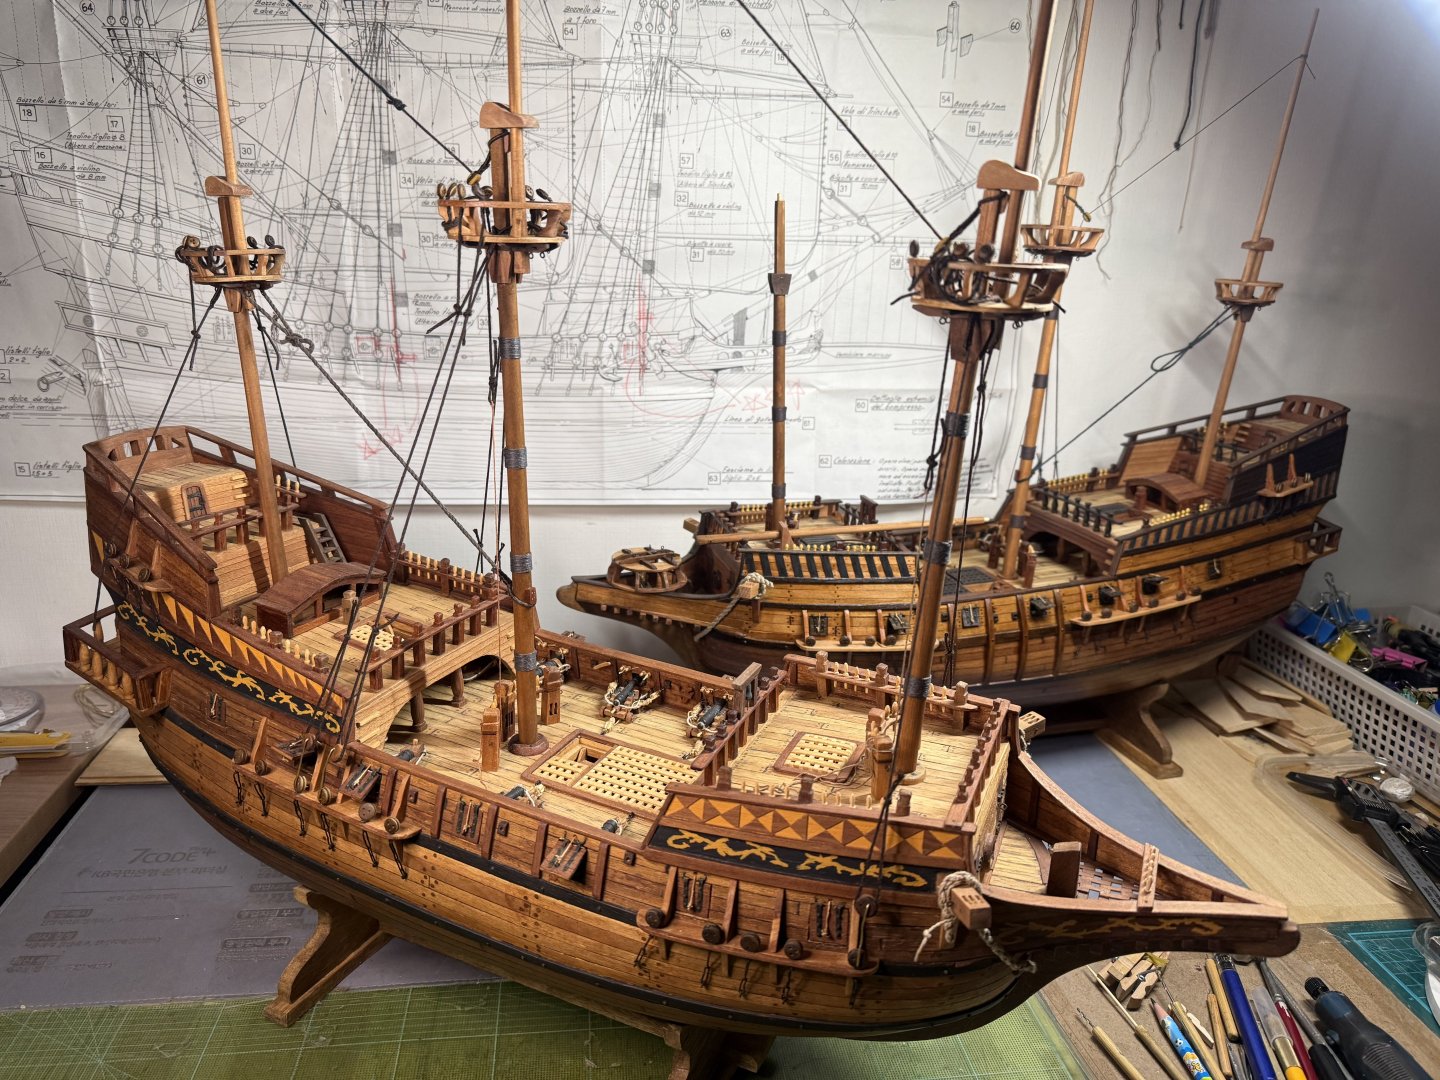
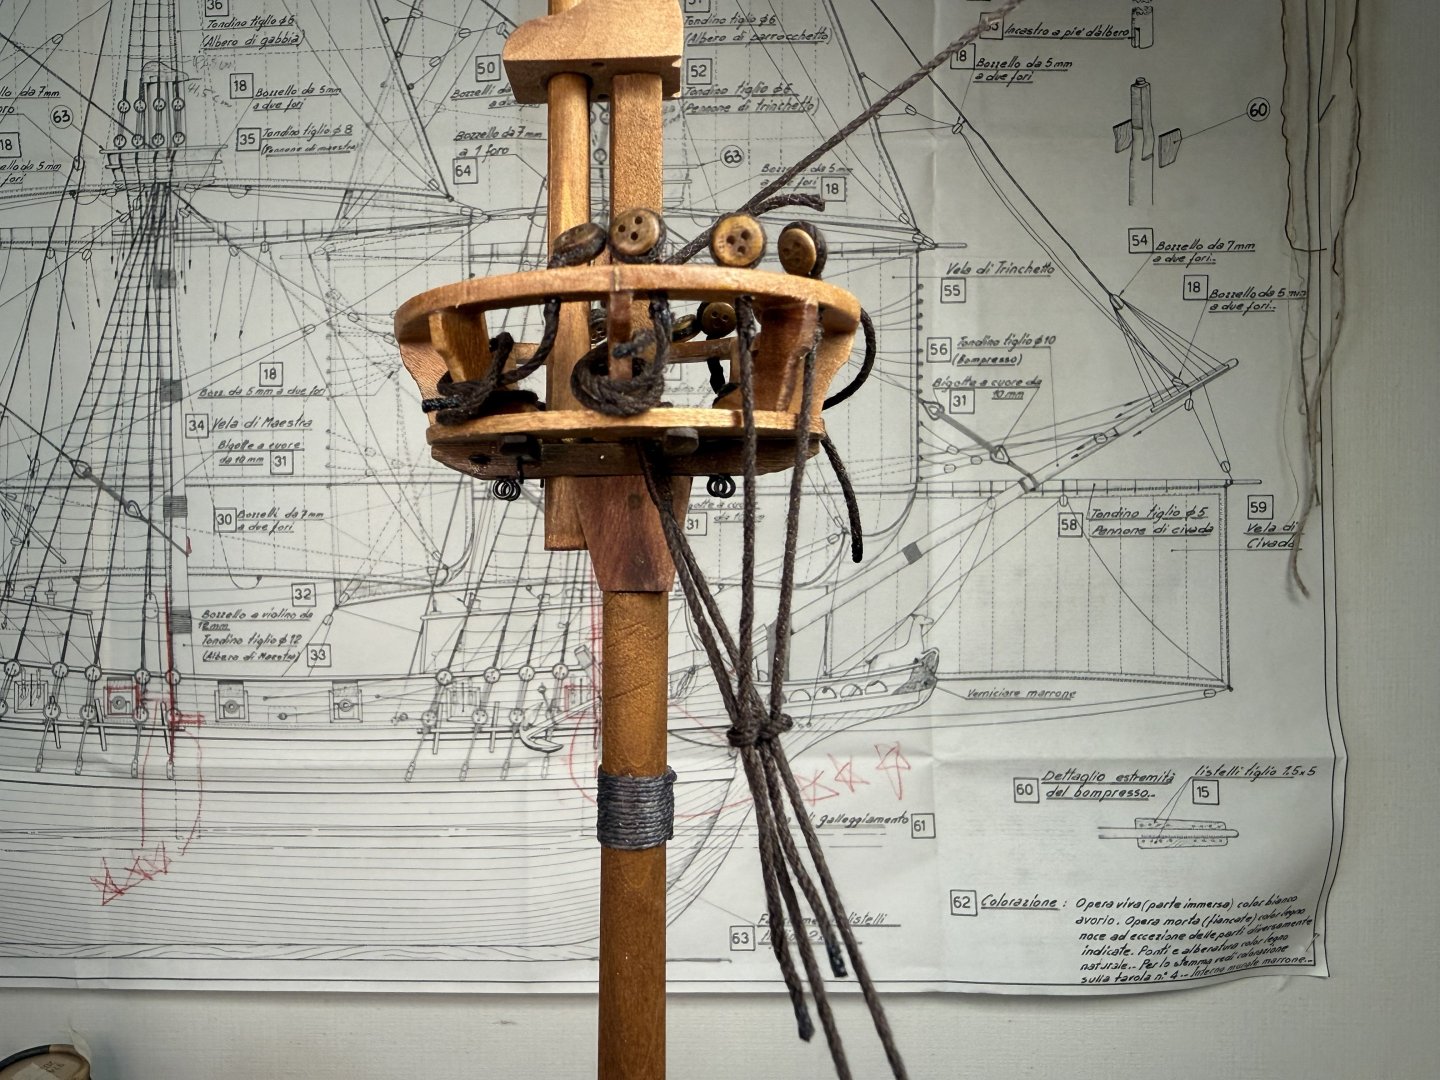
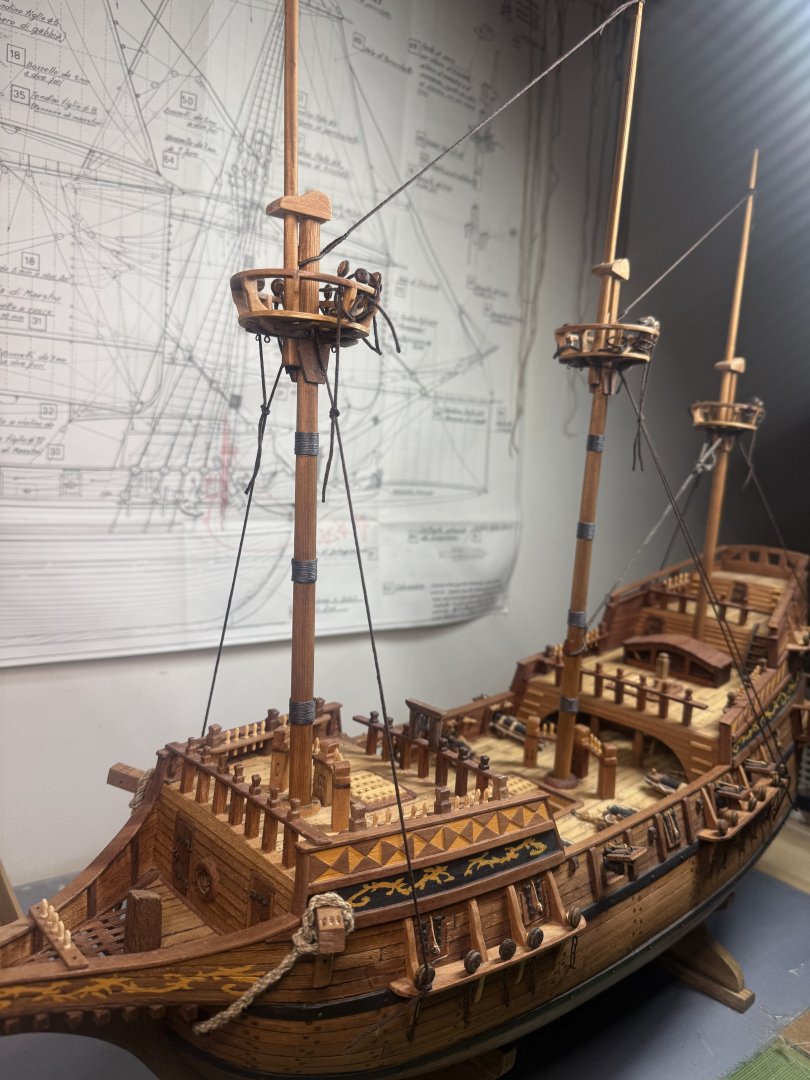
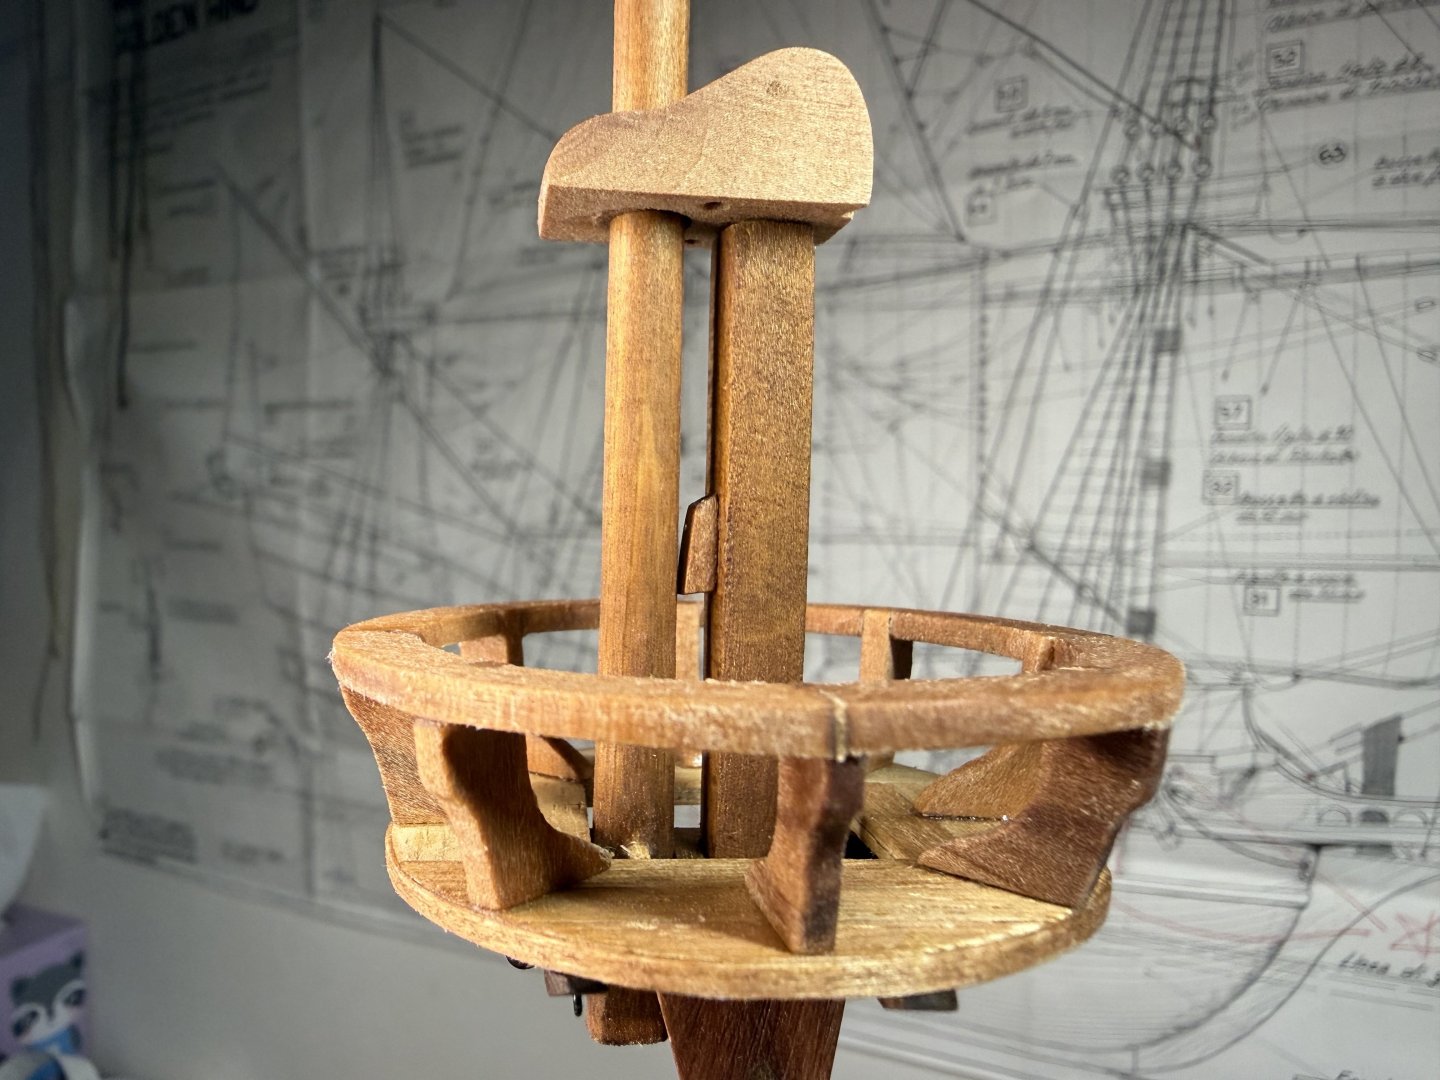
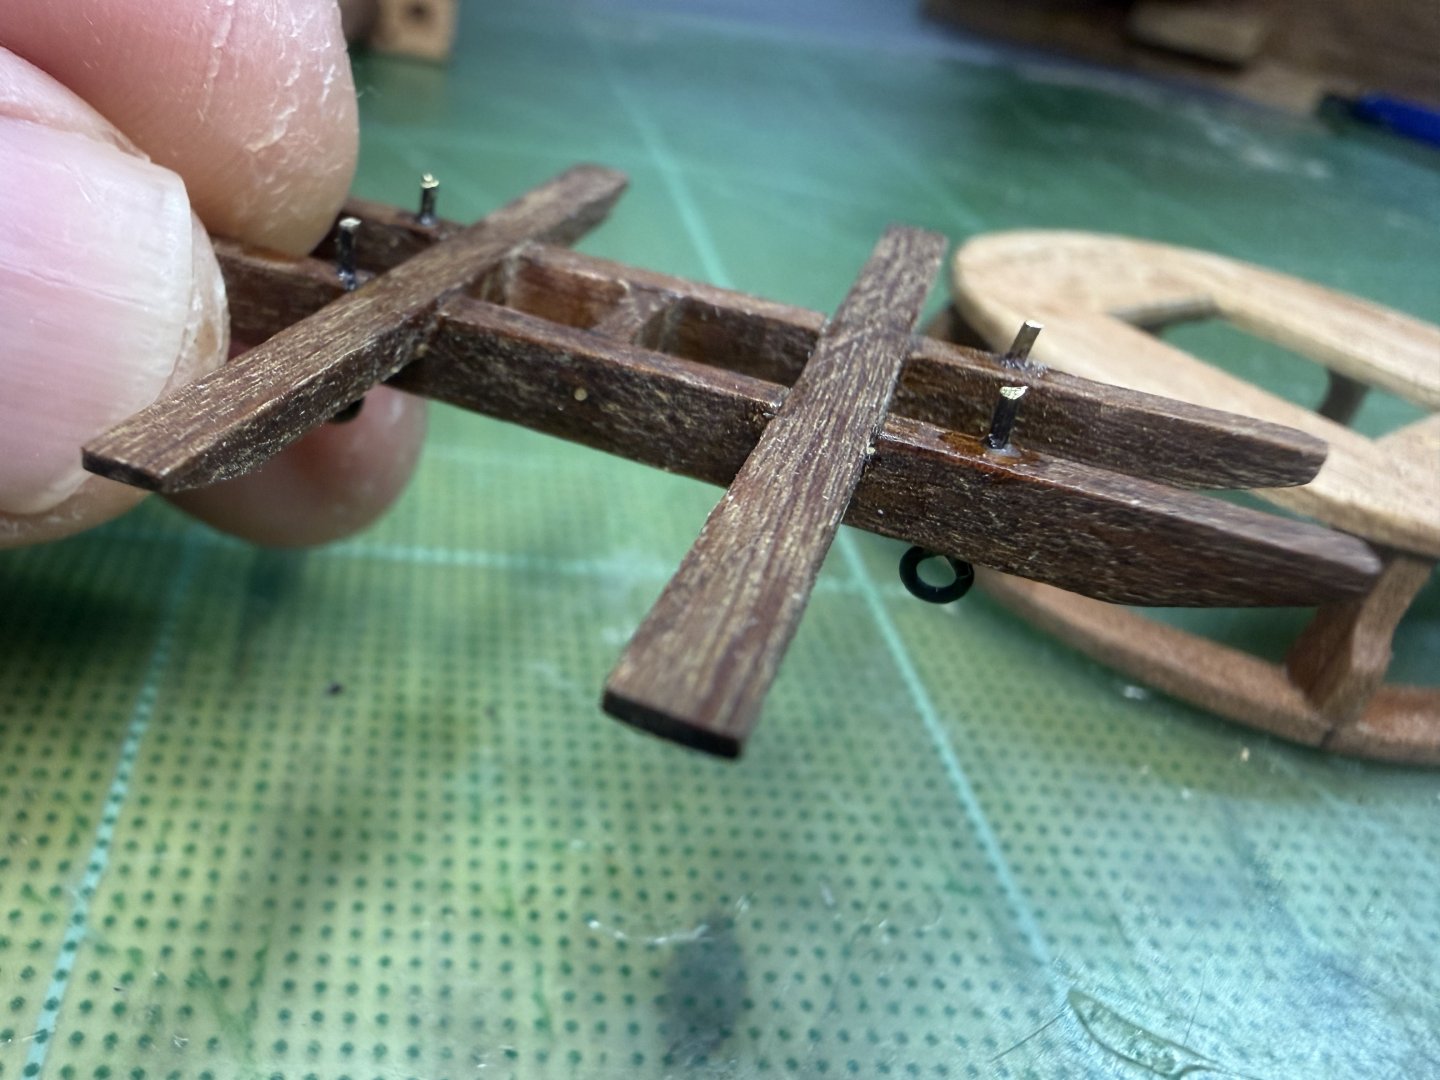
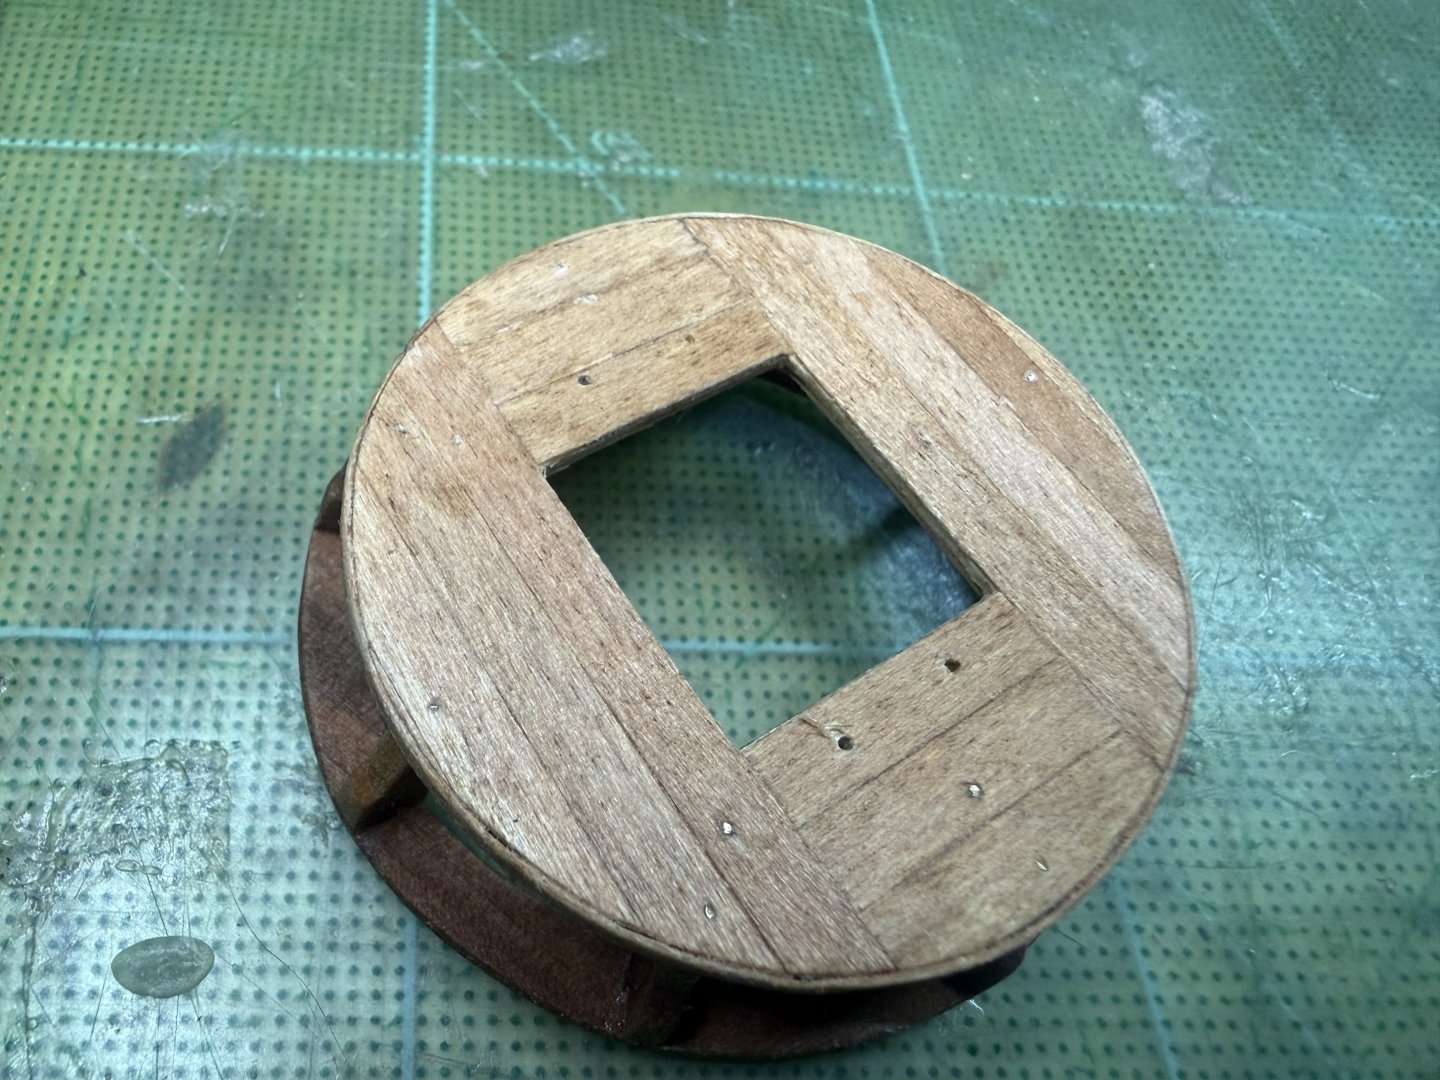
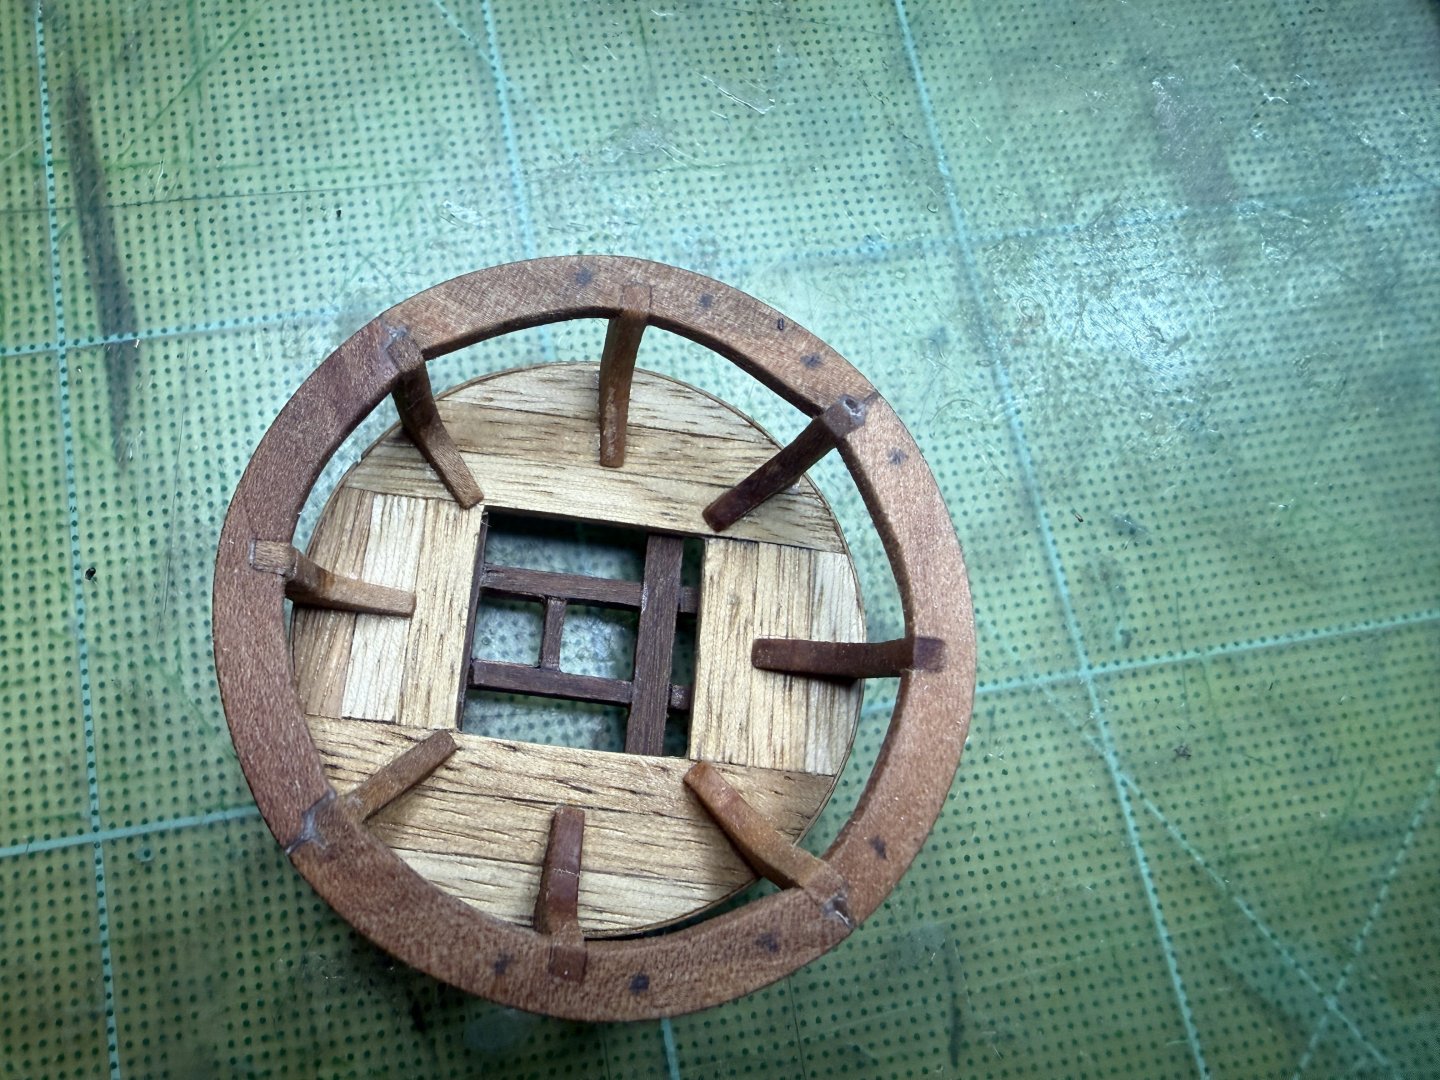
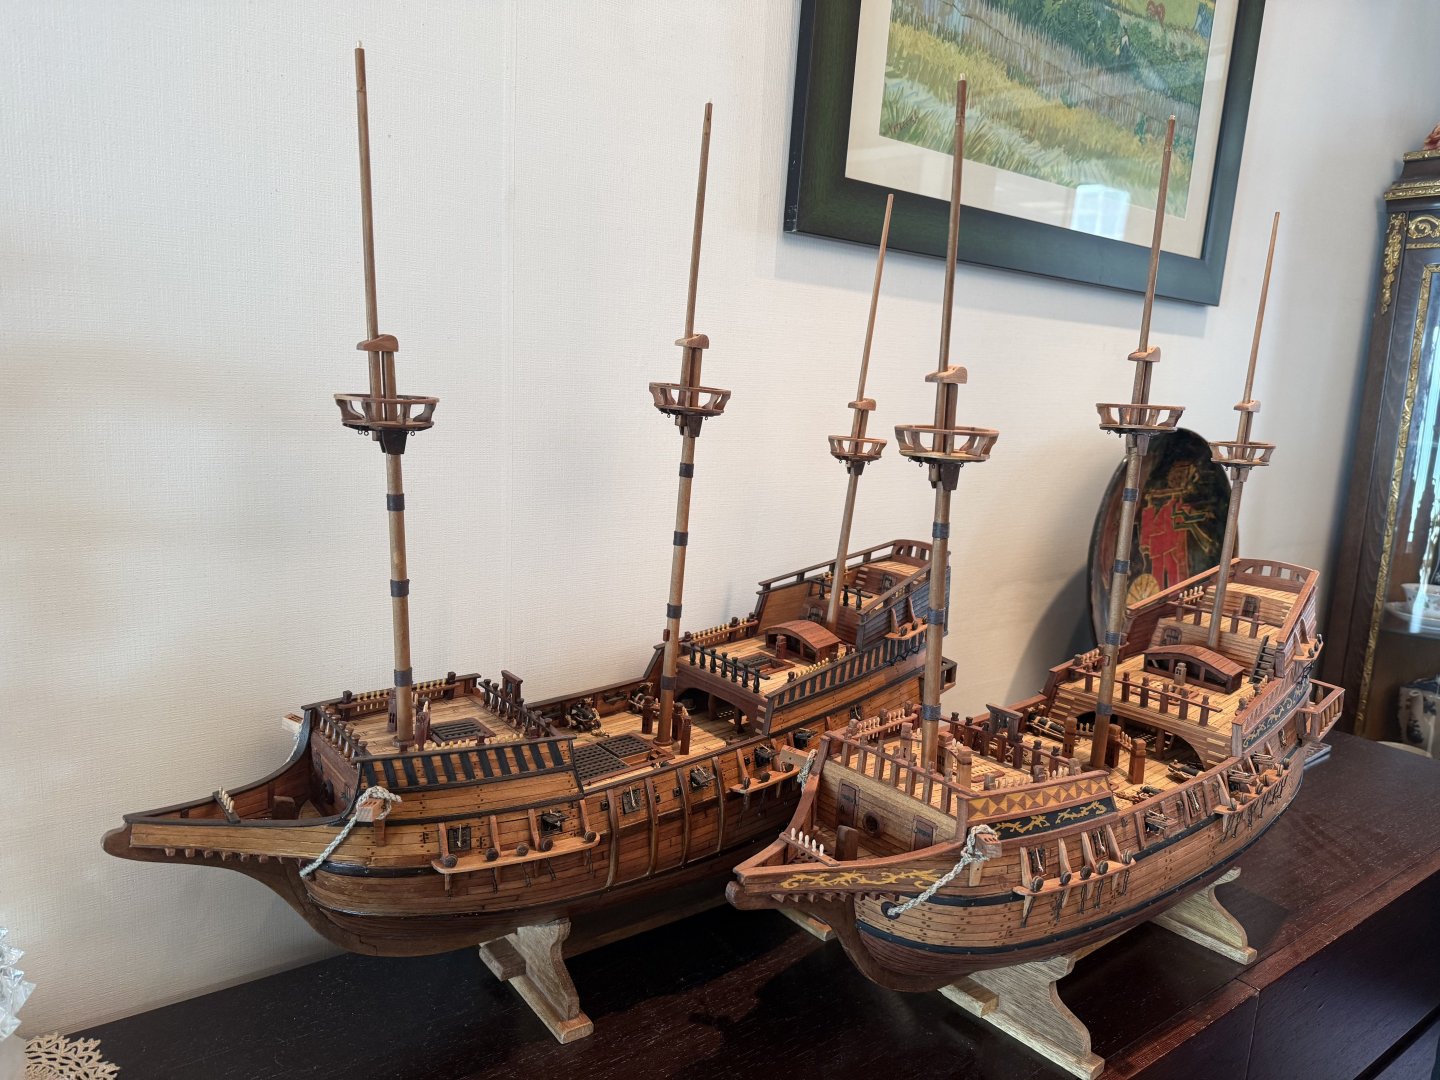
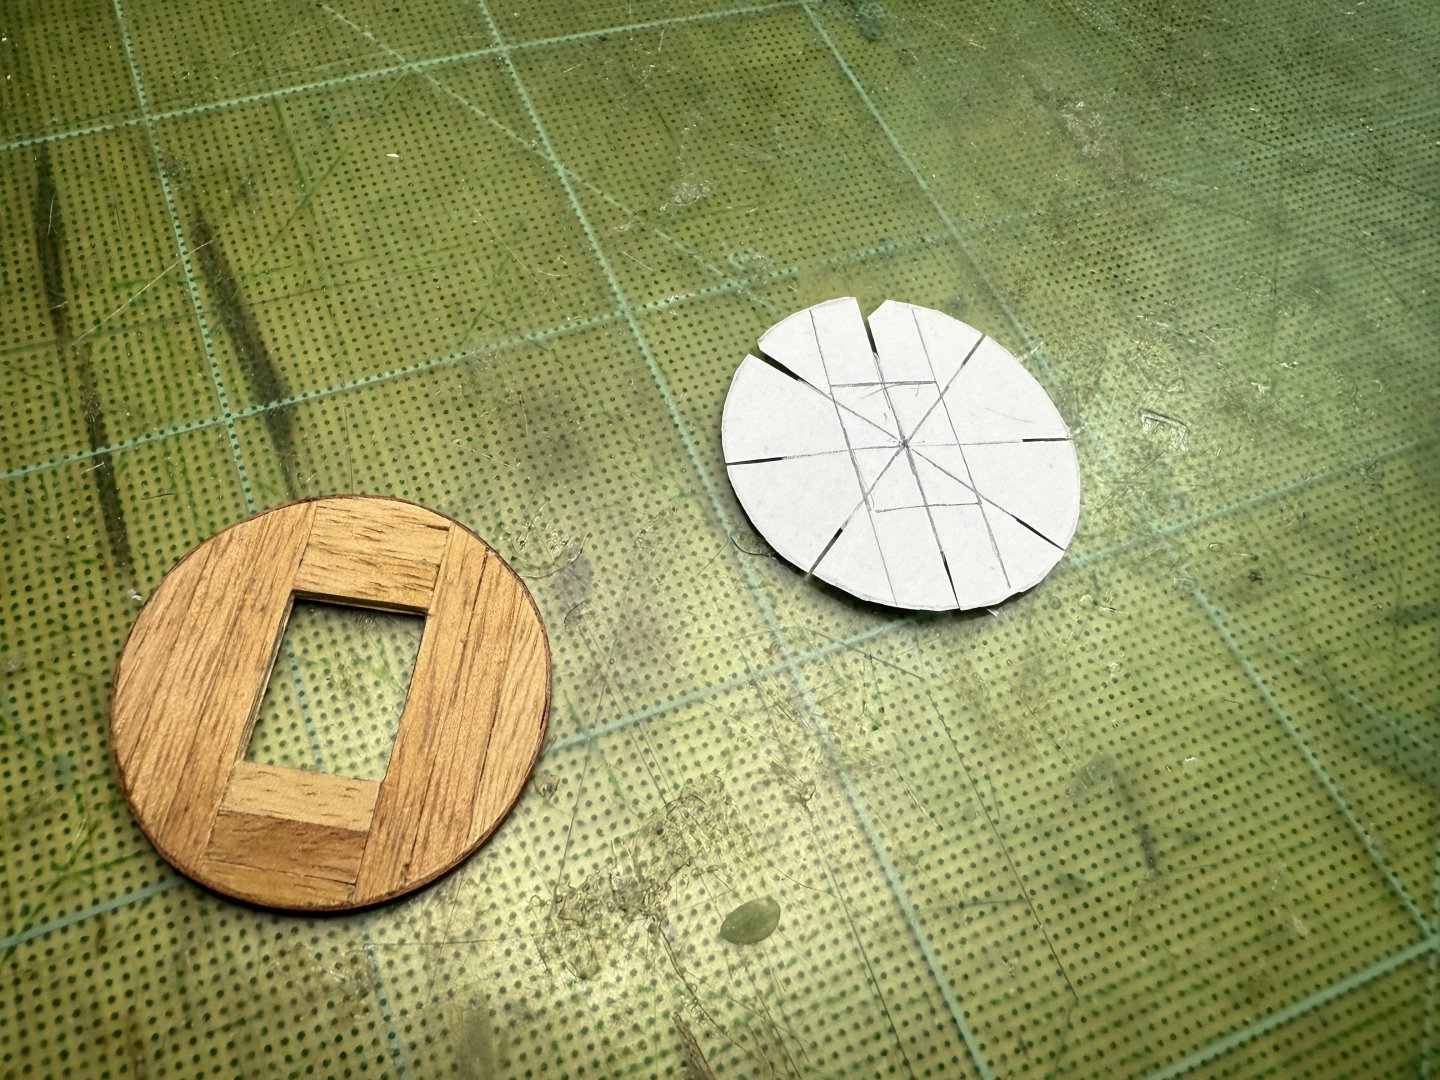
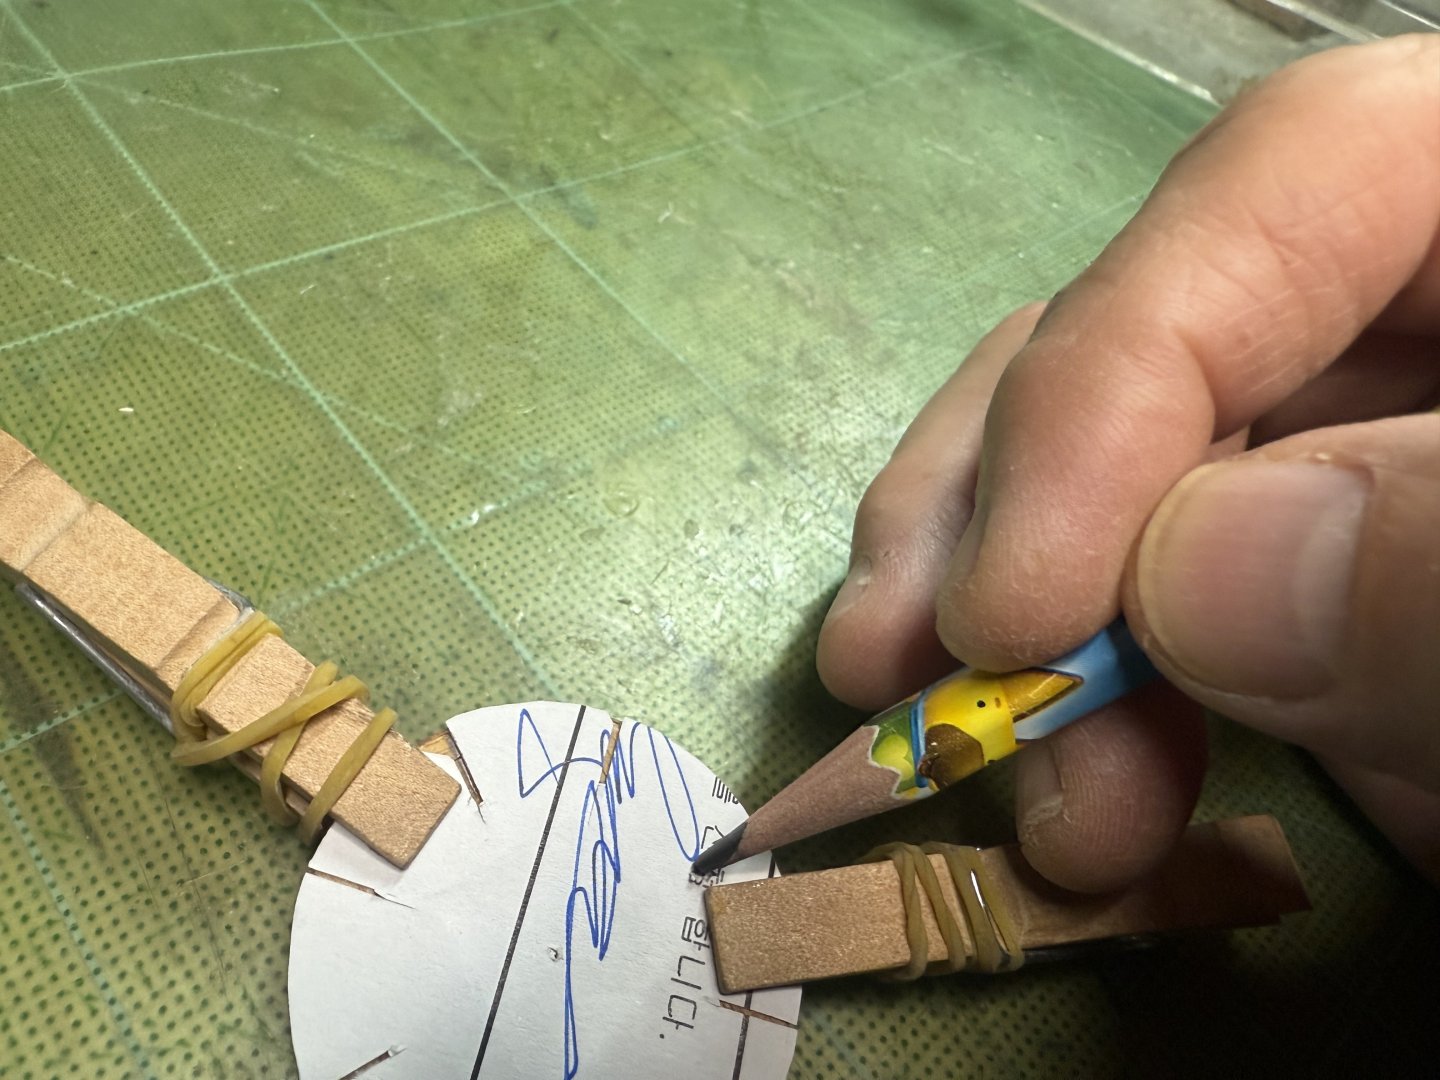
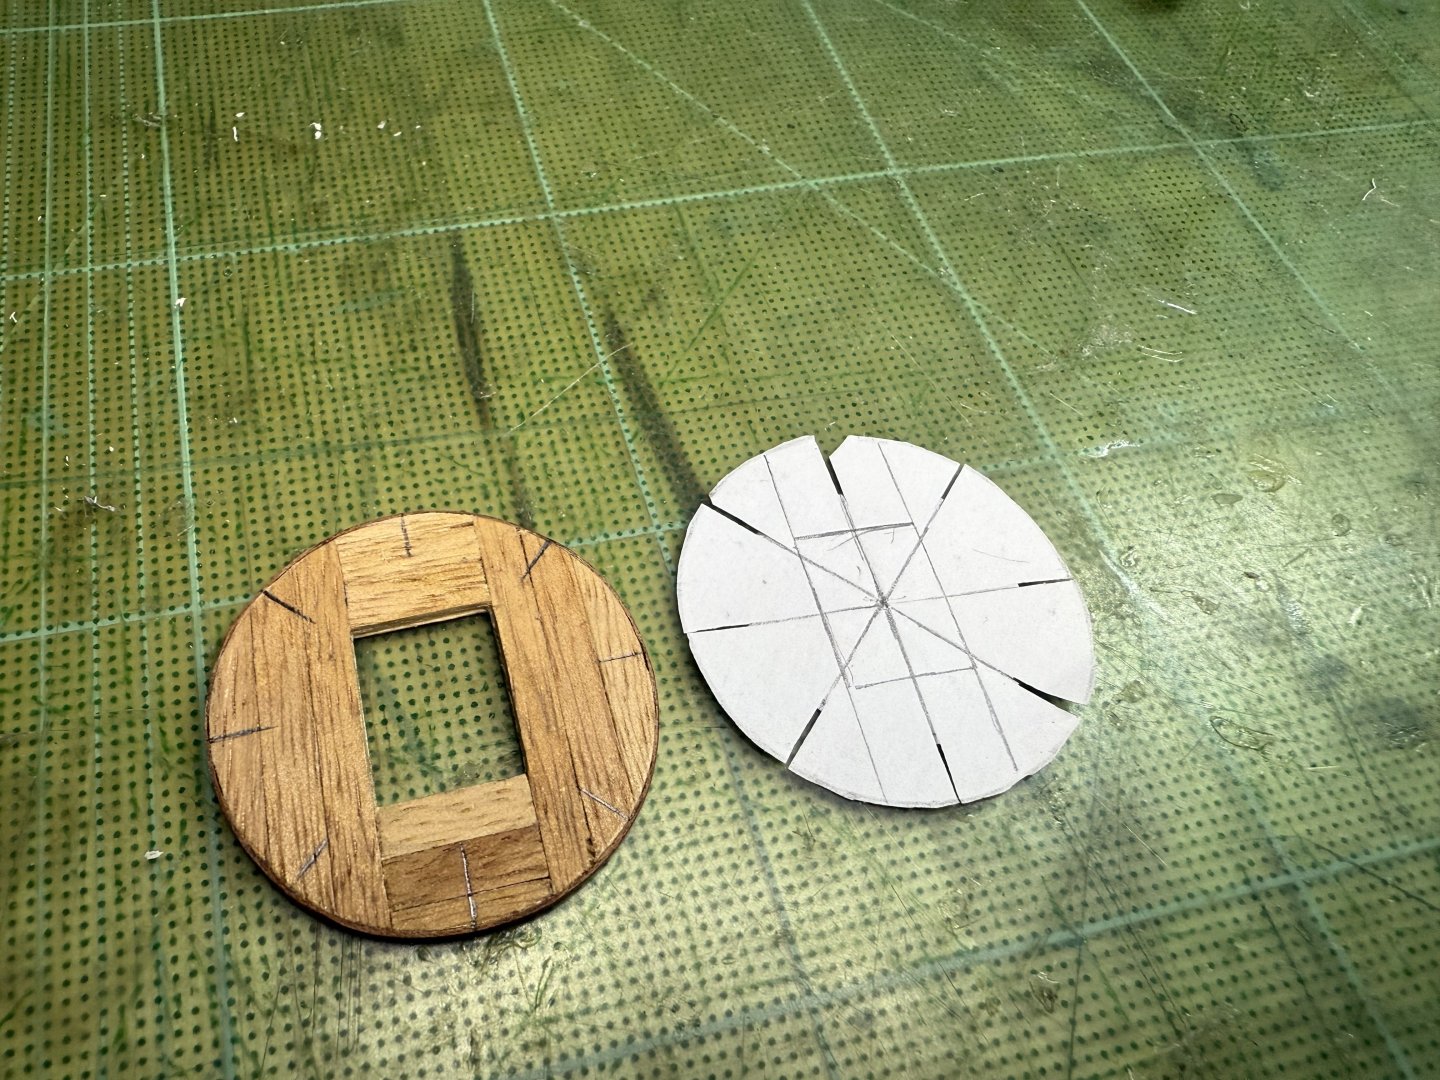
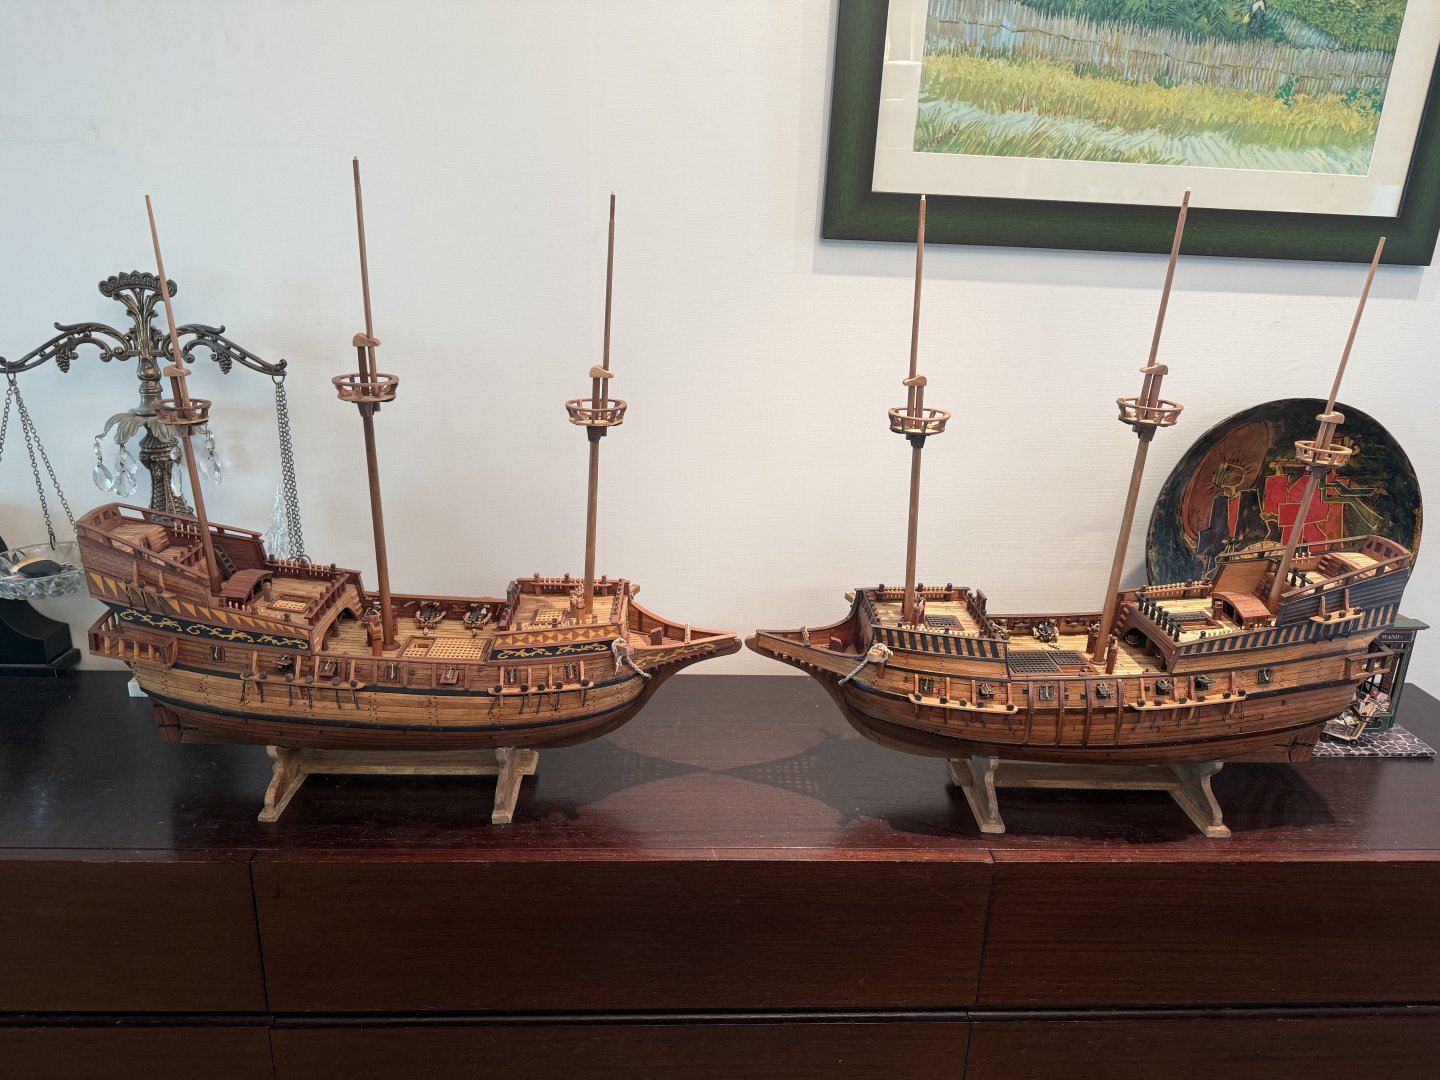
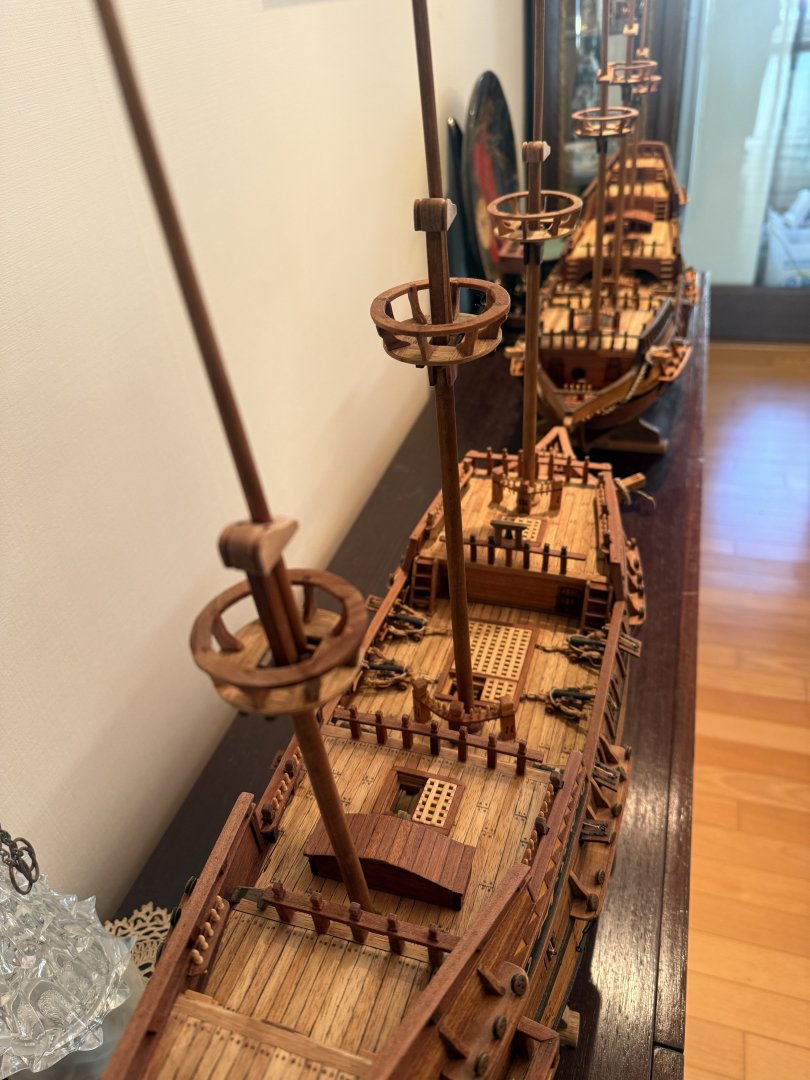
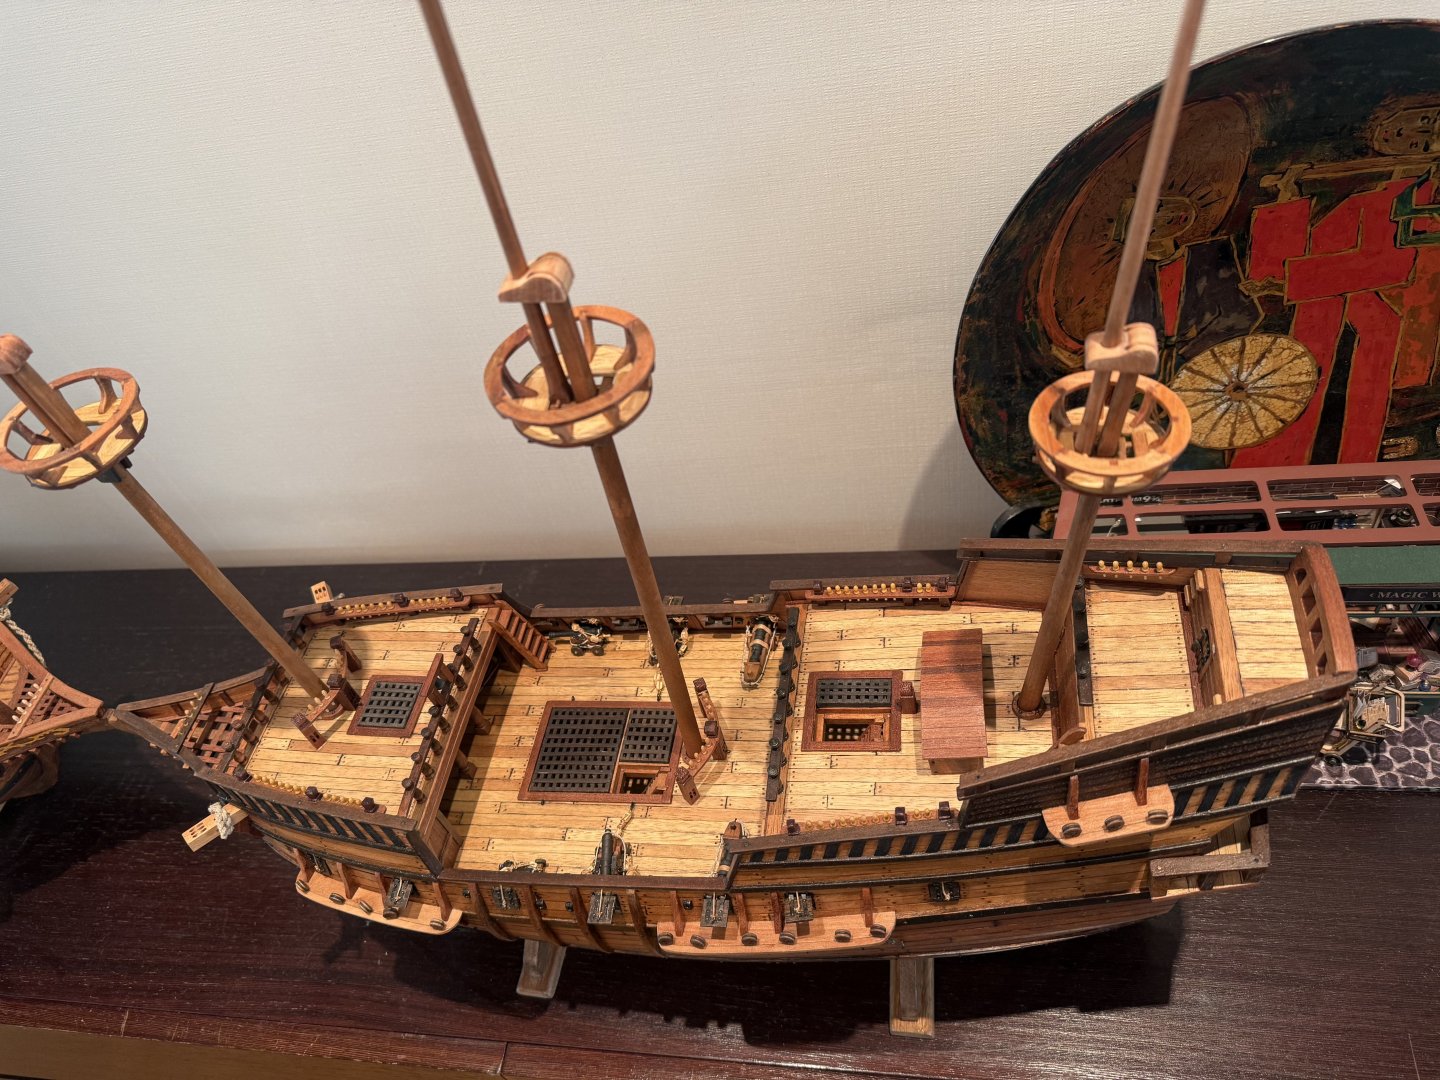
Hello shipmates! Just a quick update on GH1 and GH2 shipyards. The fighting tops are finally all done~ I am posting some pictures of these below. First up are the photos on the fighting top on mizzen mast. Significantly smaller than the fore and main mast fighting top. While working on the fore and main mast fighting tops, I devised a method for a quick marking of the 8 pillar positions. And when I started to work on the mizzen mast fighting top, I kind of forgot this method. Fortunately the memory came back quickly. So, I decided to document the methodology so that I don’t forget it next time. The mizzen mast fighting top on GH1 done and moving on to GH2. Pictures of both GH1 and GH2 with all the fighting tops done and put in place but not glued or fixed yet. Next, I am planning to put blocks under the fighting top structure before finally glueing things together. But, the Aeropiccola plans really lack details on rigging . Does anyone have a good picture of plan on fighting top block rigging please?


-
Alan, thanks very much for spotting my mistake and informing me early!! Fixed those mistakes and re-uploaded the missing pictures~
-
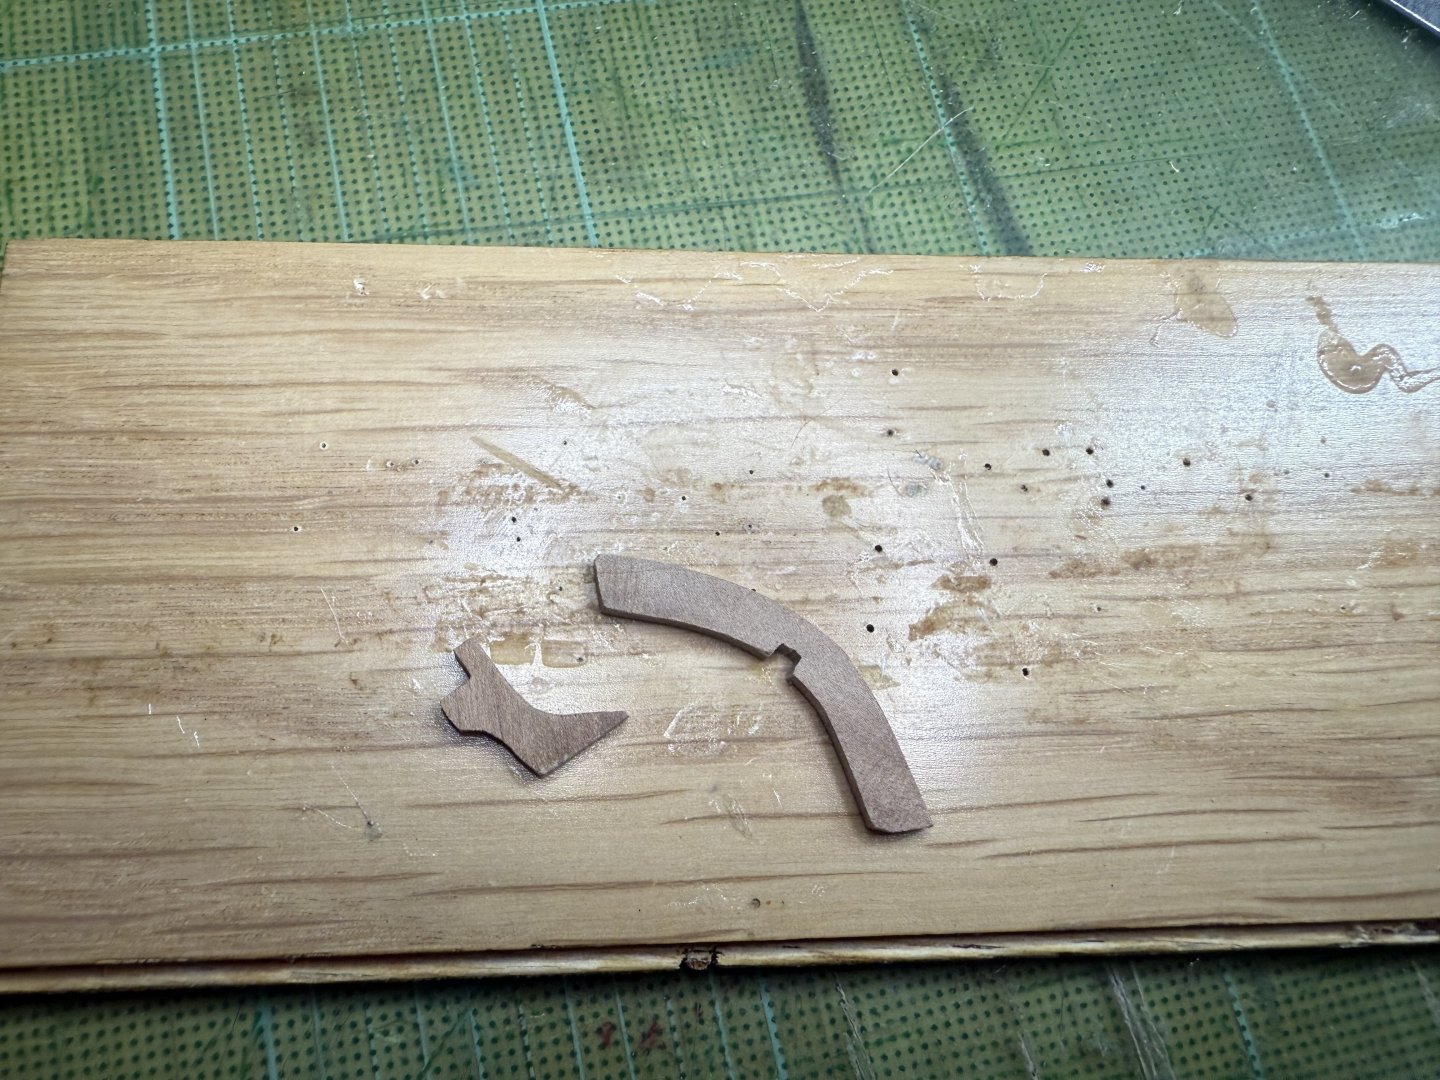
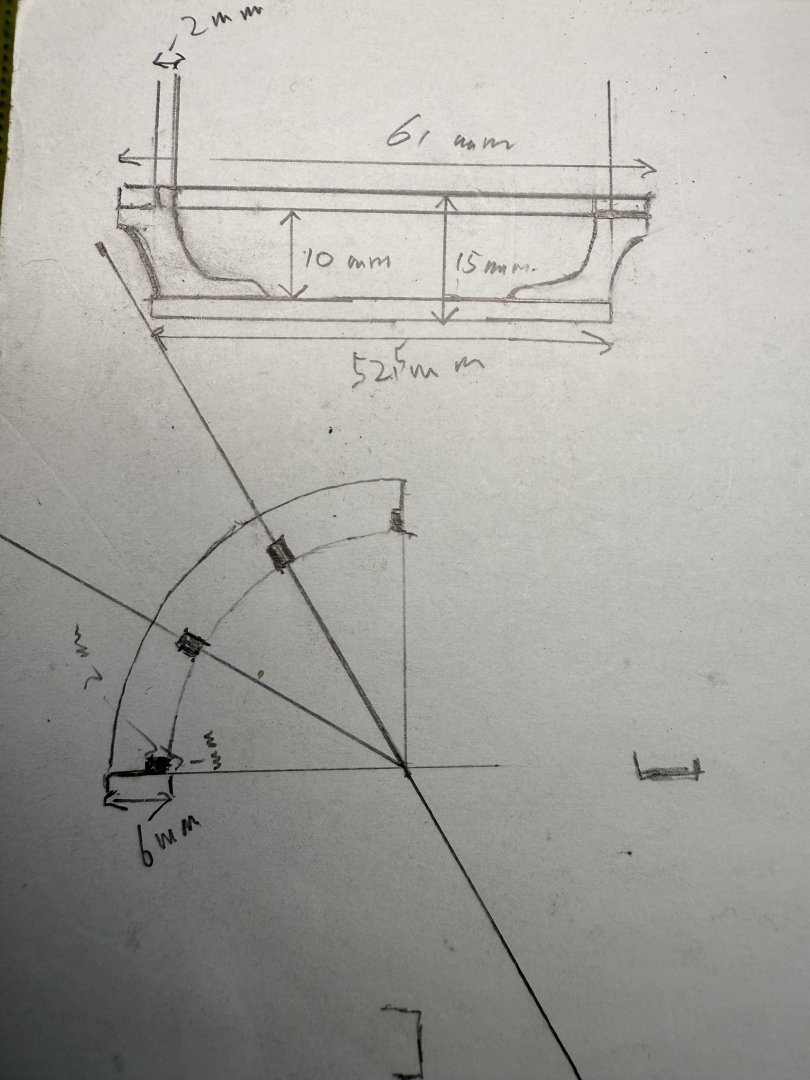
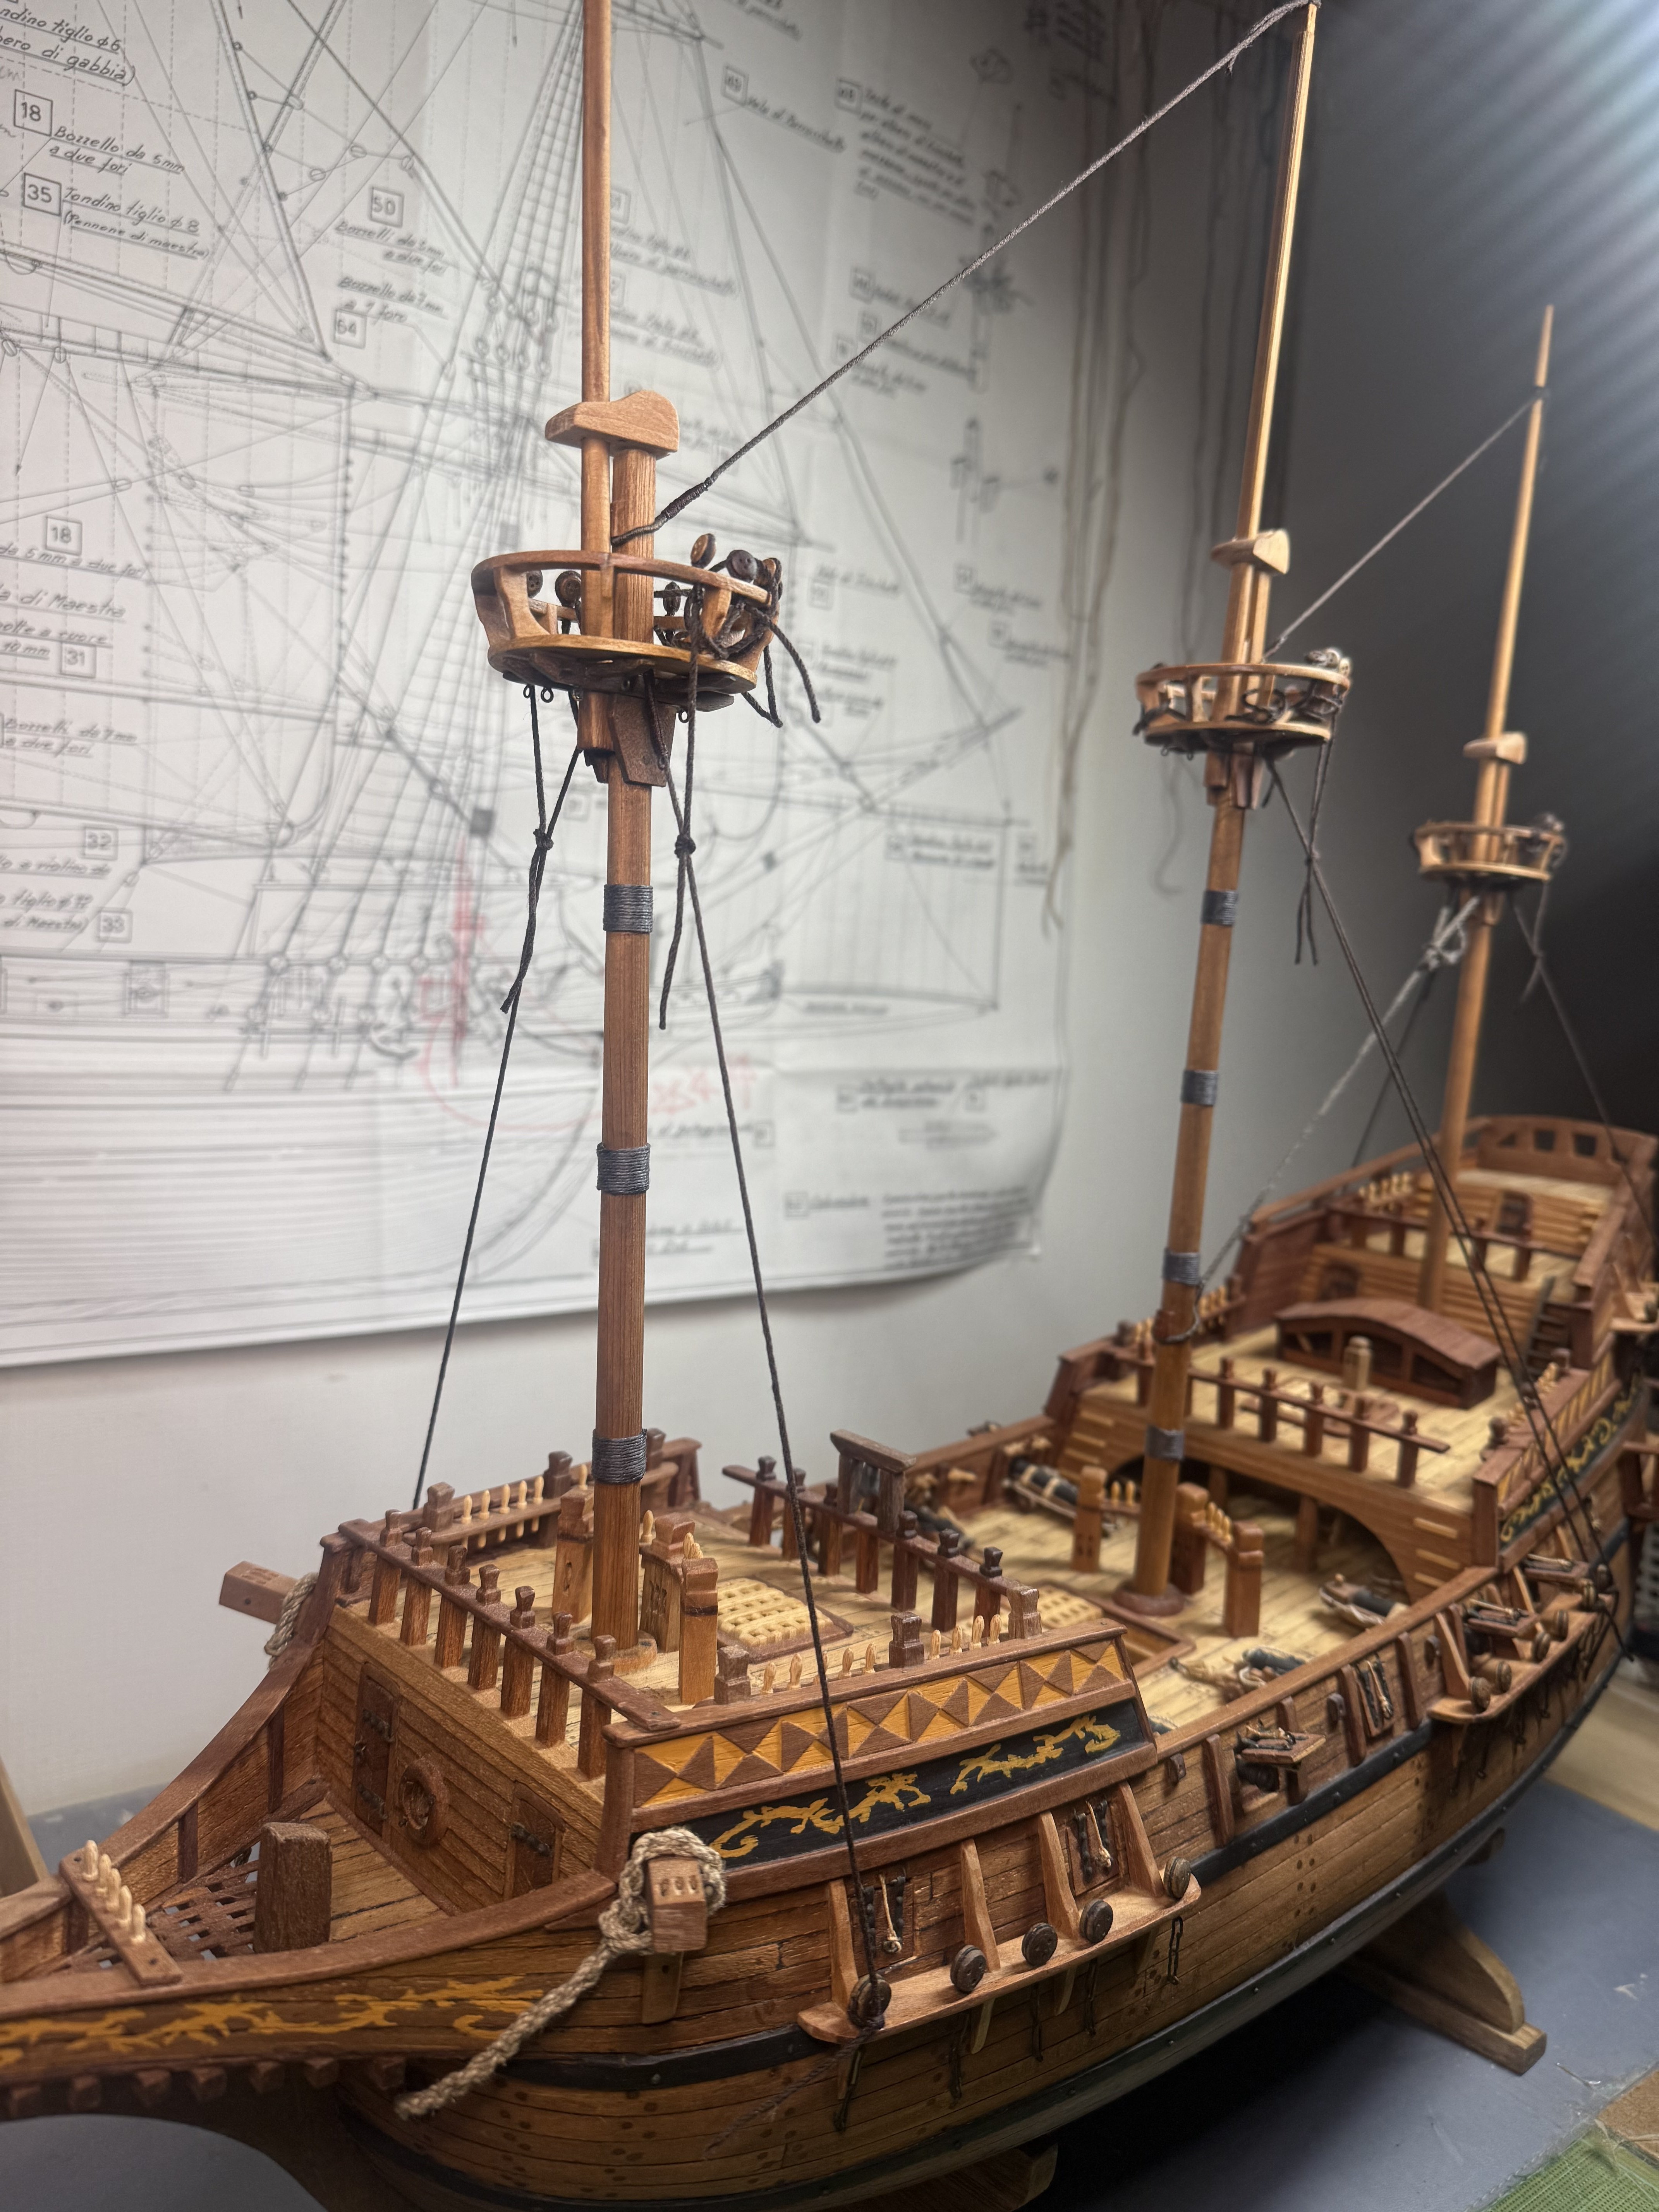
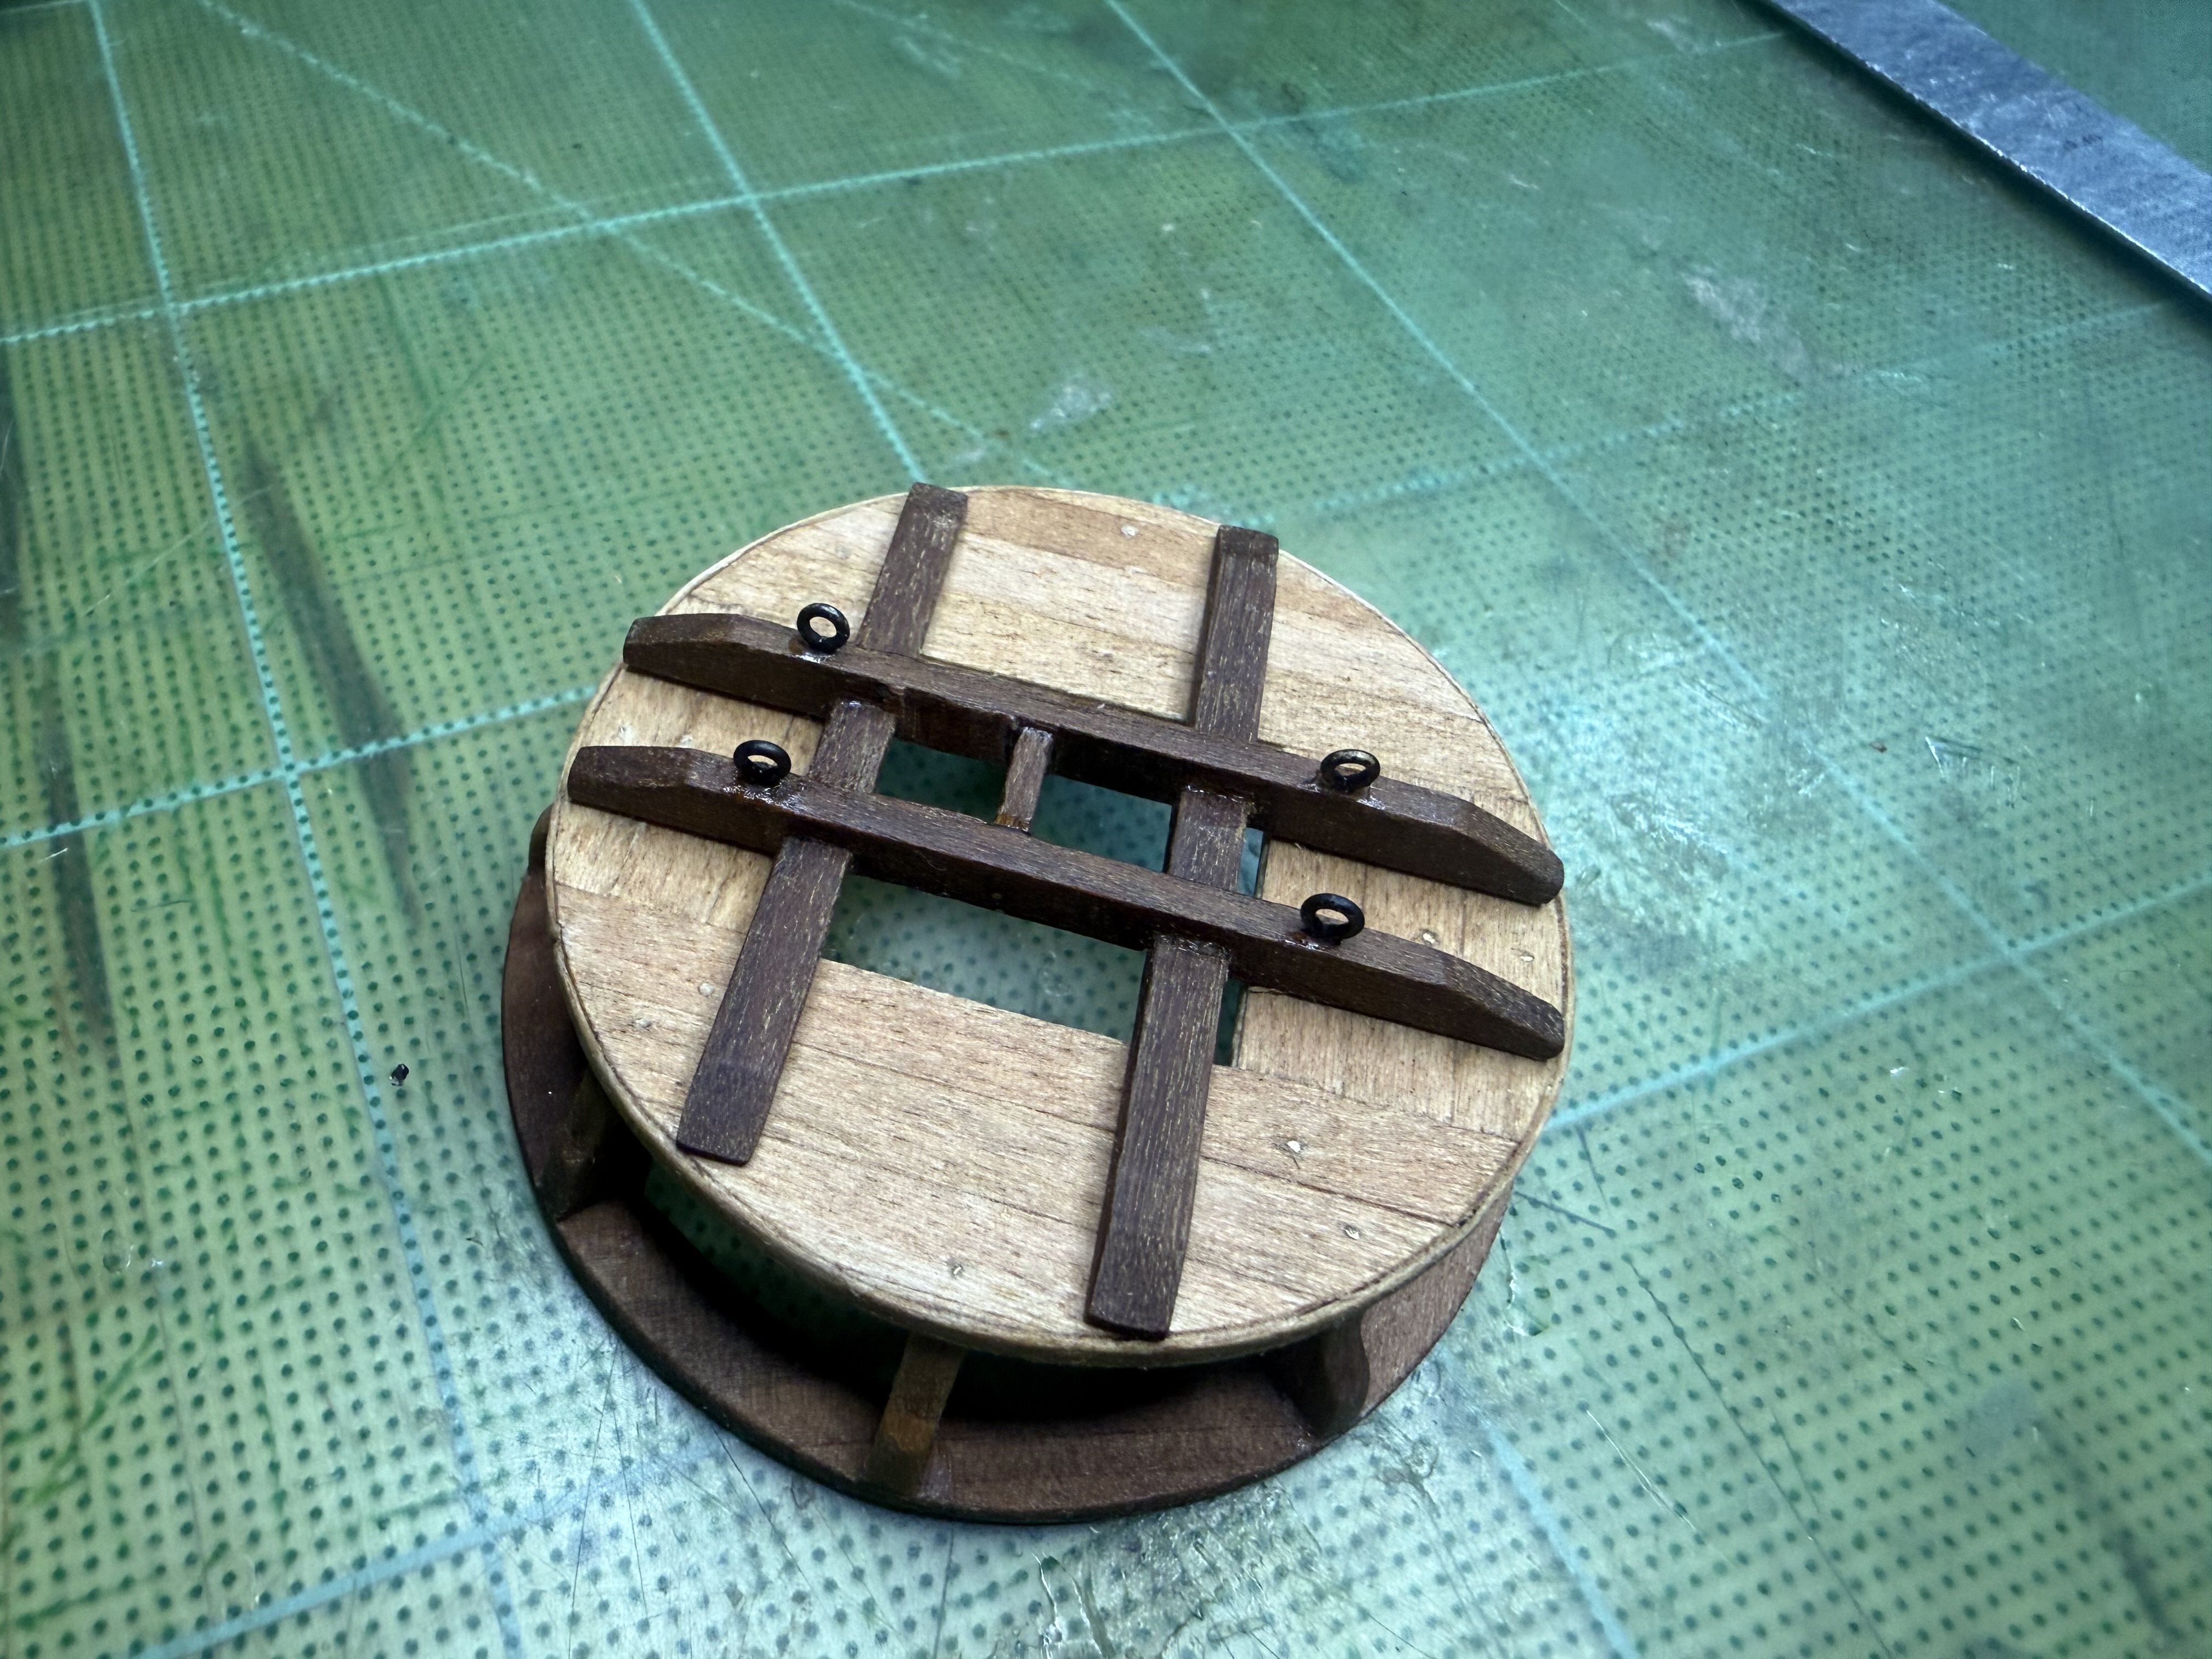
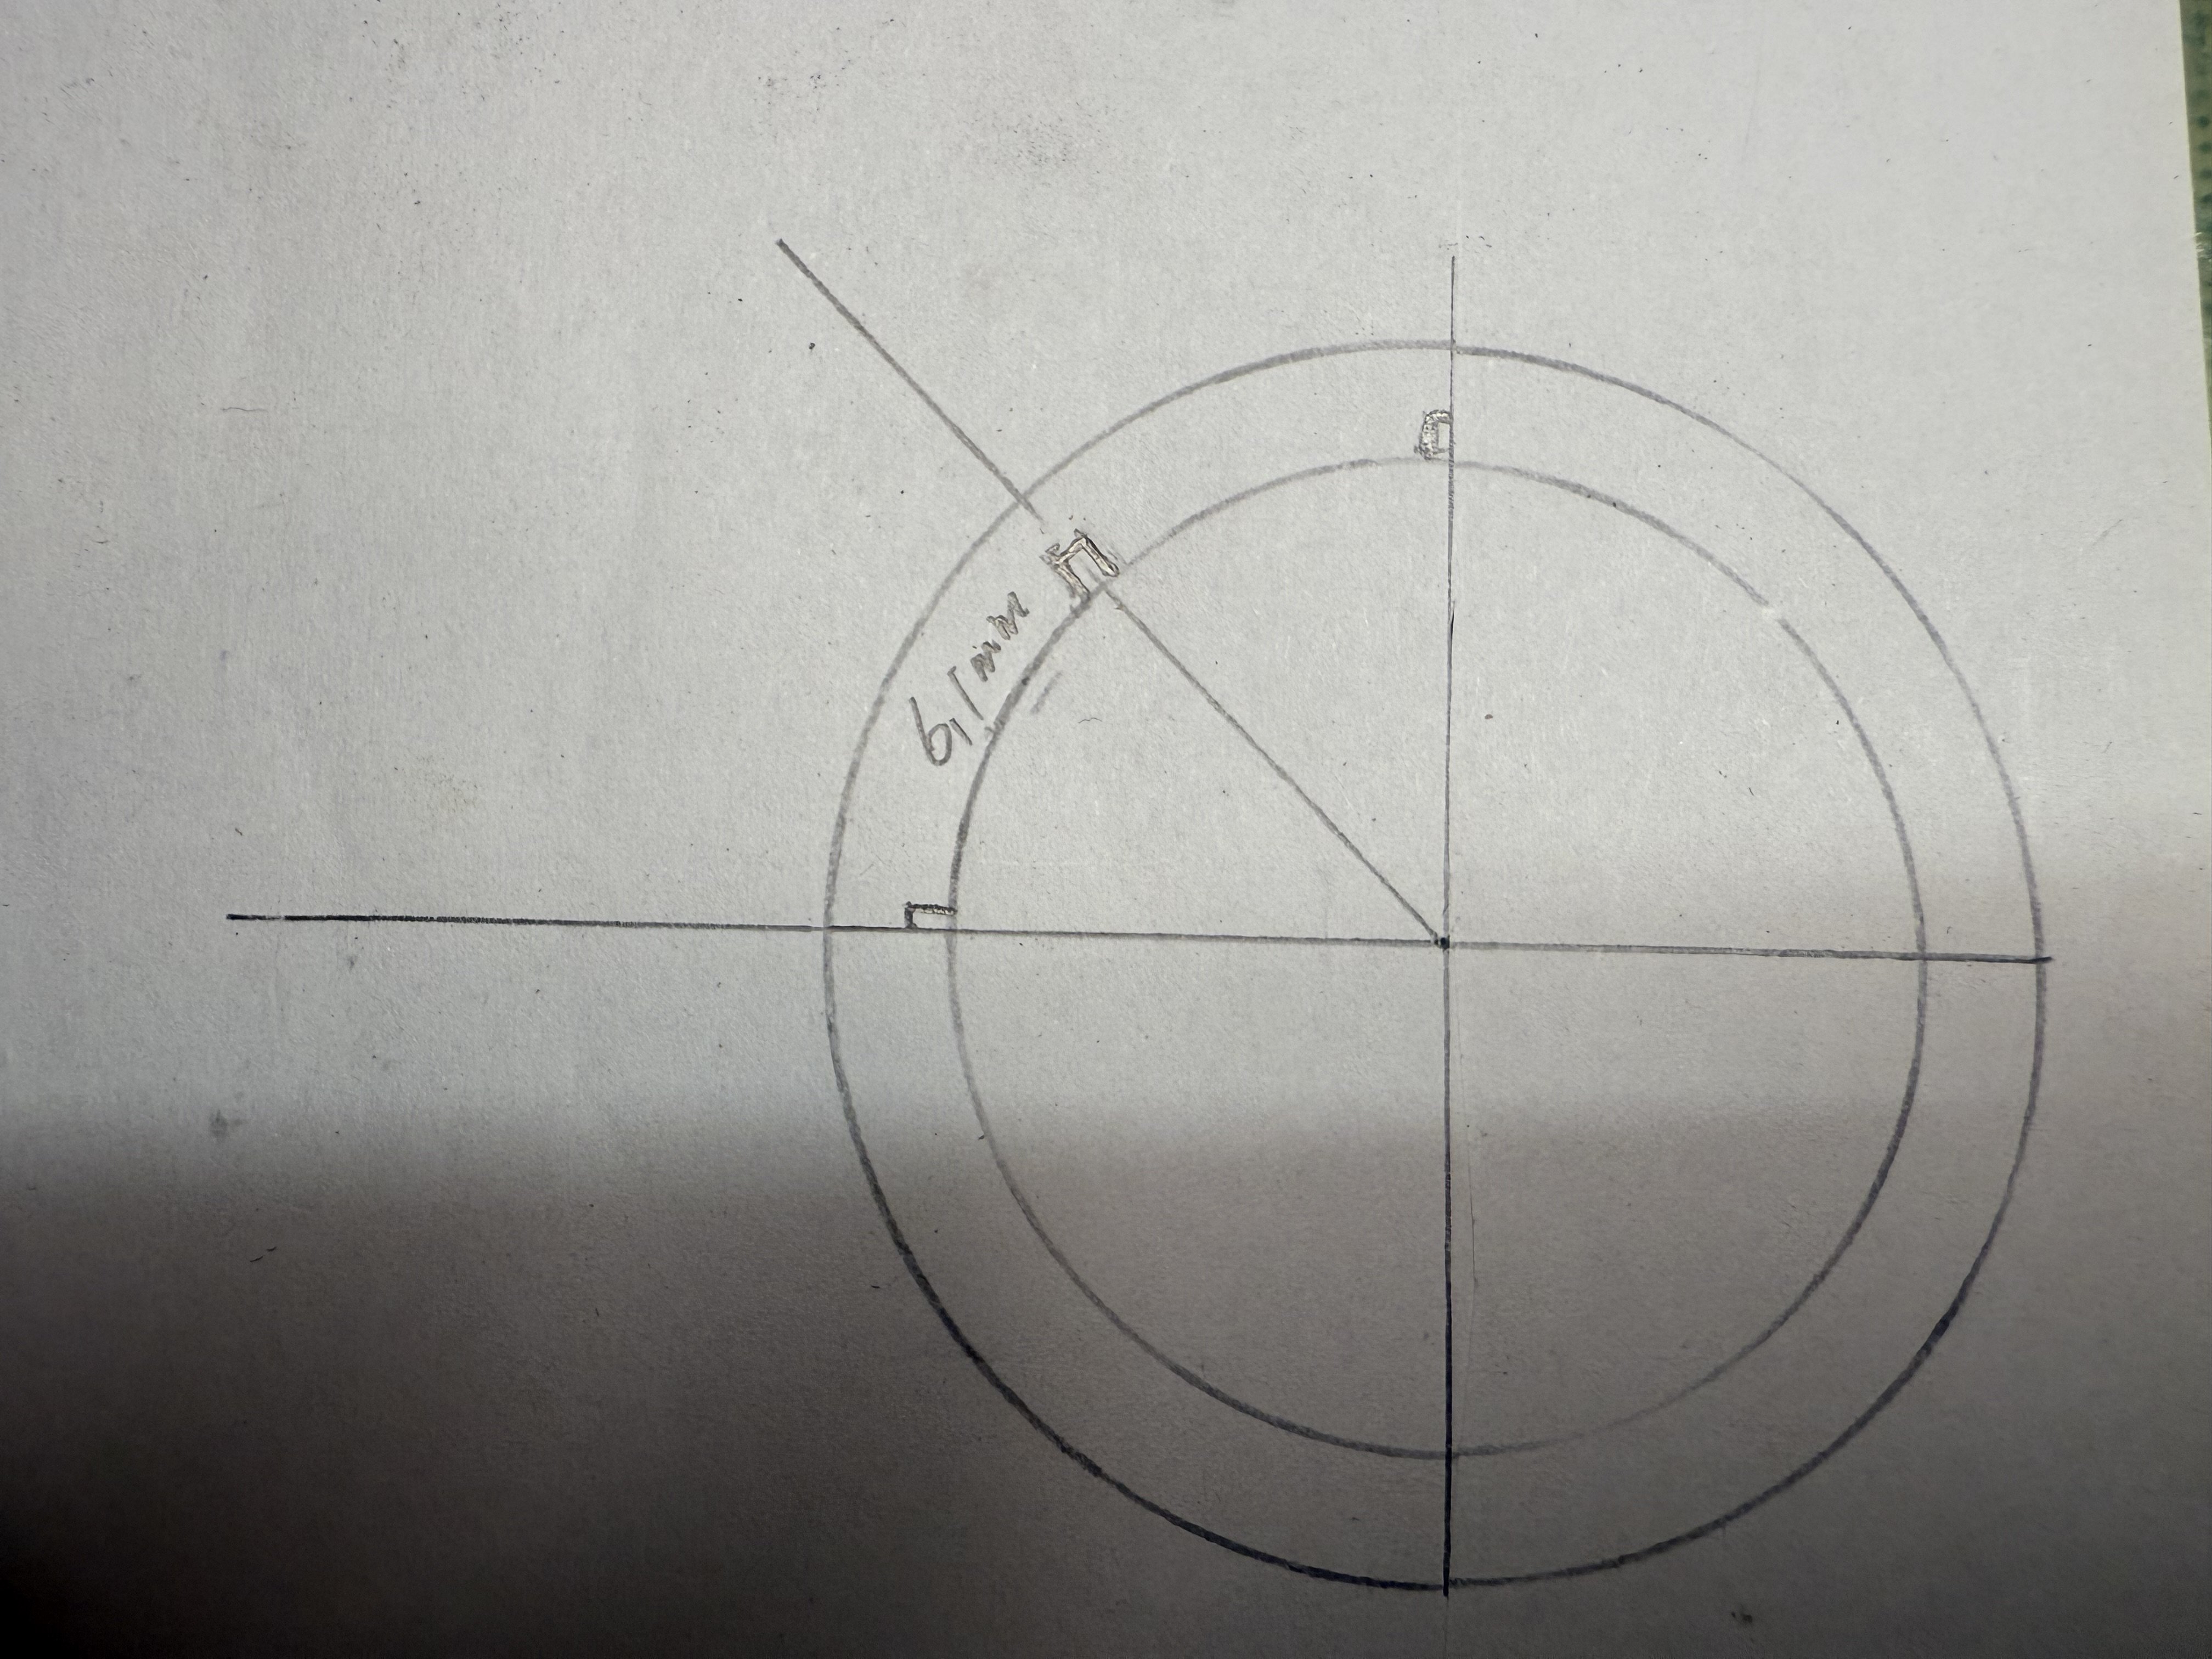
Hi shipmates~ Relatively short updates on the progress of fighting top. Firstly, the process applied to GH1 has been replicated in GH2 as below. Followed by mizzen mast fighting top work on both GH1 & GH2 as below. At first, I planned and designed the structure of fighting top as below. However, I soon realized that the 30 degree interval between pillars was making the floor of the fighting top too crowded. So, I changed the design to reflect a 45 degree interval. With the first templates made out of the wooden hanger material, the tedious work of making each pillar and quarter piece continues. I was pretty sure that I needed to do some reinforcement work (possibly near the floor area) as there are just 8 pillars (instead of 12). But, the end result with just 8 pillars is surprisingly robust. So, no further modification seems necessary. Finished second fighting top and continuing with the tedious work streams.