HOLIDAY DONATION DRIVE - SUPPORT MSW - DO YOUR PART TO KEEP THIS GREAT FORUM GOING! (83 donations so far out of 49,000 members - C'mon guys!)
×


Spaceman Spiff
-
Posts
205 -
Joined
-
Last visited
Content Type
Profiles
Forums
Gallery
Events
Everything posted by Spaceman Spiff
-
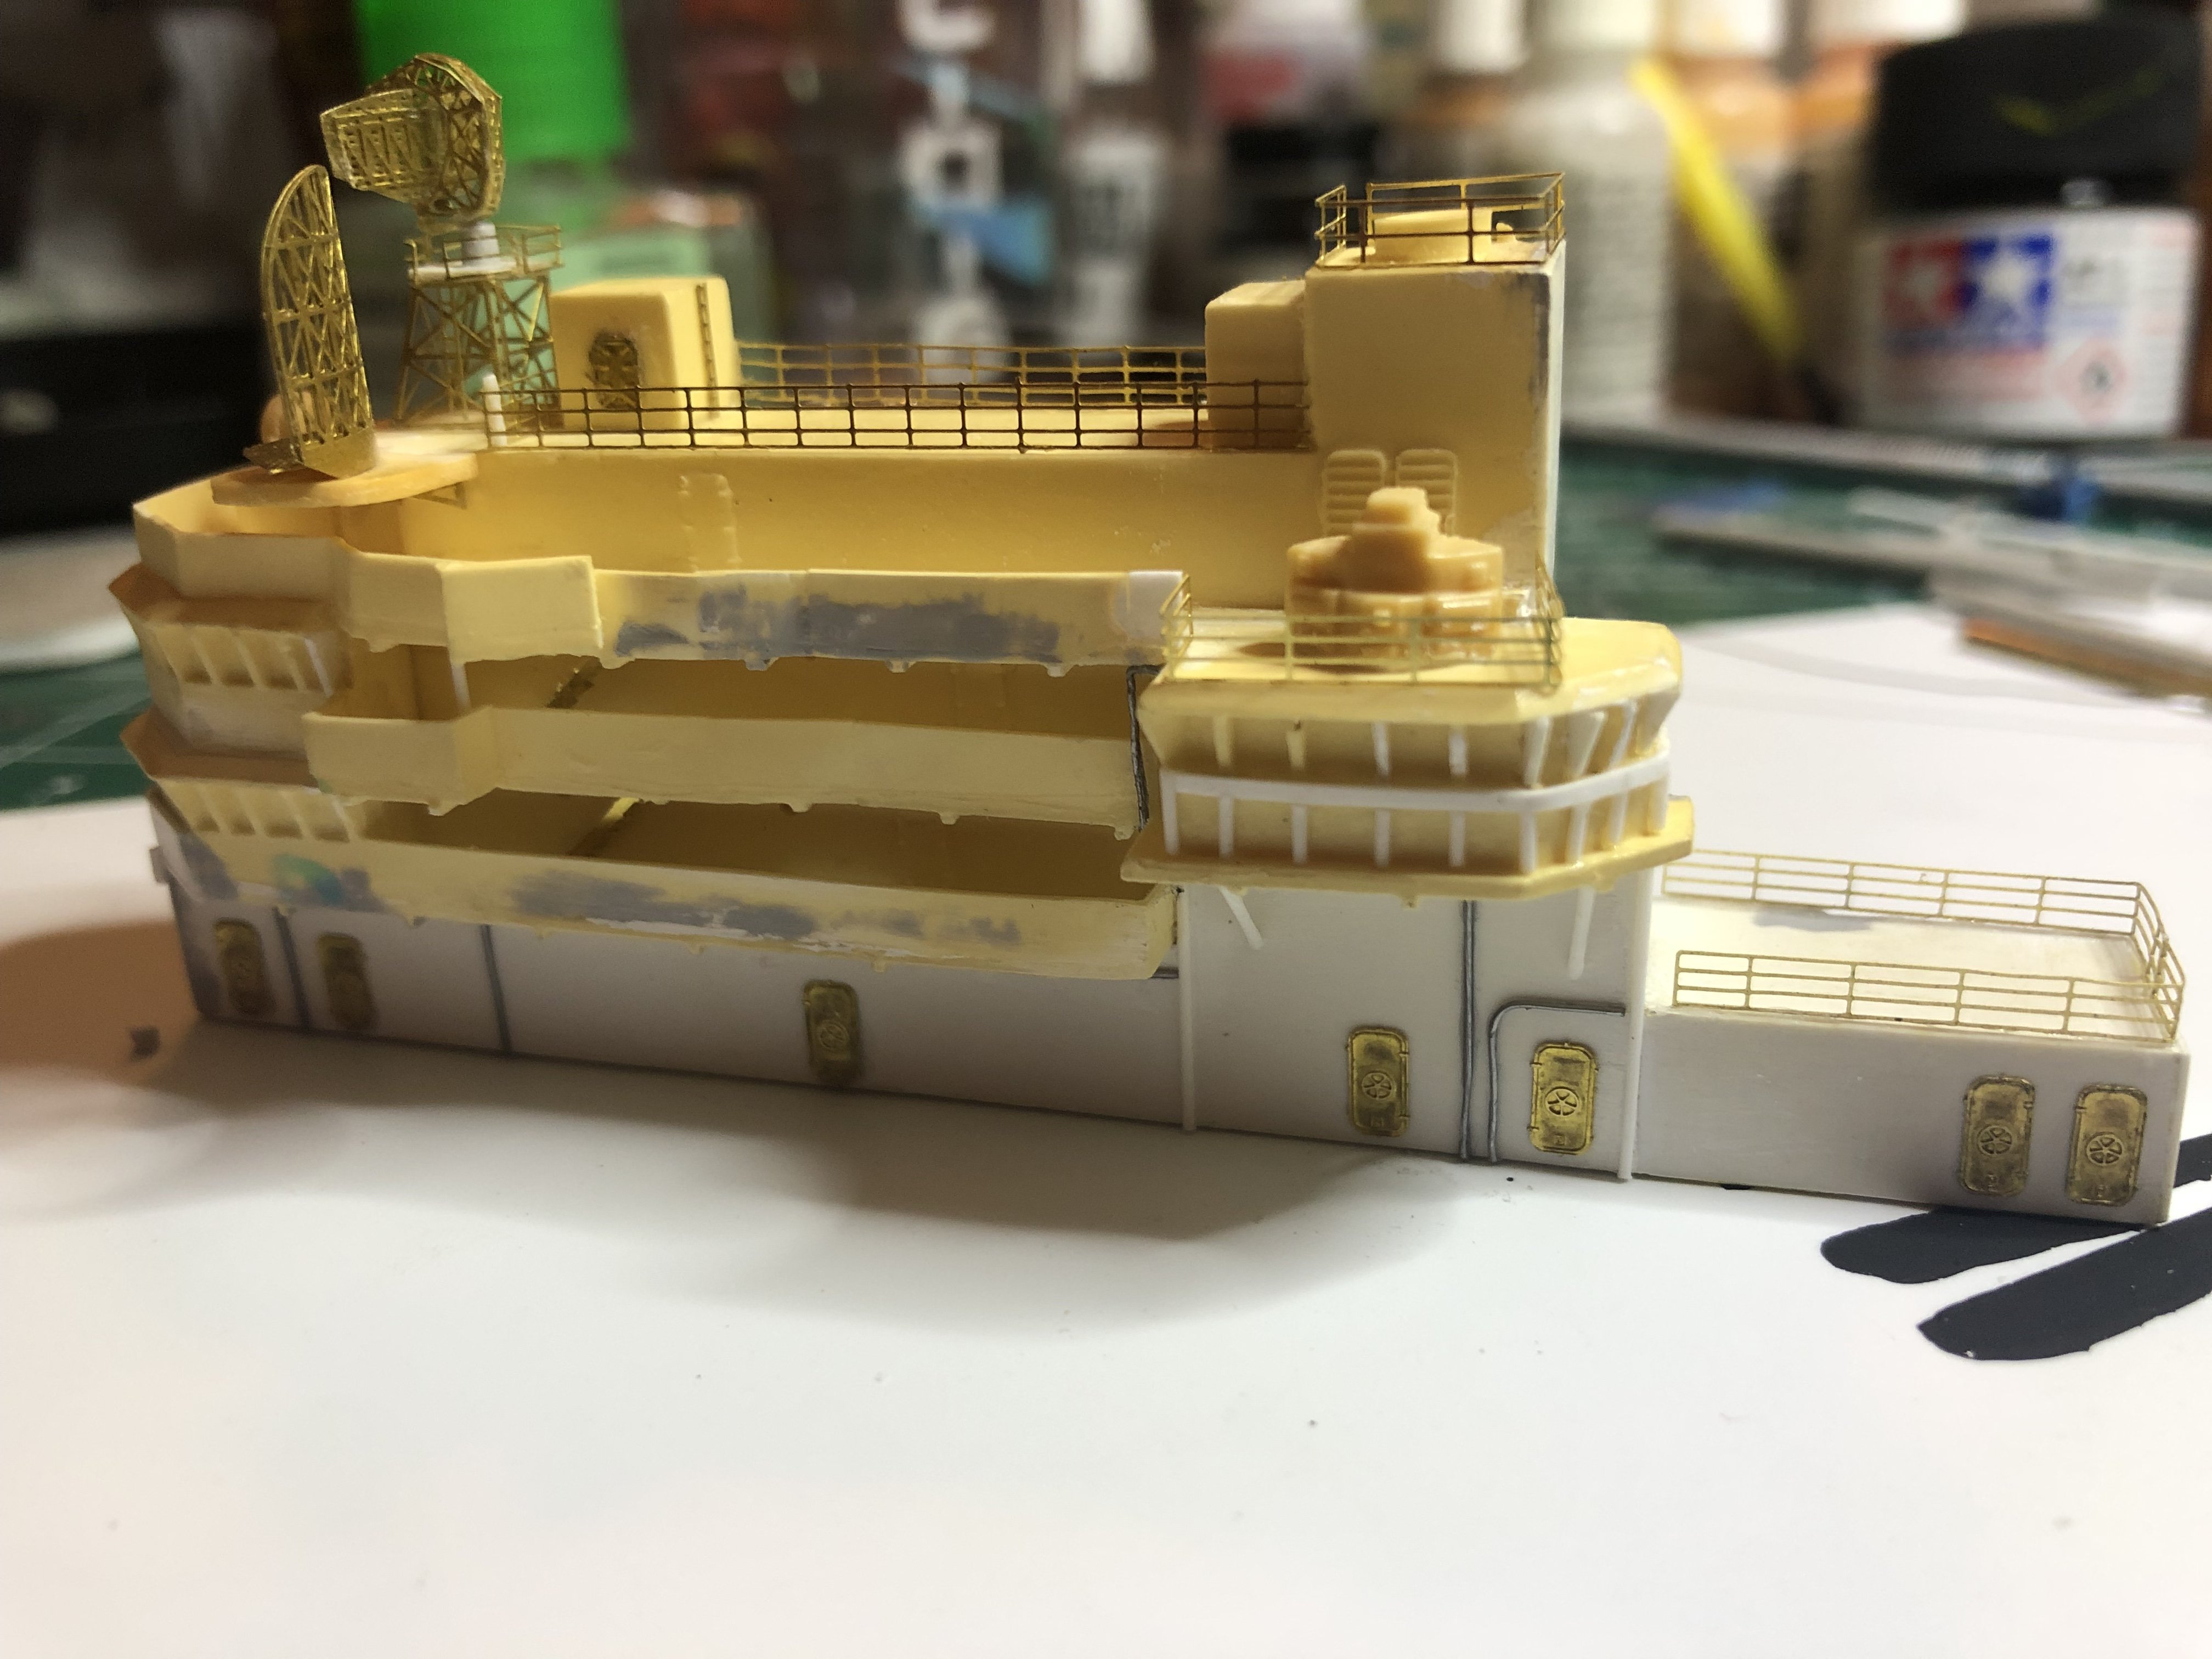
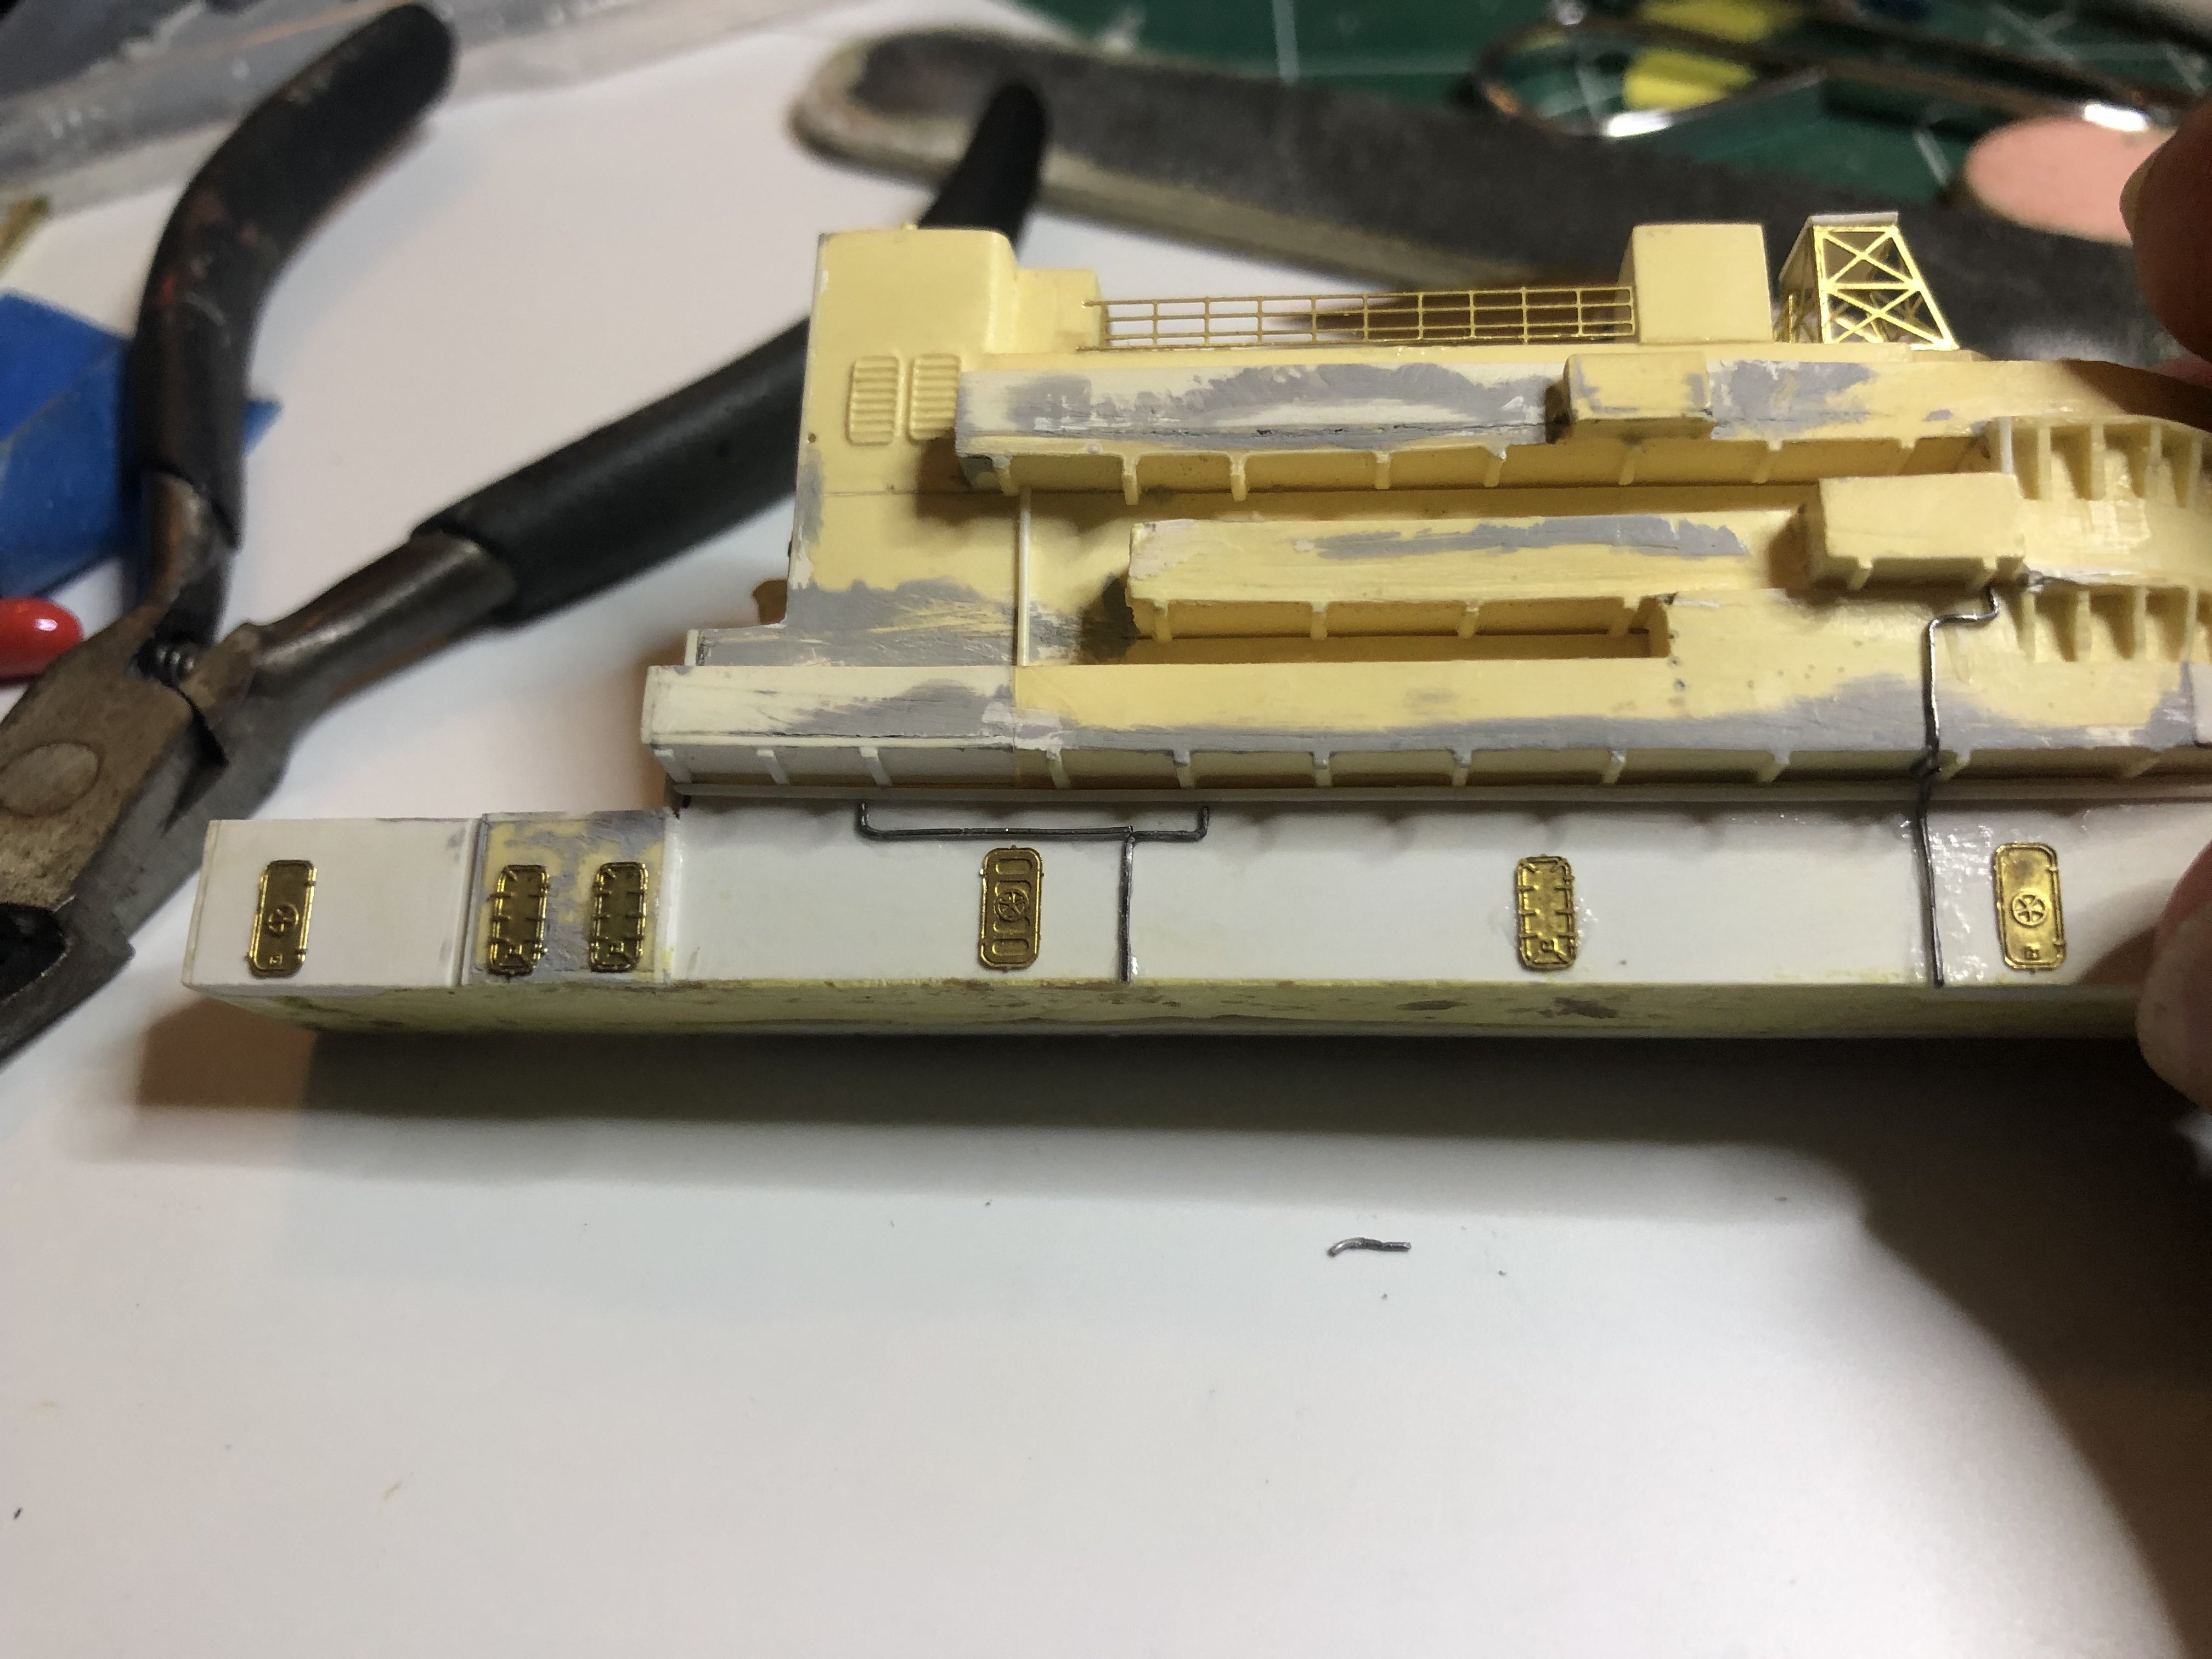
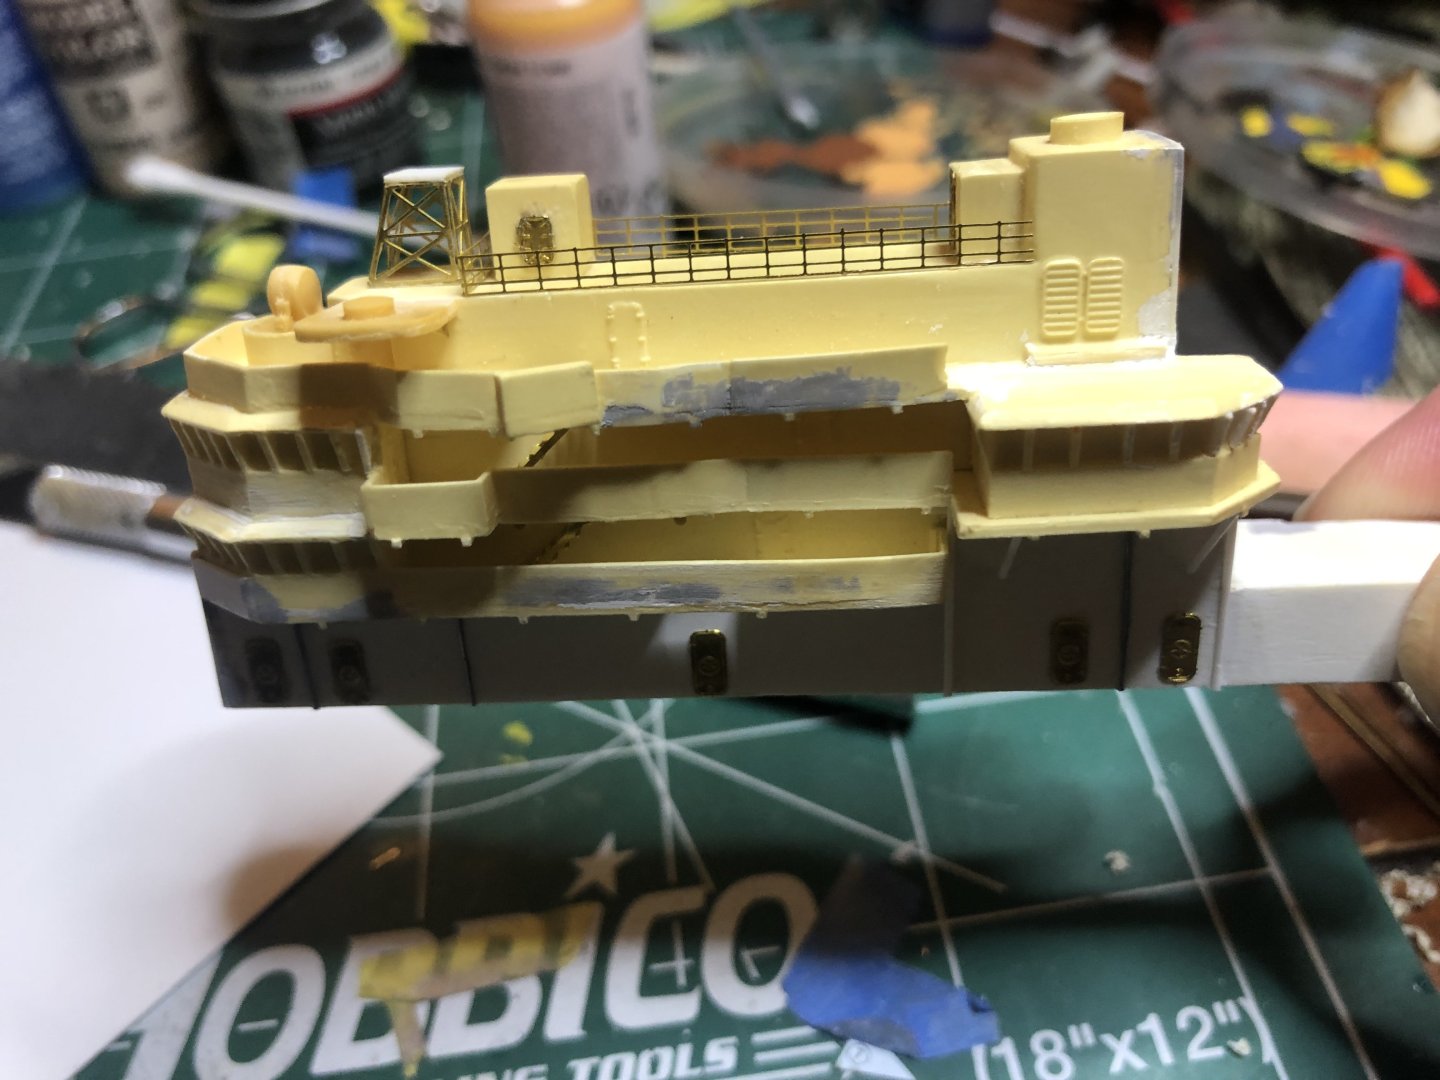
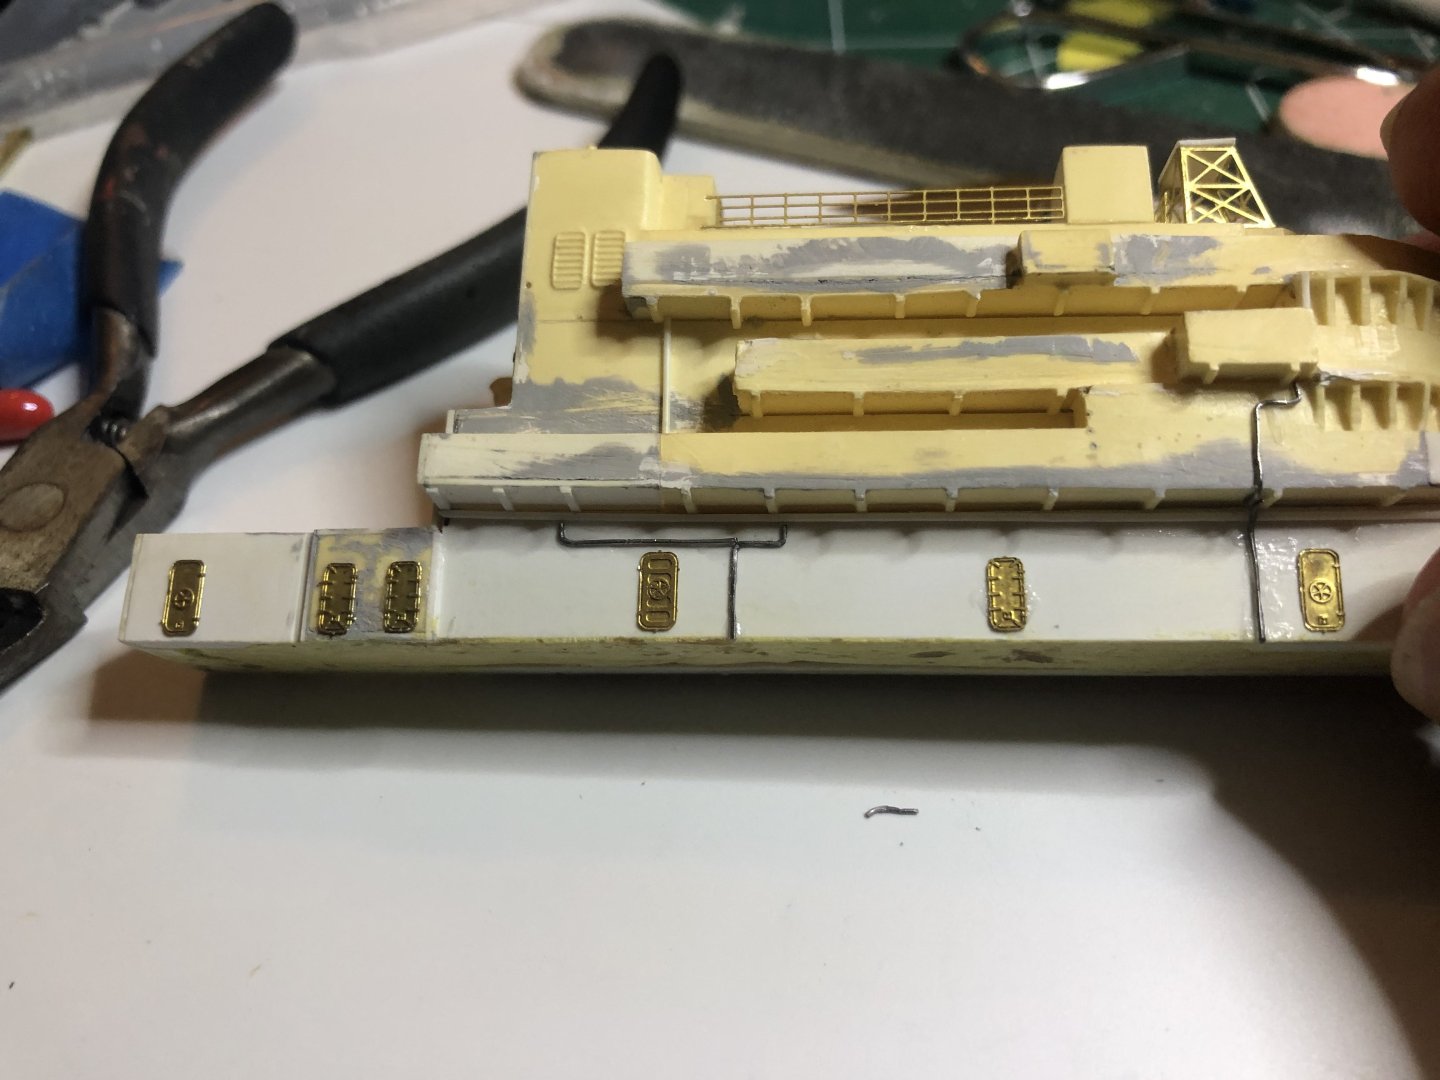
 So this is what I’m dealing with now. A lot of work ahead - the flight deck is straight but look at those gaps. Looks like I have a few shims to make. Ugh. Ideas??
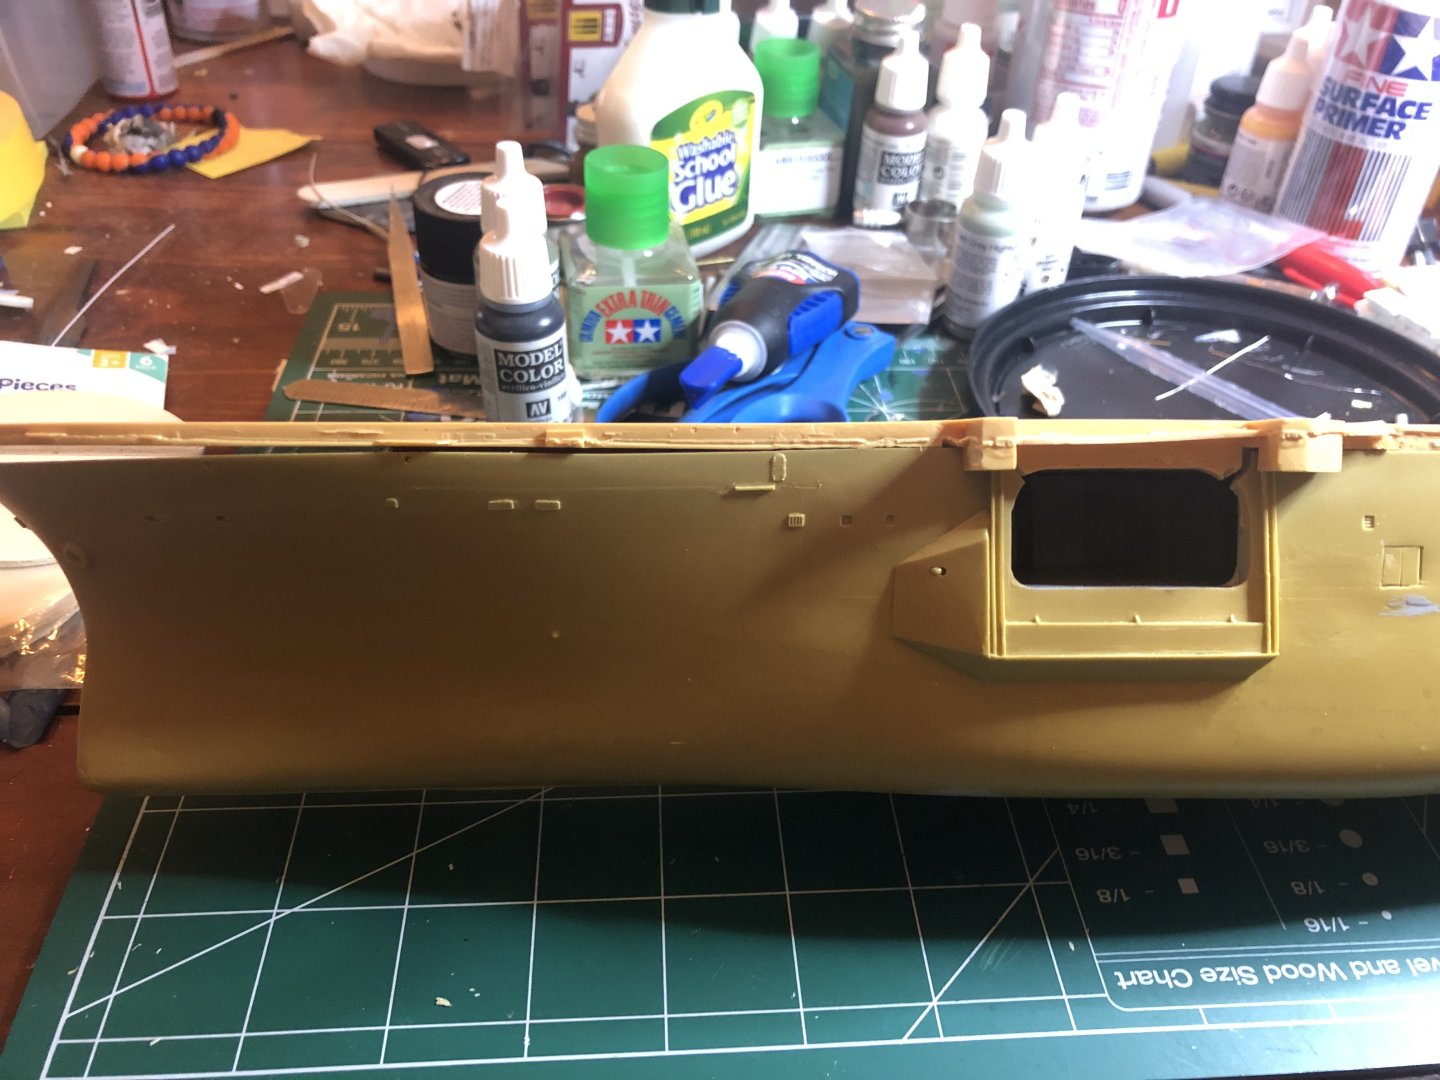

- 176 replies
-
- 5
-

-
- new orleans
- iron shipwrights
- (and 2 more)
-
Thanks man. Still some rough areas and I definitely could have done better (I critique my work harder than anyone else), but it’s not bad. The hull is a different story as trying to fit the fight deck to it proved to be no fun at all. A lot of grinding/cutting/shaving/sanding is ahead of me. Not to mention that the sides are not exactly straight. A lot more to go but at least there is light in the tunnel lol
- 176 replies
-
- 3
-
-
- new orleans
- iron shipwrights
- (and 2 more)
-
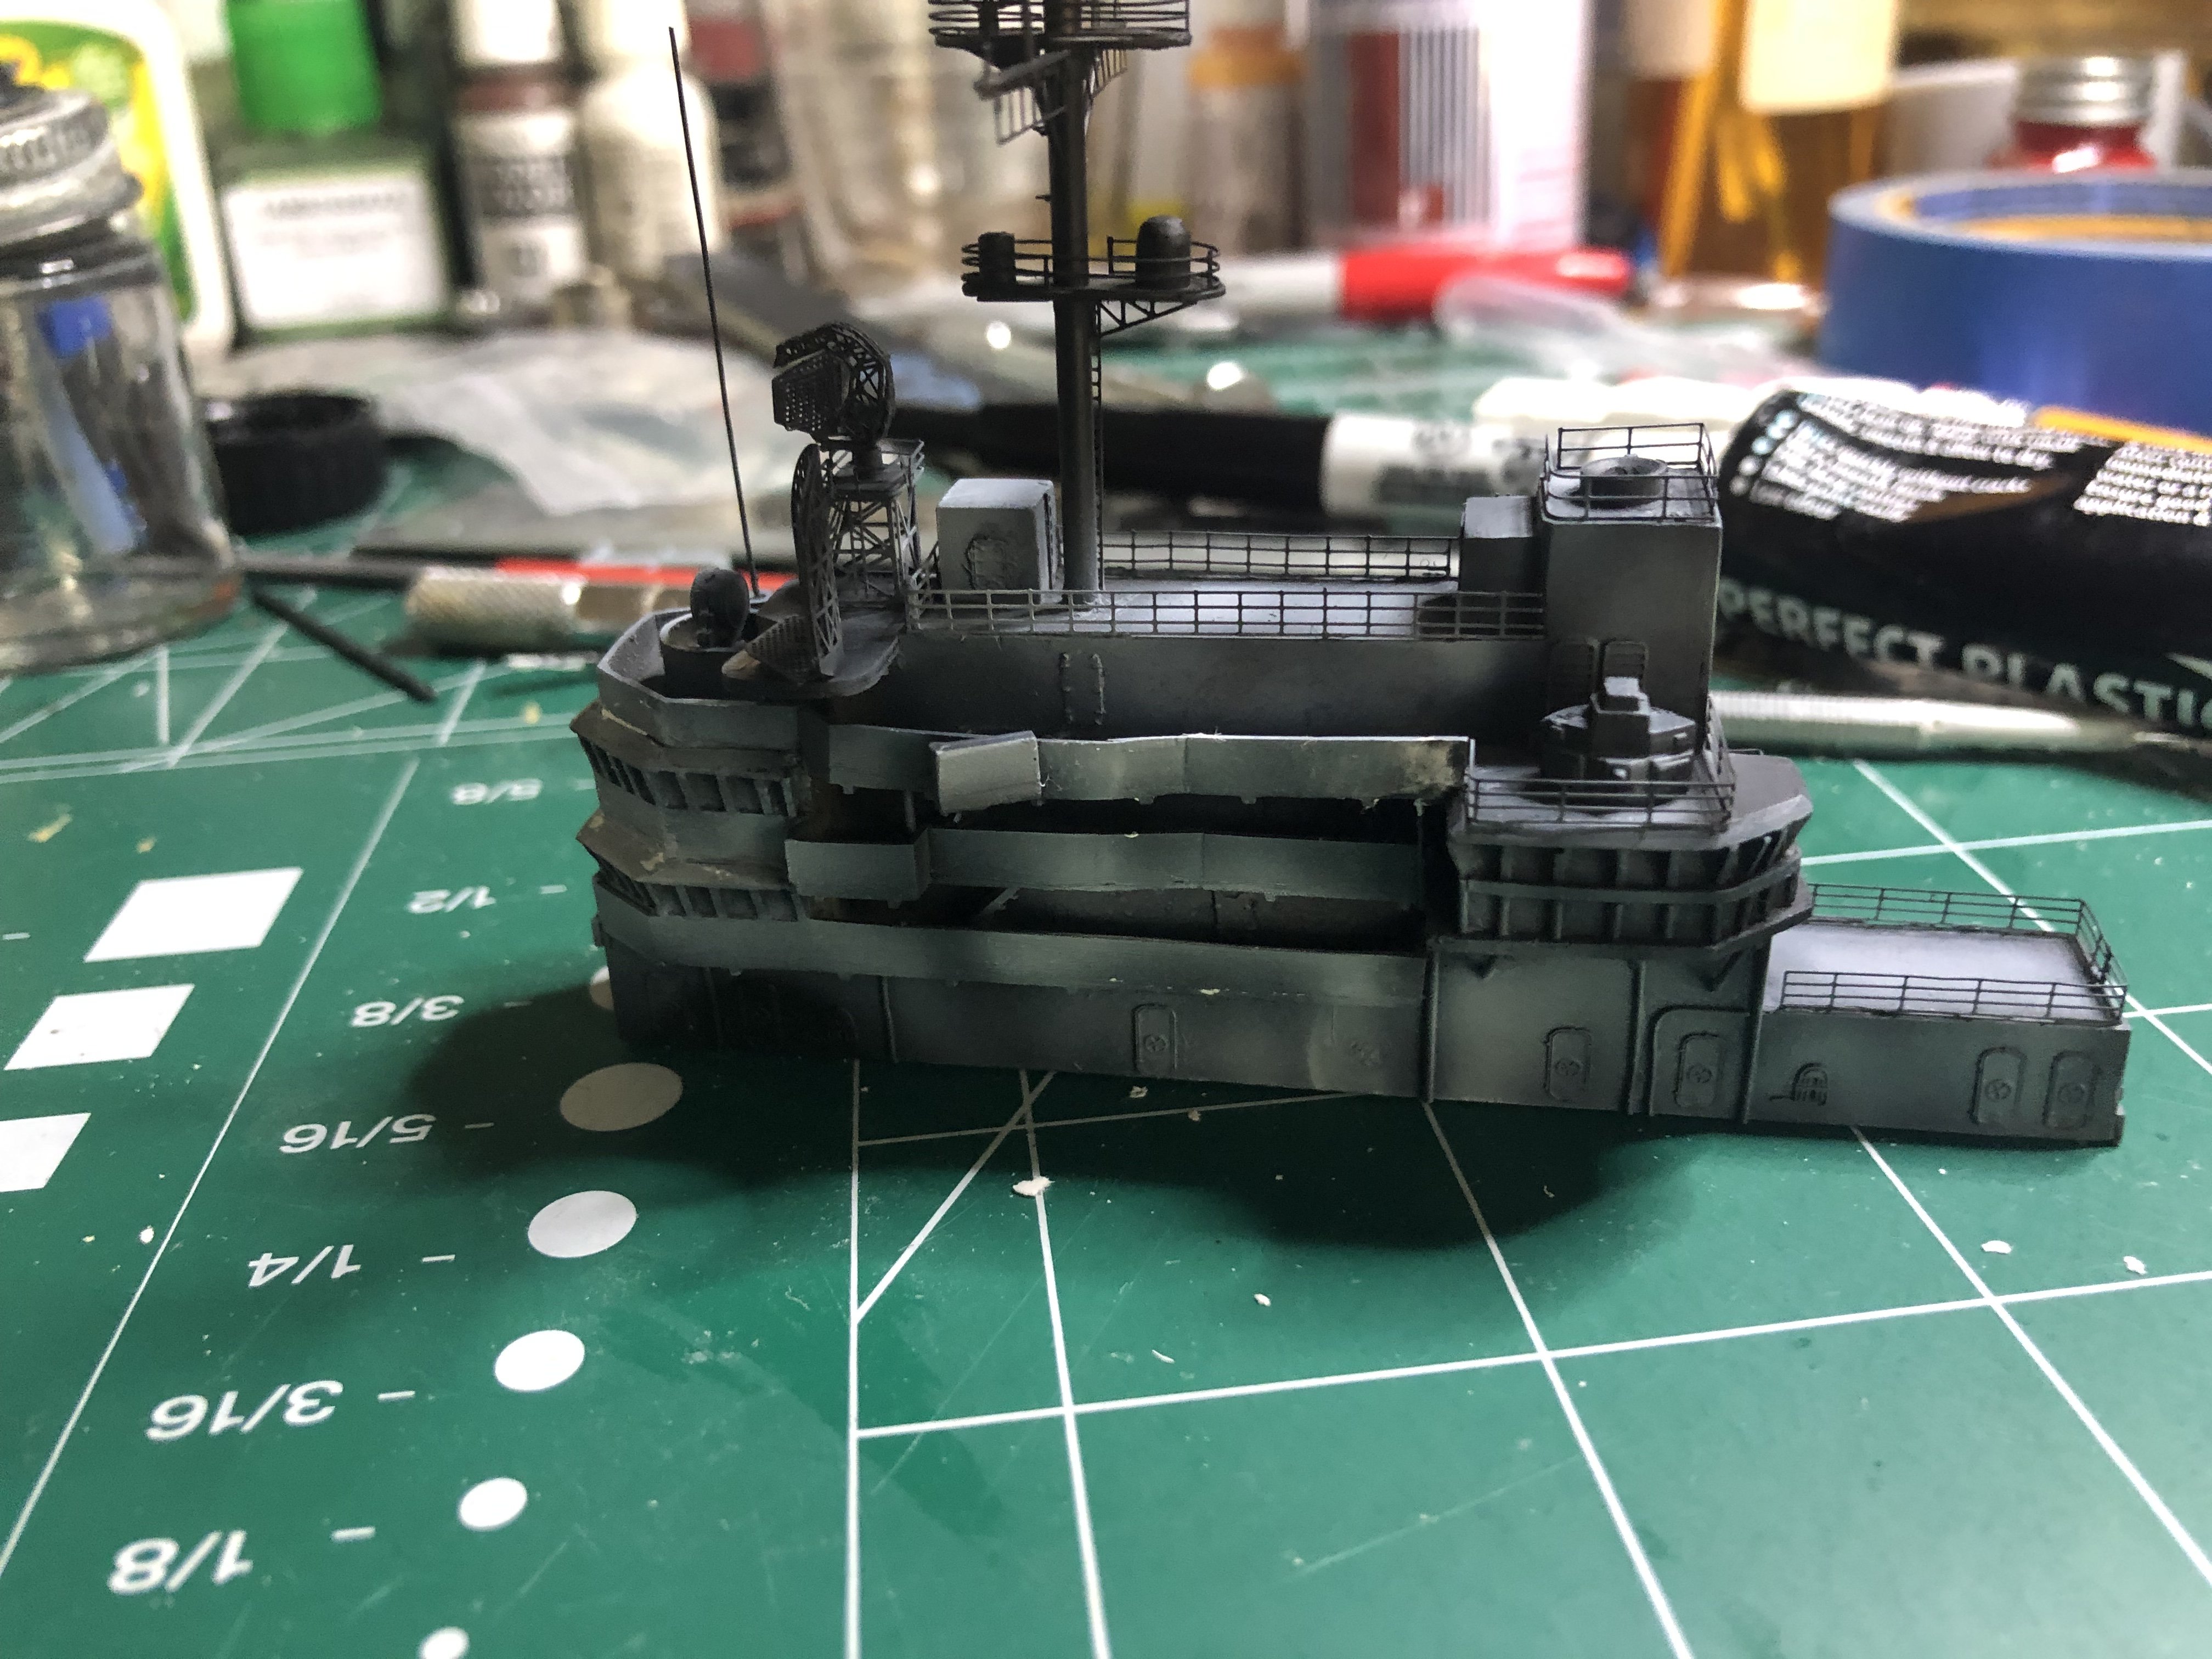
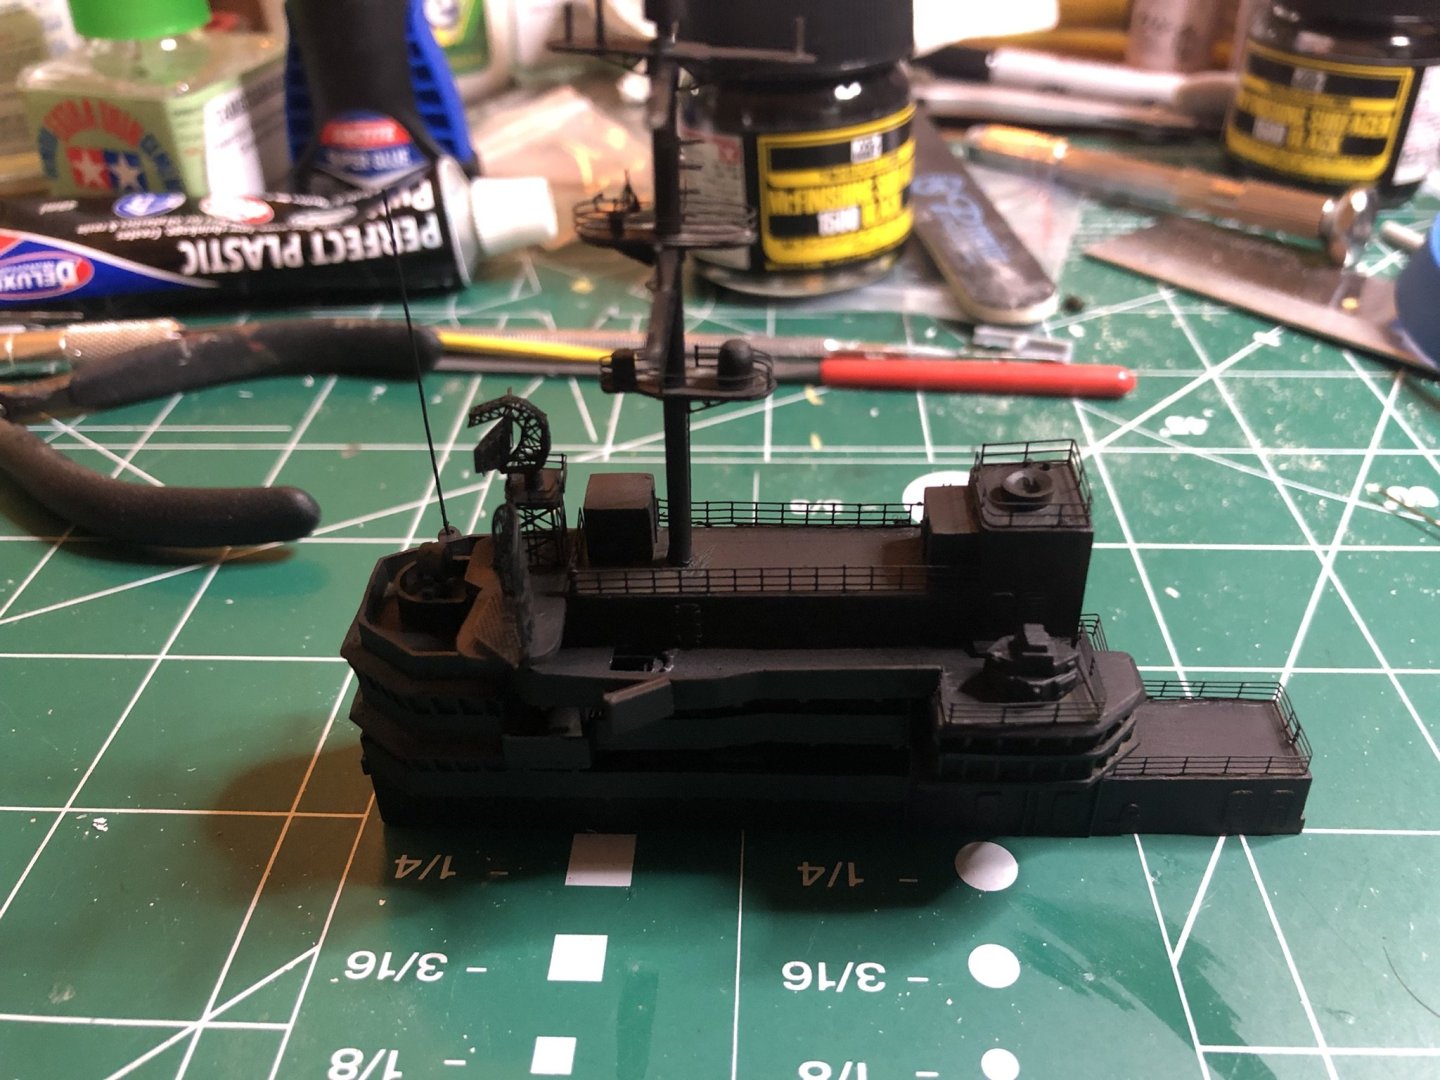
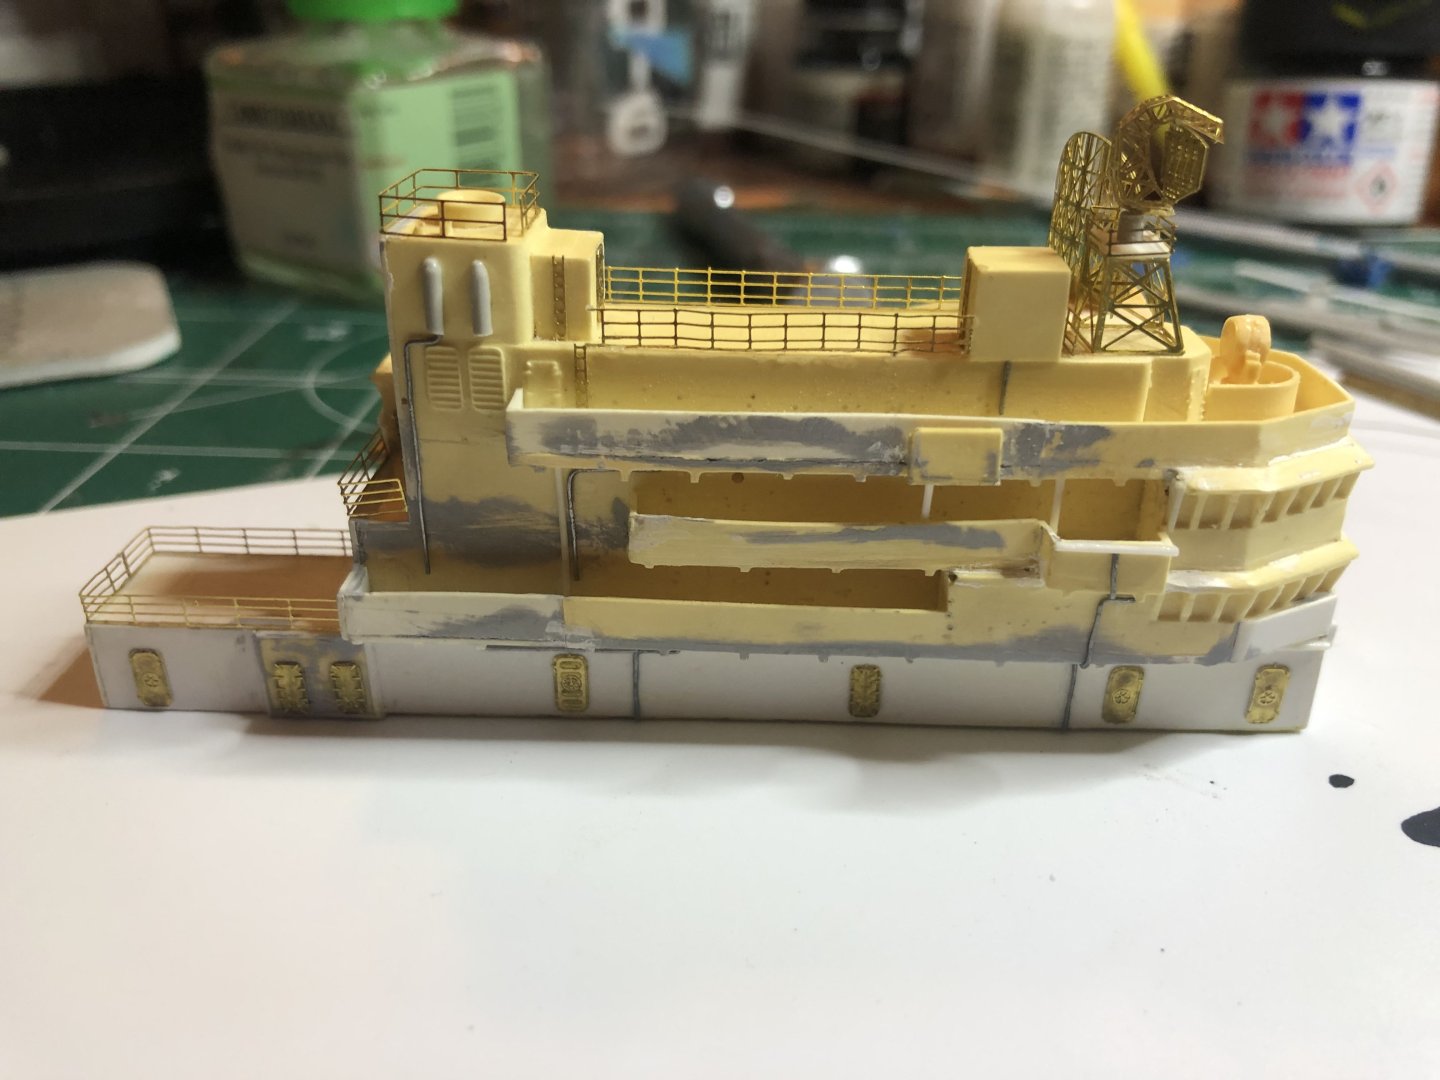
Update: paint is on. The island was primed with Mr Surfacer 1500 thinned with Mr Color Leveling Thinner. Great stuff. White was then used in sort of a black basing method, although the tonal differences aren’t really visible in the pics. Time to set it aside and work on the harder stuff. Thank you for looking.


- 176 replies
-
- 11
-
-
- new orleans
- iron shipwrights
- (and 2 more)
-
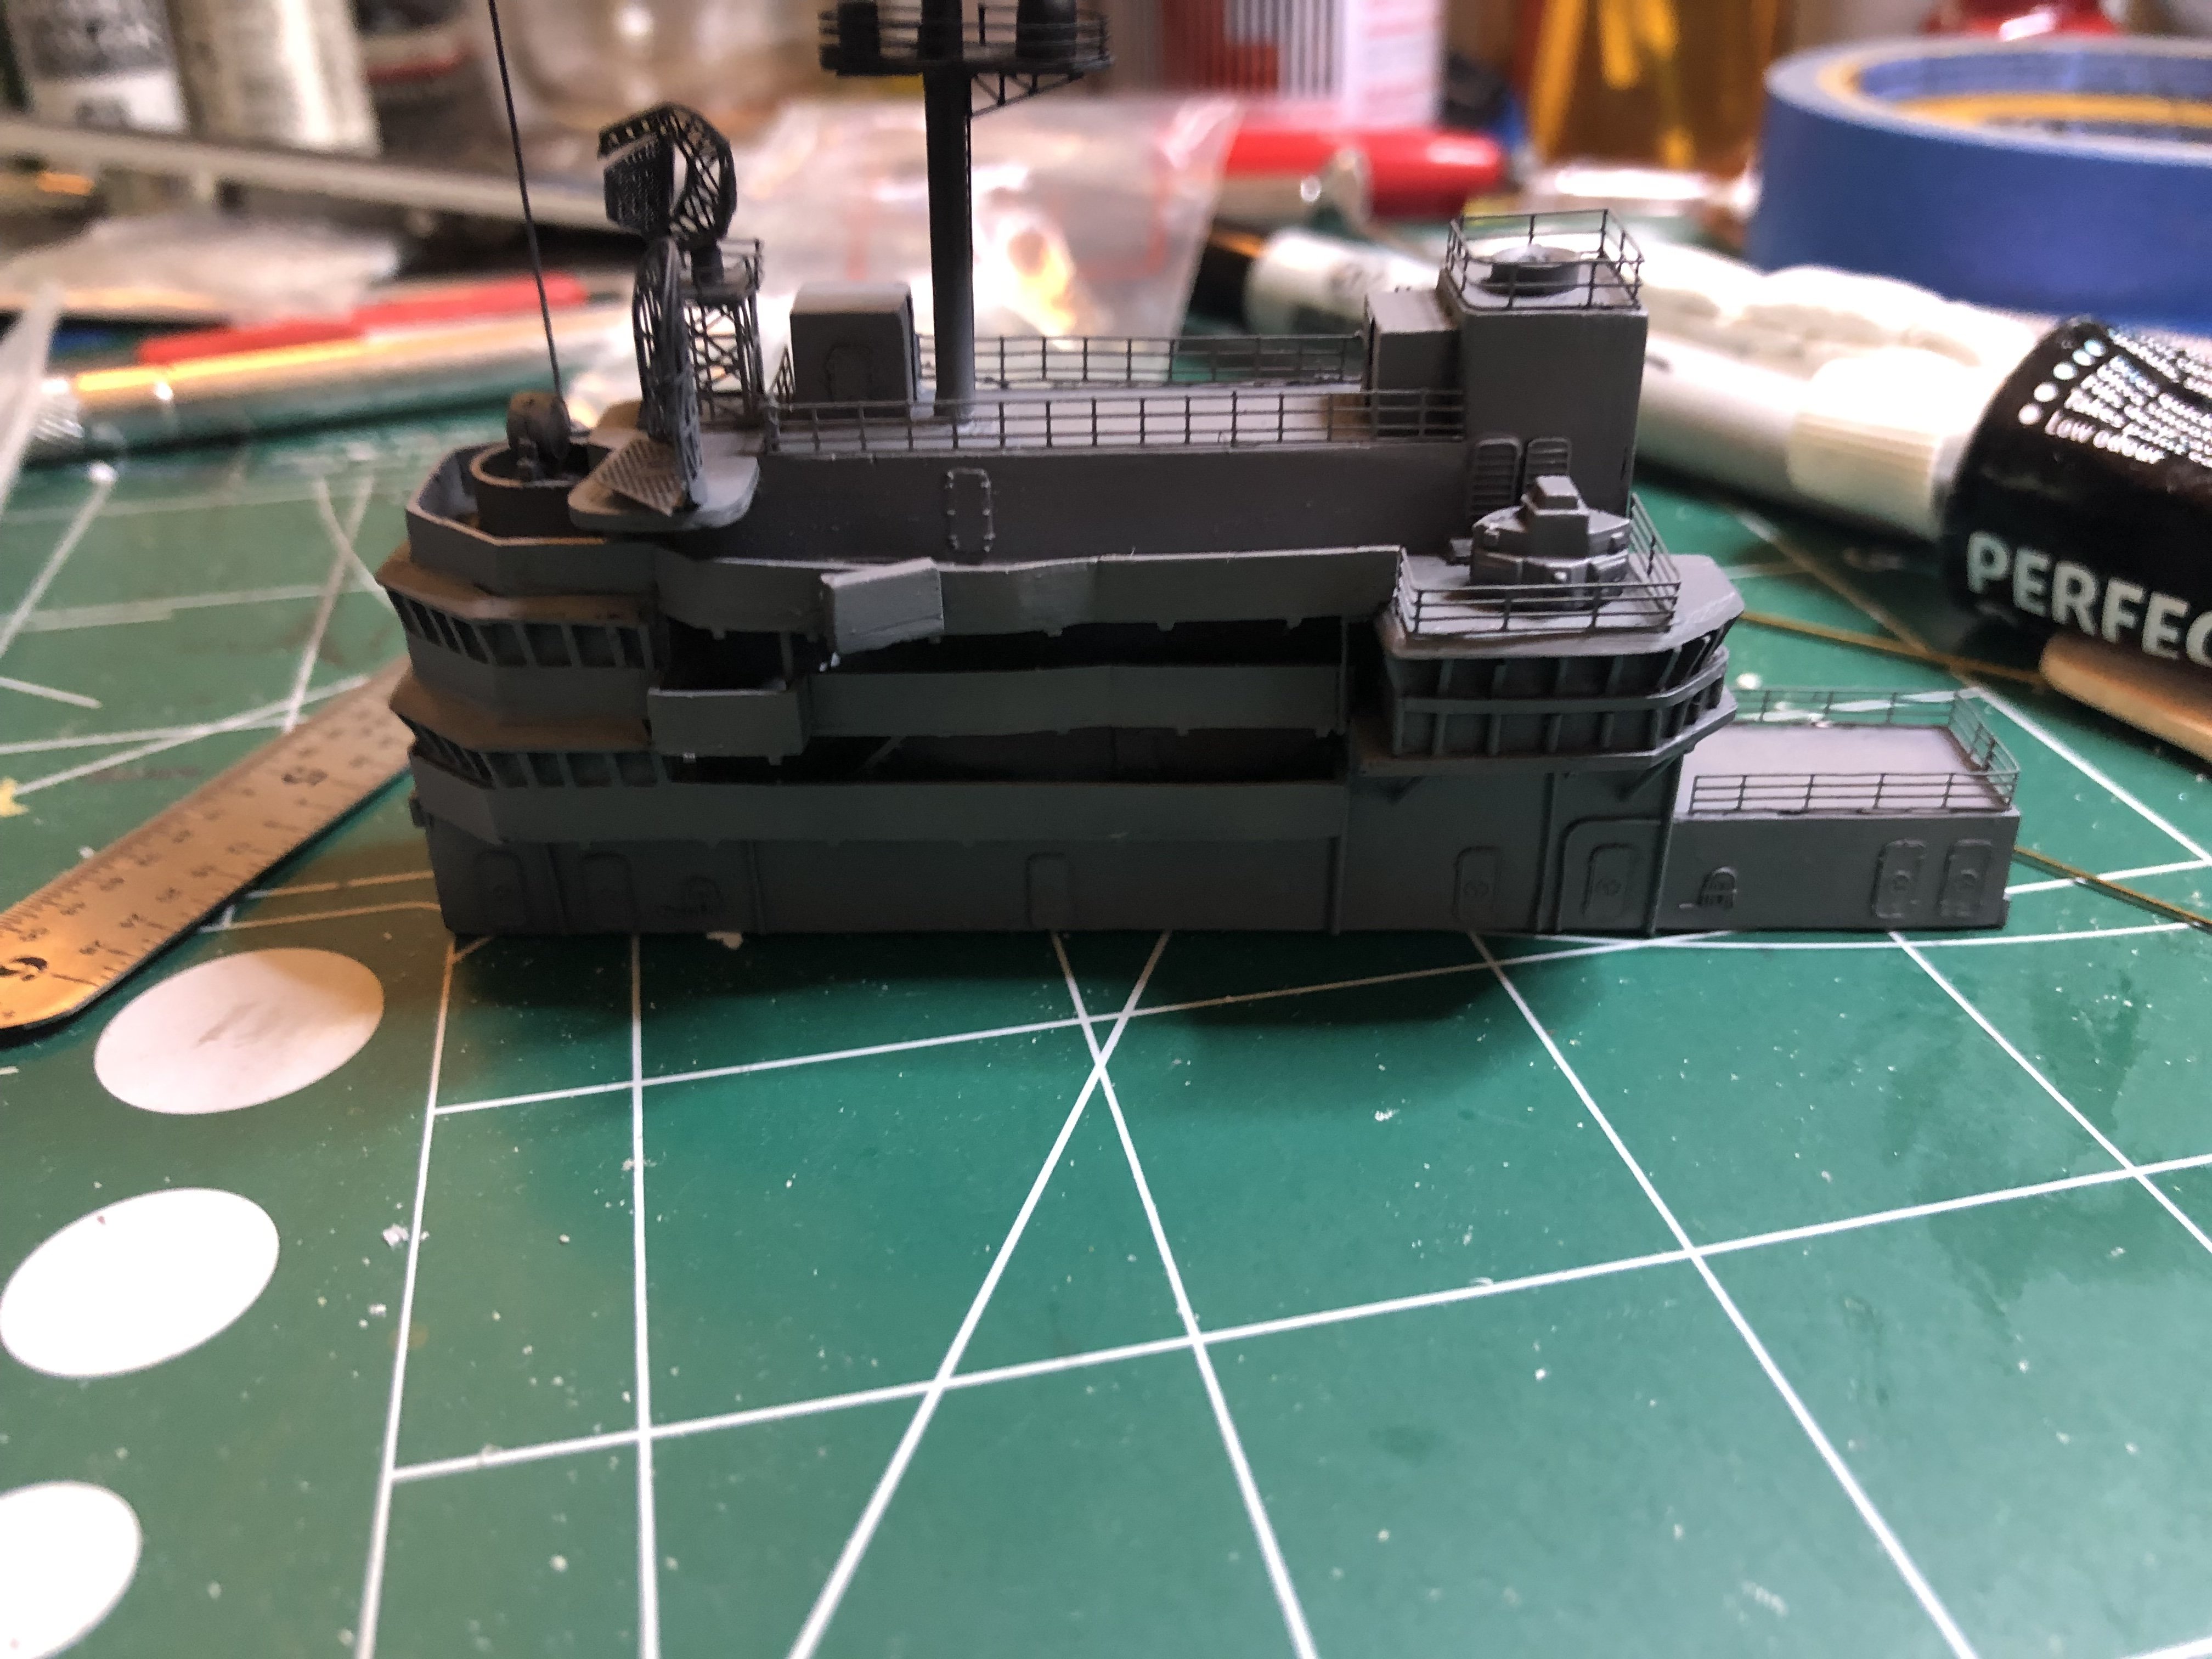
I think the island may be ready for prime and then paint. May weather it a bit, too, and set it aside until final assembly. Thoughts?

- 176 replies
-
- 8
-
-
- new orleans
- iron shipwrights
- (and 2 more)
-
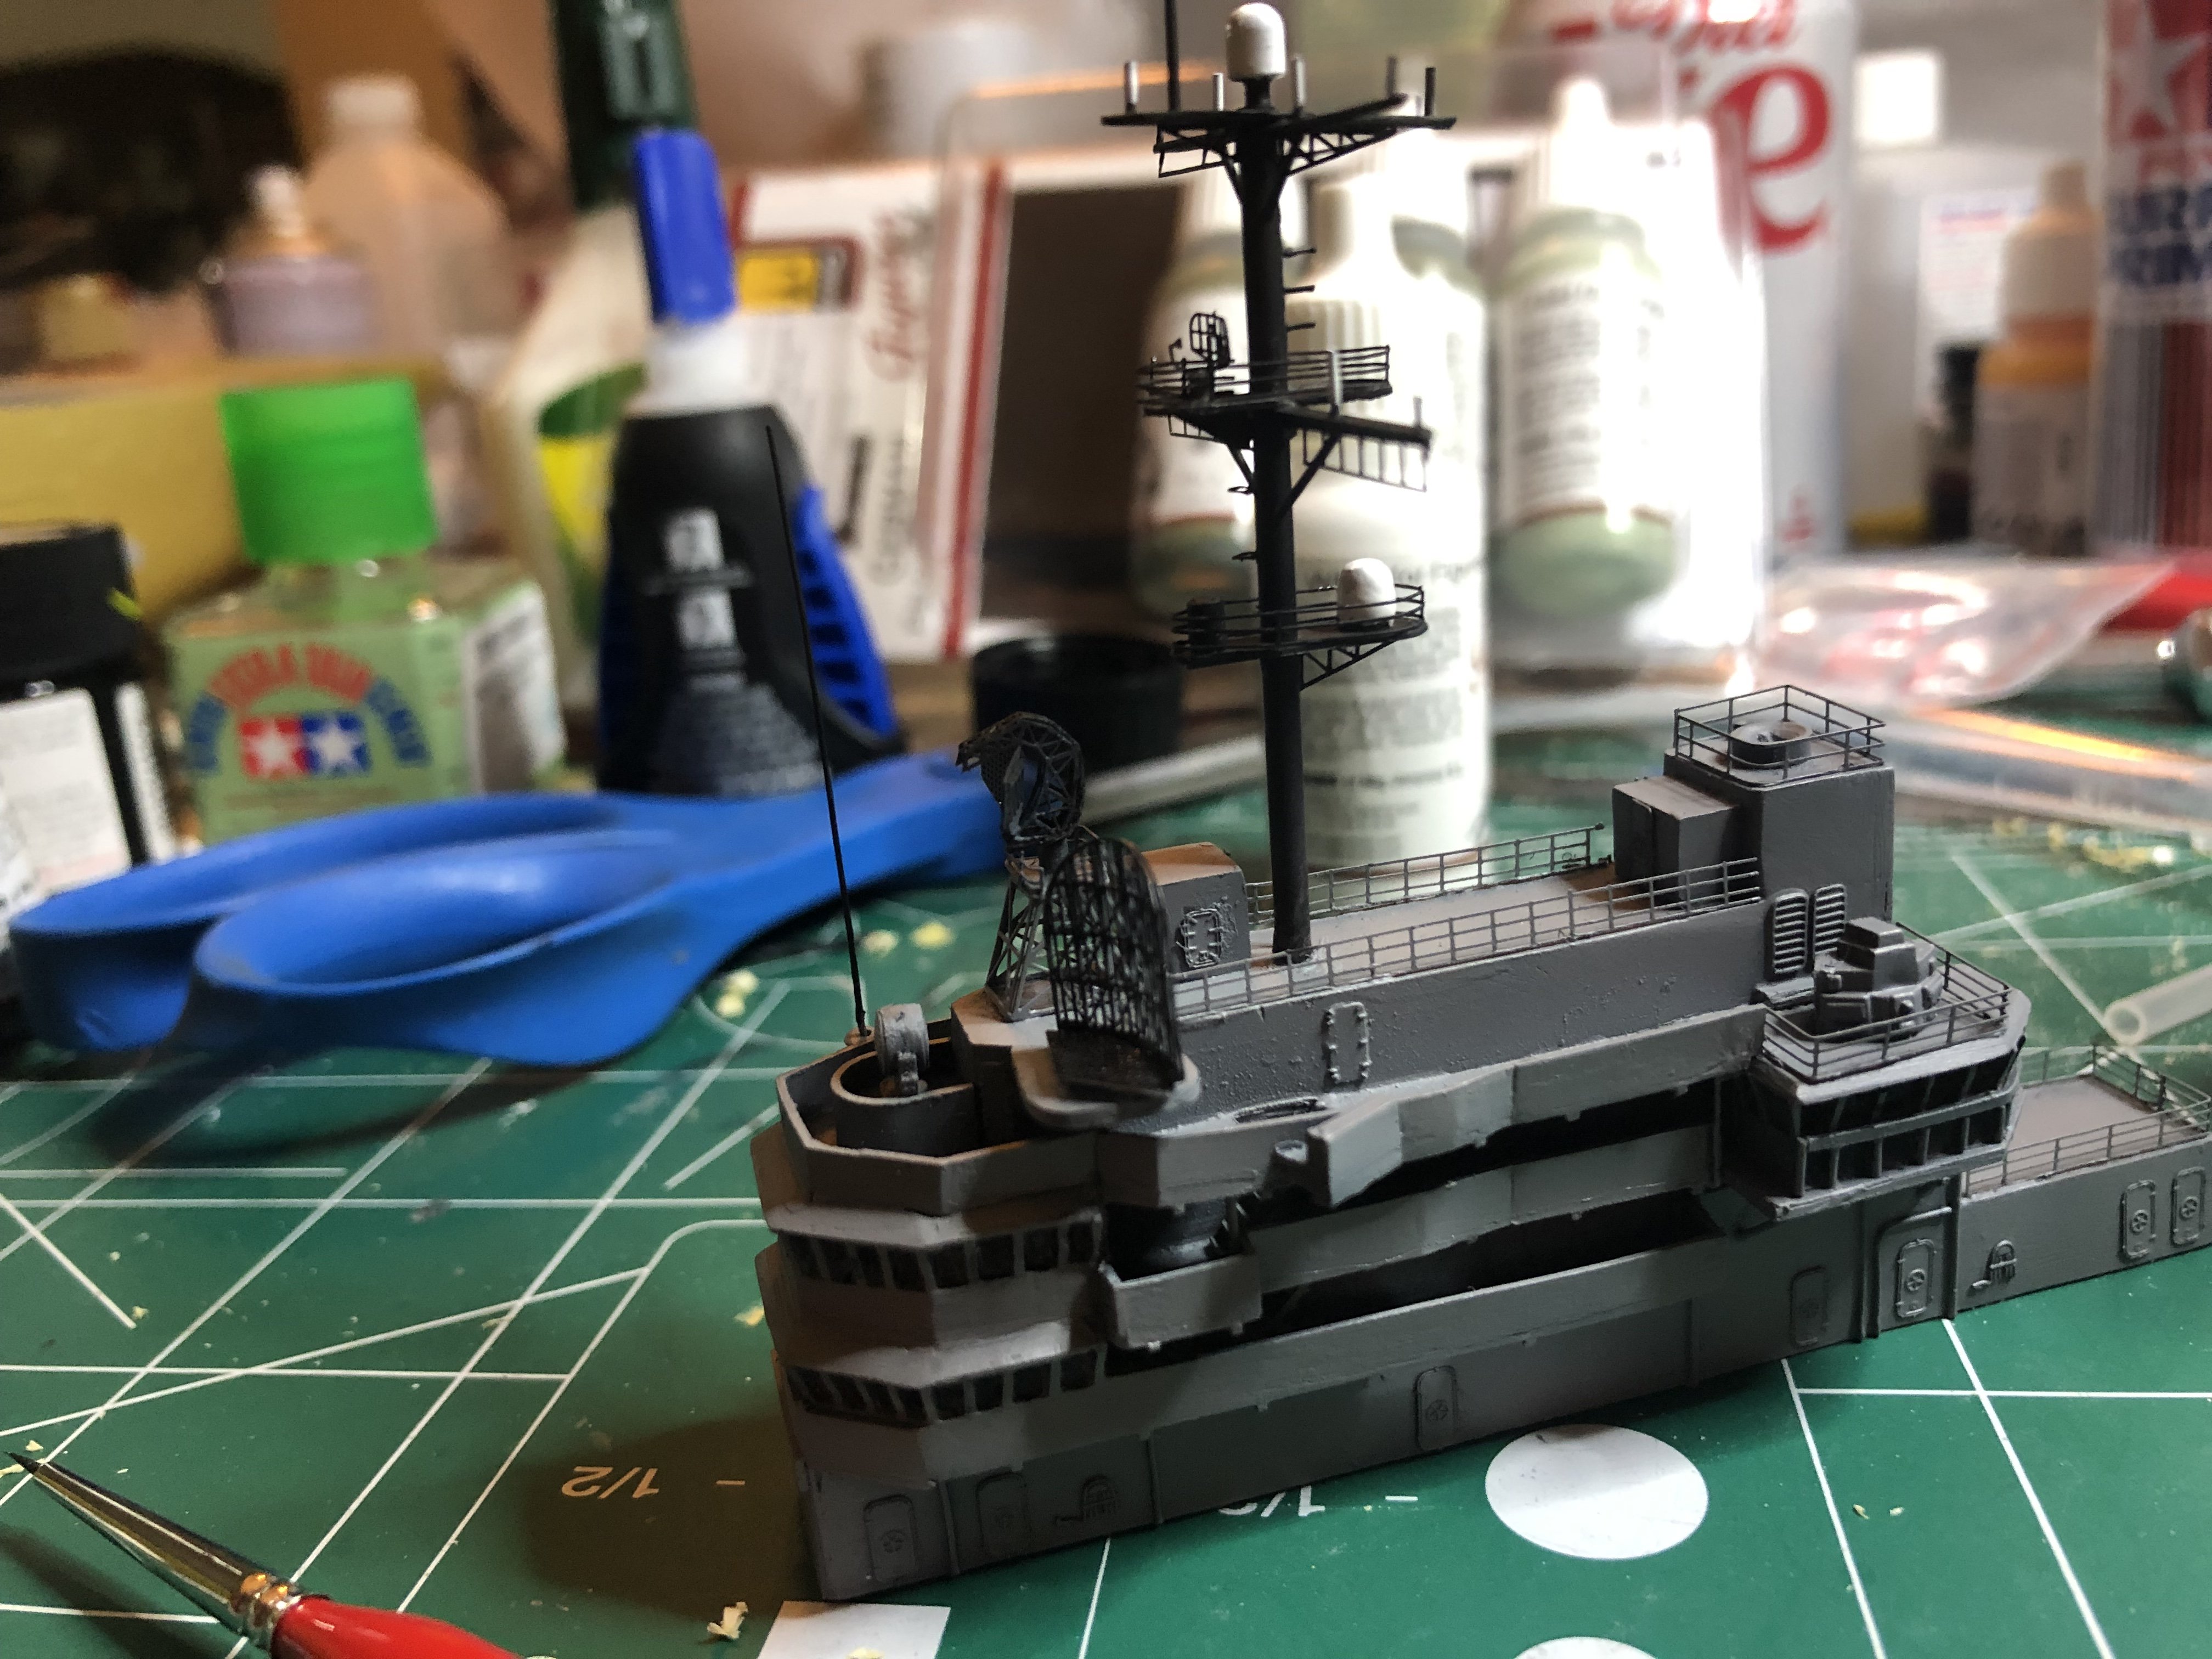
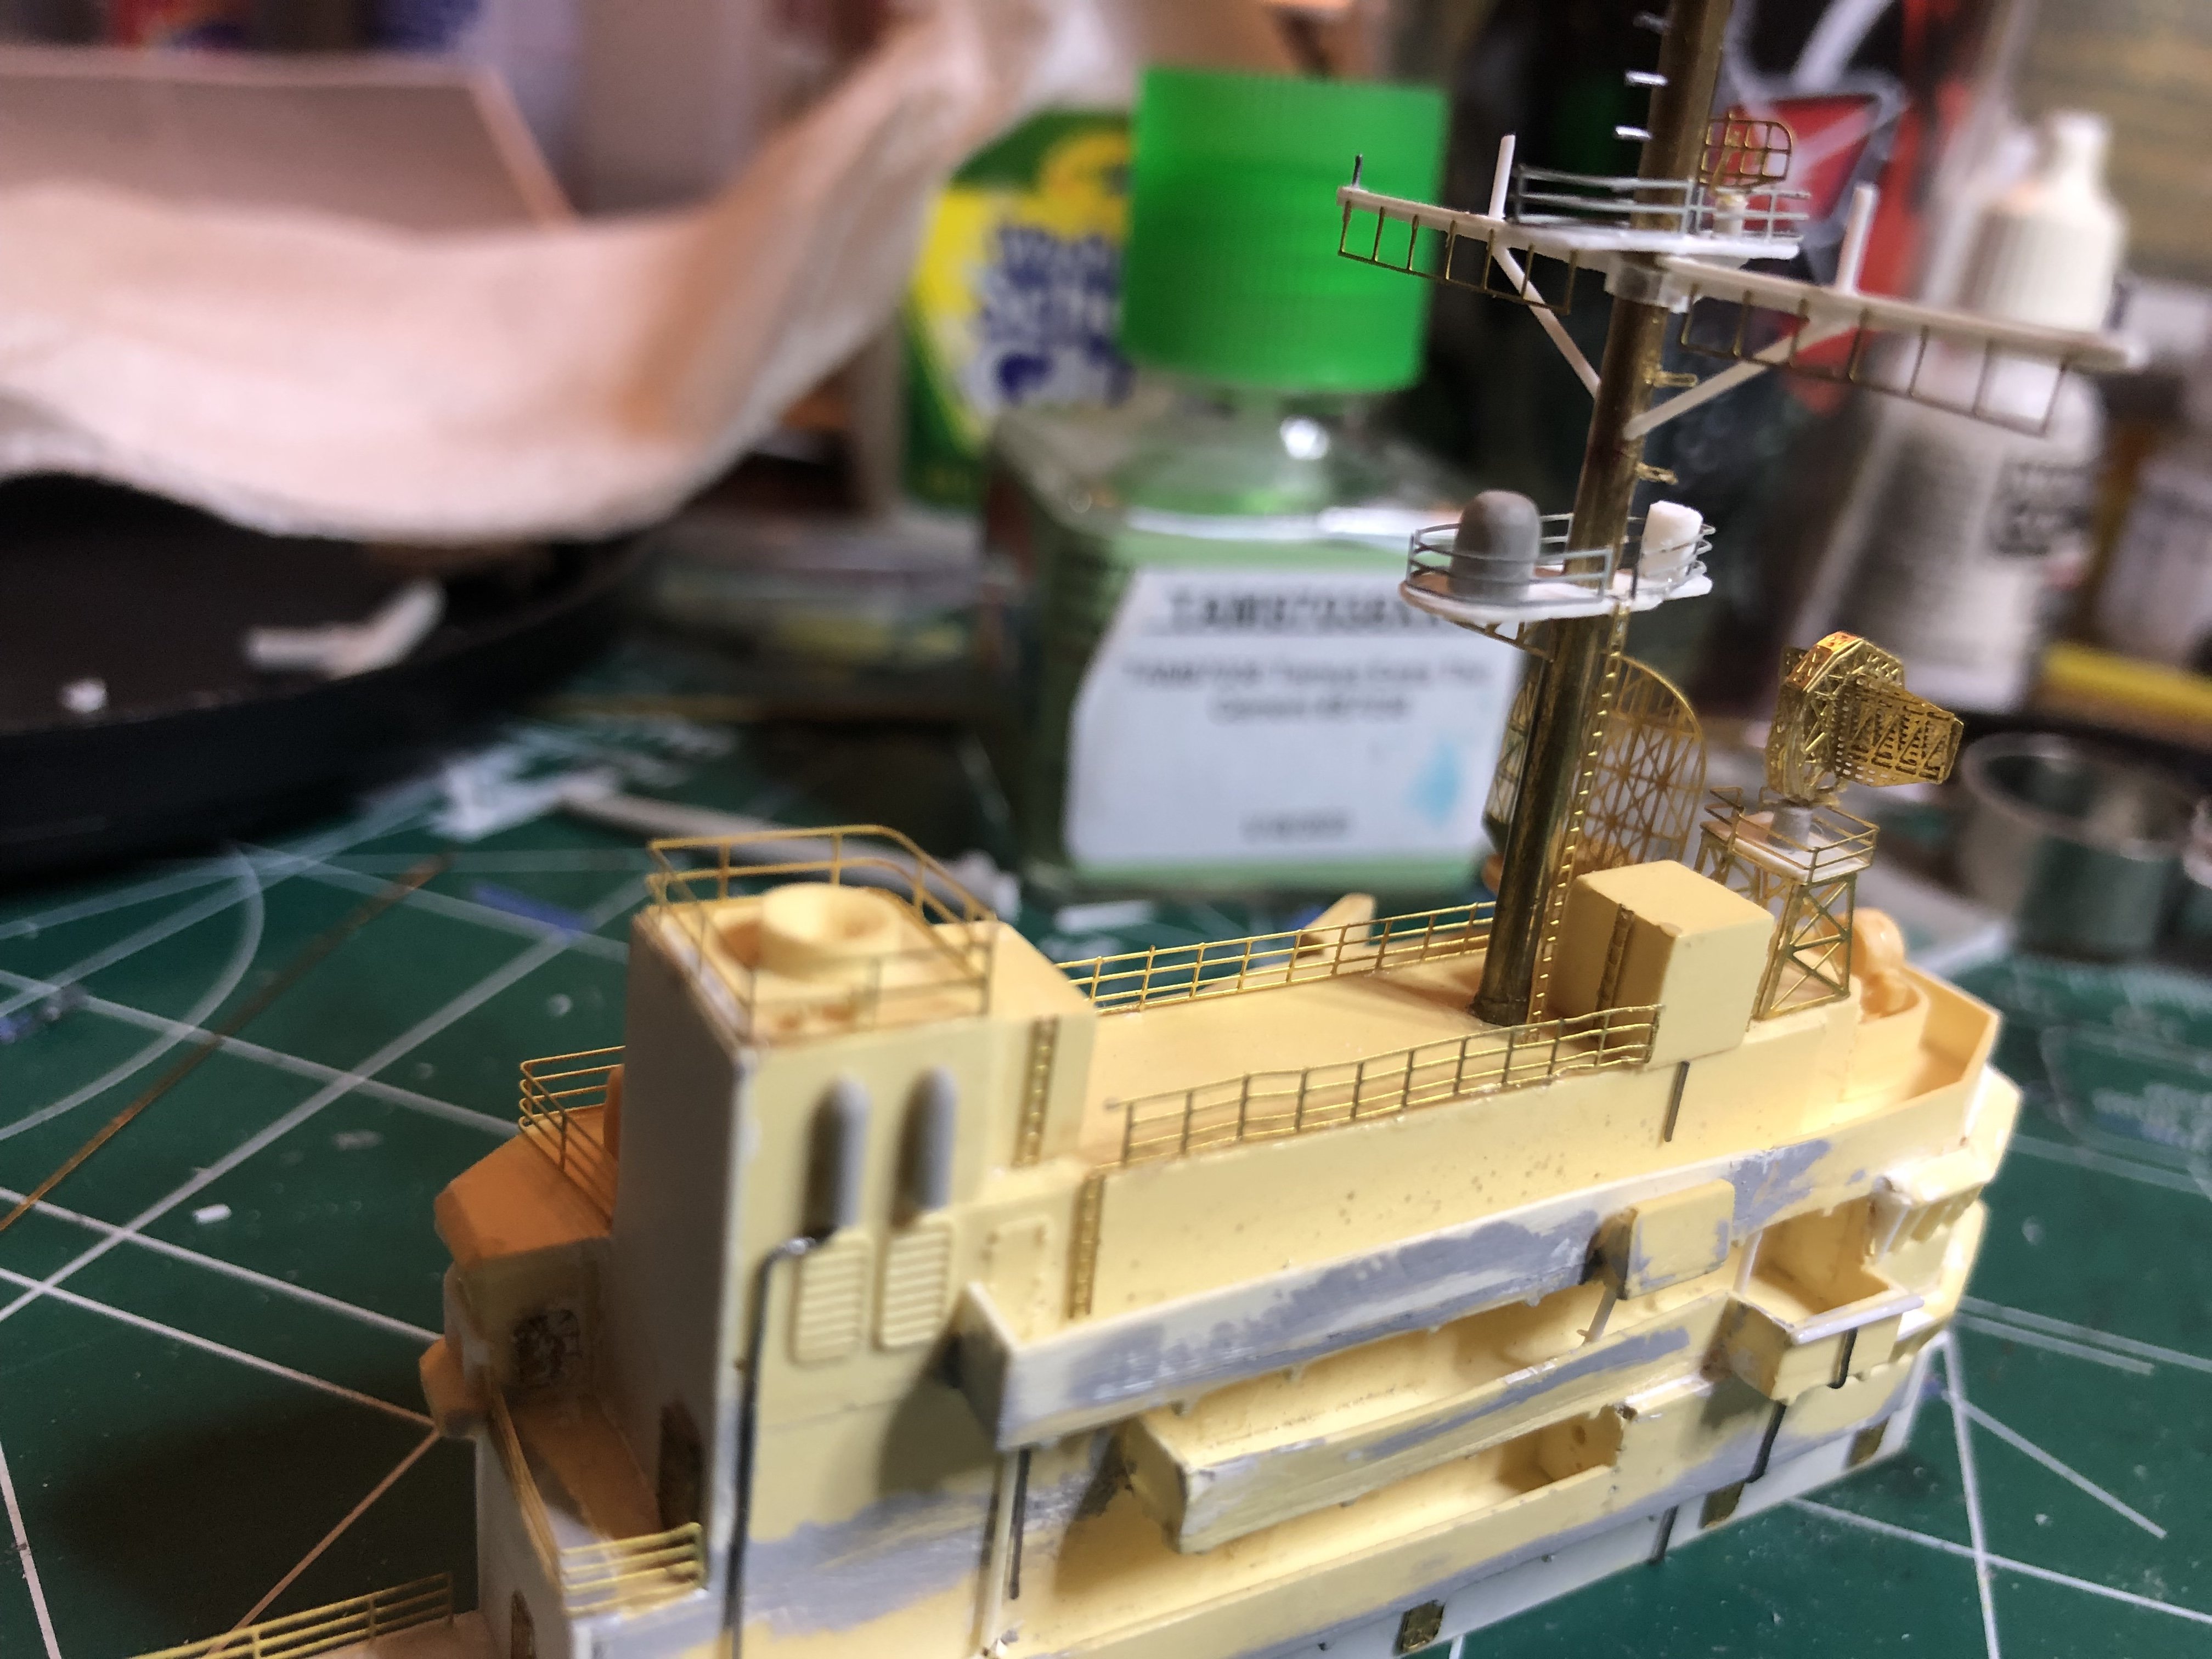
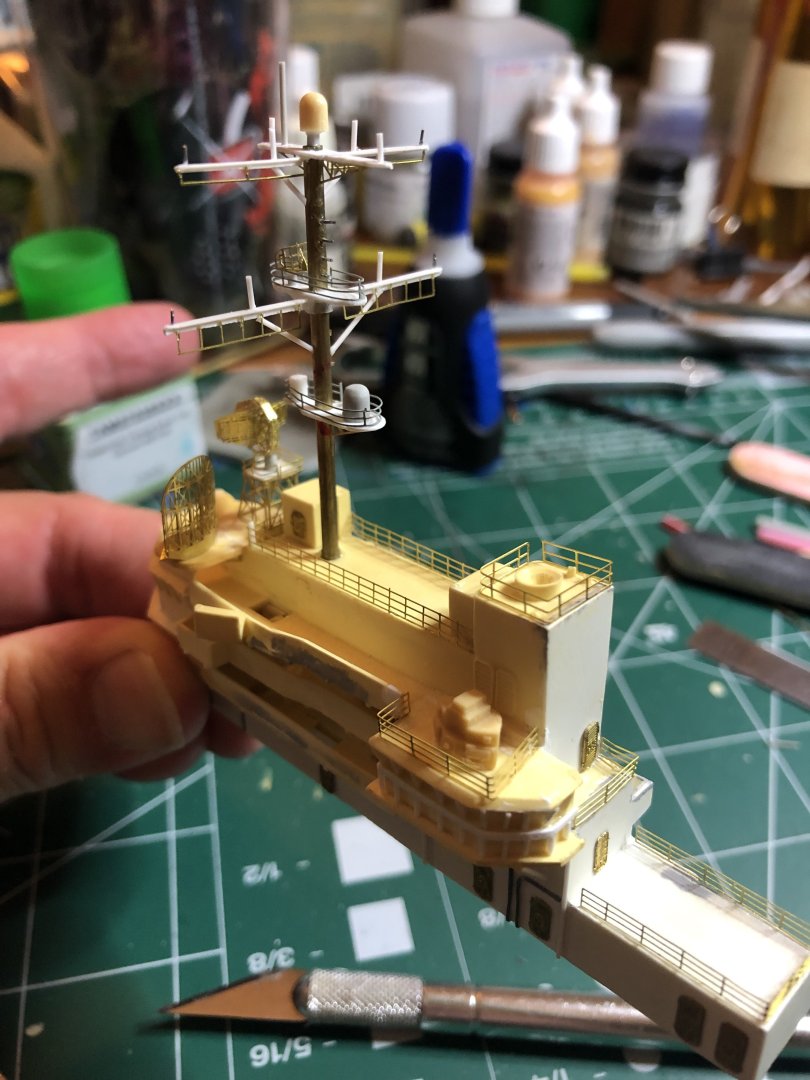
Minor update: a few more odds and ends added and a few more to go. The mast has been glued in and she’s almost ready for prime, paint, and then set aside. Thanks for looking!

- 176 replies
-
- 8
-
-
- new orleans
- iron shipwrights
- (and 2 more)
-
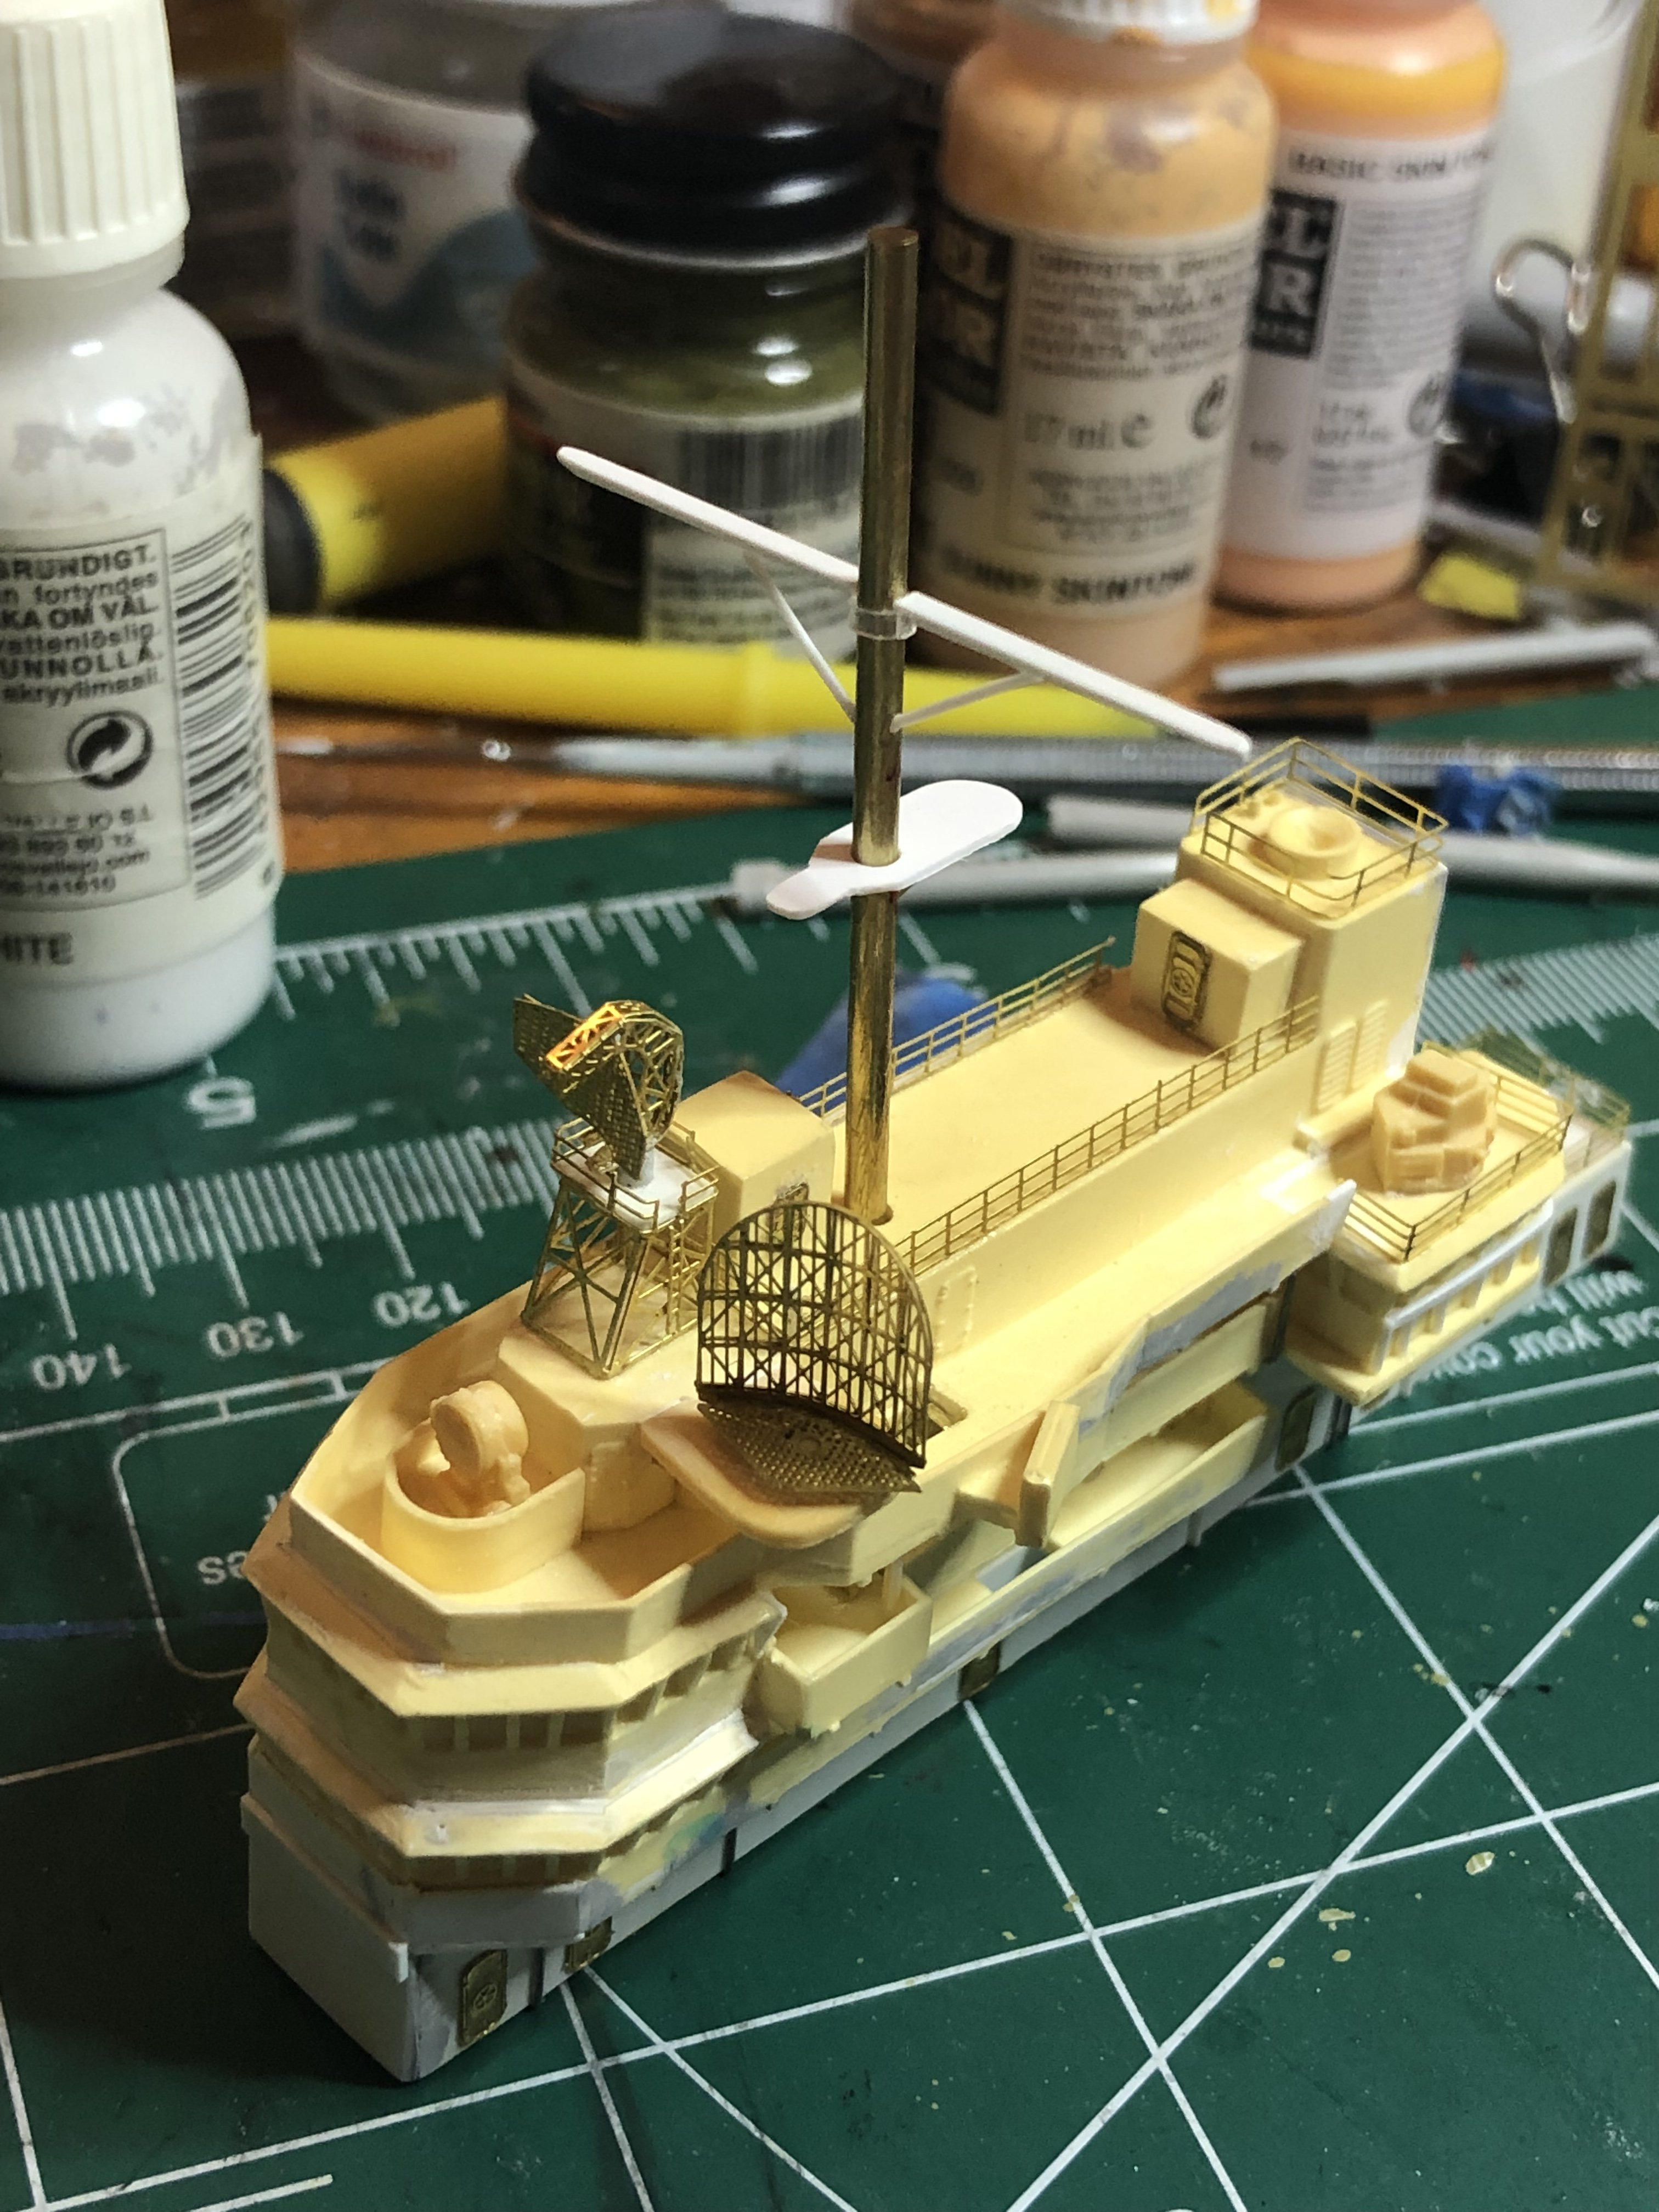
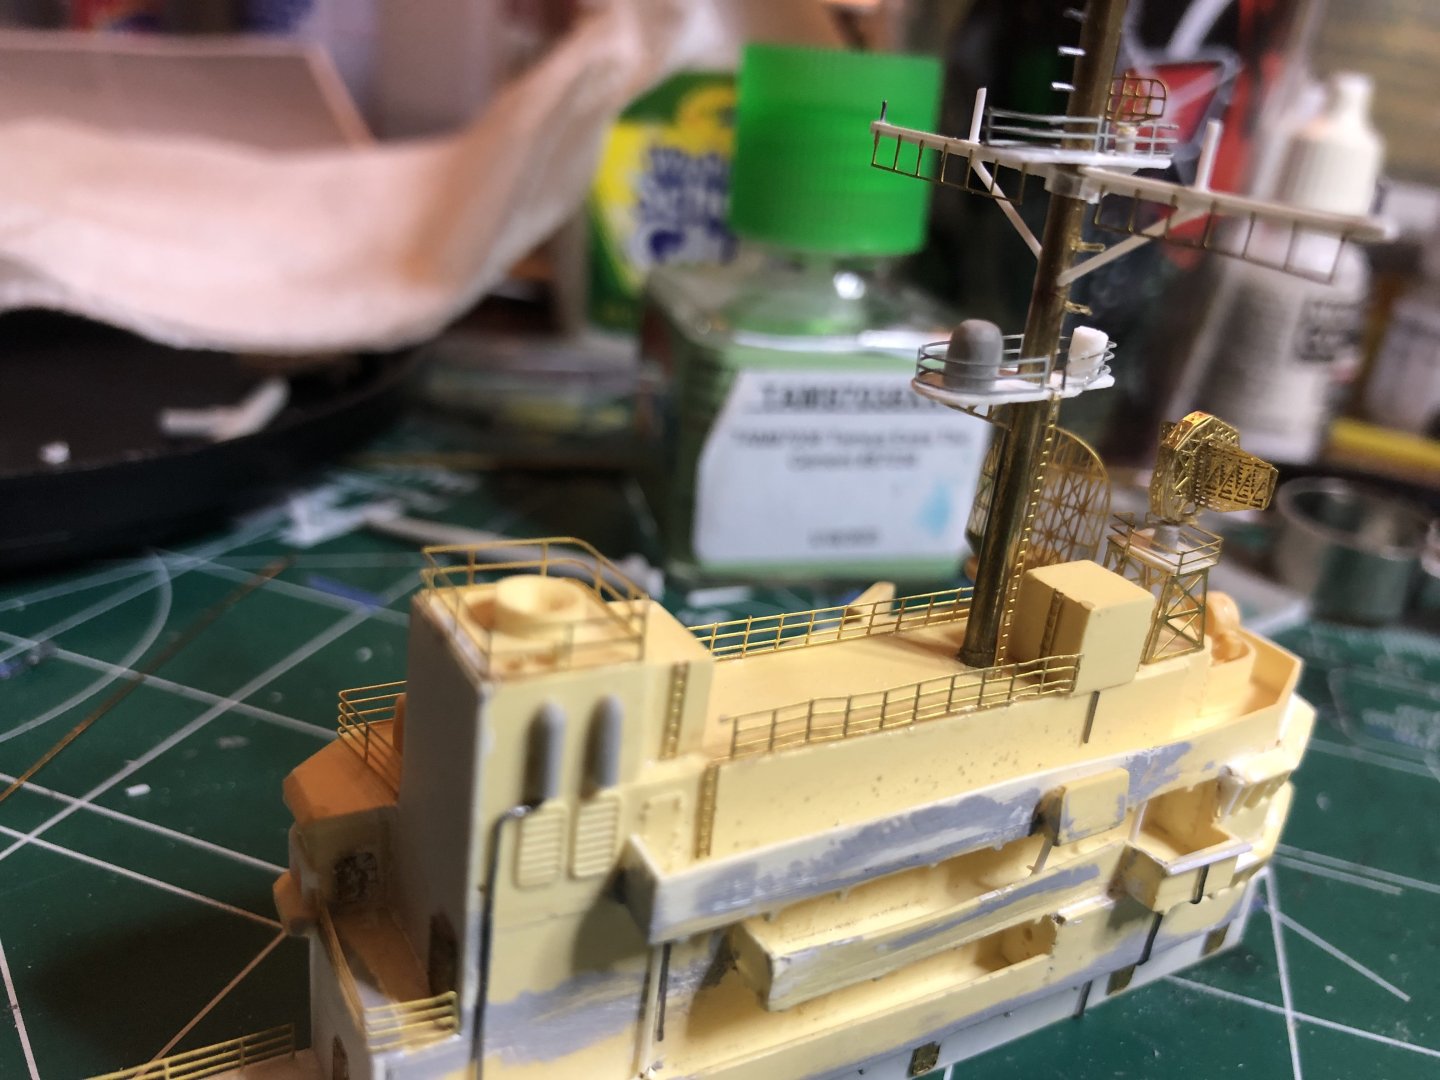
Another minor update. I decided not to taper the mast - I know, it’s not right… I’m trying my best to get it to match the pic above, as she was in ‘69. Still a lot more to go on mast, but it’s trying there. Not perfect, or even good. I am aware it’s leaning, it’s not glued in yet Thanks for looking!
- 176 replies
-
- 7
-
-
- new orleans
- iron shipwrights
- (and 2 more)
-
Thanks. I will have to break out the dremel and cut it. That pic is circa ‘68-‘69, not far removed from her maiden cruise. That’s how she appeared when Dad was on her in 69-70
- 176 replies
-
- 1
-
-
- new orleans
- iron shipwrights
- (and 2 more)
-
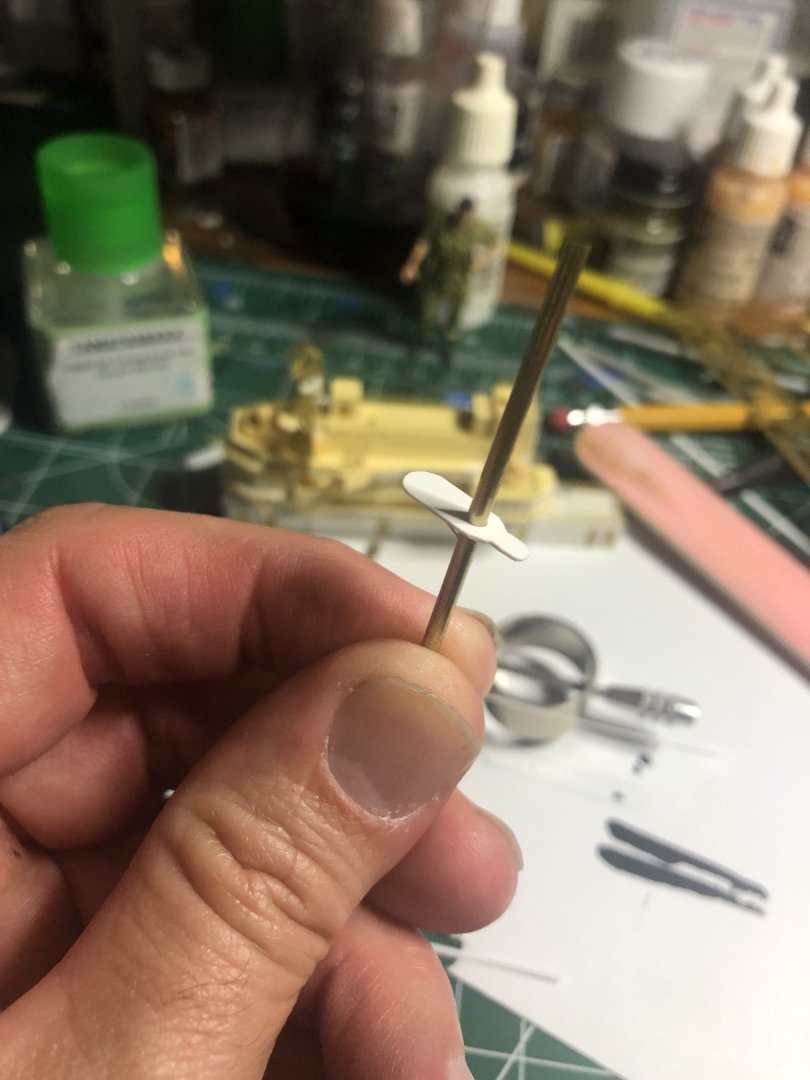
Appreciate that. Just how do I properly taper a brass rod? Thanks for that image - that’s after multiple refits. Here is the timeframe I’m modeling:

- 176 replies
-
- 3
-
-
- new orleans
- iron shipwrights
- (and 2 more)
-
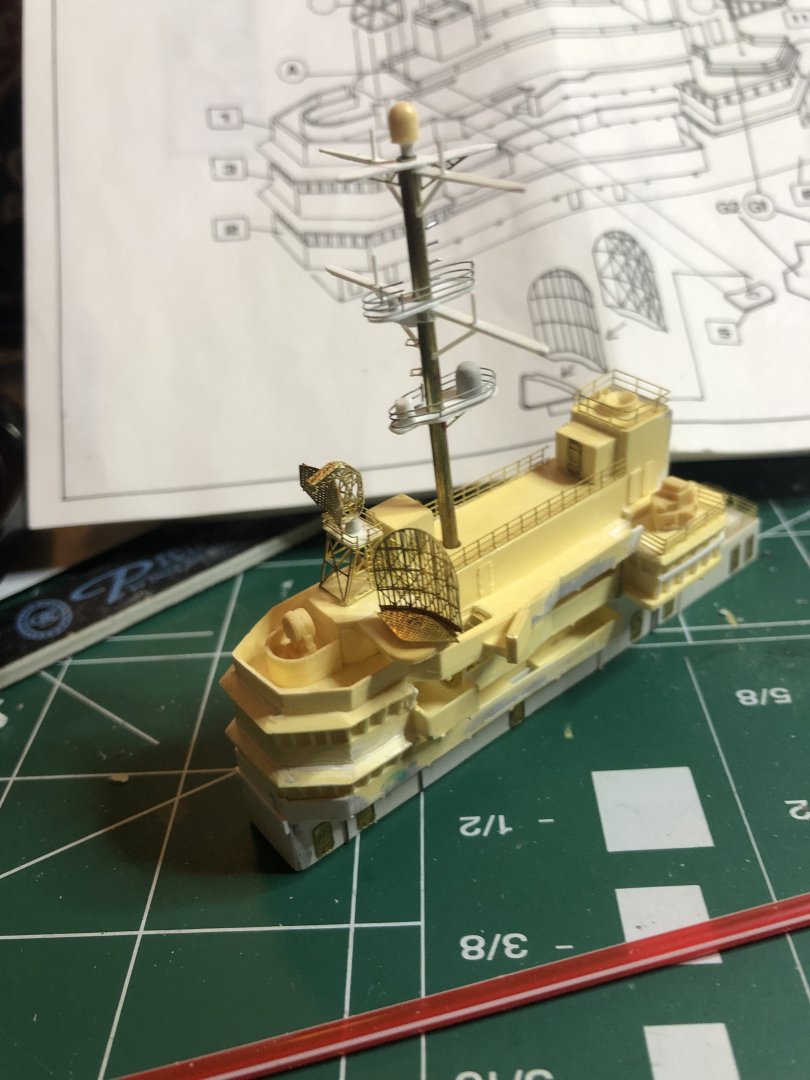
Another minor update. The scratch-built mast has begun. I took some Evergreen I-beams and split them. Also cut a ring off a pipette and used styrene rod as support. I know, looks like crap. Thoughts?

- 176 replies
-
- 3
-
-
- new orleans
- iron shipwrights
- (and 2 more)
-
Thanks! Have most of those cataloged including images from Dad’s cruise book. It’s not easy to find those from the 69-70 era, as things changed after each retrofit
- 176 replies
-
- 3
-
-
- new orleans
- iron shipwrights
- (and 2 more)
-
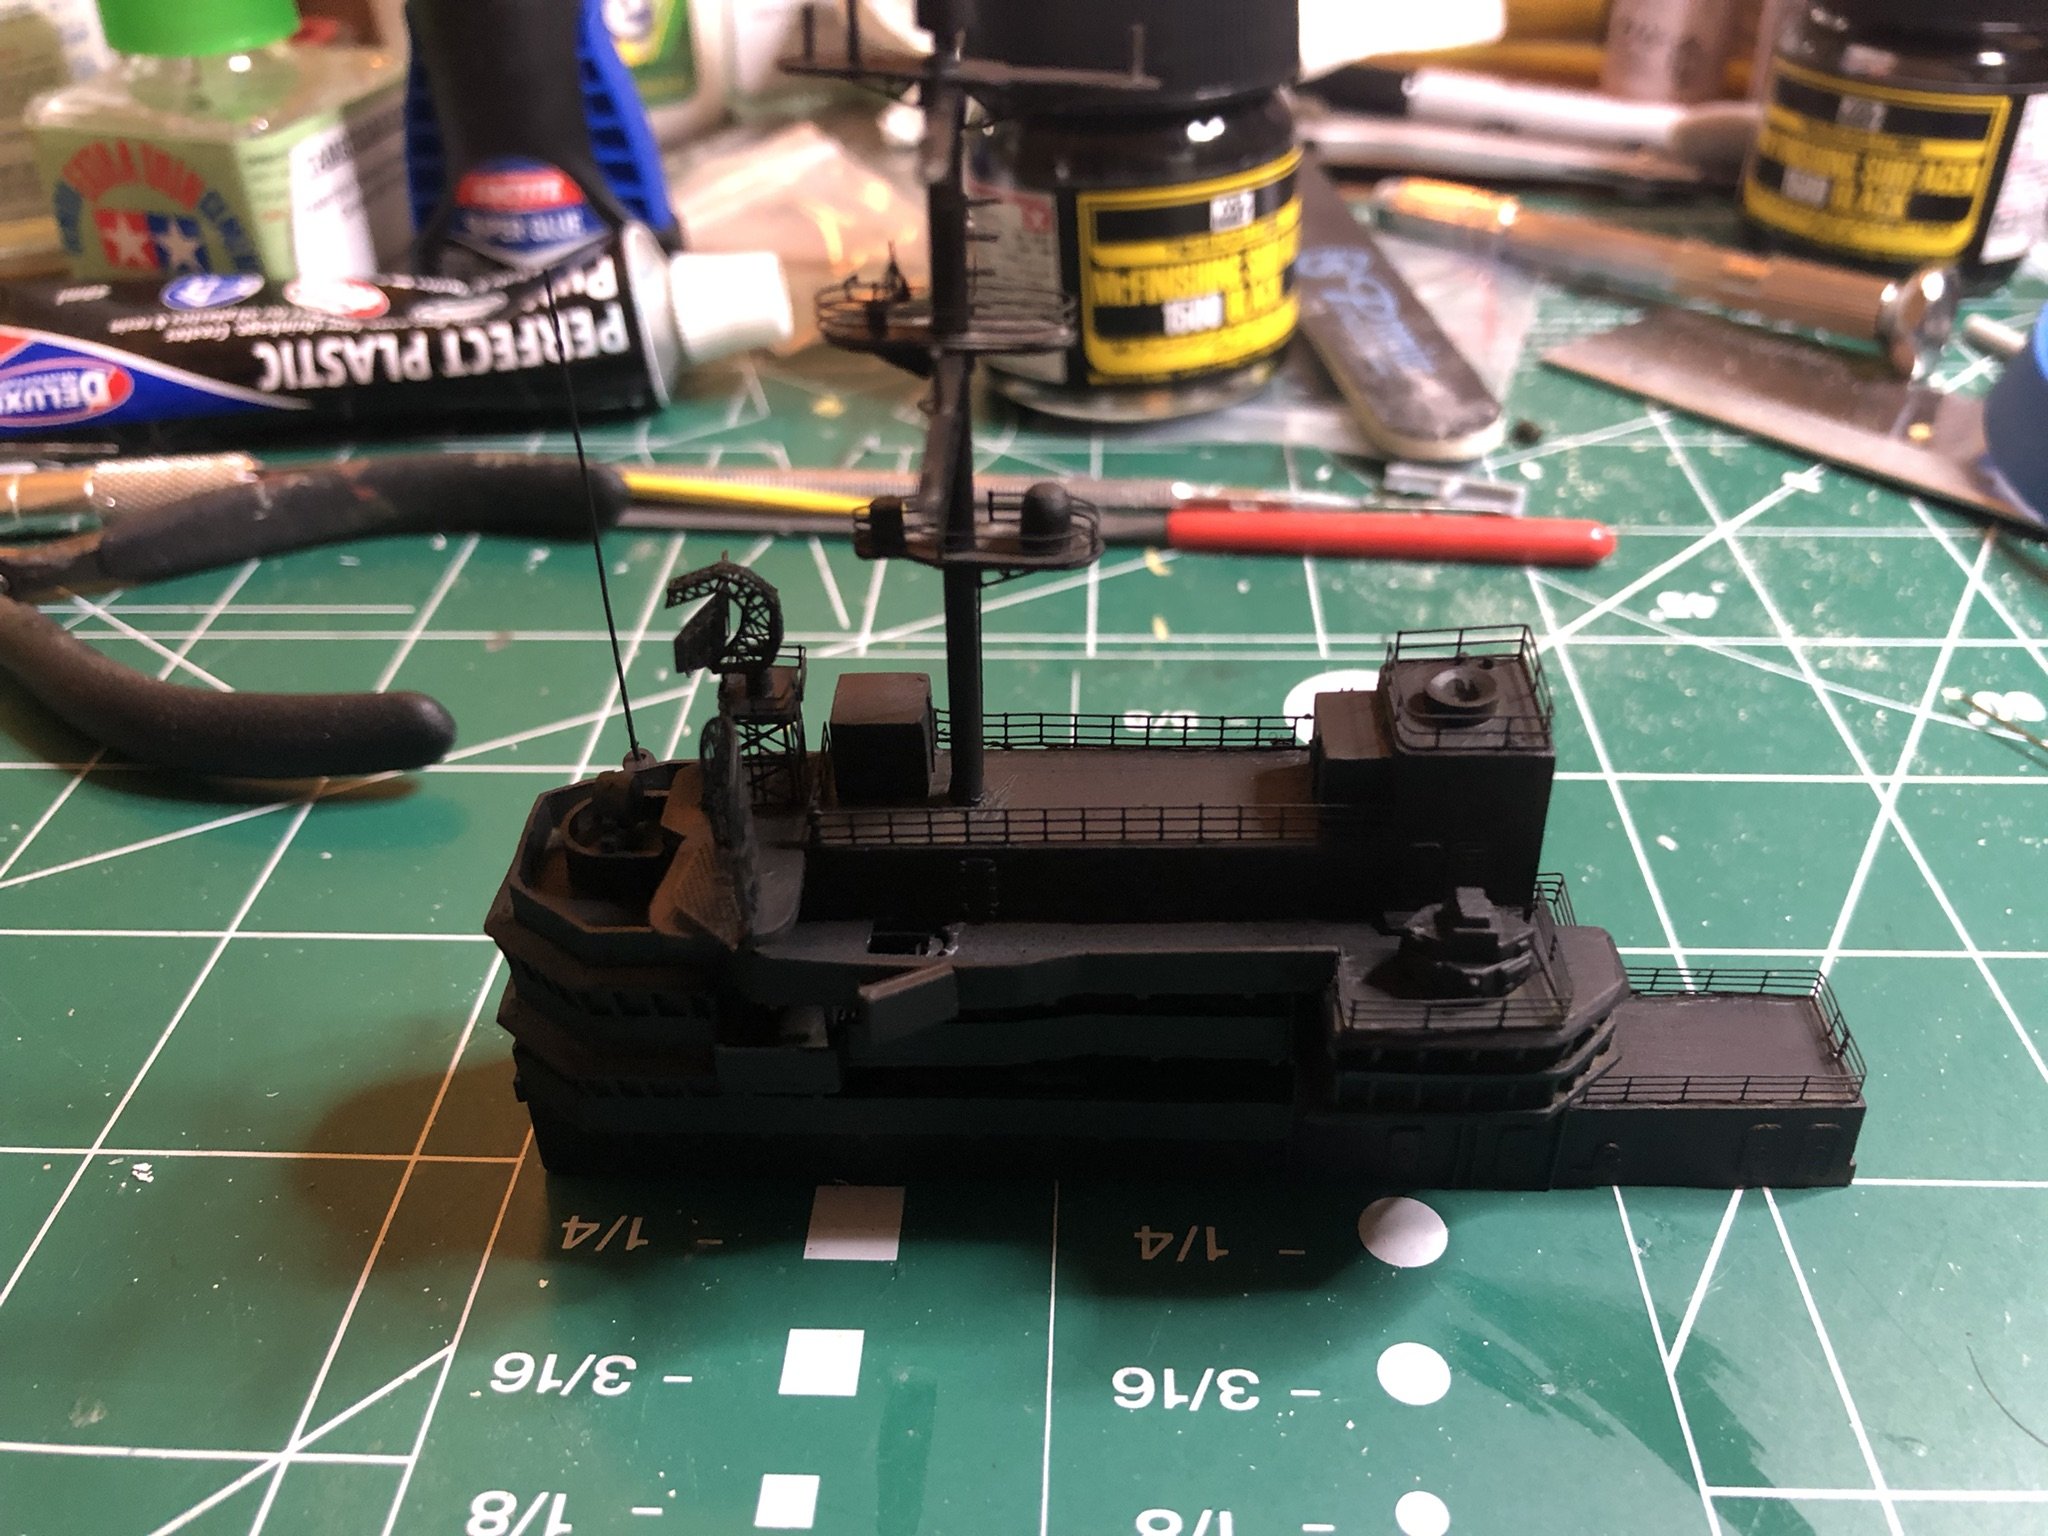
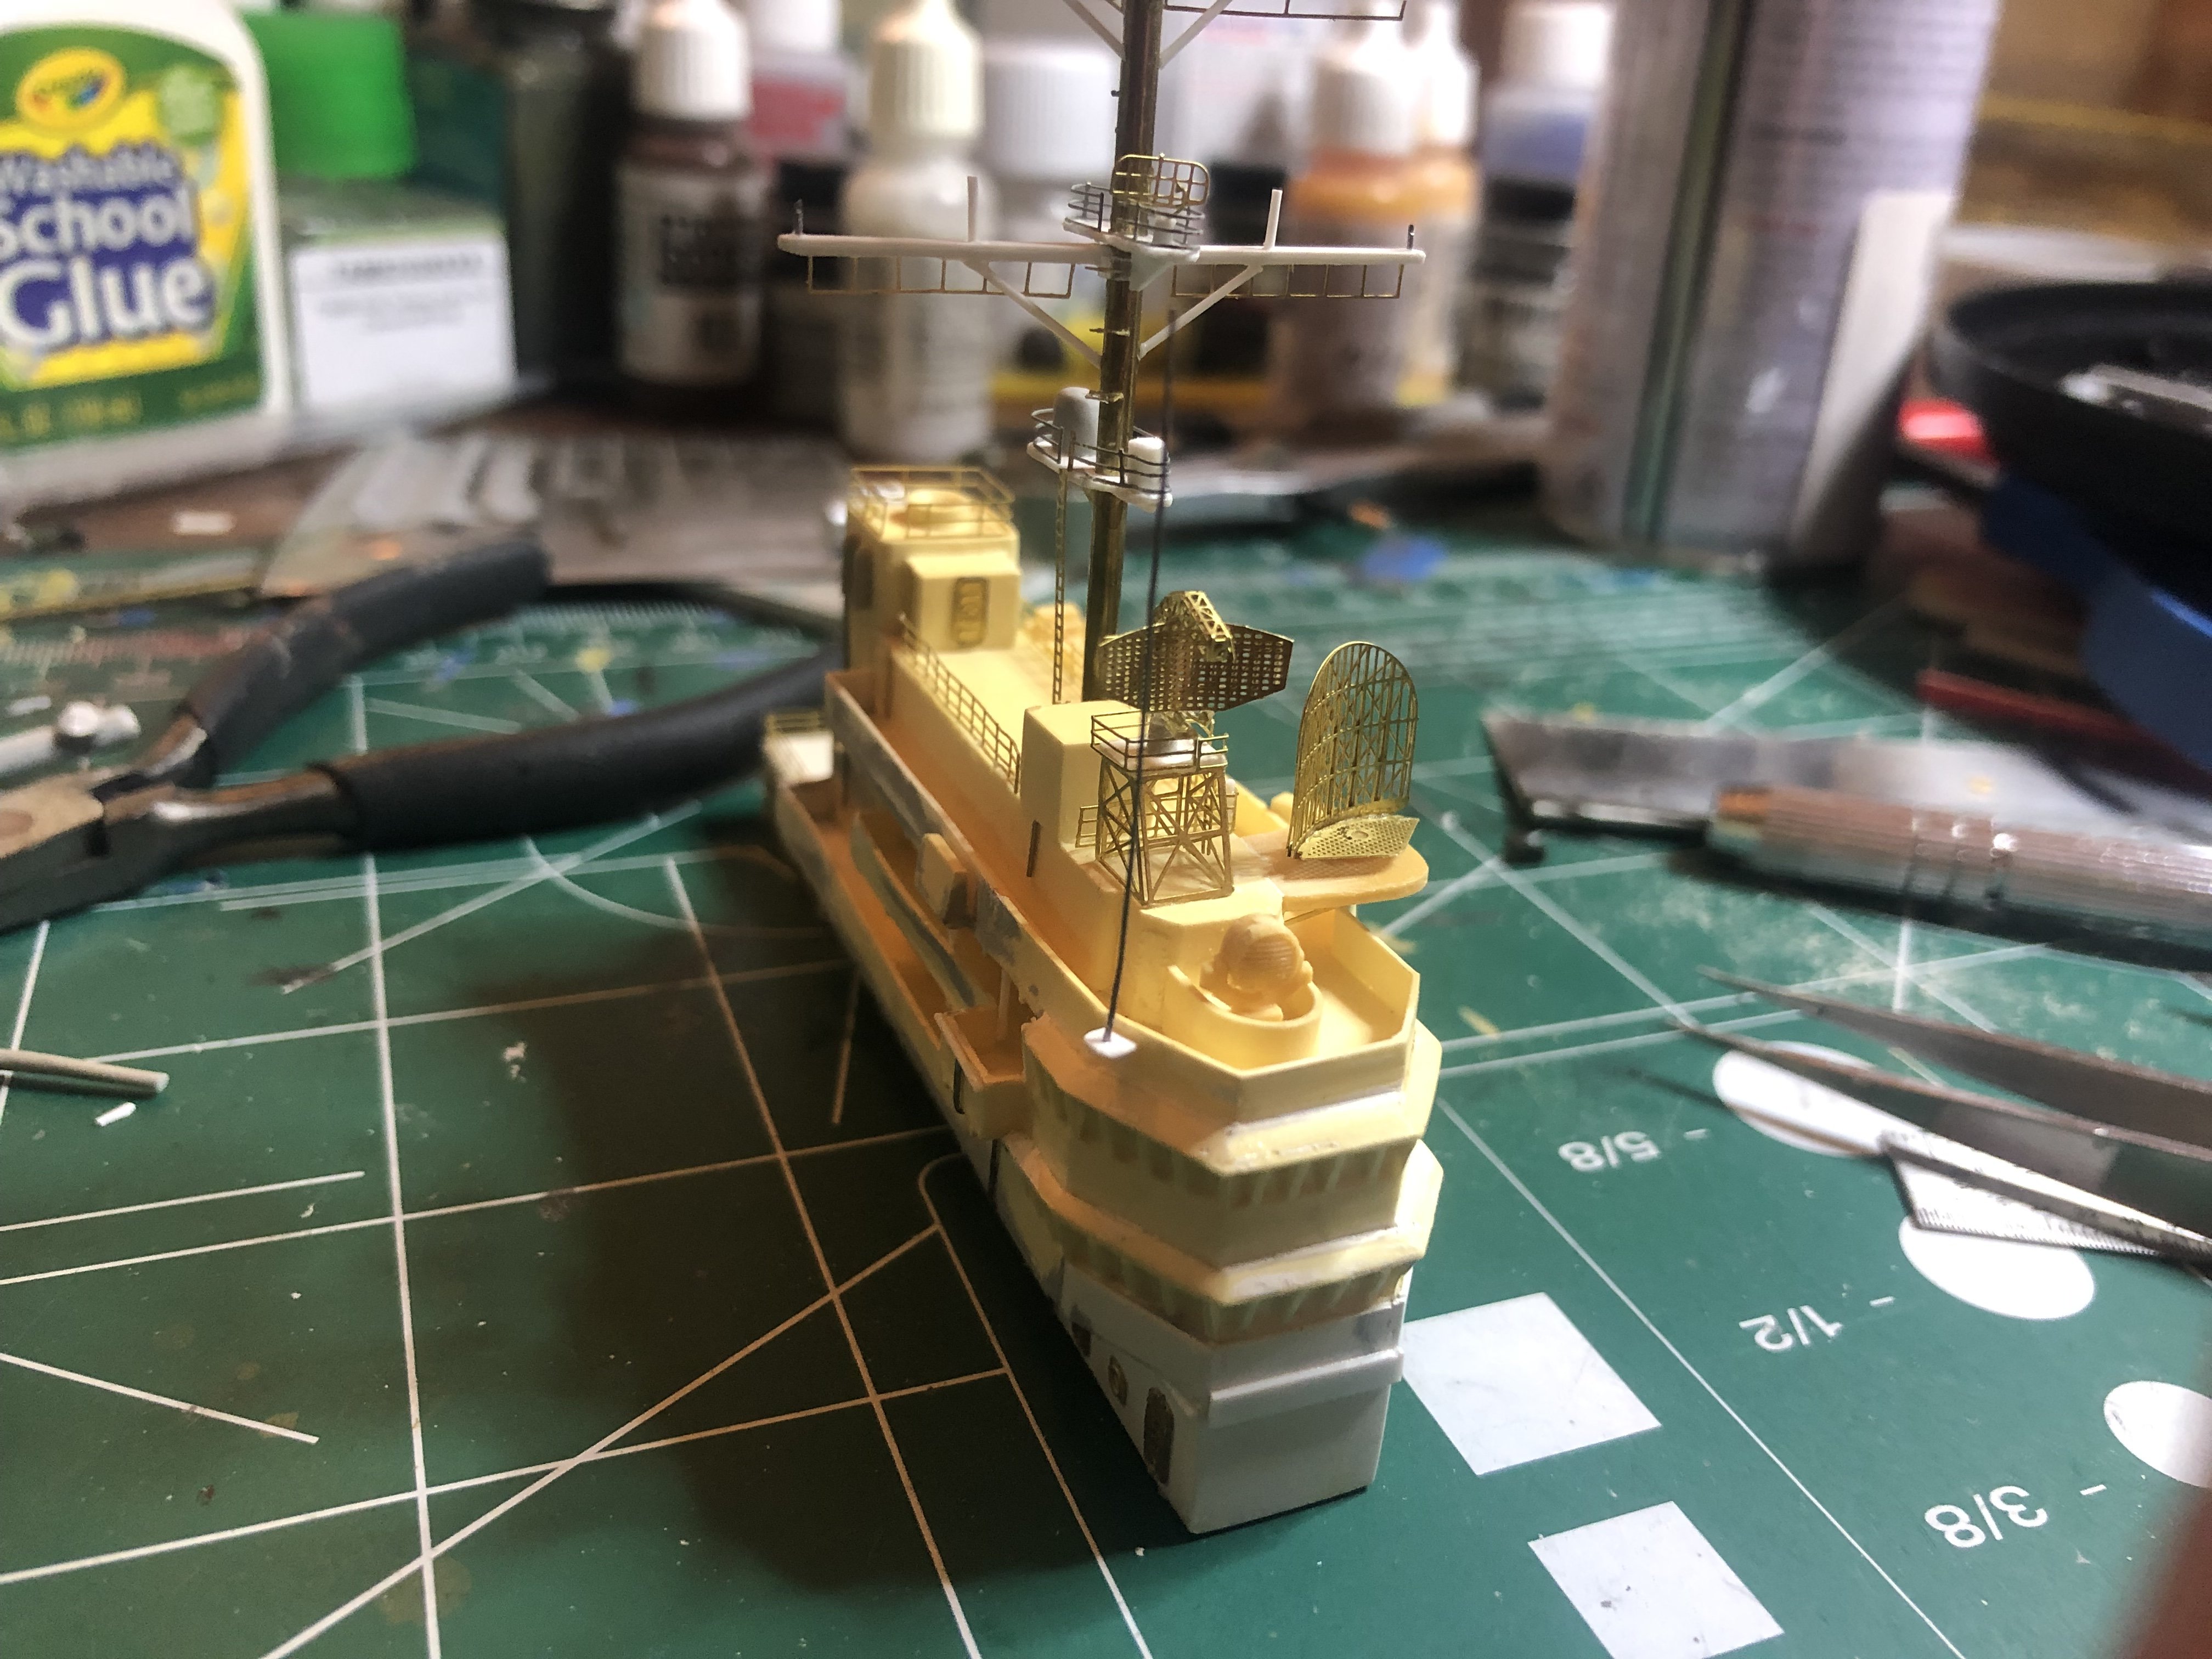
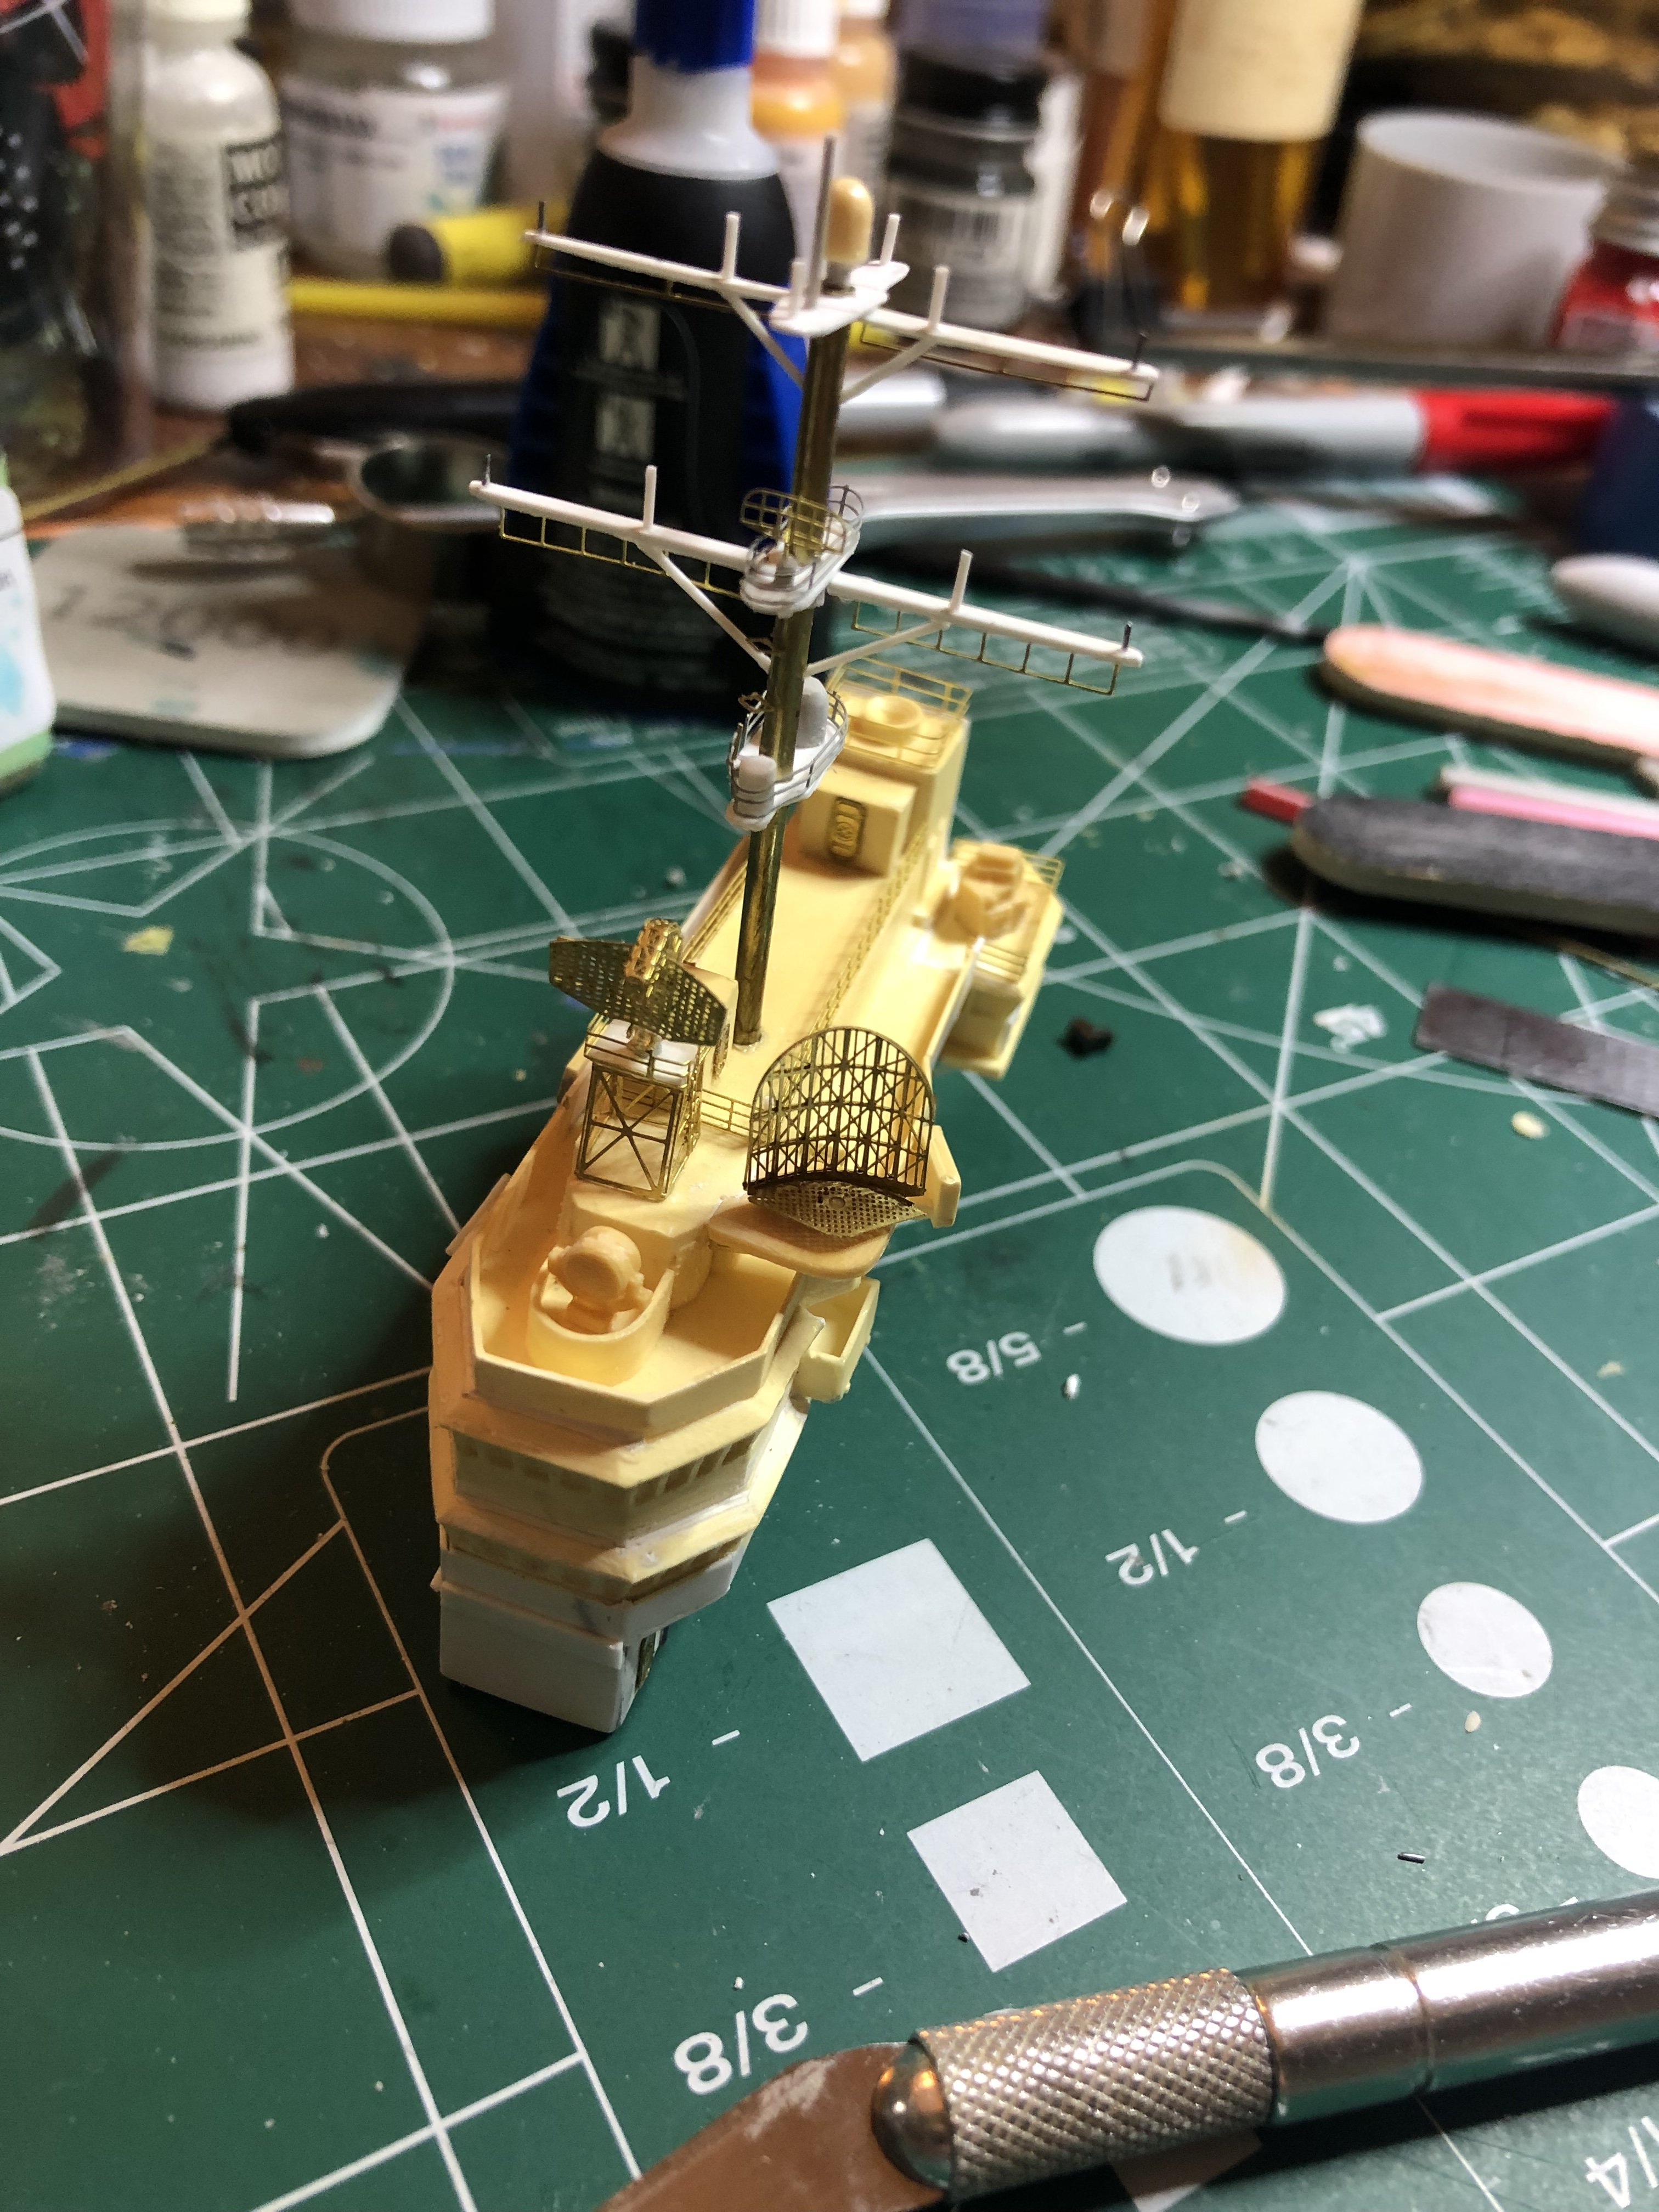
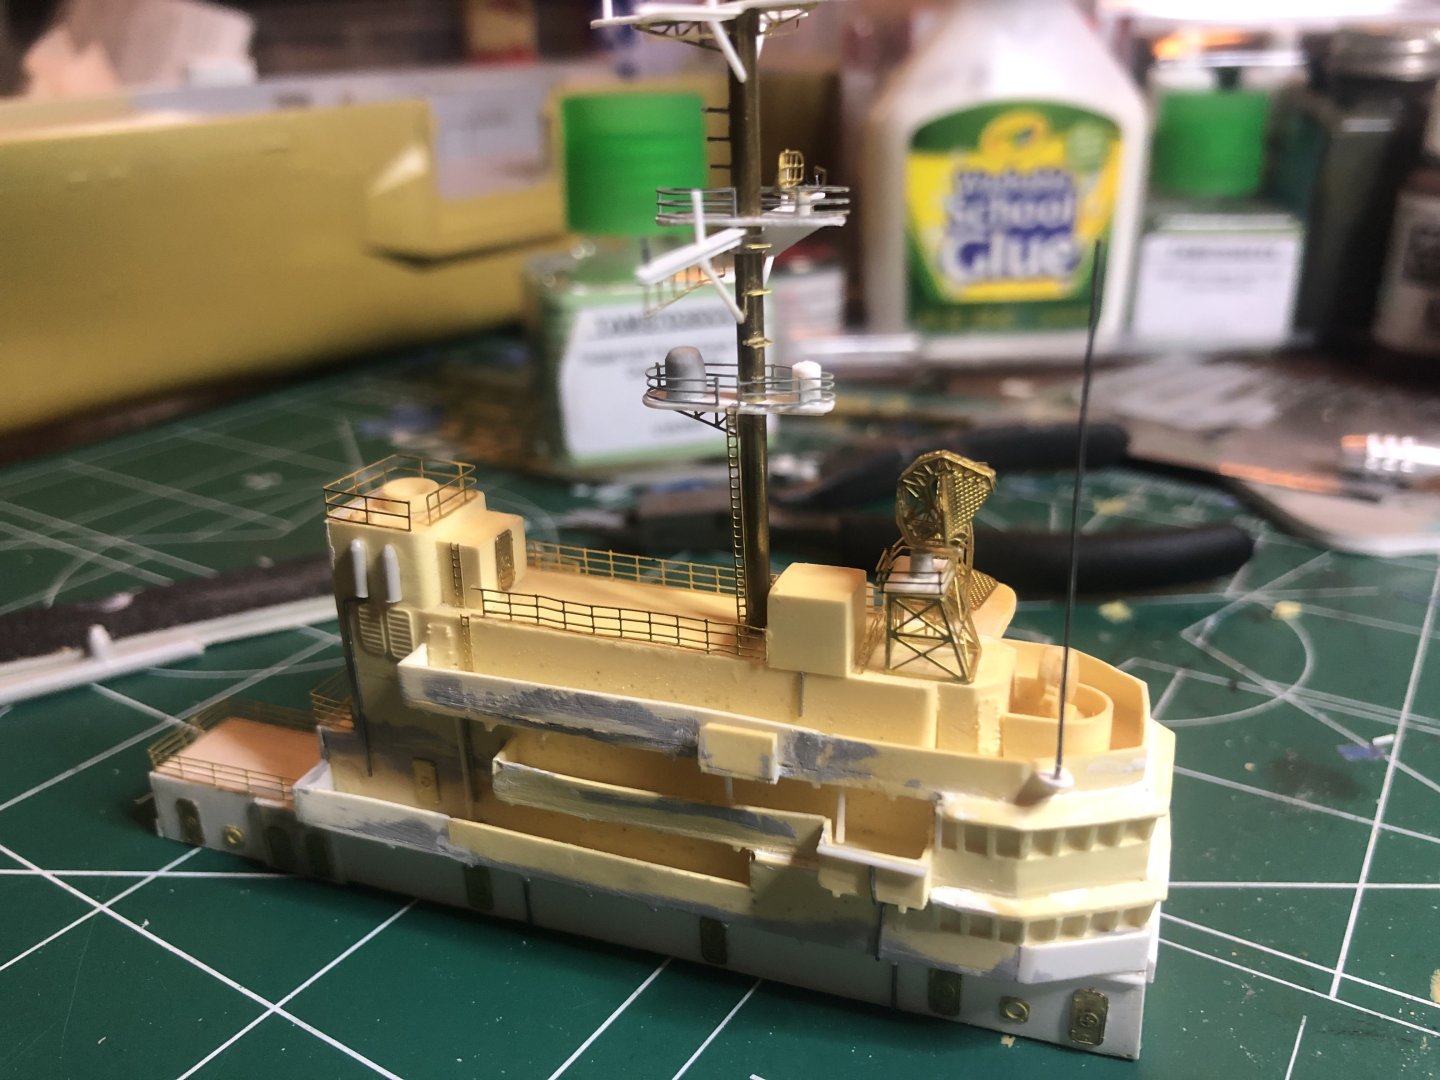
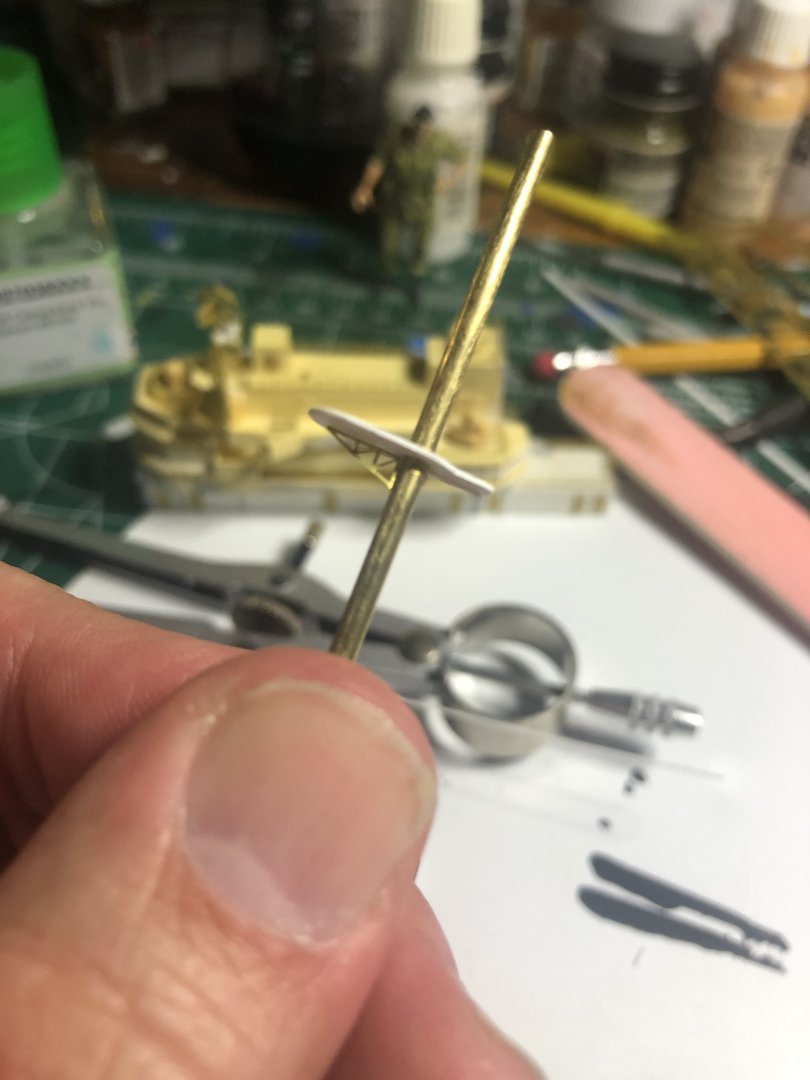
Just a minor update on the mast. The first platform is on. The mast is totally from scratch: brass rod, plasticard, and photoetch. It’s difficult to find pictures of the New Orleans’ mast, so I’ve used a few from other ships in its class to piece it together.
- 176 replies
-
- 5
-
-
- new orleans
- iron shipwrights
- (and 2 more)
-
I know, right? My luck would be that as soon as I’m finished they will come out with a good one
- 176 replies
-
- 3
-
-
- new orleans
- iron shipwrights
- (and 2 more)
-
Thanks! It is good to get back to it. I’ve been building planes, etc, off and on. As my skills went up I’m enjoying this more
- 176 replies
-
- 3
-
-
- new orleans
- iron shipwrights
- (and 2 more)
-
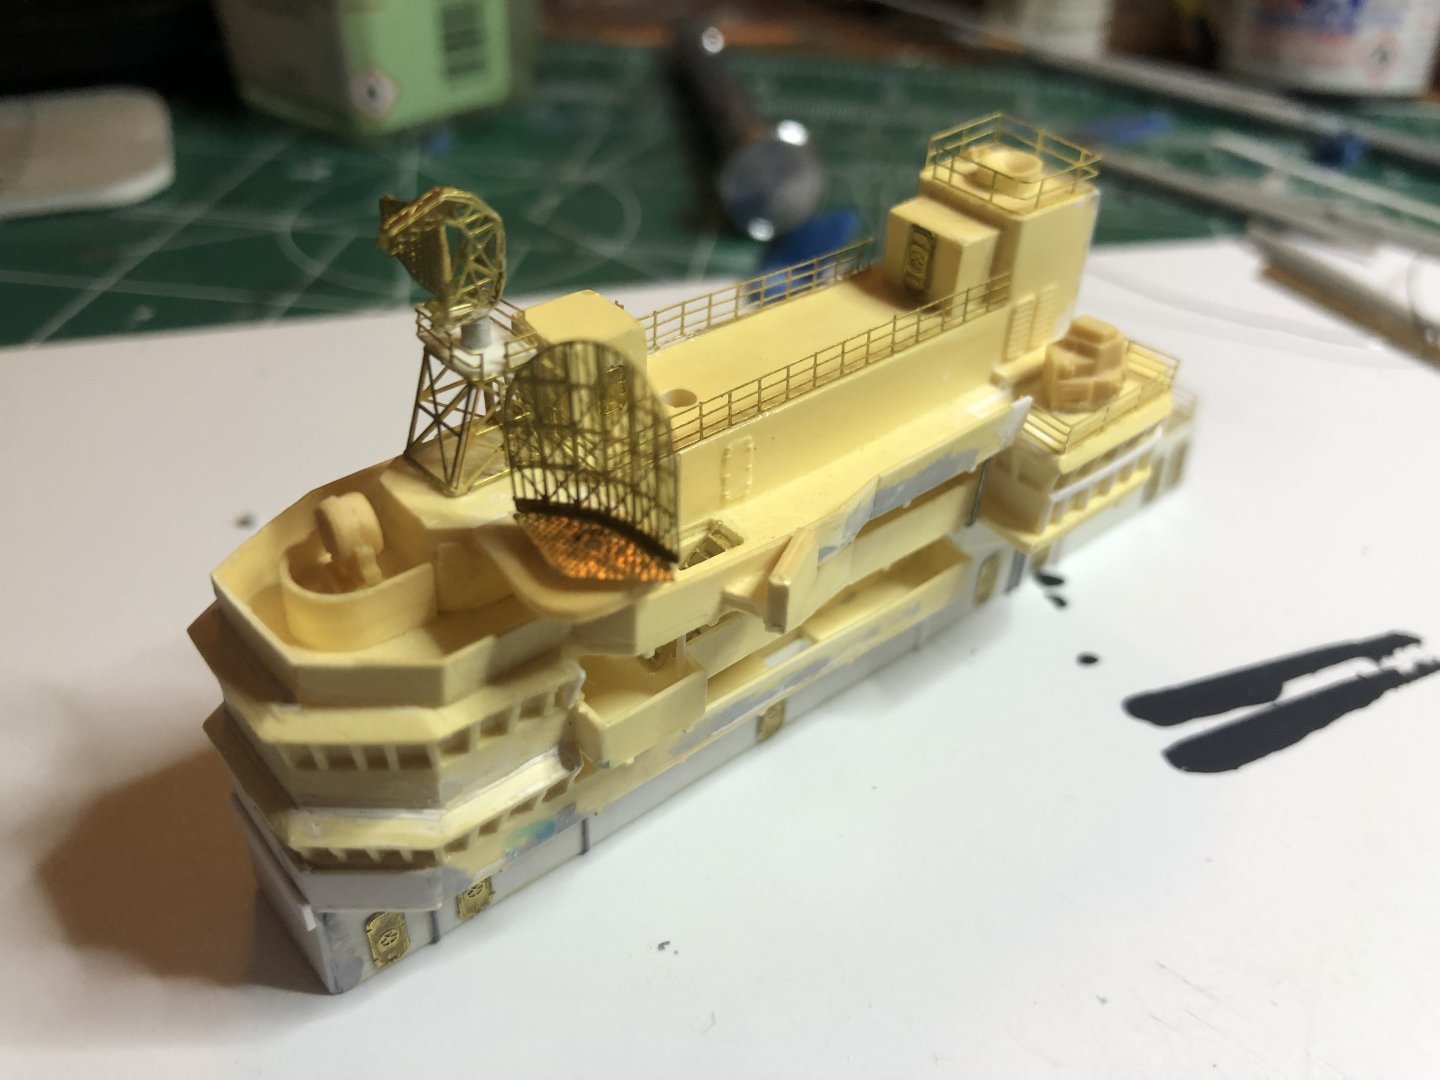
Minor updates. All white/gray additions are scratch-built. Added lead wire for conduit. PE is on and I think that the island is almost done - it’s on to the mast which will totally be scratch-built. As crappy as this kit is, it’s the only game in town. Thanks for looking.

- 176 replies
-
- 7
-
-
- new orleans
- iron shipwrights
- (and 2 more)
-
Minor updates again - this kit sat on the shelf of doom since the last post. Hated it because it was pure crap. Still the only game in town so I decided to restart it. i used lead wire for conduit and started adding PE to the island. Still much more to do but here goes. Enjoy. Did I mention it was pure crap???
- 176 replies
-
- 7
-
-
- new orleans
- iron shipwrights
- (and 2 more)
-
Hi, I’m looking to sell my copy of the Constitution practicum. I’d be willing to sell it for $50. Thank you for looking!
-
The kit is complete and has been opened for inspection purposes only. All parts accounted for. $500 (US). Shipping $30 (Continental US)
-
I would like to say that model expo came through in a huge way. I humbly apologize for any negativity I may have caused. Admins please delete this thread. Thanks to model expo!!!
-
Not sure if this is the right place to post this, if not then please move it to where it belongs. I finally started building my Gunboat Philadelphia and when I got to the bottom pieces (23S, 23P, and 24) I found they are of varying thicknesses and not usable. Last week, I contacted Model Expo using the online form (using the link given by a fellow member here) and even attached photos showing said parts. No response of any form. I sent an email to their modelexpo.parts email shown on their website and still no response. I can't move forward with the ship until I source the parts. Anyone have any other ideas? Or am I out of line posting here given no response or acknowledgement? Thanks for time and consideration. If my post is out of line, please delete it.
-
Why? Are you entering it for awards? Make that thing pop!
-
Future floor polish (the acrylic kind) is the best. Can be brushed or airbrushed. It levels very well and provides an excellent base and reduces silvering. Also a great setter, too. Once is dry, it can take any covering.
- 8 replies
-
- 4
-
-
- decal
- weatherring
- (and 1 more)
-
Great job! I thought about this kit, too. However, that engine and all the other white-metal pieces looks almost toy-like and having no life. Even if you are going for an unpainted look, every metal used wasn't the same exact color all the way through - the gun metal most certainly wasn't the same as used in engine as used in cowlings, etc. Paint/wash/drybrush/etc to bring things to life. I mean, why paint the engine mount (looks to be almost a WWII era interior green color - was that how the originals were painted or just something different?) and not the guns, engine, struts, etc.? Would really bring things to life and make it look like a real plane but without its skin. Great job on all accounts! I love it and don't mean to sound harsh...
-
Hello from Virginia Beach, VA
Spaceman Spiff replied to ftnemtst's topic in New member Introductions
Jake's is awesome. I think I could just make a meal of those sweet corn nuggets! Good stuff. What part are you in?