
Jay 1
-
Posts
654 -
Joined
-
Last visited
Content Type
Profiles
Forums
Gallery
Events
Everything posted by Jay 1
-
 Thanks for your nice tutorial, Keith. At your scale, that’s a lot of fine and precise detailed work. Cheers, Jay
 -
LOL about asking how you know! Yep, I regularly walk into a room and then ask myself, “Now what was I going to get?” 🤣
- 63 replies
-
- 2
-

-
- Lady Eleanor
- True Vine
- (and 2 more)
-
Hull Construction – Hull Cleanup Shout out to those who are following along or popping in for a peek—thank you! No photos this week. Most of my hobby time this week was spent off the boat with figuring out how to tackle several things coming up next on the build. Fingers crossed that items I need arrive mid-week, as I’d like get some work in next weekend. The only things I accomplished on the build were touchups and fettling with rudder pintles and gudgeons to hang the rudder when I start painting and so I can also remove it for other work later in the build. Cheers, Jay
- 63 replies
-
- 1
-

-
- Lady Eleanor
- True Vine
- (and 2 more)
-
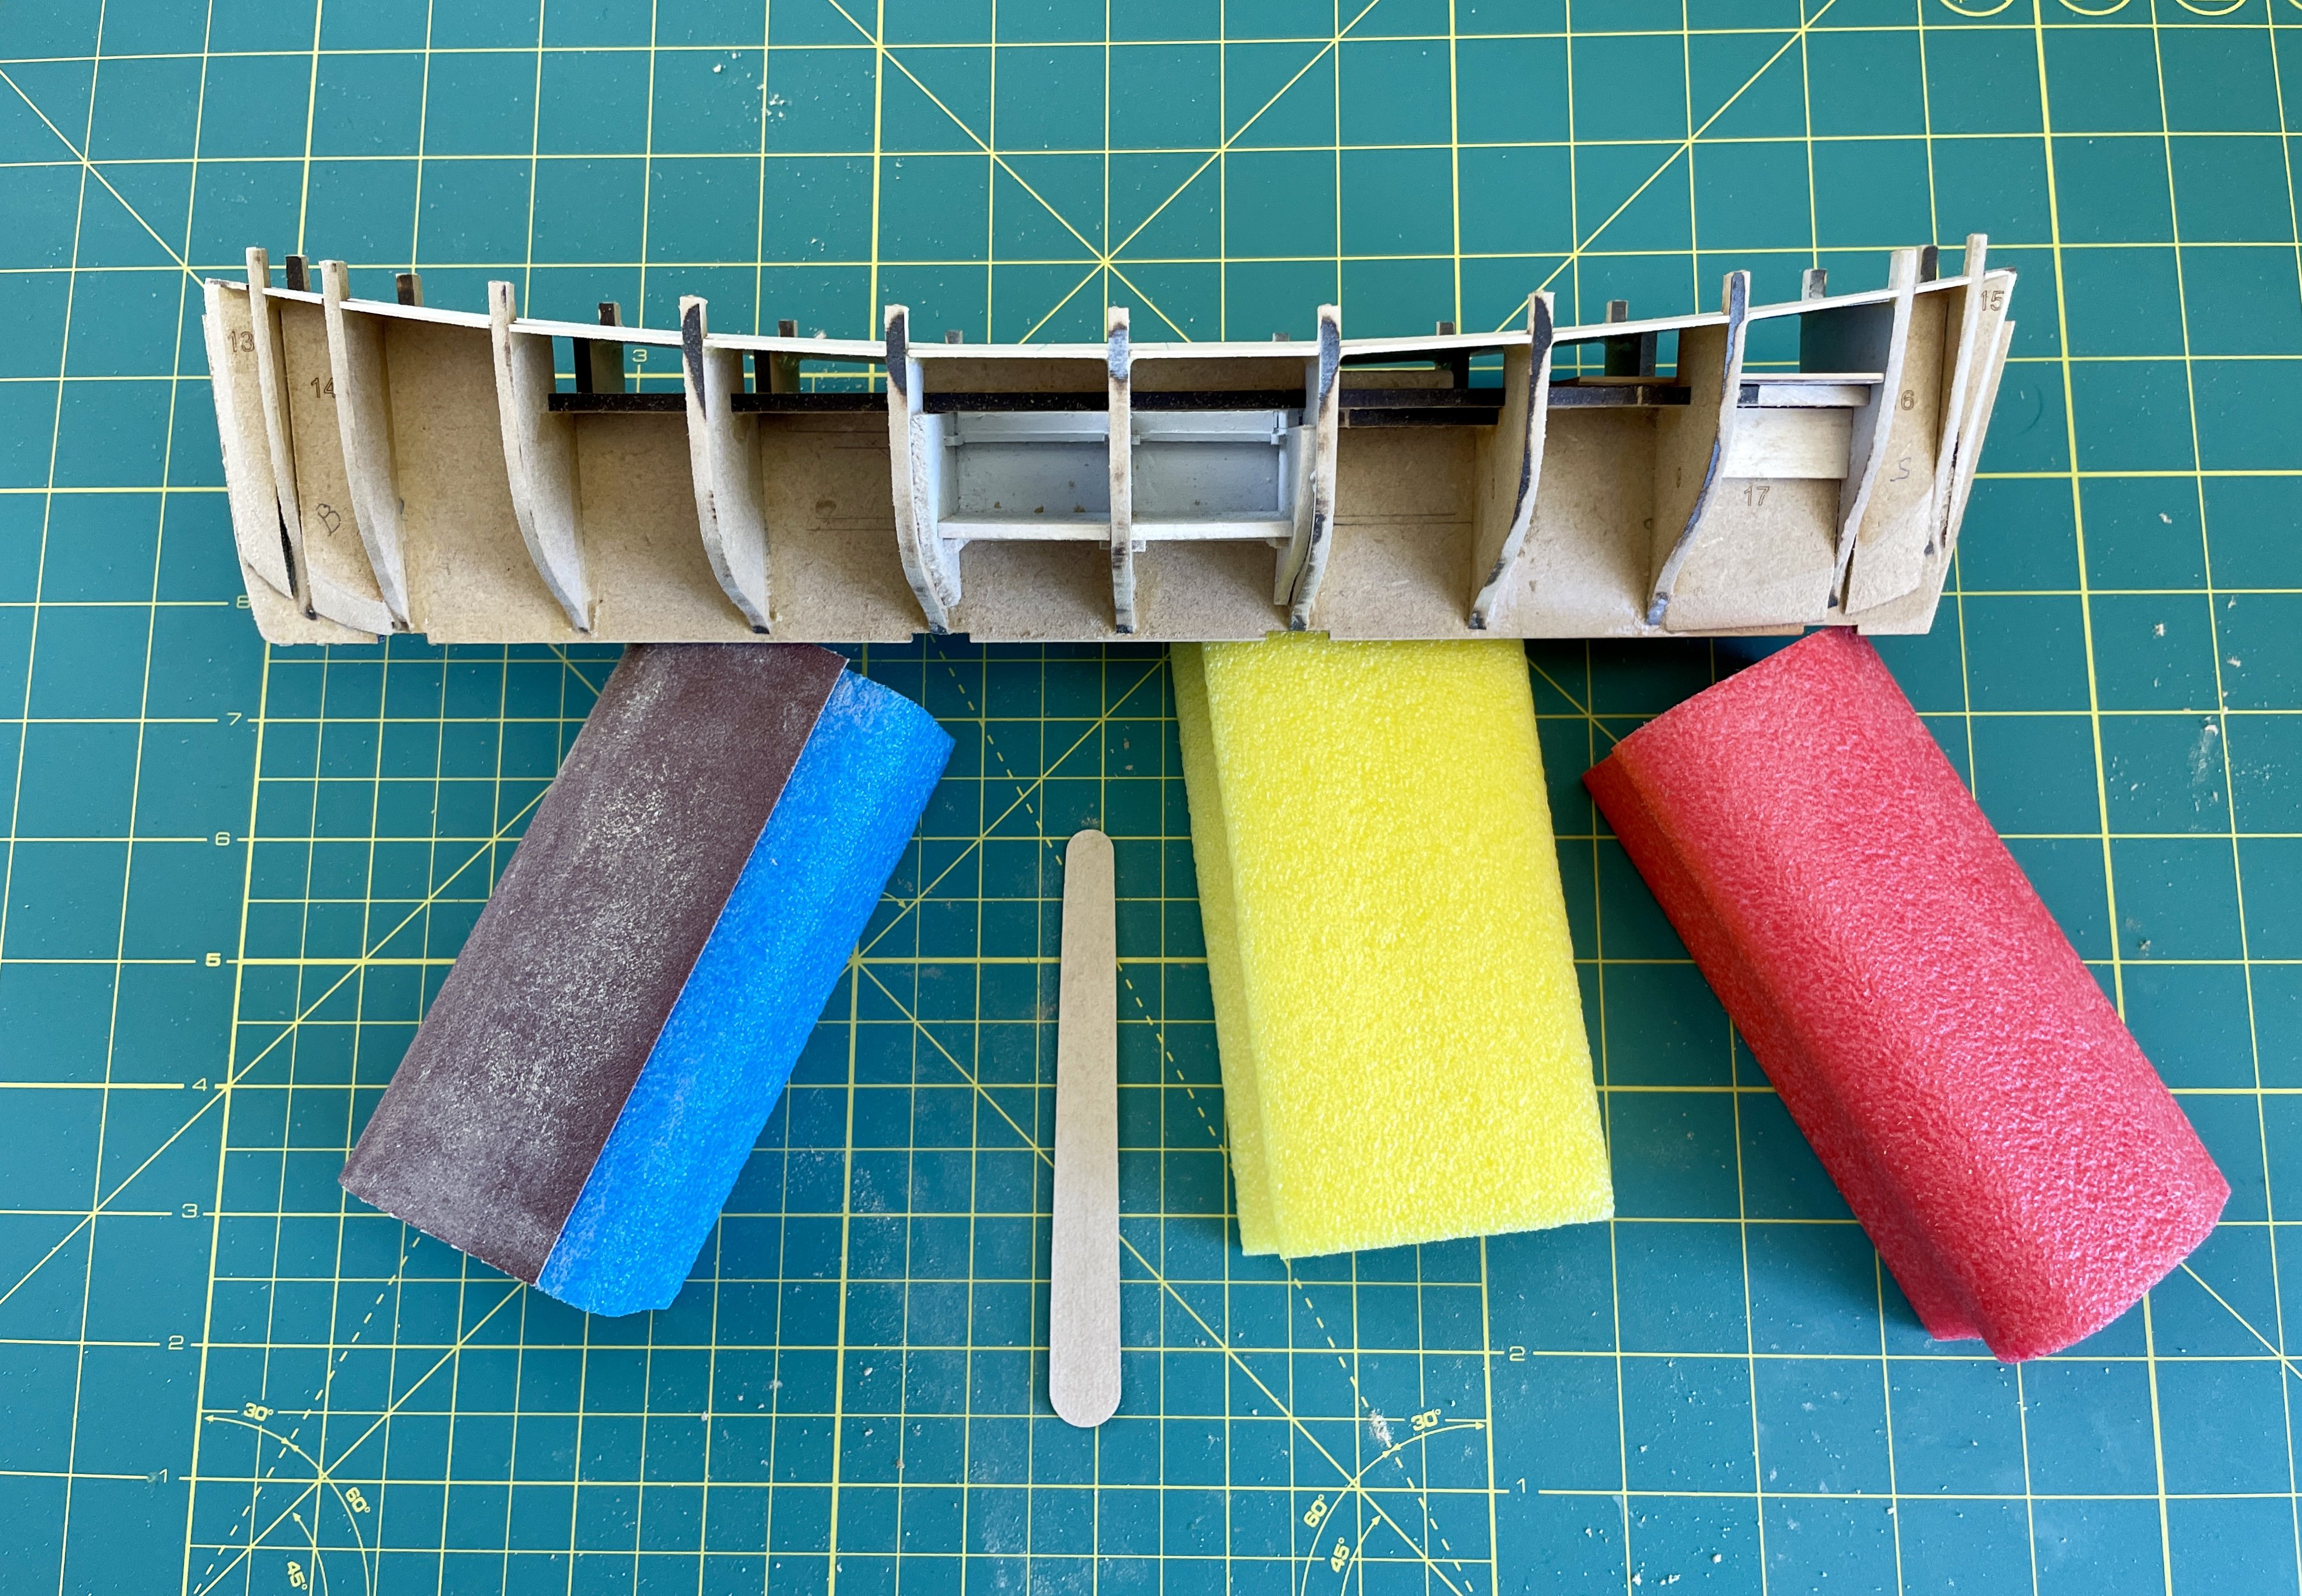
Those look really nice, Chuck! Are they pear? I think having a variety of toned blocks adds to a model. Cheers, Jay
-
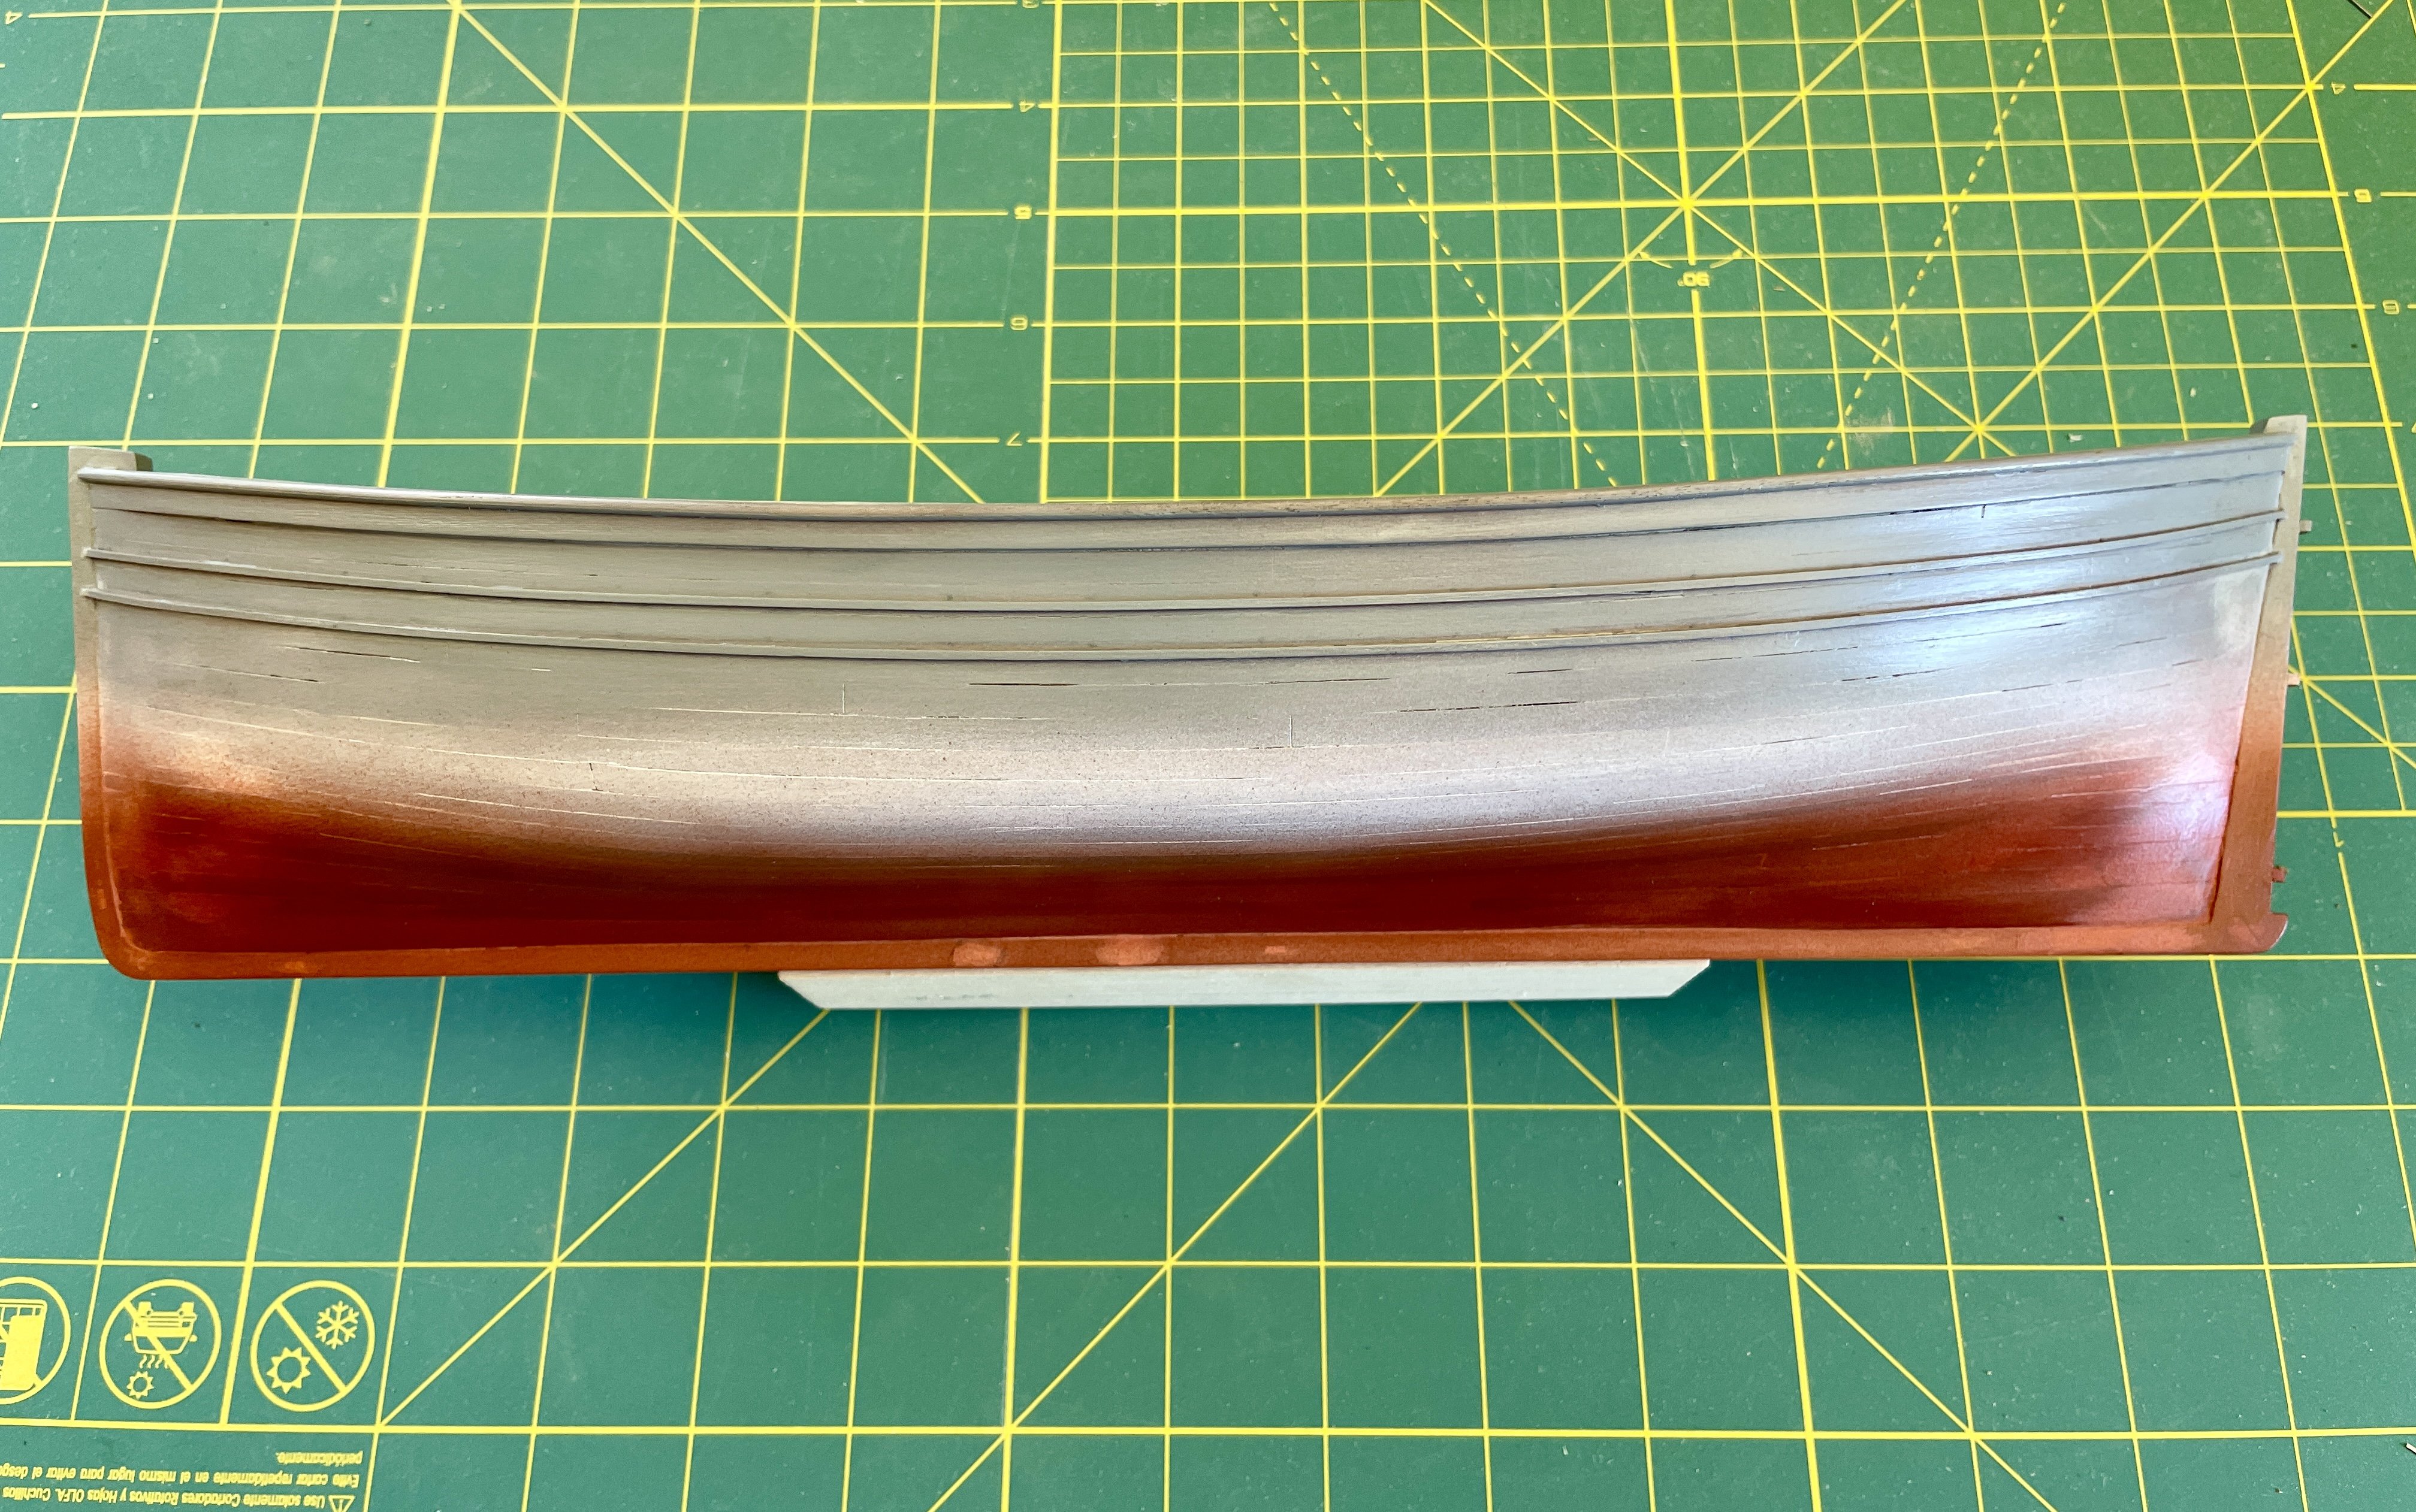
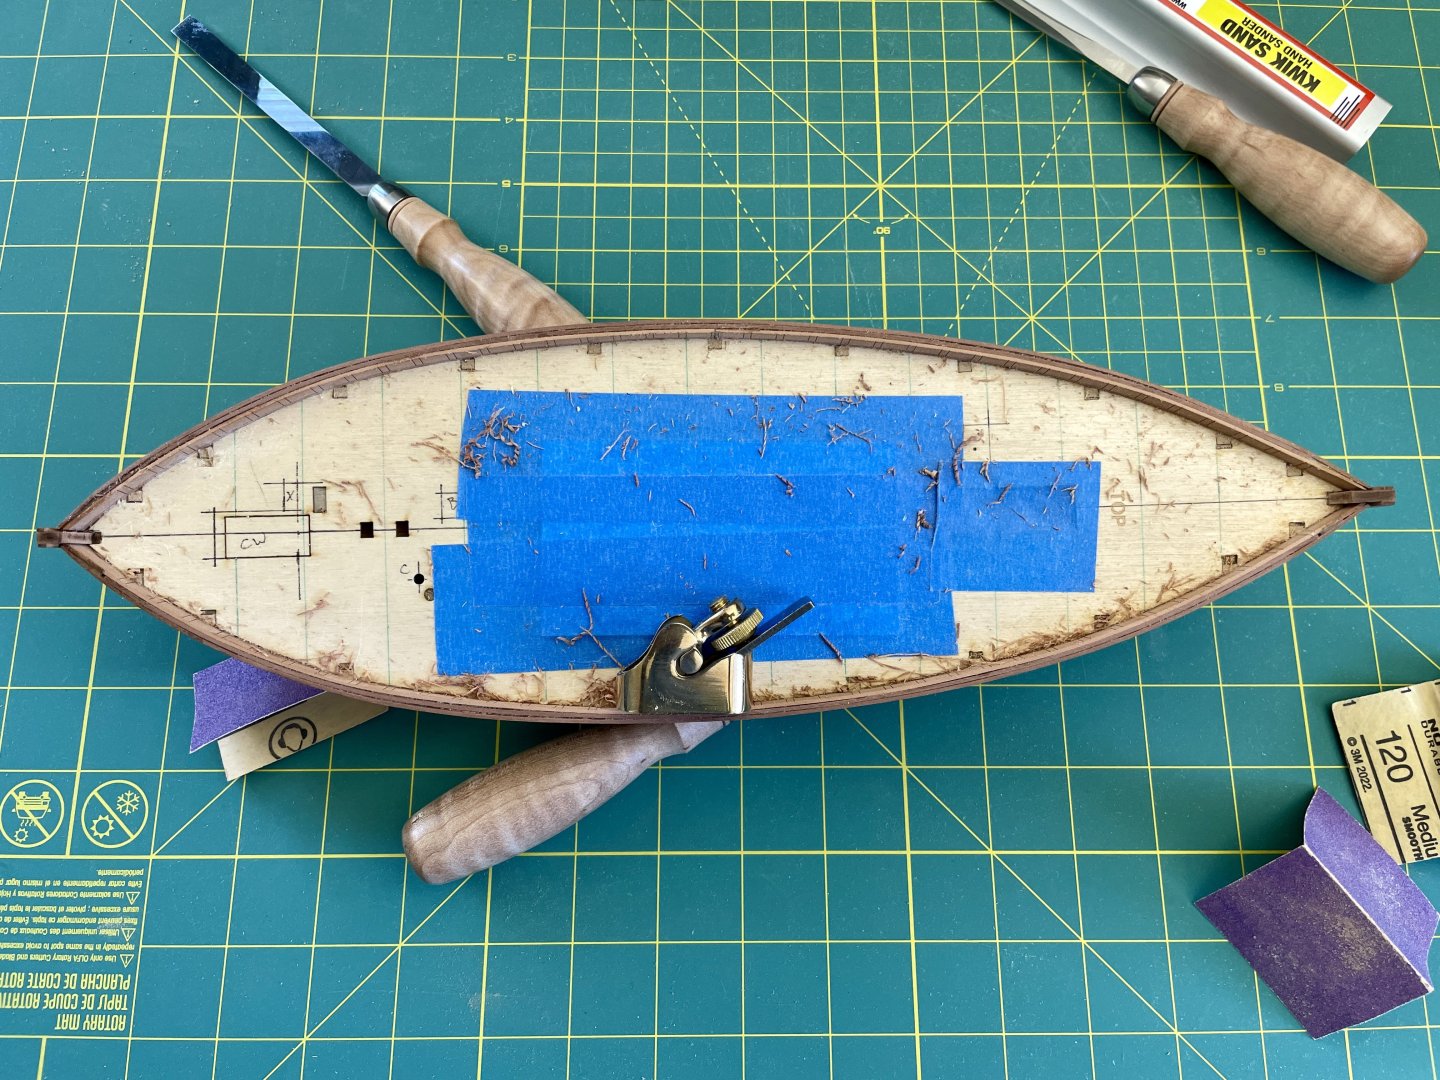
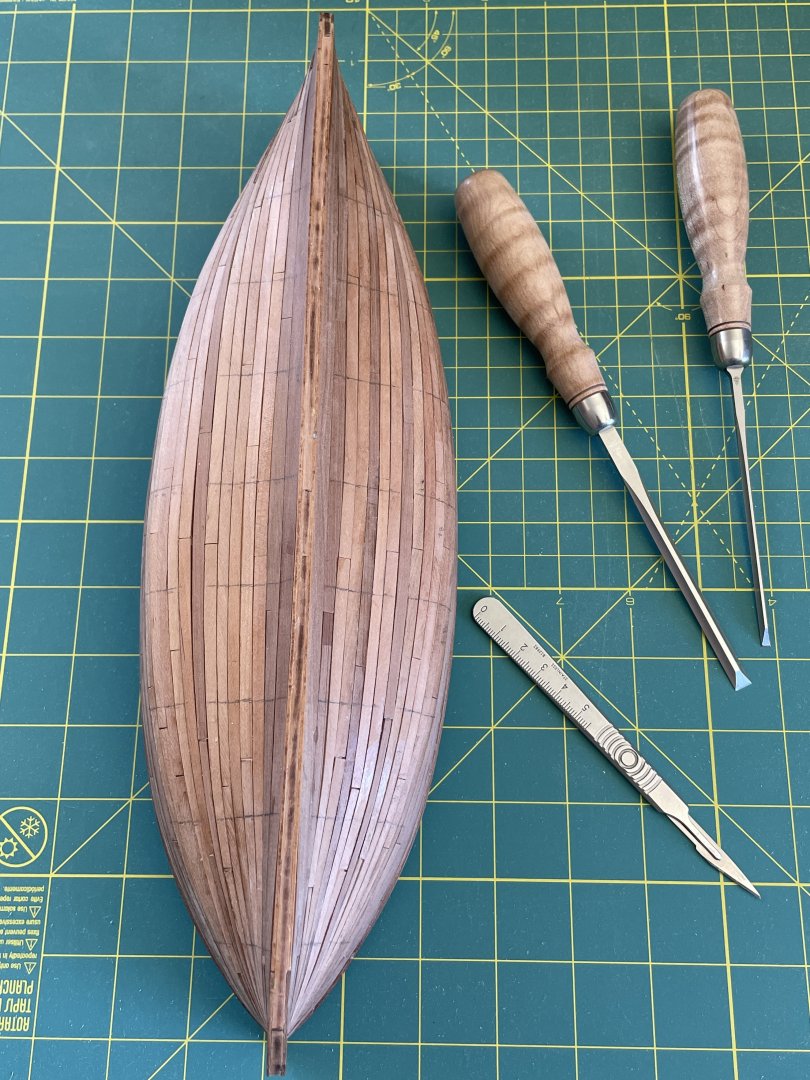
Hull Construction – Hull Cleanup • When I was 2nd planking, I had to pare areas of the 1st planking near the bottom of the stern and the stem so that the 2nd planking would hood reasonably well into their rebates. Those pared areas are where fill was needed to level the 2nd planking and fair the hull. • I scabbed the tops of the stem and stern with 1mm stock so that their thicknesses were uniform and close the large through gaps in both pieces. • All the rebate location holes were plugged and then filled; likewise, rebate joints along the stem, stern, and keel were leveled at their joints. • Because I wanted a moveable rudder, I used one of Chuck’s pintle and gudgeon kits to start hanging the rudder. • I planed the tops of the gunwales to get them level and then after the gunwale rubbing strakes were installed, I filled the tops of the gunwales to ensure the multiple wood joints don’t flash through when the gunwales are painted. • Installing all the rubbing strakes required using CA and were a bit tricky. The Vine only had 1 rubbing strake on its gunwales; the rubbing strakes on the hull are positioned according to the Vine’s plans. • All the bulkhead tops were cut off with a flush-cut saw. • To help harden delicate areas of fill and help with painting hull when I get to that point, I sealed the hull with shellac. Although priming wasn’t necessary with the hull sealed with shellac, the purpose for using primer was to easily identify areas on the hull that will need additional work, corrections, or etc. before I paint and to also further harden the hull fill. • I selectively scored hull planks so that the planking will flash through when I paint the hull; however, after priming, I think the scoring looks like crap and I’ll fill these spots when I make other minor hull fixes. Cheers, Jay


- 63 replies
-
- 5
-
-
- Lady Eleanor
- True Vine
- (and 2 more)
-
Chris, you turned a pig’s ear kit into a silk purse—well done!
-
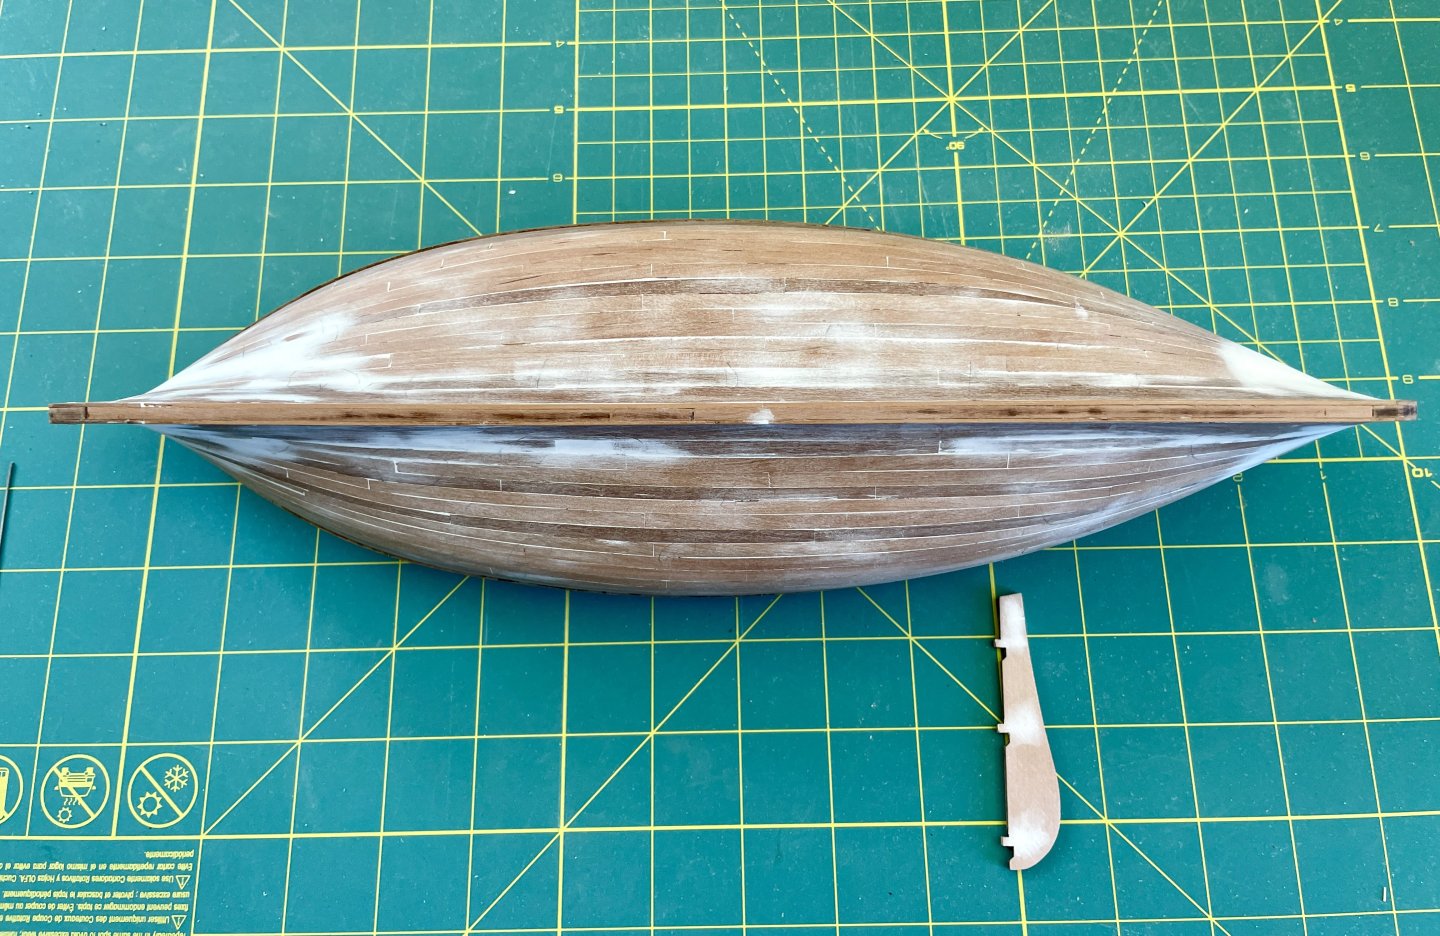
Hull Construction – 2nd Planking Completed I finished the 2nd planking today and will begin giving the a hull a cleanup with some sanding, patching the kit’s alignment holes in the keel, stem, and stern, and taking care of a few other hull odds and sods. Cheers, Jay
- 63 replies
-
- 5
-
-
- Lady Eleanor
- True Vine
- (and 2 more)
-
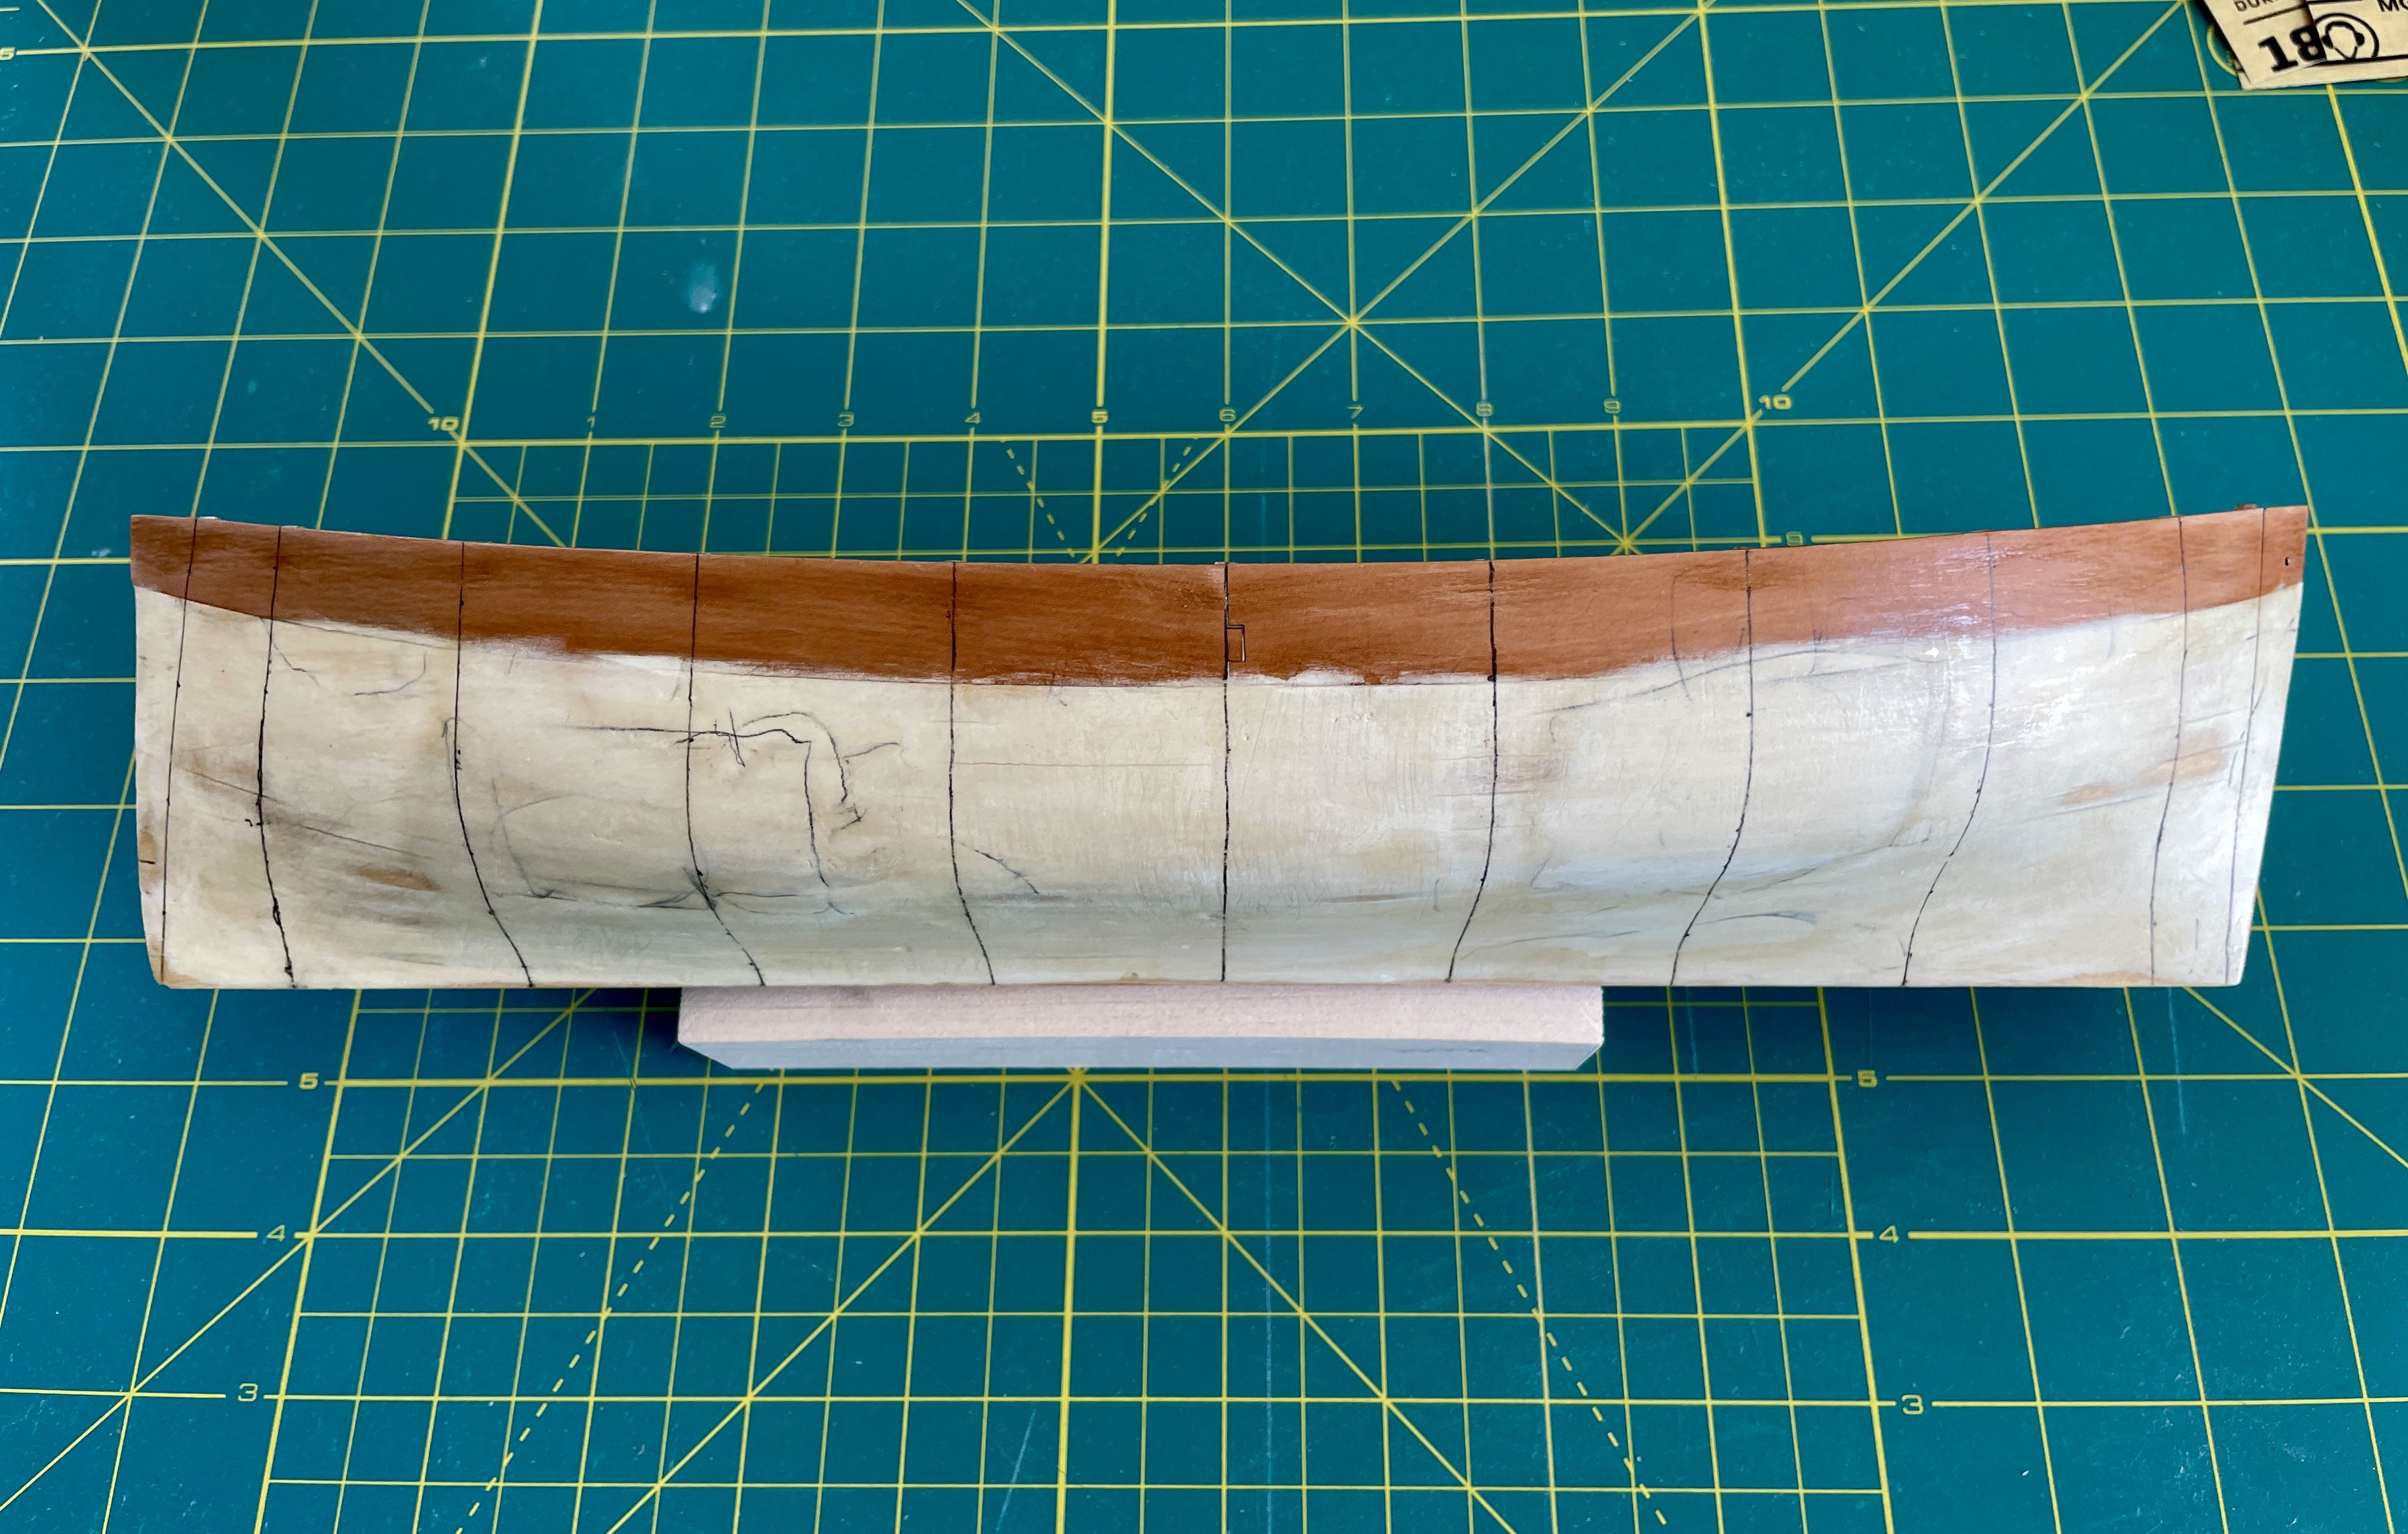
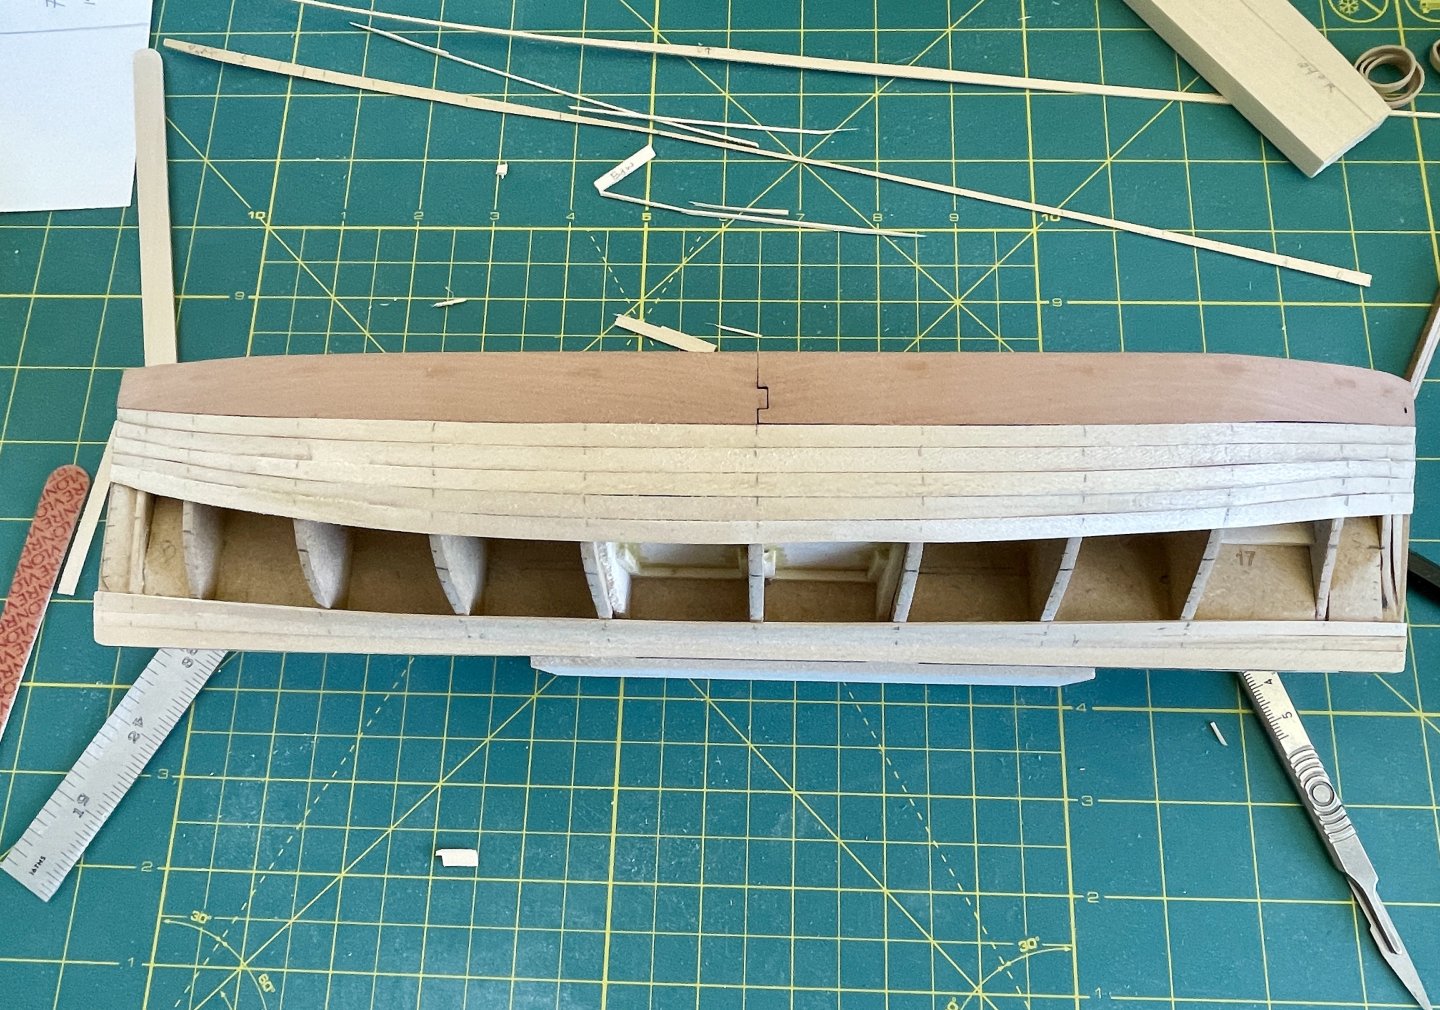
Hull Construction – 2nd Planking Shout out to those who are following along or popping in for a peek! The Vine’s gunwale was 9” wide x 5” thick (~ 23 cm x 13 cm), which works out to be ~ 4 mm x 2 mm at scale. I elected to go with 6 mm x 1 mm because the 6 mm dimension contrasted better with the 4 mm planking and 1 mm looked better than 2 mm. Both the port and starboard gunwales are installed and taper into the stem and stern rebates. 6 mm wide garboards are also fitted both port and starboard. As mentioned in earlier, I’m using a 4 butt shift 5:3:1:4:2 pattern and 7 strakes are installed both port and starboard. Cheers, Jay
- 63 replies
-
- 9
-
-
- Lady Eleanor
- True Vine
- (and 2 more)
-
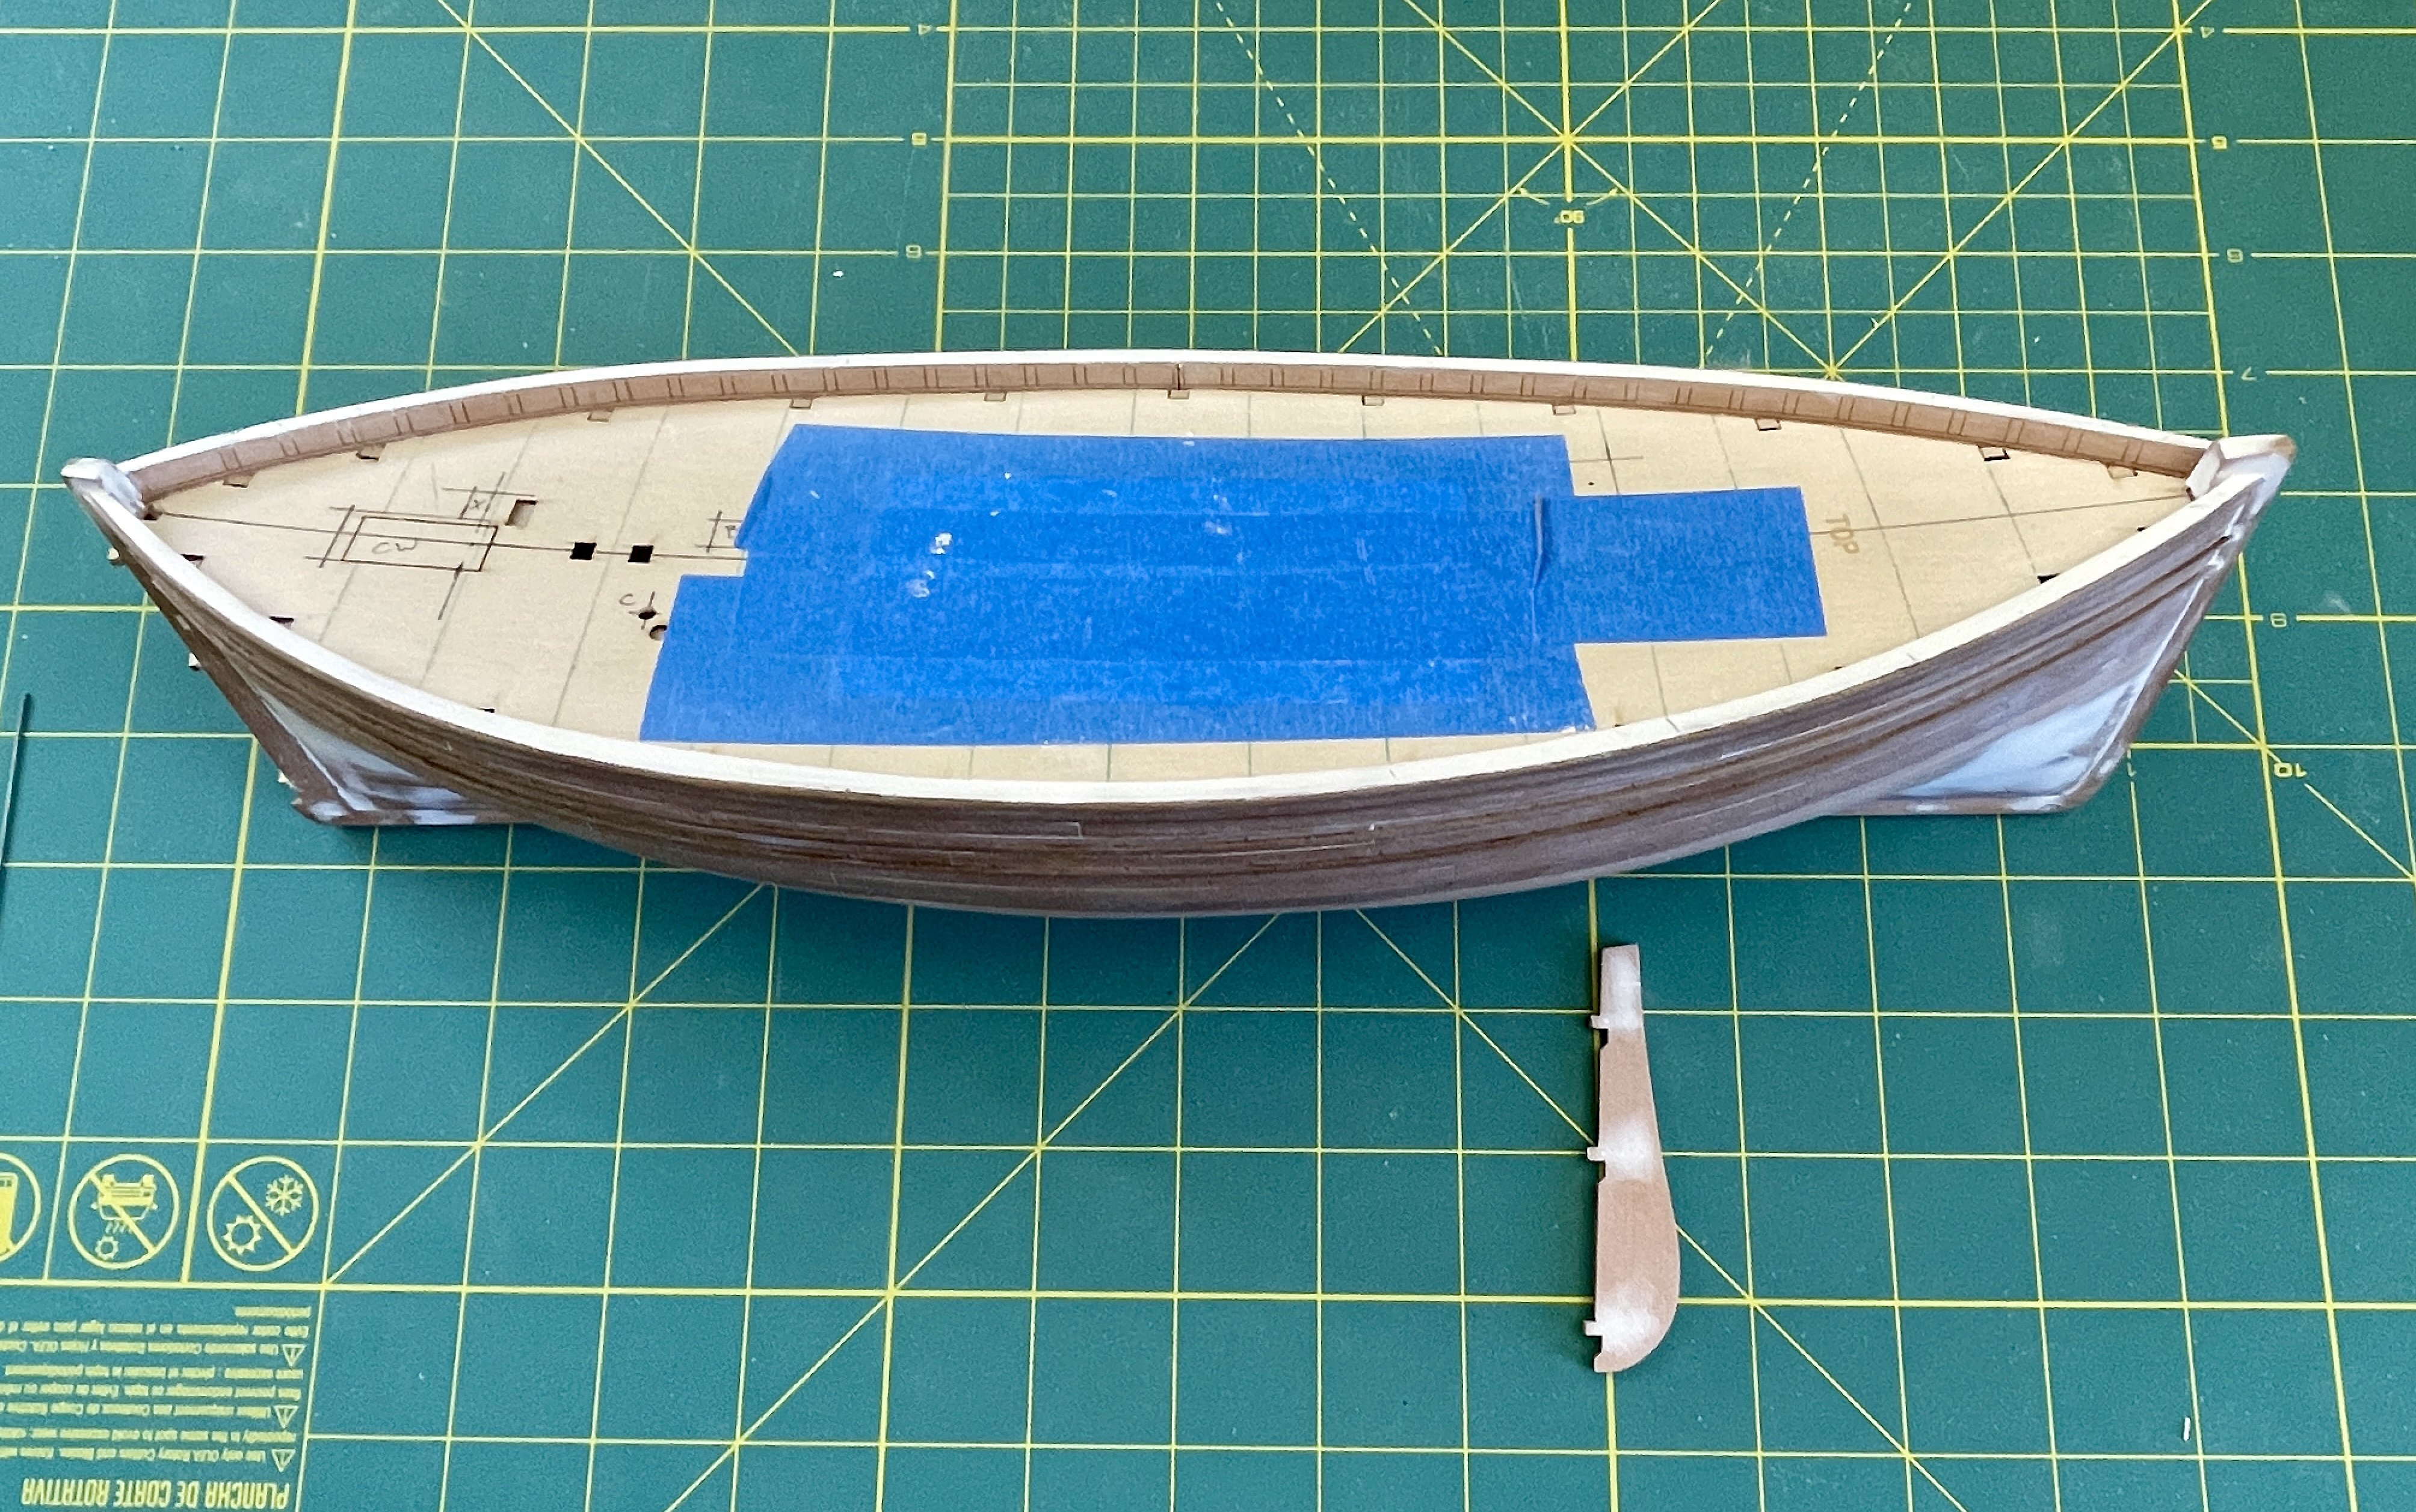
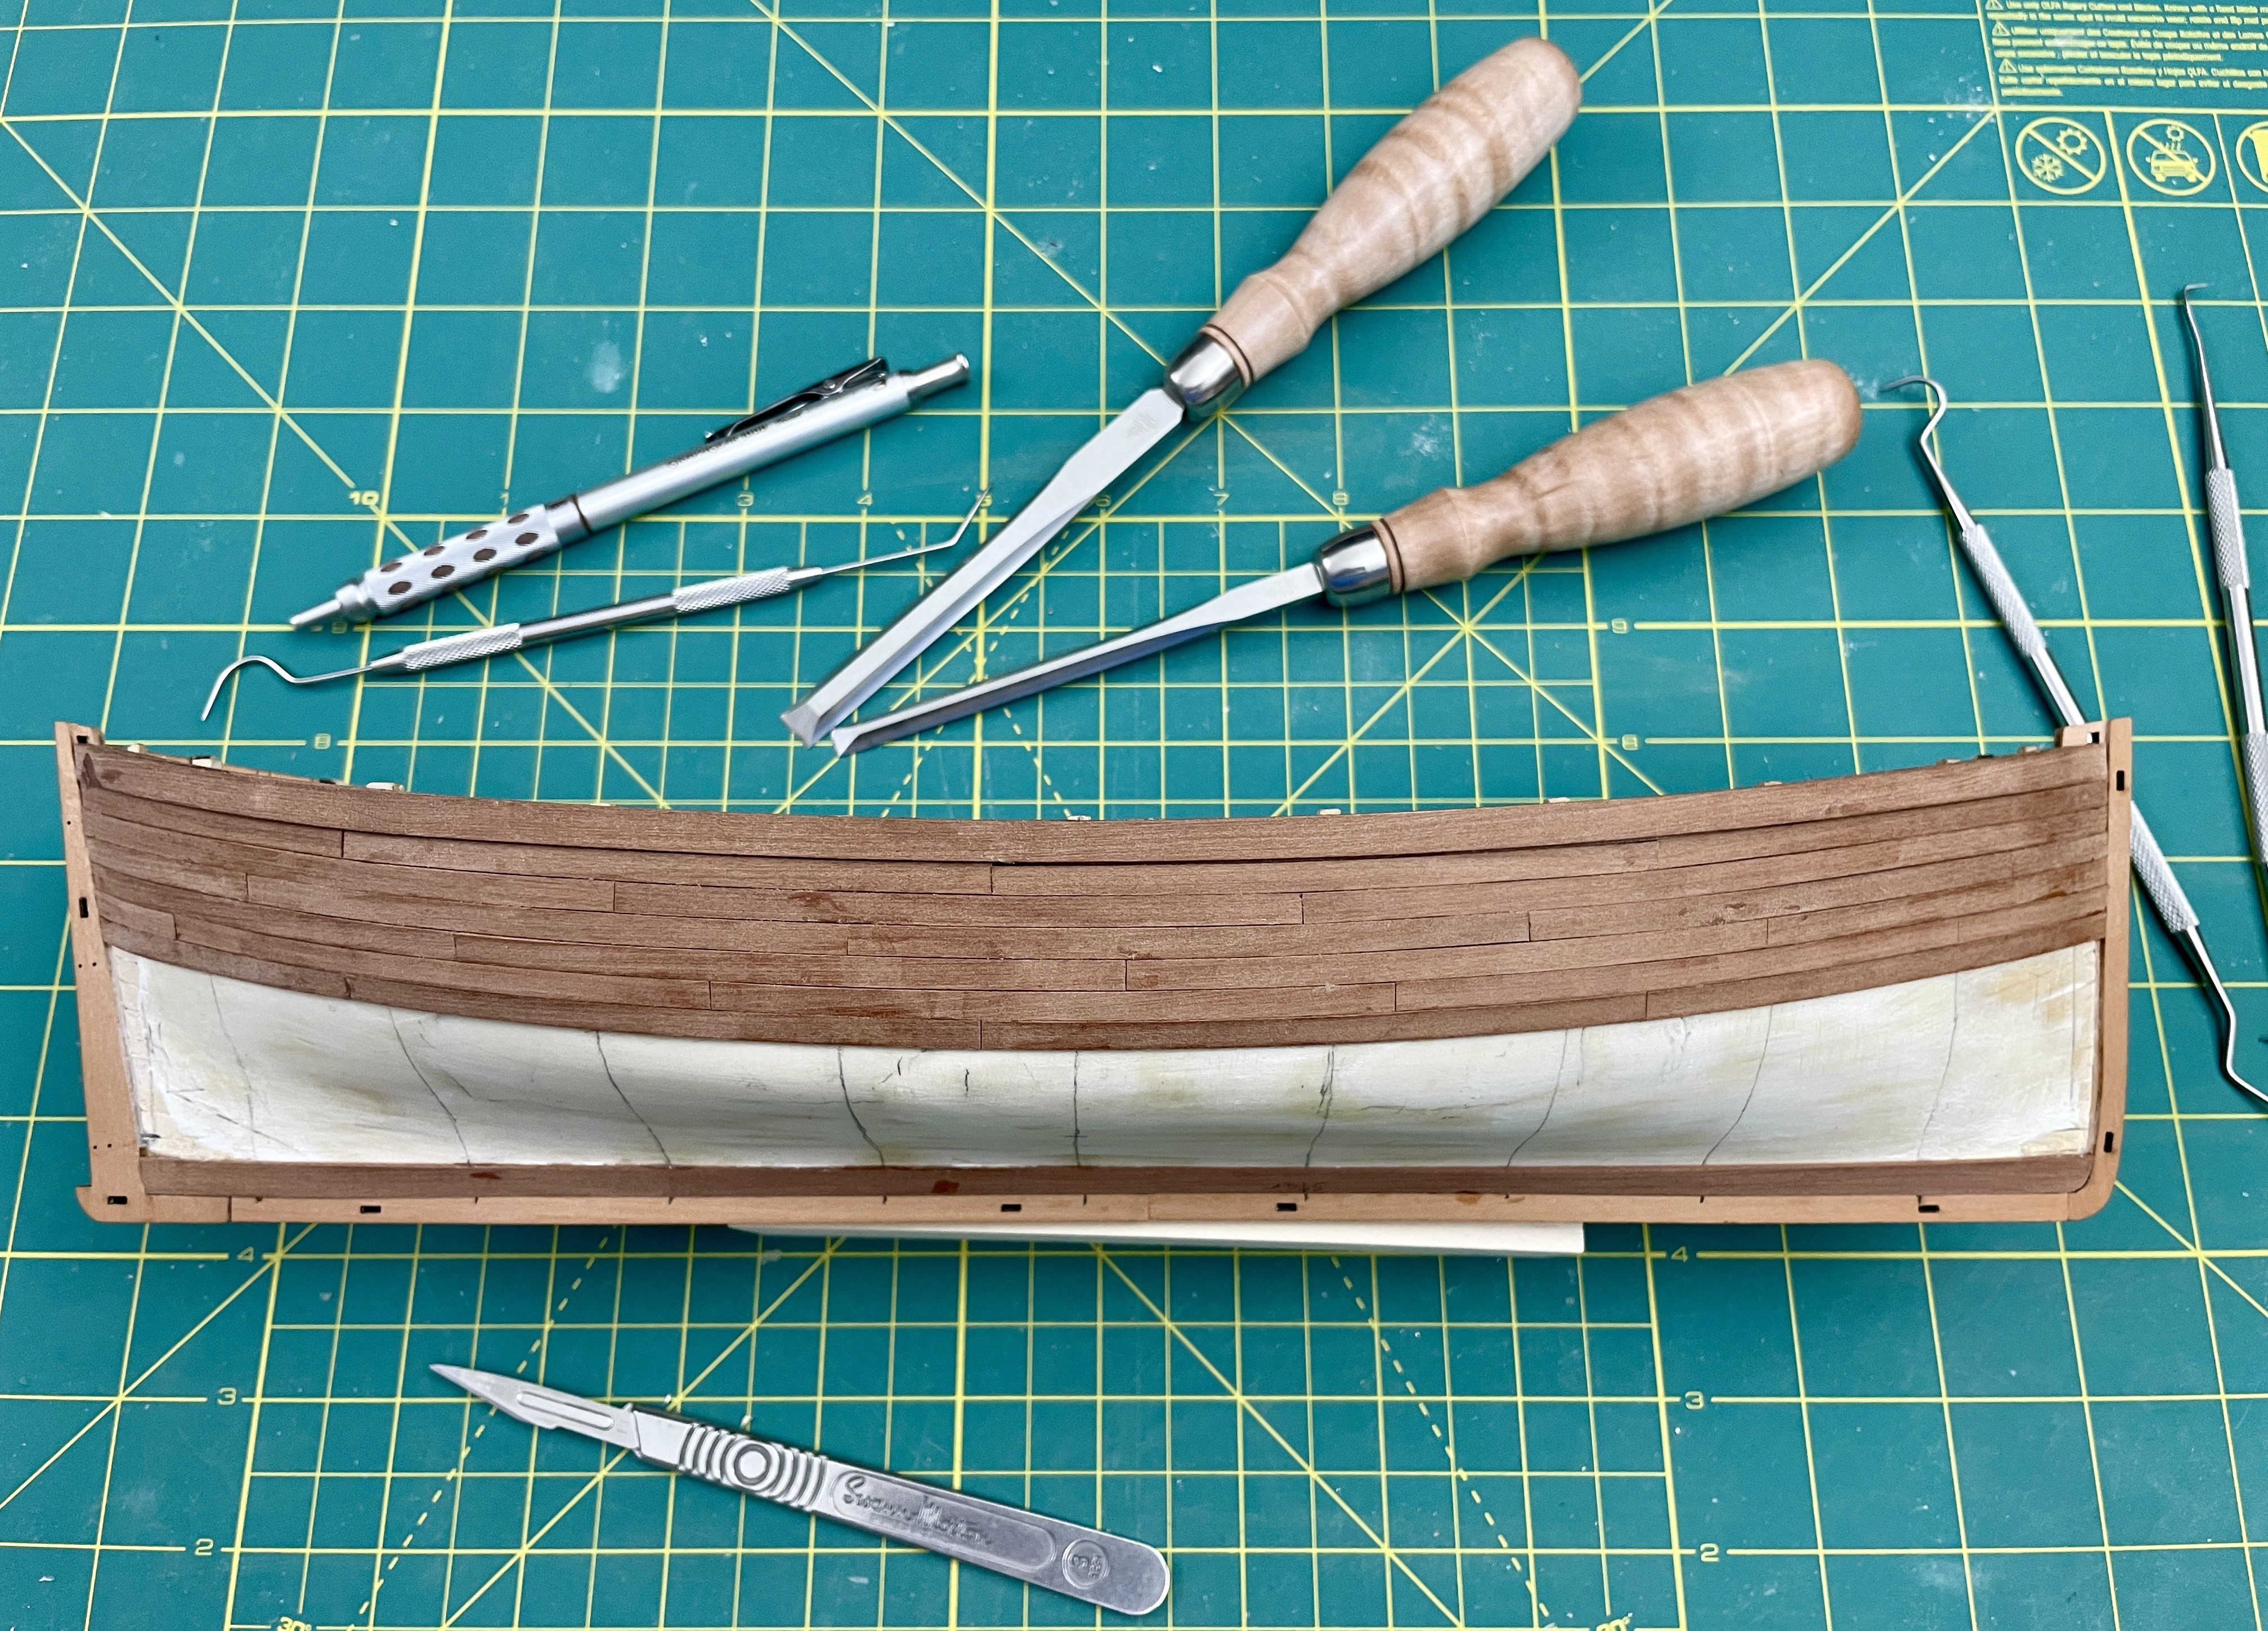
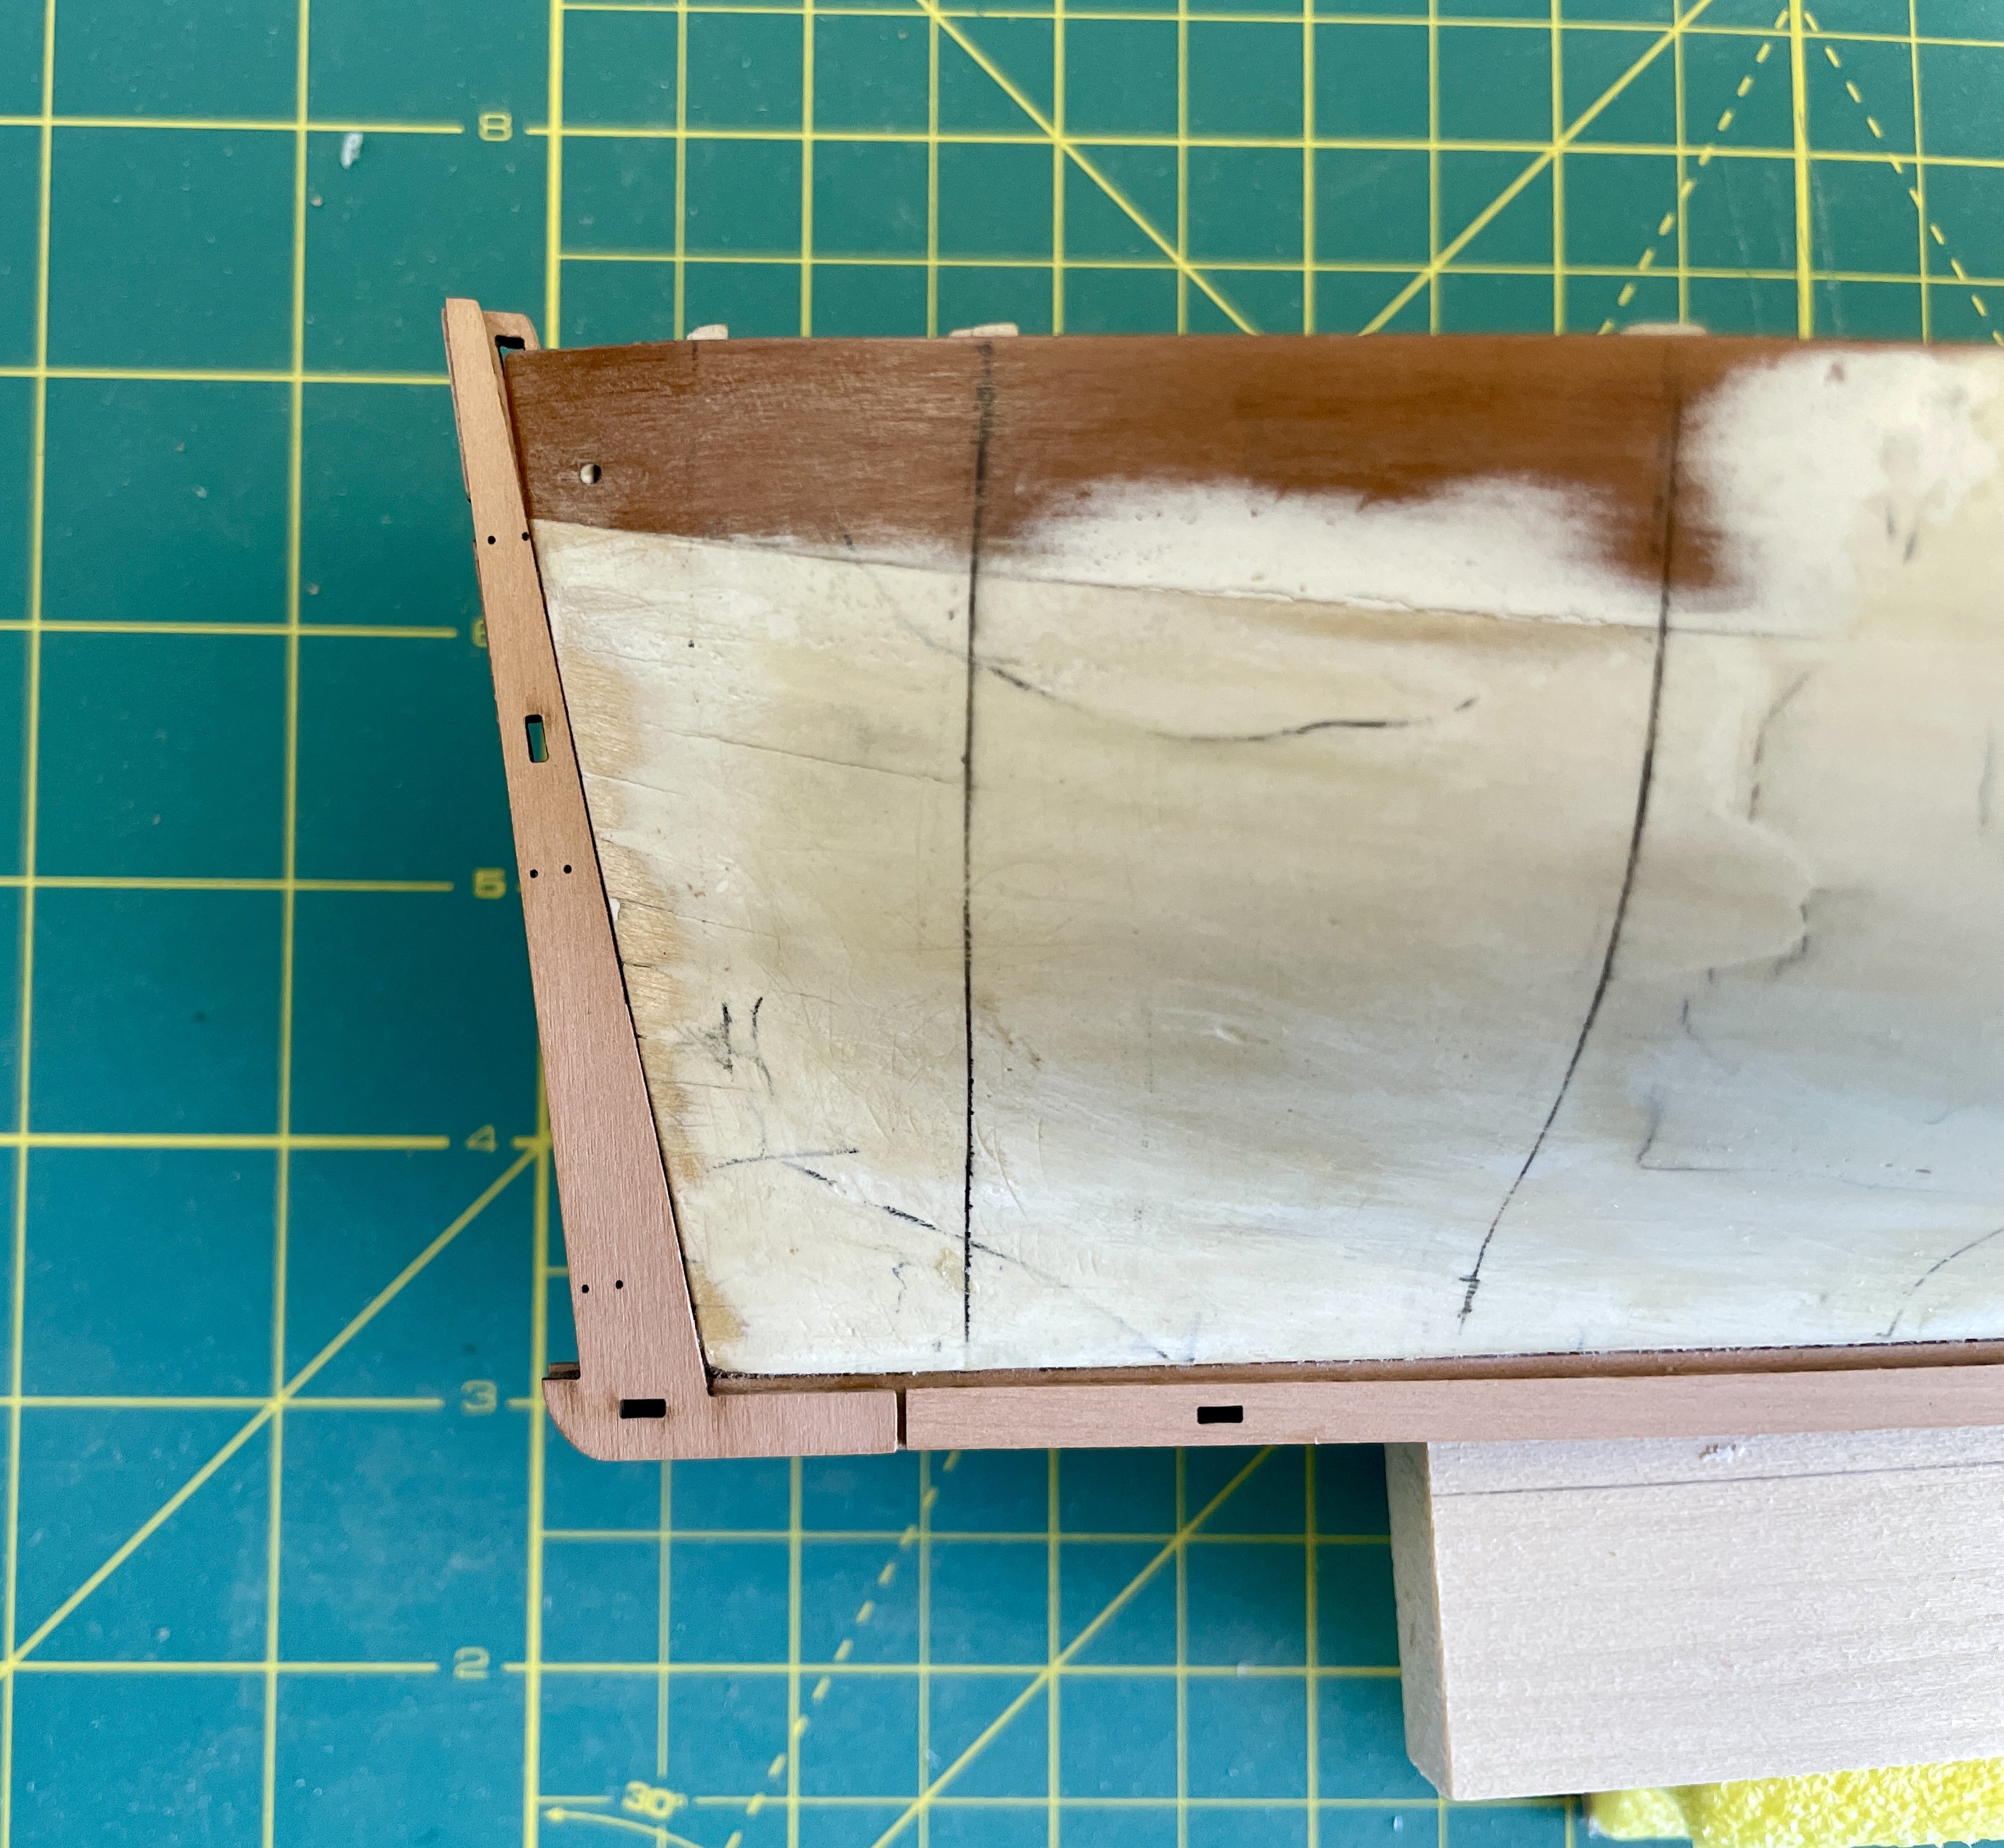
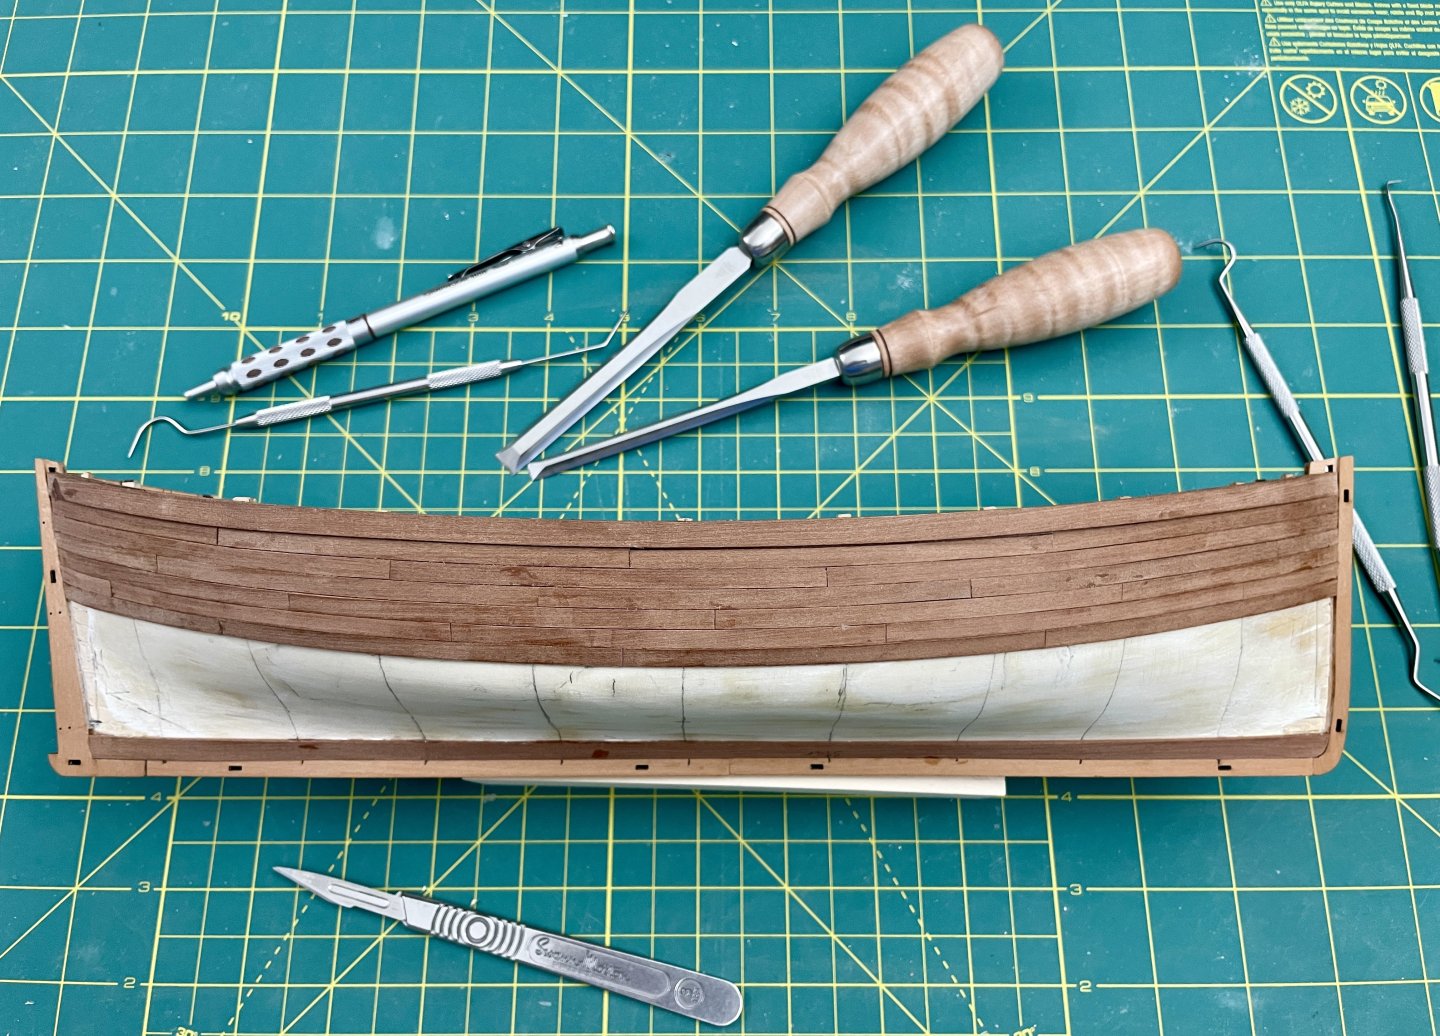
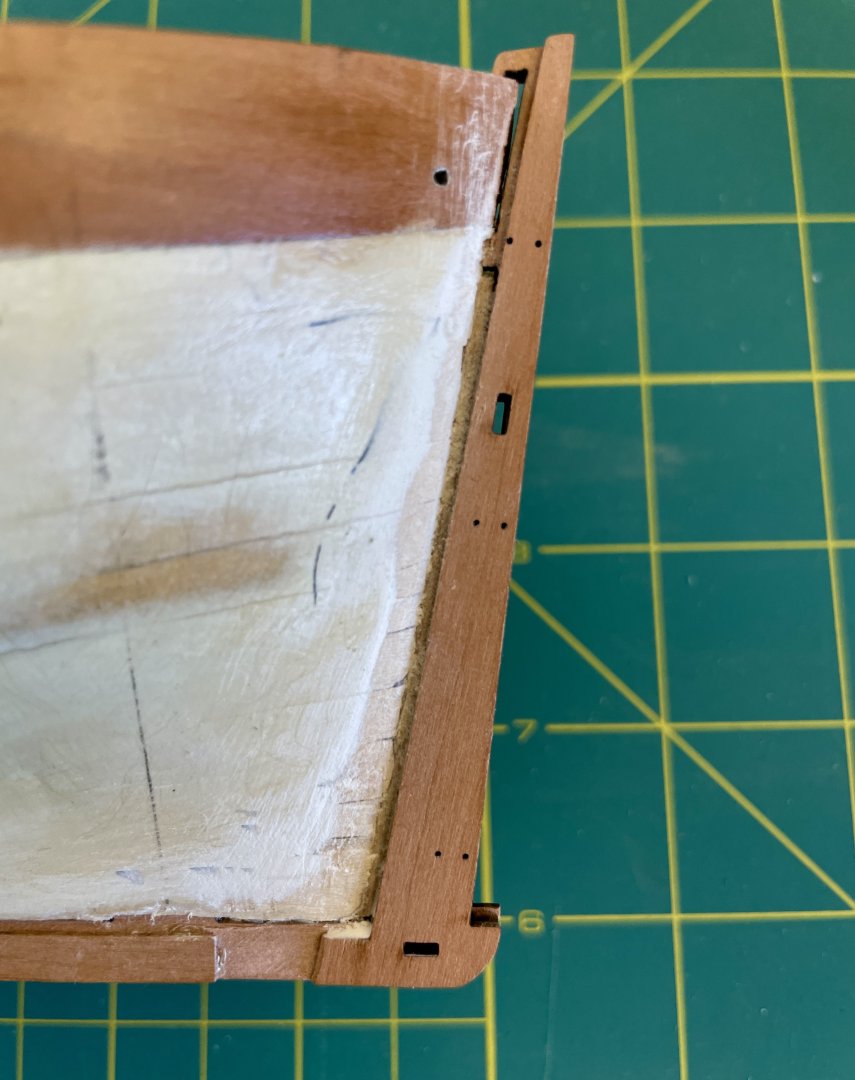
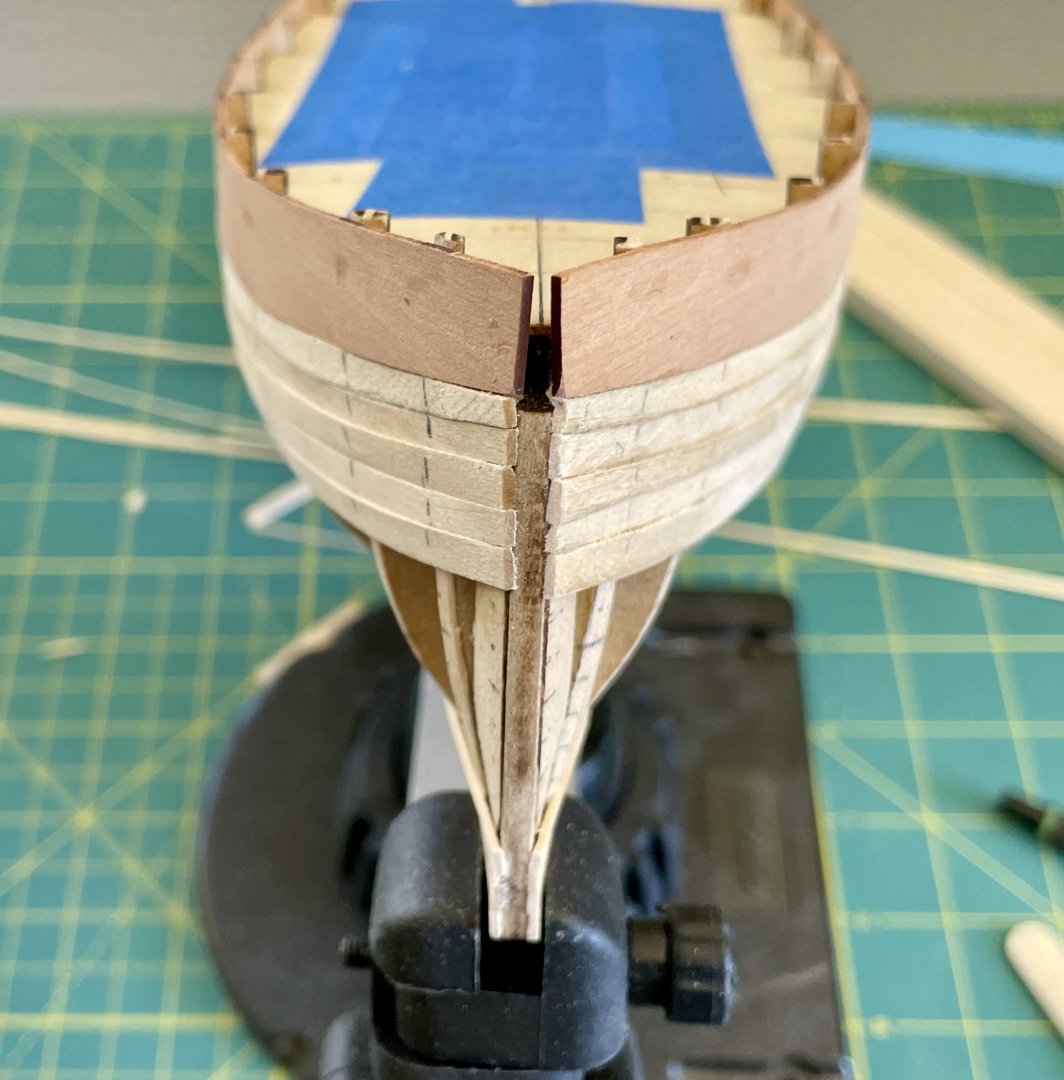
Hull Construction – 2nd Planking I had a build delay for a bit while awaiting wood, but that’s all good now. I installed the keel, stem, and stern pieces along with their pear overlays that form rebates. The stern rebate turned into a gotcha. In the 1st pic. below one can see there is no rebate at the stern. The stern piece fit fine, so it wasn’t a keel issue. I then checked other logs and BE may have had a similar issue but it’s not mentioned in his build. Other logs had rebates and others were indeterminate. I think the most likely cause was the limewood planking. BE and I both noticed it varied in thickness. The other possibilities are either the stern piece is slightly short or its rebate overlay piece was long. To resolve the stern rebate issue, with a chisel I pared in rebates at the stern and deepened the rebates at the stem (they were too shallow). In the 2nd picture, the missing piece on the stern is where I stern nicked a piece of the rebate overlay with my chisel and will fix it when I clean up the hull after the 2nd planking. The last picture is my 2nd planking order of battle: It will be a 4 butt shift. Cheers, Jay


- 63 replies
-
- 4
-
-
- Lady Eleanor
- True Vine
- (and 2 more)
-
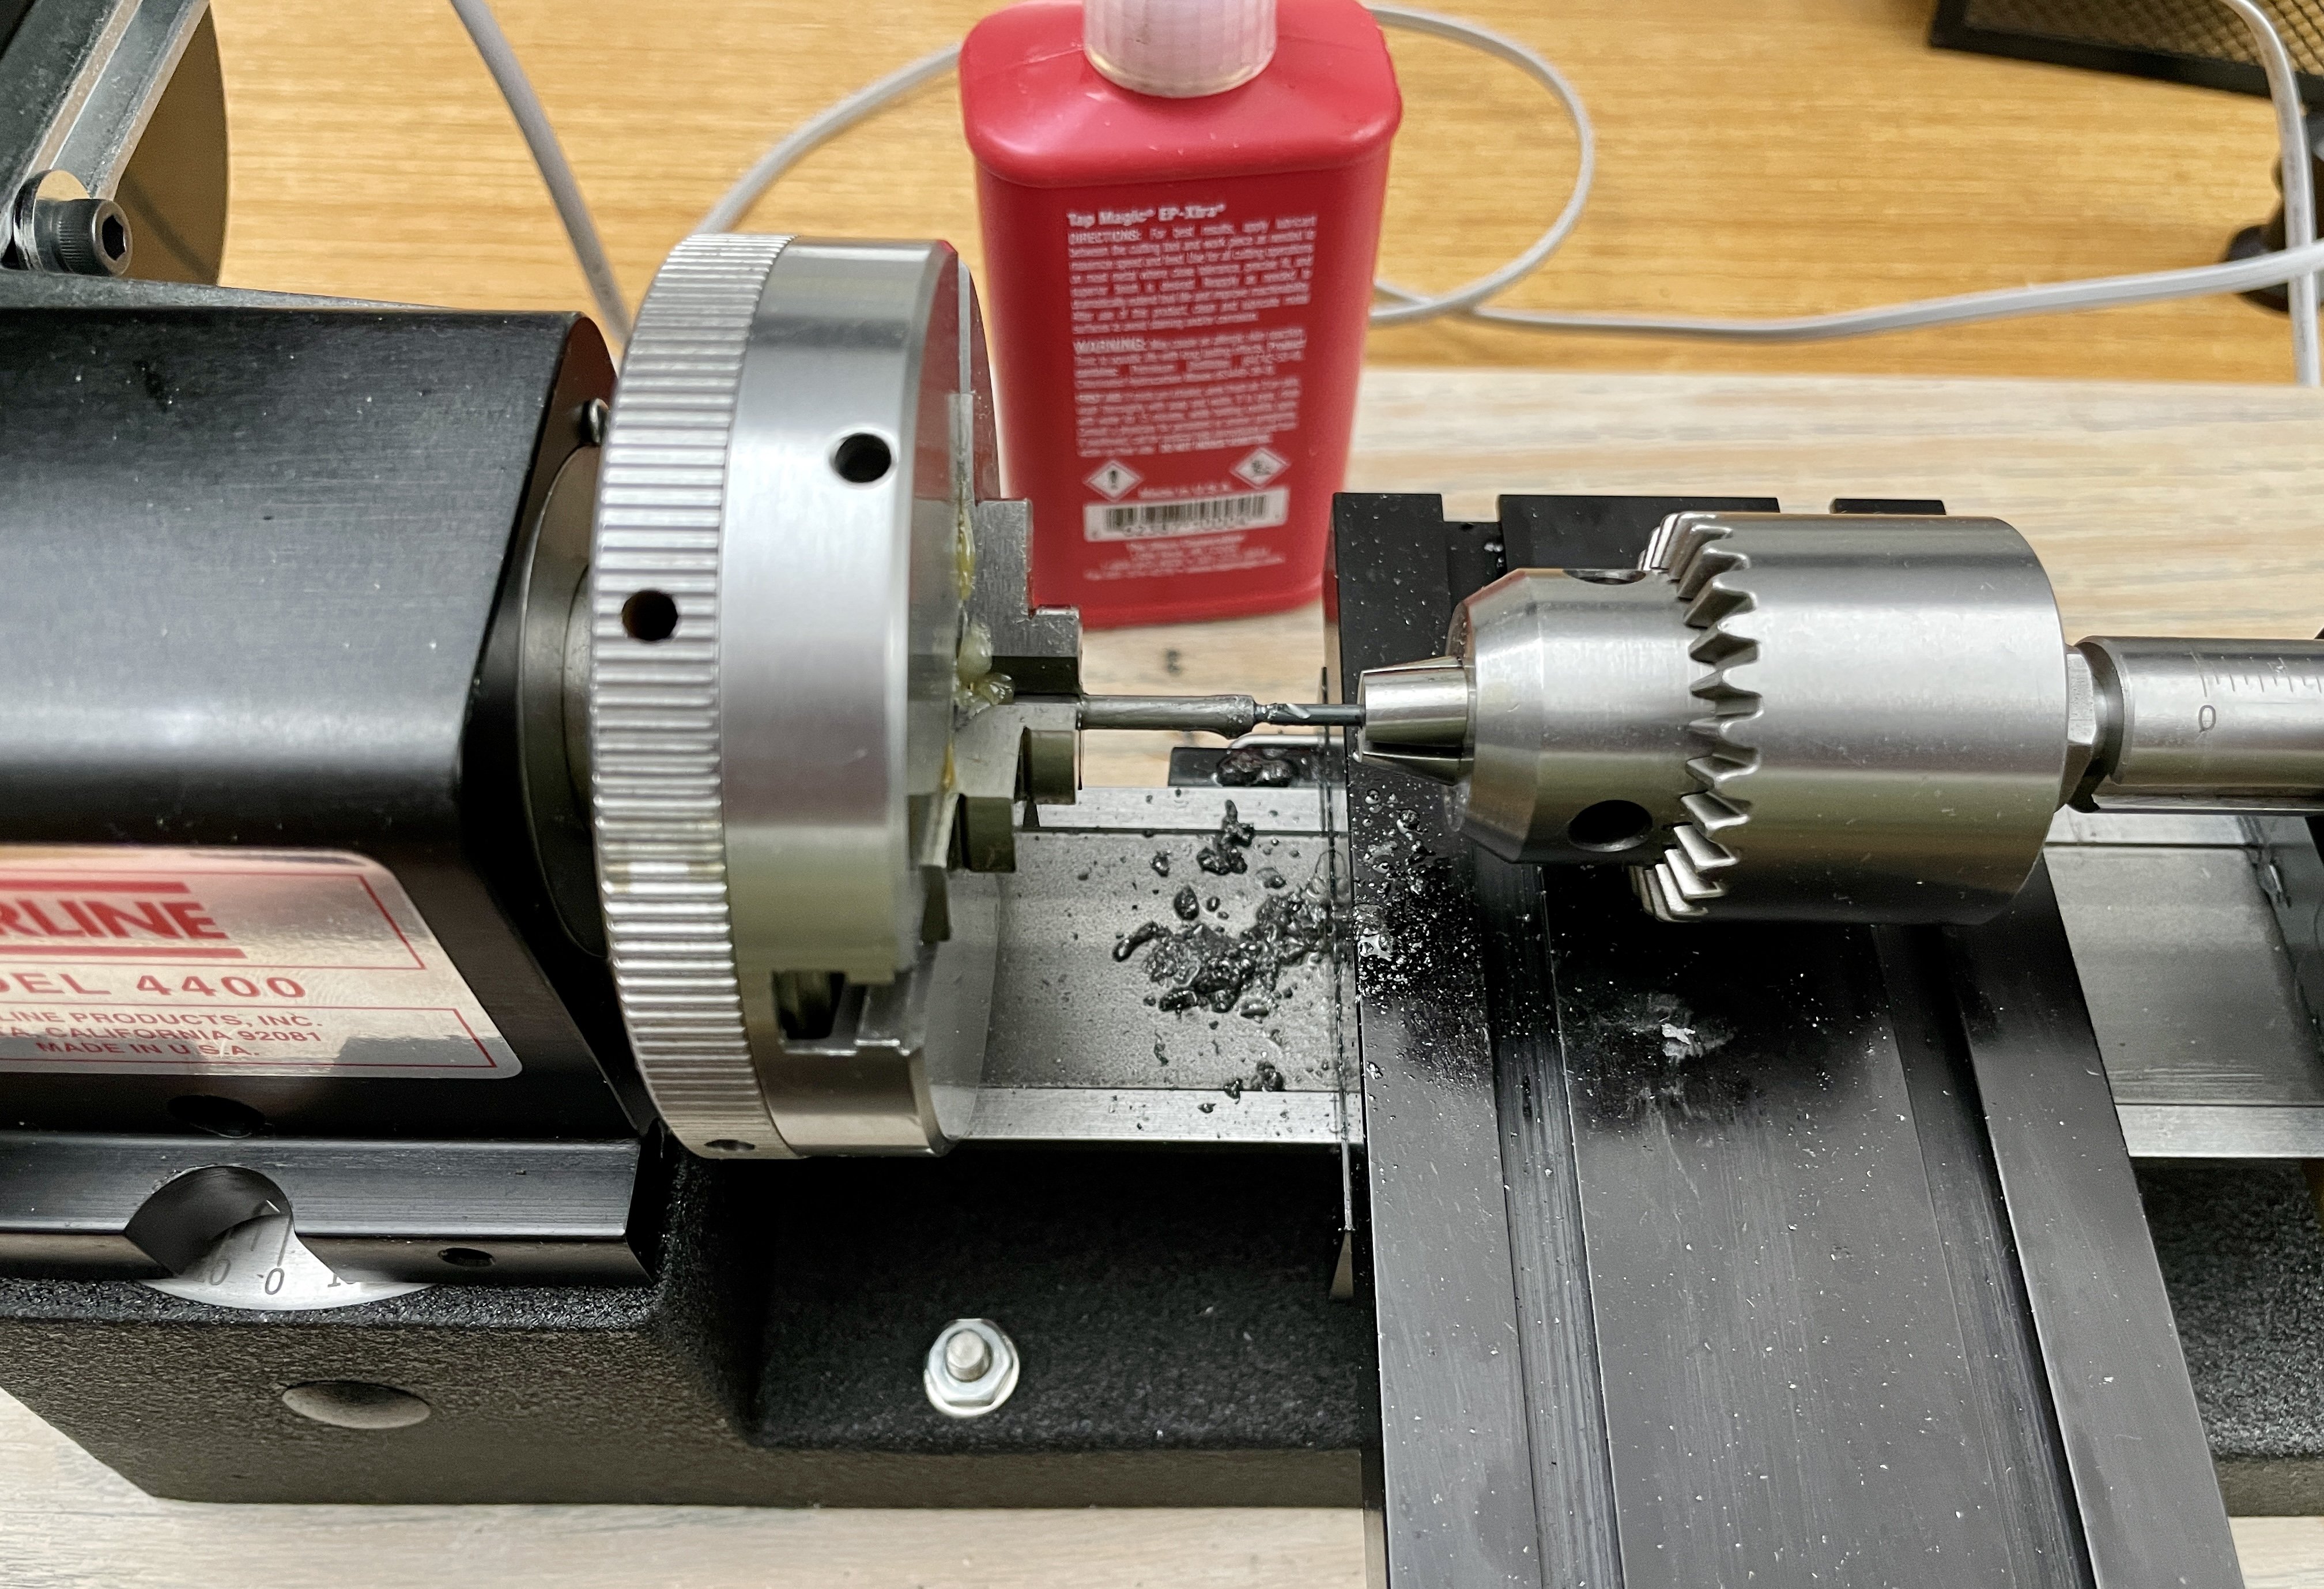
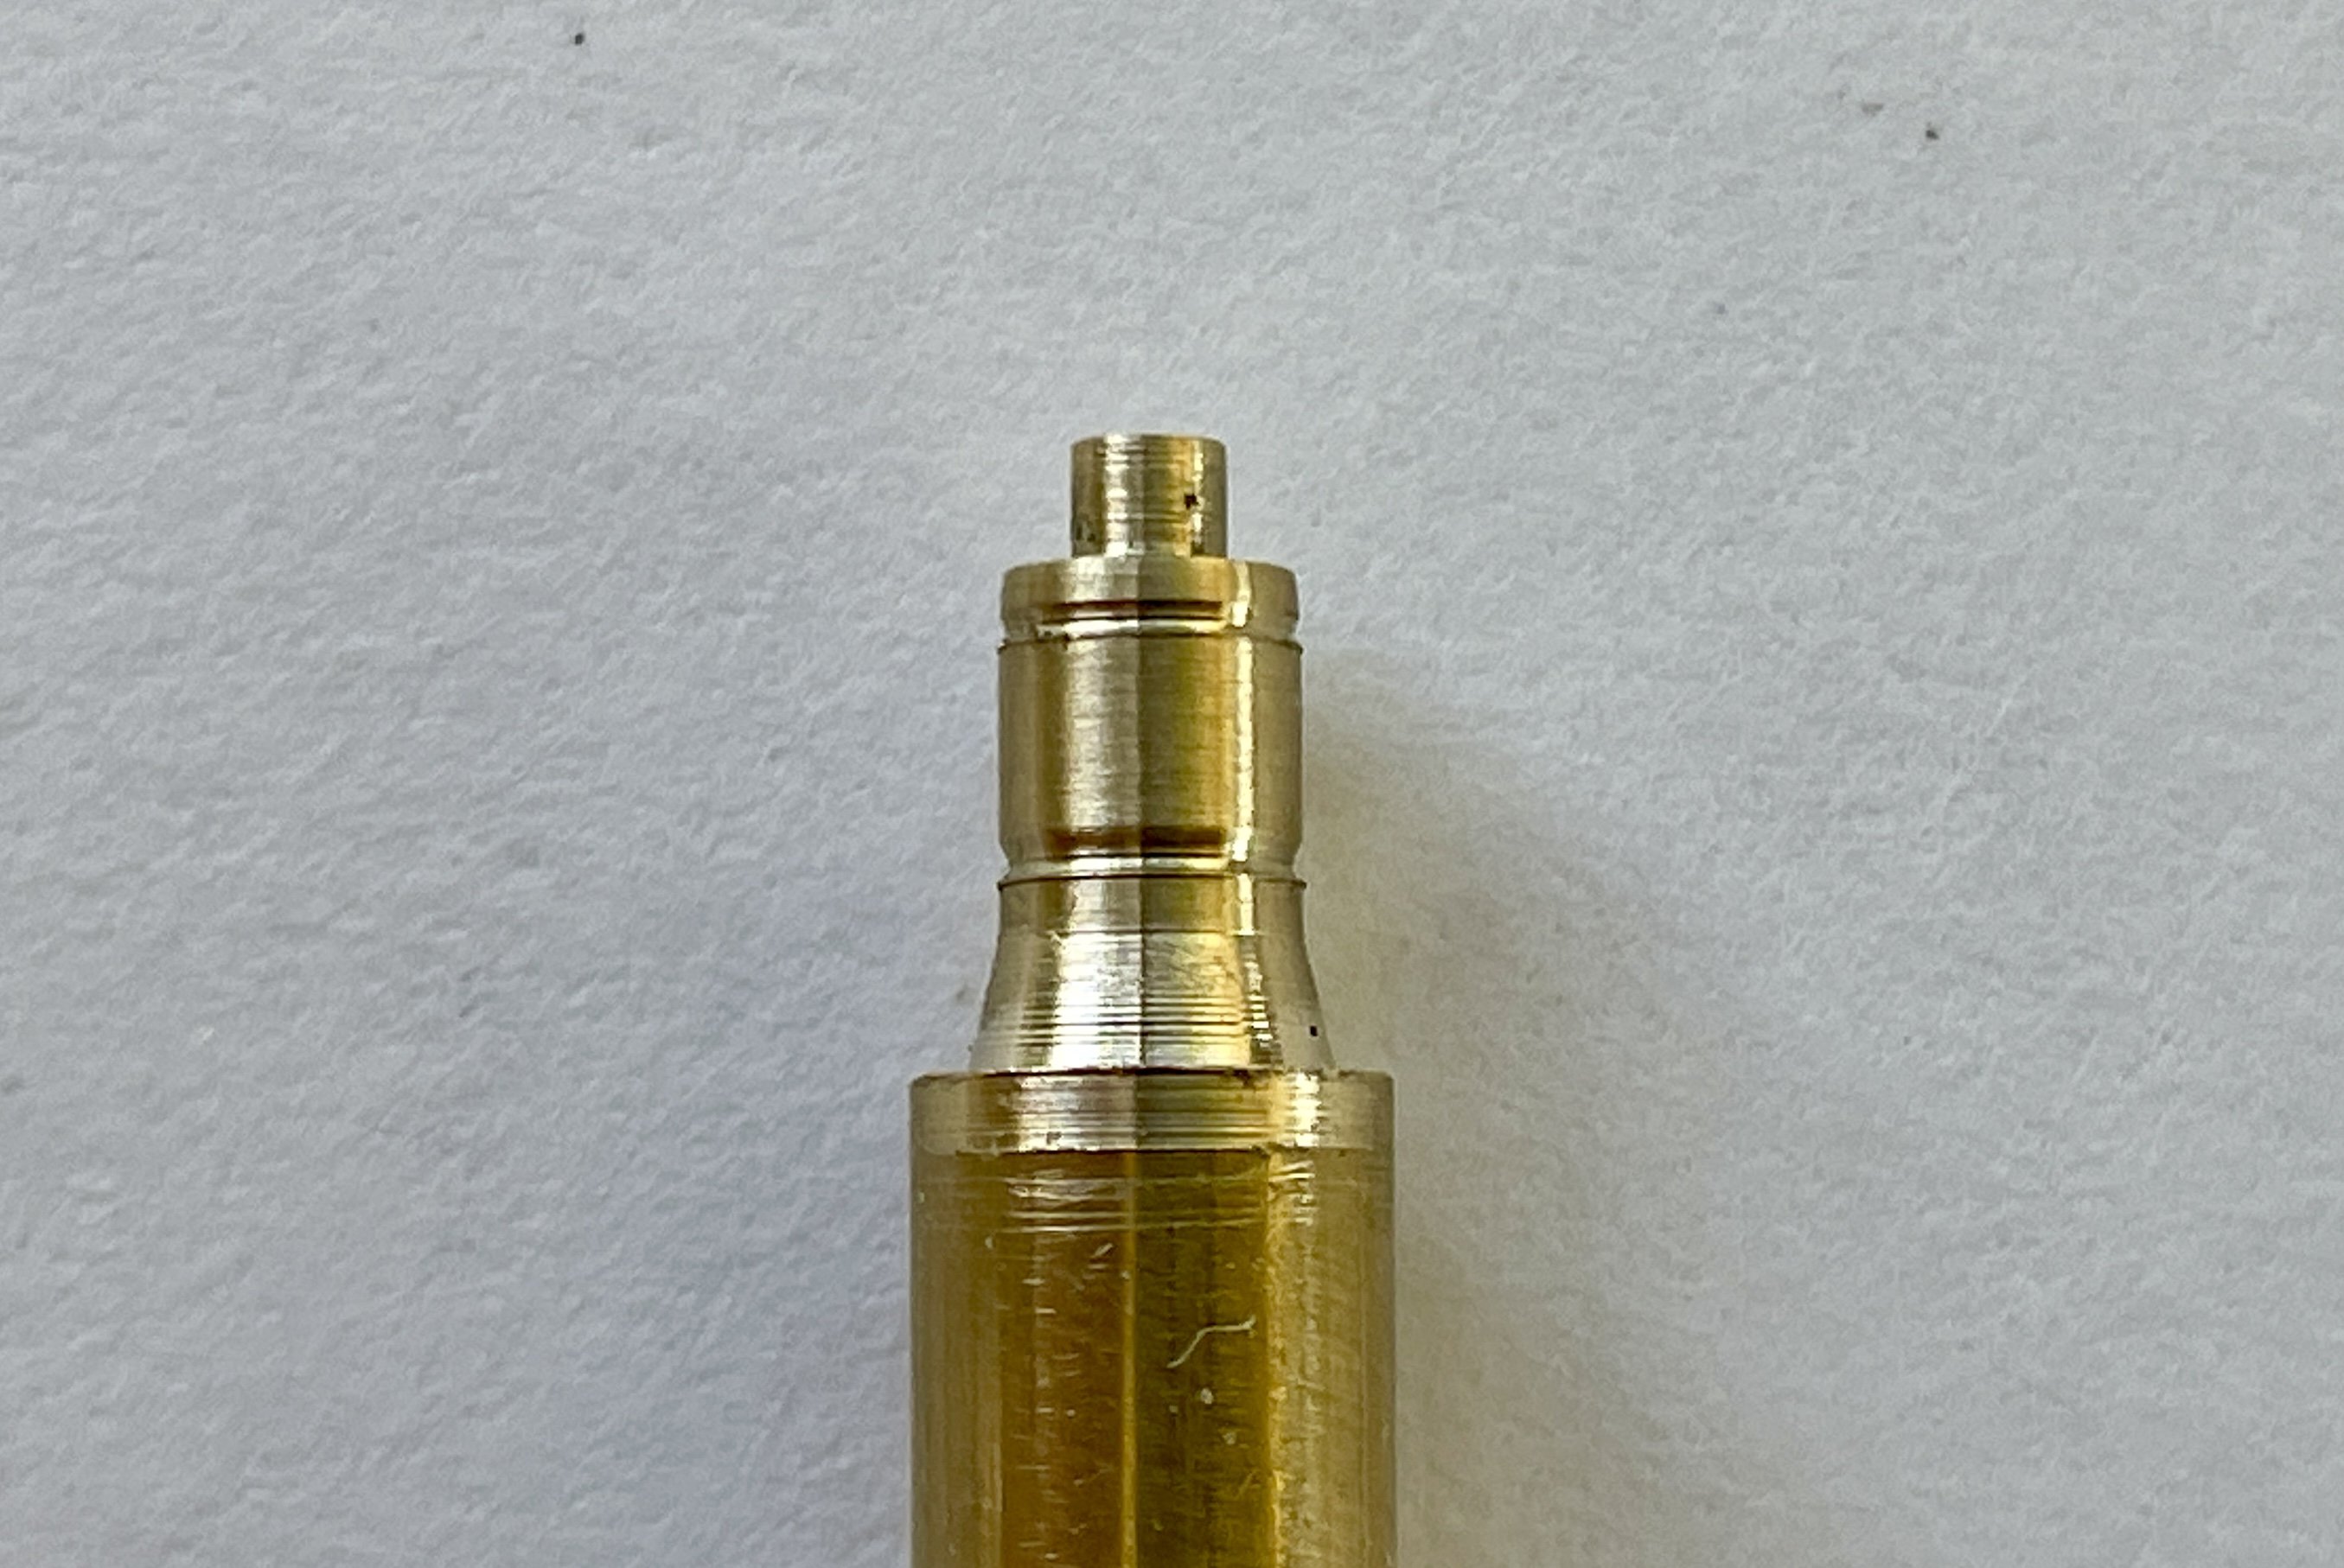
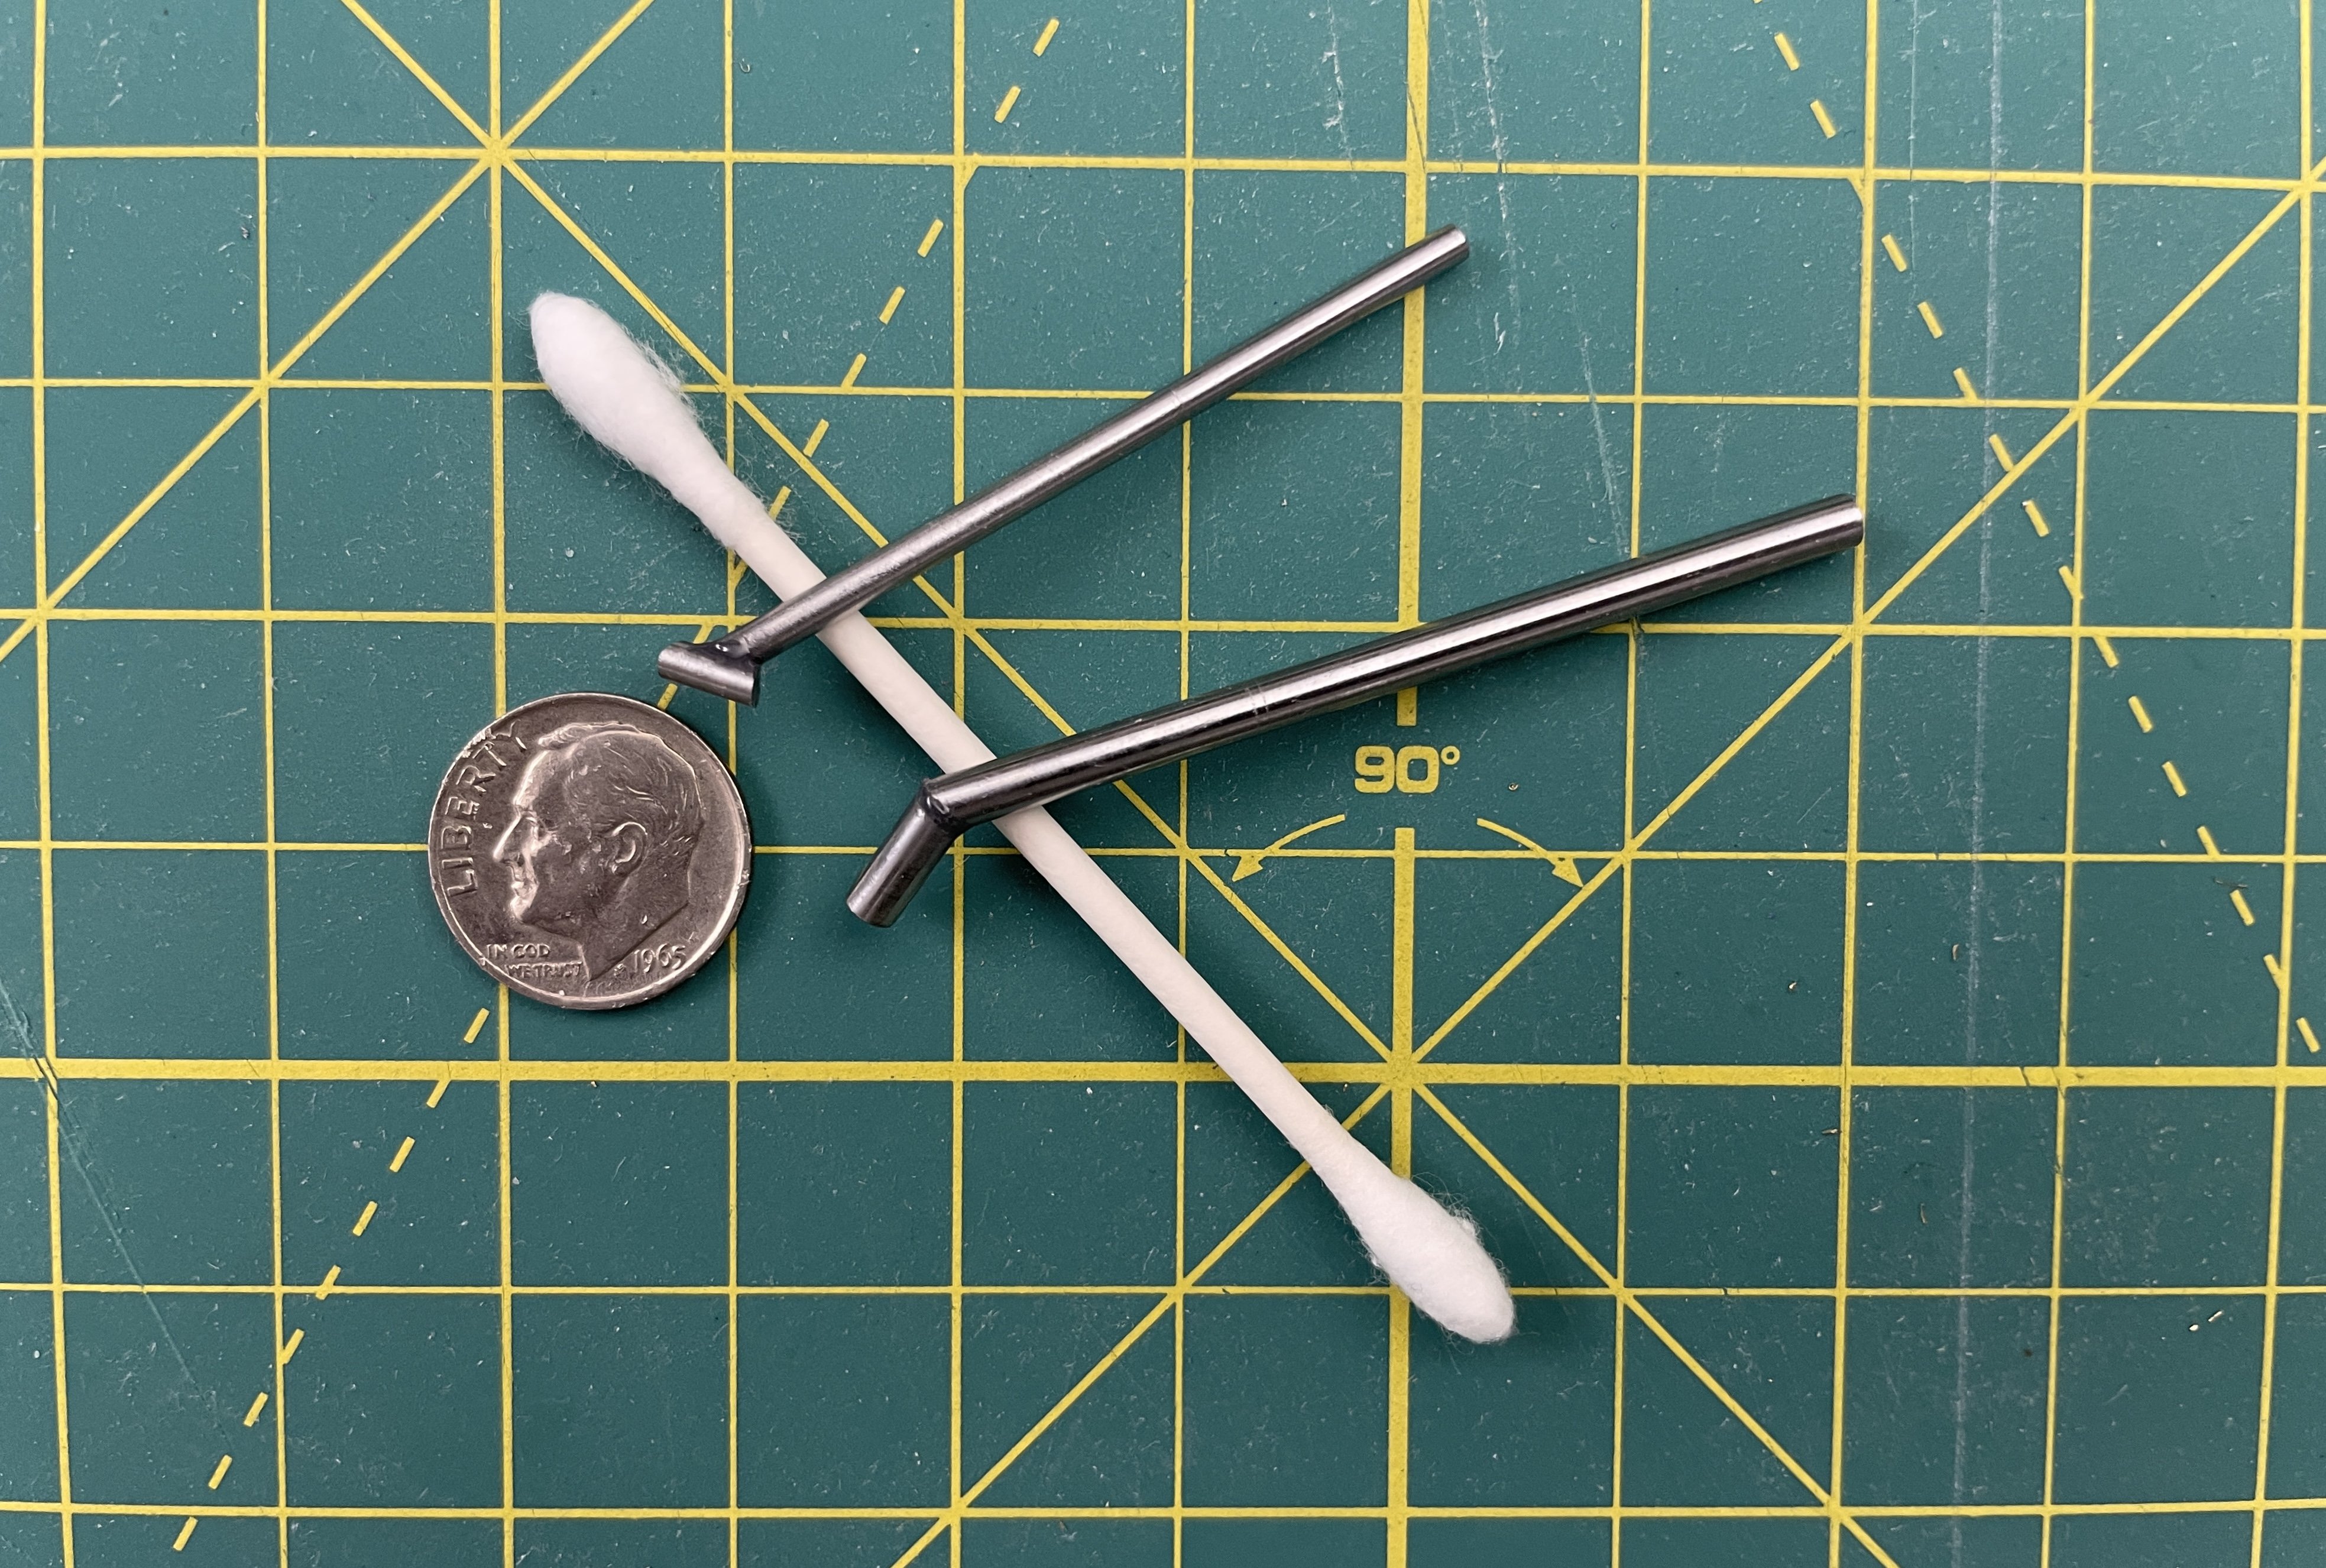
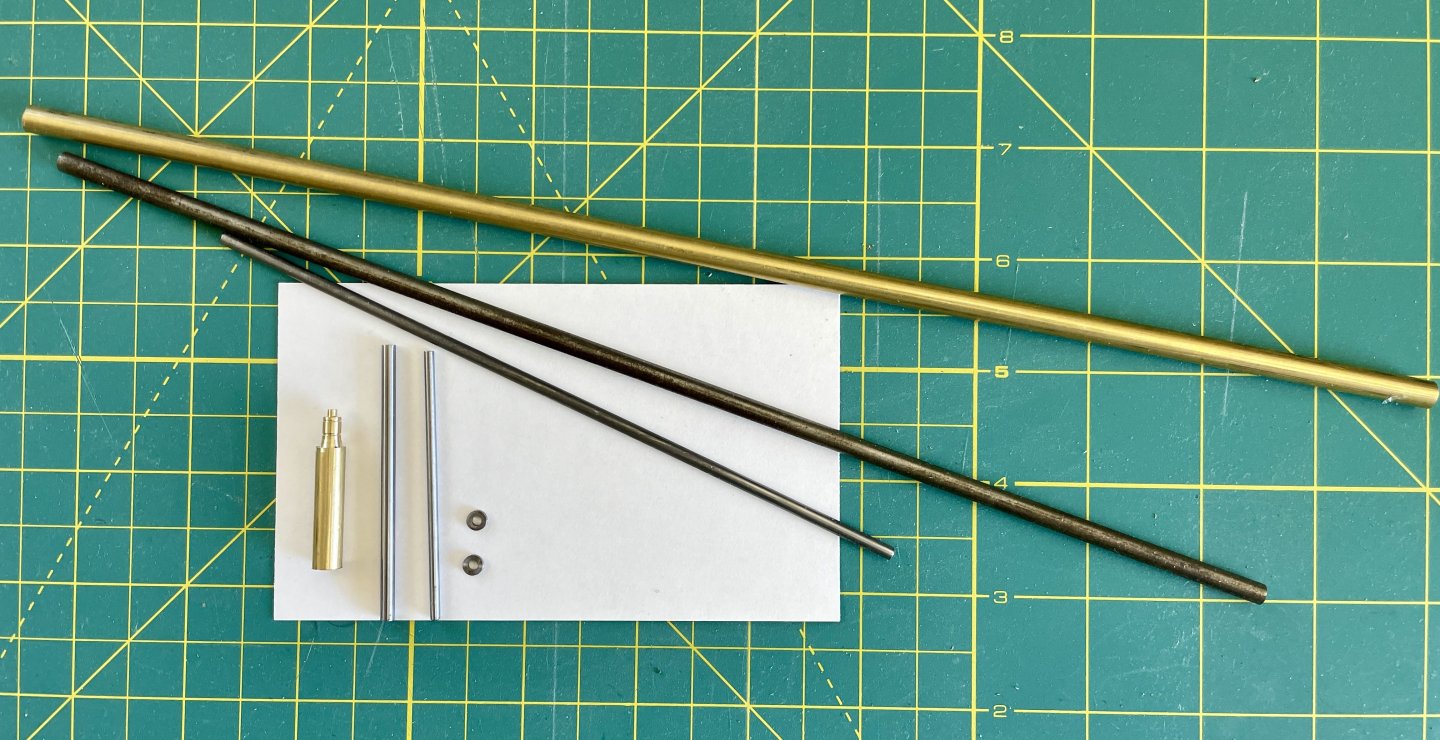
Metal Work: Flues and Lantern I worked on making fittings while waiting for more wood (see previous post). In the 1st pic below, I’m drilling out steel a steel boiler flue and in the 2nd pic, turning brass for a navigation lantern . The 3rd pic are my initial results along with the stock I used. The lantern in the 4th pic is a test piece and is 4.5 mm at its widest and 8 mm high. While it’s not visible, I bored a 3 mm hole from the bottom of the stock so I can possibly later insert material for a lens. The reason it’s a test piece is because I’m going to try to mill openings in the front and back for the lens whilst leaving 2 brass side pieces about 1.5 mm each. What I’m not sure about with the milling is if an end mill will “catch” on an edge of the hole I bored and tear out the workpiece—i.e., I’m going to mill perpendicular to the bore hole, so that’s how the tear out may happen. On the flipside, if all works out, I’ll do finish work on the lantern’s metal. If the milling works on the lantern, I’ll use a similar technique when I make the port and starboard running lights. The 2nd to the last pic is the assembly of the boiler and stove flues. The boiler flue dia. Is 3 mm, and I’ll cut it to length when I get to the point where it’s ready for installation. The angles on the boiler flue parts are each at 67.5 degrees. When then the angles are pieced together, they form the 45 degree complimentary angle of the flue’s top piece. The stove flue dia. is 2.25 mm, and it too will be cut to length at a later point. The angle of the top piece is also at 45 degrees and was far simpler to do than the boiler flue! The last pic are of the finished flues and the stove flue’s deck plate (+ a spare). I used 12L14 steel for these parts because steel usually takes cold bluing well and looks fantastic! Where practical, I’ll use more blued 12L14 steel elsewhere in the build because of how well it looks in comparison to blackened brass. Cheers, Jay


- 63 replies
-
- 7
-
-
- Lady Eleanor
- True Vine
- (and 2 more)
-
Build Decisions I've taken a brief pause before I move on to the 2nd planking. The True Vine's actual gunwales dimensions were 9 inches wide (~23 cm) and 5 inches thick (~13 cm). If I model those, I'm not sure if the scale gunwales will play nice with the available space at the stem and stern. The wood for the gunwales should arrive next week, and when it does, I'll begin dry fitting / testing the gunwales to see if they'll work. I also paused while I made decisions about additional wood for a few other features as well. A biggie here was whether to use the kit's design for the bulwarks frame timbers or modify. Chris' design for the bulwark timbers is fantastic, it's just that the kit's design here doesn't quite fit for the Vine. Essentially the decision about modifying the bulwarks frame timbers came down to whether or not I was willing to do a lot of fiddly work. In the end, doing fiddly work won.... 🤣 Cheers, Jay
- 63 replies
-
- 5
-
-
- Lady Eleanor
- True Vine
- (and 2 more)
-
Thanks for jumping aboard, Bob! Sorry I didn't acknowledge you sooner fellas: Shouts out to Jacques Cousteau, Thukydides, and Keith for your interest as well and also for everyone's likes! Bob, what you said about these boats are why I'm drawn to them as well! And the regional variations throughout Europe and the US (as well, elsewhere) offer seemingly endless subjects for modeling. While I appreciate sailing warships, the bluff bows and lines of the 18th and early 19th Century ships don't captivate me like these little guys. Cheers, Jay
- 63 replies
-
- 3
-
-
- Lady Eleanor
- True Vine
- (and 2 more)
-
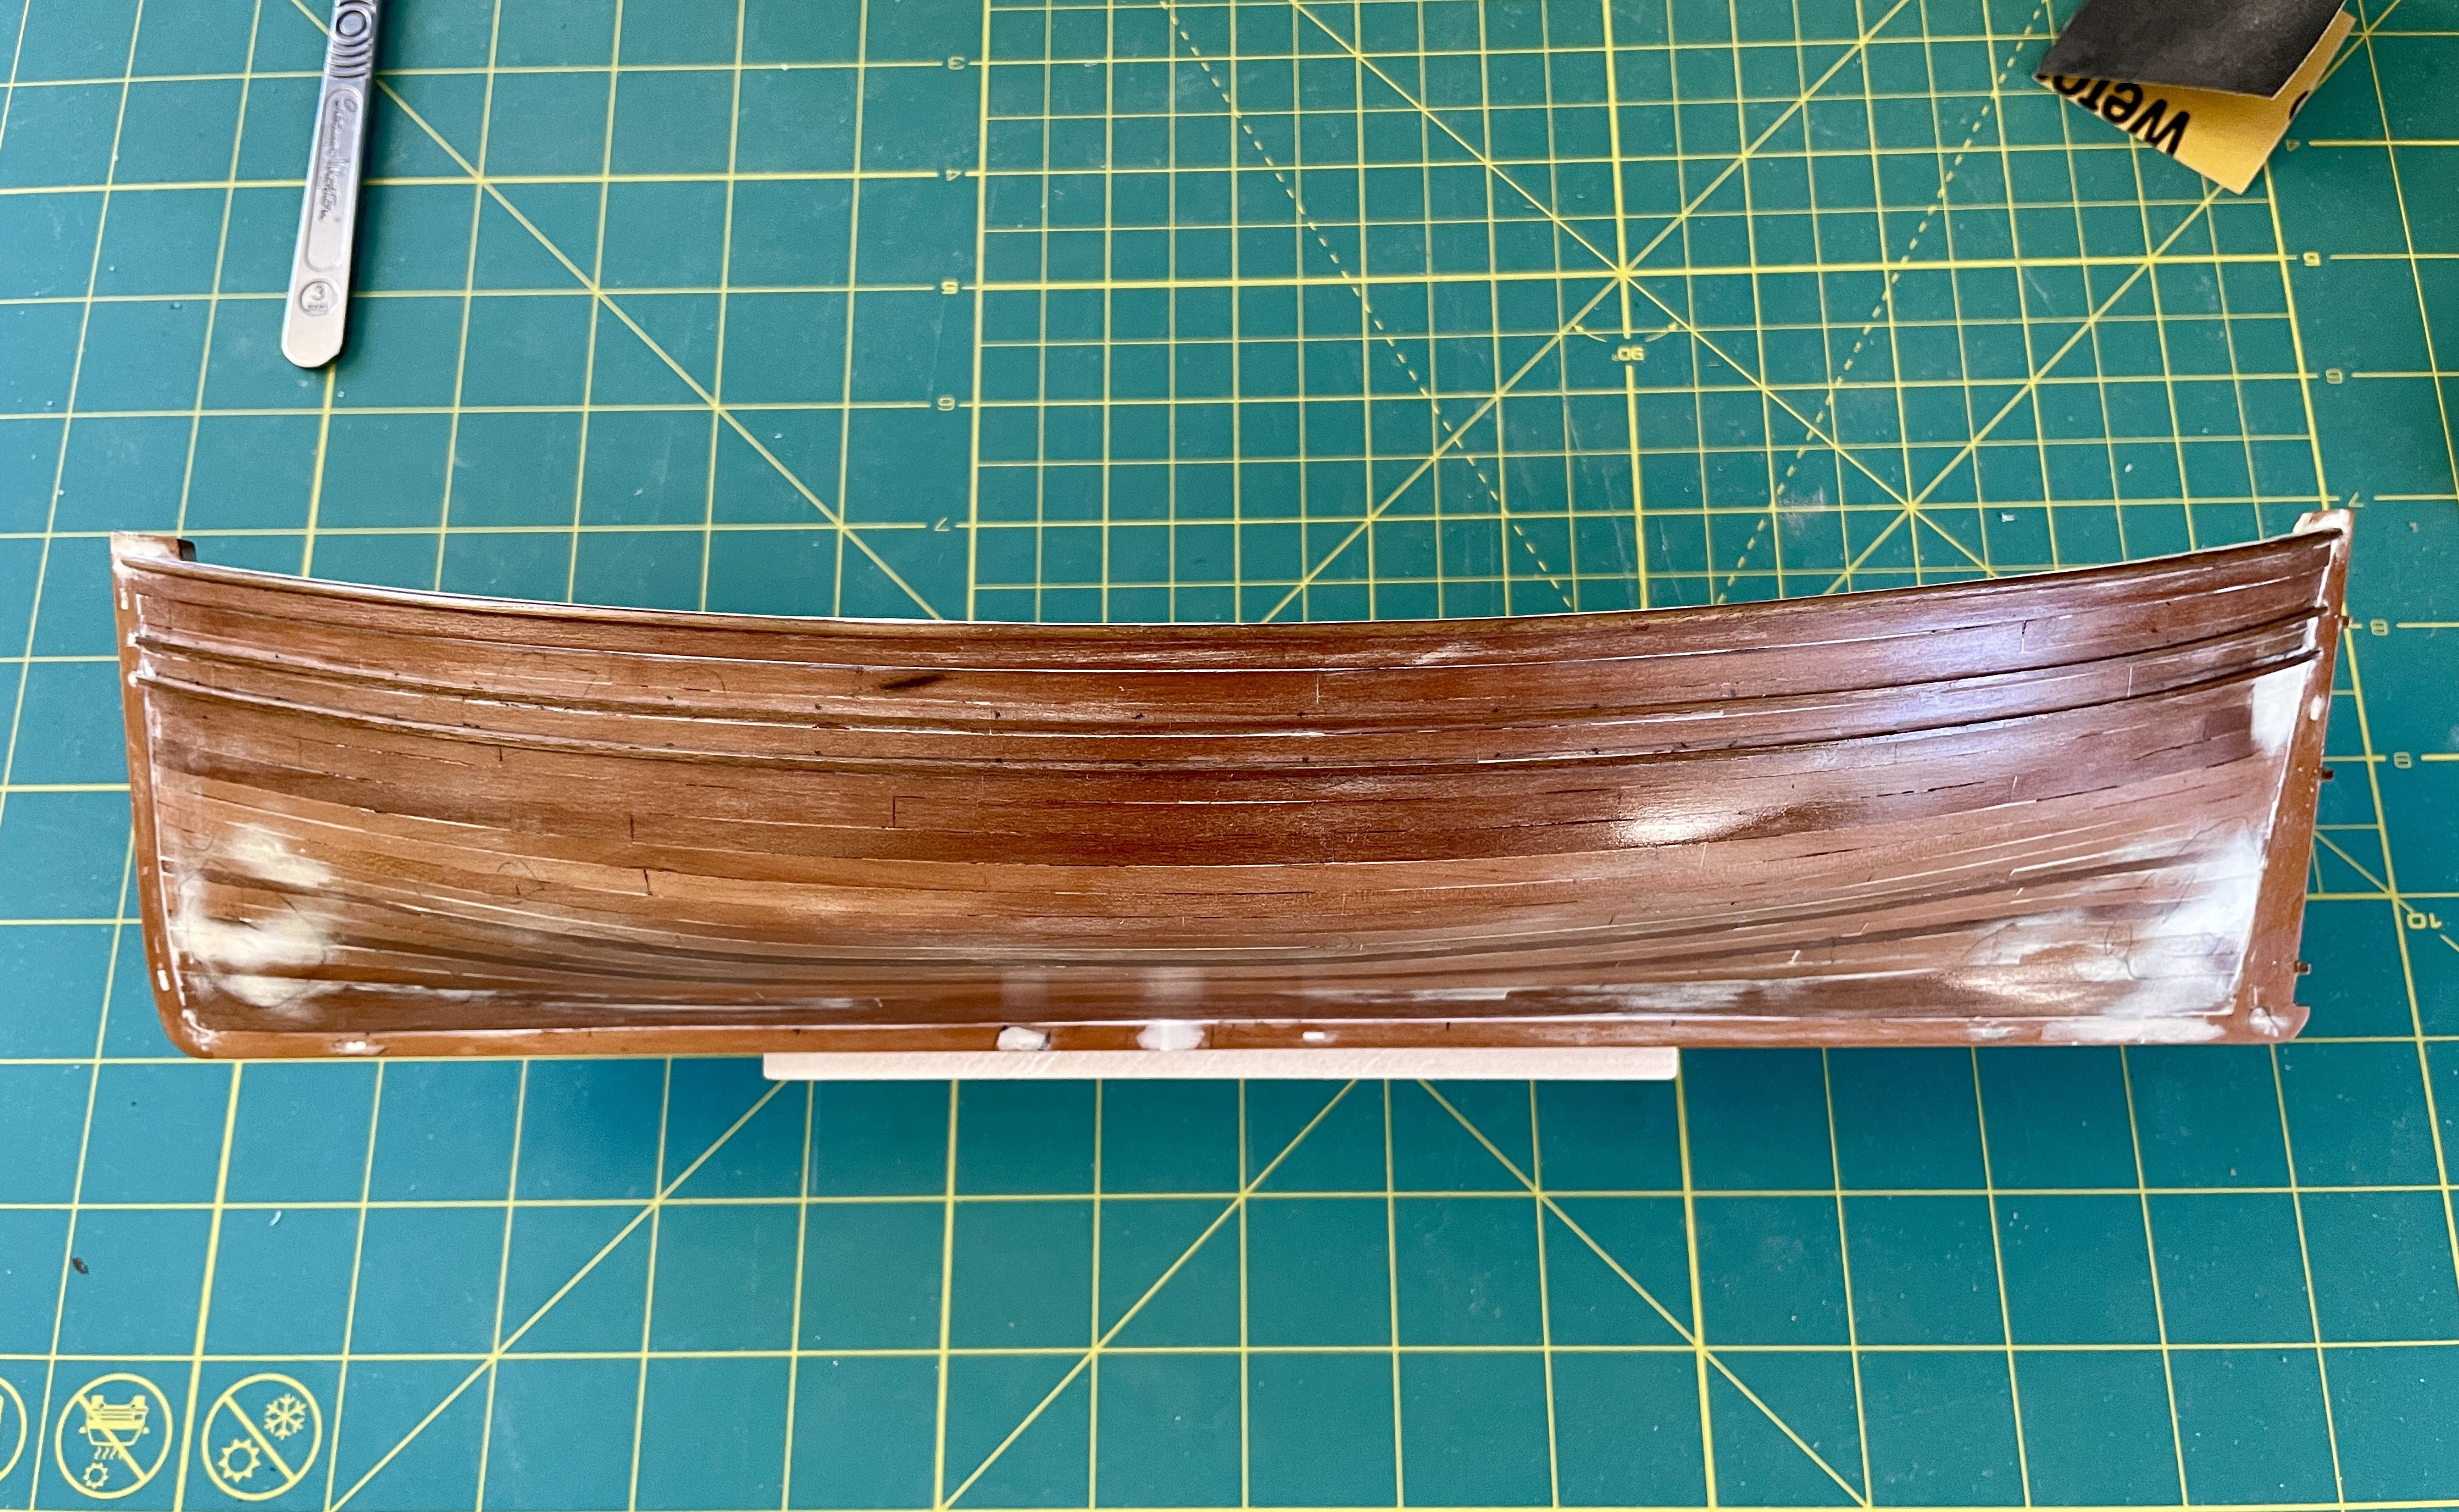
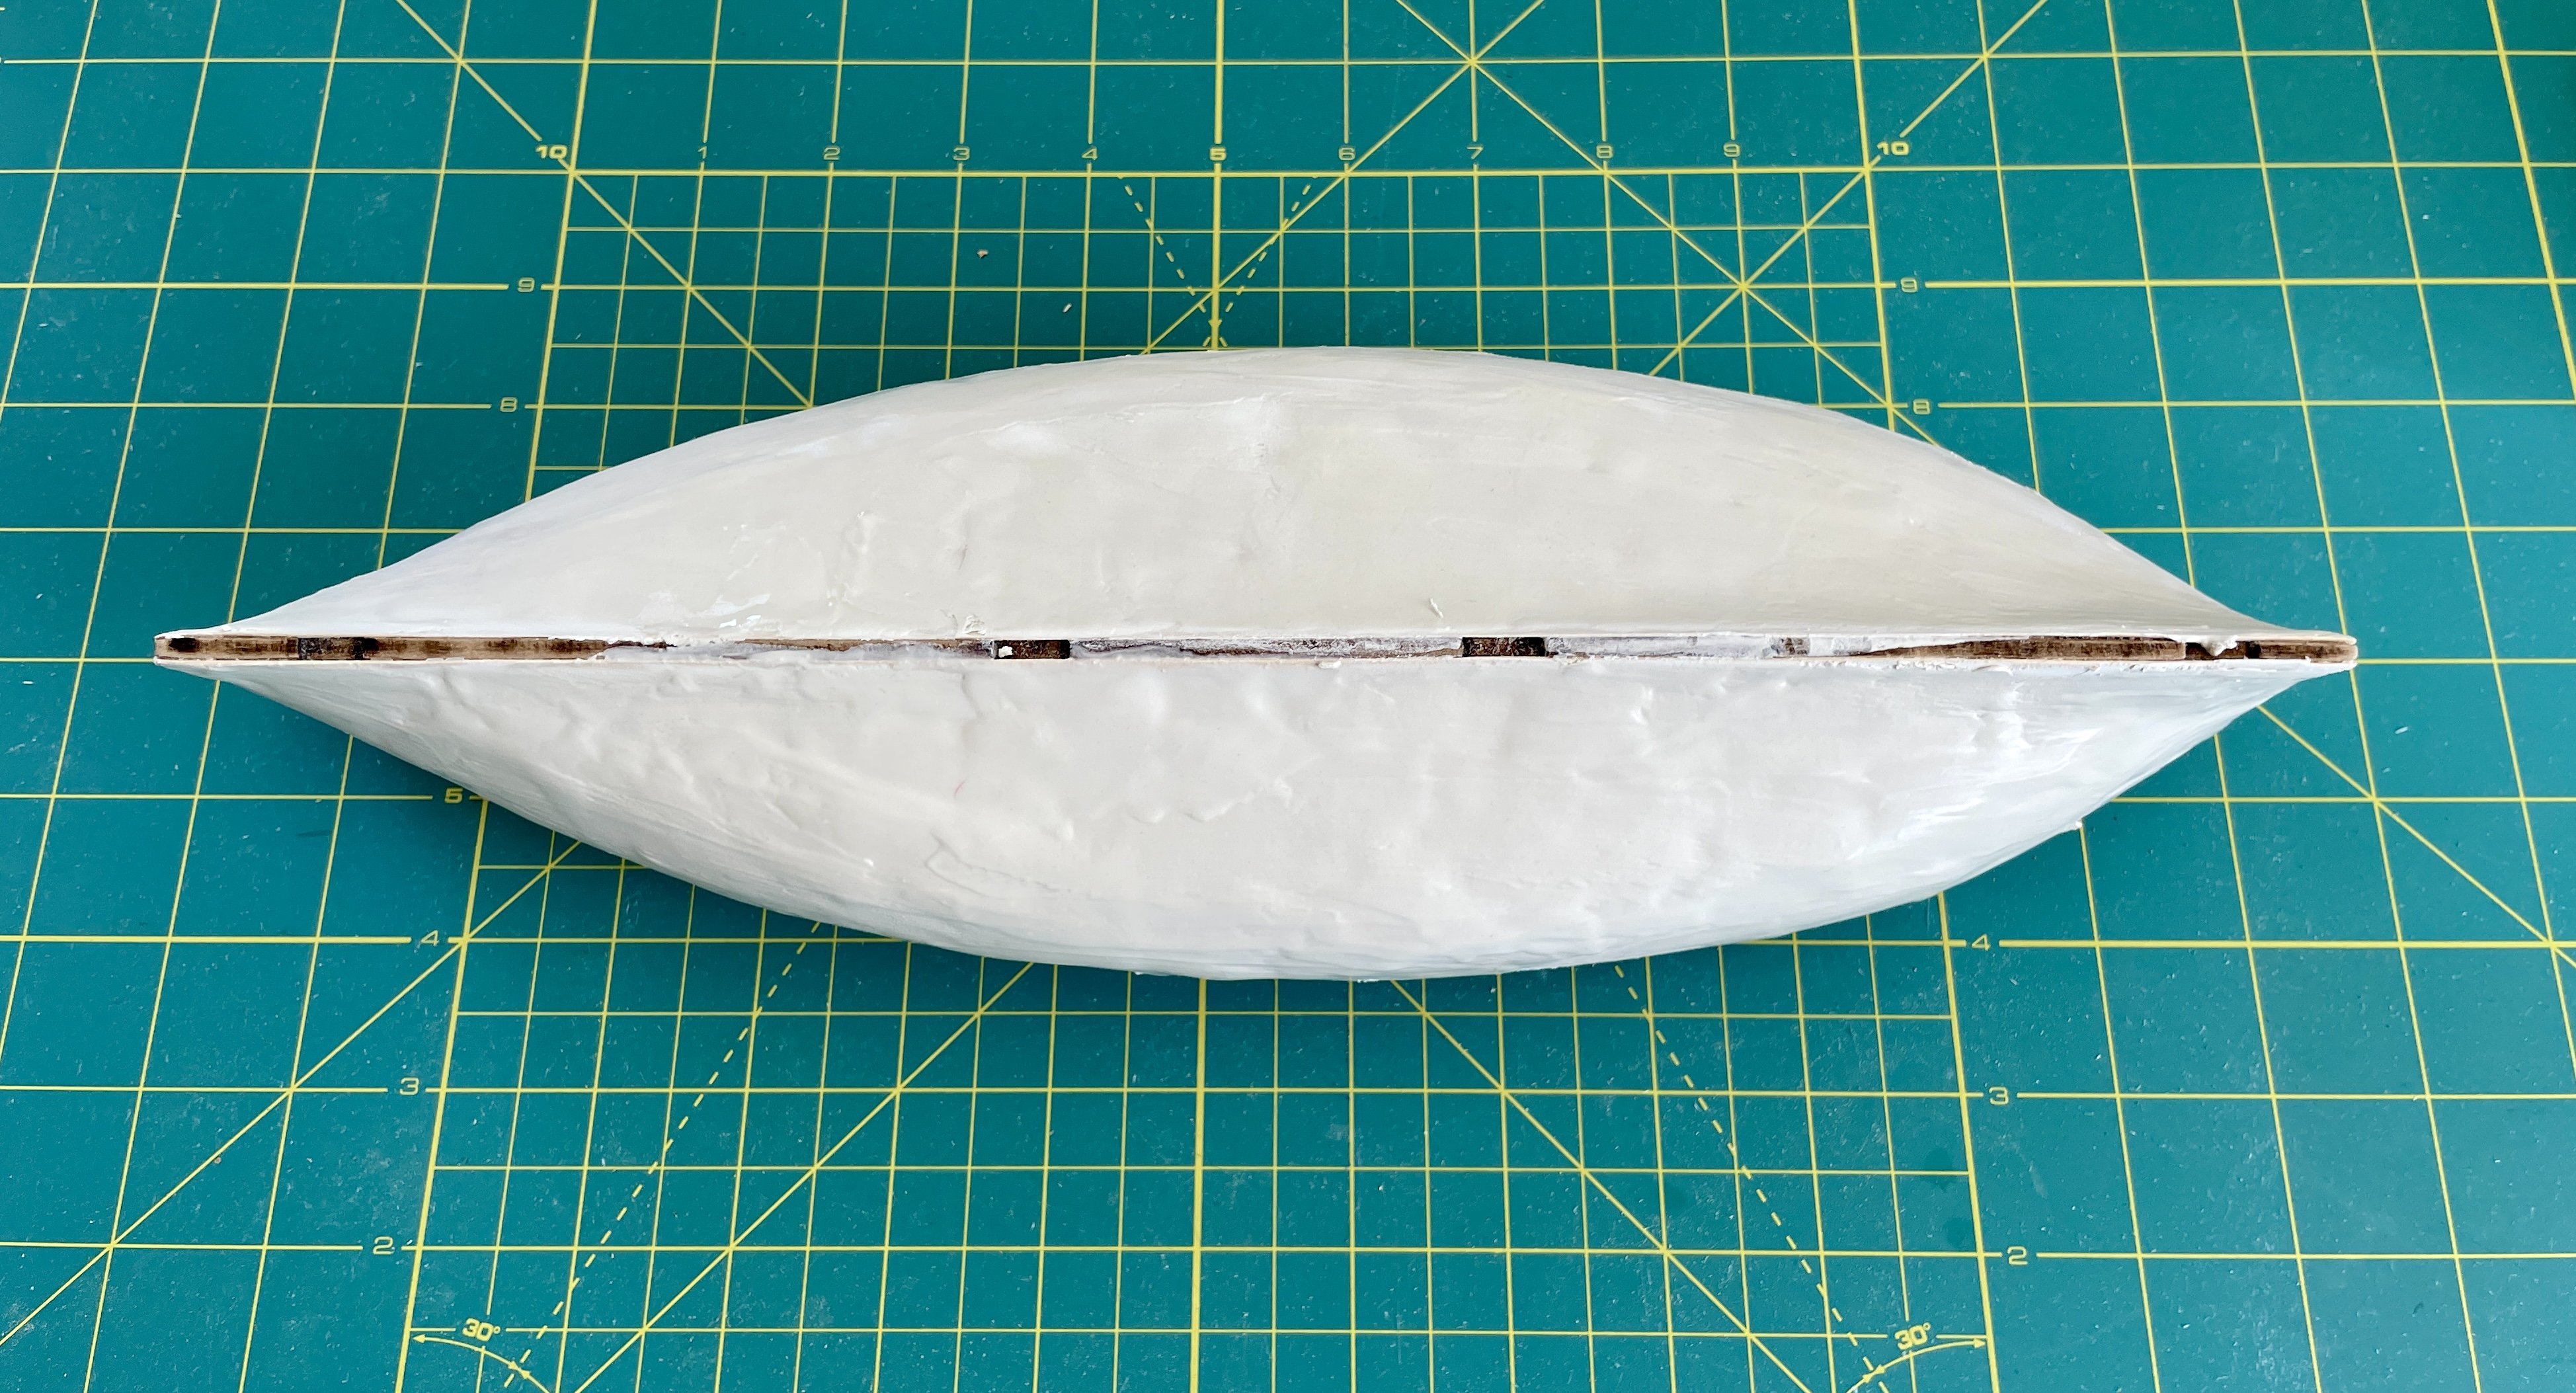
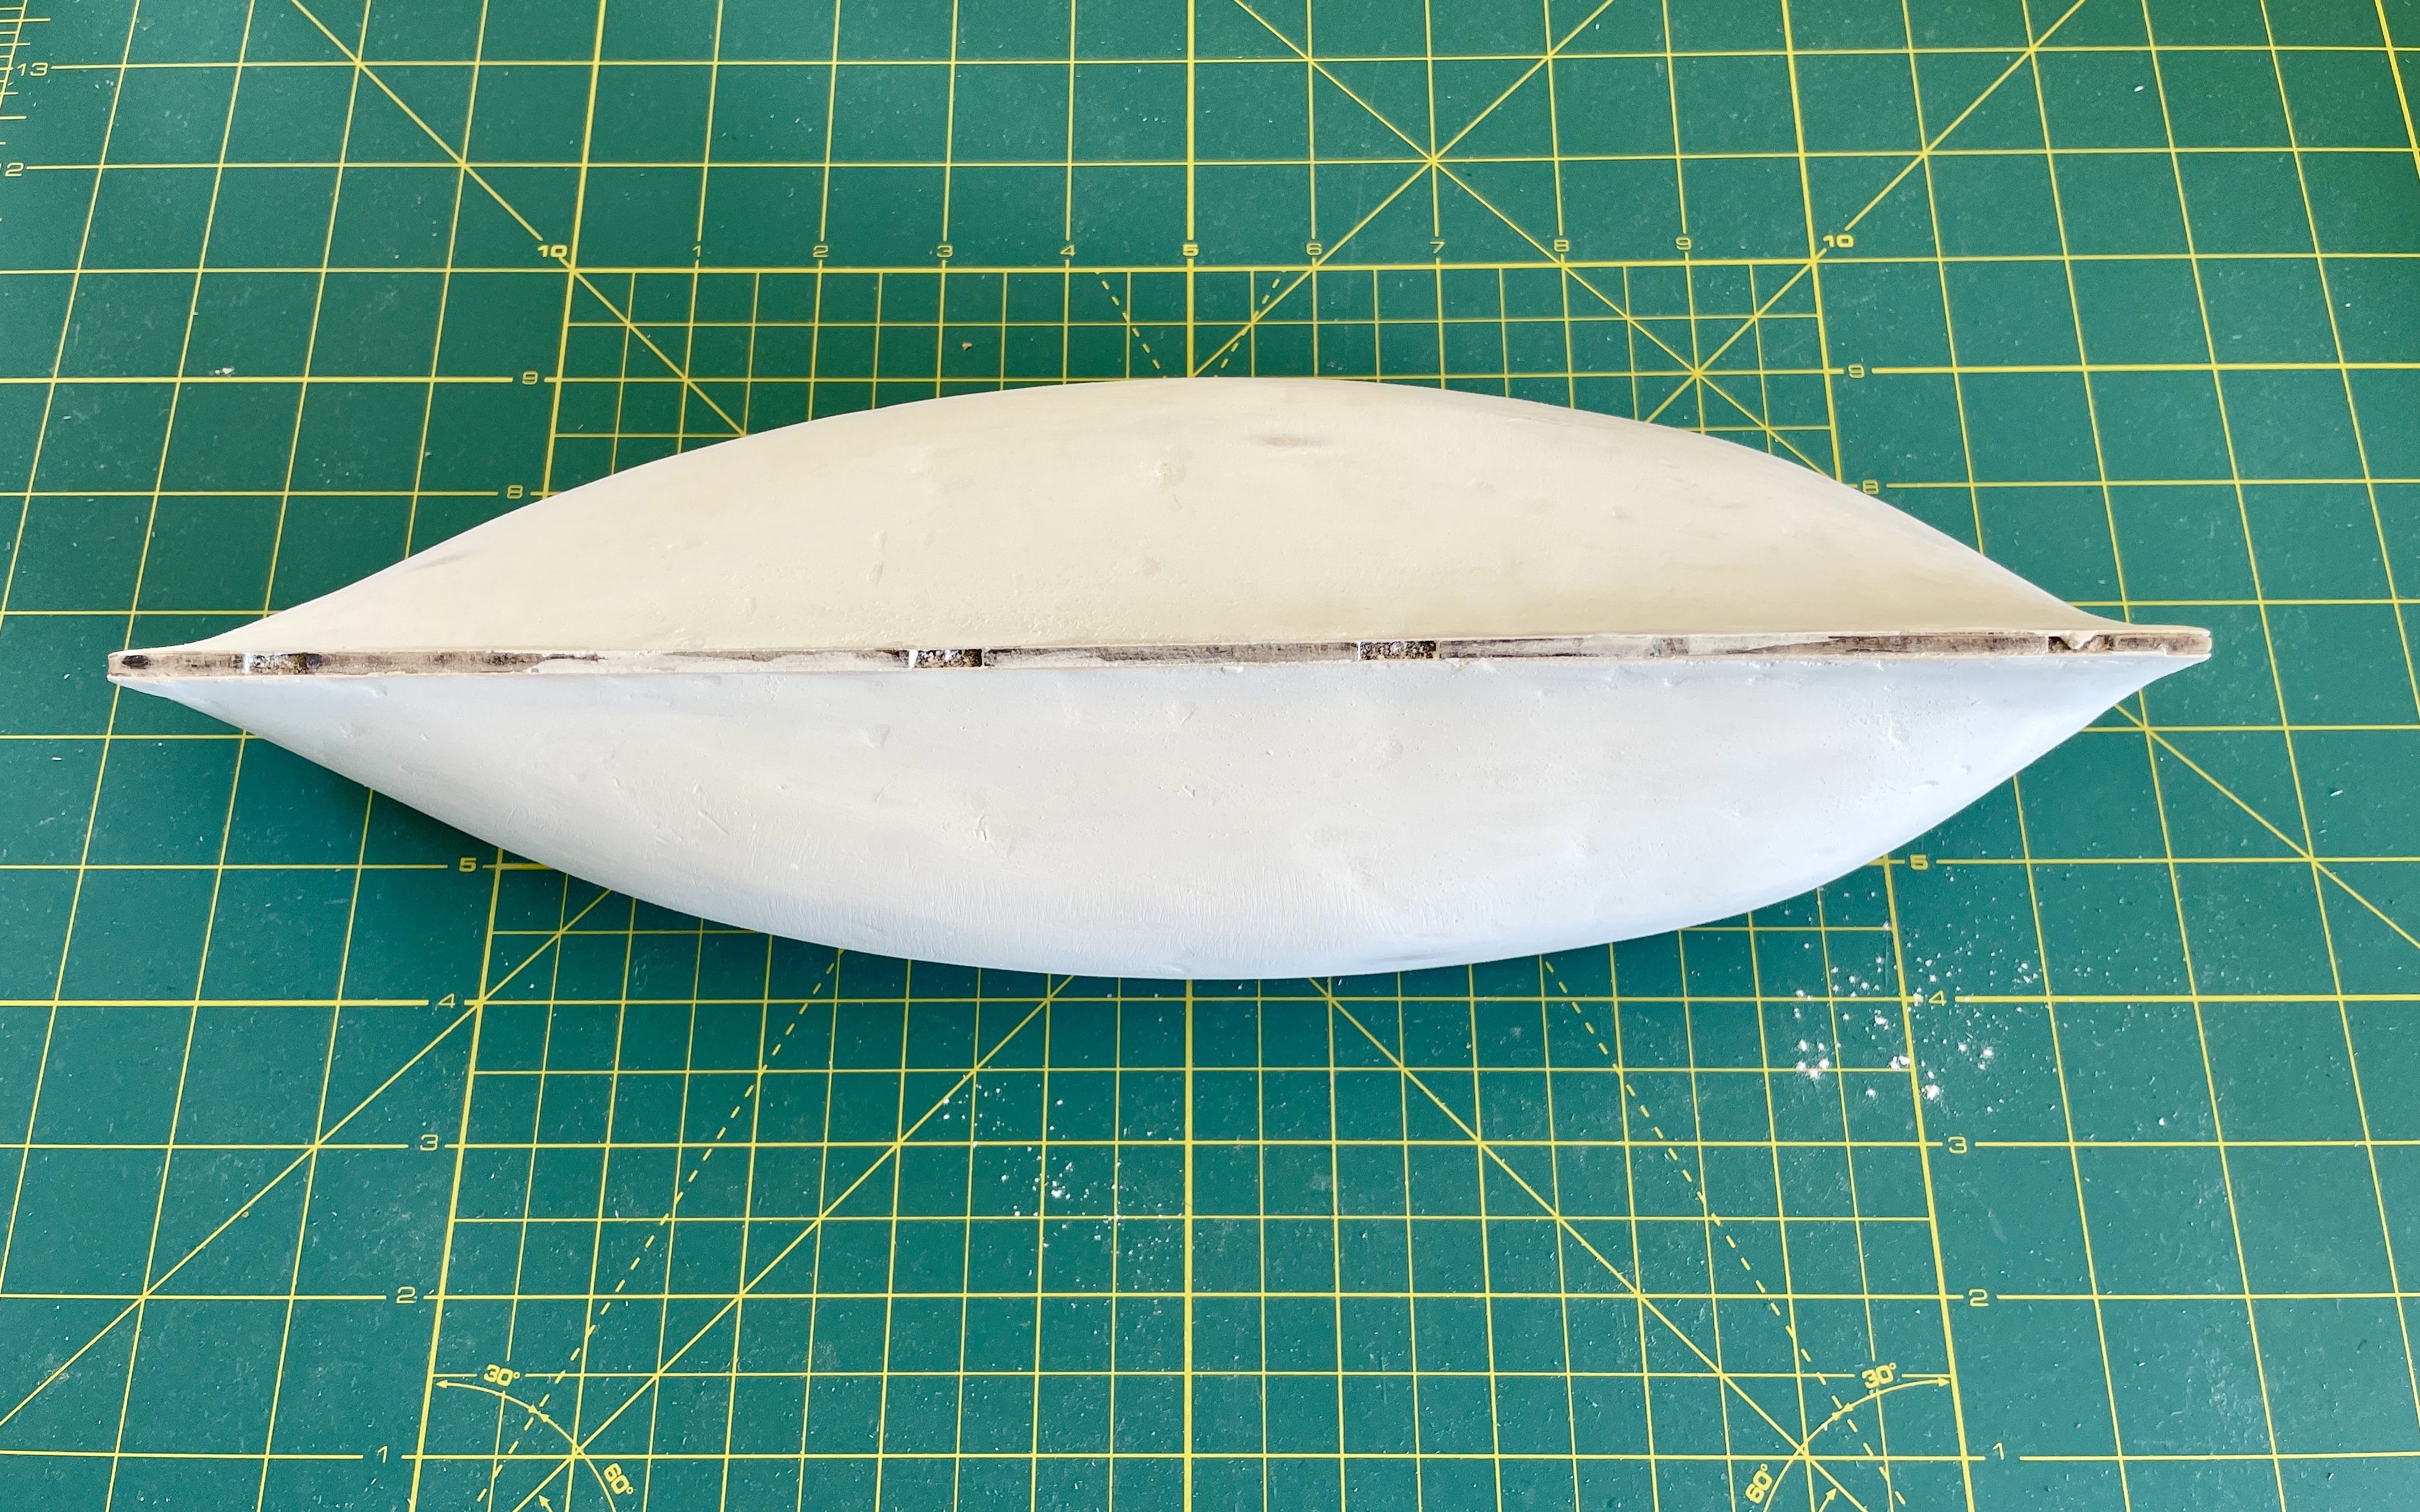
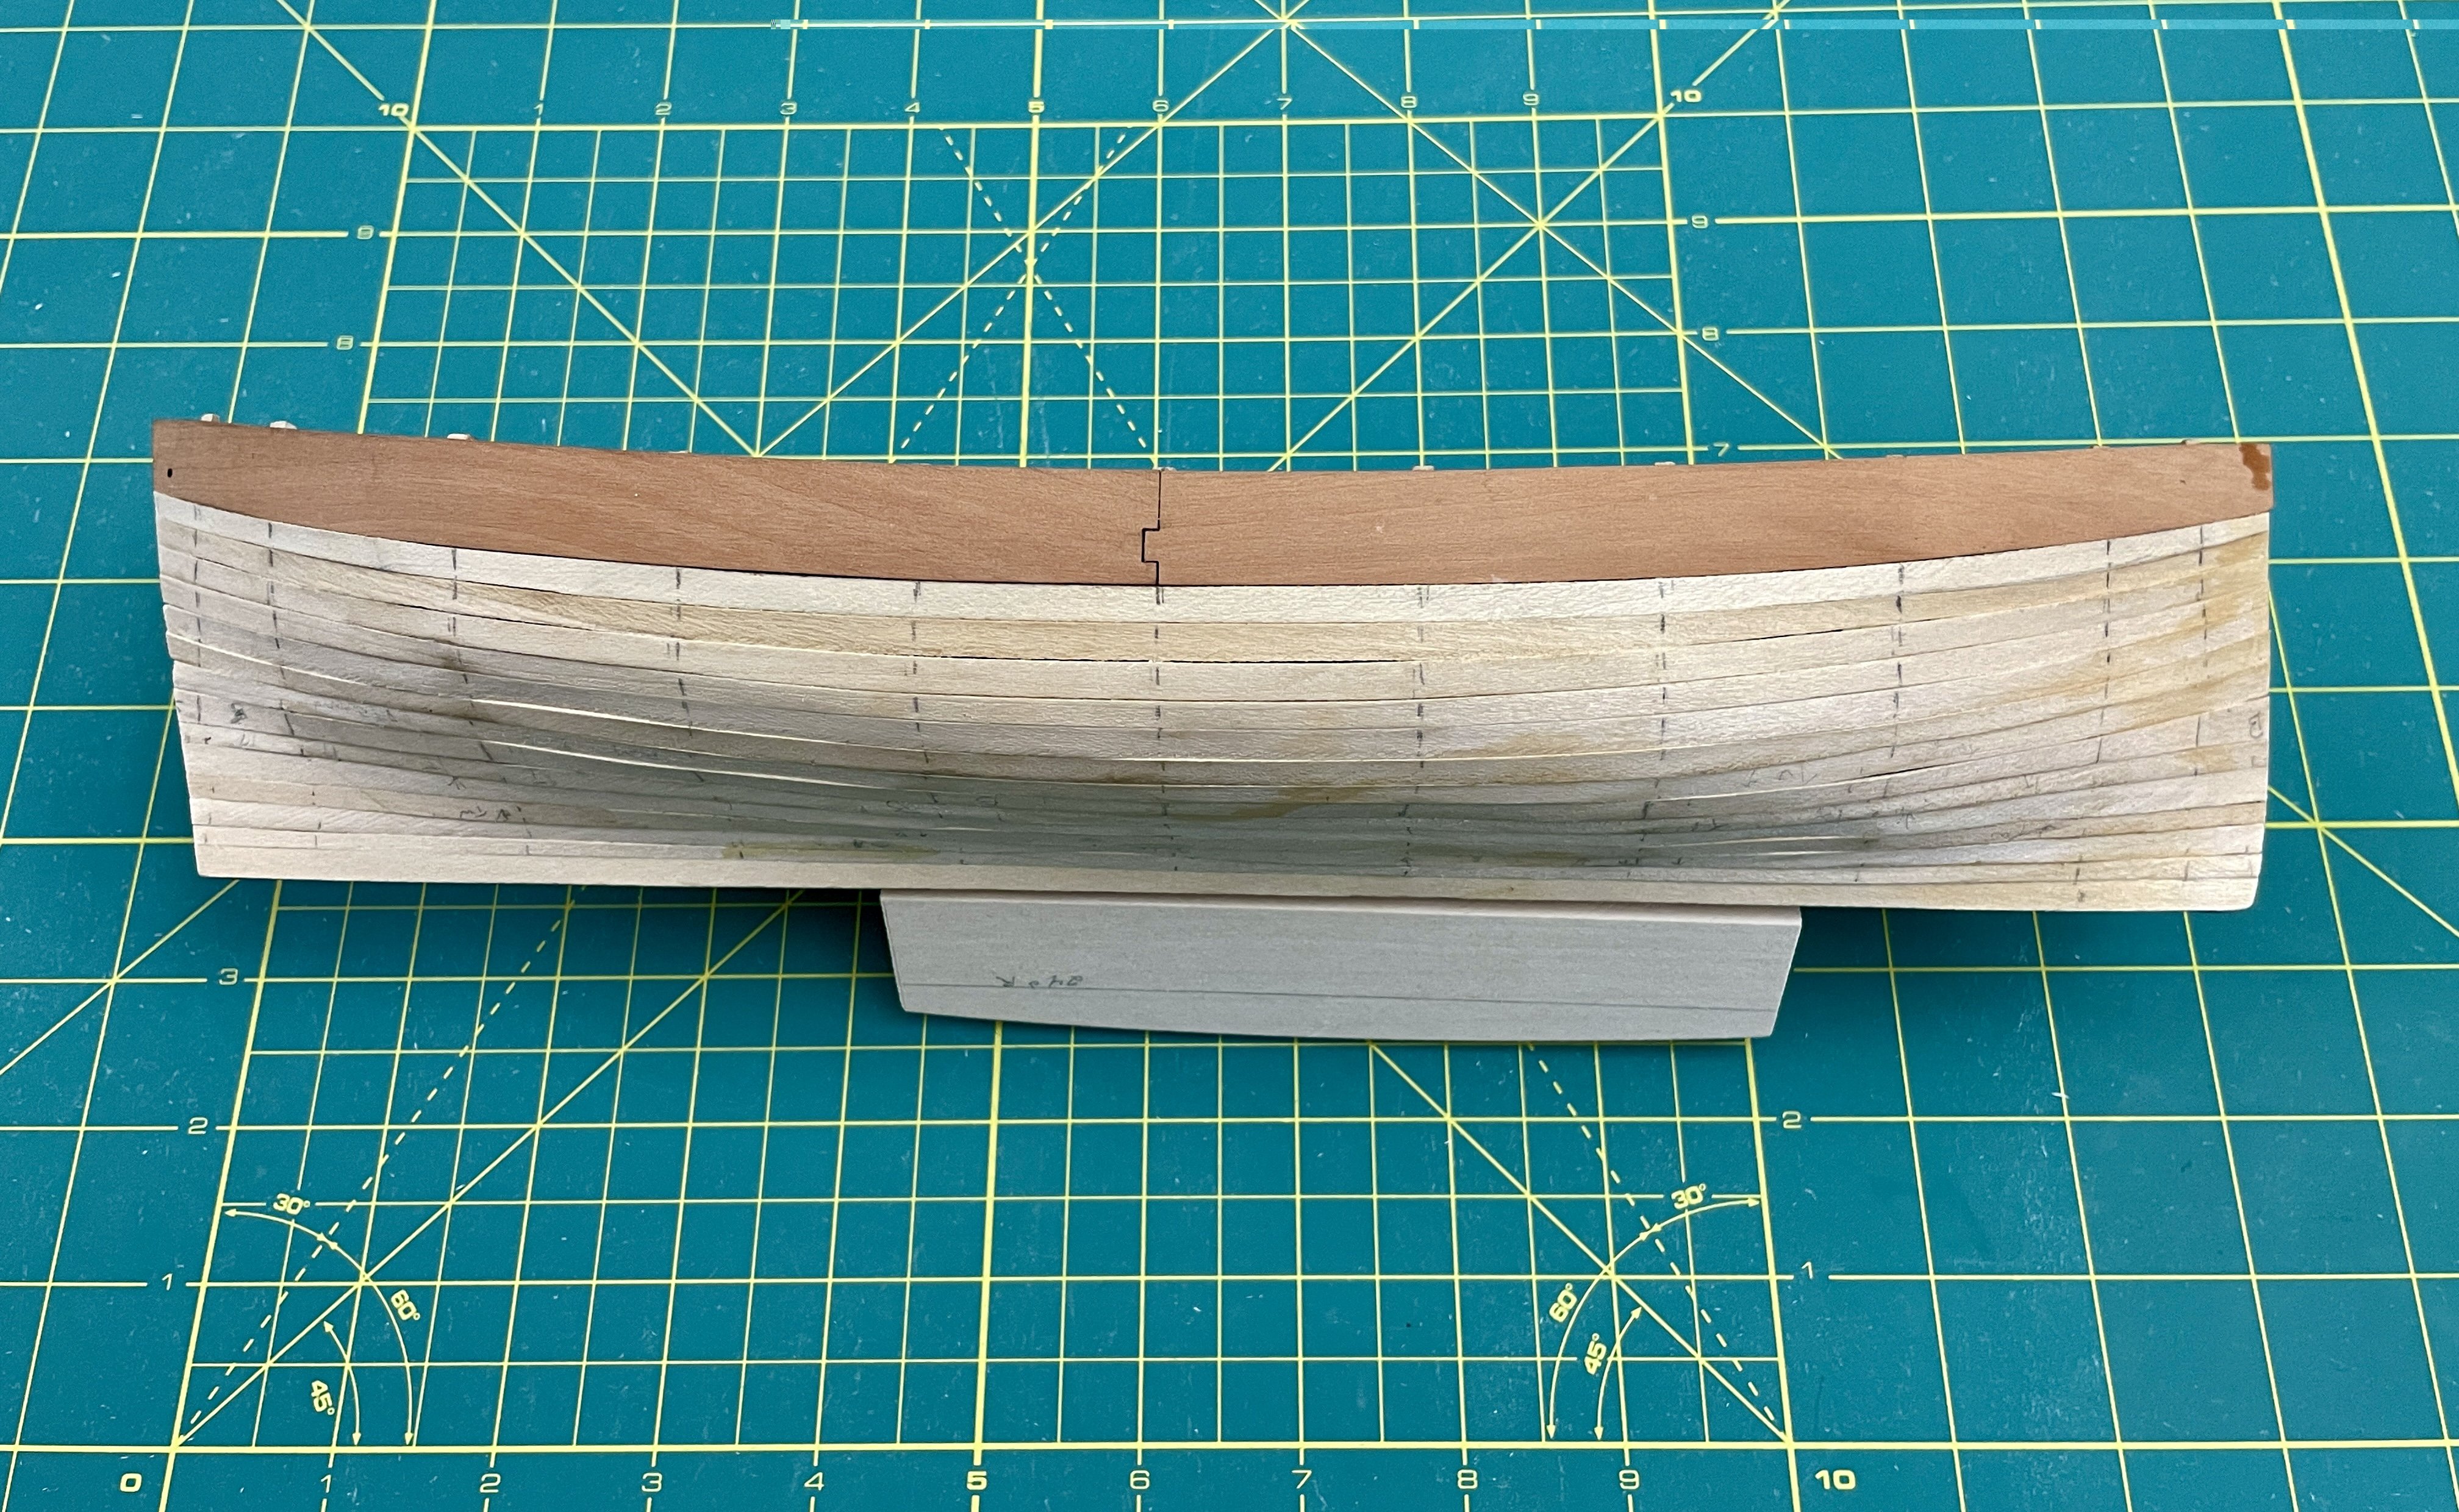
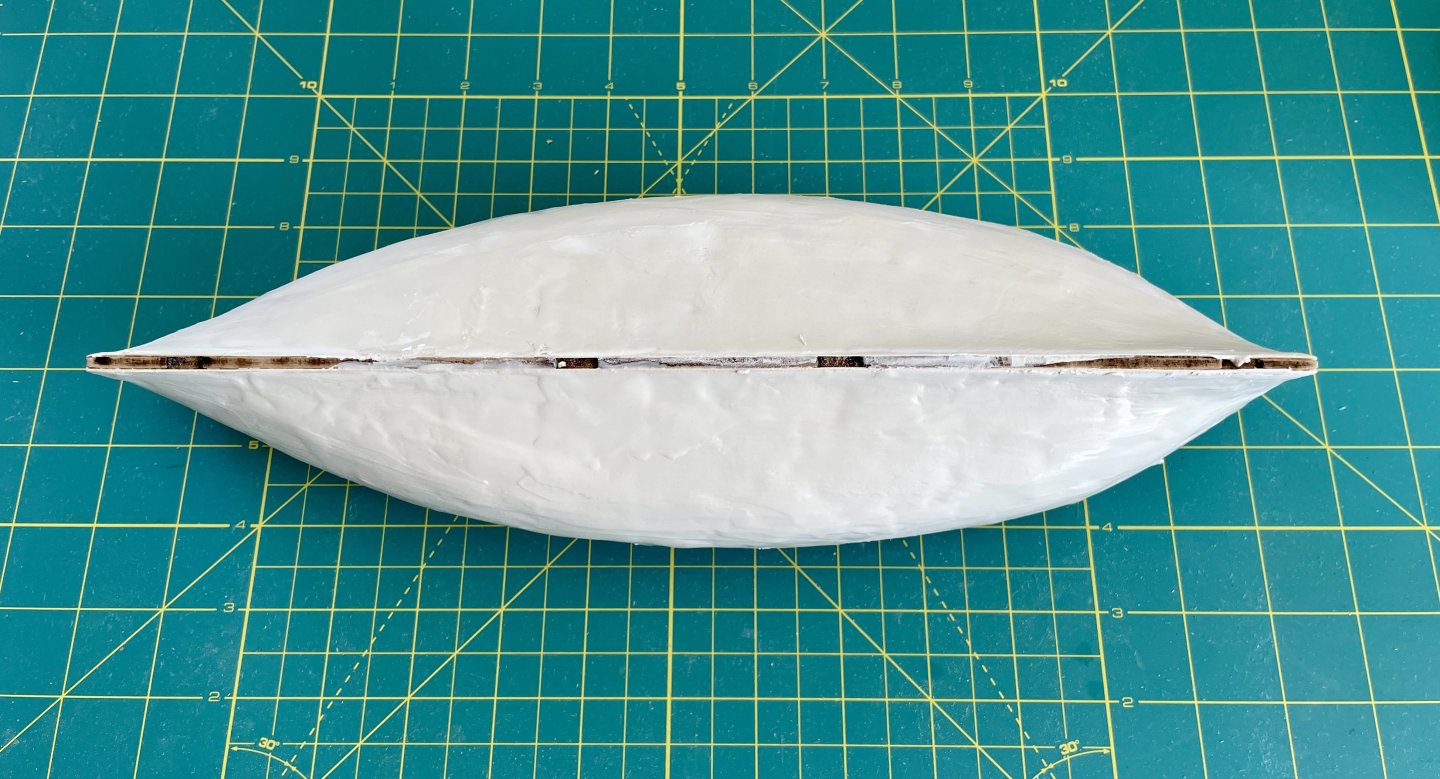
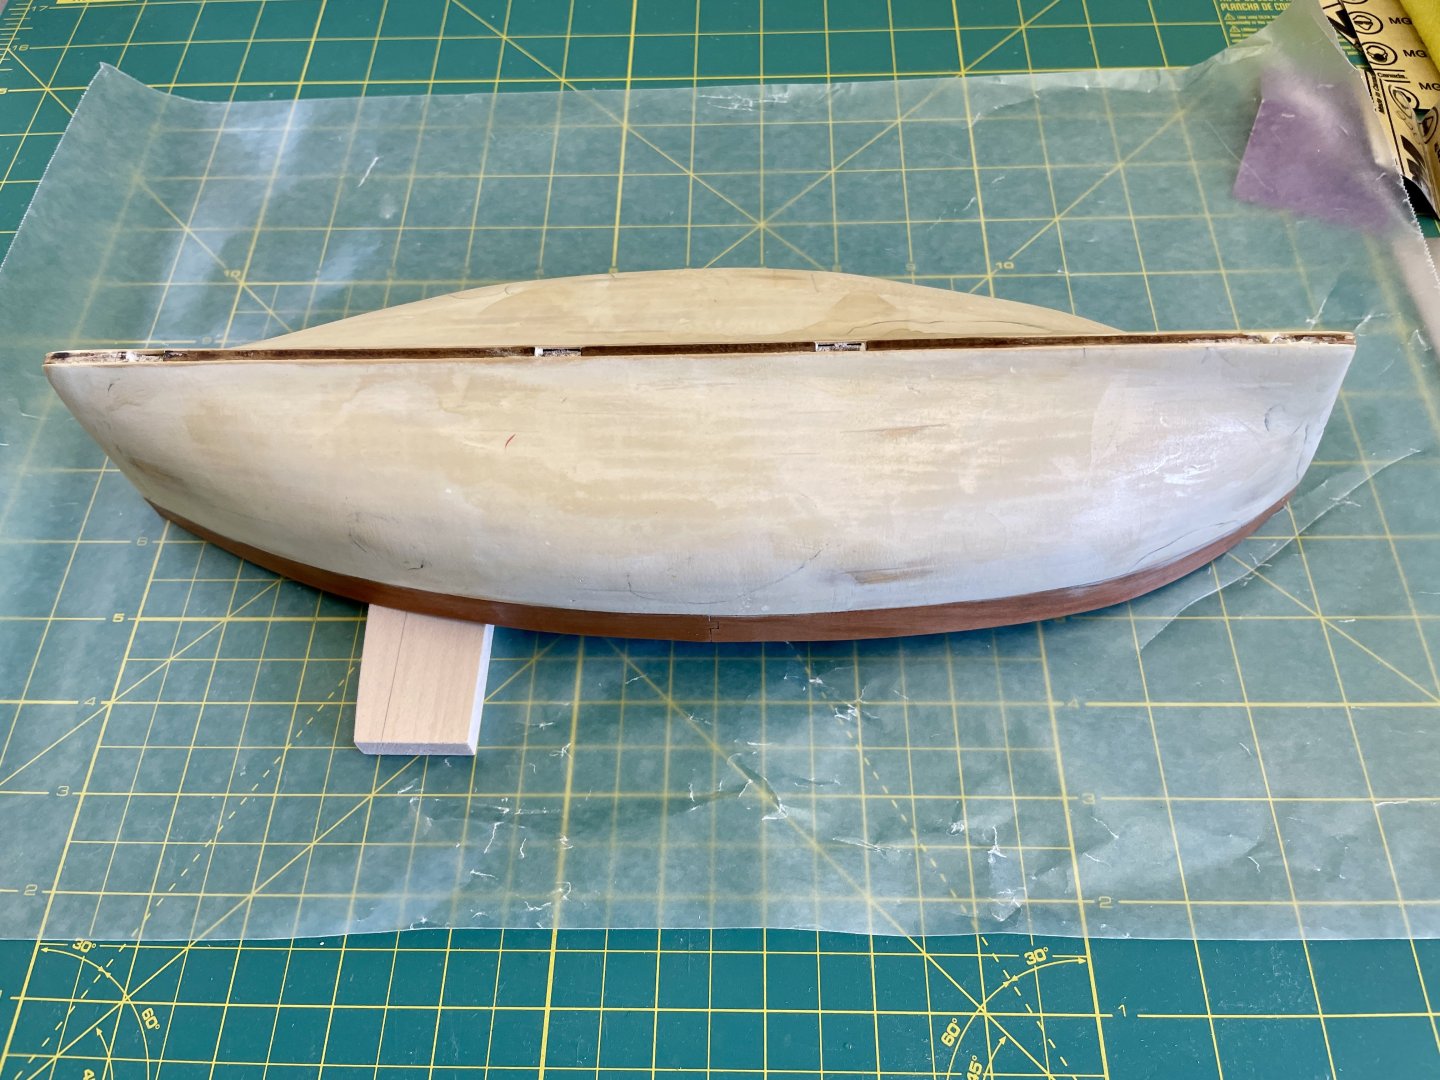
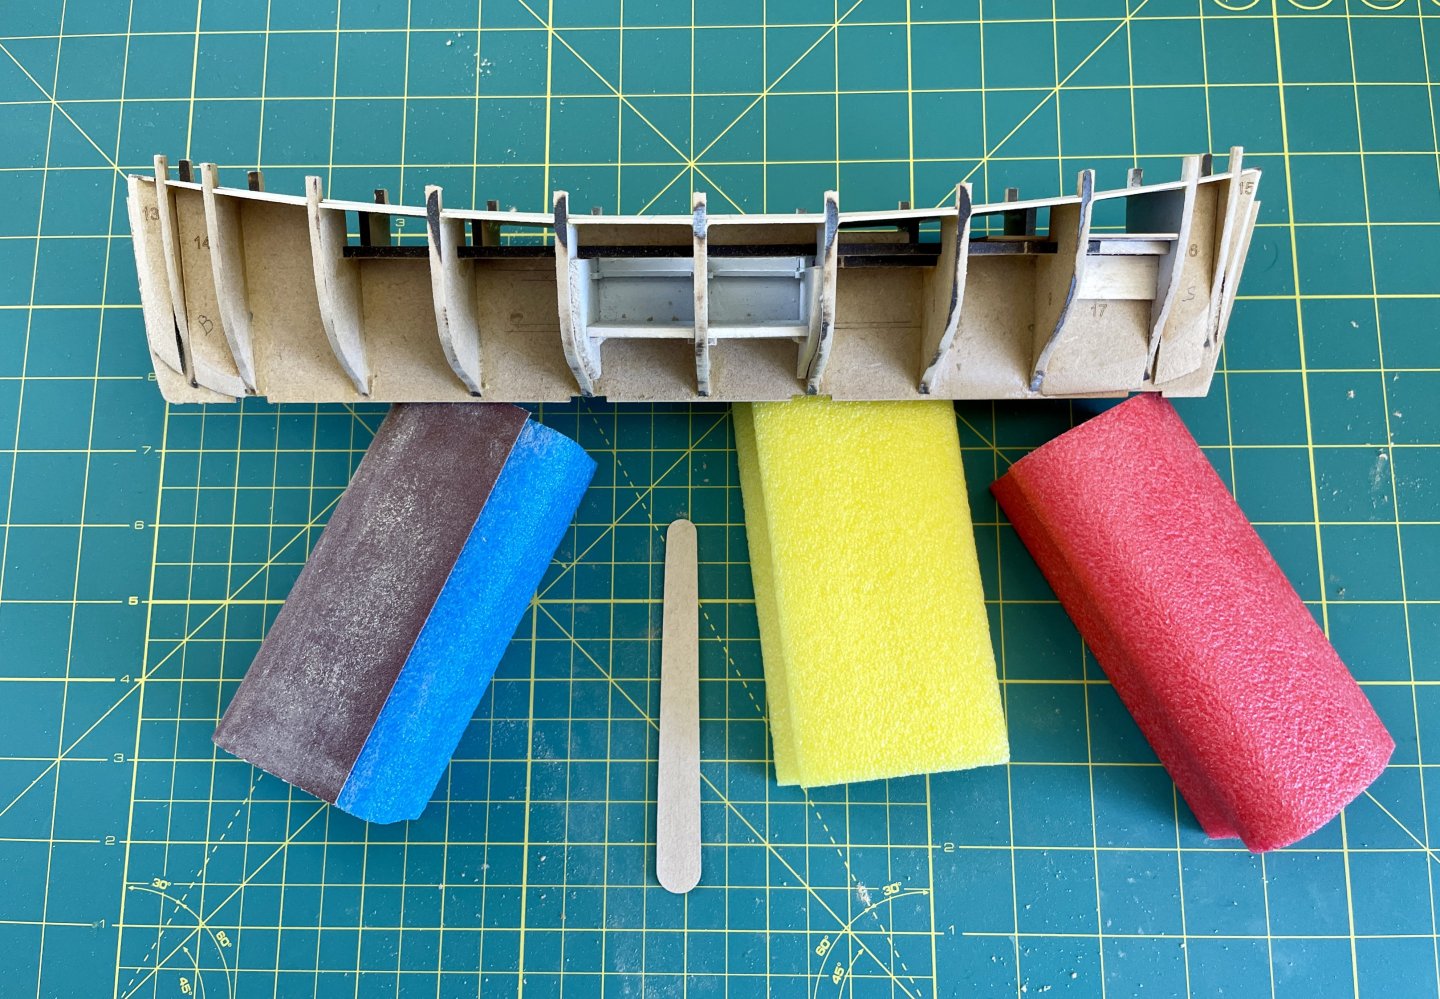
Hull Construction – 2nd Planking Prep After finishing the 1st planking, I steamed it to help level uneven planks and etc. I then sanded out high spots. A trade I practiced when I was younger was interior wall repair (I still do repair work for family and friends in need). I used that skillset to fill and finesse the hull in preparation for its 2nd planking. The pics that follow are the progression of finessing the hull. Although the hull looks like hell in the last photo, it actually is exceptionally fair. I then sealed the hull with shellac, scuff sanded it with P180, and then rough-marked bulkhead locations for the 2nd planking. Cheers, Jay


- 63 replies
-
- 5
-
-
- Lady Eleanor
- True Vine
- (and 2 more)
-
Hi Paul, excellent—thank you for your feedback and help! Jay
-
What sizes of extra wood do you recommend getting for a Cheerful build? I’m going to order a cut package for the build and figured I would add some extra wood based on the experience/ recommendations of builders who ran short on wood during their builds. Thanks in advance for your suggestions! Jay
-
Hull Construction – 1st Planking Finished She’s starting to look like a Boaty McBoatface! 🤣 Boaty McBoatface aka the "Sir David Attenborough" Caught Covid this Friday while on my way home from work travel, so got a Paxlovid script and finished the 1st planking in-between naps and etc. Cheers, Jay

- 63 replies
-
- 7
-
-
- Lady Eleanor
- True Vine
- (and 2 more)
-
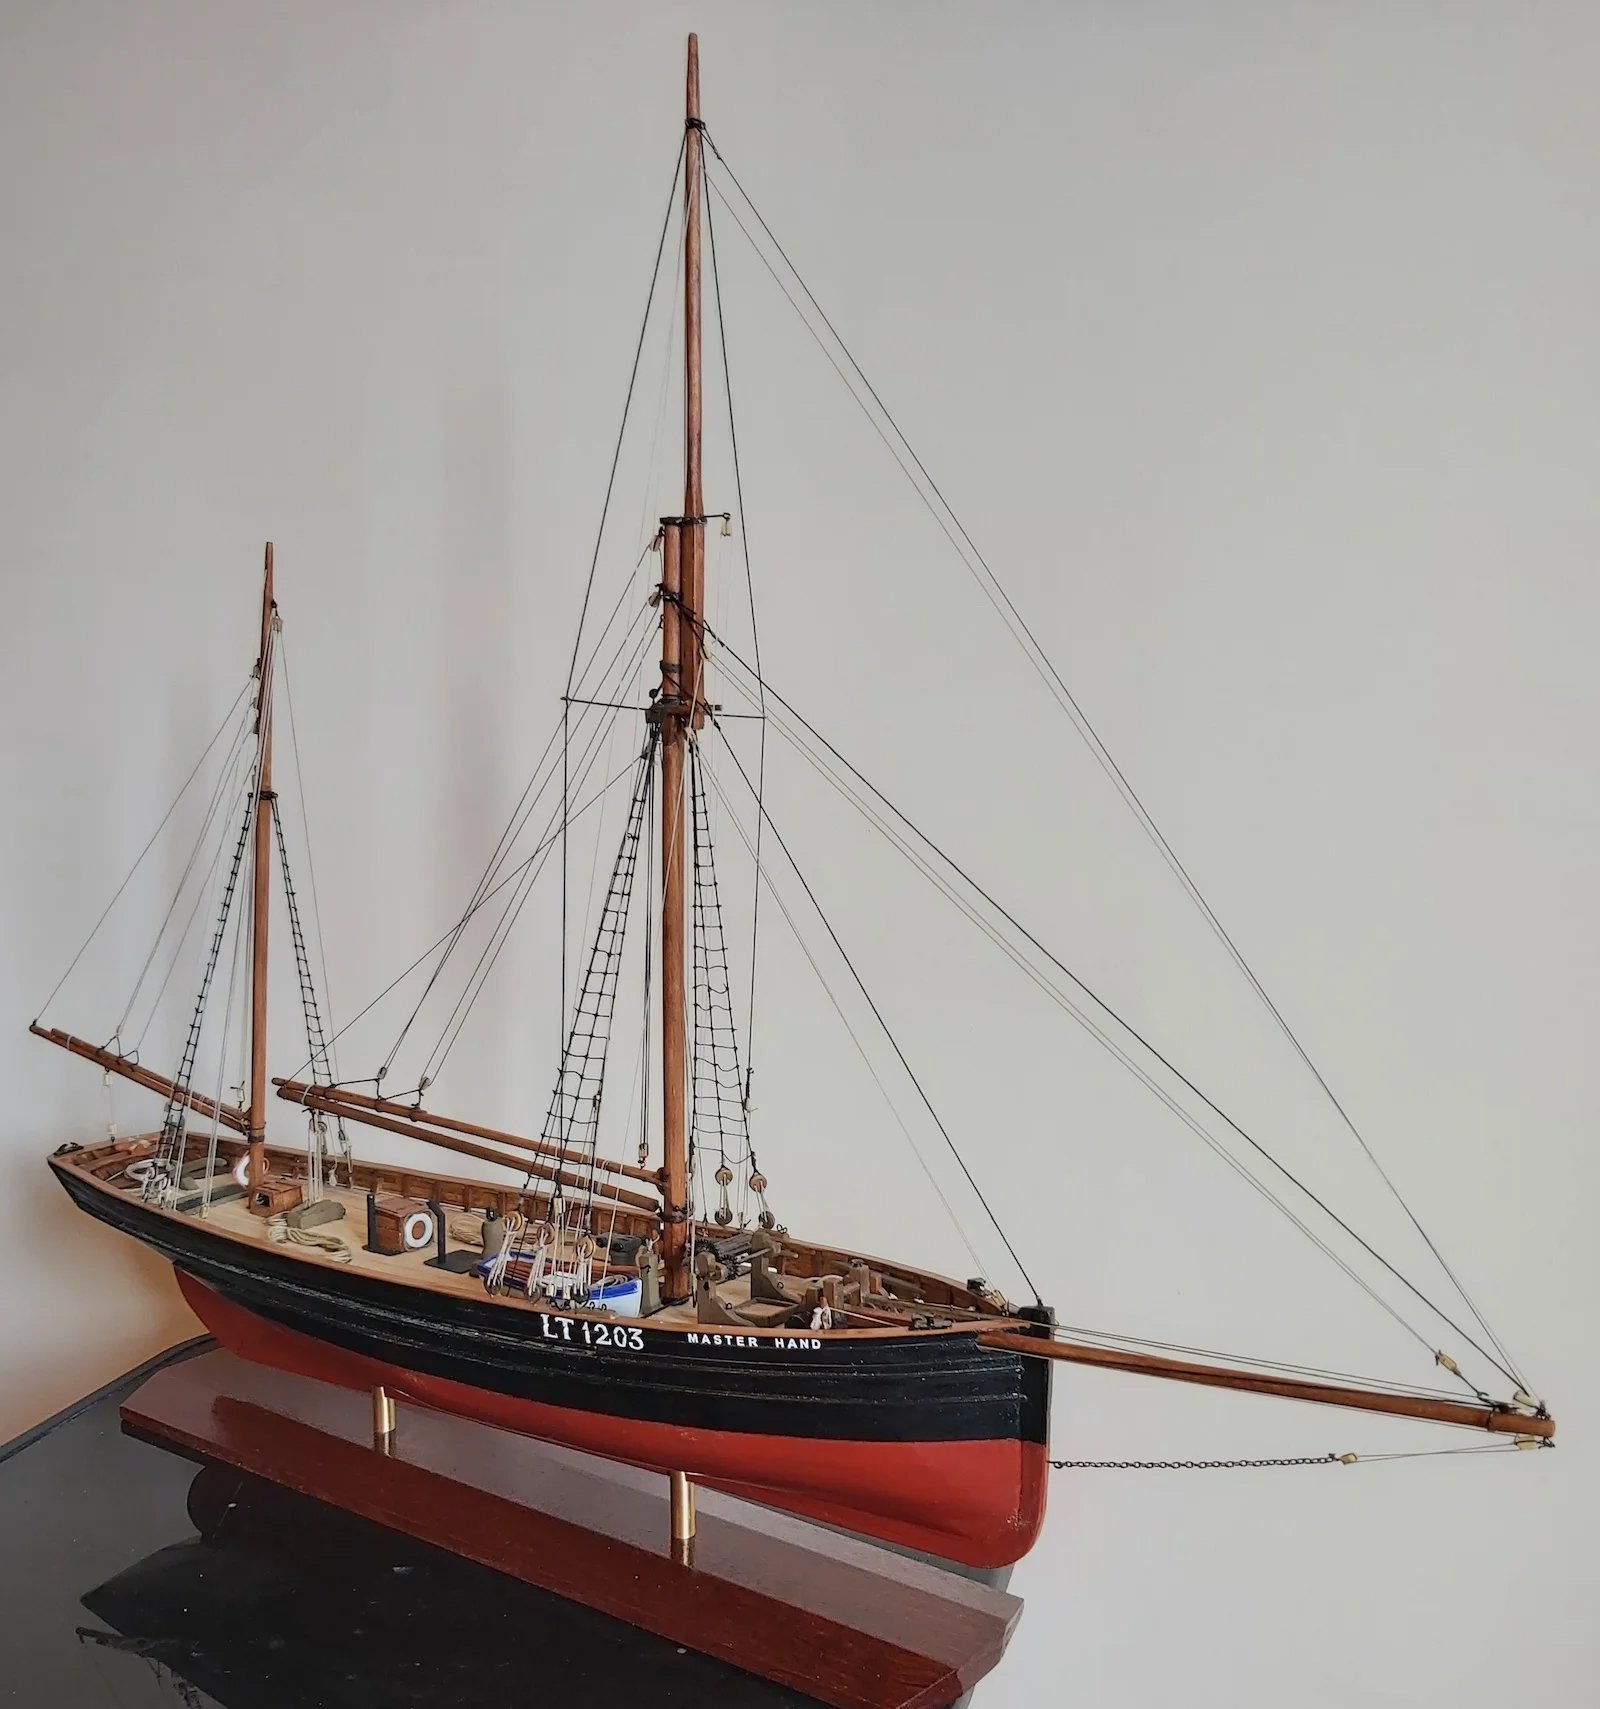
Thank you, BE! Your "Lady Eleanor" and "Muirneag" builds were, and are, inspirations for my build. Like you, I'm also fond of these fishing boats--they have so much character! To build back my modeling skillset after such a long break, I plan on building several of Chris' fleet--plus, they'll make nice gifts. Oh the Master Hand was lovely--what a sad fate she came to. Hopefully Chris will consider adding her to his line up...we definitely know there are at least 2 builders that will go for her! 😉 Had to include her image below to maybe sway Chris in case he drops in..... Source: Capt. David Bray's lovely build at: https://nauticalnostalgia.com/model-making-model-engineering/master-hand/ Cheers, Jay

-
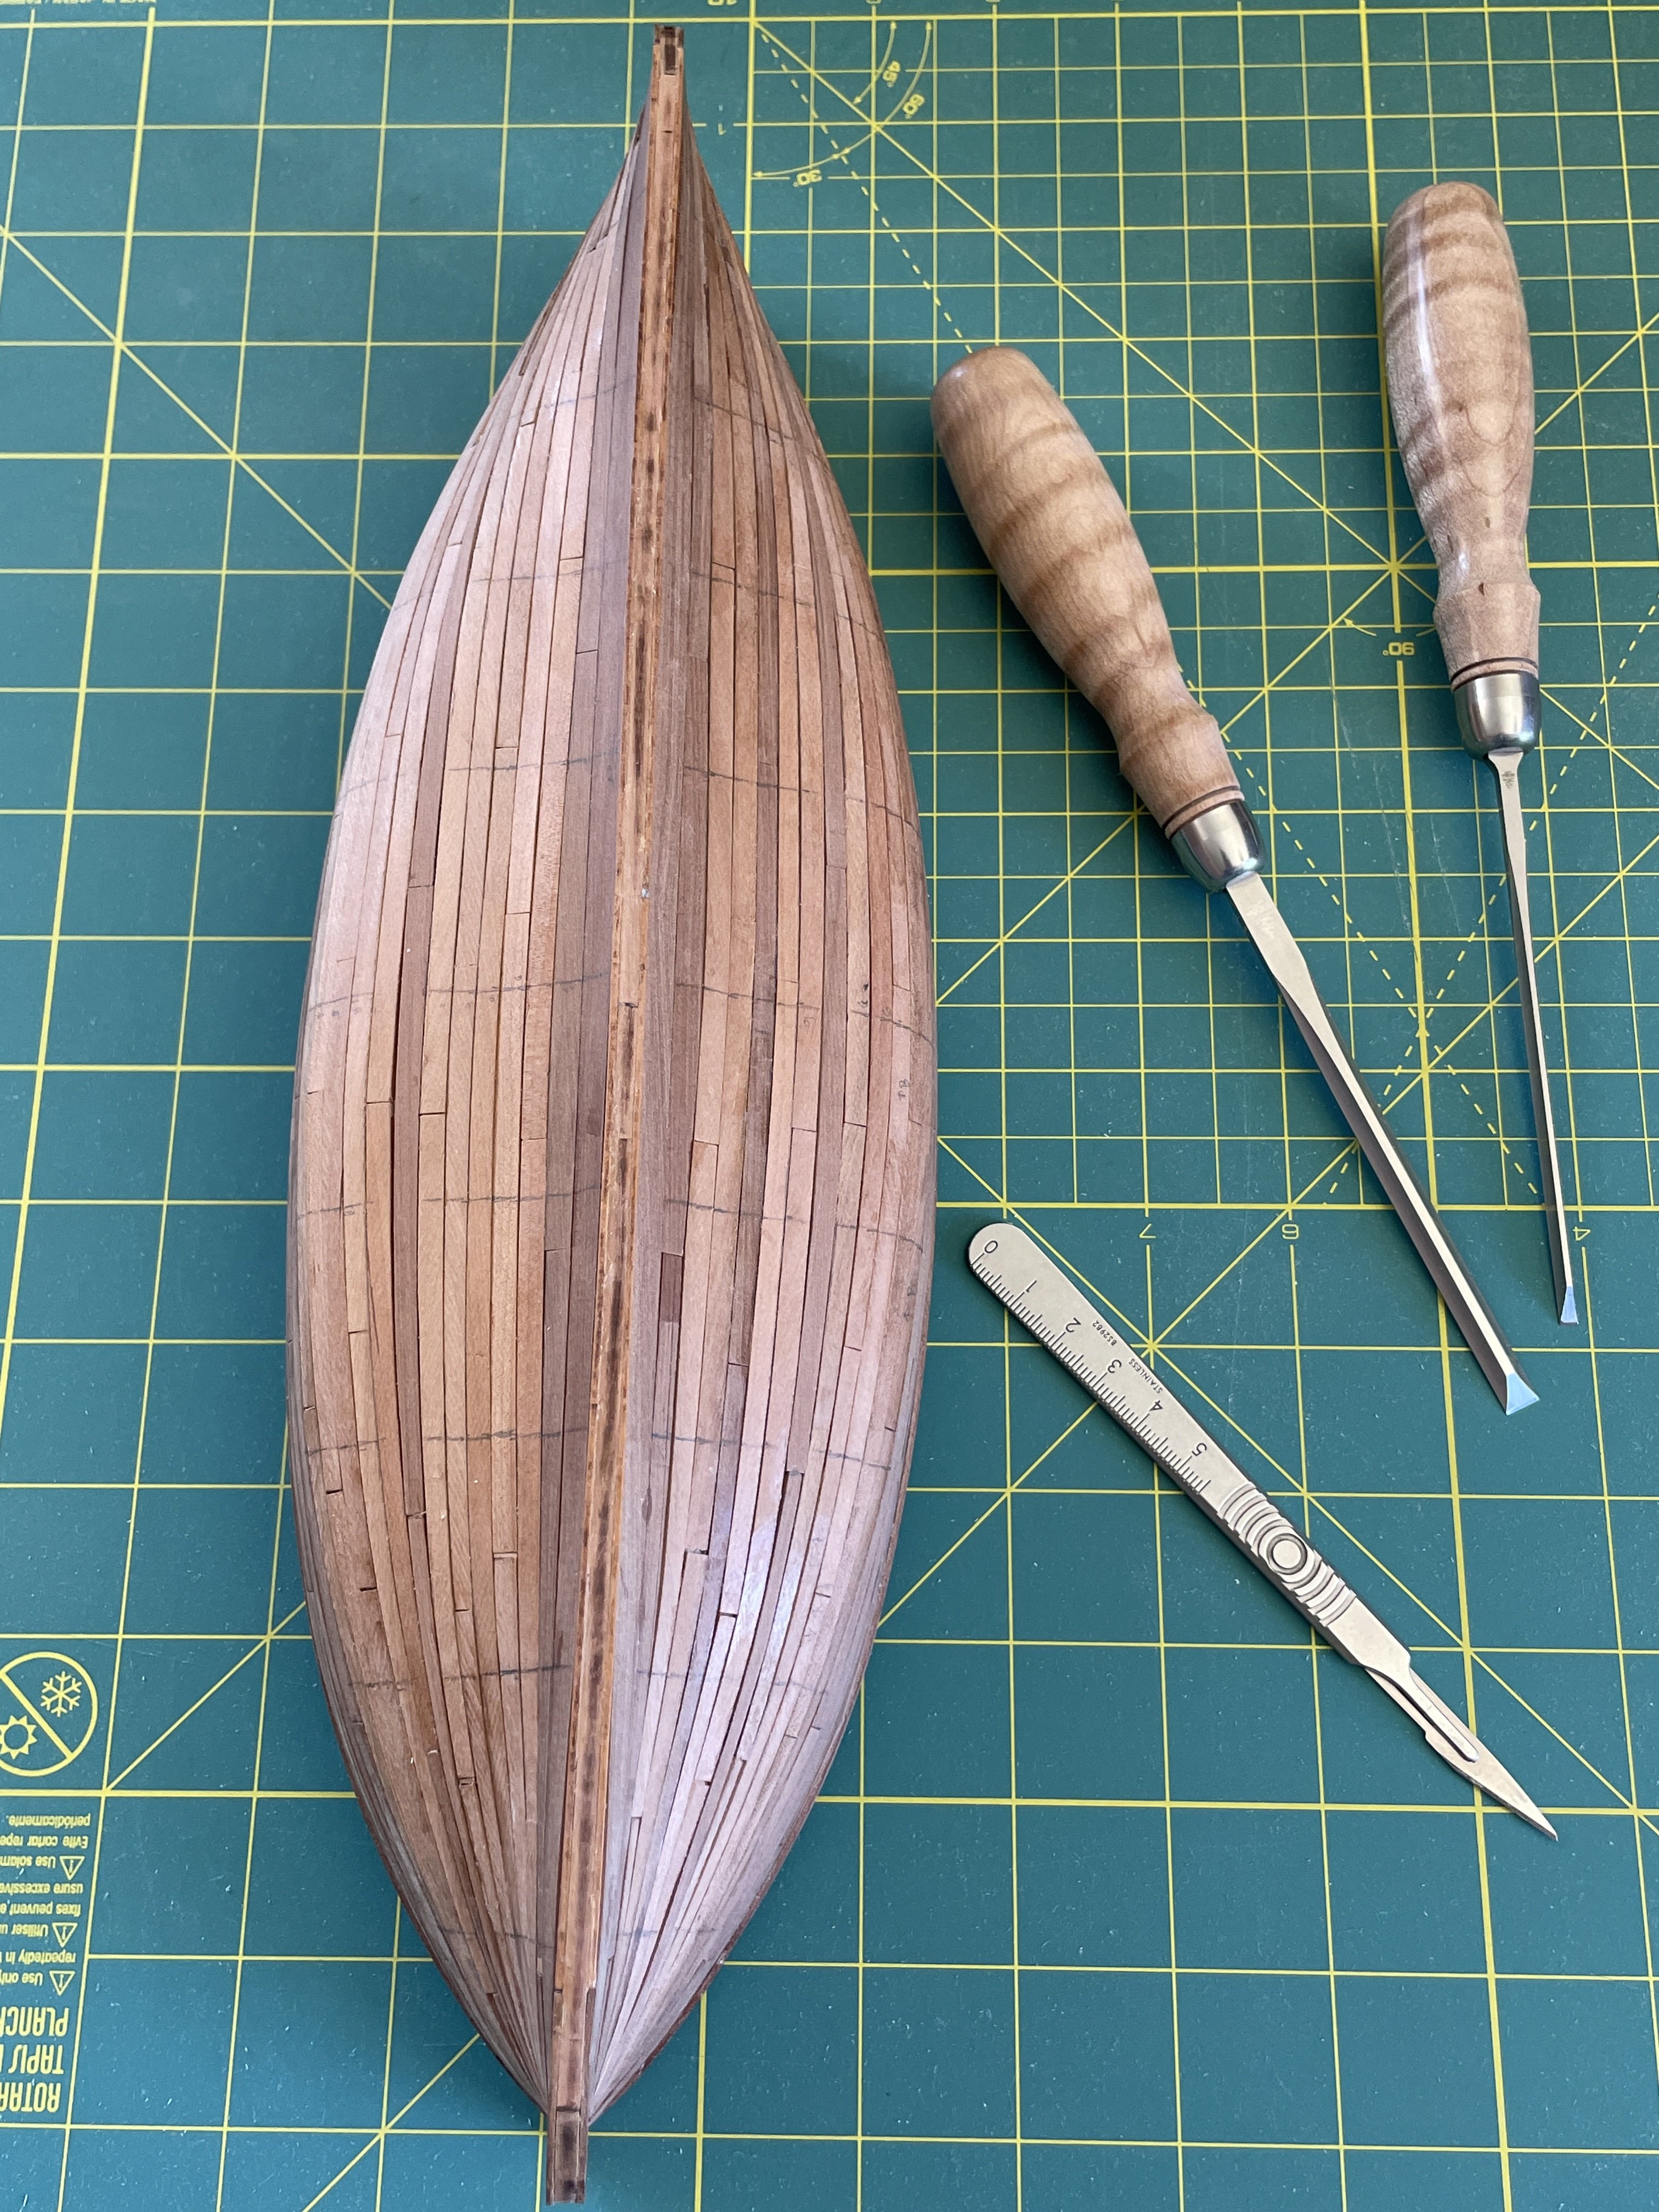
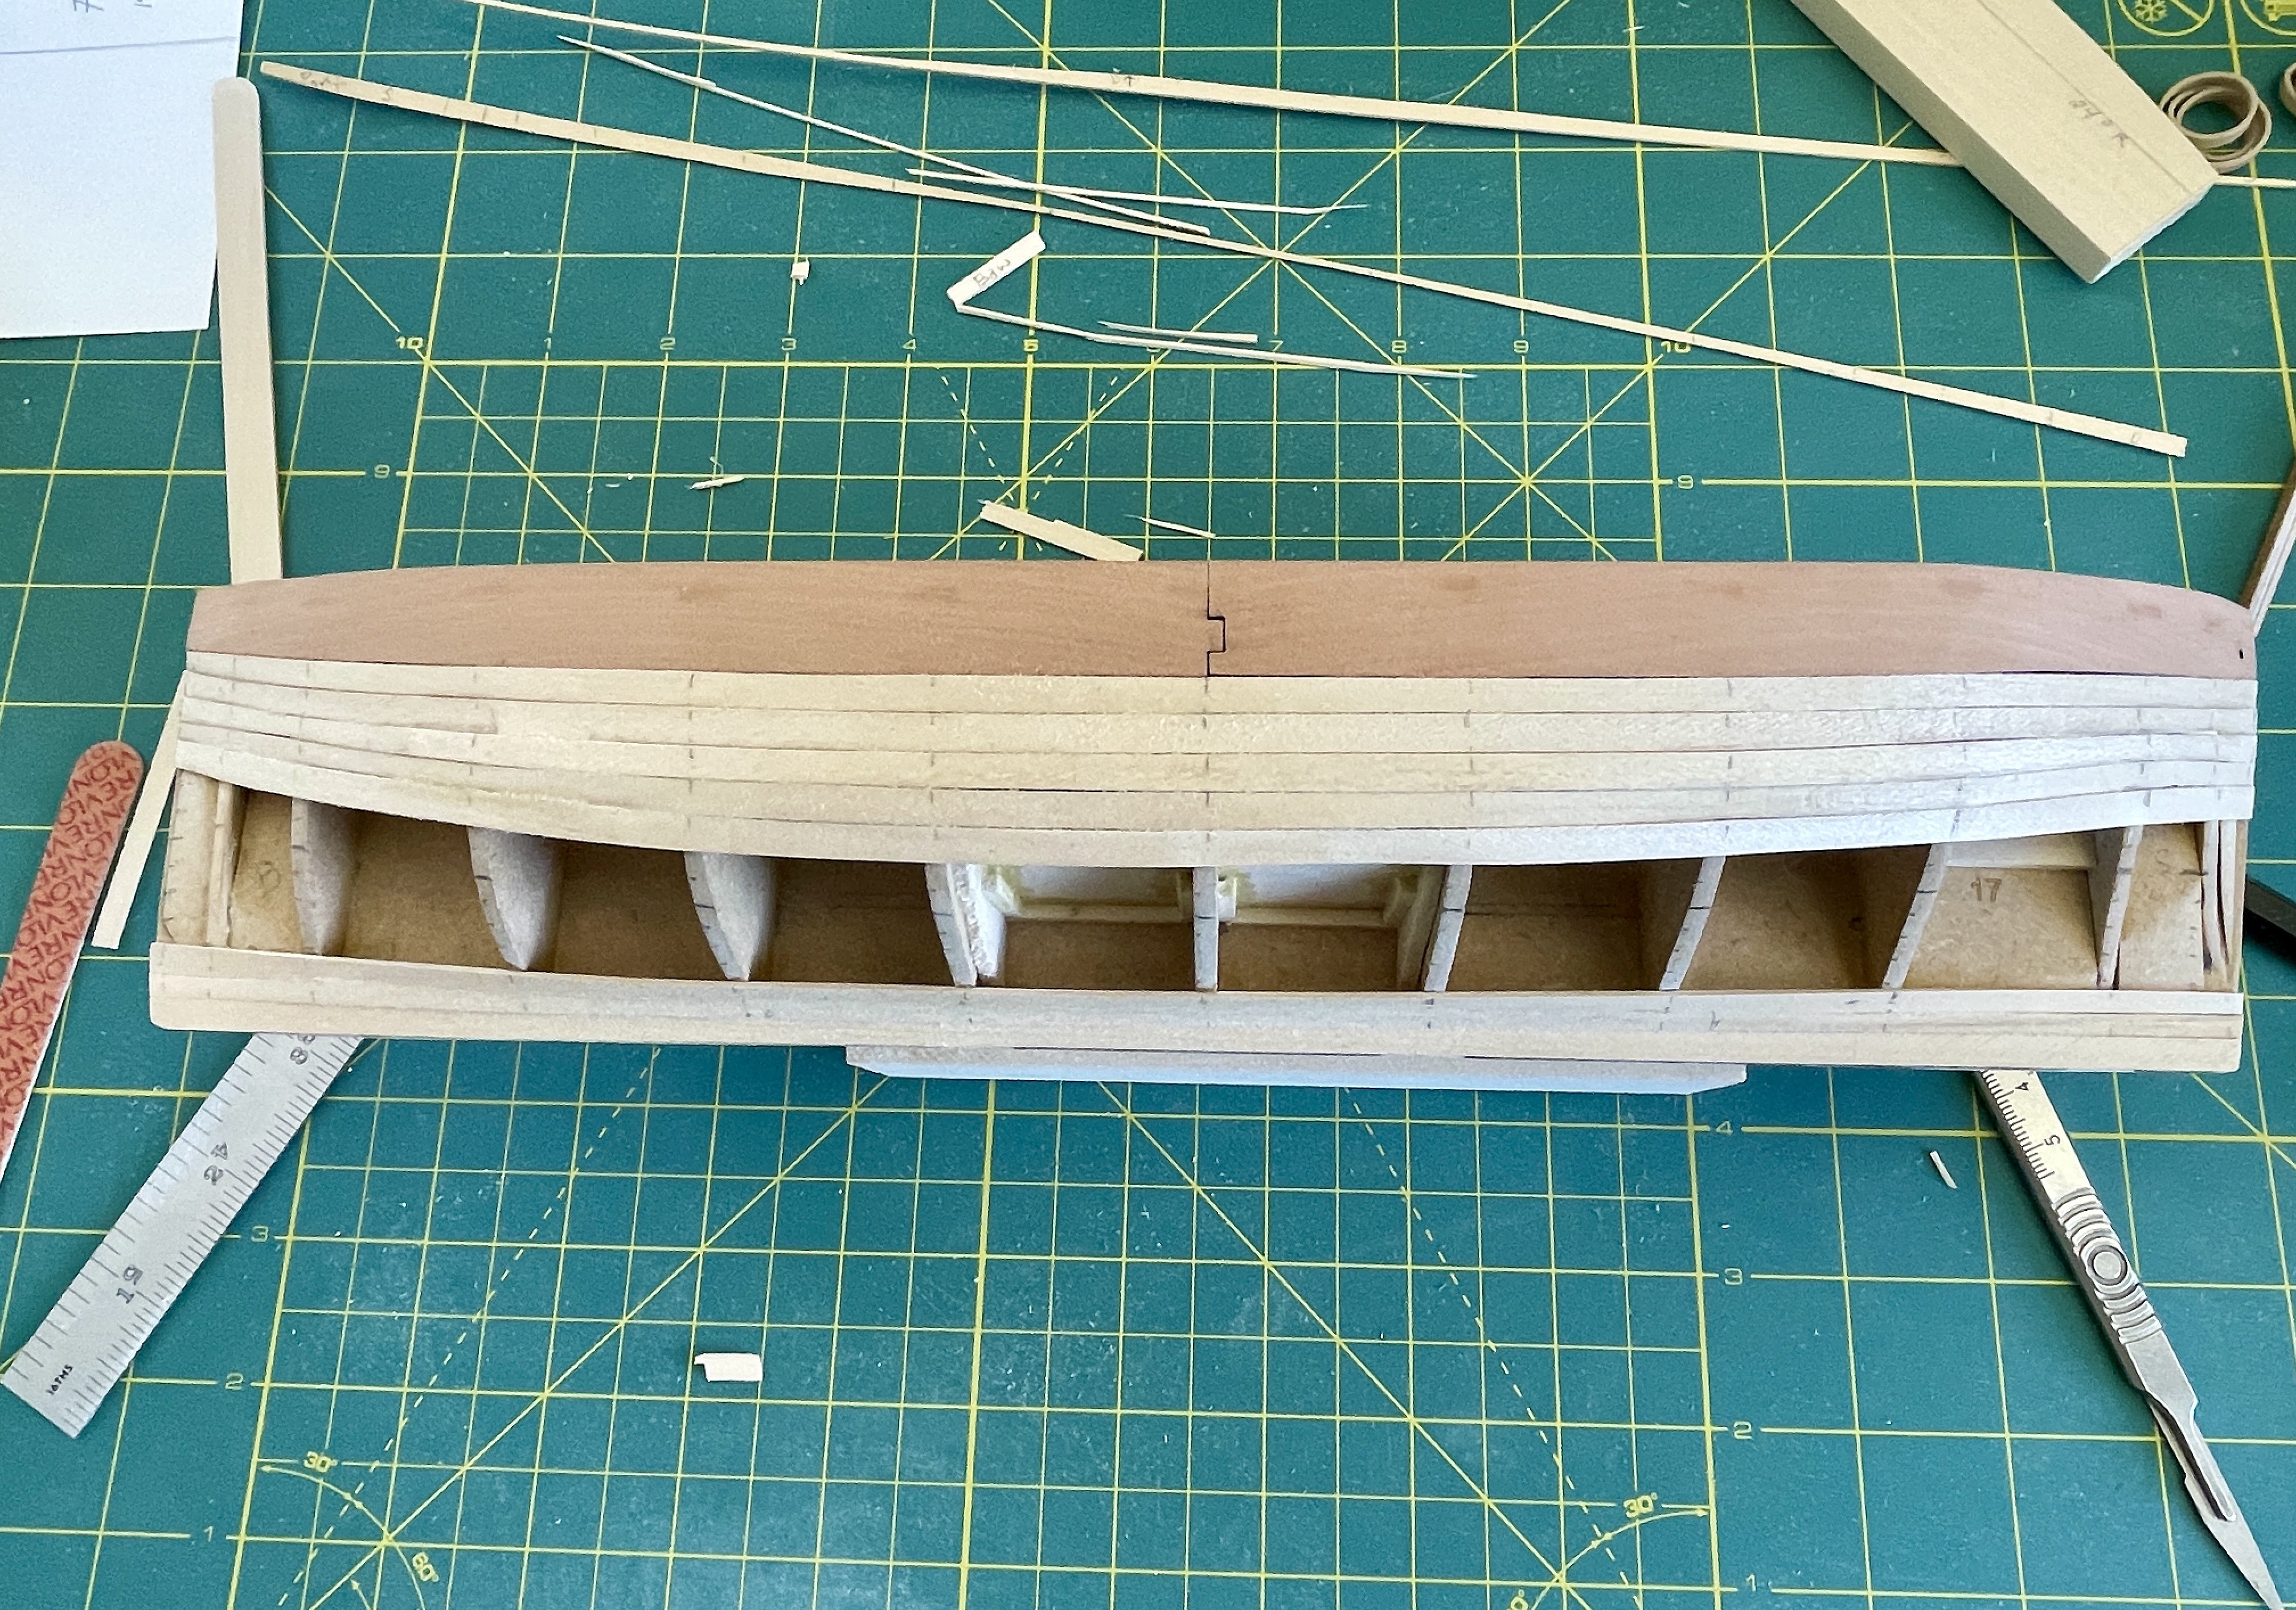
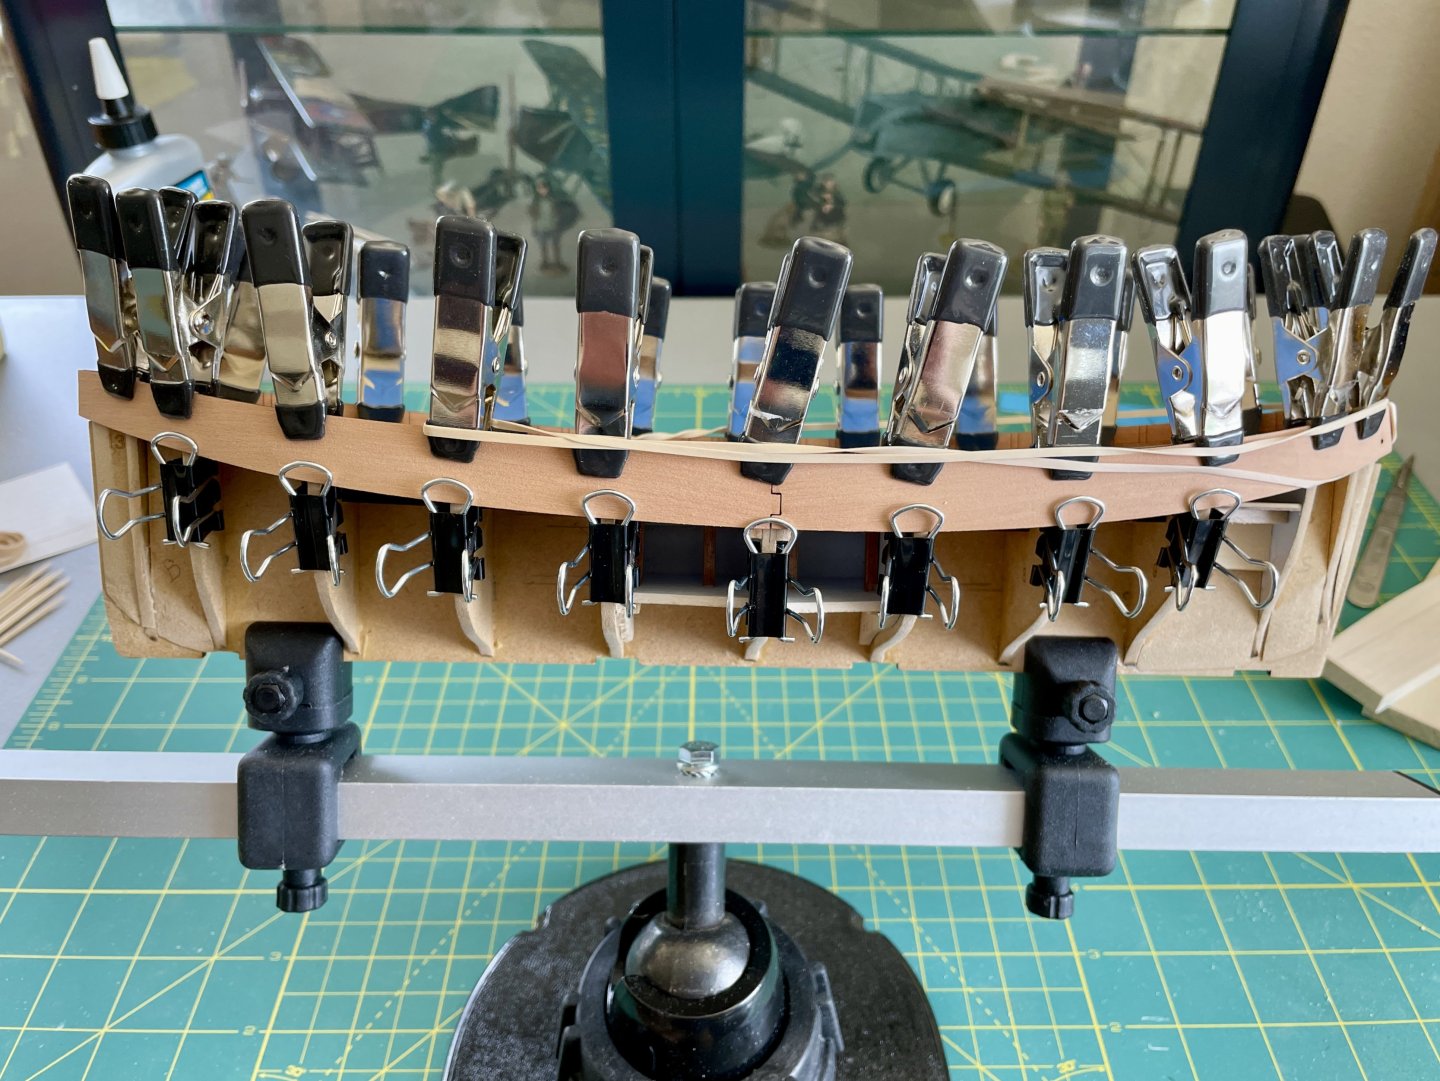
Hull Construction – 1st Planking I also began planking the hull with its 1st layer of limewood. I decided to follow the more standard method of lining off the hull. It’s been a long time since I did any planking, and I definitely needed the practice! A part of my planking practice was aiming for symmetrical planks at the bow and at the stern. I worked down from the bulwarks and then up from the keel and completed 16 strakes and have 14 to go, which I’ll complete when I return from work travel next week. I'm using a combination of PVA and CA to secure the planks. I then lightly brushed PVA inside the planked areas to help prevent any planks from popping up. Overall, I’m feeling pretty good thus far about my planking. A Few Observations: The midship bulkhead distance from the bulwarks to keel bottom is about 2mm wider than the kit’s planks. In other words, based on my measurements, a 7mm plank is needed for 1 strake on each side of the hull. I think Blue Ensign made a similar observation about wider planks with his Lady Eleanor build. The thickness of some of the limewood varies, so there are height variations with planks—not a big deal for this layer but the thickness differences will make for a bit more sanding and etc. I think the thickness and the finish of the limewood can’t totally be helped though because it’s such a soft wood and likely difficult to mill. Cheers, Jay
- 63 replies
-
- 4
-
-
- Lady Eleanor
- True Vine
- (and 2 more)
-
Hull Construction – Installing Bulwarks I was able to get some build time in this week and followed the instructions for 1st forming the bulwarks and then doing their glue ups. This process went smoothly and with no hitches. Cheers, Jay

- 63 replies
-
- 3
-
-
- Lady Eleanor
- True Vine
- (and 2 more)
-
Thank you, Thukydides for your kind comment—adding the mods have been both fun and challenge! There will be more as I get further with the build that will be fun additions. Cheers, Jay edited for grammar error
- 63 replies
-
- 1
-
-
- Lady Eleanor
- True Vine
- (and 2 more)
-
Current Build Status and Break Now that I know my modifications won’t trash the model and actually worked out okay, from this point forward, my log will reflect my where I’m actually at with my build which is installing the bulwarks and planking. Because I have a lot happening at work next week and then am on the road for work again the following week, I may not be building much, if at all, for next couple of weeks. Cheers, Jay
- 63 replies
-
- 3
-
-
- Lady Eleanor
- True Vine
- (and 2 more)
-
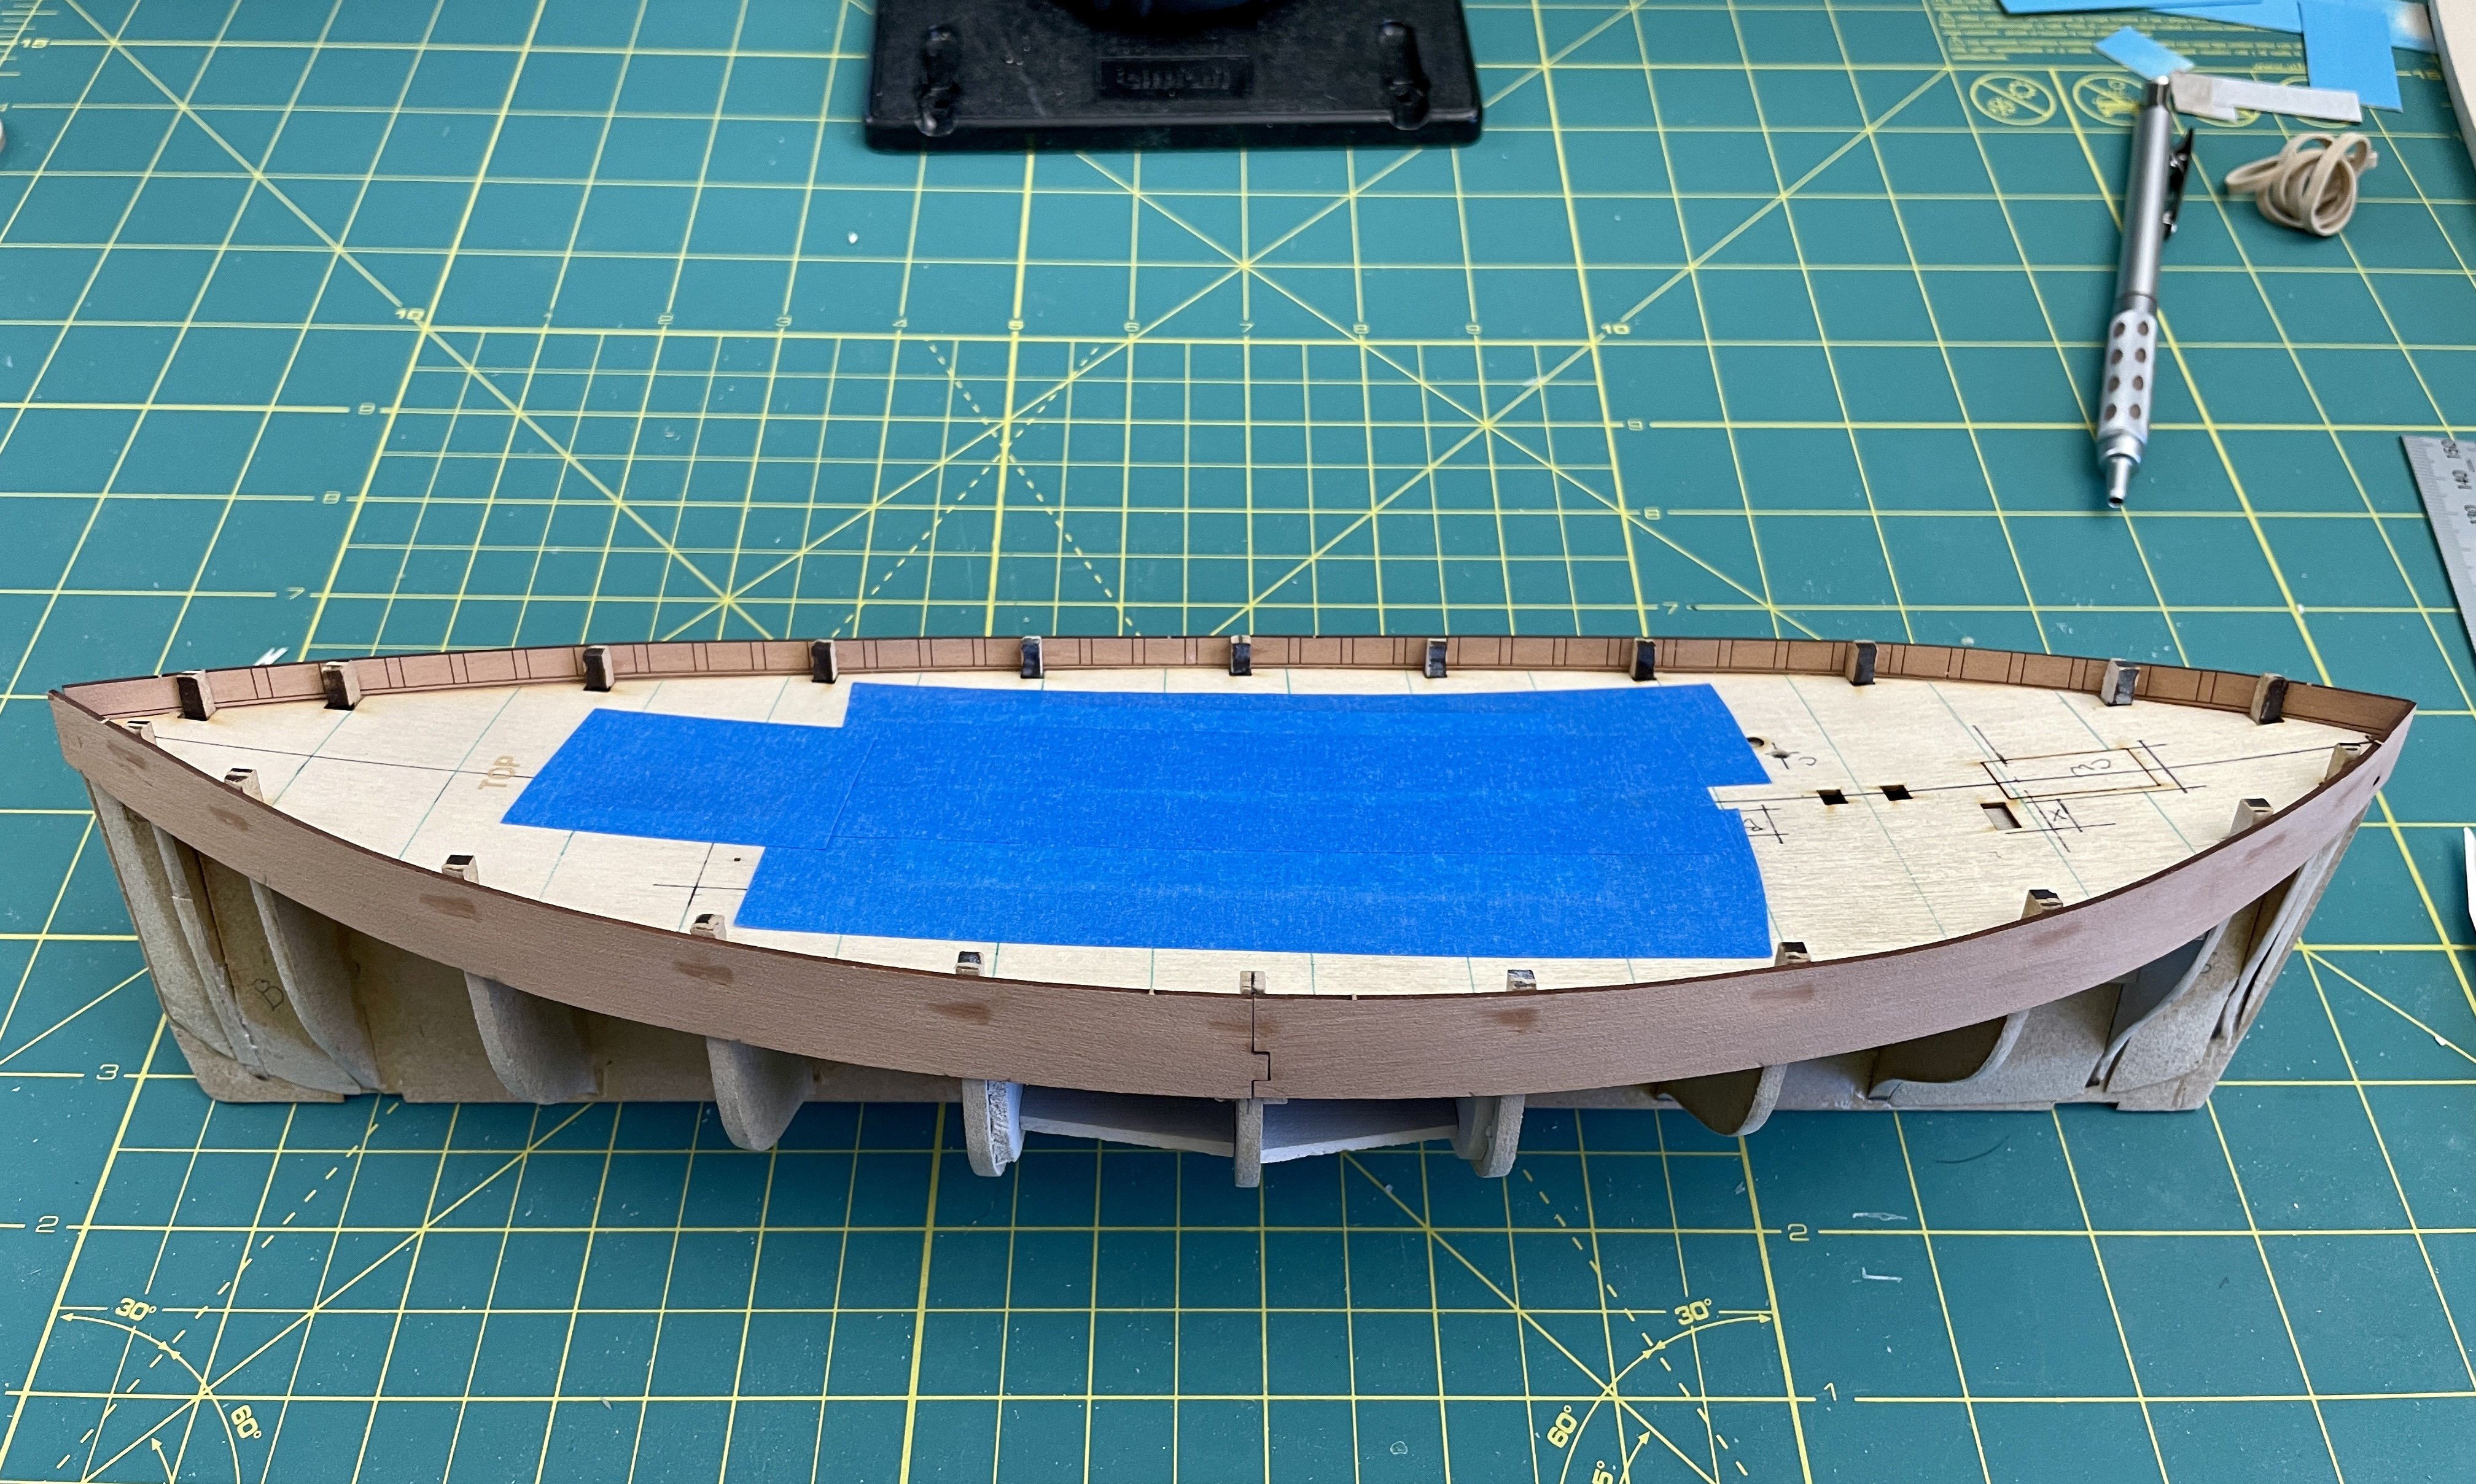
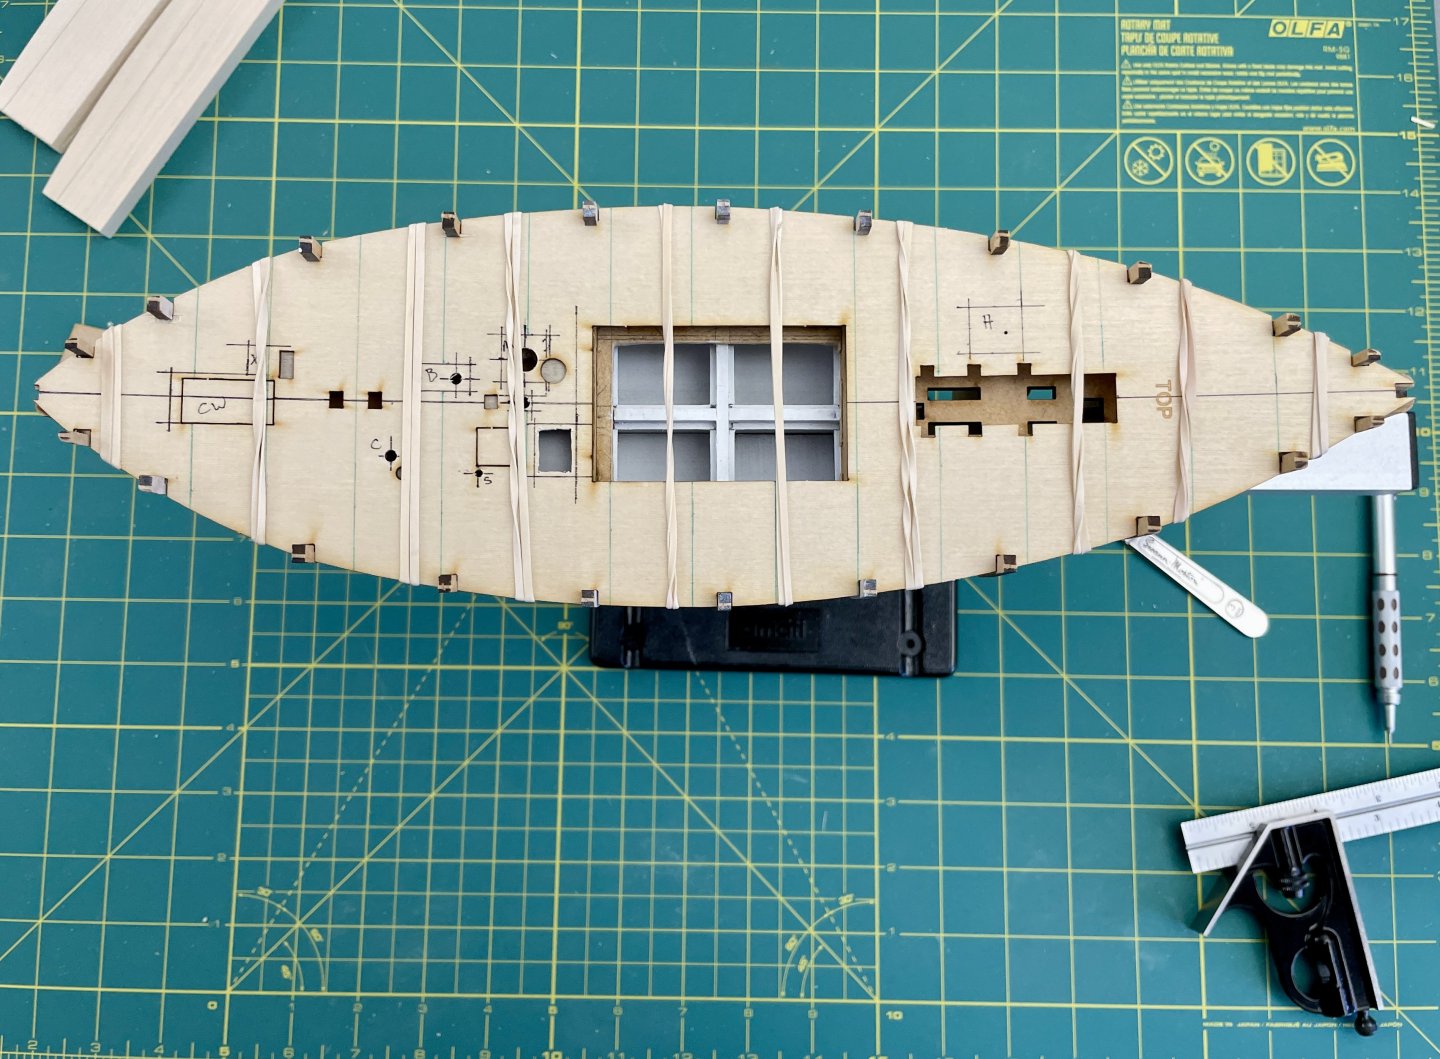
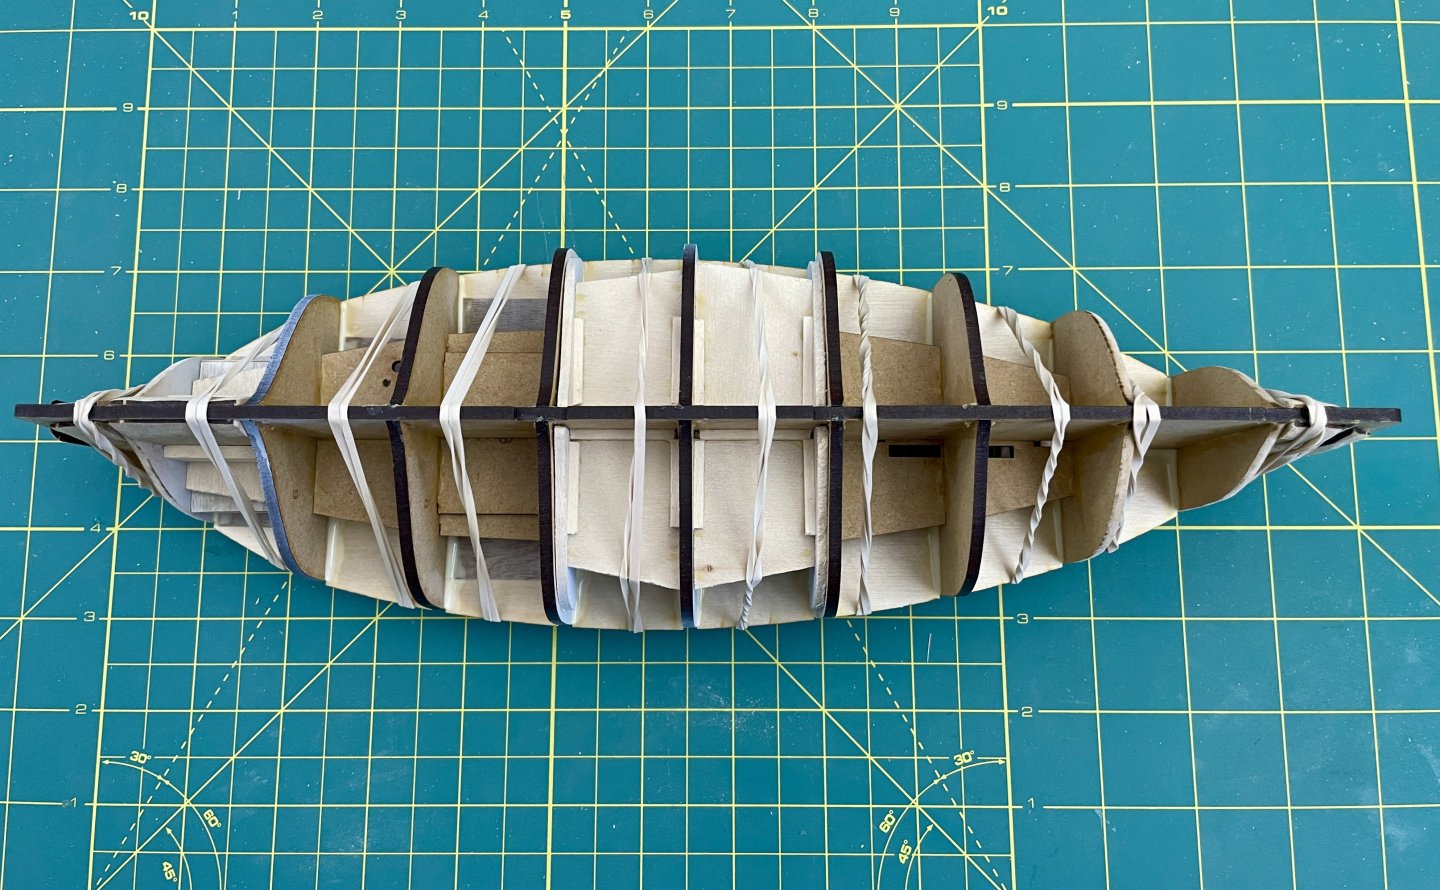
Subdeck Installation and Fairing The milestone with the deck layout / hull modifications was installing the subdeck. Even though I reinforced the subdeck with birch plywood, I still didn’t know if the subdeck would or would not split from all the modifications I made to it. Additionally if the subdeck didn’t split, I also didn’t know if it would be able to bend enough into its BH positions due to its added reinforcement. I knew pre-shaping the birch plywood strips would help with bending but still the ply was additional layer of wood that would decrease the subdeck’s flexibility. Overall, fairing went well. The only real issue I encountered was with BH 1. While a batten ran fair from the bow infill piece, atop the upper sections of BH 1, and back to BH 4, the same batten didn’t touch the lower sections of BH 1 but did run fair from the bow infill piece to BH 4. I think reason behind this issue was operator error when I beveled the port and starboard lower sections of BH 1: Either my bevel angle was wrong or I just simply took off too much MDF. At any rate, I shimmed the lower sections of BH1 and made adjustments until I got fair batten runs from the bow to BH 4. Cheers, Jay
- 63 replies
-
- 6
-
-
- Lady Eleanor
- True Vine
- (and 2 more)