HOLIDAY DONATION DRIVE - SUPPORT MSW - DO YOUR PART TO KEEP THIS GREAT FORUM GOING! (Only 68 donations so far out of 49,000 members - Can we at least get 100? C'mon guys!)
×


DanB
-
Posts
163 -
Joined
-
Last visited
Content Type
Profiles
Forums
Gallery
Events
Everything posted by DanB
-
Thanks Dave. Its a great kit, and the instructions are really excellent. There are also multiple build logs to look at when things are not clear.. I think fairing those thick frames is going to be quite an adventure. I was planning to move on to a different ship, but I am happy I decided to this next.
-
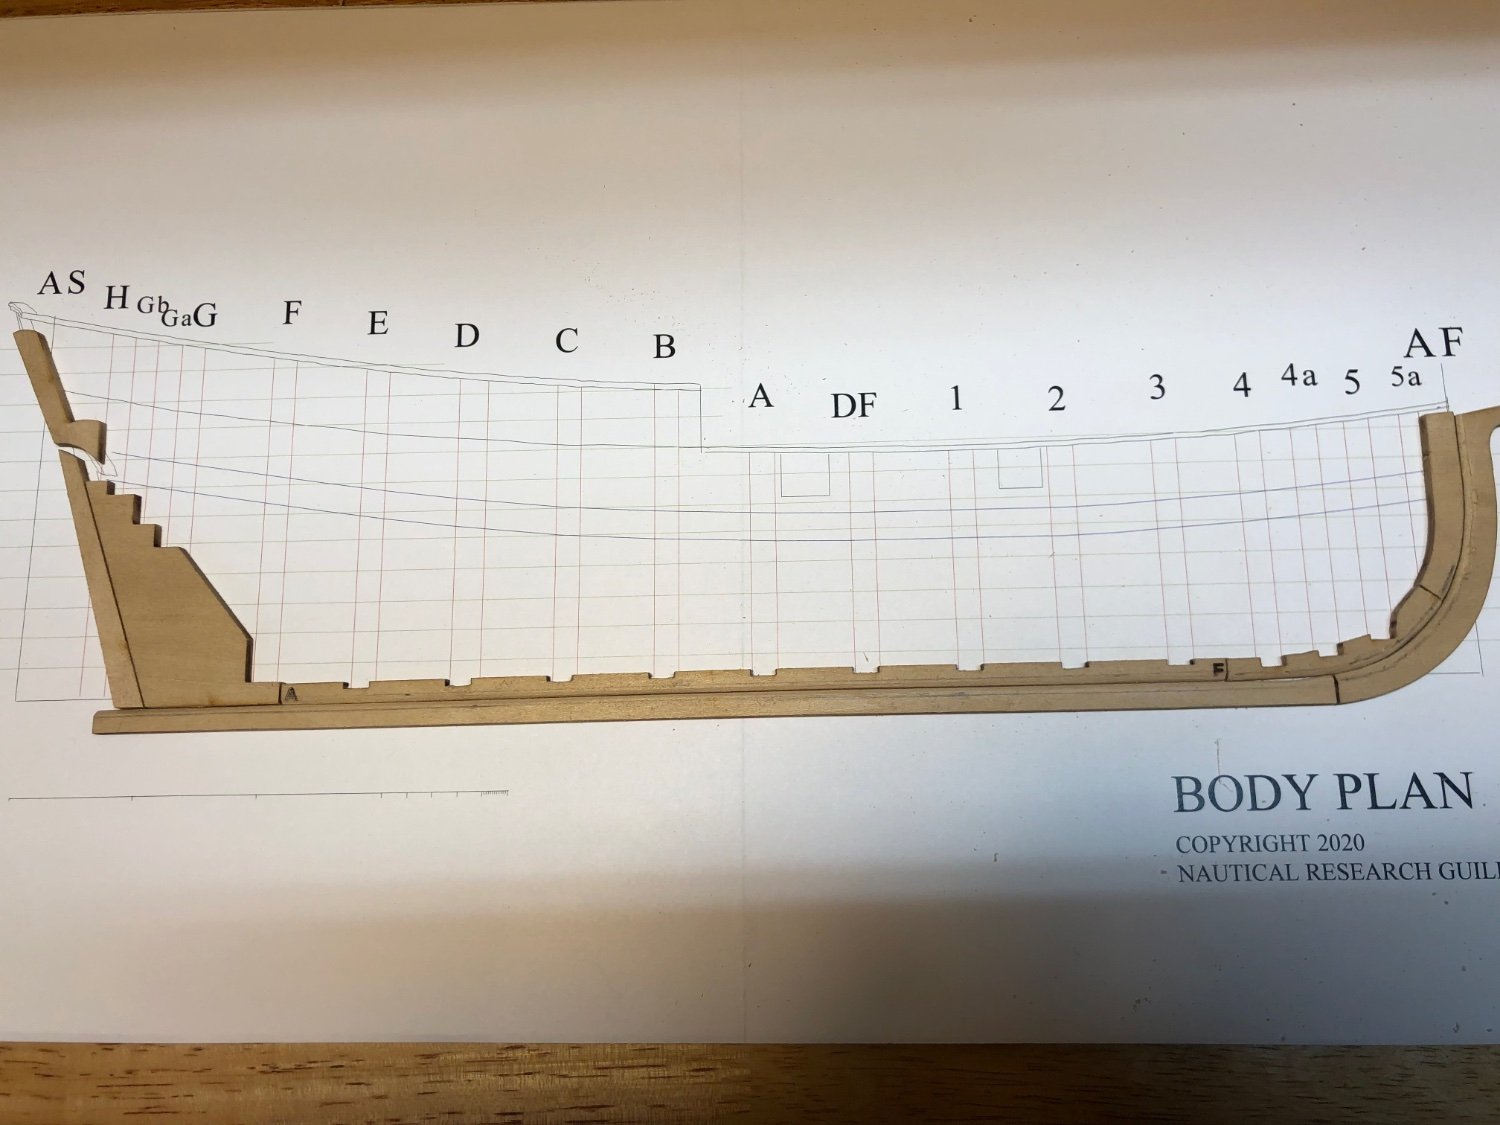
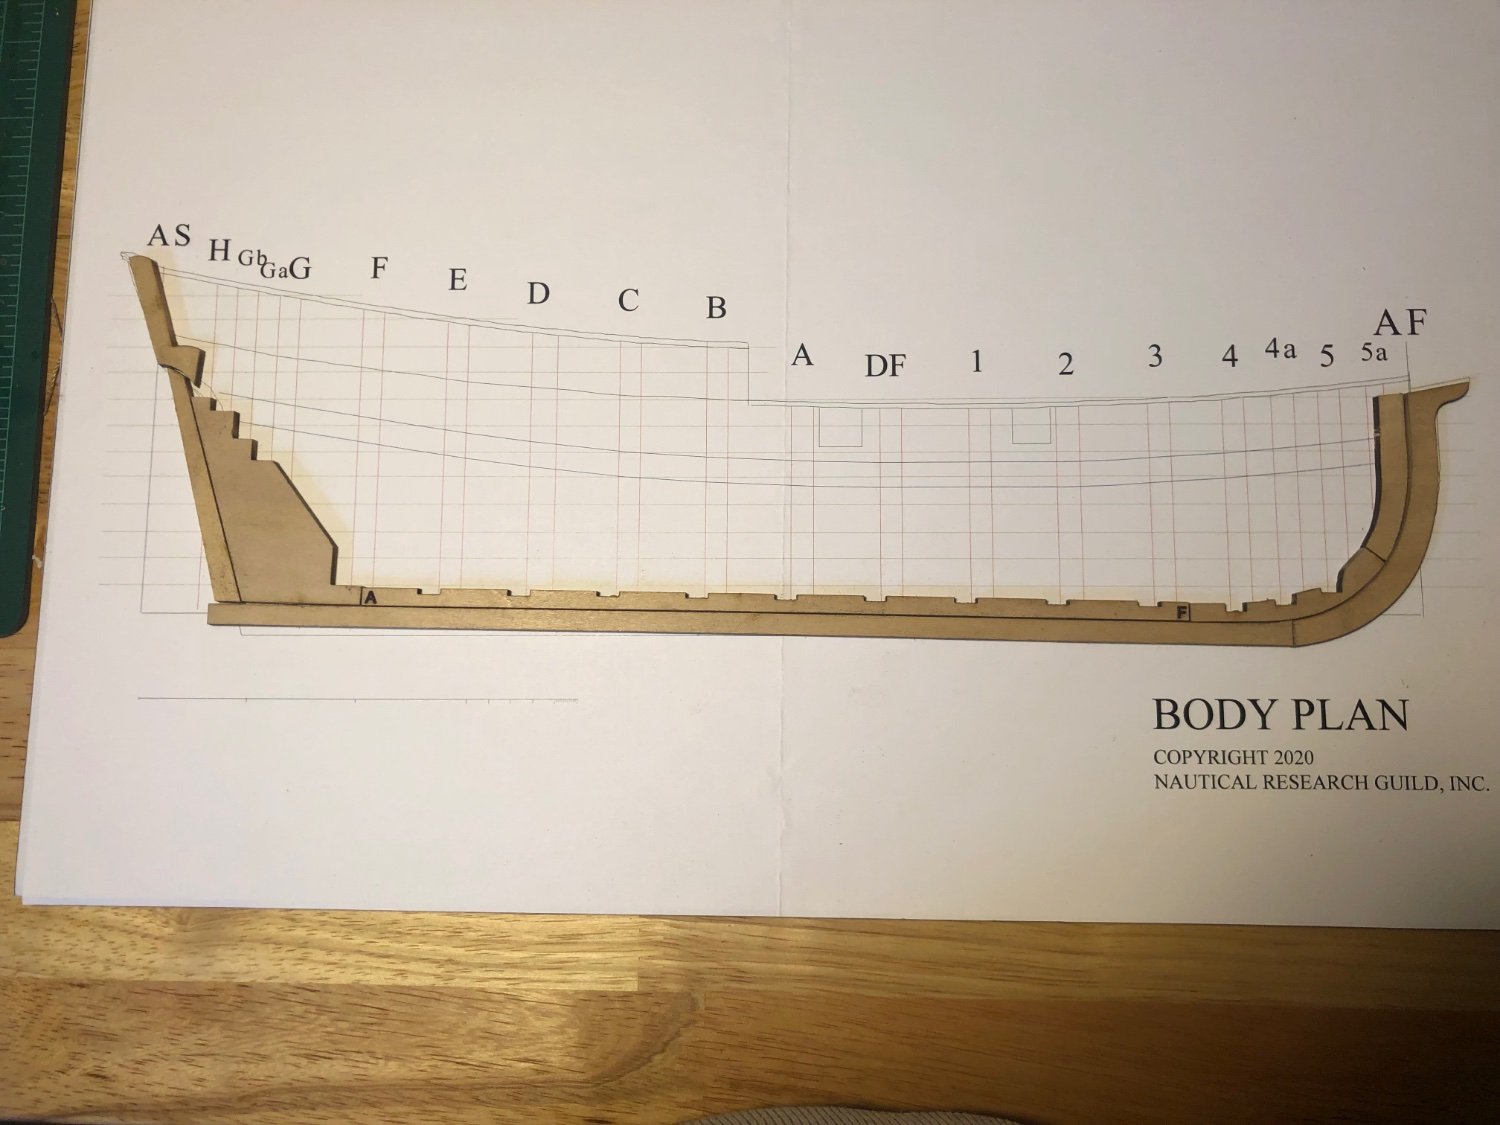
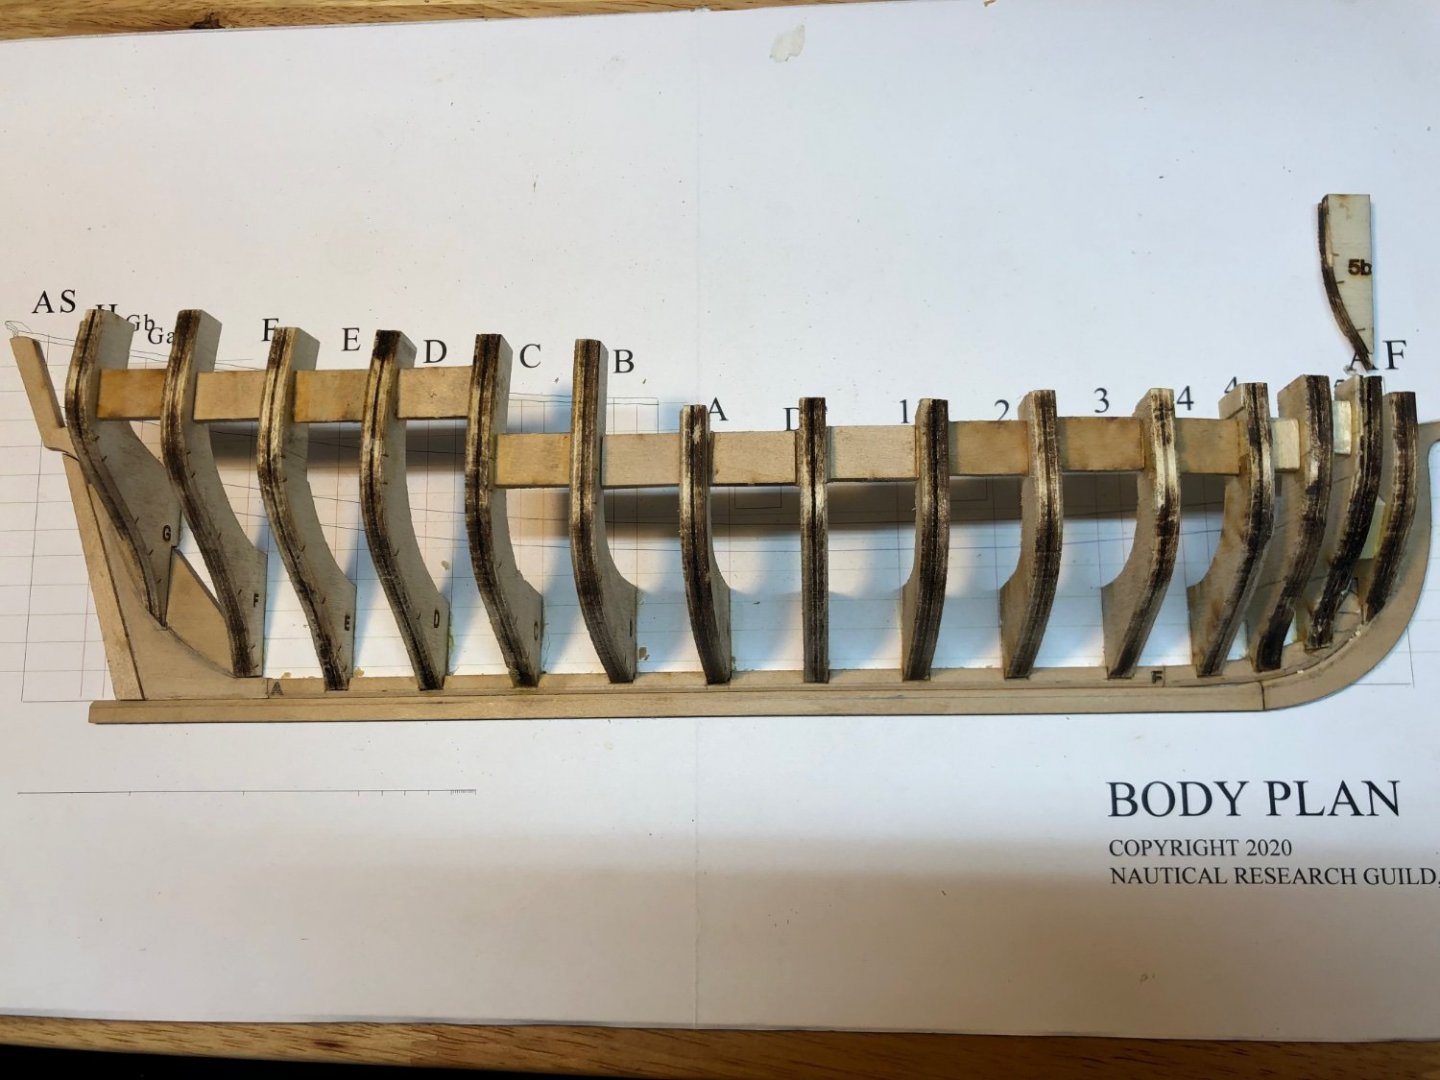
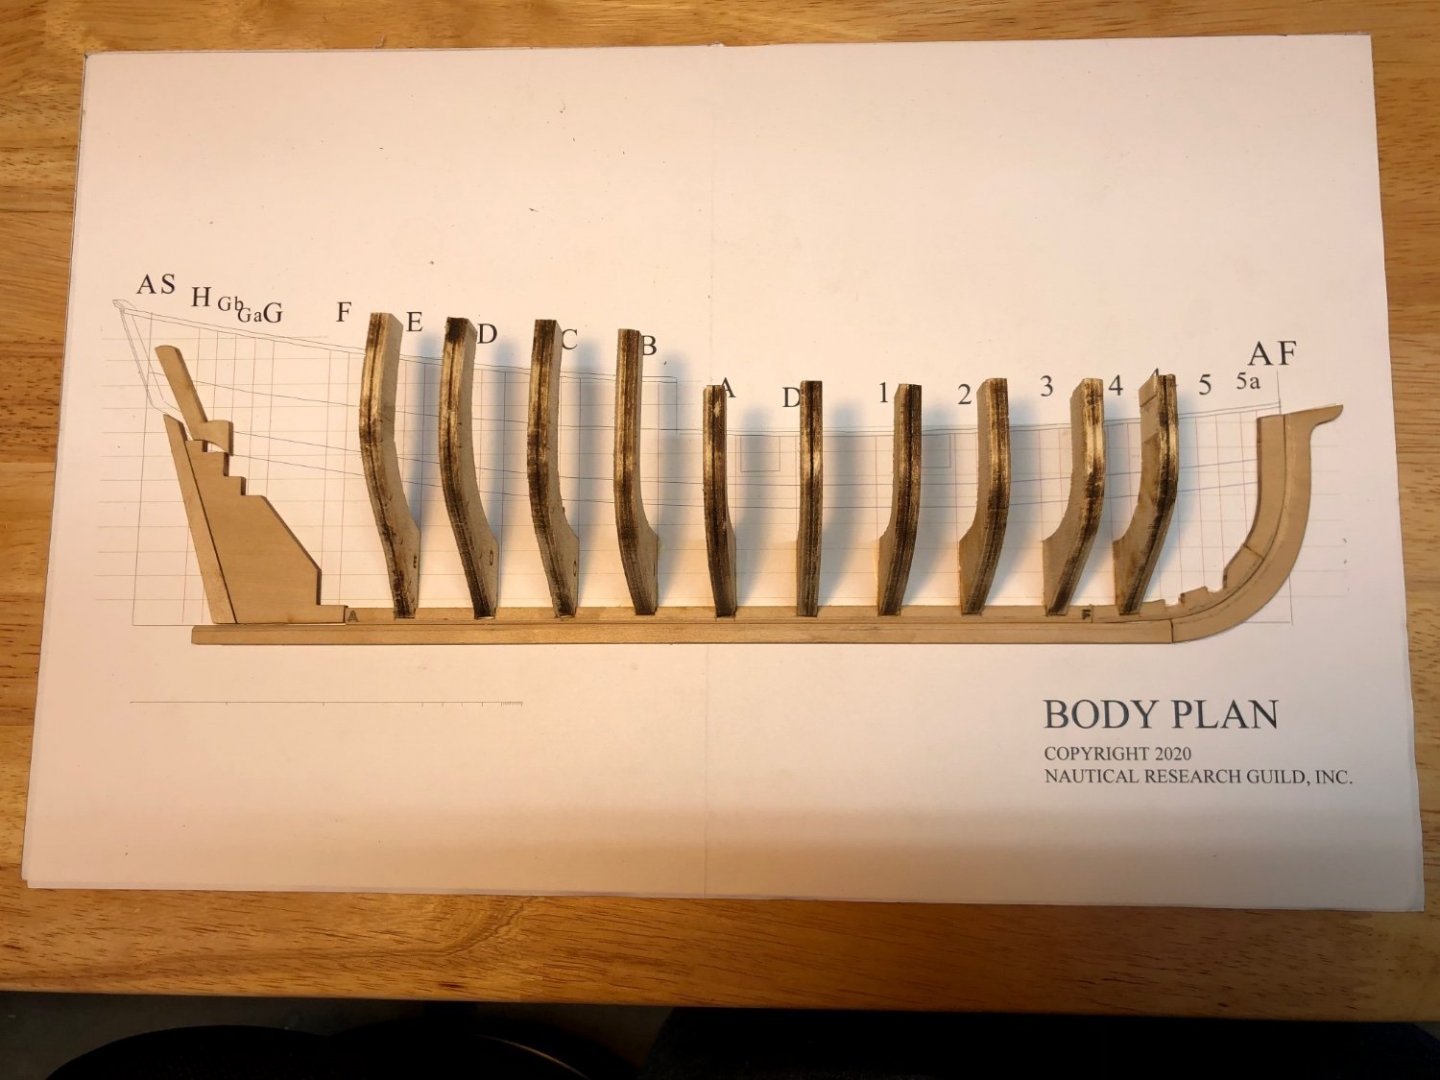
Added a few more frames and spacers. Looks like something is a bit off because frame 5b is supposed to end just before the rabbet and have another quarter inch piece in from of it. It is sitting right at the rabbet. I will check some other build logs. Looks like I will have to get out my trusty bottle of isopropyl alcohol and move frame 5 a back a bit. It has not been too difficult to unglue and correct things on this project— I am getting lots of practice😀
-
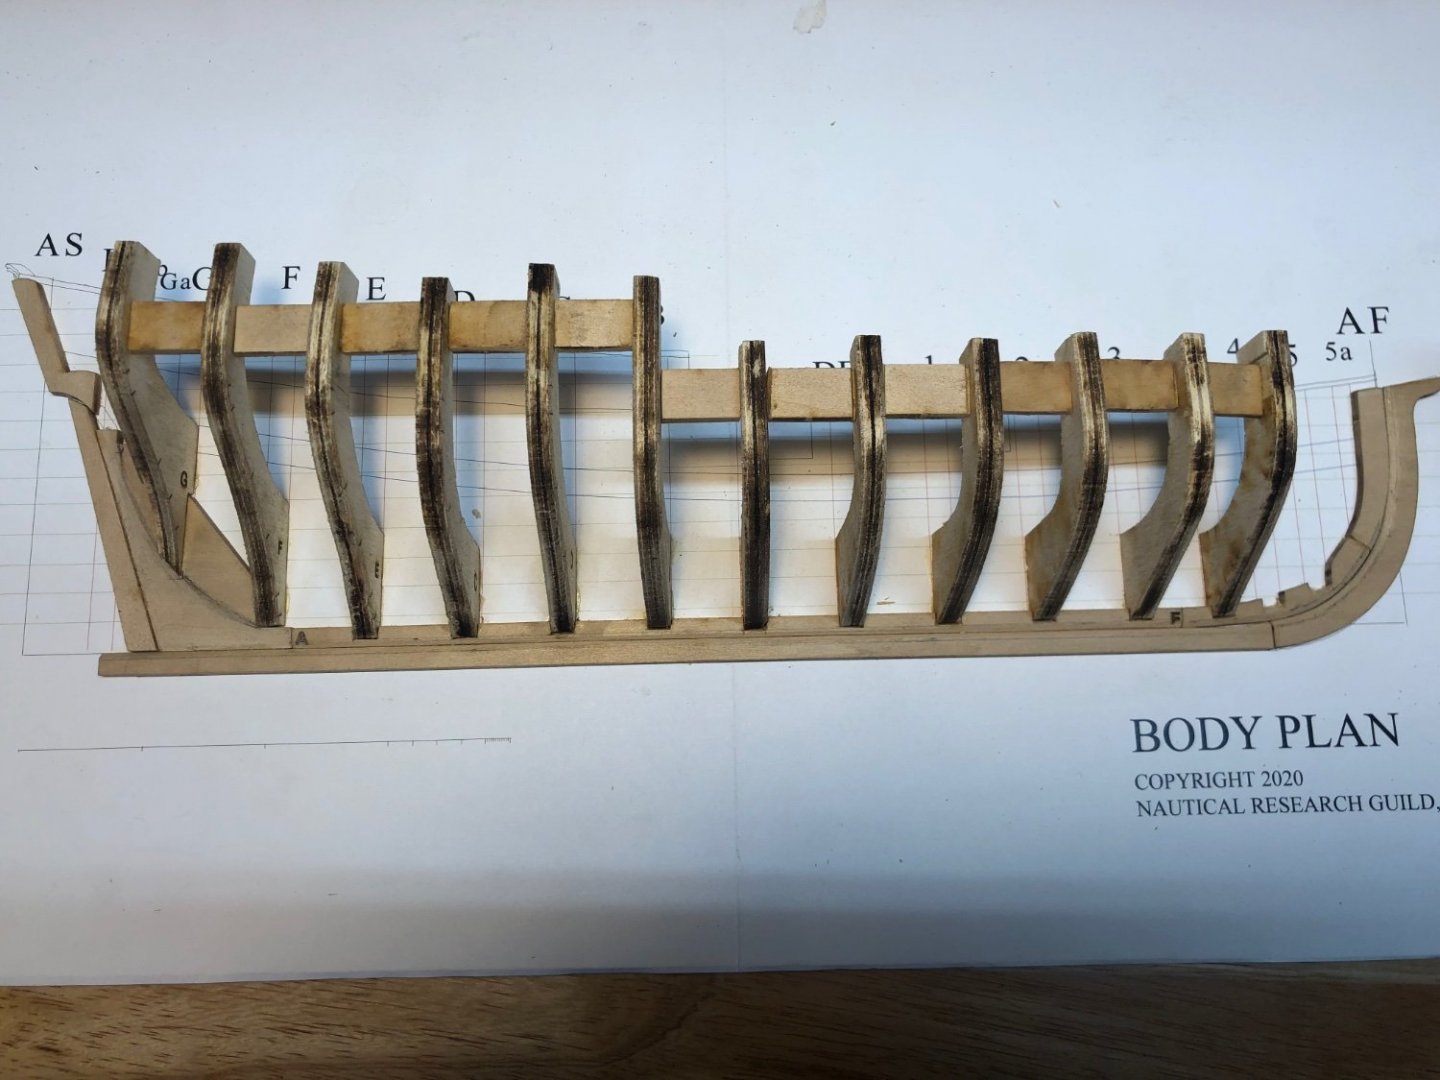
Added spacers between frames. Drew in bearding line and sanded the rabbet at stern and keel and tapered deadwood aft of bearding line. I read these instructions a few times and still managed to miss the part where it said to mark the line at the fore face of the frames G and H. I drew a nice line in the wrong place and figured it out after everything was glued in, when I noted the taper on my frame G did not look right. It was not too hard to correct: redrew the line free hand, trimmed, frame G, sanded the deadwood a bit more. I will keep reading these instructions (which are really great) in the manual and the build log a few more times before each step! ‘
-
I continued to sand and glue in frames today. The next step is to glue supporting spacers between these frames.
-
Yes, it is at a bigger scale than I have worked at so far. The frames area also very impressive. The are ¼ inch thick plywood , I think to give a bigger surface for the planks. They are laser cut, but freeing each one of them has been a bit of a project with bigger knife blades than I have had to use in the past.
-
I spent more time working on the rabbet and did some shaping for the stemson pieces to get them to align with the plans. The instructions say to deepen the slots for the frames to just above the rabbet using a razor blade. I found that a number 17 chisel blade worked well for this. I stared gluing the frames in place.

-
Today I sanded more char, sanded the stemson a bit so it would fit and align with the bulkheads on the plan. I was worried about cutting the rabbet. I read the instructions a few times studied the build log for the project and also others build logs. I did most of of it with sanding sticks and used a knife to cut the mortise part at the stem. I think its close to what is shown in the pictures. I will another look at it tomorrow before moving on .

-
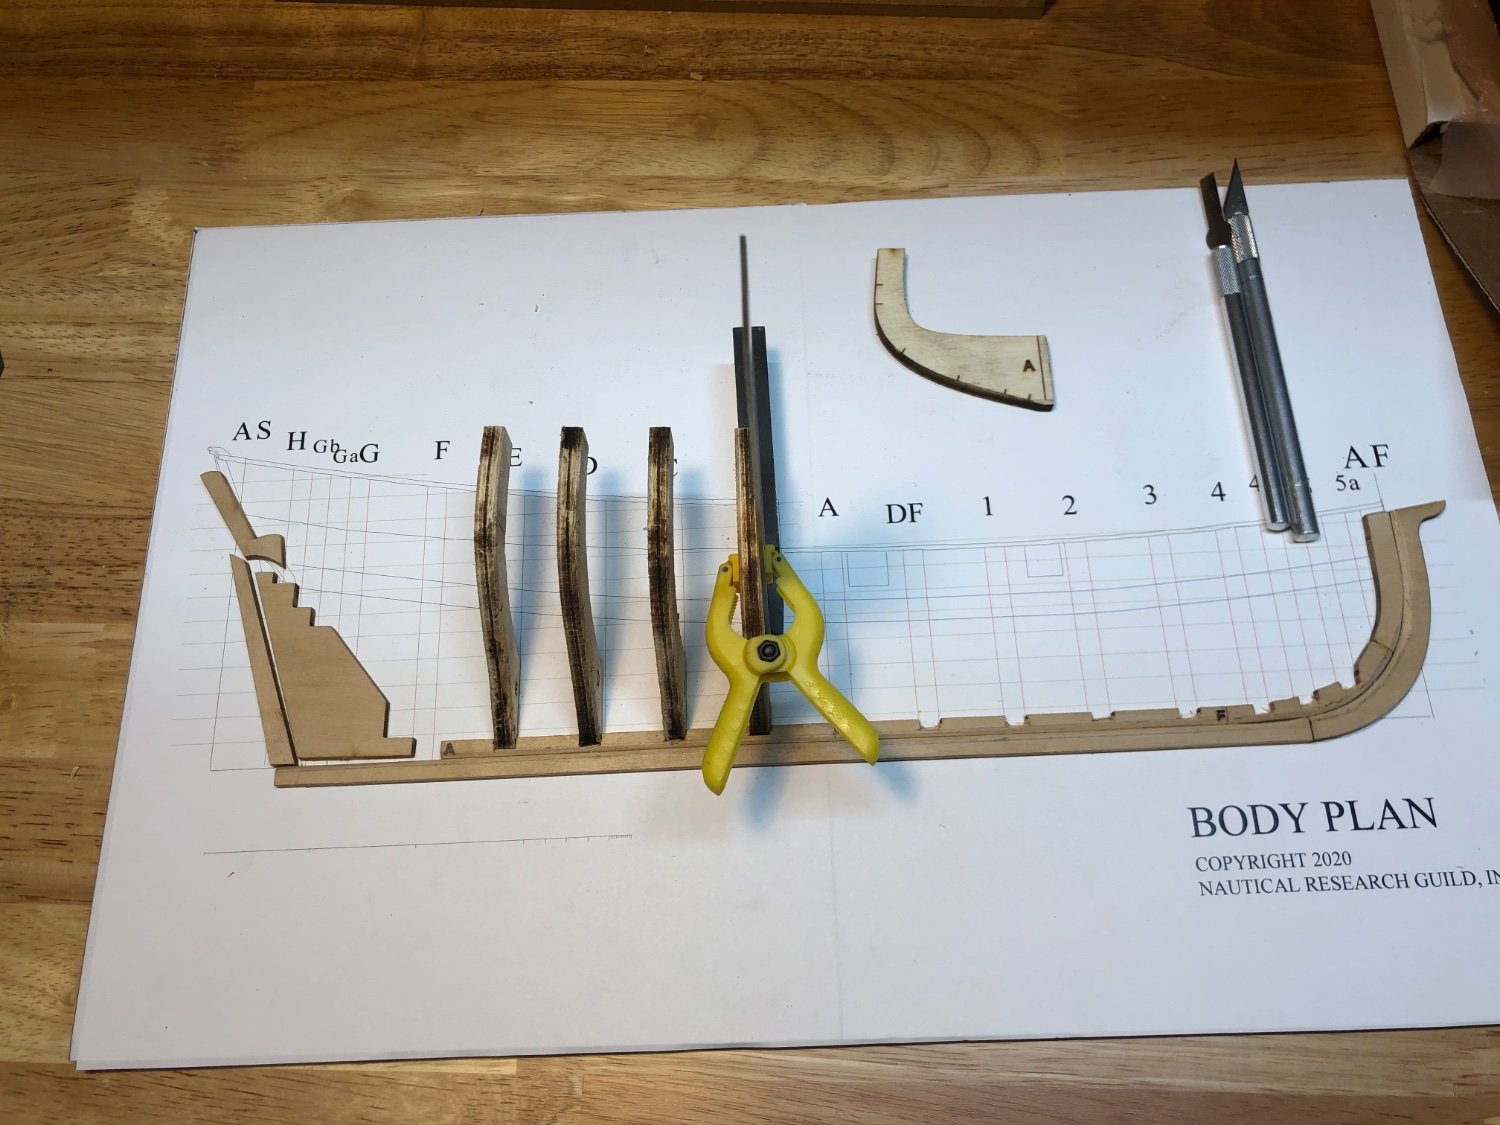
This is my next project after completing the first three kits in the Model Shipways model shipwright series. Each of those kits provided good experience and instructions on planking, I clearly need more practice though , and hope to learn how to lay out the planking on the bulkheads and how to shape the planks. Those skills were not needed in the shipwright series since the planks were all cut to the correct shape. This kit looks like a great way to learn more. There are many other build logs on MSW that I am sure I will be referring to for help as I go along. I managed to hunt down the spray adhesive and foam core board to make the building board and have started removing the char form the parts and seeing how it all goes together. I have some scraps of basswood left over from other kits and I think I am gong to make copies of some of the pieces to practice cutting the rabbet a few times to reduce the chance of messing it up too badly . Dan

-
Thanks Dave! Starting the Half Hull today. I needed a trip to the hardware store for some supplies to get started. I will start a build log. It looks like there are lots of them and the instructions are great, but it is so helpful to get suggestions and encouragement for others along the way.
- 90 replies
-
- 1
-

-
- Model Shipways
- muscongus bay lobster smack
- (and 1 more)
-
Your dory looks great! The extra details really add a lot. Good luck with the Pram.
- 23 replies
-
- 2
-
-
- Model Shipways
- Shipwright Series
- (and 2 more)
-
Thanks very much to everyone for all of the nice comments! Dan
- 90 replies
-
- 1
-
-
- Model Shipways
- muscongus bay lobster smack
- (and 1 more)
-
Thanks!
-
Thanks!
-
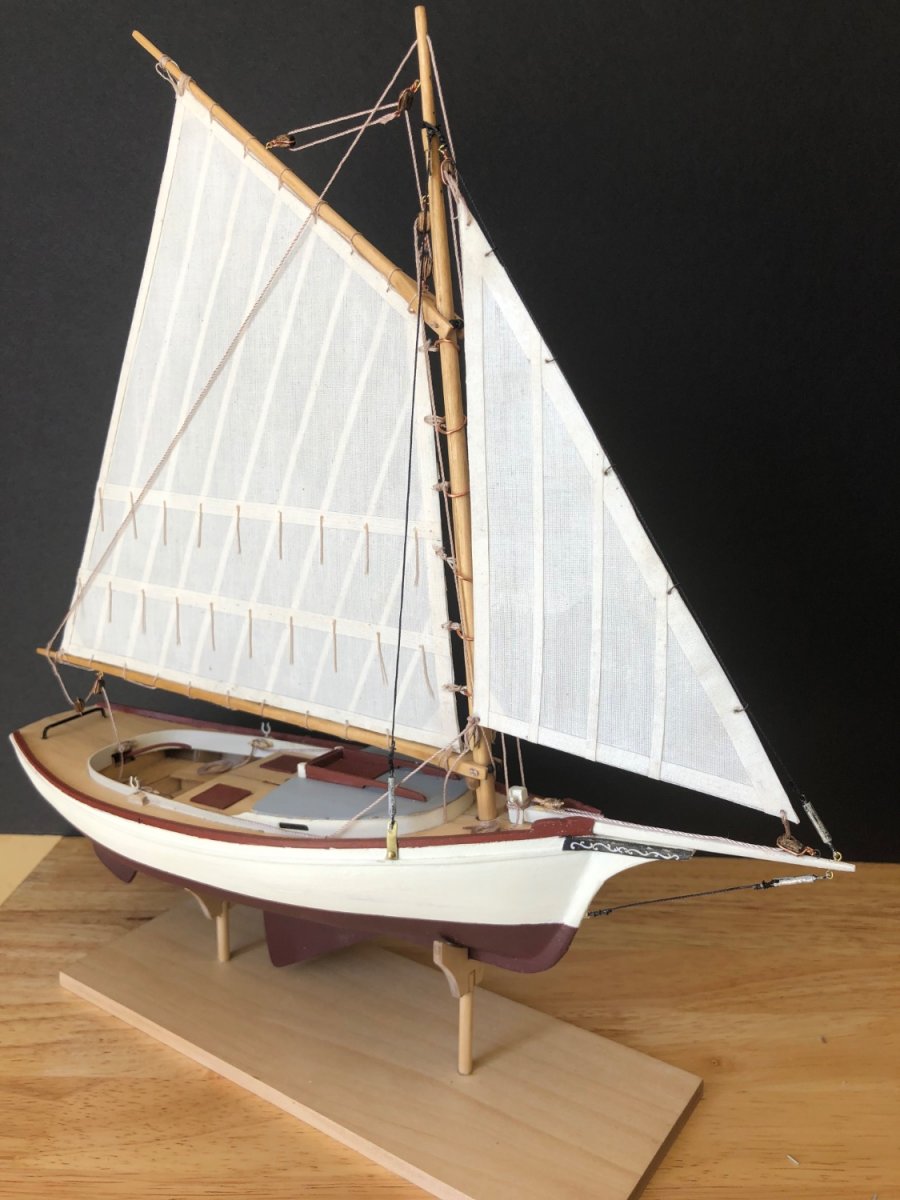
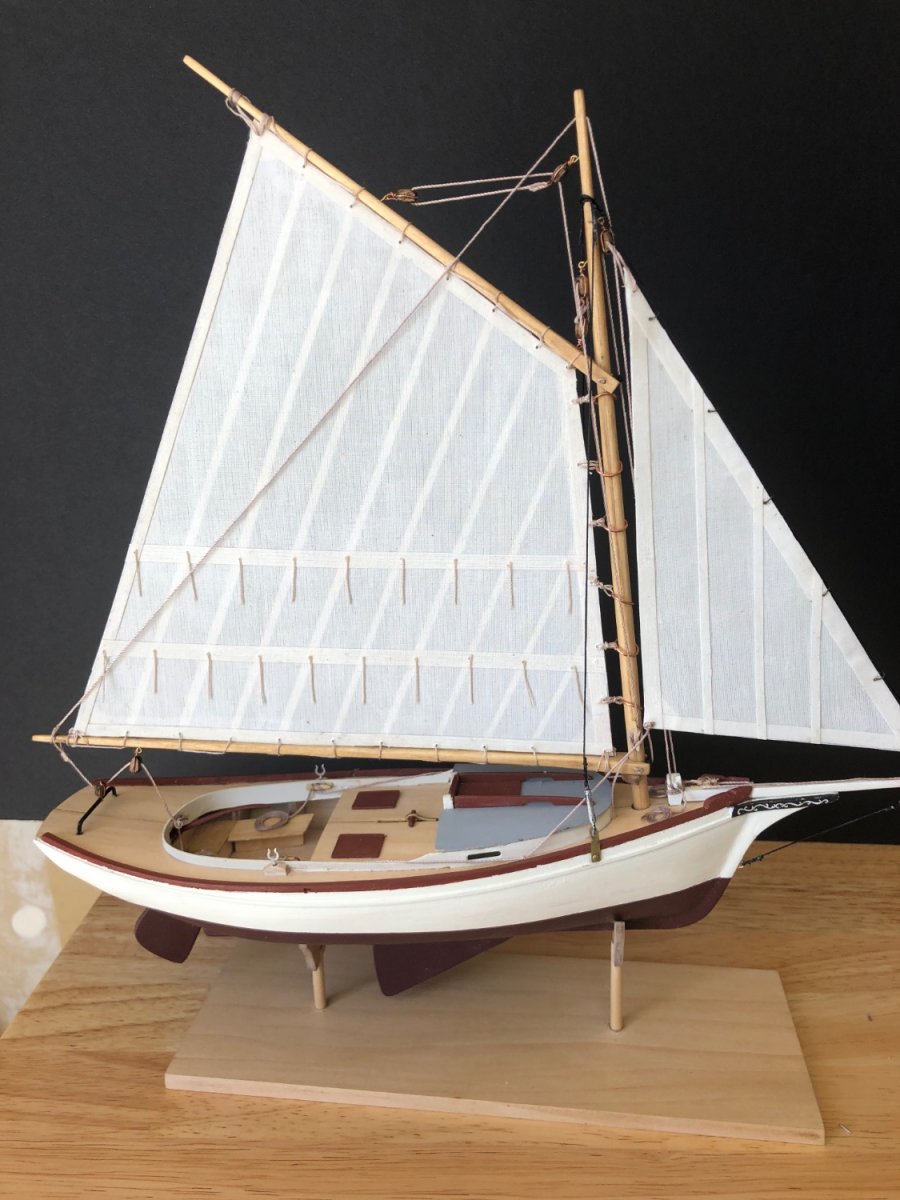
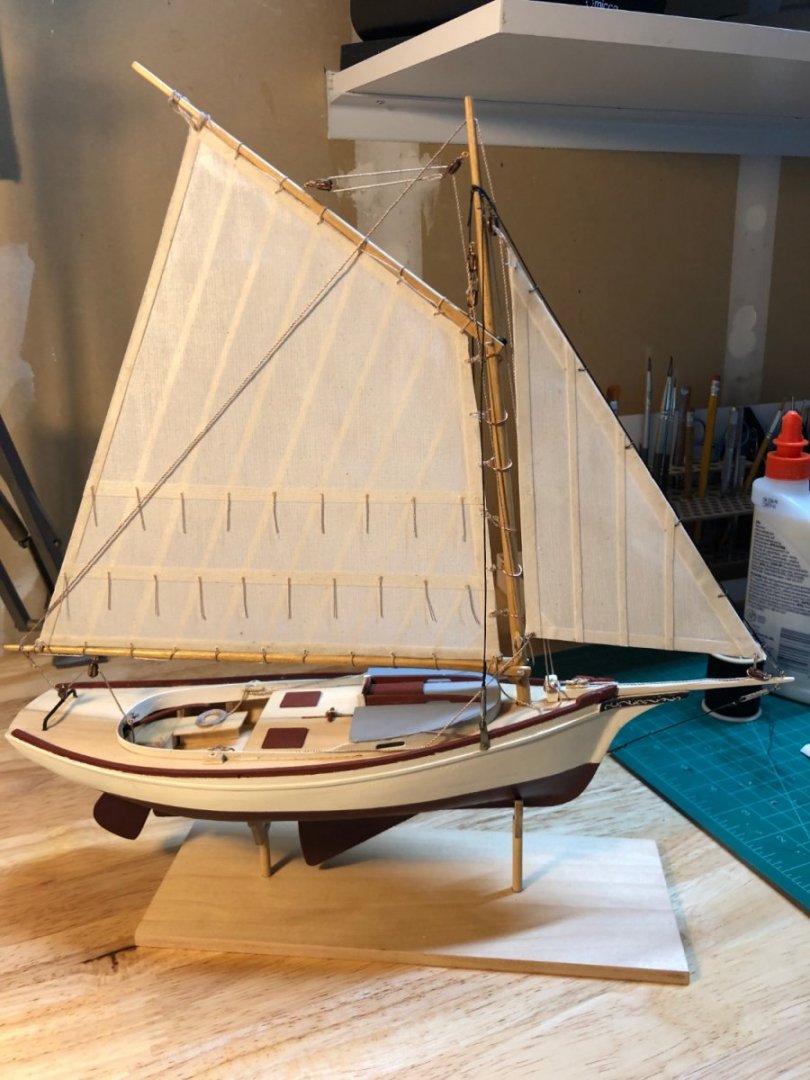
Finished! Overall, this kit has been a very good experience. David Antscherl´s instruction manual is excellent. The planking instructions were very helpful, and it was nice to be able to learn to do it using pre shaped planks. It was also much clearer in this kit how to shape the masts and spars from square to round. It would have been helpful to have more detailed plans for the hull, and rigging, but it was usually possible to figure things out form the photos in the manual and the written instructions. Other build logs on this site are also a great help, and I hope mine will also be of some help to anyone else who builds the Lobster Smack. I was planning to build the Sultana next and try to follow Chuck Passaro’s very detailed practicum. I ordered the kit at the end of March during Model Expo’s pre-moving sale. It is still back ordered with no information on when it will be available 🙁. So my next project will be the NRG half hull project which arrived here about 6 days after I ordered it last week.


- 90 replies
-
- 11
-
-
- Model Shipways
- muscongus bay lobster smack
- (and 1 more)
-
Getting Close to Finished I still have a few more rope coils to make and place, oar locks to glue in and one back stay that is a bit loose to re- do (again). I keep needing to remind myself to slow down, take my time. I’ve been doing a lot of the rigging a few times over on this one. I am going to LA to see family for Memorial Day, so finishing the Lobster Smack have to wait until next week.
- 90 replies
-
- 8
-
-
- Model Shipways
- muscongus bay lobster smack
- (and 1 more)
-
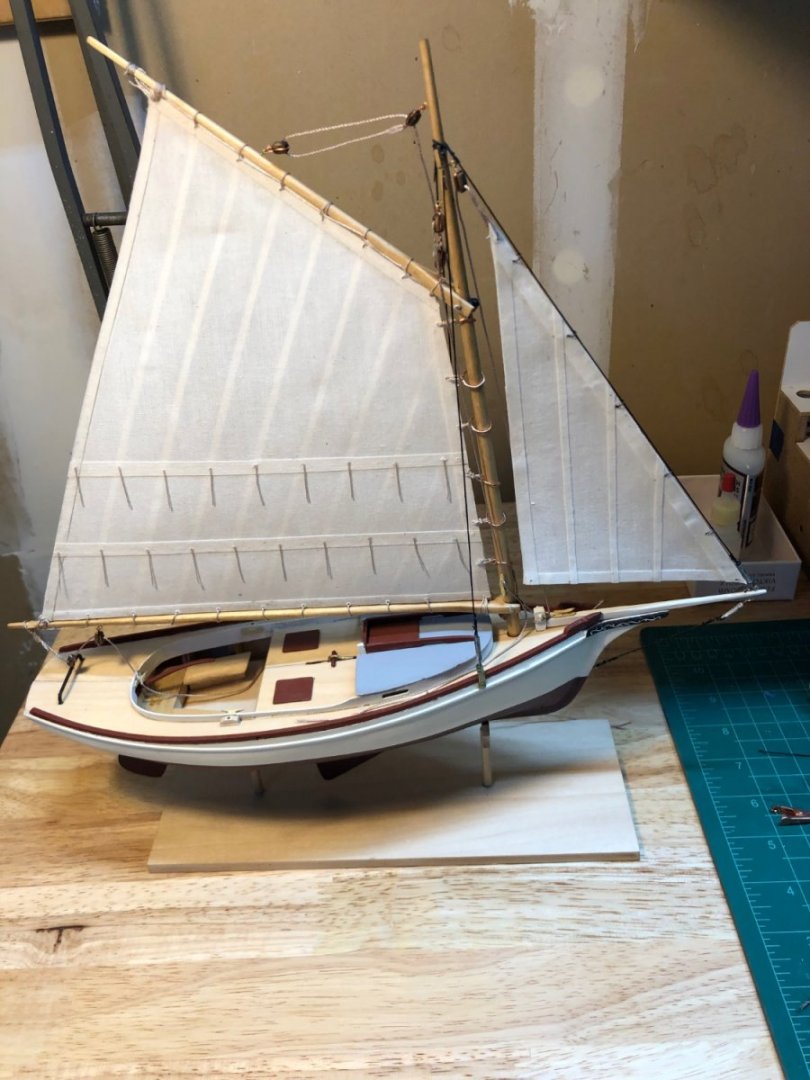
Jib sail — twice Moving a long slowly. Working on my rigging skills 😀 The kit comes with a full size sail plan. I meticulously copied the locations for the holes for in the sail for the hanks that hold the jib sail to the fore stay. I did not take a close look at the brass loops that are supplied with the kit for the hanks. If I had , I would have figured out that the holes needed to be closer to the edge of the sail. I will probably need to keep learning this lesson: read the instructions, look at the plans, and the materials, and the ship! There is an option to use rope hanks to attach the jib sail and the plan even has a nice diagram to show how to do it, but I used up all the beige 0.4mm line. I went to the local hardware store, bought some 28 gauge black annealed steel wire. I wrapped it around a small screw driver and used the same technique that was used for the mast hoops to make slightly larger loops that the ones supplied for the hanks for the jib sail. That seemed to work well ,but then I noted that fore stay did not seem tight enough. I took the whole thing apart today and rigged it again The down haul form the front of the jib sail is supposed to belay at a cleat on the bow sprit. I think my splice loop on the sail was too big and the line was not close enough to to the block it goes though and not long enough to belay at the cleat. I will do that that again — after a break. I am going to spend some time looking at videos and diagrams of how lines are supposed to be attached to a Sampson post and watching videos to relearn how to make a cleat hitch.
- 90 replies
-
- 5
-
-
- Model Shipways
- muscongus bay lobster smack
- (and 1 more)
-
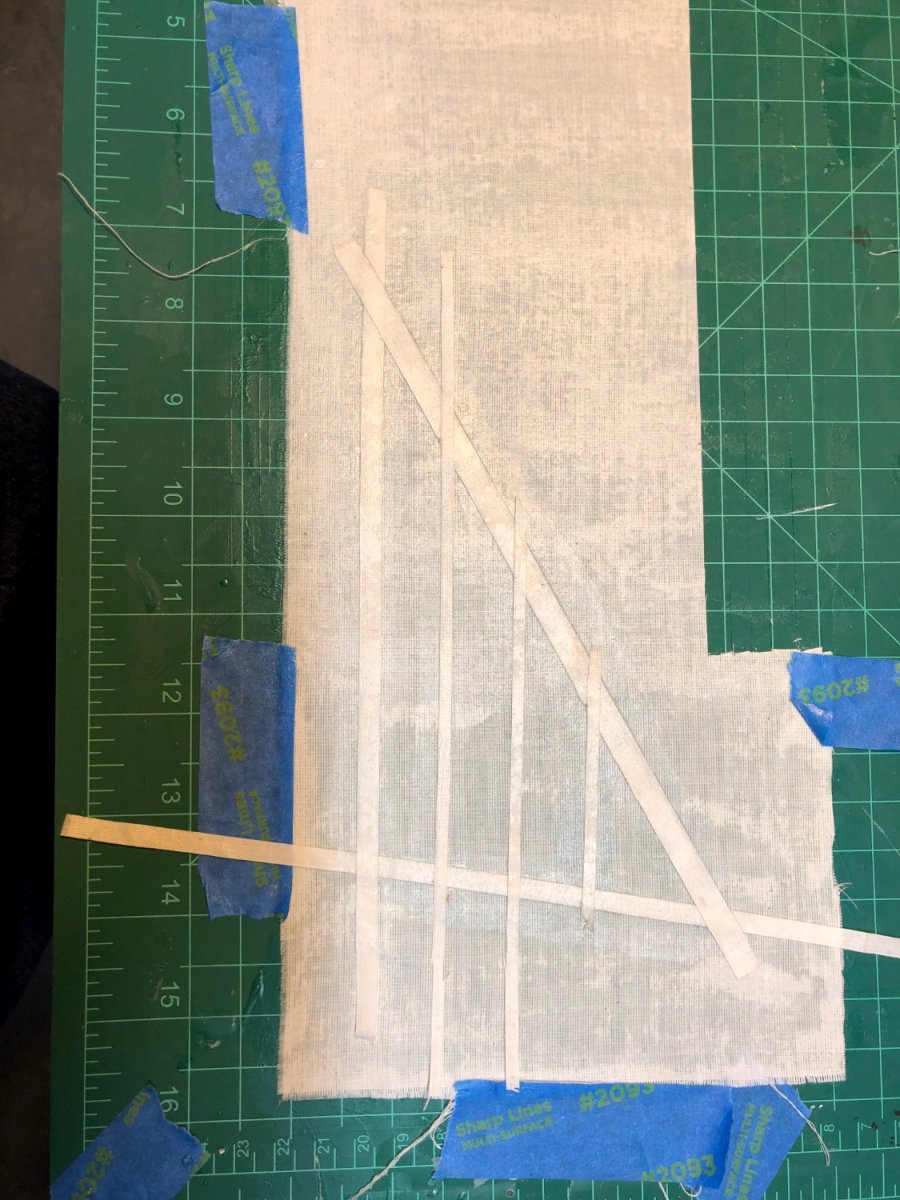
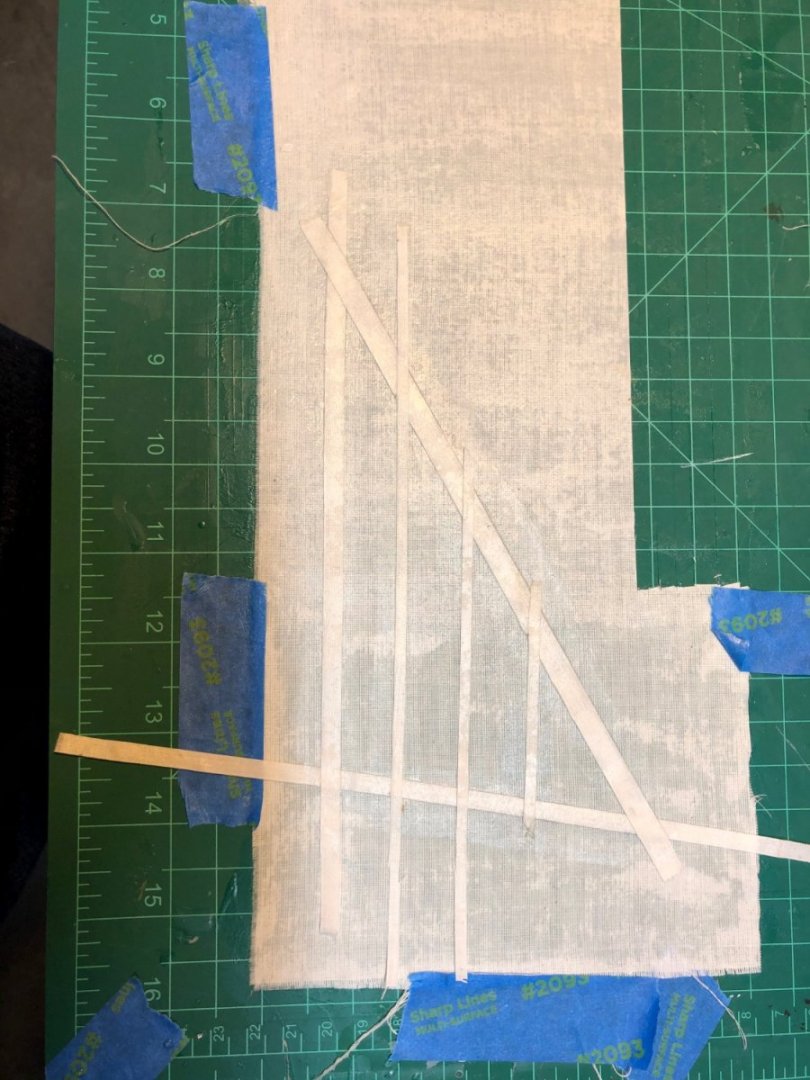
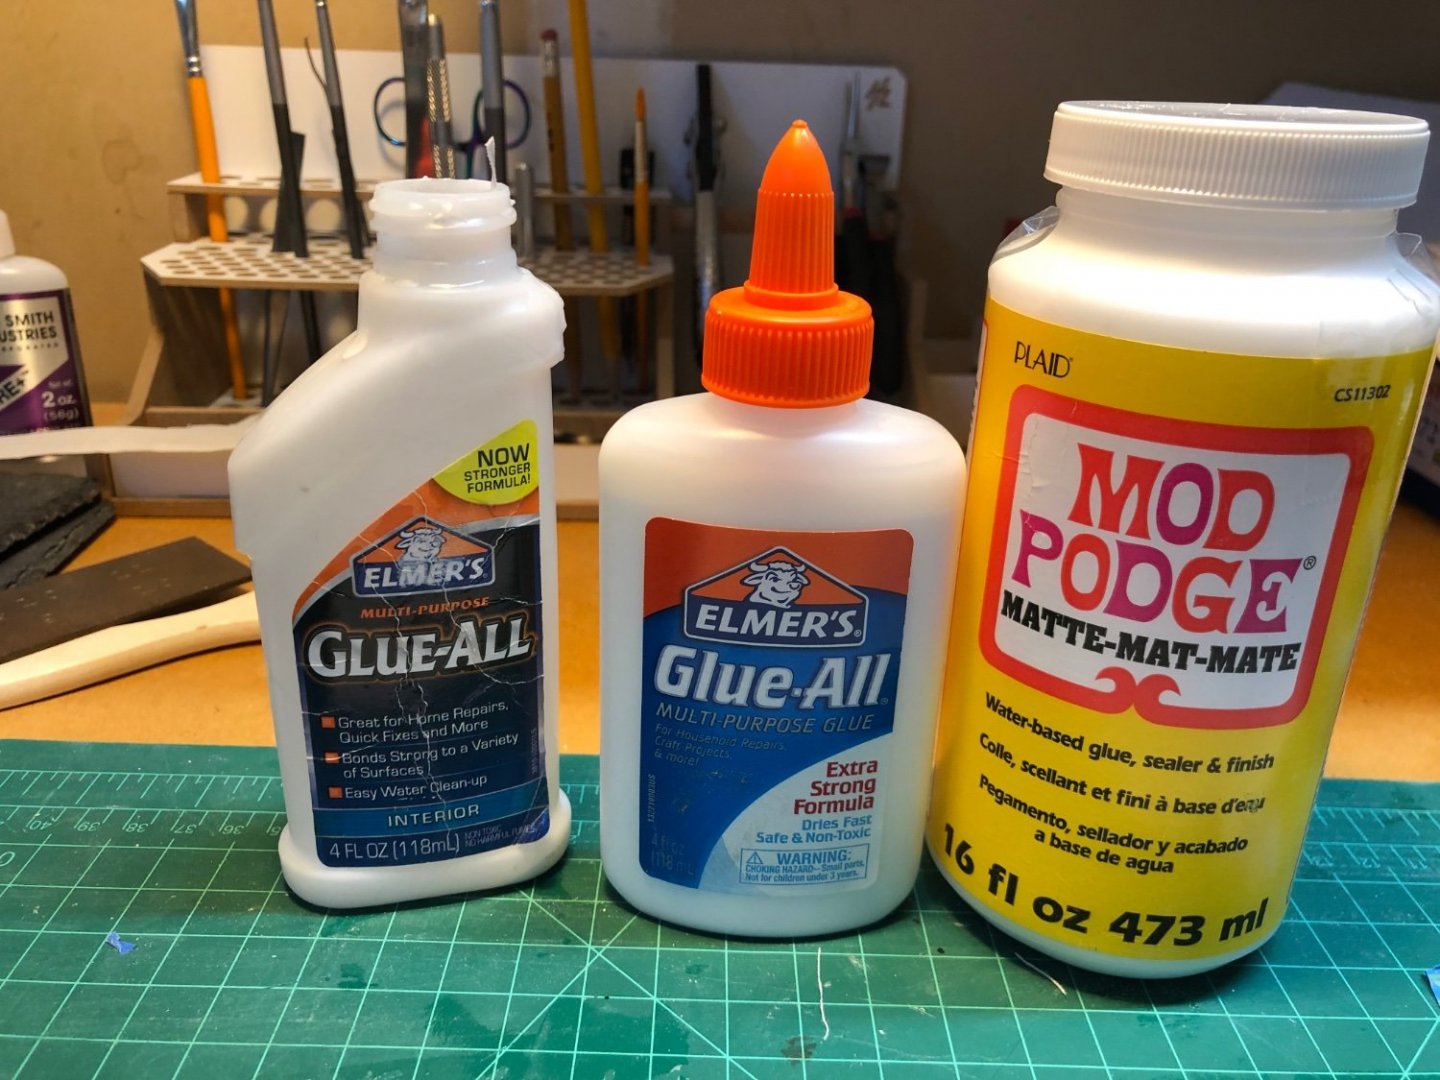
Jib Sail in Progress I I had trouble with this. The first step is to tape down the cloth and use white glue diluted to a cream consistency with water to stiffen it. I have been using Elmer’s Glue All, and it was working well. I used a new bottle to do the jib sail, and it did not work well, the cloth bubbled up as it was drying. I dug my old bottle out and noticed that it said “Interior” on it. The other bottle had different stuff in it, not as thick. I read lots of build logs (maybe too many?), and several people mentioned using Modge Podge for this step. I decided to try that instead of hunting for the other species of Elmer’s Glue-All. Modge Podge seems to be working great and it smoothed out most of the bubbles. Since I am not planning to put any of my models in the water at this point, I will have to find another bottle of the Interior stuff, it was thicker, smelled better and it comes apart nicely with a bit of rubbing alcohol when I make mistakes.
- 90 replies
-
- 5
-
-
- Model Shipways
- muscongus bay lobster smack
- (and 1 more)
-
This looks like it may be a good solution for me! It will fit in the space where there current one with no leg space lives. It has some storage space and looks very sturdy. From all of the responses, I have learned that more storage and more work surface are both very important, so I am going to reorganize the garage so there is some place to keep the other workbench. That project I will also keep me busy while I wait for the next kit to arrive. Dan
-
That is a very impressive workshop and the hobby desk you built looks great!Thanks very much for sharing the photos. I am still really a beginner and do not have much space in my garage work area, but I am definitely getting the message the the more work space there is, the better. Dan
-
Thanks very much to everyone for all of the helpful and informative replies! As usual, I have learned a lot from this group, and I am really glad I posted the question here. Dan
-
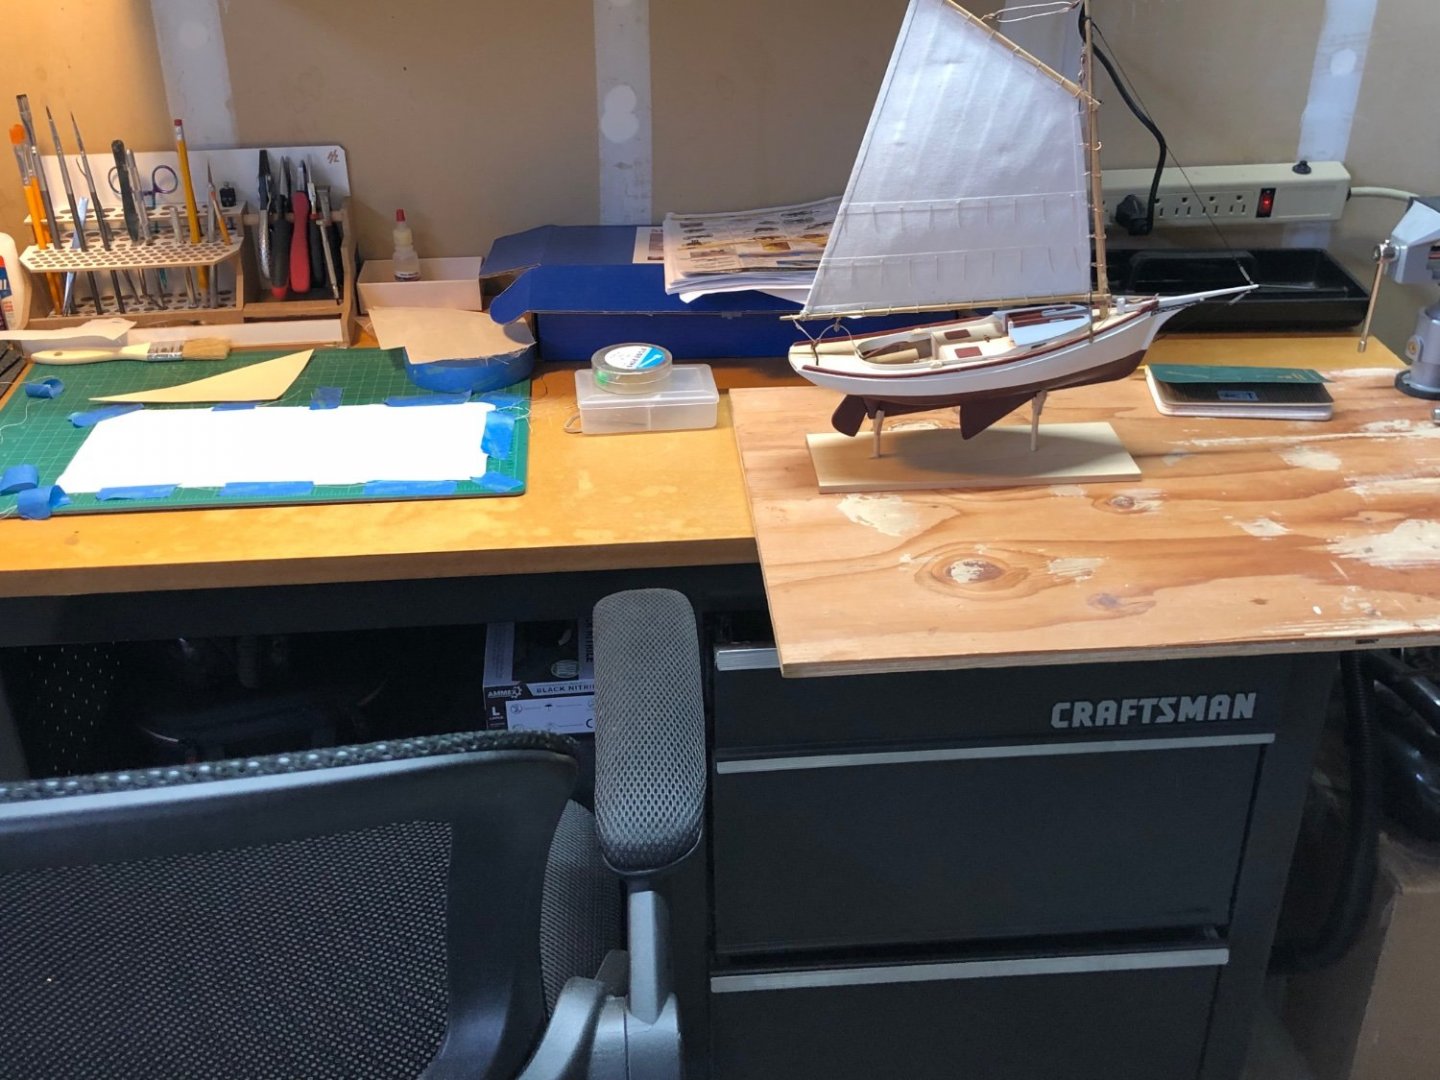
Does anyone have a recommendation for a work table they think is great for building ship models? I have been using an old Craftsman workbench, but it has no leg room under the bench and it is difficult to sit down to work at. I seem to switch between sitting and standing, but for detailed work, sitting down seems to work better. The work surface is also not very wide. I have been making the table wider by clamping some plywood to it to make it easier to sit at, but its not very stable or level and stuff rolls off it a lot. I have considered putting a new top on it but, I don’t think that is the best solution. Thanks in advance for any advice or suggestions! Dan
-
Hi, Welcome to MSW. If you decide to go with the shipwright series, you can download the manual for each boat from the Model expo website at the page for the kit. The instructions are really excellent and very detailed. At the back of the instructions is a description of the tools and glues you need for each boat (the section gets longer as the models get more complex). I did get the fist kit with all of the tools which was a nice way to get started on the first model and then added the tools suggested for each model (I also upgraded the knives and paint brushes from the original set). There is lots of great support available on this site. Good luck with your build!
-
Hi Mark Unfortunately, the centerboard does not function on my model. In the instructions there is an option to make it function and and option to just glue it in position. Getting it to move properly was one of the more difficult parts of assembling the central spine as it was necessary to modify the slot that the rod travels in quite a bit (see the beginning of my build and others on this site). I thought I had it working pretty well but, I think I had to do some ungluing of several bulkheads to get them to fit properly and align with the deck, and I most likely during that process diluted glue got into the centerboard slot and it was then stuck. I managed to free it but had to remove the rod to do it so I just took the option of gluing it so it was in the down position .
-
Thanks Gregg!