HOLIDAY DONATION DRIVE - SUPPORT MSW - DO YOUR PART TO KEEP THIS GREAT FORUM GOING! (Only 68 donations so far out of 49,000 members - Can we at least get 100? C'mon guys!)
×


DanB
-
Posts
163 -
Joined
-
Last visited
Content Type
Profiles
Forums
Gallery
Events
Everything posted by DanB
-
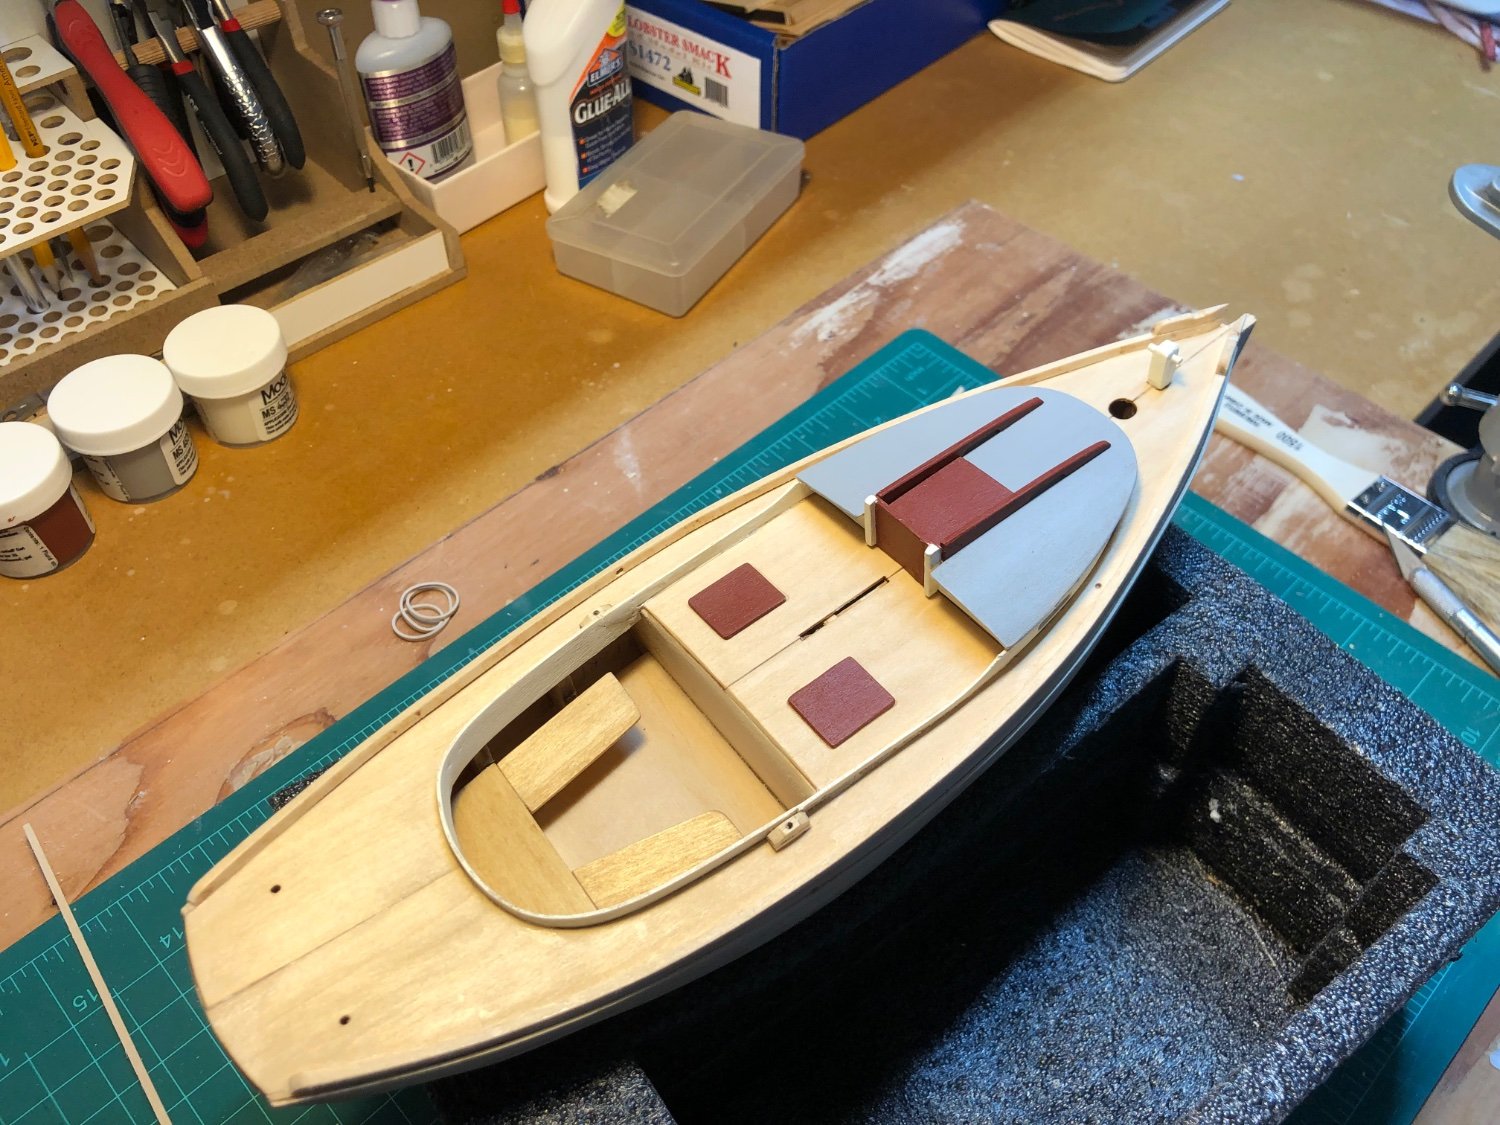
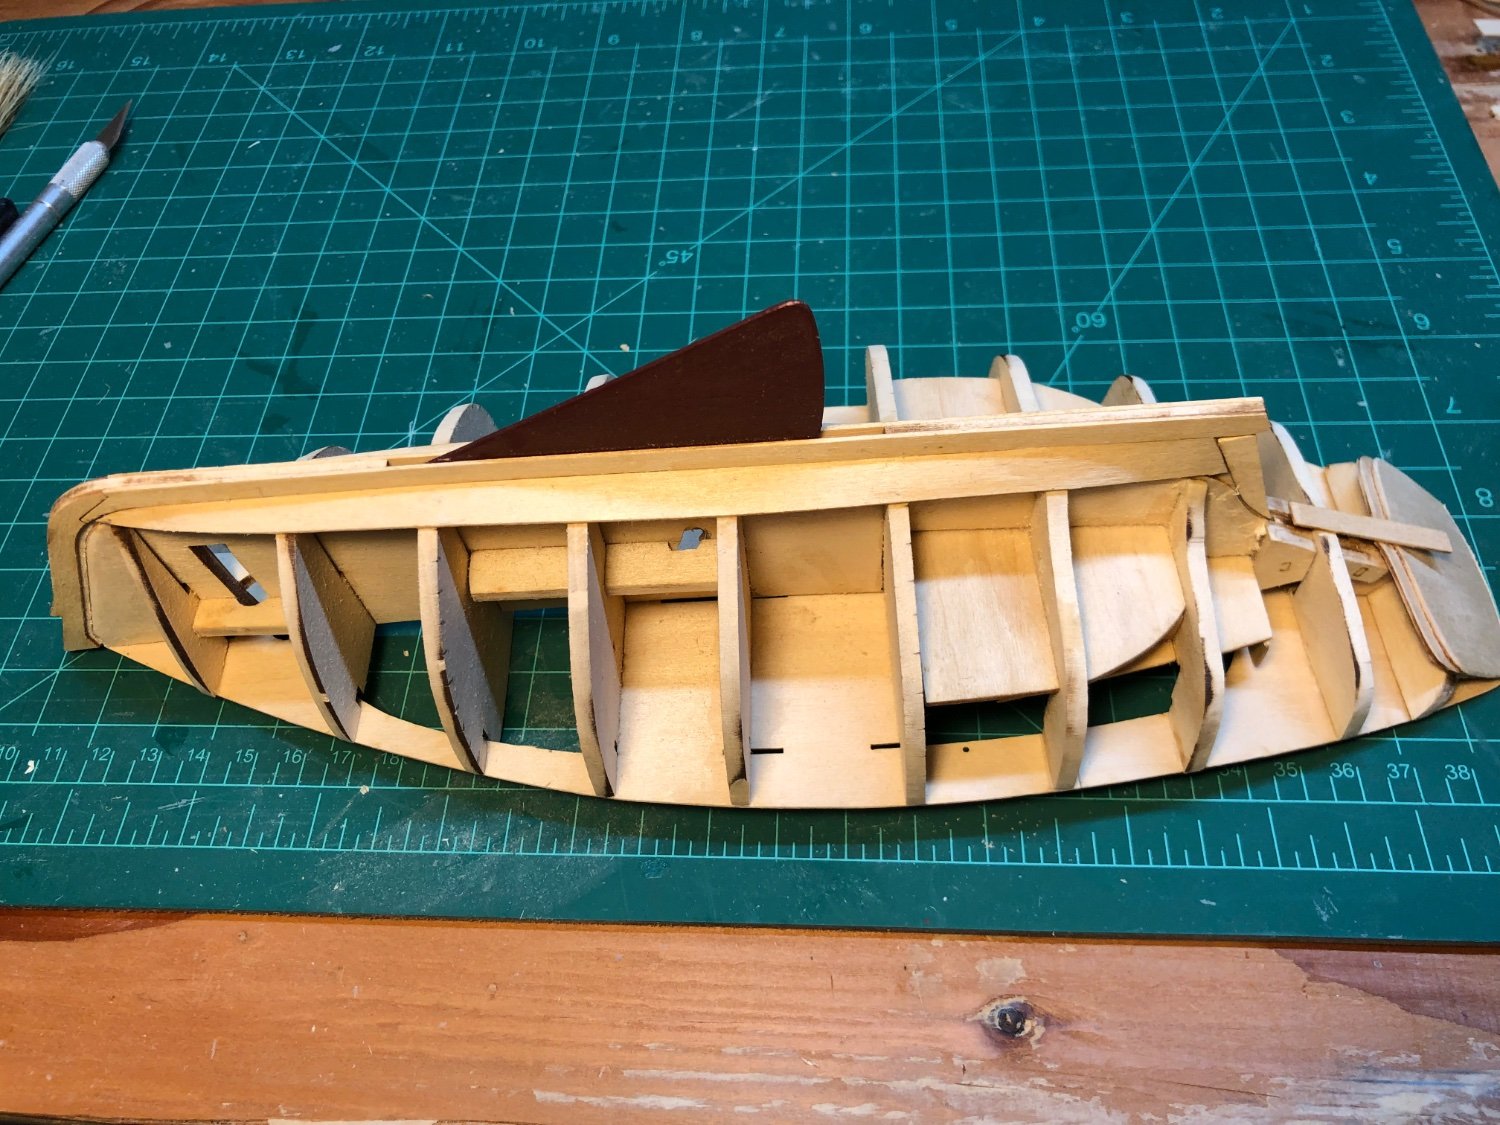
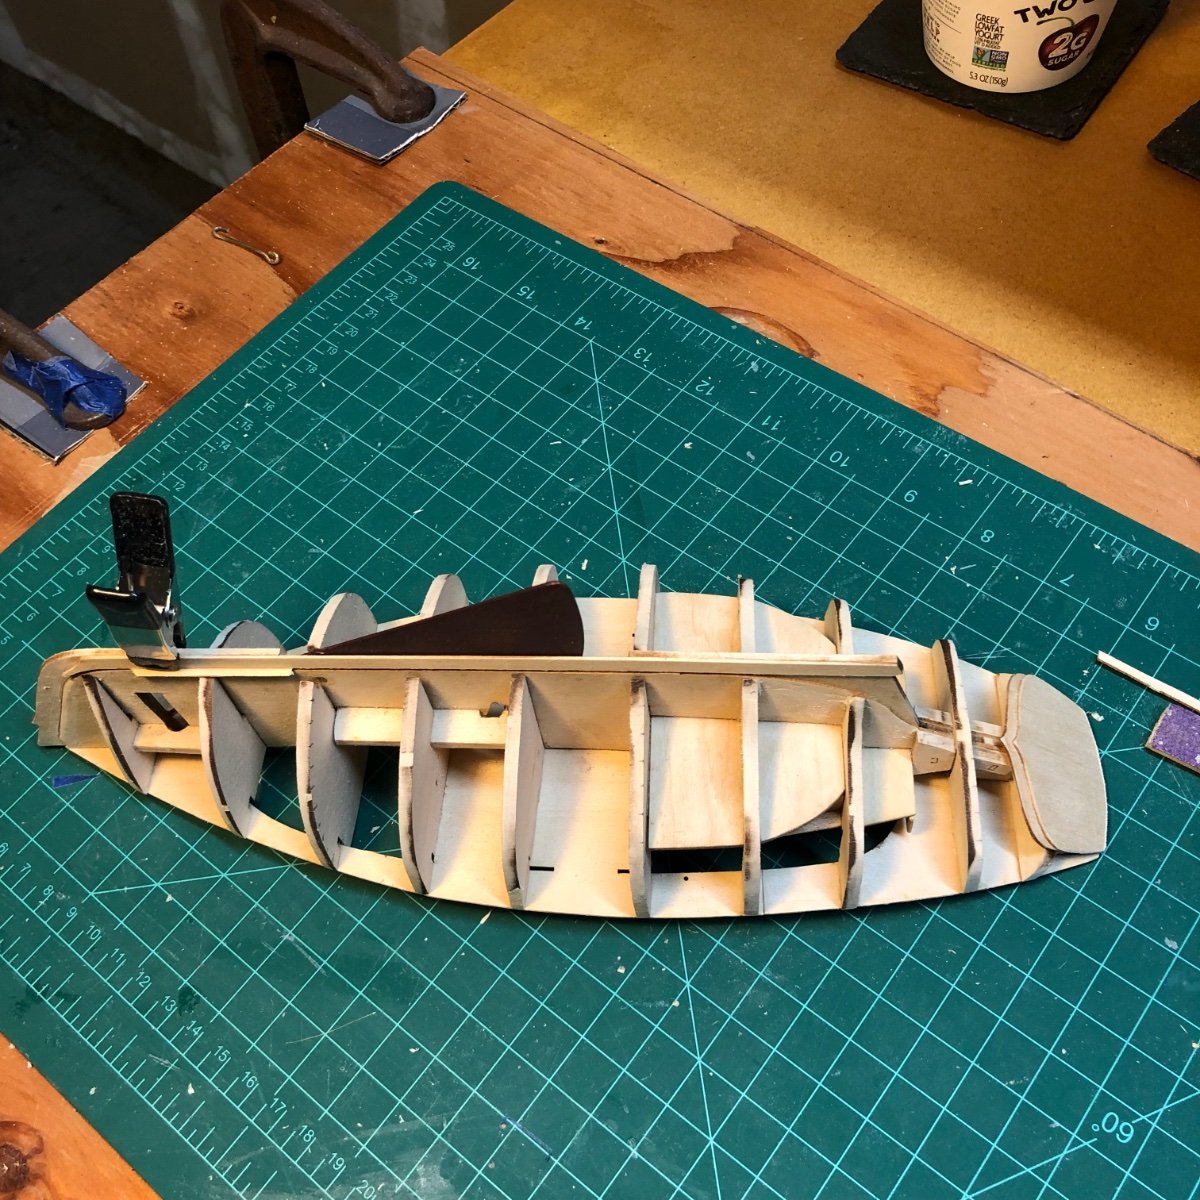
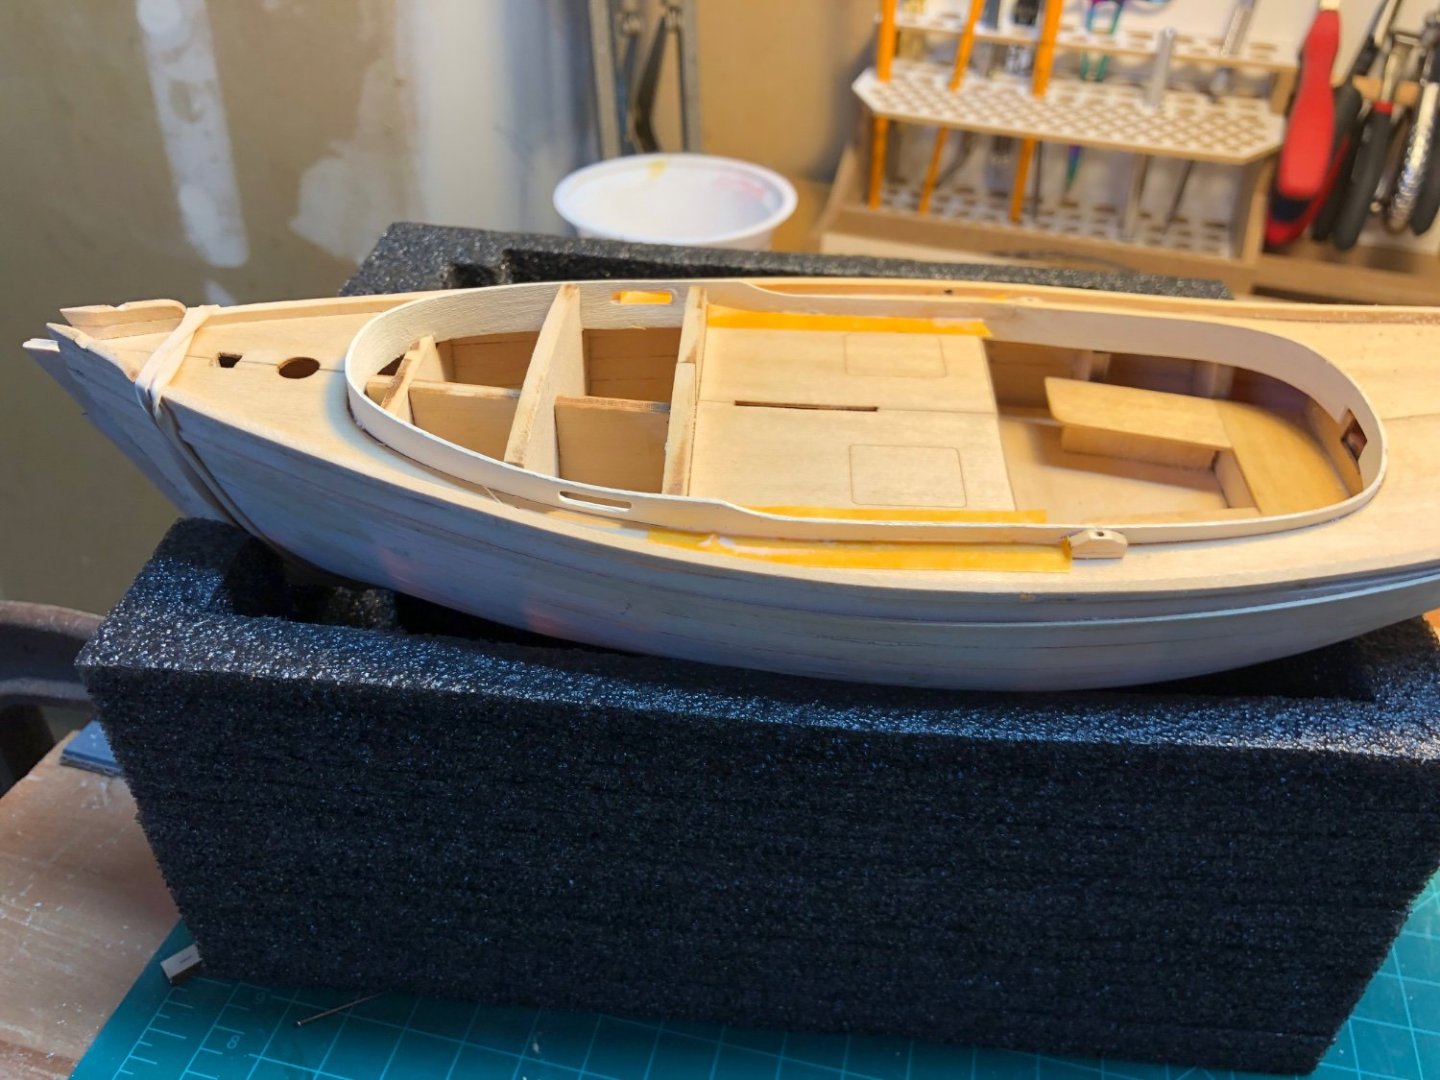
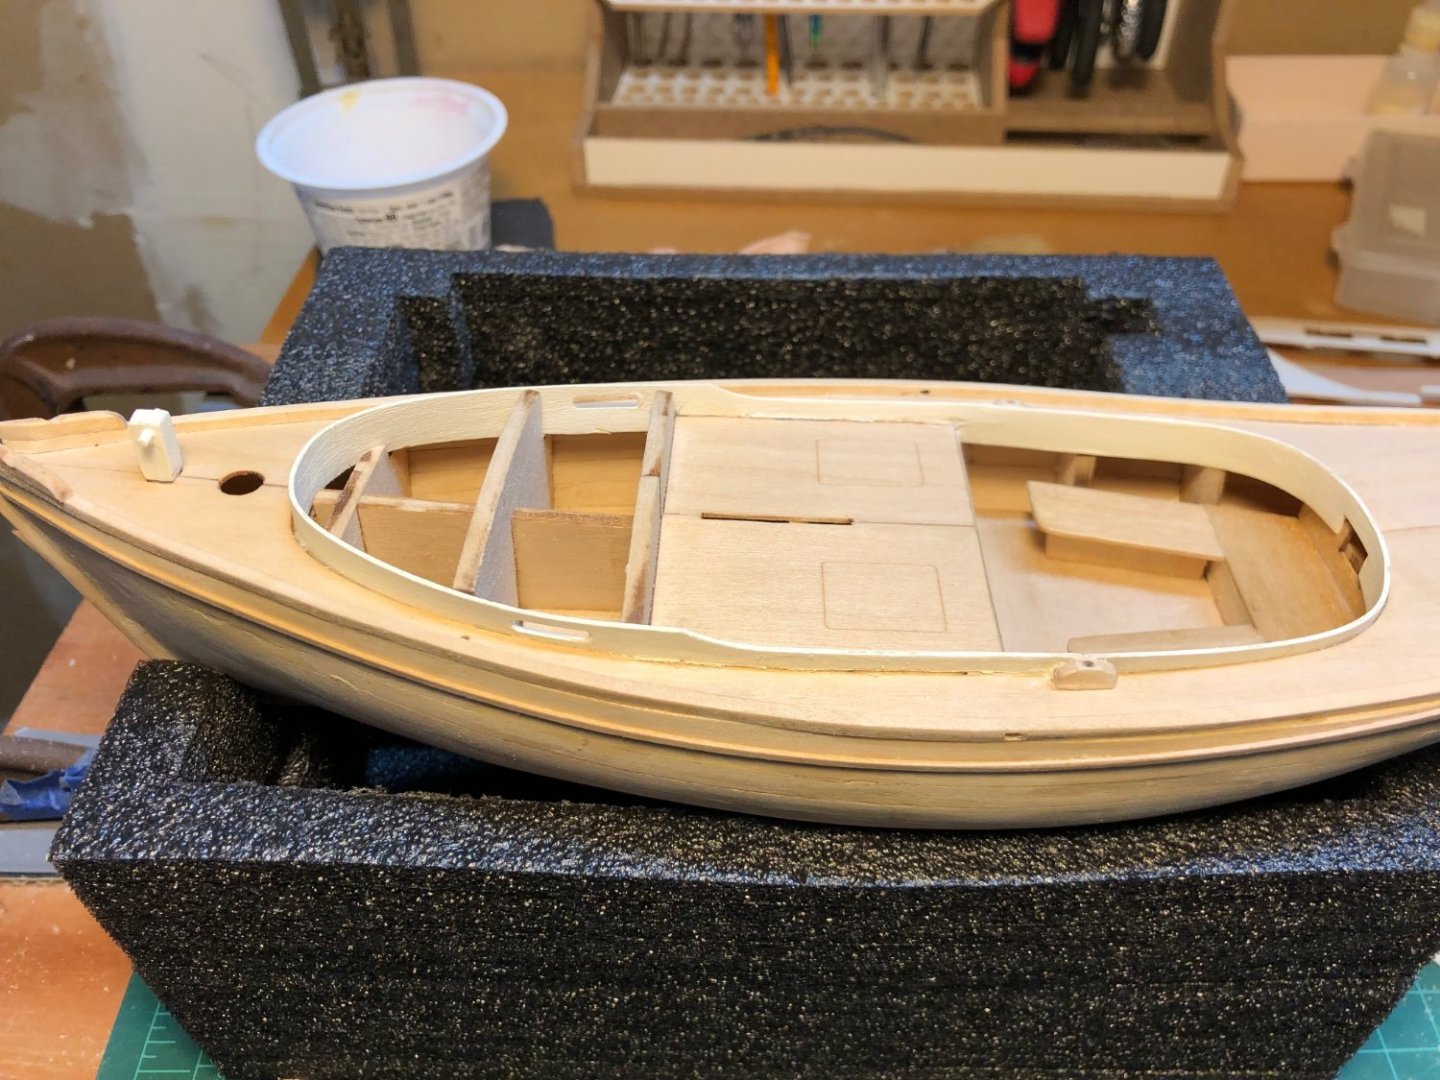
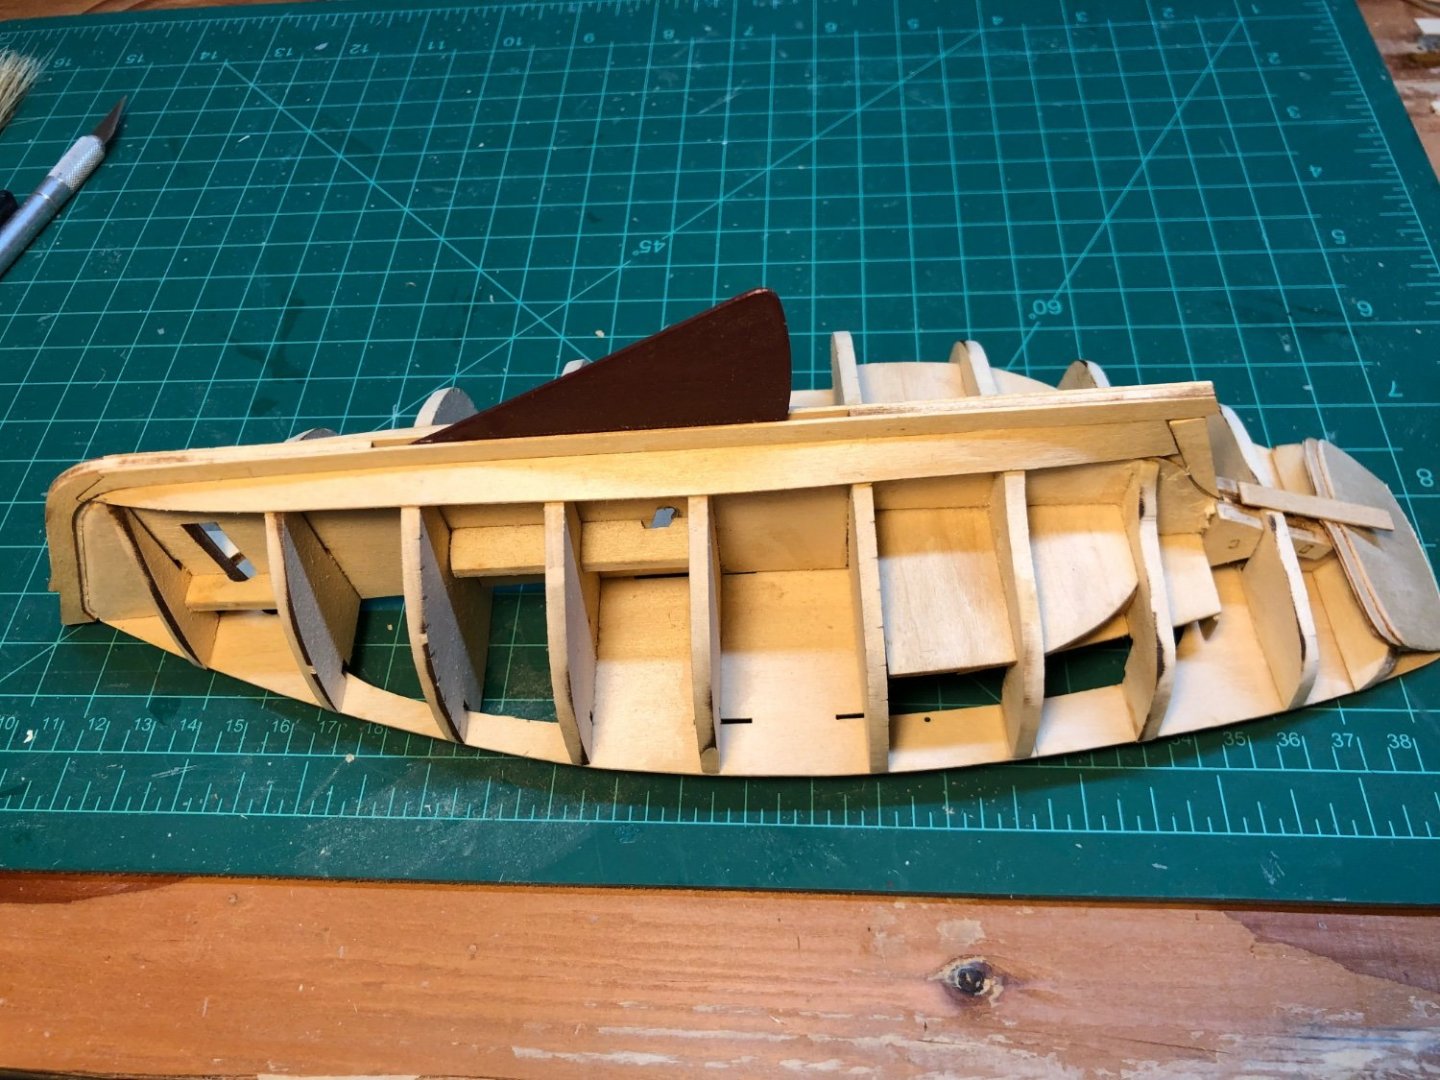
Bulkhead, Wet well covers, cabin roof. This part was fun!. I lost the upright pieces for the bulkhead. They just fell out of the carrier sheet, somewhere, and I could not find them, so I made new ones using some scrap from the sheet. The cabin sides were a bit uneven so the overhang along the roof needed to be sanded a bit. I painted the wet well covers first and they did curl up when I put the white glue on and I had to use some CA to get them glued down. I tired to seal the wood for the hatch by giving it a coat of wipe on poly before painting it. I probably needed more coats as that did not work either. It still curled up even though it was sealed and painted on both sides, and I needed to use a few drops or CA to get it glued down . I looked at lot of other build logs and images of lobster smacks and Friendship sloops to try to figure out a color scheme, I finally decided I liked the one in the instructions best but wanted to also paint the covers and hatch.

- 90 replies
-
- 4
-

-
- Model Shipways
- muscongus bay lobster smack
- (and 1 more)
-
Hi. I am still pretty new to all of this, but found that soaking the planks for 5 minutes, then using rubber bands to attach the to them to the boat and allowing them to dry got the shape pretty close, and it did not take a lot of pressure to glue them down . If you want to speed up the drying process, someone on this site gave me the excellent advice to use a hairdryer. That also works well if you need to bend and adjust the plank a bit more. There is a "rolling bevel" on the inner surfaces for the ends of the planks described in manual. I think was not much, just a bit to get them to come together at the bow and stern better. I just glued the planks down a bit at a time using white glue, a bit of finger pressure on the dry bent planks and some spring clamps and rubber bands. I put some paper towel scraps between the clamps and the wood to avoid denting it.. Others have stained the wood, especially the thwarts and the stand. I think you get a better, more even result if you use a pre stain to prepare the wood. . Definitely try it on scraps first. I think the glue could affect the evenness of the stain. There is one of these dory models on this site that was stained and weathered and looked really great- I was happy to just get the paint on with out making too much of a mess. Dan
- 61 replies
-
- 2
-
-
- Lowell Grand Banks Dory
- Model Shipways
- (and 1 more)
-
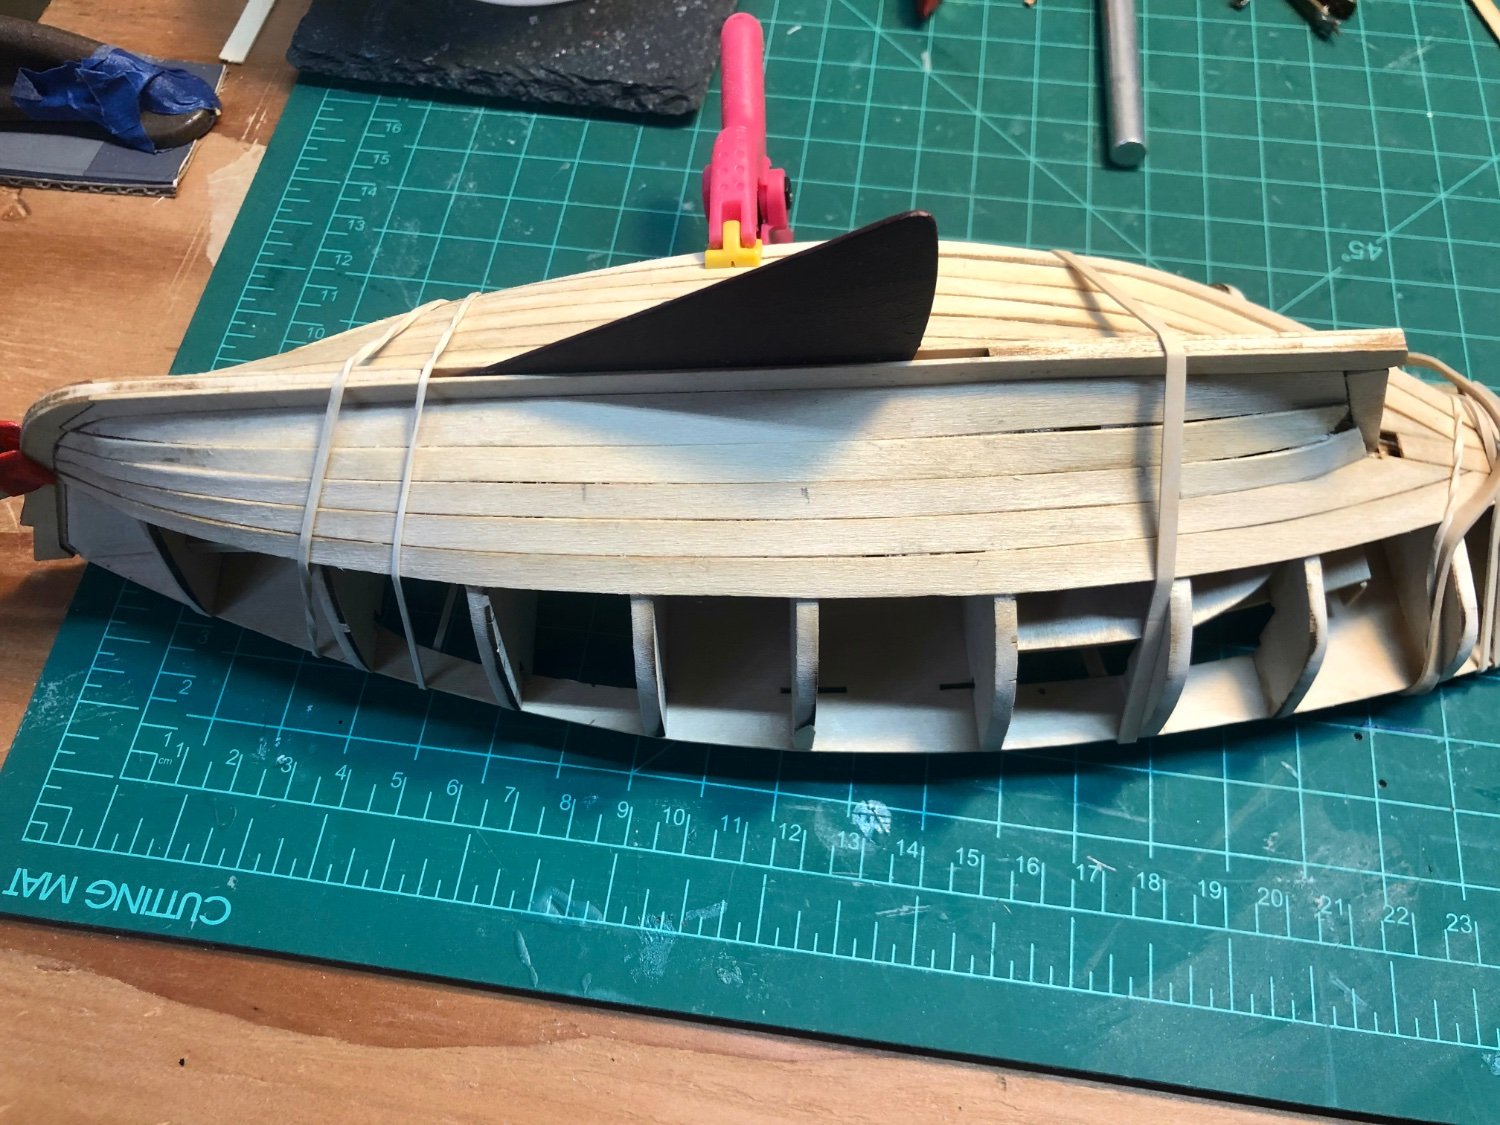
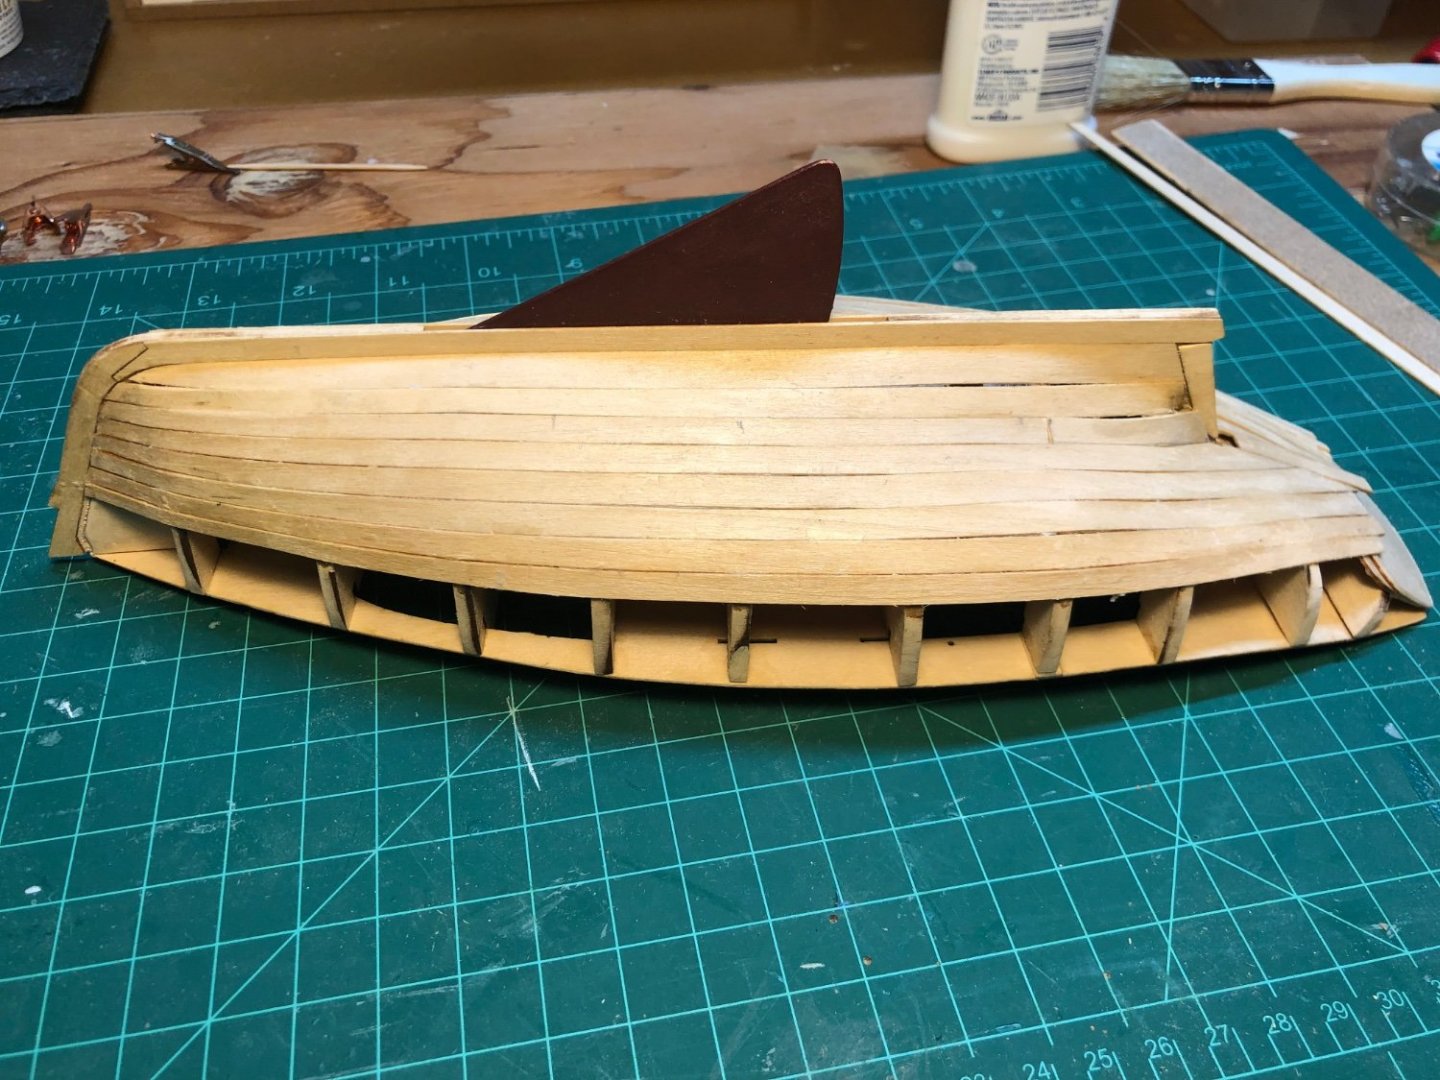
I have been busy with other responsibilities for the past week so not much progress. Coaming and Cabin sides. This was a lot more difficult than I expected. Soaking the pieces in boiling water, using the plank bender to get the shape about right and then using rubber bands to hold them in place while they dried on the boat worked pretty well. Getting the cabin side piece to fit correctly was really difficult. I had to do a lot of cutting and shaving the bulkhead slots and it still did not really fit right. The pictures all appear to show it flush with the deck and mine had a gap near the slots in the deck that the tabs fit into— not matter what I did. I finally got it pretty close and glued it down. I masked off the deck and tired to fill the gaps with glue and sawdust— but there were still gaps after it dried. Then I used some wood filler, sanded it and repainted. Gaps are much better . I had to unglue. my oarlock pads as they need to be ⅛ inch high and I had sanded them down a bit.I glued some wood to the bottom to get them to the correct height. I will probably try another round of masking and filling after a break to recover my patience.
- 90 replies
-
- 5
-
-
- Model Shipways
- muscongus bay lobster smack
- (and 1 more)
-
Thanks for the suggestions Gregg!. I will have to mask to paint the toe rails but plan to use the color scheme in the instructions so the rub rails will be the same color as the hull. Thanks for the suggestions on the coaming. I will paint them before gluing them in and makes sure they are dry before fitting them.
-
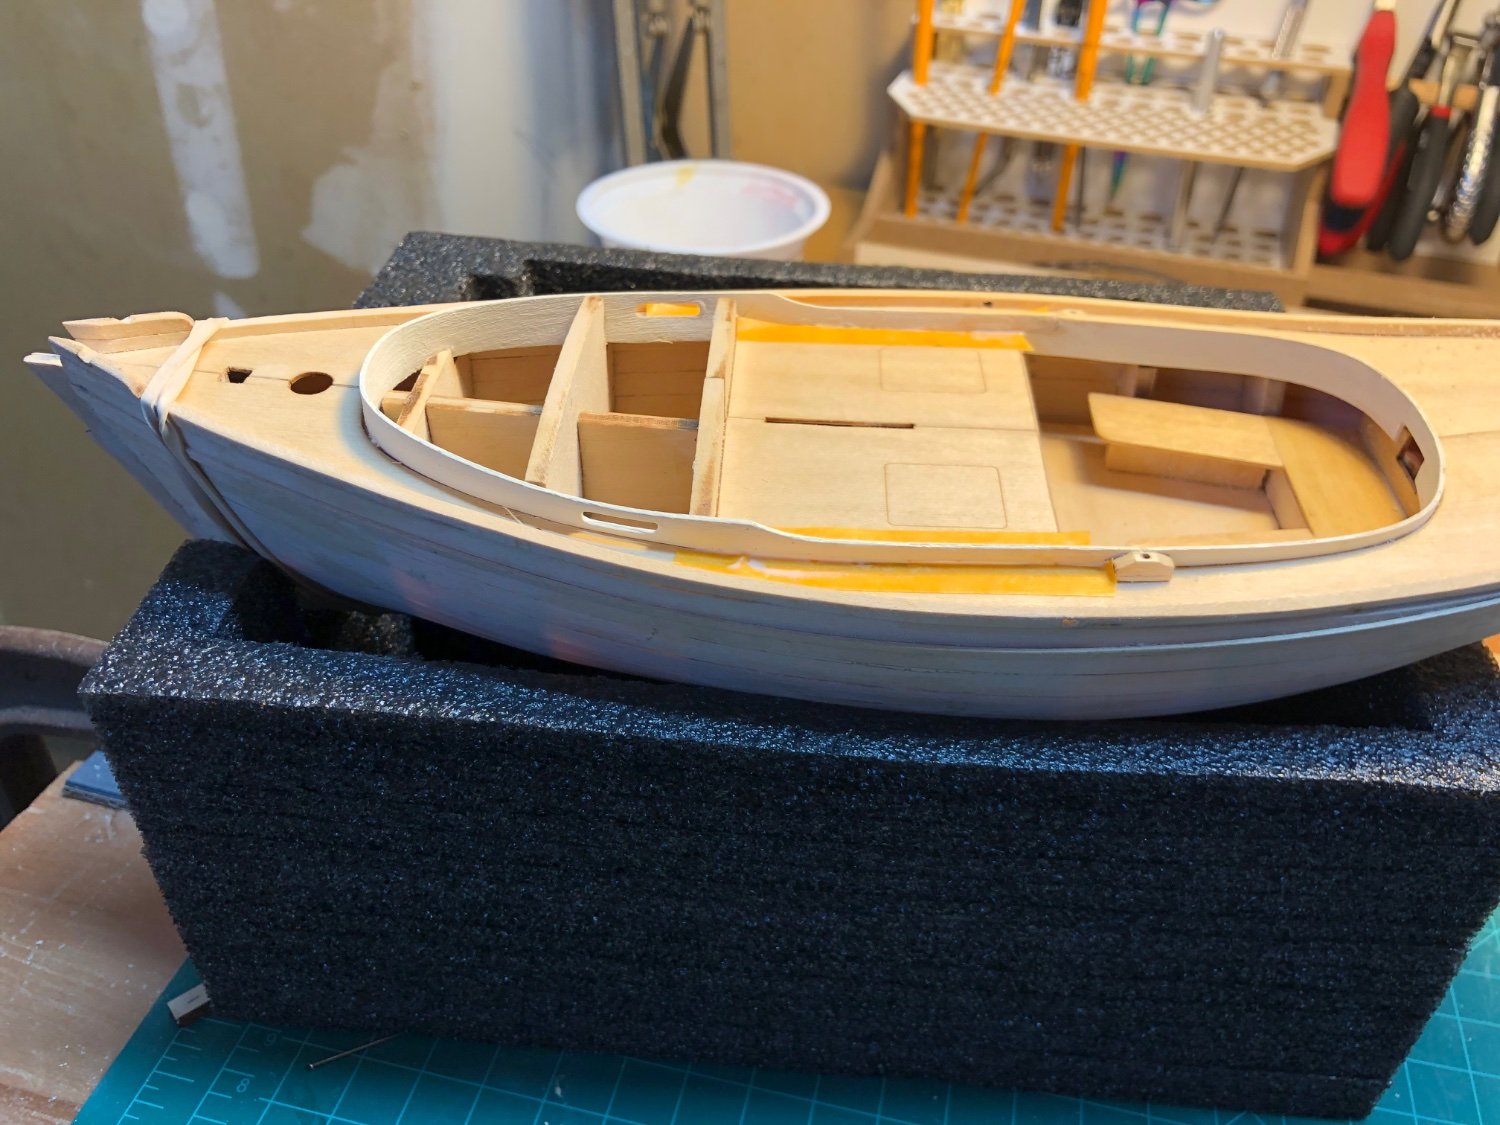
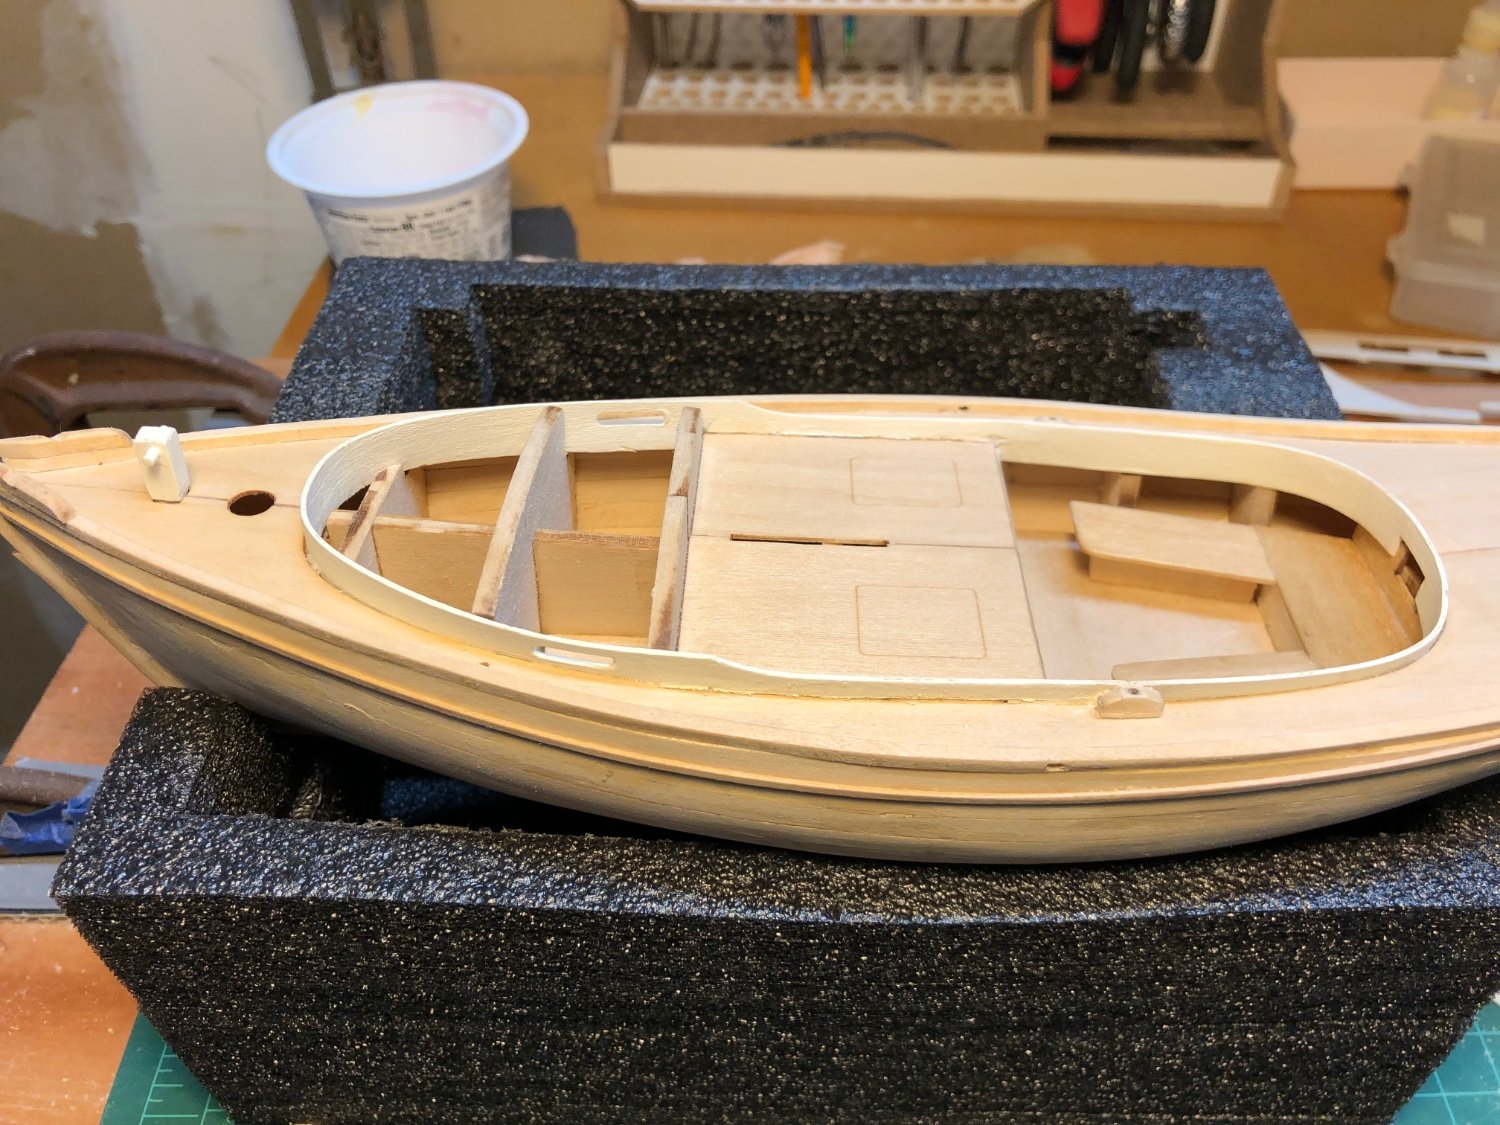
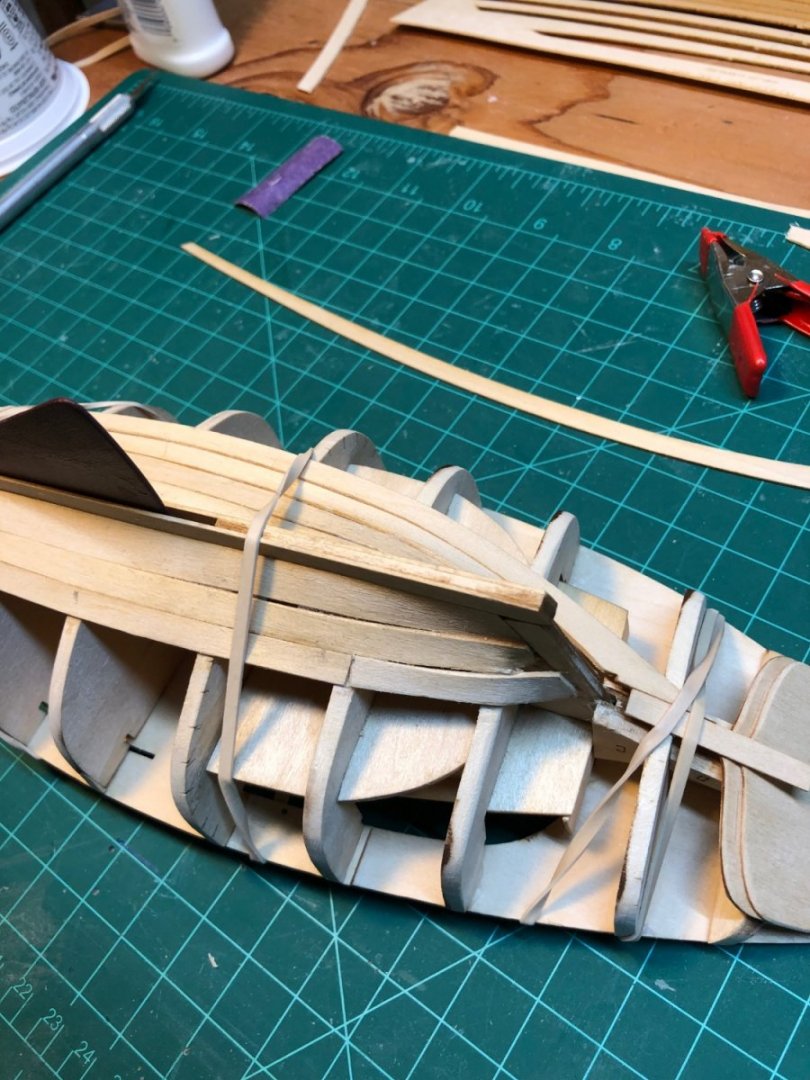
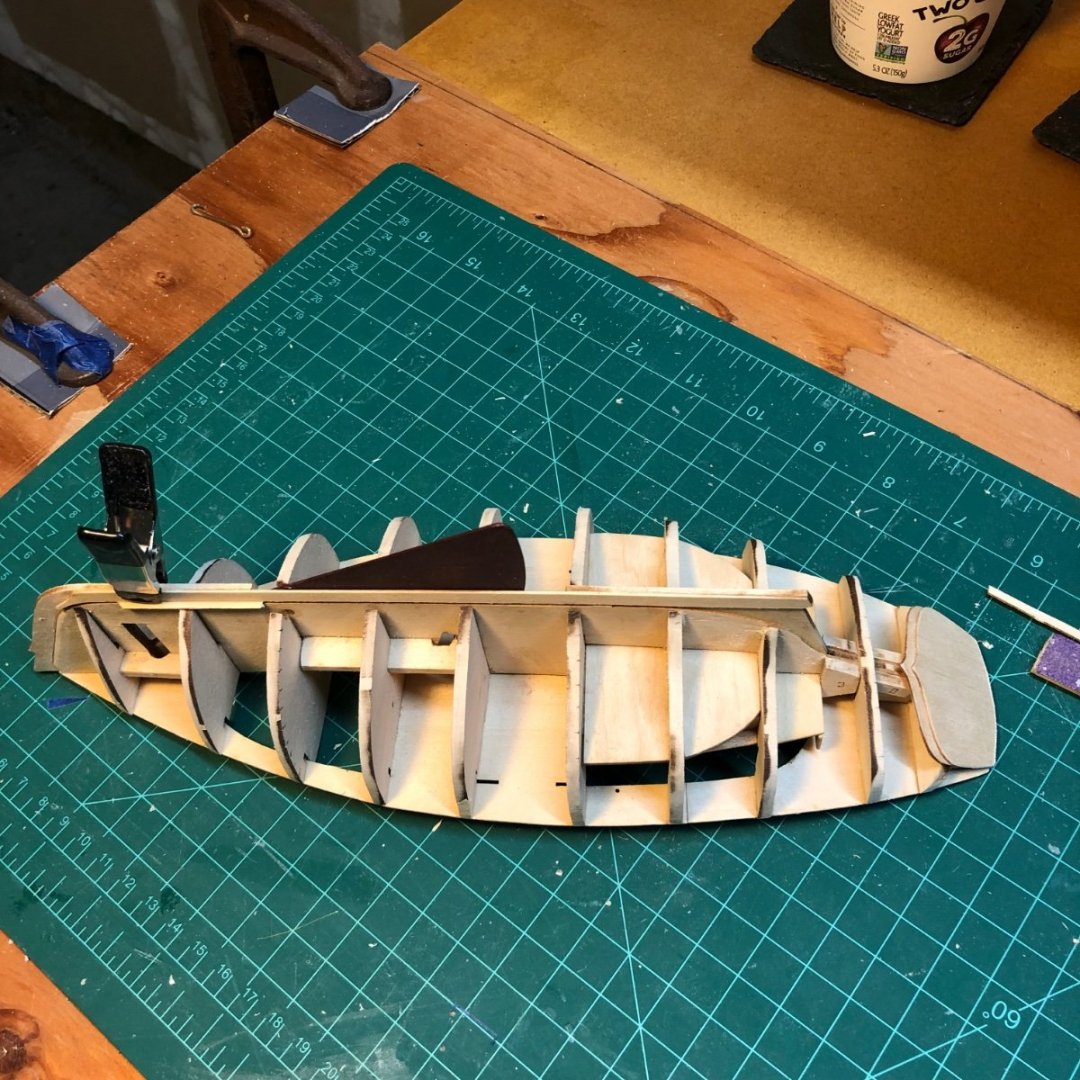
I have been working on the rails over the past few days Toe Rails and Rub rails. The instructions say to steam the toe rails. I used the model shipways plank bender and that worked really well, adjusting the bend to fit the hull a bit at a time. The optional holes in the toe rails were a challenge, to get shaped. I used a 55 bit, followed by the small saw blade I used for the Pram and then needle files. I still could not get them to the oval shape in the instructions but I came close. The size was a guess based on the pictures in the manual. Fairleads and Samson post The post did nto fit well and I had to file the hole and sand the post. I still managed to break the below deck part twice trying to fit it in Oar lock pads—Look thinner in the pictures in instructions than the supplied pieces. I sanded the bottoms down a bit after shaping them More filling and sanding on the hull. I had bit more time tonight and soaked the coaming in hot water and then used the plank bender to get the curves about right. It’s drying out clamped in its space in the boat overnight getting ready for tomorrow’s adventures, cutting the slot in it for the tiller, painting, the outside and gluing it in The instructions don’t seem to say anything about finishing the deck. It seems like that should happen now before adding the coaming and cabin. I think I am going to sand it lightly and give it a couple of light coats of WOP or use an oil finish before adding more to the deck.

- 90 replies
-
- 4
-
-
- Model Shipways
- muscongus bay lobster smack
- (and 1 more)
-
Sanding and Filling After multiple rounds of sanding and filling the hull looks better. I was worried I was going to start sanding the planks to thin. Moving on. Painting comes later in the instructions, so I will see how it looks after some primer and do more filling and sanding then if needed.
- 90 replies
-
- 5
-
-
- Model Shipways
- muscongus bay lobster smack
- (and 1 more)
-
Hi. You could get another sheet of parts from Model Expo. If you sill have the carrier sheet you, you could create a new frame from scrap wood. You could use the laser cut out to get roughly the shape and then sand it to match the plans. You could also just use the plans to make a copy. Be patient with the alcohol to unglue, It takes a while for it to work and you may have to apply it a few times. Make sure to soak the planks well-- 5 minutes or more in warm water before your try to bend and attach them to the model. Once they dry completely, the shape is pretty close and it is much easier to glue them in
-
I am really new to this and still learning. I have found that soaking the planks, bending them in to position and using rubber bands and clips to attach them to the boat and then allowing them to dry to shape works well. A hair dryer will speed up the drying and can also be used to tune up the curves by wetting the outside of the plank again and hitting with more hot air from the hair drier. Dan
-
I have finished planking and sheer strakes. It went better with practice, but there are a lot of gaps and uneven spots. Hoping that sanding and filling will take care of some of it.
- 90 replies
-
- 2
-
-
- Model Shipways
- muscongus bay lobster smack
- (and 1 more)
-
For the past few days I have been continuing to plank the hull and now have finished strake 7. It is taking a while, but I am enjoying it!
- 90 replies
-
- 2
-
-
- Model Shipways
- muscongus bay lobster smack
- (and 1 more)
-
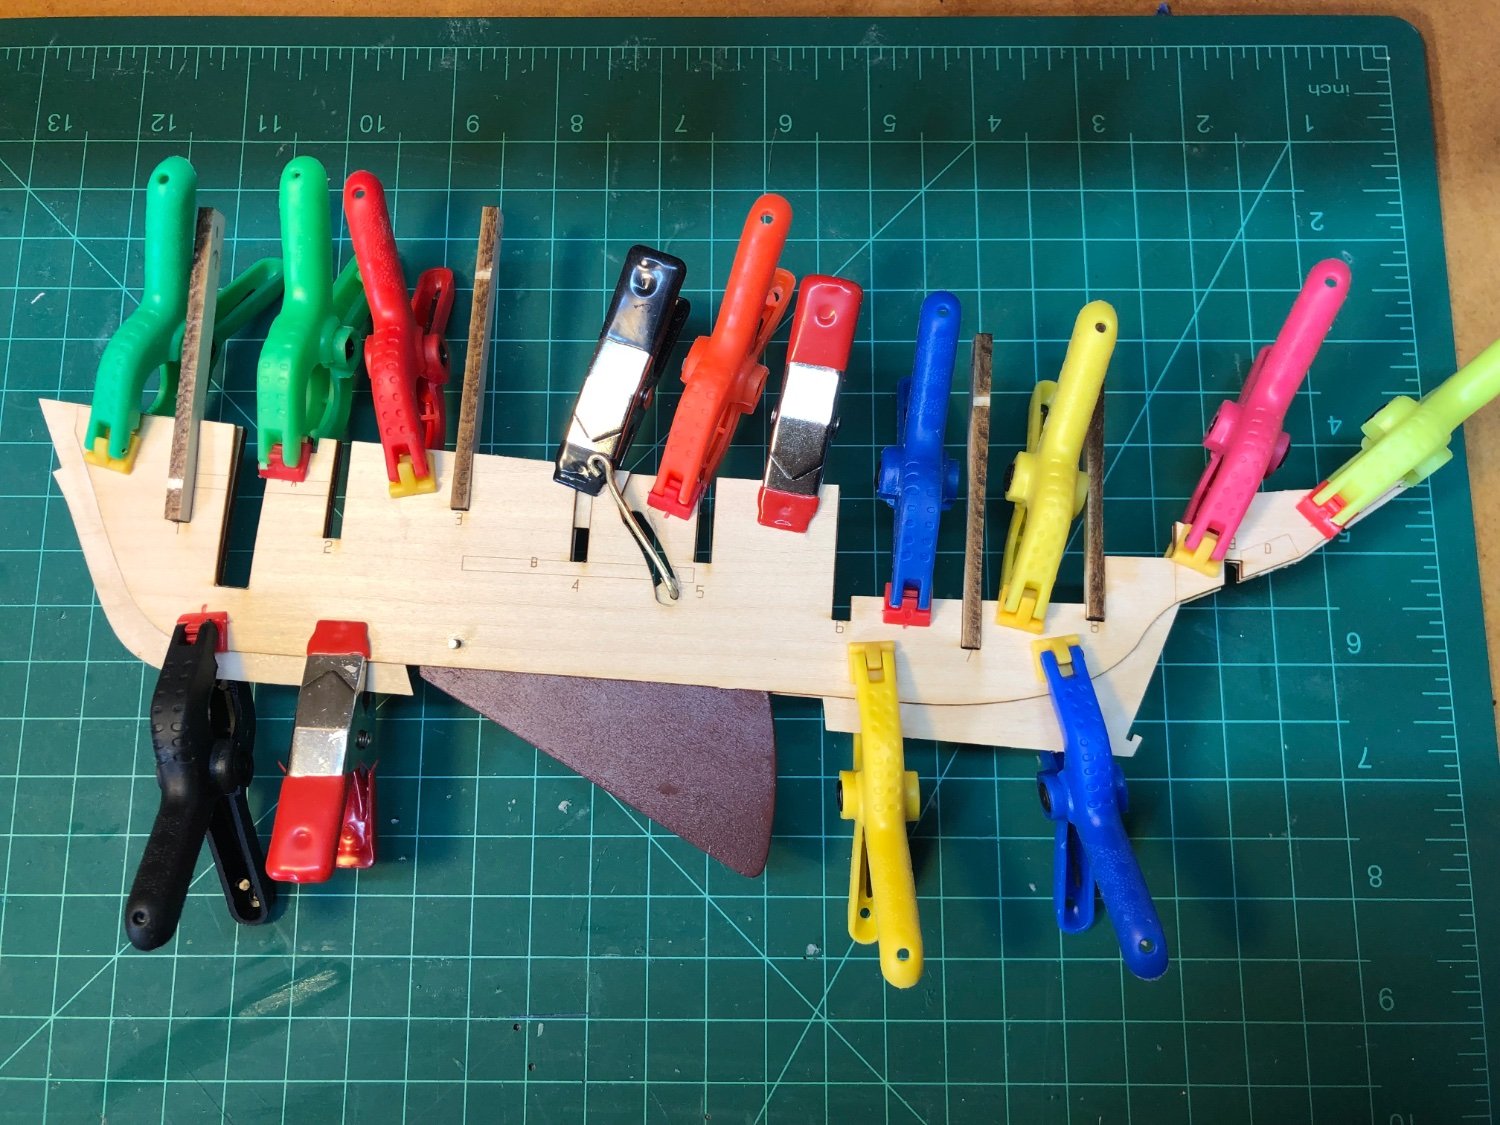
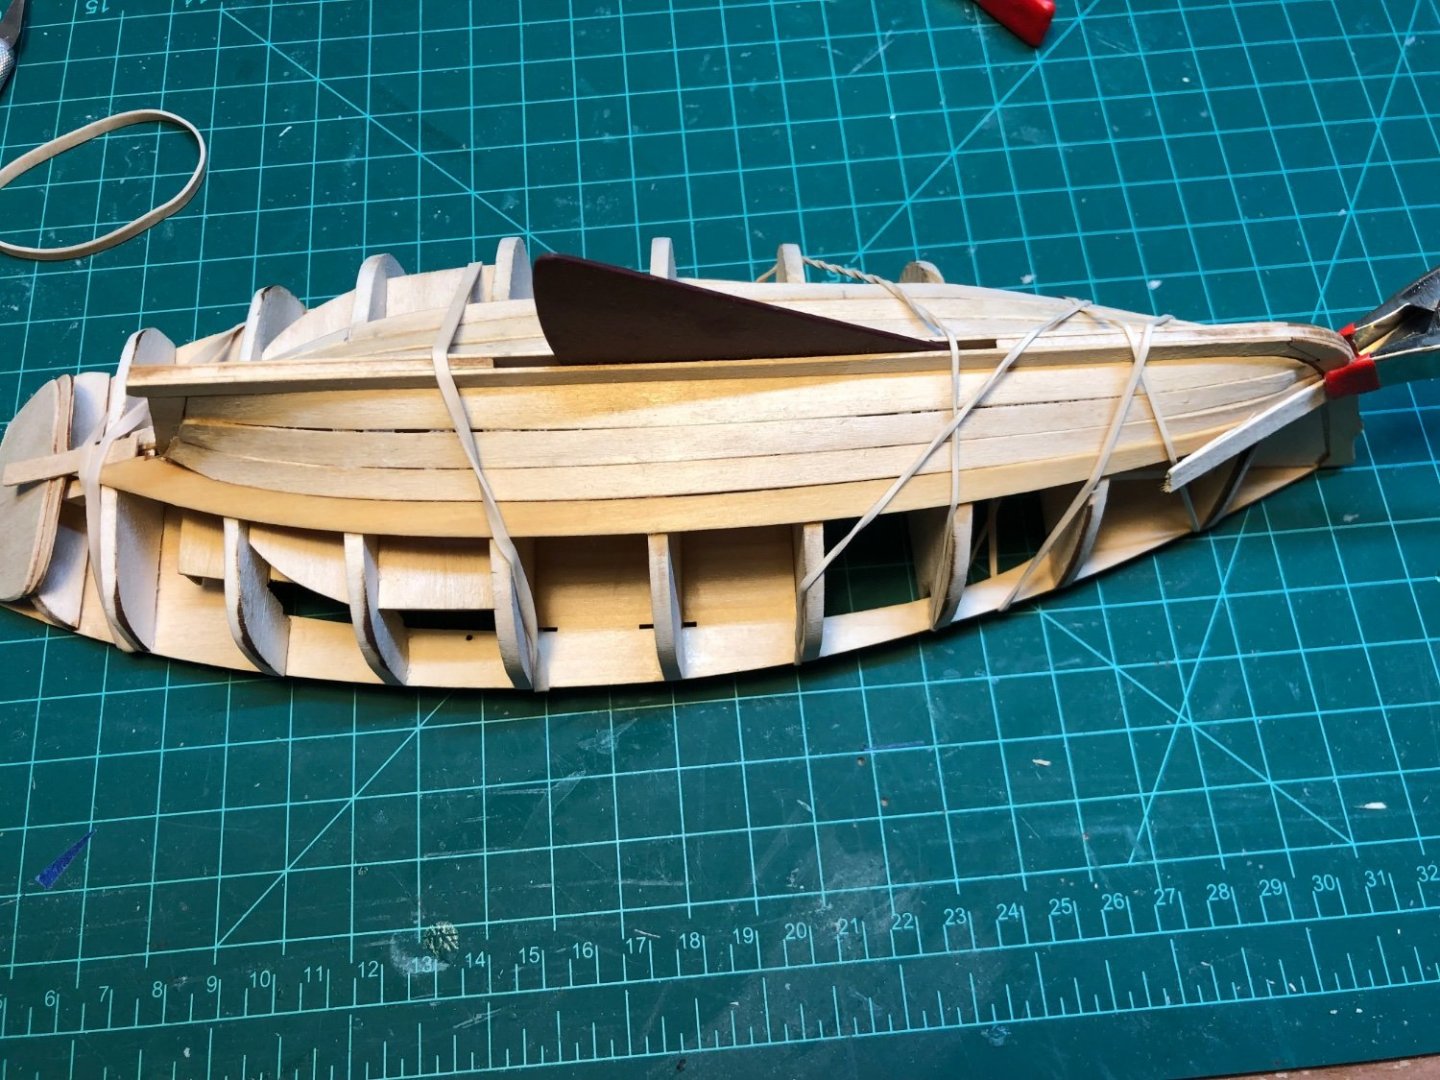
Planking strakes 3 and 4 Planking is going better with less gaps. Using clamps between the bulkheads, in addition to the rubber bands has helped to keep the gaps smaller and the planks more level with each other. Thanks everyone for the suggestions! I am taking my time and just gluing them in 1 to 2 bulkheads and letting the glue dry a bit before moving to the next one.

- 90 replies
-
- 4
-
-
- Model Shipways
- muscongus bay lobster smack
- (and 1 more)
-
Thanks for the suggestions and encouragement Gregg. I will look again at the planking part of your log. The third strakes went a lot better today. I may need to do a bit of cutting the bulk heads to get the coatings to fit, but I think if got the slots pretty close with a lot of ungluing and repositioning.
- 90 replies
-
- 1
-
-
- Model Shipways
- muscongus bay lobster smack
- (and 1 more)
-
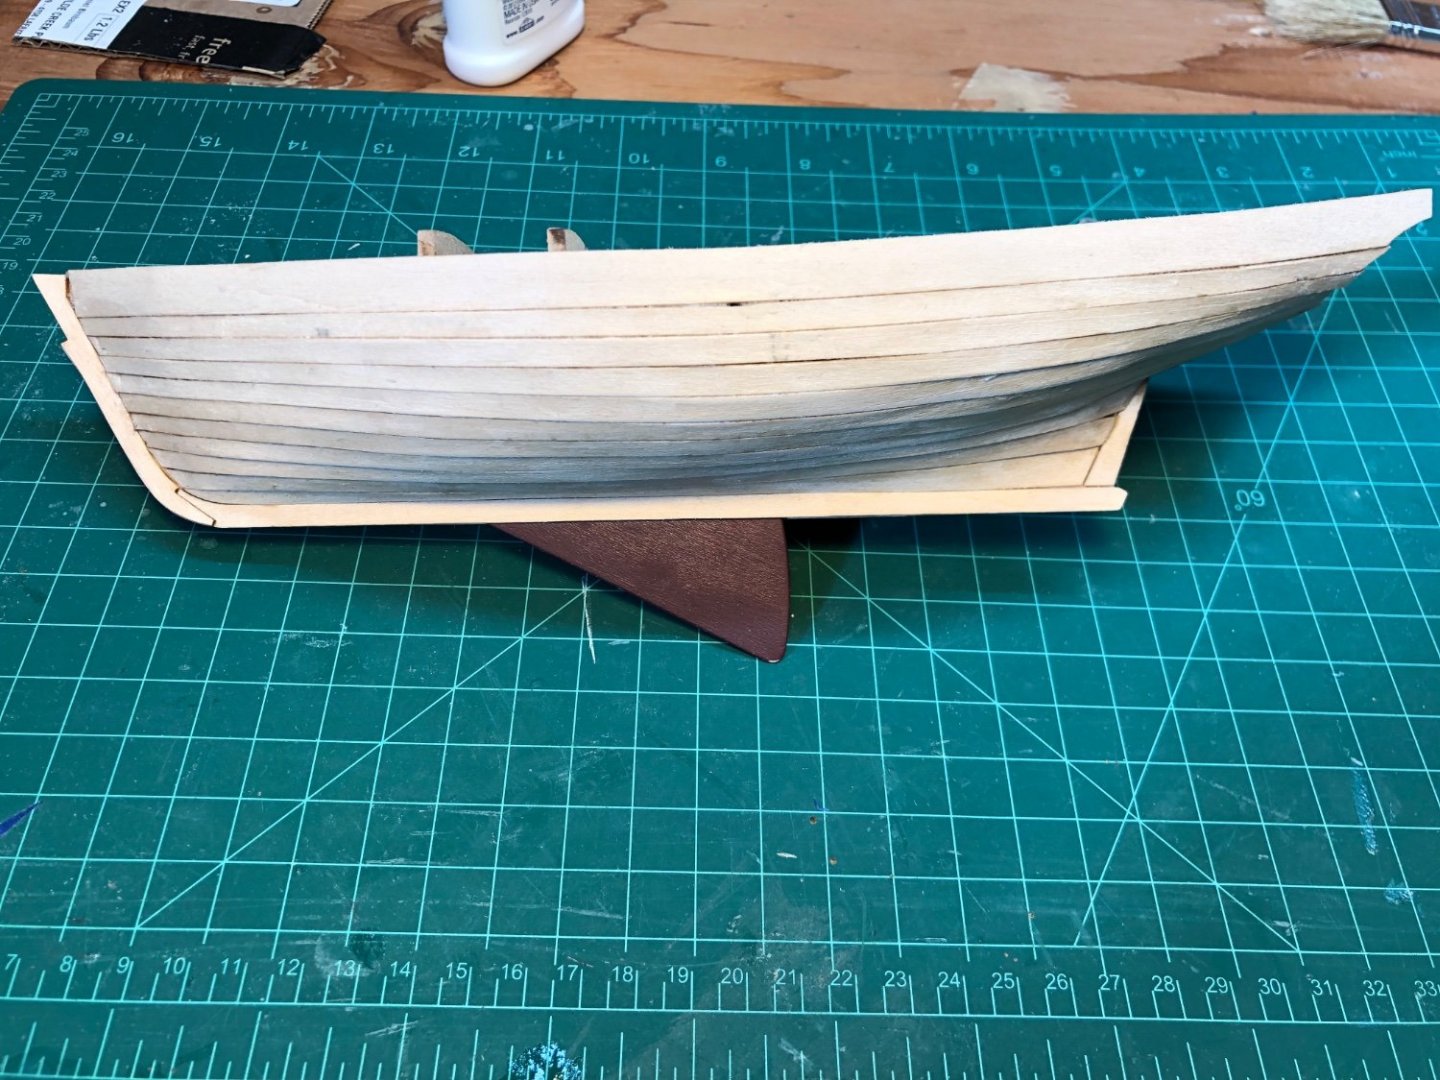
Planking - Strakes 1 and 2 I have been using the procedure in the manual: soak the planks for 5 minutes and then use rubber bands and a few clamps to hold them to the boat while they dry. This gets the shape pretty close. The garboard and the first strake were pretty rough, but then I figured out that I could fine tune the fit a bit more by wetting the plank again and using a hair dryer to help curve it to close the gap between planks. I also learned to be really careful cutting them at the stern rabbet, as I cut the second one too short on one side and then bent it too much to get it to meet the rabbet. I am now cutting them a bit long and using a file and sanding sticks to fine tune the fit just before I glue them down. There would have been a big gap at the rabbet and at the third plank. I removed the aft part of that plank and made another using the cut out form the laser carrier sheet as a guide. It looks much better. One build log mentioned gluing the planks in with PVA glue on seams between planks a drop of CA on the bulkheads and that seems to be working well. I feel like I am getting better at this with each strake, but I think wood filler is going to be my new best friend. Strake 3 = Put to bed to dry overnight
- 90 replies
-
- 3
-
-
- Model Shipways
- muscongus bay lobster smack
- (and 1 more)
-
It looks great Gregg! Congratulations! Dan
-
Hi. I built the Dory as my first model. I think yours is looking good. I think you have it right—just make the bevels so the planks fit together well and don’t worry about sanding off all the char. I recall being concerned about sanding off too much and distorting the edges of the planks. I try to avoid CA as much as possible. The PVA will give you more time to get things lined up. Just use lots of clamps and rubber bands as it sets up. It is also easier to clean up and keep things neat with a damp brush to wipe off the excess. Best of all is for me is being able to unglue my mistakes with a bit of alcohol and a lot of patience. Dan
-
Garboards I started the planking and have the garboards glued in place. I soaked each one for 5 minutes and used clamps and rubber bands to hold it to the boat as it dried. That seemed to work pretty well. I bought the model shipways plank bender, as they suggested it with the kit, but I am not sure how helpful will really be. It may be useful to wet the planks again and use the plank bender to adjust any places where the plank is still not following the the curve prior to gluing it it. These planks curve a lot more than the planks on the other models in the series. Looking at the shape of the garboard plank, I am really glad they supplied laser cut planks. I have read about how to mark out the hull and the shape the planks, but its nice to have them already shaped so I can just focus on bending them to fit the curves of the hull,
- 90 replies
-
- 2
-
-
- Model Shipways
- muscongus bay lobster smack
- (and 1 more)
-
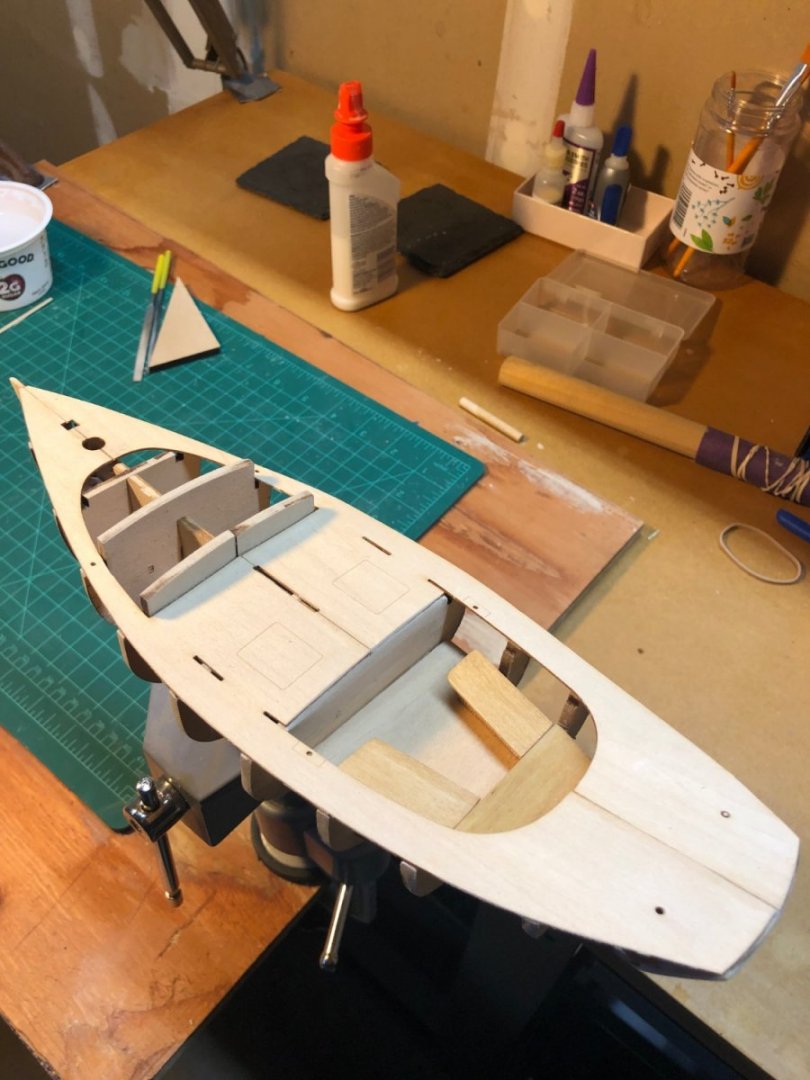
Deck i tried to carefully fit one side and glue it down as per the instructions but then noticed that the slots in the deck did not align with the slots in the bulkheads where the coaming will go and it was also a bit out too far forward when I placed the other half on and compared its position. It was also a bit further in from the edge of the bulkheads. It was not far off and I might have been able to correct for it , but I decided to try to fix it. More alcohol to unglue it all: I am getting good at that. I gave it a rest and took the weekend off for a planned trip to Seattle to see my granddaughter"s first cheerleading completion. Today I took another shot at the deck. Glued one side and then glued the other alost immediately to check the alignment. I think I got much closer than my first try-- still a bit off. I started faring the bulkheads and attaching the keel pieces.
- 90 replies
-
- 4
-
-
- Model Shipways
- muscongus bay lobster smack
- (and 1 more)
-
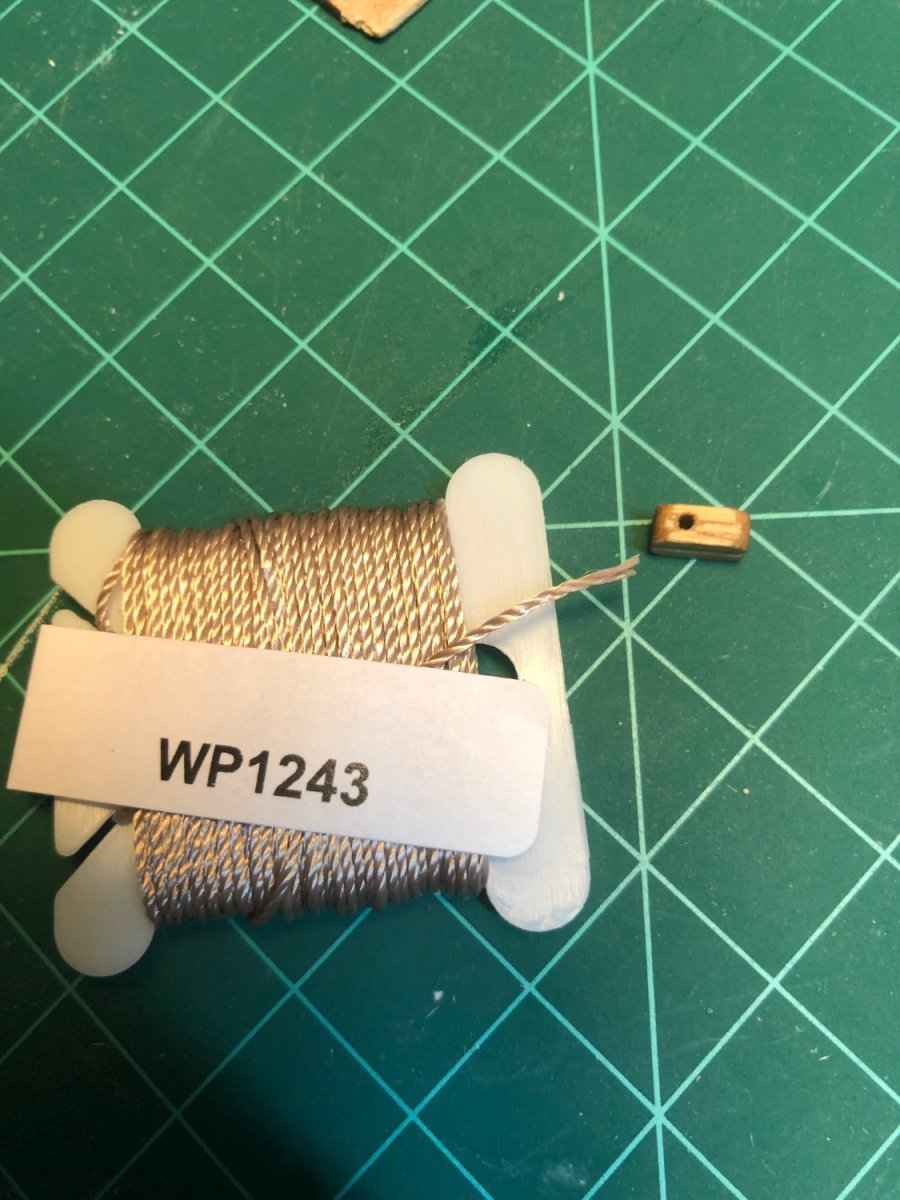
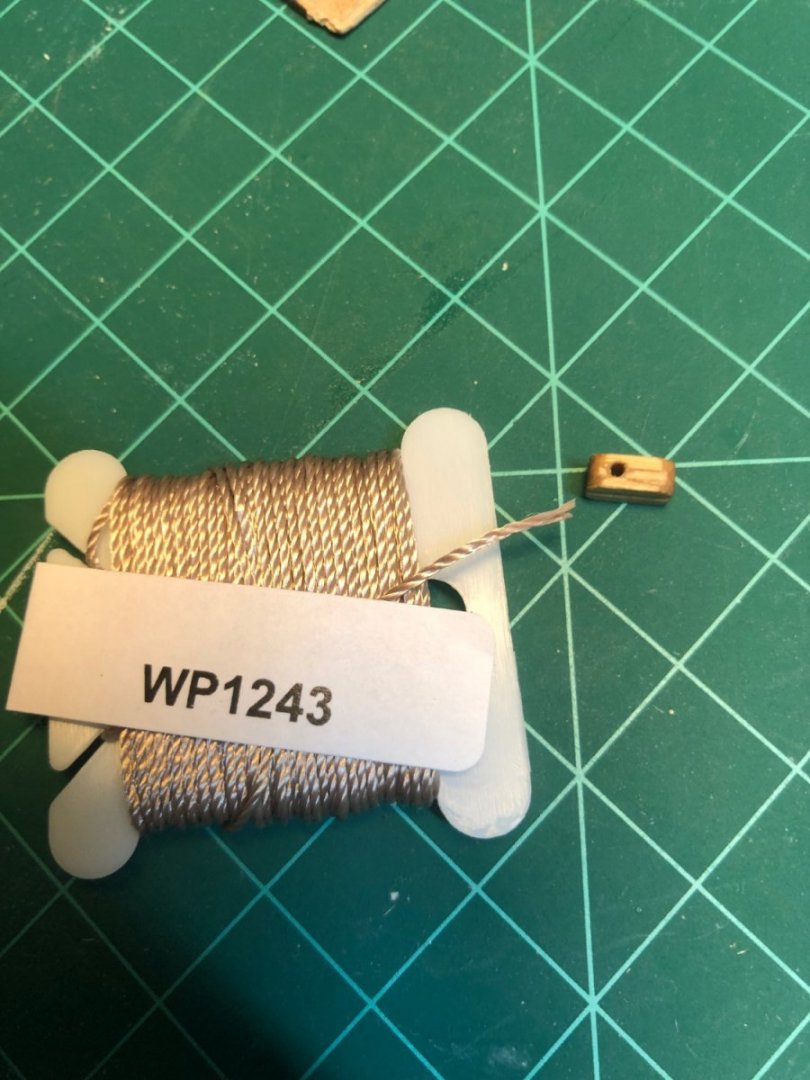
Hi You are way ahead of me, but your line looks thicker than mine and the part number is different. Mine looks like it would fit if I sealed the end with dilute glue. Maybe they sent you the wrong line? Dan
-
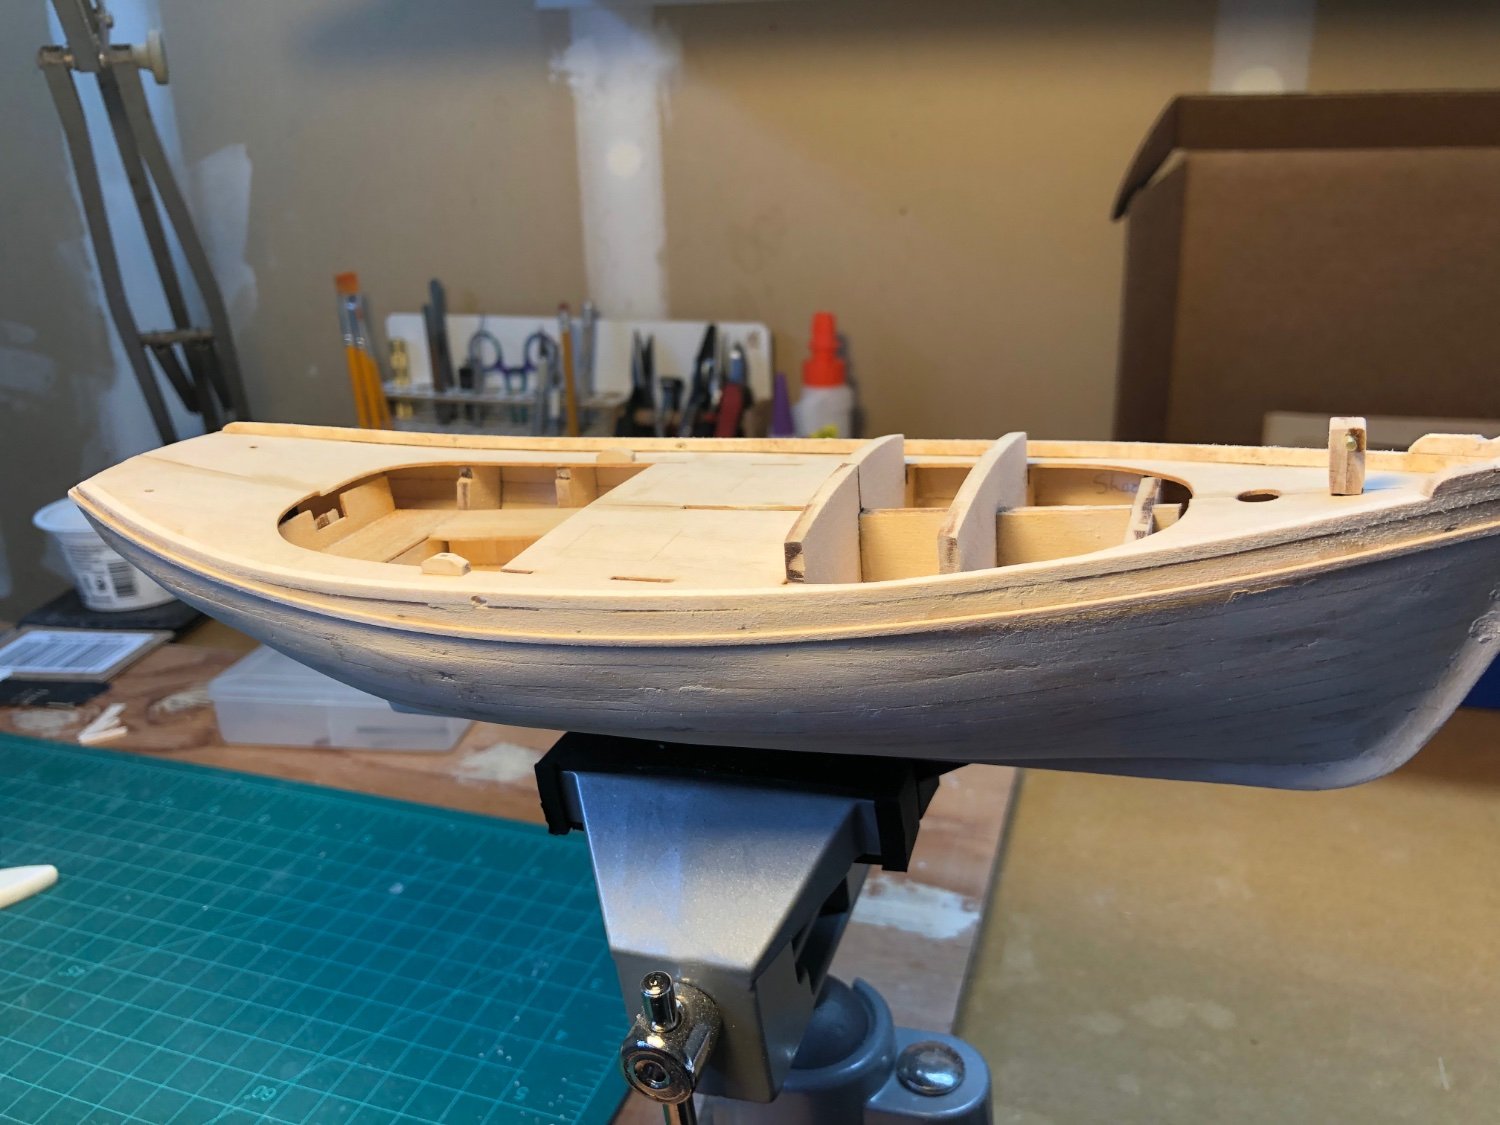
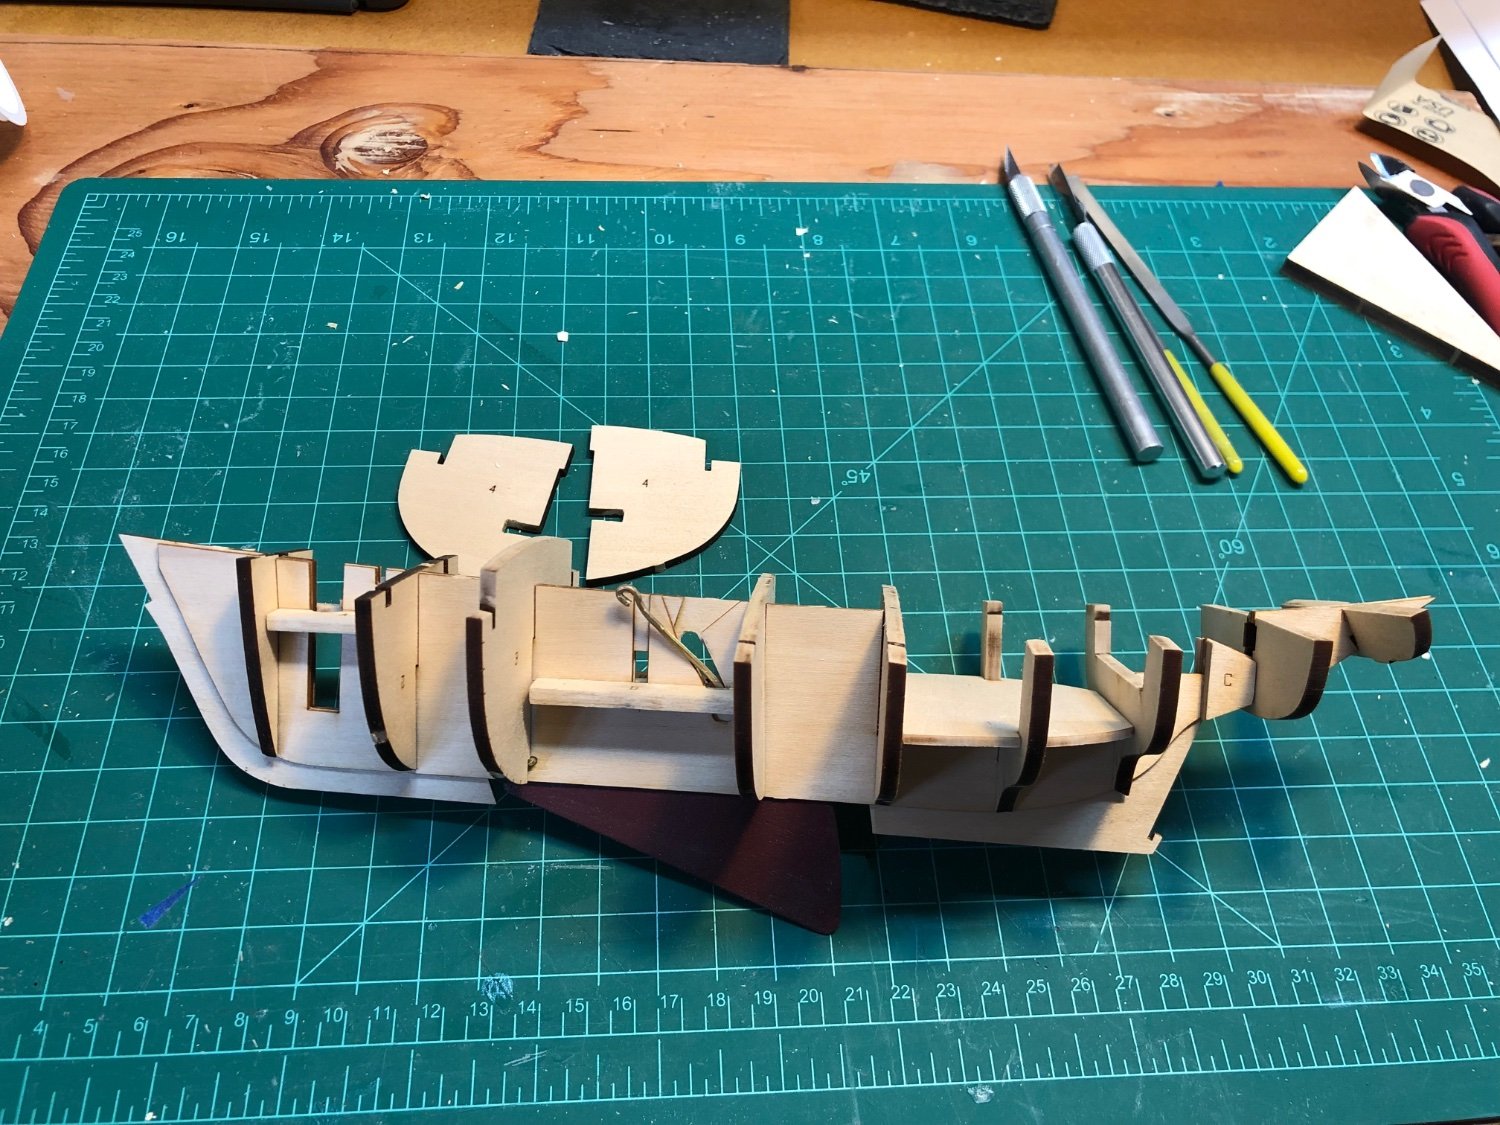
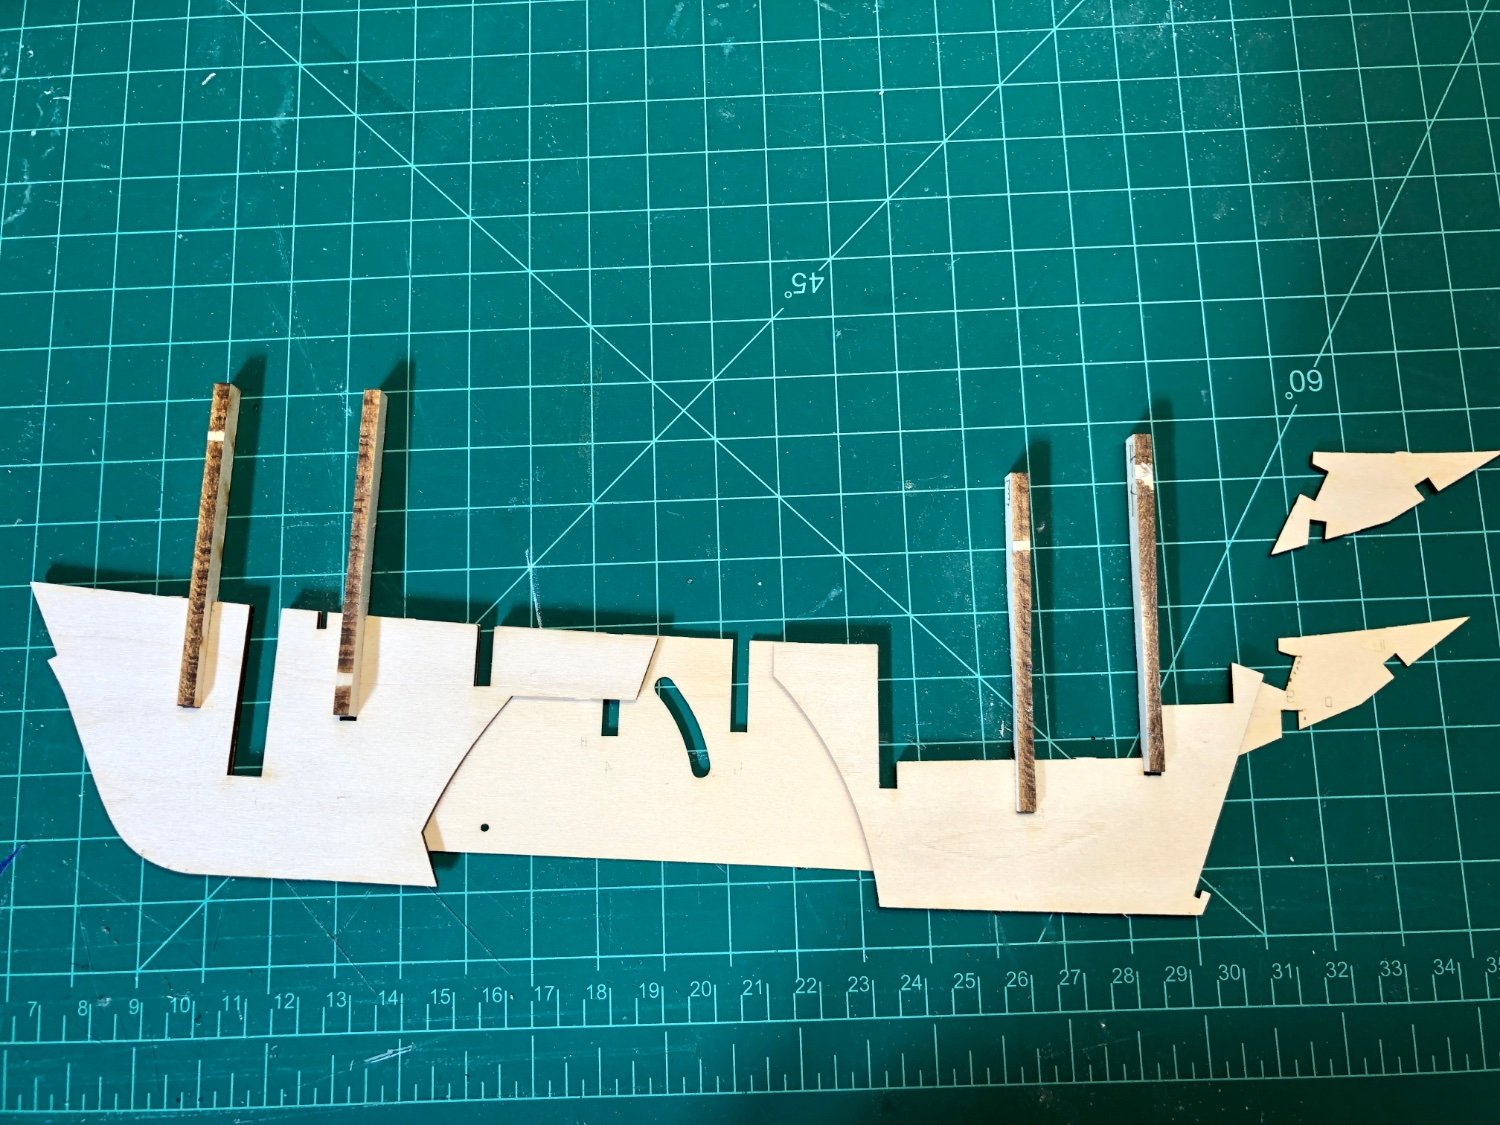
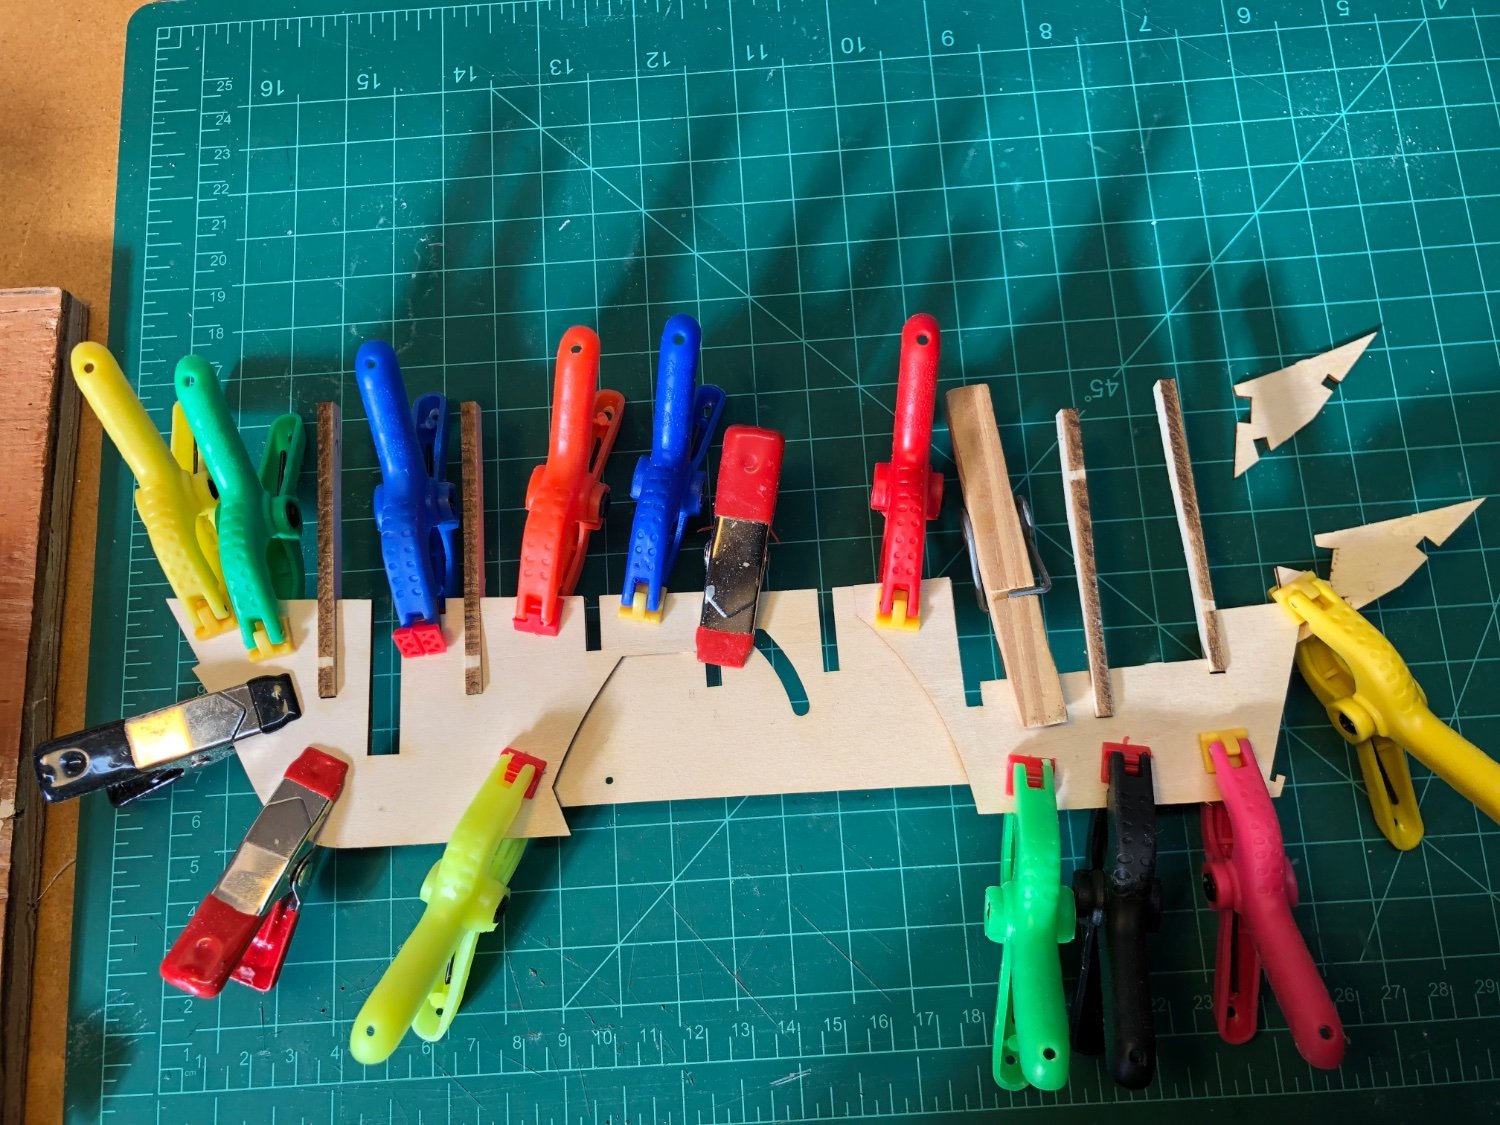
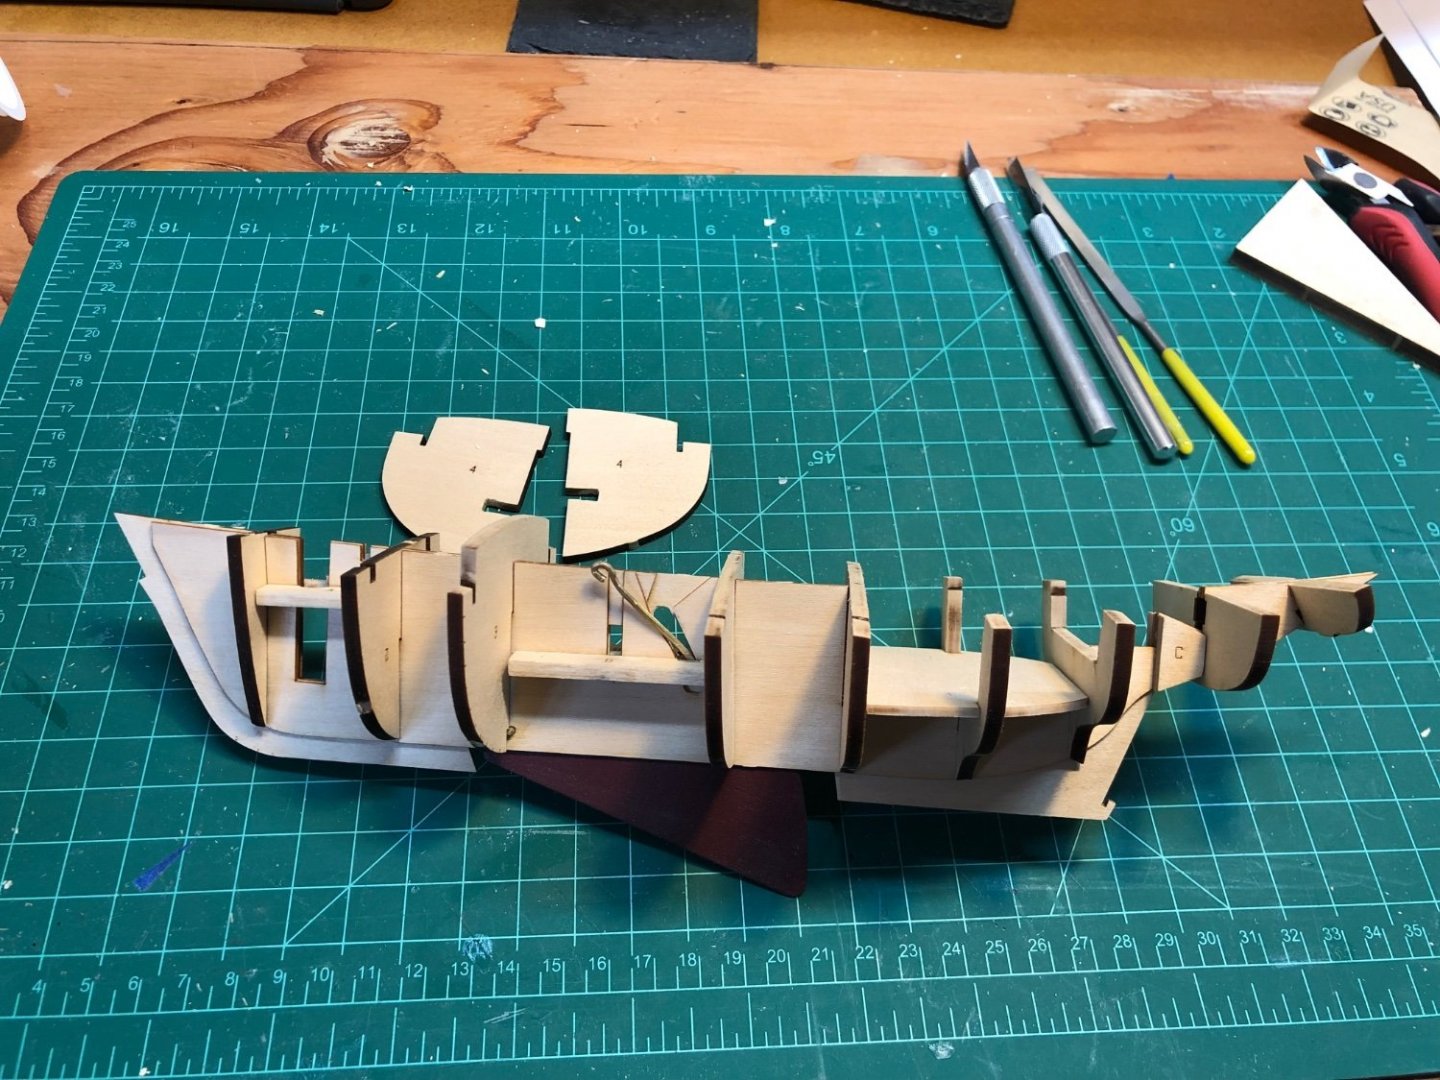
Gluing Bulkhead Frames, Transom and Seat supports It does not look like much has changed. I took a long time to adjust the frames so I could get them level and square to the spine before gluing them in. The 90 degree square from the Pram was really helpful in getting them square since is is small and light. The instructions say to glue the cockpit floor but they don't say at what level and the pictures are not clear. It was only after trying to fit the seat supports in that I figured out, I had glued it too high and it needs to be sitting on the spine so the supports wind up level with the bulkhead. Lots of alcohol and patience were need to reposition it!. The transom was not hard to assemble off the model, but with its bulkhead fully seated in the slot, it was too low, and too far from the stern part of the spine. I filed and fiddled with it, tried to get it square, and glued it in. Then I started sanding it as instructions direct. It still seemed off and that I would be removing a lot of the transom. I tried fitting the deck to see how it would meet the transom and it was clear that it was, still not high enough or close enough to the spine. I would run out of deck a bit before the transom. More alcohol, more work on the slots for the transom ! It was difficult to get the transom square and level, and I think it will still need more sanding. The moveable centerboard has become stuck and immoveable (despite widening the slot for the handle) Looks like I will have fixed centerboard. I am not sure why there are minimal or no drawings in these kits. The pictures in the instructions are great, but surely they must have had drawings of the boats to design and build the prototypes. I am new to all of this, but it seems like one of the skills that is needed to build more complex models is to be able to look at plans and drawings to figure out how to build the model and they belong even in a beginner kit. I am also surprised how much work was needed on the laser cut parts to get them to fit correctly. I thinkI may need to take a few days off from this boat!

- 90 replies
-
- 3
-
-
- Model Shipways
- muscongus bay lobster smack
- (and 1 more)
-
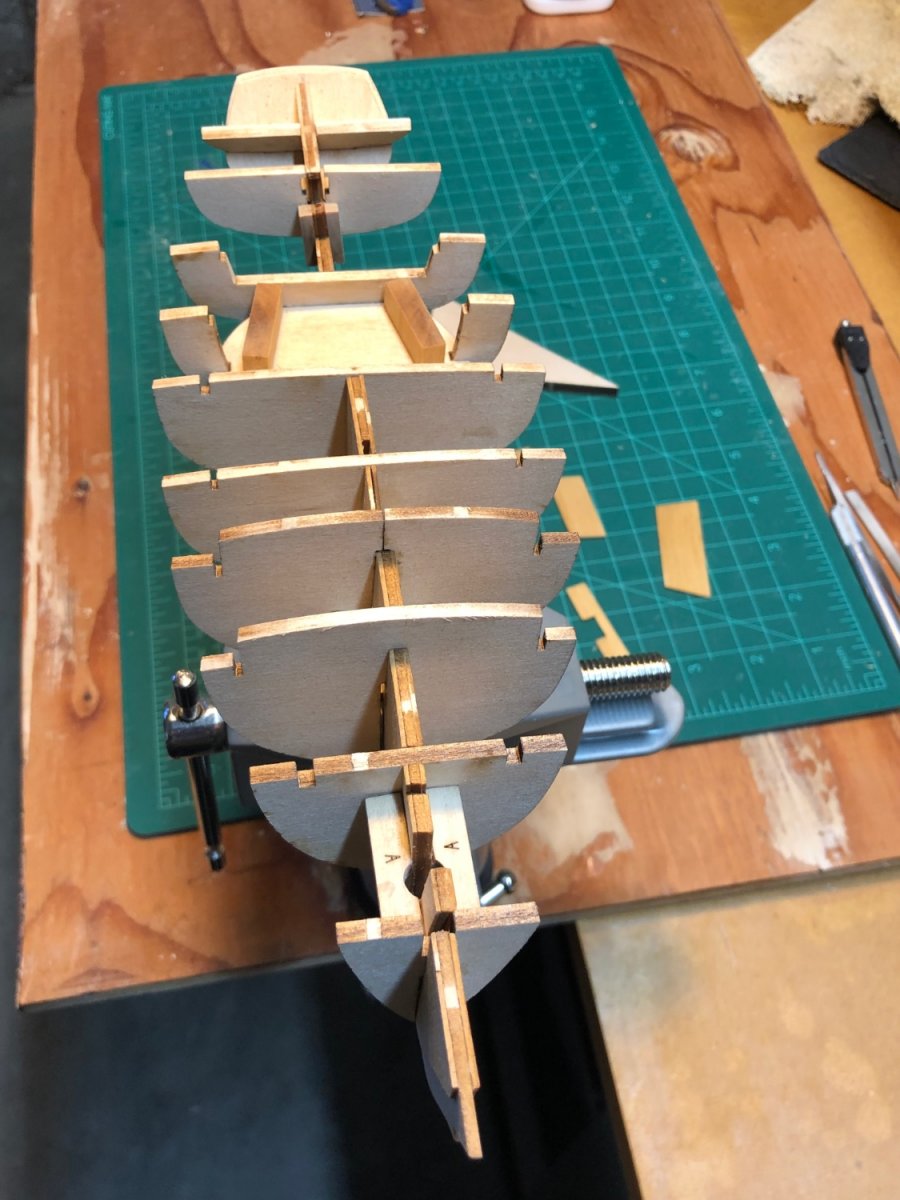
Reinforcing Pieces and Bulkhead frames. I spent a lot of time adjusting the bulkhead frames. Number 4 needed to the the slot for the support piece deepened. Most of the others needed a bit of filing to get them to sit level and square in the slots. Several were too wide at the bottom of the spine piece. In some other build logs some people made shims to close the gap, others did not. I did not shim them as was concerned it would be more difficult to align them. I think the numbers on the bulkheads face aft. (not clear form the manual ) It does not matter for most I think except the 9 th one which is at an angle-- it fit better that way and lined up with the top of the spine. Trial fit before glue: I have started gluing each one in using a square to check them, and adjusting the fit some more just prior to gluing each one in and then checking the alignment again after gluing them . So far, so good.
- 90 replies
-
- 5
-
-
- Model Shipways
- muscongus bay lobster smack
- (and 1 more)
-
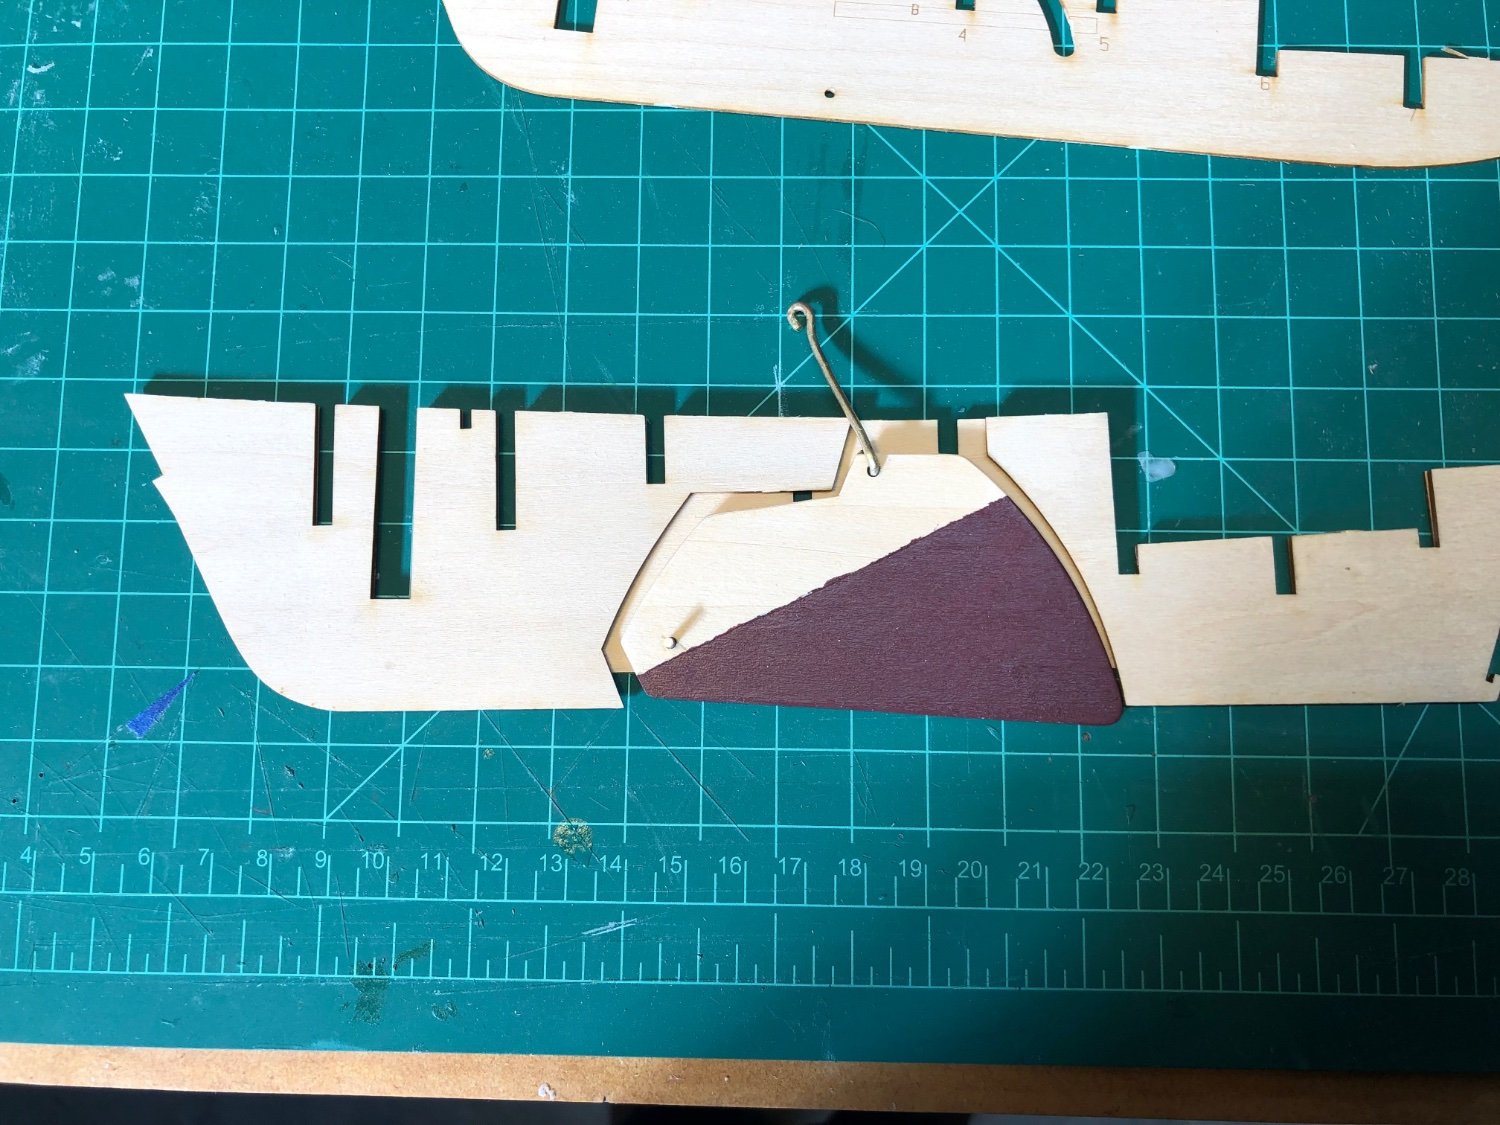
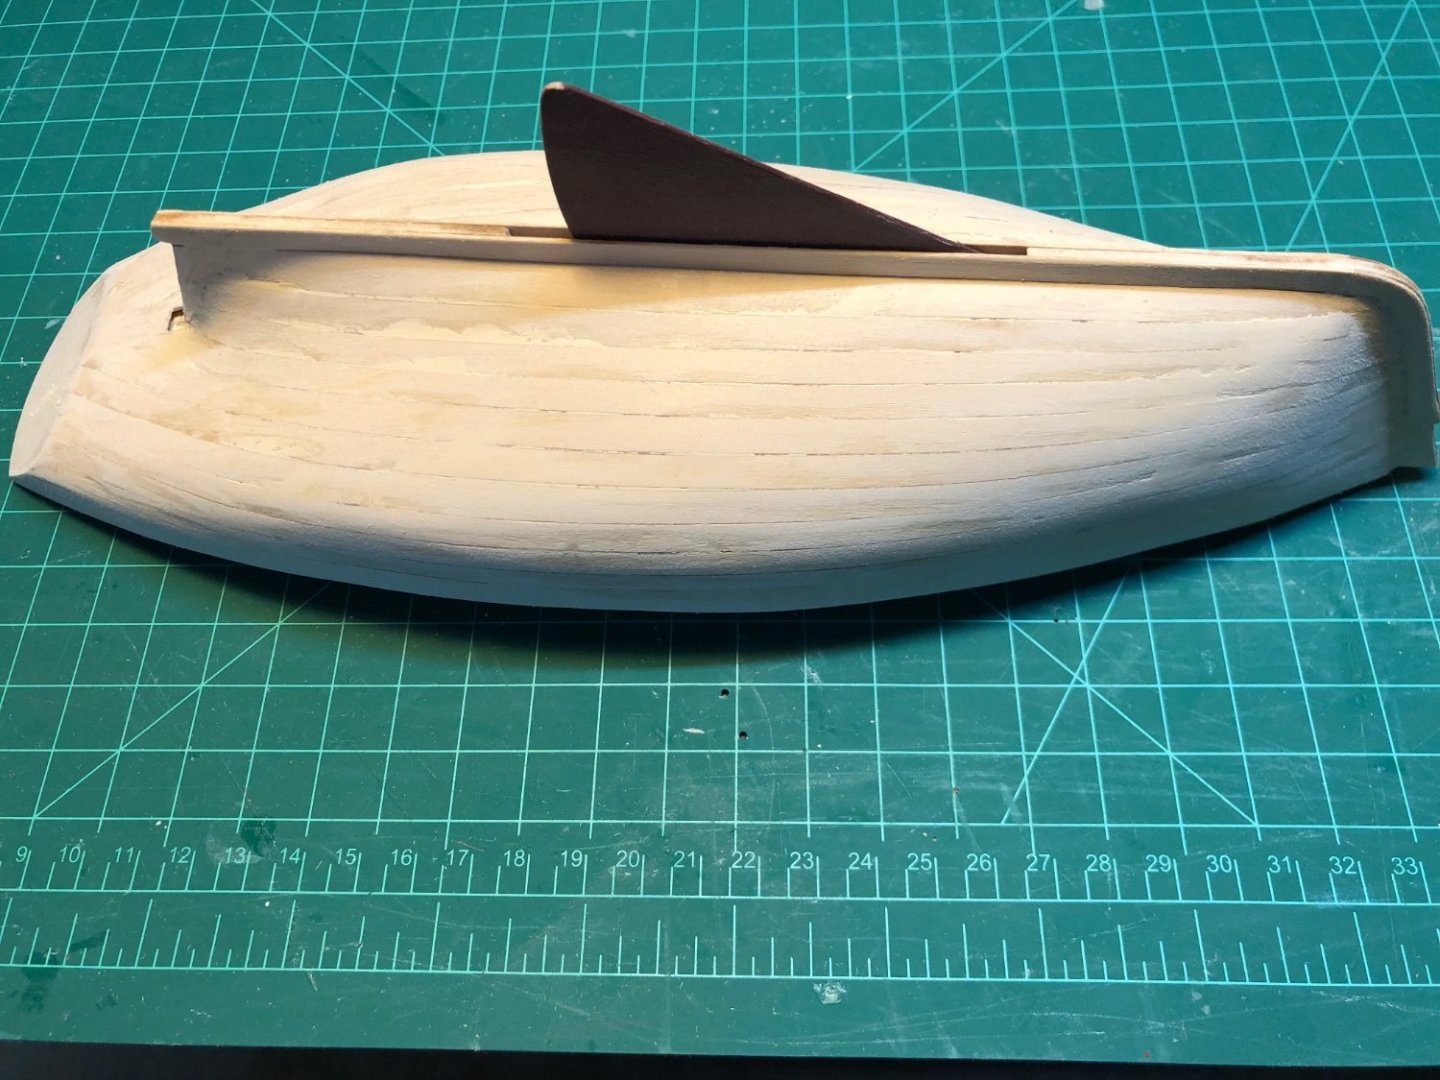
Centerboard When built the Pram, I was really worried about annealing the brass. I watched Youtube videos of people who reload their brass shell casings annealing ends of them (who knew?) and watched videos of annealing brass tubes for trumpets using big blow torches. Finally, though I figured out that it was not such a big deal. Holding the small brass rod with a pair of pliers and heating in the burner of our gas stove until the end glowed red worked fine. A slate coaster worked well as a place to let it cool down. Once the rod was soft, it was a lot easier to bend the loop and the hook. The diagram in manual makes the loop look pretty small. I figured out later that I made it too small and my tooth pick handle would not fit though the loop, so I made it a bit bigger. I painted the centerboard as suggested on some other very helpful logs. The manual does not say to glue in the tiny pivot rod, but if you enlarge the pictures in the PDF it looks like there is a touch of CA there. I glued it in , and it was much easier to use the pivot to work with the centerboard and the handle and see the spots where the slot for the rod needed to be enlarged a bit. I used a round needle file and some sand paper and was really careful because the wood is so thin. More fiddling and sanding the slot on the other side was needed to get the centerboard to travel the entire length of the slot. Even so, I could not fully raise it but let it be. I will want to show the centerboard and, I was worried I would break the other central spine piece if I was too aggressive enlarging the slot. I glued the other spine piece on and managed not to glue the centerboard to it (almost though!). When I took the clamps off, I noticed the spine was a bit high at the stern, unglued the last bit with some alcohol of it and repositioned it.


- 90 replies
-
- 4
-
-
- Model Shipways
- muscongus bay lobster smack
- (and 1 more)
-
This will be my third model and my second build log. I have looked at a lot of the other great build logs for this kit, as the logs were a great help in building the Norwegian Sailing Pram. I'm starting this with a bit of trepidation after looking at the logs! I did and inventory of the kit and everything seems to be present. I have found this to be very helpful in getting familiar with the kit and the various parts. Central spine I made sure all the spacers fit well into the slots. It took a bit of sanding the spacers. The starboard spine piece which I think is on sheet 5, not sheet 3 as the manual says), is really thin! The glue causes it to curl away from the other pieces. I used lots of clamps instead of weighting it on a flat surface. It was easier to check the alignment at the tops of the pieces that way. Checking it later, even with all the clamps and what seemed like enough glue, there were a few spots that need a bit more glue and clamping when I attached the smaller third piece


- 90 replies
-
- 4
-
-
- Model Shipways
- muscongus bay lobster smack
- (and 1 more)
-
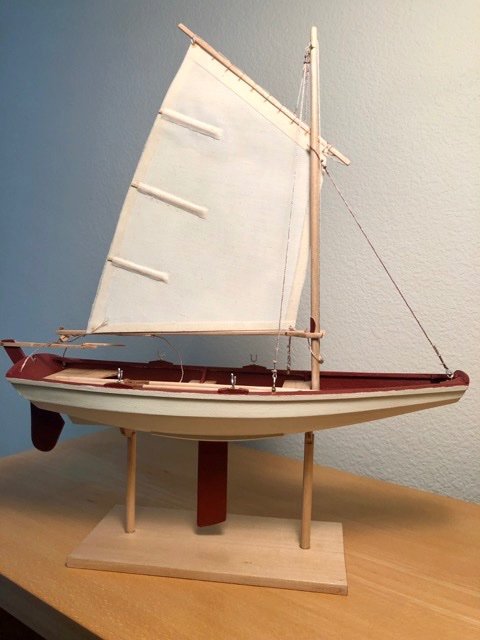
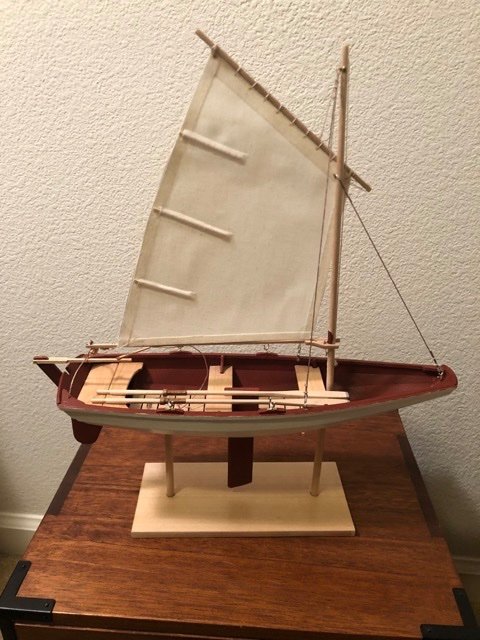
Finished! It took a long time for me to get all of the lines in, especially because I made a lot of mistakes and had to go back and correct them. I learned a lot form this model and the instructions and were really great, if felt like just the right amount of difficulty for my current level and I really trying getting to try all of the new skills this one calls for. A few issues with this kit : - The transoms sit a bit off the building board and it is easy for them to be tilted, especially the bow transom. I used some supports for the stern transom to keep it square but I think, it would be better to have longer of wood strips glued to building board on each side of the transom supports to be sure the transoms stay square as the planking progresses. My bow wound up a bit off square. - Lots of care is needed alining the planks starting at the bow as any error becomes greater as the plank angles out form the bow. The planking wound up being a compromise between the lines scribed on the transoms, the lines where the plank bevels start, and the marks on the 2 molds. I had to unglue one plank after it came out too far off. - The paper strip guide in the instructions was helpful for locating the horizontal position along the hull of the frames and supports for the thwarts, but there is no guide for positioning them vertically. I tried to use the pictures and the relation of the supports to the strakes in the pictures, but I had to unglue them and reposition 4 of them when it was time to install the thwarts. I think it would be better to install the frames, then make and fit the thwarts, then figure out where the smaller supports need to be so the thwarts are level so and the one around the center board sits level with the centerboard case. - I glued the tubes for the rudder grudgeons with CA glue, and they both broke off at some point during the build. I finally used epoxy. - The kit is short 4 brass nails and its was short more after I lost some of them when they went flying as I cut them or tried to install them. - I needed more 0.3 mm line to seize the lines for the stays. Its a nice option in the kit. I used the 0.5 mm line, but it would have been better to raid my wife's sewing kit for some tan thread-- next time. Overall this model is very good experience for someone new to all of this, and I am going to build the Lobster Smack which is the third boat in the series. I am going to spend a bit of time cleaning up and reorganizing my work space before I start it. Thanks to everyone for all of the likes, suggestions, and encouragement!
- 51 replies
-
- 12
-
-
- Model Shipways
- norwegian sailing pram
- (and 1 more)
-
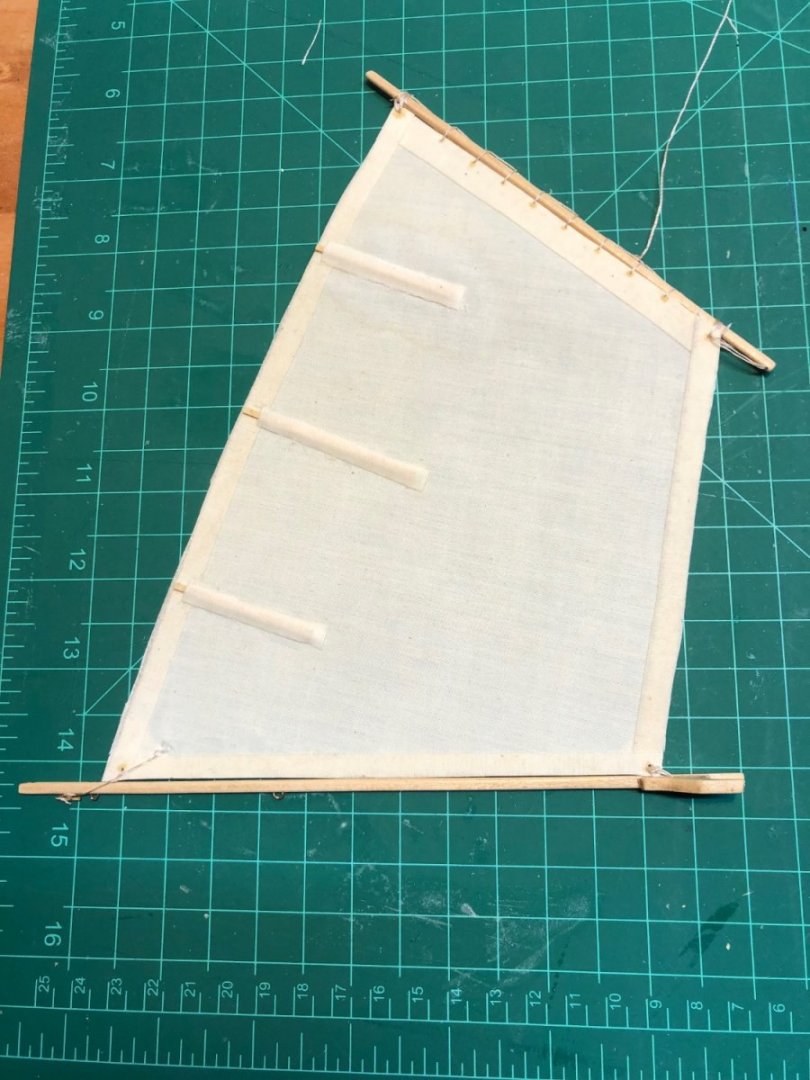
Today I attached the sail to the gaff and boom. It was slow going, especially as it took me a while to figure our how everything was connected. I worked on the block for the traveller and the drilled the holes for the line in the transom knees , but then realized my patience was starting to go, I had really had enough for the day and it was time to stop.
- 51 replies
-
- 5
-
-
- Model Shipways
- norwegian sailing pram
- (and 1 more)