moreplovac
-
Posts
701 -
Joined
-
Last visited
Content Type
Profiles
Forums
Gallery
Events
Everything posted by moreplovac
-
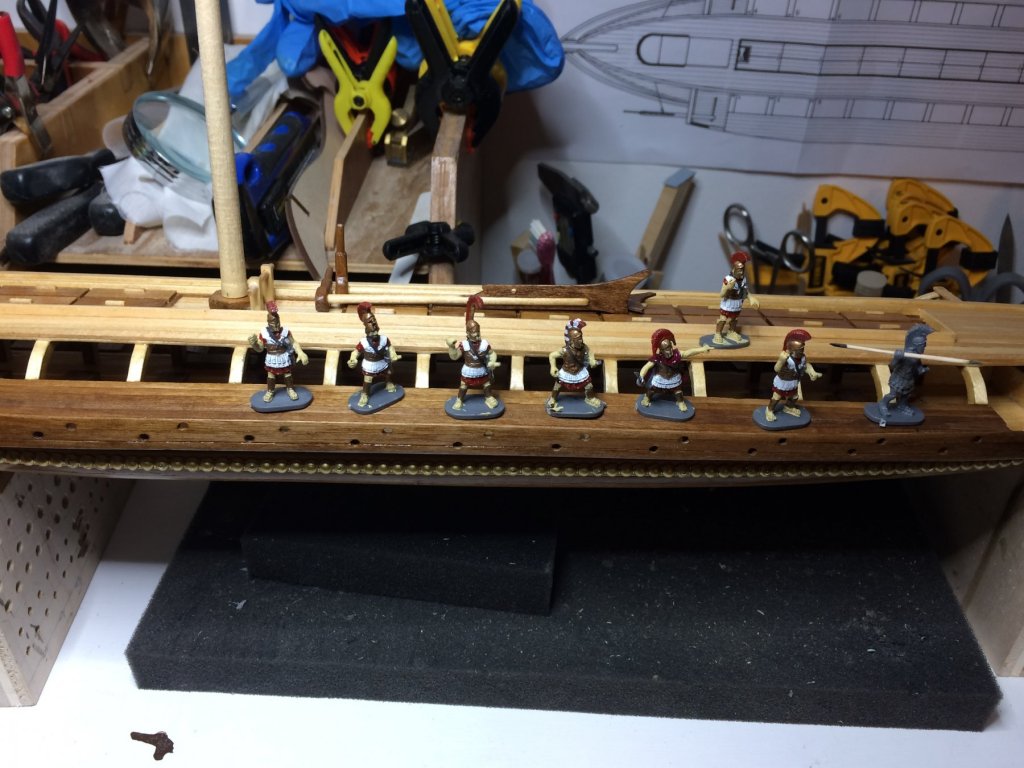
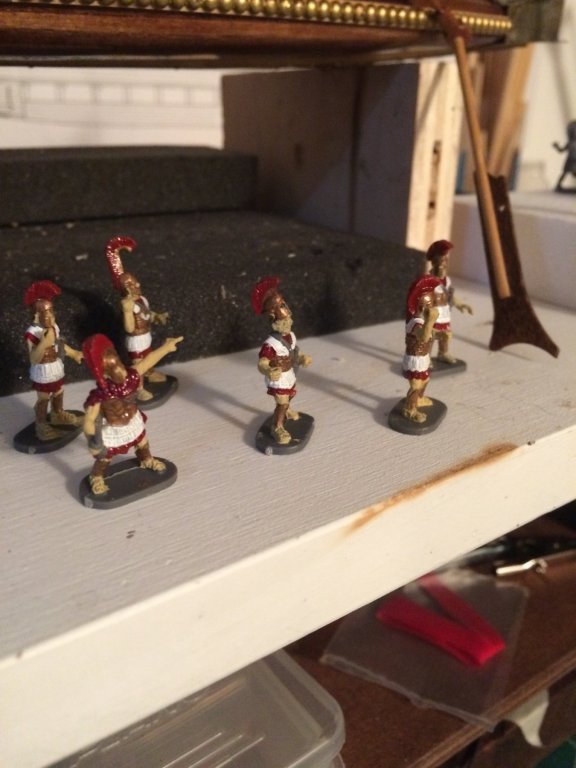
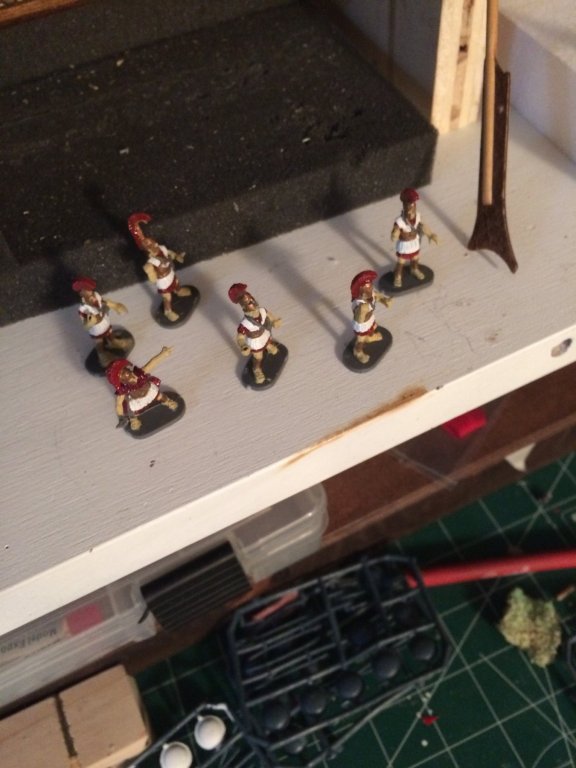
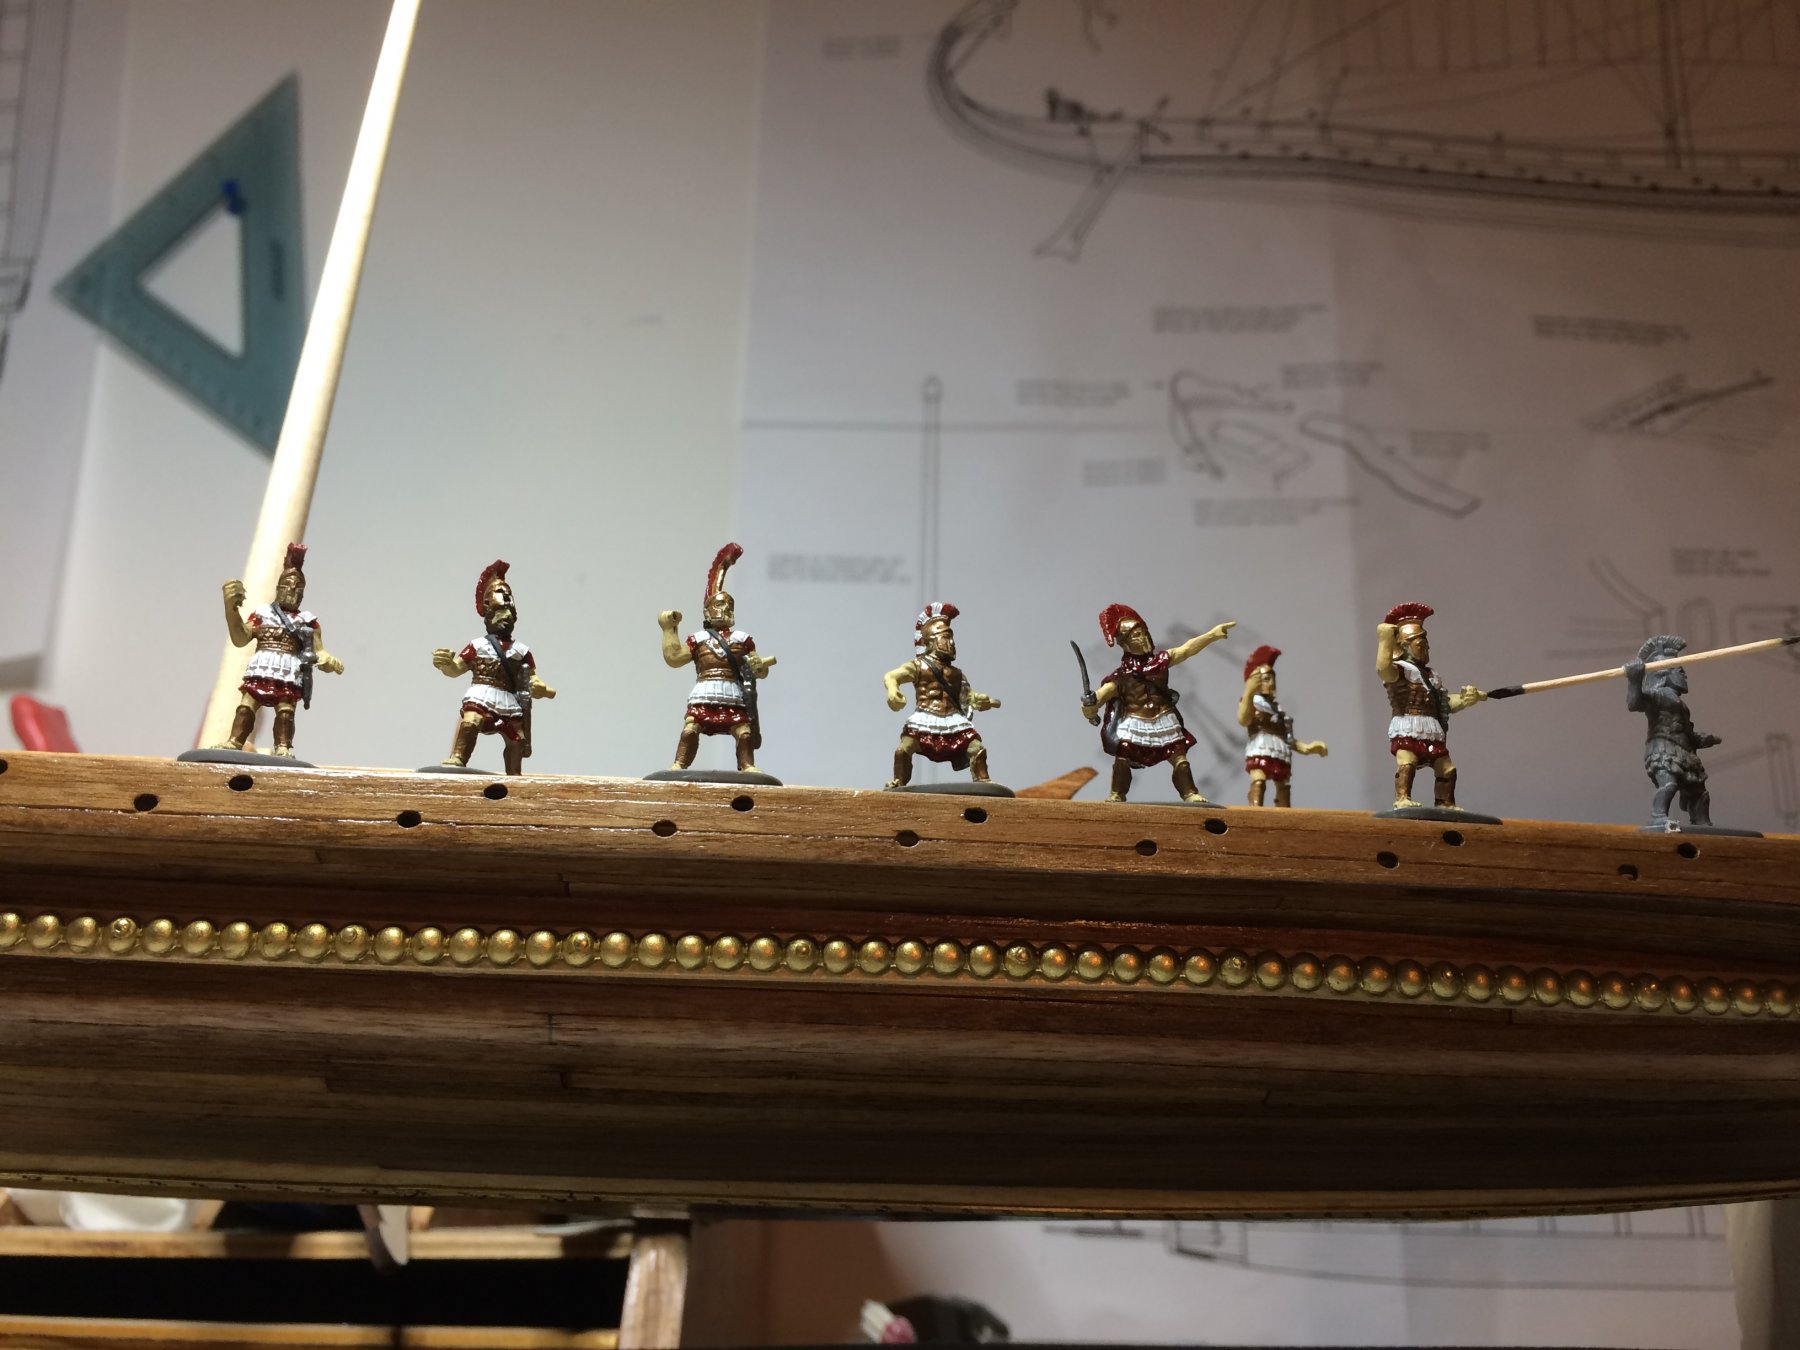
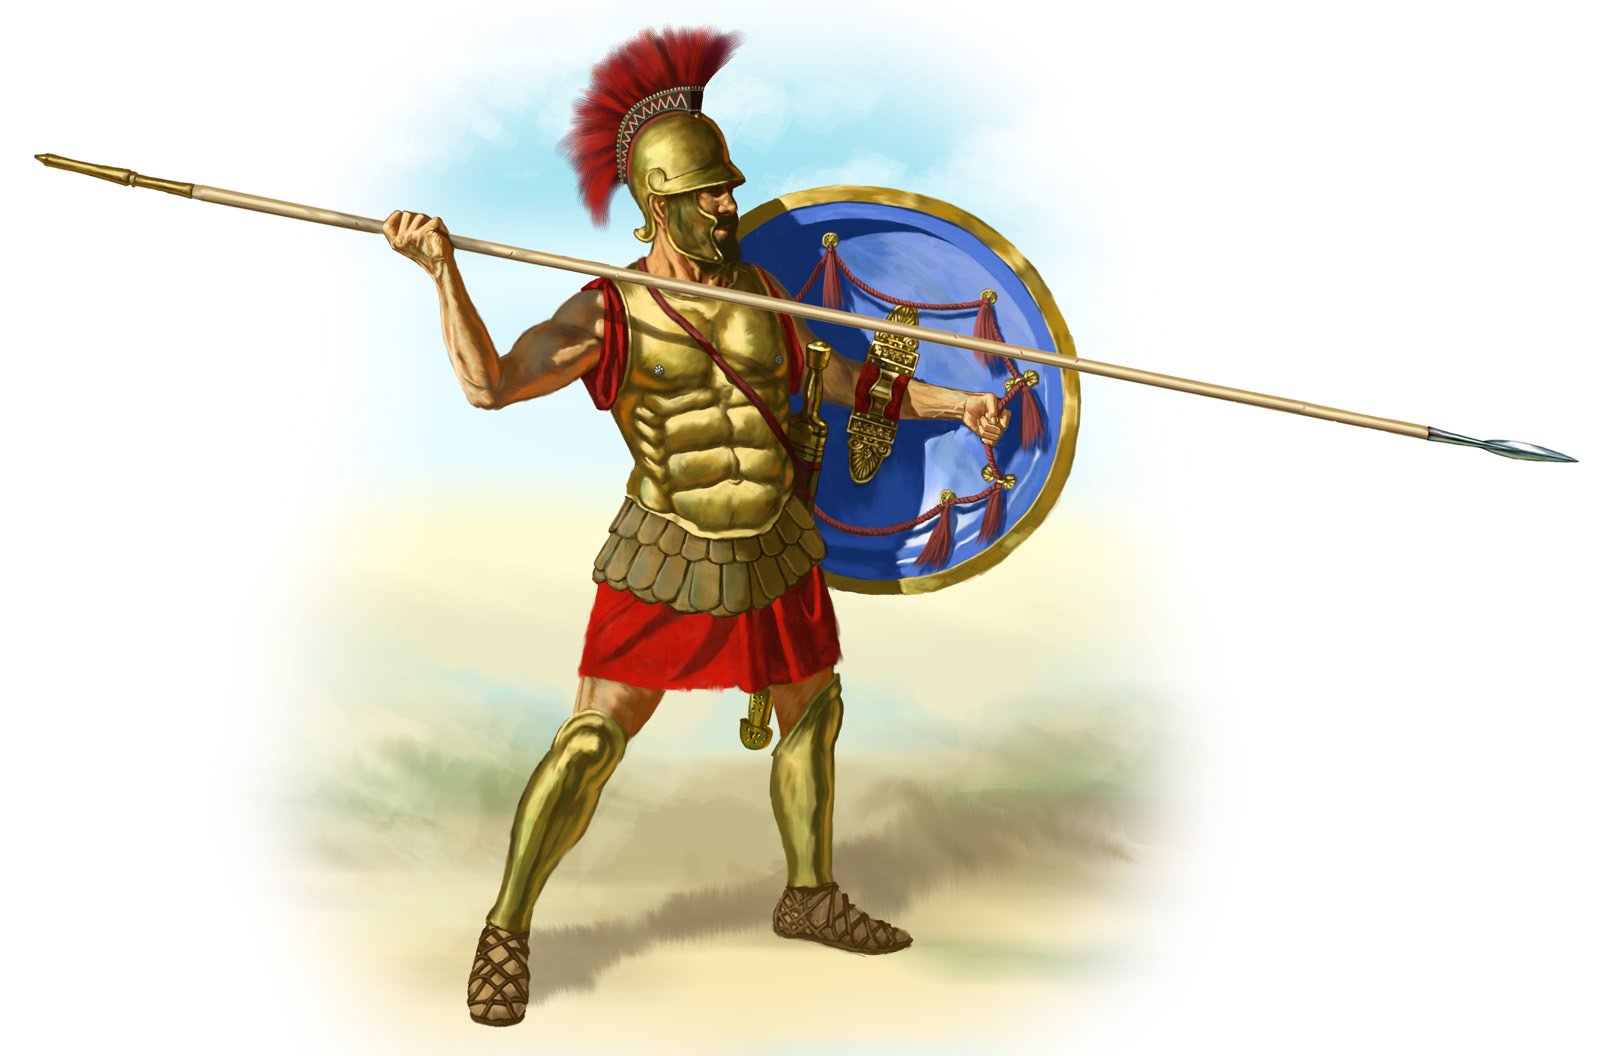
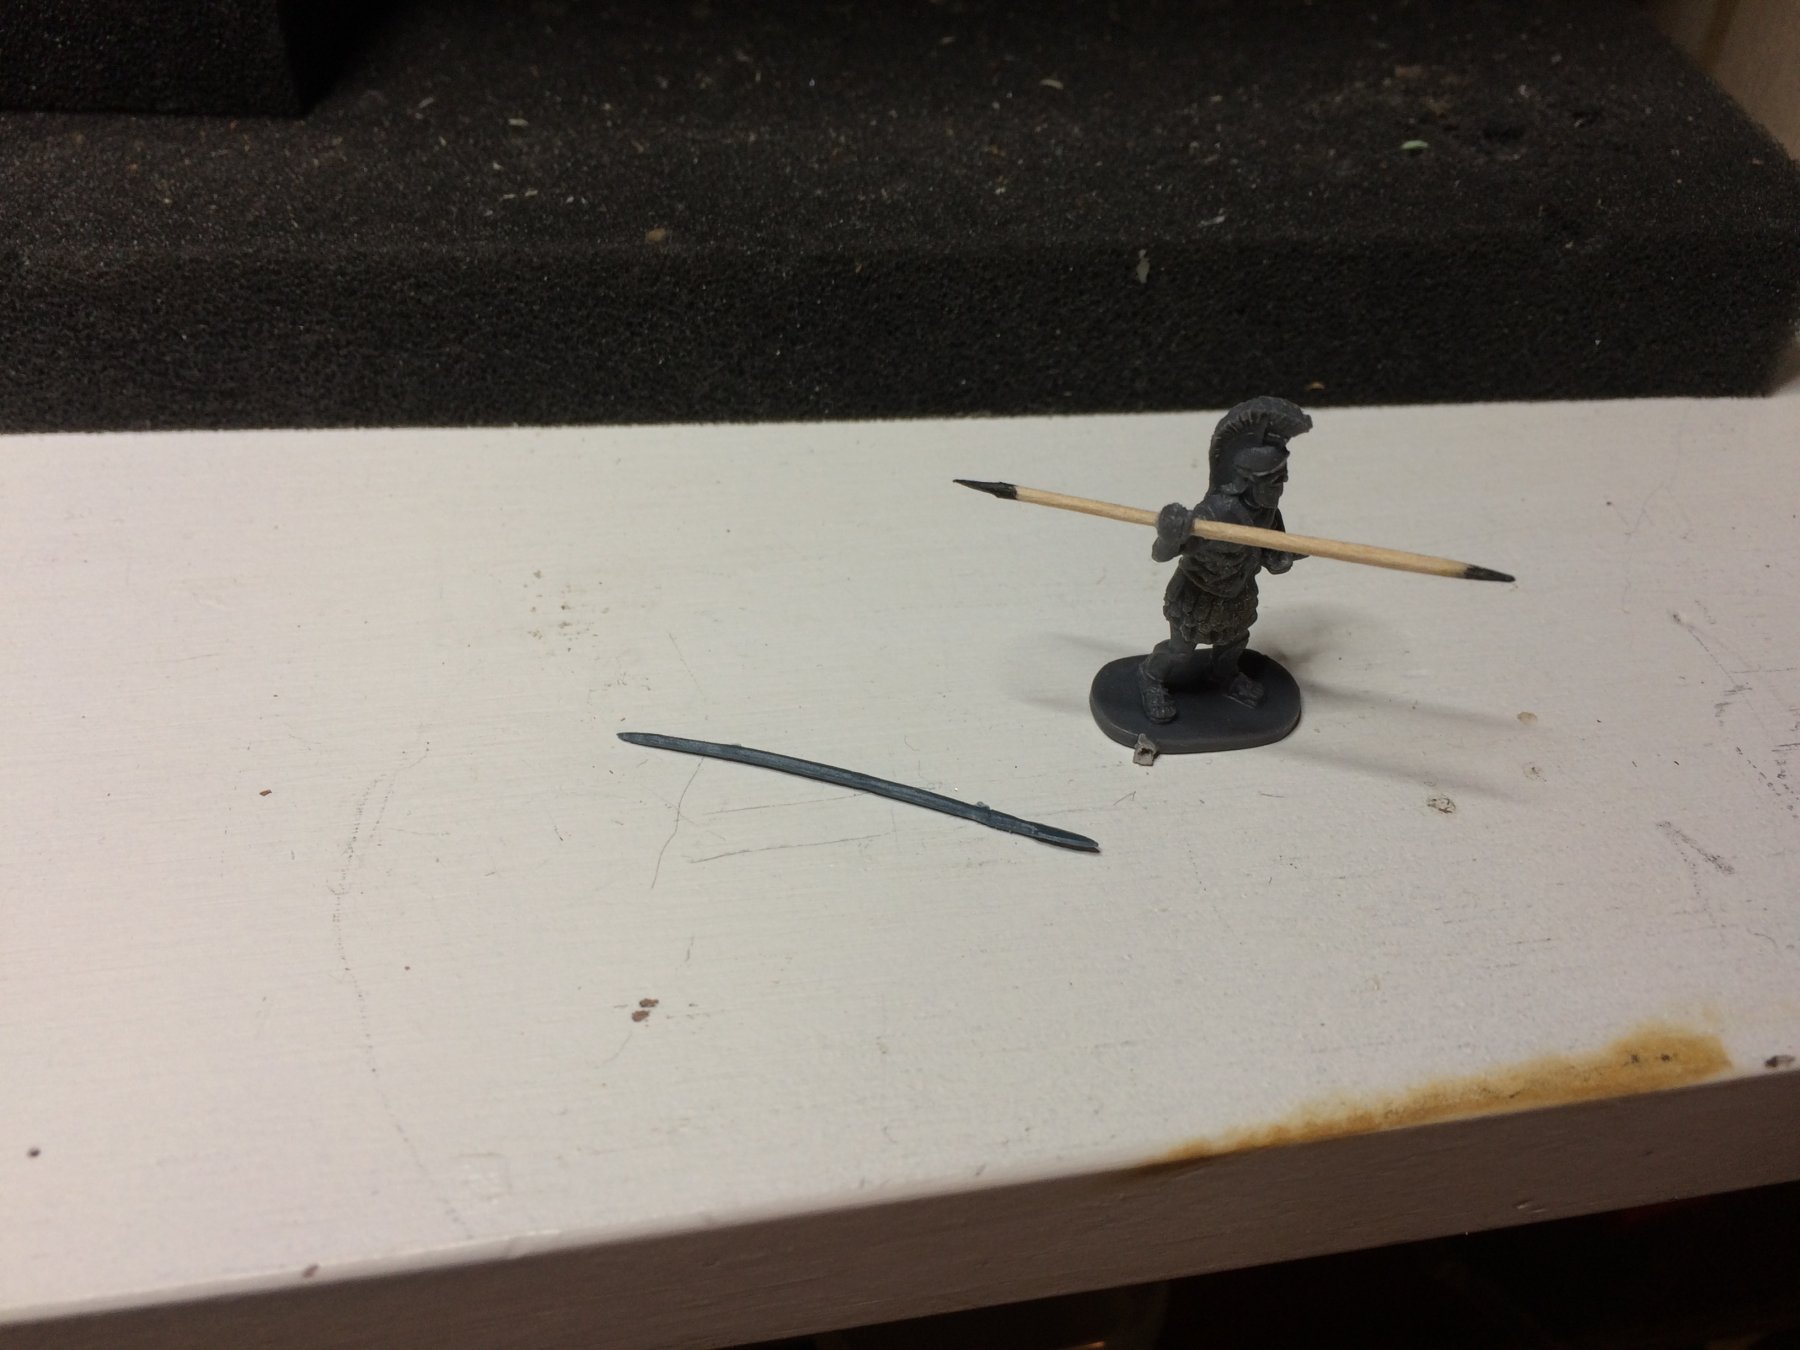
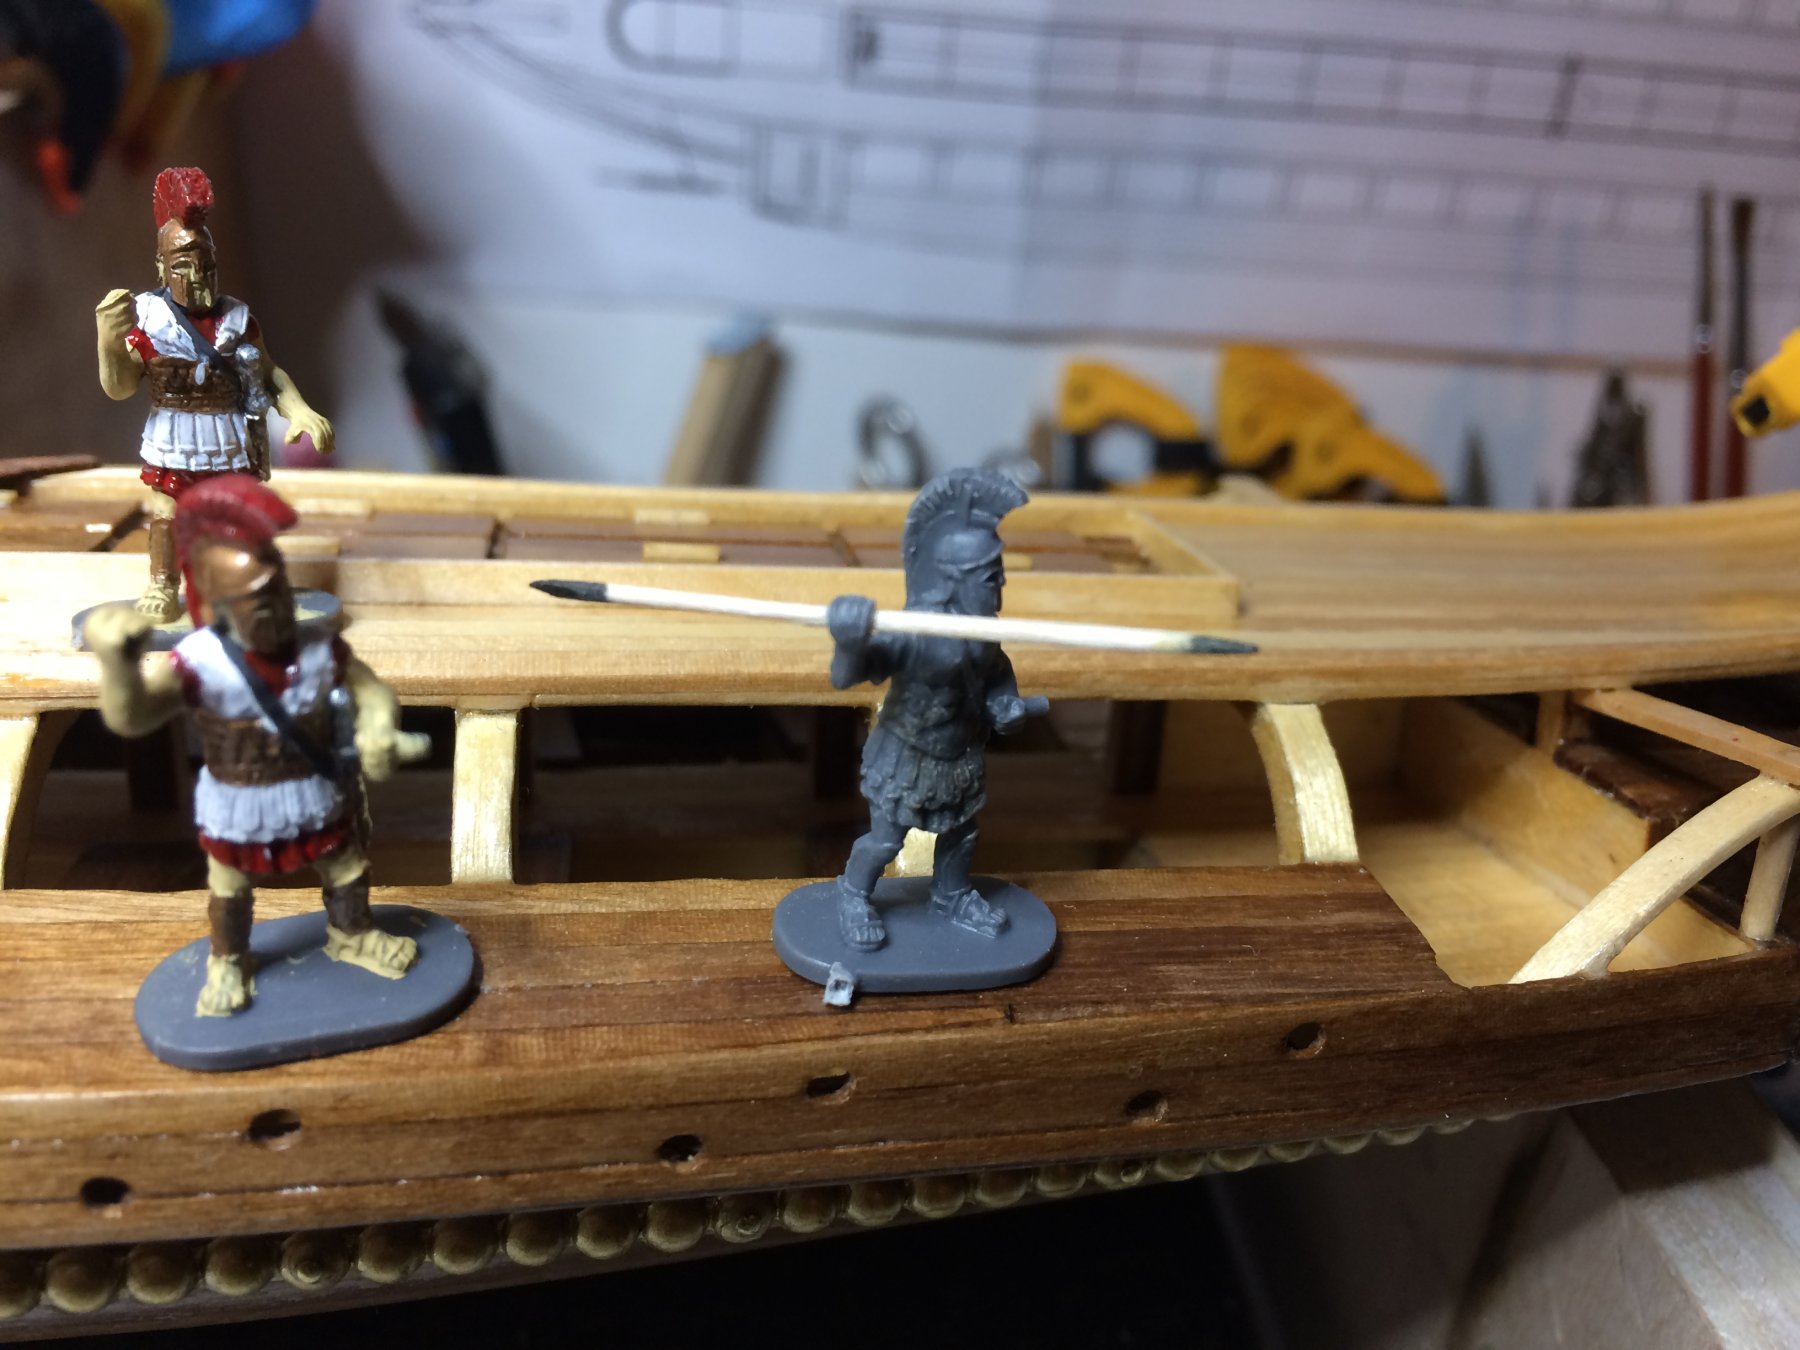
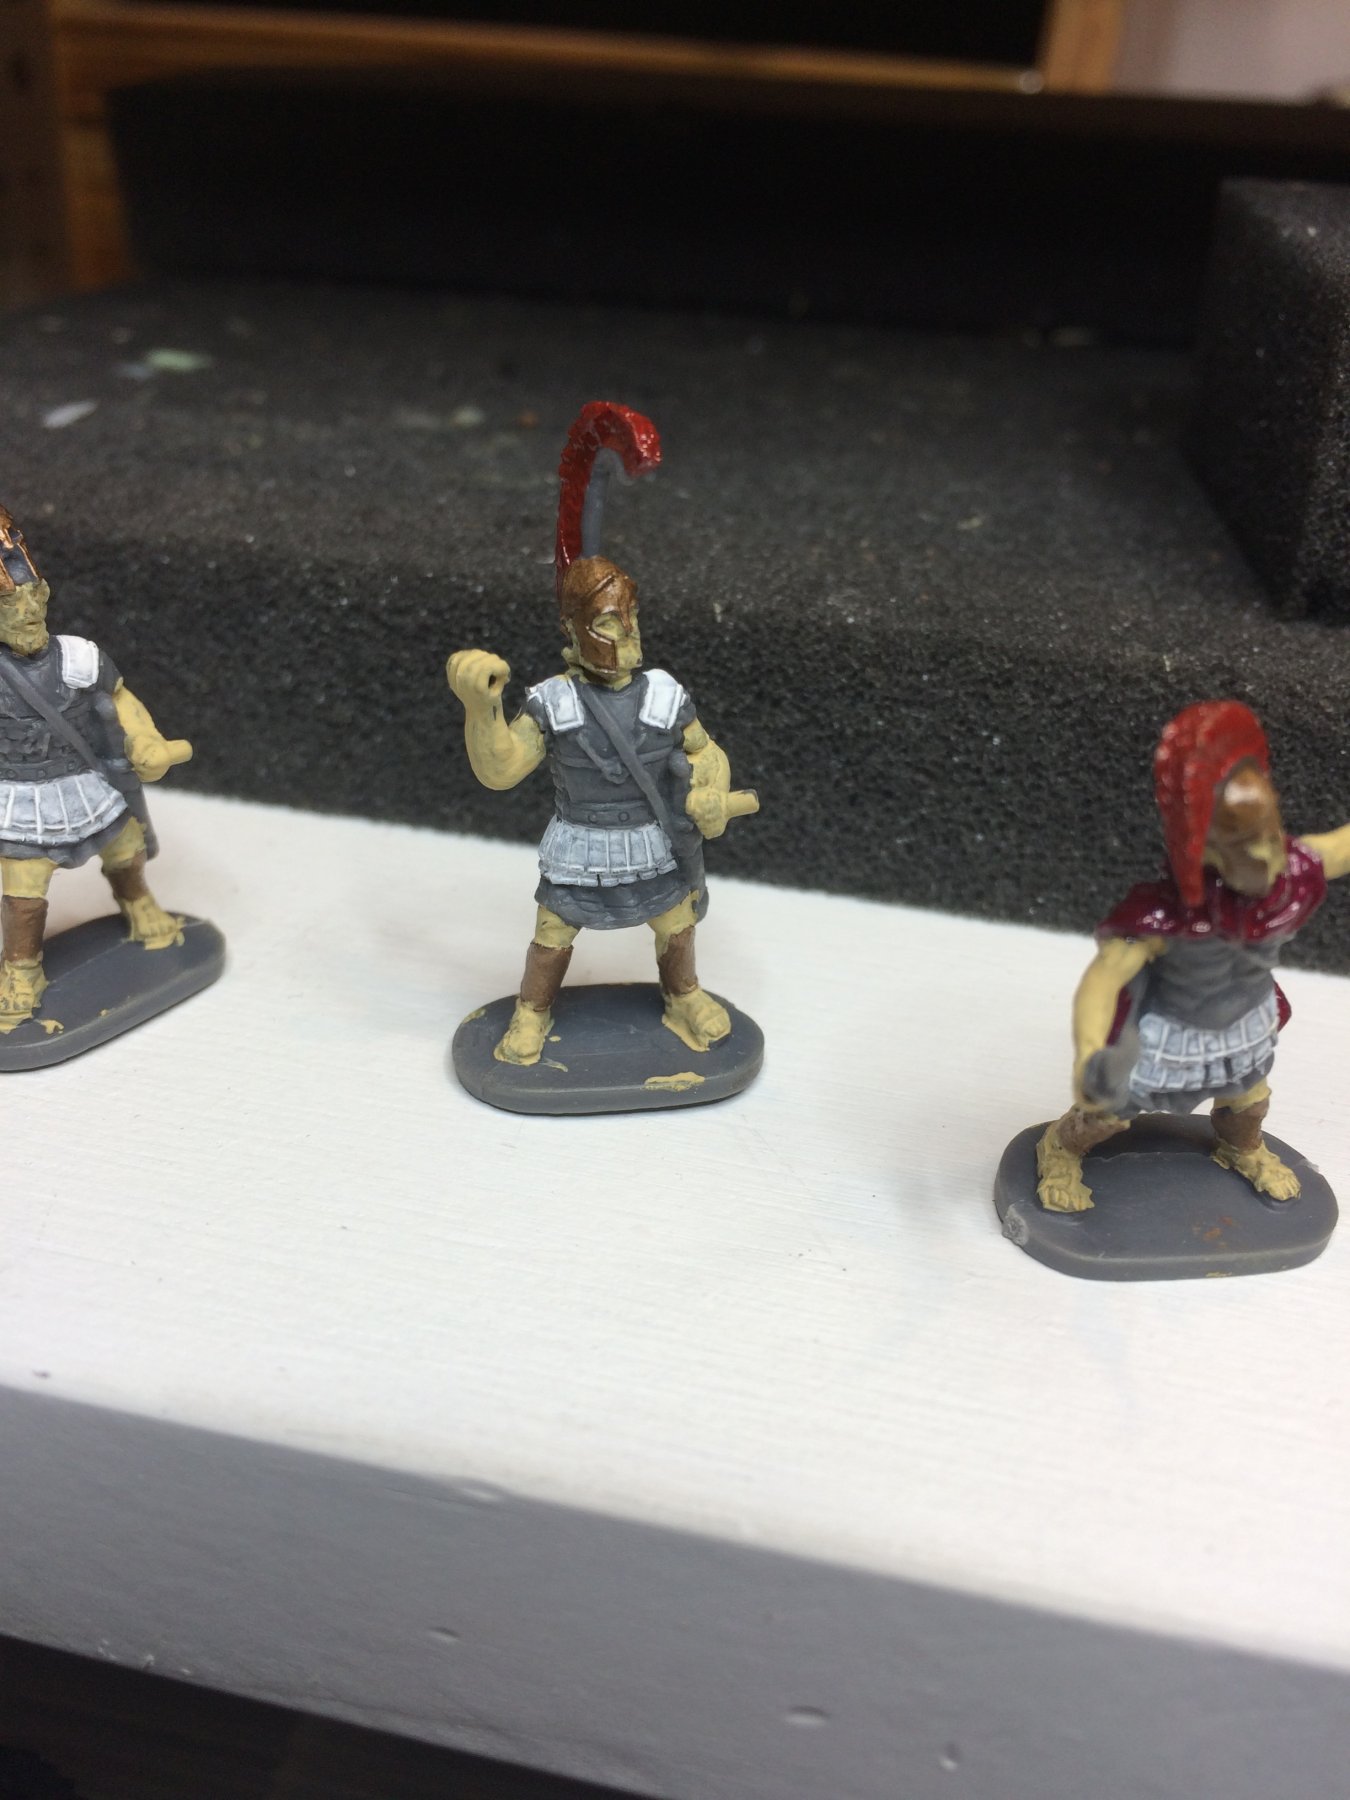
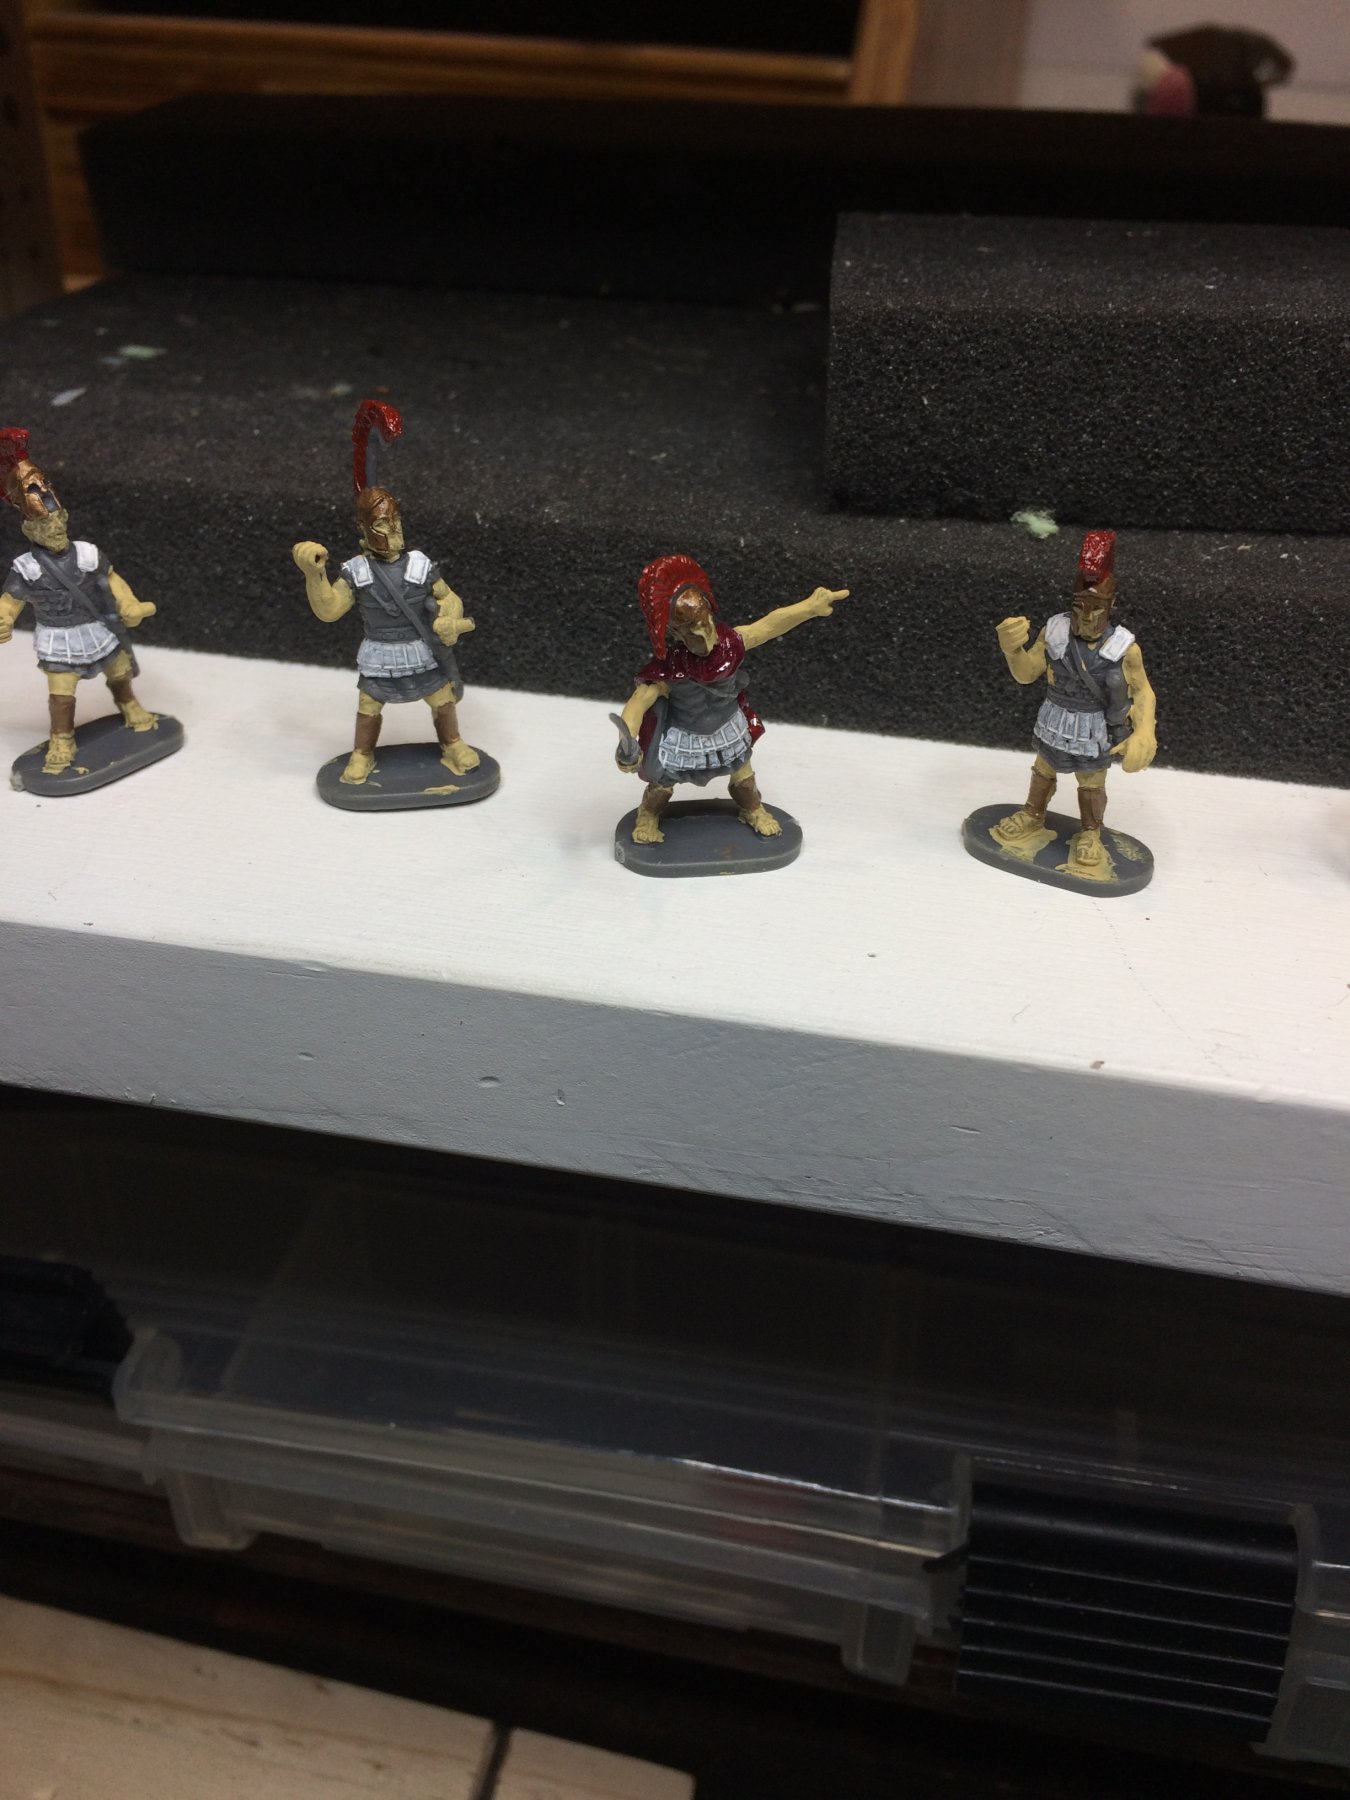
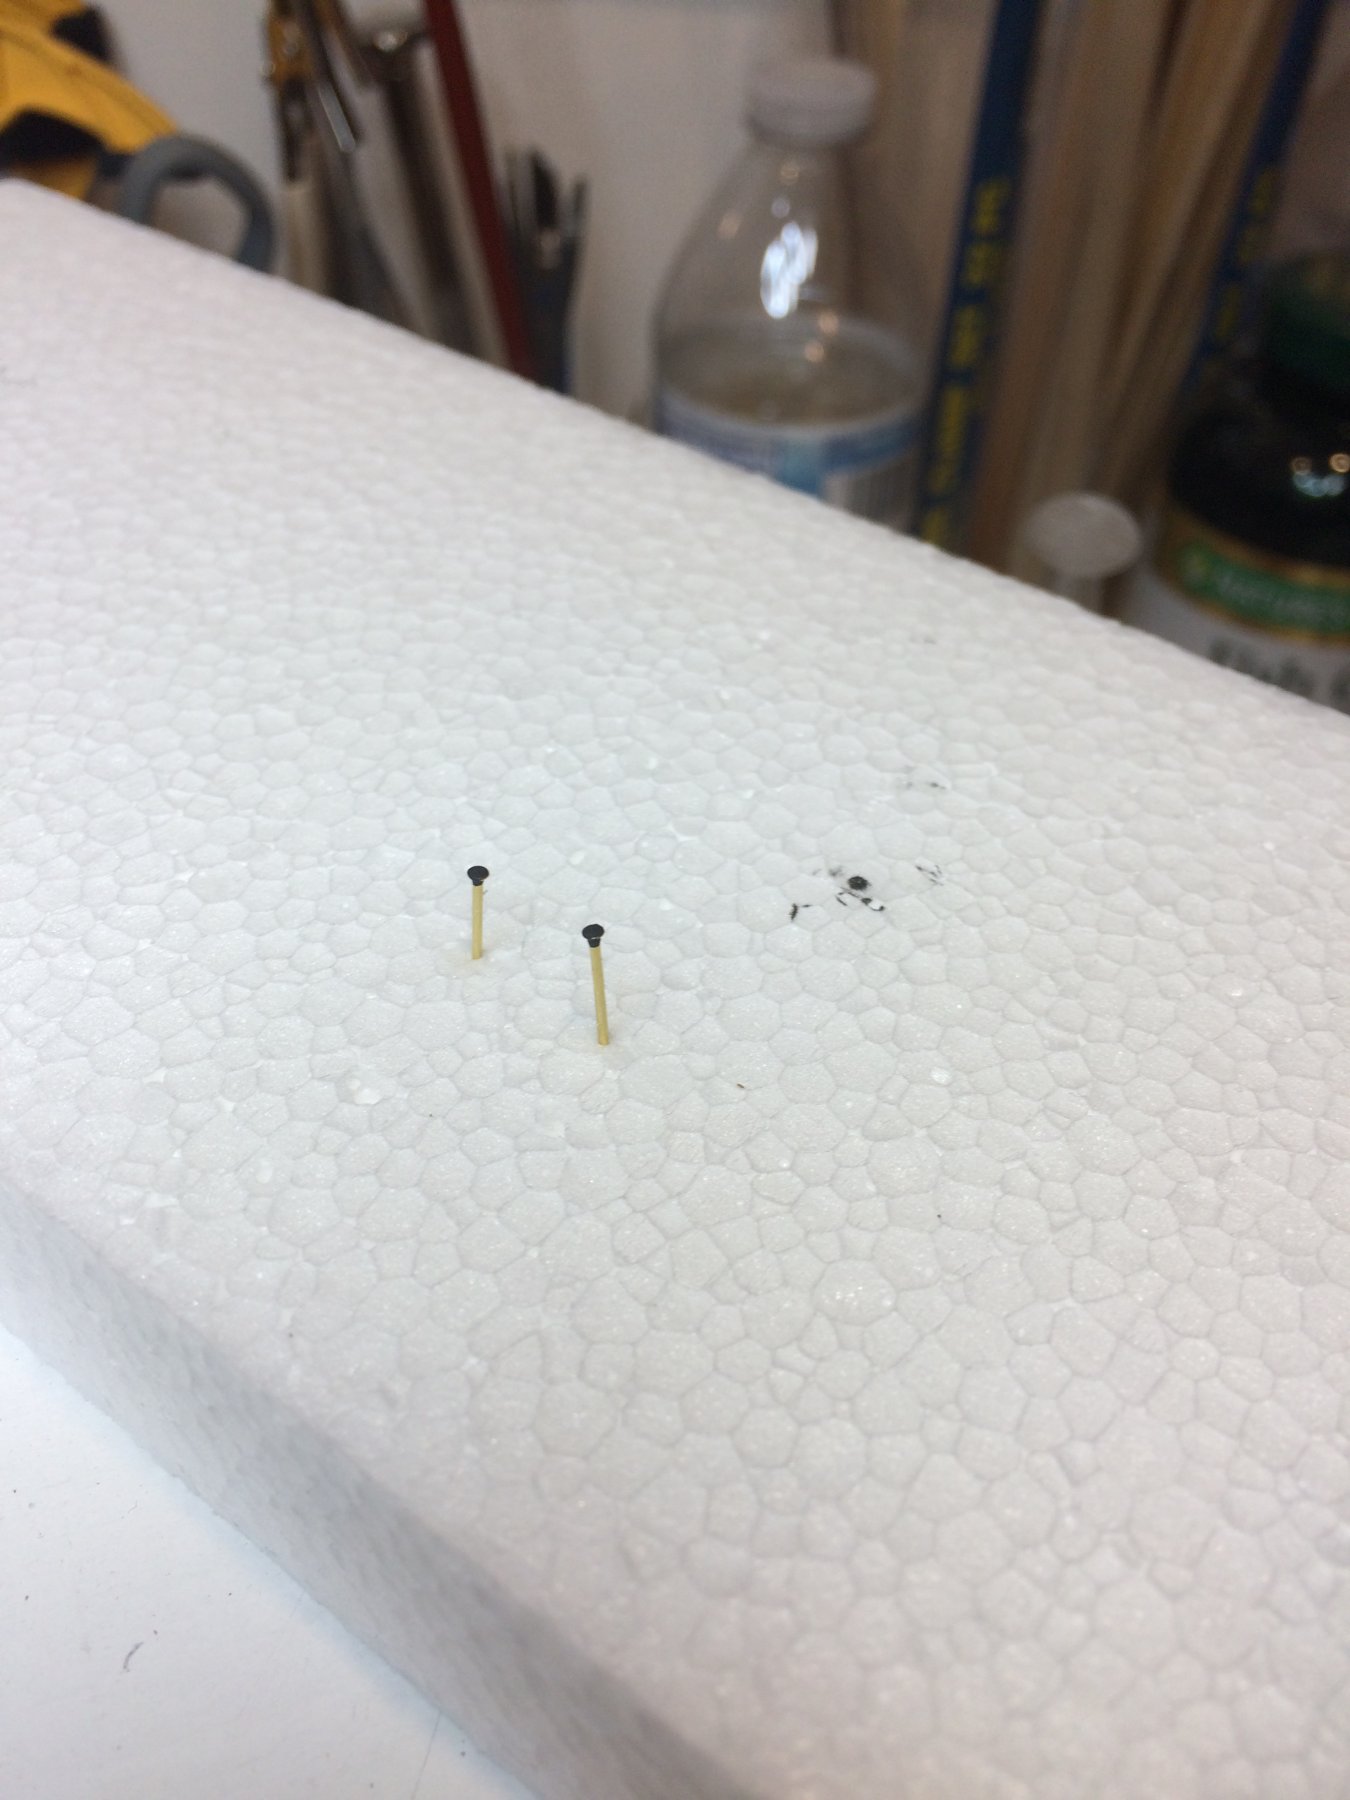
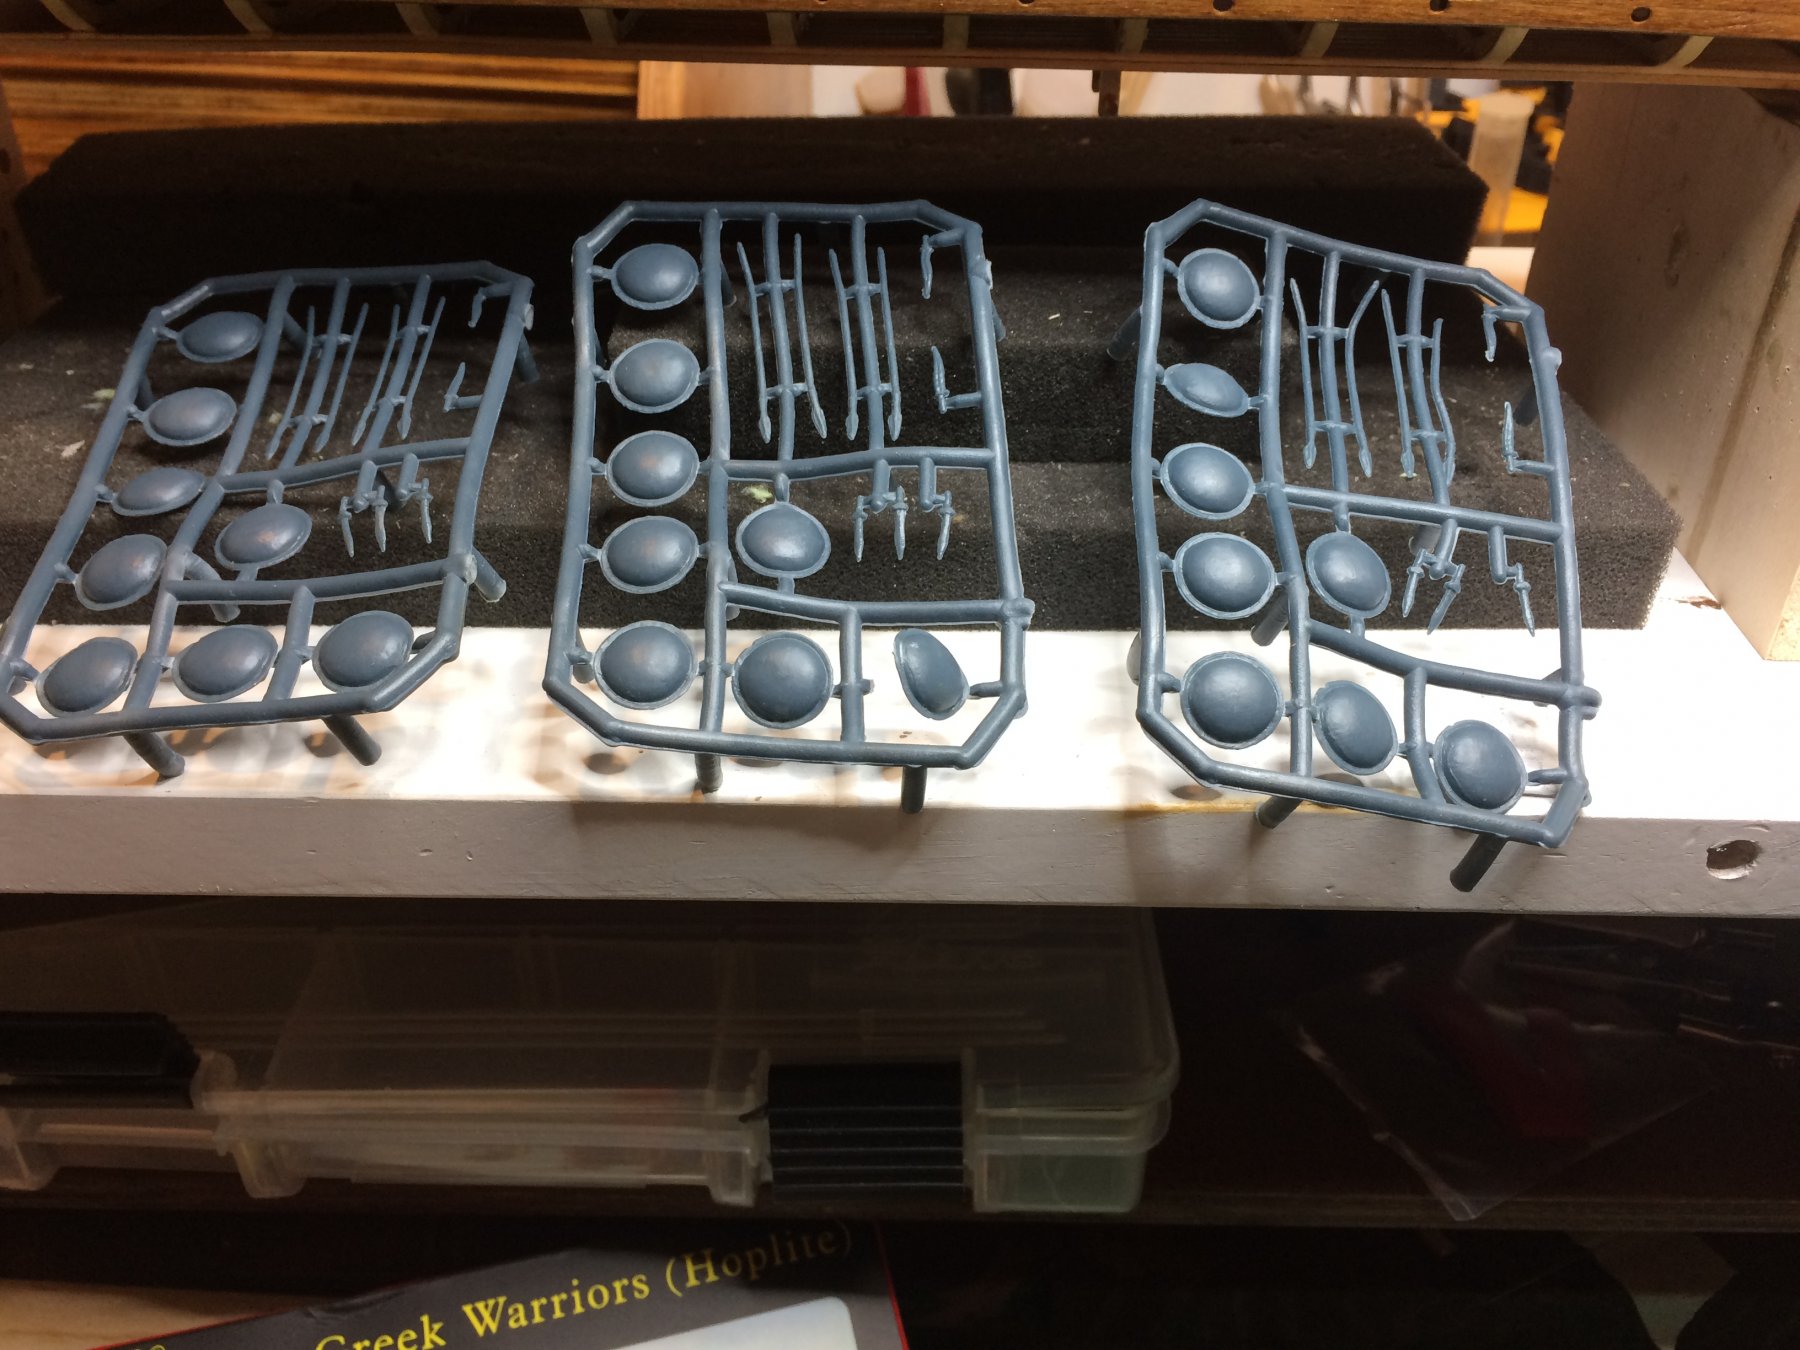
 Today i spent a bit more time with painting friendly hoplites. Some touch-ups, painting the swords, one dude' hair that was sticking out of helmet (i nicknamed him a Hairy Harry), etc. Hairy Harry is second from the left... While i was waiting for a paint to dry out, i was thinking about spears that come with the box. They do not look quite good; most of them are twisted and usable to some extend. Noticed few toothpicks laying around and some 80-size sand paper, i started to shape what turned out to be really decent looking spear. Did some google-ing and find out a painting of hoplite with a spear that looks very realistic. Spear is longer then ones included in the box so i decided to give it a try and see if i can get a decent-looking spear to replace plastic one... I did not use my mini lathe; rather just a sand paper and was able to make a spear that will work, i think much better on the warriors.. Like i dont have nothing else to do with this build, it is a go decision - i will make at least 6 new spears for my hoplites... I believe spears will be about 45-50mm long (that is kind of my rough estimate and measurement taken from the above internet picture) with 1mm of thickness.. I am expecting to have several broken ones as my fingers might be to big for such a delicate work... Unless i break several of them in my attempt, i think i can get there in a few hours. Happy modelling..
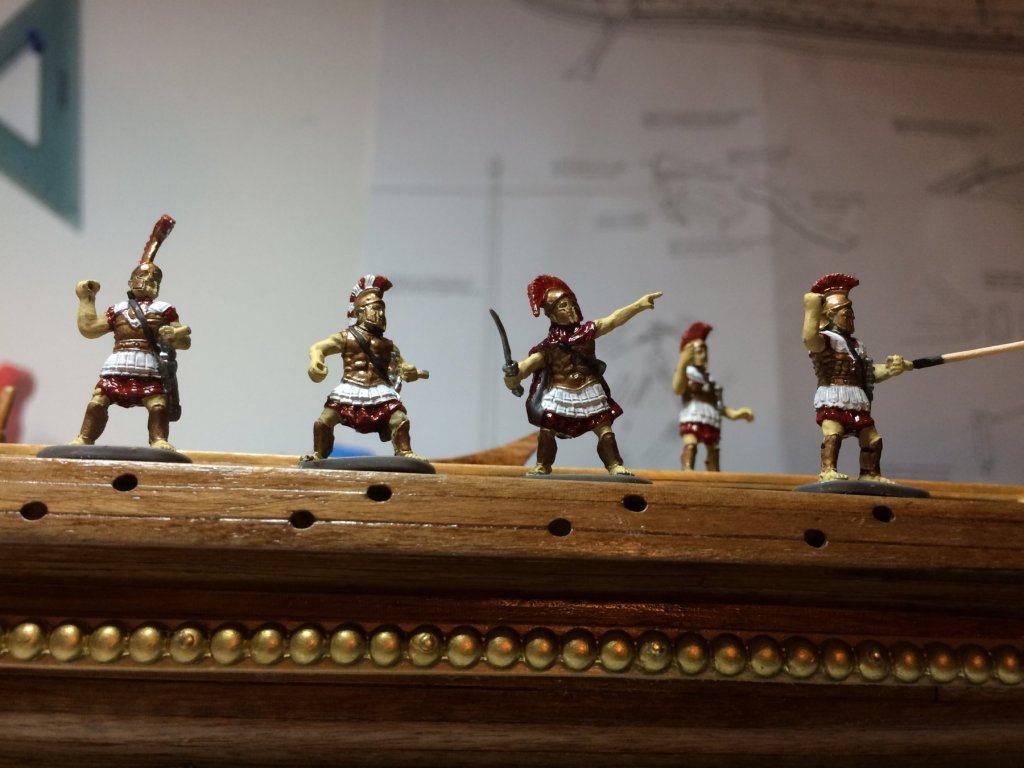


- 122 replies
-
- 2
-

-
- greek bireme
- scale-1/35
- (and 2 more)
-
Today i painted second coat on mighty warriors. Some touch ups and another layer of varnish on the ship. This painting/varnishing process is not very exiting. You can run another coat of varnish which takes about 5 min and spend 10 minutes cleaning brush... Oh well, more to come soon. Happy modelling...
-
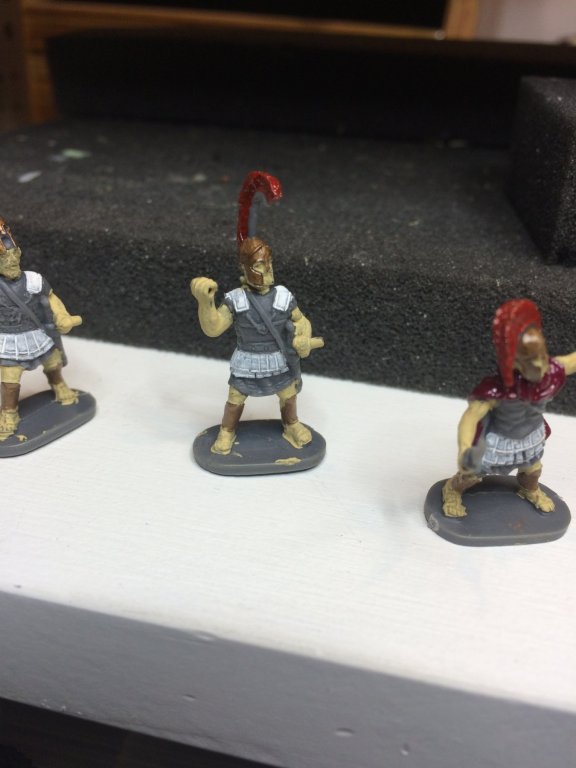
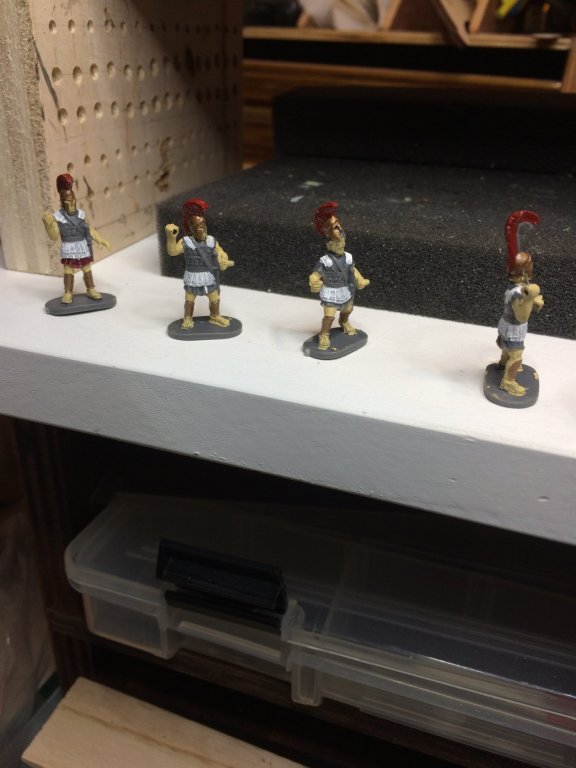
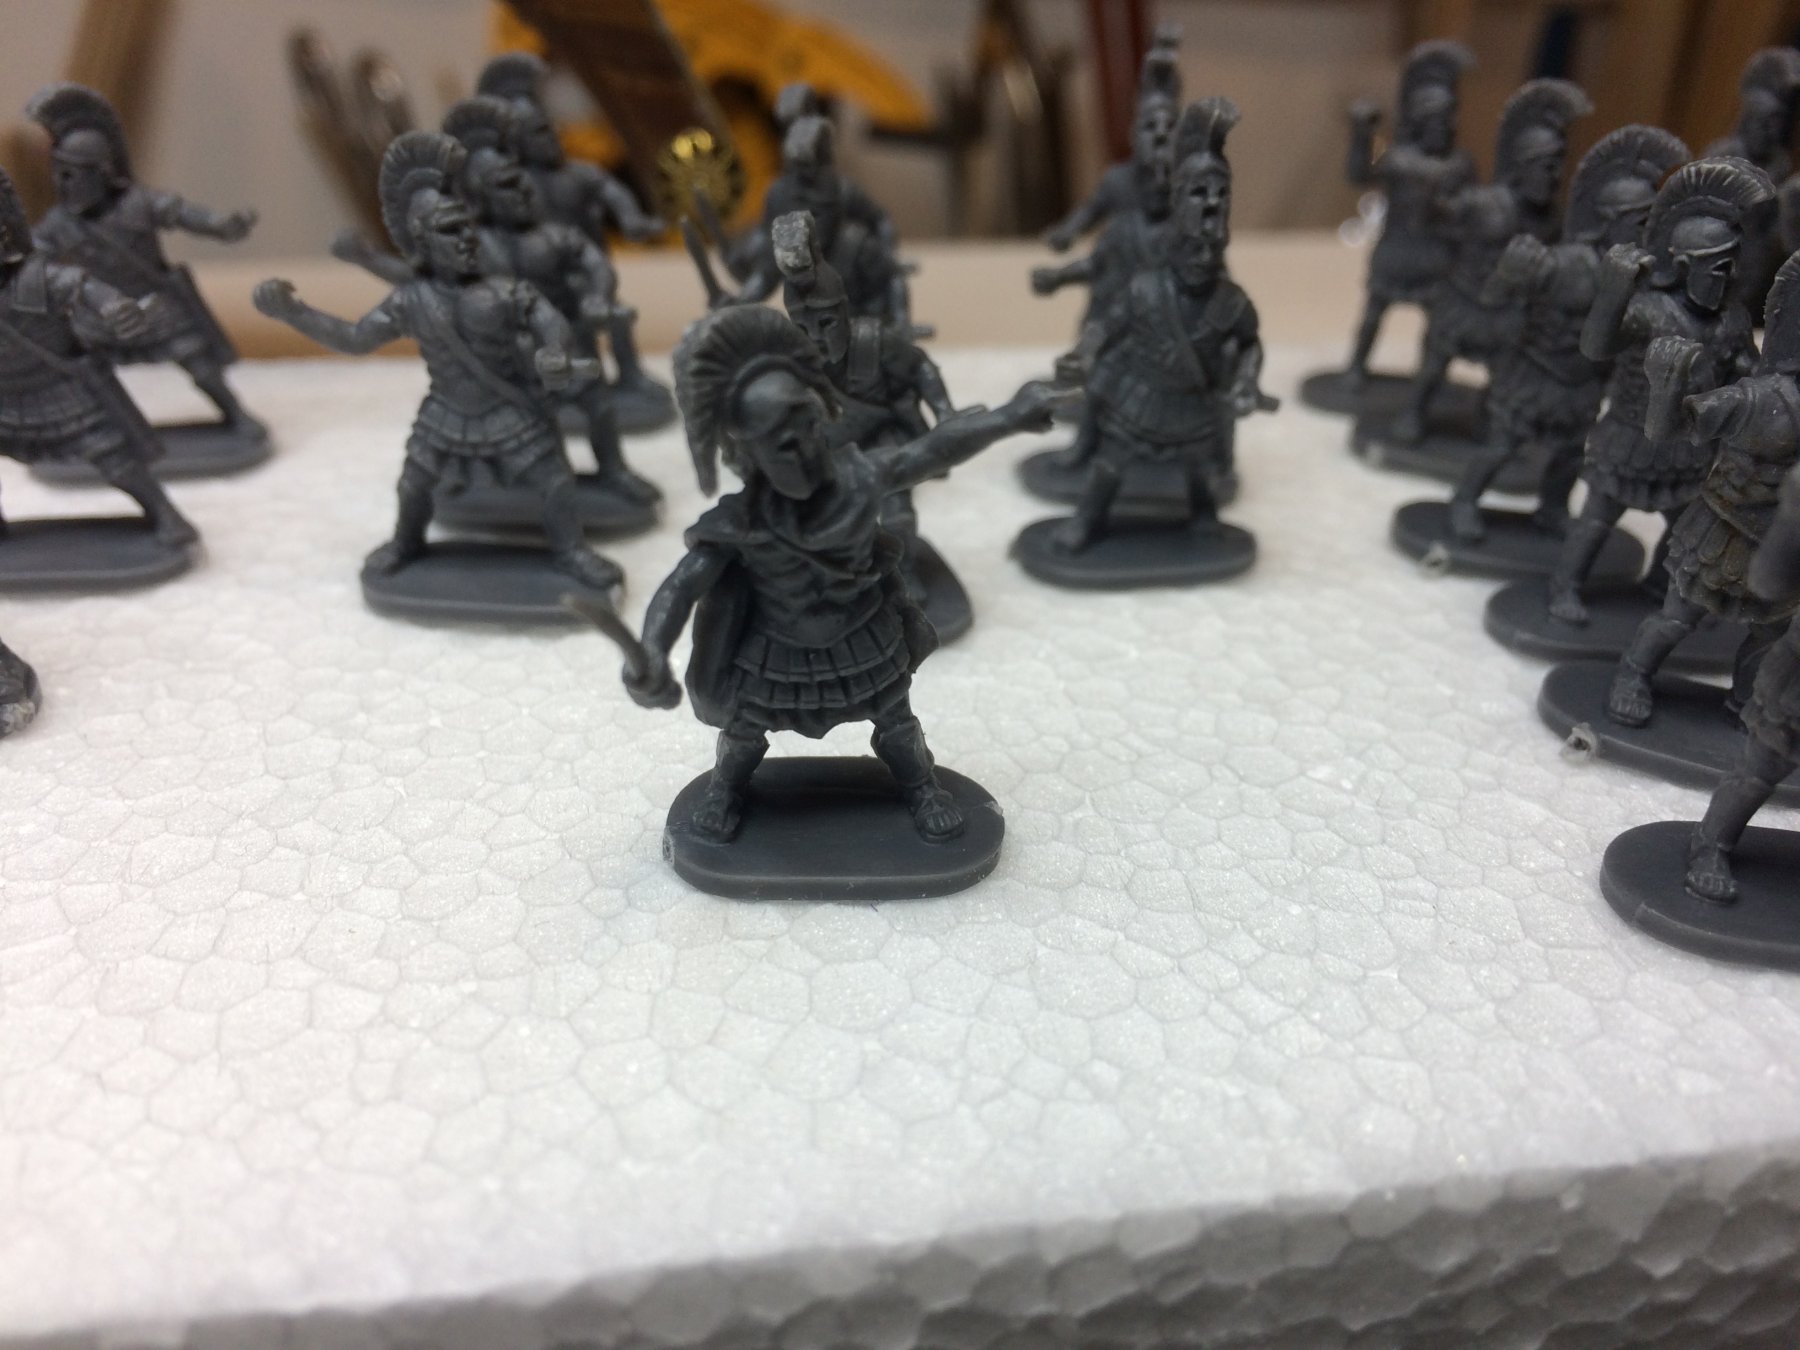
Warriors are getting some paint... They are very tinny for colouring, using lamp with magnifying glass to assist. I can also do some manicure in the same time.. Need to do few more layers of paint as the toys colour is dark grey and very hard to cover with either white or yellowish.. Was thinking to test different approach on few of them: to cover them all in white or skin colour, then to continue with other (red, gold, solver) or to cover them in flat black and then the same process. Will try it for sure. Happy modelling.

- 122 replies
-
- 2
-
-
- greek bireme
- scale-1/35
- (and 2 more)
-
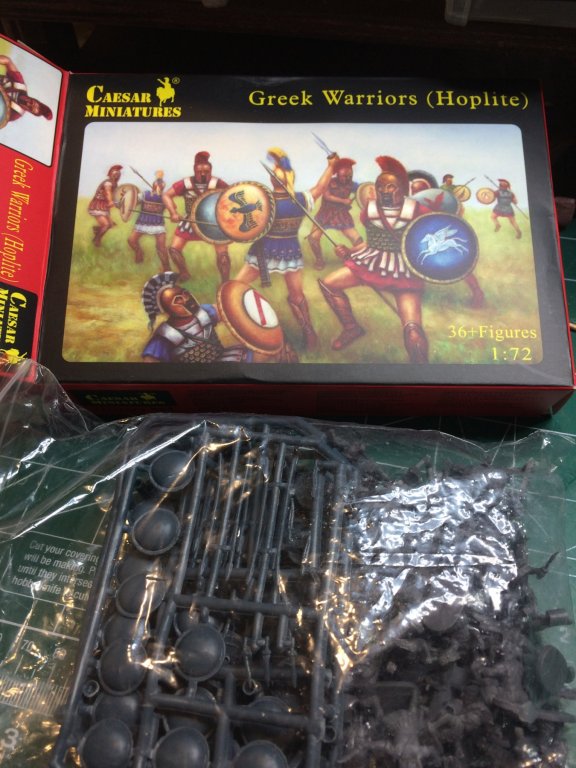
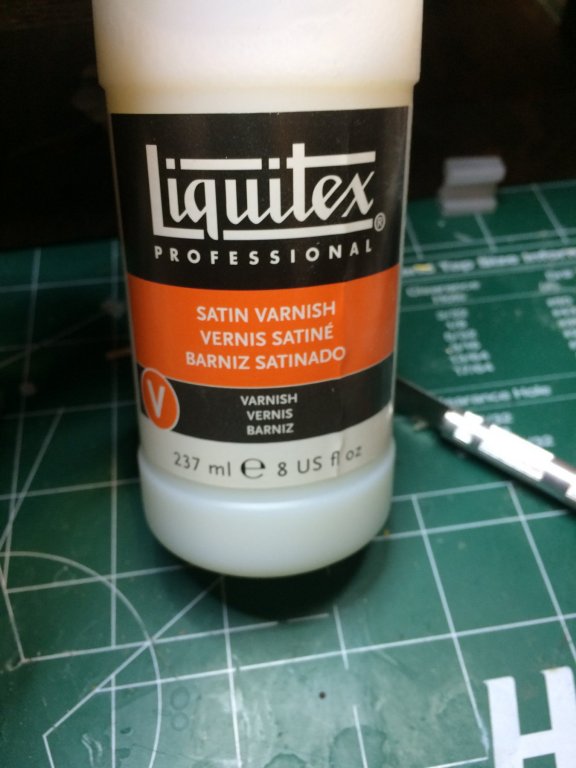
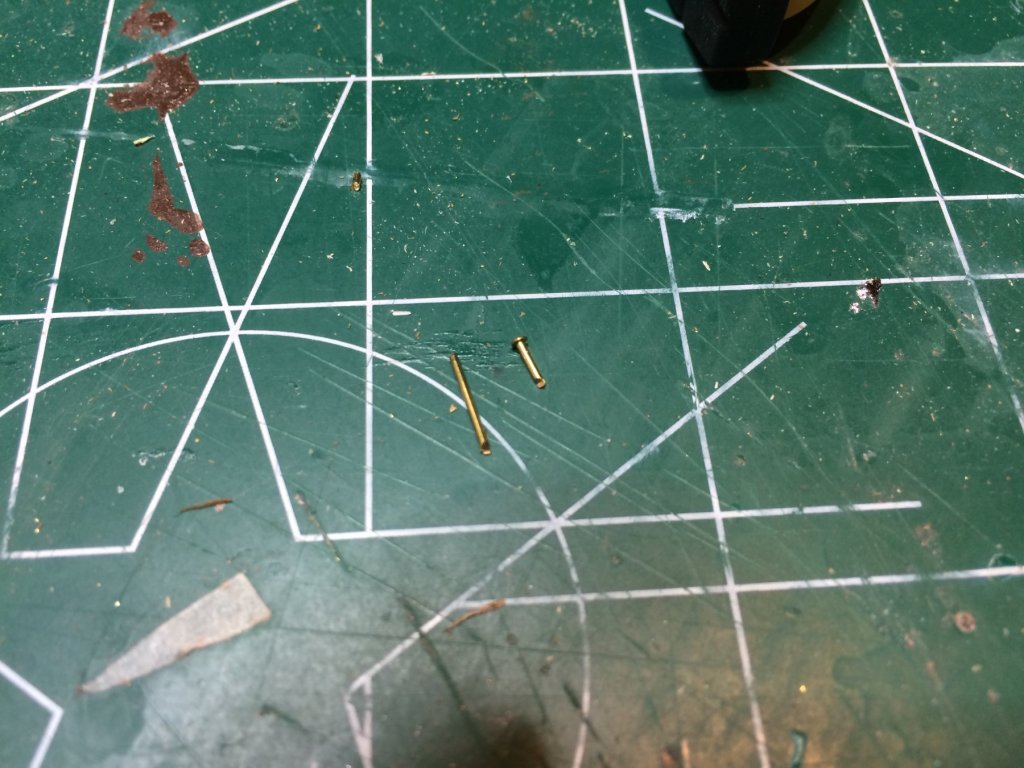
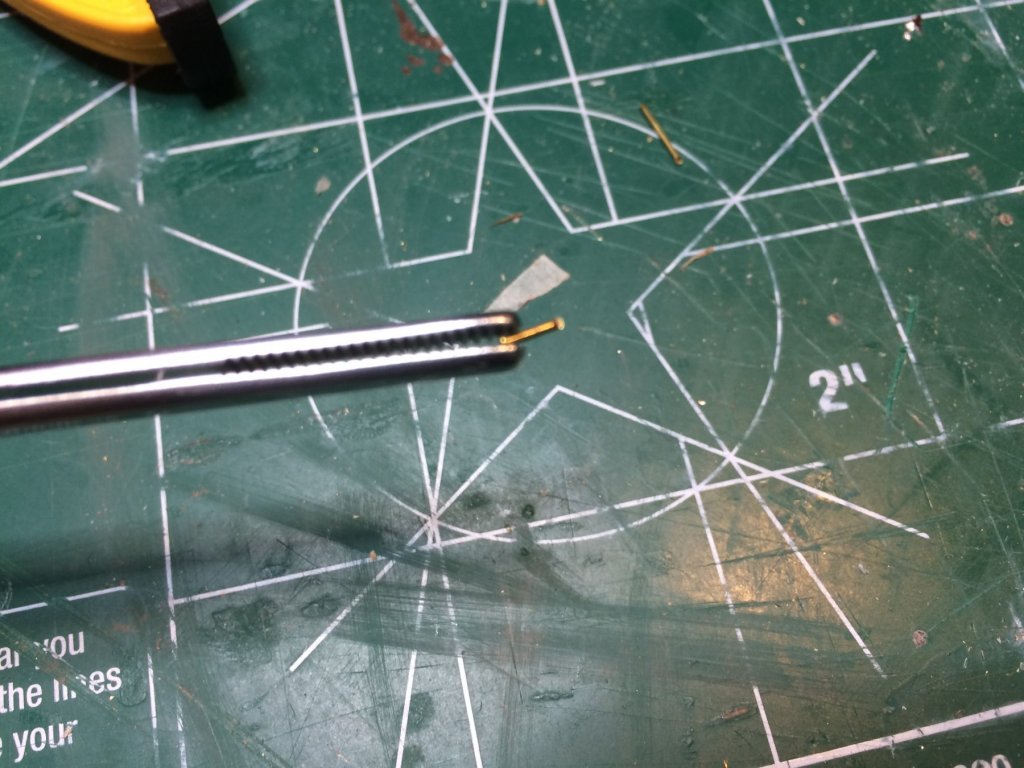
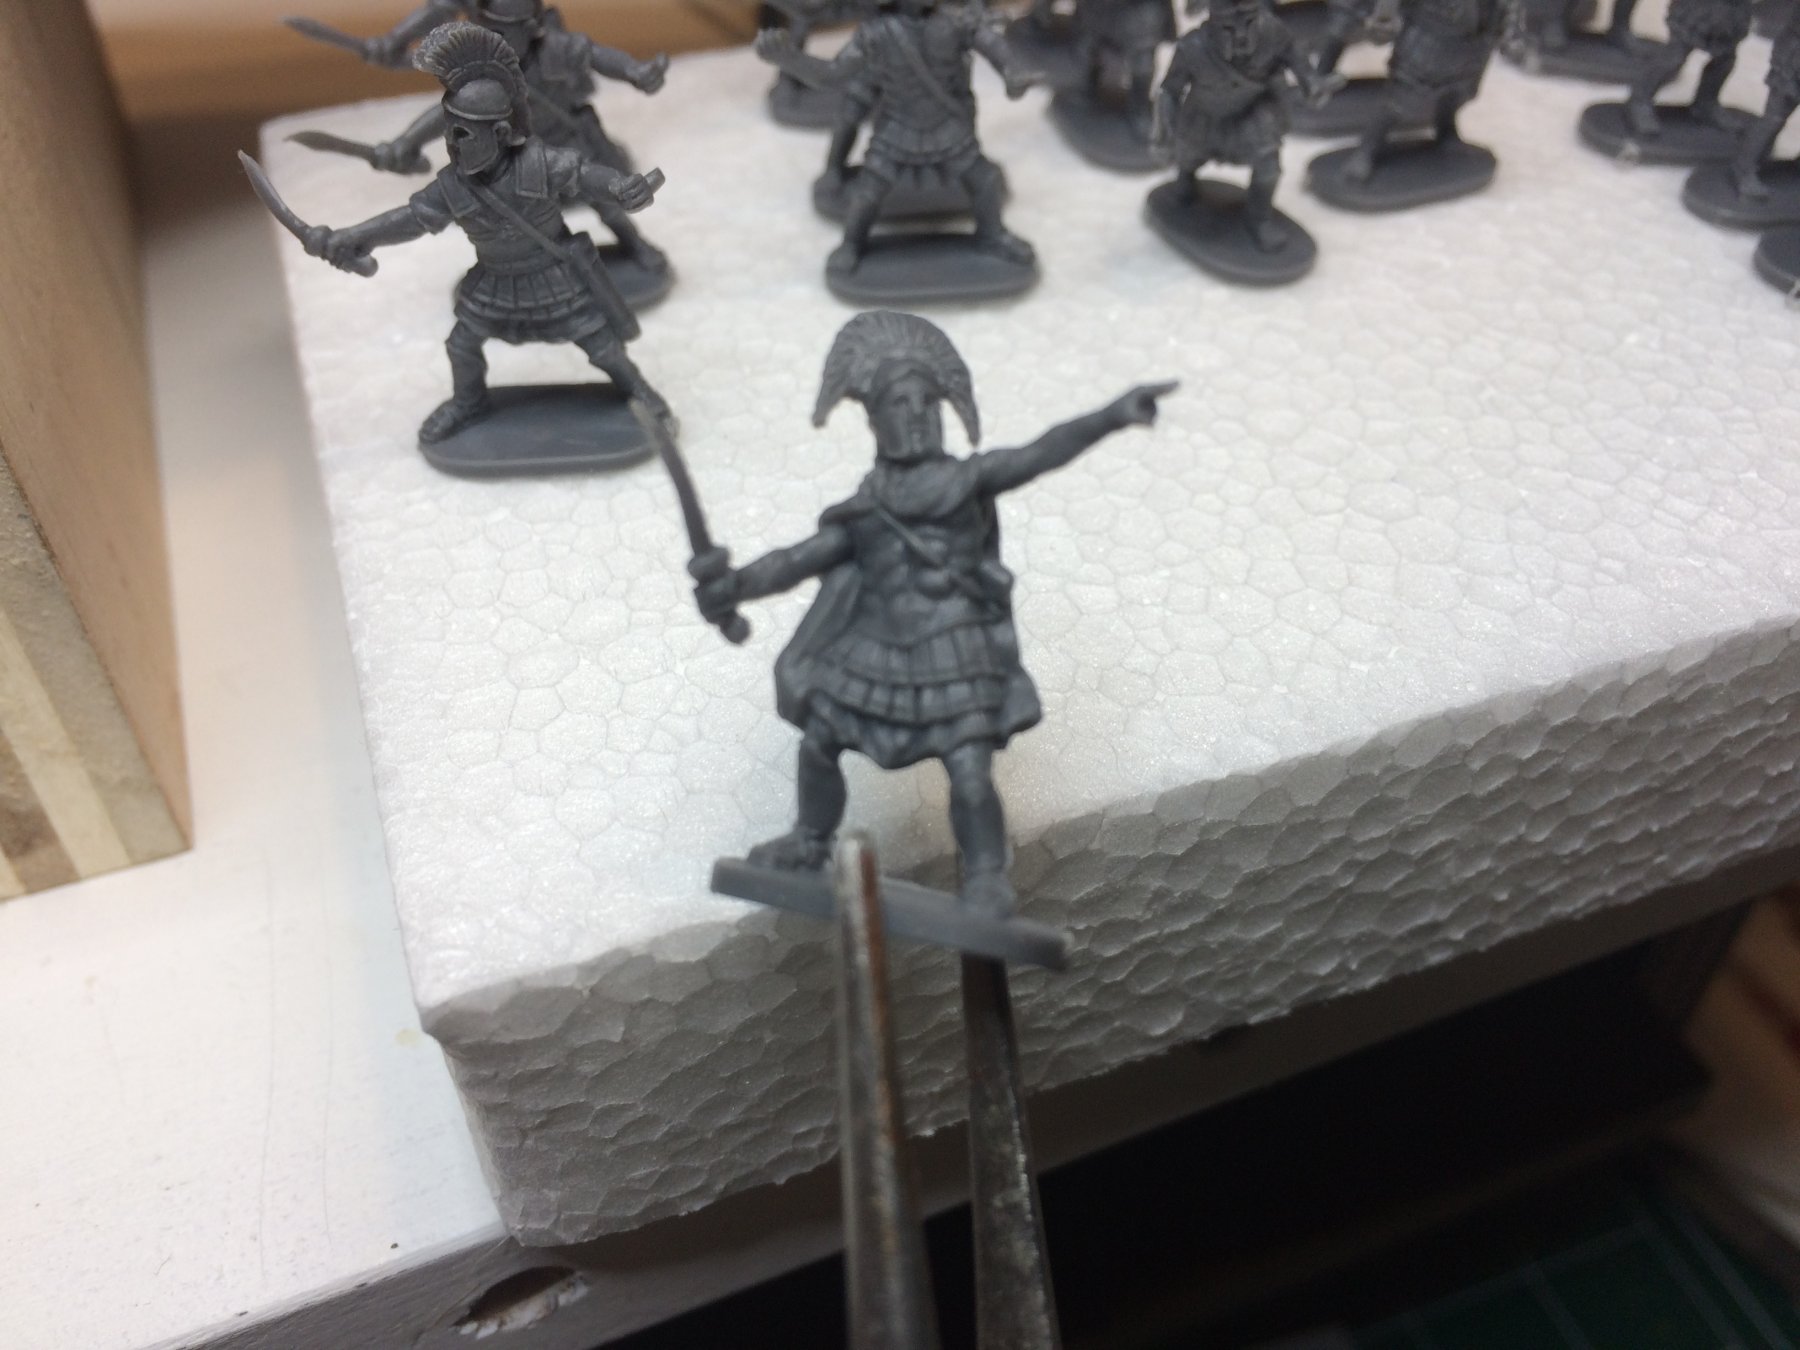
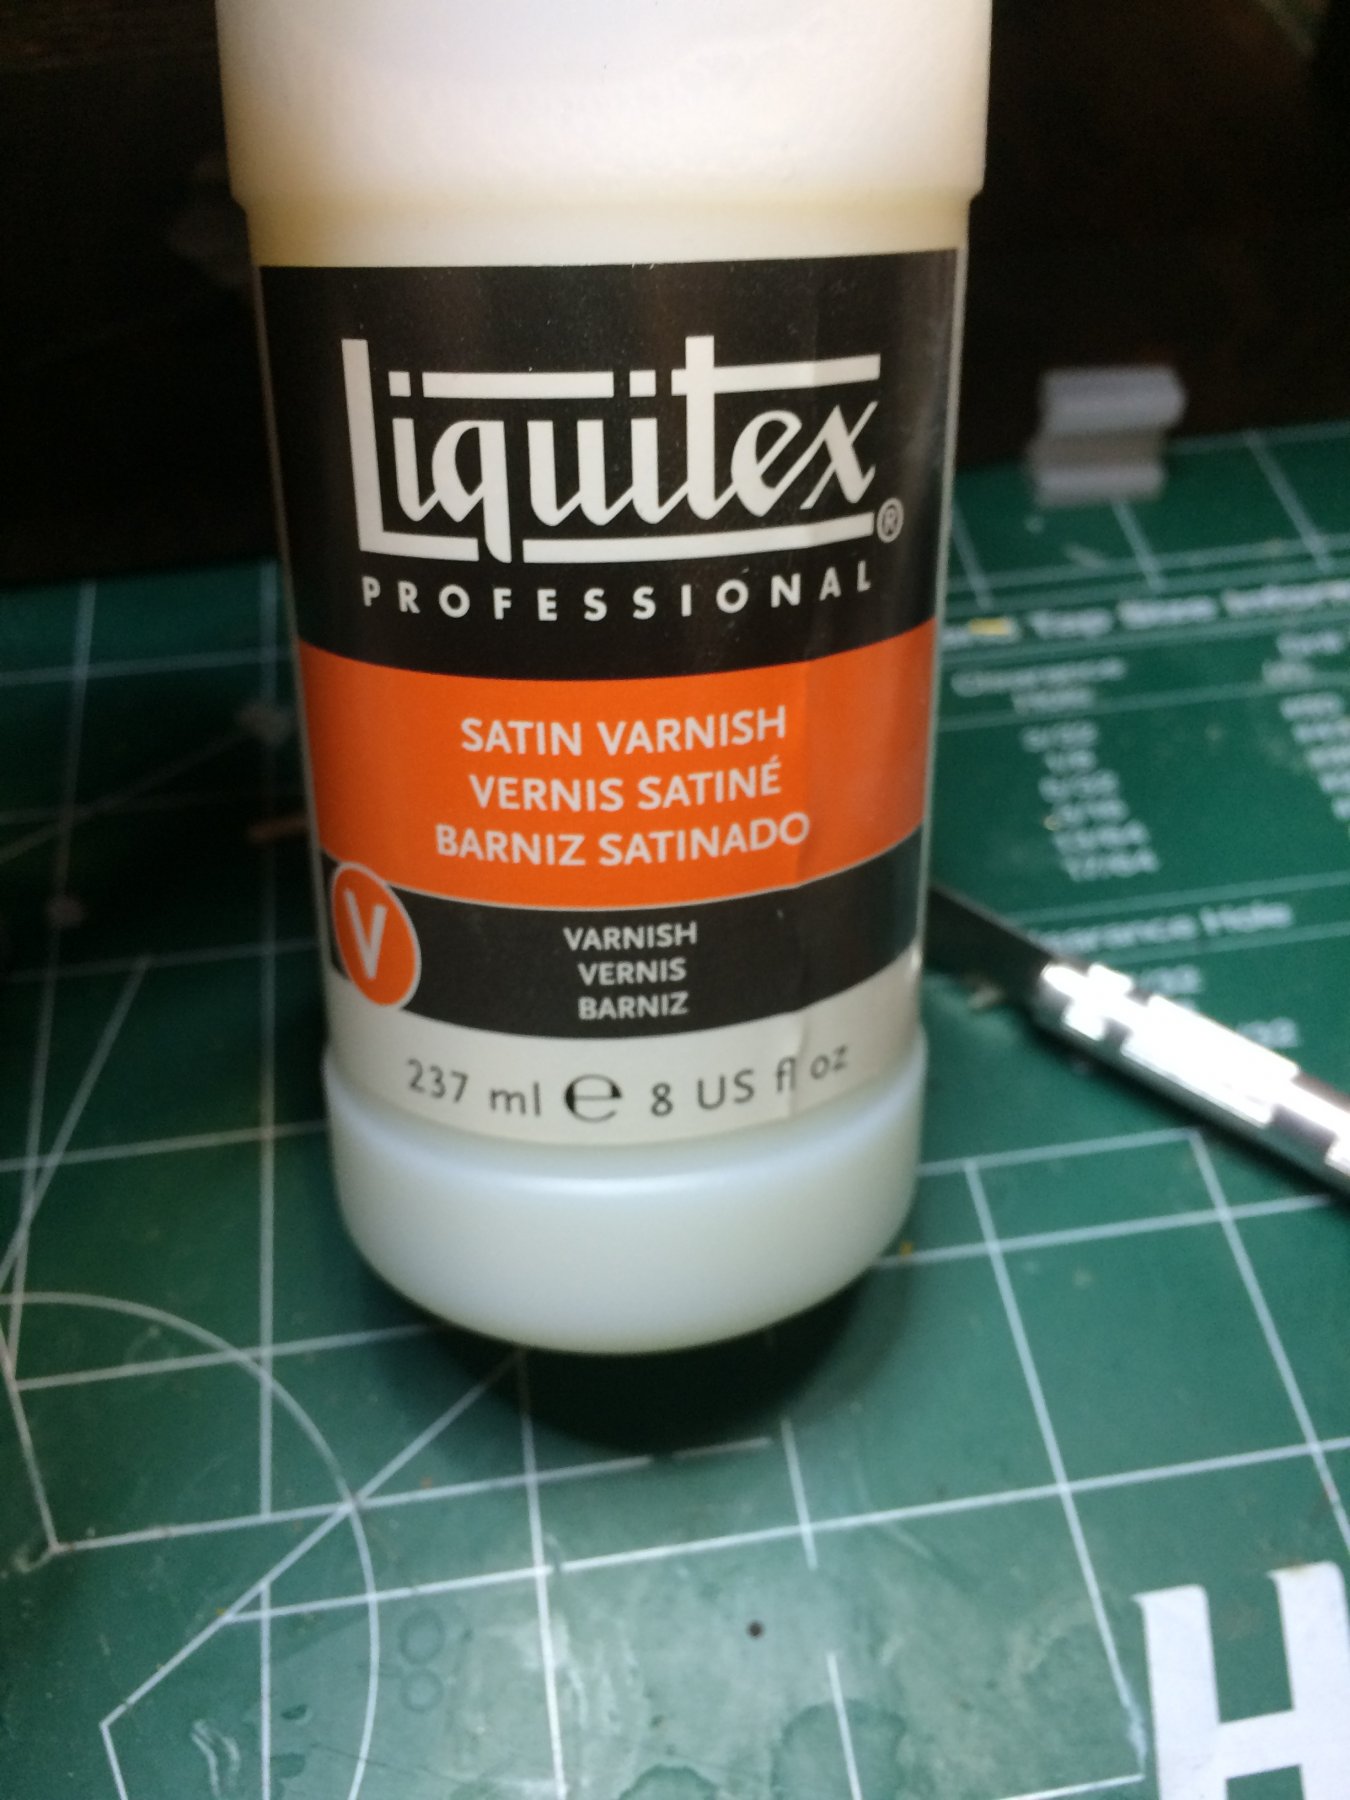
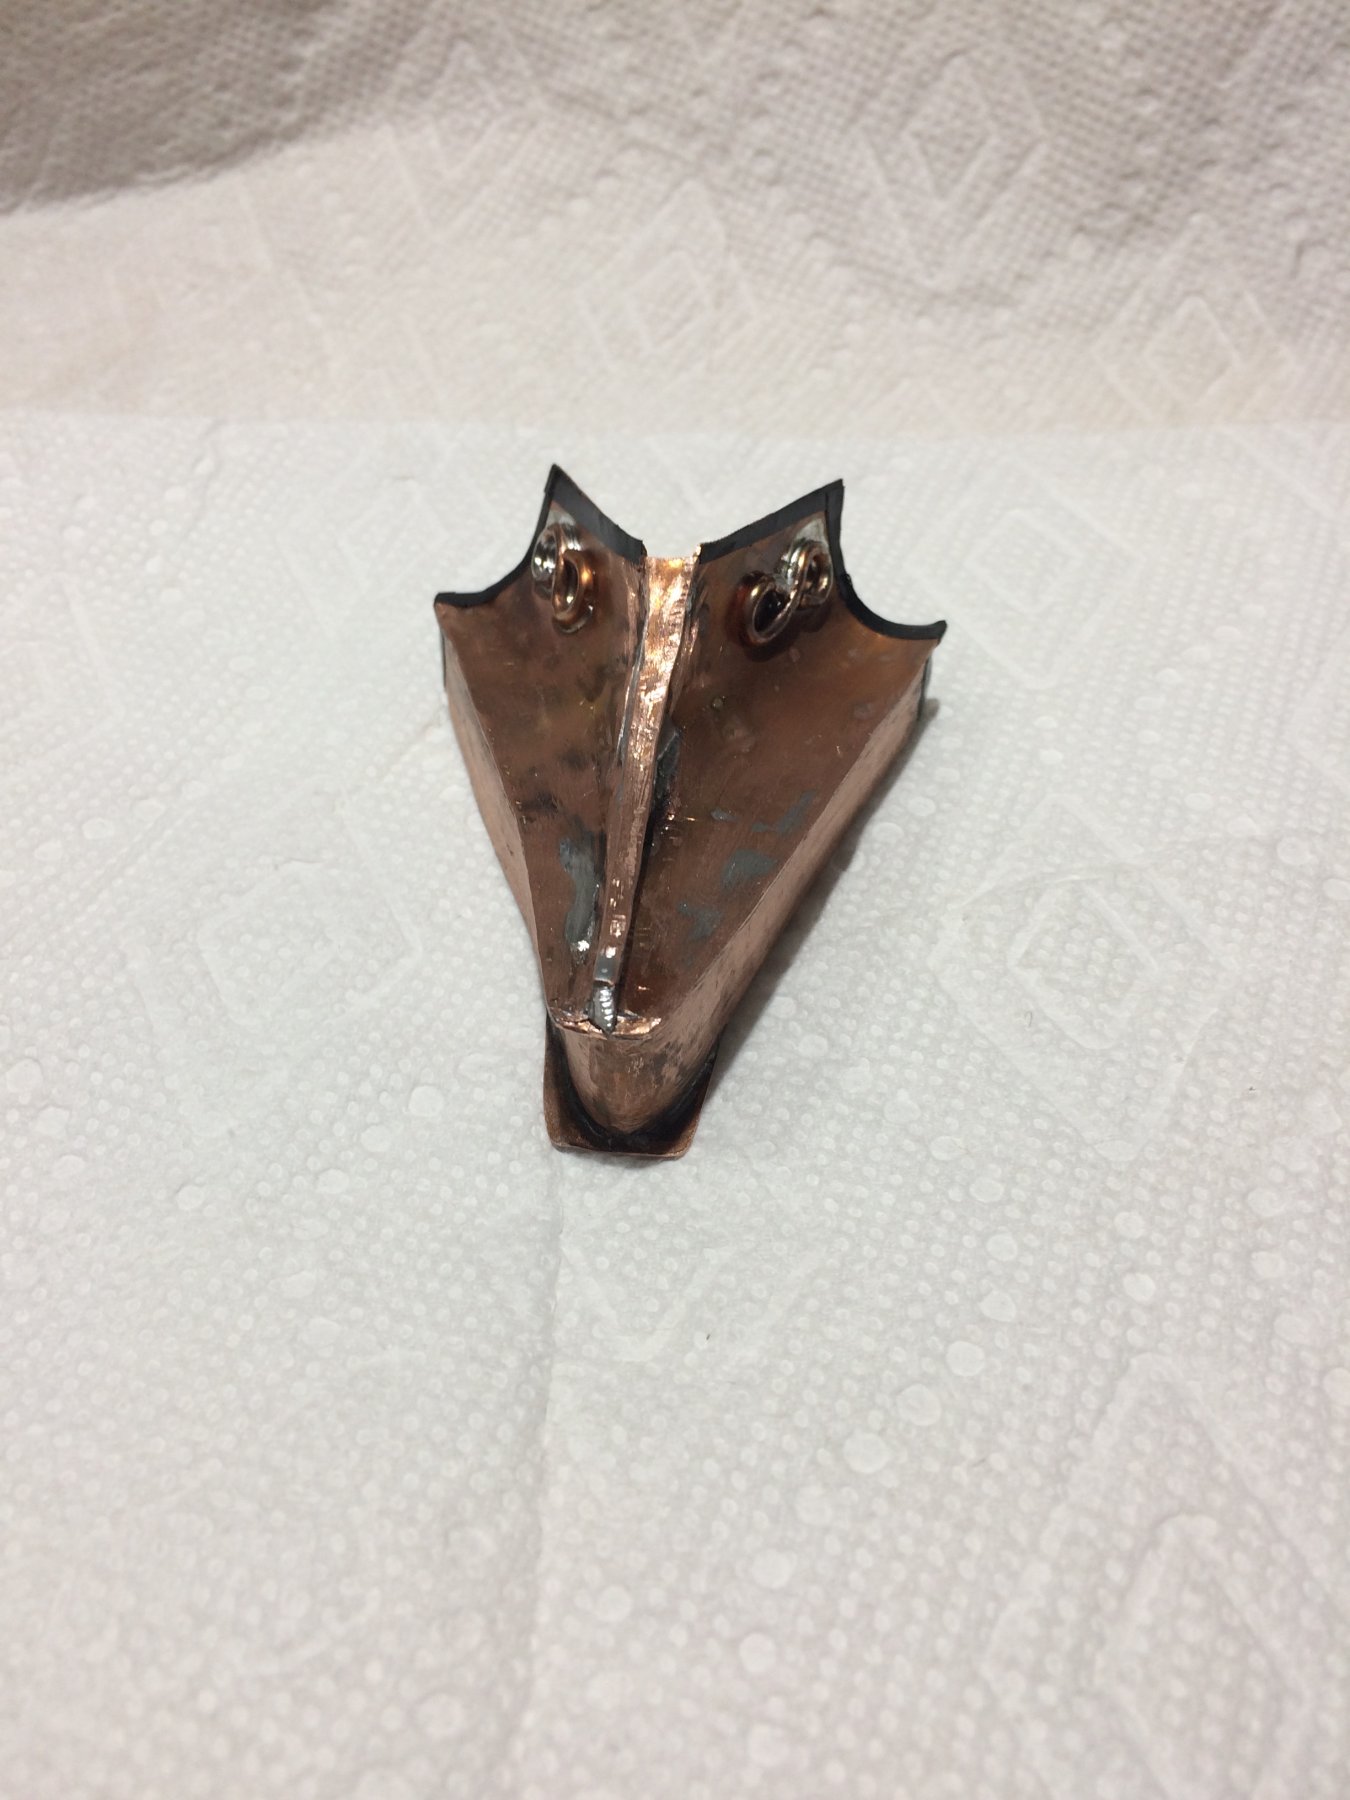
Today i finished up the ram by adding few pins to simulate a way to fix ram to the ship. Not sure what techniques was used back in days but i think they had some sort of iron pins for this purpose. I painted the pin head black but during installation process some of the paint was removed. Not a big deal.. I also drilled a pilot hole for pins. Had to make particular attention to the top corner of ram since the pin will be visible after installation so i ended up cutting most of the pin and leaving only head with few extra mm in length. And installed. Then the Hoplite arrived.... Finally i received a box of Greek warriors (Hoplite) figures i planned to put on the ship. The reason for having them is to give a bit of a scale vision of ship size. The scale of warriors is not quite matching the scale of the ship but it is fairly close... They have made in China, sold by company in Austria via Amazon and shipped to North America. I was actually surprised with the level of details these small dudes have. It will be interesting process to paint them in the colour of ancient world. This friendly dude will definitely have a place on the ship; he is the leader and must be there.. Not sure how many warriors will be enjoying the mighty bireme but i am planning to have them 4 or 5. Will see.. They also need to have shields and spears so here they are. This part is not quite good but it is workable.. Then i decided to run a first layer of protective satin varnish on the hull. I used this product in the past with satisfactory results. Will need several layers of it. This complete the work for today. Will continue with varnish and painting warriors. Happy modelling.


- 122 replies
-
- 3
-
-
- greek bireme
- scale-1/35
- (and 2 more)
-
Thanks Don, i will definitely keep that on mind for future projects. I was actually contemplating of using markers but on test runs i was not getting quite satisfactory colour shades. To modern for Greek bireme..
-
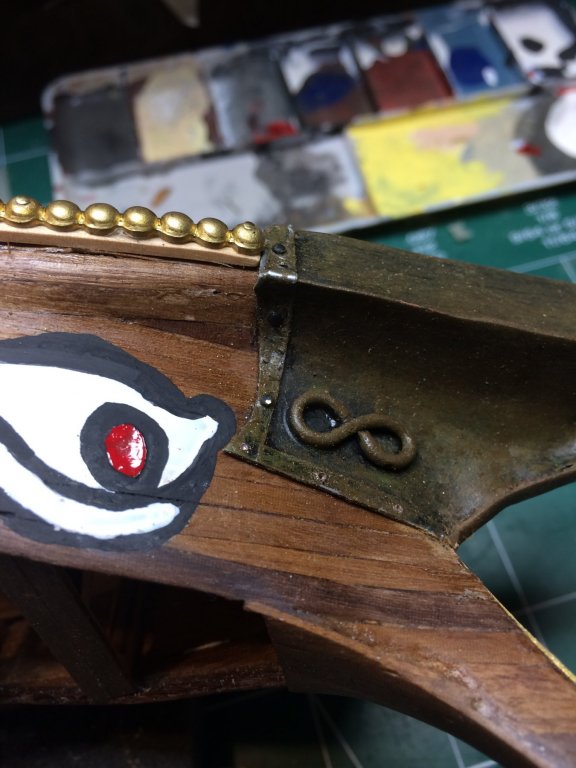
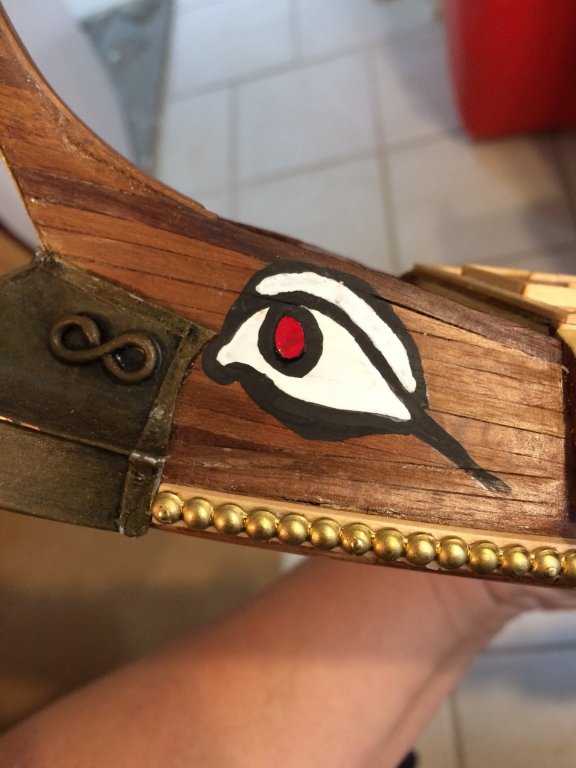
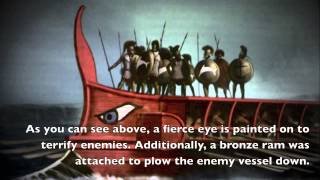
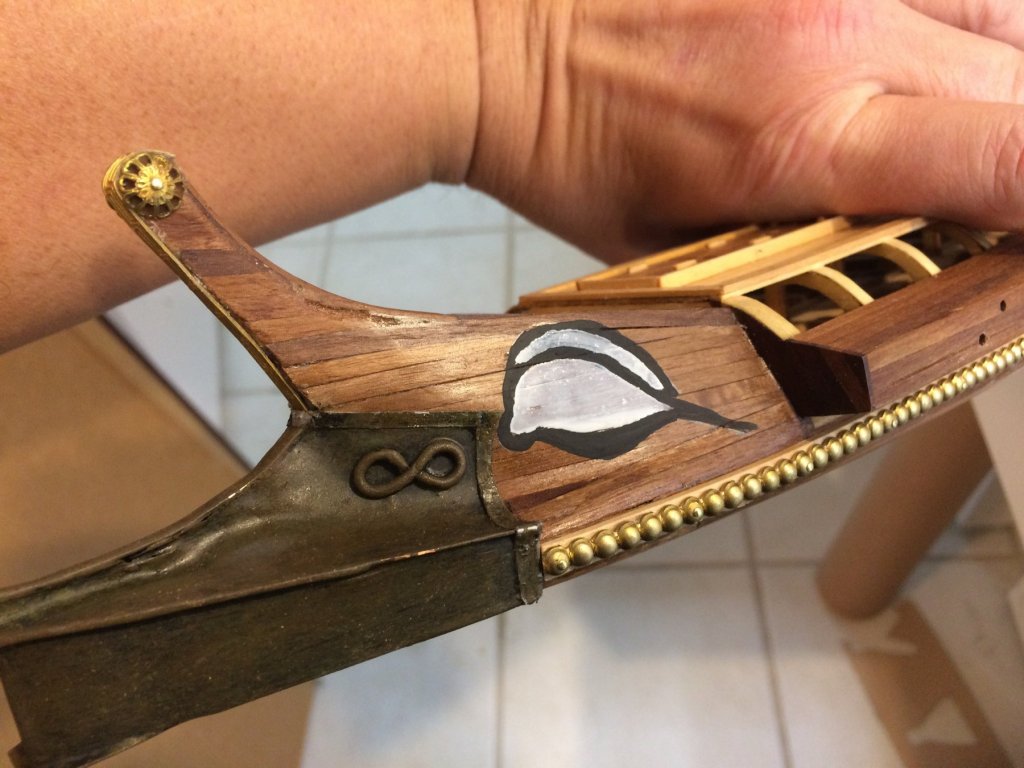
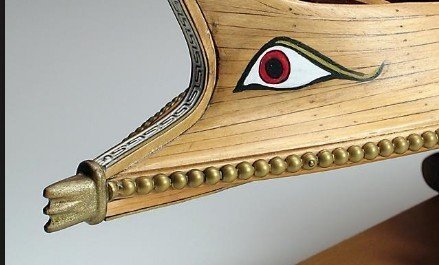
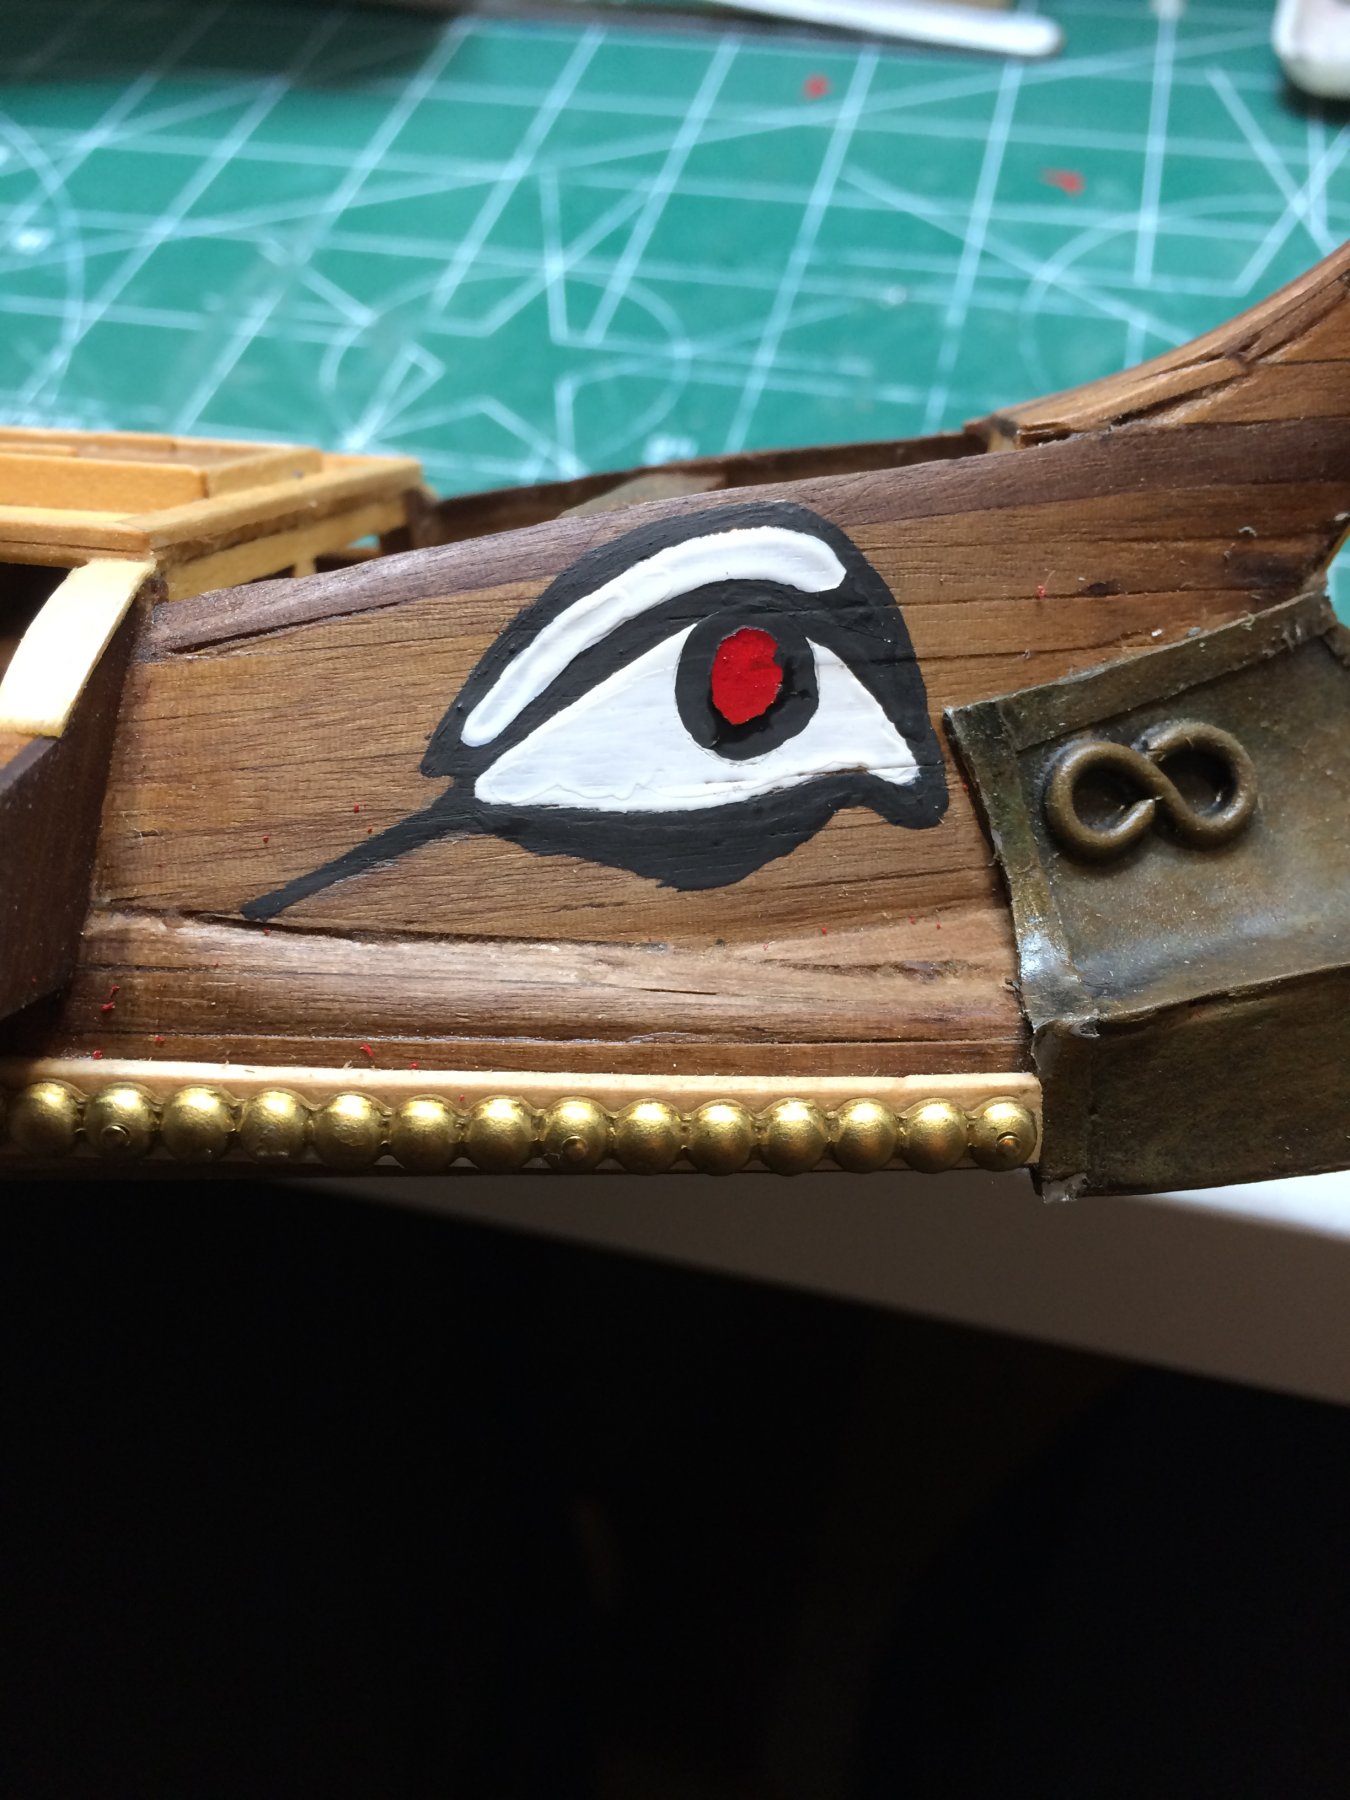
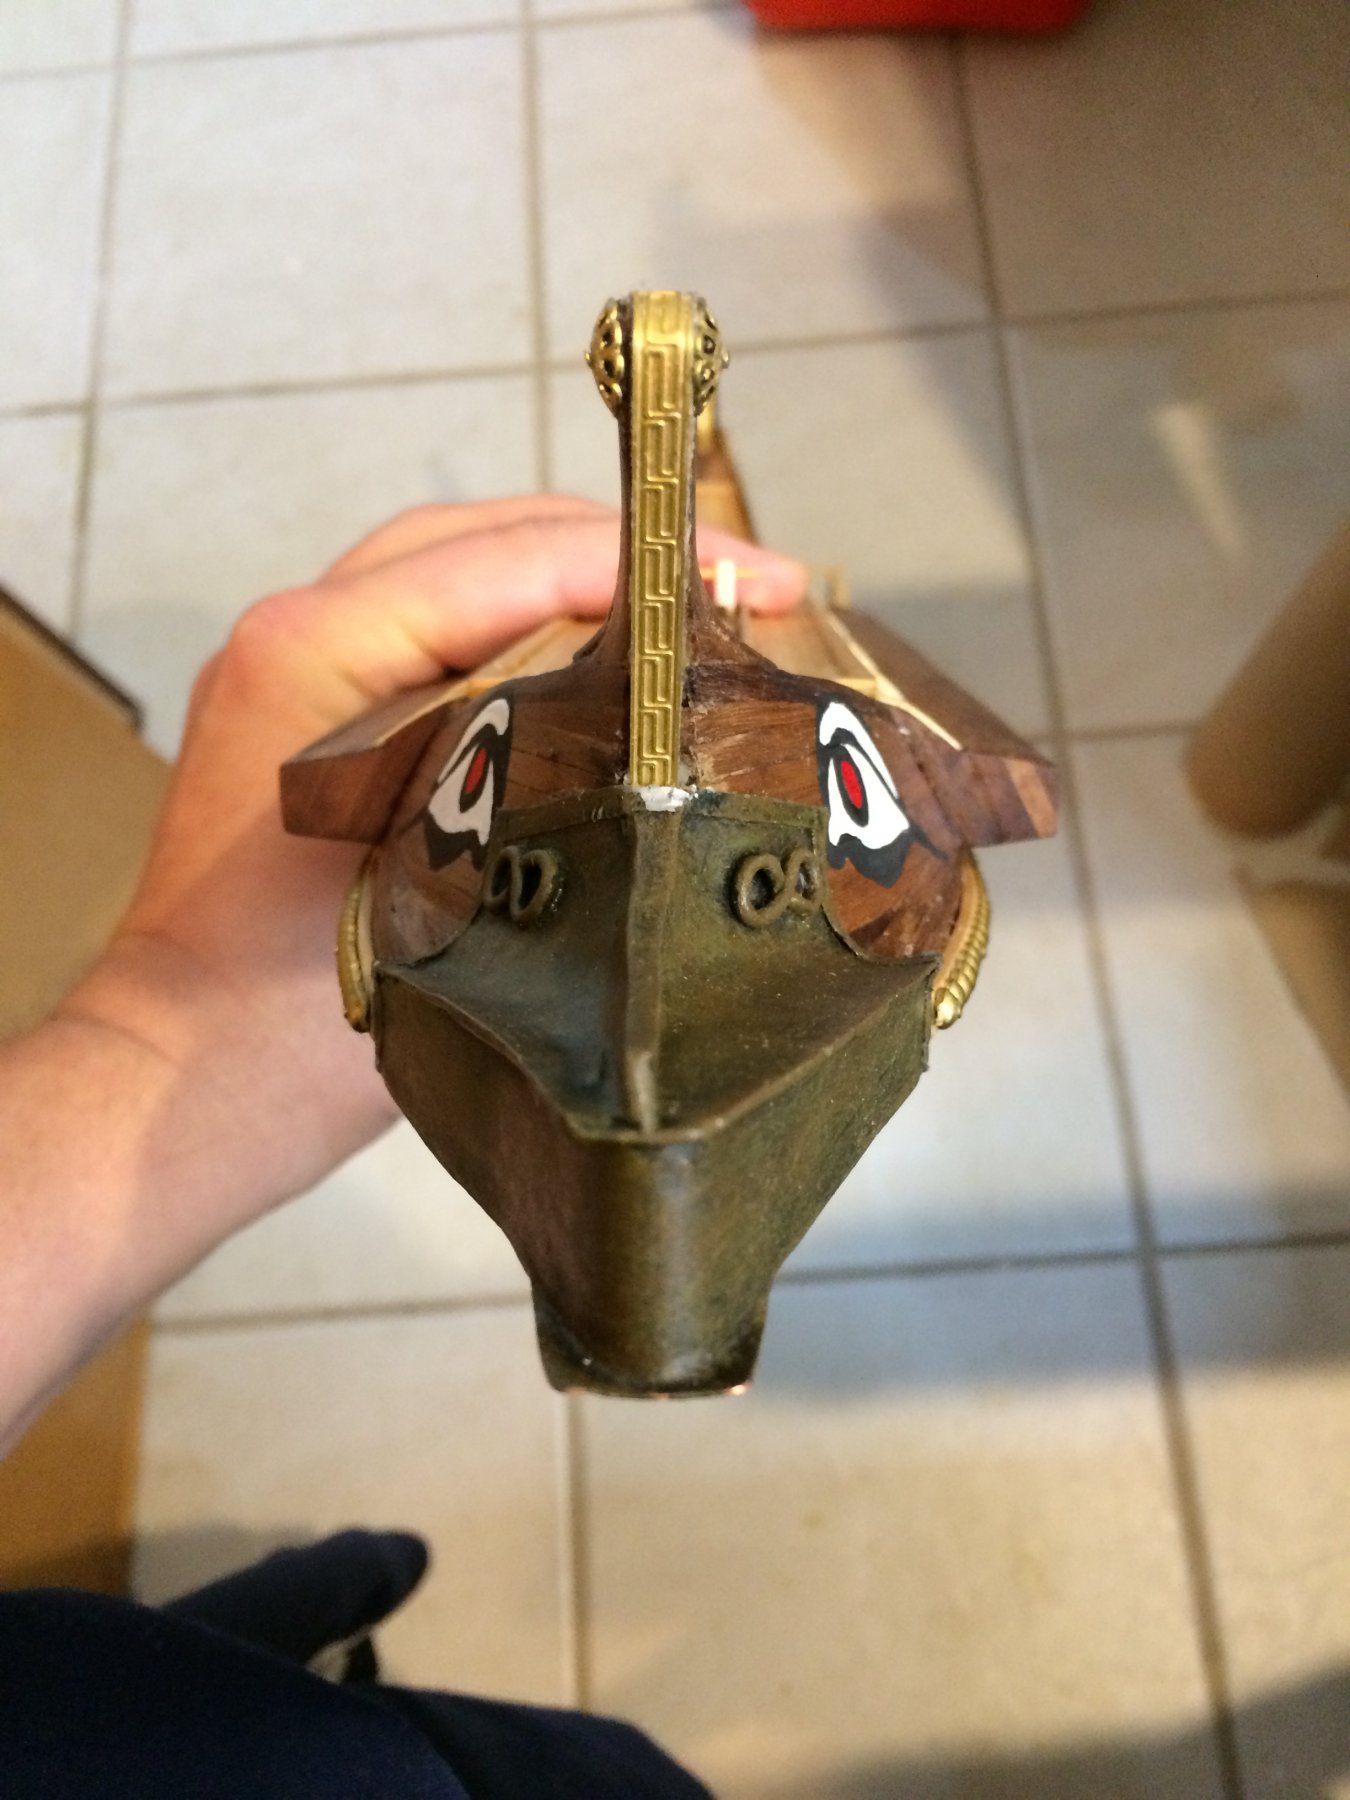
I finally finish painting ship eyes. They took me a while and two attempts as my hand was not steady enough and slightly stronger push on the brush resulted in wider line that expected. So remove all and start from scratch. I wanted to have a more mighty look particularly when you look from the enemy' perspective to the approaching ram. Later in painting process i came across one picture that really shows how mighty eyes should be looking but it was to late to start painting all over again. So it is what it is.. And from enemy's point of view: So, this activity completes this stage of the building process. Next is few layers of protective coating, mast, sail, captain's chair, oars and stand. More to come soon.

- 122 replies
-
- 3
-
-
- greek bireme
- scale-1/35
- (and 2 more)
-
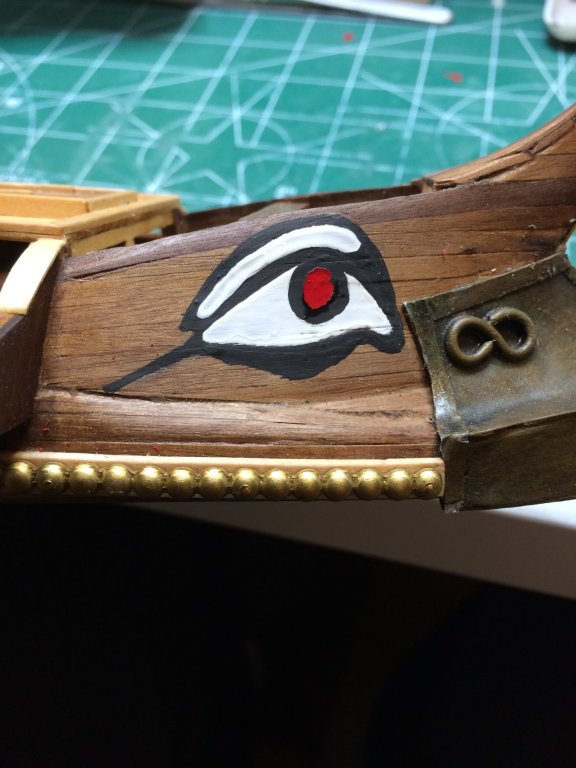
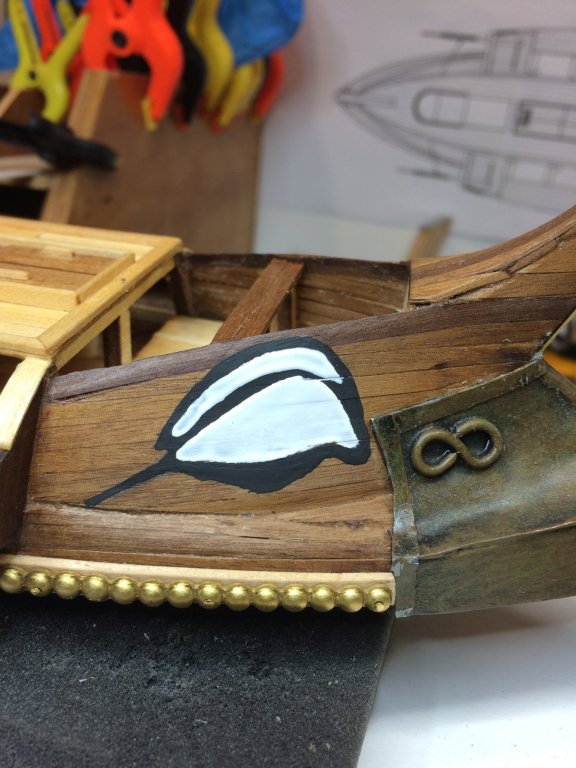
Getting there, getting there. Started to work on eyes, painted them on both ends. Need to work on pupils today and some touch up since i painted it all by hand, directly on the ship. Very good brush is all what is required and some acrylic paint.. Need to fix that top of the ram, accidentally damaged it with flat strip decoration. More to come..

- 122 replies
-
- 5
-
-
- greek bireme
- scale-1/35
- (and 2 more)
-
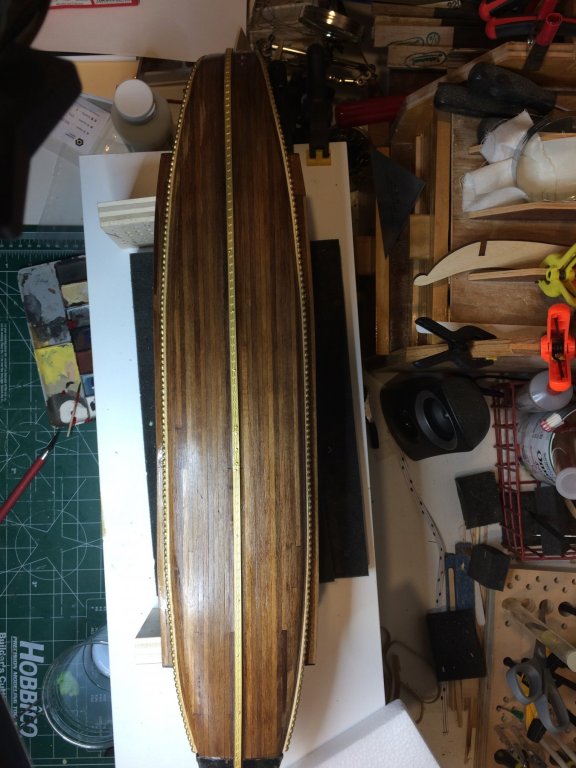
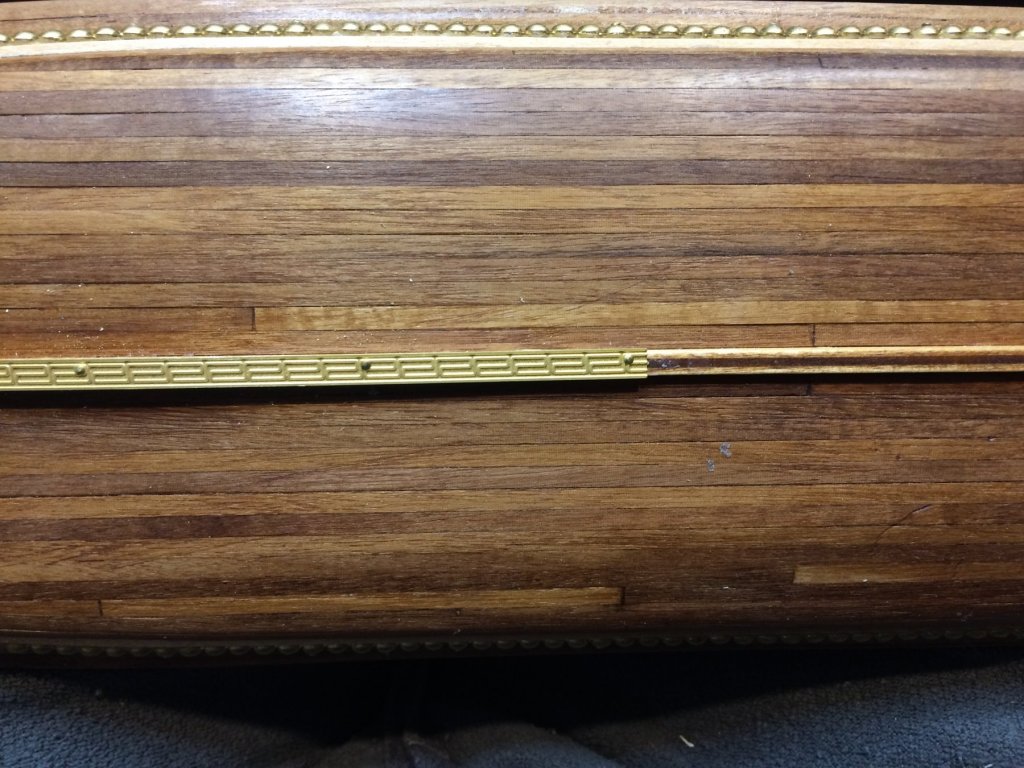
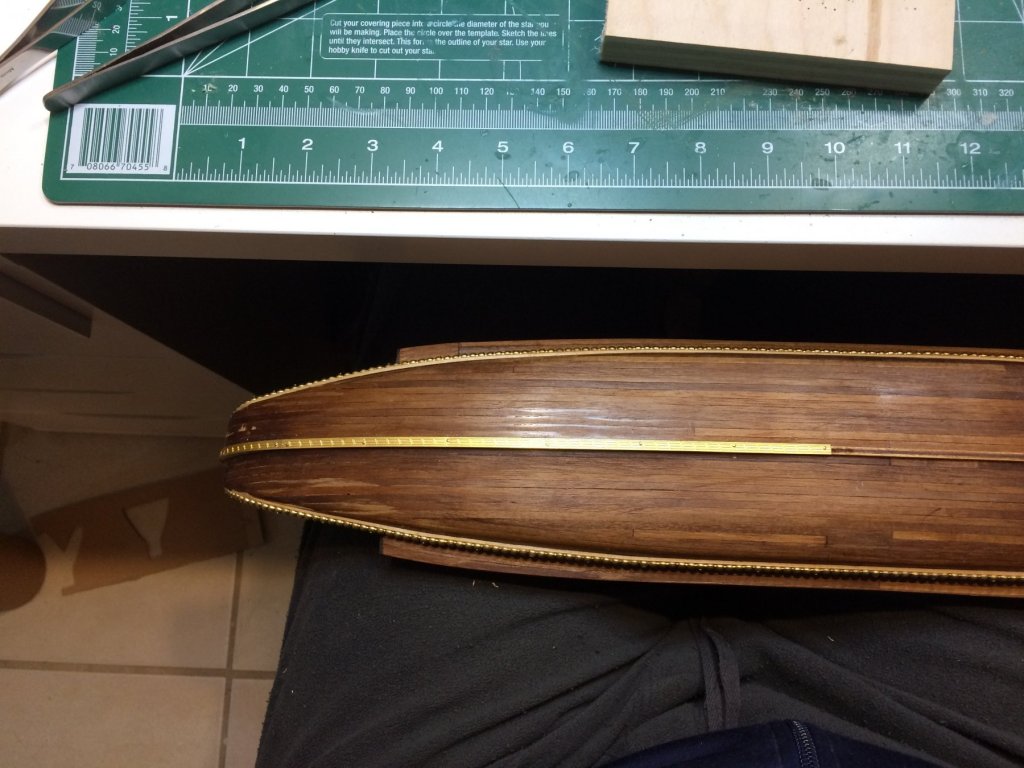
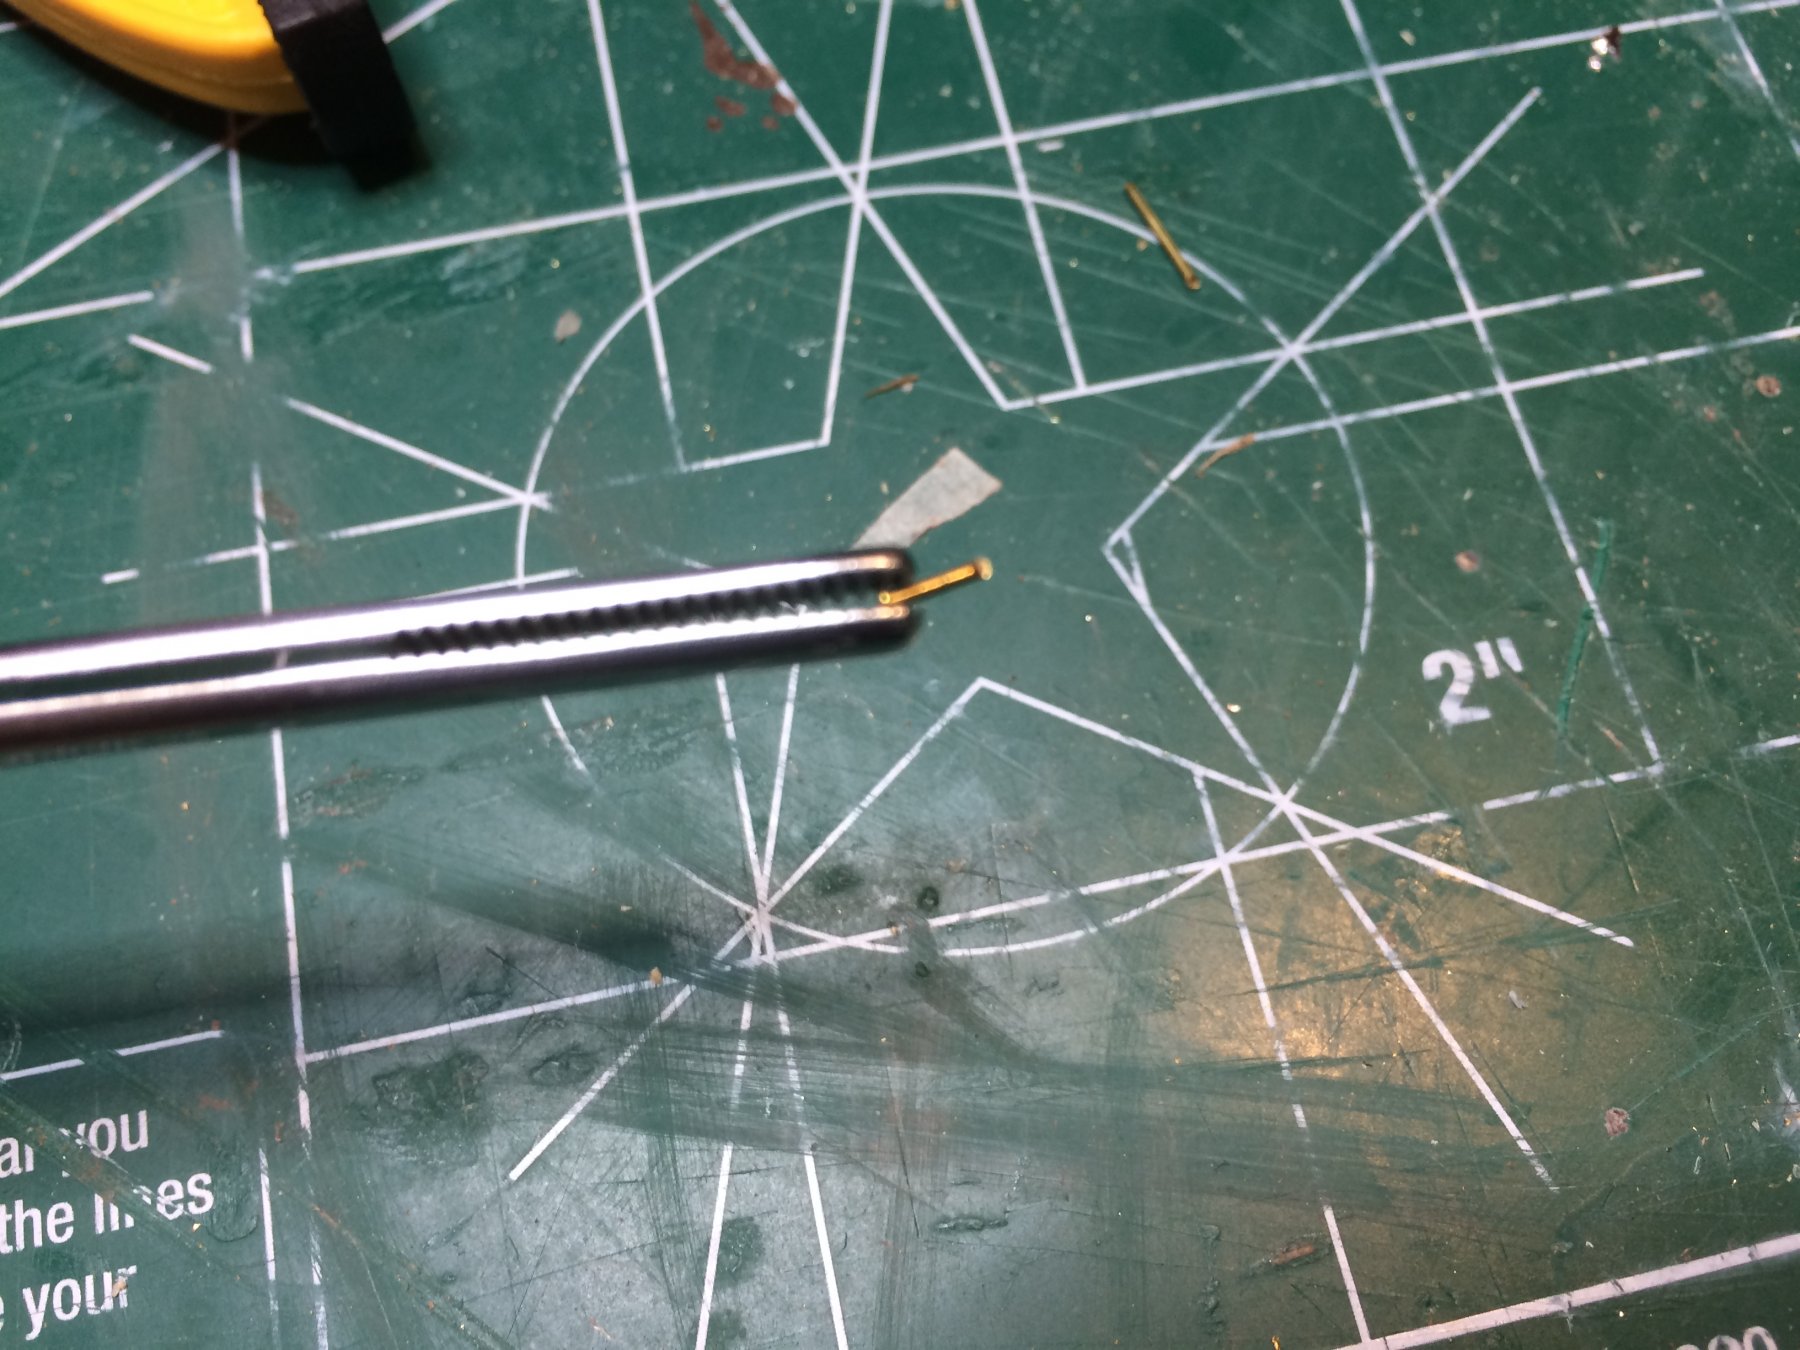
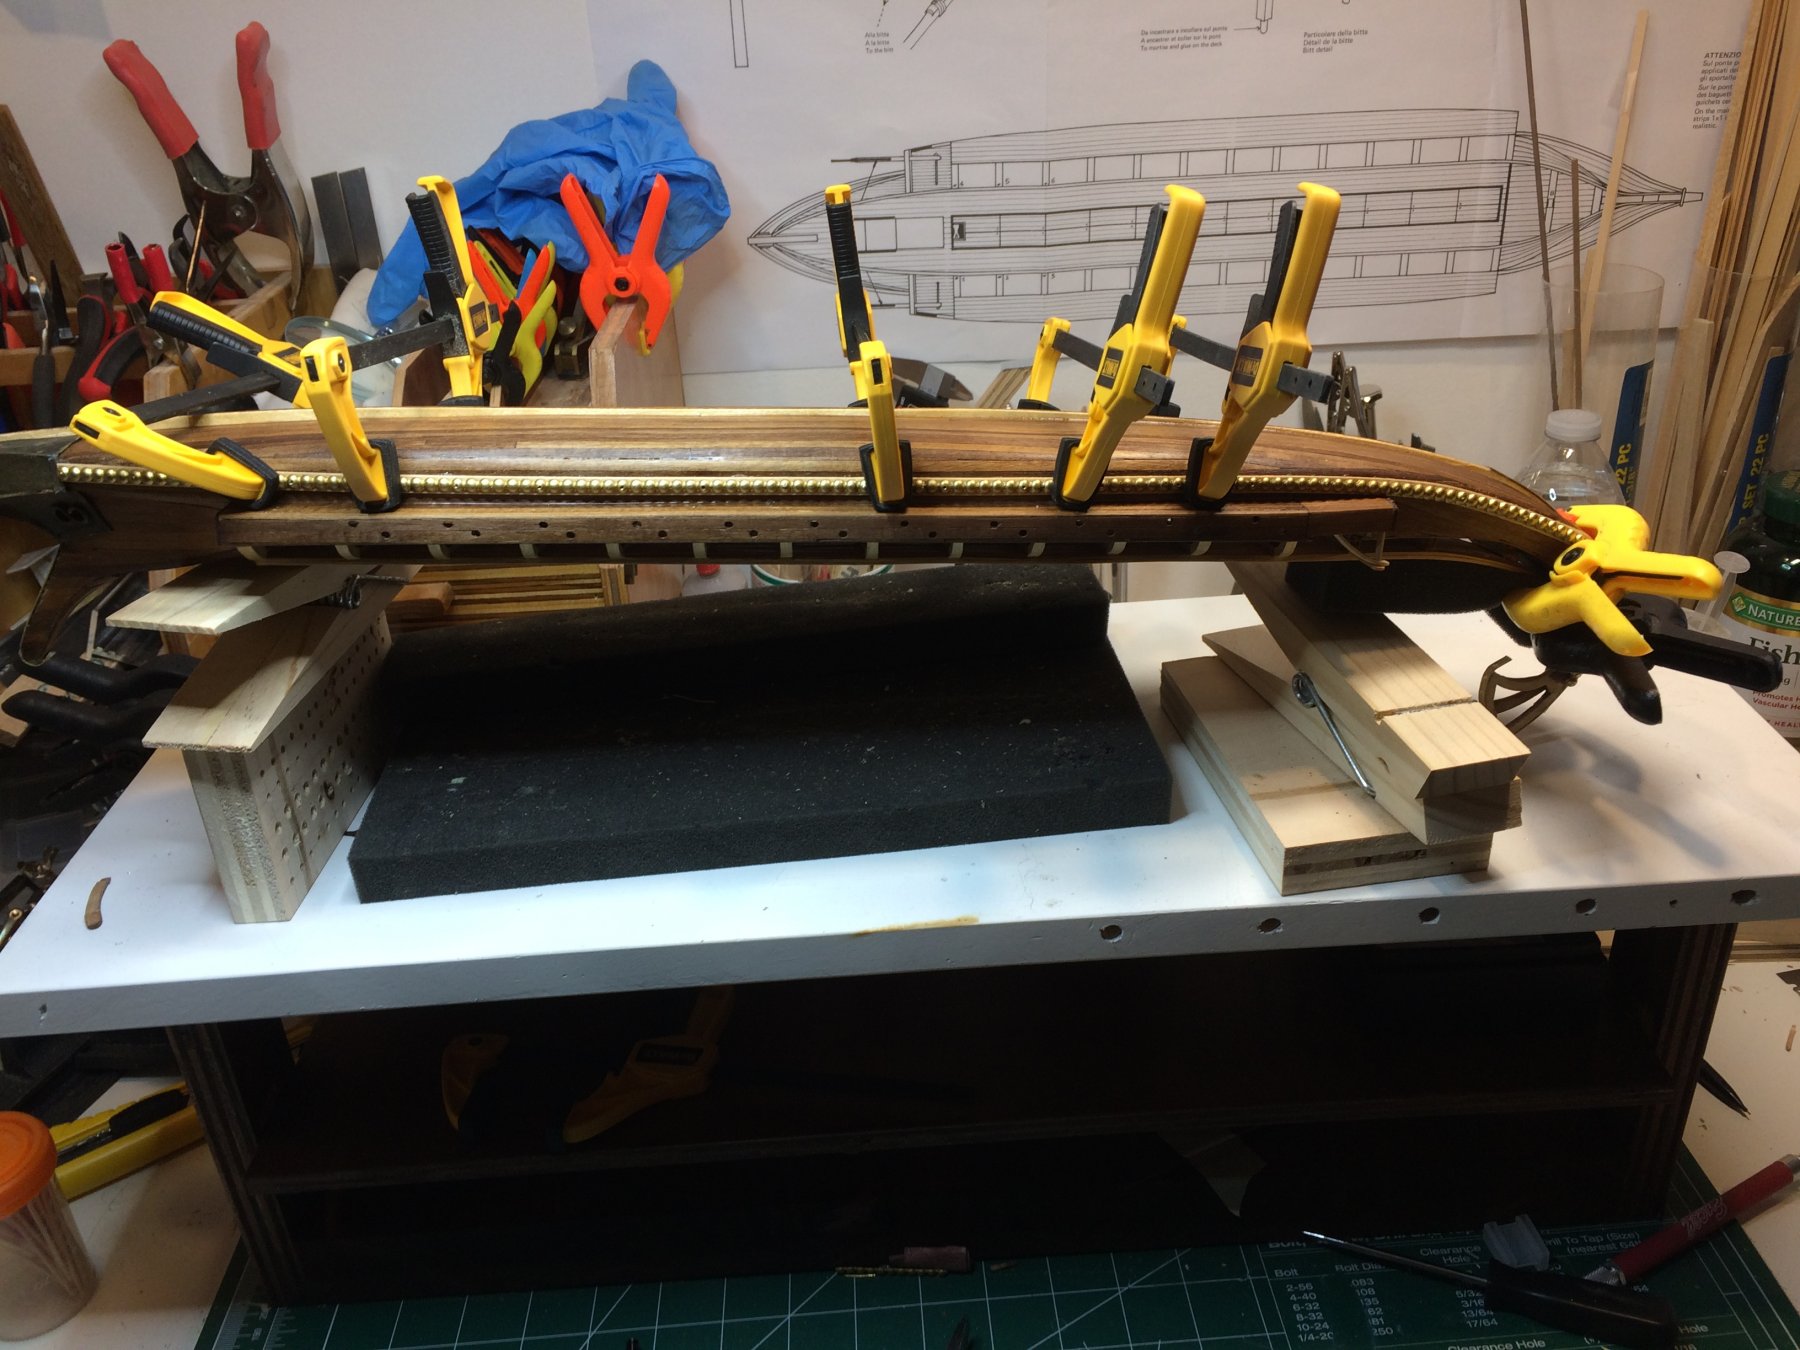
I had some extra free time today so i completed all decorations. I made executive decision to use pins in addition to glue to fix the flat strip decoration that goes on the keel. Reason is just to make sure it will stay put. Cut few pins to the size of 4-5mm, drilled a pilot hole in decoration, a bit smaller in diameter than pins and start with glue first. Than drive those small pins into the flat strip and to the keel. Did not want to be extremely precise but tried to make the distance between pins as even as possible. These flat strips comes in 4 strips, so at the end there will be a small gap that has to be filled with 2cm long flat strip. Wondering should this small piece be at the ram area or in the middle of the ship. Middle of the ship it is... The whole length of keel decoration. I was not quite sure what was the point of this decoration on real ships as you might not be able to see it anyway, unless you have some ancient Greek made scuba gear. Next will be to paint two eyes; will do it free hand, and as precise as possible. Do not want to use printer and print them out; i think it will be to thick and sticking out much more that doing it by hand.. I am getting fairly close to complete this interesting model. After eyes there will be several coats of varnish for protection, captain seat, flag, mast, sail and oars... Happy modeling..


- 122 replies
-
- 4
-
-
- greek bireme
- scale-1/35
- (and 2 more)
-
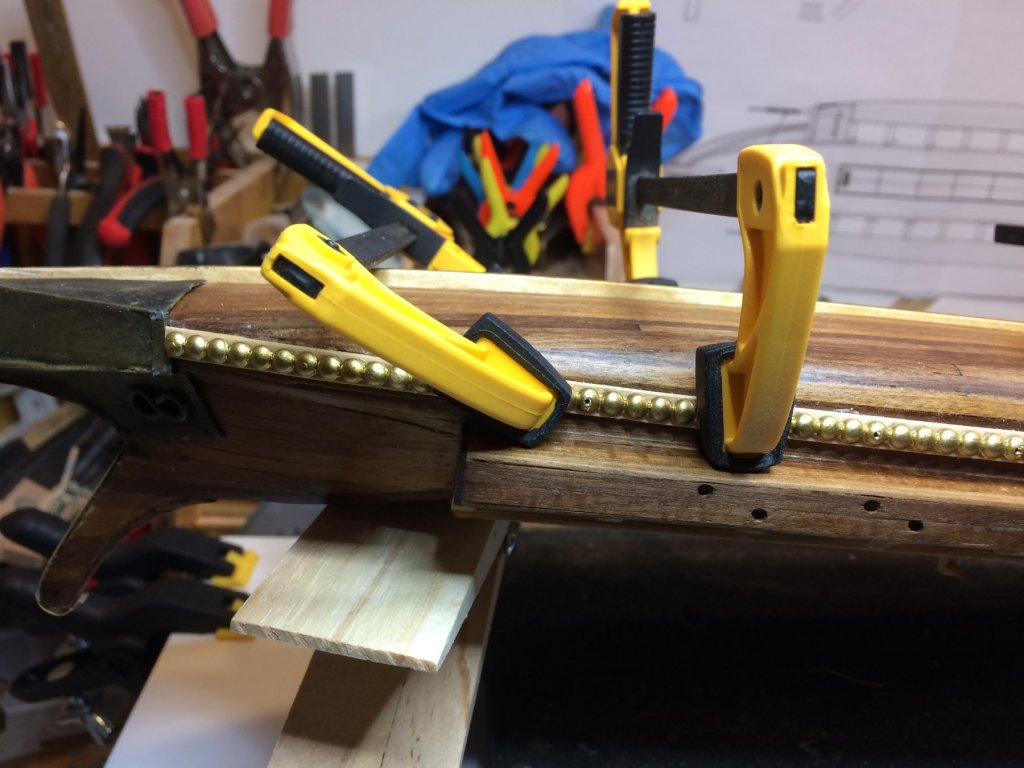
Nothing interesting to report today; spent time gluing and clamping bubbly ornaments, cutting pins to 4 mm in length so i can put them back in pre-drilled holes, without damaging the hull again. And bubbly ornaments completed.. Happy modeling..


- 122 replies
-
- 4
-
-
- greek bireme
- scale-1/35
- (and 2 more)
-
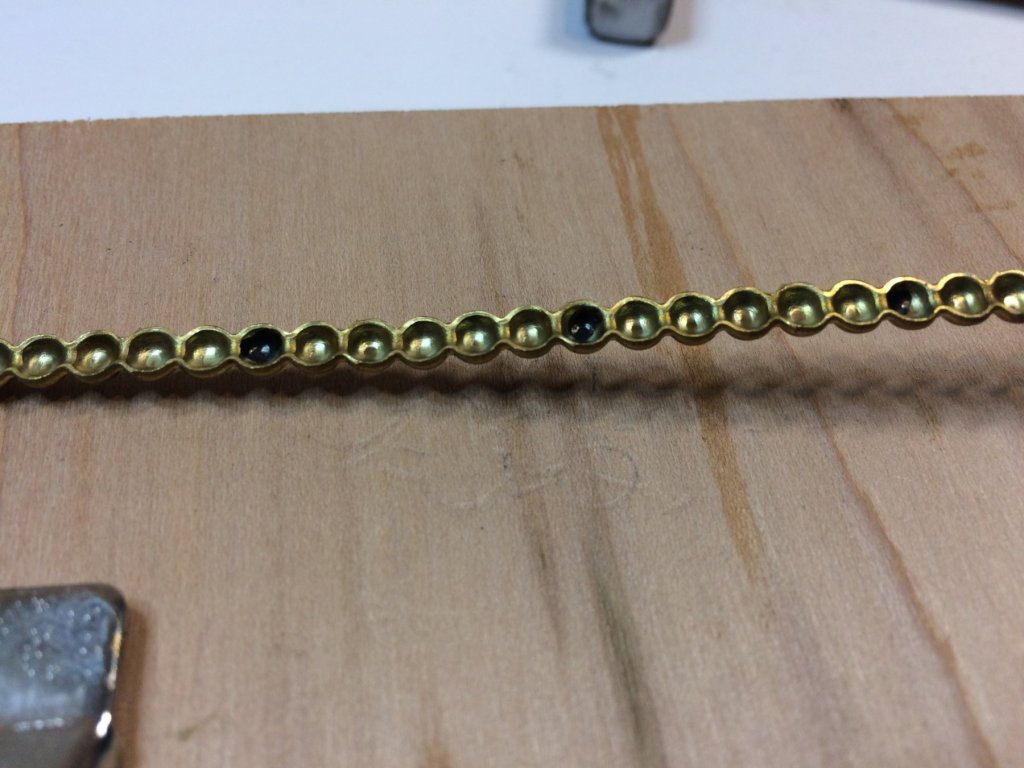
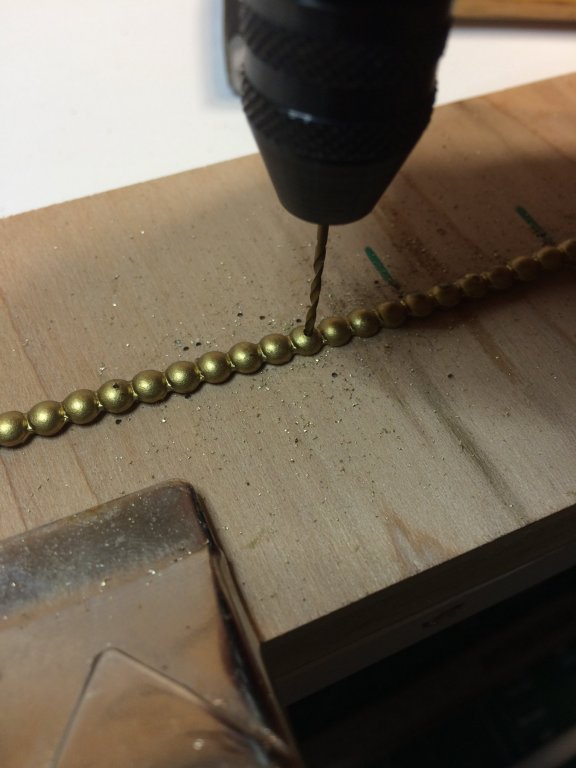
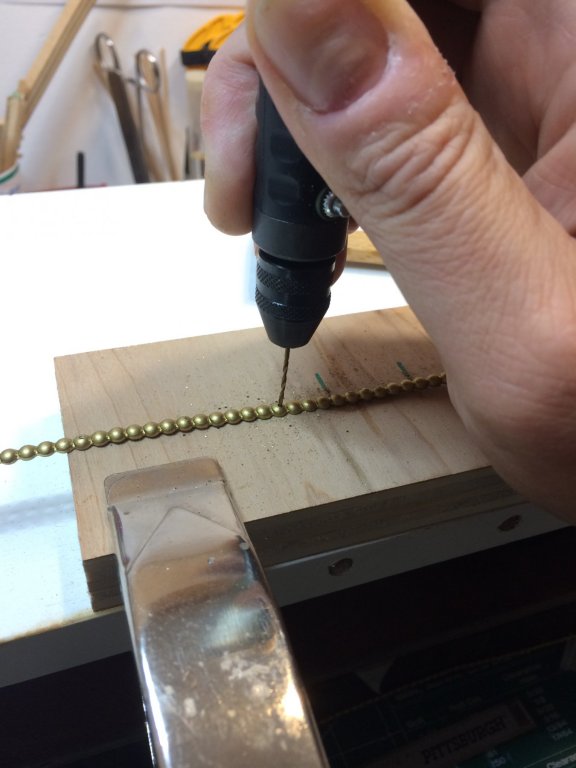
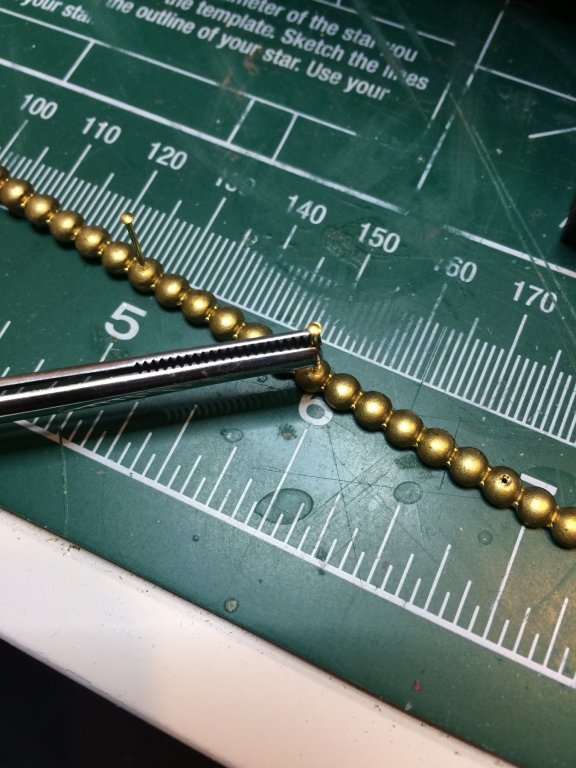
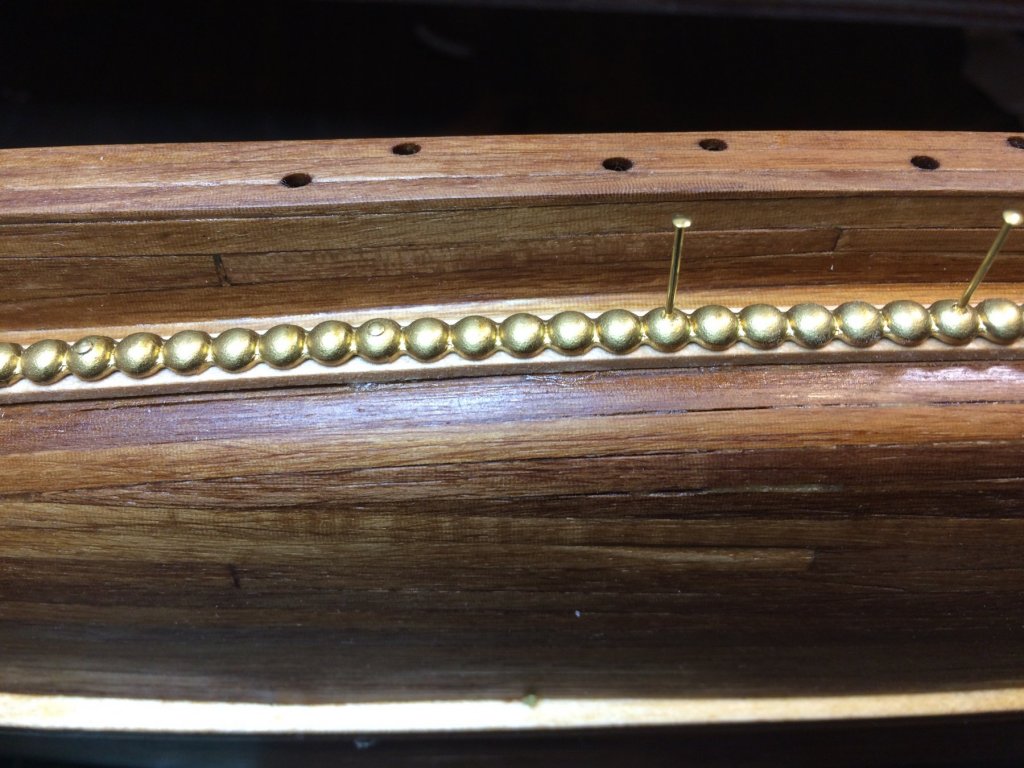
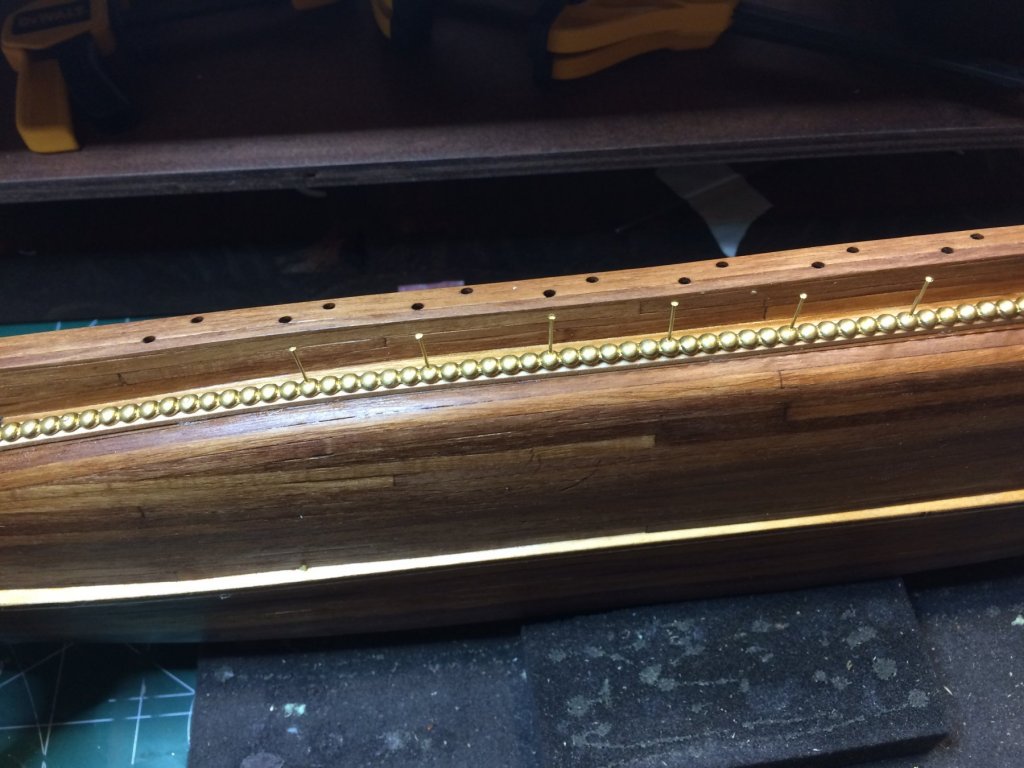
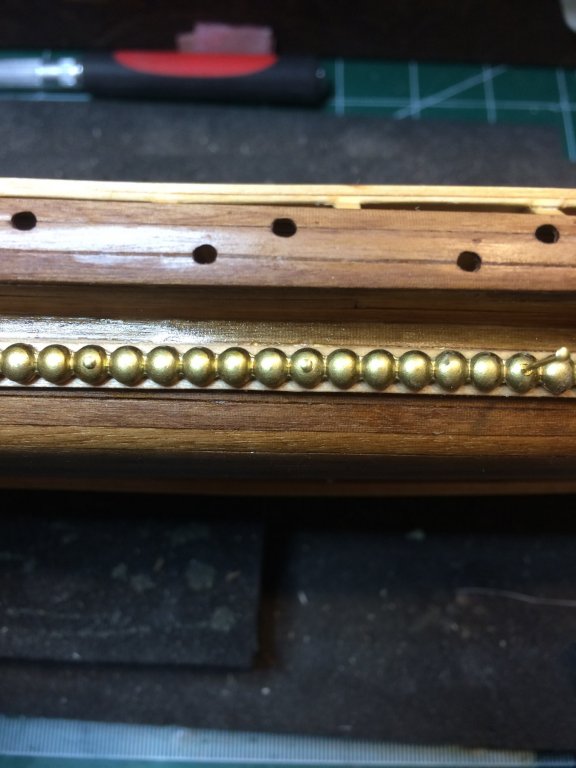
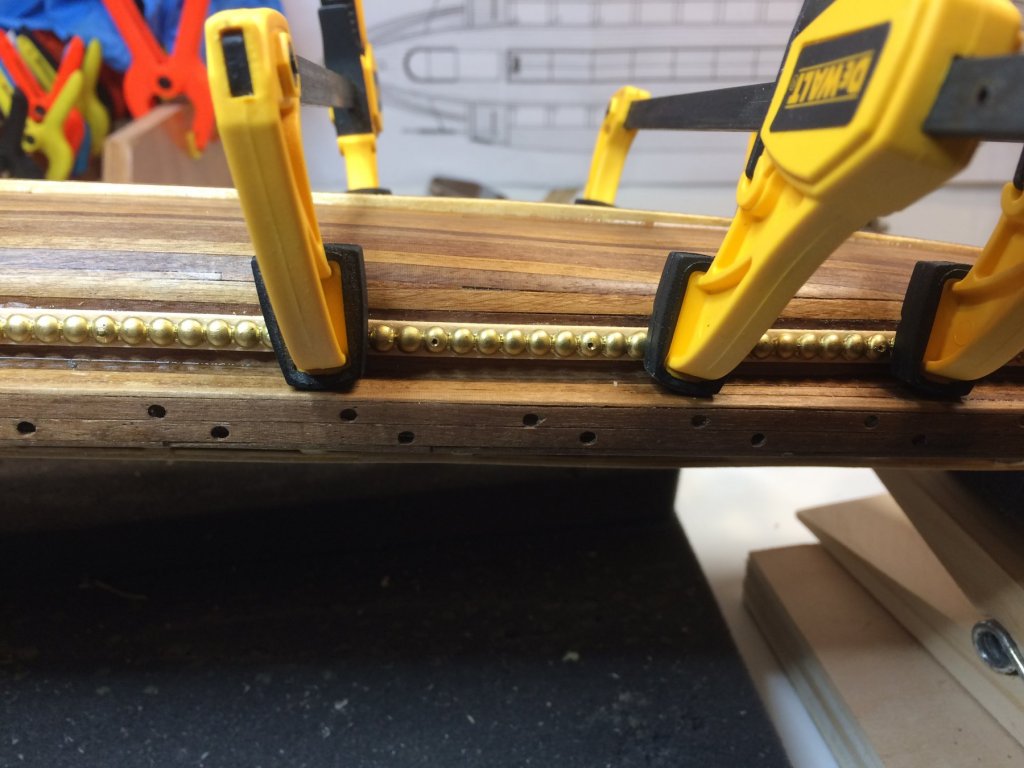
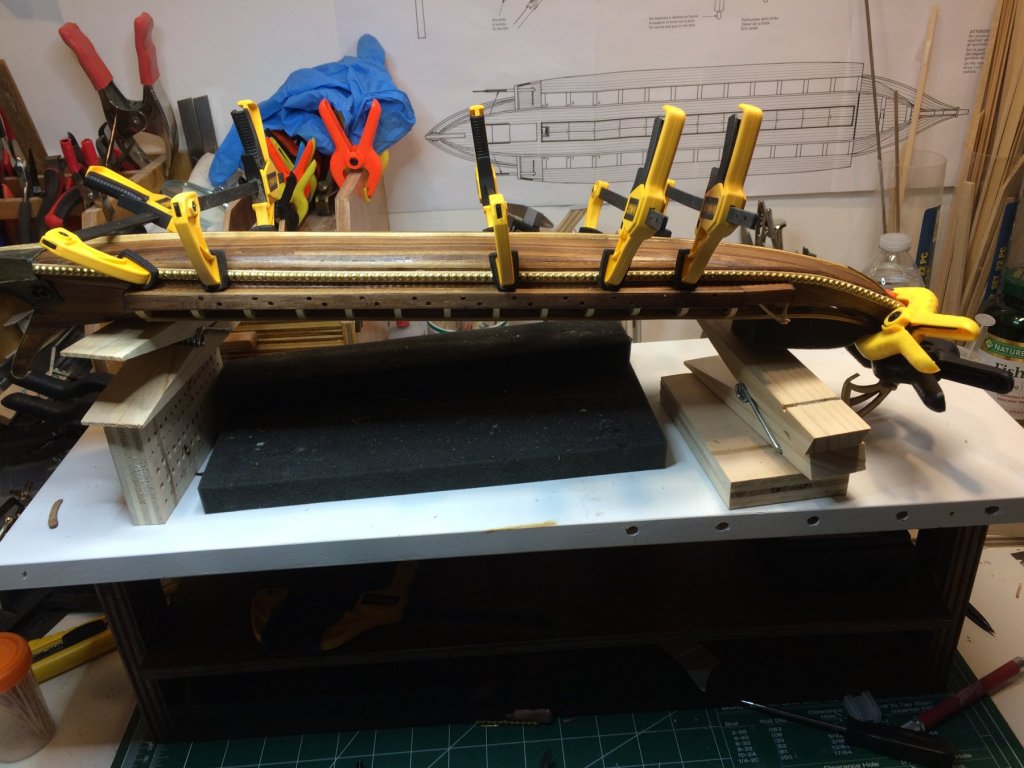
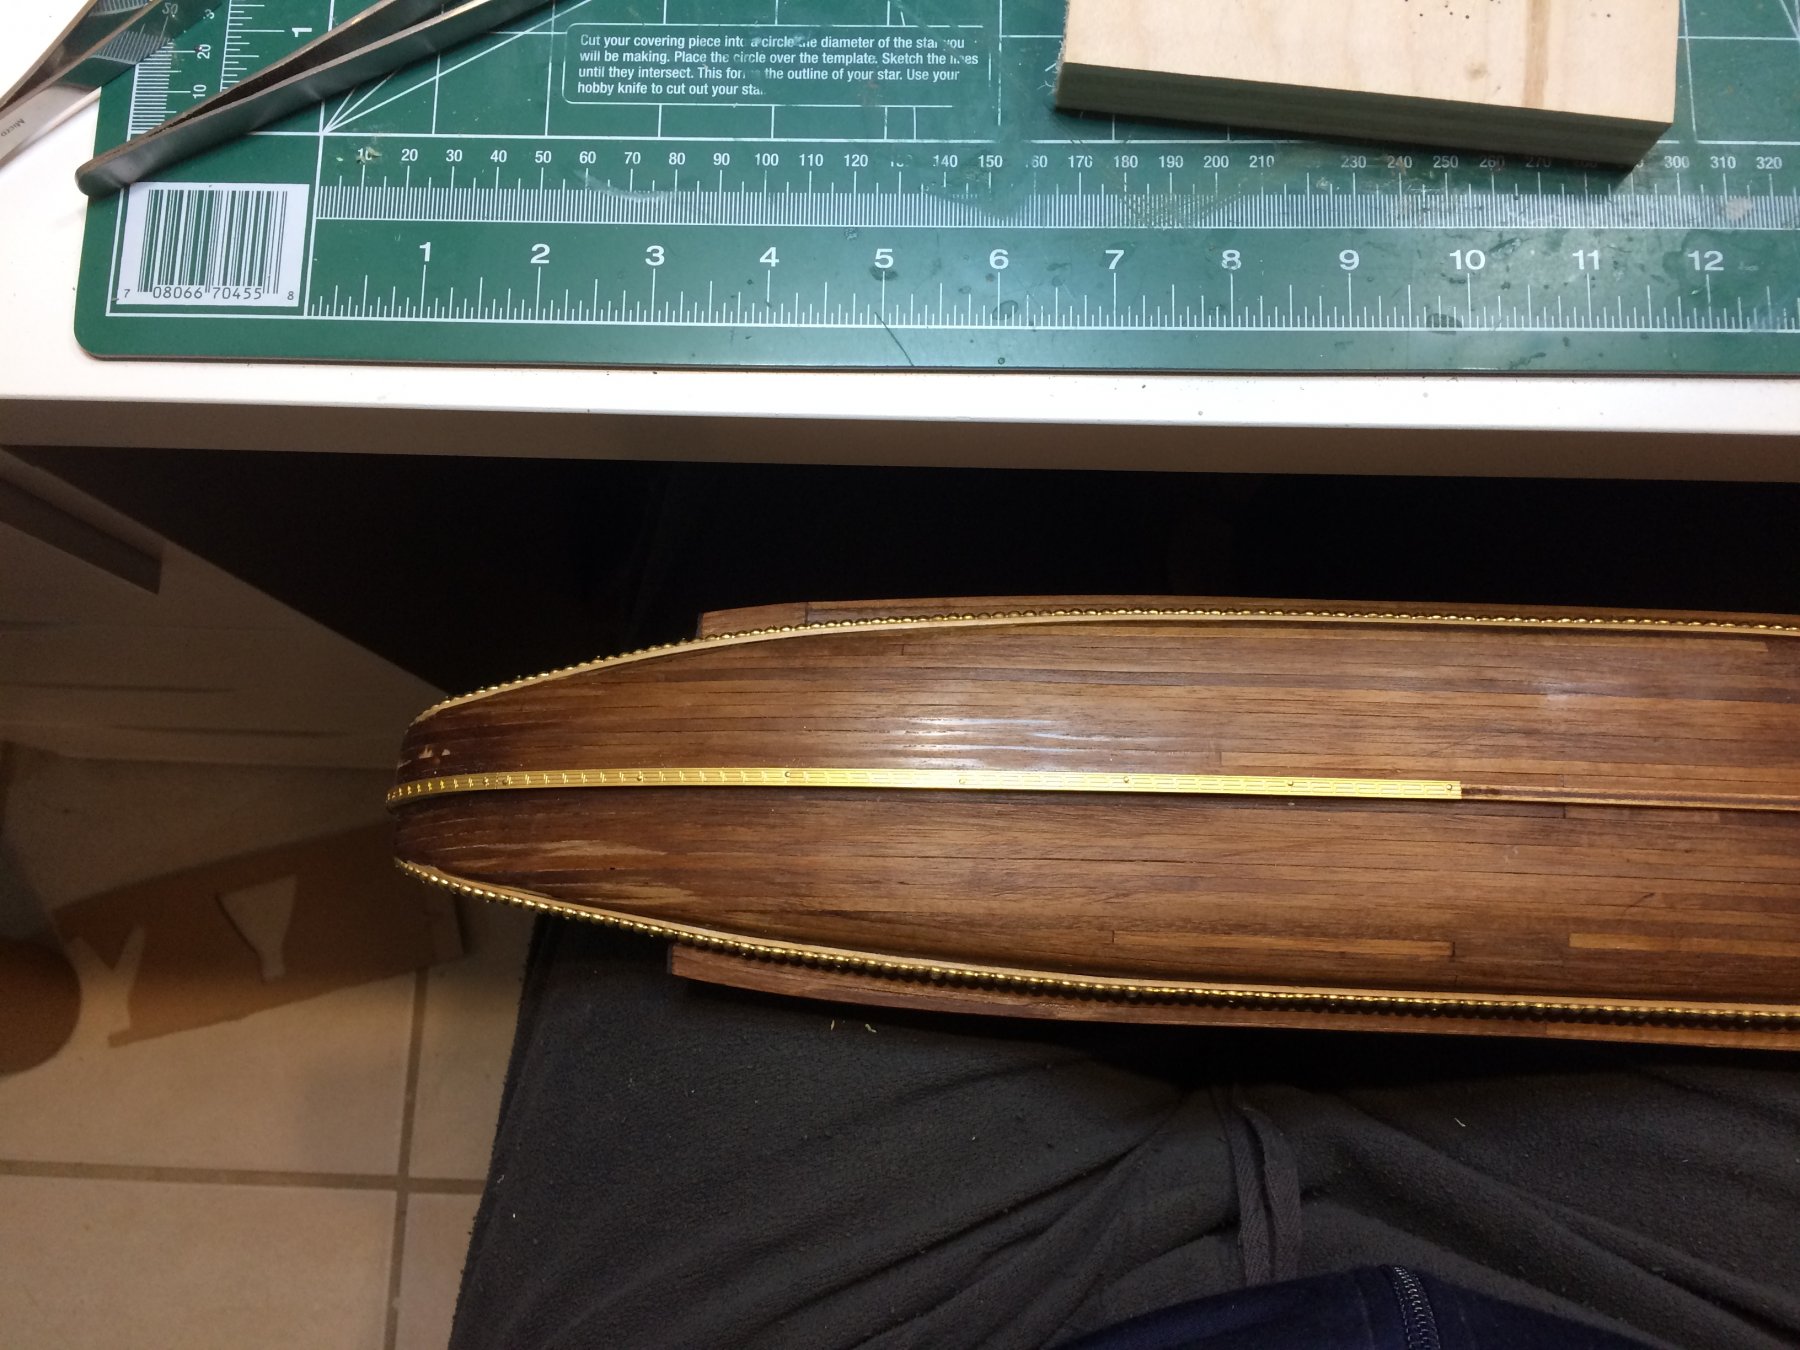
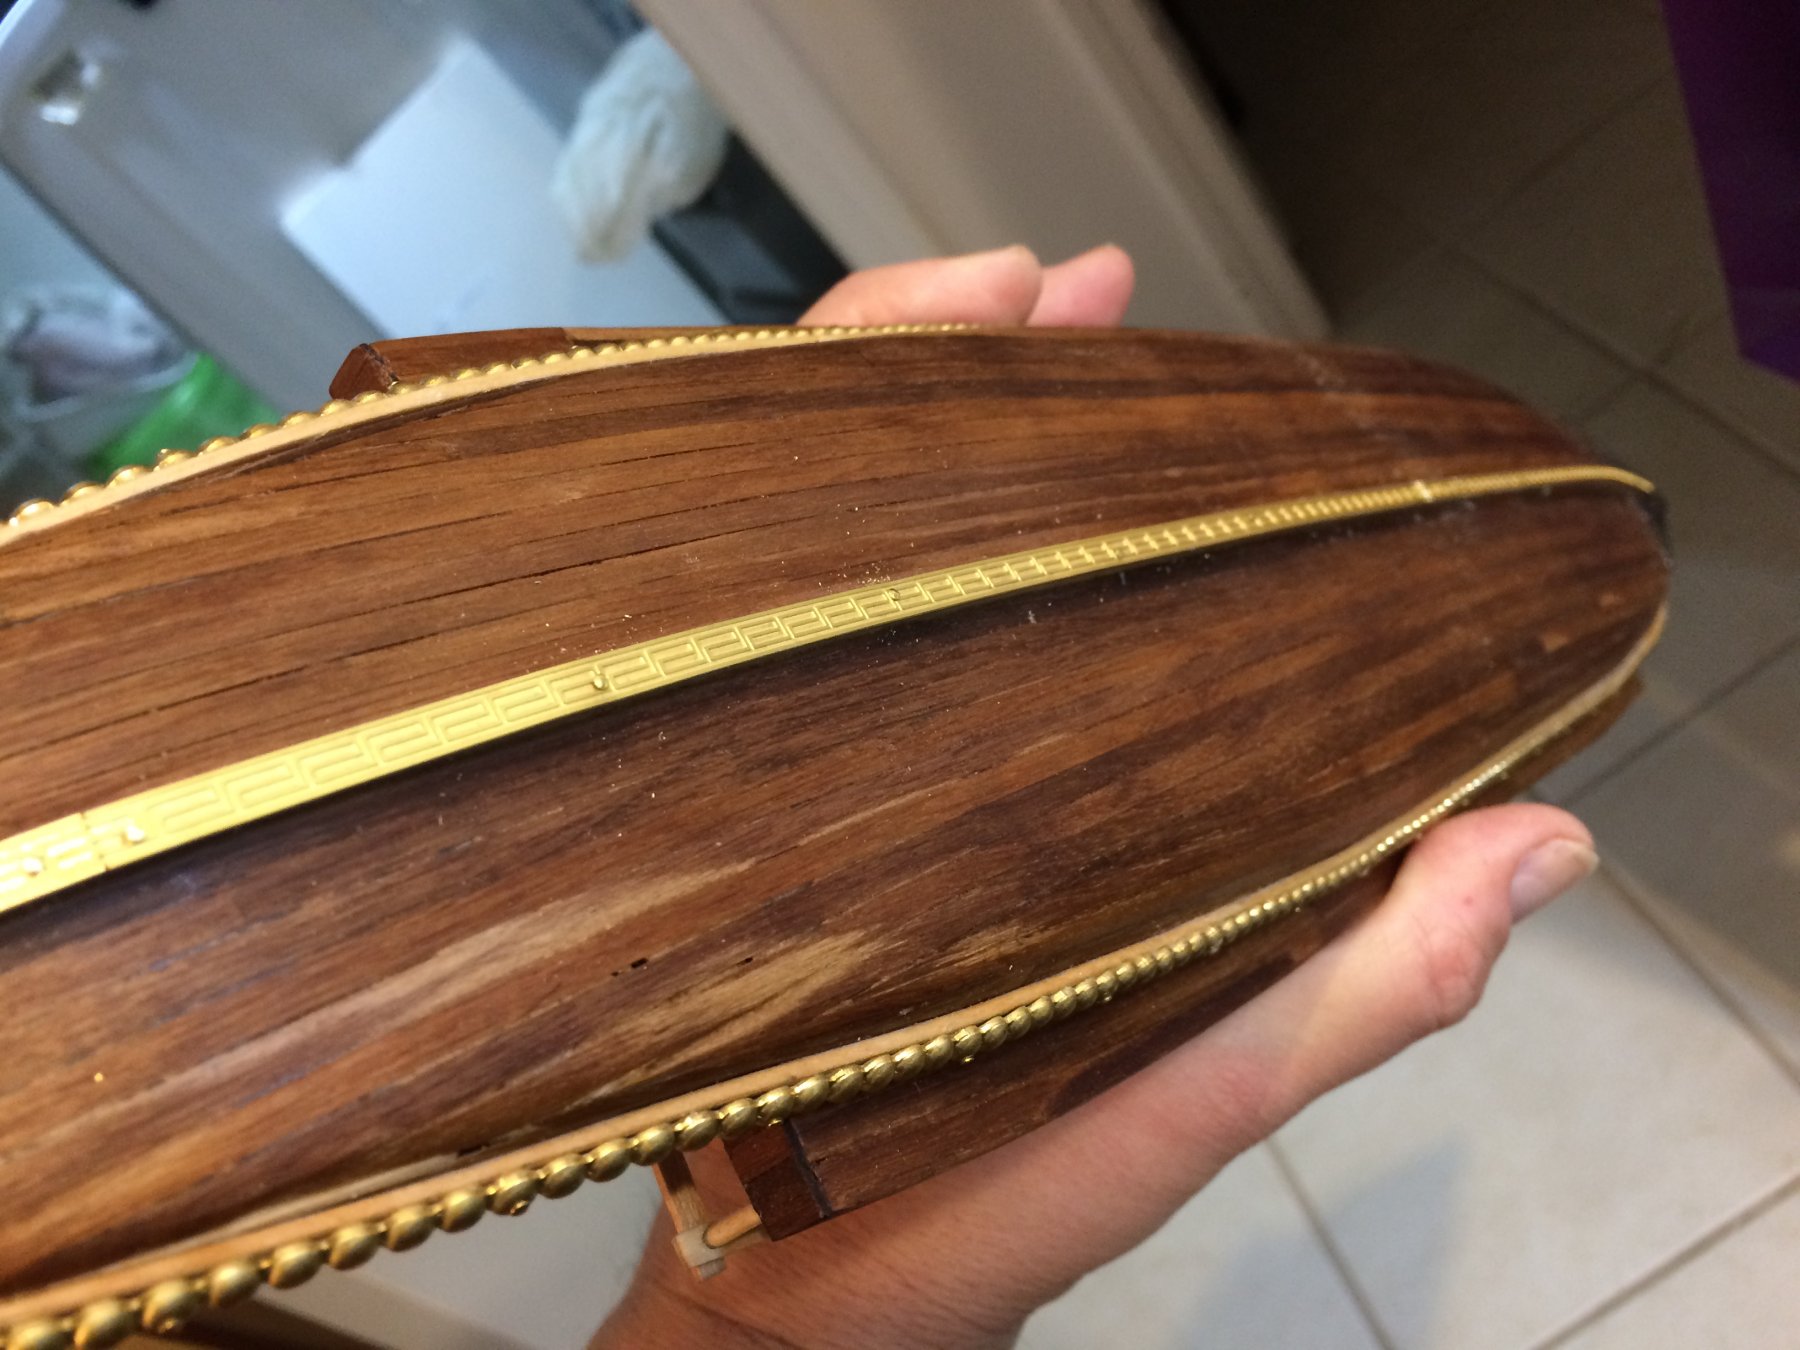
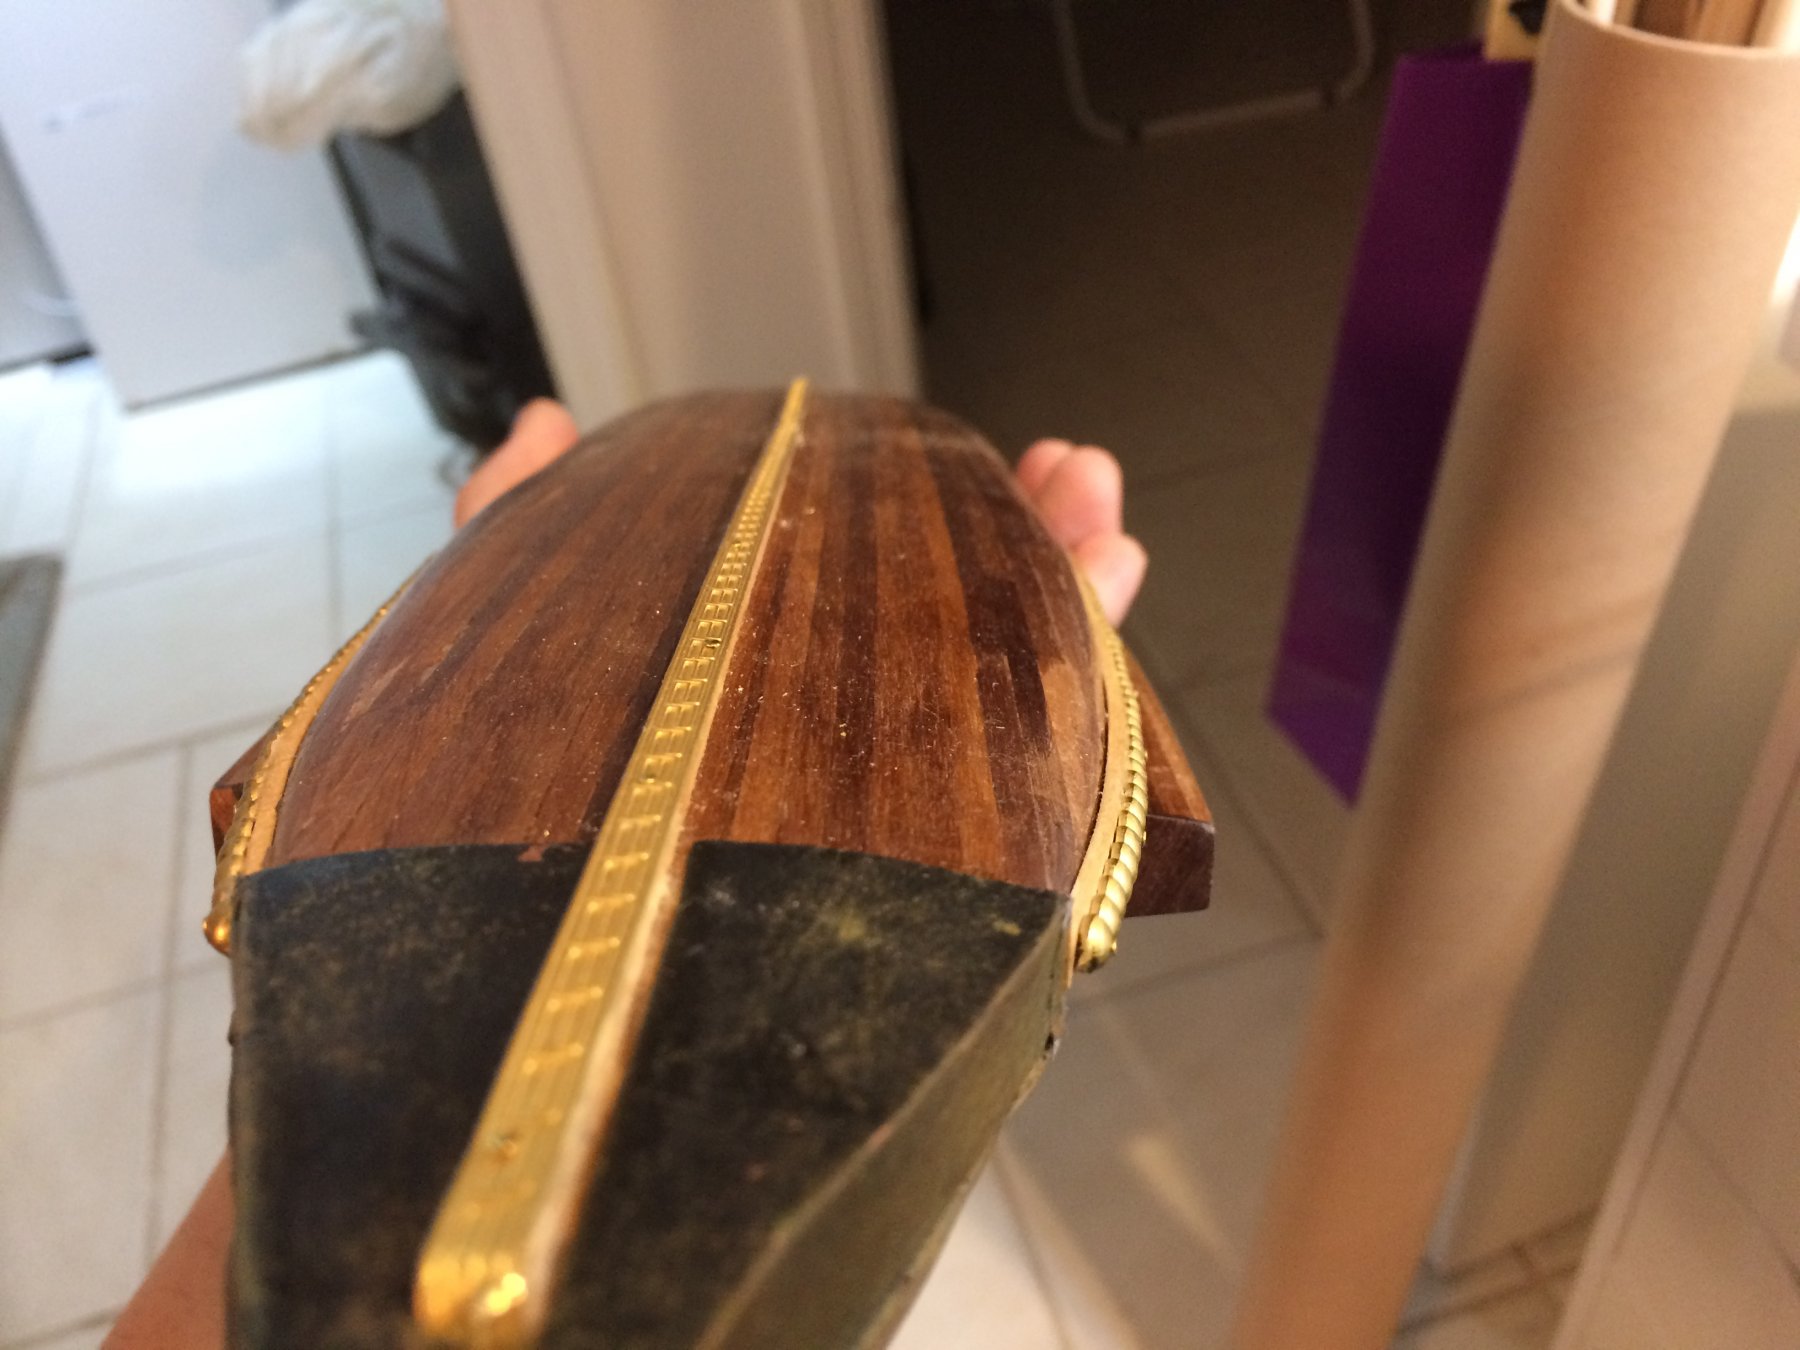
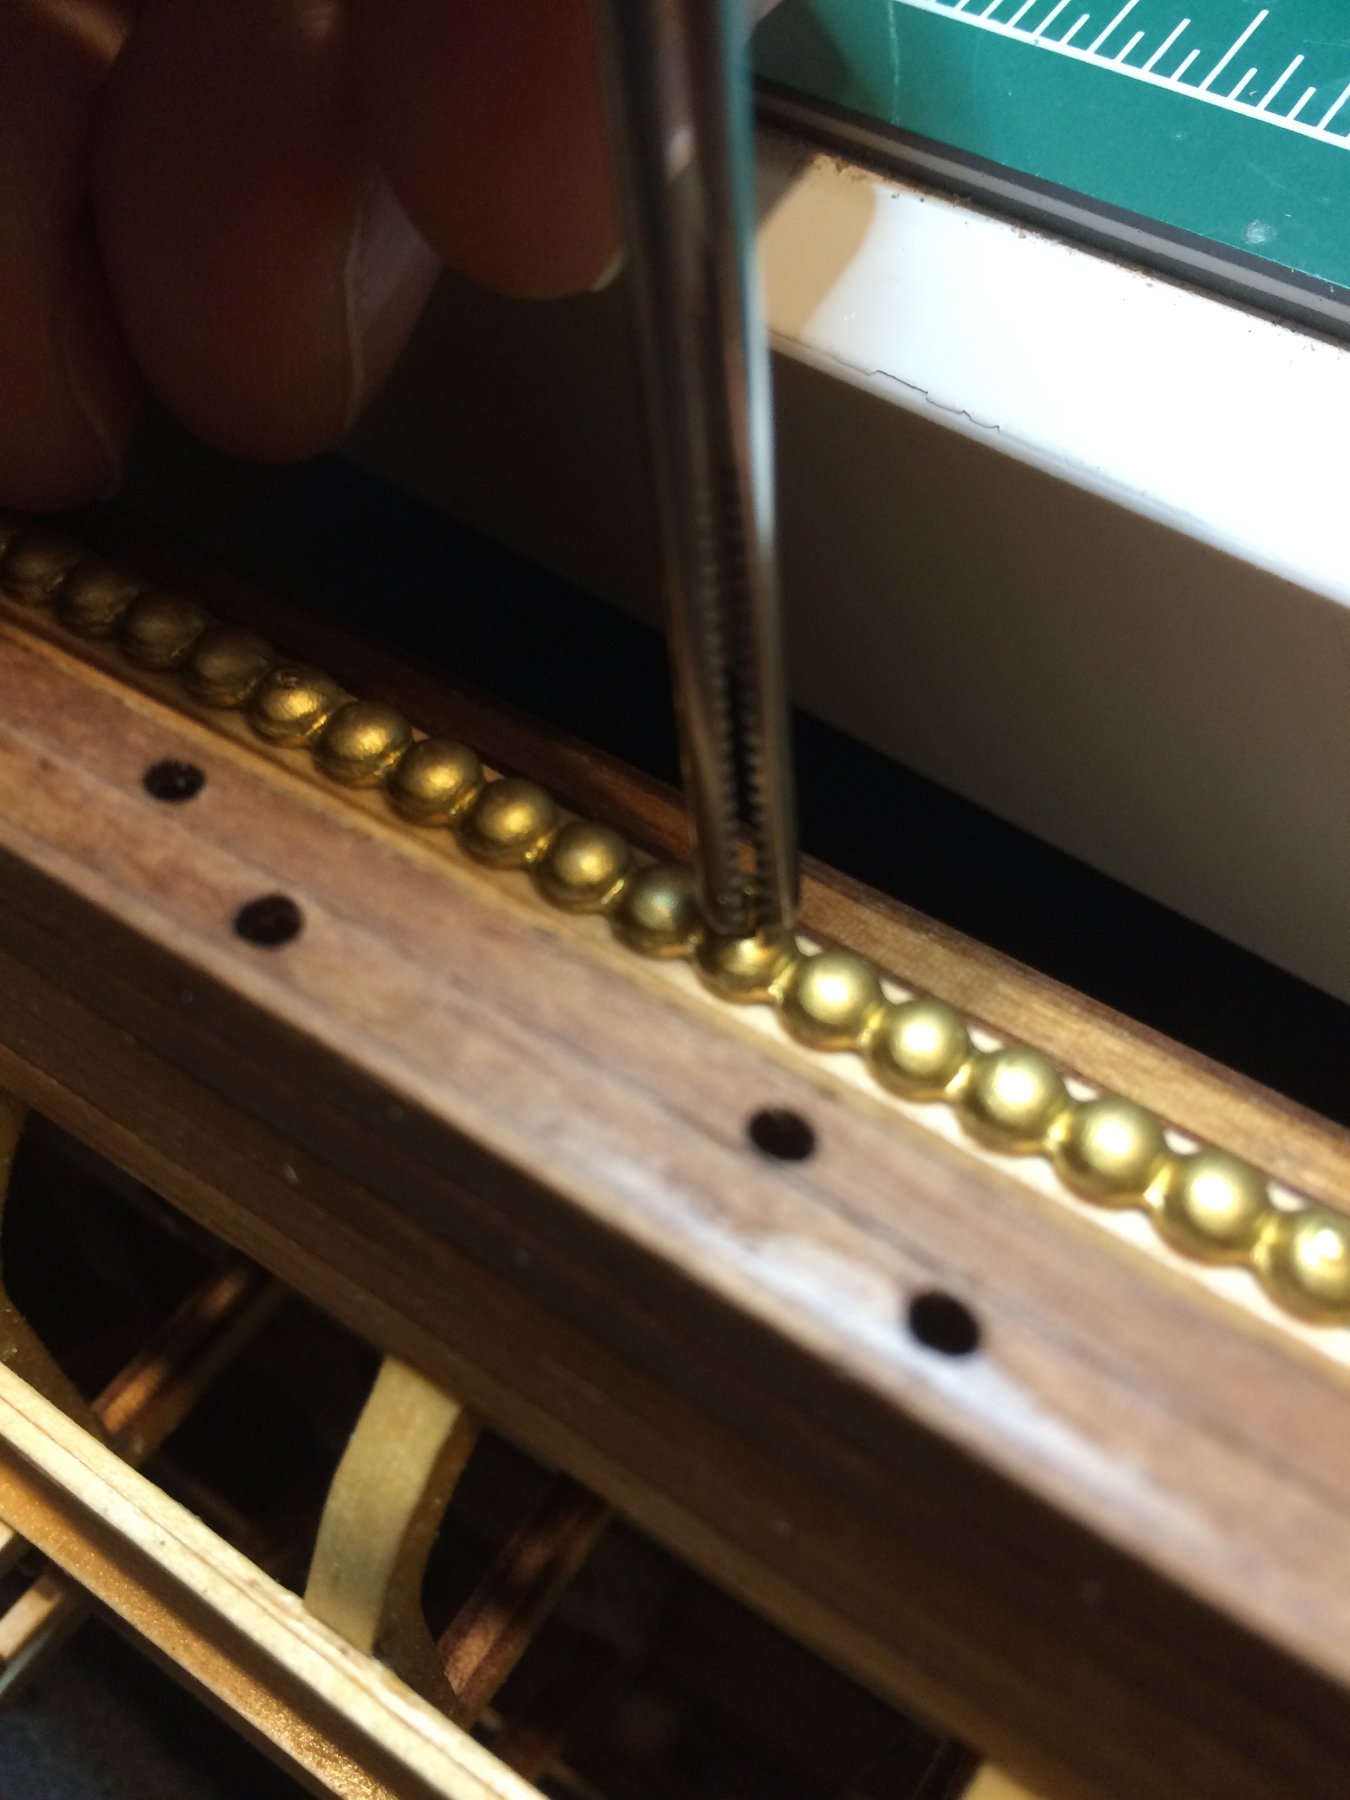
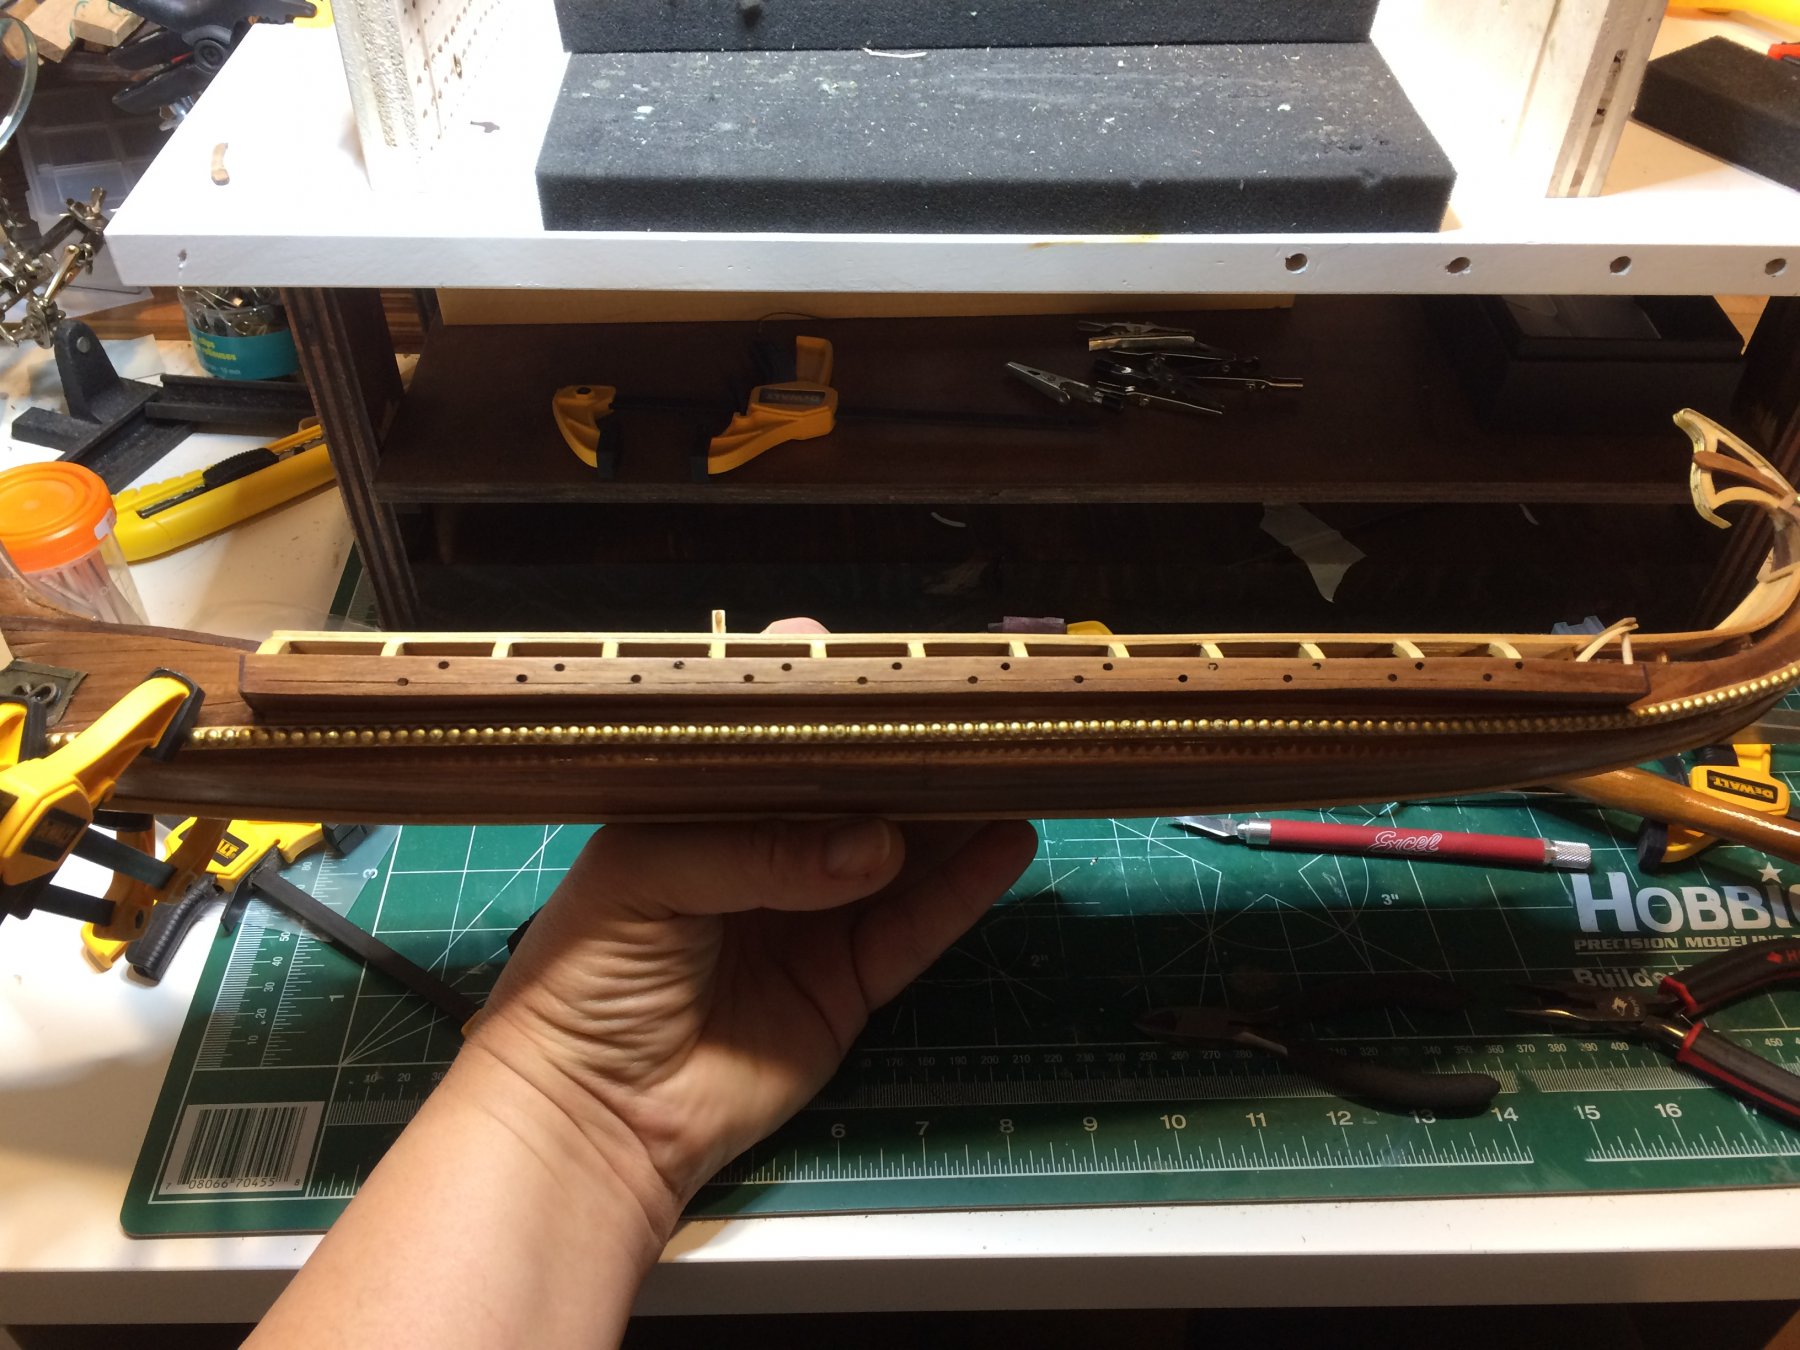
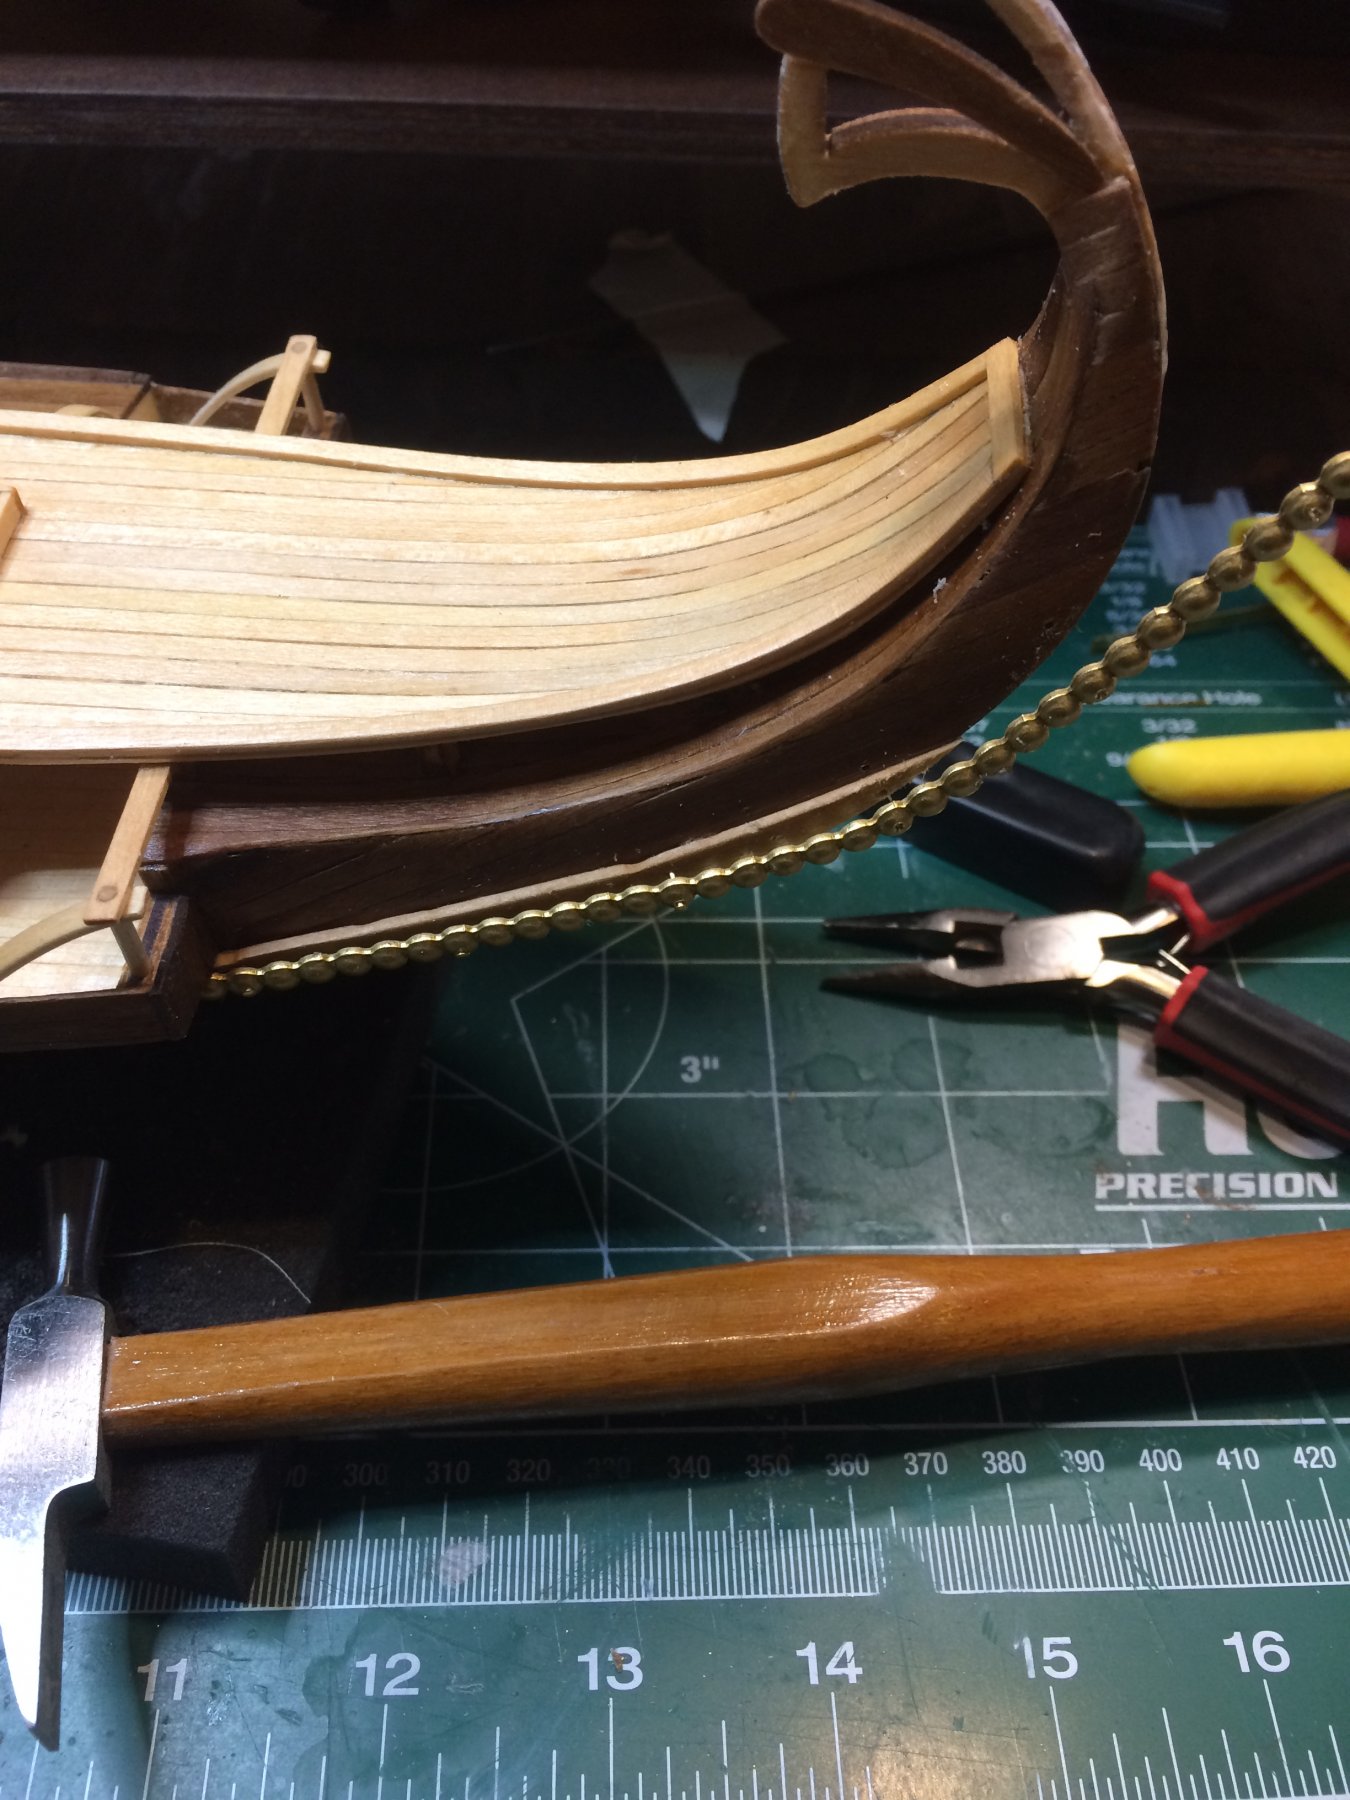
Today i continued applying side borders/ornaments and other decorations. The border ornaments (or bubbly peaces of brass) are surprising well made. Not quite sure that original ship has this type of decorations although it might have some type of decoration. Anyhow, the bubbly brass decoration are surprisingly well made and tough. They are about 0.8mm tick and robust and i would say a bit on hard side when it comes to shape them to fit on the hull. I was able to drill small holes for pins (0.4mm) and even counter-bore the hole so the head of pins sits fairly flush. There is also a flat strip, very good quality with embossed design on the face. It runs on the keel.. I started by marking every sixth bubble at the back so i can drill a hole. Brass is very slippery and no way to hold the drill bit properly on the top of the bubble. Drilling holes.. Drilling holes... Then i put in nails, the hole for a nail is a bit smaller than the nail, so tapping with hammer is required to push the nail into brass bubble. Here you can see that this brass ornament was accepting counter-bore very well.. Decoration going on the ship.. One side completed.. I have completed the other side of the ship as well.. All looked tight and well done. And i discovered that i did not mark the holes that will match position of ship frames so majority of the pins went thru the ship hull, right to the space where oarsmen will be sitting. That was really bad on my part. Then i also discovered that flat strip decoration was not holding on the keel; i was either not mixing well epoxy glue or removed holding clamps before glue was completely cured or Martians were coming to the Earth. According to Amati' plan i supposed to use pins to fix the flat strip to the keel. I am not quite happy with that solution so i will try to fix the problem by using another type of glue, since i am sure that Martians are not coming. At the same time i removed all pins that were penetrated the hull and start gluing the bubbly decoration to the wales. I will need to put pins back into drilled holes but will cut them very short making sure they are not penetrating the ship hull. Will see tomorrow how this works. Hopefully glue will hold tight and will be no need for pins. Worst case scenario i can use pins for flat strip; also will need to make several more holes on bubbly-like decoration to match the ship frames and again use pins. Time will tell.. Happy modeling.


- 122 replies
-
- 2
-
-
- greek bireme
- scale-1/35
- (and 2 more)
-
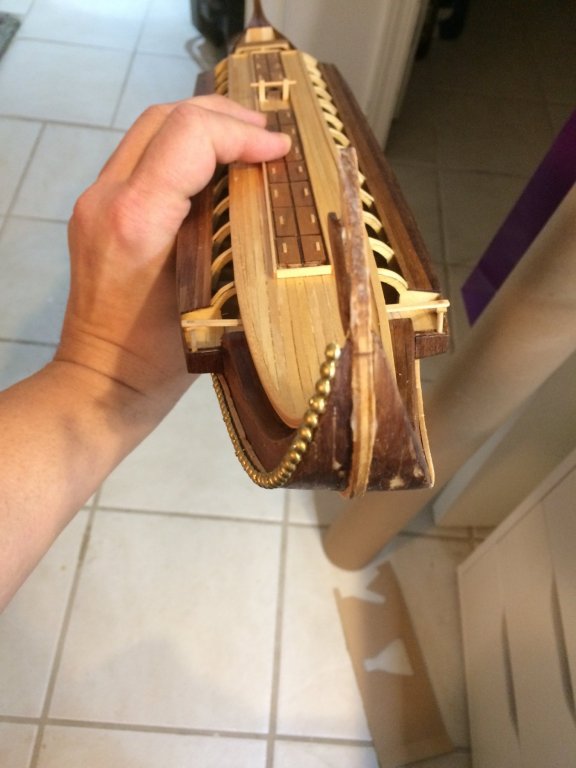
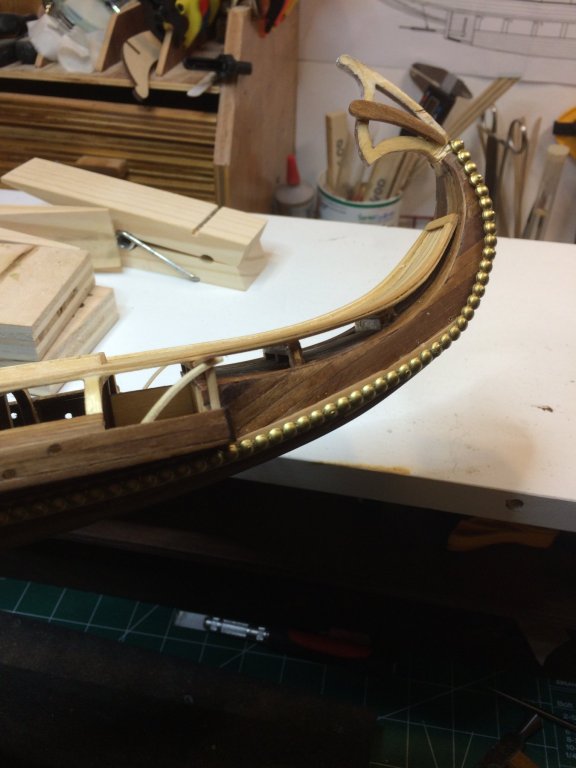
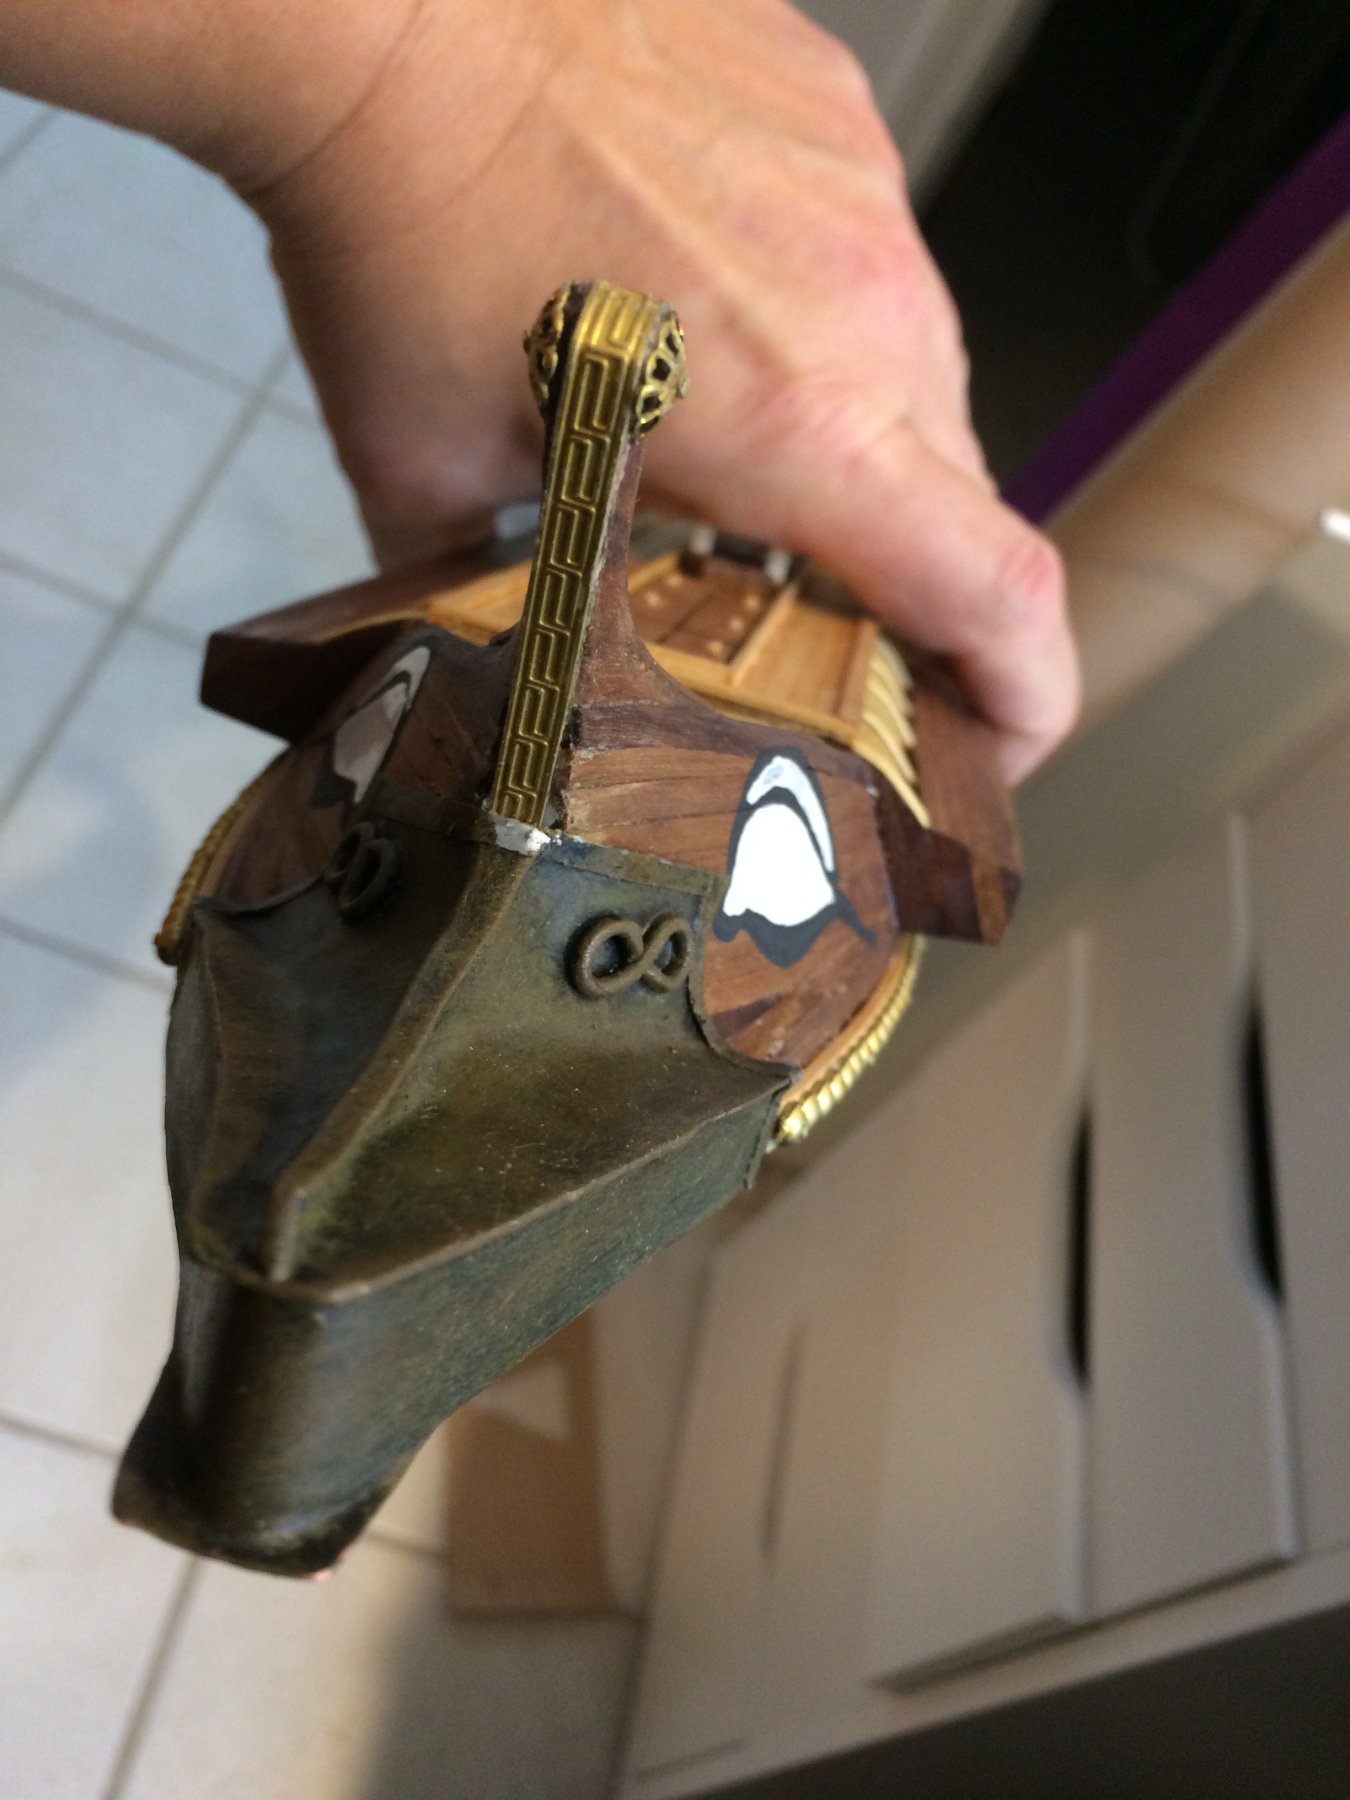
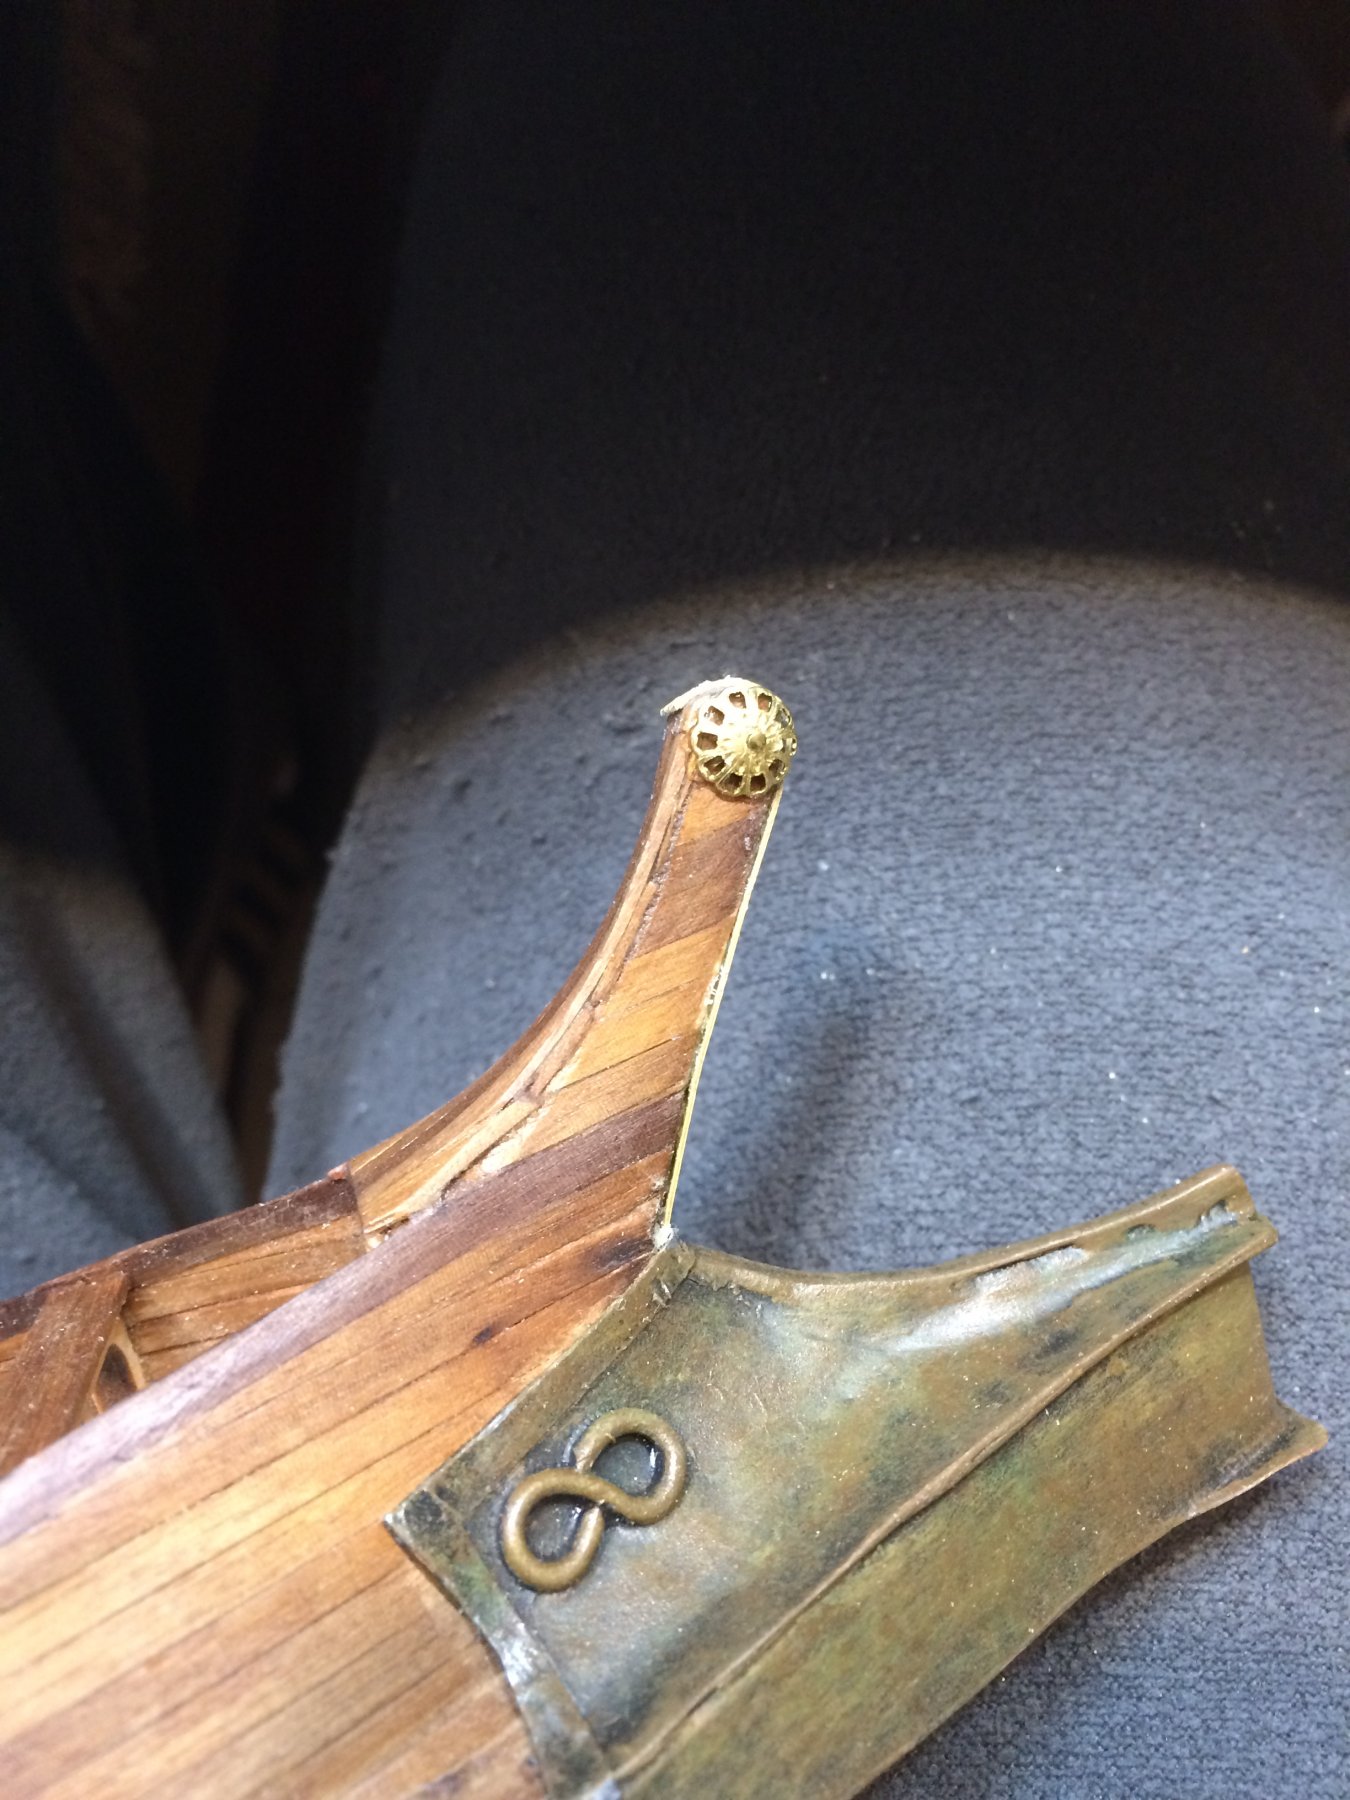
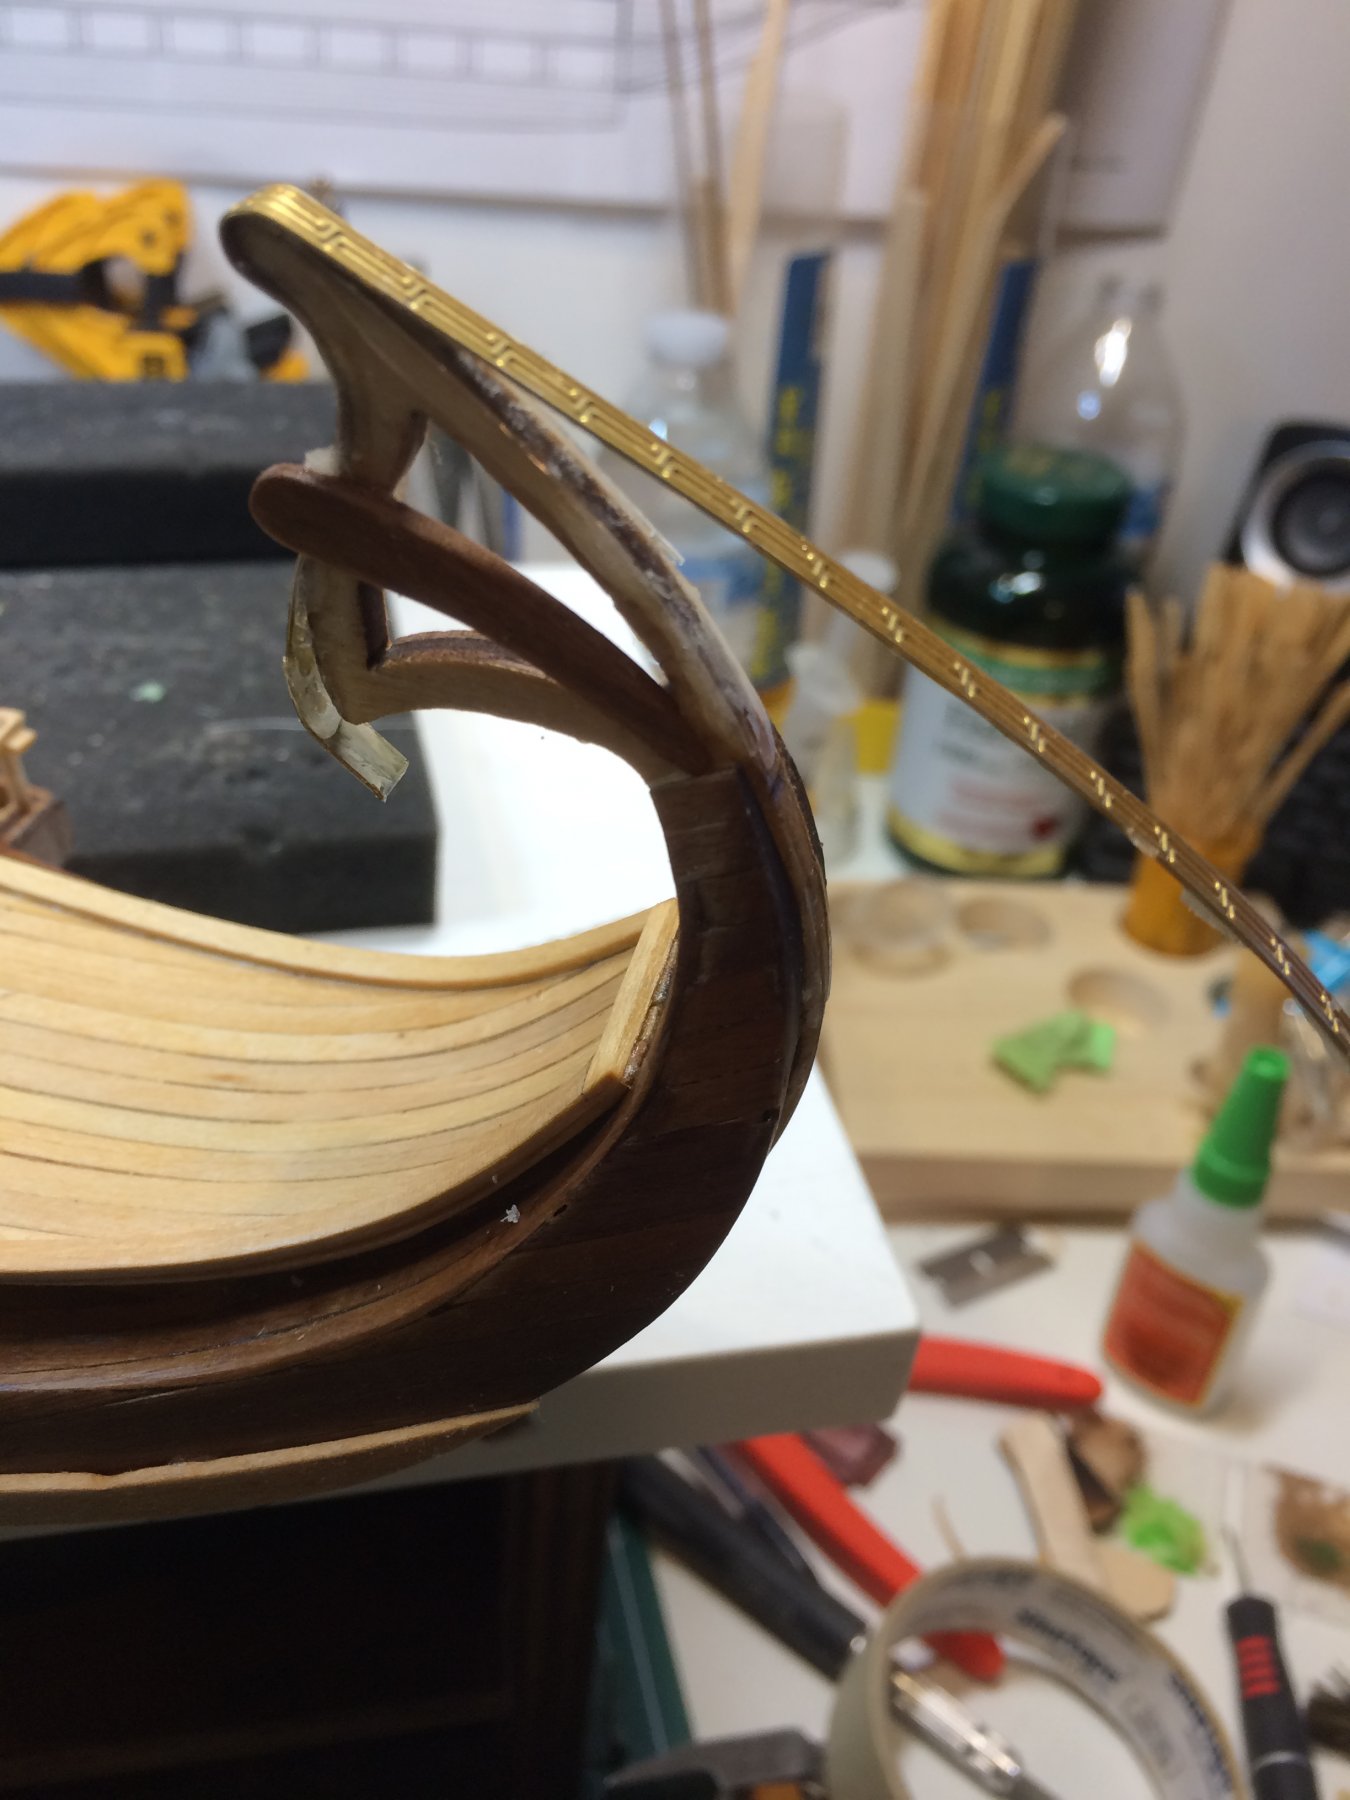
Not much to report today. Was working on mounting that goldish-like ornaments. It turns out to be a bit of a pain. The ornament is fairly stiff and hard to twist to correct shape. I tried to glue it with cyano gell glue but it was not successfully. Then i used epoxy glue. It is in process of curing at this moment. It appears to me that ornament is slightly wider than ship keel so on the end it might stick out for about 1mm total on both side of the keel, at bow. I will see once it is all done. For now i installed ornament on bow and stern. Since i used epoxy glue it will take some good number of hours for glue to cure so no more work in shipyard today. Happy modeling..


- 122 replies
-
- 4
-
-
- greek bireme
- scale-1/35
- (and 2 more)
-
Thanks zappto.
-
Today i was working on wale and tried to laterally bend it. It is a tough job but managed to get is up to required curve. Left wale planks in the water for some time and drop it into bending helper... Was not quite perfect but was able to make it acceptable. At the end on these wales i will be mounting some other pieces.. Started from the ram, i used few nails to assist with holding it in place. Few drops on cyano gel and continue with work.. One wale installed.. And a view from front... Both wales installed. Then i cleaned up the model from dust, sanding particles and applied a light coat of danish oil, covering wales as well.. So that is all for today. I dont have that many tasks left on this building so i am hoping to complete it by the end of January, unless i win lottery.... Happy modeling..


- 122 replies
-
- 5
-
-
- greek bireme
- scale-1/35
- (and 2 more)
-
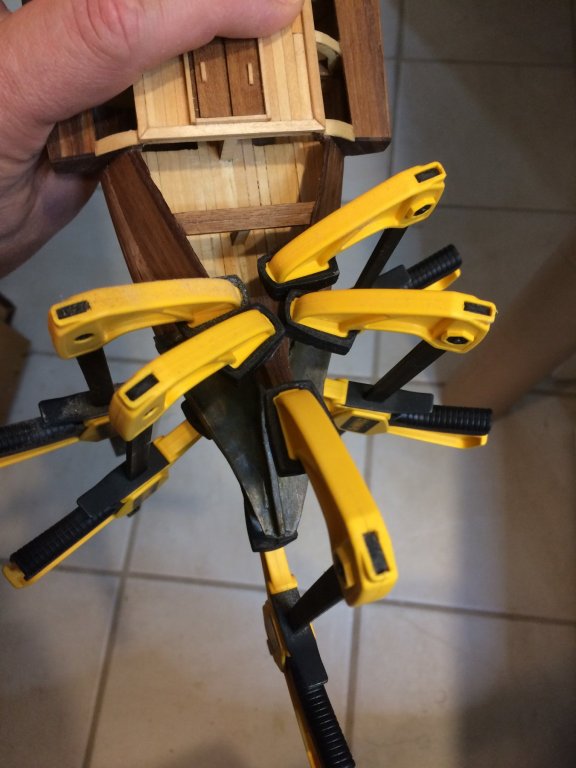
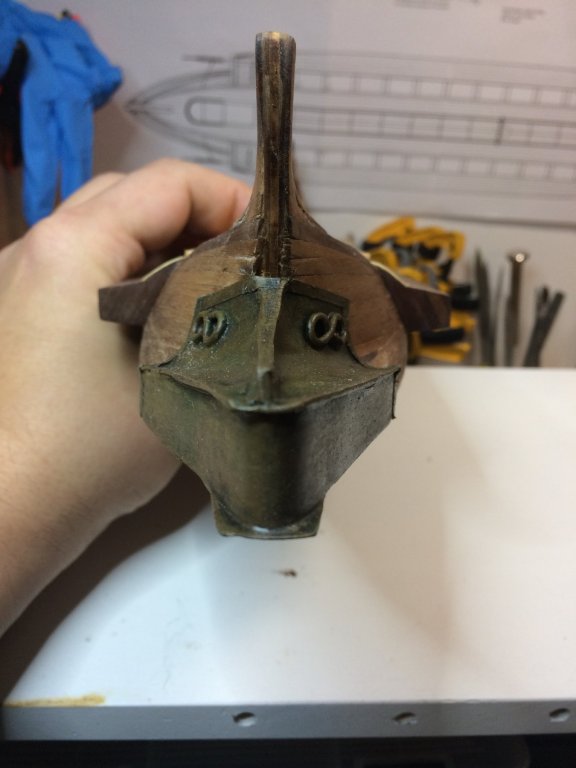
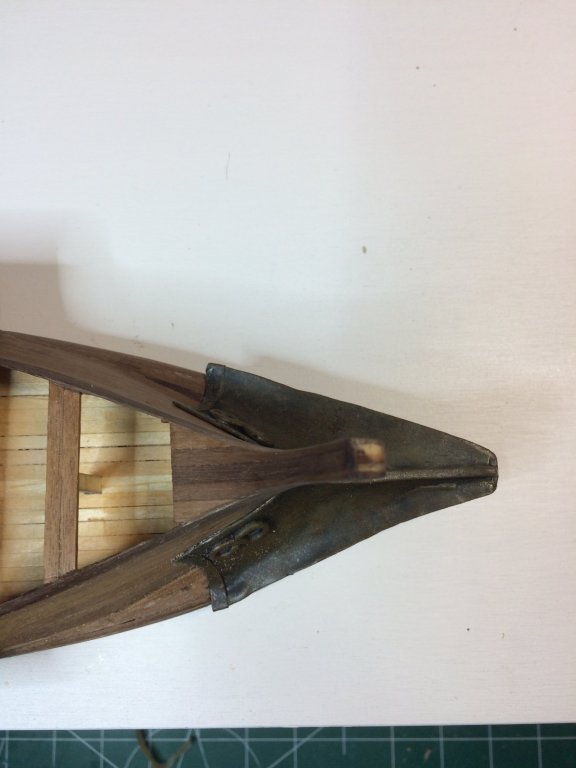
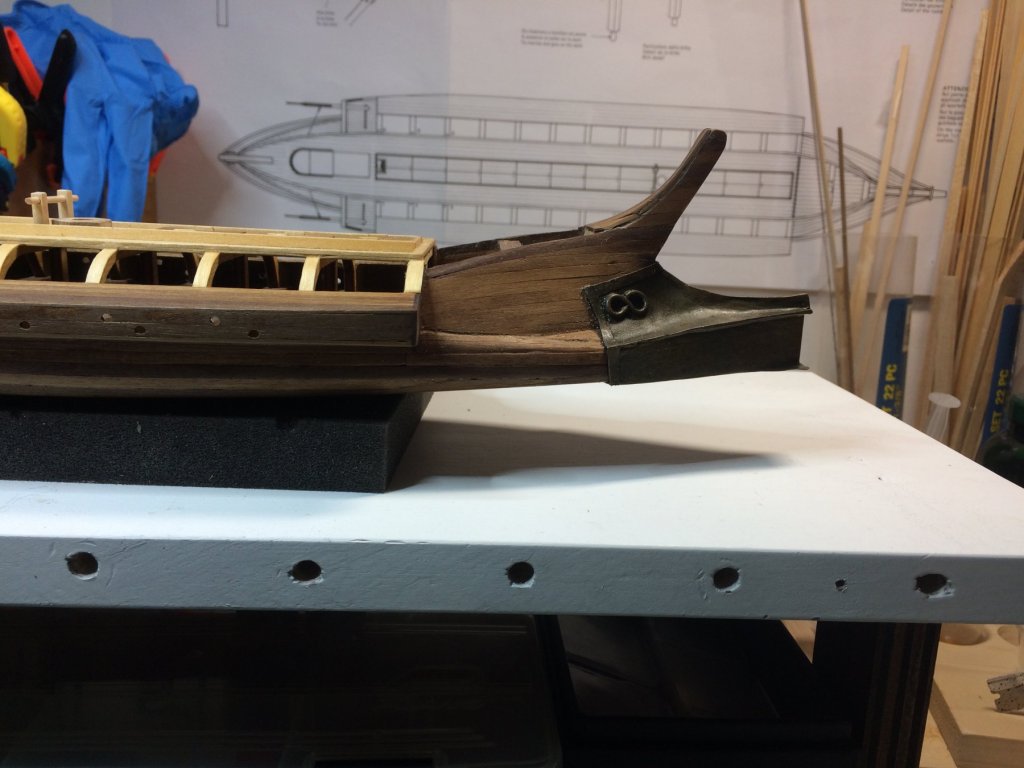
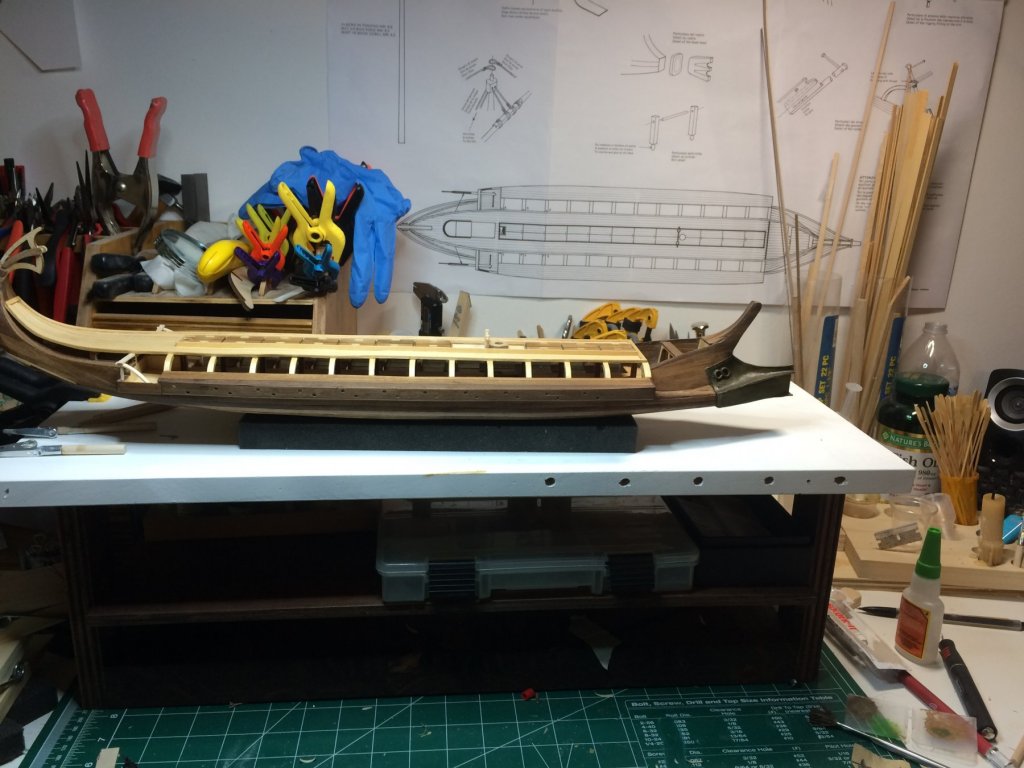
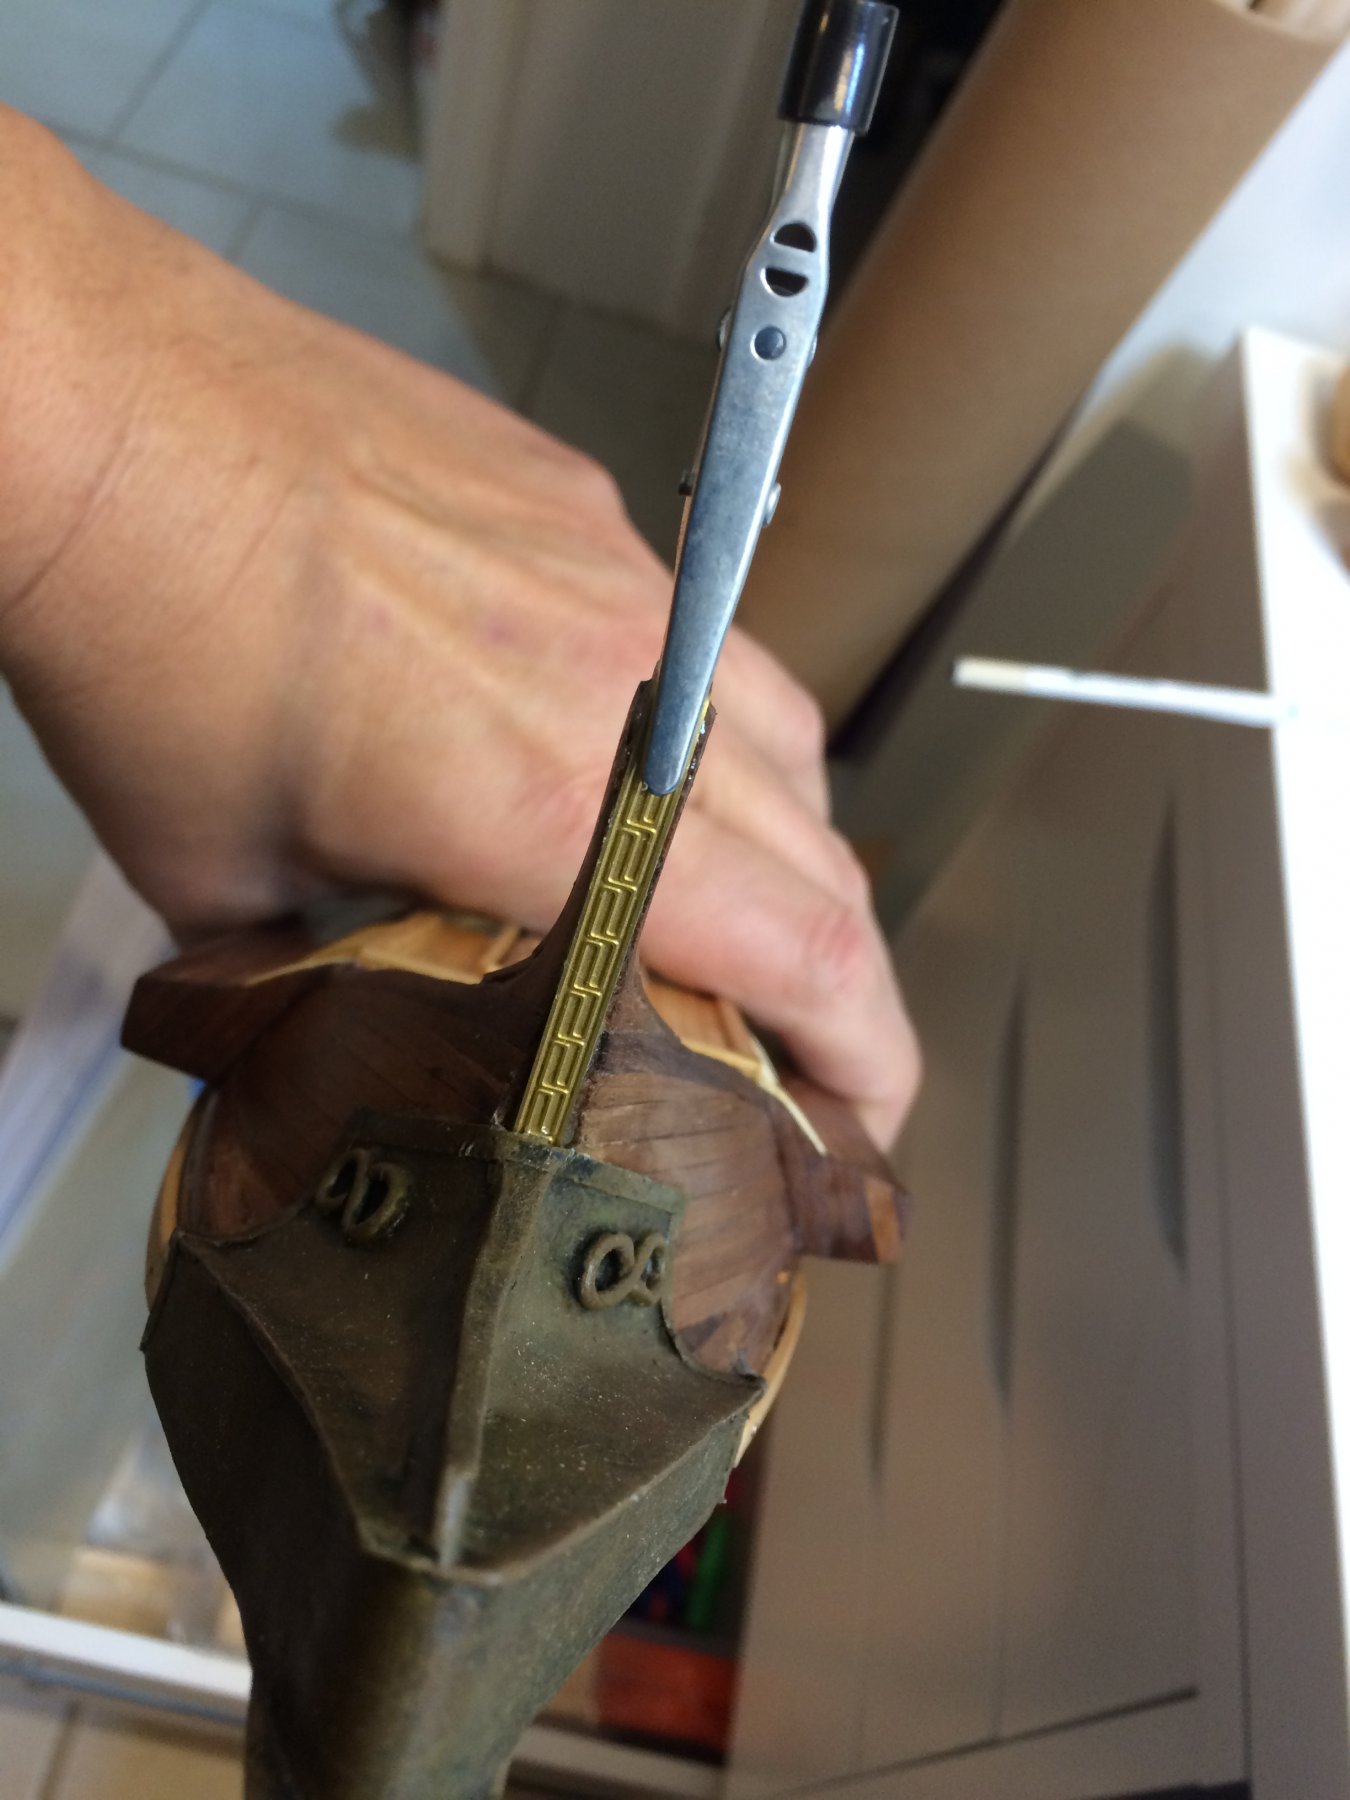
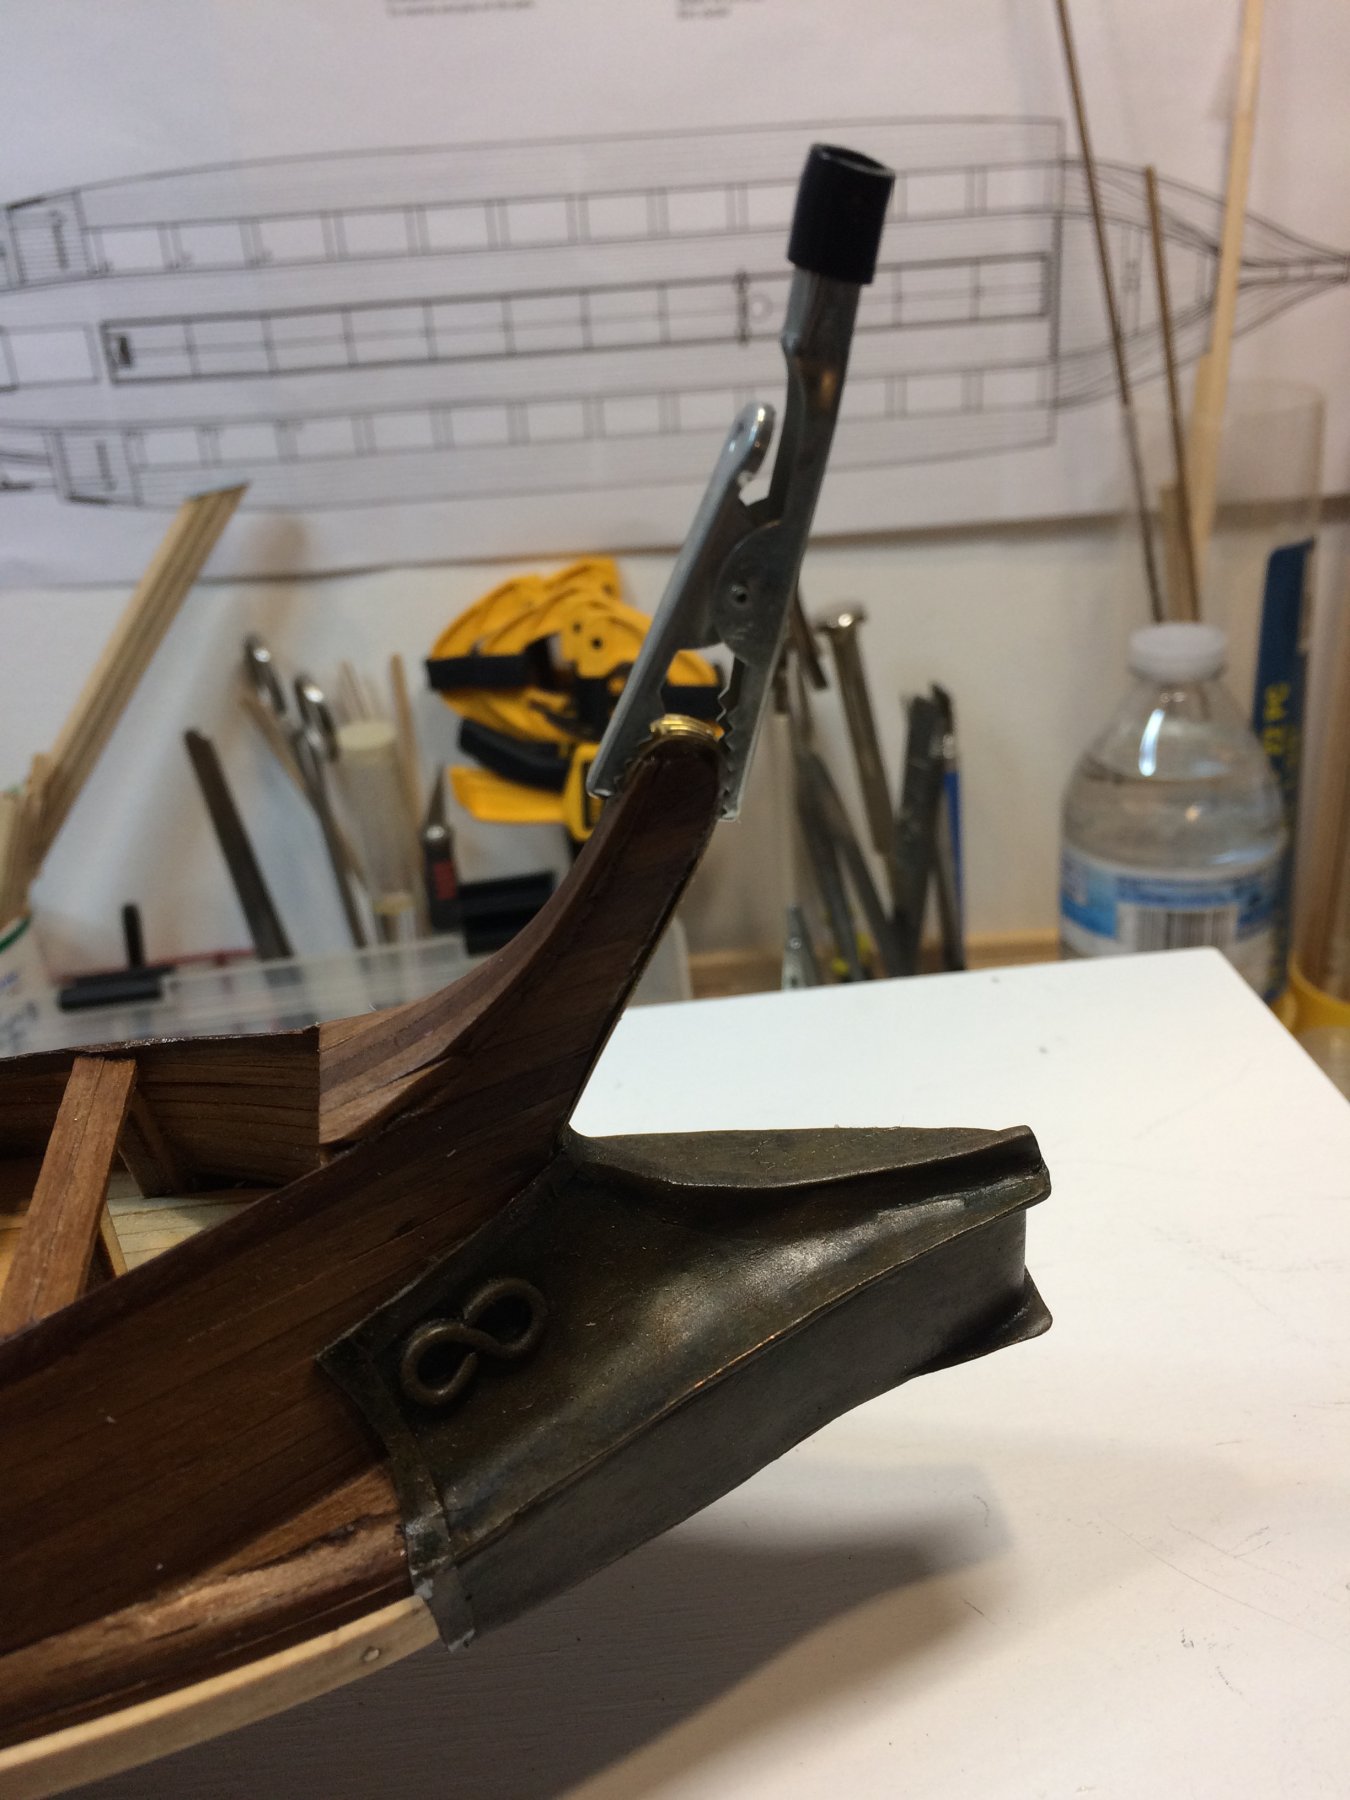
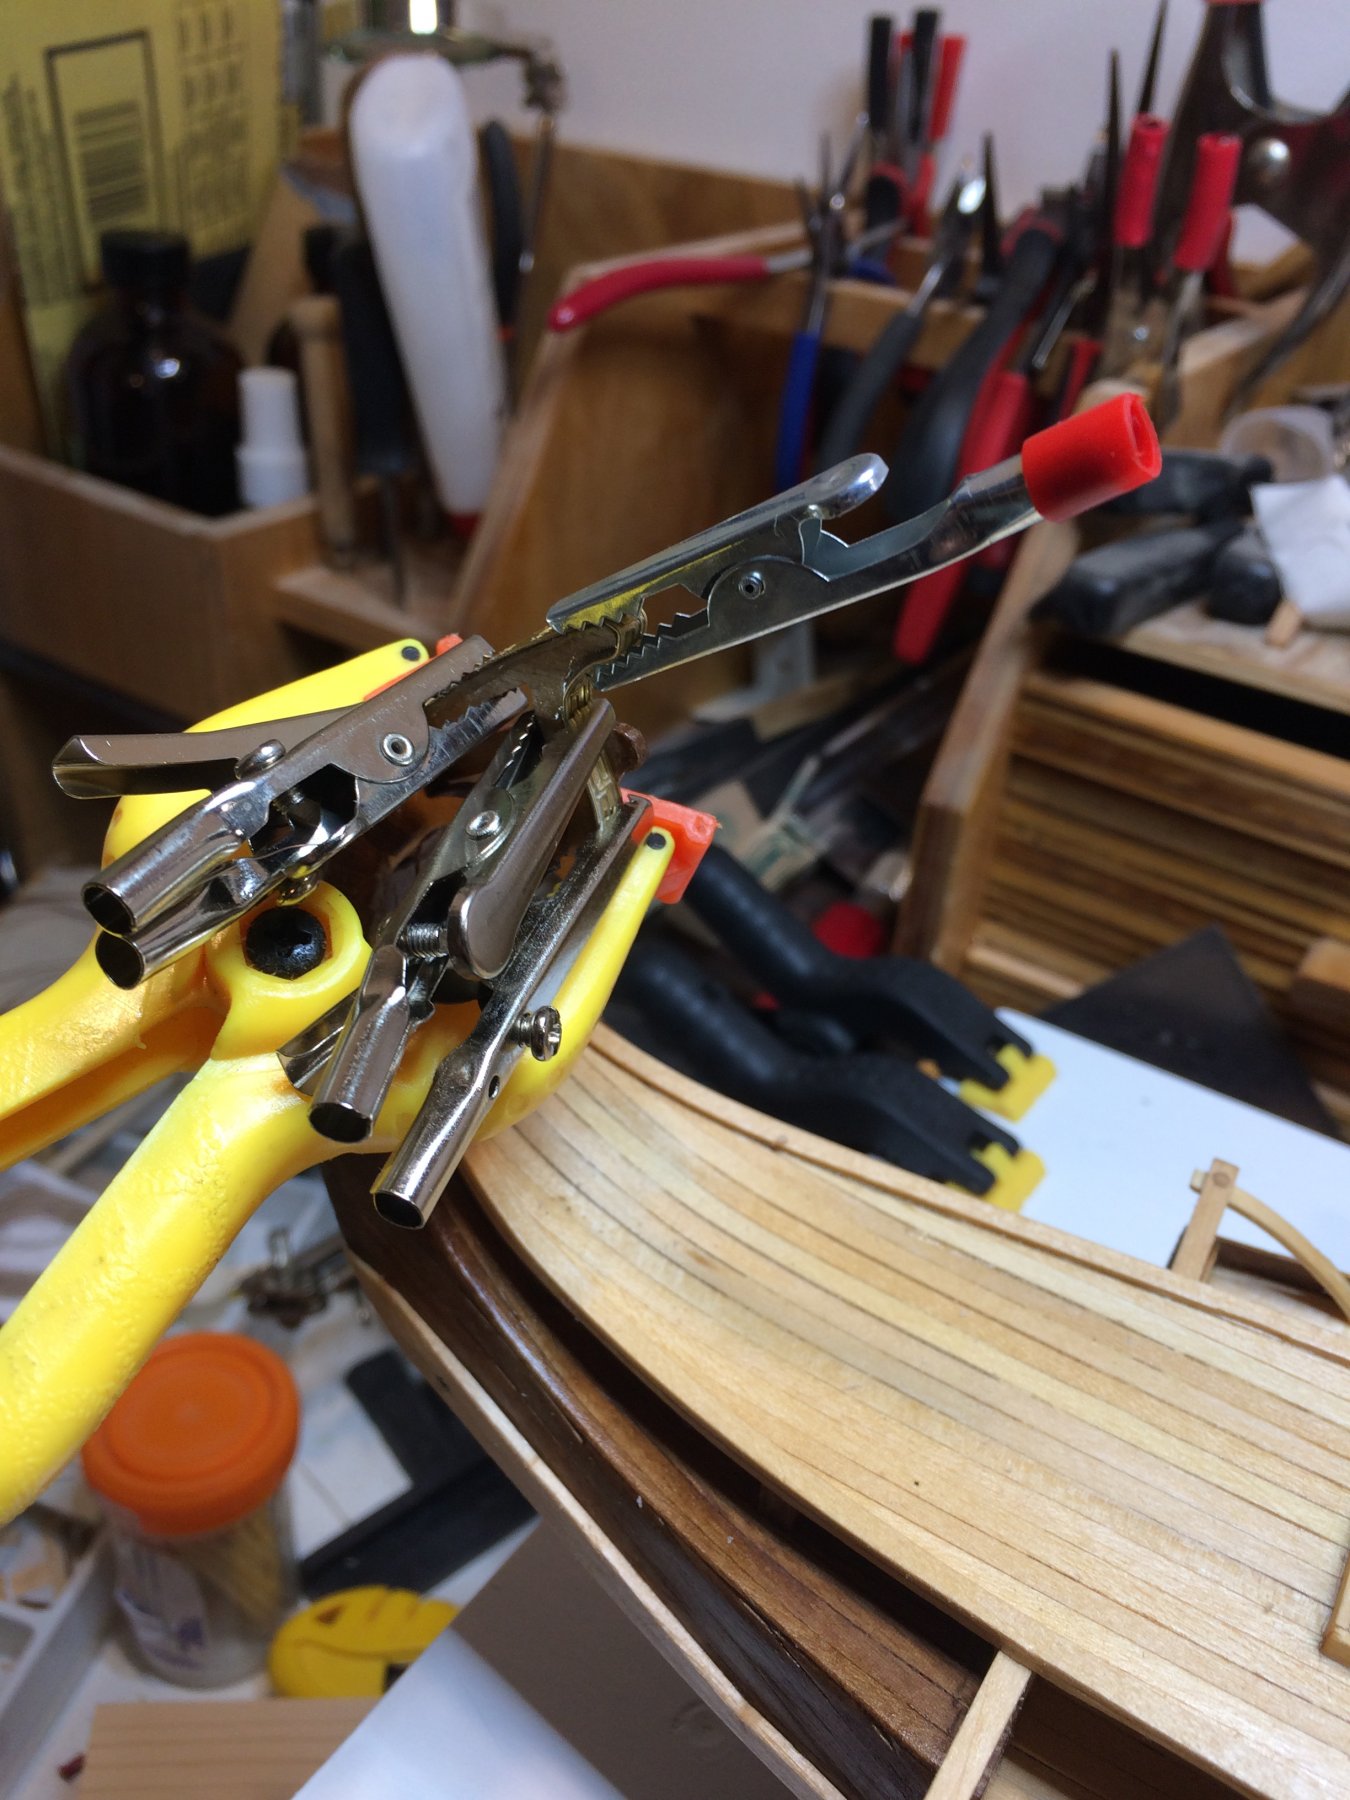
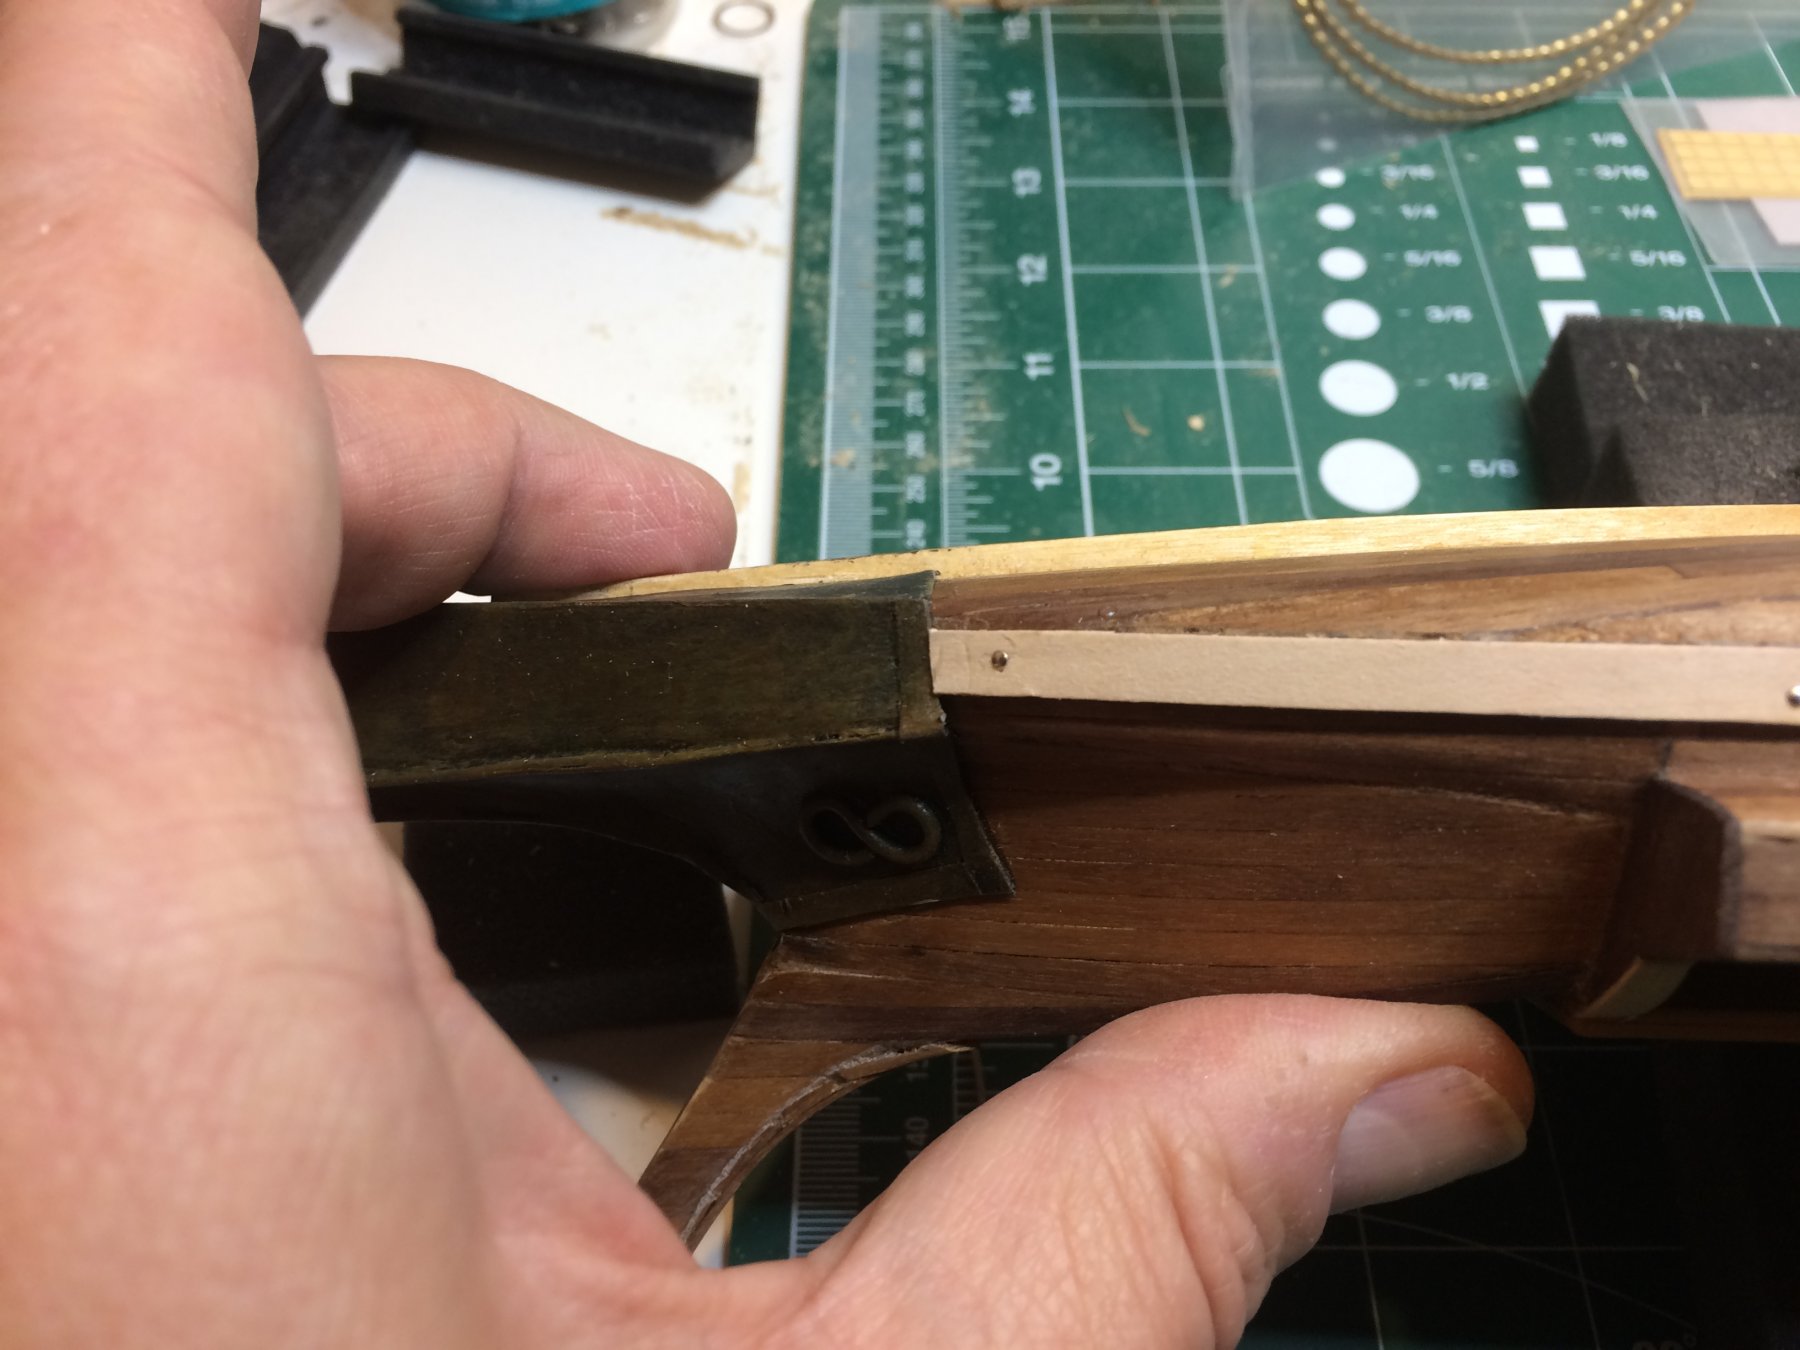
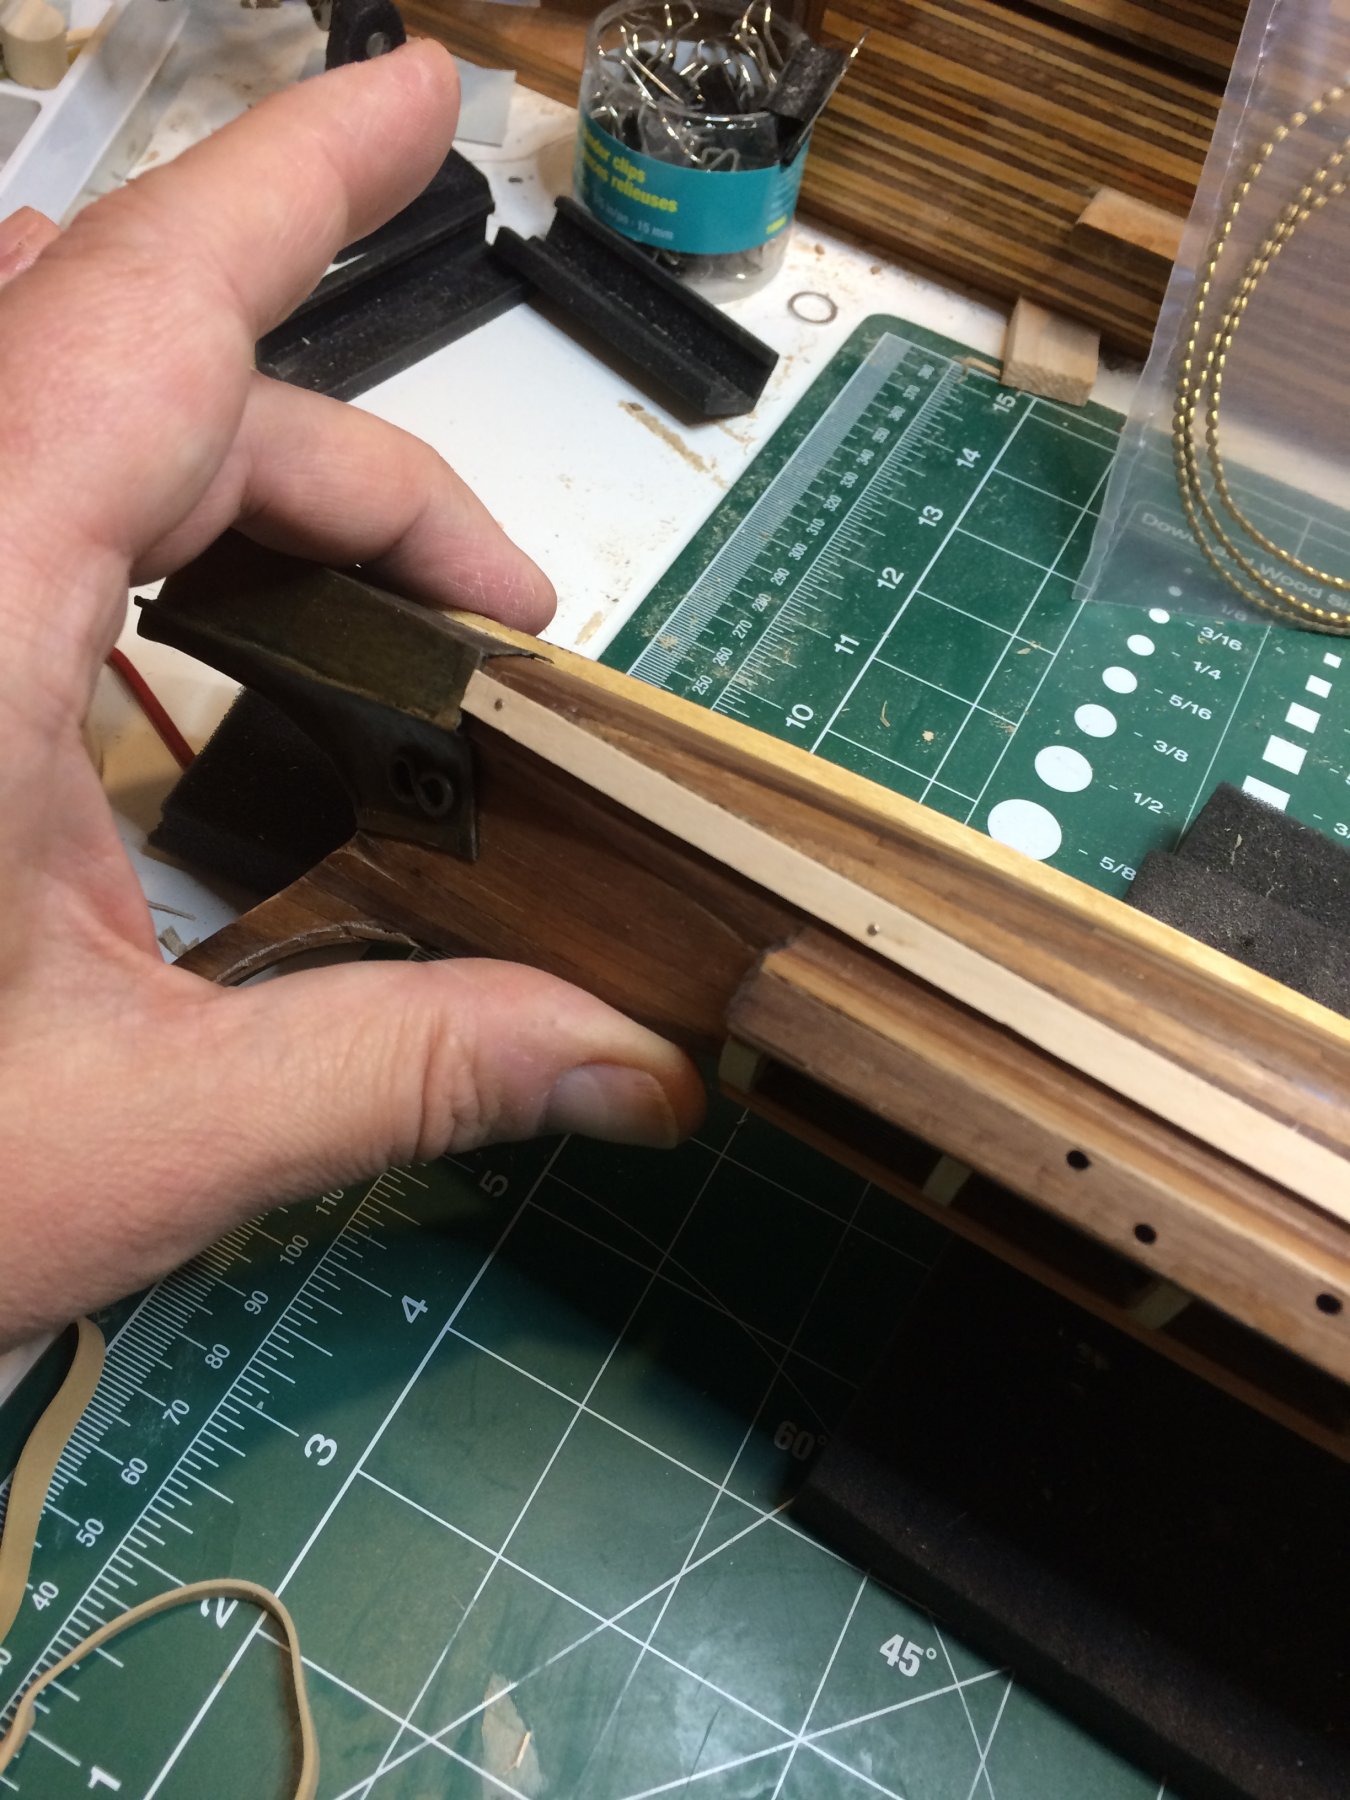
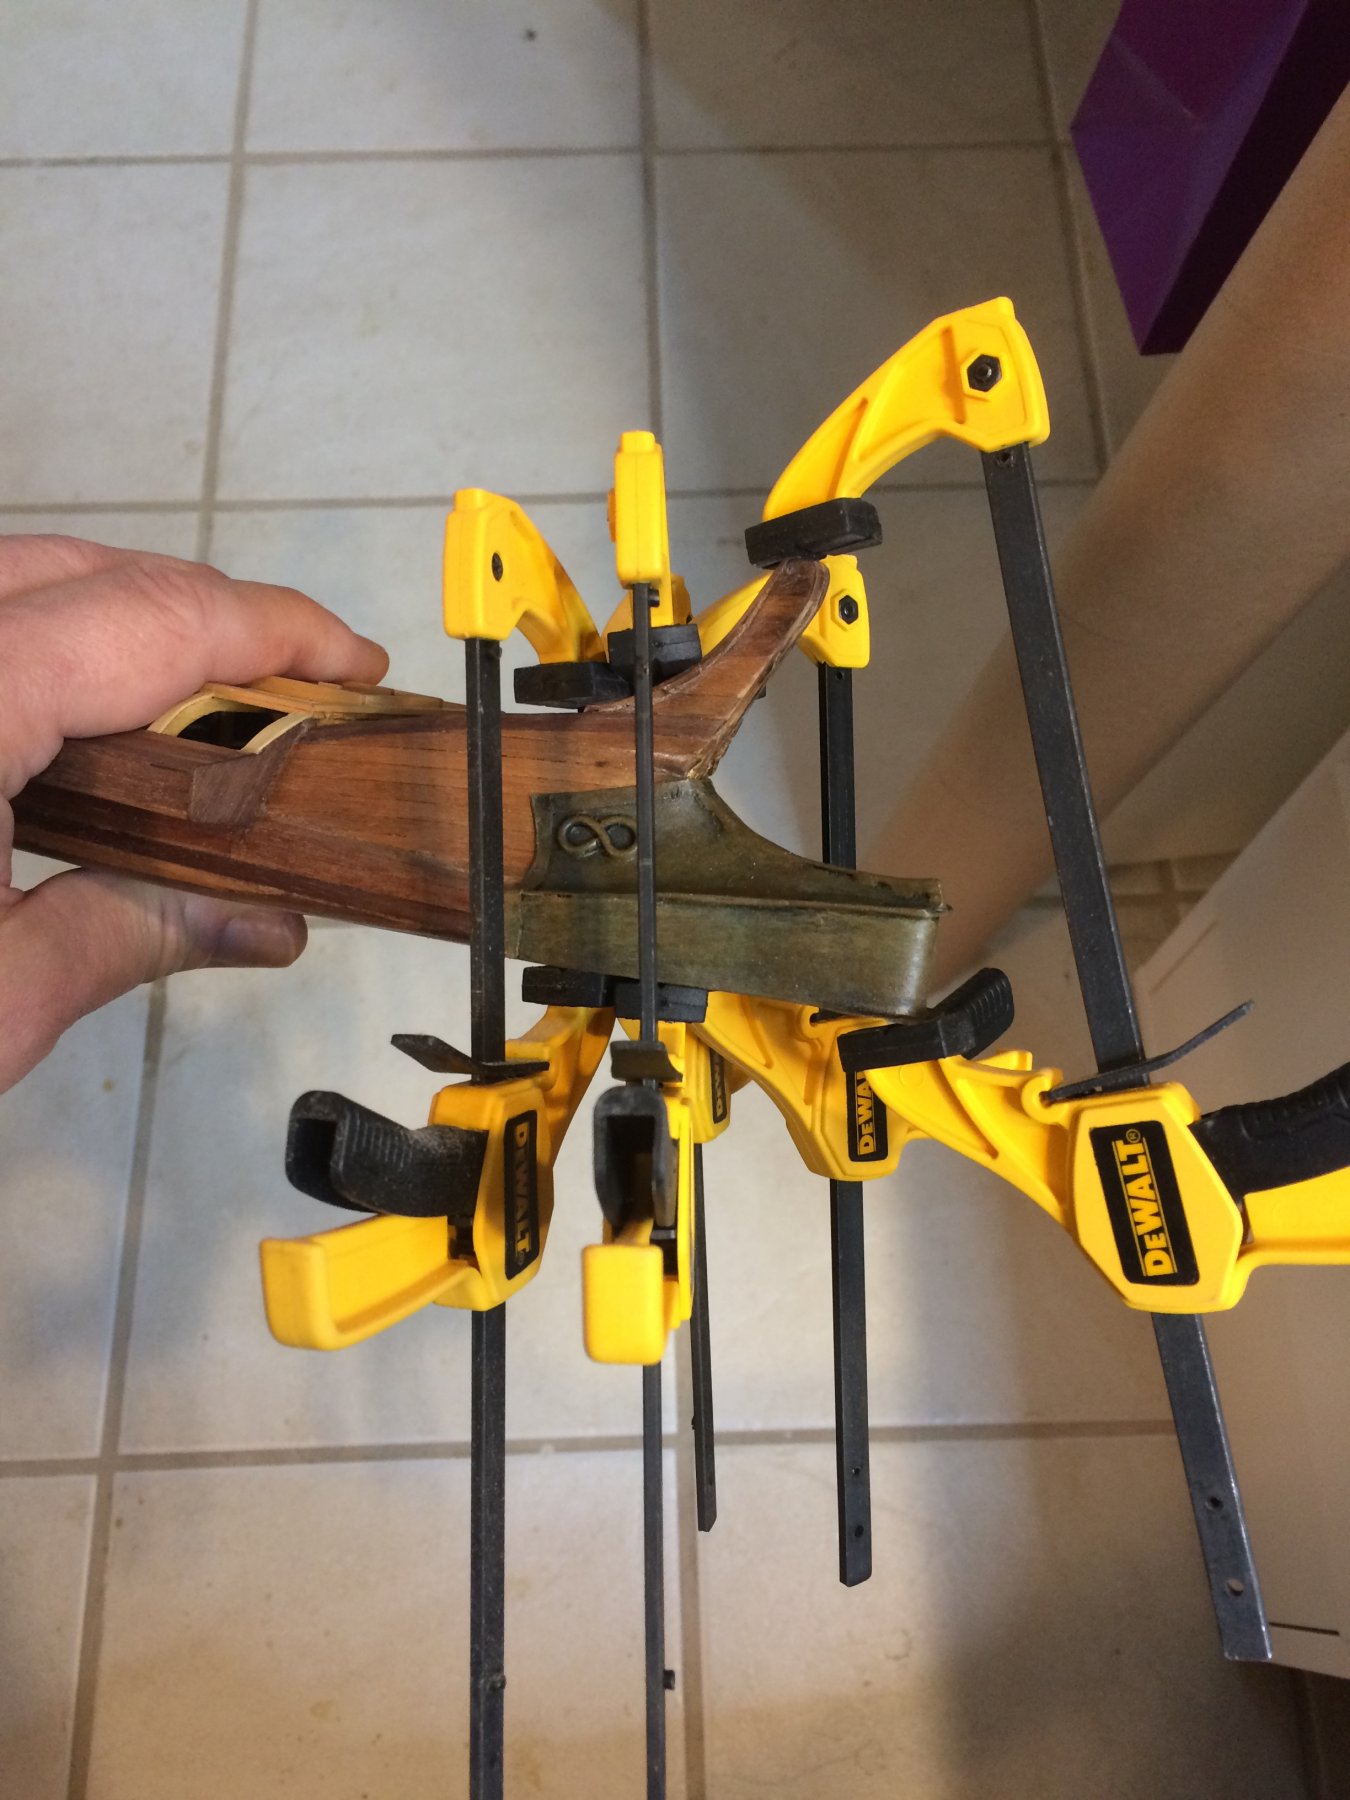
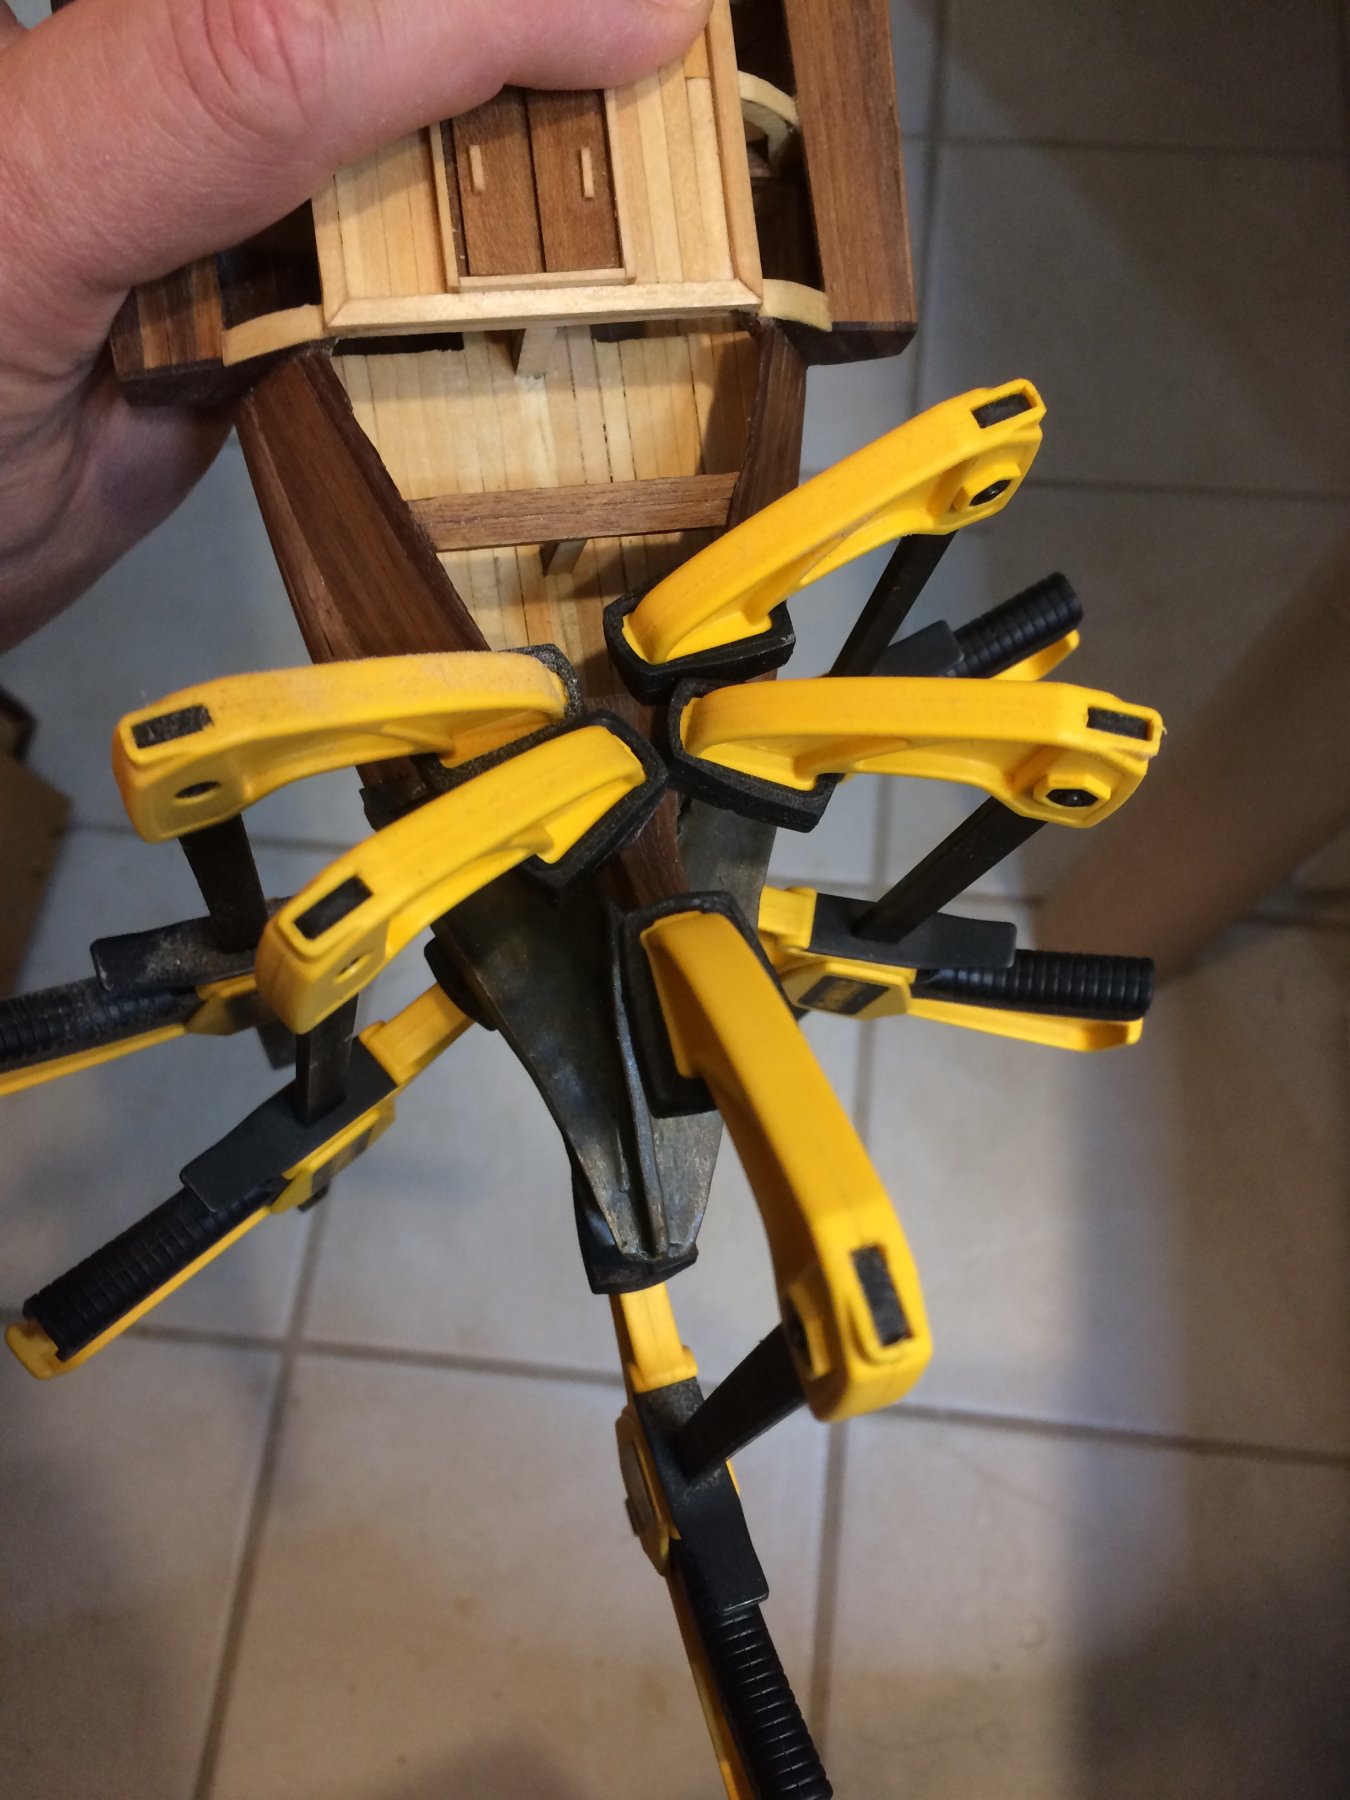
It is time to mount this part. Just by working with this small scale model i can imagine how difficult must have been back in days to build, transport, mount, hold, raise and fix it to the ship. If i have a time machine this history time slot will definitely be a must to visit. Being close to 2 m tall i think i would be sticking out from the crowd for sure :-).. So, with assistance of epoxy glue, which i freely applied to inside of the ram and after a bit of sanding of location where ram will be mounted, i fix the ram to the ship. Used few clamps to hold it it place and i left it overnight for glue to cure.. And in the morning this was my first task; to go to the shipyard and check it out.. And here it is, mounted and ready for some RAMing actions... On this picture it does not look that mighty, more like some smiling guy that has lost all his teeth.. :-) But i would still be very concerned seeing it approaching from the horizon.. But it absolutely gives more realistic view than the original "ram" shown on below picture. Happy modeling...


- 122 replies
-
- 5
-
-
- greek bireme
- scale-1/35
- (and 2 more)
-
Thank you Michael..
-
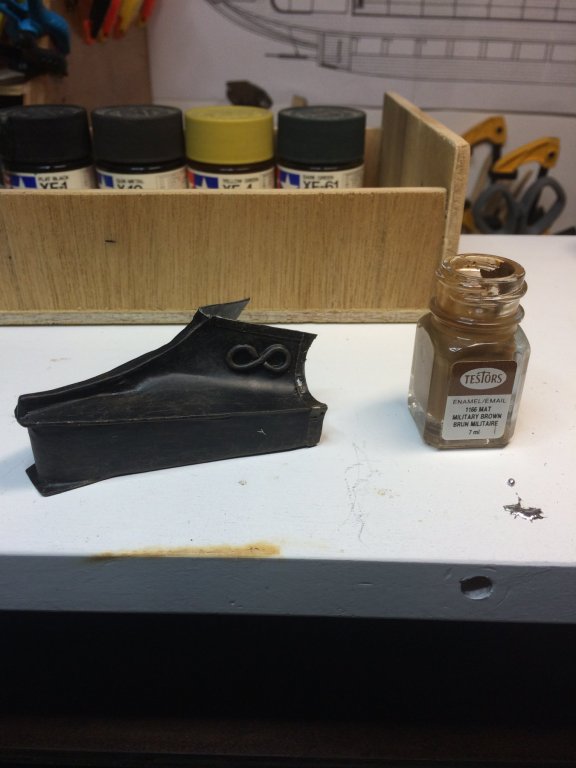
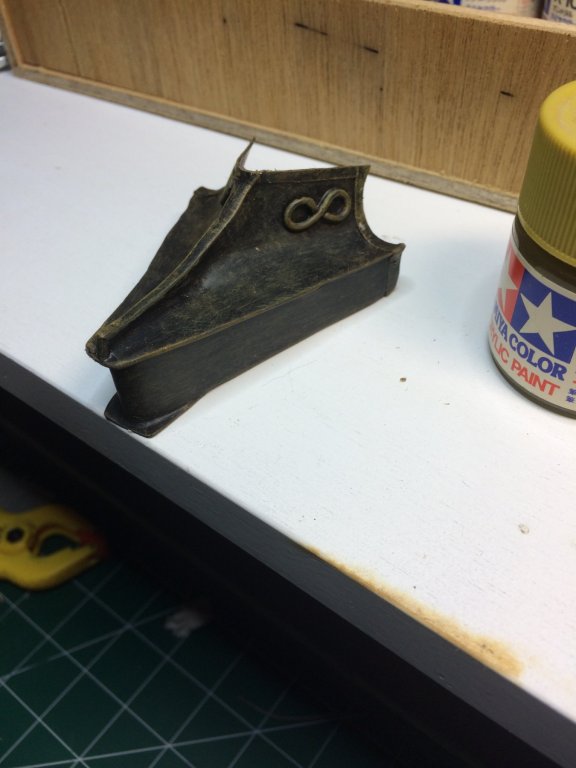
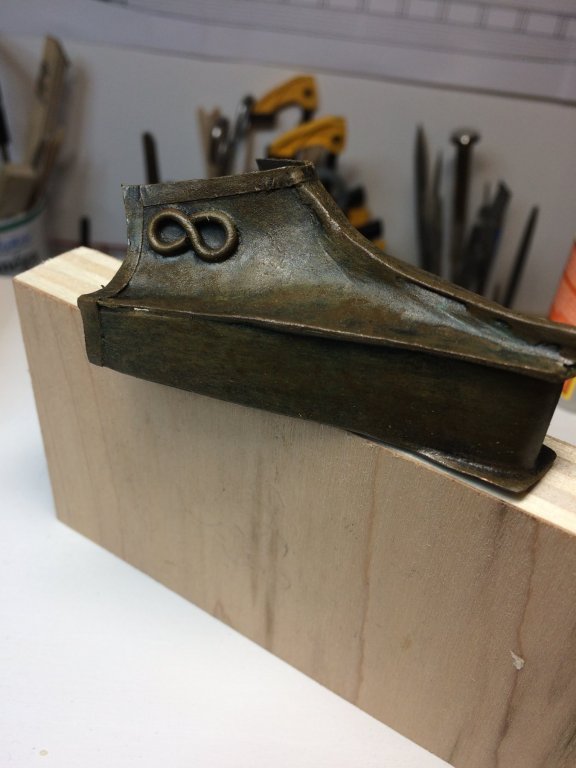
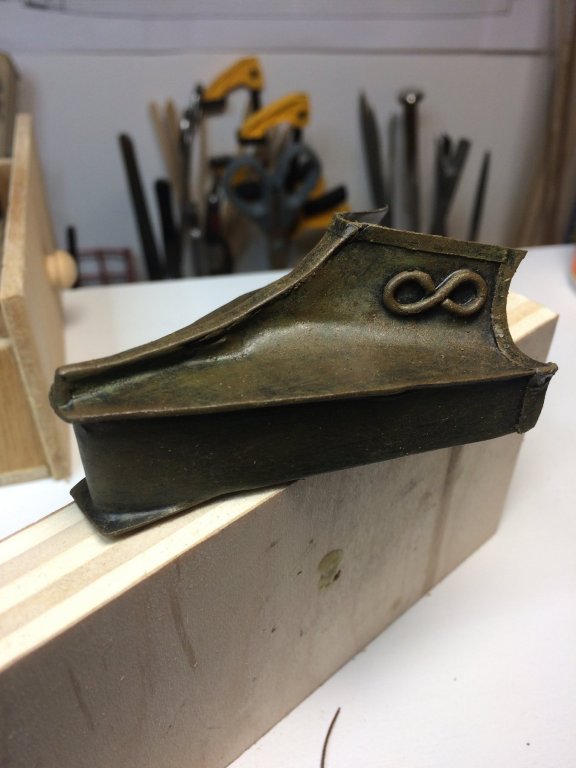
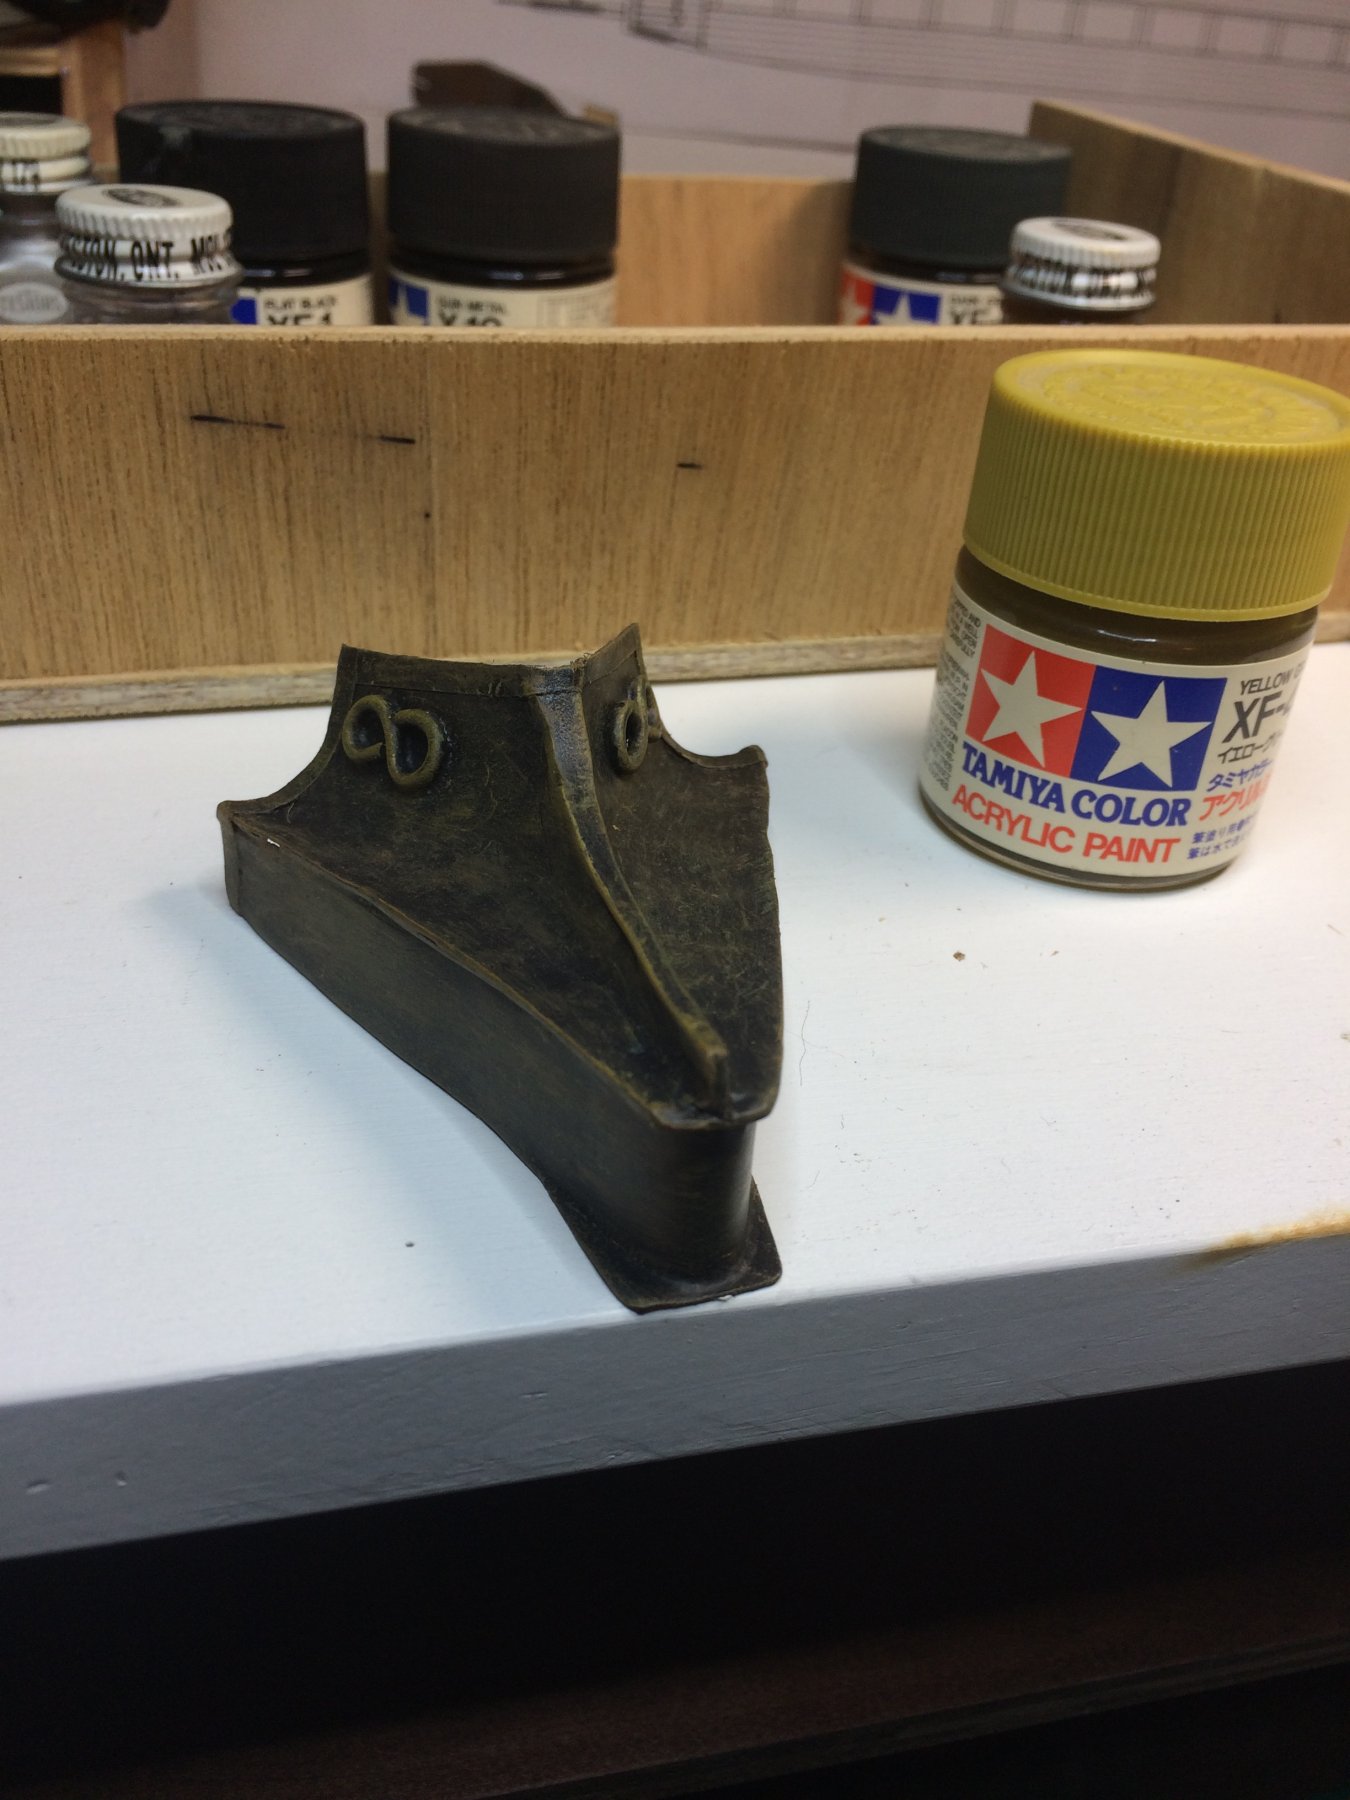
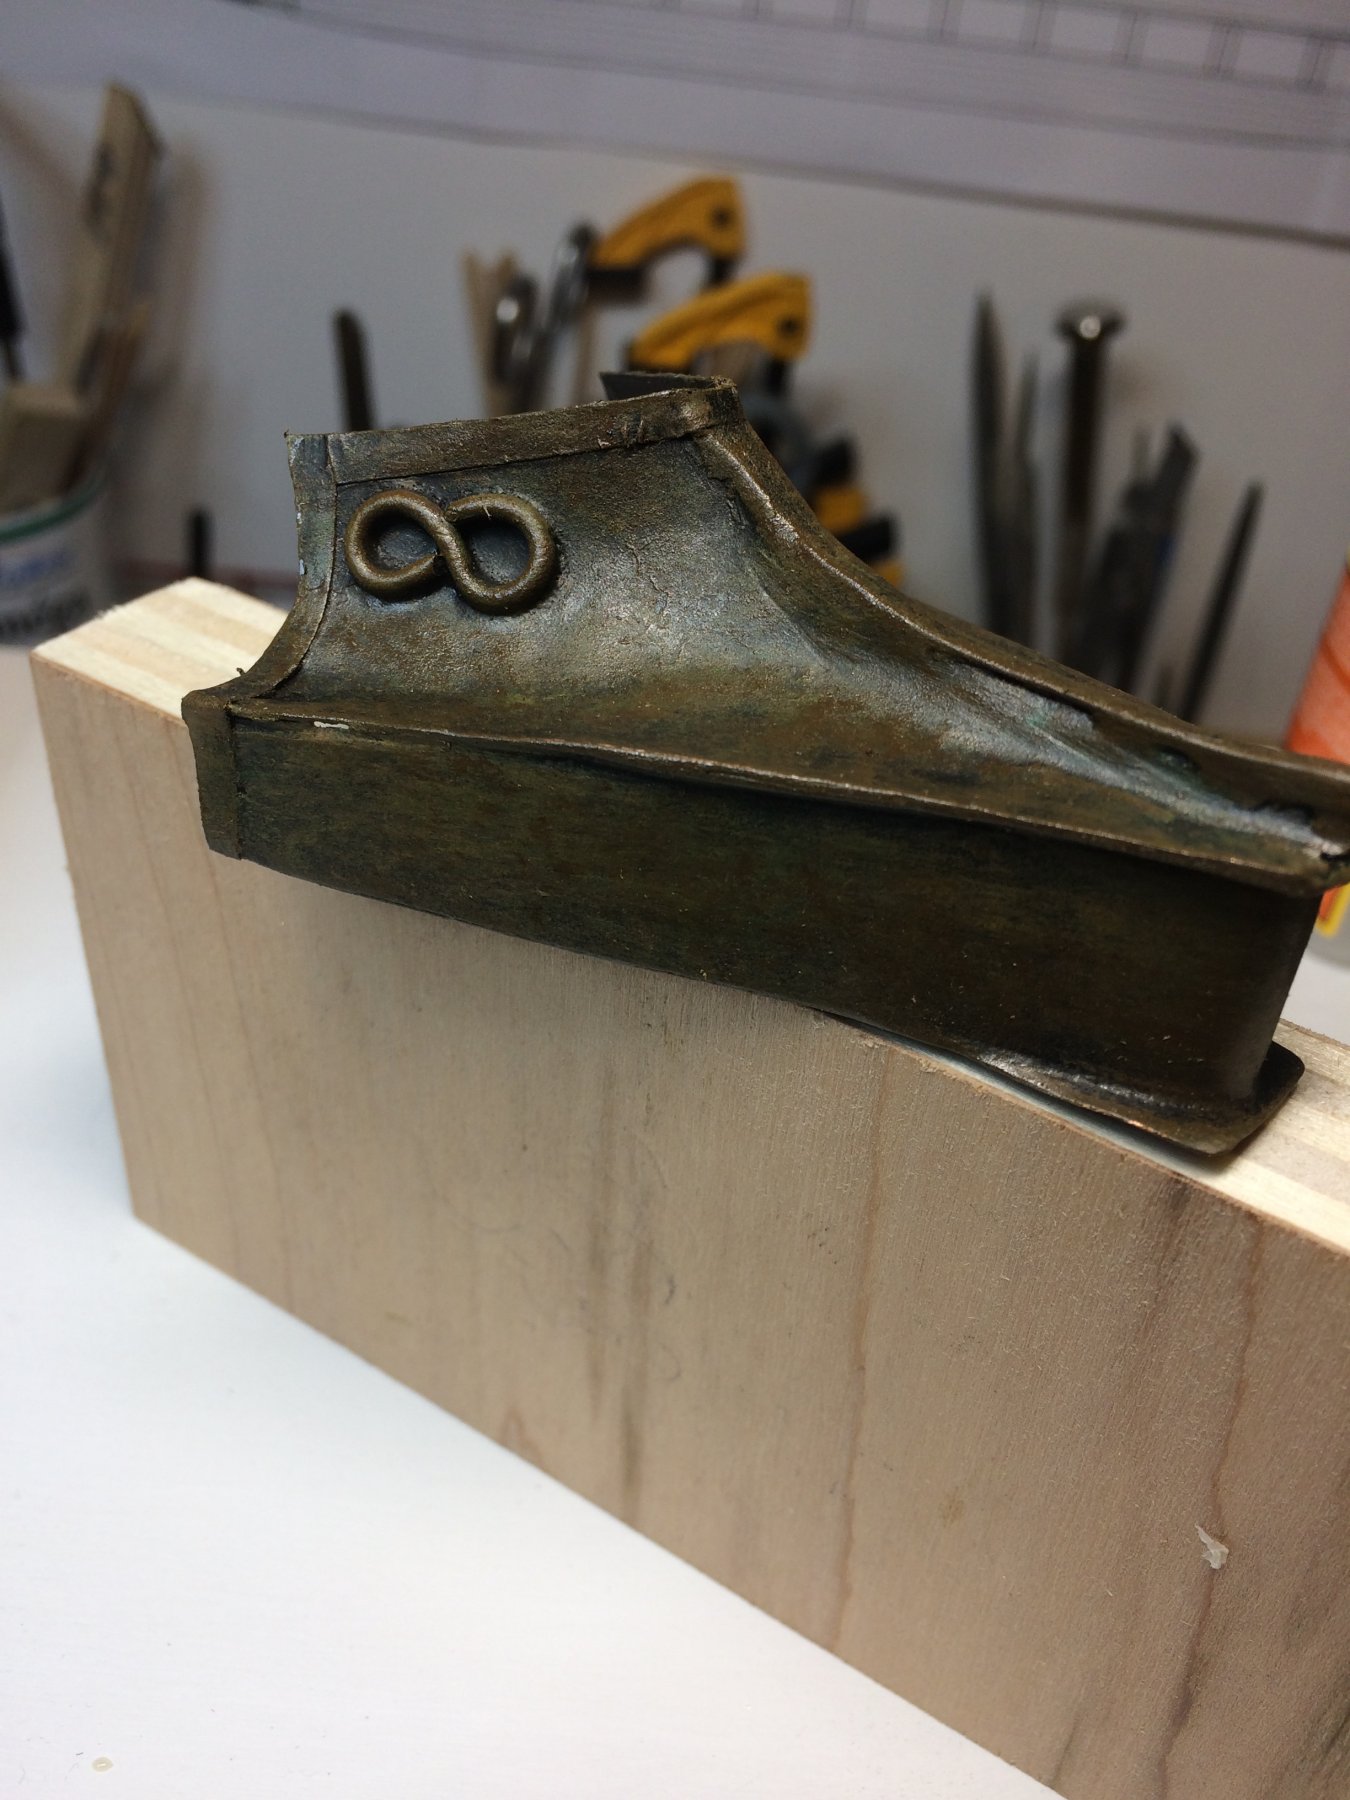
It is weathering time... which brings me back to my airplane modeling days. After coating it with a flat black paint i started to make it a bit more oldish-alike. Used a dry-brushing techniques which is nothing more than drying out the brush almost to the point that there is no color on it, and running it in back-front motions randomly on the model, in this case ram. Very simple and effective. This is color i used for a first layer; it is Testors mat military brown. I must say something about these colors. About 10 years ago was the time when i did my last model; it was a German Kubelwagen. I left all my modeling tools and paints in the drawer for future use. After moving into new house and doing some renos, i was hoping that i can still use these paints even dough there were all disintegrated, leaving thinner and paint color in separate levels. After several good shakes ("shaken not stirred") which 007 would like, all paints went back to life. I can easily start using them for plastic models with no issues. Must say very impressive... Next step was to use Tamiya's Earth Yellow to lighting up the edges... Other side... Then it was time for Testors again, this time it was dark brown color. I also added, some by accident some on purpose, very tiny sanding particles to bring up effect of parts that are under heavy rusting and starts to breaking off the ram. Accidentally - i sanded some other model parts forgetting to move freshly dry-brushed ram away which caused some particles to end up on the ram, sticking on it for good.. On purpose, i spayed those particles in some areas. Slightly crooked nose is witnessing many fights this ram went through... Anyhow, for me this part went very well; i really like the end results. Was also thinking that i might be able to provide the same effect (or very close) if i used a template ram i made from a cardboard and perform dry-brushing weathering.. But this copper one was really fun, i enjoyed process of making it, to the point that i might even make just a ram itself, based on the picture from Israel museum... Will see. Happy modeling..


- 122 replies
-
- 7
-
-
- greek bireme
- scale-1/35
- (and 2 more)
-
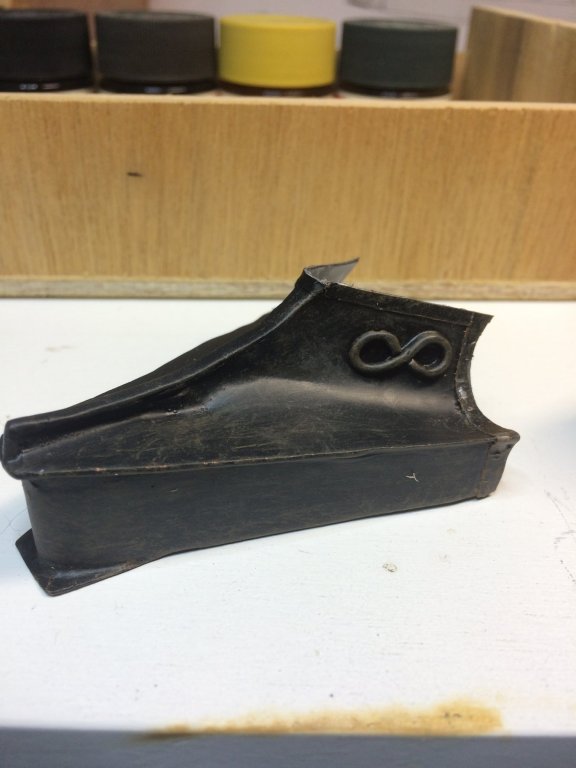
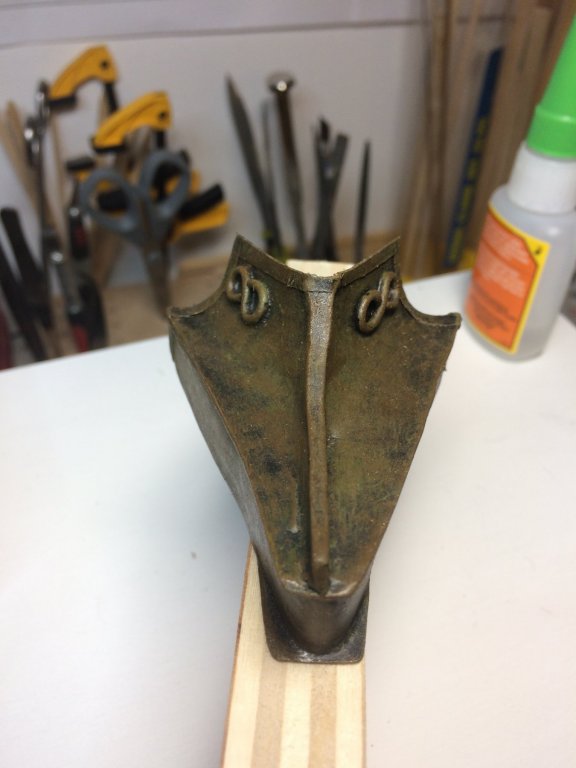
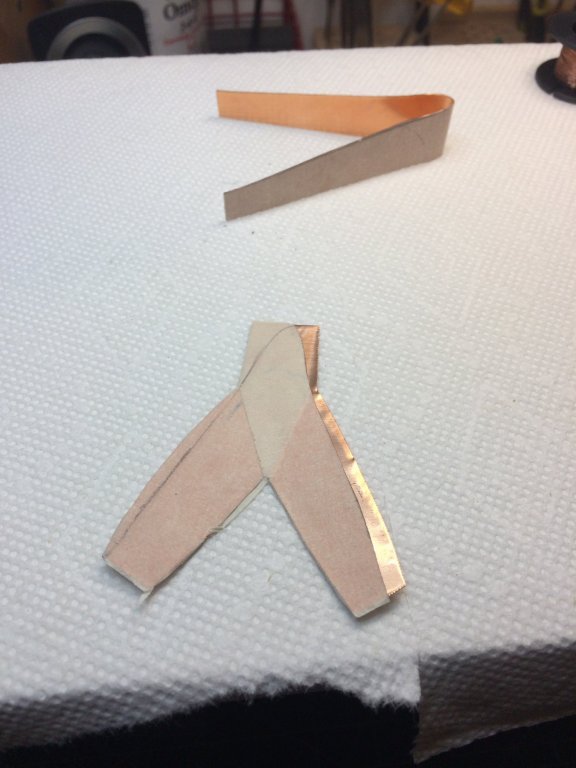
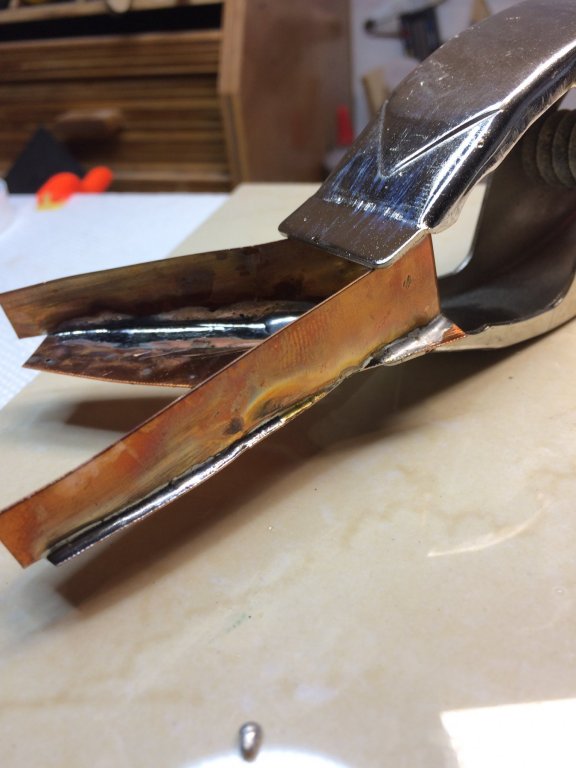
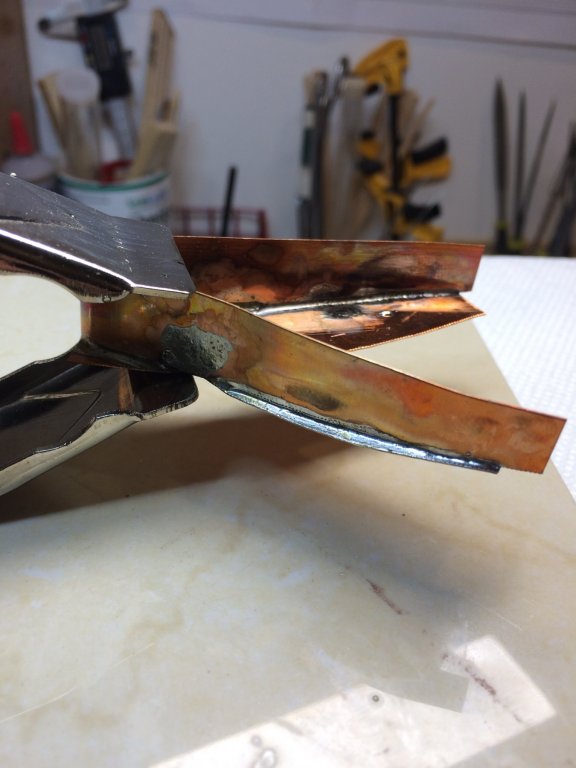
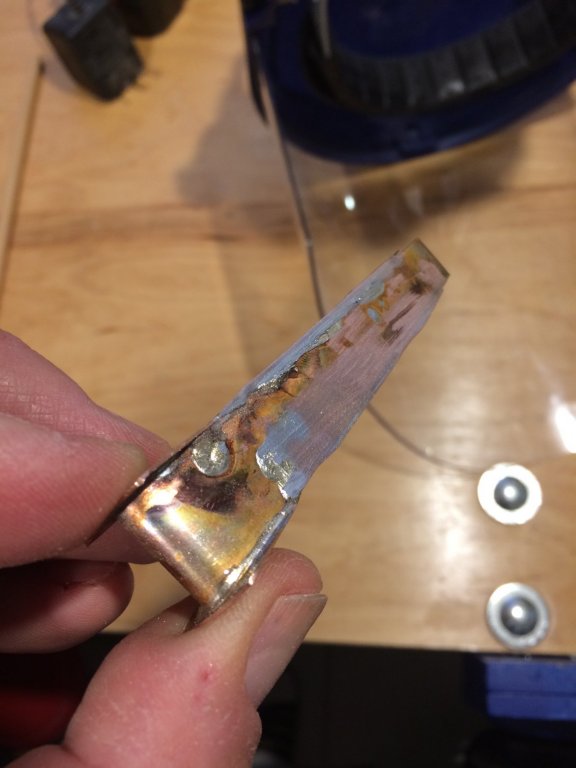
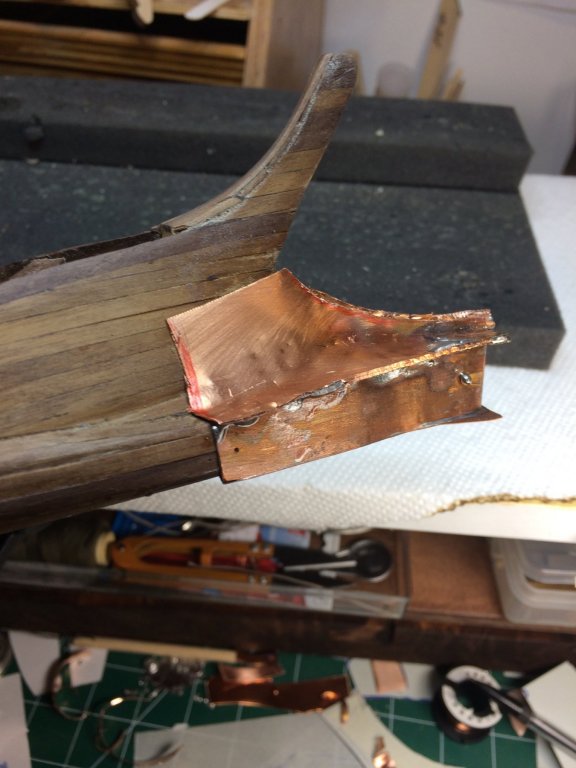
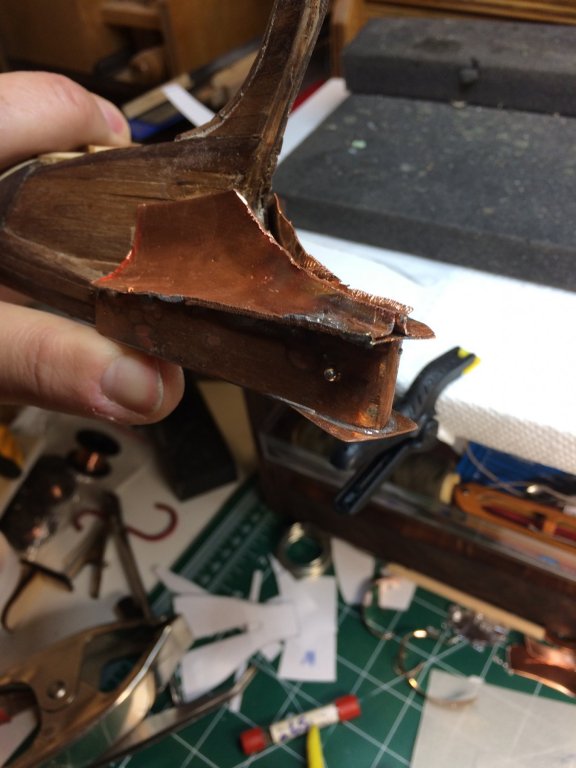
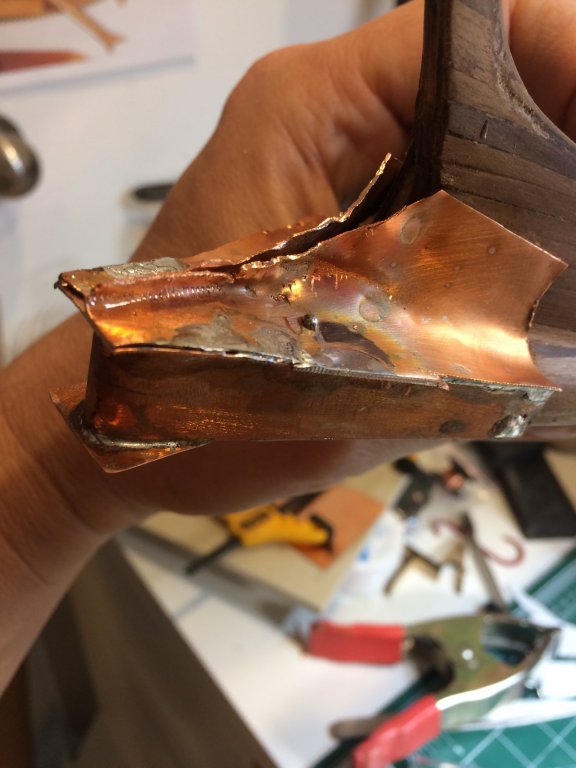
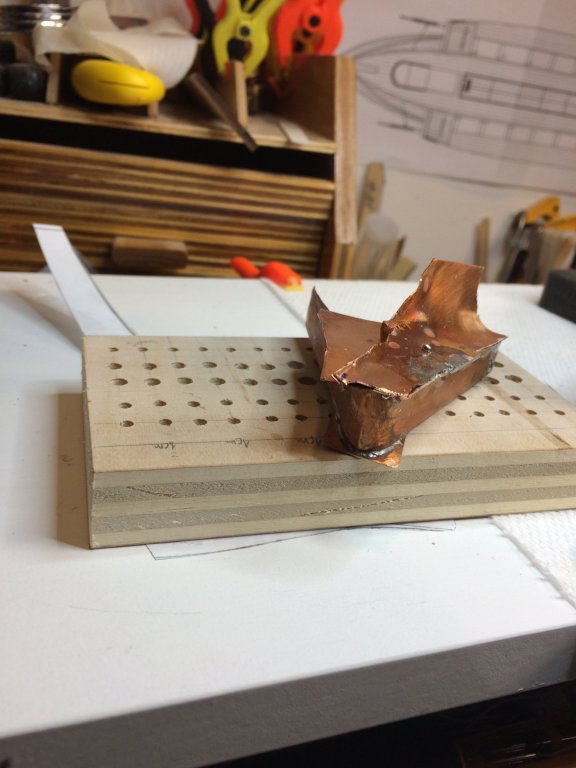
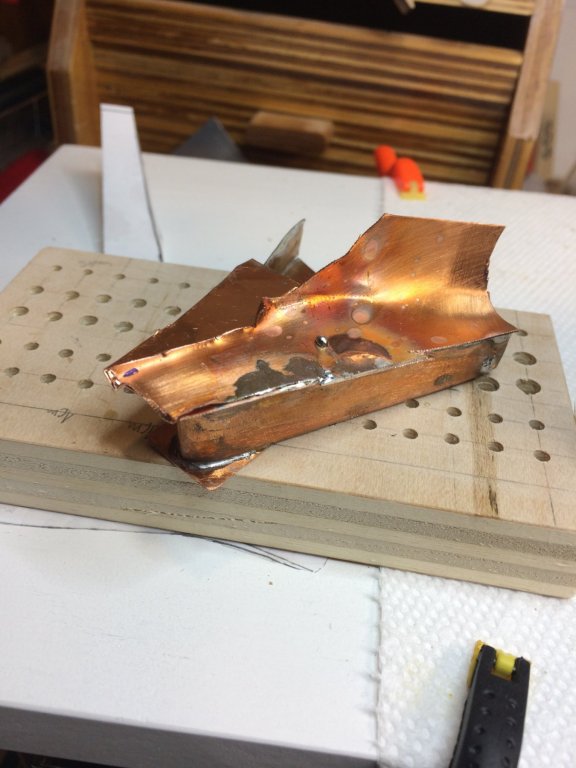
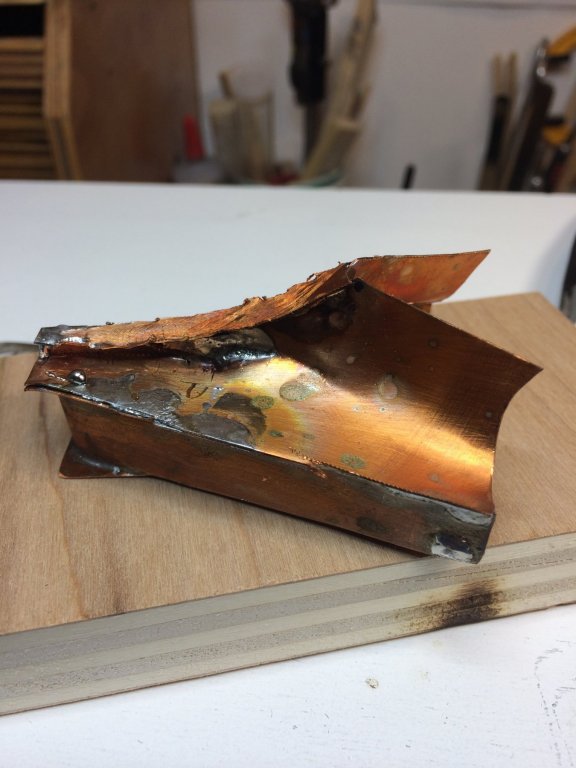
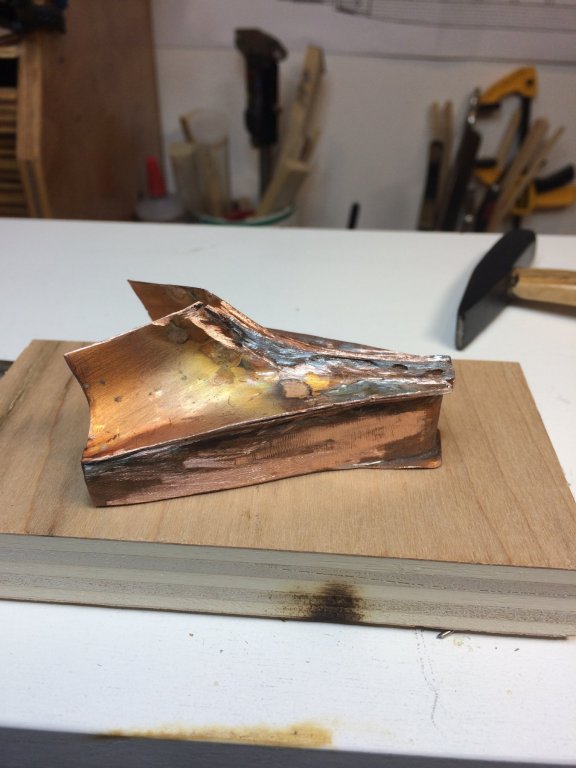
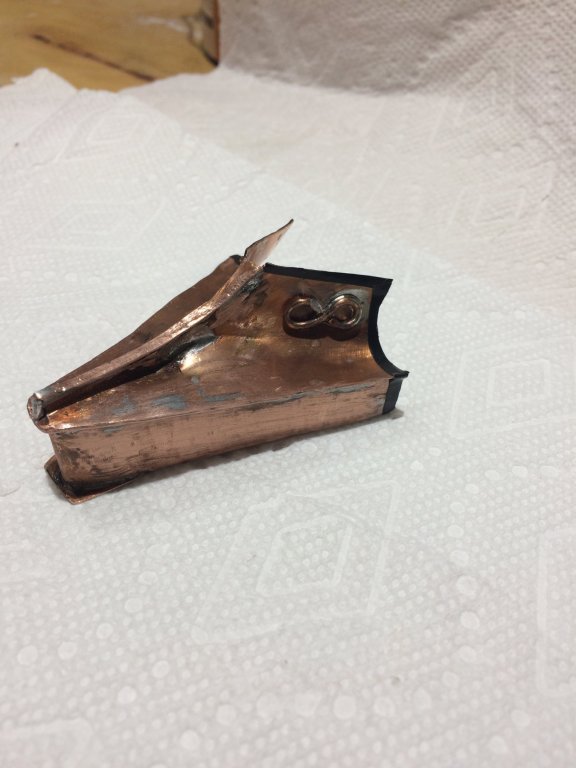
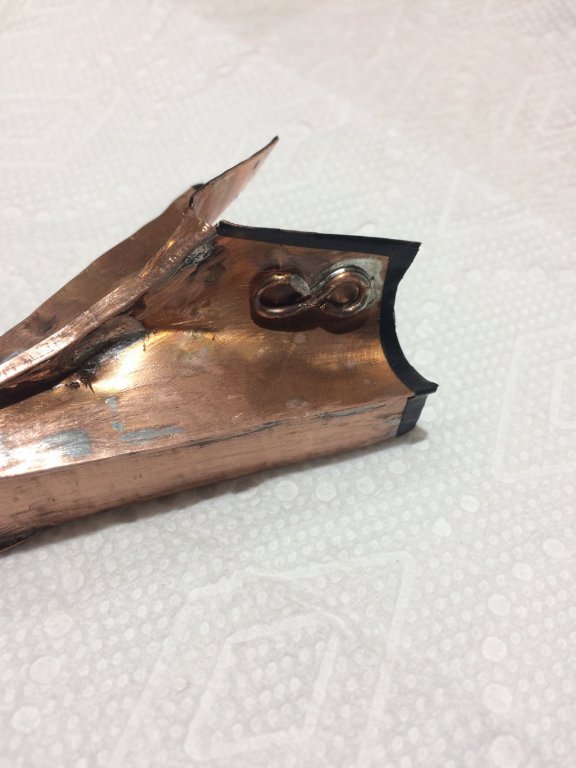
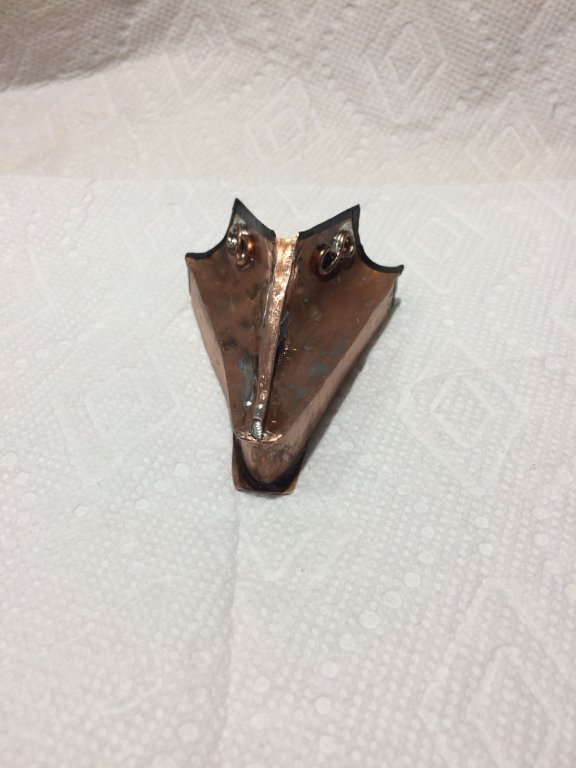
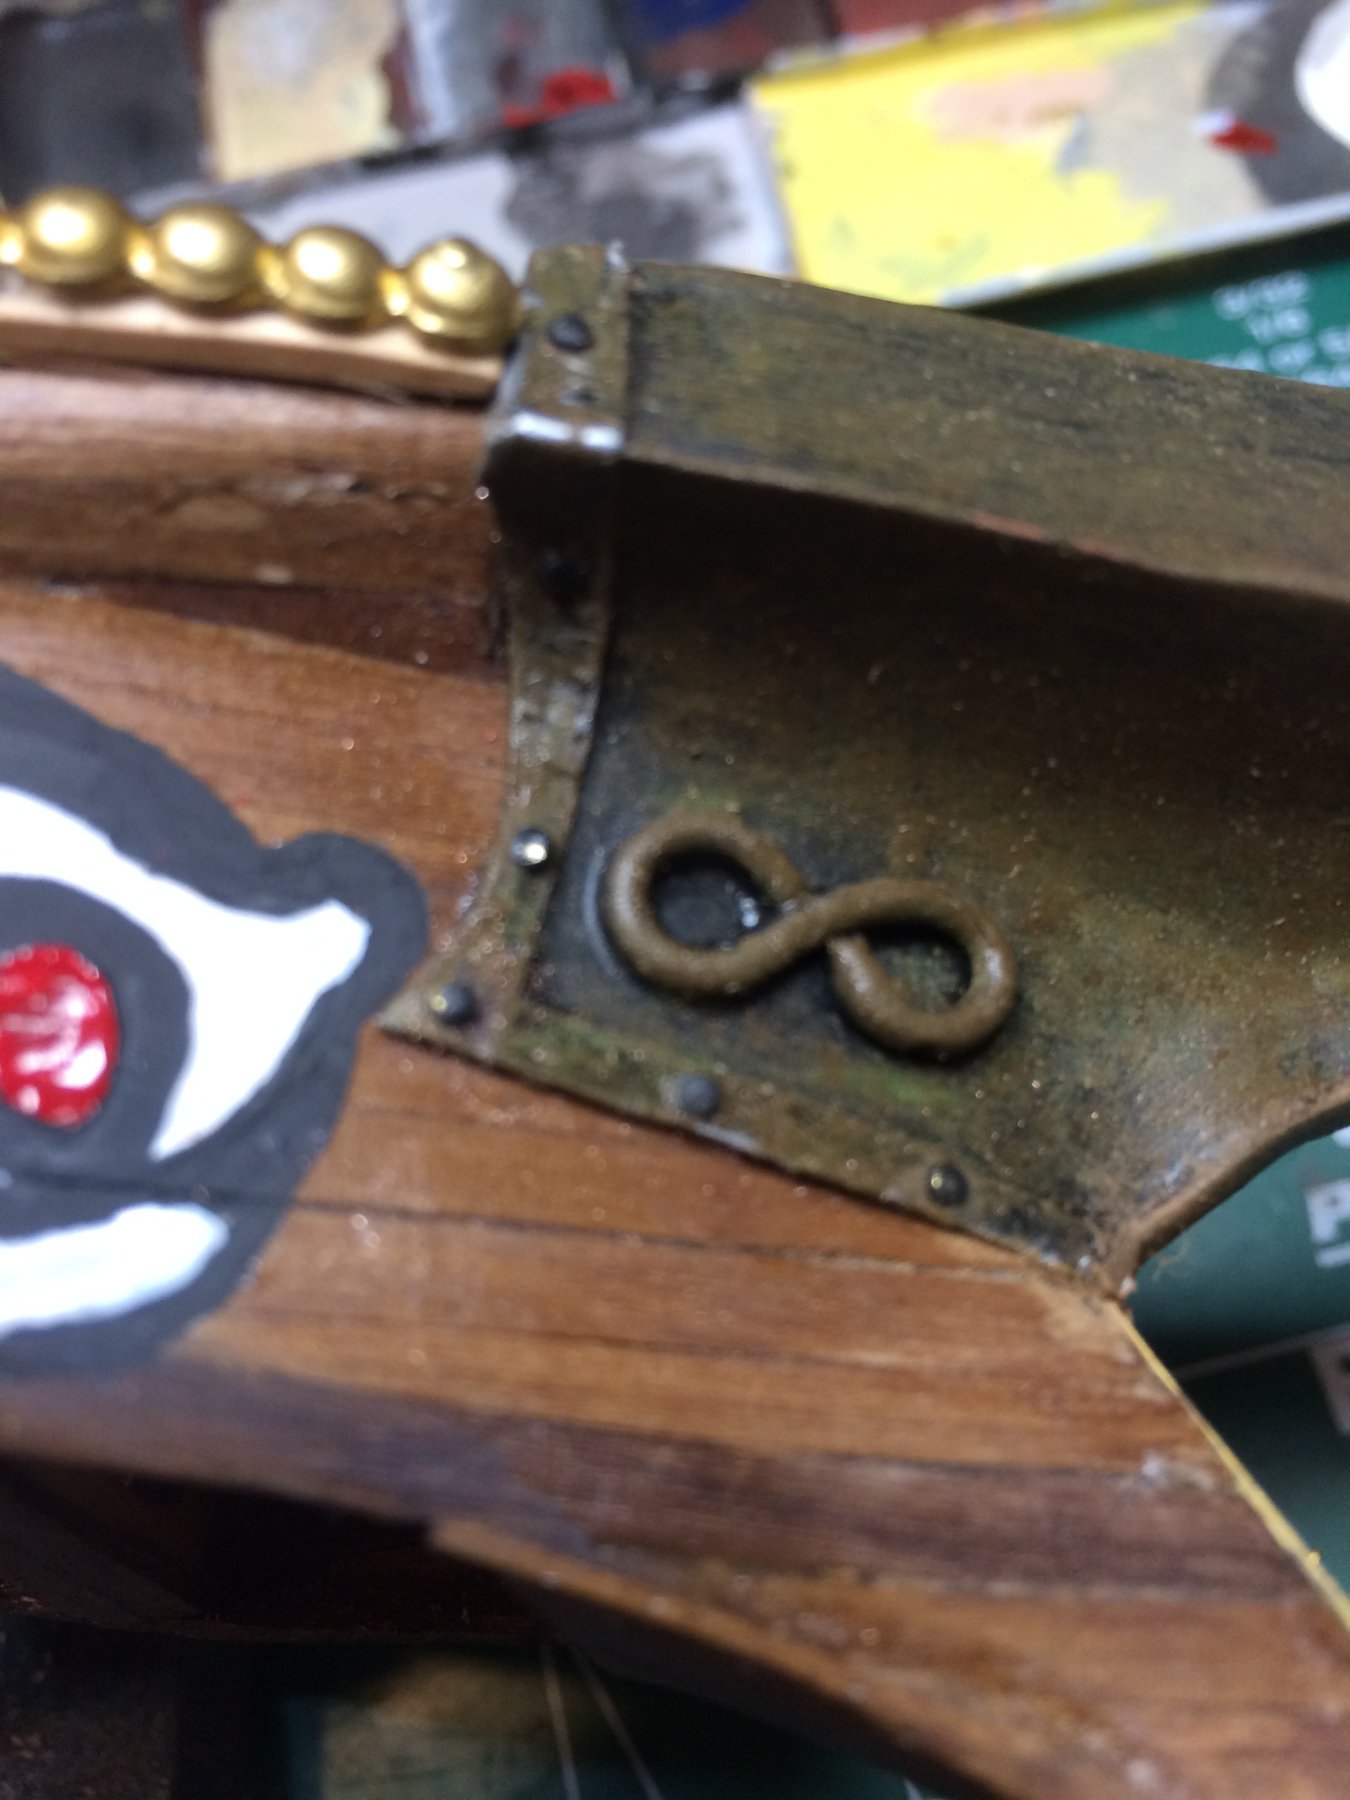
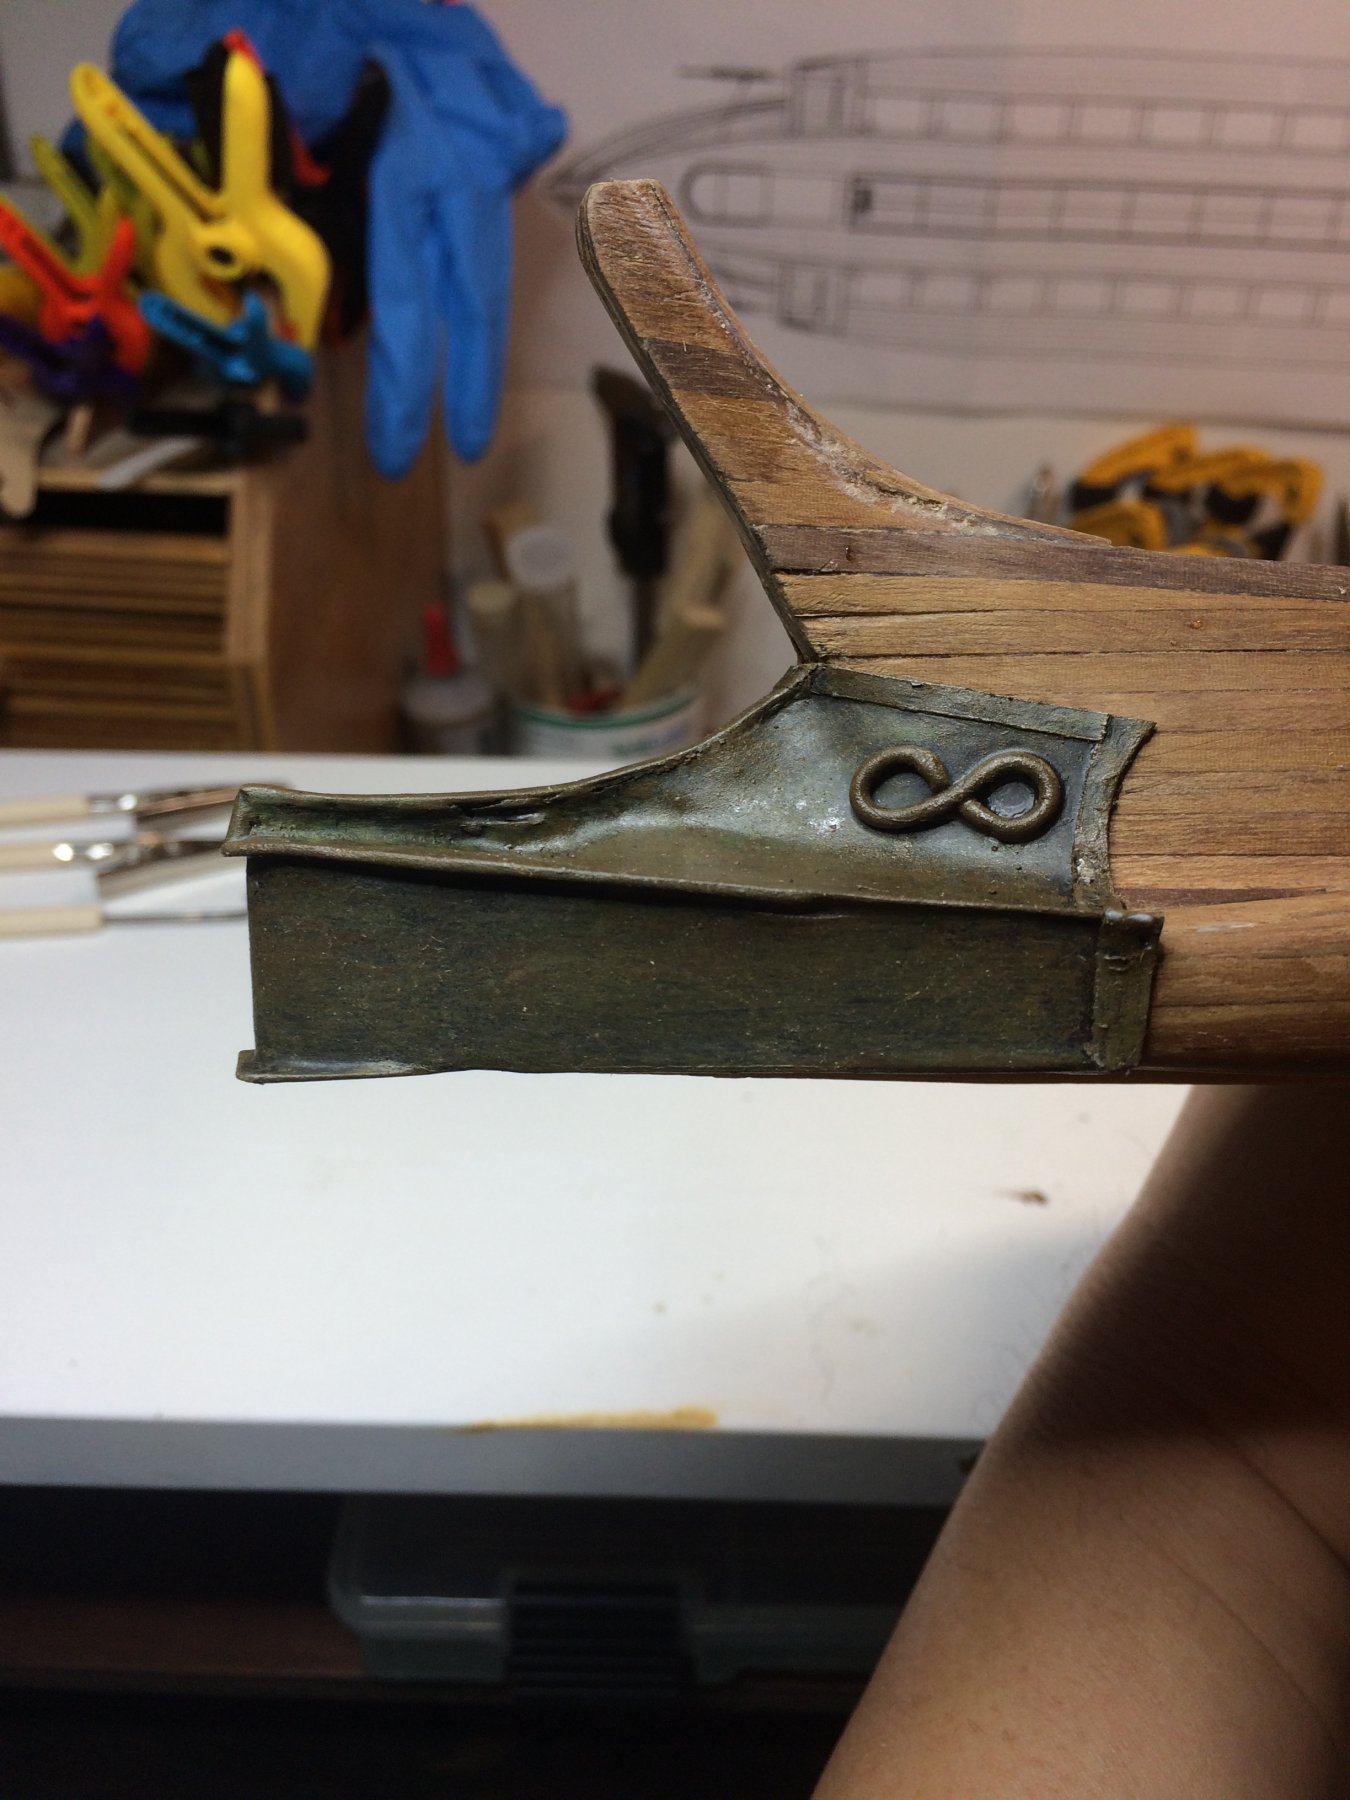
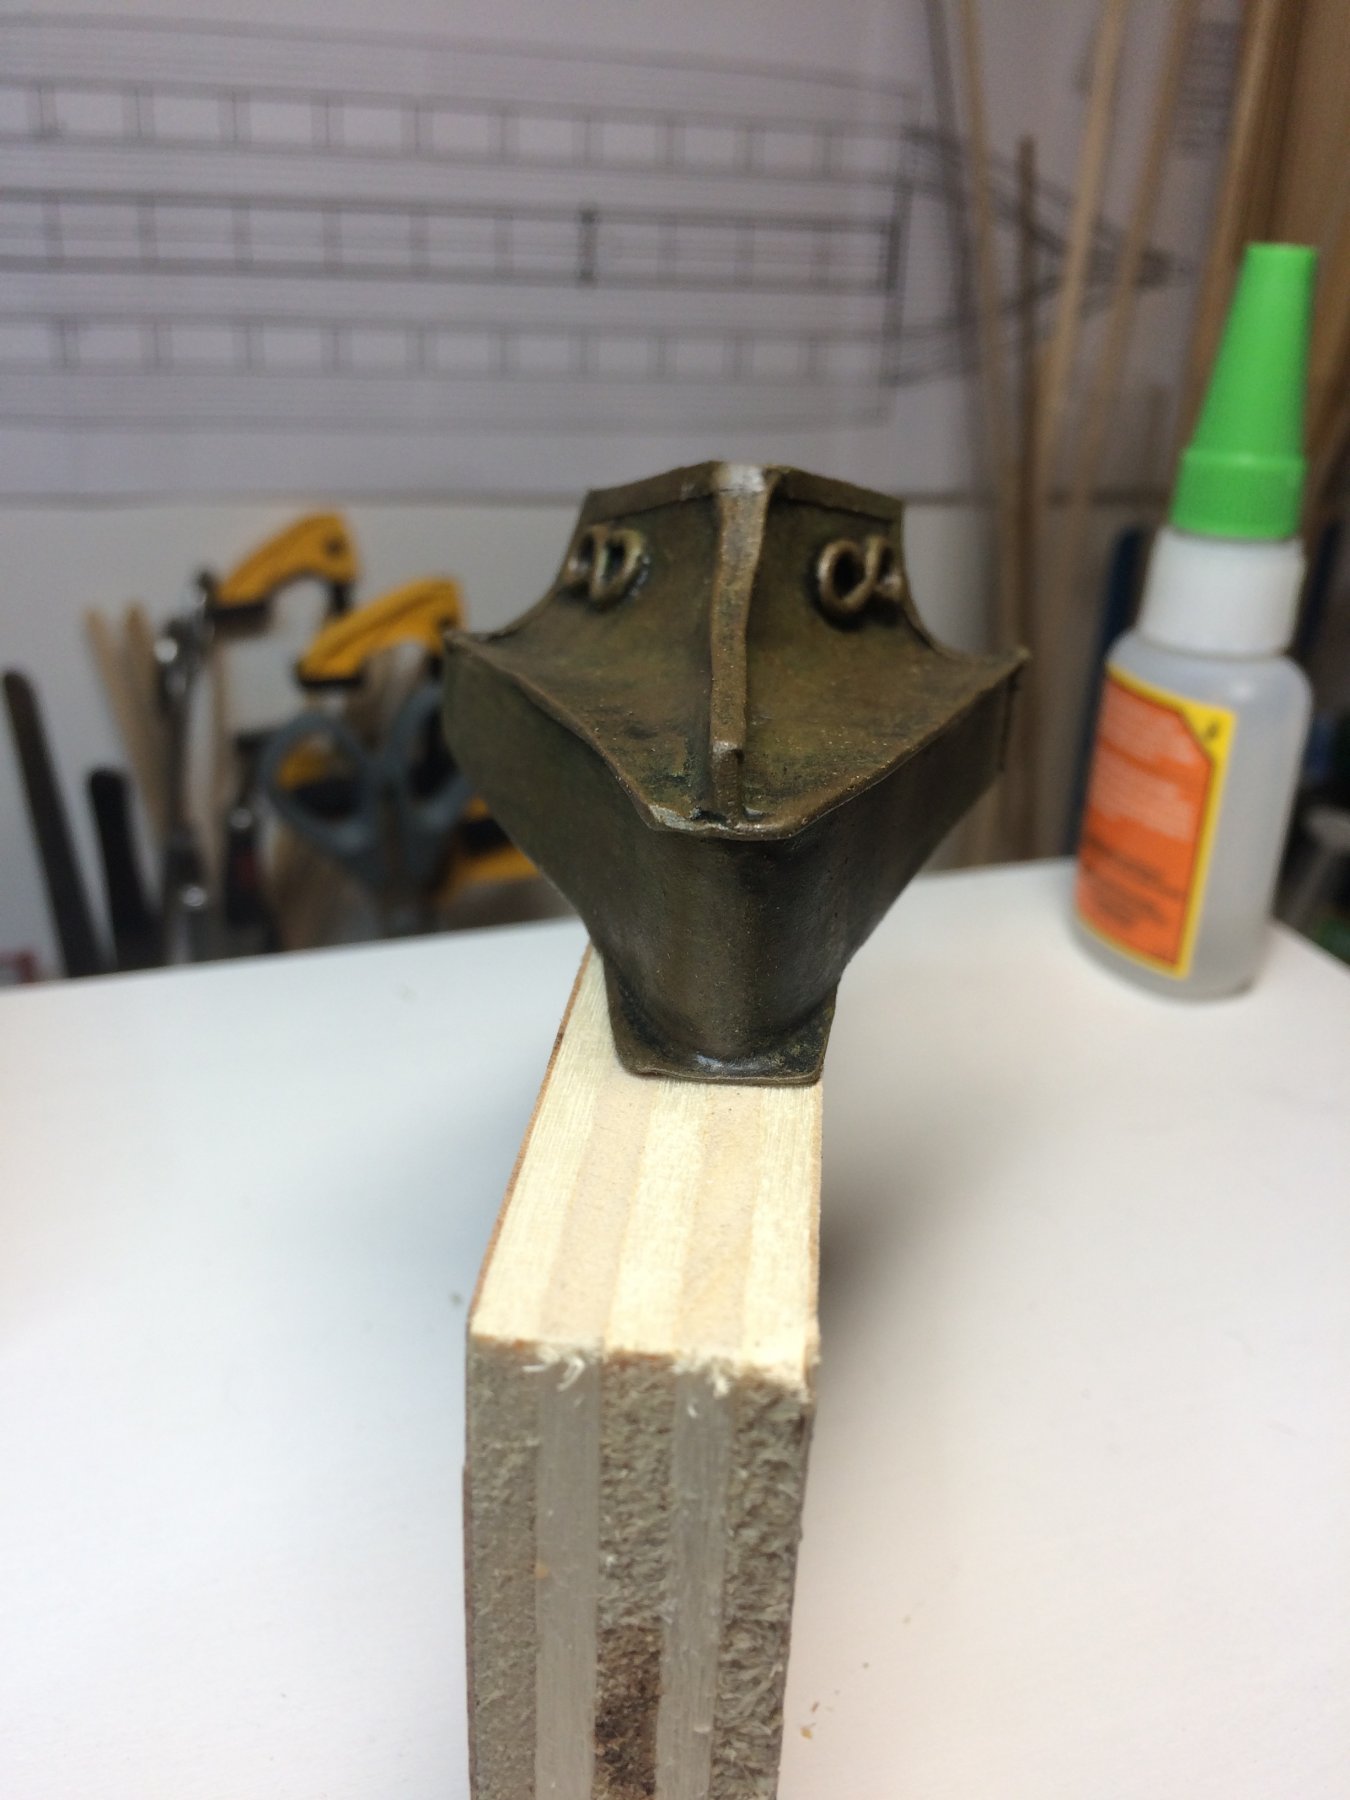
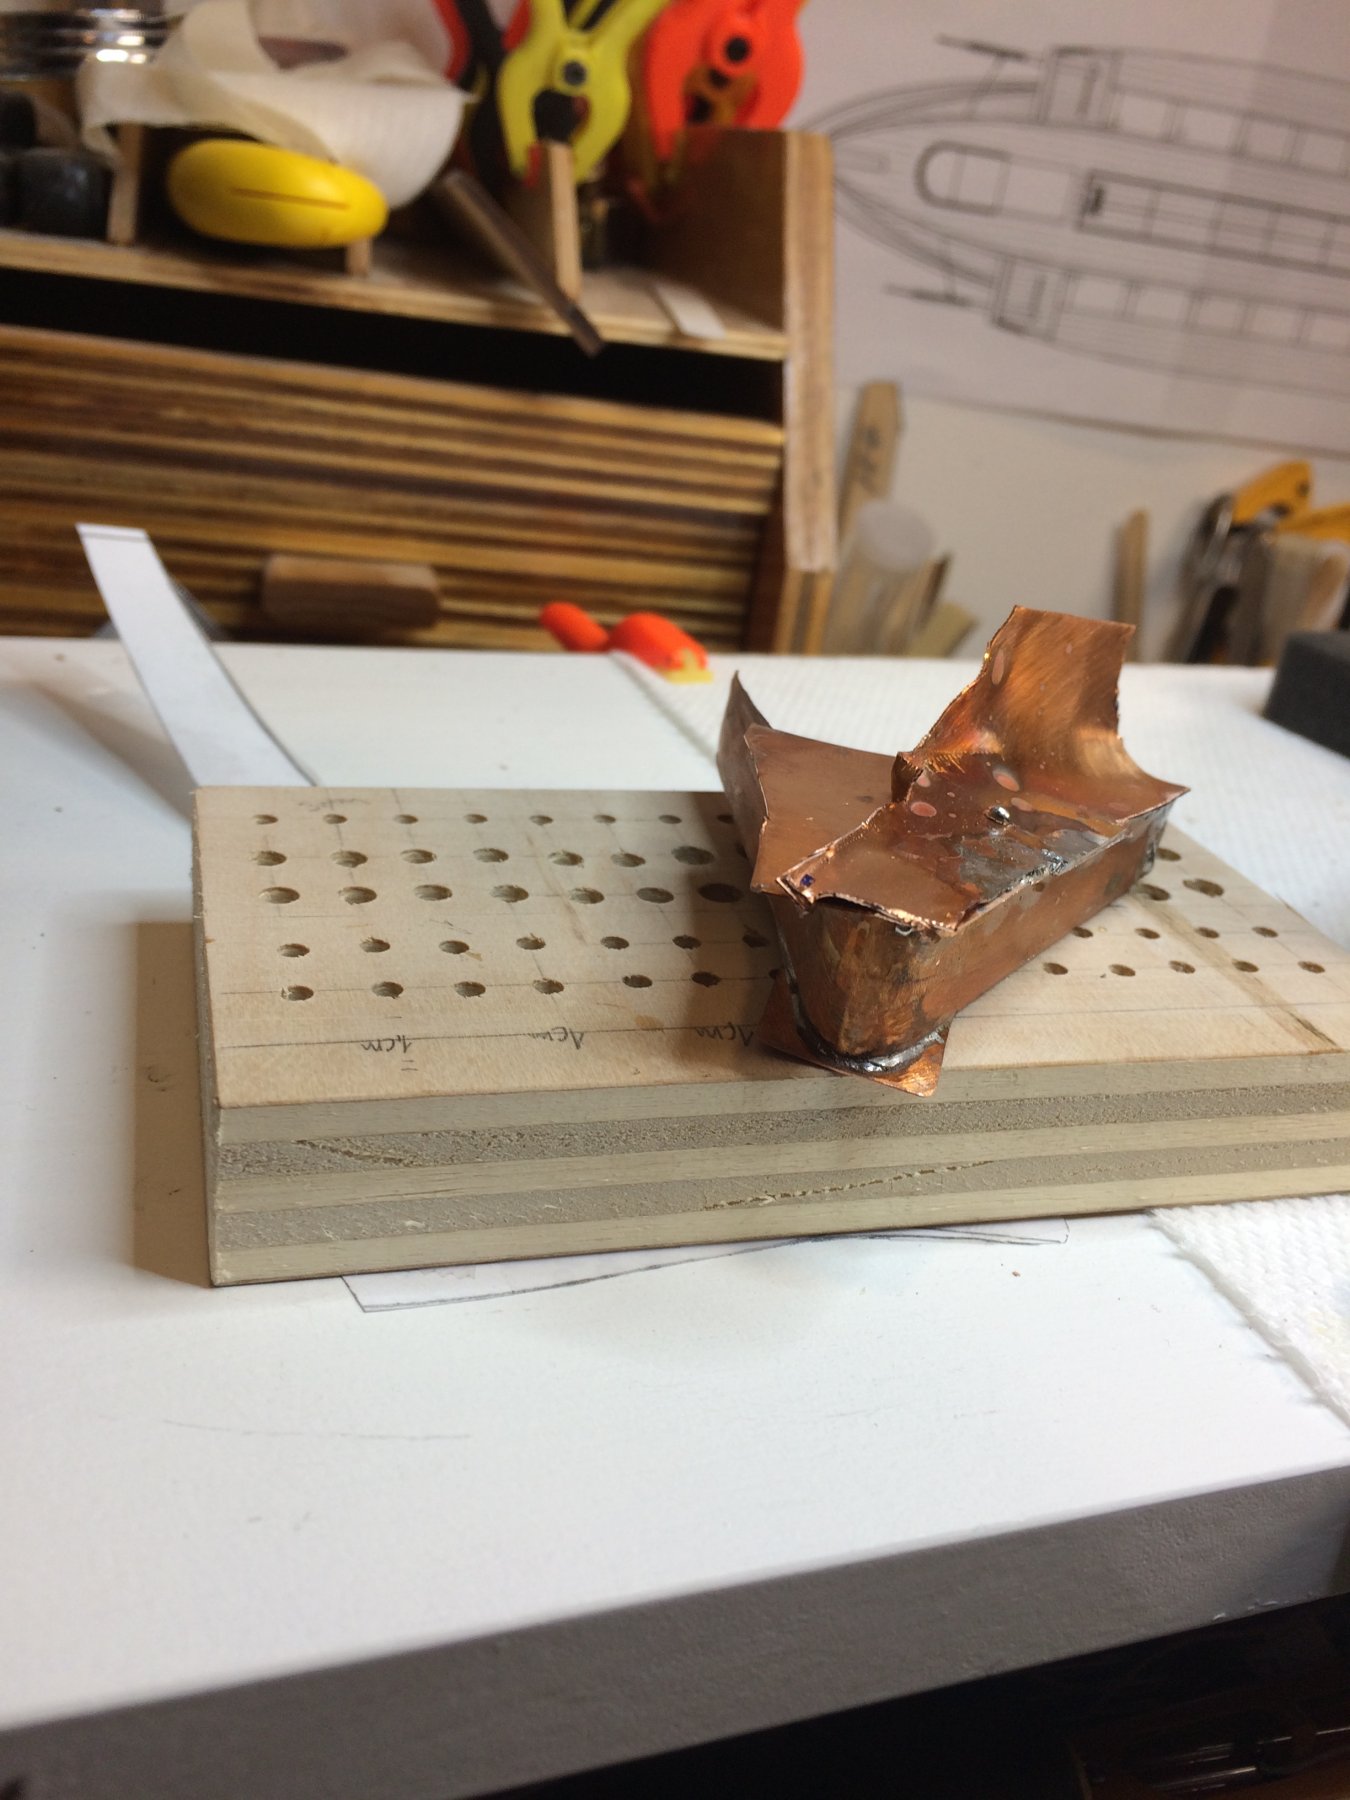
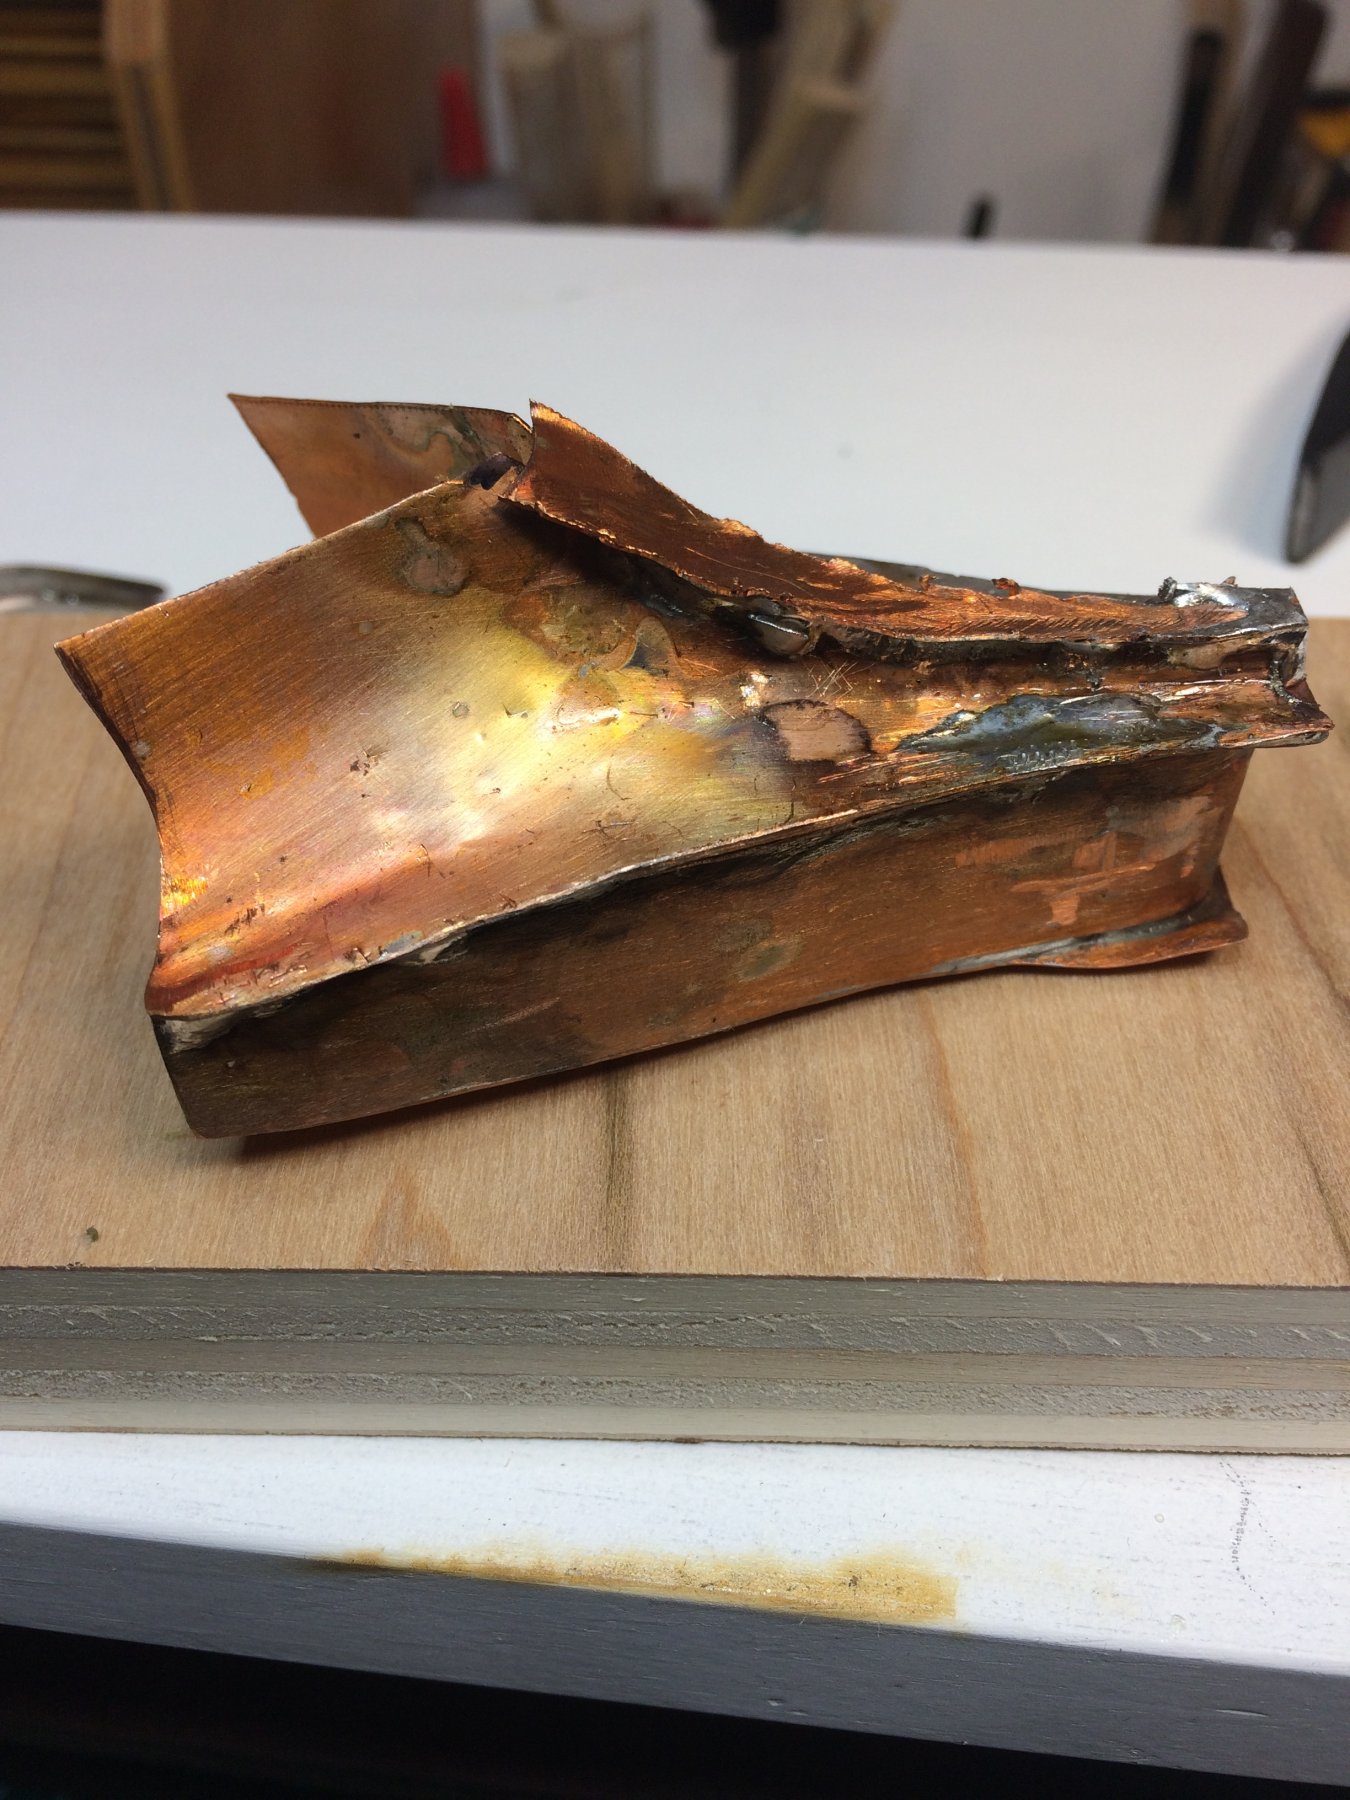
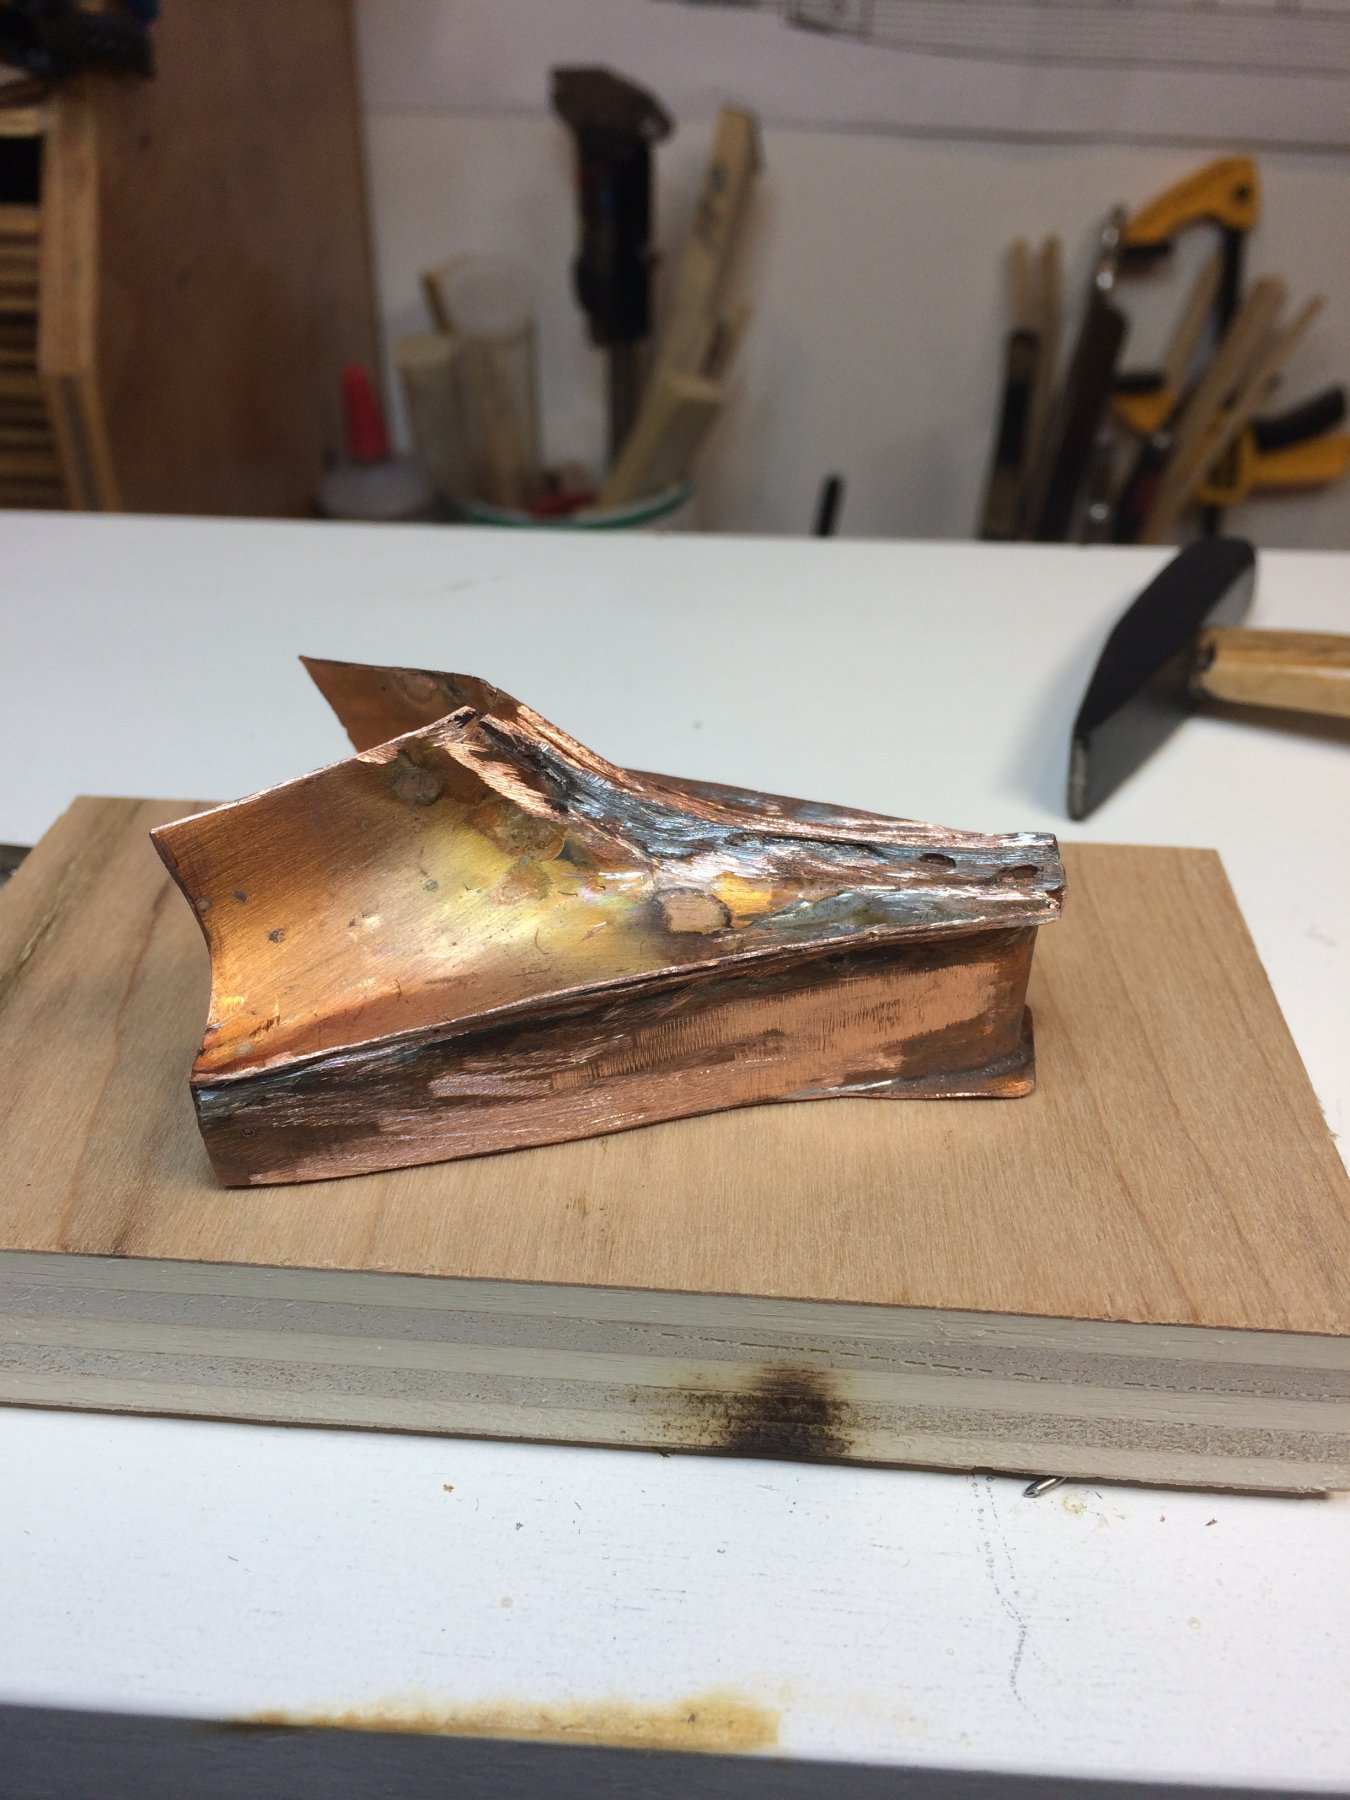
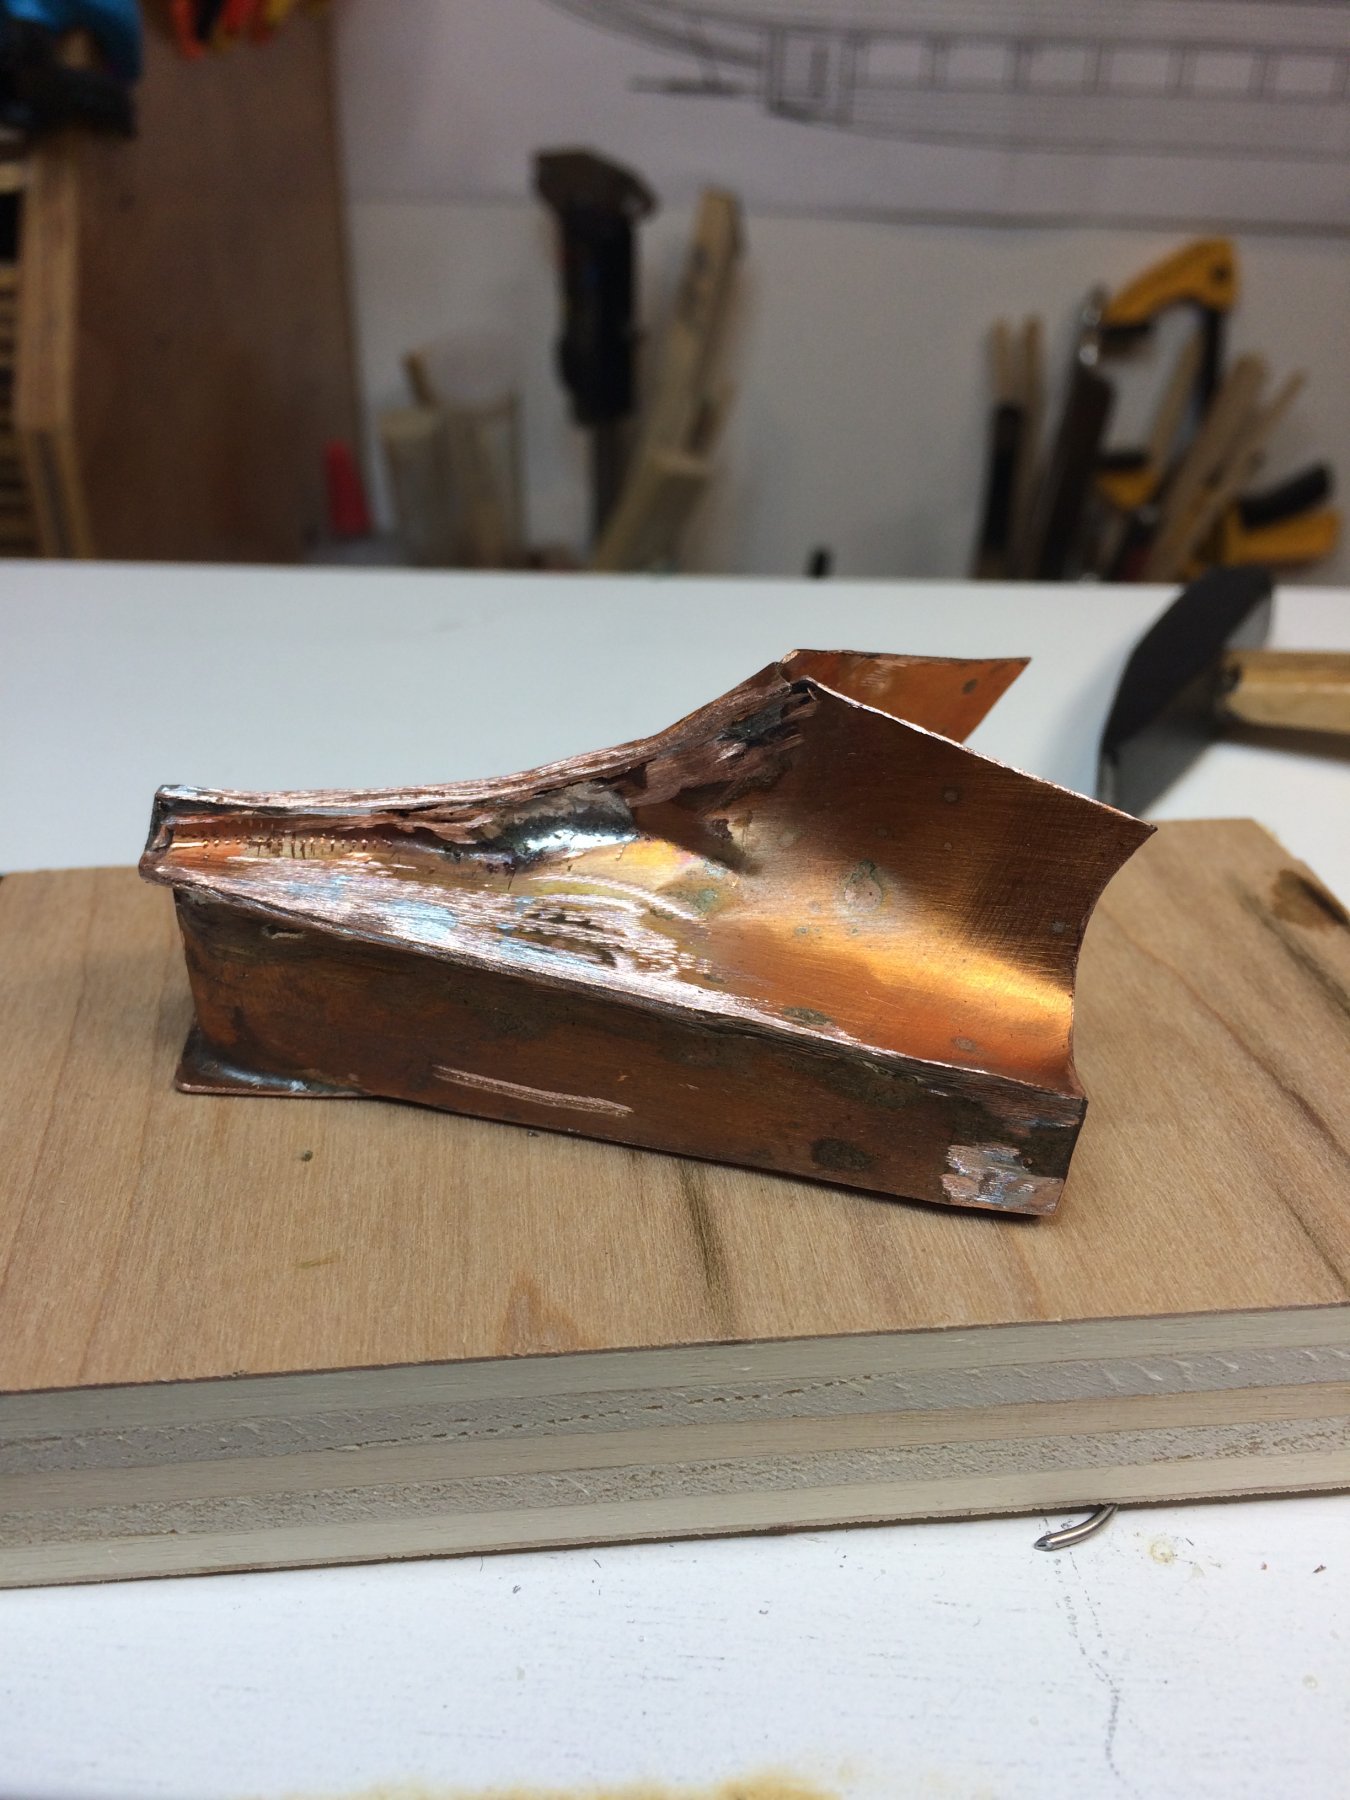
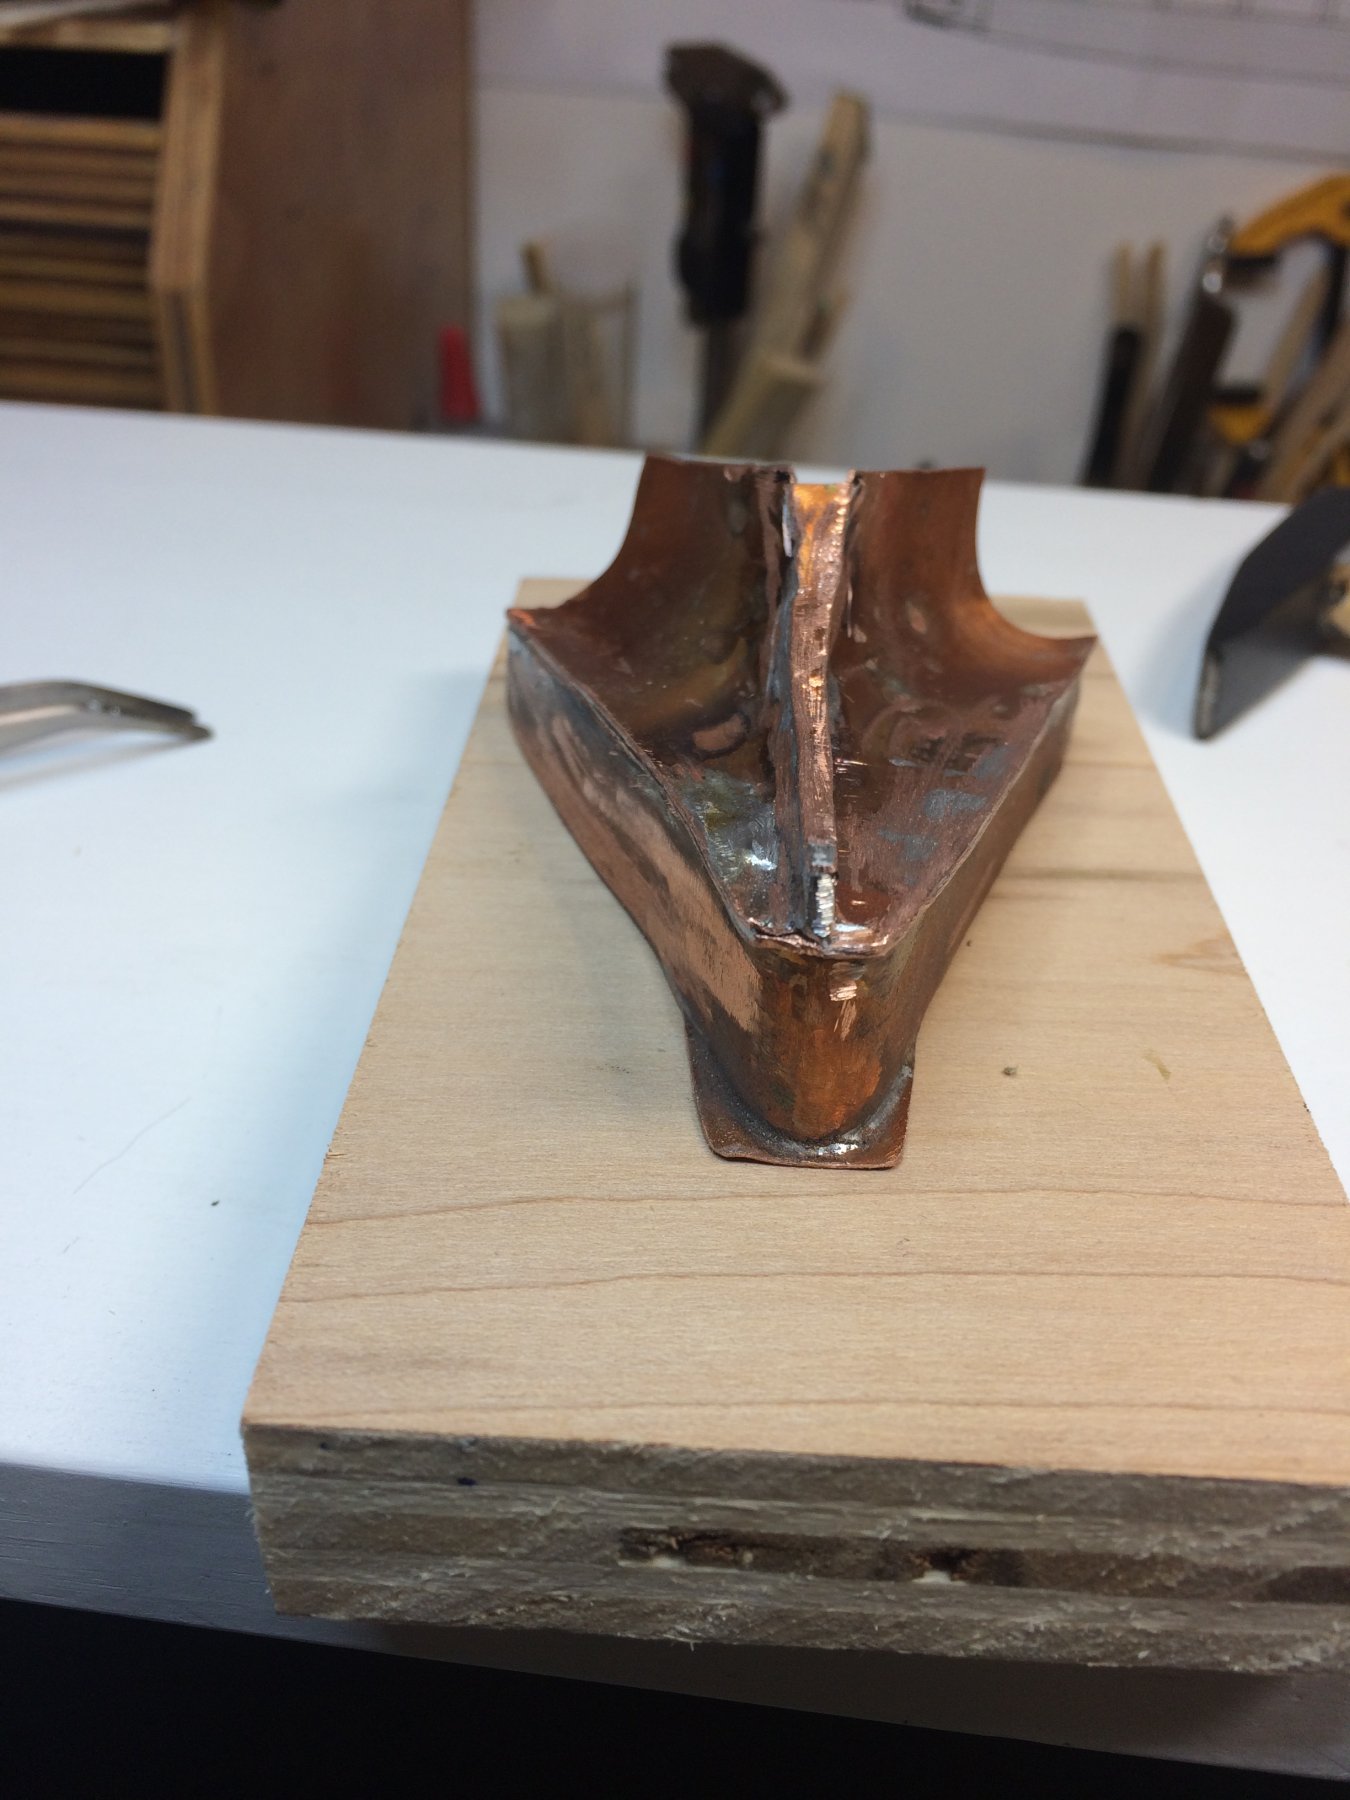
It is all about copper, soldering, flame, burned fingers, sanding, cutting, etc. so lets start... Based on a template from a cardboard i made some posts ago, i cut the copper sheets to the approximate size. Wanted to leave some extras in case i had to modify it. I wanted to go with a ram that looks like one in Israel museum (https://upload.wikimedia.org/wikipedia/commons/9/9a/Israeli_National_Maritime_Museum-_Naval_ram-2.jpg ). Unfortunately this one was made for a ship that it is not the same shaped as my model so i needed to adopt it a bit. Was doing a bit of online research and came across multiple different versions of this mighty war weapon. This always leave some room for builder' personal touch... First picture shows top and bottom part of a ram. In order to trace a correct shape a bit more easily i put a layer of tape on the copper sheet, trace the form and cut with scissors for metal. The gauge of copper is thin enough so there was no problem cutting it. Removed the tape and started soldering process. Must admit that i had some challenges finding correct soldering wire, proper heat temperature and some tools to hold everything together. Copper does transfer the heat very quickly so make sure you are wearing some protection on your hands.. In the past i did a bit of plumbing soldering around my house but this task requires way more precise tools.. The other side.. First test on the ship.. Then it was time to attack side panels. Cut side panels, shape them in the correct form and start soldering. Must admit that this was very challenging task as by heating the copper for side panels, the heat transferred to the whole copper plate and "un-solder" previously soldered parts. In the process, one side installed. Both sides soldered and first test on the model.. The top piece of a ram installed. This piece connects both side panels. Had plenty of extra copper and cut the excess with scissors. That is why the top piece looks very sharp and screams for a good sanding.... After spending some quality time with different sending belts and Dremel sanding bits, here is end result. No sharp edges. Now i wanted to put some ornaments on it, to make it a bit more original-like but was not quire successful and was ending up soldering an 'infinity symbol' made out of a electric wire. Also i put a small strip of electric tape on the edges; i replaced it with a duck tape as duck tape is a bit ticker than electric tape. I wanted to simulate the edge that is visible on the original ram. So that's it. The soldering is done and ram fits very nicely on the model.. I was contemplating what to do next: leaving it like this or do some weathering to give it a bit of patina look. Was not quite happy with all colors (copper, solder, sanding) shown on it and decided to go with weathering. I sprayed a small layer of black paint on it and now ram is drying waiting to weathering process. This will be interesting process, hopefully the end result will be satisfactory. I can always build another ram if weathering process ends up being disaster. Anyhow, more to come soon.. Happy modeling


- 122 replies
-
- 7
-
-
- greek bireme
- scale-1/35
- (and 2 more)
-
Hi Blighty, thanks for a chair..
-
Thanks Michael and zappto..
-
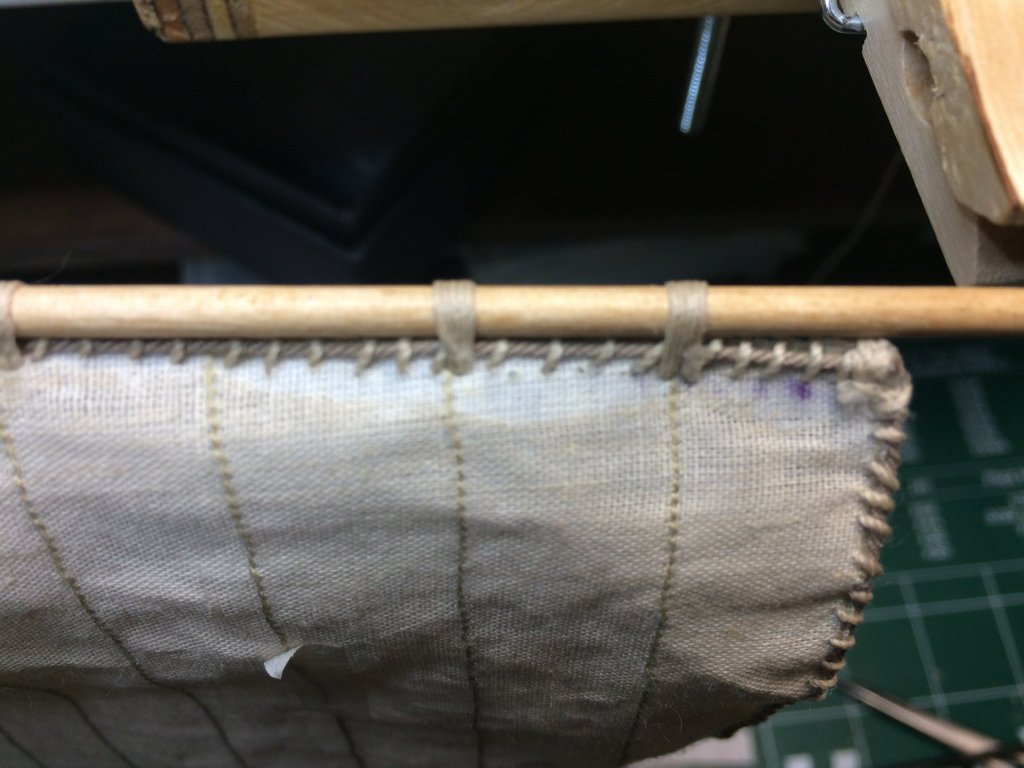
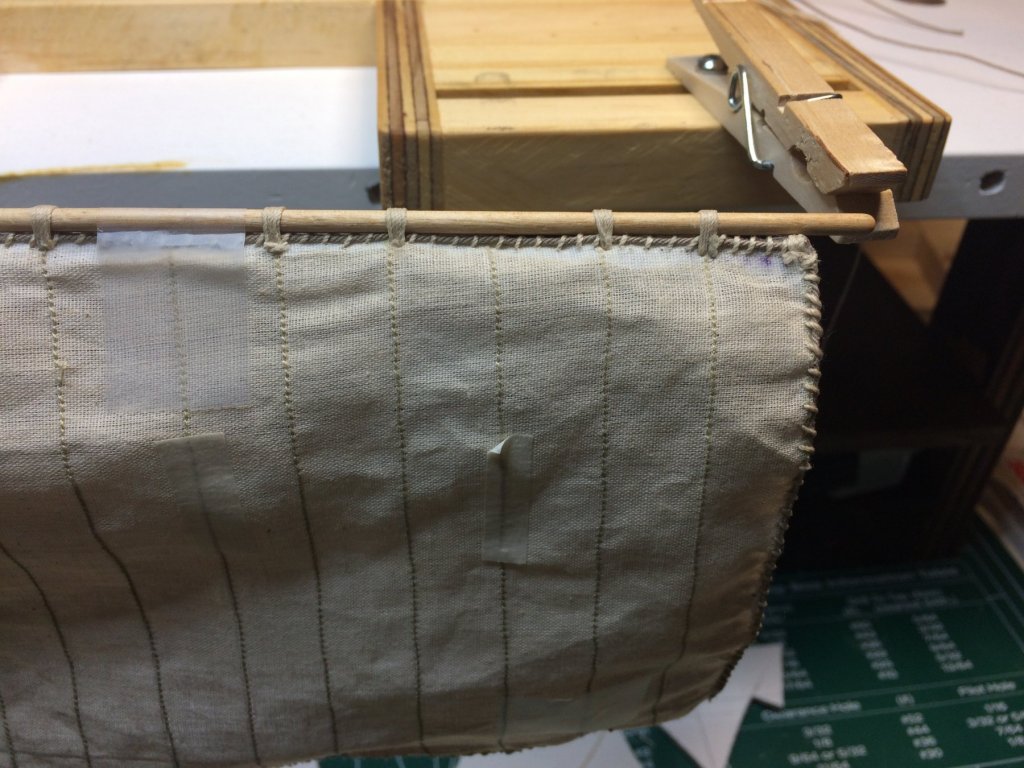
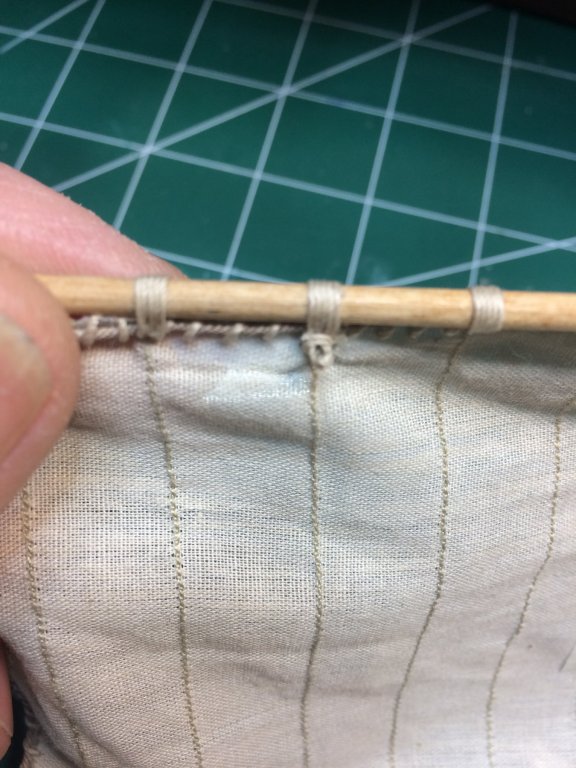
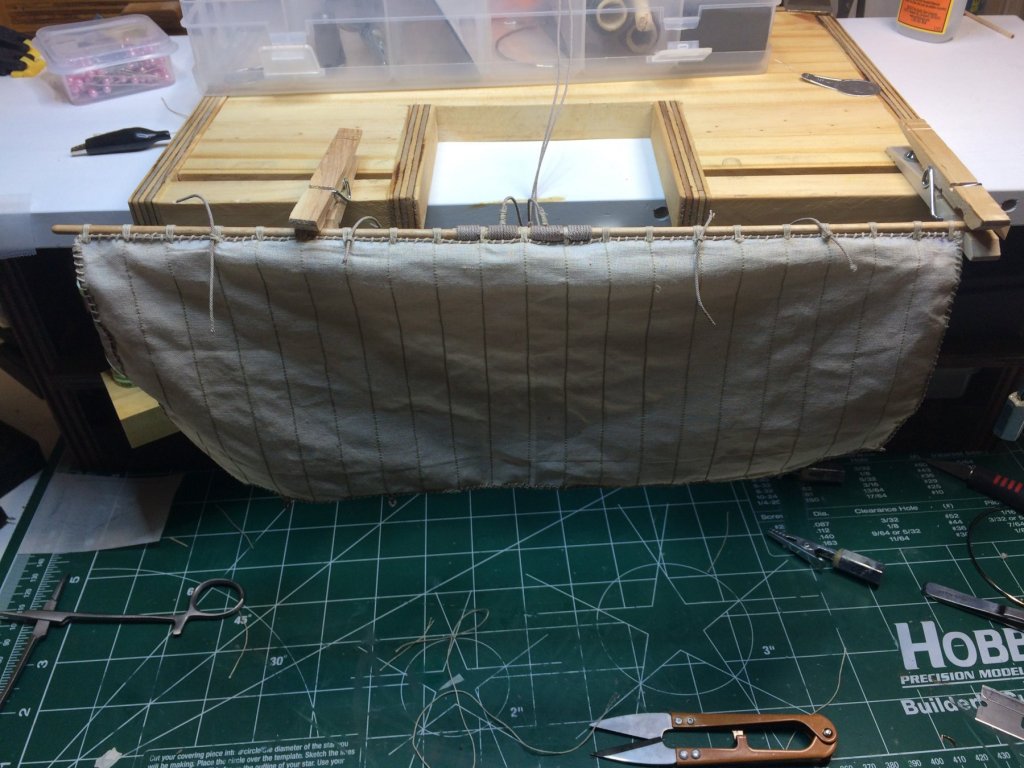
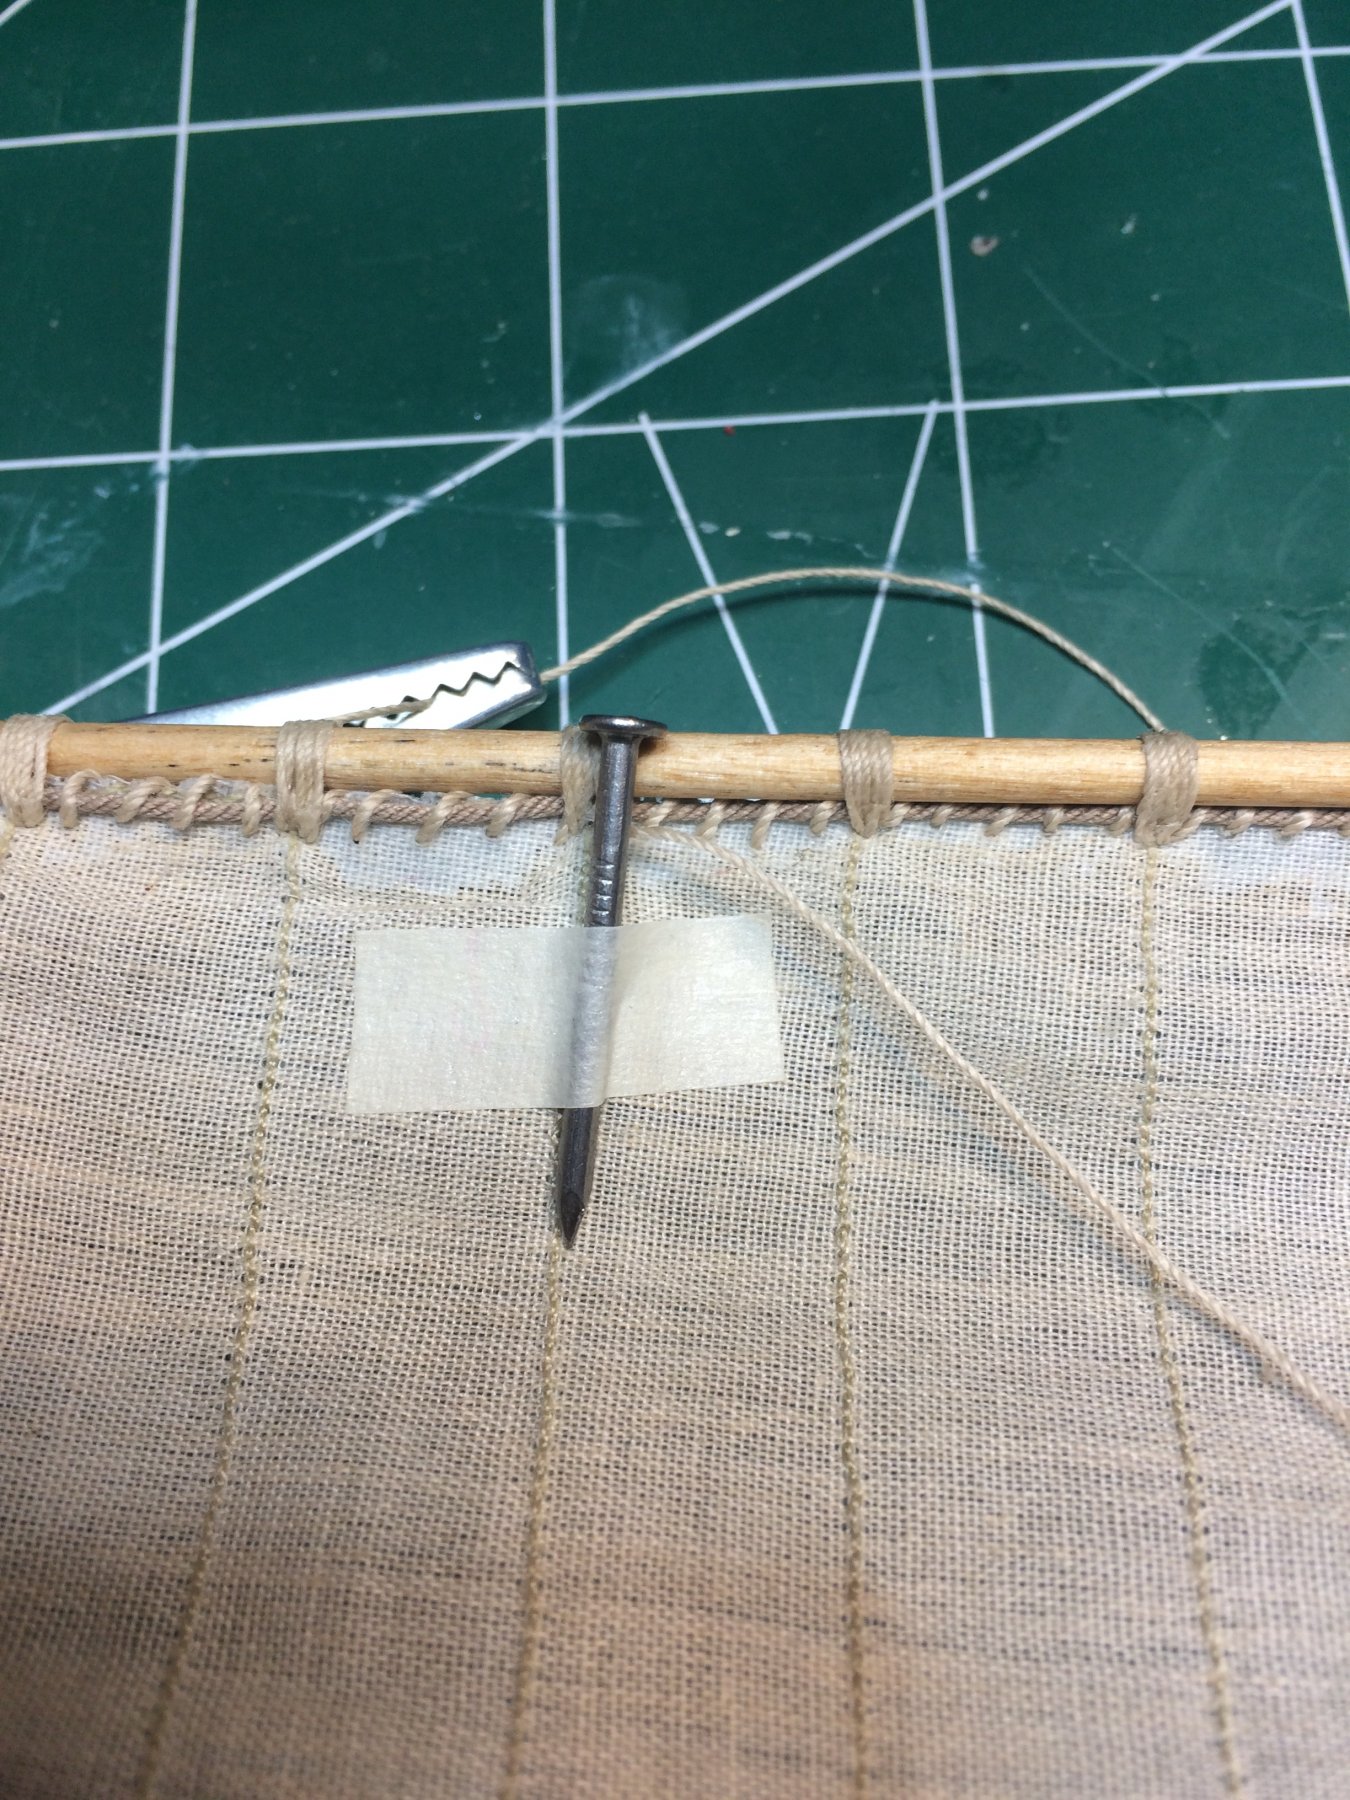
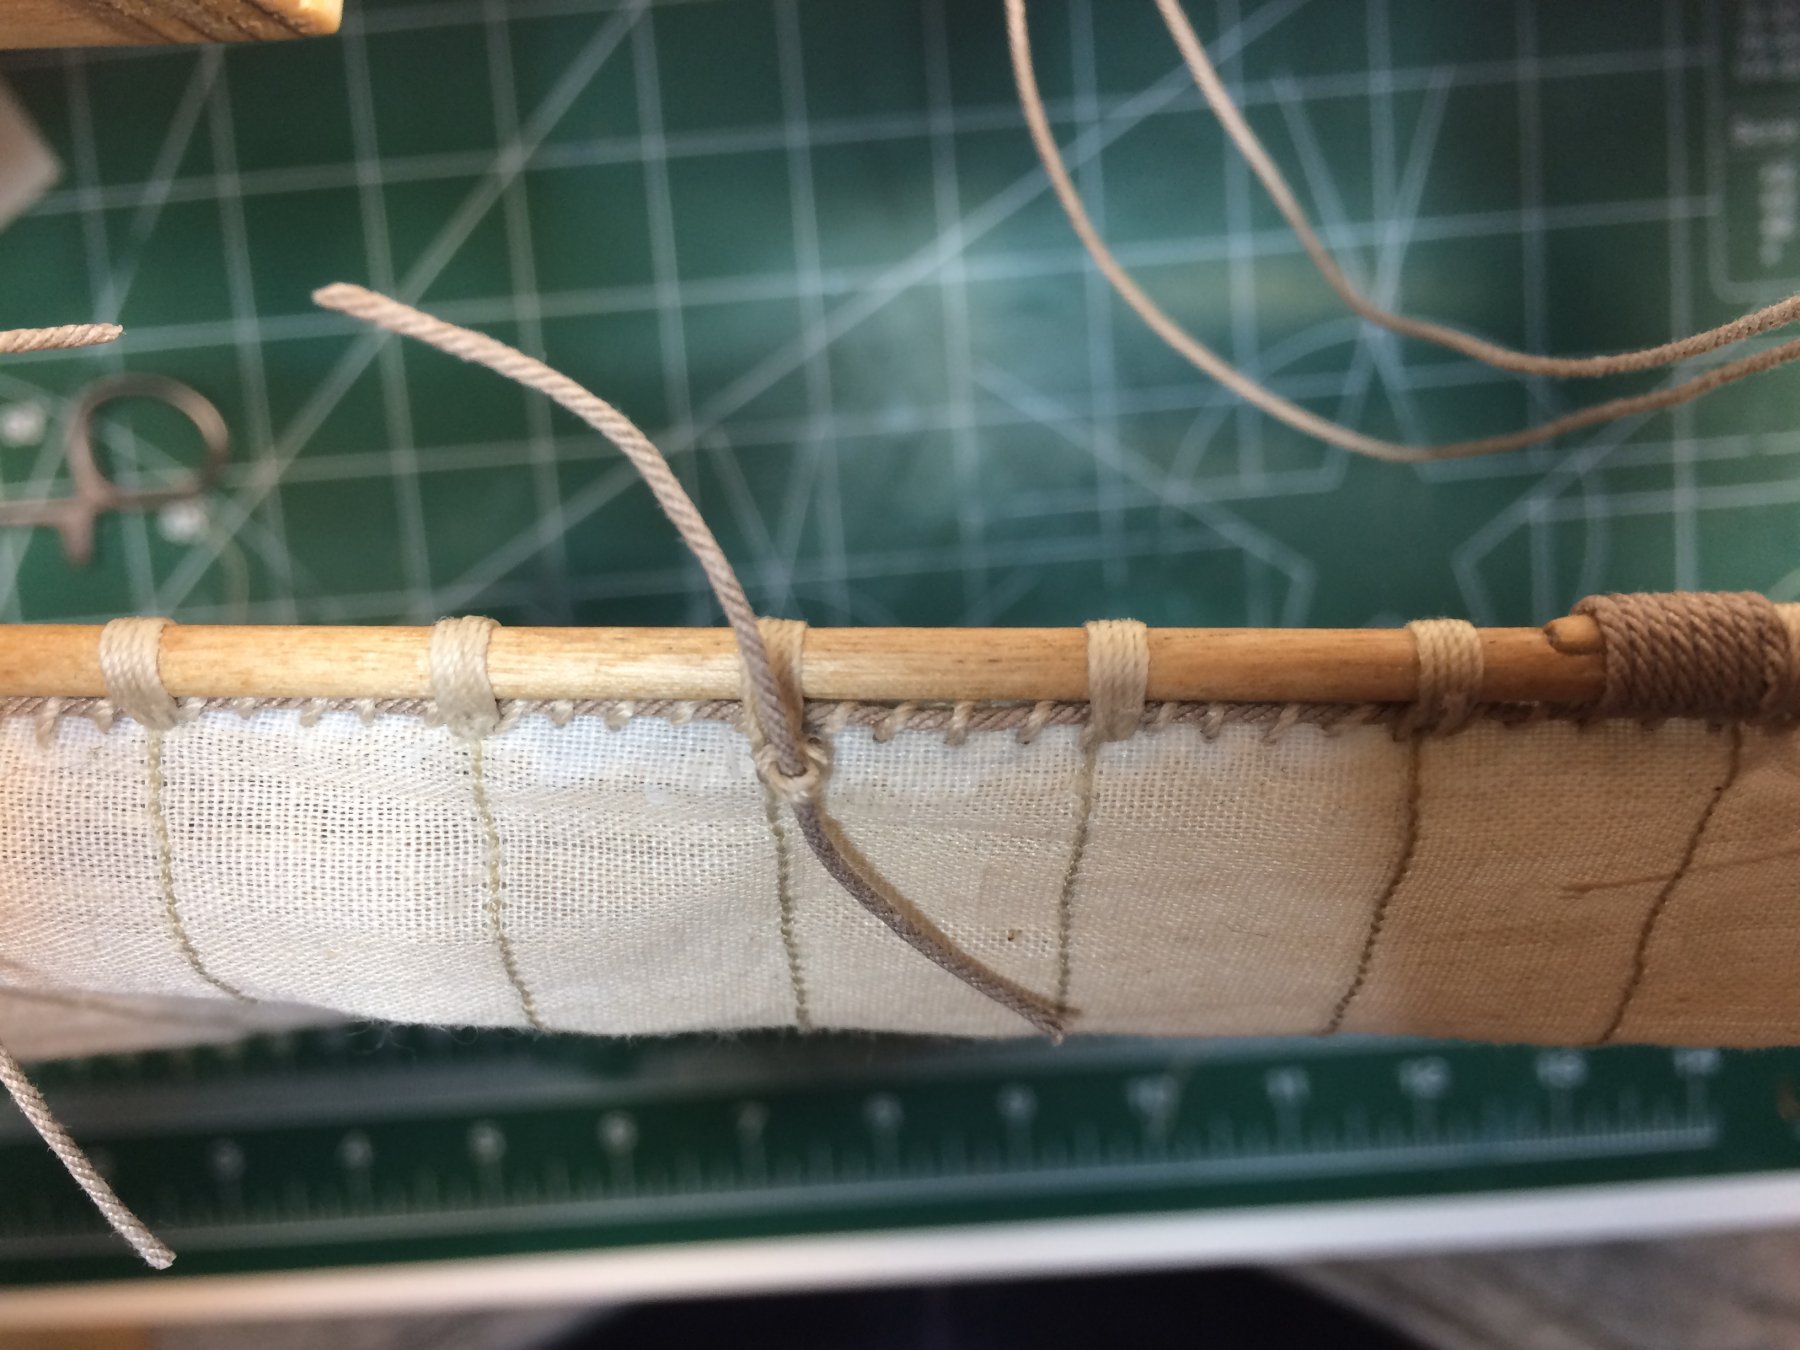
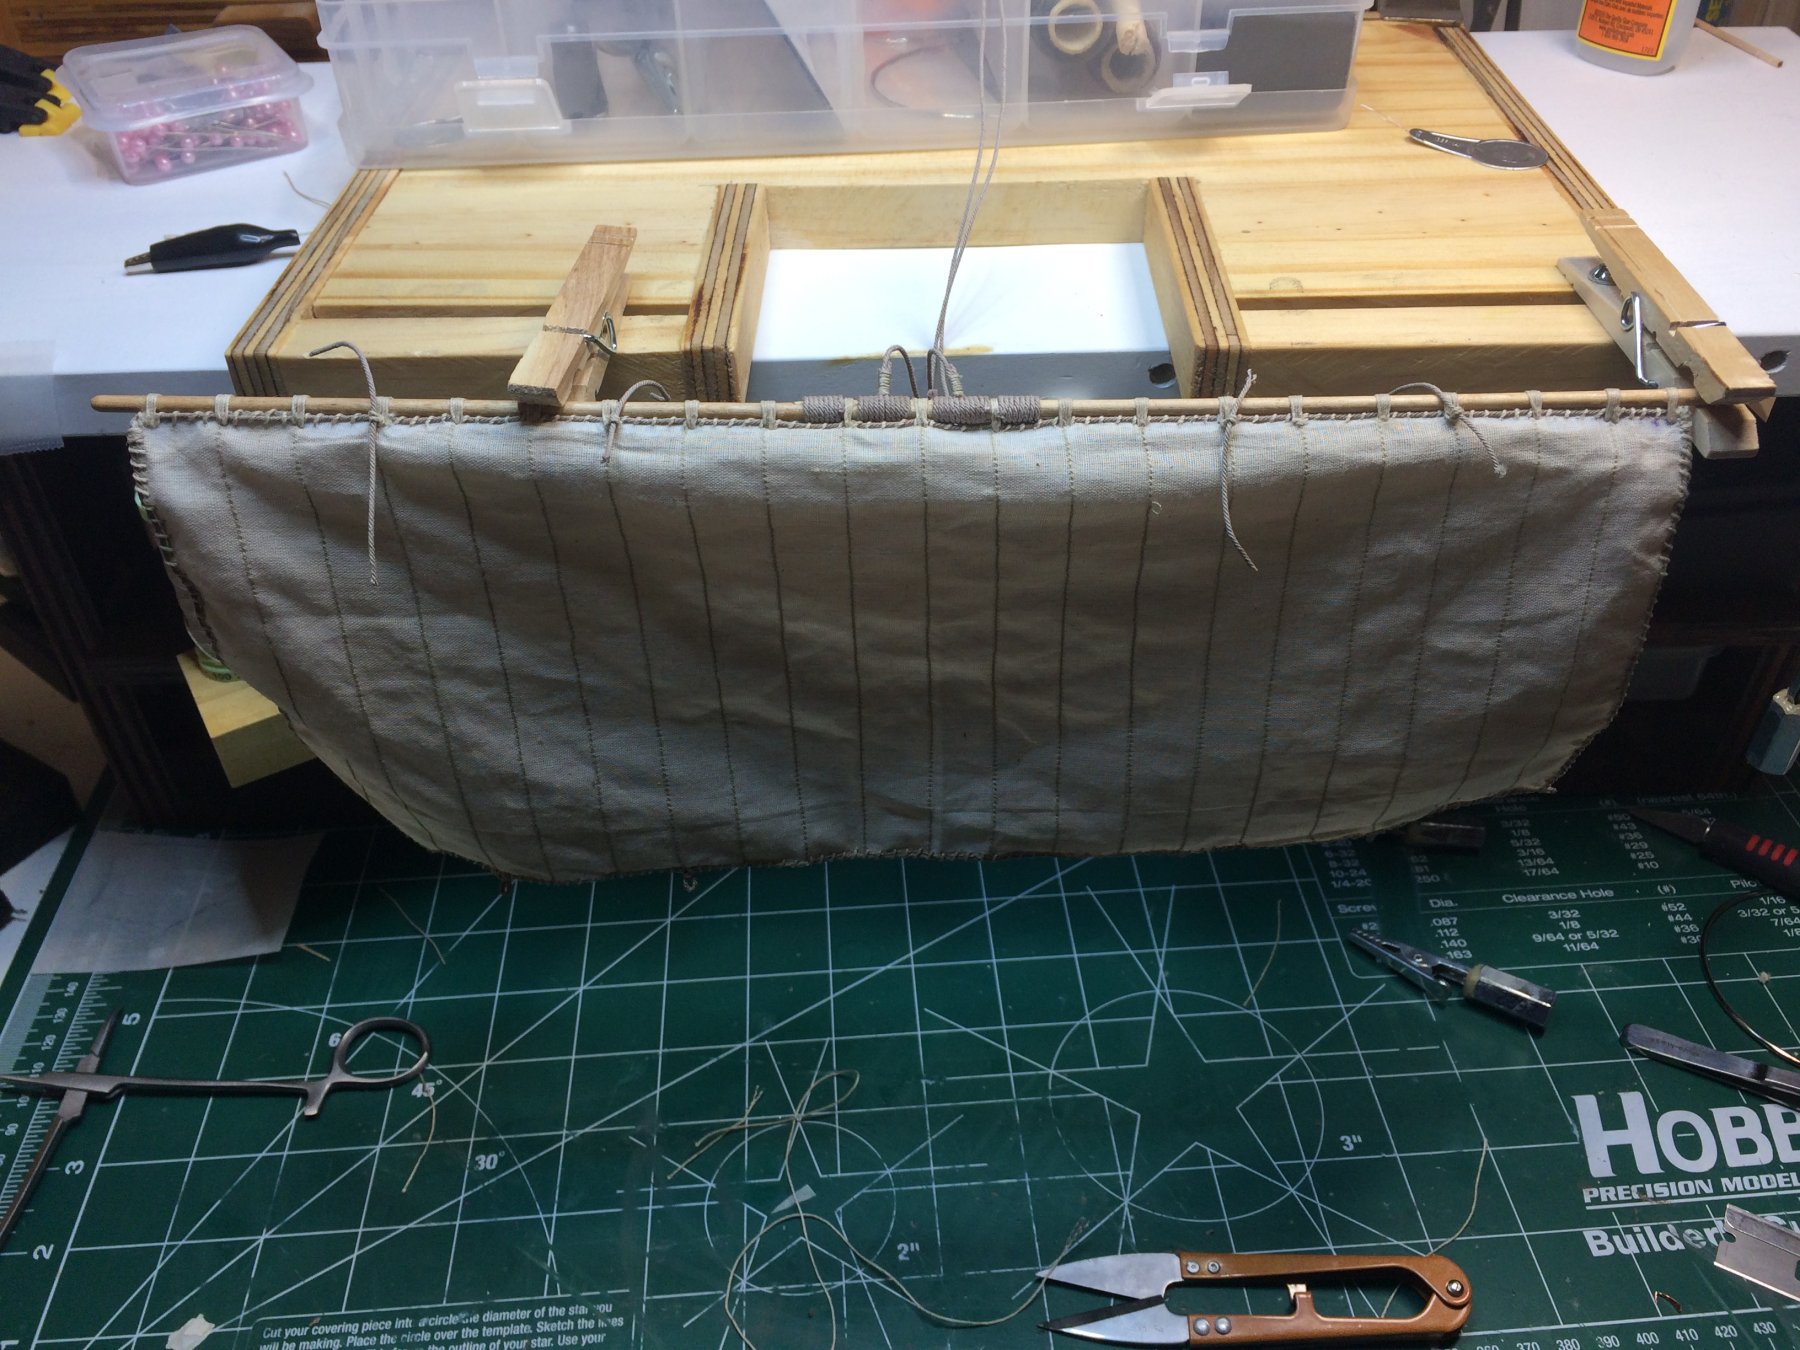
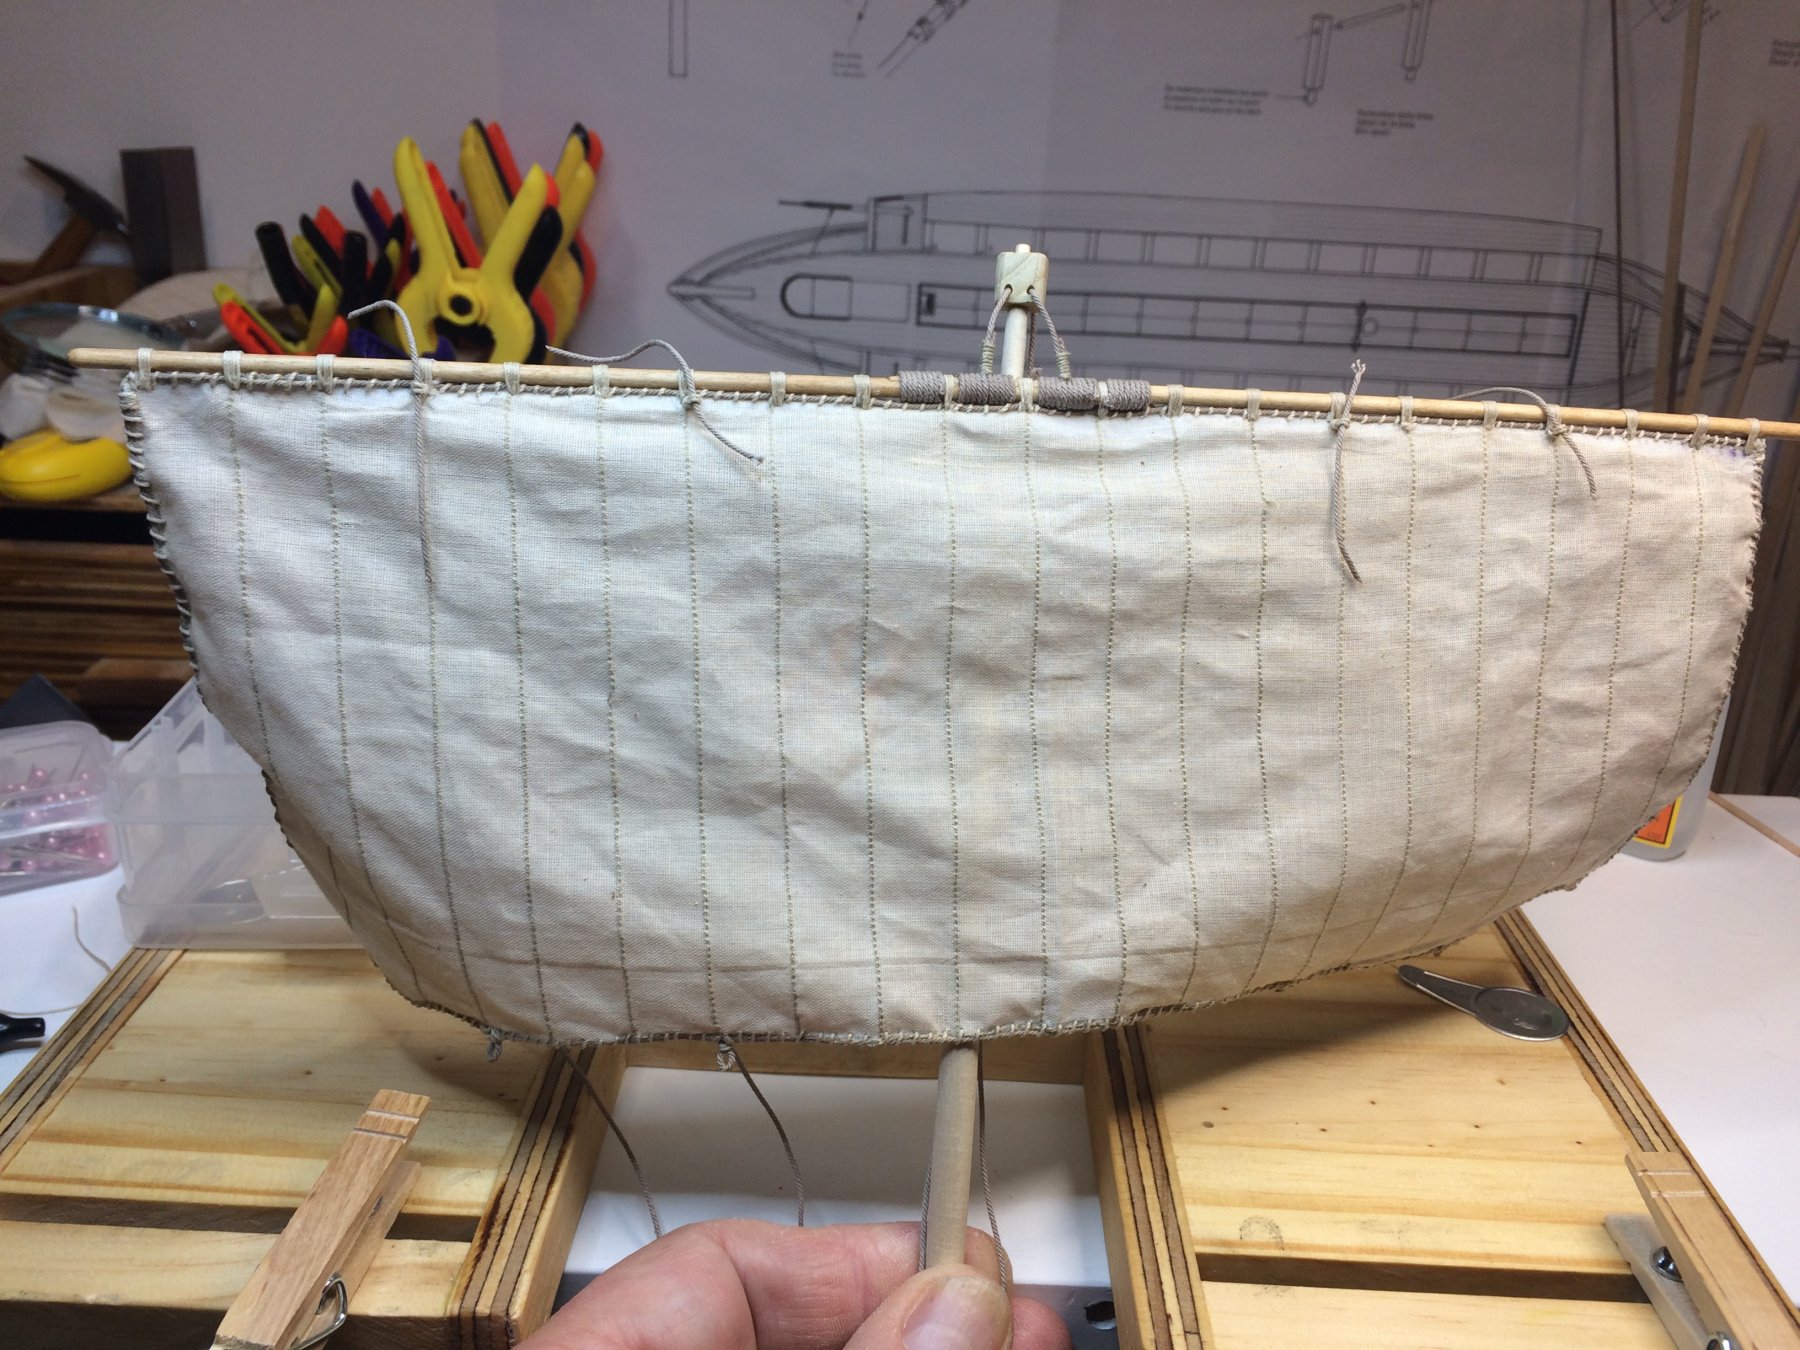
It is time to work on sail and mount it to the yard. Was thinking since there is only one sail, it will be a walk in the park working on it but turns out not to be that way. Most likely the reason is that my skills are a bit rusty these days. But practice makes it perfect so lets start or what old Latins would say.. repetitio mater studiorum est. Before i start, need to mention that kit plan does not provide much details how to mount the sail, what techniques to use to attach the sail, etc. Also, few threads on ship modeling forums showed different ways to attach the sail and including not that much detailed pictures from the process. Not having enough details about the whole process leave me with an opportunity to put a personal touch to the model. Which i did, so lets get it going.... Here is beginning of the process. Sail was mounted to the yard with assistance of few pieces of scoth tape to keep it stretched until i attach at least few lines of ropes. I did not spend much time getting historically correct rope size, instead i decided to go with the rope size i think was available 400+ years b.c. and what i had in the shipyard... Below picture is during rigging process; i ended up running 5 loops of a rope around the yard and freeze it with a touch of cyanogel. During the process i used scotch tape to help keeping the sail stretched and on the yard... Then i had to make four "eyes" (need to spend some times learning the proper ship modeling terms, dough) that will be used to run the rope thru and it is used to assist in rolling up the sail. Good old nail helped with correct eye diameter. First i run four runs of rigging around the yard, then run the line thru the sail and around the nail, back thru the sail and again around the nail making a two-loops eye. Small amount of cyanogel to freeze the eye.. Finished and with a test rope running thru.. All four "eyes" completed. Had to test the fitting on the mast... Then i ended up making blocks, actually only two blocks needed on the ship. Tiny, 3mm blocks are very hard to keep on the bench during seizing process.. Blocks attached to the yard.. After attaching two blocks on yard and running four lines of rope thru "eyes", here is a final sail/yard product.. Next i will need to complete the mighty ram... Had some challenges with soldering, copper, etc but will cover this process in the next post. Happy modeling..


- 122 replies
-
- 8
-
-
- greek bireme
- scale-1/35
- (and 2 more)
-
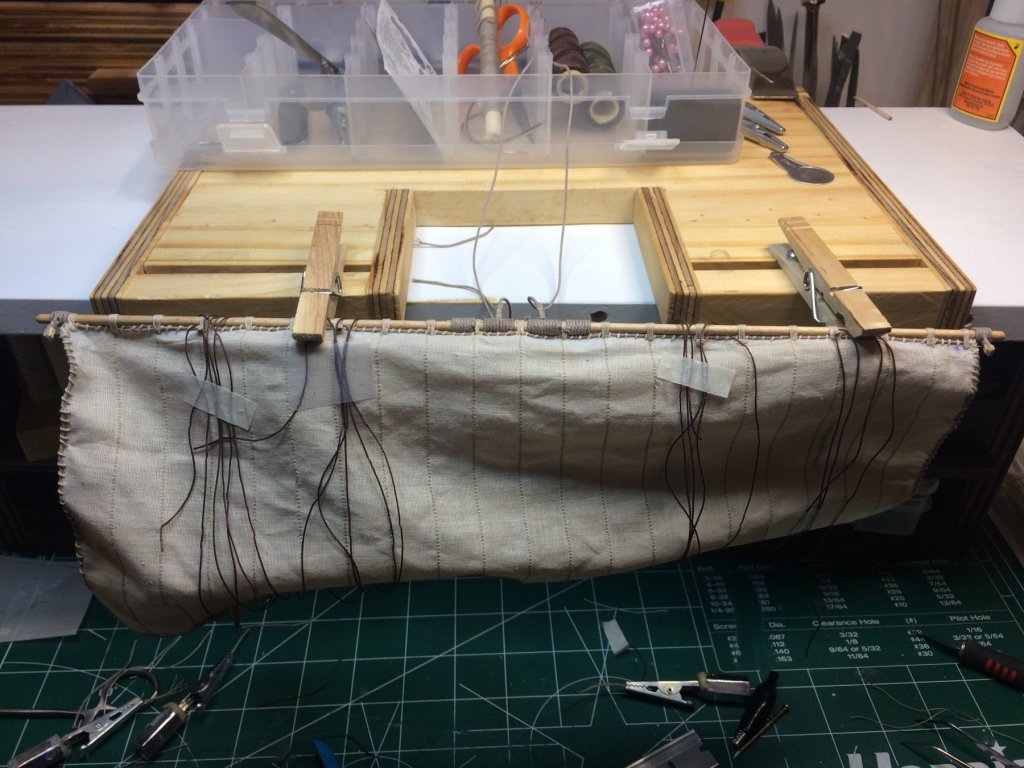
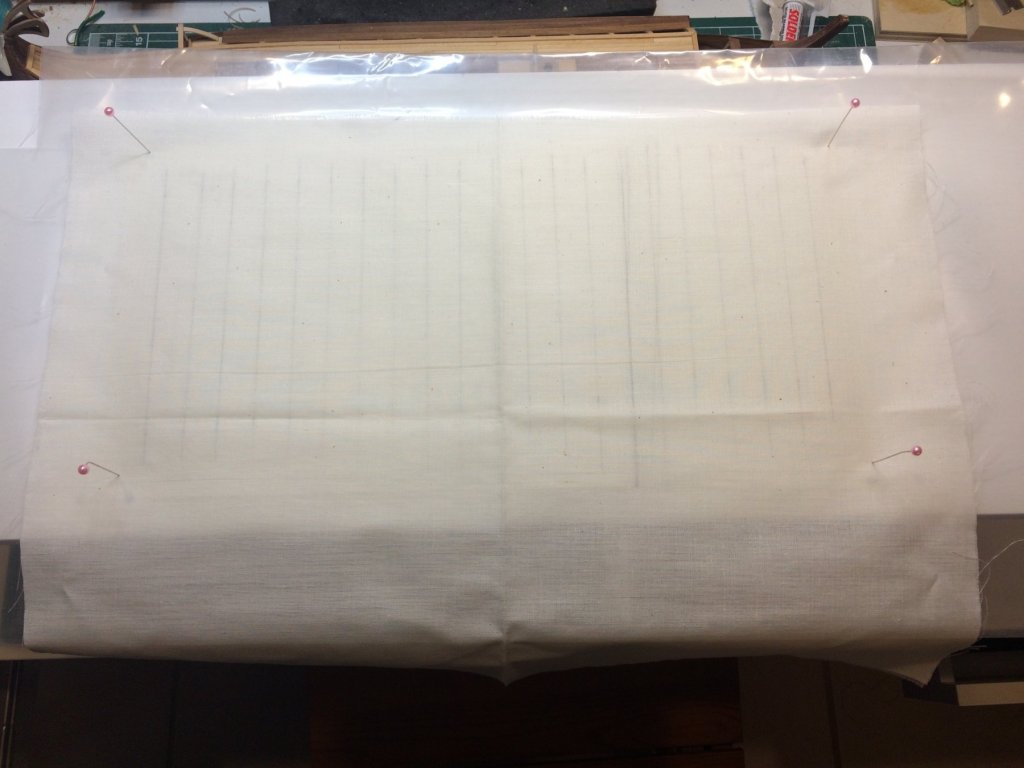
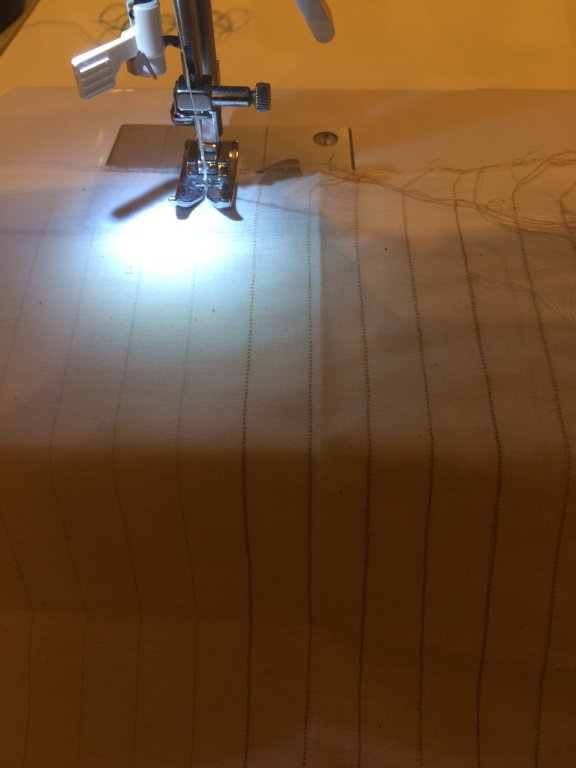
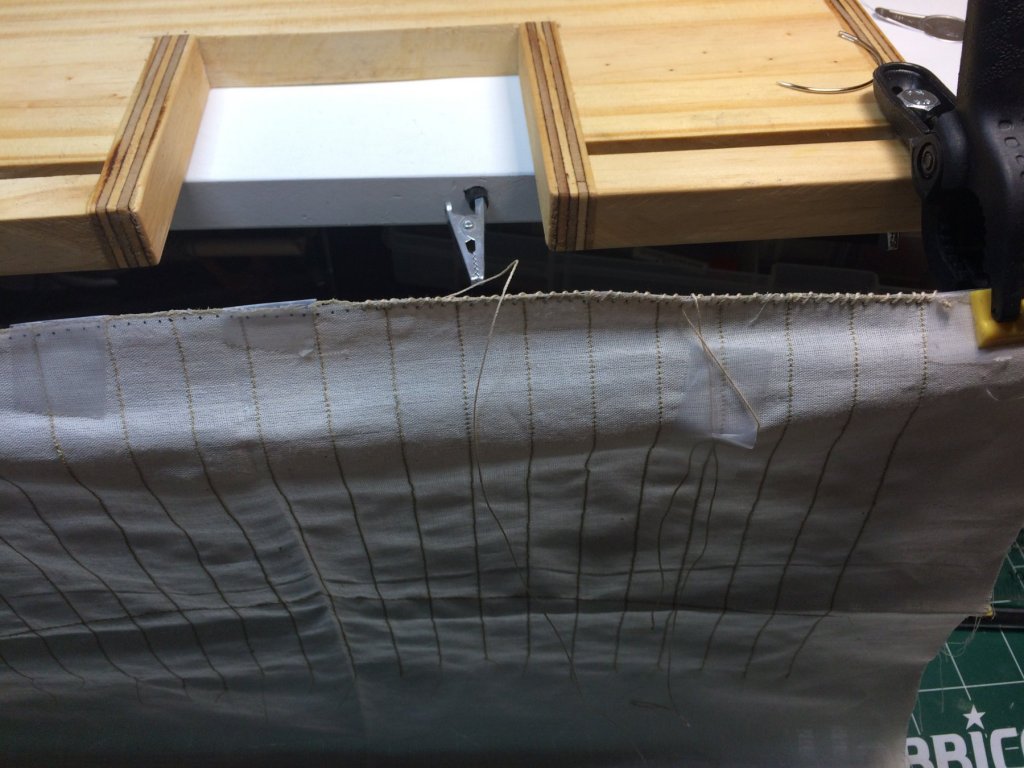
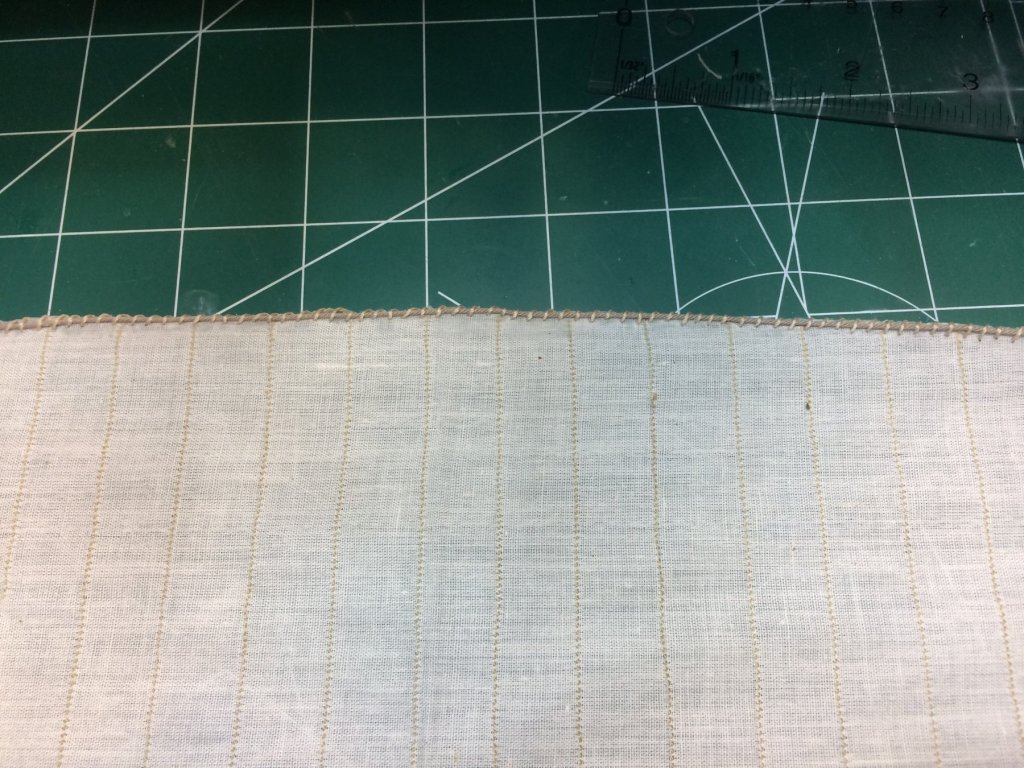
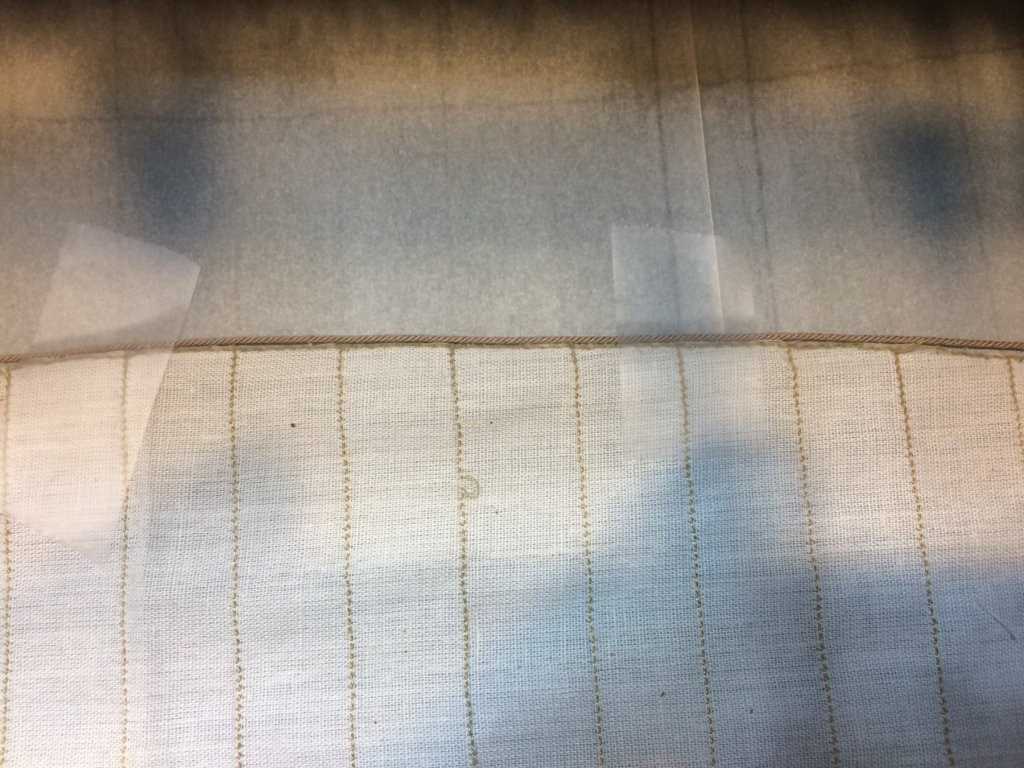
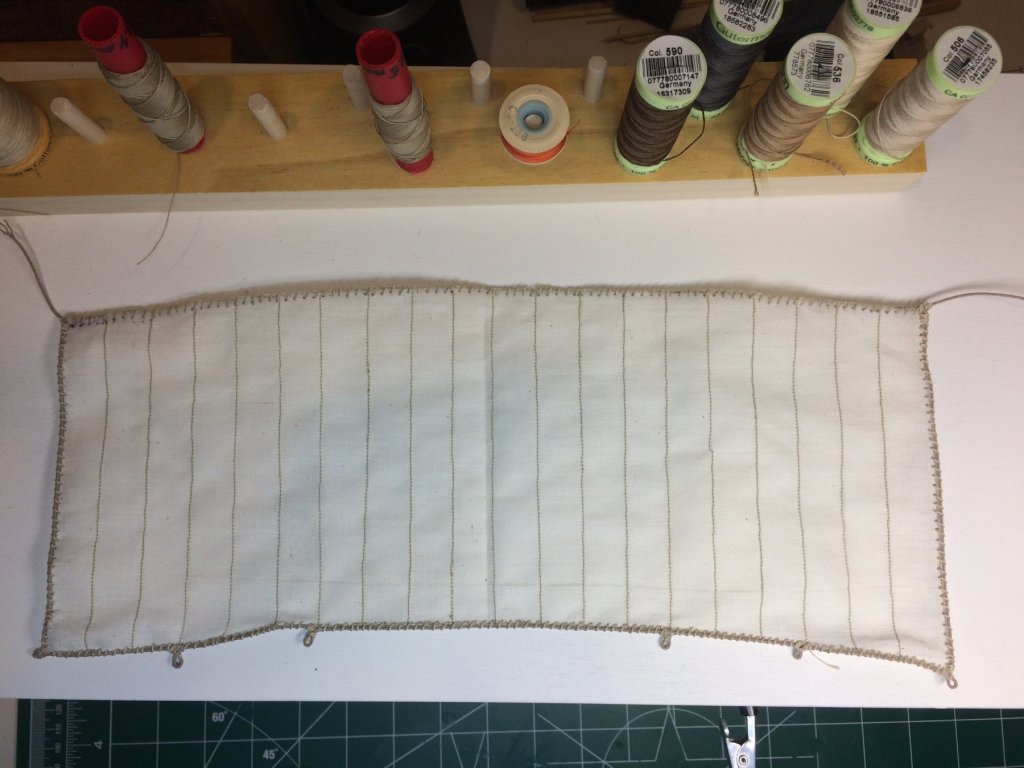
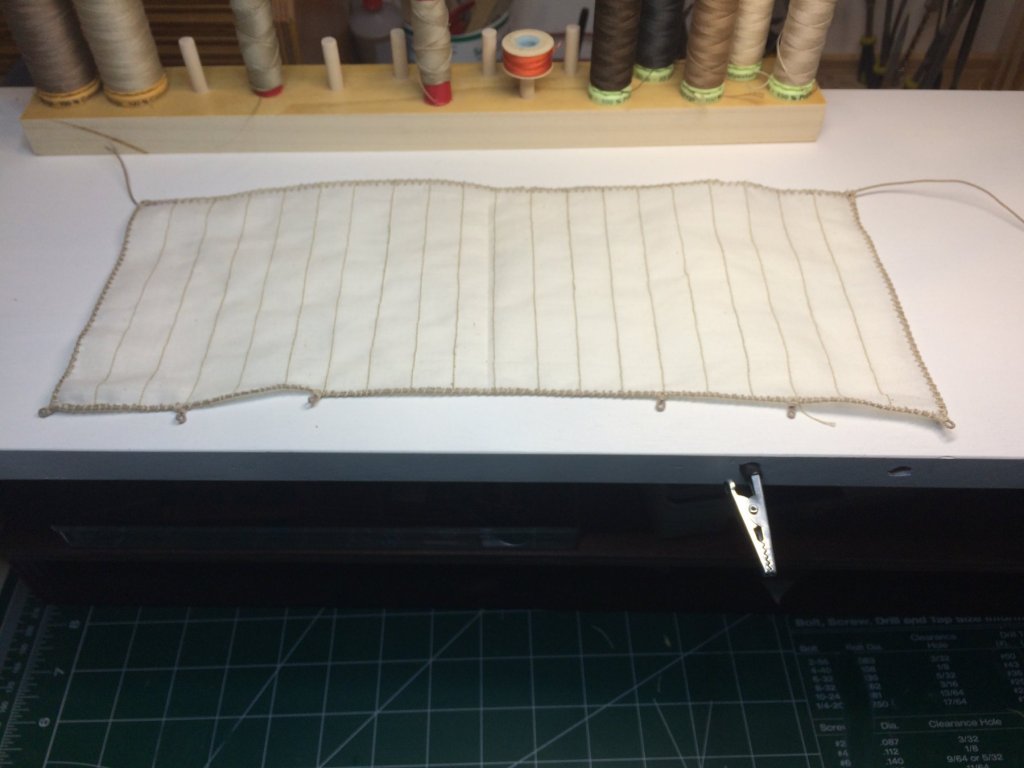
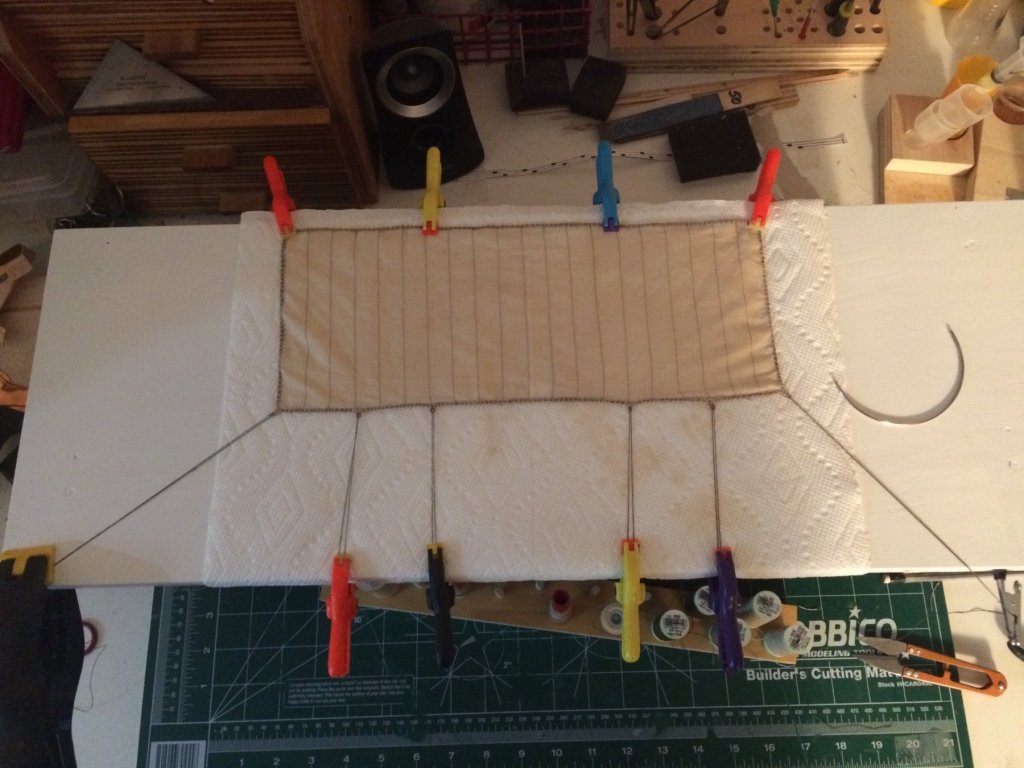
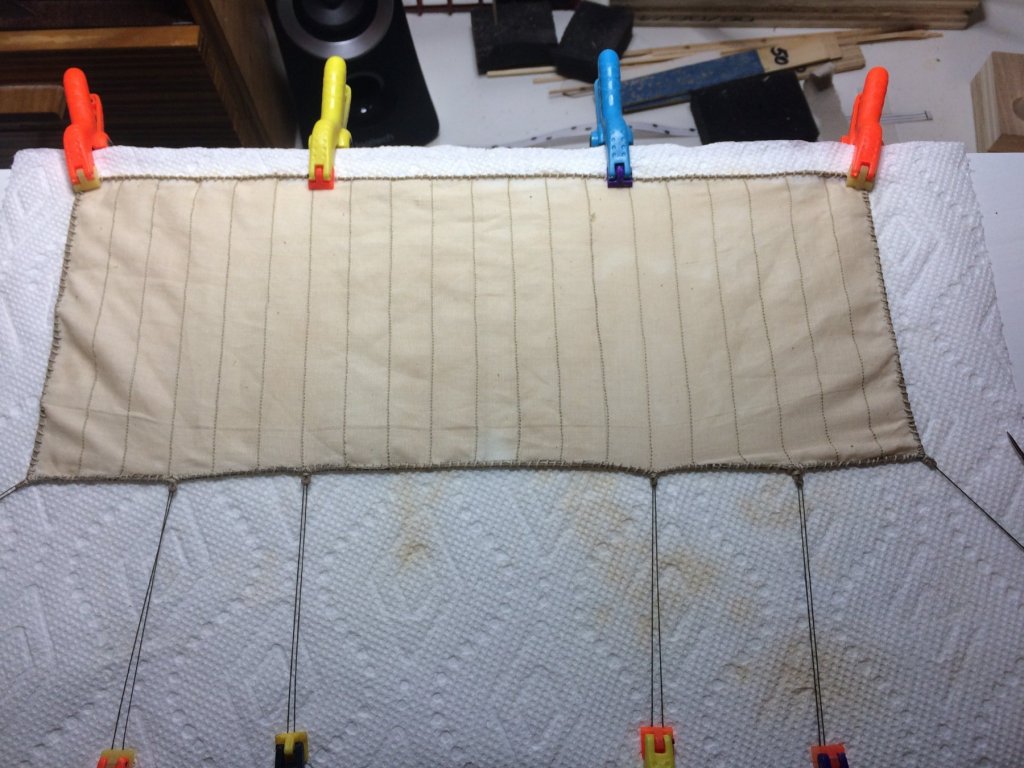
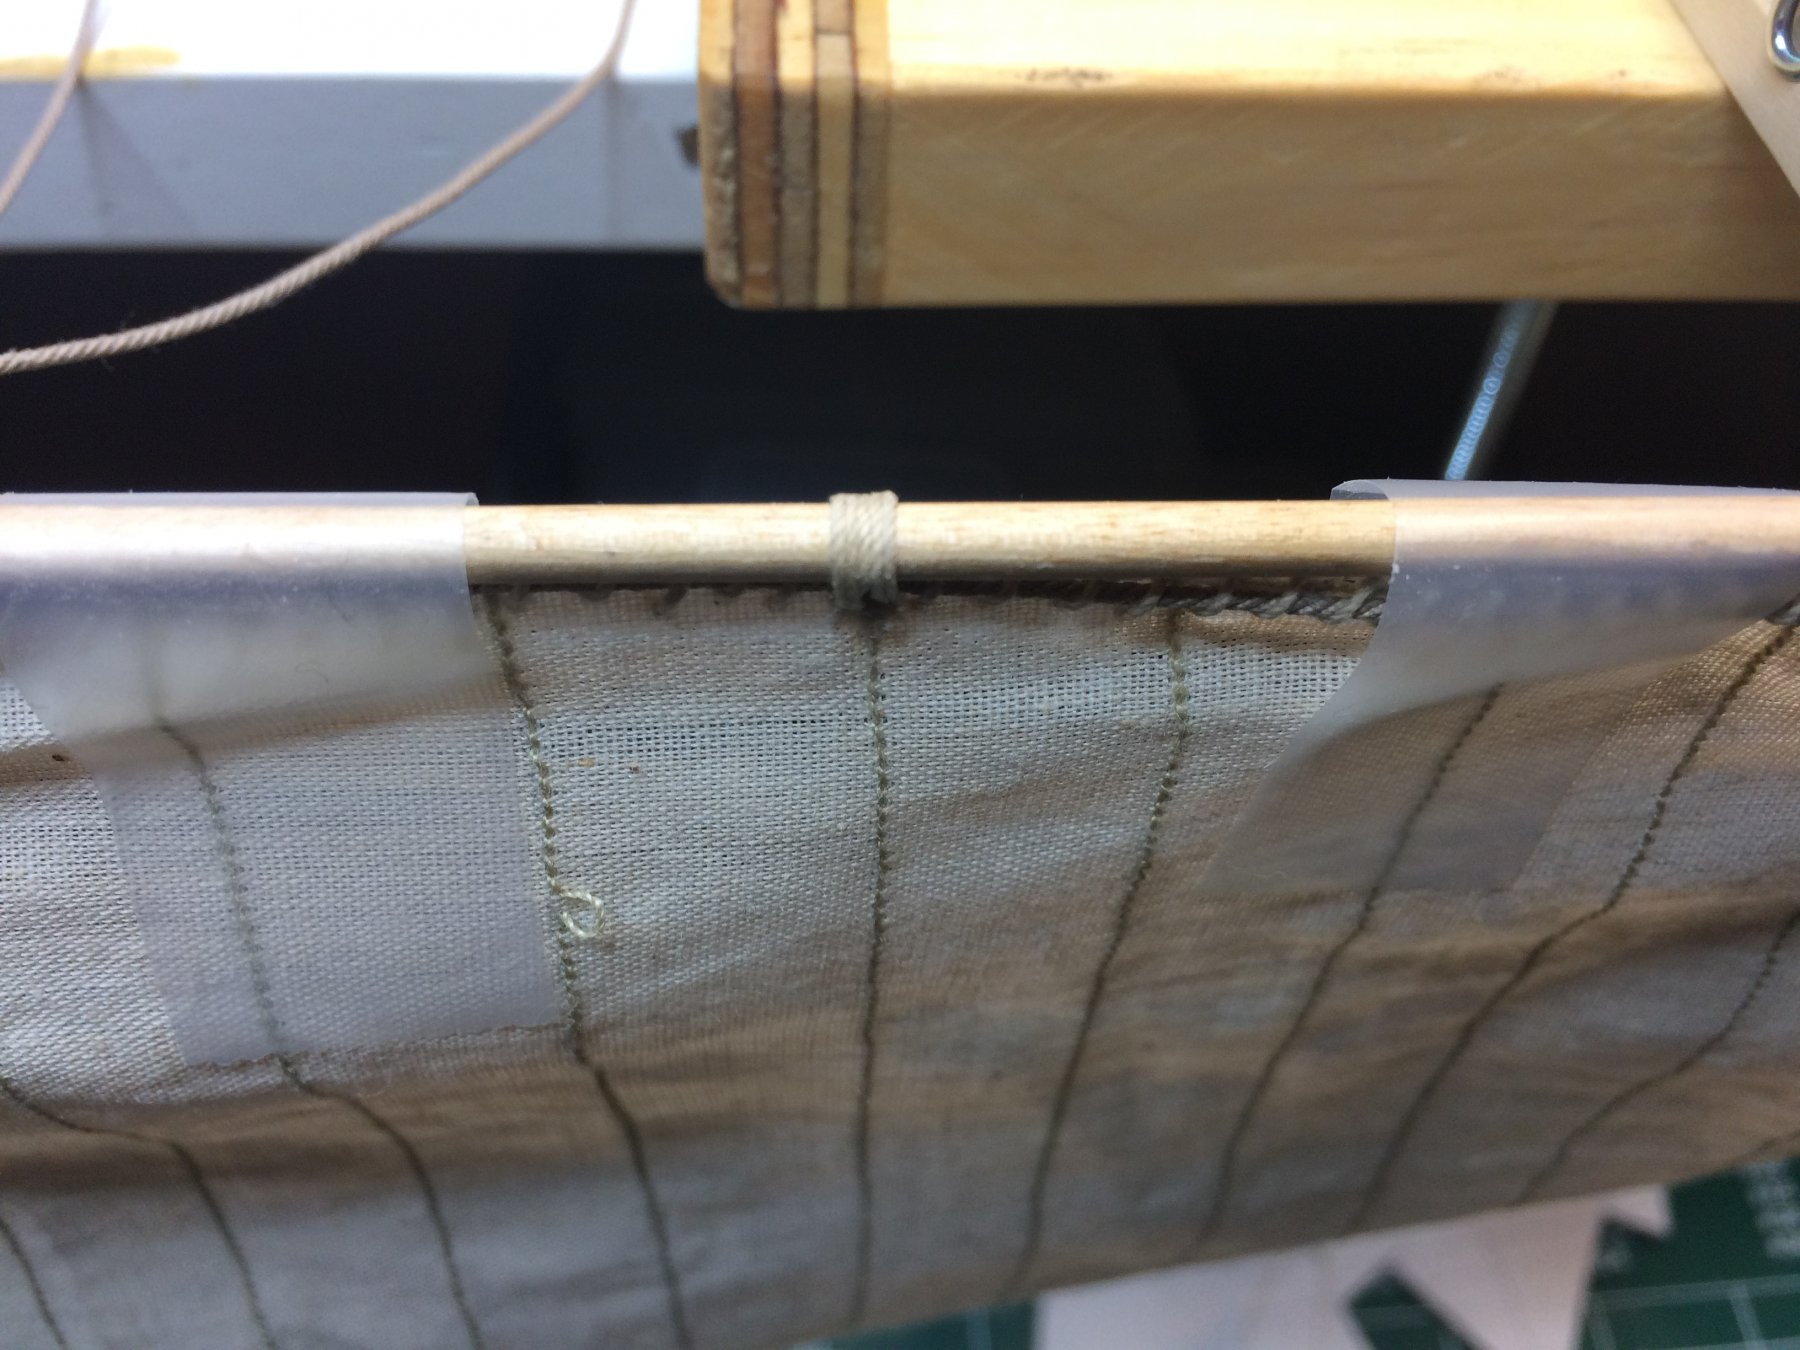
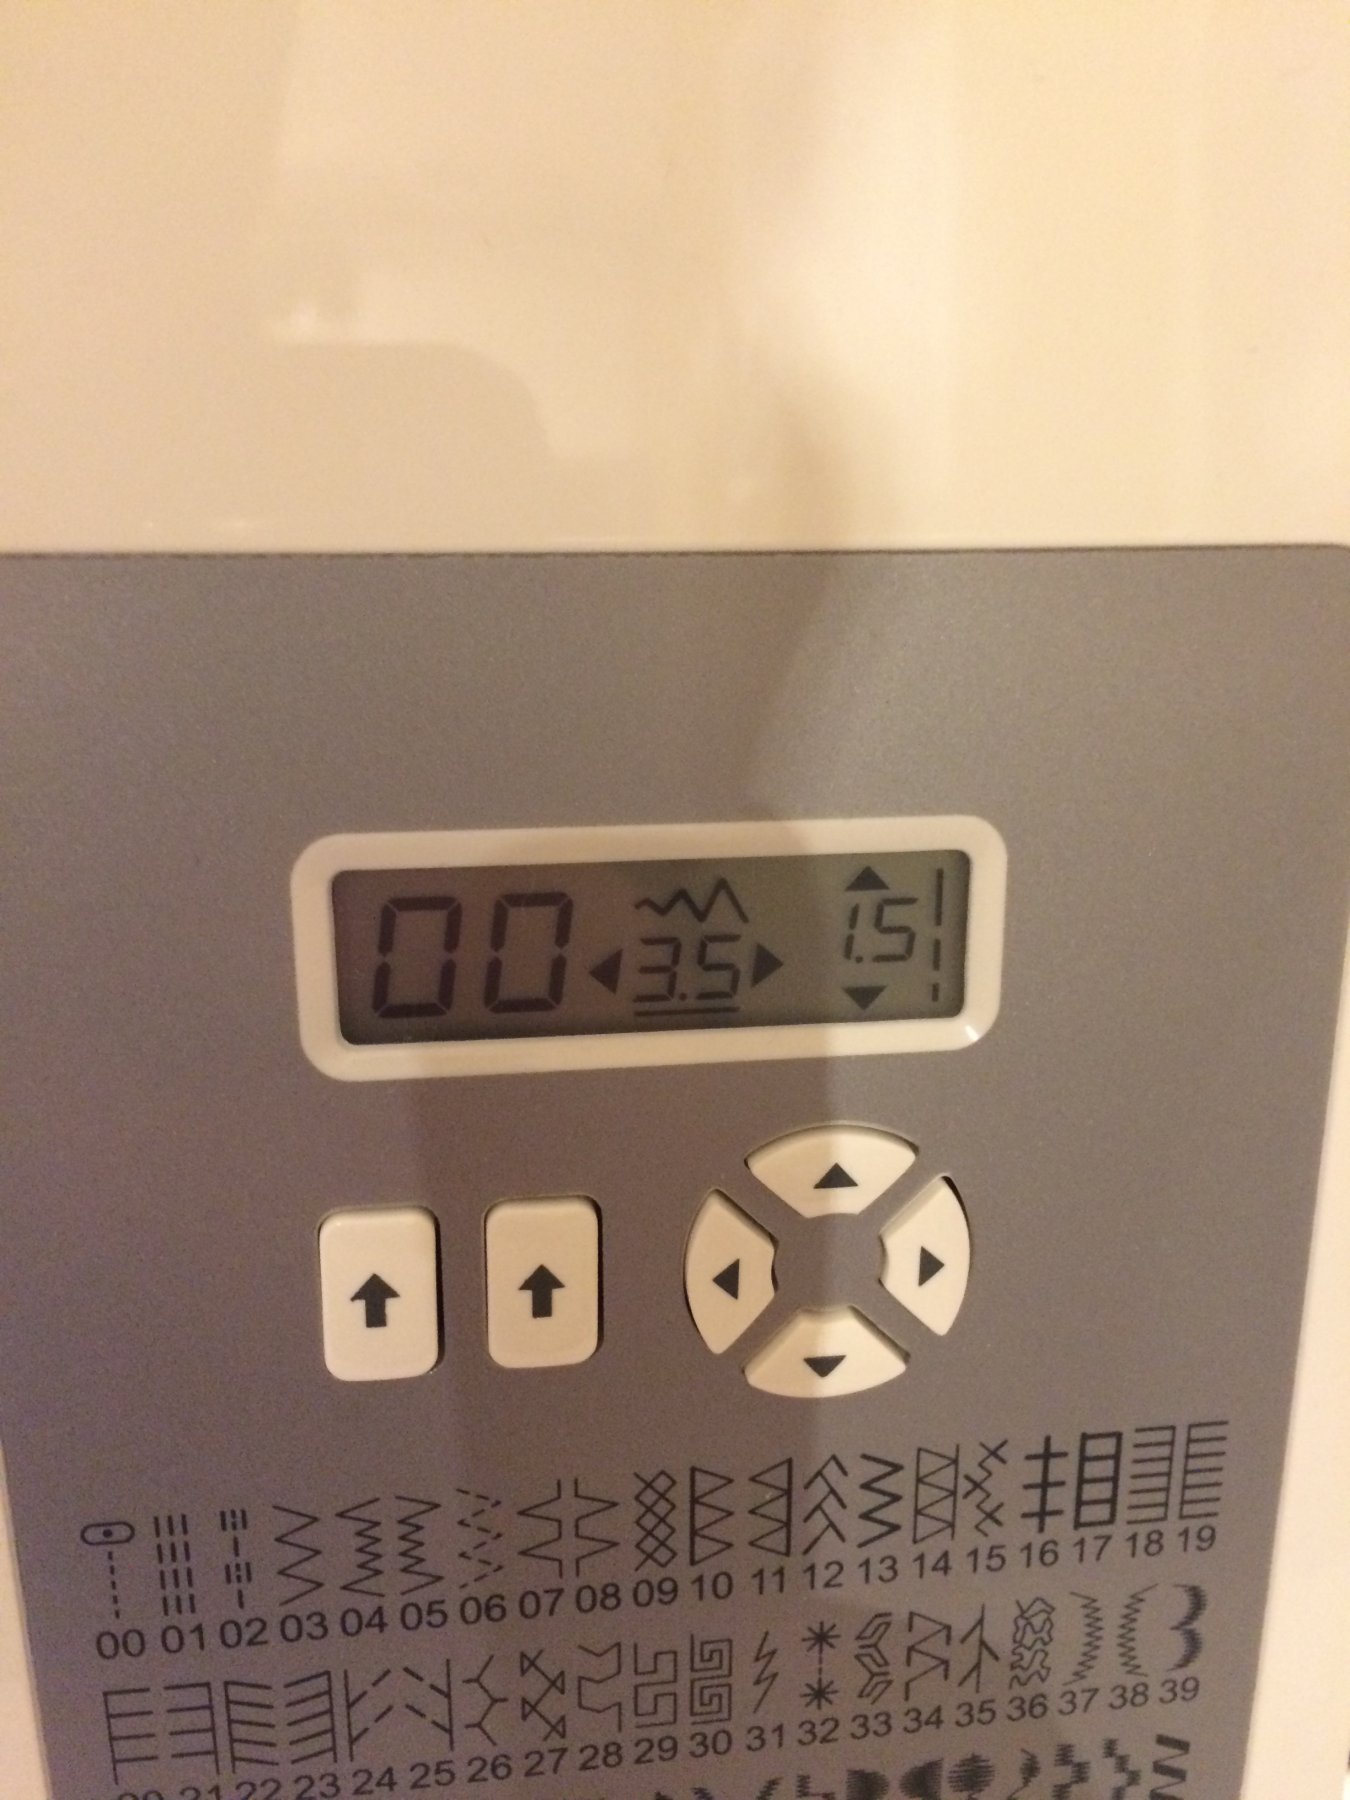
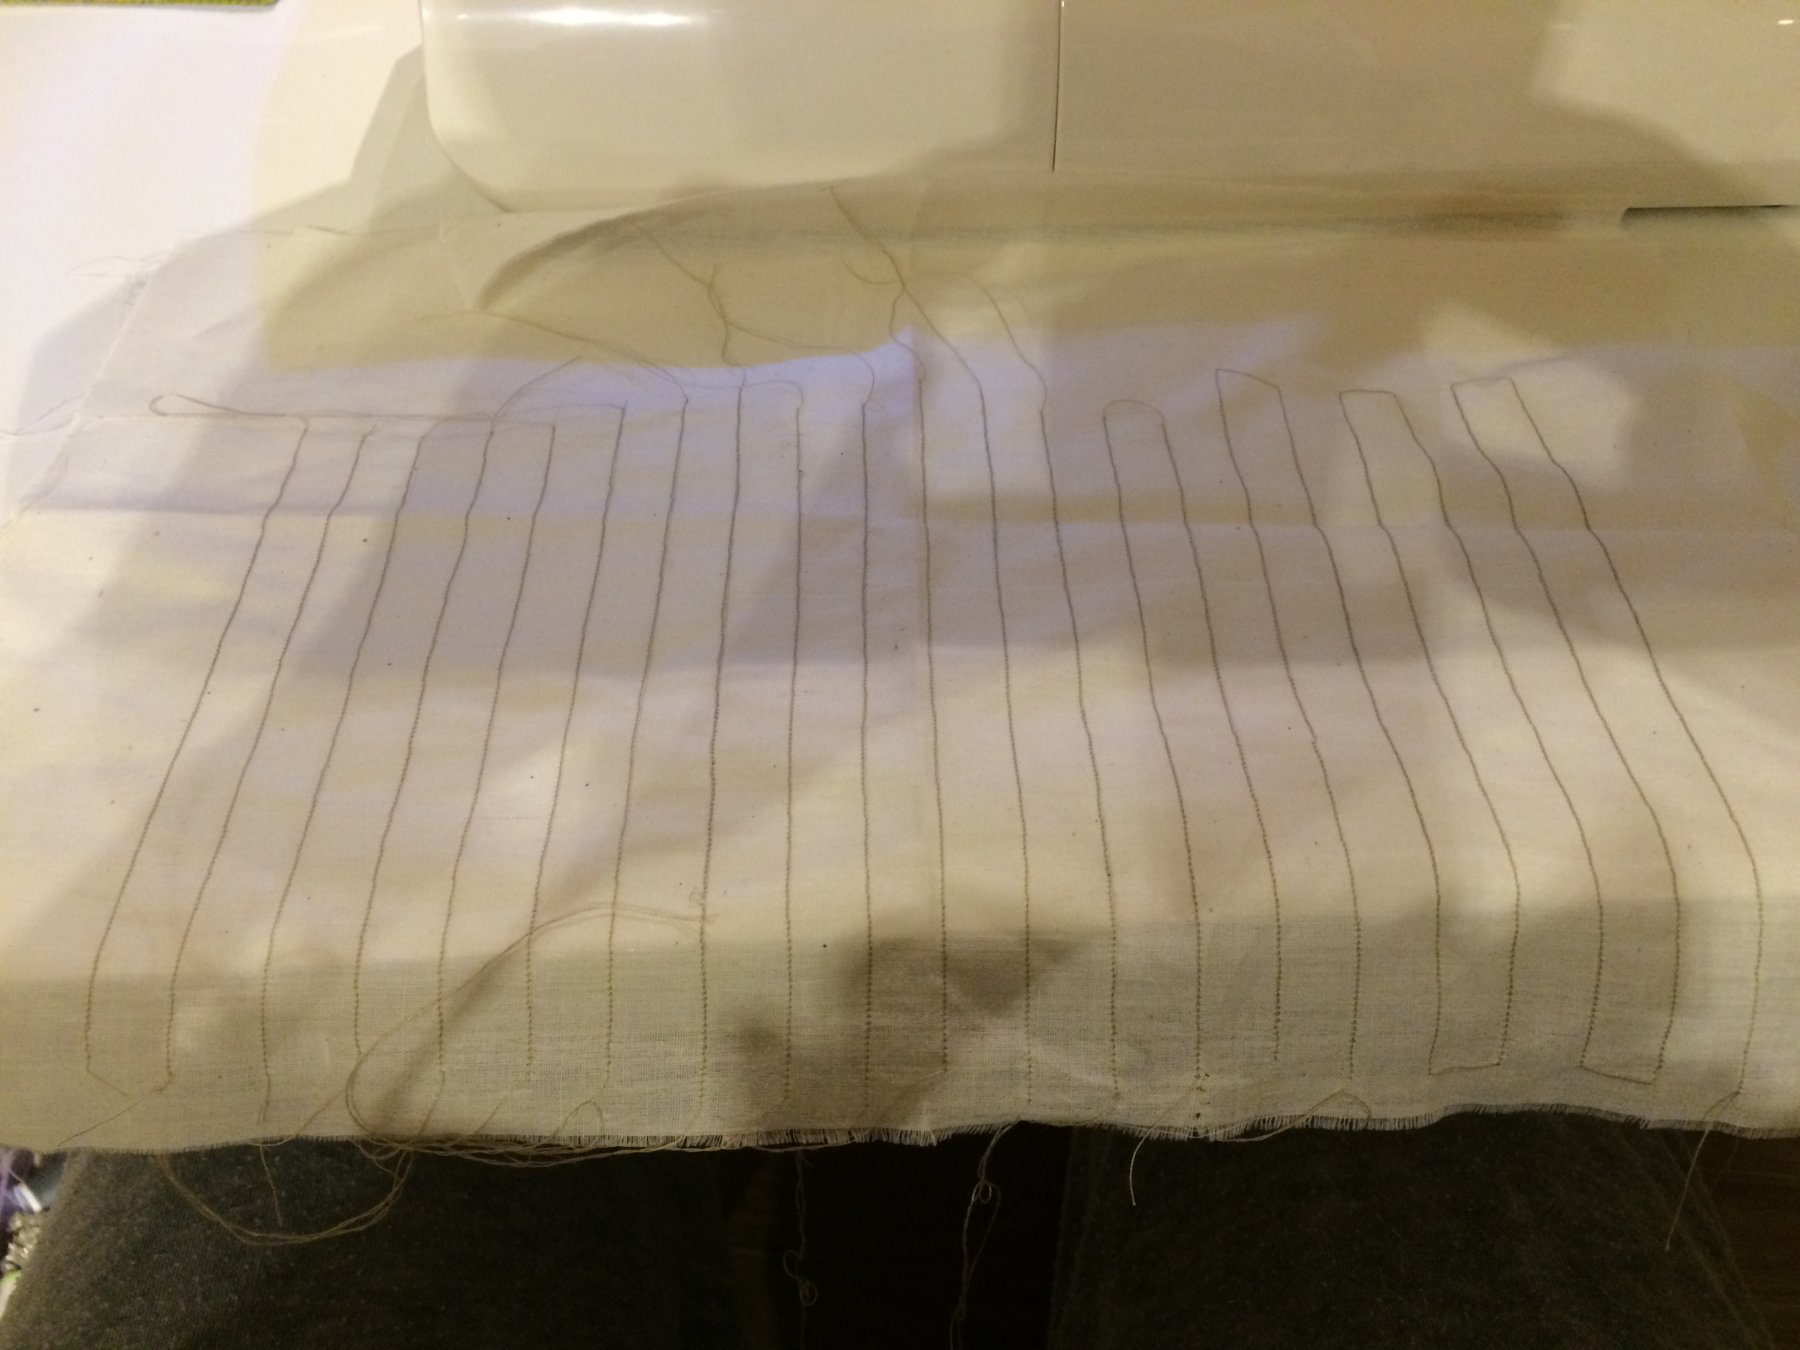
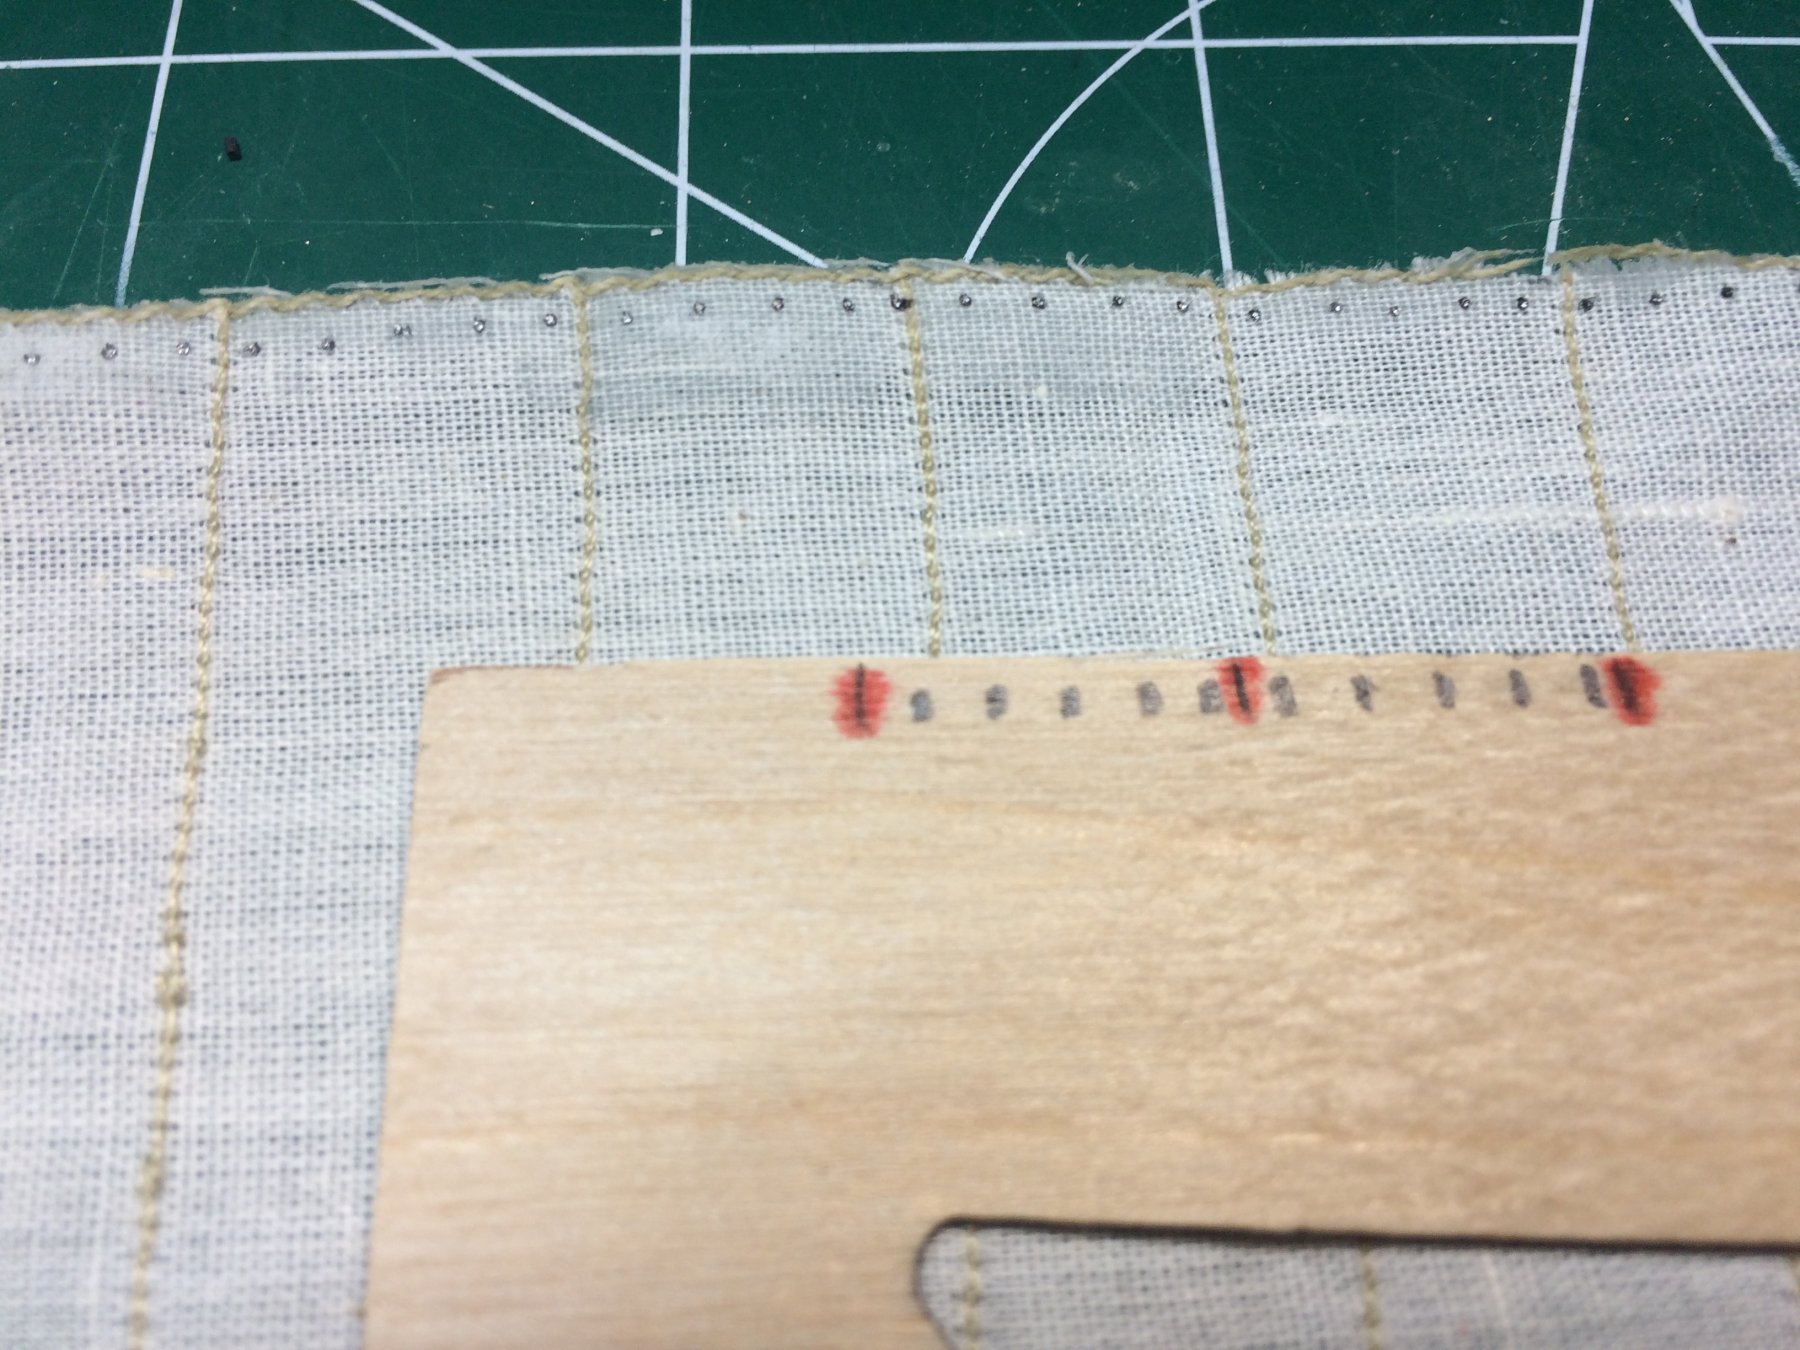
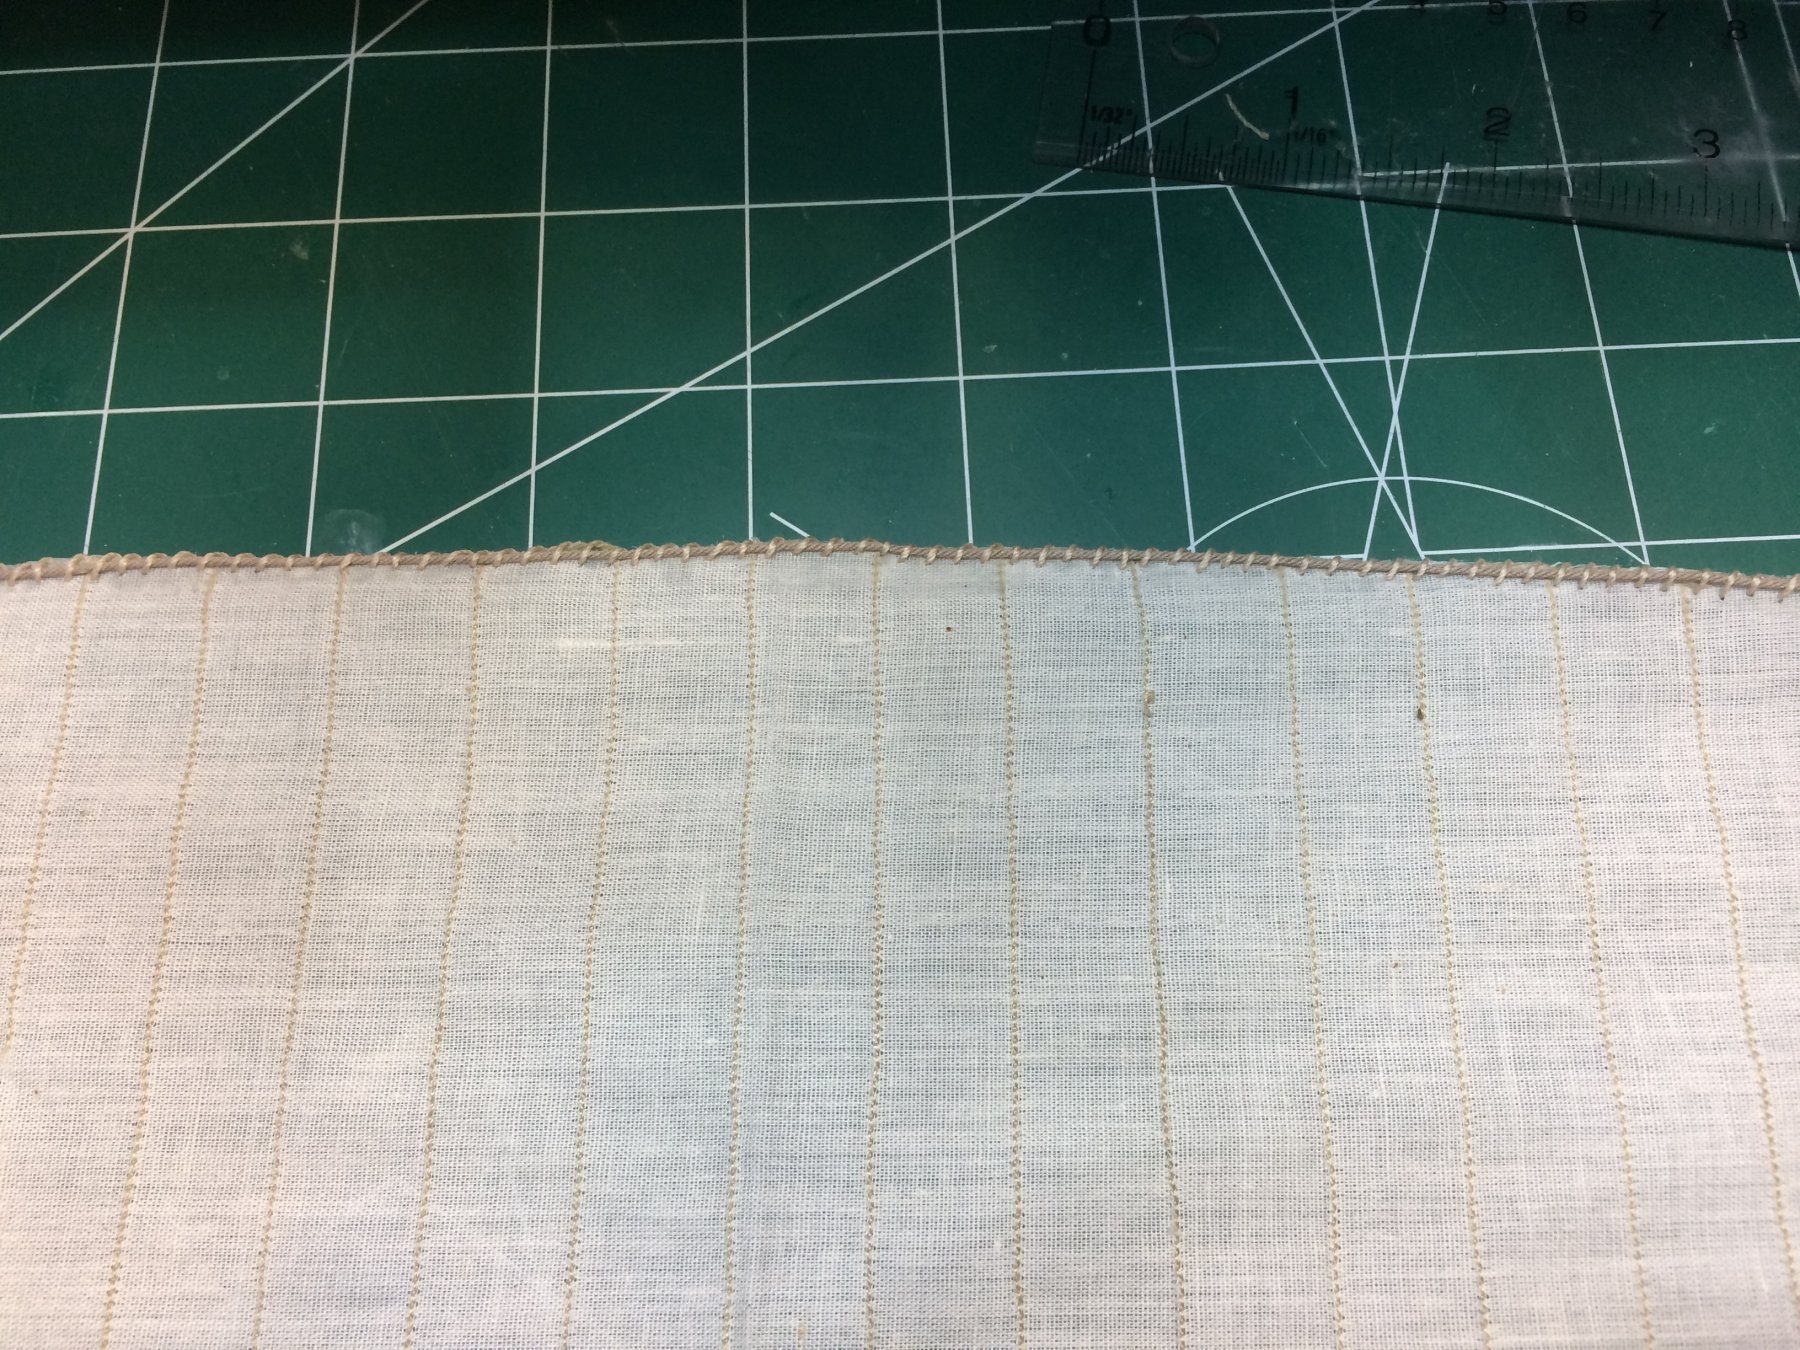
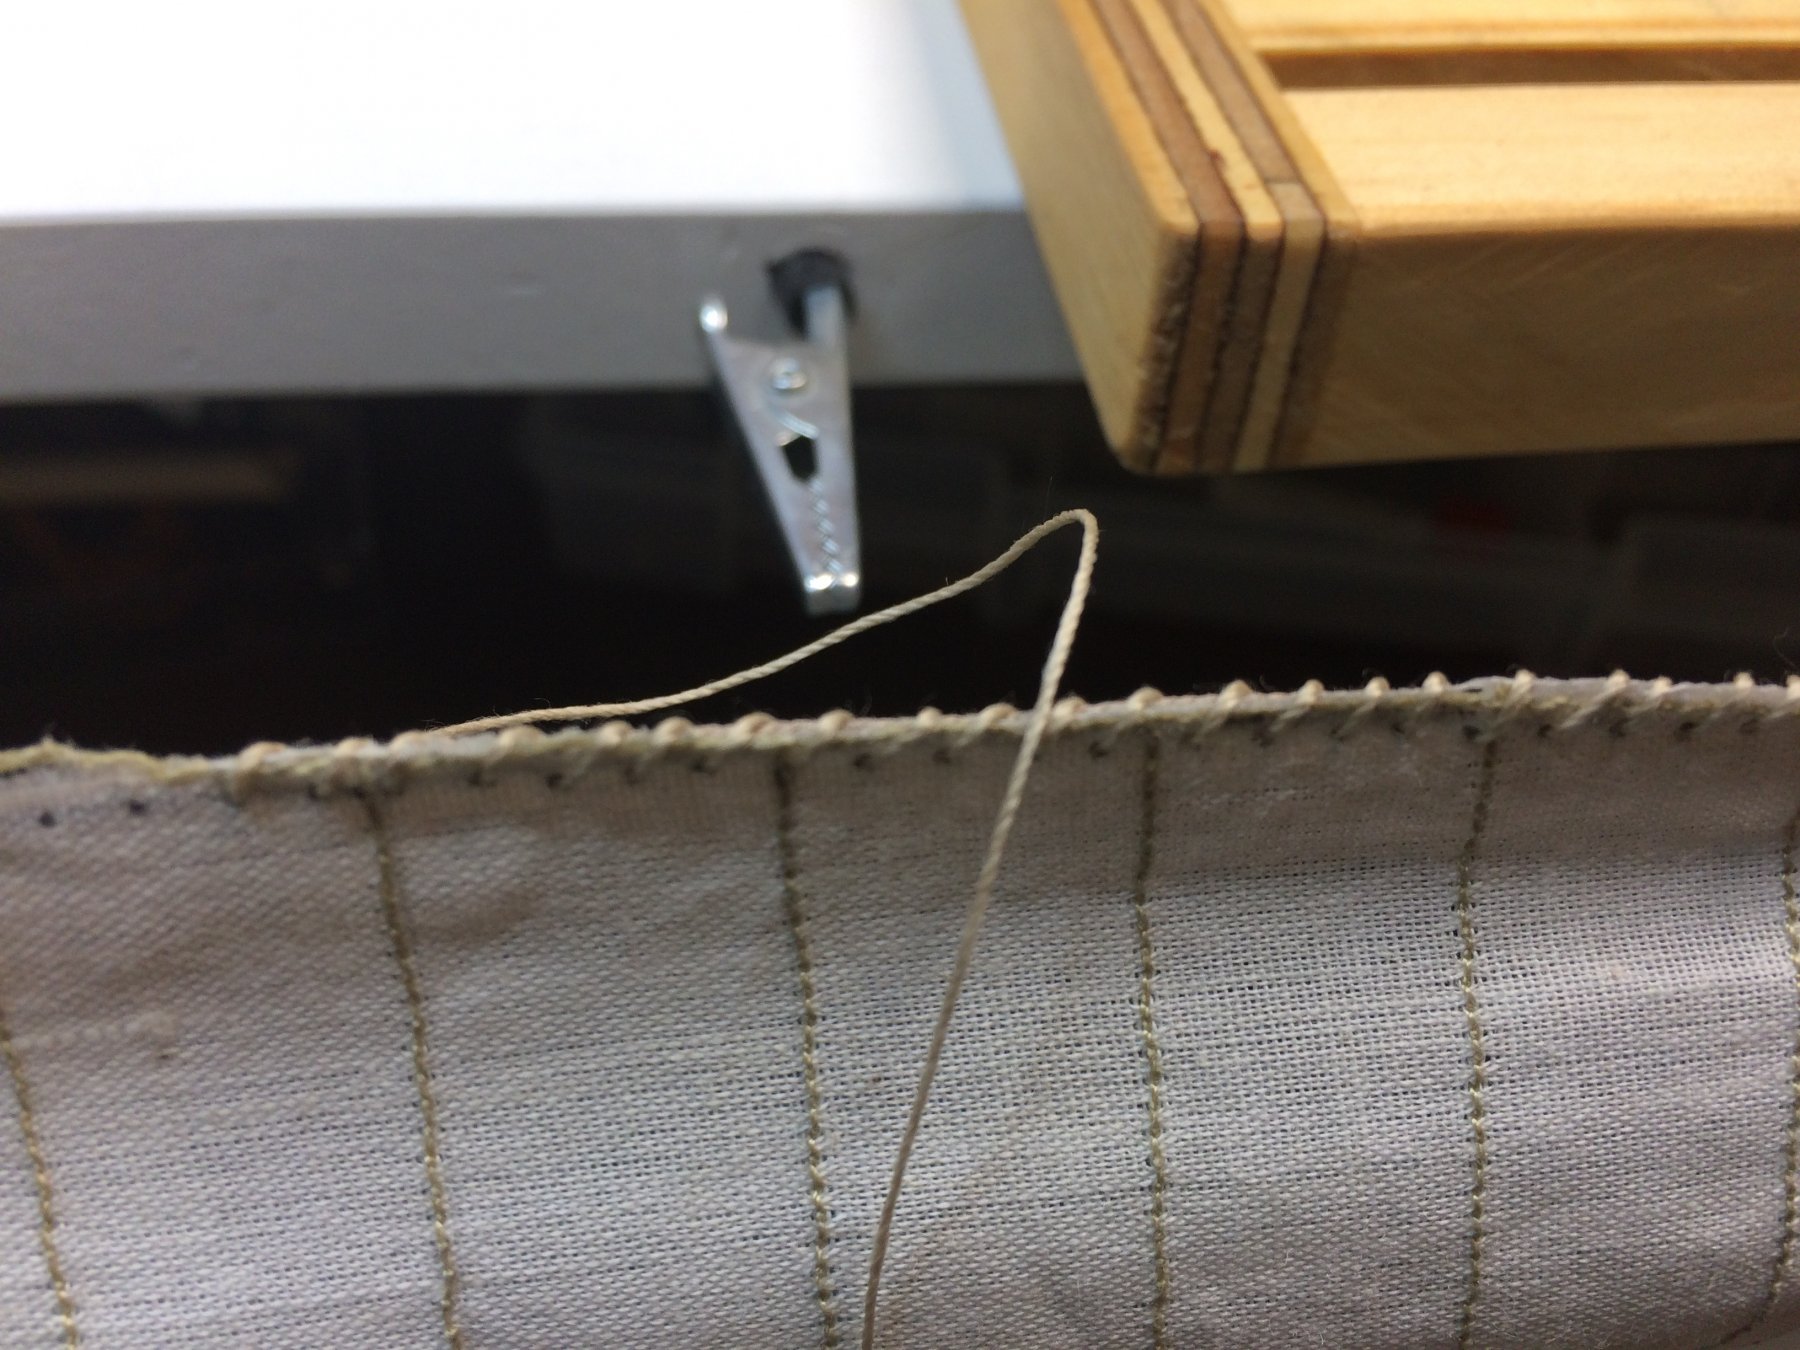
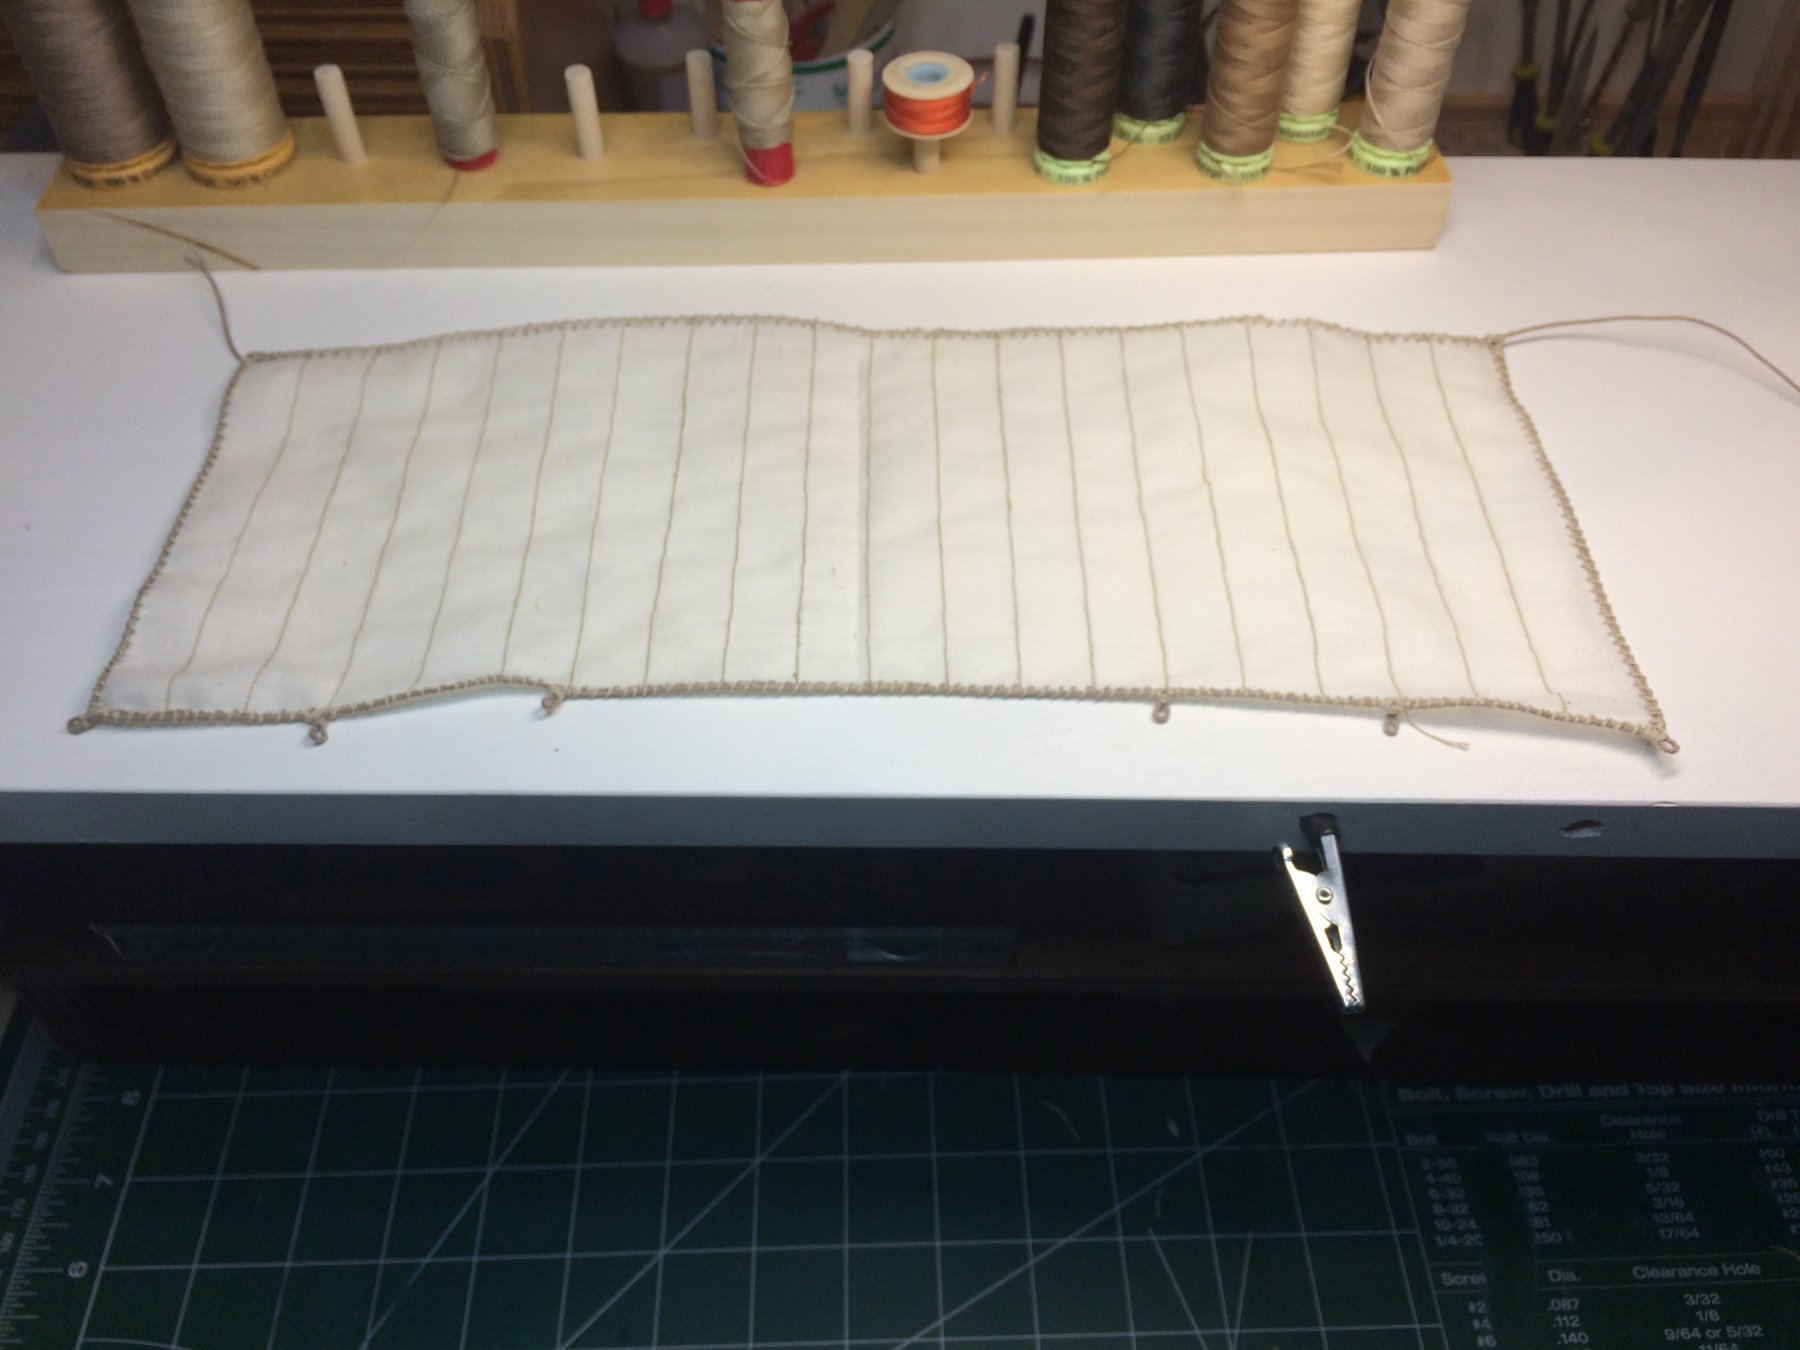
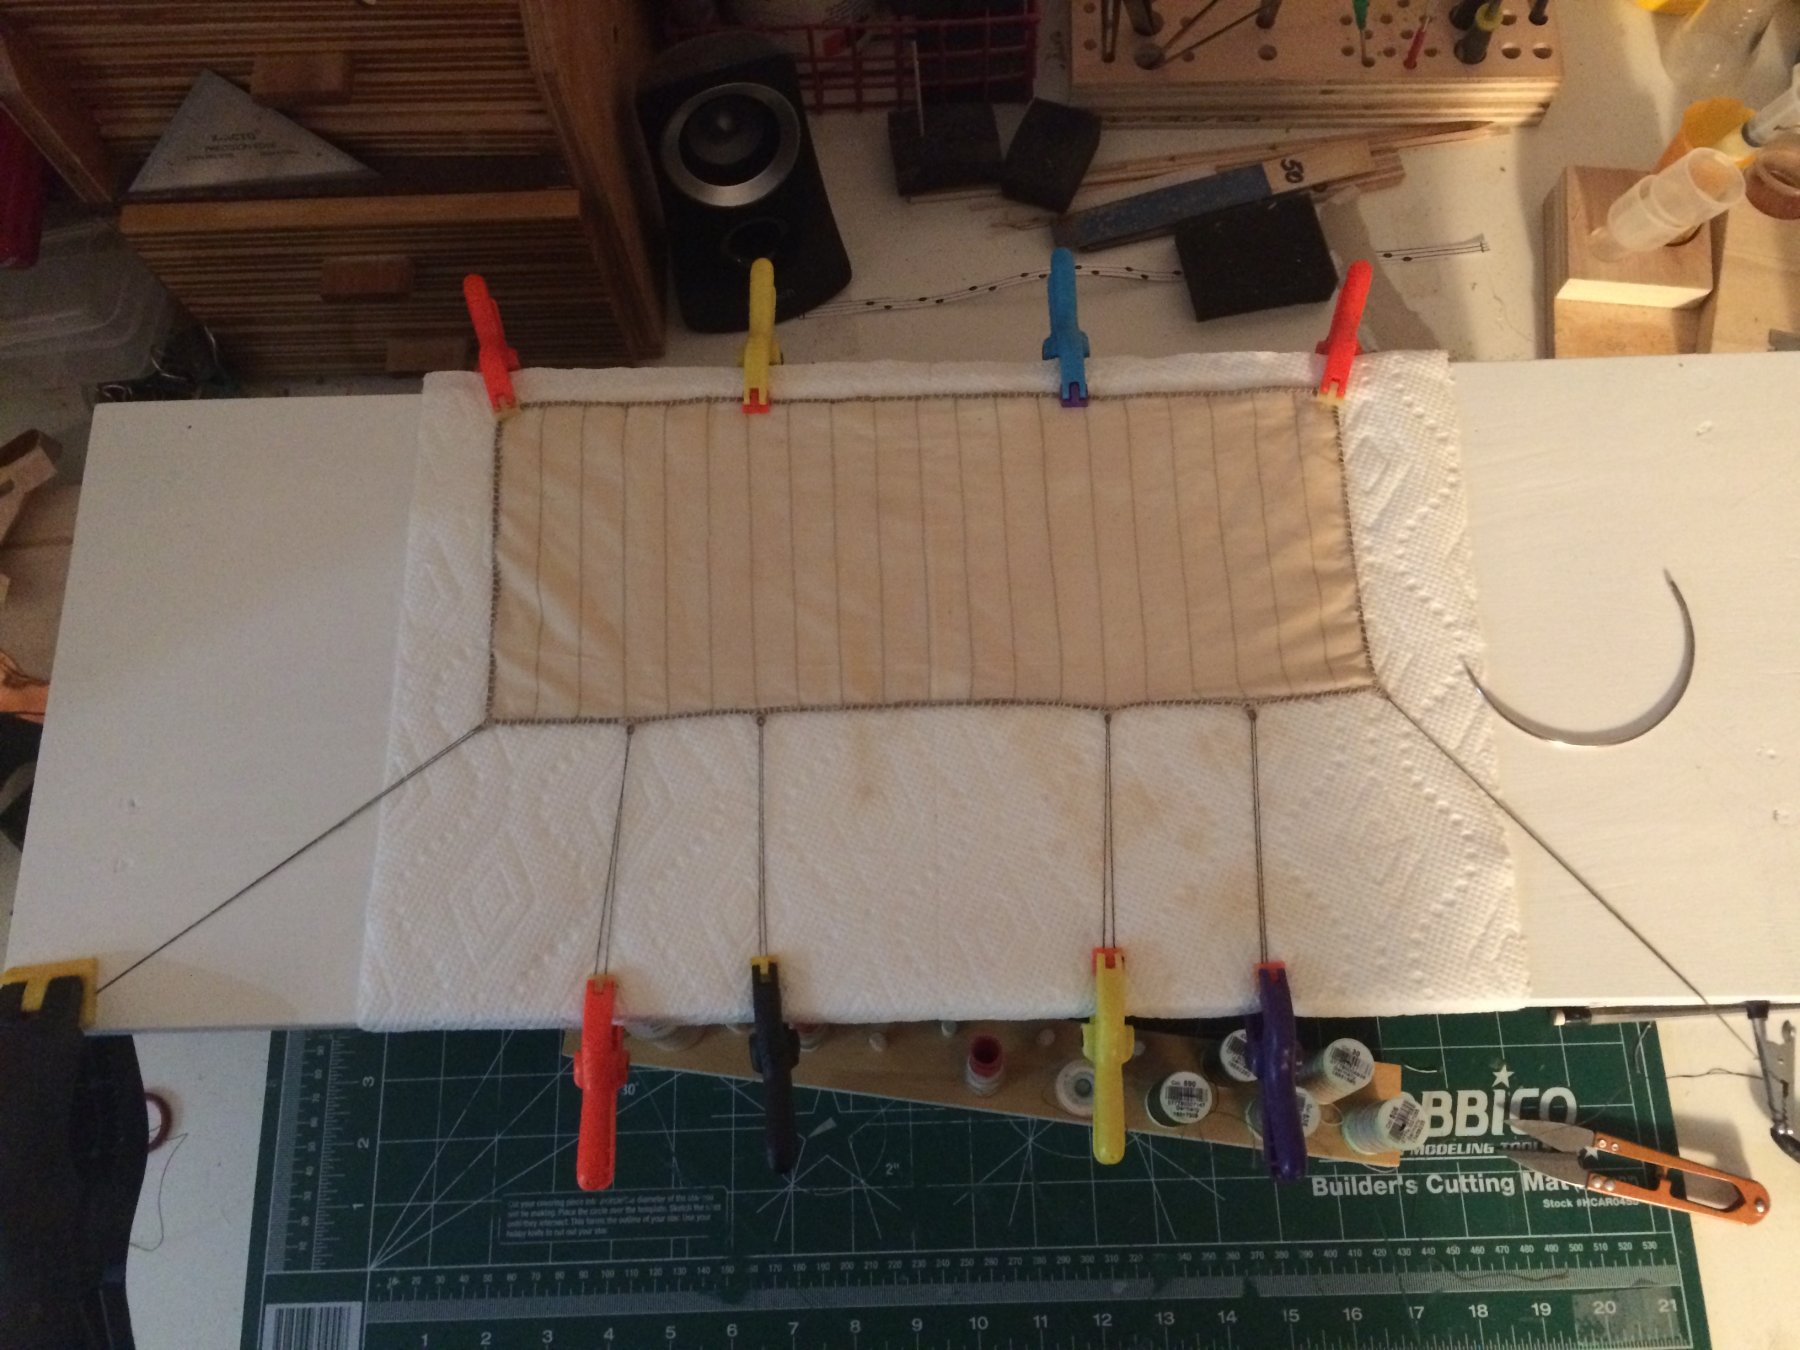
It is time to attack the sail. It has been a while since my last 'war' with a sail, few decades ago... The plan was to simulate separate cloth pieces sawed together to form a big sail. Idea was to run sail material thru sawing machine, with setting for a small stitches so stitching will not not look out of the scale. At least that was an intent.. First, i transfer lines from the sail plan to the cloth with a HB pencil. Then i set a sawing machine to: I tested this setting with a cloth sample just to make sure i have it right (or to the satisfactory pattern). Sawing is well underway and it looks very nice.. Sawing is completed and looks very good to me. I was running sawing lines well above the sail size; then i will cut sail to the required dimensions. Actually i forgot to wash the sail material before any work on it; it is a good practice to remove any factory added stiffeners that will keep the material wrinkle-free. It is OK, will do it later in the process. After cutting the material to required dimensions, i decided to run a rope all over the sail. I was not sure how they've done it 480 B.C. but was thinking that in order to mount the sail and have sail does its job, the sail has to withstand some pressure and there should be some type of rope around it. On the other hand, i need to make few eyes so the sail can be attached to the ship... Needed to follow some pattern when it comes to sawing the rope on sail edges so i made a small template and marked holes where sawing needle will go thru. Before that i did freeze the edges of the sail with a small drop of cyano glue gel. Wholes were marked and ready for hand-sawing process.. I did not want to use sawing machine just because it might look to uniform. Some deviation will be more accurate, i think.. I placed the rope around the edge of the sail and used a tape to hold the rope to the edge of the sail. During the process i discovered better way - put a small amount of glue on the edge and press the rope on it. This would make sure that rope is right on the edge of the sail.. There might be some better way for doing this so i need to do a bit of a research on this forum. In the middle of the sawing process. One side (top) of the sail completed. Does not look bad at all... Attacking another sail side.. The sawing process is done. Now it is time to wash the sail and prepare it for darkening process so it will look a bit more ancient-ish, i hope. Have some green tea left overs and soaked the sail into it. Two hours later, sail is removed from tea and stretched to dry.. Final product looks like this: Looks very nice to me. Tomorrow will be mounted to the yard... Happy modeling..


- 122 replies
-
- 6
-
-
- greek bireme
- scale-1/35
- (and 2 more)
-
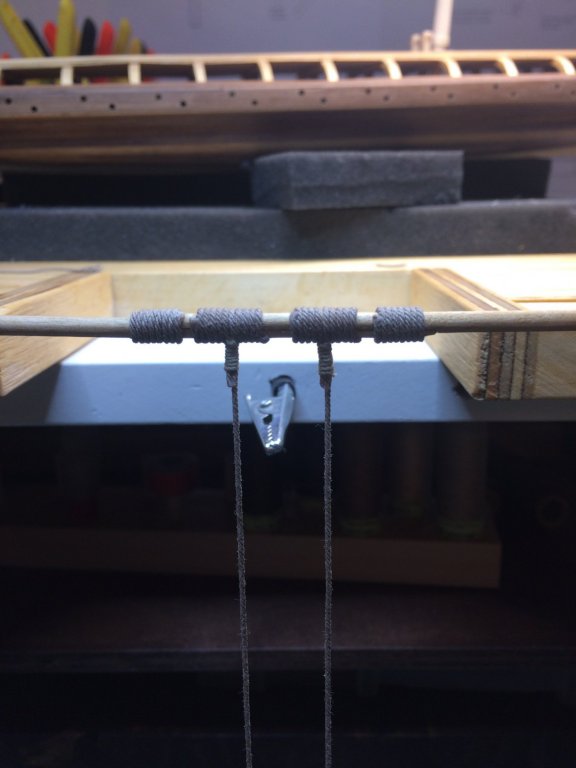
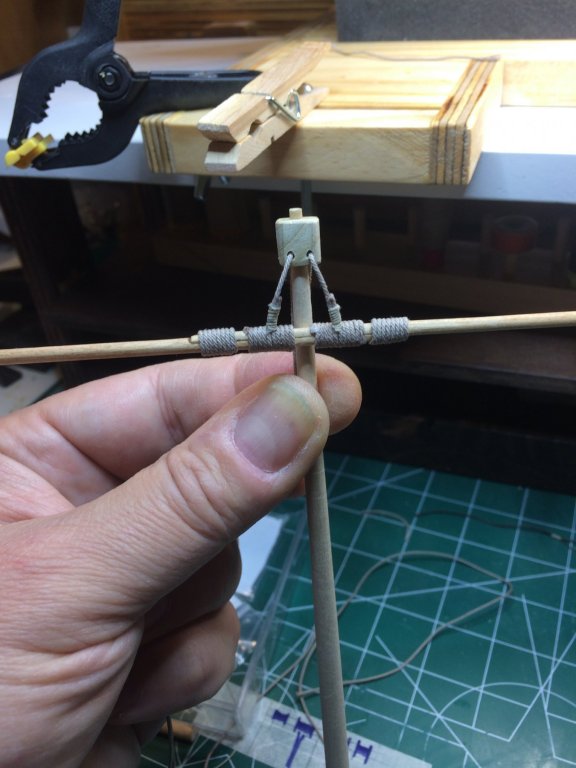
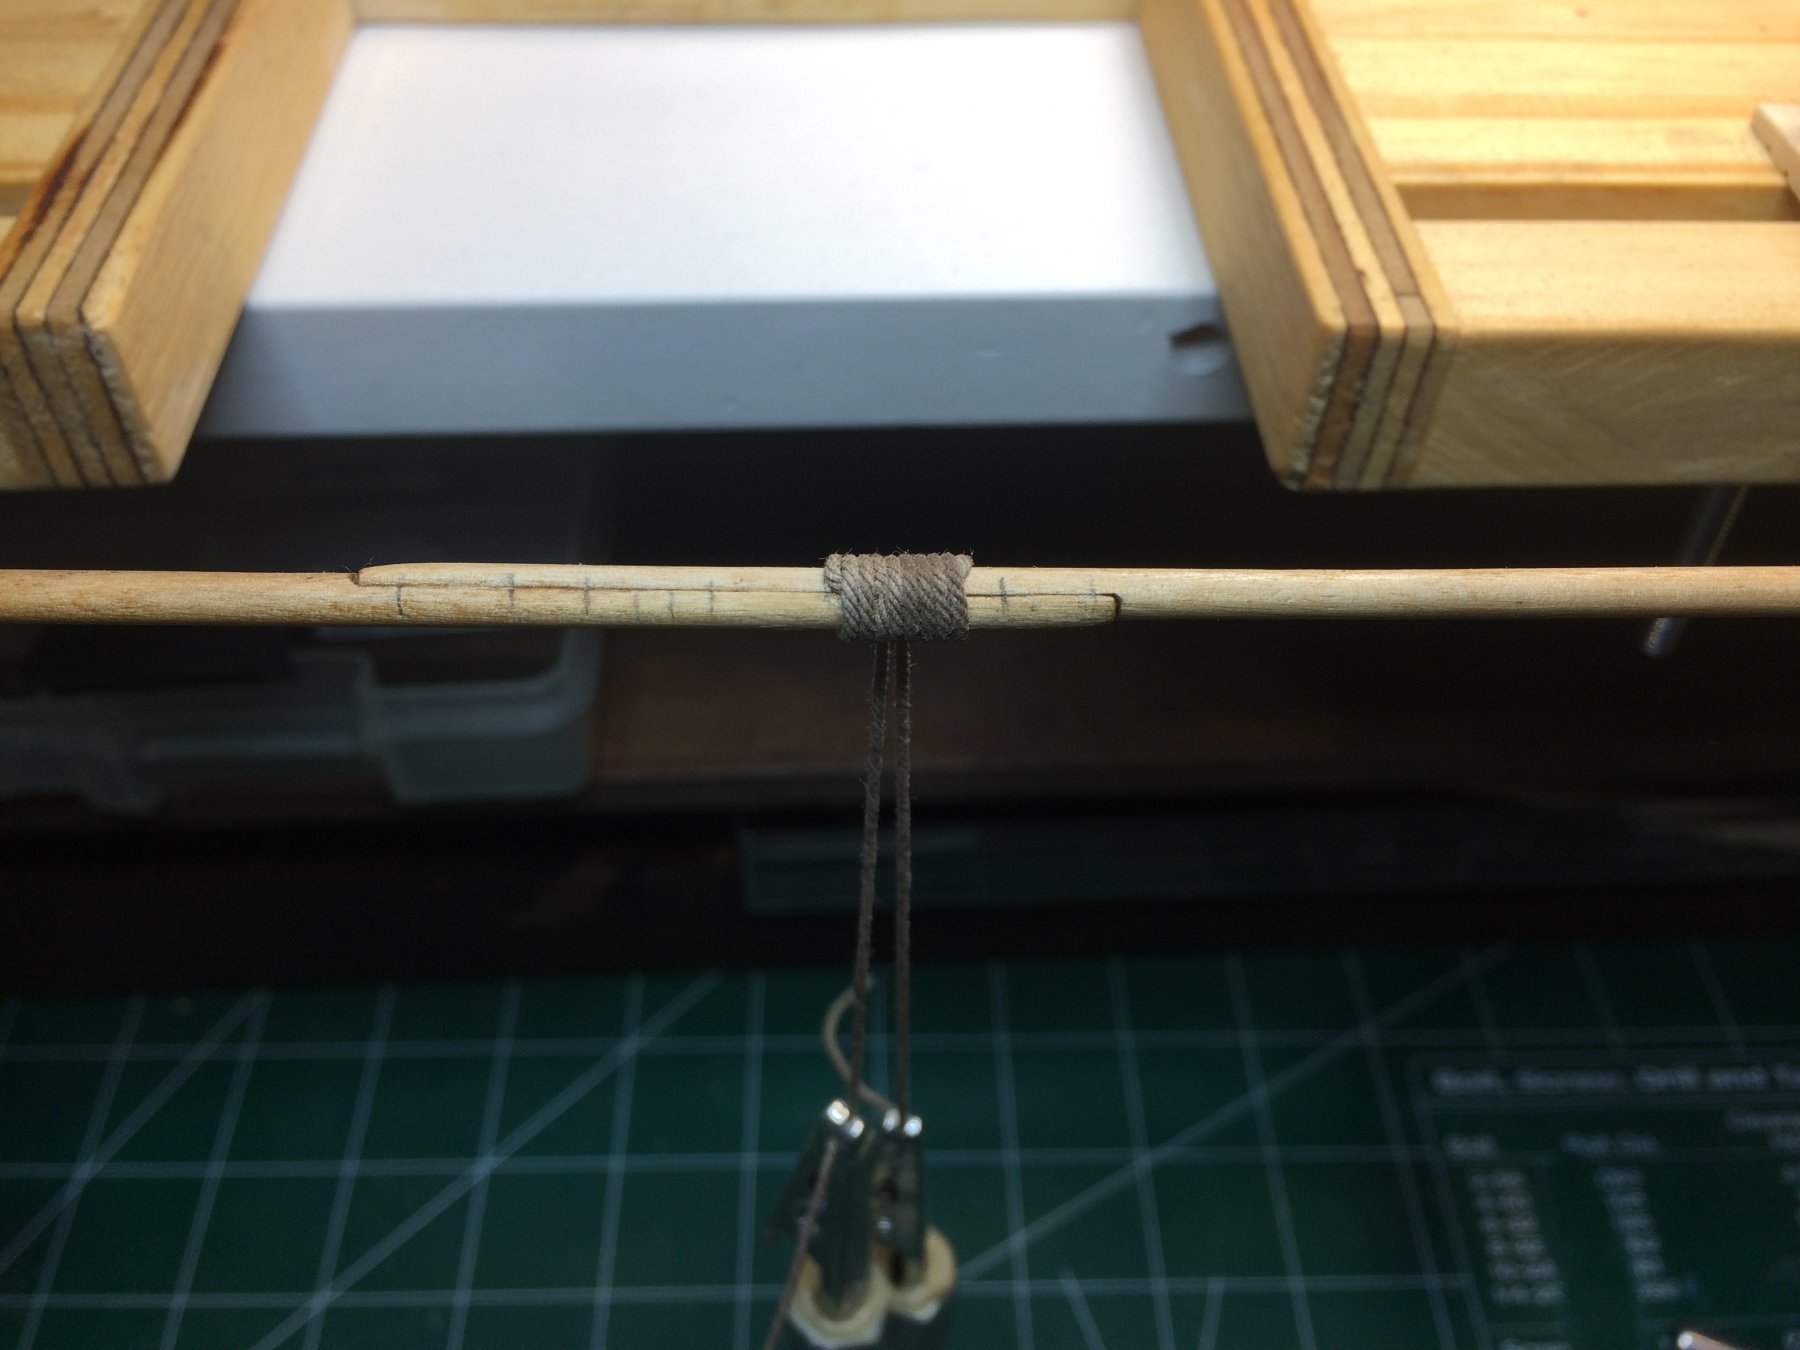
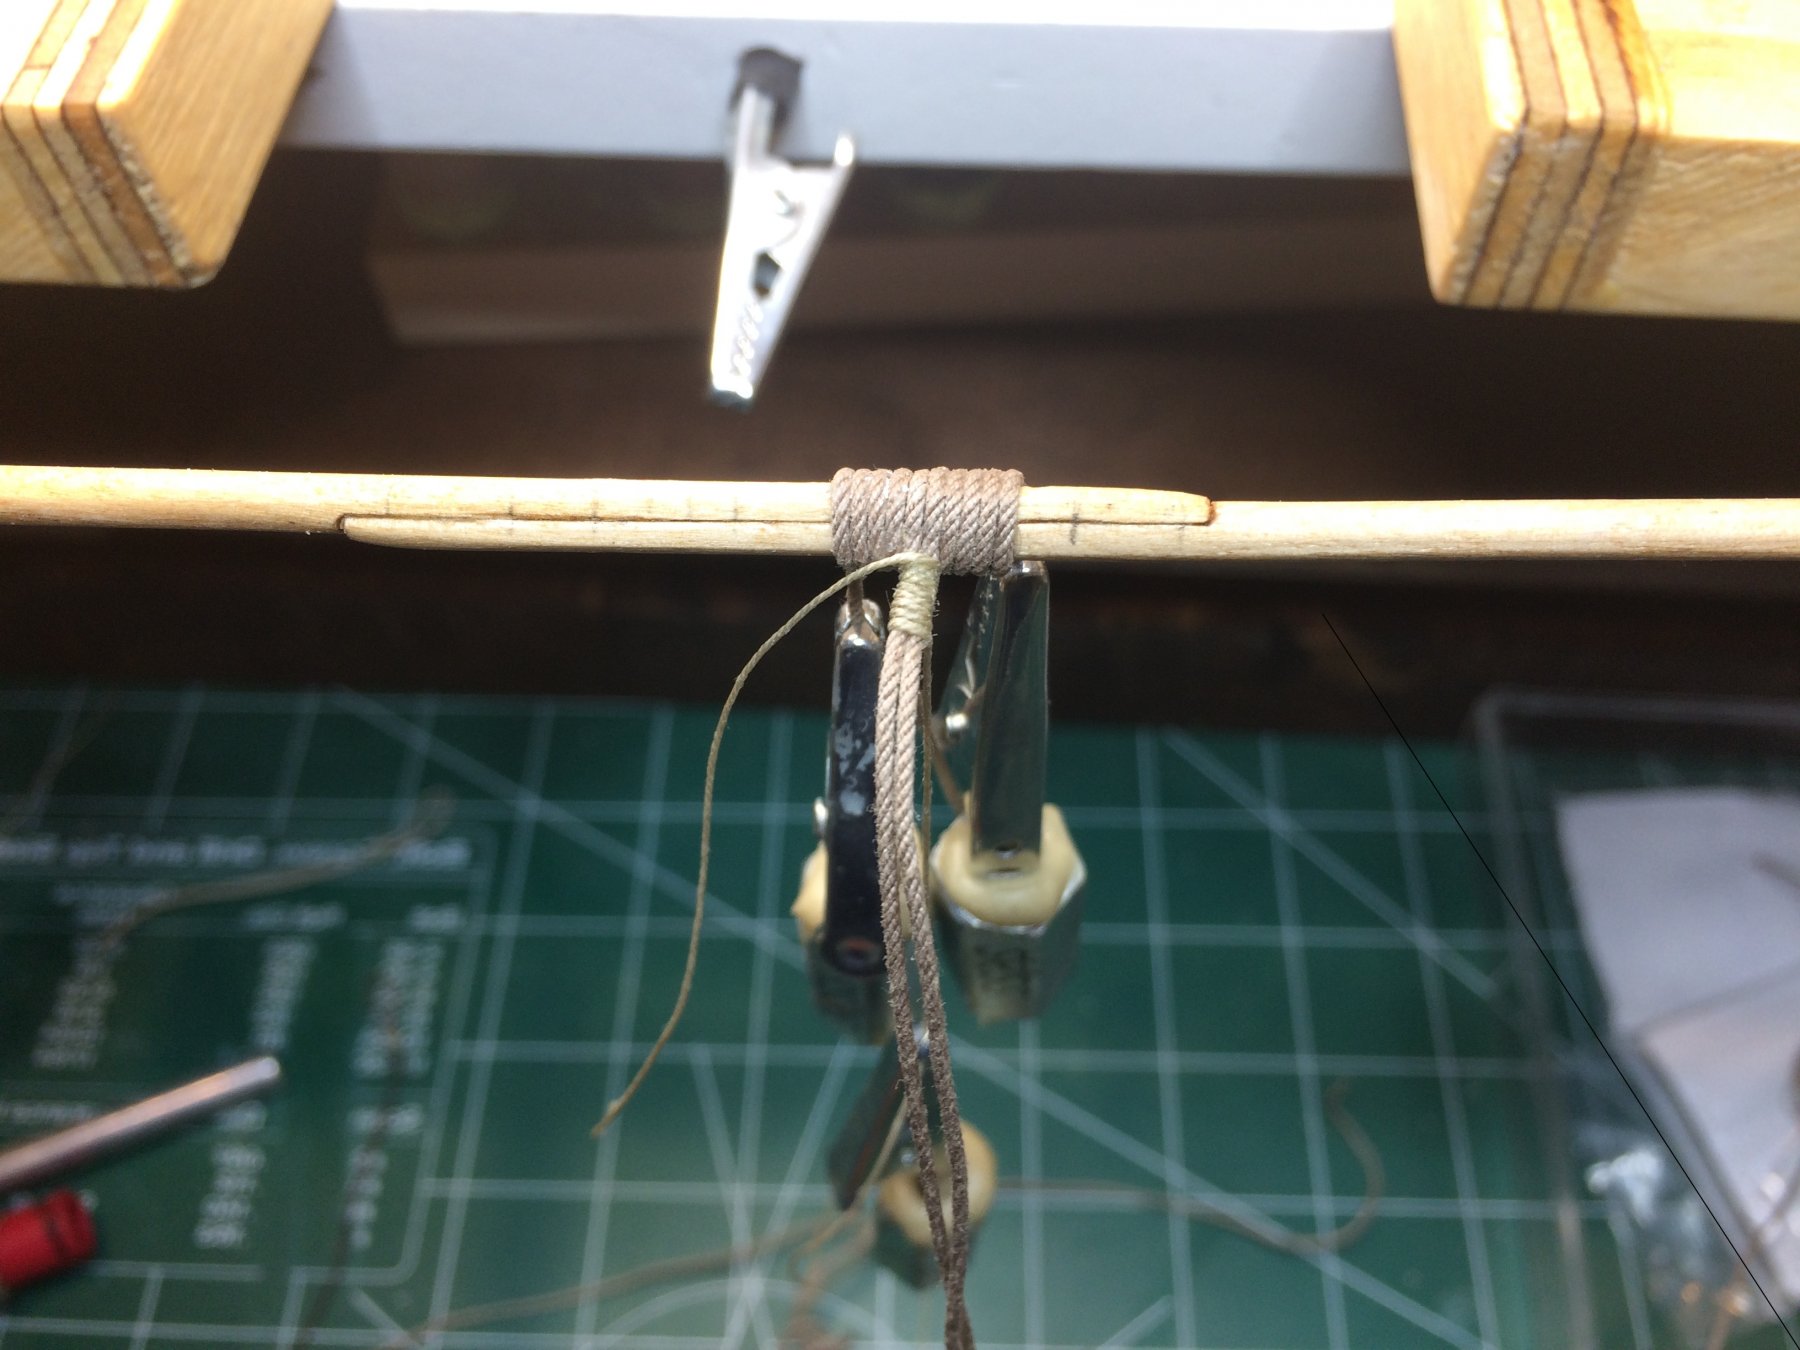
A bit of a work completed today. Was working on a main yard, actually the only one on this ship. First created a small template to follow while doing ridging. Transferred markings on the yard and .. Yard in the new, i called it ridging helper table... you might noticed that i added two more clamping helpers, this time made out of clothespin. I find out that a spring clamp i intended to use has a strong grip that might be damaging some delicate wood parts in the future build so decided to replace them (actually to add) two more clothespin.. If the grip is not strong i can always add a rubber band around it.. One part completed.. A bit of a closeup.. Prep for seizing.. Two completed, two more to go.. All roping done.. Testing on the mast... Now i need to do a bit of a research how to attach the sail. The kit plan is not quite helpful for this task... Happy modeling to all..


- 122 replies
-
- 6
-
-
- greek bireme
- scale-1/35
- (and 2 more)
-
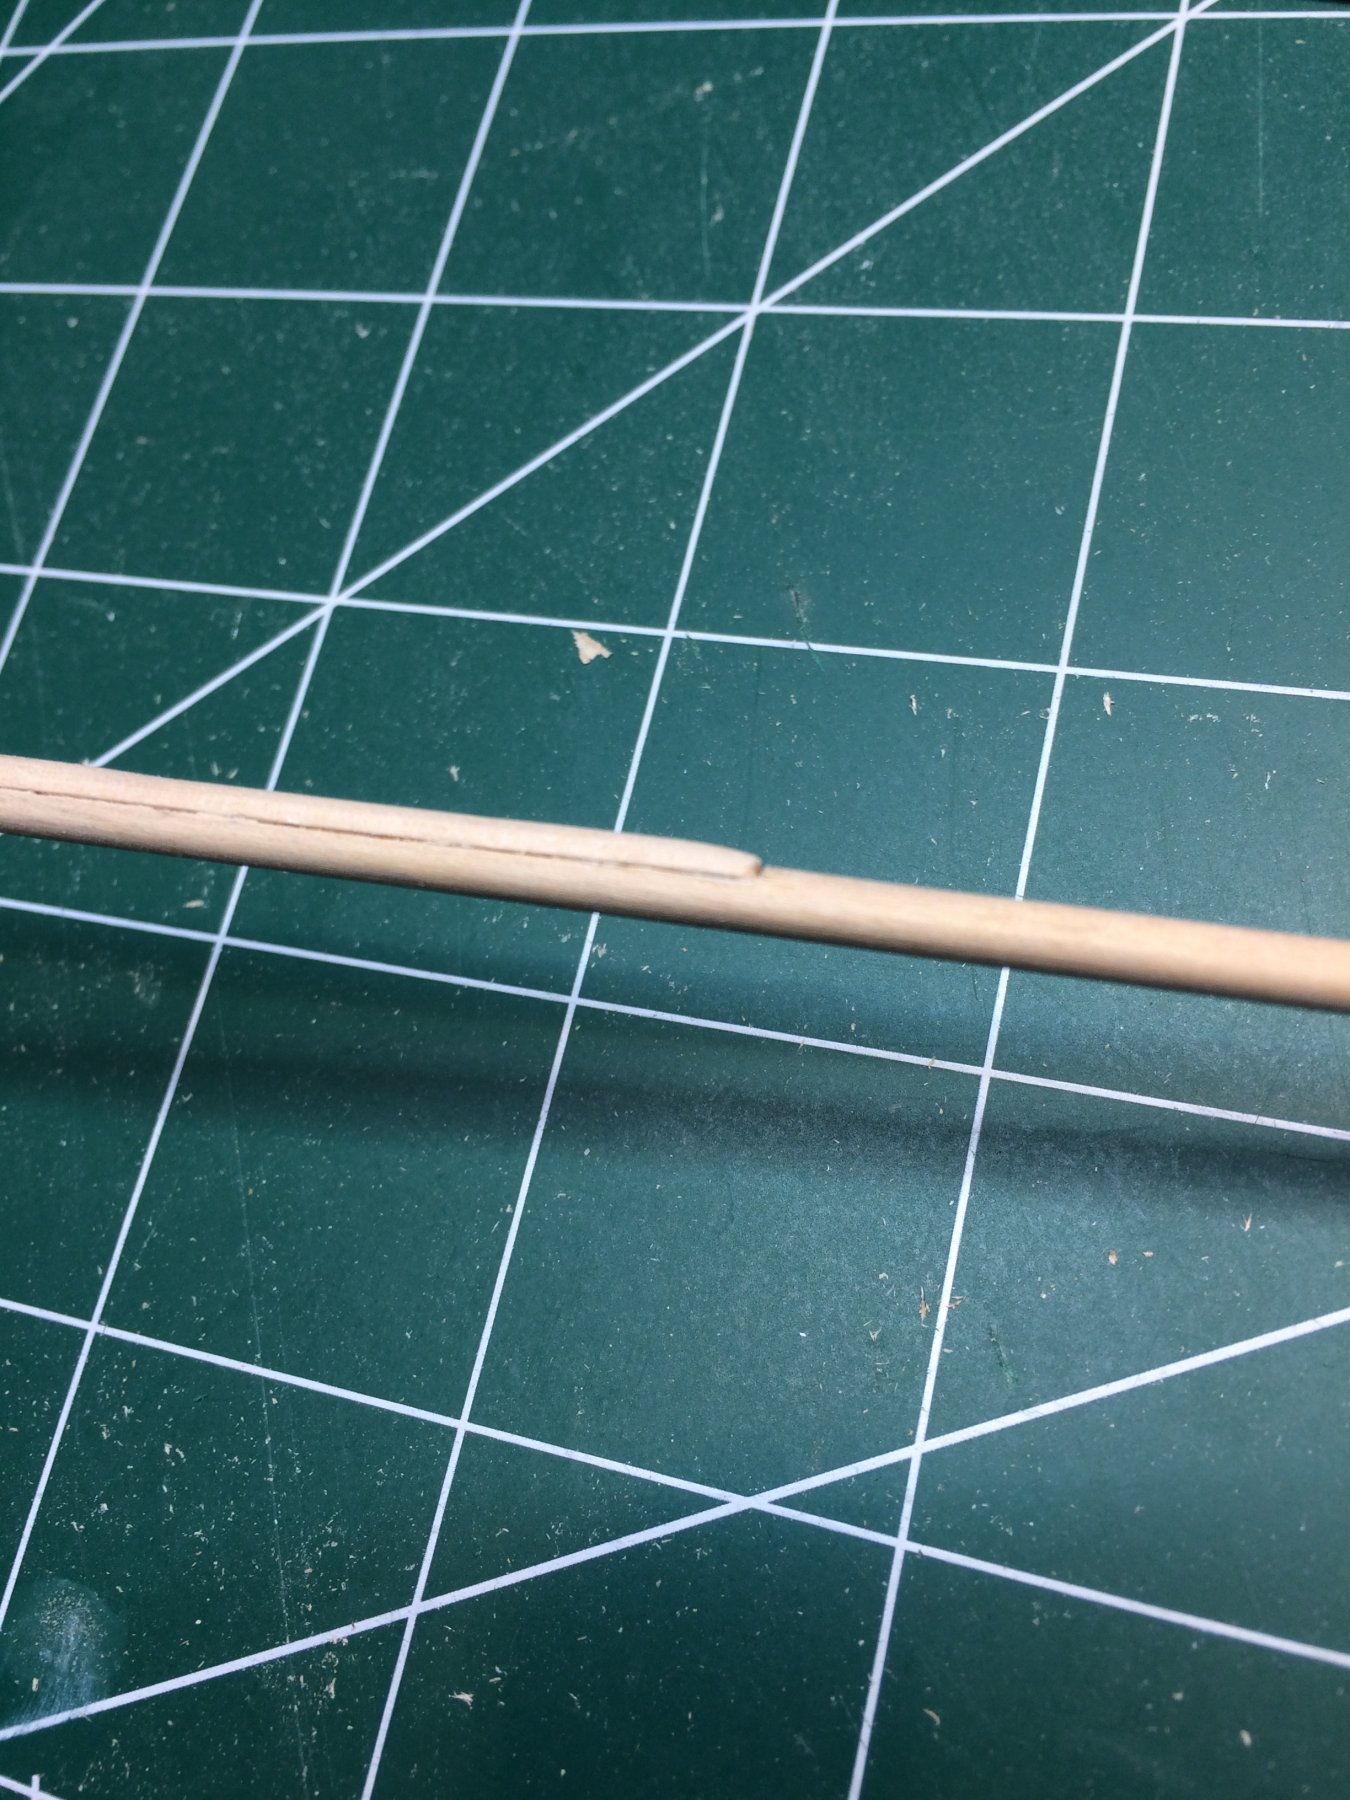
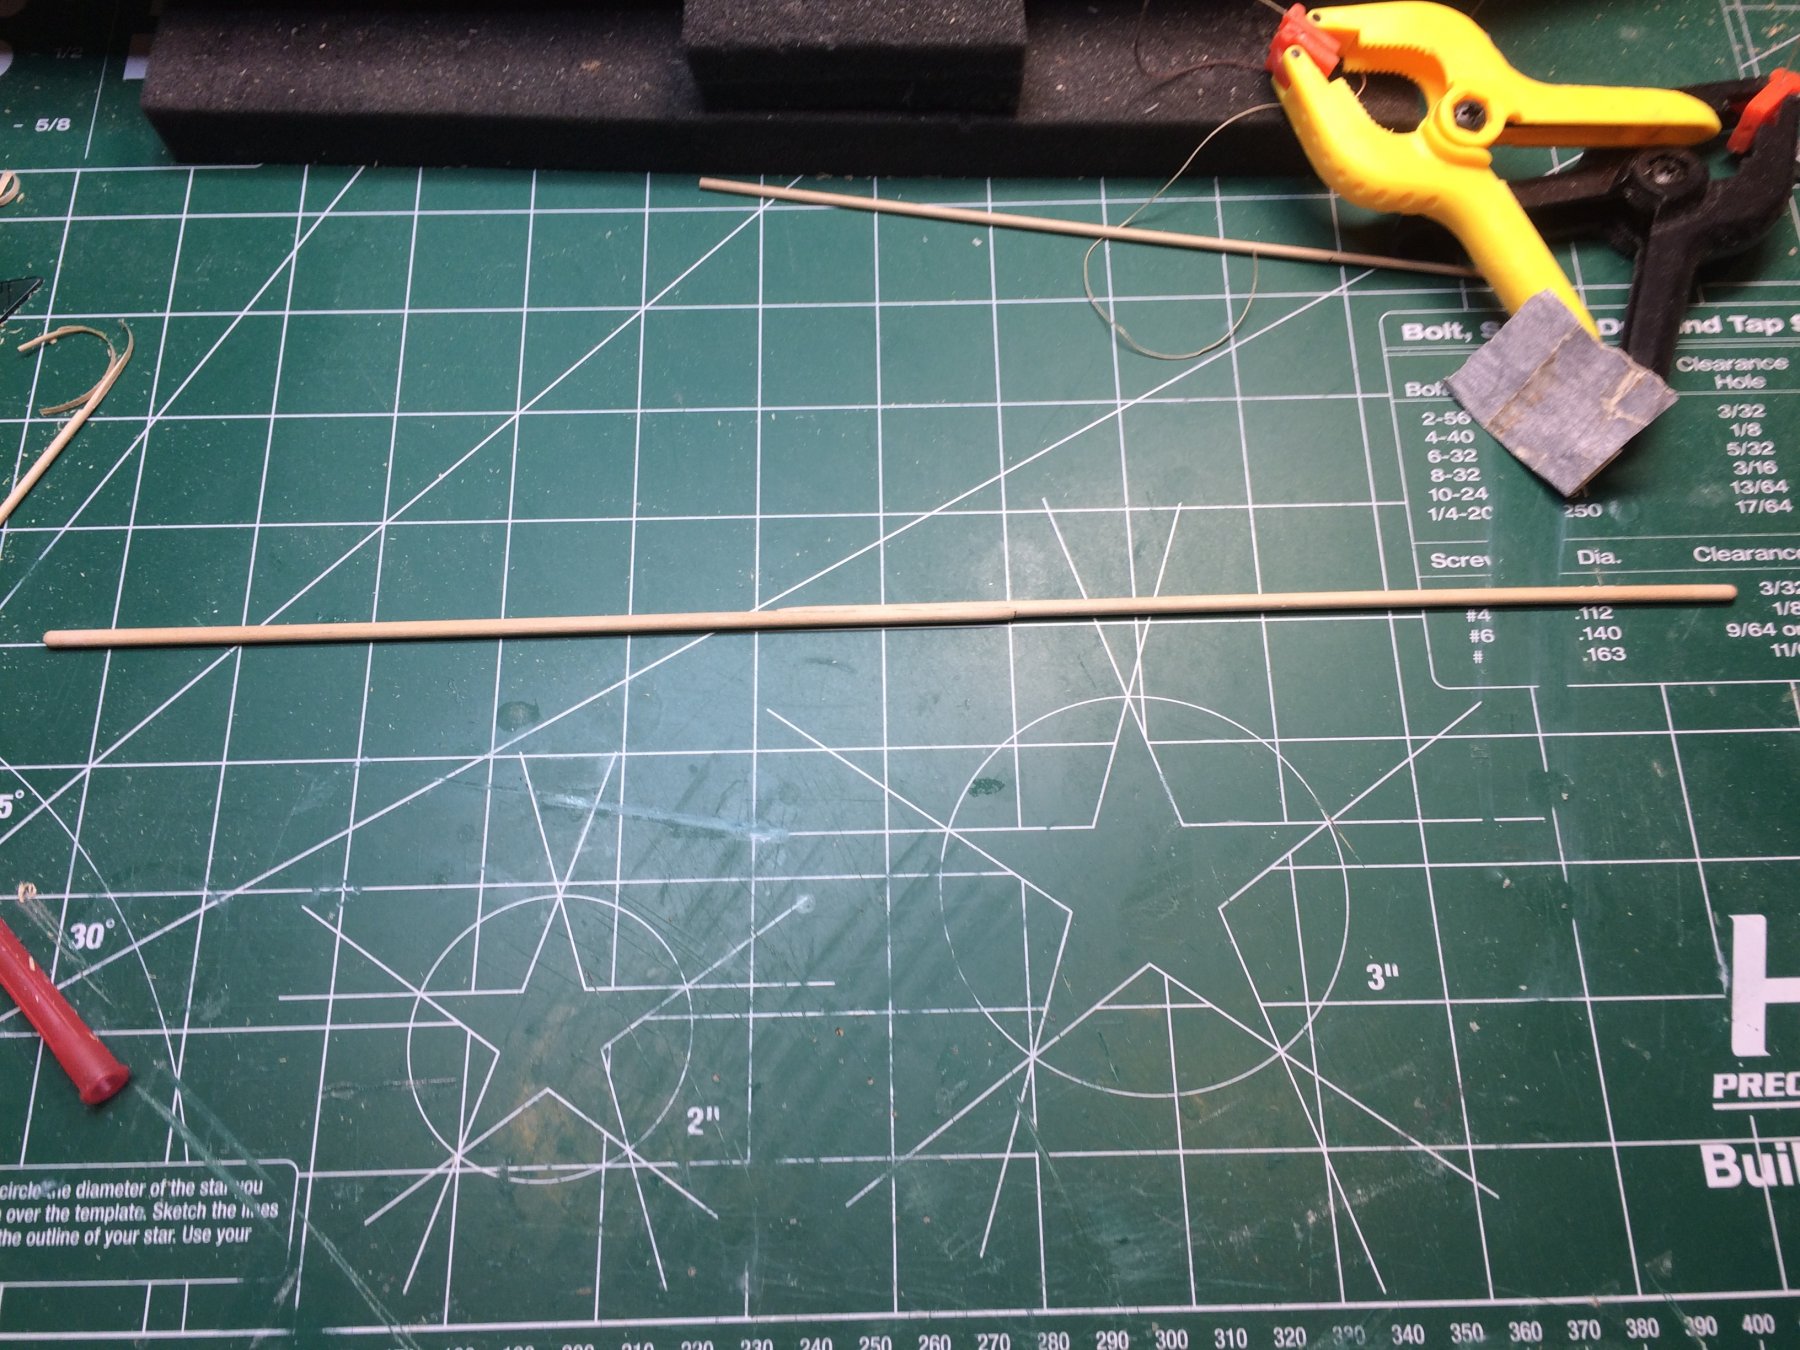
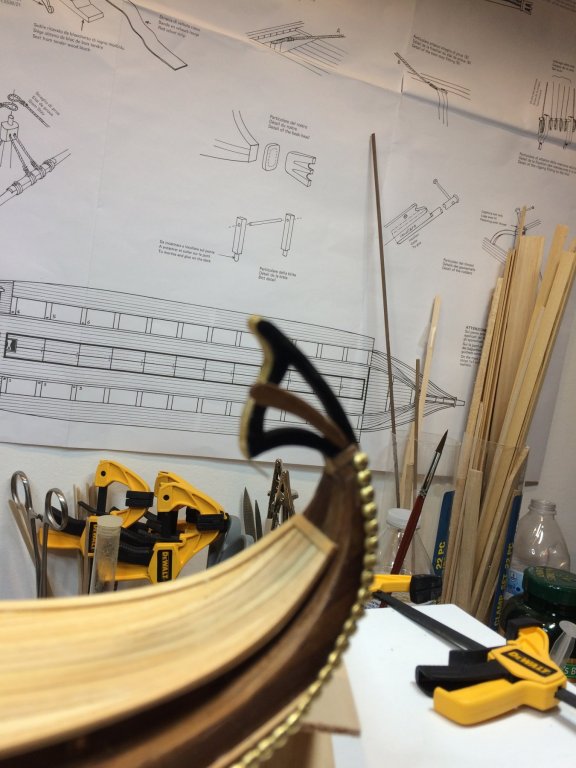
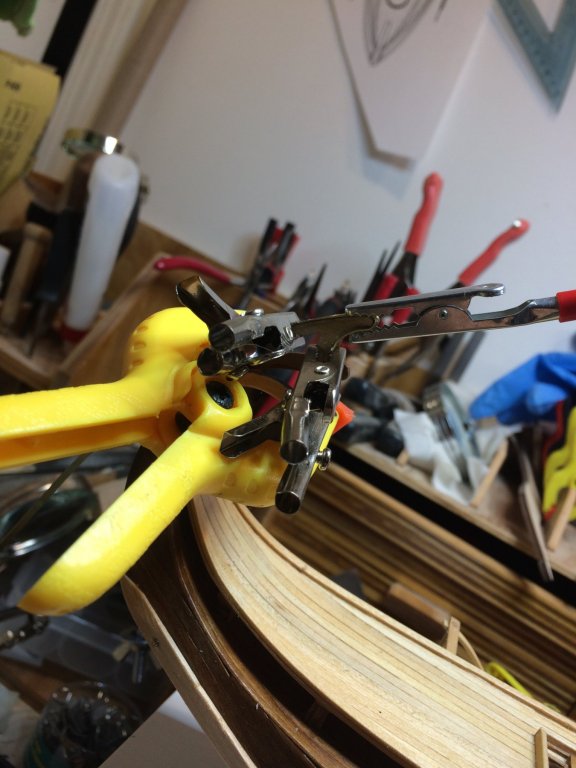
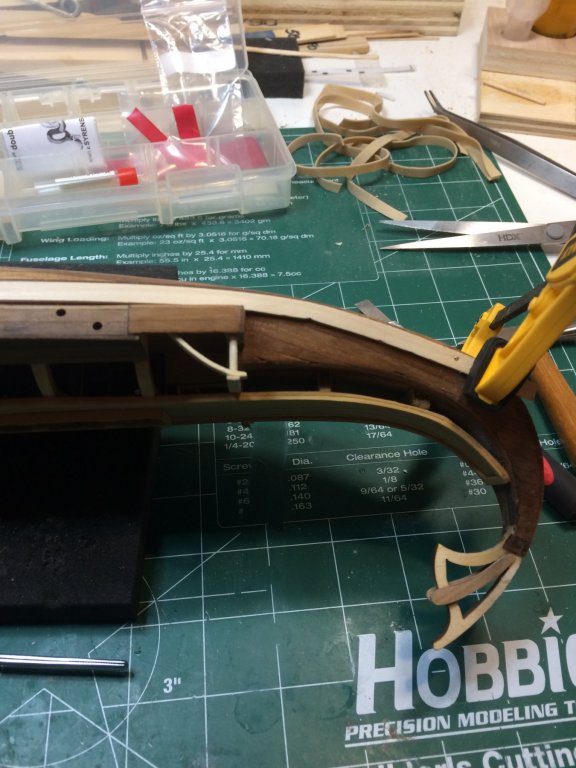
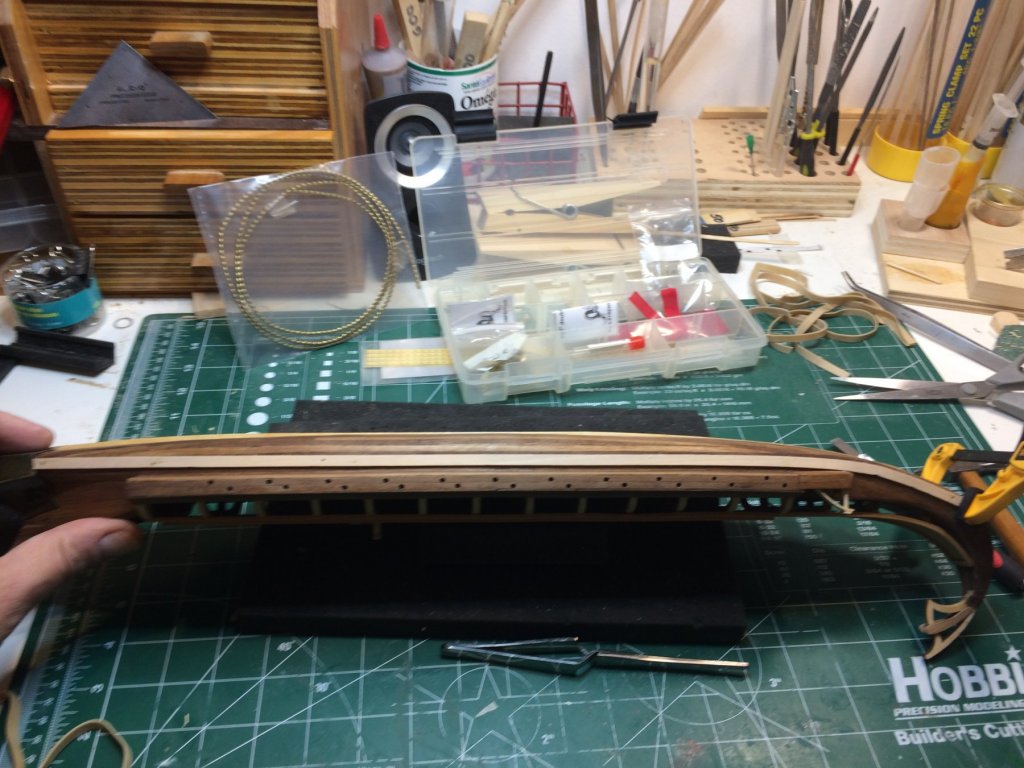
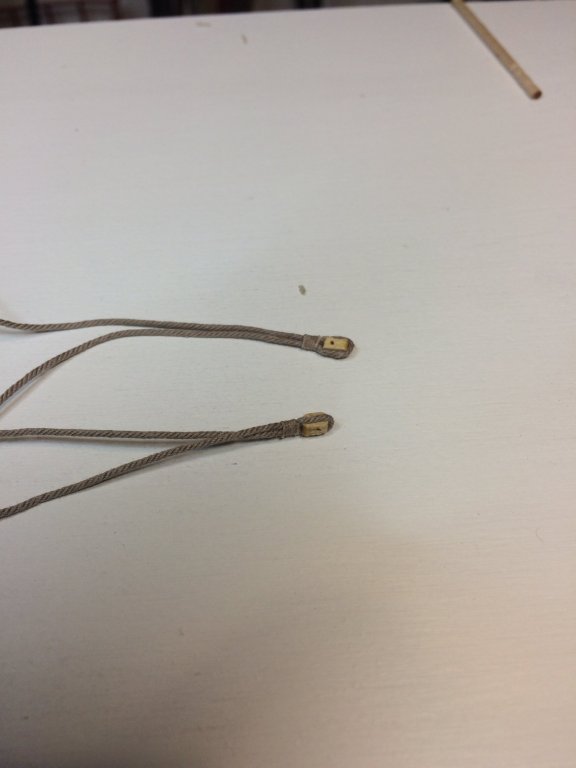
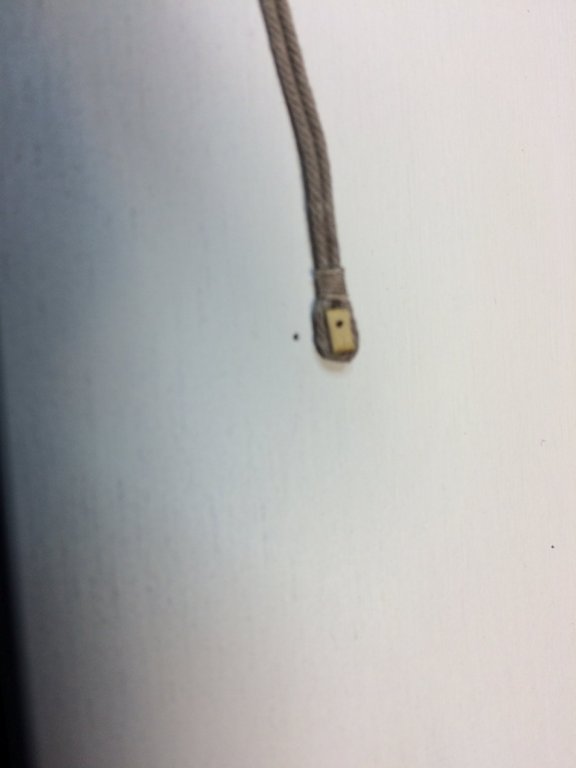
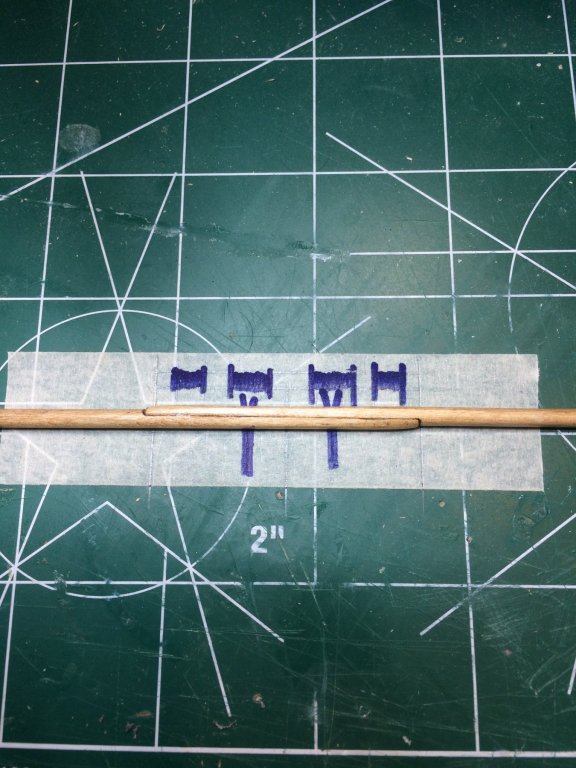
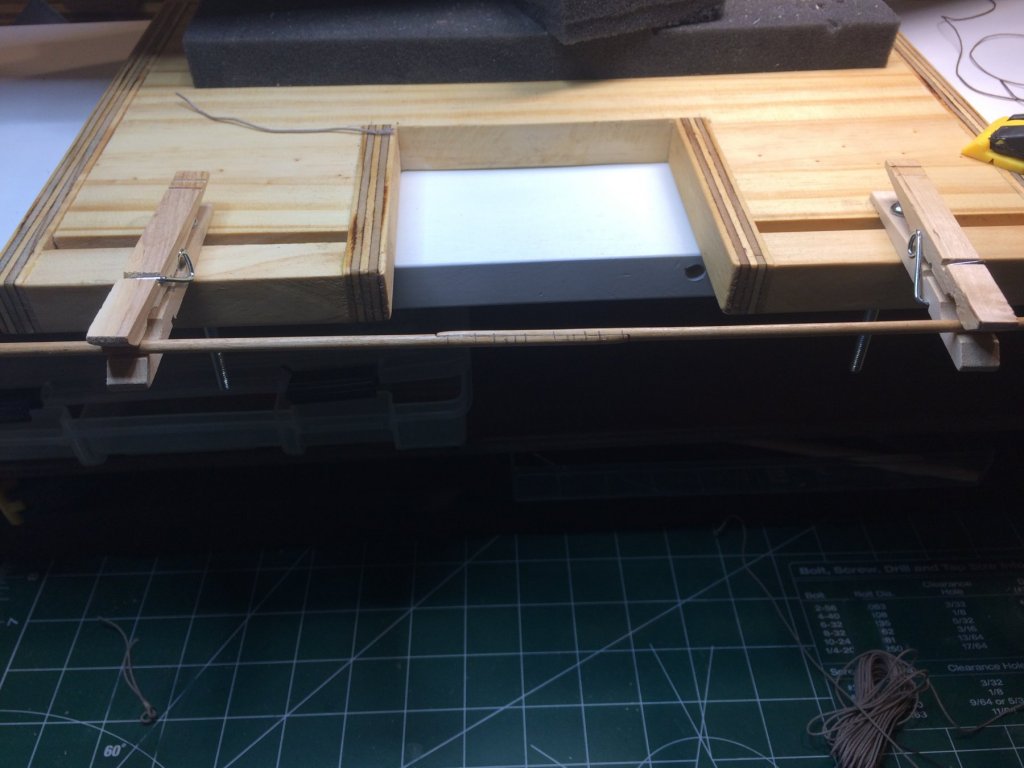
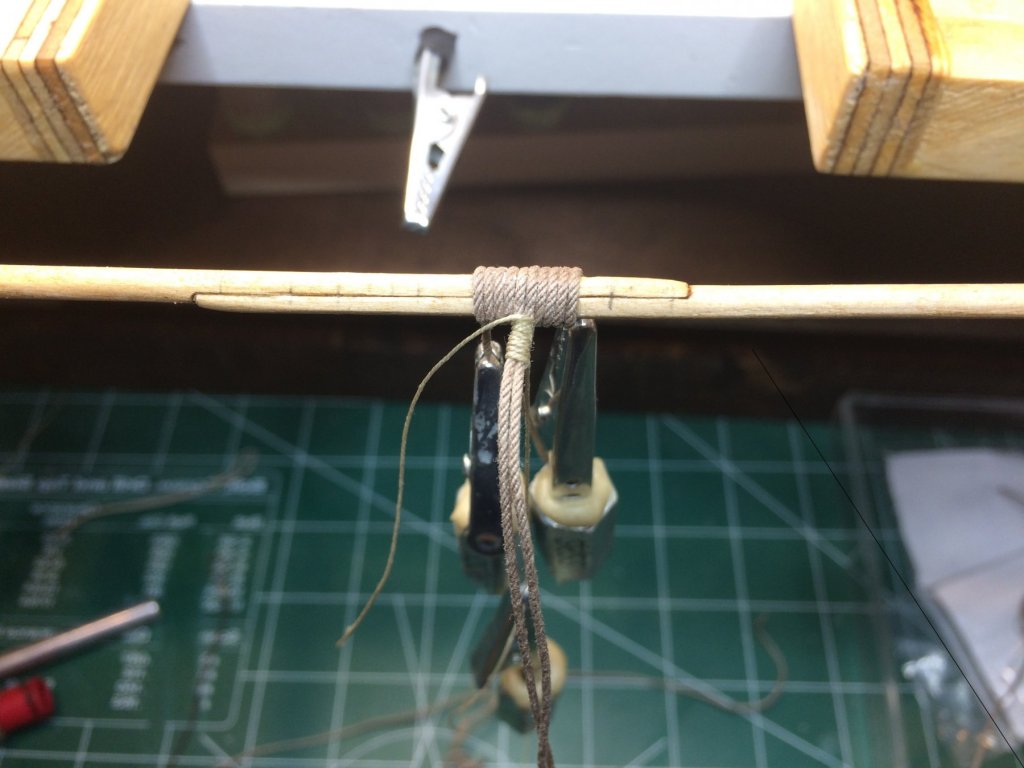
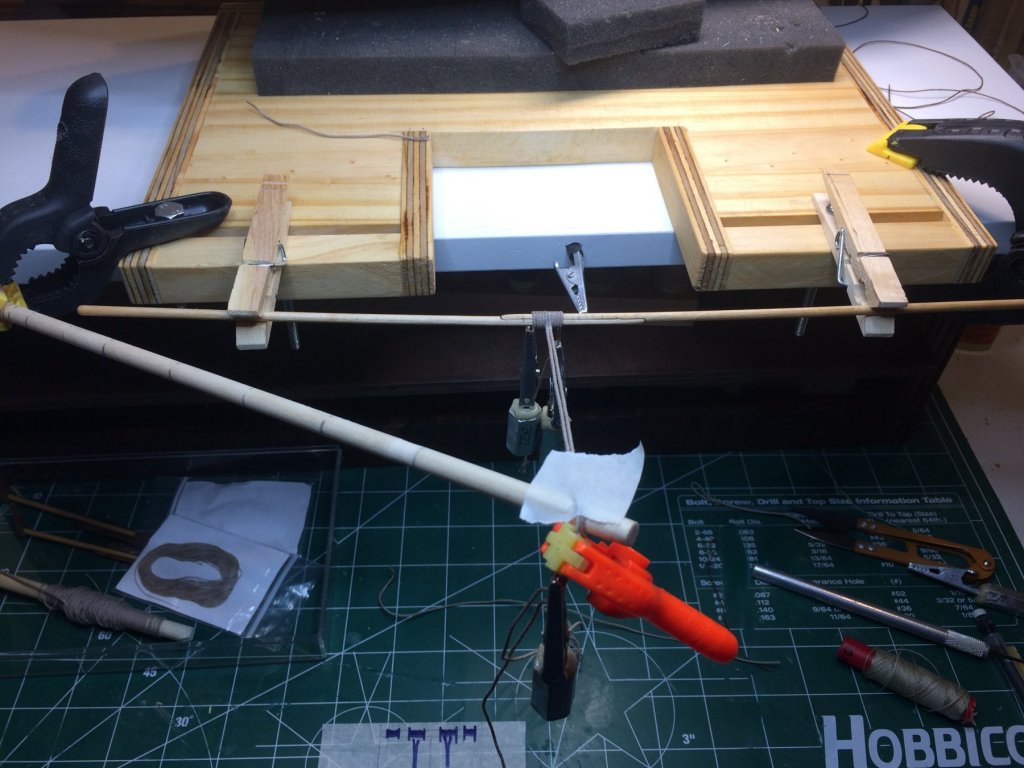
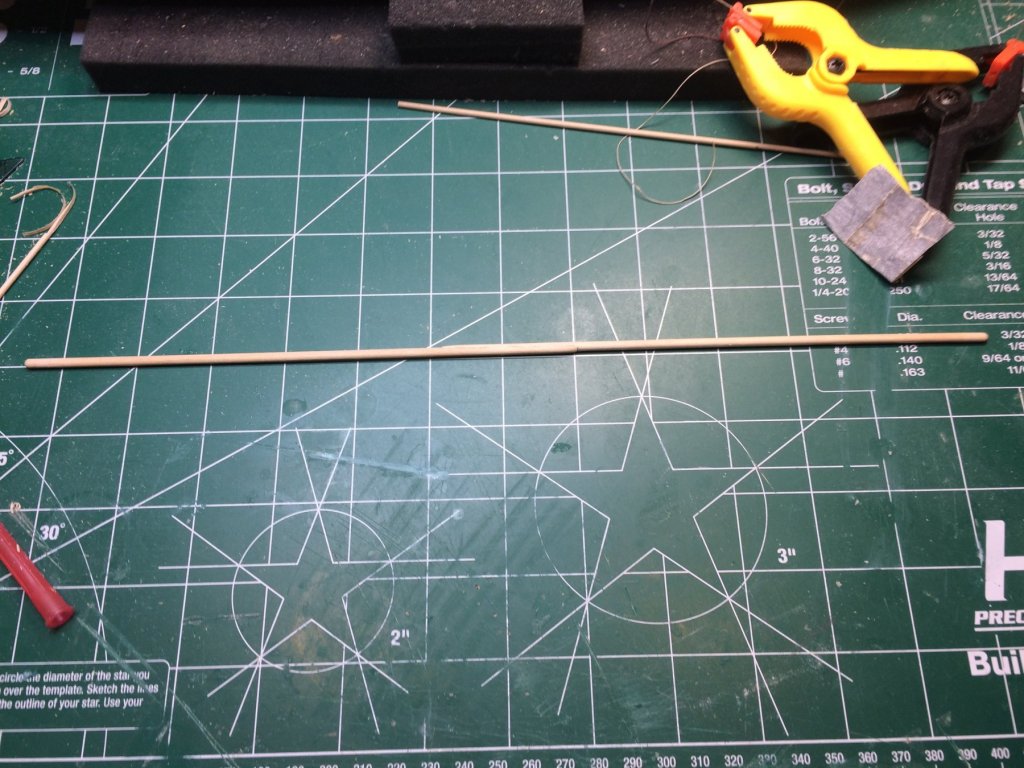
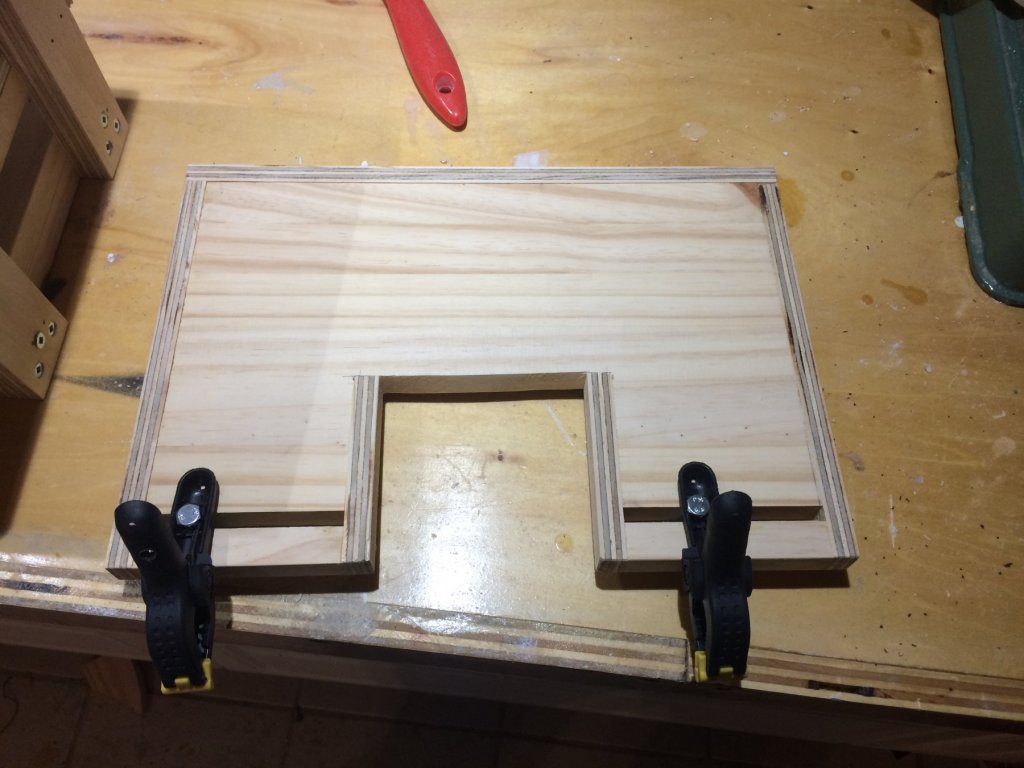
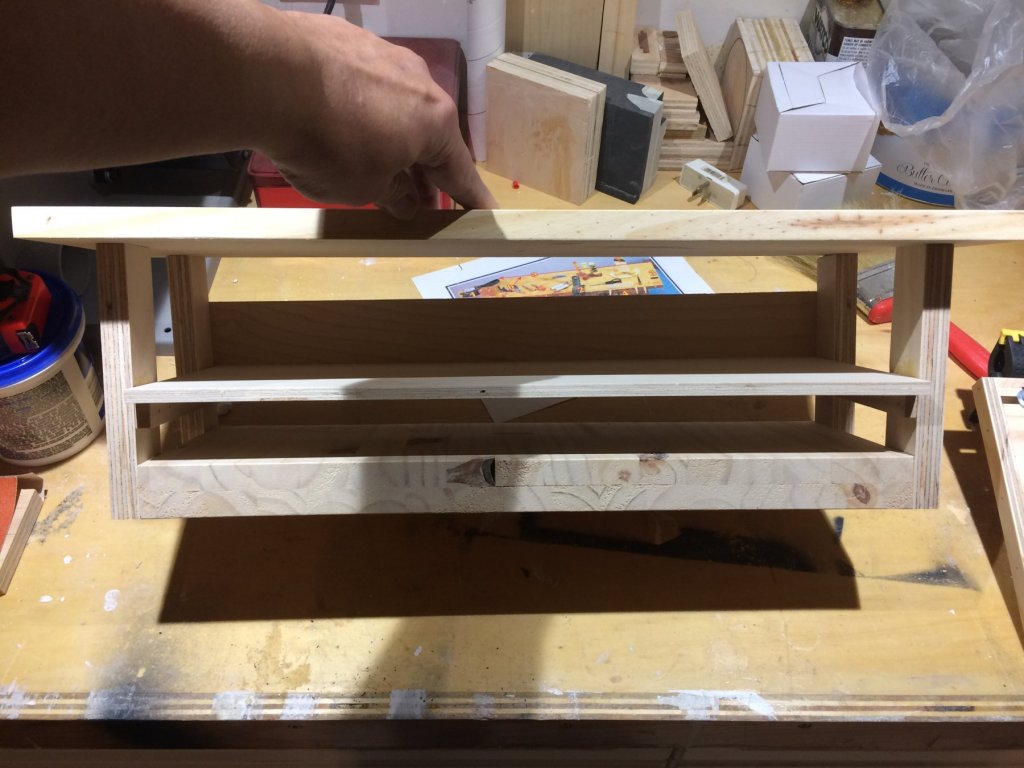
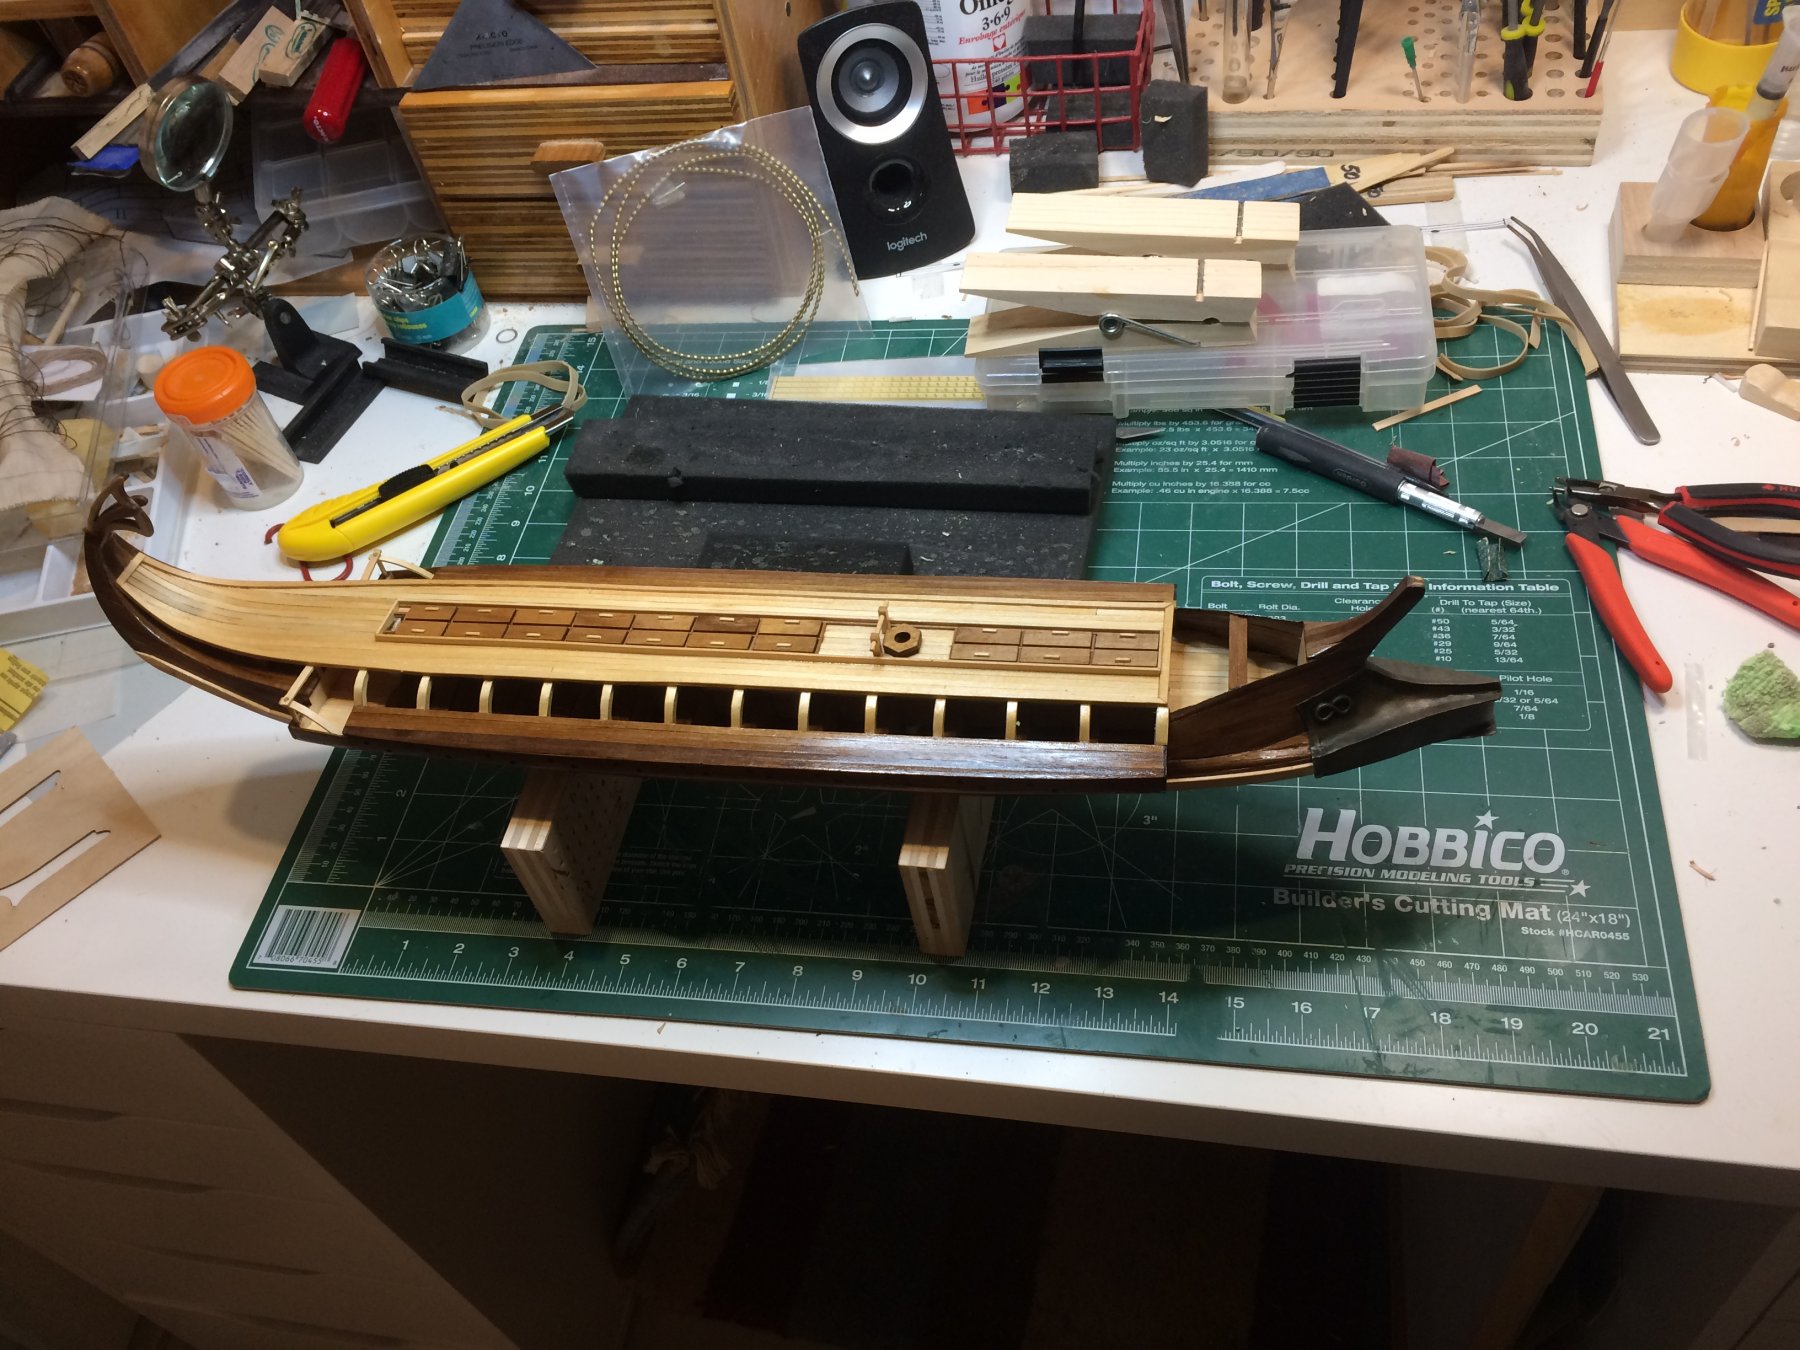
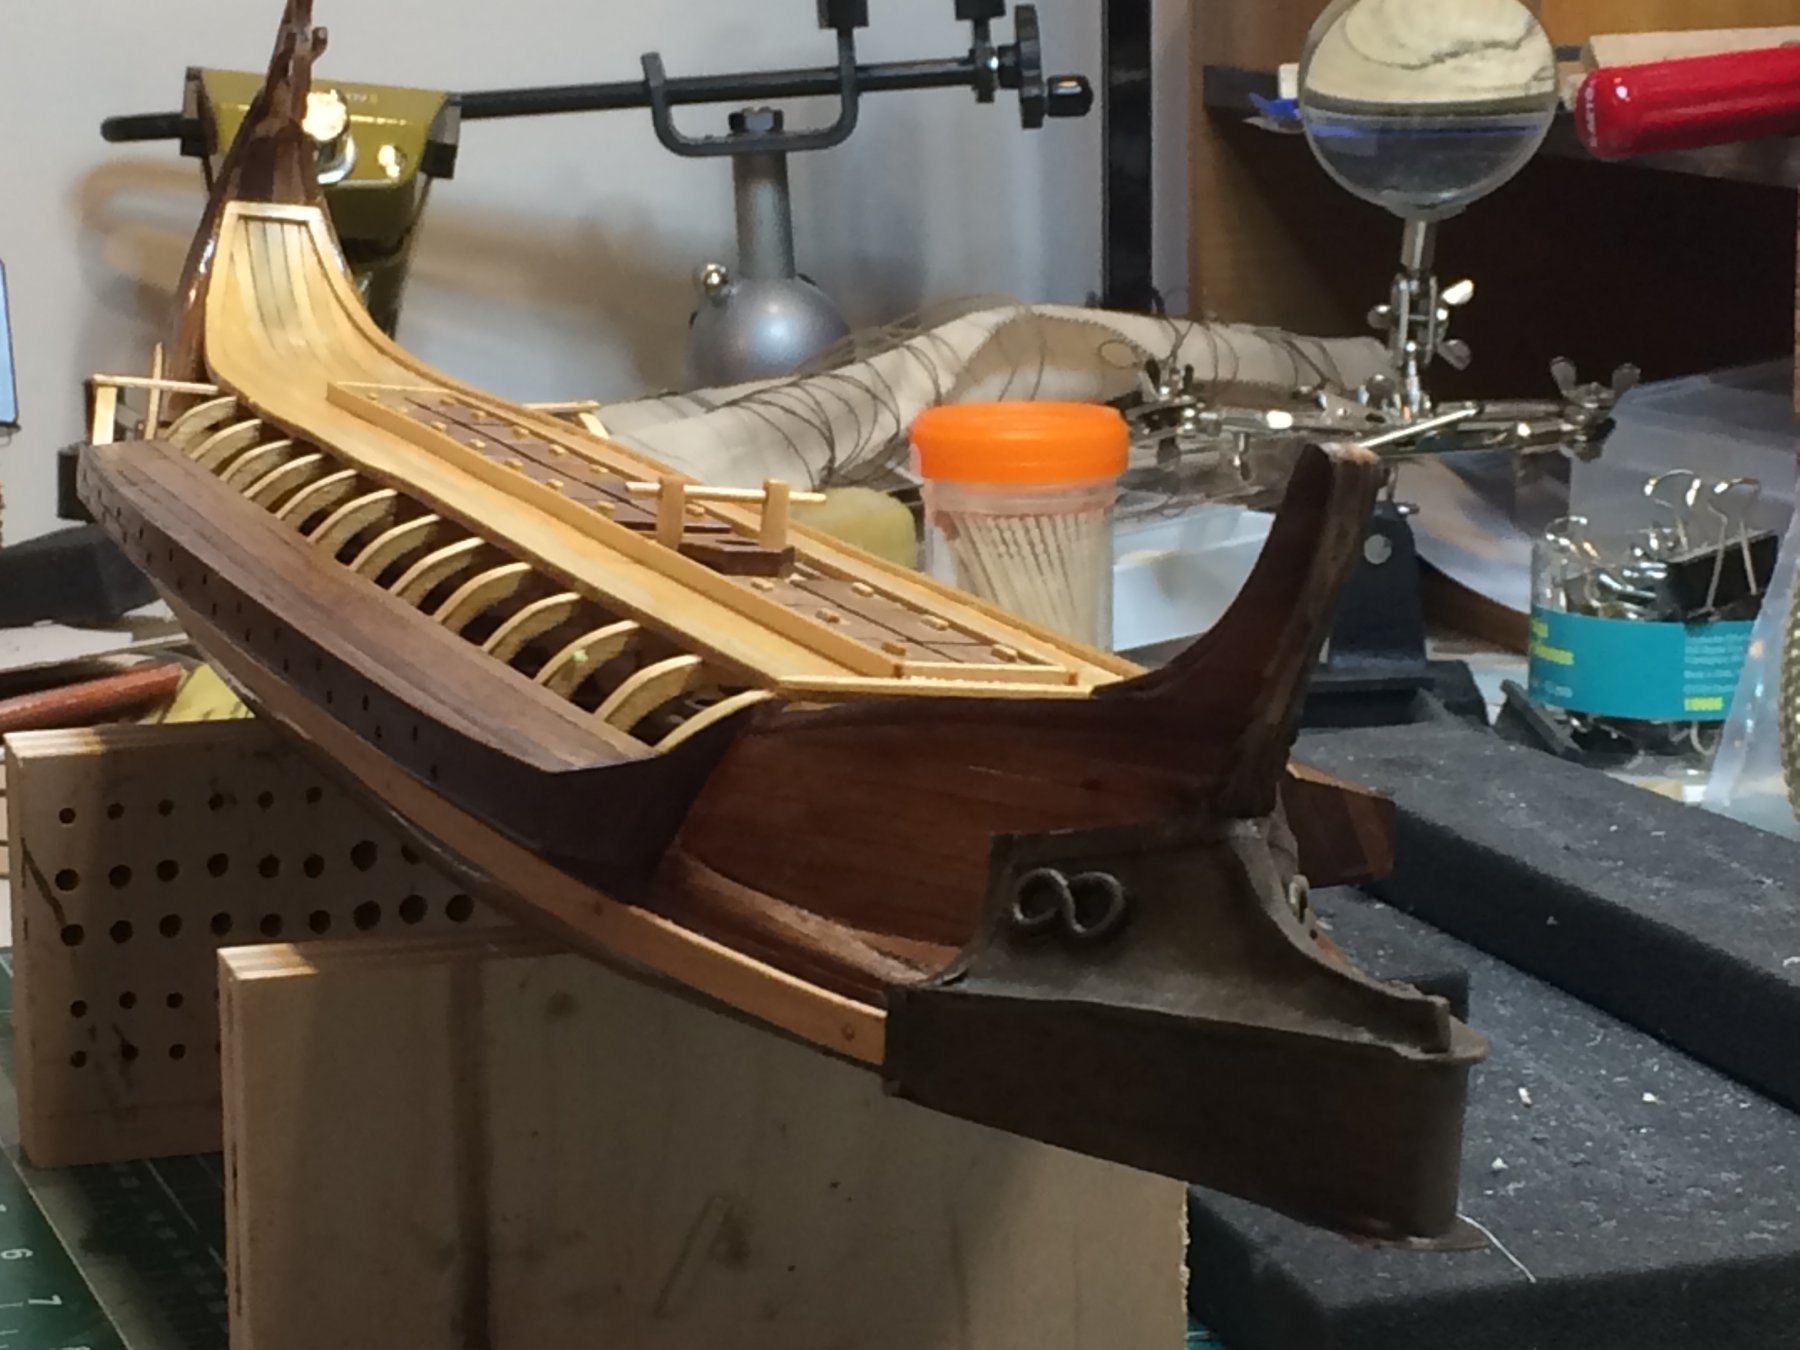
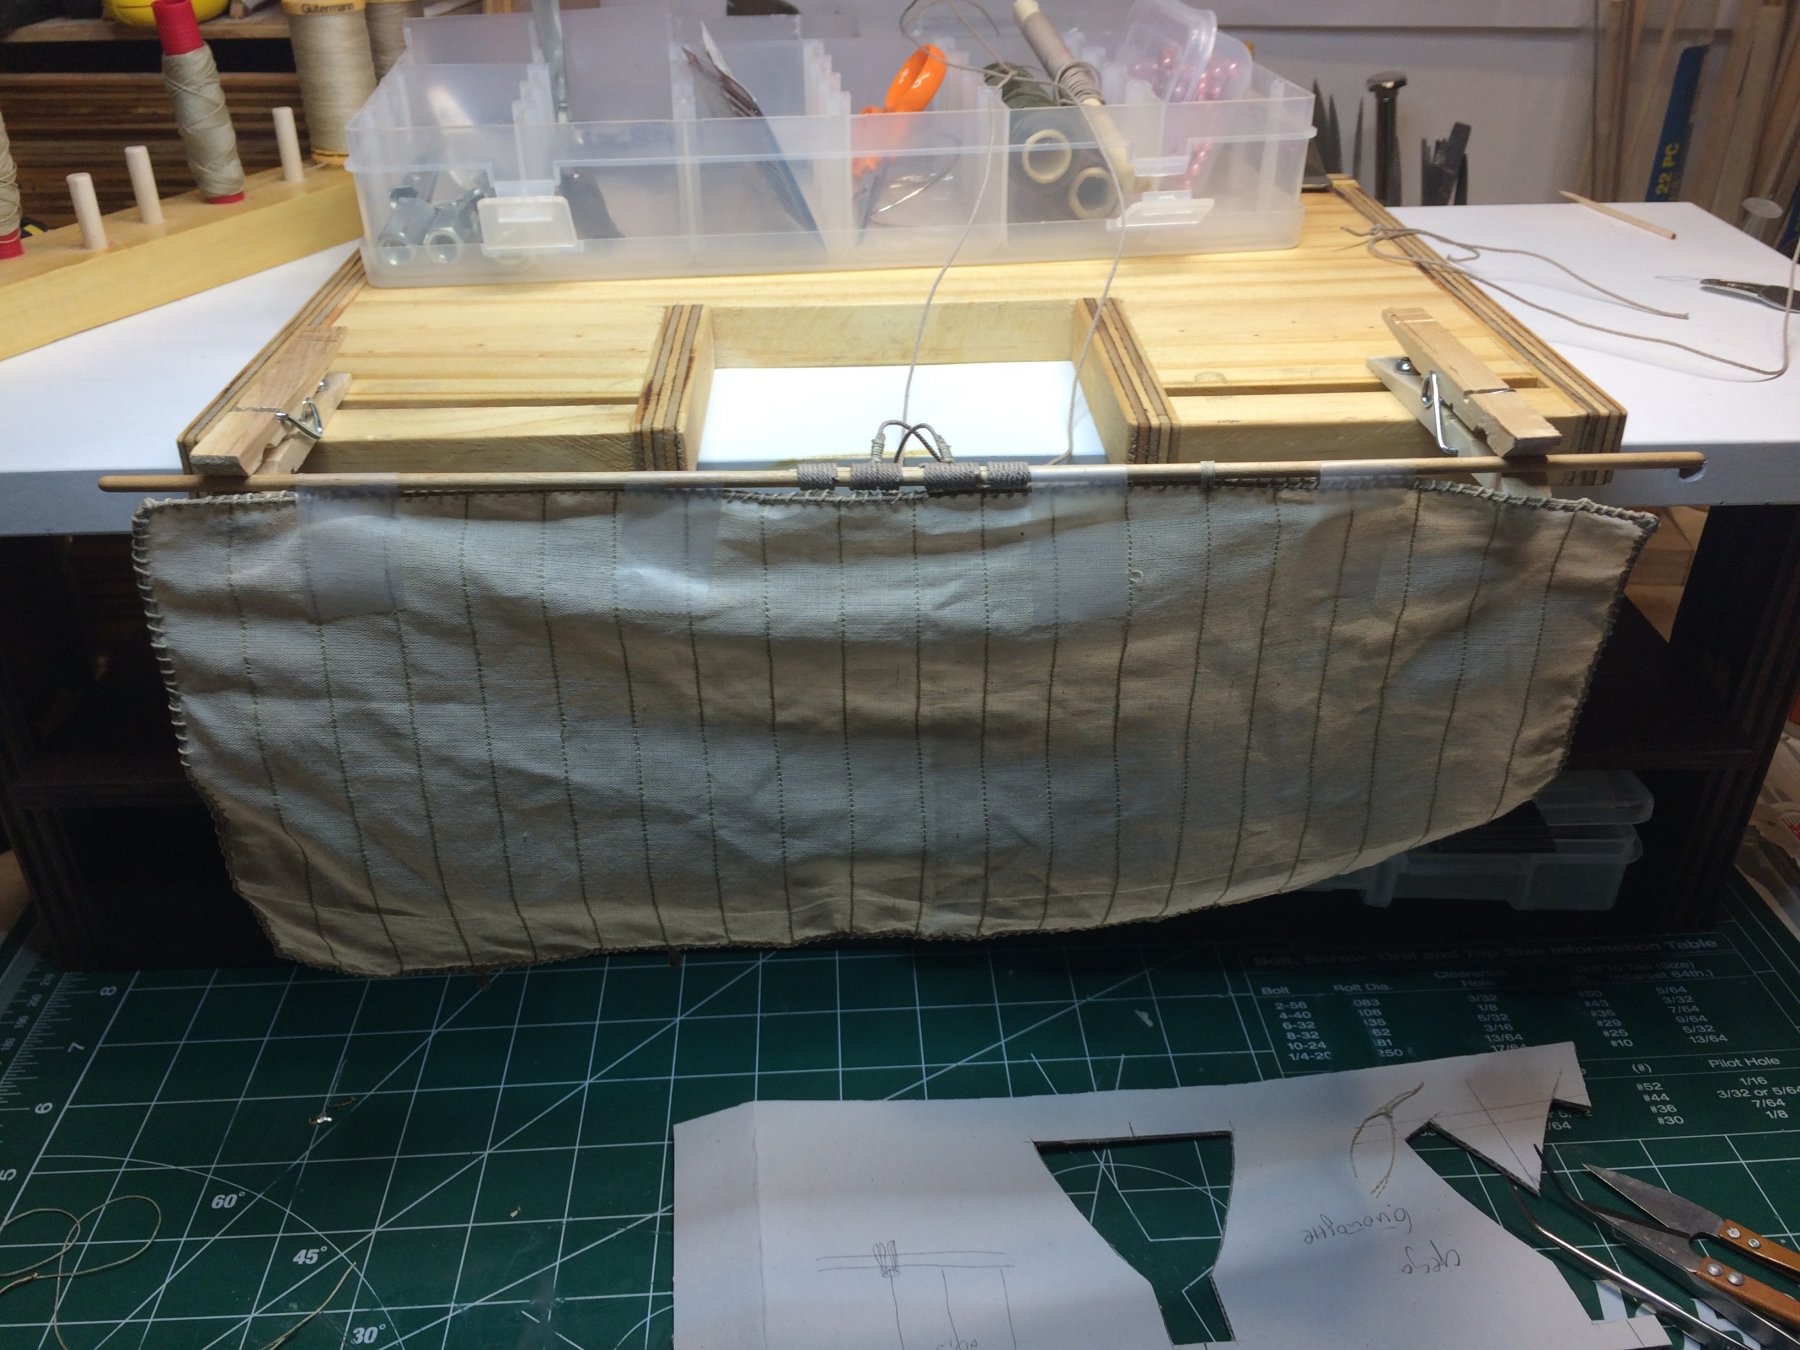
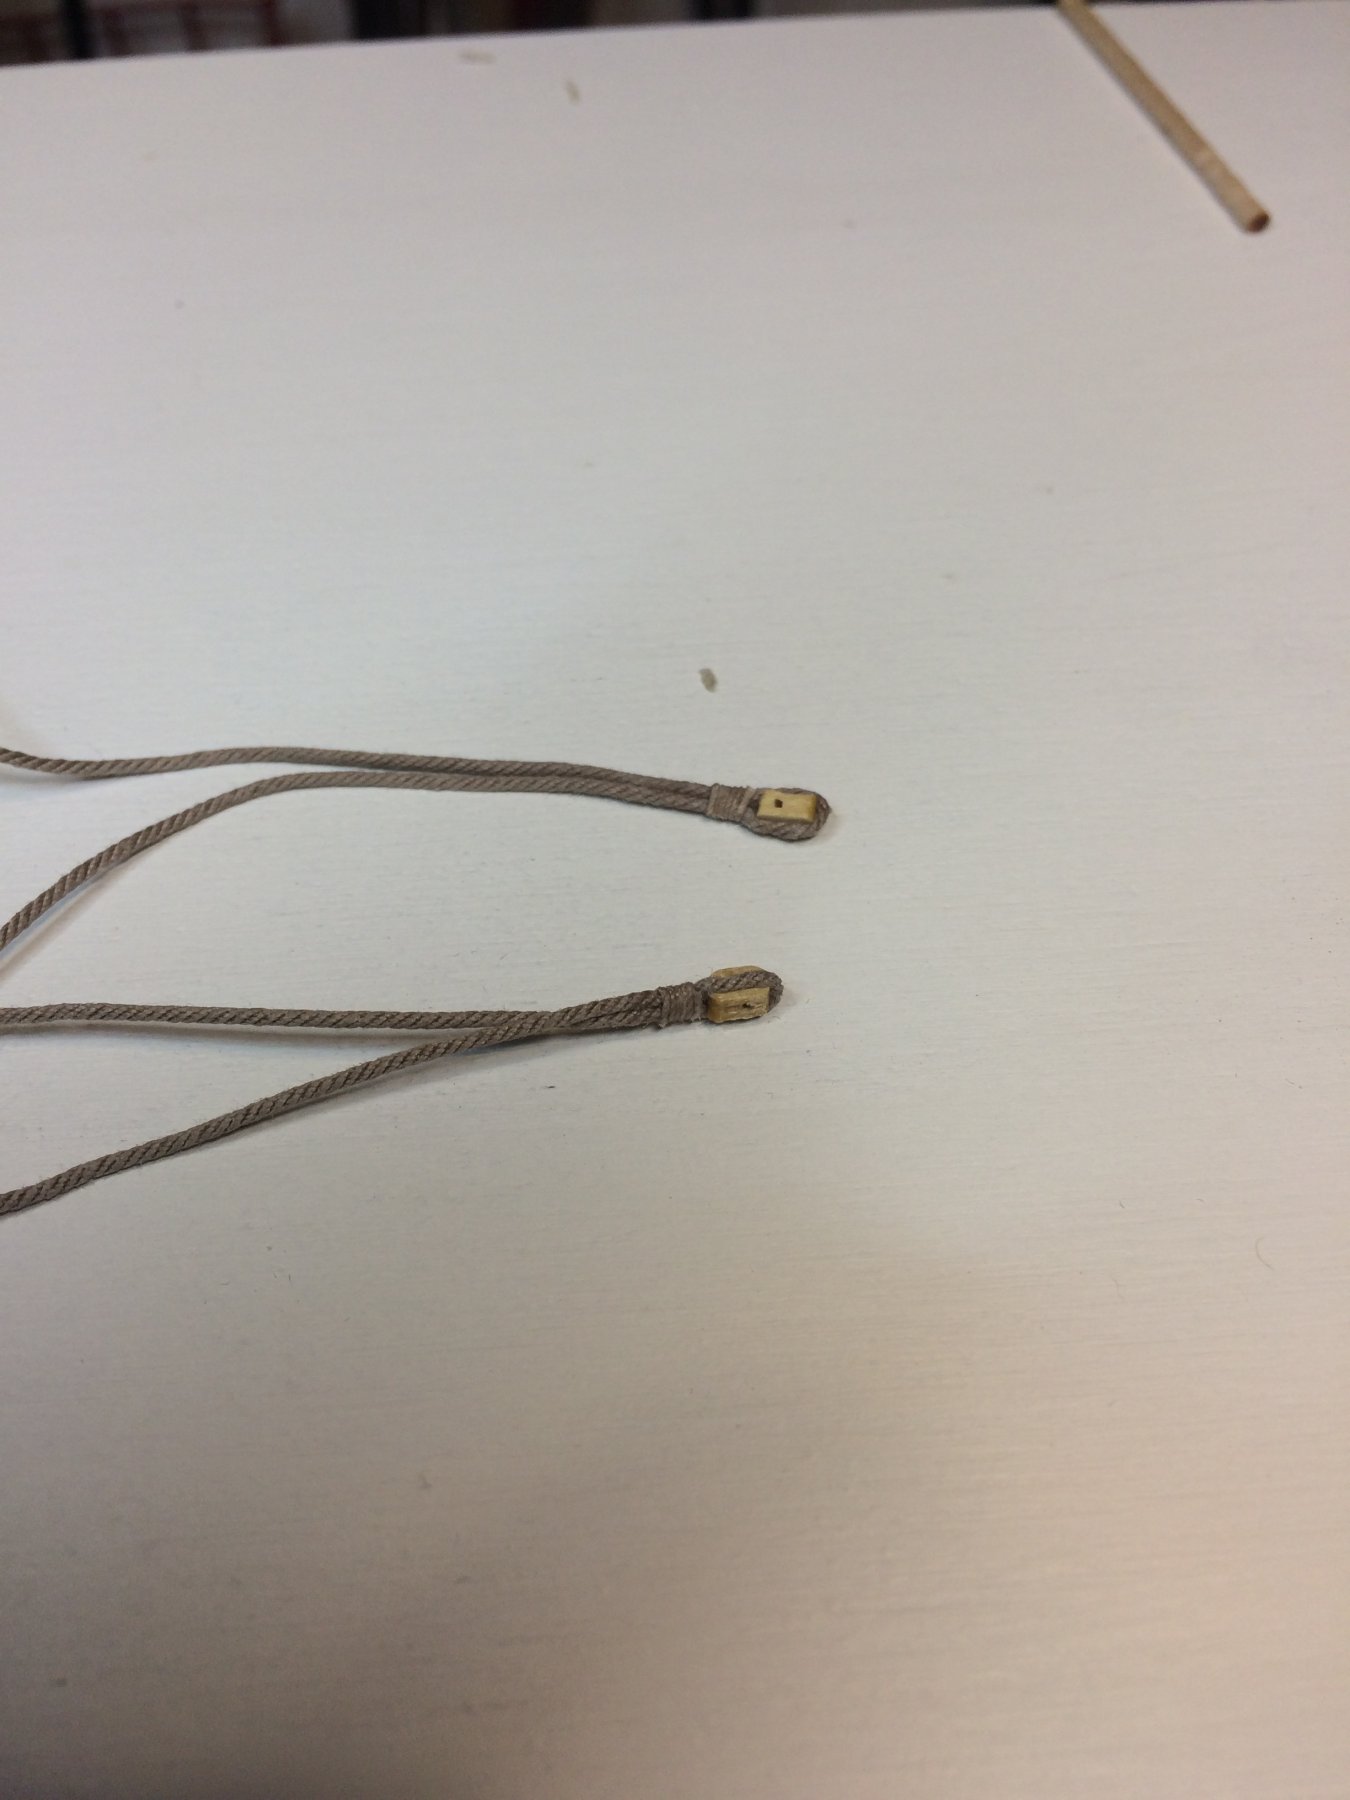
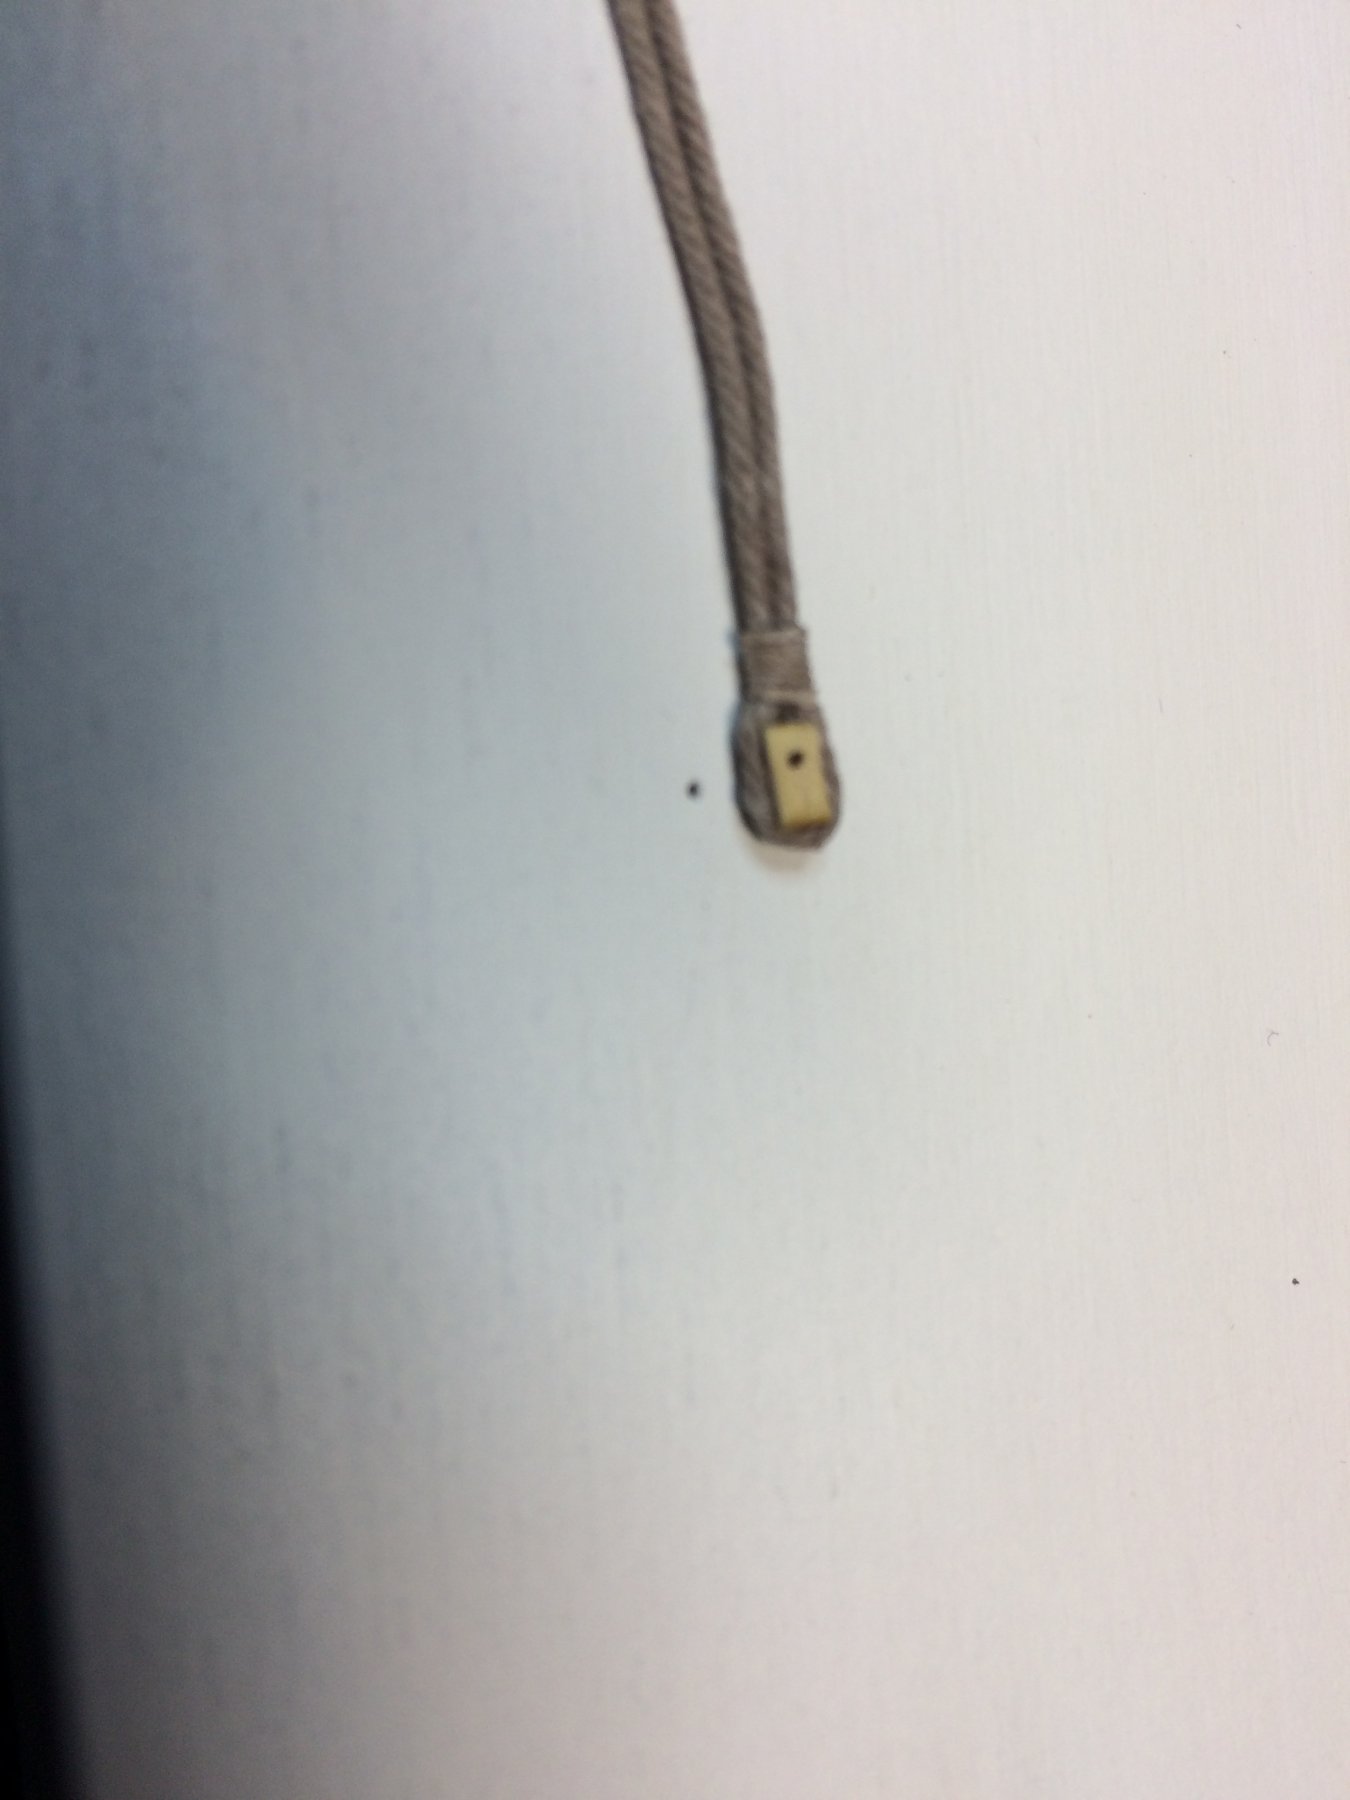
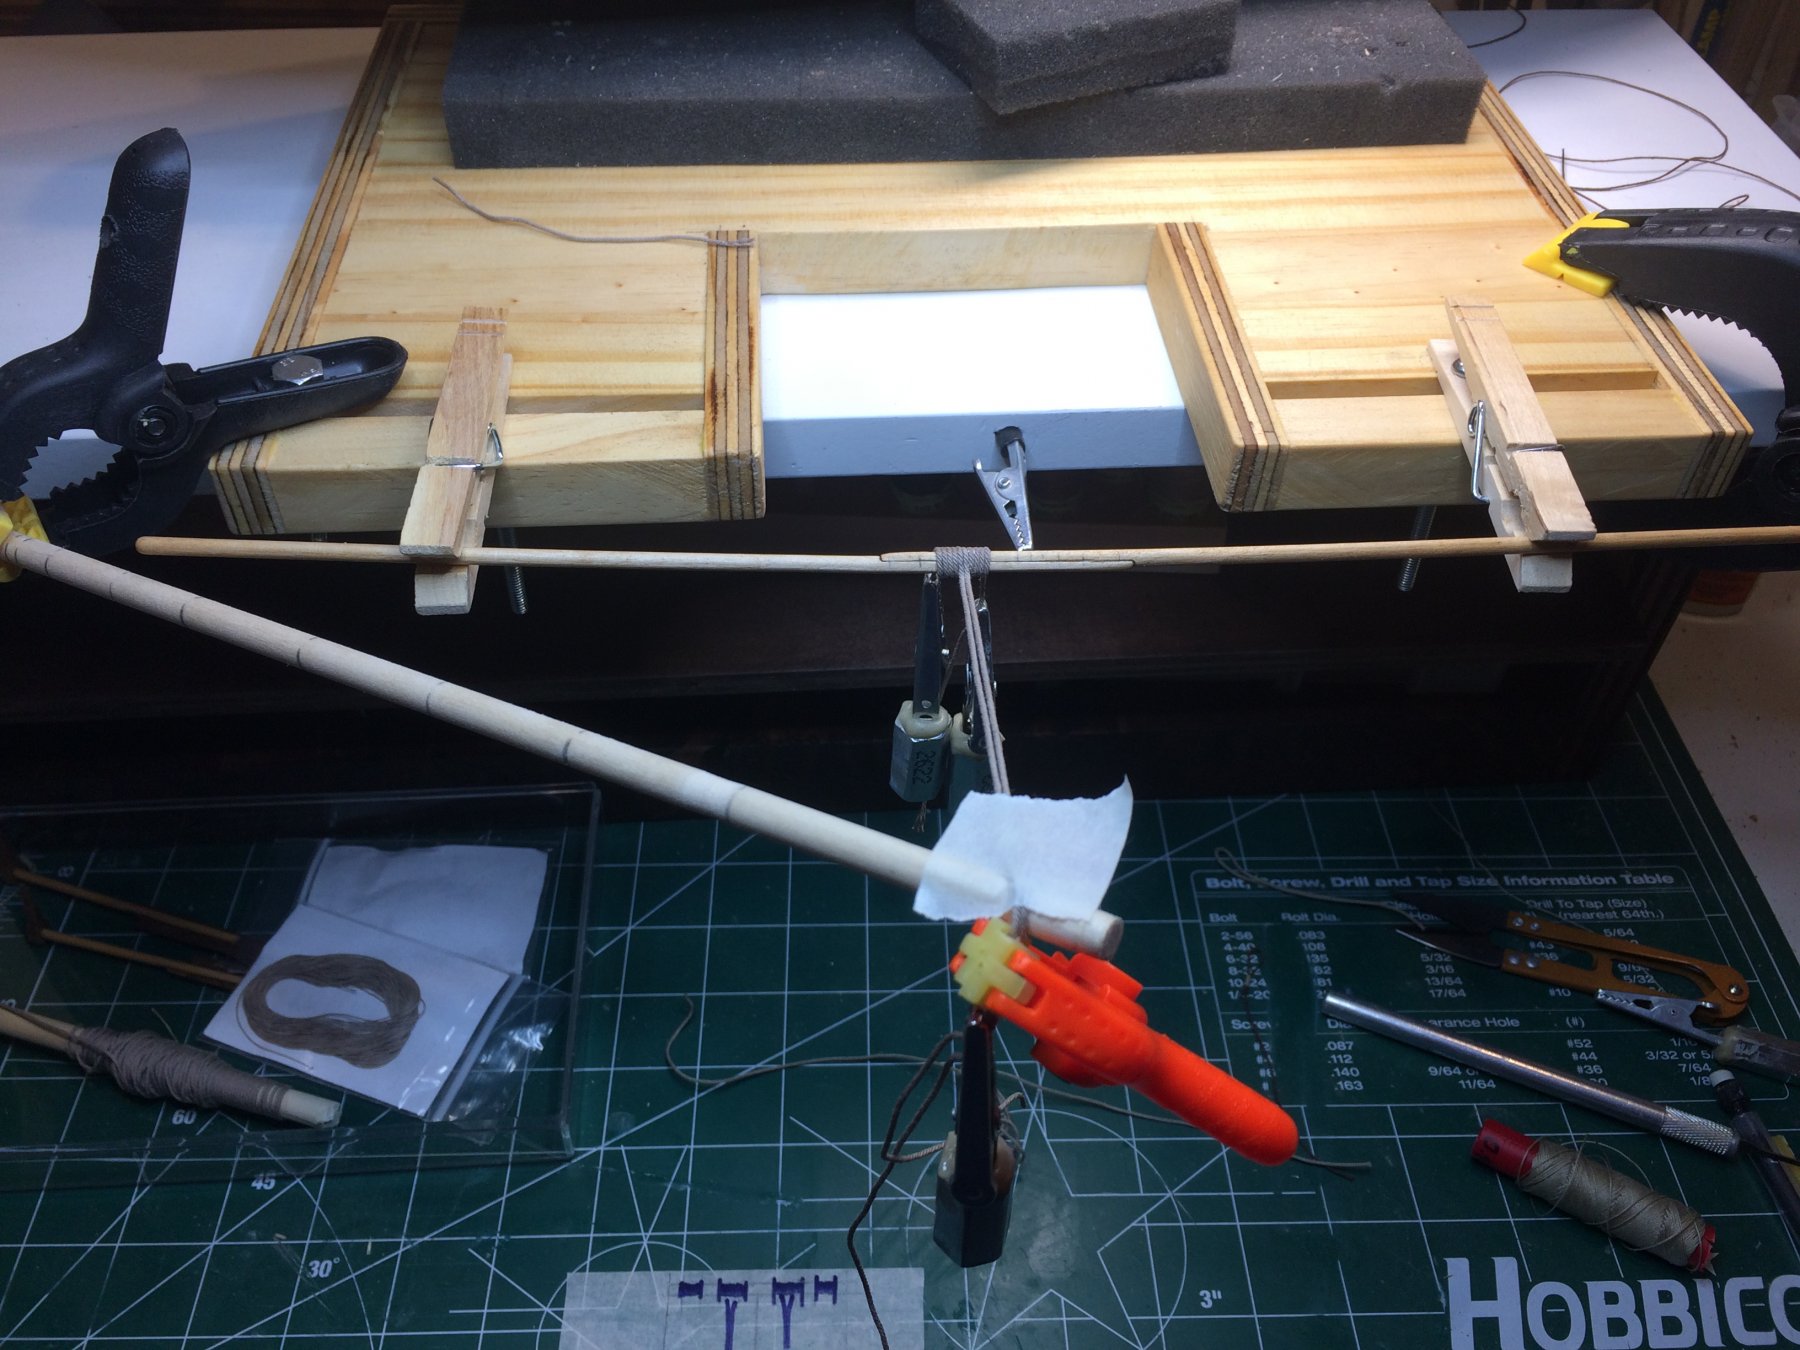
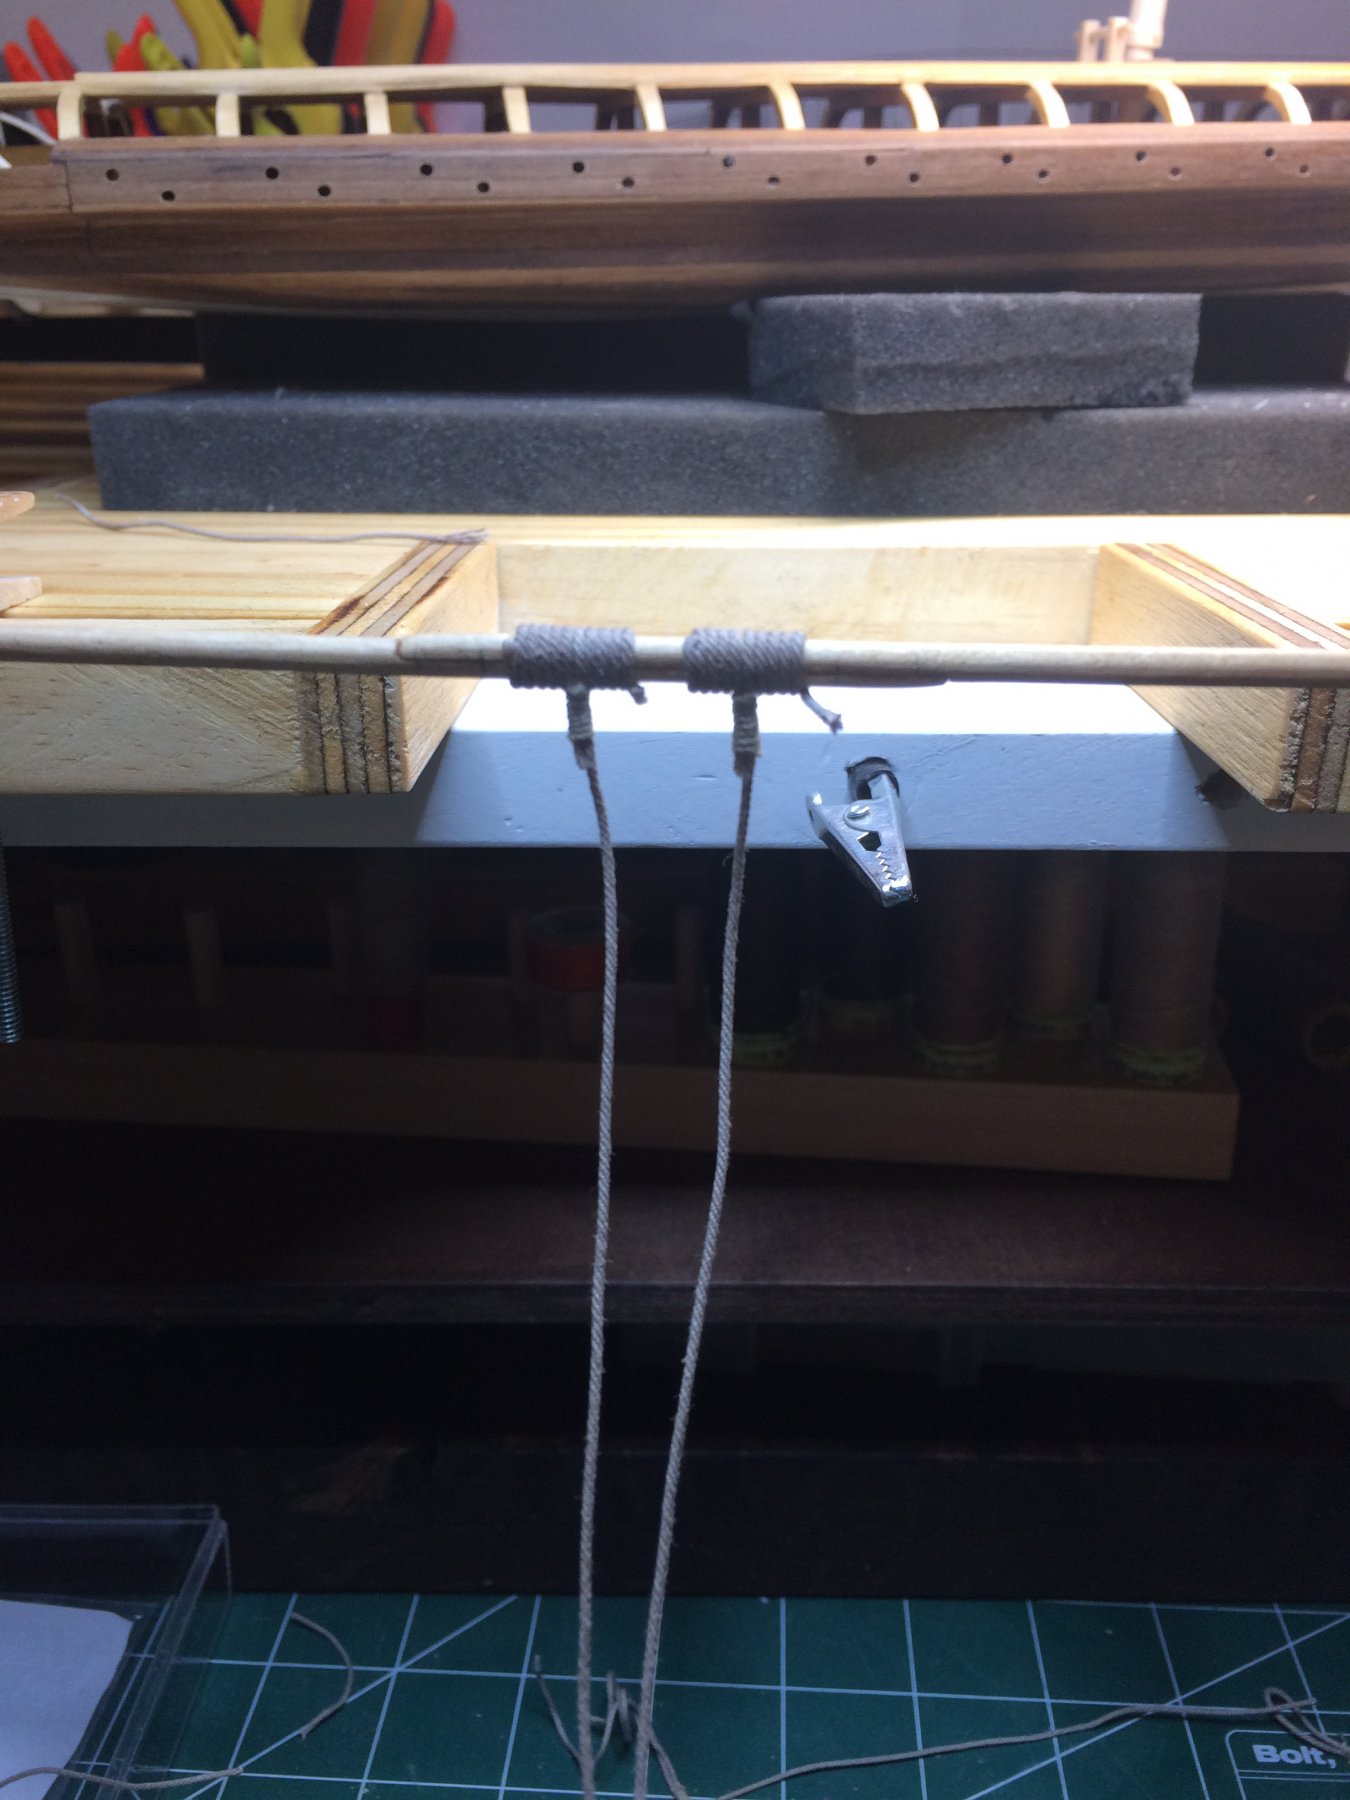
A bit of a work happened over past weekend. Was working on yard, preparing it for a sail. Needed to make a call what type of rope (threat) to use... The second from the bottom appeals the best for me, but the first one is also good.. Will see.. Back to work on yard.. Making a small grove.. Few drops of gel glue.. .. press tight and small amount of sanding make it looks like this A little bit of a work on ends, and final products is like this: So now i have to find i way to hold this yard and tight a ropes around it; not sure i can make it with only two hands. Researching some other forums threats, i come across very useful workbench extension i can easily build. So here it it; the purpose of it is to use those two clamps to hold yard or sail when you need to work on them. While i was in build mode, i completed a small table that will be solely used to work on ridging, sails, masts, and other roping activities. I will show more about this when times come; again, cannot use credit for this small workbench, it is borrowed from one of the forums on the internet. Happy modeling.
.thumb.jpeg.2c95d1c891590da1109543fcc69a89da.jpeg)
.thumb.jpeg.c030e1d9fdce6bbf50a4a21698686f49.jpeg)
.thumb.jpeg.3ab8b676a2efb41079ee58562ea337a0.jpeg)

- 122 replies
-
- 3
-
-
- greek bireme
- scale-1/35
- (and 2 more)
-
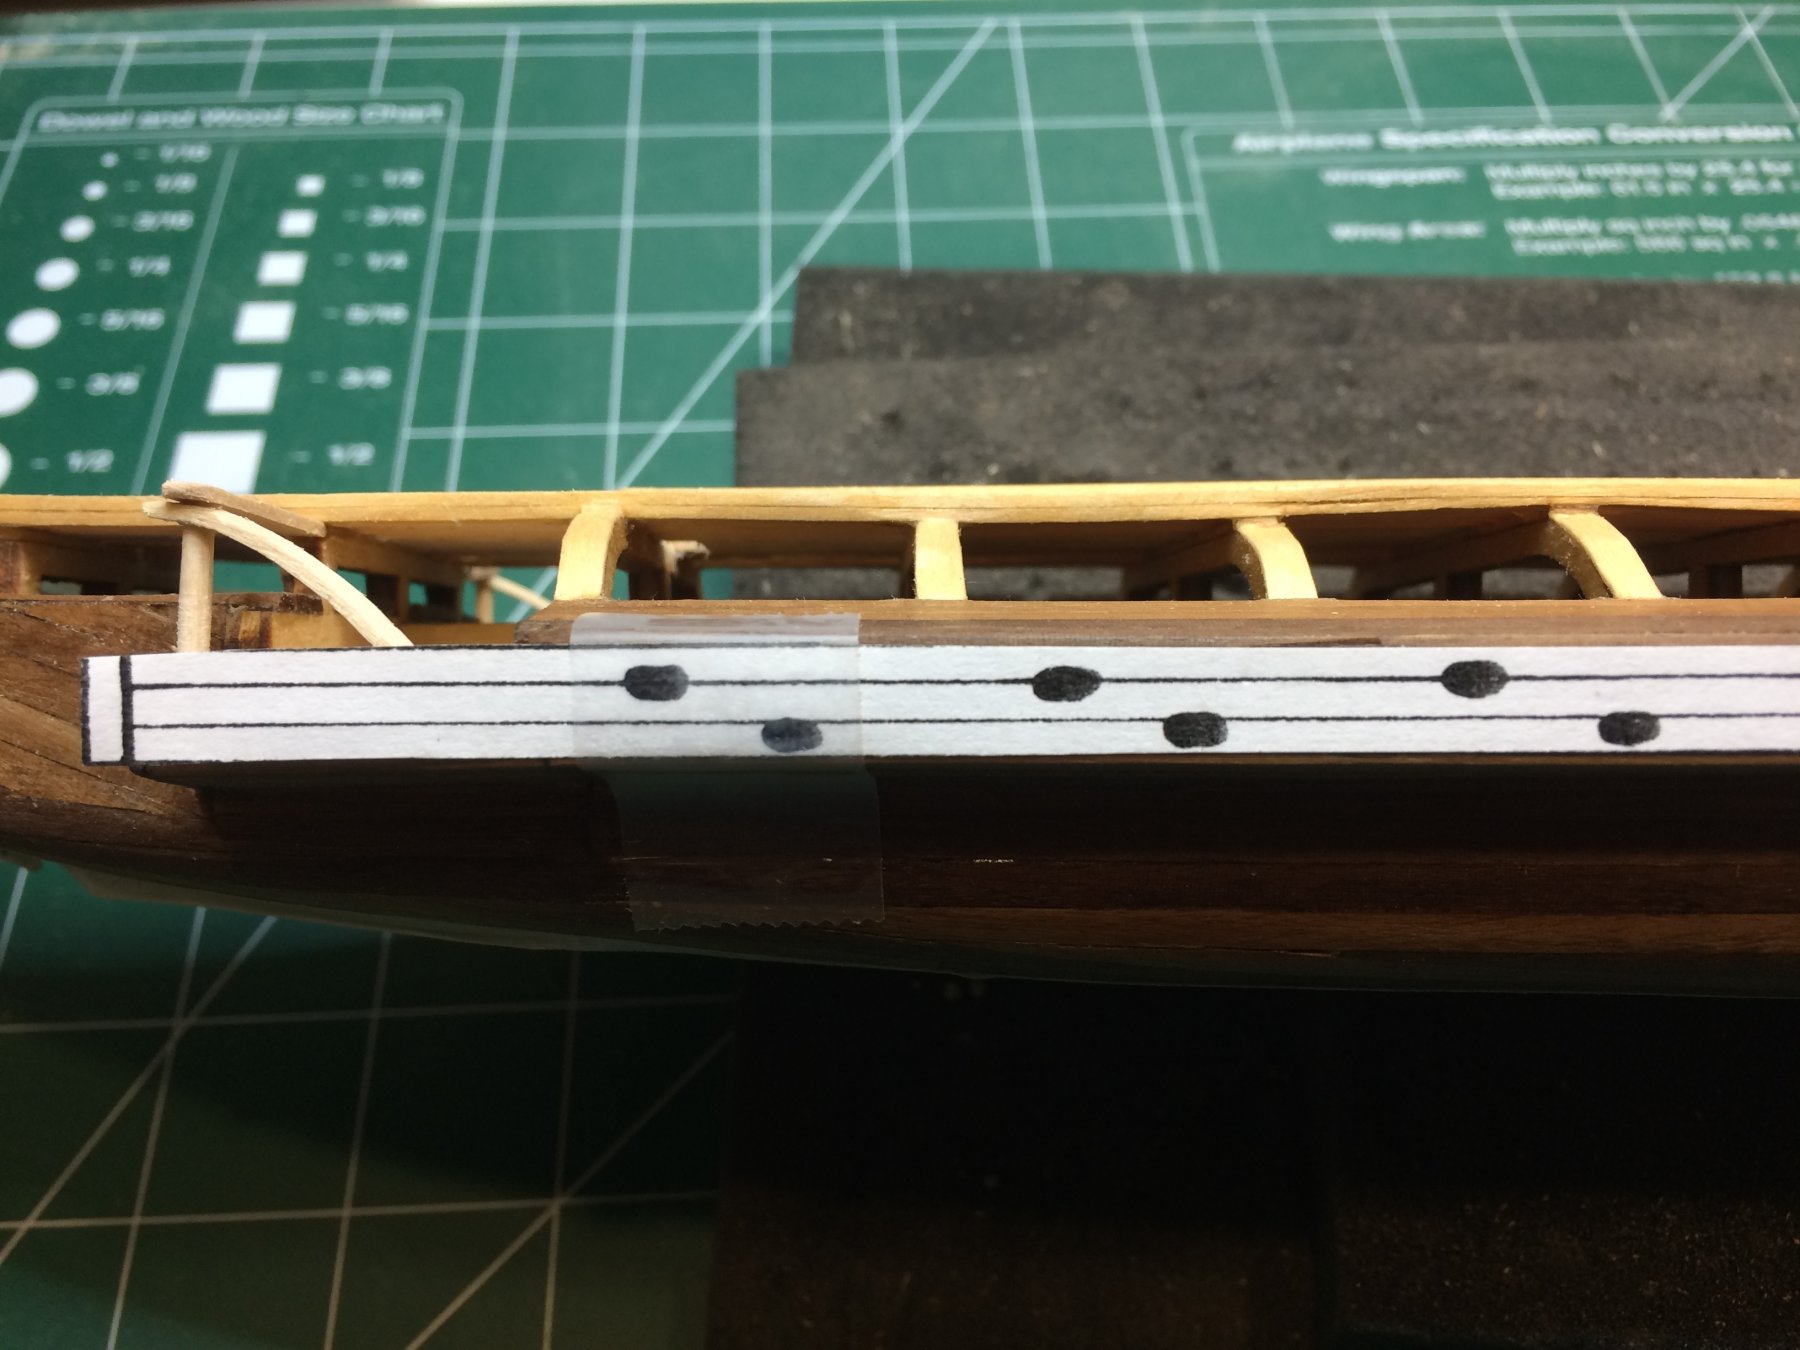
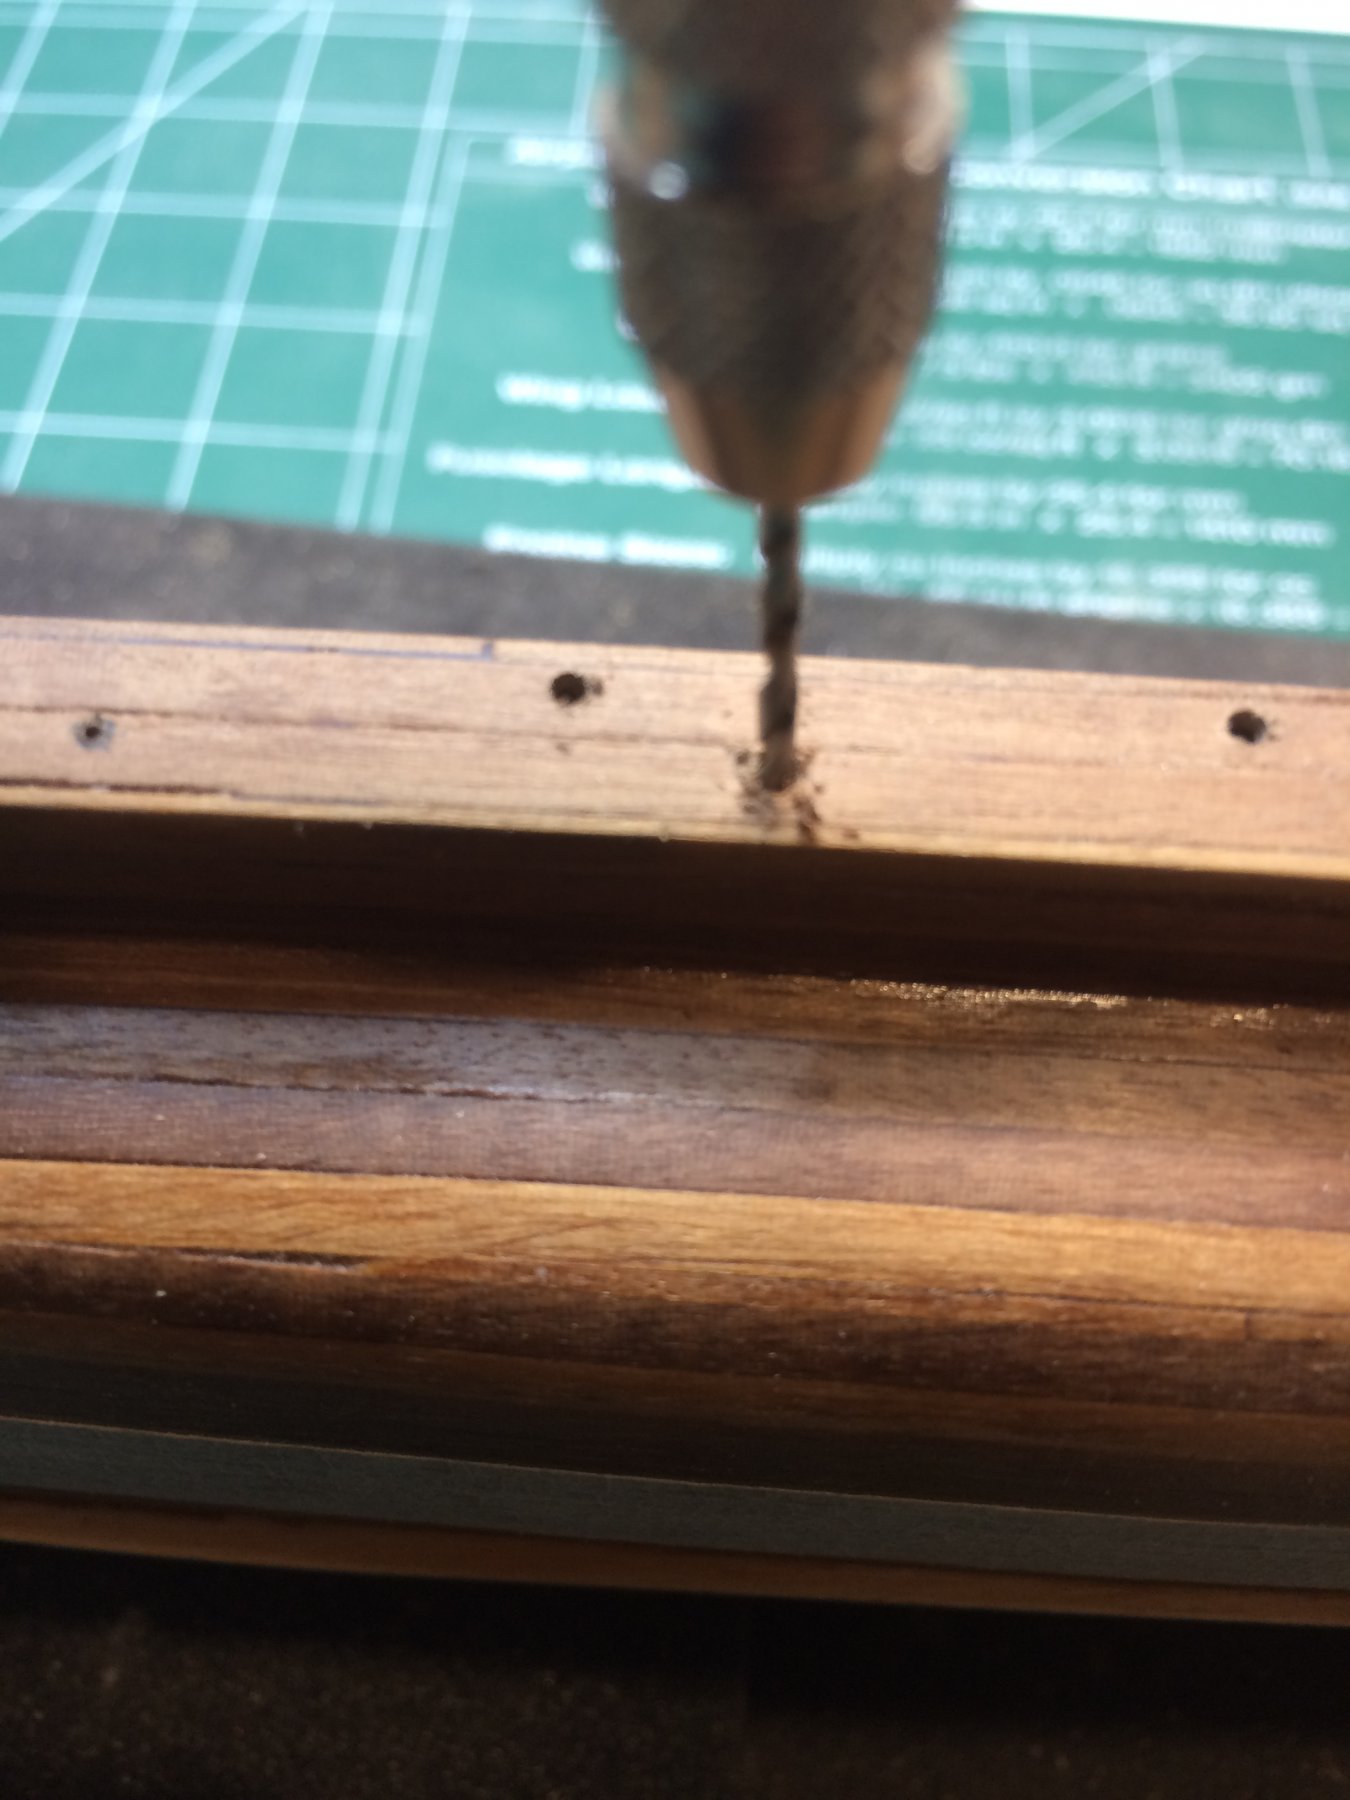
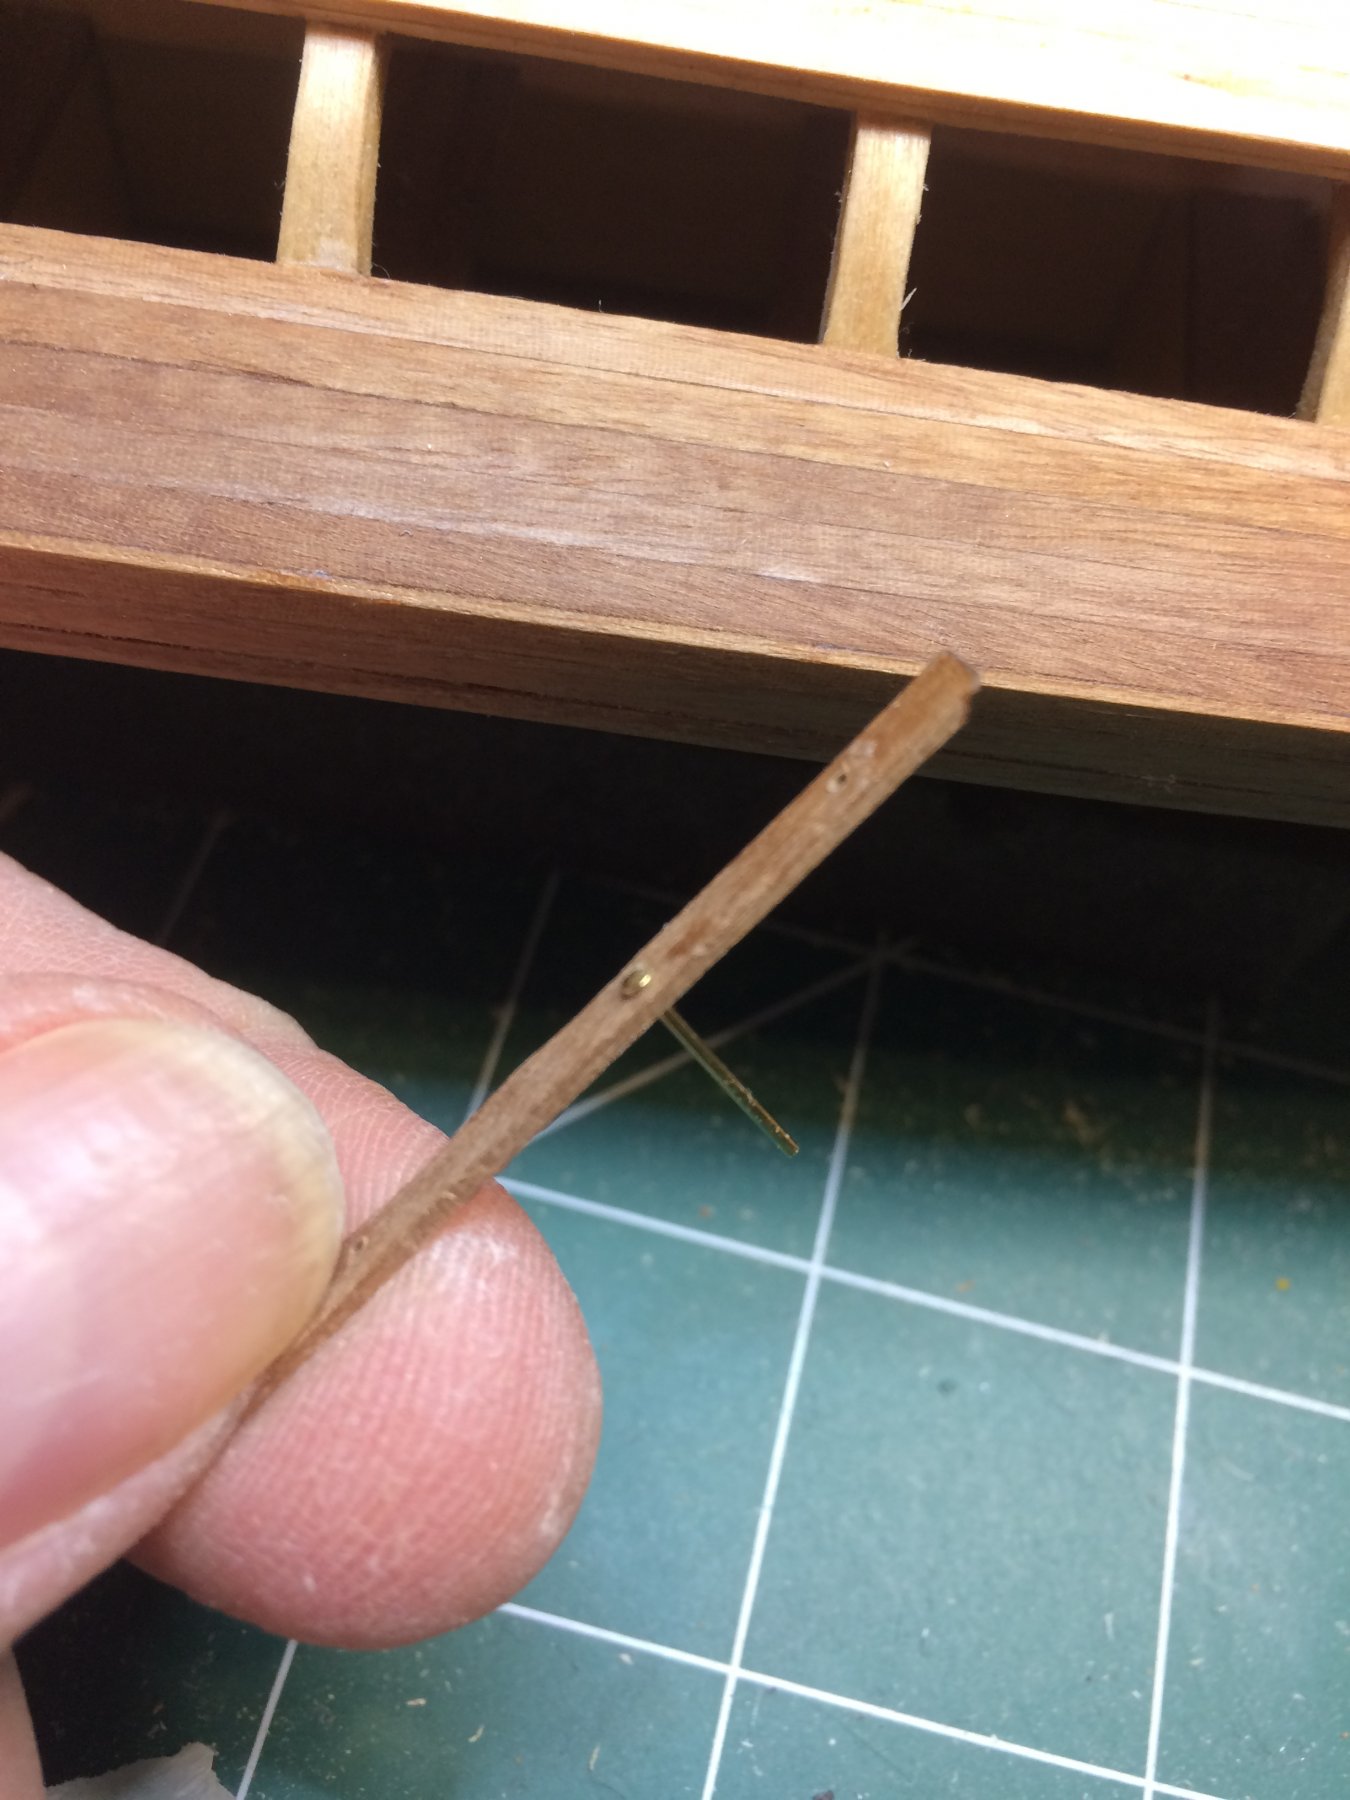
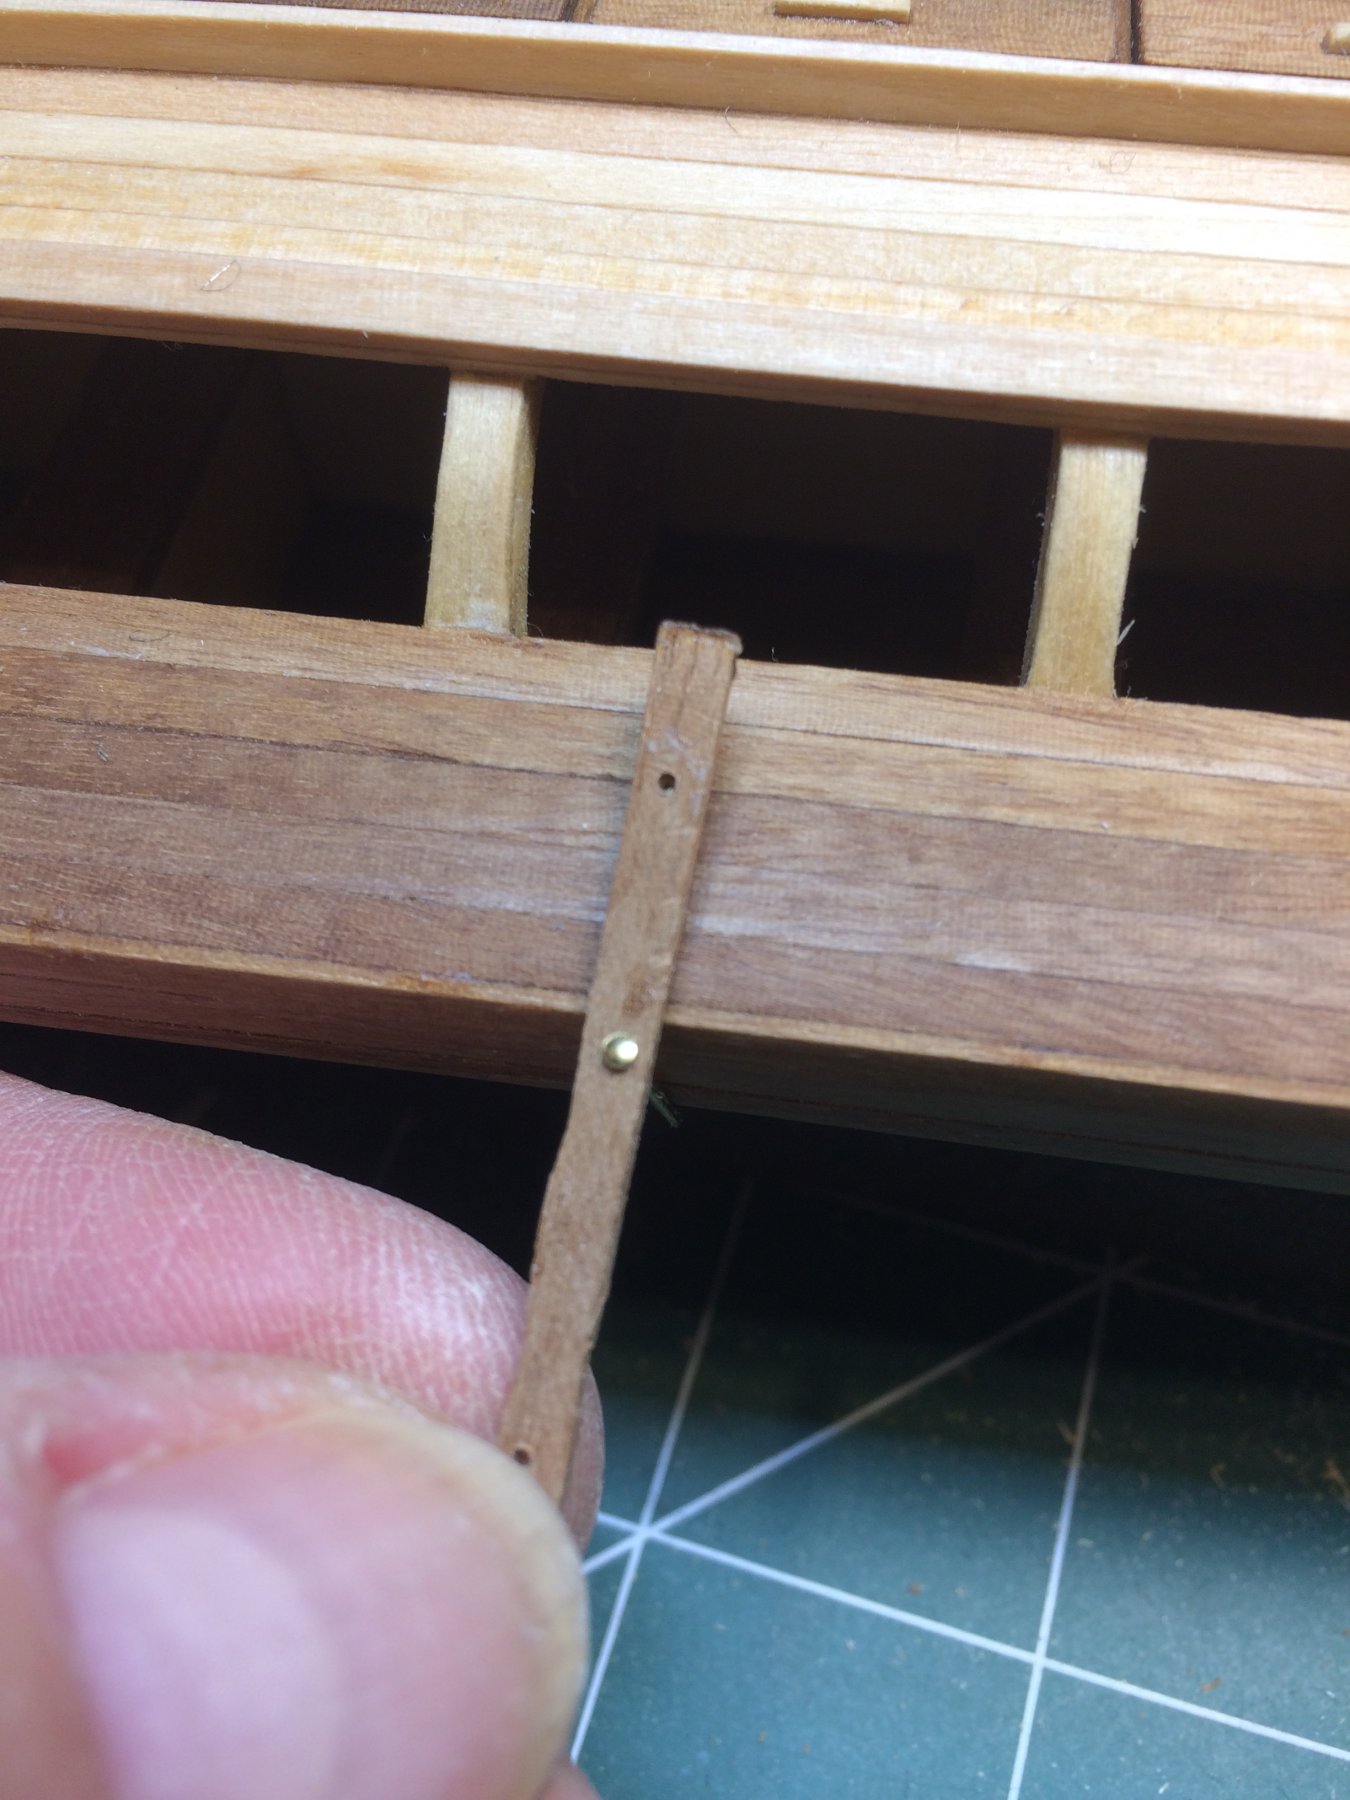
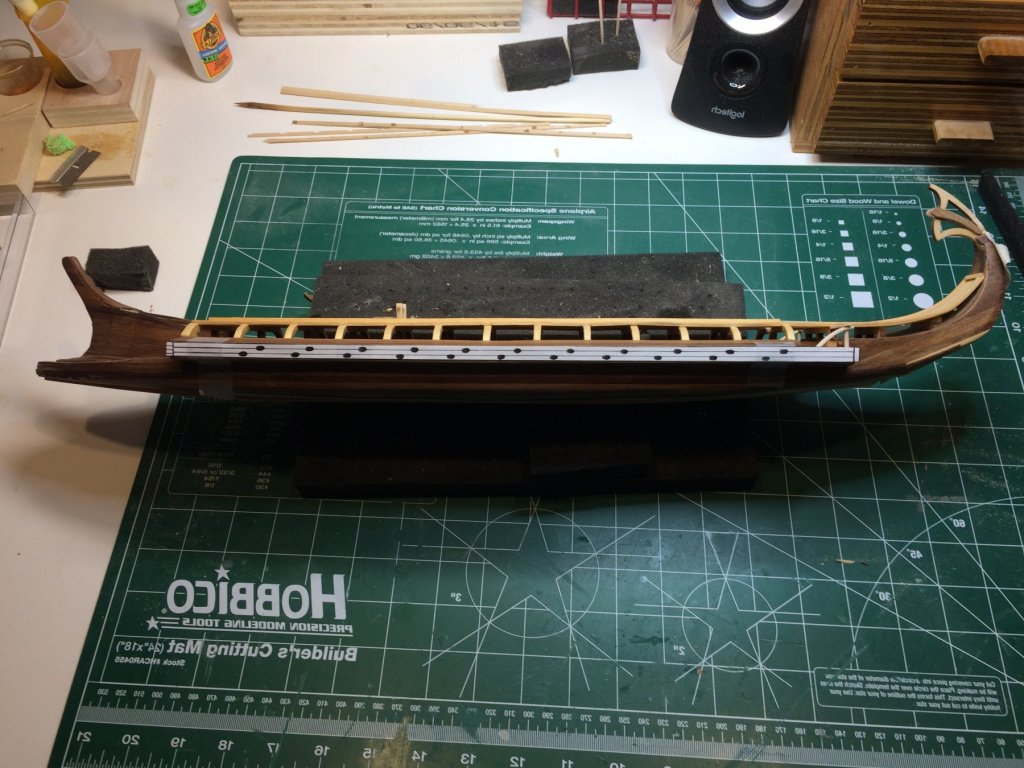
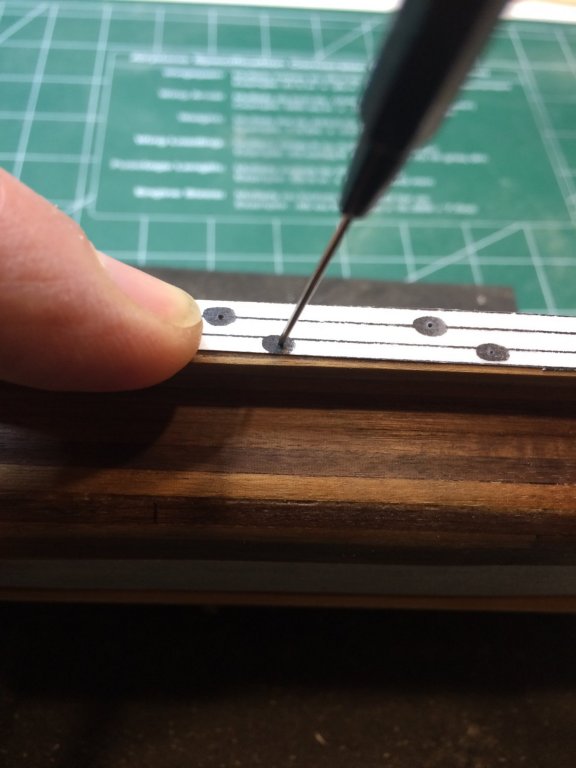
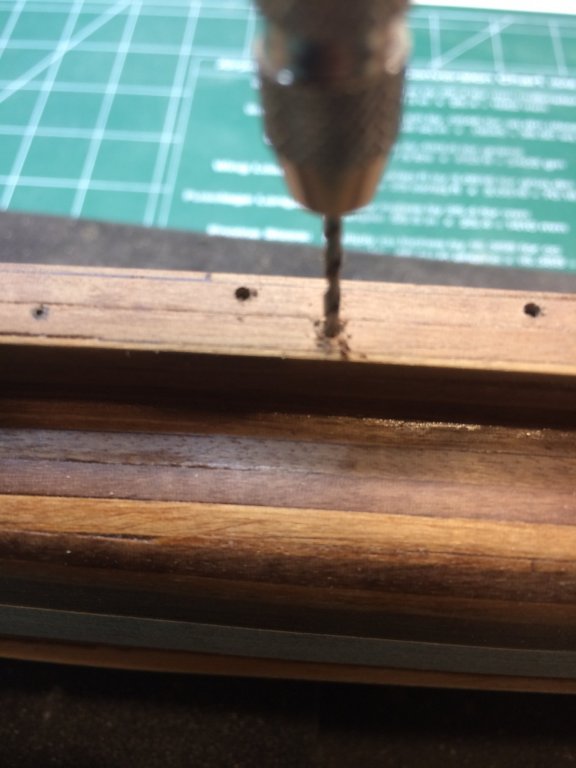
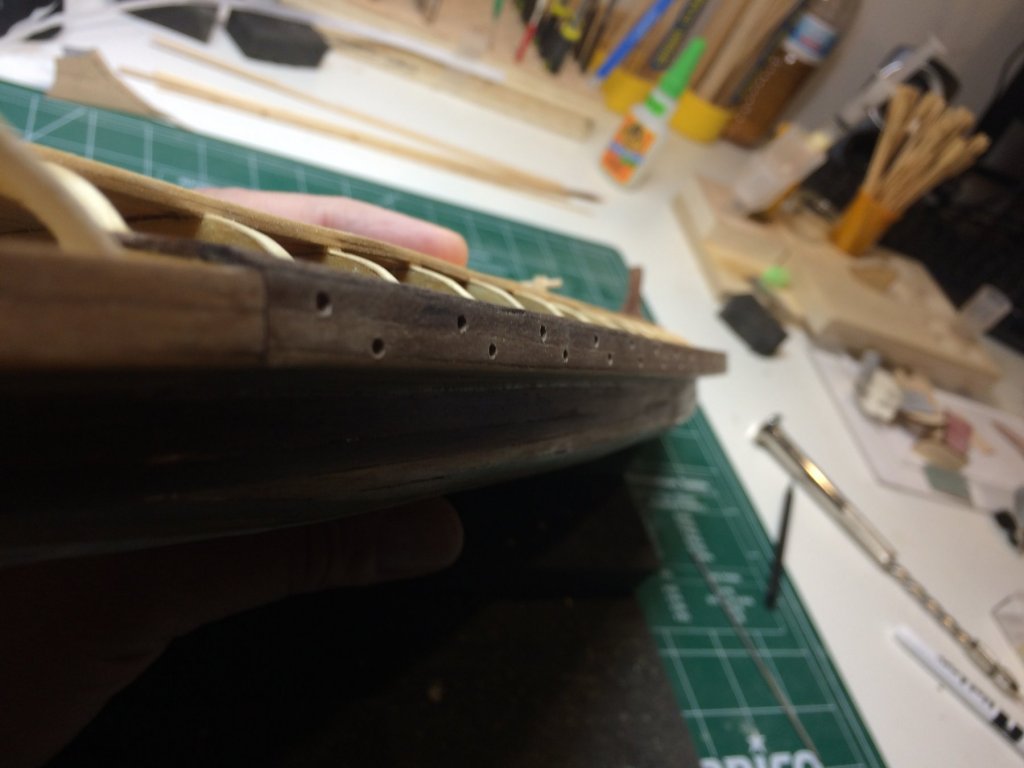
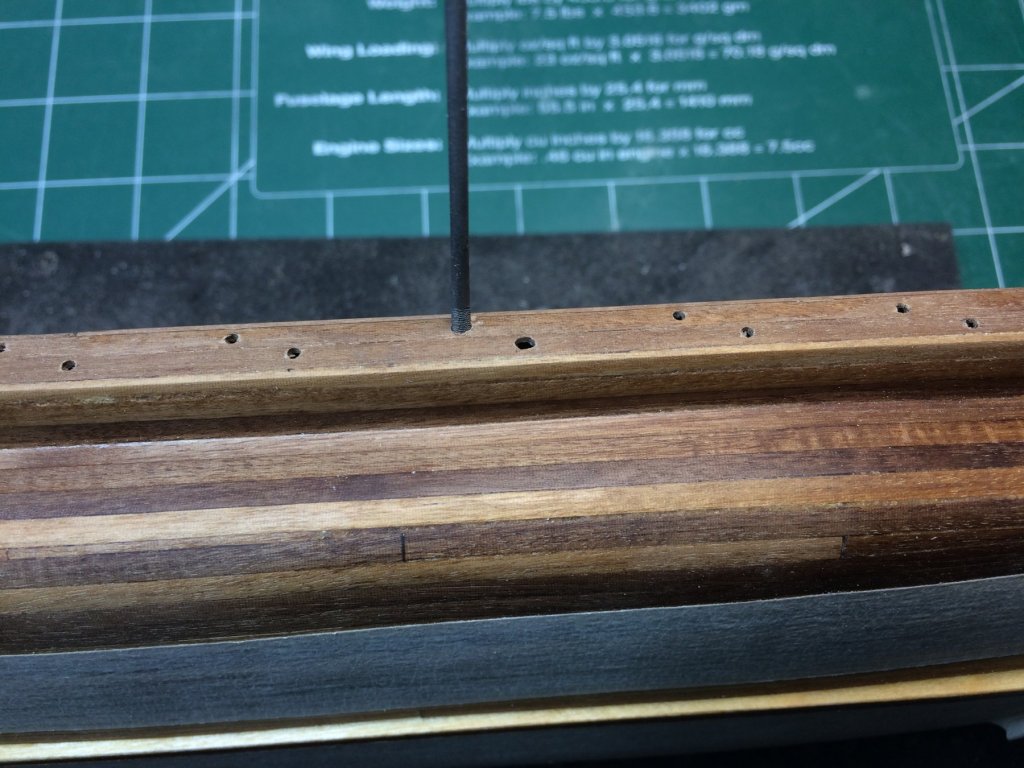
It is time to drill some holes for oars. First i made a copy of a plan, cut it and mark it on the hull. Make the marks for a drilling... It is time to do some drilling... Once the holes are drilled, i used needle file to reshape the hole. It supposed to be in kind of a egg shape as the oar movement is in front-back direction. This process is a bit repetitive but it was completed in a few hours, no problems there.. Holes completed. Then a test run of setting up oars was done, just to feed curiosity of how it will look at the end. Tomorrow i will start working on ridding but need to visit local shop to get few roles of good cotton threads. The one that comes with the kit is a bit too shiny and too polyester-ish for my taste.. Happy modeling..


- 122 replies
-
- 4
-
-
- greek bireme
- scale-1/35
- (and 2 more)
-
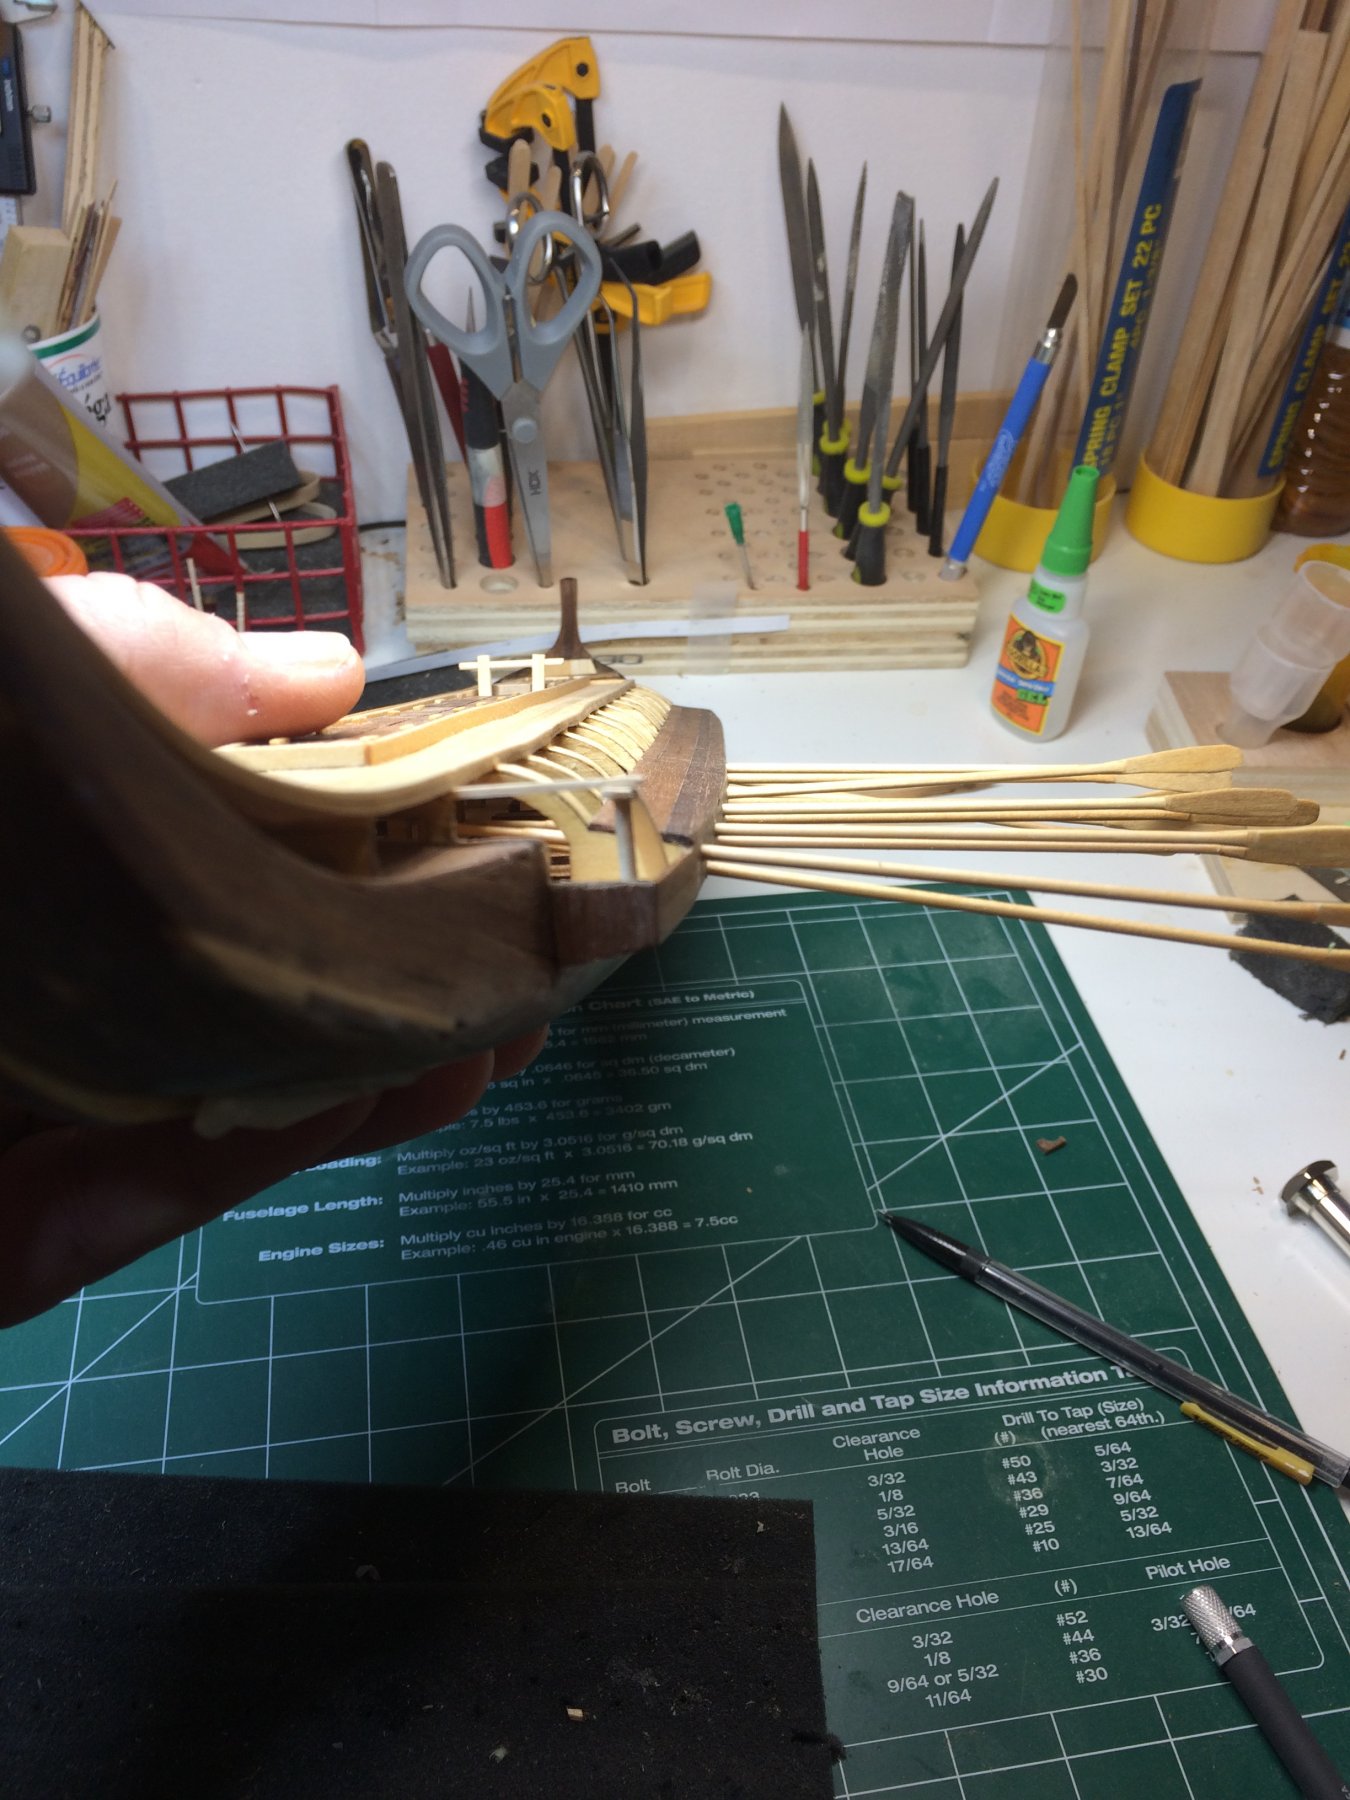
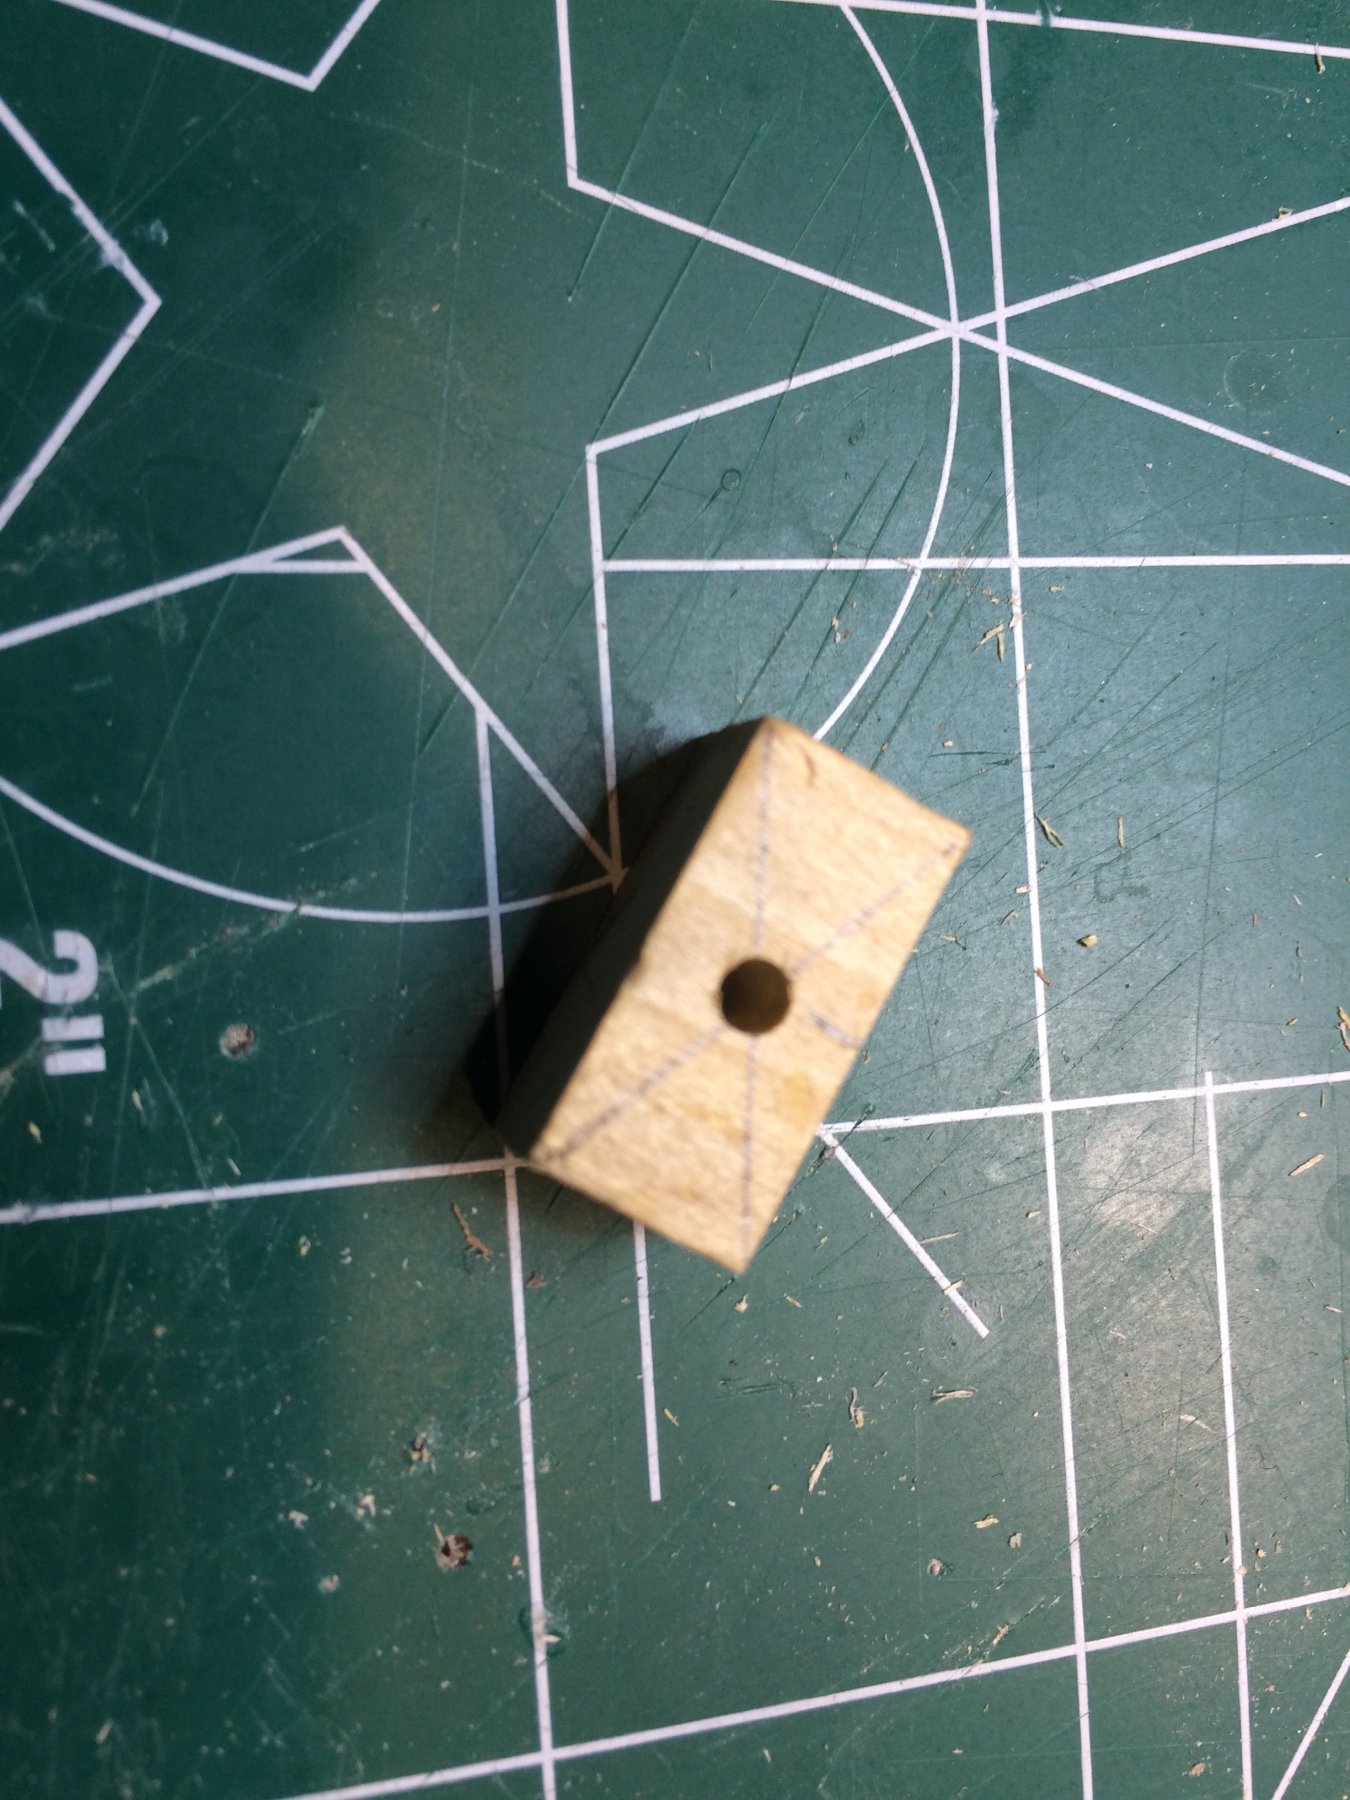
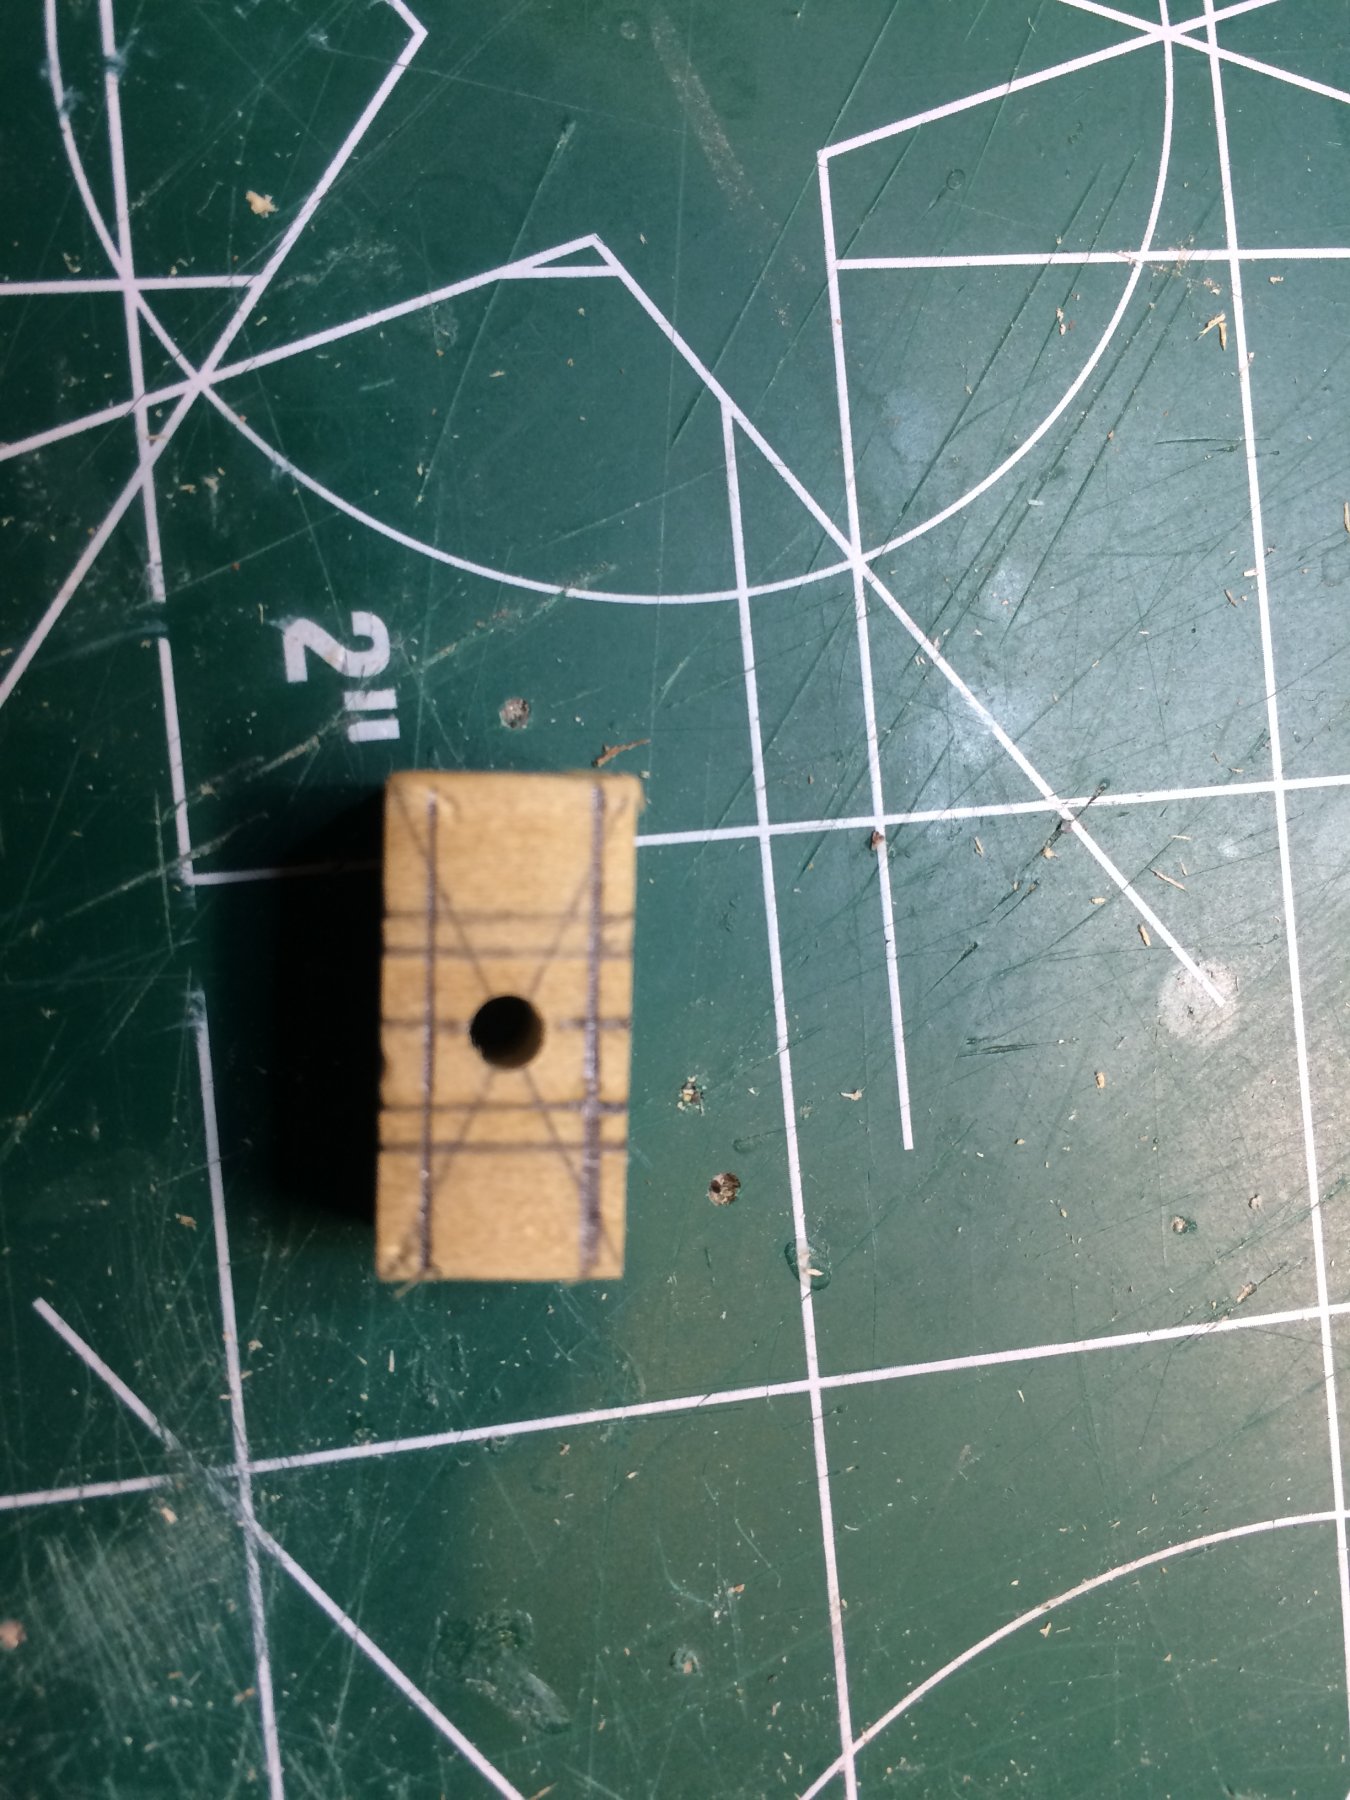
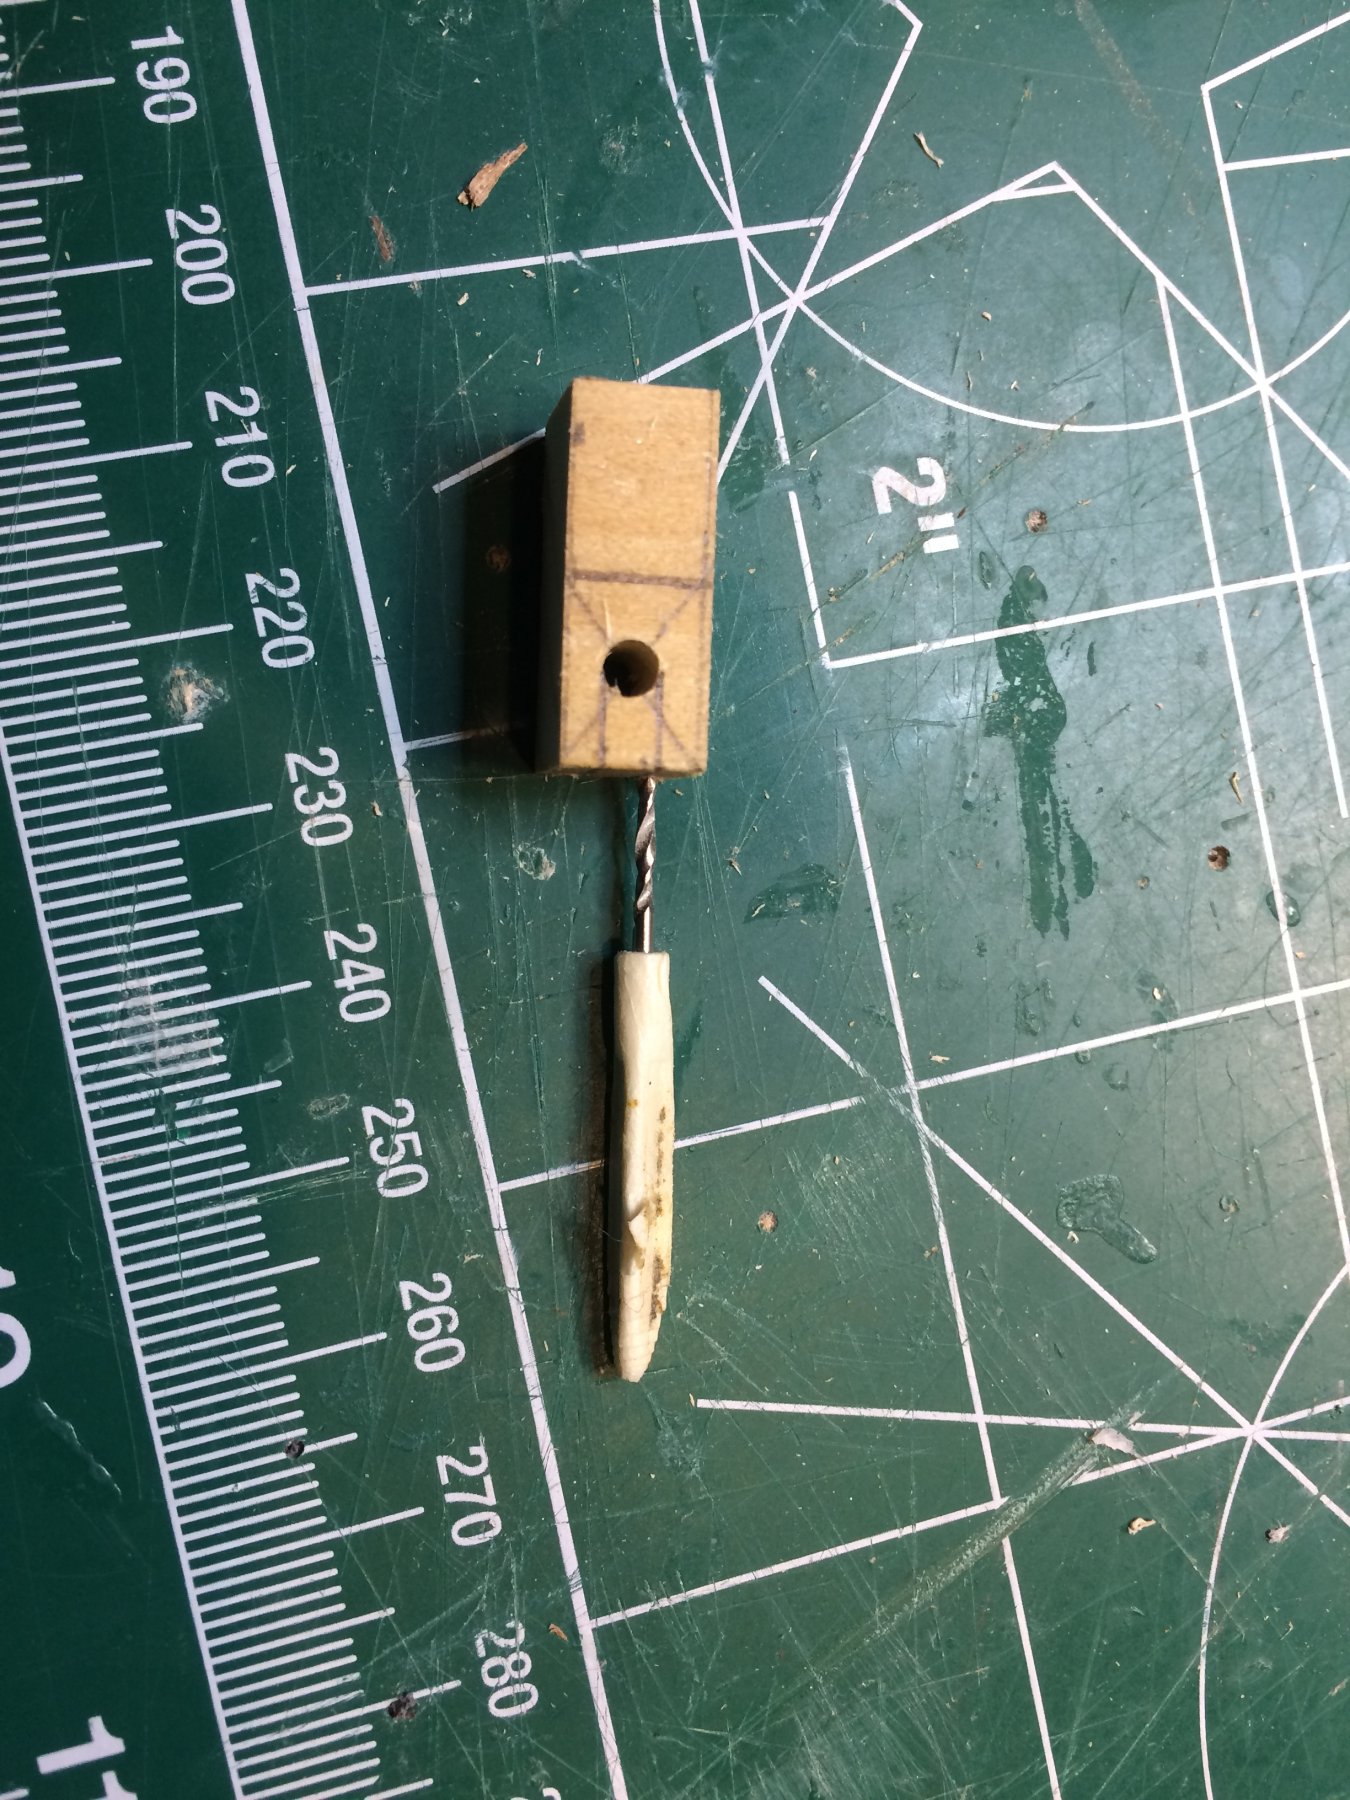
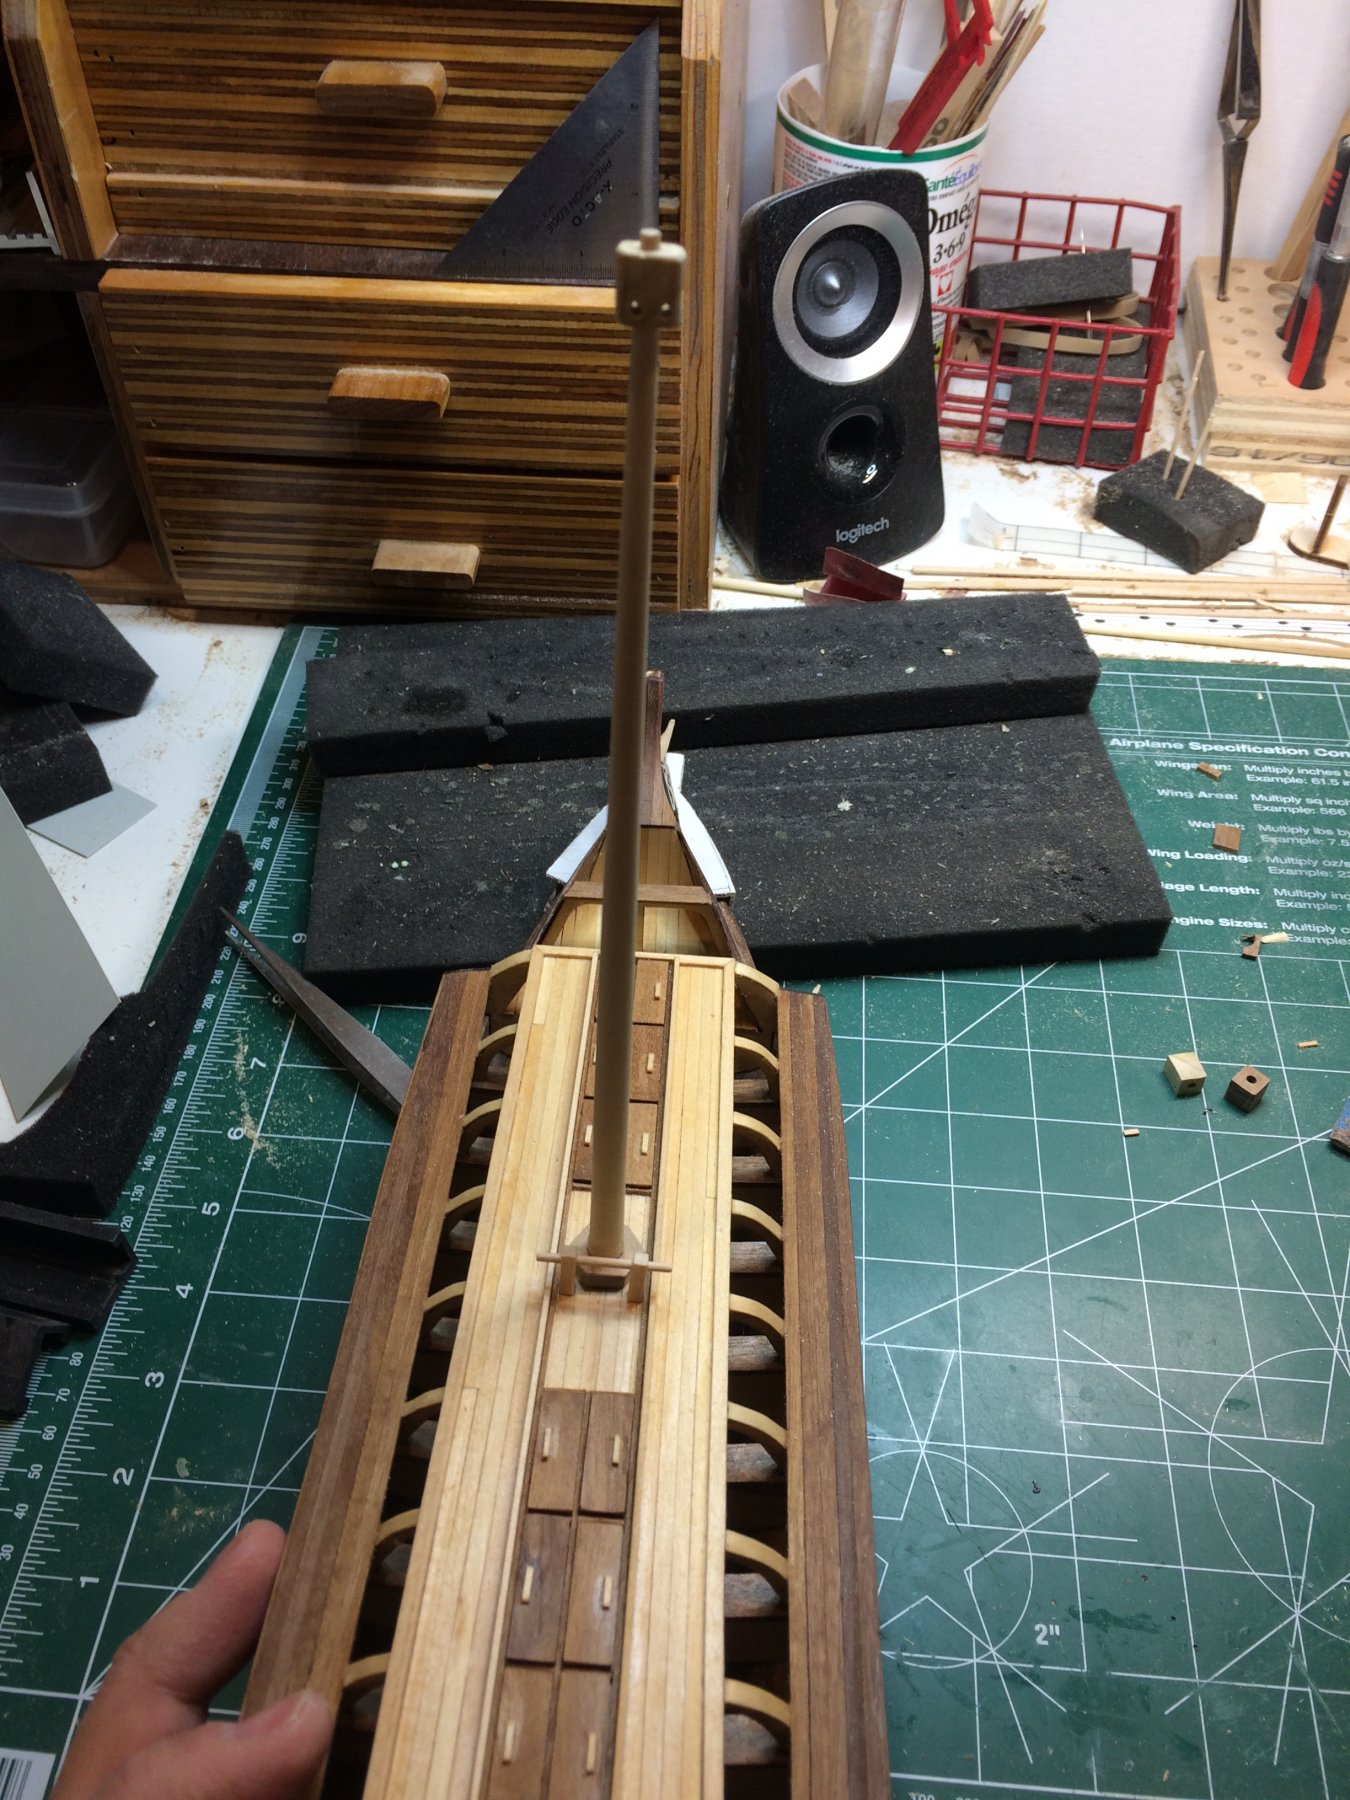
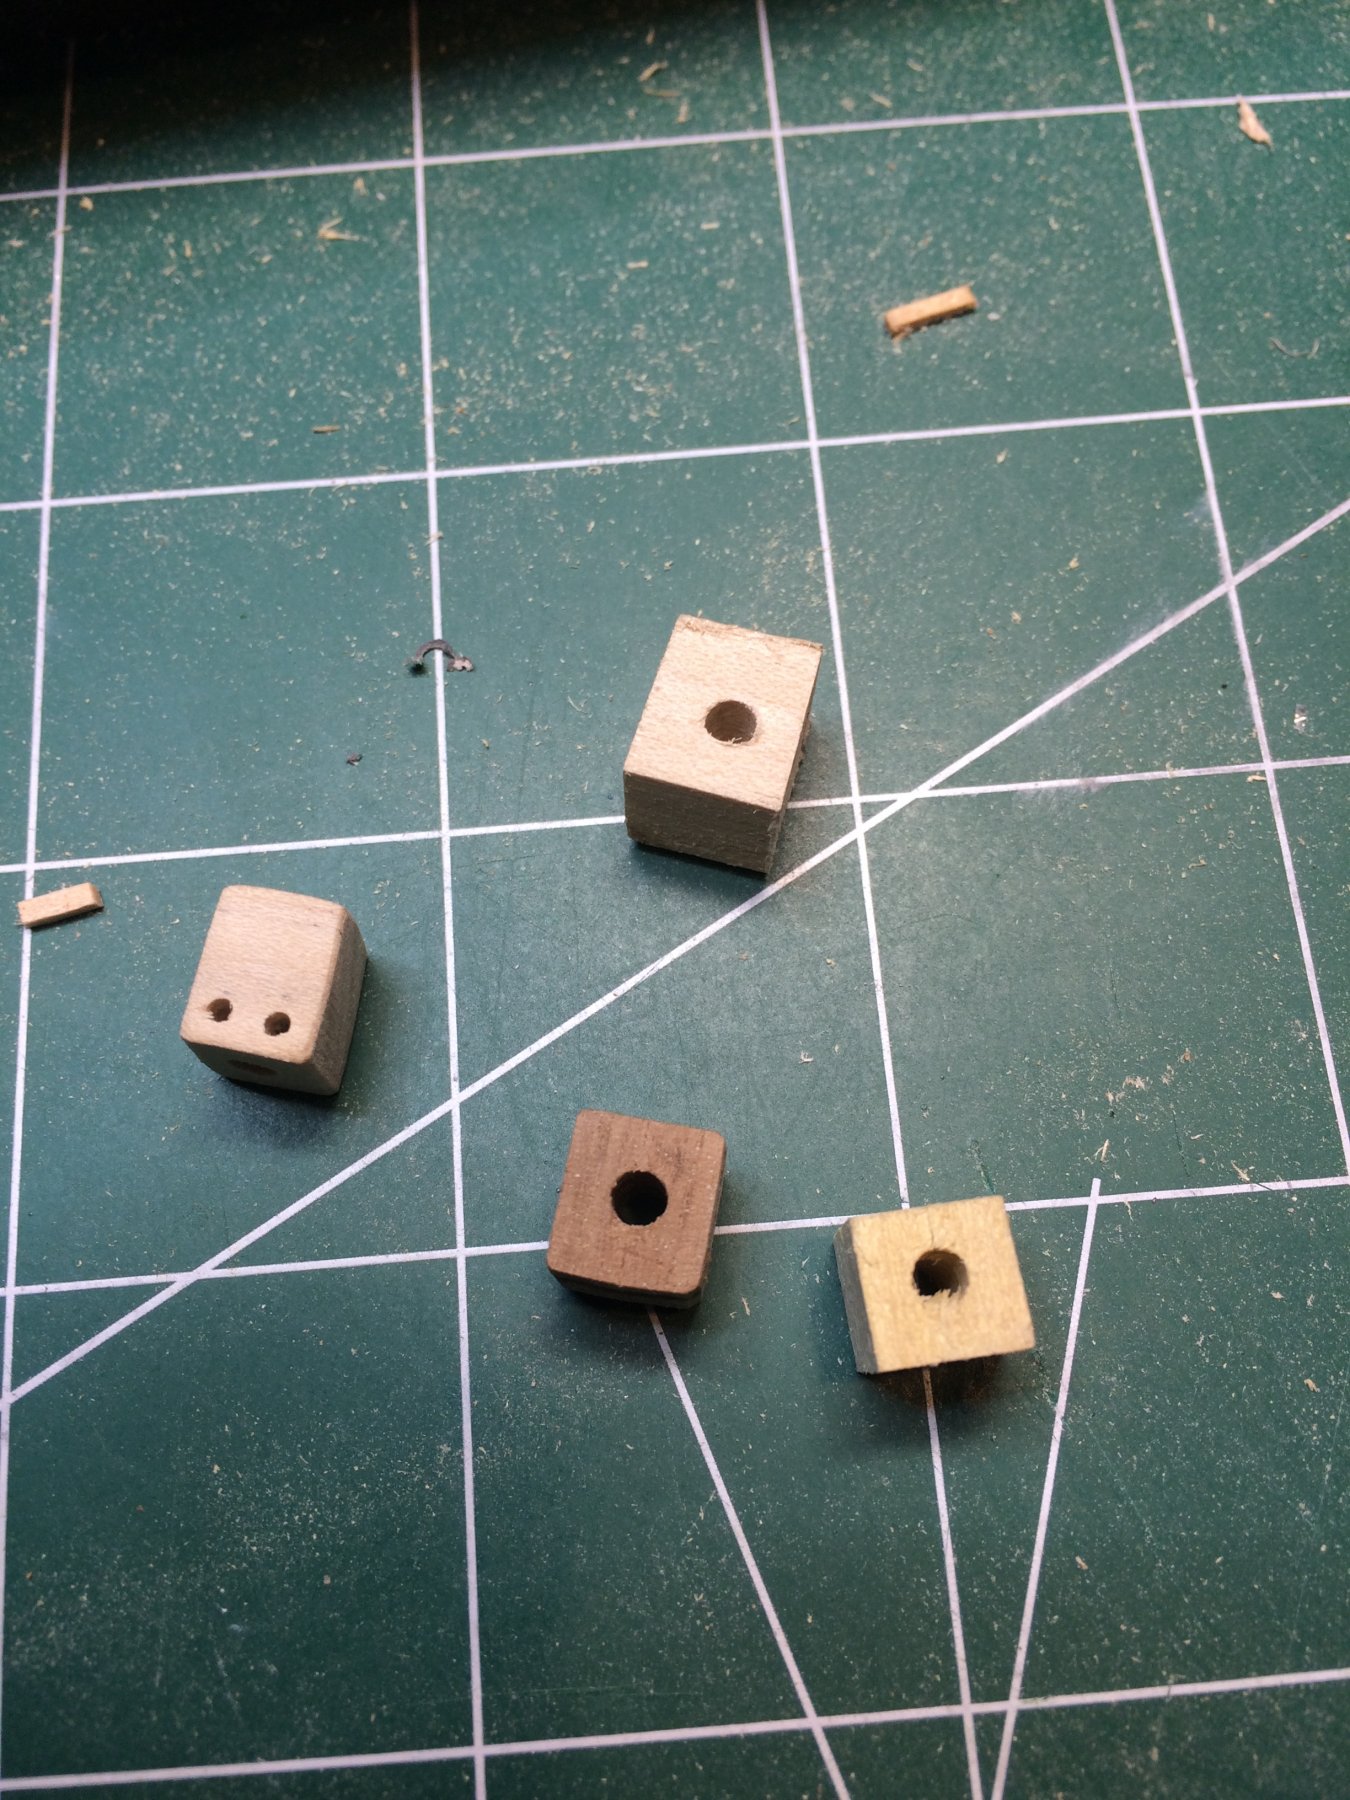
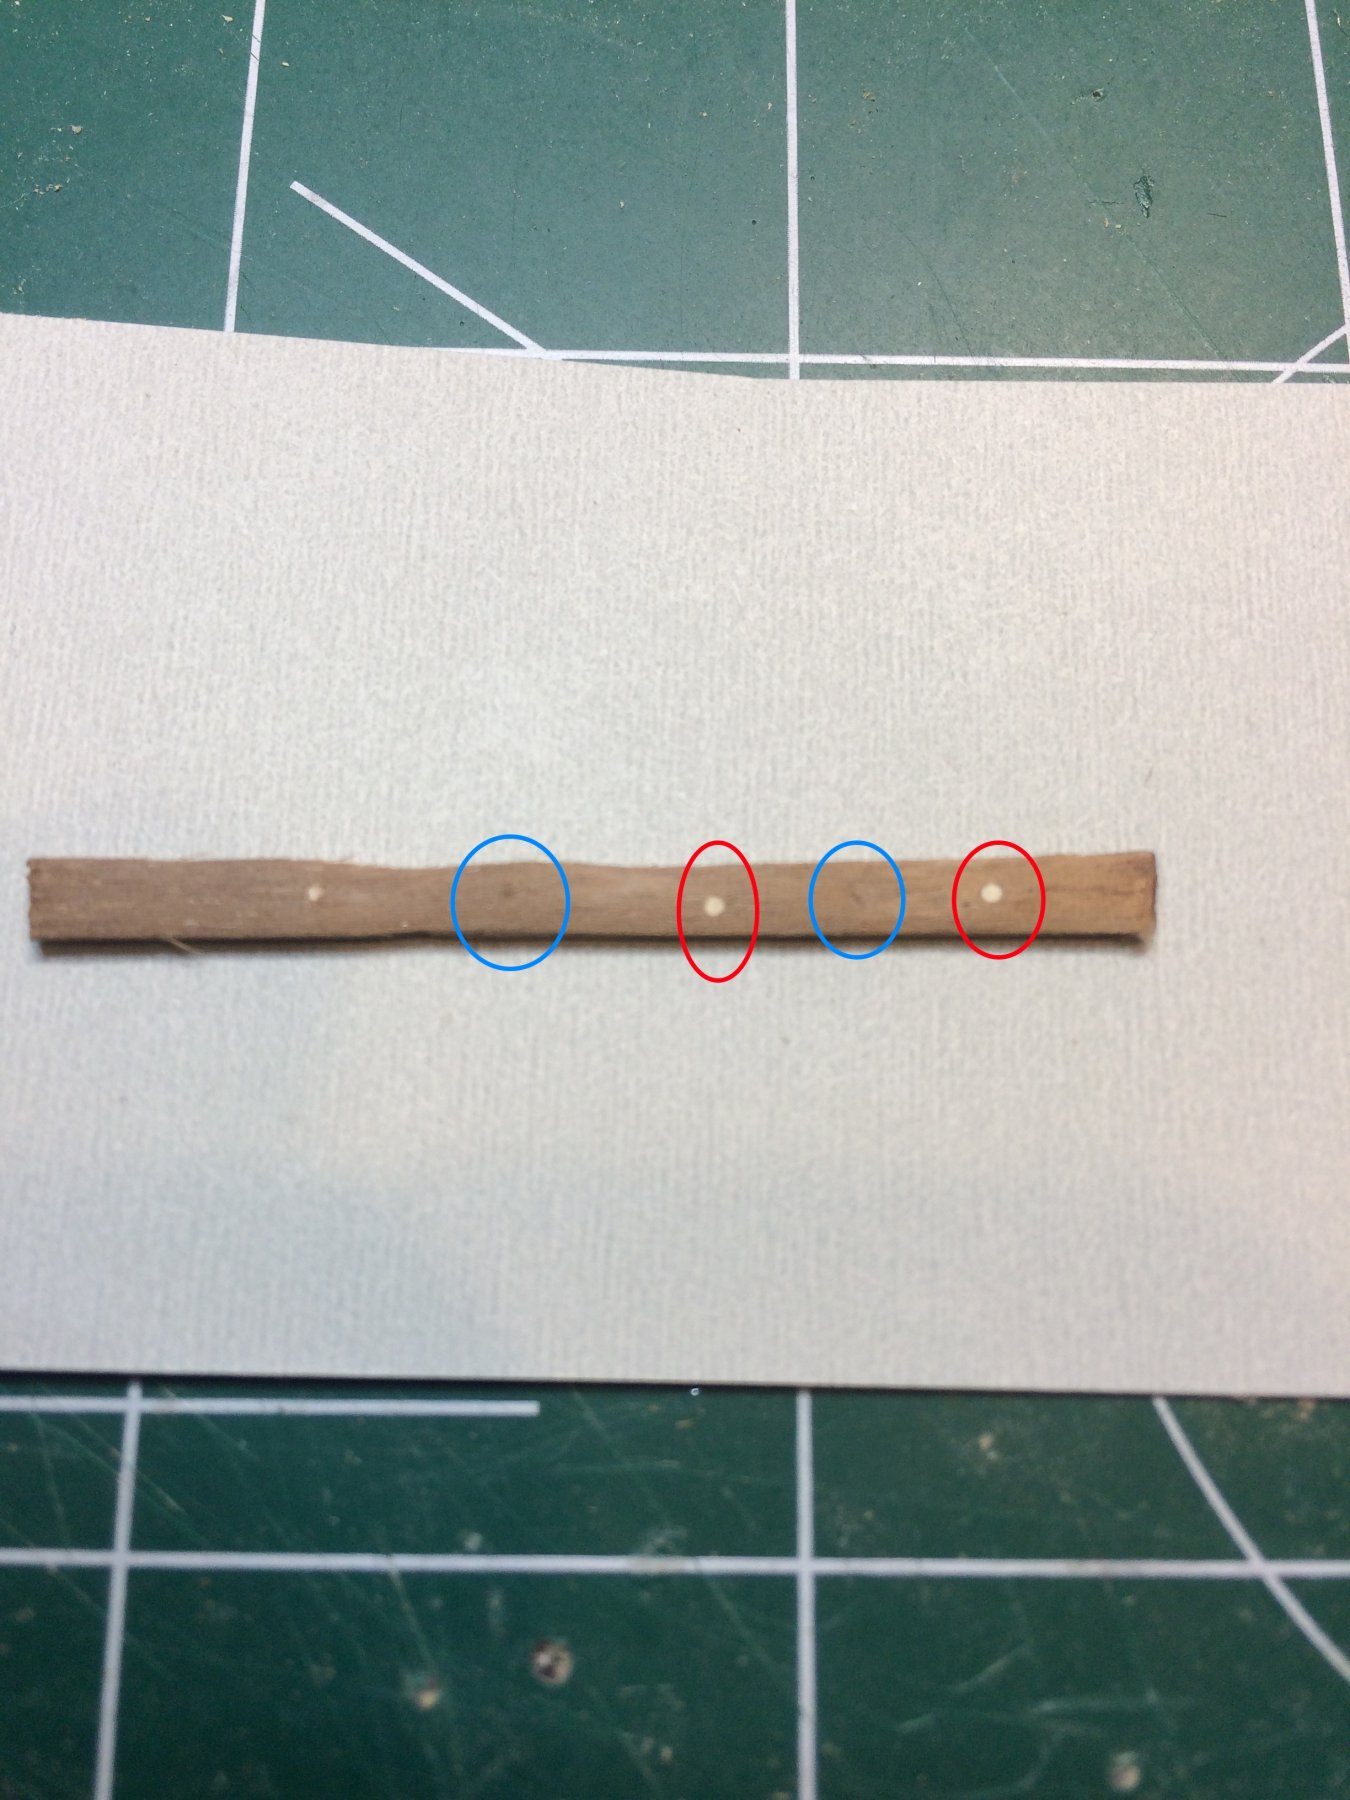
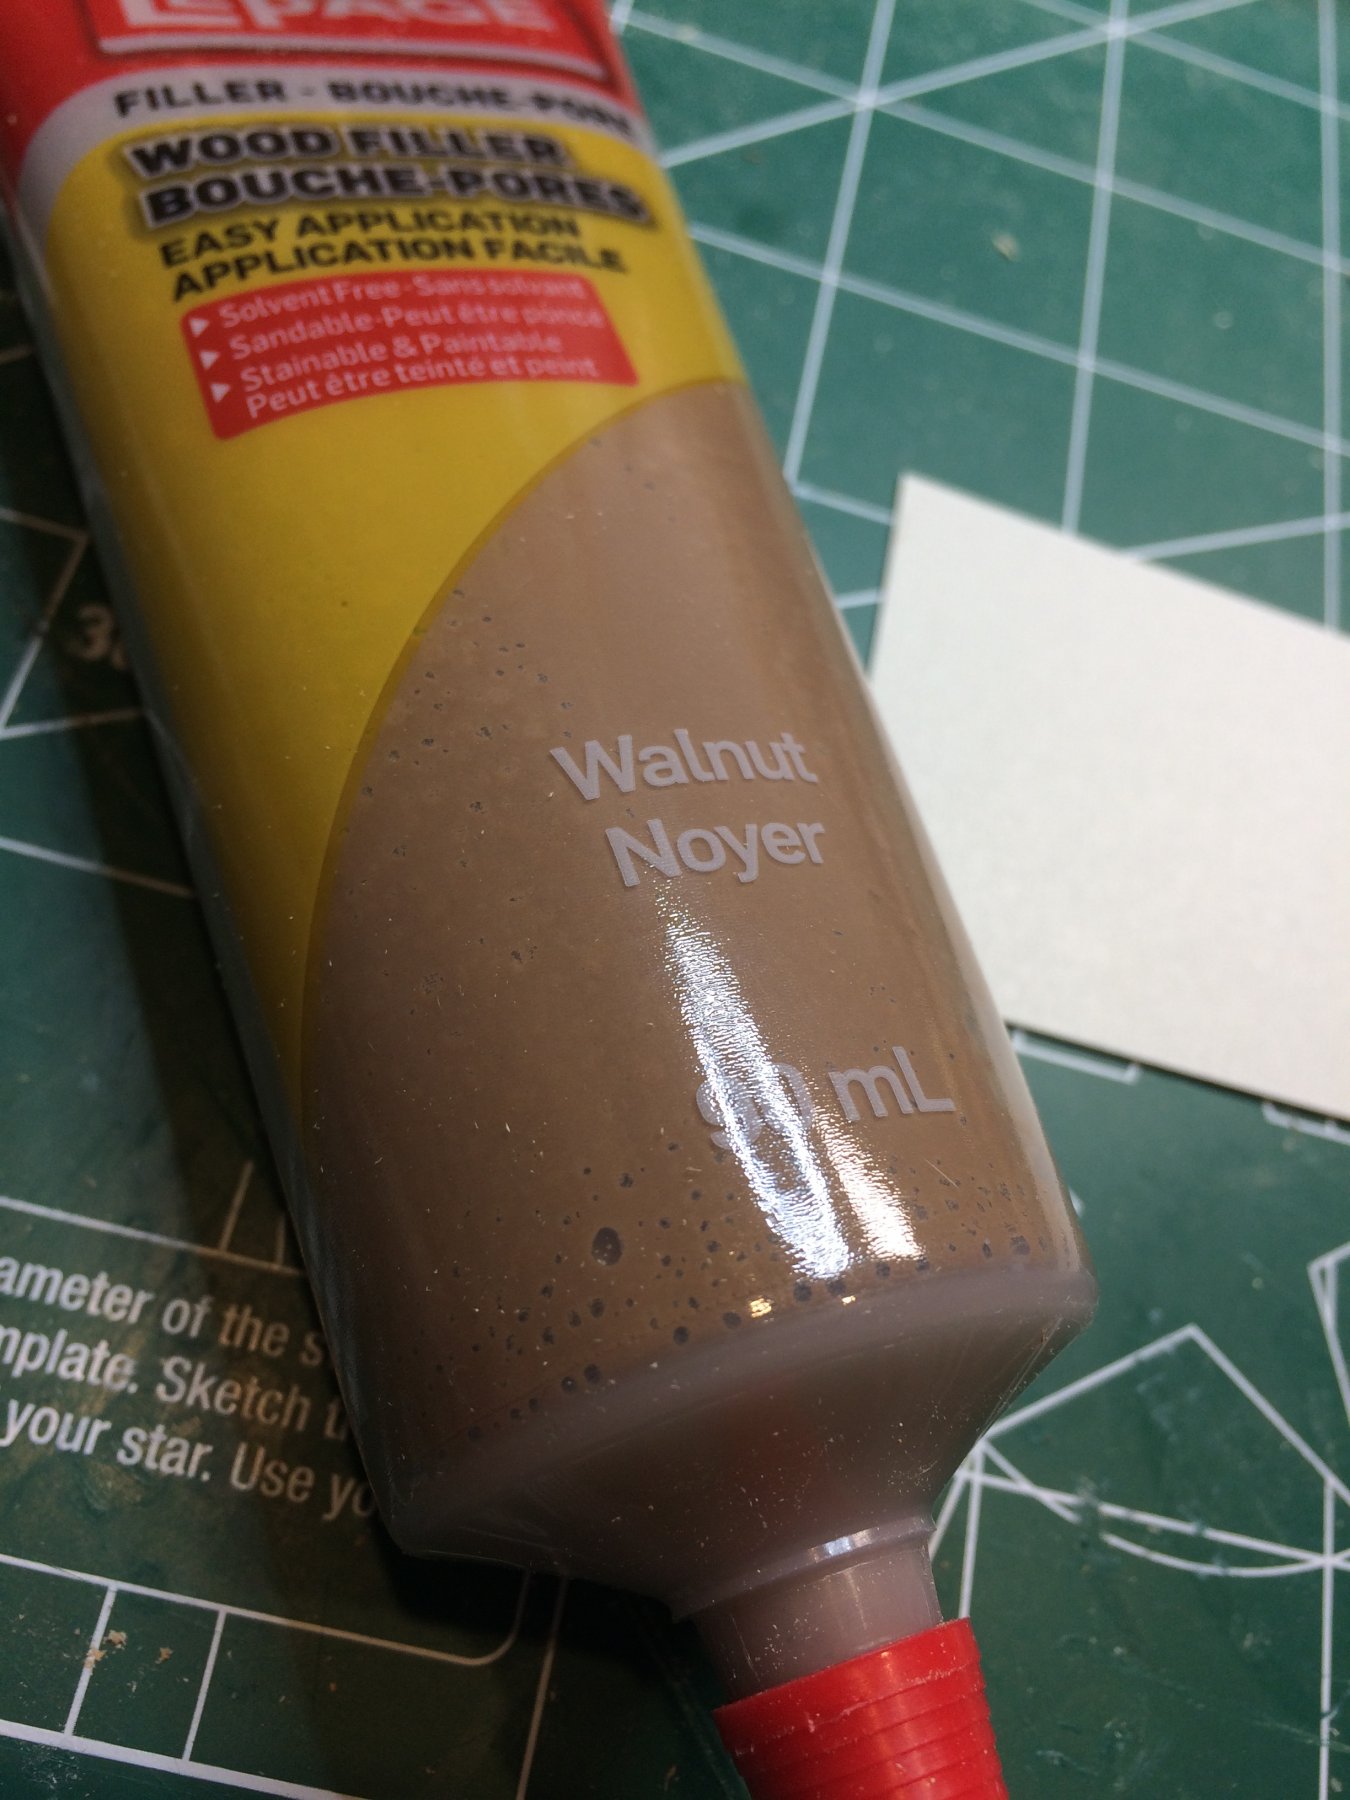
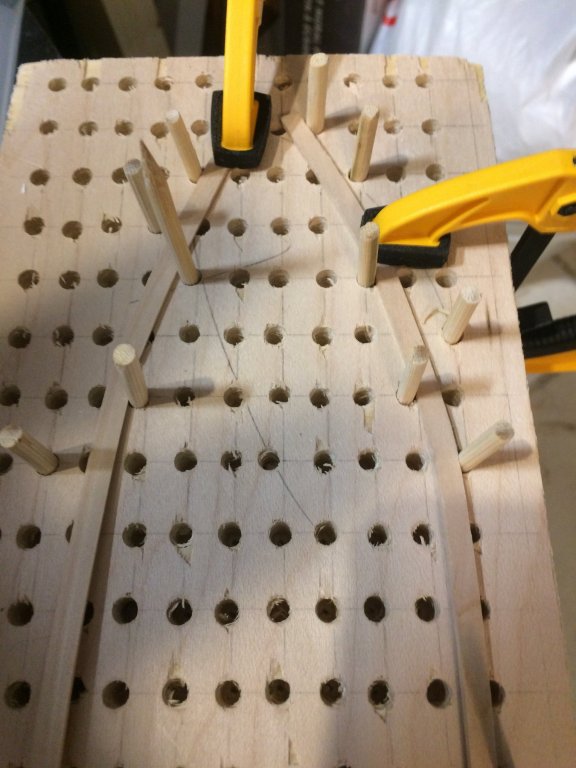
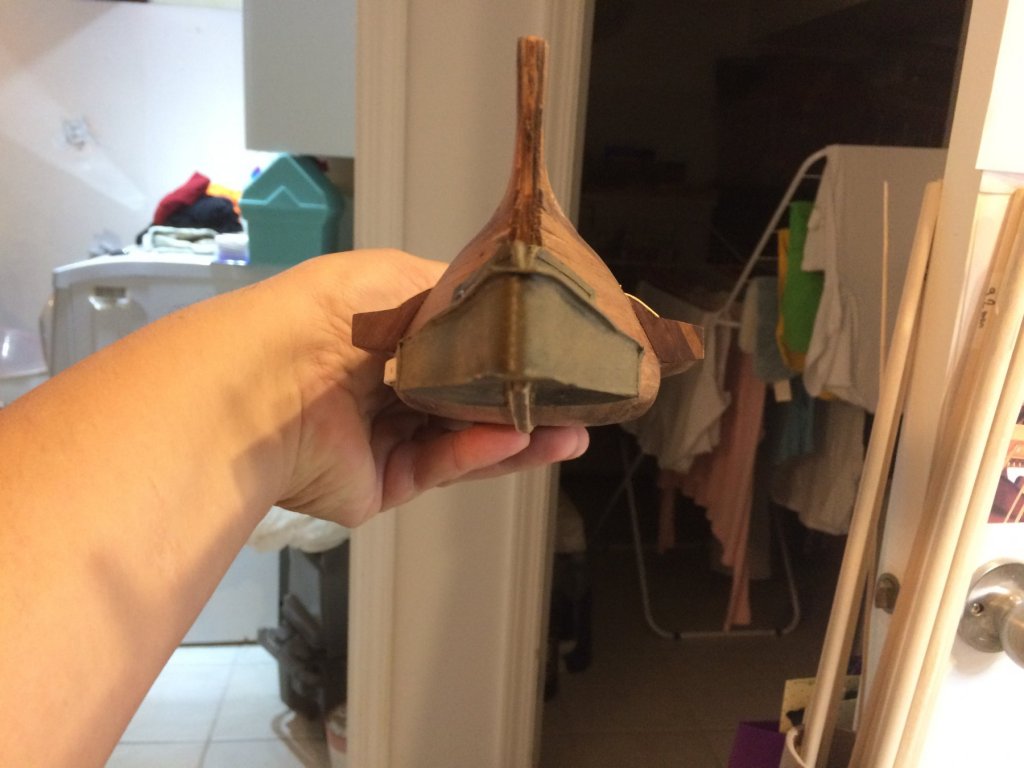
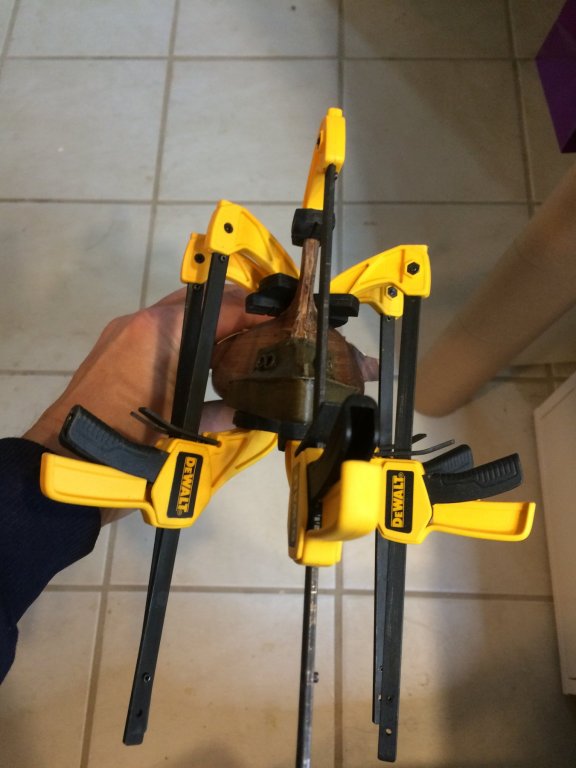
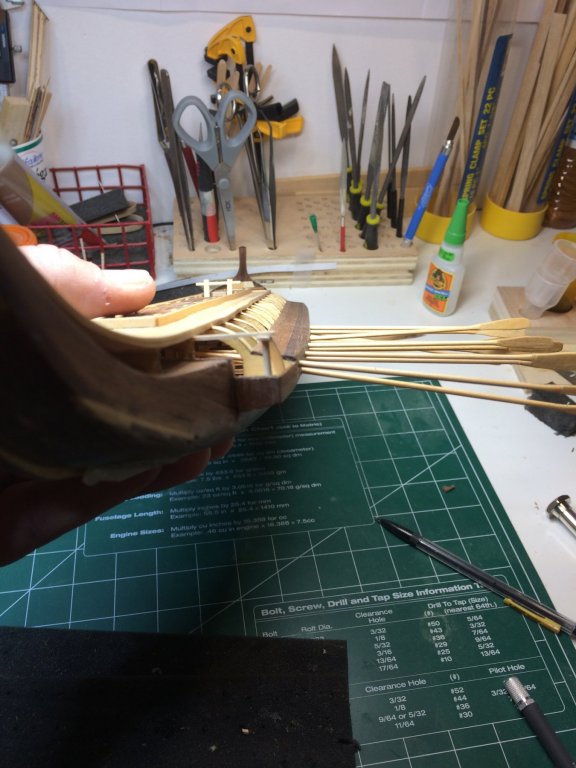
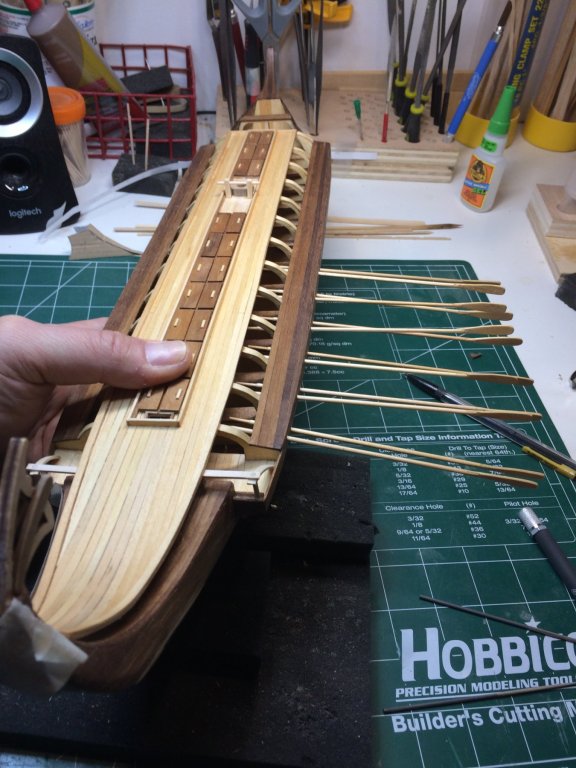
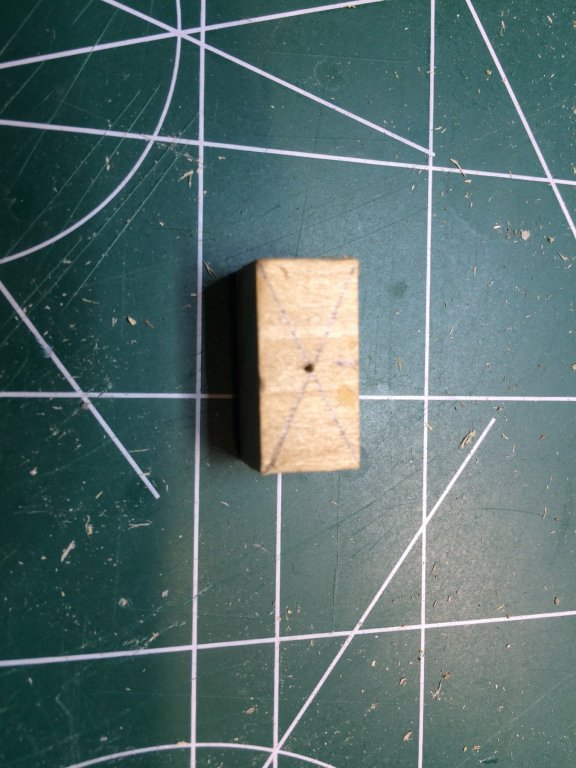
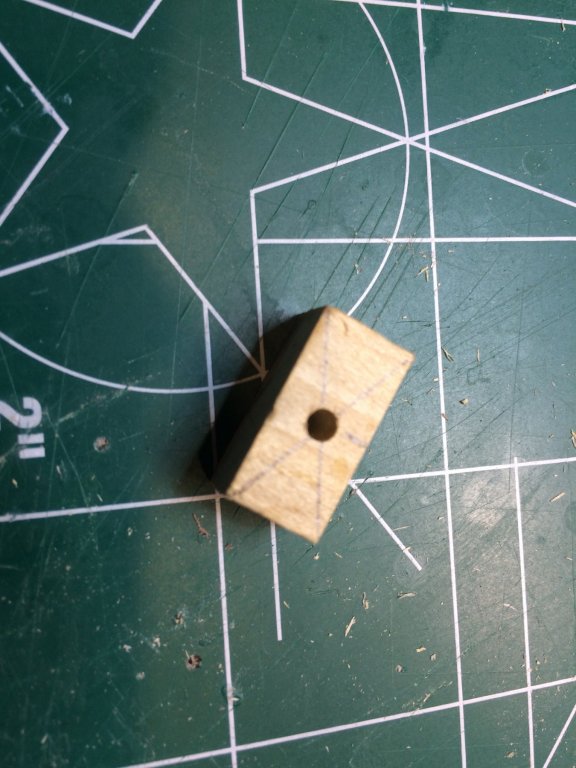
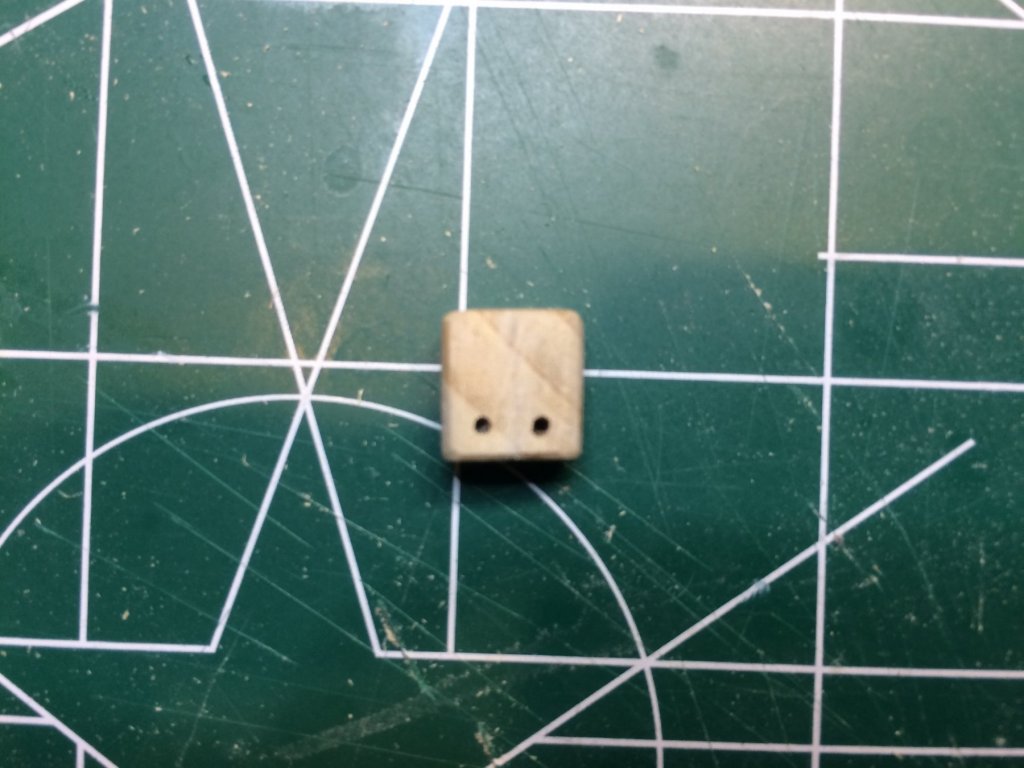
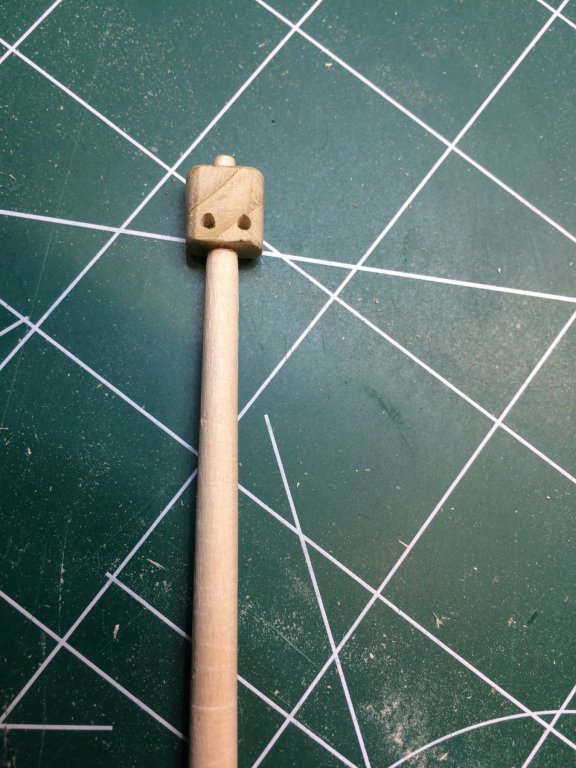
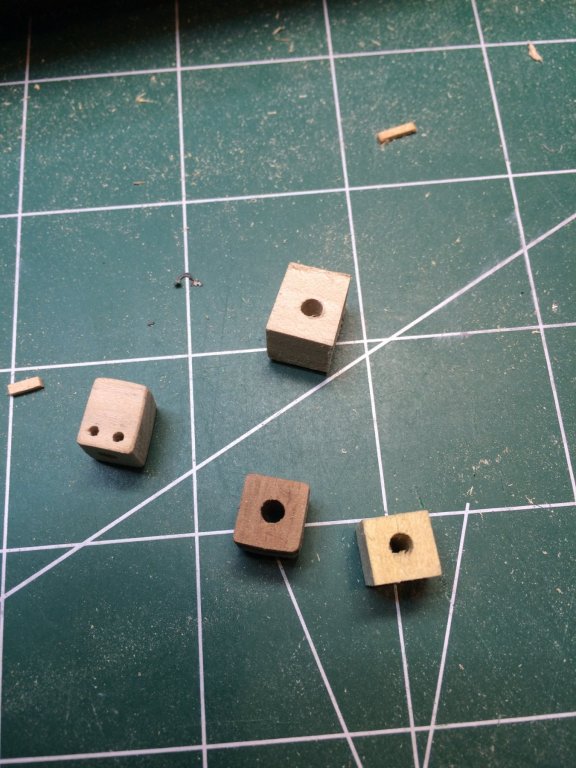
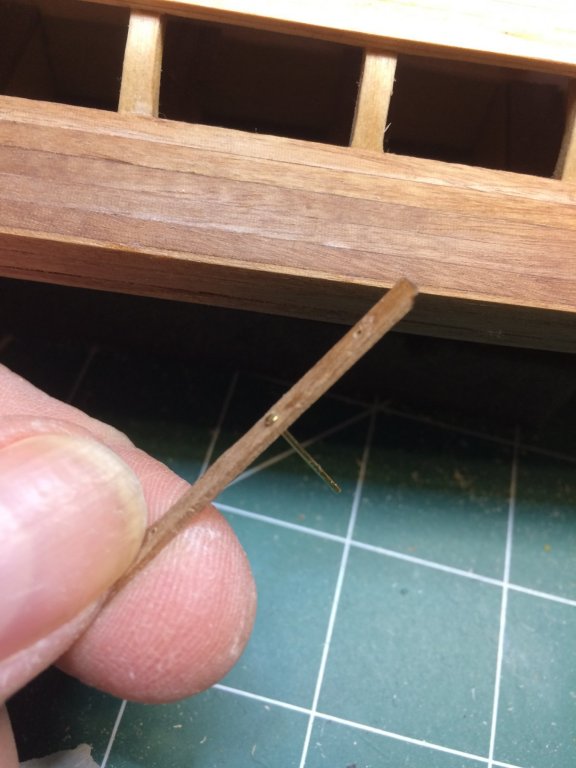
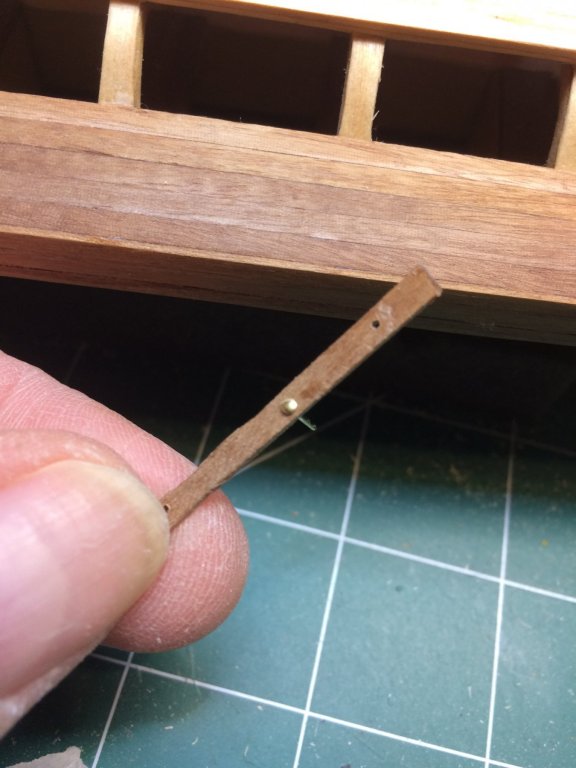
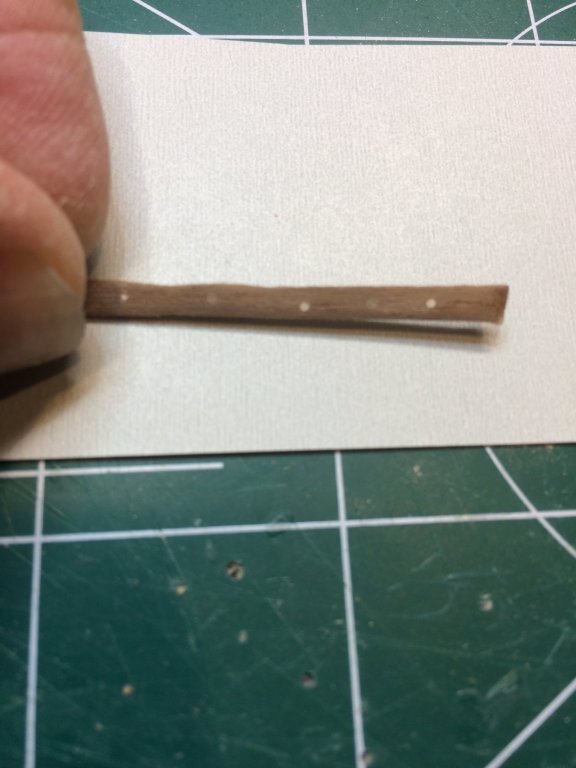
Back to the shipyard after some time dedicated to real work and daily routines.. Today i attacked a part i did not like last time... Cut down a block of poplar, 1cm x 2cm so i have some room to hold the `patient` while drilling ( :-)) Some old basic geometry skills helped to mark down place for a hole and for pilot hole.. Back to bench drill press and made a hole.. Now this part has to be shaped to the correct size and form.. There are two holes, very tiny and close to each other that are used to hold some rigging so i decided to make them ahead of time and with some extra wood i can use to hold it while drilling.. I ordered few chucks that can hold the small size drill bits but, unfortunately there are not here yet. So. back to basics, i covered a 0.5mm drill bit with plenty of masking tape, make it a big fatter so it can be used with bench press drill. Just to show the perspective.. Managed to make those small holes, here is brief fitting test on the mast.. After some quality time with rasps, different sanding blocks and paper size, here is end result. Happy with it, glued to the mast and tested on the ship.. At the end, i collected all attempts i was not quite happy with and here they are; some wrong size, some wrong wood, wrong hole, etc.. But they can be reused somewhere else so will keep them in a spare parts box. Then i was thinking of treenails and what to do with them. The ship kit comes with 200 metal nails that can be used but for my taste they looked a bit out of the scale and too long. So i decided to either make my own treenails or to fake it with wood filler. Here is my test attempt with wood filler: Made a few holes, filled them up with wood filler and sand them - the beige colored one is called `natural` (red circle). For my planking it looks a bit to white-ish.. The second is walnut-colored filler (blue circle) and it looks much more acceptable. Since the whole point of treenailing the planking is to just add some details to the model and not for a structural strength, most likely i will go with walnut filler. I also like the fact that walnut colored filler will provide less visible treenails which would not drag attention from the model to treenails. There are few other techniques for making/faking treenails but i think will leave those for some other models. During research i did not find correct answer how many treenails this ship requires. I still need to make decision how many treenails to install: should i just cover the upper part of the ship including place where oars will be installed or to cover the whole ship, including the complete hull.. Not sure yet, TBD. This is the one i will go with in case i decide to do the treenails at all.. More to come soon...


- 122 replies
-
- 4
-
-
- greek bireme
- scale-1/35
- (and 2 more)


.jpeg.480267d5a9539f7fa2d603eb0a69cca8.jpeg)
.jpeg.c2208cd273e88b494c7cb1edf3689a77.jpeg)
.jpeg.2896bf4e764a3ccd1d9c547b3baa6f2f.jpeg)