HOLIDAY DONATION DRIVE - SUPPORT MSW - DO YOUR PART TO KEEP THIS GREAT FORUM GOING! (Only 20 donations so far - C'mon guys!)
×


moreplovac
-
Posts
794 -
Joined
-
Last visited
Content Type
Profiles
Forums
Gallery
Events
Everything posted by moreplovac
-
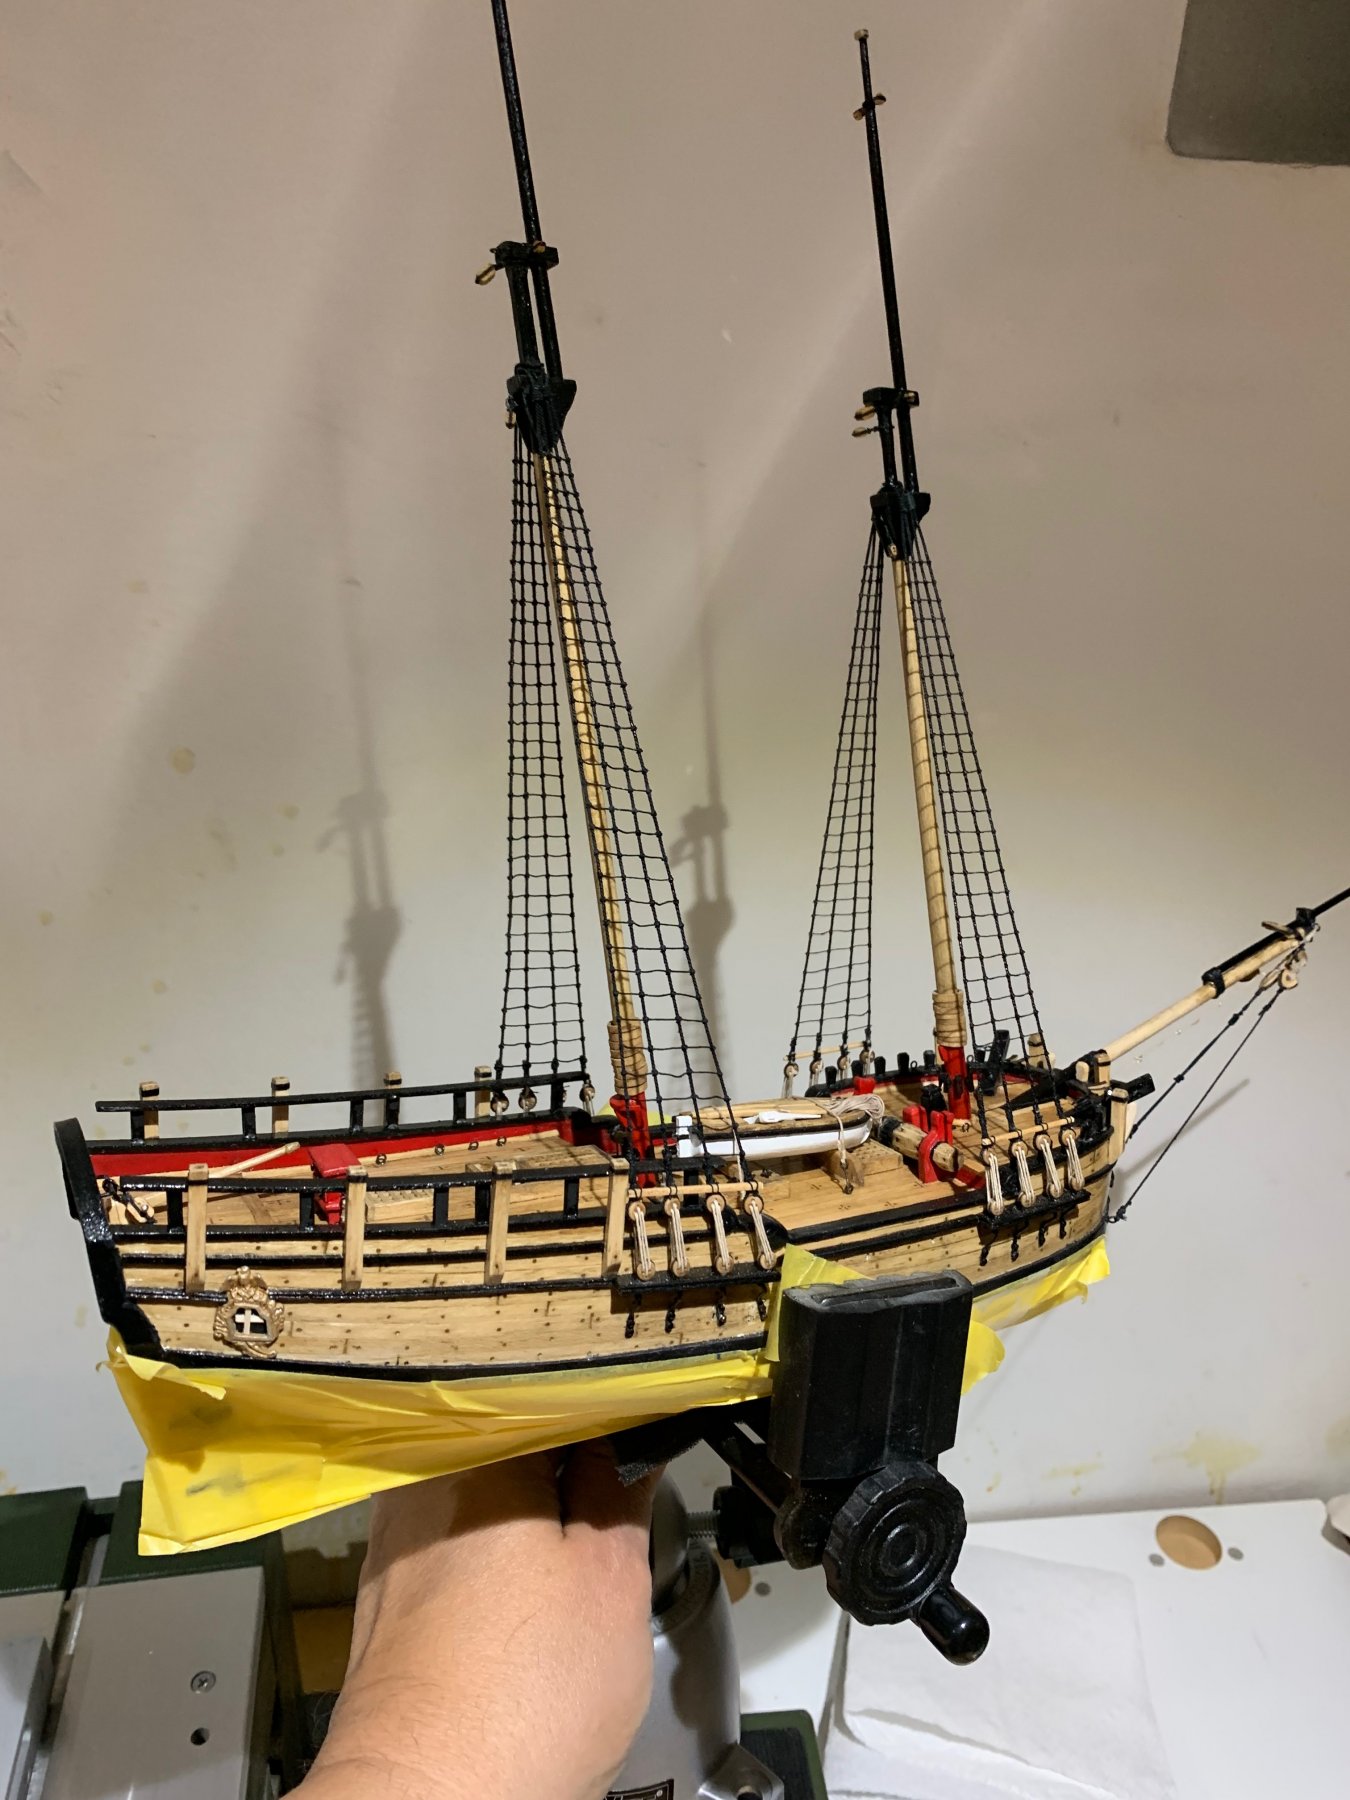
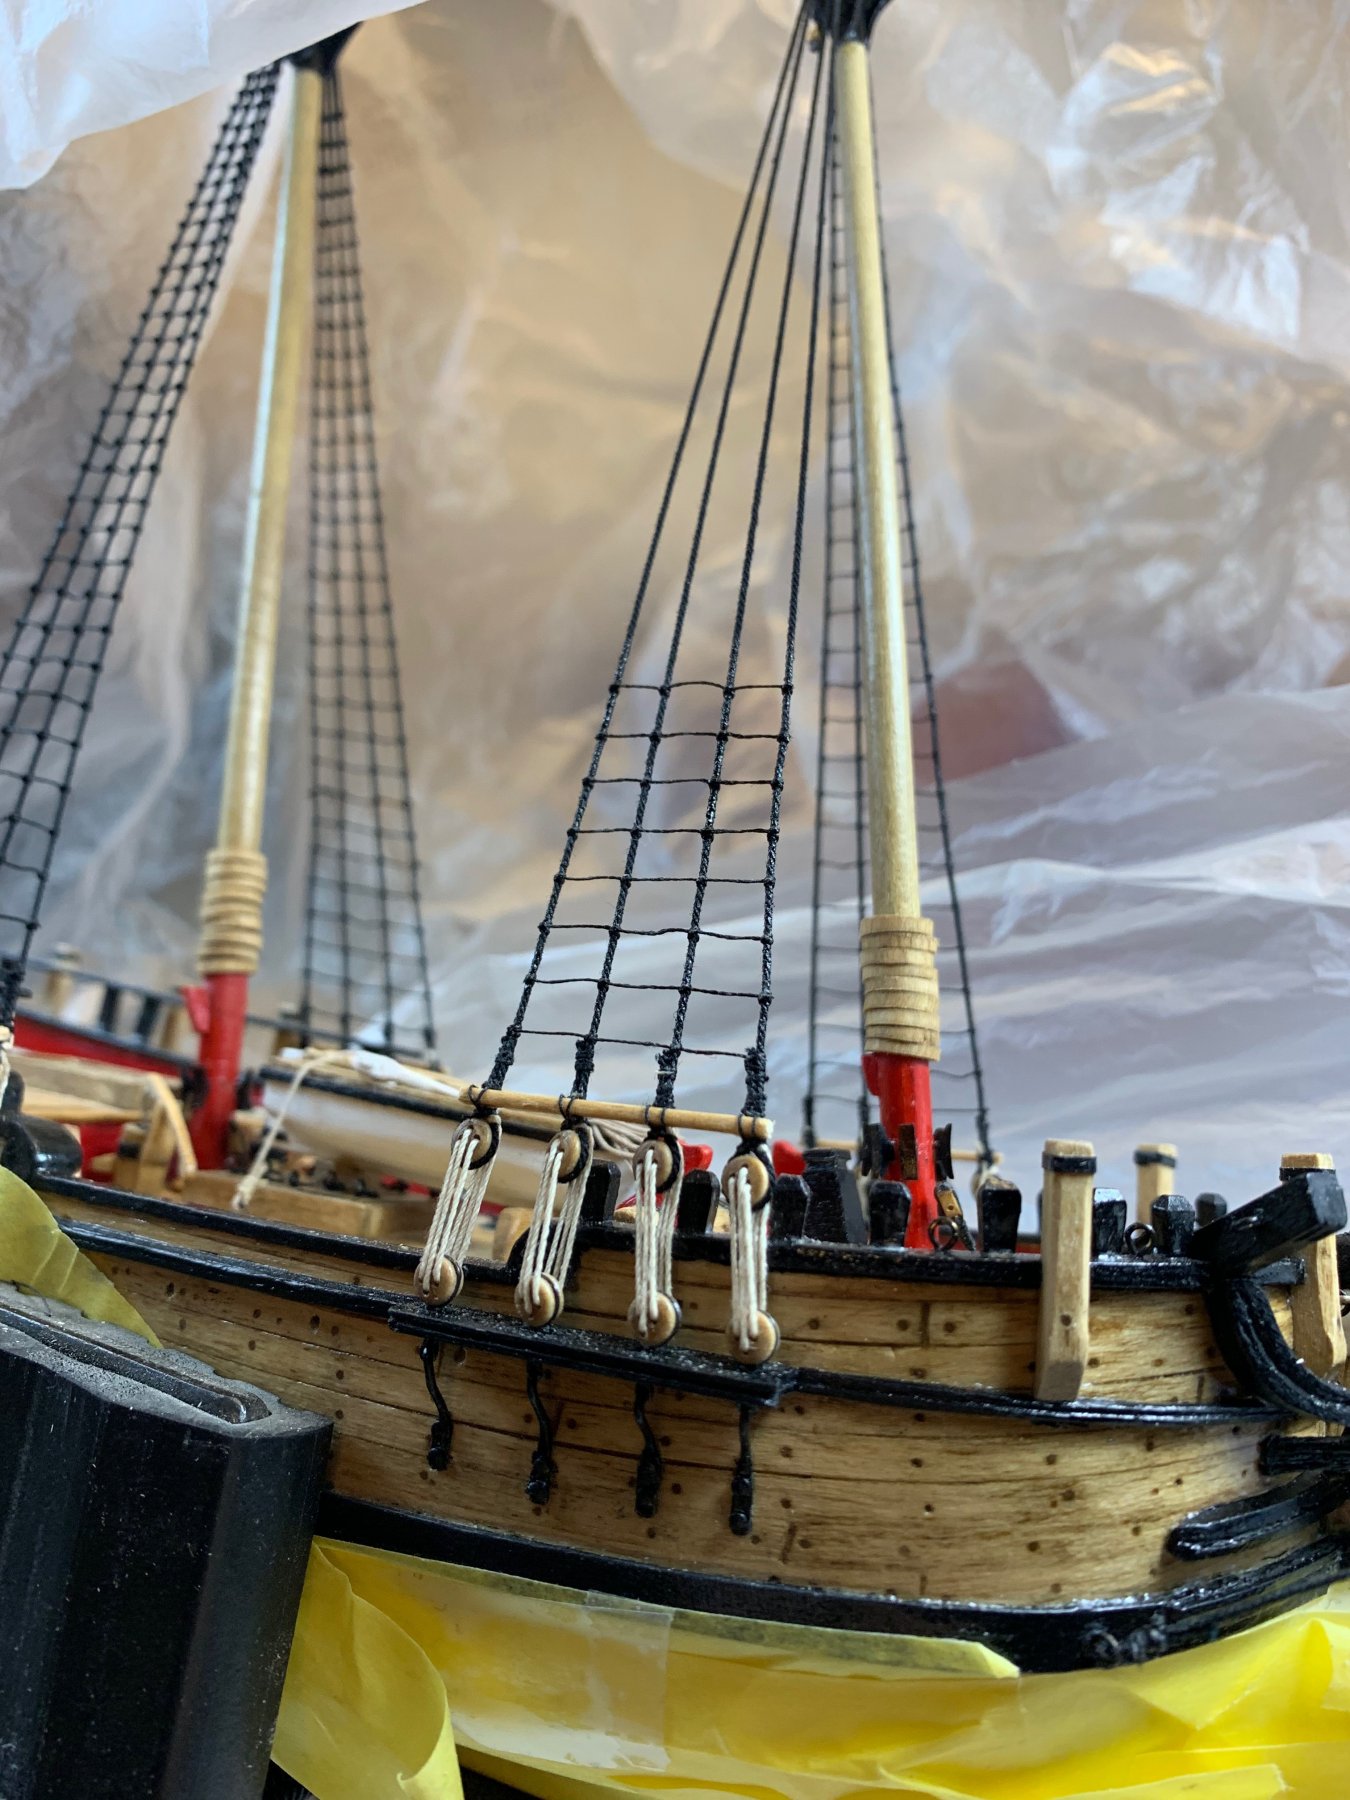
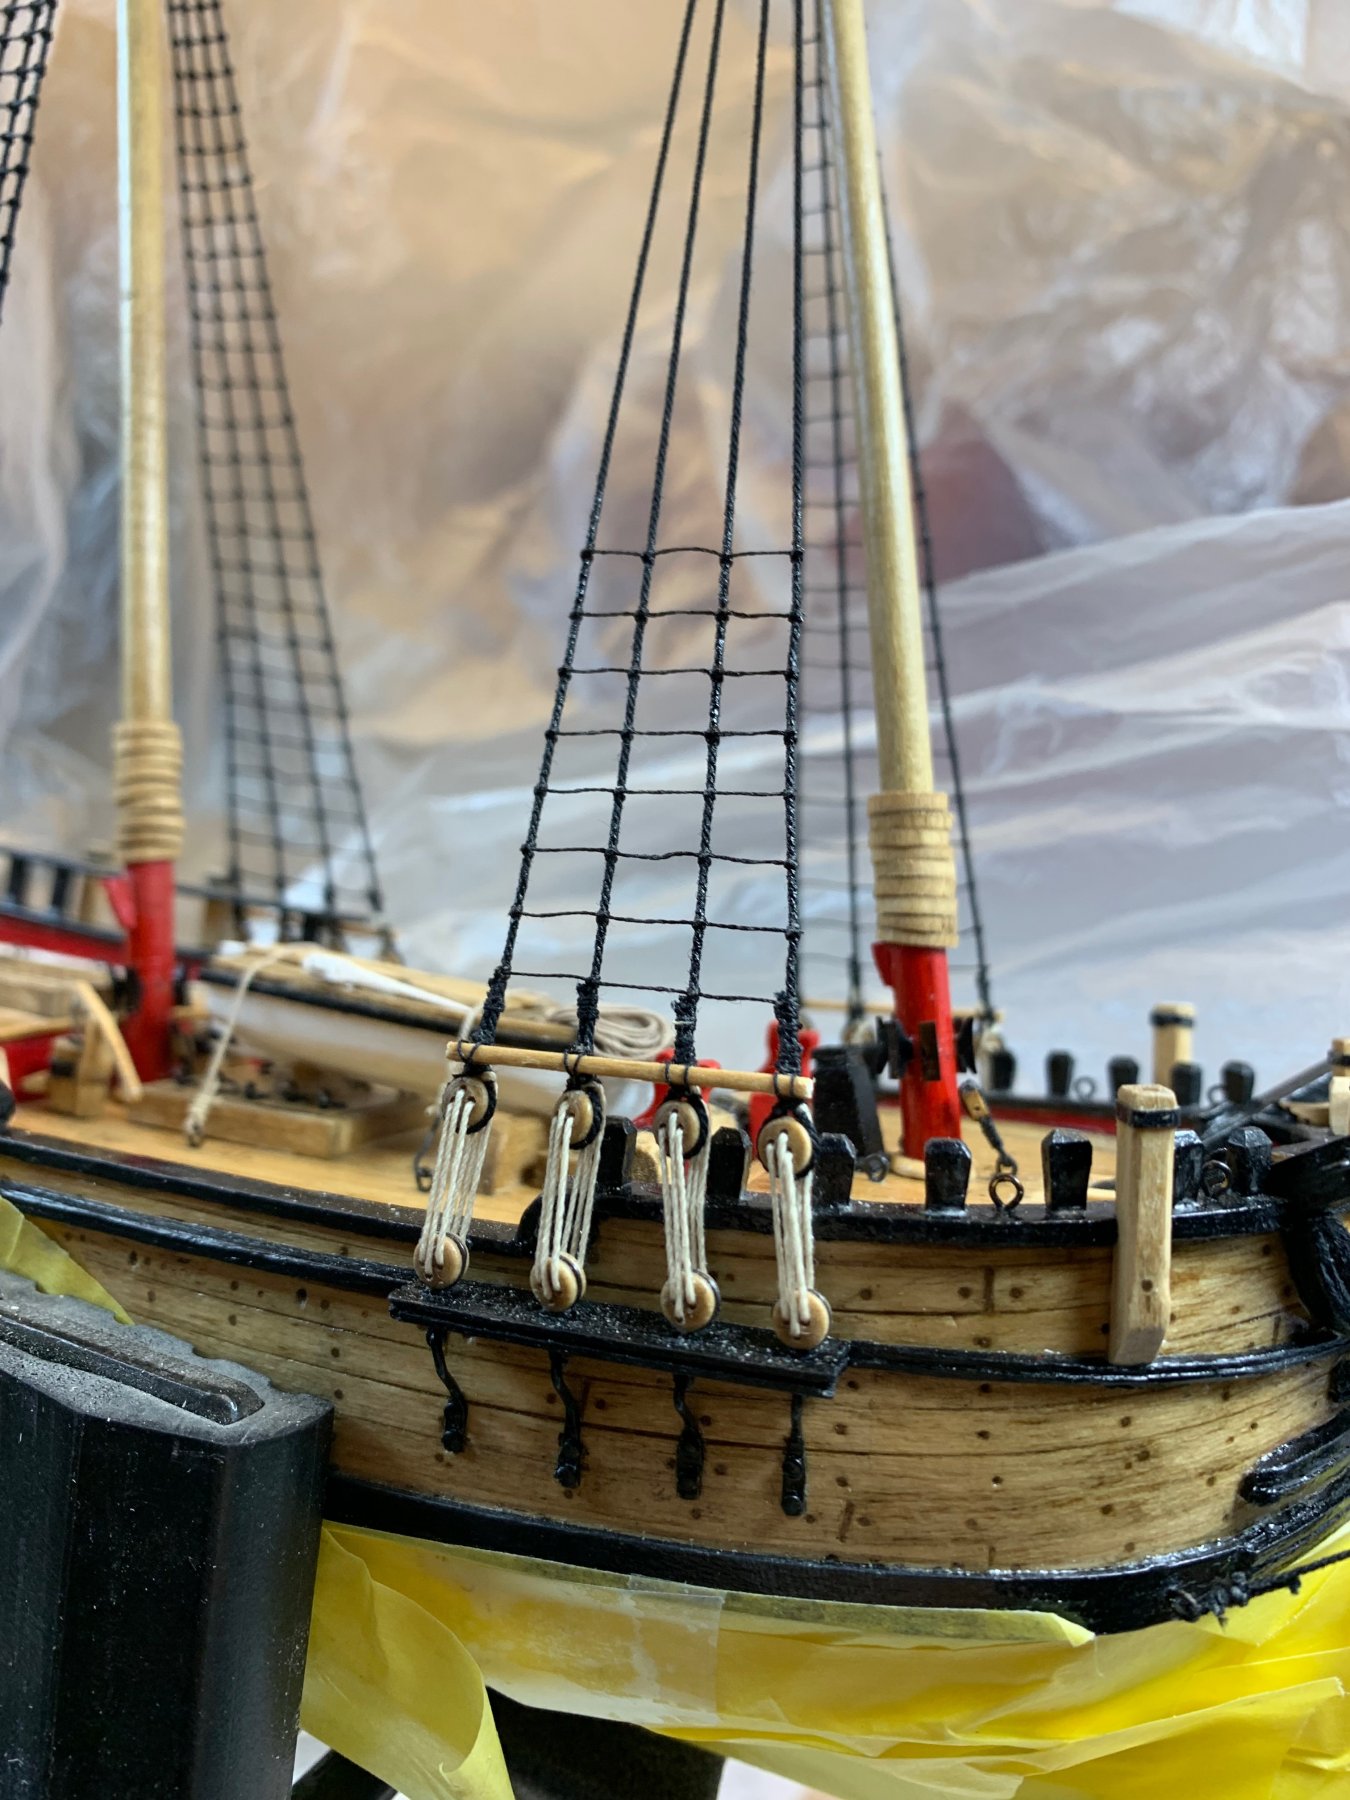
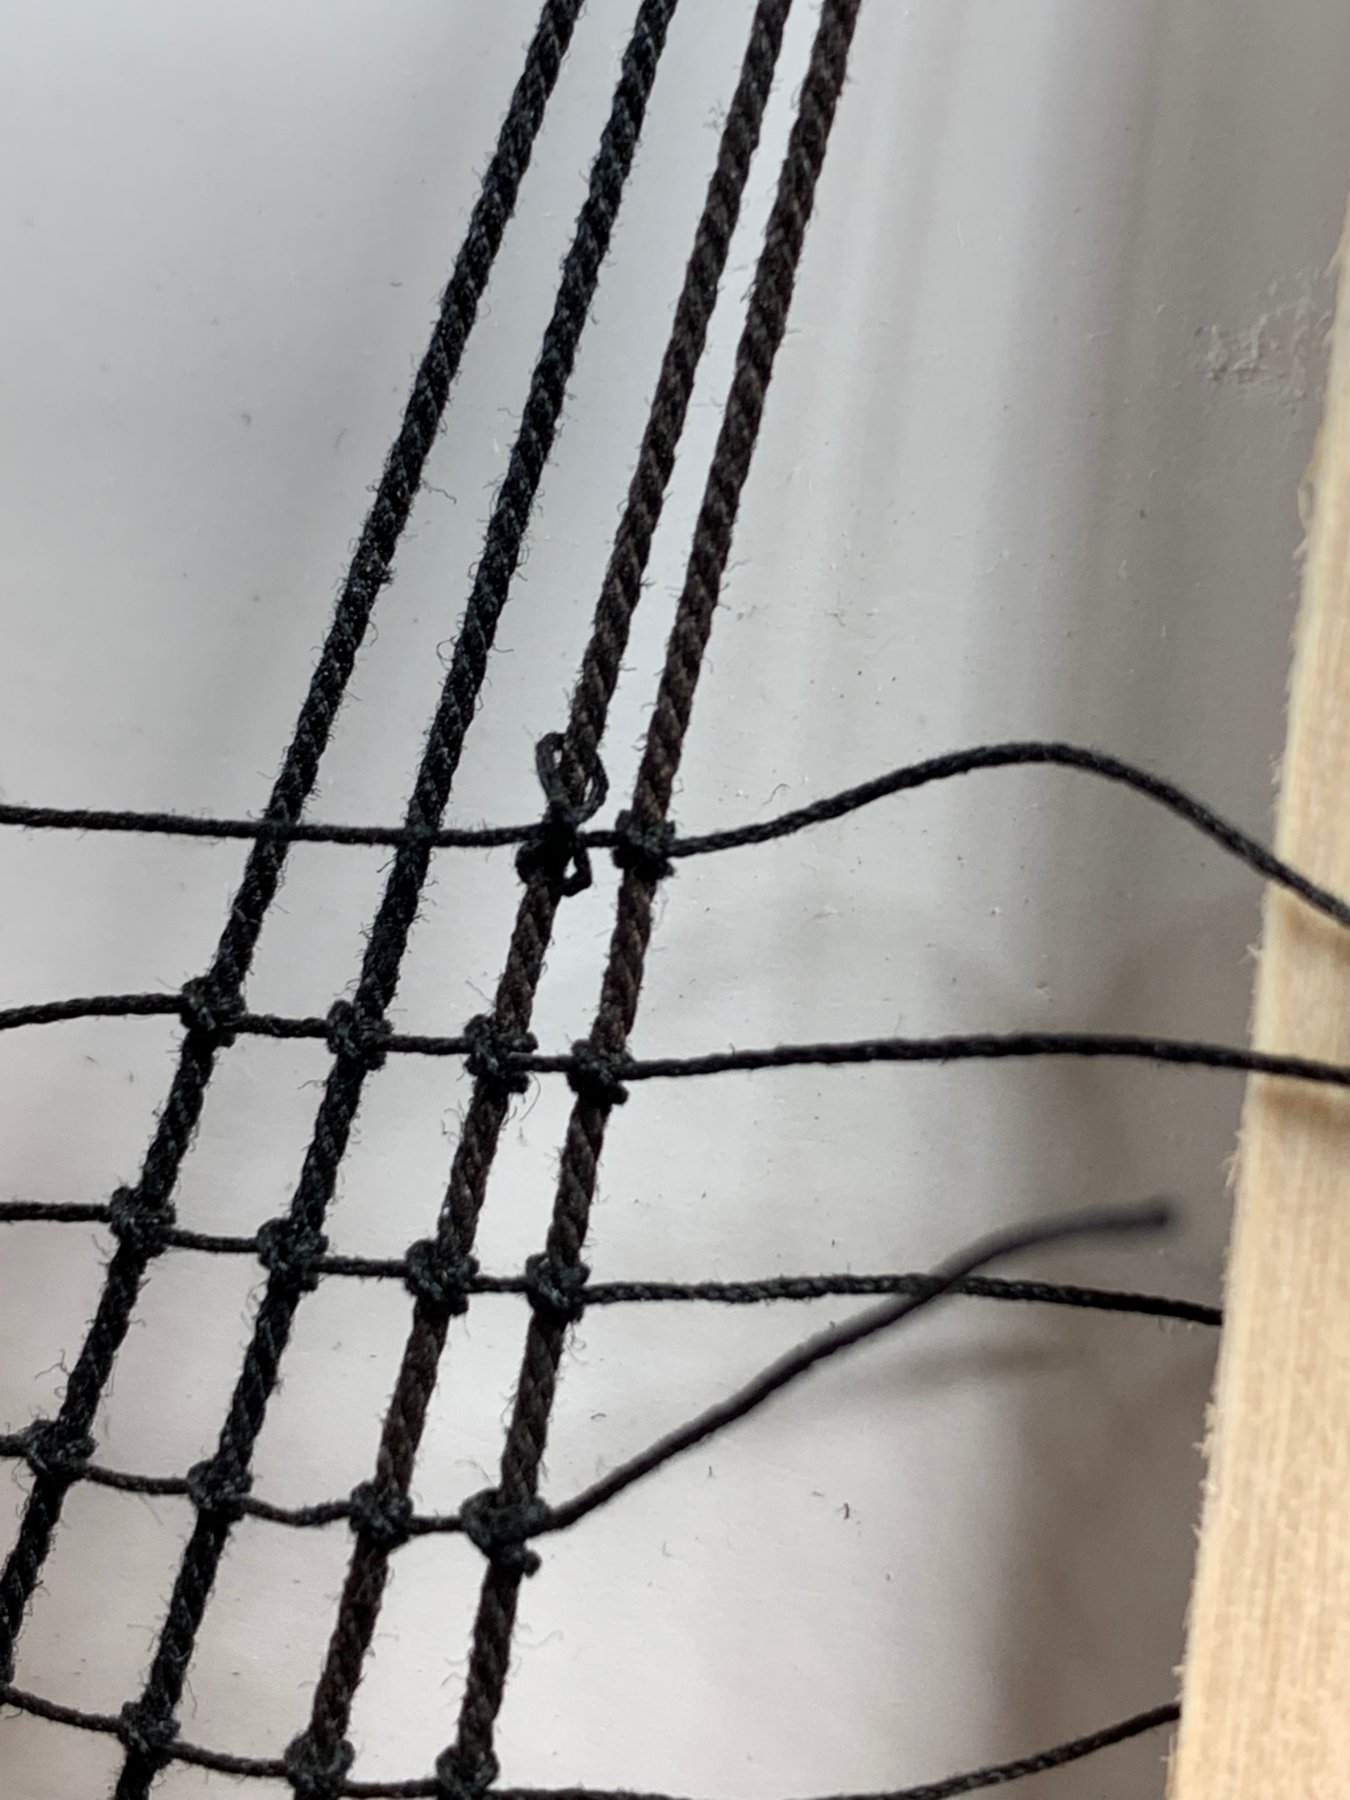
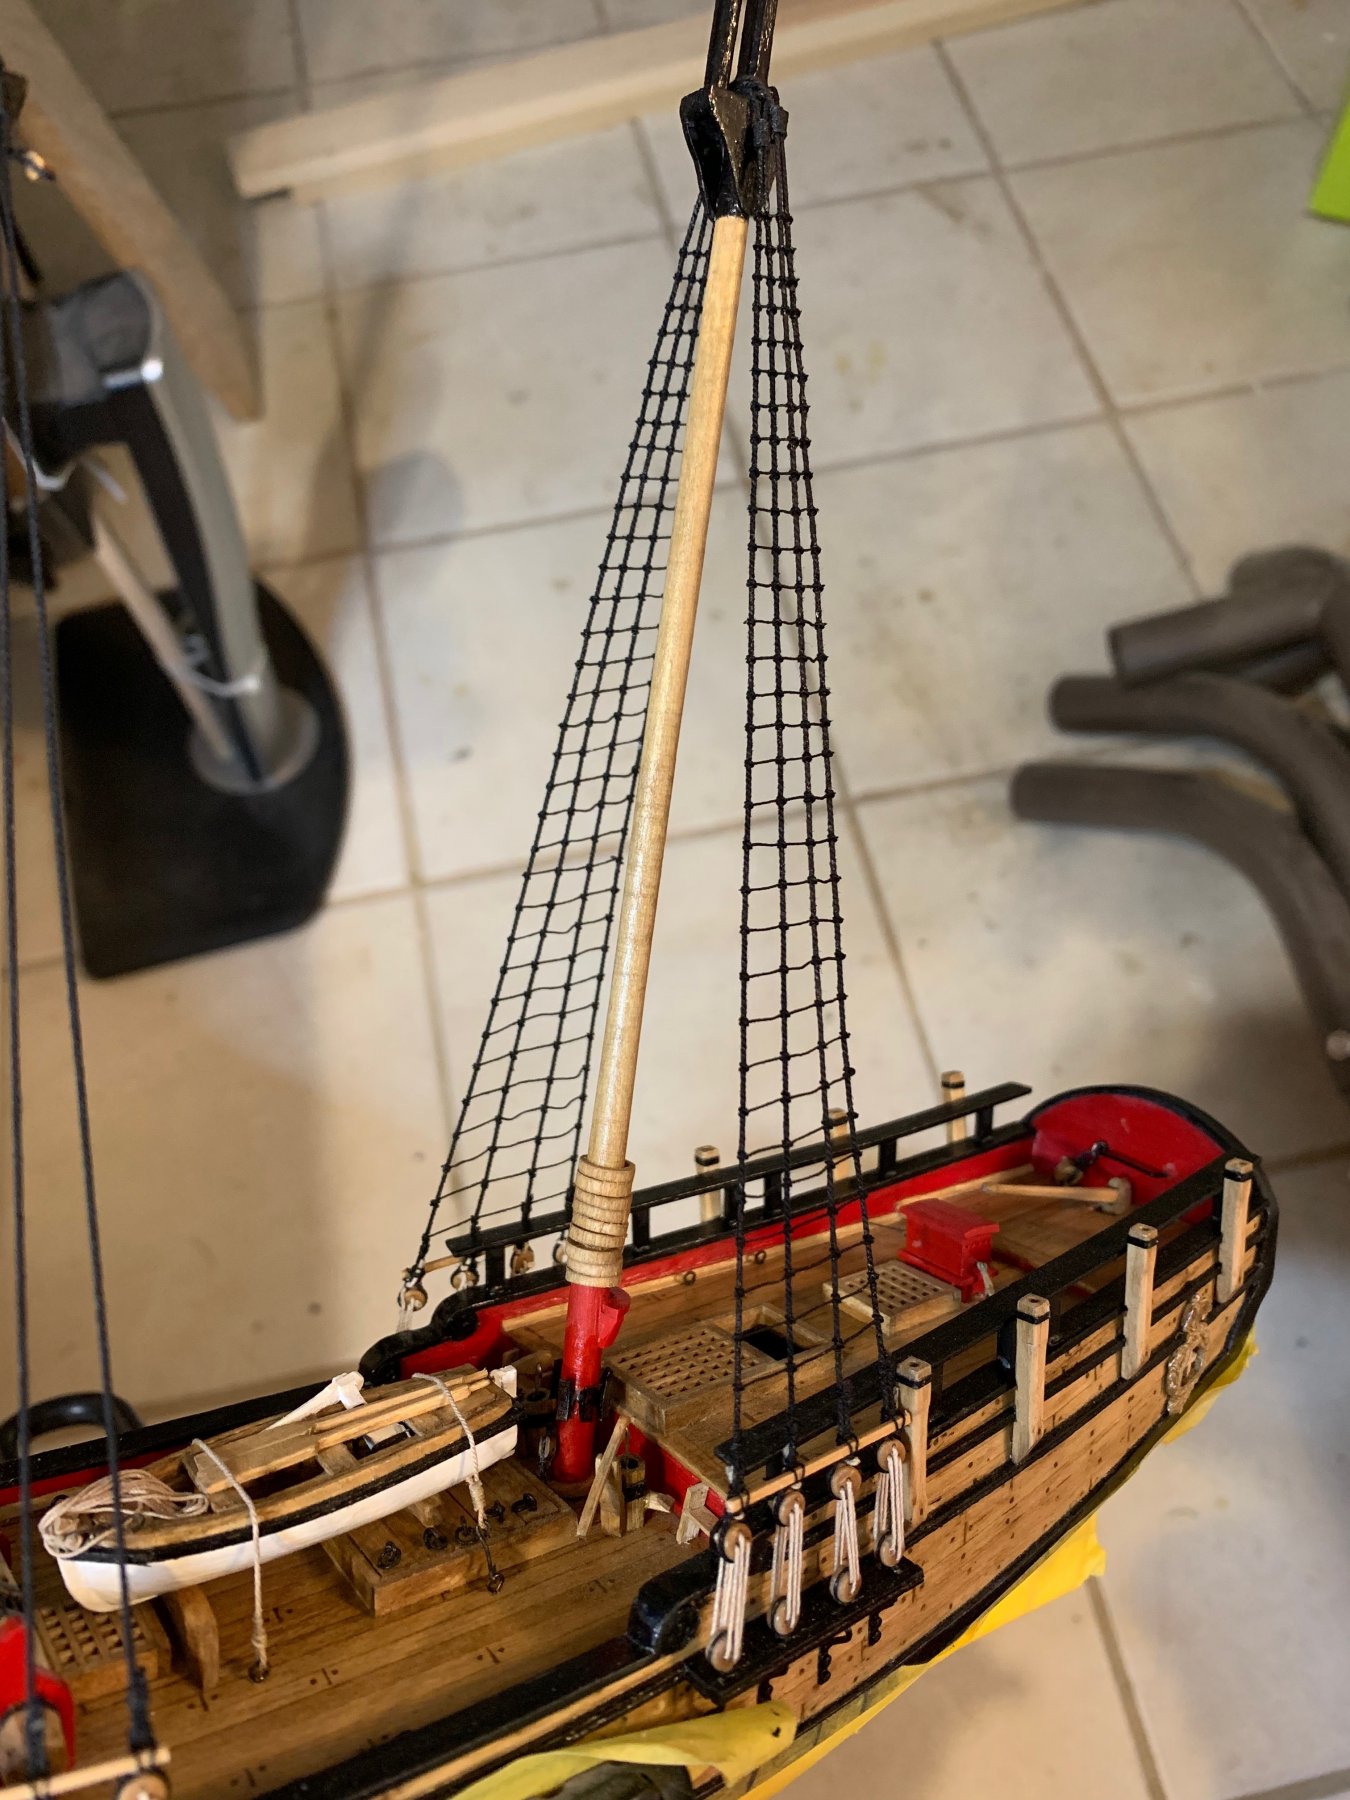
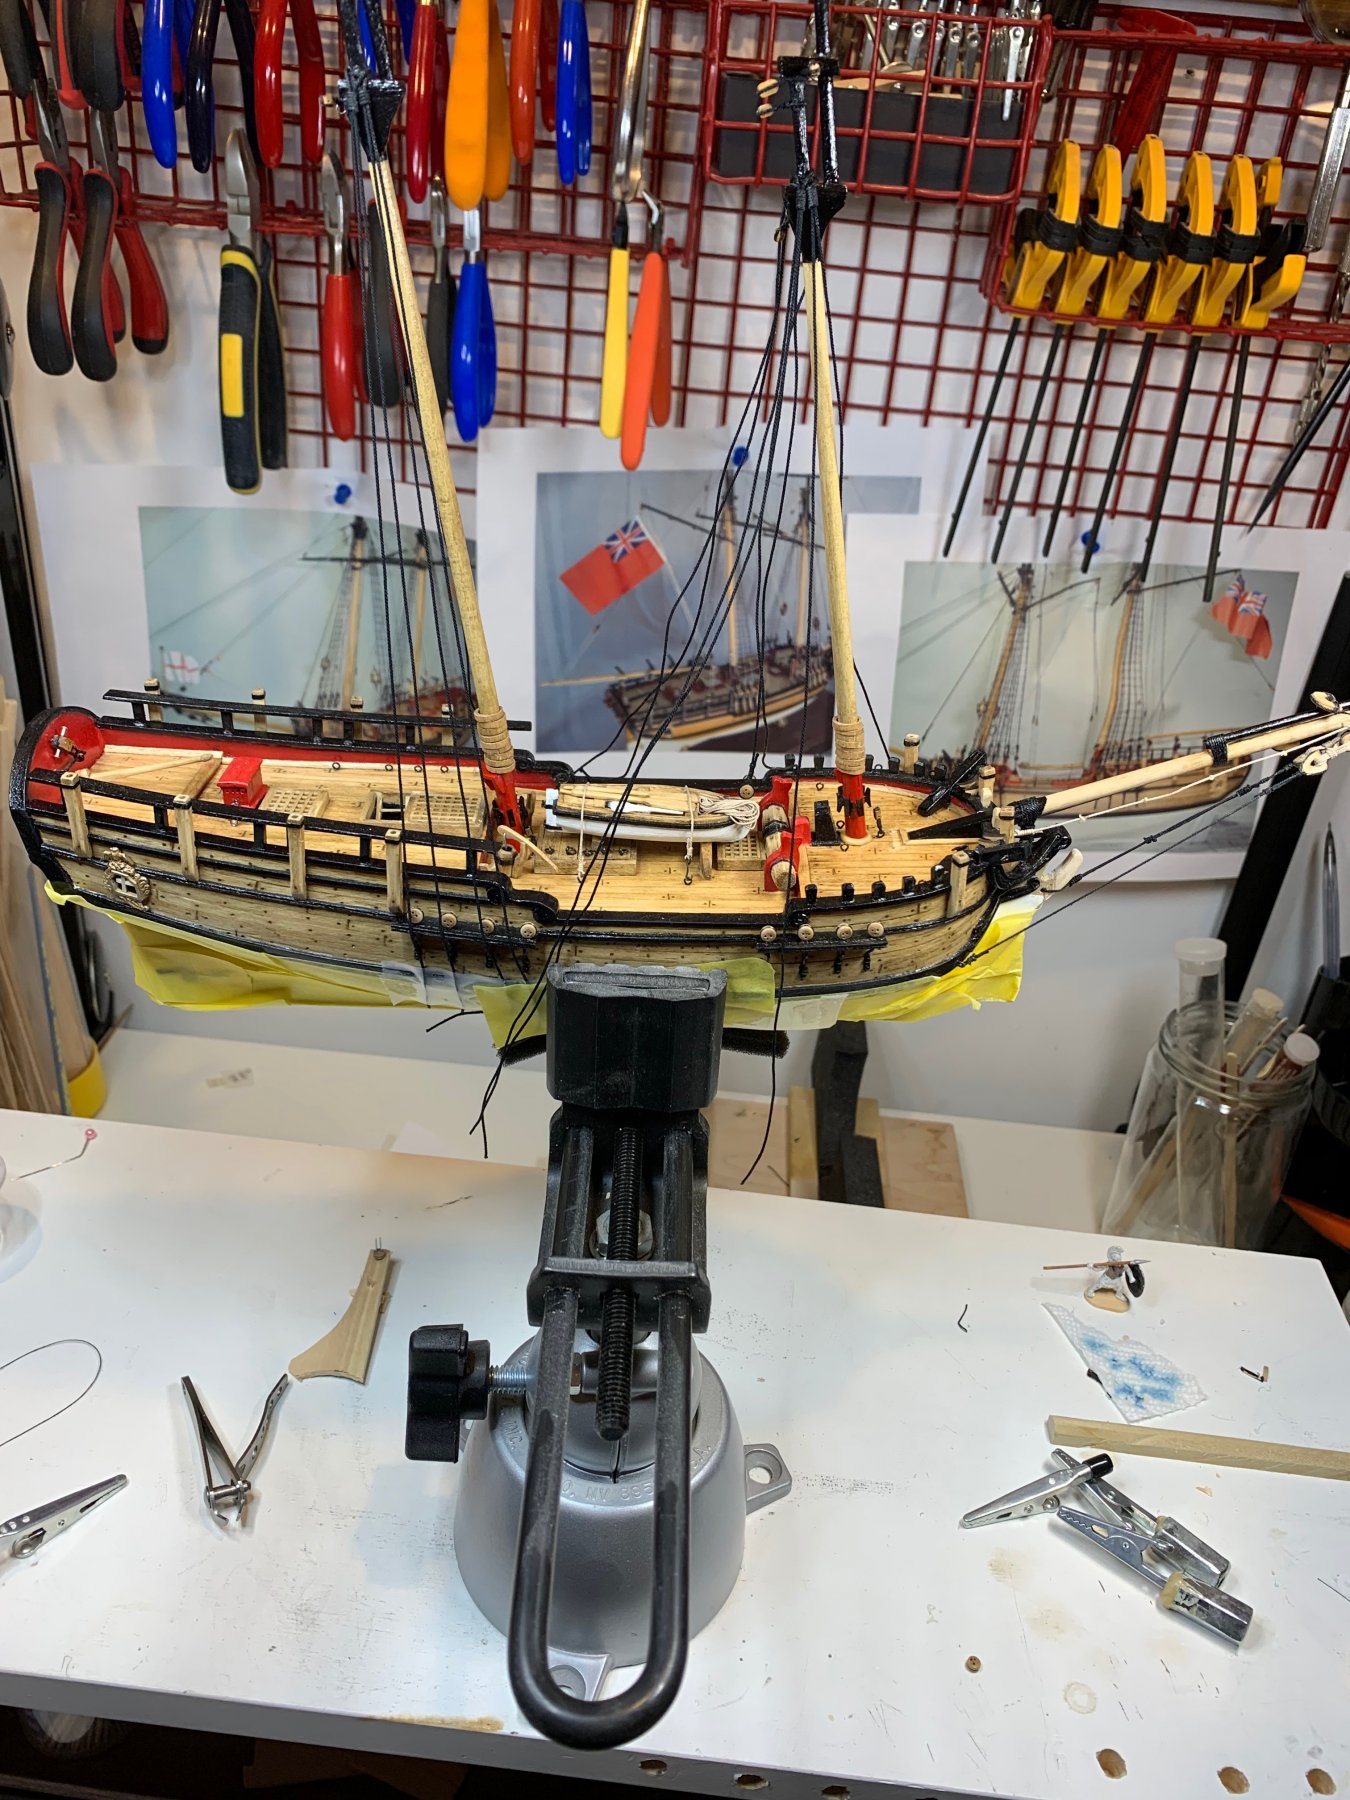
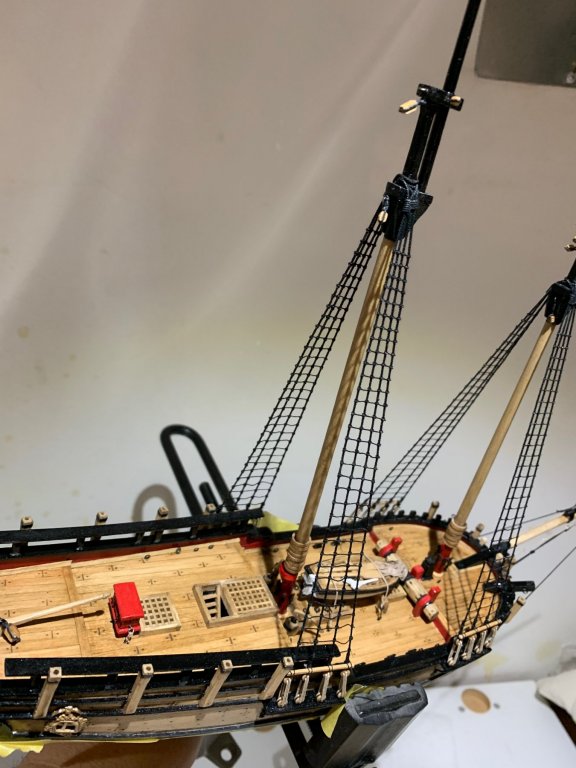
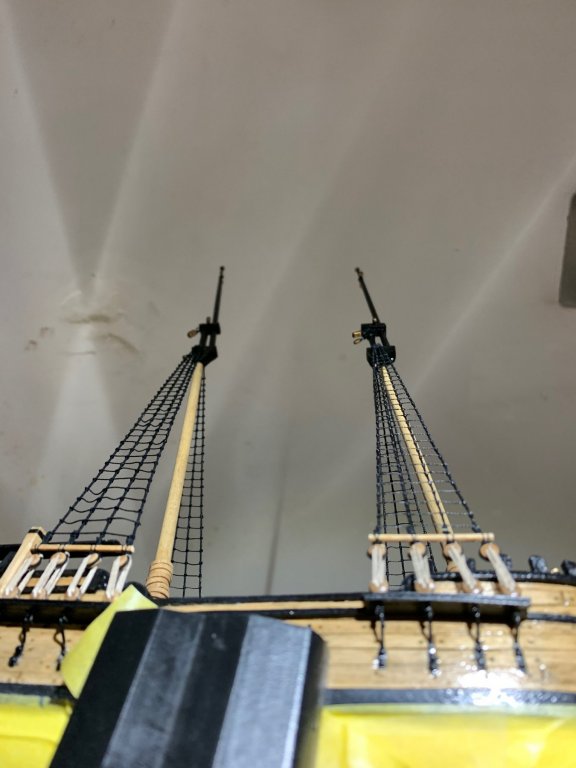
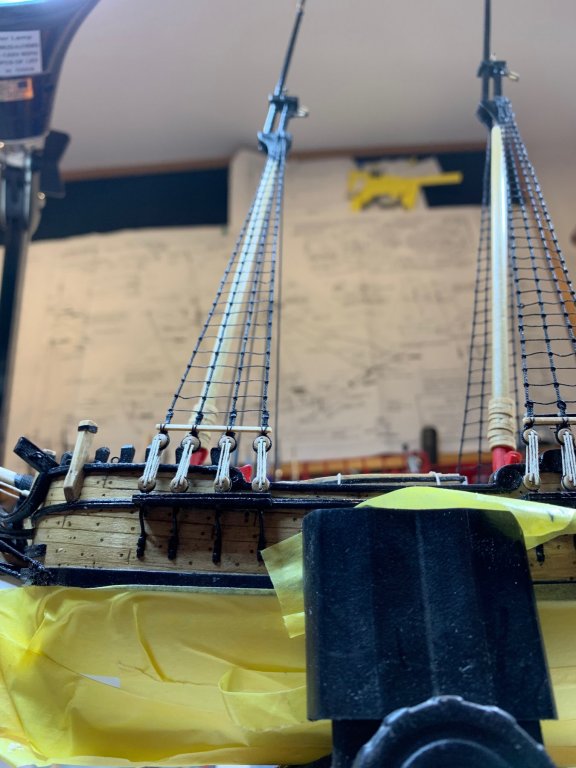
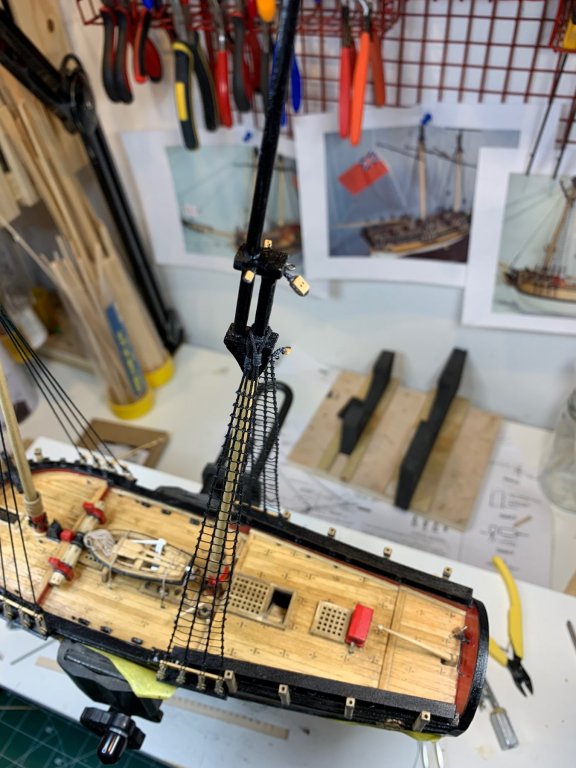
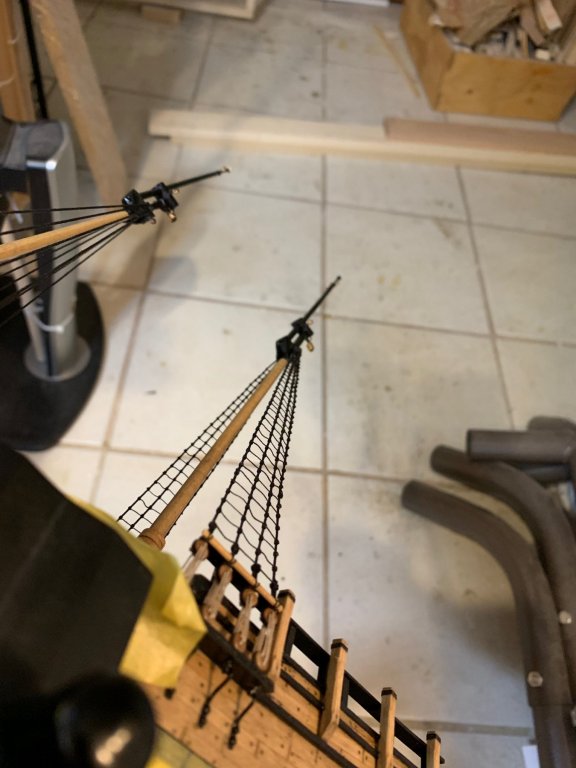
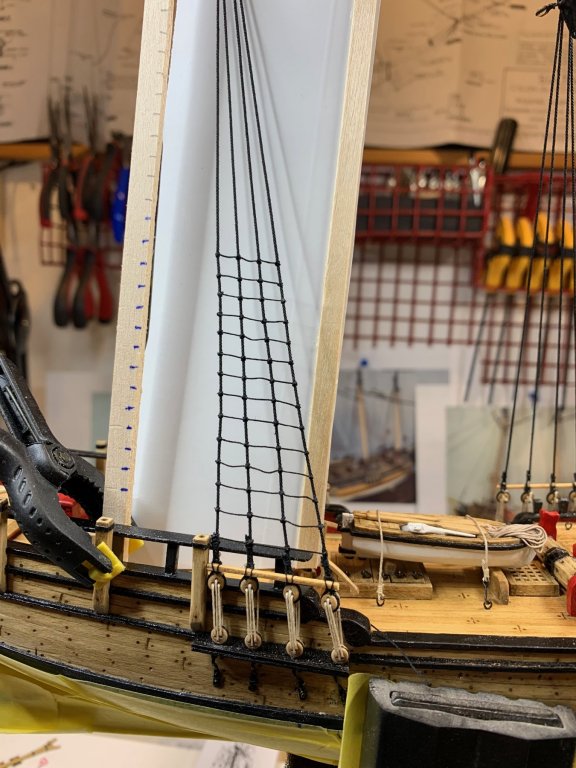
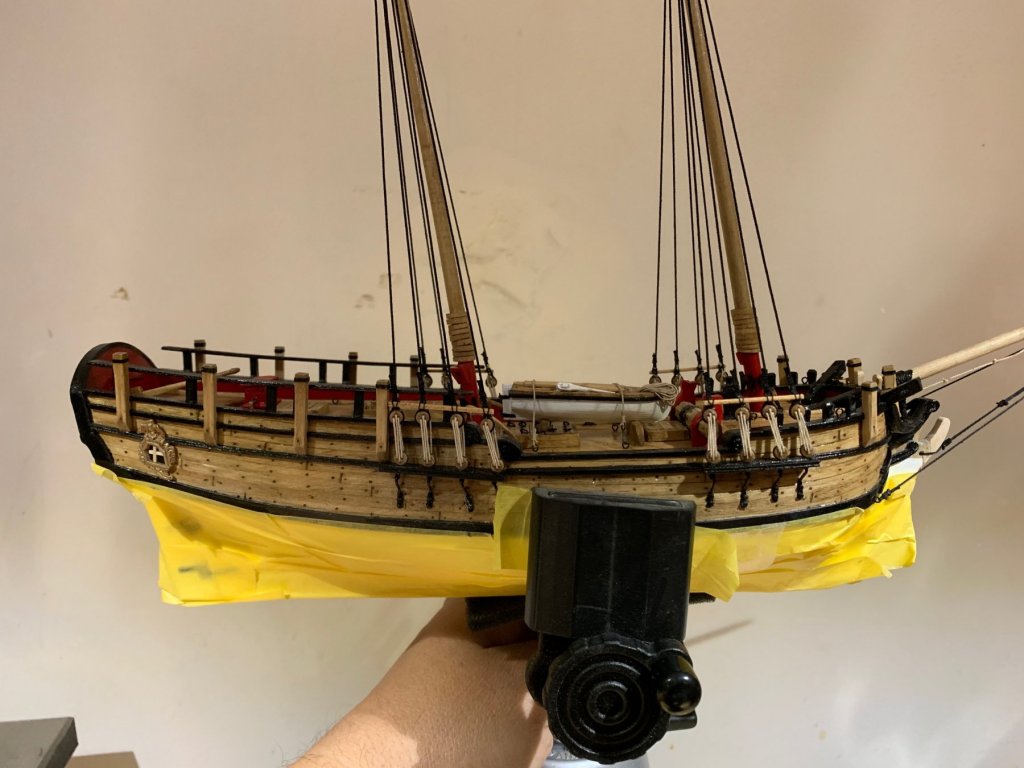
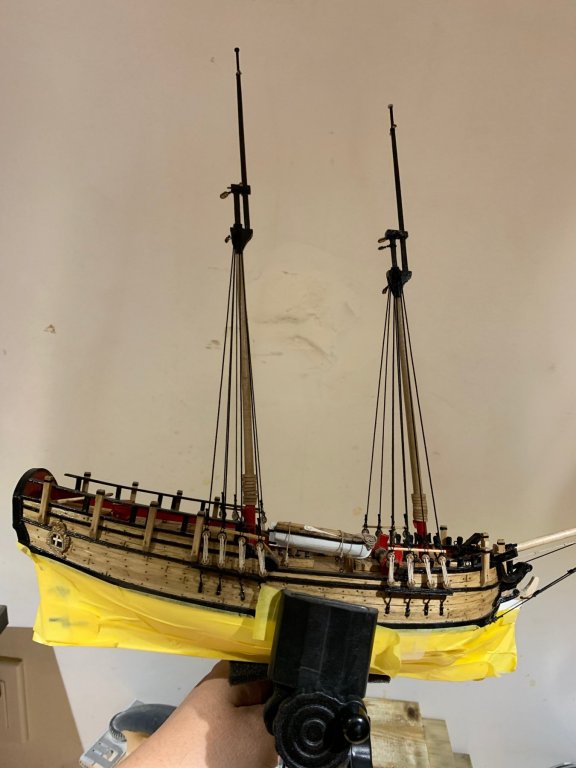
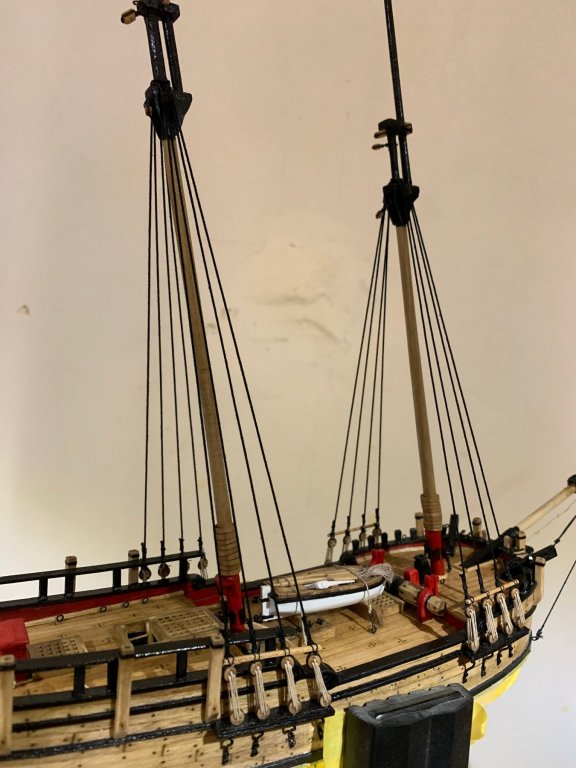
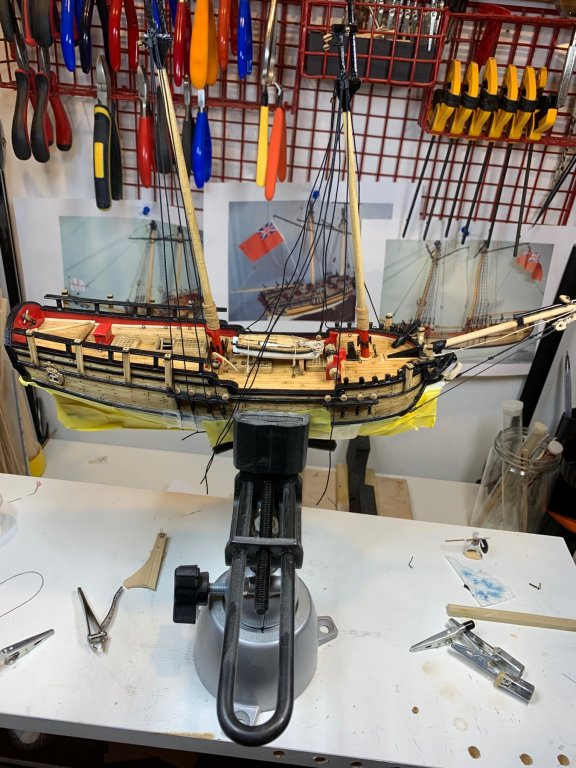
 ... and the last ratline... So, this time consuming but very interesting task has been completed. Overall happy with the result but i can see the difference between start and end job of adding ratlines.. Plenty of lessons learned and room for improvements. I am keeping a building notes so will not forget all things that come to mind while working on this nice model.. Moving forward... i have start cleaning up 16 kit provided cleats.. Happy modeling.
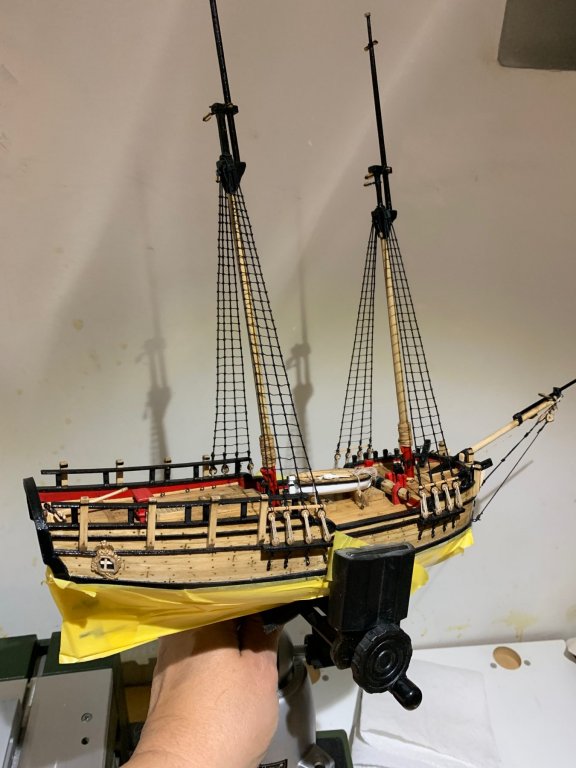

- 360 replies
-
- 3
-

-
- sultana
- model shipways
- (and 1 more)
-
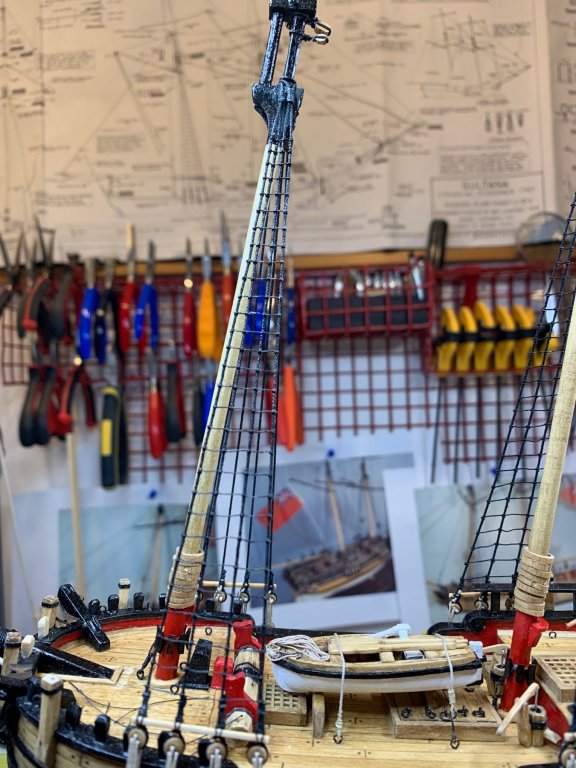
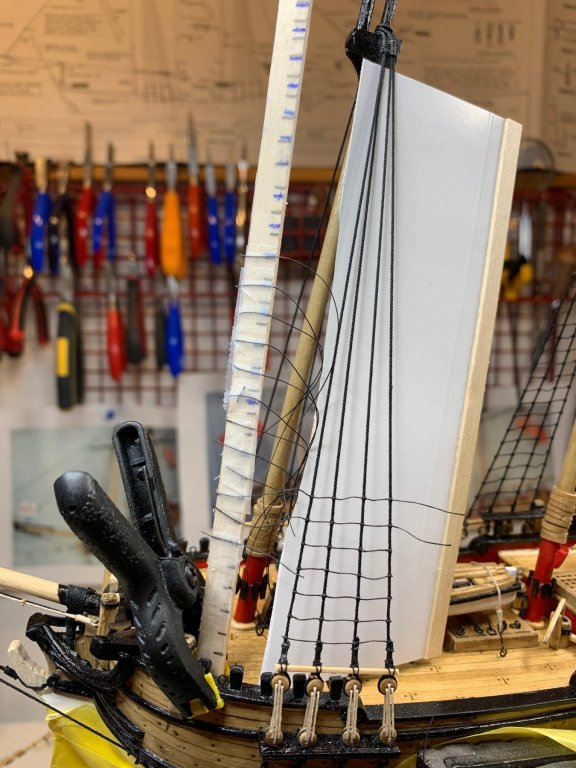
The ratlines work continues. Last part.. No much to report at this moment... Ratlines appears to be much cleaner and unified when using a new jig.. And to protect it from the element, while waiting for a next ratlines round... Happy modeling.


- 360 replies
-
- 3
-
-
- sultana
- model shipways
- (and 1 more)
-
Thanks Patrick.
-
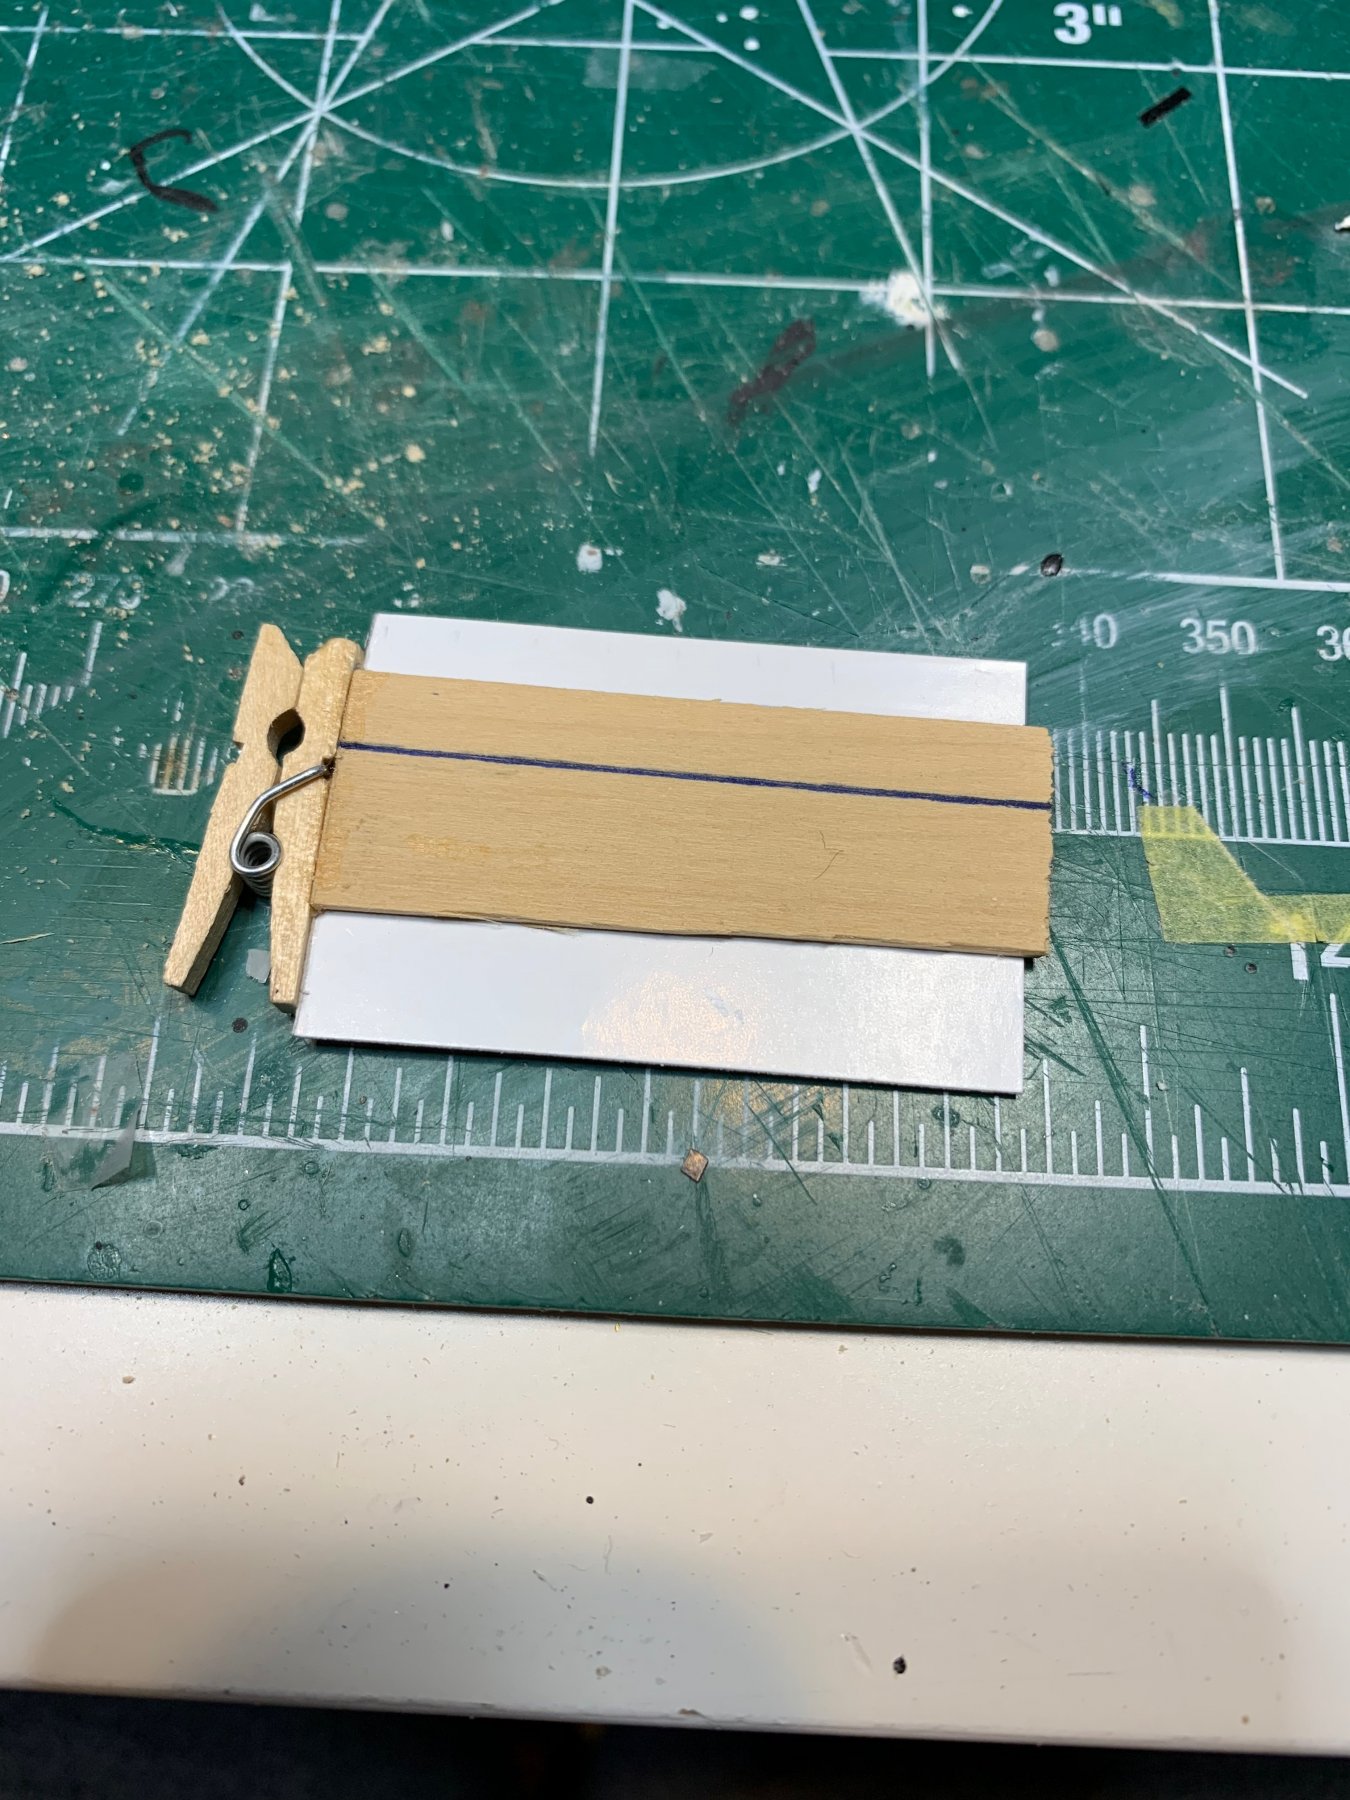
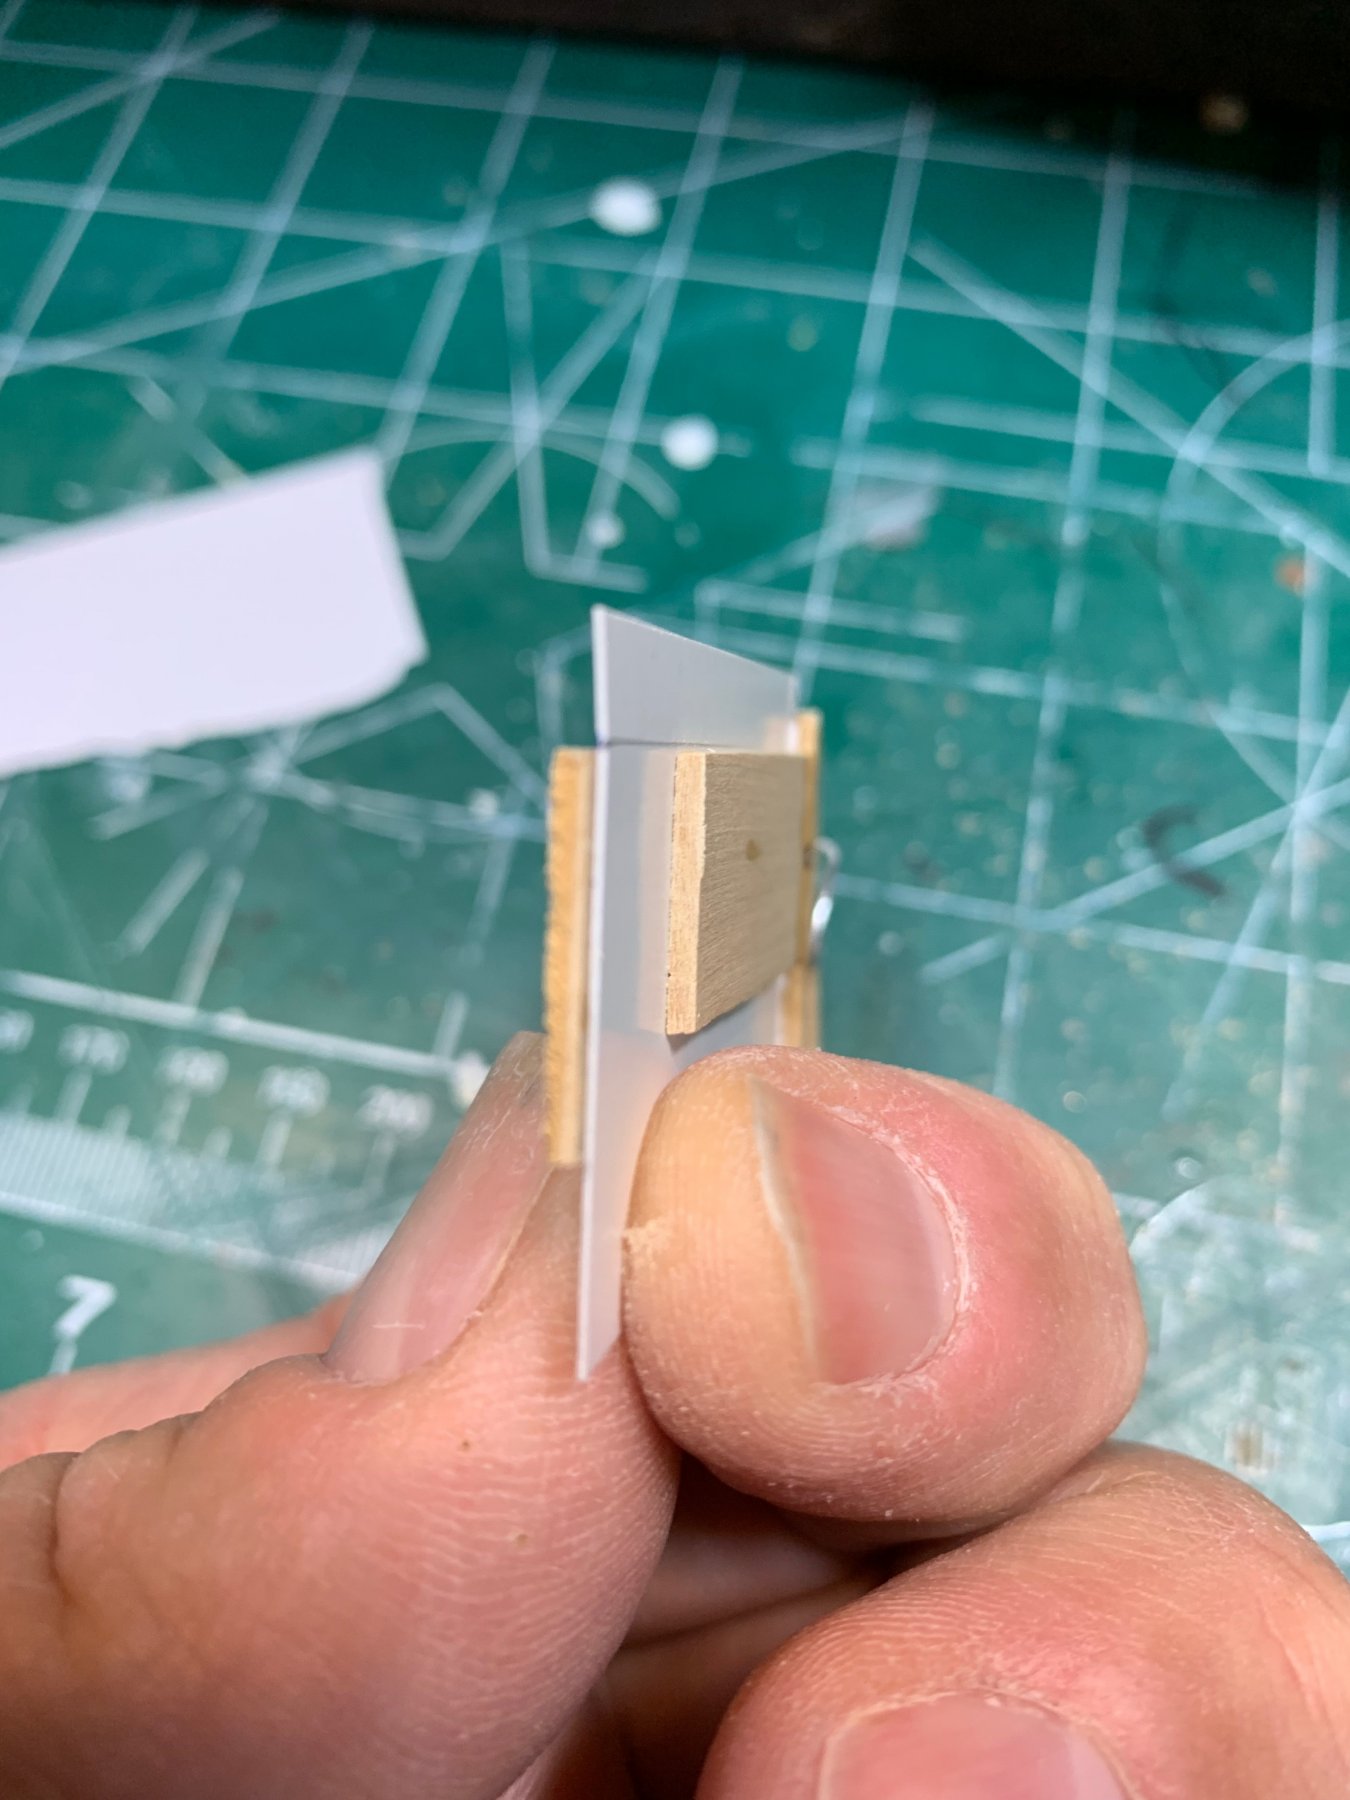
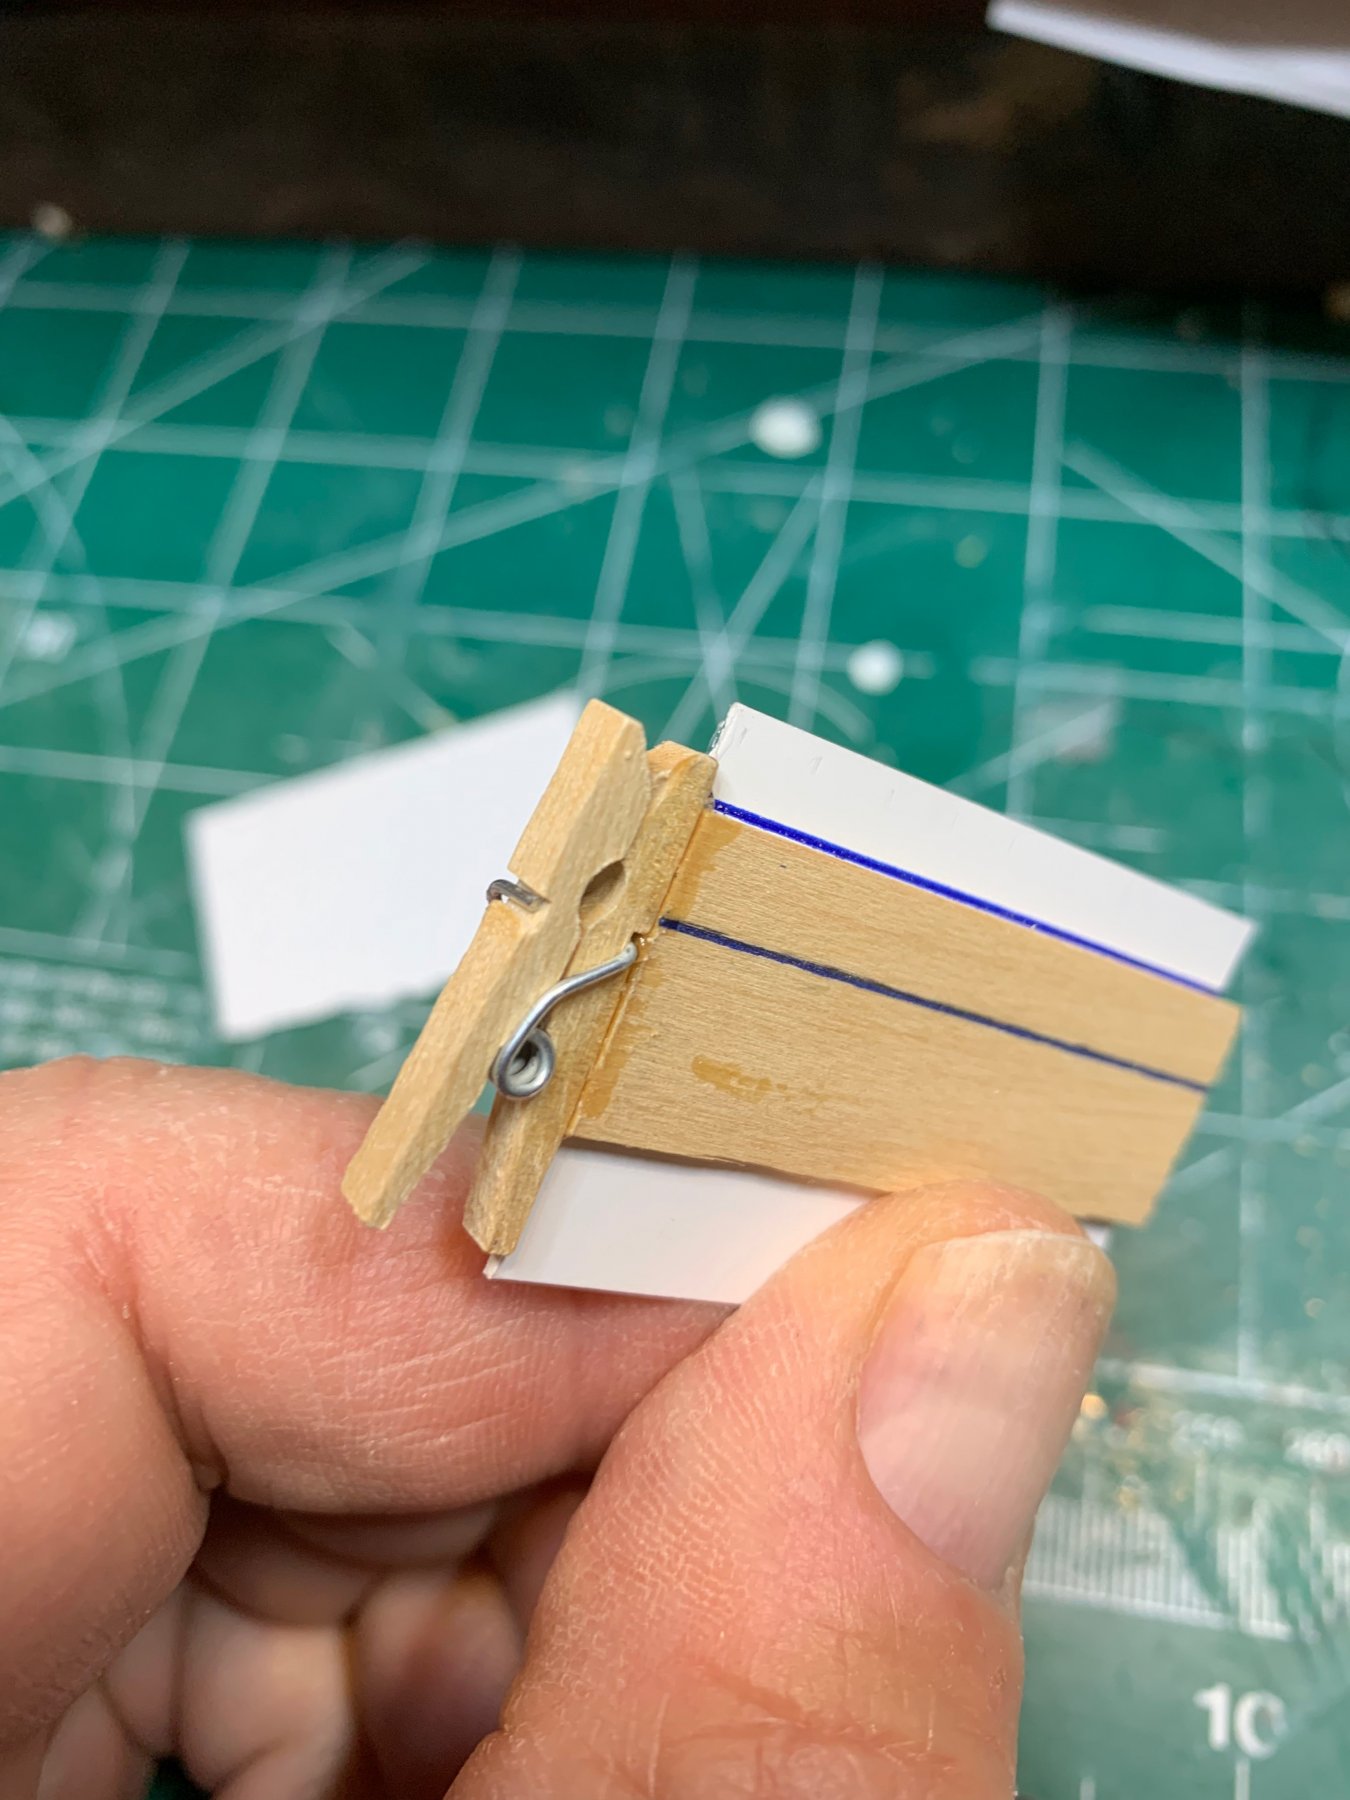
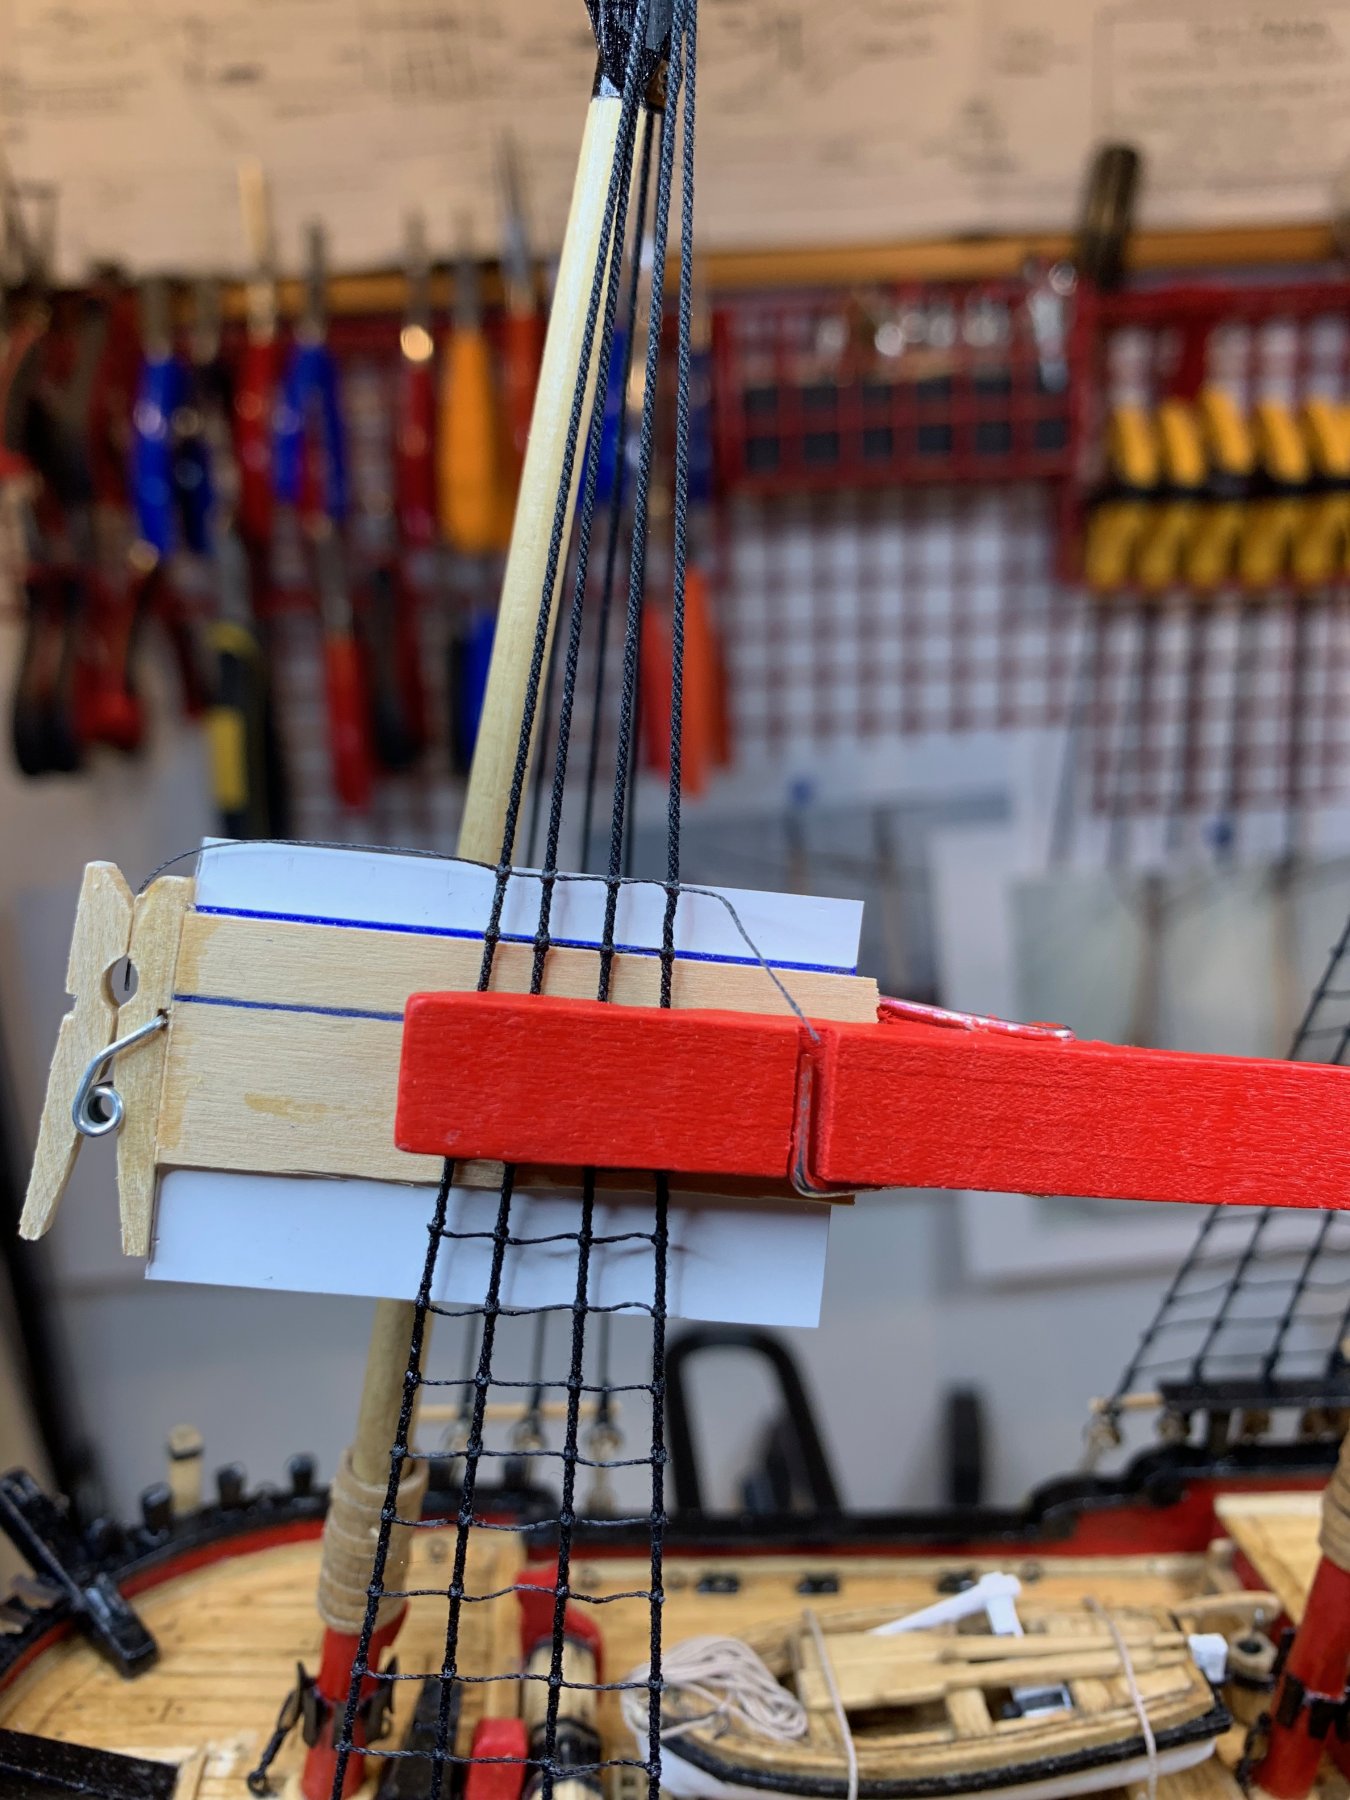
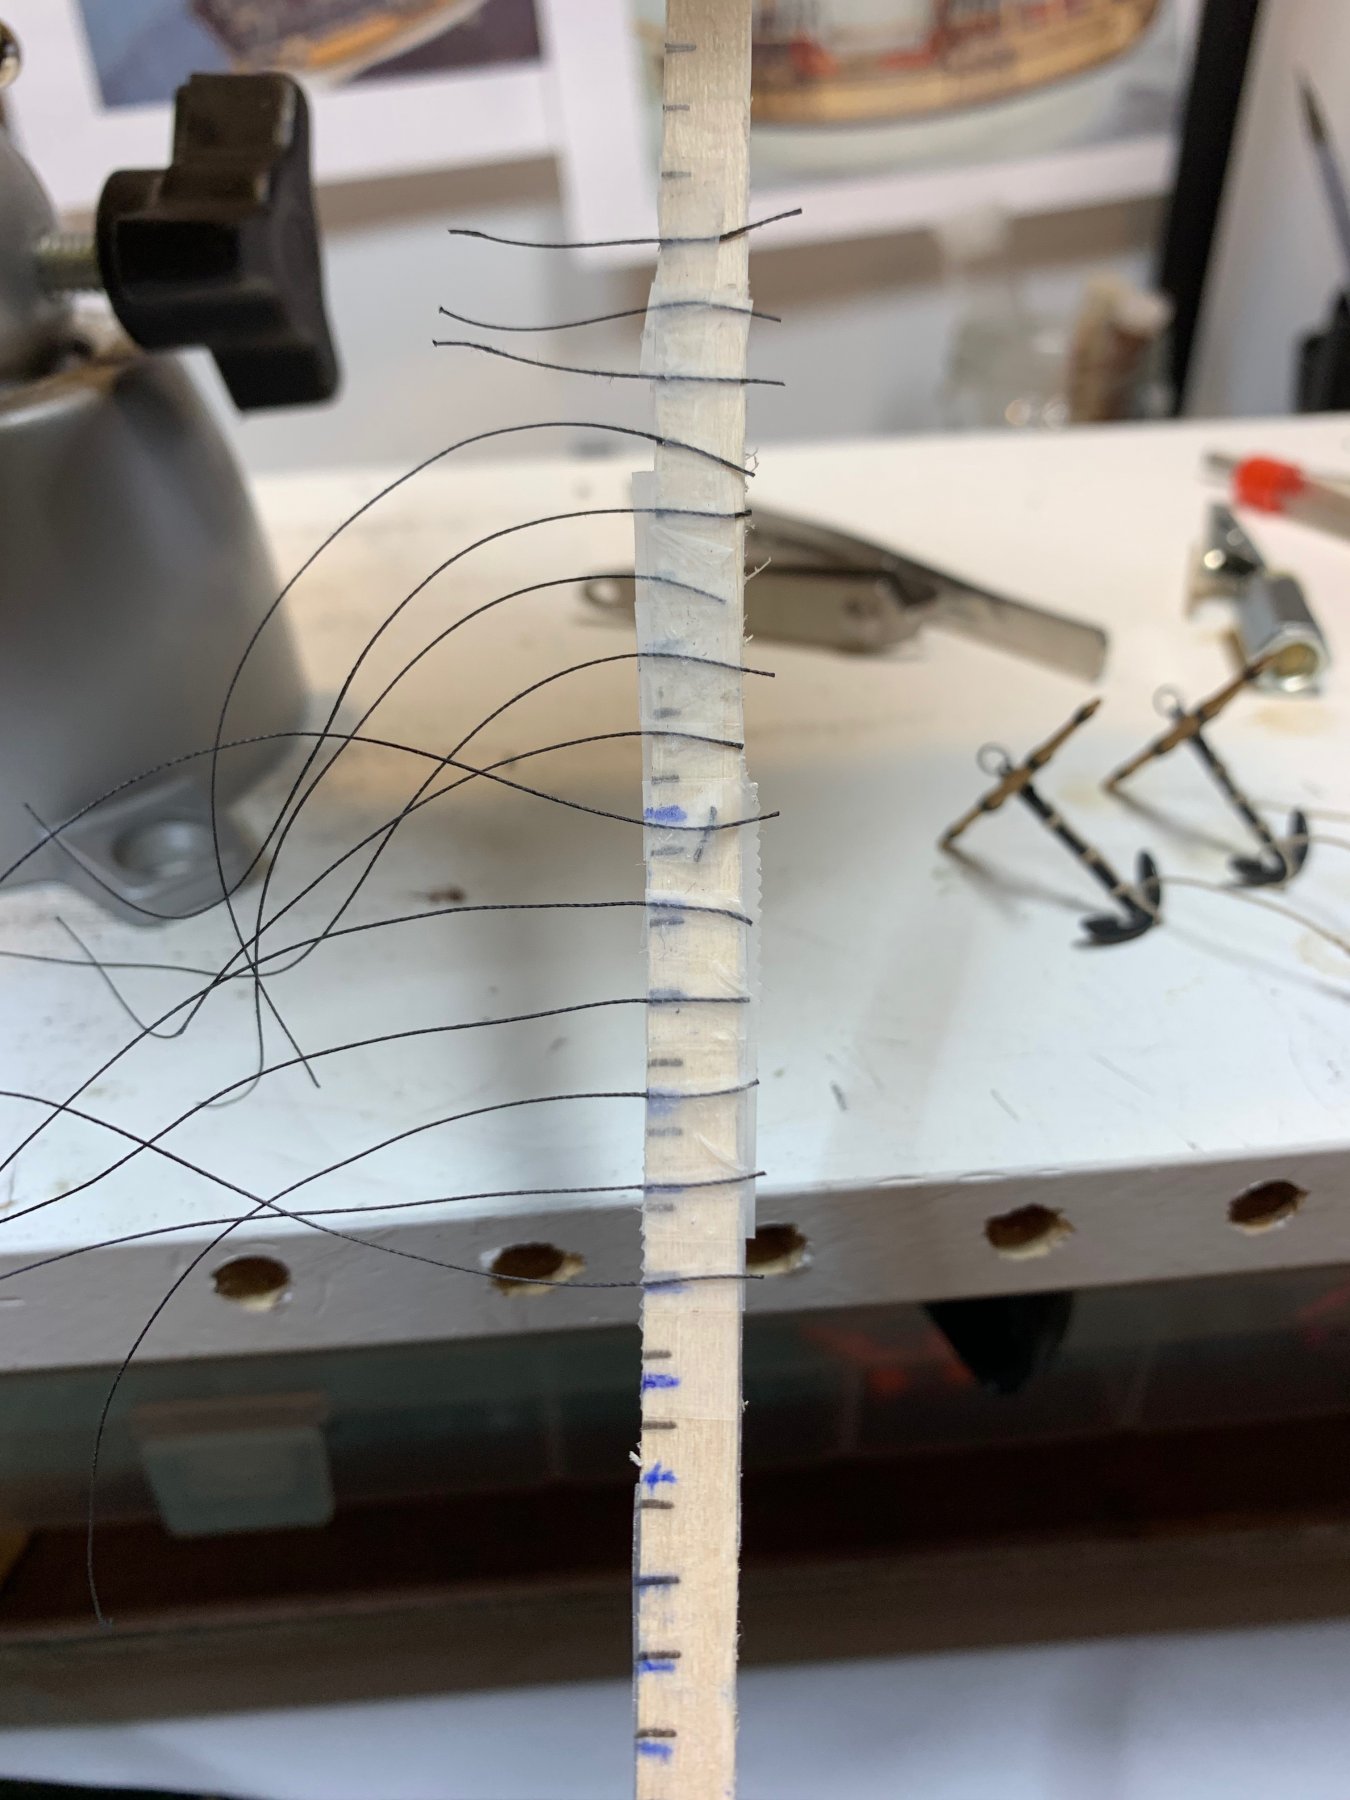
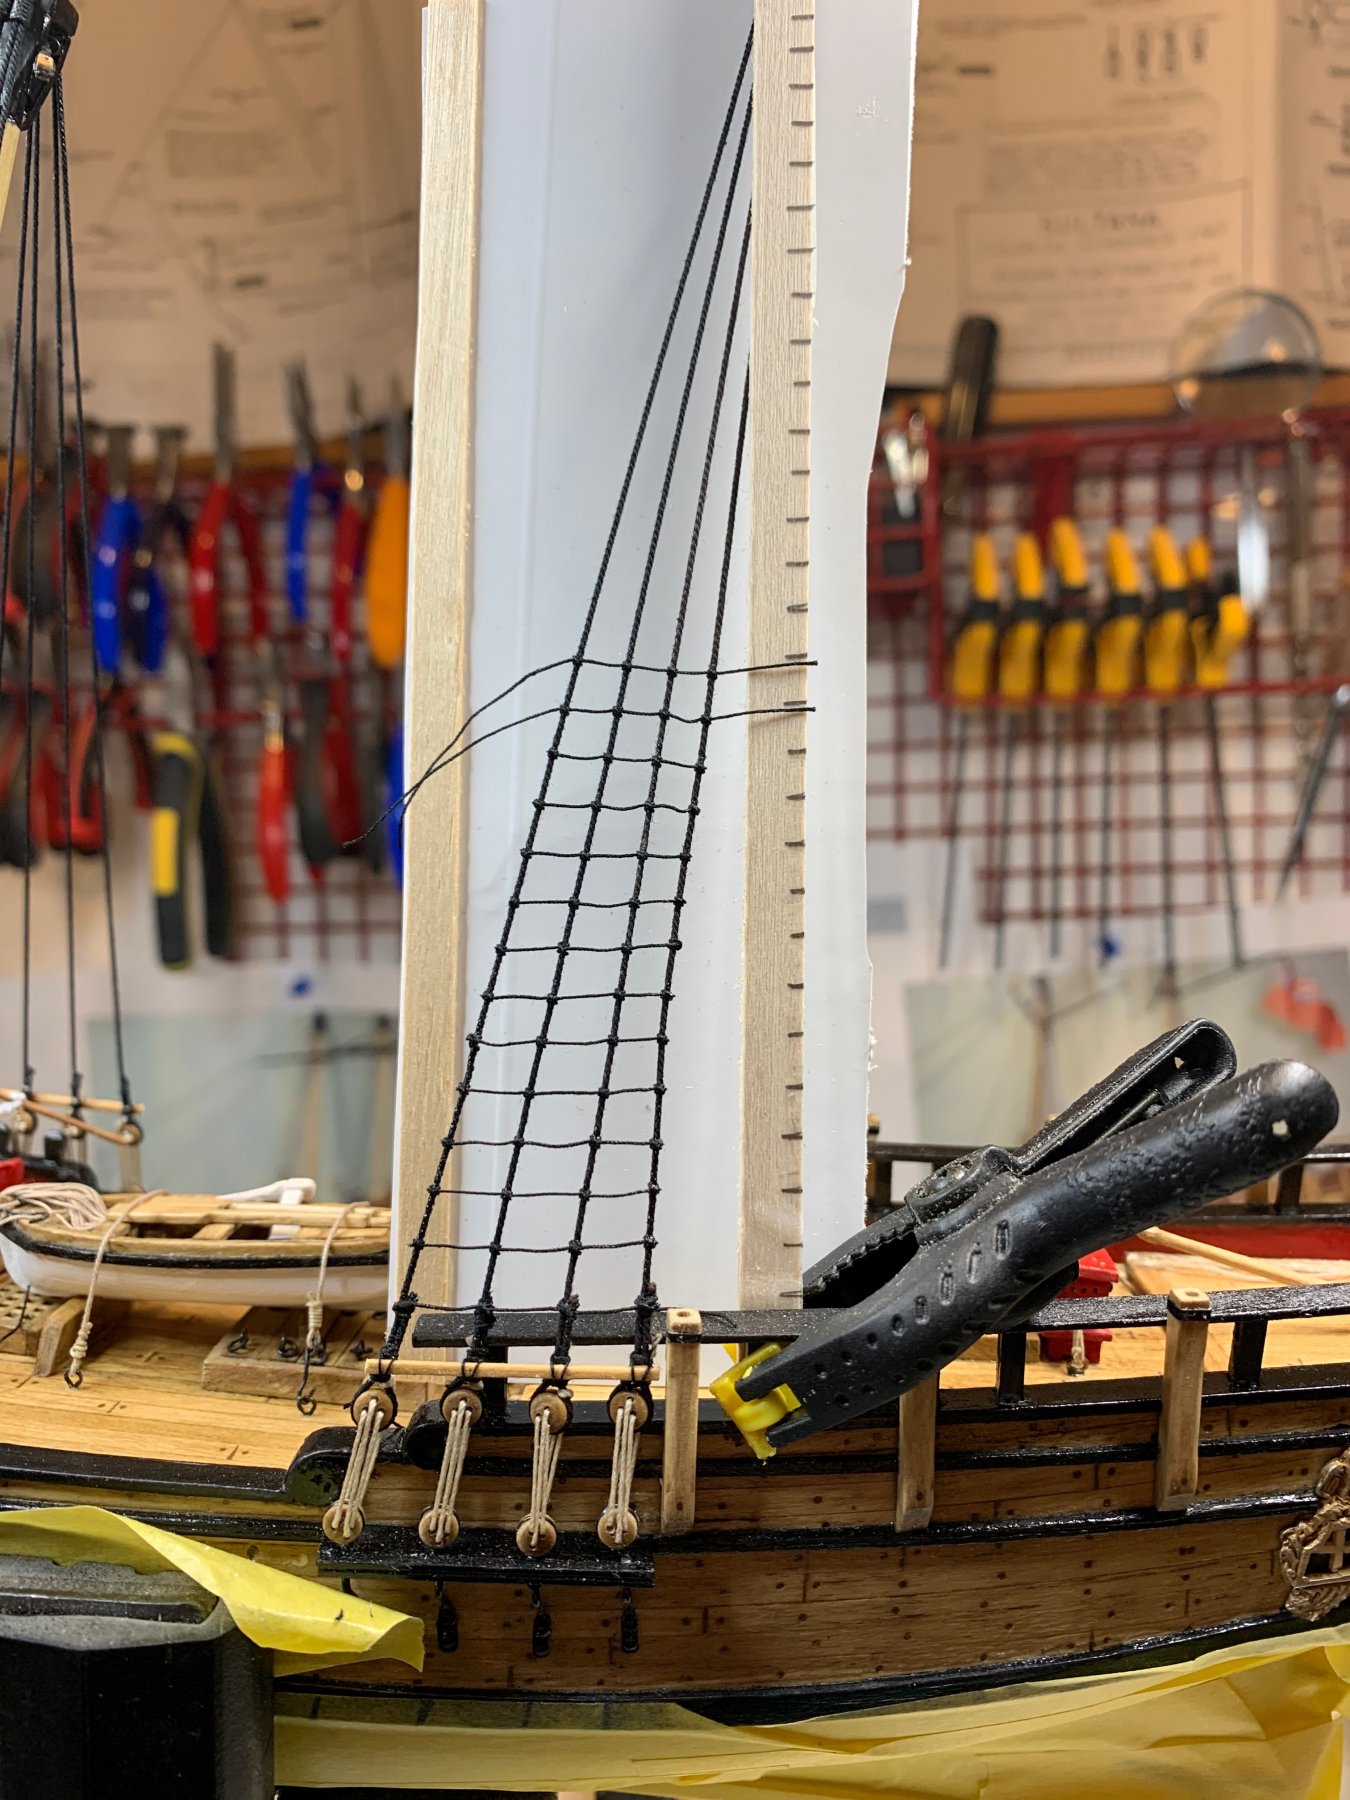
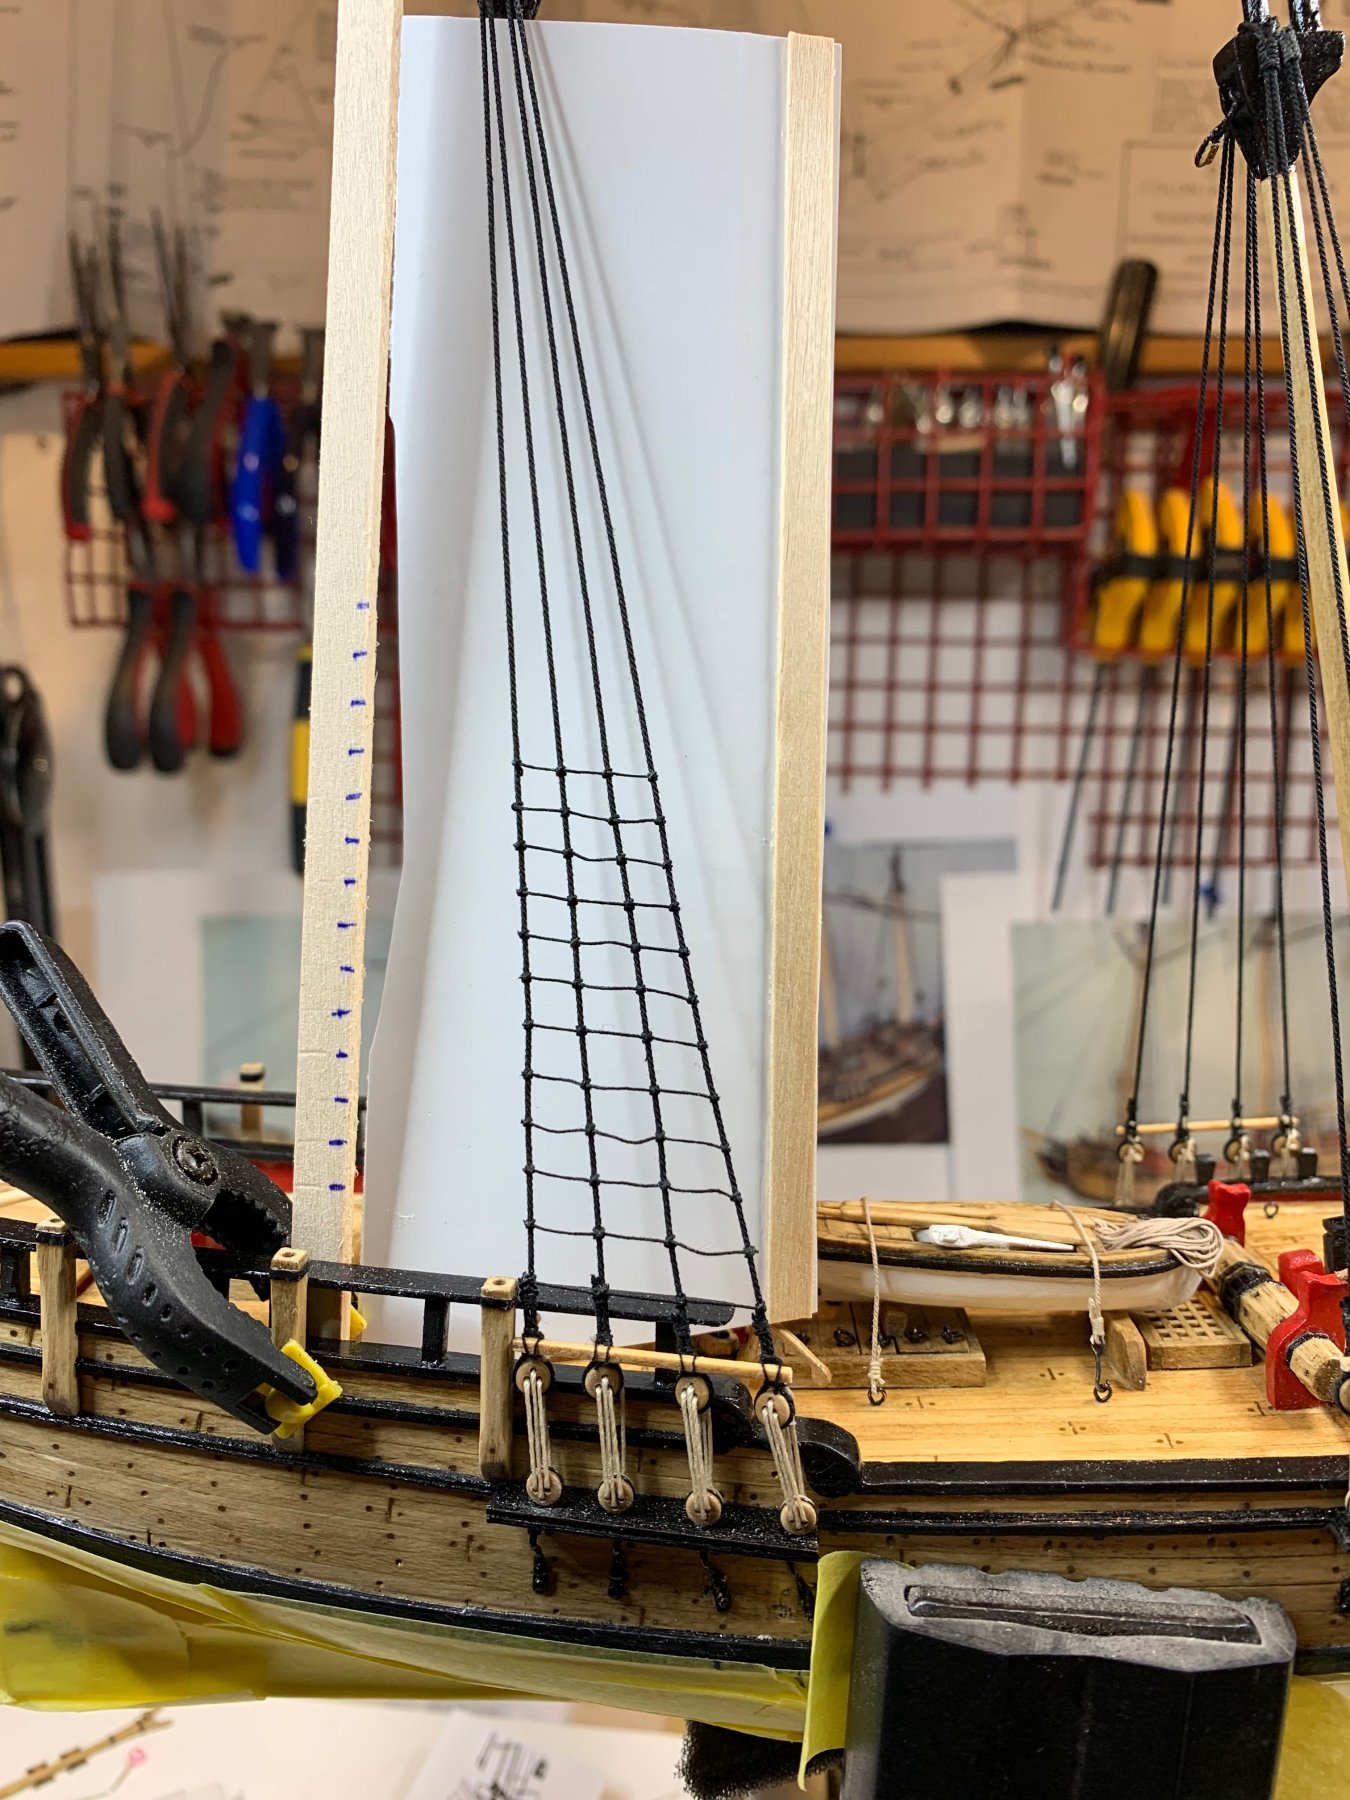
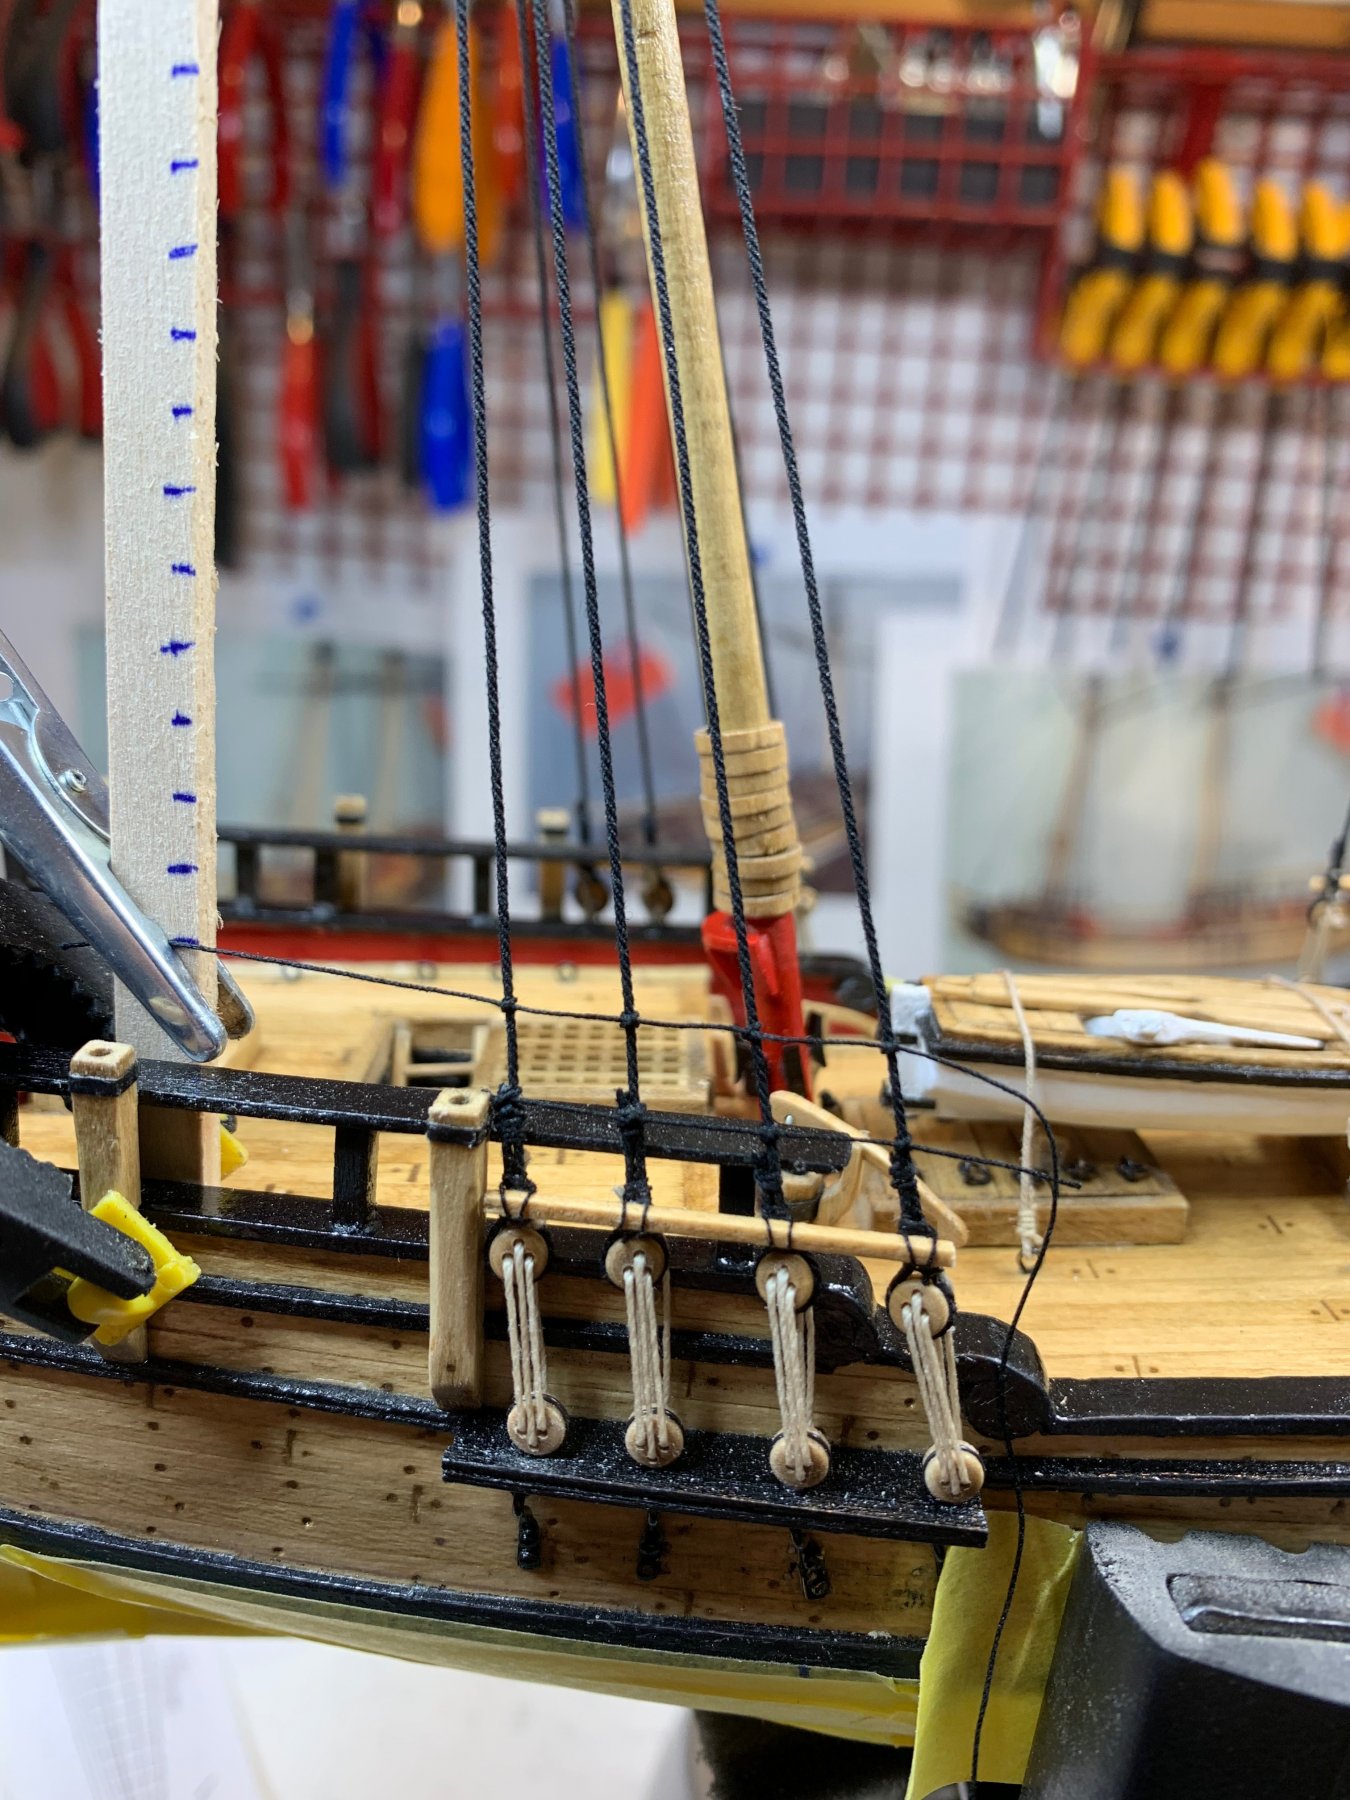
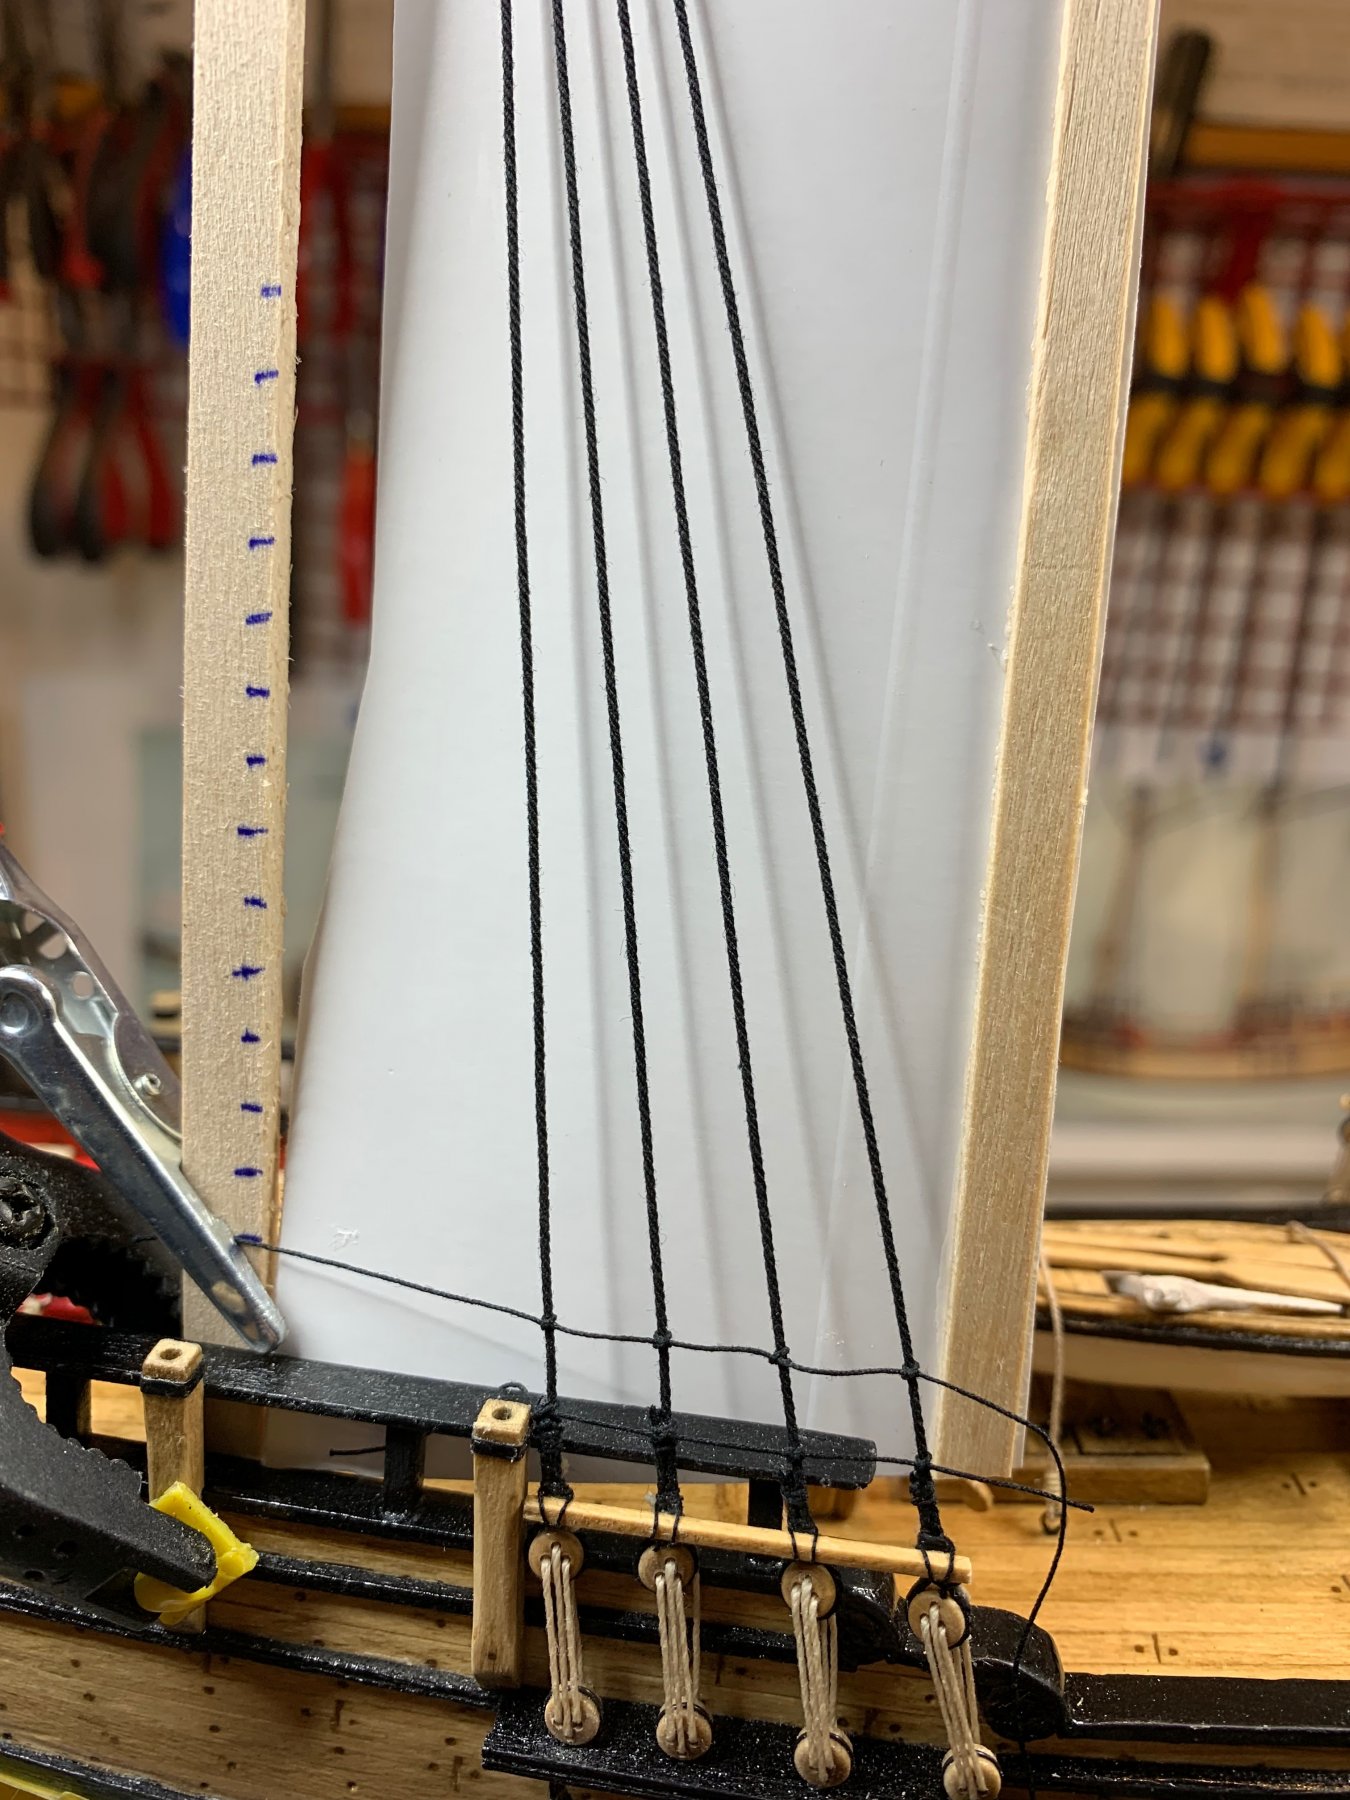
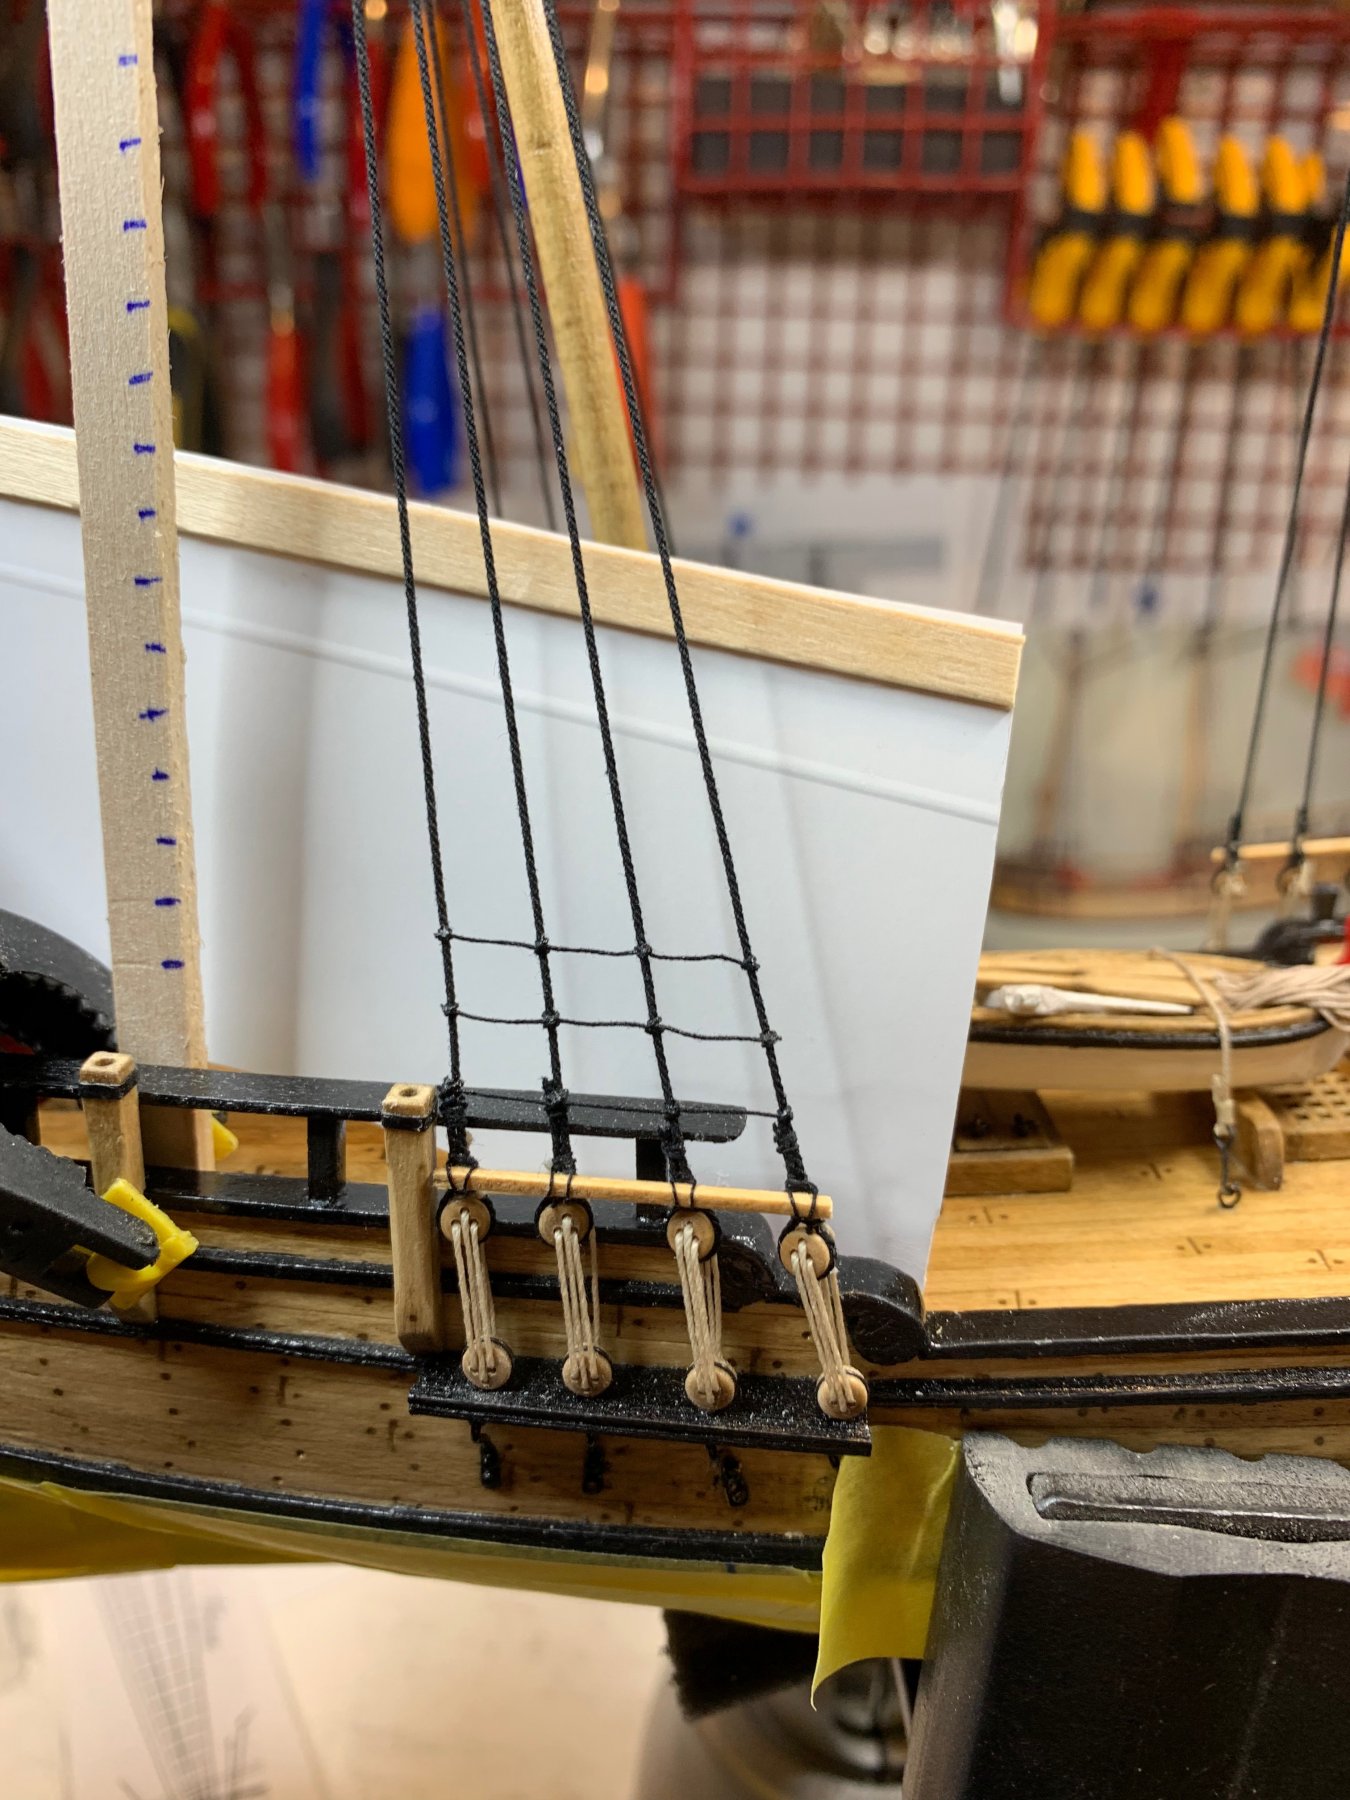
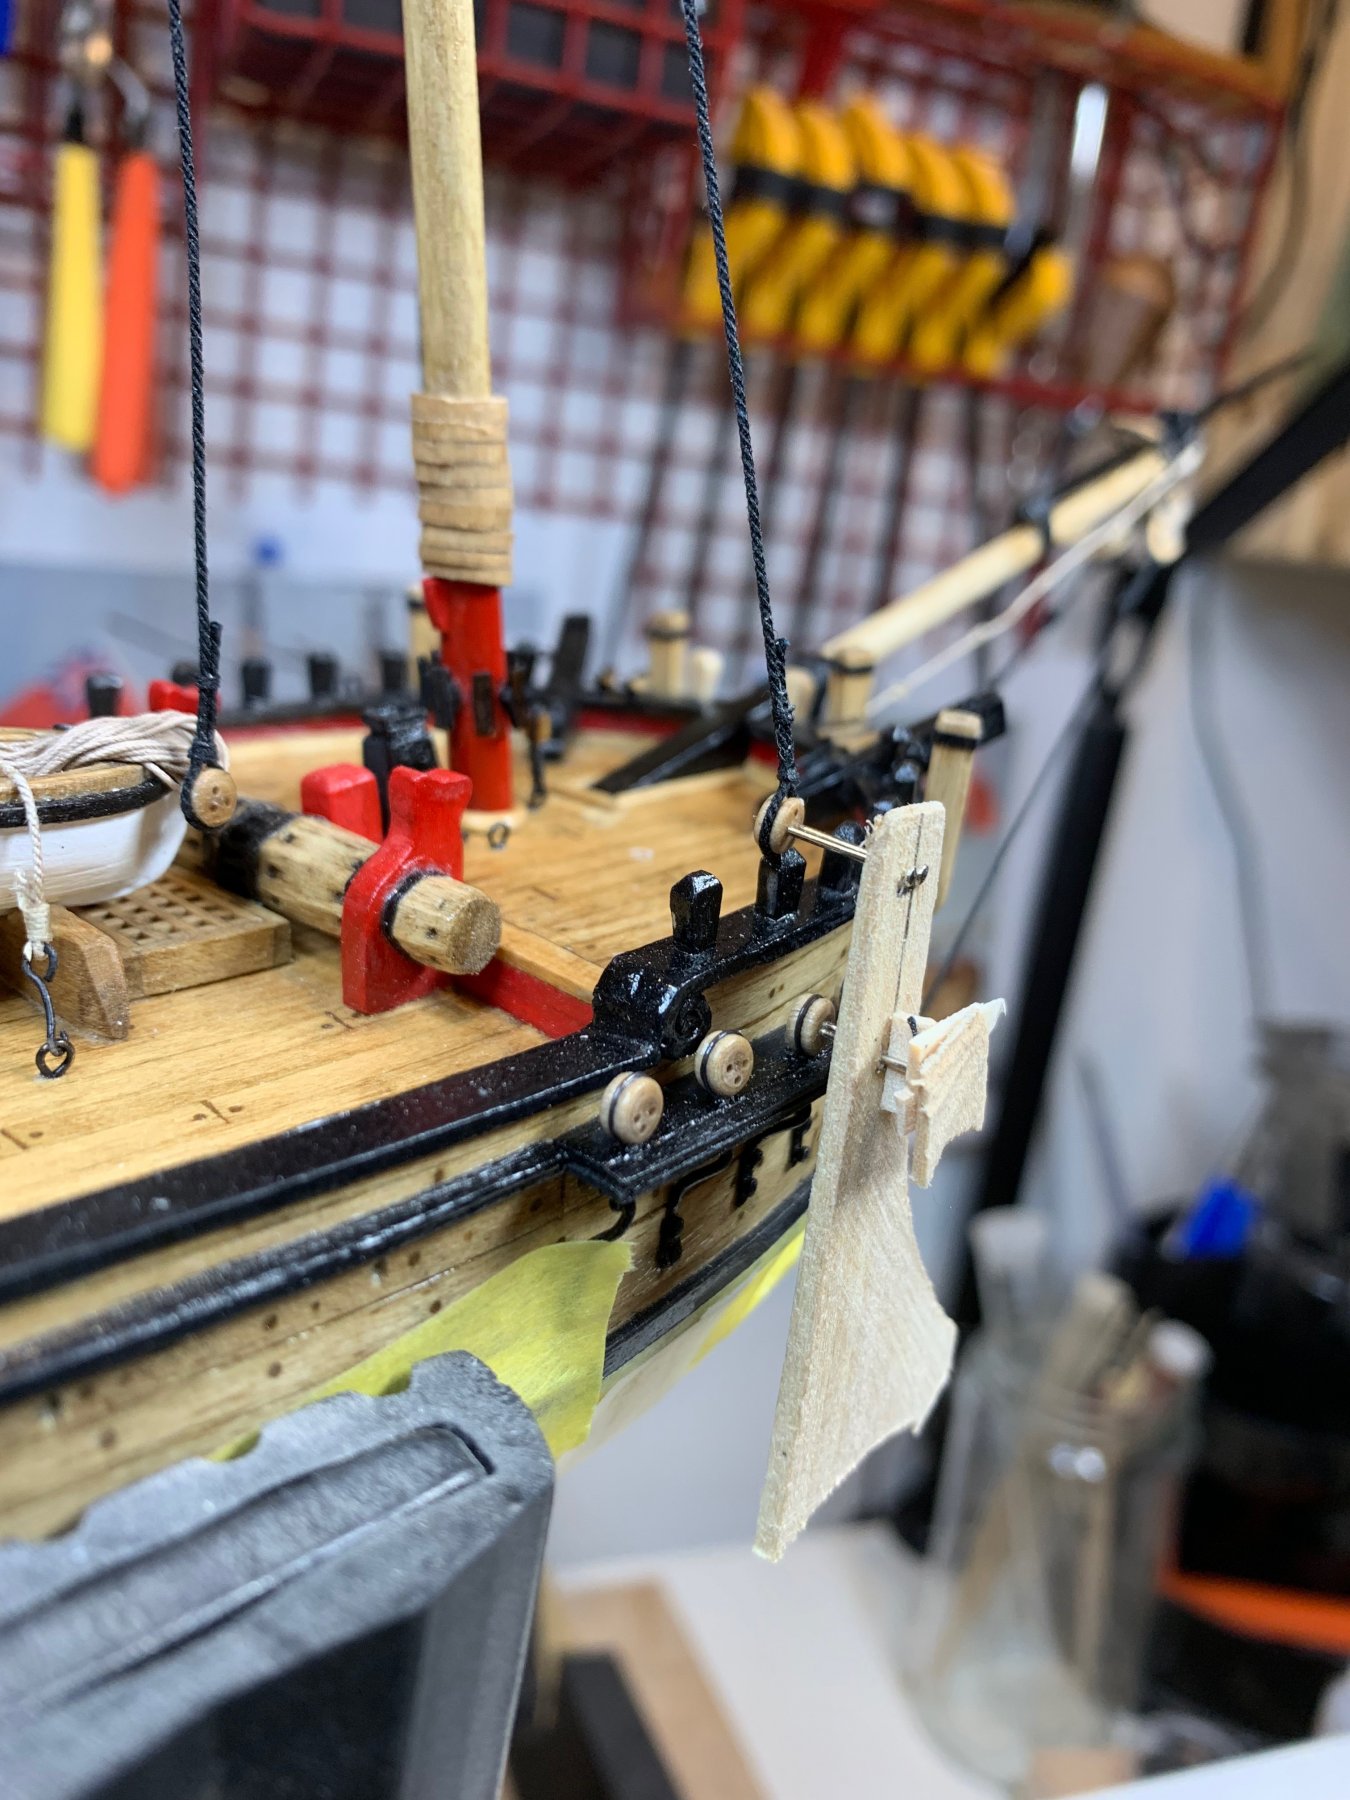
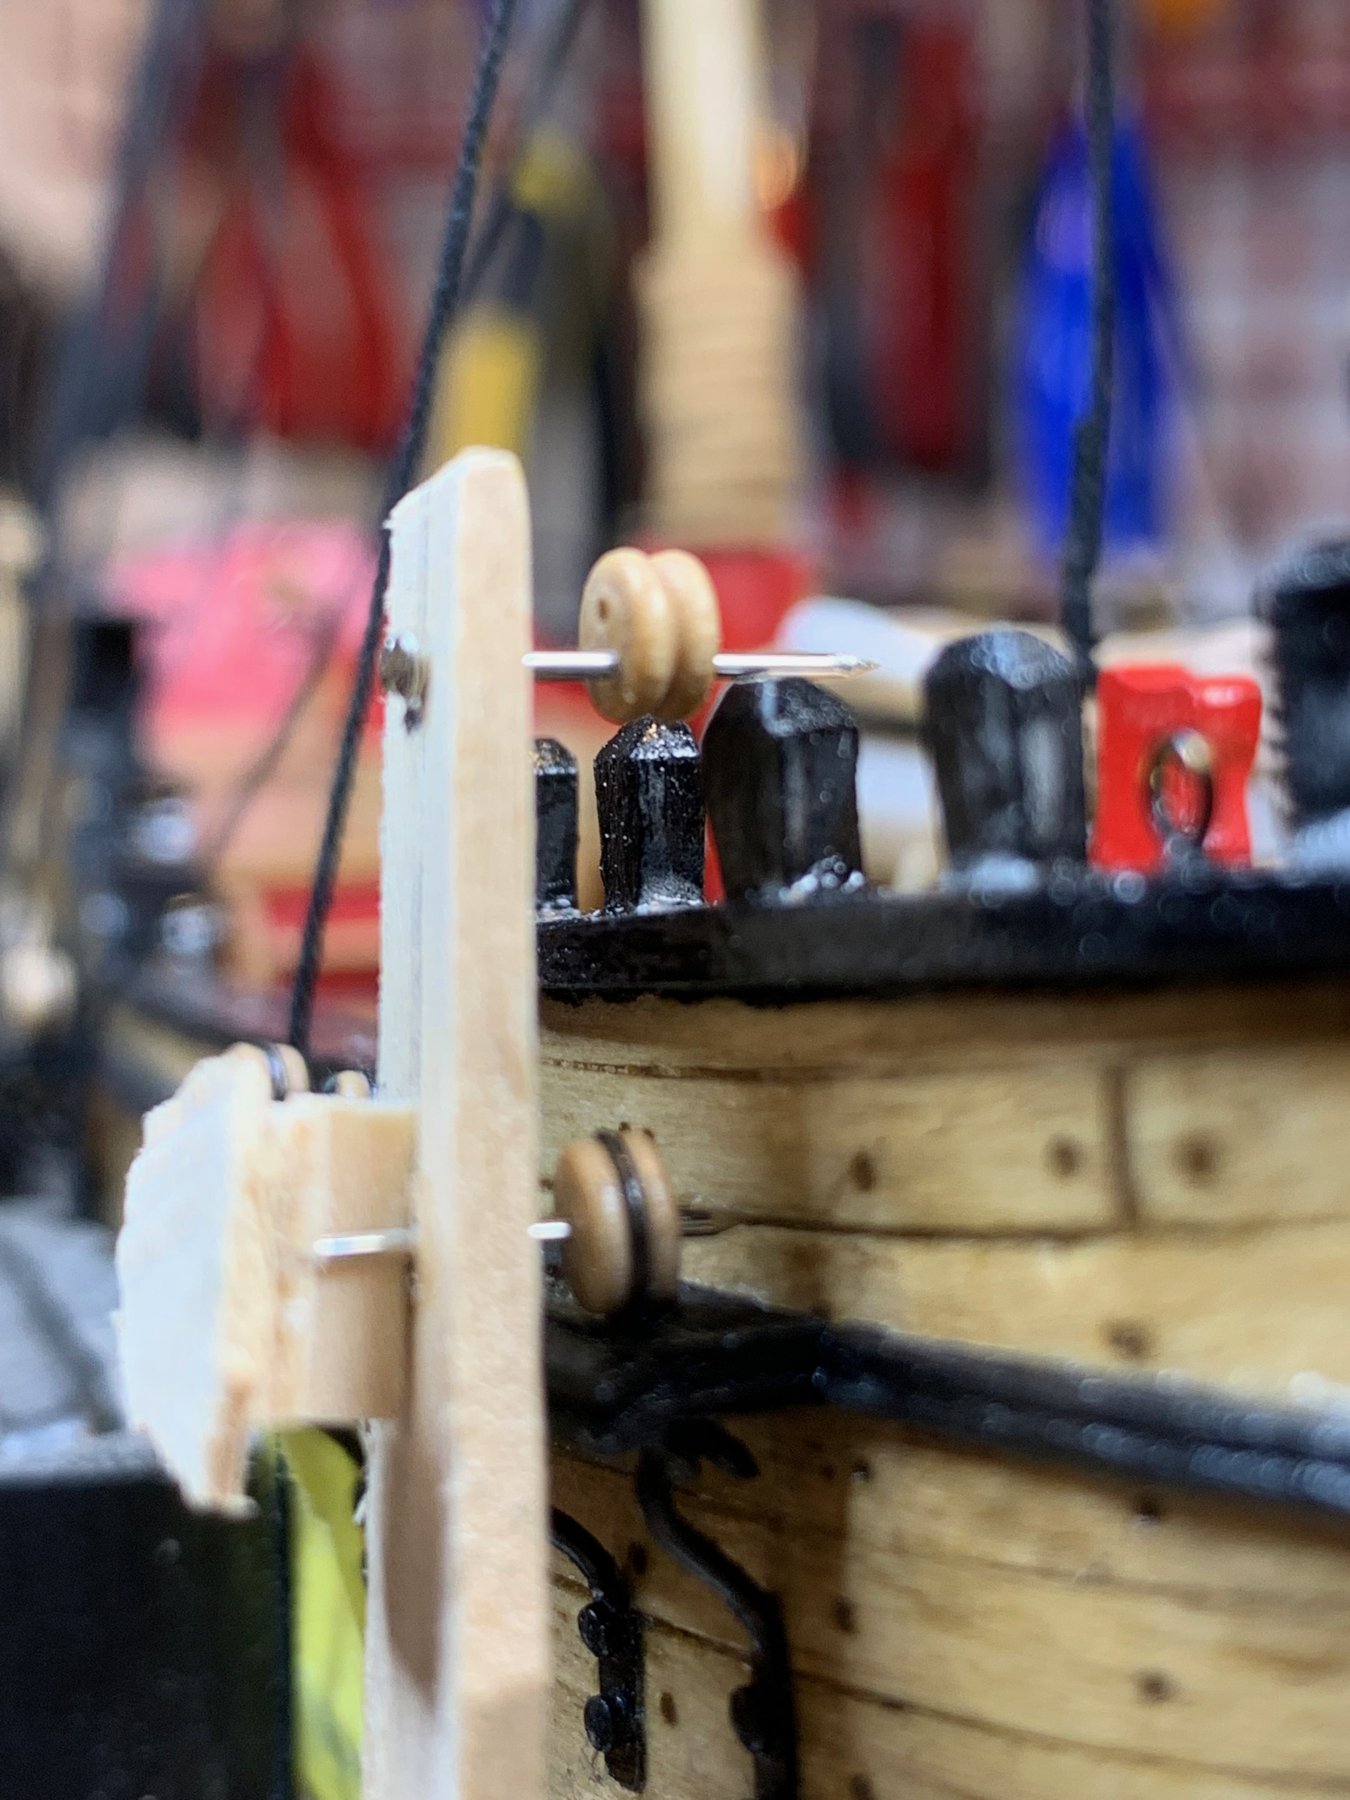
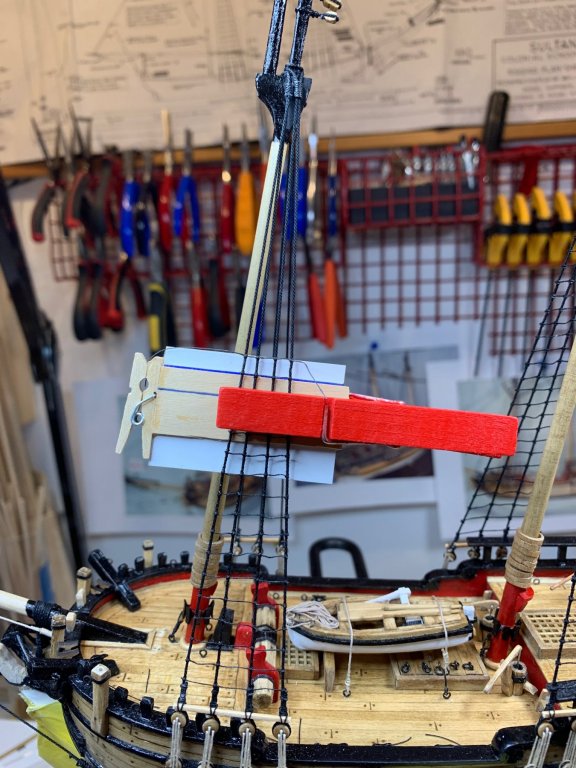
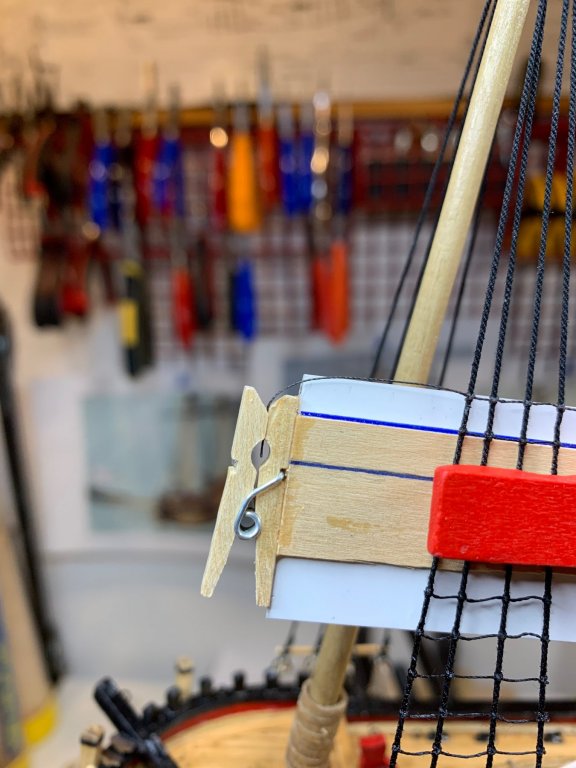
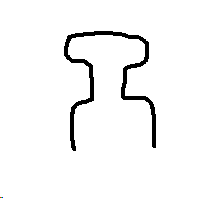
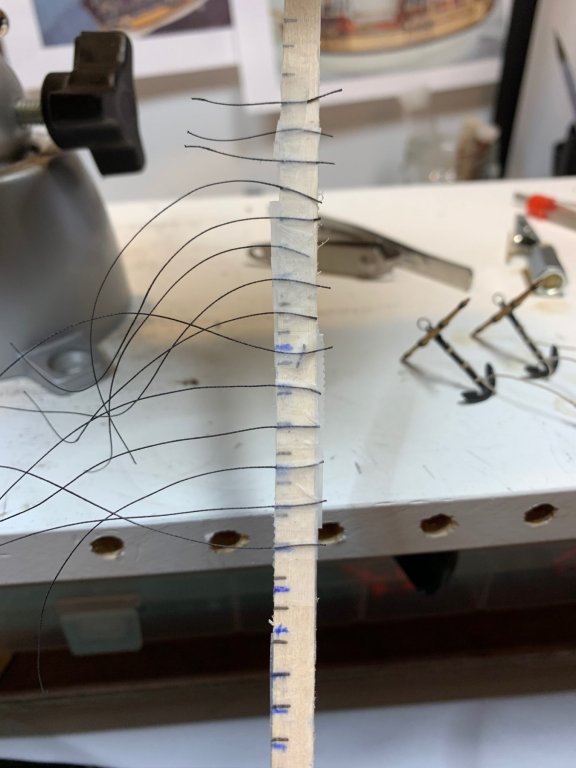
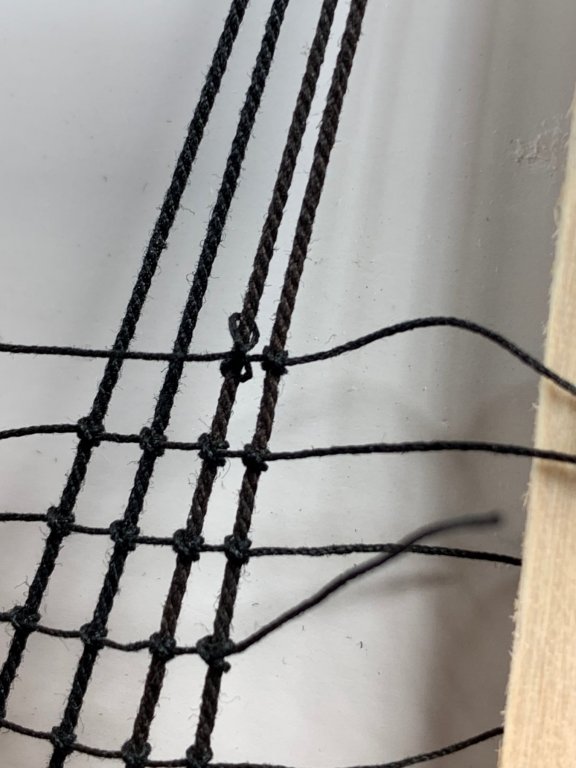
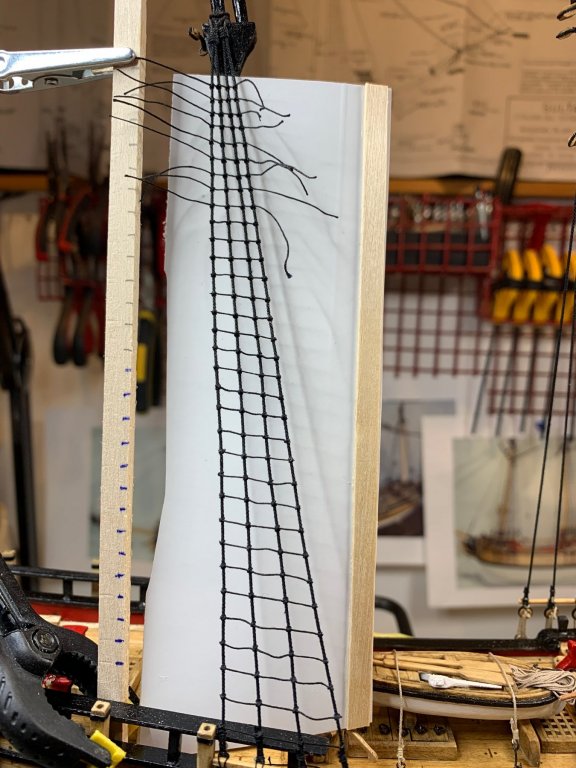
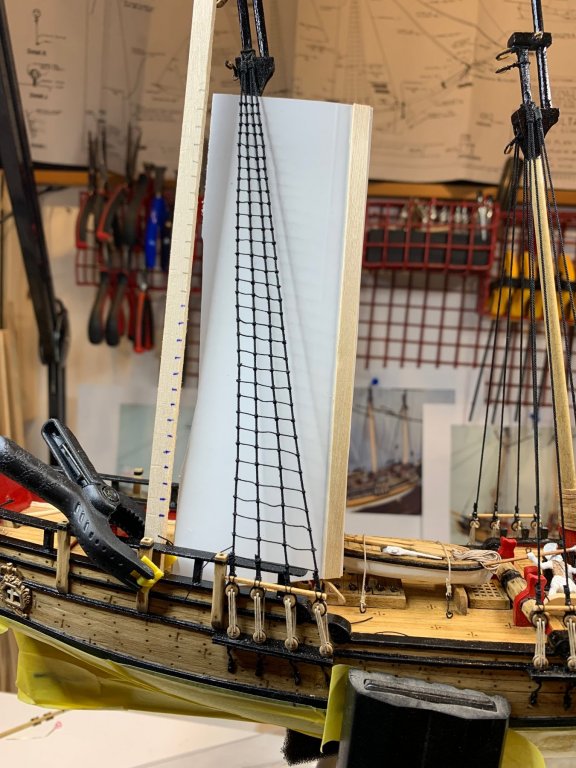
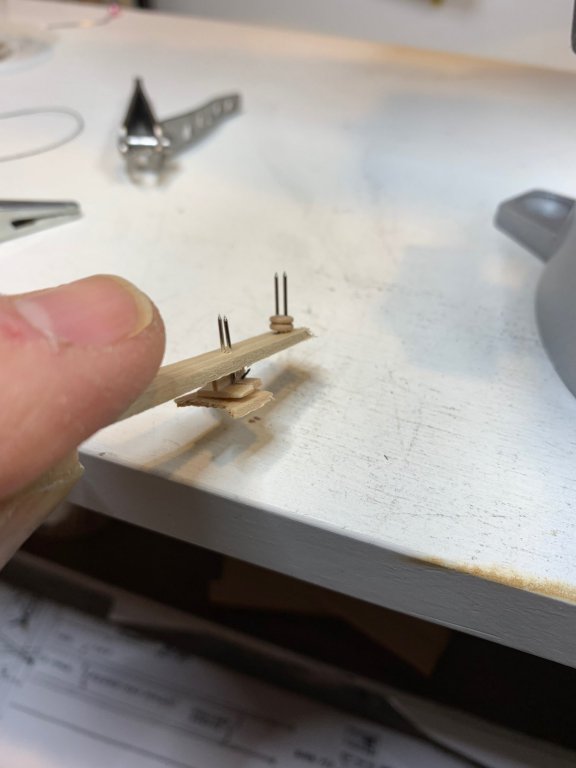
As i always looking for some improvement in building process and tools used, i was thinking of getting some sort of template to have making of ratlines a bit more unified and easier. The challenge with helping tools i used so far is that the piece of wood with markings was always standing straight up and not following rigging angle. This has the result that wood "moves away" from the rigging and makes ratline making process a bit difficult and not always with the same distance between two ratlines. So my next invention was based on this: the idea is to have a top edge of the office foder presenting a place where ratlines needs to be mounted and top edge of wood piece is matching the previous ratline. The purpose of a small cloth pin is to keep the ratline rope fixed so the first knot will not be loose... The sandwich was made, the edge were sanded to have a smooth edge and pin was glued to the edge. The distance between two ratlines is 5mm. The white color of a folder provide adequate contrast for the black ratline so it was visible enough and easy to mount... Then this little helper was positioned on the ridging and fixed with another (normal size) cloth pin. The third set of ratlines is completed now with a help of this tool. These two pieces of toothpick were put in place just to divide two ringing lines so i can actually maneuver ratlines around the ridging ropes. The top of the toothpick were sanded (shape showed below) to correct spacing, cut to length of 15mm and put in between second and third ridging ropes. Happy modeling..


- 360 replies
-
- 5
-
-
- sultana
- model shipways
- (and 1 more)
-
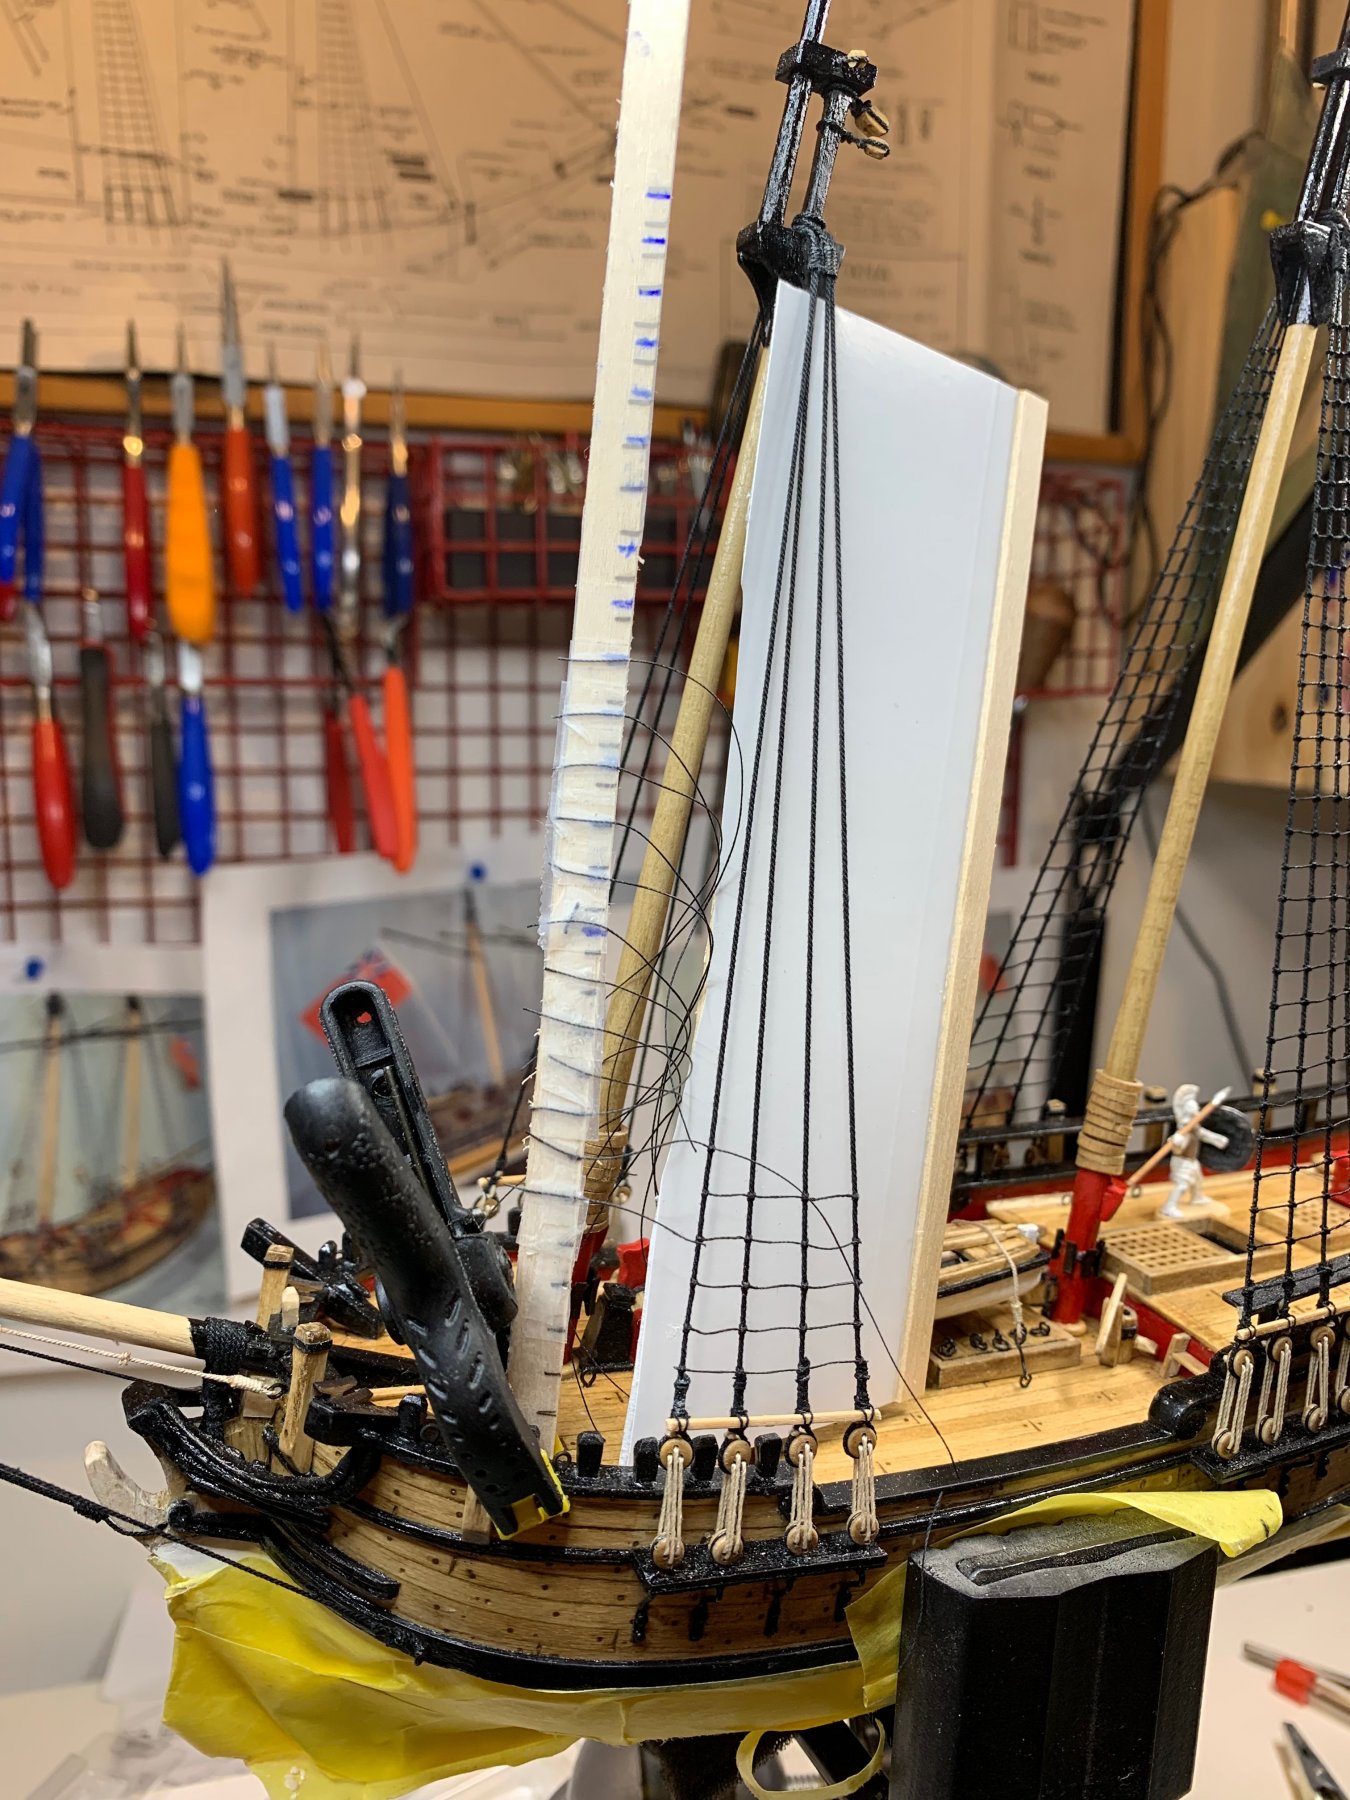
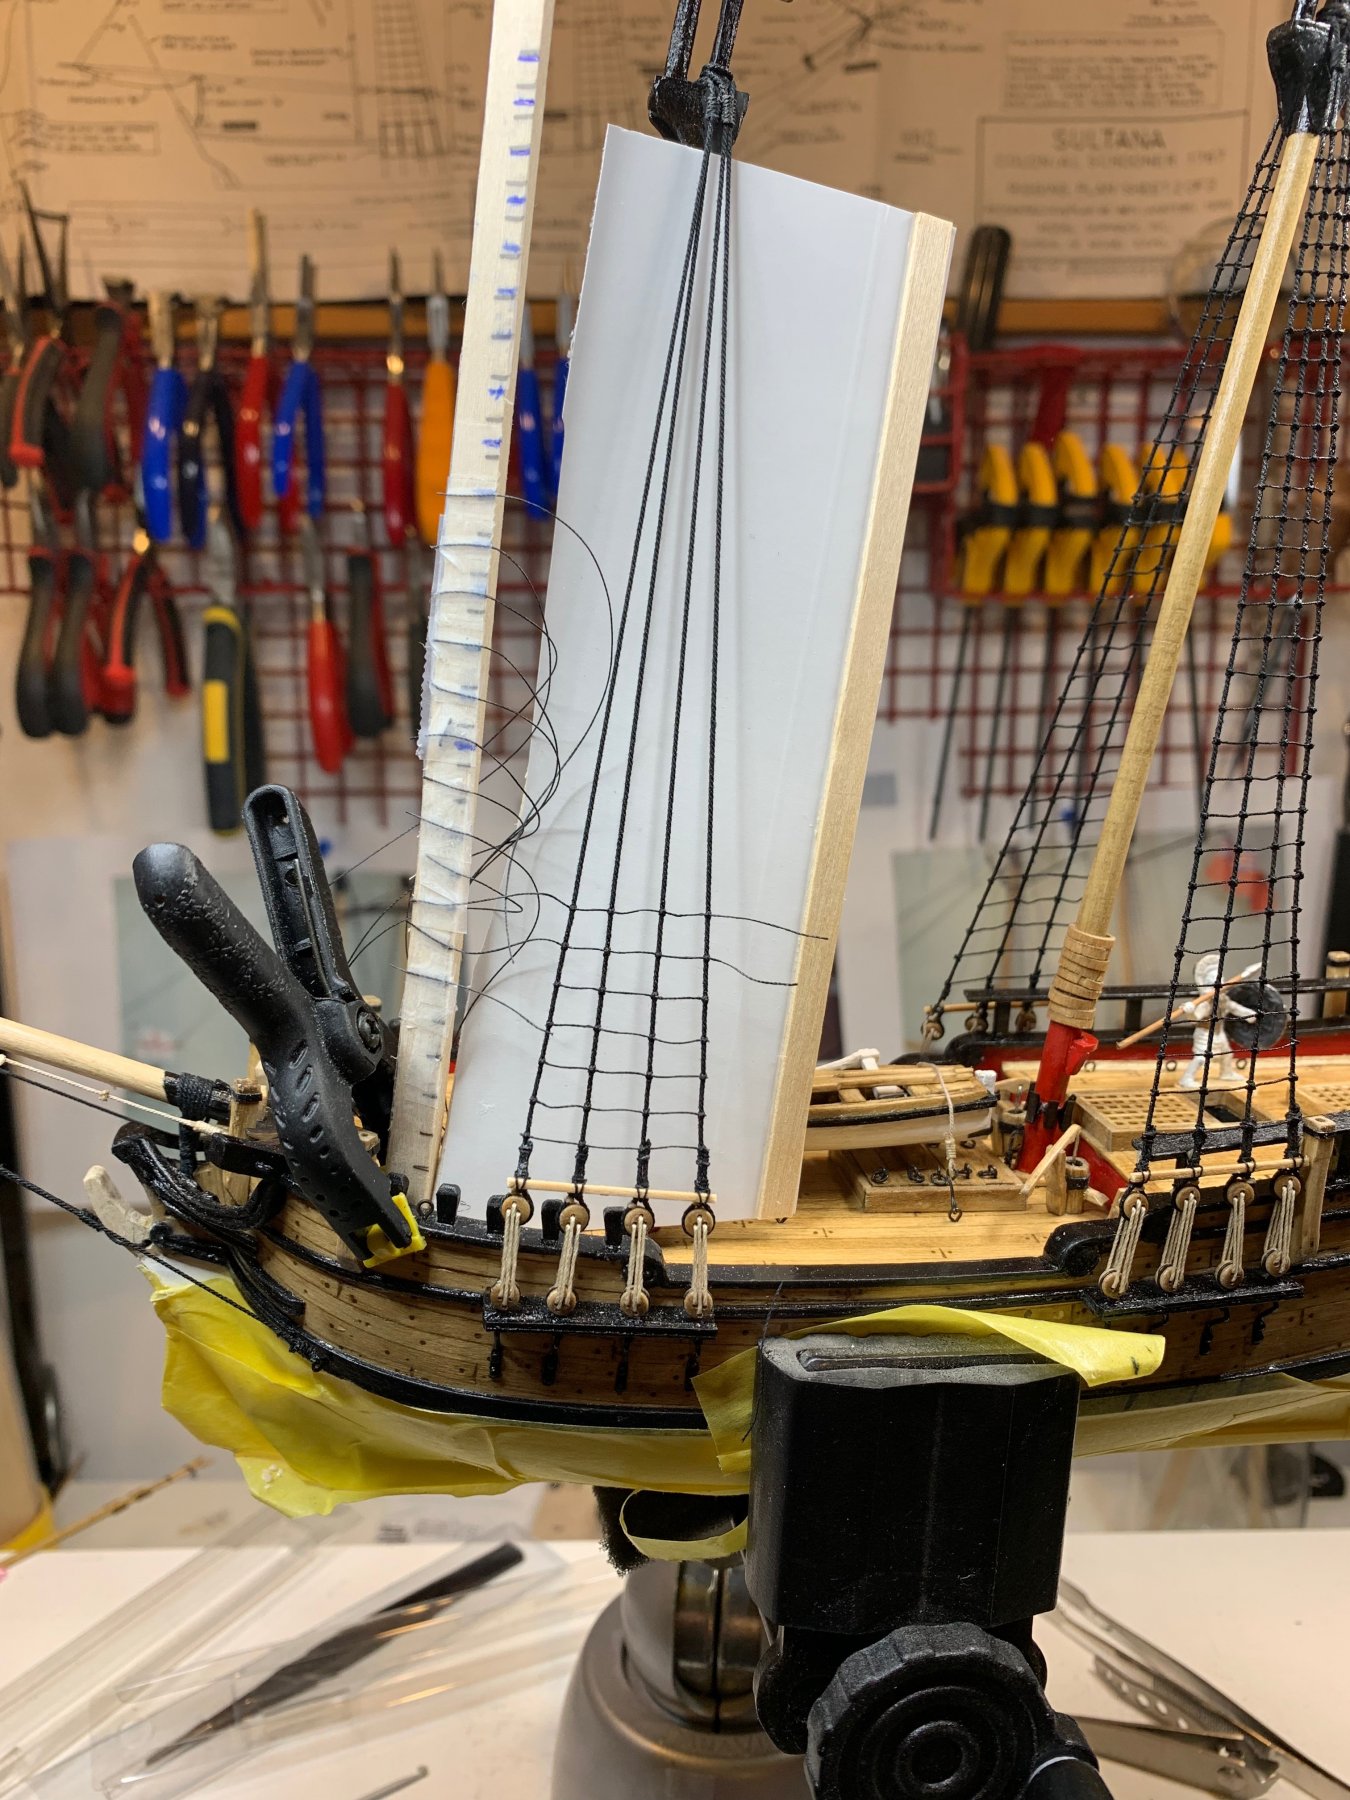
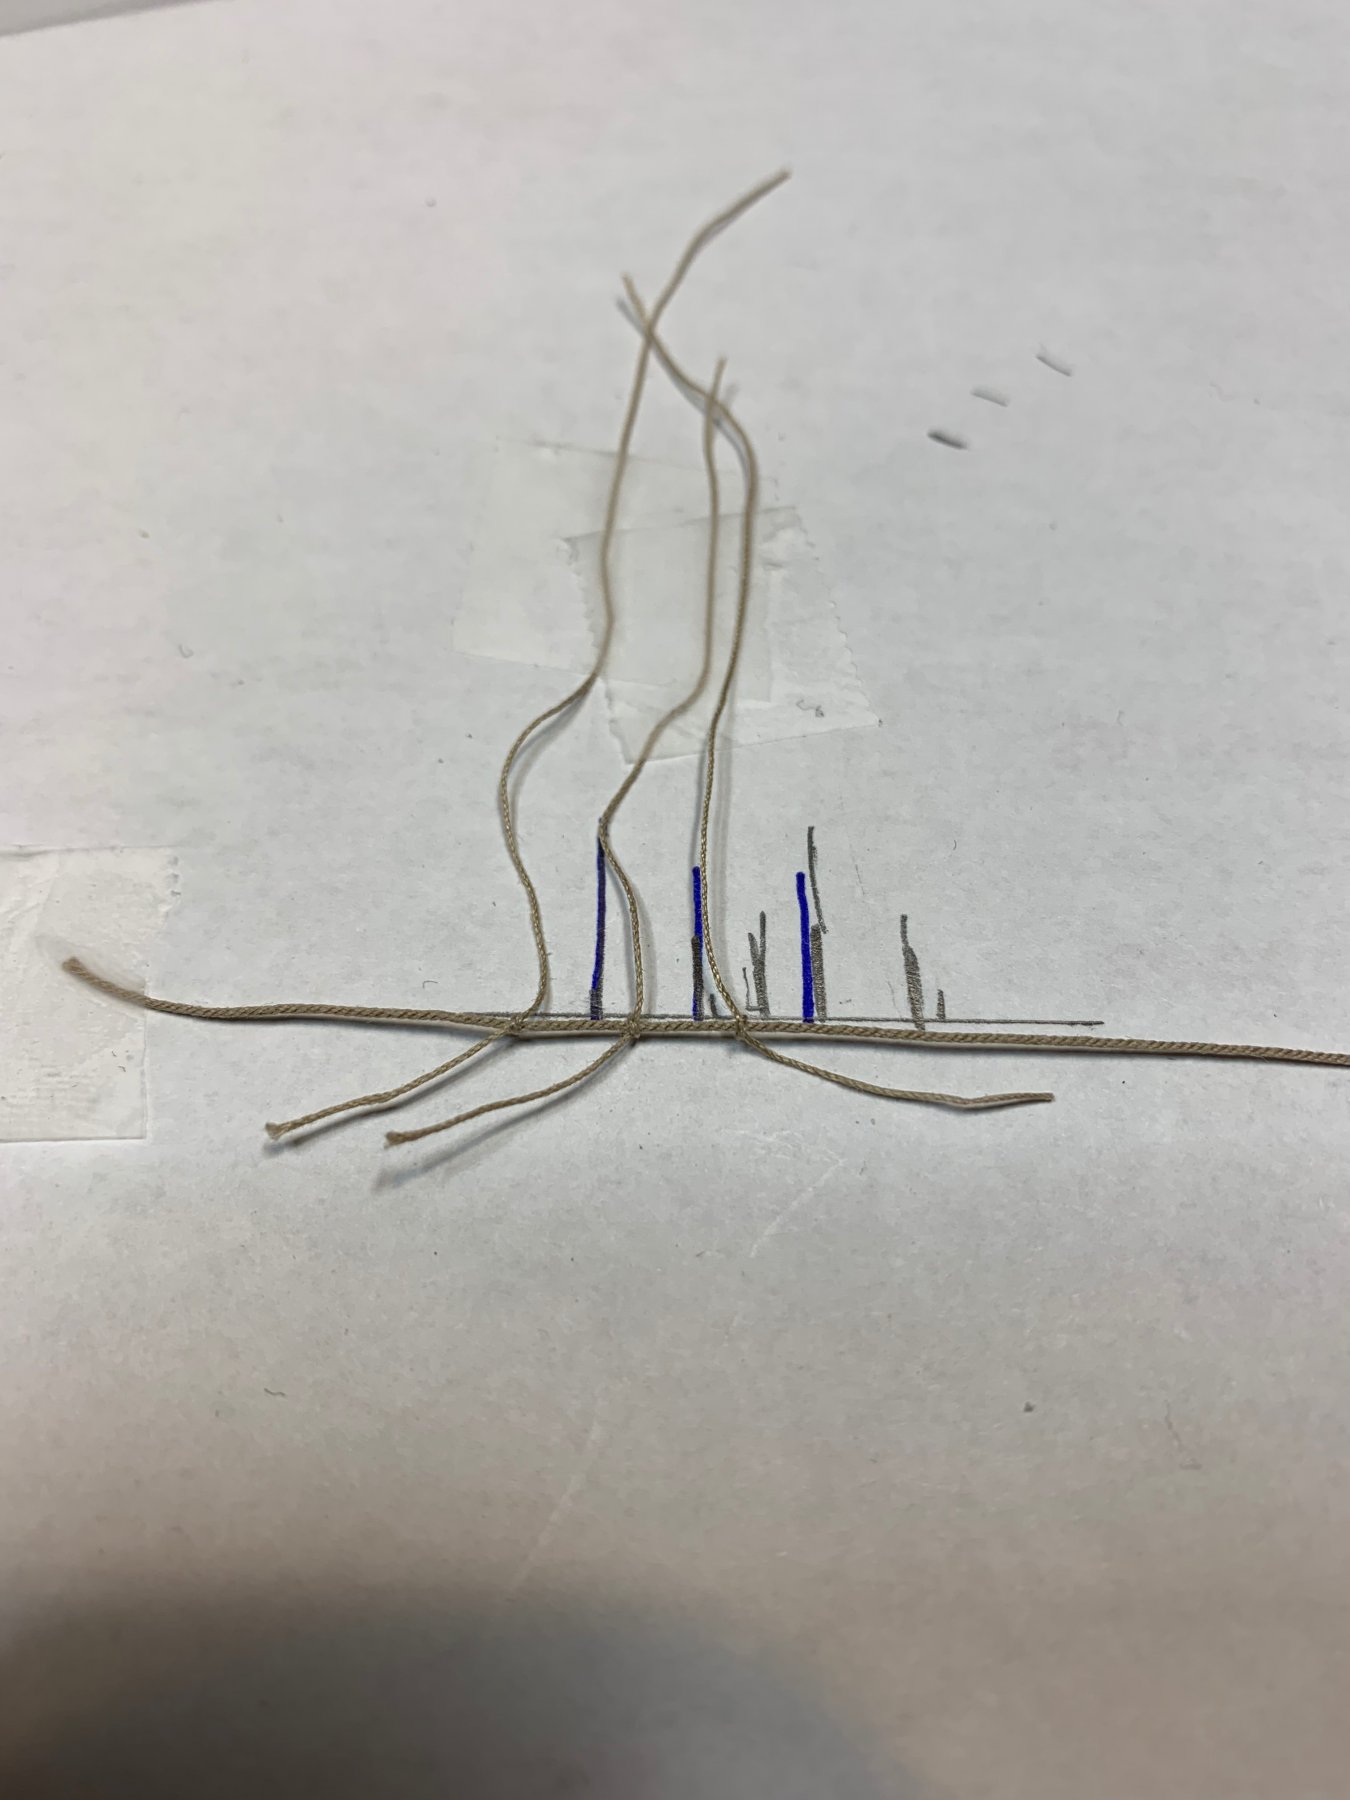
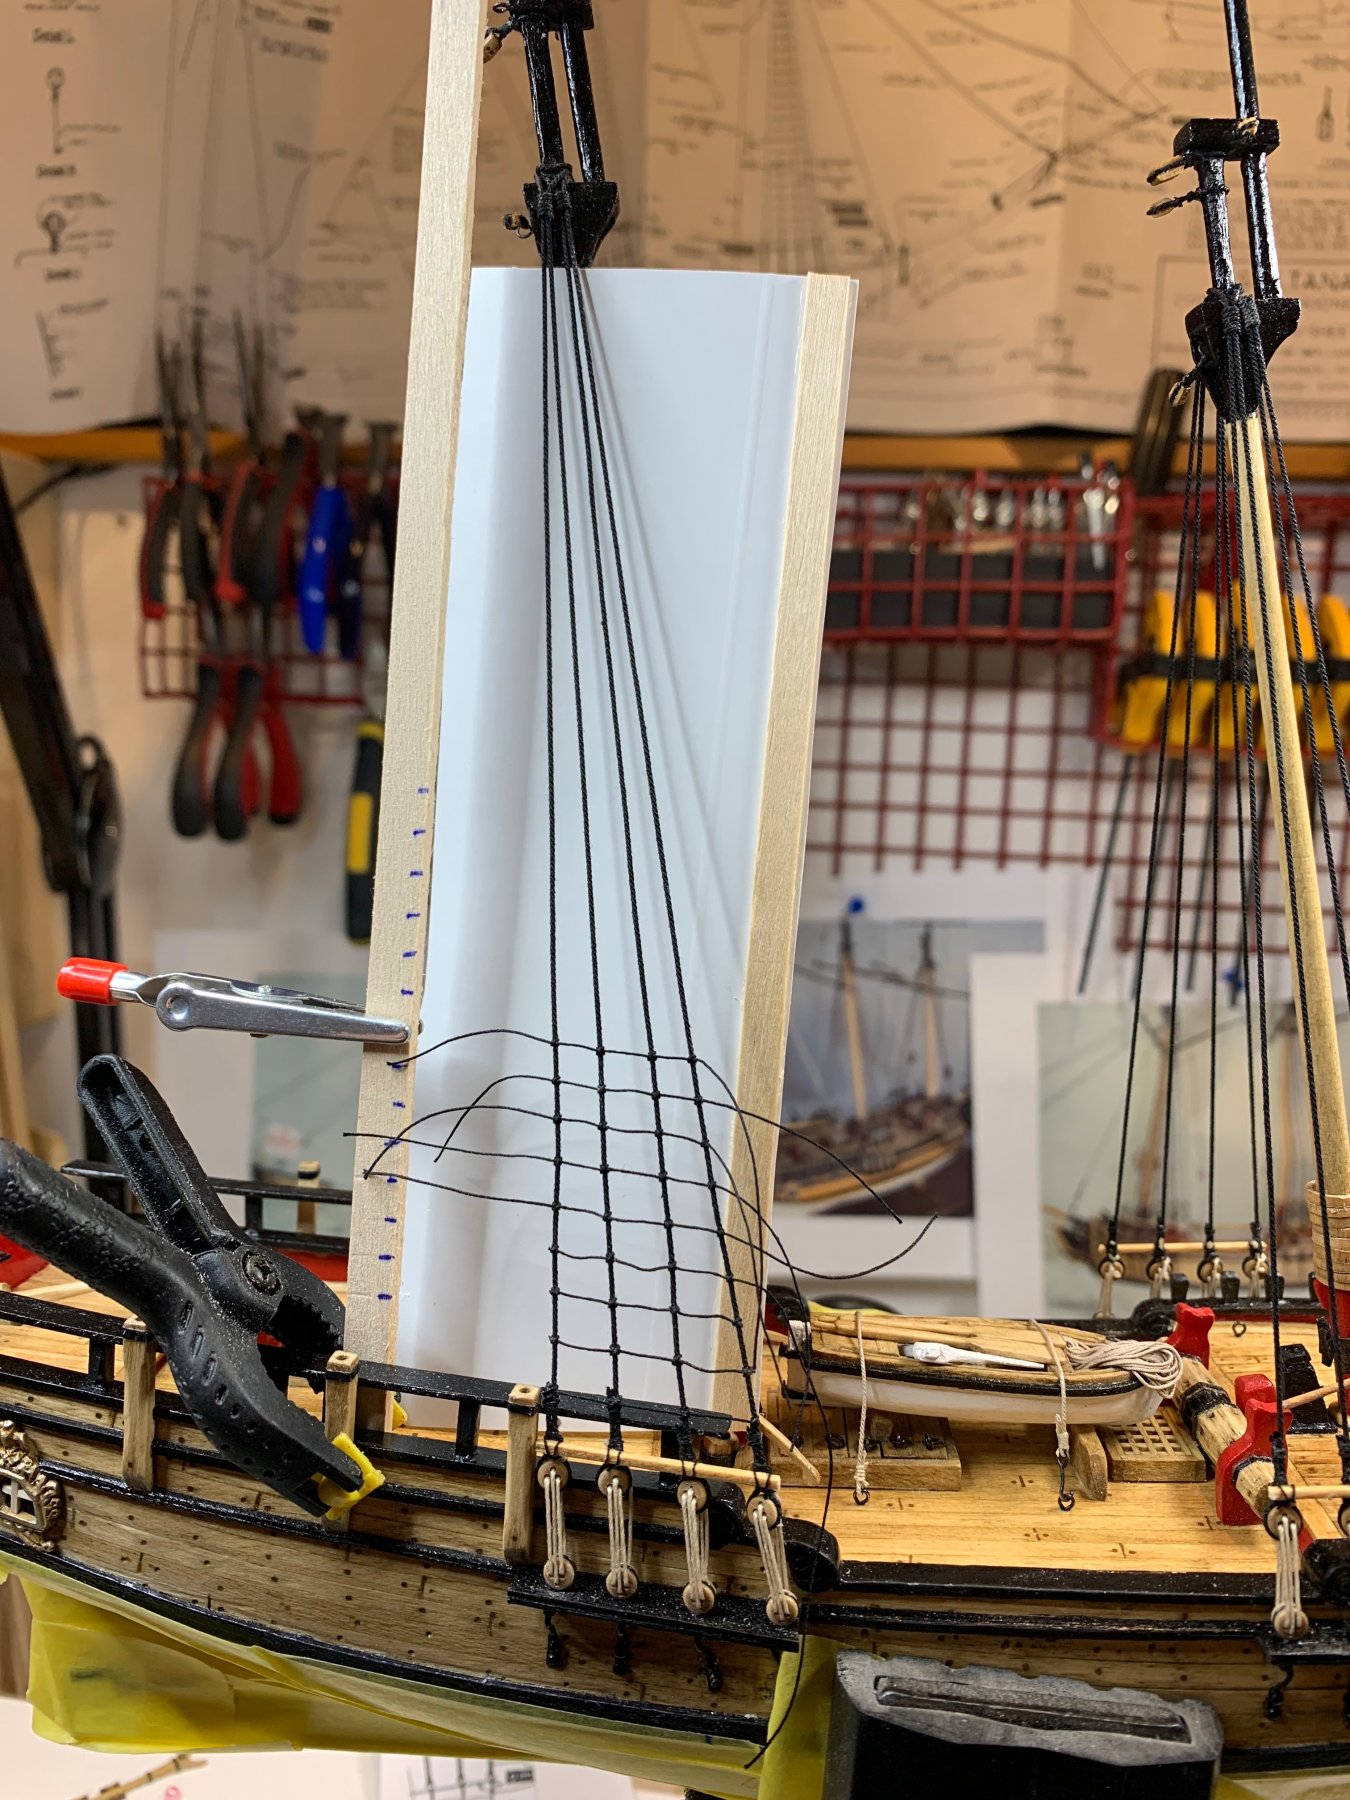
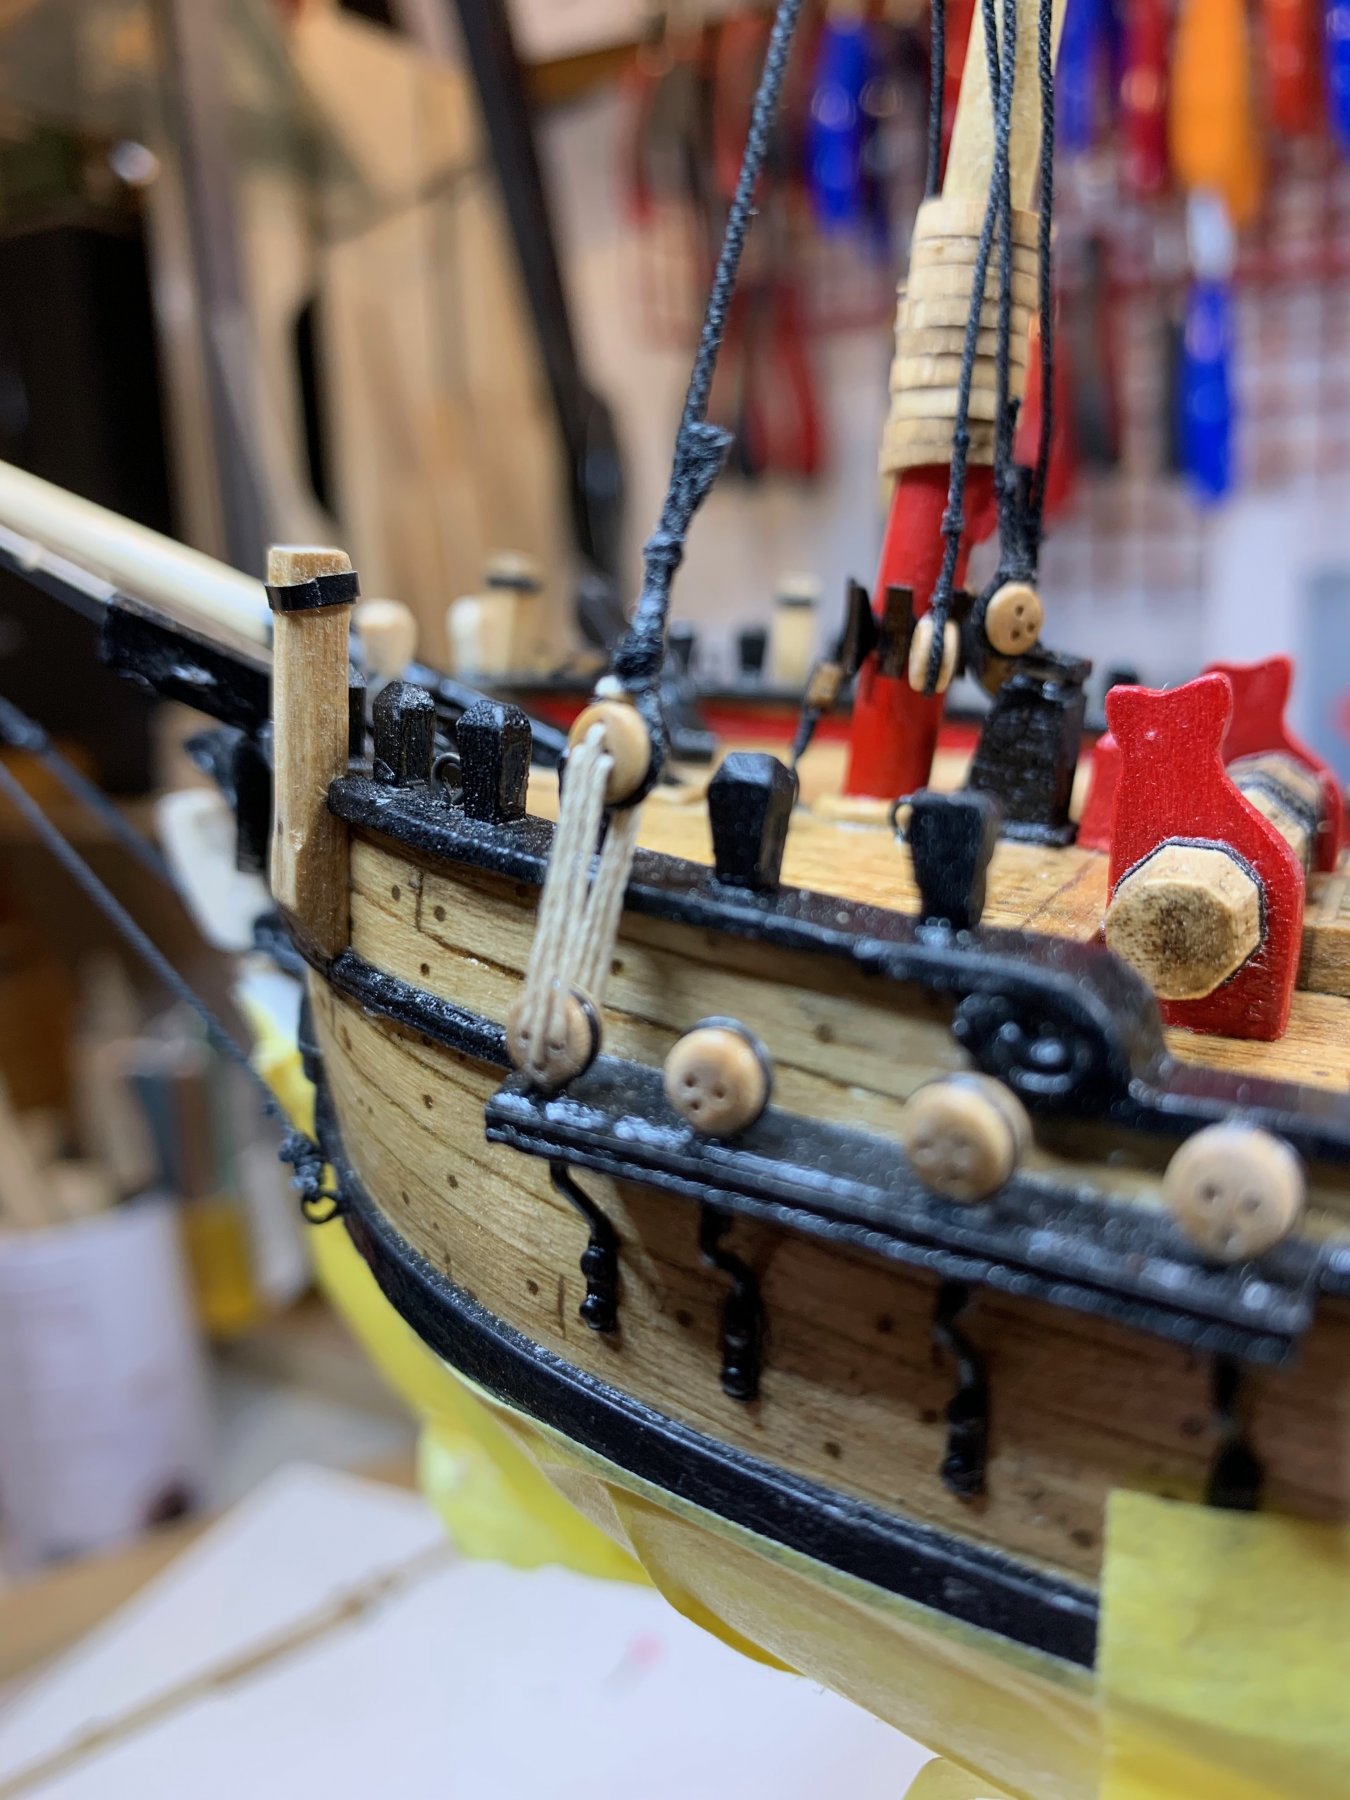
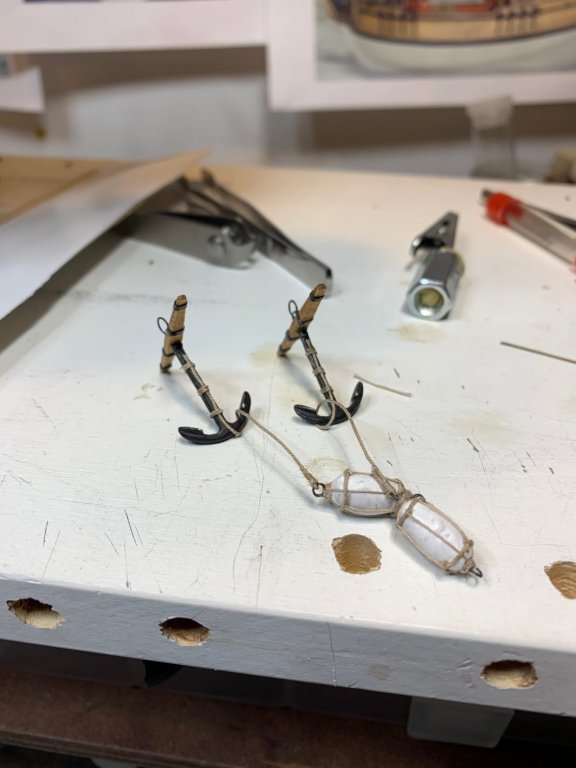
The buoy line was tied up on each anchor... A bit of a glue was put on three spots were seizing will be completed and two runs around the anchor was quite enough to keep the buoy line in place.. and to look interesting.. More work on buoys will come shortly... Then i started to do more ratlines.. Was contemplating how to make the spacing between ratlines as equal as possible and come up with this plan/idea. Not sure how it will be working but until i get something more useful i will try with this technique. The space between the ratlines was transferred on piece of wood, then individual ratlines were fixed with a small piece of scotch tape on each mark. This should provide fairly equal spacing for the ratlines. Then this template was fixed on the ship with a help of a small clamp. So when i work on one line, the rest of lines is dragged on the back of this white background so it is not in the way. It appears to be working fine for now... Then each knot was fixed with a small amount of glue and after the glue is dried, the extra line was cut with sharp cutter. For this purpose i find it more useful to use wire cutter (a good one) instead of using scissors or nail clipper. Happy modeling.


- 360 replies
-
- 3
-
-
- sultana
- model shipways
- (and 1 more)
-
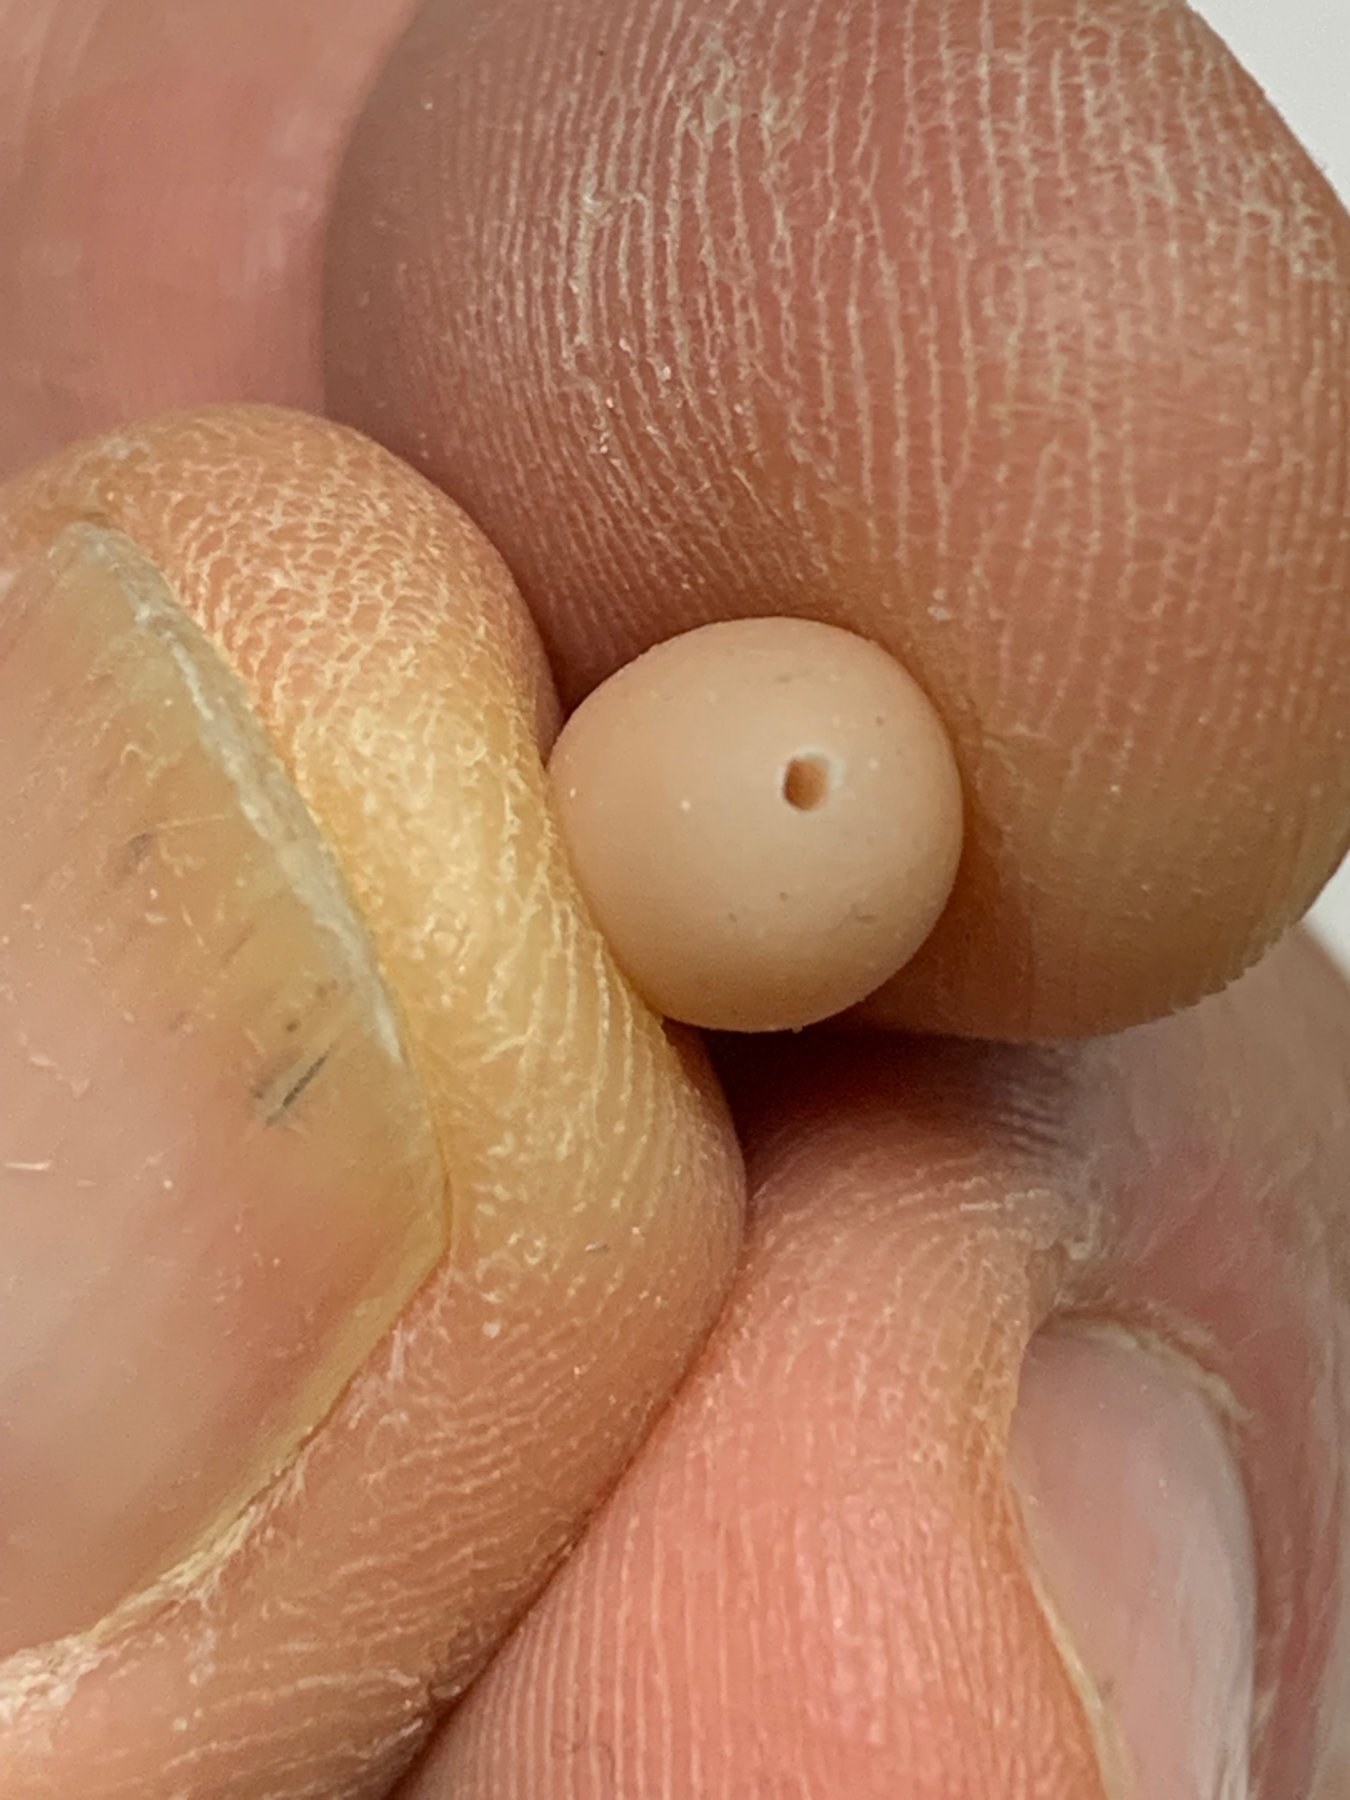
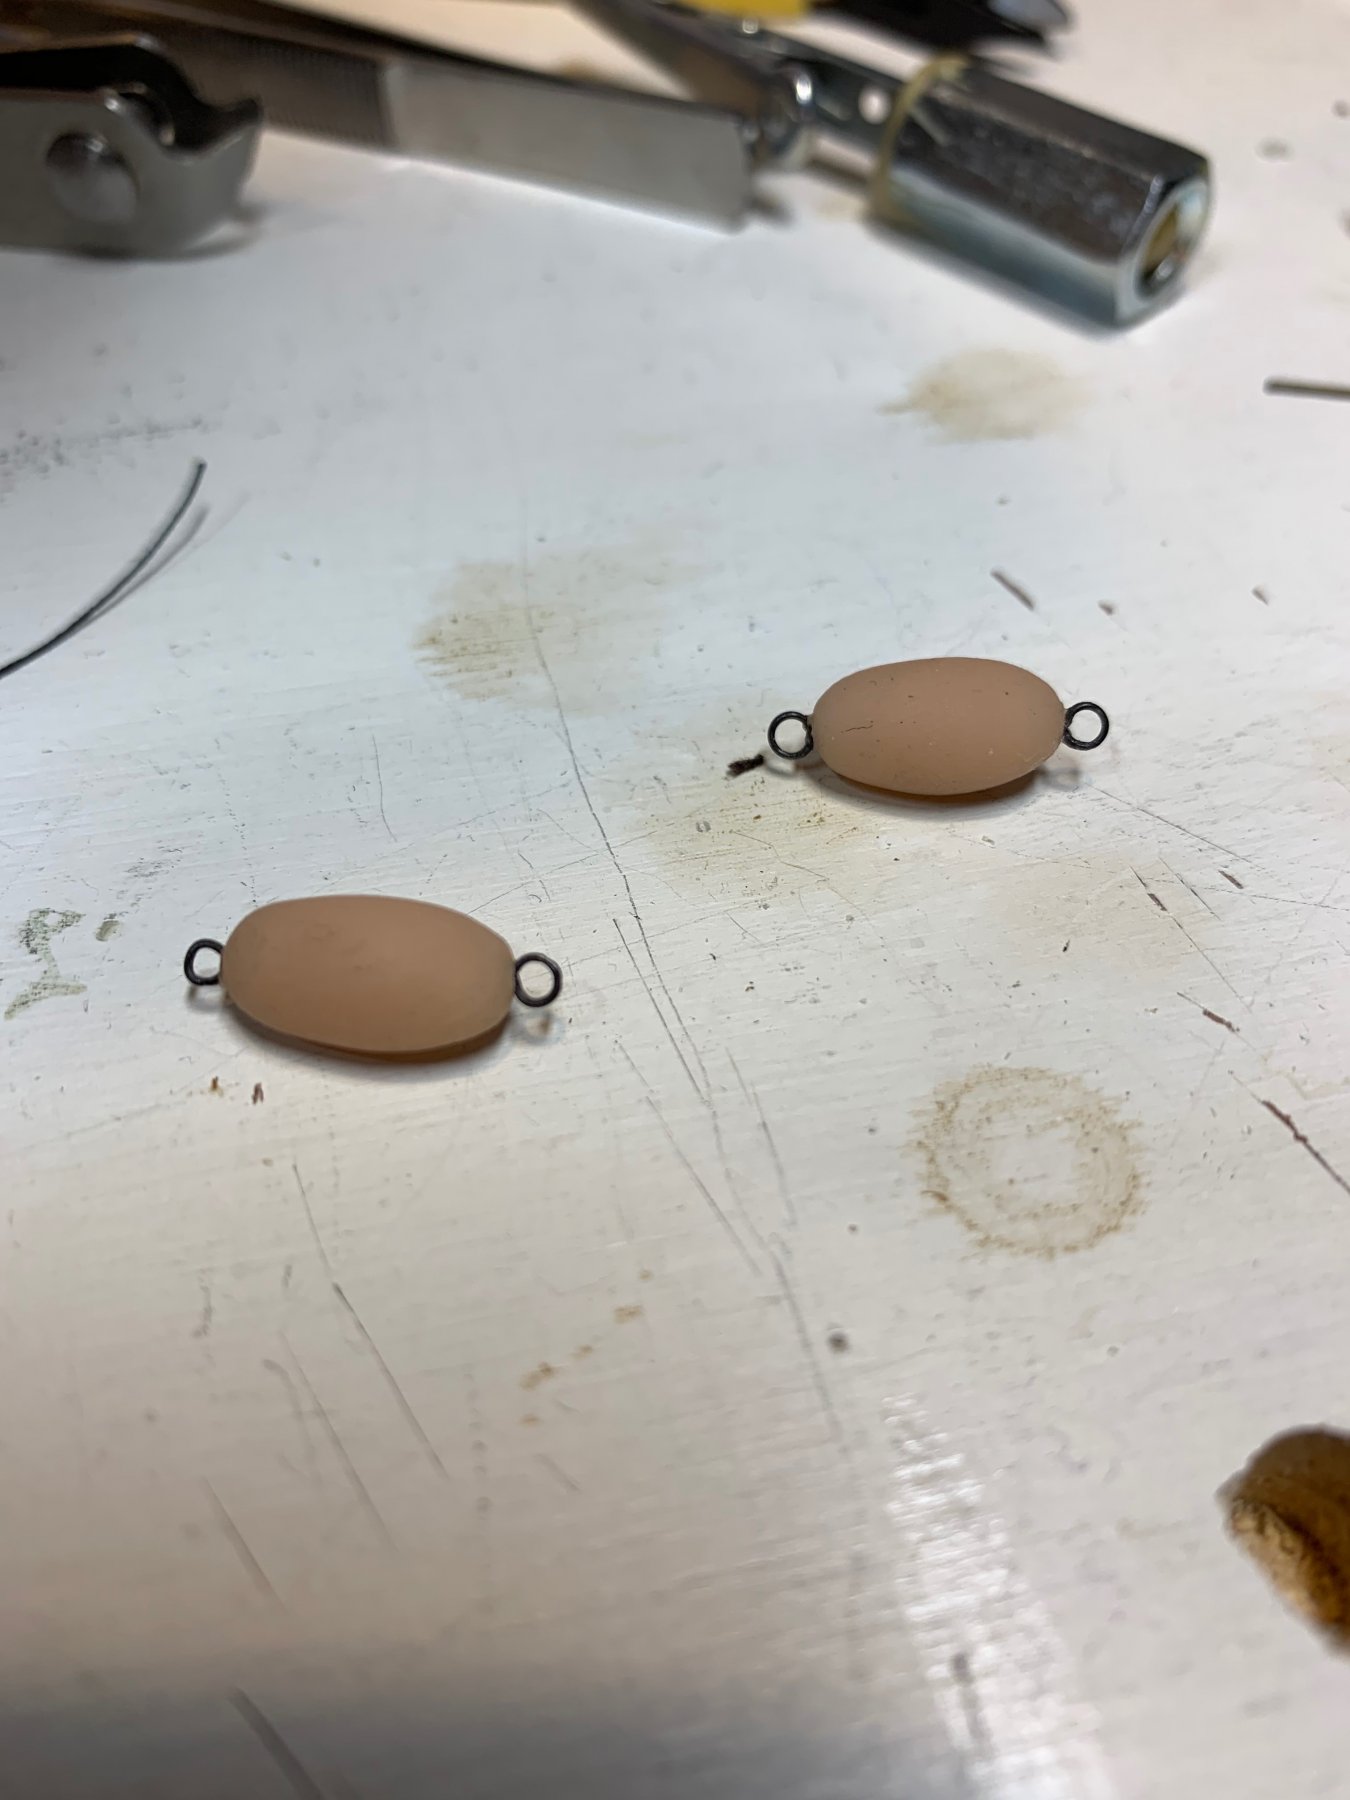
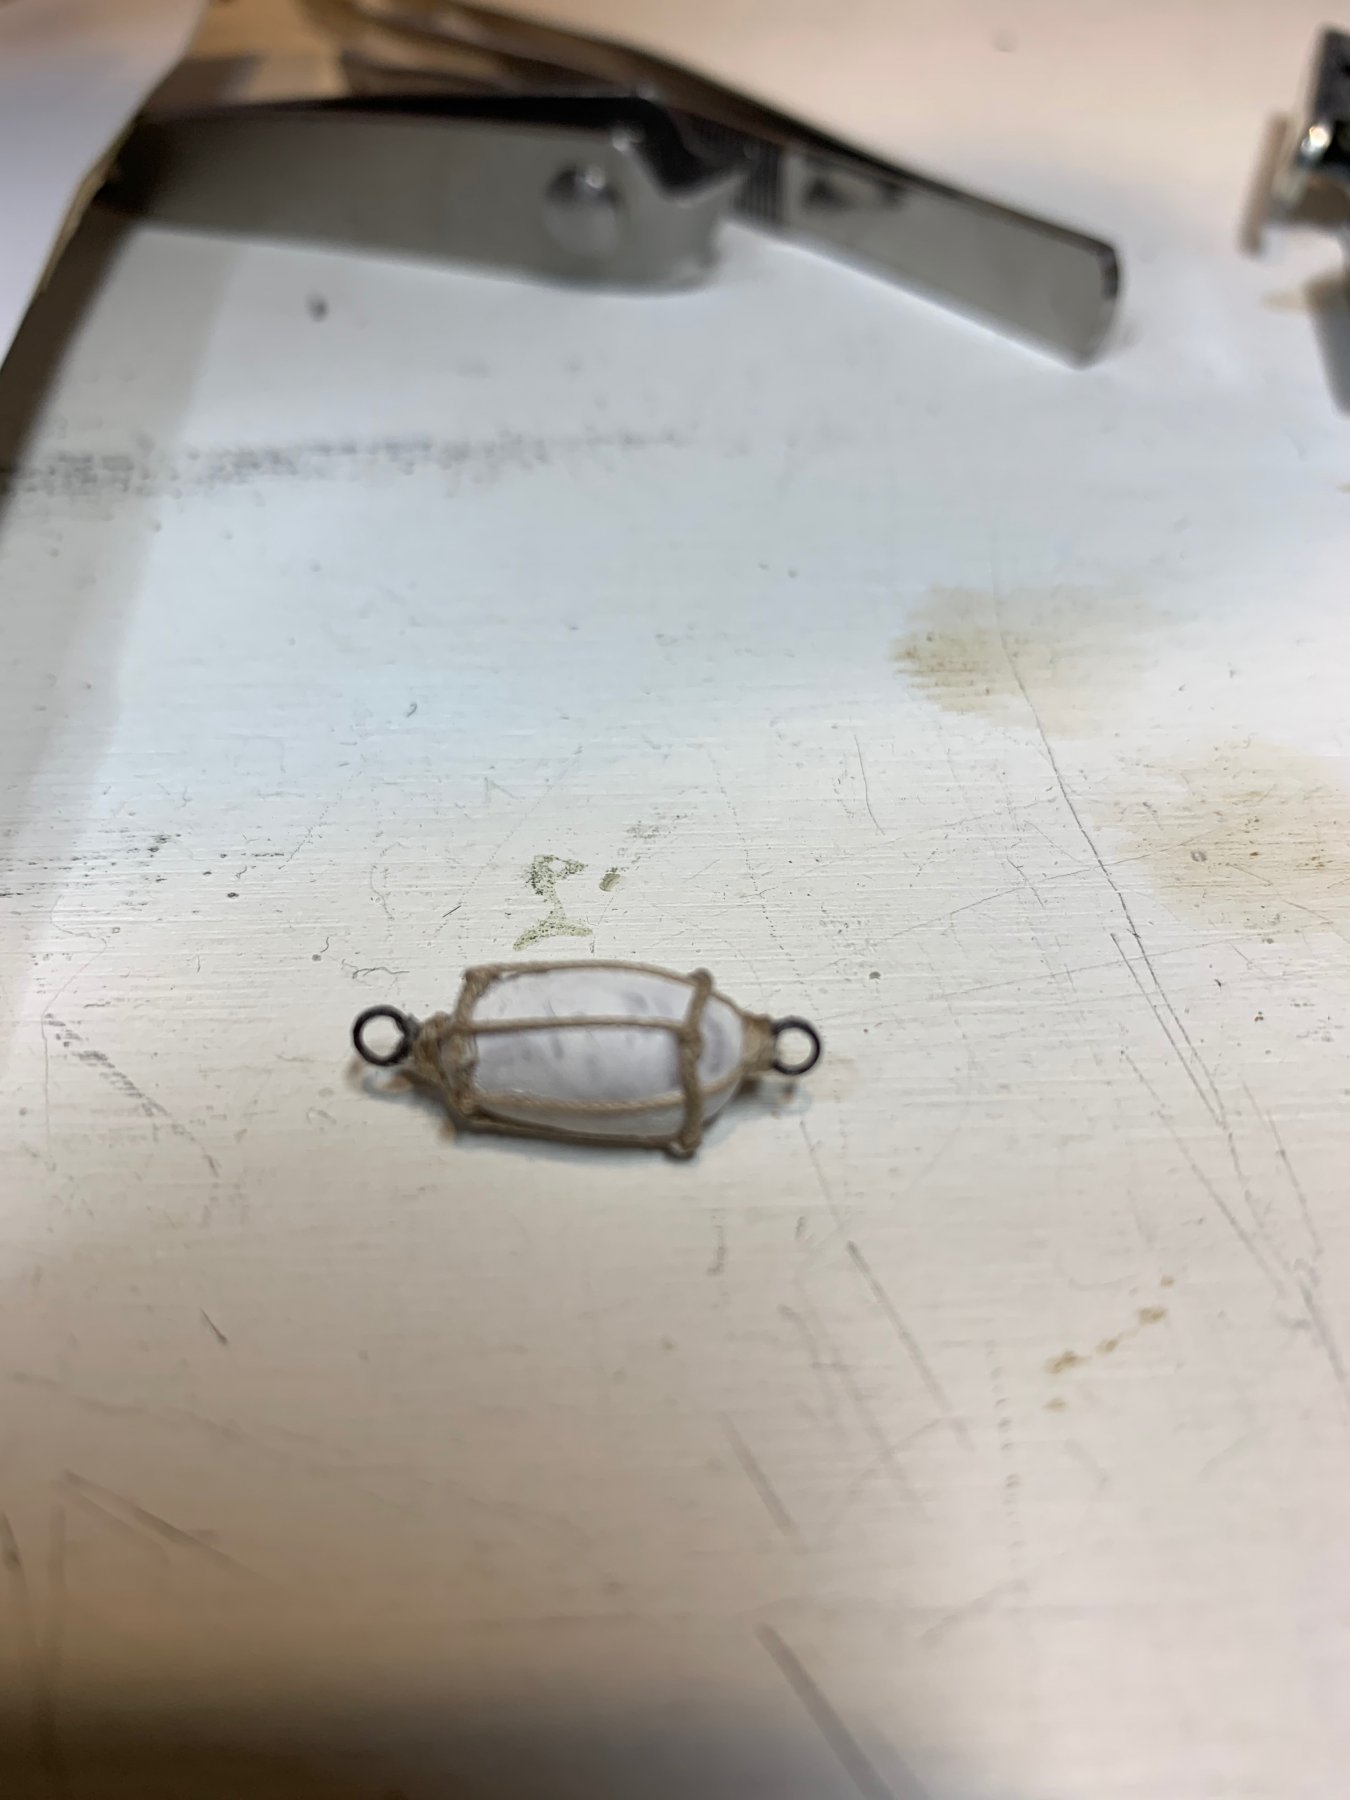
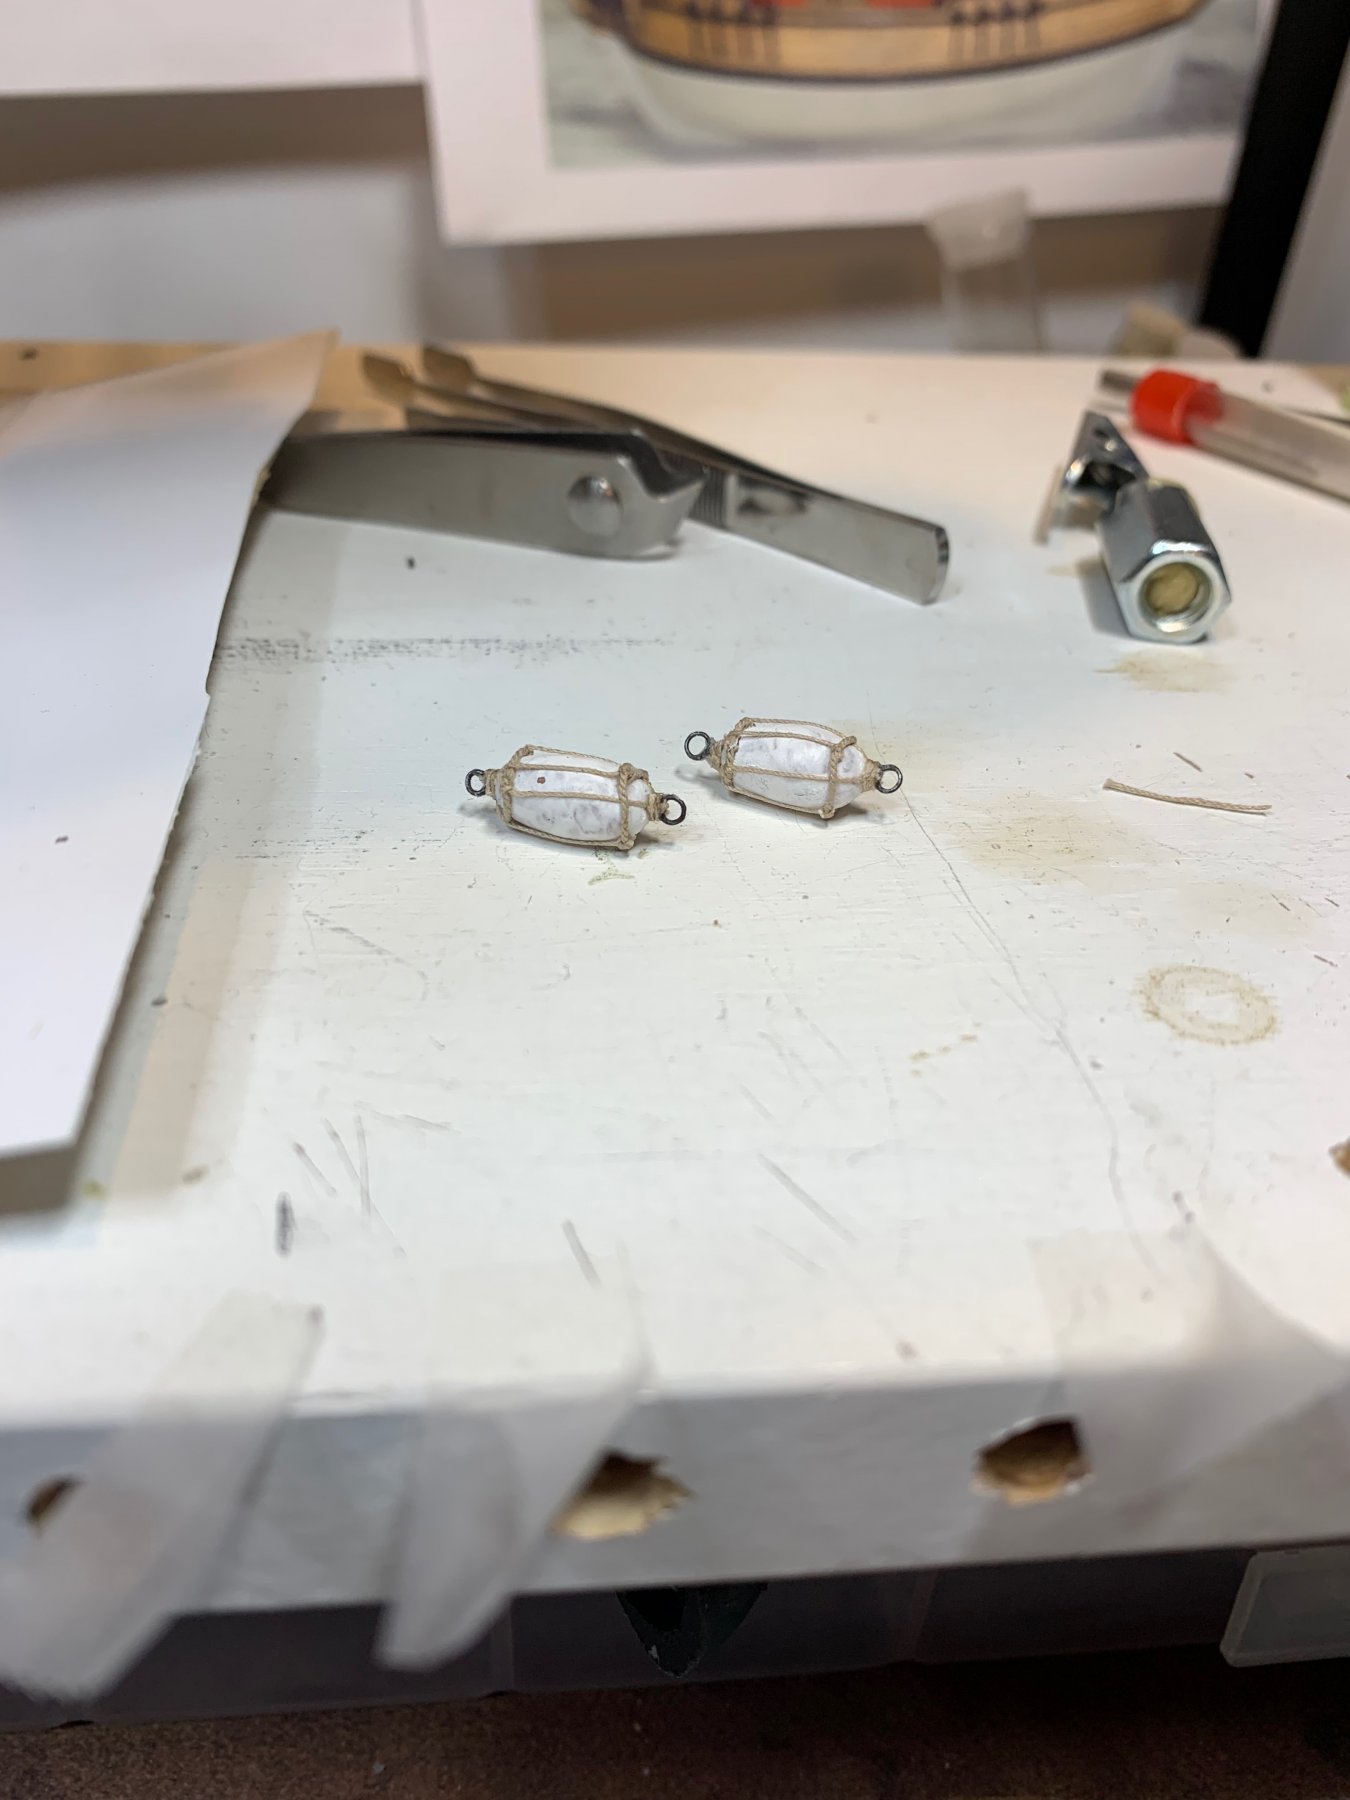
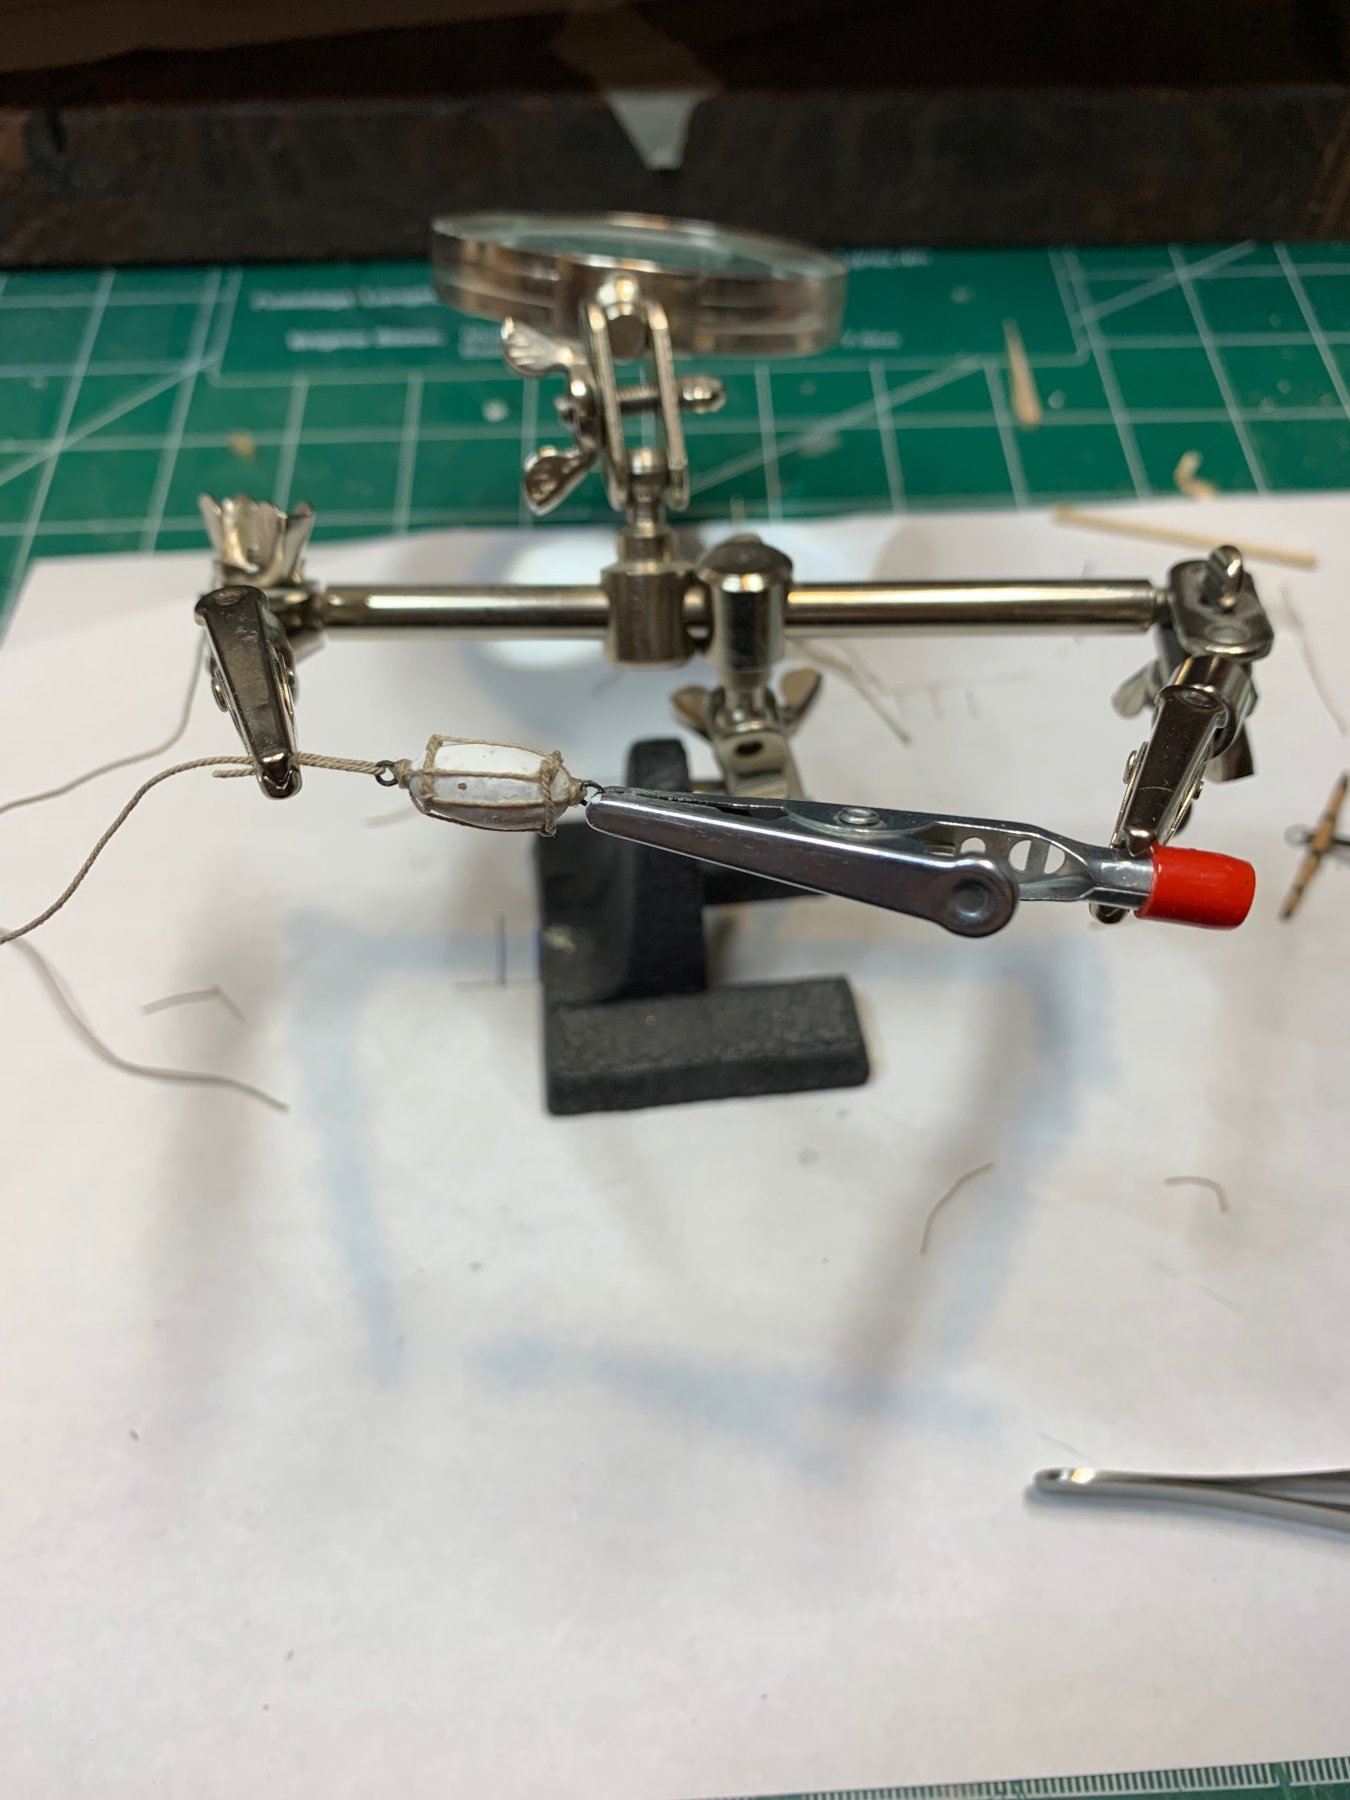
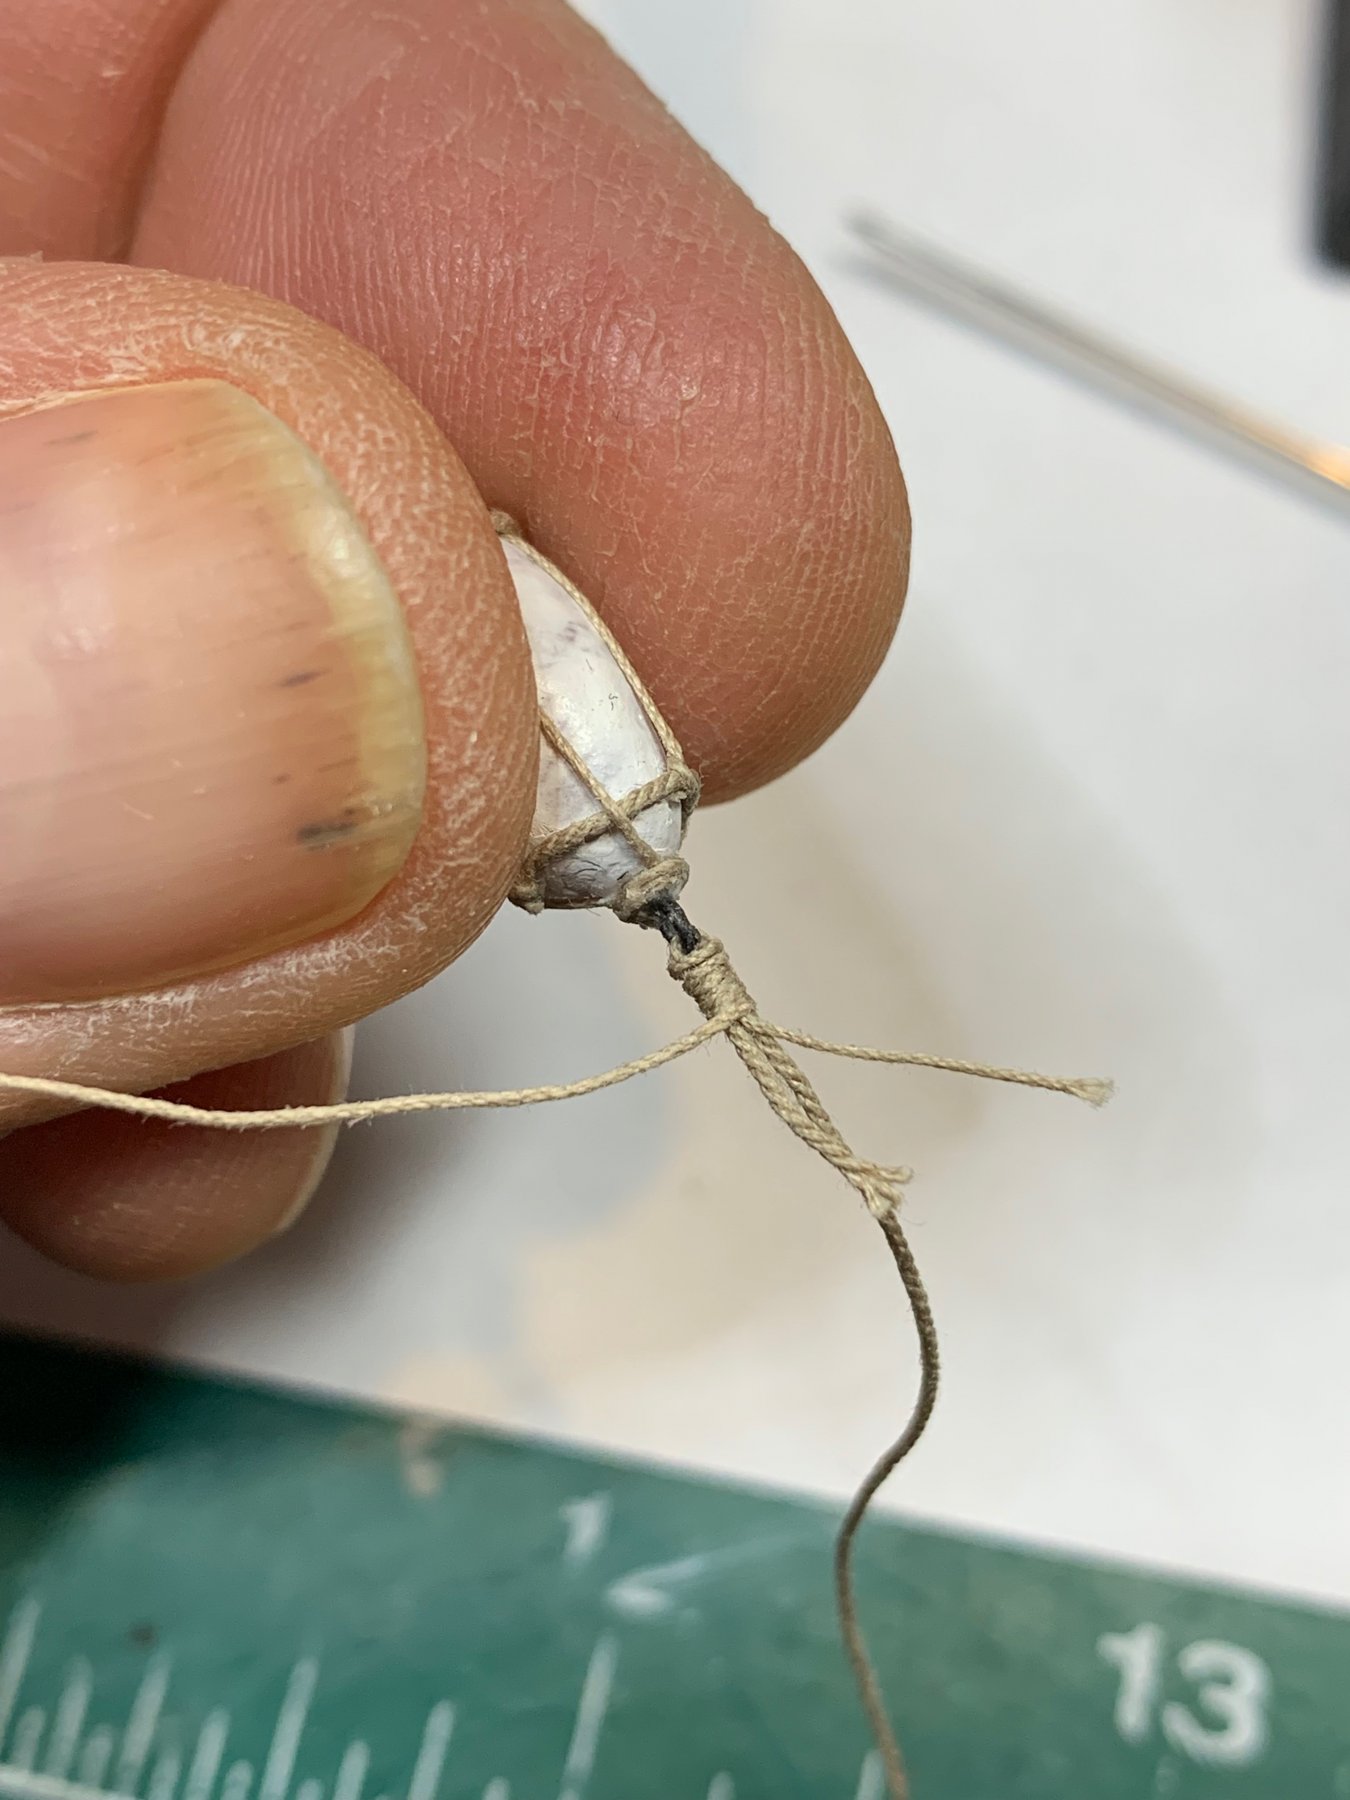
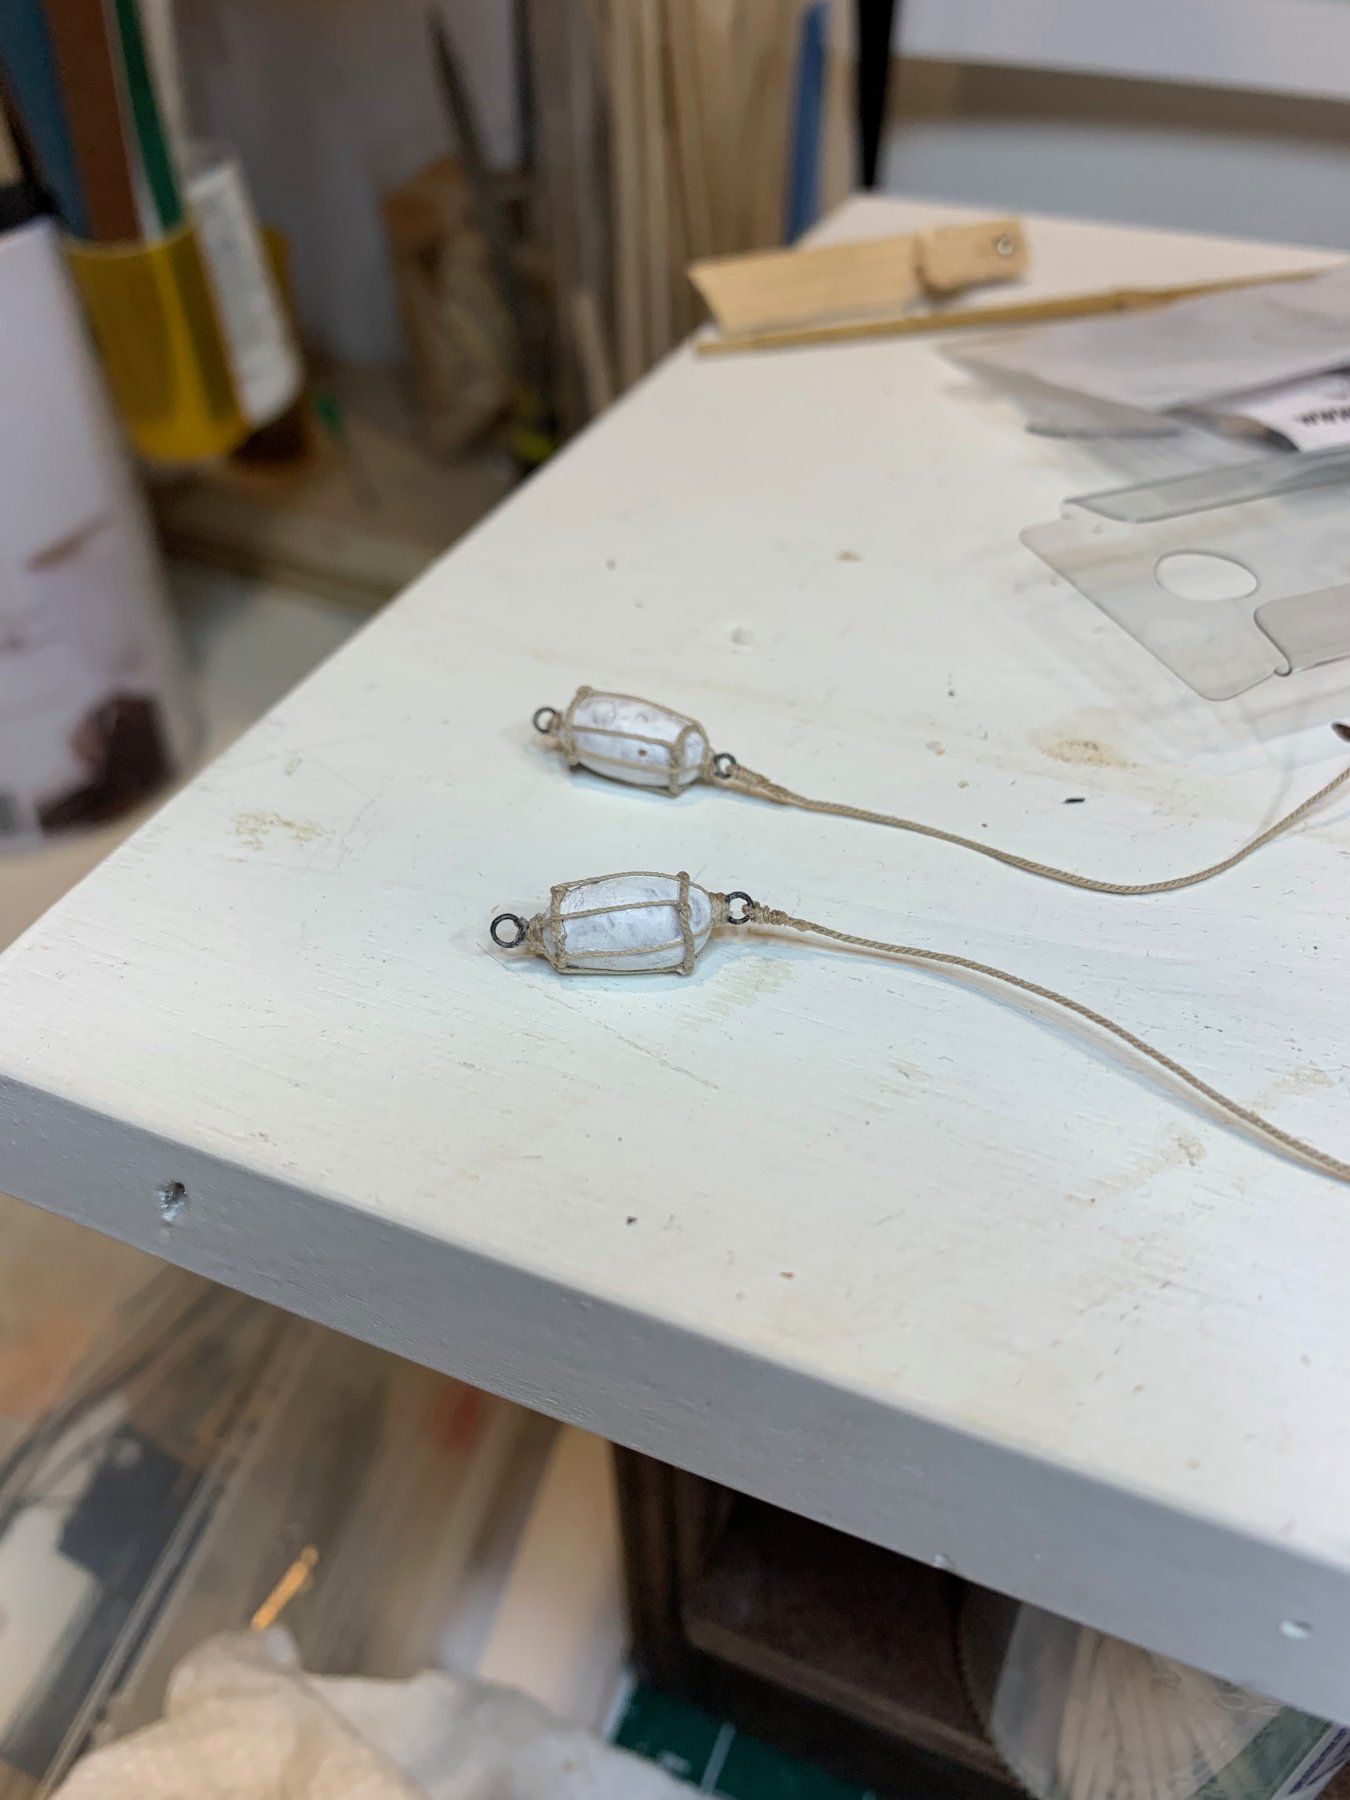
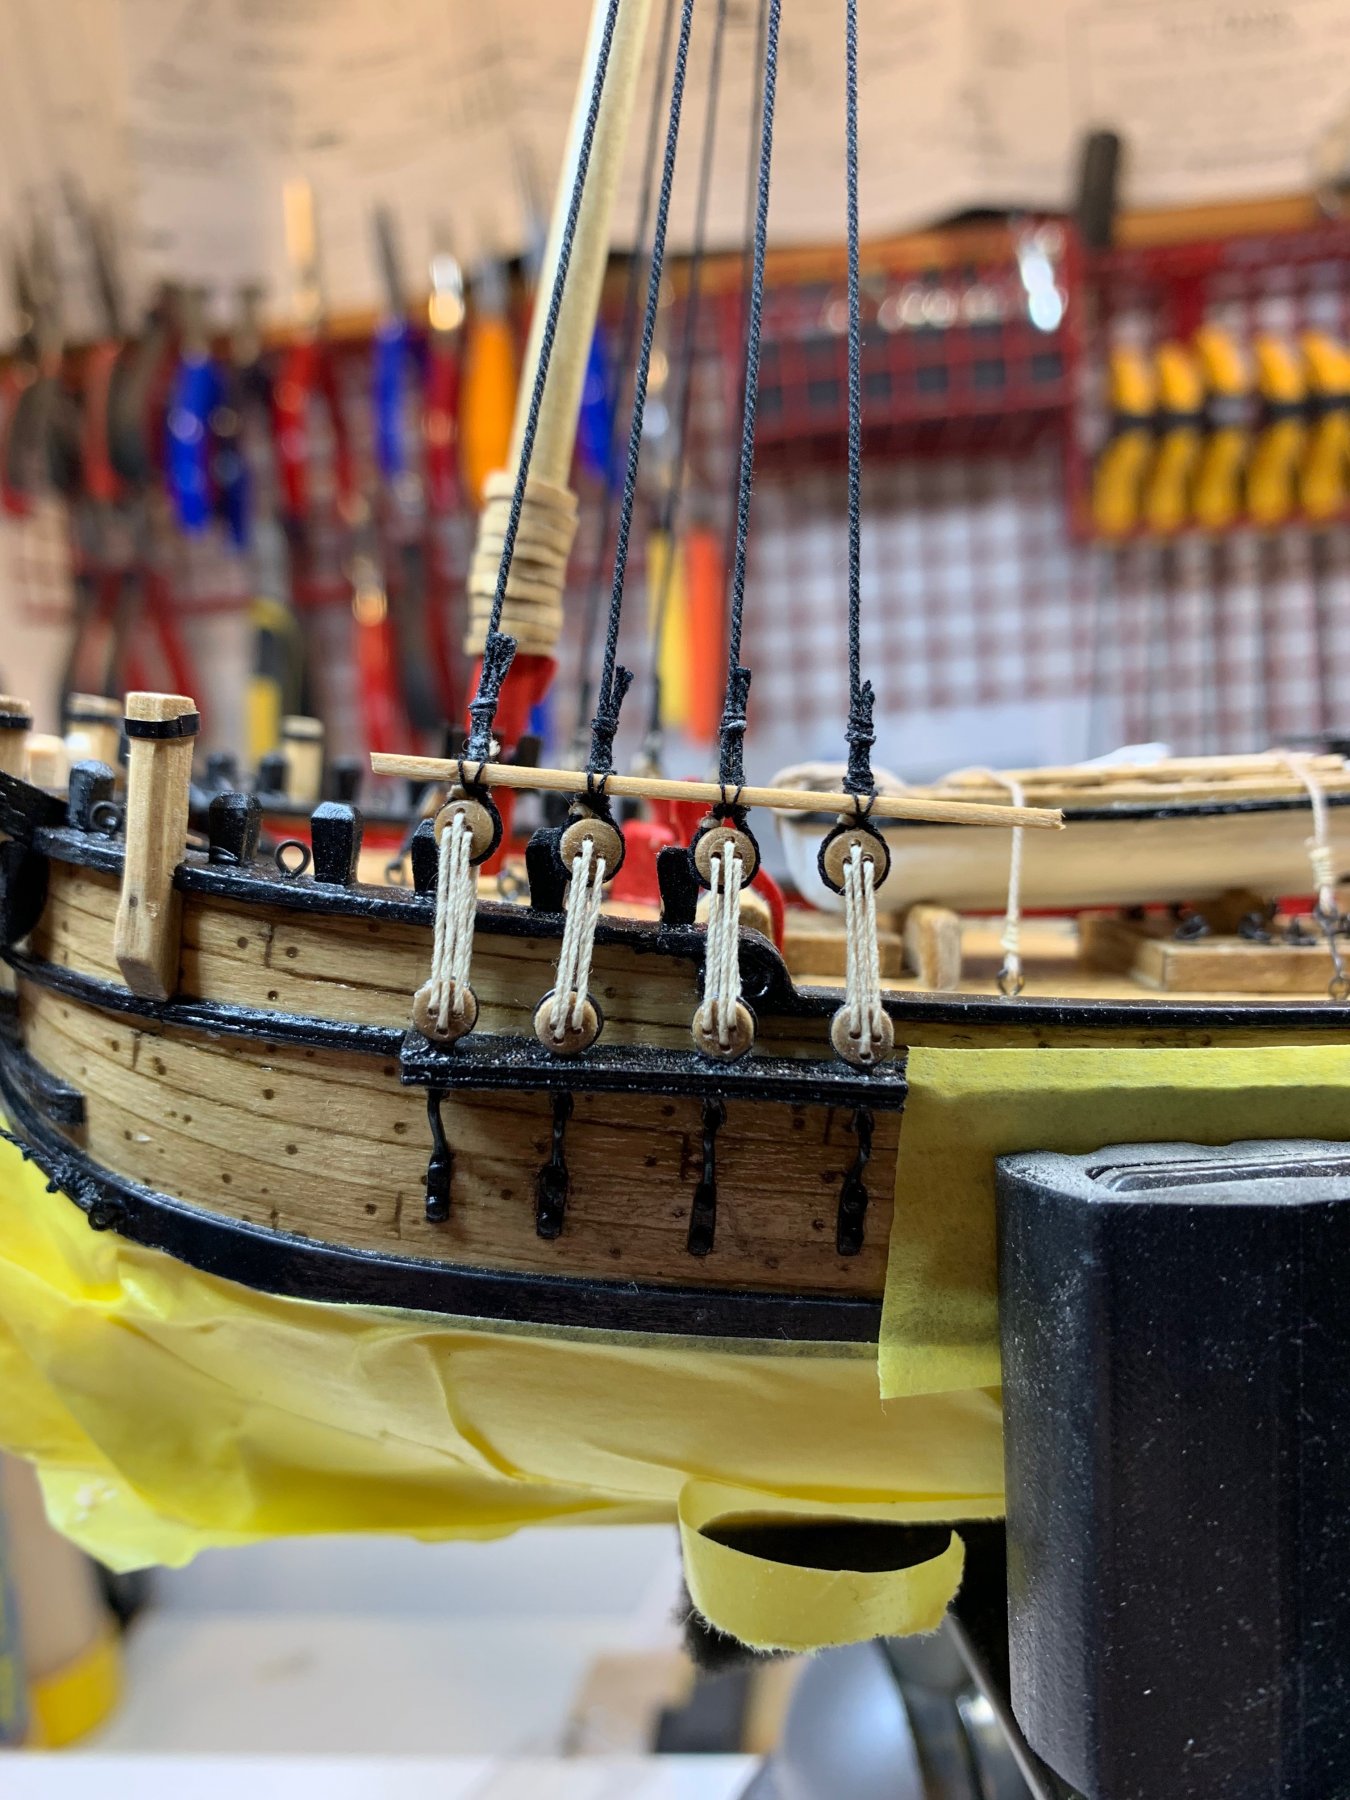
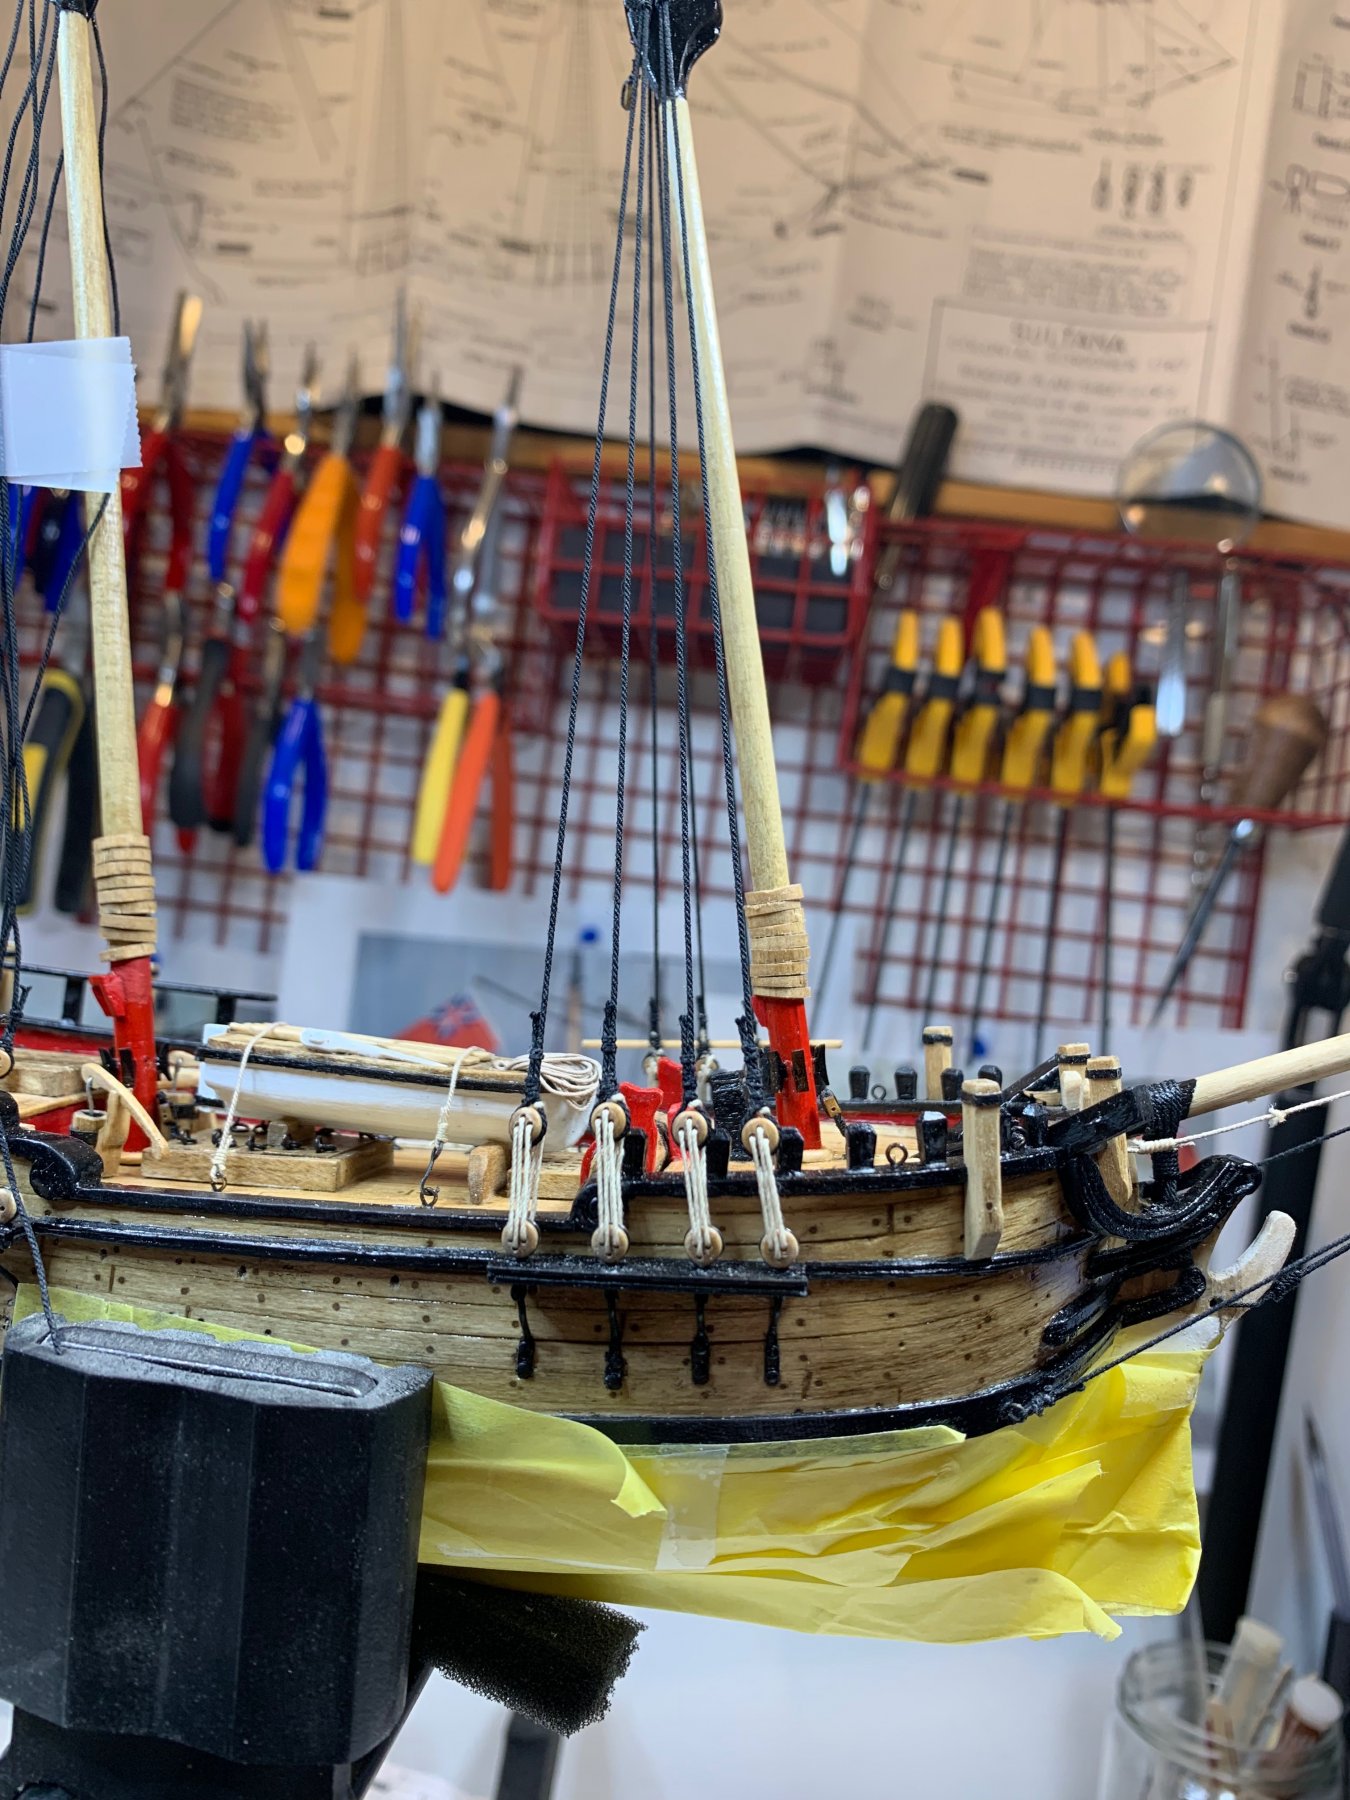
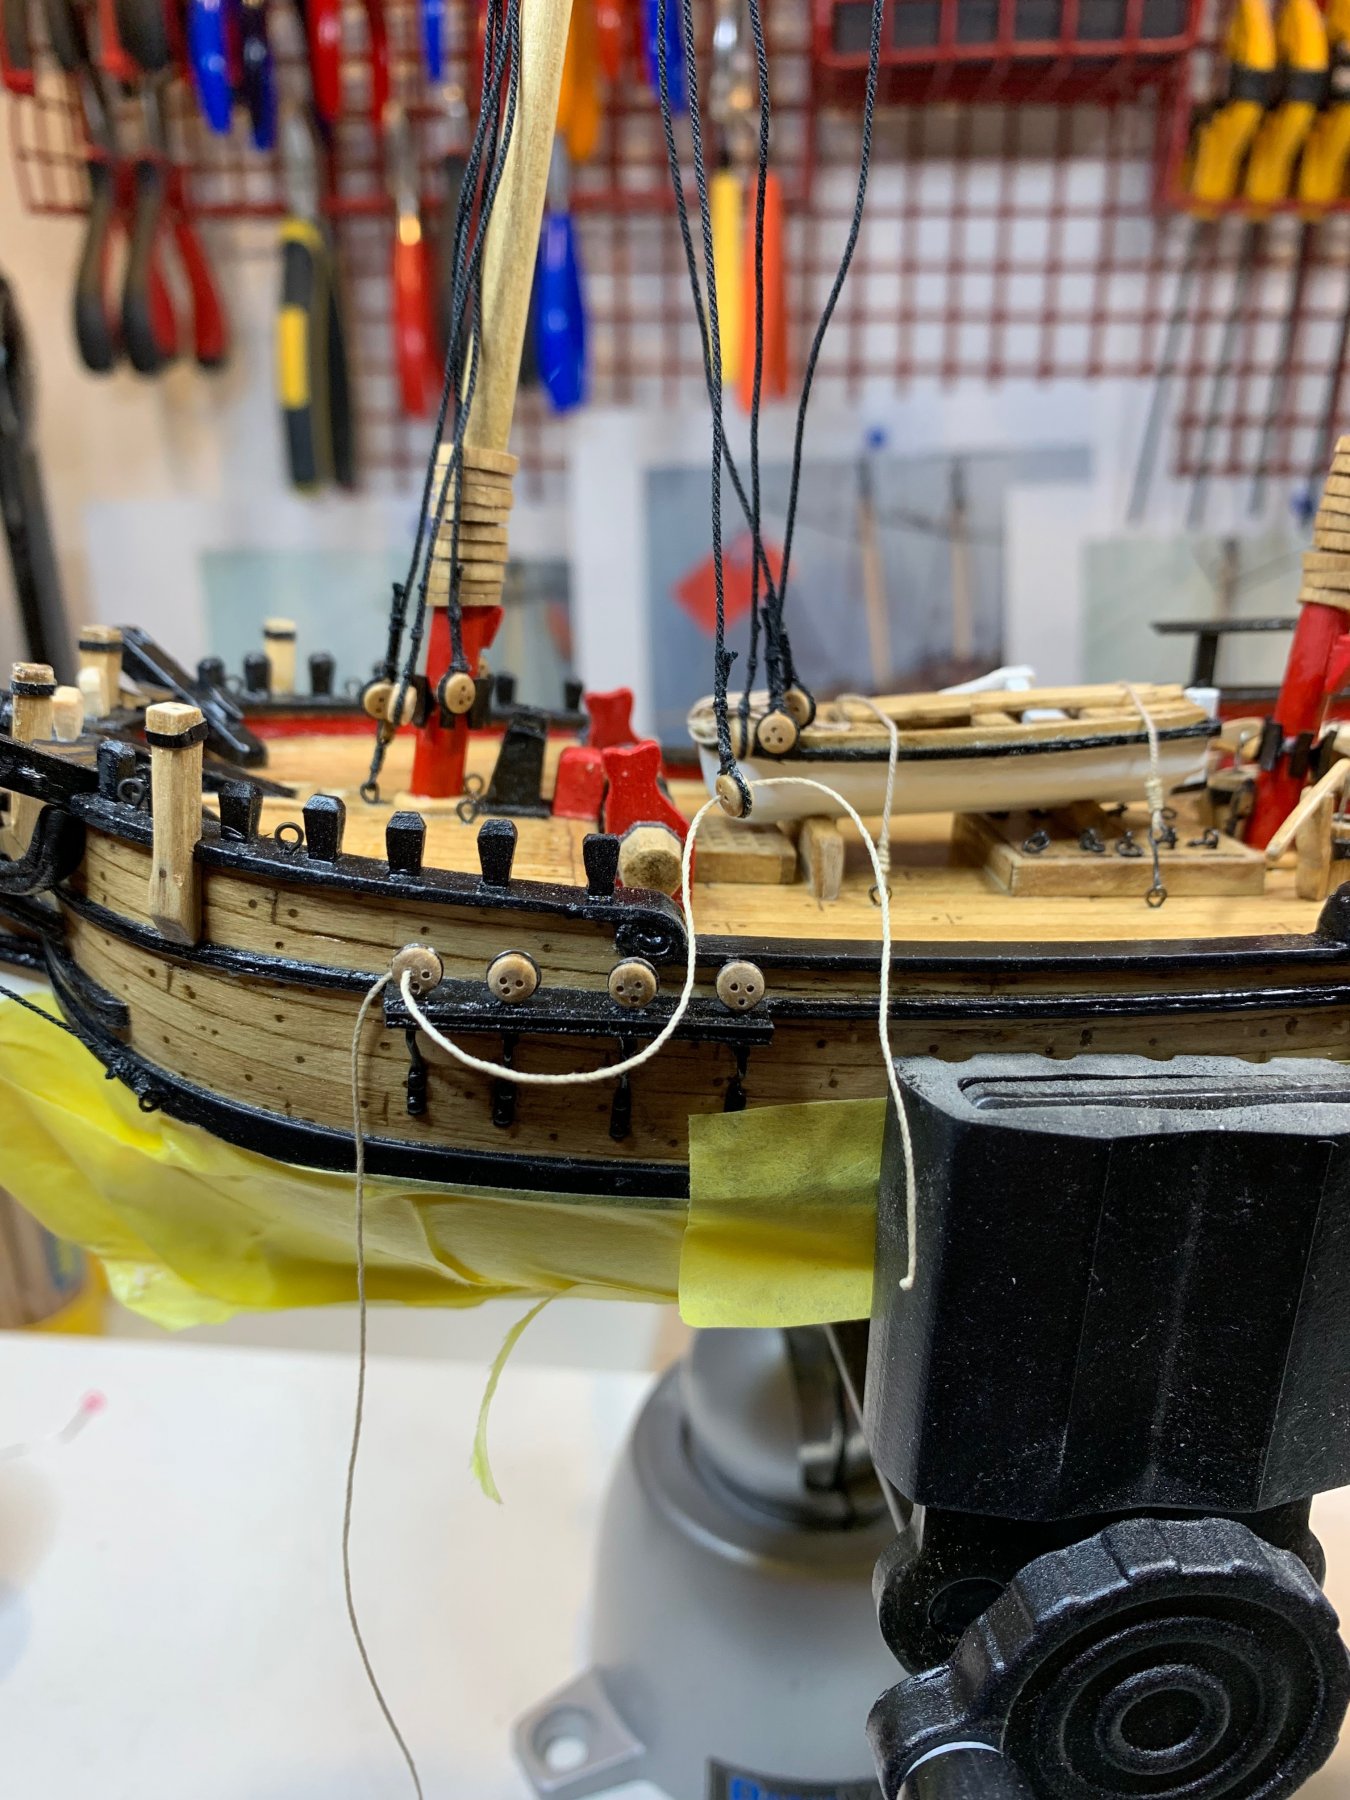
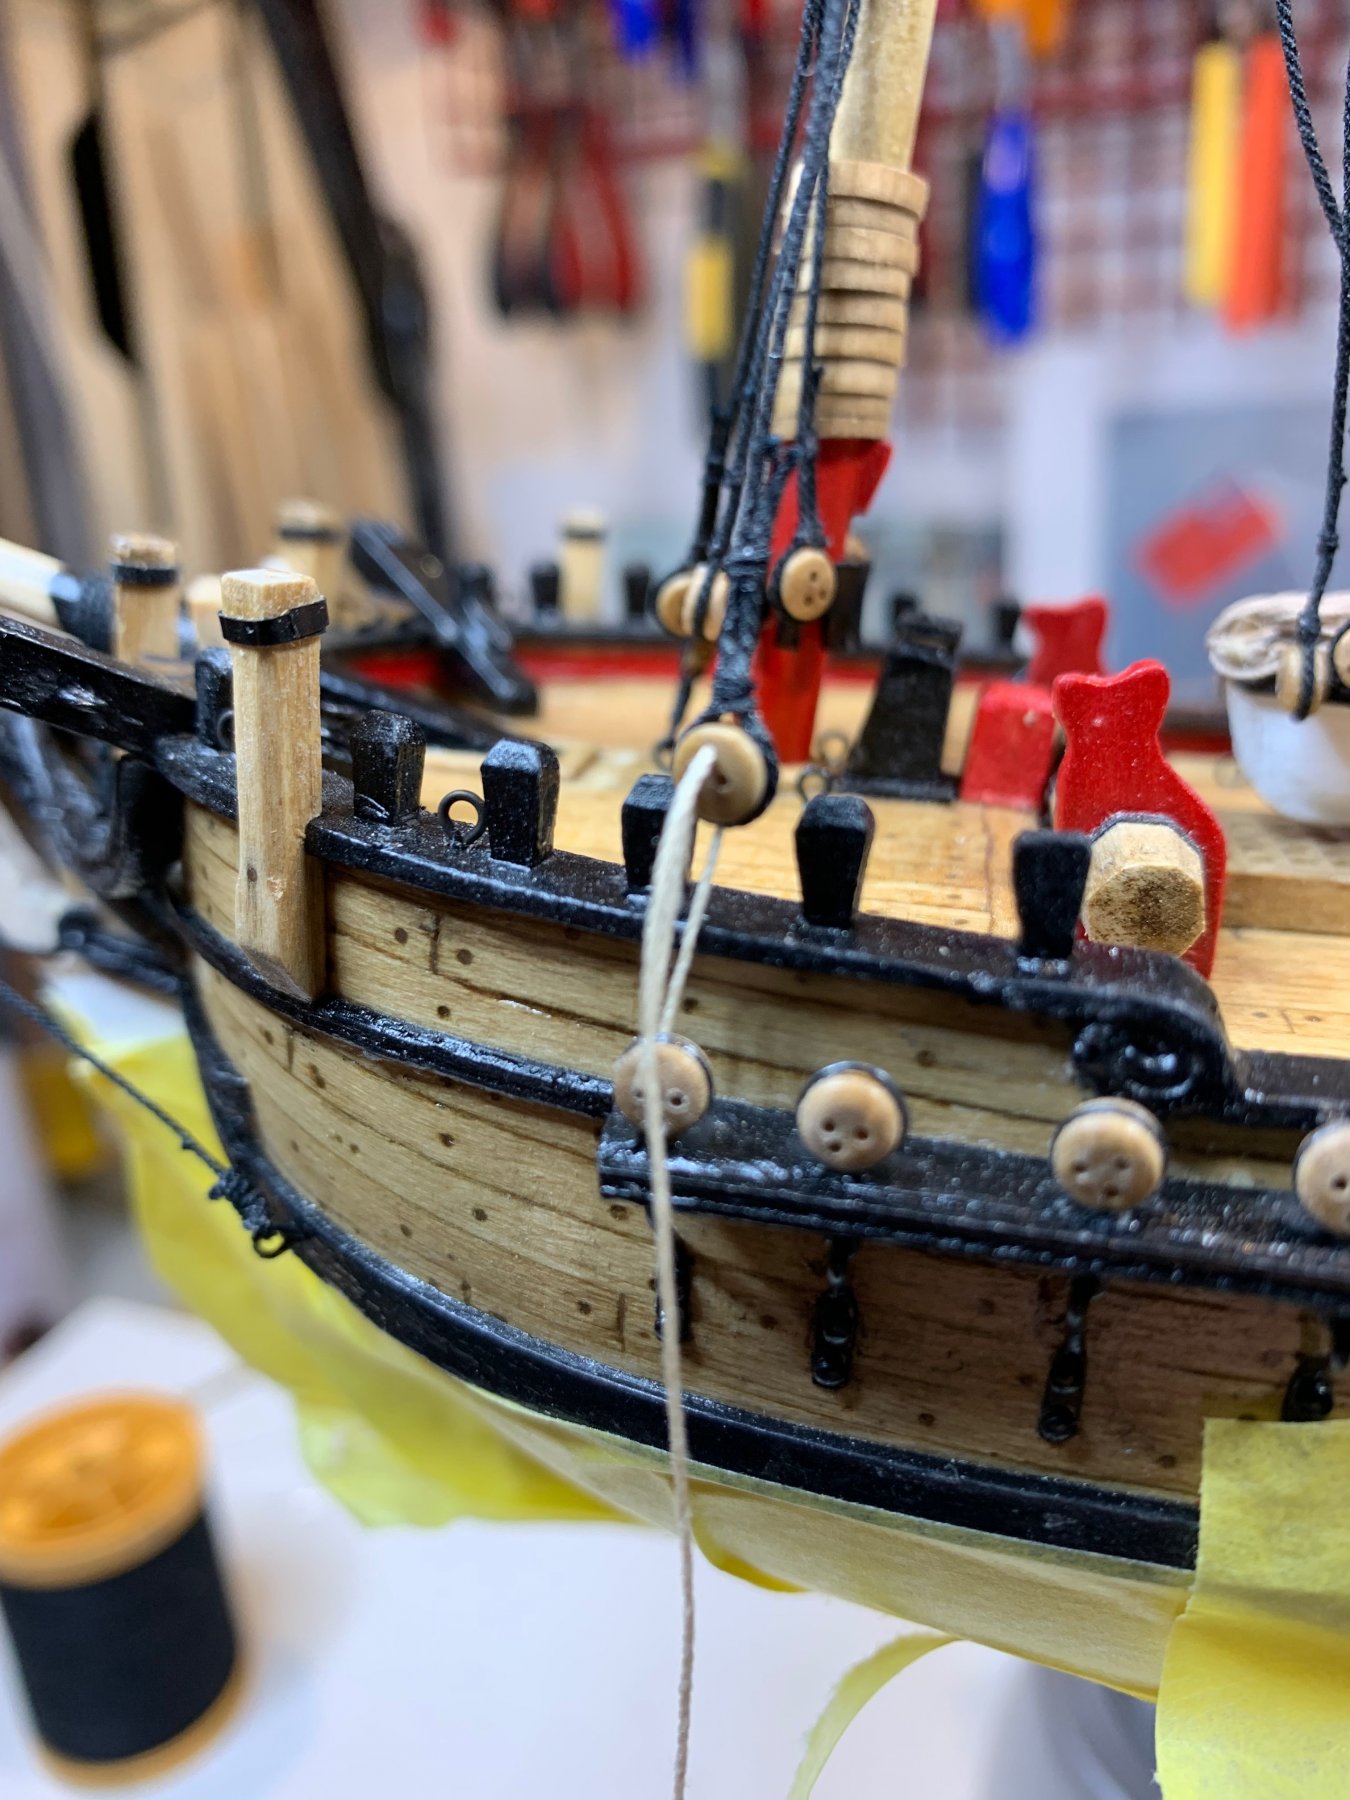
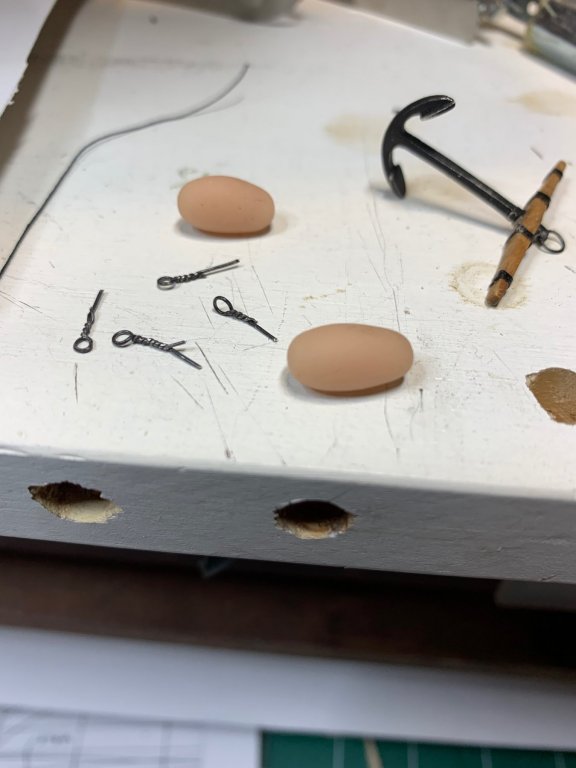
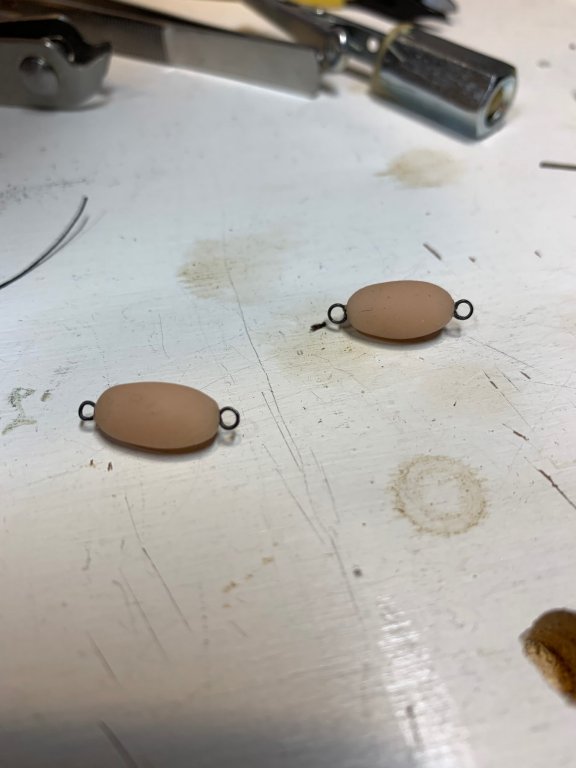
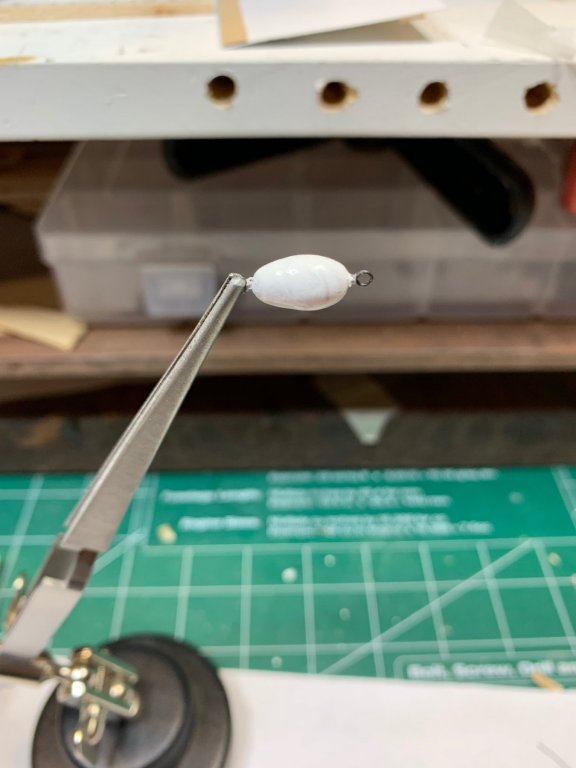
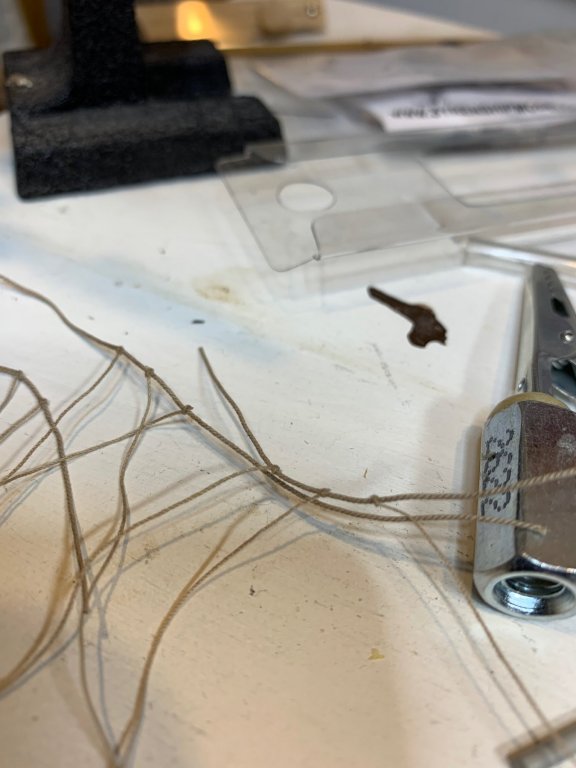
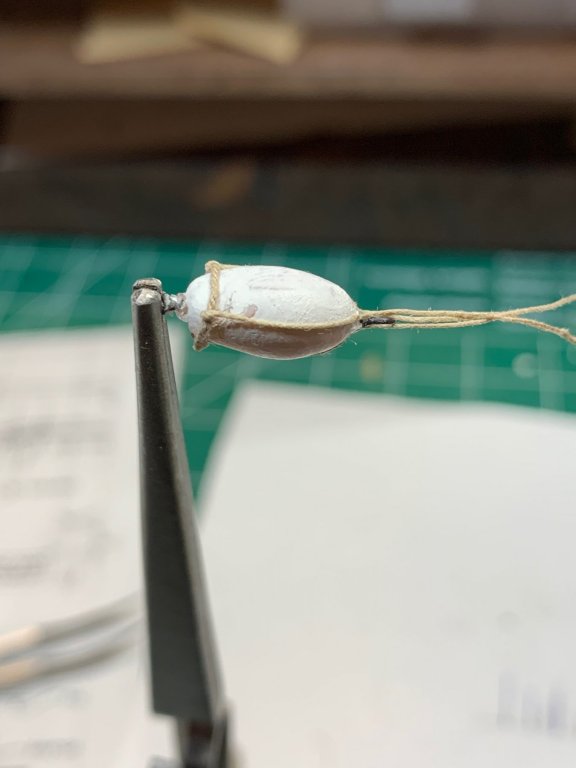
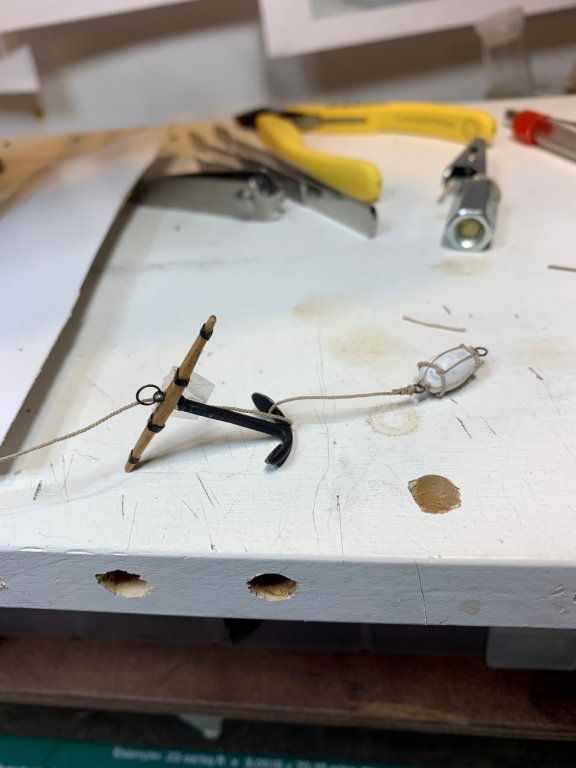
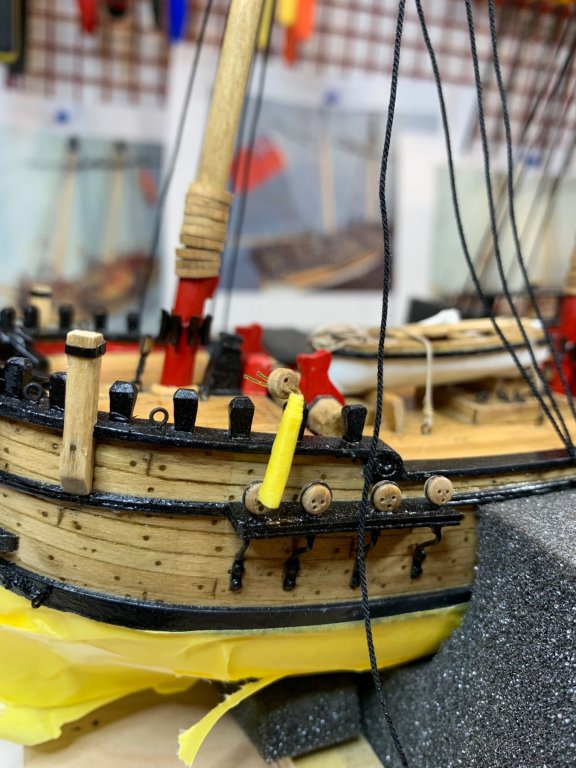
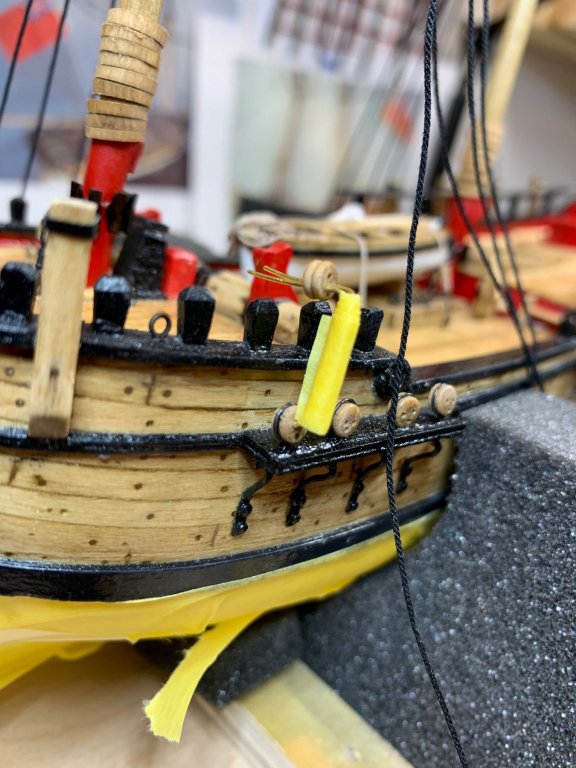
The work on buoys continue... The buoys were not included in the kit so i am following practicum when it comes to roping the buoys... First, i made 4 eye bolts from 0.3 mm wire, by twisting them around a small nail.. Two buoys were chosen from the pile of six. The small hole was drilled on both ends of each buoy and eye bolts were inserted. The small amount of glue was put in the hole before. The eye bolts were not inserted to the end, app 2mm reminded between buoys and eye bolts. The eye bolts were inserted... this pictures shows eye bolts fully inserted just to test the fittings.. The harness for each buoys were made, two per each buoy. Three lines were knotted along the main, rigging line. It took a little time to space the lines properly. I used small template that helped a bit. Four sets of harness were made and set aside. The buoys were painted in flat white, not paying to much attention that color covers whole buoy. Did not want to have brand-new buoy effect... The harness was wrapped around the buoy and fixed with a small amount of glue. The three knotted strands are seized at the eye bolt; here those 2mm are coming into play.. The second harness was also mounted making sure that space between strands is as close as equal possible. This time the strands are going above the first set of harness and seized in the same manner as the first one. Both completed.. Another rigging line was seized on one side of the buoy. This line will be tied to the anchor. With assistance from helping hands, the work was easy to complete. This is the way how it will be tied to the anchor. Happy modeling.


- 360 replies
-
- 5
-
-
- sultana
- model shipways
- (and 1 more)
-
I was contemplating of getting some Advil or similar but don't think it will hold the paint that well.. 🙂 Thanks
- 360 replies
-
- 1
-
-
- sultana
- model shipways
- (and 1 more)
-
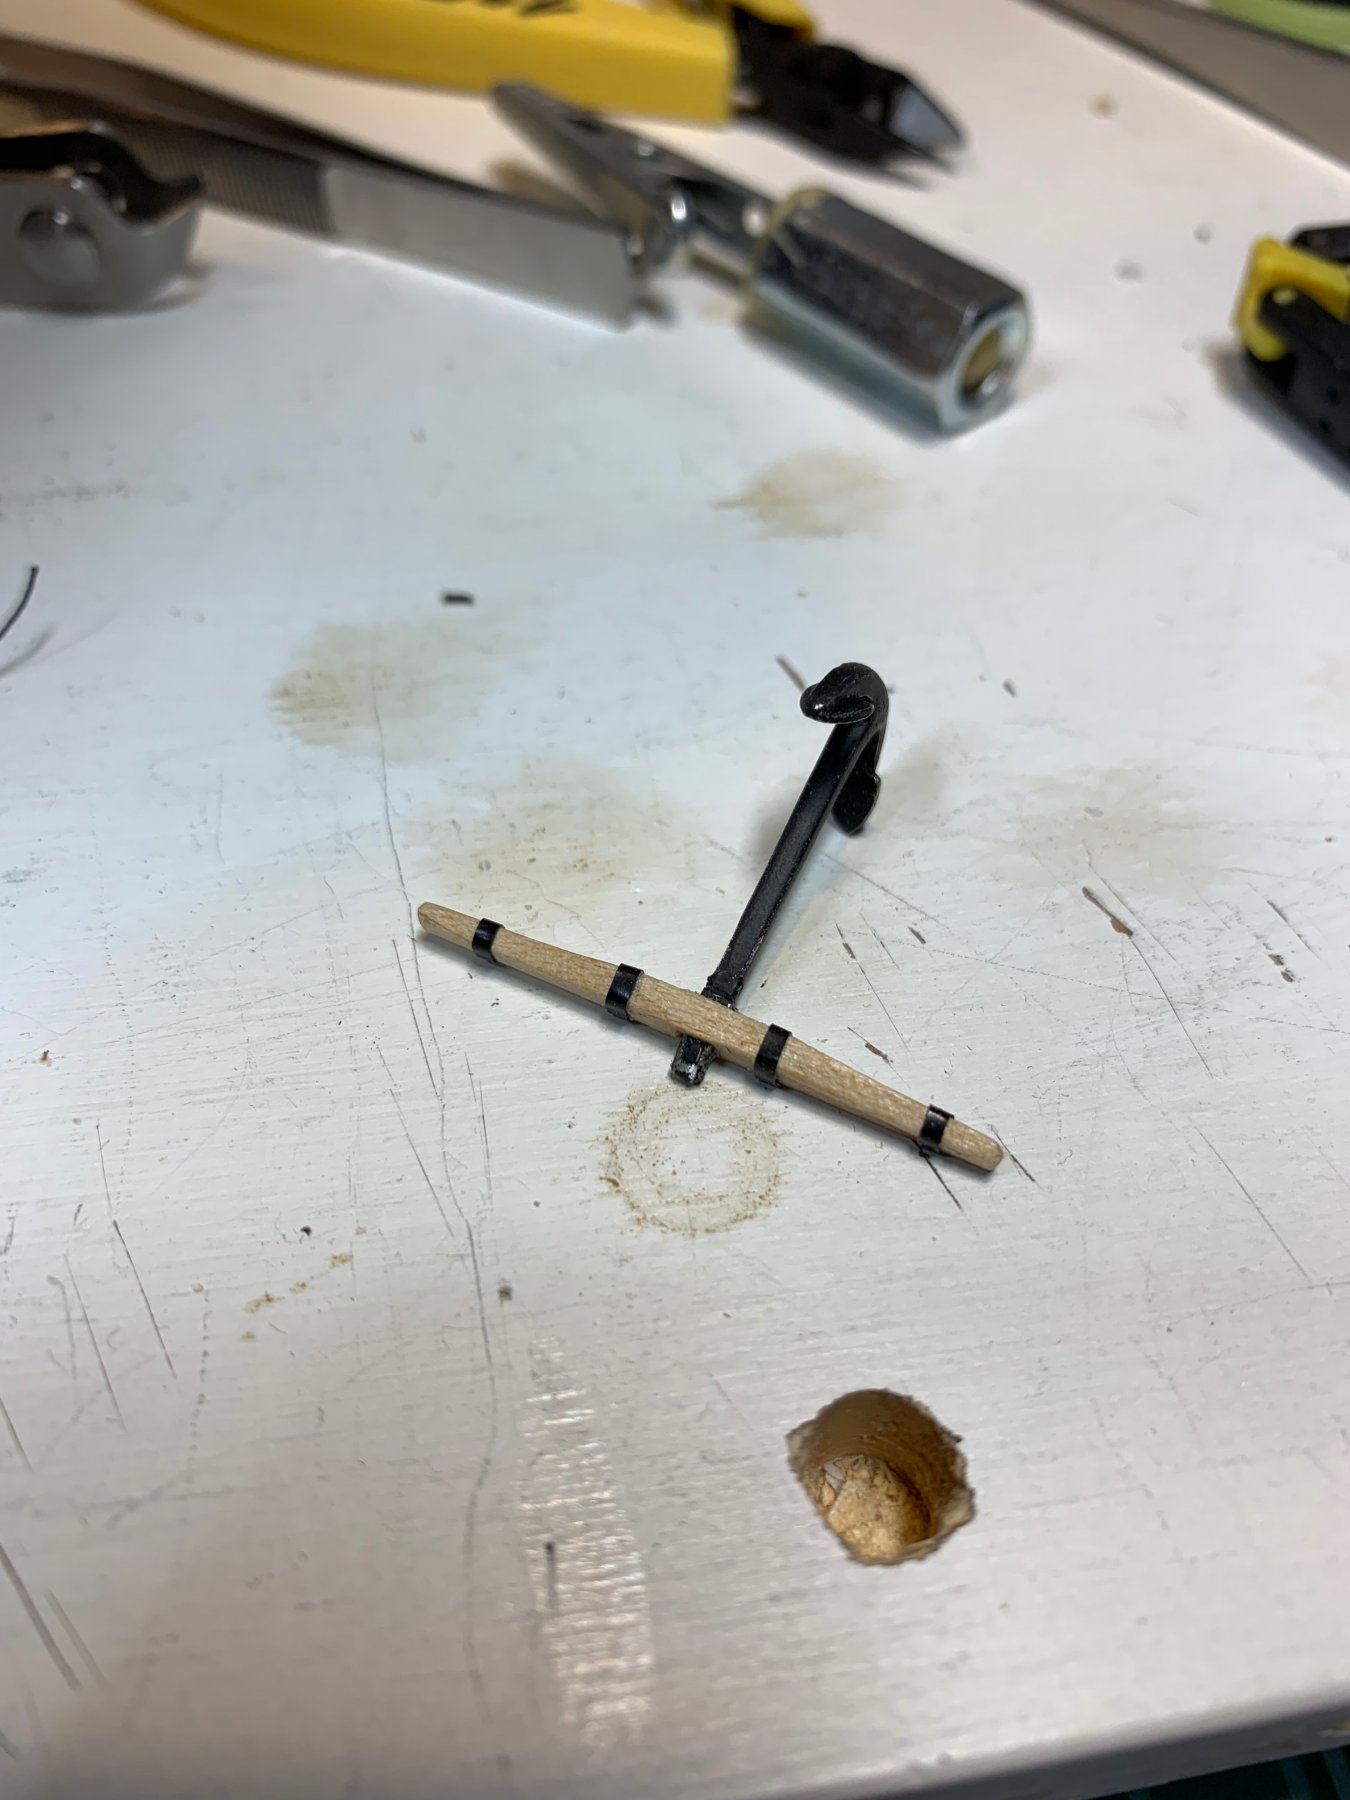
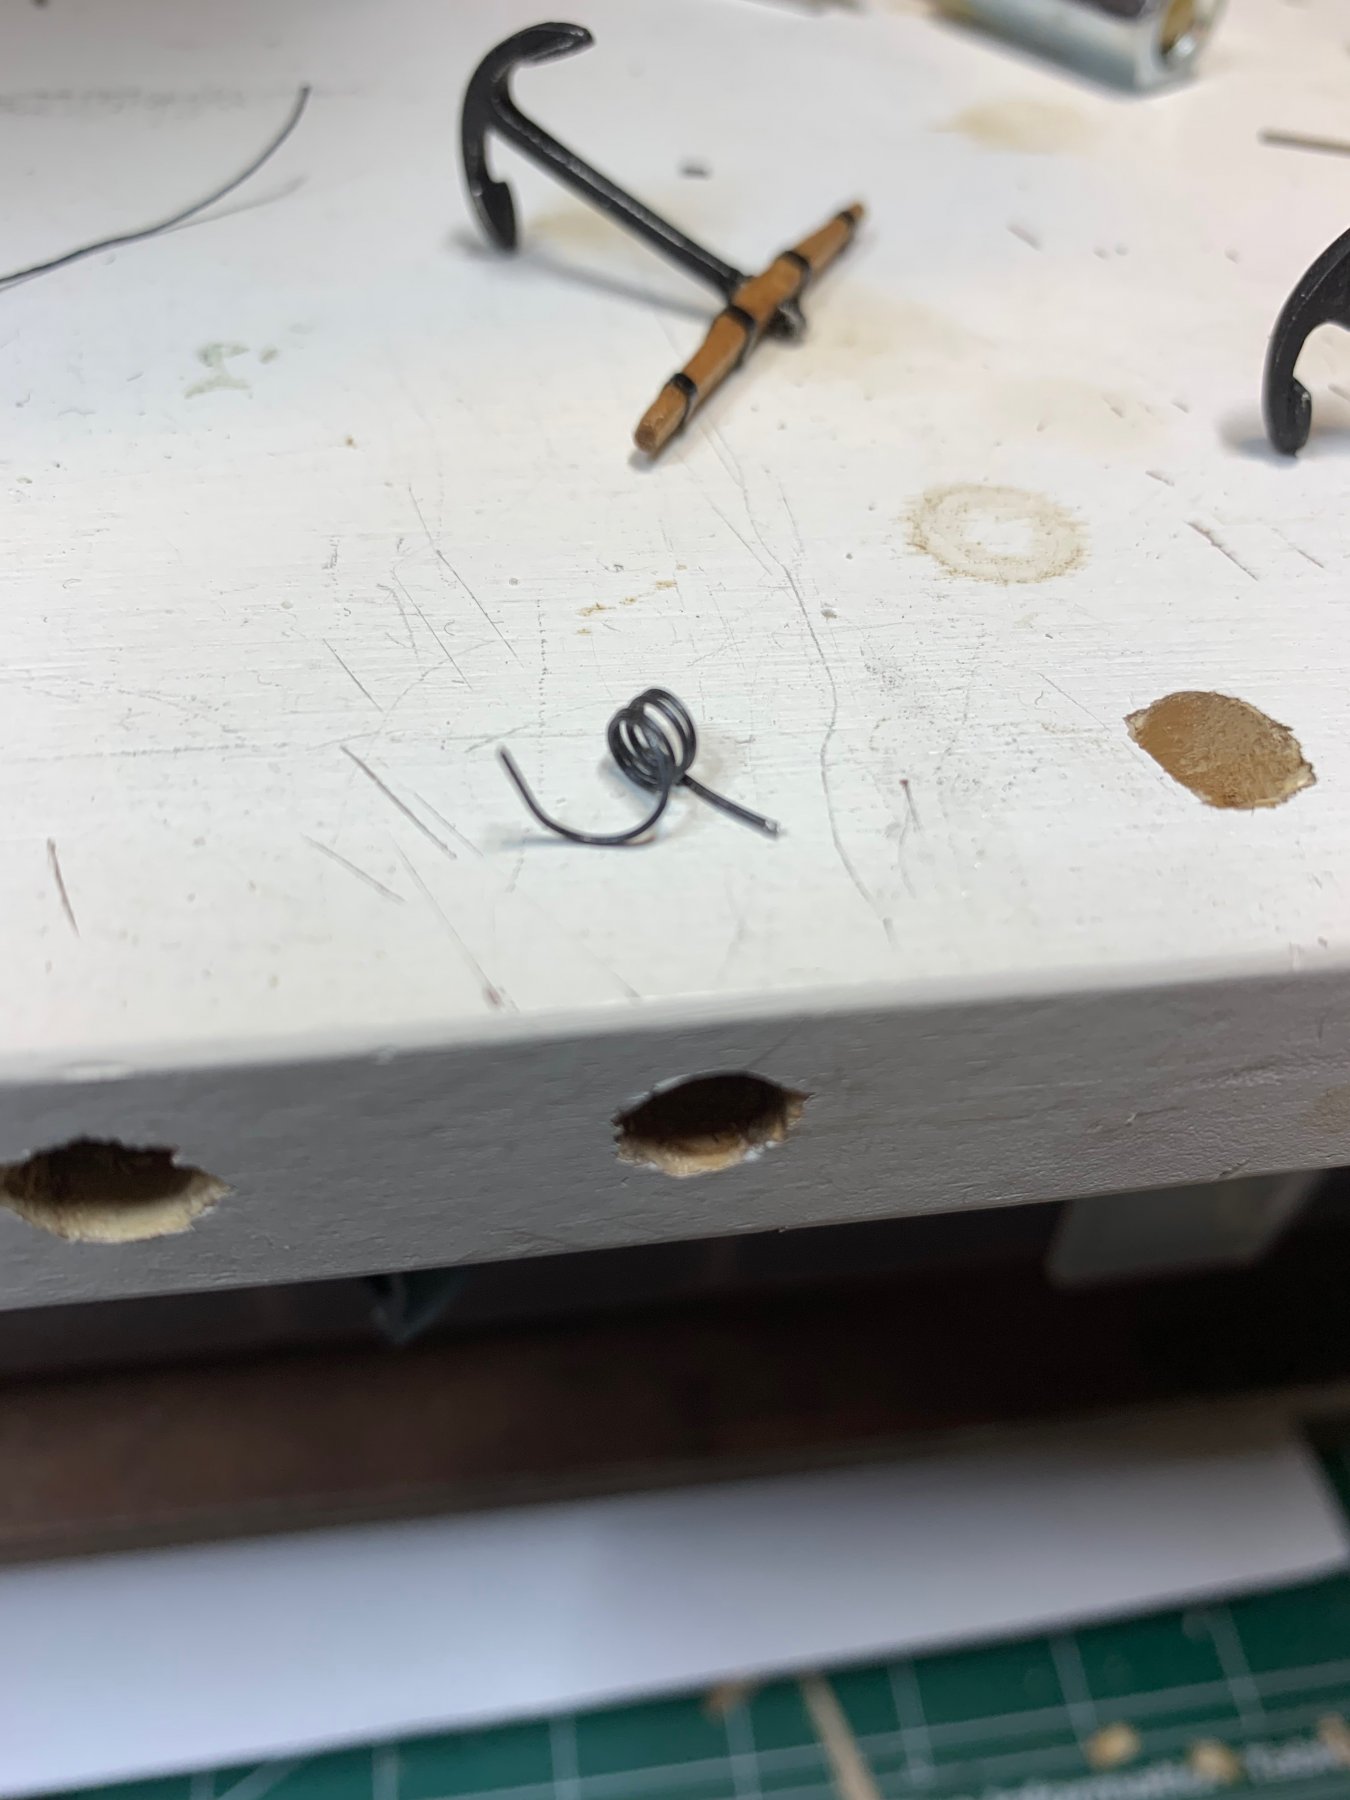
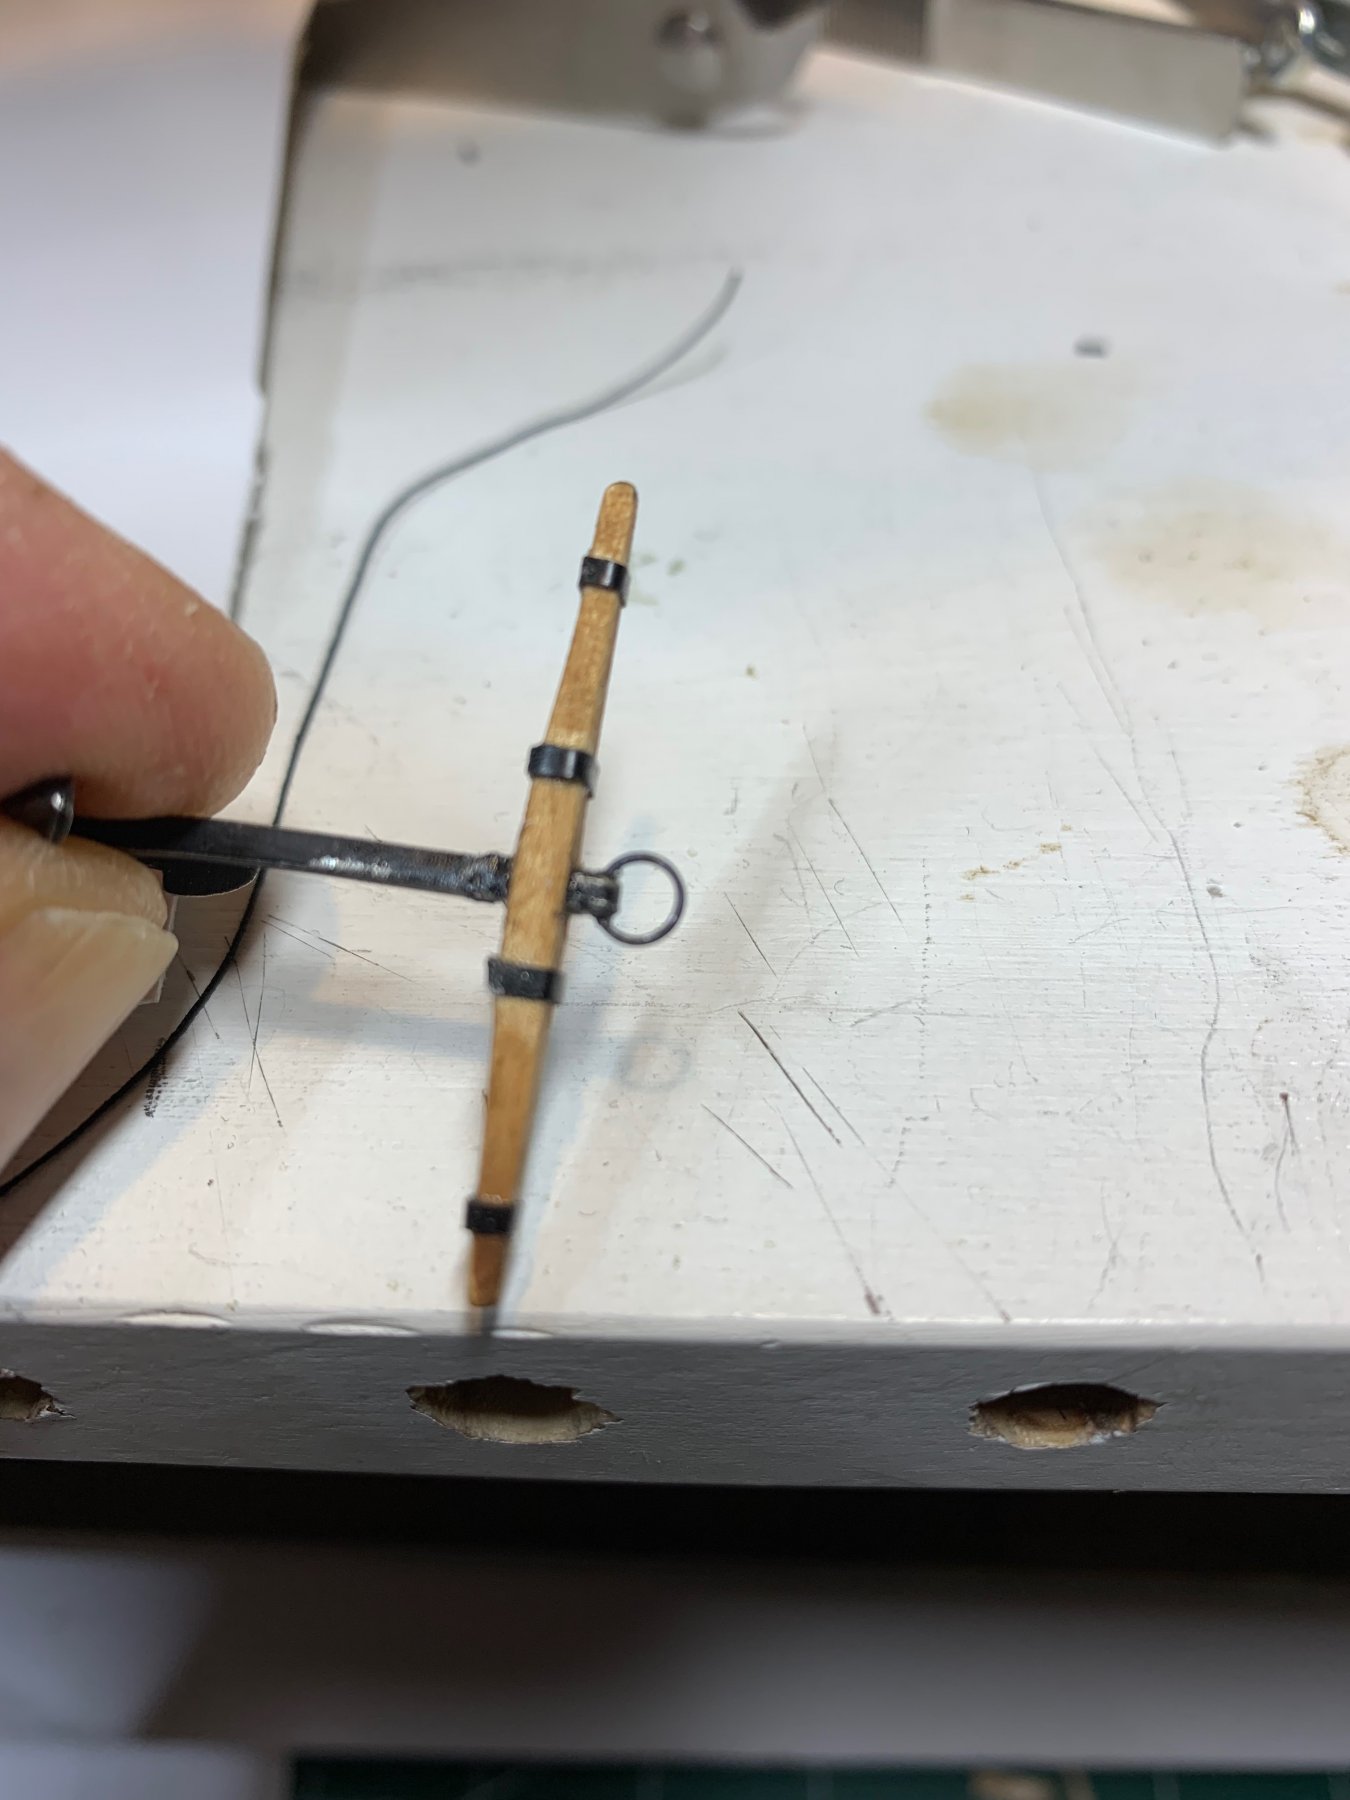
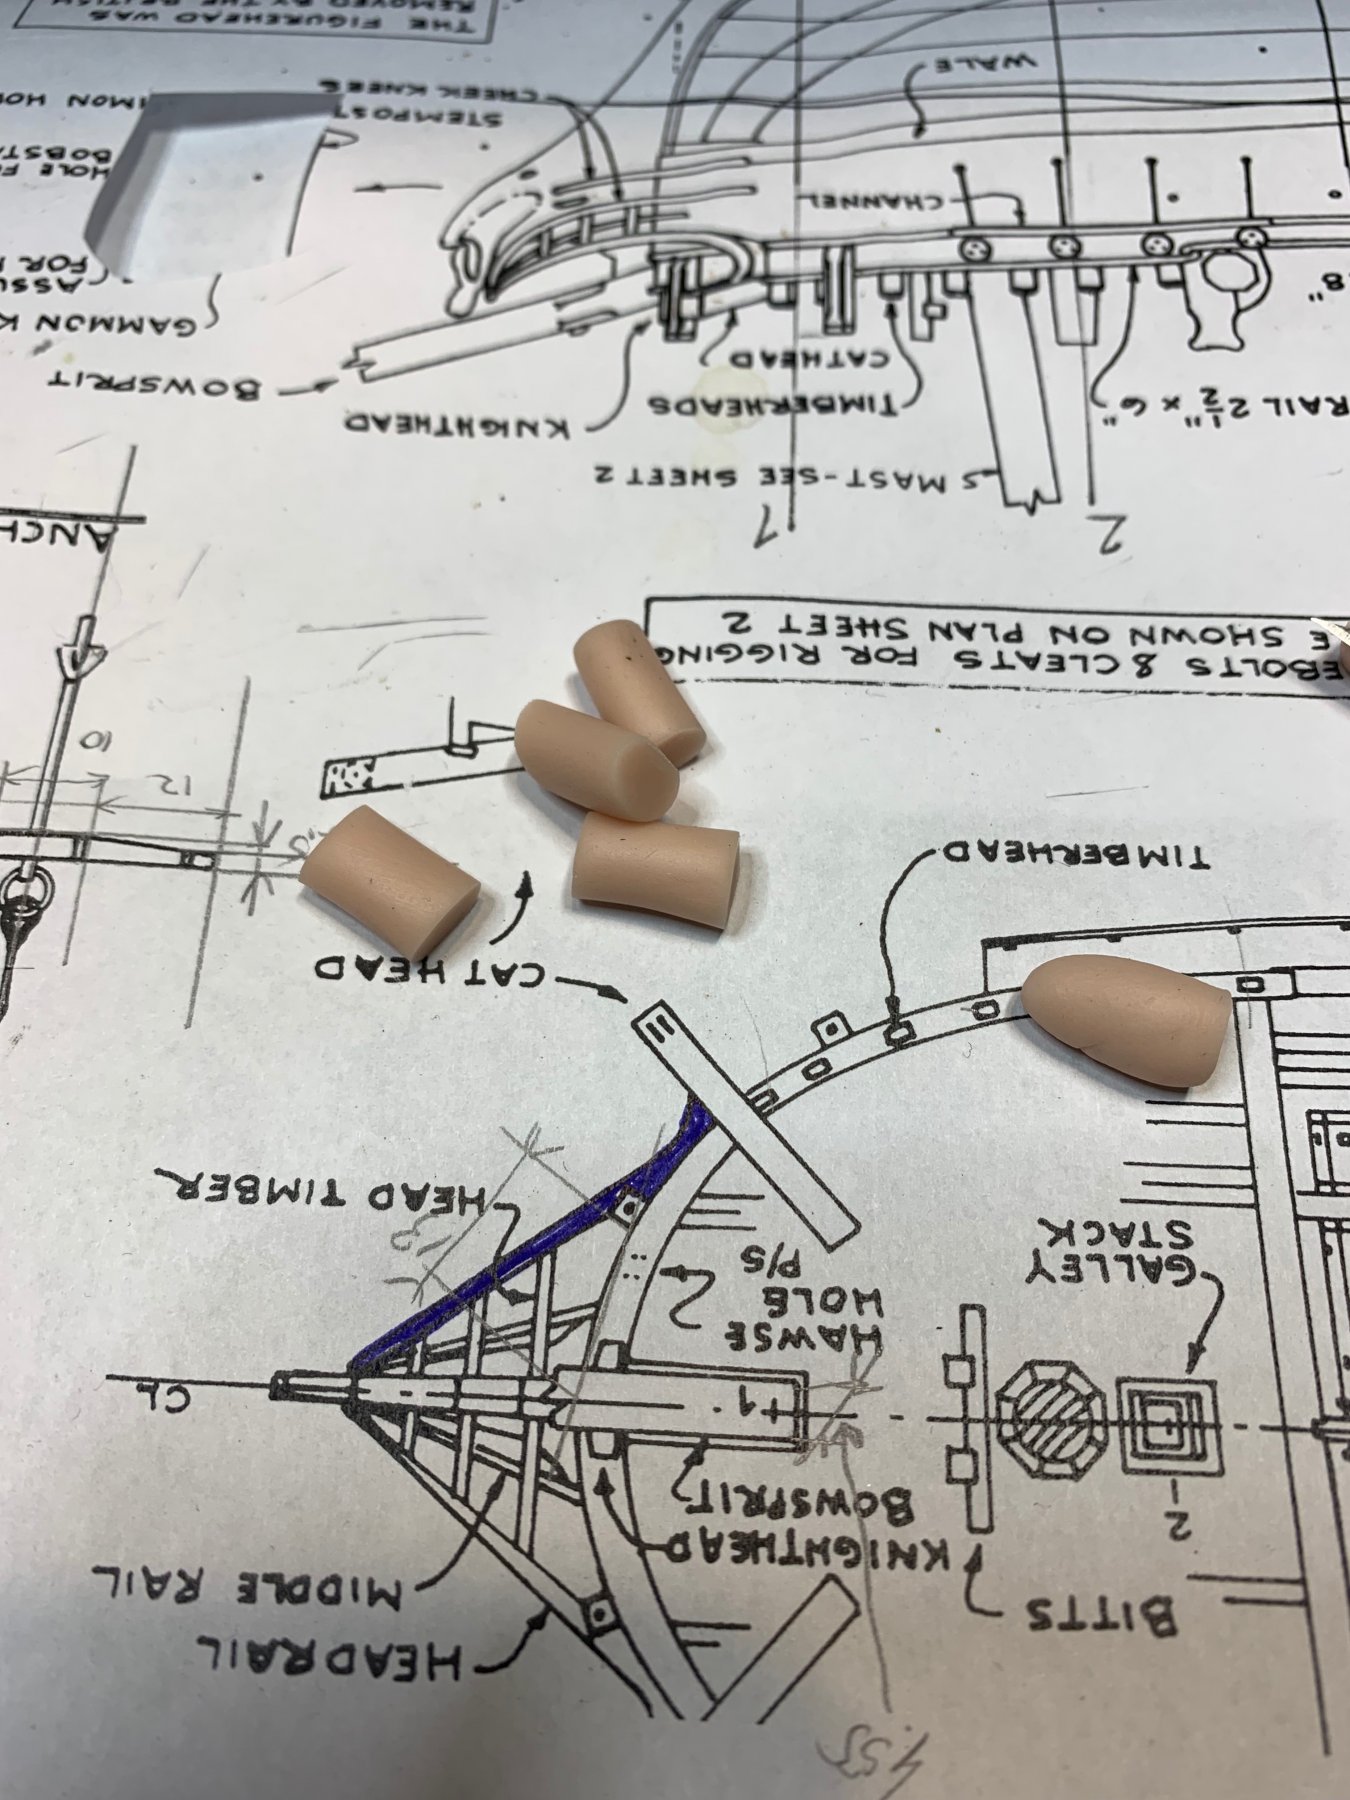
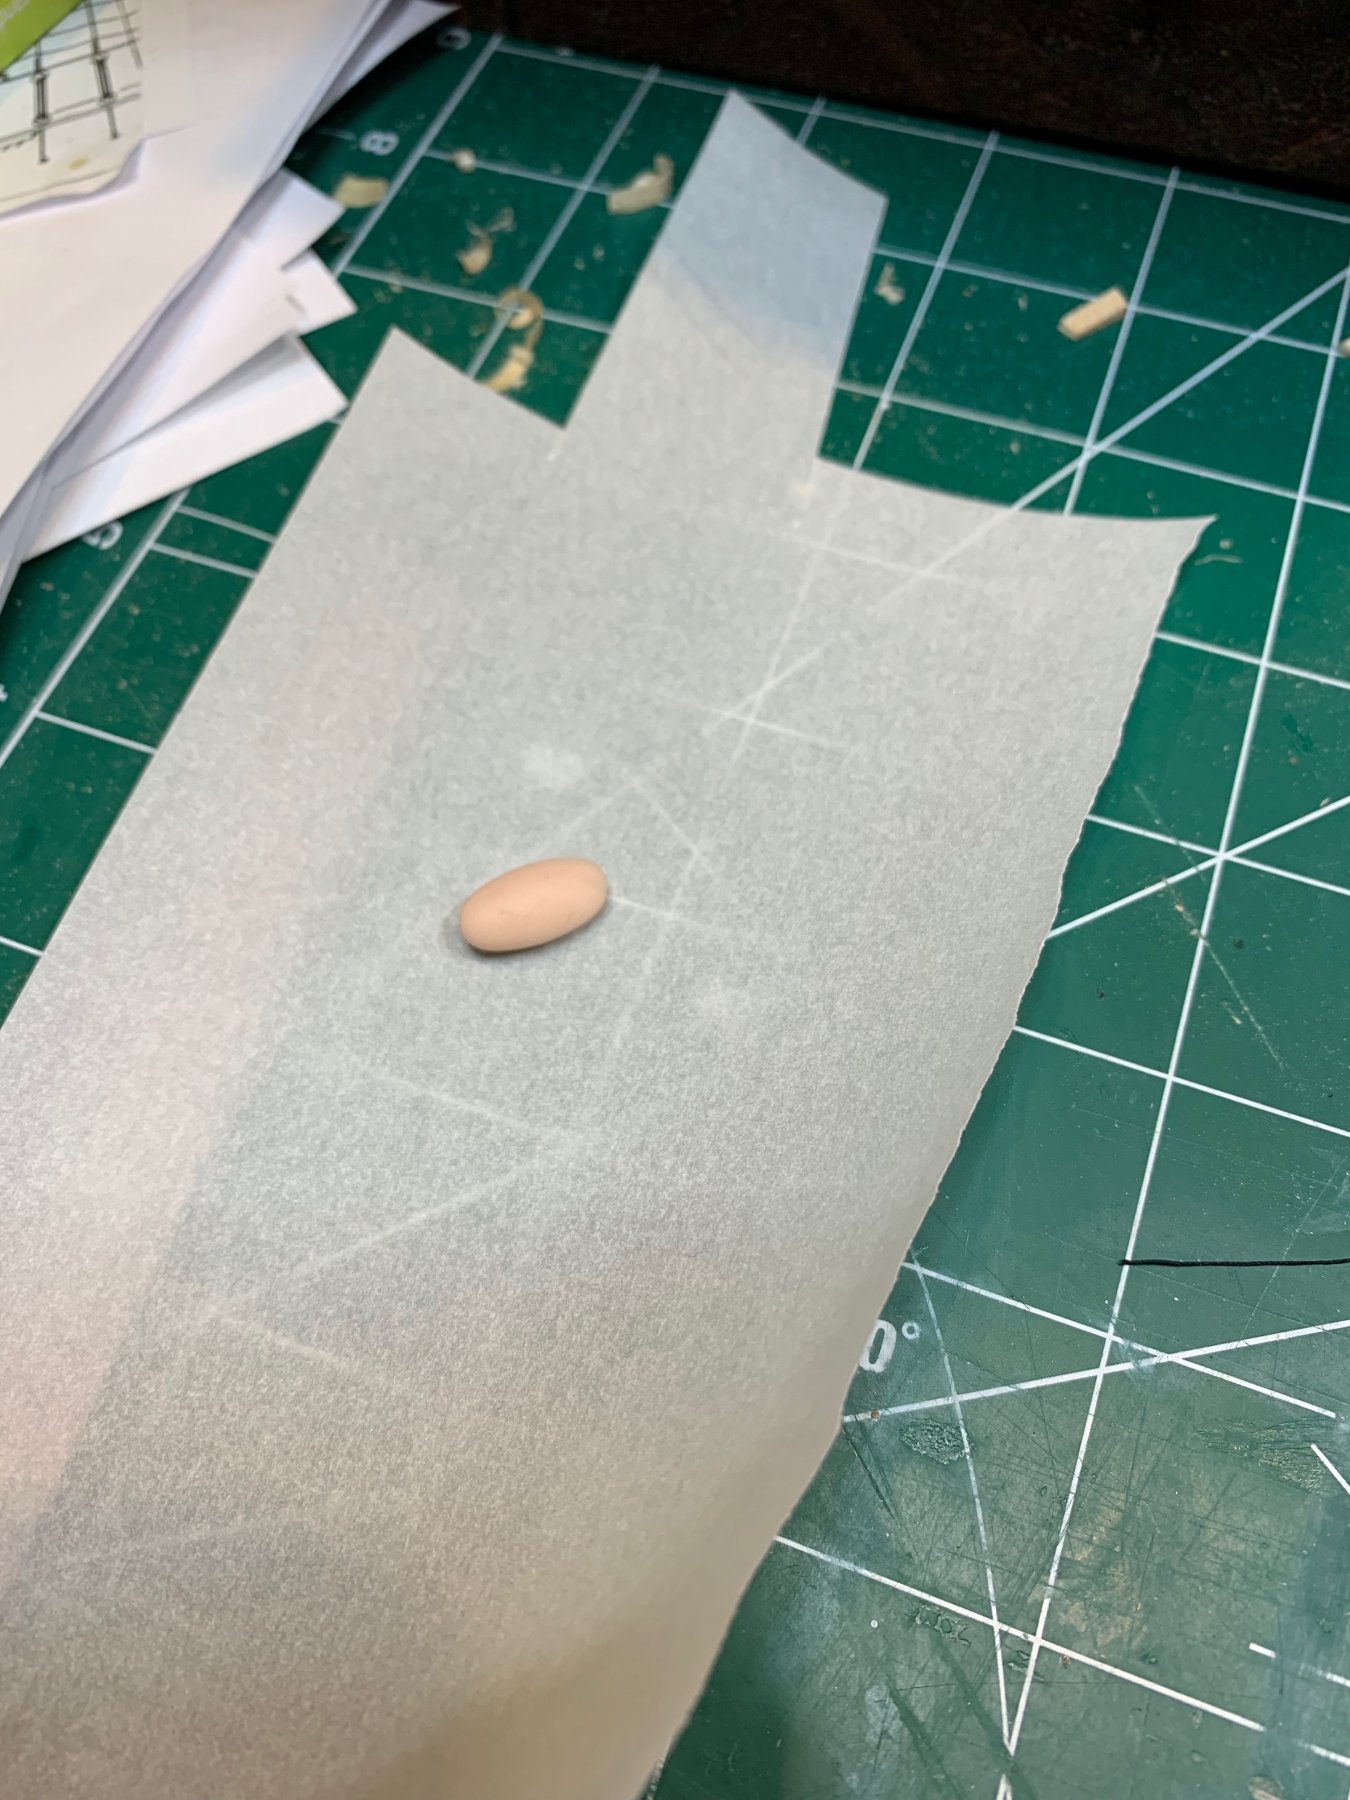
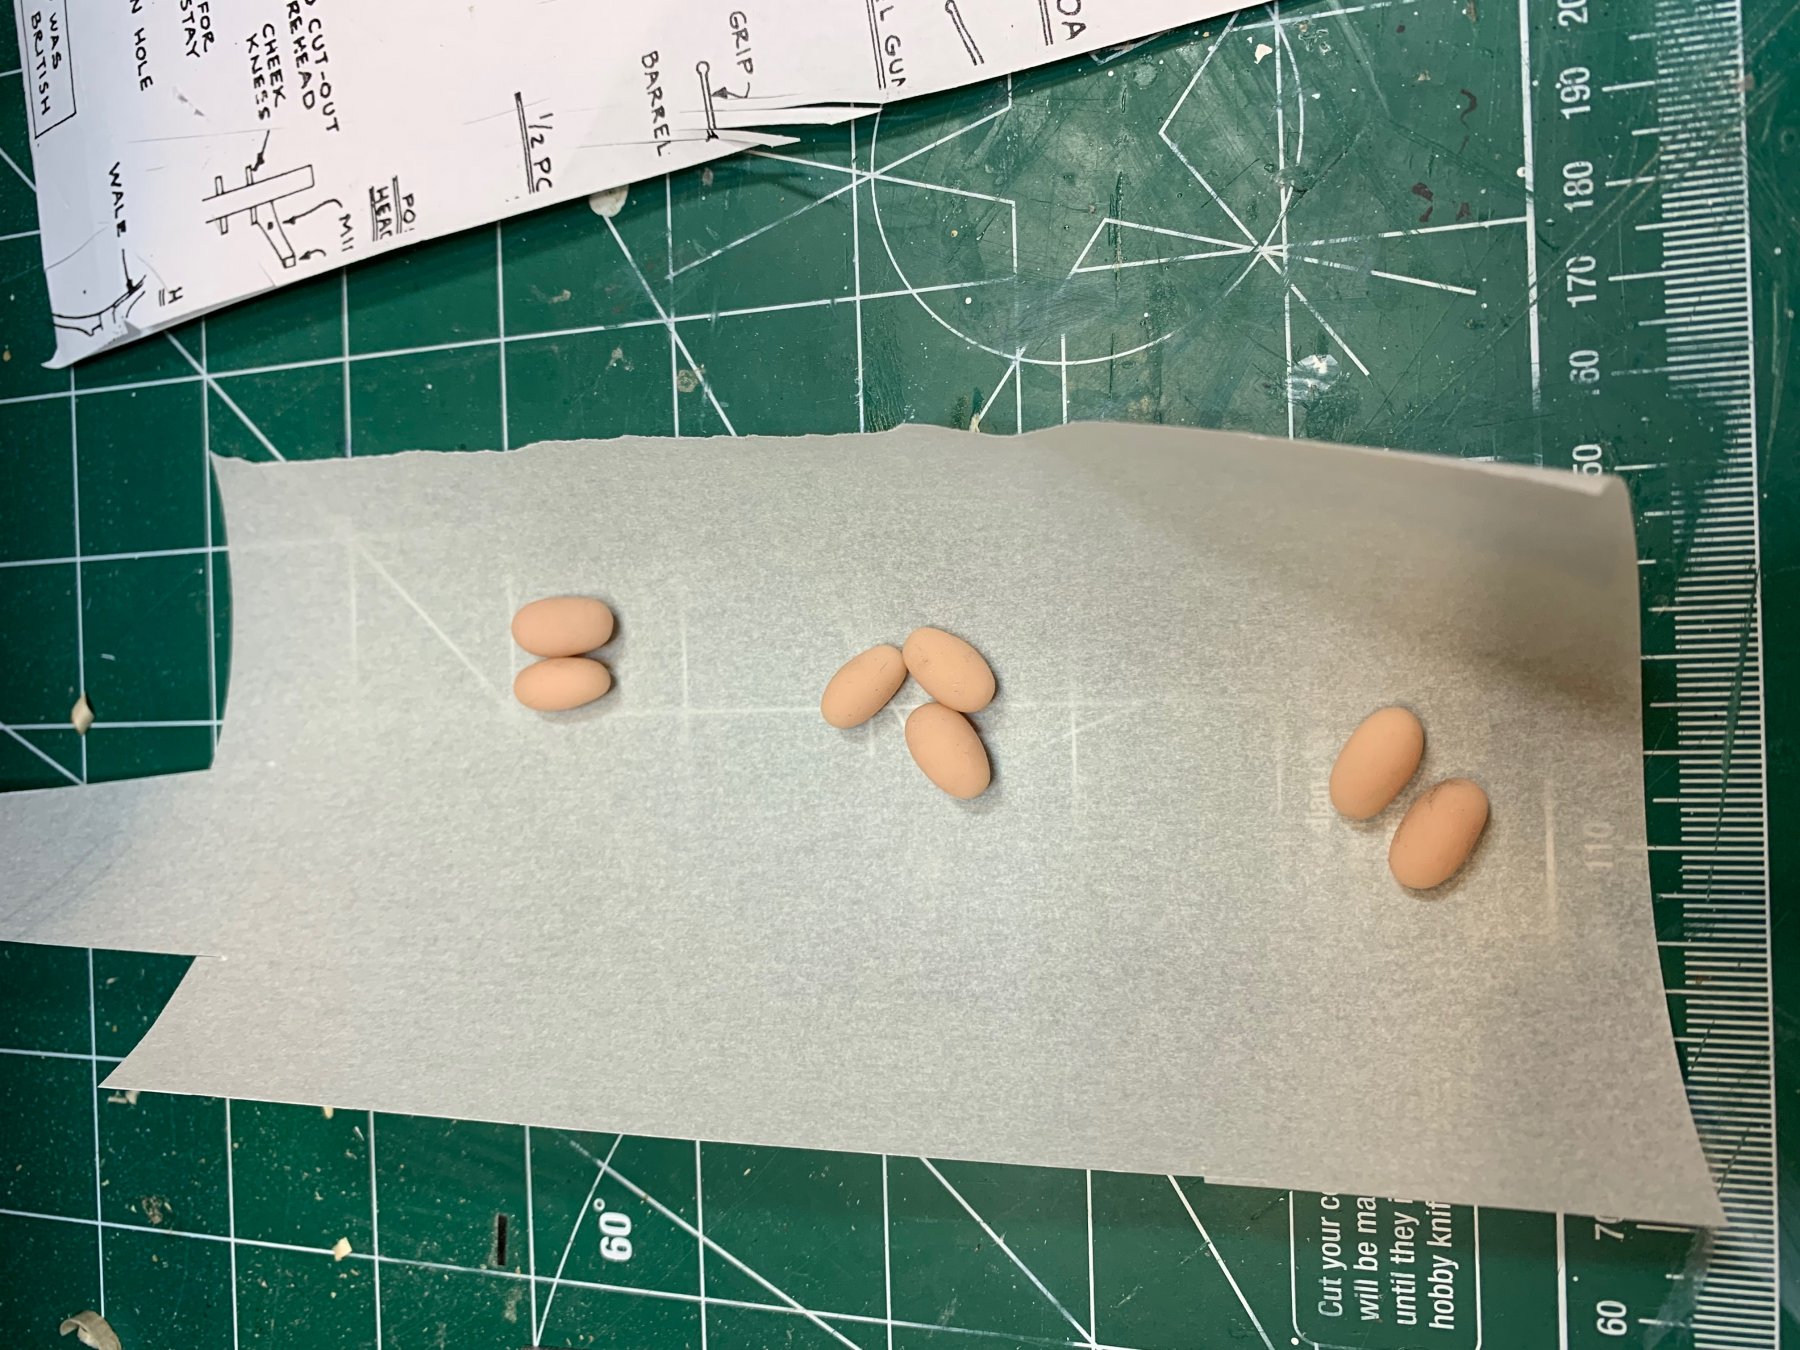
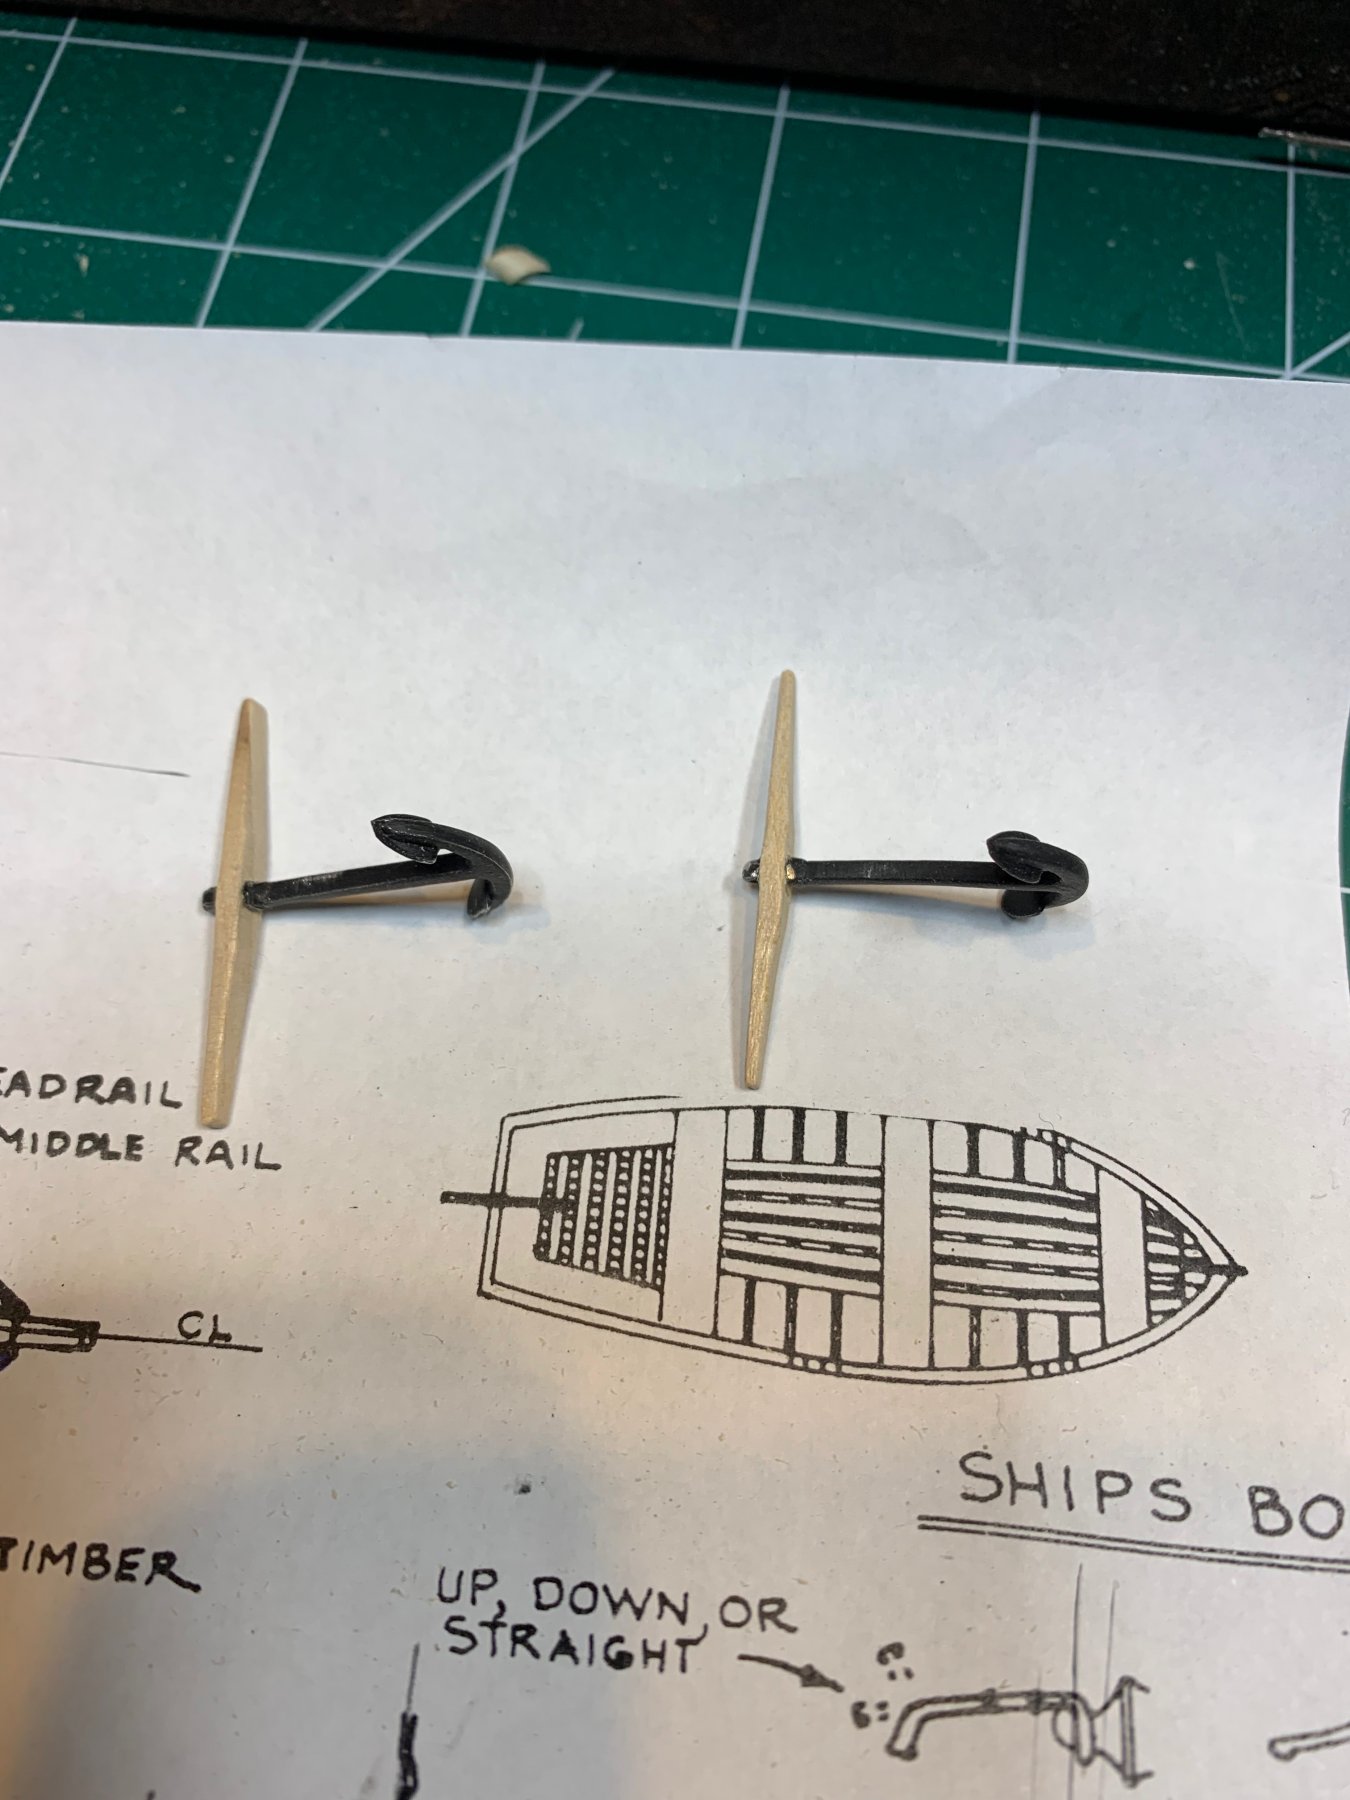
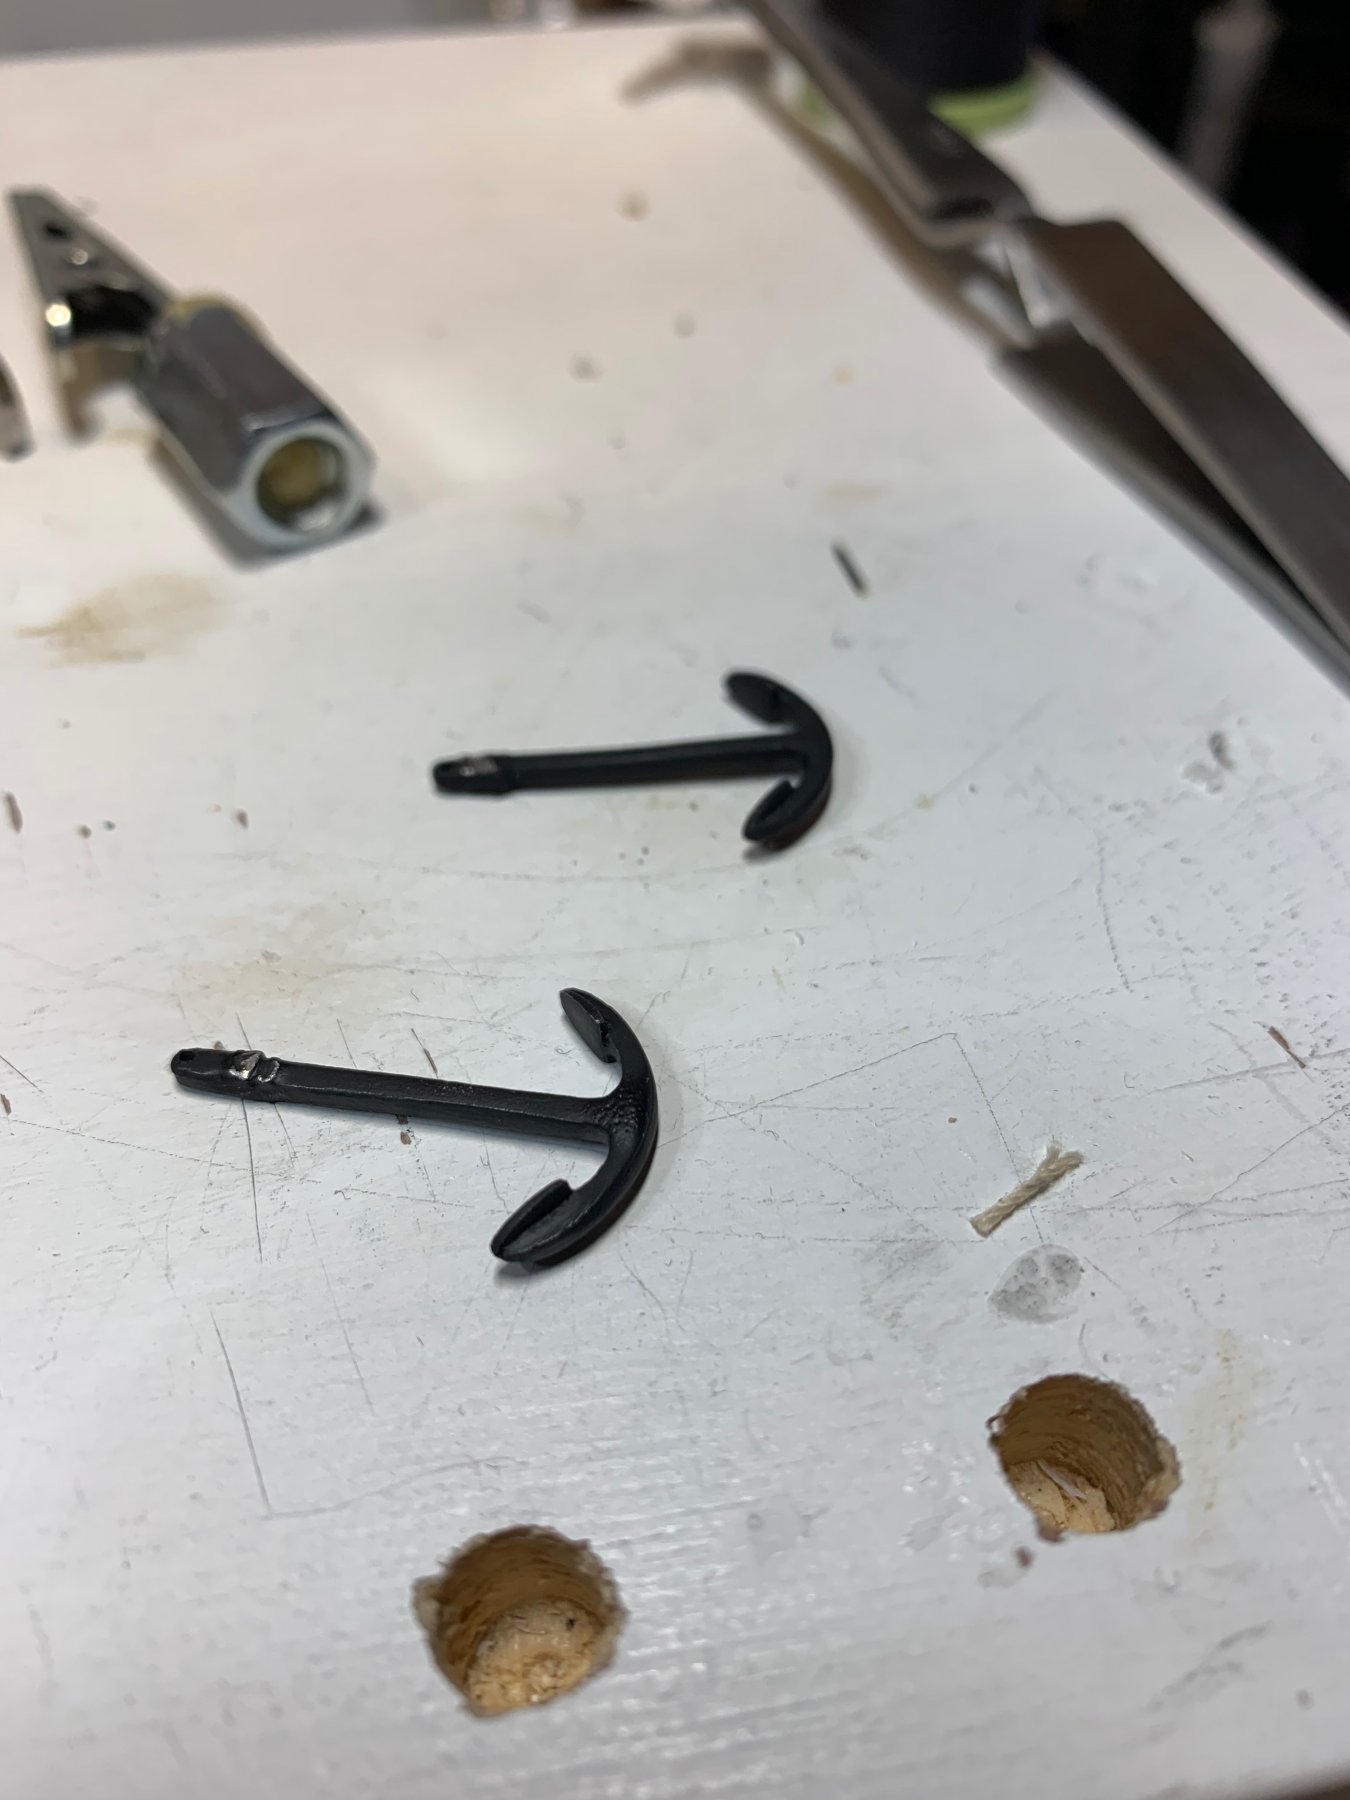
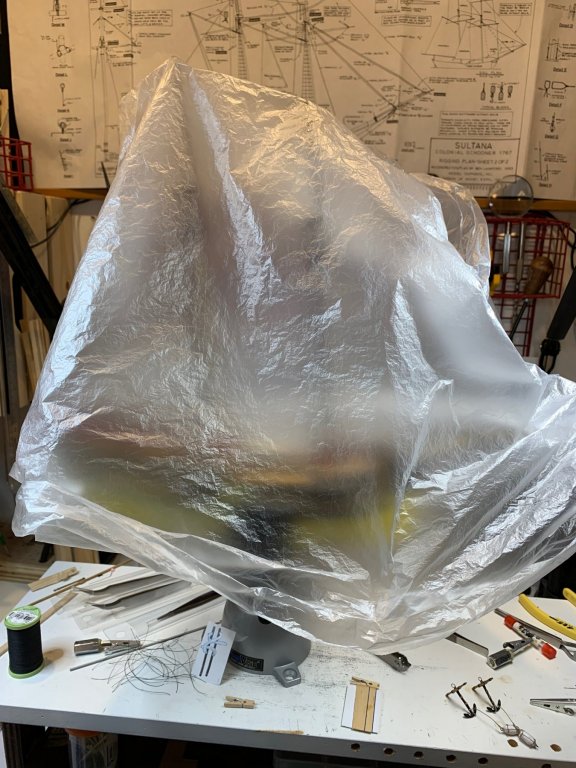
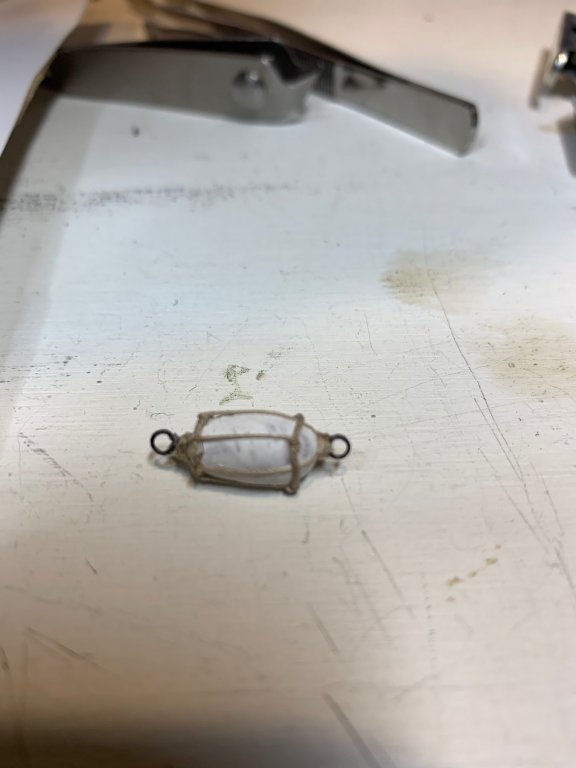
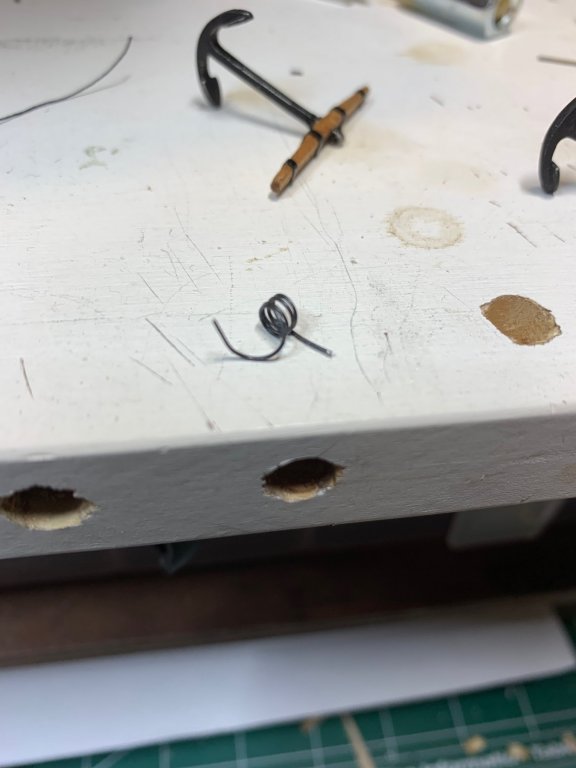
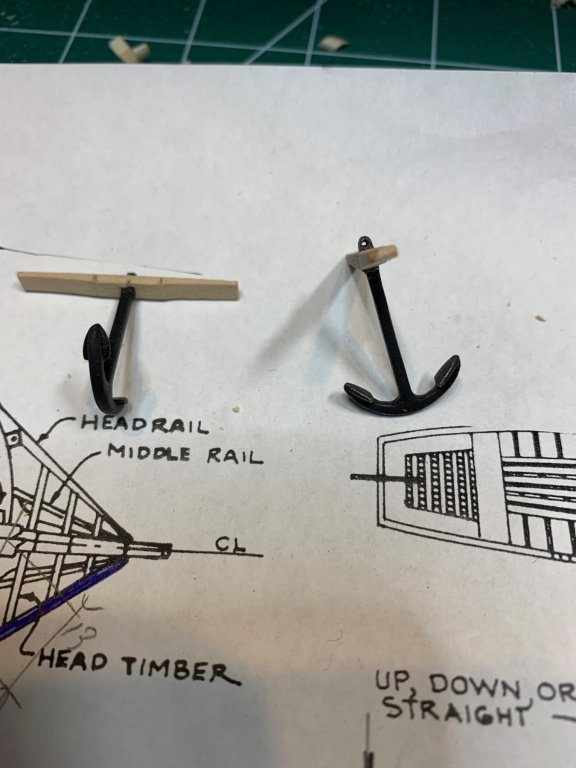
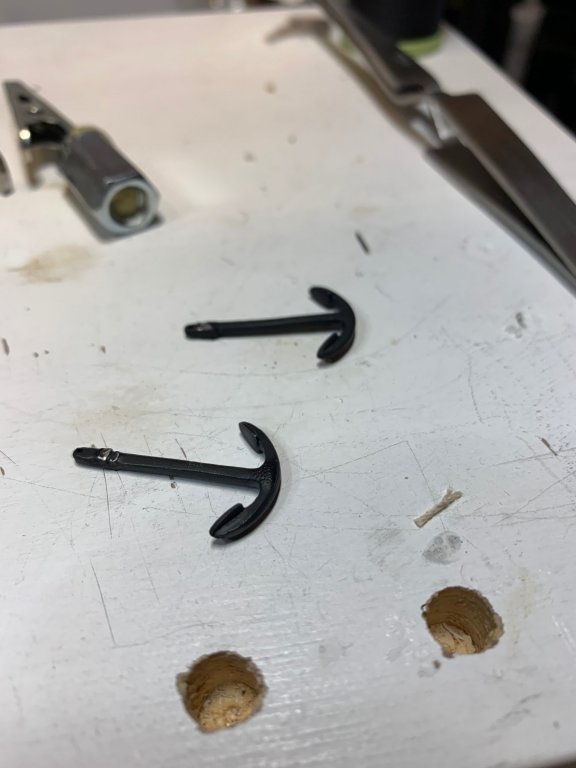
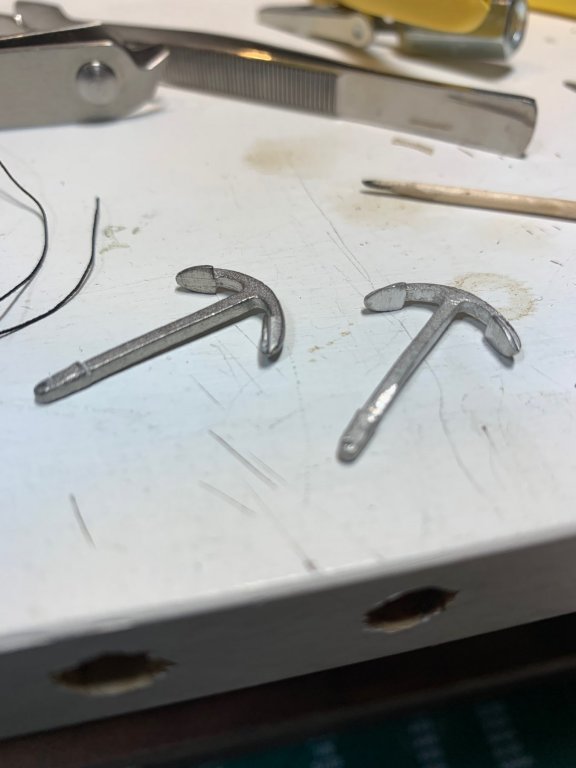
The iron bands were simulated with black electrical tape. The tape was also secured with touch of glue around the place were it will be wrapped up.. The both anchors were dipped (stock down) to the golden oak stain, left with a stain for few seconds and extra stain was wiped out with bounty.. The ring for each anchor was made from 0.3mm black wire. The ring diameter is app 3.2mm. The rings were cut, ends were filled to provide good seating between two ends of a ring. Then a small amount of glue was applied to the ends and positioned in the way that cut ends were in the anchor, not visible from outside. The anchors will be mounted on the ship with anchor buoys. As from practicum: "Ships similar to the Sultana would certainly have had them. There were strict laws and codes that mandated the use of anchor buoys while in a harbor or port. They weren’t used for the Sultana’s benefit. They were used so the other ships wouldn’t get damaged by the anchor and cable. Stiff penalties were brought against a ship’s crew when they failed to use a buoy". The kit doesn’t come with buoys so i decided to follow practicum and make them from sculpey. It was a bit hard to find out correct size but i looked at the buoys from practicum and trying to get a feeling for a size. The sculpey was cut in approximate same size loafs and shaped. The quick bake (130 degrees C for 15min) and they are ready for a next stage.. I made few extras and will pick the best looking pair.. Happy modeling.


- 360 replies
-
- 3
-
-
- sultana
- model shipways
- (and 1 more)
-
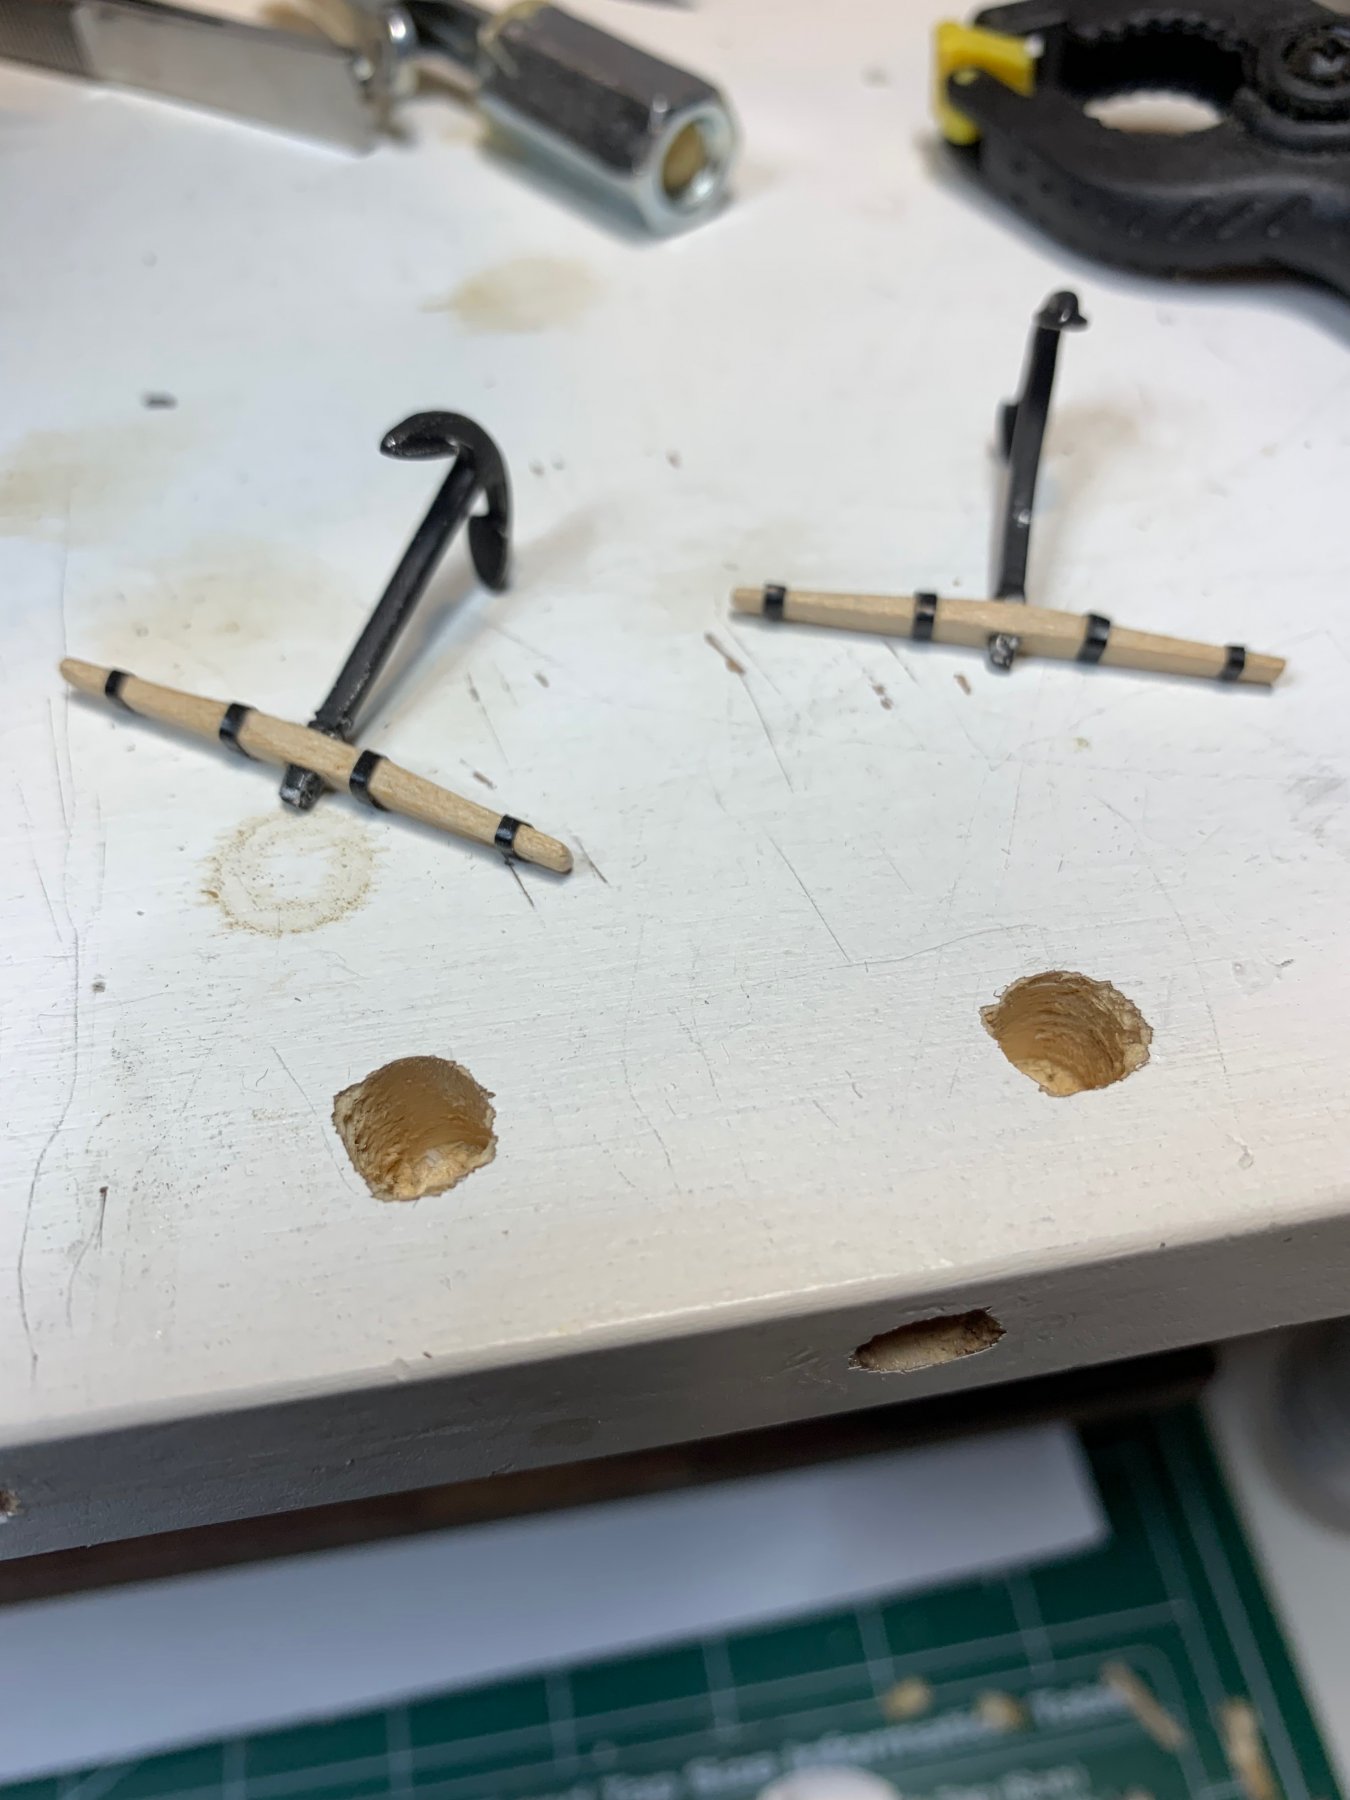
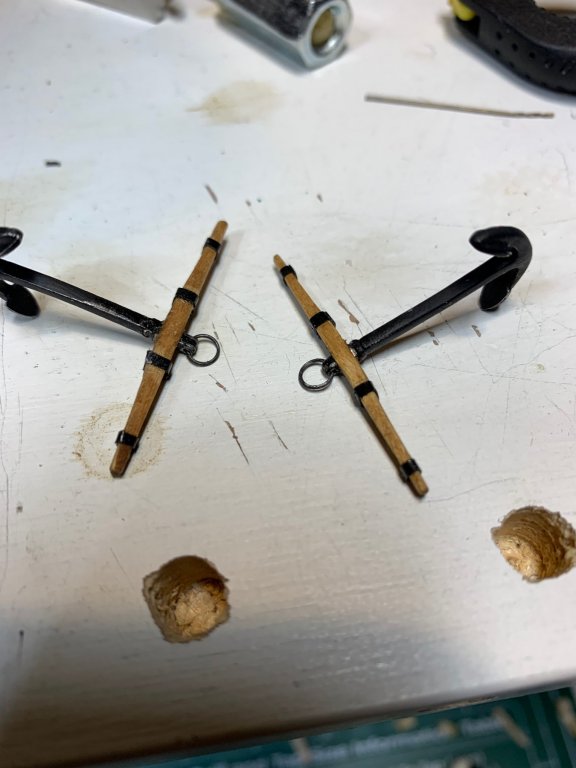
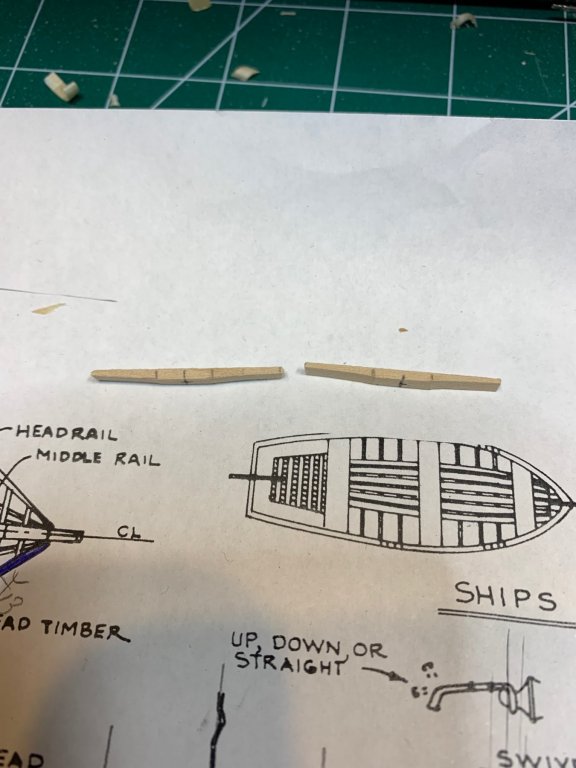
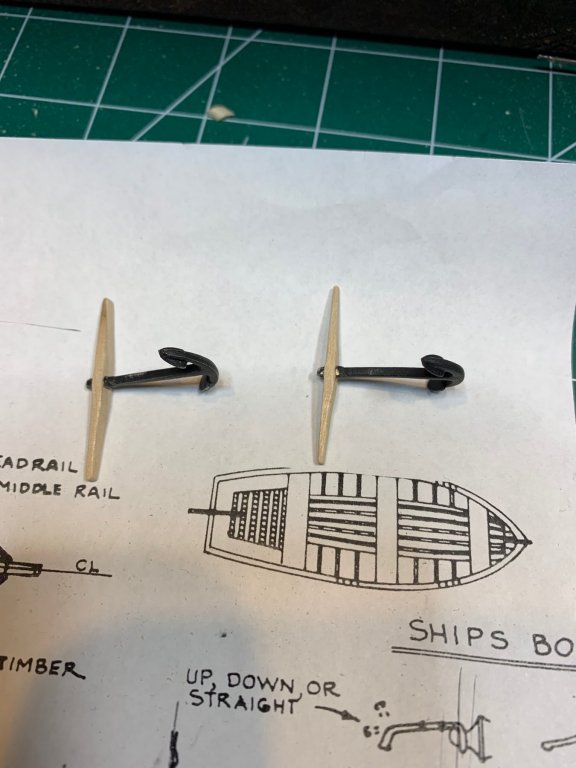
Climbing the ratlines.... This is the way how i made a clove hitch... The second set of ratlines completed... and the sailor' view.. To break a bit from a rigging i continue work on anchors.. I discarded anchor stocks that were provided in the kit and made one from the piece of bass strip. The dimensions were taken from the plan and transferred to the strip wit h a help of scotch tape.... Two stocks were made and with file and knife carved to the correct shape. I made the stock from one piece; practicum uses two stocks and glue them together. I use one piece of wood per anchor. After carving and sanding i drill a hole in the center (1.5mm) and shape it further with a file. The final shaping was done when anchors were glued to the stocks. Next will be adding a electric tape strips to simulate iron band, a layer of golden oak stain and layer of varnish, ring for an anchor, anchor buoy .... Happy modeling..

- 360 replies
-
- 4
-
-
- sultana
- model shipways
- (and 1 more)
-
For a change, started to work on anchors; a layer of flat black was applied. The anchors stocks is next.. The continue with ratlines. It is slow but very rewarding work... It appears that i squeezed the 5 or 6th line a bit more than necessary so i have to fix it.. Happy modeling..

- 360 replies
-
- 2
-
-
- sultana
- model shipways
- (and 1 more)
-
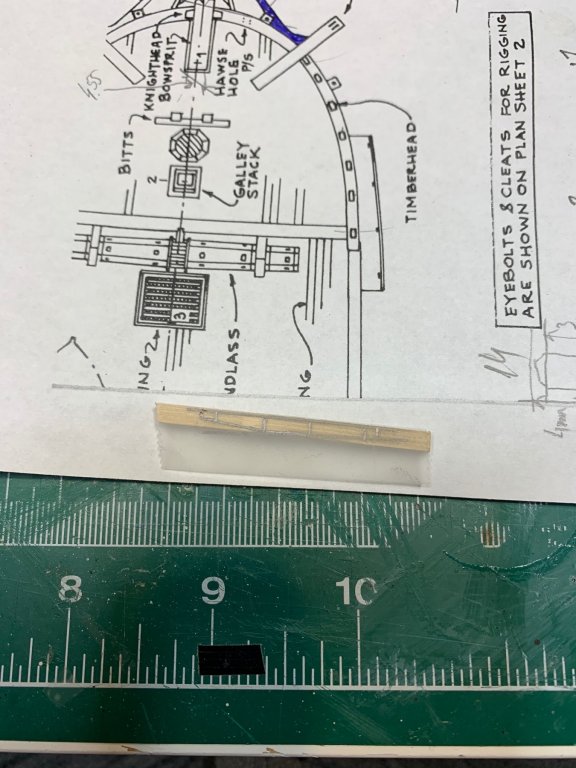
Work on ratlines continues... For a change from ratlines, i cleaned up the anchors with sandpapers and files and start preparing a wooden anchor stocks from scratch. The kit supplied anchor stocks will not be used... Happy modeling.
- 360 replies
-
- 3
-
-
- sultana
- model shipways
- (and 1 more)
-
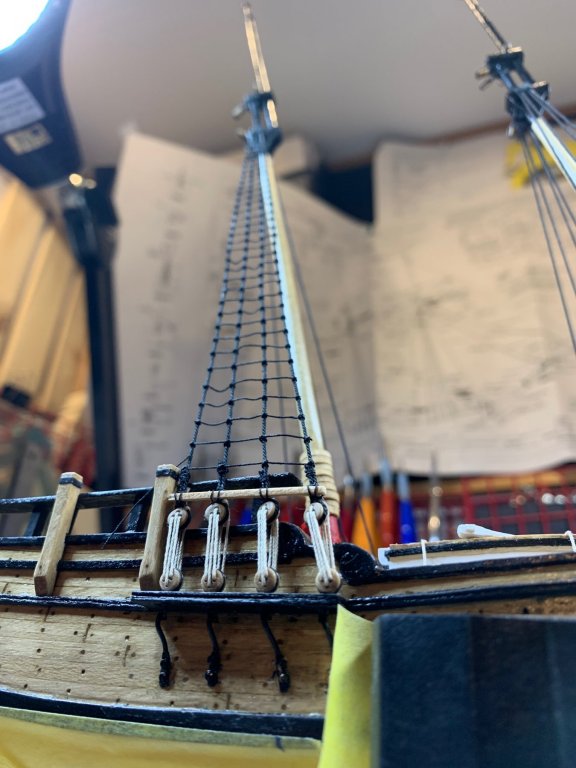
Ratlines, ratlines and more ratlines.. Time consuming but awarding task. The first clove hitch was tight as soon as it was completed and a small amount of glue (diluted white glue this time) was applied to it. The rest of the cloves was not secured with glue right away; instead they were secured at the end which was living a bit space to tight them up and to adjust a height as needed. Happy modeling..


- 360 replies
-
- 4
-
-
- sultana
- model shipways
- (and 1 more)
-
I stumbled upon this link; it covers Sultana' history, interesting reading... https://web.archive.org/web/20041217181616/http://www.schoonersultana.com/education_pages/wood_water_beef.htm
- 360 replies
-
- 1
-
-
- sultana
- model shipways
- (and 1 more)
-
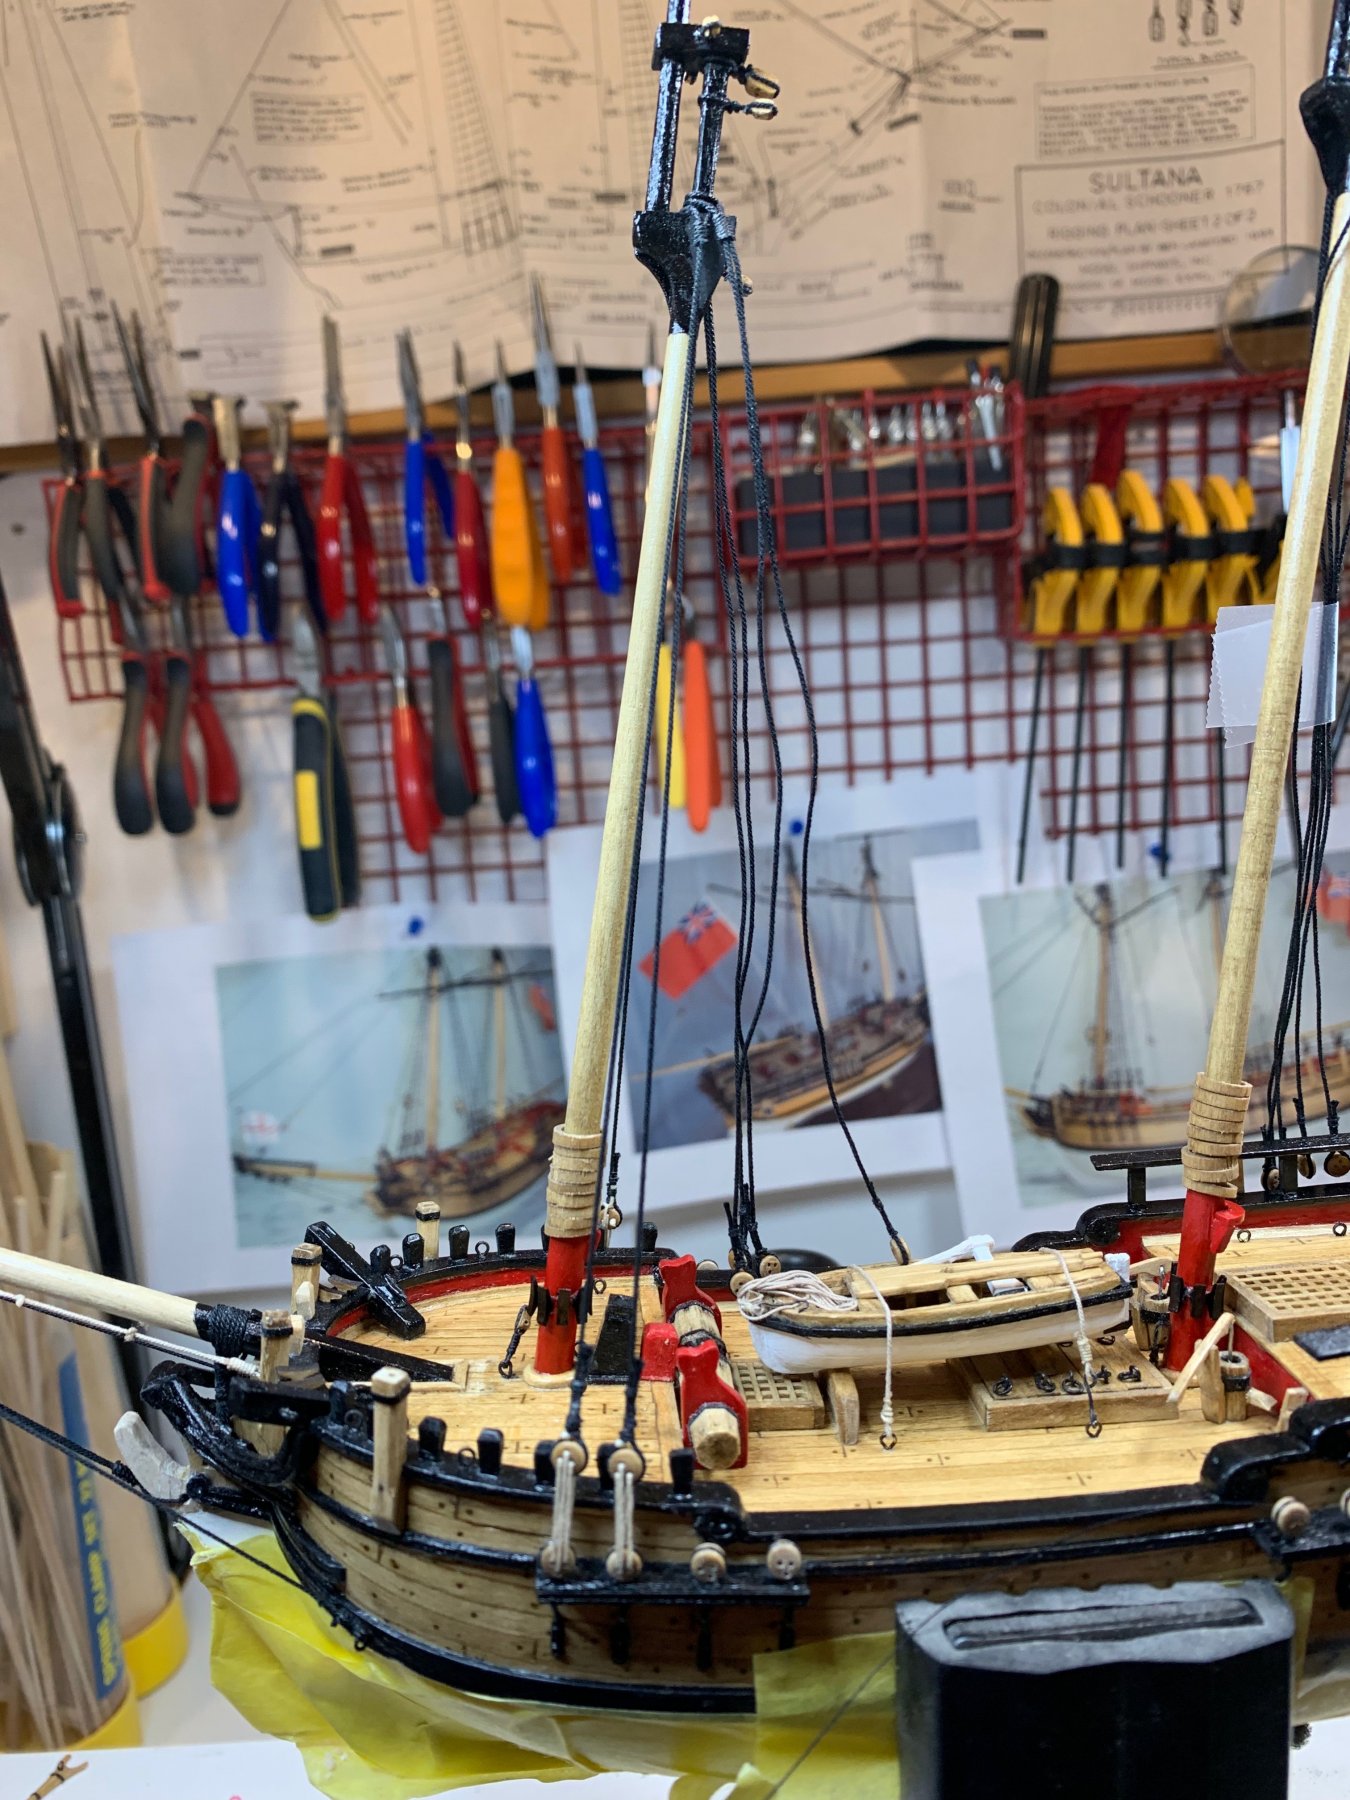
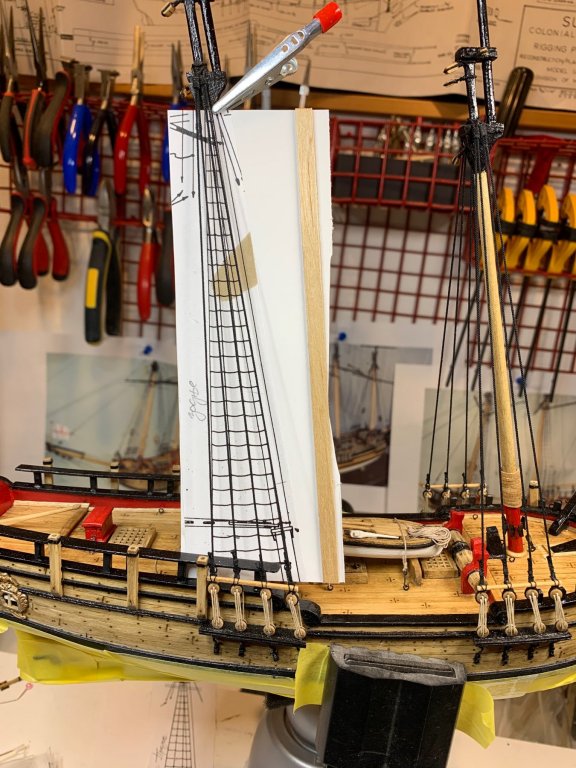
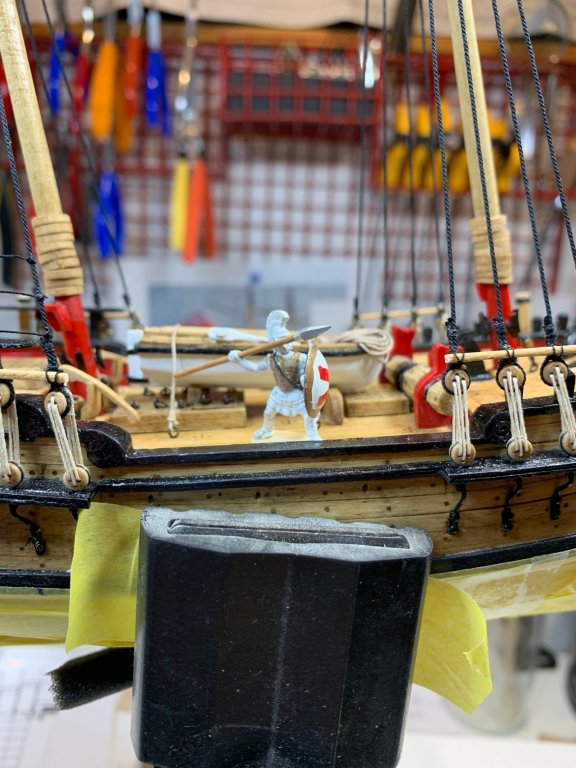
Lanyards have been completed and sheer pools were mounted. I was trying to make the same distance between deadeyes and to install sheer pools just above the deadeyes but it appears that the sheer pools are not quite straight.. So will following the kit plan for ratlines positions... One of the extra plan copies was used to make a template for ratlines. The template was glued to piece of cardboard and two Starbucks stirring sticks were used to stiffen the template.. The template will be to close to the lines so i think i might not be using it at all. It will be very difficult to move the string around and make decent ratlines if the template is in the way. So i decided to use a piece of wood and transfer approximate location of ratlines. This strip also serves as a holding point for ratlines rope; it keeps the beginning of line tight so i don't have to freeze first clove hitch with a glue. I kept the clove hitch template close to eyes so... First three ratlines... For some reason mighty Greek soldier keeps coming to Sultana... Happy modeling.


- 360 replies
-
- 2
-
-
- sultana
- model shipways
- (and 1 more)
-
Real work prevented me from my shipyard.... Still no winning lotto numbers.... Sheer pools and lanyard work continues... Happy modeling.
- 360 replies
-
- 1
-
-
- sultana
- model shipways
- (and 1 more)
-
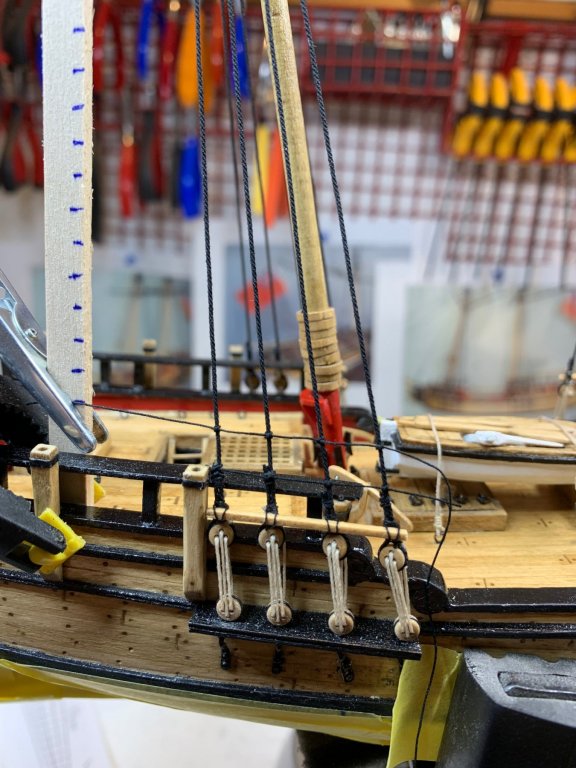
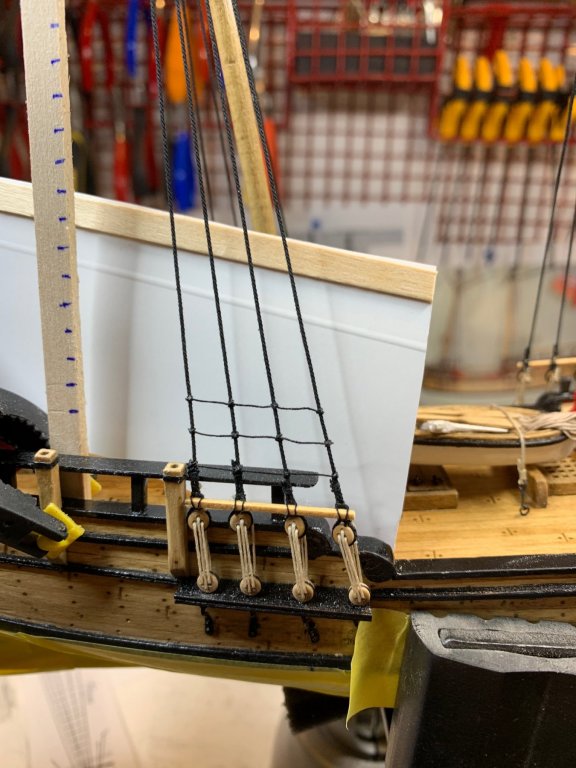
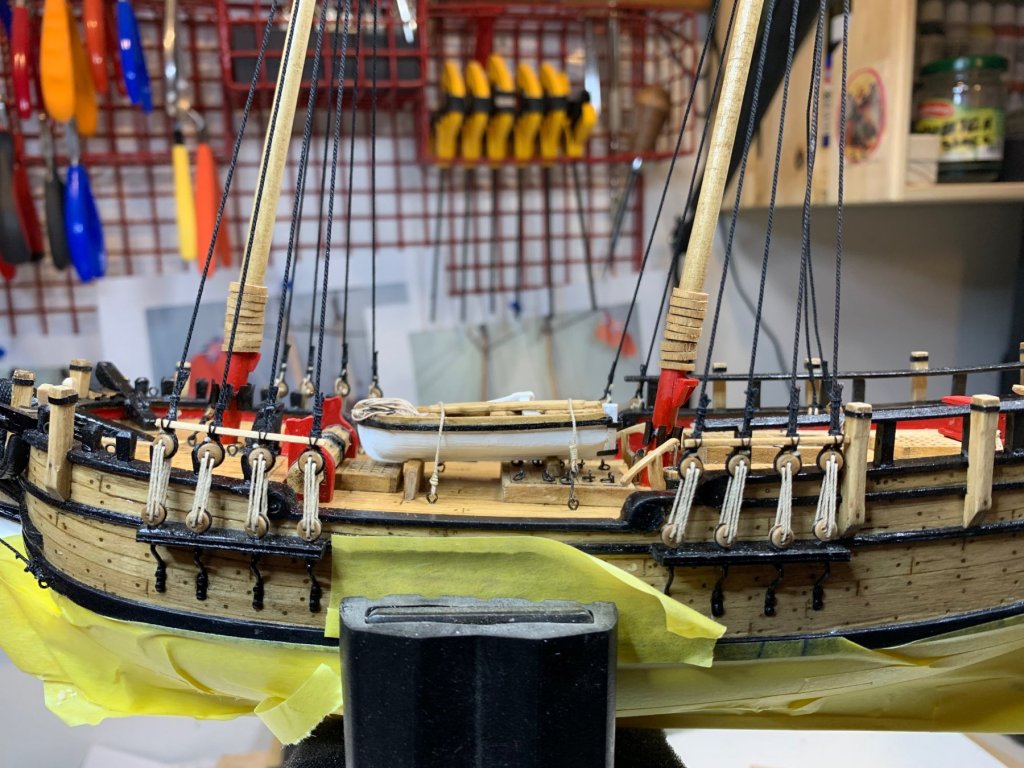
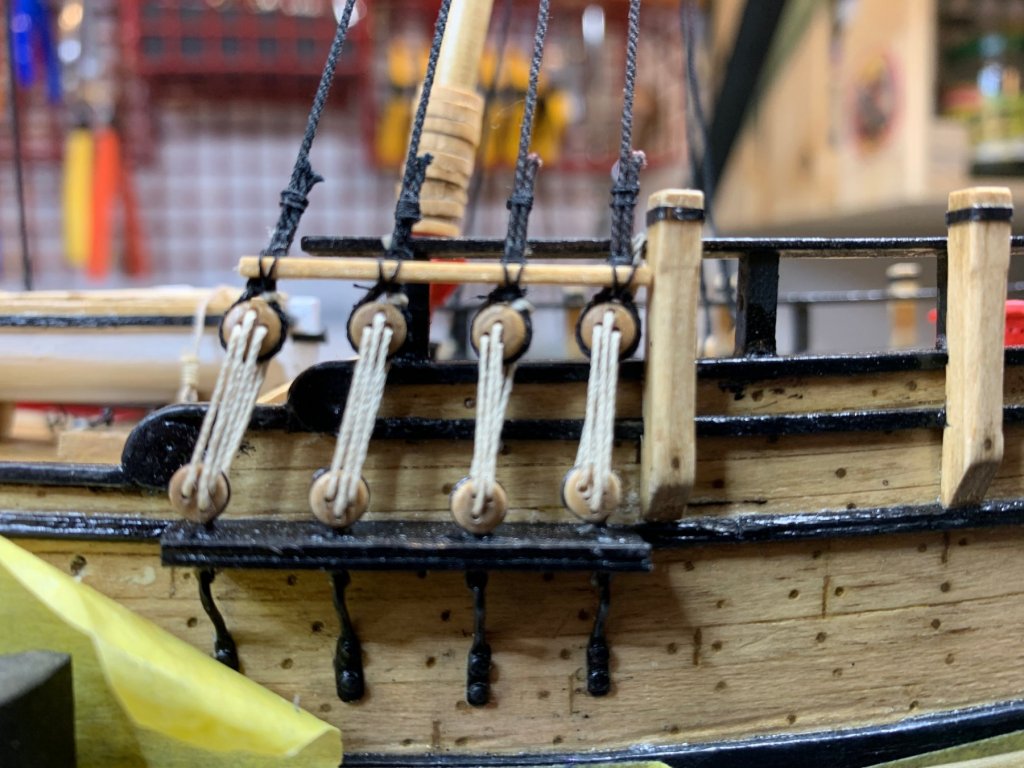
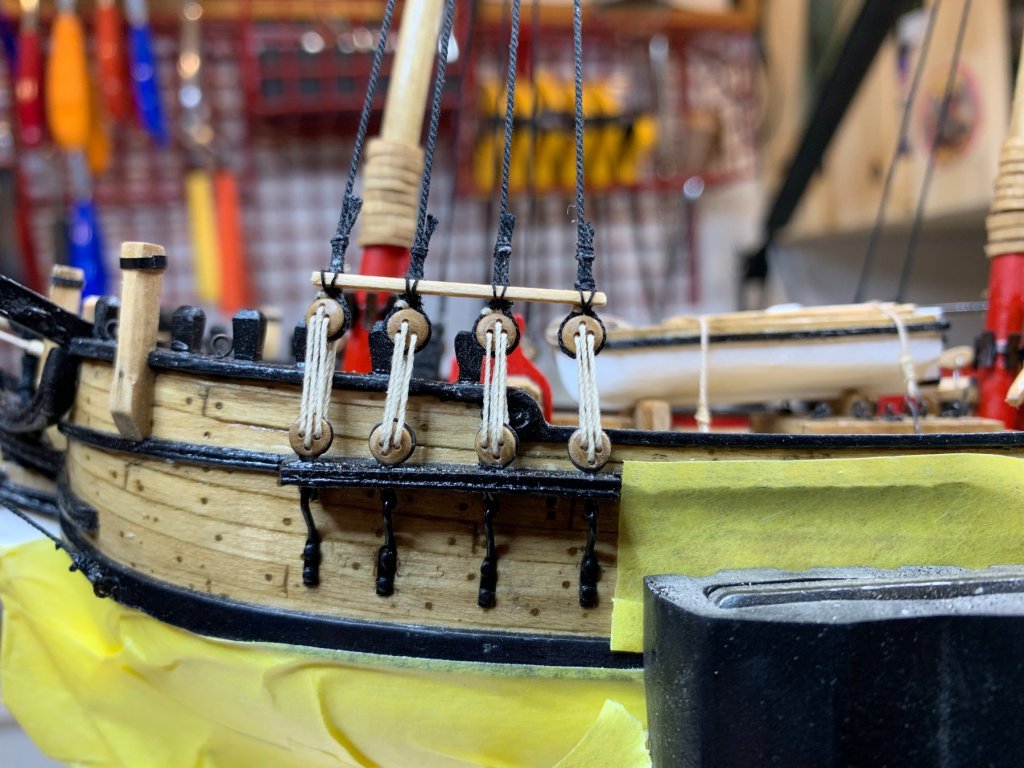
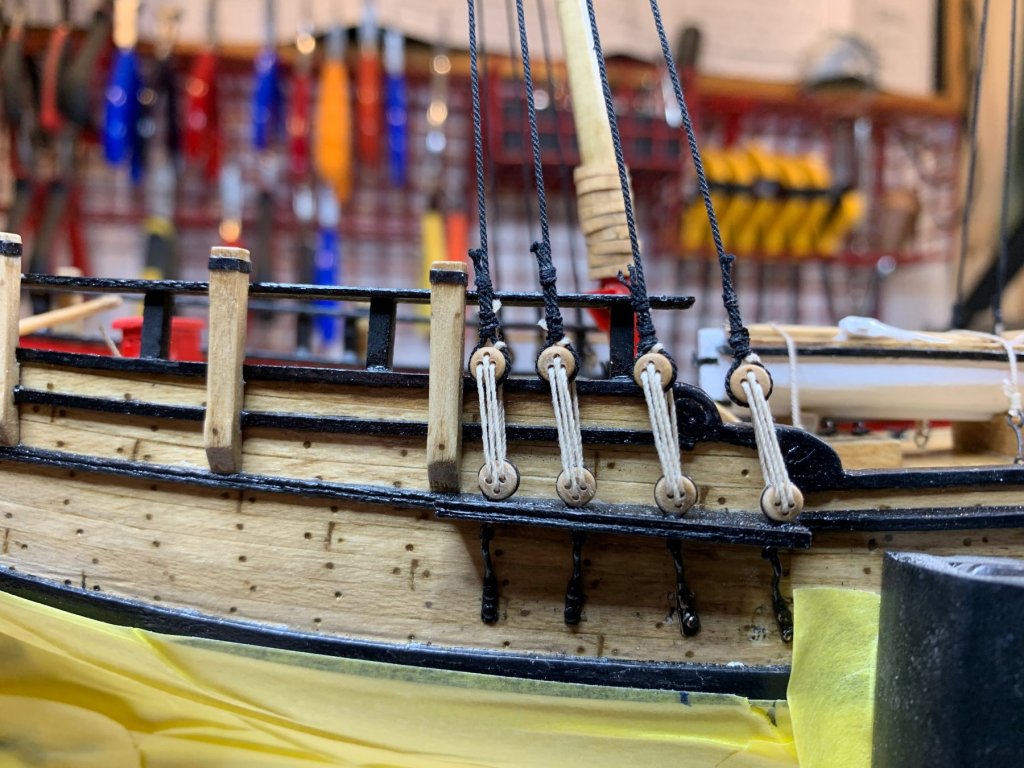
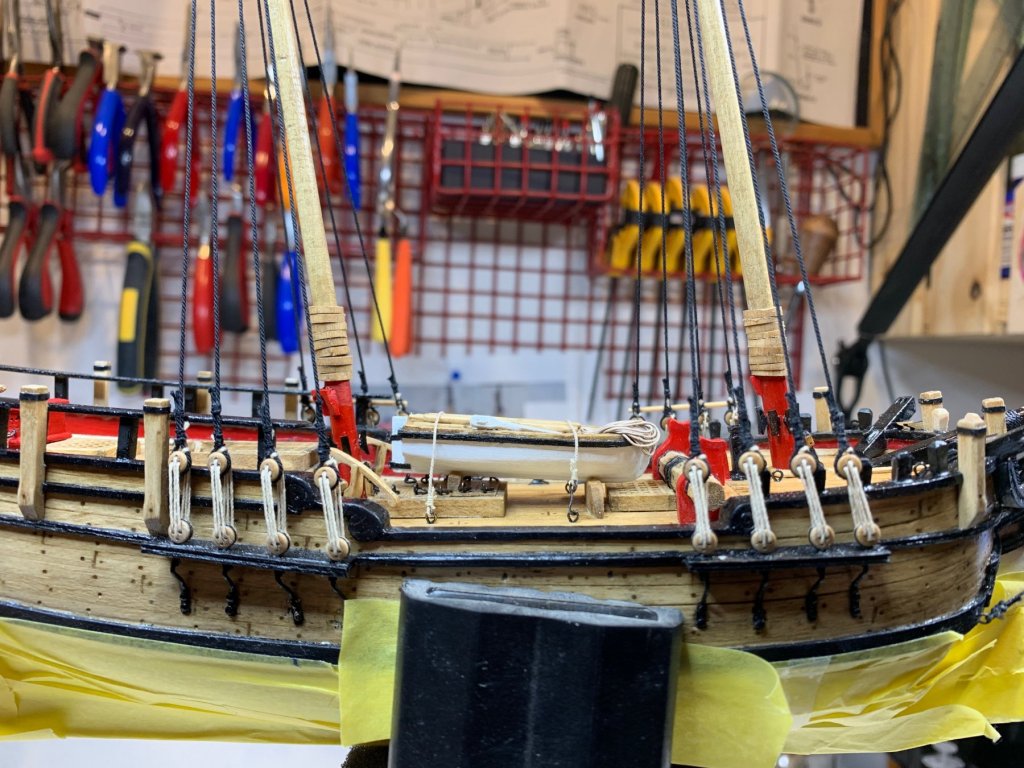
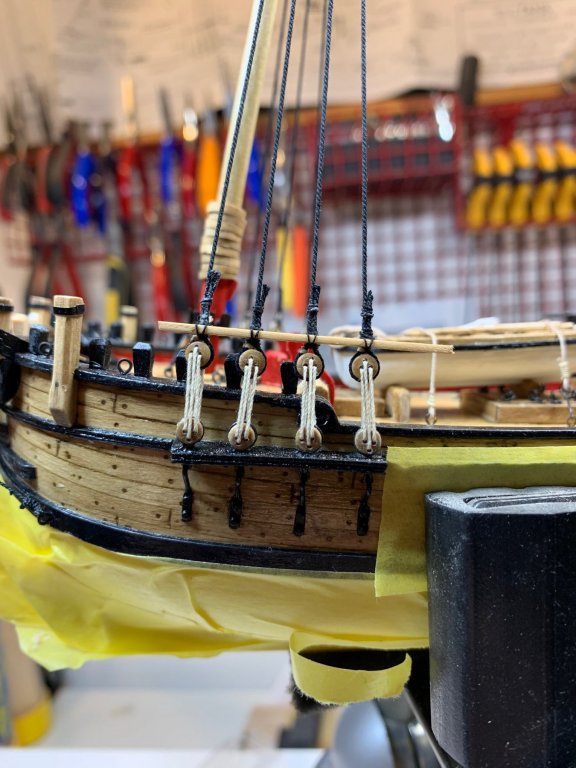
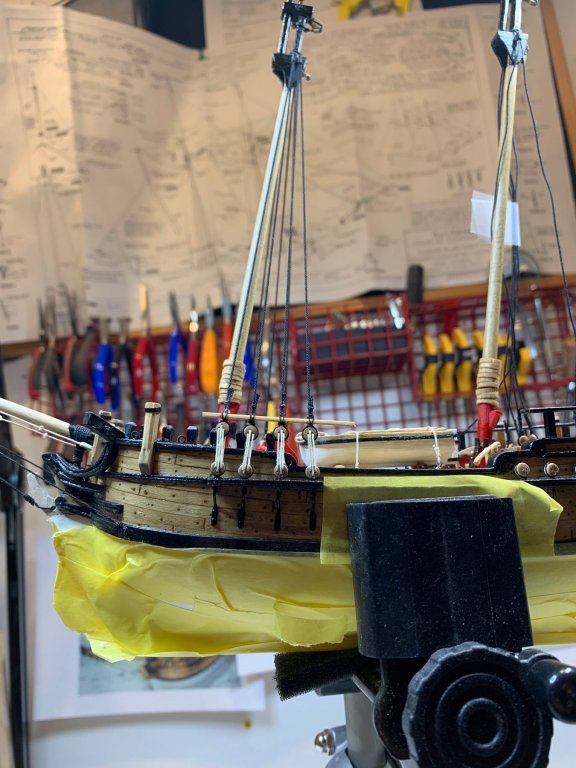
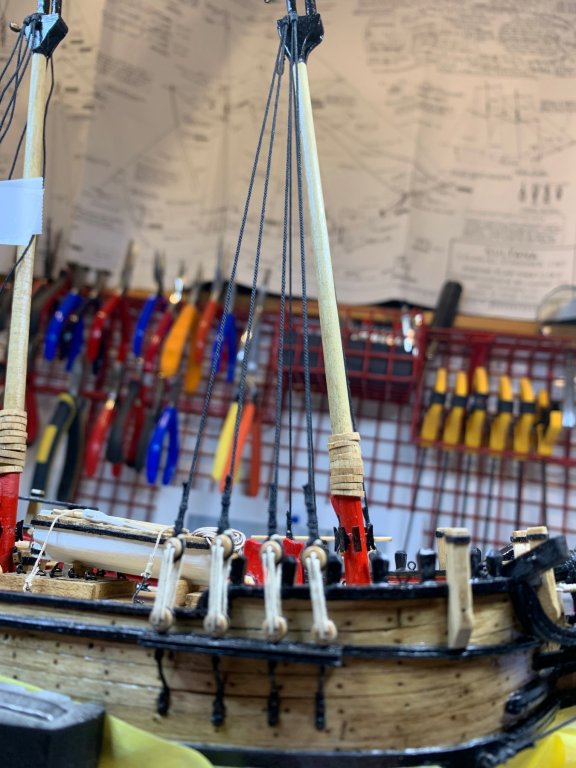
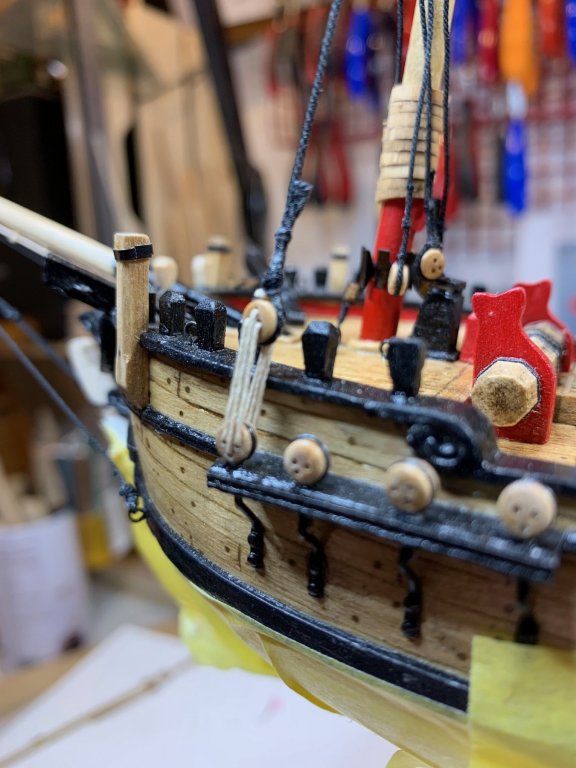
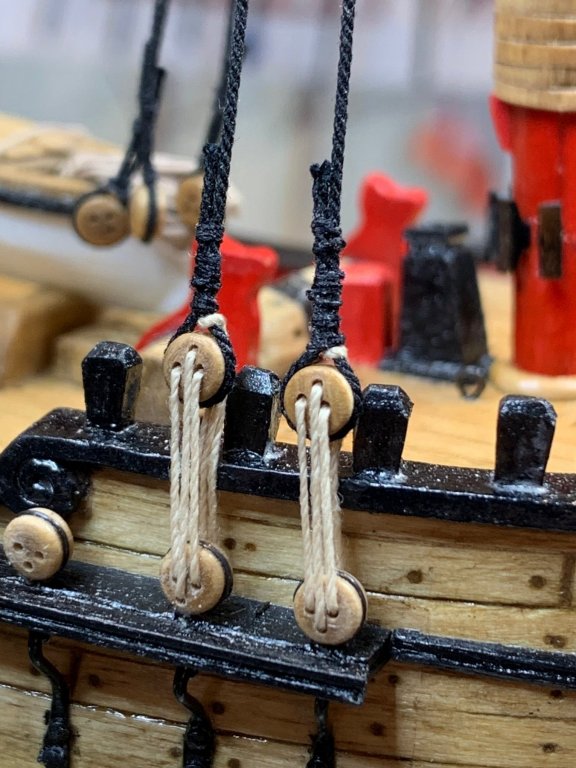
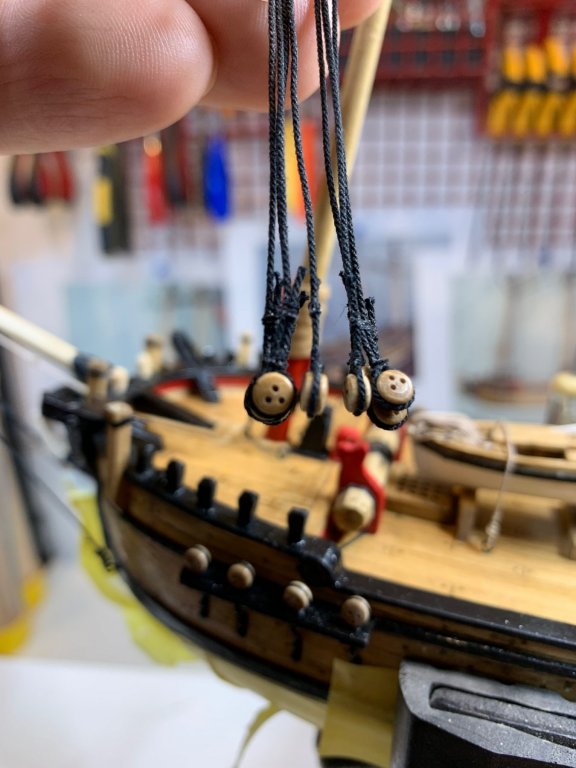
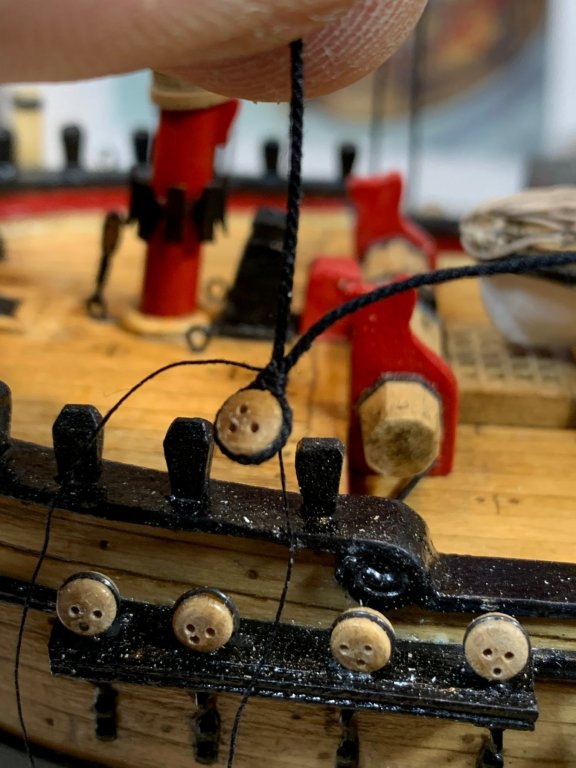
Lanyard work continues... The shrouds are done in pairs. One pair completed, then pair on opposite side of mast is done making sure and checking very often not to over tight the mast on one side... Deadeyes i have purchased do not have properly positioned eye holes, at least majority of deadeyes.. Not sure why since it appears to me that this is mass production of deadeyes and not individual. Anyhow, i am trying to pick the best looking deadeyes and install them on the ship... I will need to re-tight the second shroud from the left, noticed that it is a bit higher than the others.. After this is completed, i have installed the sheer pool. These items would prevent deadeys from twisting while rigging the ratlines. The piece of wood was sanded to the correct shape and one layer of golden oak stain was applied. I glued the sheer pool on the shrouds and then lashed to each shroud. I left the sheer pool length a bit longer so i can hold it during assembly process.. The proper length will be cut afterwards.. Happy modeling..

- 360 replies
-
- 2
-
-
- sultana
- model shipways
- (and 1 more)
-
Thanks Patrick
-
Lanyard, lanyard and more lanyard... No much text, just pictures... The deadeyes' holes were cleaned with drill bit and one end of thread was freeze with cyano glue so it gets thru the hole easily.. No more time today... Happy modeling..


- 360 replies
-
- 4
-
-
- sultana
- model shipways
- (and 1 more)
-
Thanks Lou. Yeah it is going well.. Few more months...
-
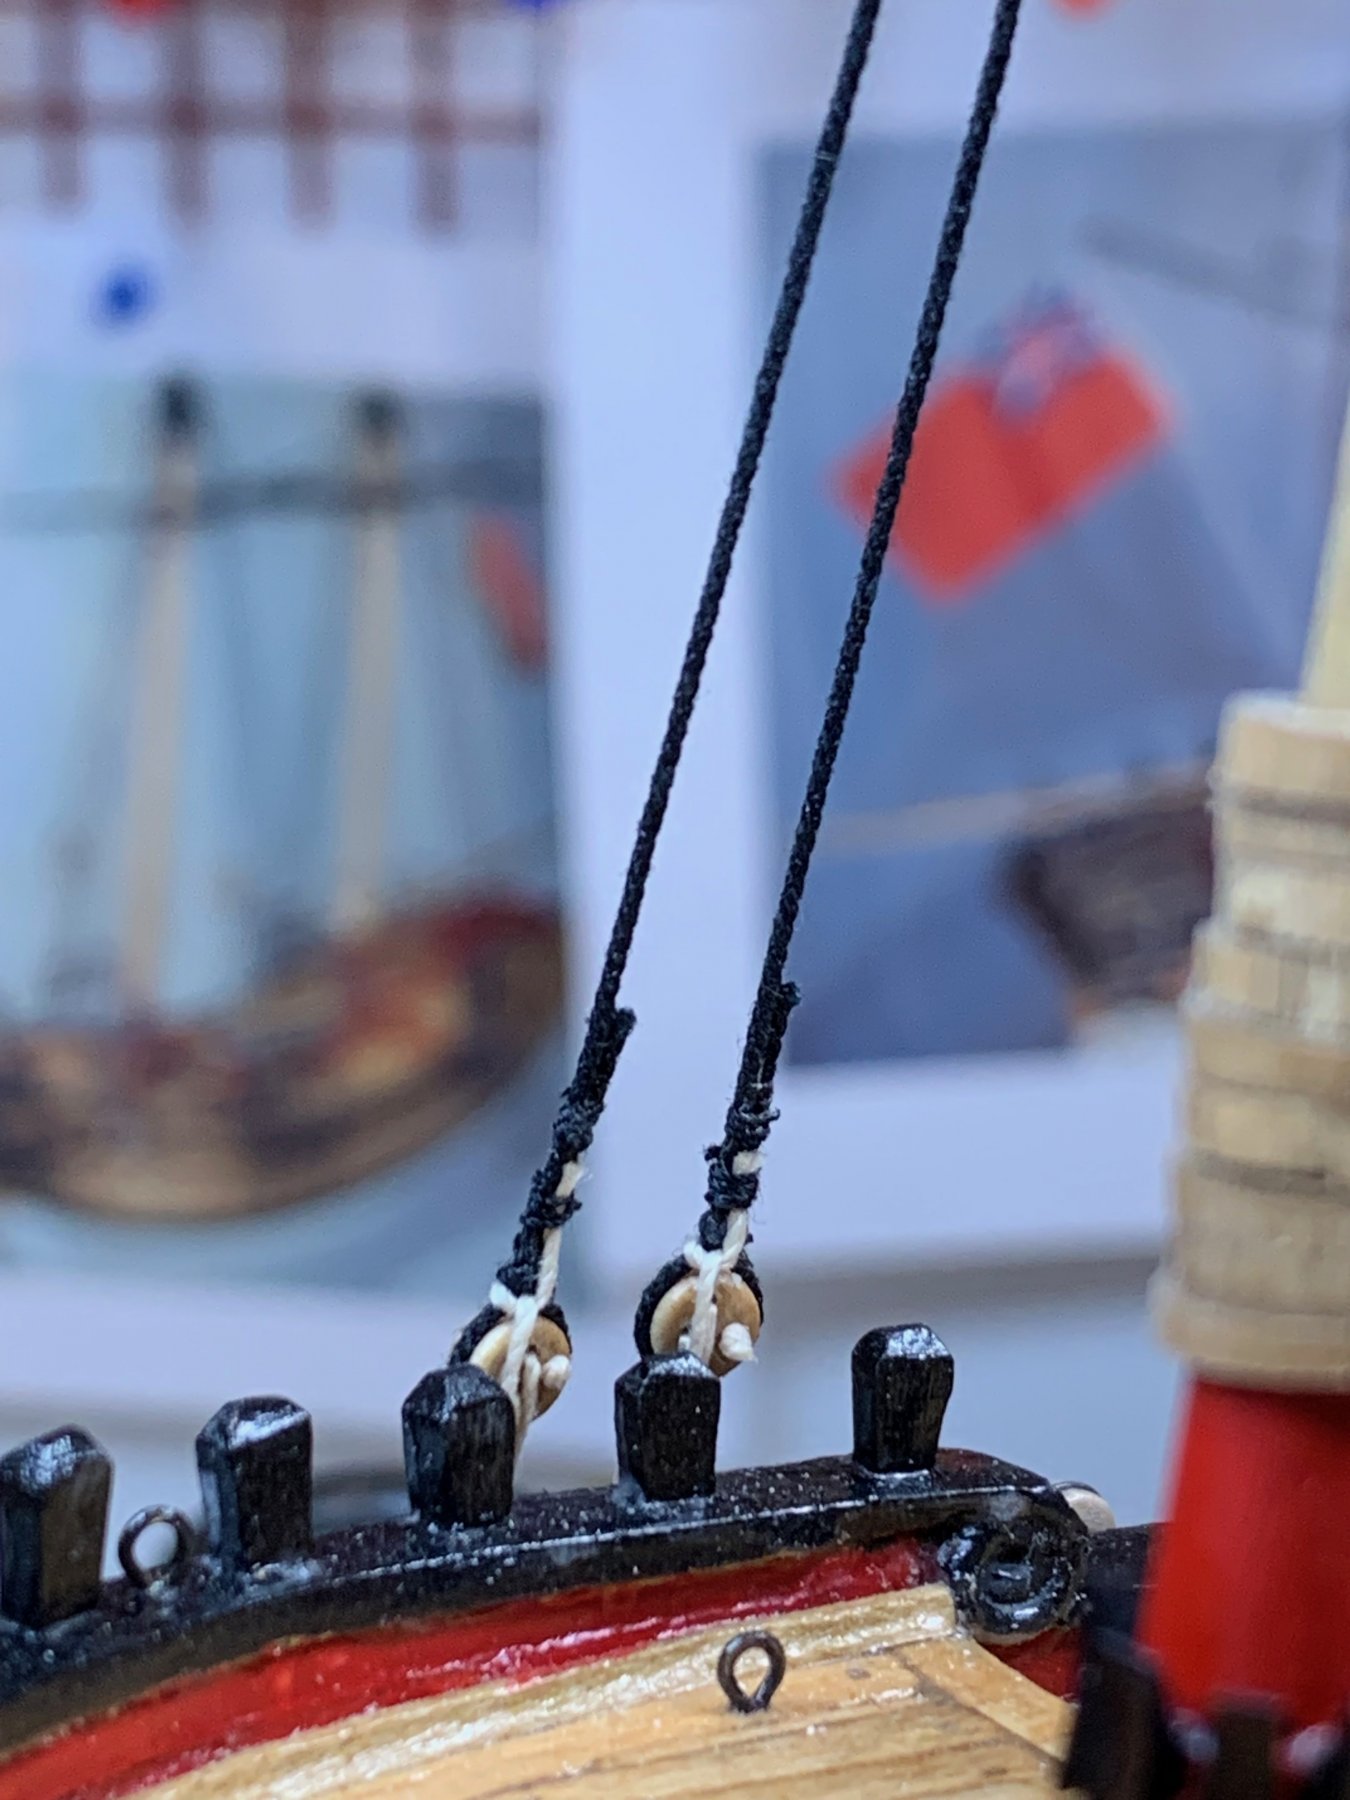
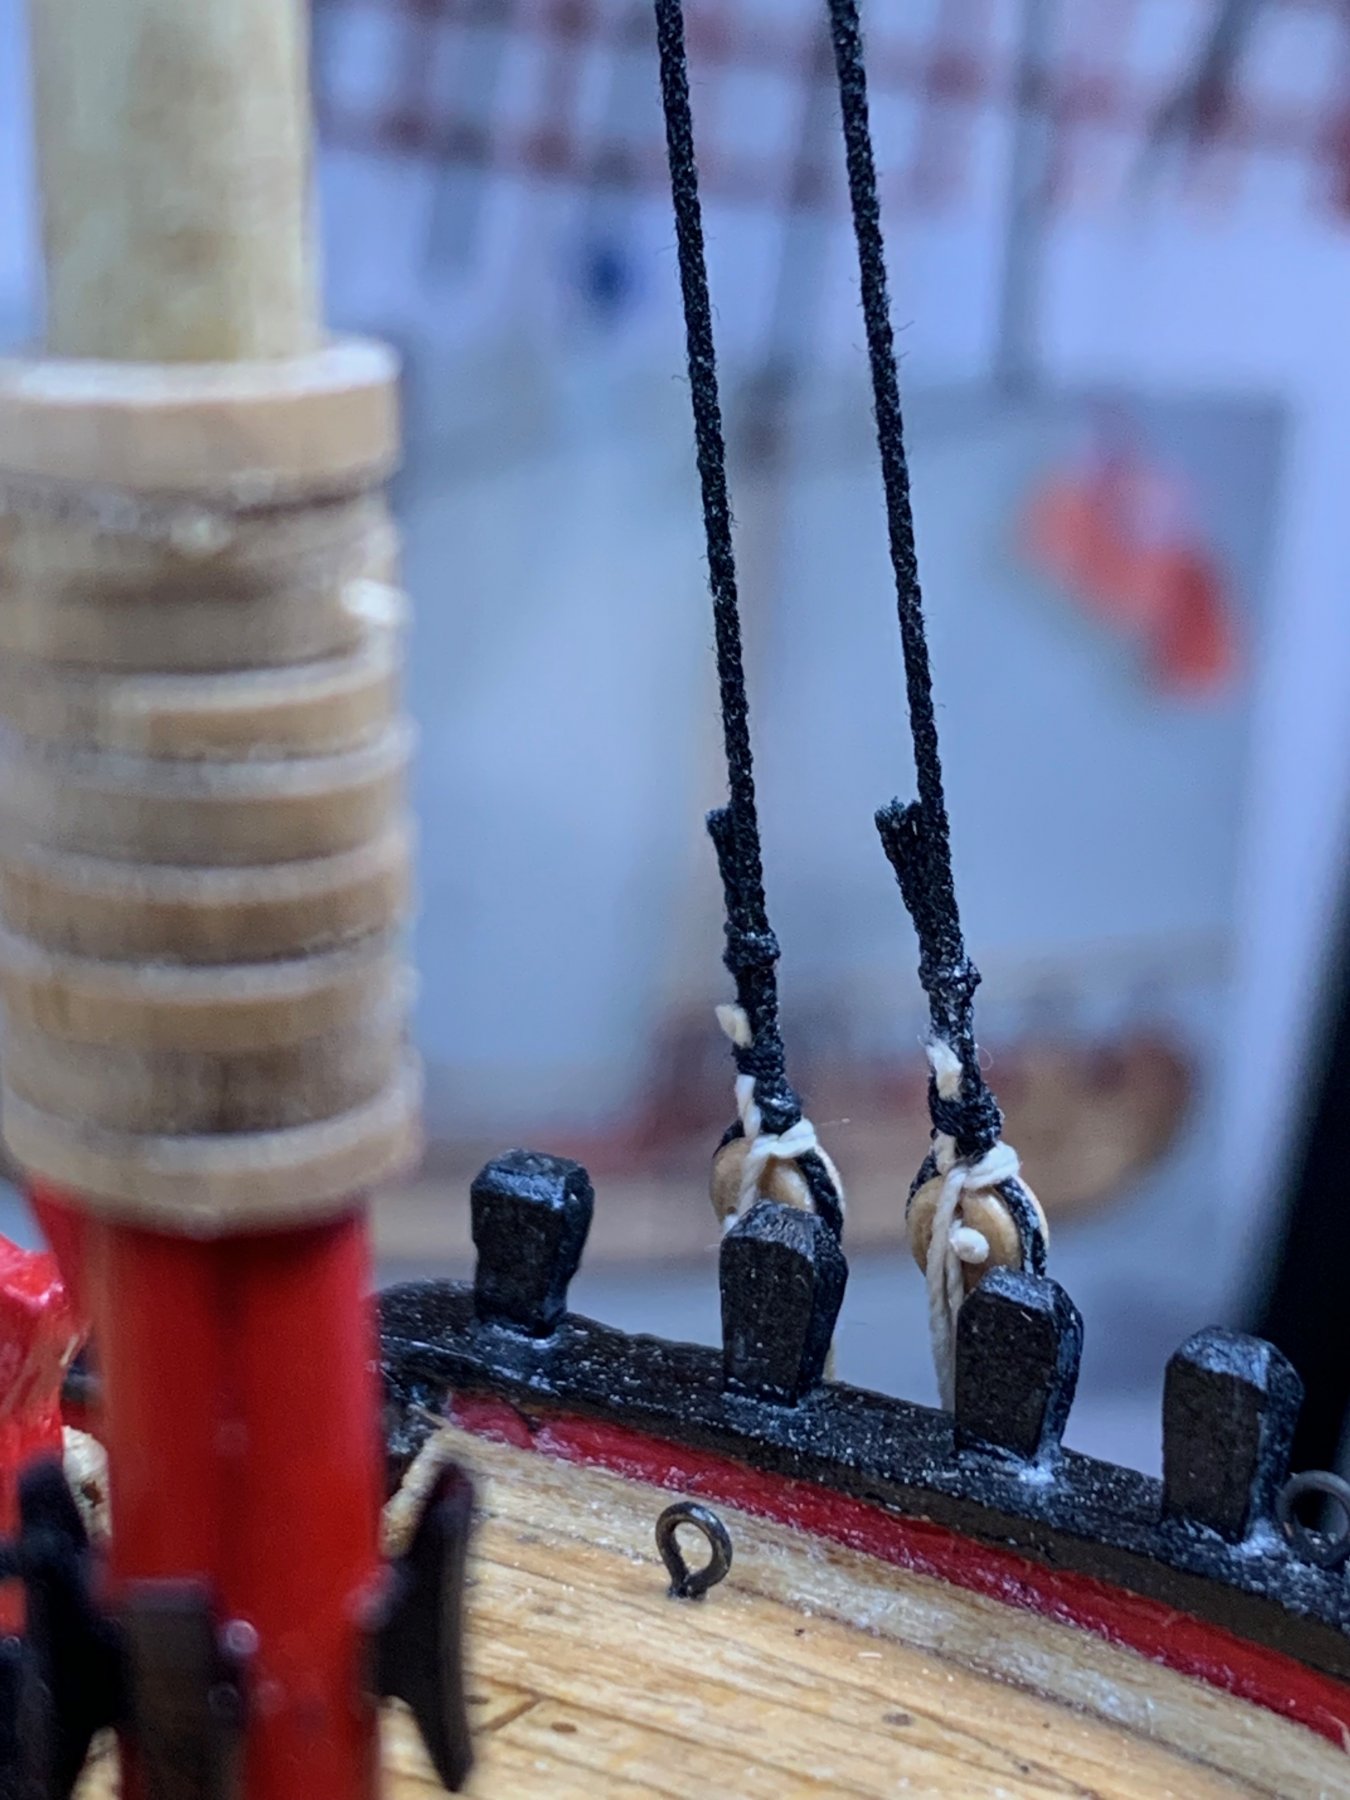
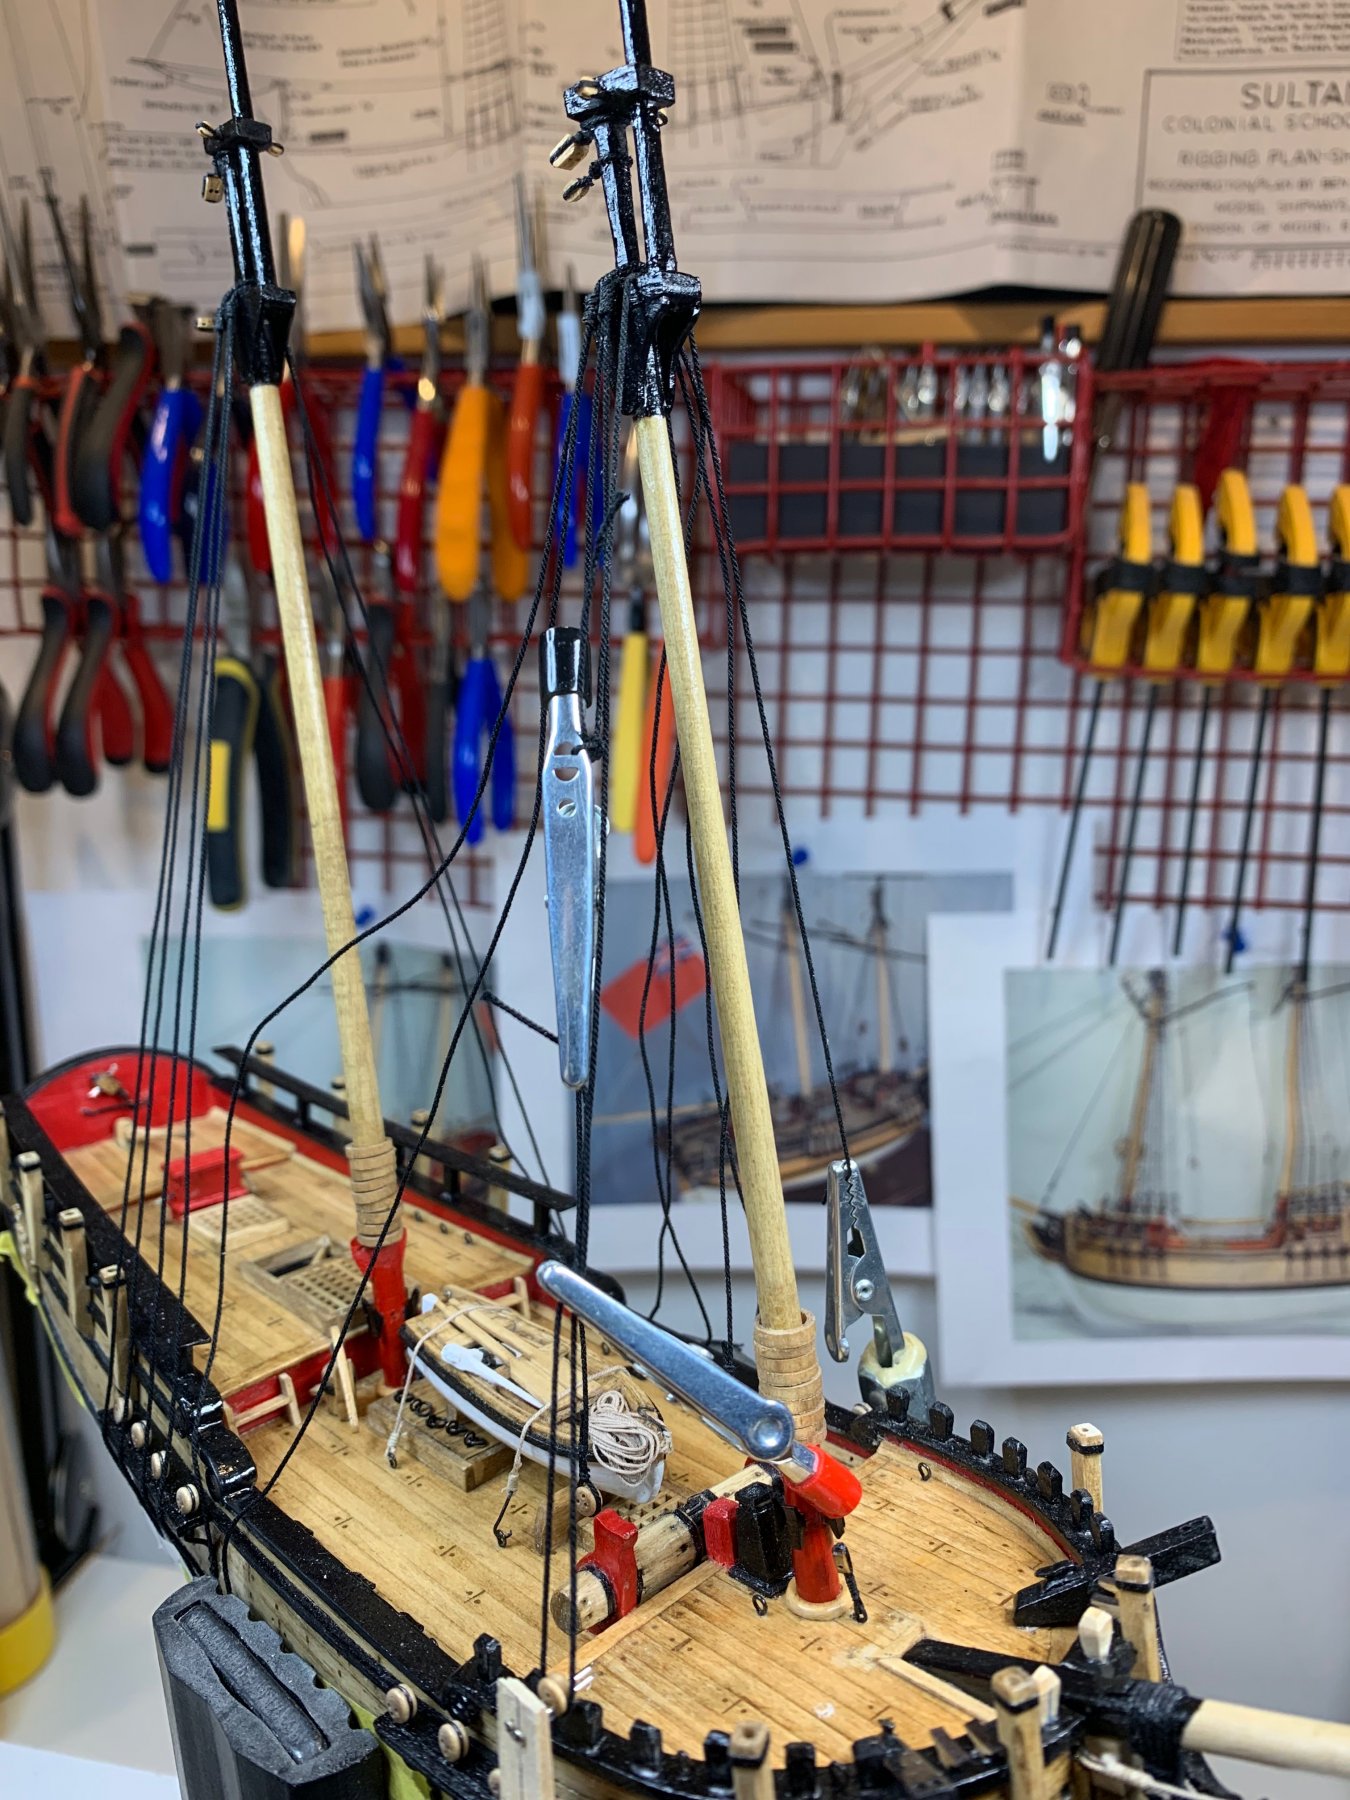
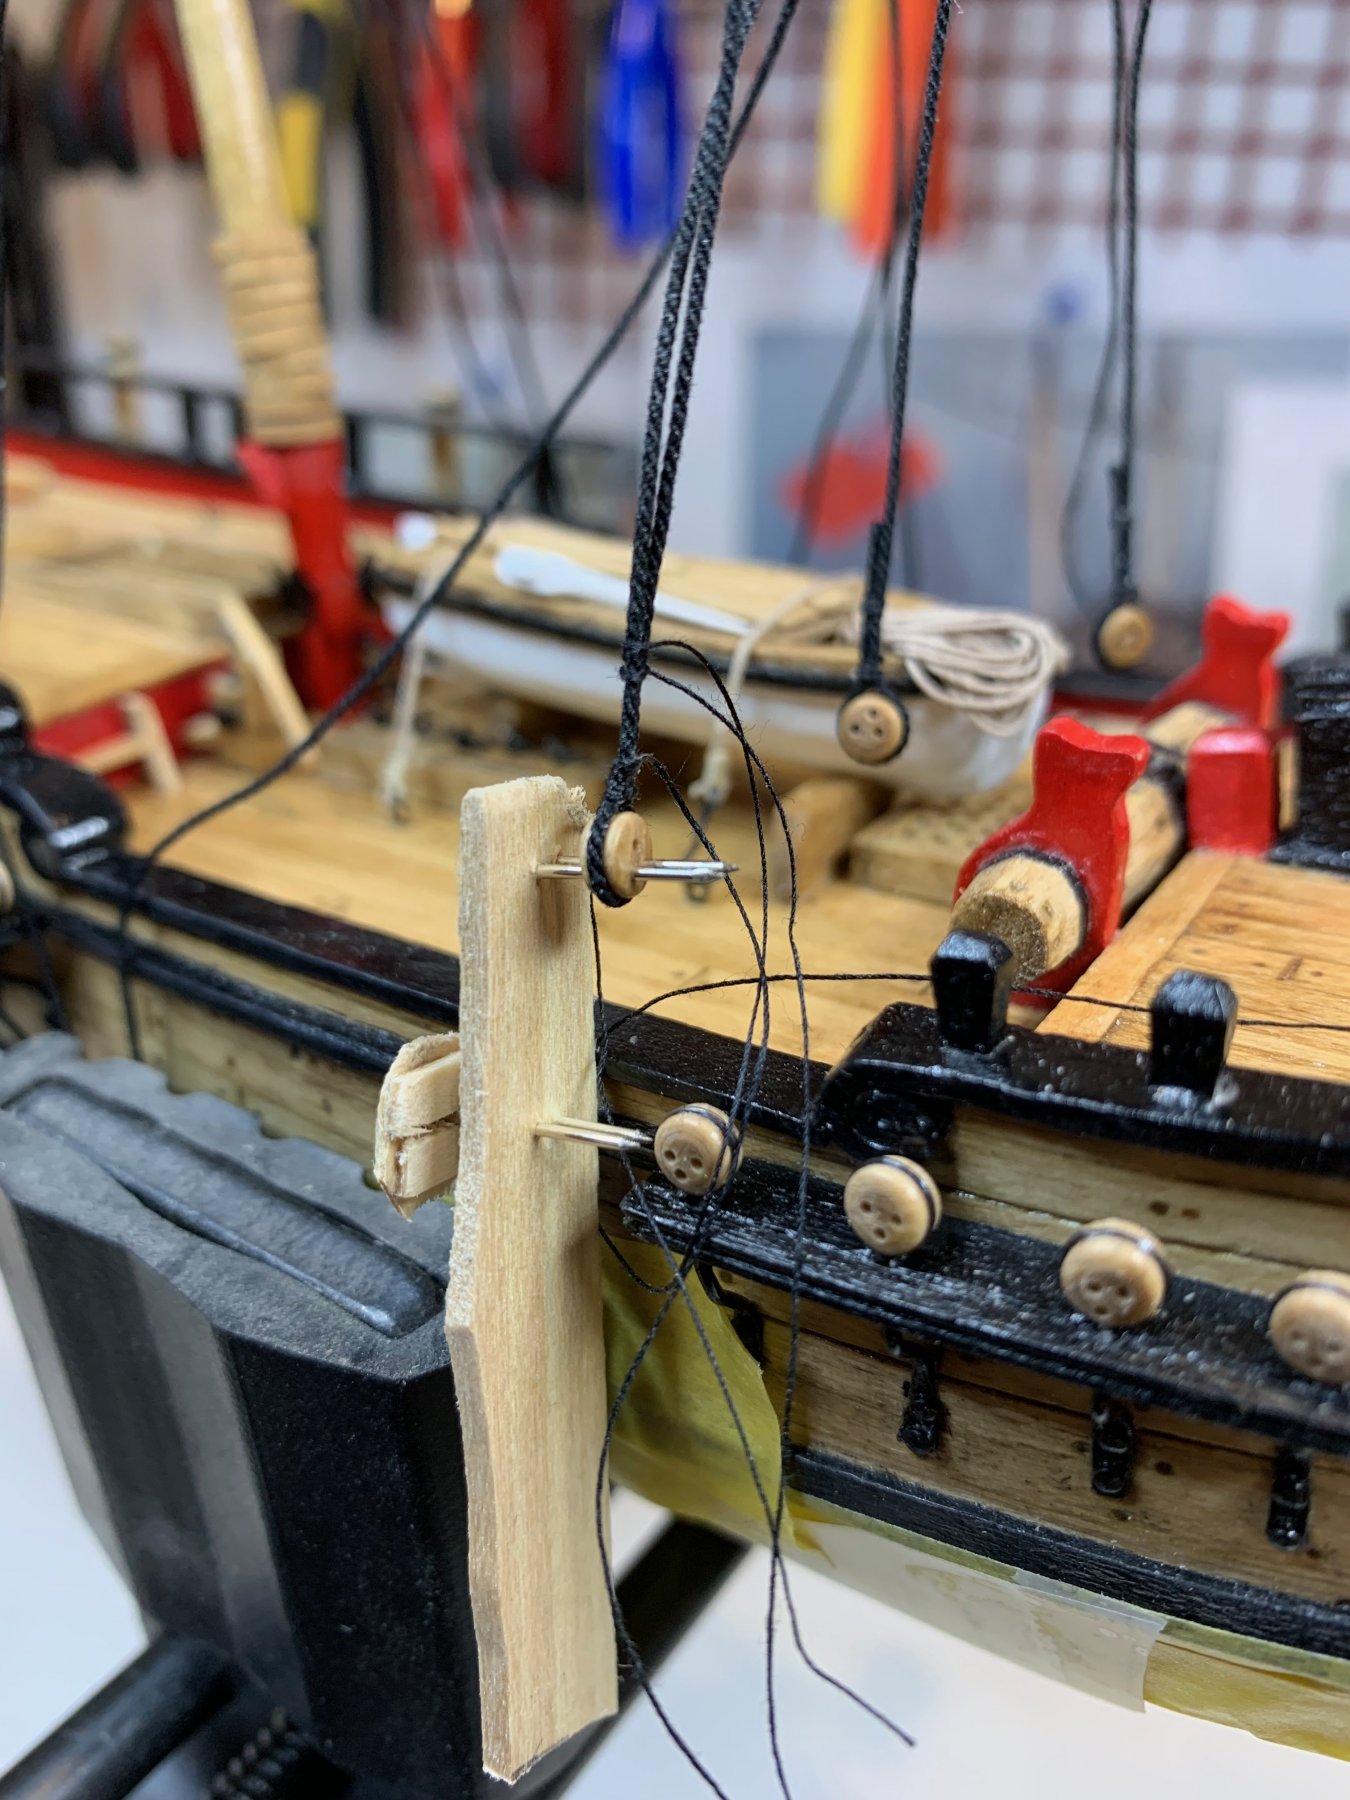
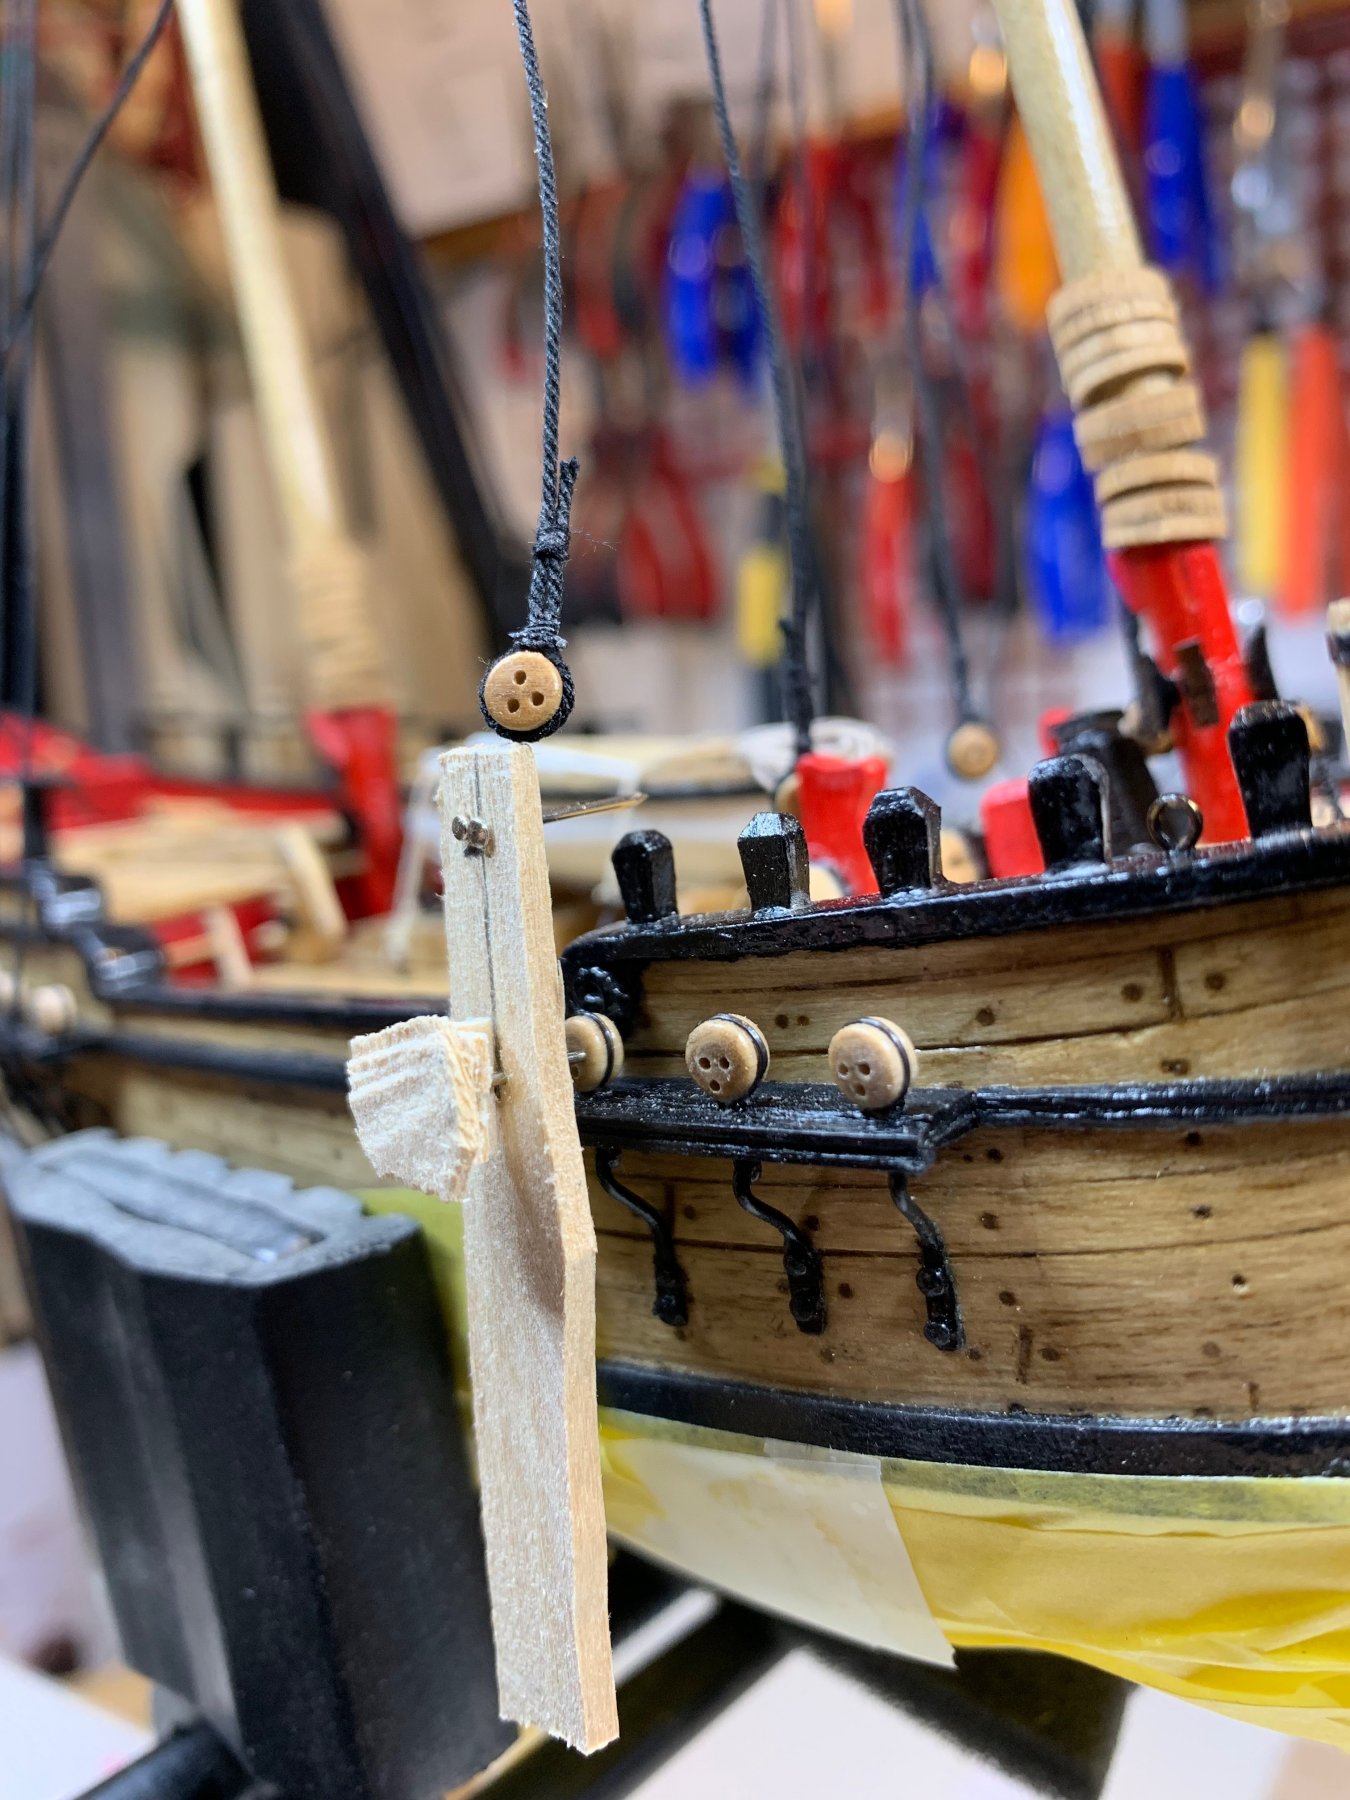
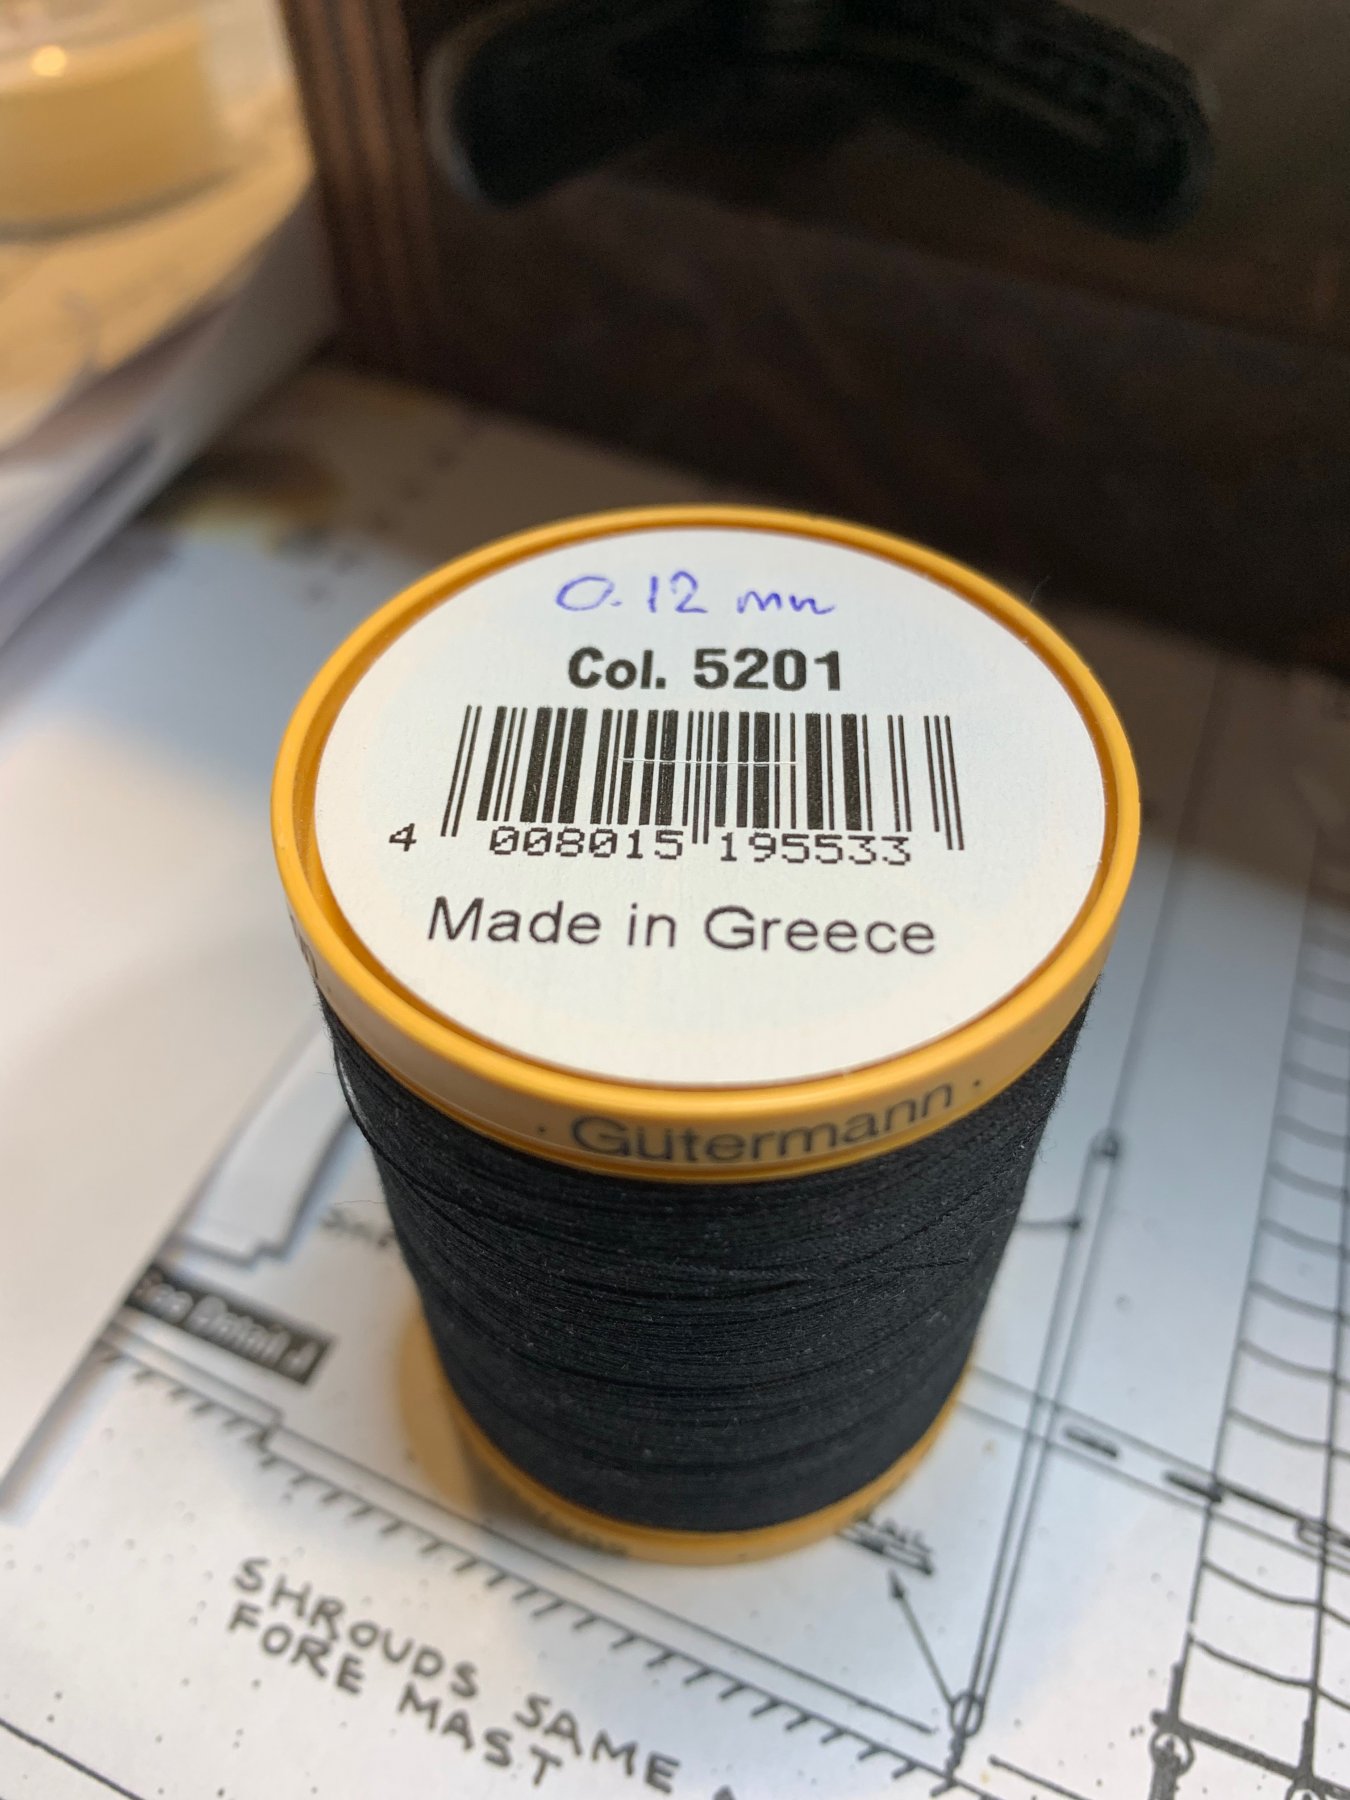
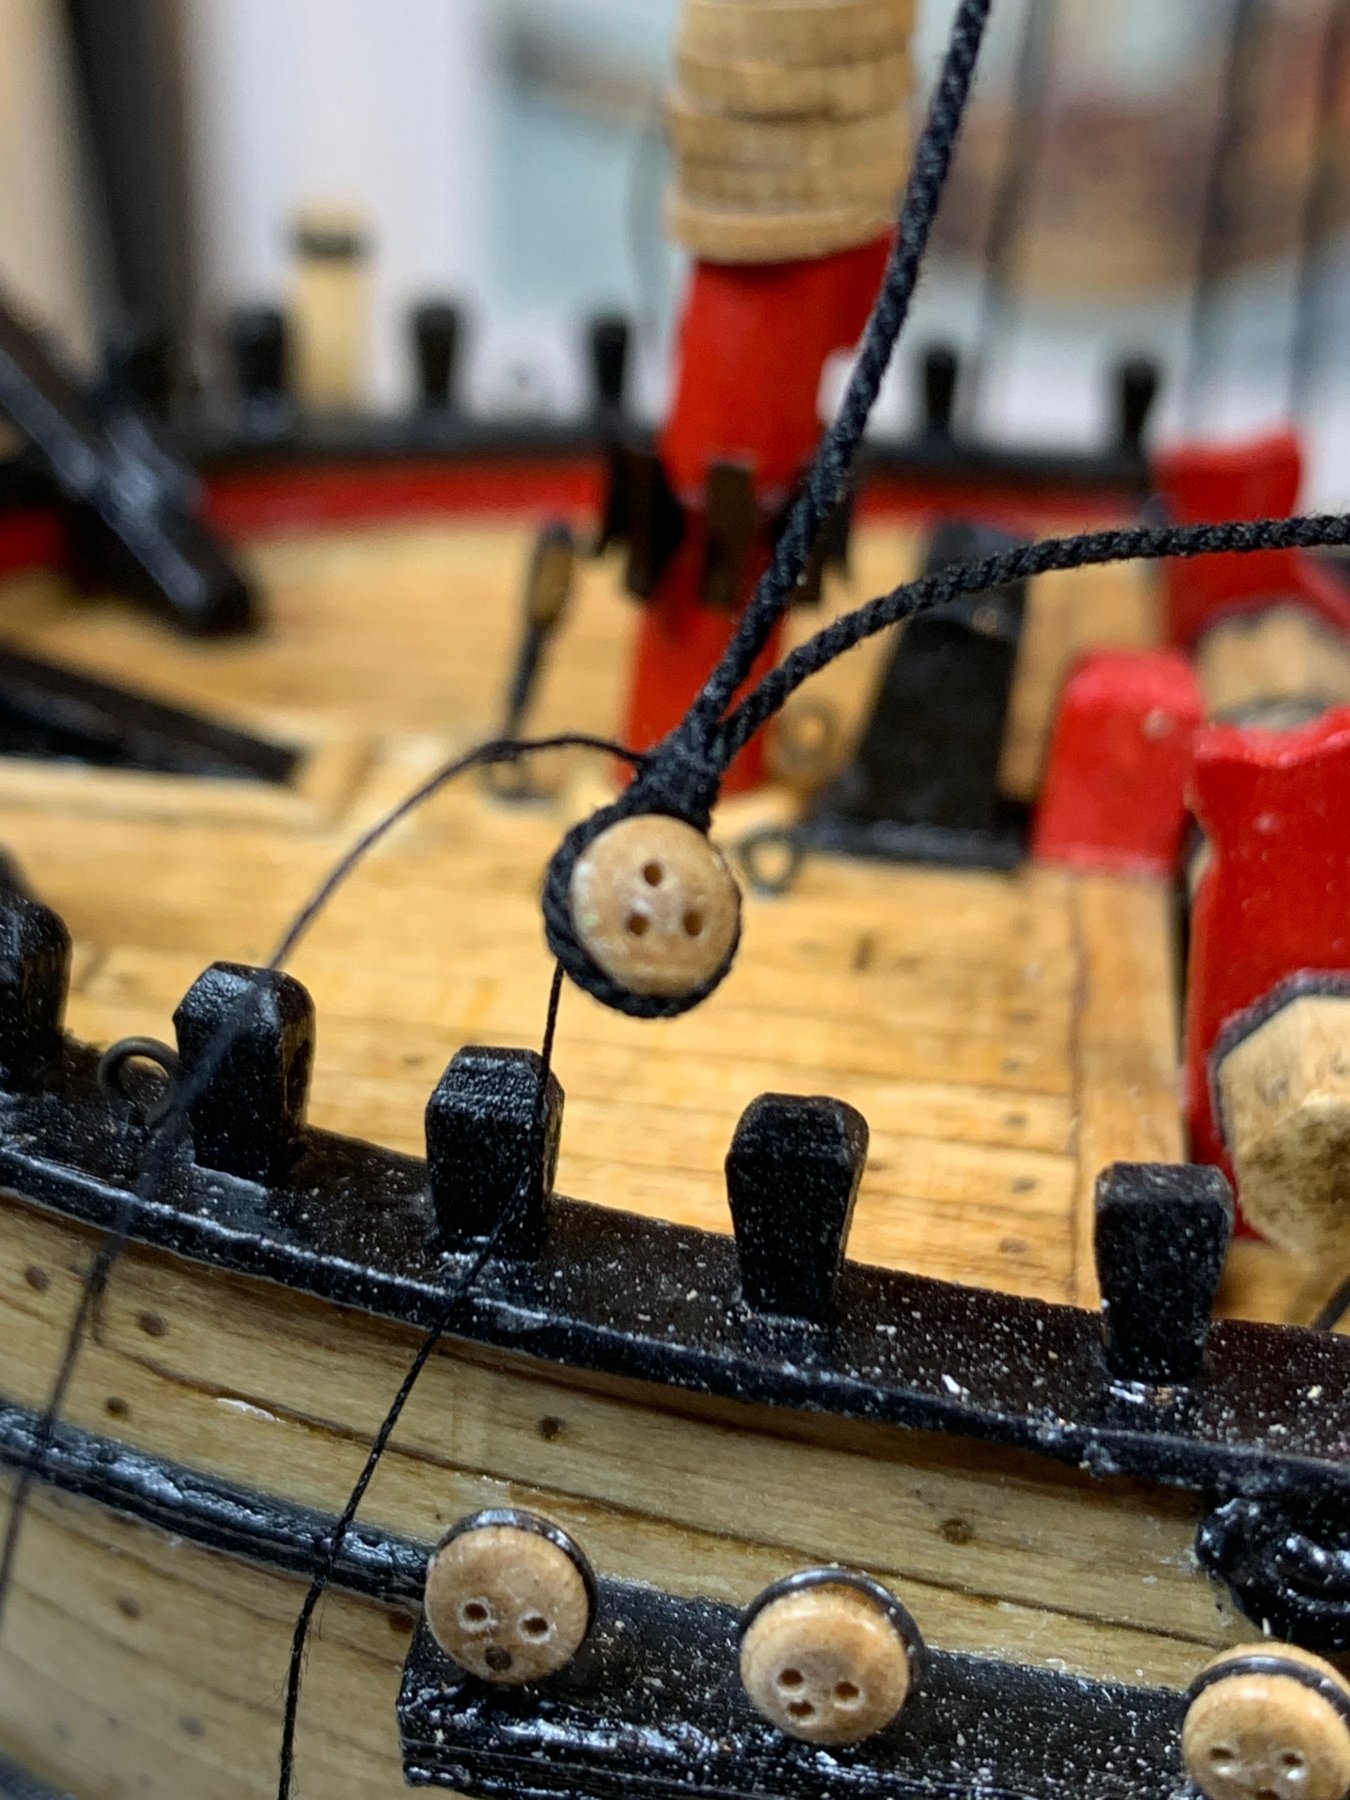
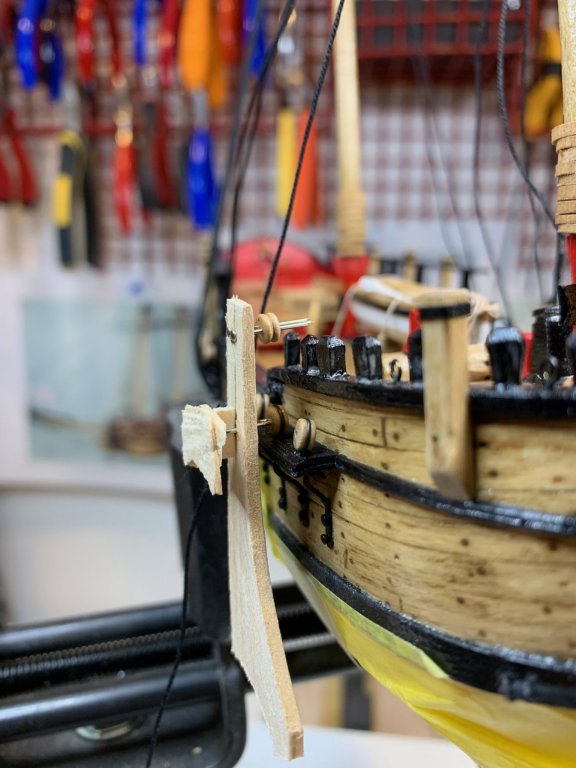
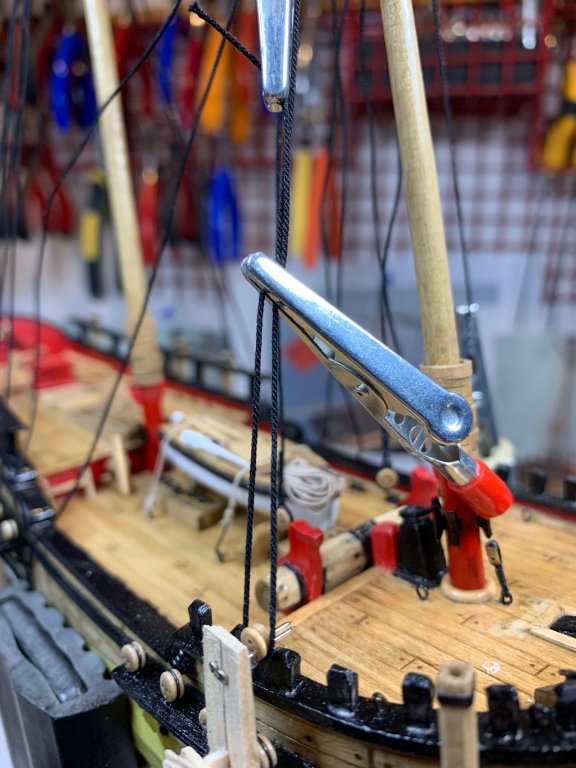
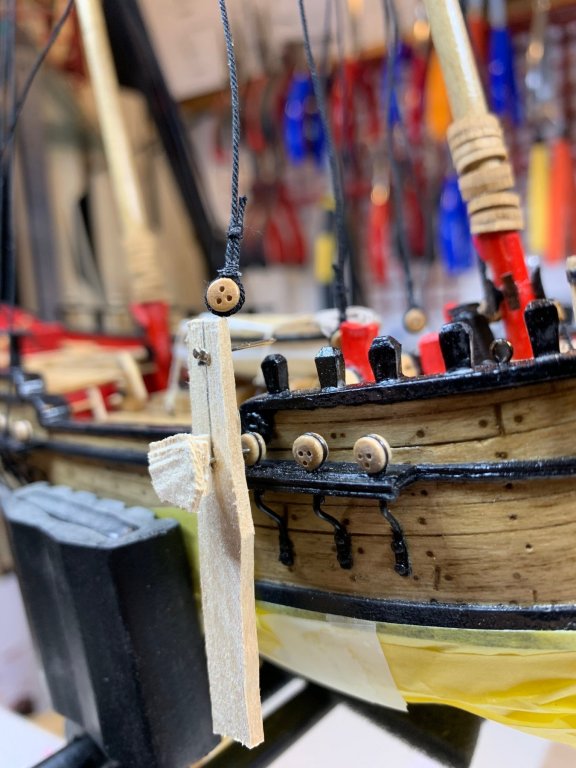
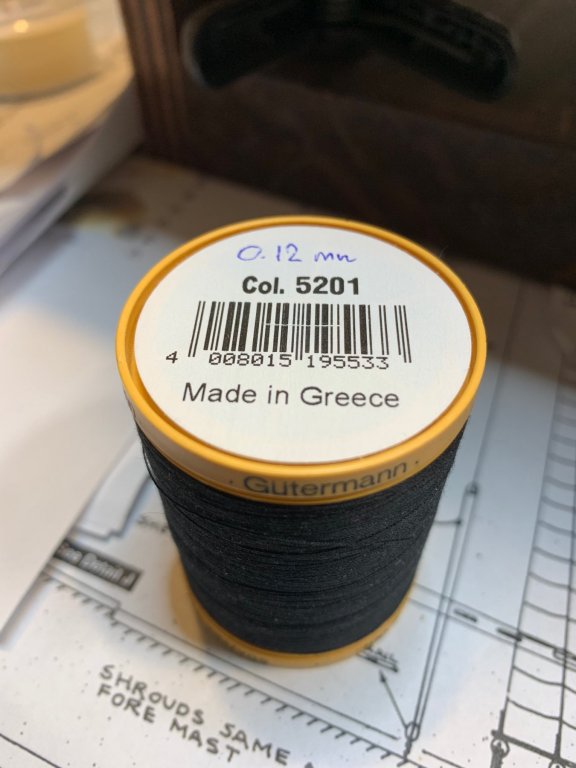
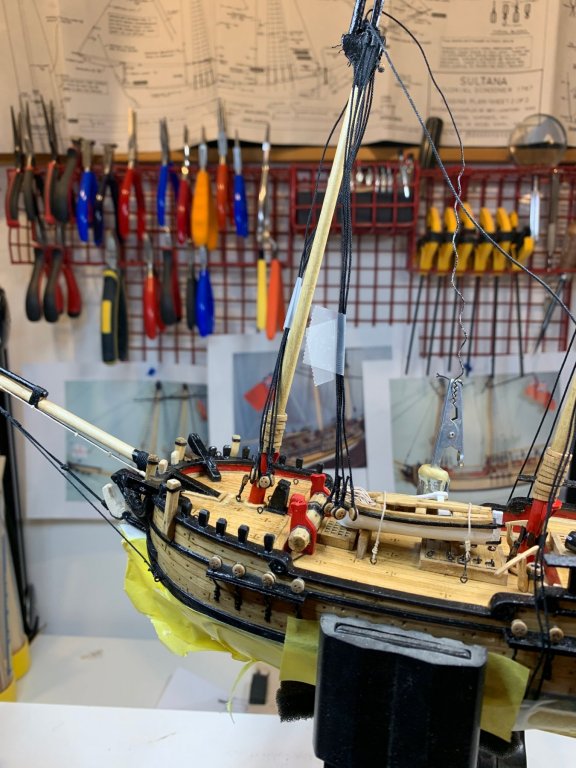
For ridding work, my Sultana needs to have different place to stay safely. One older wise will do the trick. Some protection on grips and she is in the position. This will allow me to come closer to the work area. I had to re-event my "distance keeper" and come up with this little helper.. There is a piece of scrap wood, with 4 nails, two on each end. The bottom pair will get to the deadeye attached with chainplate and top pair will be used for a deadeye that has to be seized, something like this: This will keep same distance for all lanyards.. The helper is in place and one rigging line is close to it. I also have few other helping hands available, this one will keep the short part of rigging (the end of the rigging line after makes its turn around the deadeye and goes up towards the mast) tight so it is easy to make seizing around it - this is the one that is not fully visible on the picture. The second alligator clip, with all tooth filled down, keeps two lines as close as possible together... A bit wider picture... A seizing is done with 0.12mm black thread.. I think this amount of thread will last for few coming generations. Completed seizing... Extra thread cut with a nail clipper... 2 x 4 rigging lines completed.. And all of them together.. Deadeyes are not glued to the rigging so they can be positioned properly to match its pair. Happy modeling.


- 360 replies
-
- 3
-
-
- sultana
- model shipways
- (and 1 more)
-
A work on shrouds has started today... I come up with a template that will keep the distance between two deadeyes in appr 1.3 mm distance, constant for all 16 shrouds.. Two wires twisted in the middle and glued together, a bit of tape to make it slightly bigger for easy holding... Then the rigging line is put in place, around one deadeye, the eye seizing is done with a black rope, cannot tell the rope diameter but it is tiny... It took me while to get a grip on this task just because parts are too tiny and i need to come up with correct work process to complete the task. During this activities i noticed that my 'distance holder' is not holding un-rigged deadeye good, the wire is not strong and gets twisted which cause deadeye to slip from it. The second "distance holder" was put in place but i forgot to take a picture of it. Some modelers are using a paper clip which will be working fine for bigger deadeyes.. Oh well, tomorrow... Happy modeling.

- 360 replies
-
- 1
-
-
- sultana
- model shipways
- (and 1 more)
-
No worries, at least we are sure we both read each other' posts 🙂
-
They are looking very nice; what is the size of deadeyes?
- 360 replies
-
- 1
-
-
- sultana
- model shipways
- (and 1 more)