HOLIDAY DONATION DRIVE - SUPPORT MSW - DO YOUR PART TO KEEP THIS GREAT FORUM GOING! (Only 20 donations so far - C'mon guys!)
×


moreplovac
-
Posts
794 -
Joined
-
Last visited
Content Type
Profiles
Forums
Gallery
Events
Everything posted by moreplovac
-
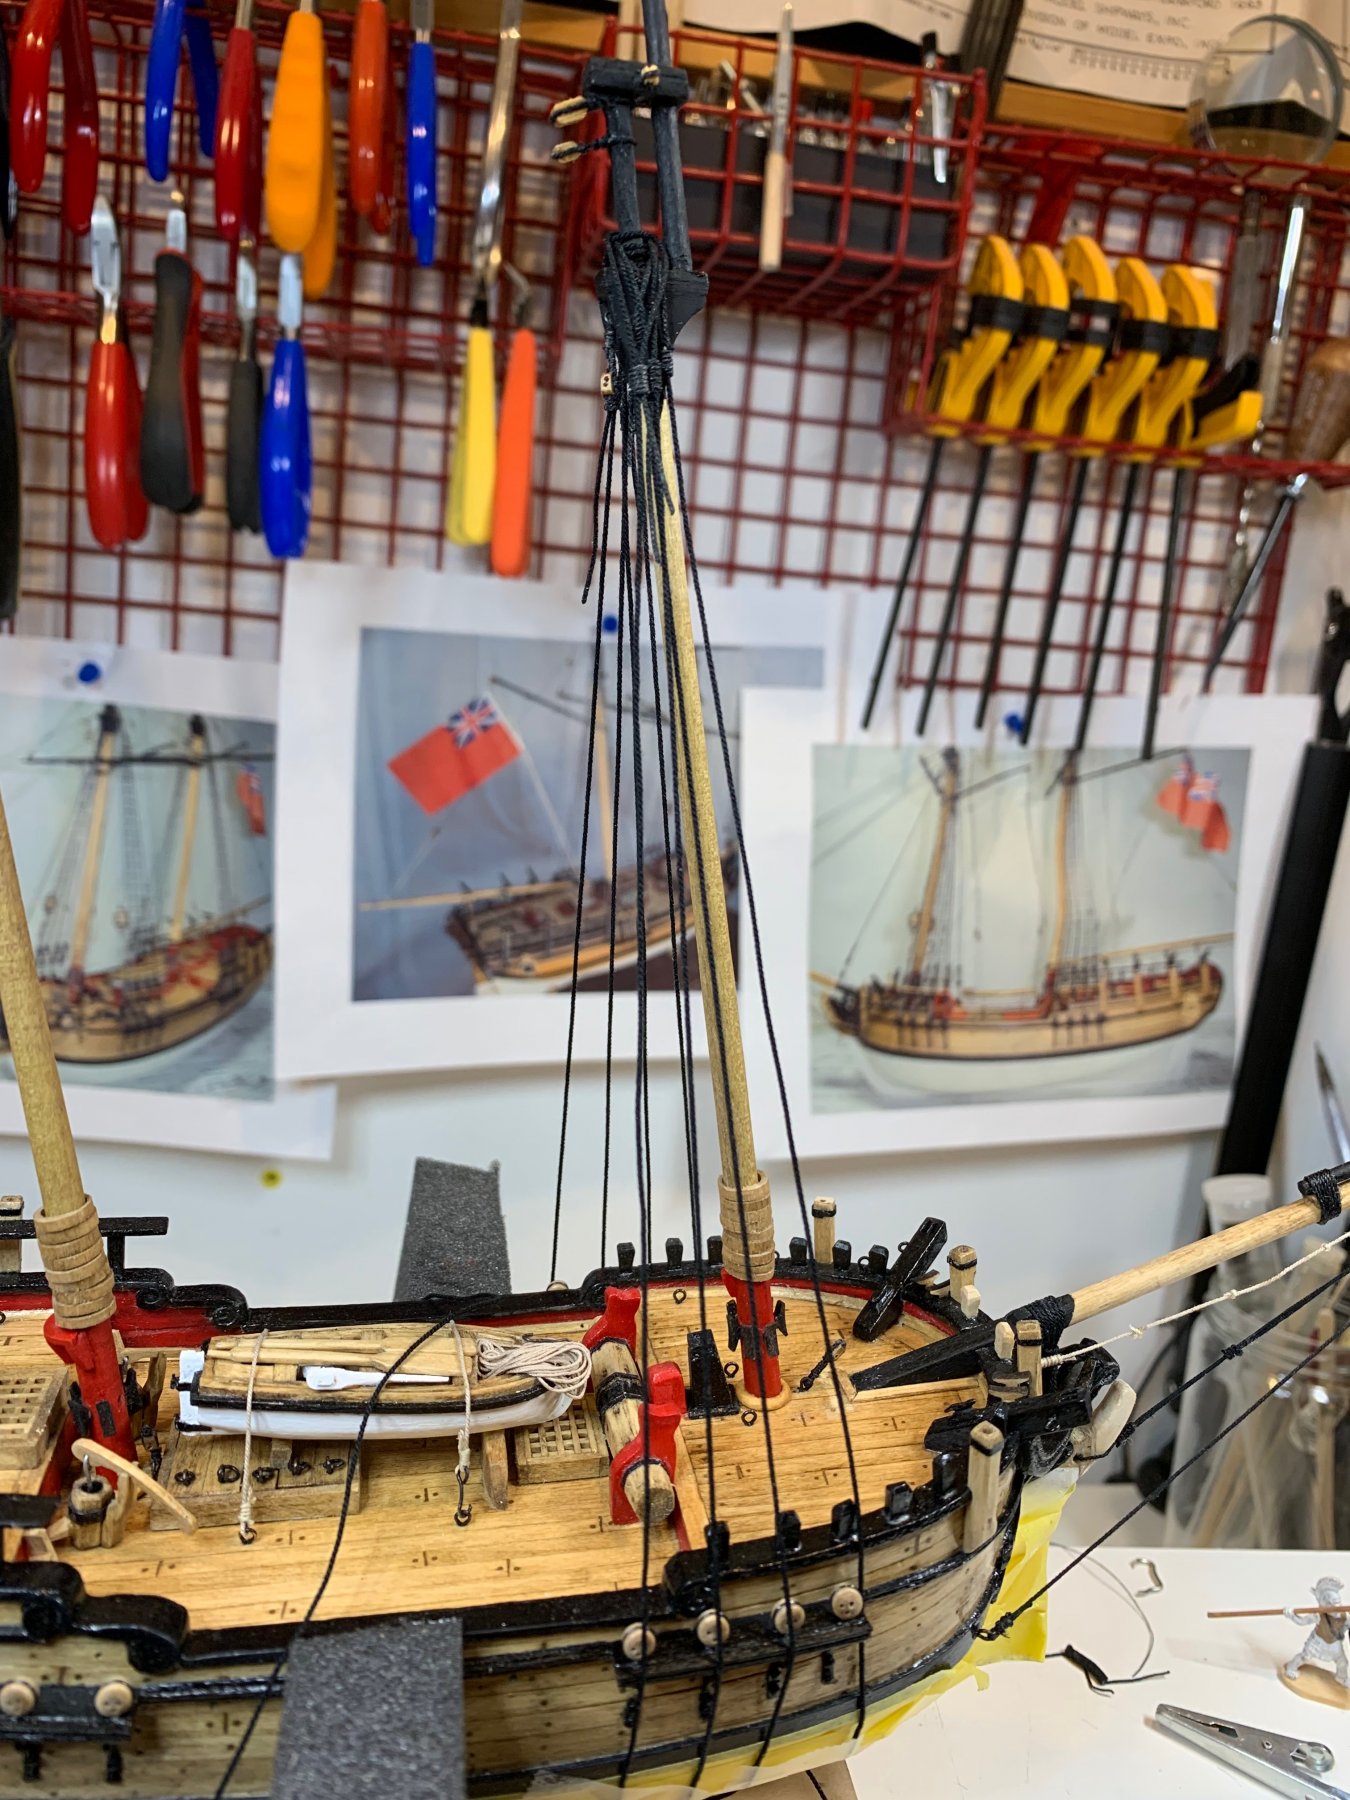
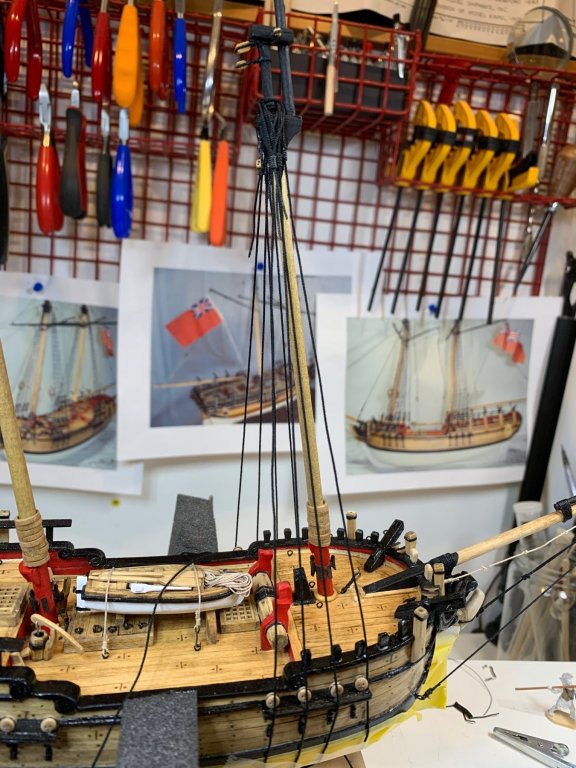
 Continue with work on shrouds and run out of black rope.... had to redo the shrouds. I build them one rope run per block which is not quite true. Practicum mentioned correct way but i was not clear how it supposed to be done. A bit of a research and question answered. One rope run will have to be enough length to cover two blocks. Ordered few more but it will arrive in a week. More and more thinking of making my own ropes... Happy modeling
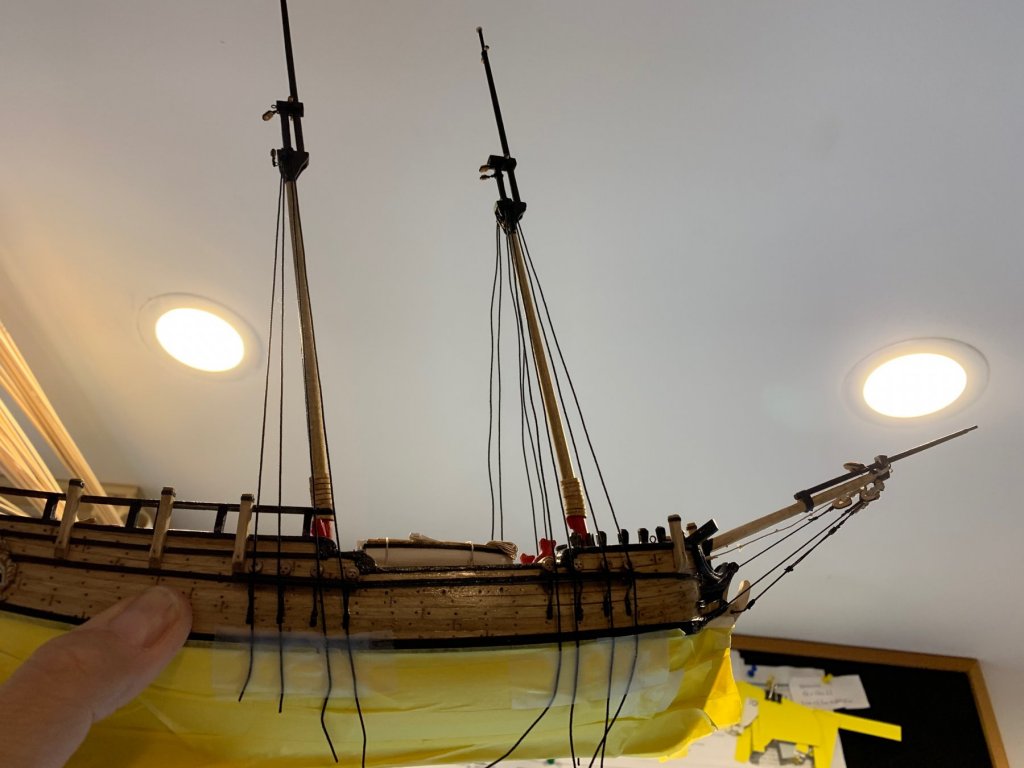

- 360 replies
-
- 2
-

-
- sultana
- model shipways
- (and 1 more)
-
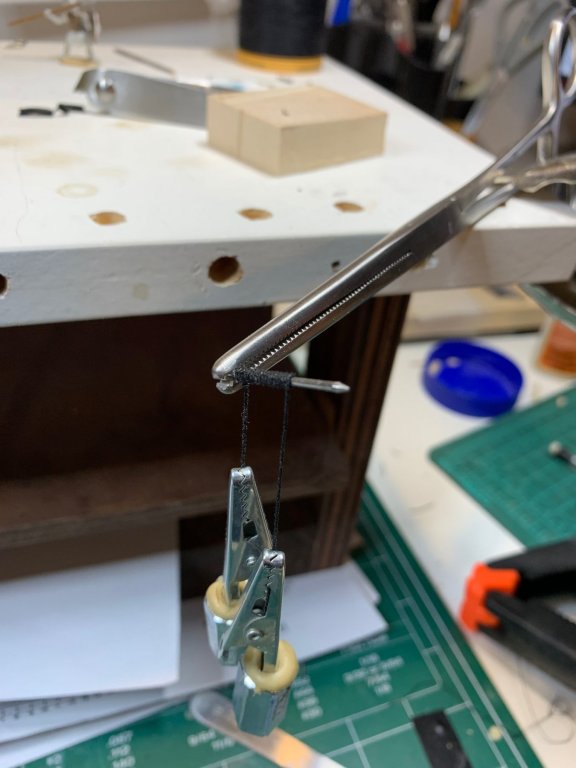
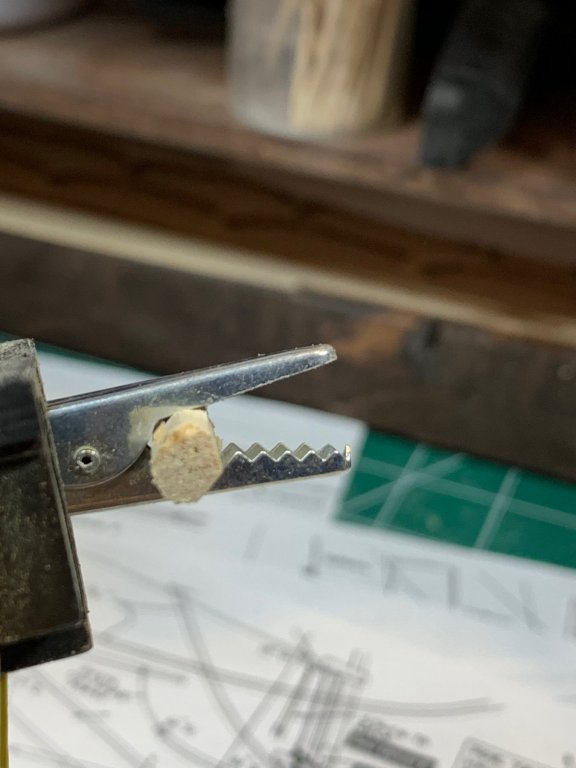
Yes, that is the process. Smaller size rope that match required seizing is wrapped tightly, around an objects (usually a nail) that is slightly "lubricated" with a wax so the glue does not stick to the nail. One end of the rope (beginning) is attached to a weight (custom made with alligator clips). The rope is then wrapped around; when it is done another weight is attached to other end of the rope, the tiny layer of glue is applied over seizing to make sure the rope does not fall apart. Then it is removed from the nail with tweezers or some other tool. It assist with making shrouds and other rigging tasks. The challenge is to make a seizing that matches the dimension of rigging rope since the second end of the rigging rope has to go thru the same seizing that already have one rope run thru it. And to make sure that cyano glue does not show too much on seizing so it start bothering with its 'whitish' appearance. I am also contemplating to make the same type of seizing but wrapped around the object that is more flat instead being a nail; this should be enough to make it more like a real thing: two ropes, parallel to each other with a flat seizing around them... Here is very good site that has plenty of details about this and other techniques and tools but does require a subscription (http://www.shipmodeling.ca/subs/aa123.html ). Cheers
-
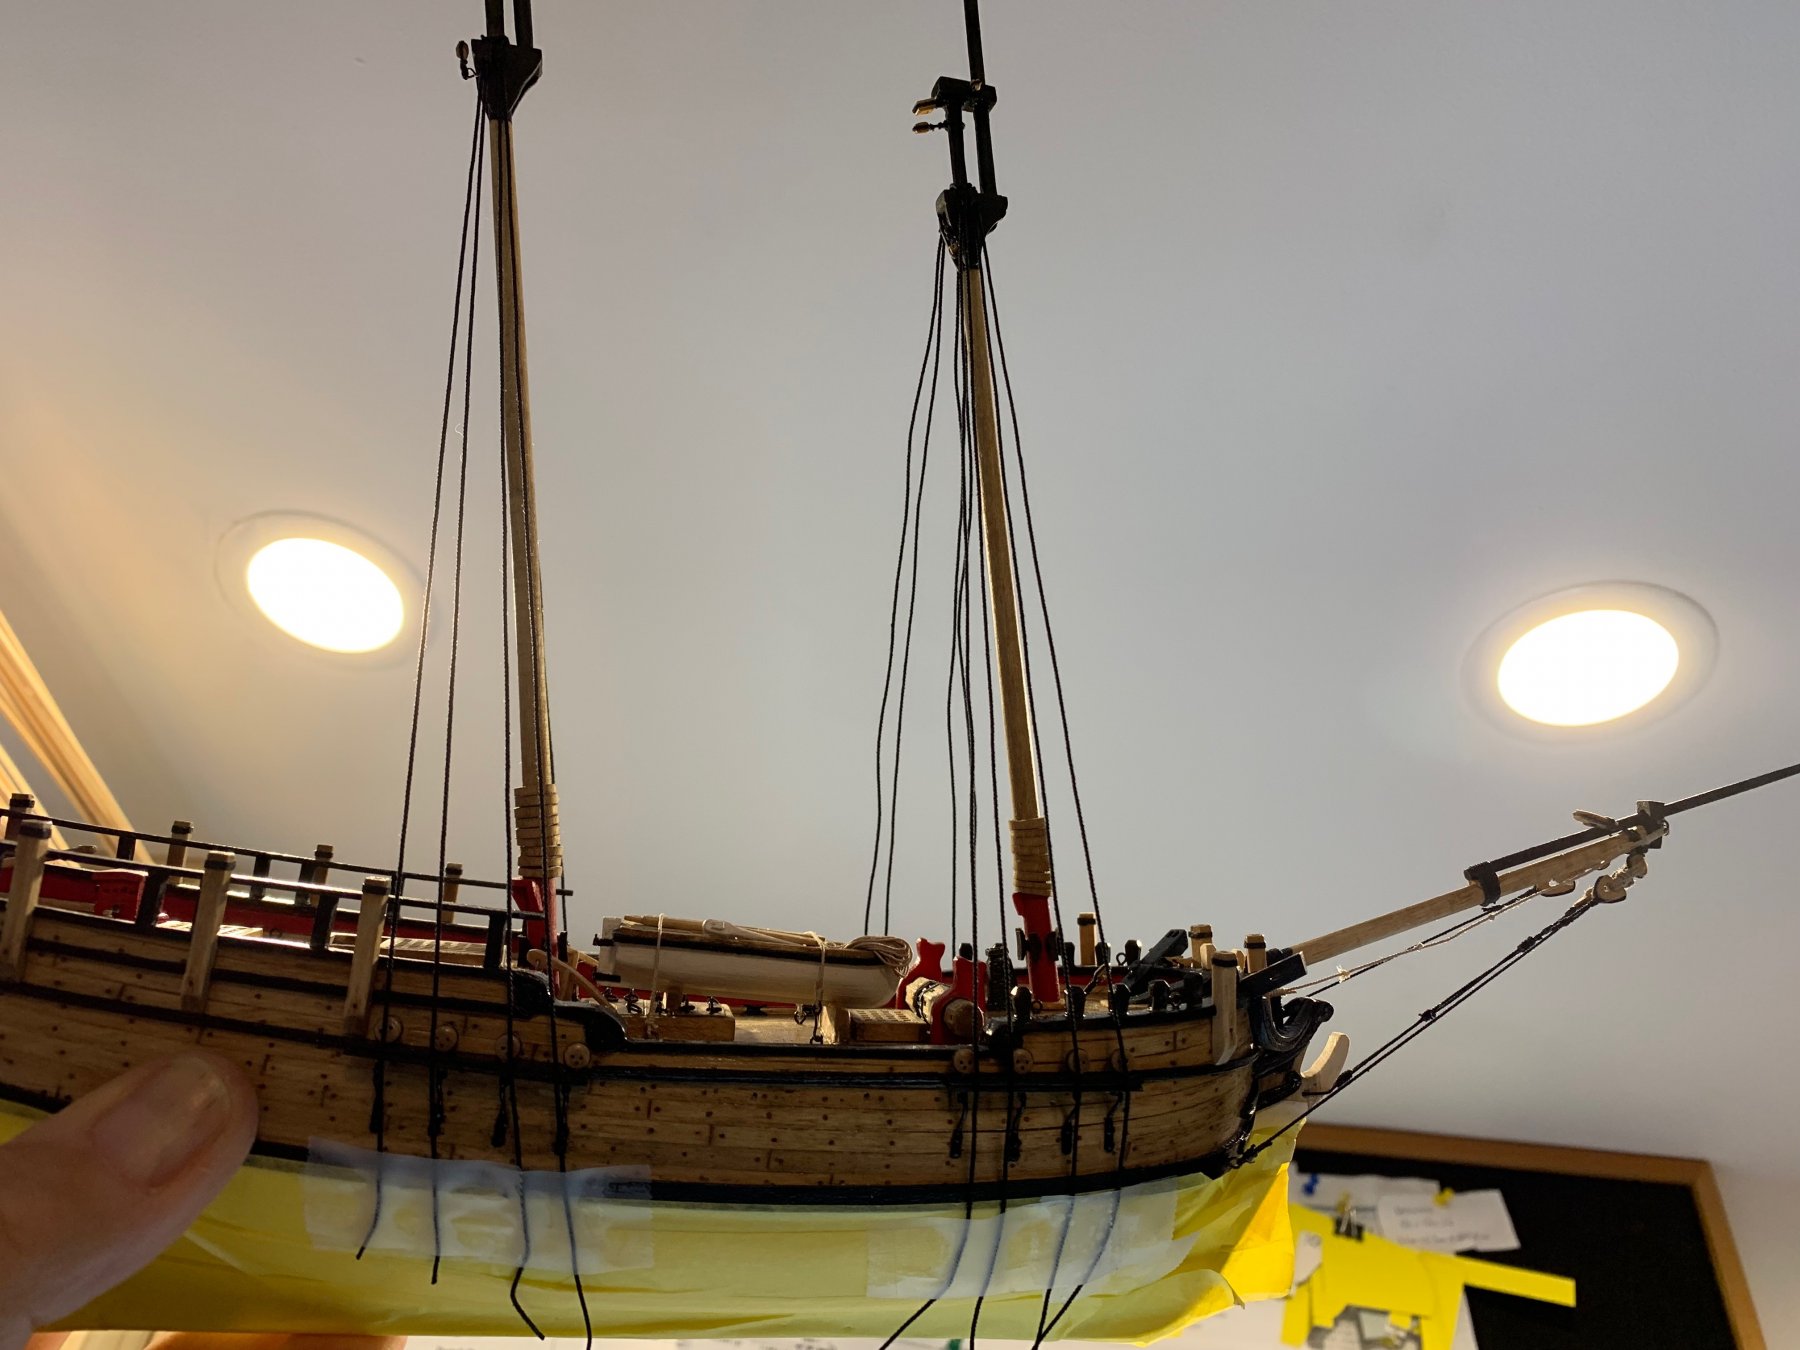
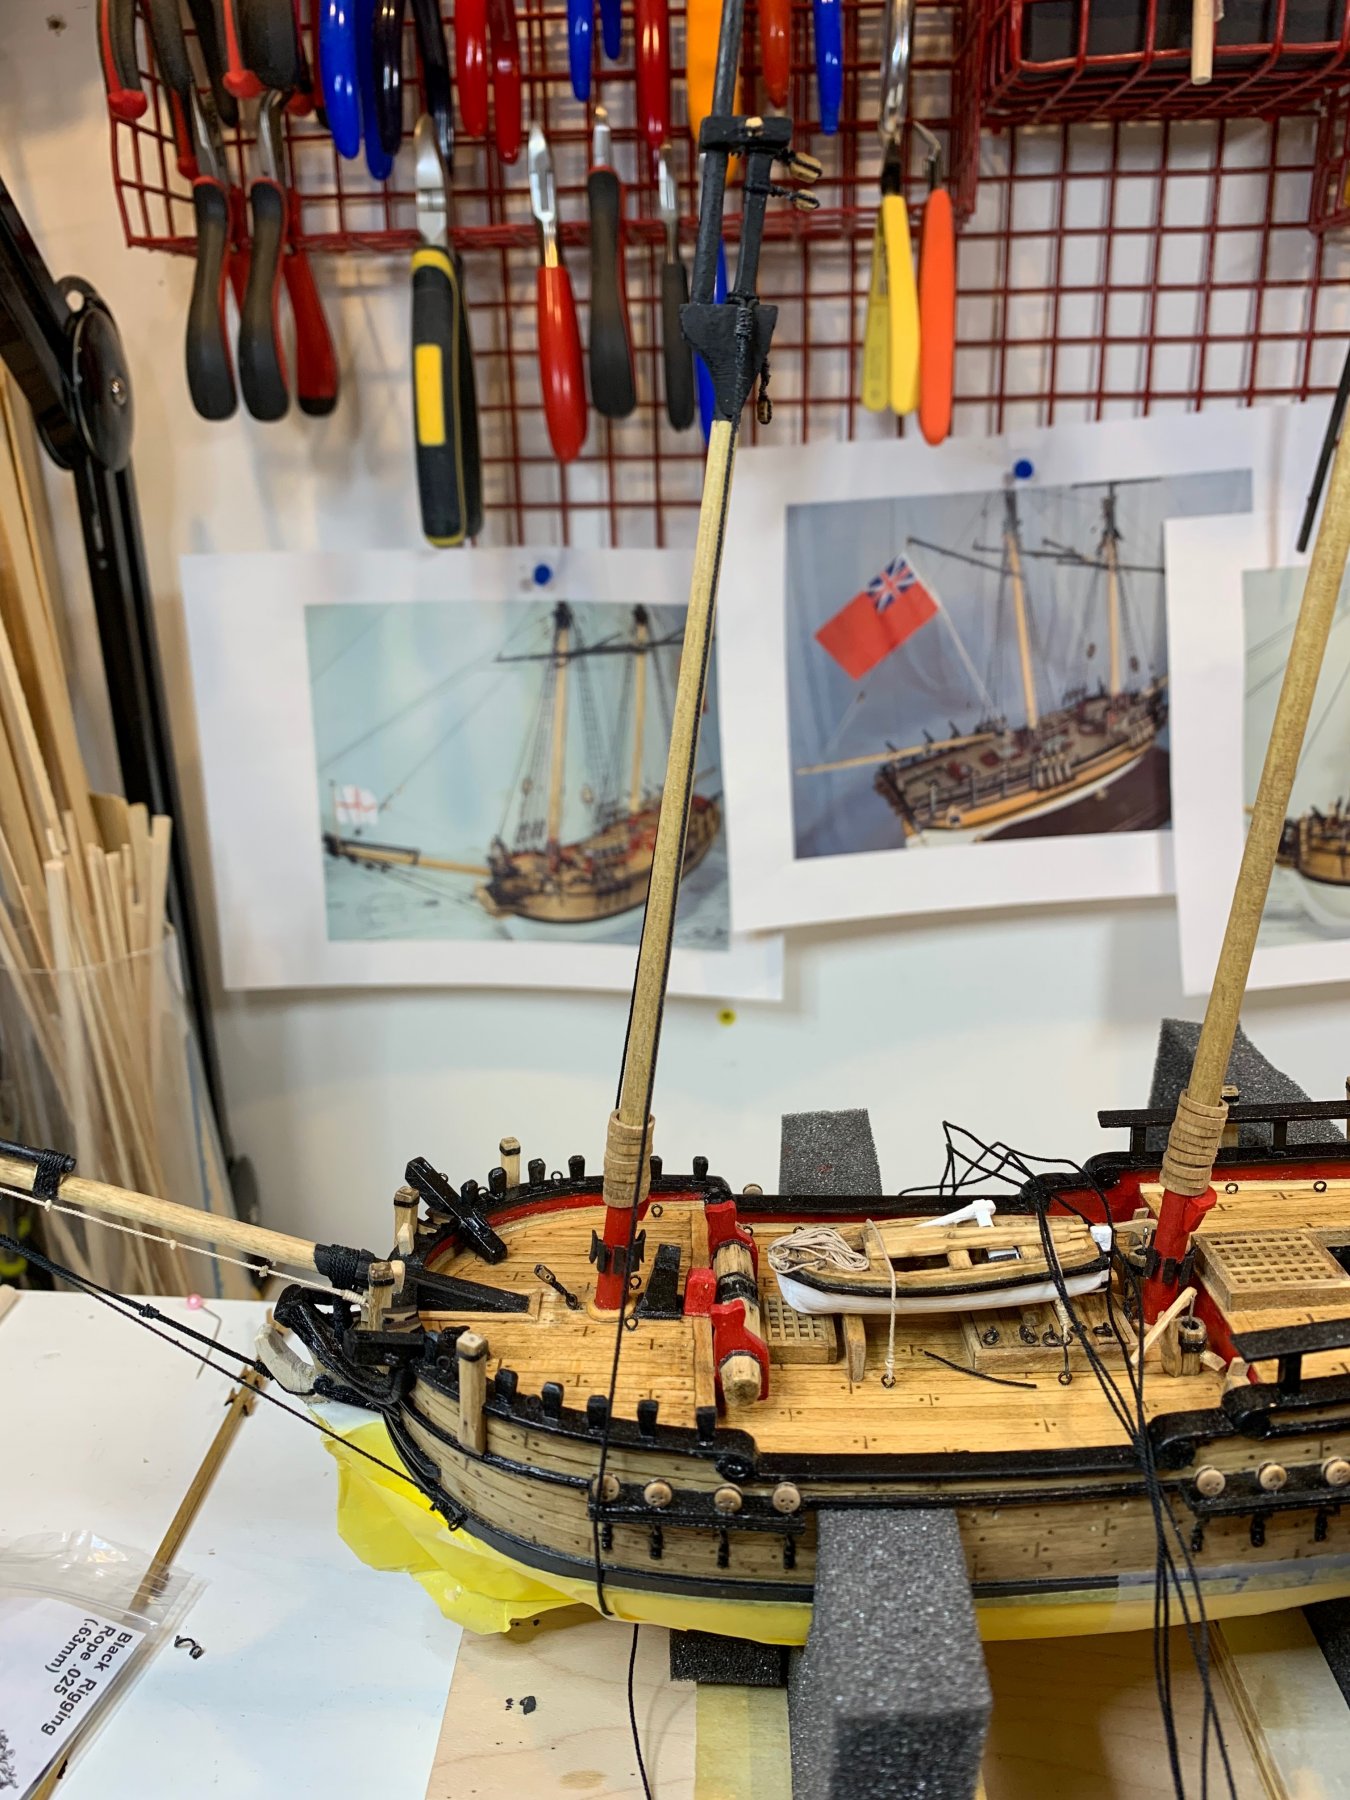
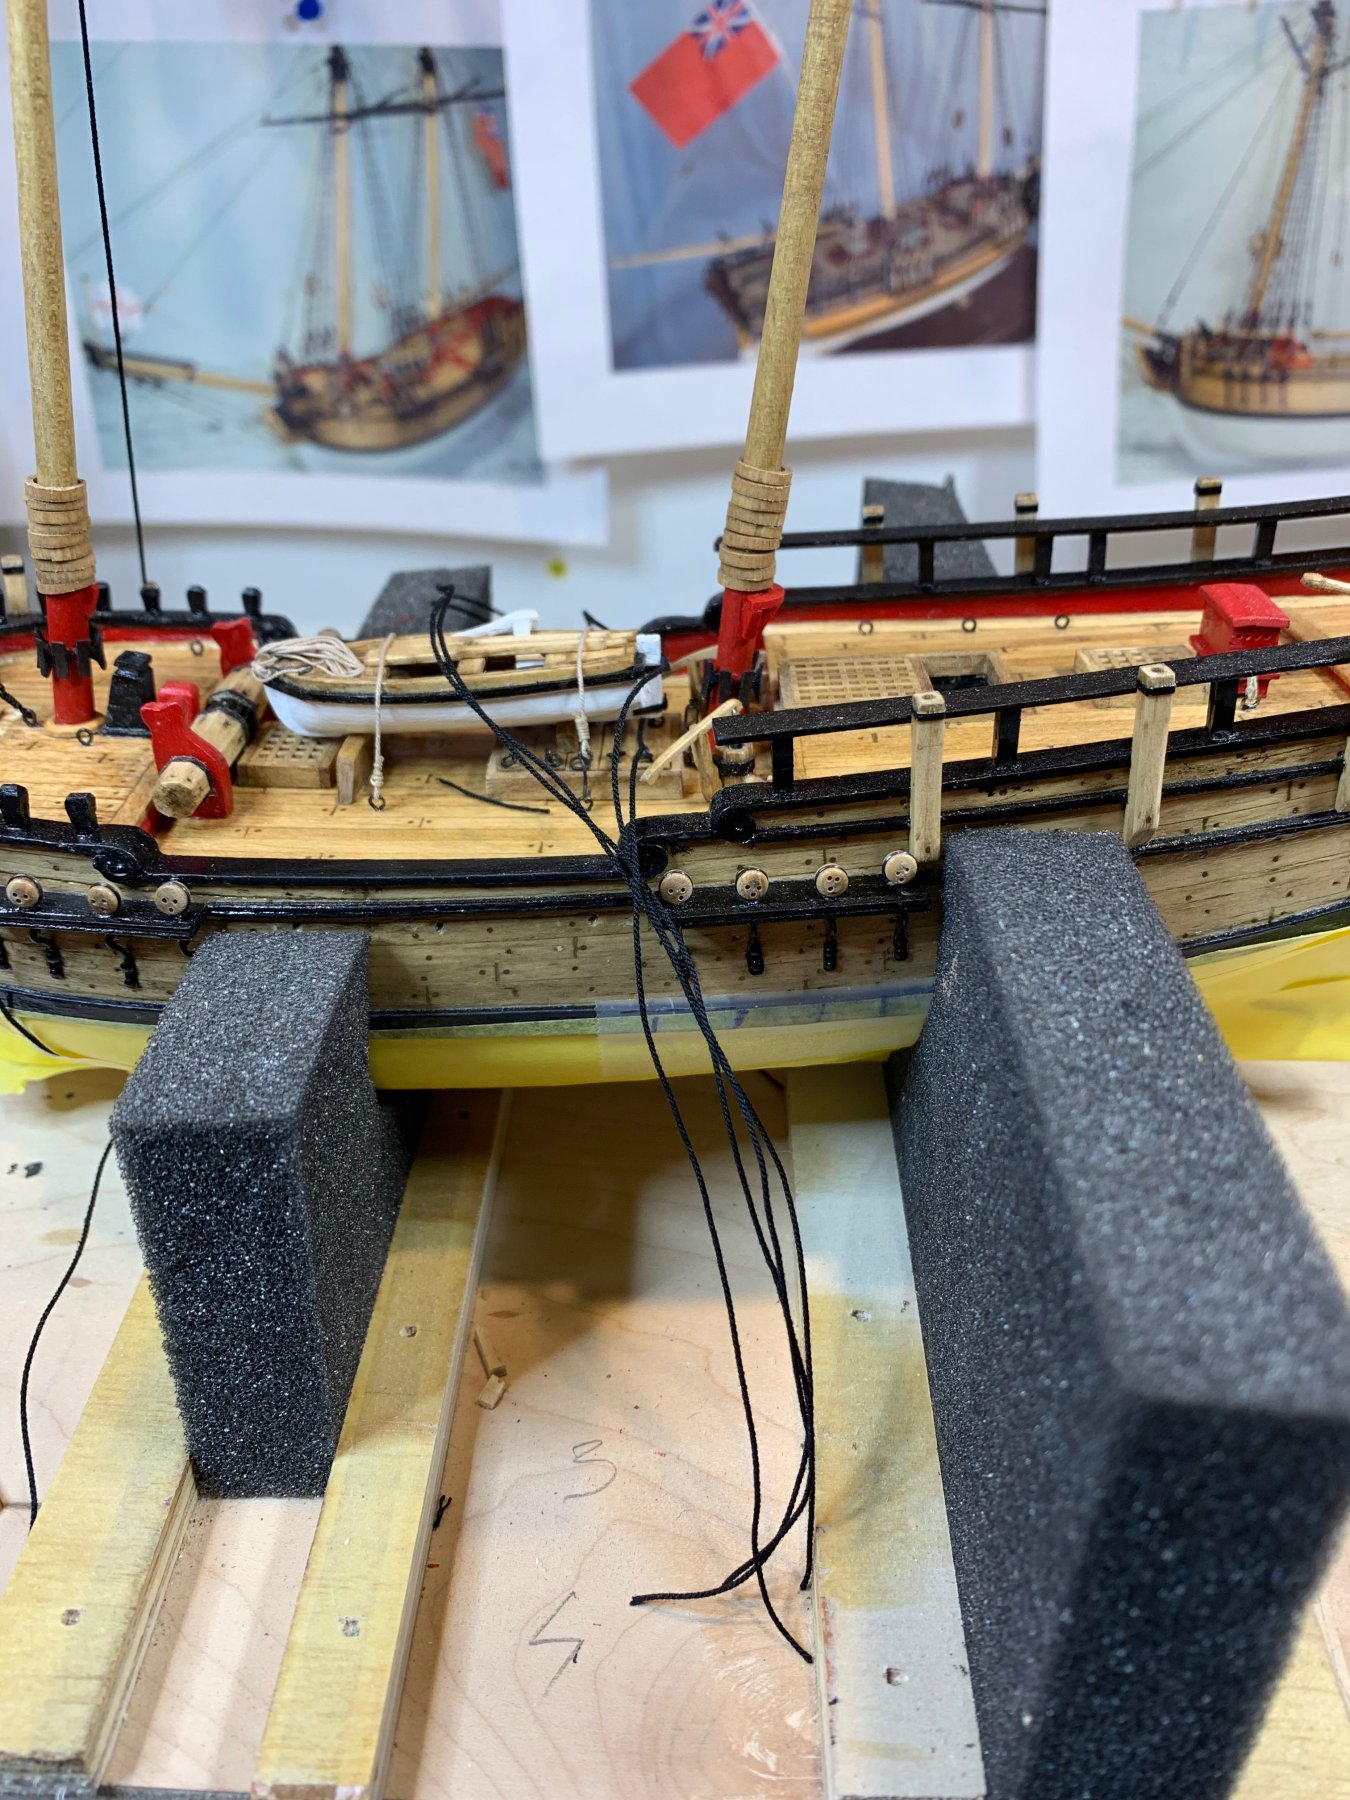
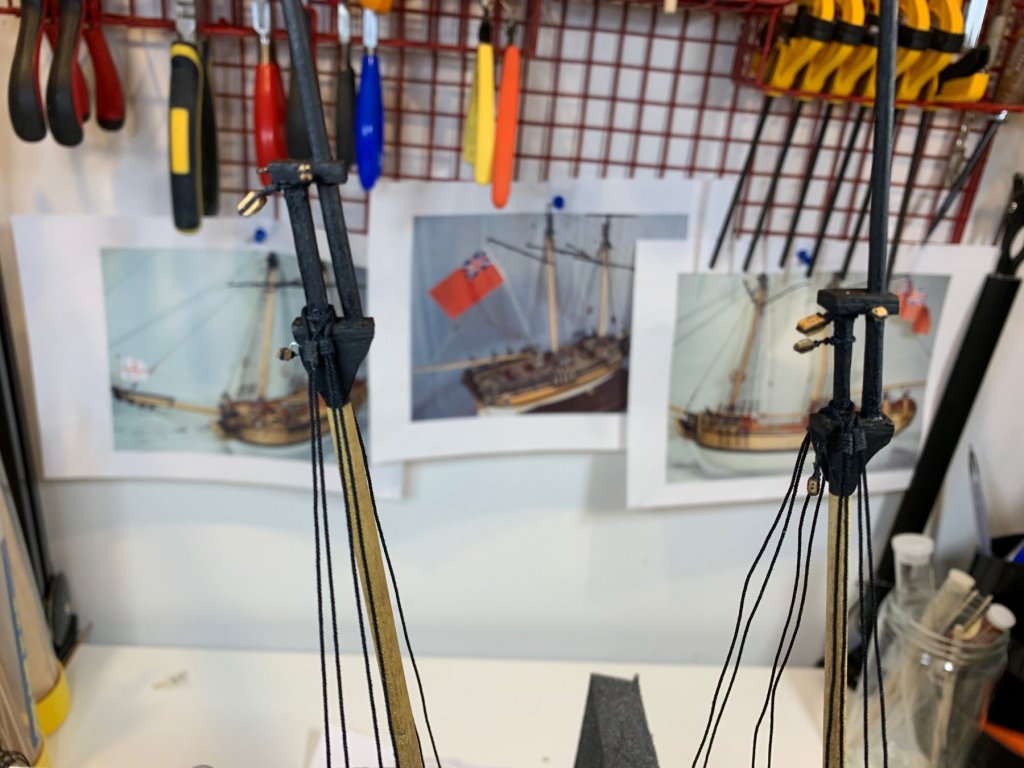
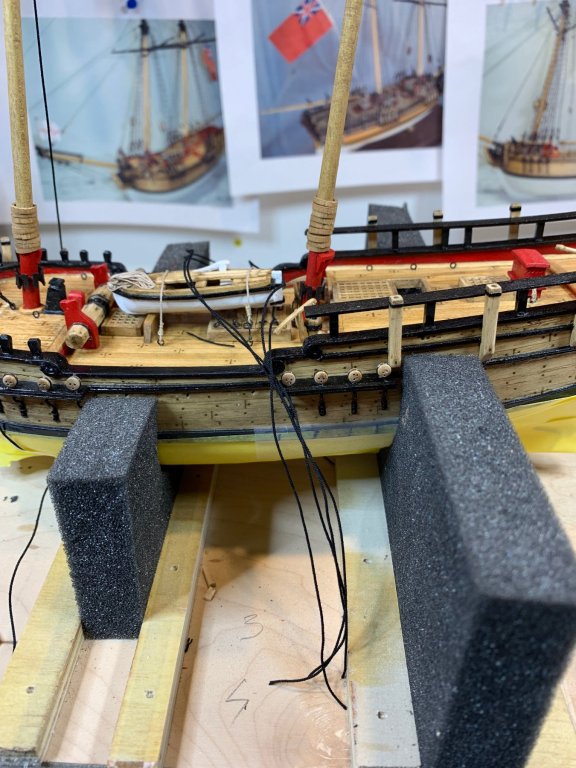
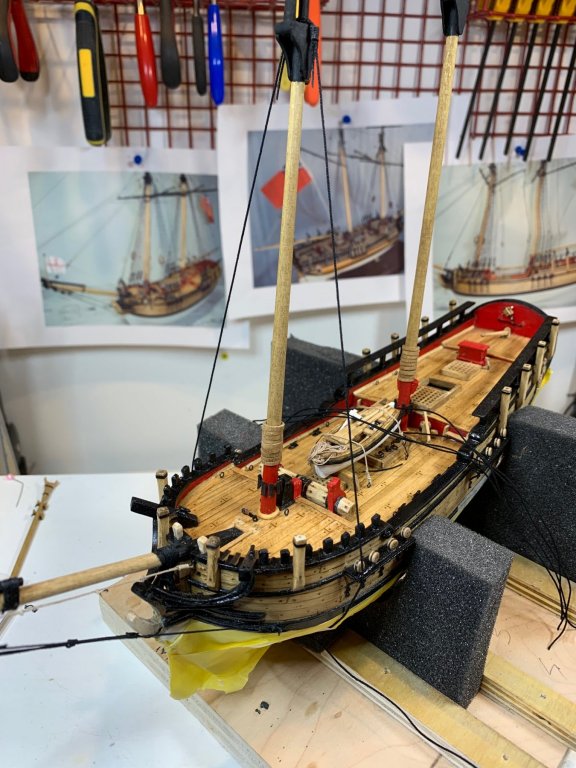
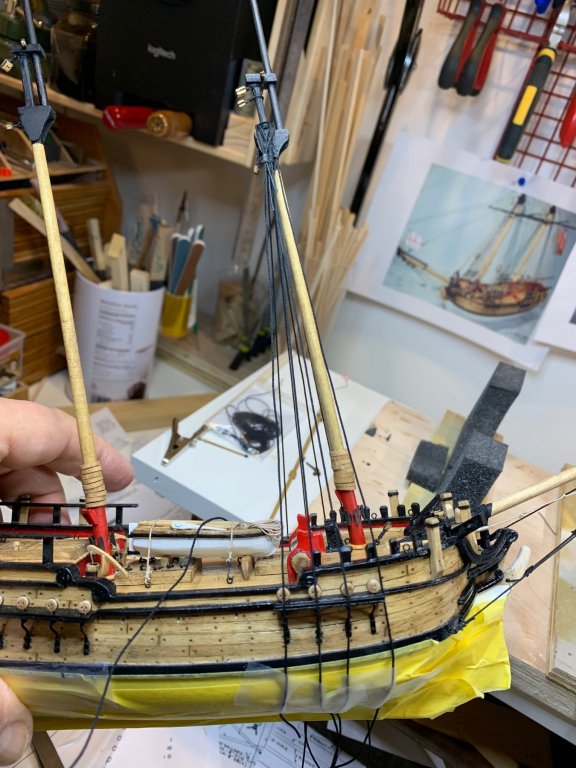
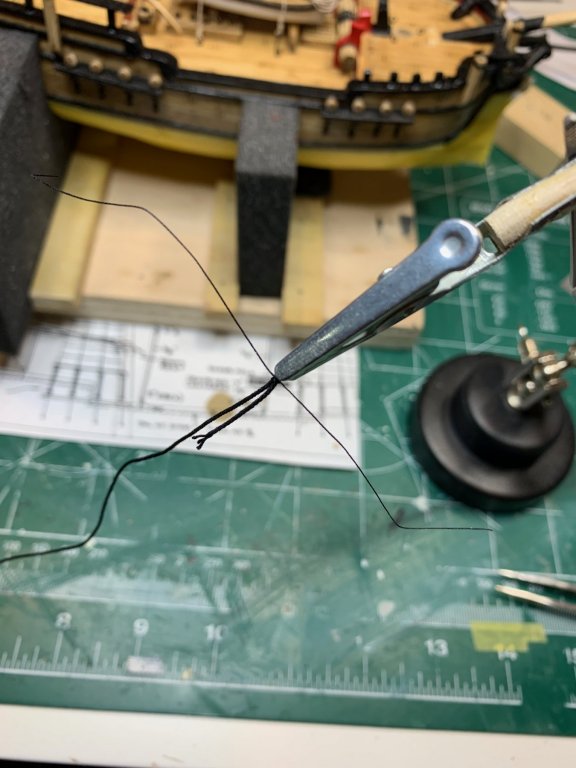
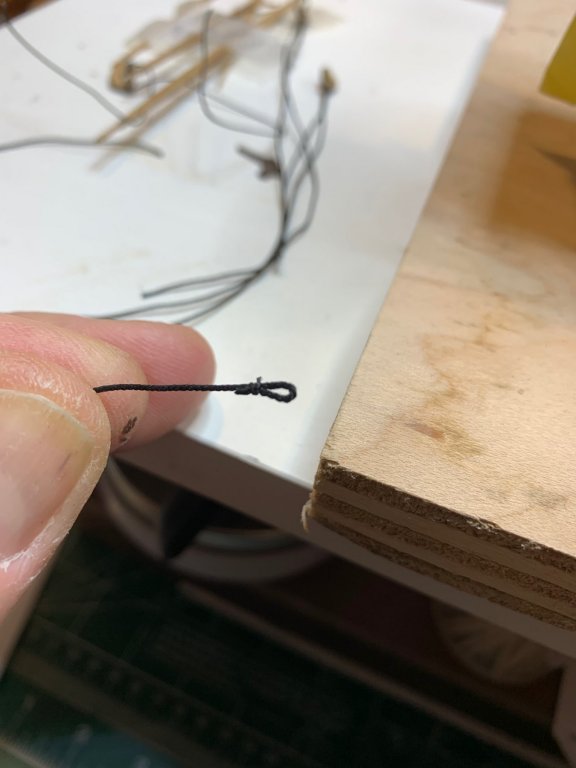
Work on shrouds started with making some zip seizing.. First line is in. I used this line to check the positioning of chain plates to make sure they will line up with shroud. One chain plate is a bit out of line and need to be adjusted very slightly. The seizing for a line was not put in final position, have to make sure that other seizing sits nicely and that the whole assembly looks neat. There will be four pair of shrouds per mast. The 0.25 black ridging line was used for this task. I decided to mount all shrouds, position them properly so seizing lined up neat and then start with dead eye seizing.. The rope was cut to correct length for few shrouds.. The end of a rope was freeze with small amount of glue and straight to make running thru per-build seizing easier. Here will do some repositioning of seizing to make then stay nice and neat. The end of rope was secured with a piece of scotch tape so it does not come in the way to other ropes. Happy modeling.


- 360 replies
-
- 4
-
-
- sultana
- model shipways
- (and 1 more)
-
Getting ready for rigging and wrapping up work with blocks.. As per practicum, blocks in different size were installed. It was a bit of challenge since the masts were mounted already but not a big deal.. 3mm blocks under trestle trees of both masts lashed to eye bolts and mounted in the pilot holes... Masts waiting rigging. Happy modeling.
- 360 replies
-
- 3
-
-
- sultana
- model shipways
- (and 1 more)
-
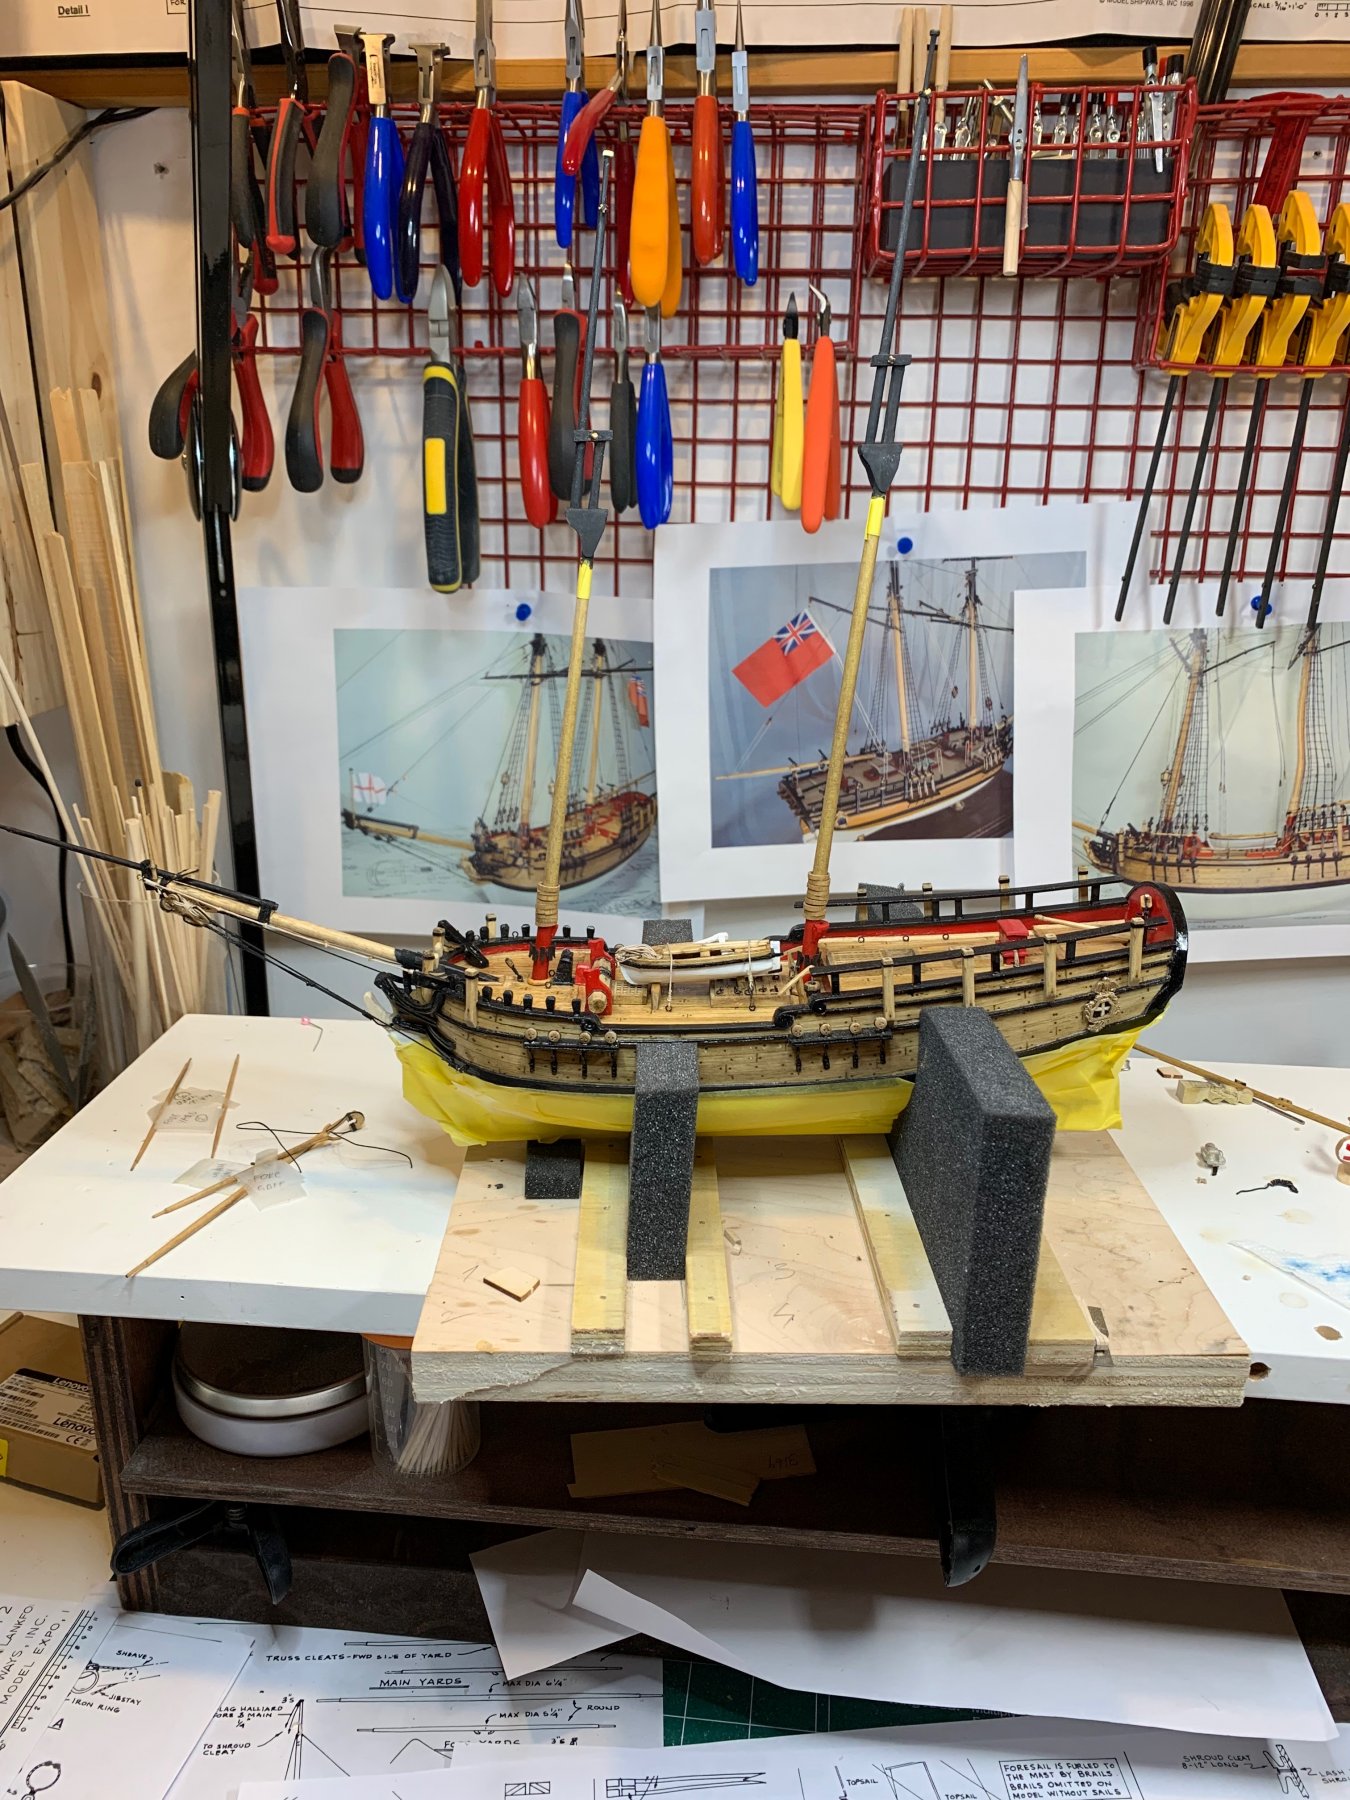
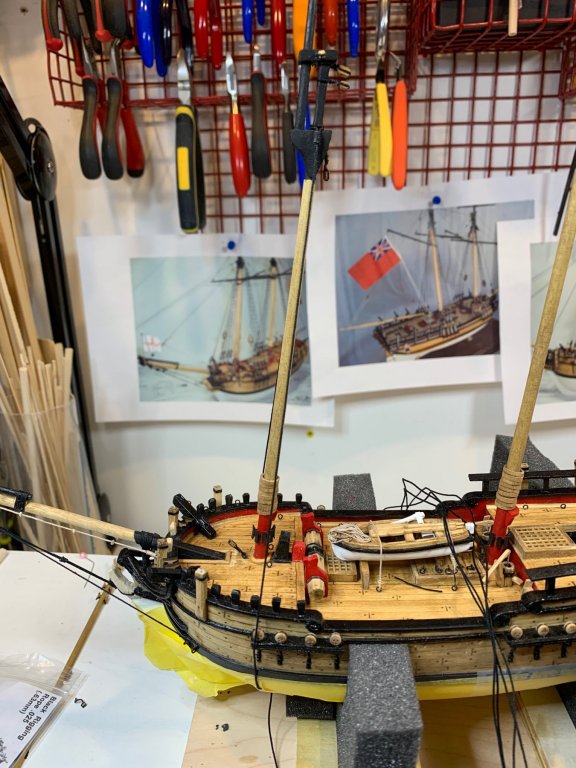
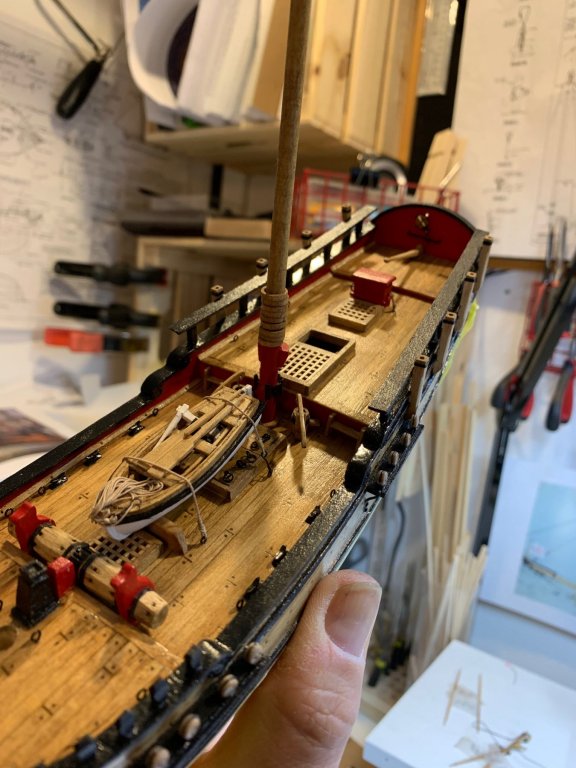
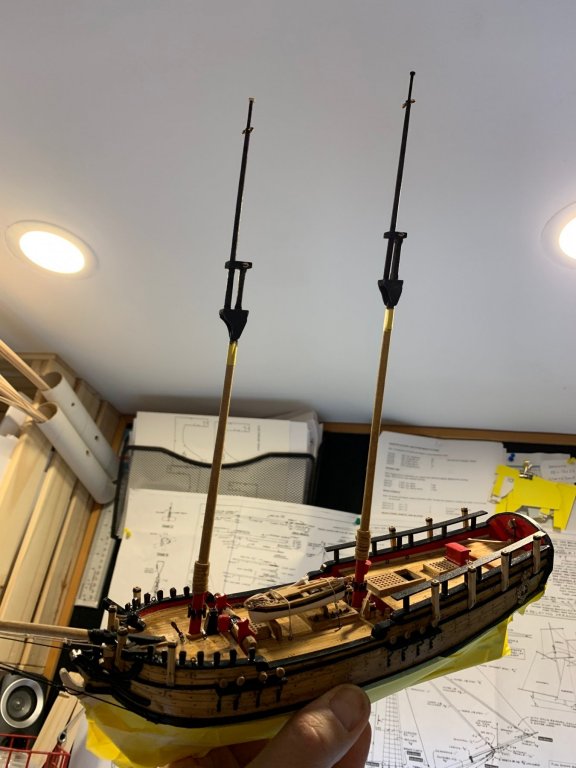
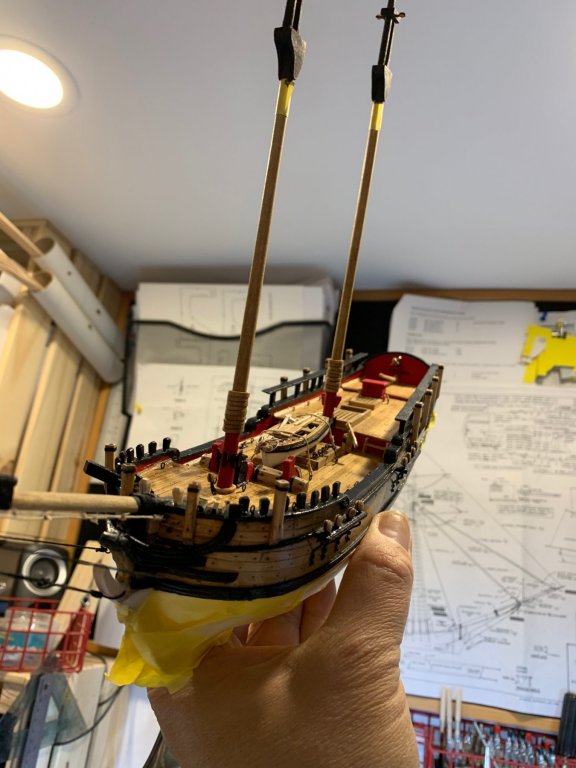
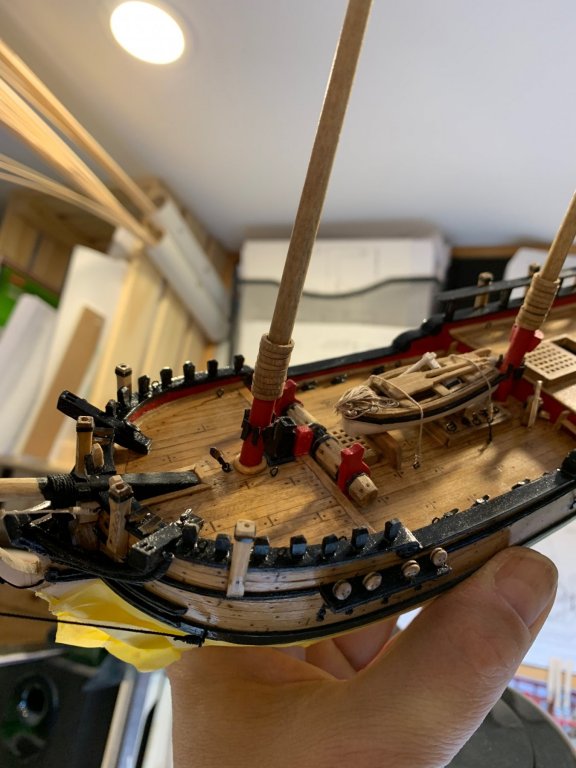
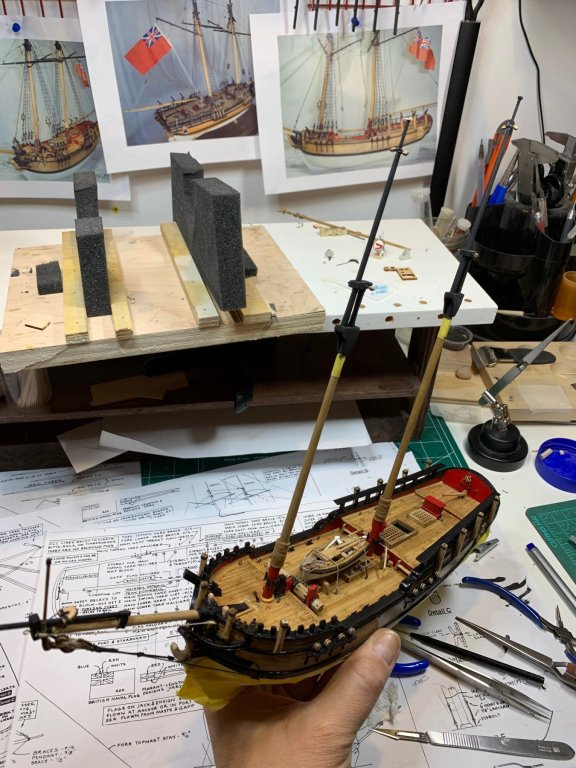
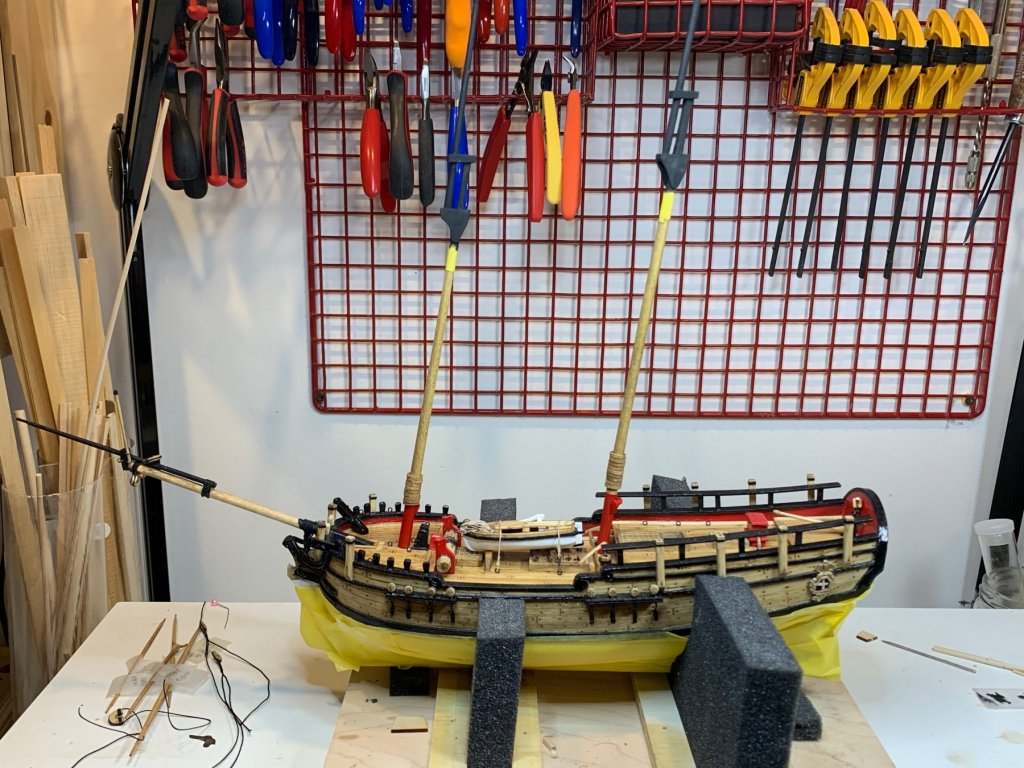
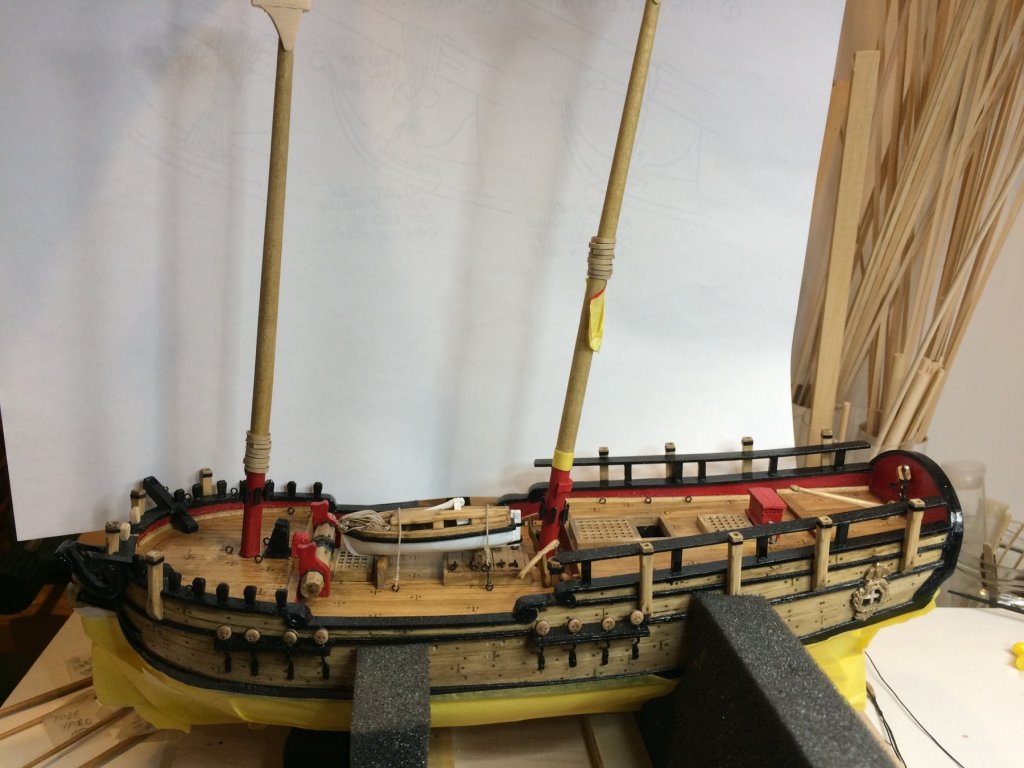
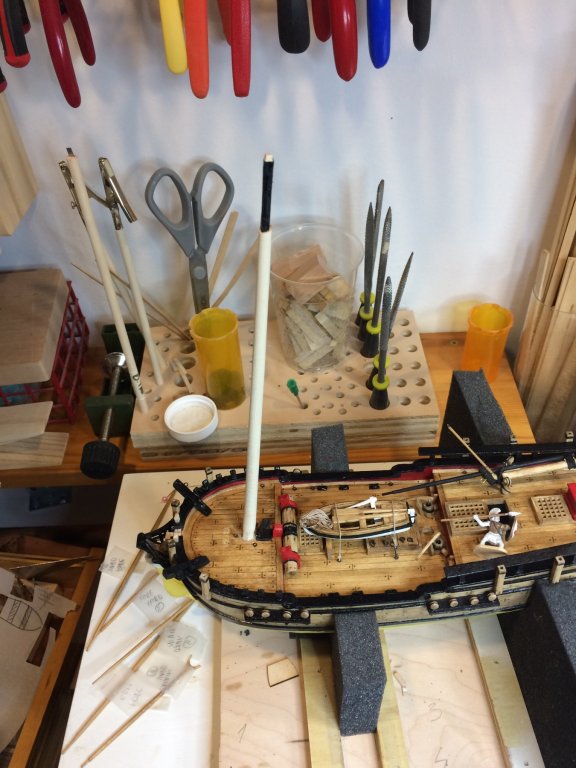
A work on masts have been completed. The 3mm single whip blocks were mounted to correct position in front of masts. Then it was a time to install the masts. I decided to use carpenter glue to glue masts to the ship, which would give me a bit of time to properly position them and make sure they are straight.. First the main mast was in.. Then the foremast... And both were on ... Now i have to make sure when moving the ship around and reaching out for tools; masts are tall... Happy modeling.


- 360 replies
-
- 7
-
-
- sultana
- model shipways
- (and 1 more)
-
I was very close to make the metal one since i am trying to follow practicum but a night before, i looked some other ship building logs and noticed nice work on wooden coats so decided to give it a try...
- 360 replies
-
- 2
-
-
- sultana
- model shipways
- (and 1 more)
-
I am keeping track of my "want to do it differently" notes during my Sultana journey so i totally understand you.. 🙂 Every time i stumbled upon other' Sultana build logs i have the same moment... Thanks..
- 360 replies
-
- 1
-
-
- sultana
- model shipways
- (and 1 more)
-
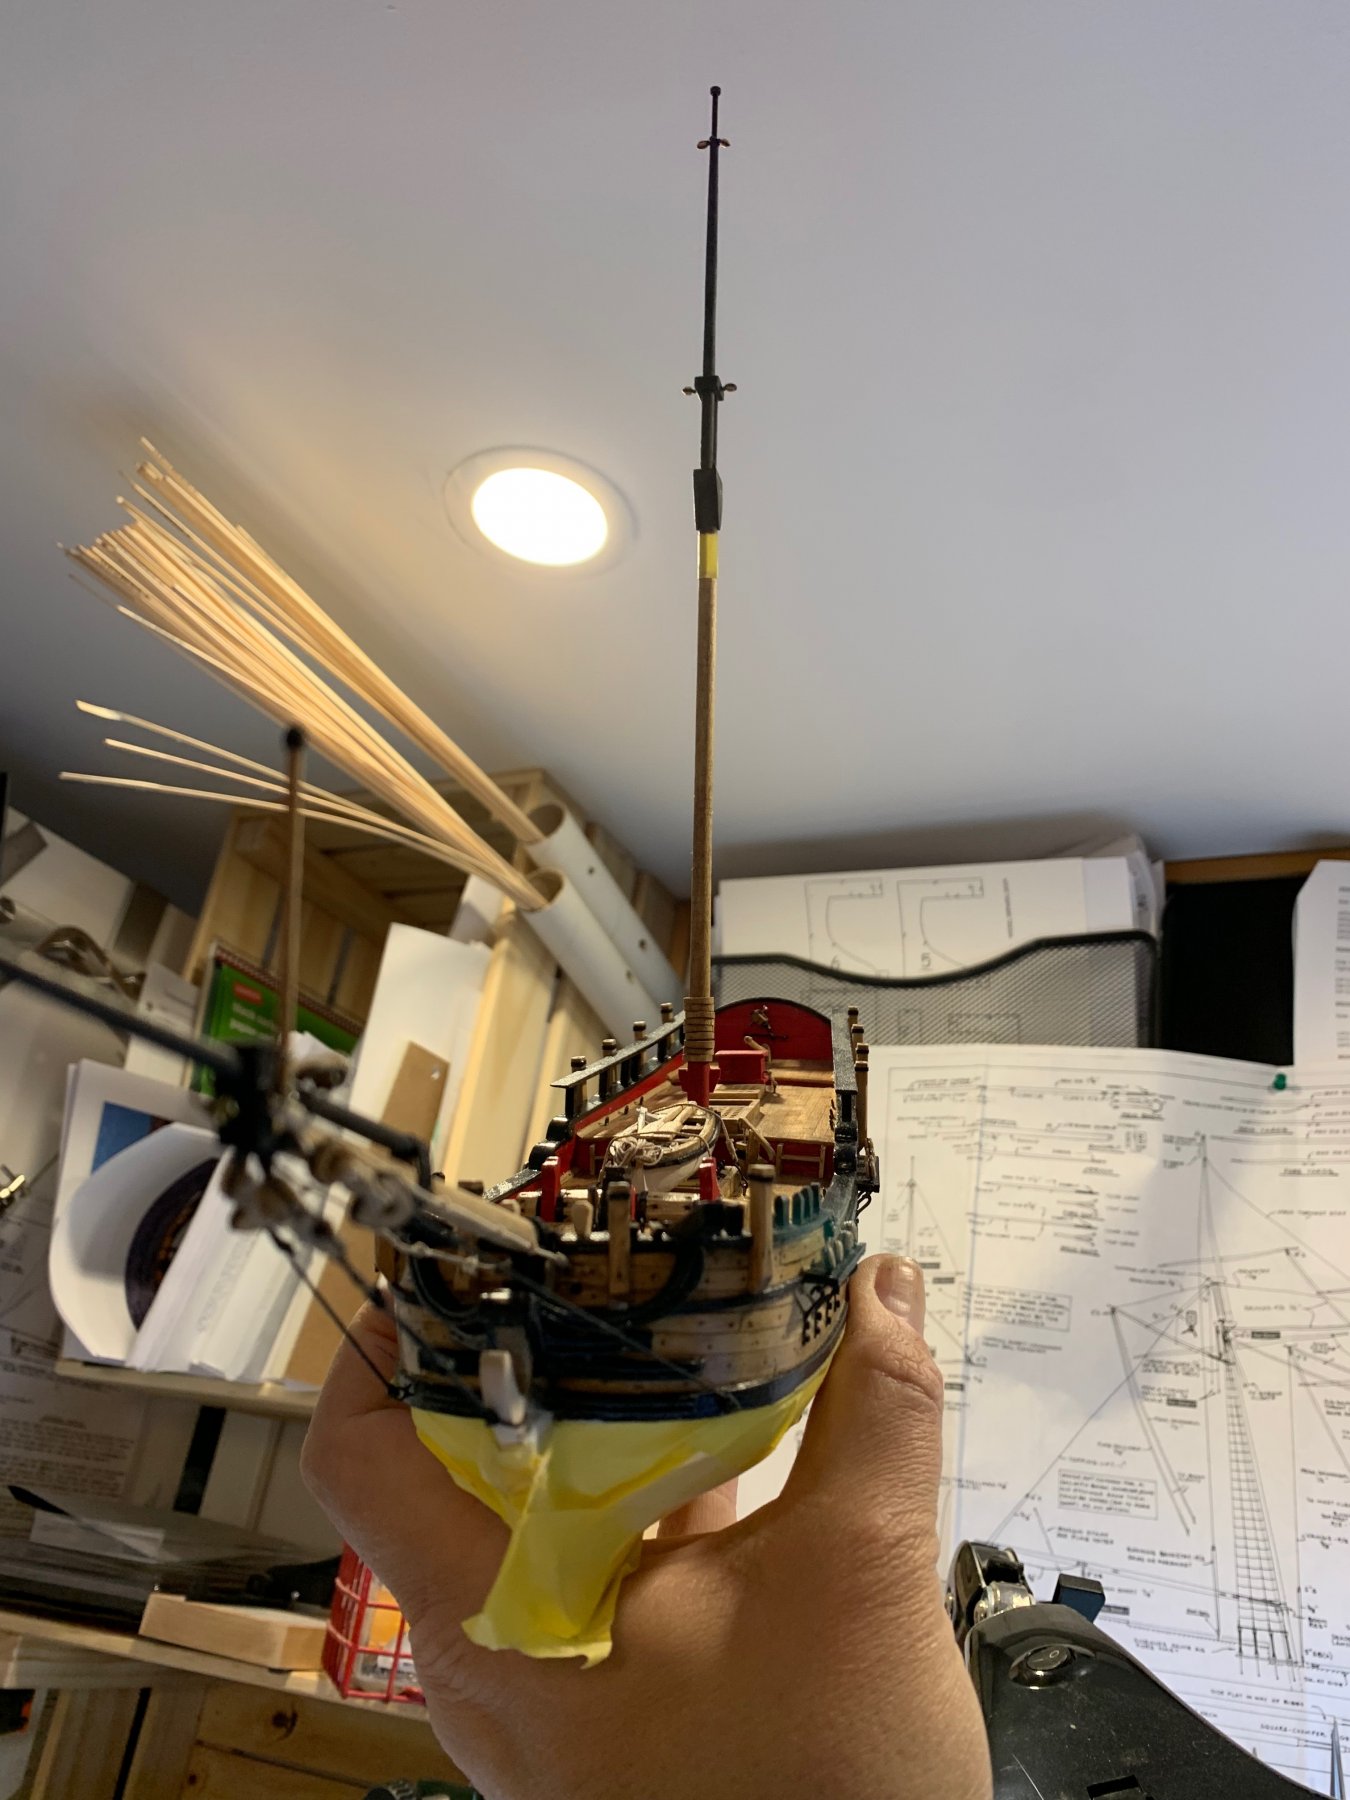
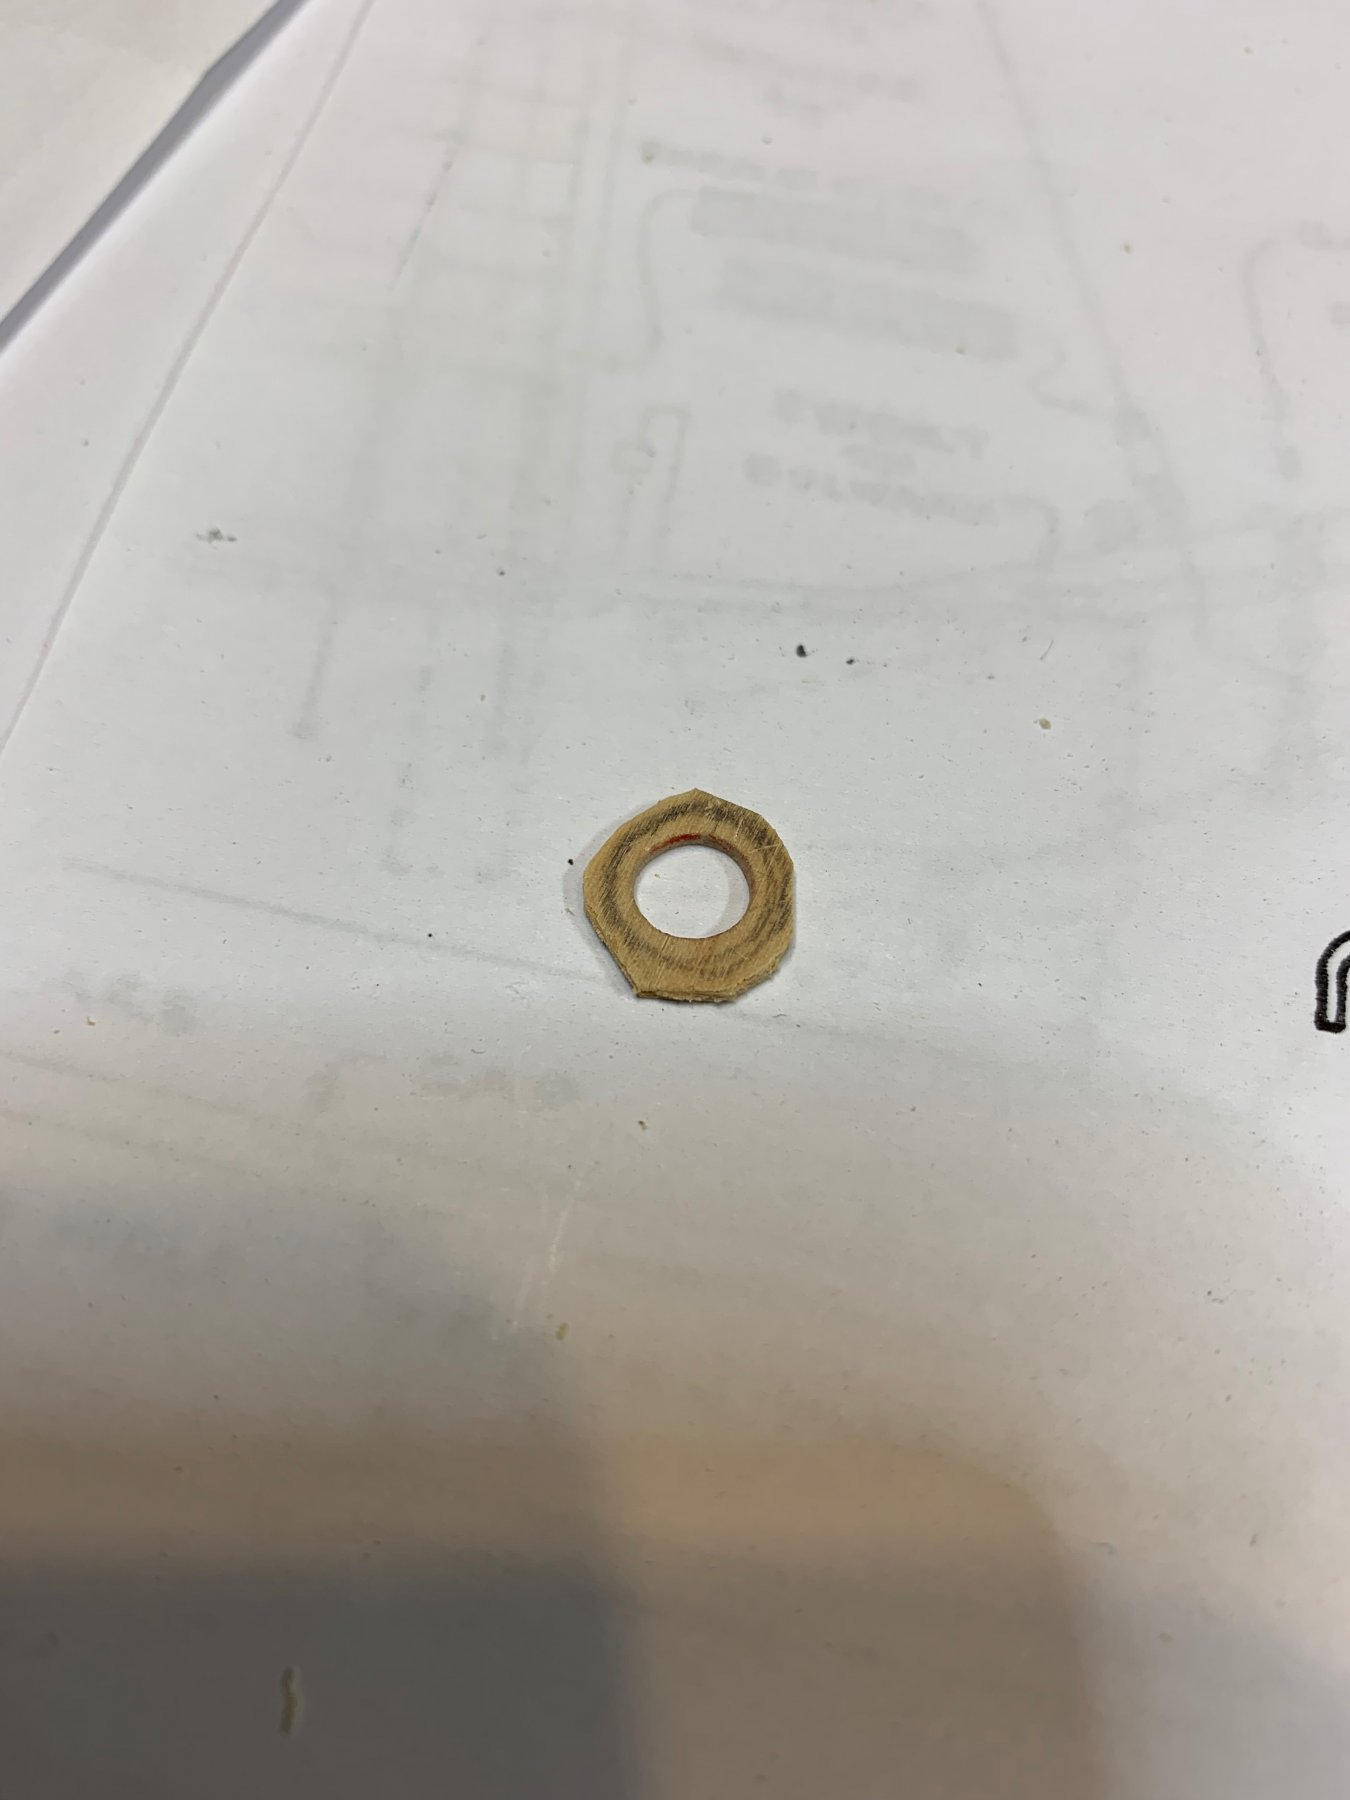
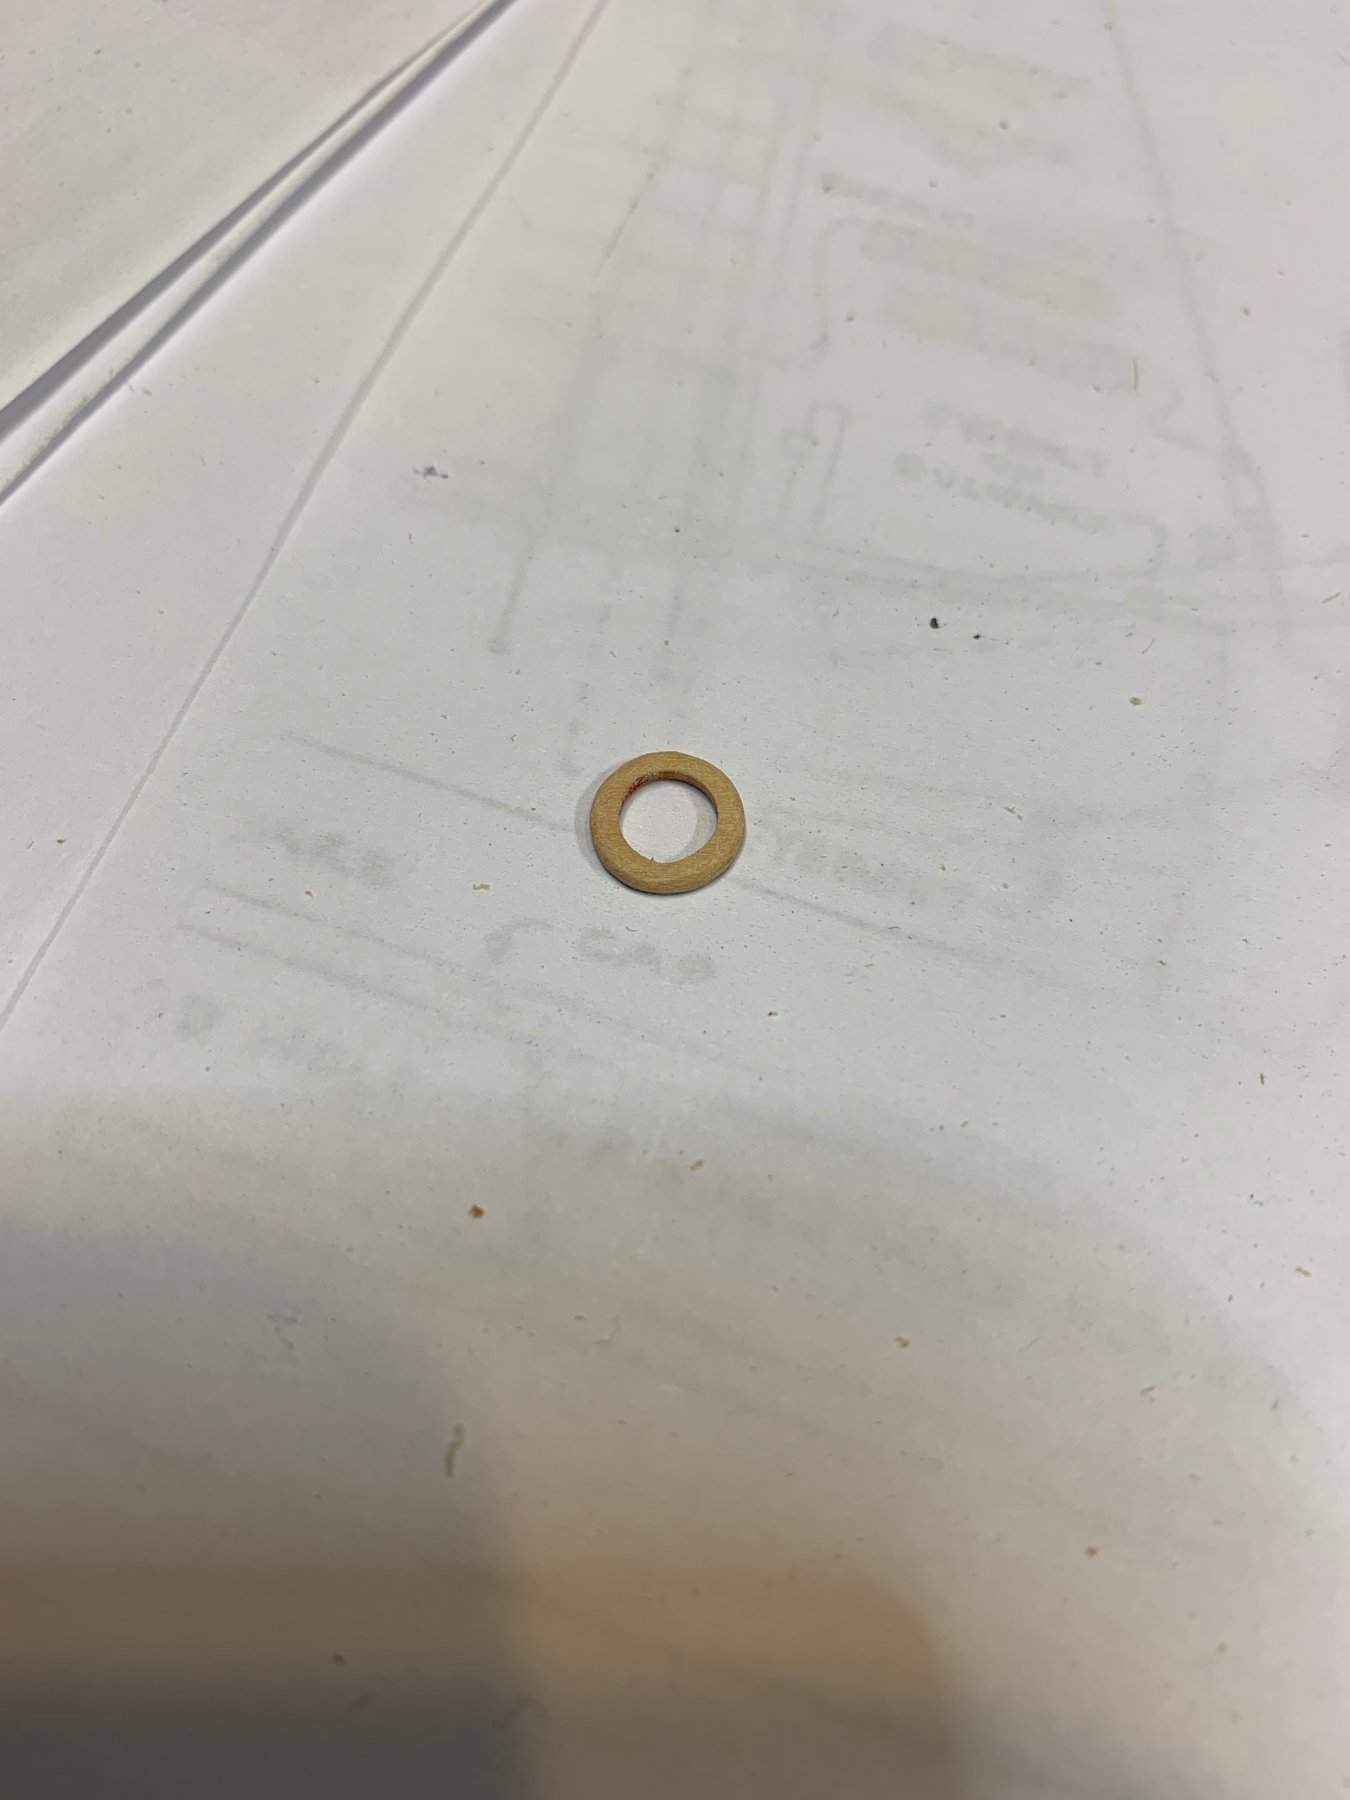
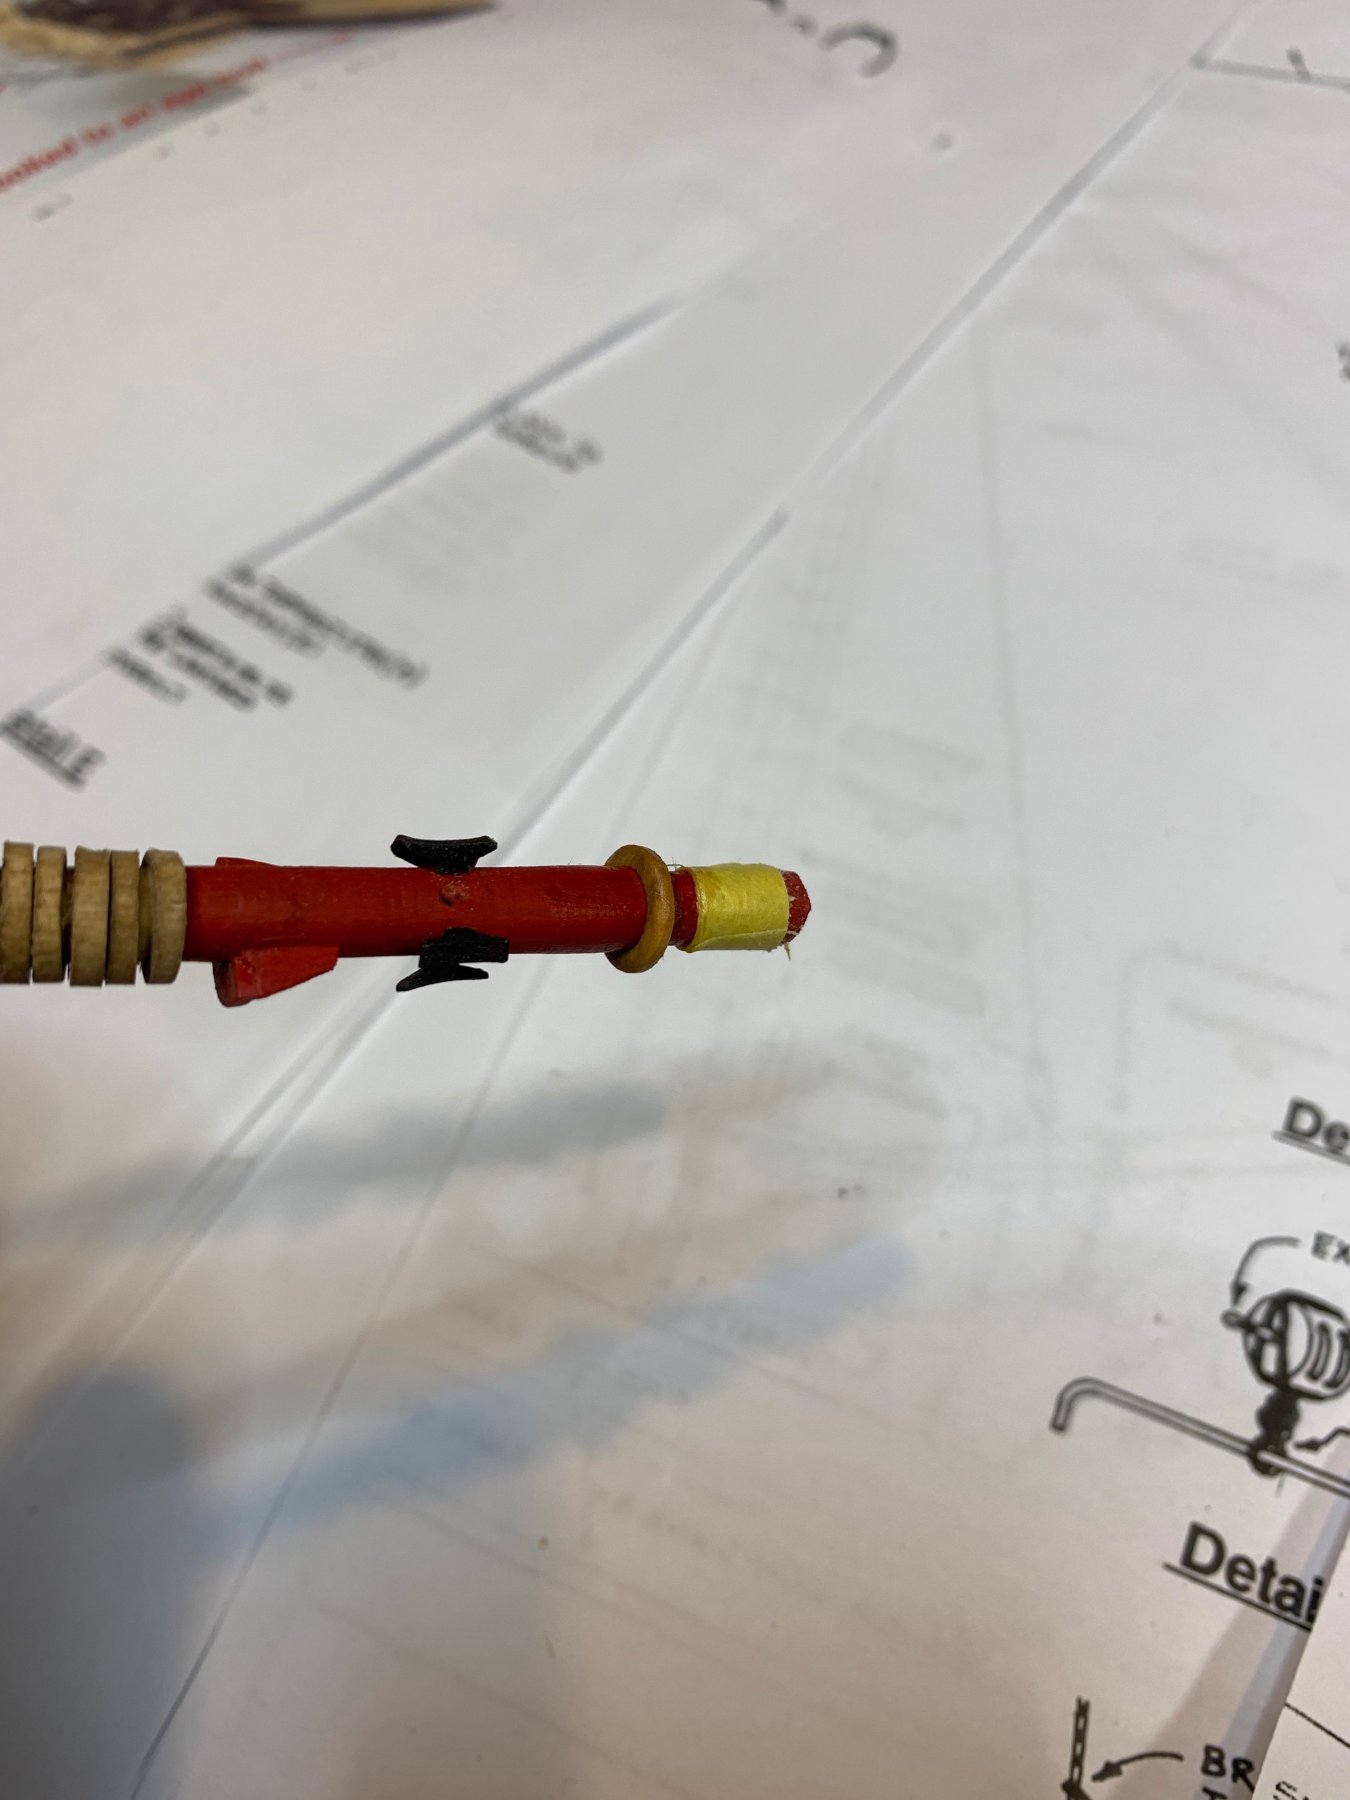
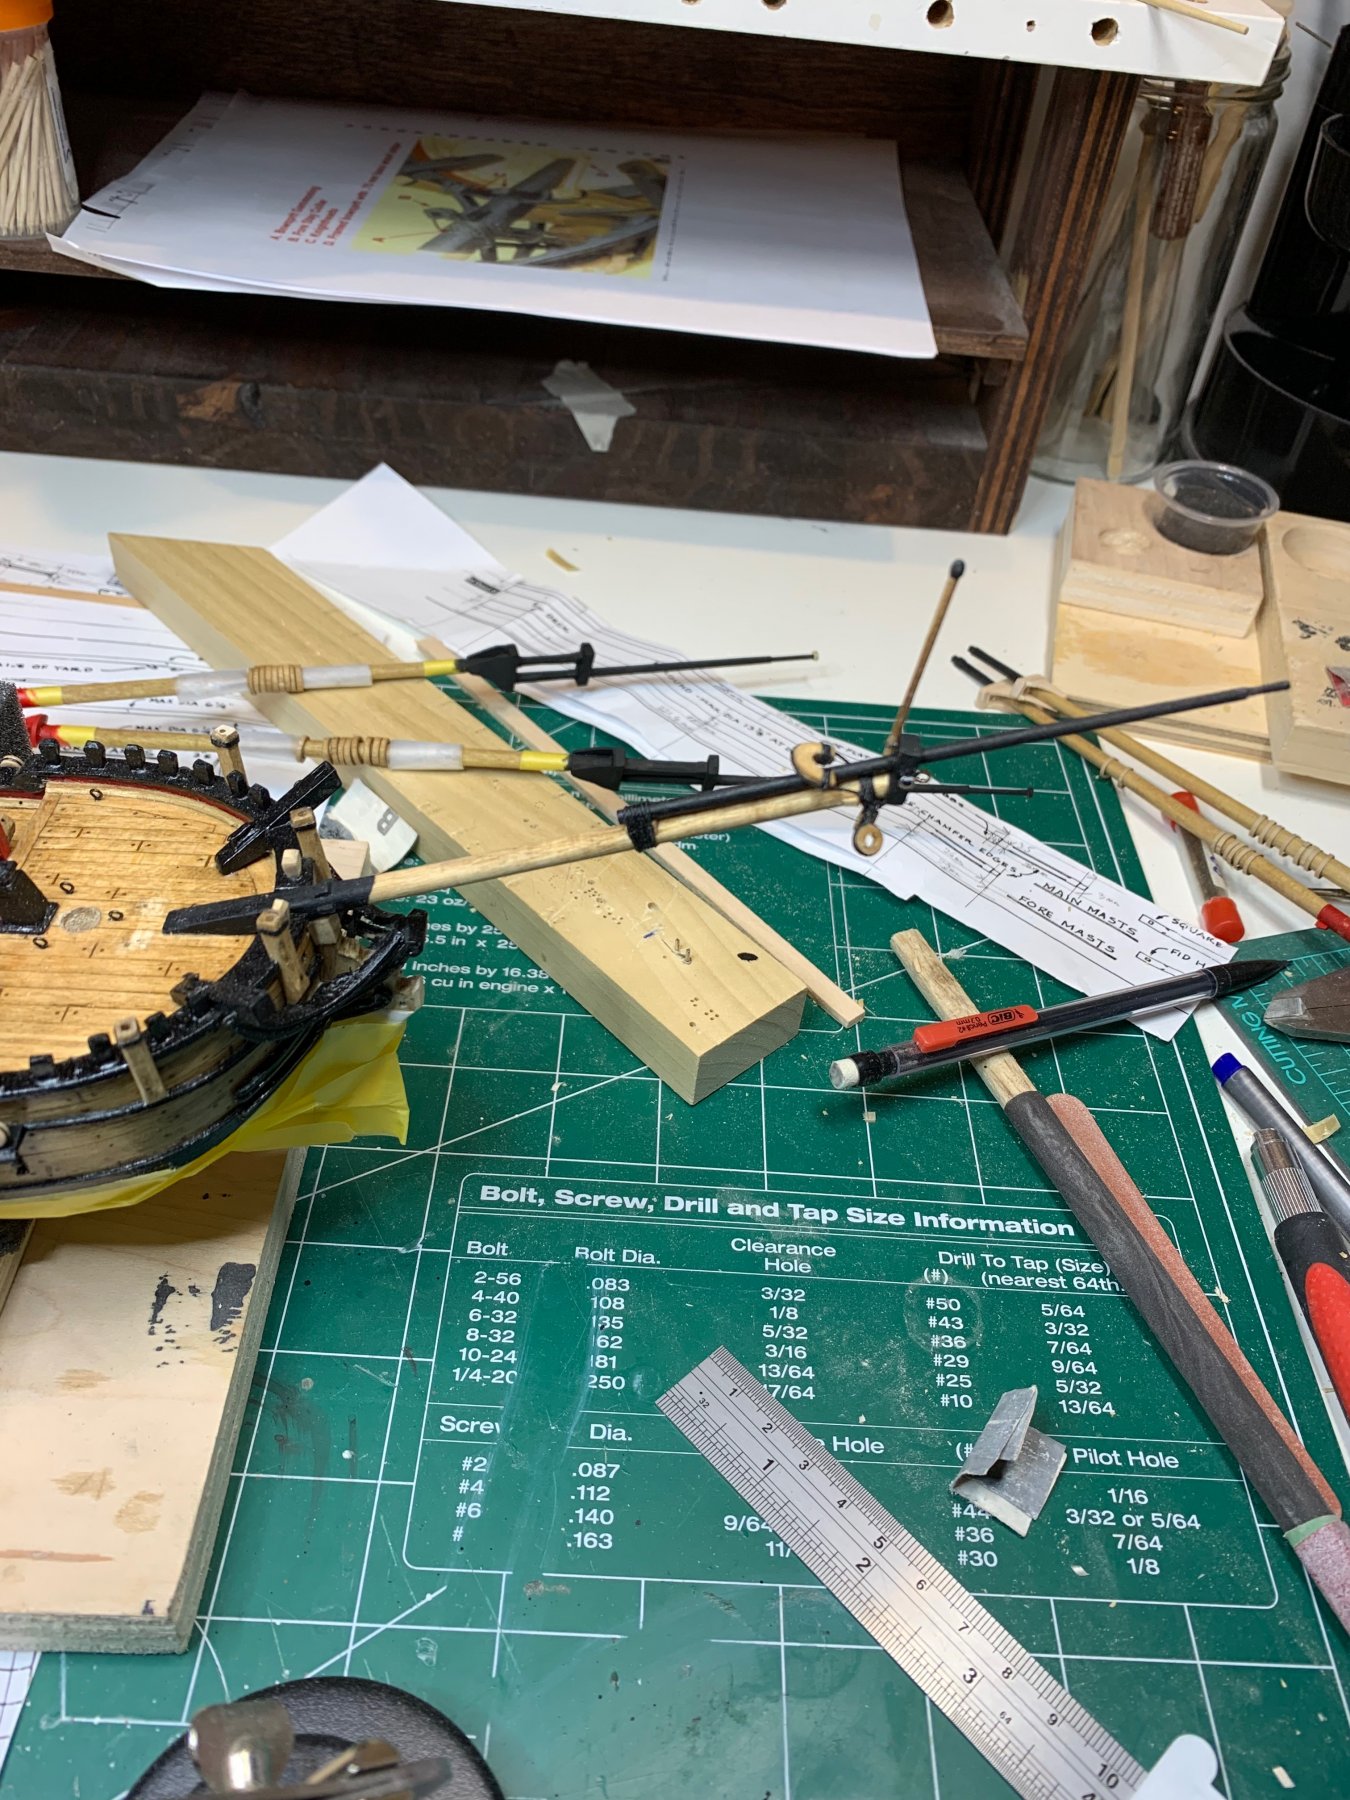
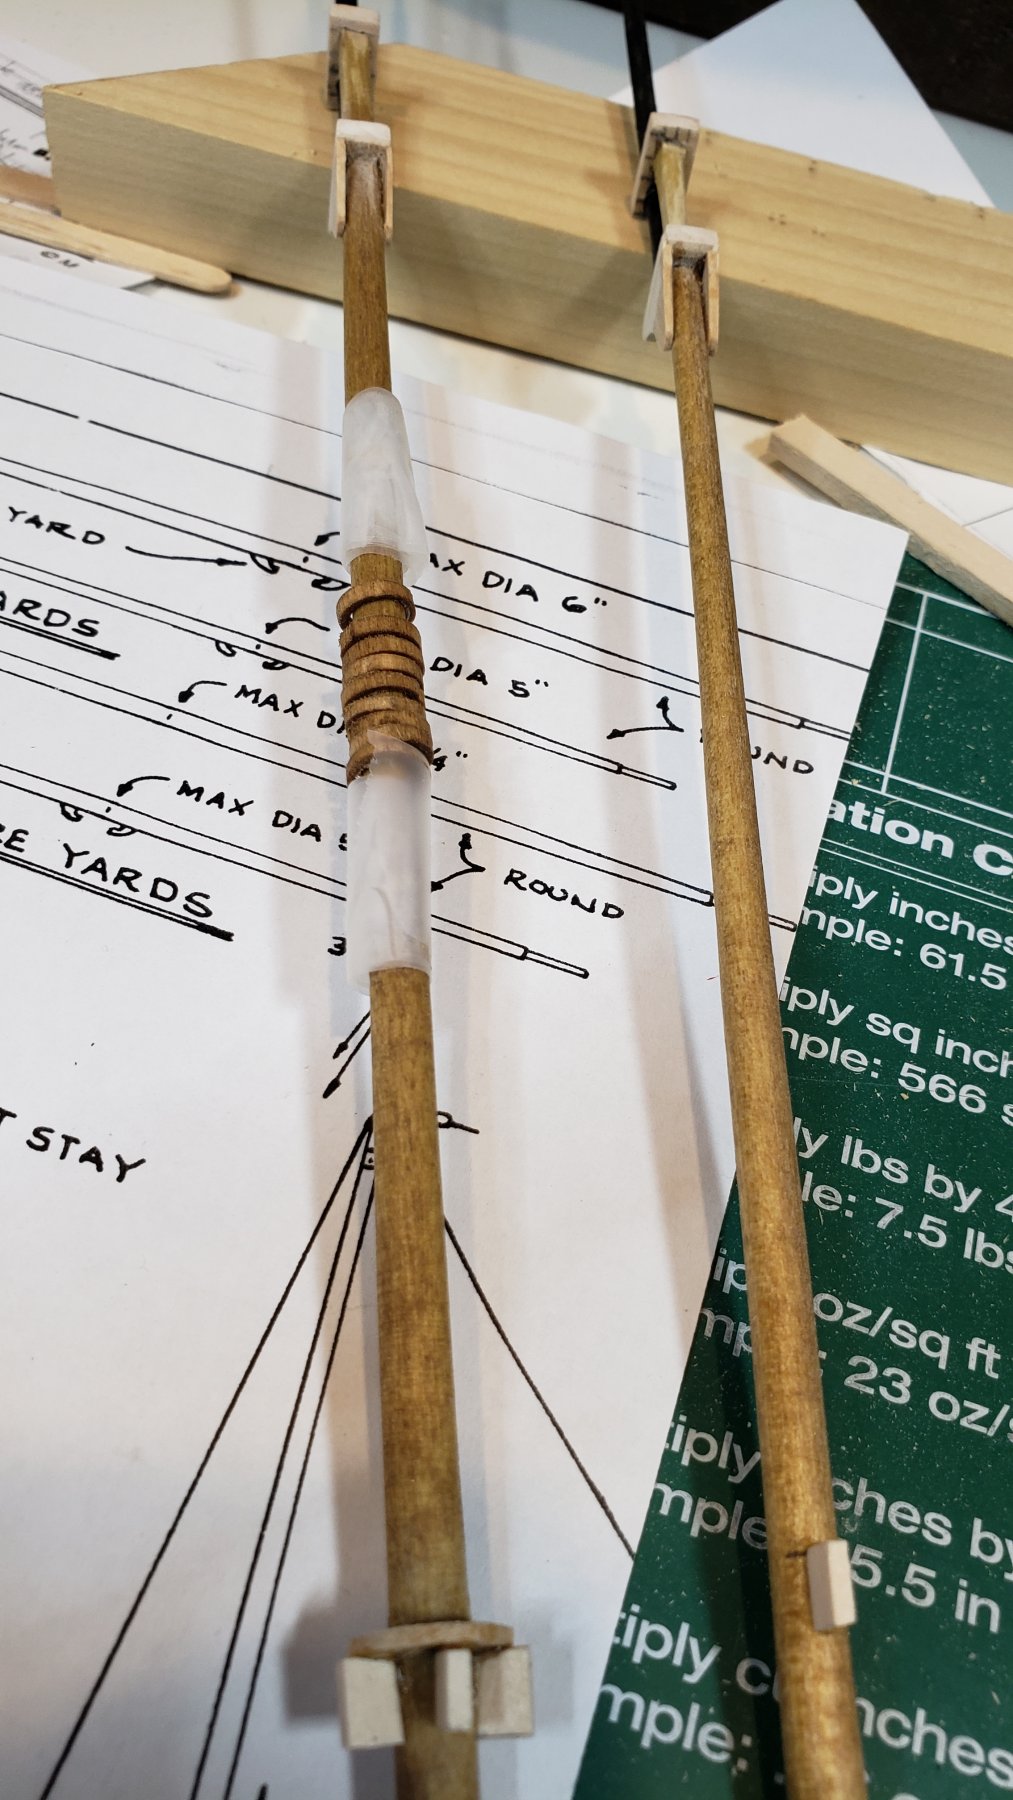
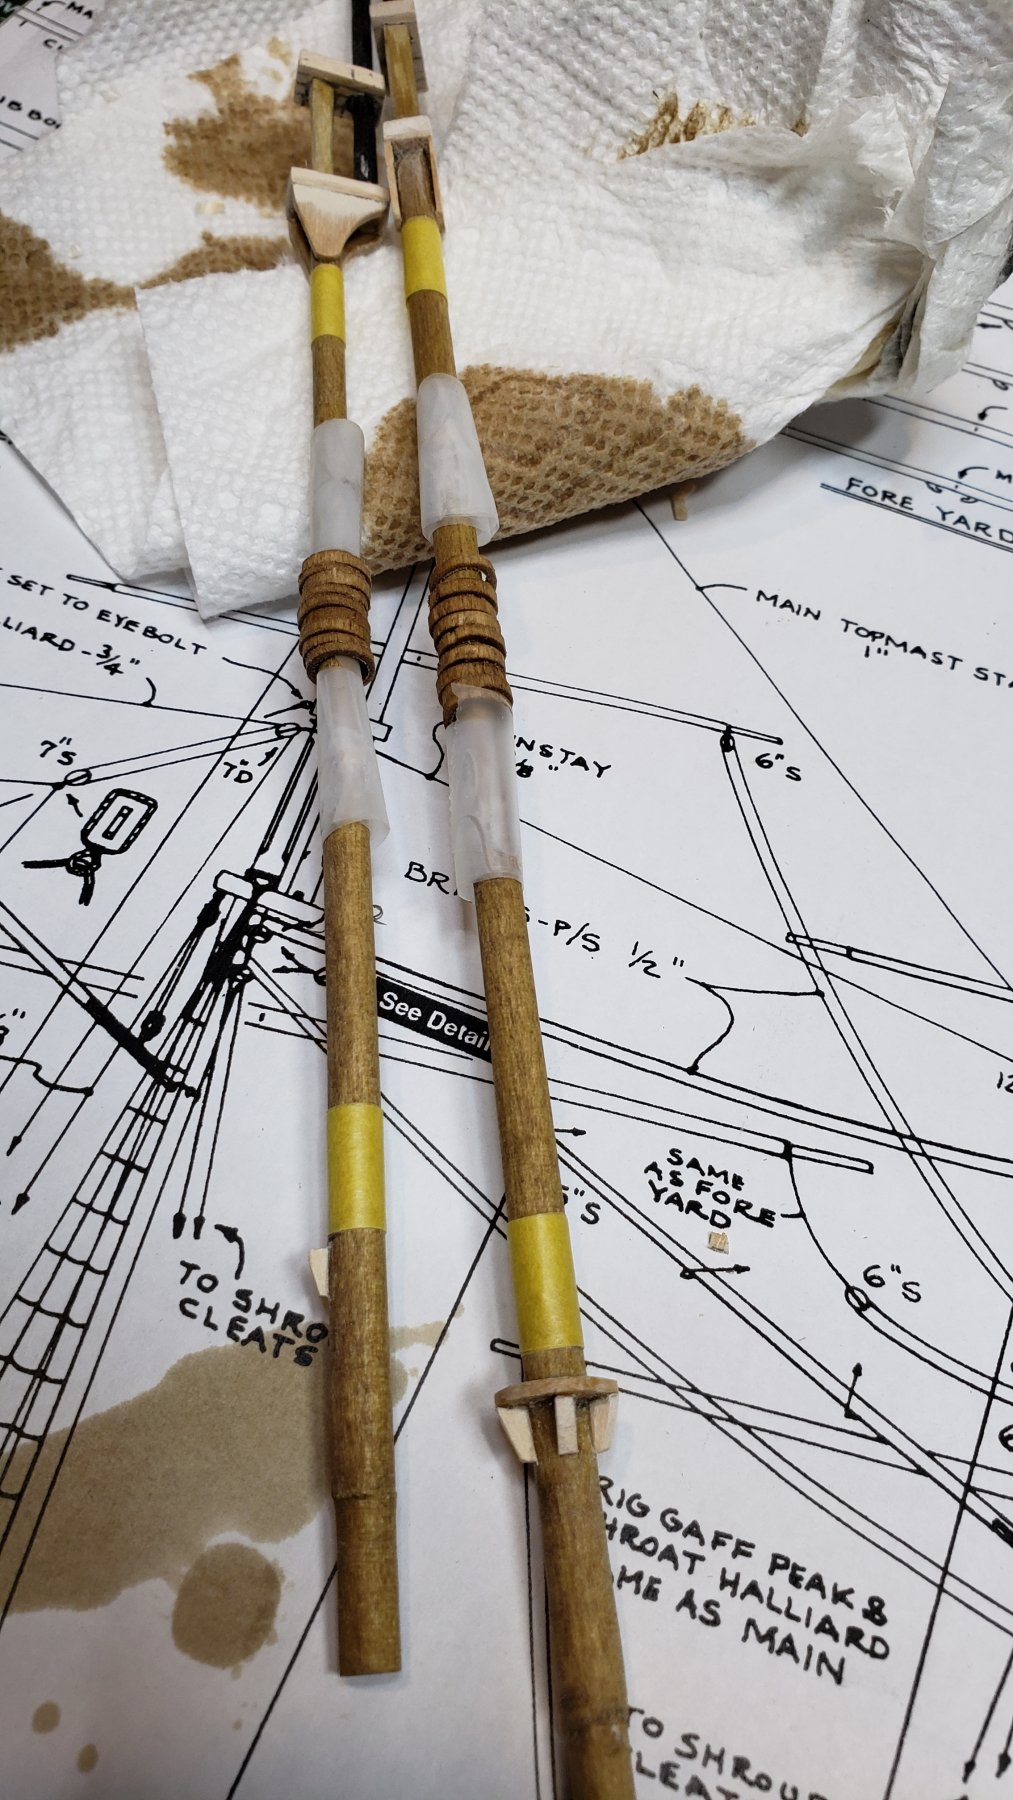
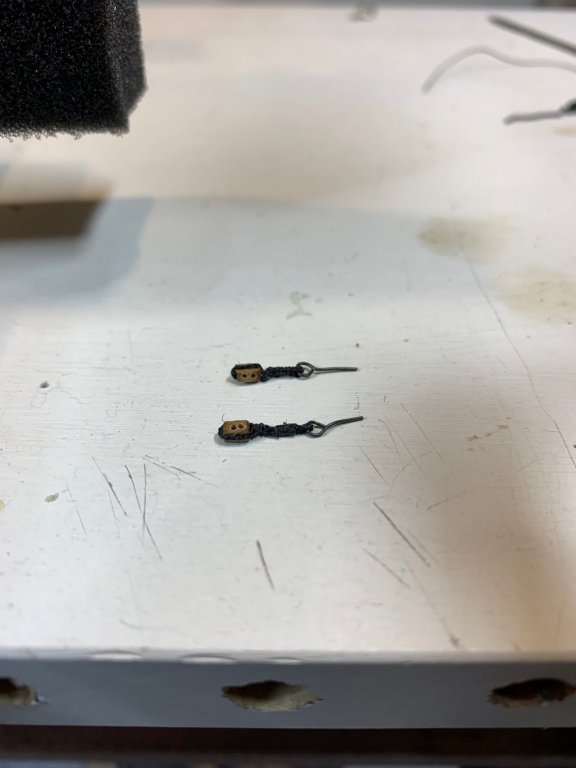
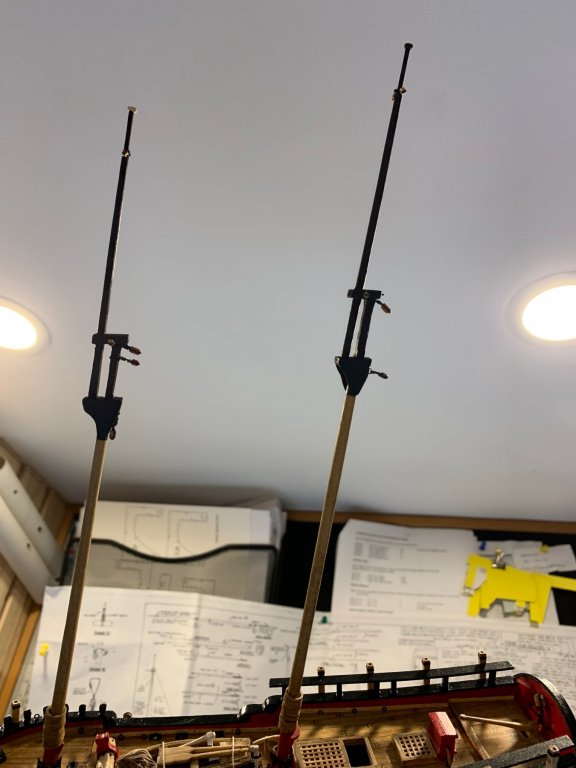
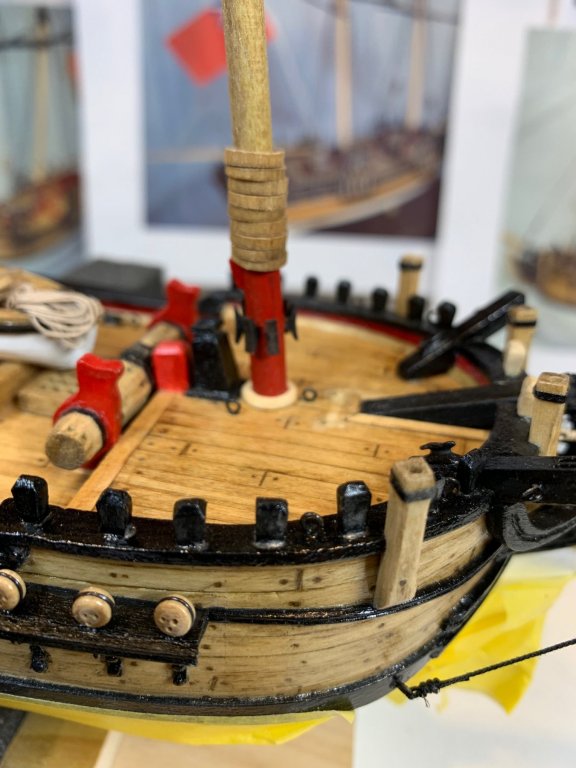
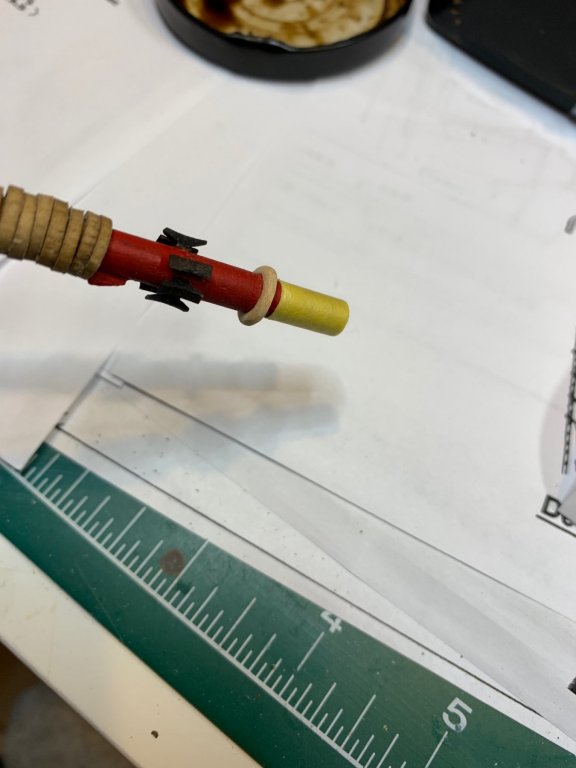
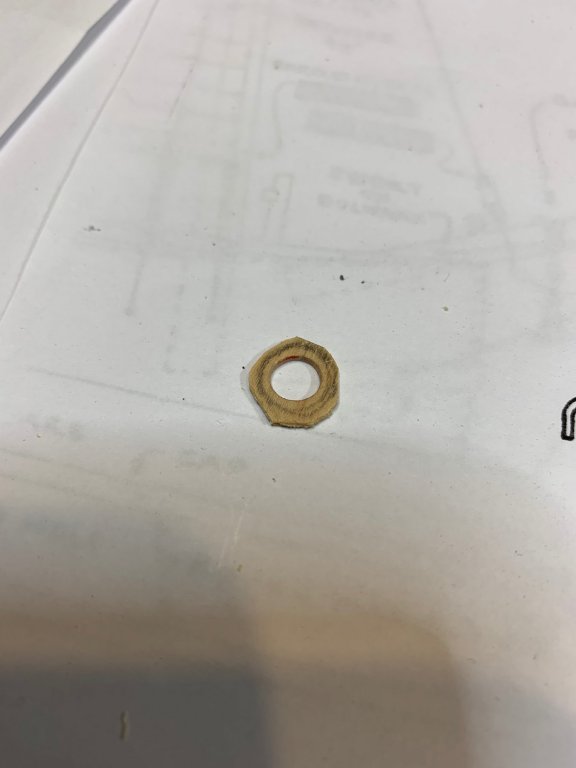
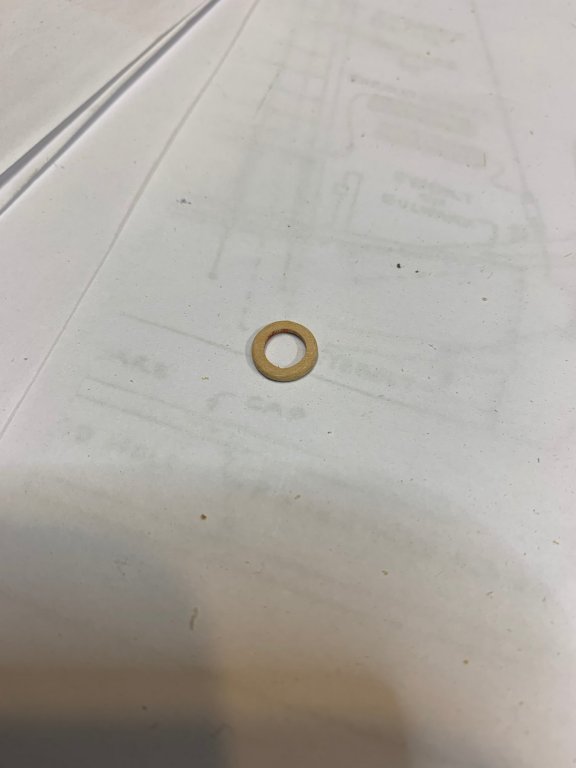
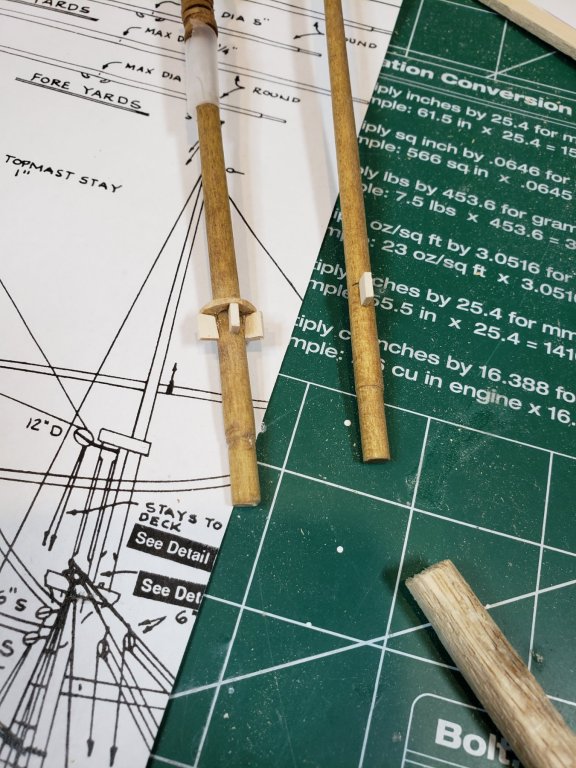
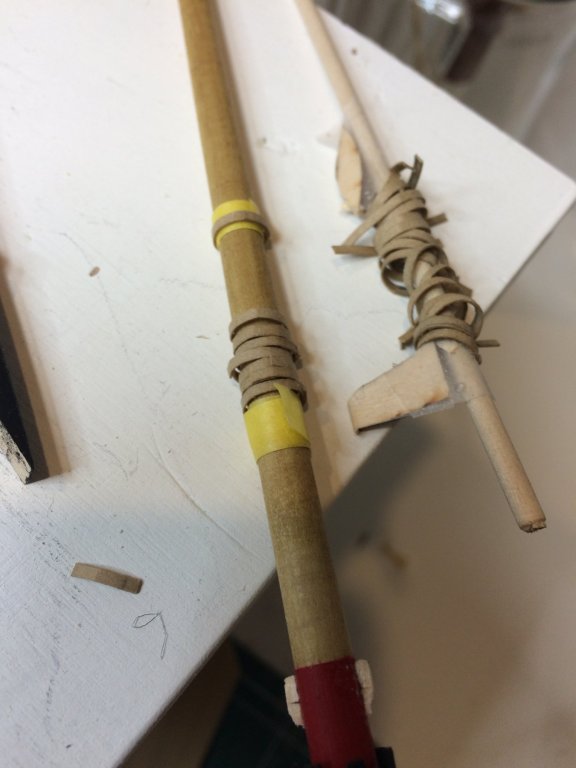
A bit of a work continued today by making a footropes on bowsprit and mast coats. A tan rope, 0.018 in size was used to make a ropes. Seizing was done in my favorite way: wrap the rope (for a seizing) on a needle which diameter is very close to double of the thickness of the rope i will be seizing. Needle was waxed a bit so the seizing can be removed easily. Then i drop of a glue is applied on seizing to freeze it so it can be removed from the needle. The seizing is cut to correct size that fits the requirements. Both ends of the future footropes are glued so pushing them thru the seizing opening will not be a challenge. After that, few knots were made with a smaller diameter rope and footropes are mounted on the ship. The footropes should be a bit loose and not tightly mounted. Then i made a mast coats (or wedges as described in instruction). Practicum suggested to use a wire but i decided to make it out of the wood. Scrap piece of wood, about 1.5mm think was a perfect candidate. The center hole matching the diameter of the mast where coats will be located. A little bit of cutting, sanding, more sanding and the correct shape was achieved. Testing on a foremast... And one more was made for main mast... I decided to keep them in a wood color, so the layer of golden oak was applied. So the masts are almost ready for mounting; ran out of black color so still waiting for an order to arrive... Once in, another layer of flat black will be applied to the top of the masts and they will be ready for mounting.. Now the ship starts to get correct size and shape so i have to be more careful and not to break parts that are sticking out and up... Happy modeling.


- 360 replies
-
- 4
-
-
- sultana
- model shipways
- (and 1 more)
-
Thanks Lou, that was very helpful; i will try to do it again, it might be successful, who knows. I also find few posts by Doris on another forums and some youtube videos... Cheers
- 360 replies
-
- 1
-
-
- sultana
- model shipways
- (and 1 more)
-
Thanks, I was unable to do anything with sculpey scrolls after baking process, except to sand it... I might need to do a bit more research on this part.. I will check some postings on forums. Cheers.
-
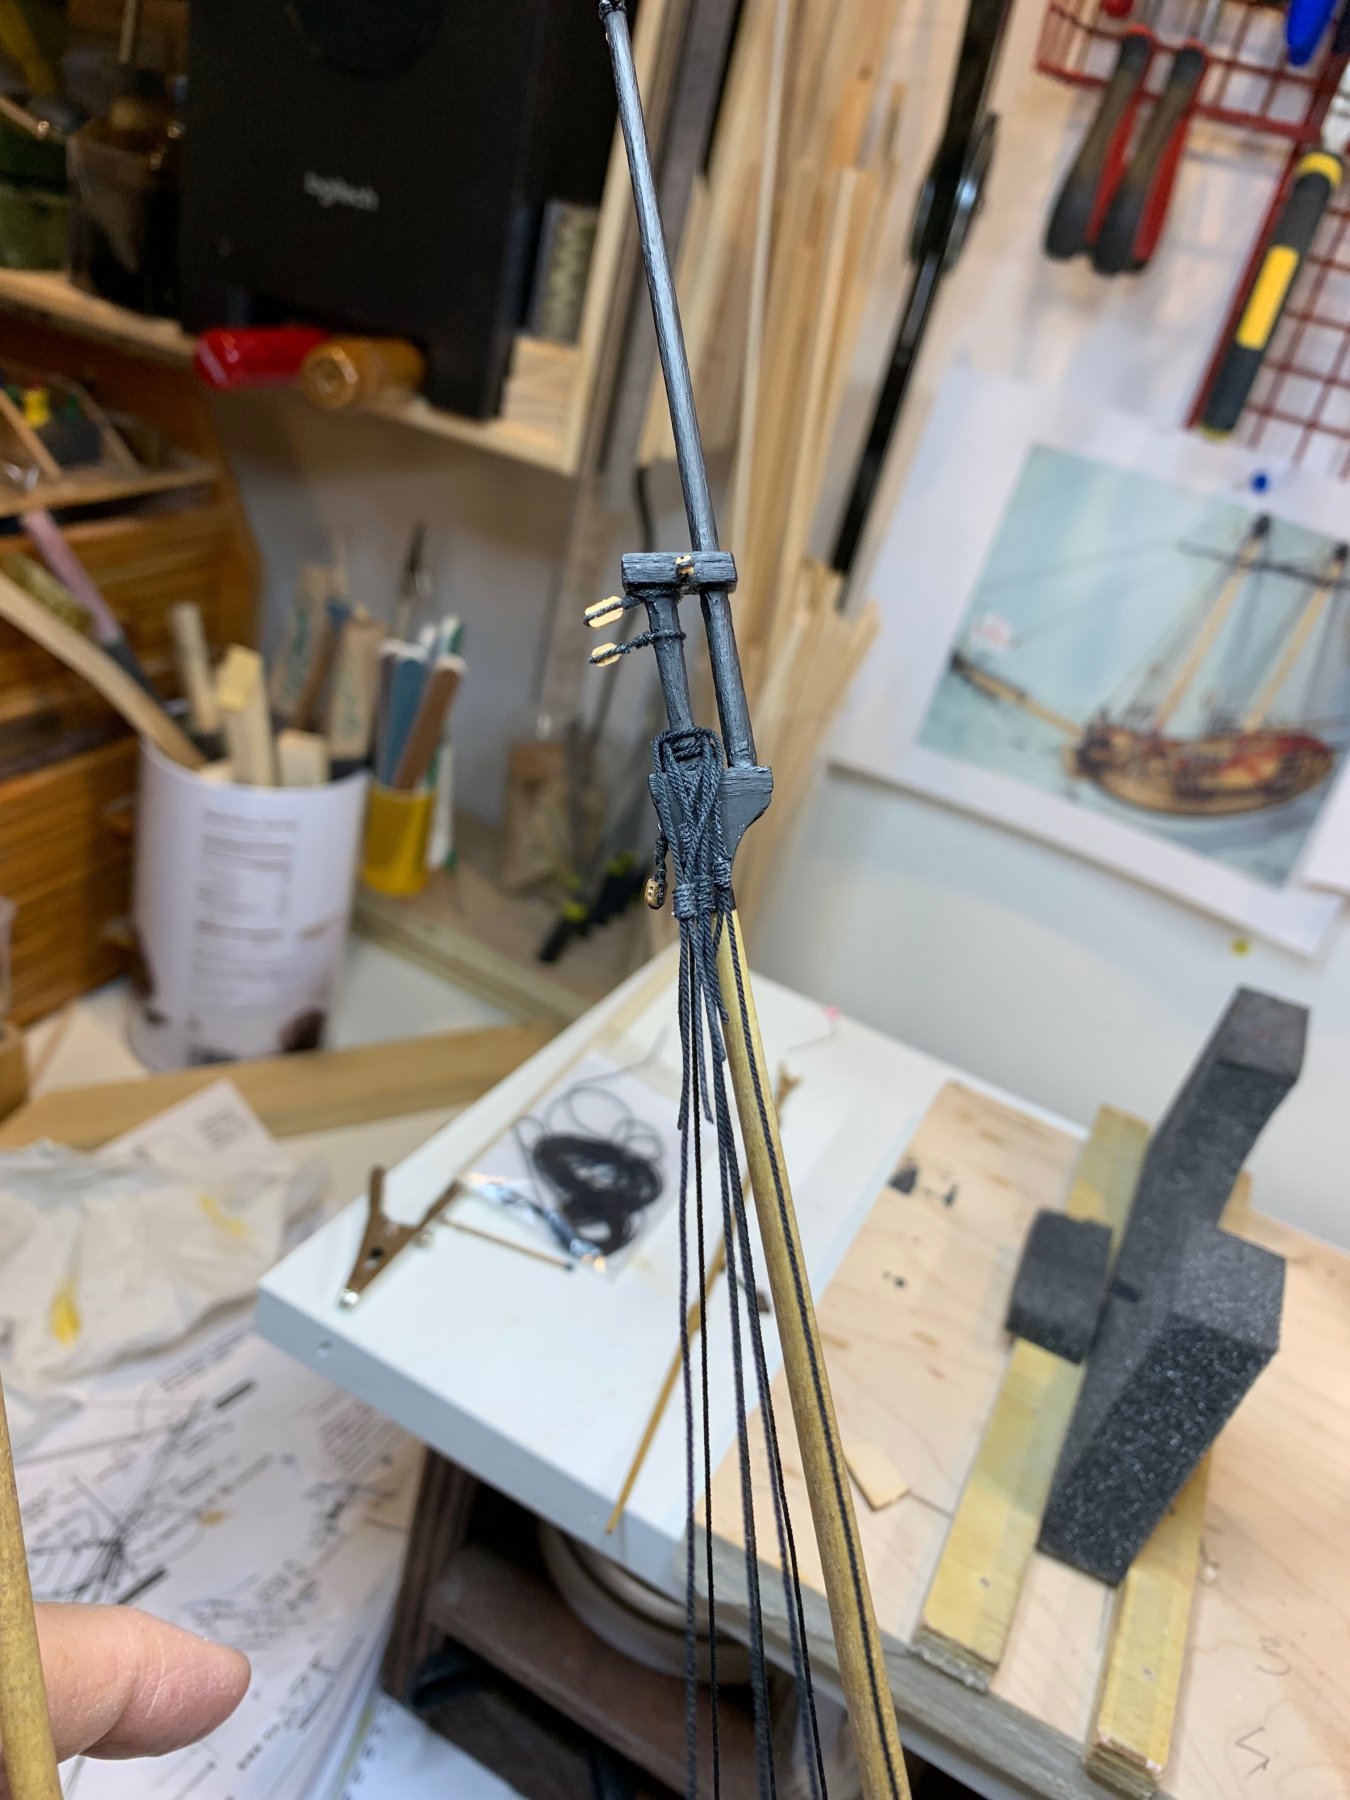
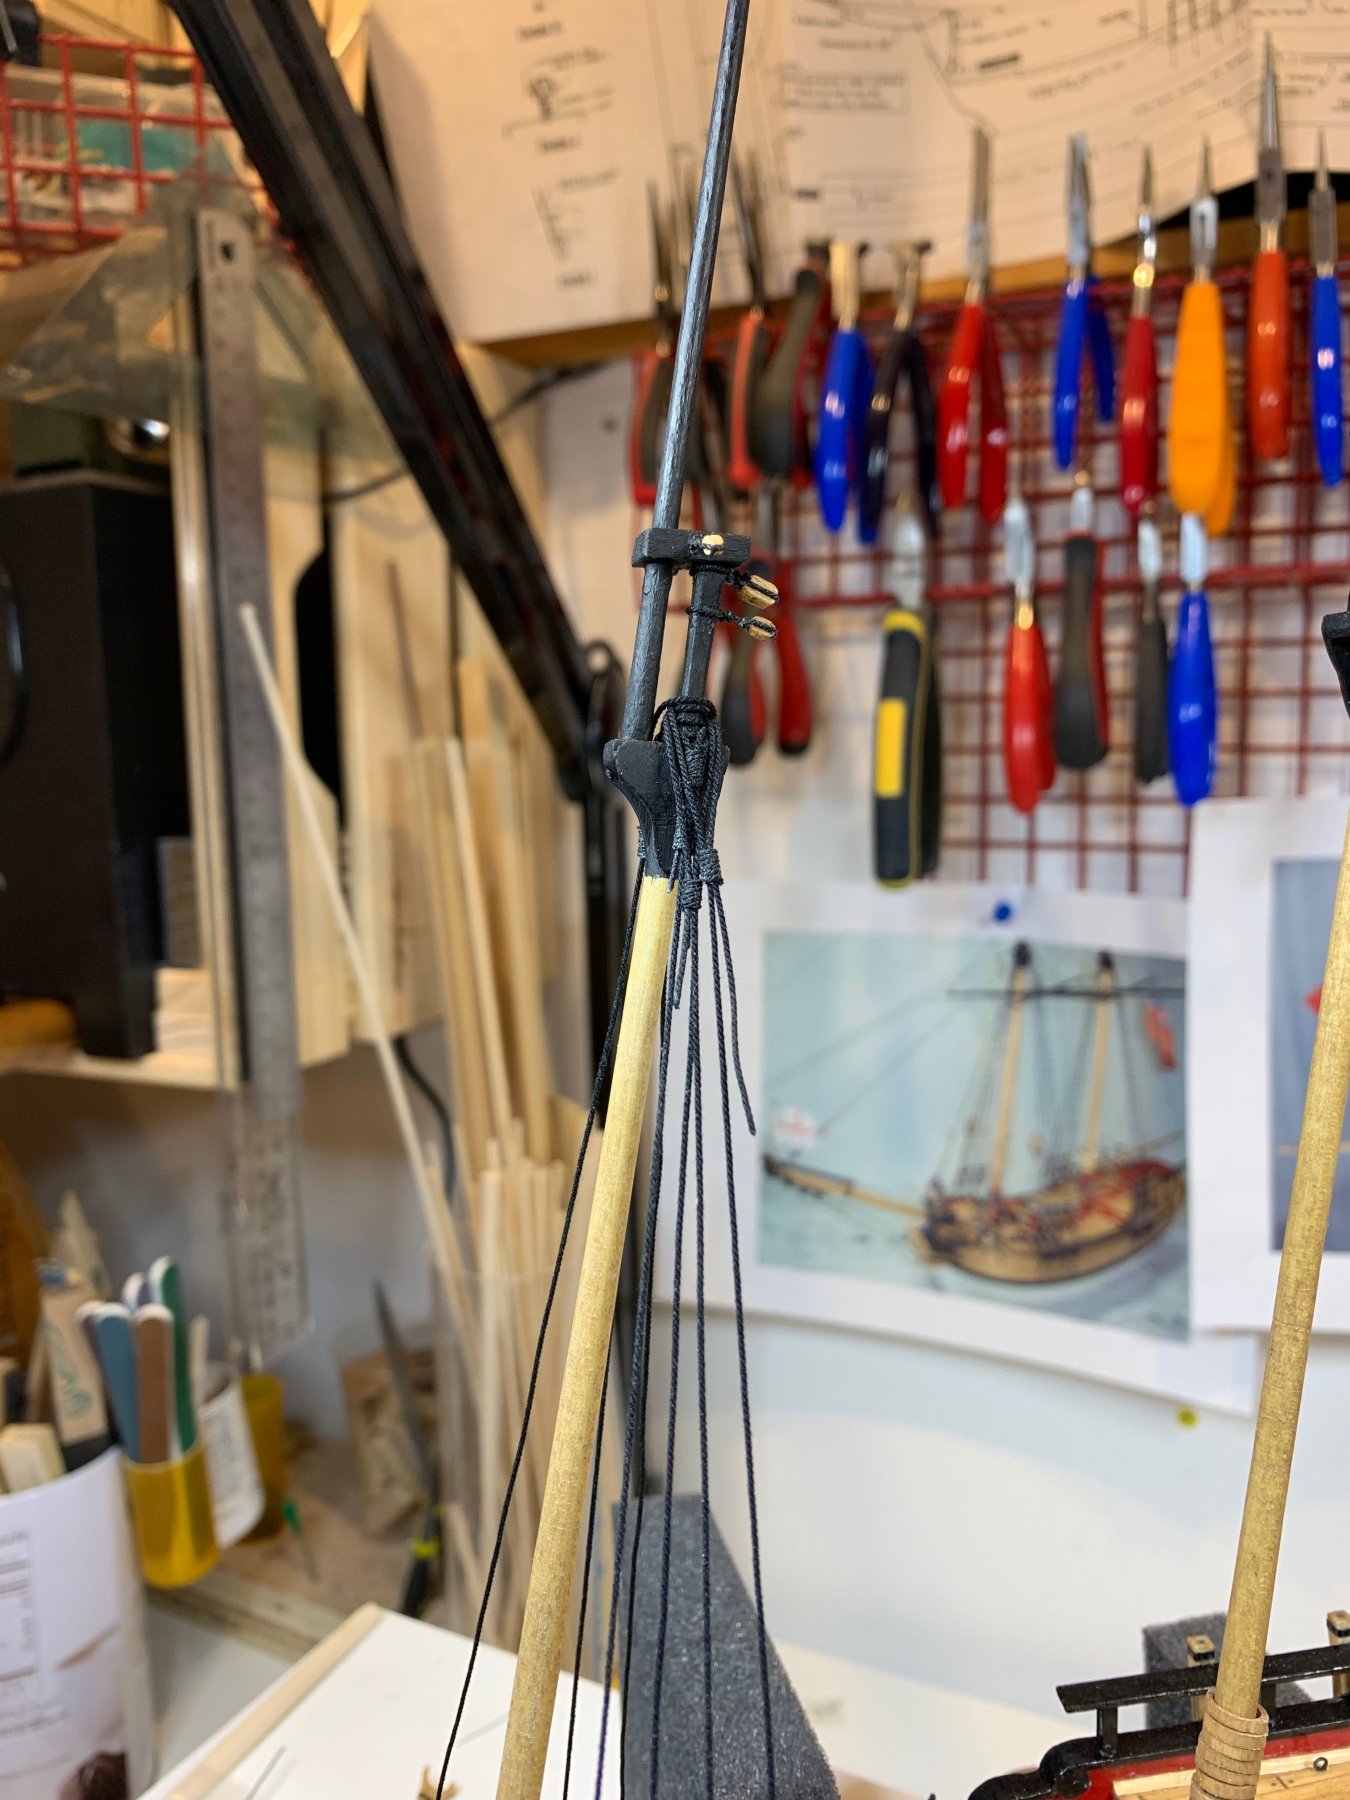
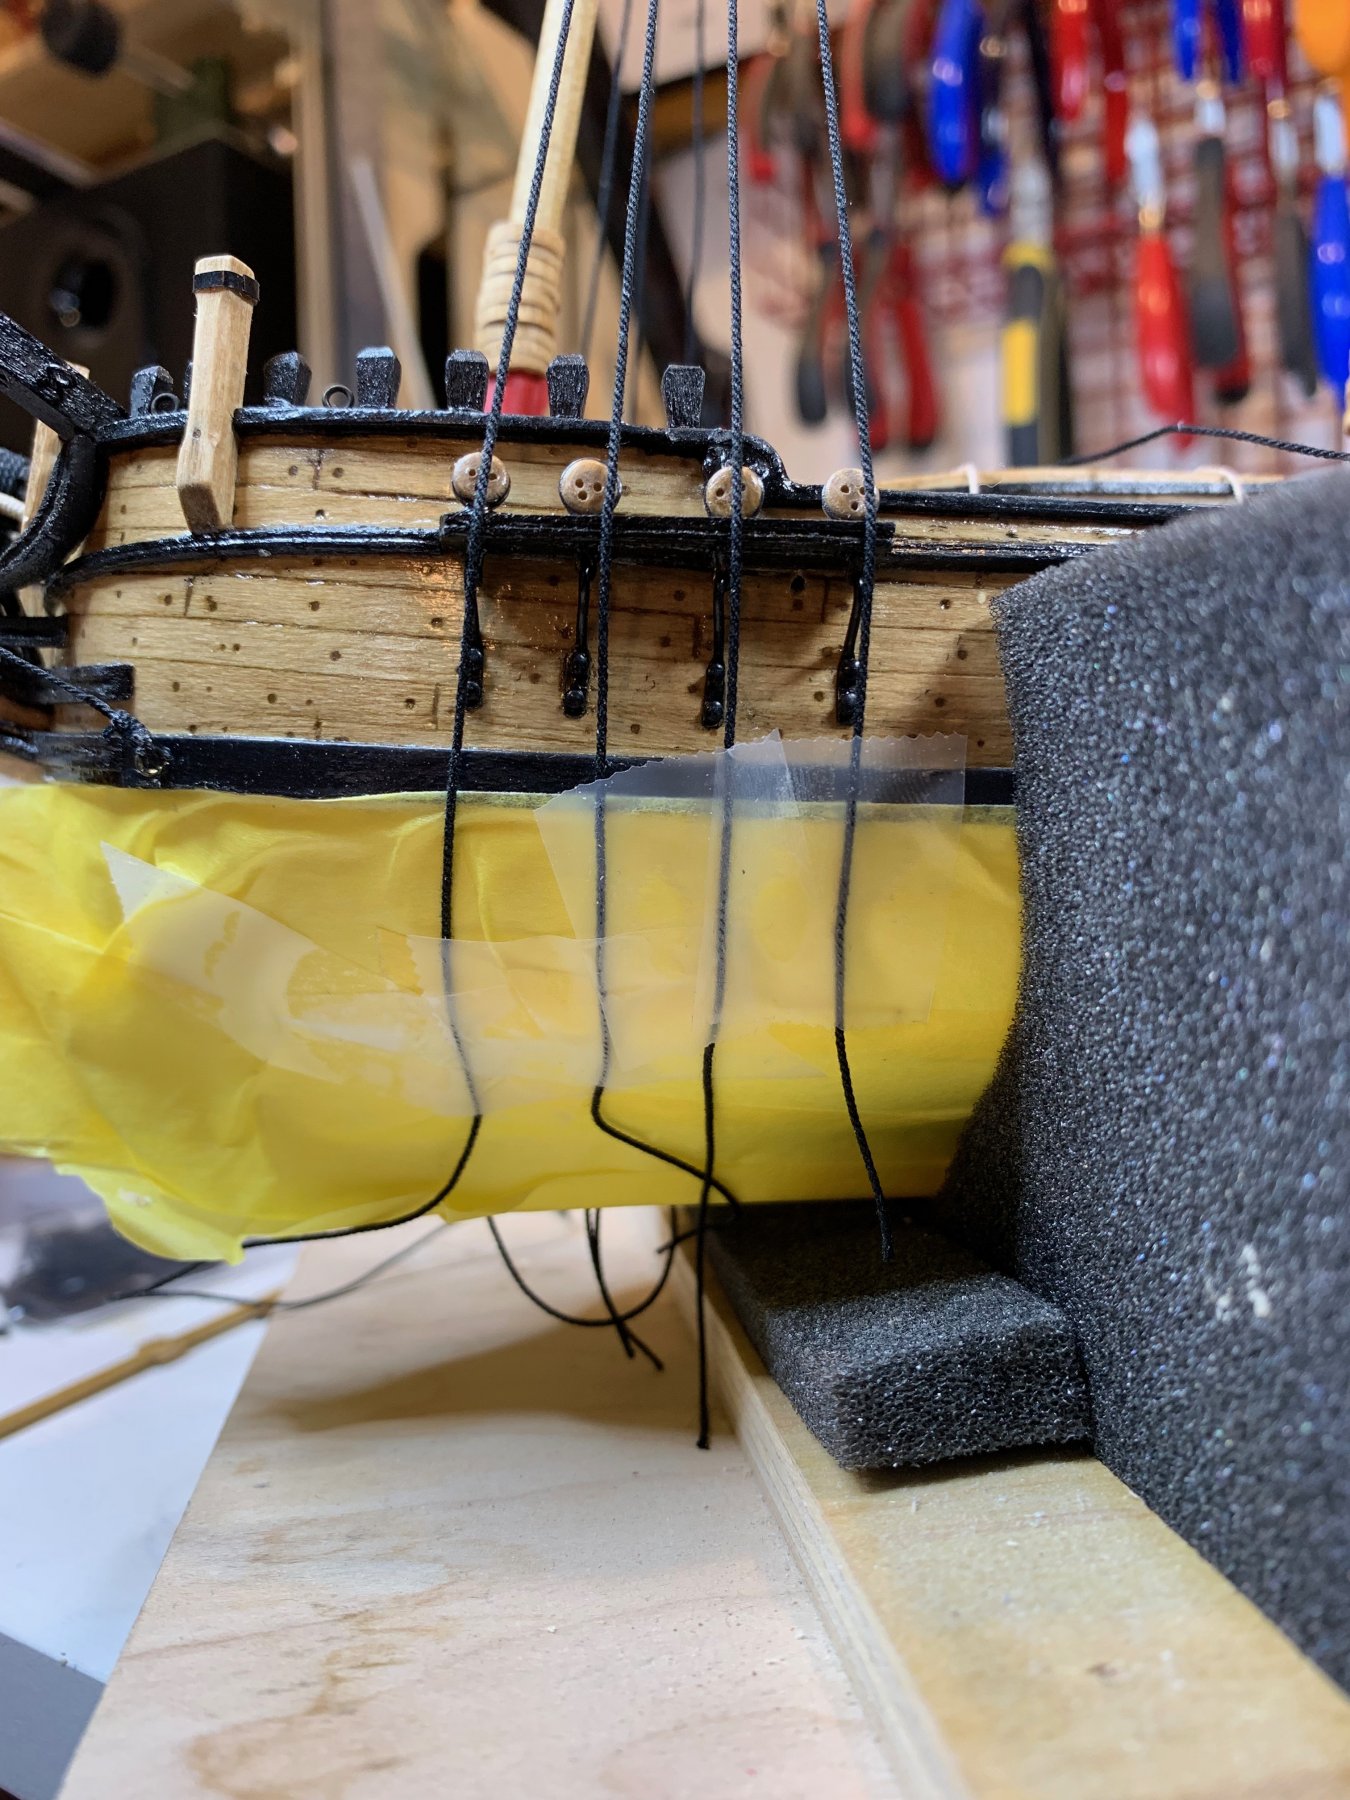
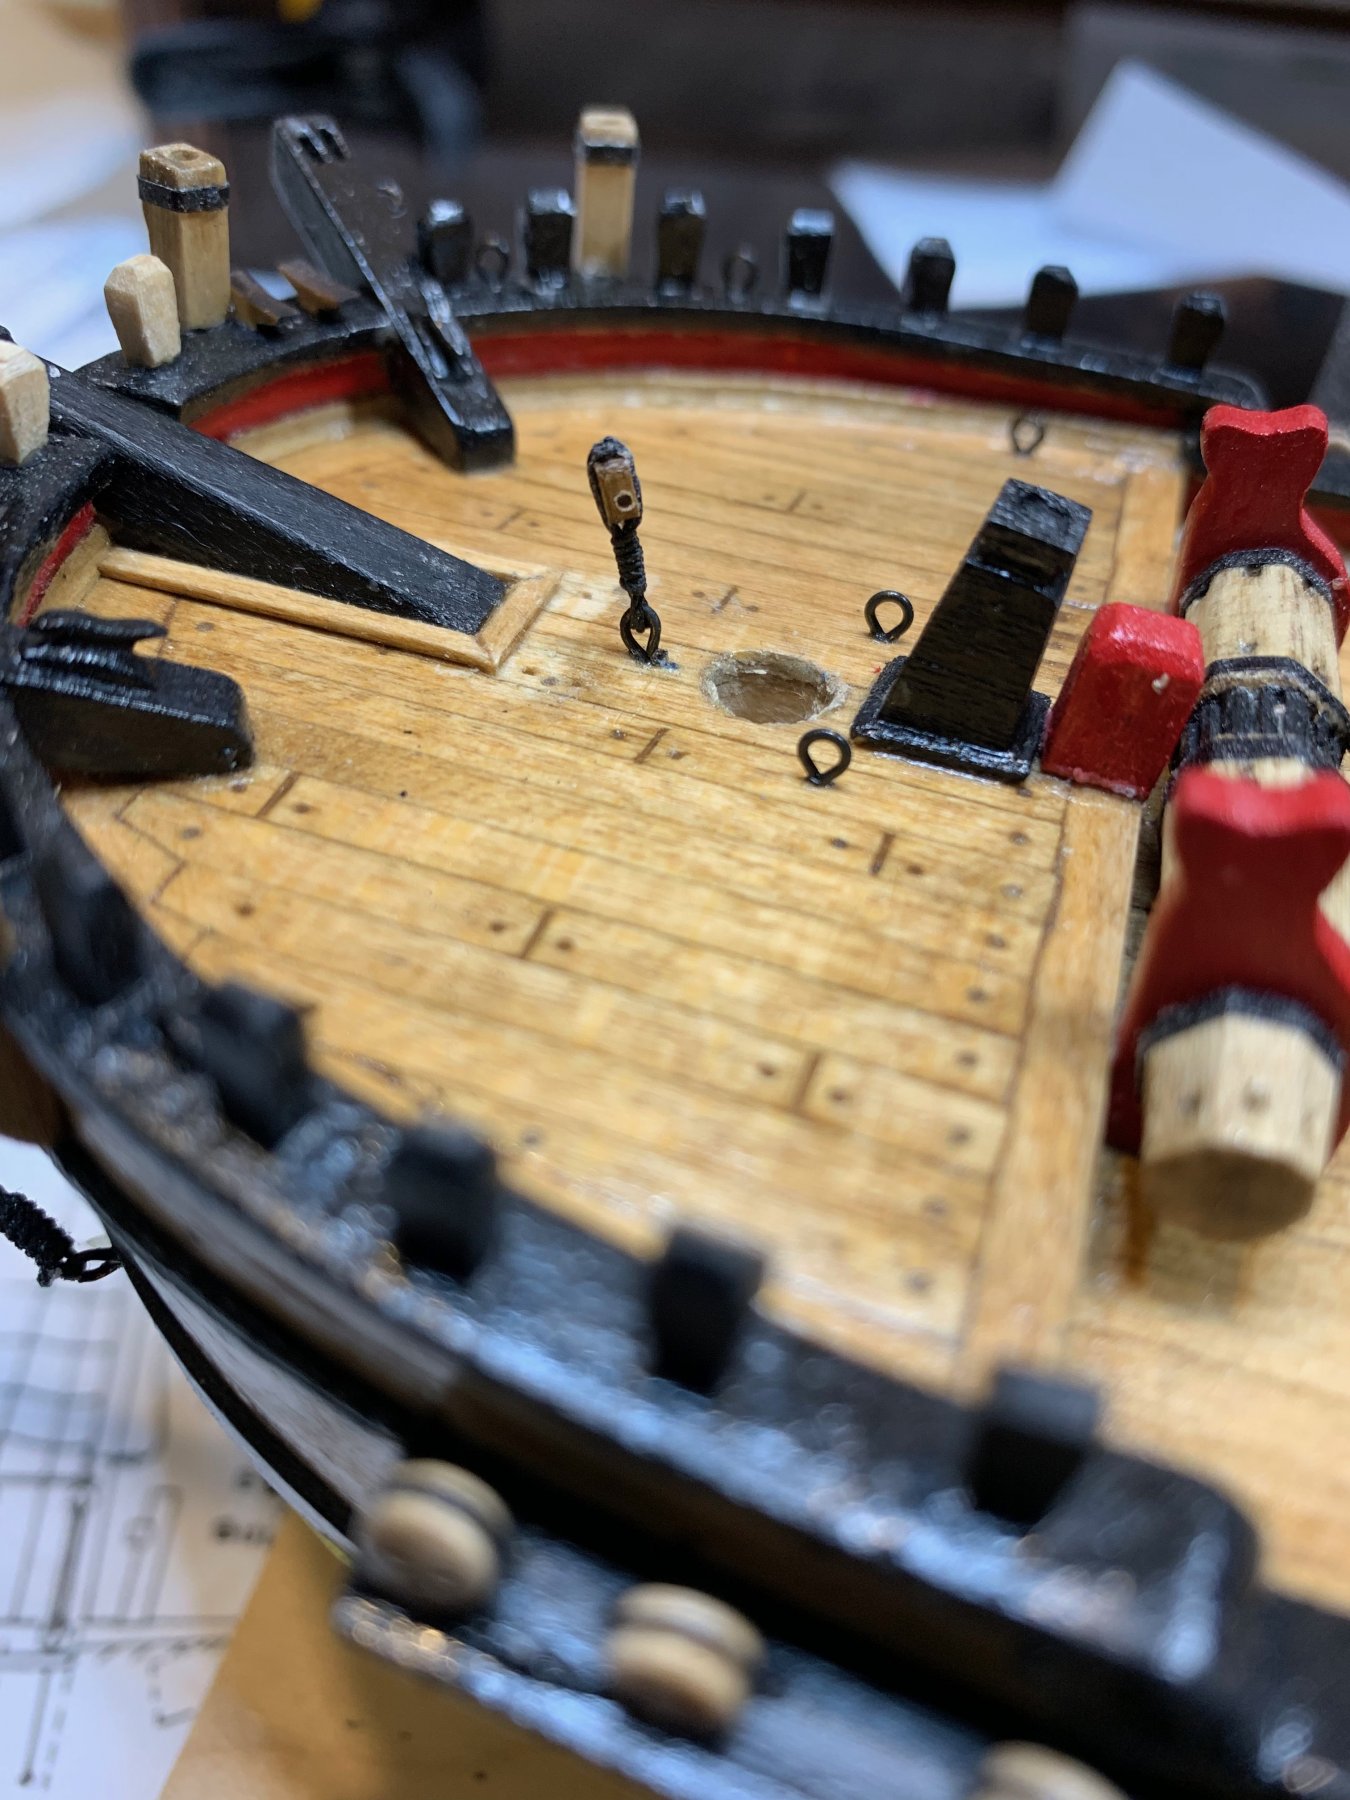
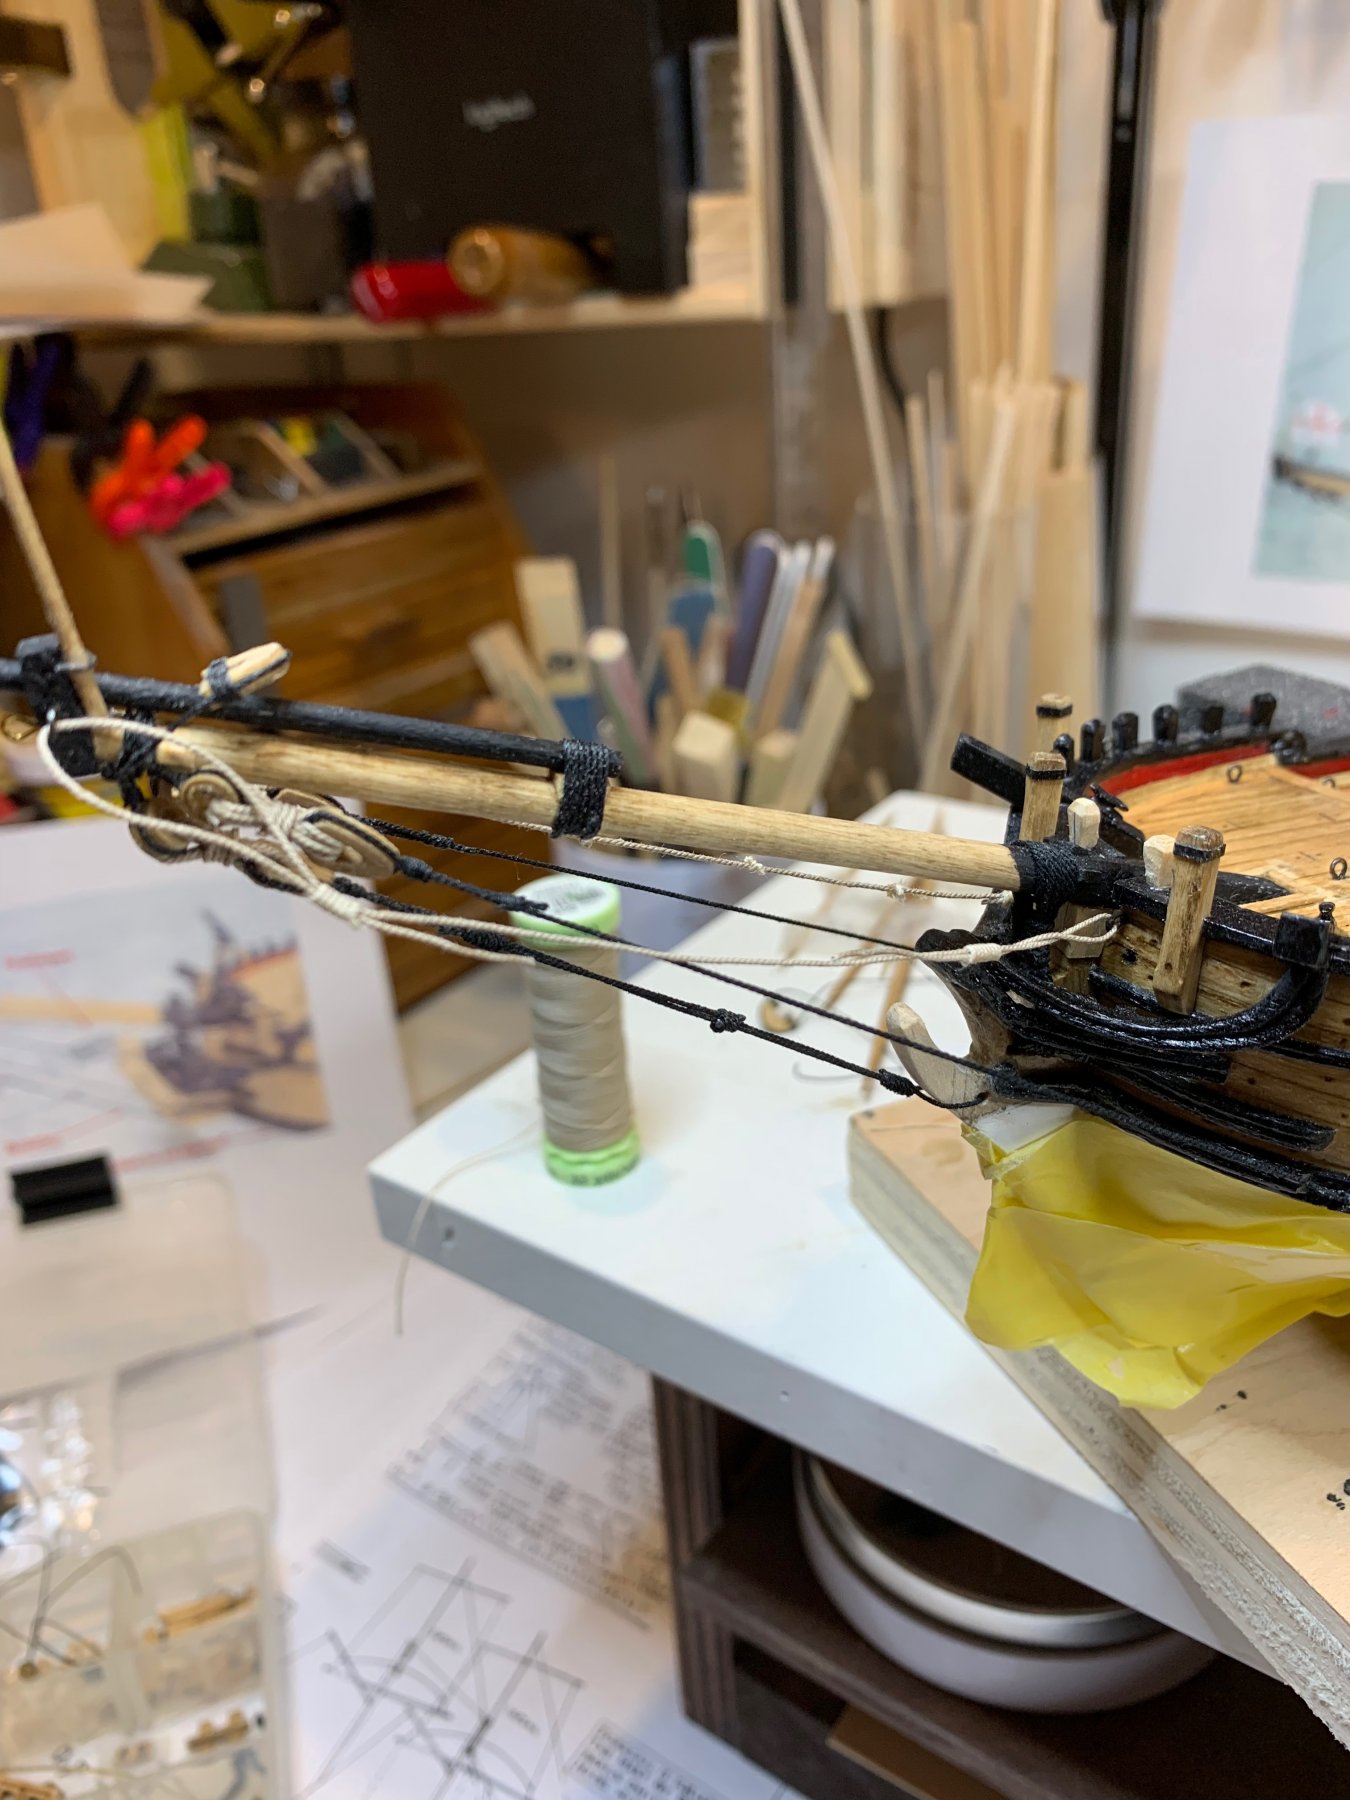
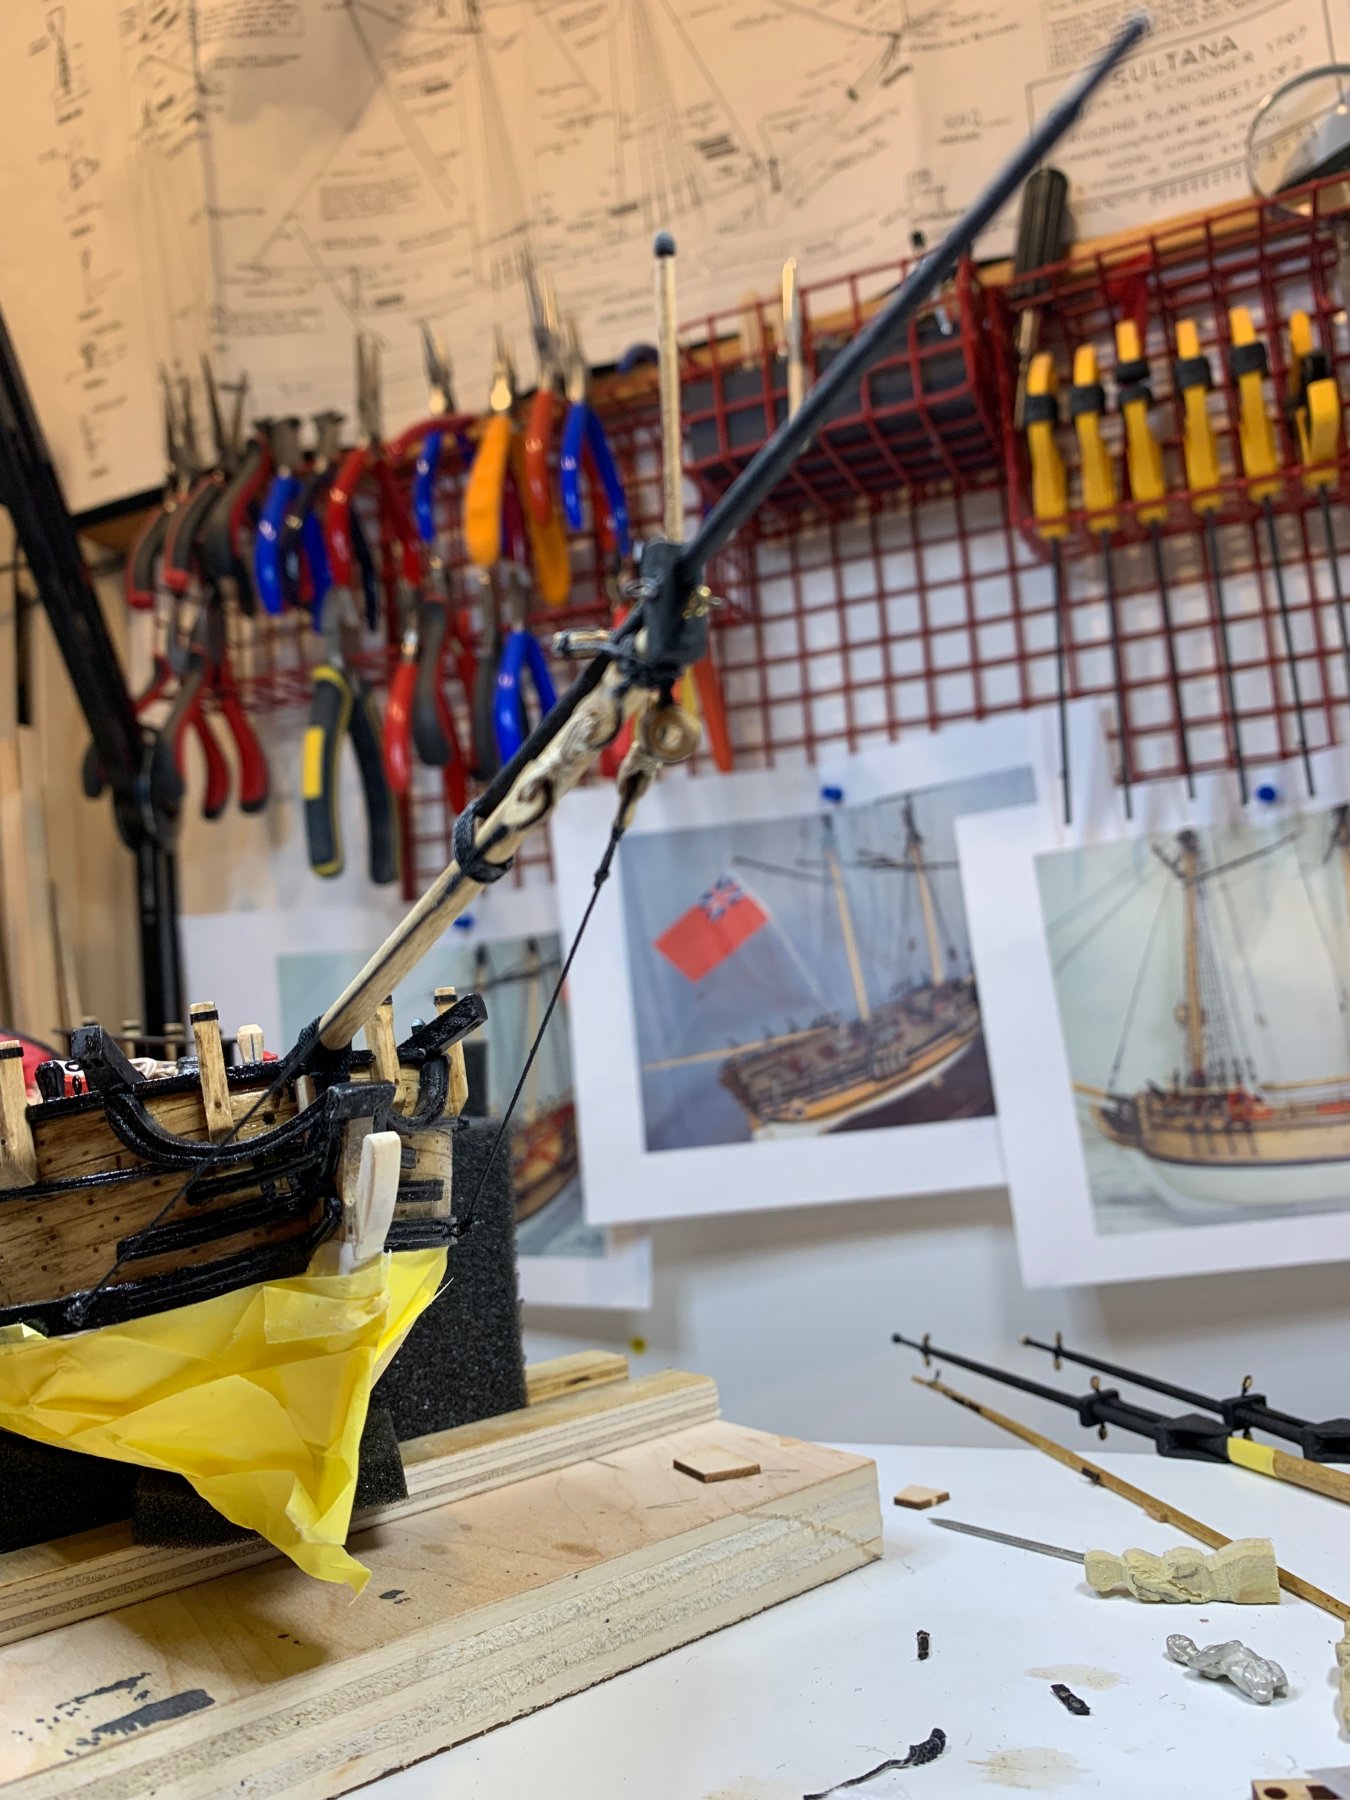
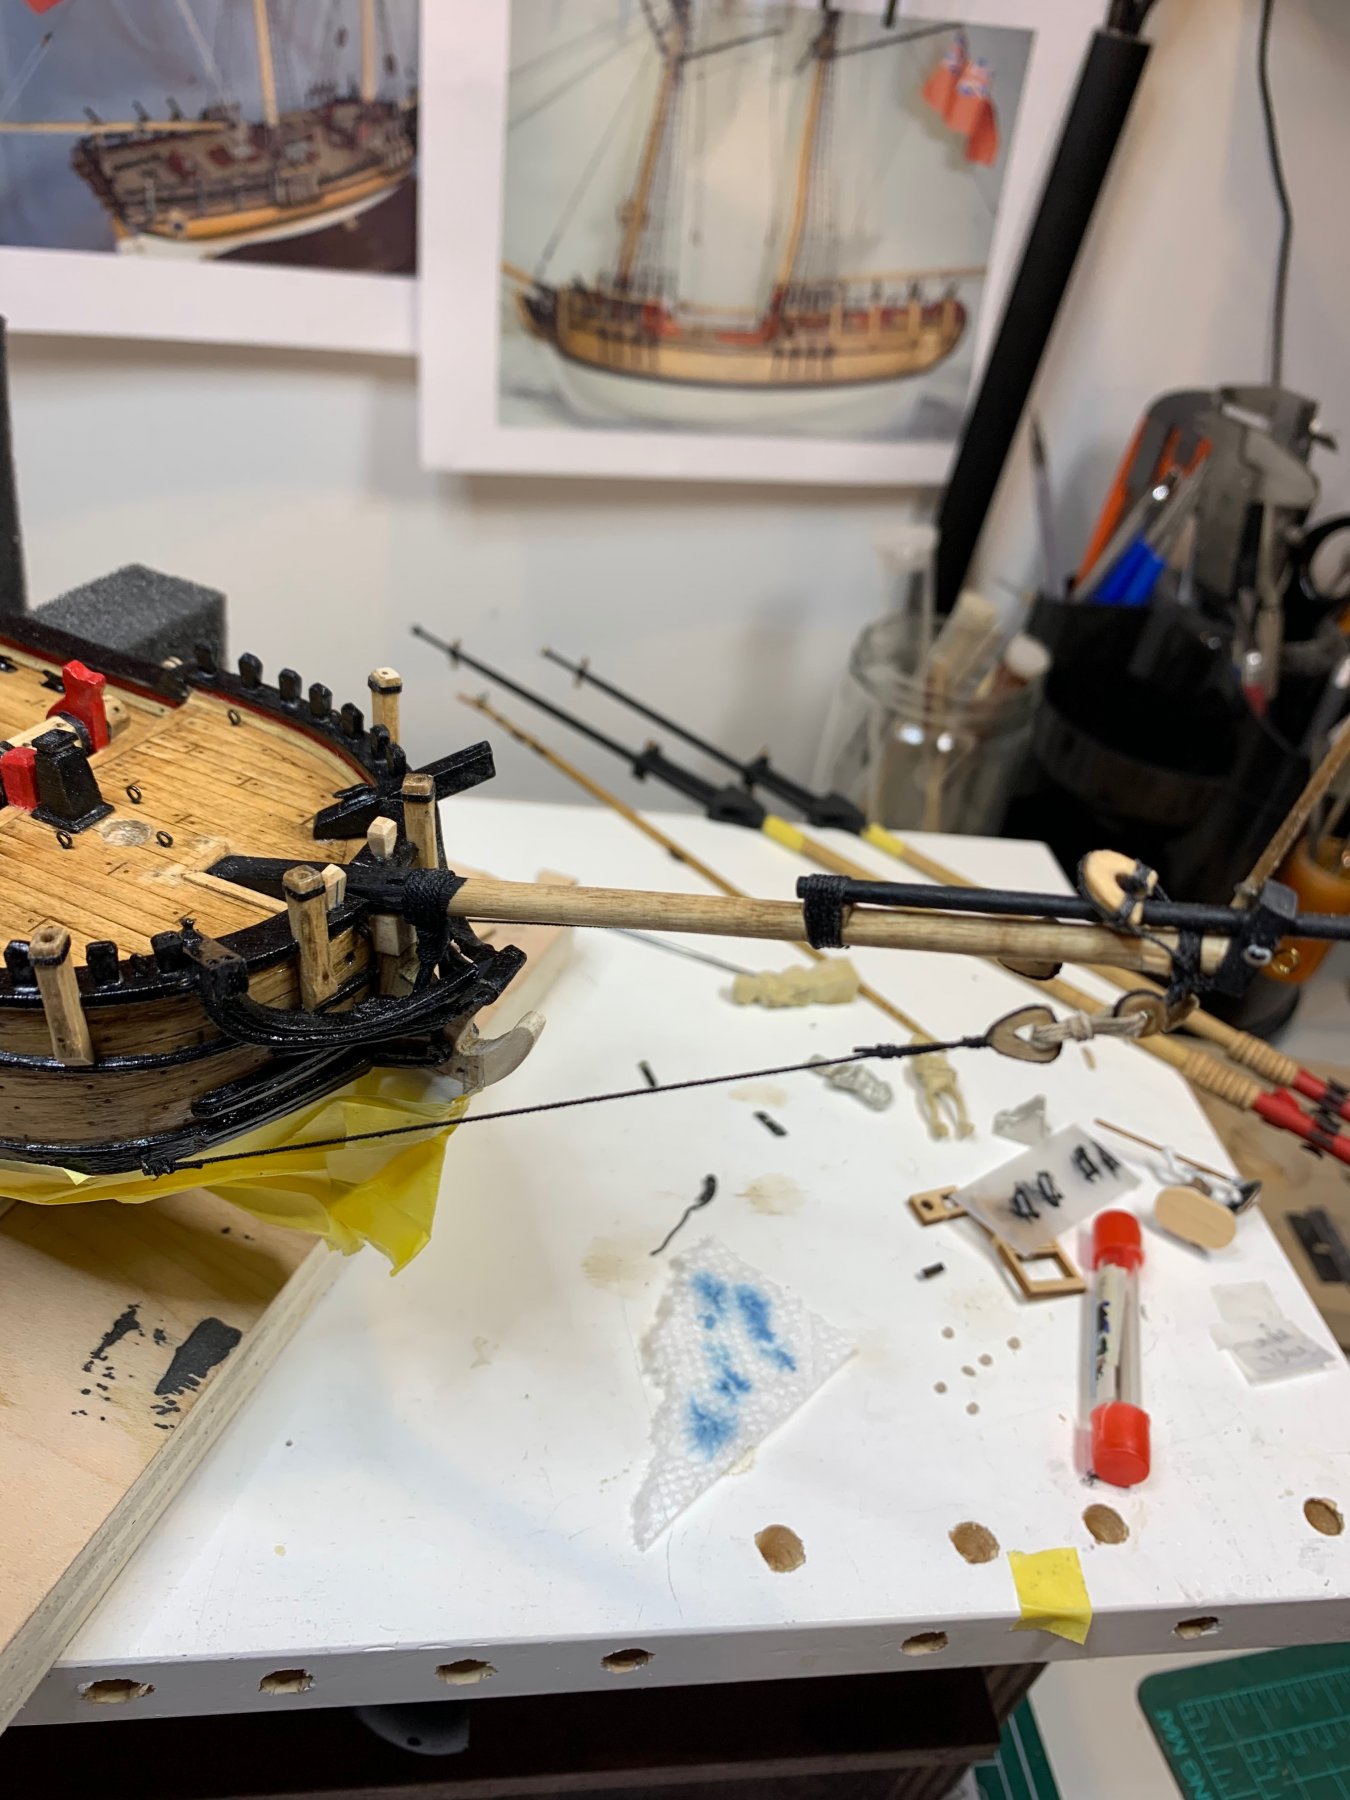
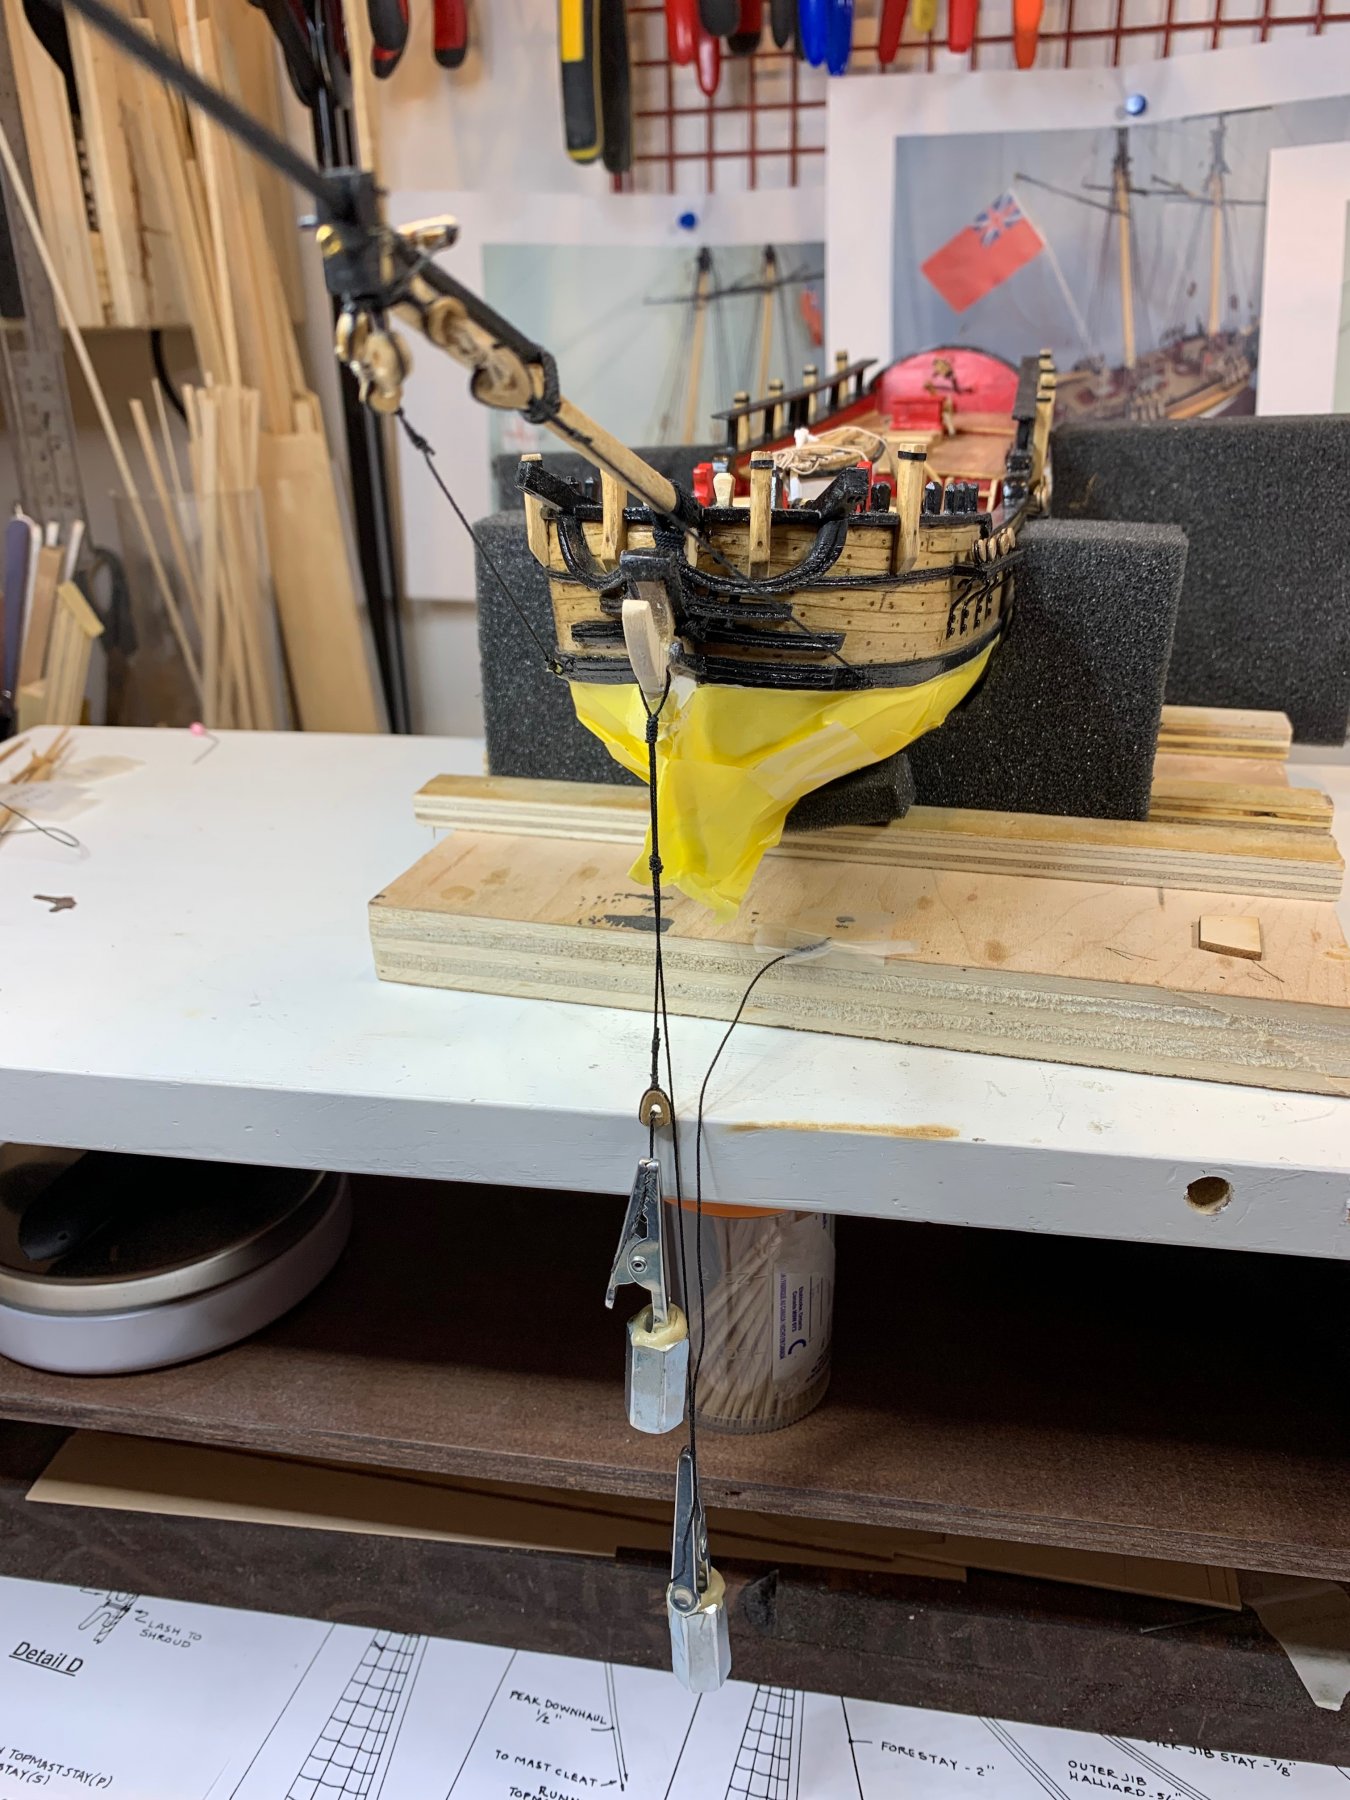
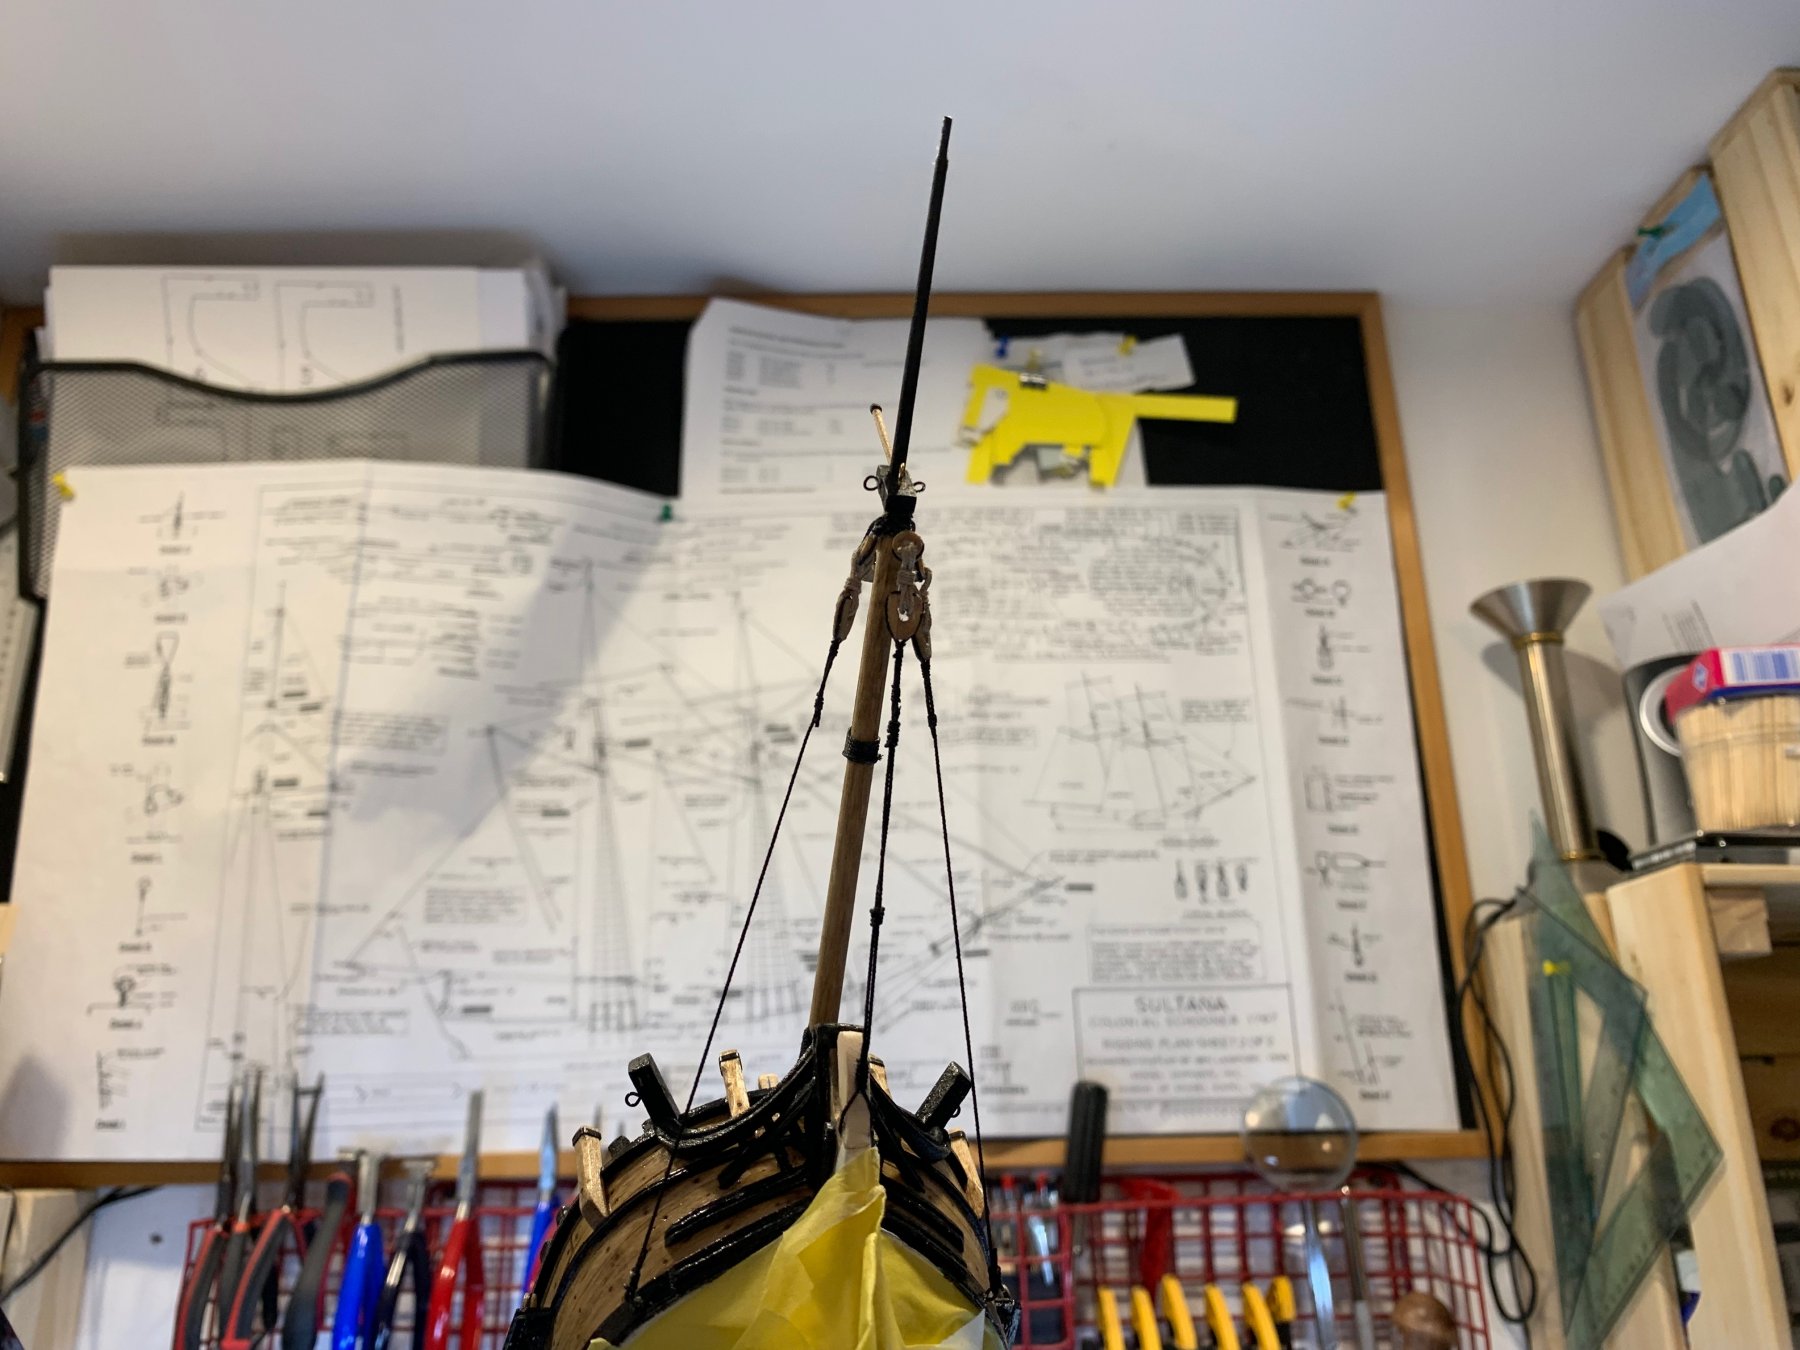
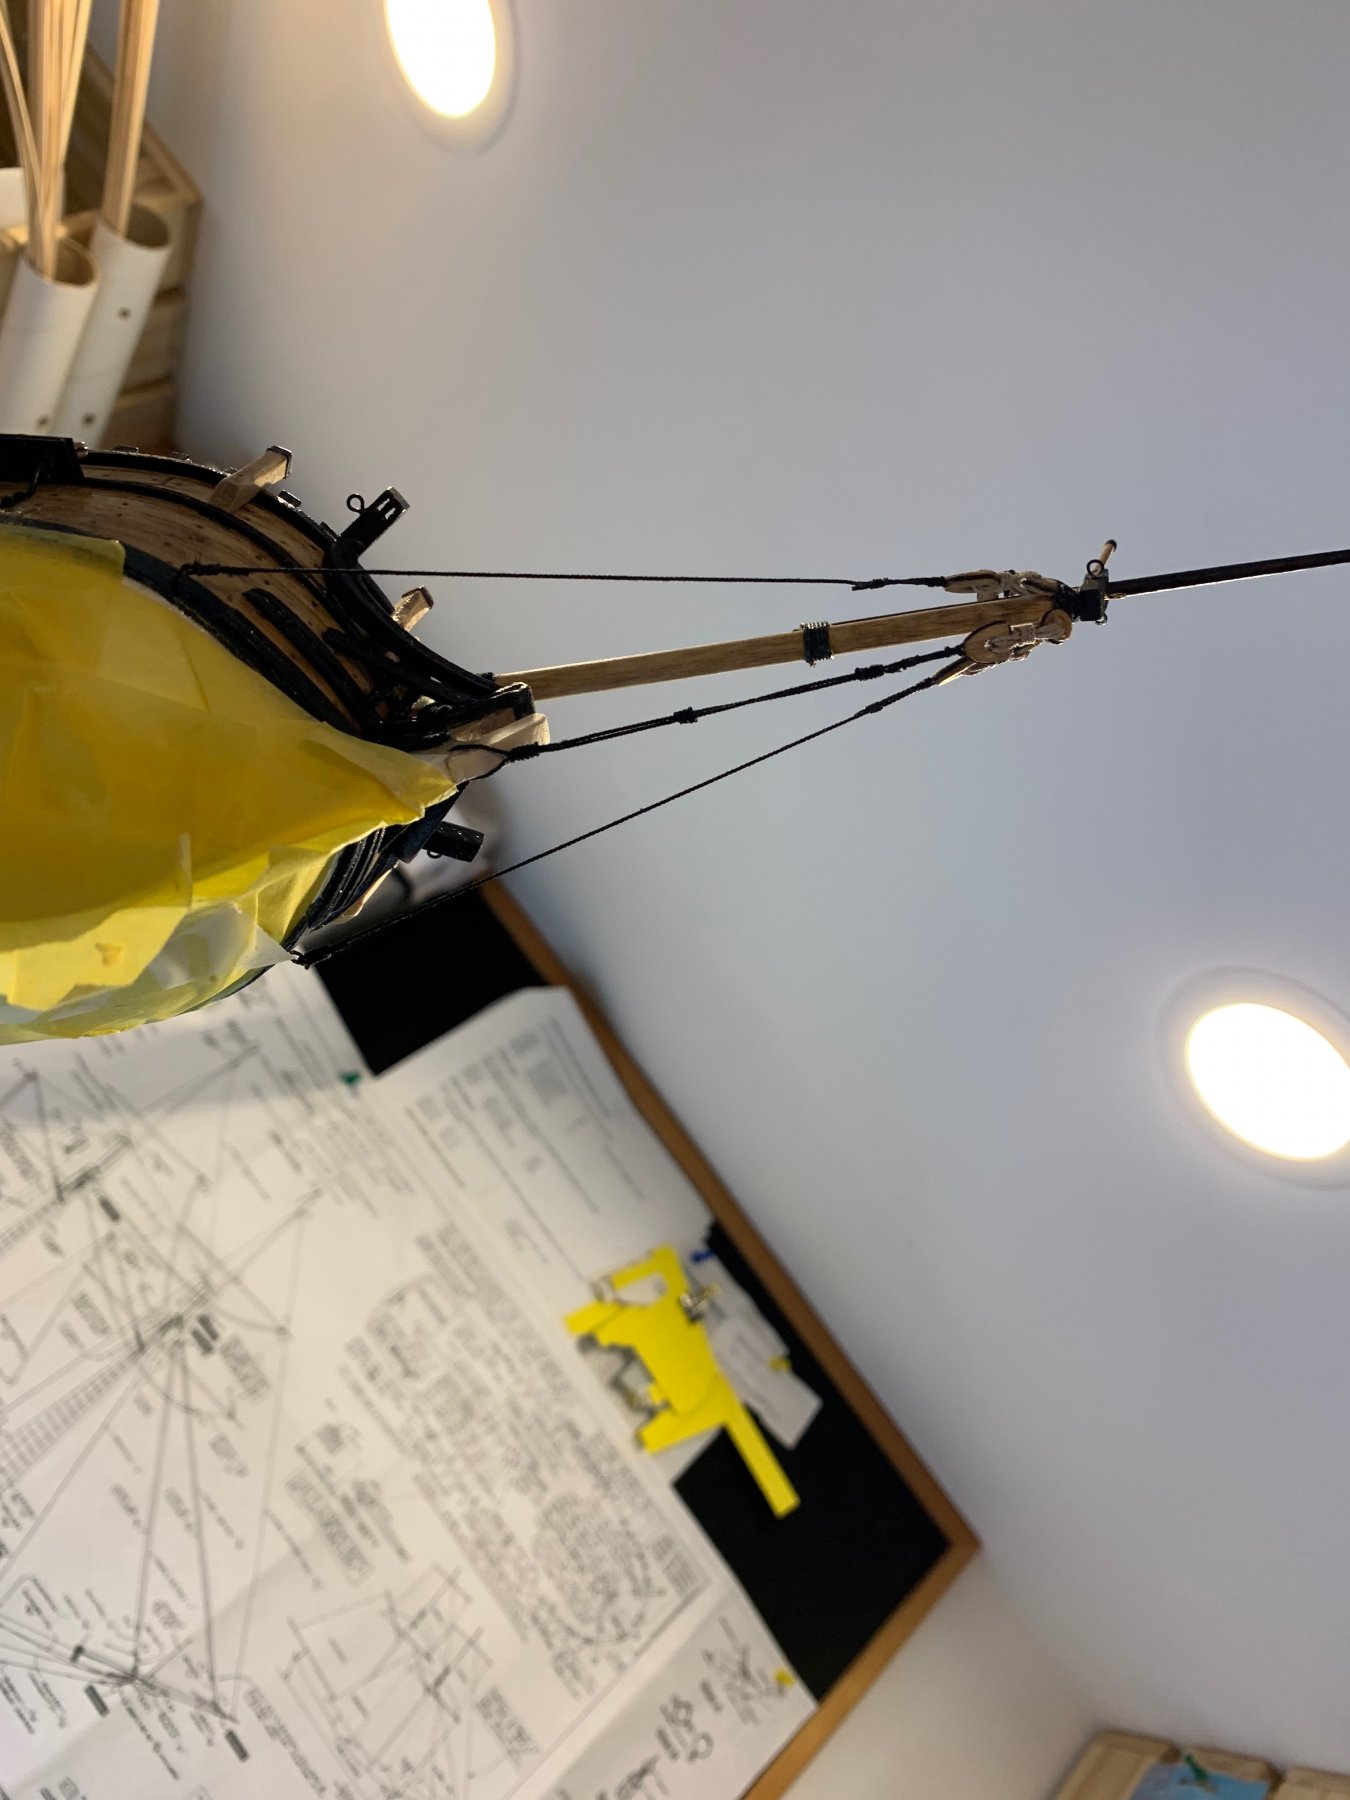
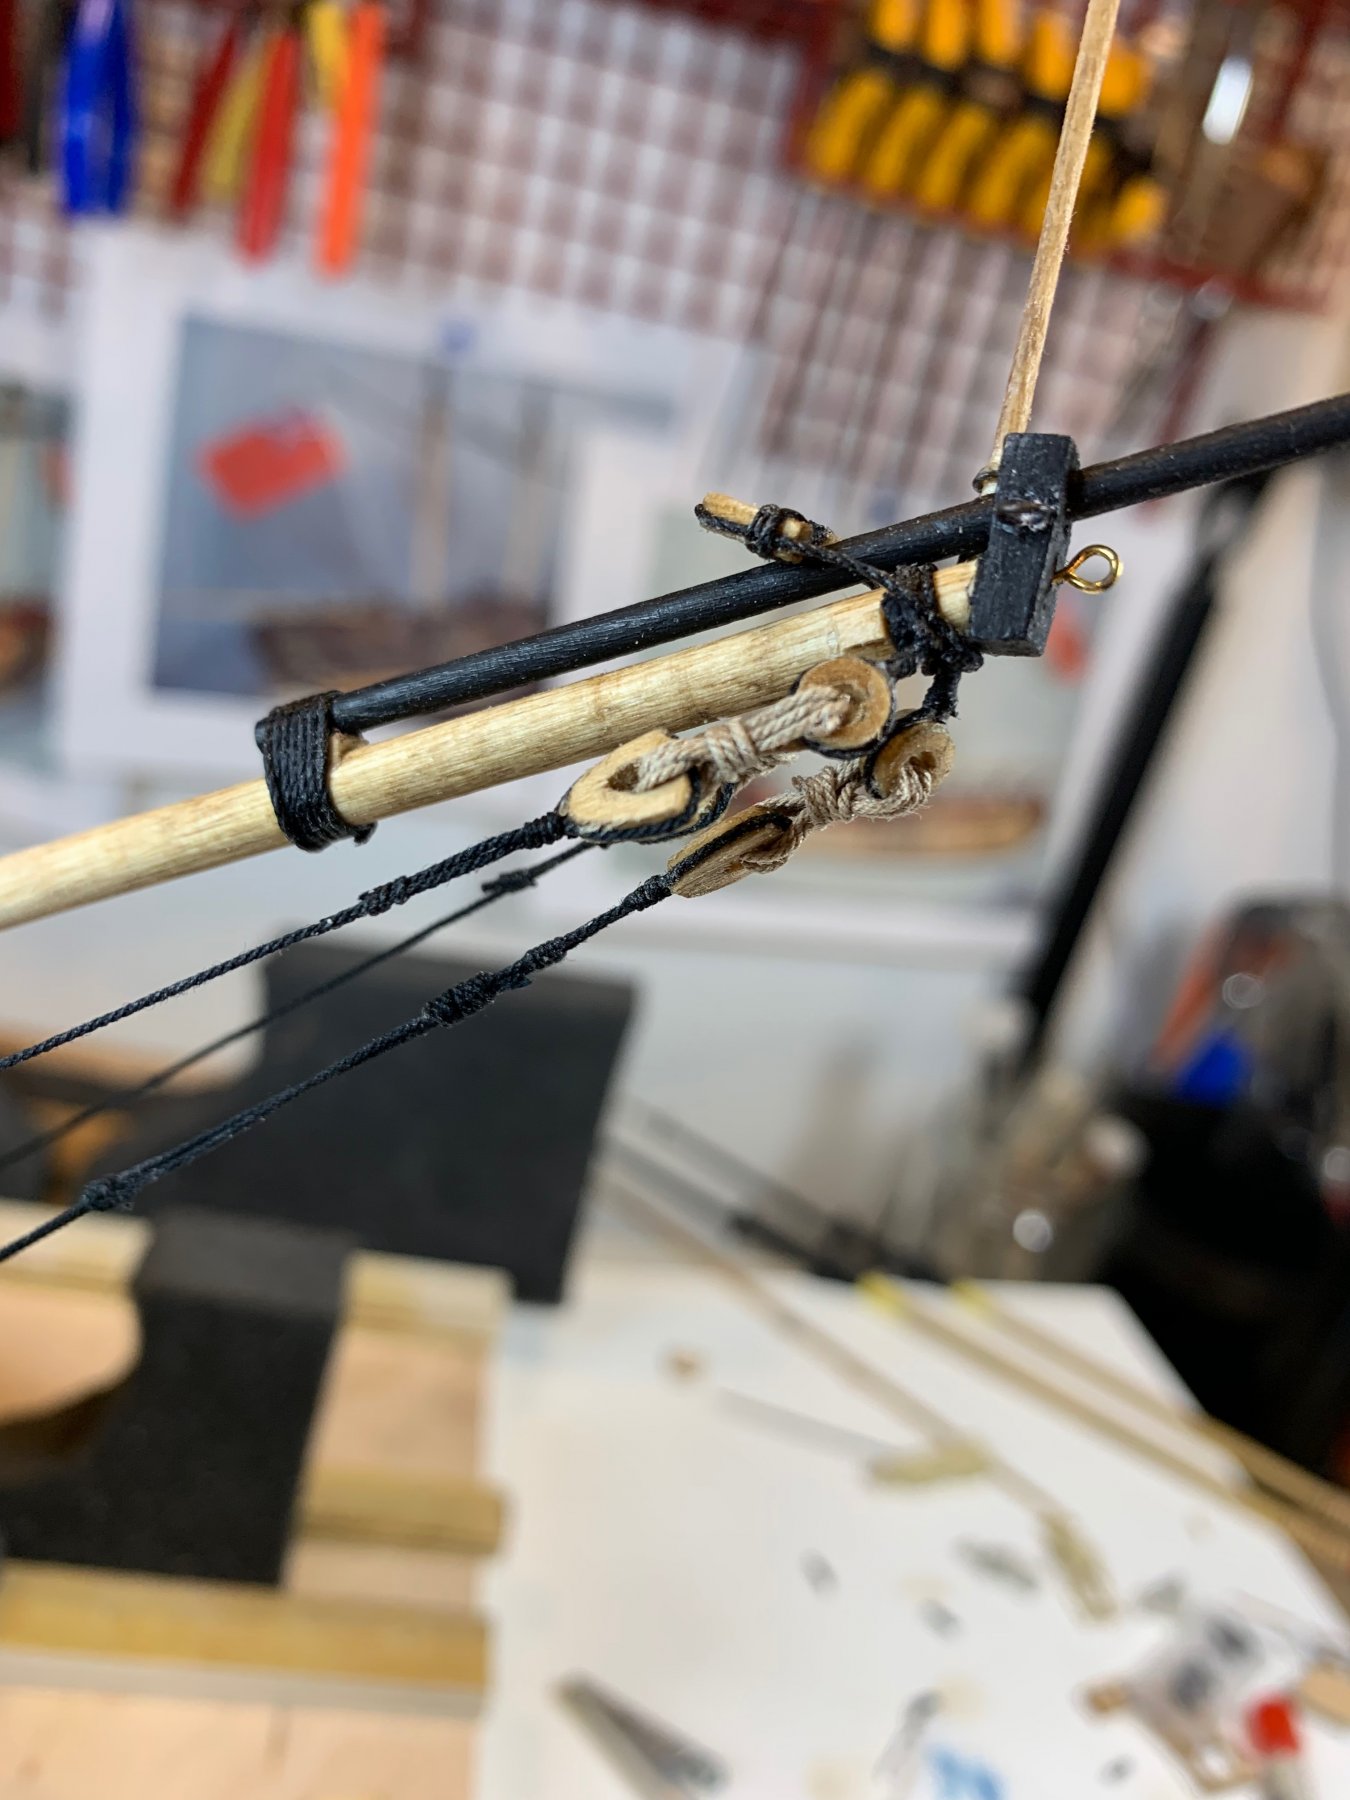
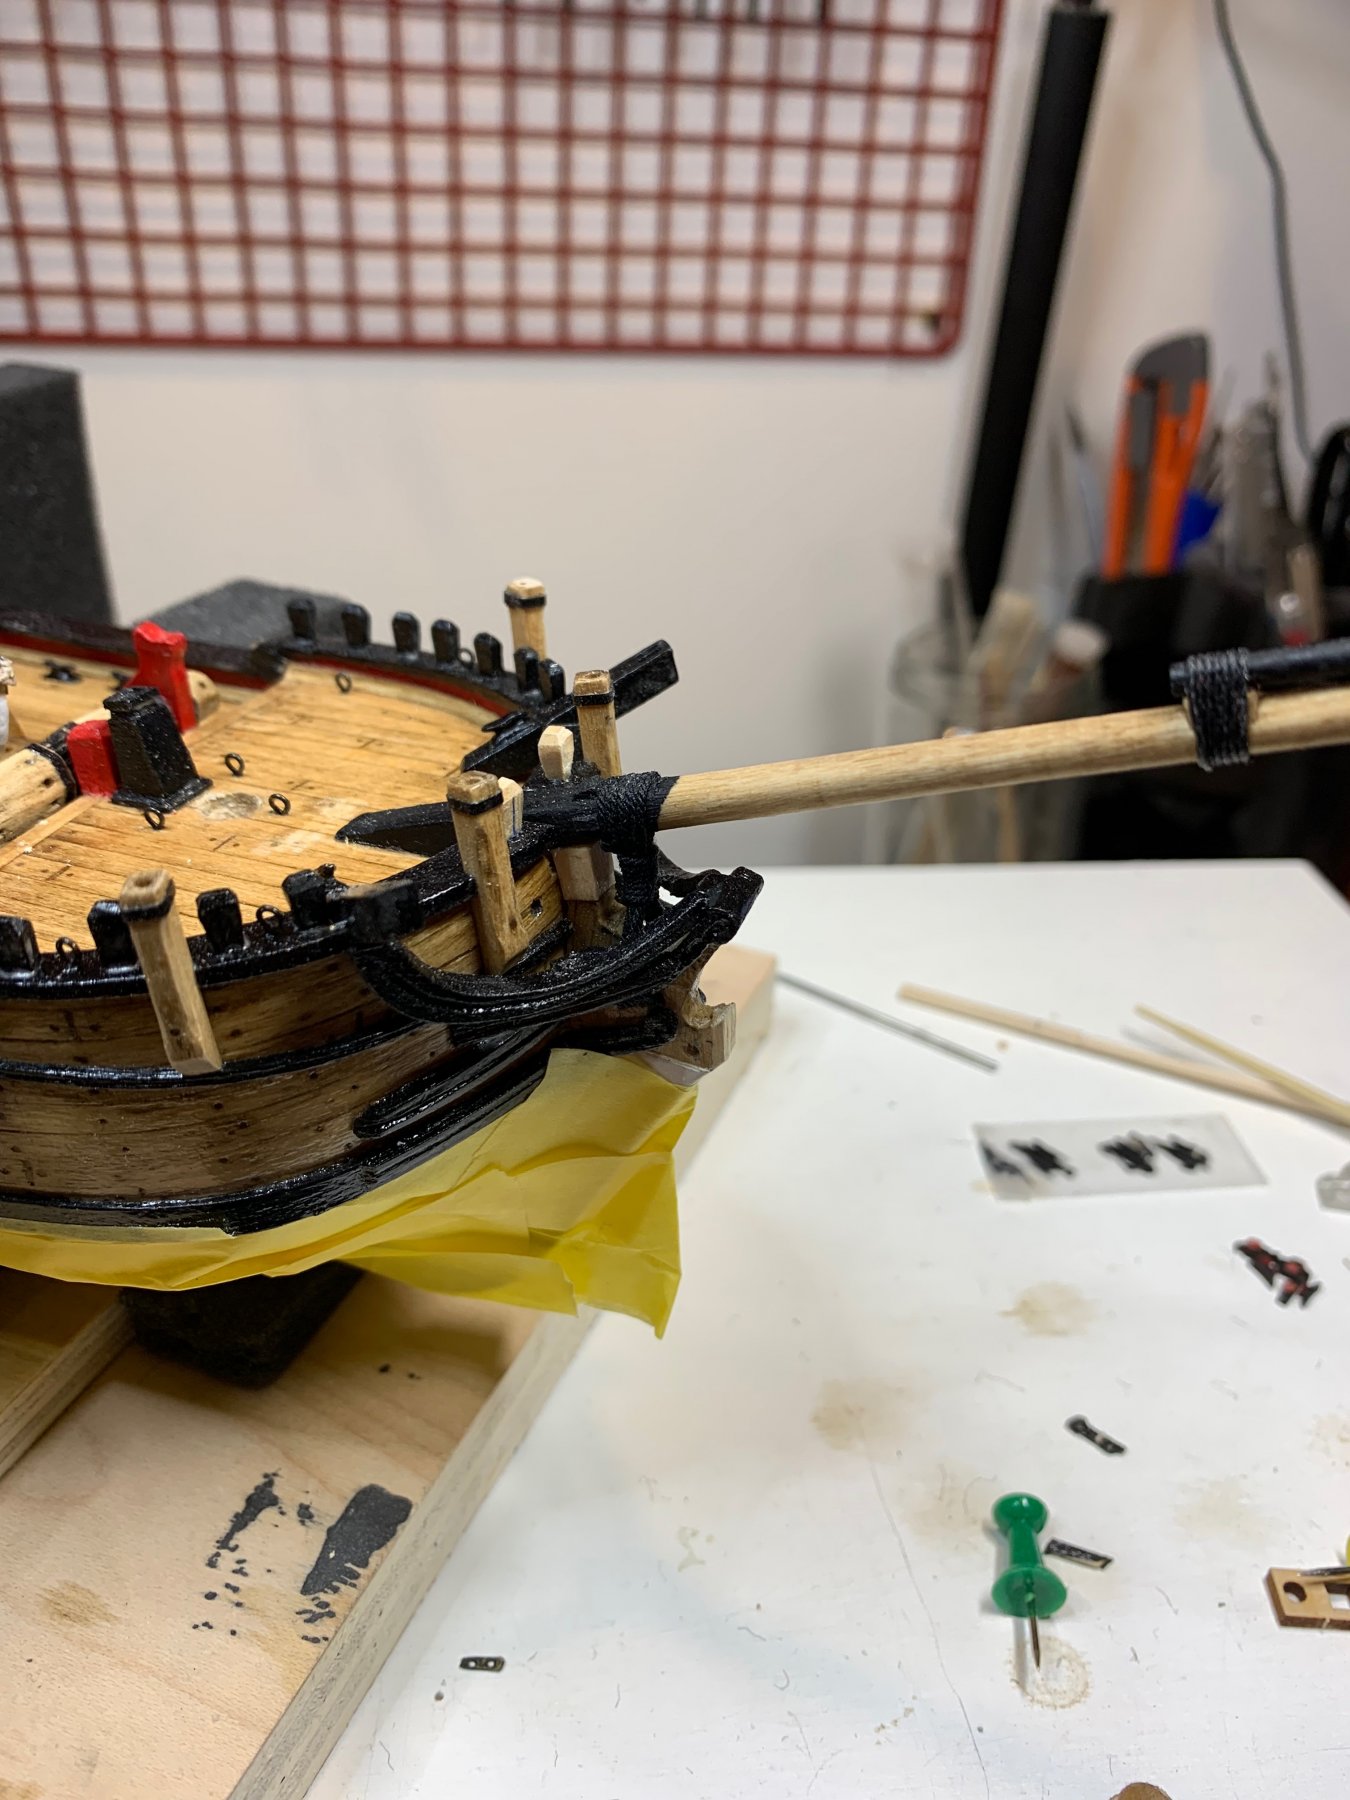
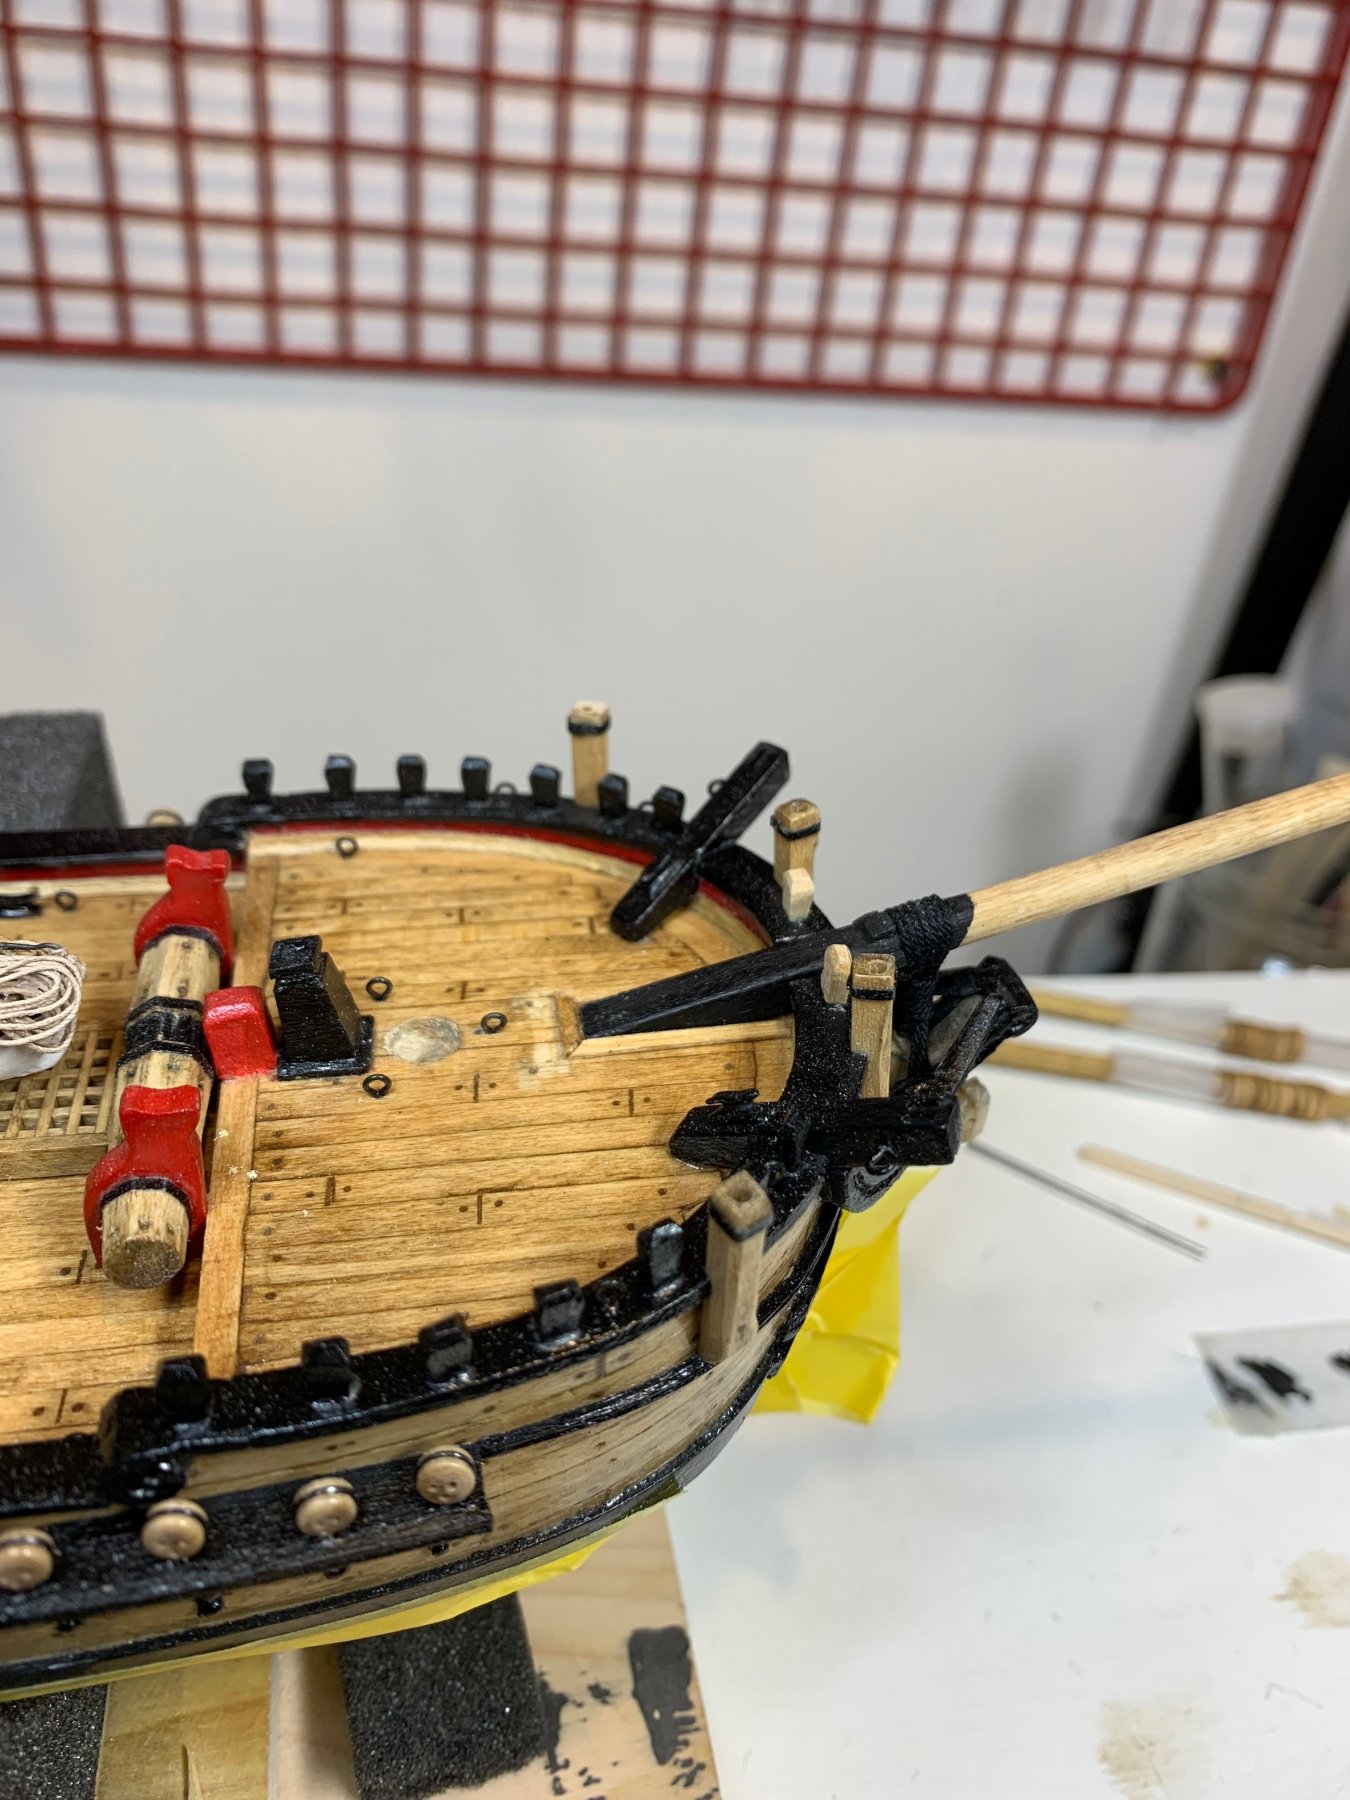
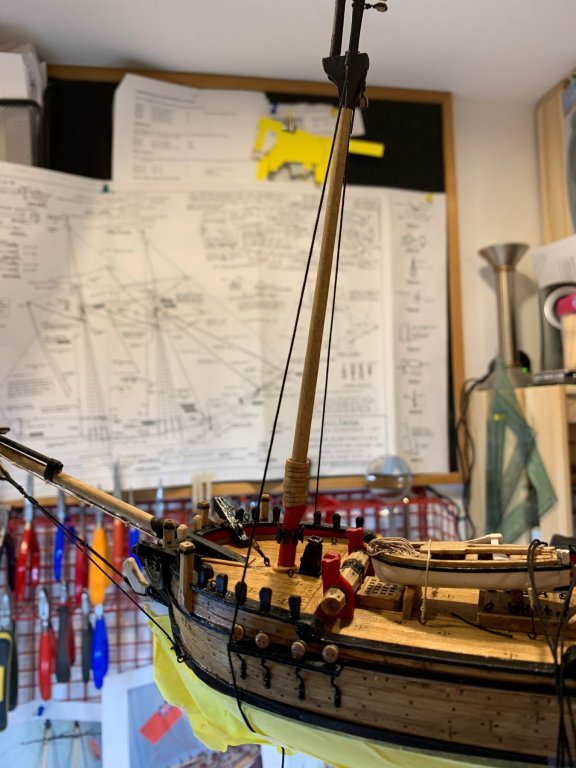
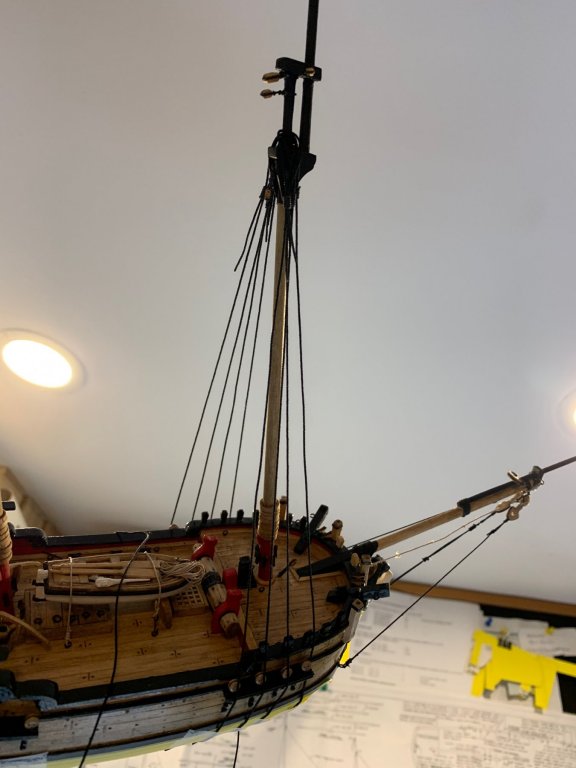
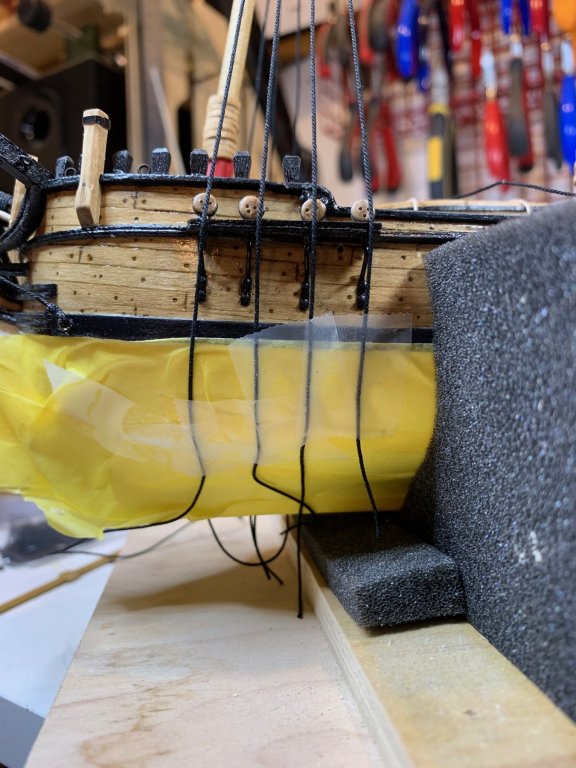
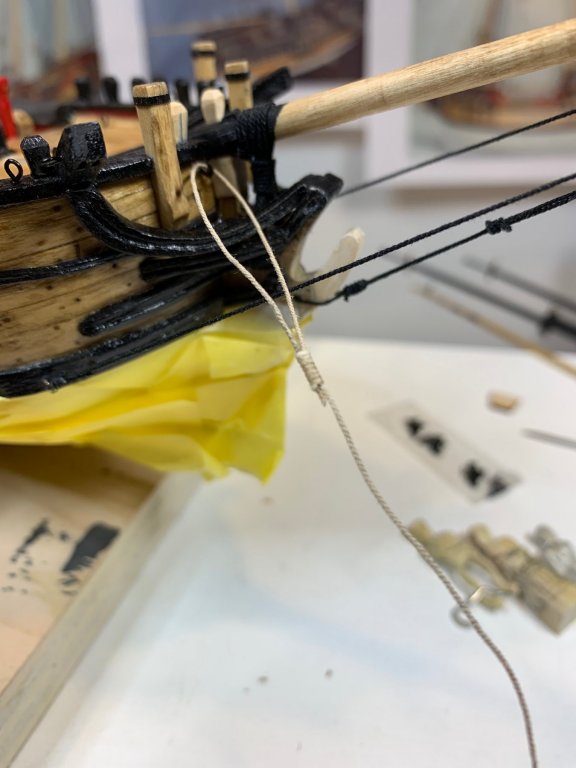
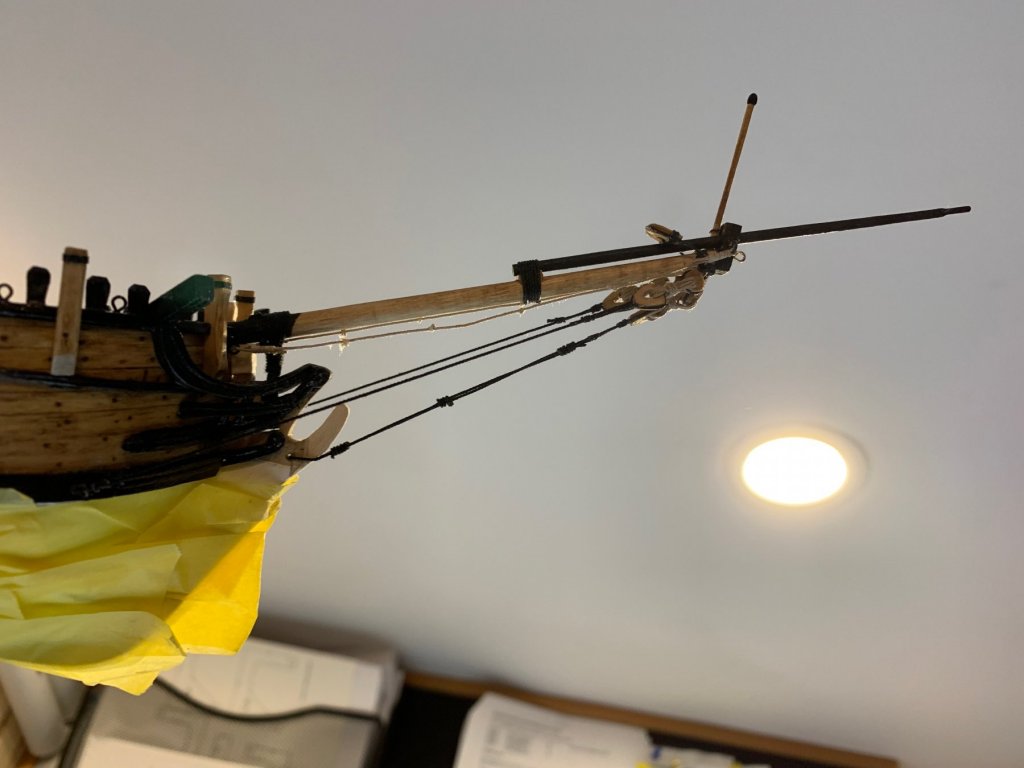
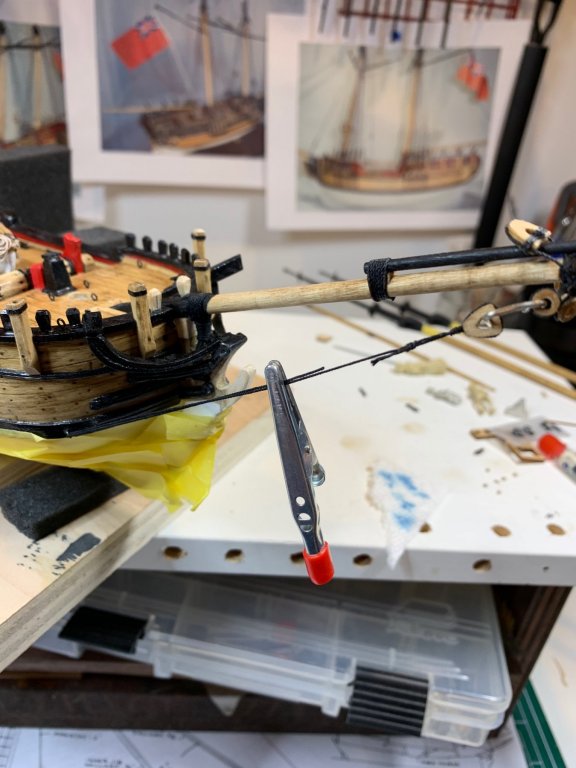
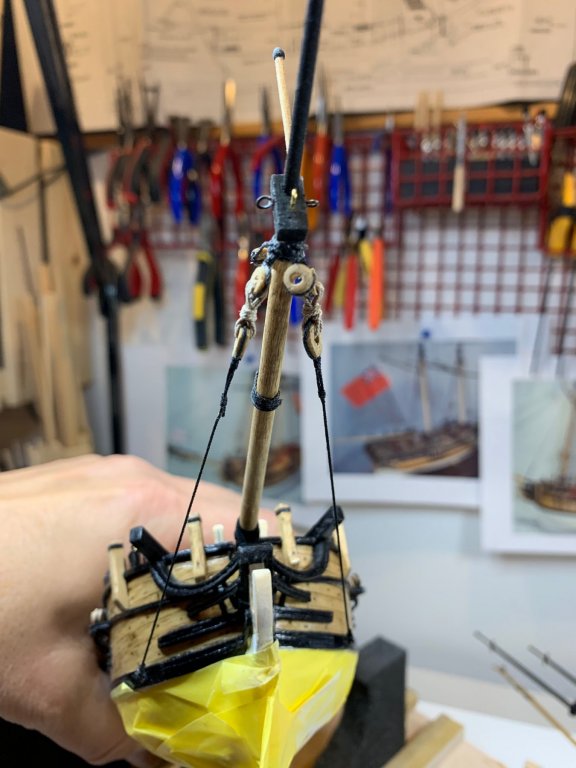
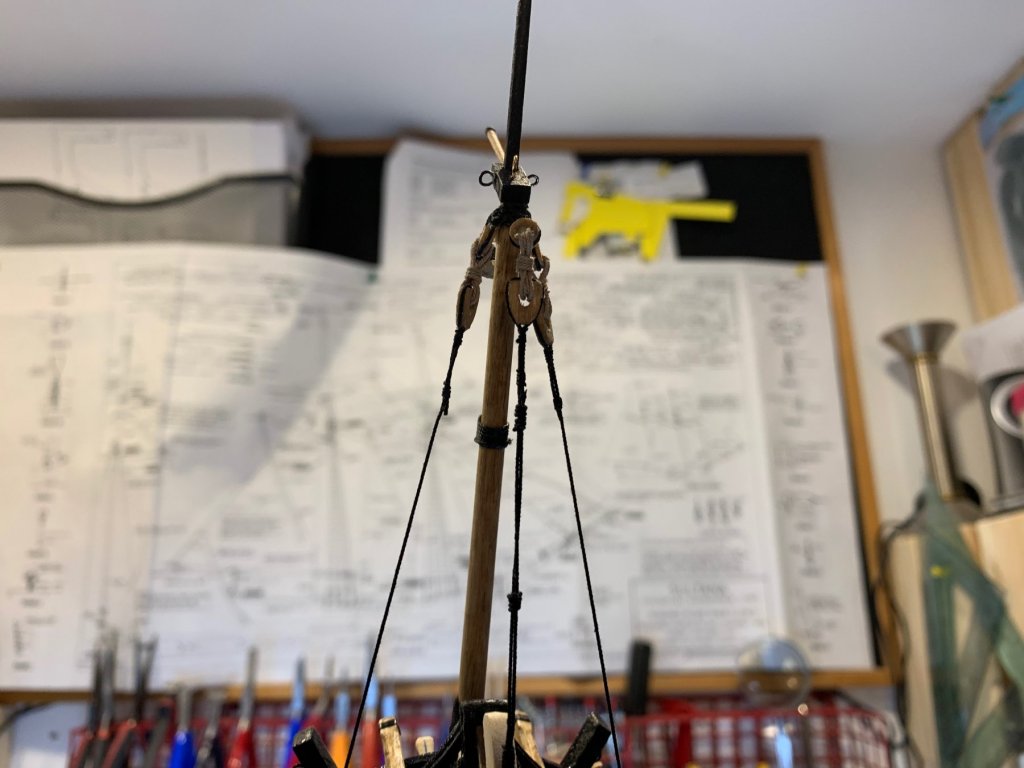
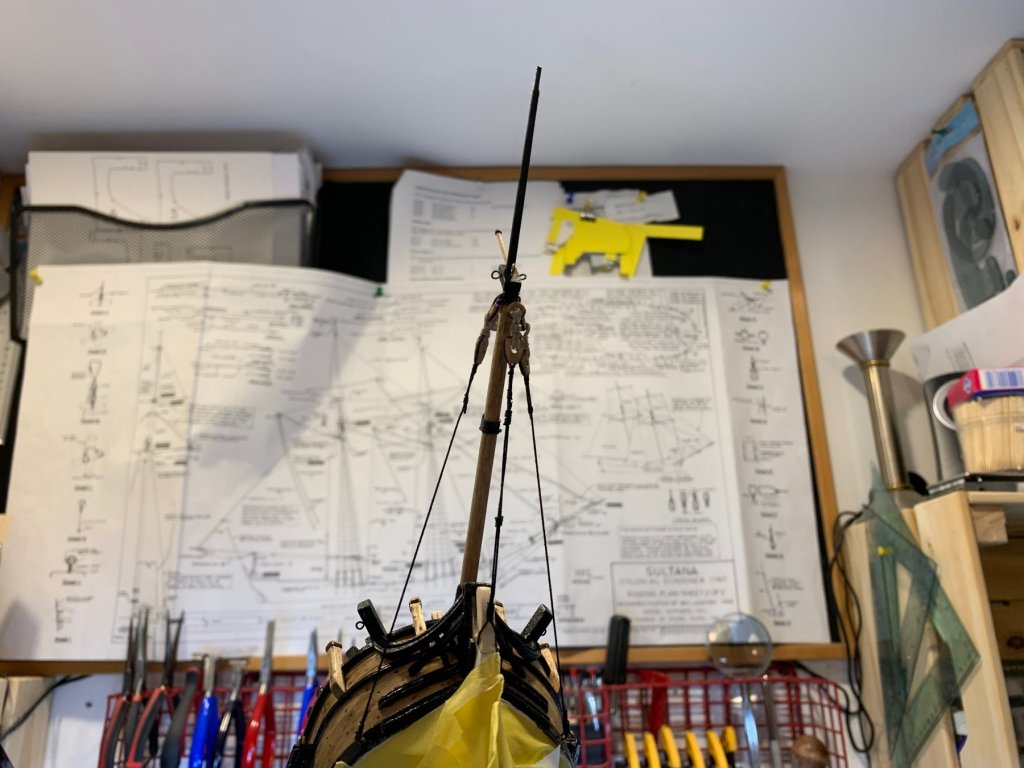
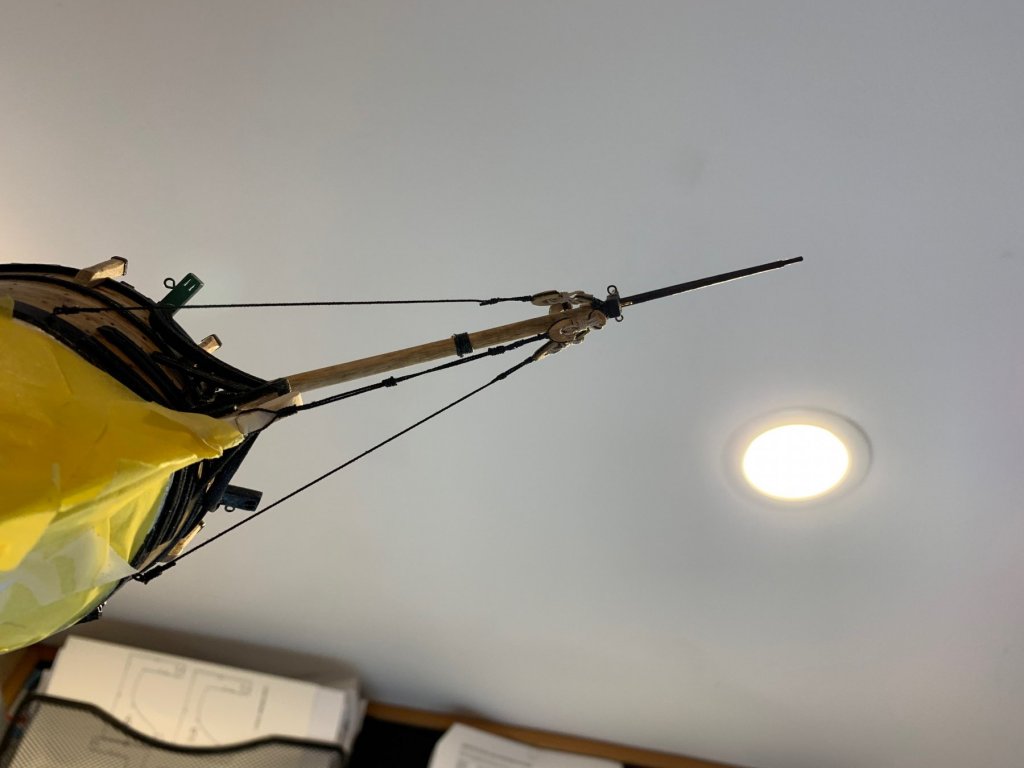
To make it up for figure head i decided to rope the bowsprit. First i drilled the pilot holes for eyebolts that will hold the shrouds. Then the eye bolts were dipped into blackening solution for few minutes, dried and mounted to the ship. Then i measure the length of laniards from the plan and used a piece of wire to have a template that will use for all laniards for all shrouds. For the purpose of keeping the lines tight, i had to modify an alligator clamp and file all those sharp teeth. Then inserted a piece of wood in up and bottom part, sharp it so it can close flat... First shroud completed. For laniard i was using tan ridding, as per practicum and ended up to be interesting. Second shroud completed. Then i started to rig the bobstay. IT was rigged with black rigging line, doubled along its entire length. The process of keeping the rigging line tight was a bit of a challenge but i made it thru. So the end result for today... For some weird reason i really do like rigging part of ship building. It is slow, precise process that requires patience, few tweezers and a good glasses :-). Happy modeling..


- 360 replies
-
- 2
-
-
- sultana
- model shipways
- (and 1 more)
-
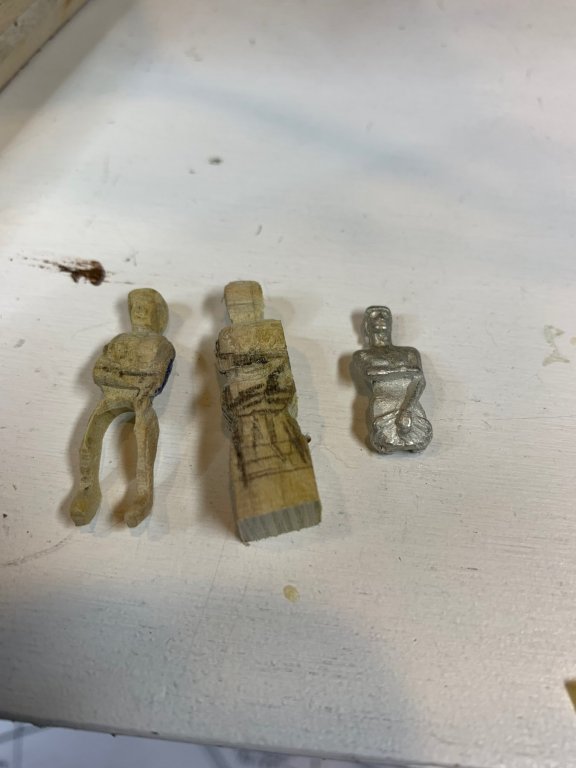
Well, i have tried and decided to go with model that represents Sultana after figure head was removed by Royal Navy after it was purchased. According to practicum it was not clear if figure head was replaced with something else. This detail will definitely make the model more interesting but unfortunately my carving skills and available tools i have, are not up to the challenge and i will need to pass it for this time. These are my two attempts to carve the figure. Also tried to go with practicum and experiment with sculpey but was not sure how can i remove the figure form the ship to get it baked once i carve it to acceptable level. It would be very easy to damage the figure during removal process. I bit more research and practice will make it perfect for some other building attempts. For now, no figure.. Happy modeling
- 360 replies
-
- 1
-
-
- sultana
- model shipways
- (and 1 more)
-
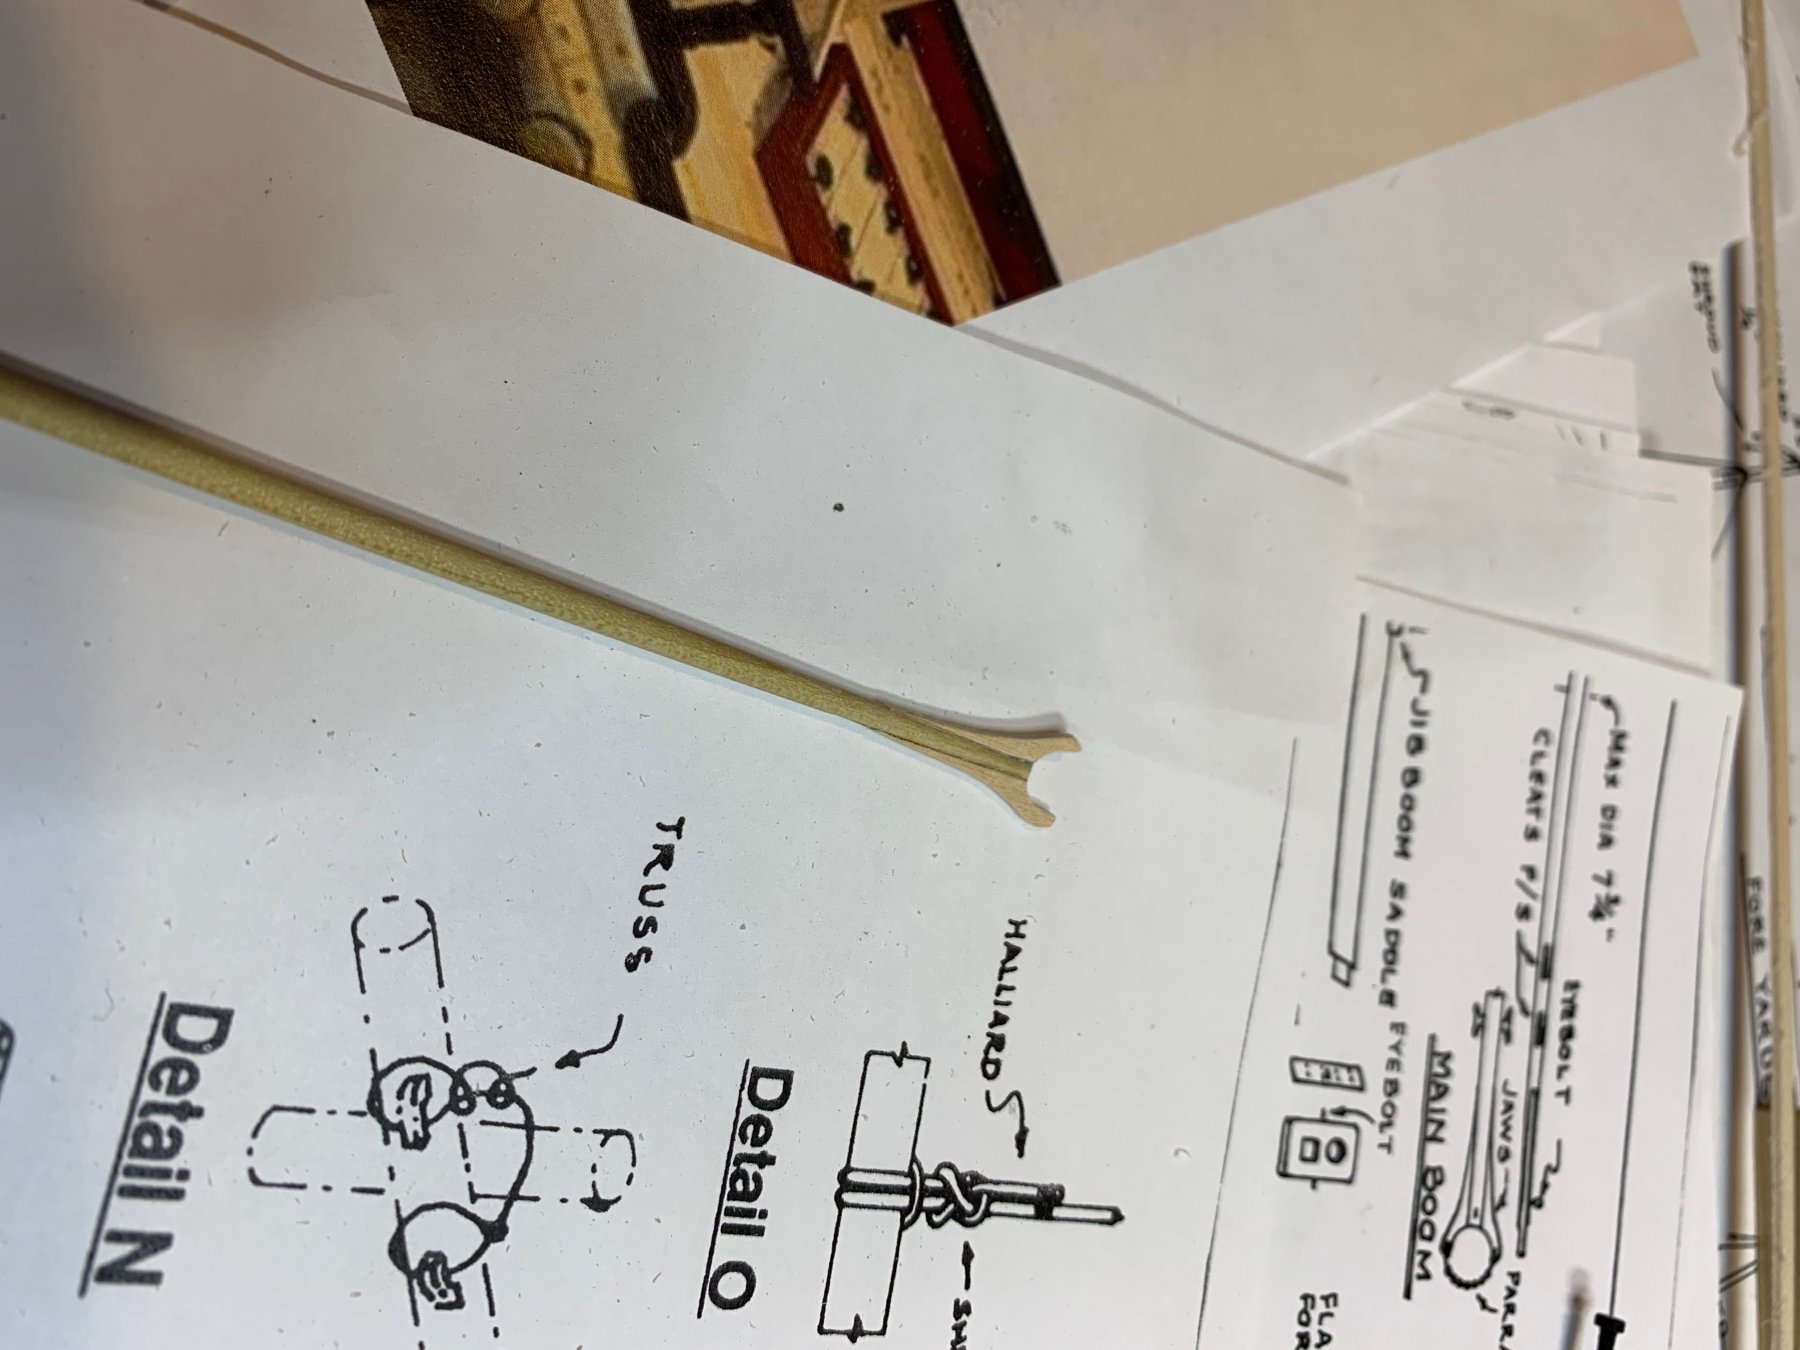
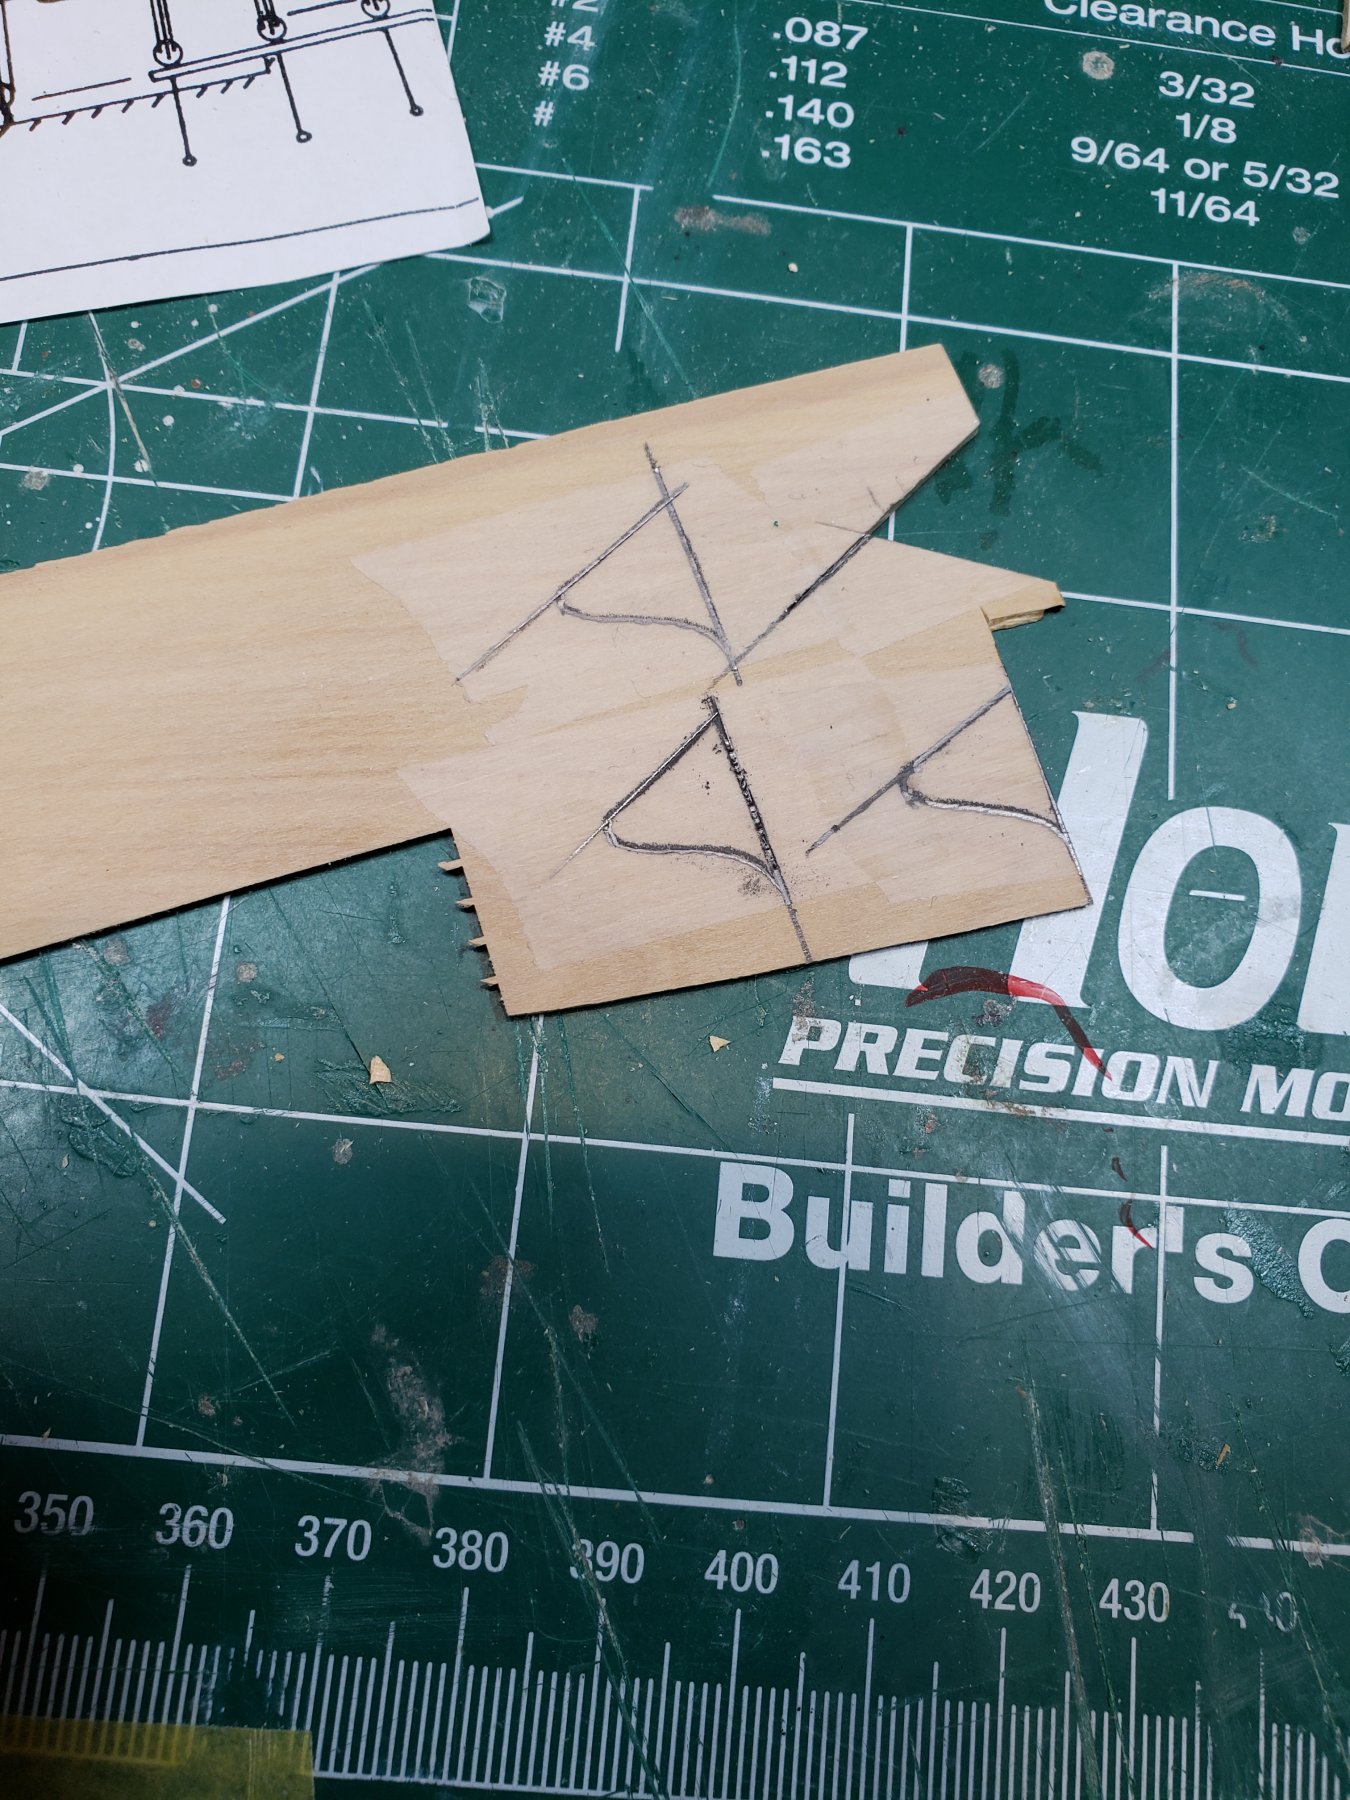
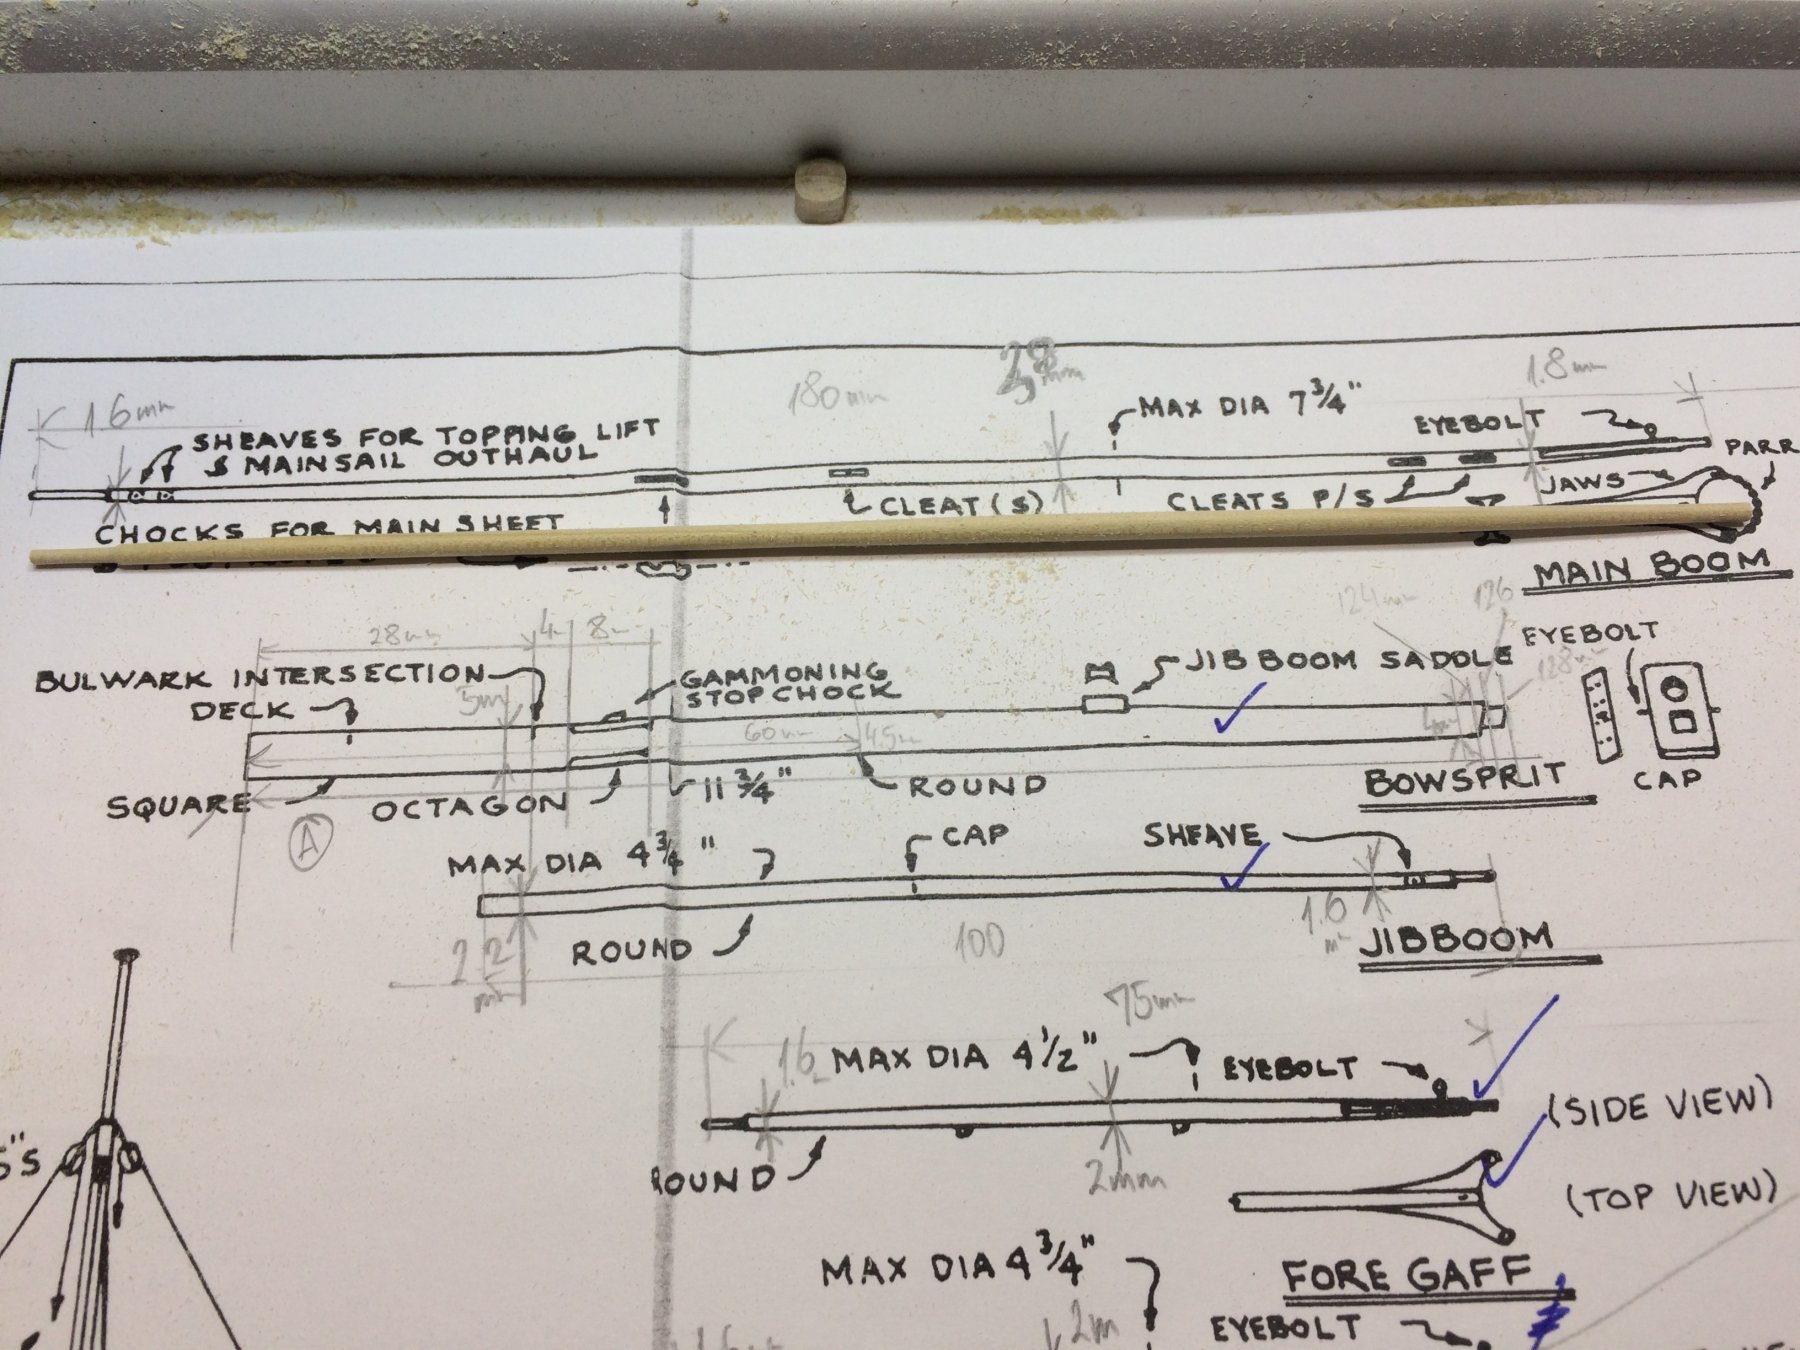
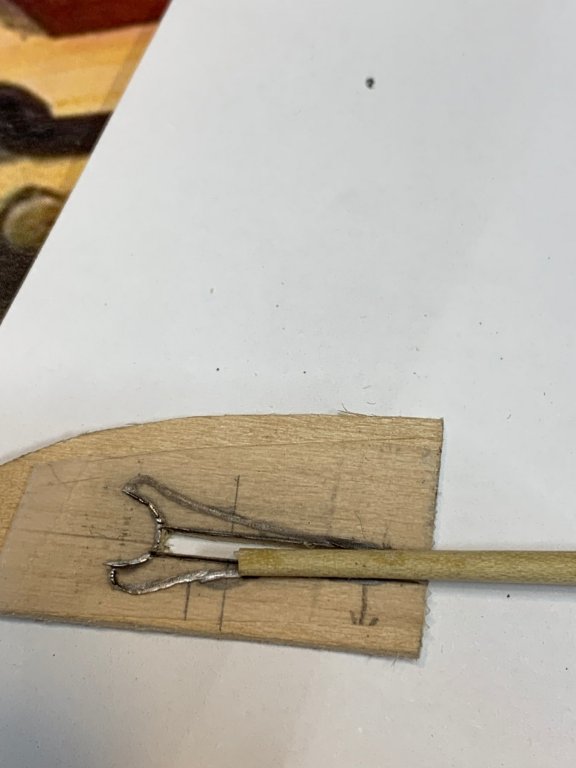
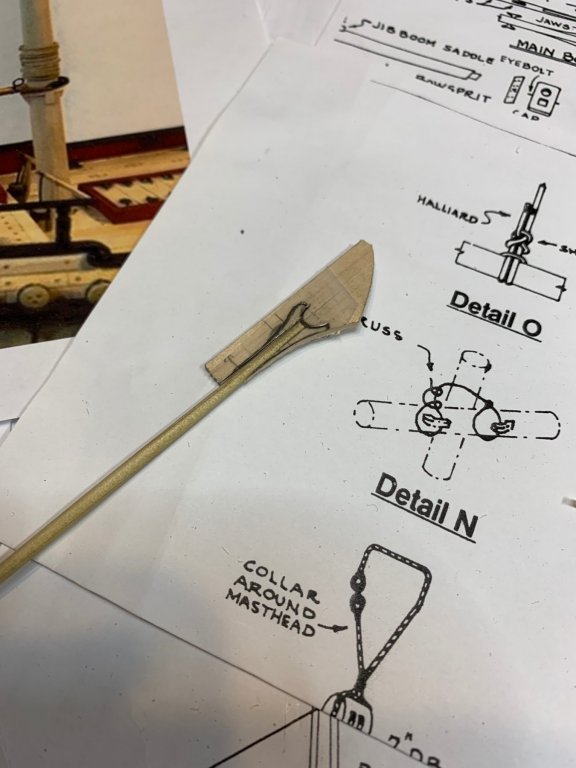
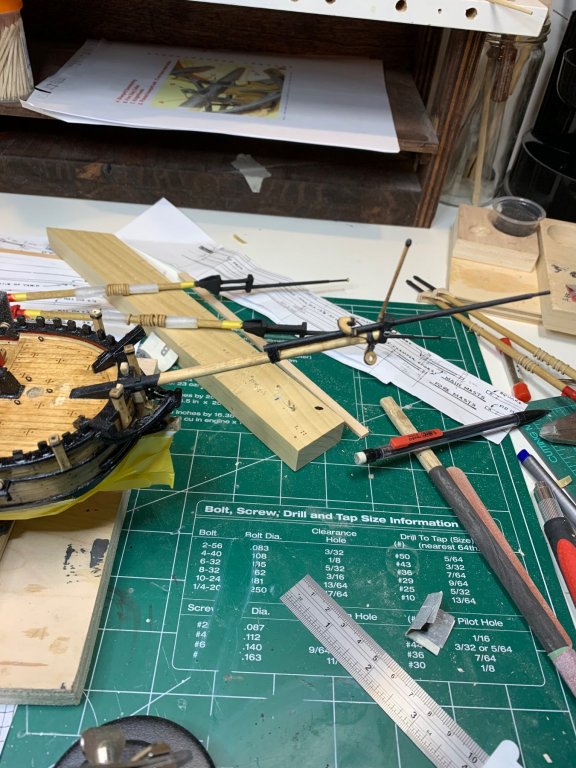
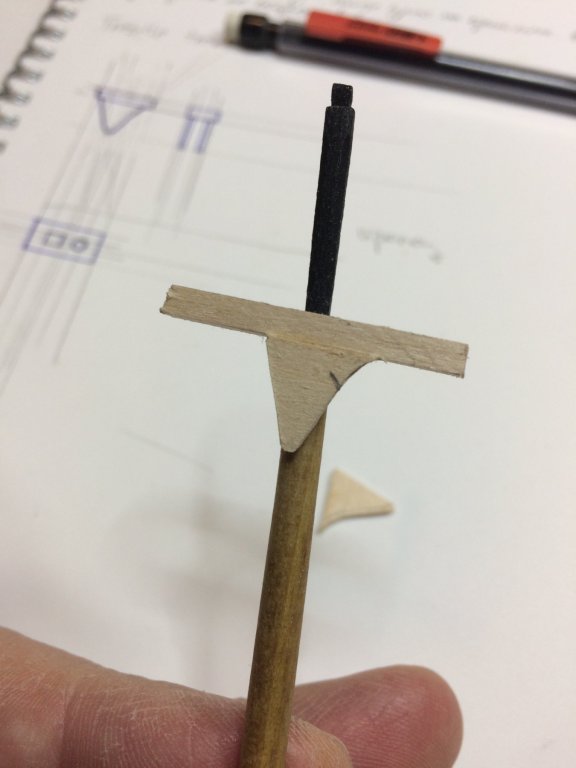
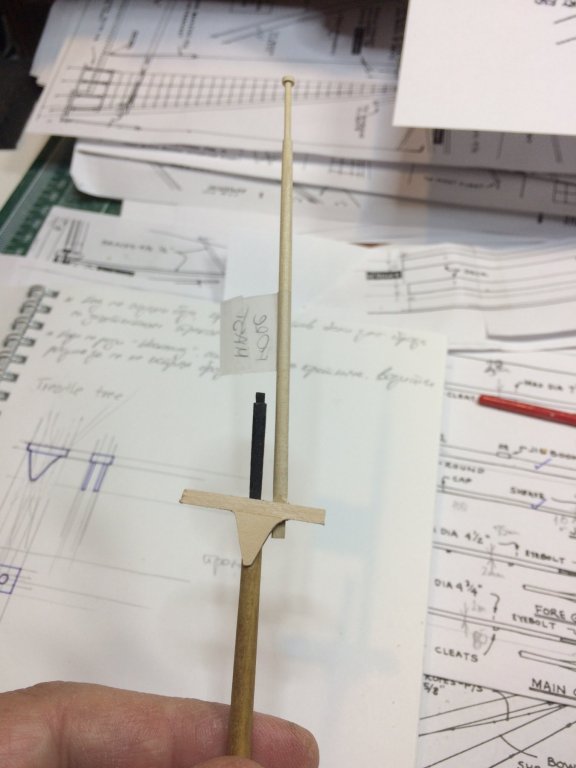
The work continue on boom; the boom was already made out of a piece of poplar dowel since all kit supplied dowels are mostly not appropriate and warped. The yaws for the boom were traced from the plan on a piece of wood. I took slightly different approach for this part. The whole assembly was traced on the paper and to the bass wood sheet, place for a boom was cut in the middle; then the boom was inserted into, glued to the wood. The yaws were then cut from the wood, one end at the time. The shape for jaws were adjusted and holes for parral beads will be drill later. I think i can manage it without breaking these fragile jaw ends. Eye bolt, cleats, iron bands (simulated by electric tape) are mounted and sheaves were made too. The sheaves were made out of two small piece of bass wood, first traced from the plan. These are very tiny... The boom was received a layer of golden oak stain to match other parts of the ship. I added one extra cleat and that one was removed later and place were it was glued was sanded with no traces of mistake.. Happy modeling.

- 360 replies
-
- 1
-
-
- sultana
- model shipways
- (and 1 more)
-
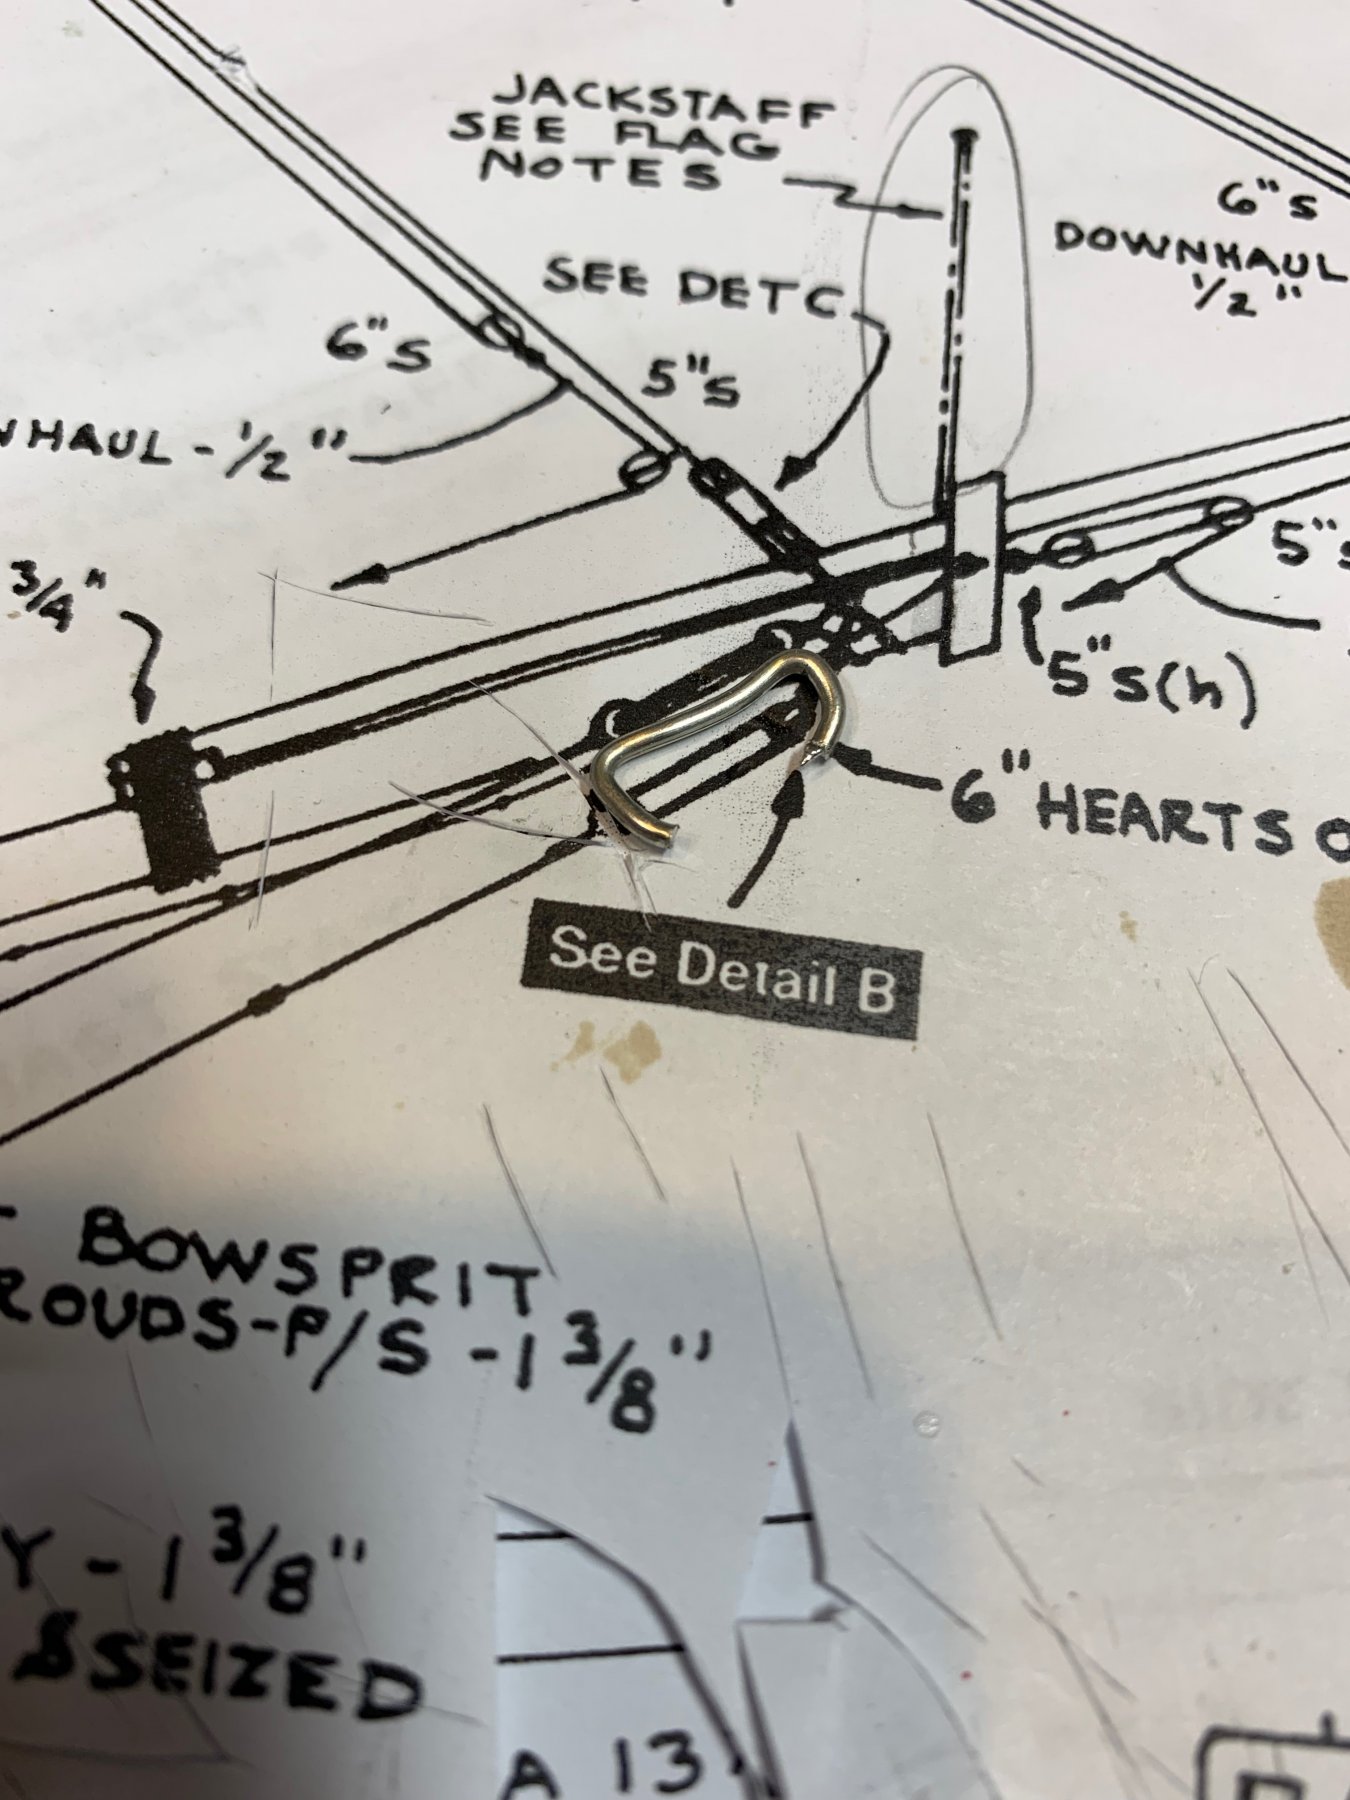
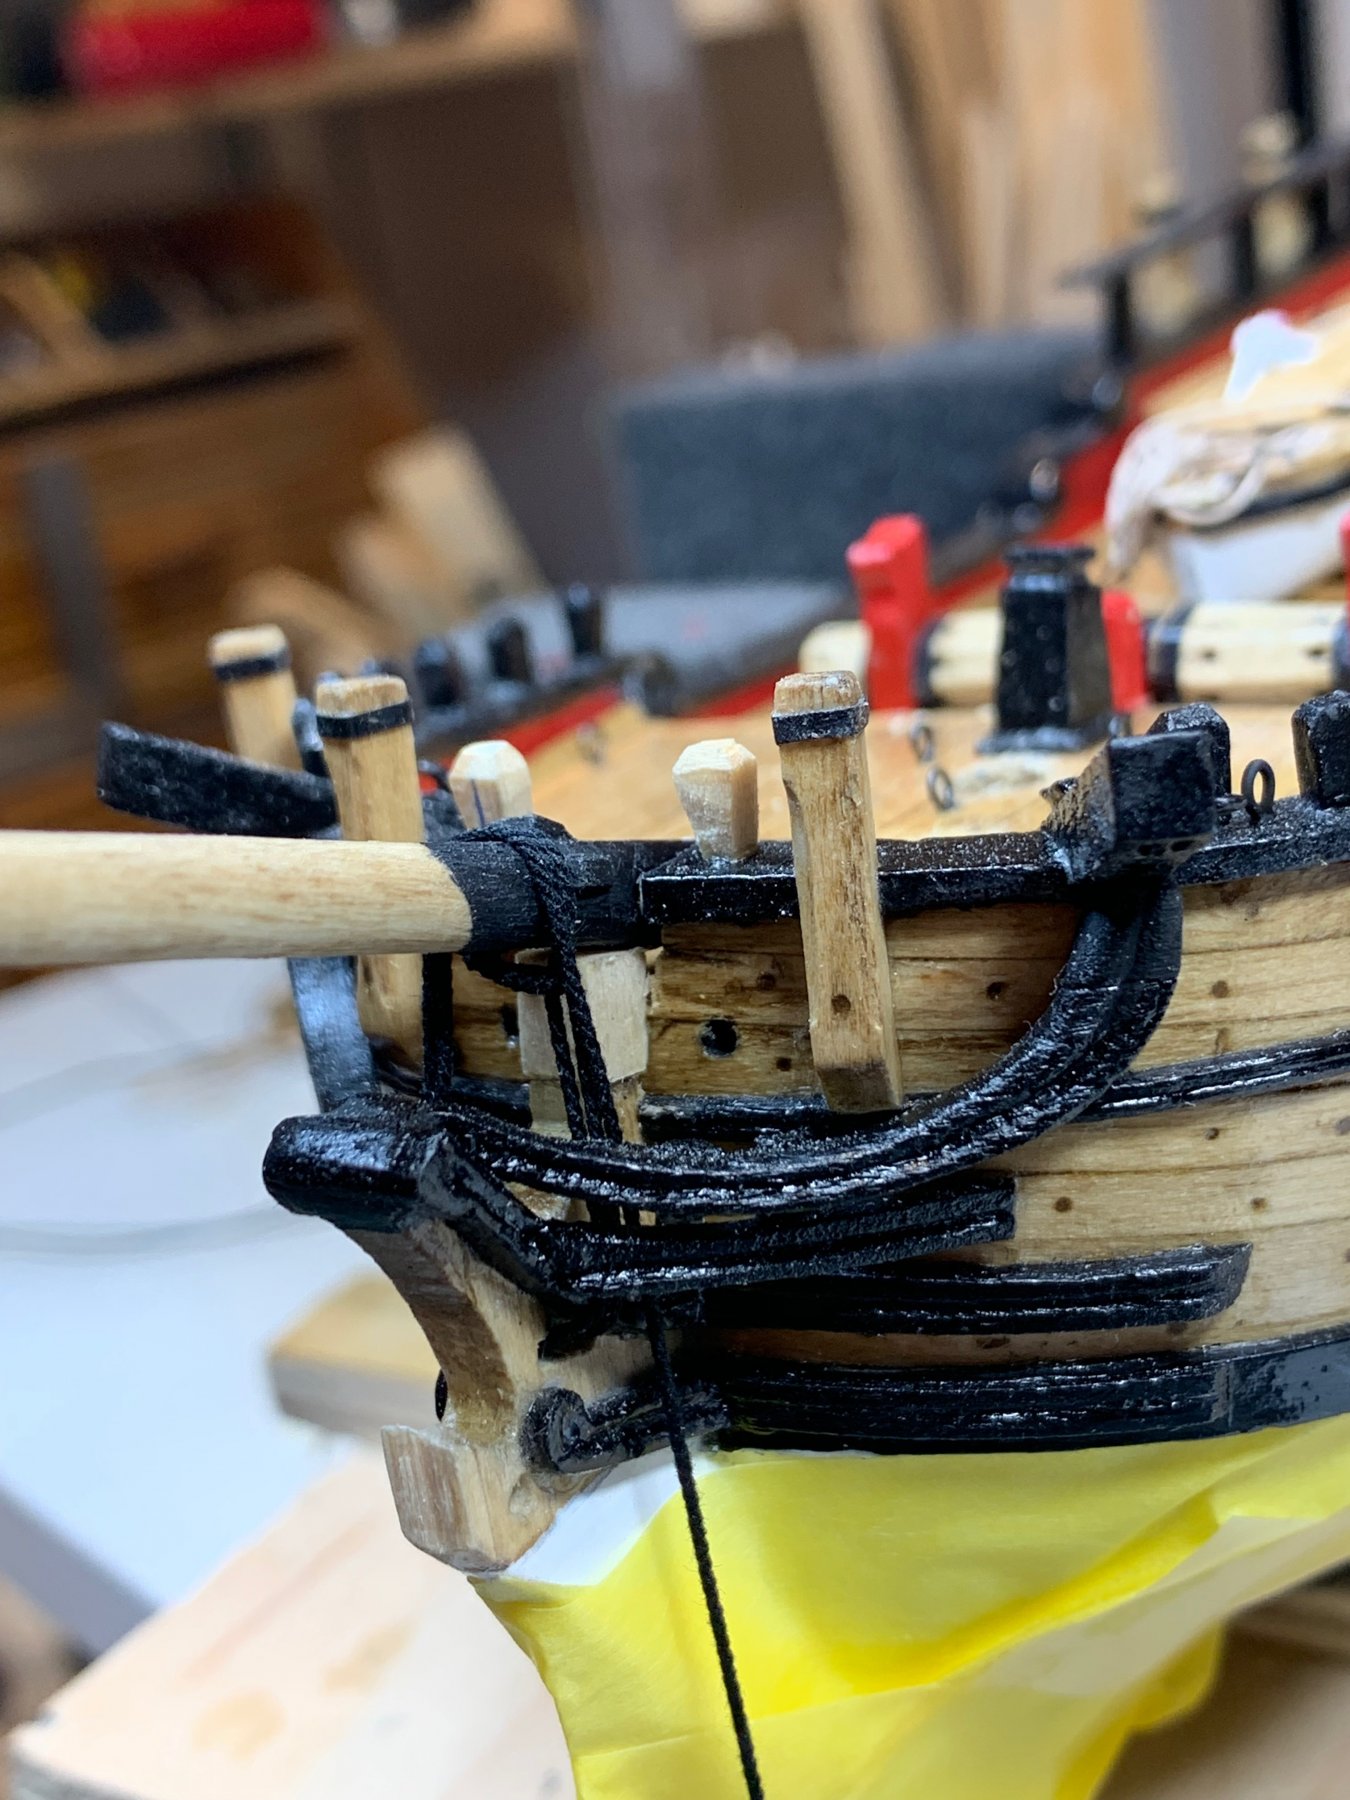
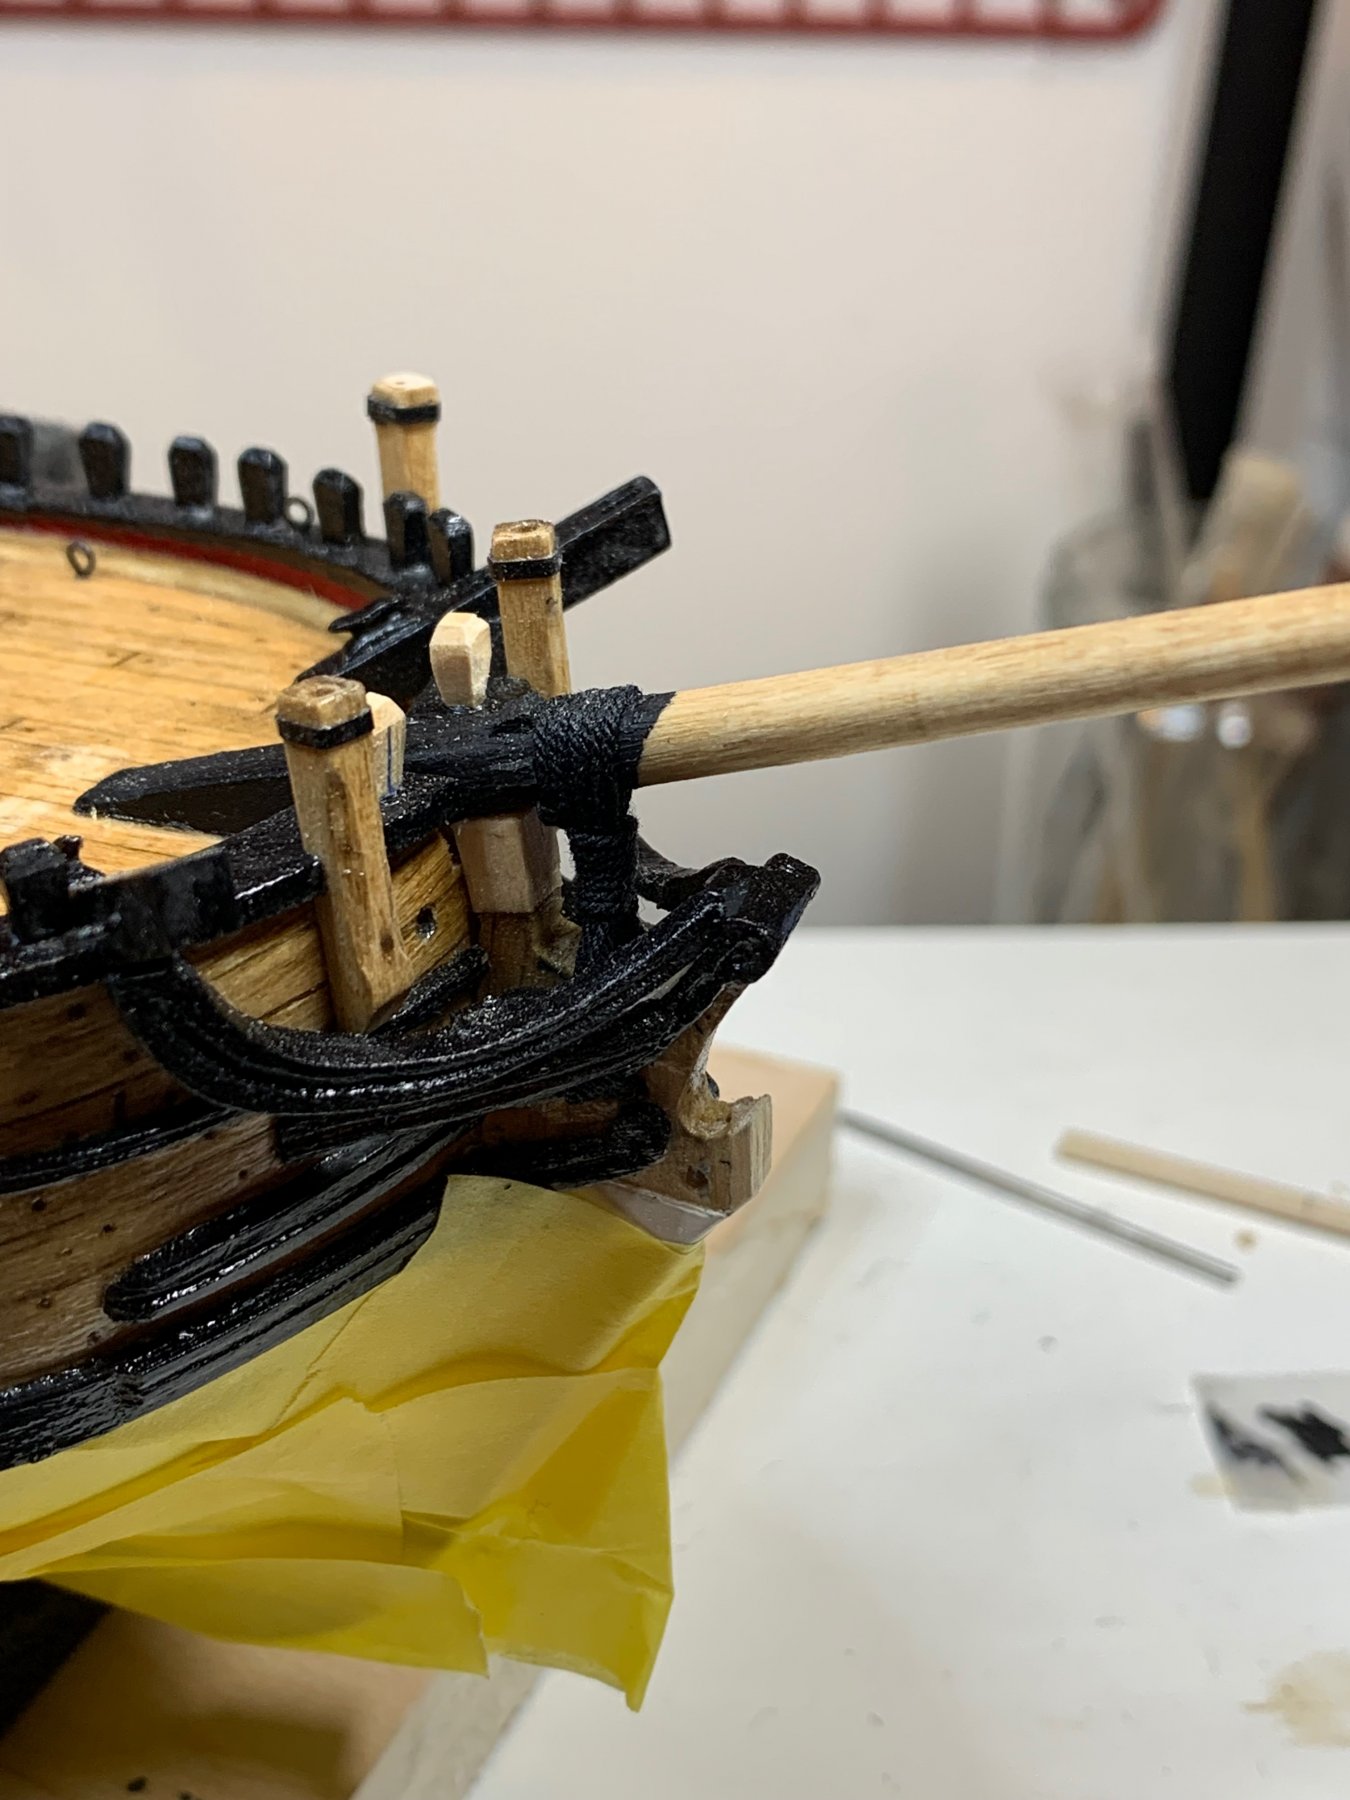
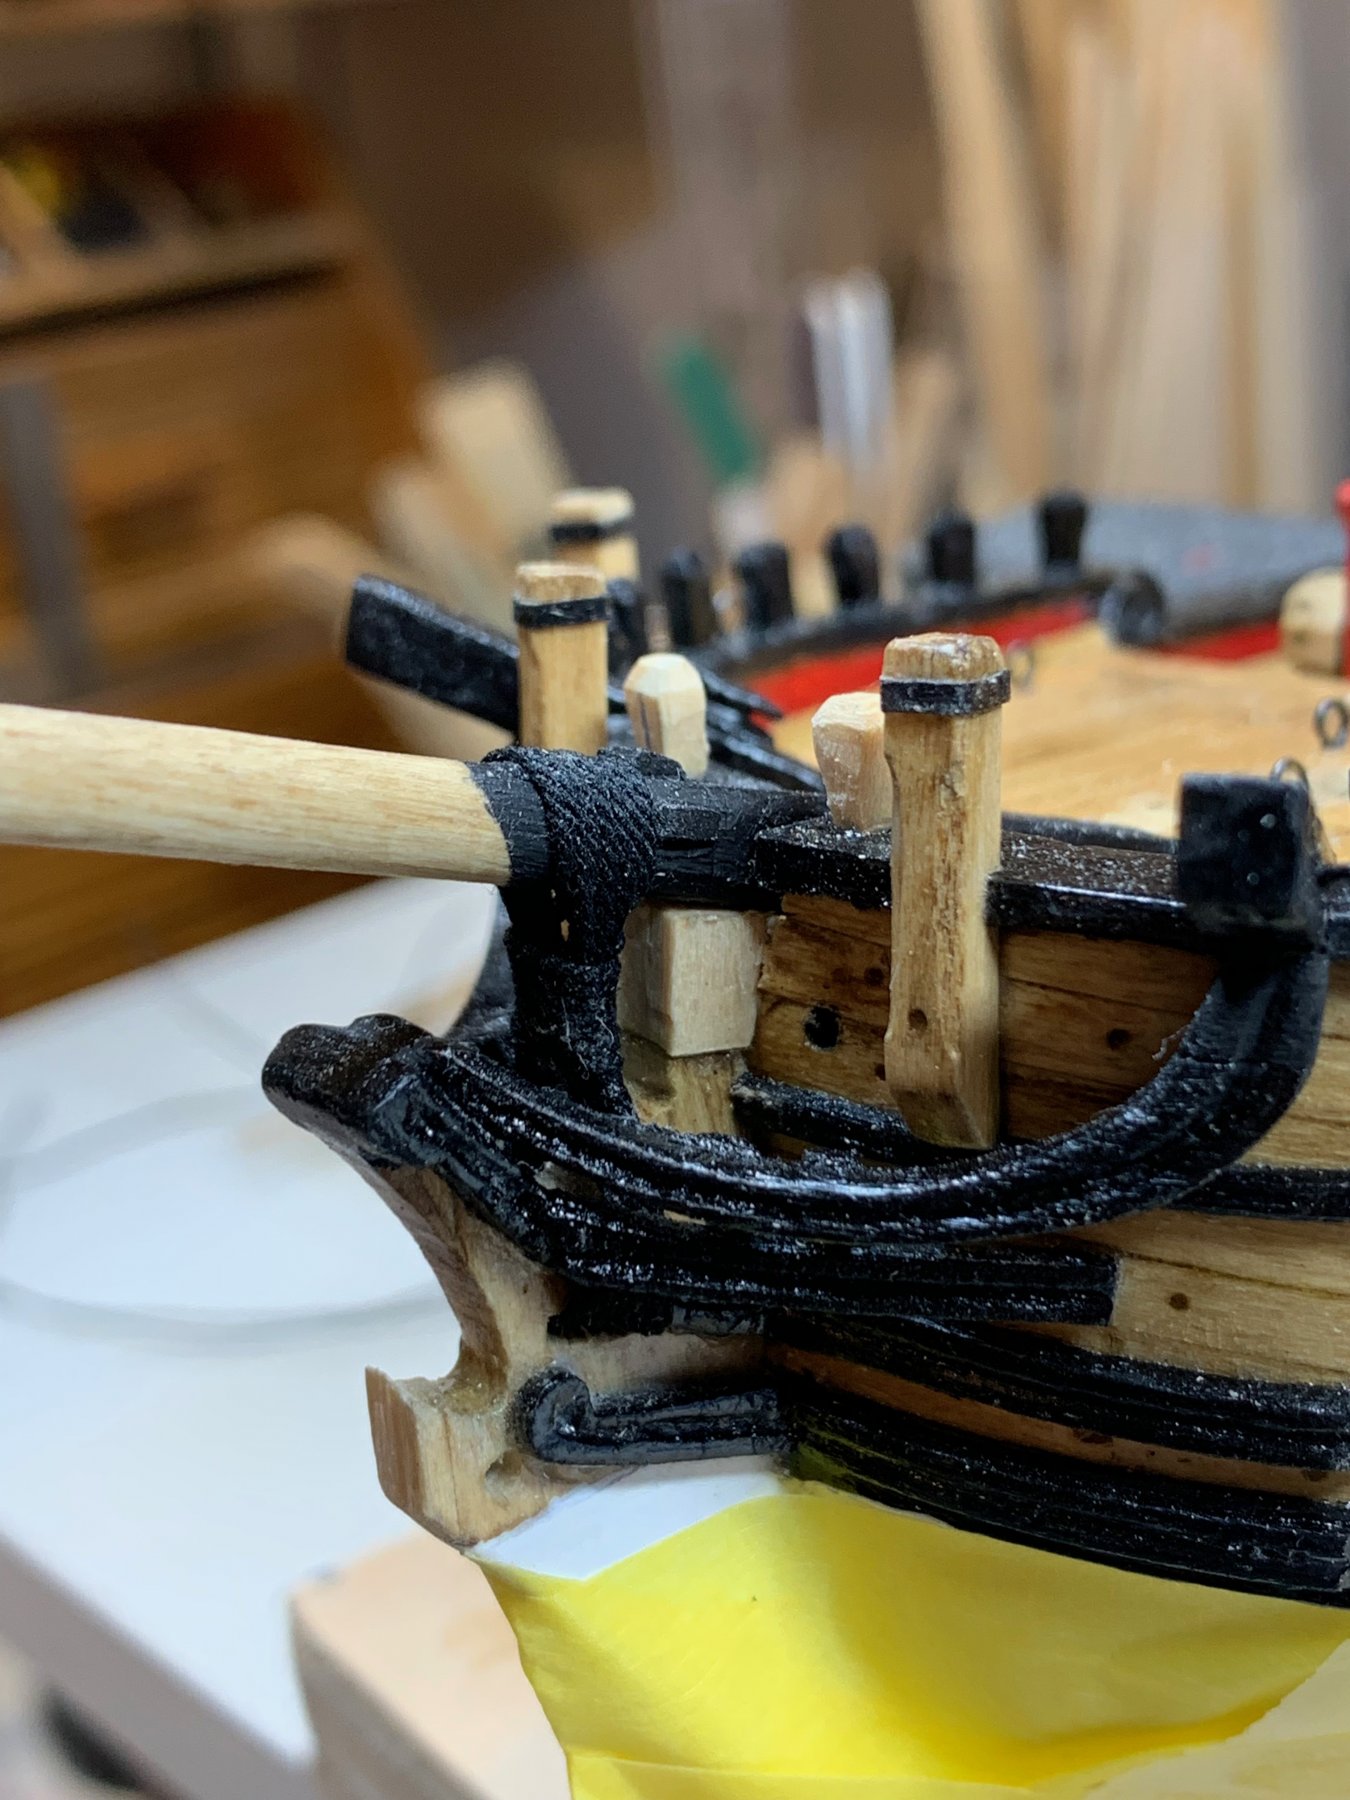
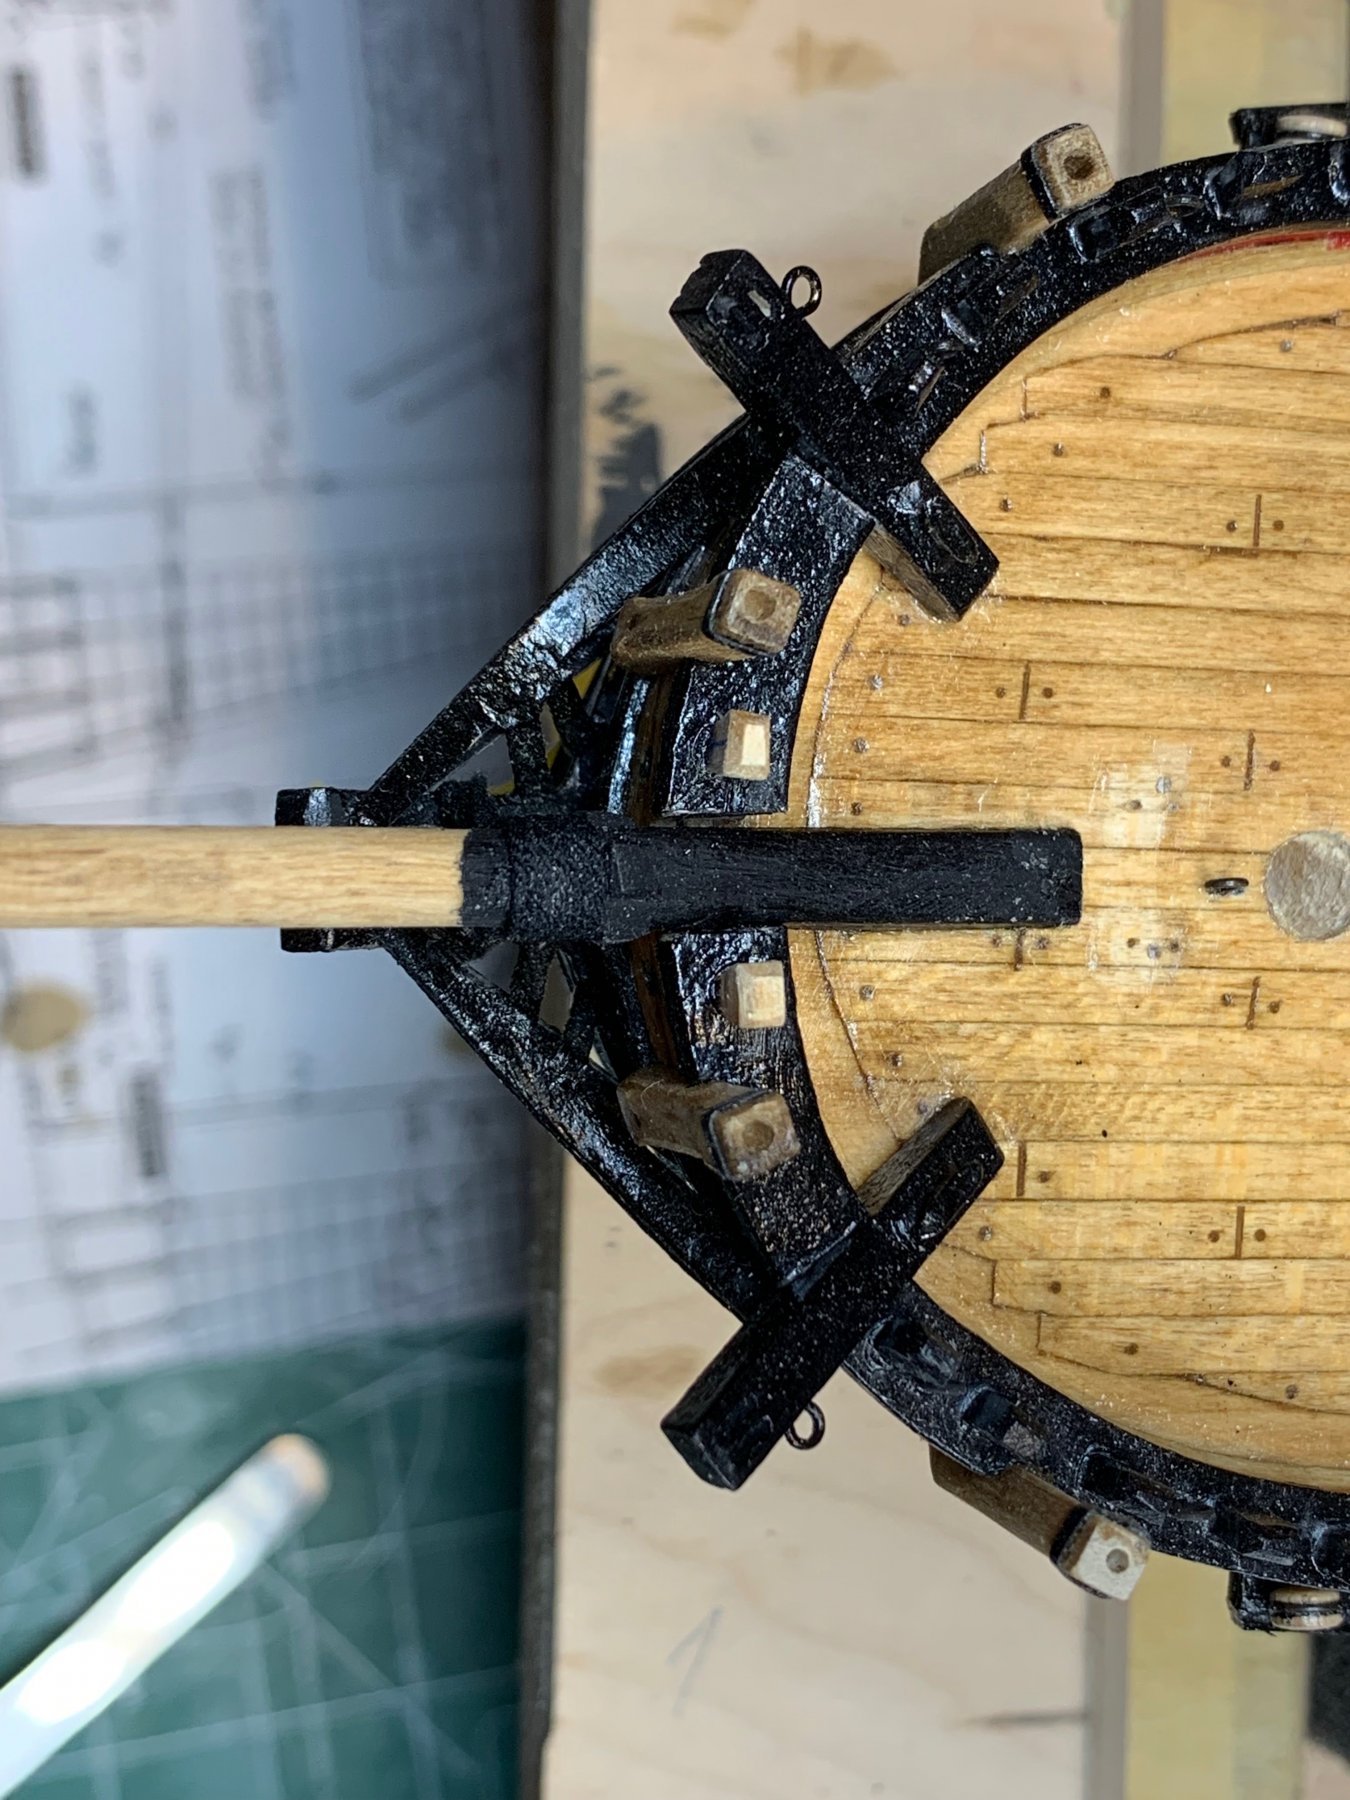
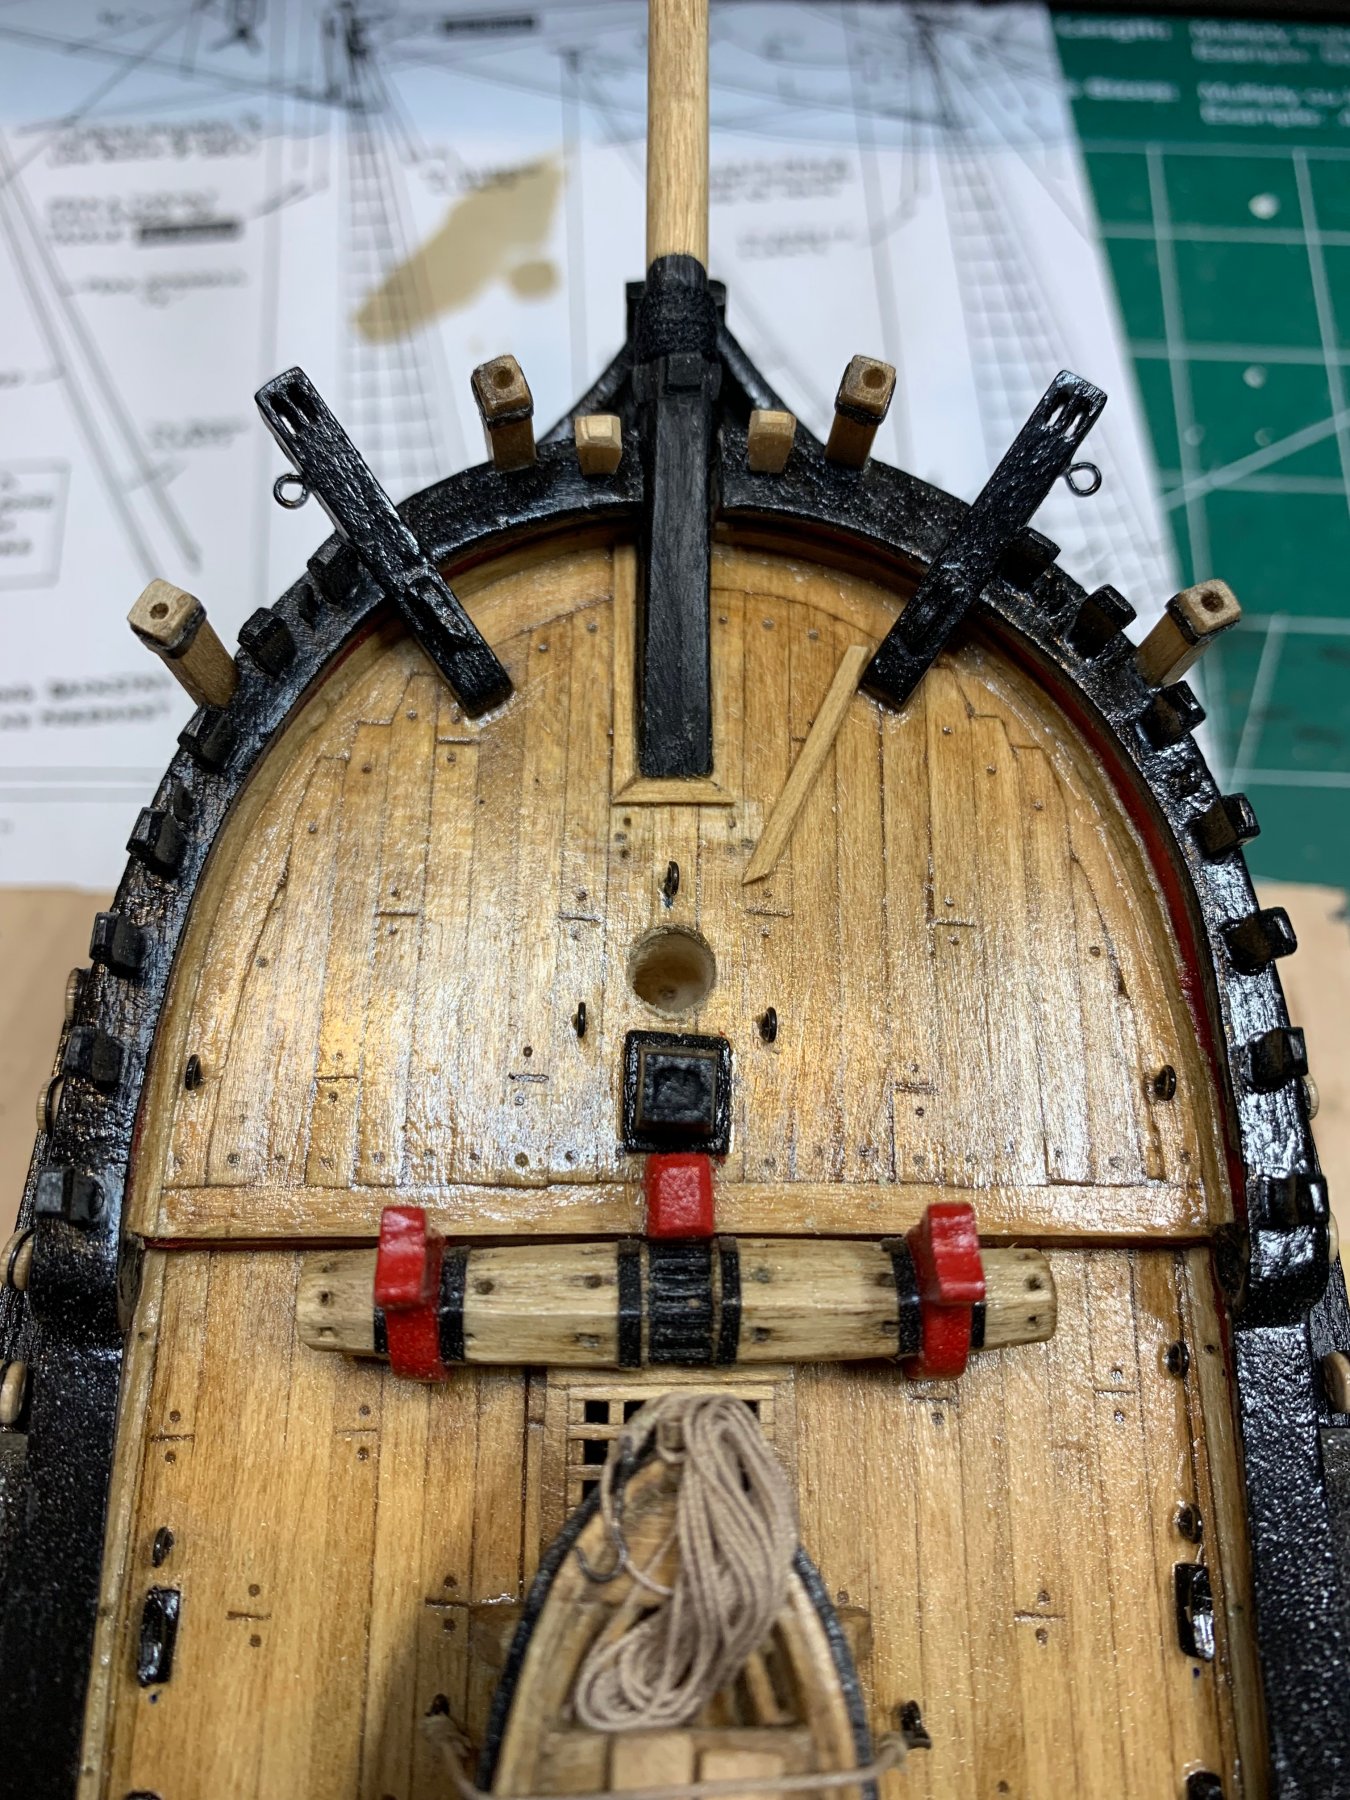
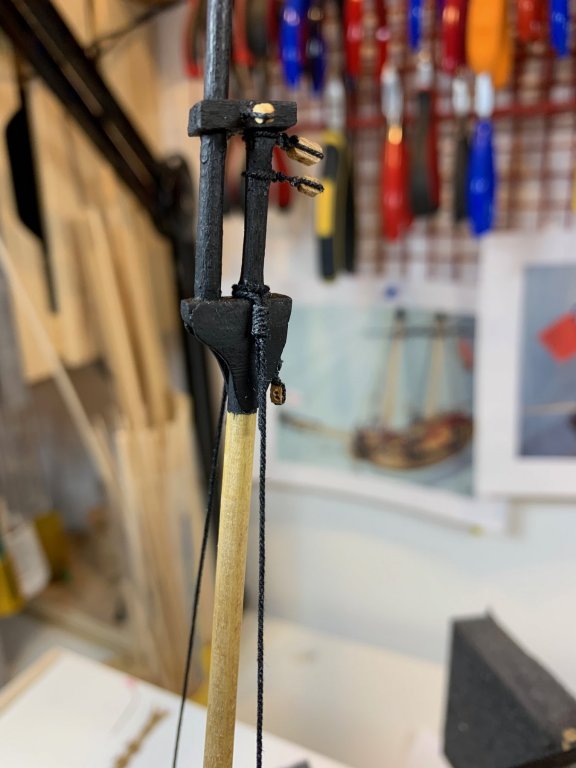
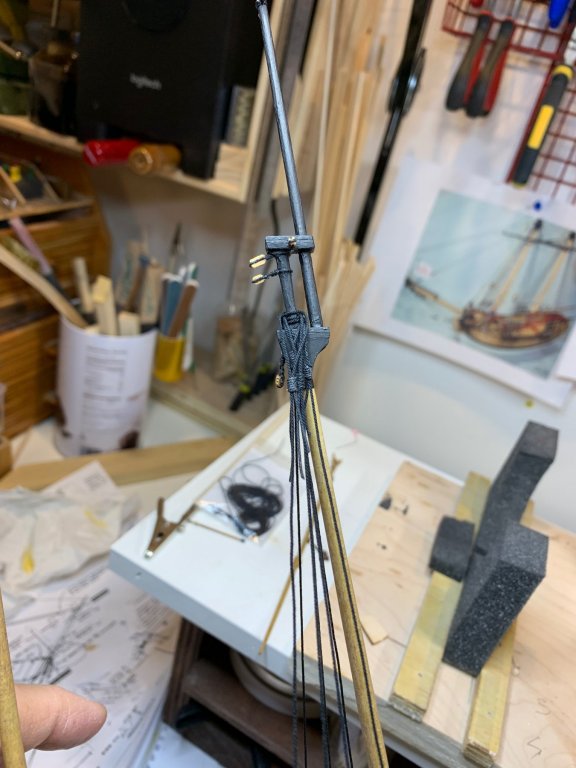
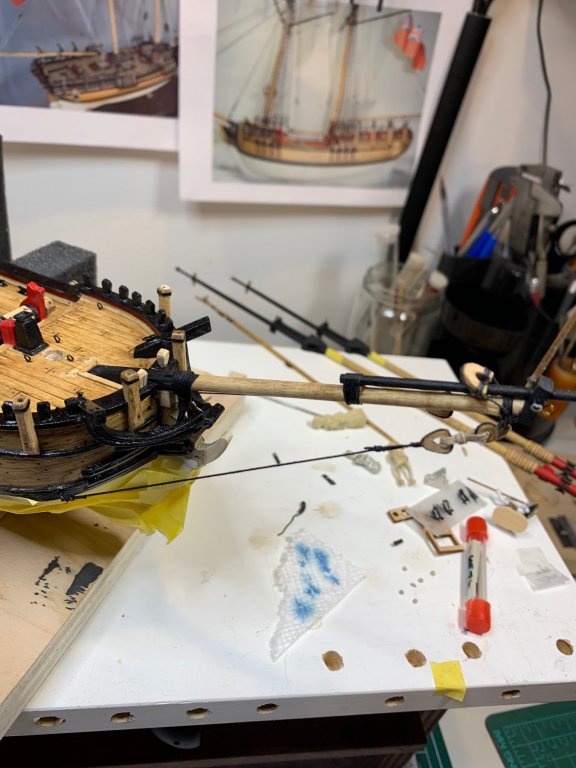
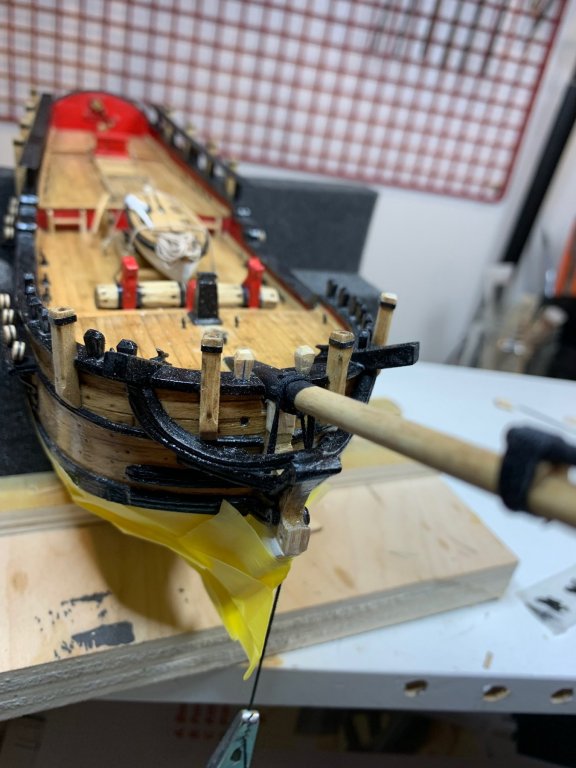
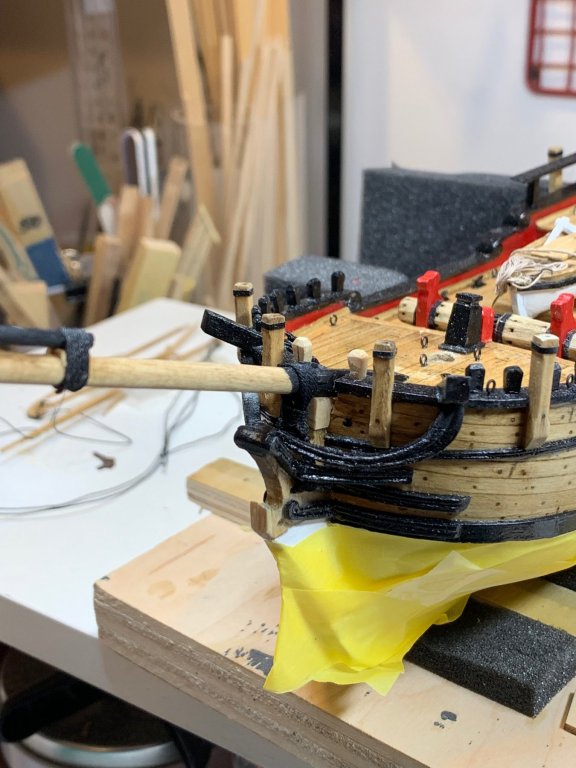
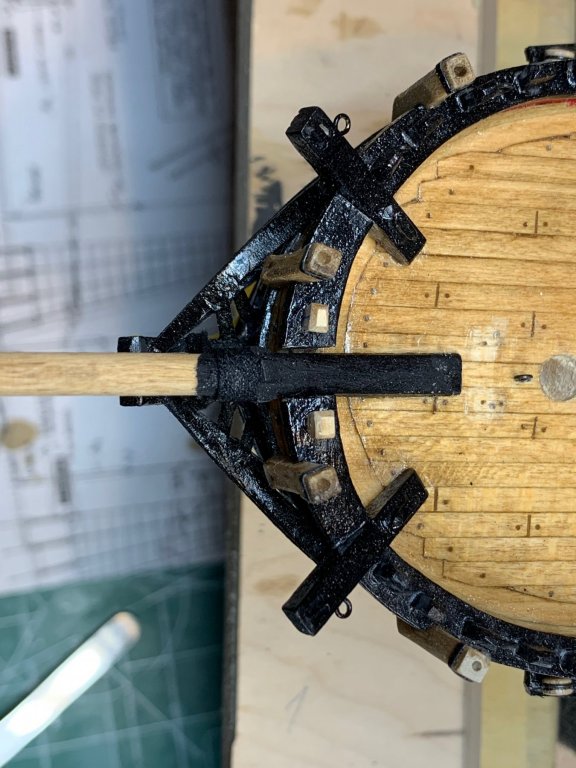
The bowsprit was mounted today. I glue it with a carpenter' glue to have some time to position it properly. The gammoning for the bowsprit was done with .028 black rigging line. Kit does not have any detailed instructions how to run it. Not sure why is this, but the gammoning is very visible on completed ship. Practicum does have correct instruction borrowed form kit supplied manual for Fair American model. First i started by seizing a small eye into the end of the rigging line and after that followed procedure in practicum illustration. The end of the rope was freezed with a touch of glue so it can go thru small openings fairly easily.. Then i framed a bowsprit with .75mm basswood strips with correct 45 degrees angle, like a real molding. Then i run another layer f black paint on trestle trees and mounted masts just for fun... Getting there... Happy modeling


- 360 replies
-
- 1
-
-
- sultana
- model shipways
- (and 1 more)
-
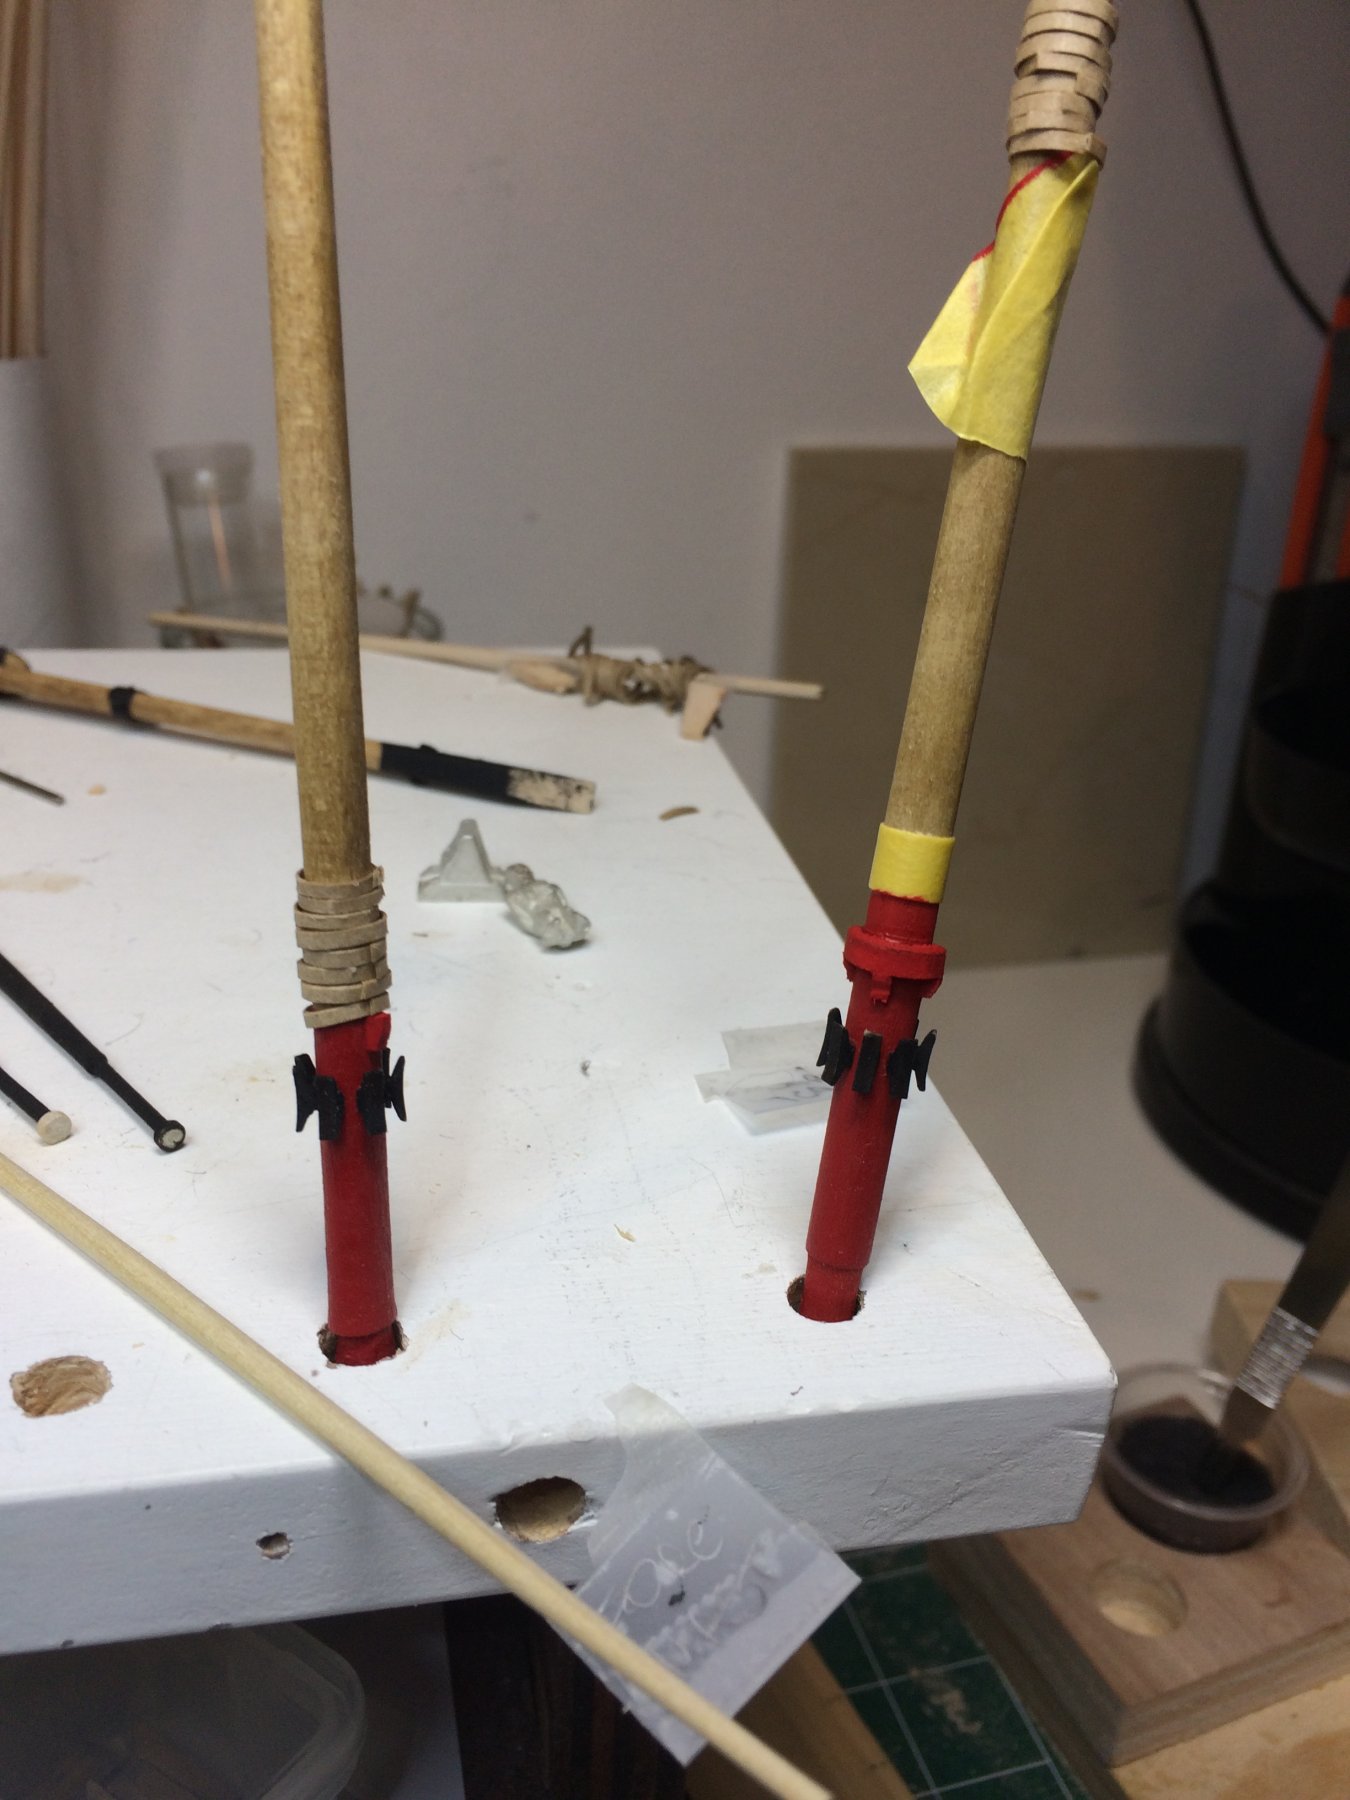
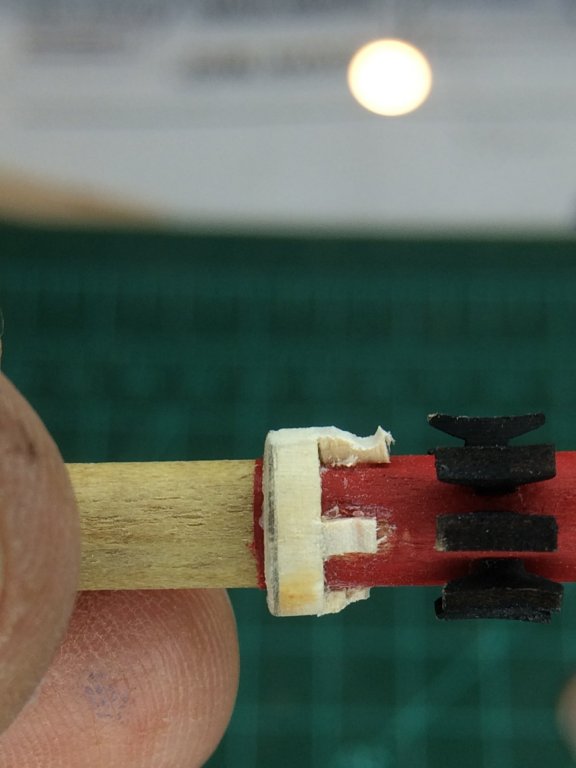
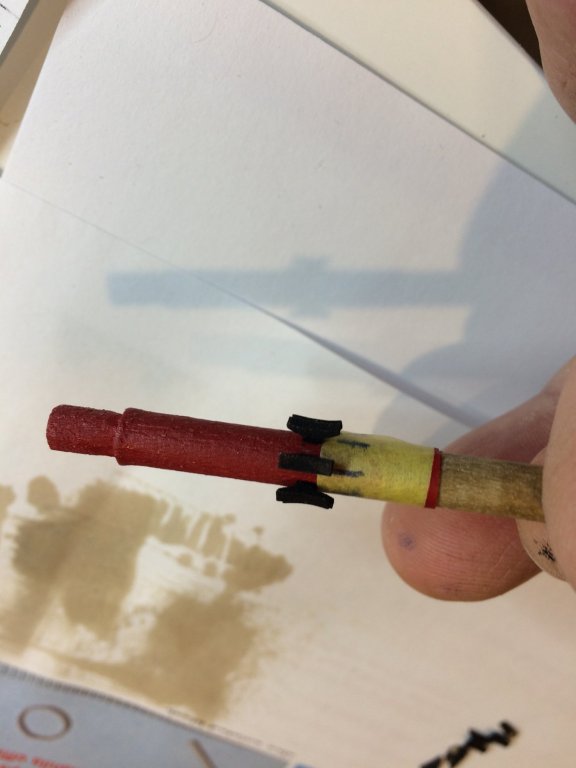
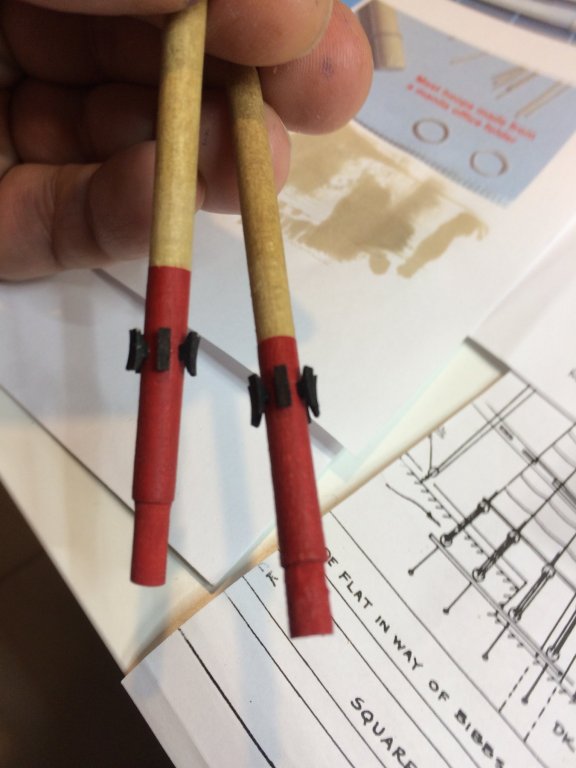
First thing first. To make sure i don't forget hoops again, they were mounted and secured from not slipping away with a scotch tape and some wood to make a bump on the mast. Then i mounted a boom rest on main mast and a chock on fore mast. ... A little bit of shaping was done on them. Protective line of tape was applied to border red and black color. And my Greek warrior making sure i do not make any more booboos.. Painted and ready for a next layer of paint. I diluted red and black color to make it as smooth as possible after painting is done. It might take few more layers... Happy modeling.


- 360 replies
-
- 2
-
-
- sultana
- model shipways
- (and 1 more)
-
Yeah, that definitely will not be interesting situation..
-
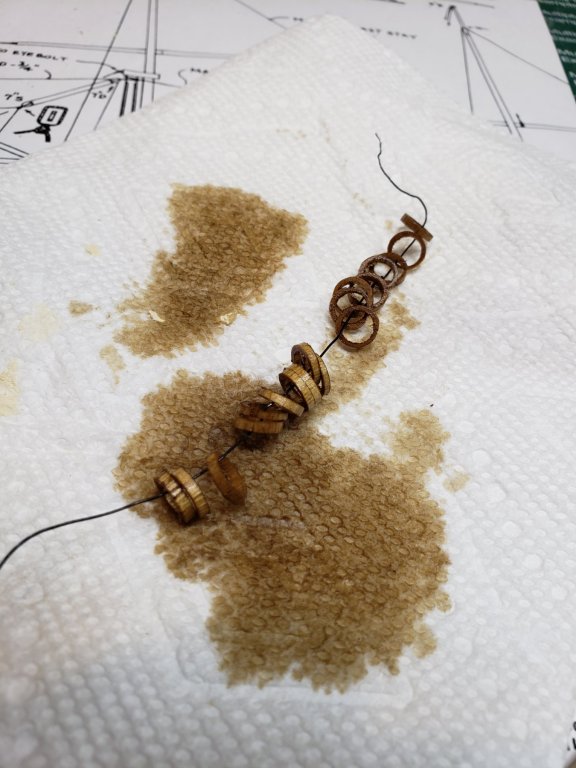
A bit more work on trestle trees. I used my old trestle tree template and made 4 parts. A piece of scotch tape helped transferring shape onto scrap piece of wood. After some cutting, shaping, more shaping and some amount of wood filler both masts have trestle tree mounted. The trestle trees will be painted black so wood filler is not a problem. The hoops were sanded lightly, during which process i broke three hoops. There are tiny, very tiny... Then they were dipped into golden oak stain, and left drying for overnight. Then i made a half-ring chock that will be mounted on main mast... After cutting it and shaping it, i almost made mistake to glue it on the mast before putting hoops on it. Today, time permitting i will continue with masts. Happy modeling..


- 360 replies
-
- 3
-
-
- sultana
- model shipways
- (and 1 more)
-
Work on foremast has been completed; actually just making a foremast and trestle trees, there are few other items still waiting... The process was the same as before; cut a piece of poplar, 8mm x 8mm... One end was sharpened to fit into lathe chuck... Then was mounted into lathe.... During shaping process using file and sanding blocks in different size... Completed... And after trestle trees in rough dimensions were added.. The layer of golden oak stain was applied to foremast as well.. Happy modeling.


- 360 replies
-
- 3
-
-
- sultana
- model shipways
- (and 1 more)
-
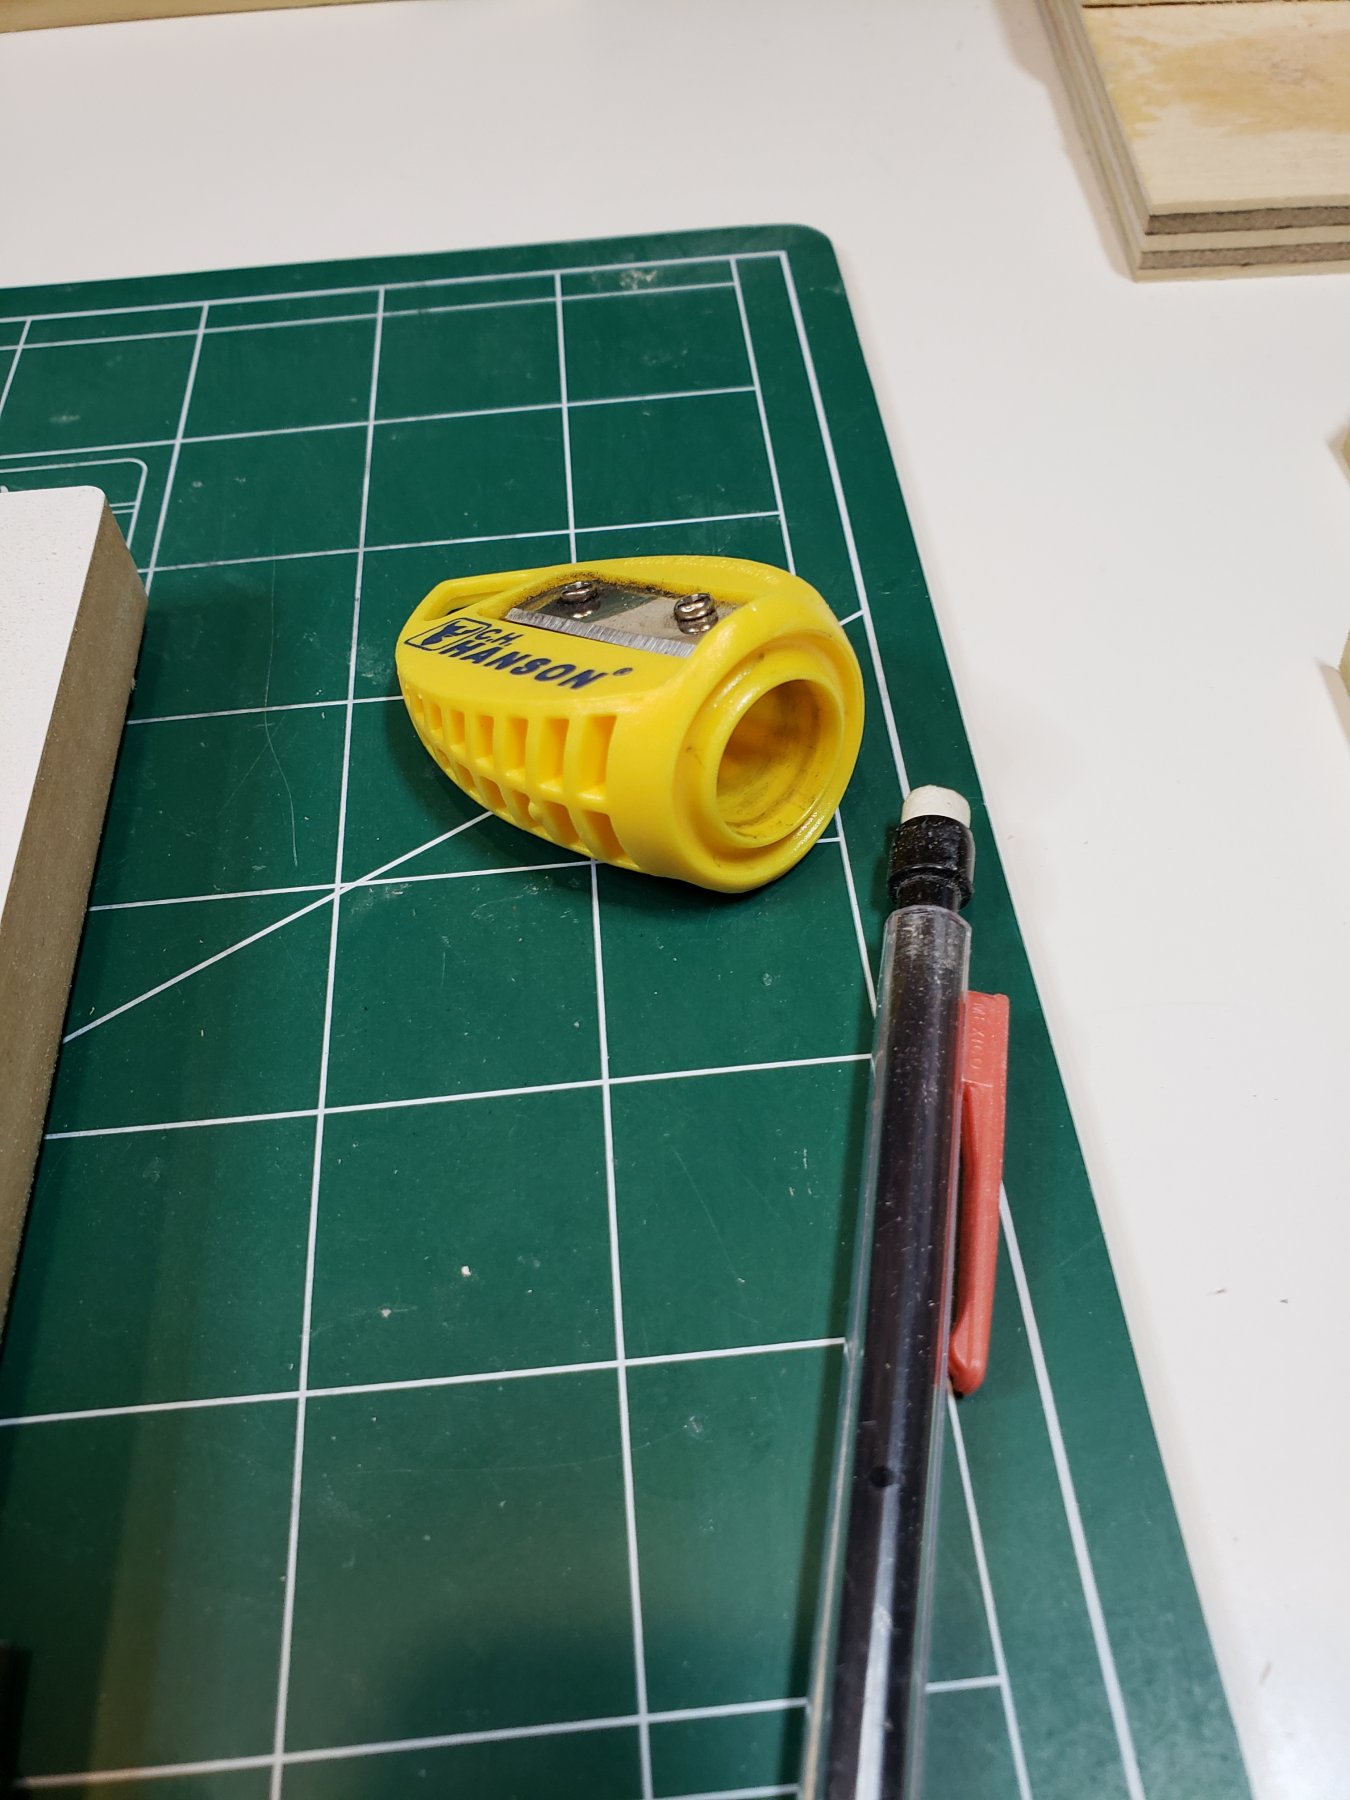
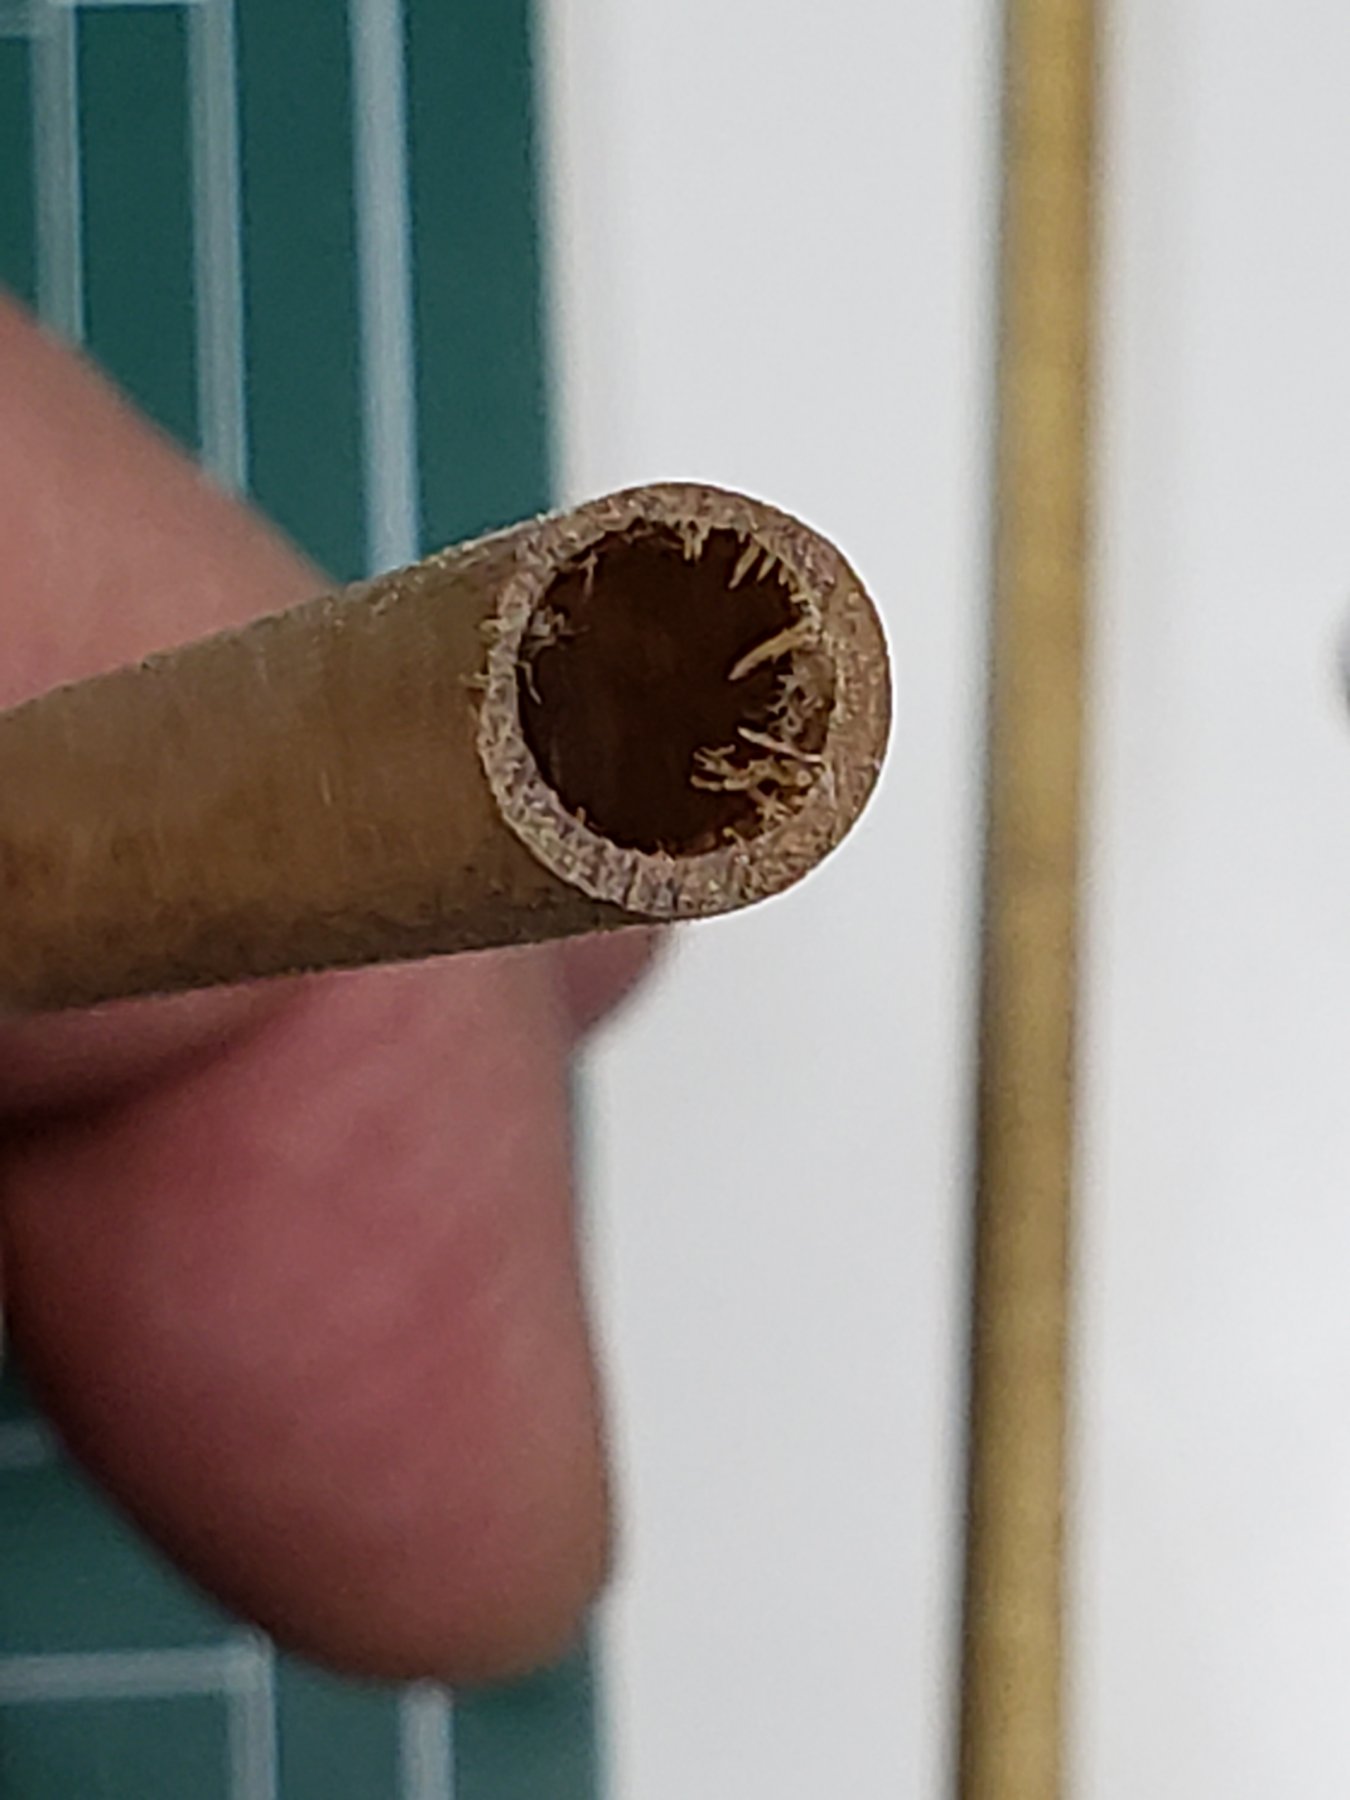
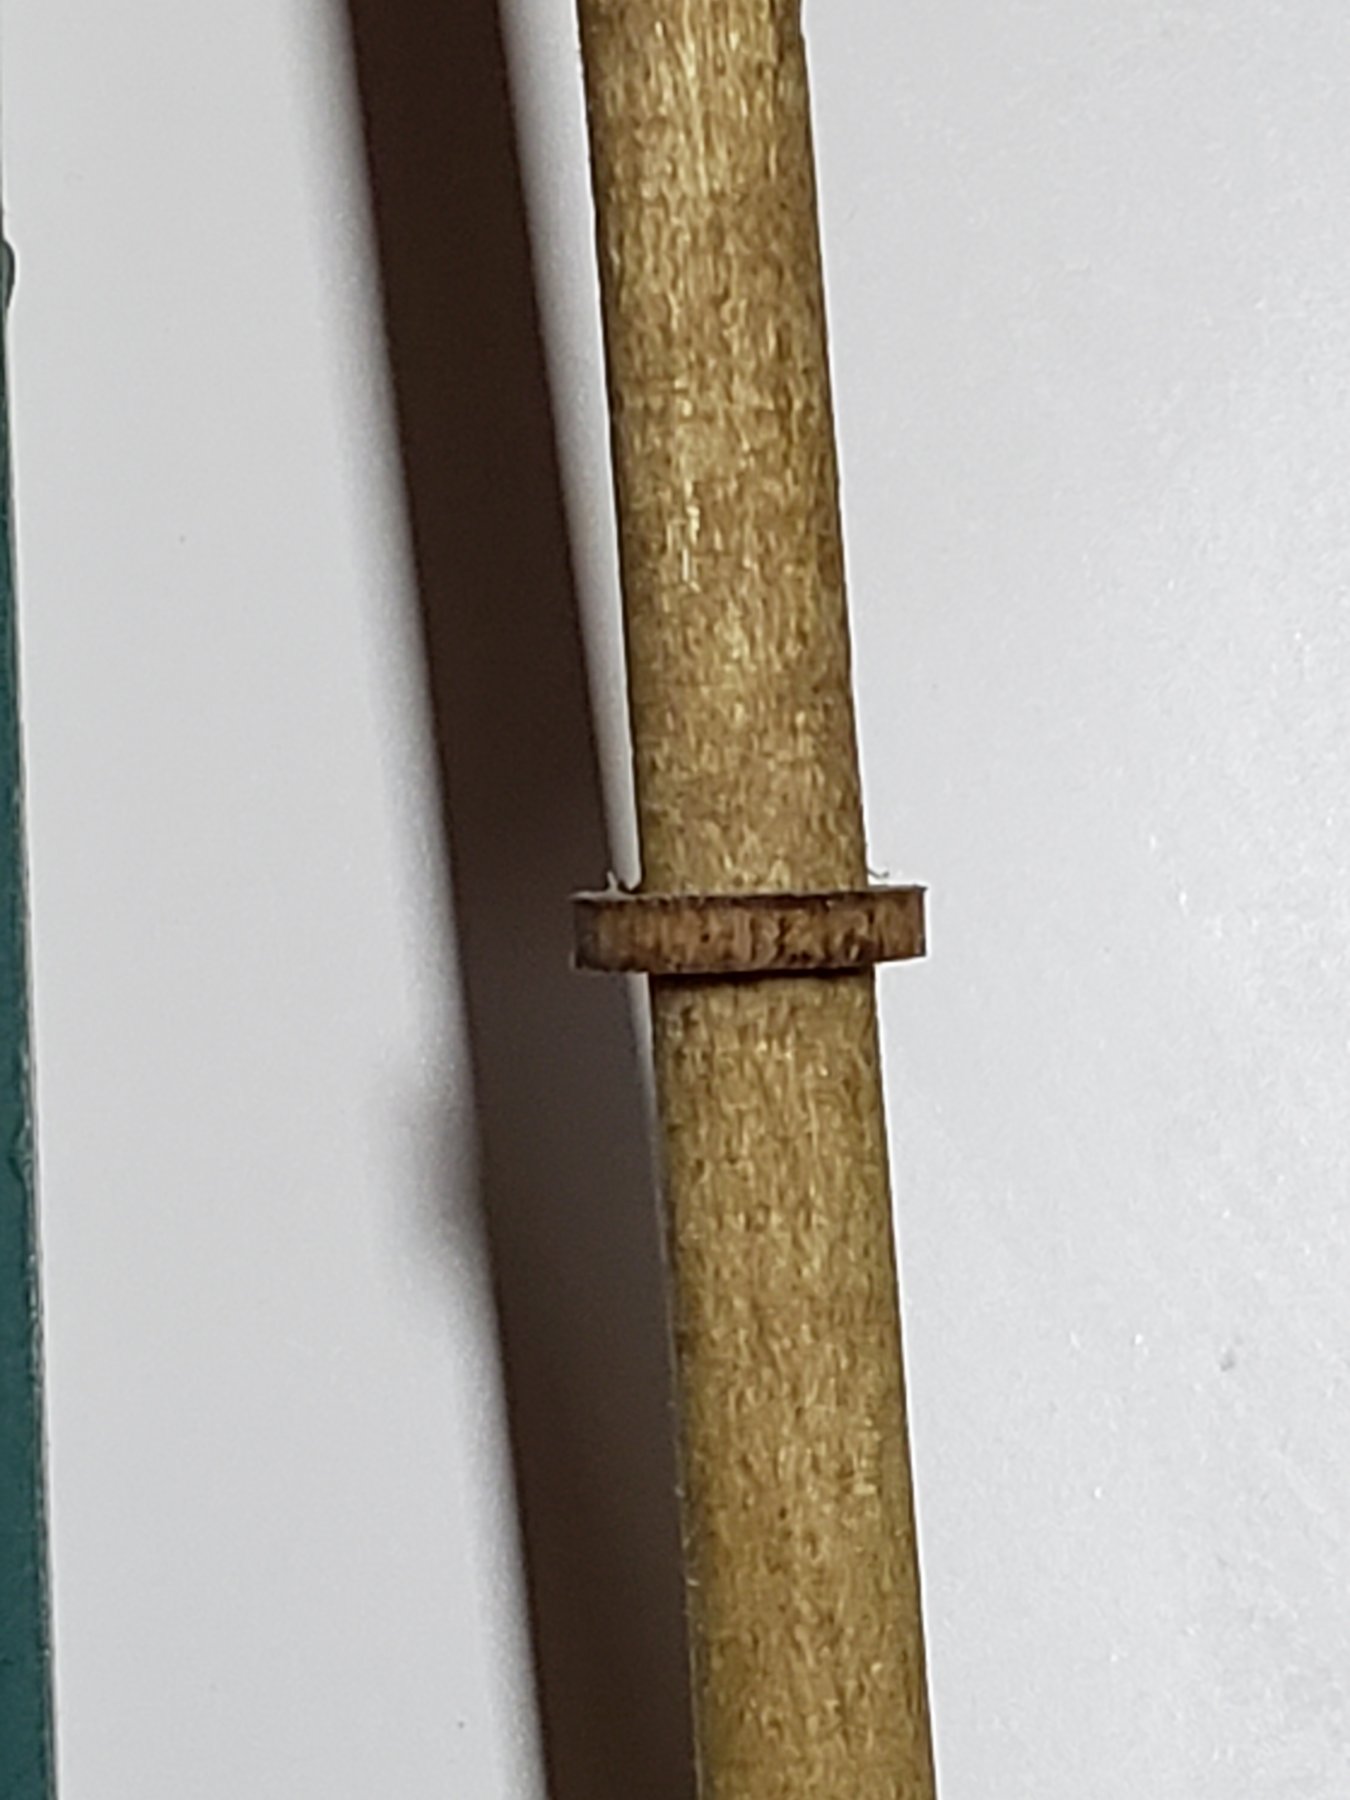
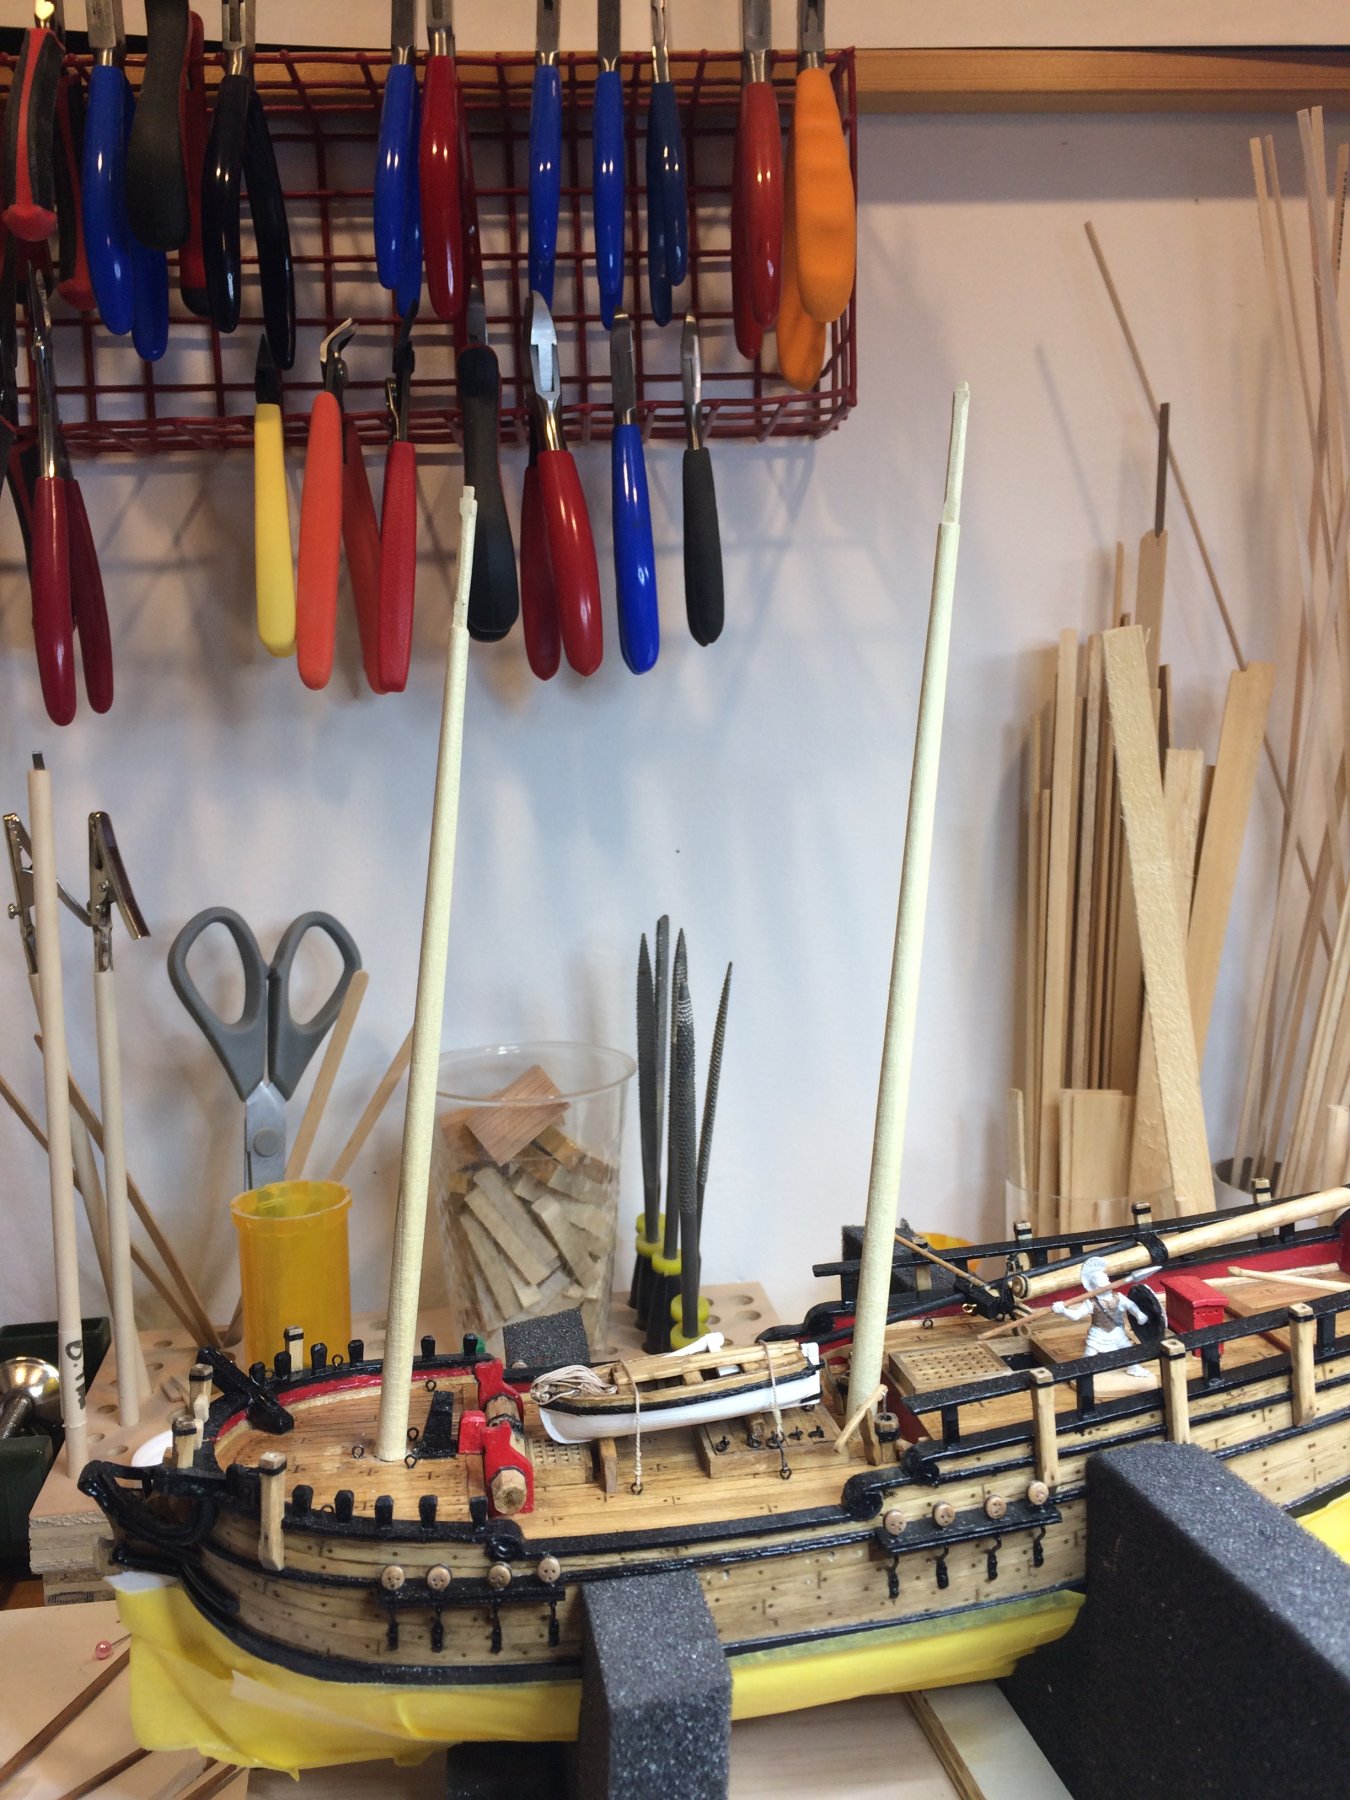
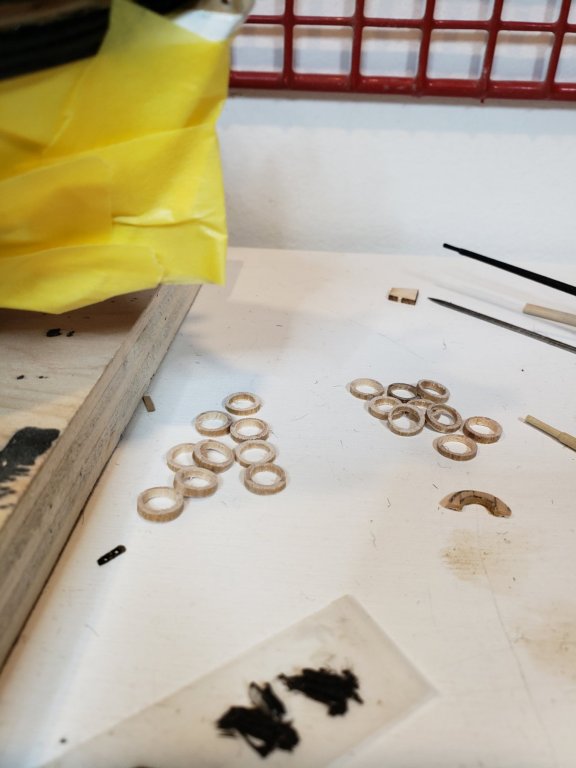
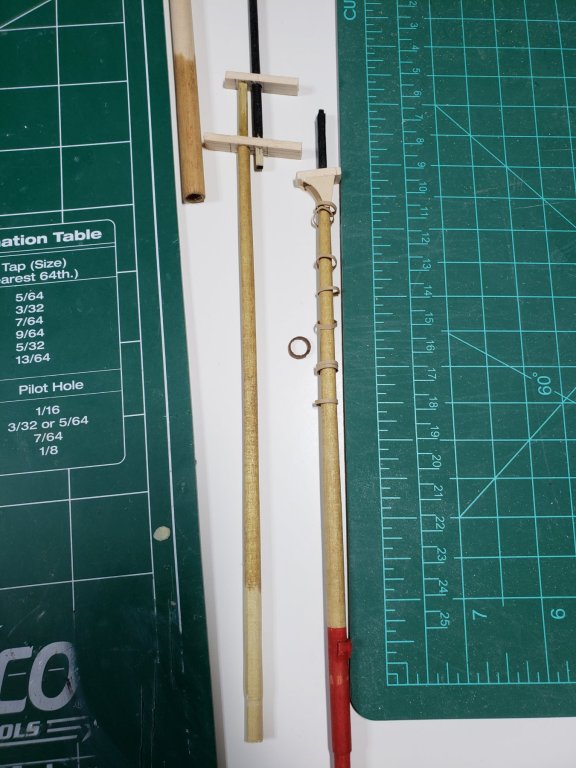
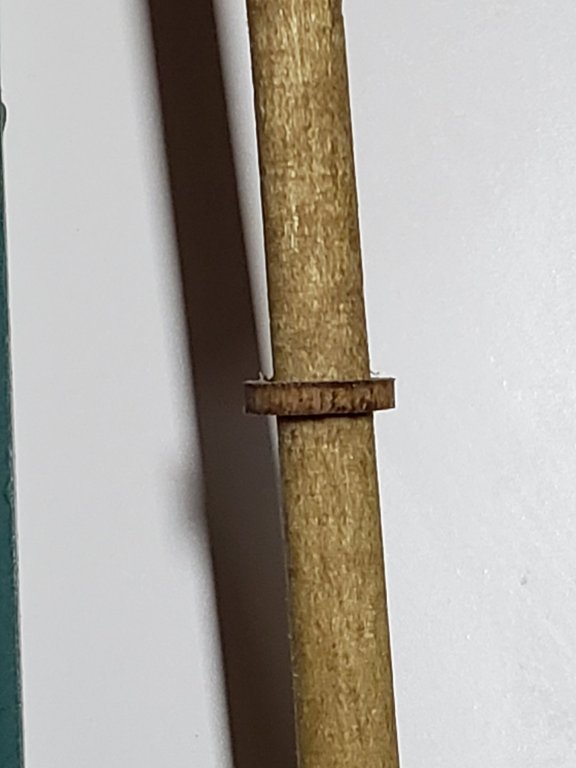
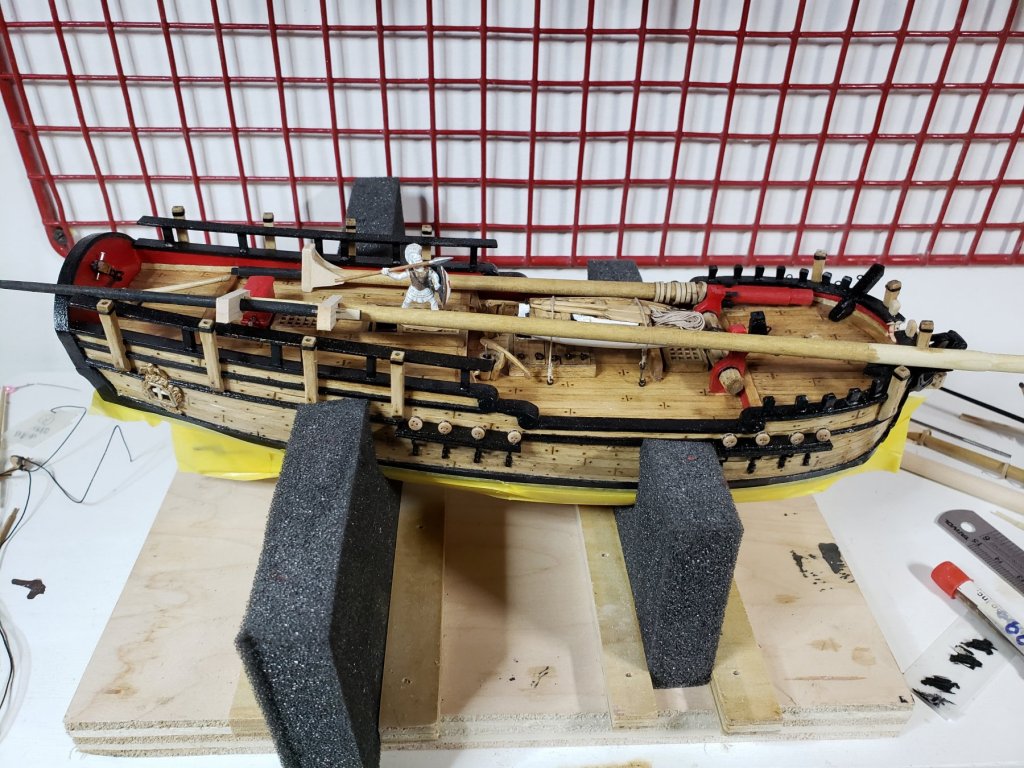
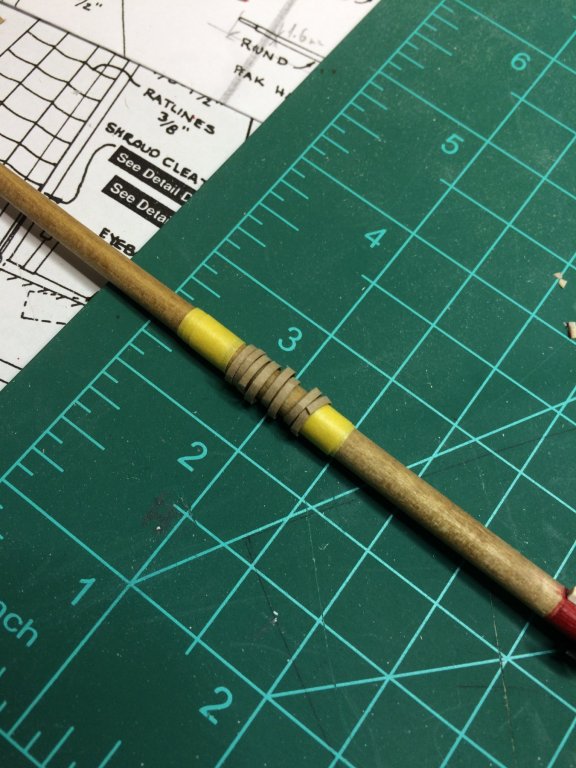
Few days ago i was looking to my simulated mast hoops and did not like to overlap that was created by gluing the manila folder strips. So i decided to take shot and see if i can make a wooden mast hoops in the same dimension. First i find a dowel in correct outside diameter and drill a hole in it. I put a dowel into my lathe, on the other end i secured a drill bit in 6mm size, turn on lathe and slowly move the drill towards the rotating dowel. The center was slightly off centered but nothing that a bit of sanding cannot fix 🙂 Then i cut first hoop using handsaw.. Testing on the mast appears to have better results than one made out of folder. So, now since my masts were all completed i was in dilemma what to do to accommodate wooden hoops: to cut the mast at the area where hoops will be mounted and slide wooden hoops or to make a brand new mast... Next picture has an answer to this... There are few other gotchas i discovered on masts like diameter was not equal all around mast which i did not notice before, cleats were not positioned correctly, etc. Anyhow, i have completed main mast, it is ready to shape and finish both trestle trees; the rough construction is done, some pieces are still to be done.... And my Sultana now rests and anciently waits for mast to be completed and to start rigging... ... with Greek warrior guarding the ship. Happy modeling

- 360 replies
-
- 5
-
-
- sultana
- model shipways
- (and 1 more)
-
Thanks Lou. The kit part is kind of acceptable but i decided to go with a scratch made one..
- 360 replies
-
- 1
-
-
- sultana
- model shipways
- (and 1 more)
-
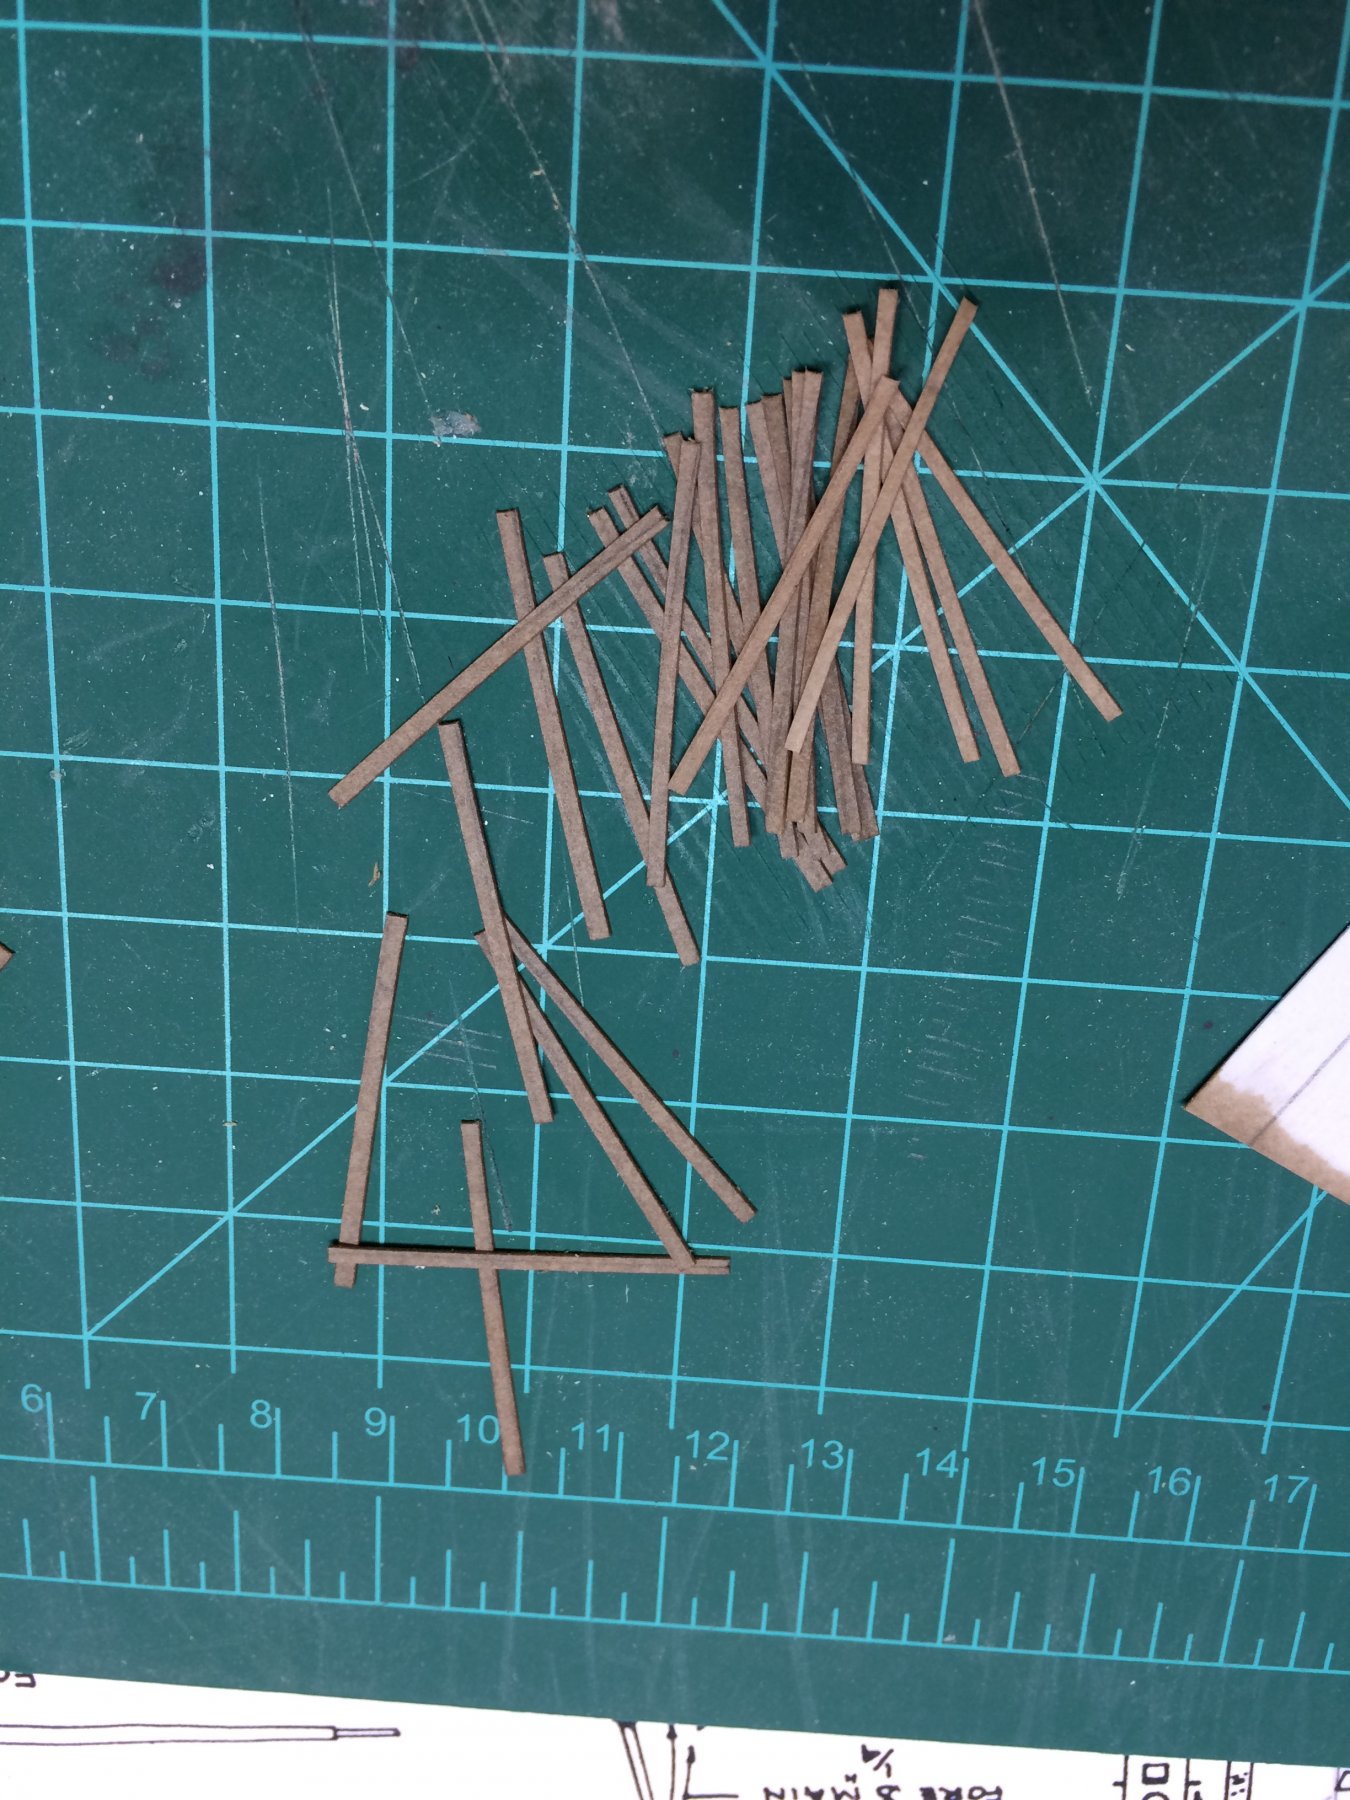
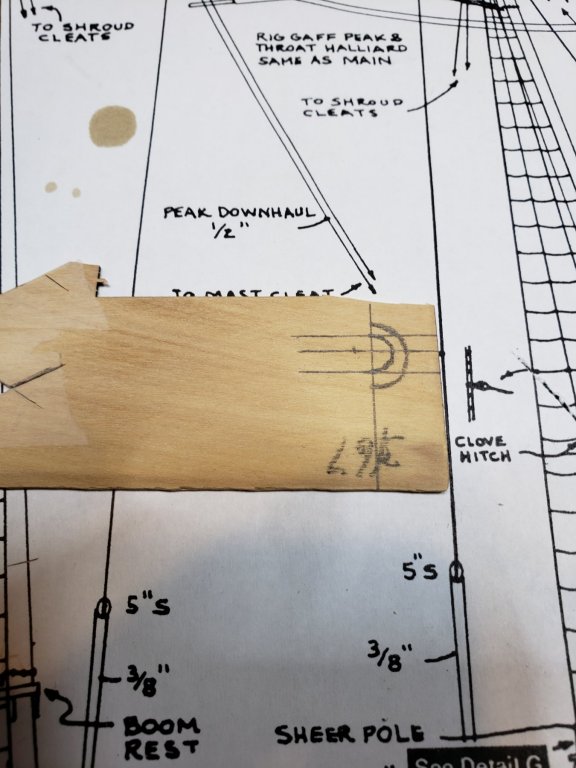
Seven mast cleats were glued around both masts. The cleats were obtained from Syren ship model company since the kit provided were a bit oversized. The cleats are laser cut and looks very nice. The location was marked with painter' tape and few dots to approximately shows the seven points were cleats will be glued. All cleats were painted black before being mounted. The boom rest was added to the main mast. For this i followed the practicum and made a half of a circle. The plan shows the full circle. I drilled the hole (6mm) in the scrap piece of dowel by increasing the diameter of the drill. Then cut the ring and divided into two parts.. A bit of a shaping was applied to the part and it was glued to the mast. Under the mast i put three small chocks on the aft part of the main mast. The chocks were then shaped to the correct shape... This is a view thru the magnified glass. All parts were shaped with a file and cleaned with a sanding block. On the foremast there was only one chock glued to hold the hoops. The layer of red paint was applied after. The hoops were build out of office folder (manila folder). The folder was white and it was stained in golden oak. Then about 20 of them were cut in 1mm width. The length was about 25mm. I wrapped the strips over a wider dowel, over lapped the ends and glue them with super glue. The excess was cut with a scissors and they were mounted on the masts before any work on cleats was started. Then they were stopped to move on mast with some painter' tape so i can hold the mast while working other parts. So the whole assembly so far looks like this: And temporary on the ship looks like this: Happy modelling.


- 360 replies
-
- 2
-
-
- sultana
- model shipways
- (and 1 more)
-
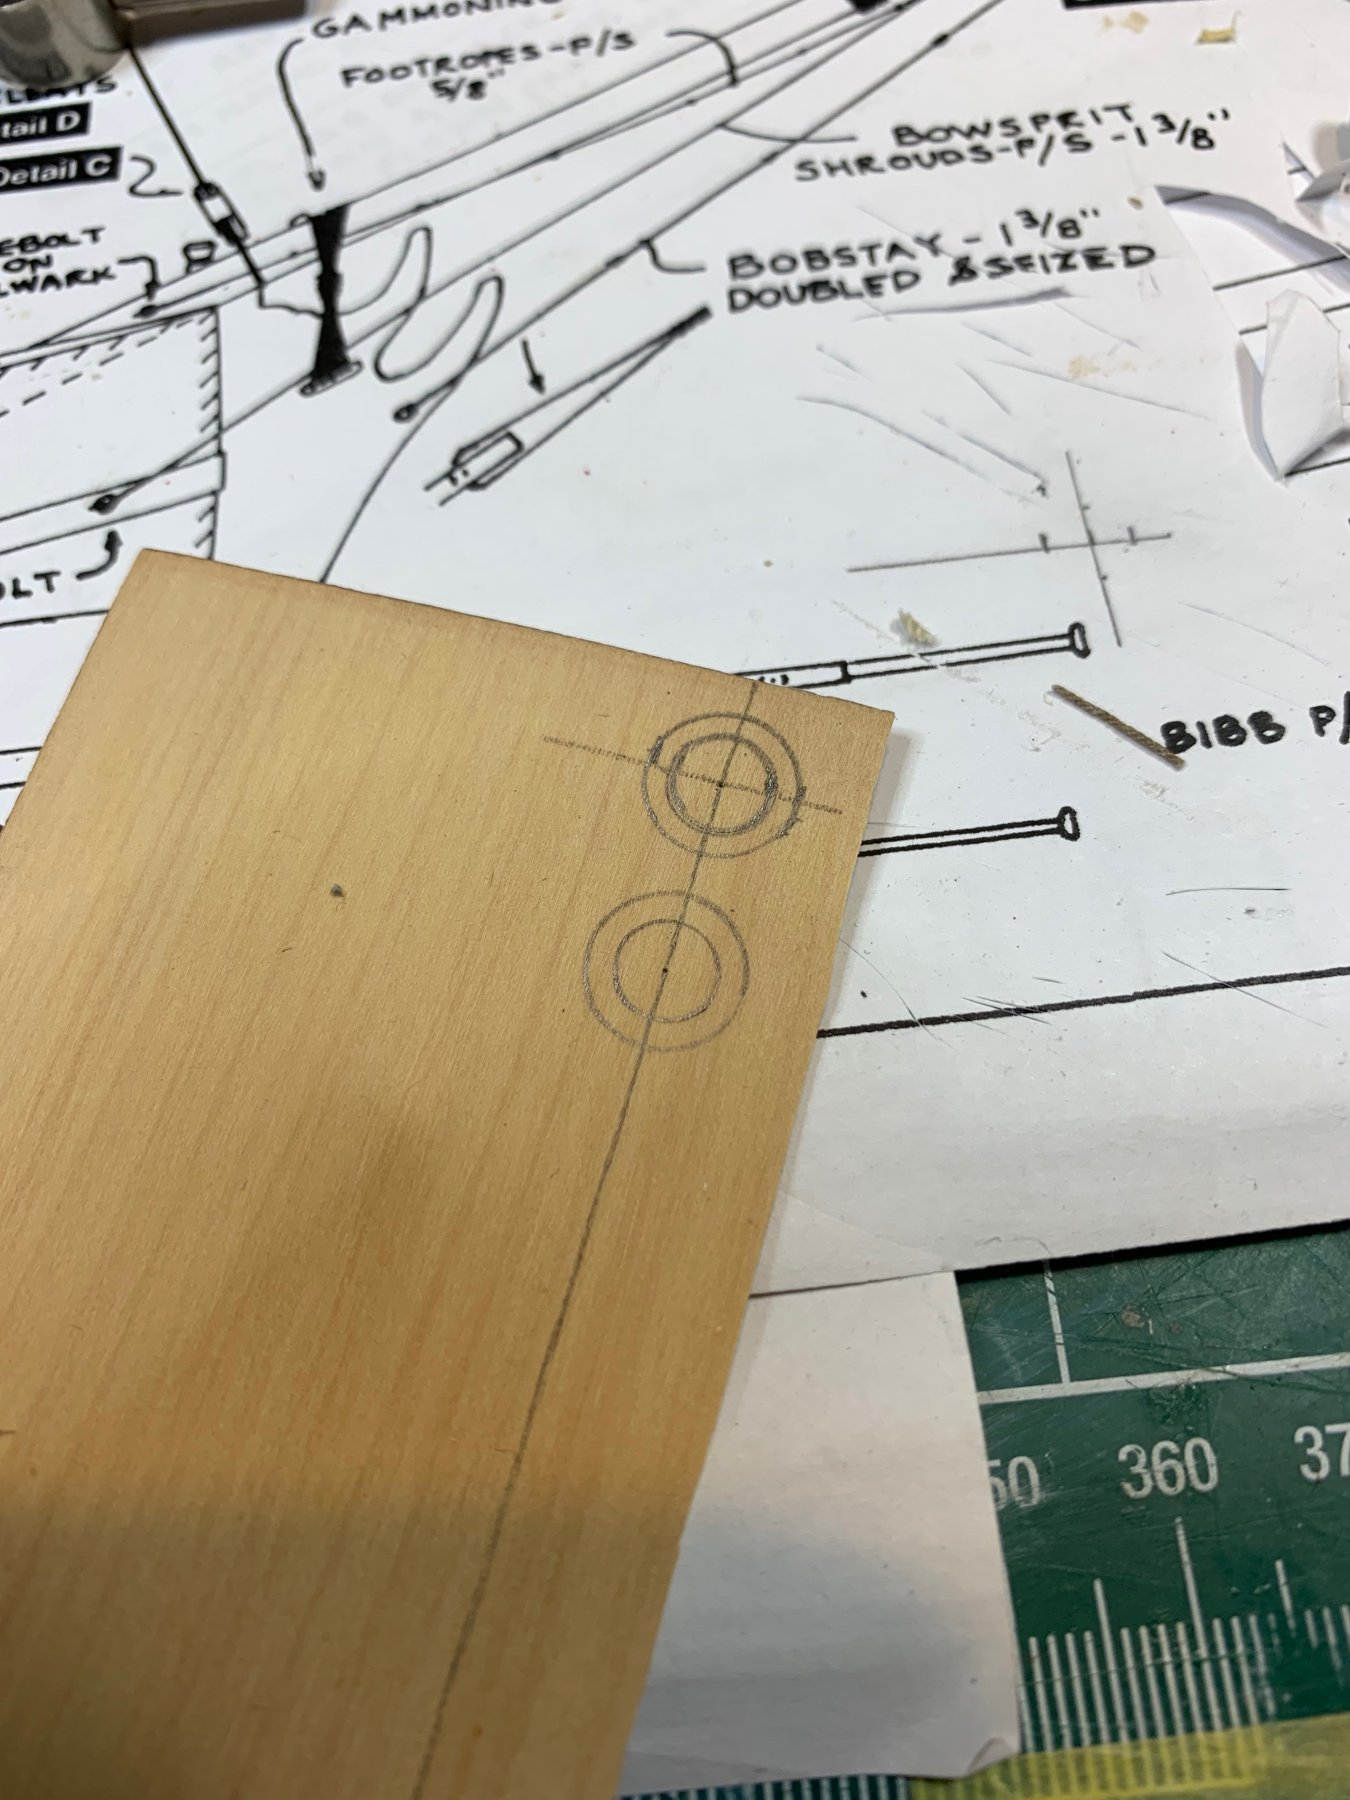
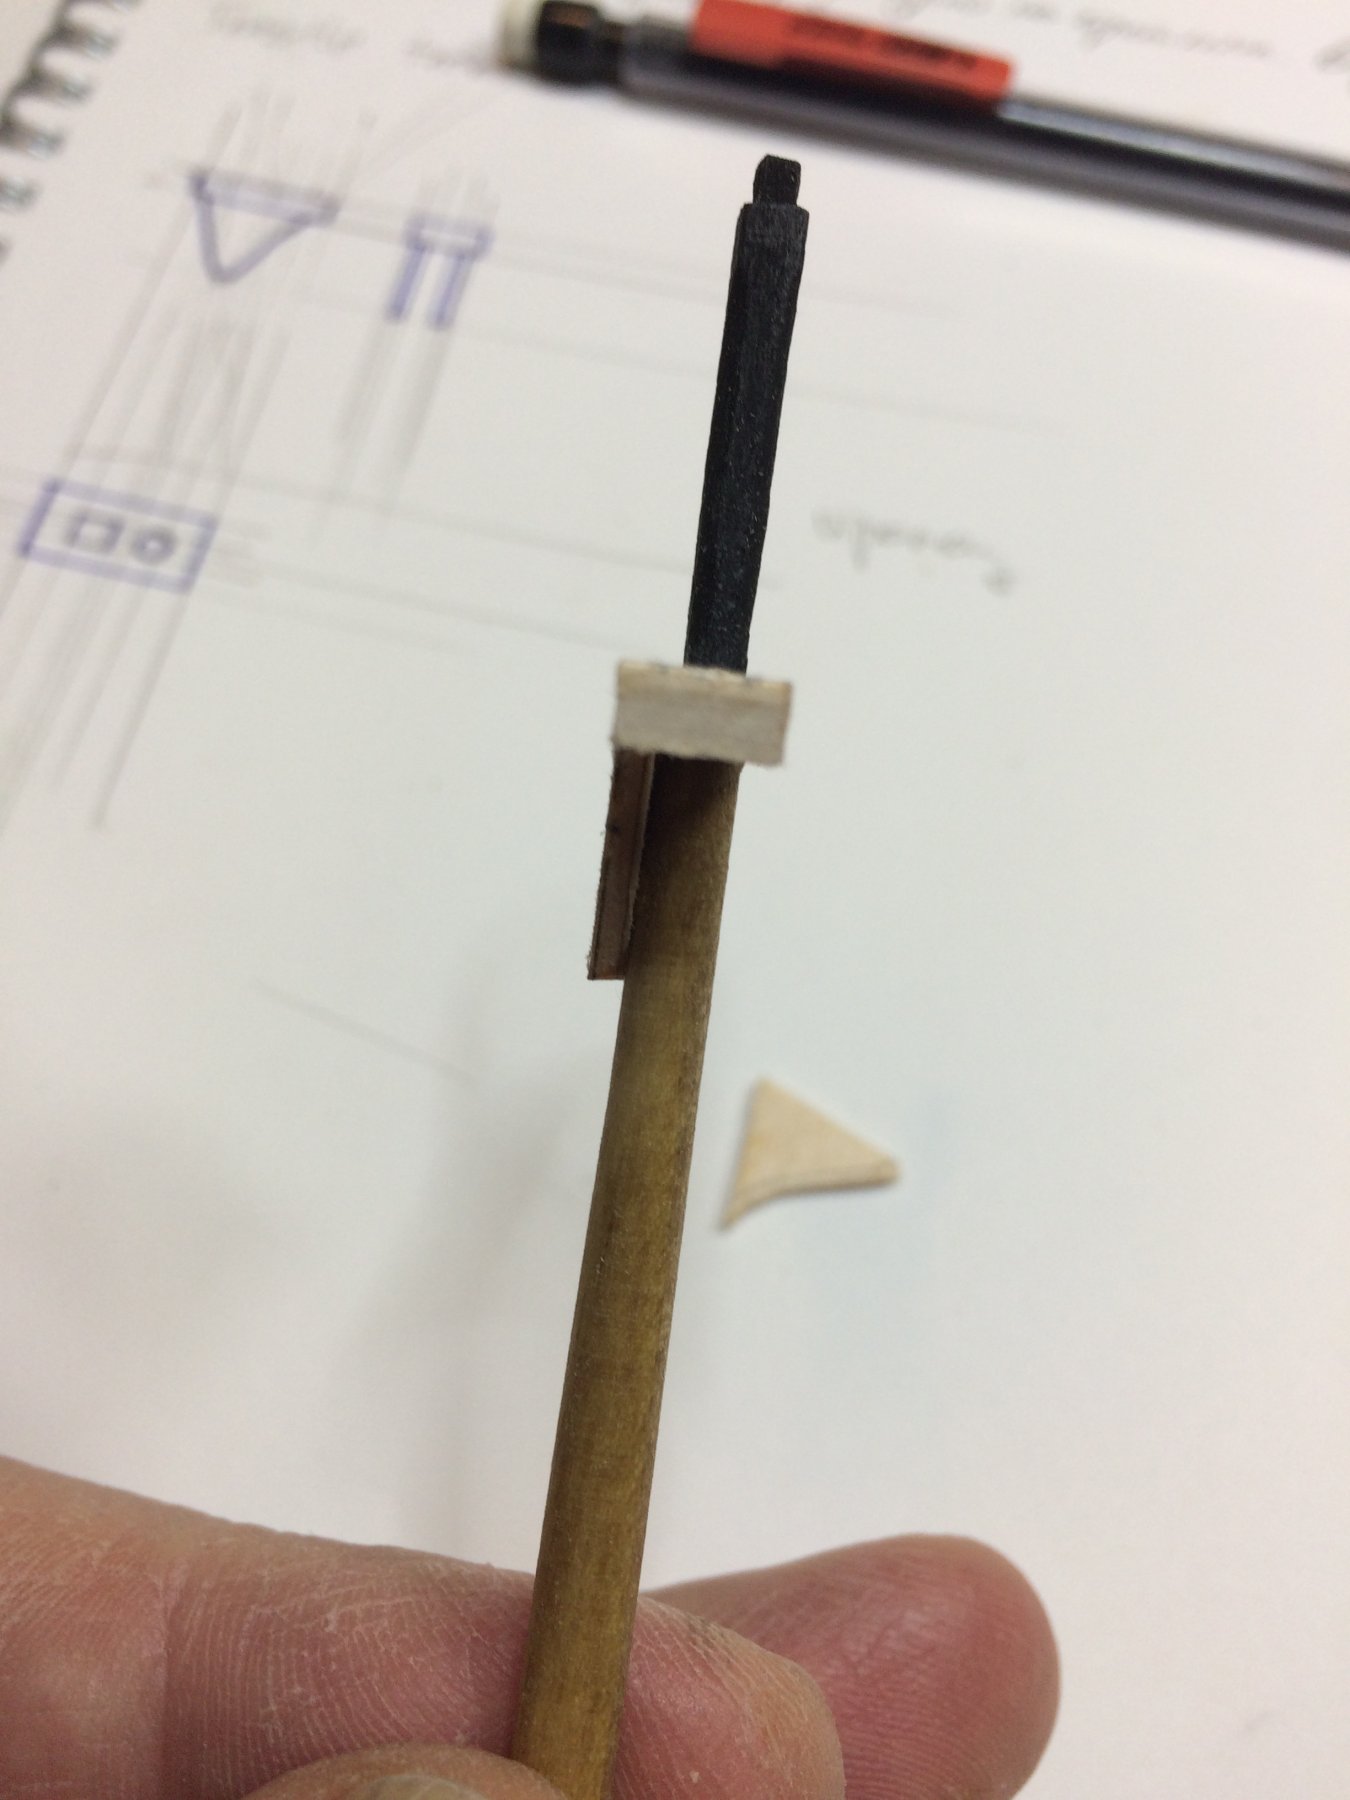
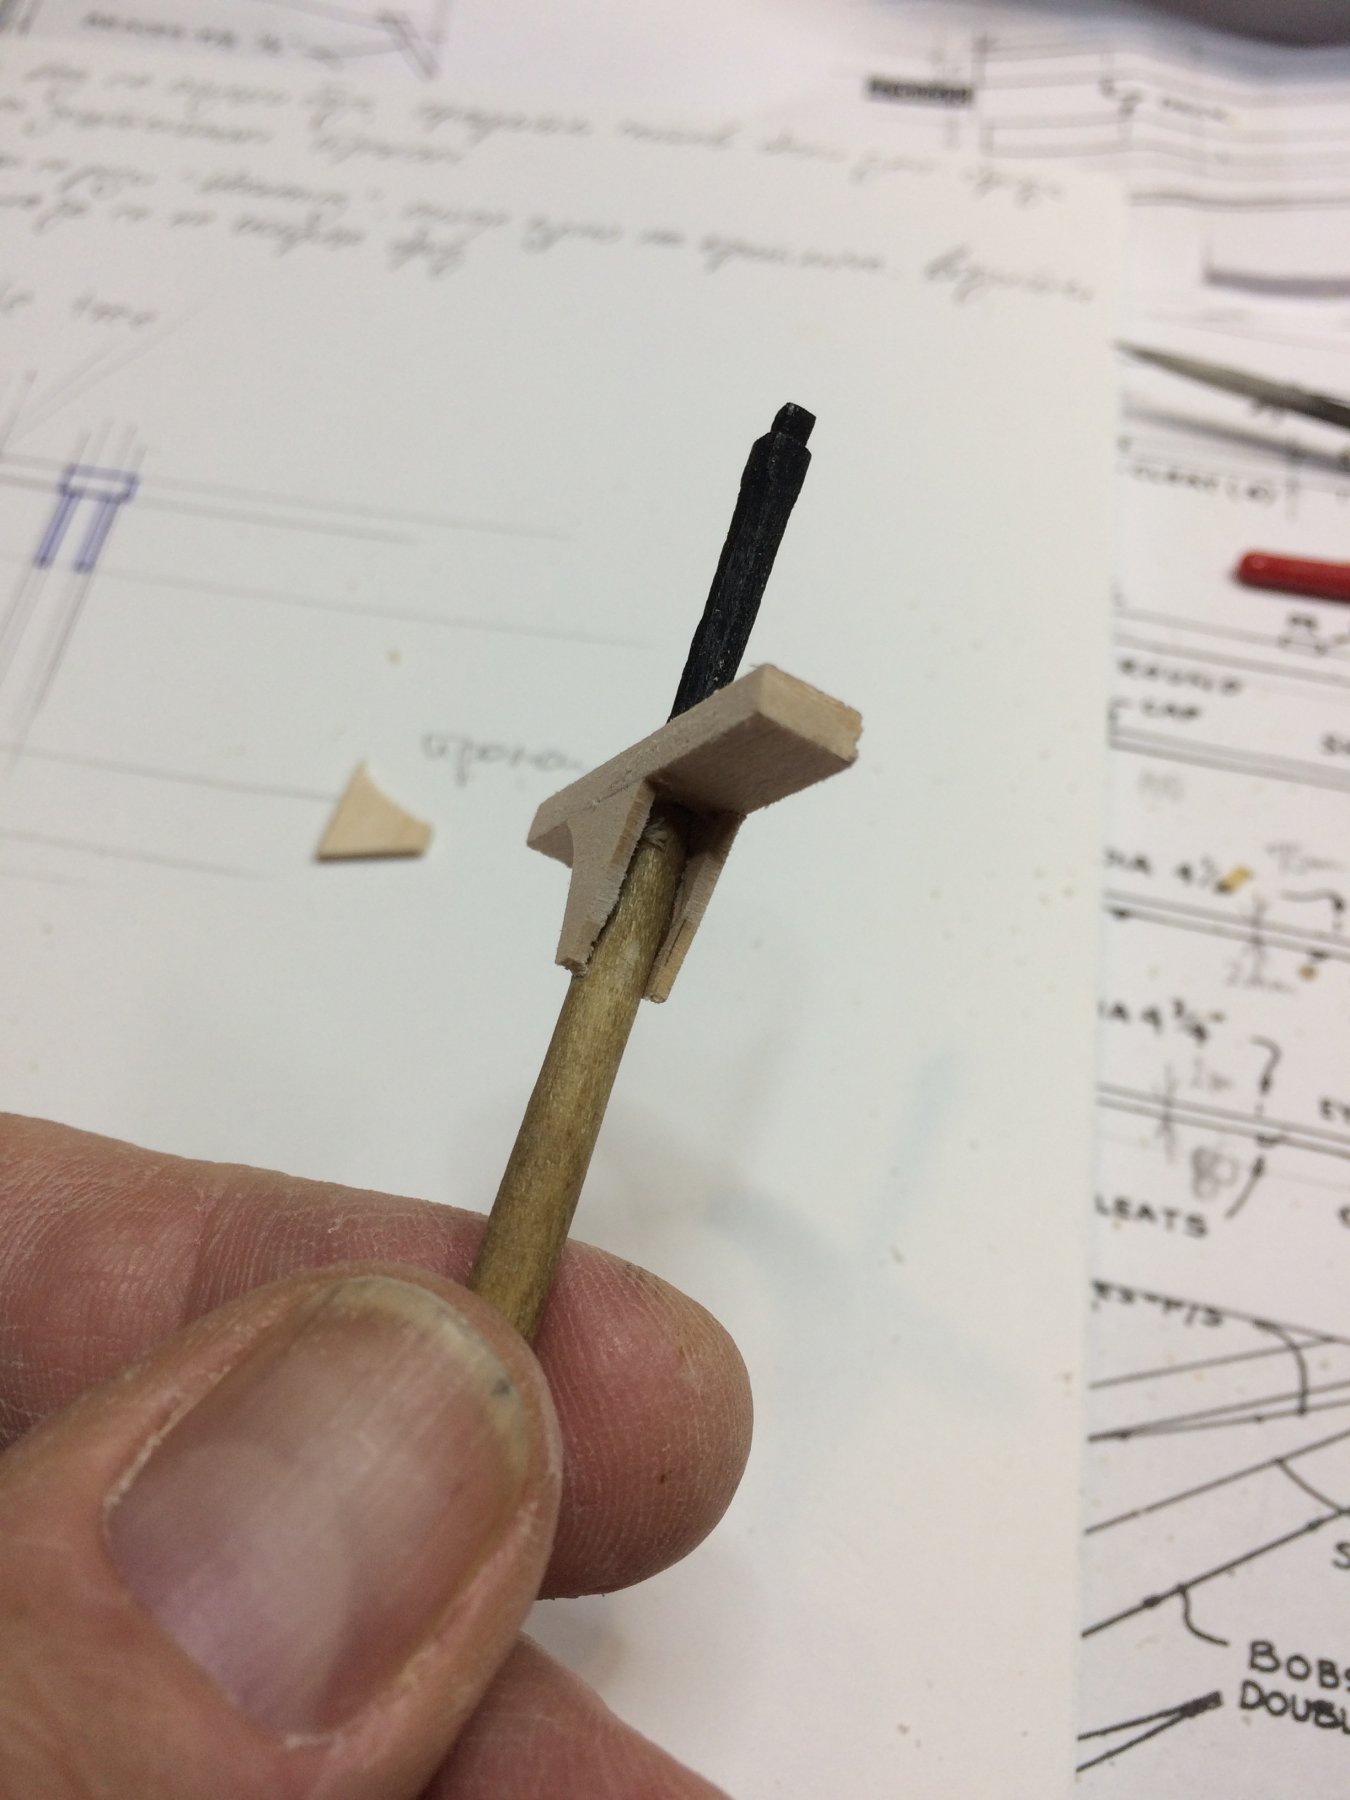
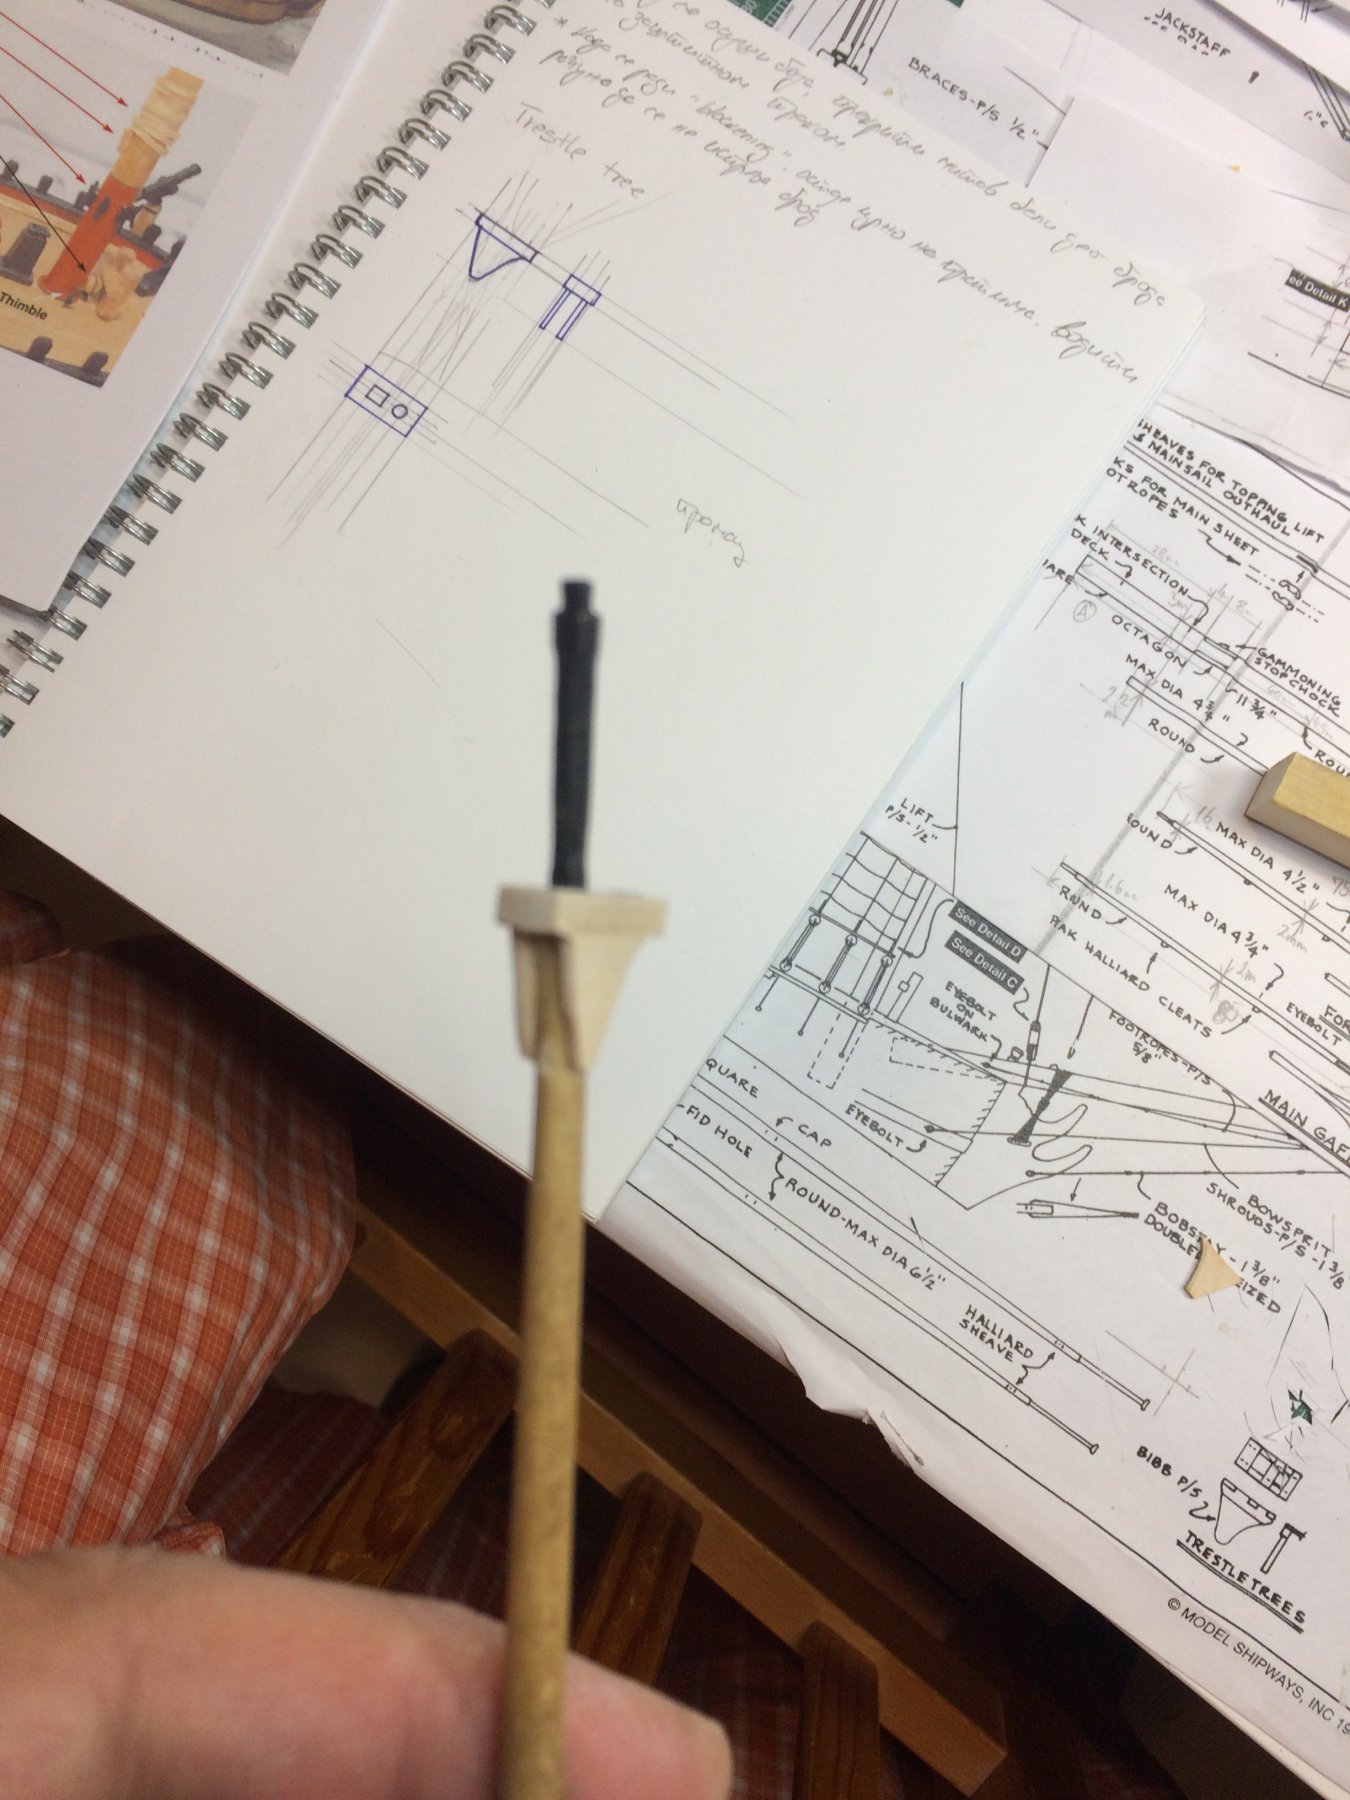
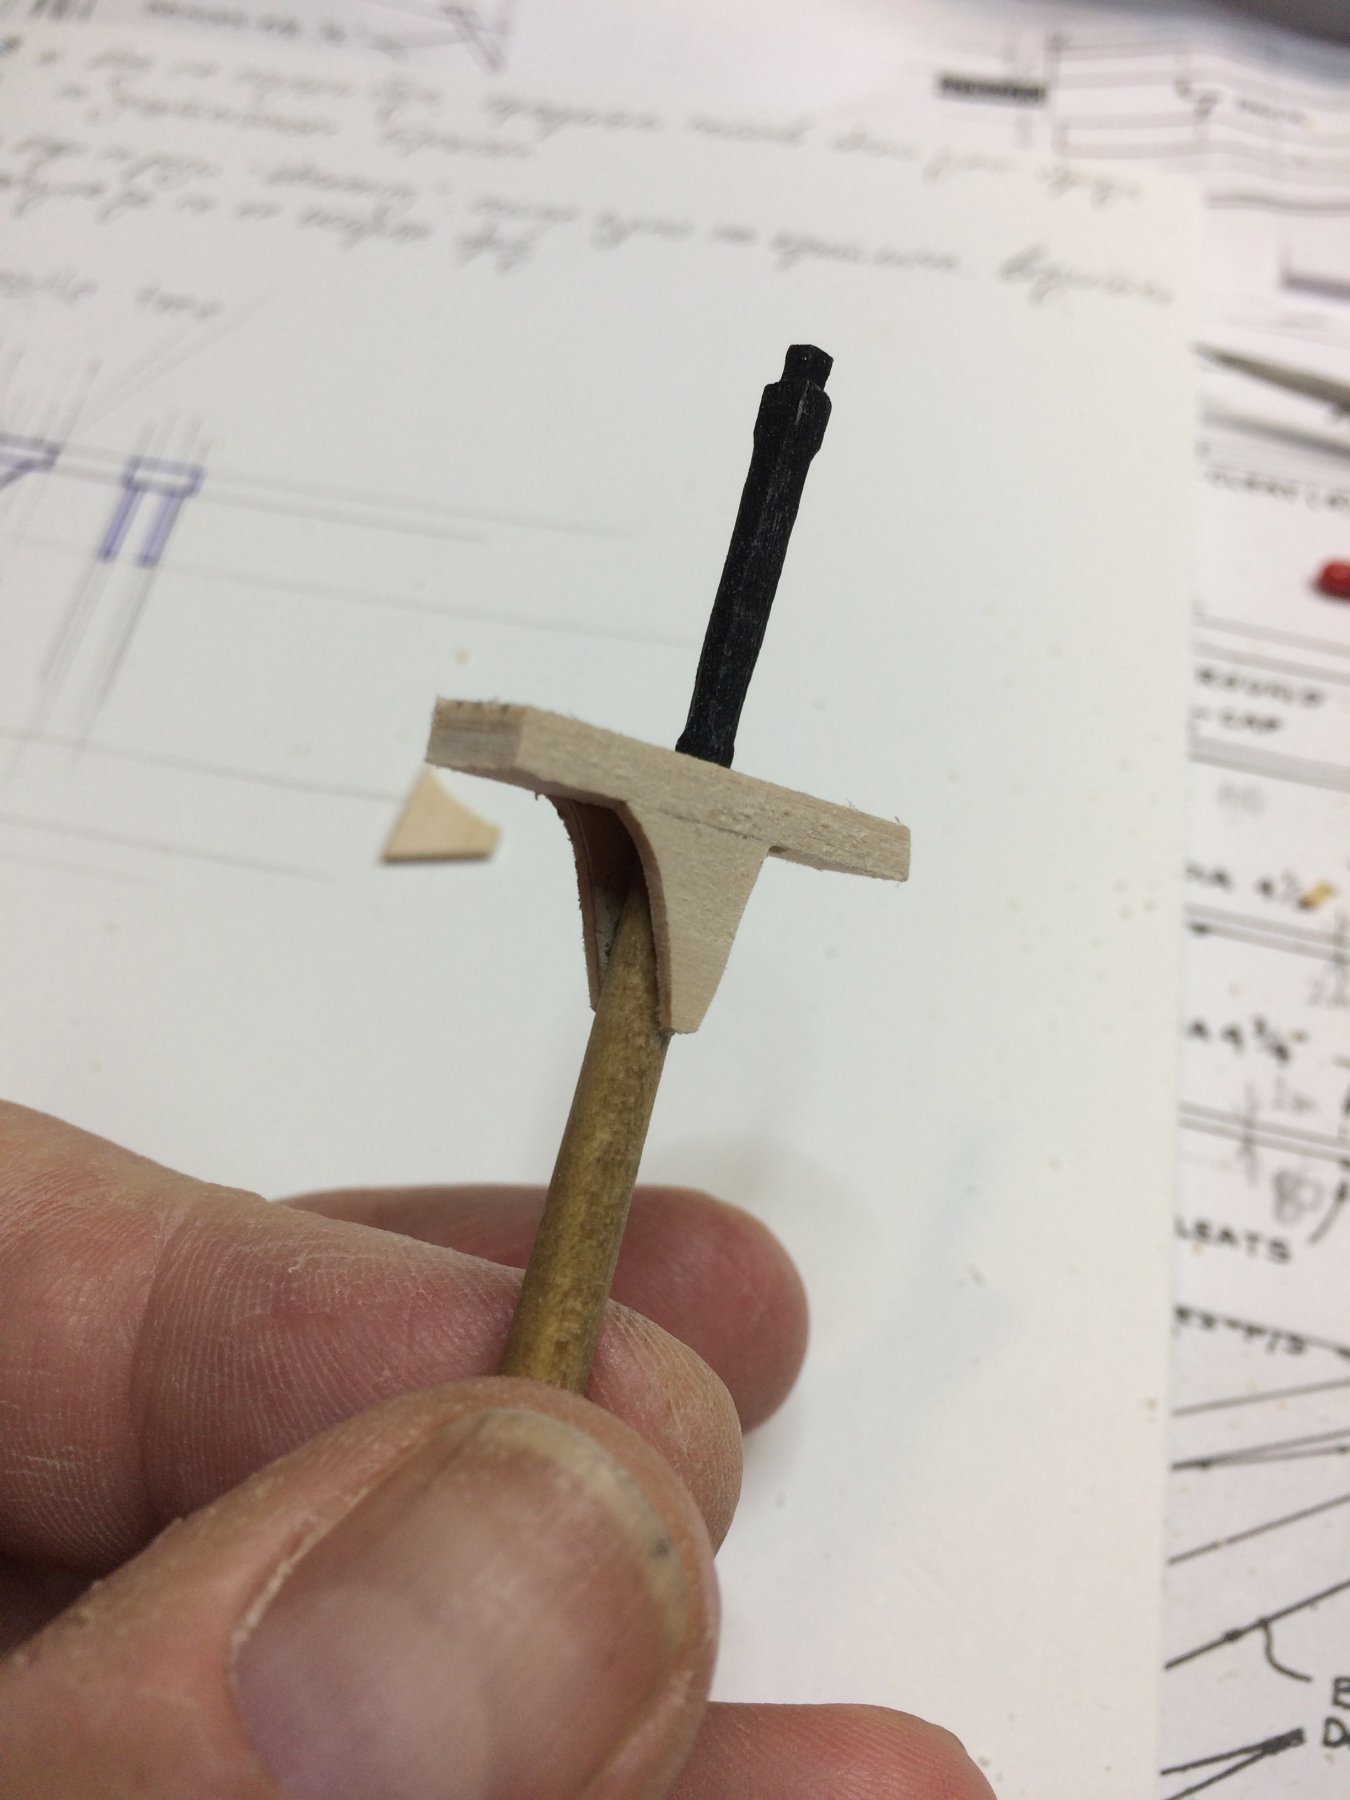
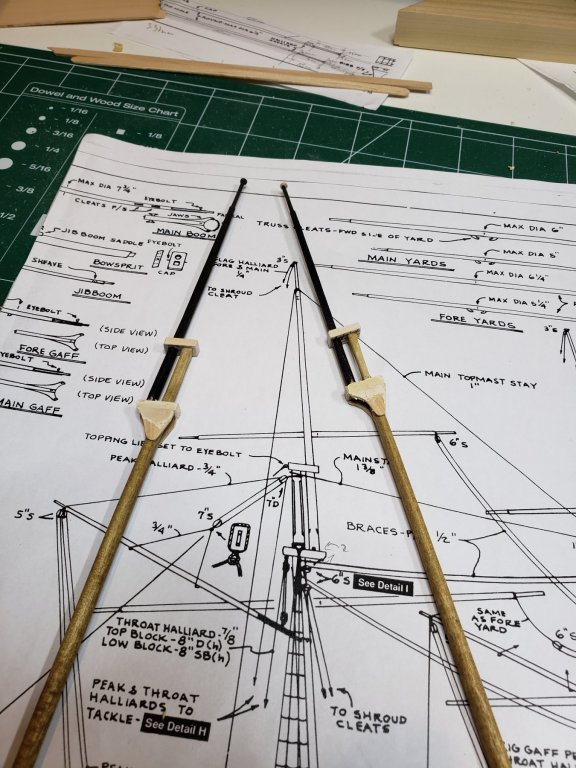
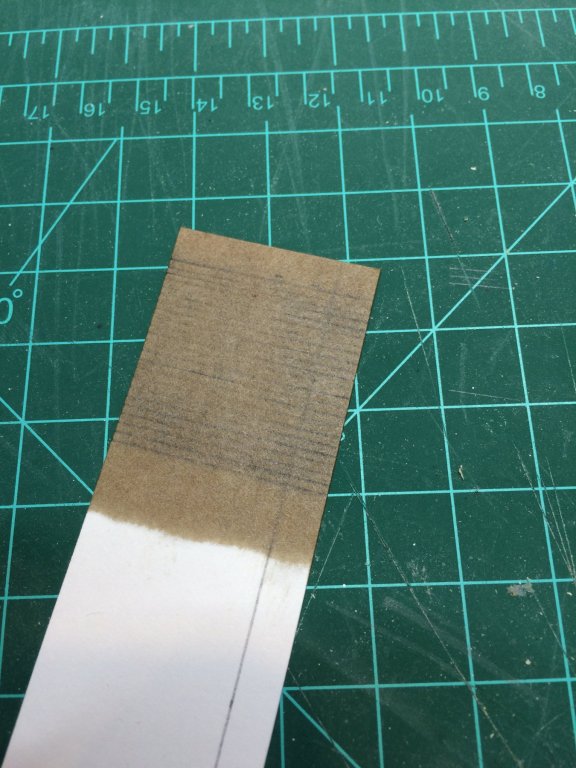
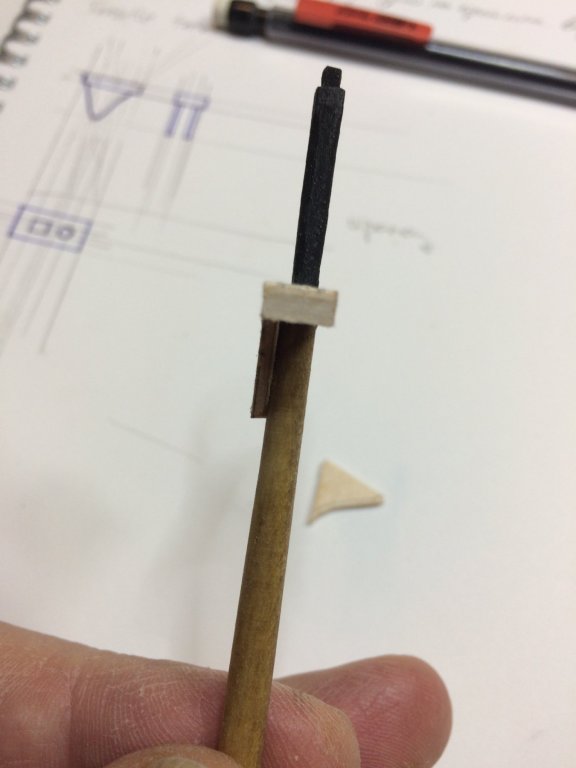
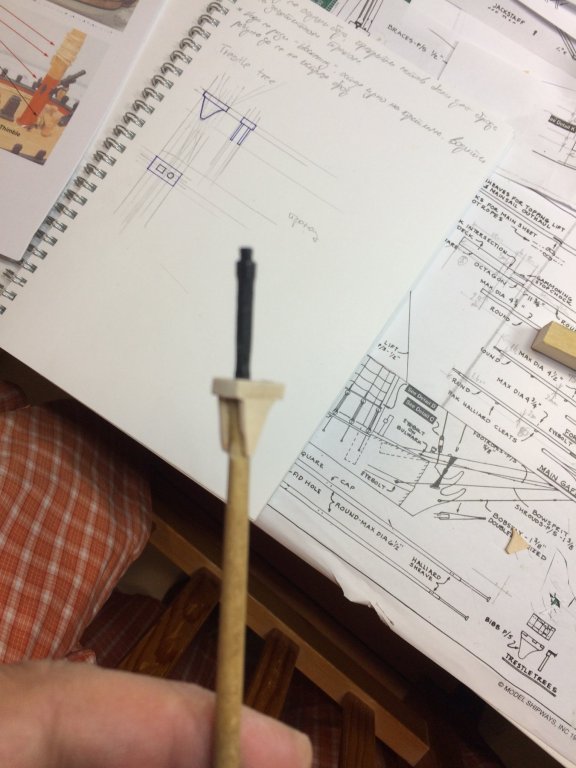
Cast trestle trees provided with a kit were not very nicely made. It can be used though but i decided to build my own version. They are easily made from scratch wood. First i made a drawing by measuring one tree provided in the kit then accommodating dimensions slightly to fit my masts properly. Below is a "technical drawing".. At the end, both holes will be square, the drawings will be used for a top tree as well as lower. The top tree will require a circle hole to hold the upper part of a topmast. The holes were pre-drilled and squared with a file. The top part of a tree is a bit oversized; it will be shaped to the correct length once all pieces are glued. The reason for this longer part is to have a bit more wood to hold with hands during construction phases. Then the tree was cut to the required dimension and whole assembly was shaped with sand blocks of different size. And testing with a topmast... I slightly deviated from practicum while building this part. To make sure that both trees are identical as close as possible, i used a piece of scotch tape, have it on a side of the tree, trace the shape with a pencil and transfer scotch tape on another part of the scrap wood. Another way will be to have all four parts hold by wise and shape them all at once but did not think about this approach ahead of time... The main mast was also completed with trestle tree; they will be painted in black and small eye bolts will need to be attached to. Next will have to make a nine mast hoops per mast before making a boom rest on main mast. Foremast will have just a small chock on the aft side of the mast. Happy modeling.


- 360 replies
-
- 2
-
-
- sultana
- model shipways
- (and 1 more)
-
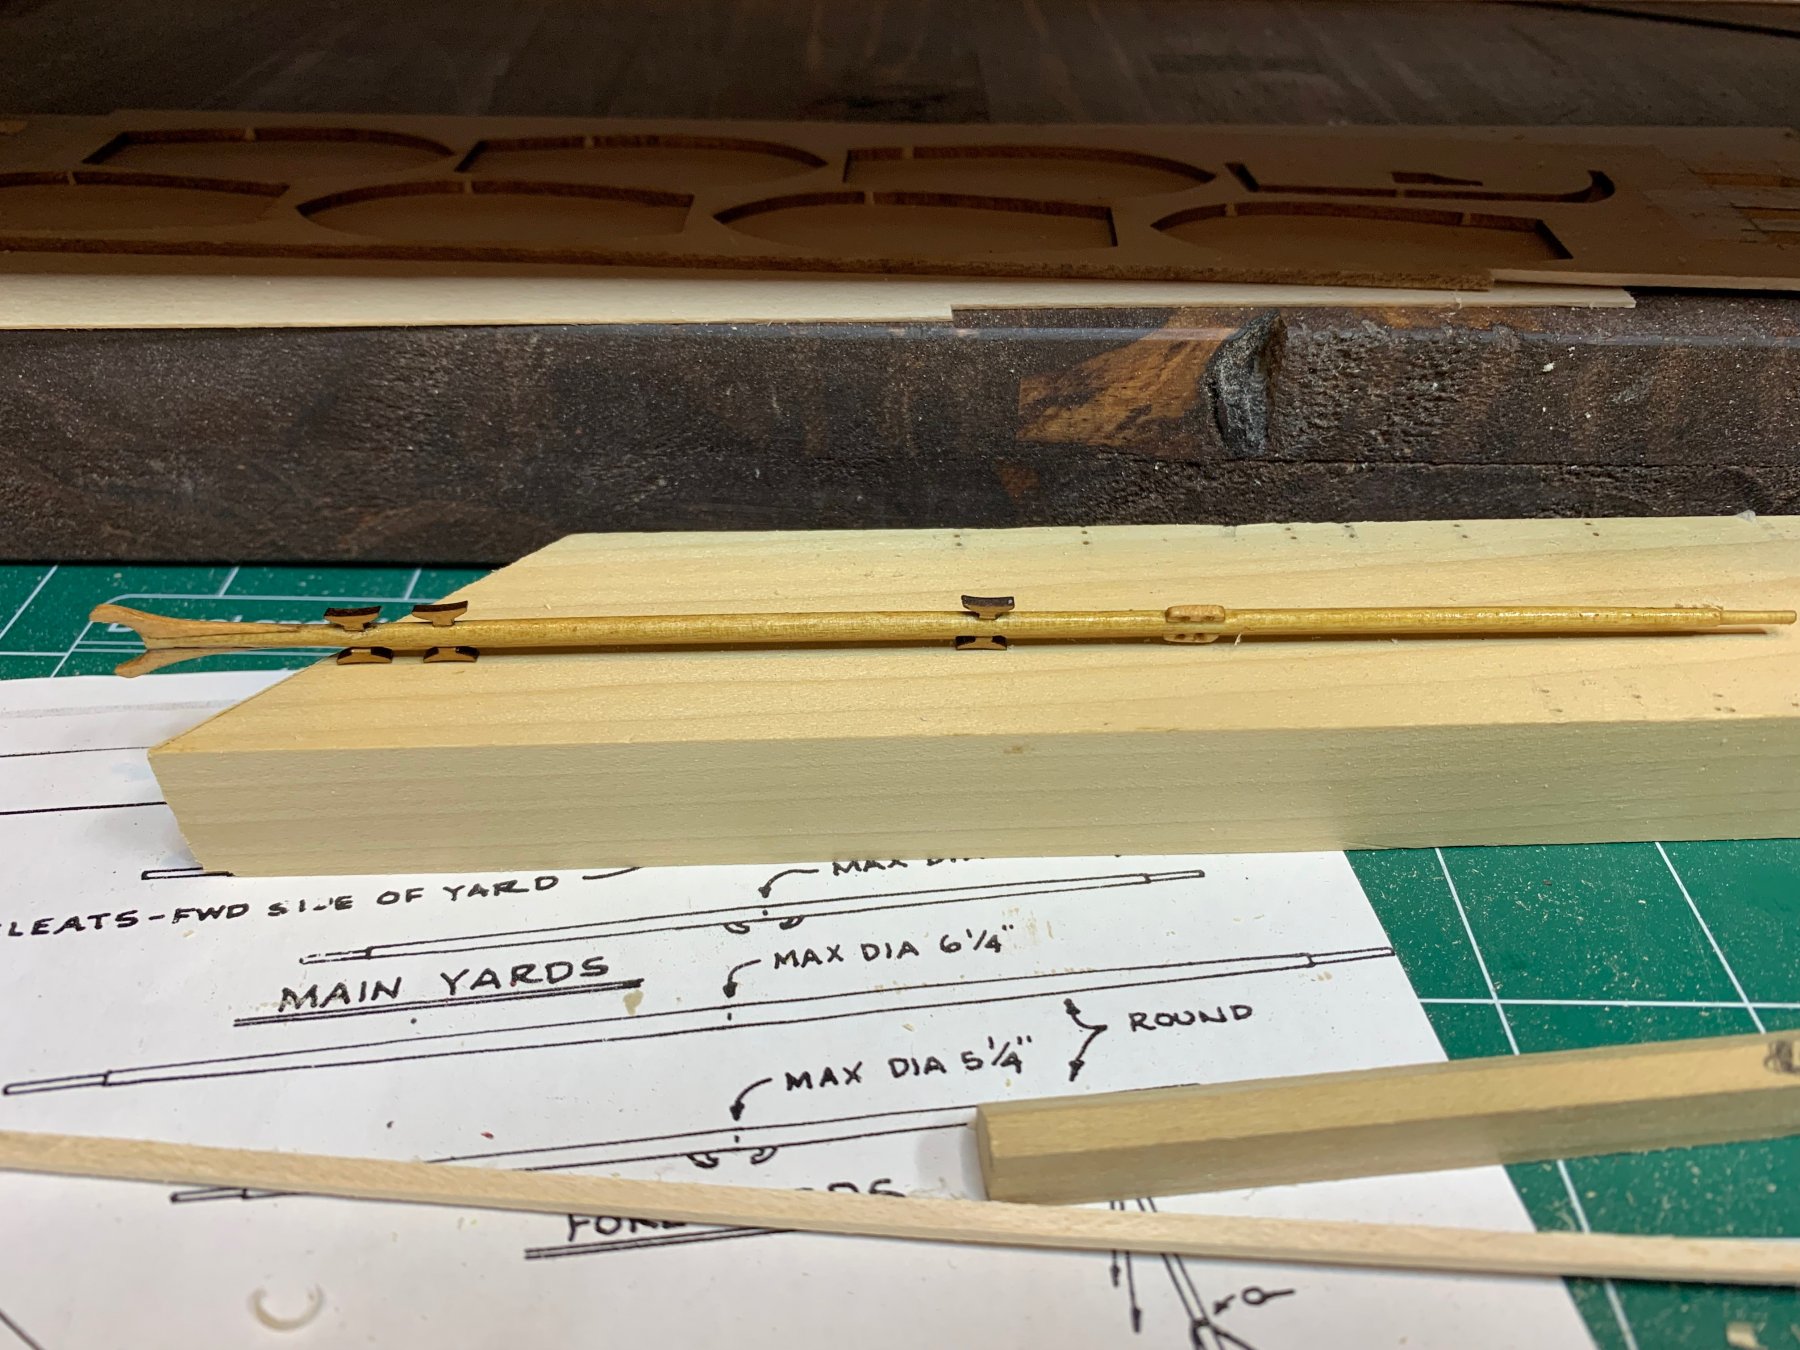
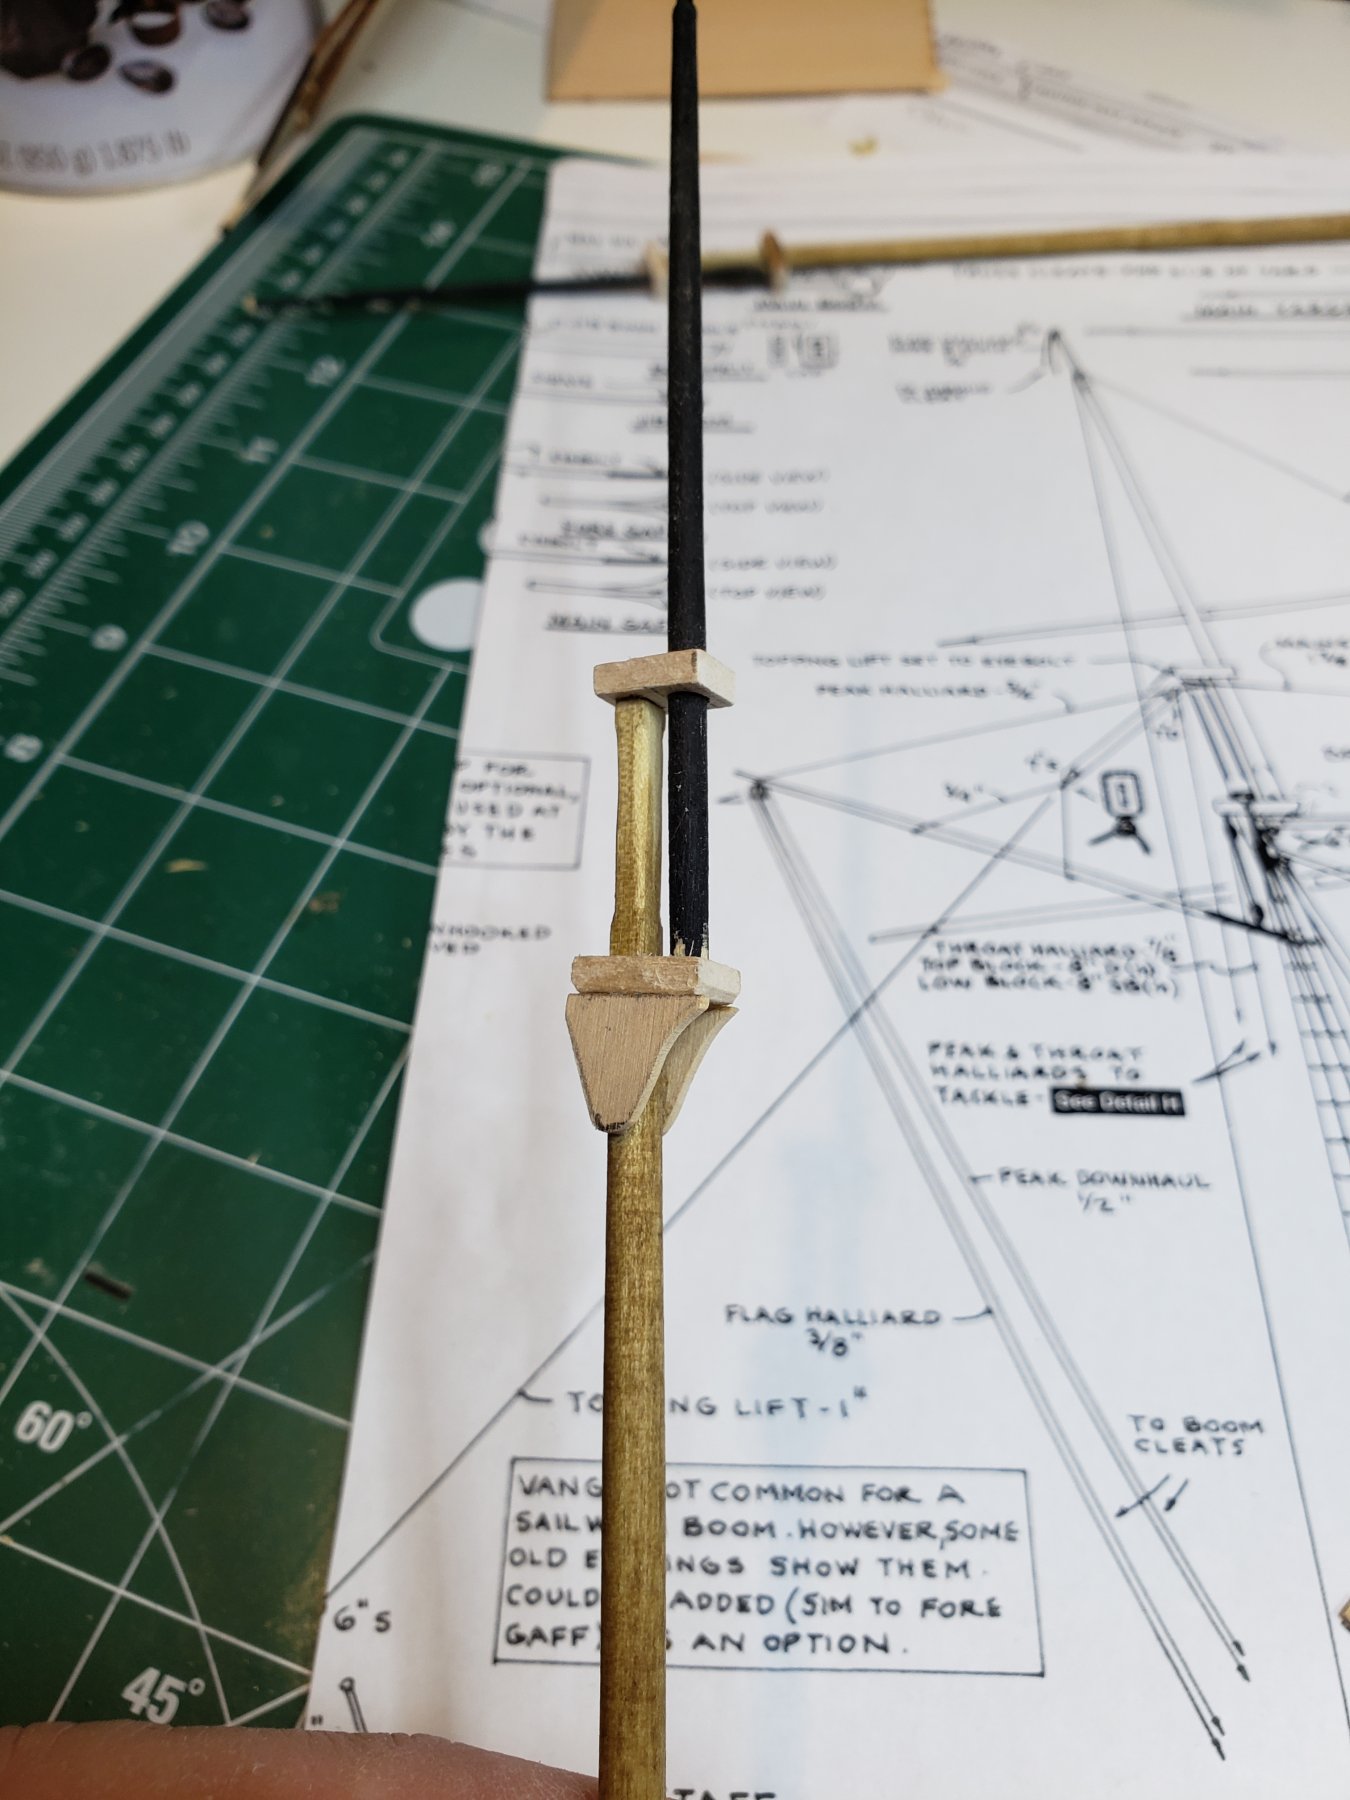
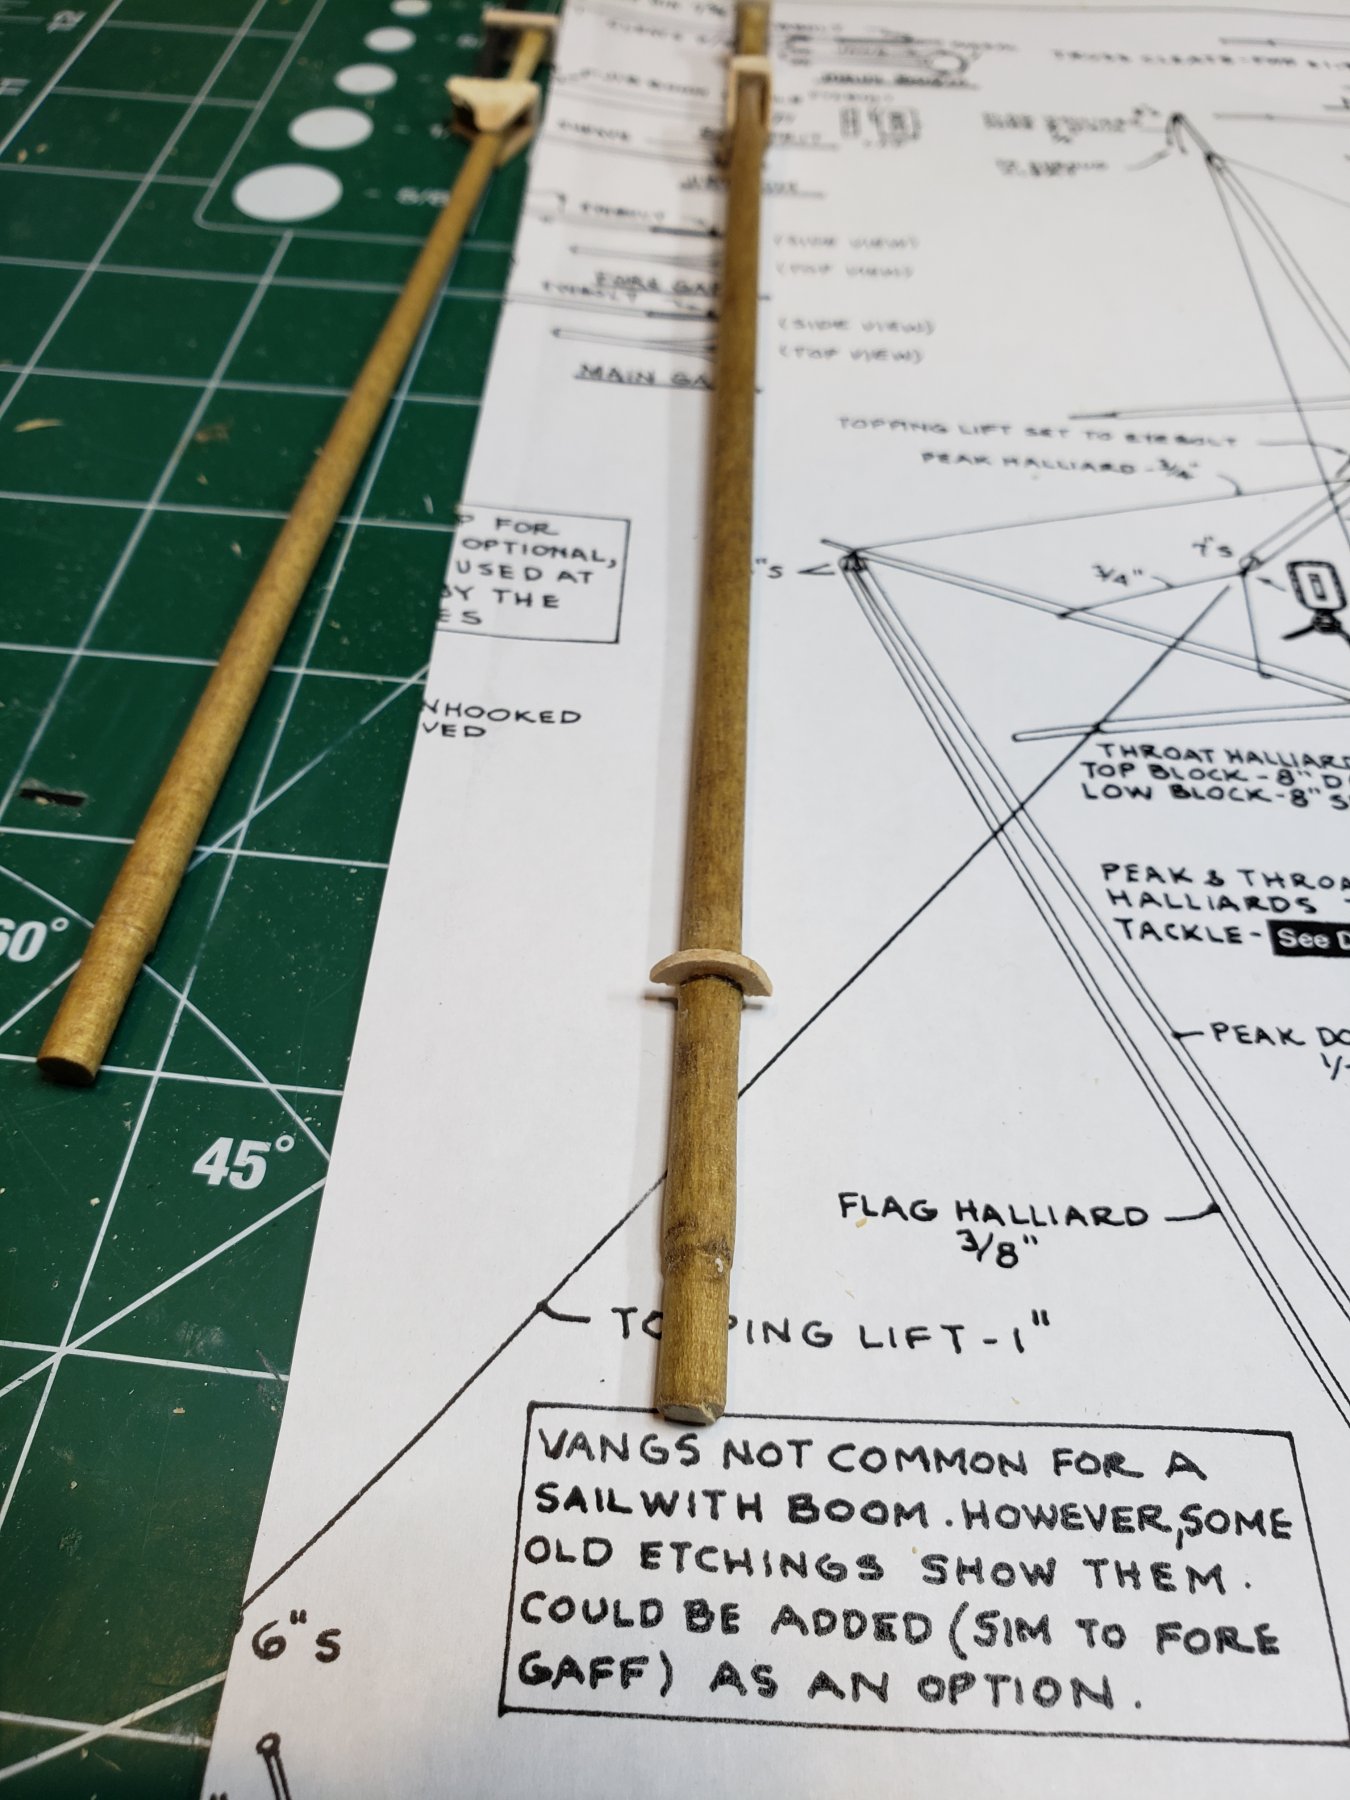
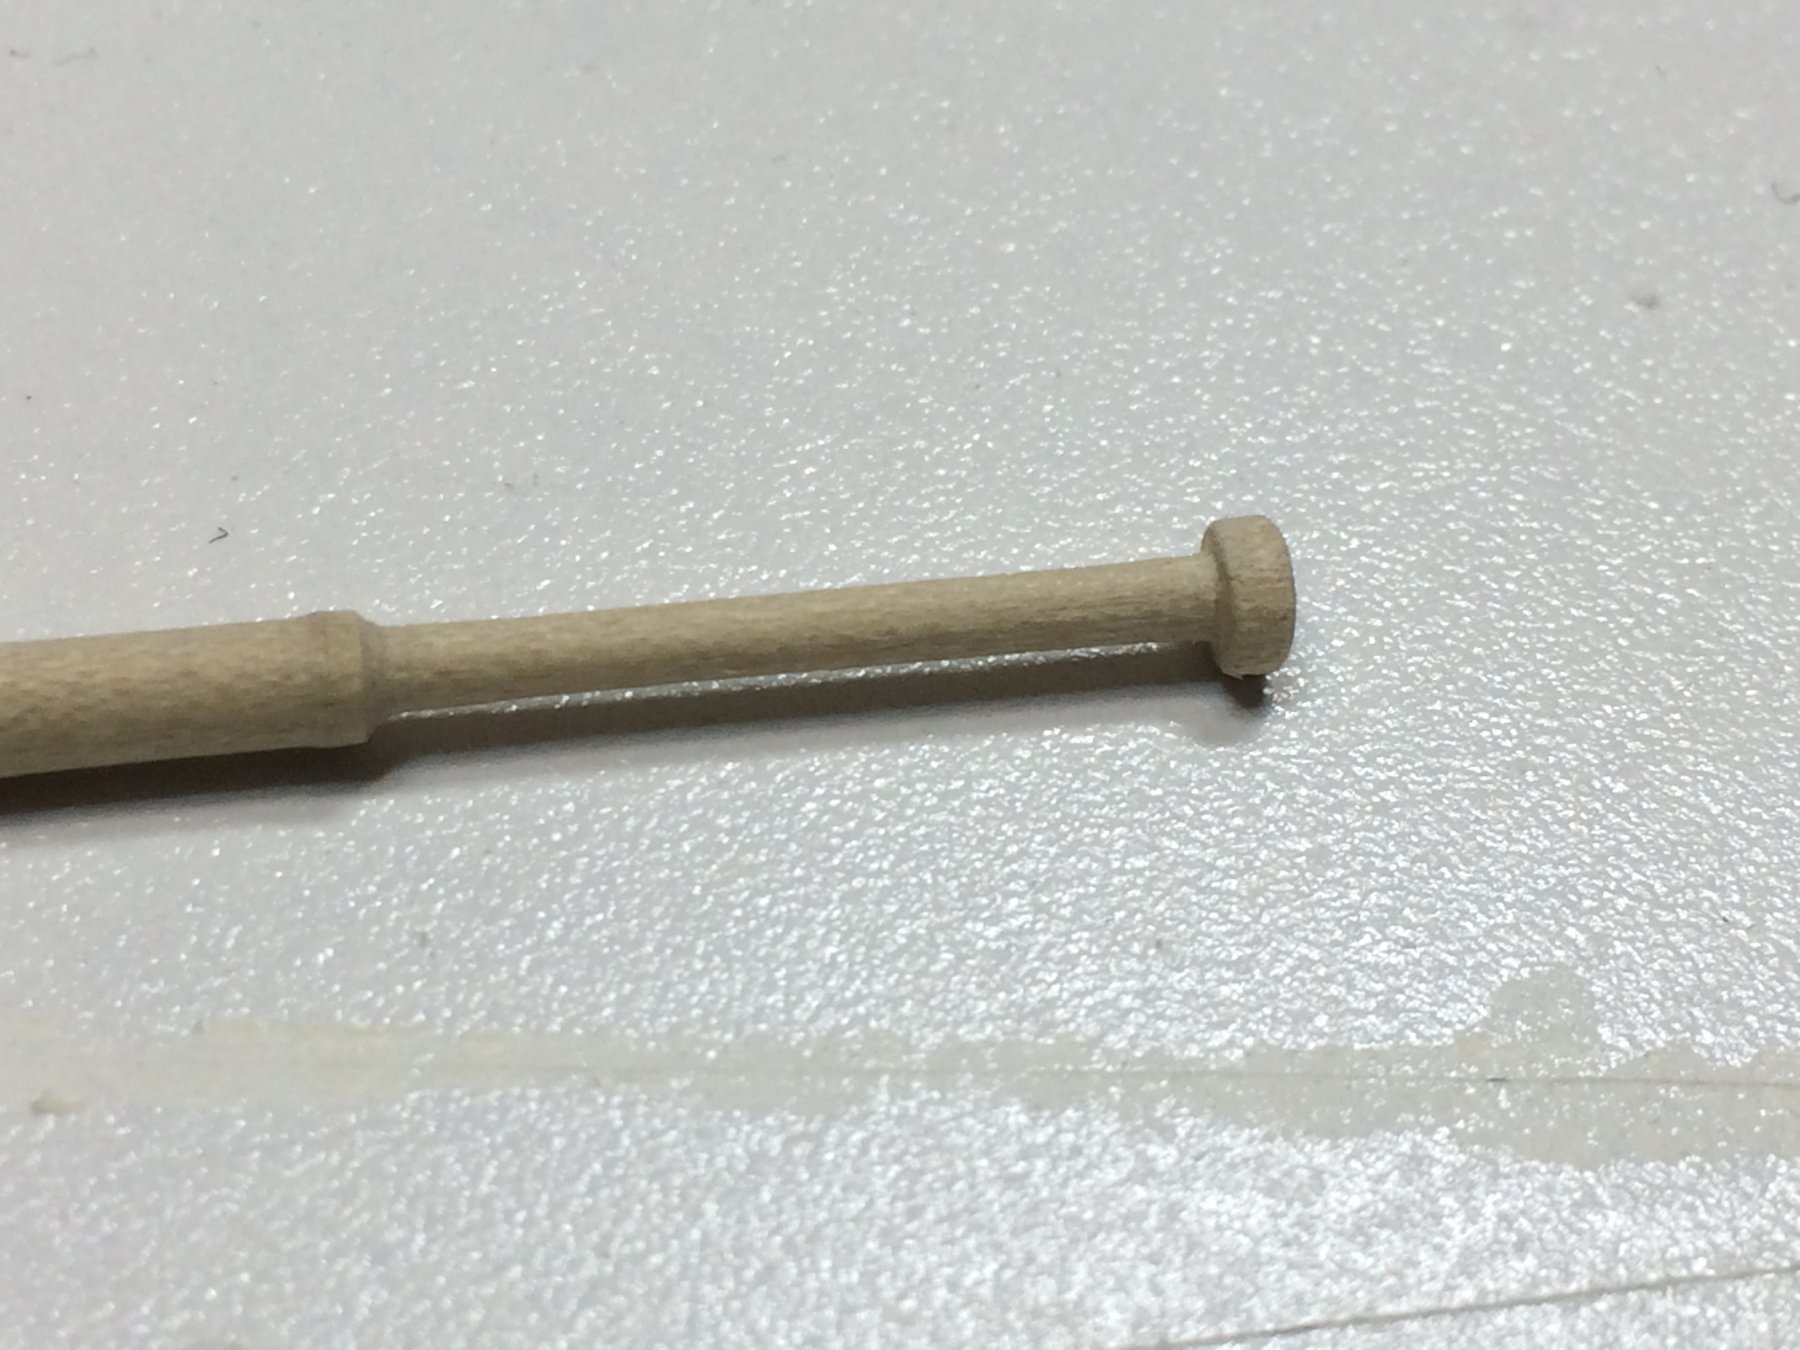
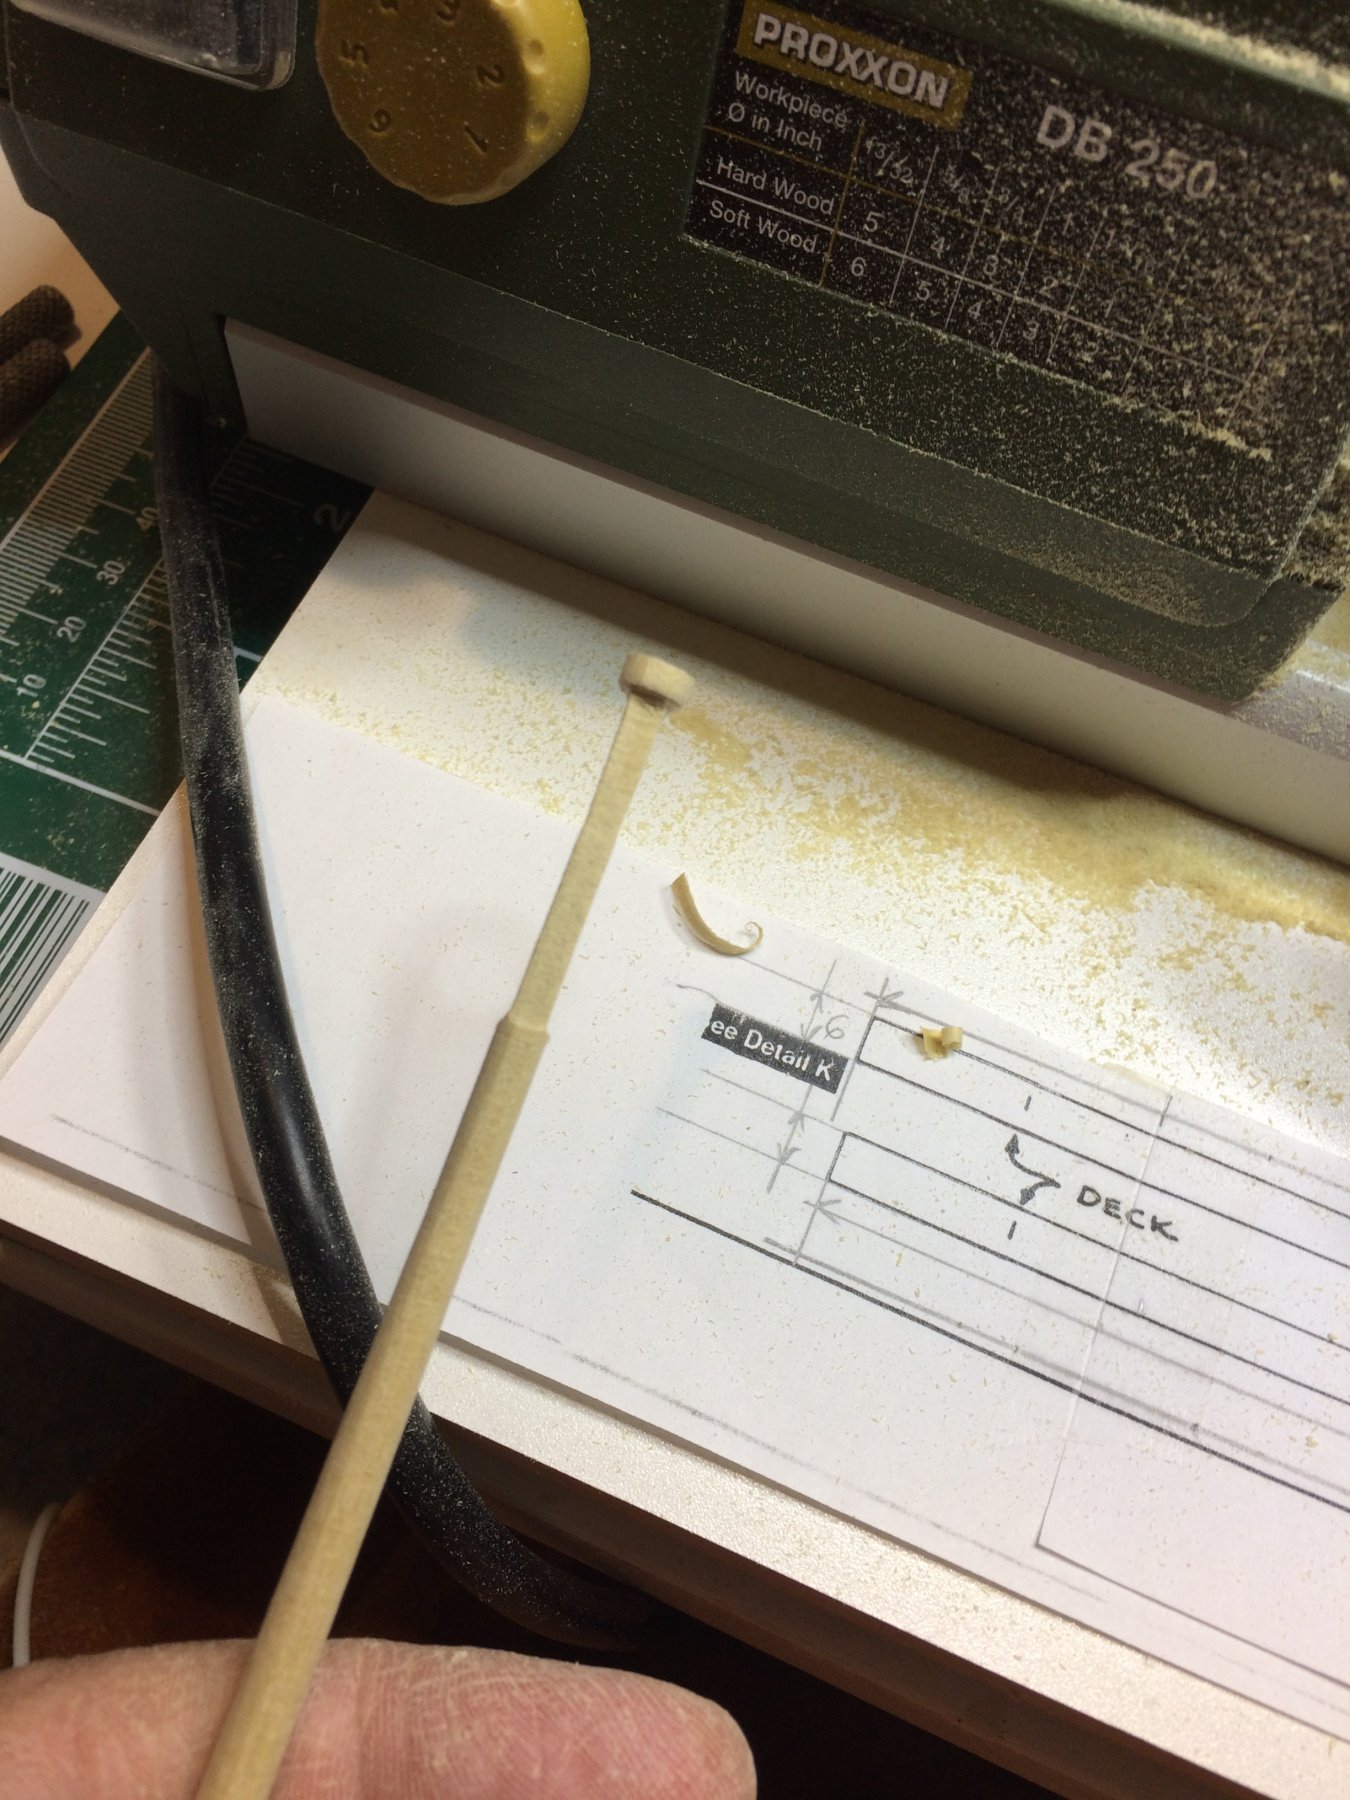
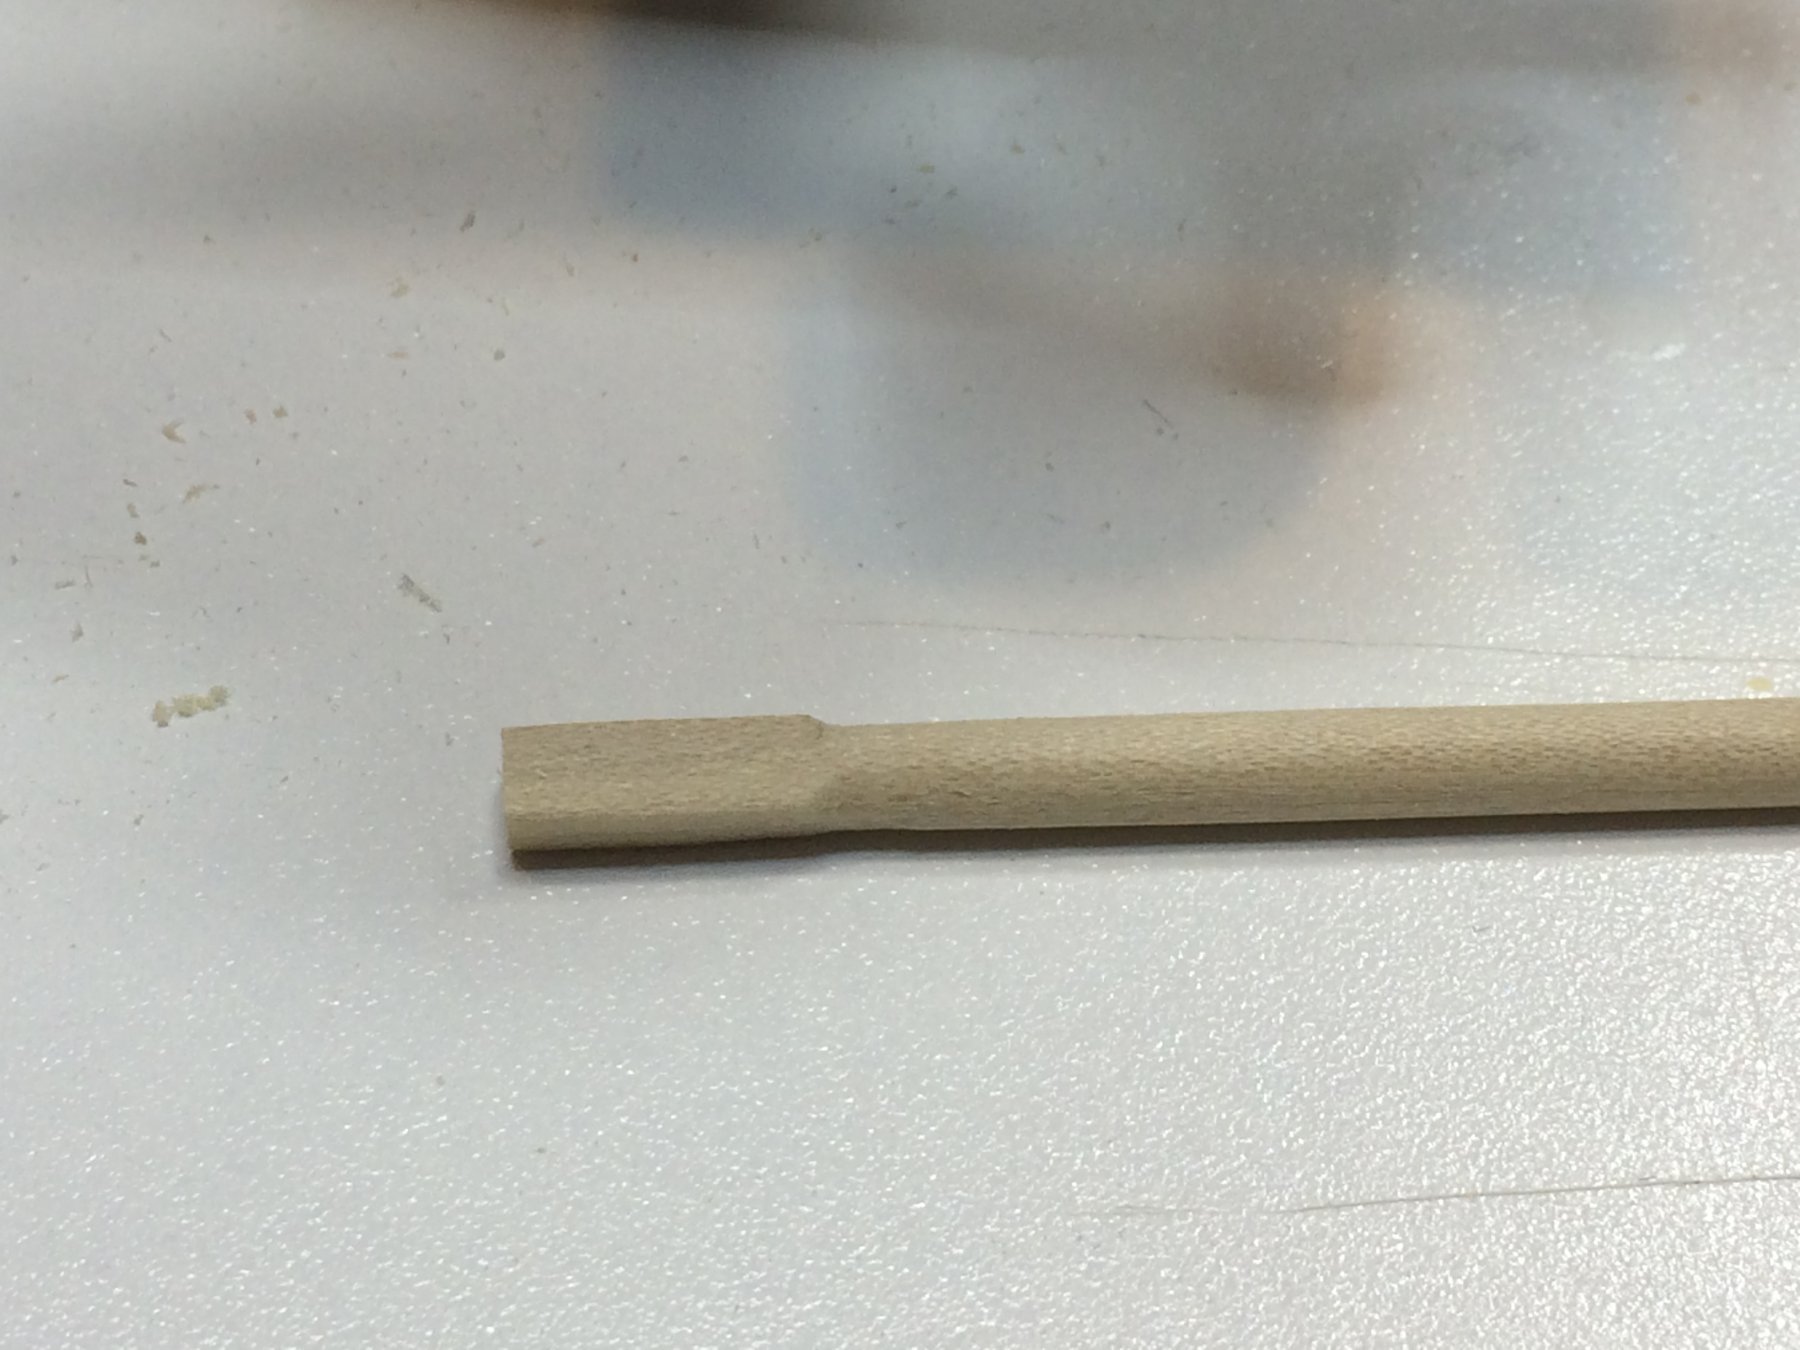
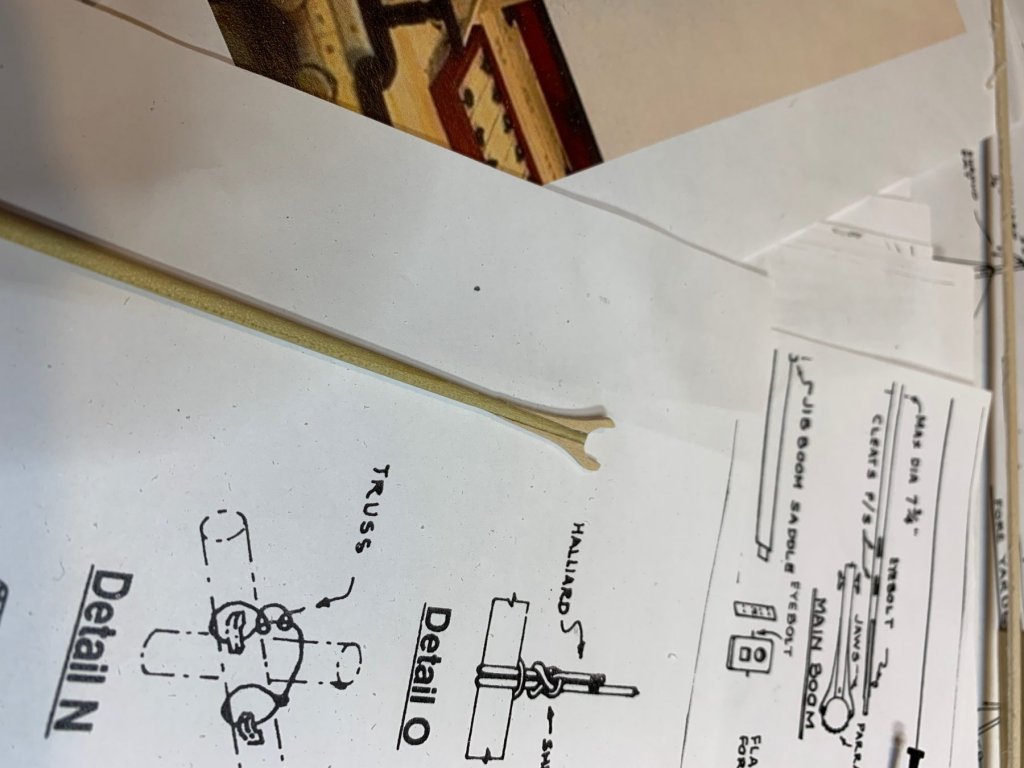
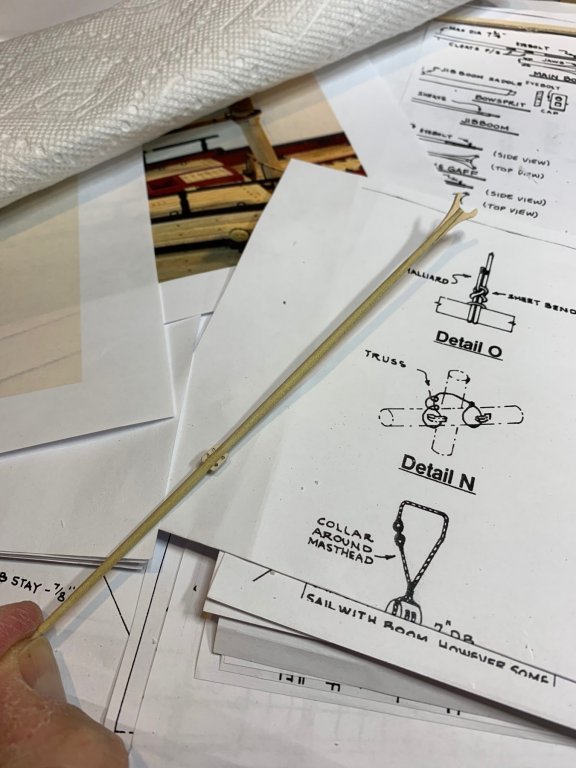
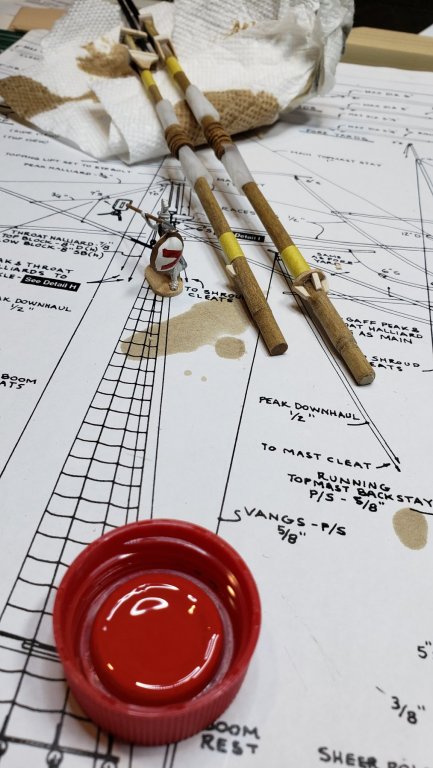
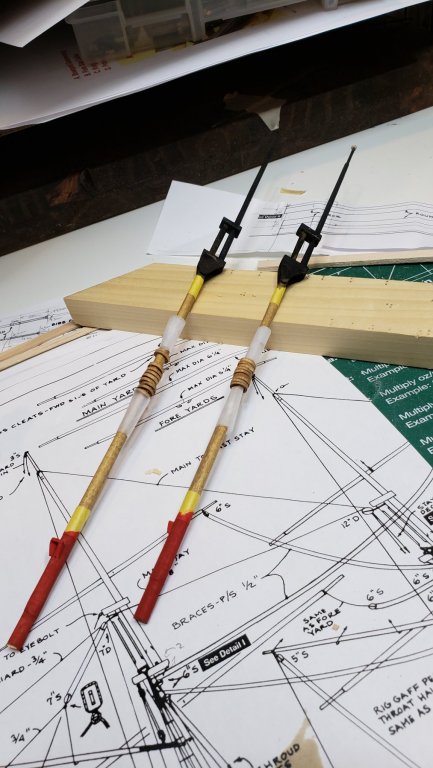
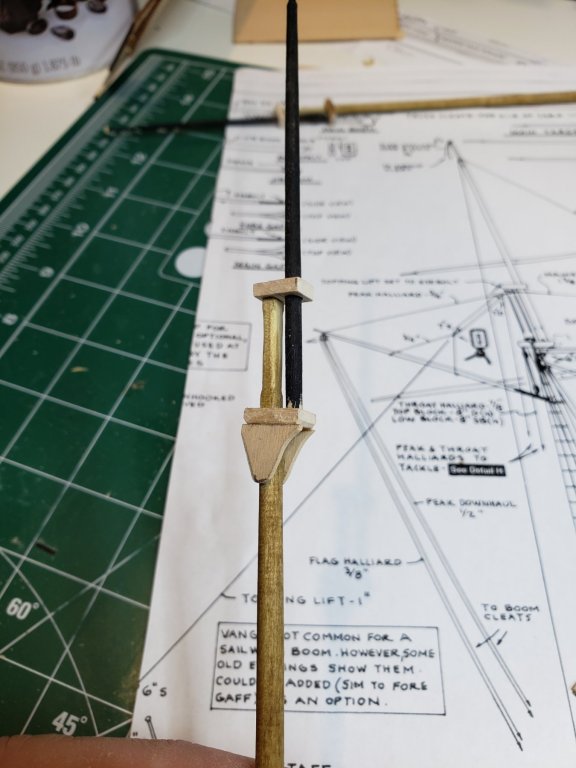
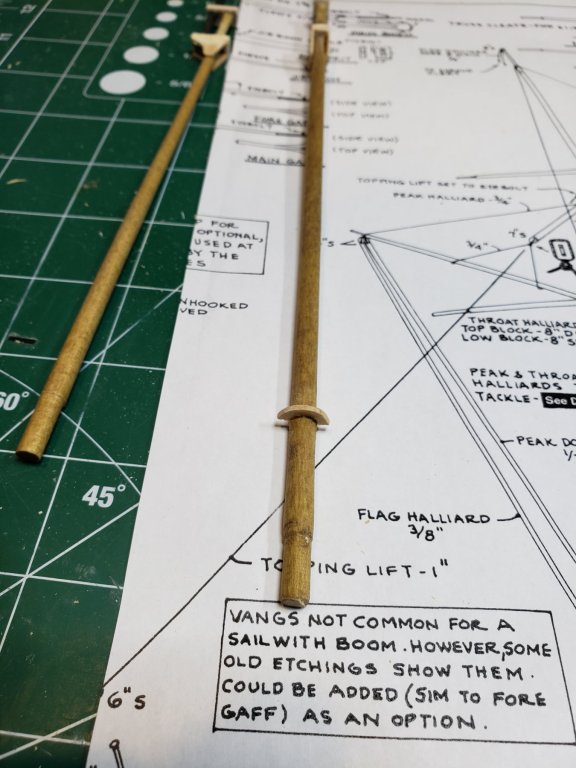
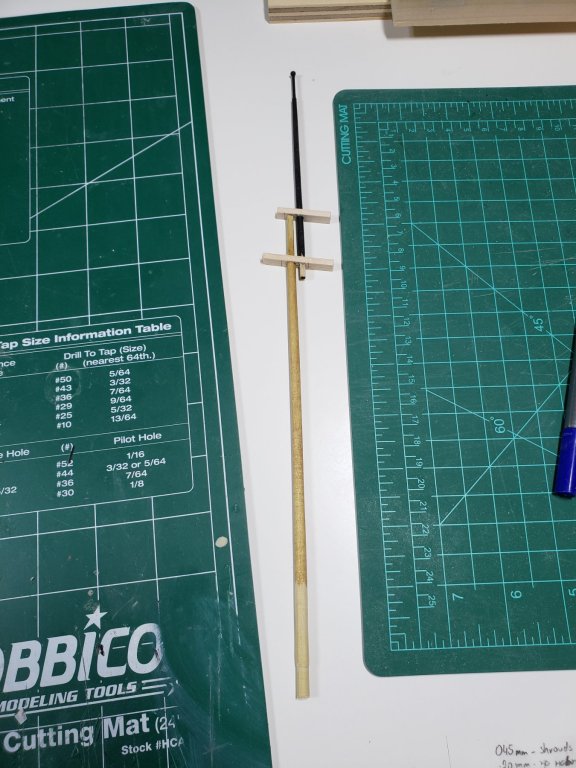
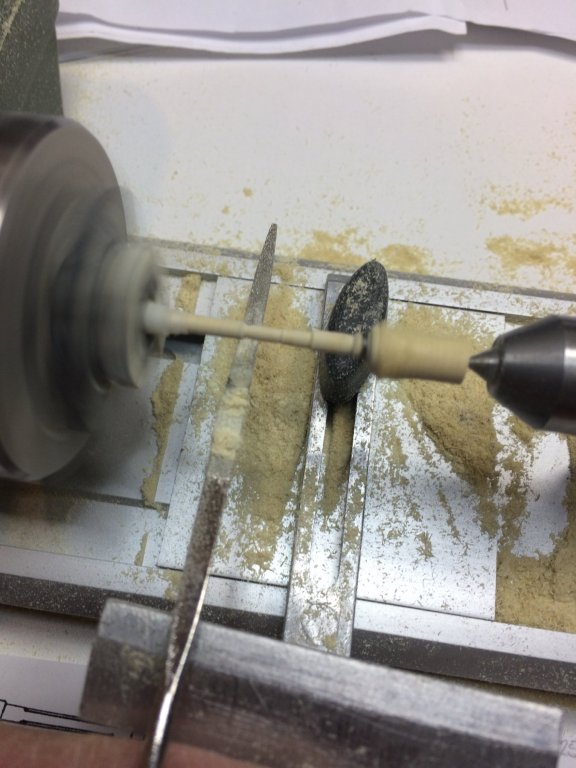
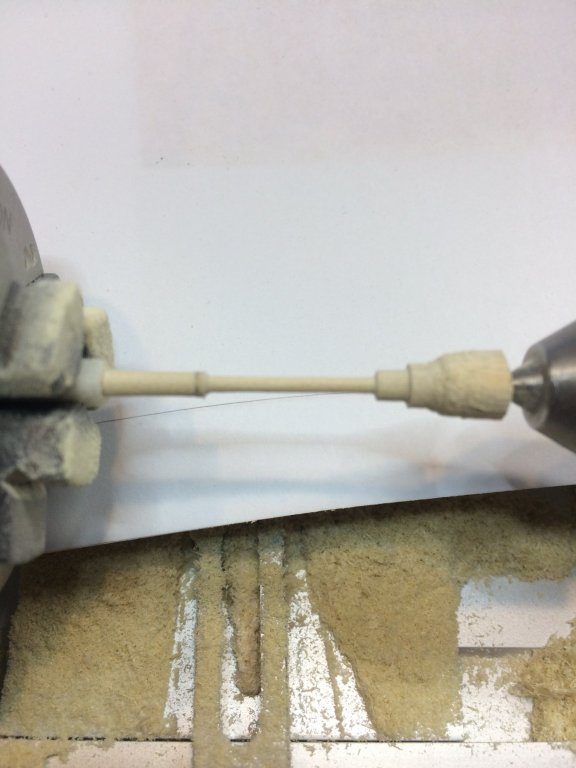
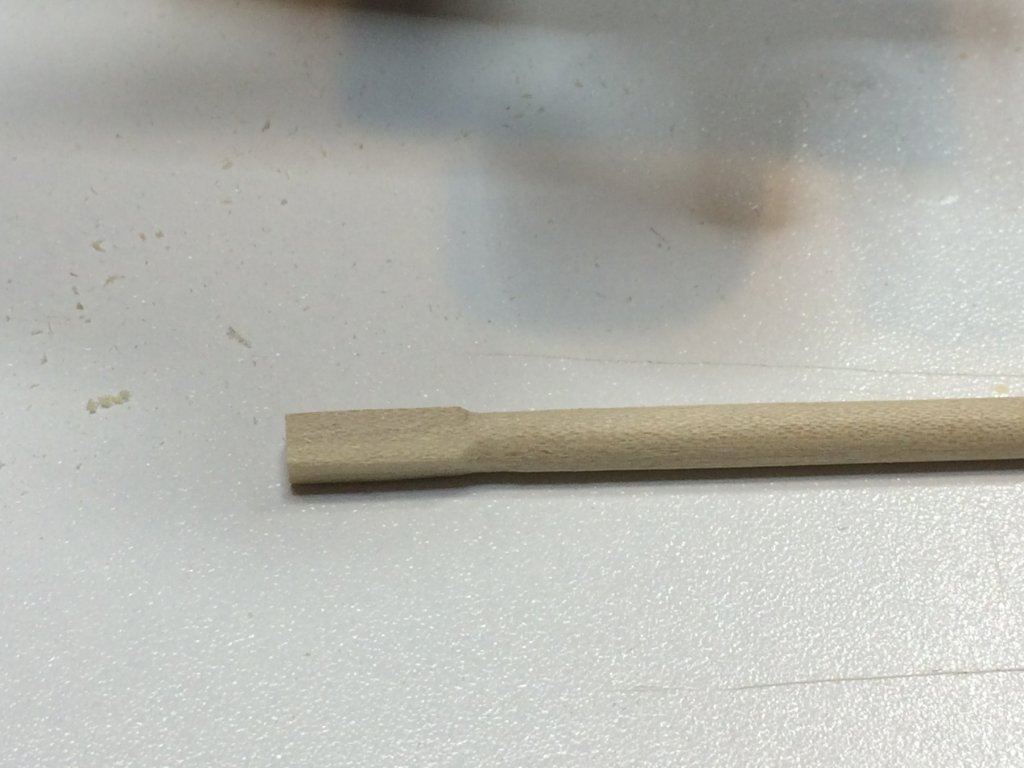
Work on masts continued in the new year... Completed top foremast ... .. and during shaping process.. This one is process of shaping top part of the mast, with ball truck.. End the main boom was carved as well.. Again poplar rod was used, first cut in 5mm x 5mm x correct length, square shape, then end piece was rounded to fit into lathe 3-piece chuck and carved to the correct shape. This way i will have all mast parts carved from the same type of wood. Once stained and varnished they will look nice. Happy modeling.

- 360 replies
-
- 2
-
-
- sultana
- model shipways
- (and 1 more)
-
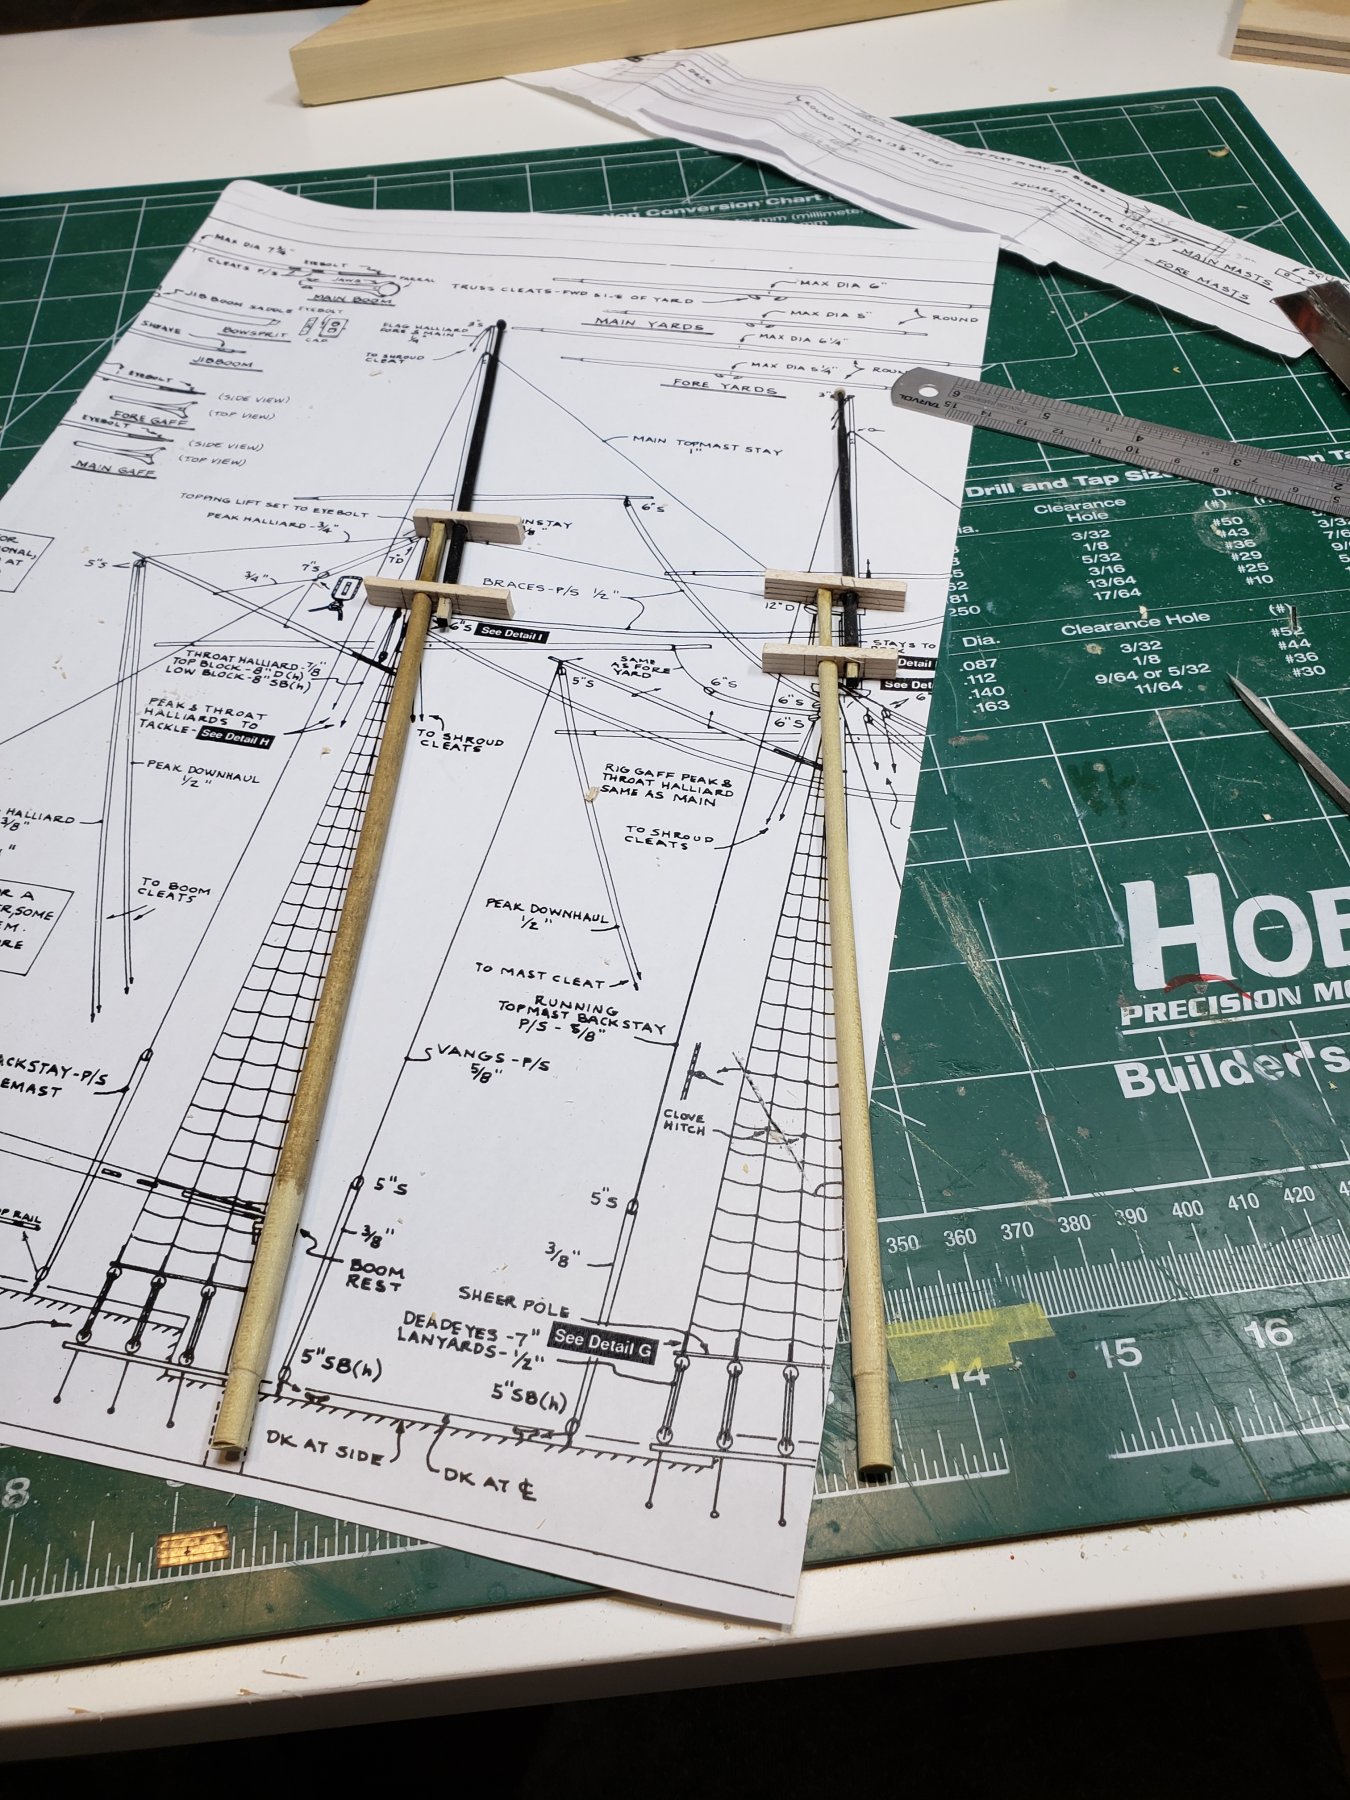
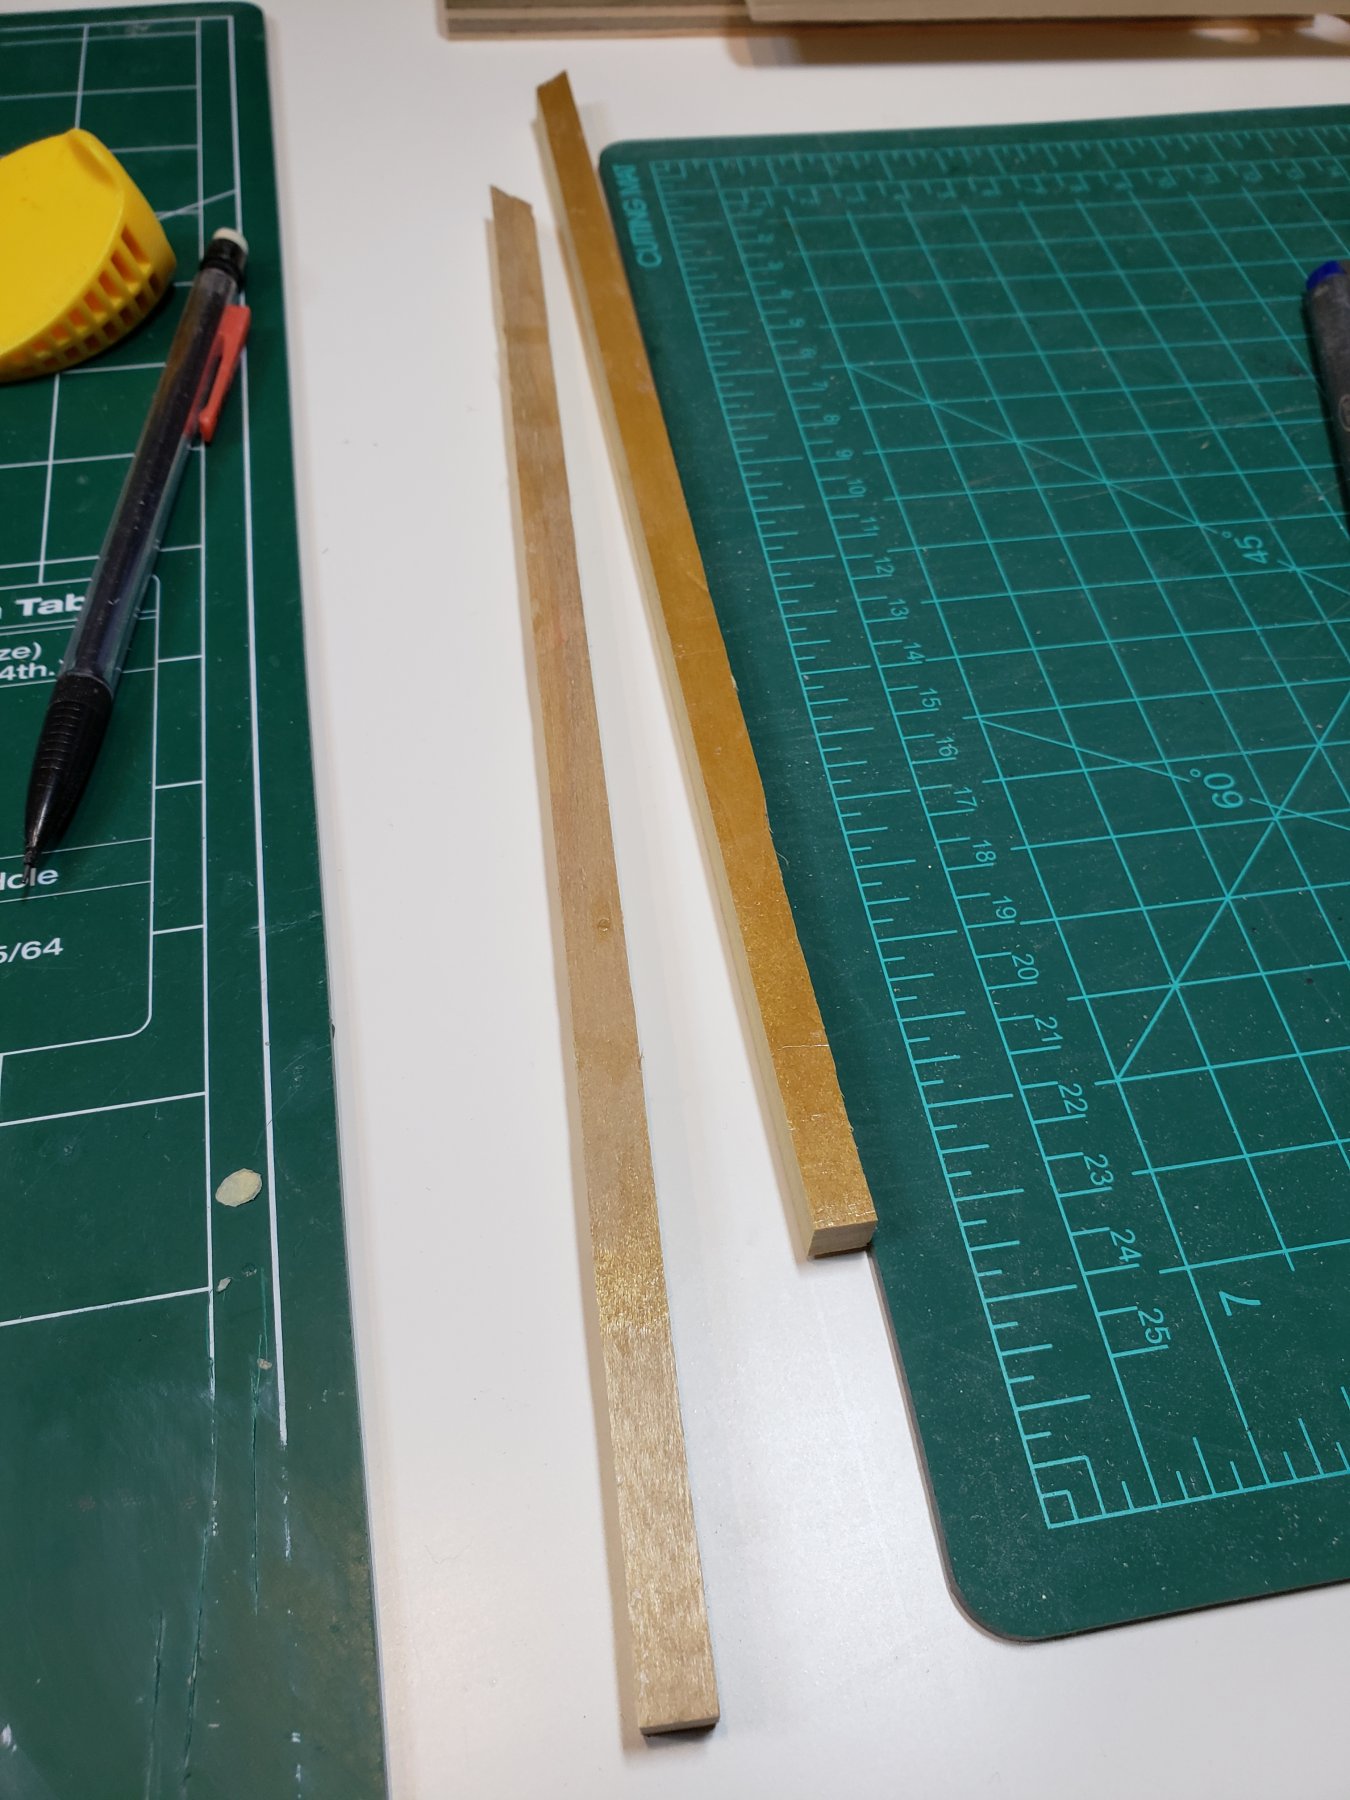
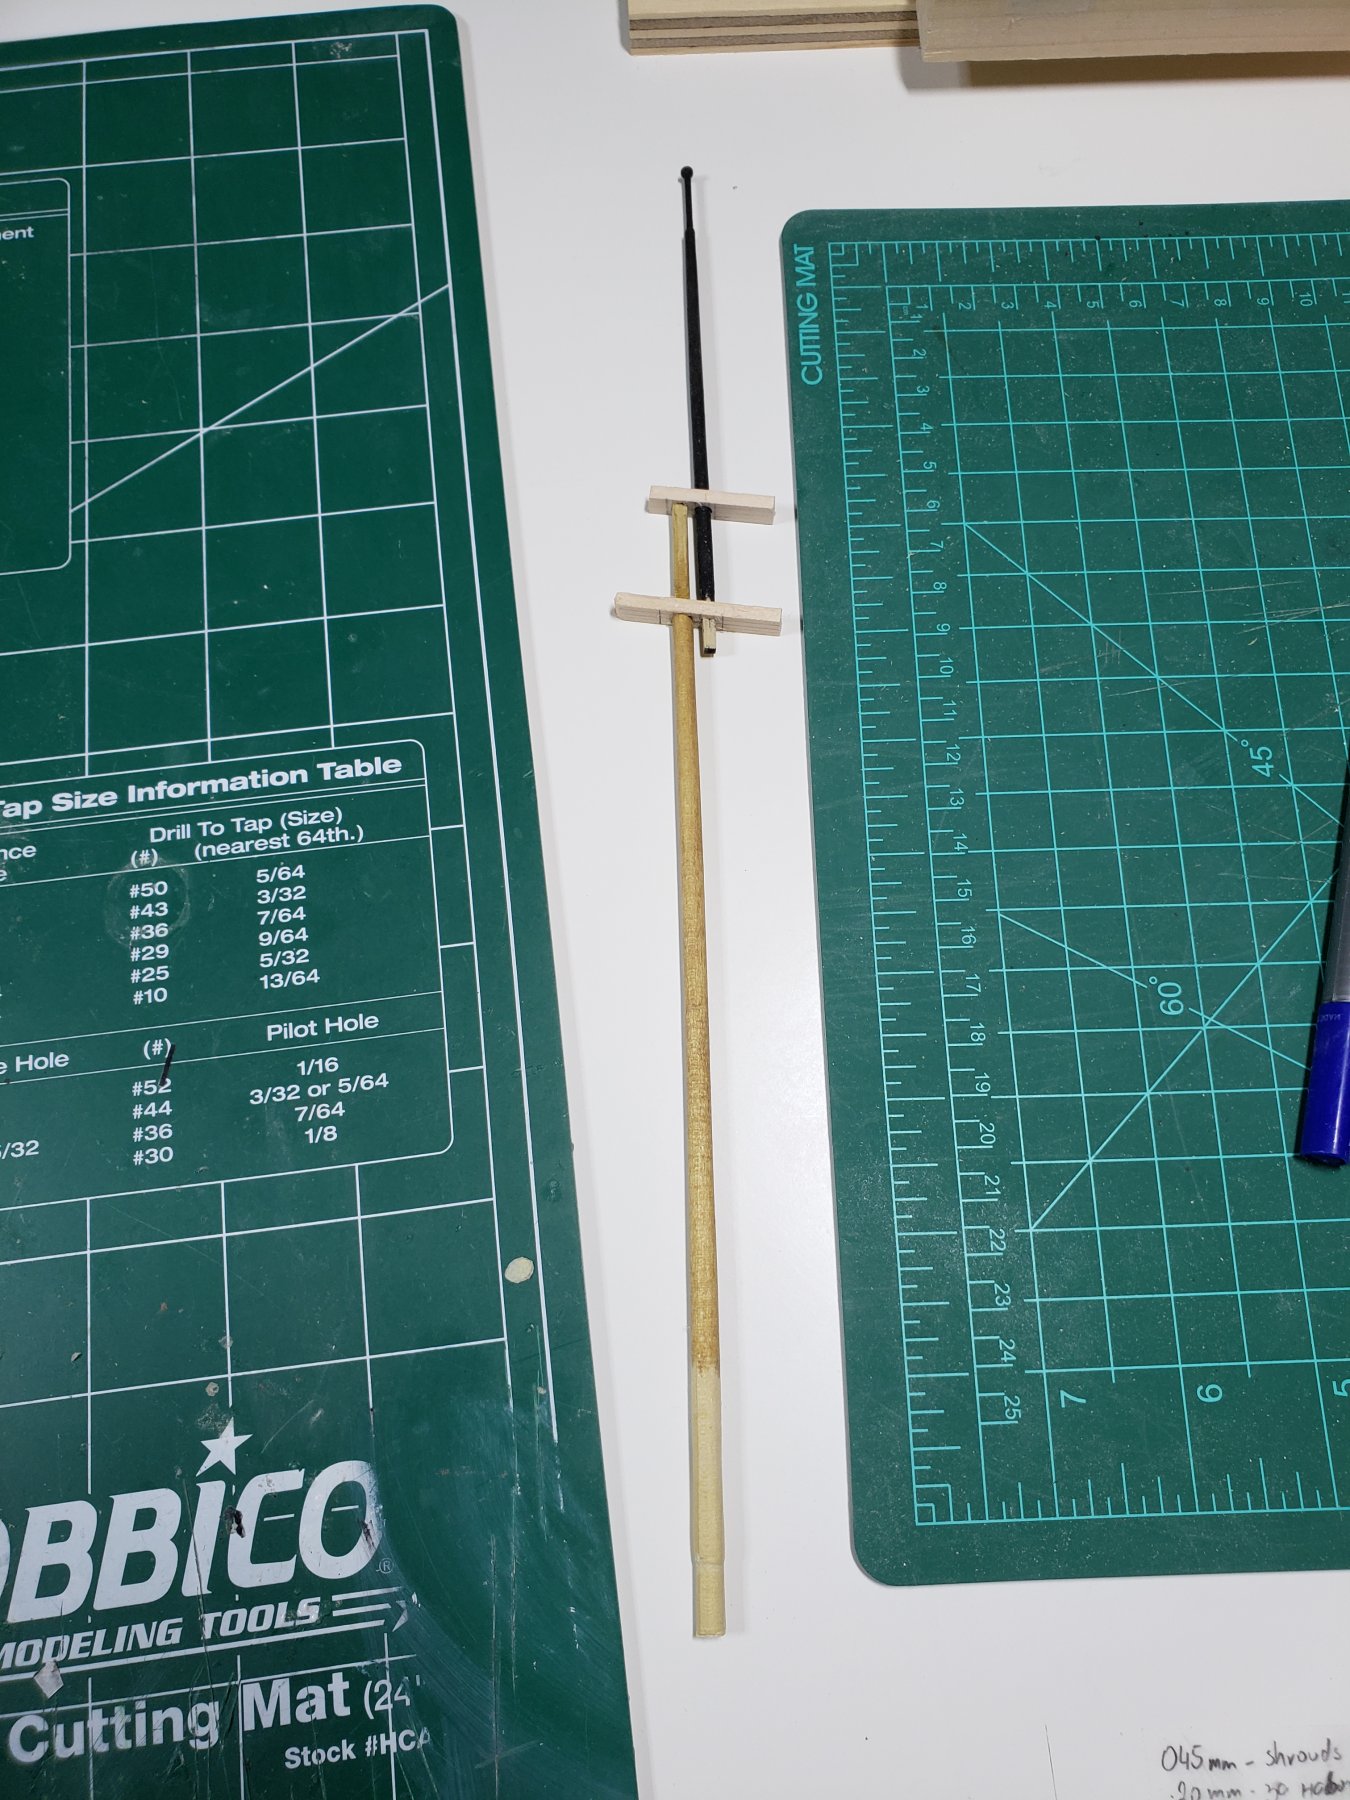
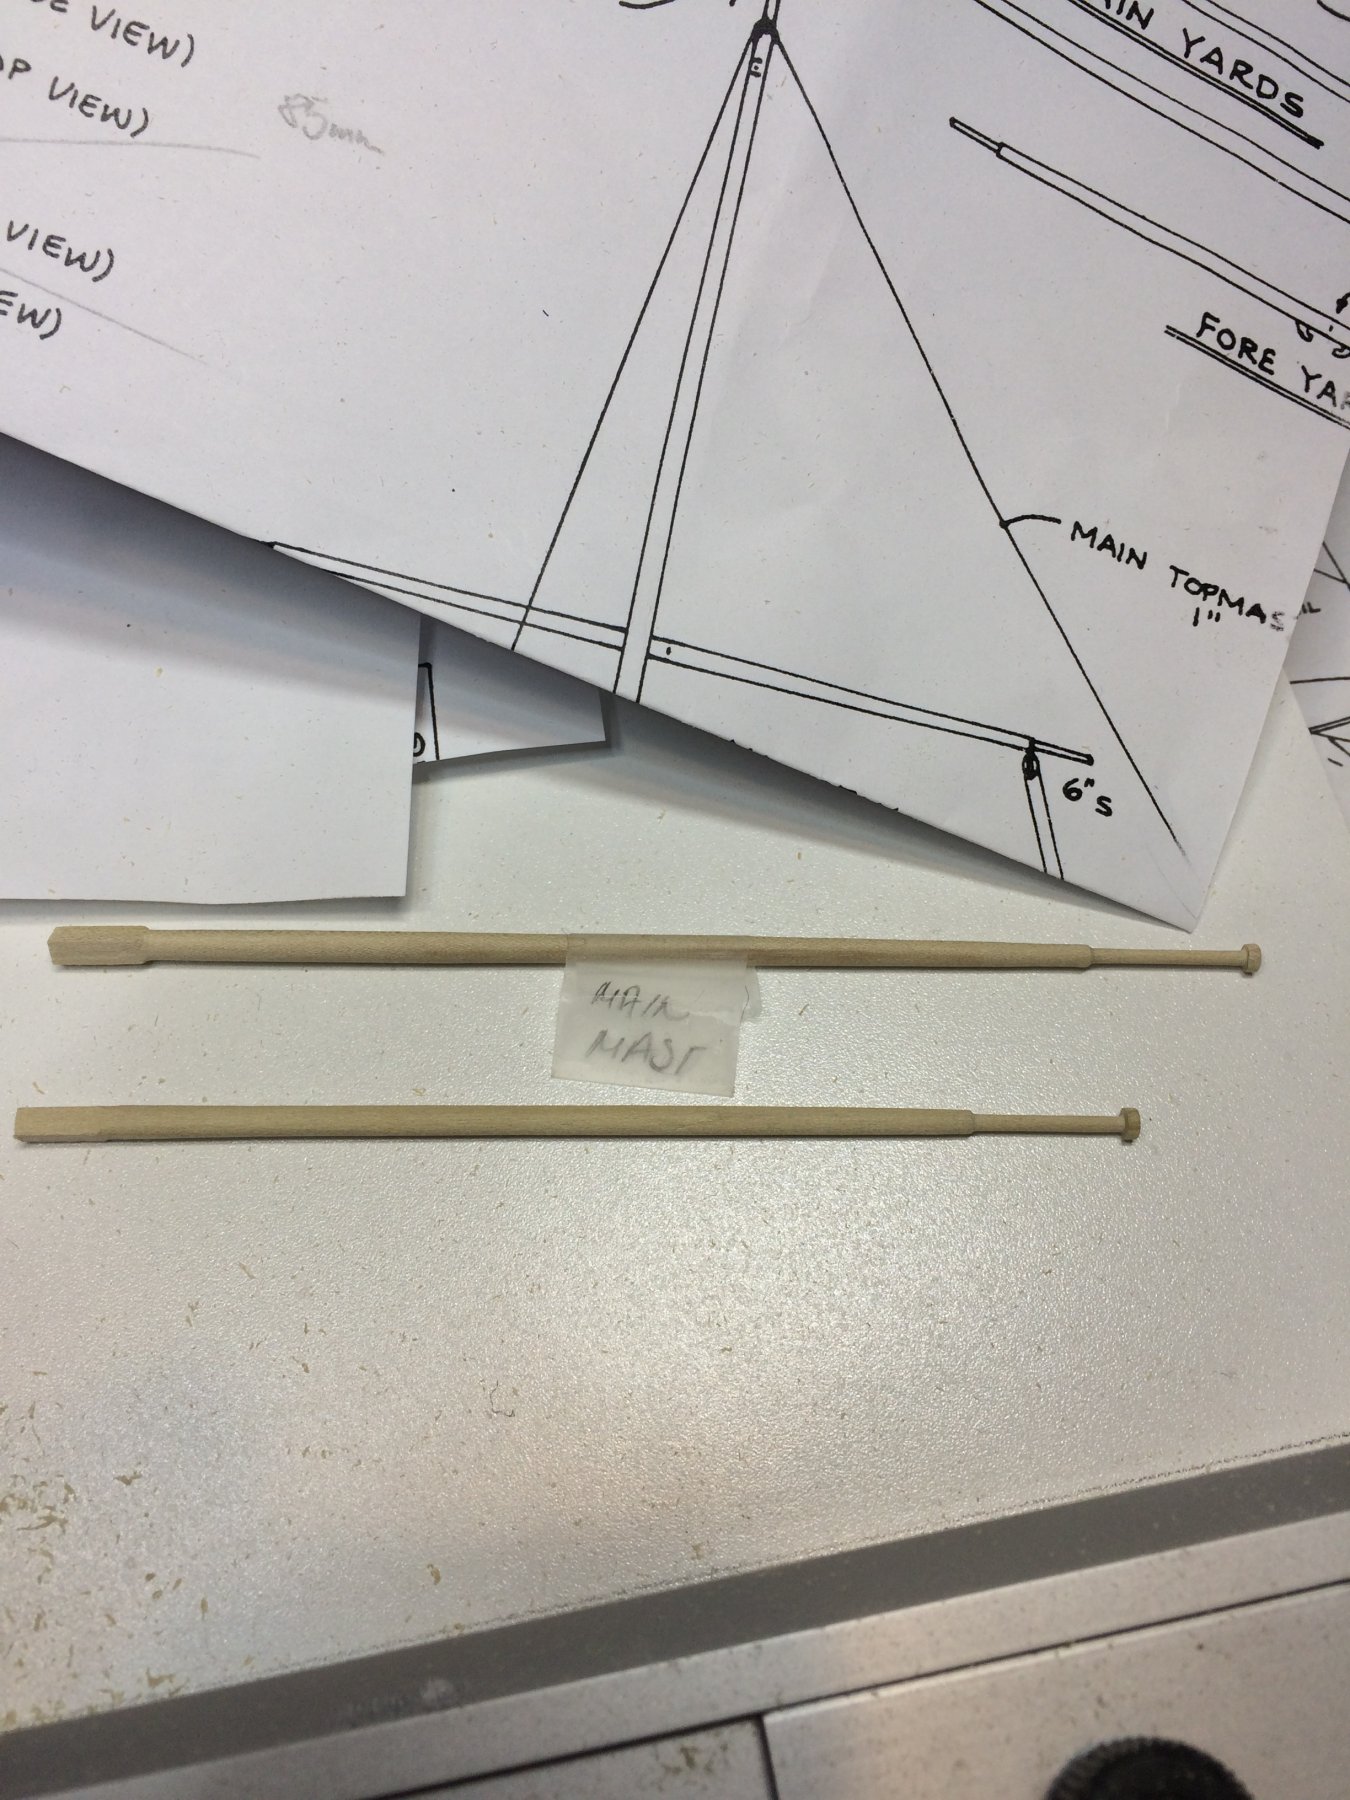
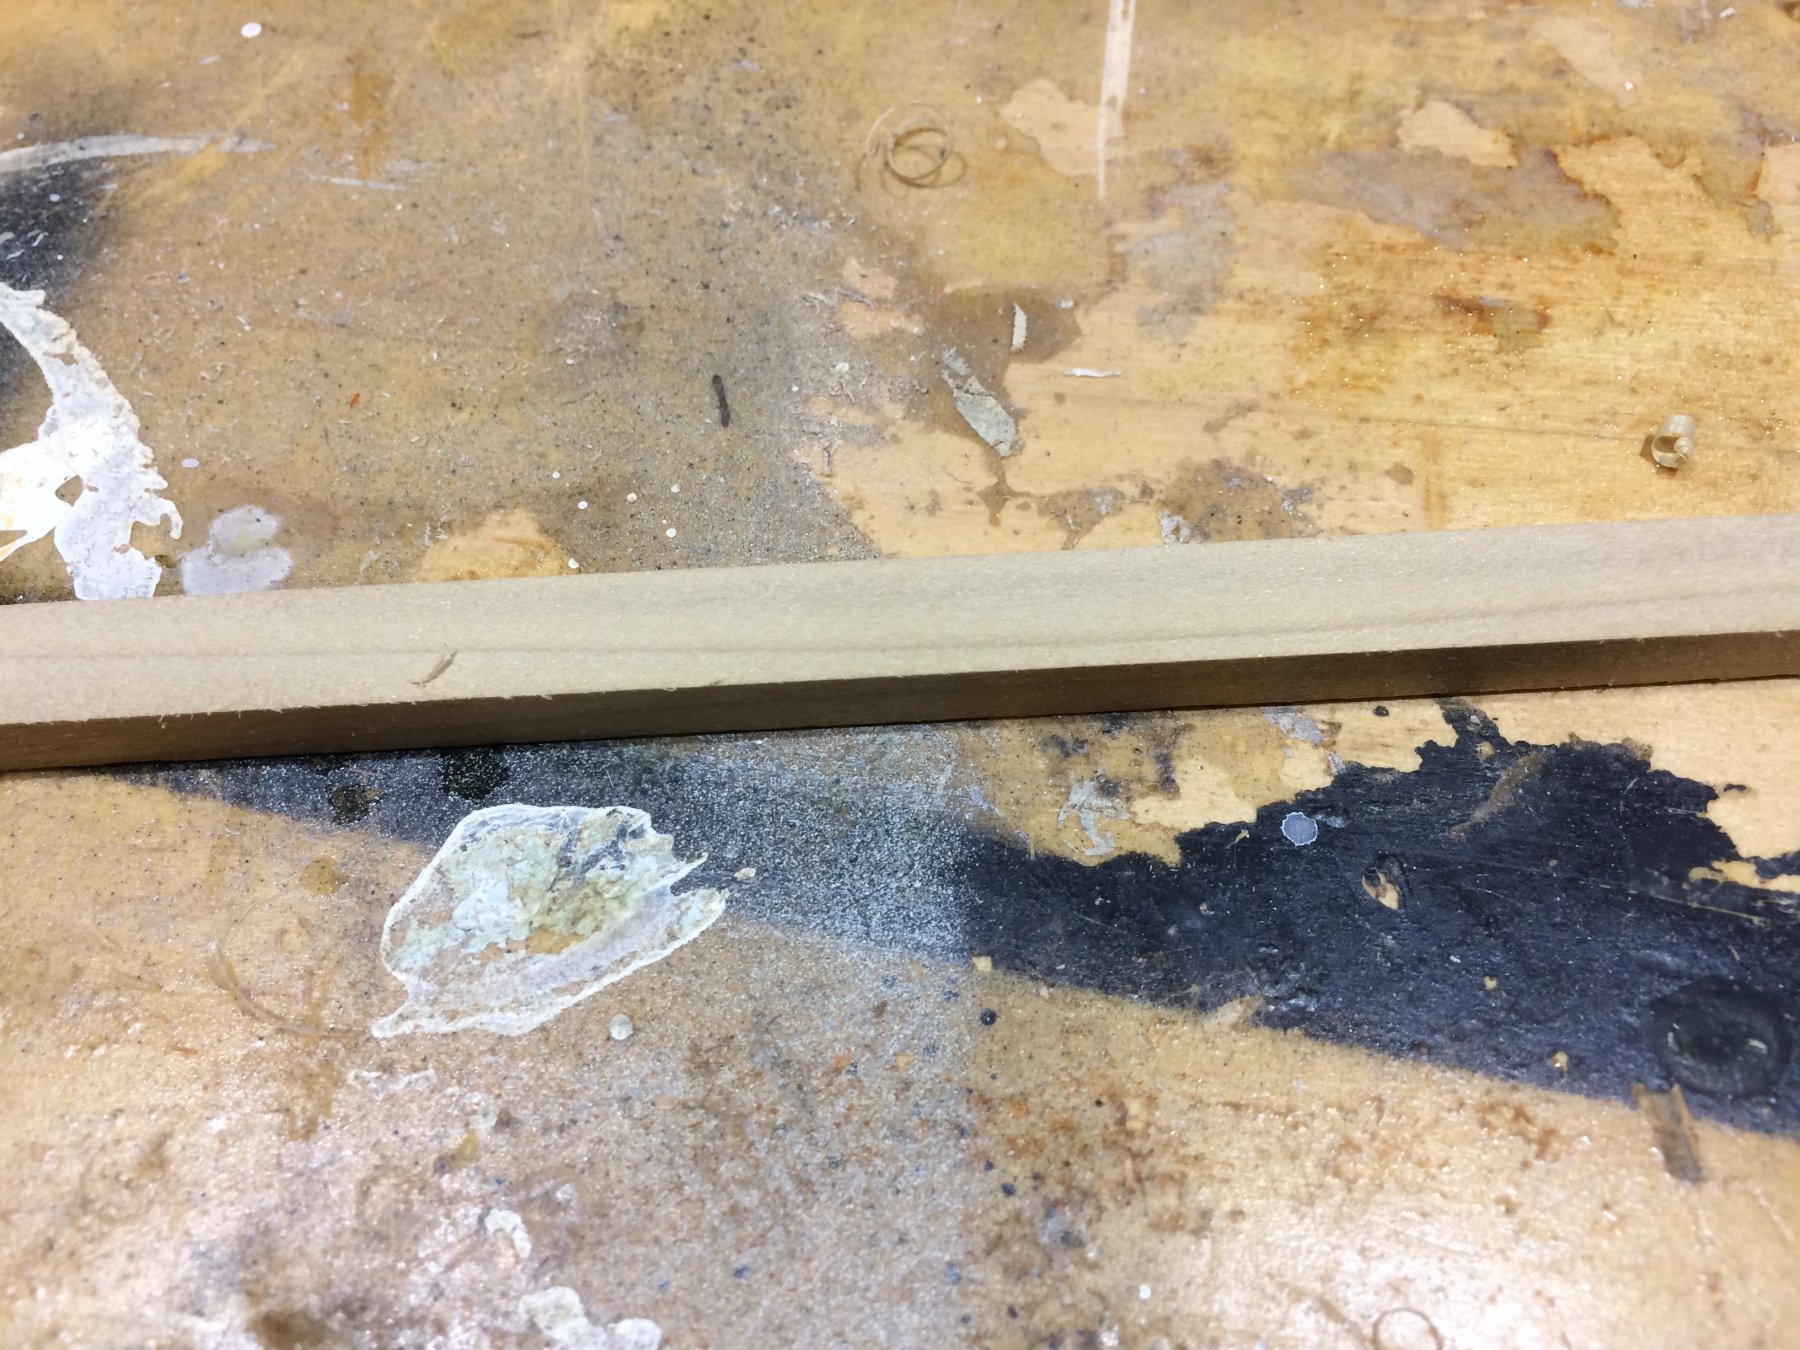
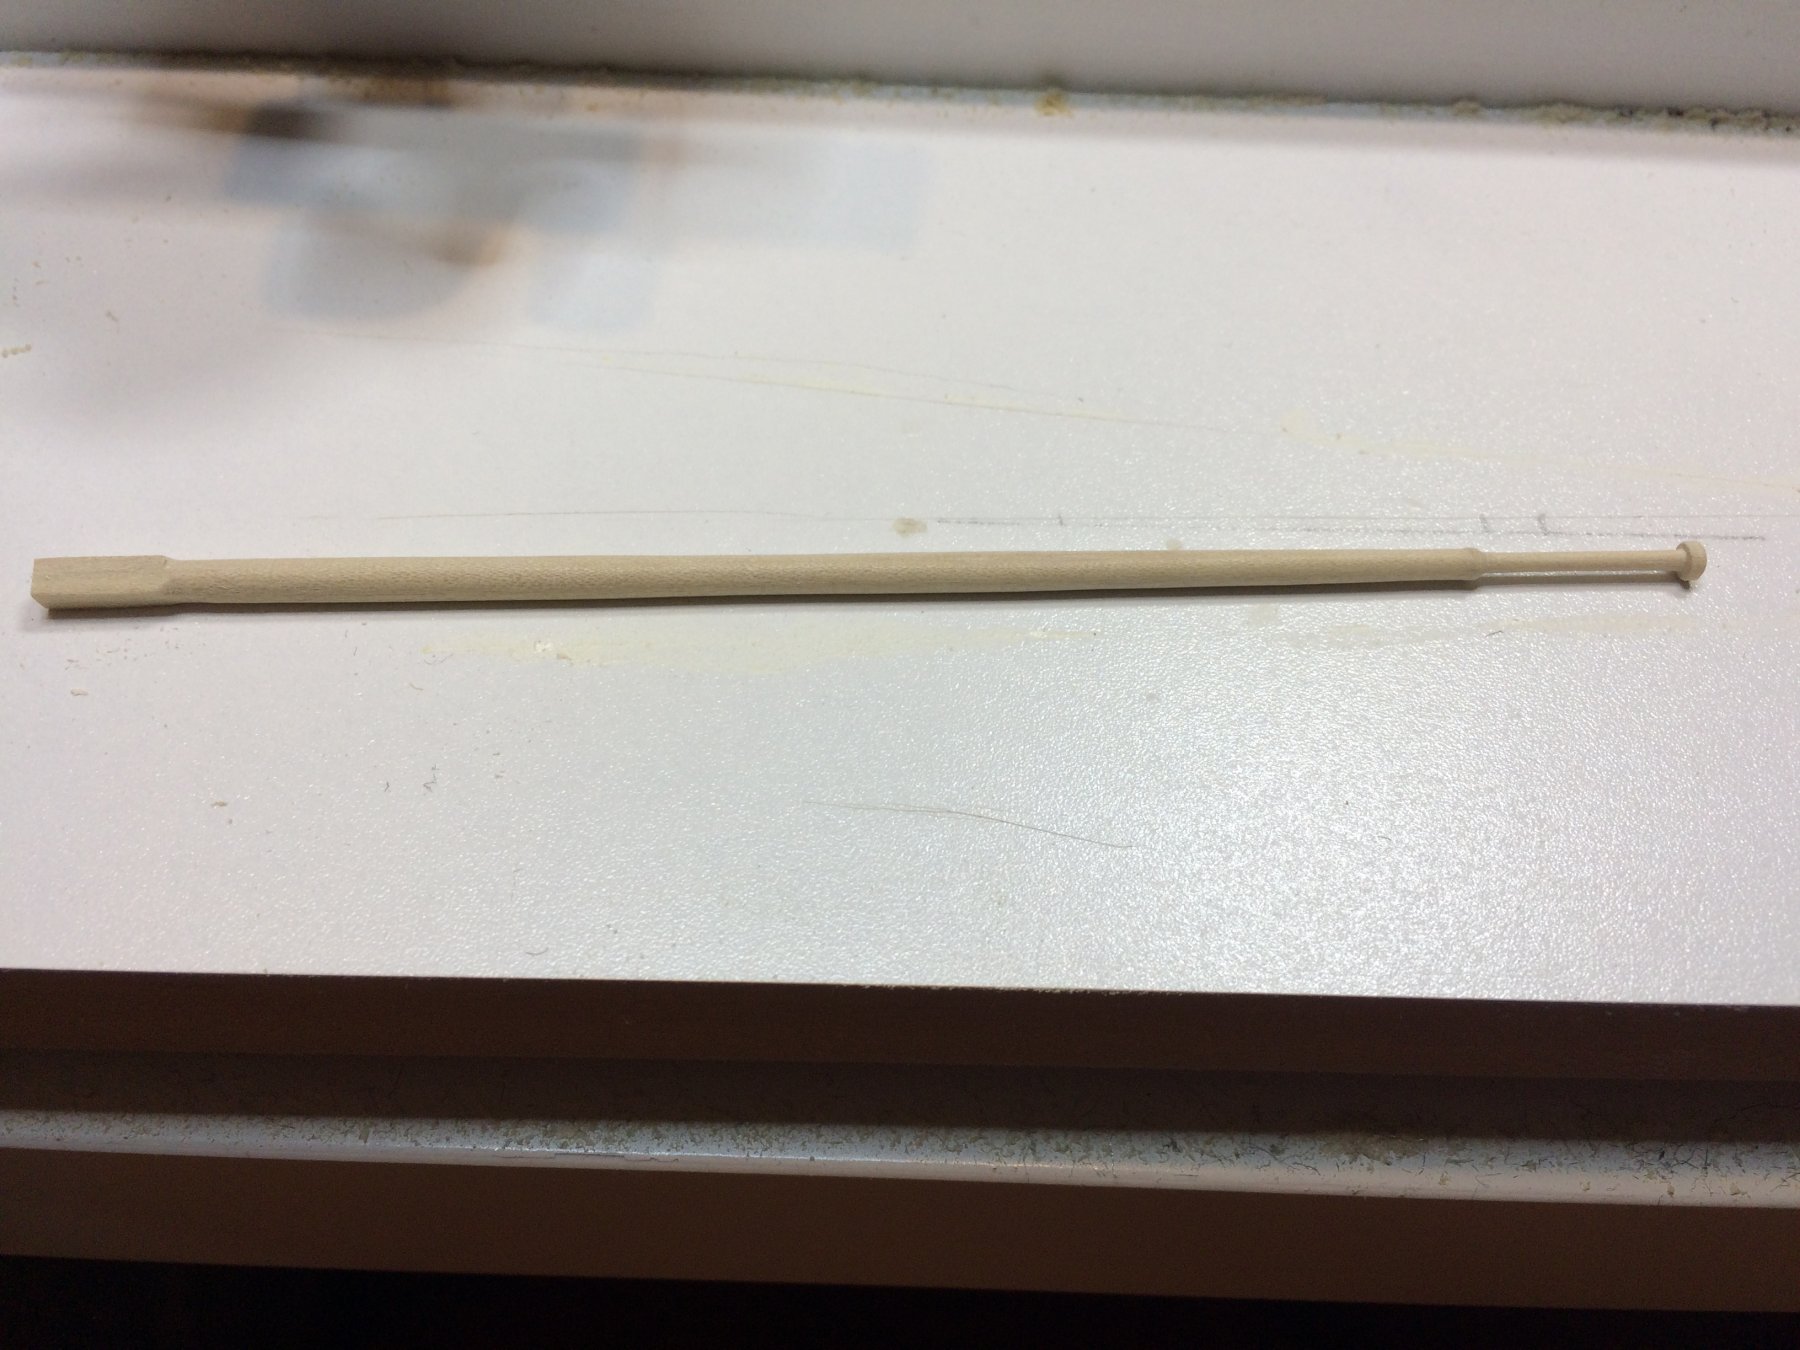
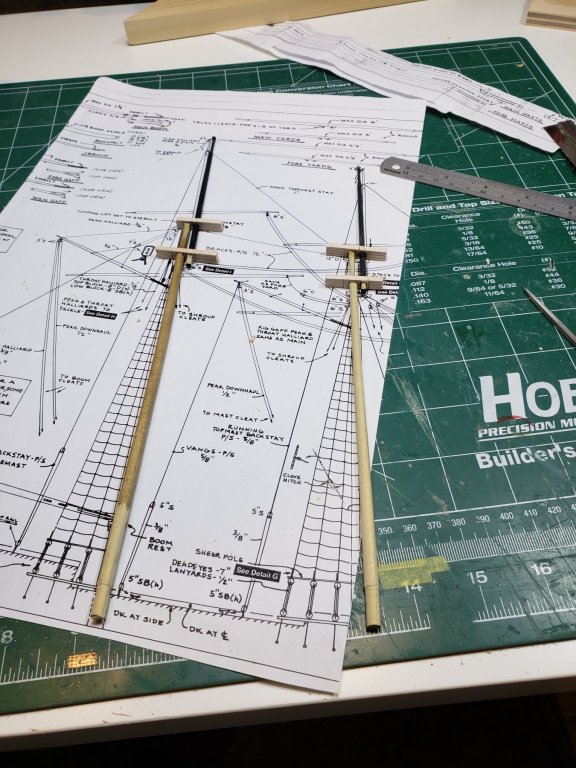
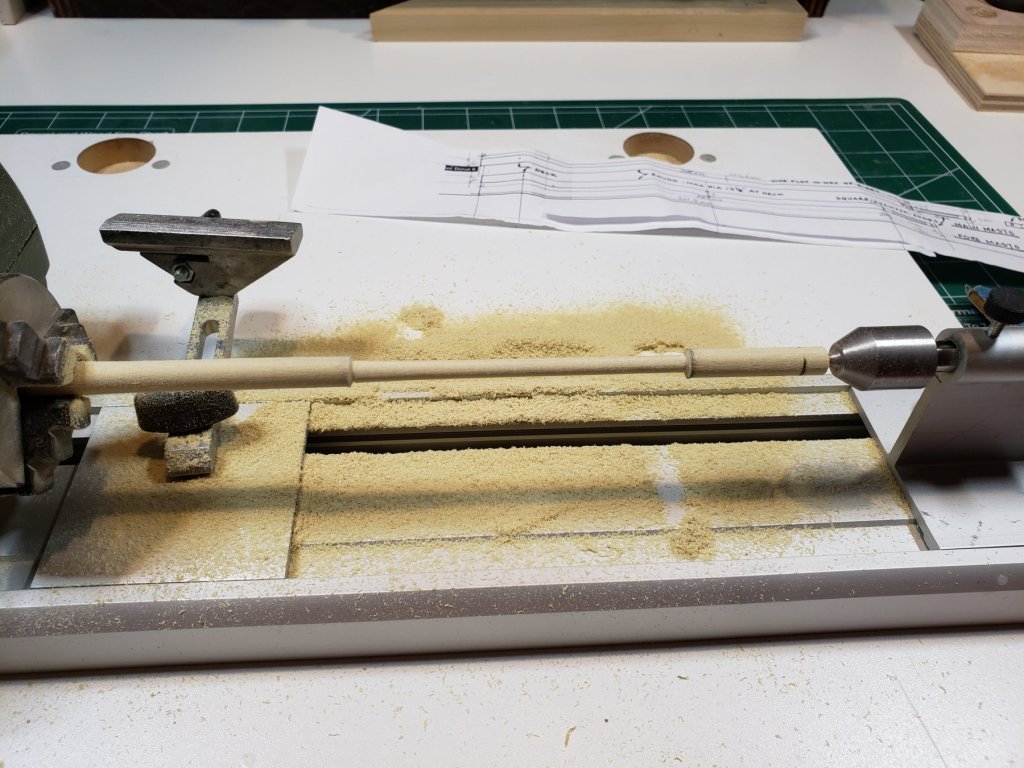
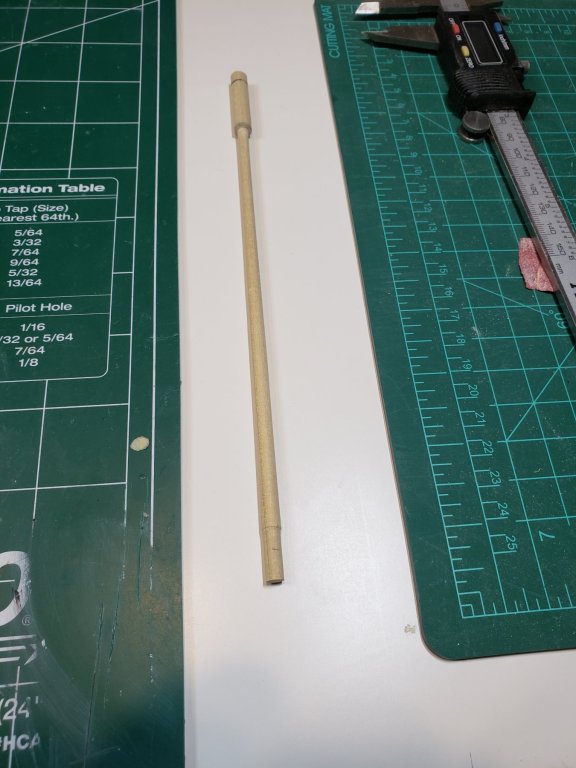
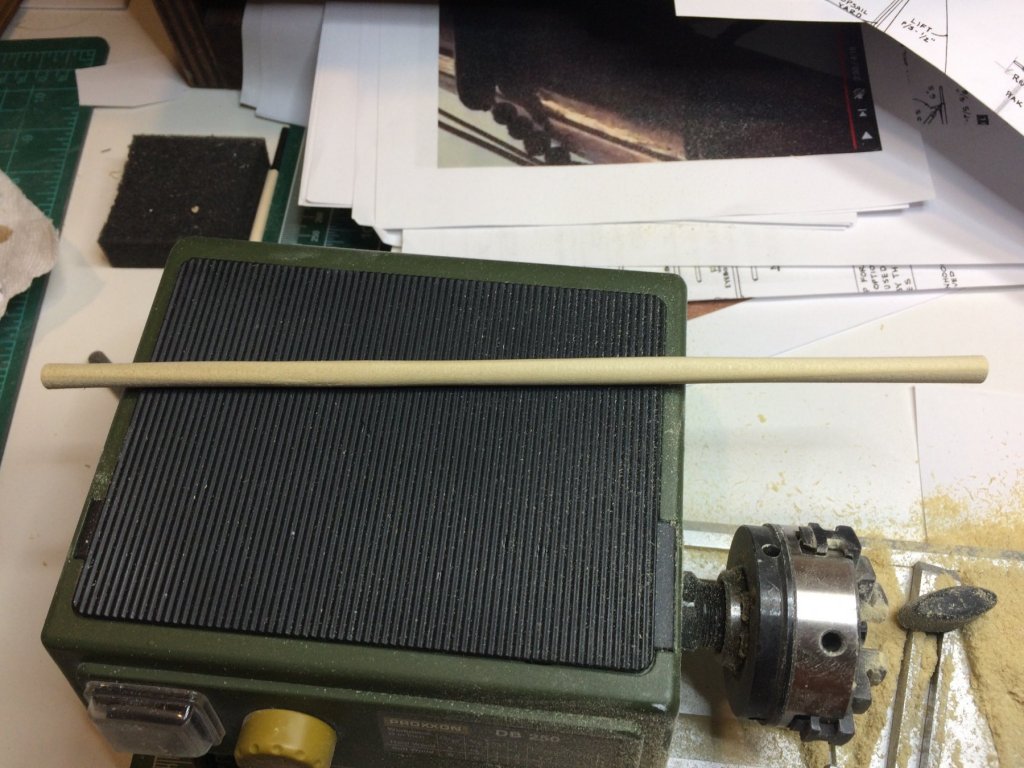
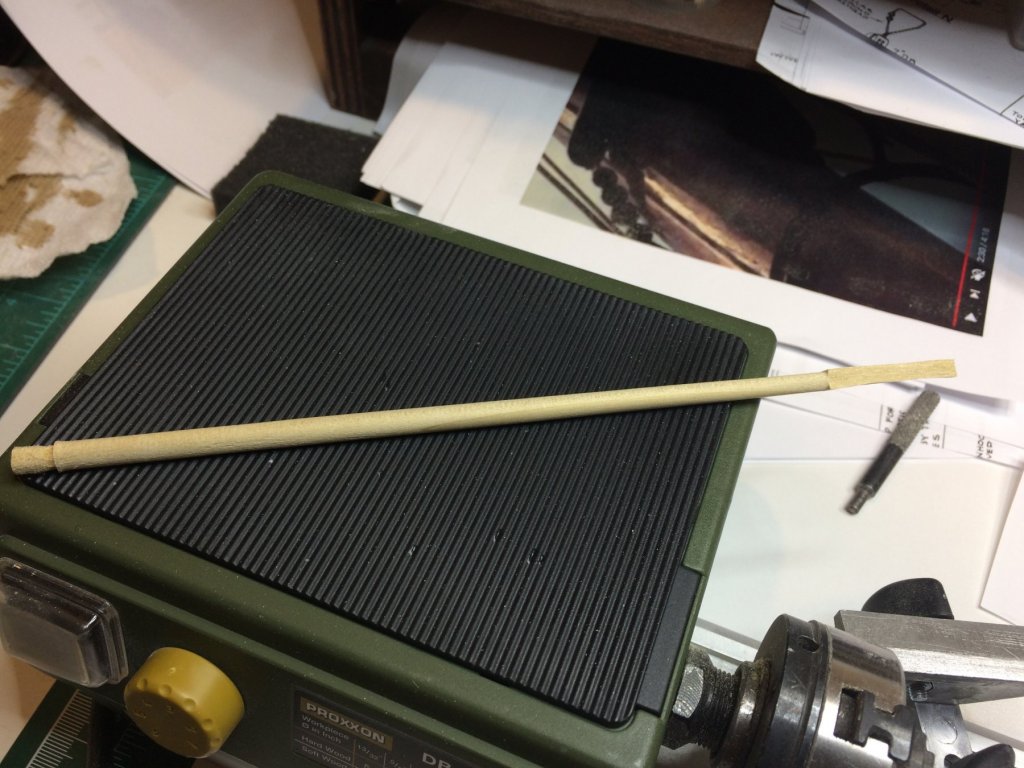
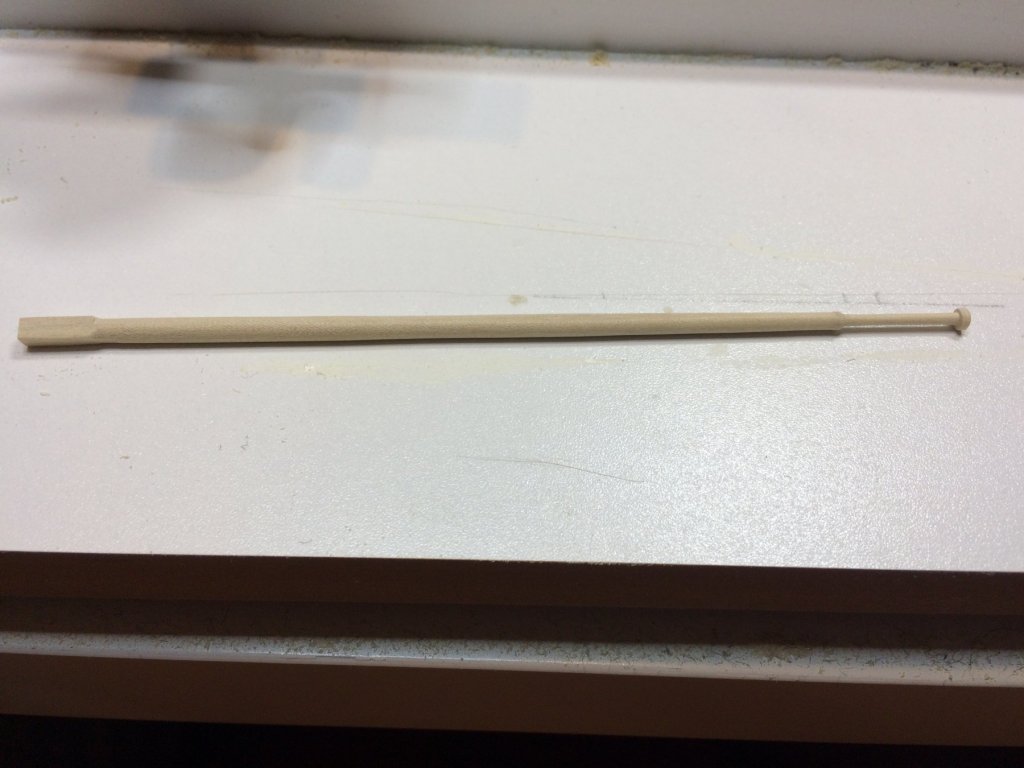
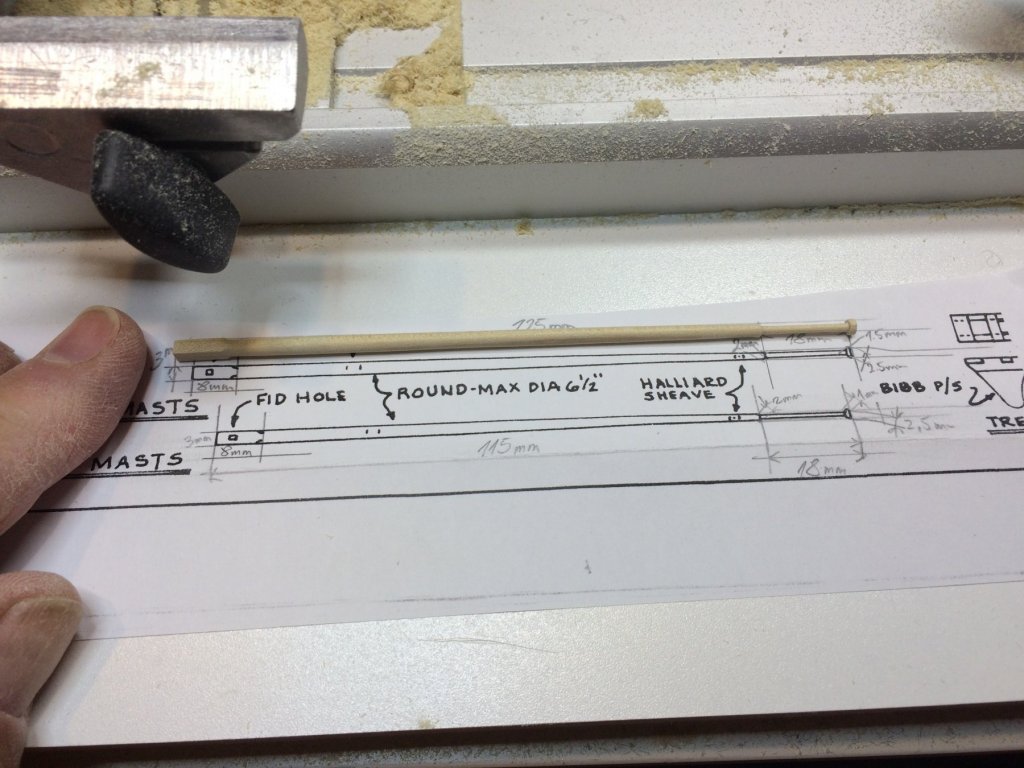
Work continue with masts.... Both masts, foremast and main mast, are identical in shape with difference in length. I will follow up mast plan that is provided in kit with small additions from practicum. I don't have that many Sultana' plans to combine details so i am staying with a kit plan. Wooden dowels supplied with the kit are slightly twisted and pretty much unusable. I don't have any close by hobby shop so trip to my homedepot ended up with few dowels in different size but they are also not quite straight. I might be able to use few smaller parts but for Sultana' masts i have to dig in my other wood pile. So, decided to go with poplar as i have few leftovers from some other projects in my house. Poplar is a bit yellowish and a bit harder to carve but less likely to snap during lathe work (as happened to me with other type of wood dowels) and with golden oak stain, it will be slightly darker comparing to rest of the ship parts. So i will make all mast parts out of the same poplar stock. Before i made decision to go with poplar i tried to use homedepot' dowels and made foremast out of 8mm dowel. Well i made it fairly decent at the end but decided not to use it at all as final product. Foremast made from homedepot dowel.. So back to the poplar pile. I cut 8mm x 8mm square rod, a bit more lengthy that mast dimension. This is a small rod and i have to round one end so it can fit into lathe. Borrowed my old pencil sharpener and made basic round shape; with a knife the round part become long enough to stick safely in lathe chuck. After some time and two usage of shop vacuum to remove all dust, here is result.. Then with assistance of home made sanding blocks (size 50), small rasps and few other type of files, i made a fore mast.. Both masts were carved from poplar rods.. The top will be painted in black and the rest will be stained in golden oak stain. The both top masts were build next. Poplar rod cut in square, 5mm x 5mm in correct length. Same thing with rounding at one end to fit into lathe' chuck and shaping can start... Here is final product. I made one top mast today, will continue tomorrow time (and New Year celebration) permitting.. A little bit extra length at the bottom will be altered later. The bottom, squared part... Process of making top part with a ball truck... And final result... That was a little extra wood at 3mm part that i removed after taking this picture. So, this is for today.. Best wishes to all and happy New Year..


- 360 replies
-
- 2
-
-
- sultana
- model shipways
- (and 1 more)