HOLIDAY DONATION DRIVE - SUPPORT MSW - DO YOUR PART TO KEEP THIS GREAT FORUM GOING! (Only 20 donations so far - C'mon guys!)
×


moreplovac
-
Posts
794 -
Joined
-
Last visited
Content Type
Profiles
Forums
Gallery
Events
Everything posted by moreplovac
-
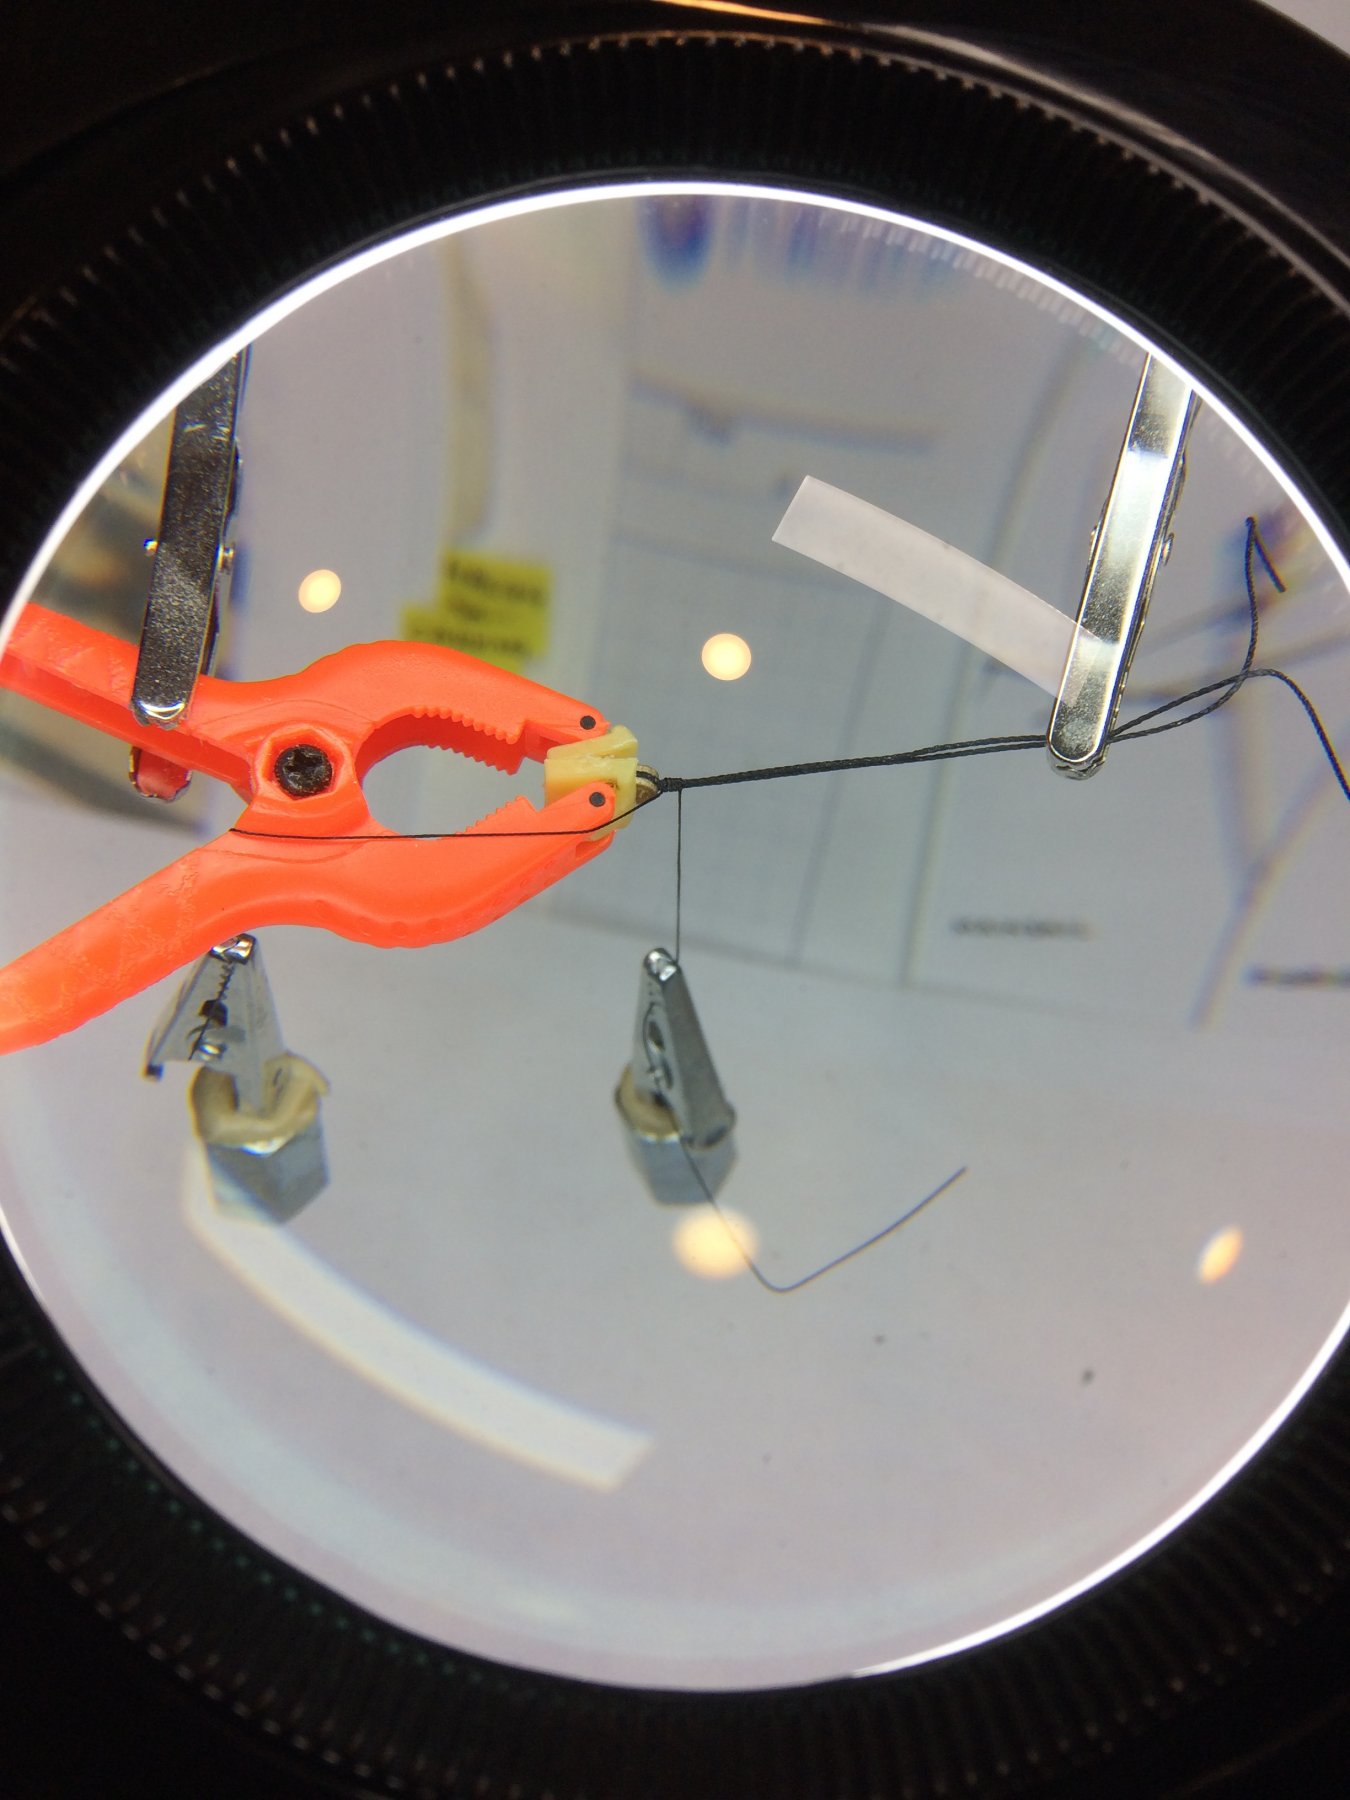
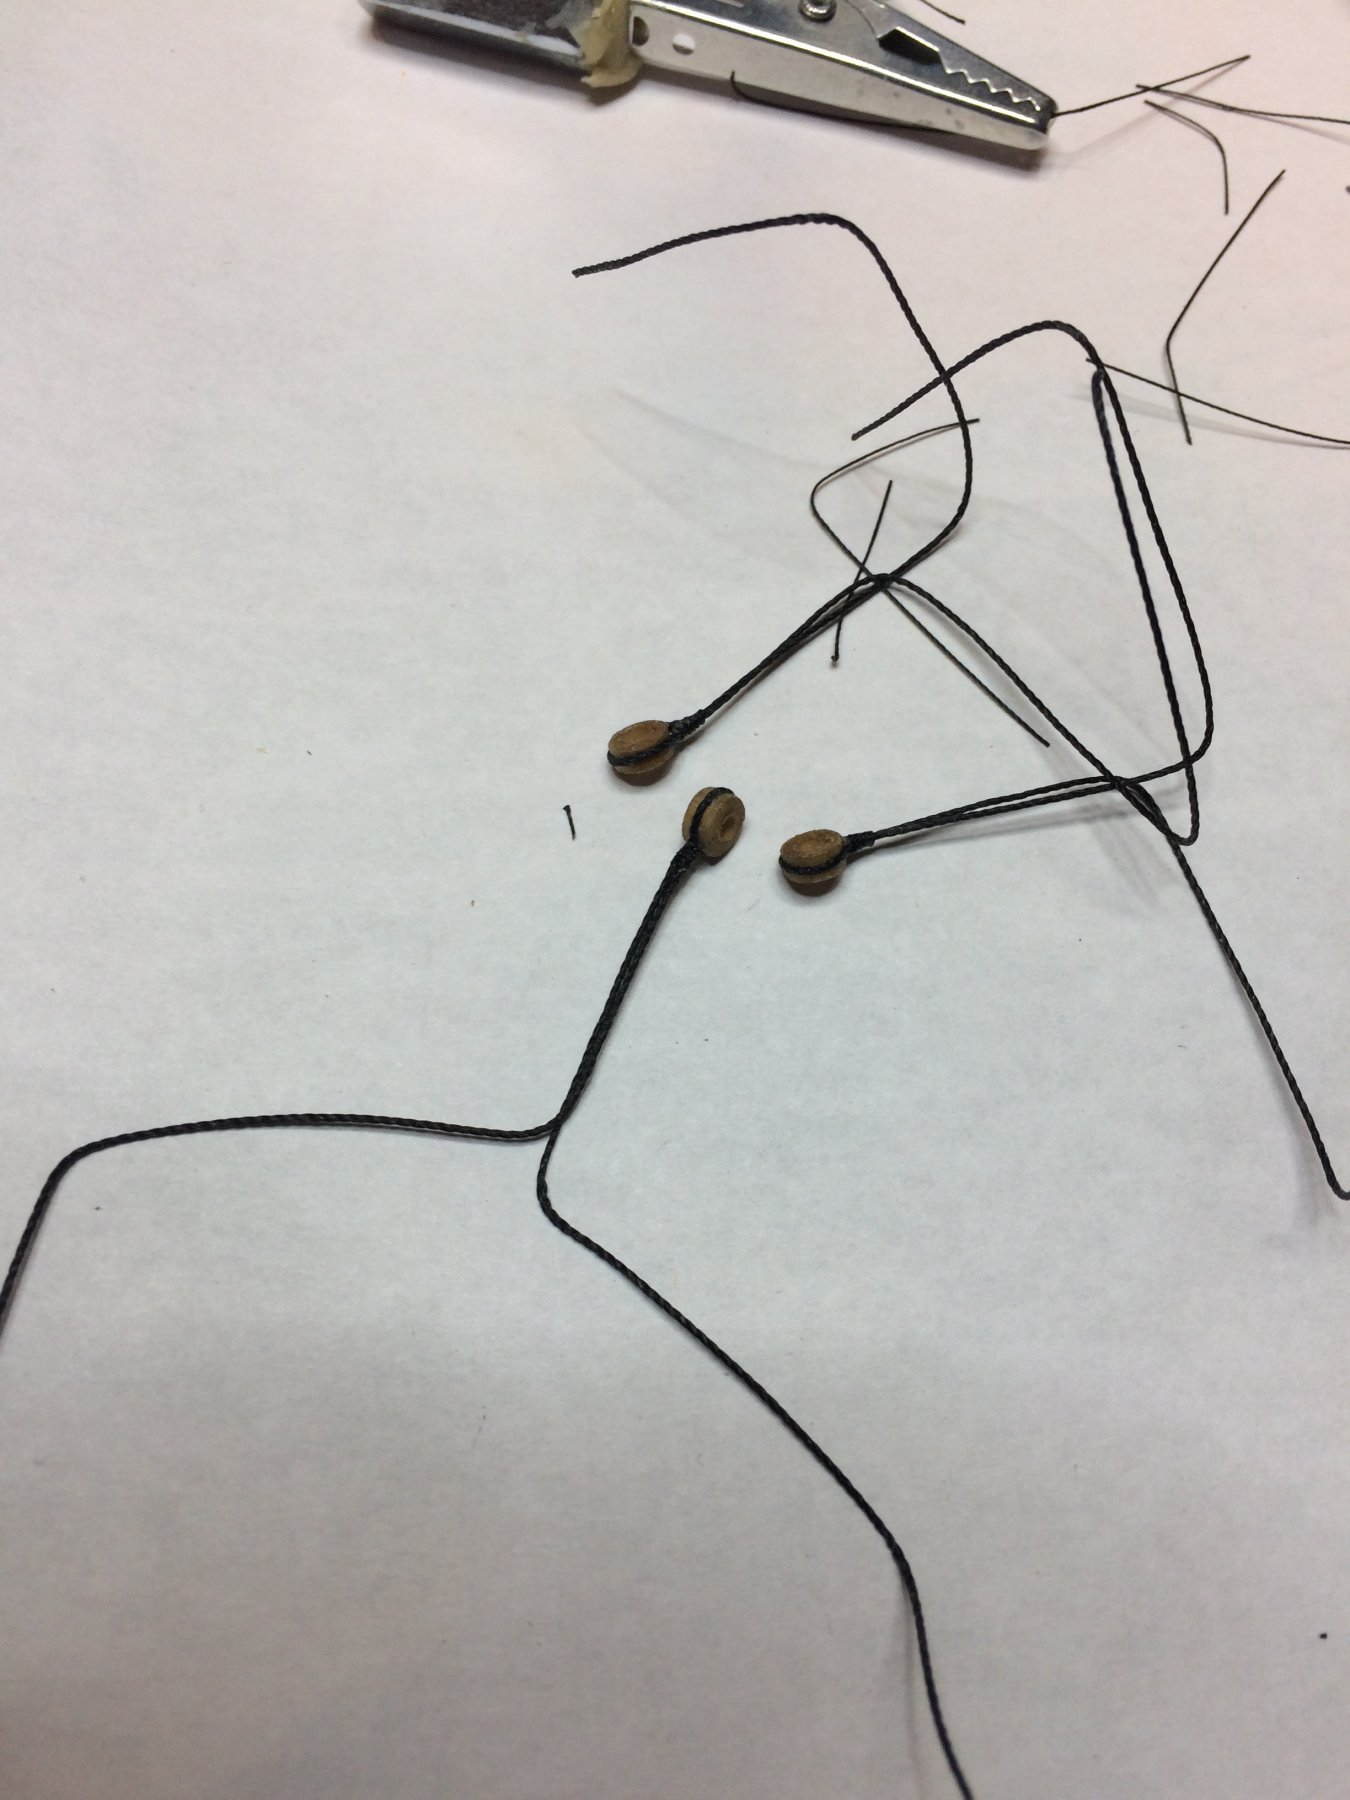
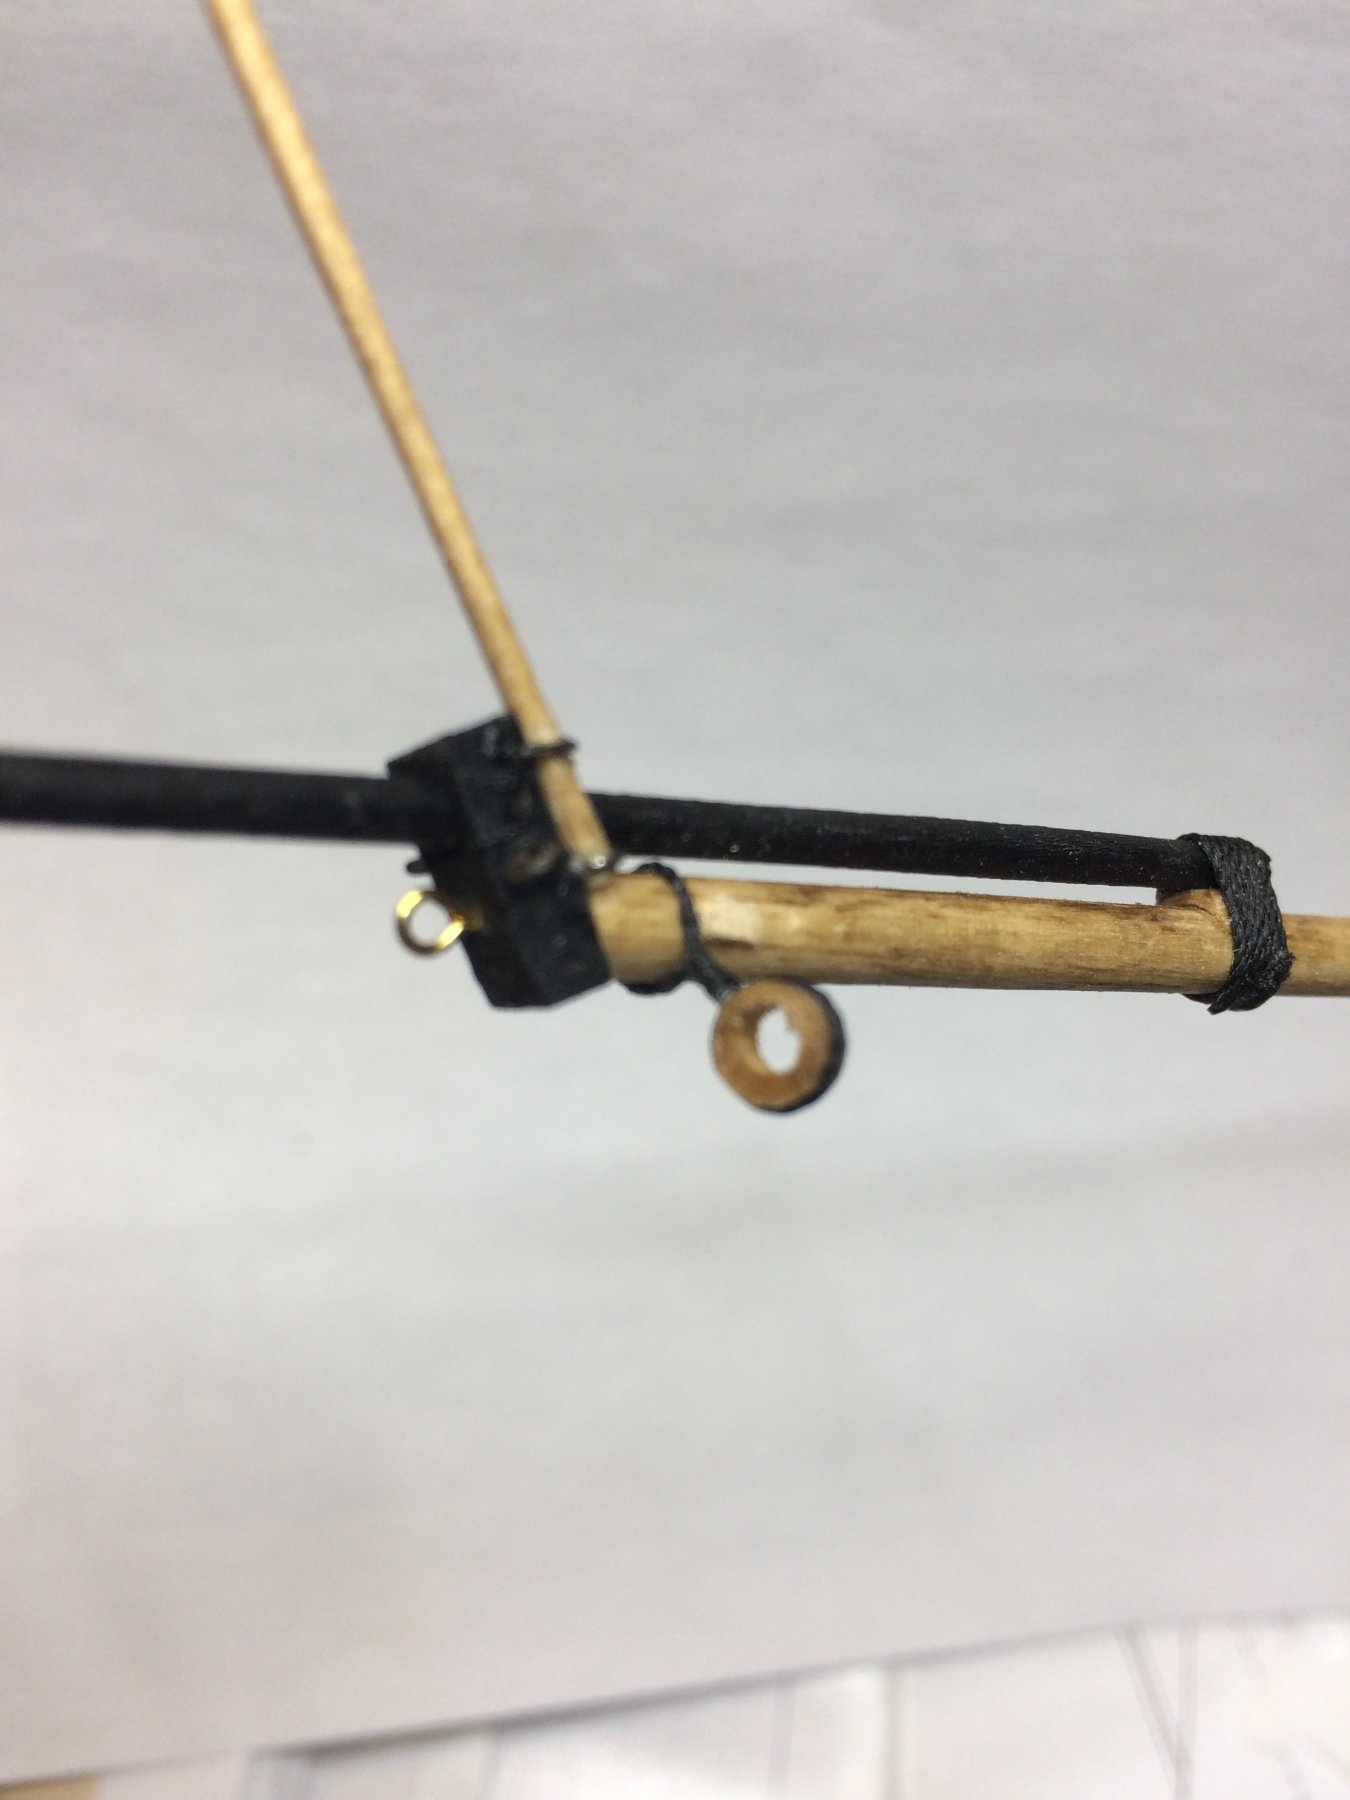
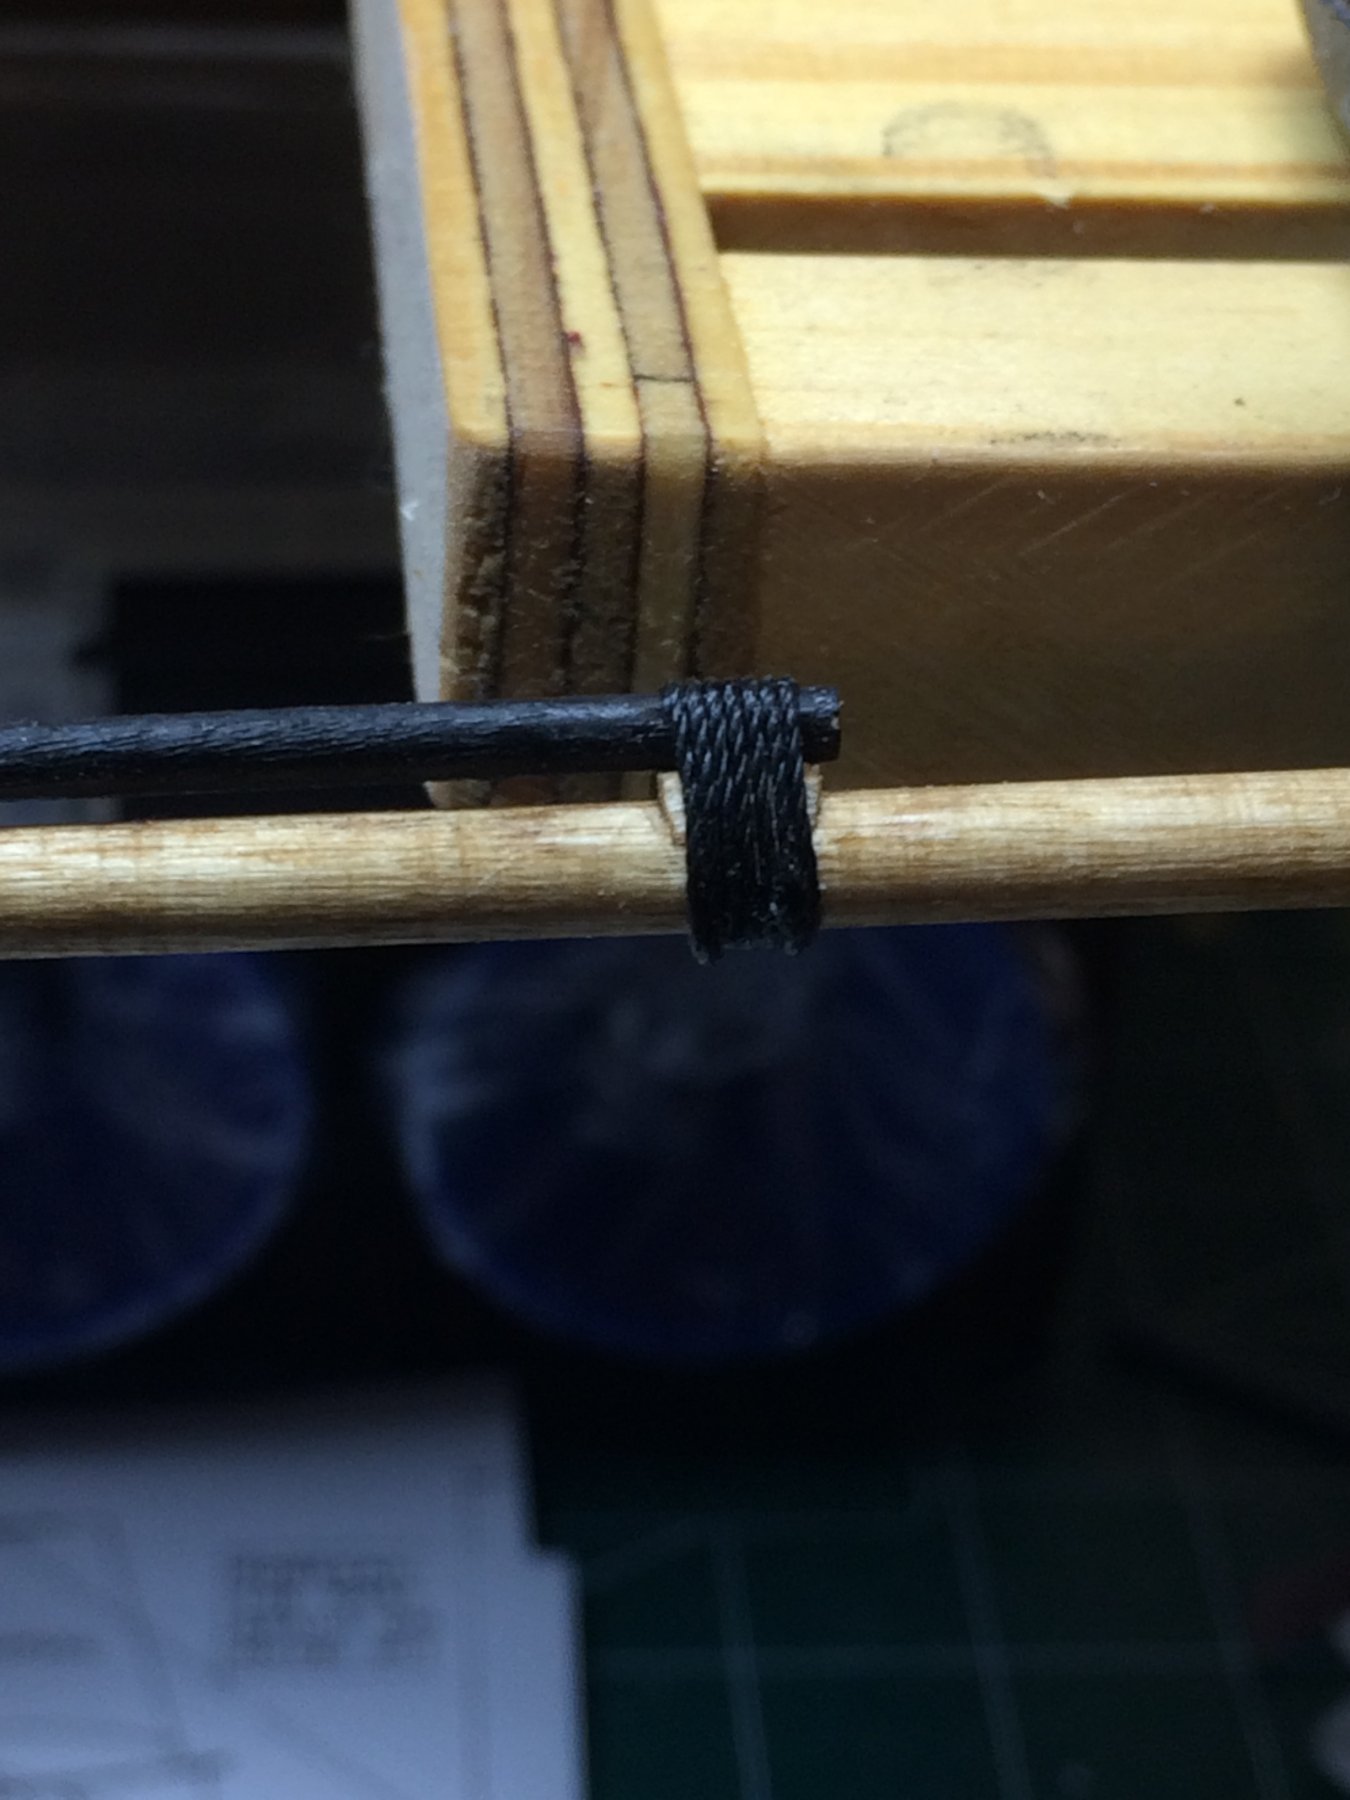
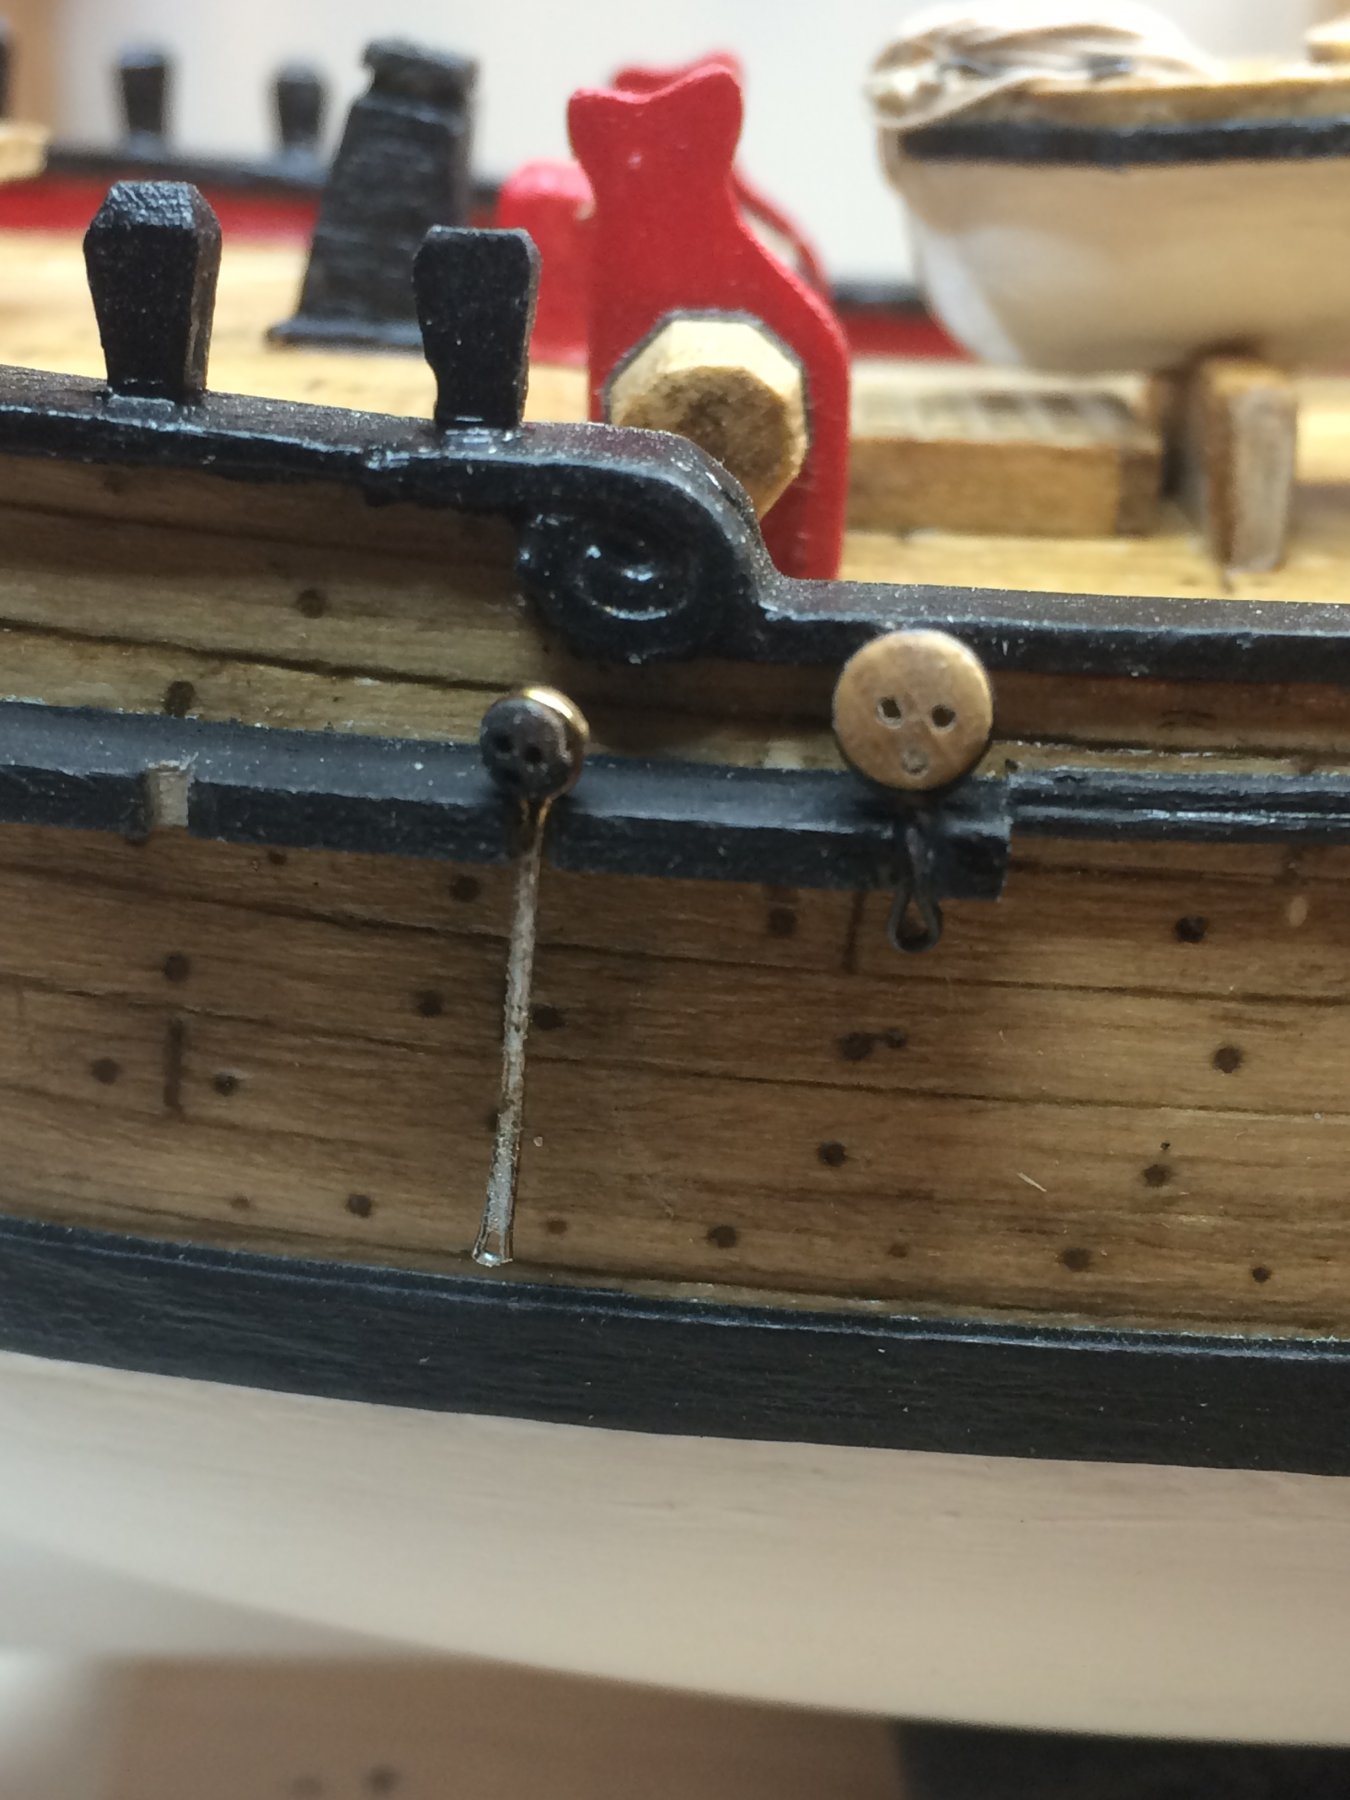
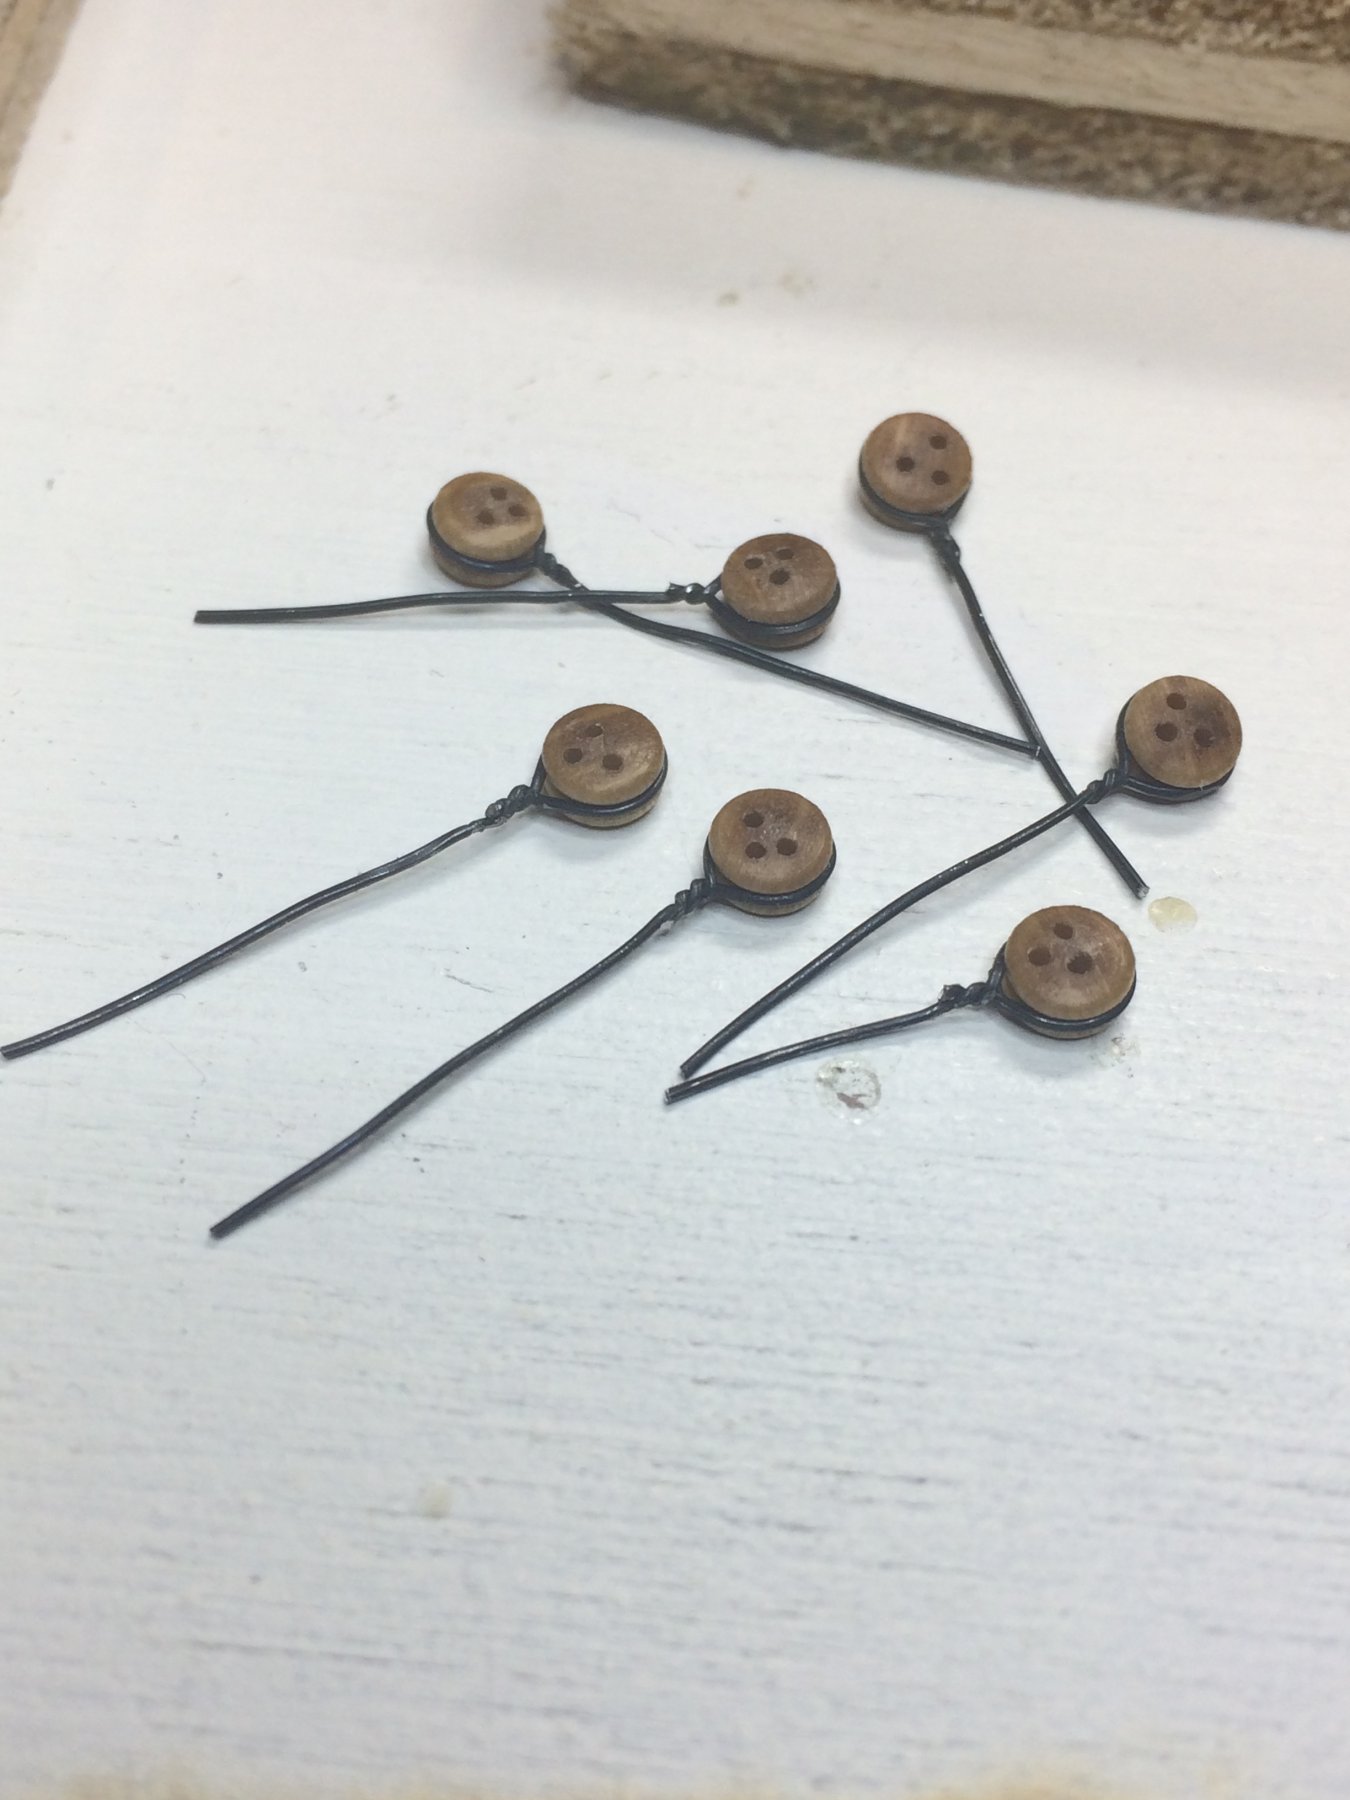
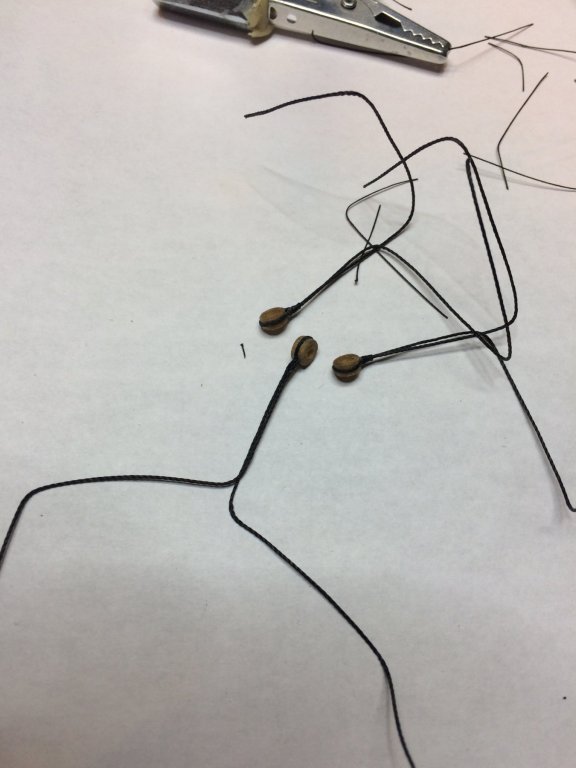
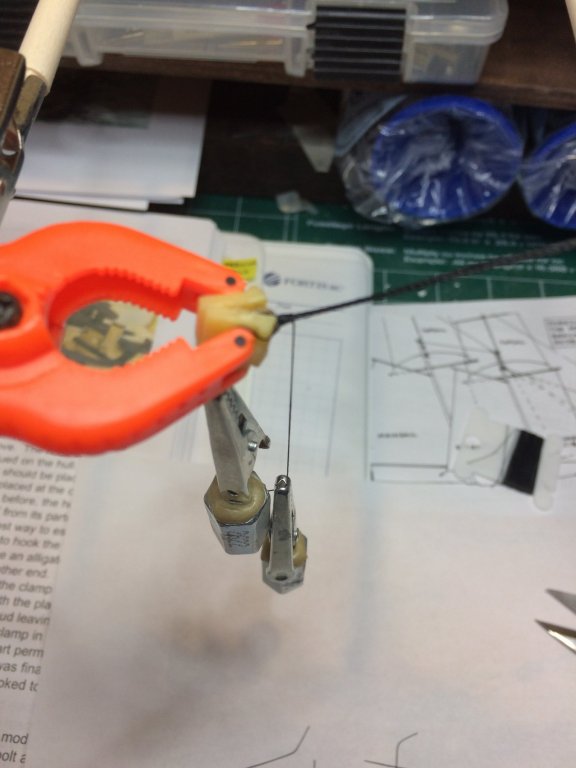
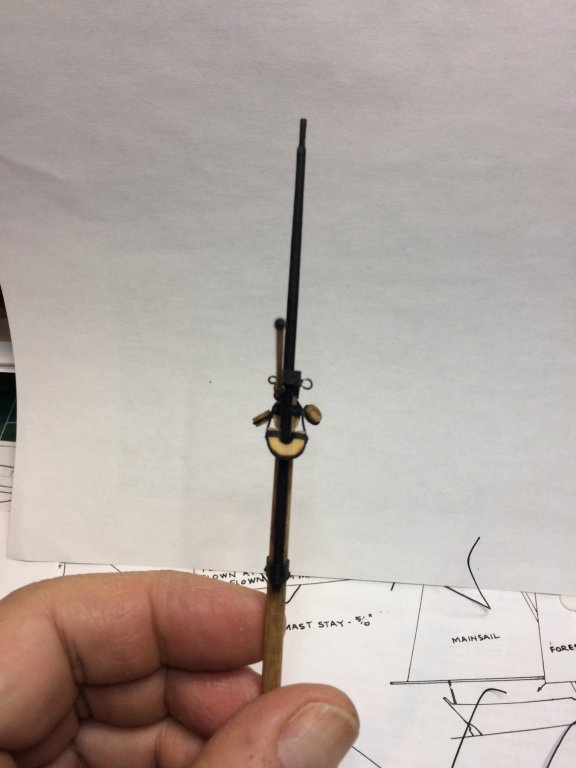
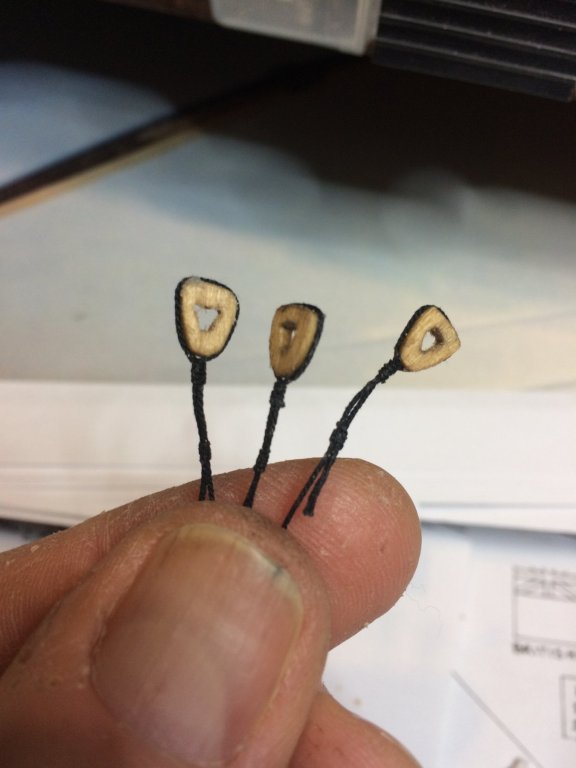
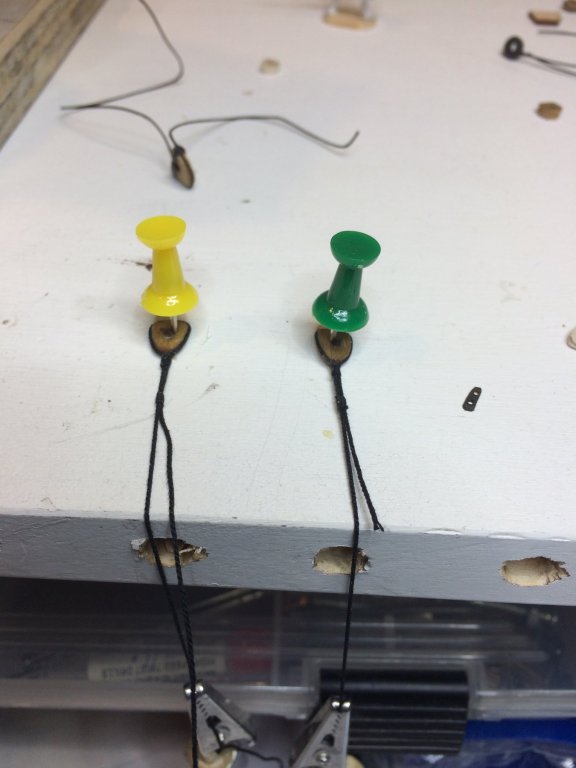
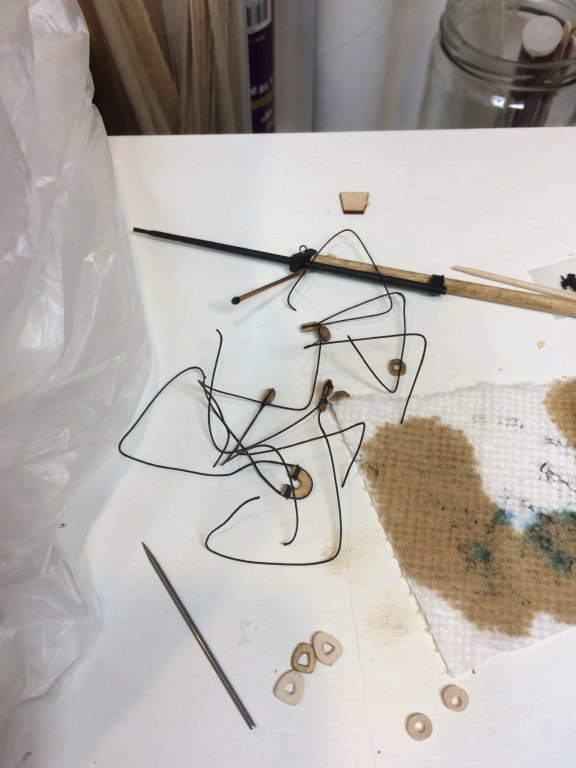
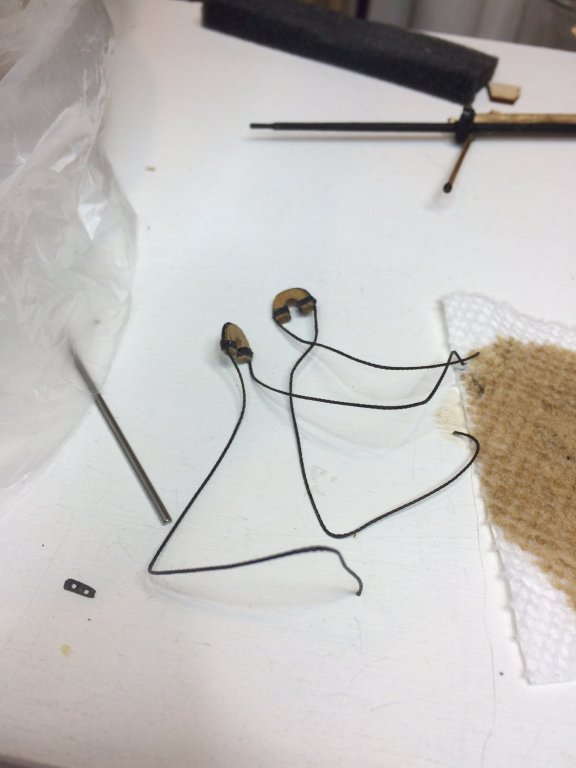
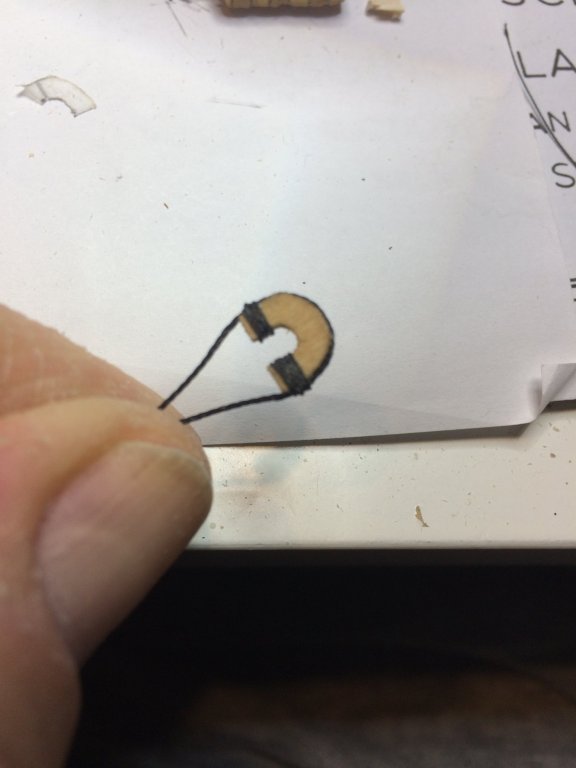
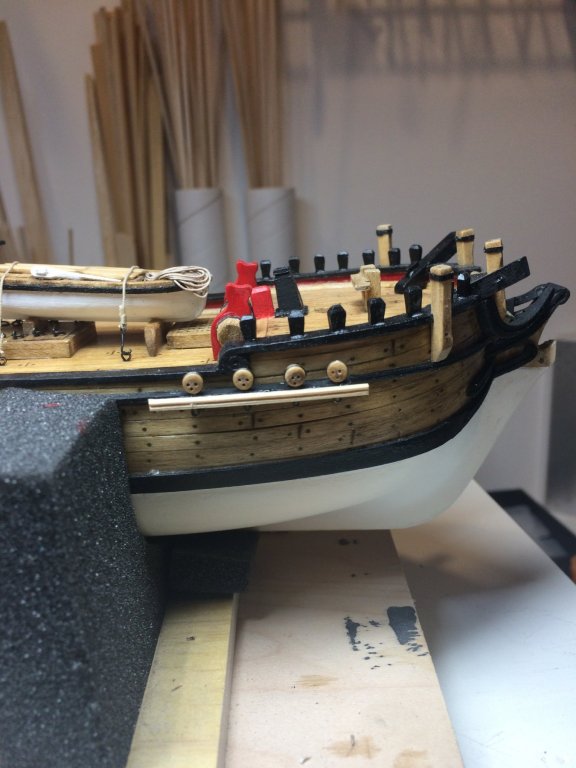
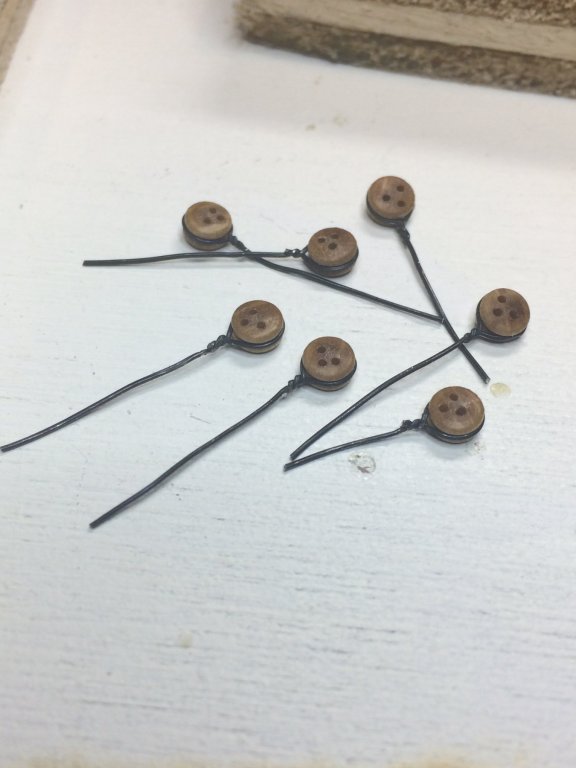
 I changed my mind, was not spending time making one collar with two eyes. Instead i decided to redo the hearts. The collars were seized with .18mm rope. Here is a brief overview of seizing setup and one view thru magnified glass. Needed, for sure. Three were completed, seized and ready for next step. One appears to be attempting to escape.. The collars were mounted to the bowsprit; three of them, following practicum steps. They were secured with single overhand knot, secured by touch of glue. The loose ends were cut with nail clipper; it is used only for this purpose, i swear. First collar assembled on bowsprit.. Then second.. .. then third.. ..then one of the open hearts was installed on bowsprit... The open heart was a bit of a challenge to put in; ropes just did not want to stay put. I had to use scotch tape to fix the open heart to position, then i was able to properly tight the rope, glue it and cut loose pieces.. The hearts were next. Cut them again from a piece of boxwood, in correct size, and sanded to proper shape. Then a grove was made on the edges, and rope (.45mm) added around them. Before, hearts were dipped into golden oak stain, extra stain was removed with a piece of bounty. The rope was put around the hearts with assistance of a glue to keep them in correct place. Seizing was also done using .18mm black rope. Just to mention that amount (and size of ropes) that is included in the kit is not quite appropriate so i decided to order some ropes from Syren company. Just to make sure i will not run out of ropes during assembly process. I will put a layer of varnish on the hull to protect it from element. Once dried i will put some bounty around the hull to have it protected while handled.. Happy modeling.
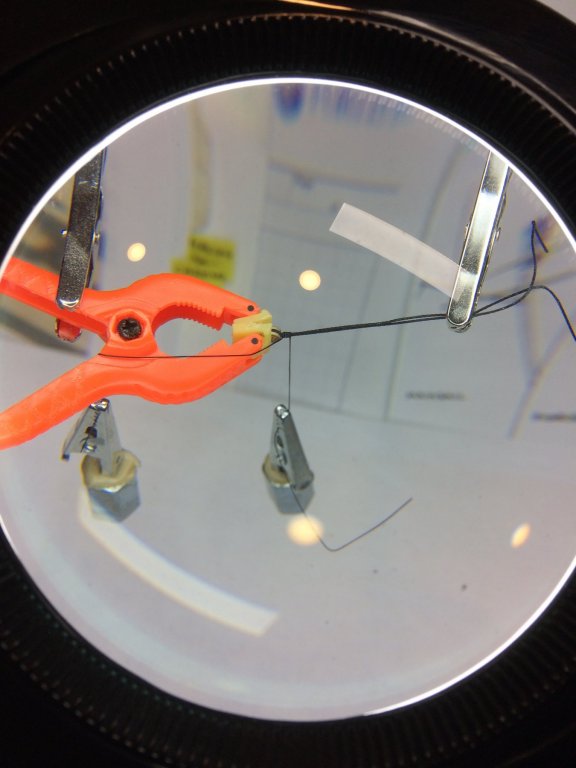


- 360 replies
-
- 4
-

-
- sultana
- model shipways
- (and 1 more)
-
Dear friends, Best wishes for you and your family this Christmas. Merry Christmas and Happy New Year! All the best.
- 360 replies
-
- 1
-
-
- sultana
- model shipways
- (and 1 more)
-
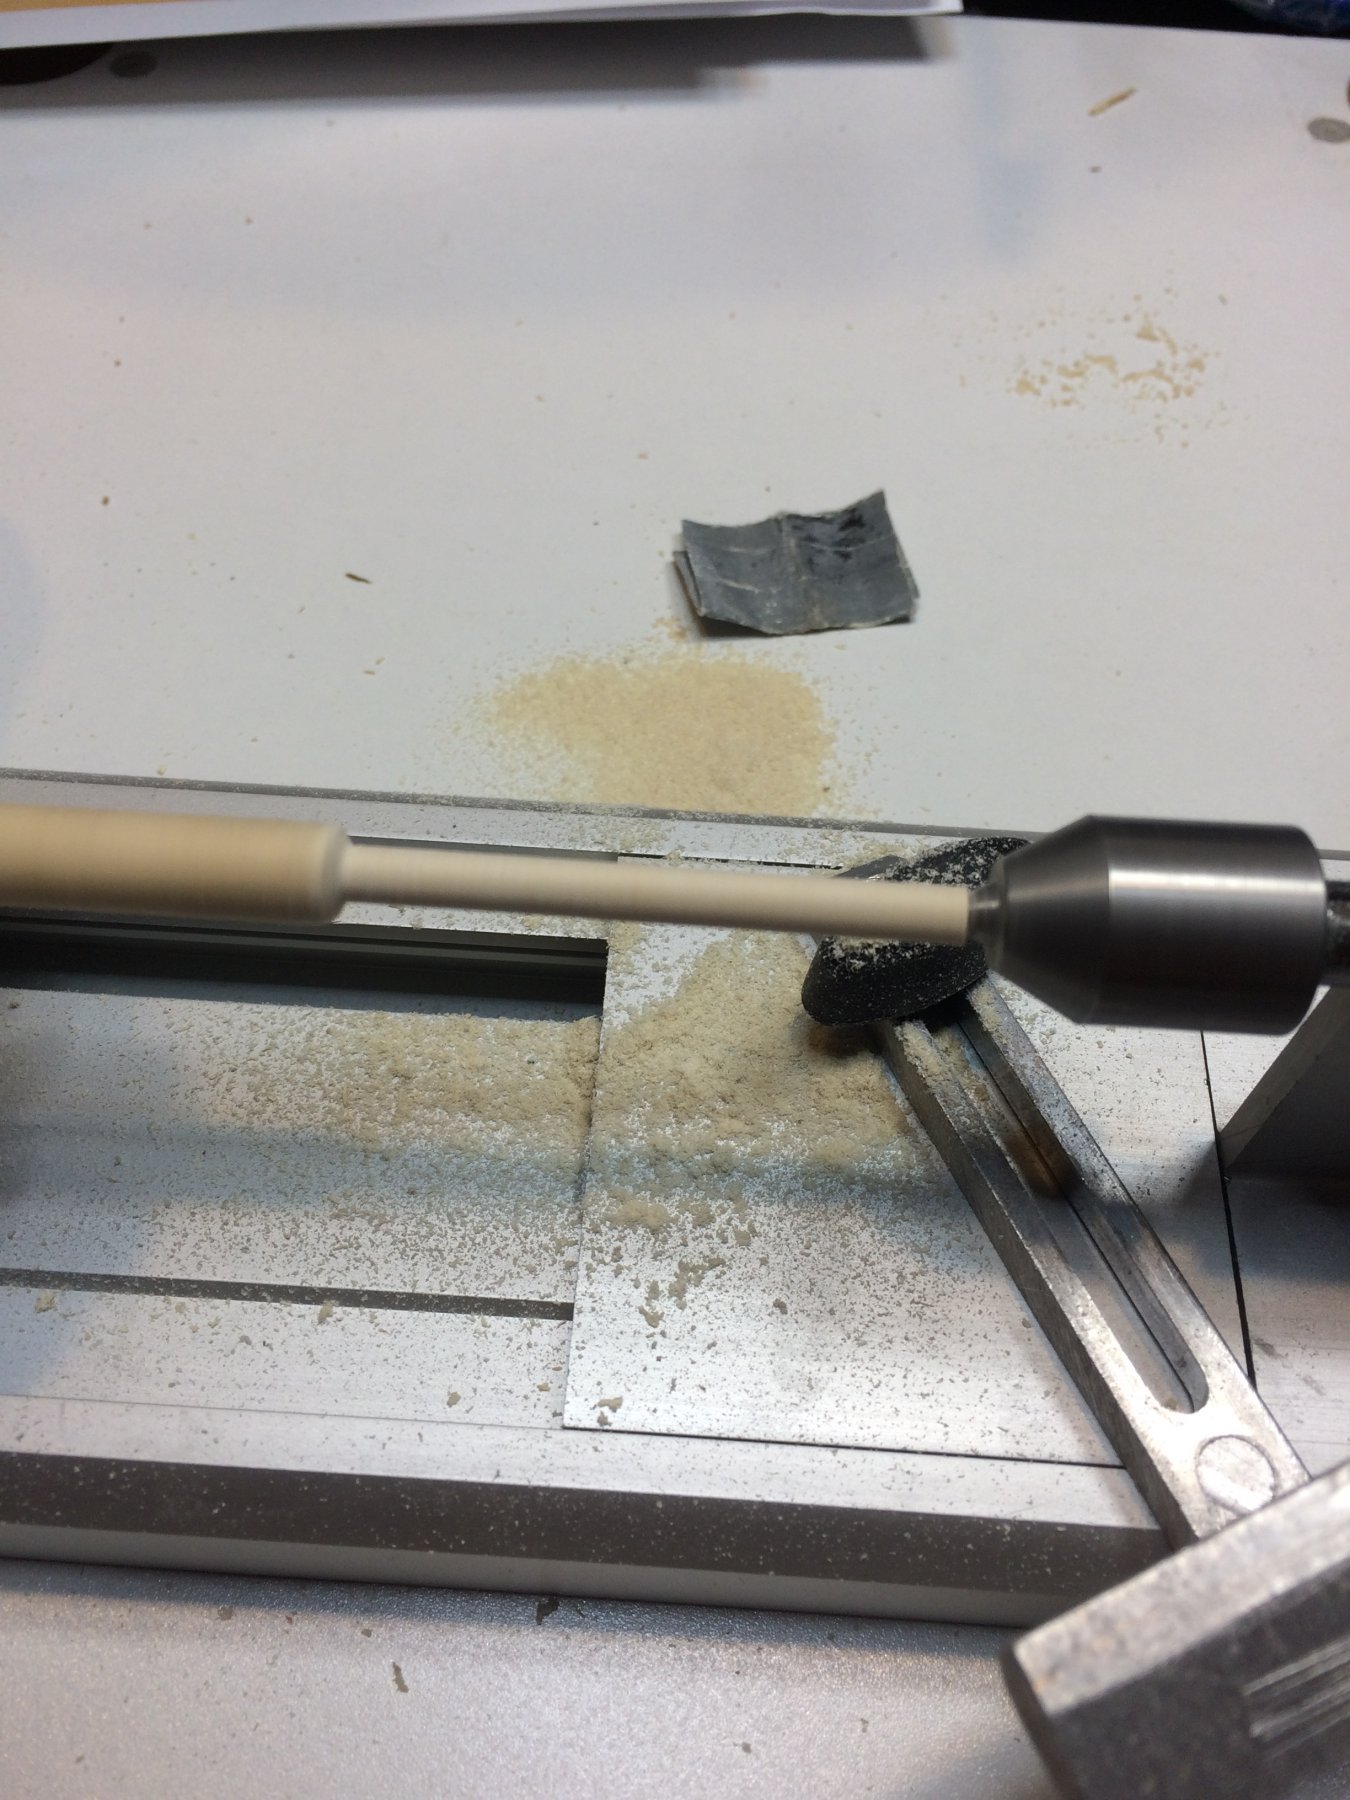
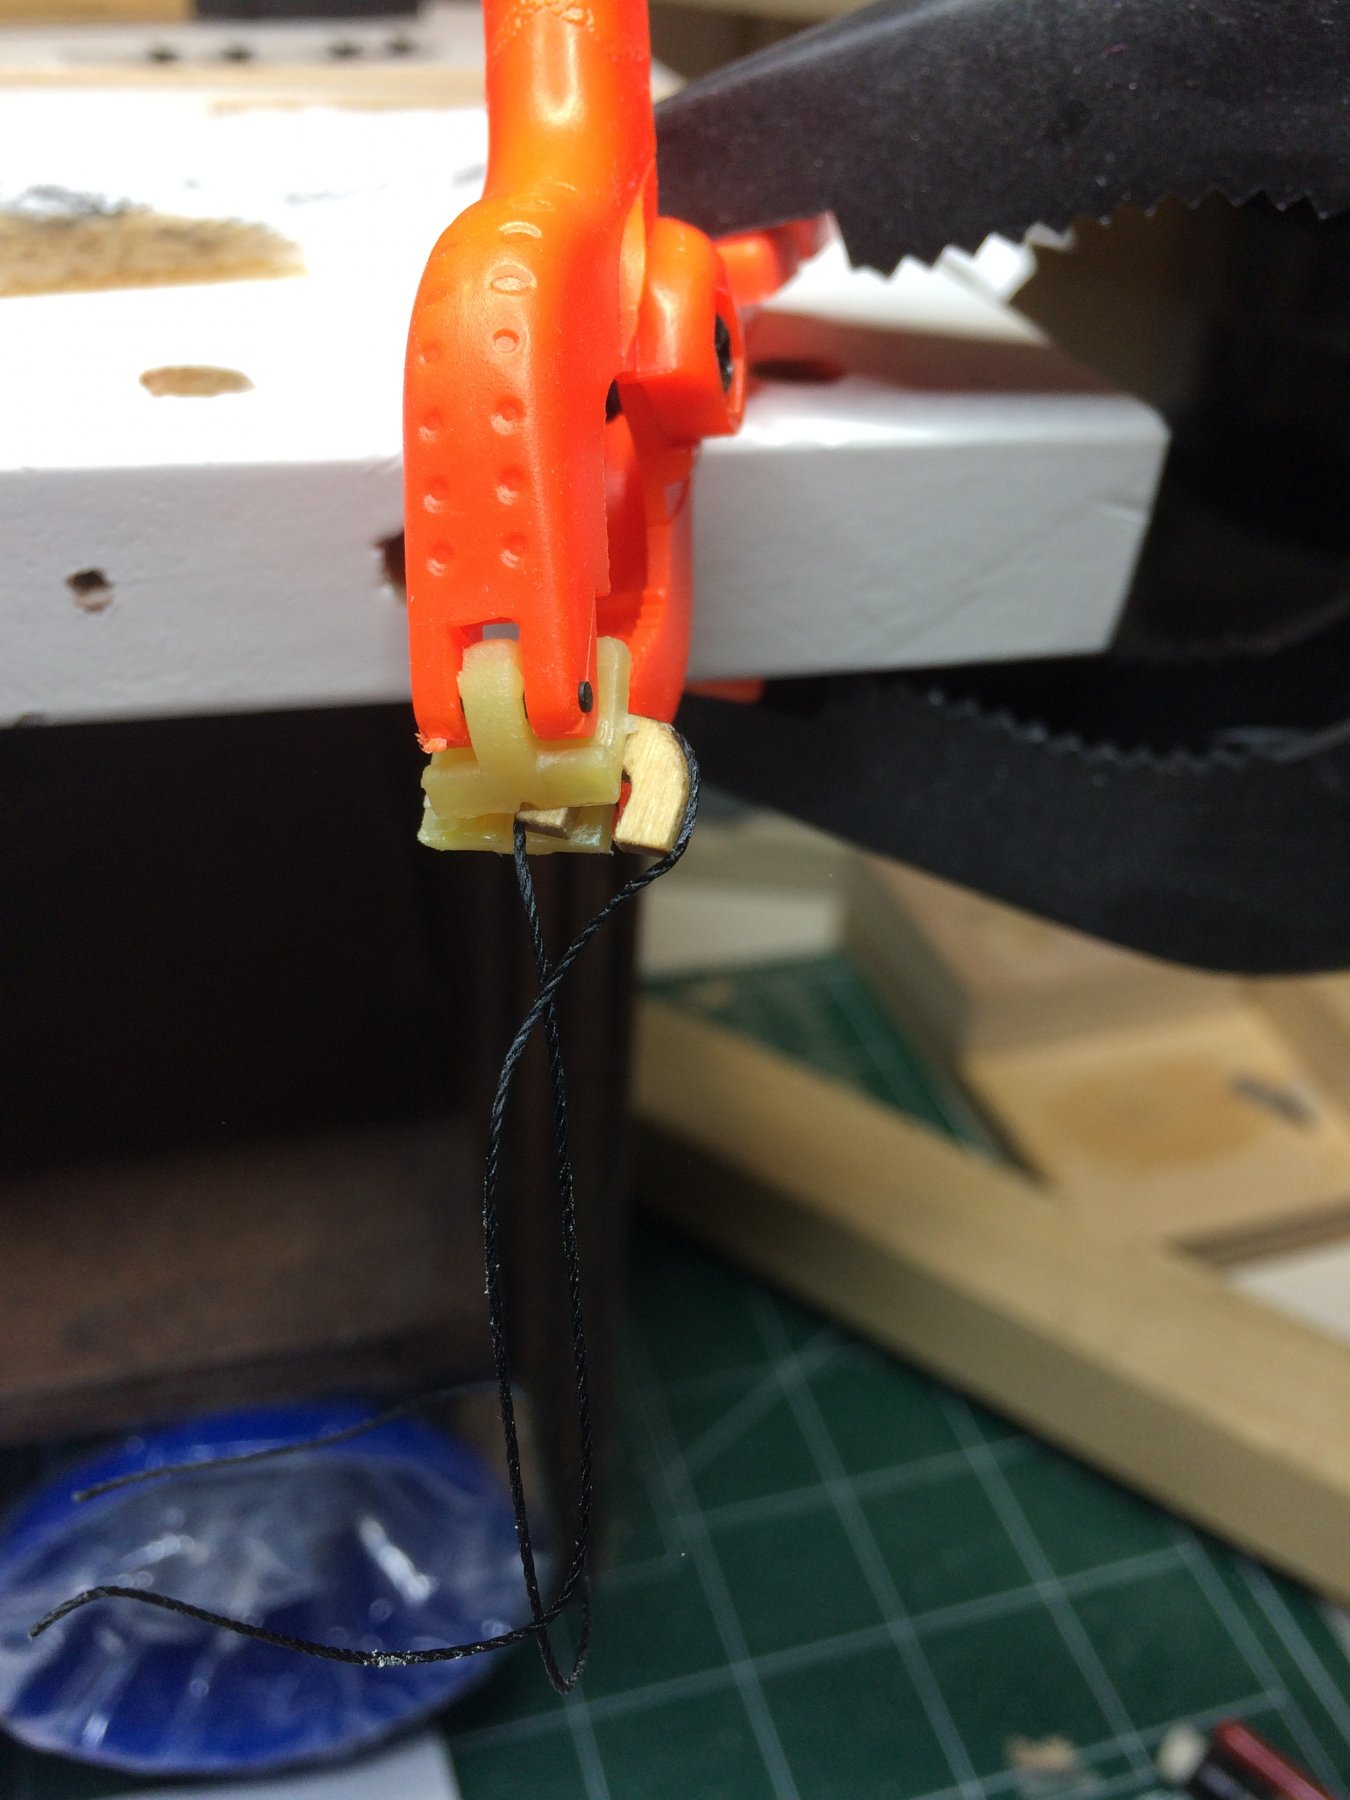
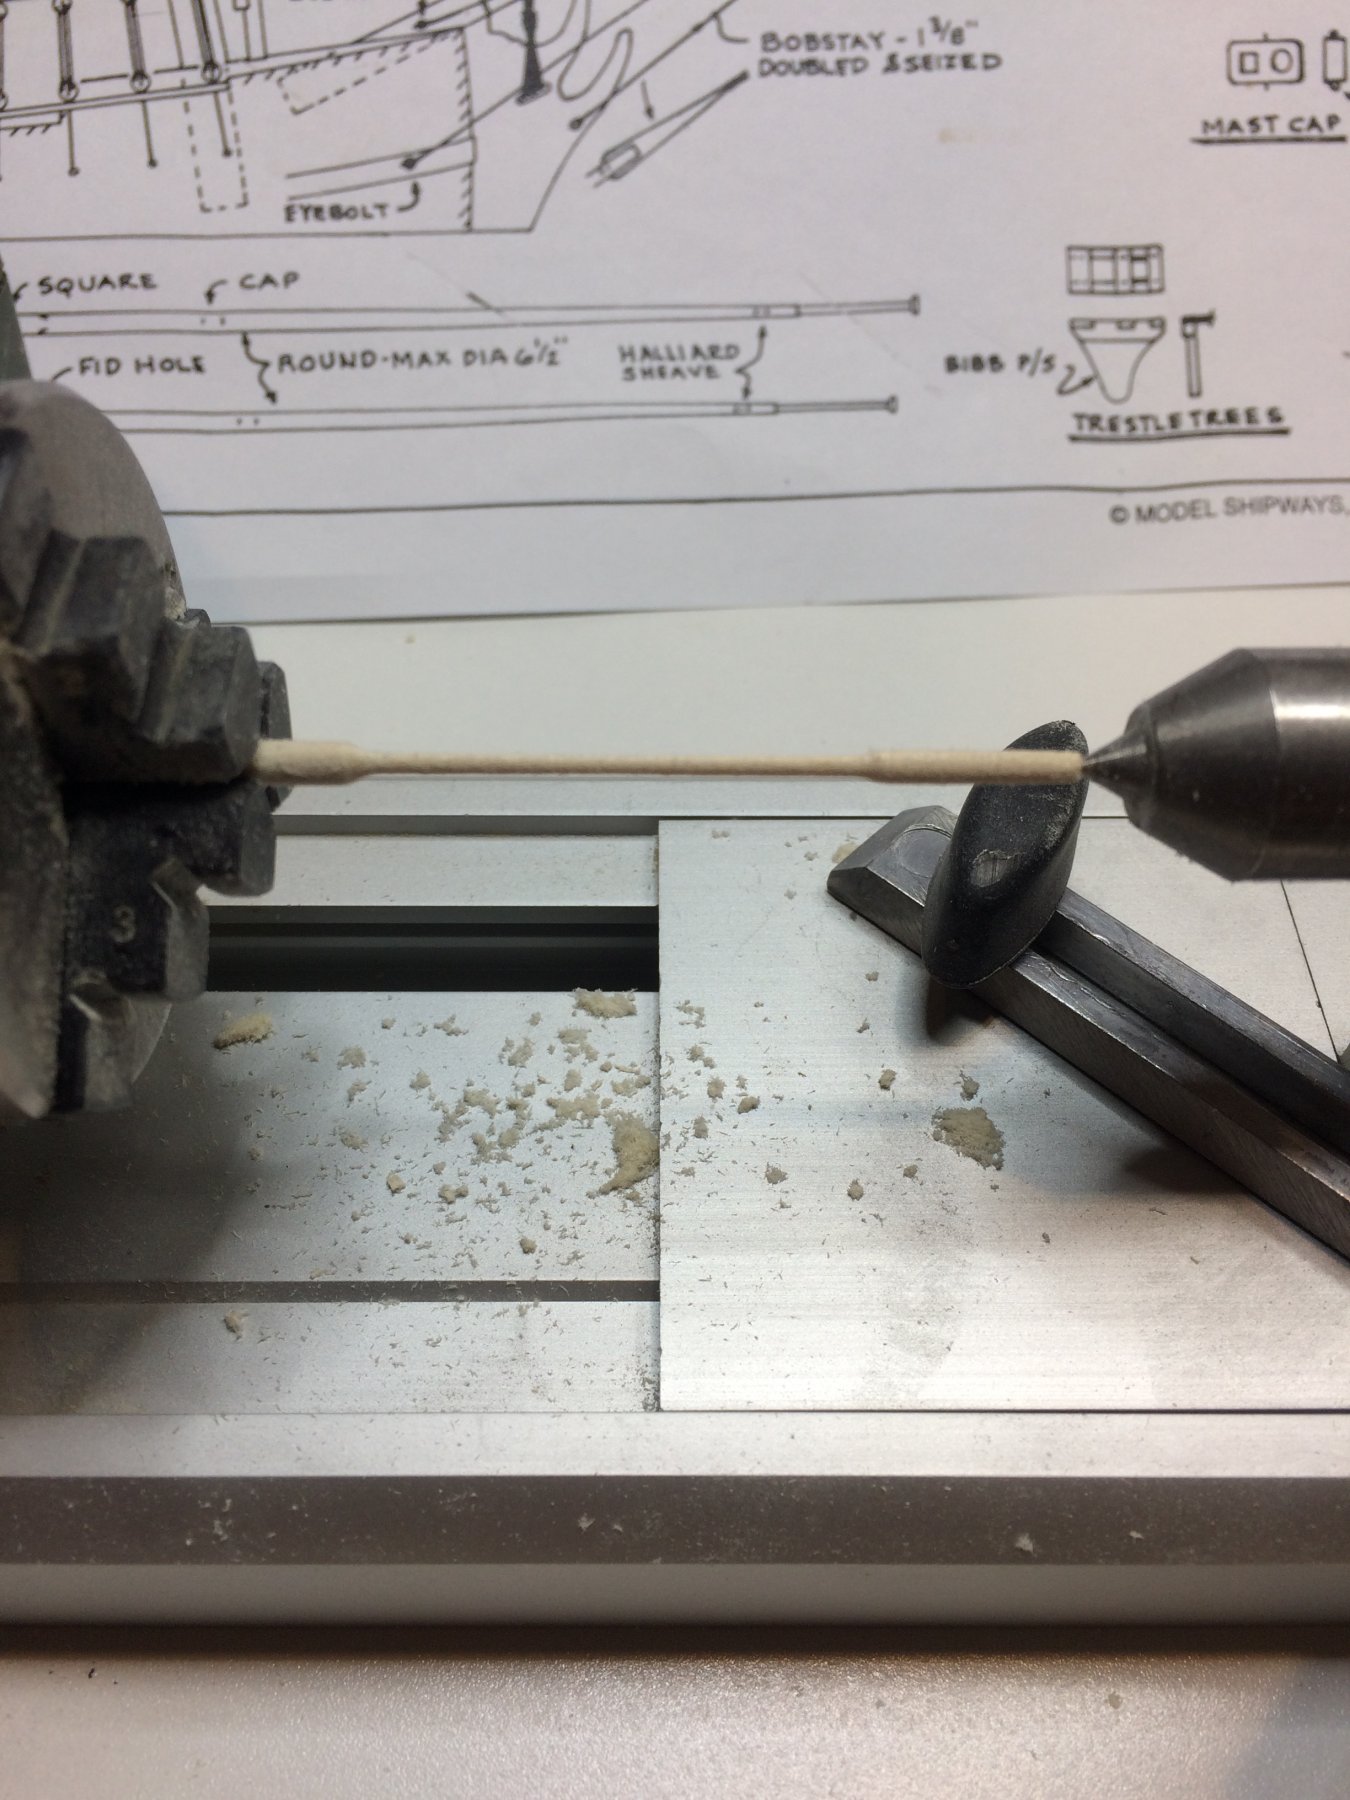
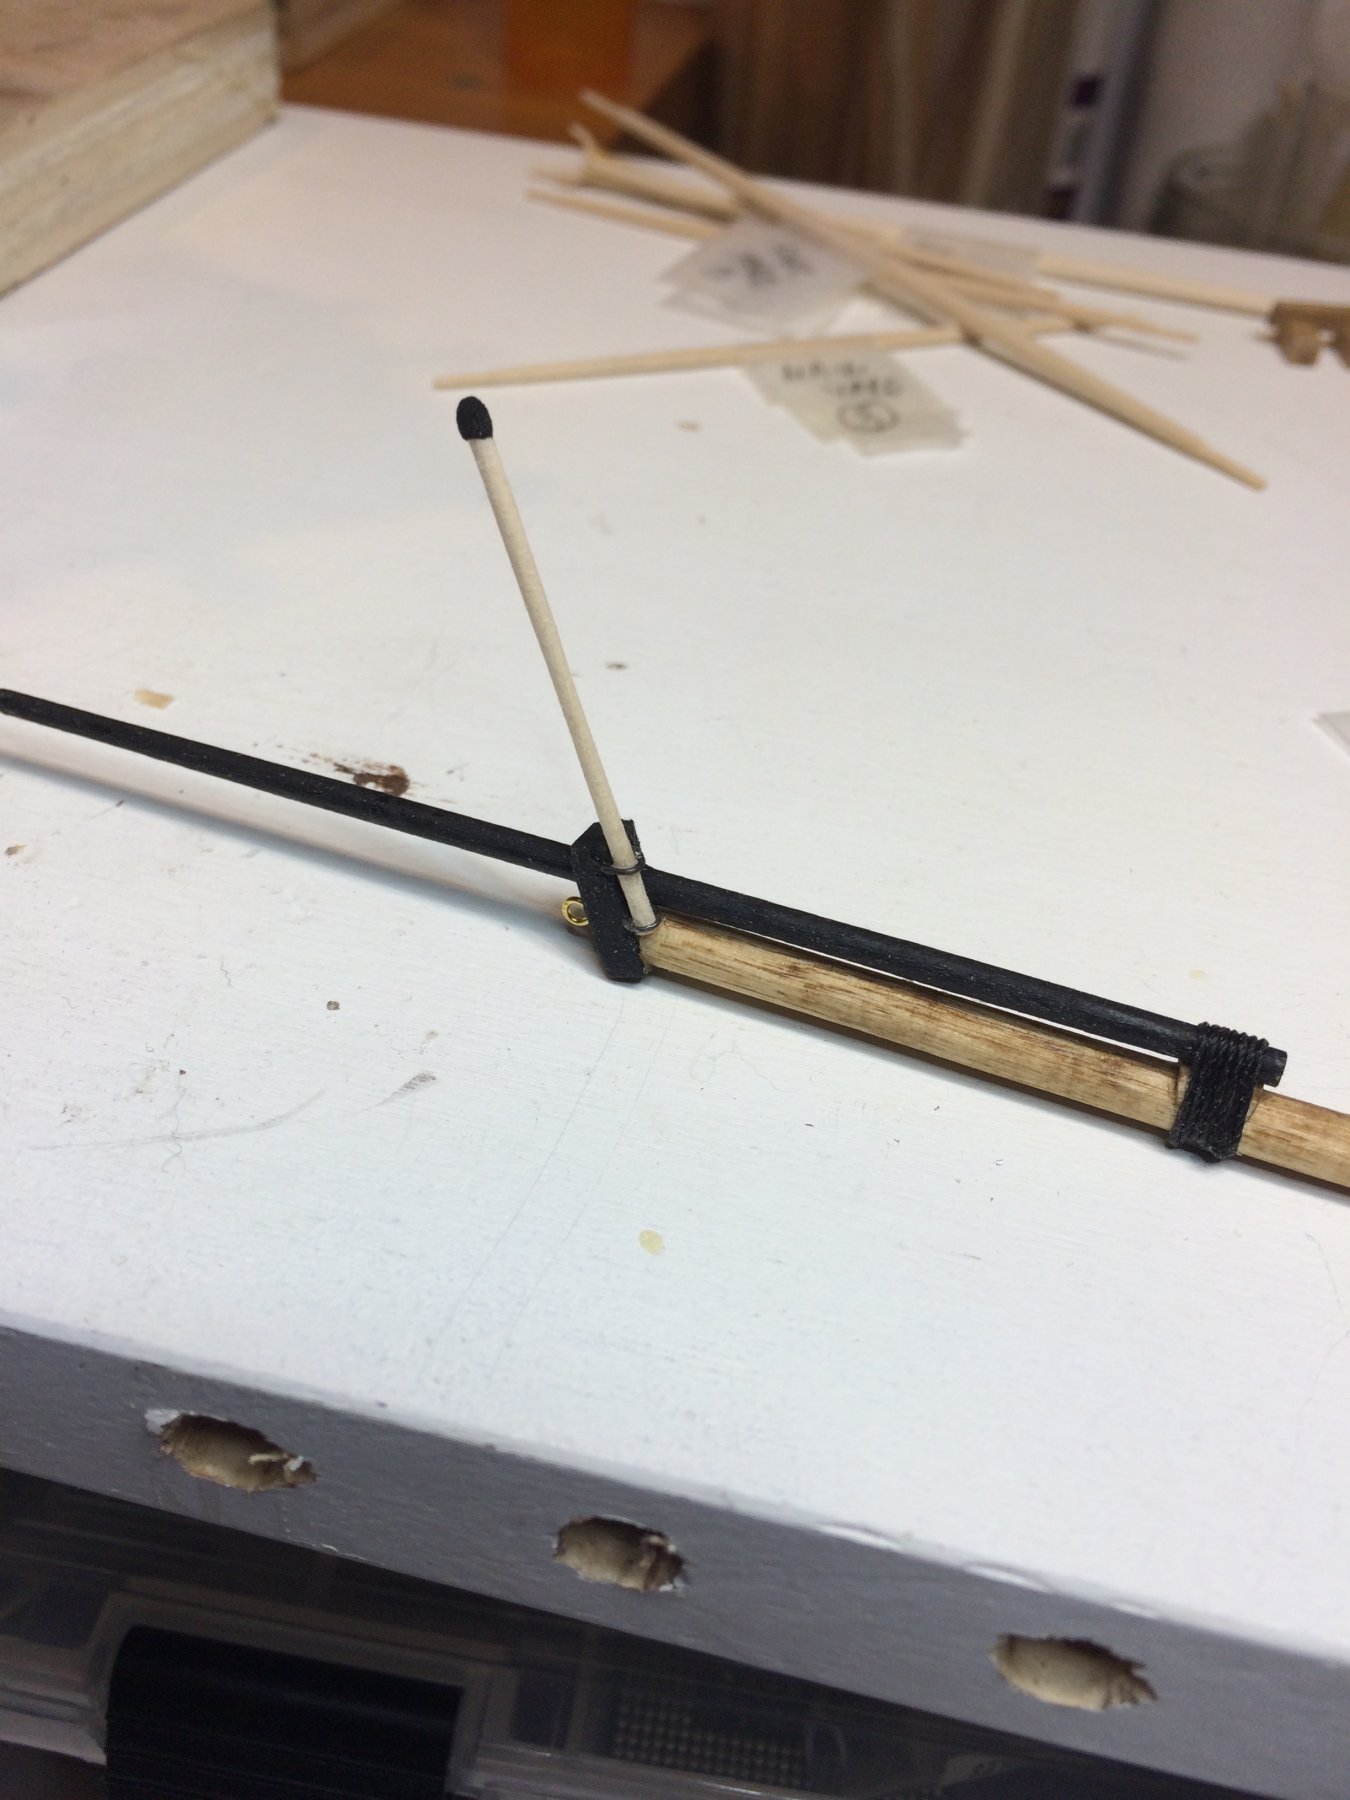
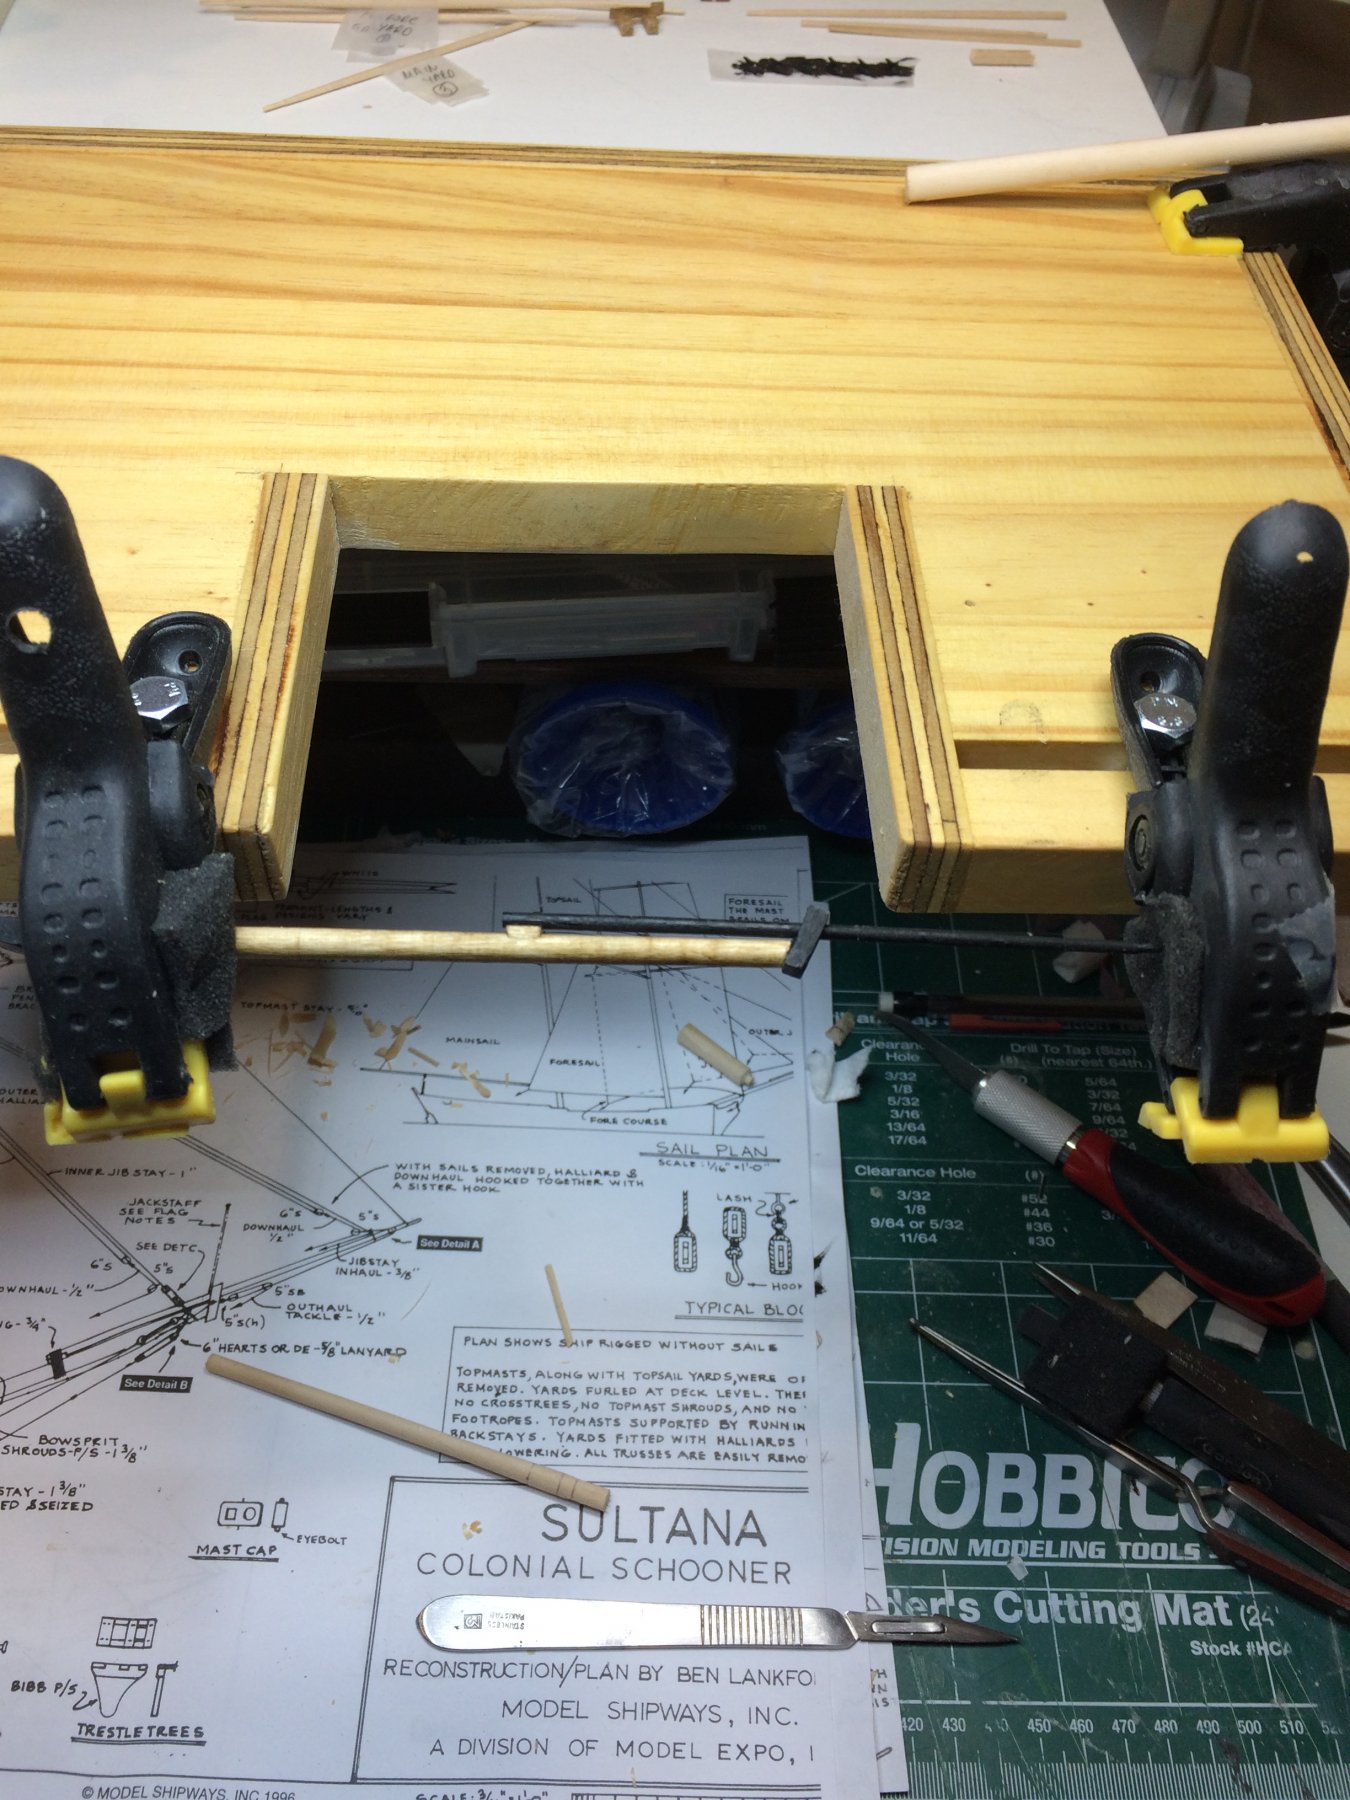
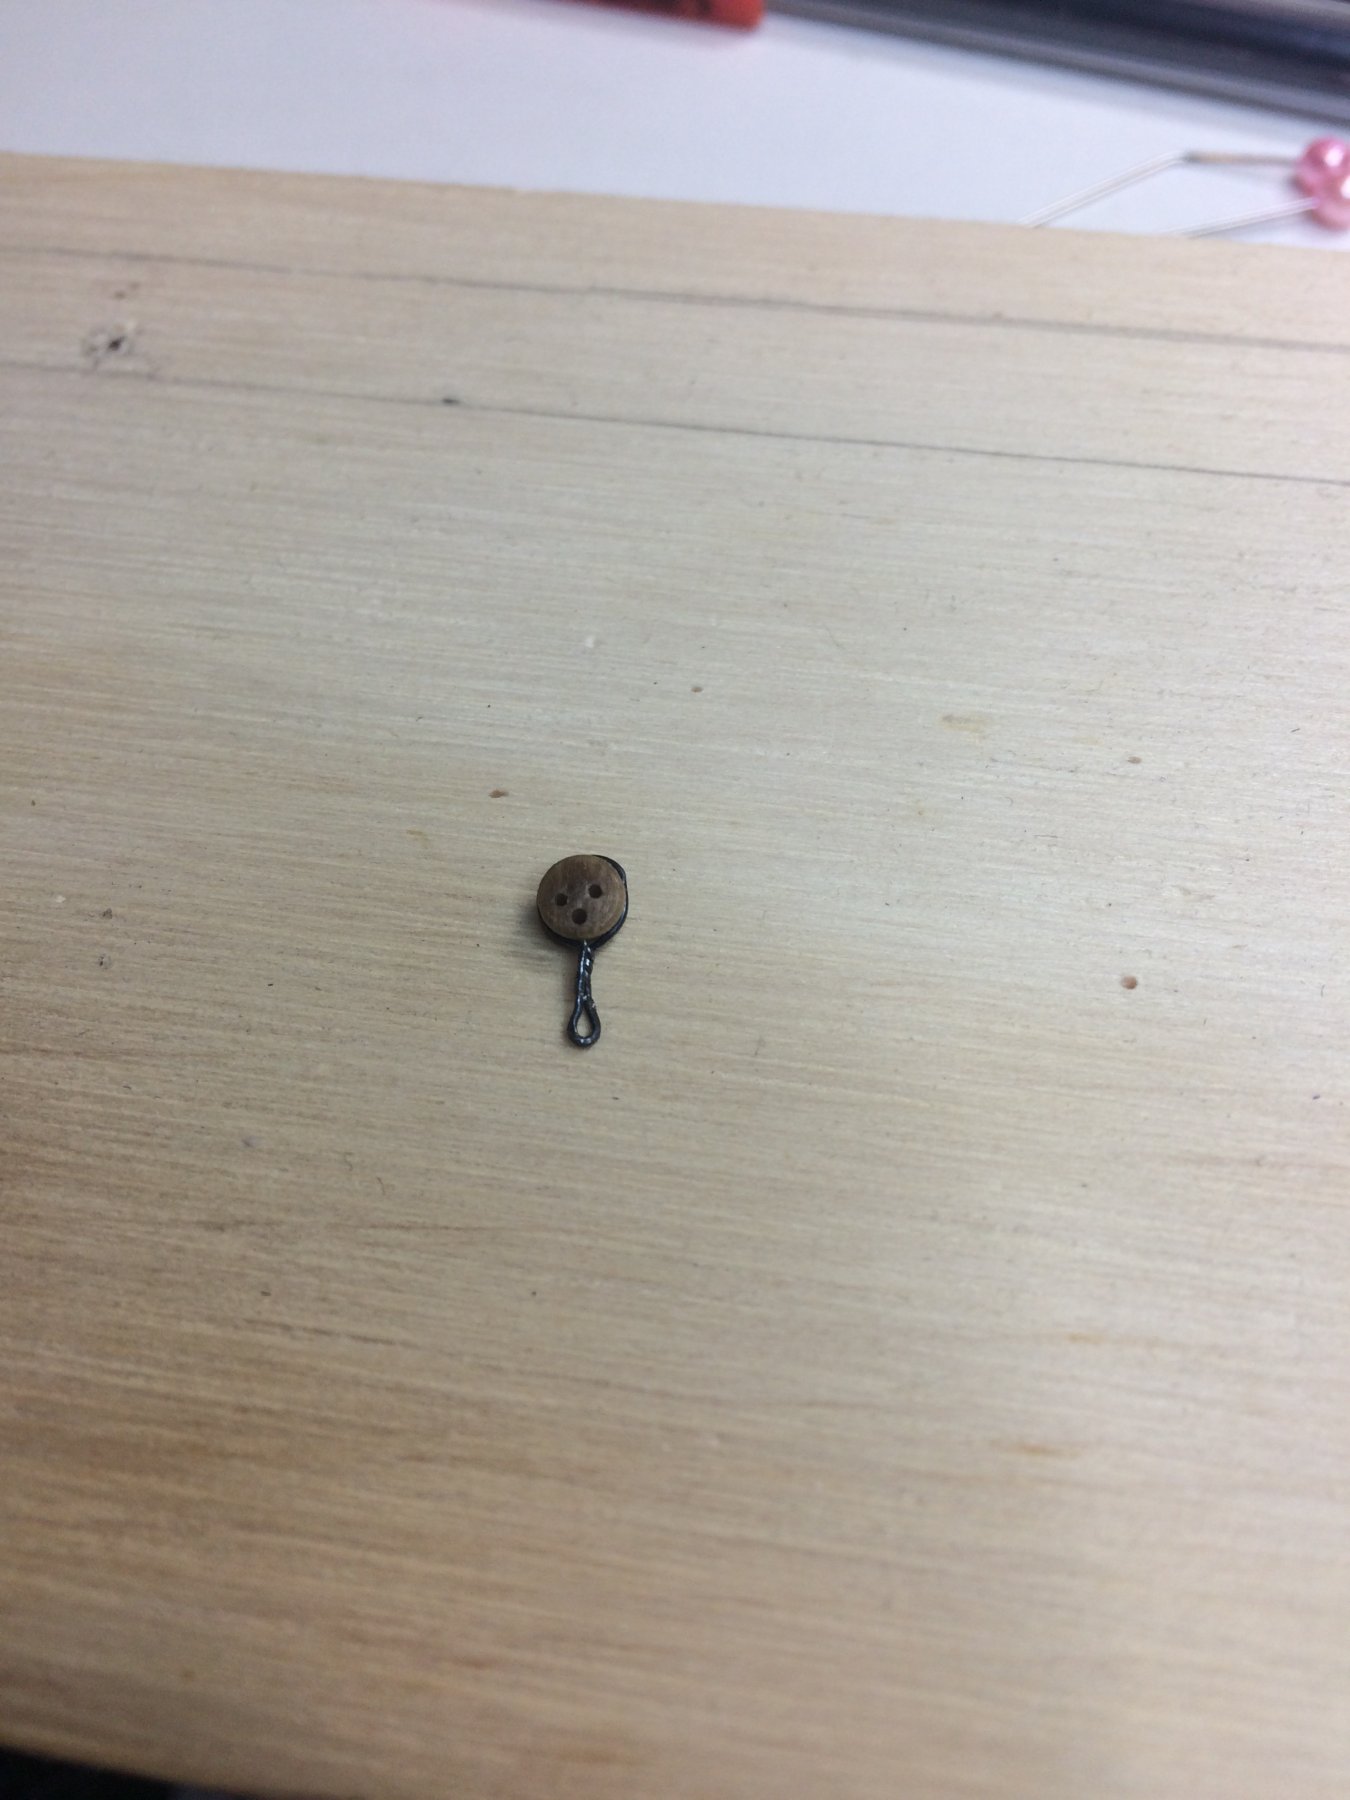
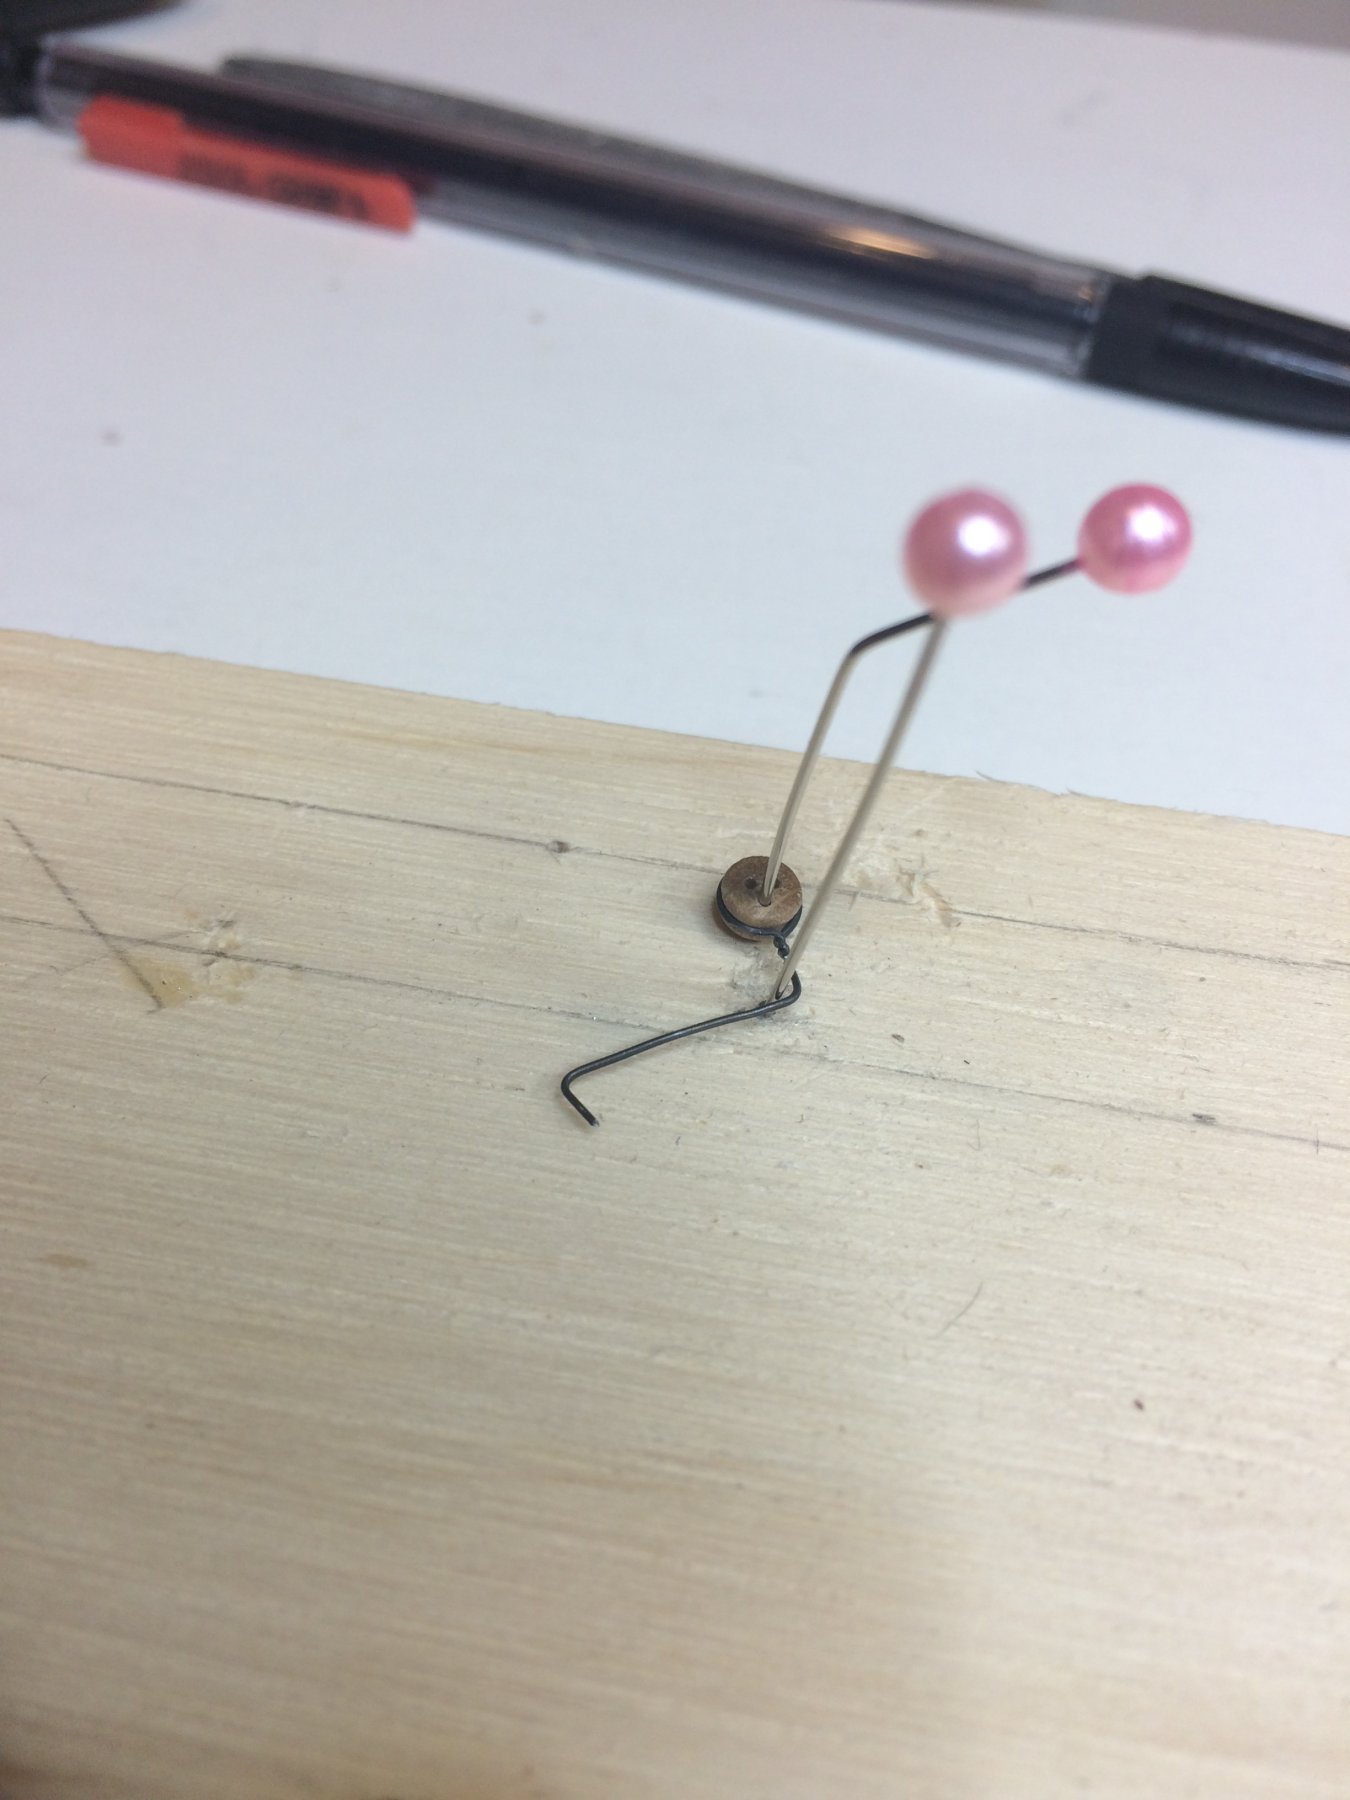
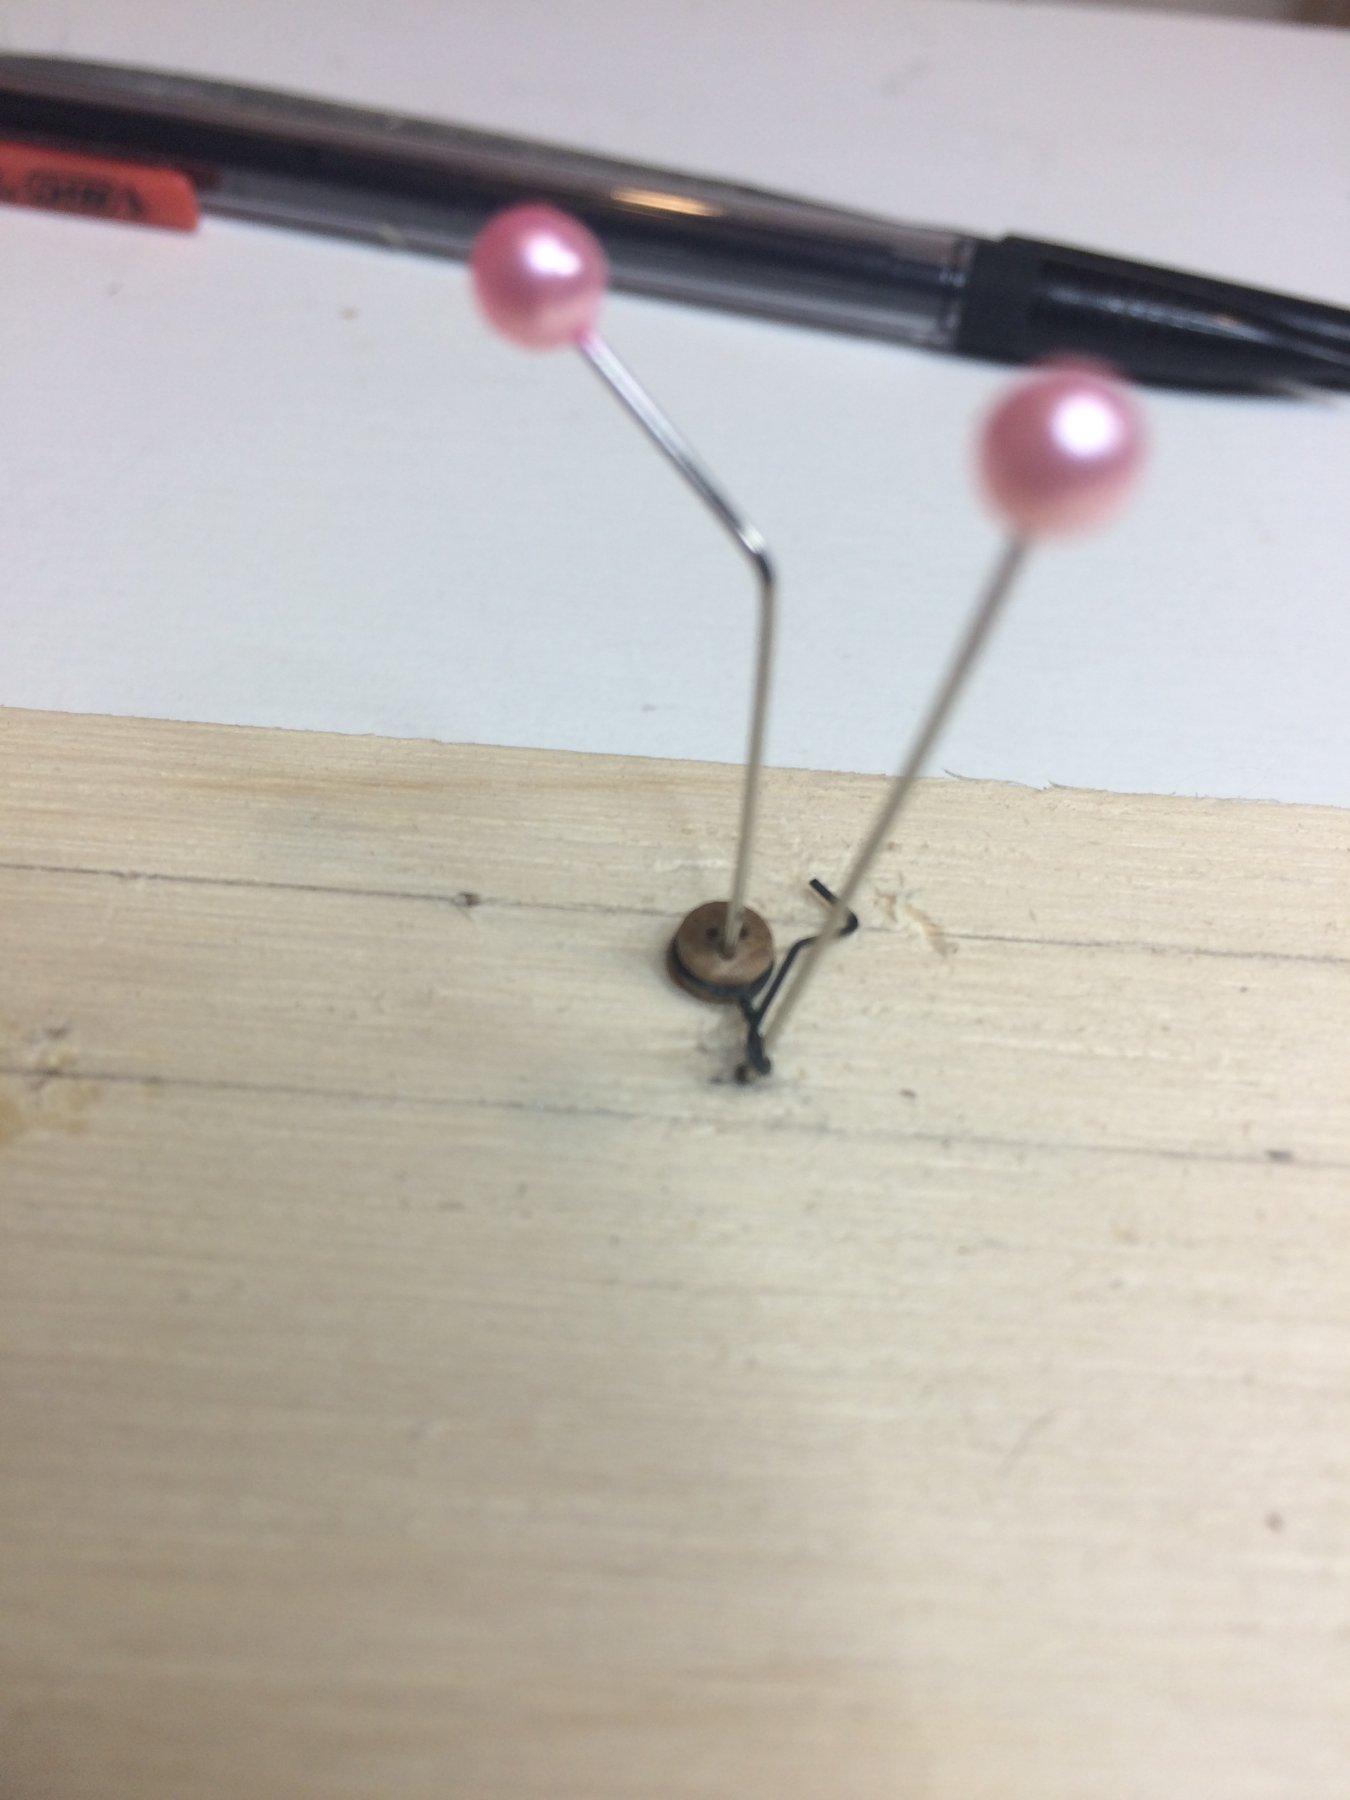
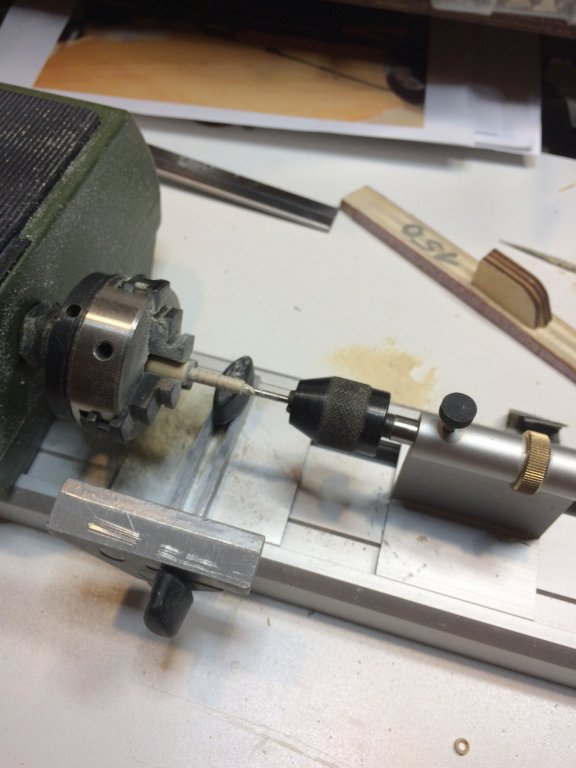
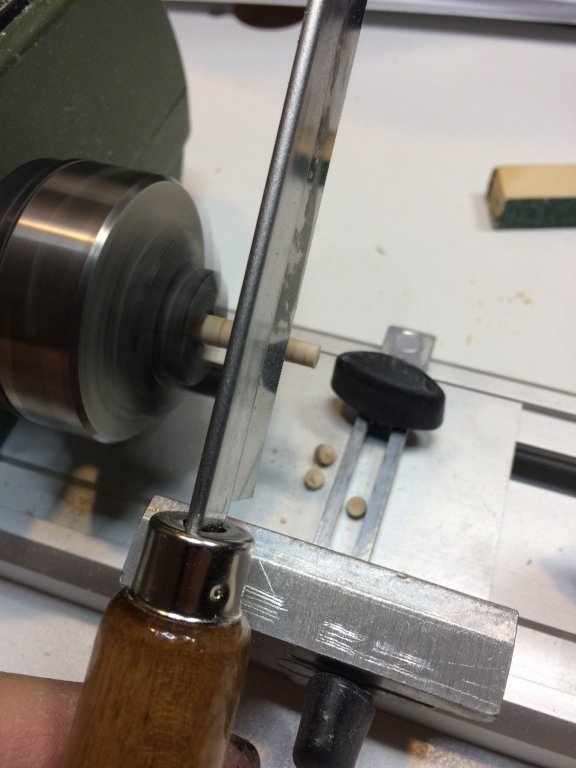
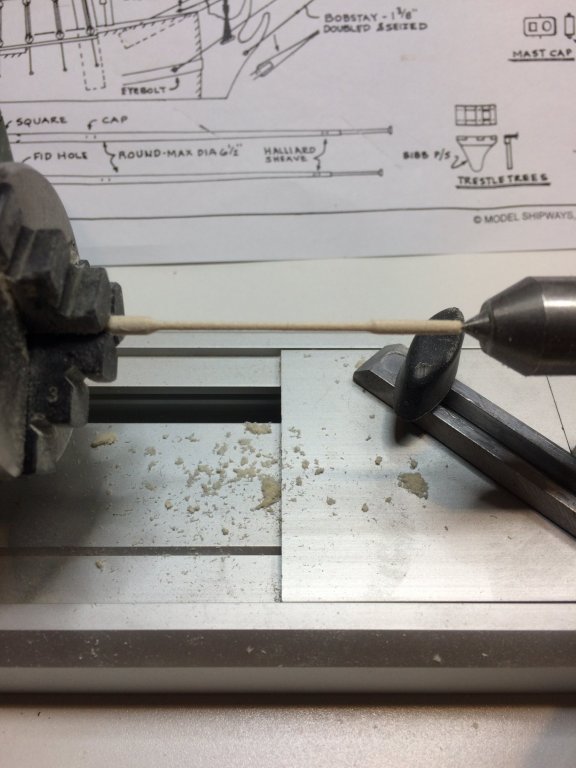
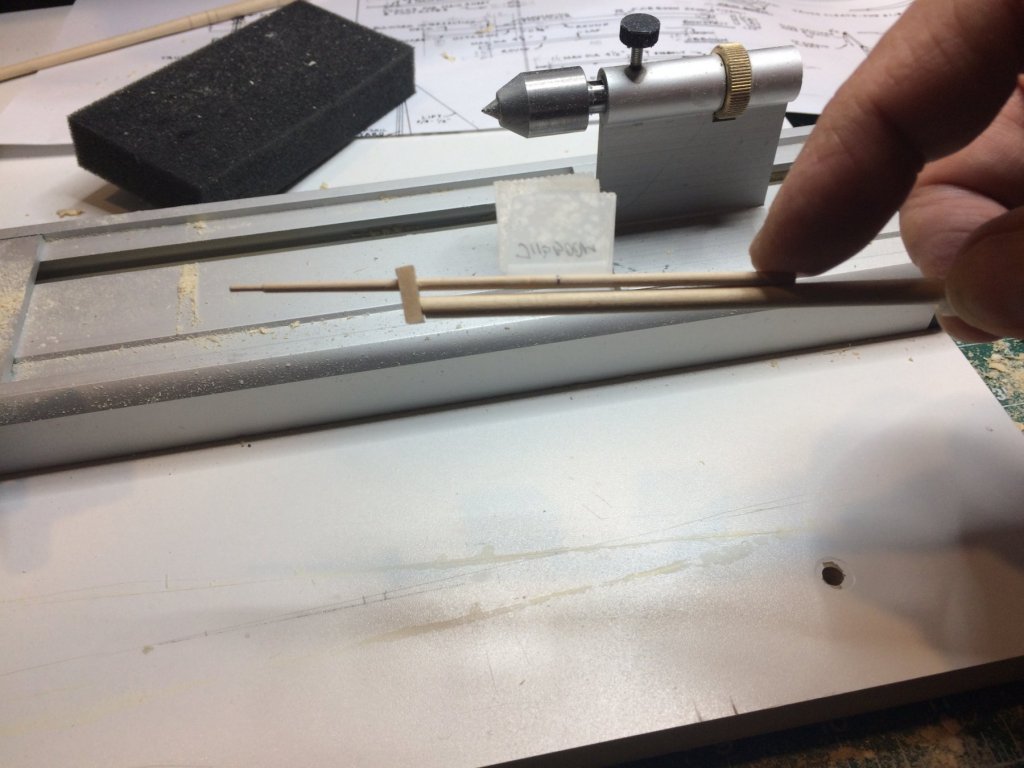
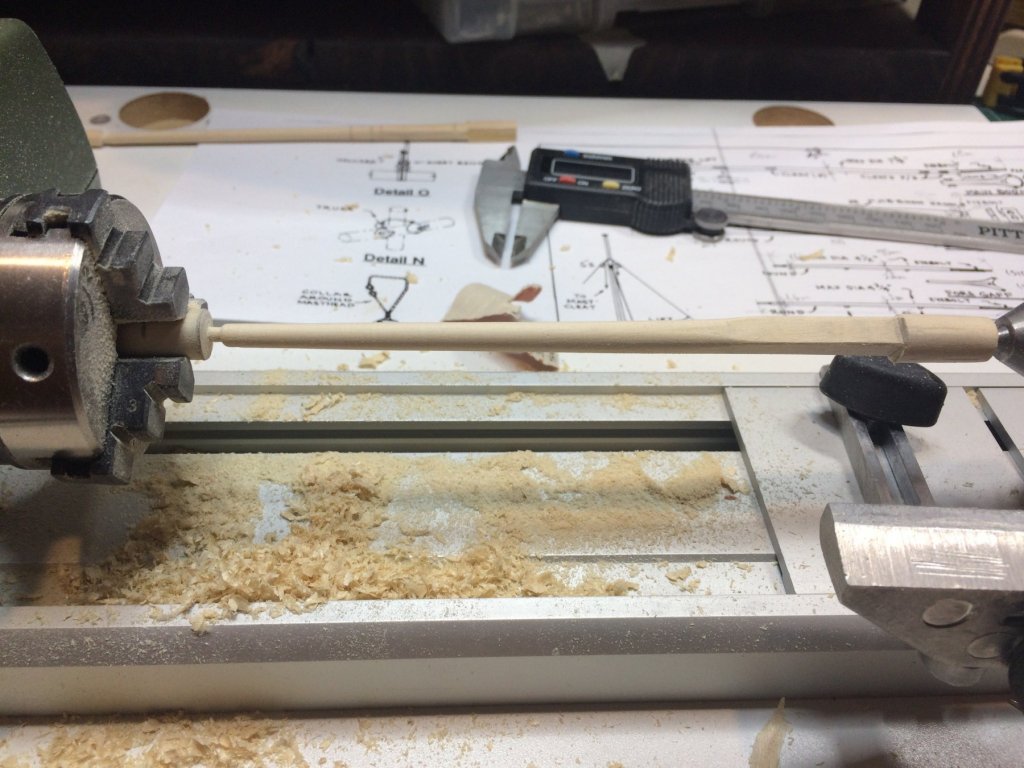
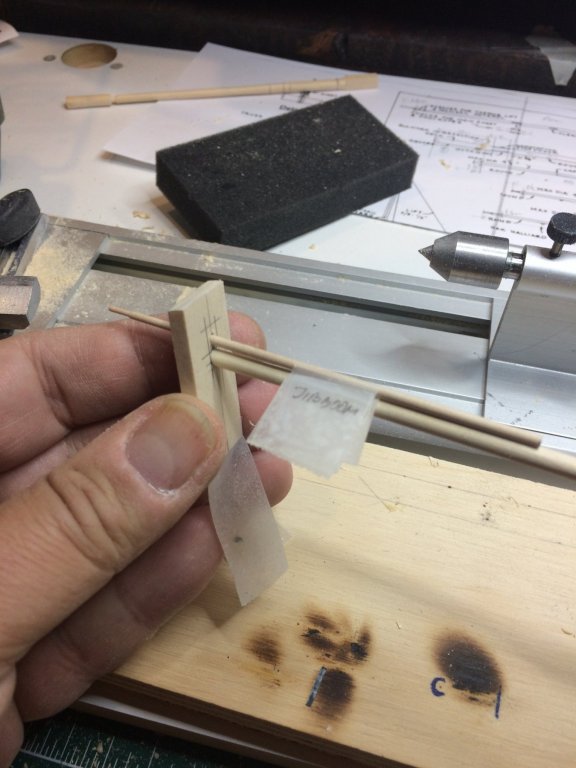
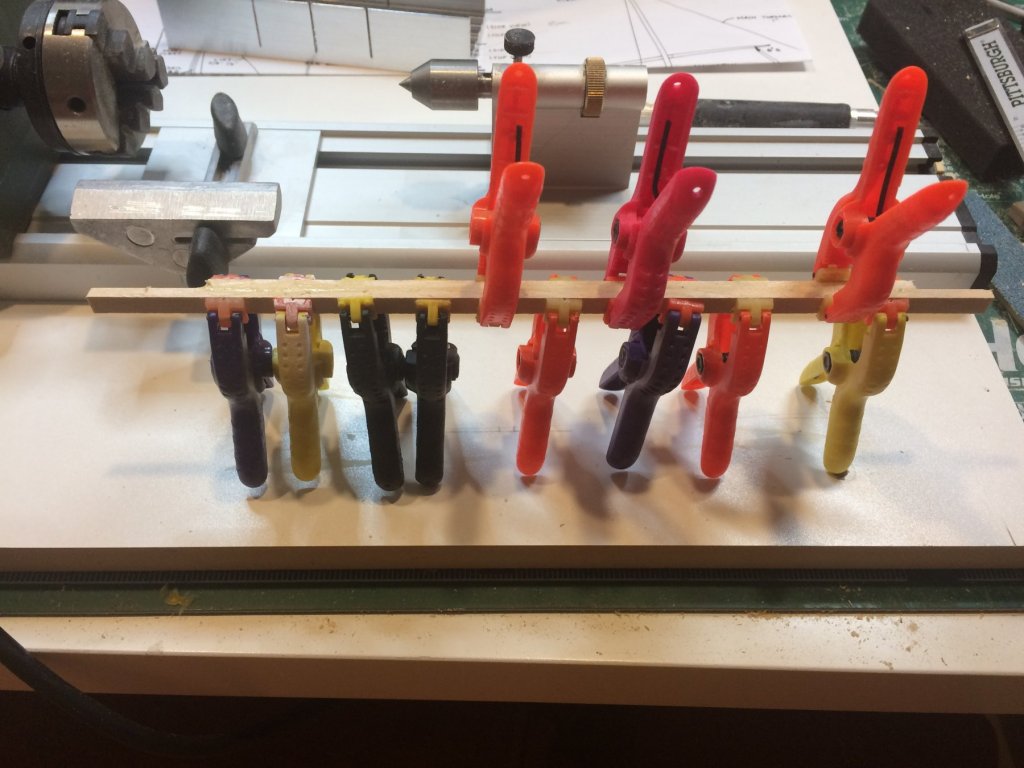
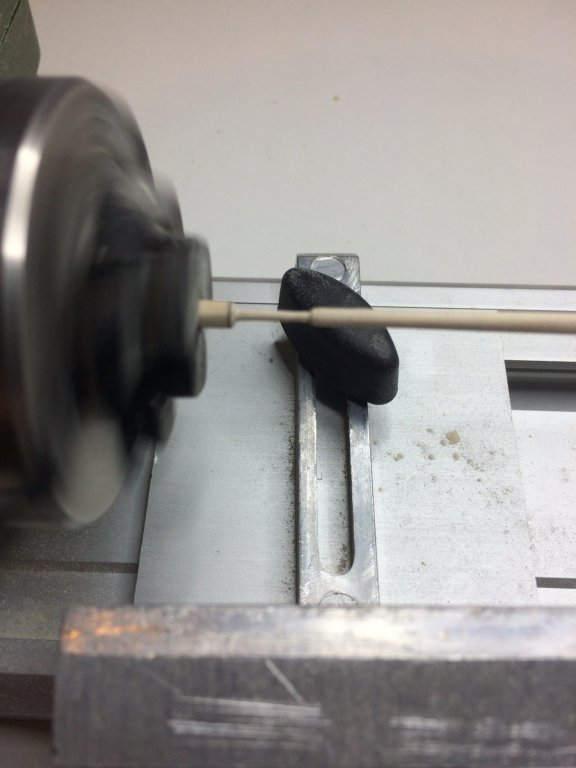
Bowsprit collars were build next. I was thinking how to make it as a mass production even dough i don't need more than 3 (at least for this stage of building) so started with carve them by hand and drilling hole in the middle. They ended up being acceptable but a bit oversized. So, another approach. First i mounted a dowel rod in lathe and shape it to the size of 4mm. Then i drilled a hole in dowel. The hole was 1.5mm in diameter and setup is shown on the picture. The lathe rotates the dowel and i was manually pushing drill bit to the dowel.. The most important part is to make sure that rod is centered in the lathe. Once the center hole is drilled, i marked individual parts, each about 2mm wide. Then i made a grove in the middle of it, using a diamond file. This grove is for rigging.. Then, cut was done with hand saw while lathe runs... Very easy to make and very easy to loose few made parts.. Completed eyes were dipped into stain to match rest of the wood parts. Then the rigging line was place around it, freezed by a touch of glue. The rope was 0.45mm. According to practicum, two separate collars are made to simulate what is on plan presented as one part, two eyes on one collar. At this scale, agreed with practicum, that it will not be much noticeable to have two collars instead of one. But for a simple test i am going to try making one collar with two eyes... Just for fun of it. The next picture shows one eye that is a bit oversized (made by hand, not using lathe). All collars ready for mounting. I decided to leave eyes in a wood color and not to cover them with black paint. I like those details showing wooden parts... Happy modeling.

- 360 replies
-
- 2
-
-
- sultana
- model shipways
- (and 1 more)
-
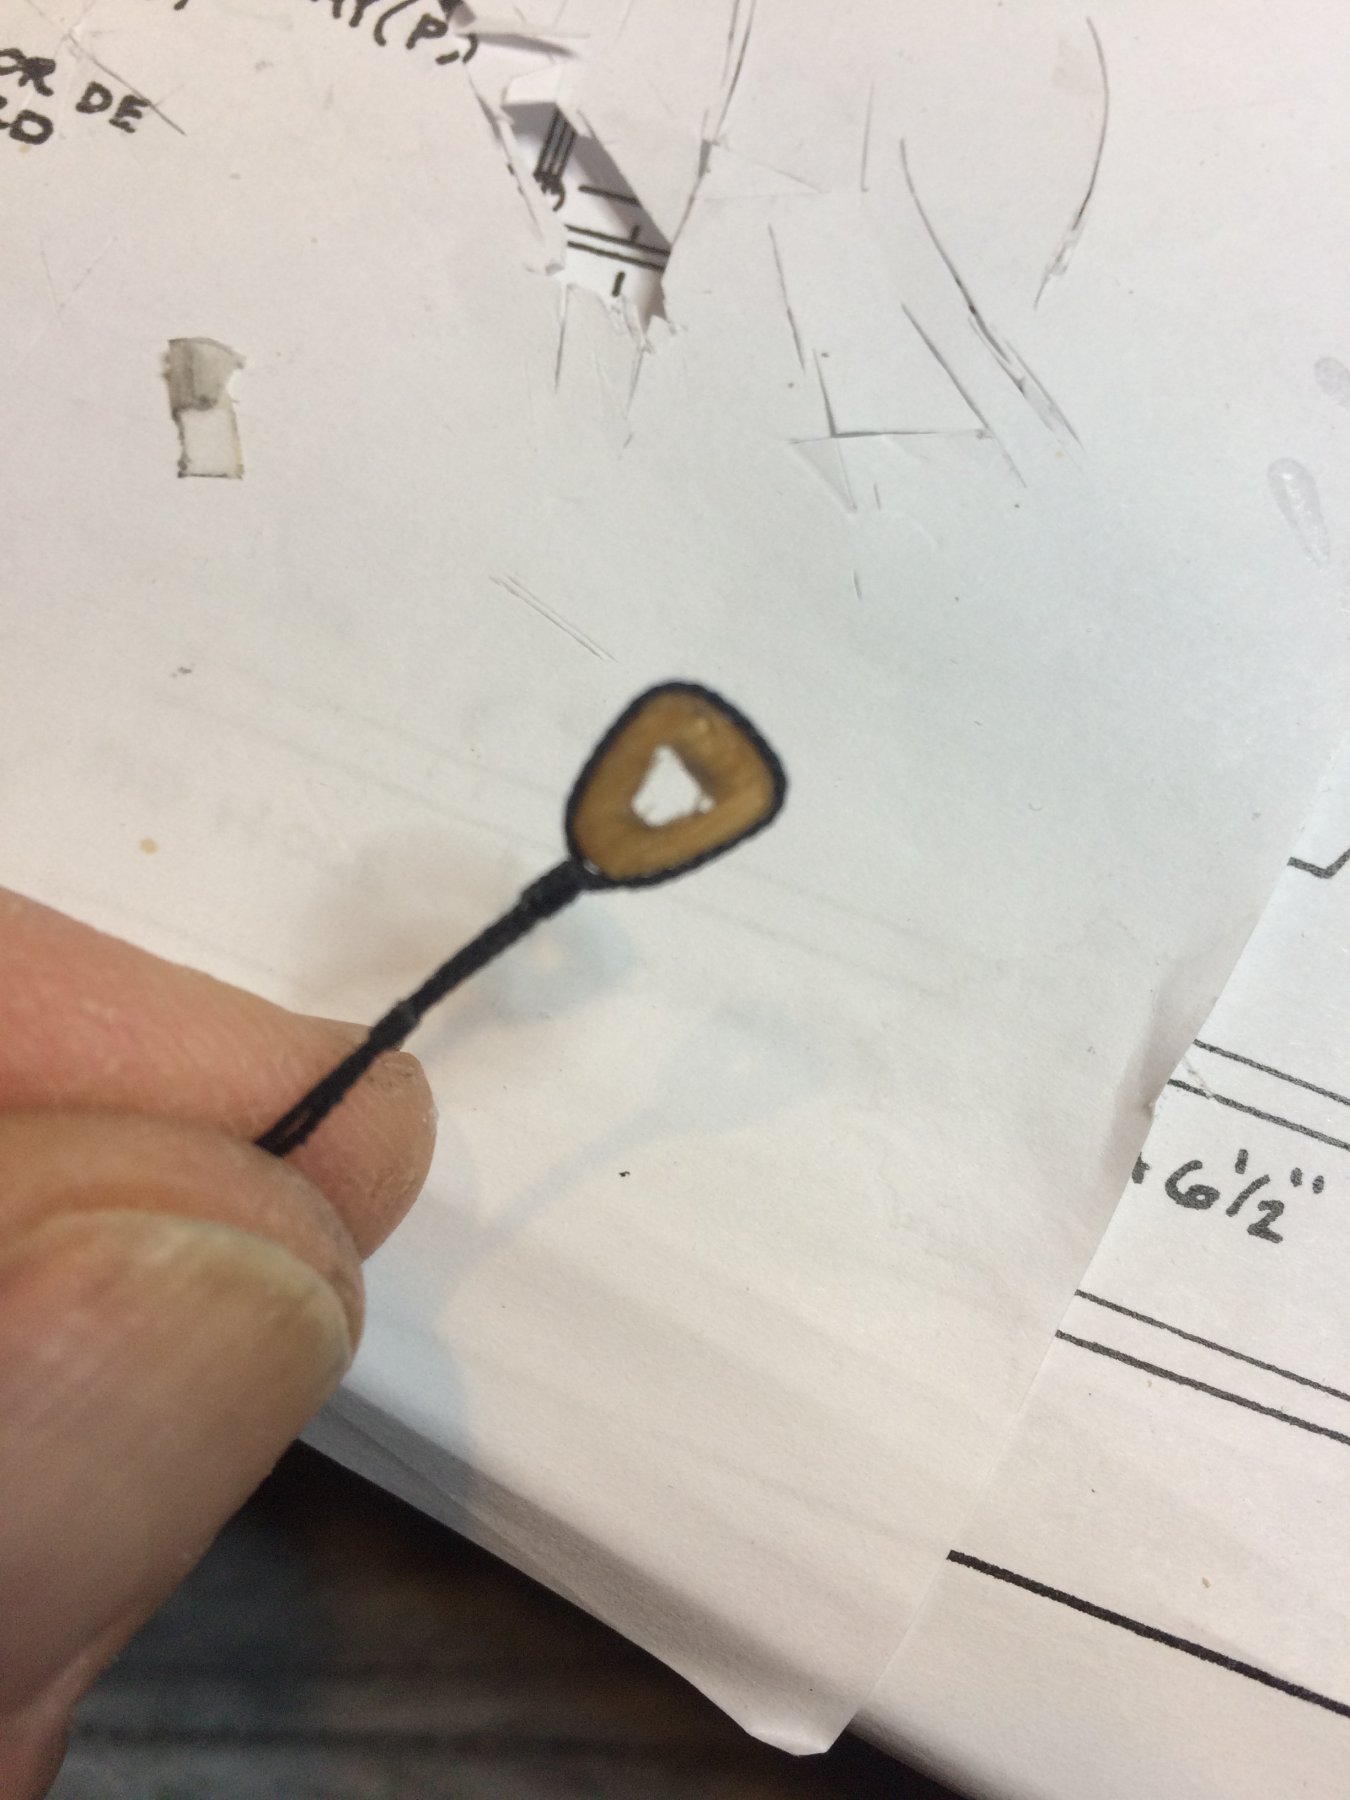
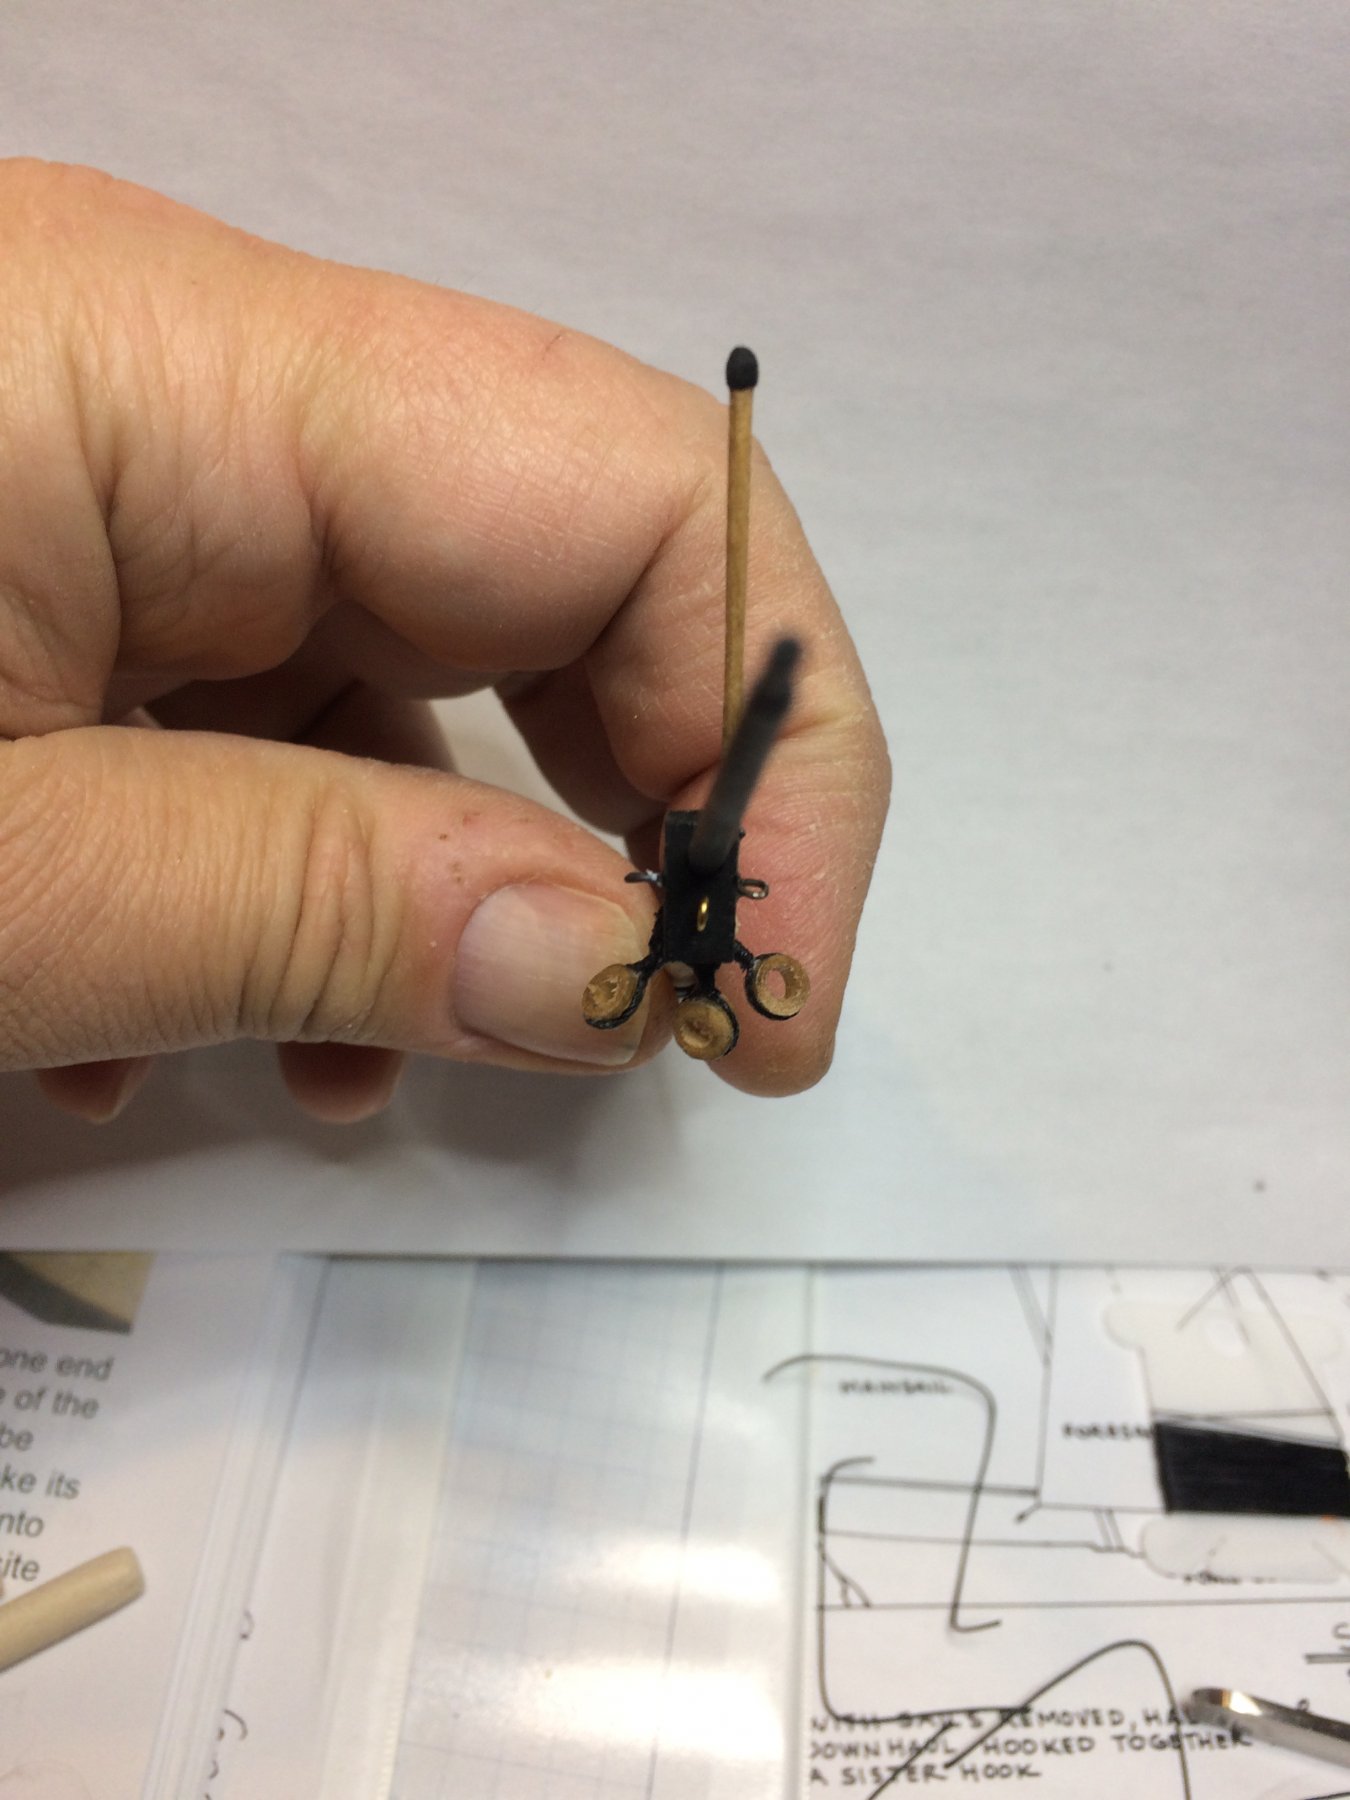
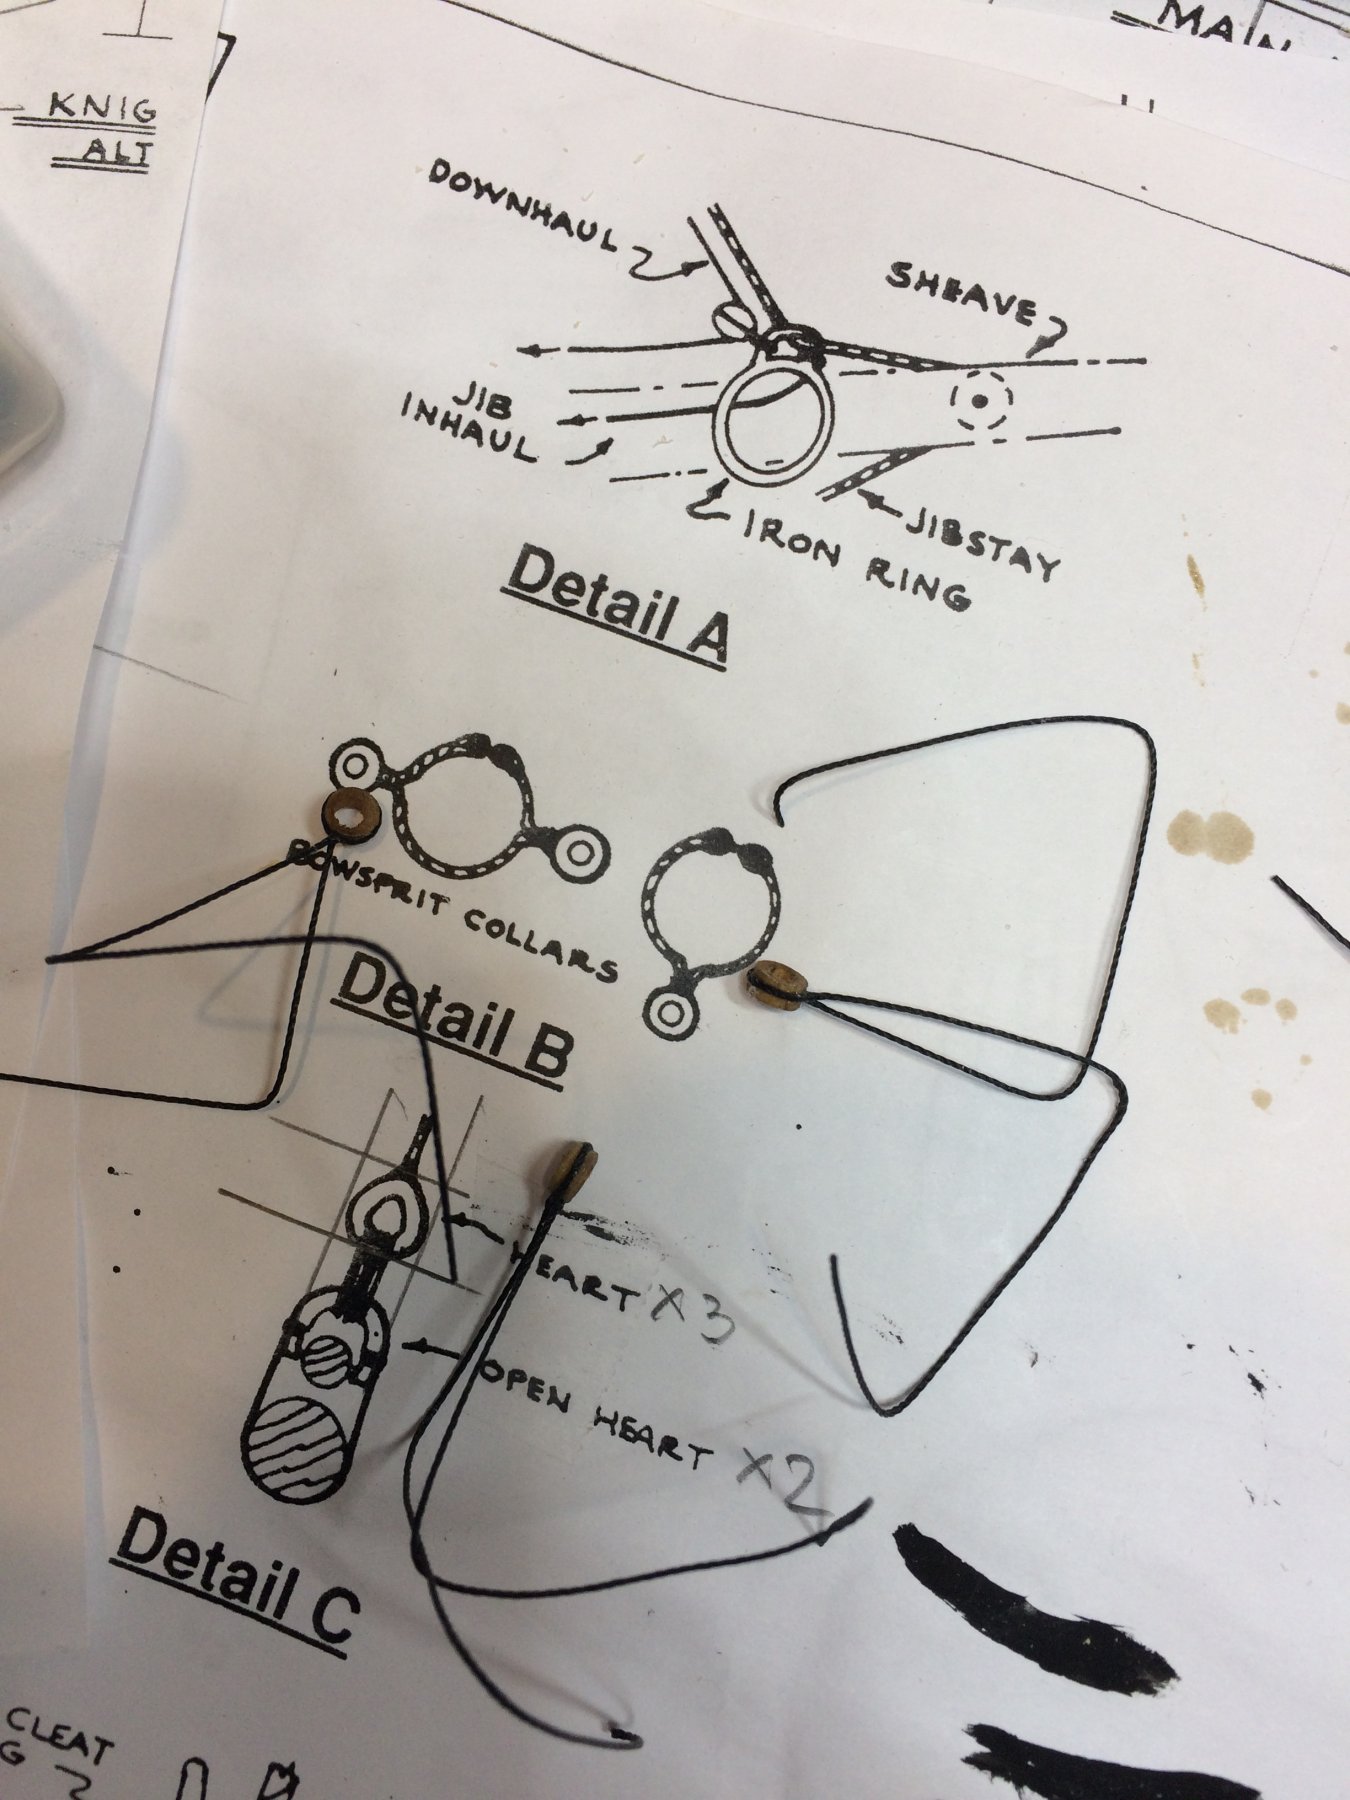
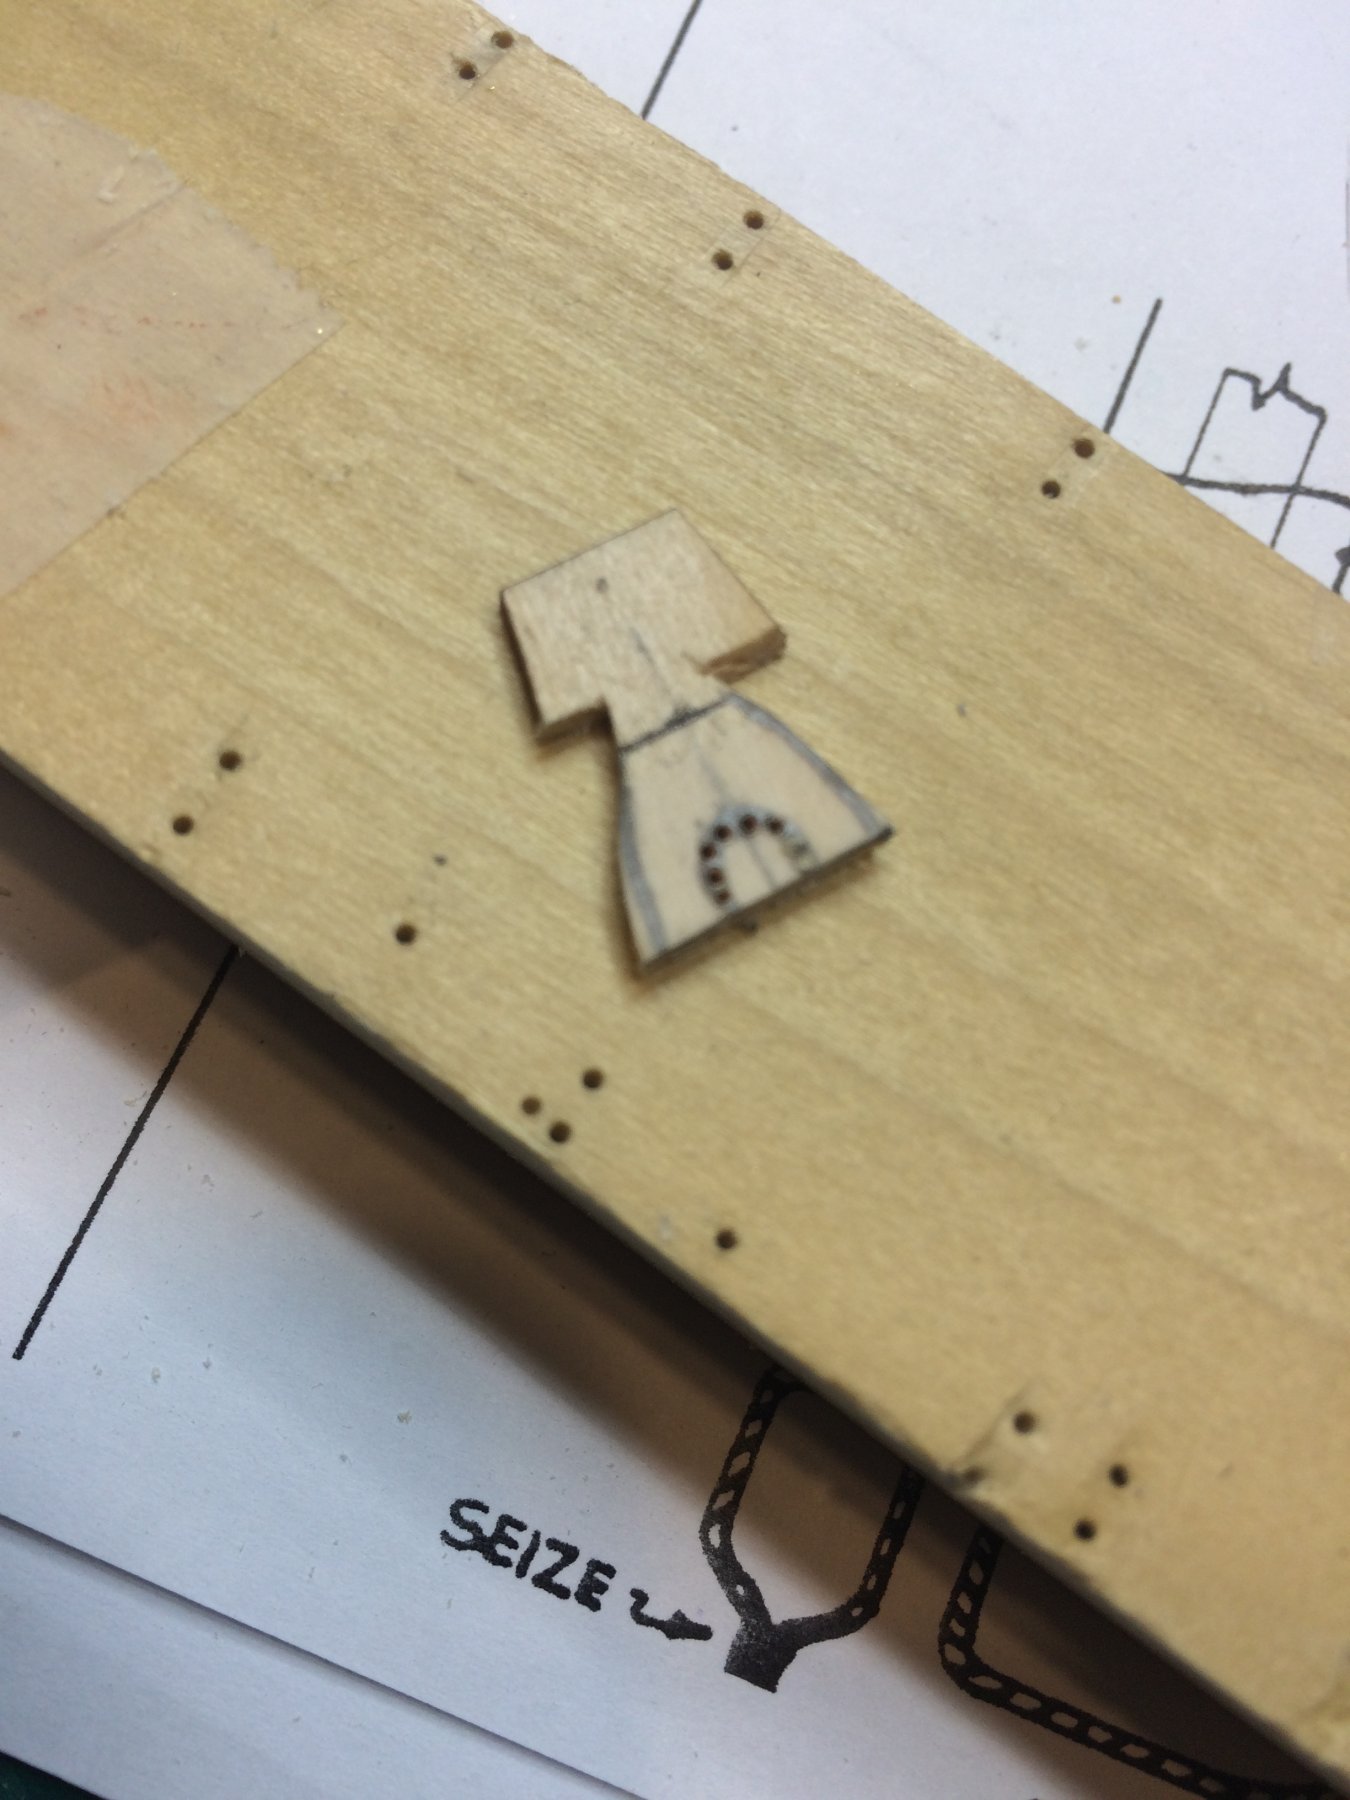
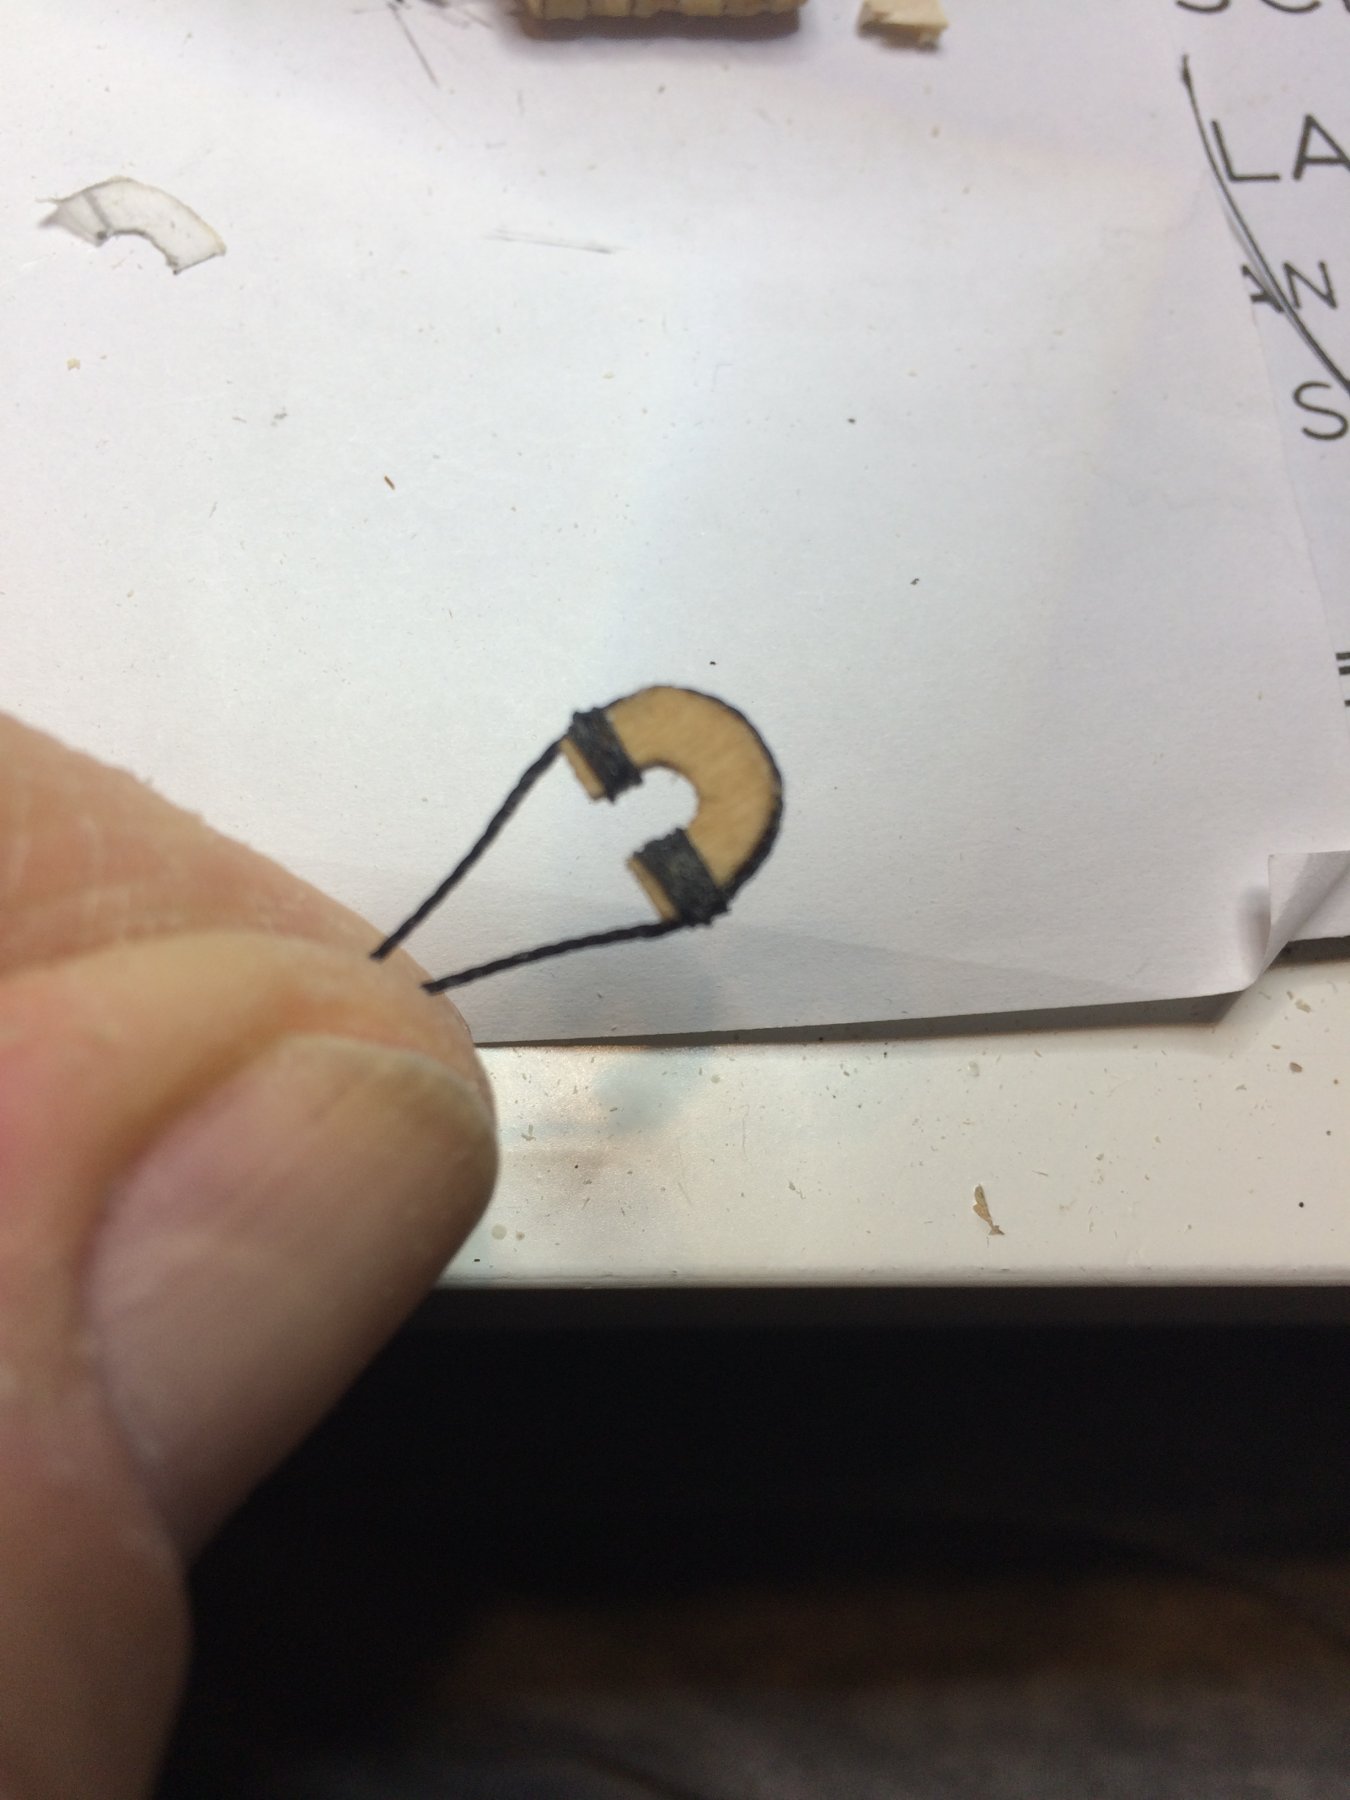
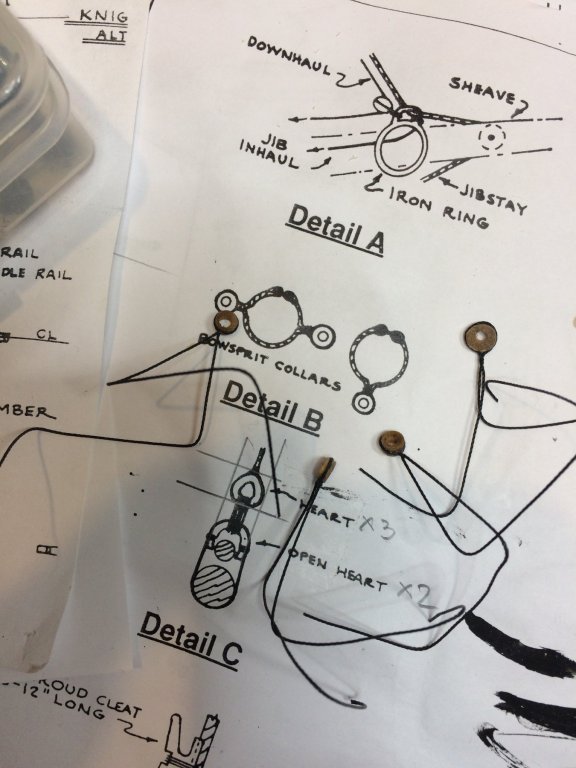
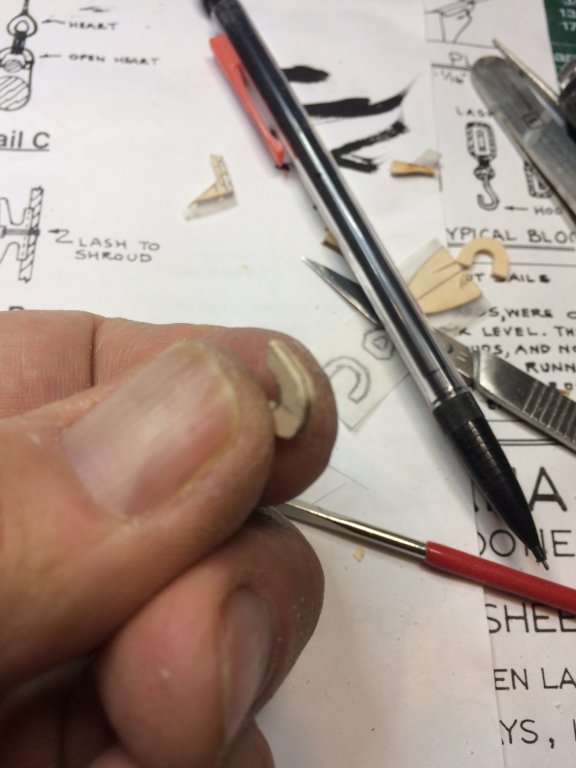
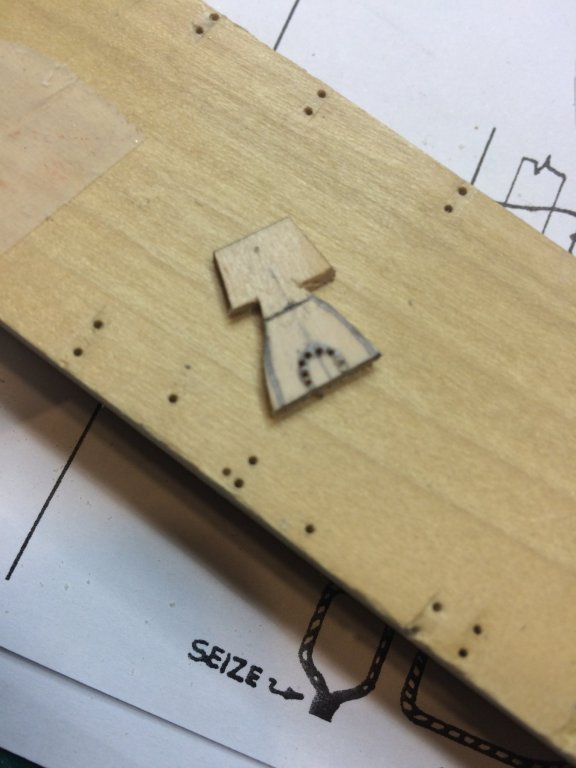
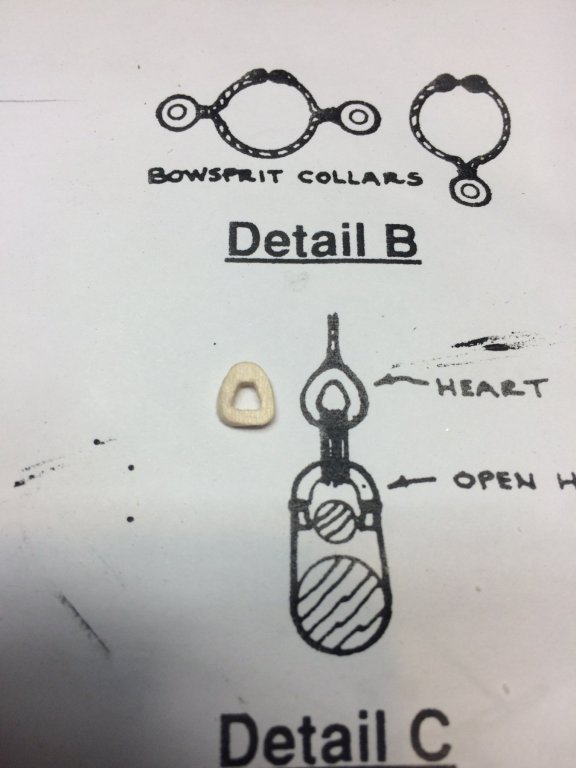
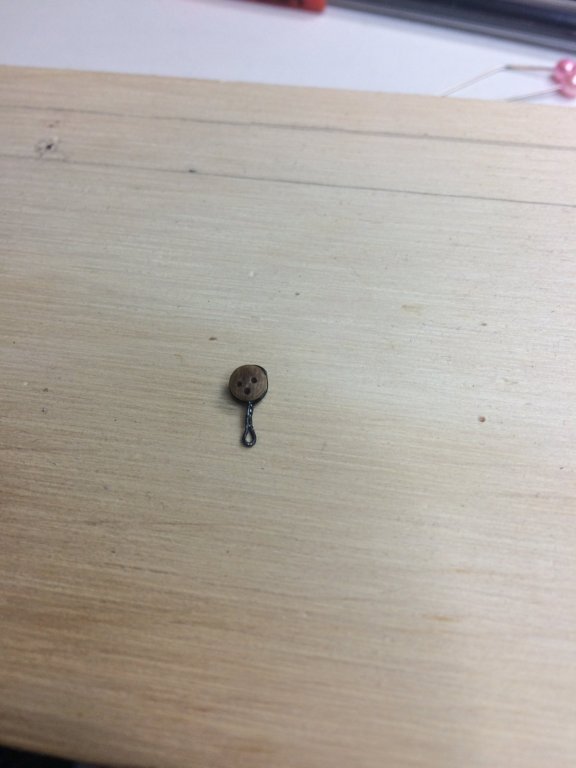
Open and close hearts were next. These are fairly tiny pieces, like most of other parts from this ship. First i worked on open hearts by transferring shape from a plan to transparent paper. Then a piece scotch tape was placed on transparent shape and pilled off. This will "copy" drawing from transparent paper to scotch tape which will be put on piece of wood. Effective way not to use carbon copy paper for small parts. The center hole was drilled with a small drill bit and shaped with small file after i shaped the whole heart. The small grove was filled on edge with small, diamond file. The black rigging line, .45mm was used to seize the collars. Two open hearts done.. Then i start working on close hearts.. One is done and compared to the ship plan looked fairly acceptable. It appears that i need to build two more.. Happy modeling.


- 360 replies
-
- 1
-
-
- sultana
- model shipways
- (and 1 more)
-
Thanks Peter for a quick respond and nice picture. Cheers
- 360 replies
-
- 1
-
-
- sultana
- model shipways
- (and 1 more)
-
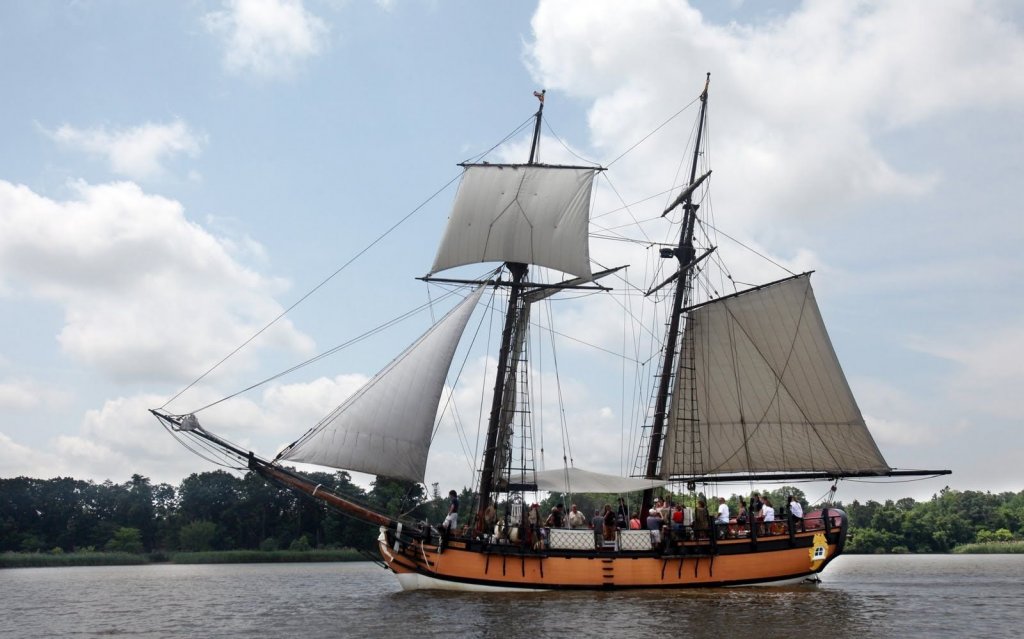
Hello, During my Sultana research, i found this picture... Besides other points, what caught my eye is something that appears to be hammocks. Is it safe to say that Sultana would have this sailors' protection available during fights and would that be common practice on ship like this (in the same manner we can see those in bigger fighting ships like Victory)? Have not seen any other Sultana' build log with these details. Or is this just there to accommodate today' safety standards? Appreciate your input.
-
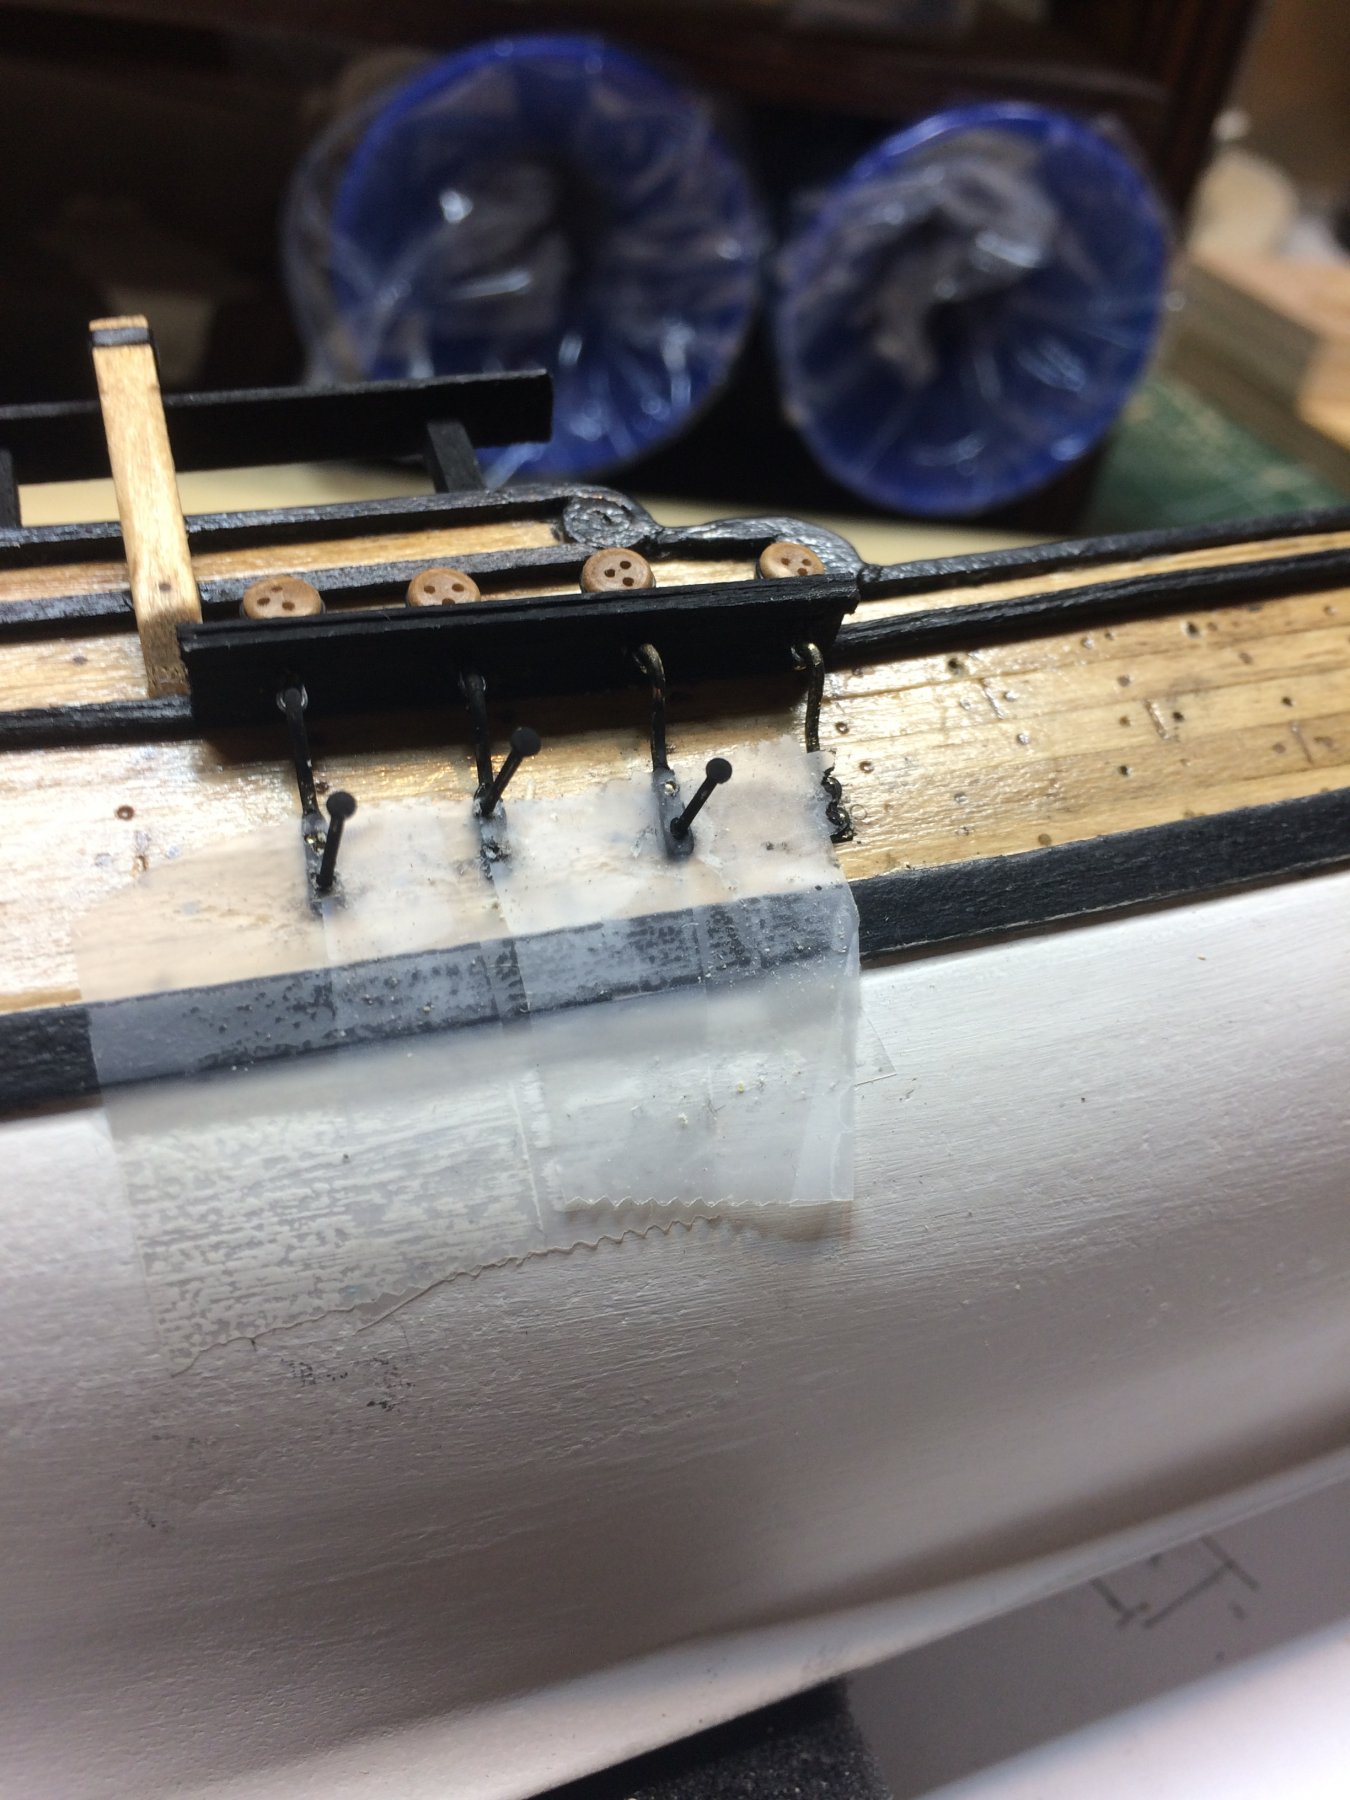
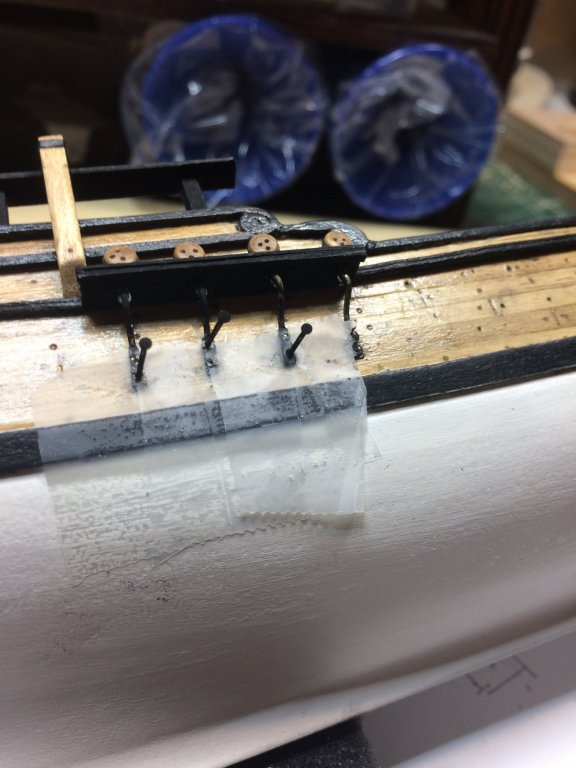
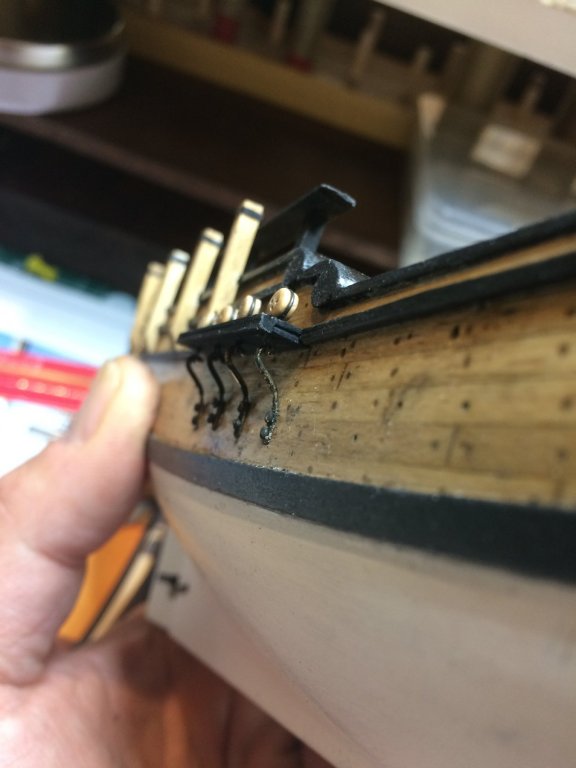
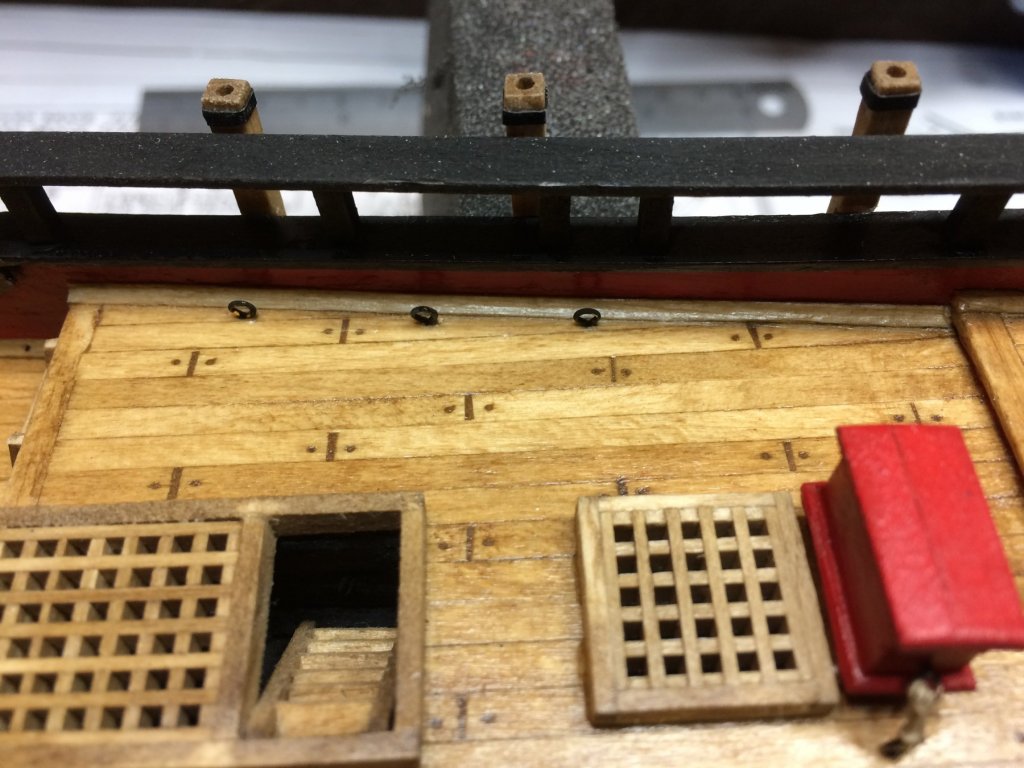
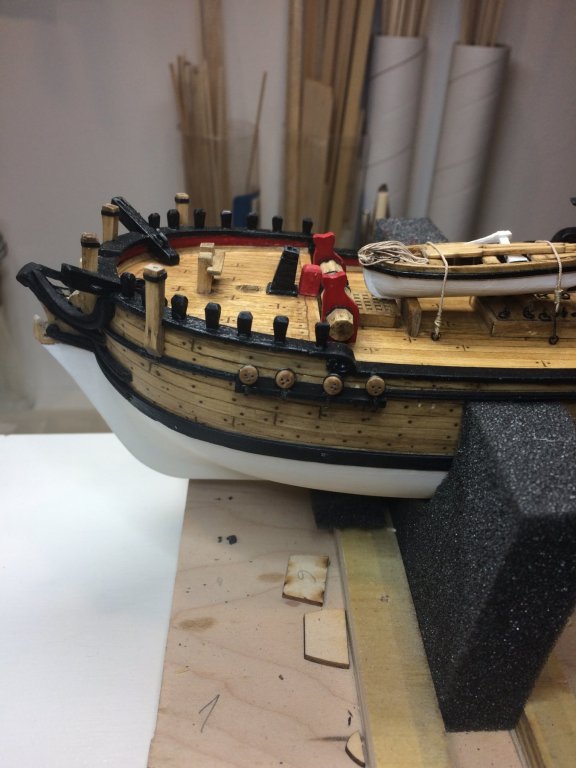
The process of mounting chainplates was completed, now just few nails into the ship to finish the work. For this task i asked my trusty scotch tape to hold chainplates in position for drilling nail pilot holes.. Then few strokes with small hammer.. One side completed.. Tomorrow more to come, time permitting... Happy modeling.

- 360 replies
-
- 3
-
-
- sultana
- model shipways
- (and 1 more)
-
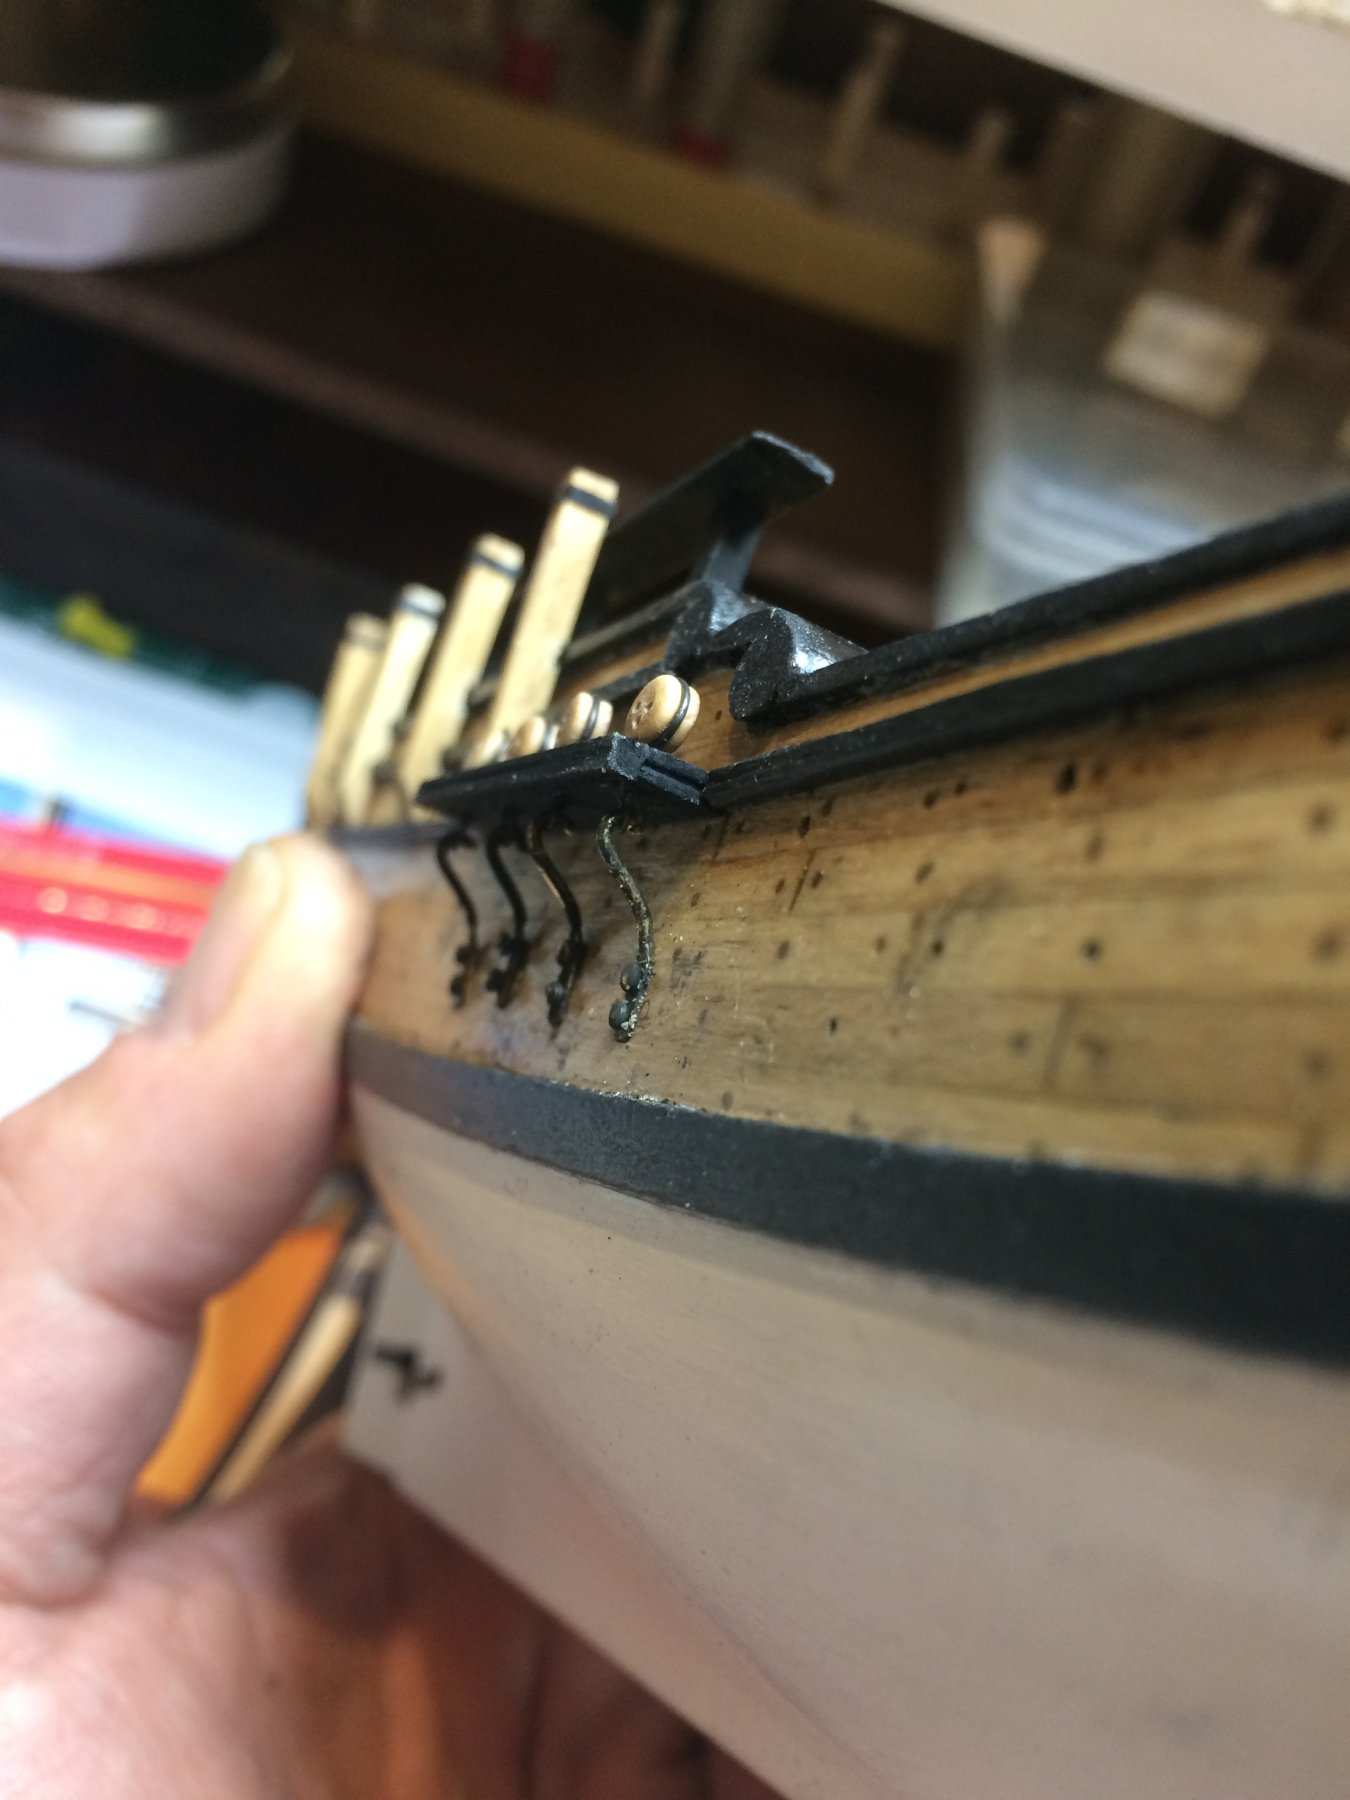
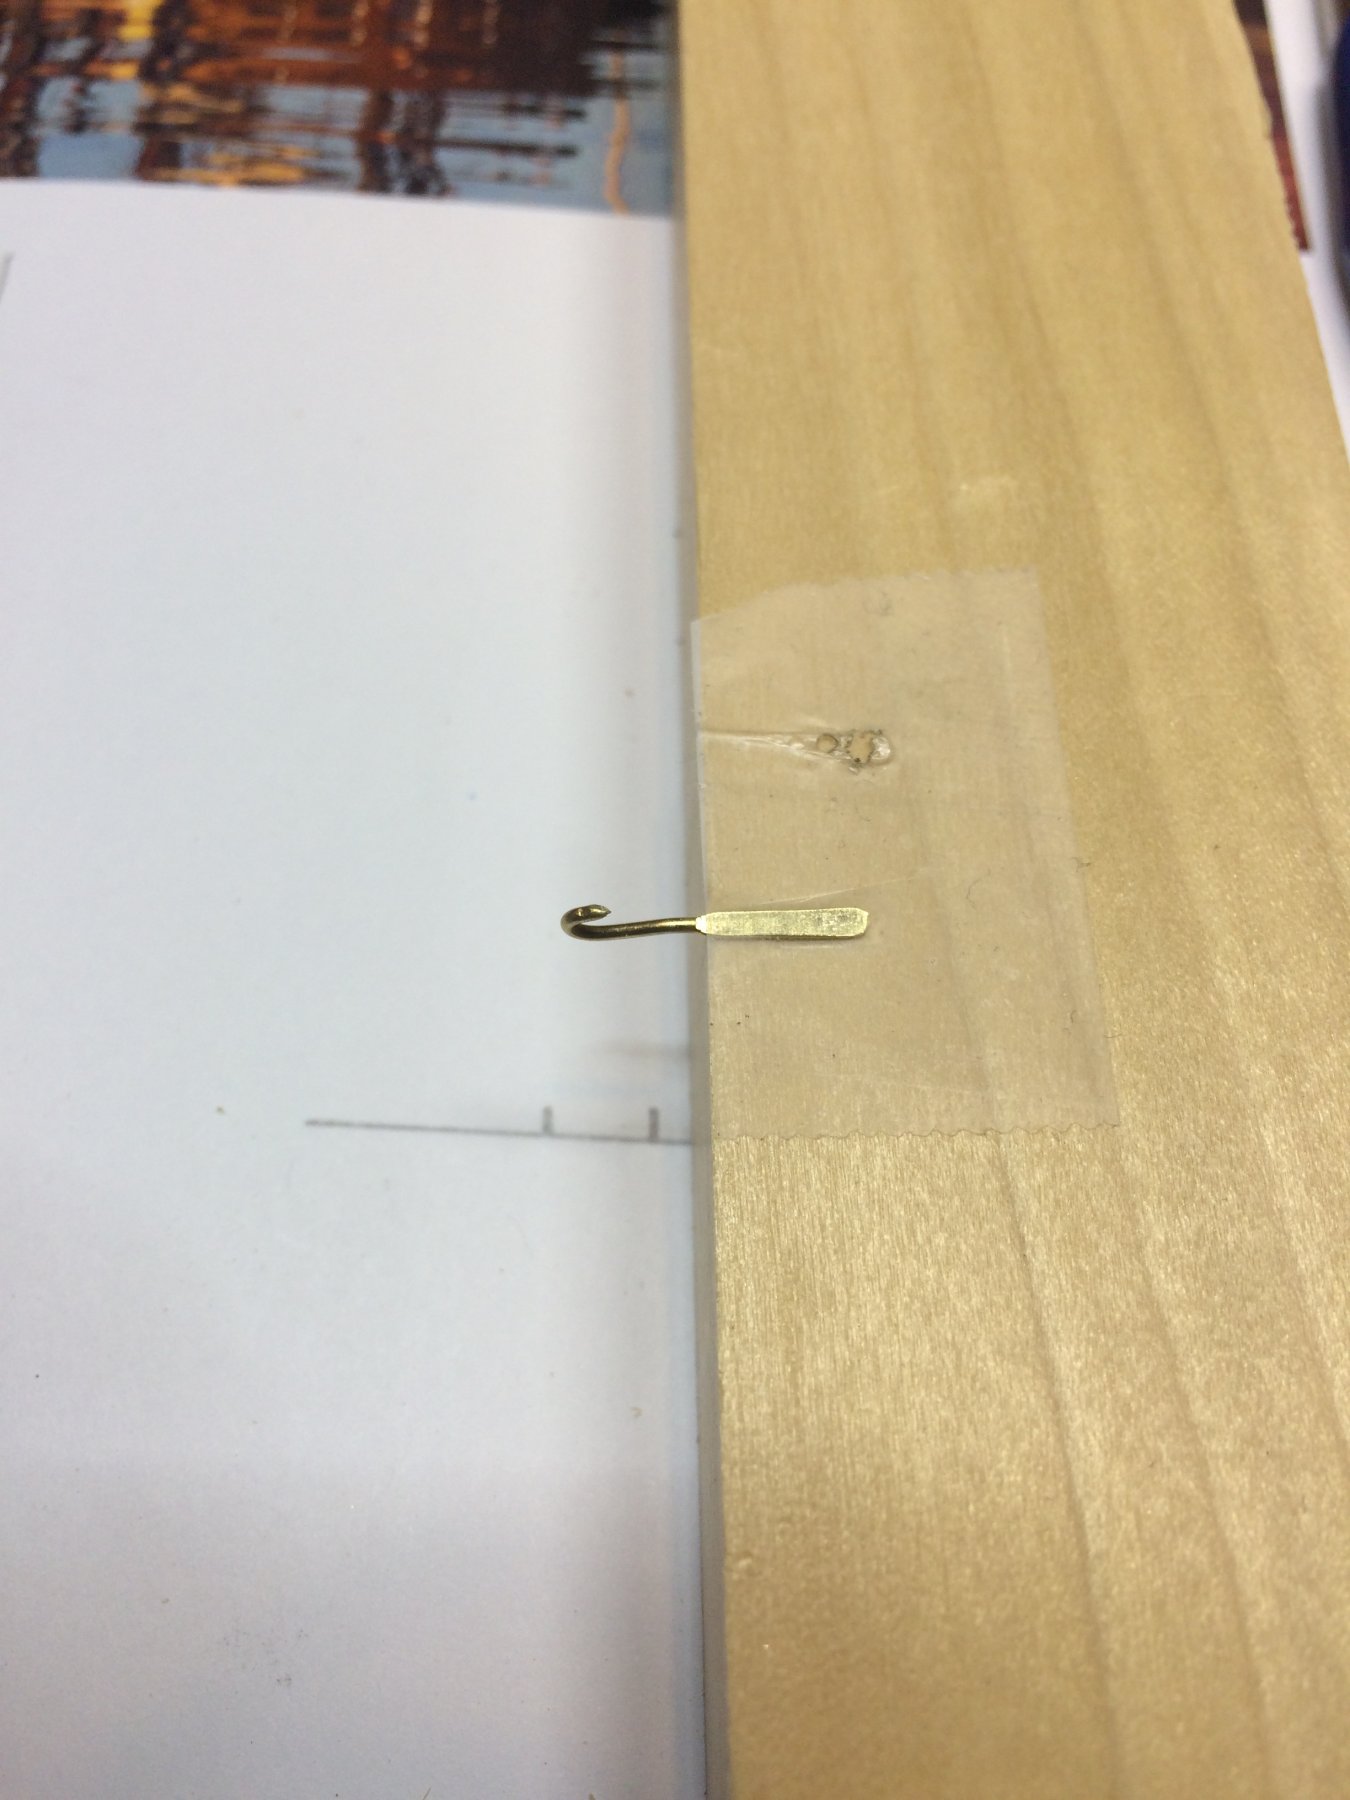
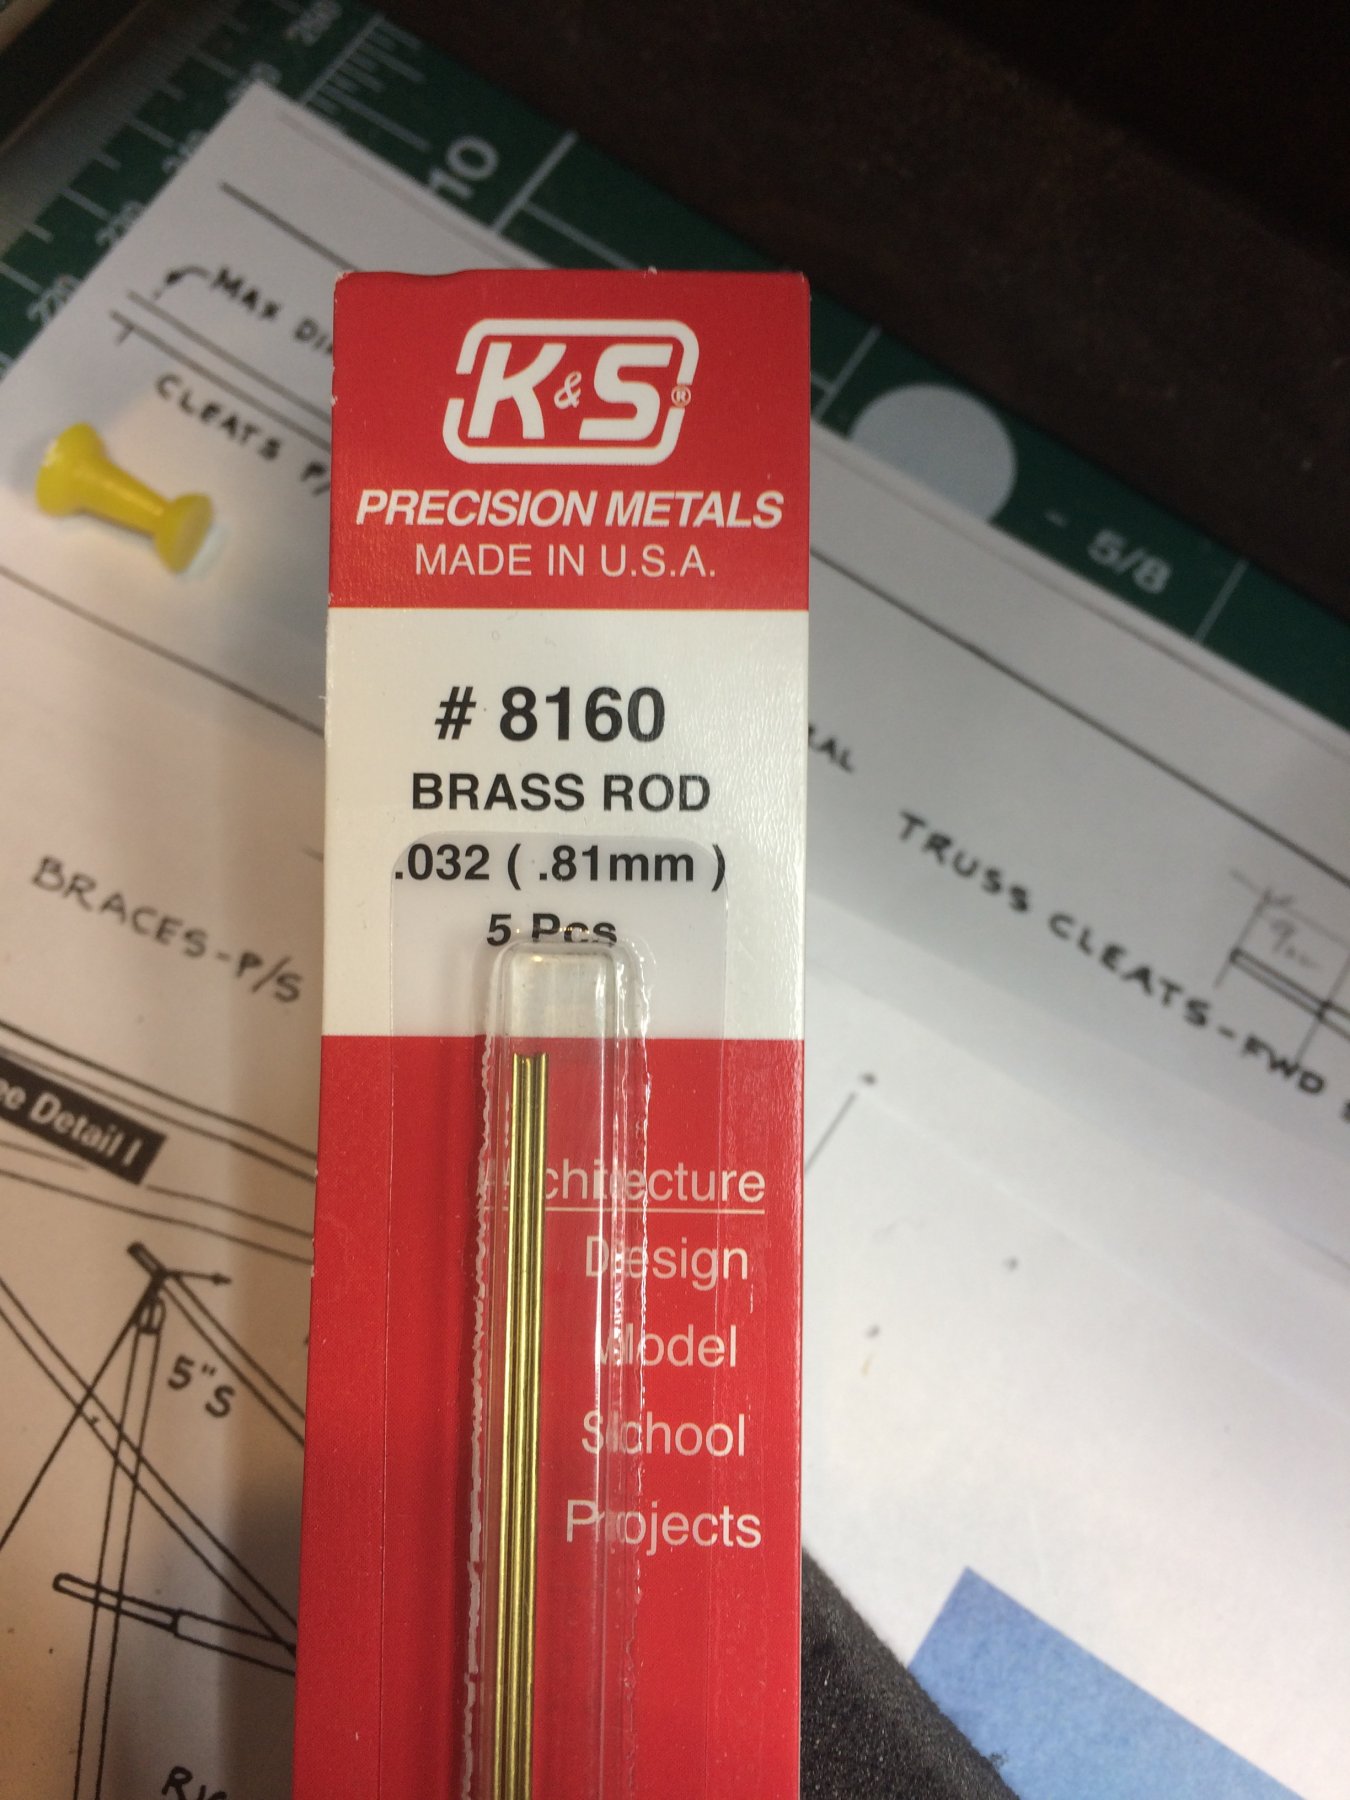
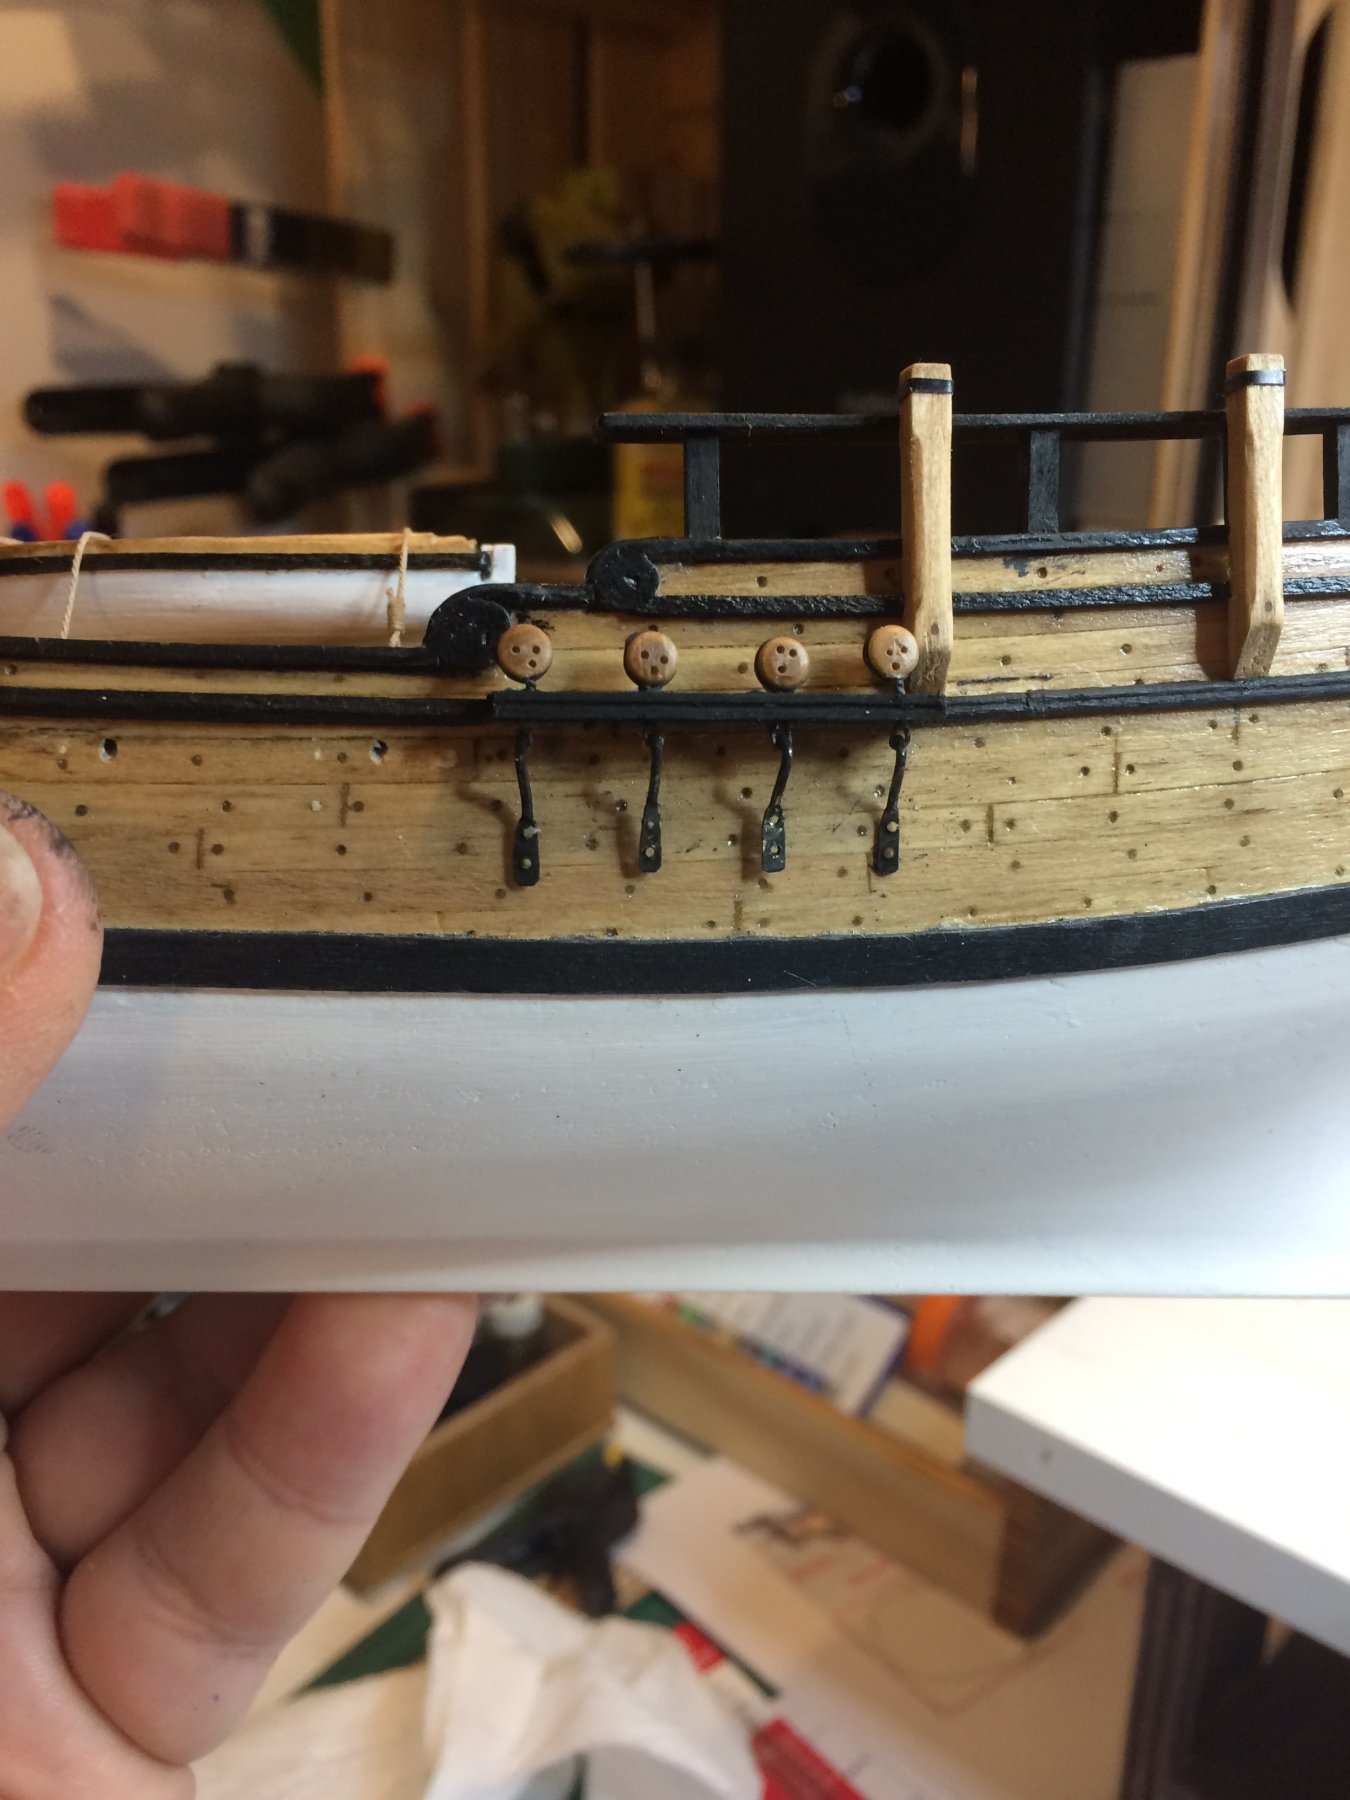
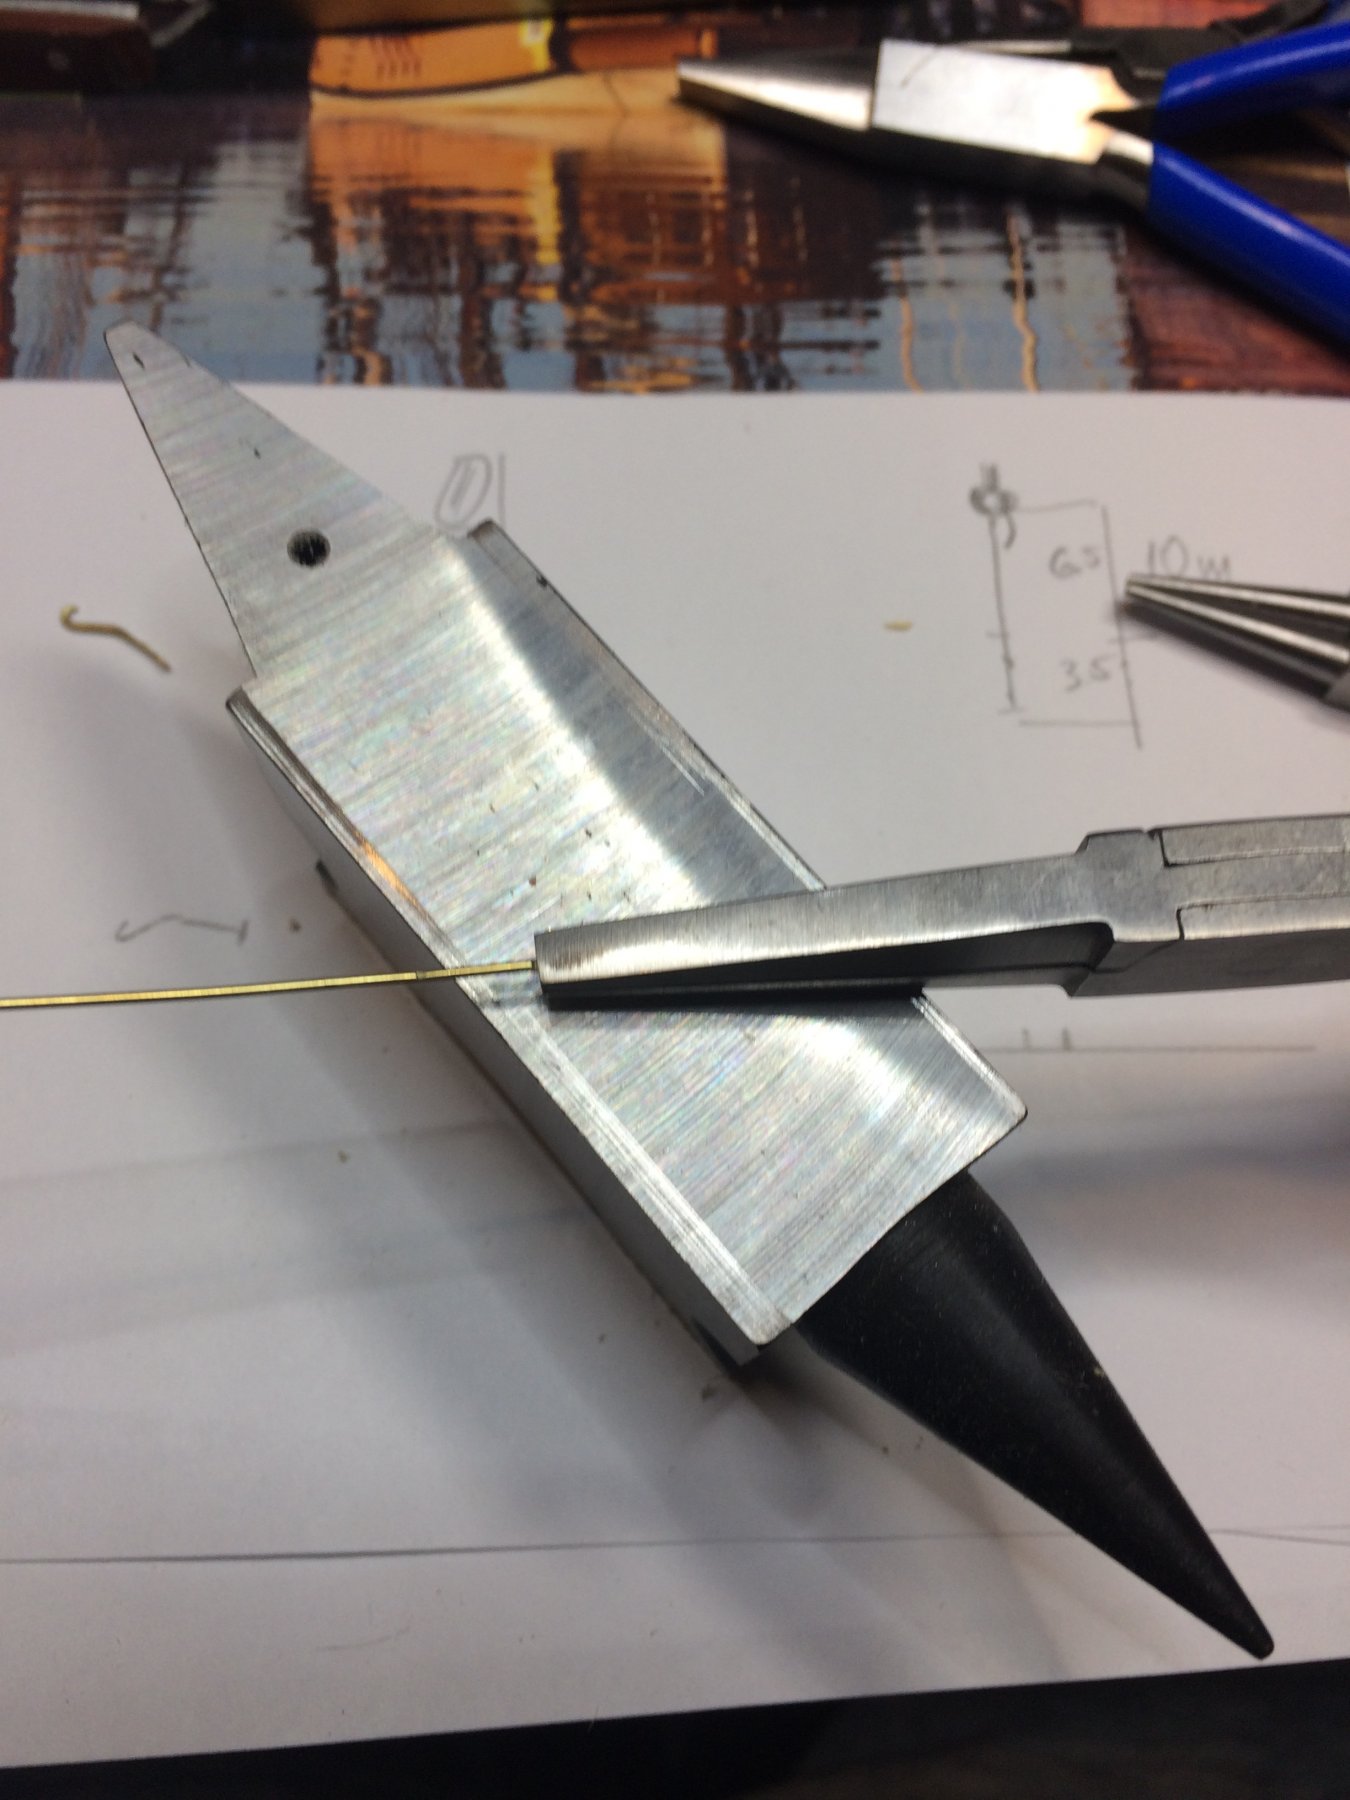
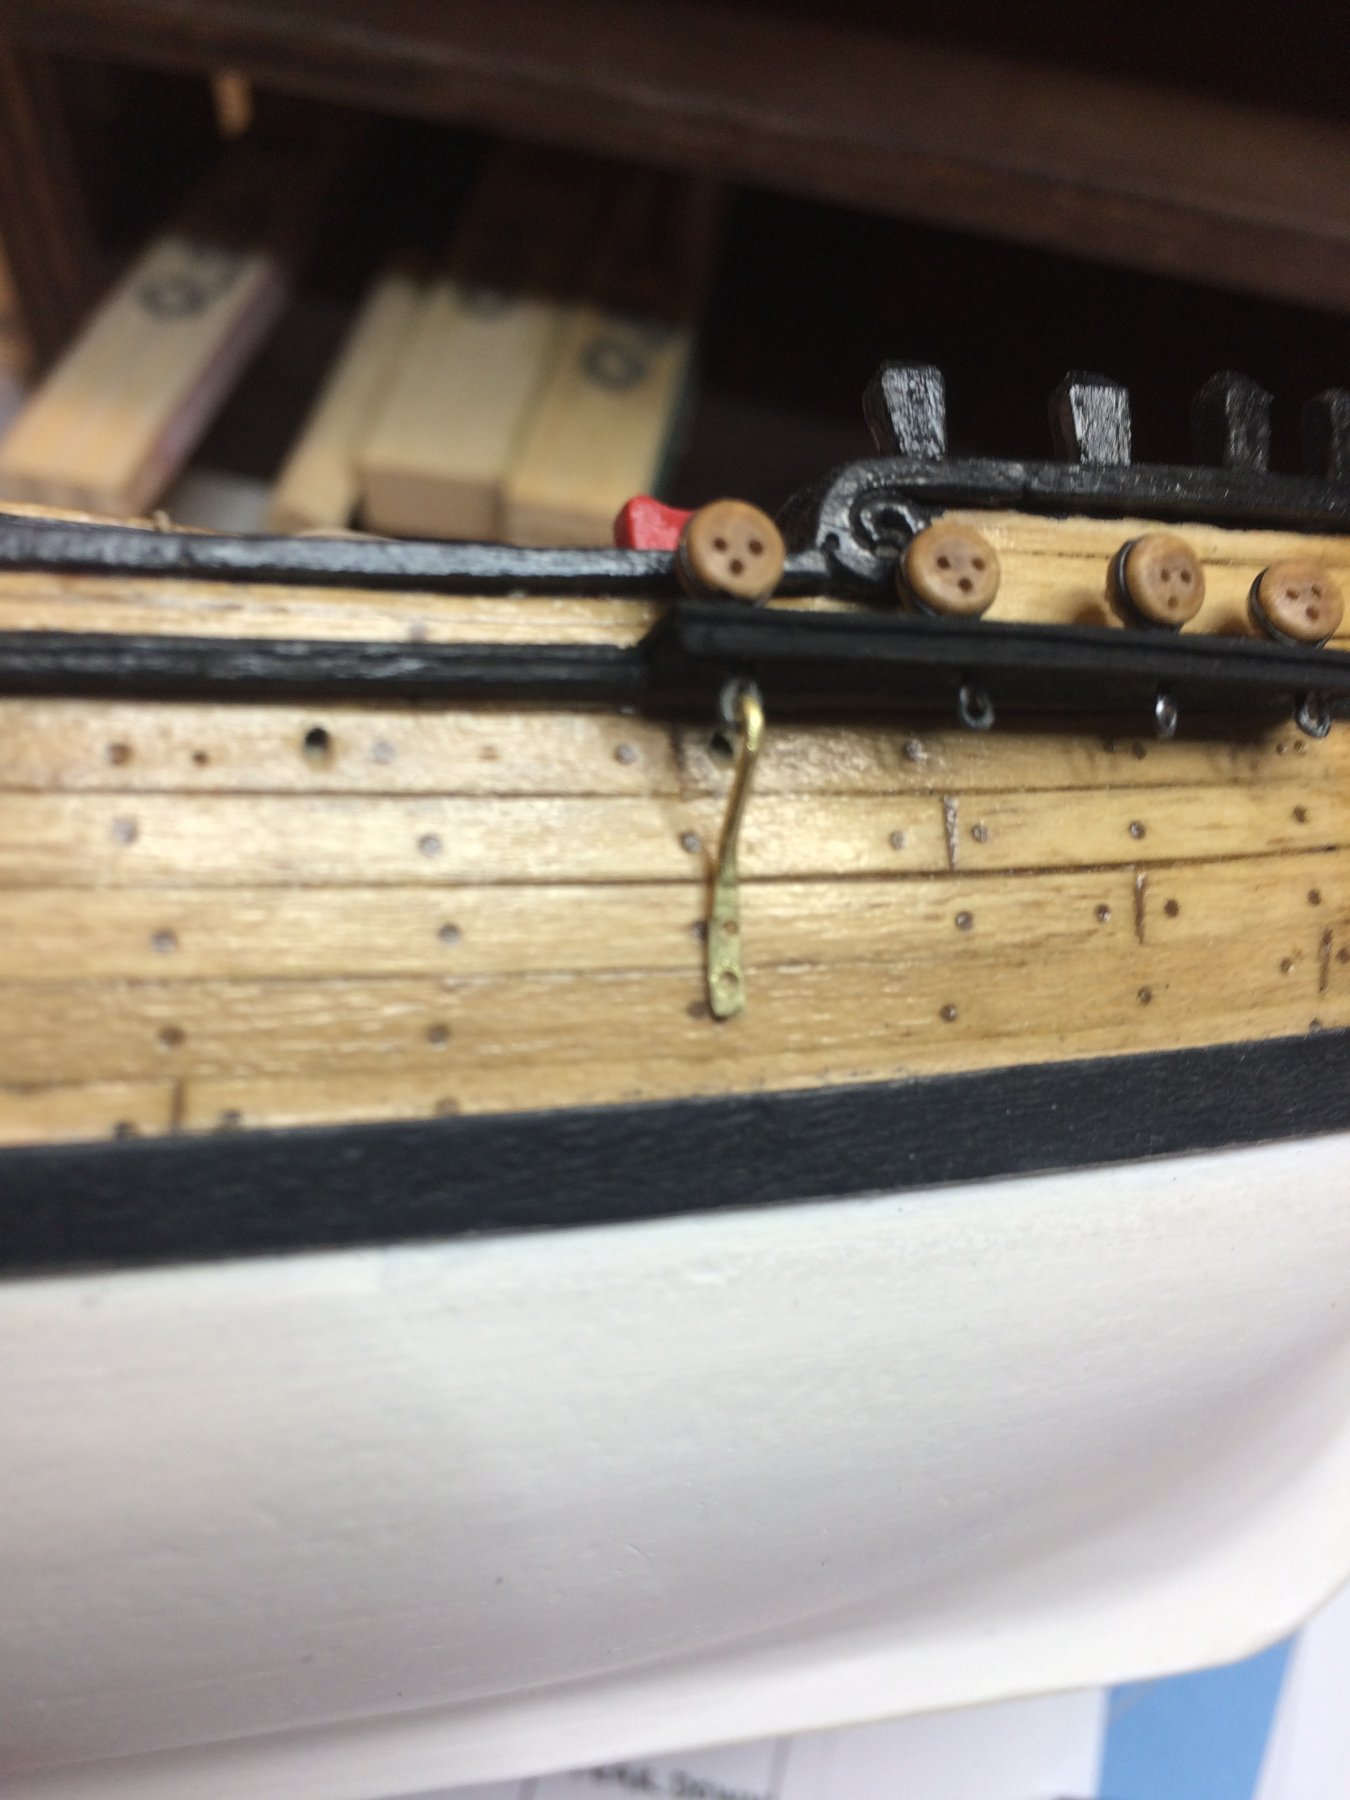
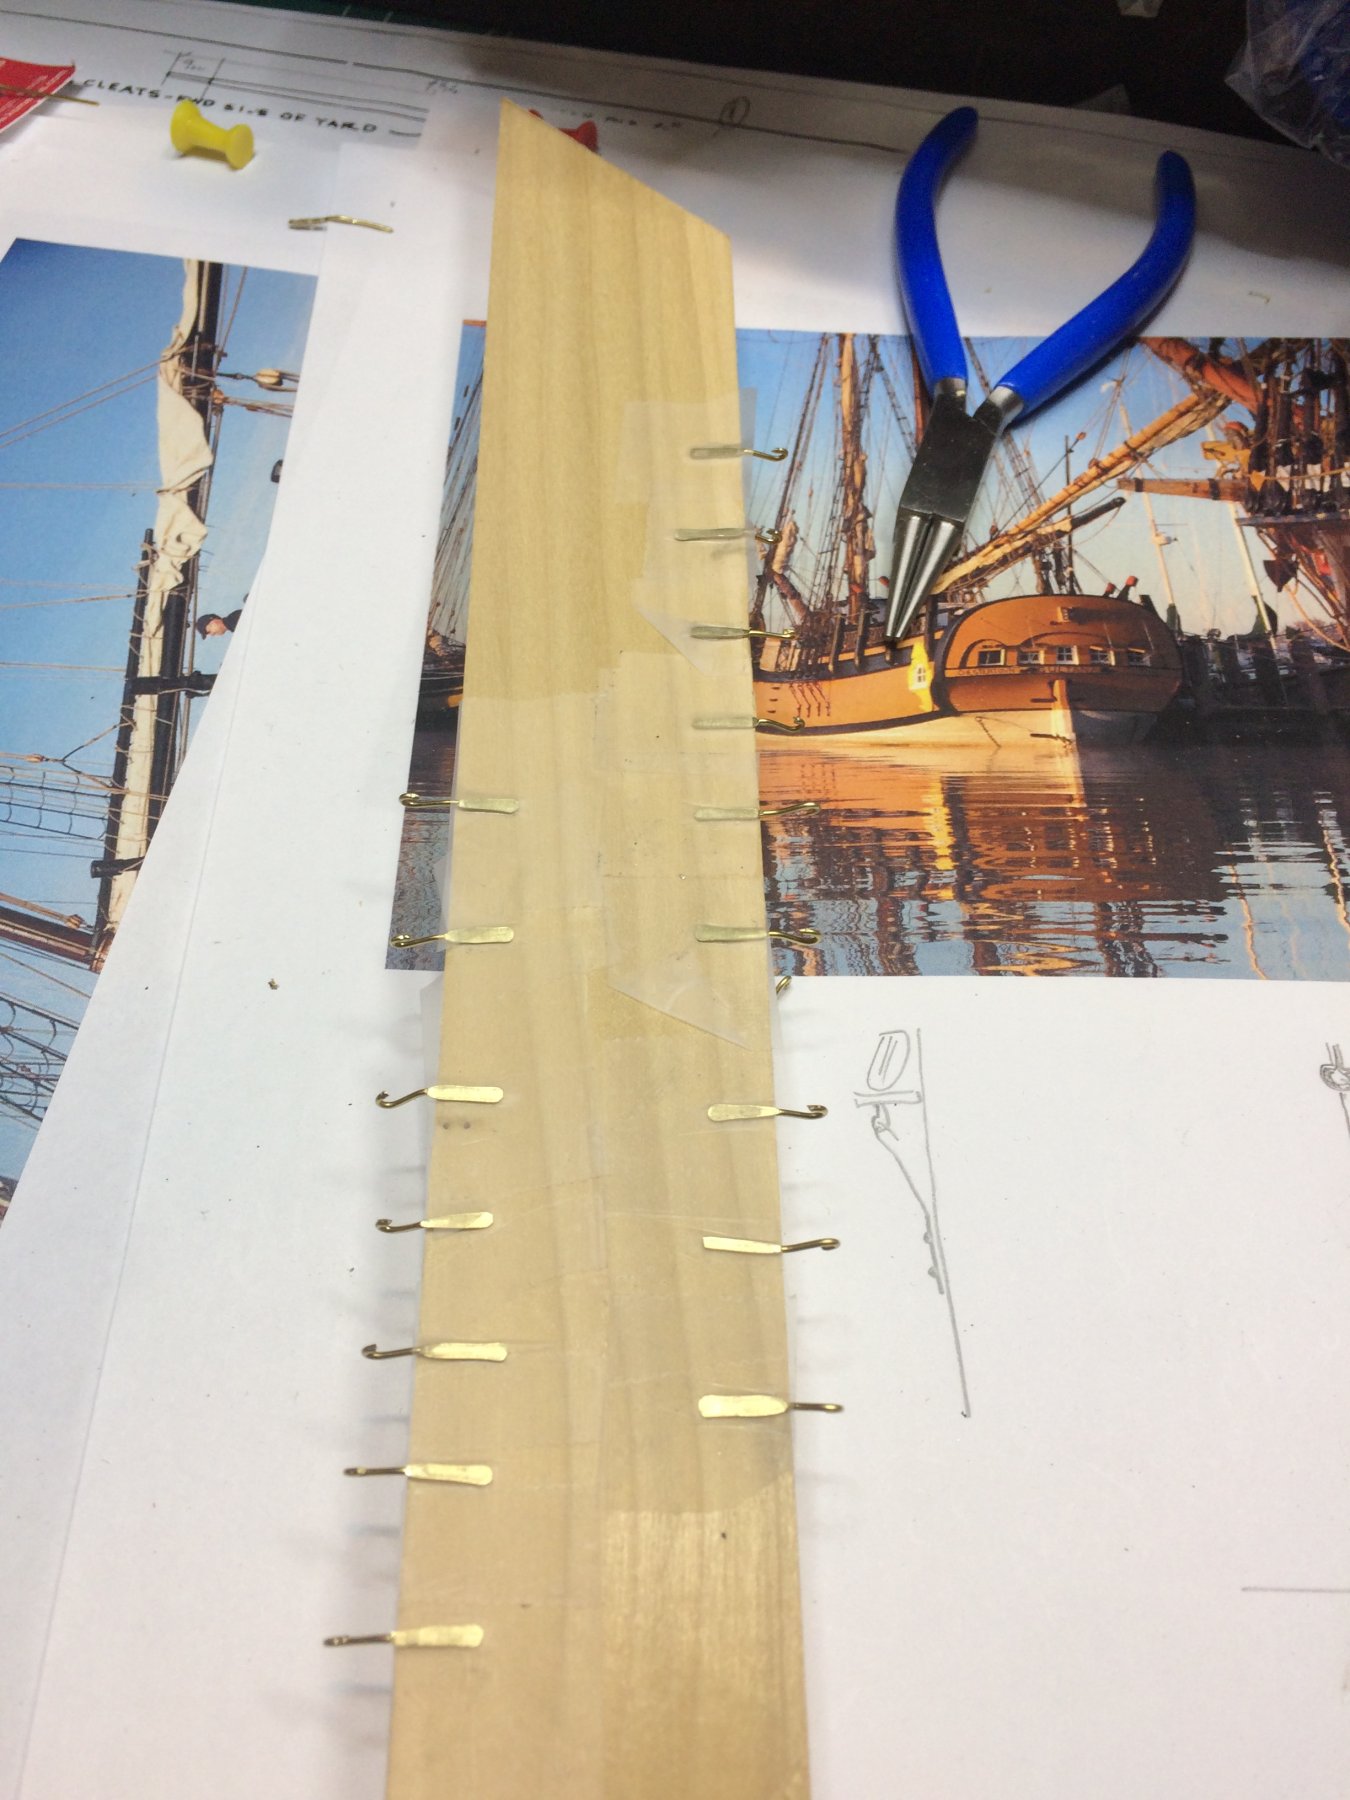
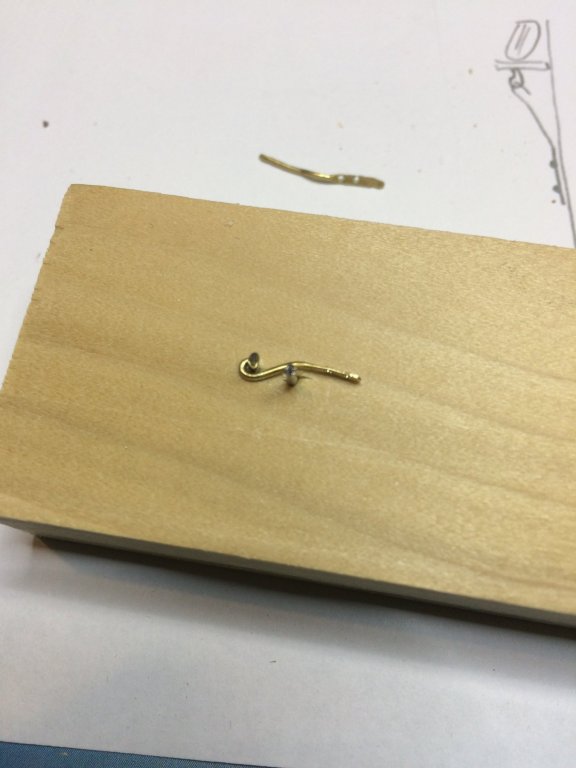
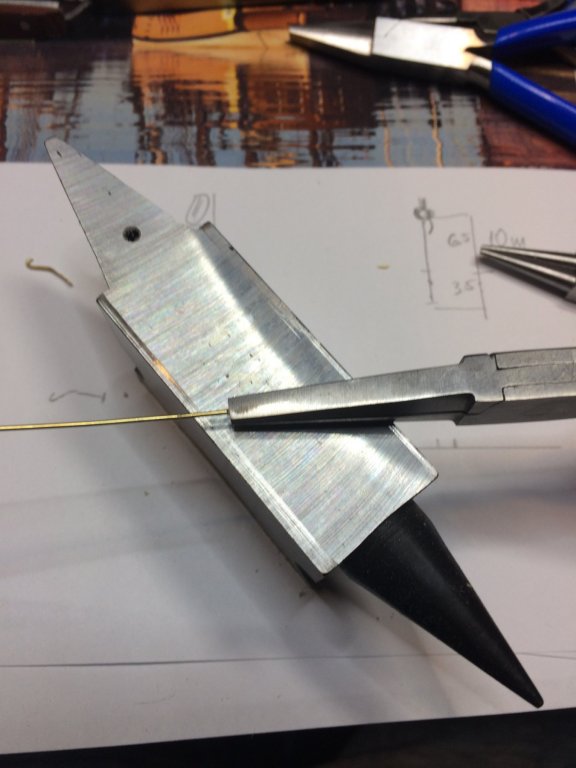
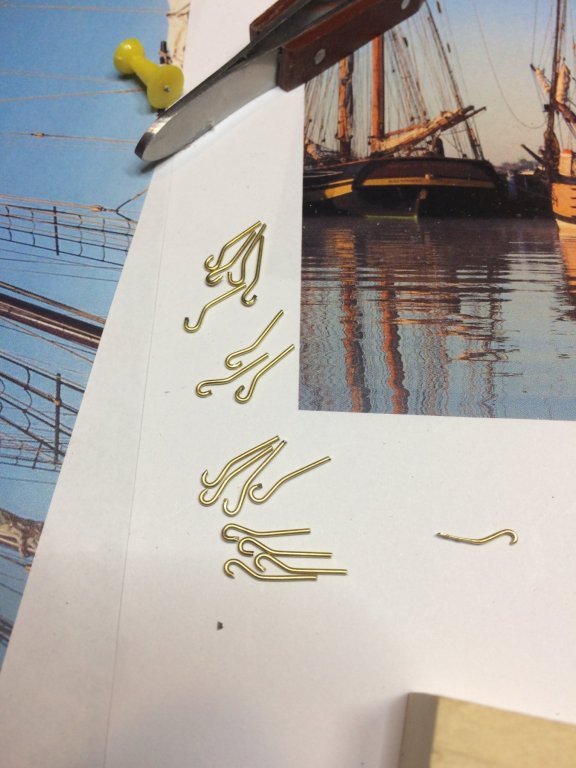
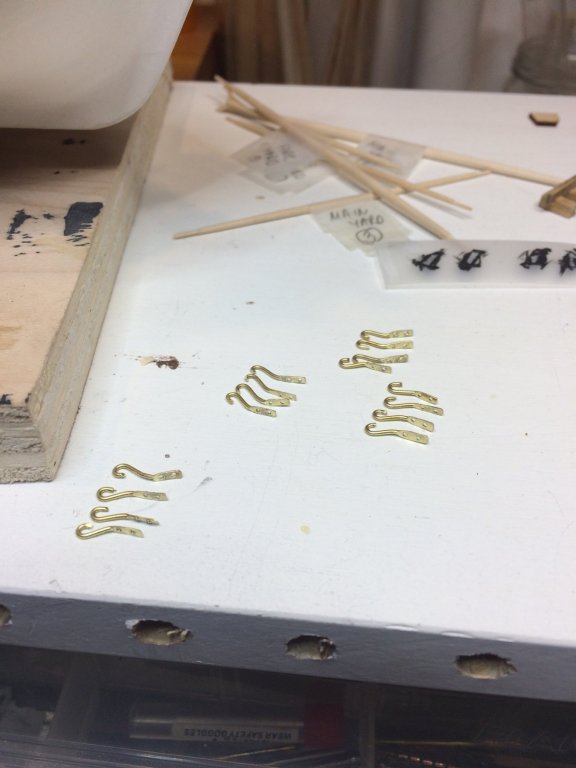
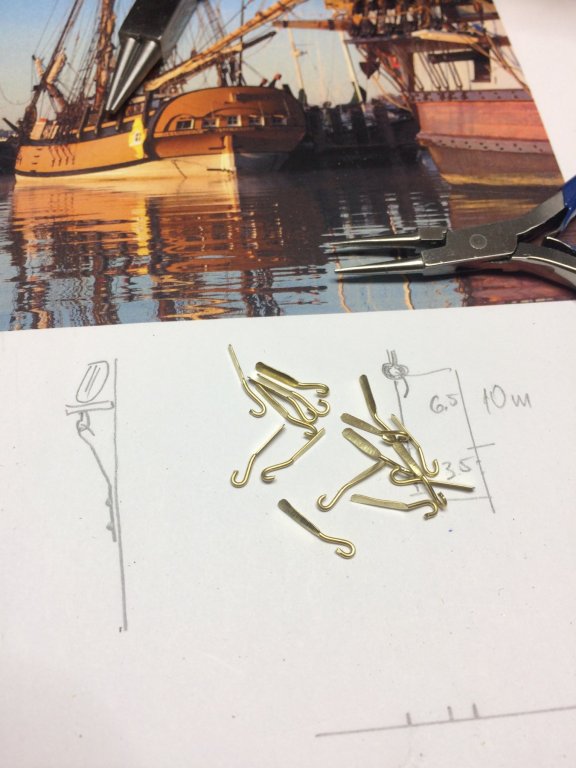
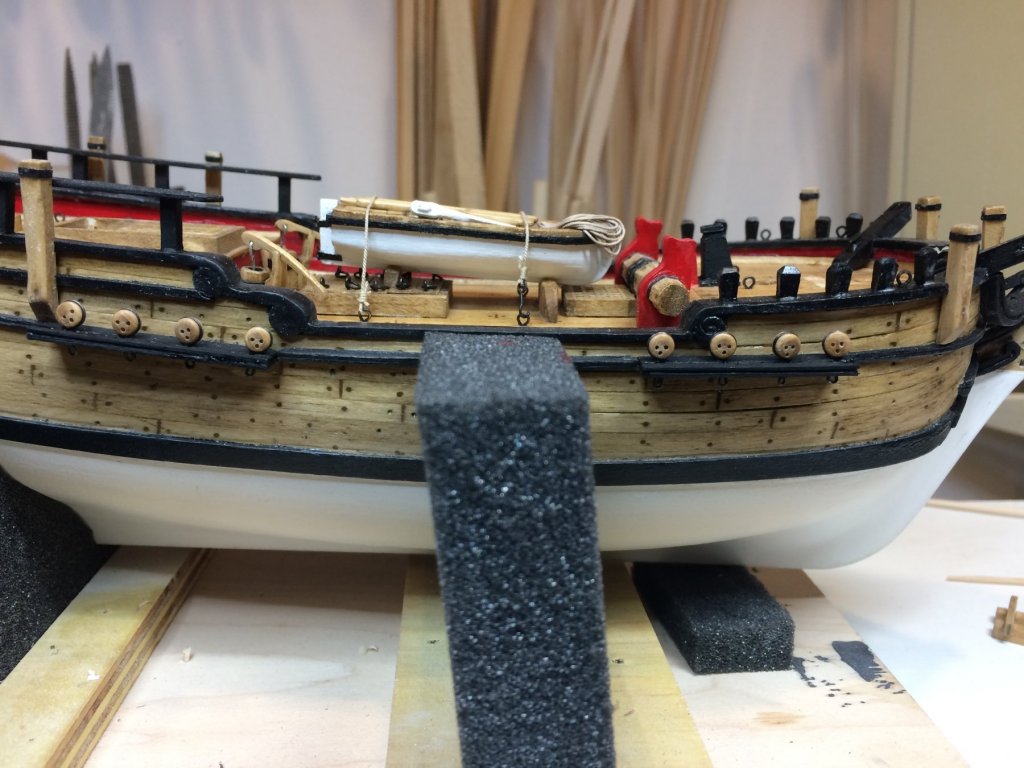
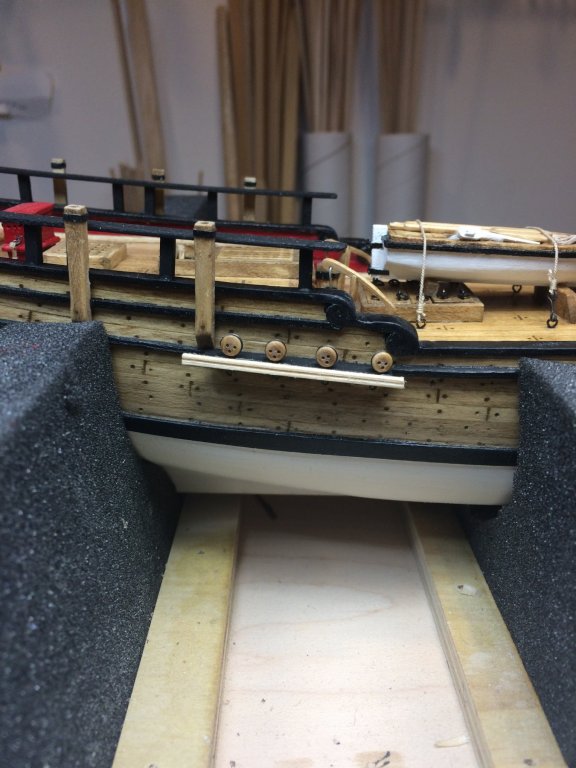
Today it was all about chainplates. I was researching some other building logs about builders' ways to make these parts. Different approaches were noticed. During this research i found pictures of Sultana' replica (i am guessing) that showed chainplates that are different. So i decided to give it a try. The hook on the top of the chainplate, part that connects to deadeye, is fairly long and i knew i will not be able to accommodate this just because my deadeyes were glued to the ship already, and there is no way to twist the wire that are holding them in position. So needed to accommodate a bit which will make me a builder who deviates from the ship picture (🙂). For this task I decided to use .81mm brass rod. First i flattened the end piece of future chainplate; it is about 3.5mm long flat part that will hold two holes for metal pins. I used small hammer and anvil. The flattening goes really well, but need to make sure the strike power with hammer is identical otherwise the flattened part will not be in correct shape. Then i twist the chainplate and make a hook... The wholes are made with proxxon drill with 0.5mm metal drill bit. For that activity, i placed chainplate on the piece of wood, with scotch tape that keeps it in position. The scotch tape served as good surface to put two dots as reference points for drilling. With a small nail, i made a mark for drilling bit so it does not slip of the flattened part while drilling.. Testing on the ship... So, now to the mass production. First i made a template to be used to twist the wire around it for correct shape.. .. then 16 of them (with few extras) were build: made a hook first, twist it around the template, cut in size.. Flattening step was next. I decided to use a pair of cheap (or how they call it economy priced) flathead noseplies, squeezed wire part that has to be flattened. Hammer is used to made a wire flat. This method produced very nice pieces and flatted part was fairly identical on all chainplates. All completed...... On above picture ship chainplates are visible as well as my drawing in attempt to replicate it. The only difference is that i was unable to accommodate longer hook - mental note to my self: next time make sure you make deadeyes and chainplates at the same time.... Now it is time to drill holes; all chainplates are mounted on the piece of wood, fixed with scotch tape... ...holes will be marked with pen and with pilot hole. These tiny pieces get hot very quickly during drilling process and they have tendency to move since scotch tape does not keep them tight to the wood.. So find a way to hold them with something else other then your fingers.. All drilled, excess flat part was cut and edges sanded a bit; now they are ready for blackening bath Drying cycle... And testing on the ship looks acceptable.. Happy modeling..


- 360 replies
-
- 5
-
-
- sultana
- model shipways
- (and 1 more)
-
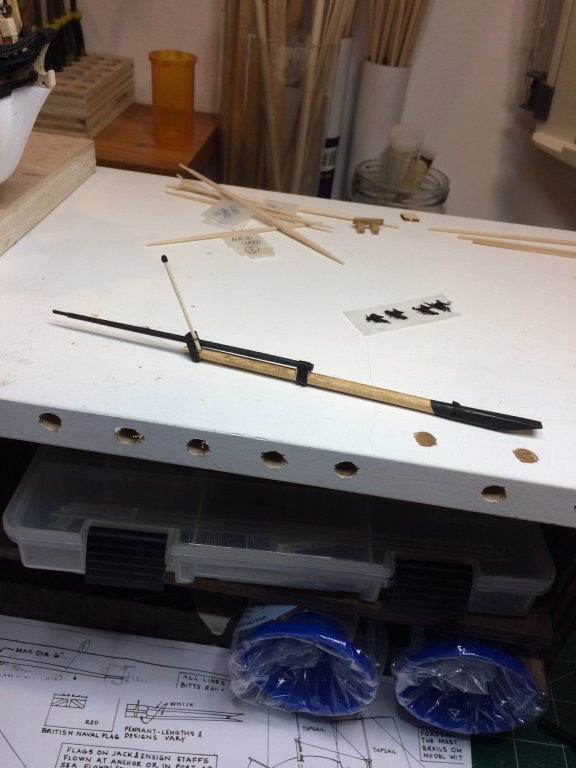
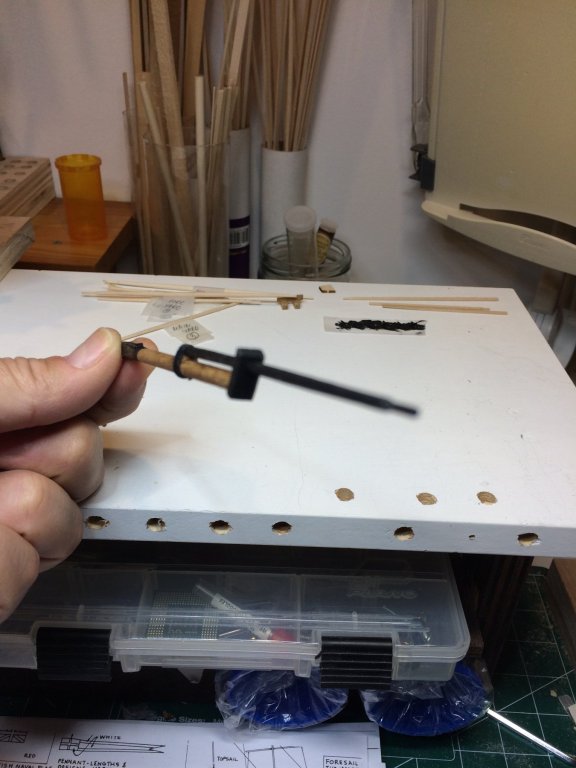
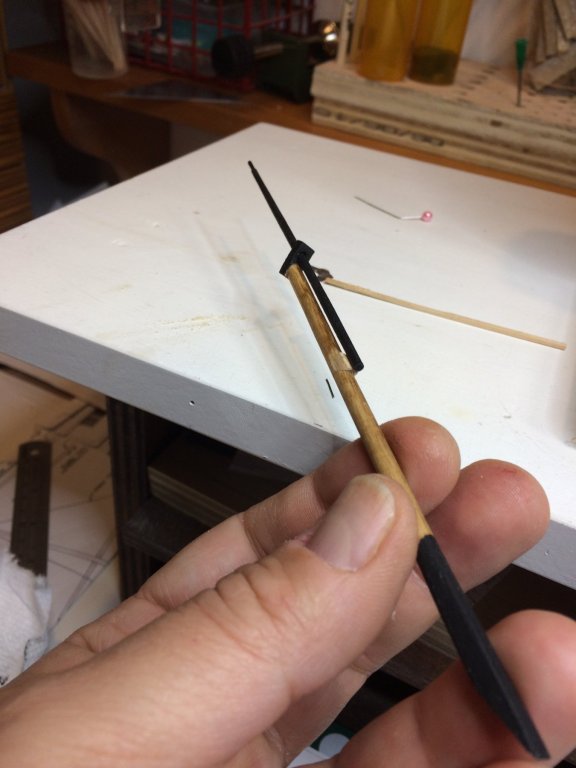
Jack staff was attacked today... Carved on the lathe to correct length and dimension. Than the top was tipped into black paint and it was glued to the cap... Two pieces of 28 gauge wire was used to simulate brackets.. Happy modeling.

- 360 replies
-
- 5
-
-
- sultana
- model shipways
- (and 1 more)
-
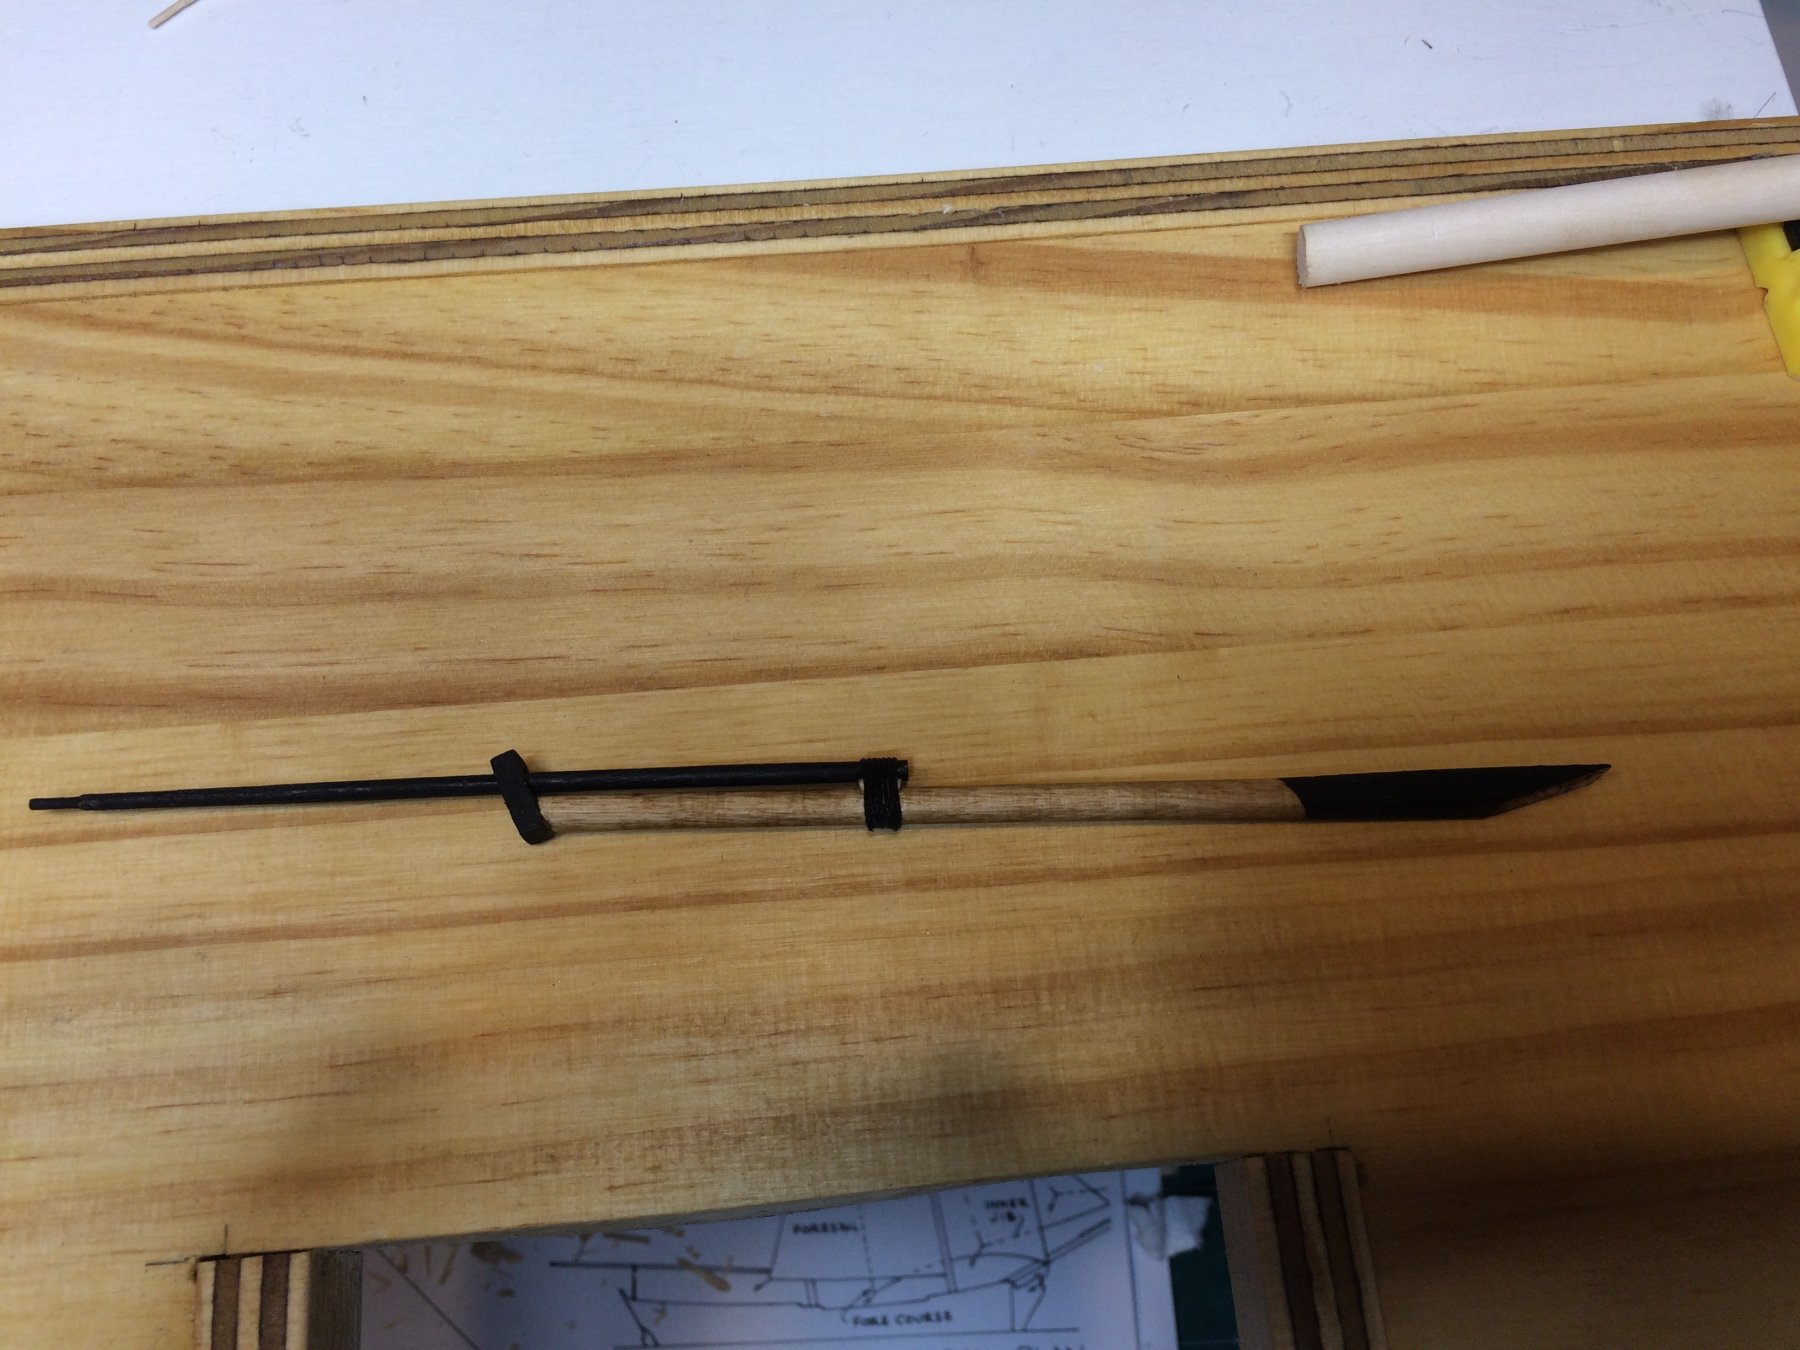
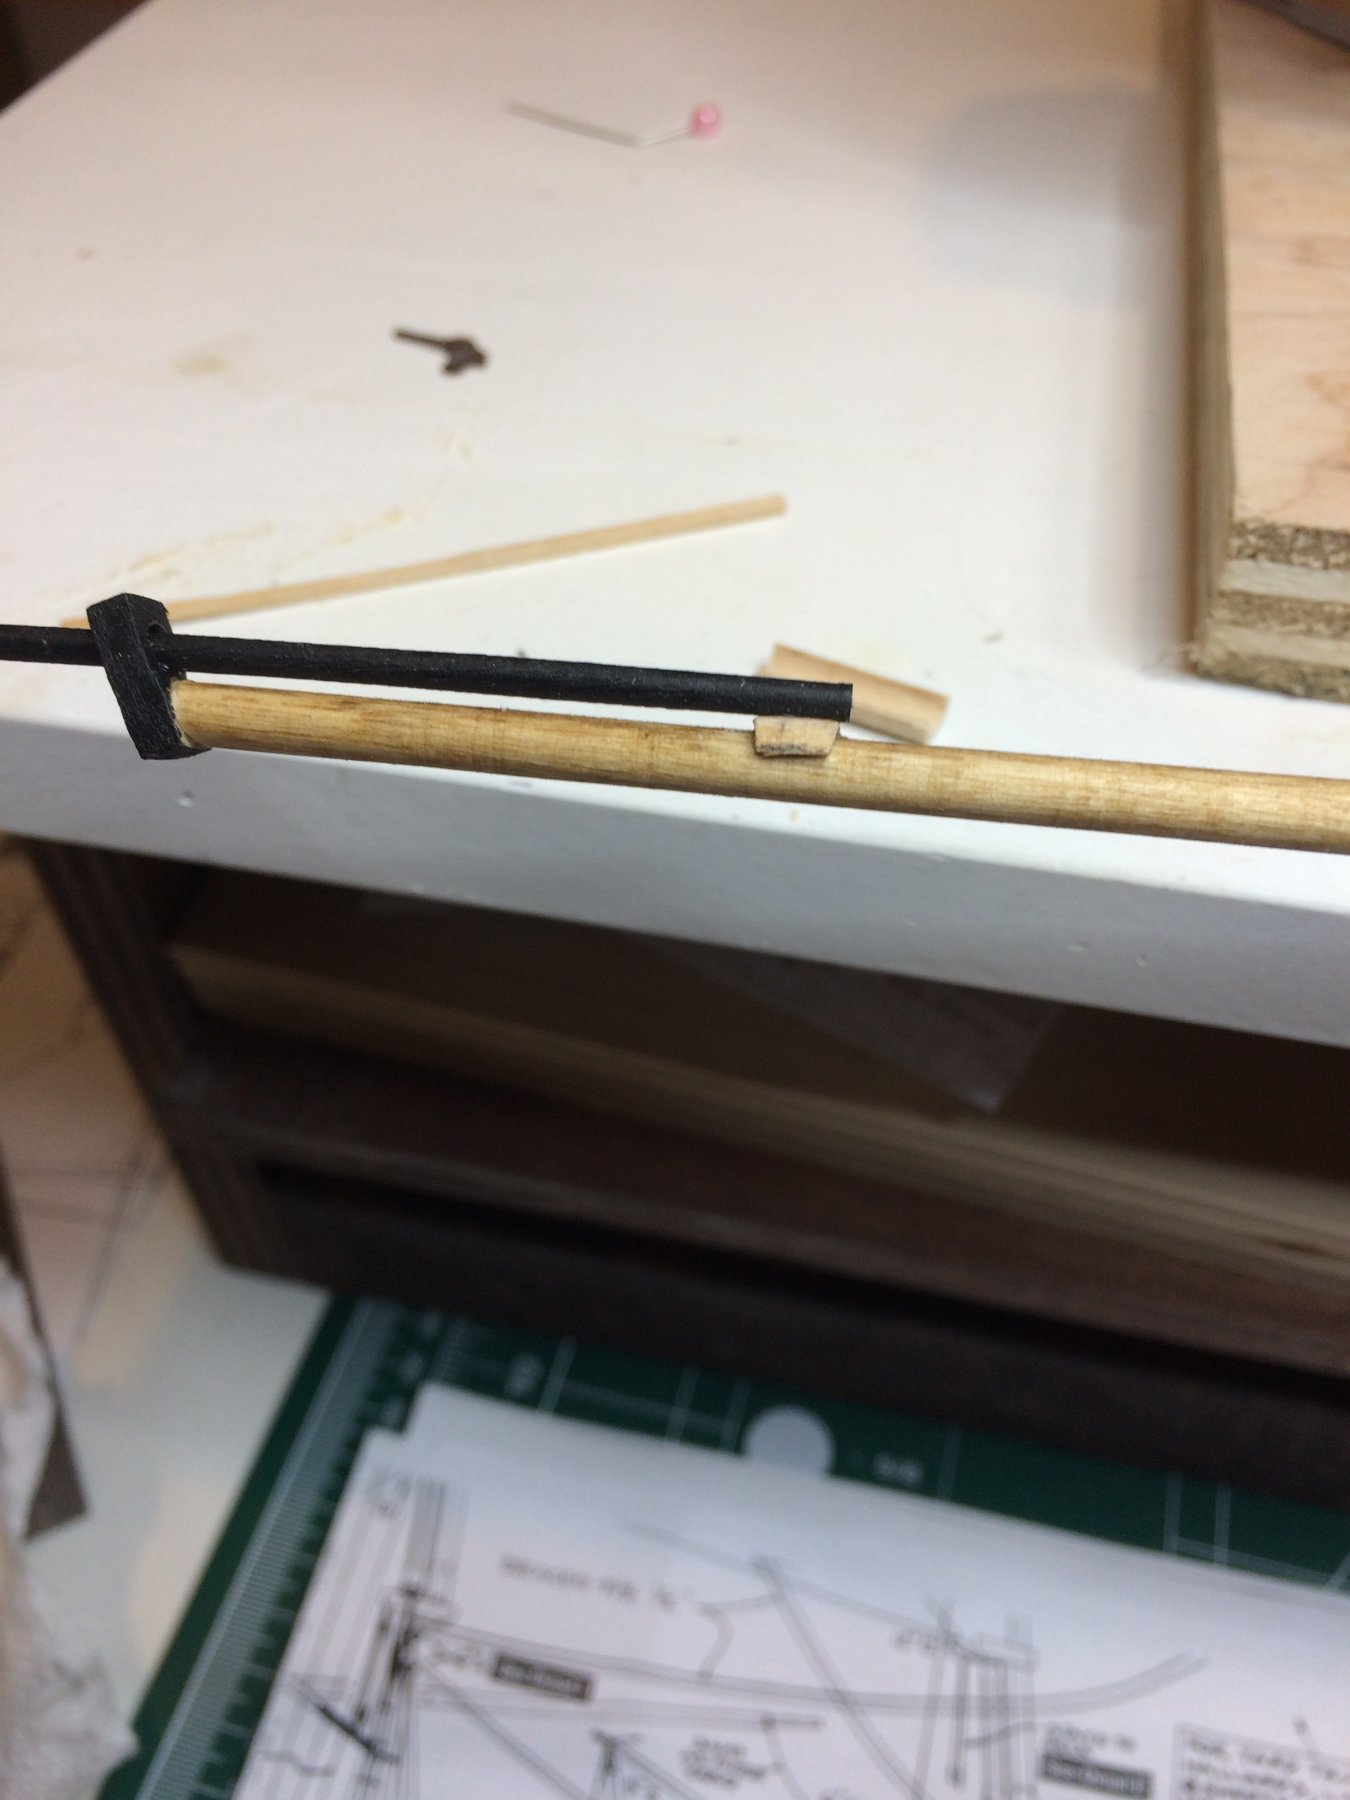
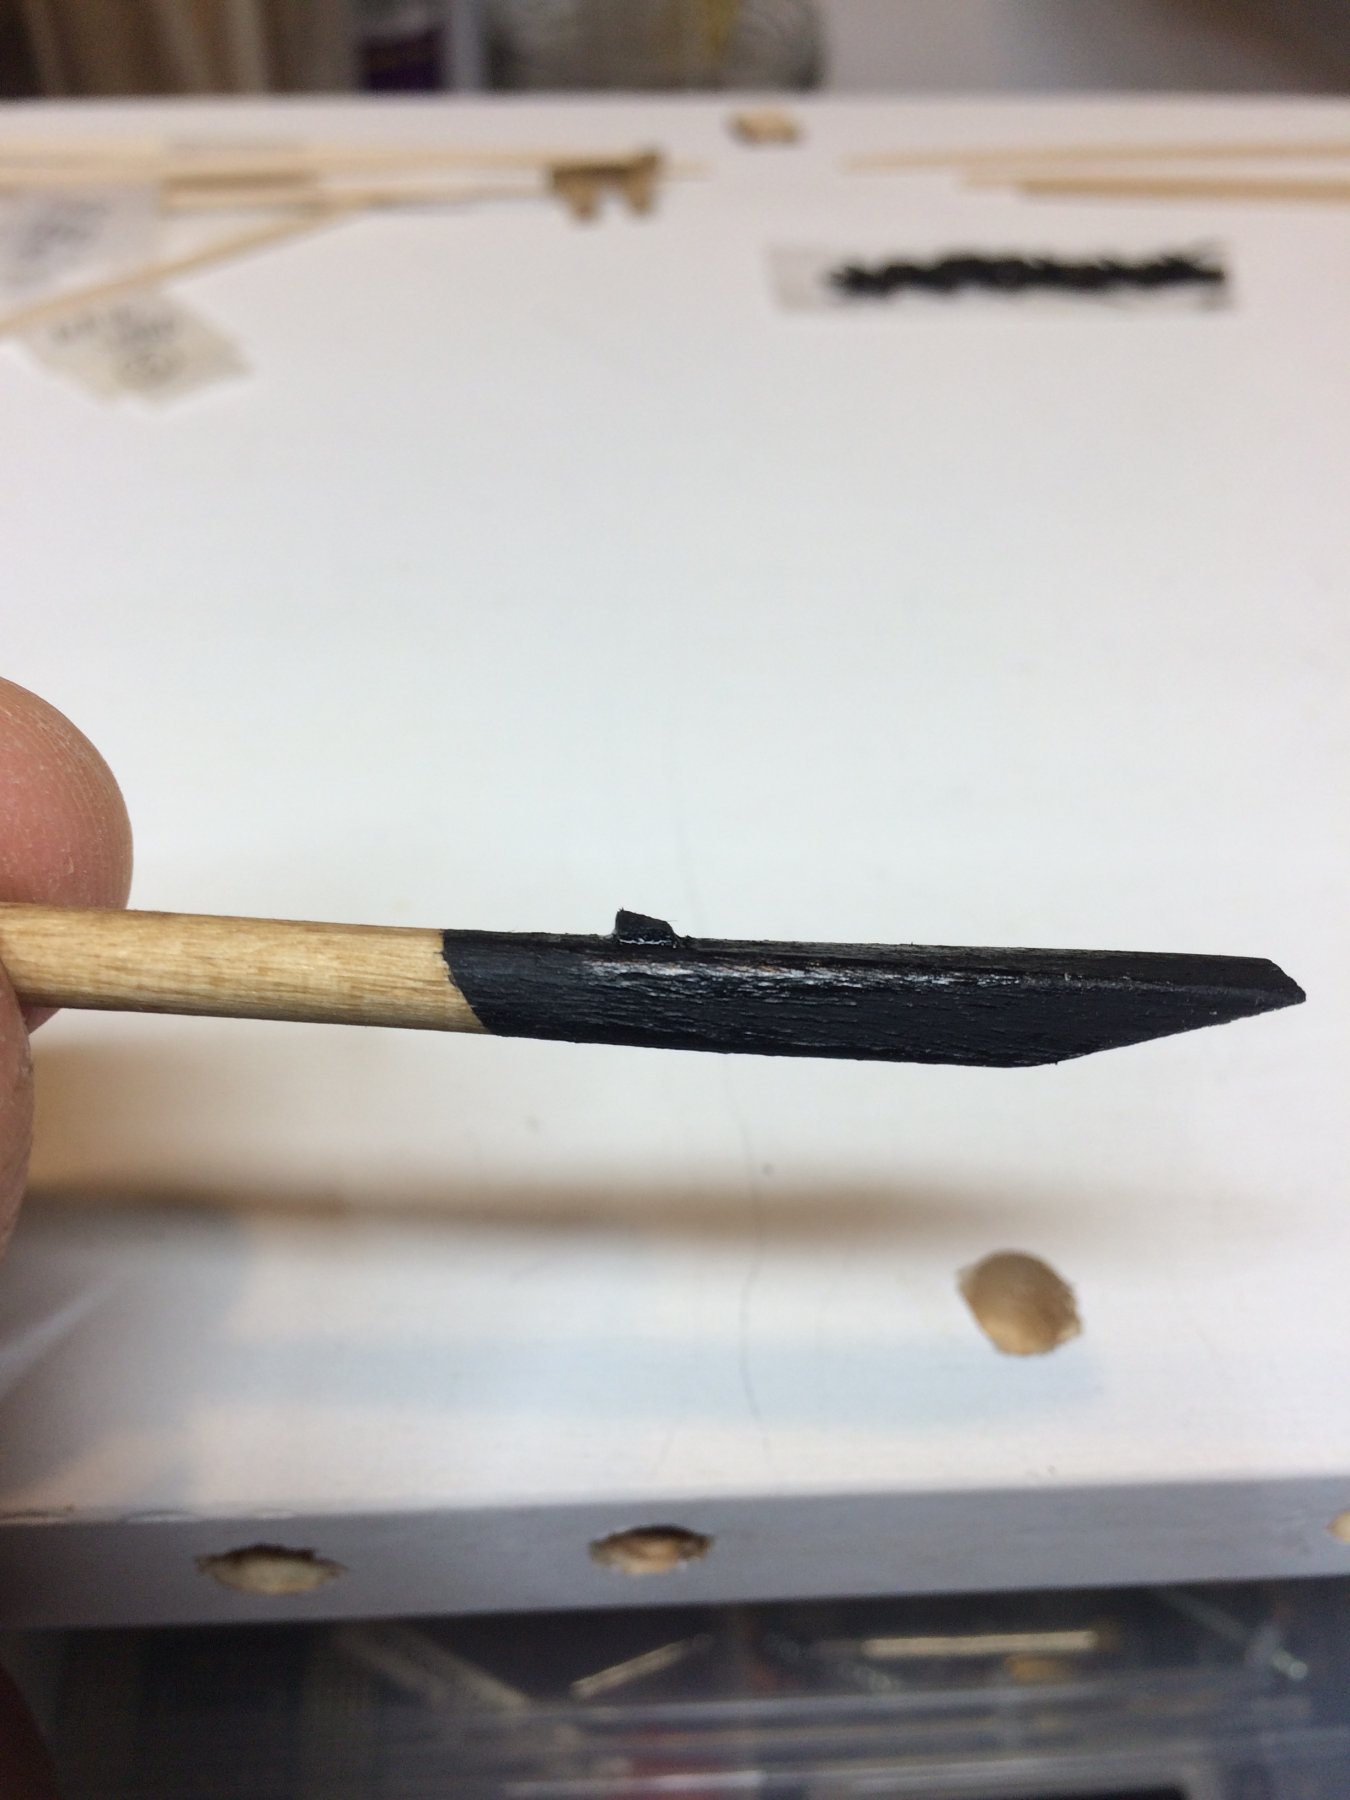
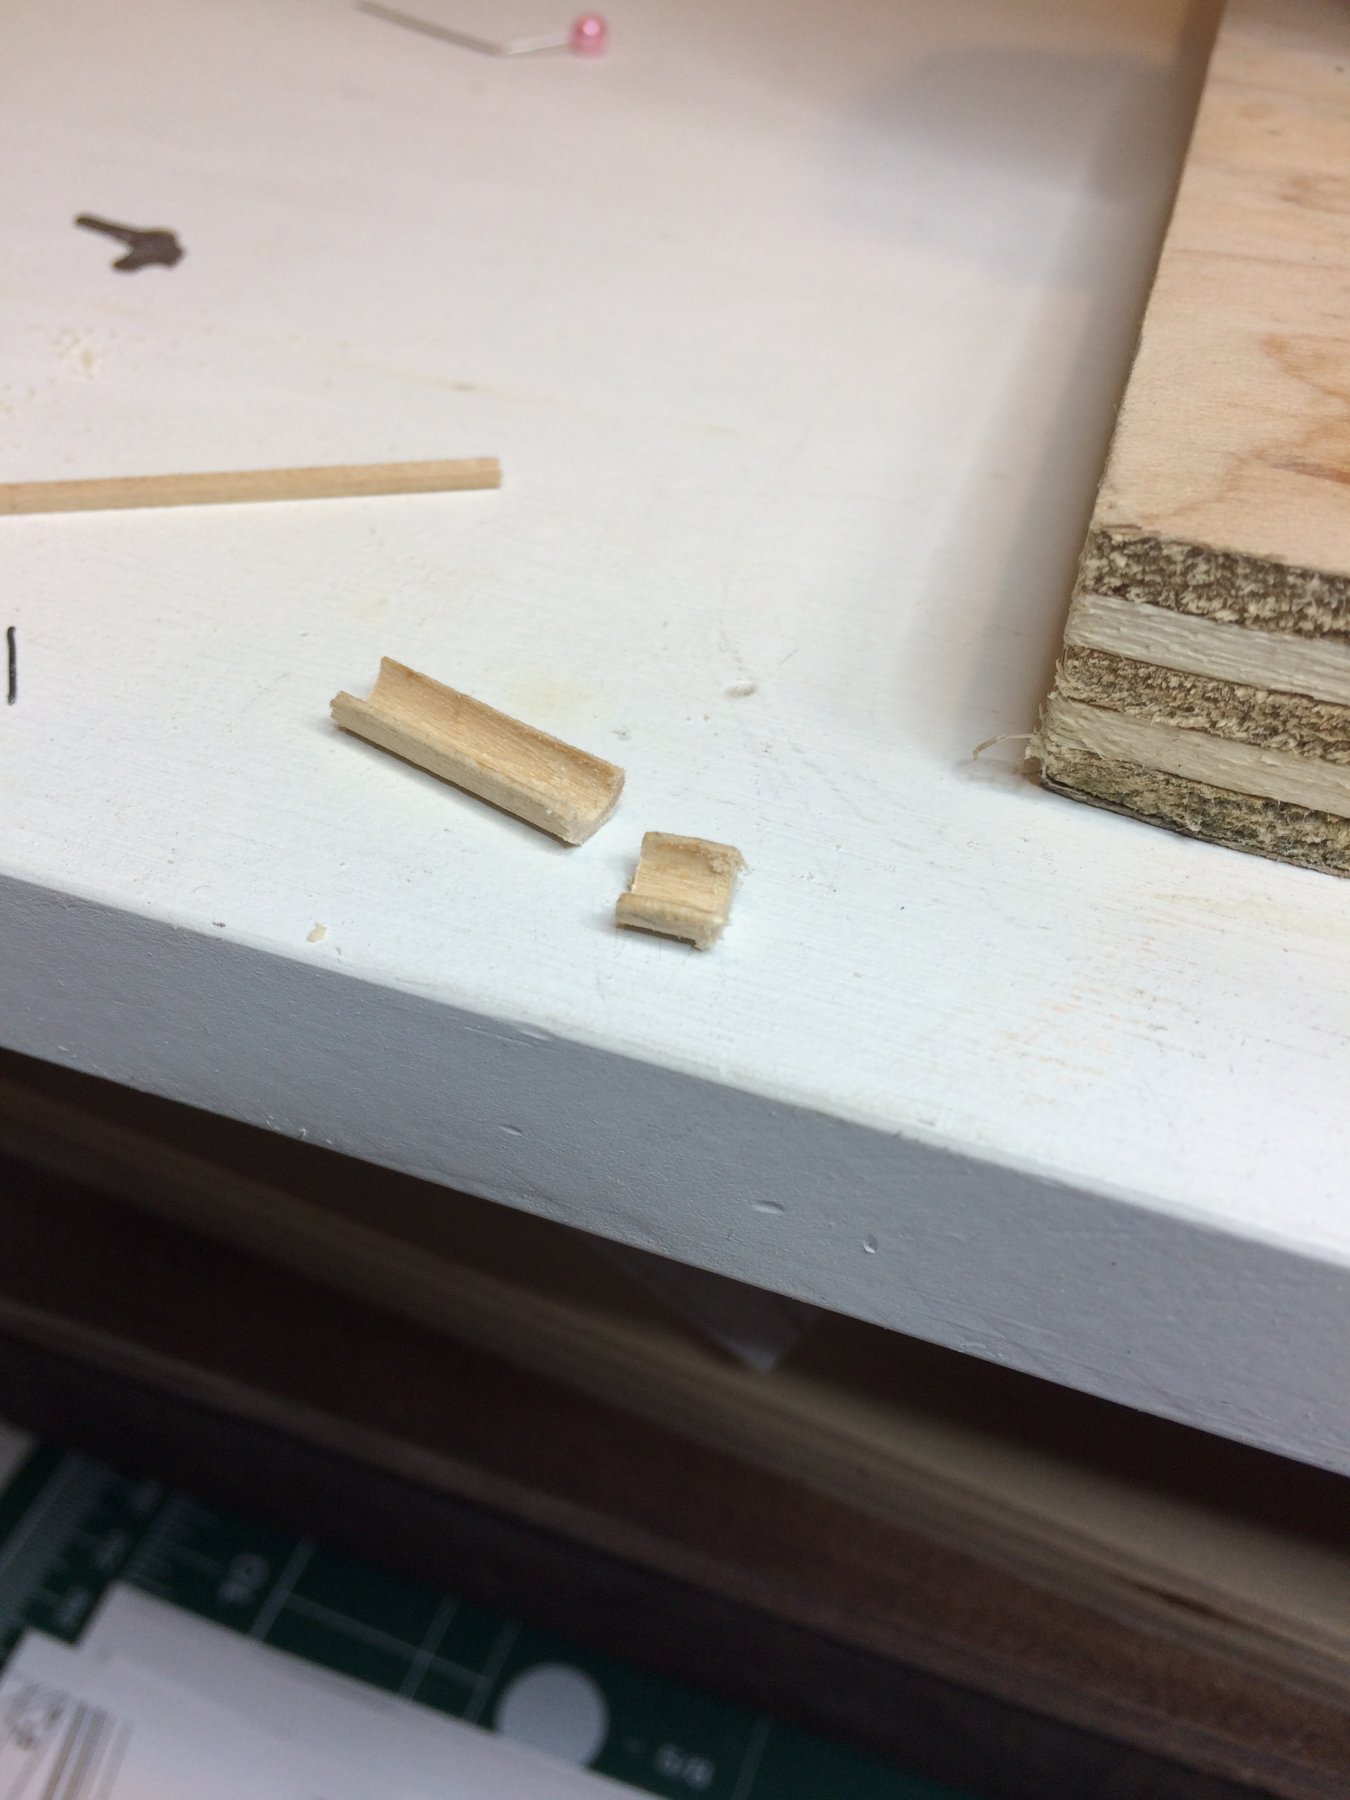
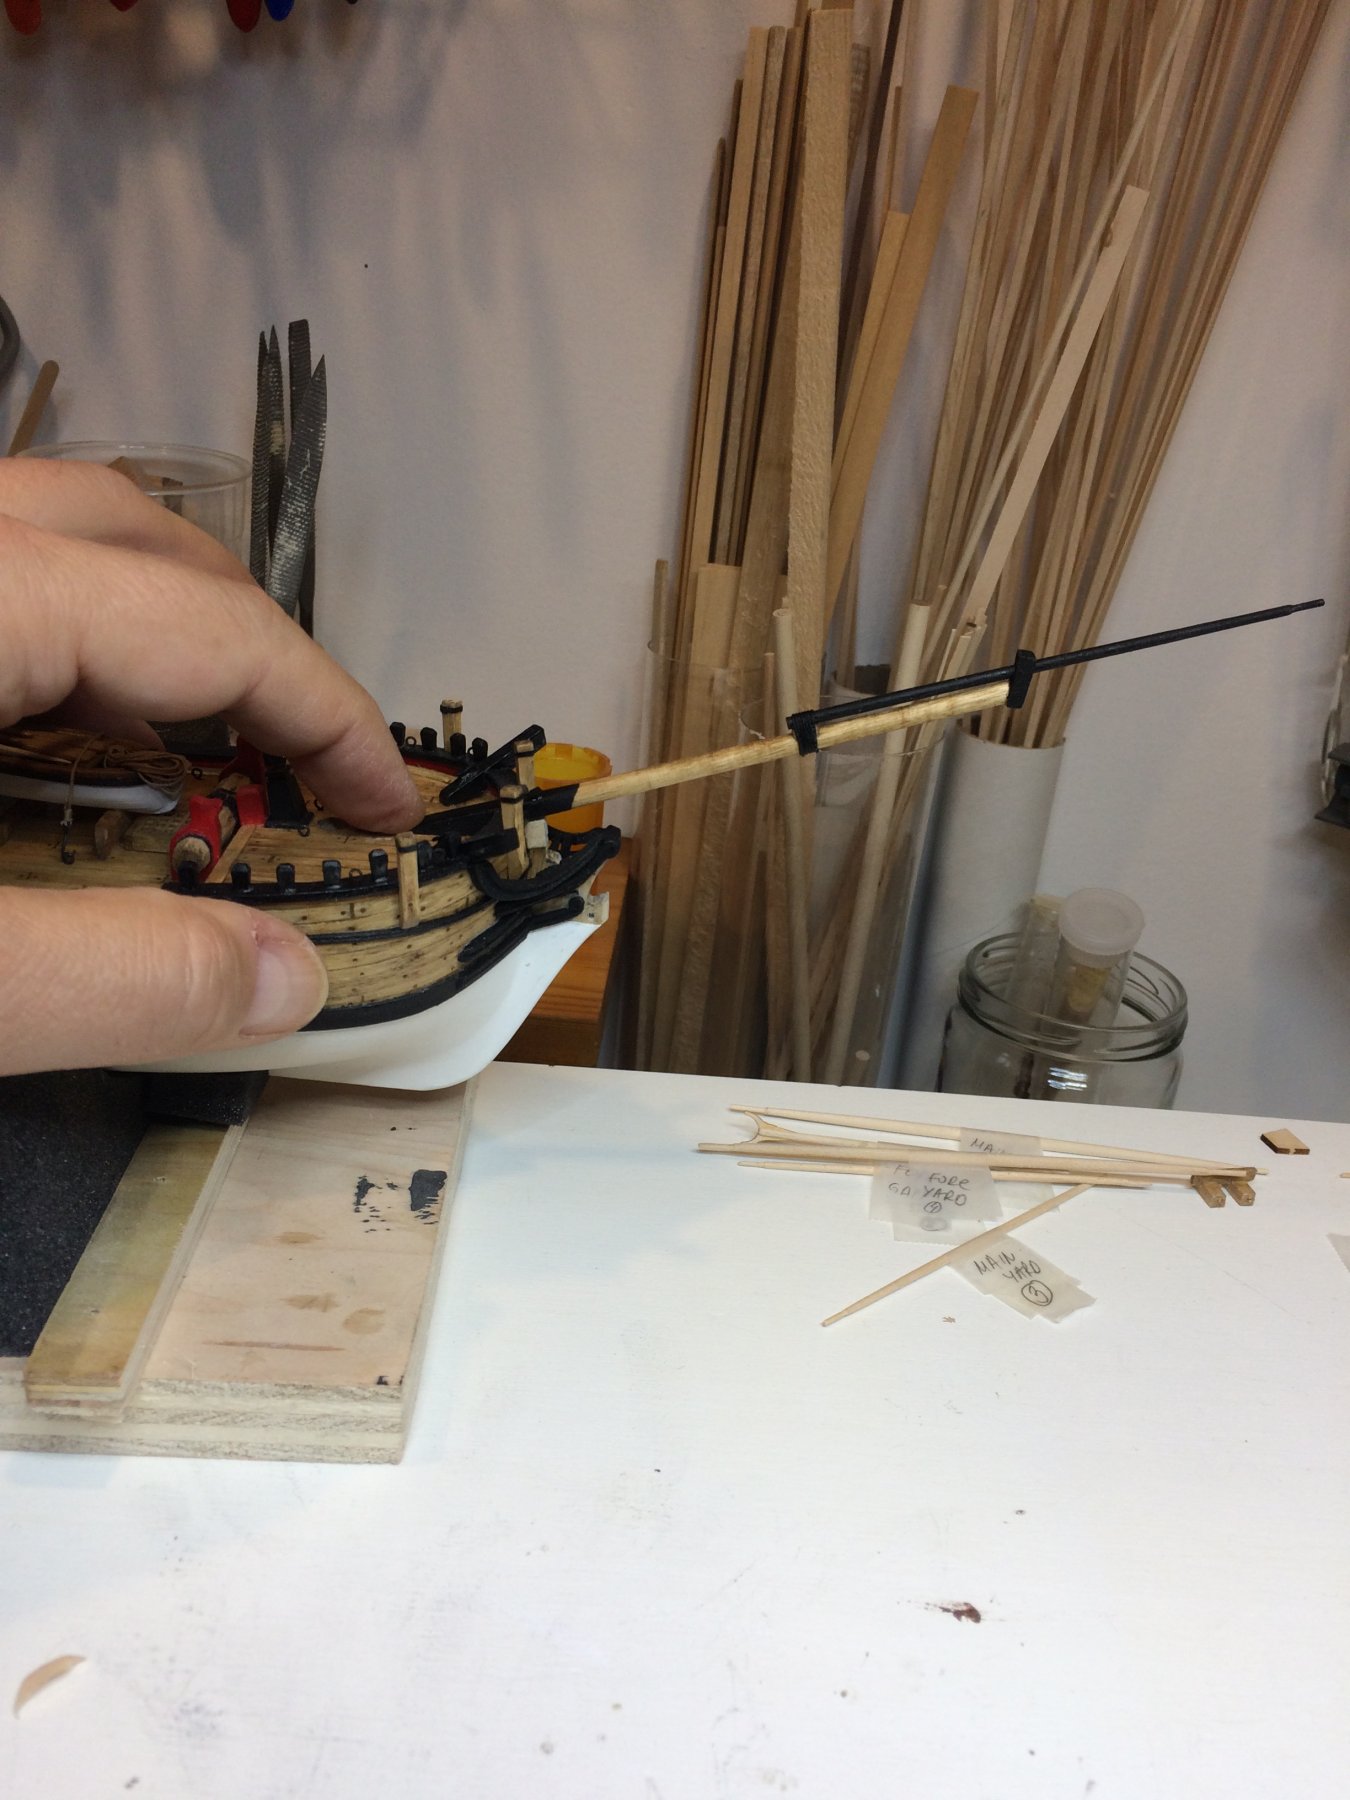
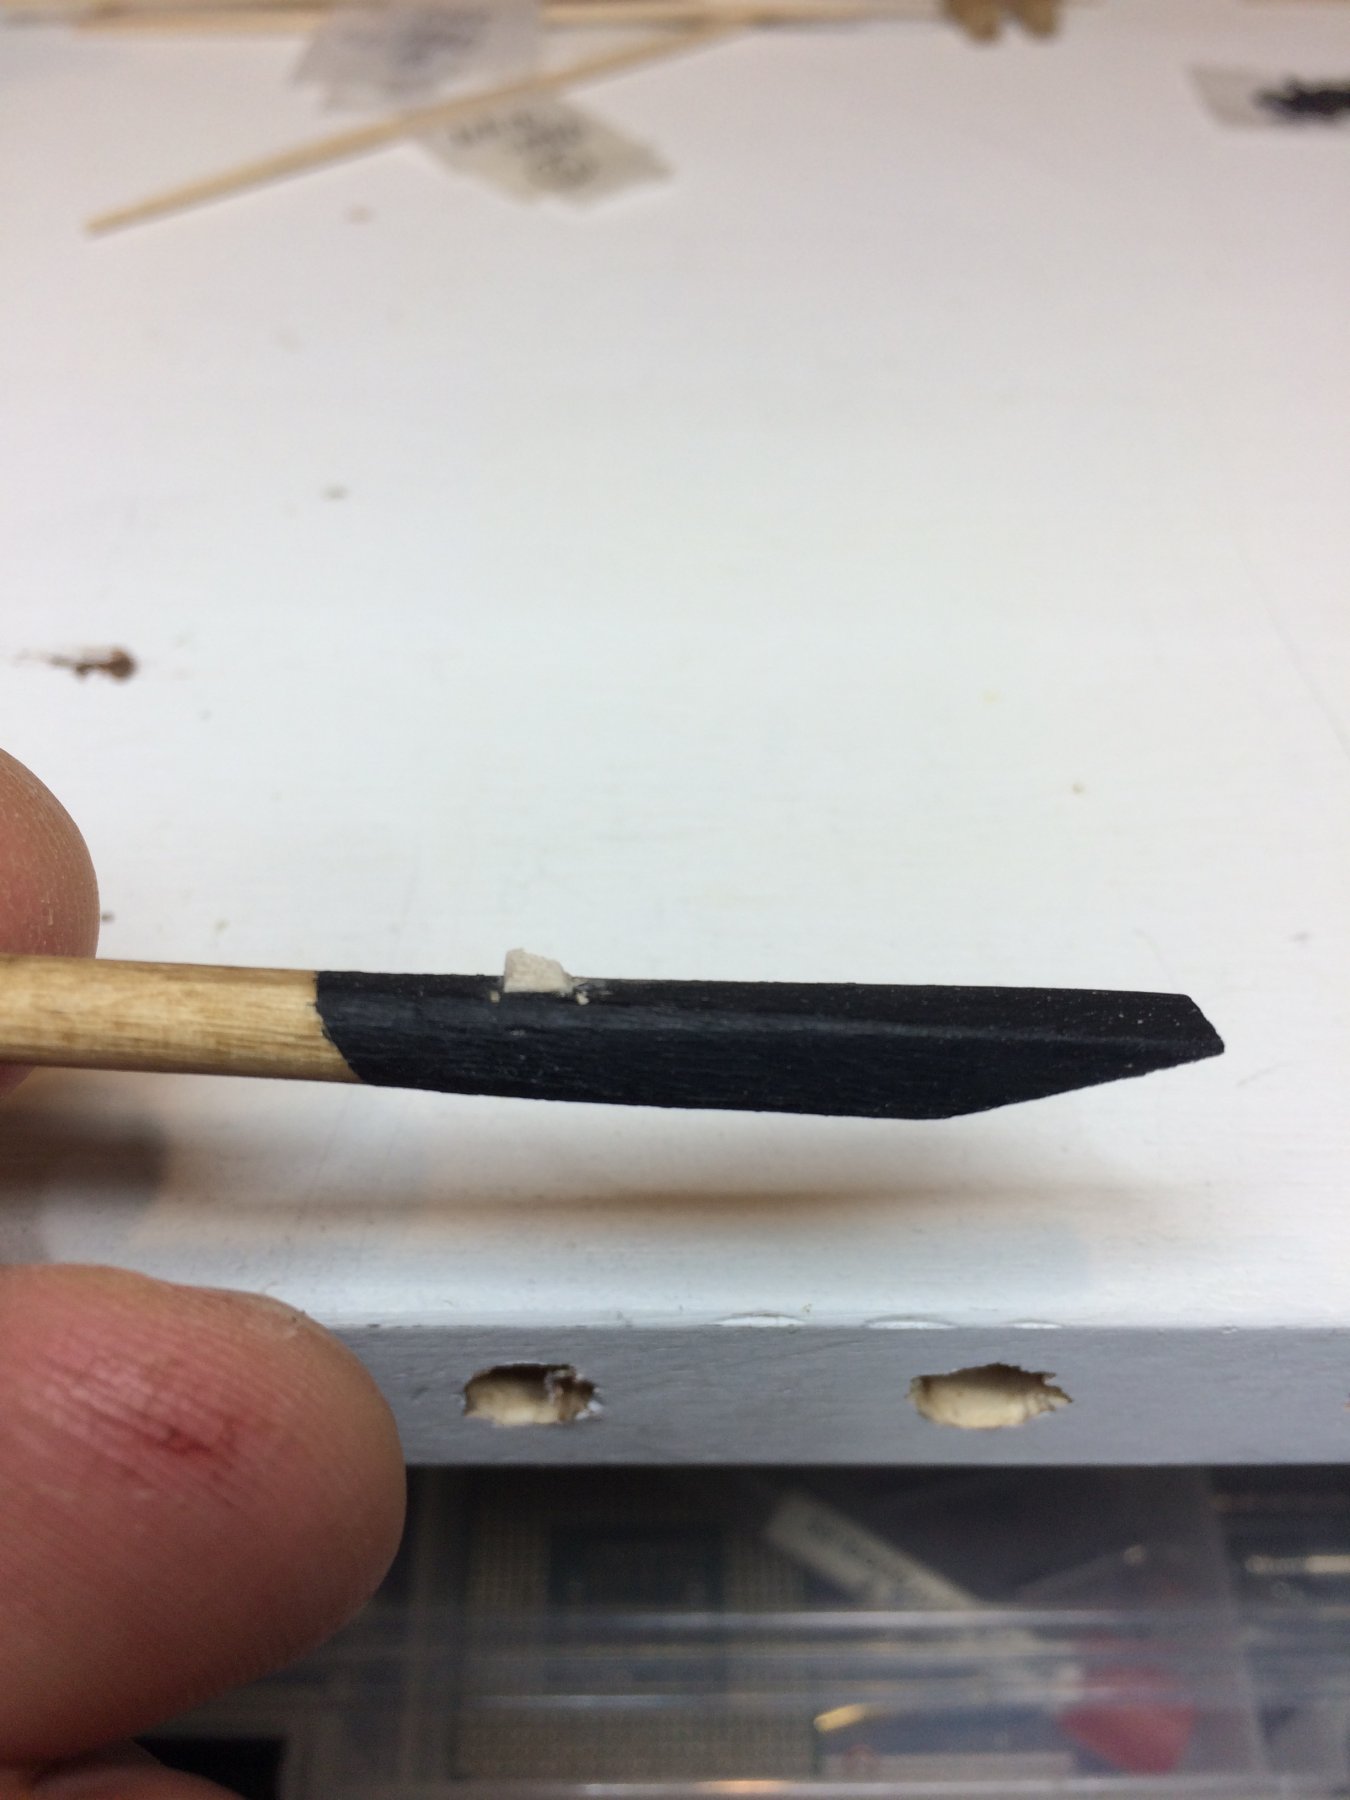
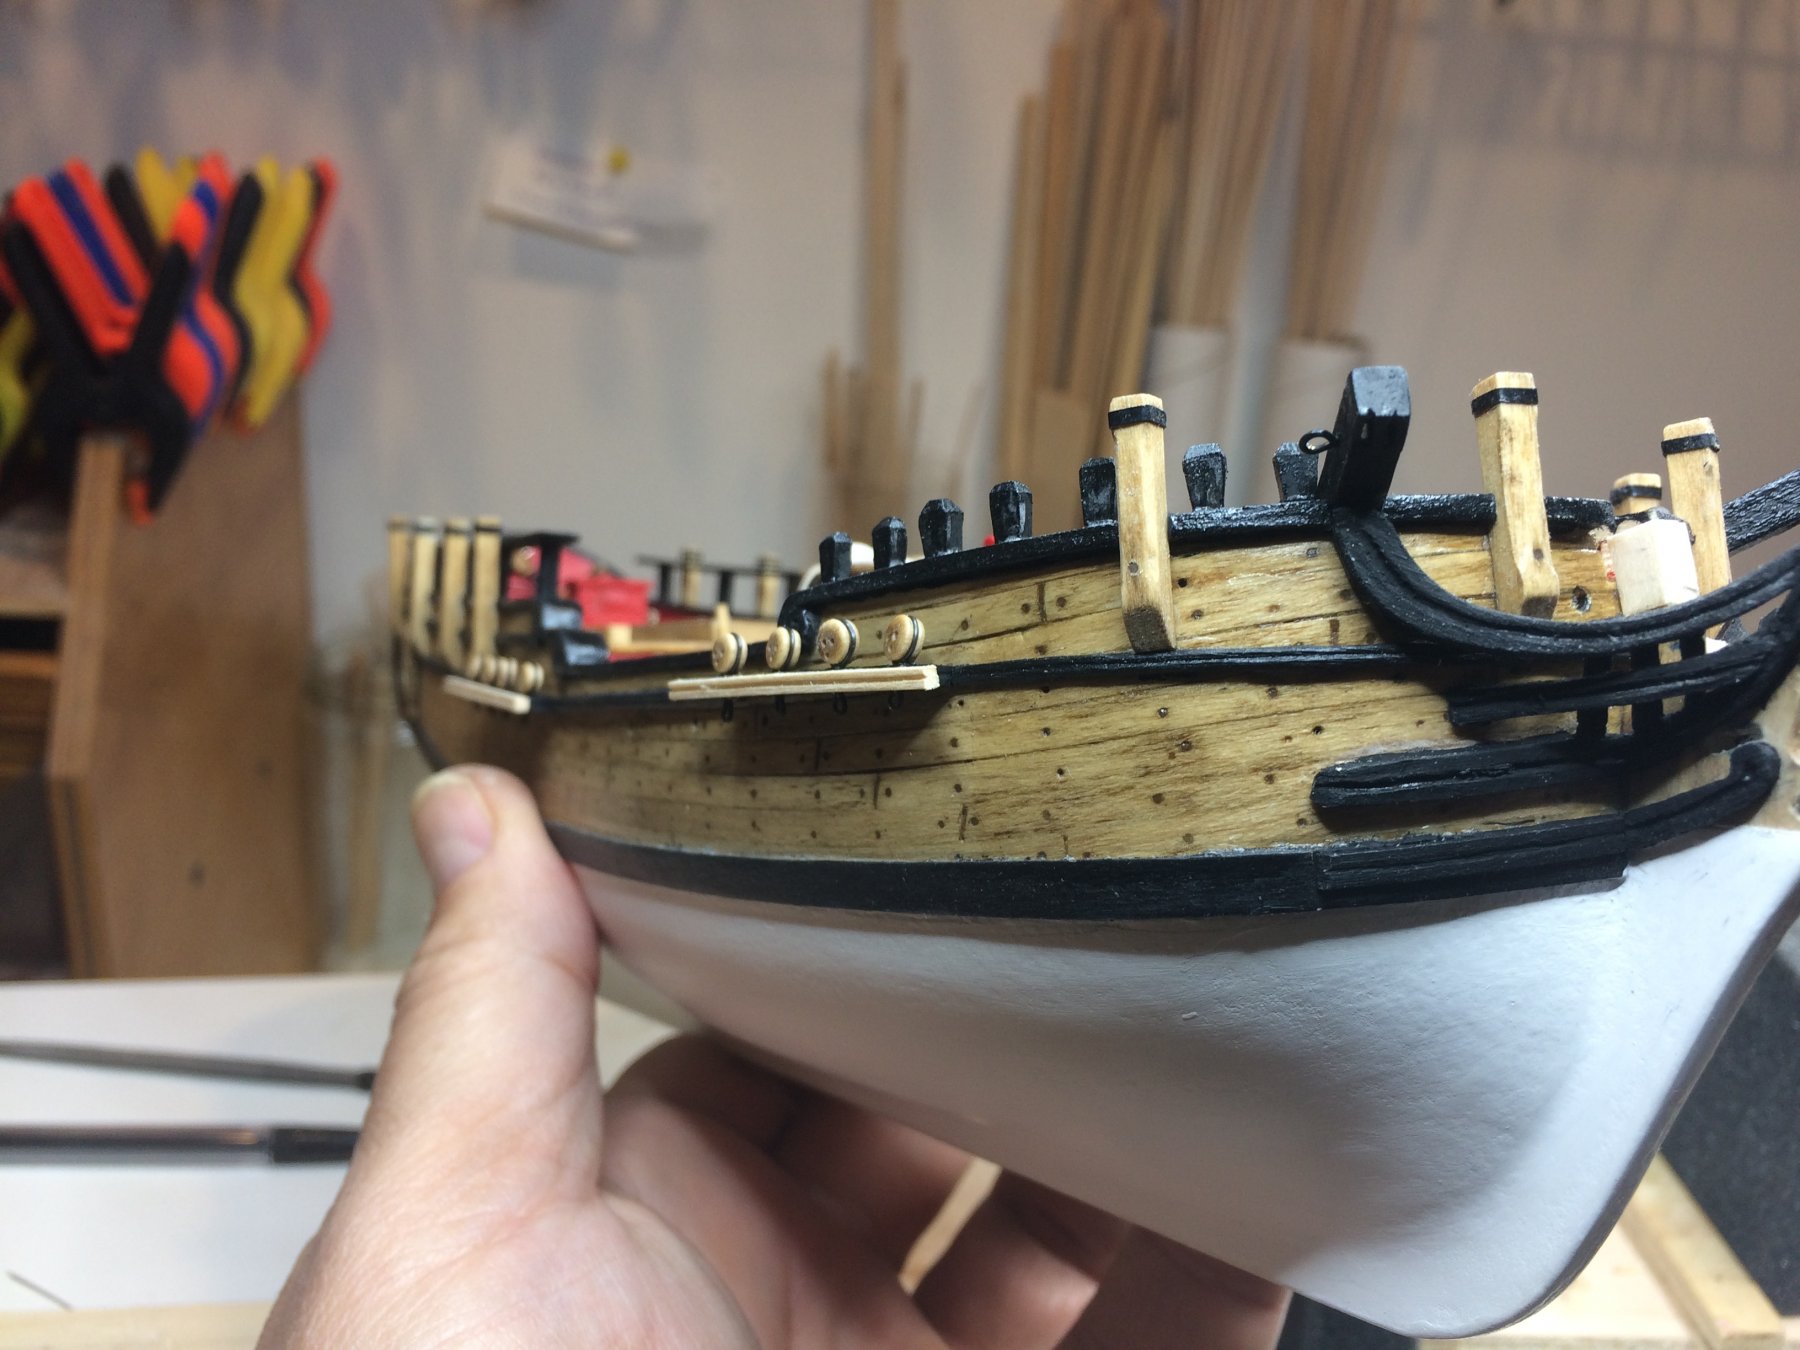
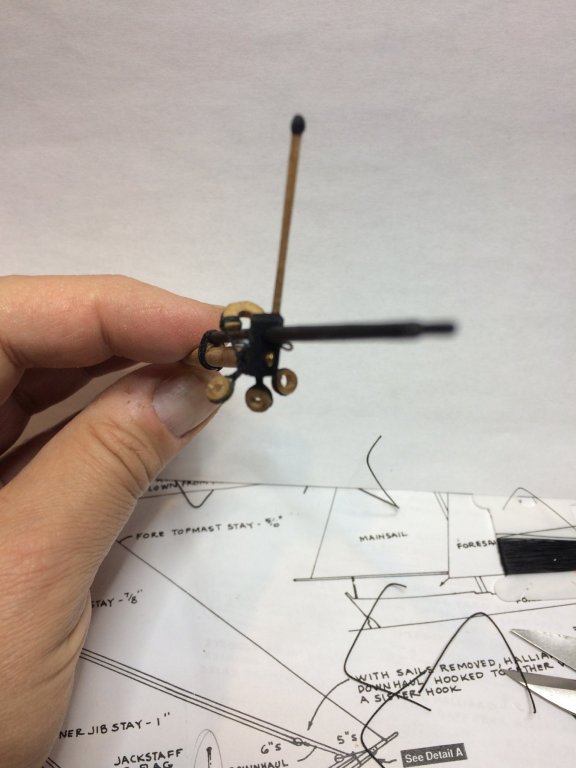
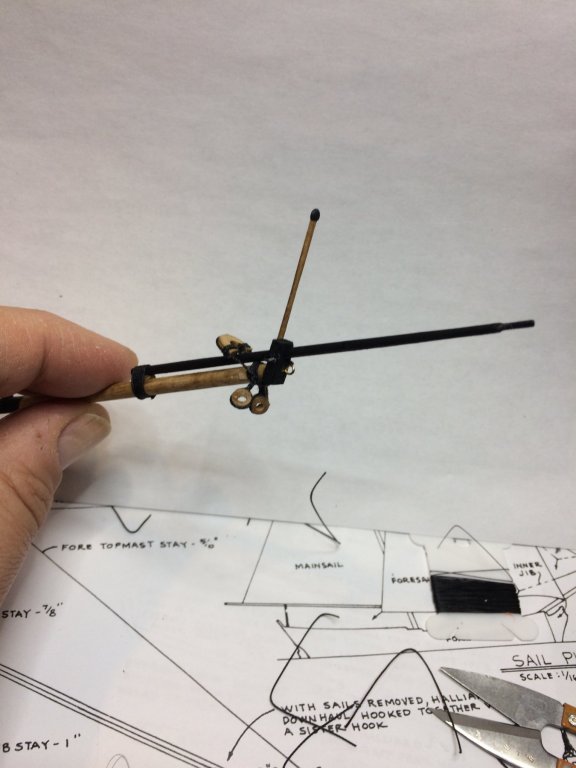
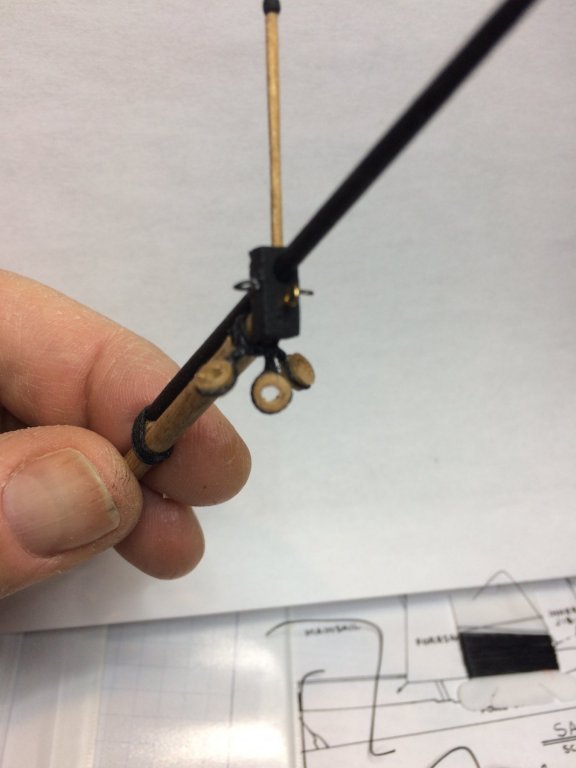
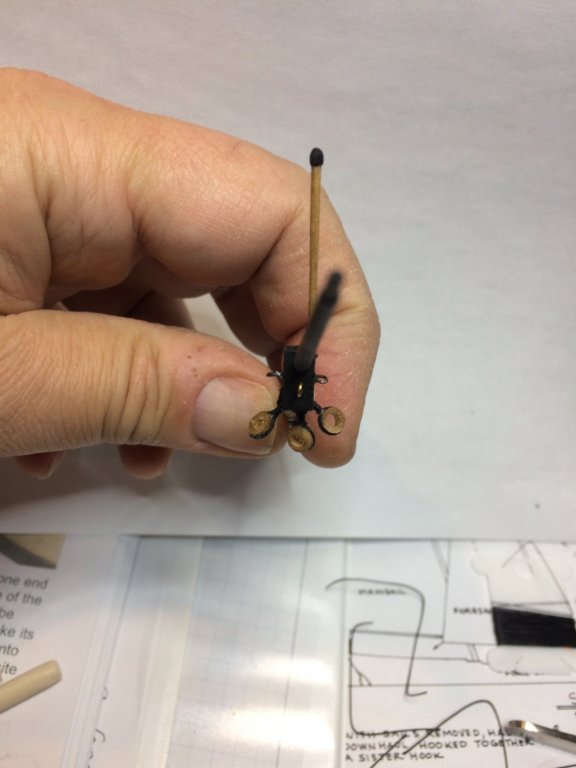
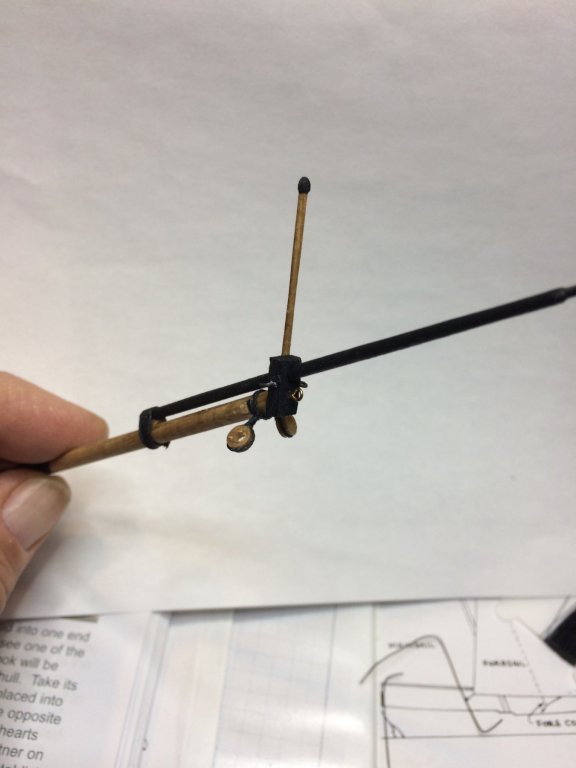
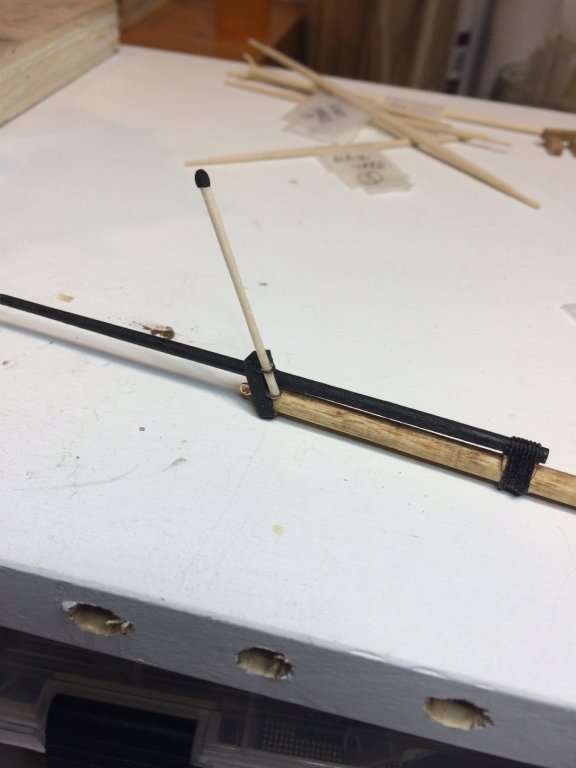
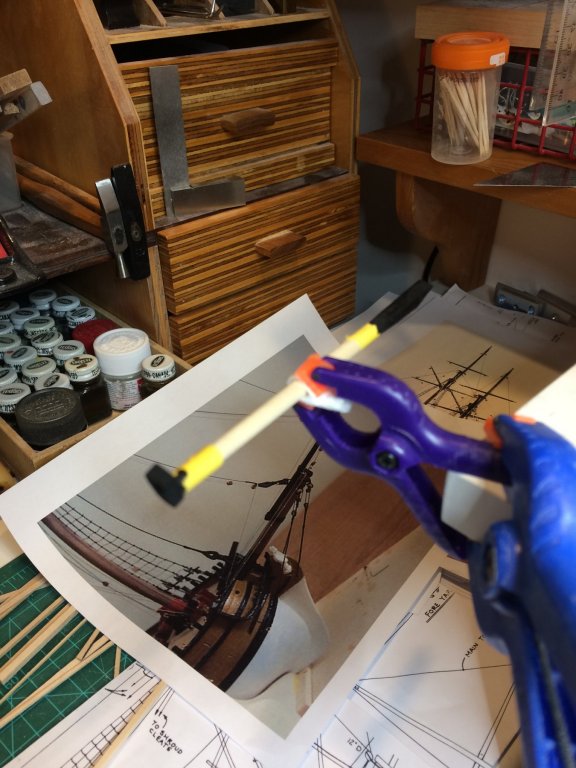
Work on bowsprit continued... A choke was made and installed on bowsprit for jib boom to rest on it.. It was done in concave shape to follow the bowsprit. The final shape by removing excess wood was done once it was glued to correct position. Assembled.. Small adjustments were made until the bowsprit was positioned correctly as shown on the plans. Excess wood was removed, and bowsprit stained in golden oak. The bowsprit was placed in my home made roping "hands". Then it was time to run few lines to lash the jib boom to the bowsprit with .018 black rigging line. The line was provided in the kit; the size appears to be correct so i used it ... A little testing on the ship... A small chock was added to prevent bowsprit gammoning from slipping; the plan shows one chock but i will follow practicum and add two more.. The chock was glued and shaped while on bowsprit, easier than doing it separately. Two more will come later. A small touch up of black paint was applied on chock.. For these small touch up jobs, i usually not using a brush since it will take me more to clean brush up than to do the work. Instead i use small piece of bounty and trow it away after.. That's for today, more work on bowsprit continues tomorrow.


- 360 replies
-
- 5
-
-
- sultana
- model shipways
- (and 1 more)
-
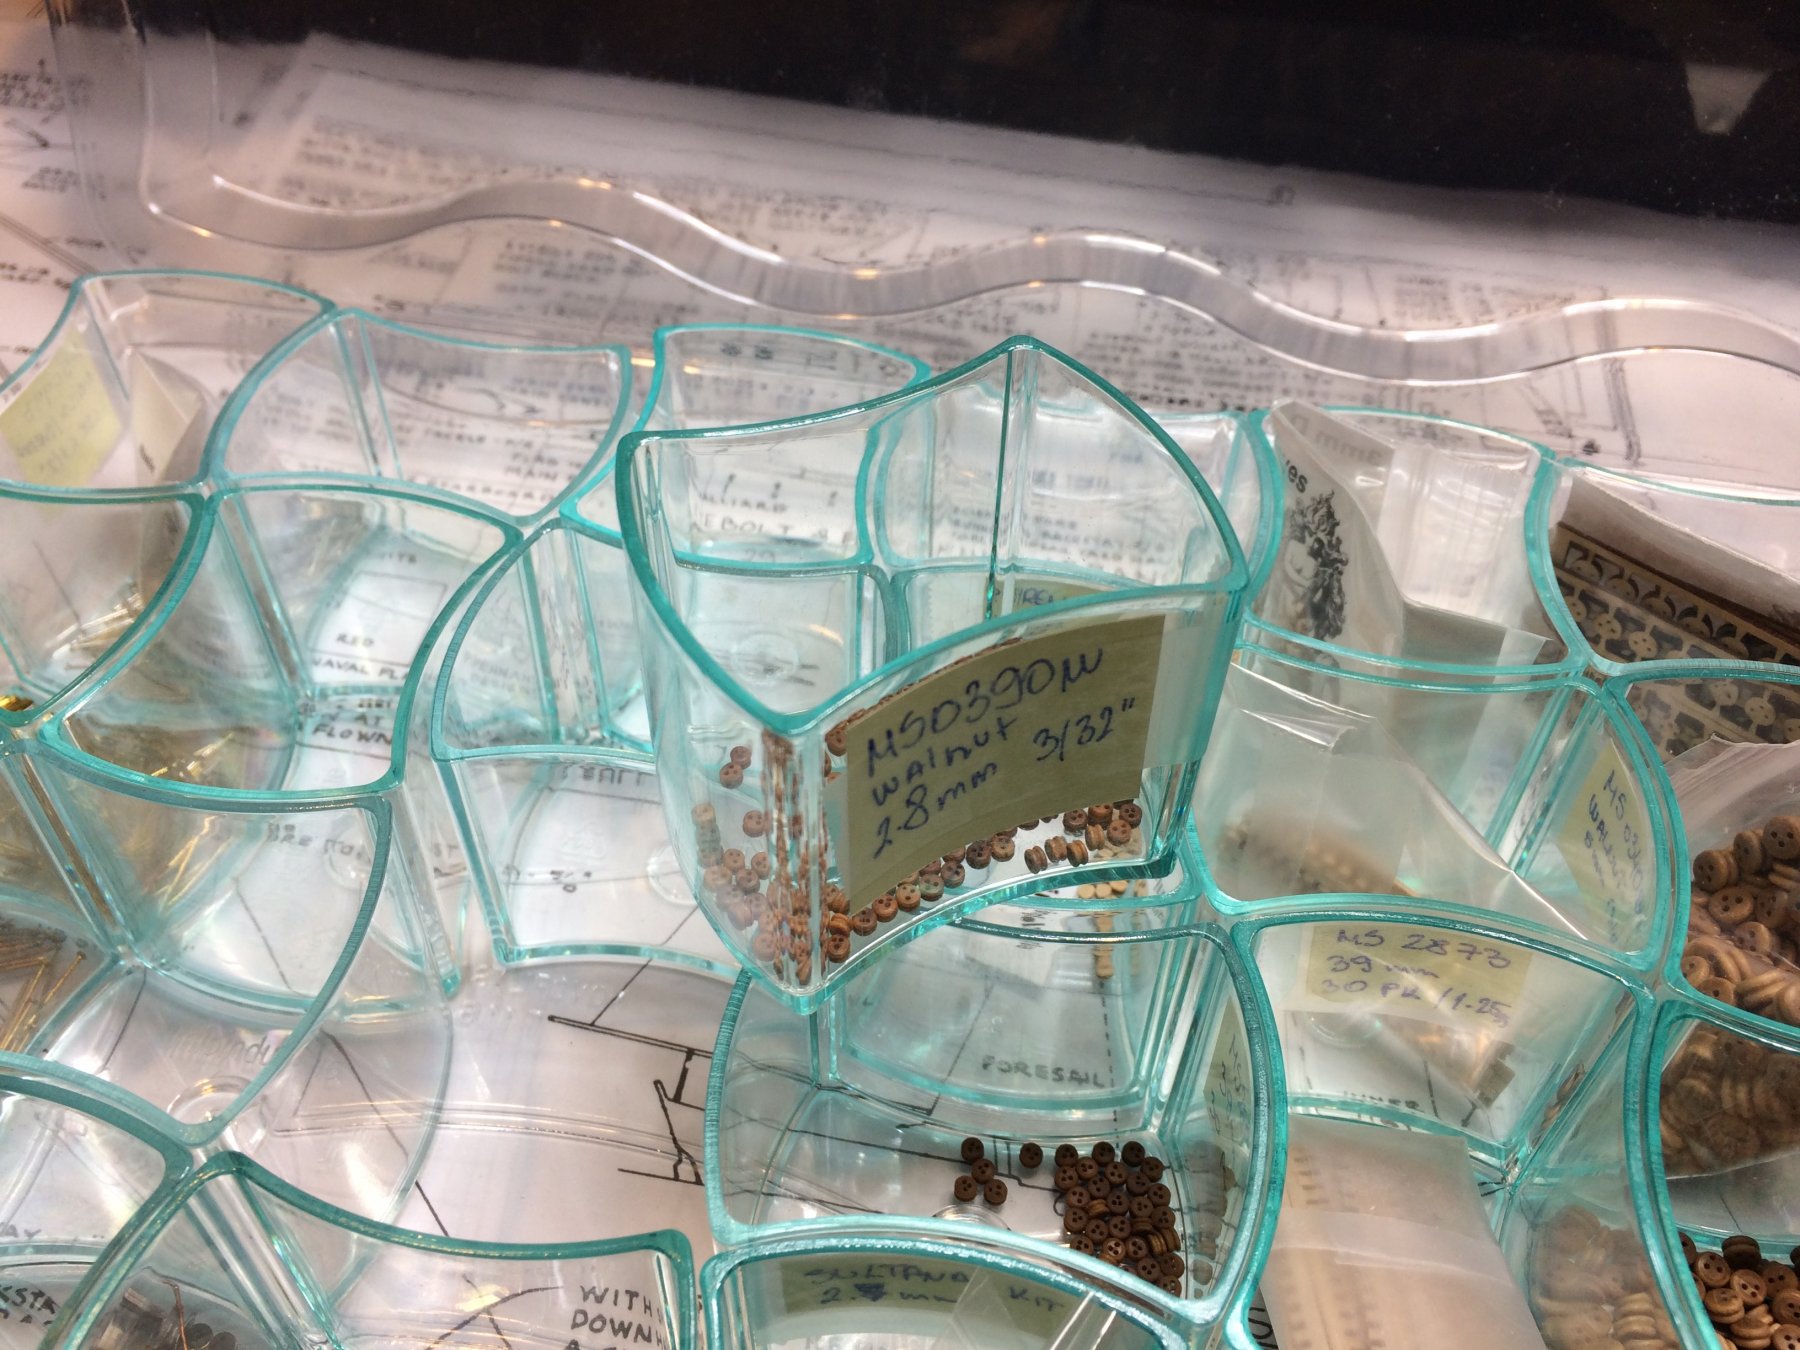
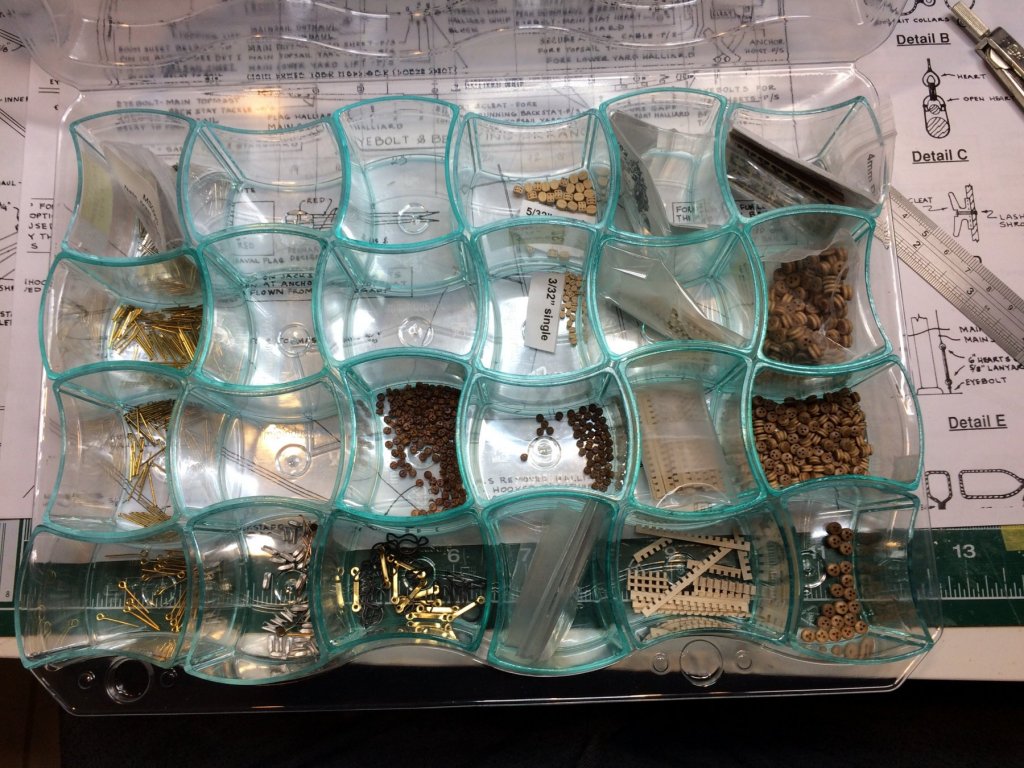
On the other topic, if you are close to Costco, in there you can get a nice Italian desert. Not about desert but about packaging... Portions are individually packed, in very nice plastic containers.. You can guess what i was thinking first when i spotted it in the Costco's fridge.. After enjoining most of deserts and spending time washing plastic containers, i used them to store all small parts.. The plastic cover closes very tight and there is no danger of accidental opening so i think this will be my small part holder for some time.. Happy shopping and modeling..

- 360 replies
-
- 4
-
-
- sultana
- model shipways
- (and 1 more)
-
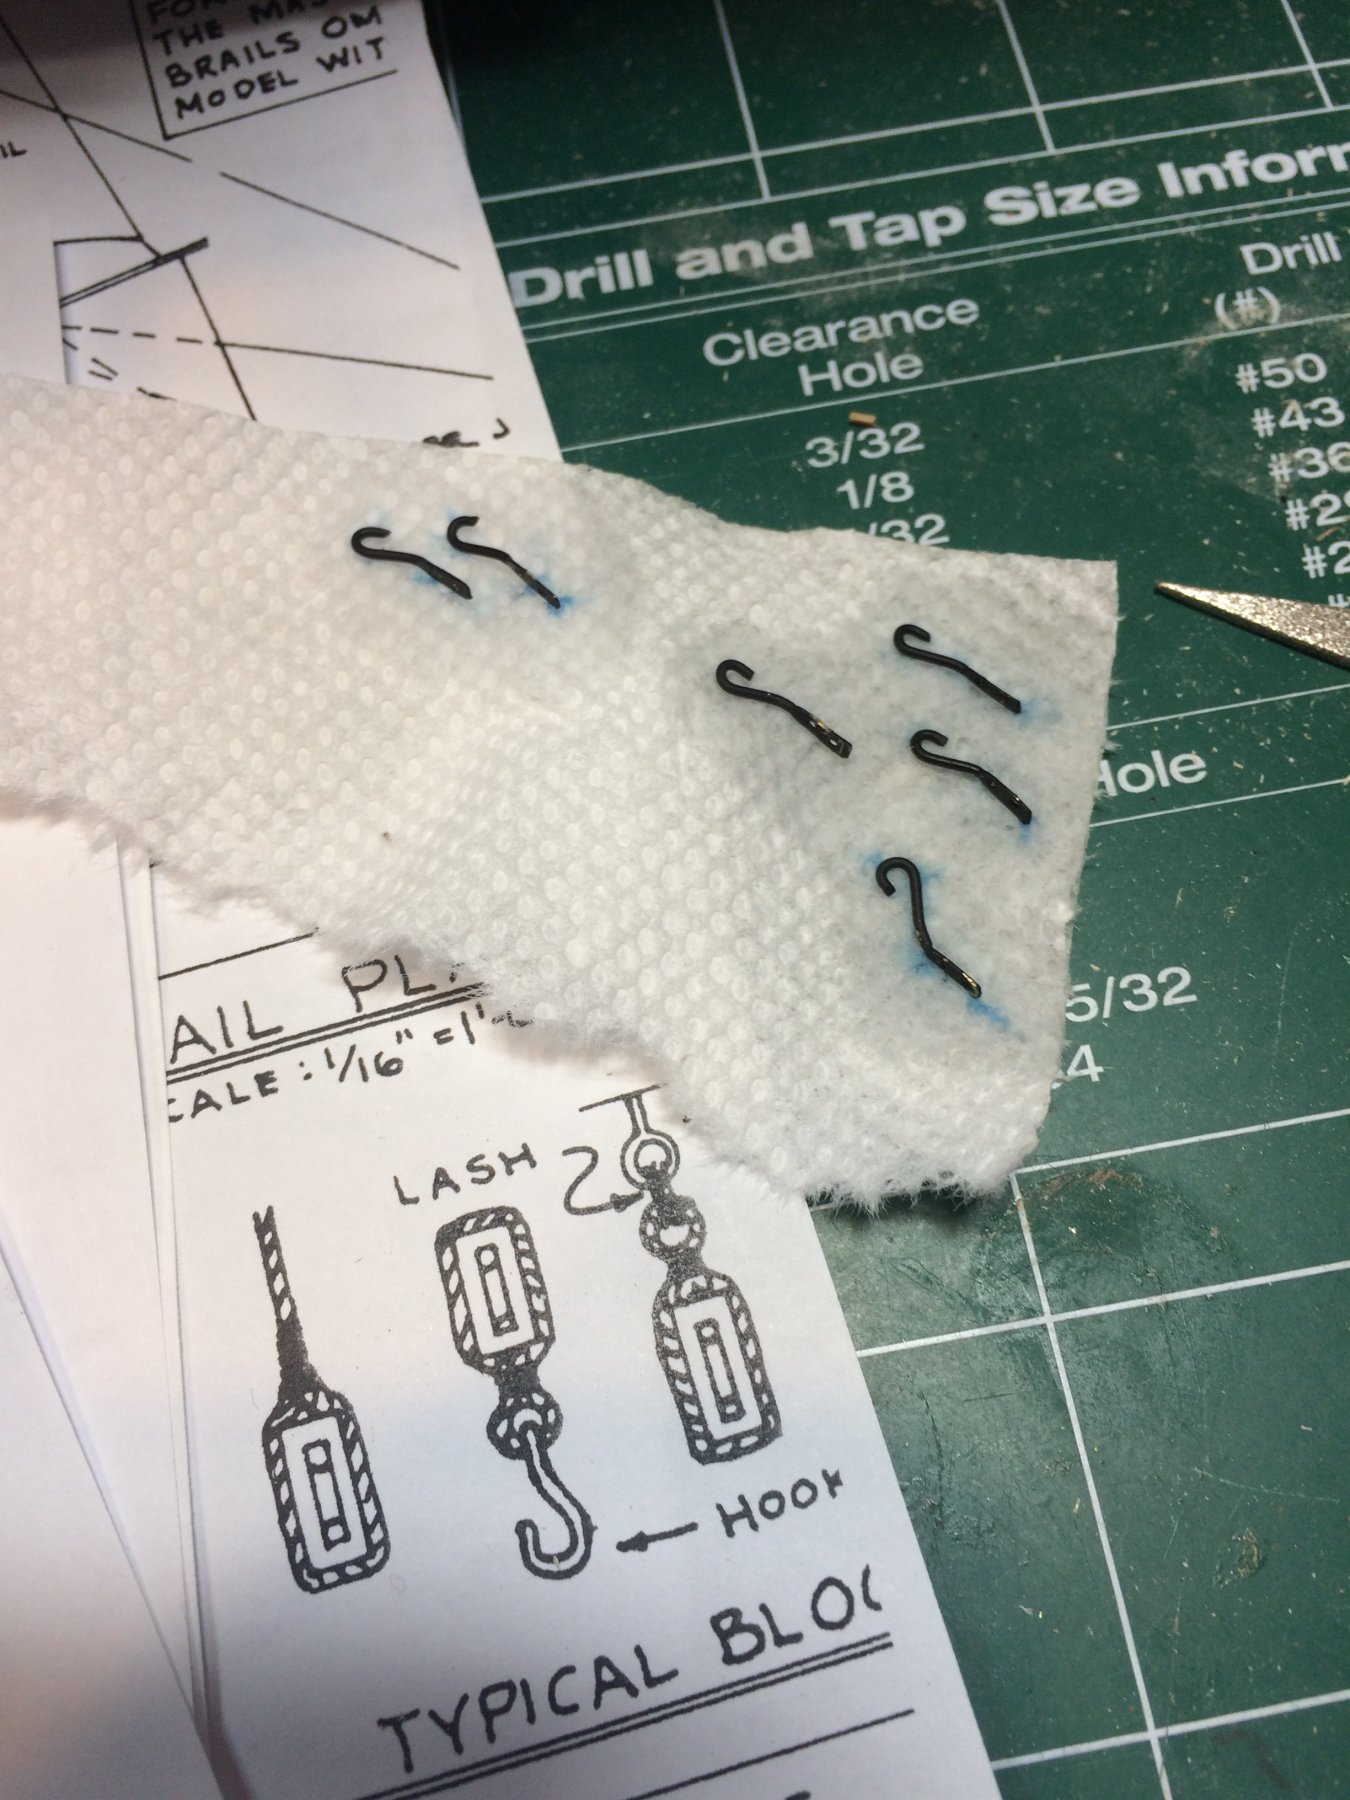
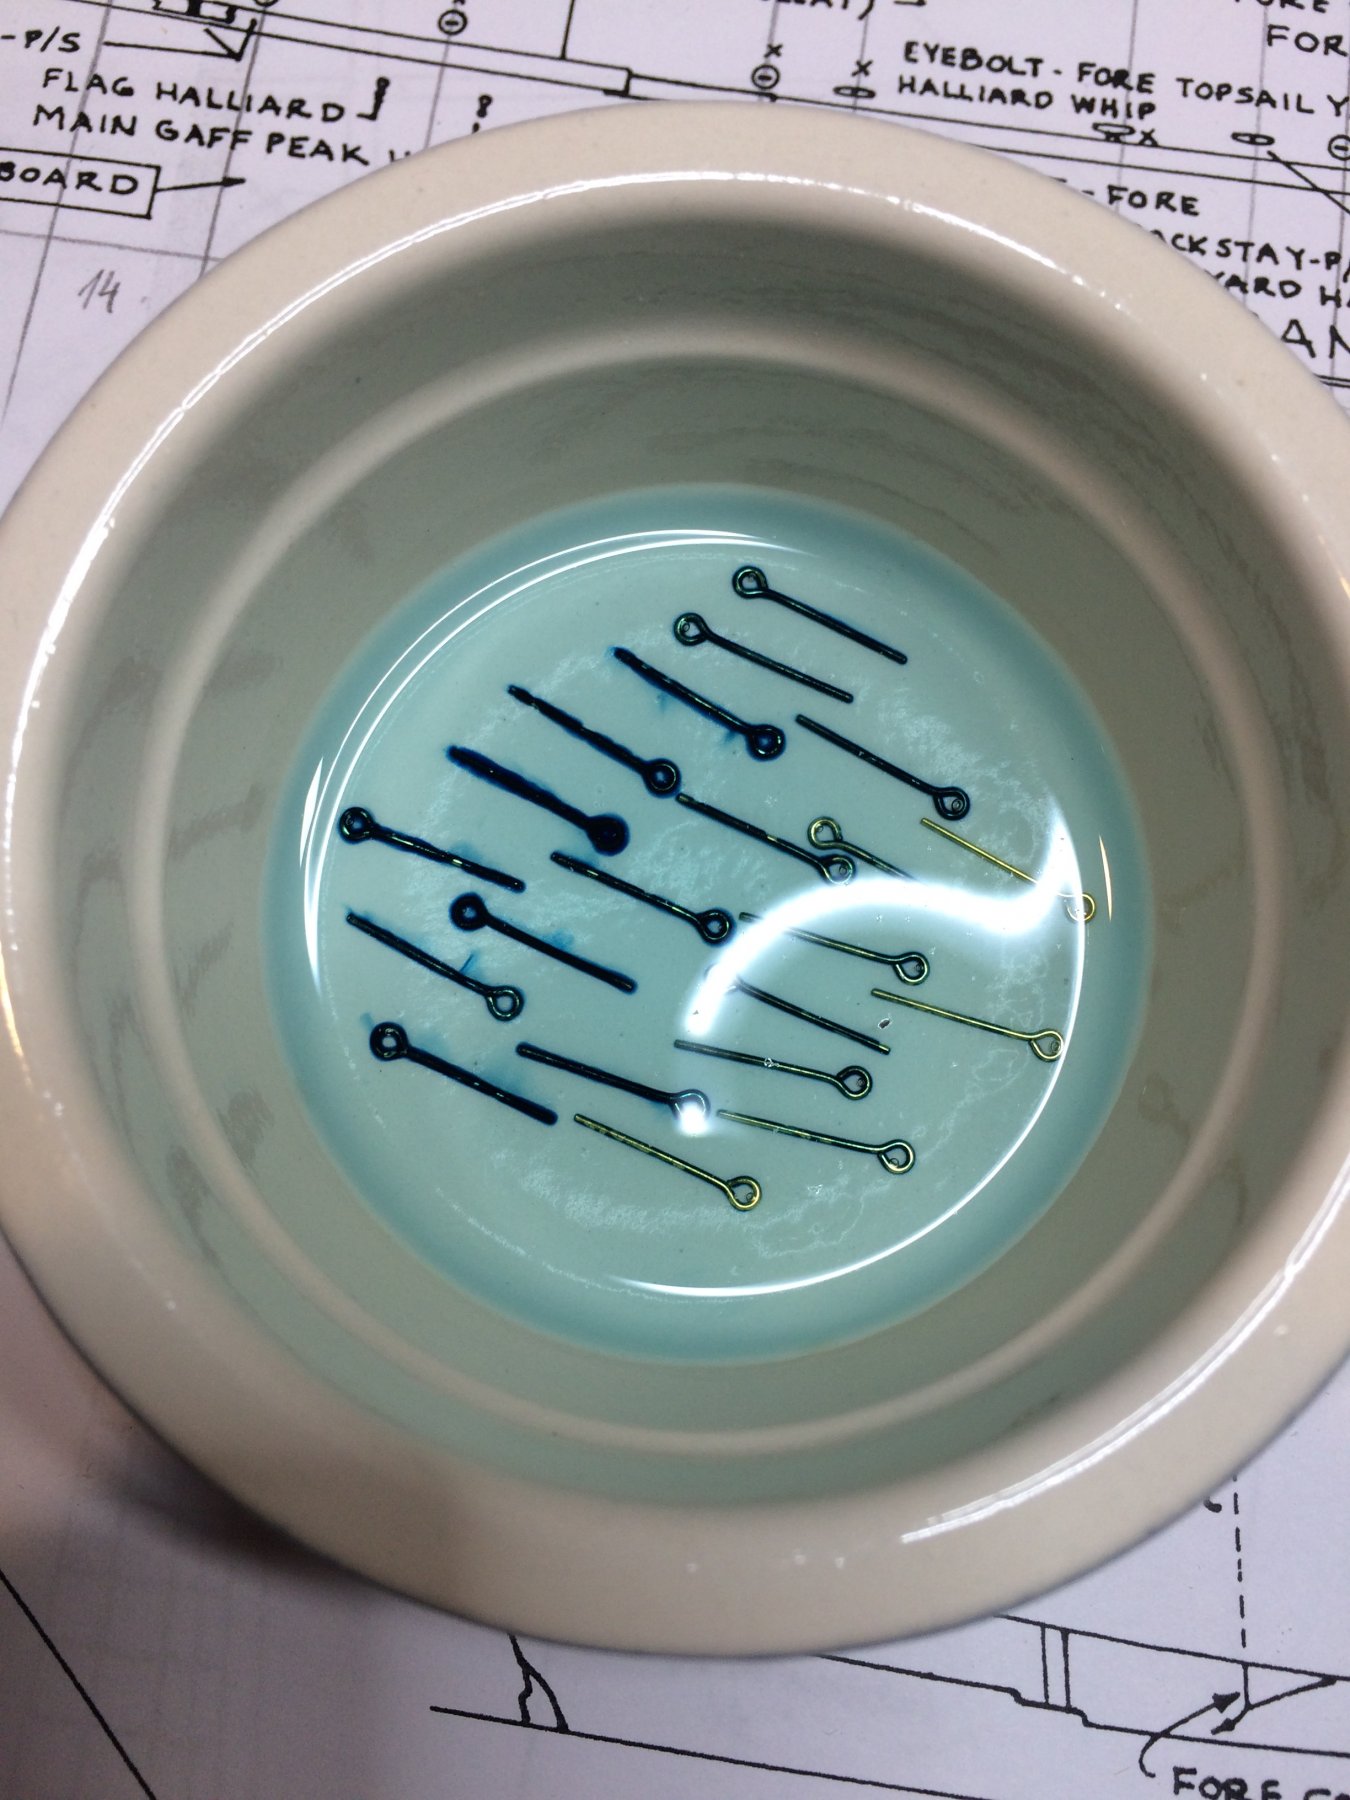
Jib Boom and bowsprit have been painted in black... While these parts were drying i was assembling hooks, actually 21 of them. First i lightly sanded the hooks so the blackening will grab much better. Usually i find it that if i do not do this, i will have black marks all over my fingers while handling blackened hooks... Then a bath in blackening solvent for a few minutes and cleaning it under running water... Hook installation started by marking the position from the plan. Drilling pilot hole was next, then dipping the hook into glue and push it into pre-drilled location.. Worked nicely.. I also sanded and painted molding around deadeyes... Happy modeling..


- 360 replies
-
- 4
-
-
- sultana
- model shipways
- (and 1 more)
-
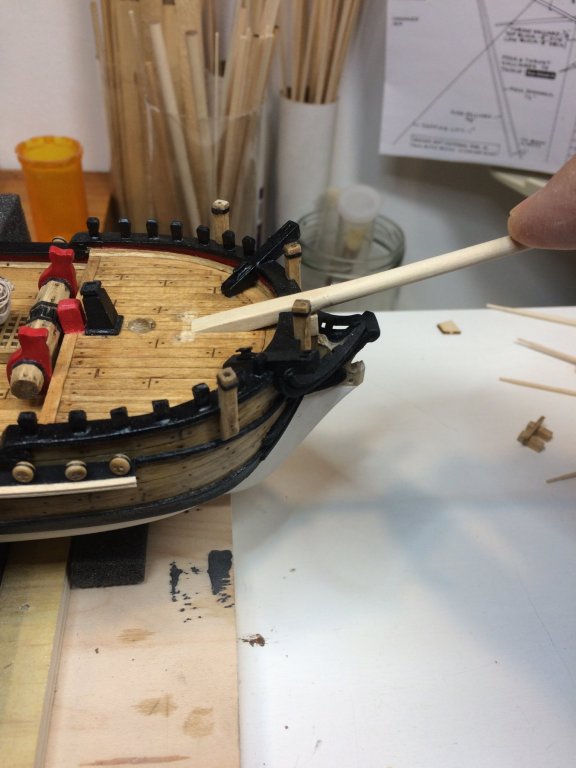
Bowsprit and jib boom in the process.. Testing fit on the ship... .. and testing with a plan.. That's all for today... Long day at work and no correct lotto numbers picked 😞 Happy modeling..
- 360 replies
-
- 3
-
-
- sultana
- model shipways
- (and 1 more)
-
Thanks Fright, appreciated.
-
Thanks, hardly waiting to get it done, but the journey is still long..
- 360 replies
-
- 1
-
-
- sultana
- model shipways
- (and 1 more)
-
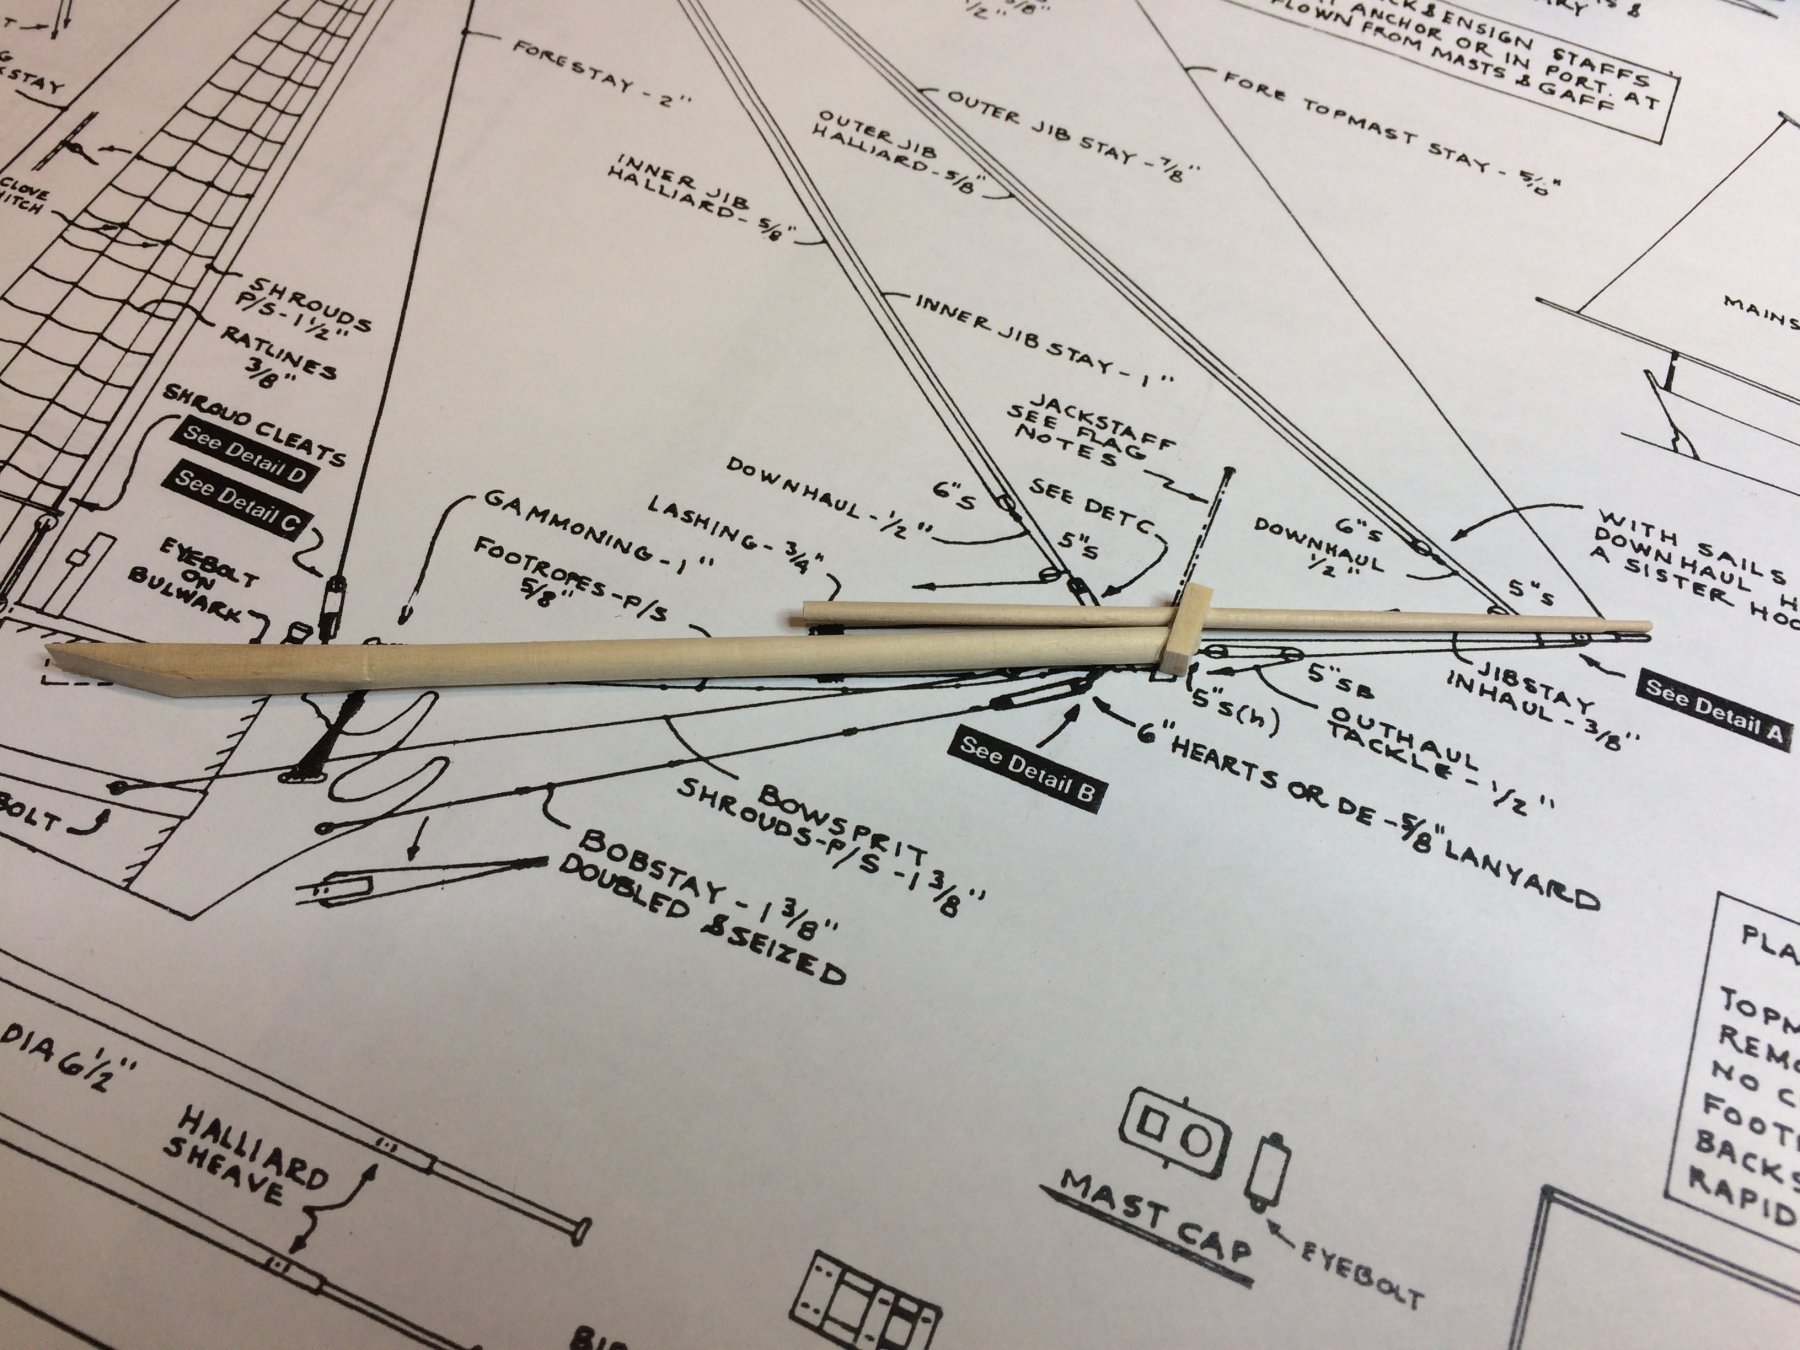
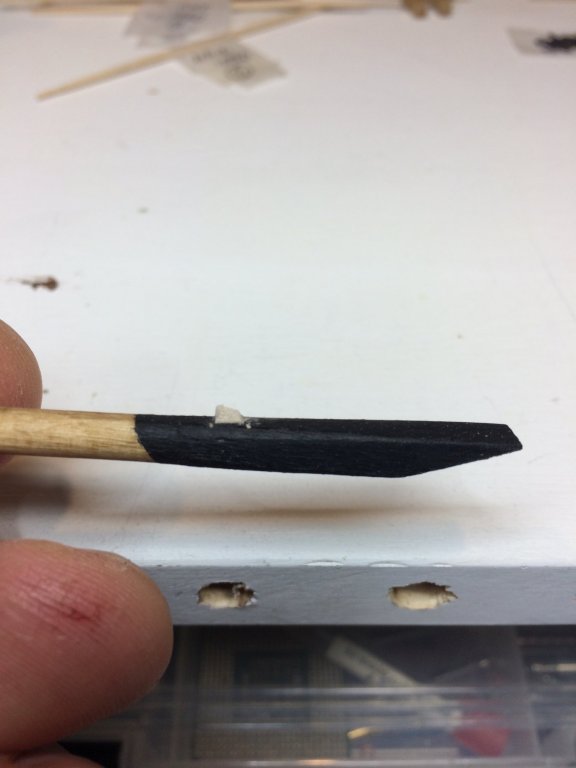
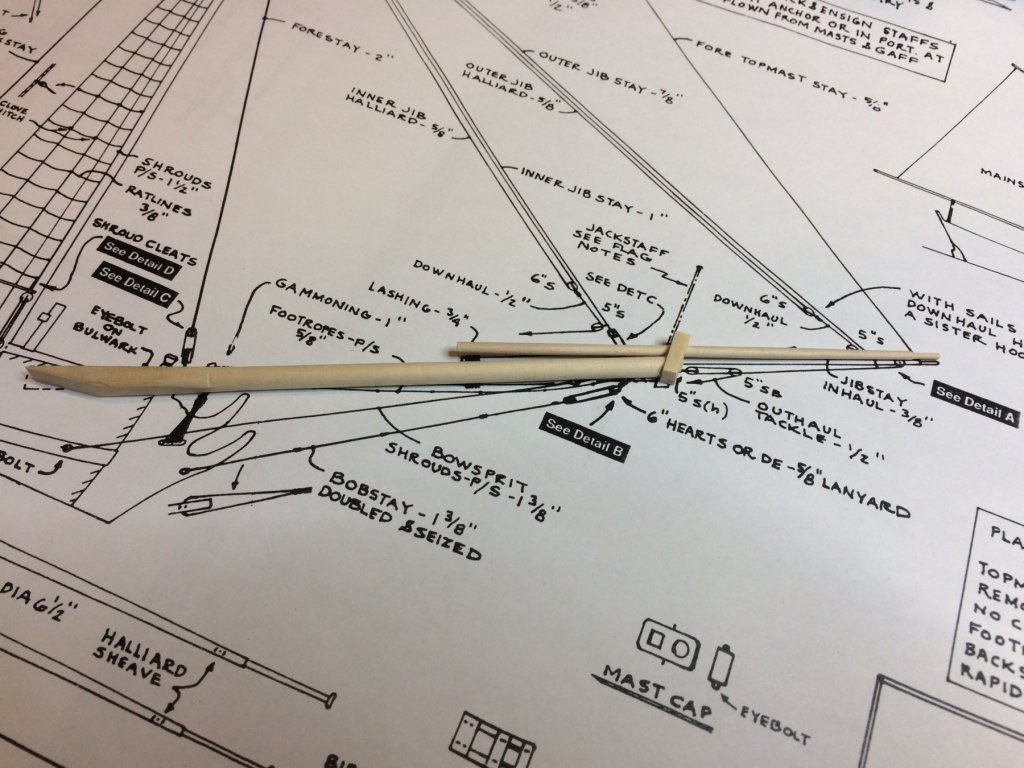
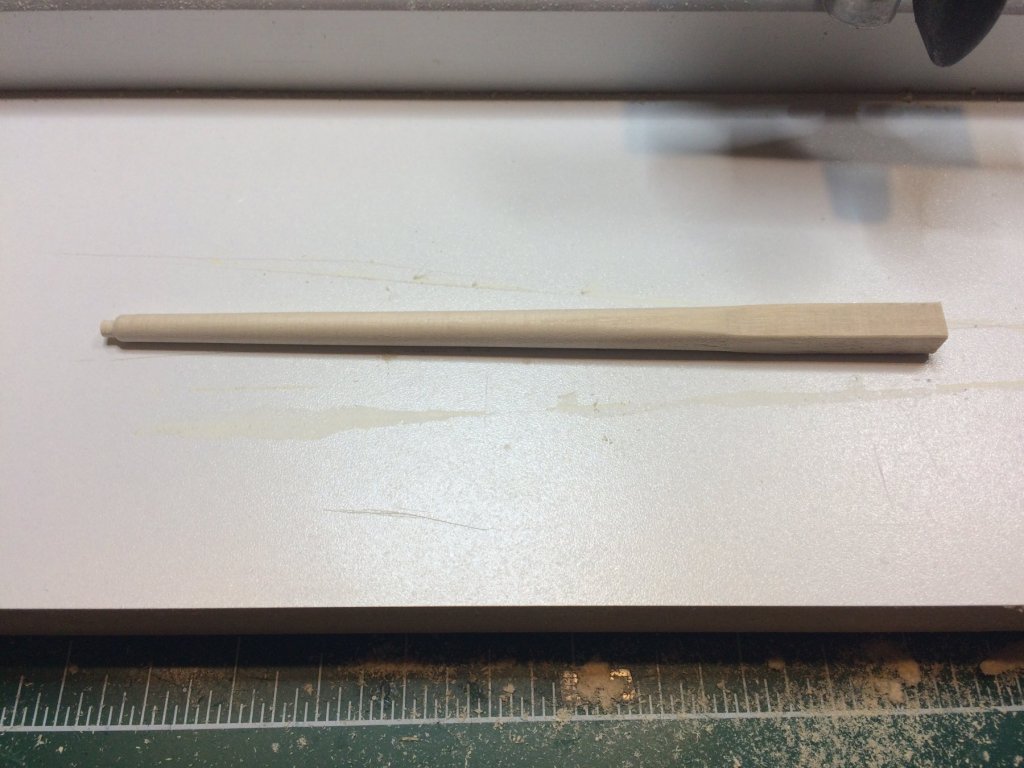
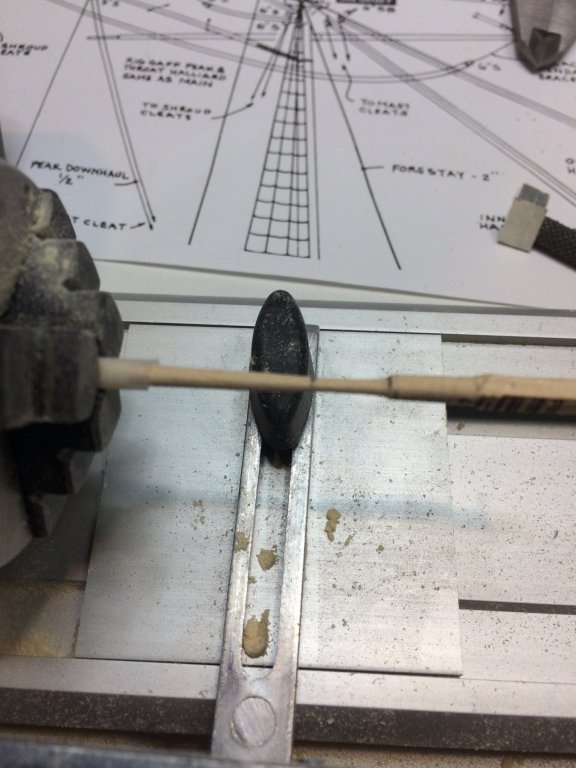
Bowsprit was "attacked" today. Used one piece of dowel and carved the shape out of it. According to ship plan, the bowsprit top is 4mm in diameter and end is appr 5.2mm. The top is squared in the length of 4.5 cm and rest of it is rounded.. Practicum shows that the whole bowsprit is in octagonal shape but the plan shows it is partially round. So i might be mistaken but will go with plan. Hopefully i red it correct. Then i start testing all and accidentally broke the cap. So here we are again, make it from scratch... I little bit of fine tuning is needed but appears to be very nice.. So that should do for today... Tomorrow more shaping to fit on the ship is planned... Happy modeling..


- 360 replies
-
- 5
-
-
- sultana
- model shipways
- (and 1 more)
-
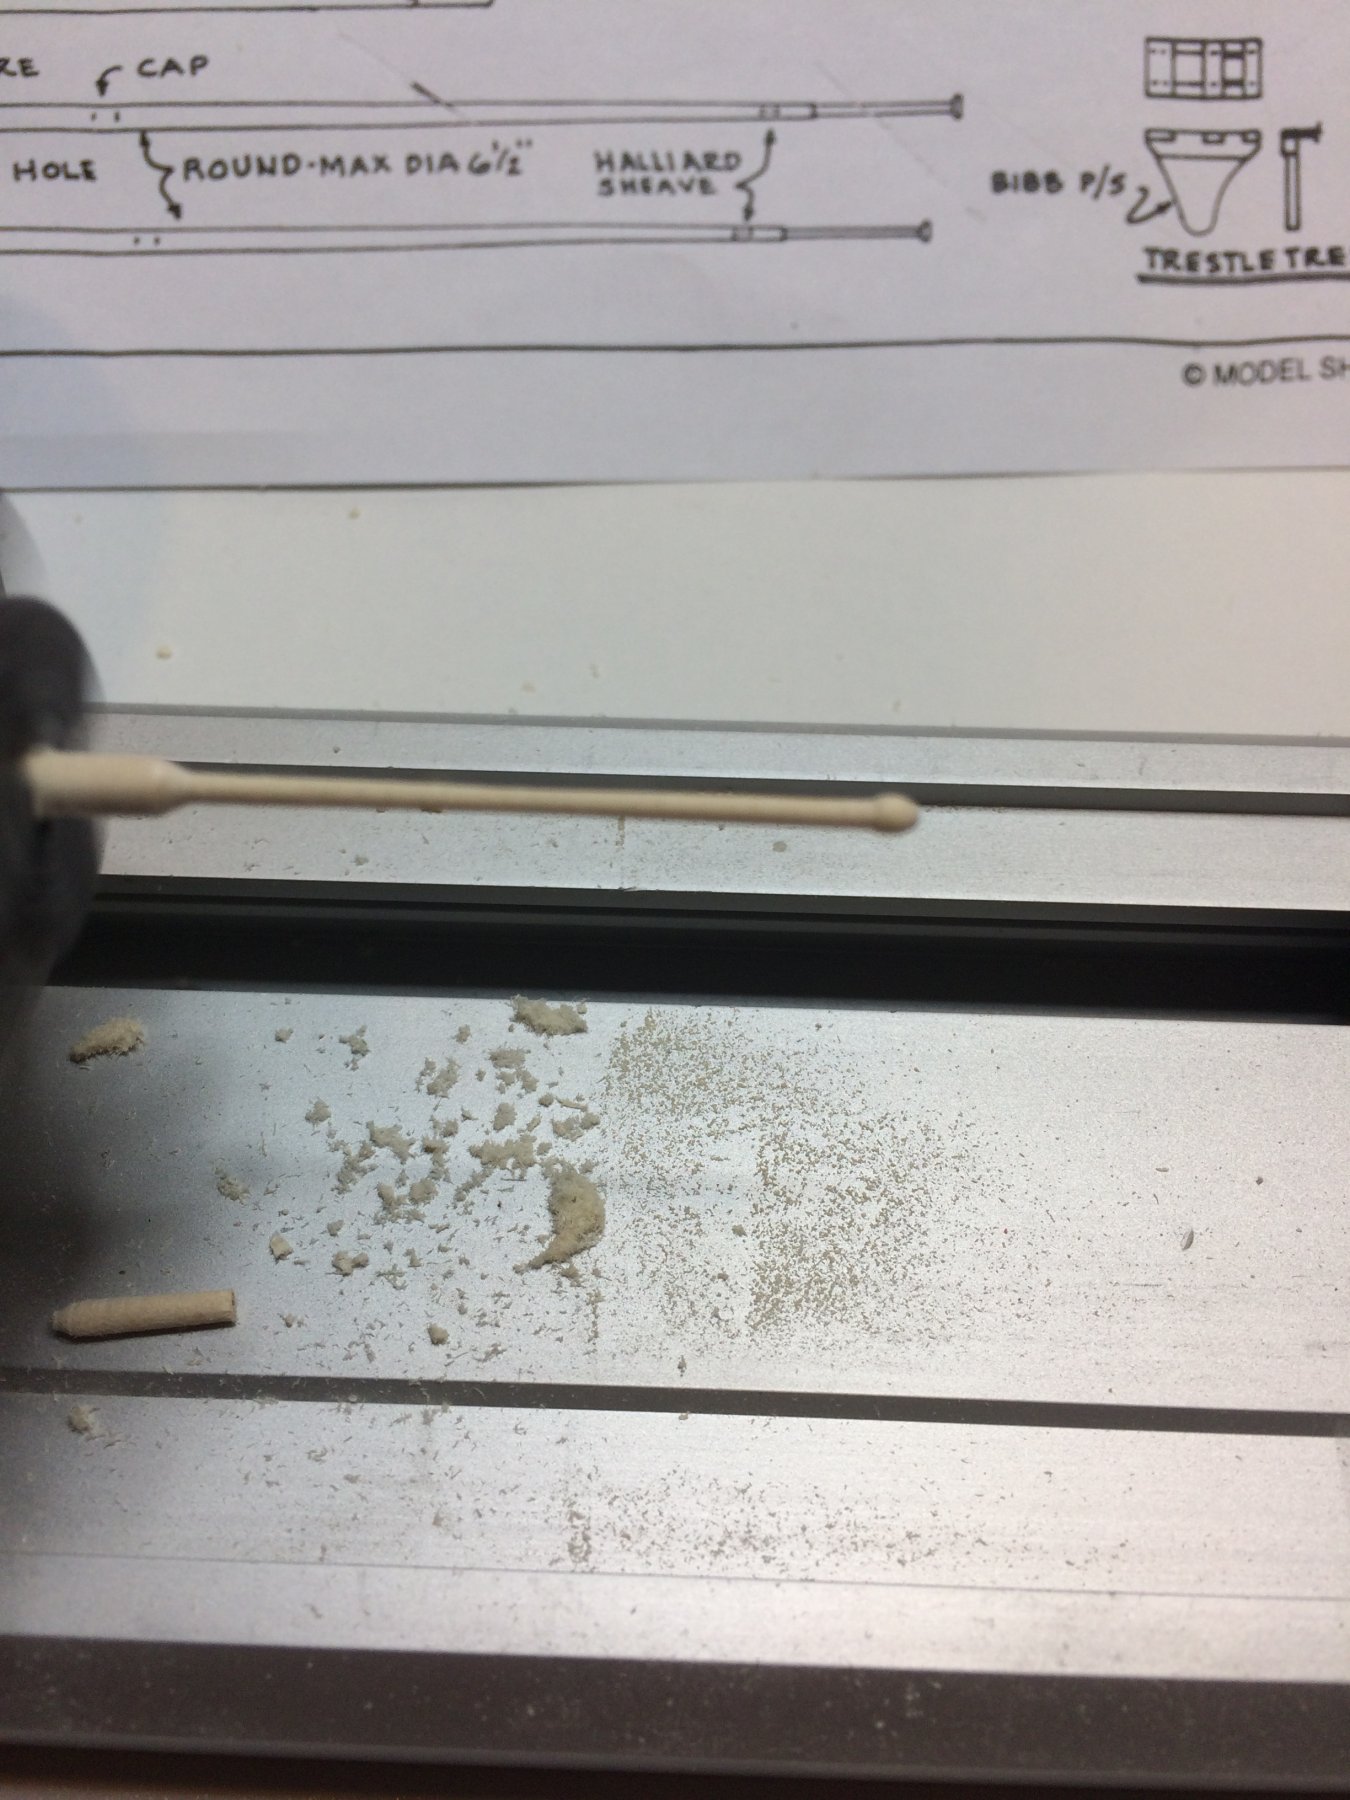
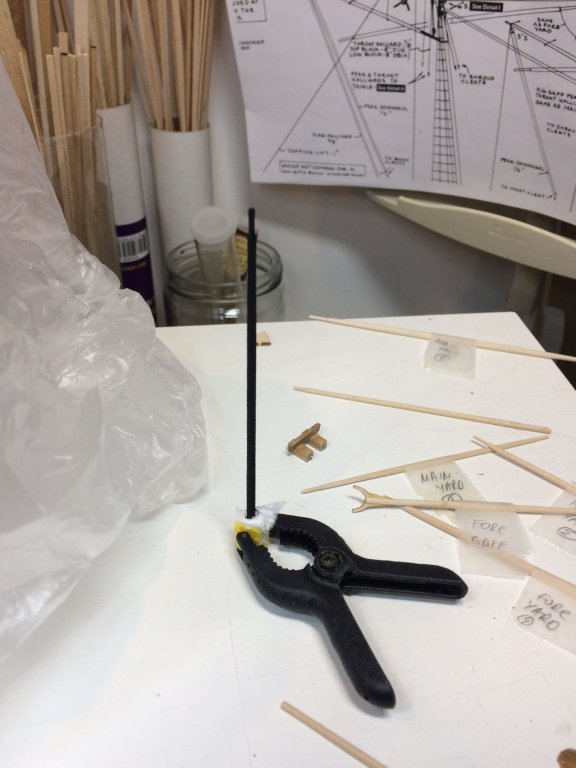
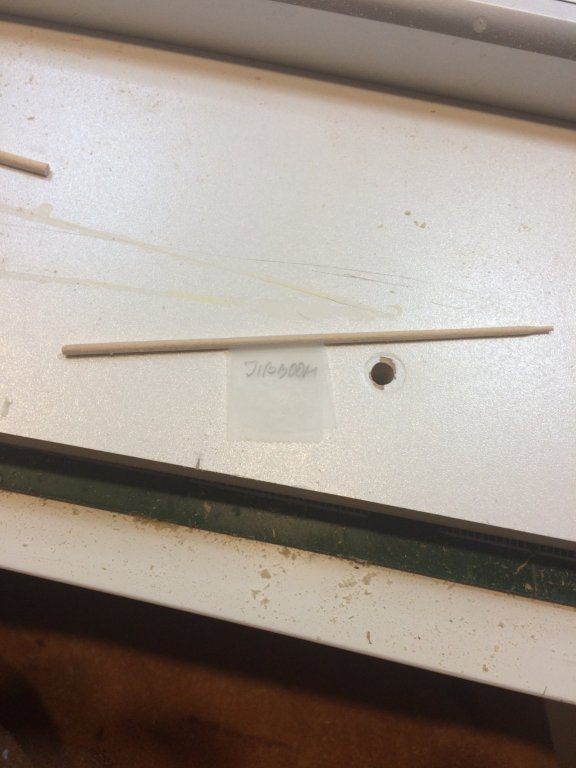
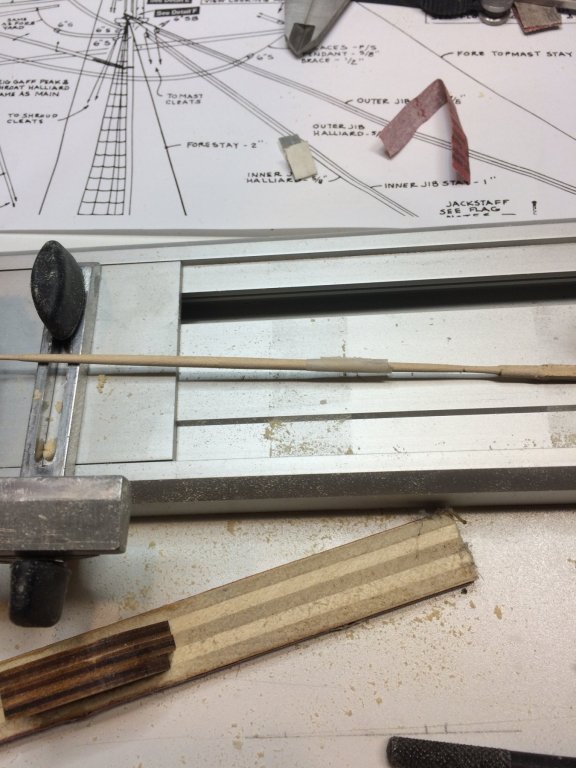
Getting ready to make a bowsprit... did not have one piece so i glued two 3mm x 6mm boxwood and left to dry overnight. Tomorrow will start shaping it. This one will be interesting according to plan, the bottom part (at the ship) is square shaped, then get changed progressively to round shape. Interesting... Jib boom was next, shaped it on lathe... While i am in "lathe mood" might as well complete few more .... A view thru magnified lamp... Shaping the arm.... Waiting for assembly time.. Happy modeling...


- 360 replies
-
- 4
-
-
- sultana
- model shipways
- (and 1 more)
-
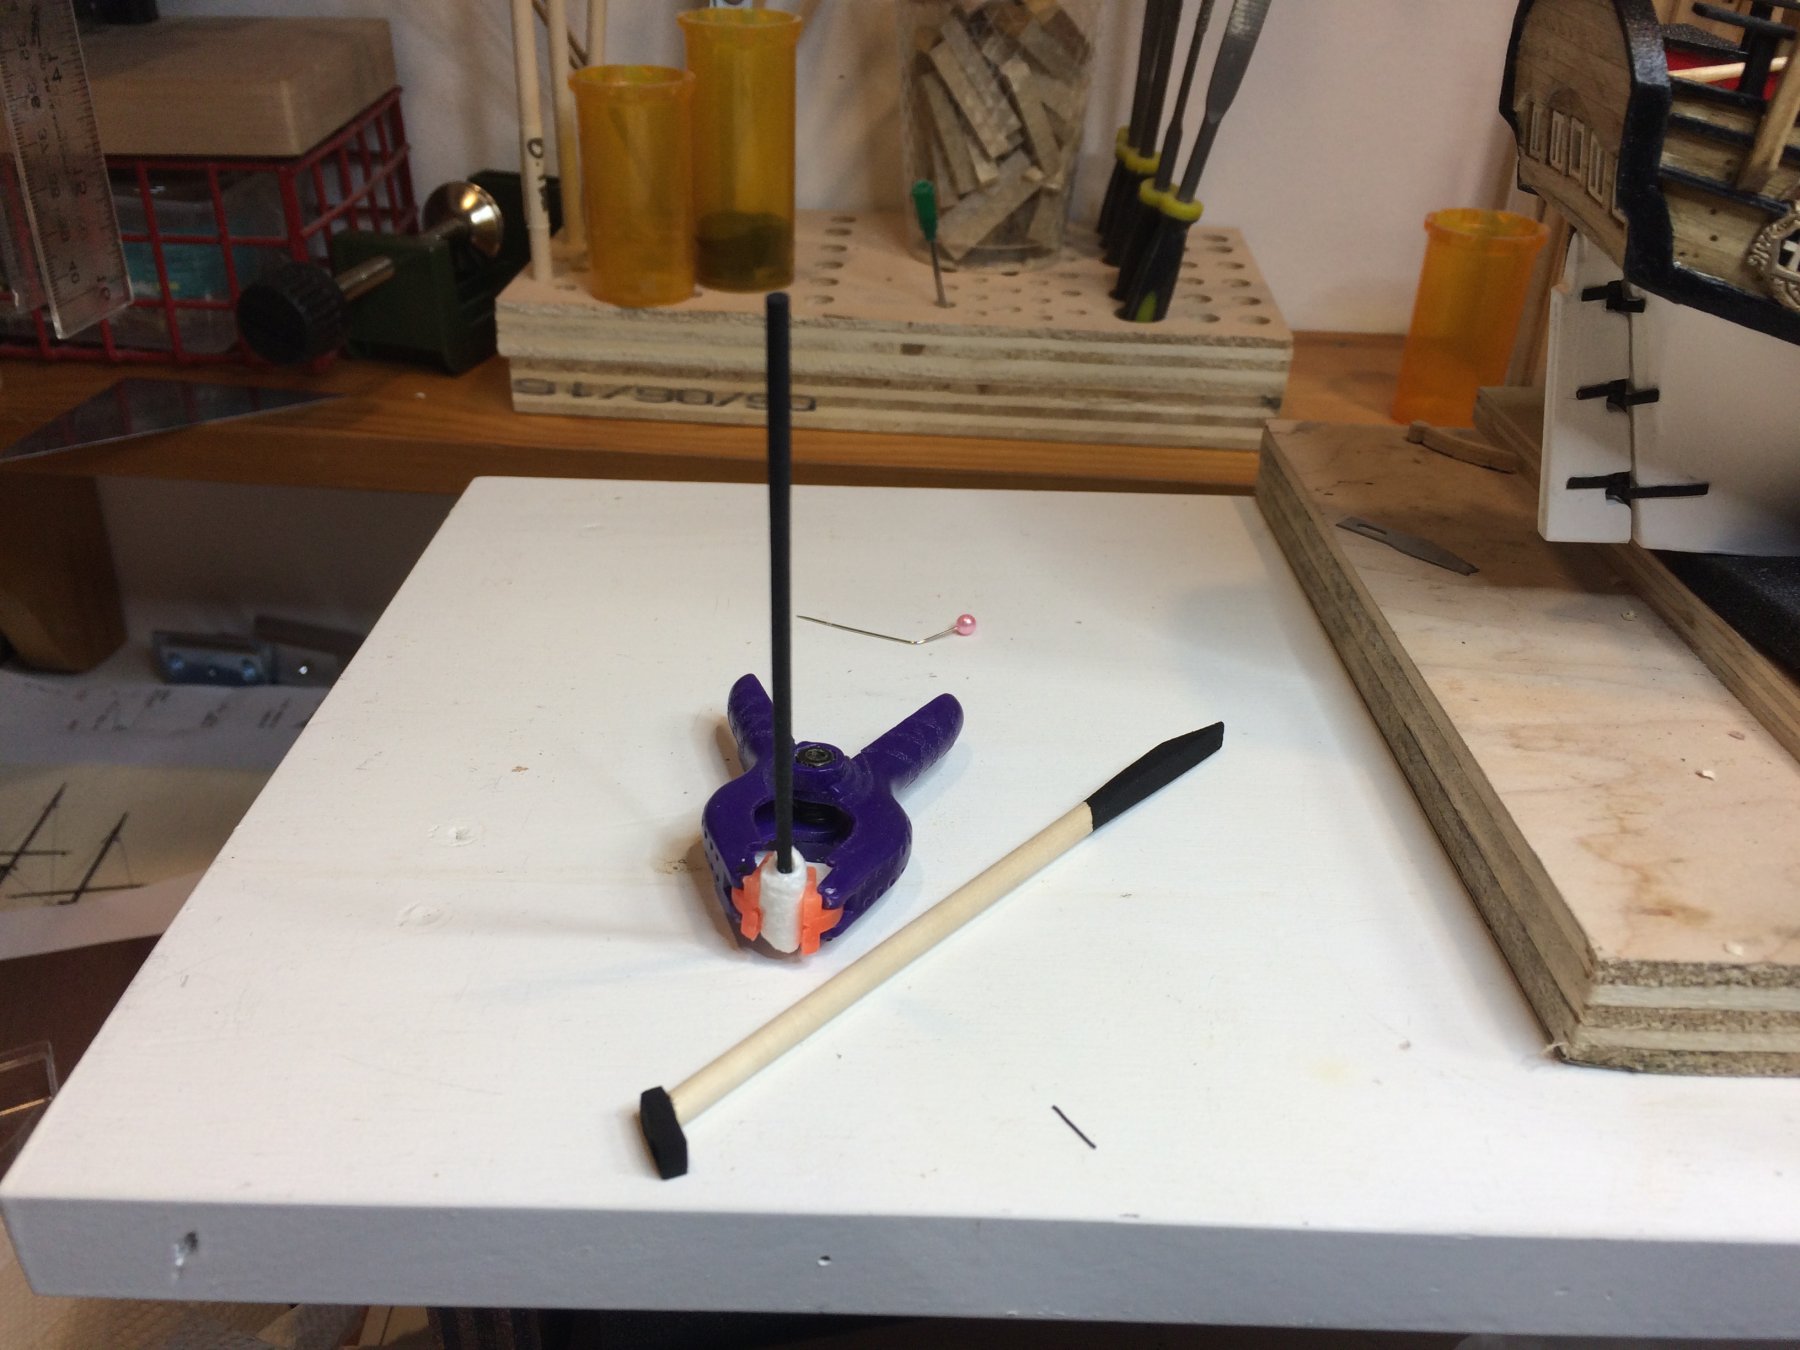
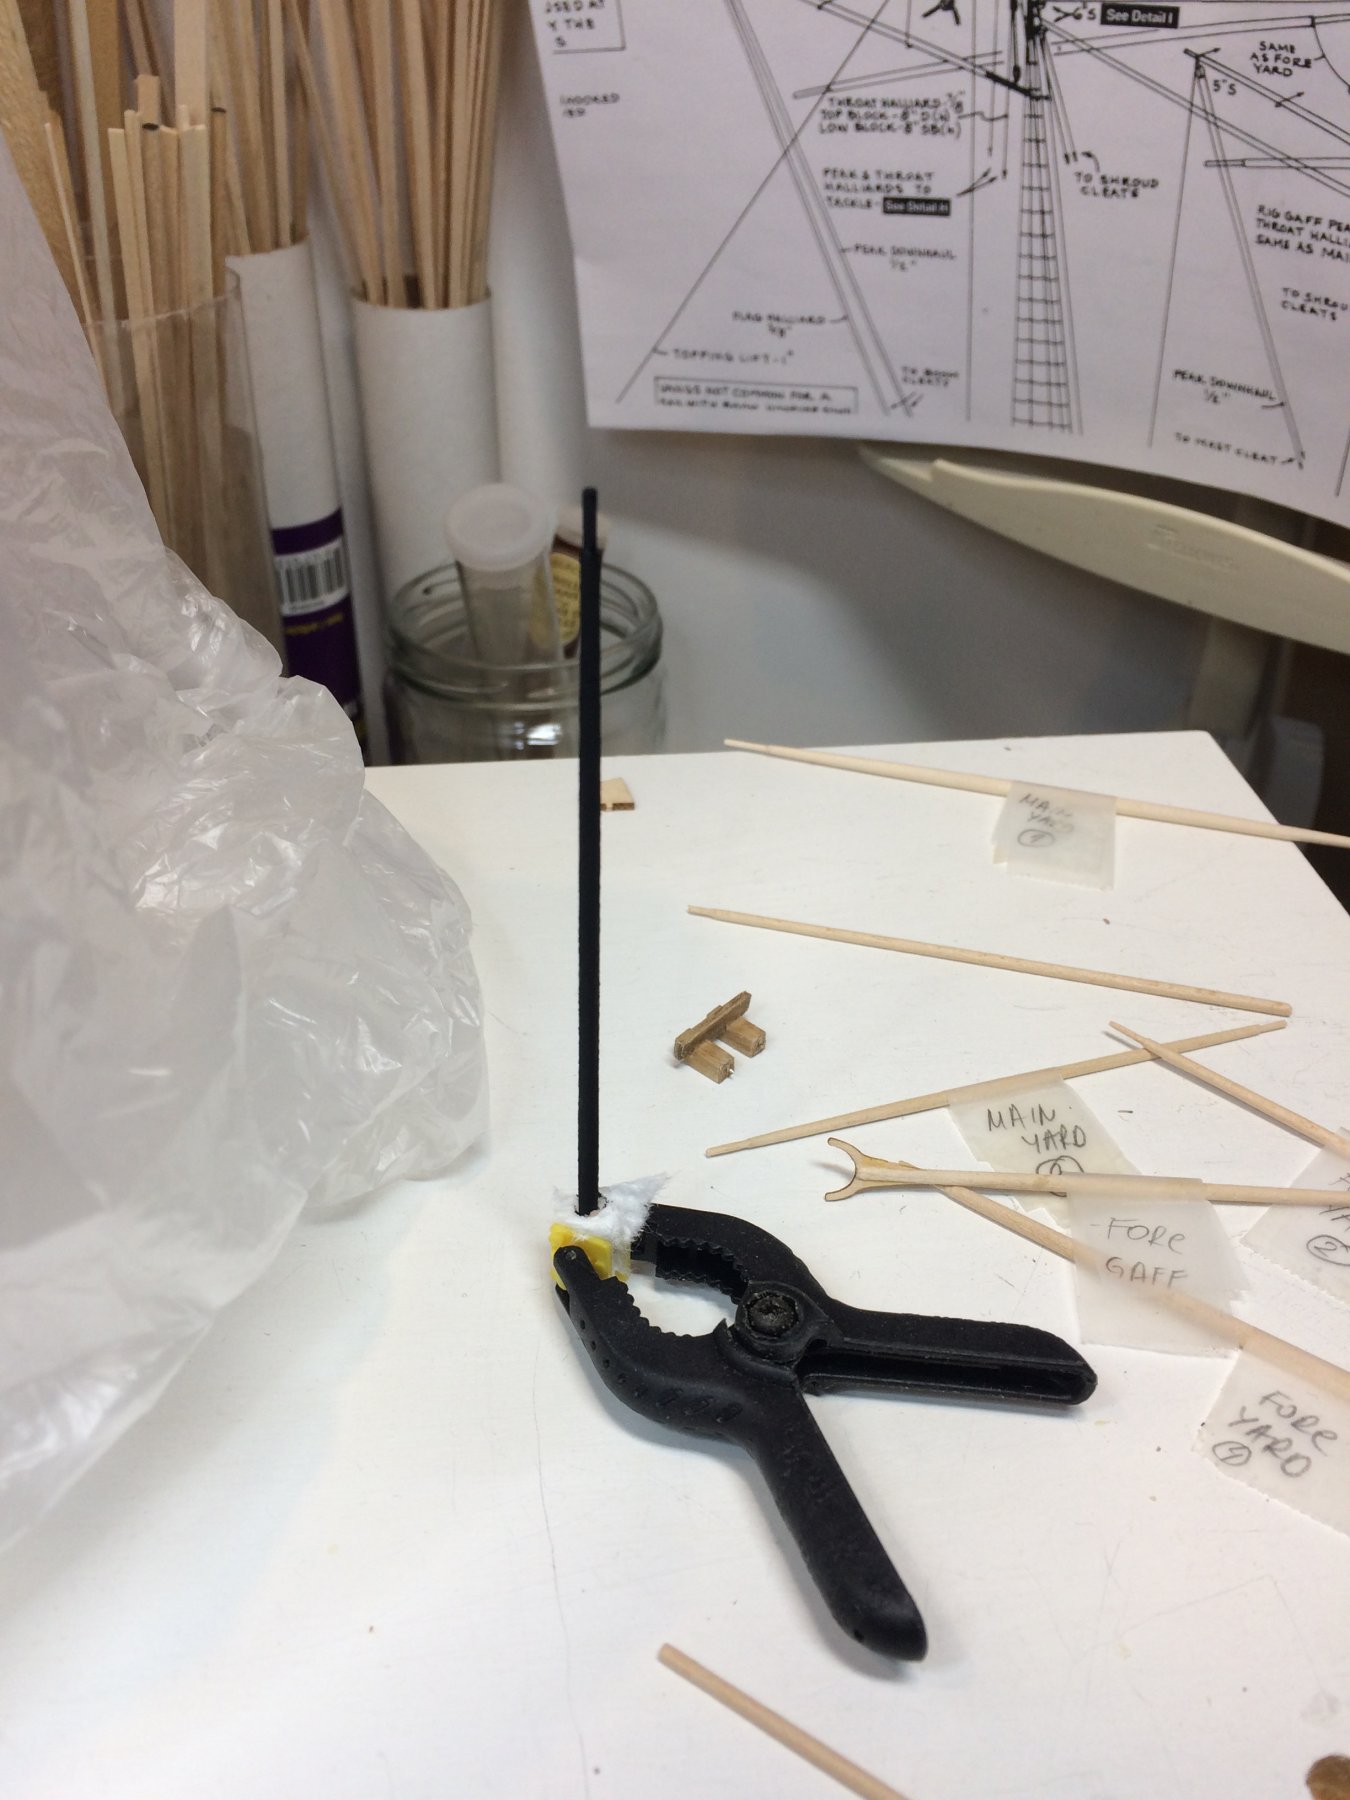
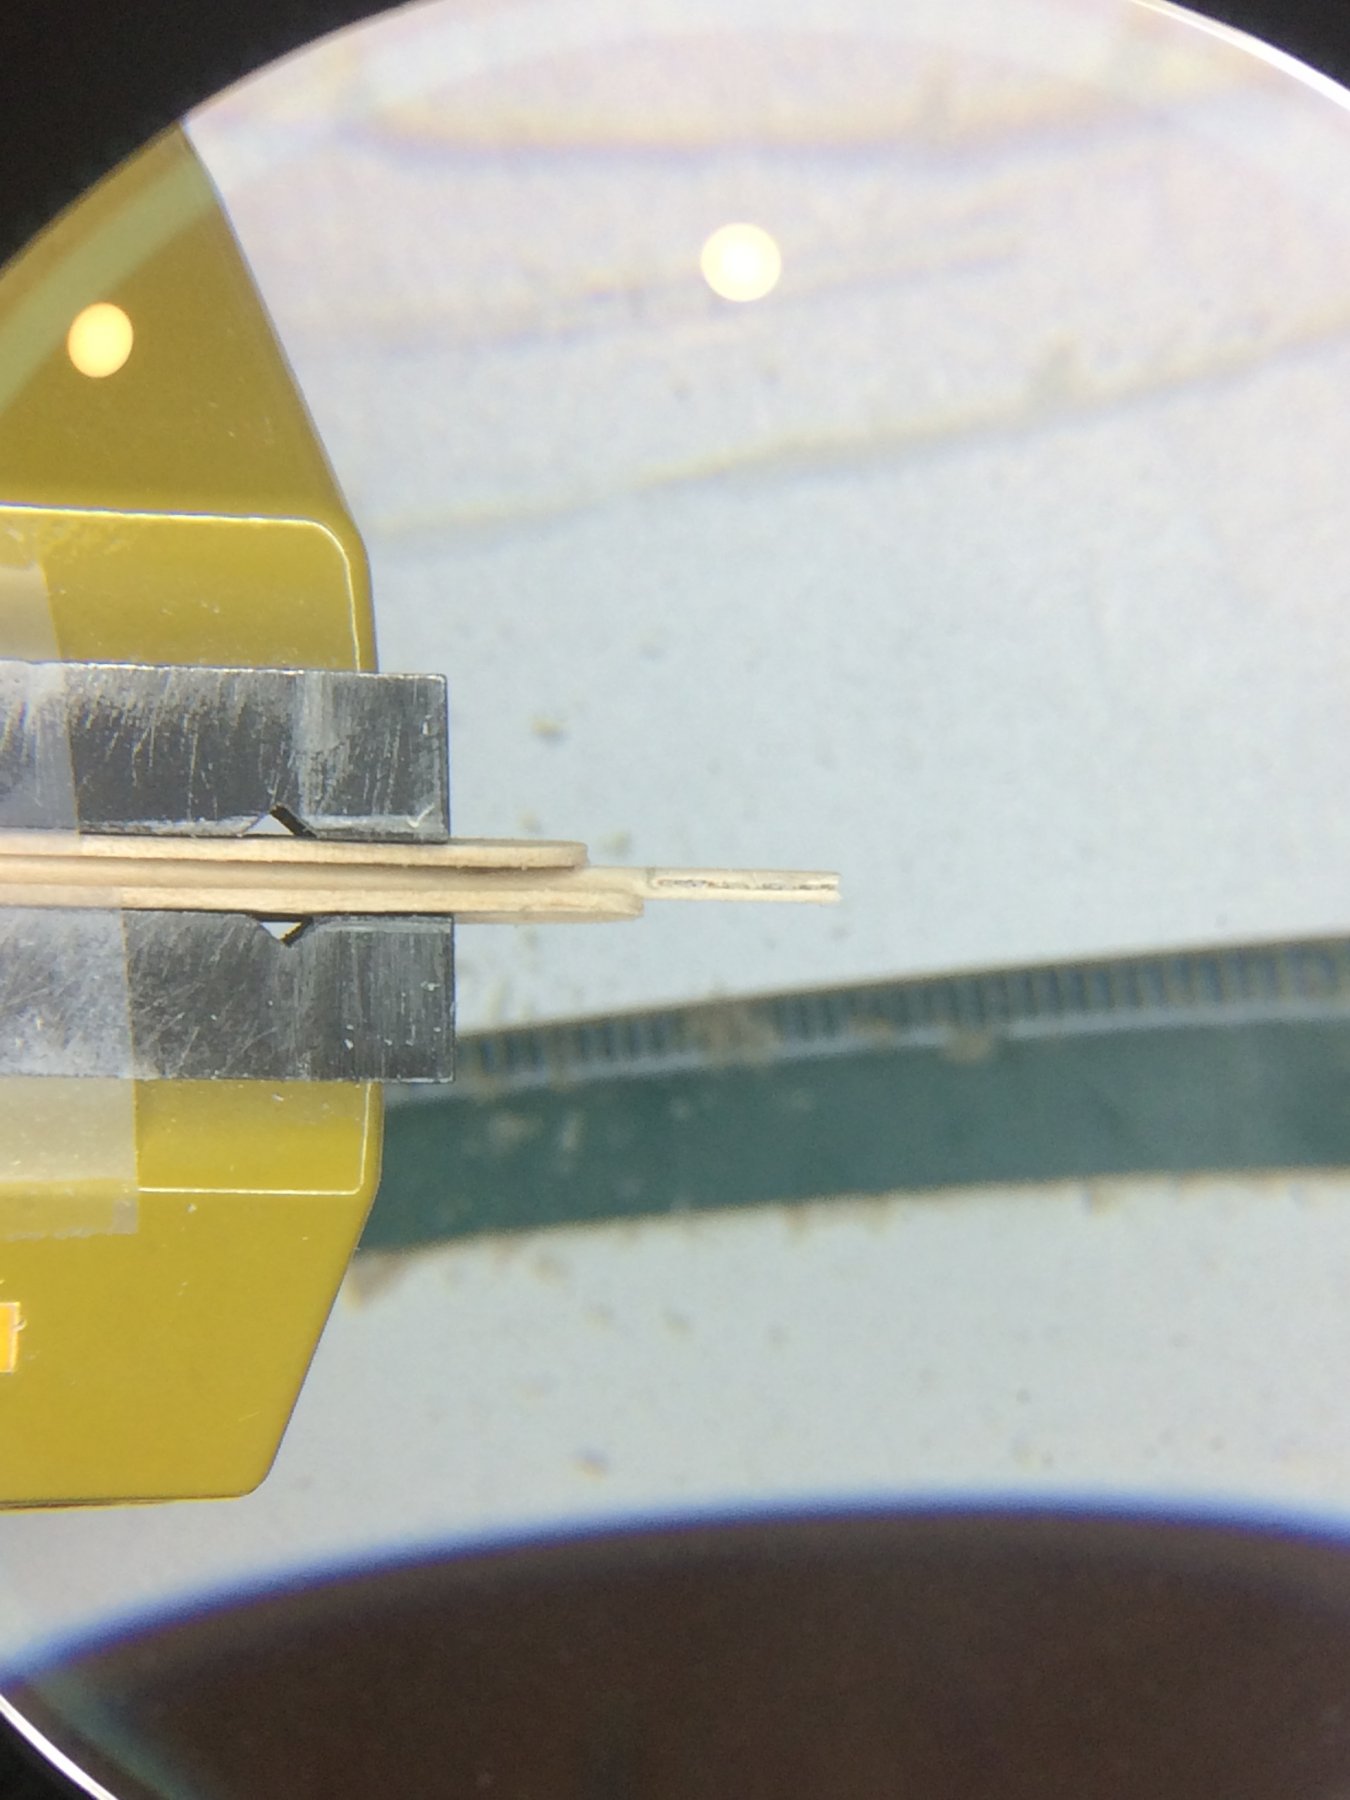
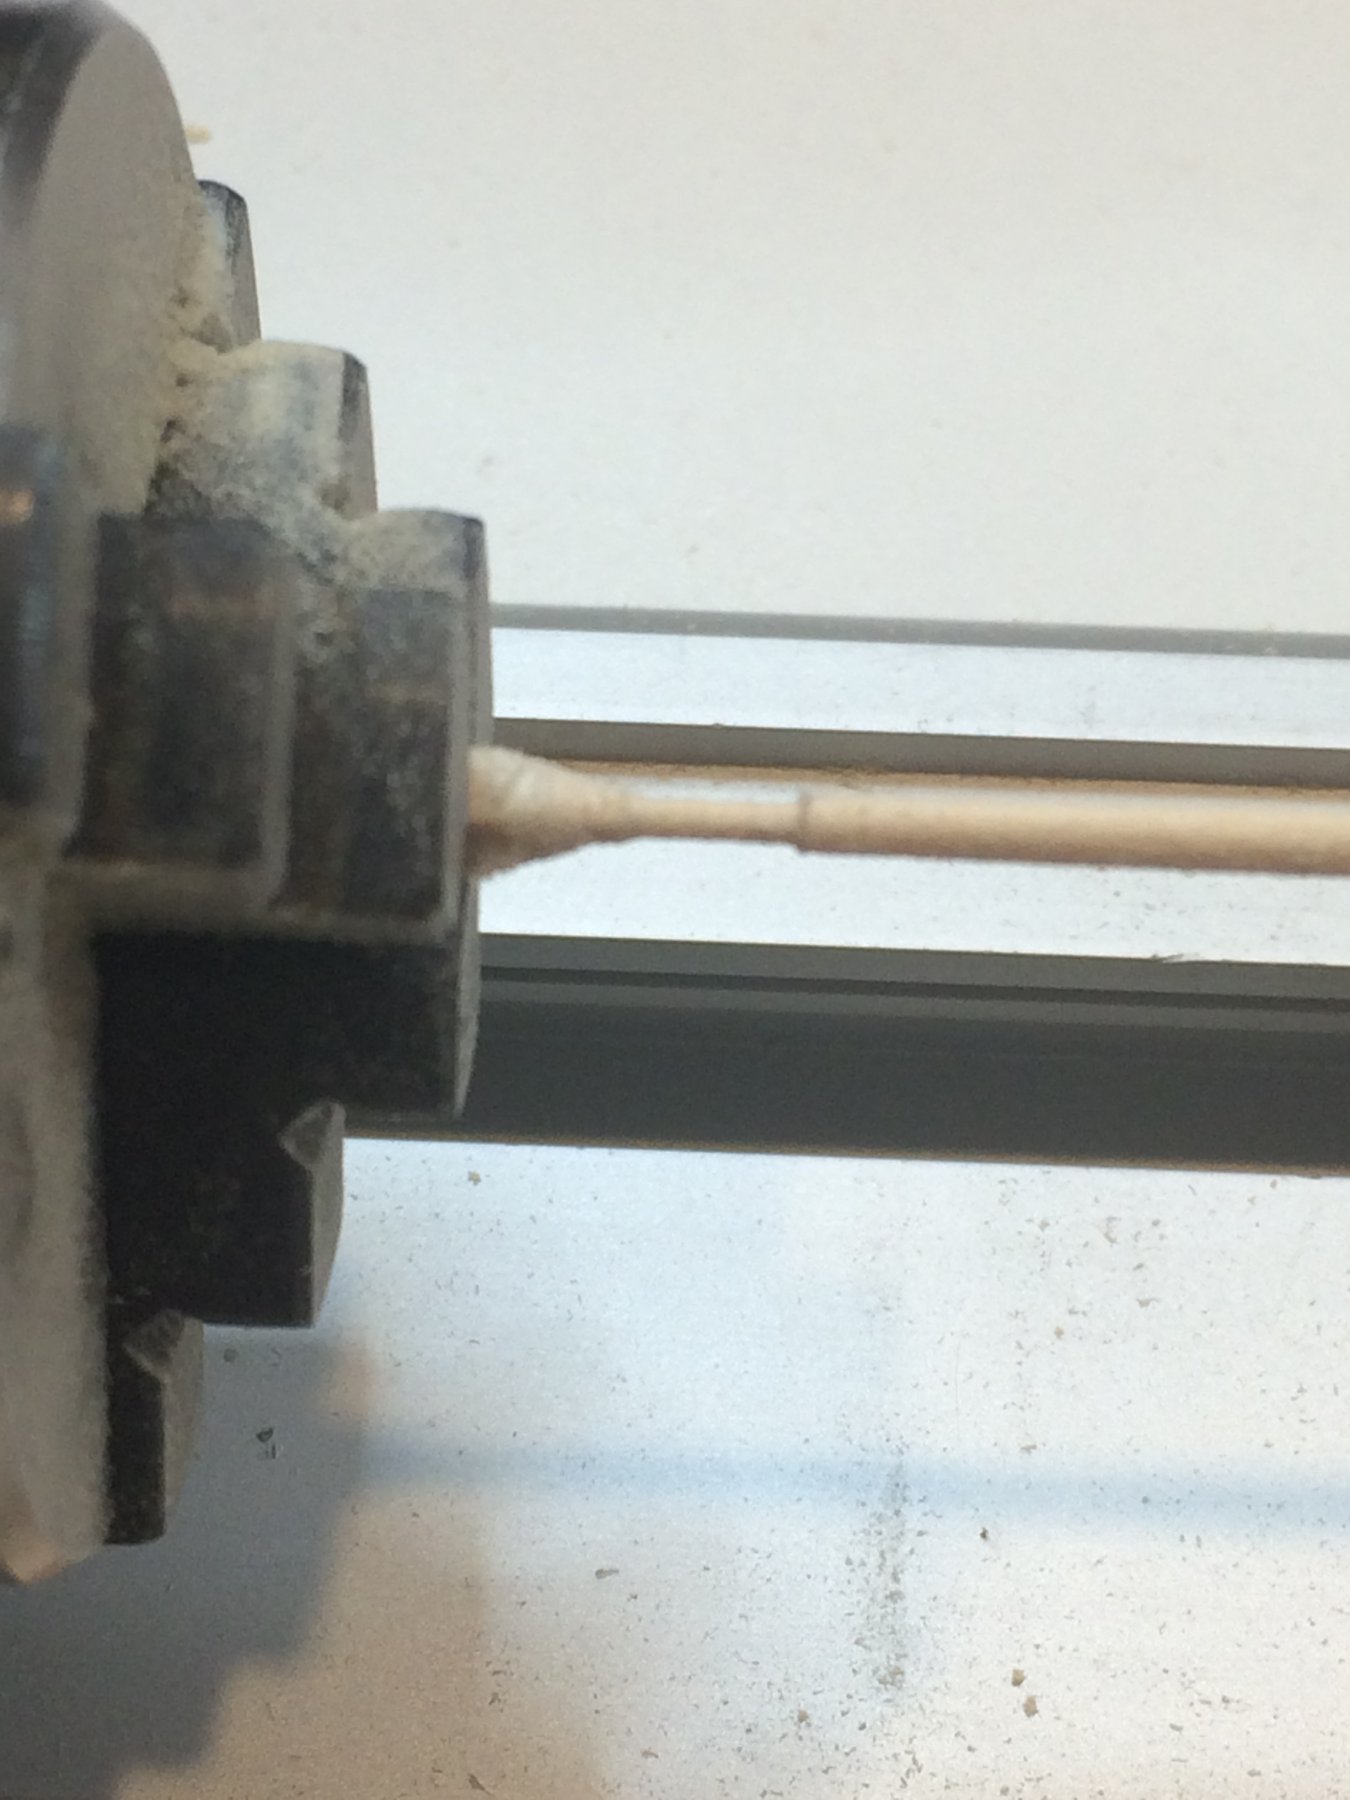
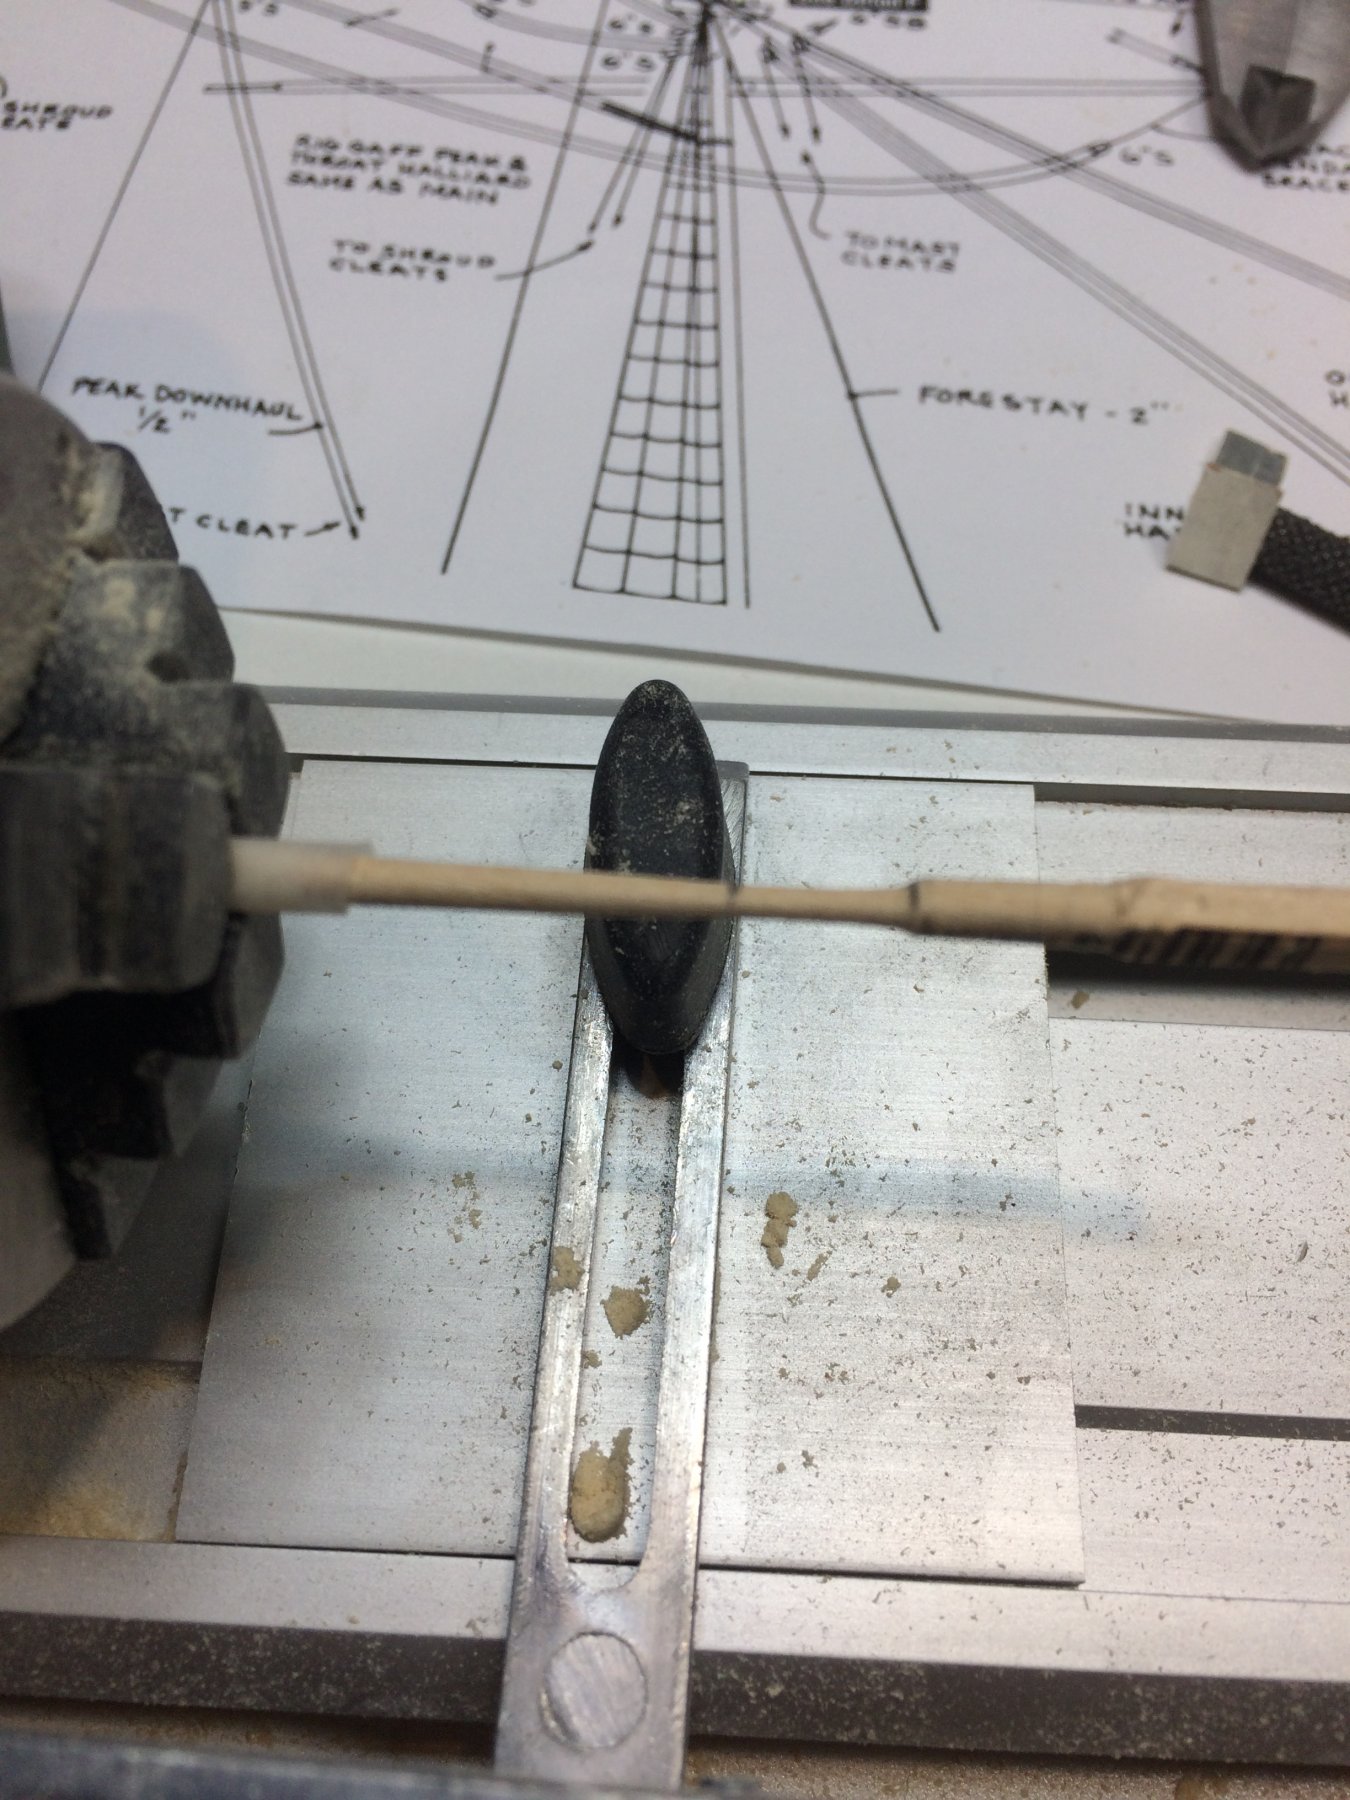
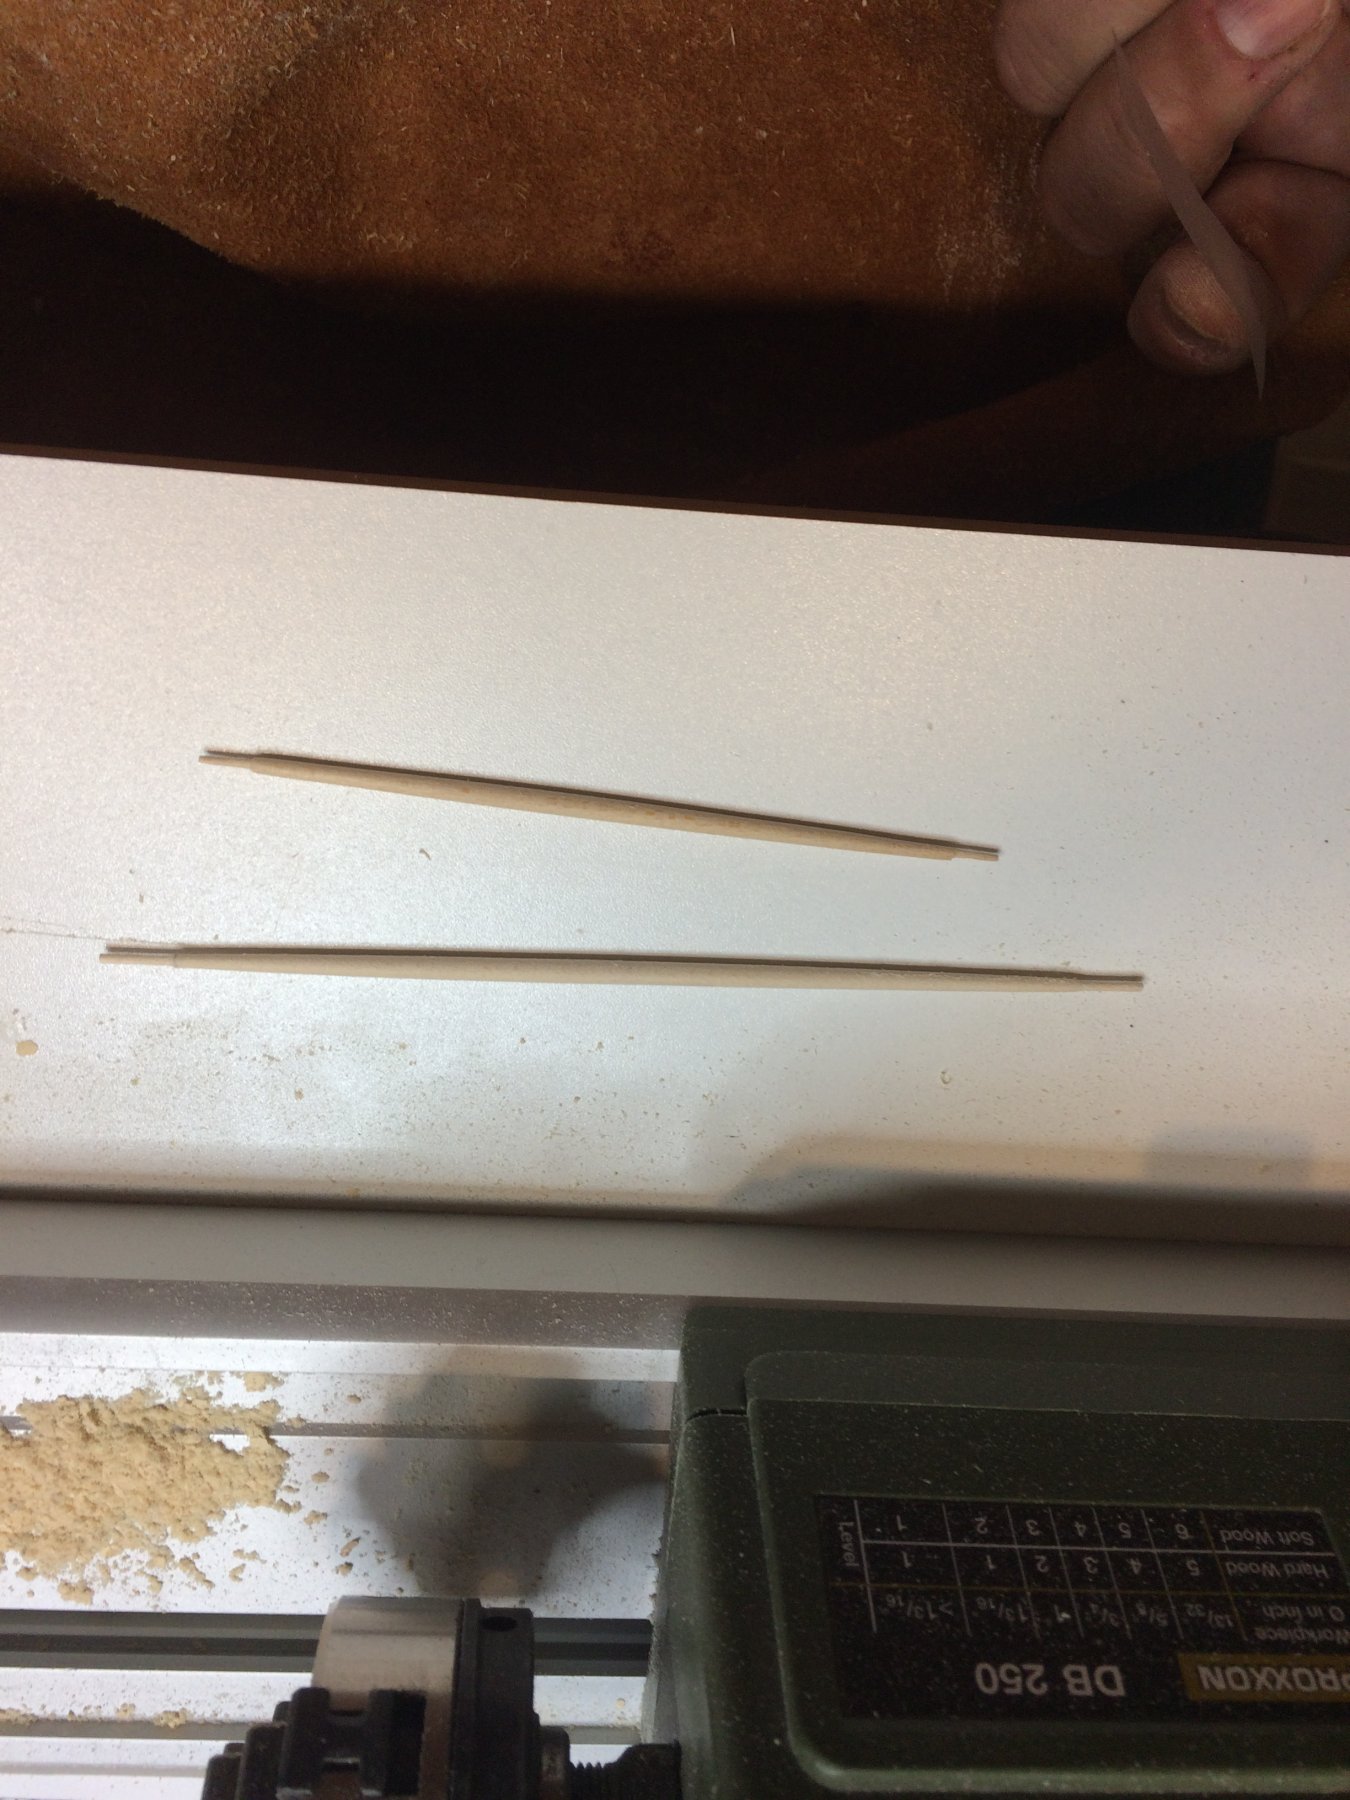
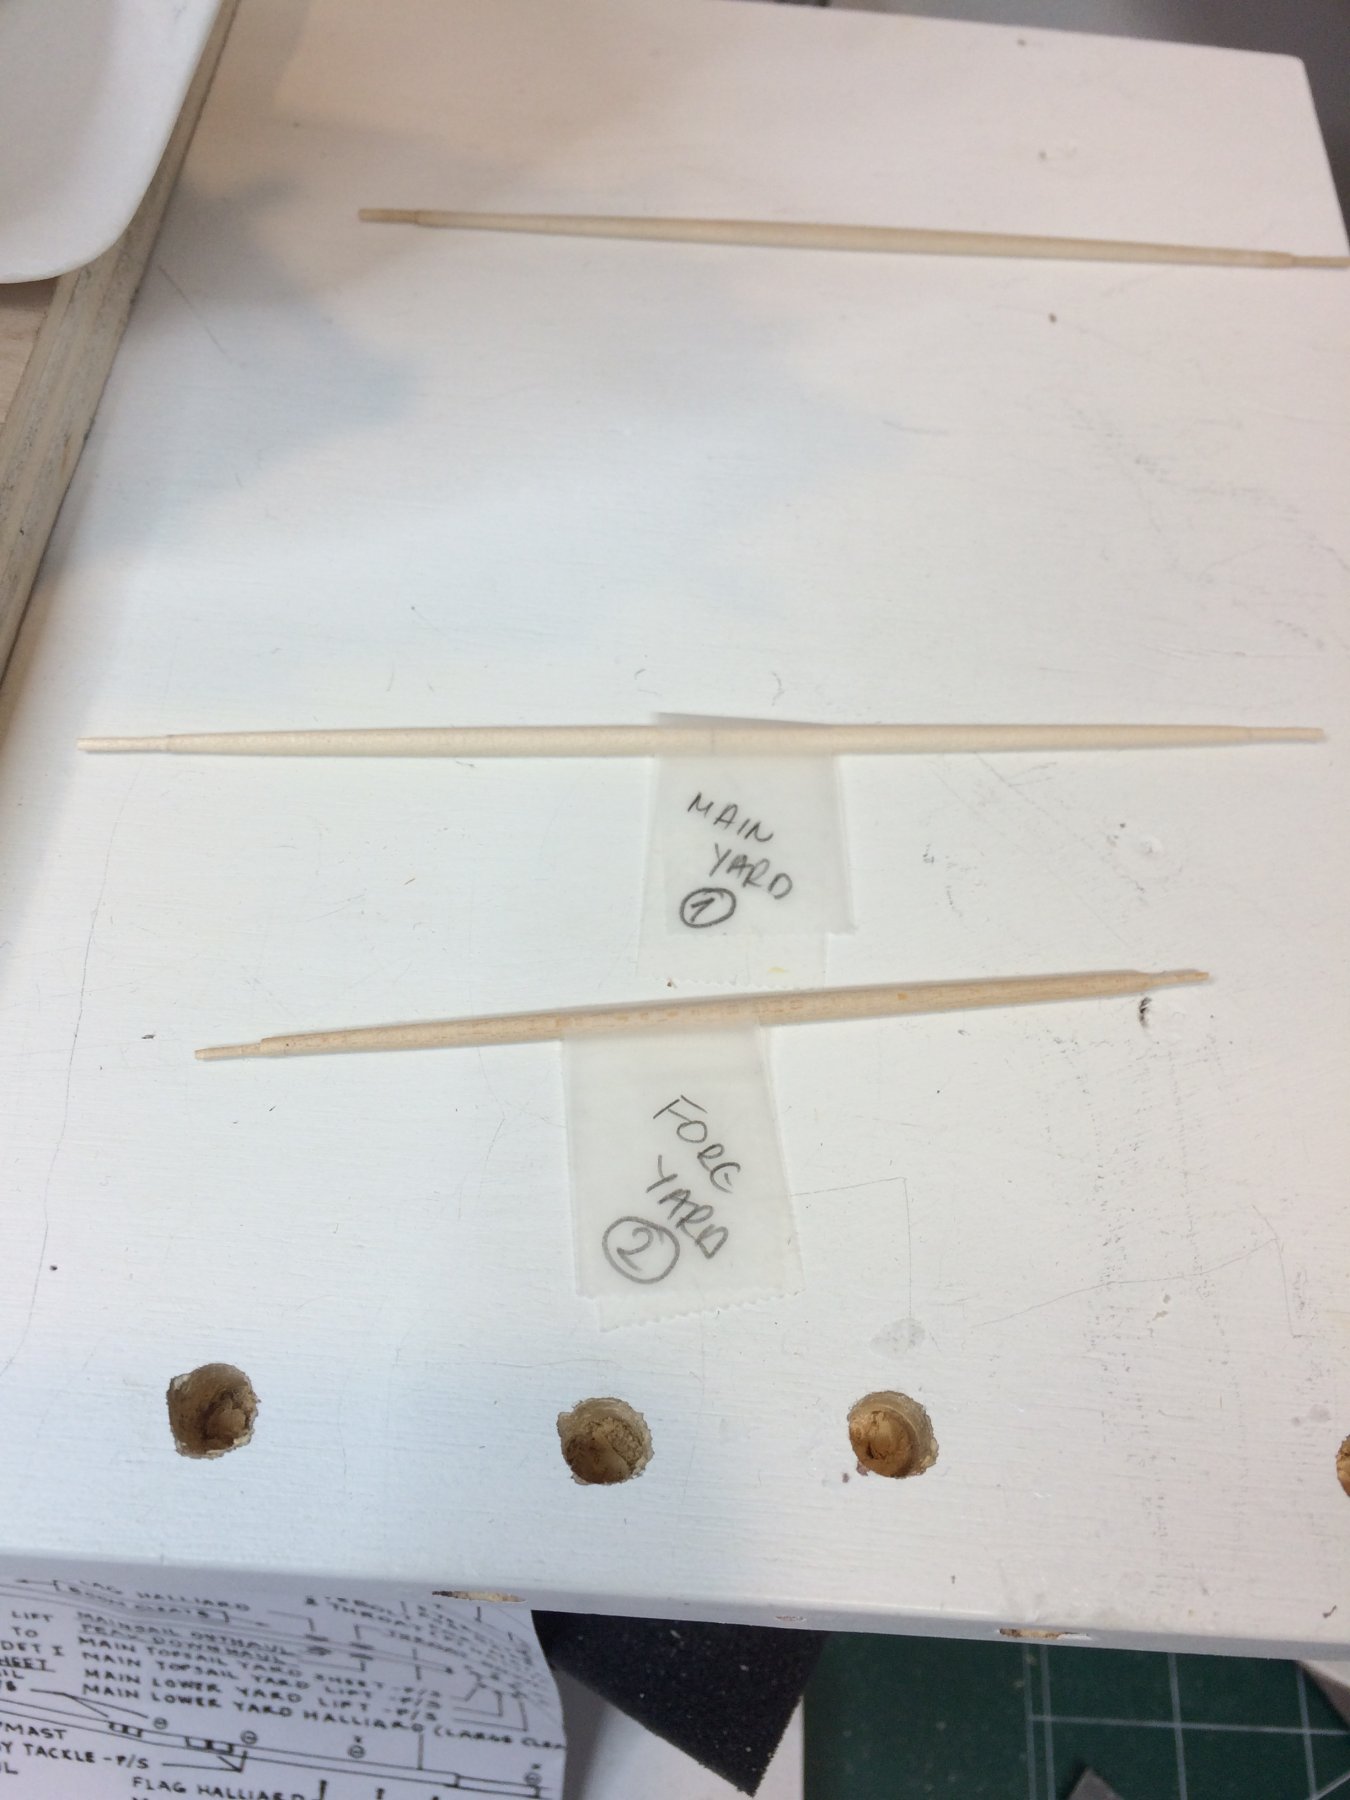
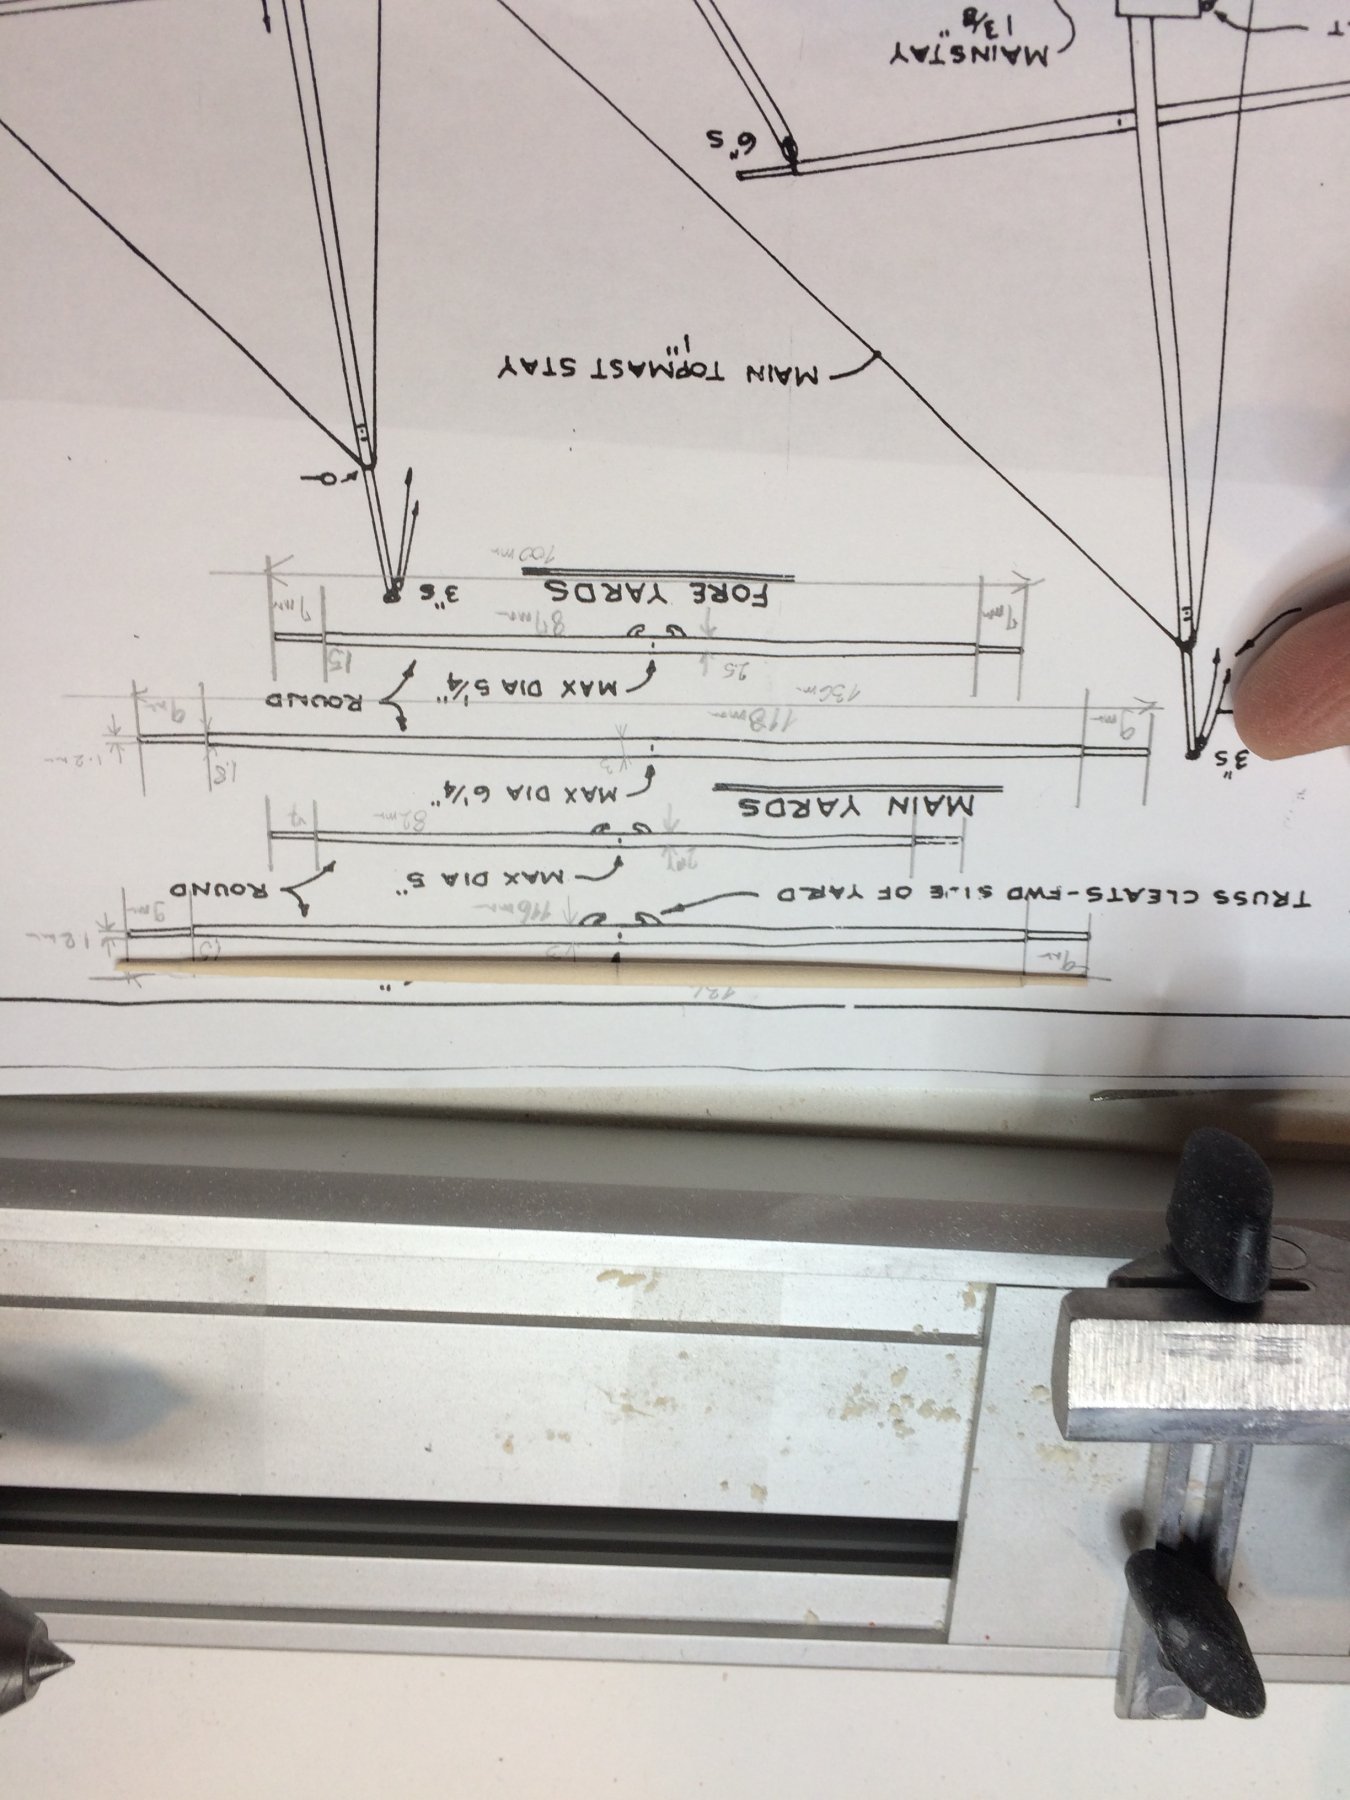
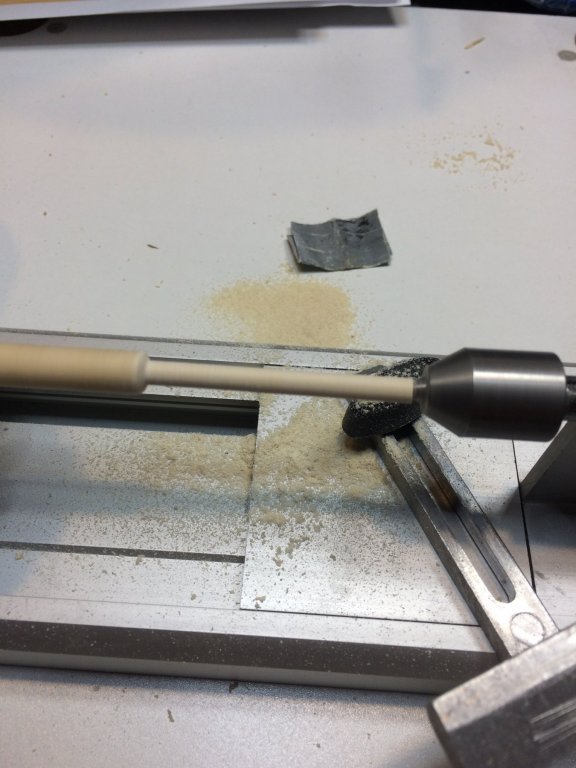
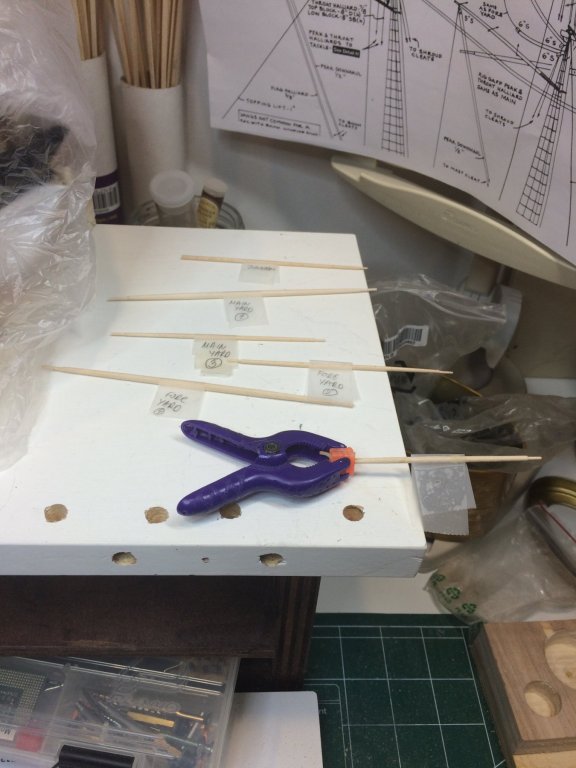
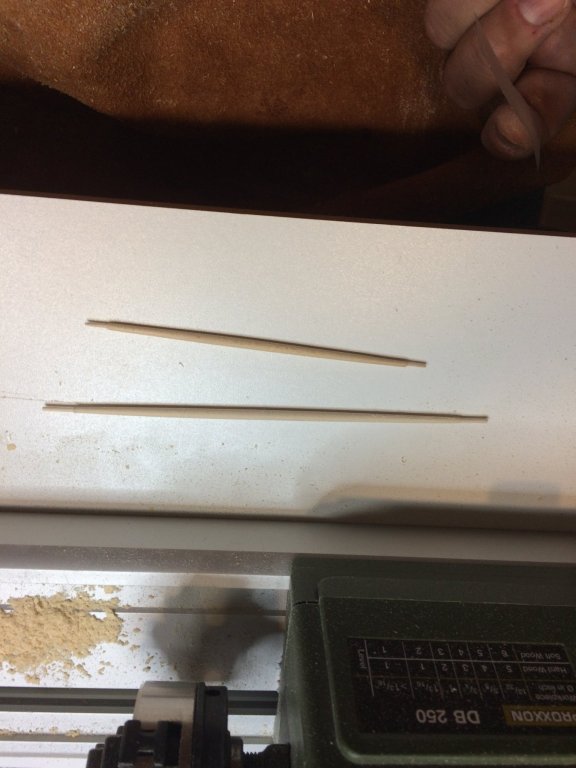
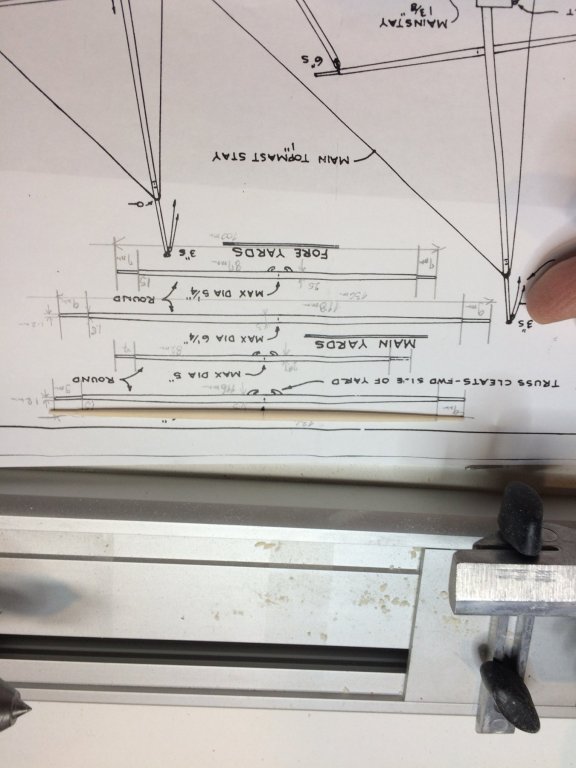
Time permitted and i have continued with yard build.. The yards are tiny, from 2mm-3mm in diameter at the thickest part of it. So i had to do it a bit differently, first i will shape to the desired diameter, and then will narrow it down as progressing towards the ends. The yard arm, the tiniest one (1mm) are done after the shape is complete. The length of yards are up to 138mm, with some extra wood length to slide safely into lathe which will cause the yard to vibrate during process. My lathe is basic one and have no accessories to hold the wood in fairly steady position while turning so i needed to improvise. After basic shape is completed and before yard arms are shaped, i will mark the middle of yard, put some scotch tape around it to protect the wood from chuck and slide it in lathe. The half i will be working on will be sticking out. The final shape is done and end piece is cut free. Then will rotate it and complete the same process on other end of a yard... Yard protected with scotch tape... In lathe, working on one half.. End results are very acceptable... That should be all for today, happy modeling...

- 360 replies
-
- 7
-
-
- sultana
- model shipways
- (and 1 more)
-
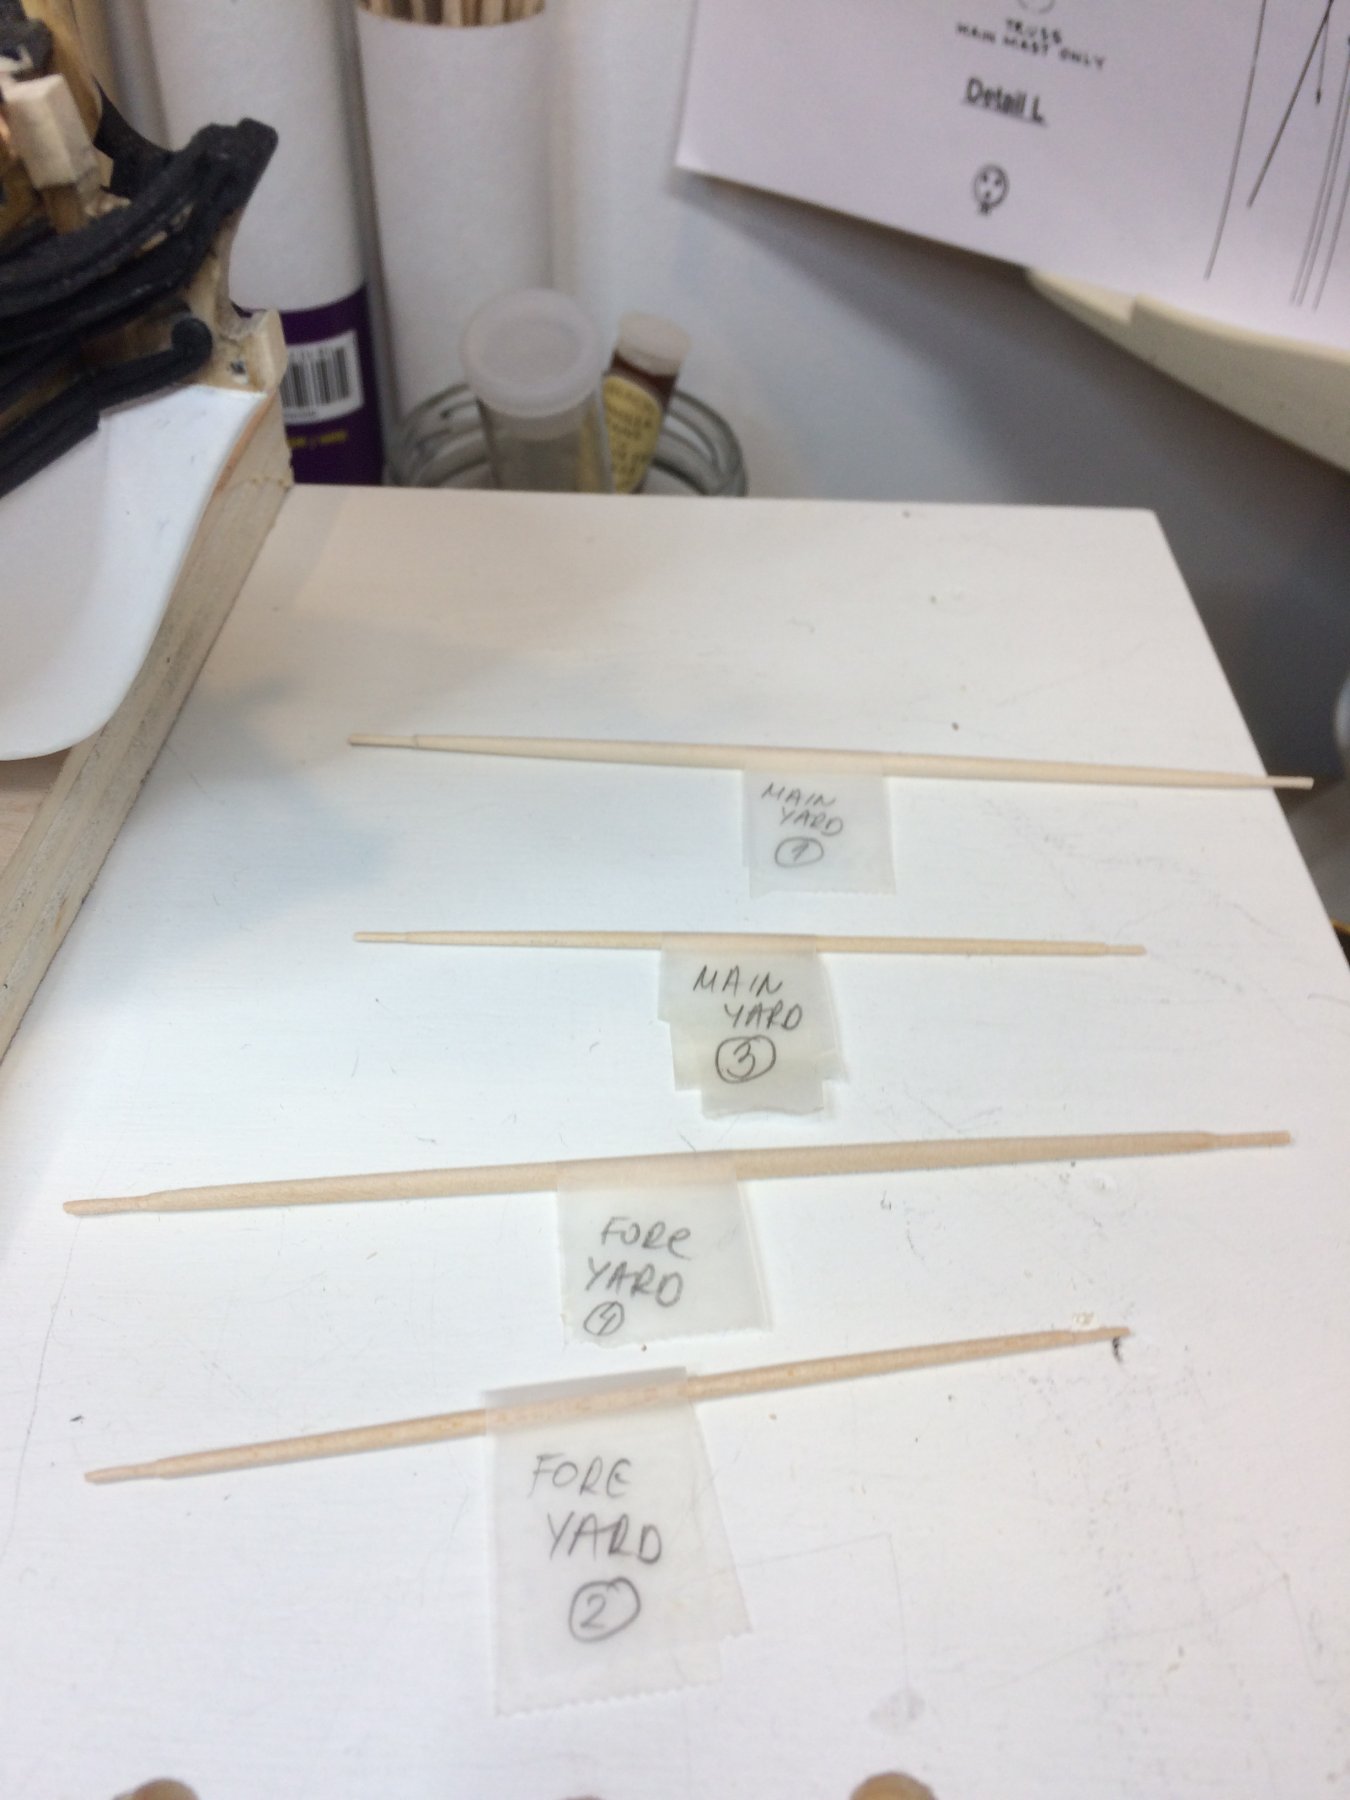
Not quite productive last few days when it comes to shipyard work.... Today i started working on yards.... The measurements are taken from the plan and parts are made out of 3.5x3.5mm boxwood, shaped on small lathe. Did not finish all of them, shaping takes a bit of time and one yard snapped on me, so some extra parts were made. Tomorrow, time permits, will continue on two more yards... Happy modeling.


- 360 replies
-
- 4
-
-
- sultana
- model shipways
- (and 1 more)
-
The work on deadeyes has been completed and all 16 of them have been made and installed. I have decided to go with 3.5mm size as it appears to be a bit more up to scale. This is example of kit provided and 3.5 mm deadeyes. It looks like that kit supplied one are actually even smaller.. So i decided to break deadeyes assembly in few repetitive tasks; the first one was to wrap the wire around the deadeye and twist it two times, cut the excess wire and cut to few cm length... Then i used a small template to twist the wire around the pin with a players and making a loop that will be used to attach a chainplates later on. Then deadeyes were glued to the position, the molding was attached as well and it is now ready for a layer of black paint. Happy modeling..


- 360 replies
-
- 5
-
-
- sultana
- model shipways
- (and 1 more)
-
Yeah, i am on the same page, will definitely not go any larger.. The challenge is can i actually made decent one, in a smaller scale, 3mm... Thanks Russ.
- 360 replies
-
- 1
-
-
- sultana
- model shipways
- (and 1 more)
-
The decision will be made upon the way how i can handle that small, tiny deadeyes during building process.. Thanks
- 360 replies
-
- 1
-
-
- sultana
- model shipways
- (and 1 more)