Ferrus Manus
-
Posts
1,407 -
Joined
-
Last visited
3 Followers


Recent Profile Visitors
3,833 profile views


-
 aaronc reacted to a post in a topic:
Muscongus Bay Lobster Smack by Kenchington - Model Shipways - 1:24
aaronc reacted to a post in a topic:
Muscongus Bay Lobster Smack by Kenchington - Model Shipways - 1:24
-
Archi reacted to a post in a topic:
La Niña by Dave boatswain - FINISHED - scale 1:72 - Columbus caravel, 15th century
-
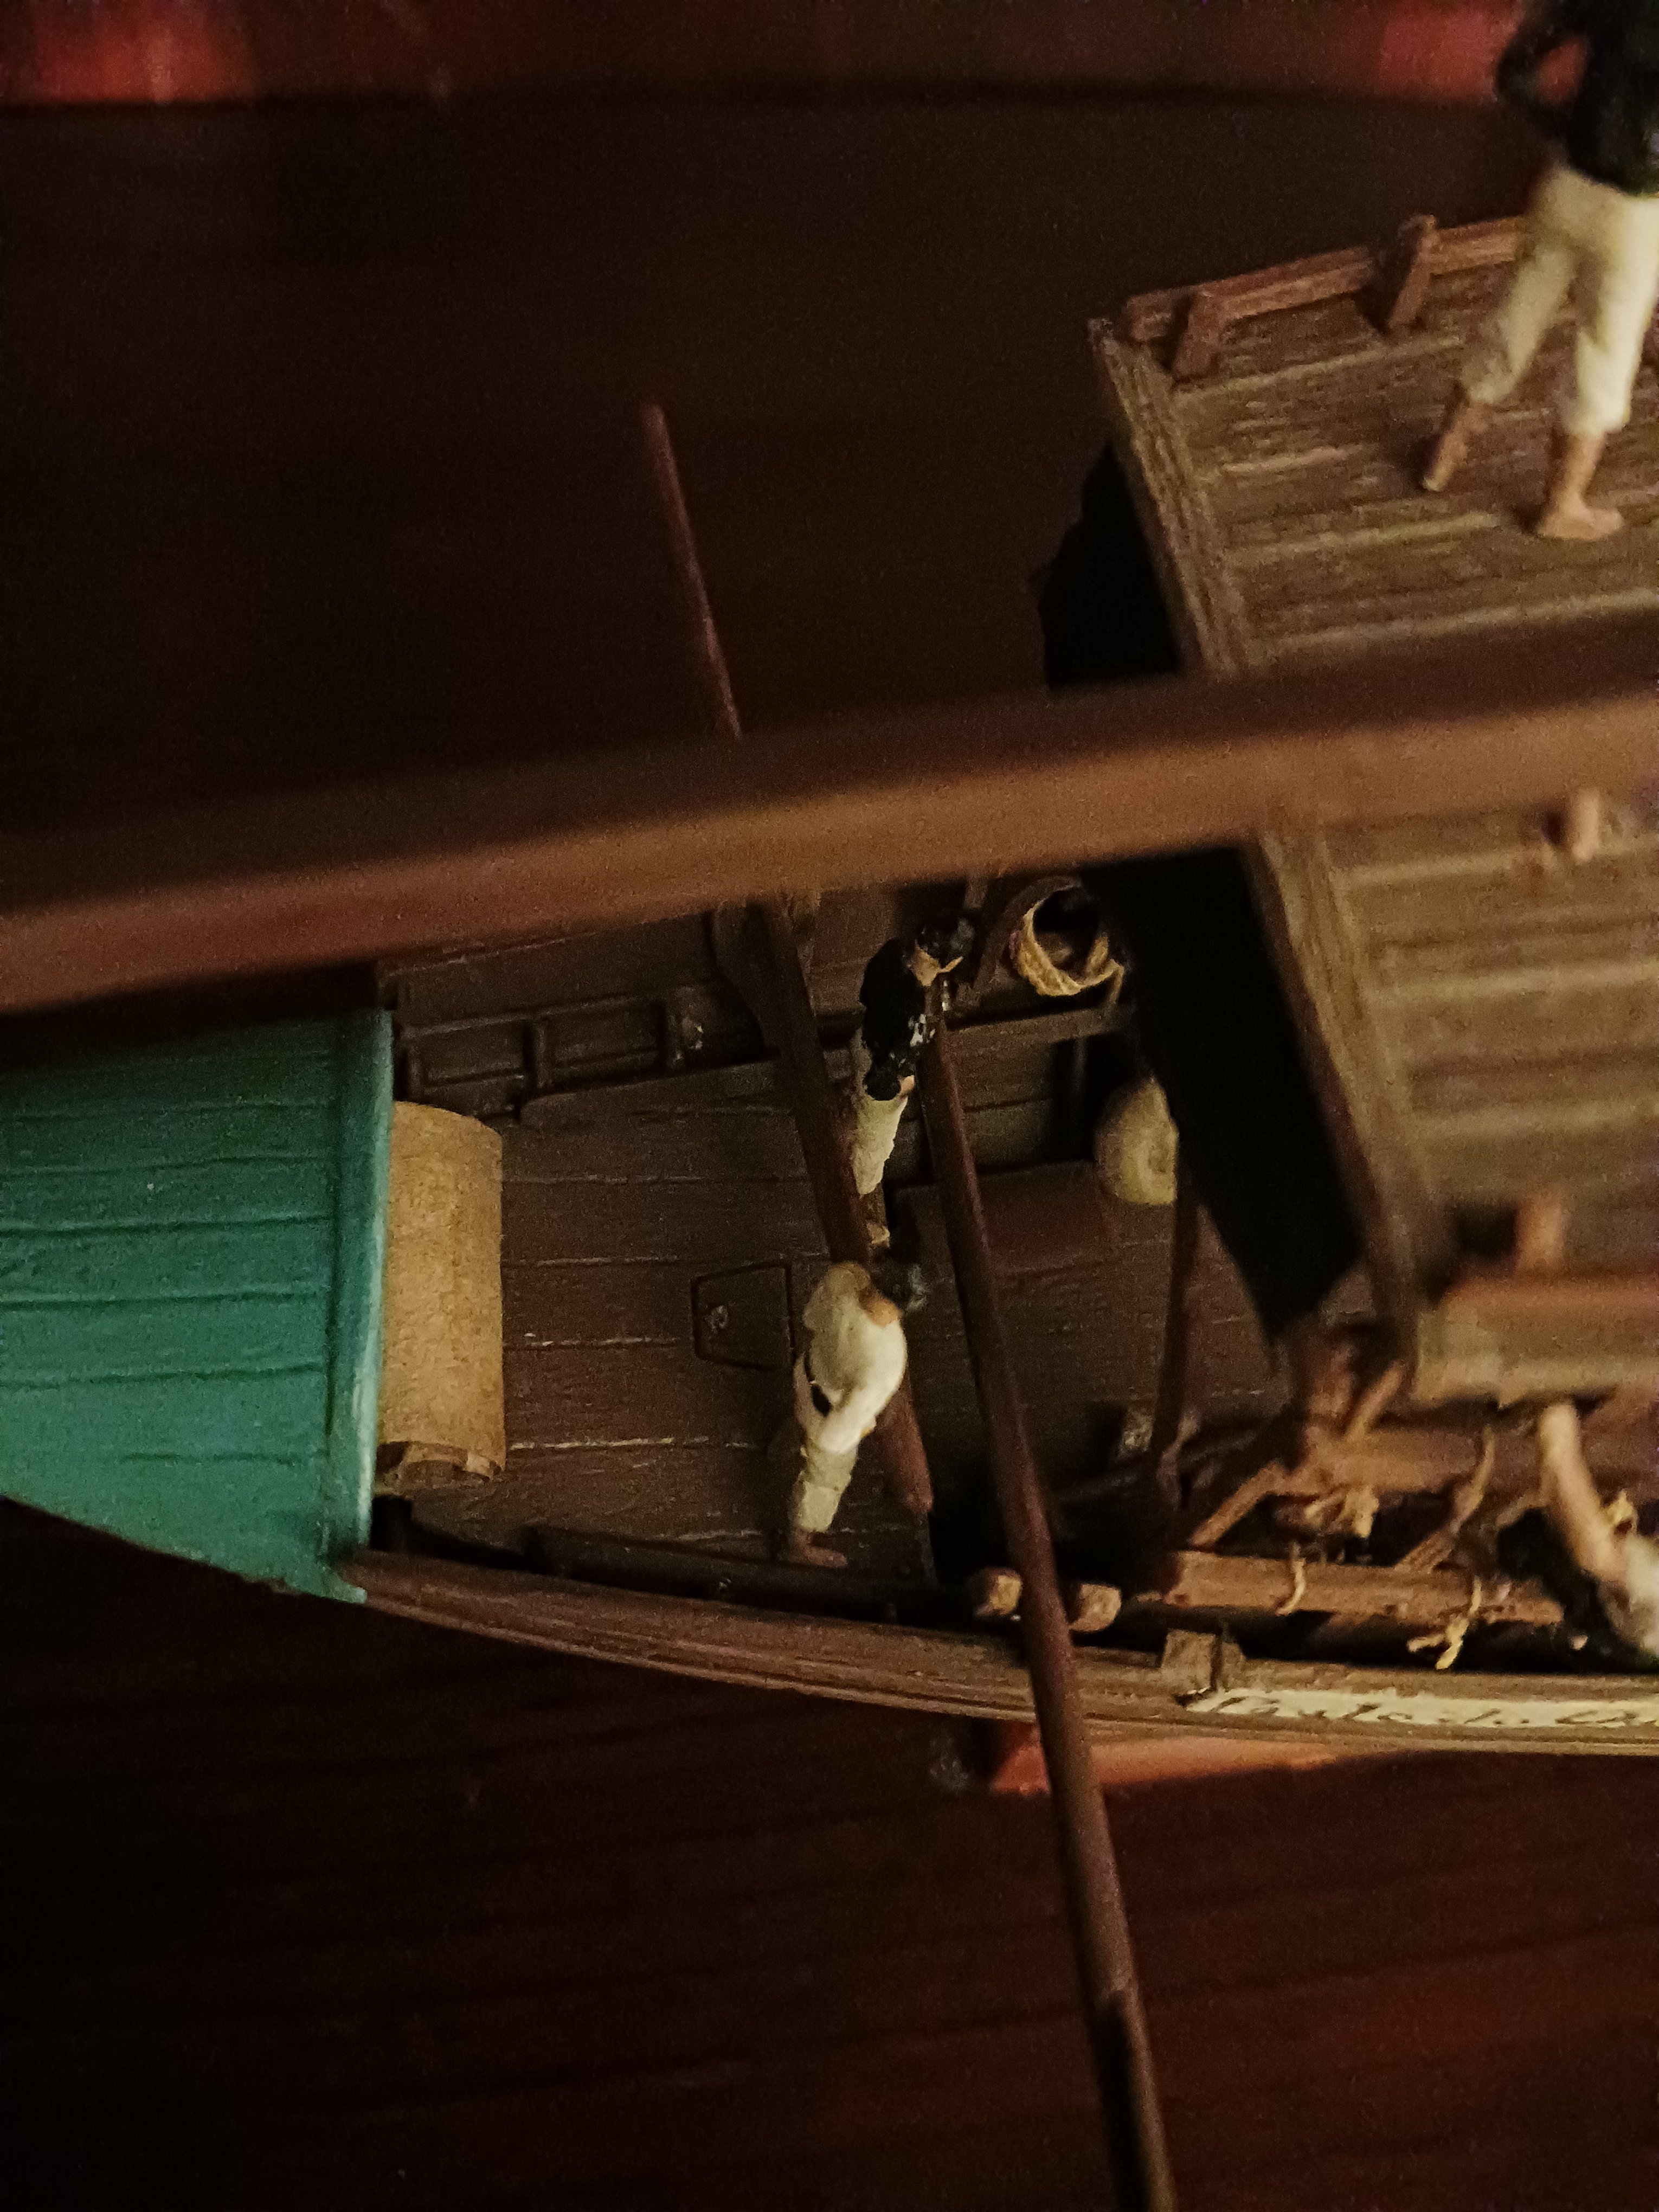
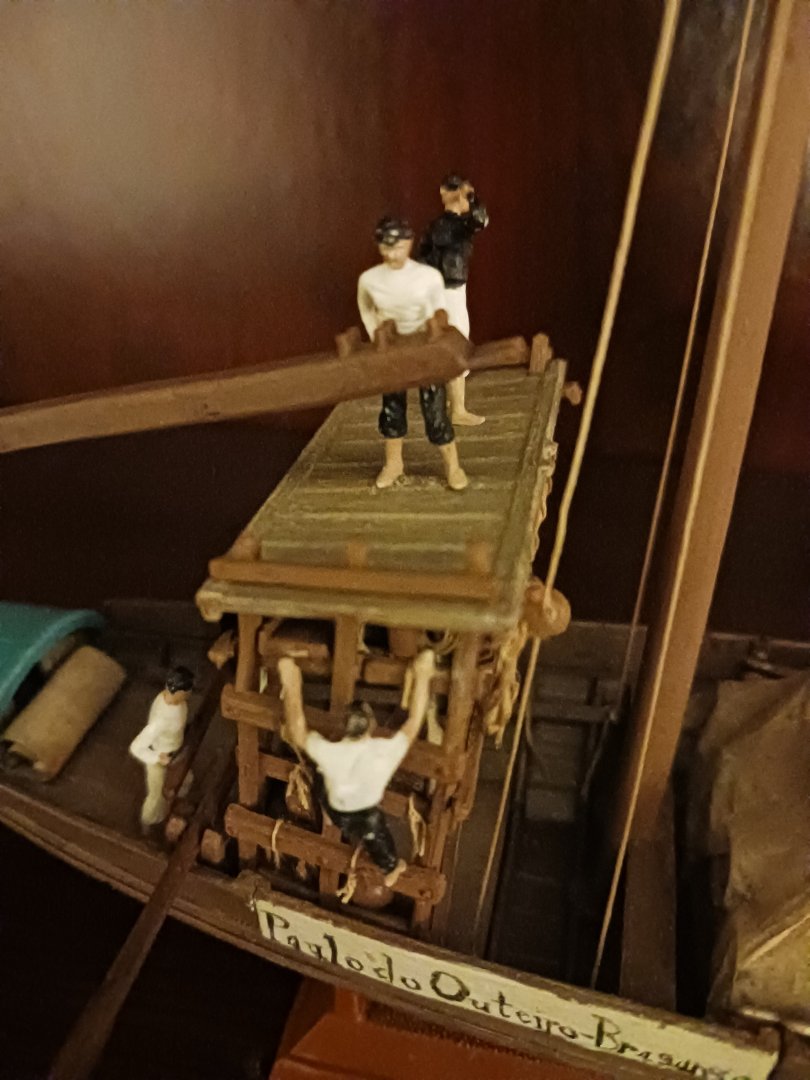
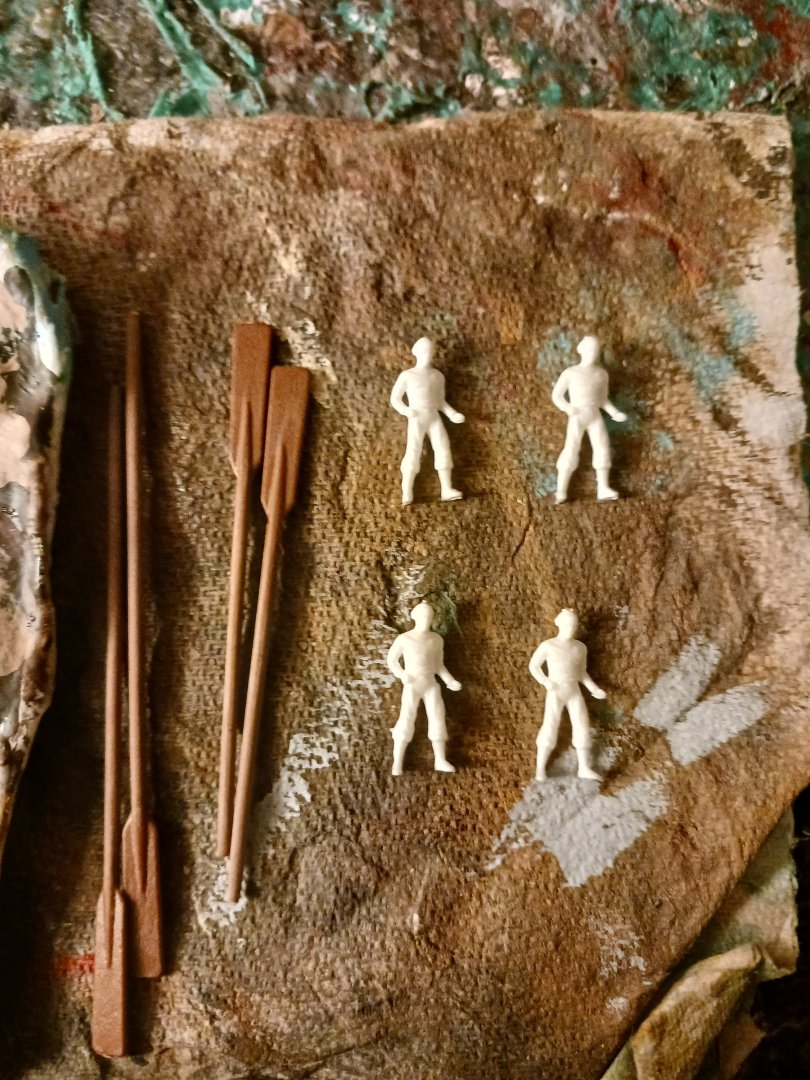
 The boat is officially crewed. About 5 or 6 years ago, I did a model of an English galleon (which was released as a small and equally inaccurate modification of their Spanish galleon) which was a terrible kit, but taught me quite a bit about how the core aspects of ship modelling work. That kit came with crew figures that were in about 1/75 scale that remained unused. I cleaned 8 of them up, painted them to look like Rabelo boatmen, and put them on the boat in accordance with historical evidence. They need a bit of paint cleanup from consistent handling, as does the rest of the boat. The man at the very fore of the boat, who will be hauling on the bowlines, has not been glued into place. I might recruit some more help for the fore oars, which are considerably longer than the aft. The boat as she is today:
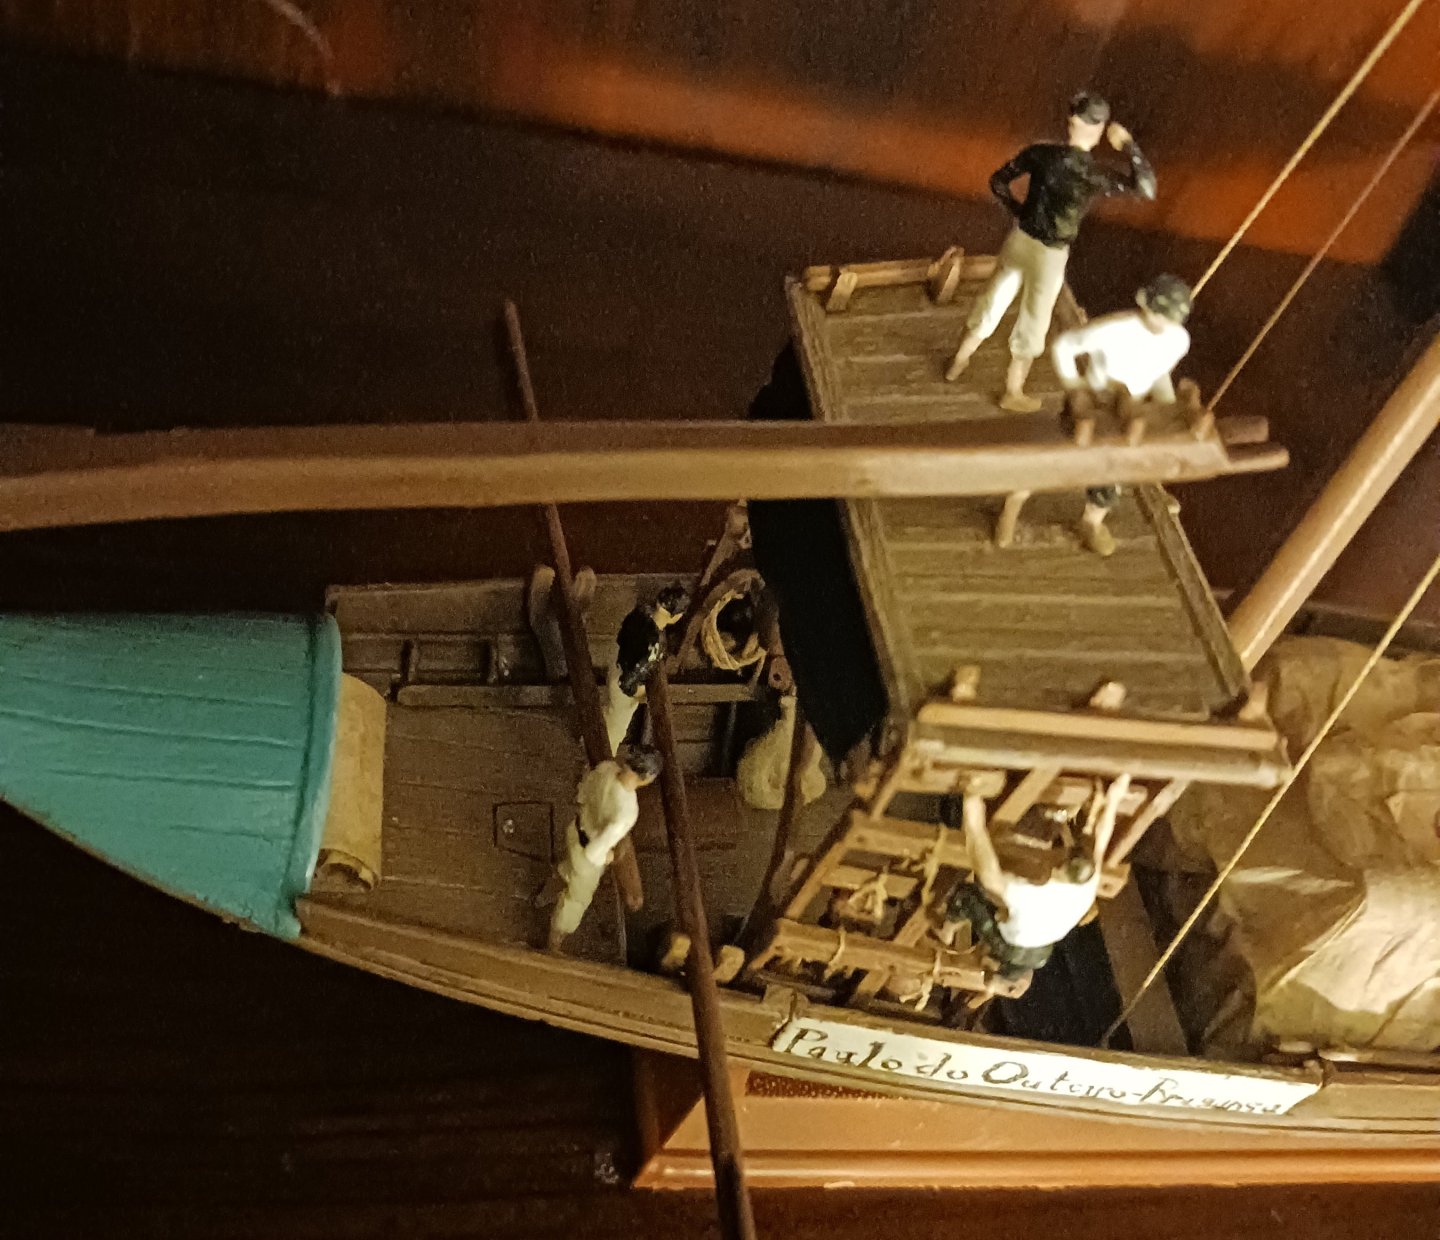


- 17 replies
-
- 1
-
-
- barco rabelo
- 1/75
- (and 2 more)
-
Dr PR reacted to a post in a topic:
Sail feedback request, Mondfeld method
-
wefalck reacted to a post in a topic:
Sail feedback request, Mondfeld method
-
Sail feedback request, Mondfeld method
Ferrus Manus replied to travis's topic in Masting, rigging and sails
Personally, I swear by silkspan. You can buy it all over the United States, and I'm sure eBay or Amazon sells it. I have used multiple different thicknesses of silkspan and never, ever had any issues even when the material was wet. The only tears I have had using silkspan sails were completely my fault and not that of the product, and were pretty easily fixable because they were small. Making a scale-accurate sail never takes me more than about a day. You can even replicate things like tarpaulins using silkspan- really any cloth product present on a real ship can be accurately represented. -
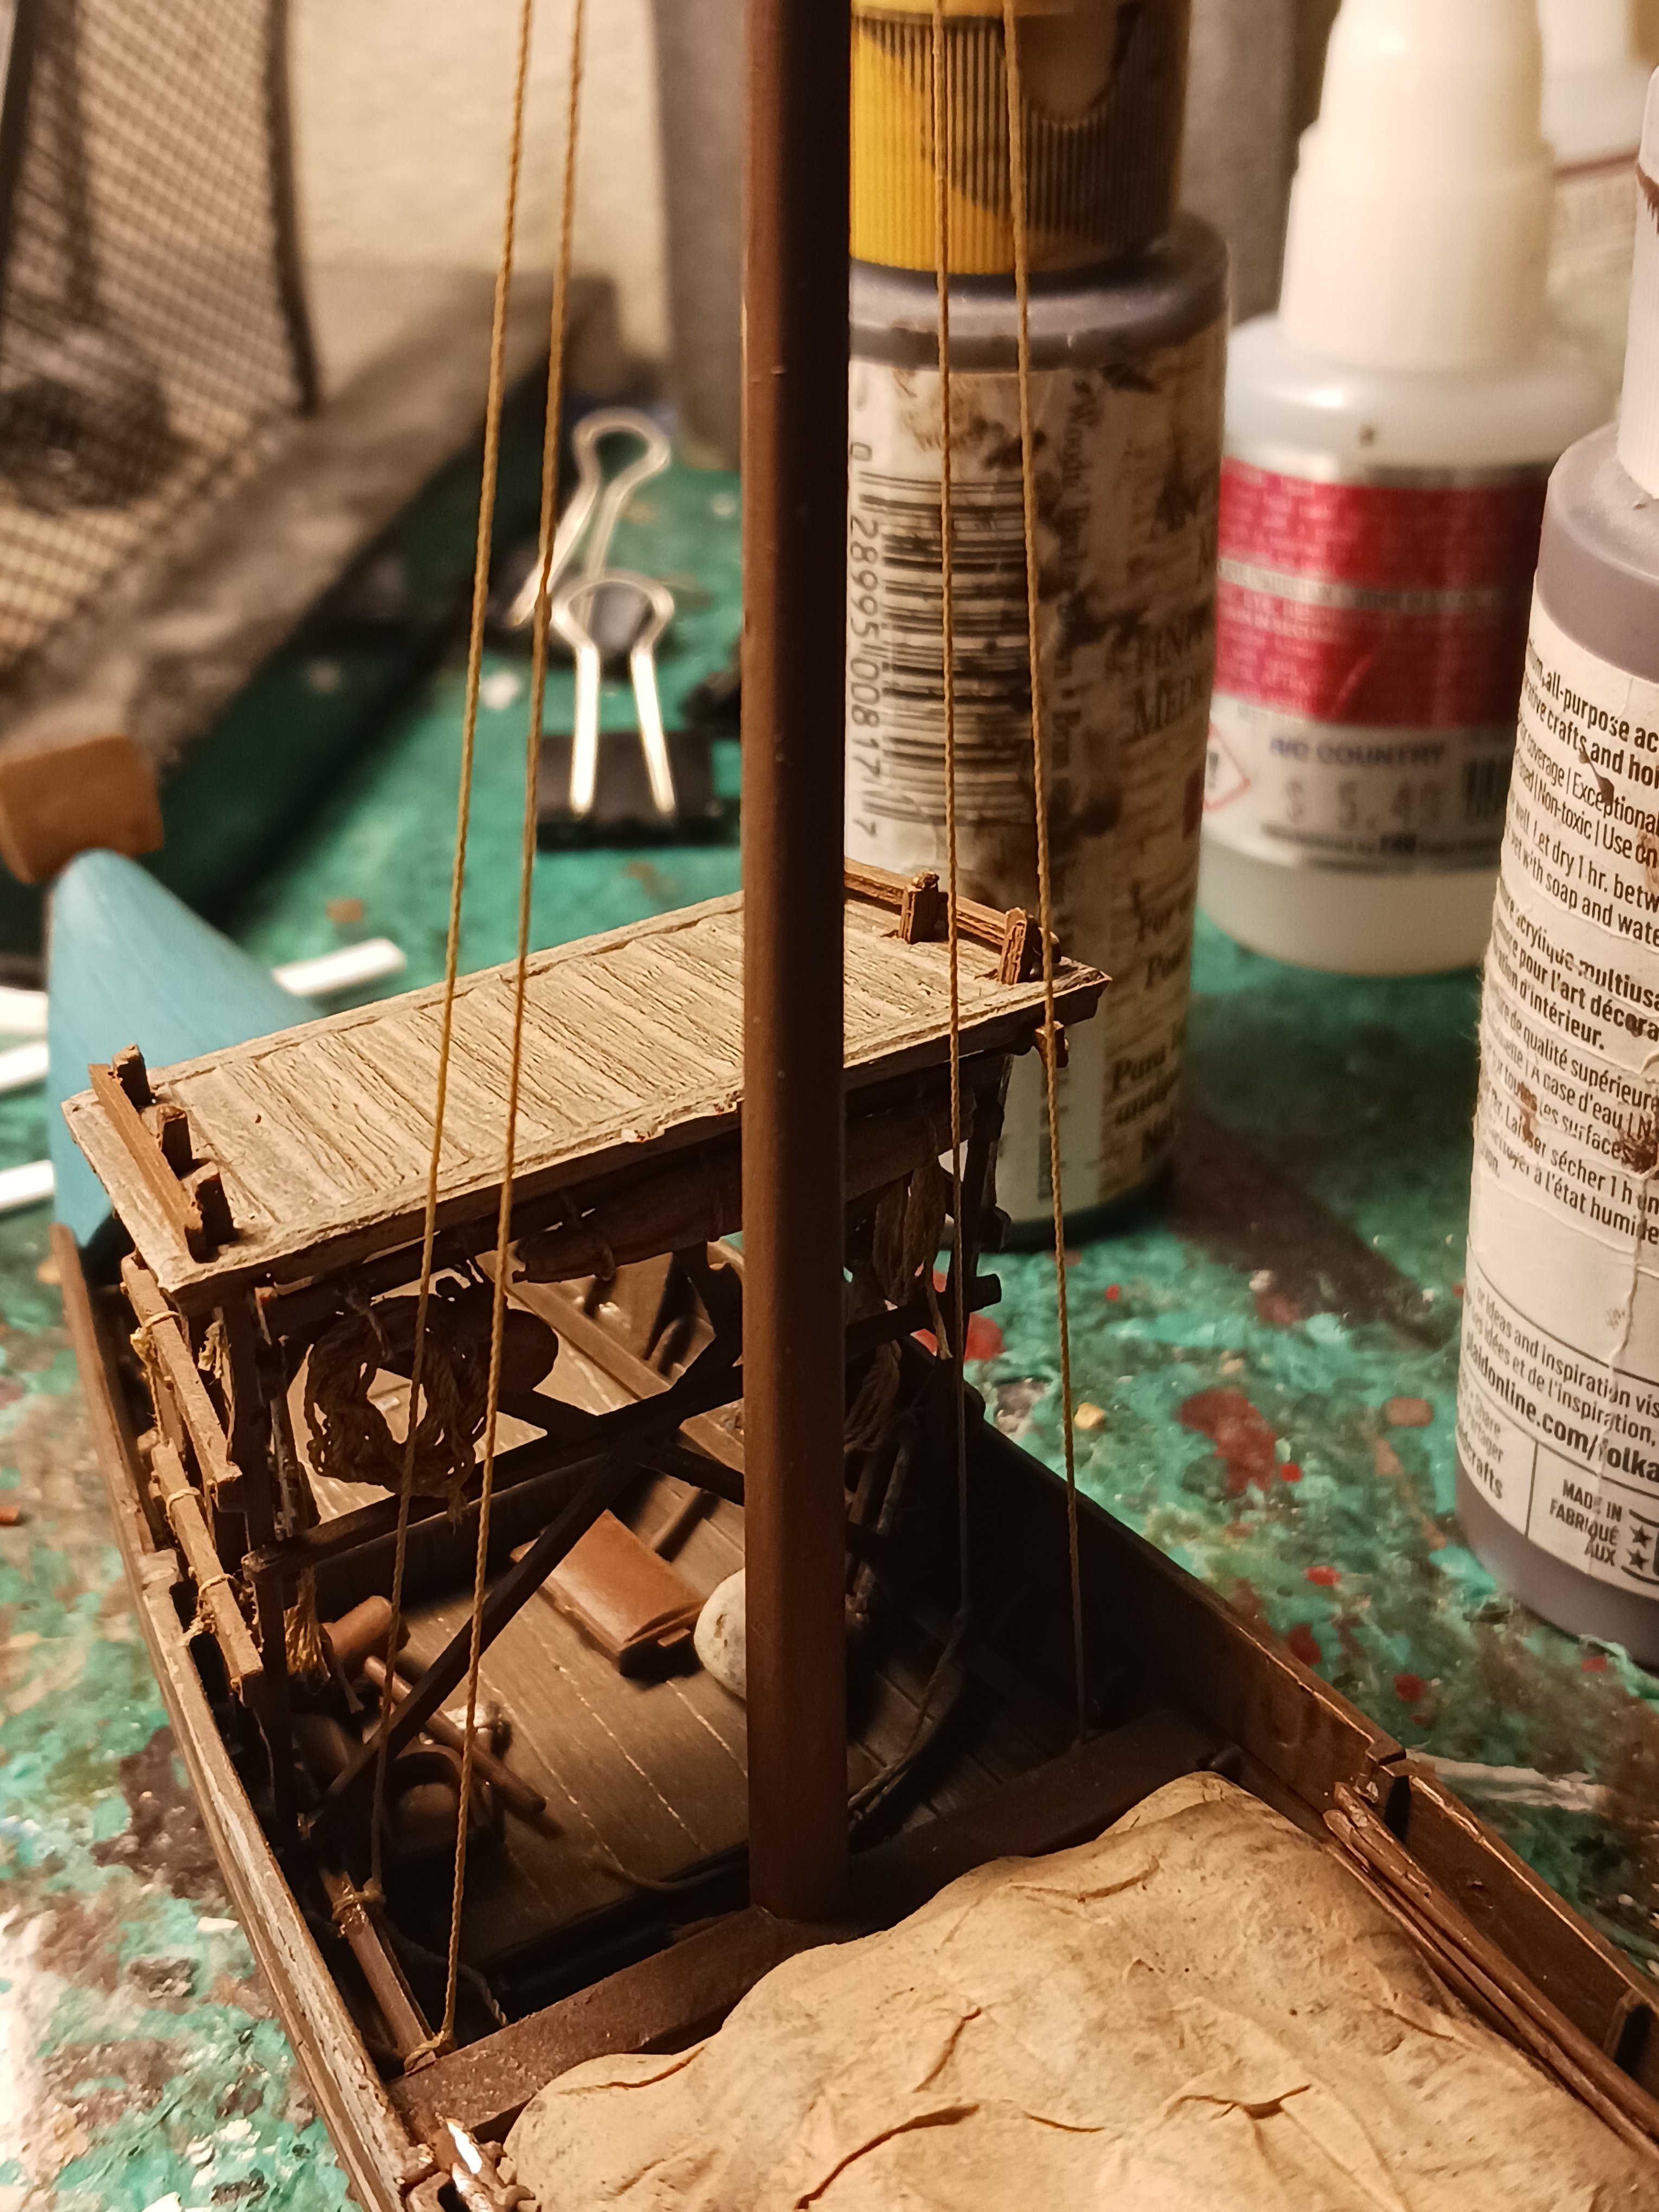
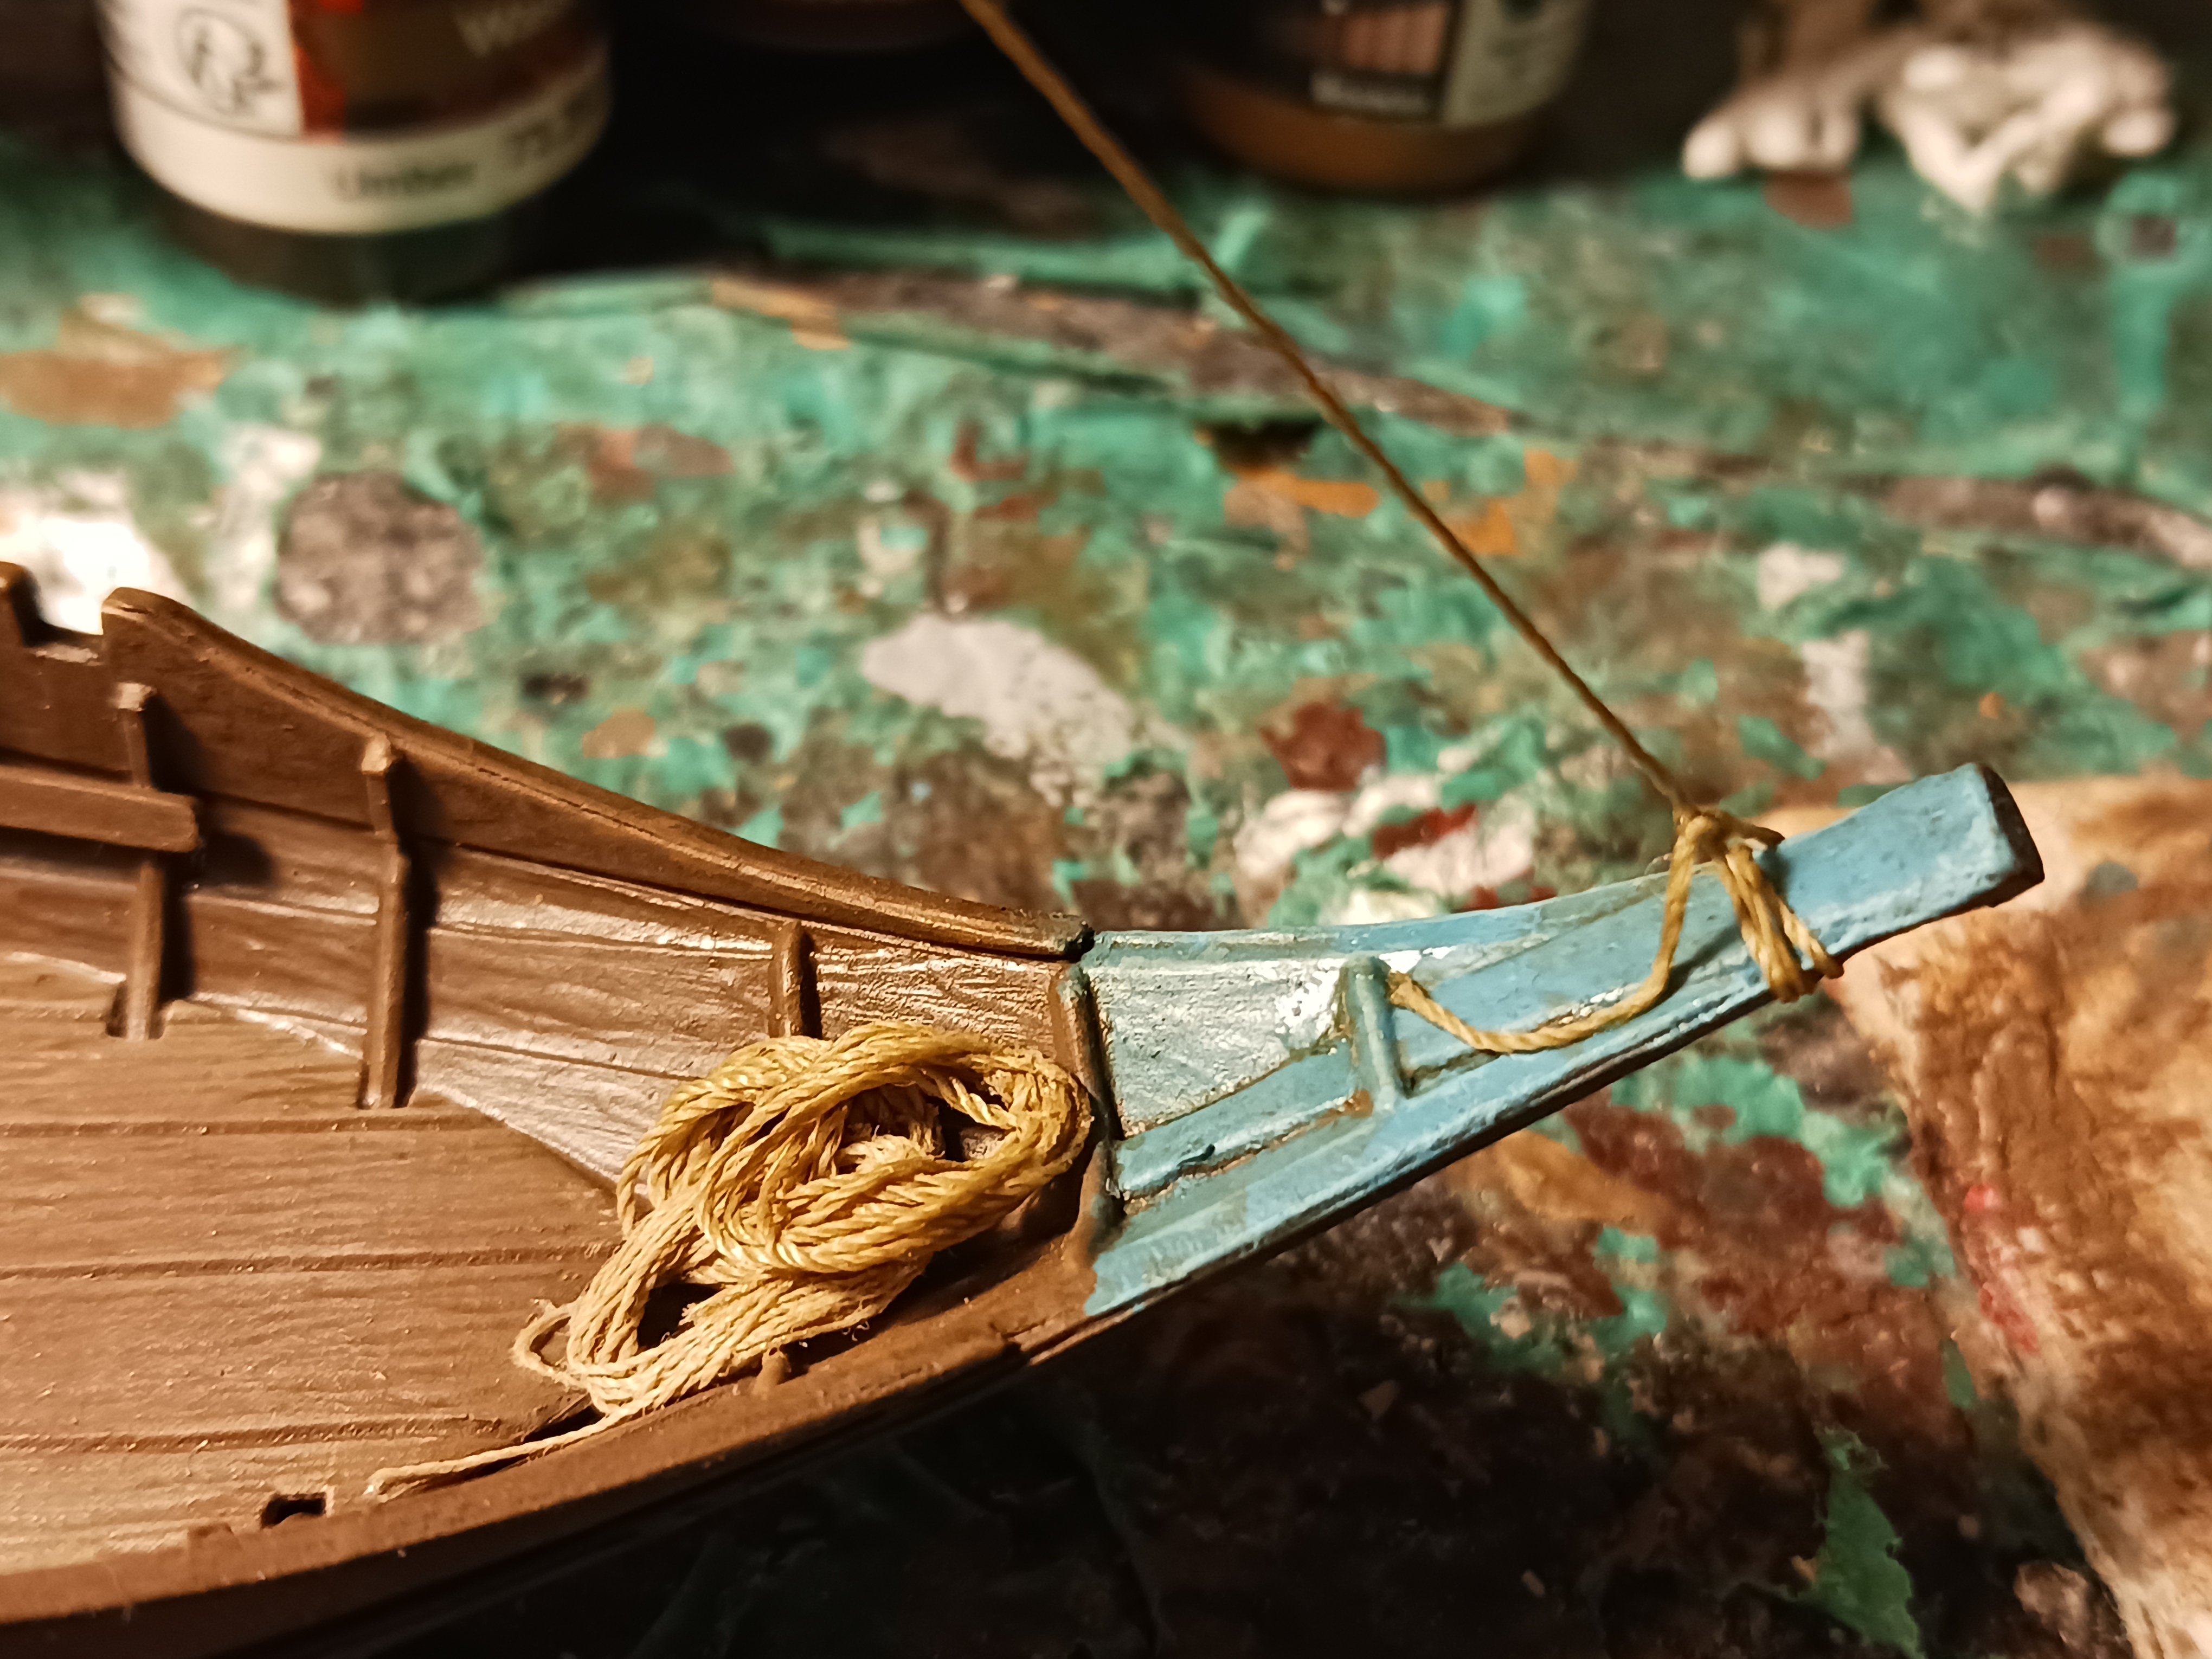
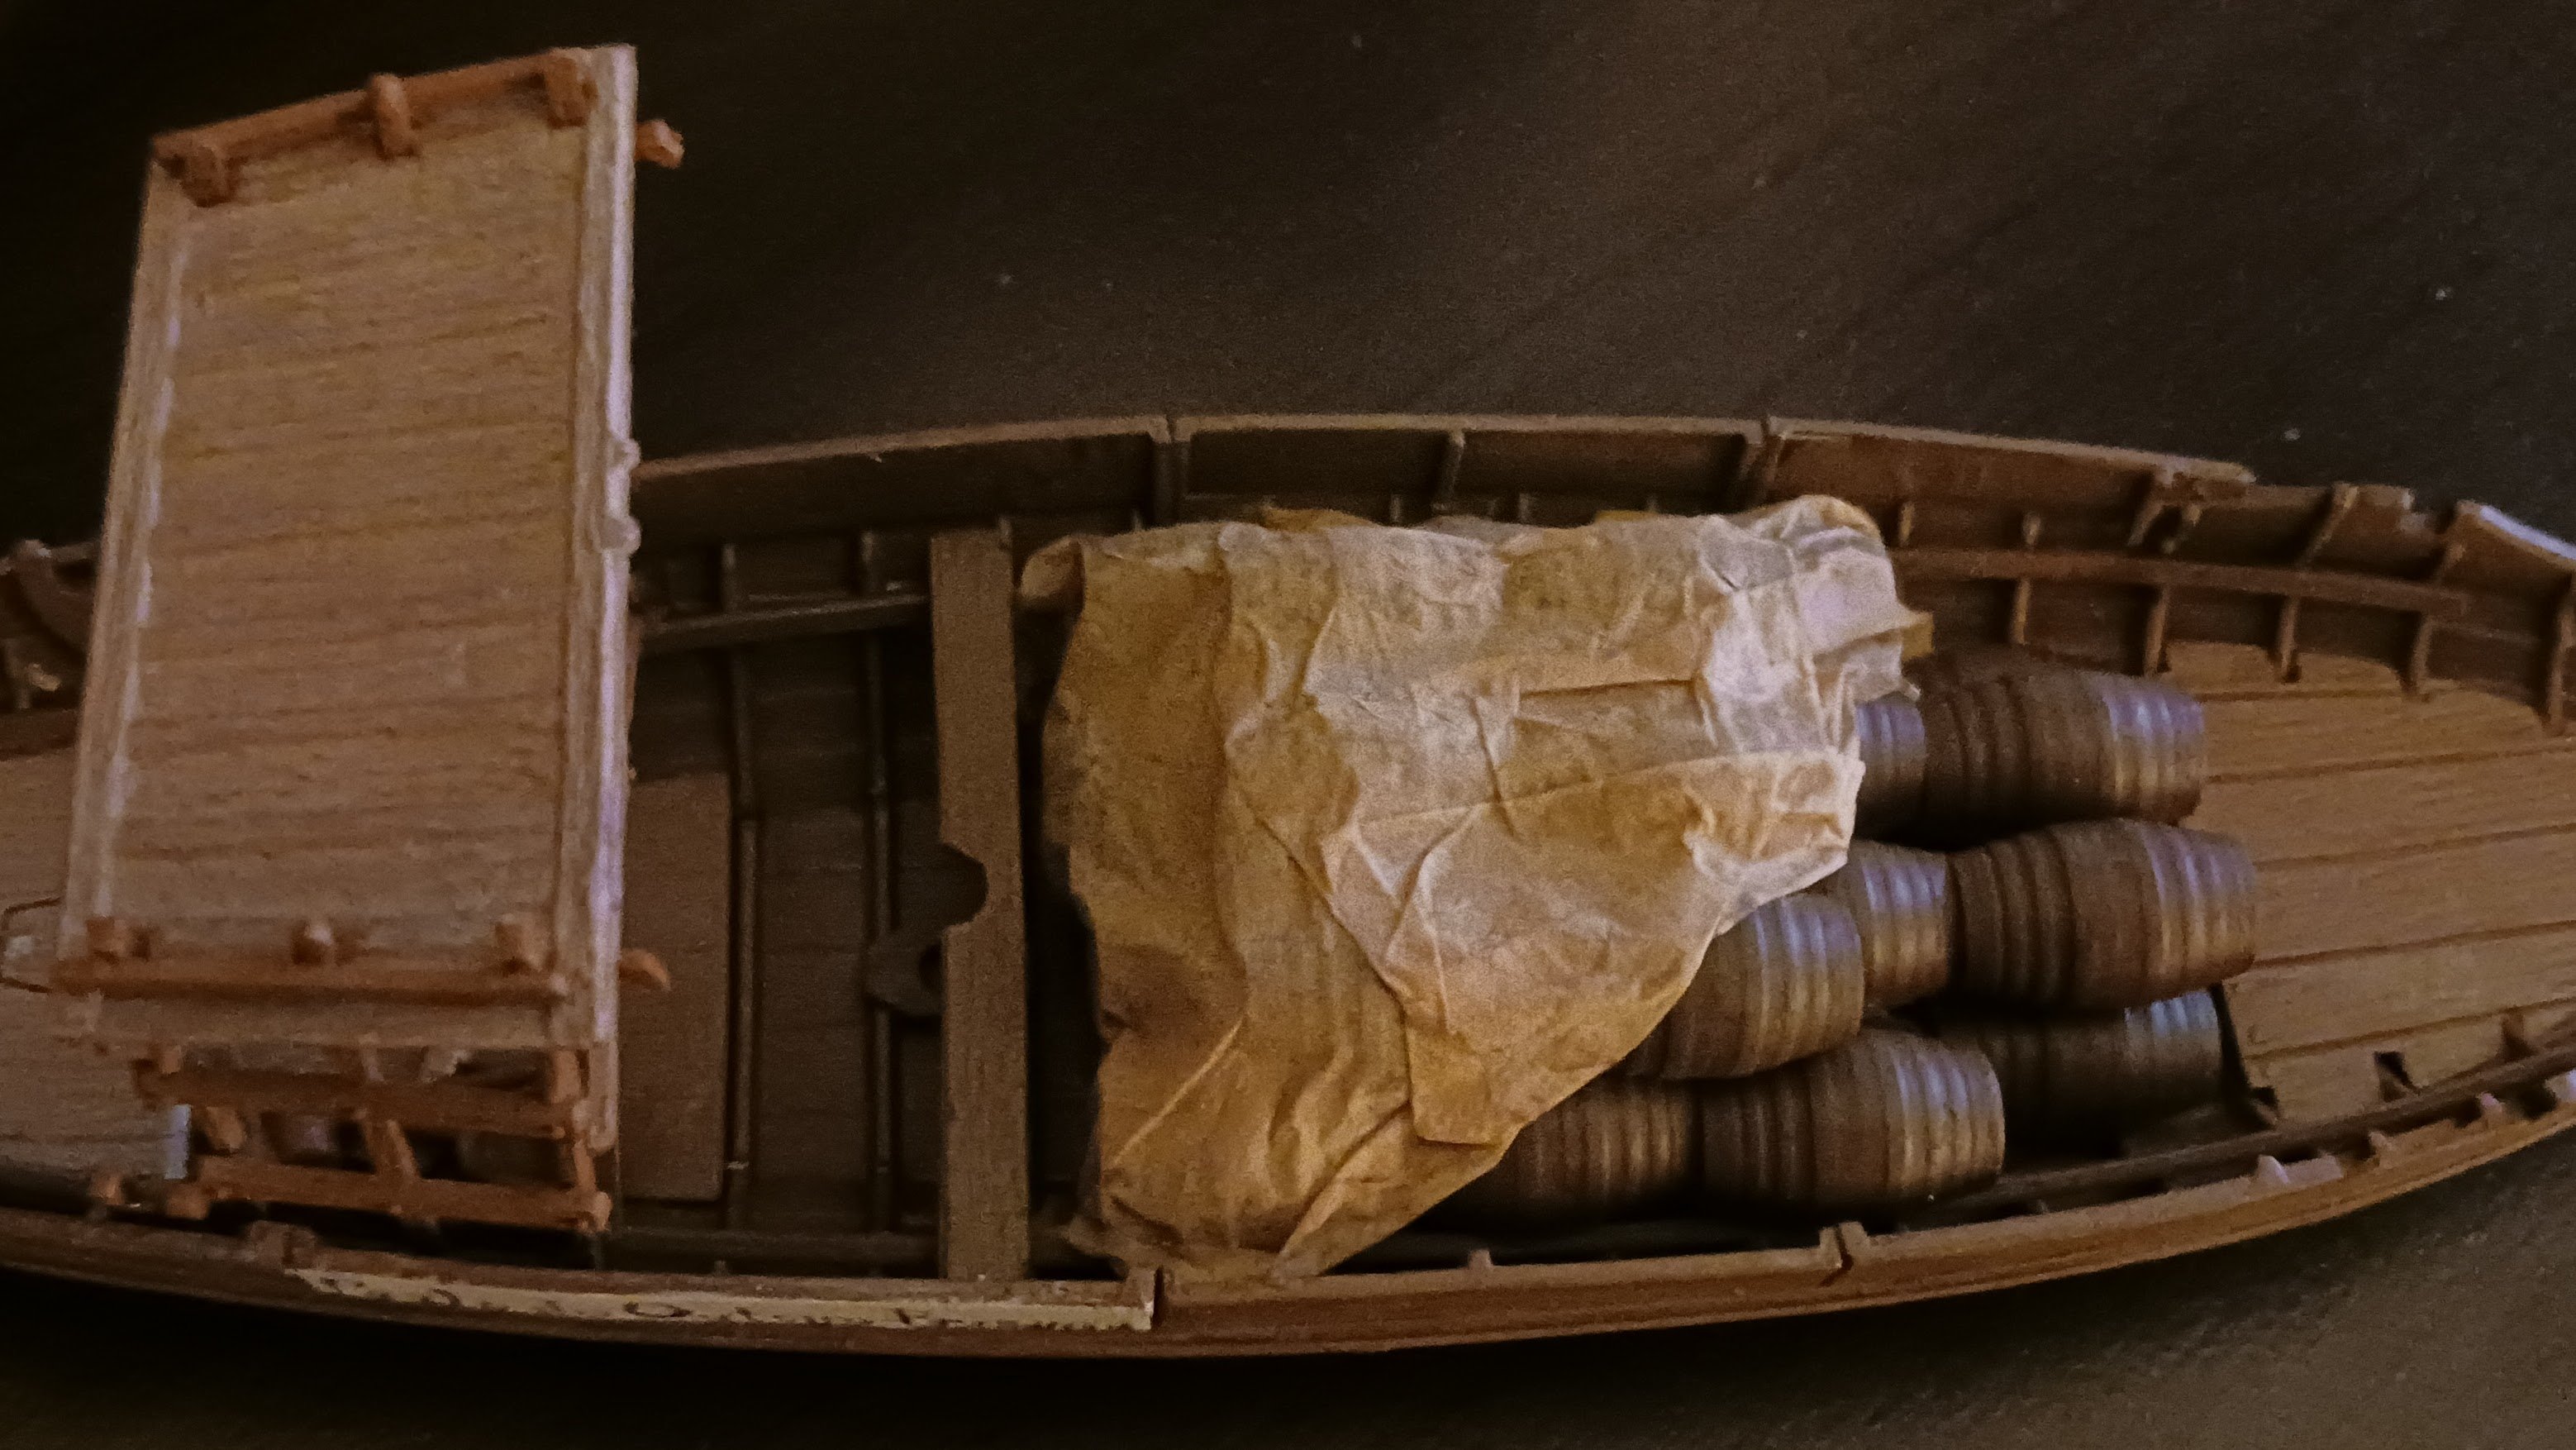
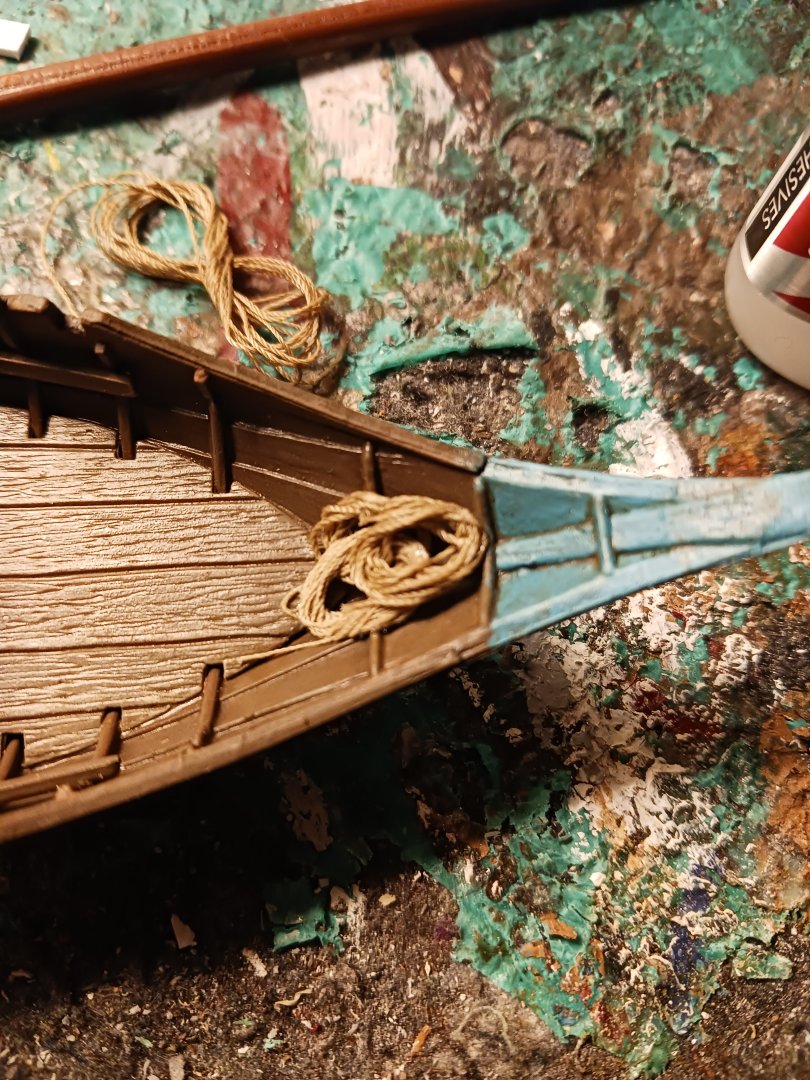
I've done a bit of work on the Rabelo boat in the last few days. I have gotten a few things ready for the addition of the crew, for one thing. I've also added some of the last remaining deck details. I've also gotten the mast stepped and the relatively simple standing rigging completed. Realistically, the boat probably would have been on the upriver journey at this point, as evidenced by the fact that it has its rig. I wanted to depict it with the sail just for completion's sake. From what I gather, they didn't go upriver empty, but instead took empty wine casks with them.


- 17 replies
-
- 3
-
-
- barco rabelo
- 1/75
- (and 2 more)
-
Ferrus Manus reacted to a post in a topic:
Please Double-Check Your Log Titles Before Posting!
-
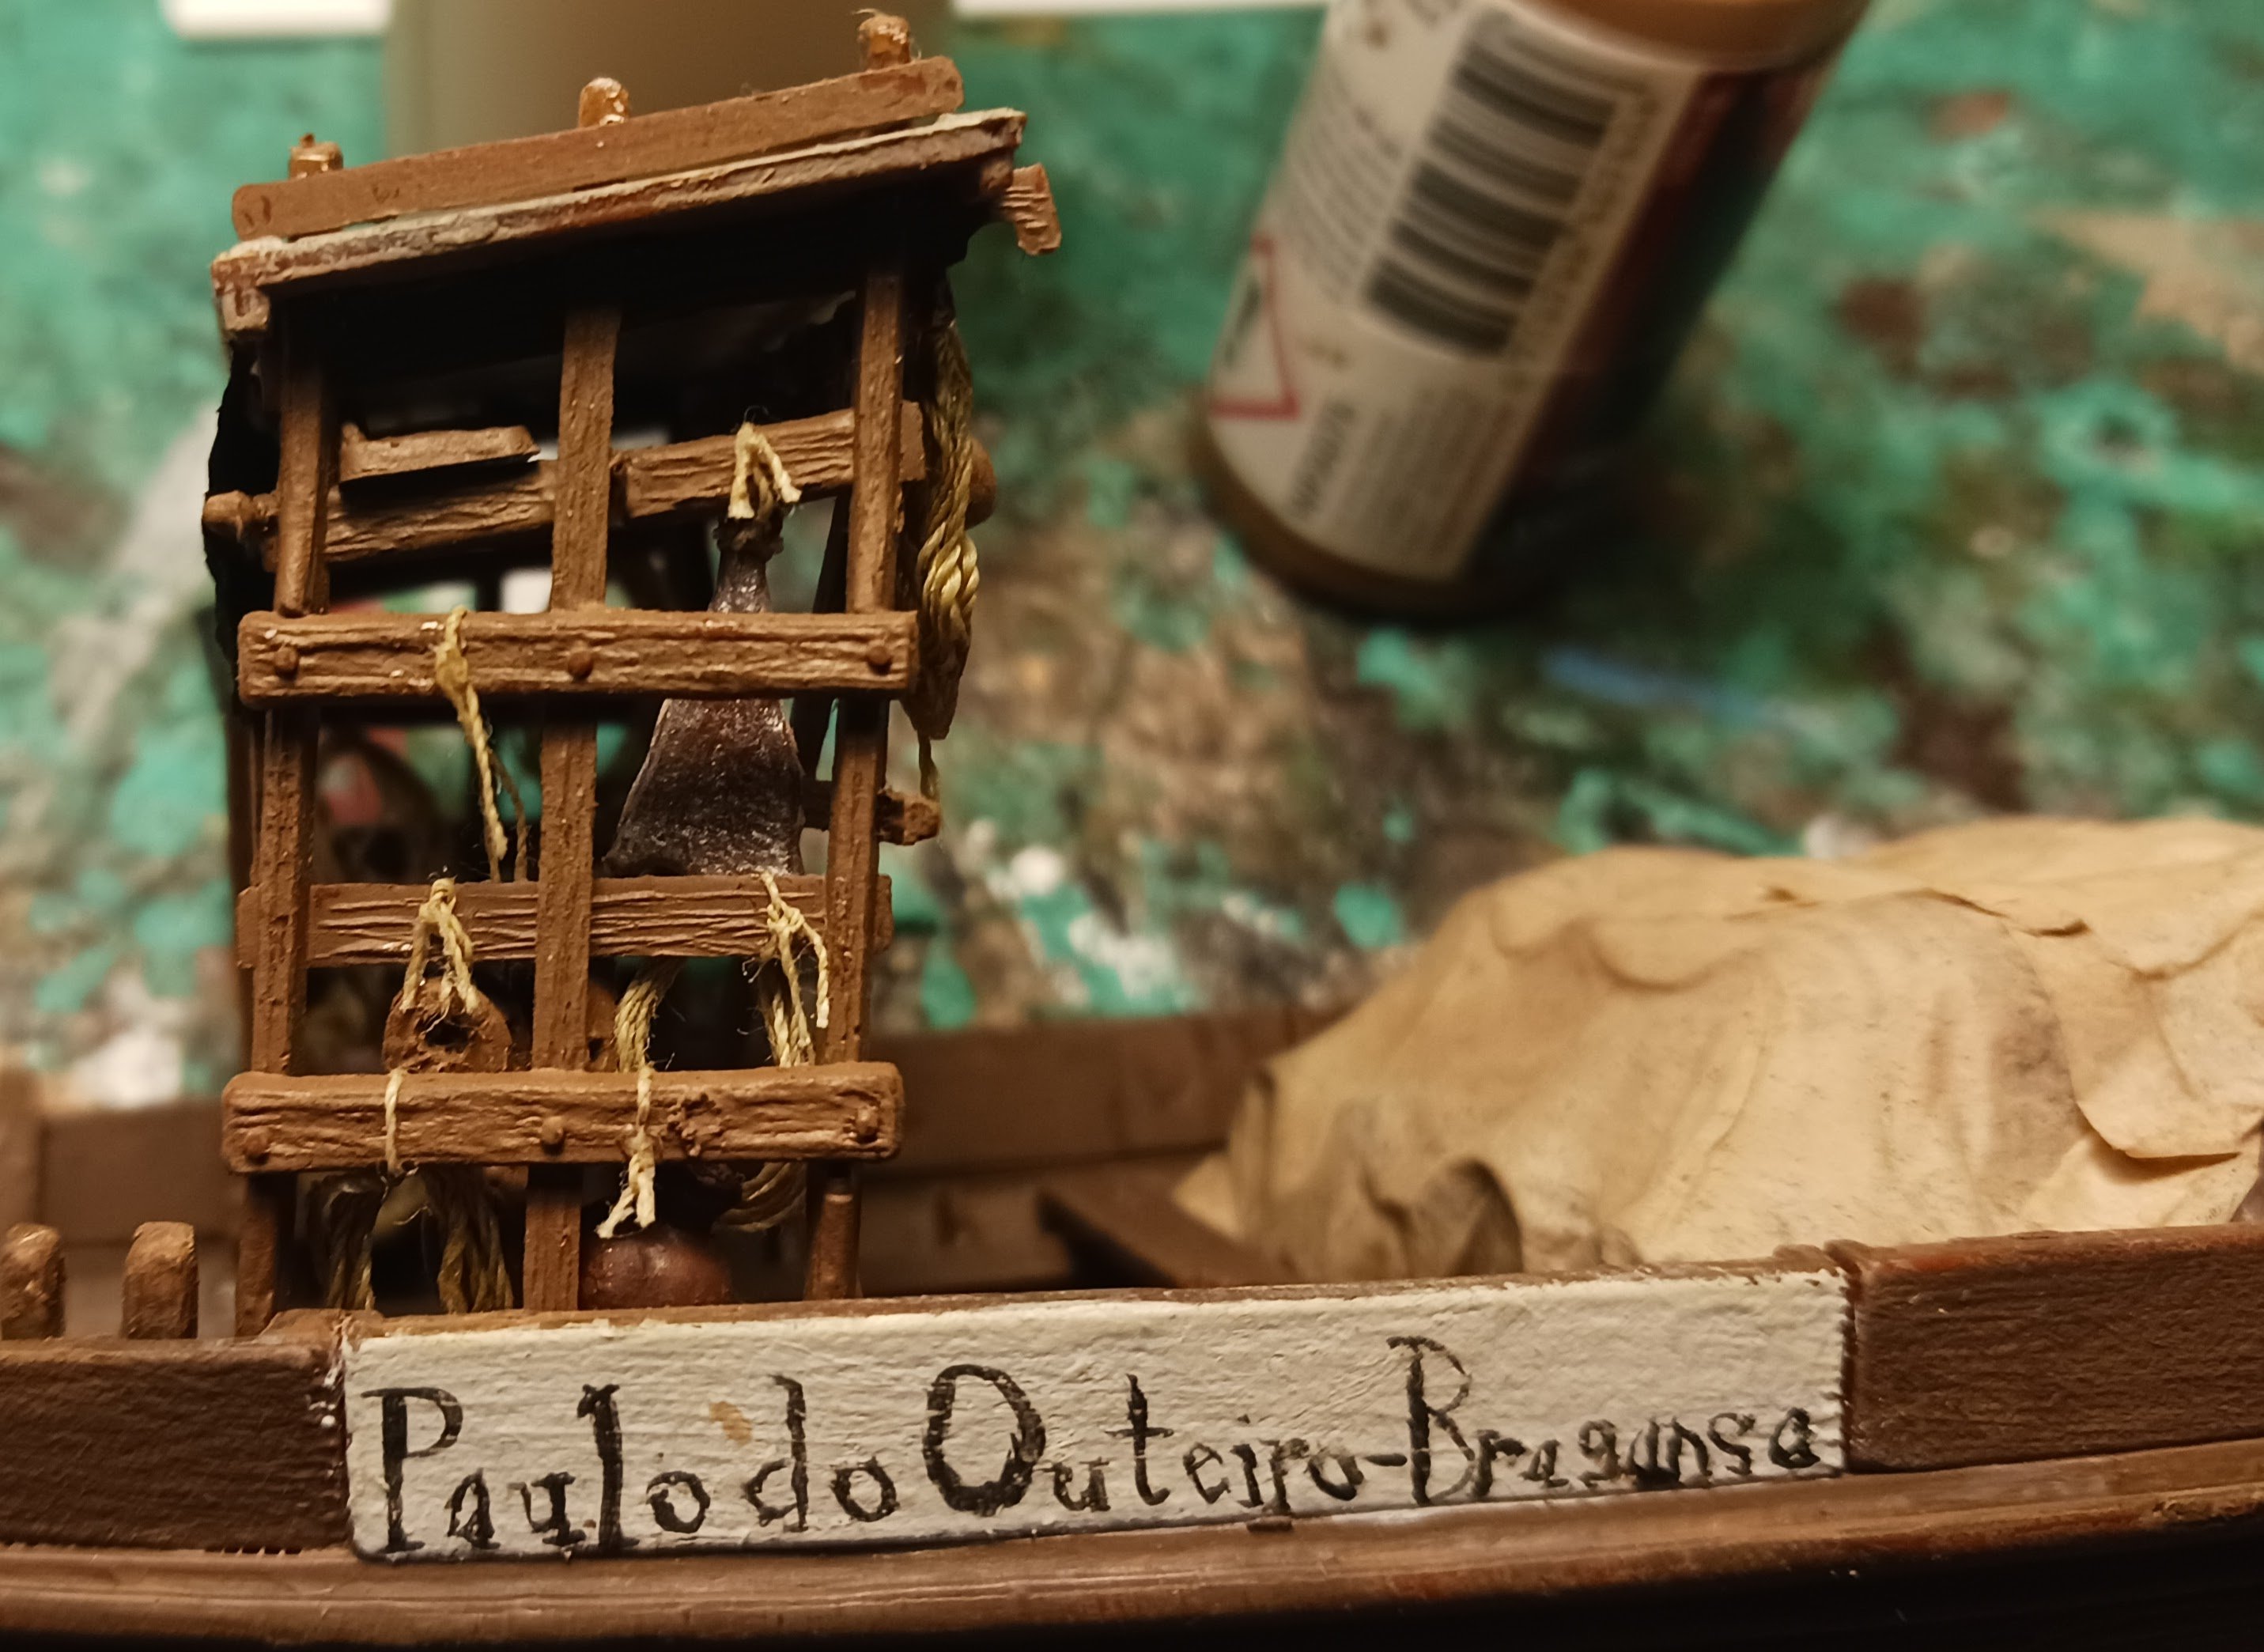
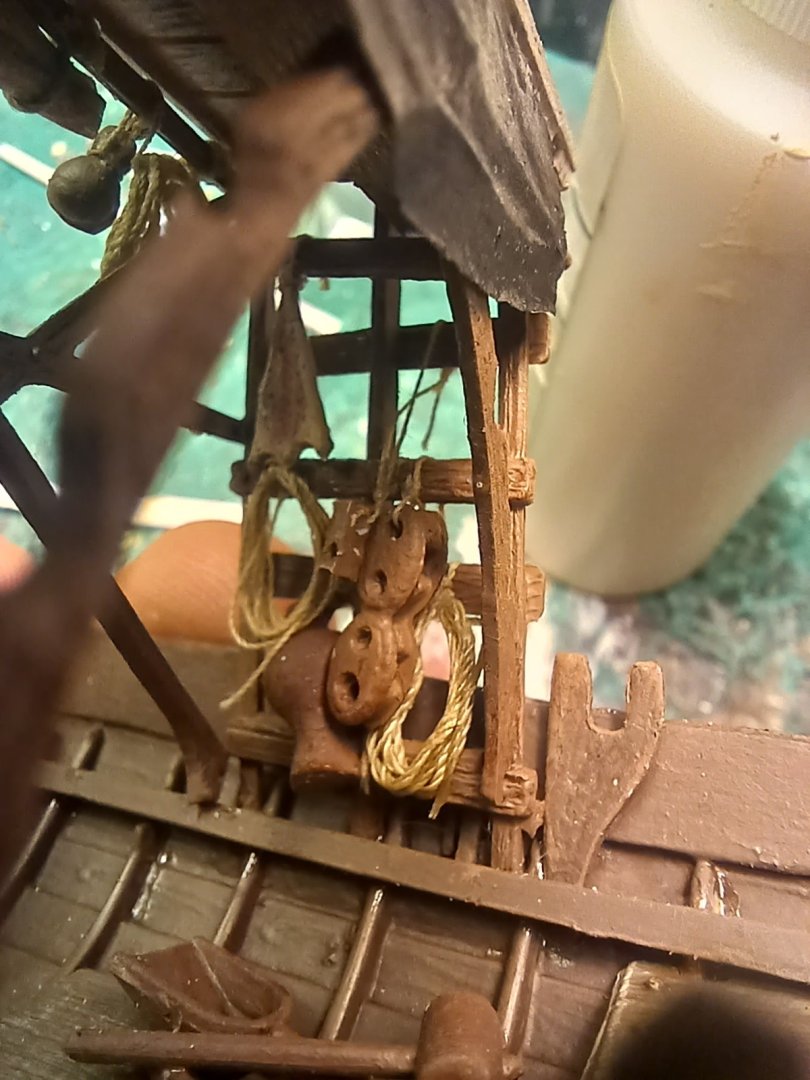
The apegadas is complete, with the exception of the ropes that will be directly used to control the steering oar. Happy New Year!

- 17 replies
-
- 3
-
-
- barco rabelo
- 1/75
- (and 2 more)
-
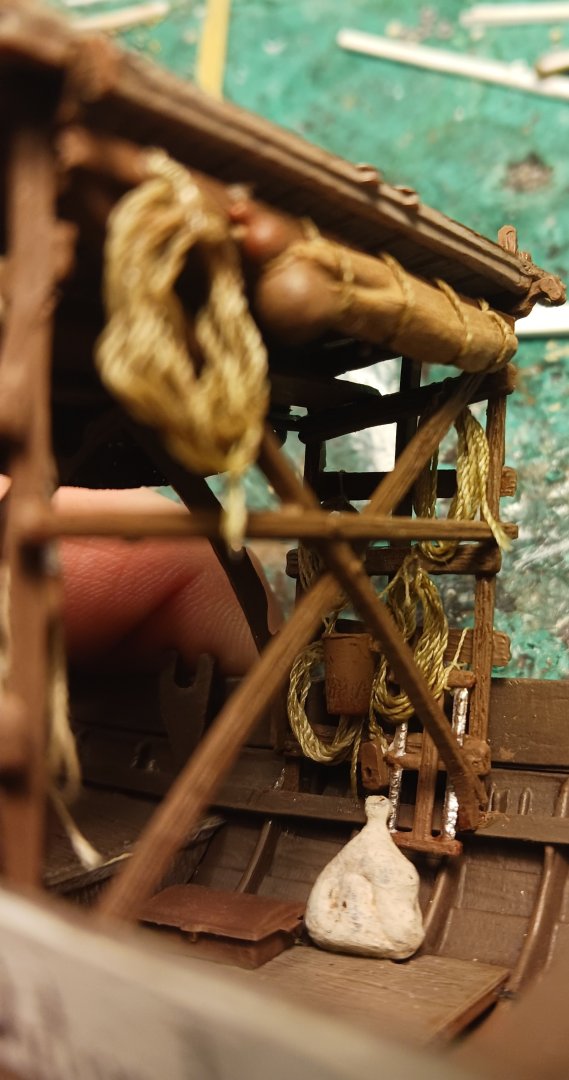
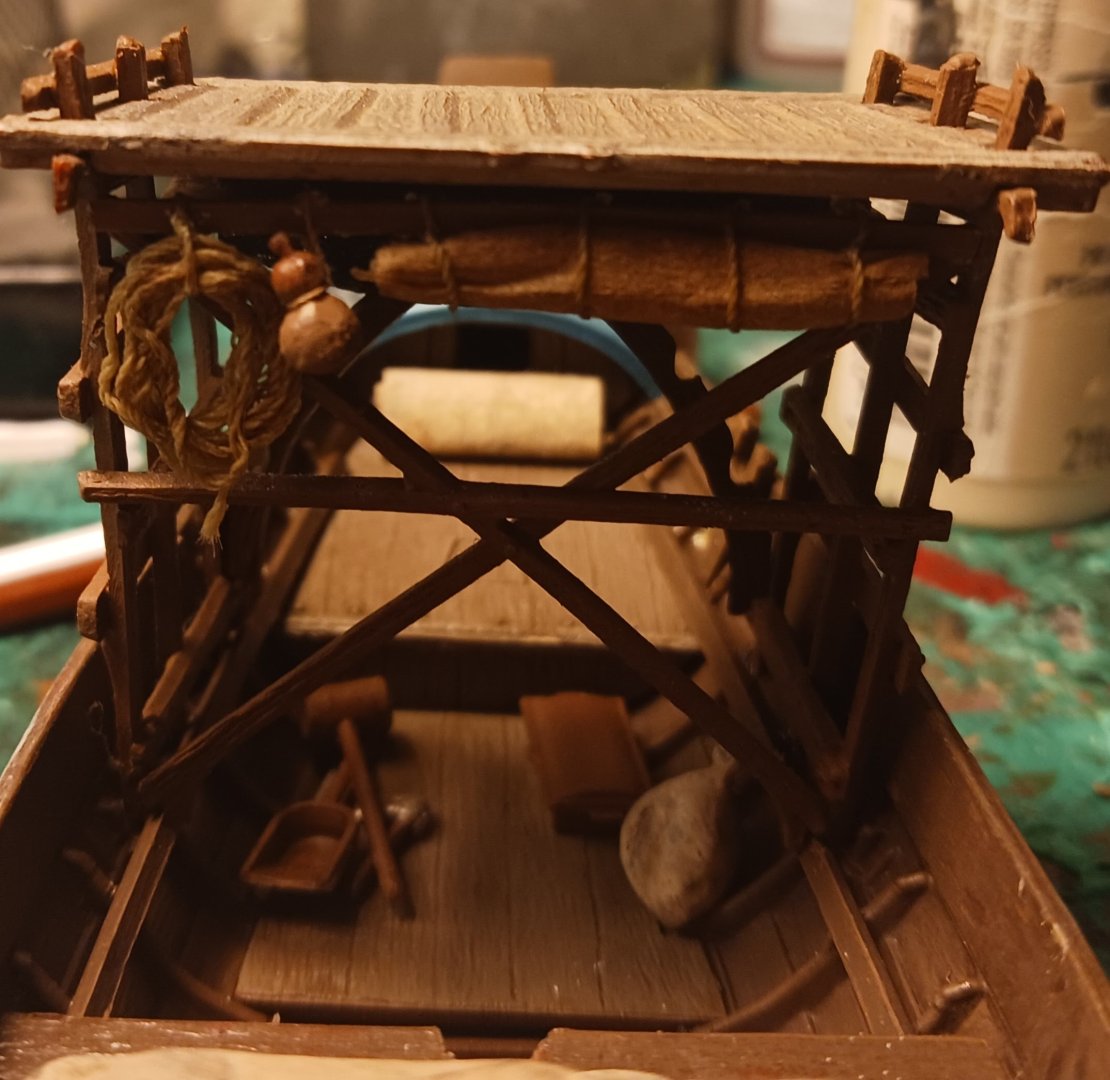
Happy New Year to everyone who visits this build log. My last bit of work for this year will be to fill up the apegadas with rope and equipment. The rest will wait until next year.
- 17 replies
-
- 1
-
-
- barco rabelo
- 1/75
- (and 2 more)
-
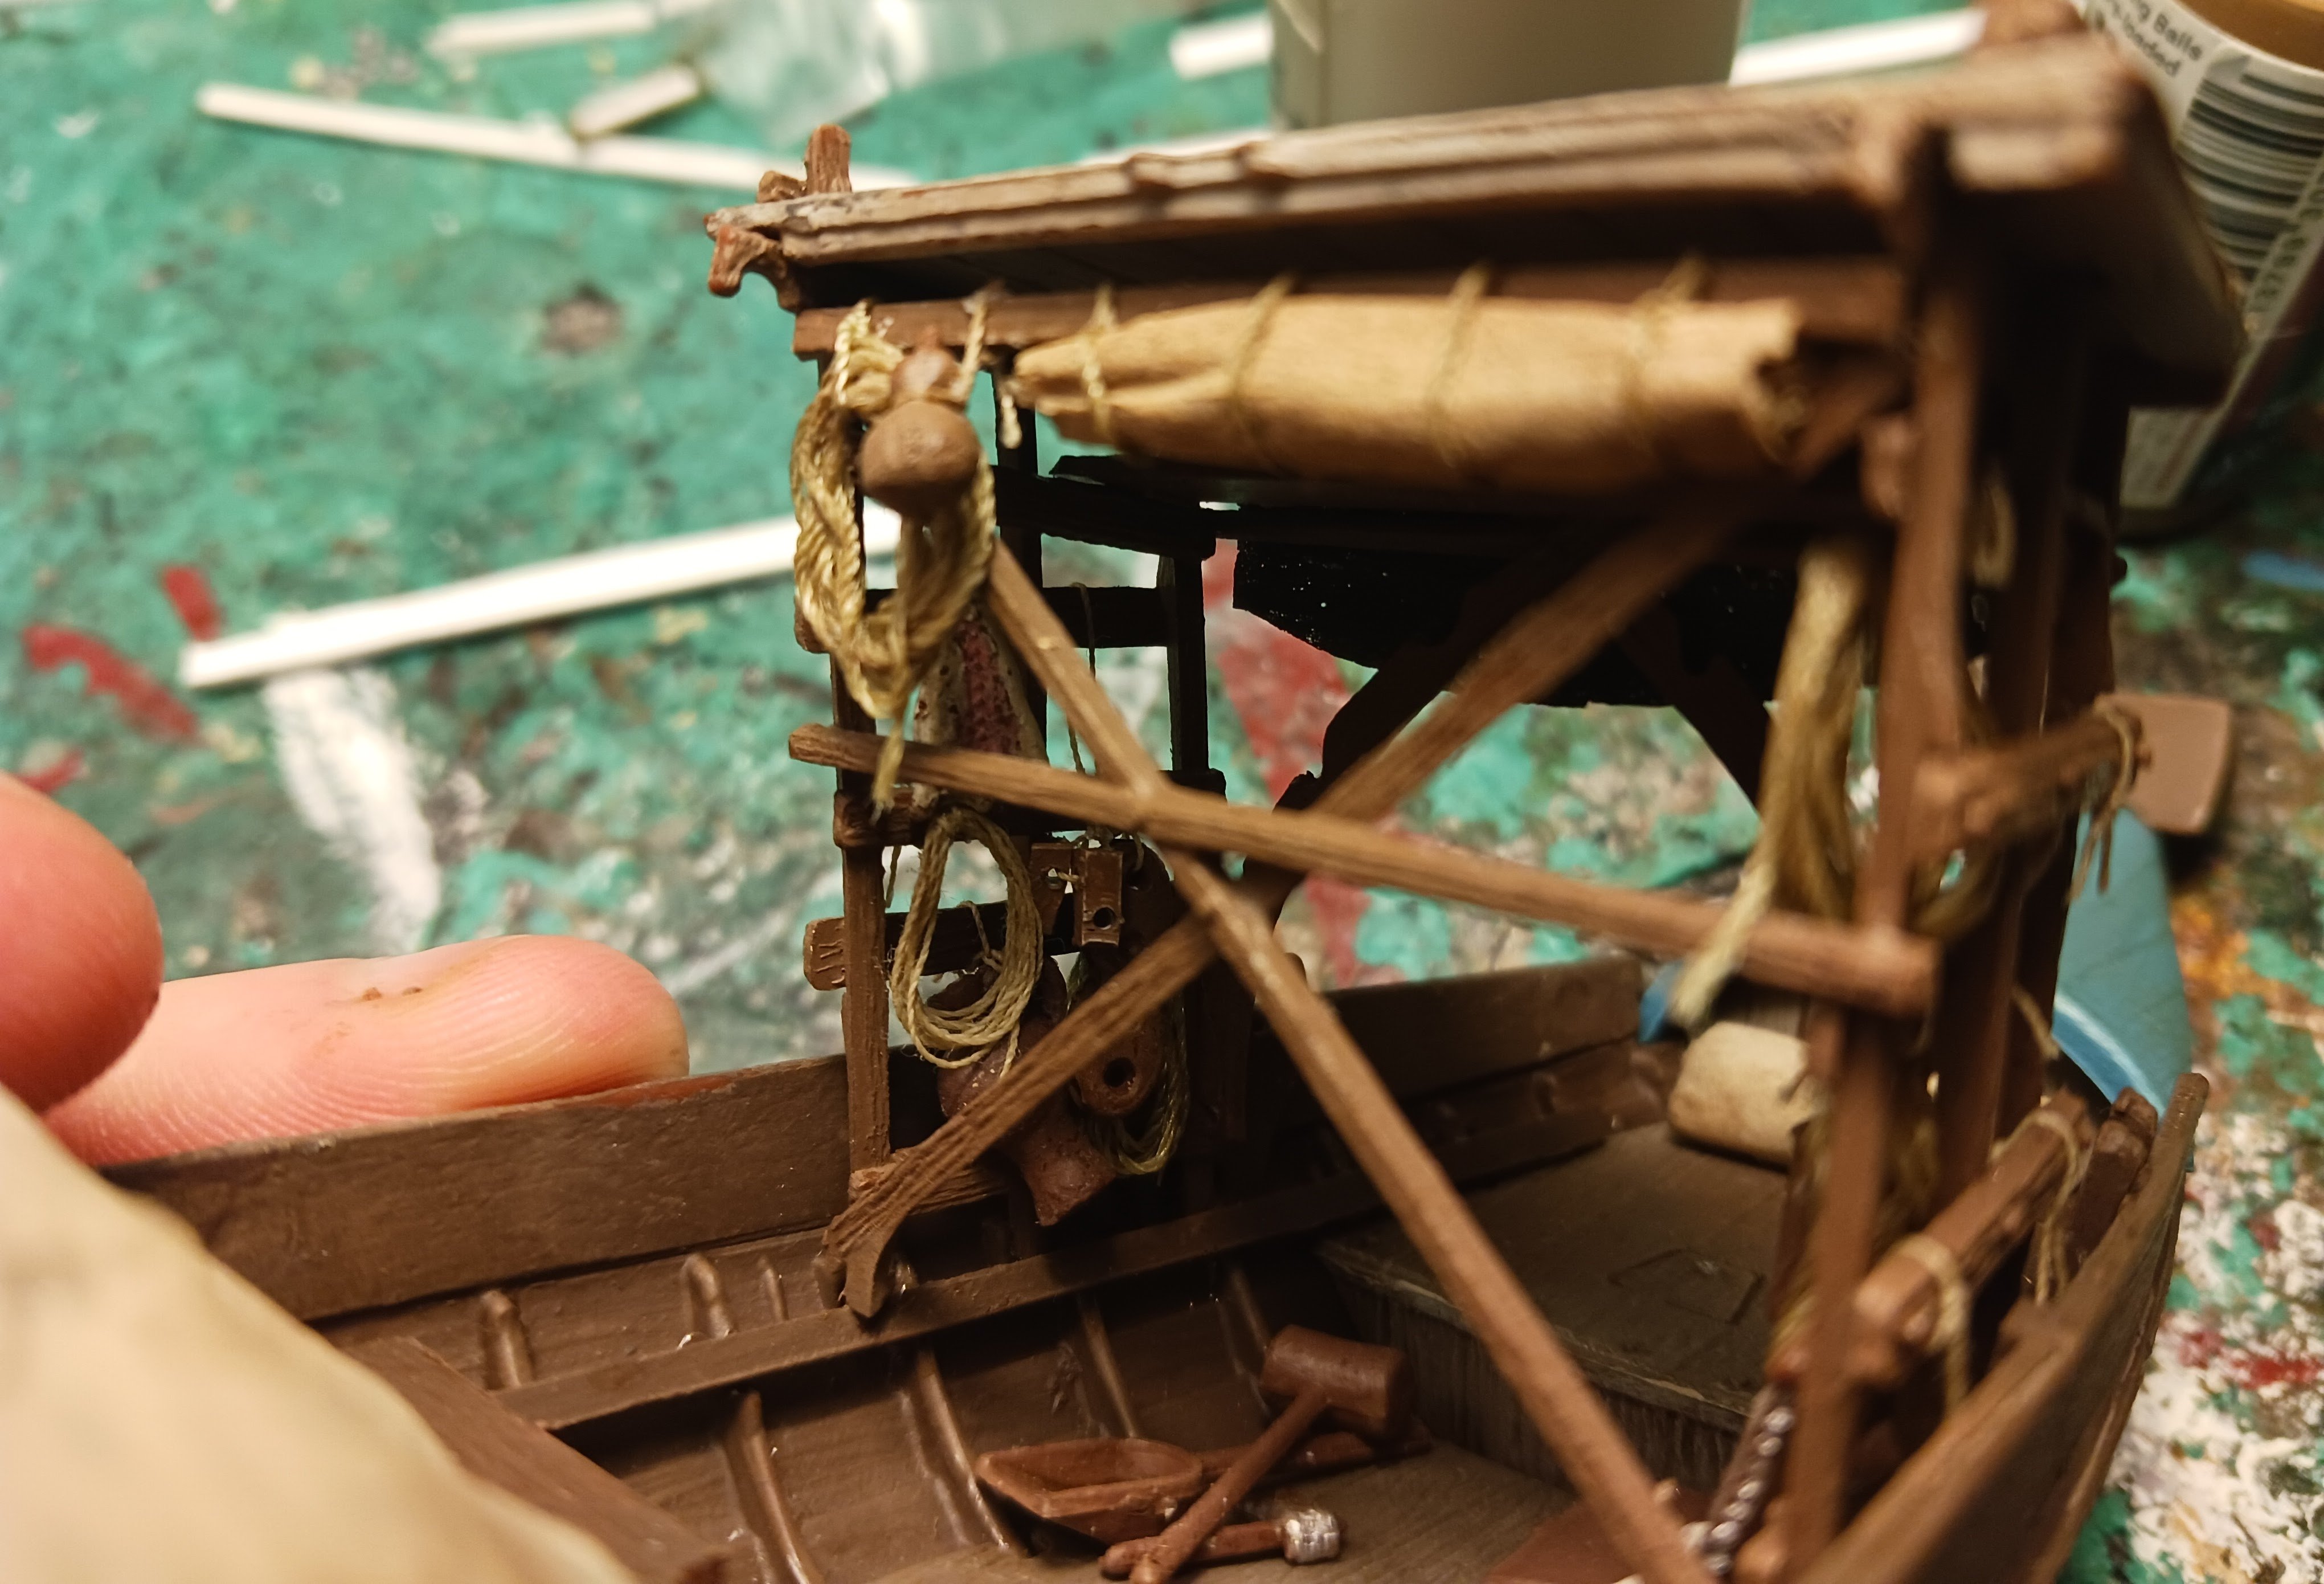
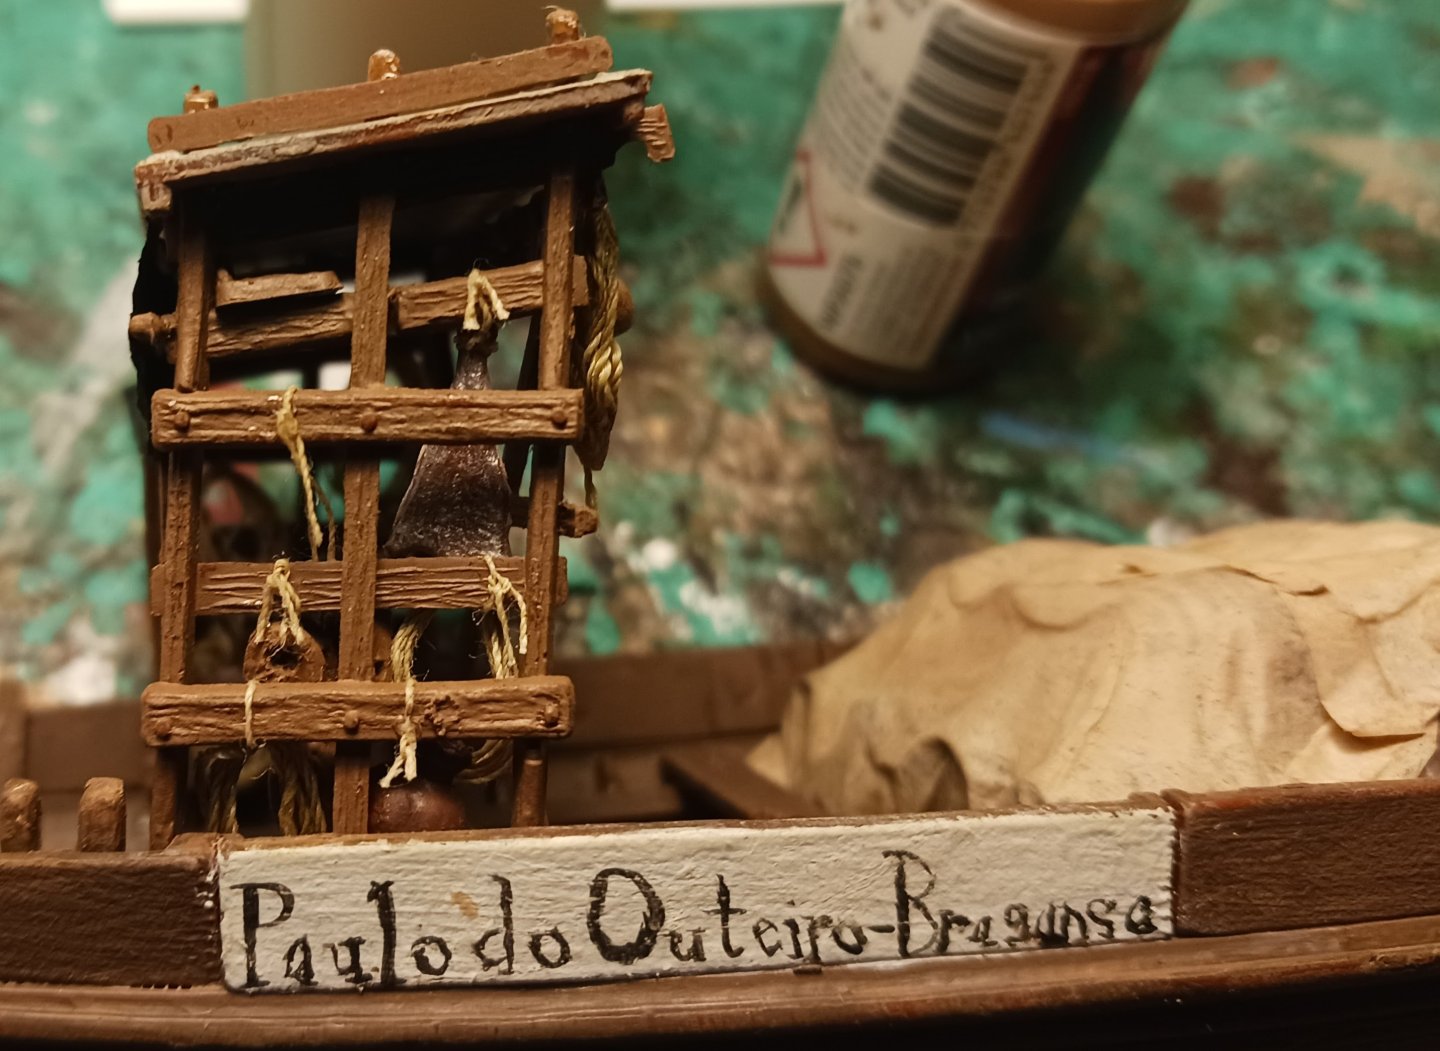
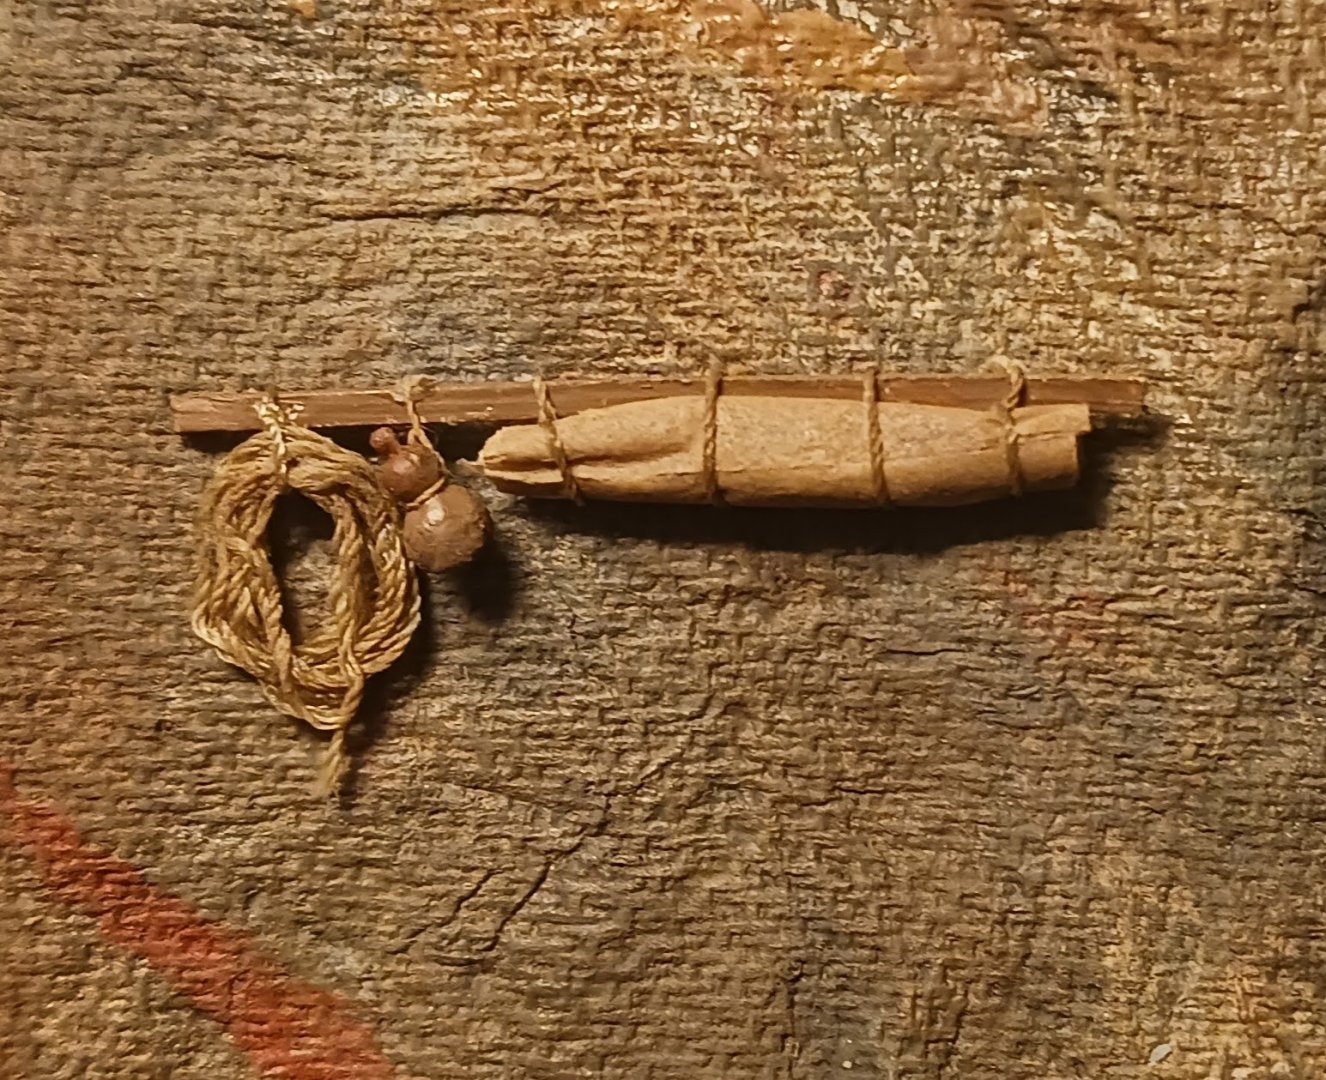
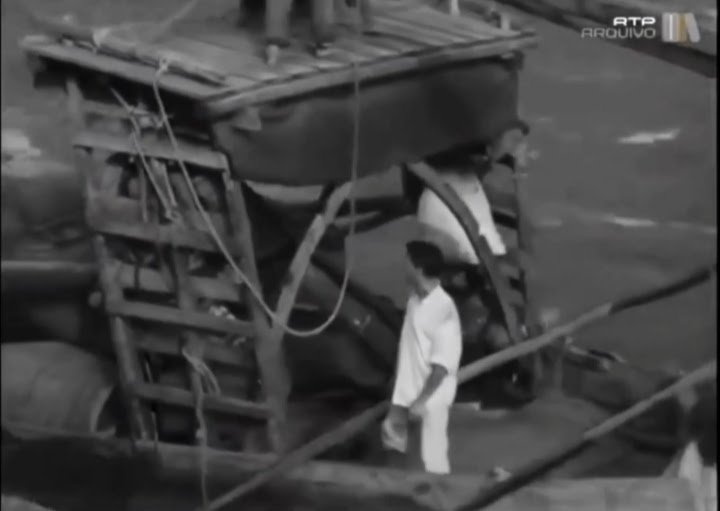
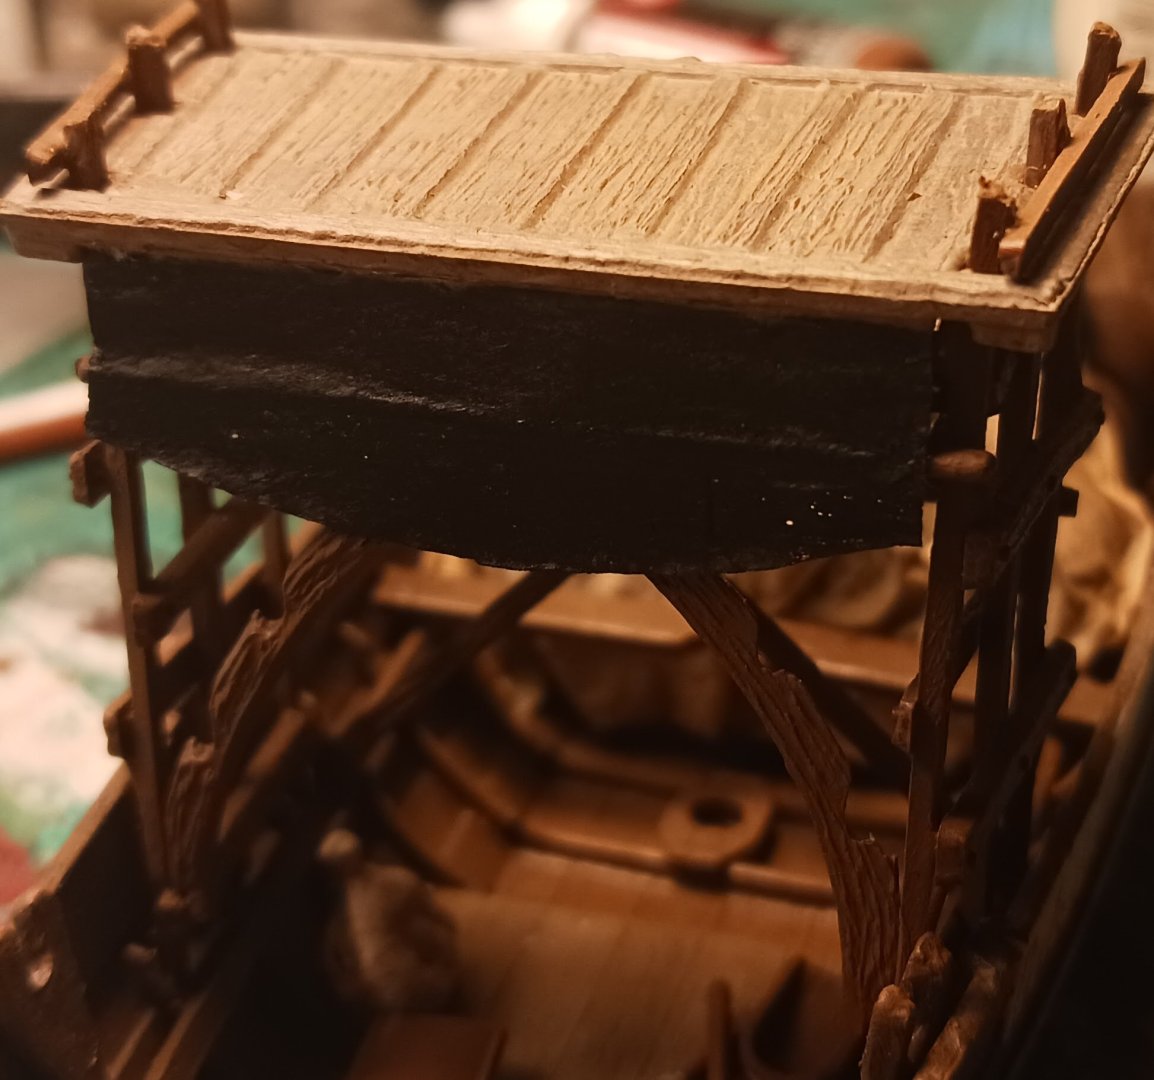
I did a bit more work on the Rabelo today. Firstly, I made and installed a small timber at the top of the apegadas with some things tied to it. This is consistently visible in pictures, even of the Rabelos with tall platforms. Secondly, in some footage I saw, there was a black cloth attached to the back of the platform, which I attempted to replicate. This might have been some sort of awning.
- 17 replies
-
- 4
-
-
- barco rabelo
- 1/75
- (and 2 more)
-
I made my tarpaulin by dunking the silkspan in diluted brown paint and then diluted white glue, and put it into position. I then repainted it with a canvas color. You're going to want to look at how Joelle does his.
- 17 replies
-
- 3
-
-
- barco rabelo
- 1/75
- (and 2 more)
-
Special thanks to @madtatt for teaching me how to make tarpaulins.
- 17 replies
-
- 1
-

-
- barco rabelo
- 1/75
- (and 2 more)
-
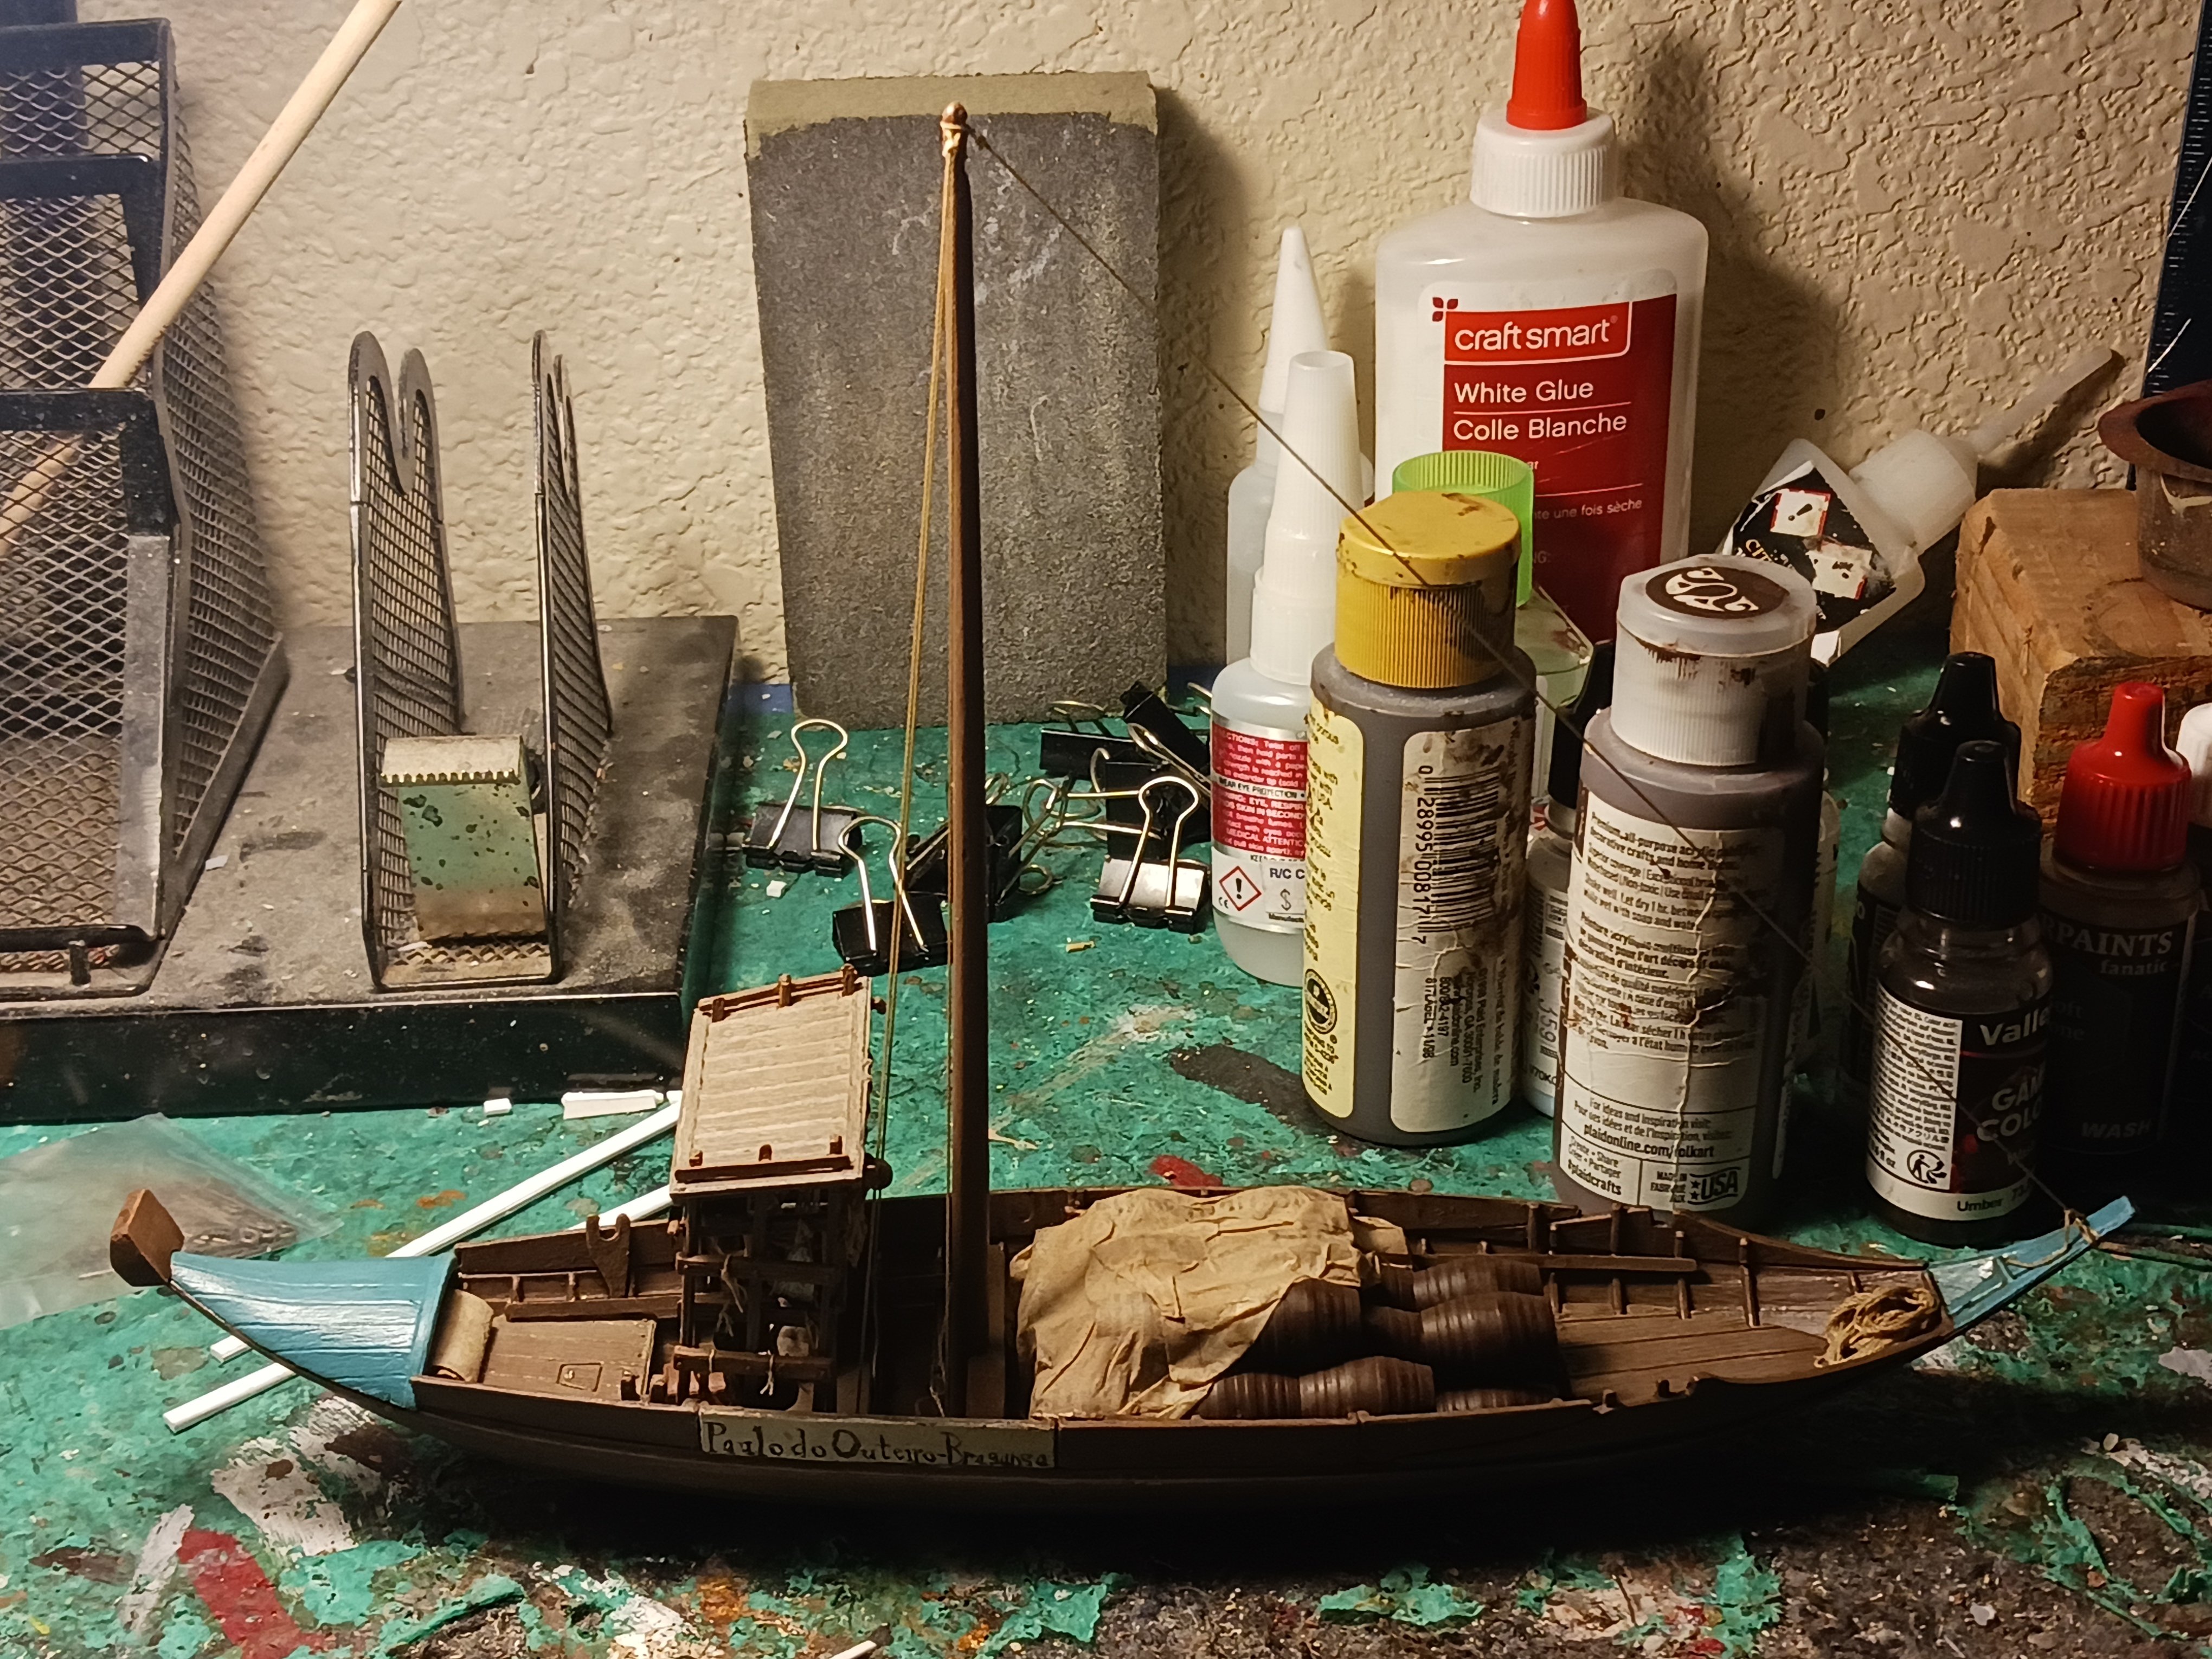
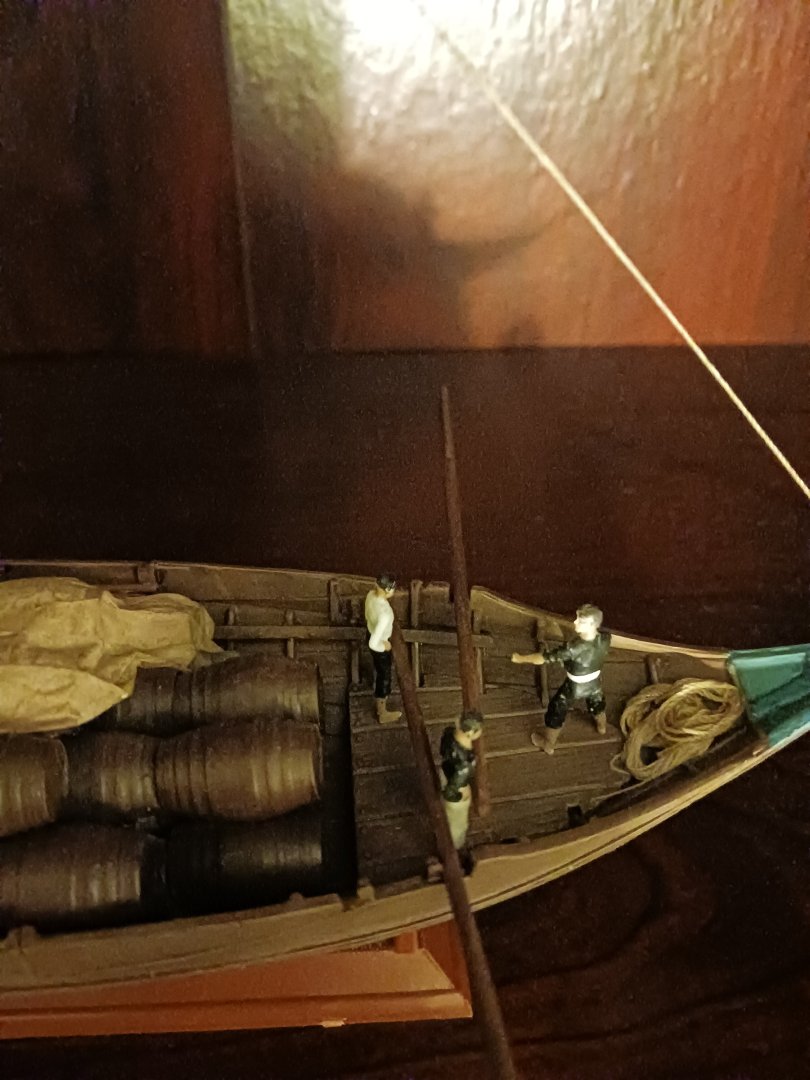
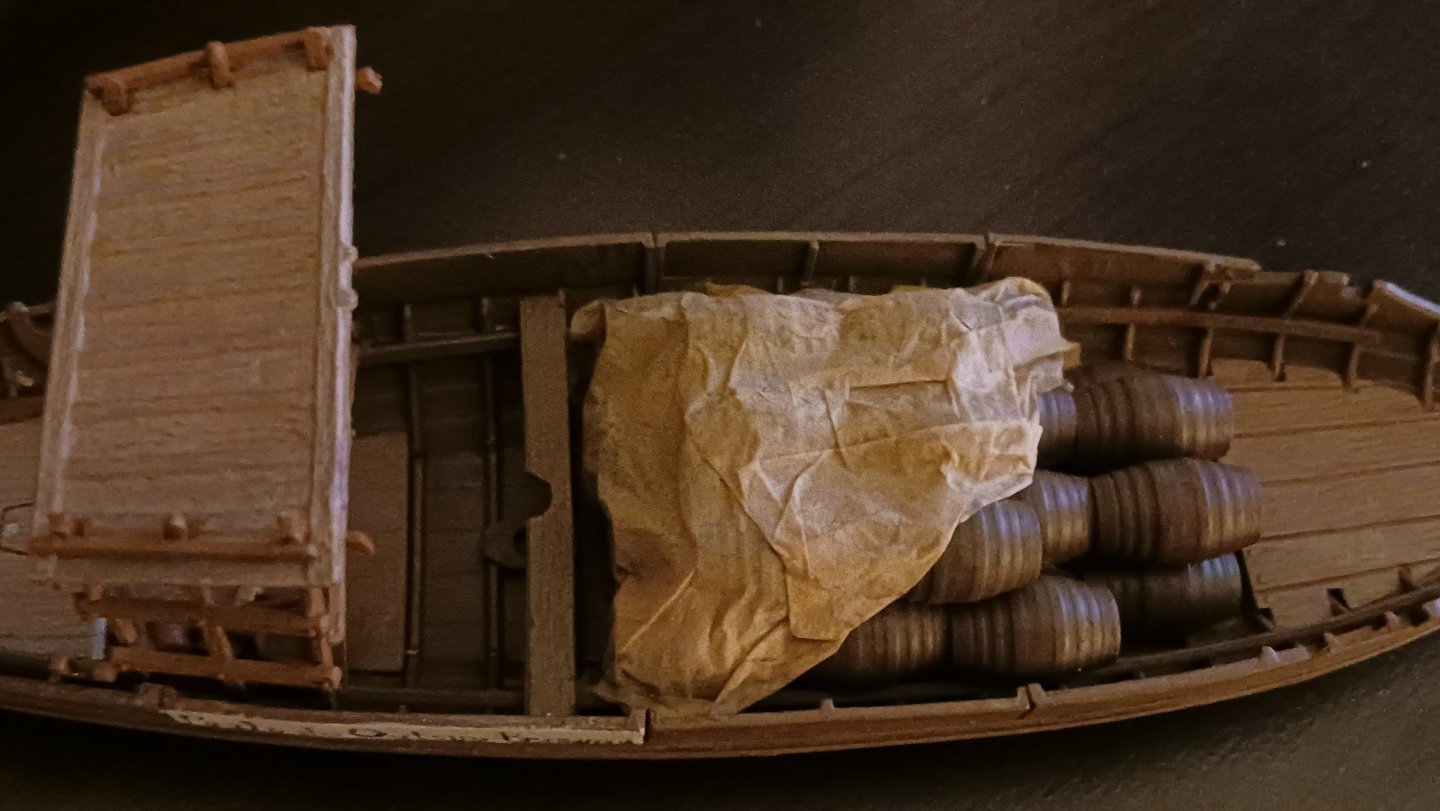
The Rabelo now has its payload, that being 32 pipas ("pipes" or casks) of Port wine from the Alto Douro vineyards, bound for Vila Nova de Gaia. The casks are partially covered with my first-ever attempt at a tarpaulin, which is folded back so you can see them. If there weren't enough things in the cargo section already, there will also be a bundle of poles for the aft awning, as well another bundle for the poles and boat hooks. The men would intentionally beach the Rabelo for the night on a sandy part of the river (few and far between) and in the morning they would pole the boat off of the sand and back into flowing water. That doesn't include the two large planks they would have stowed lengthwise onboard the ship for offloading the wine: They would also often sail down the river with no rig, as the river's momentum was often sufficient to keep them in motion, sometimes supplemented with rowing. They would then set the completely removable mast and sail at either Porto or Gaia for the return journey. Remember when I mentioned the need for the removable planks to increase freeboard? The reason why those were necessary is that these men packed the boats so full of wine as to be dangerously overloaded. The rest of the equipment has yet to be stowed under the apegadas.
- 17 replies
-
- 5
-
-

-
- barco rabelo
- 1/75
- (and 2 more)
-
@JacquesCousteau I revisited your Canoa de Rancho just now, and immediately recognized just how similar these boats were to the Rabelo boat I'm working on now. Truly, convergent evolution does exist in shipbuilding!
- 17 replies
-
- 2
-
-
- barco rabelo
- 1/75
- (and 2 more)
-
Ferrus Manus reacted to a post in a topic:
Fischkutter by Bryan Woods - FINISHED - Laser Creation World - 1:35
-
If you don't mind me asking, how in the world do you make tarpaulins like that? They are the most realistic I have ever seen by a large margin.
- 213 replies
-
- 2
-
-
-
- Russo-Japanese War
- Mikasa
- (and 2 more)
-
That all looks reasonable for a fishing boat. There is a hatch for the fish, and a winch for the nets. Google image searches for the vessel in question should suffice for you to figure out the rigging.
- 45 replies
-
- 2
-
-
- Fischkutter
- Laser Creation World
- (and 1 more)
-
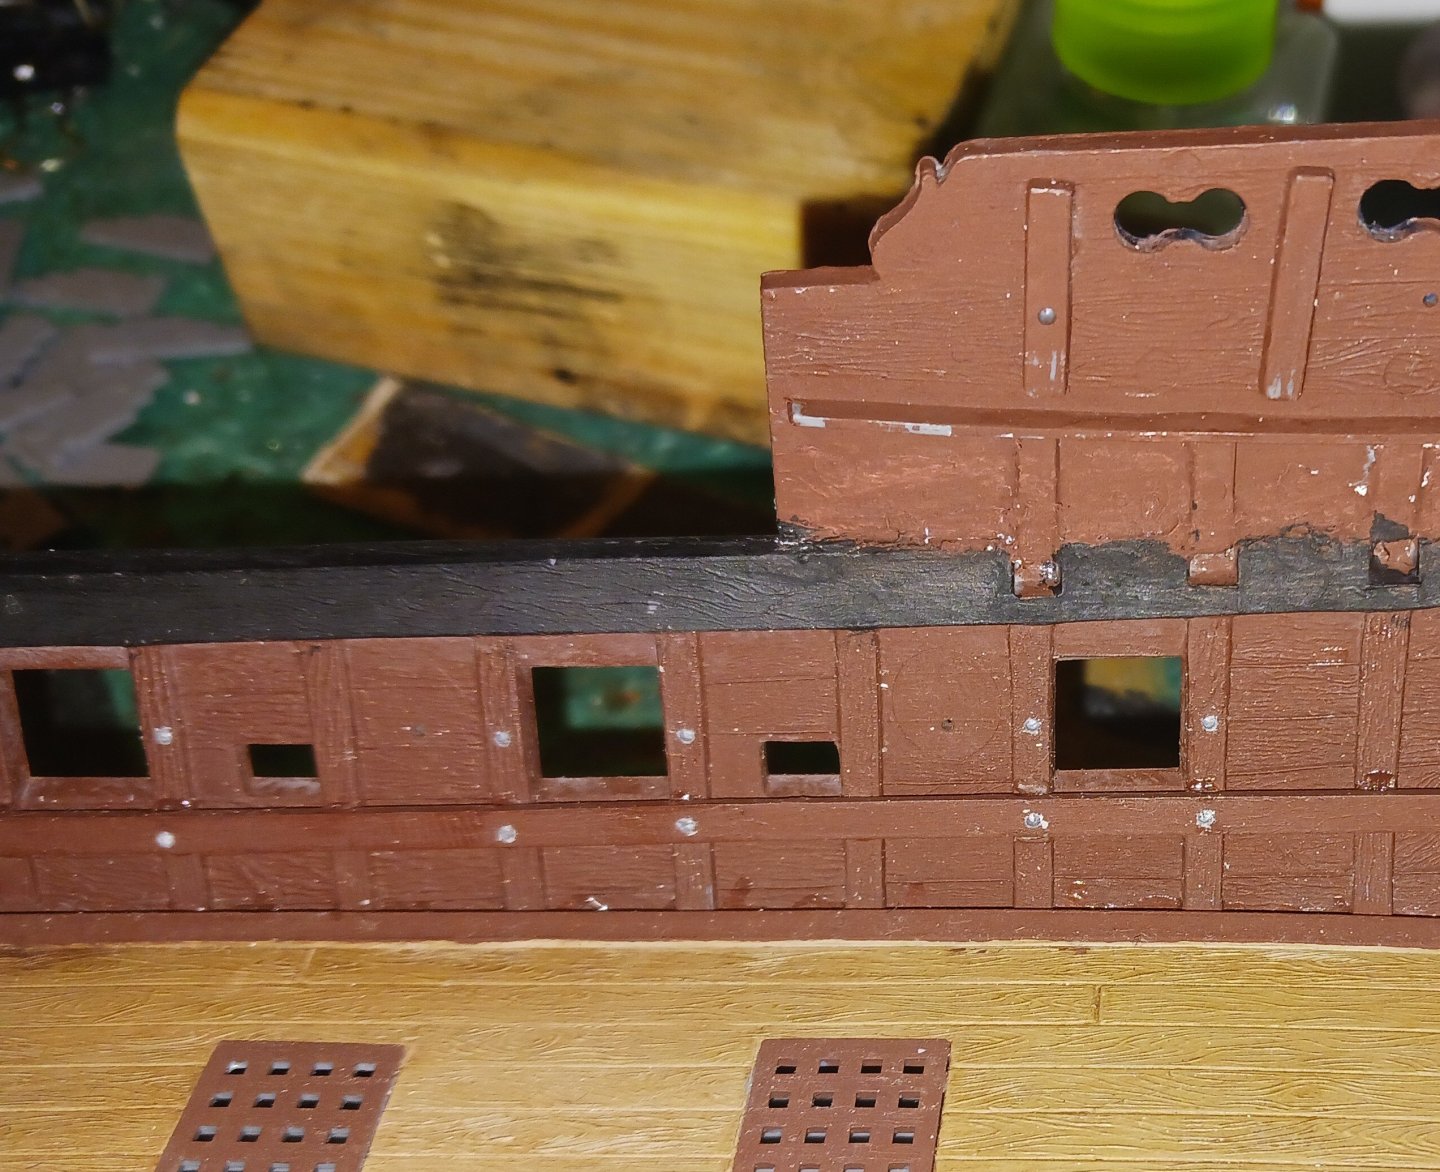
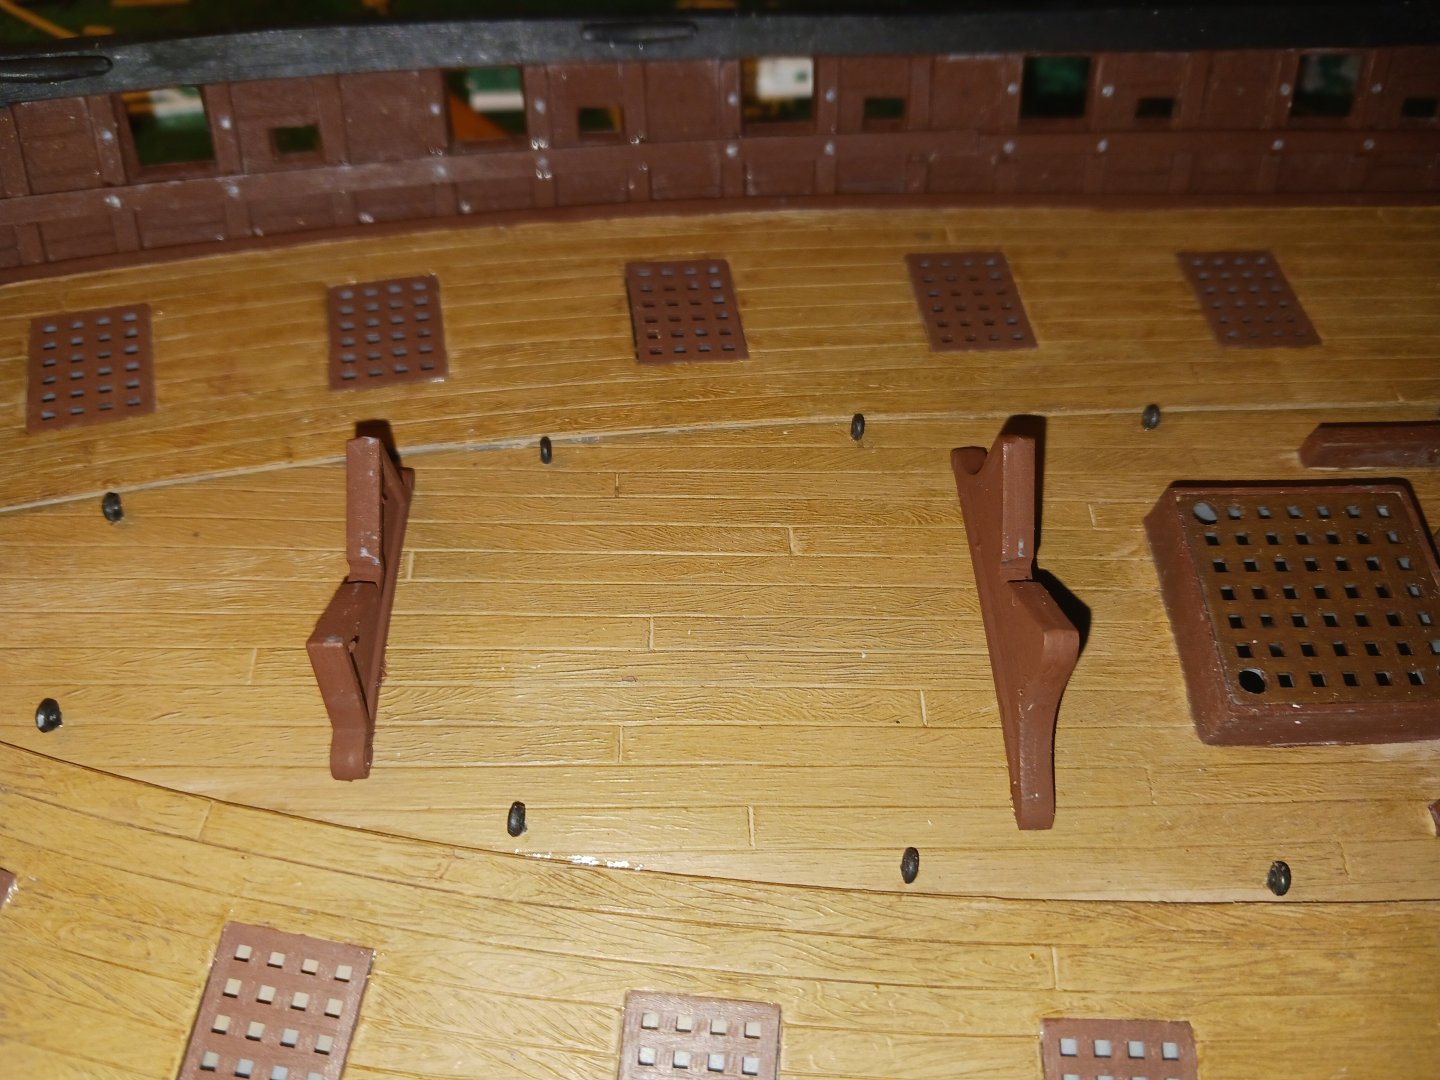
What isn't shown is the 50 eyebolts I made from steel wire, and put in a small plastic bag. They will be needed for the gun rigging.
-
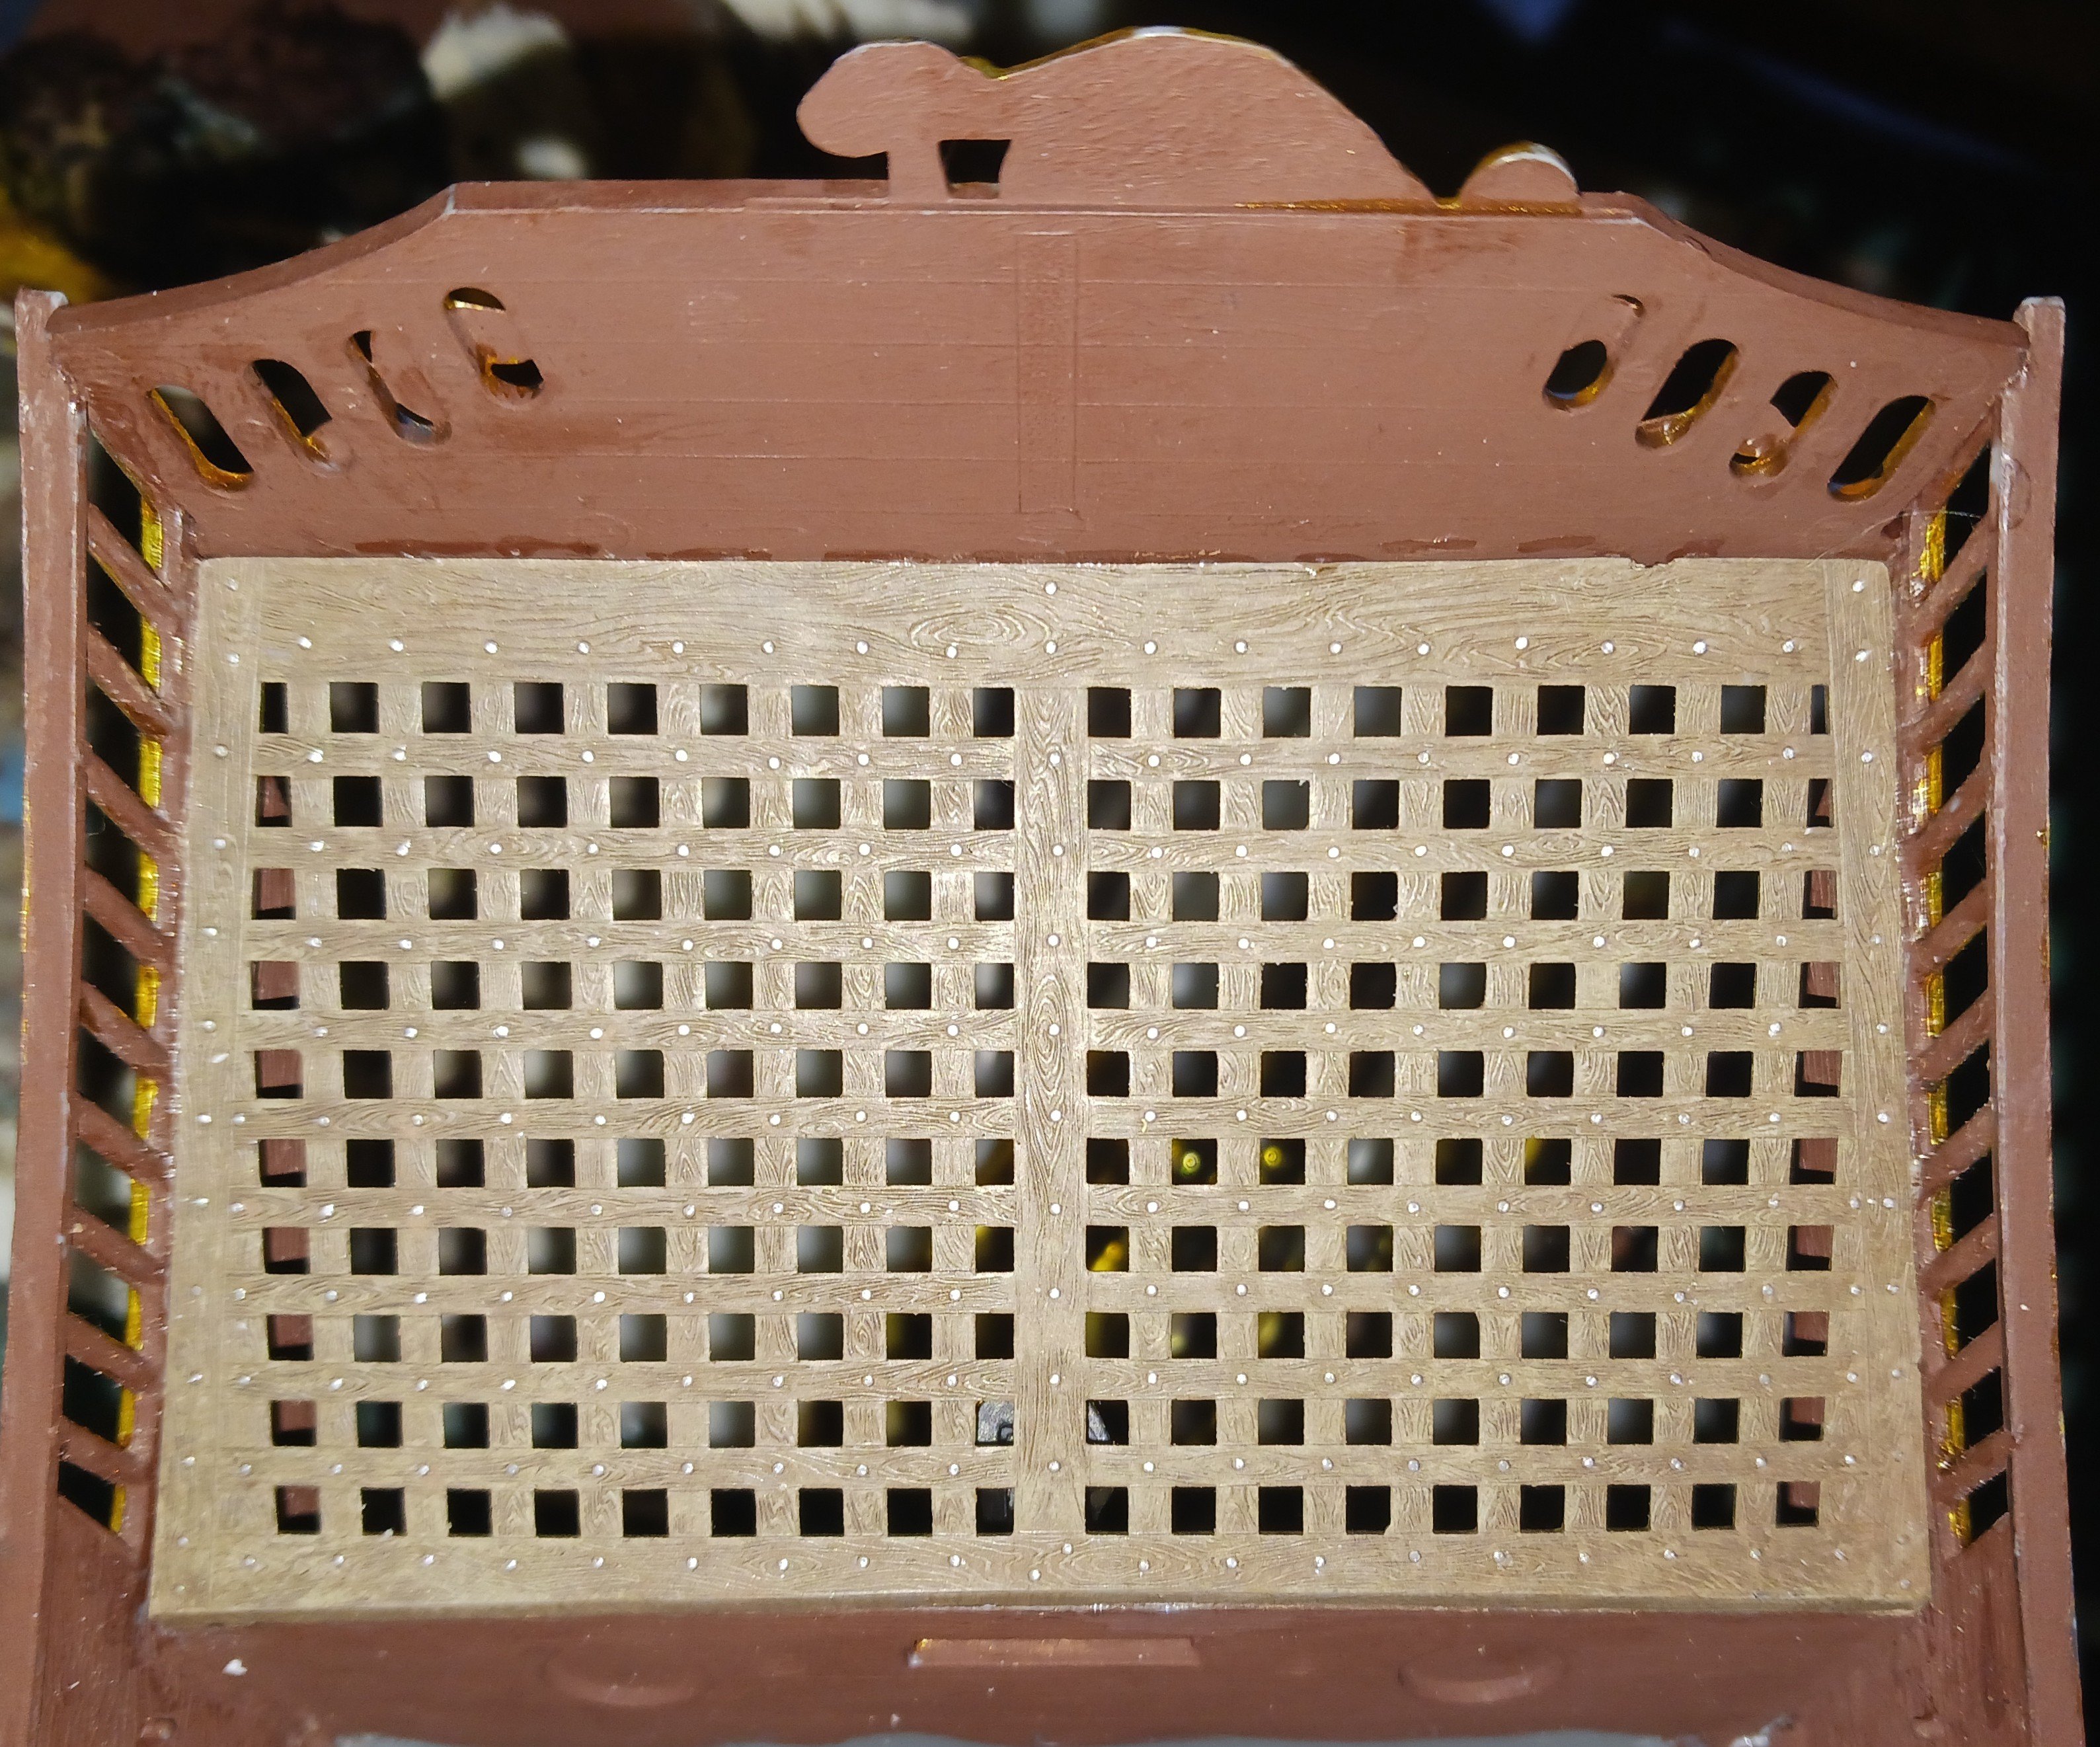
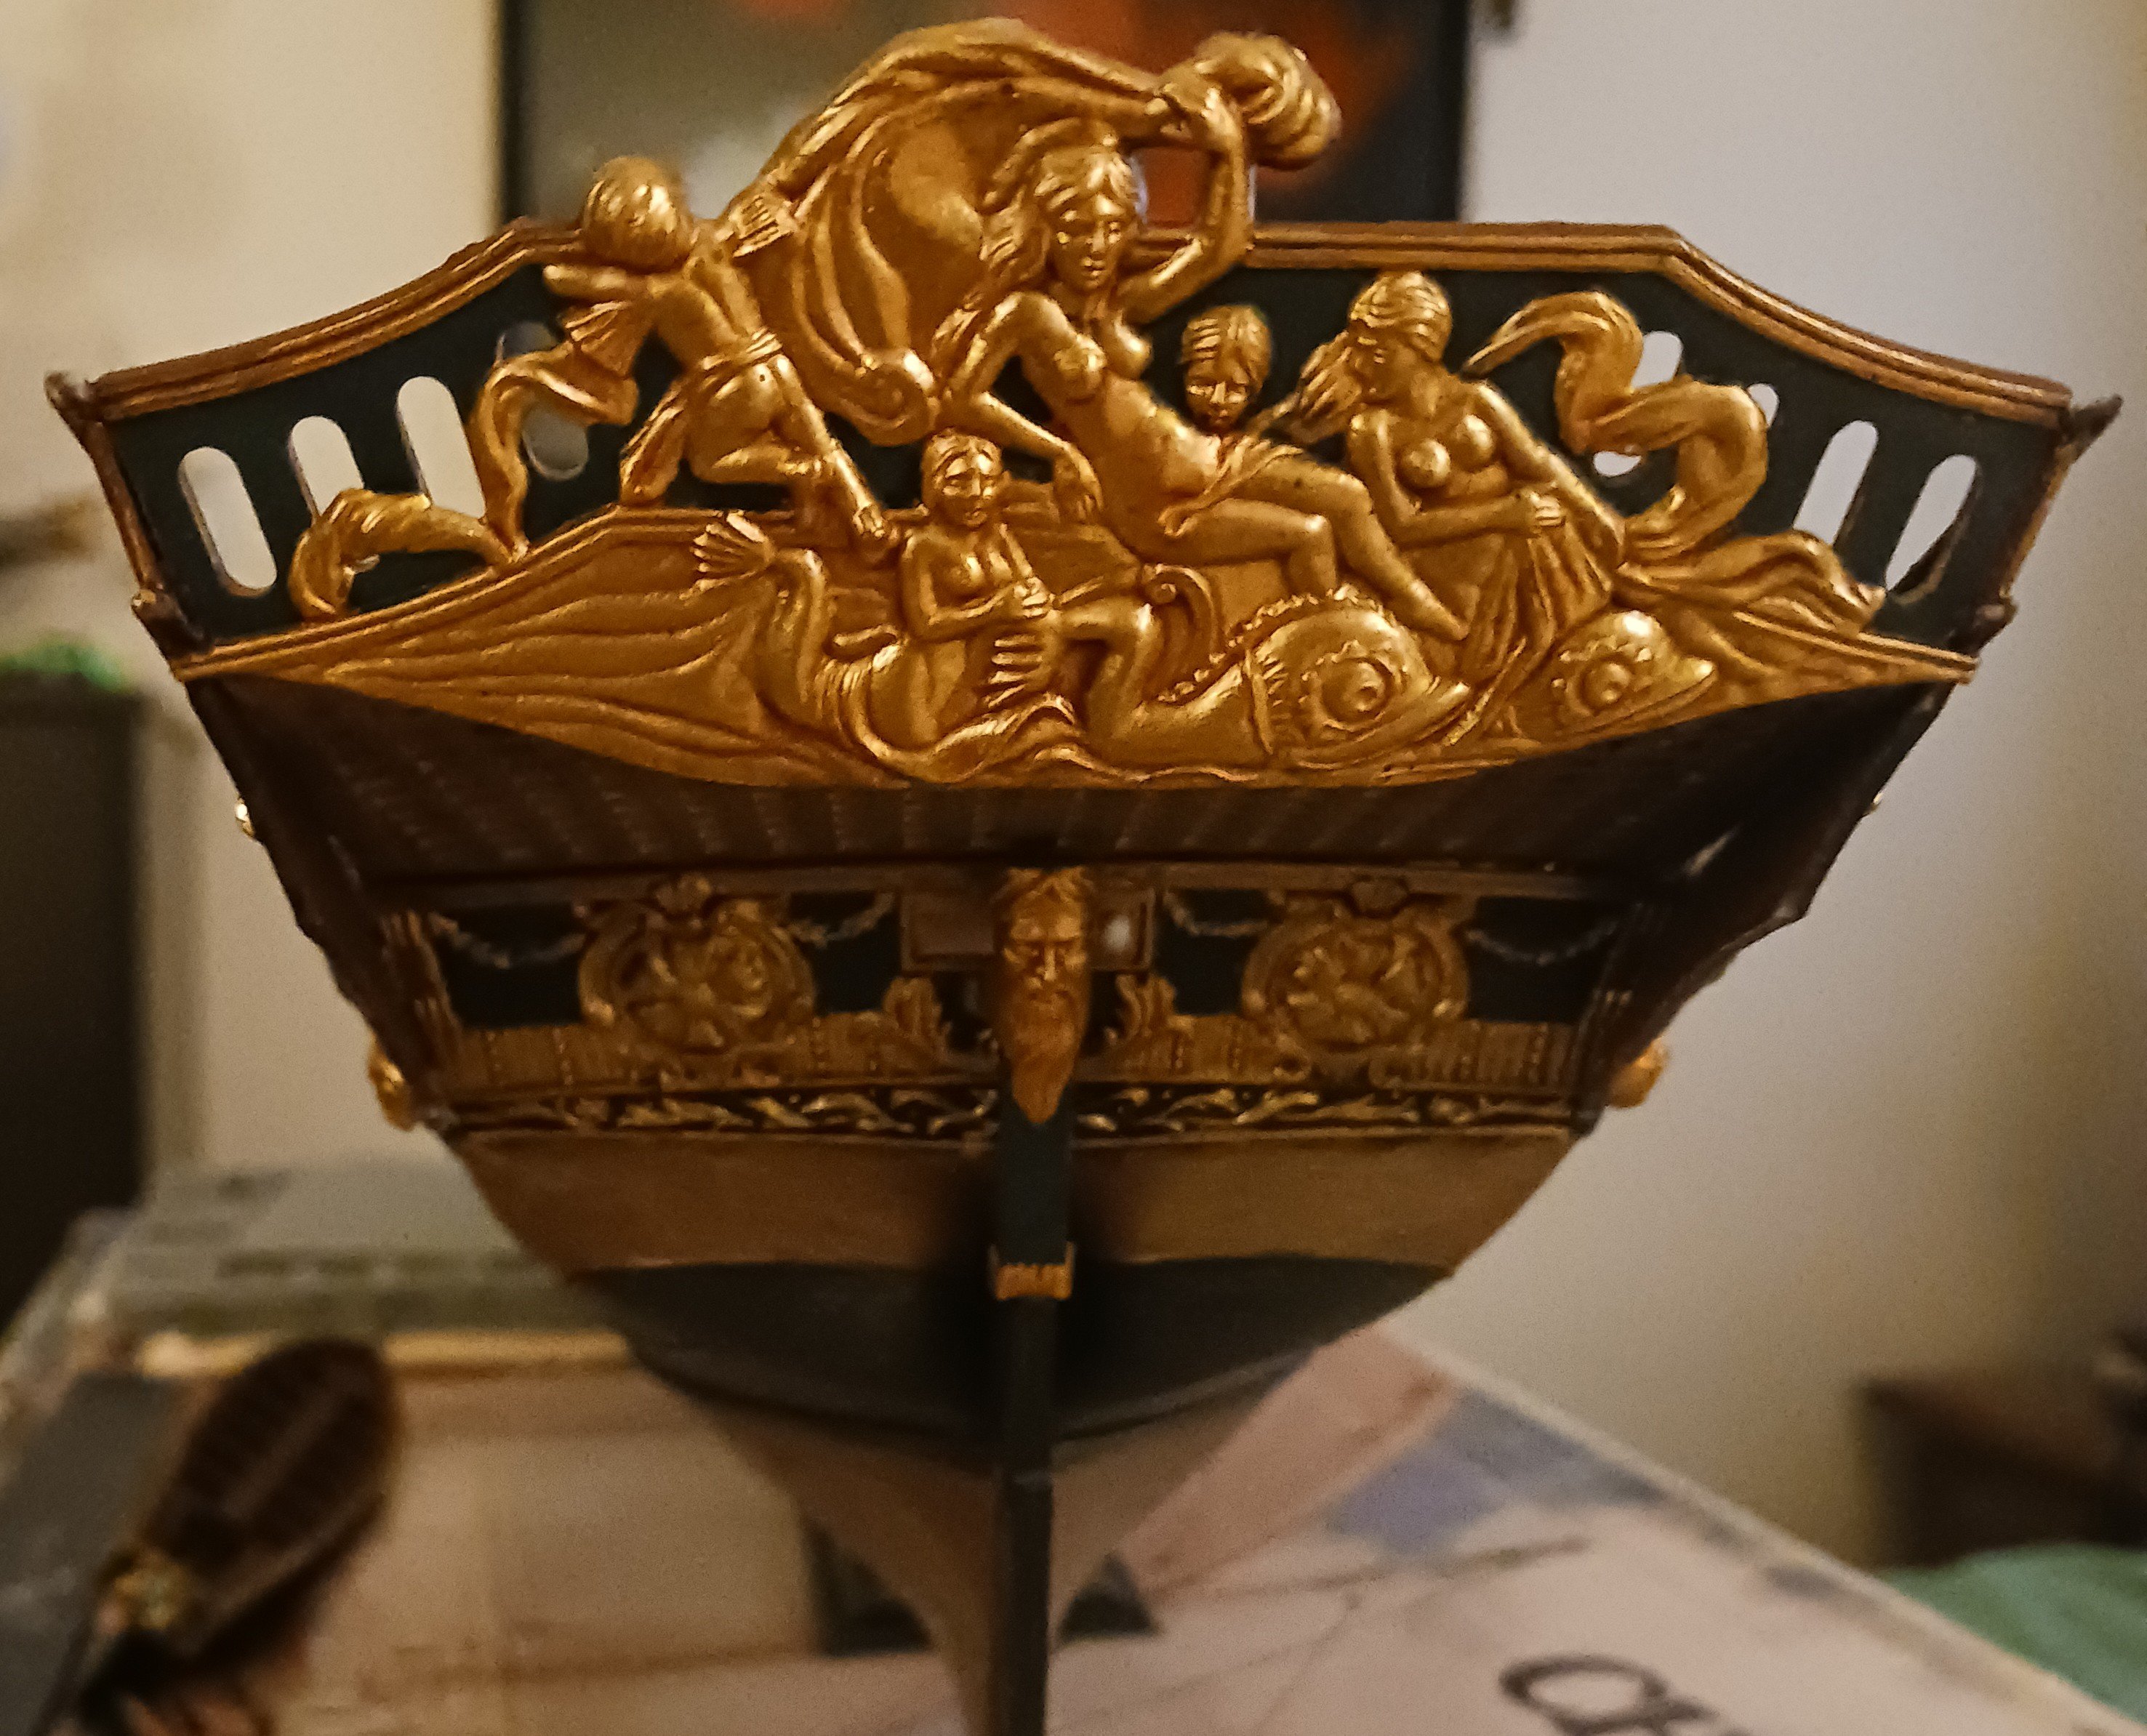
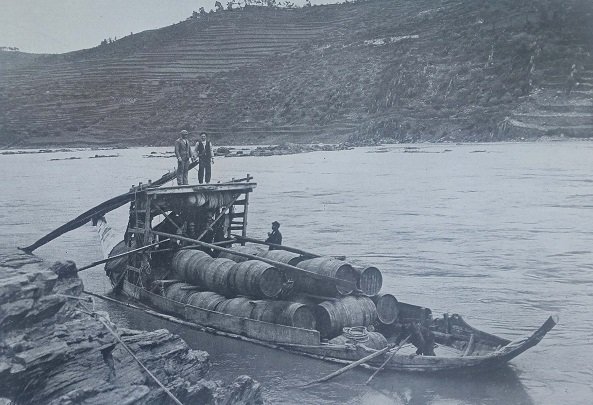
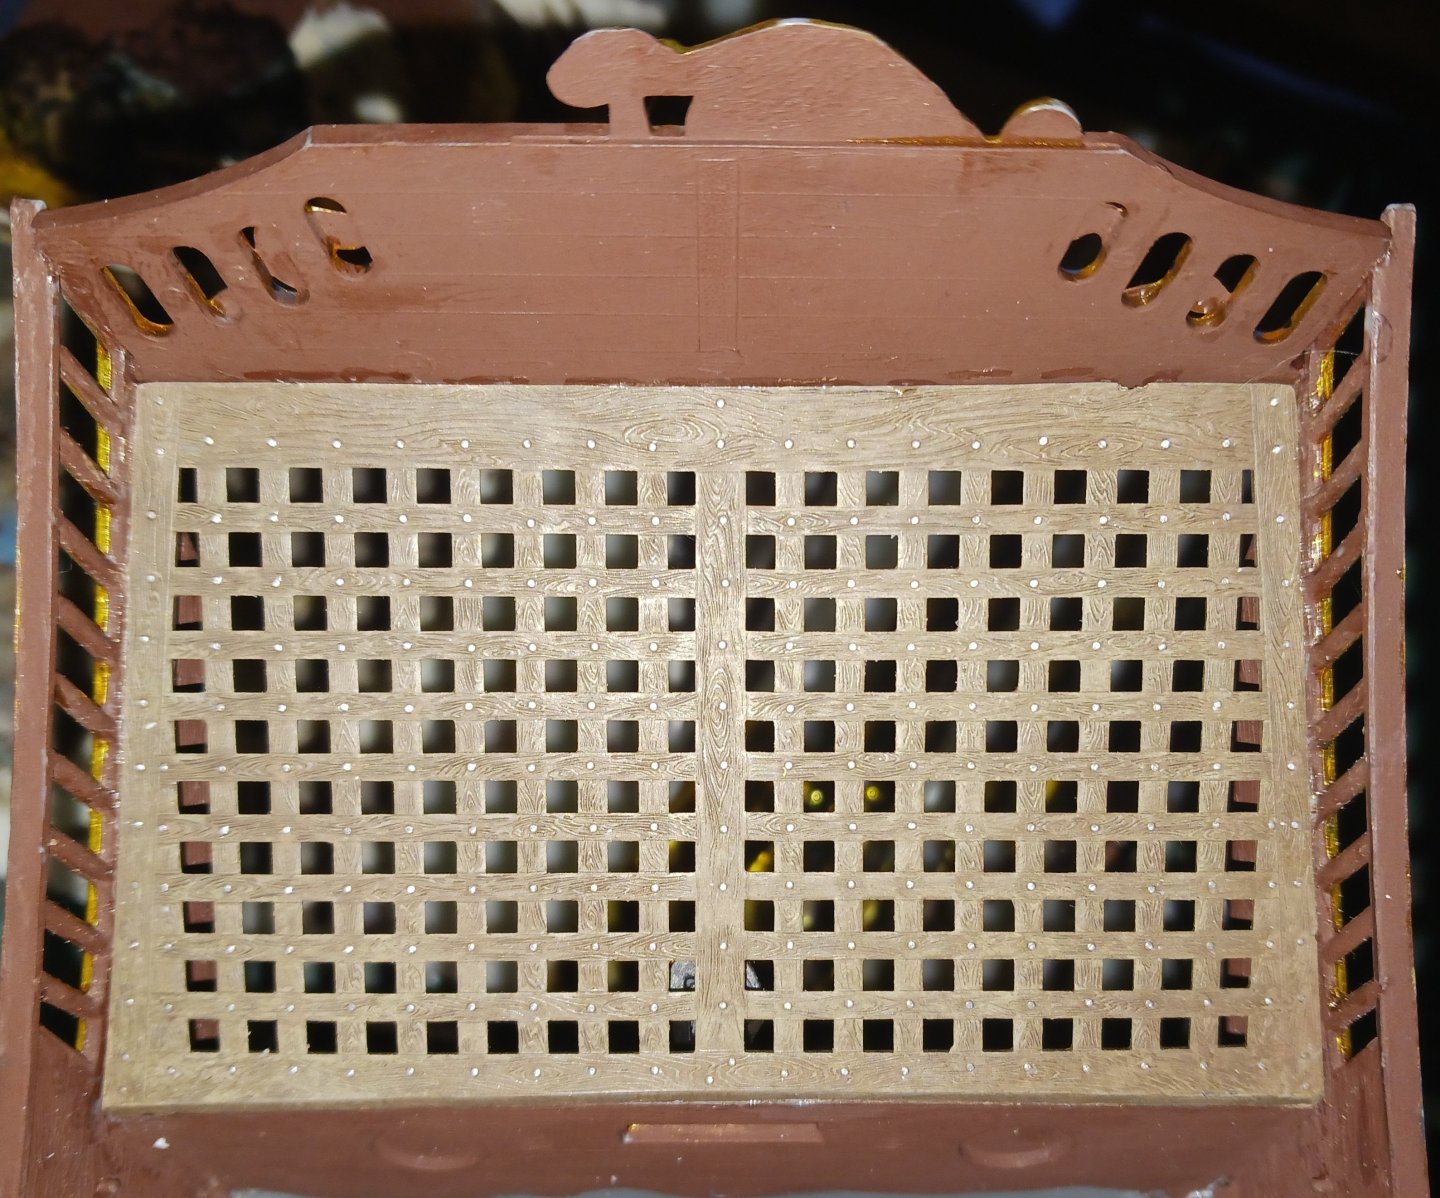
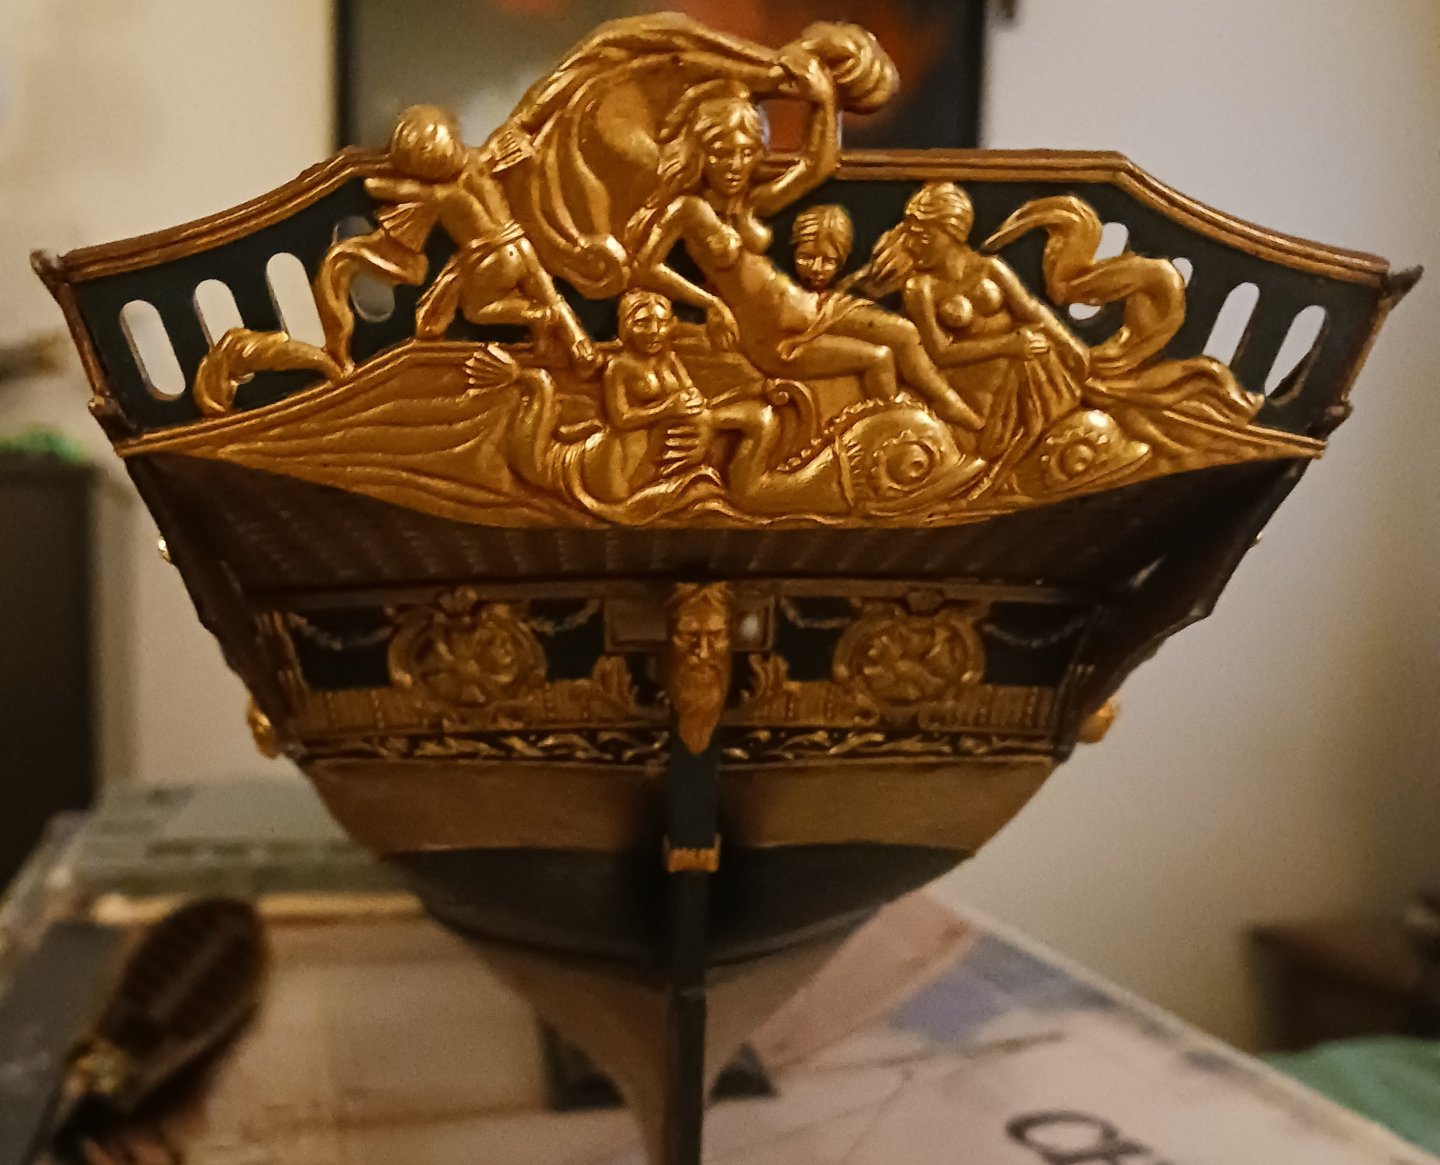
I forgot to post these images. The chebec's paint was able to be mostly restored with brushed water. Furthermore, I have painted some of the rest of the ship, and done work on the stern. I painted and installed the aft grating, as well as the intricate stern filigree piece. Some cleanup has yet to be done on the areas stained with glue. They will be covered with matte varnish. I also replaced the rudder pintles so that the rudder could properly turn.
-
Ferrus Manus reacted to a post in a topic:
Fischkutter by Bryan Woods - FINISHED - Laser Creation World - 1:35
-
Ferrus Manus reacted to a post in a topic:
Fischkutter by Bryan Woods - FINISHED - Laser Creation World - 1:35
-
Bryan, what I have personally found is that AI is completely untrustworthy for even the most basic details of ship rigging. AI has no idea what a real ship looks like, and probably never will. I think you would be much better off looking at real examples of these boats built by real people, and photographed by real people. It might be harder to accomplish, but at least you'll get it right.
- 45 replies
-
- 2
-
-
-
- Fischkutter
- Laser Creation World
- (and 1 more)