doivud
-
Posts
12 -
Joined
-
Last visited
-
 François de Saint Nazaire reacted to a post in a topic:
Krevetka by doivud - CARD - Soviet shrimp trawler - First Build
François de Saint Nazaire reacted to a post in a topic:
Krevetka by doivud - CARD - Soviet shrimp trawler - First Build
-
amateur reacted to a post in a topic:
Krevetka by doivud - CARD - Soviet shrimp trawler - First Build
-
yvesvidal reacted to a post in a topic:
Krevetka by doivud - CARD - Soviet shrimp trawler - First Build
-
GrandpaPhil reacted to a post in a topic:
Krevetka by doivud - CARD - Soviet shrimp trawler - First Build
-
Valeriy V reacted to a post in a topic:
Krevetka by doivud - CARD - Soviet shrimp trawler - First Build
-
ccoyle reacted to a post in a topic:
Krevetka by doivud - CARD - Soviet shrimp trawler - First Build
-
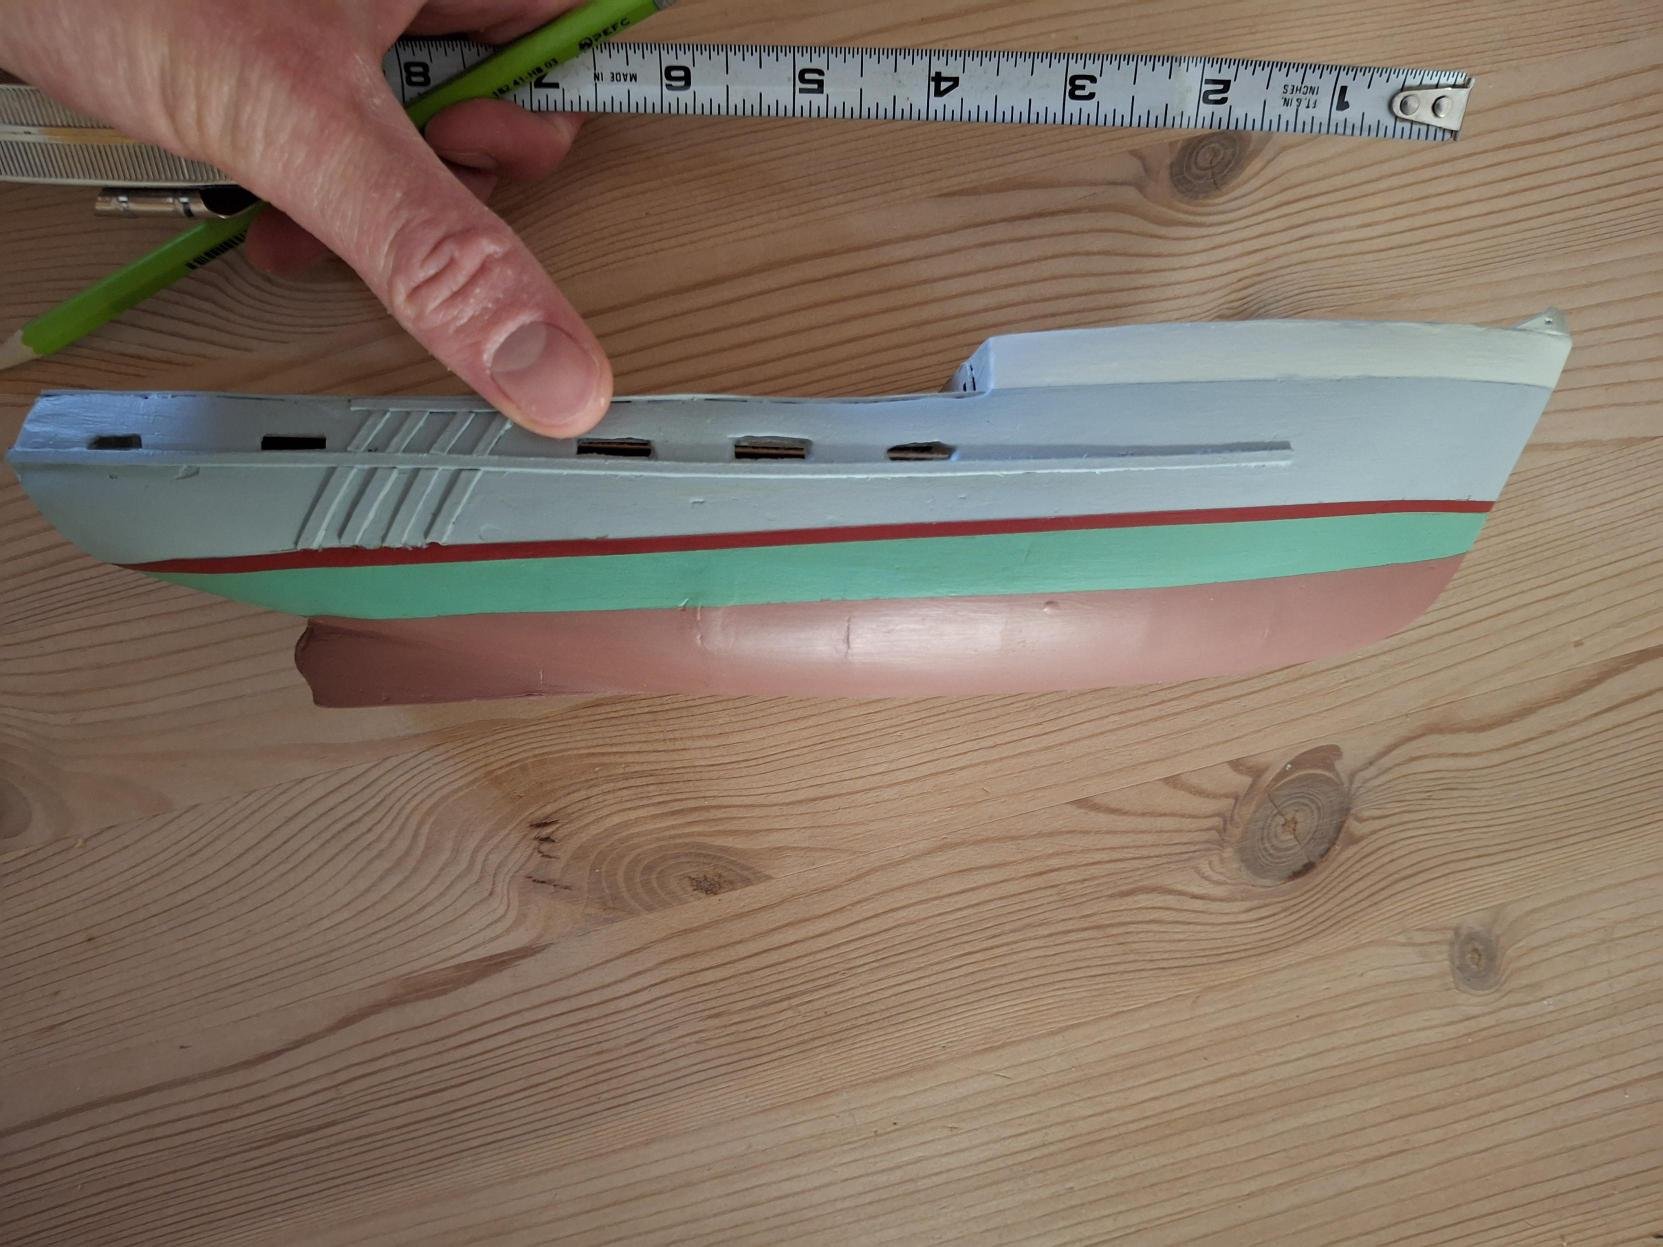
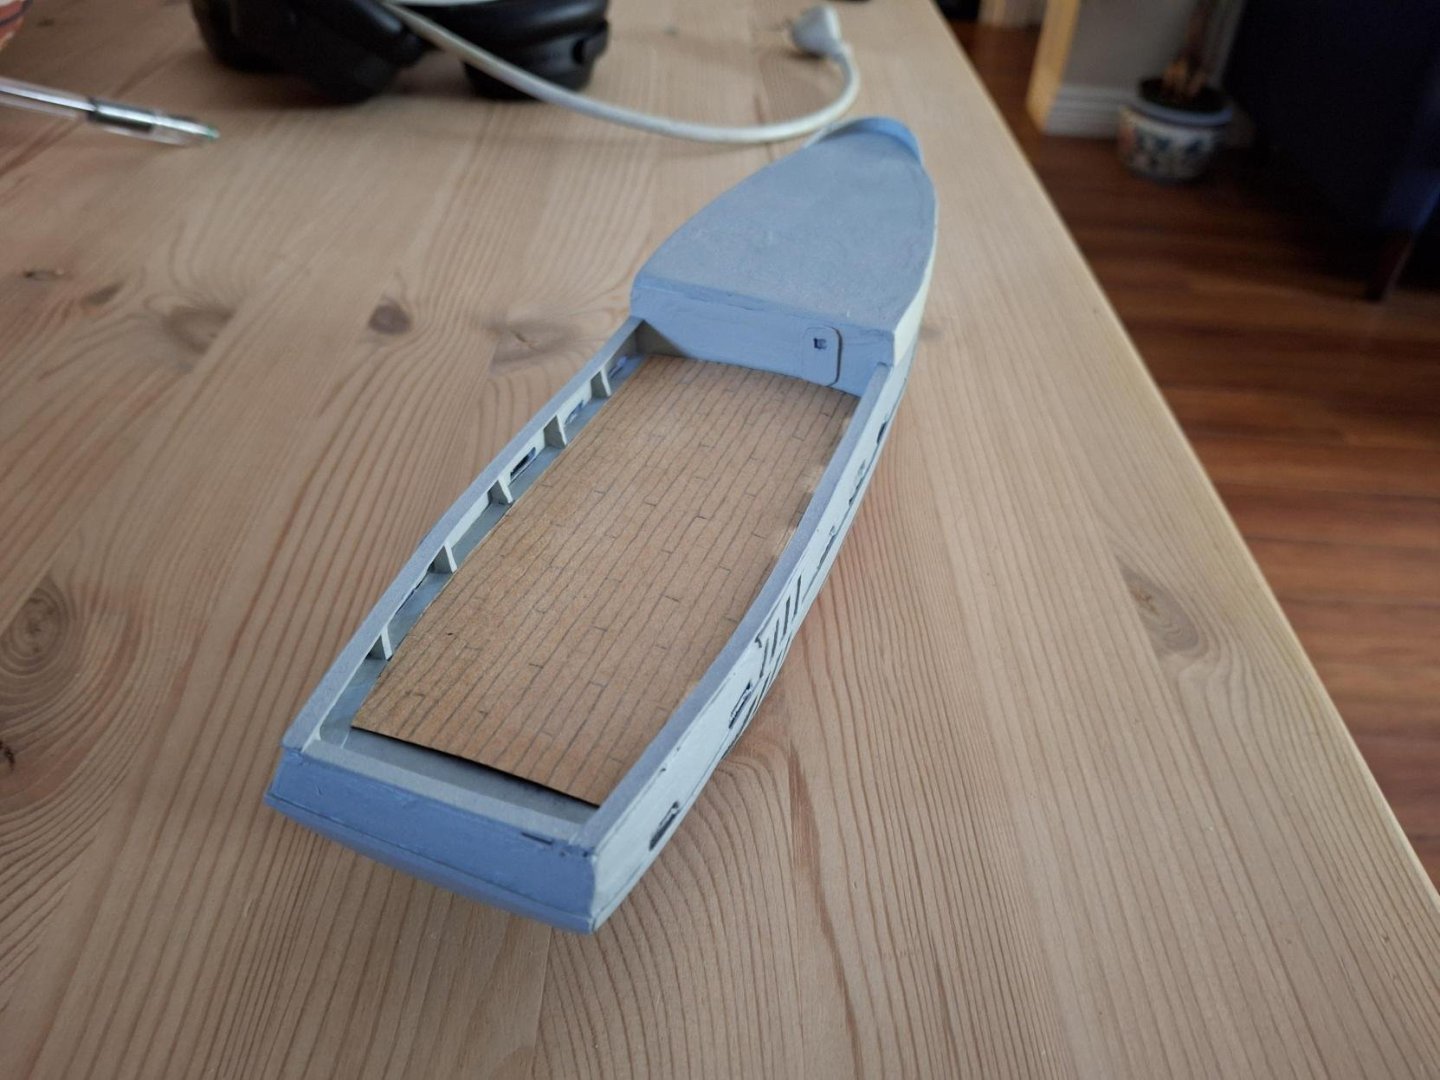
Yes there are! I've put it on hold somewhat while I was building the Cove Isle, but have made some progress on small bit like the rudder and prop. Also got the deck laid out, just deciding how I want to install it: plank by plank or in one big piece. I might try painting it first and see how I like it. Main point of progress: the paintjob for the hull is complete!


-
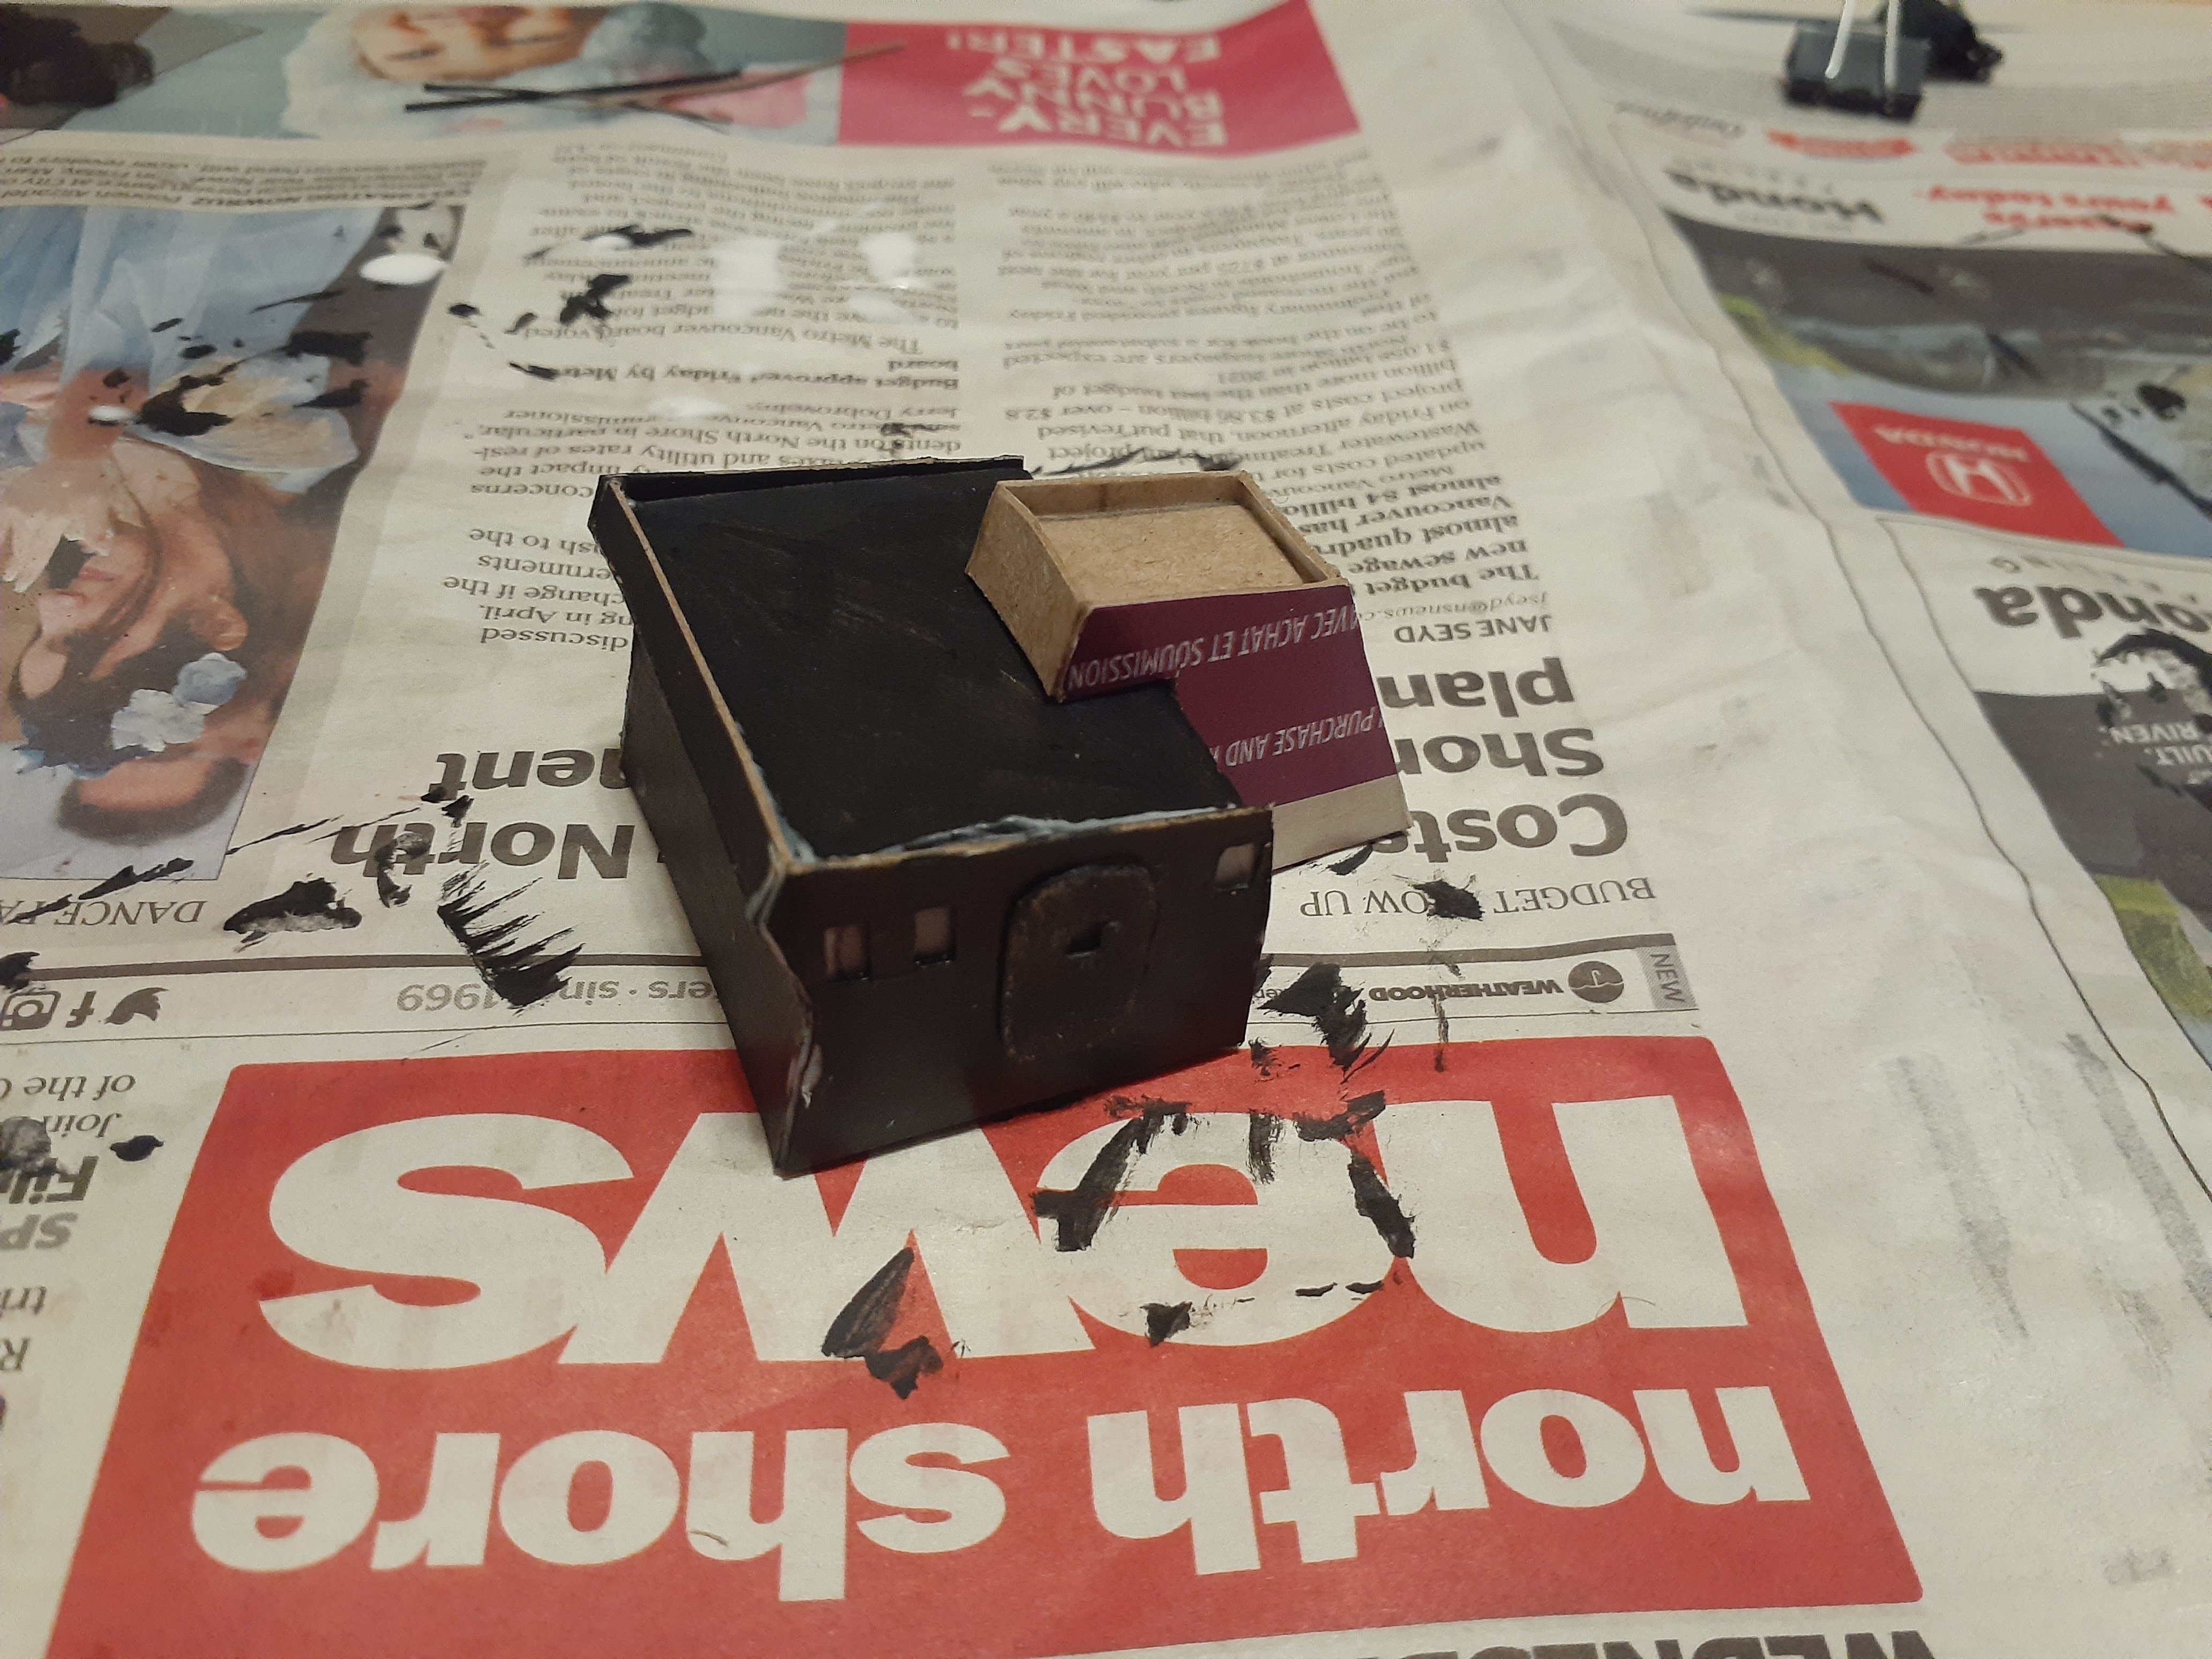
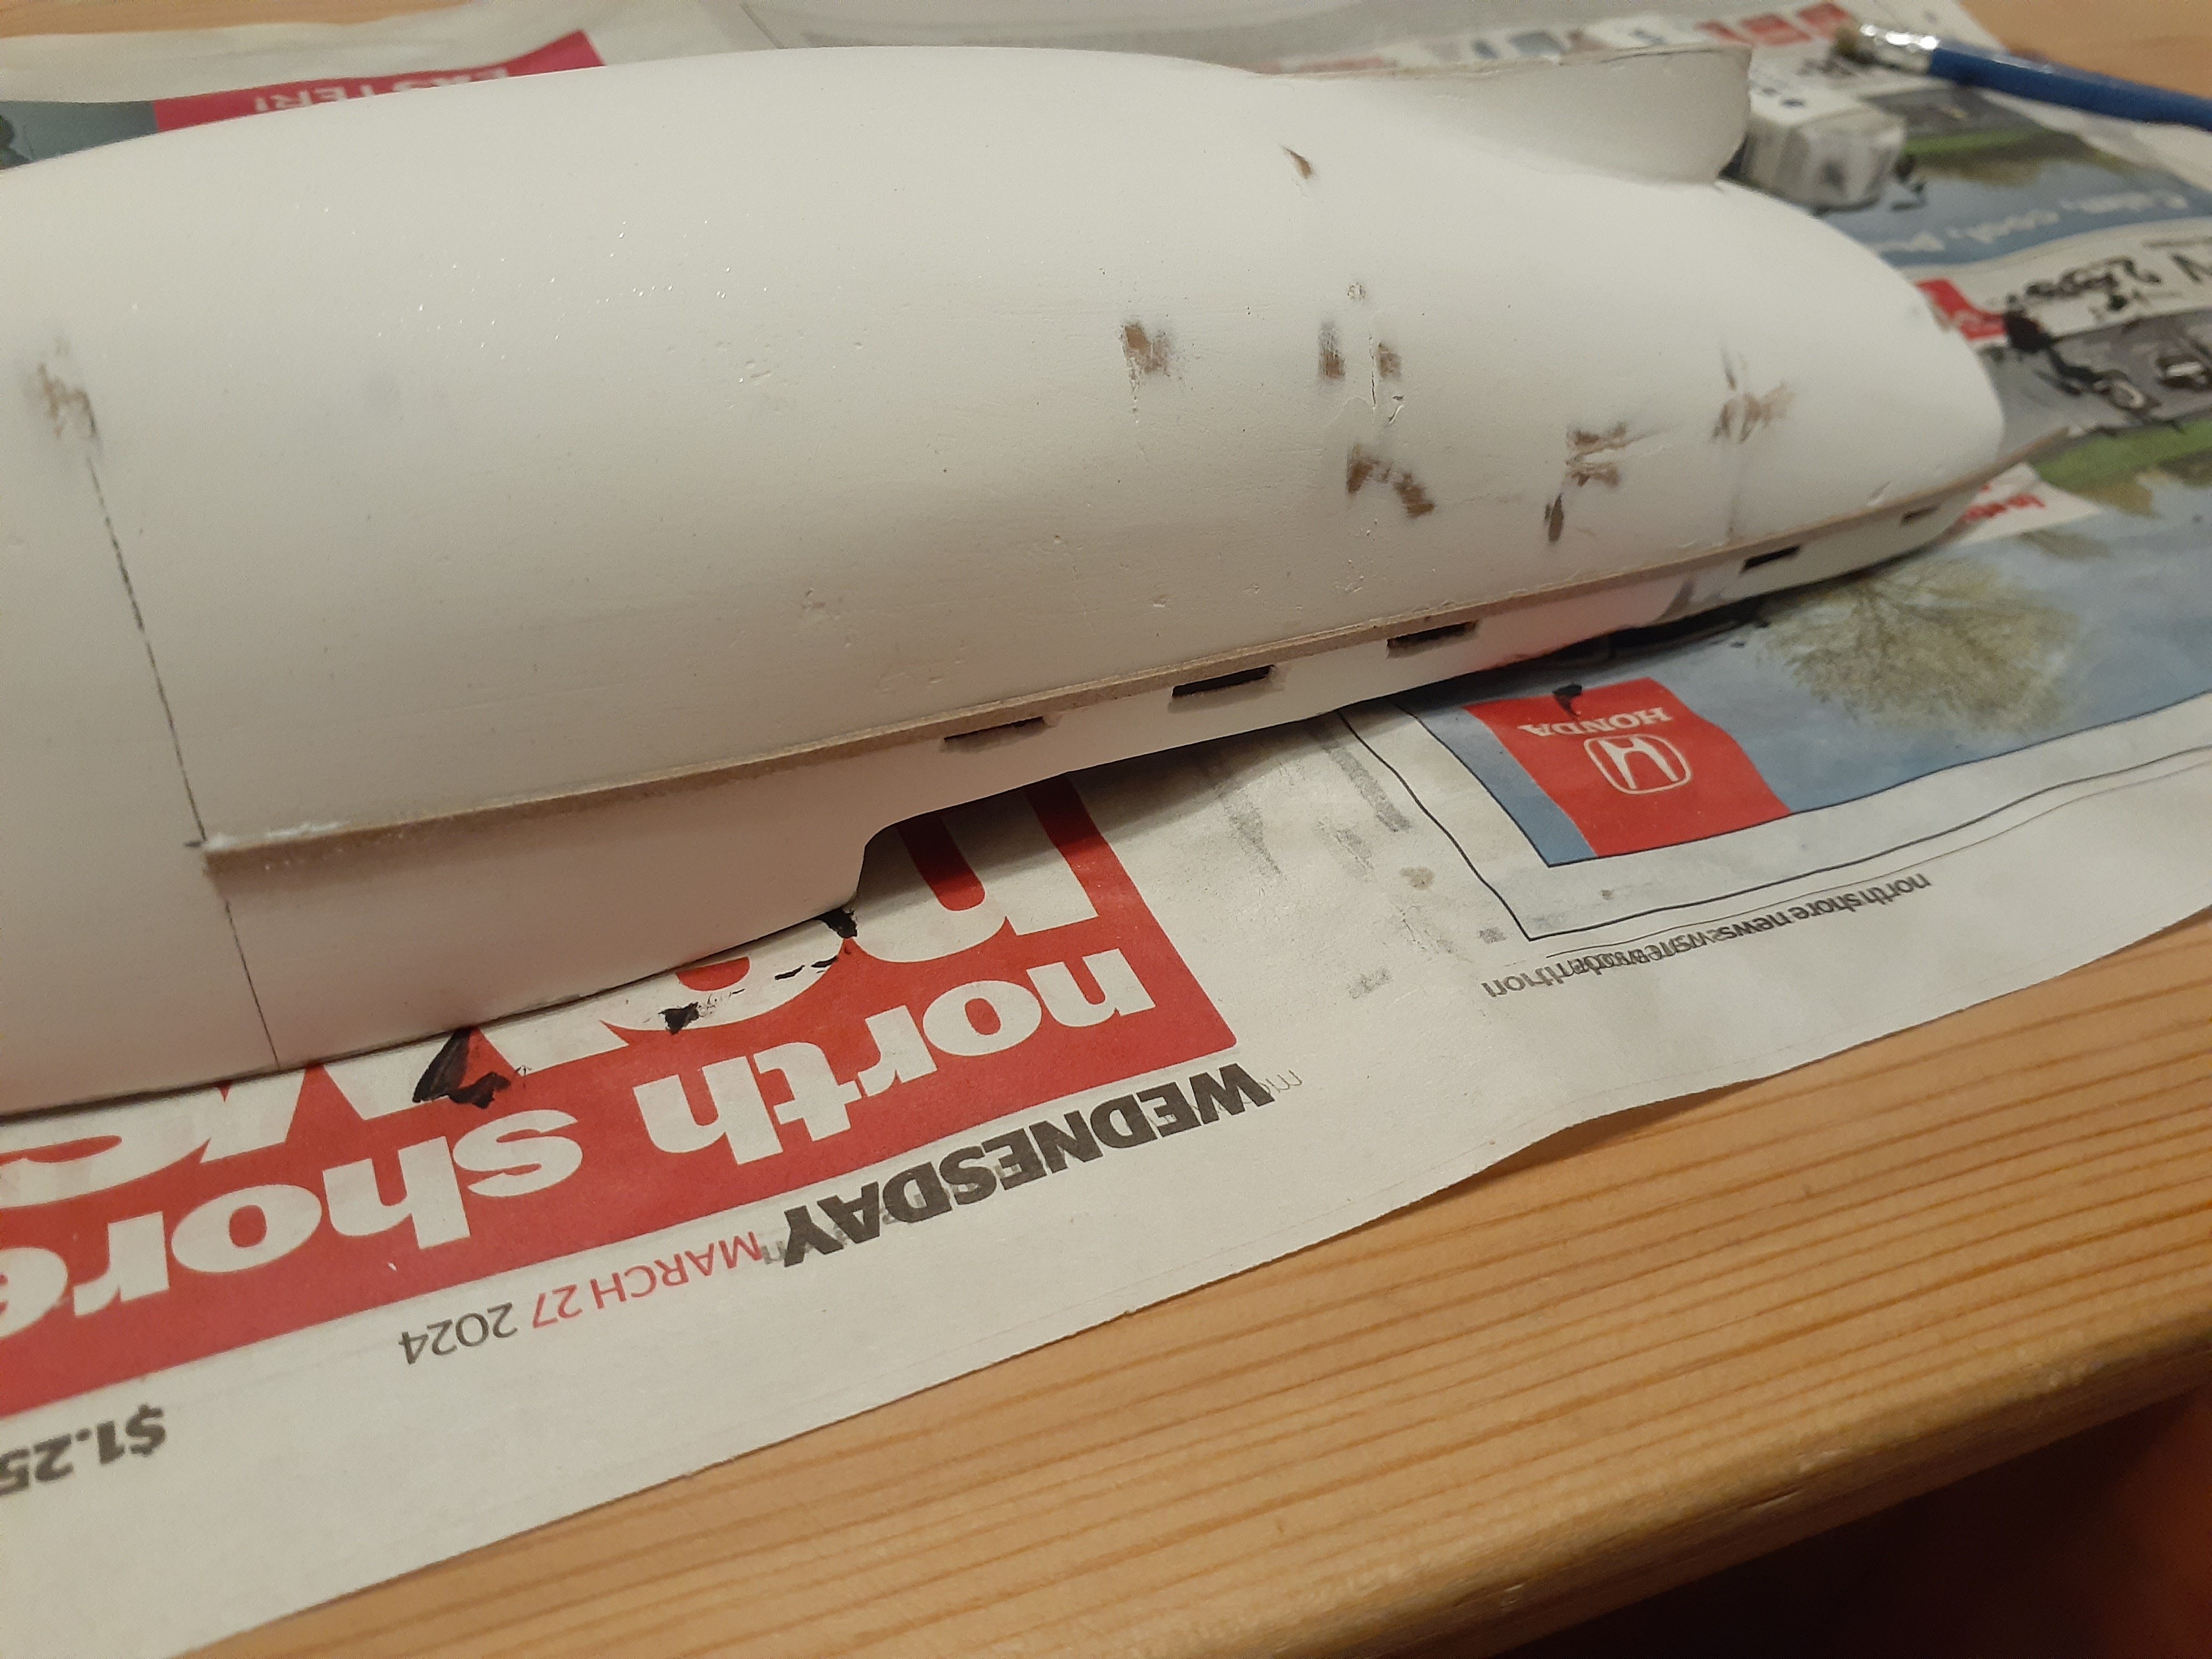
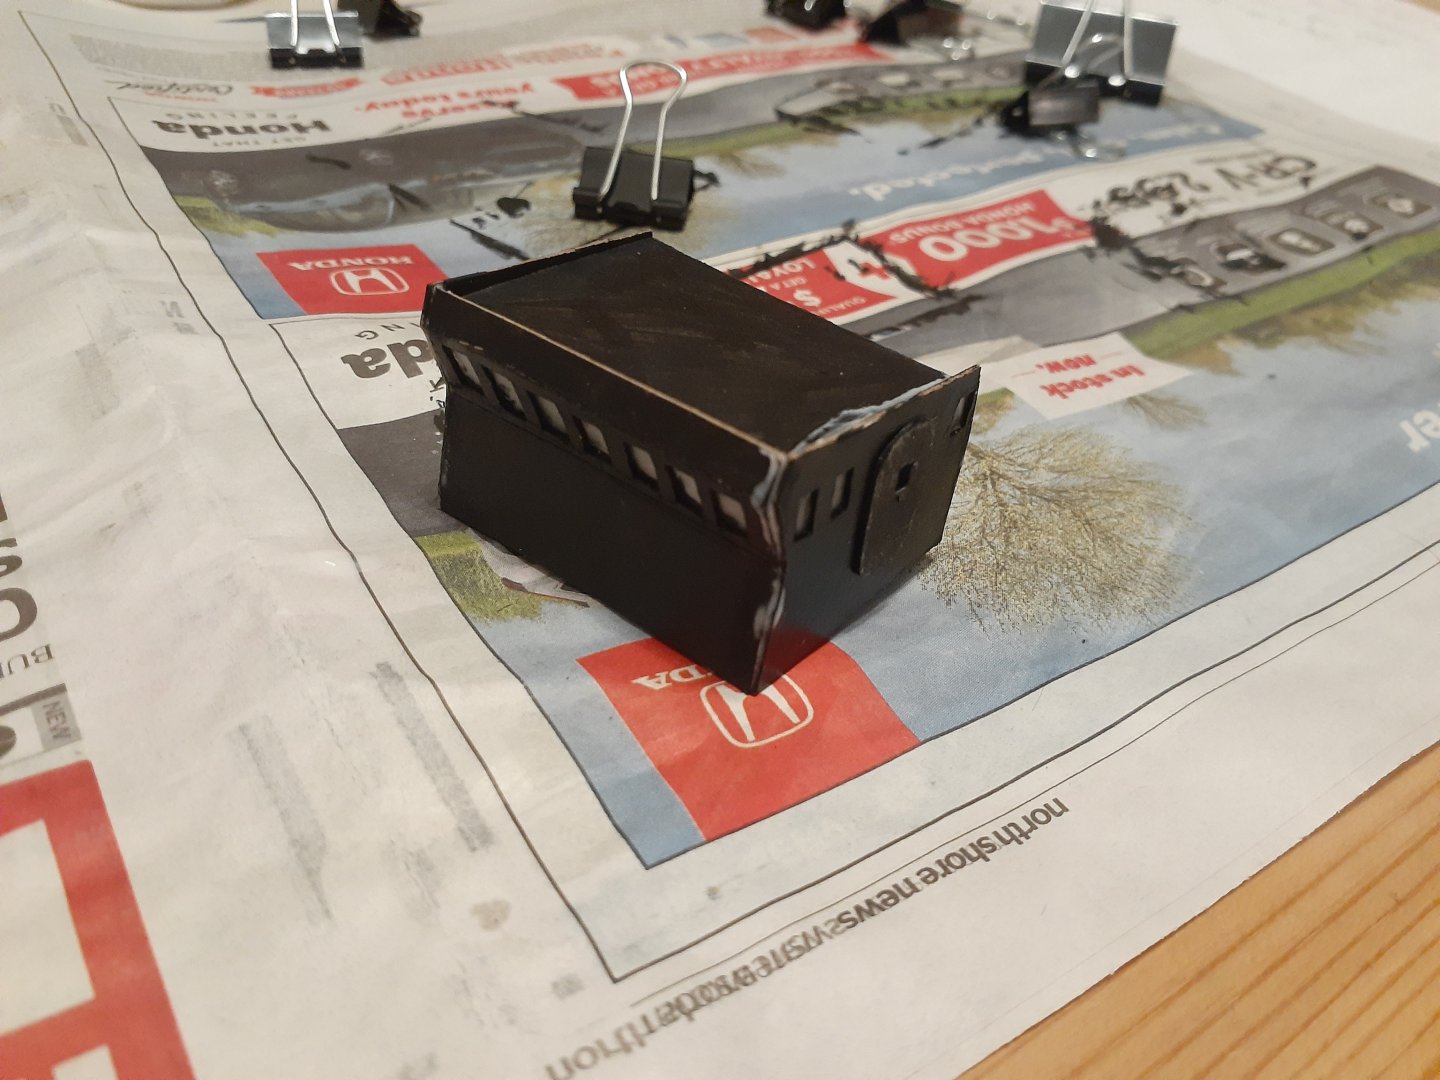
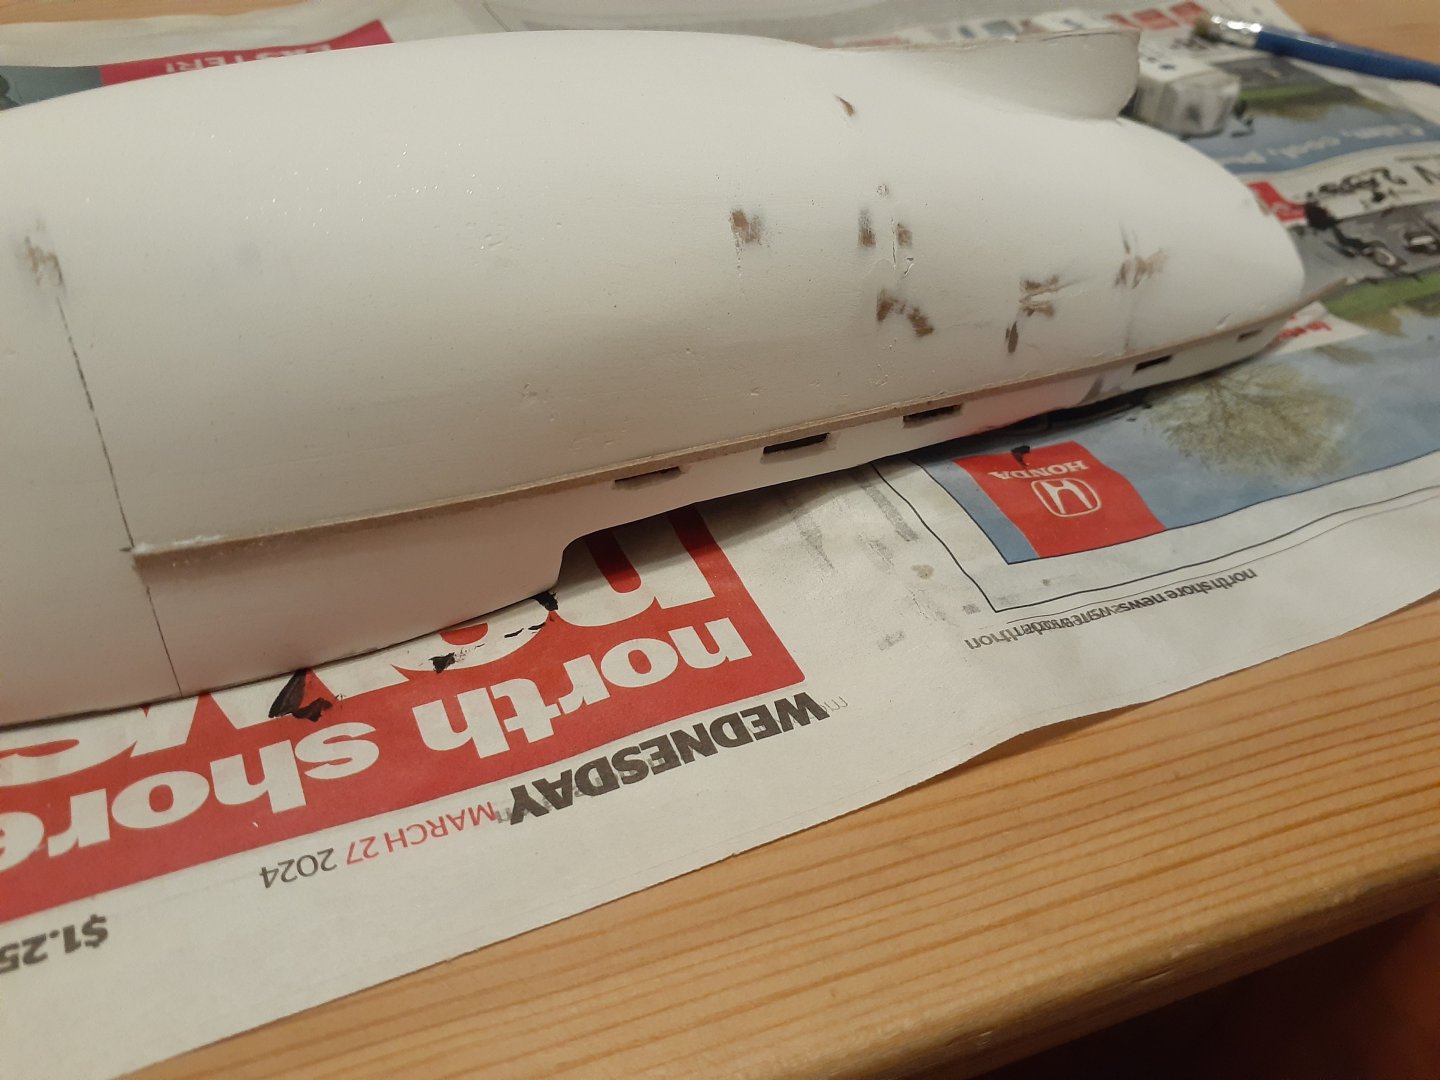
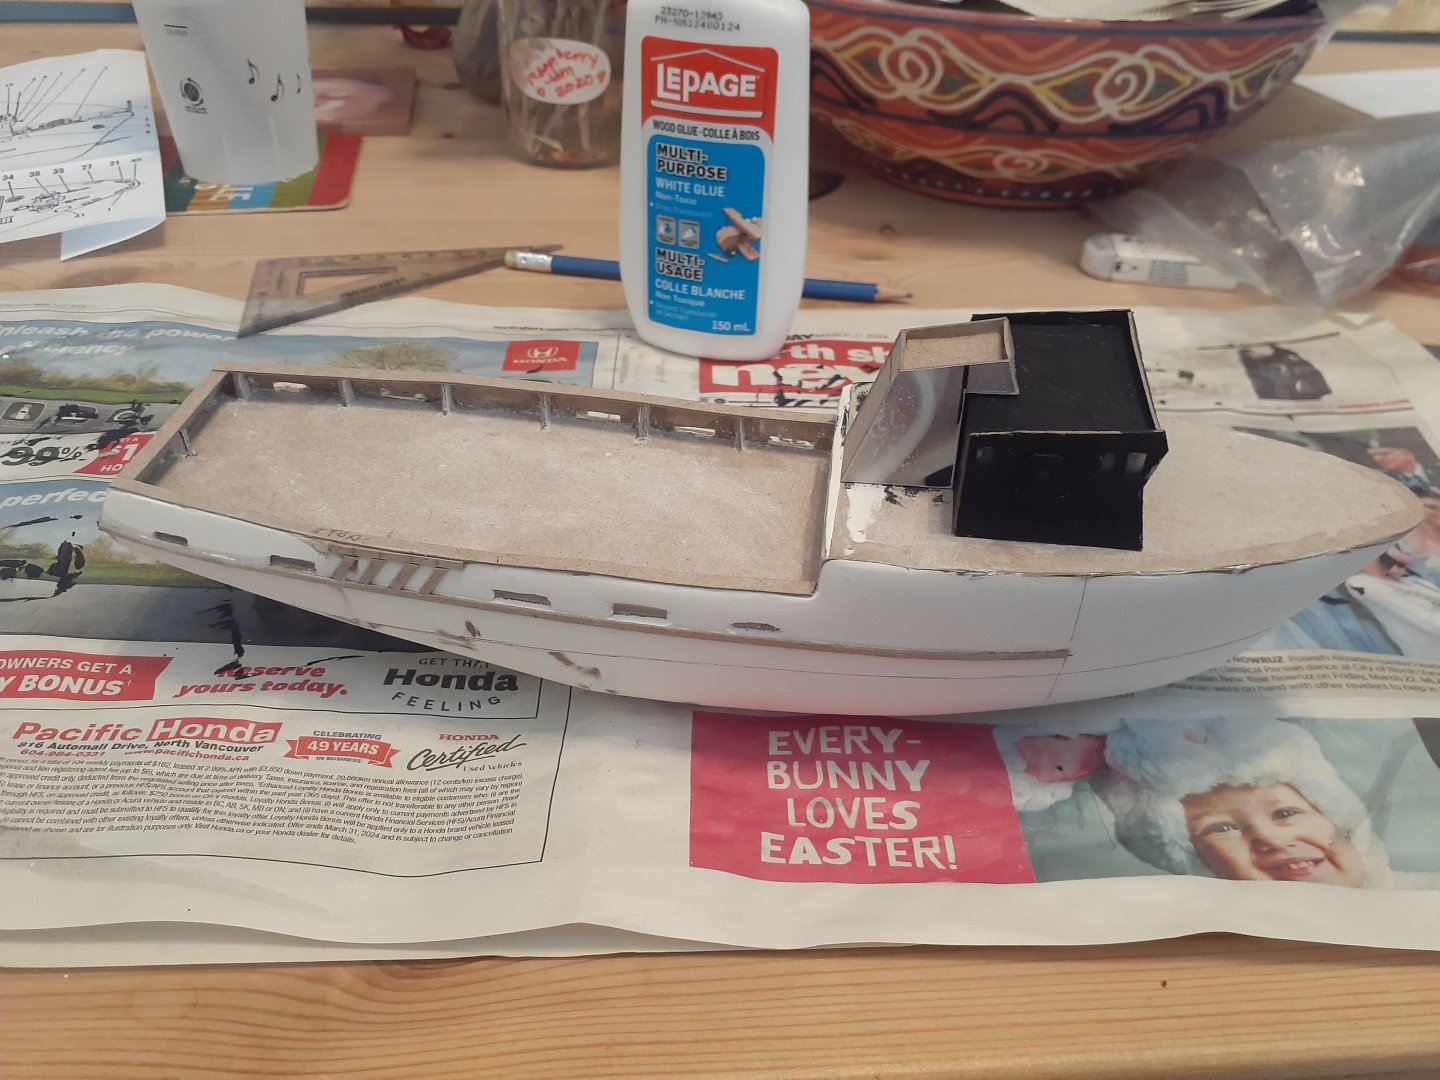
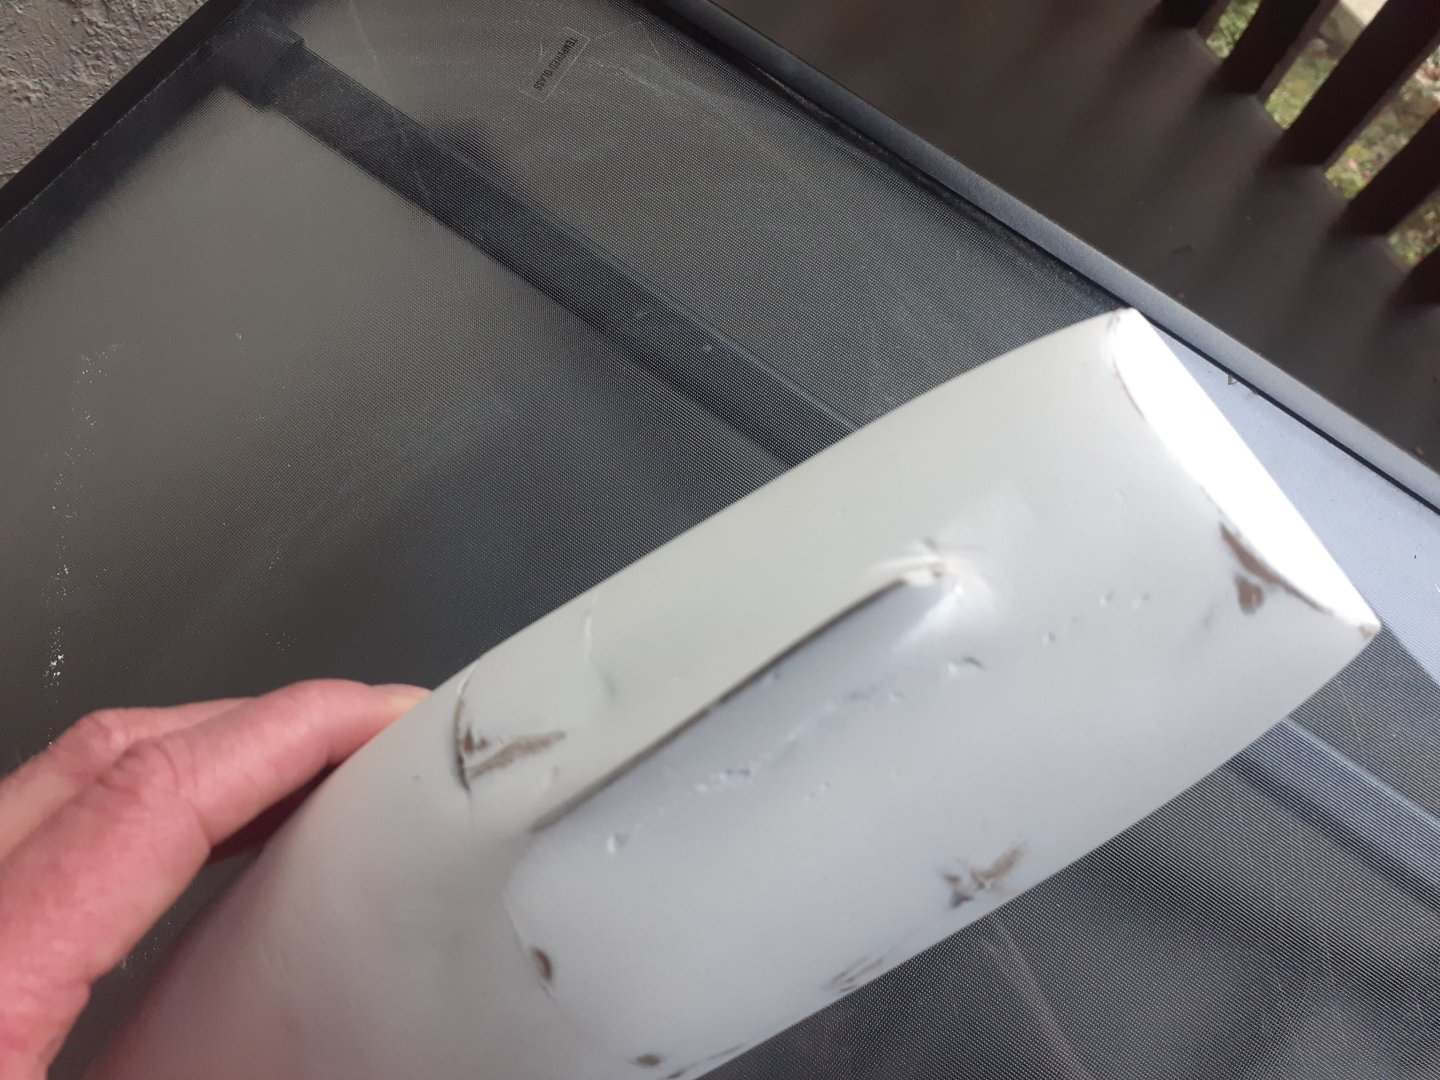
Time for a much needed update! I have spent a good part of the week reading build logs, and it seems that card models are generally finished with a coat of sealant after completion. I think I am going to stick to this method before learning any more complicated techniques, as I am already somewhat in over my head and want to keep the motivation flowing! Thanks again for the advice I received. I managed to construct the bridge and funnel during the week, including plastic backing for the windows. They don't fit together perfectly. I need to get better at cutting in general... i think working from a kit would help thee alignment issues, but generally I am happy with my results, as I'm retracing all these parts by hand. The thin spot and some other minor imperfections in the hull were fixed with a final coat of filler. It still looks a bit rough where the bulkheads are poking through, but feels quite smooth. Had some distractions this week as well... After the sanding, I cut the scuppers. I had some trouble here as I hadn't marked them beforehand, and the filler thickness varied quite significantly from scupper to scupper and was very crumbly. Therefore, they don't look great, or very even... If anyone knows a good way to repair these somewhat, I'm all ears, but I'm happy with how they look from viewing distance so am not super bothered. Railings and rub rails were next! She's starting to look like a ship, which is great I'll be doing the prop, rudder and shaftline next, all from card as of now. I have some wooden dowel for the rudder post. Again, I've reviewed several build logs and have a plan, though without proper kit parts, some trial and error may be involved. I'll end with a question: is black a reasonable primer colour for model shipbuilding? I've used it for miniatures to help with the shadowing, and I think it might help here to tone down my colours and give a more weathered impression, which is what I'm after. I know it does mean I'll need more coats, but I'm fine by that. Does this sound reasonable, or should I go pick up a white or grey? Thanks! Go Canucks!


-
Thanks Valeriy, thats very helpful. The colour scheme looks quite nice. Do you know if these ships would typically have wooden planked decks, or steel decks? I have been wondering about planking it. Valeriy and Phil, I wonder if I might be able to combine your suggestions in some way by covering the hull with thin layers of paper or fabric reinforced with epoxy. I have to do some thinking while I start the superstructure. Thanks again for your comments!
-
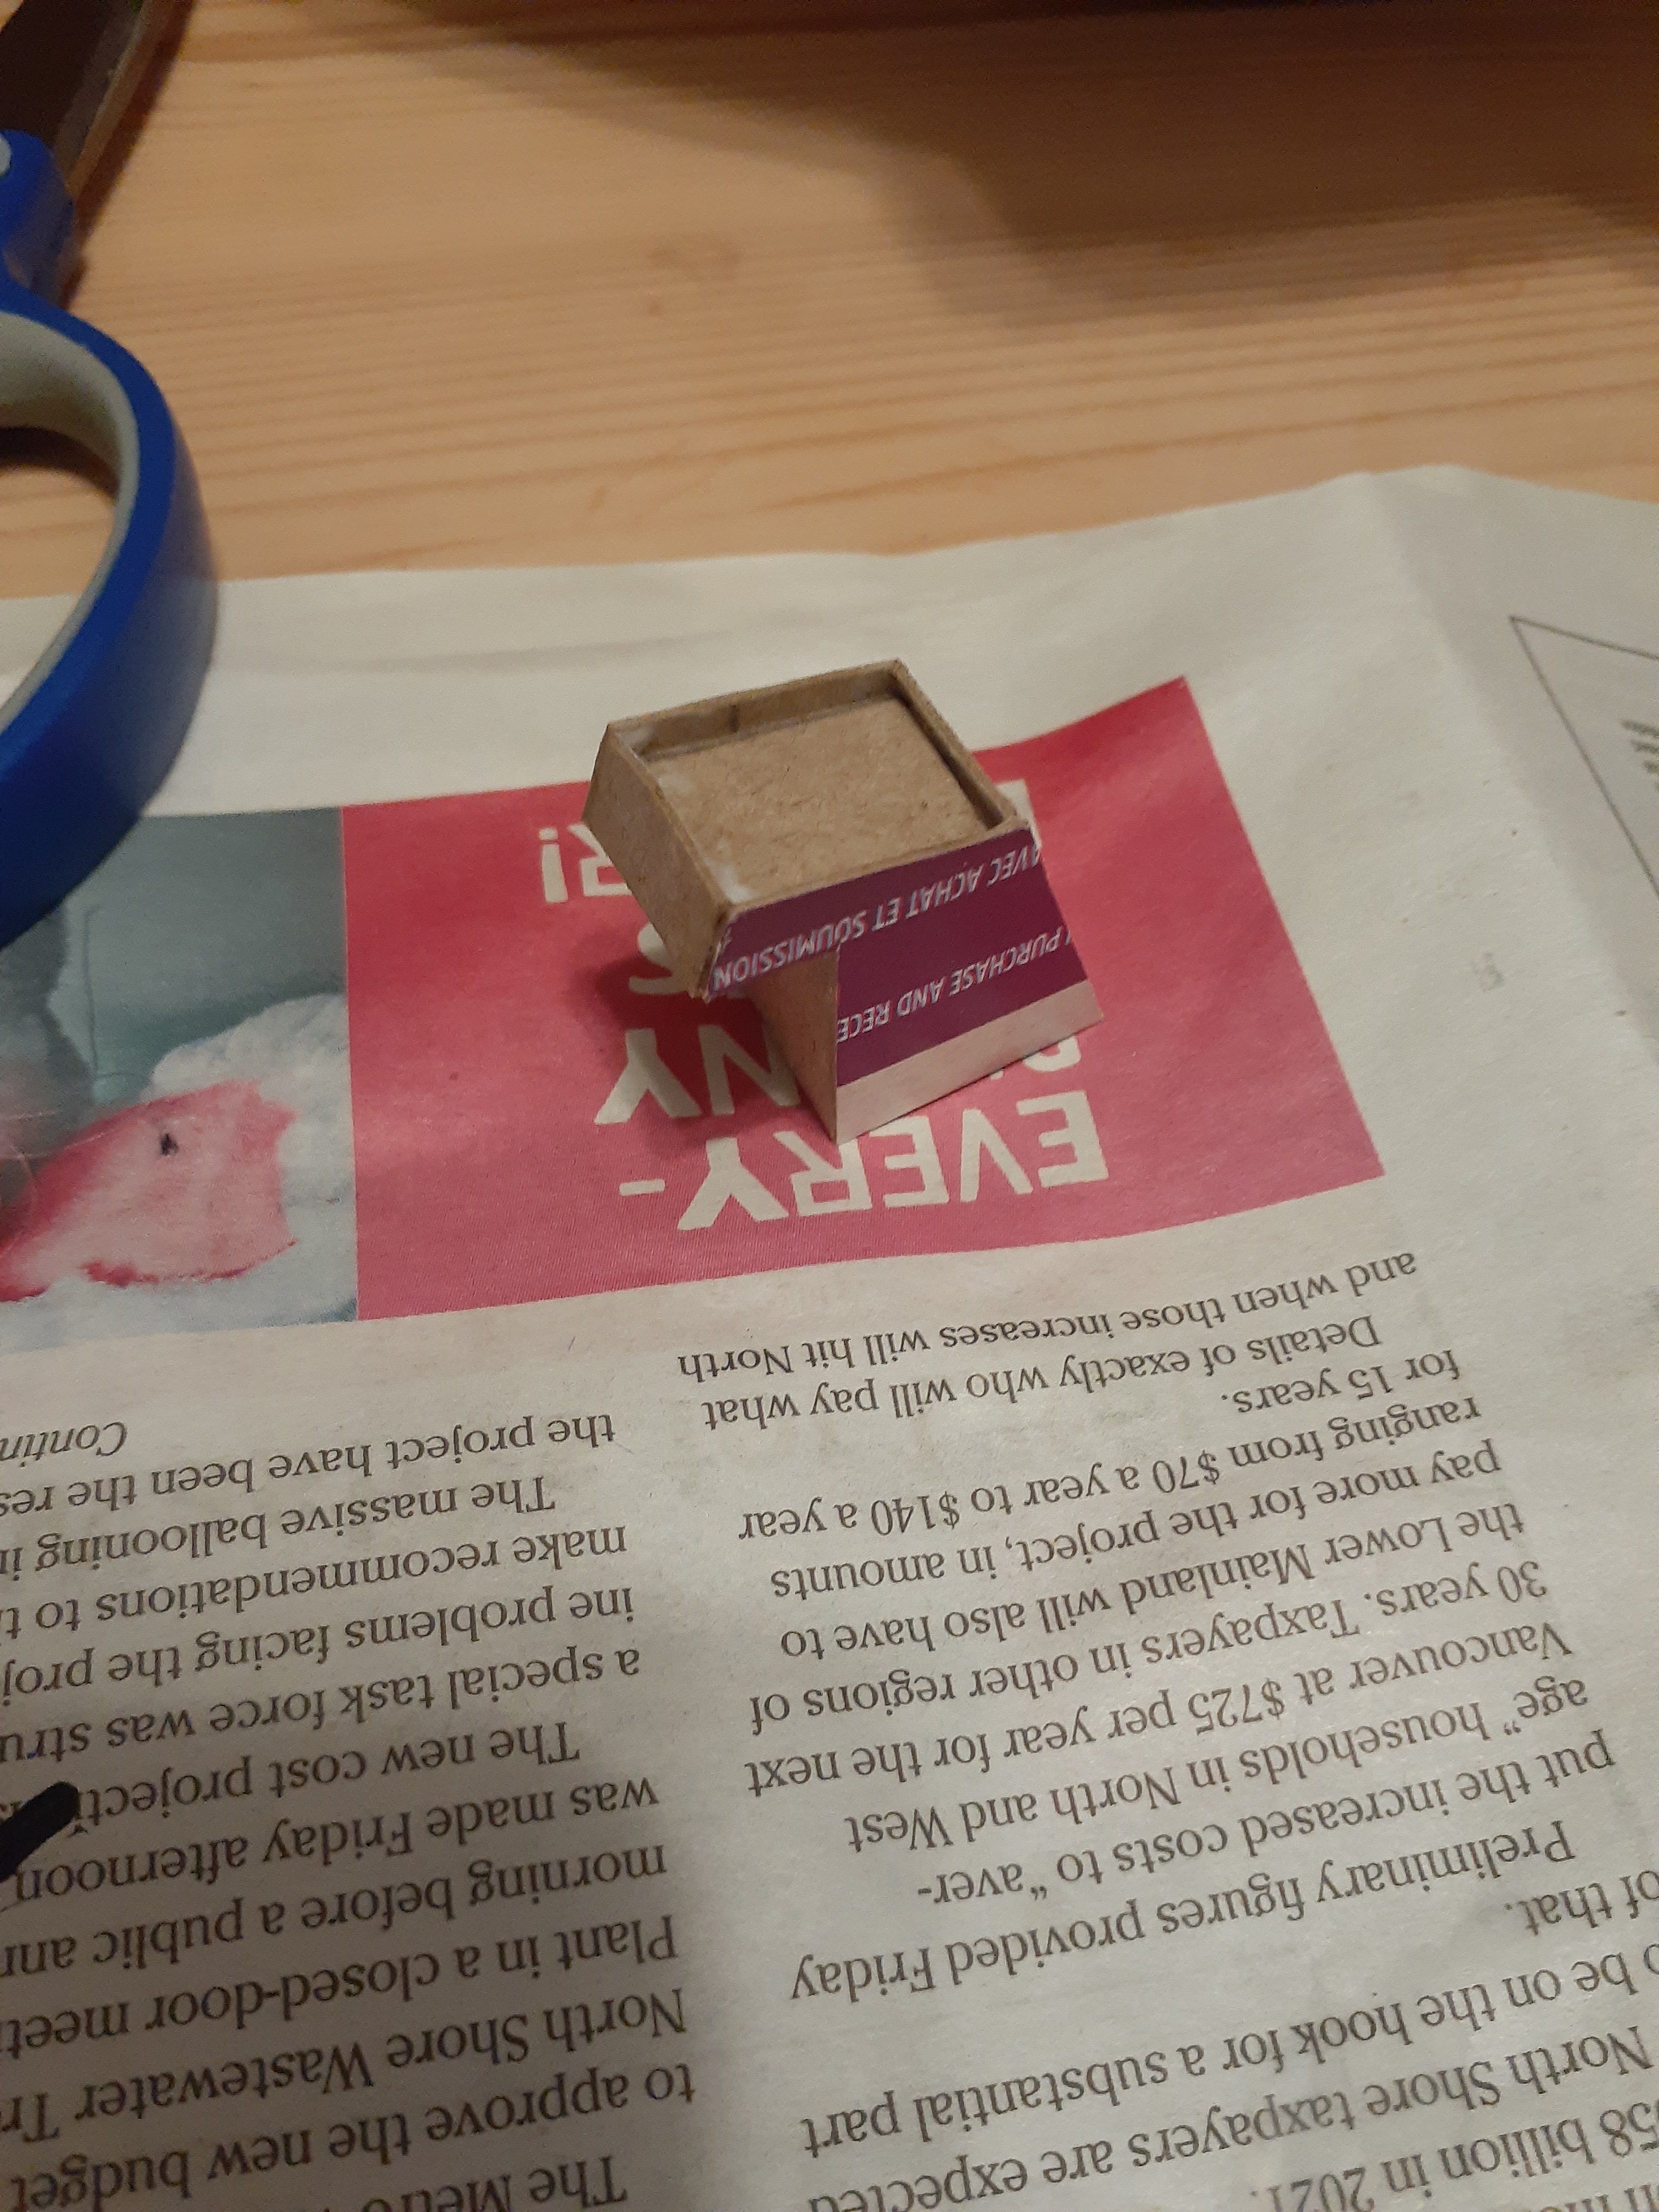
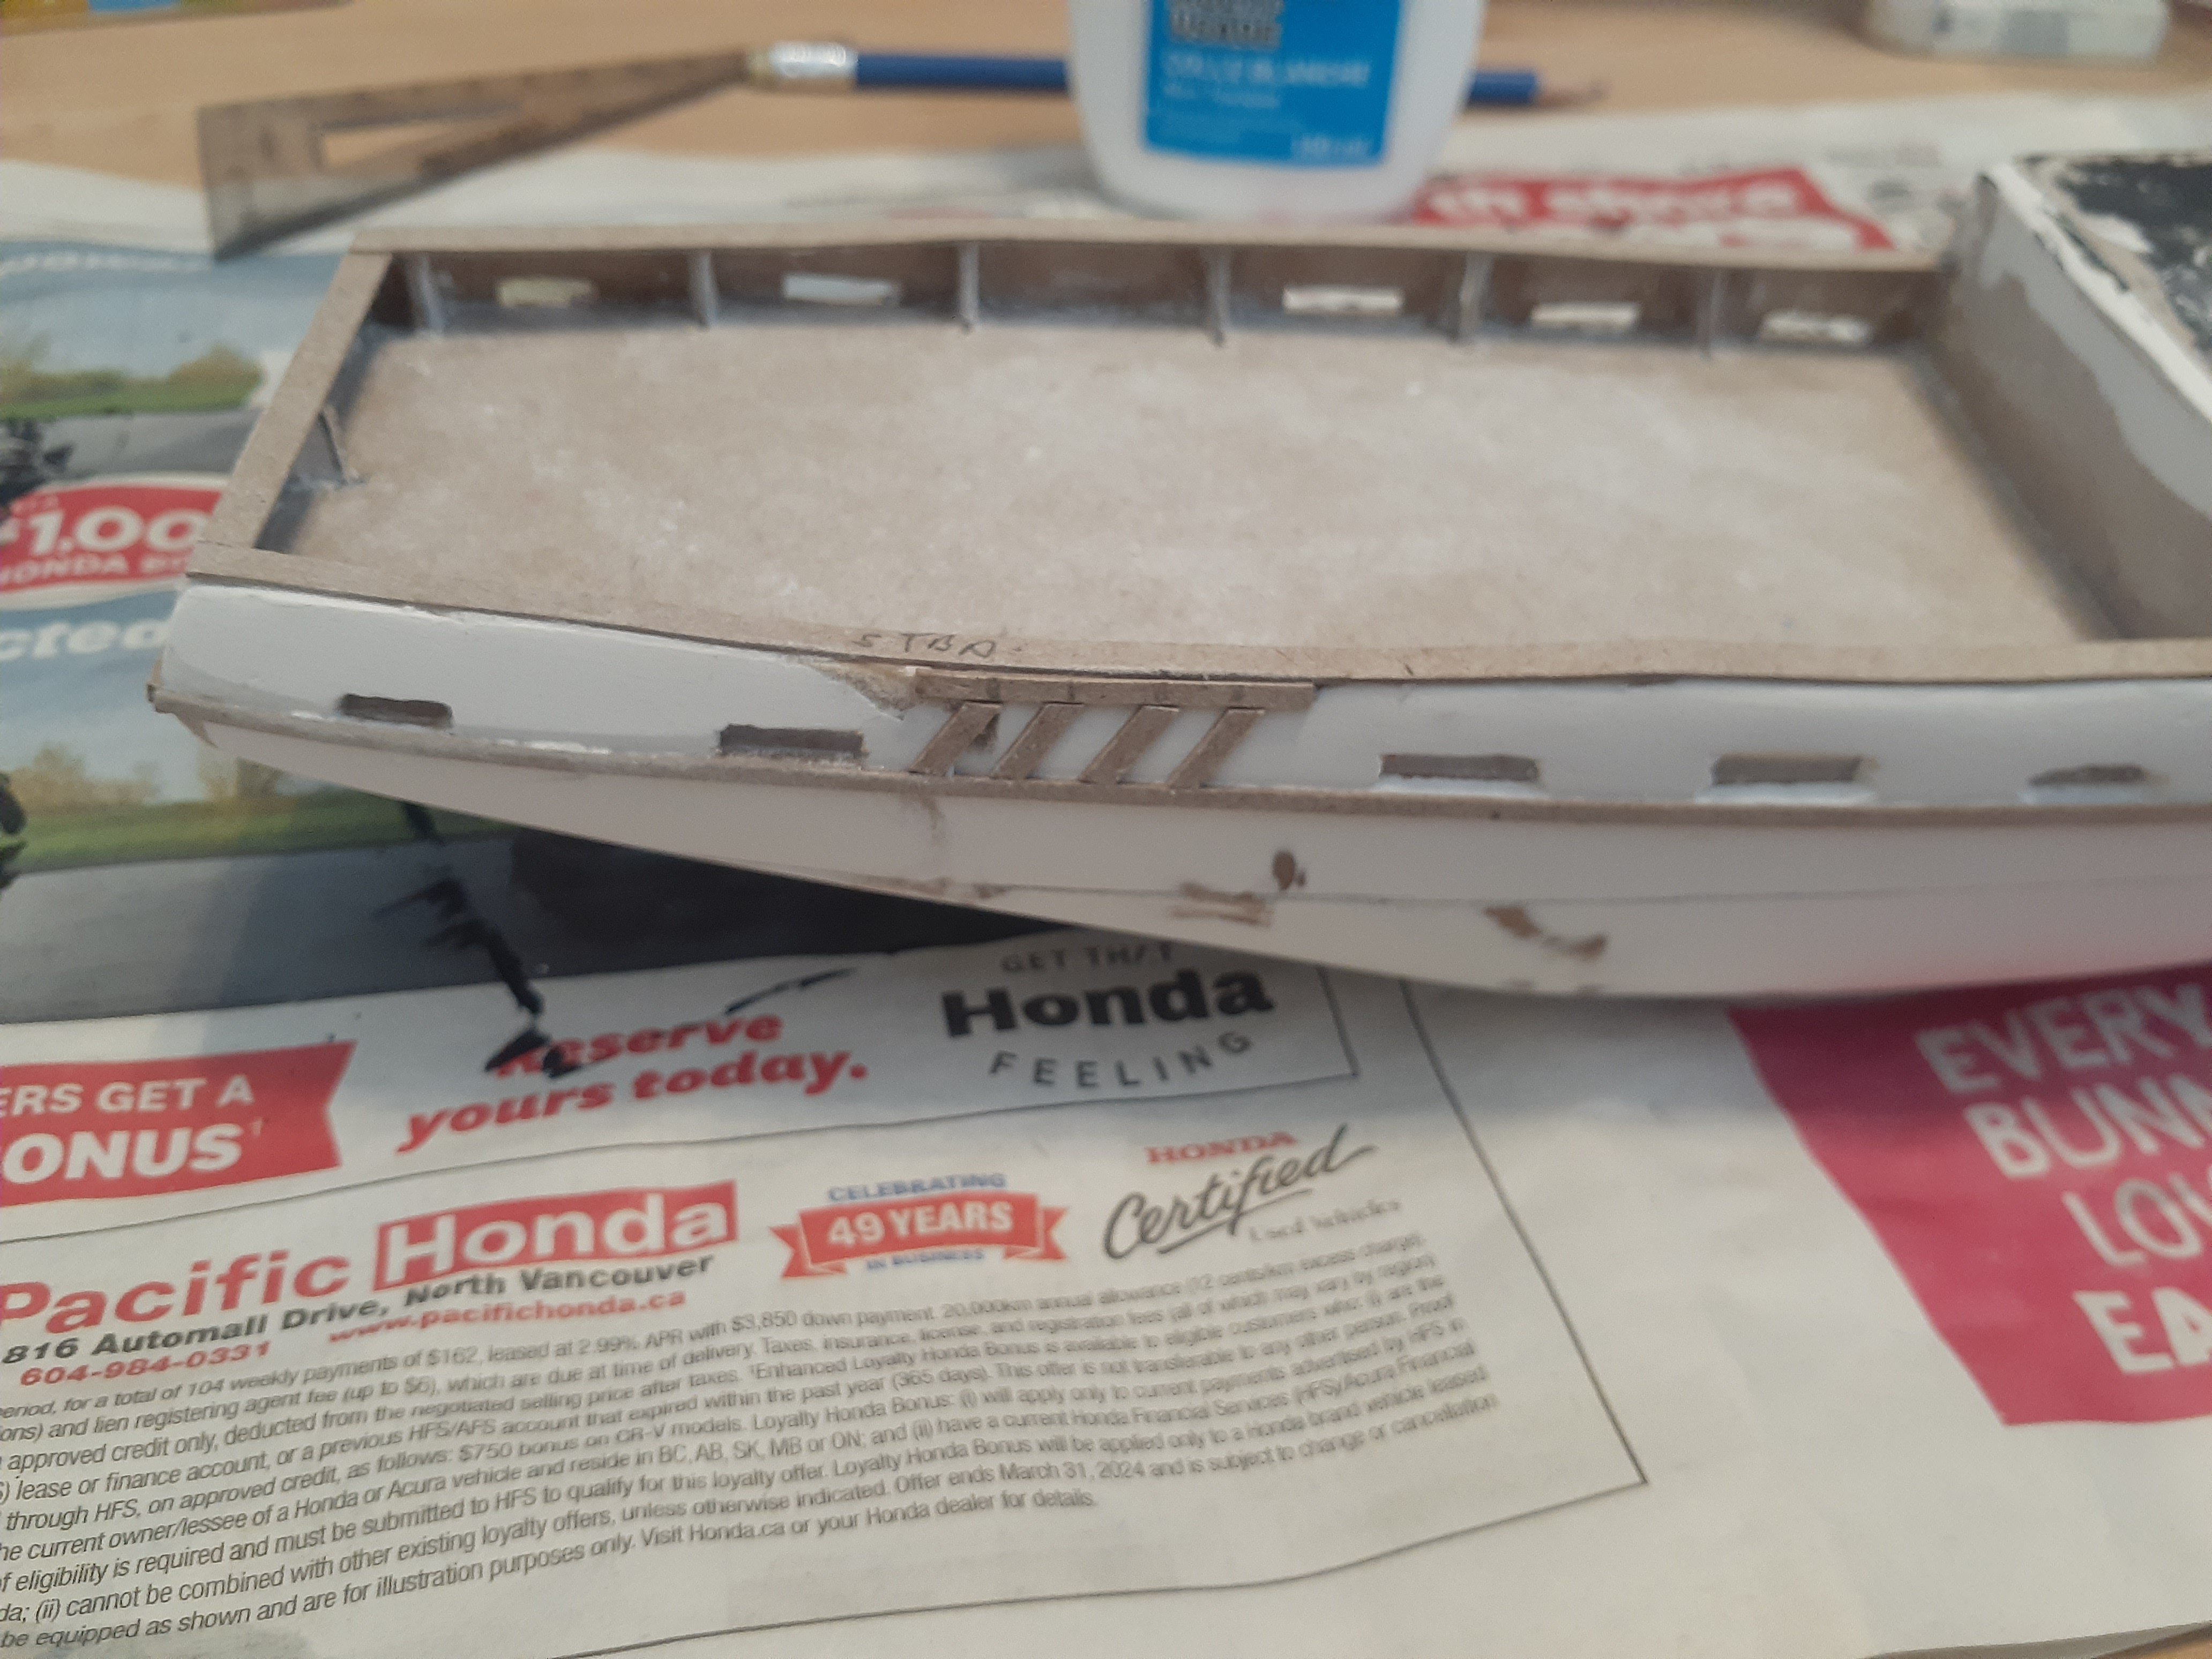
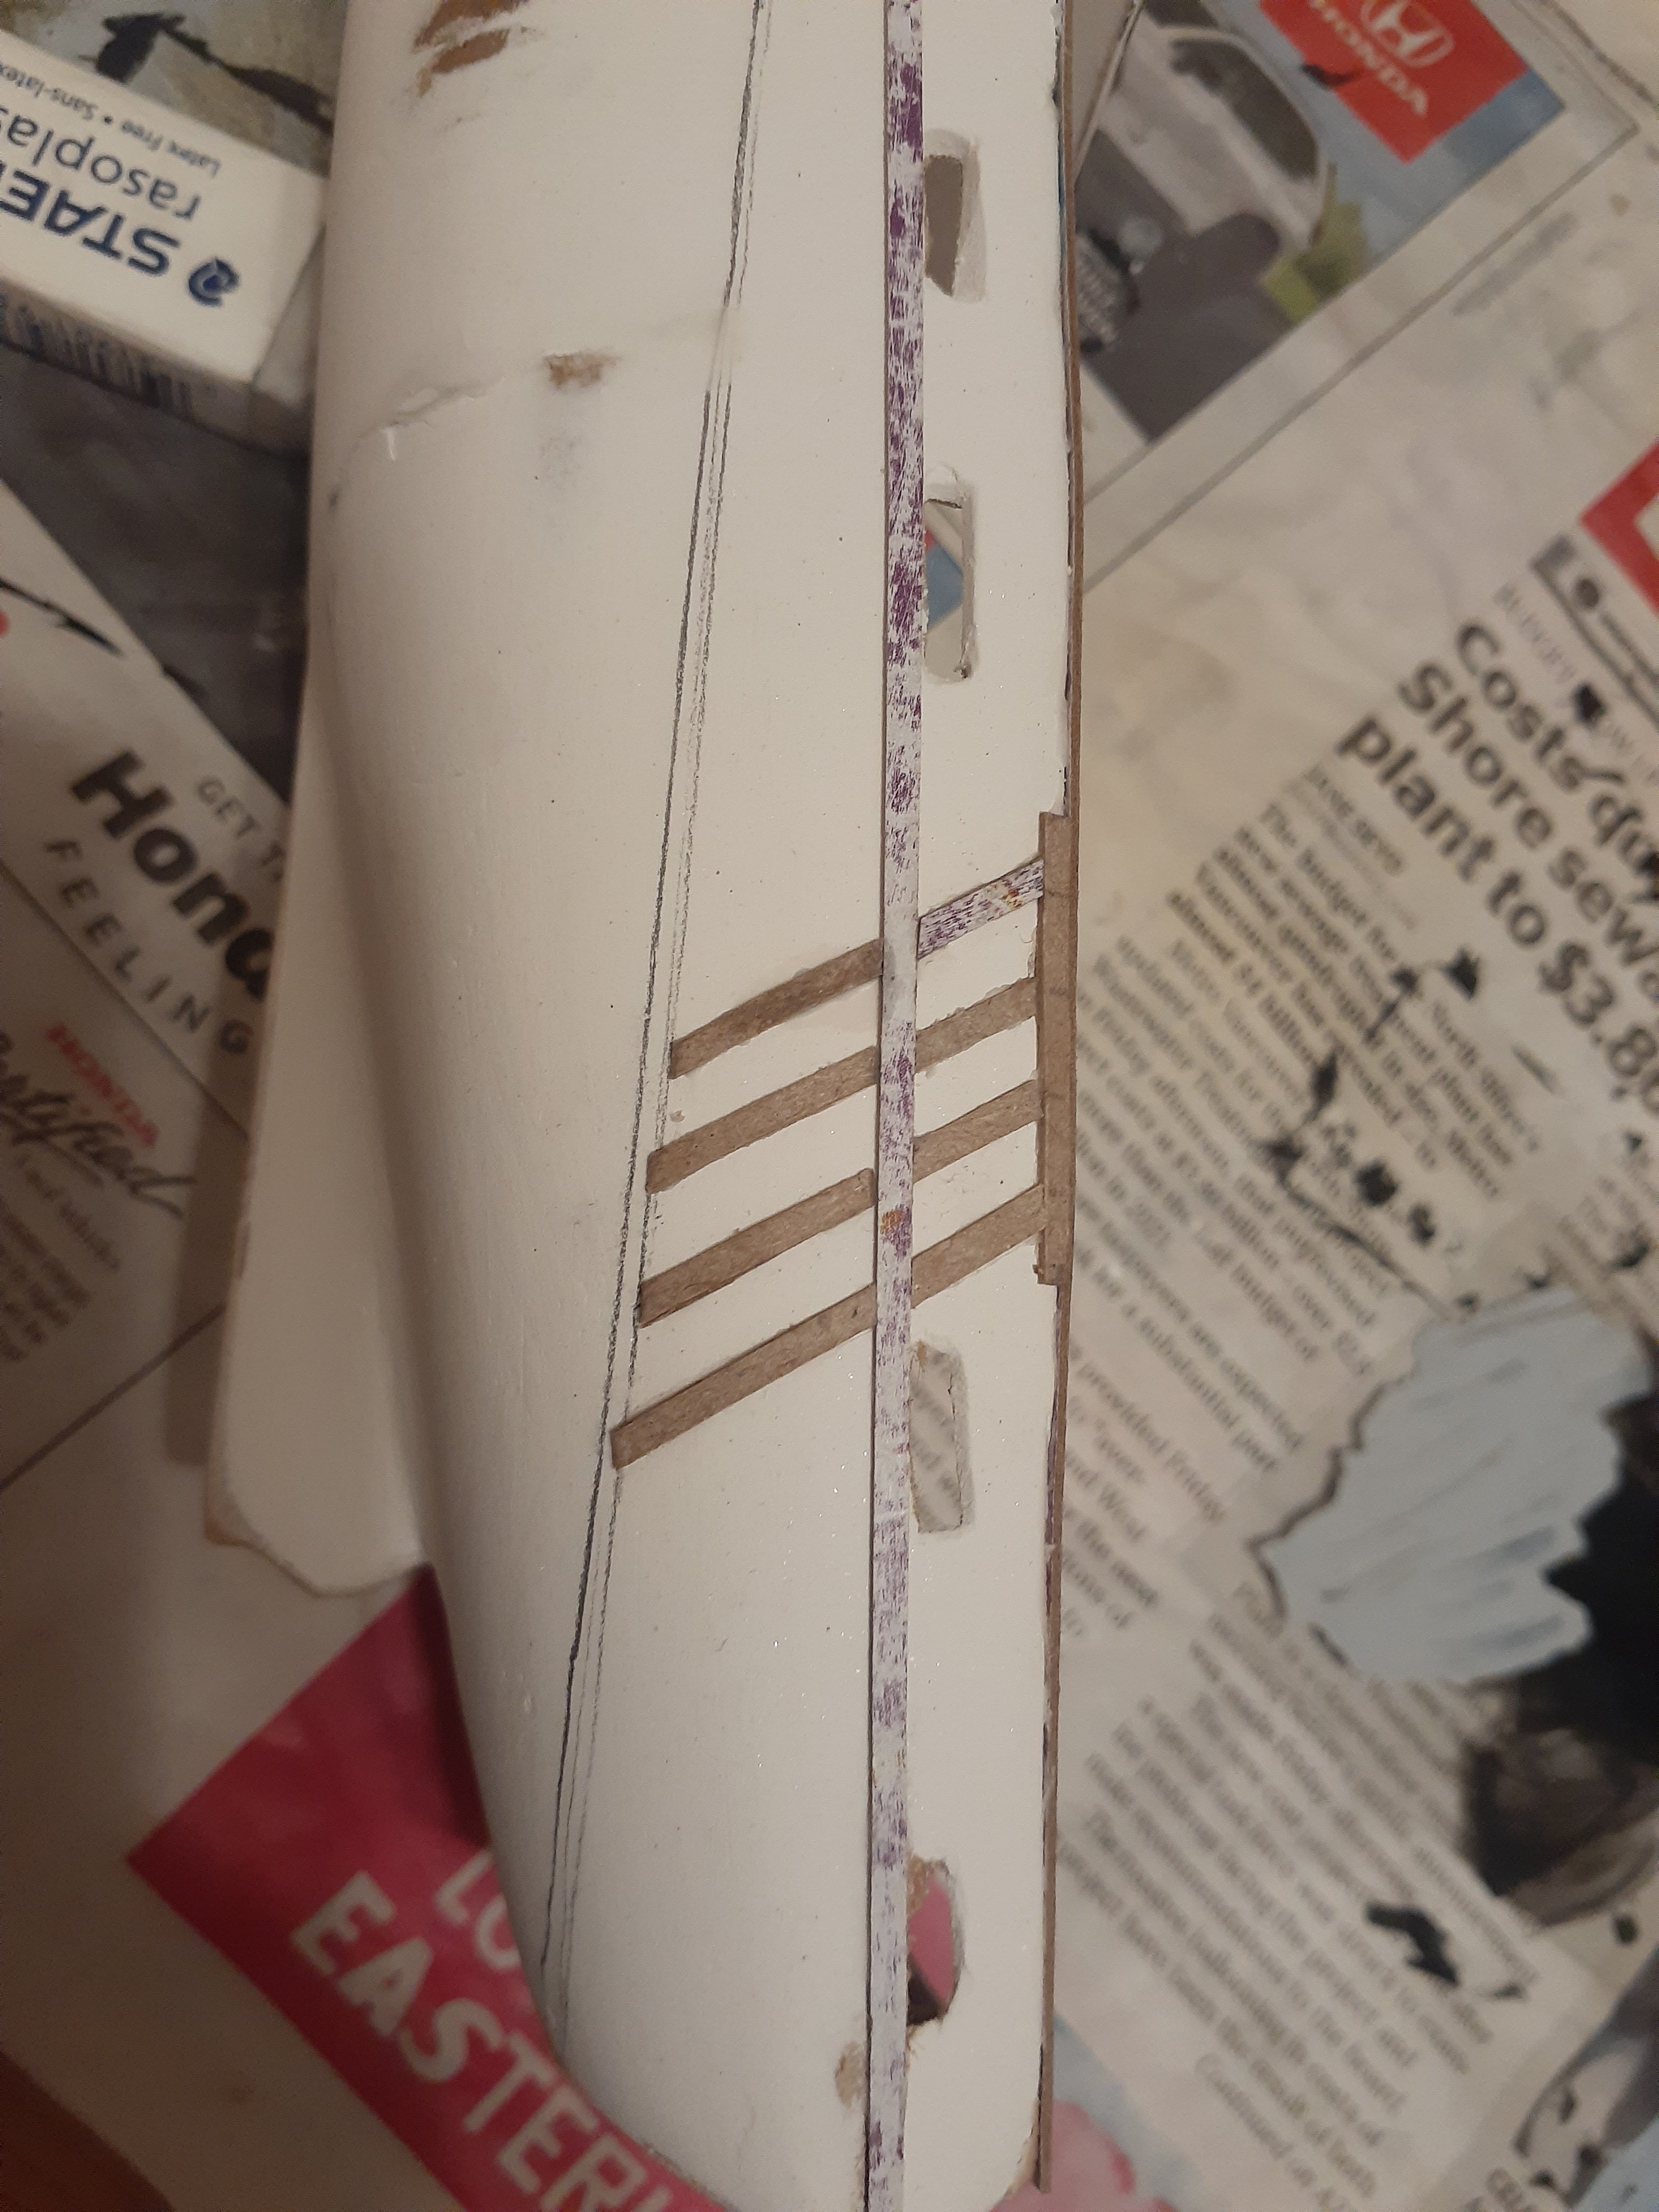
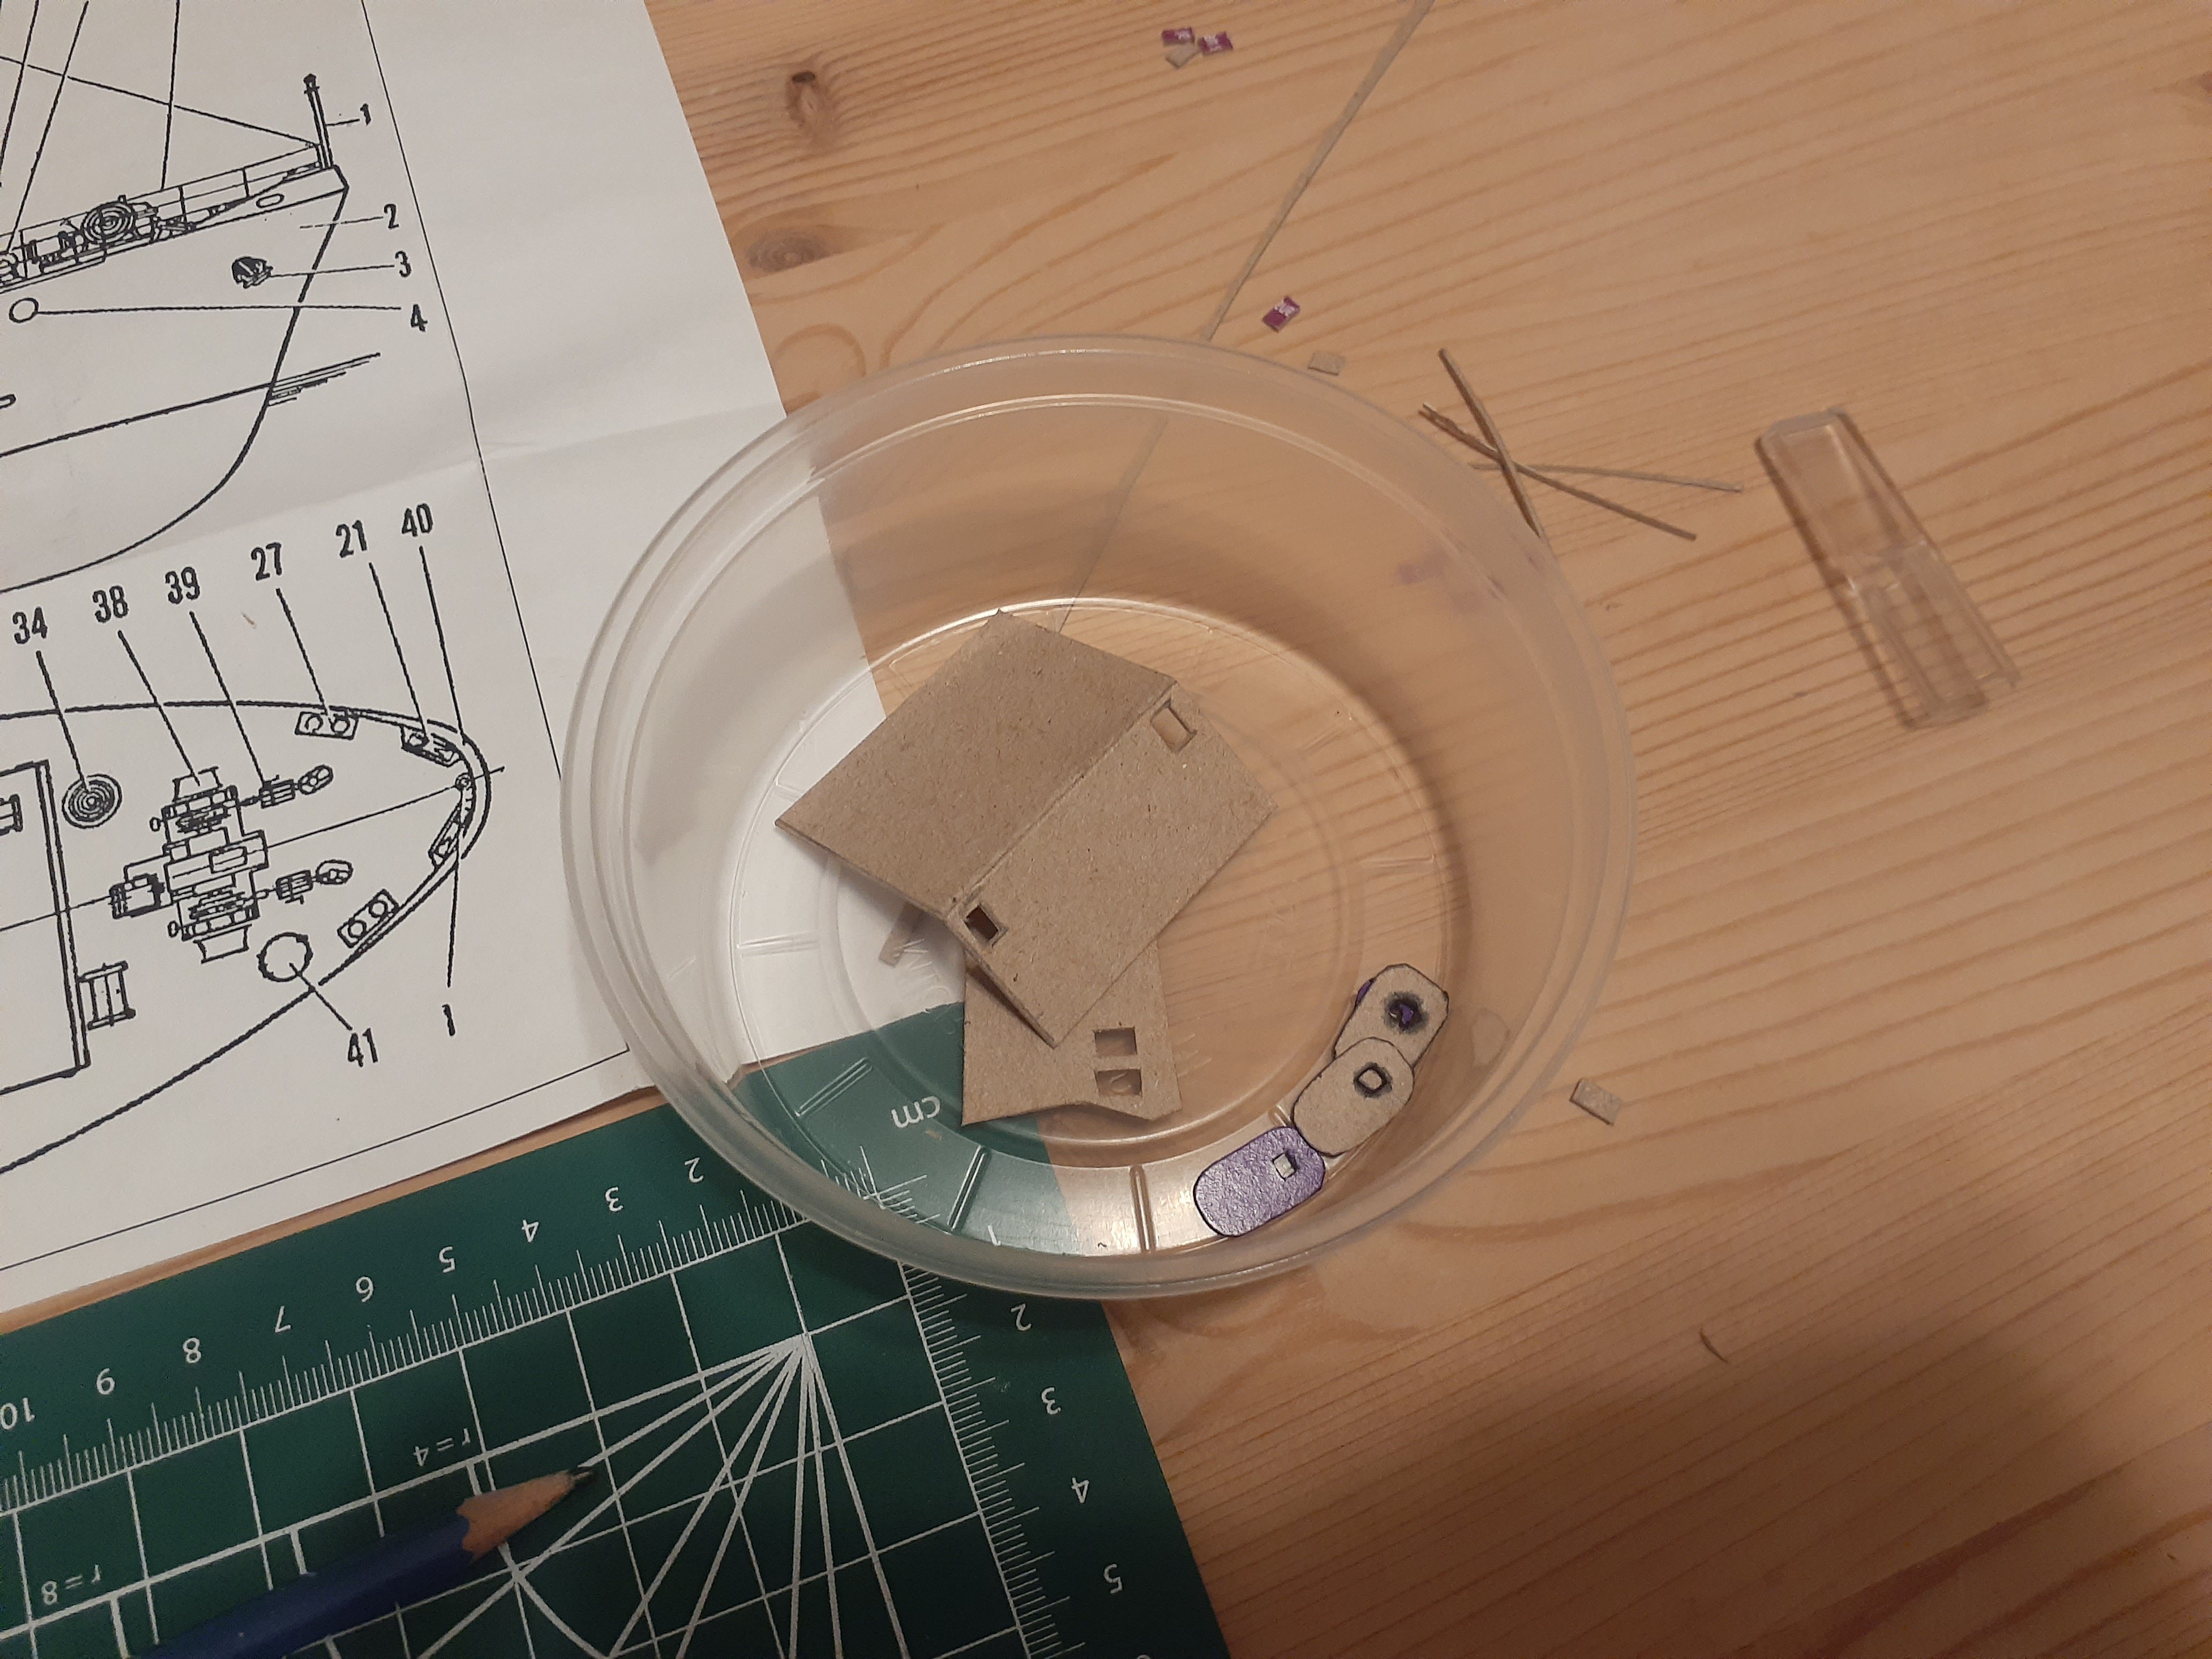
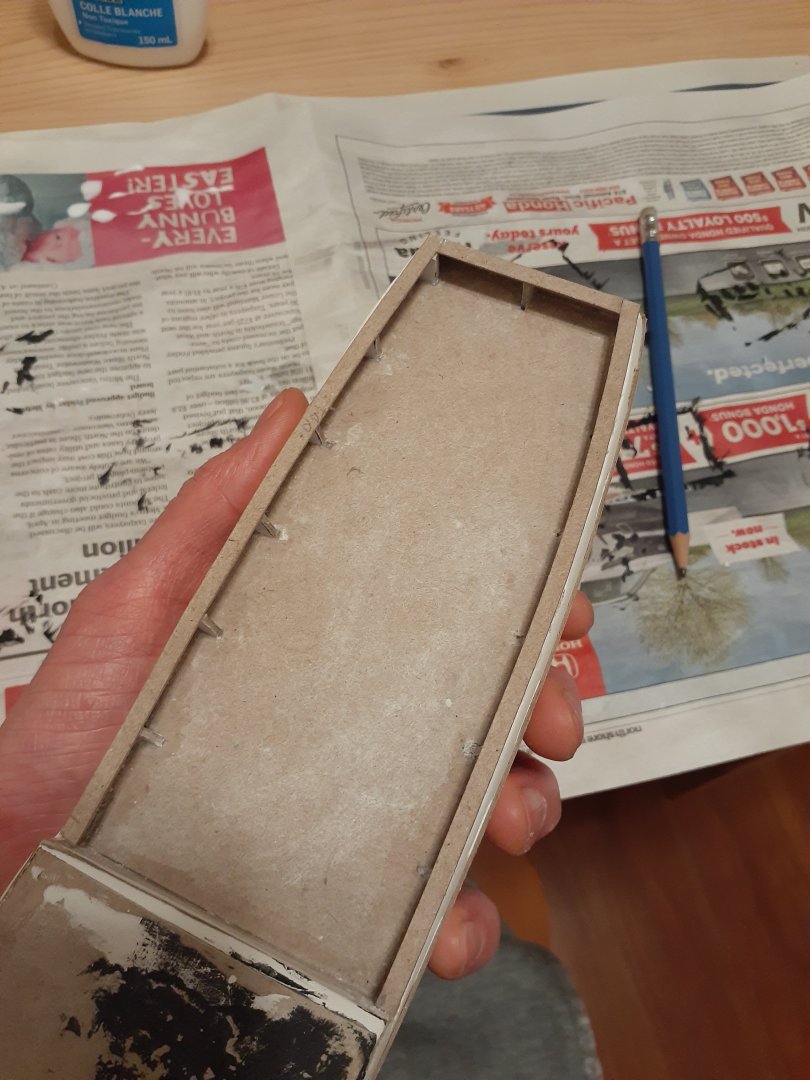
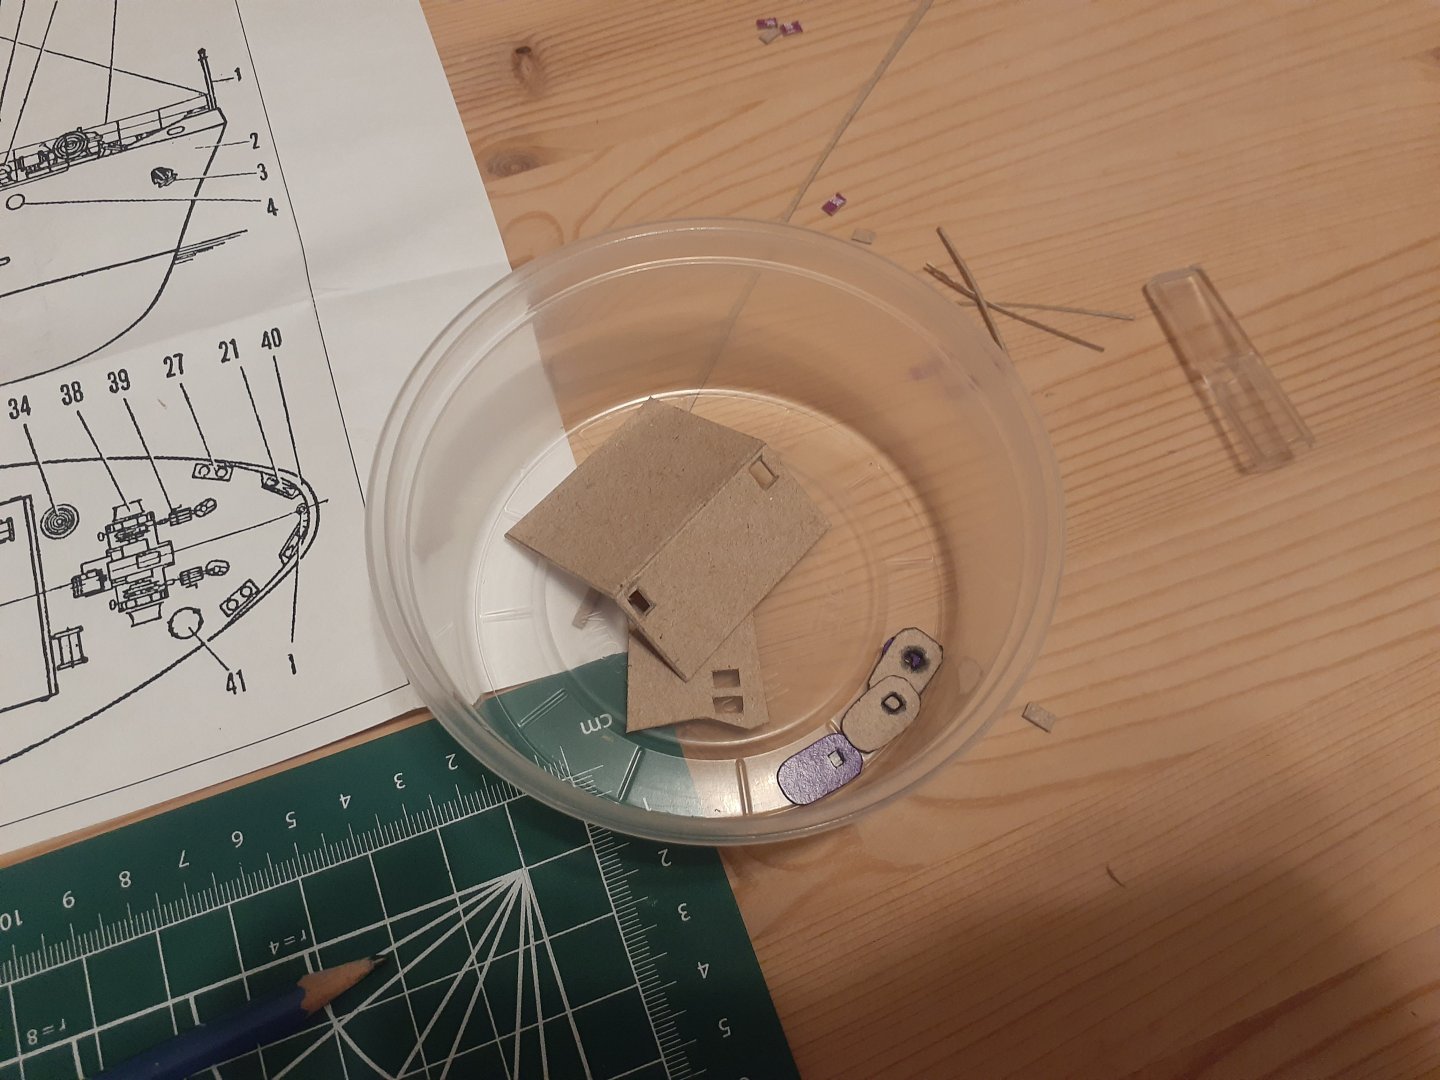
Here is a brief progress update. Despite it being a busy week, I have applied a second coat of putty and started to sand down to 400 grit. Im pretty happy with the results so far. I still have some cracks and low spots that may need filling, but im going to try sanding them out a bit more first. One particular sticking point: Ive managed to sand through one of my card "planks, leaving a weak point and a bit of a hole. Its not huge, so im hoping a generous application of white glue might solve it, but if anyone has any recommendations, Im all ears! The plank in question is the uneven one on the port side. While thinking about this, I also had time to stat tracing out the bridge, which is starting to come together. My plan is to make windows from clear hard plastic packaging. Ive been thinking about the order of assembly, and I think the best would be: Trace inside of window frames in permanent marker, insert window panes, glue together bridge assembly, prime and paint inside and outside of bridge.


-
Phil and Chris, thanks for the encouragement! Valeriy, those resources you shared are awesome. I was wondering about possible colour schemes, and the Project 1336 types you shared have certainly given me some ideas. The deck arrangement and side profile plans I found are also slightly different in terms of equipment layout it would seem than the article you shared. I wonder if the trawler went through a few design iterations before completion, or if it may have had different layouts based on the tyoe of fishing it was doing? With regards to your comment about warping and cracking: Unfortunately I dont really have the facilities to do any fibreglass work. I've helped build a carbon fibre sailboat before, and though I know fibreglass is much easier to work with, I think I would need a more dedicated workspace compared to my current setup on the kitchen table. I was planning on sealing the model with some kind of clear coat or epoxy once complete, which I think should be sufficient for my fairly low stakes project!
-
doivud reacted to a post in a topic:
Krevetka by doivud - CARD - Soviet shrimp trawler - First Build
-
doivud reacted to a post in a topic:
Krevetka by doivud - CARD - Soviet shrimp trawler - First Build
-
doivud reacted to a post in a topic:
Krevetka by doivud - CARD - Soviet shrimp trawler - First Build
-
doivud reacted to a post in a topic:
Krevetka by doivud - CARD - Soviet shrimp trawler - First Build
-
doivud reacted to a post in a topic:
Krevetka by doivud - CARD - Soviet shrimp trawler - First Build
-
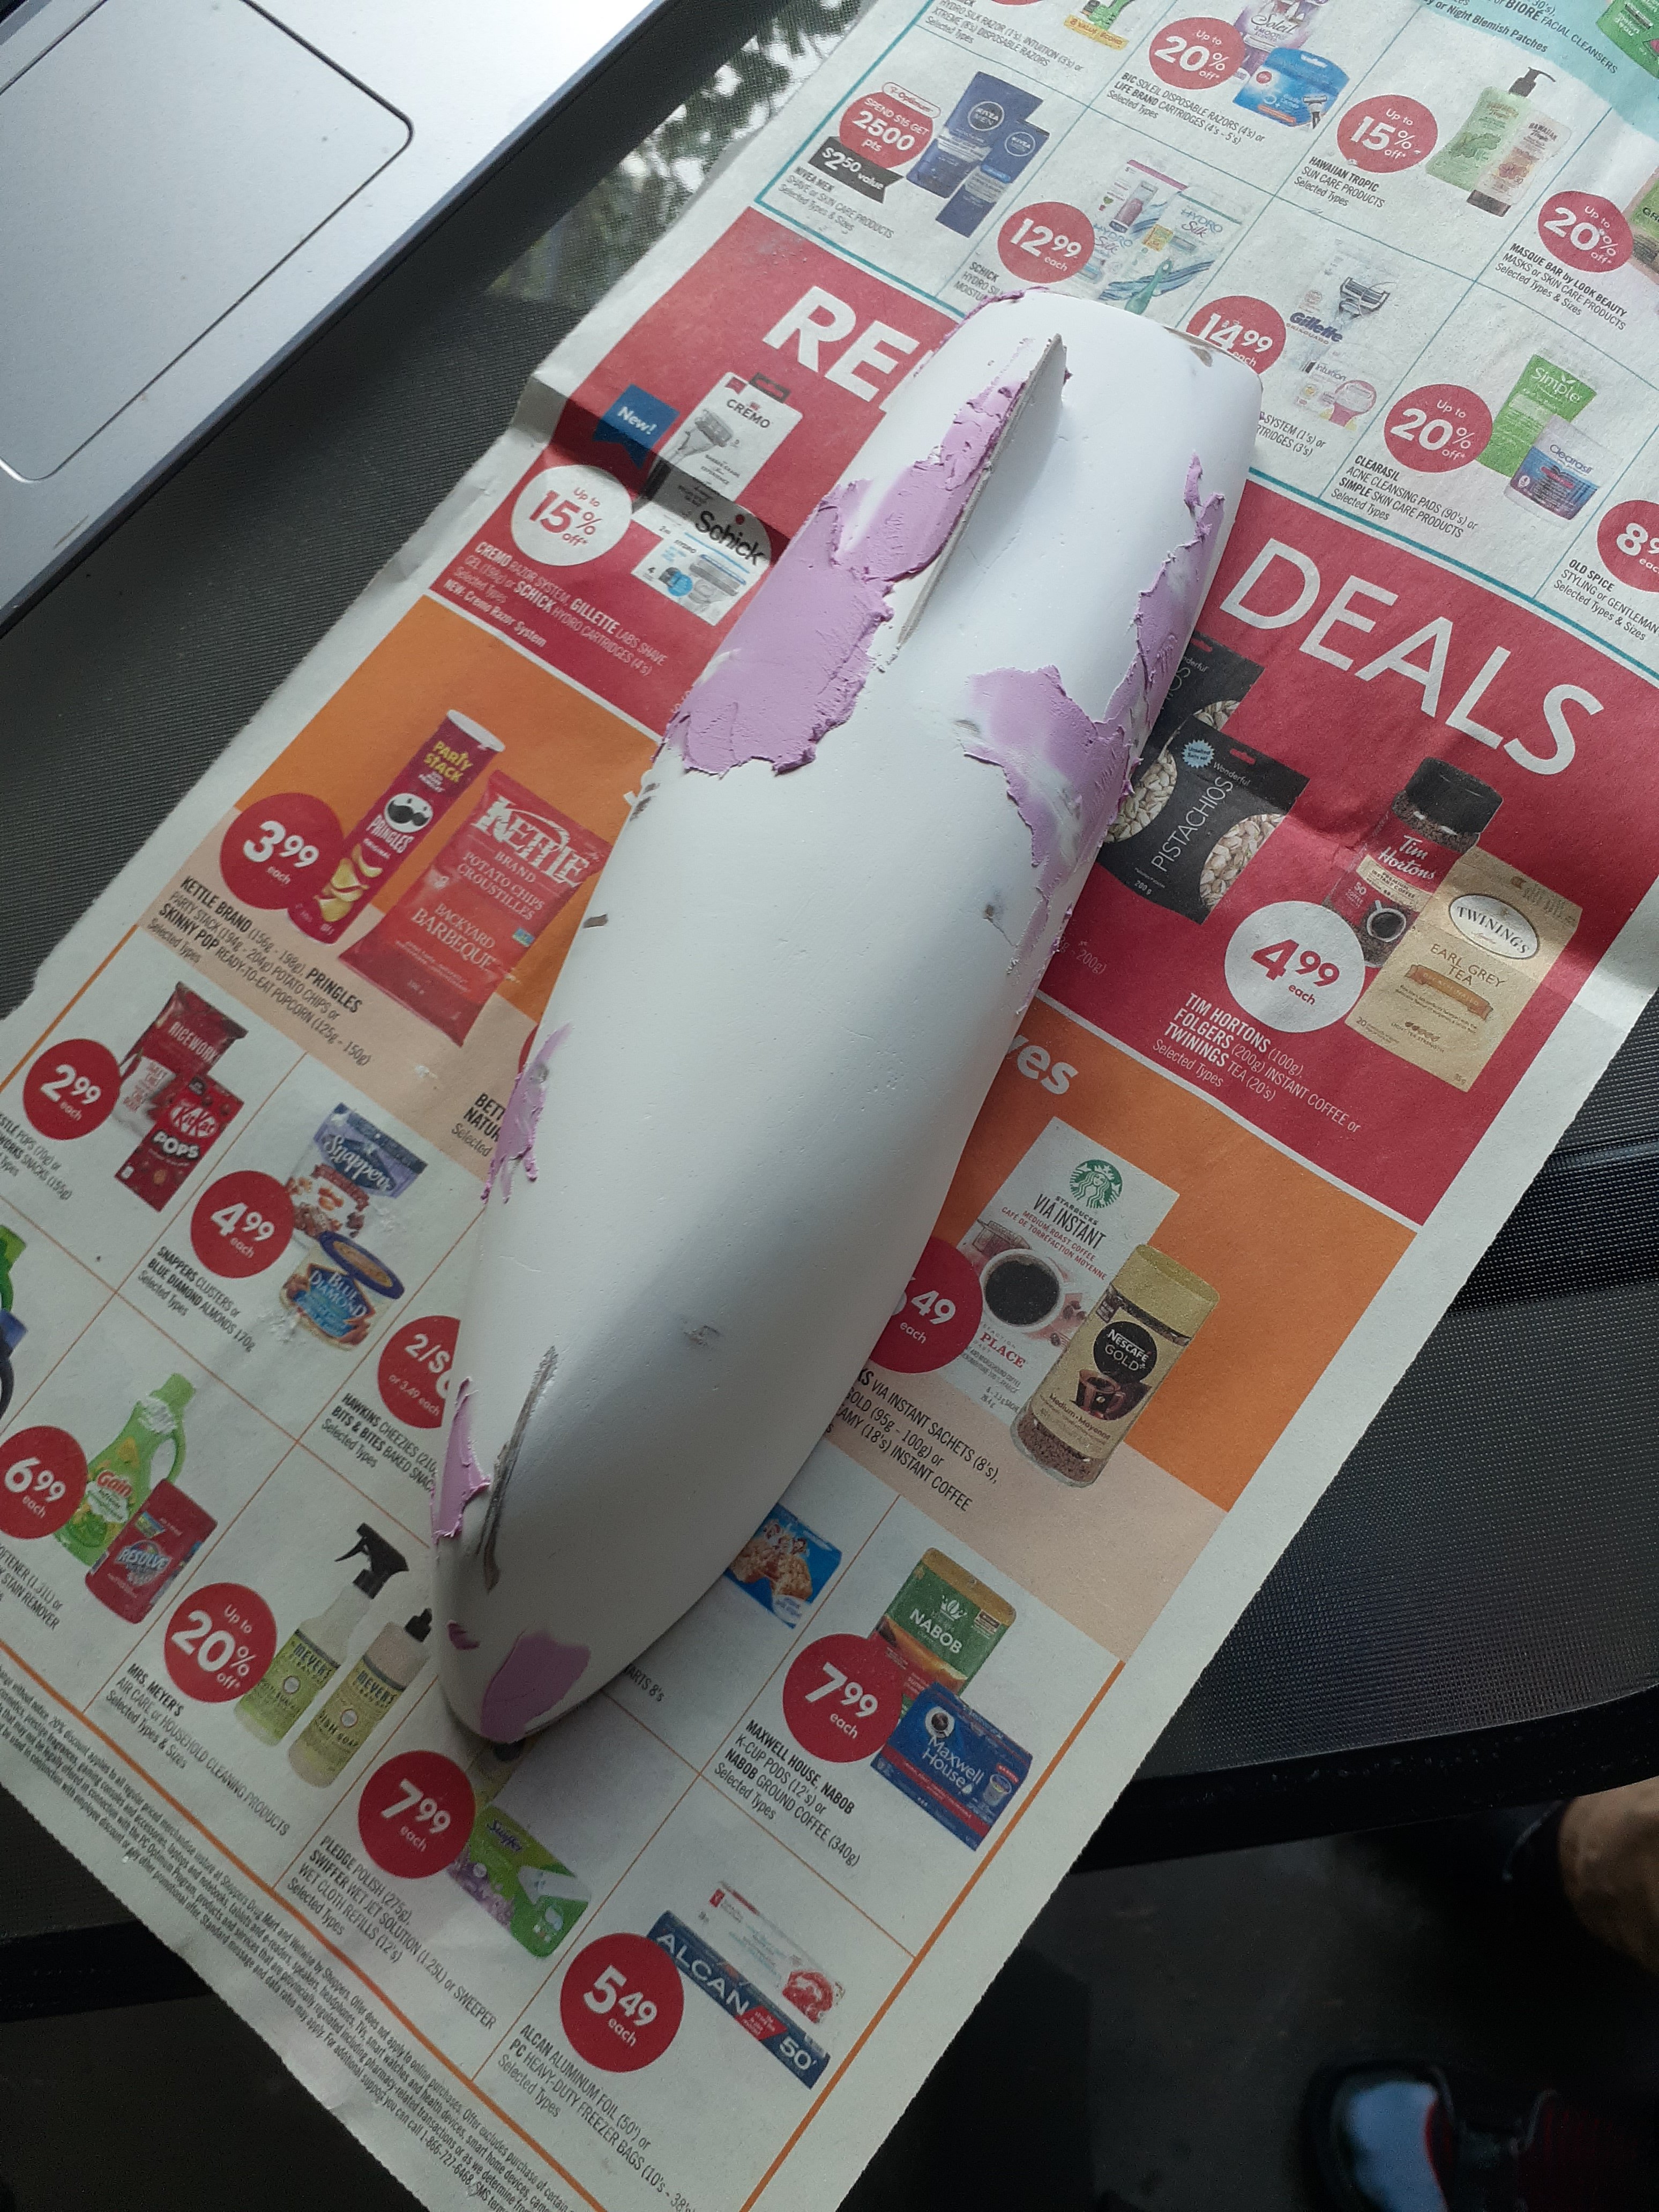
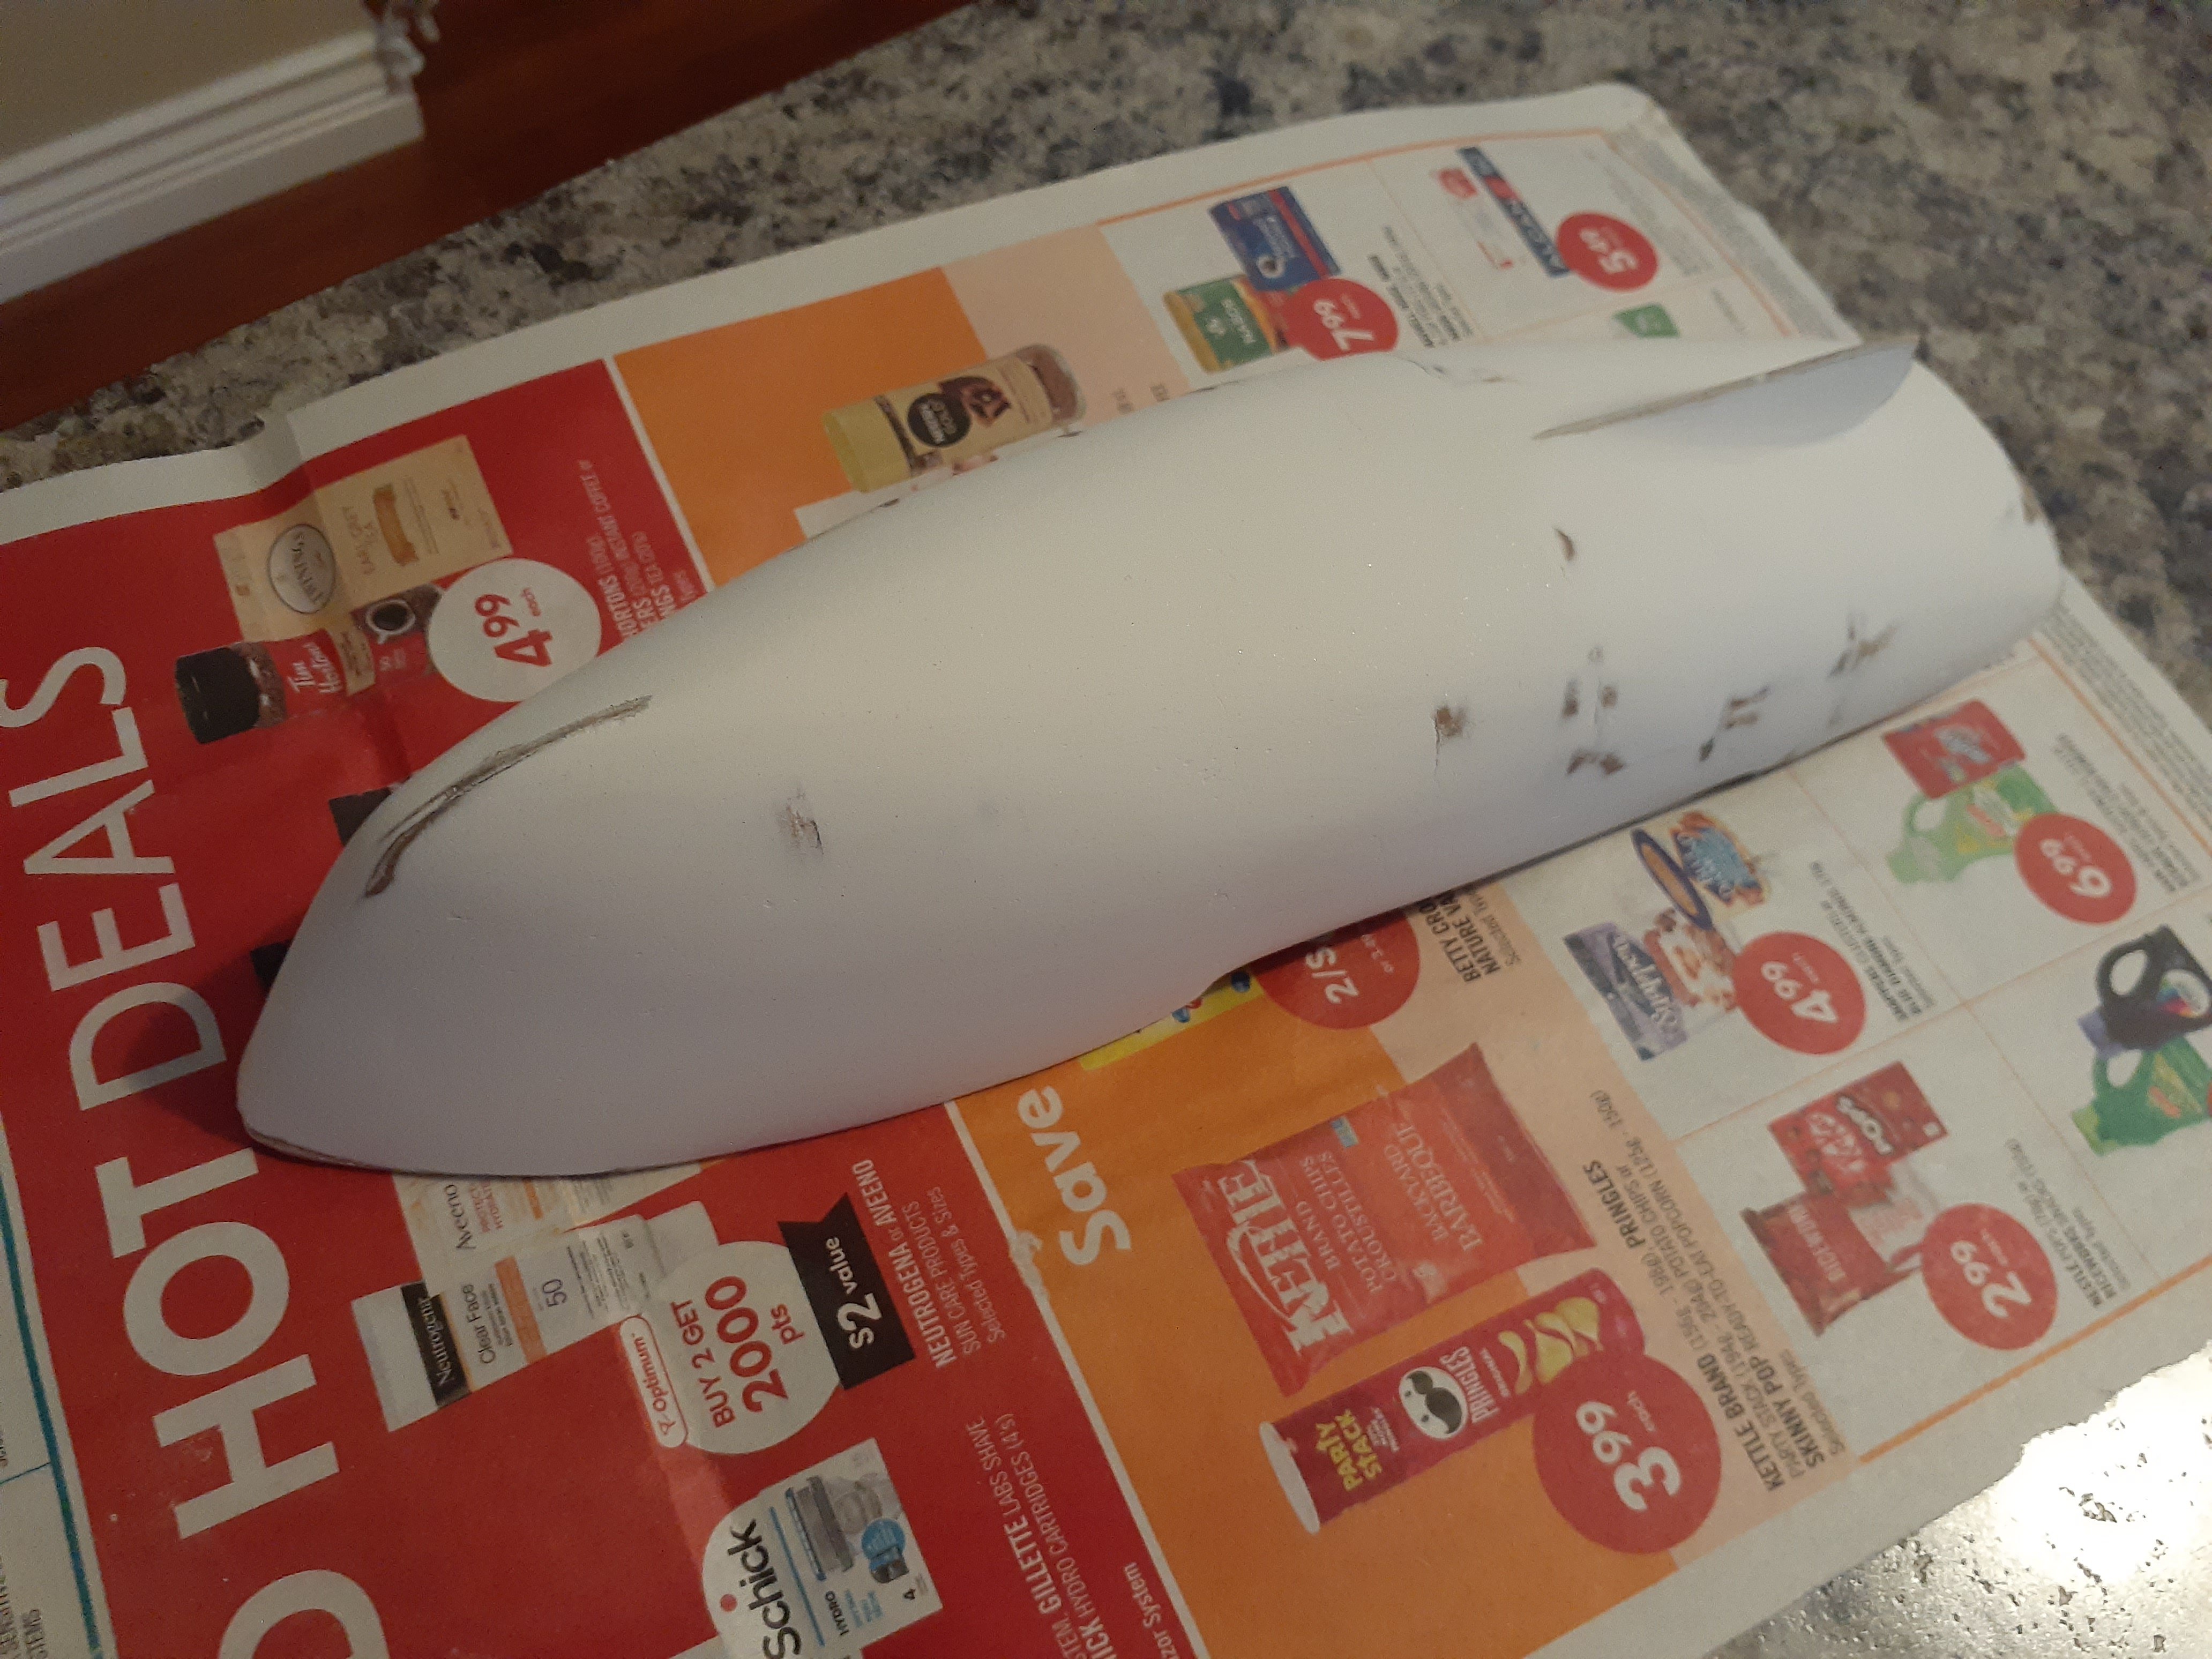
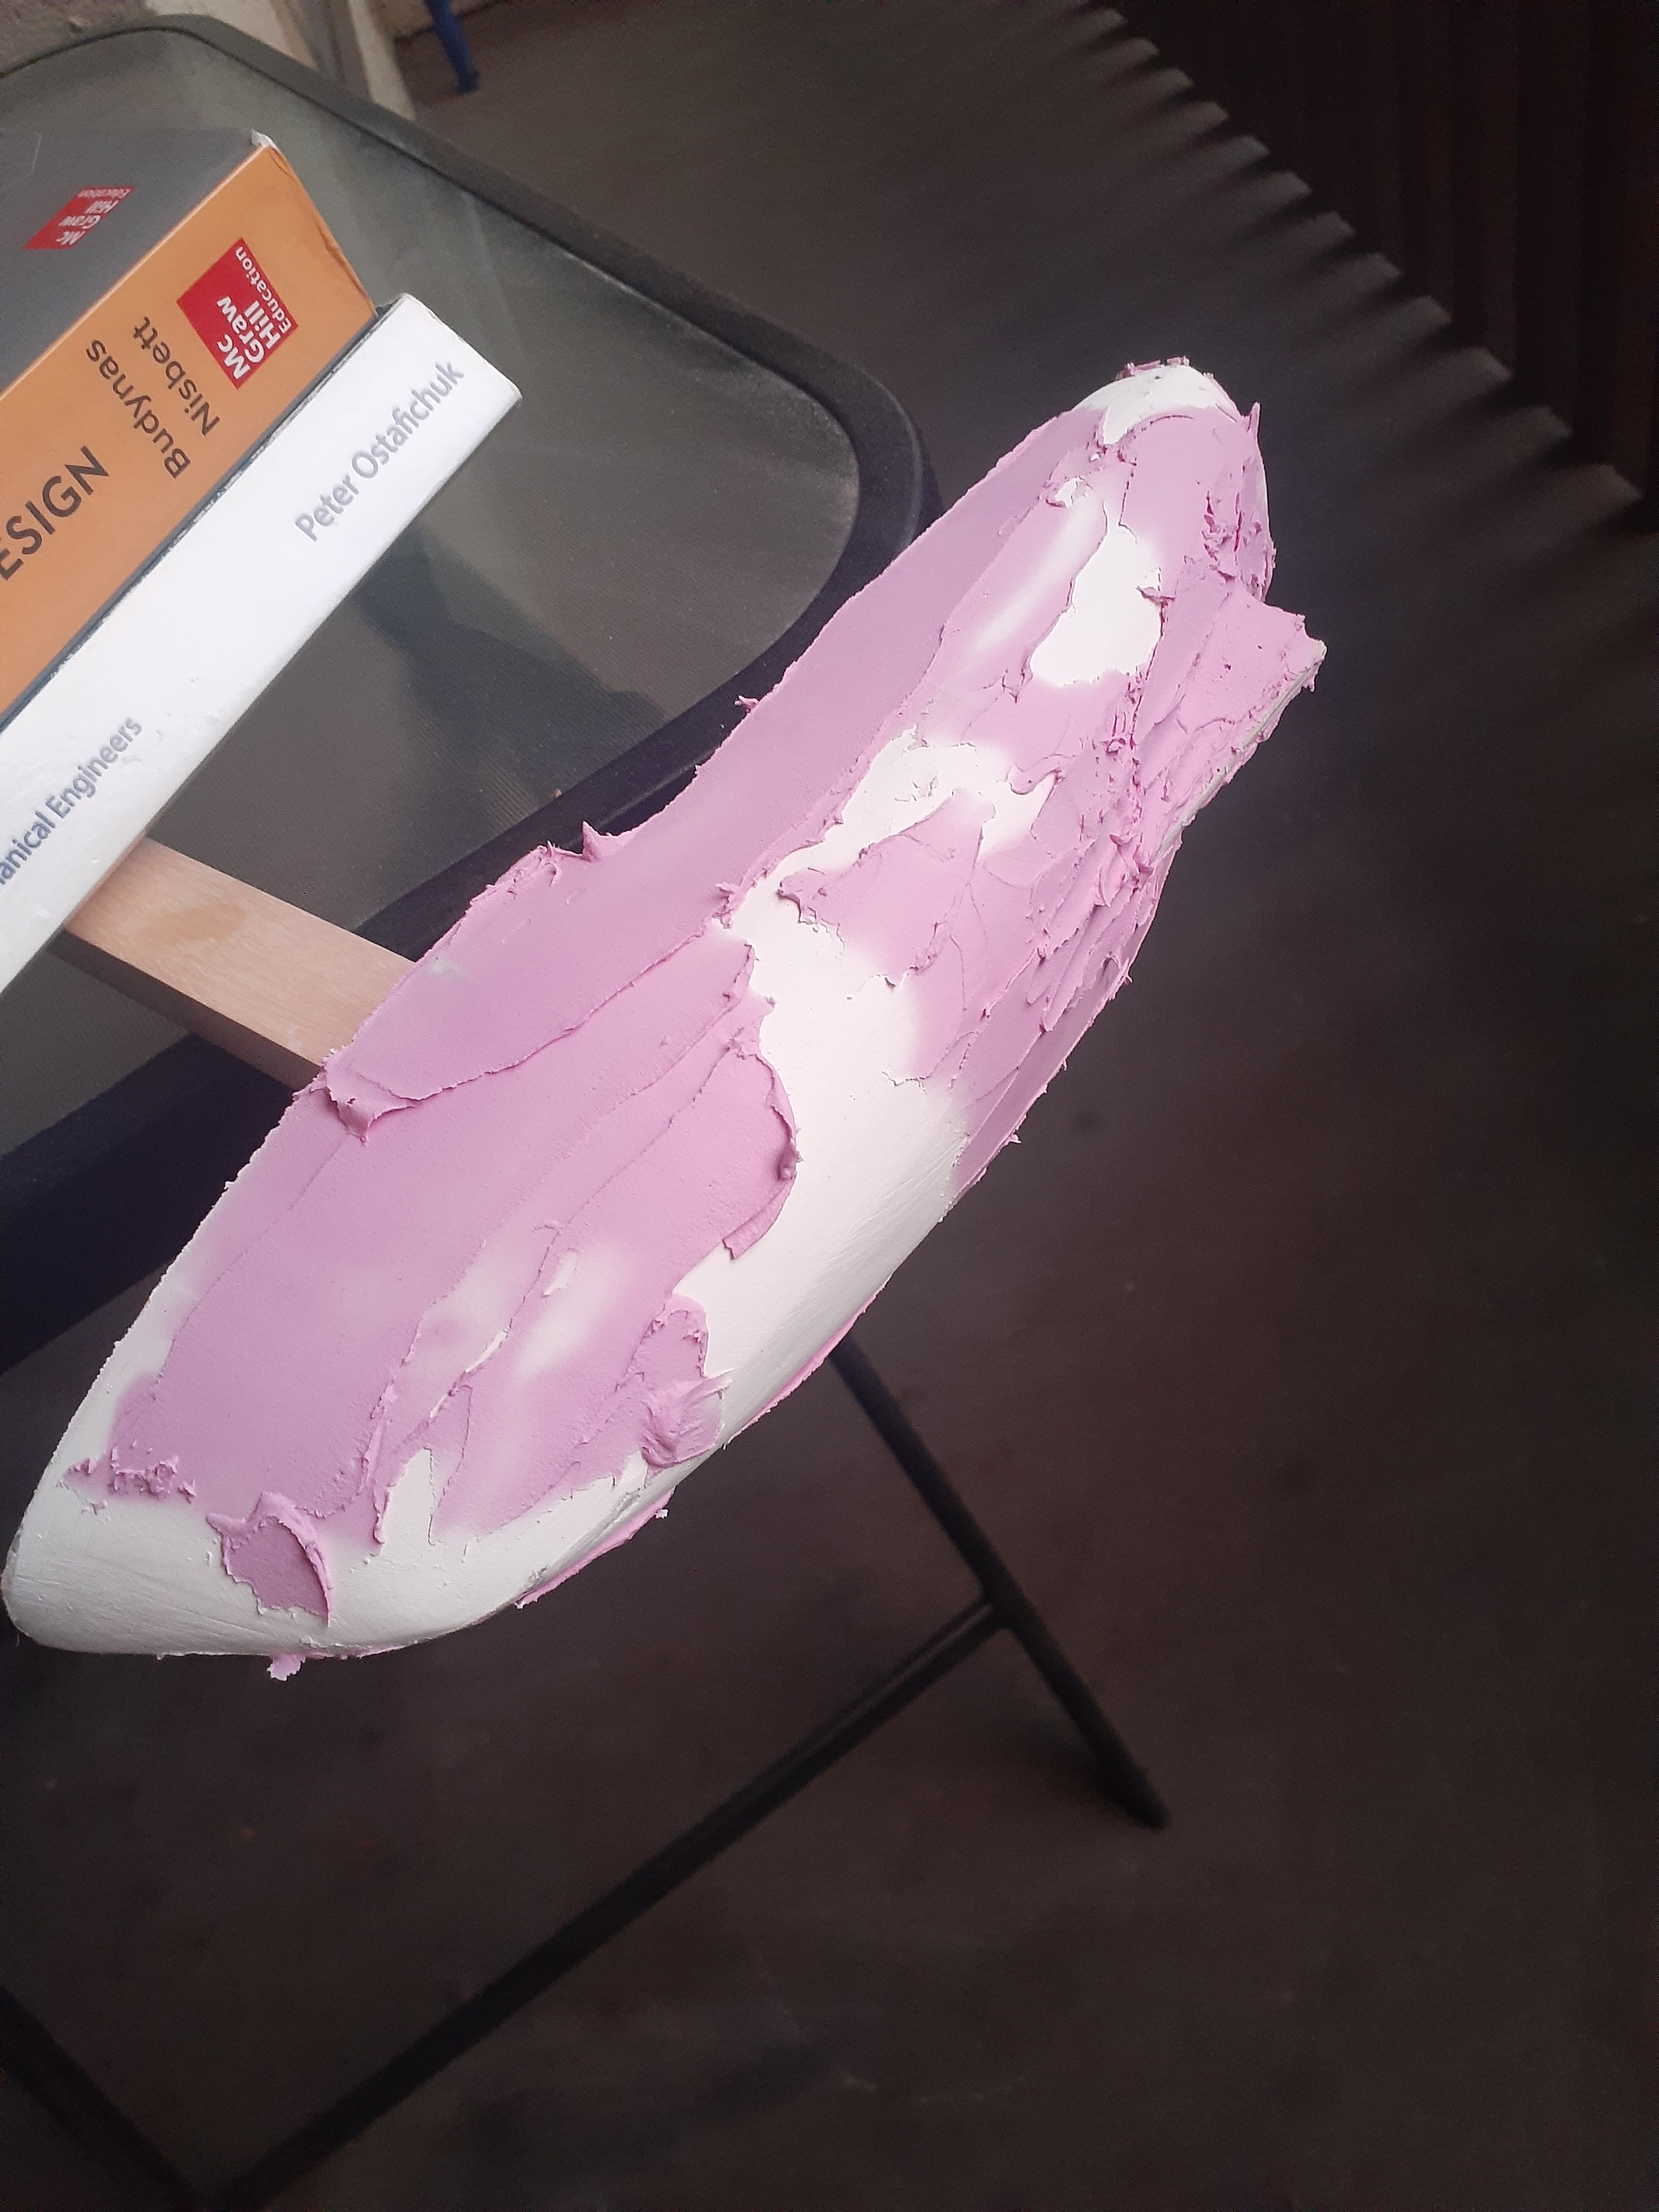
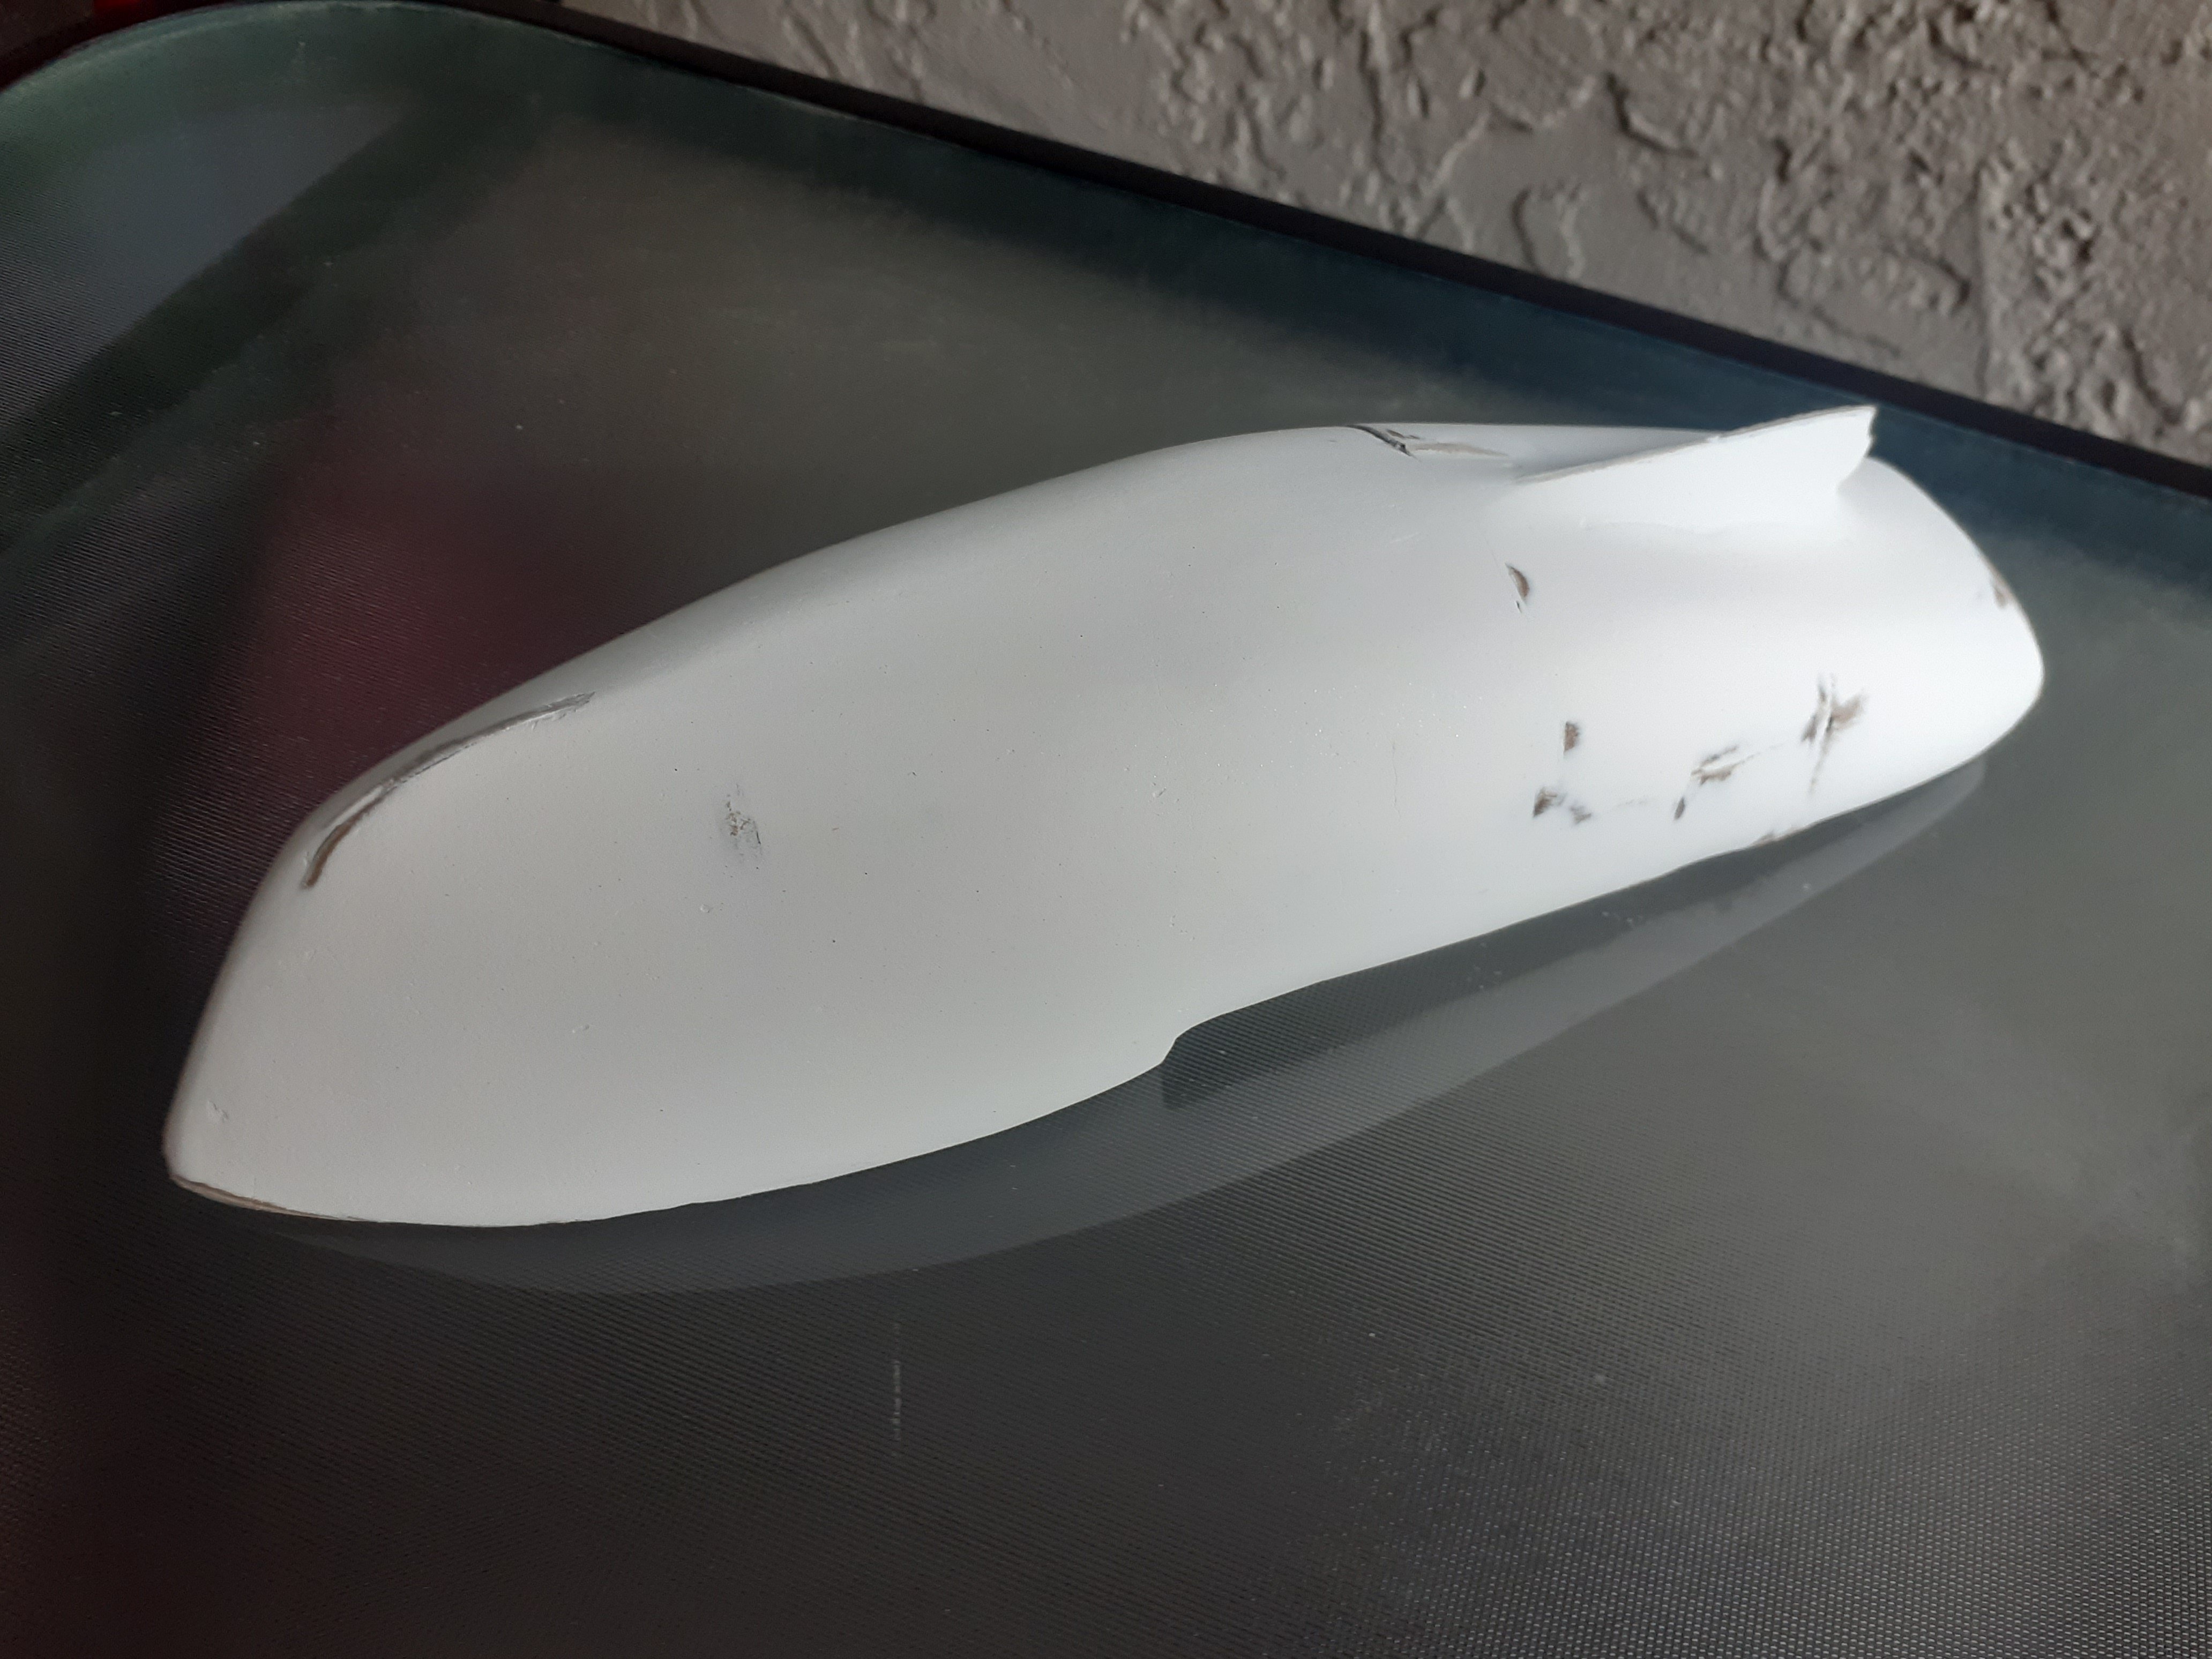
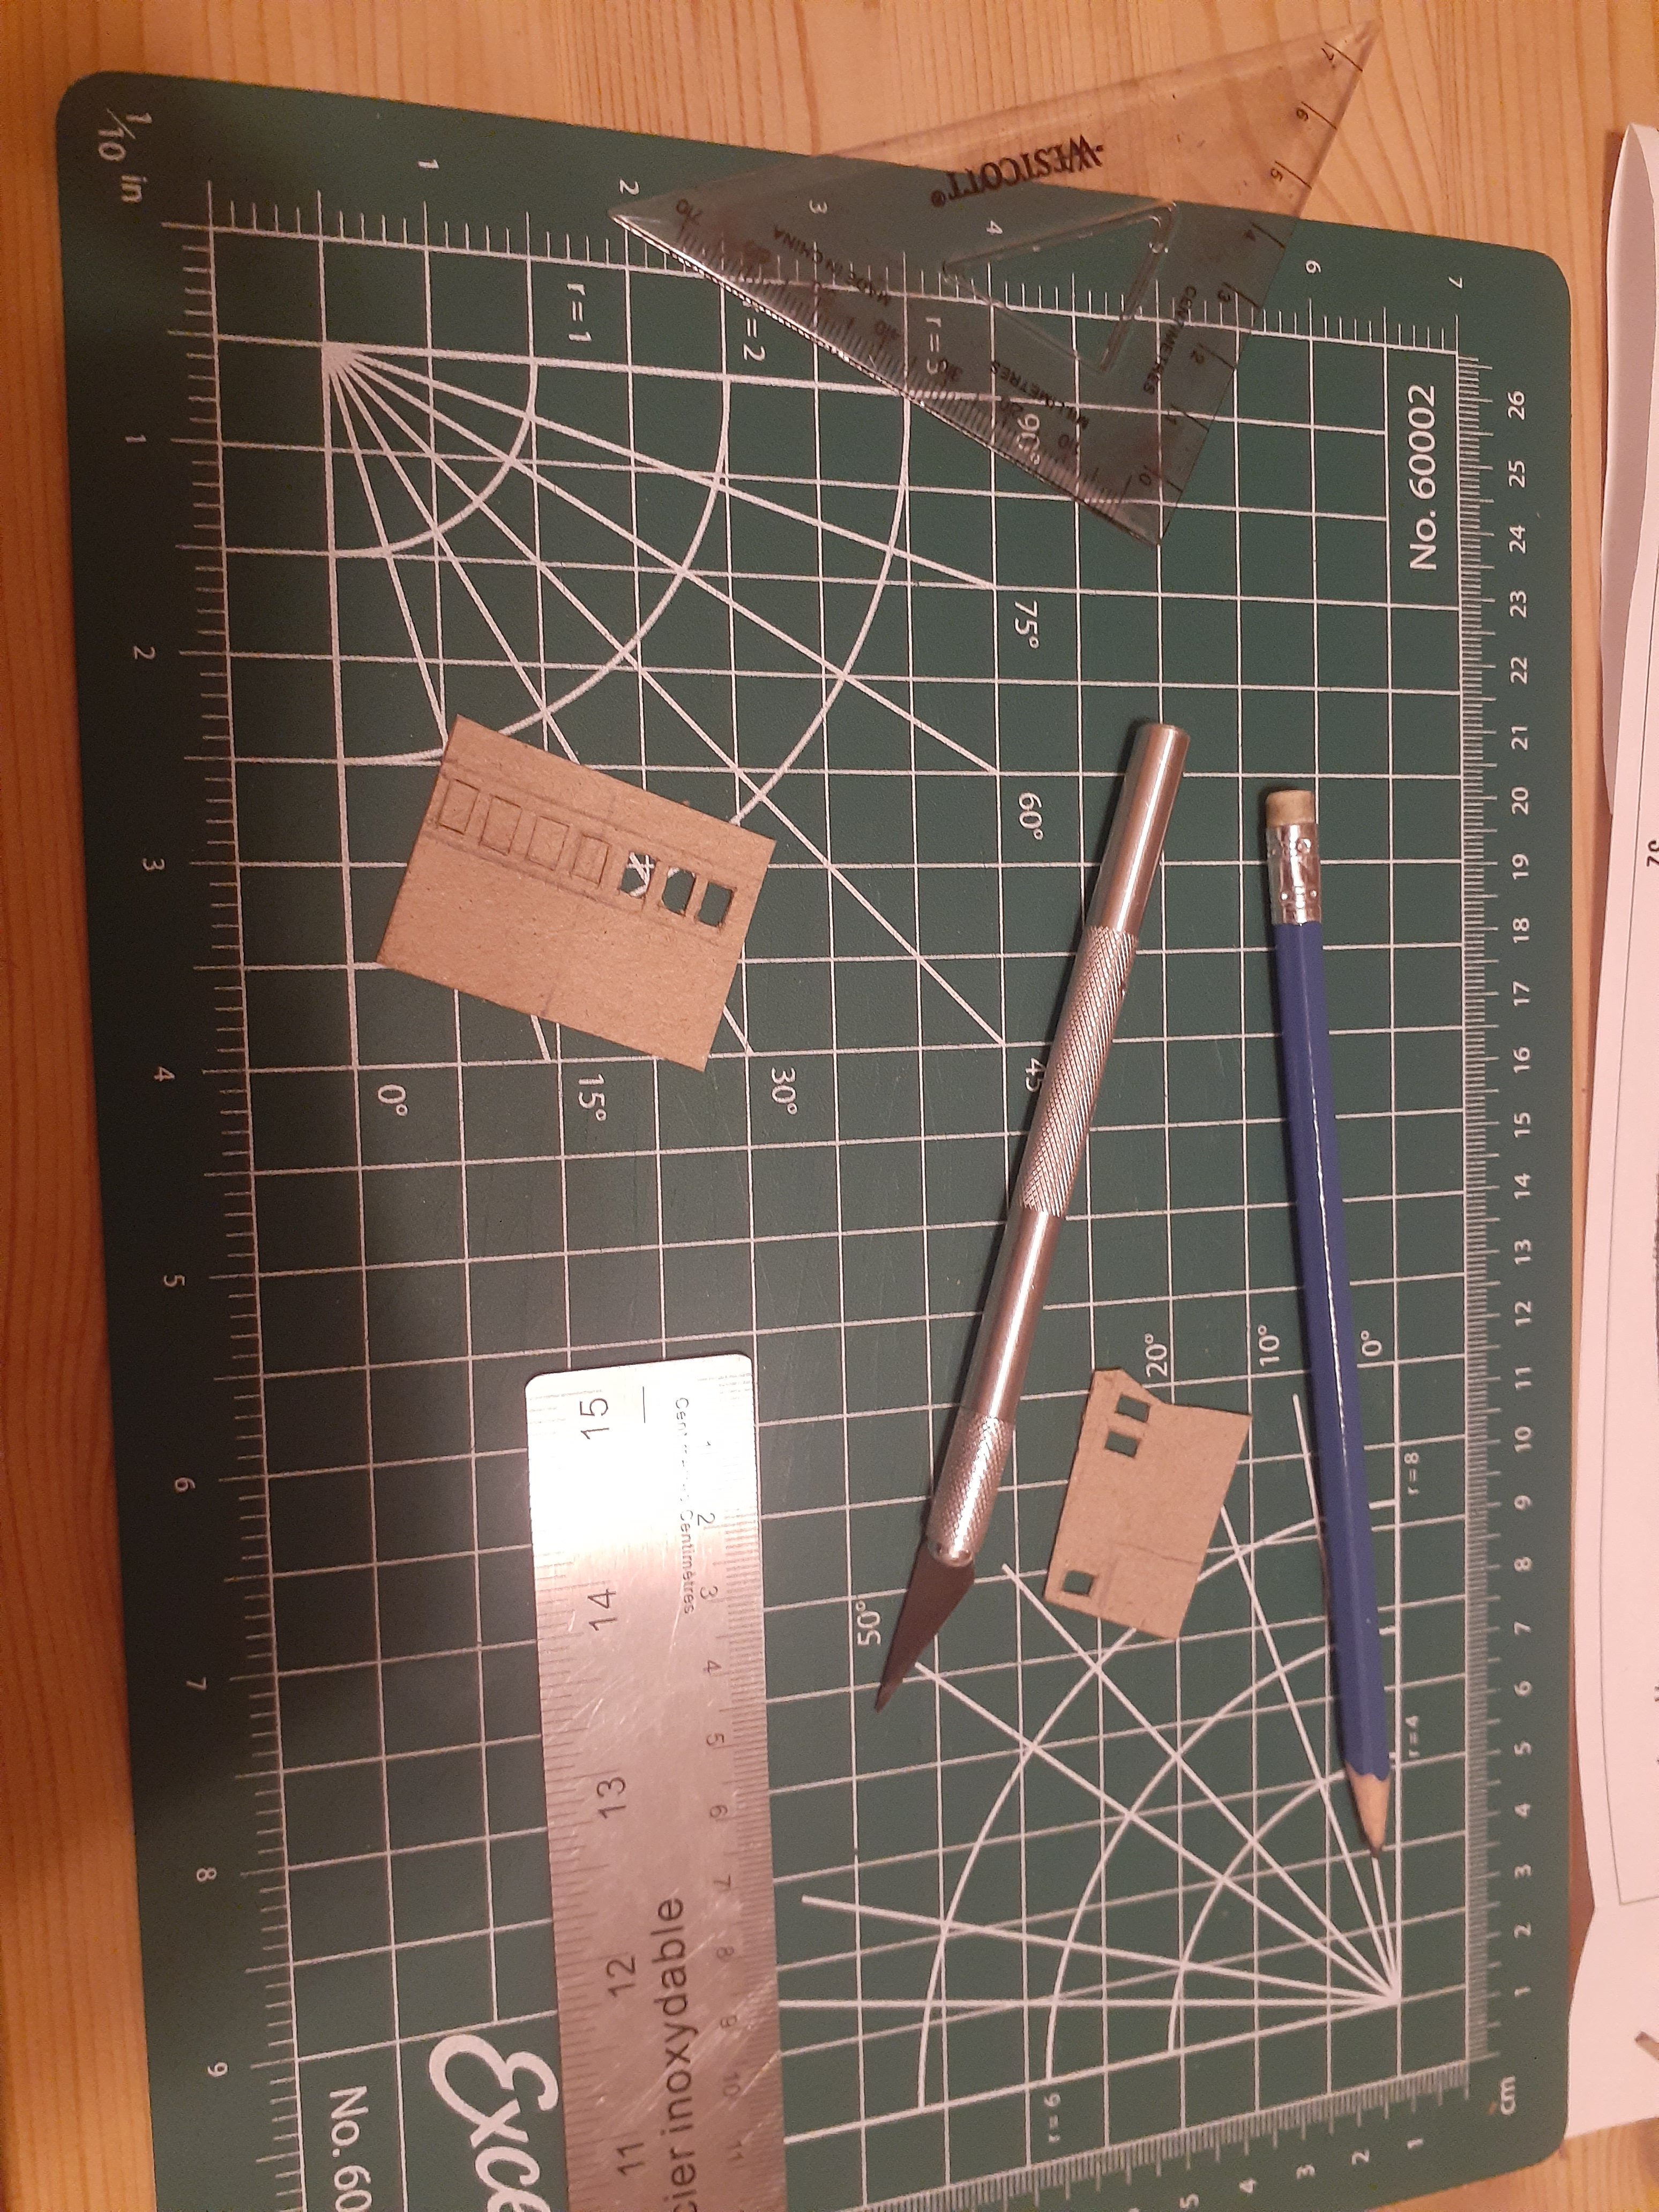
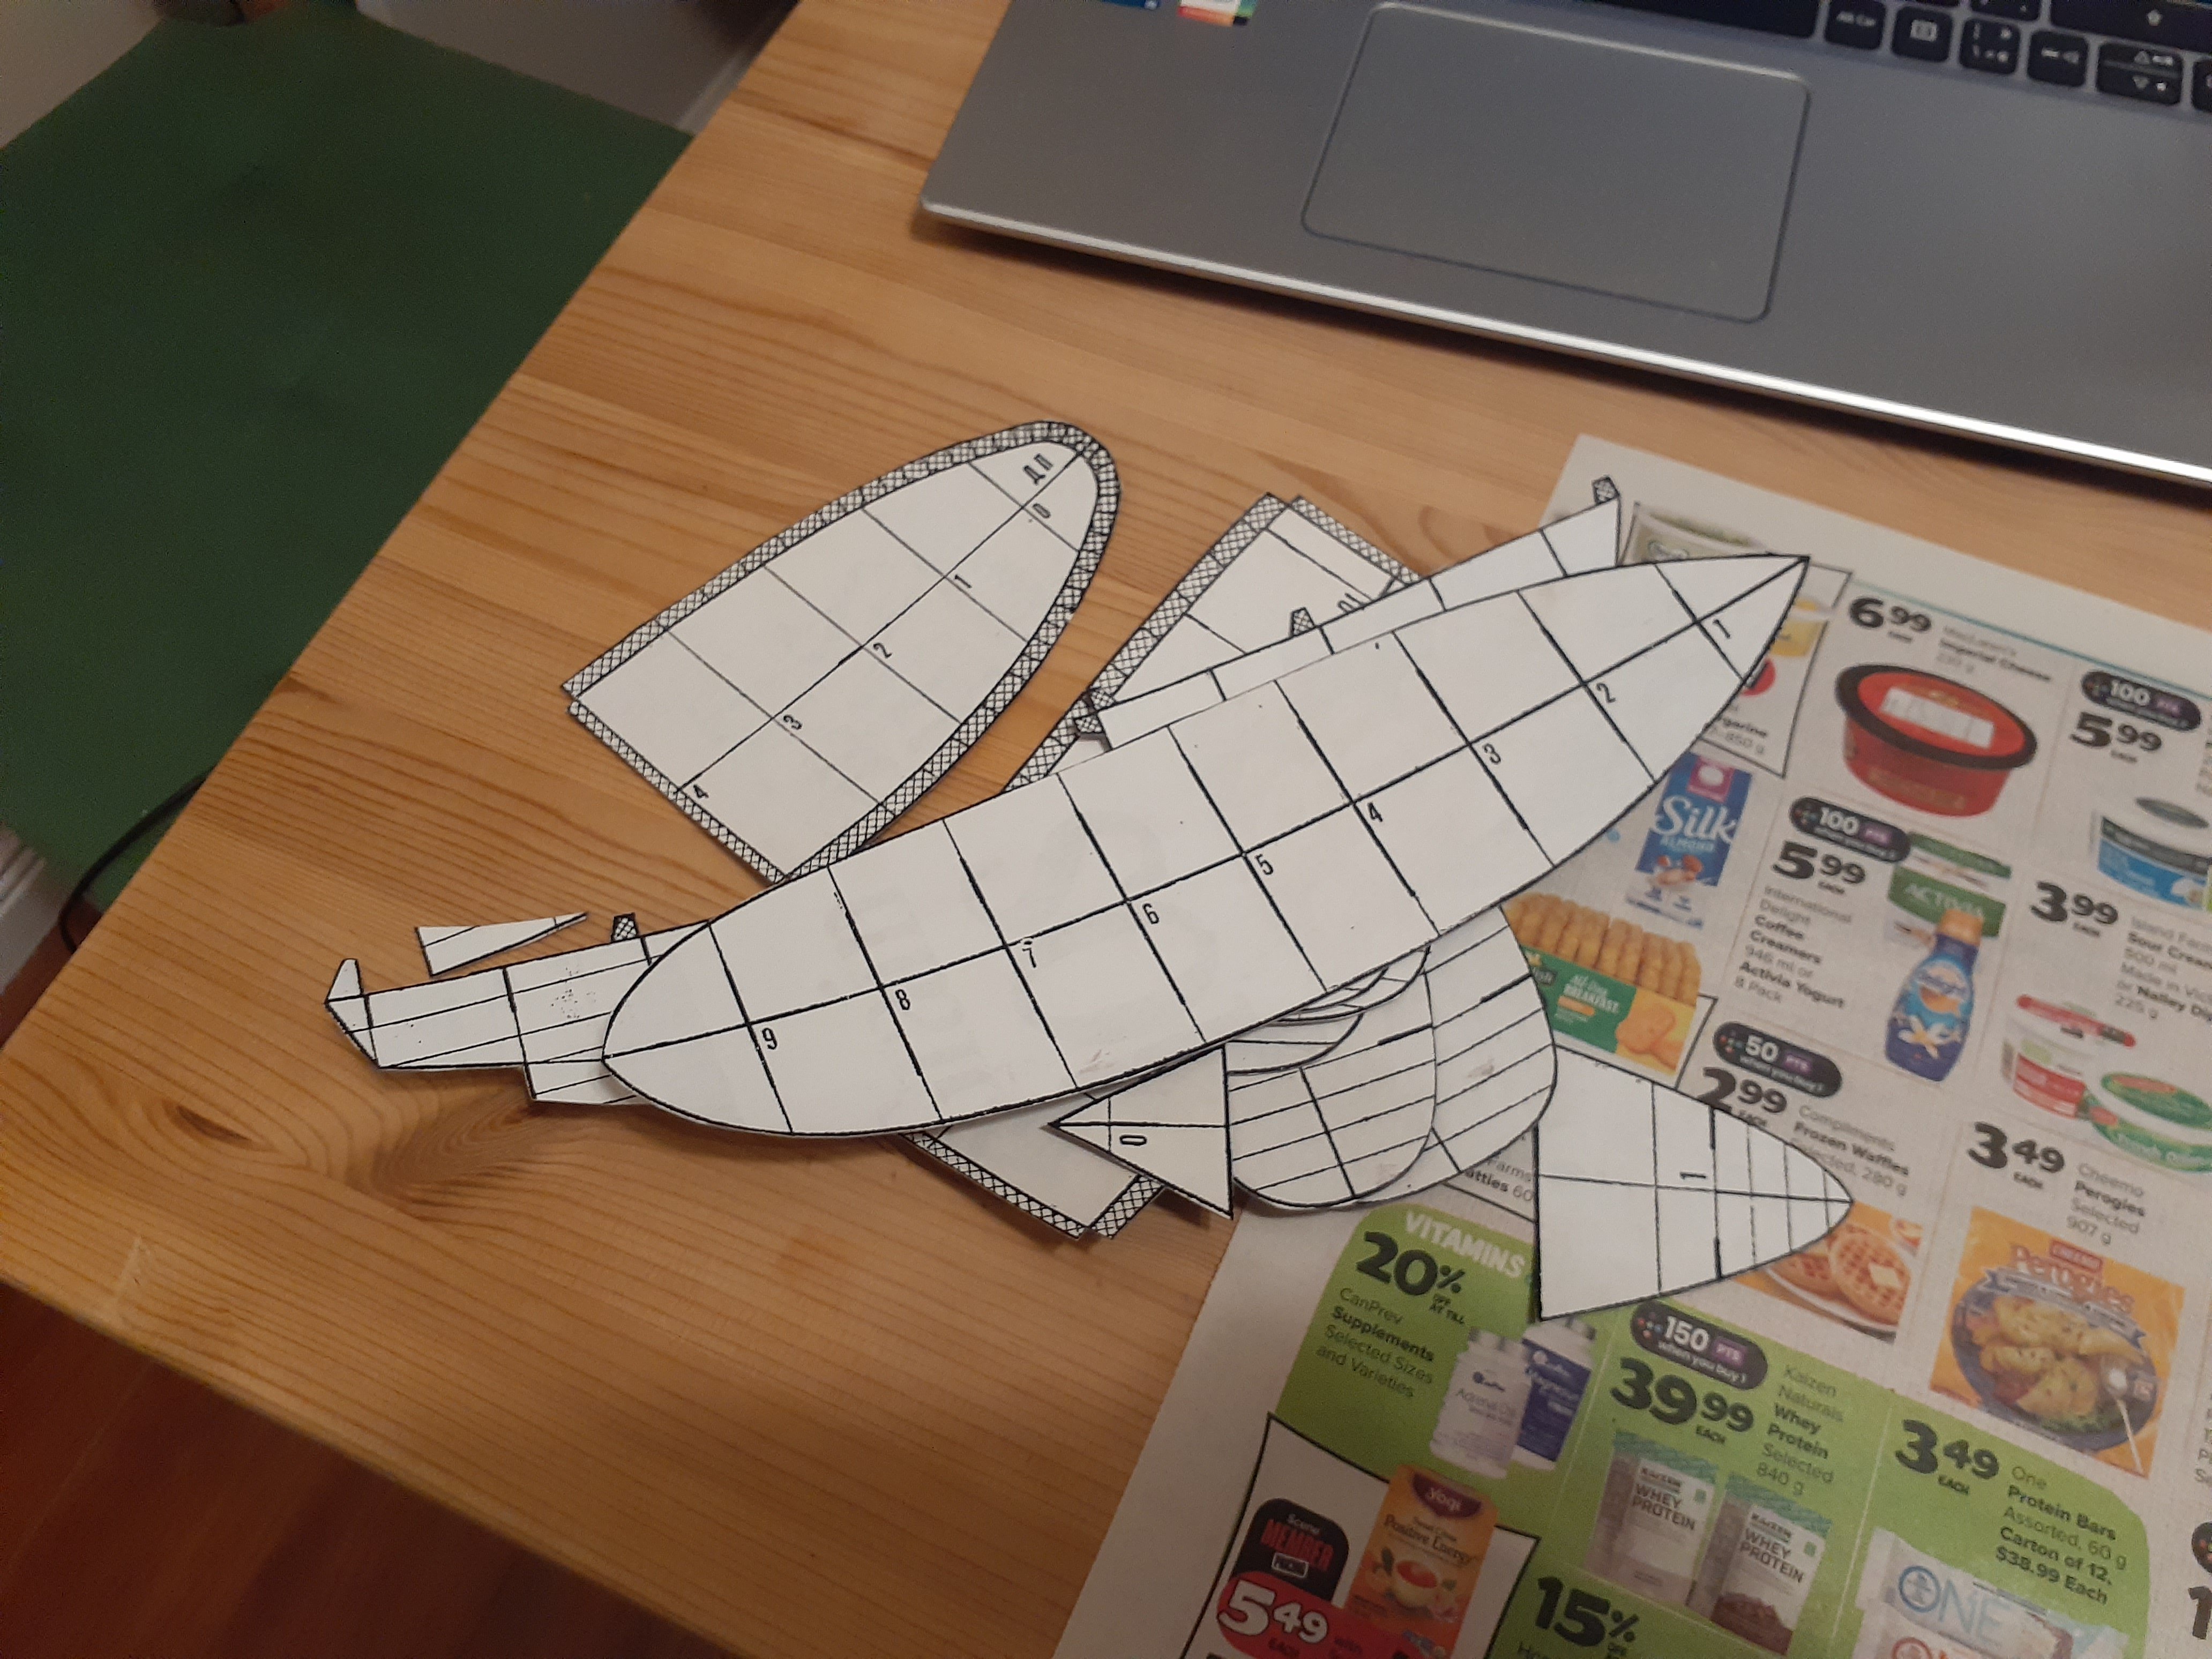
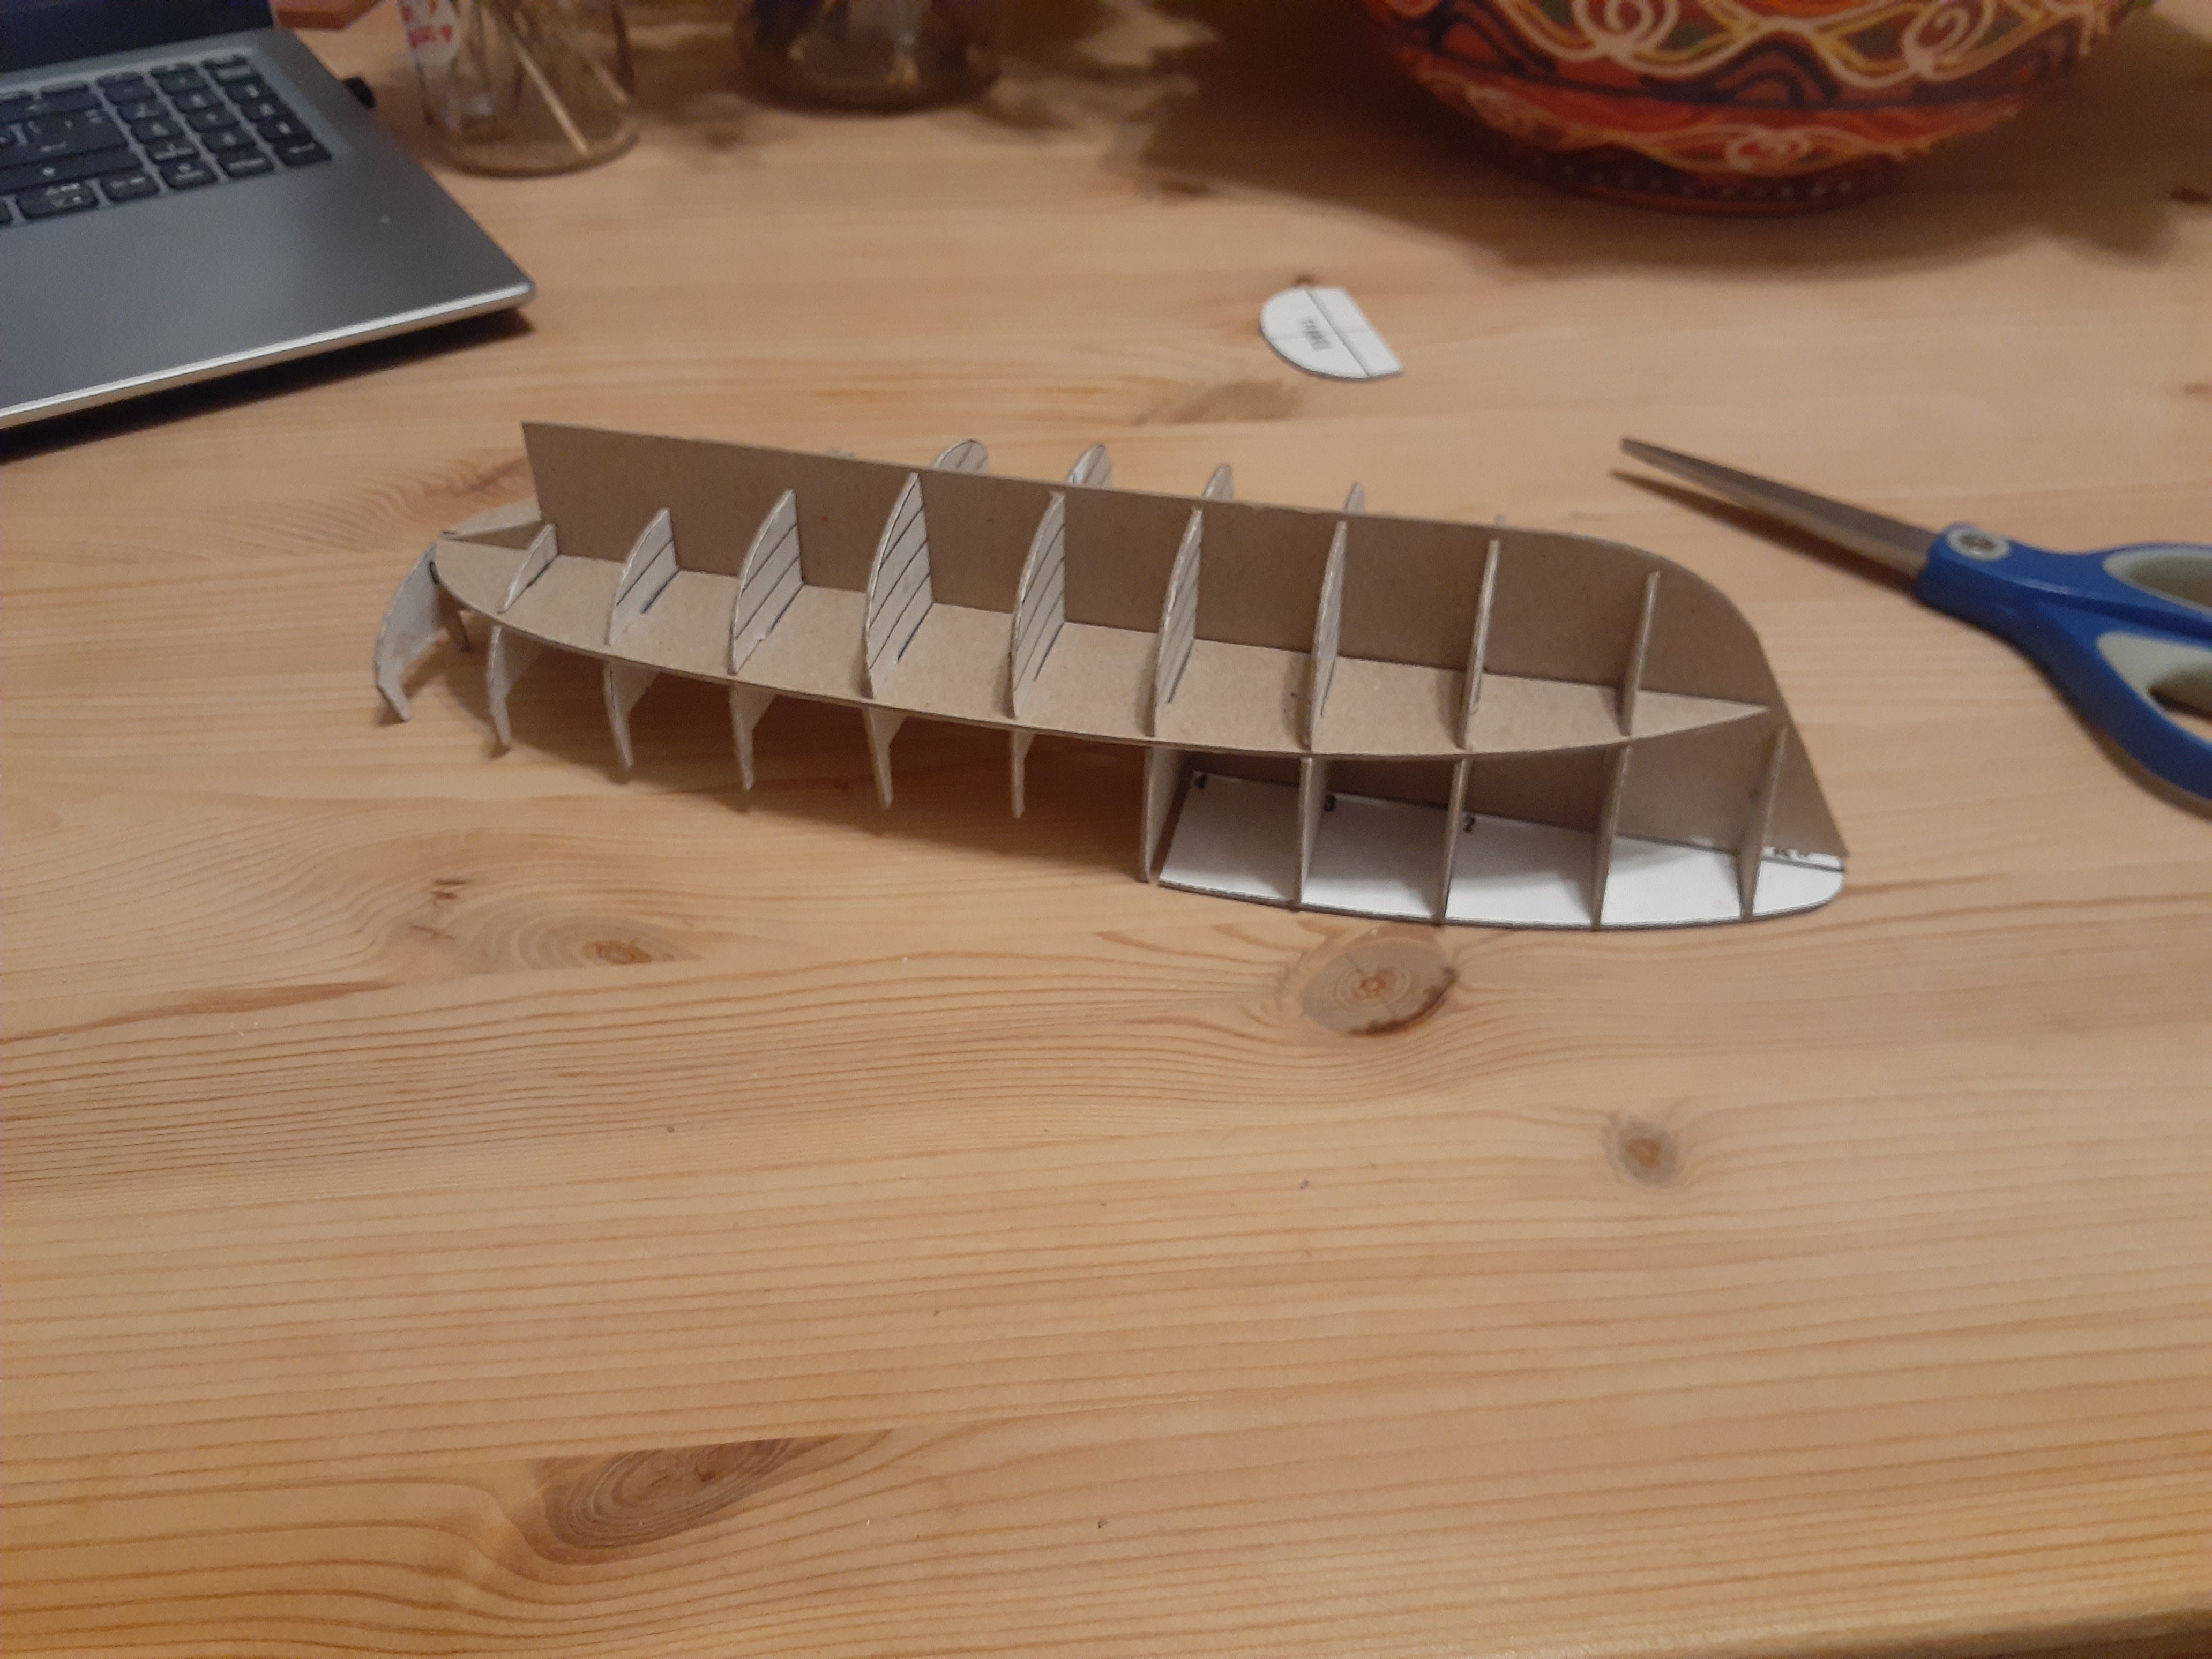
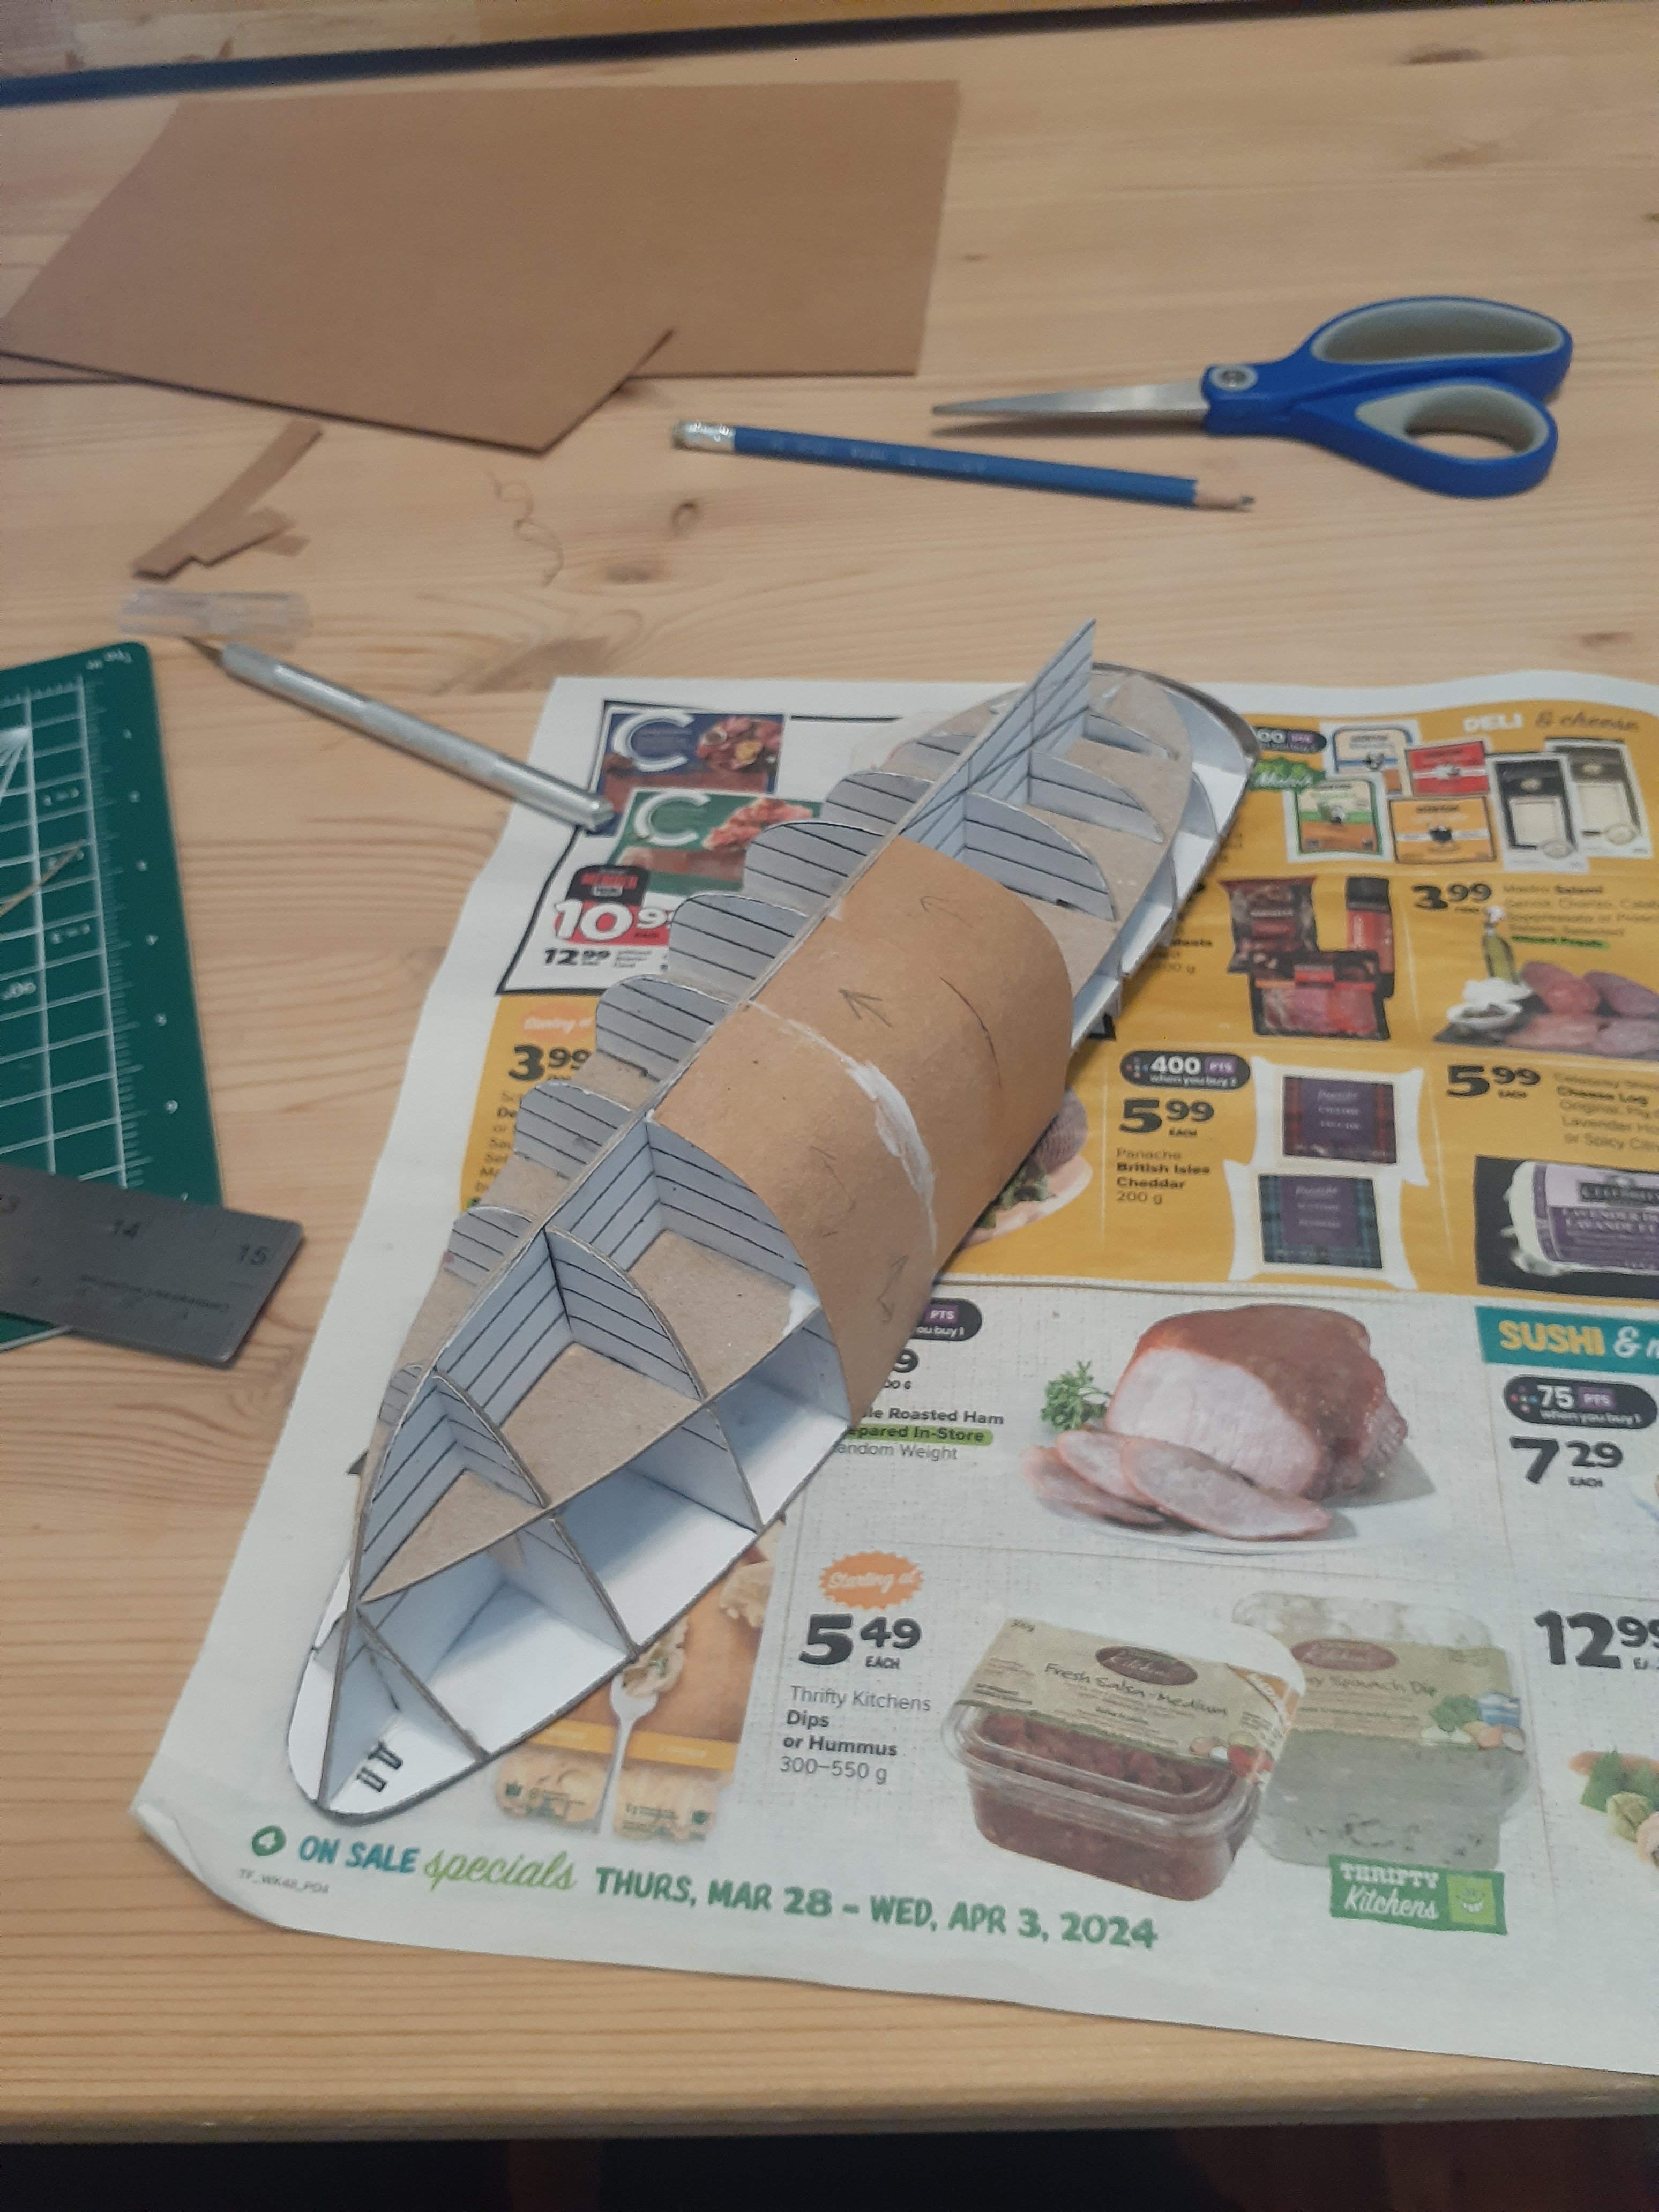
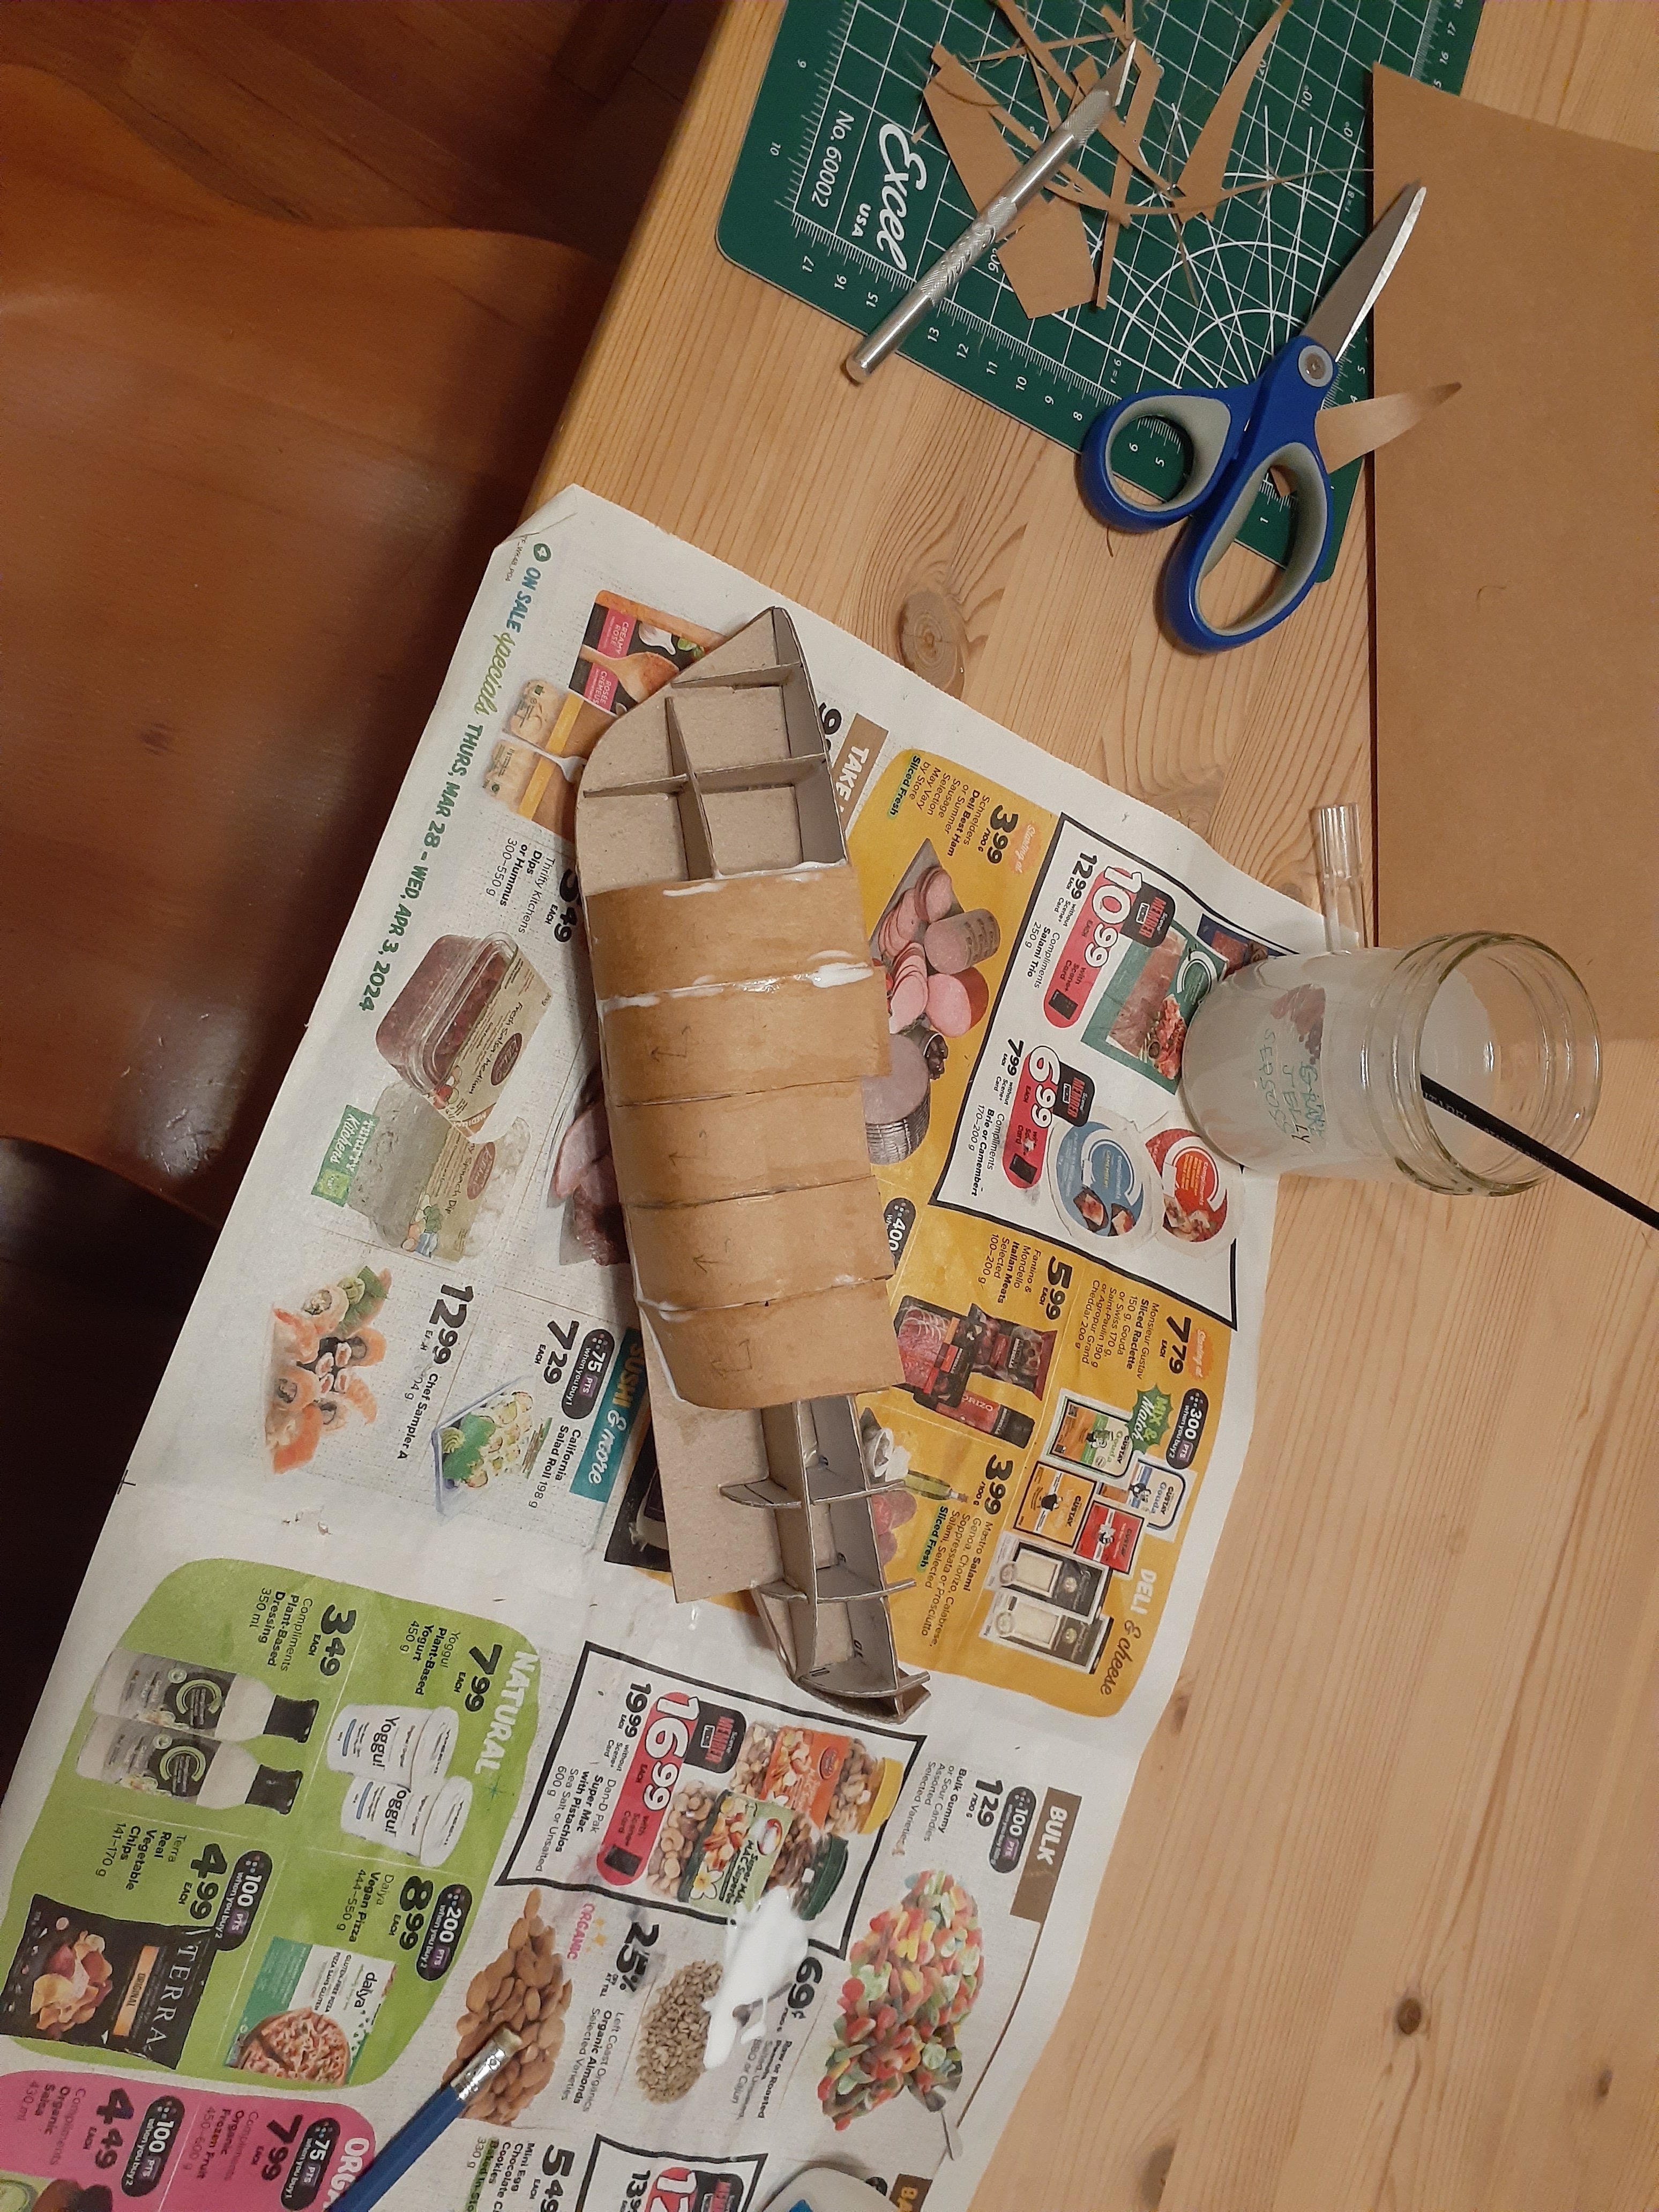
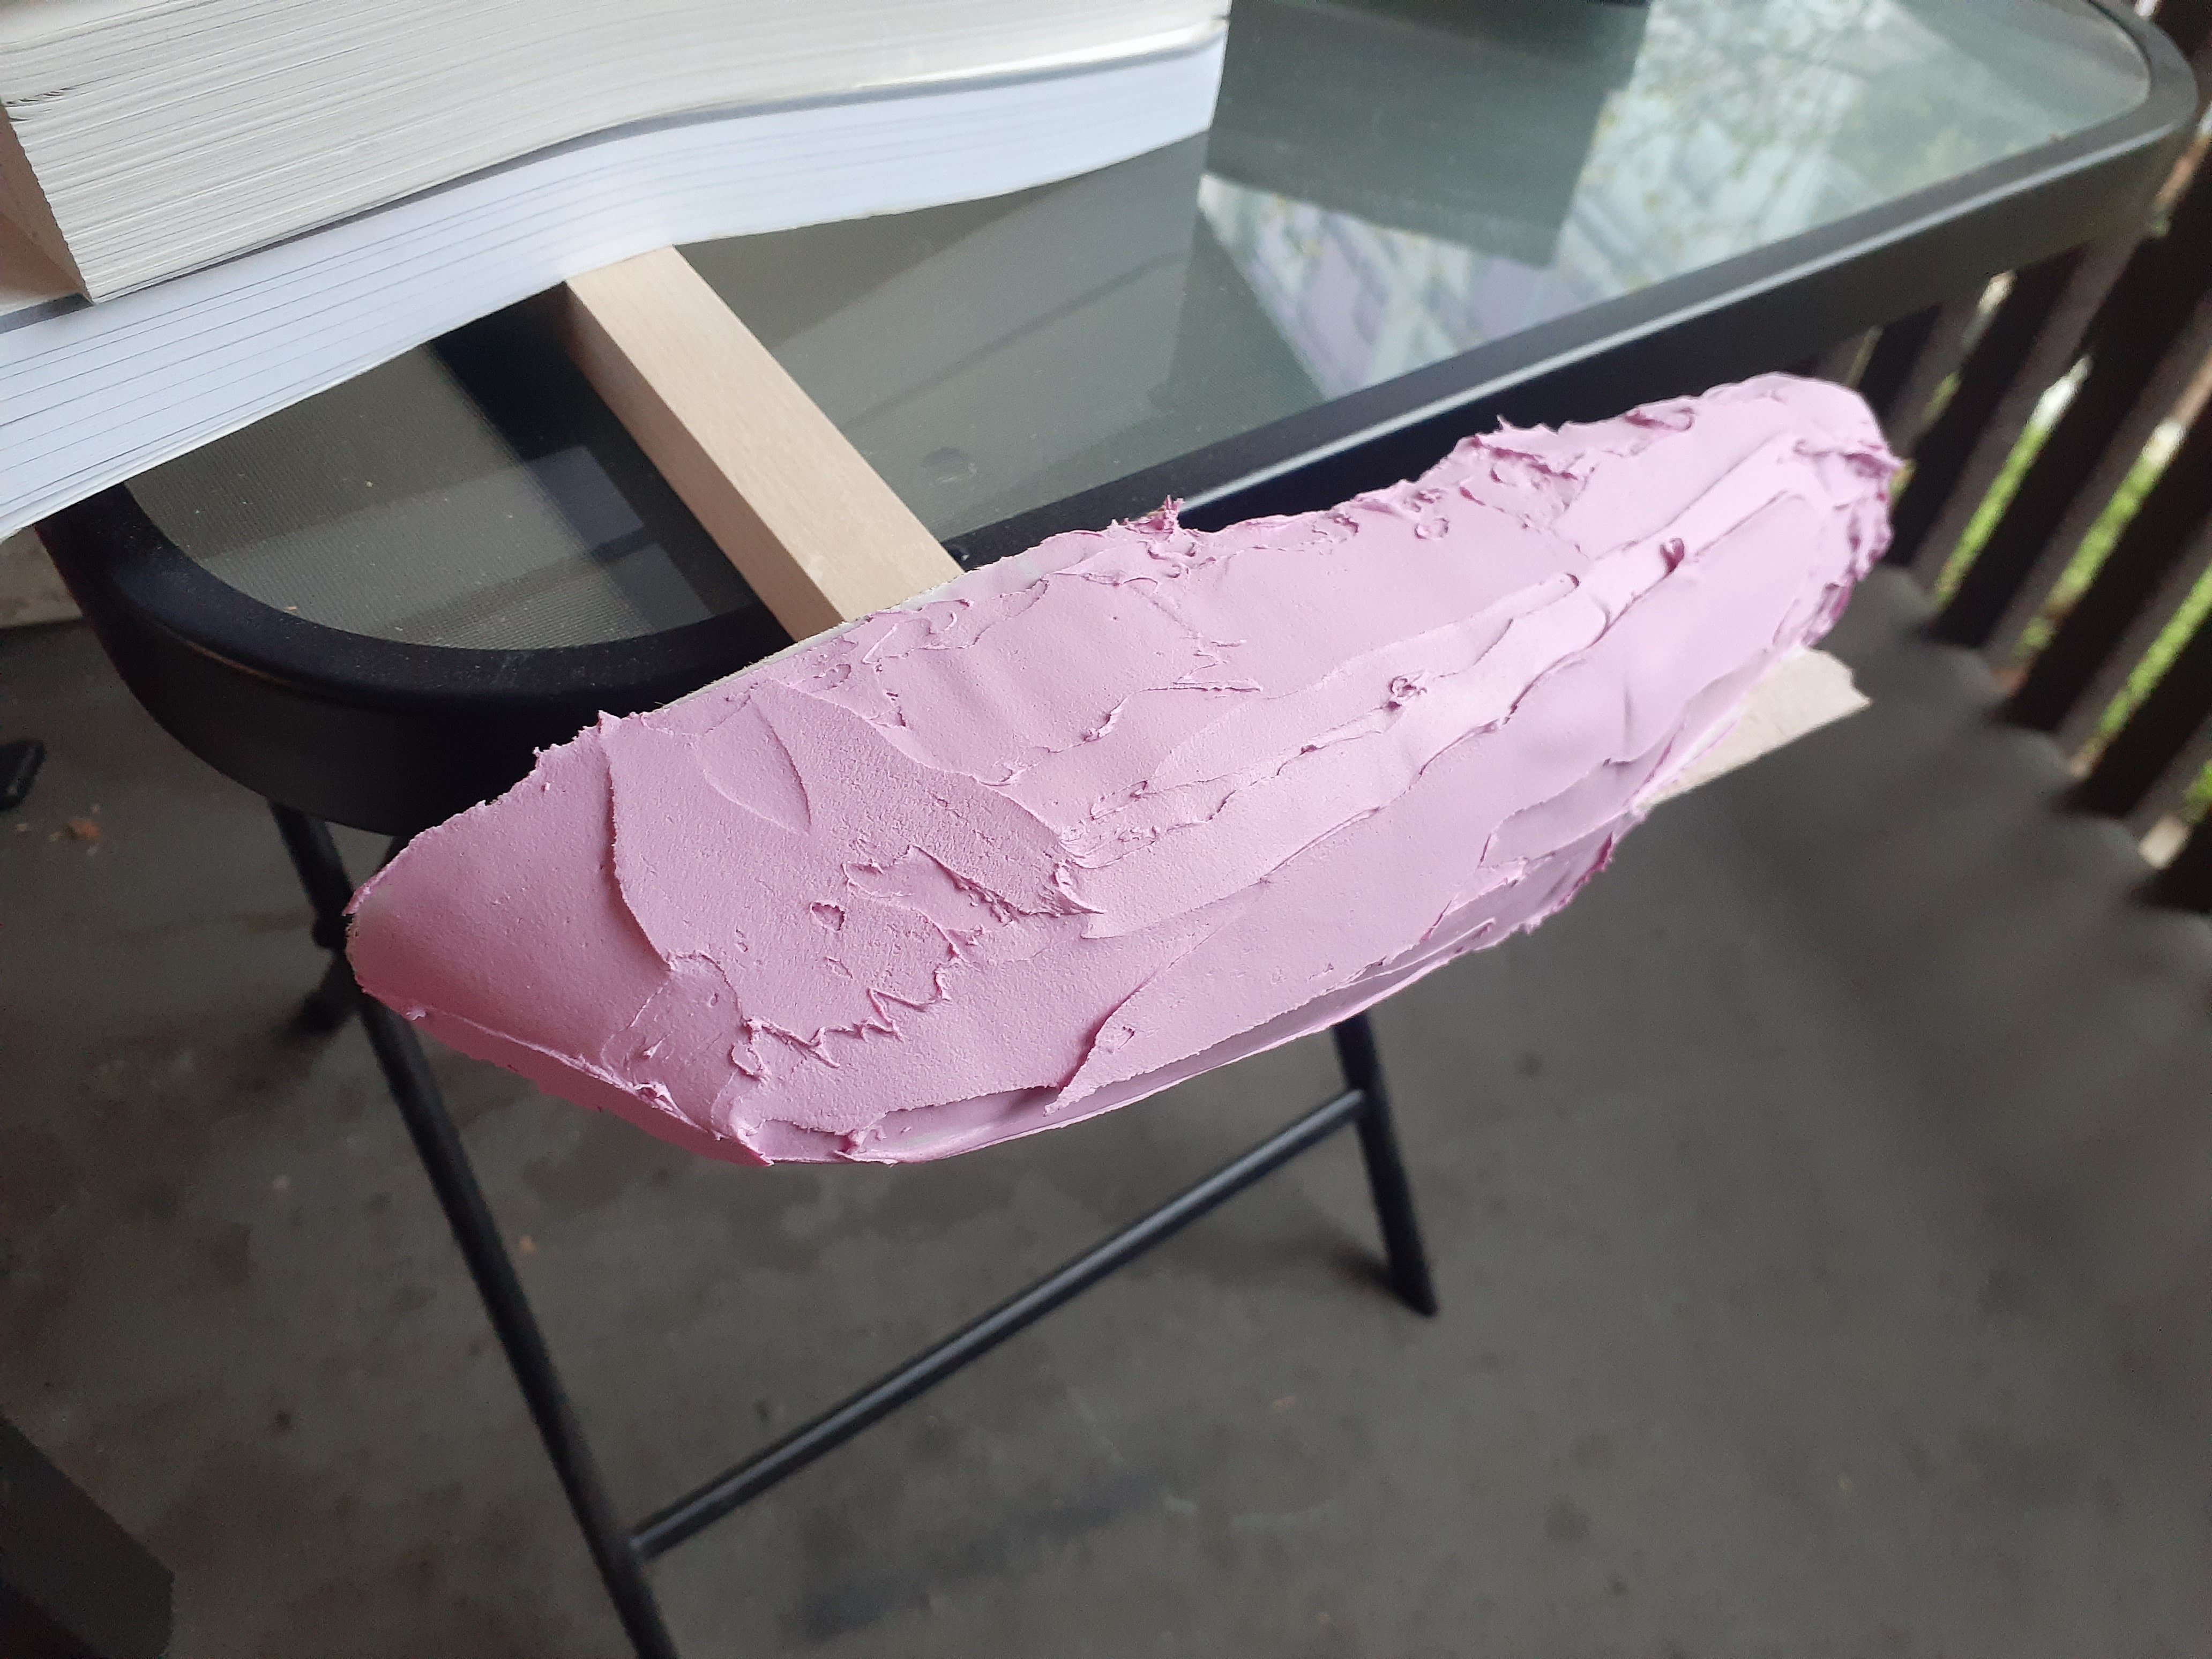
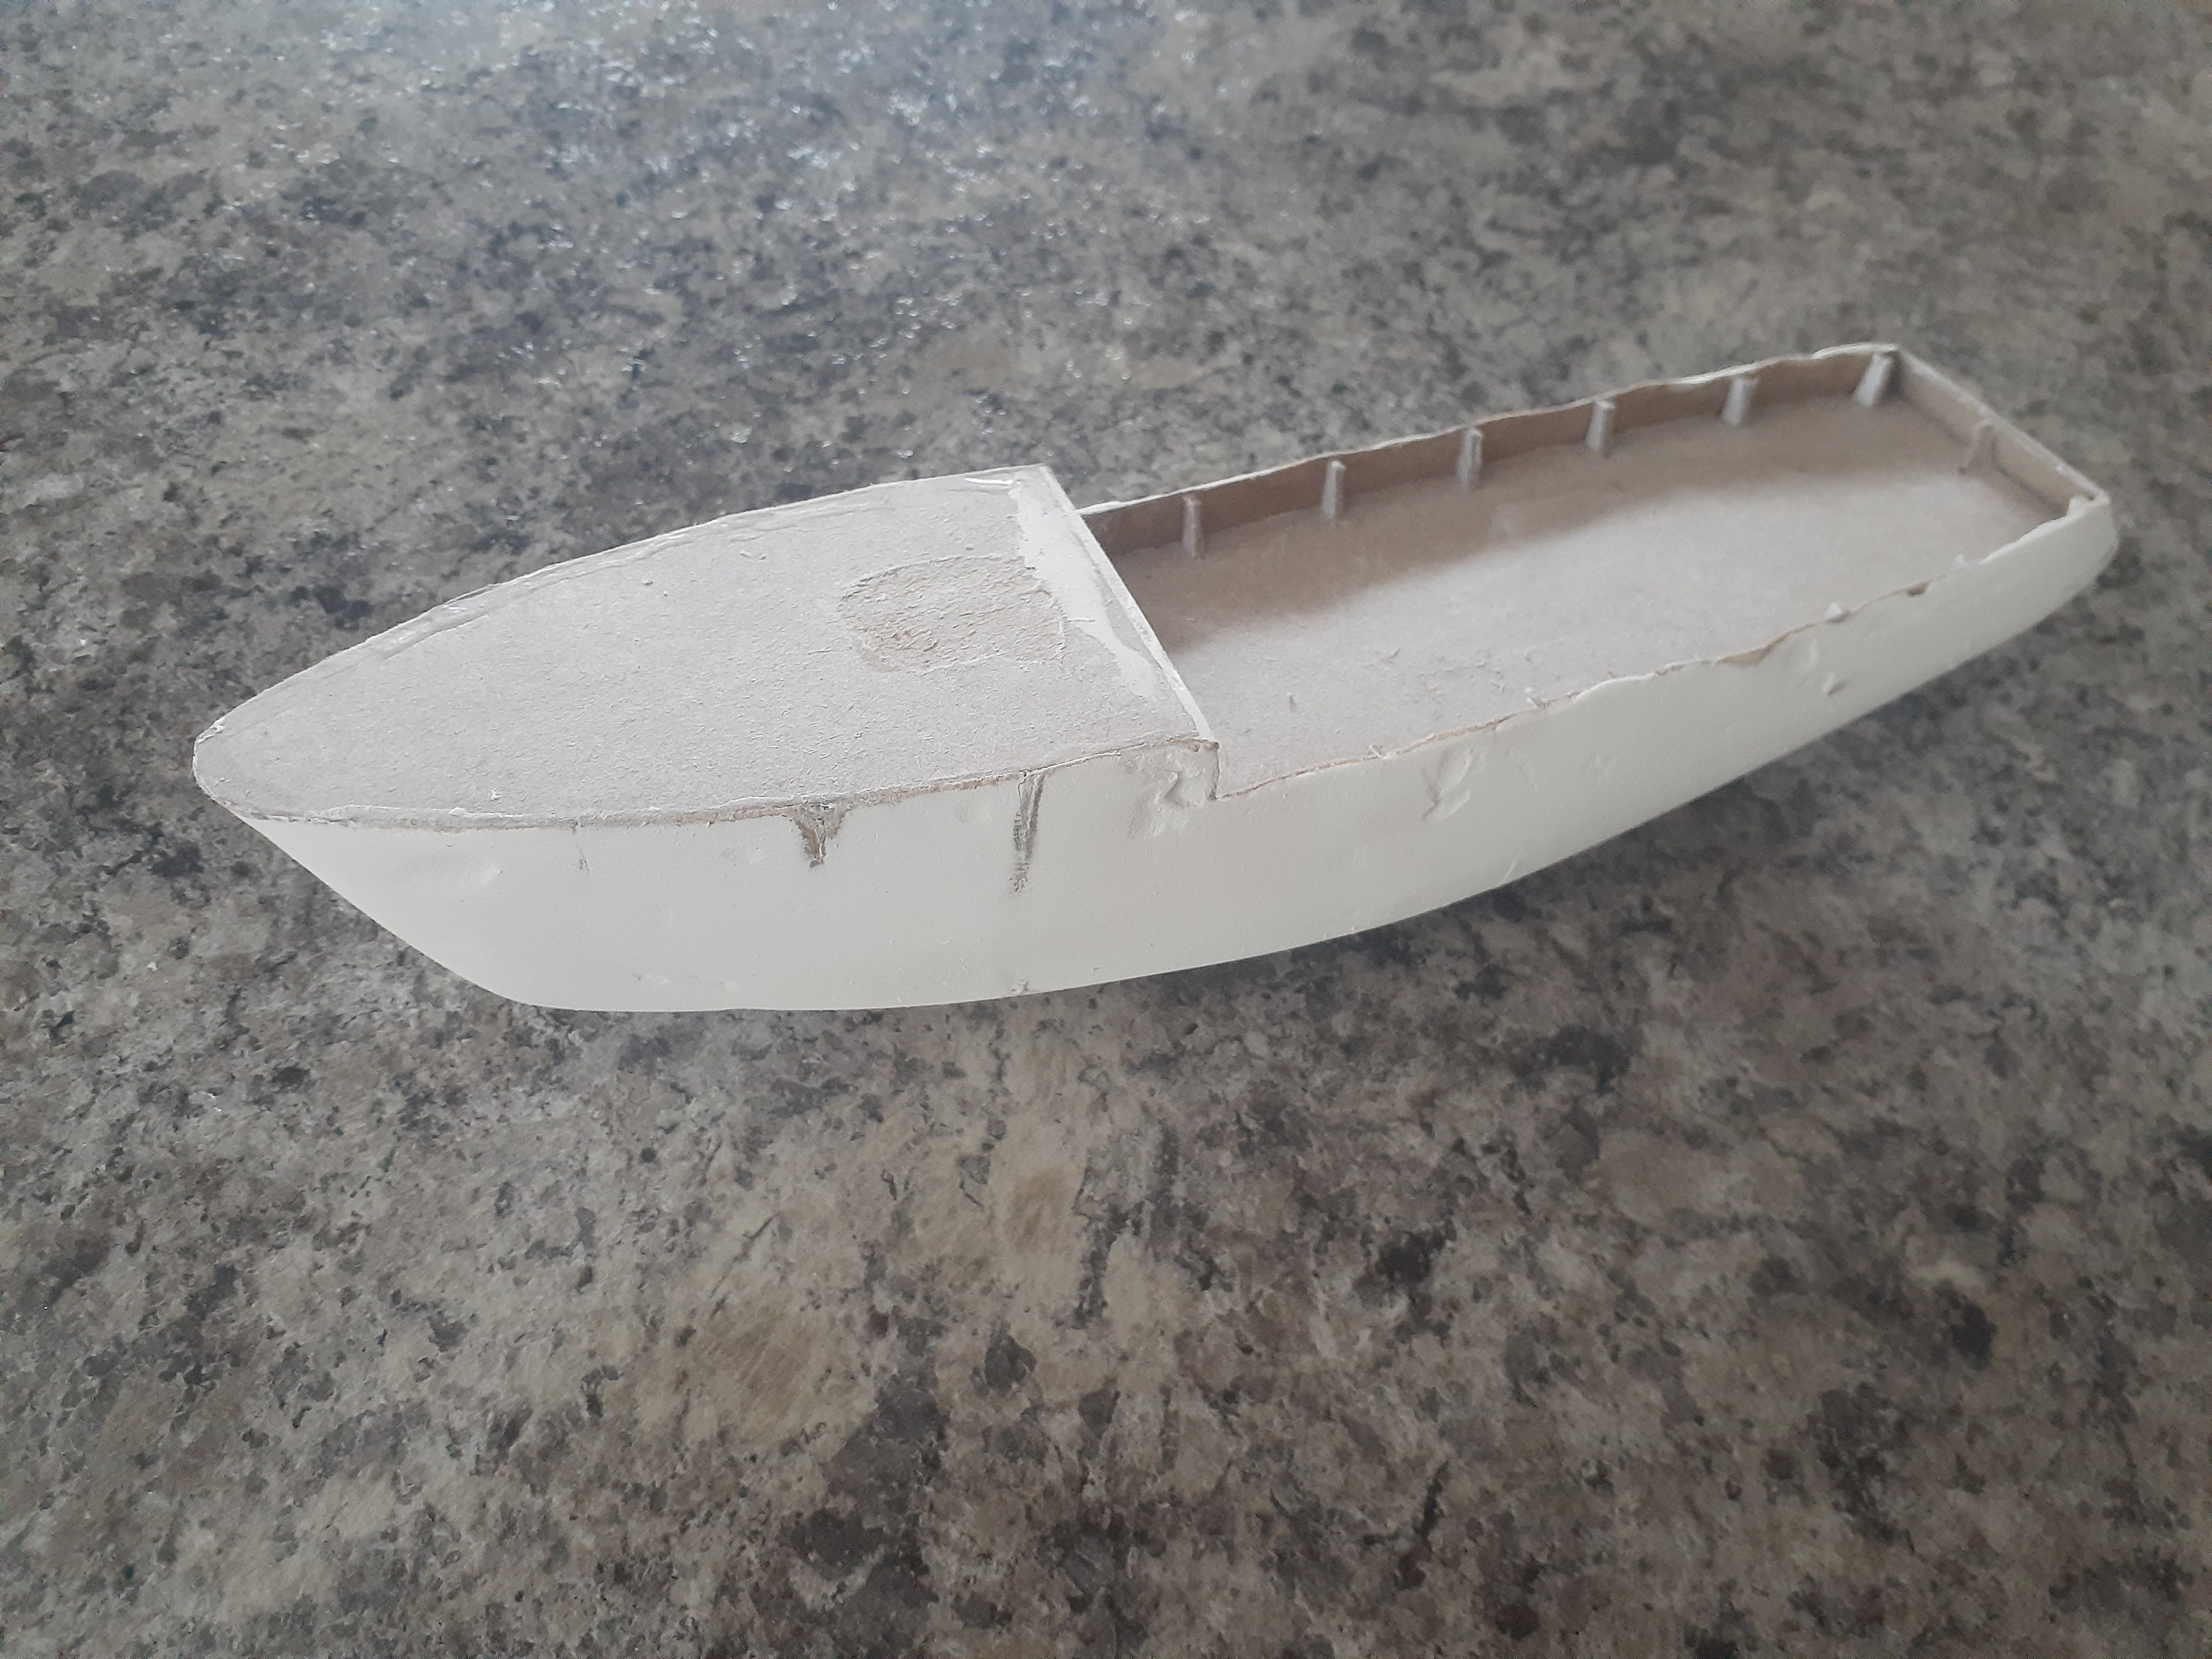
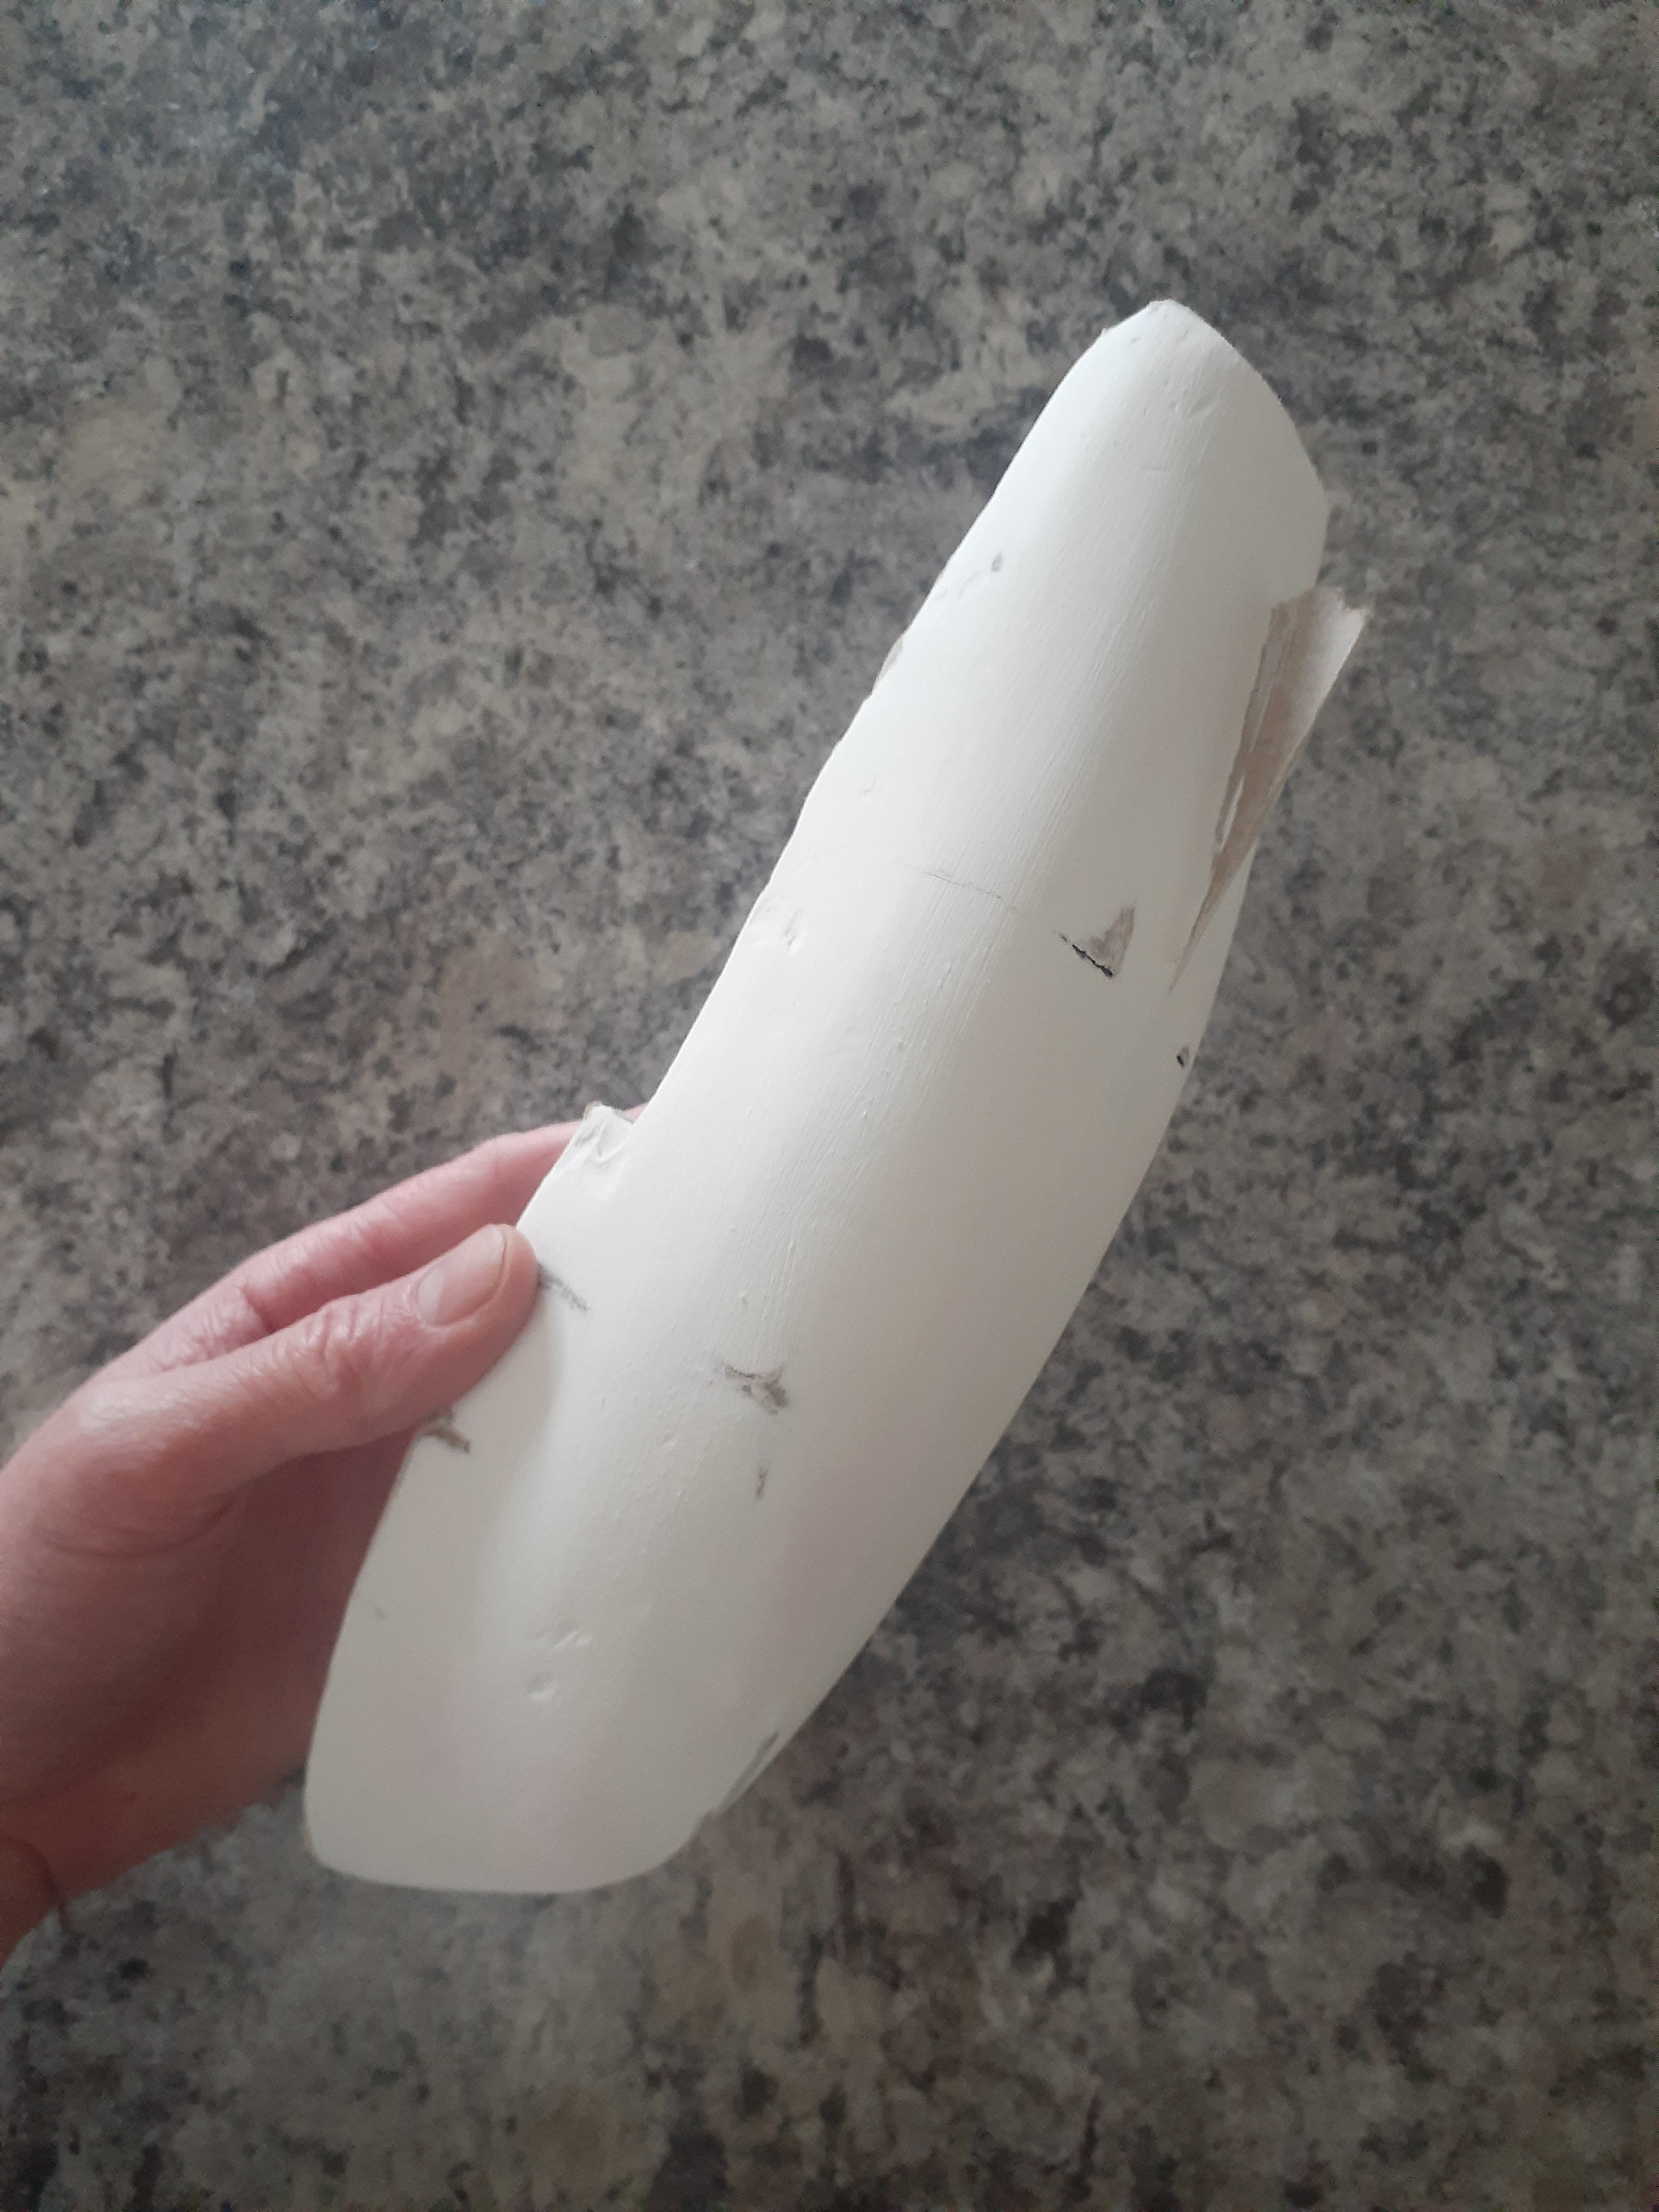
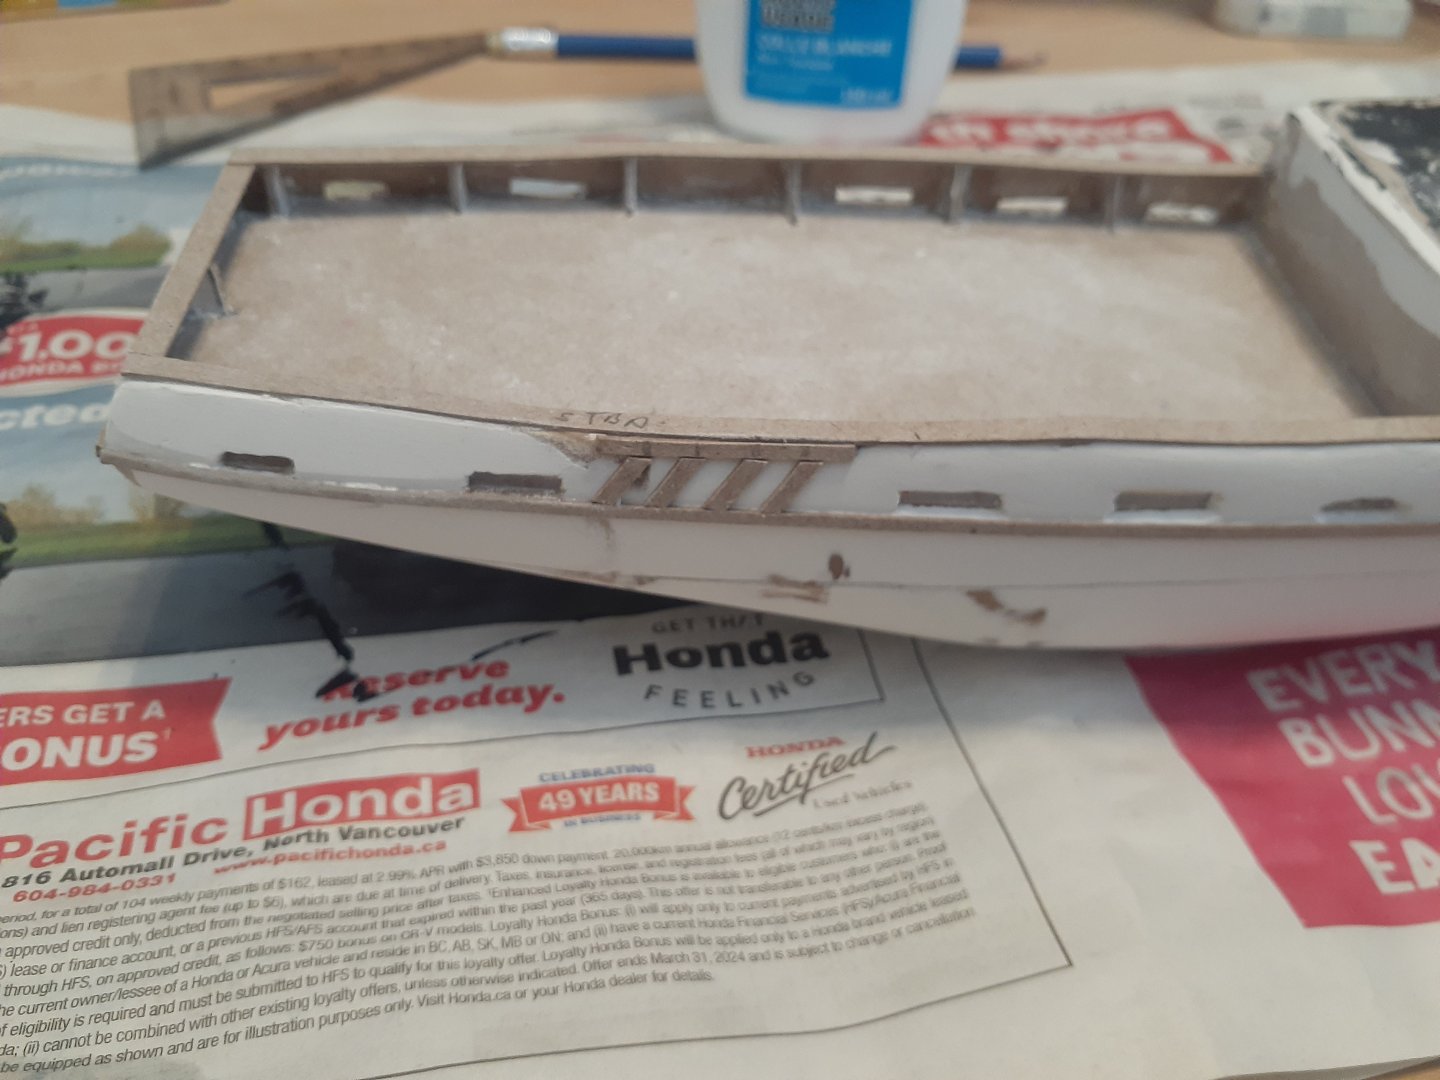
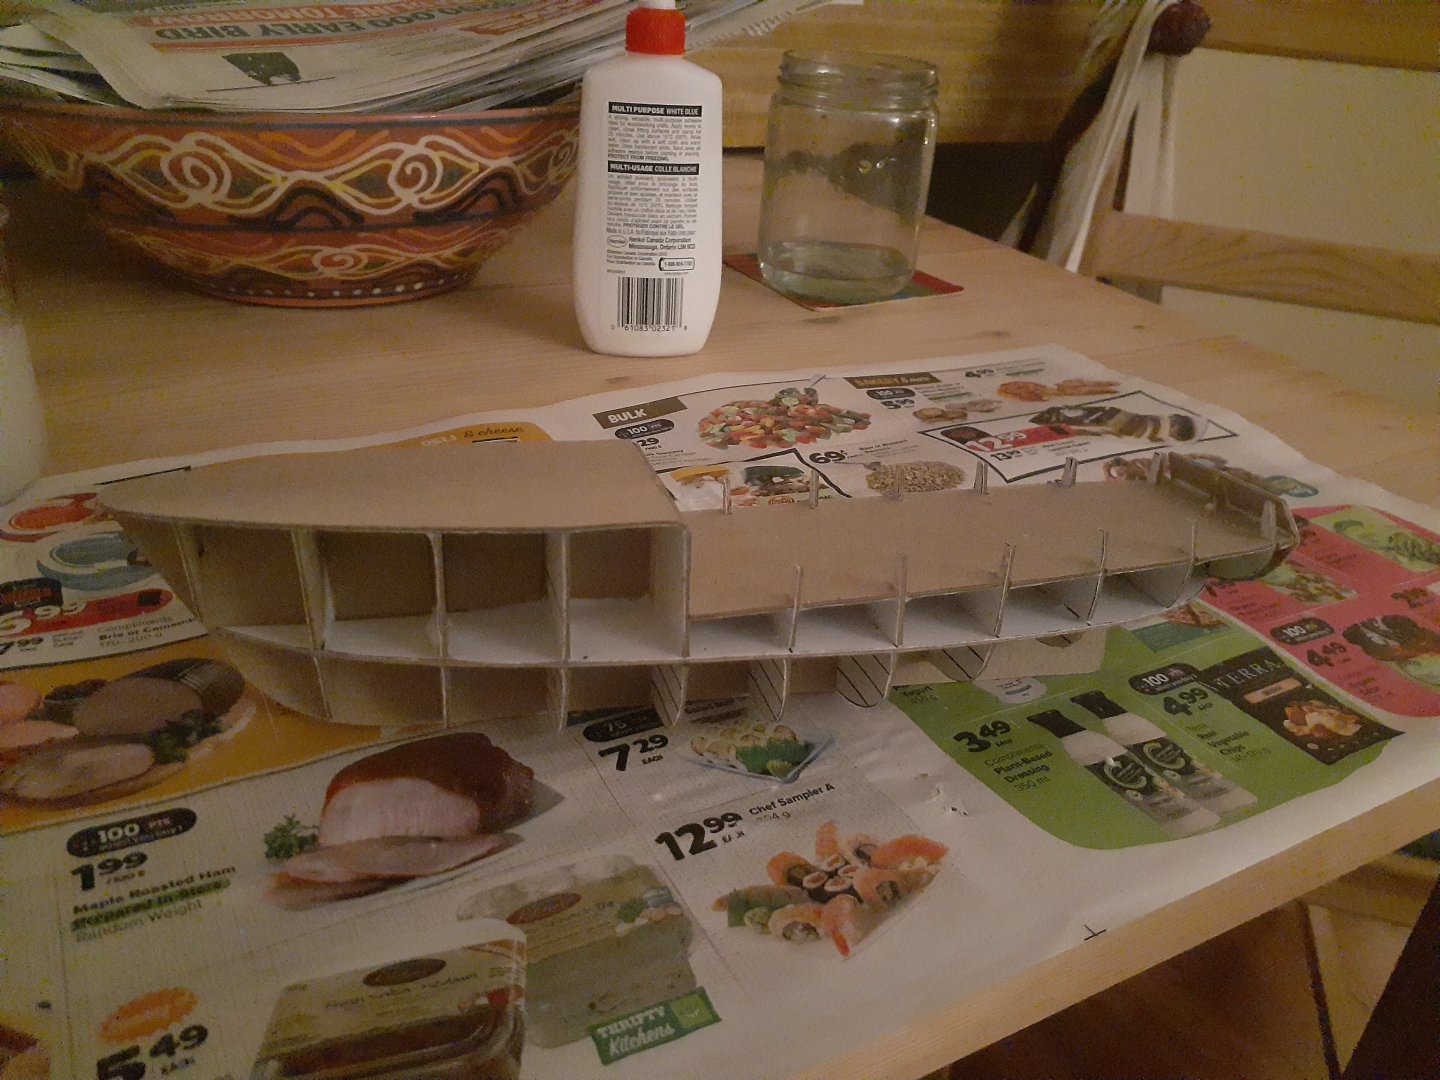
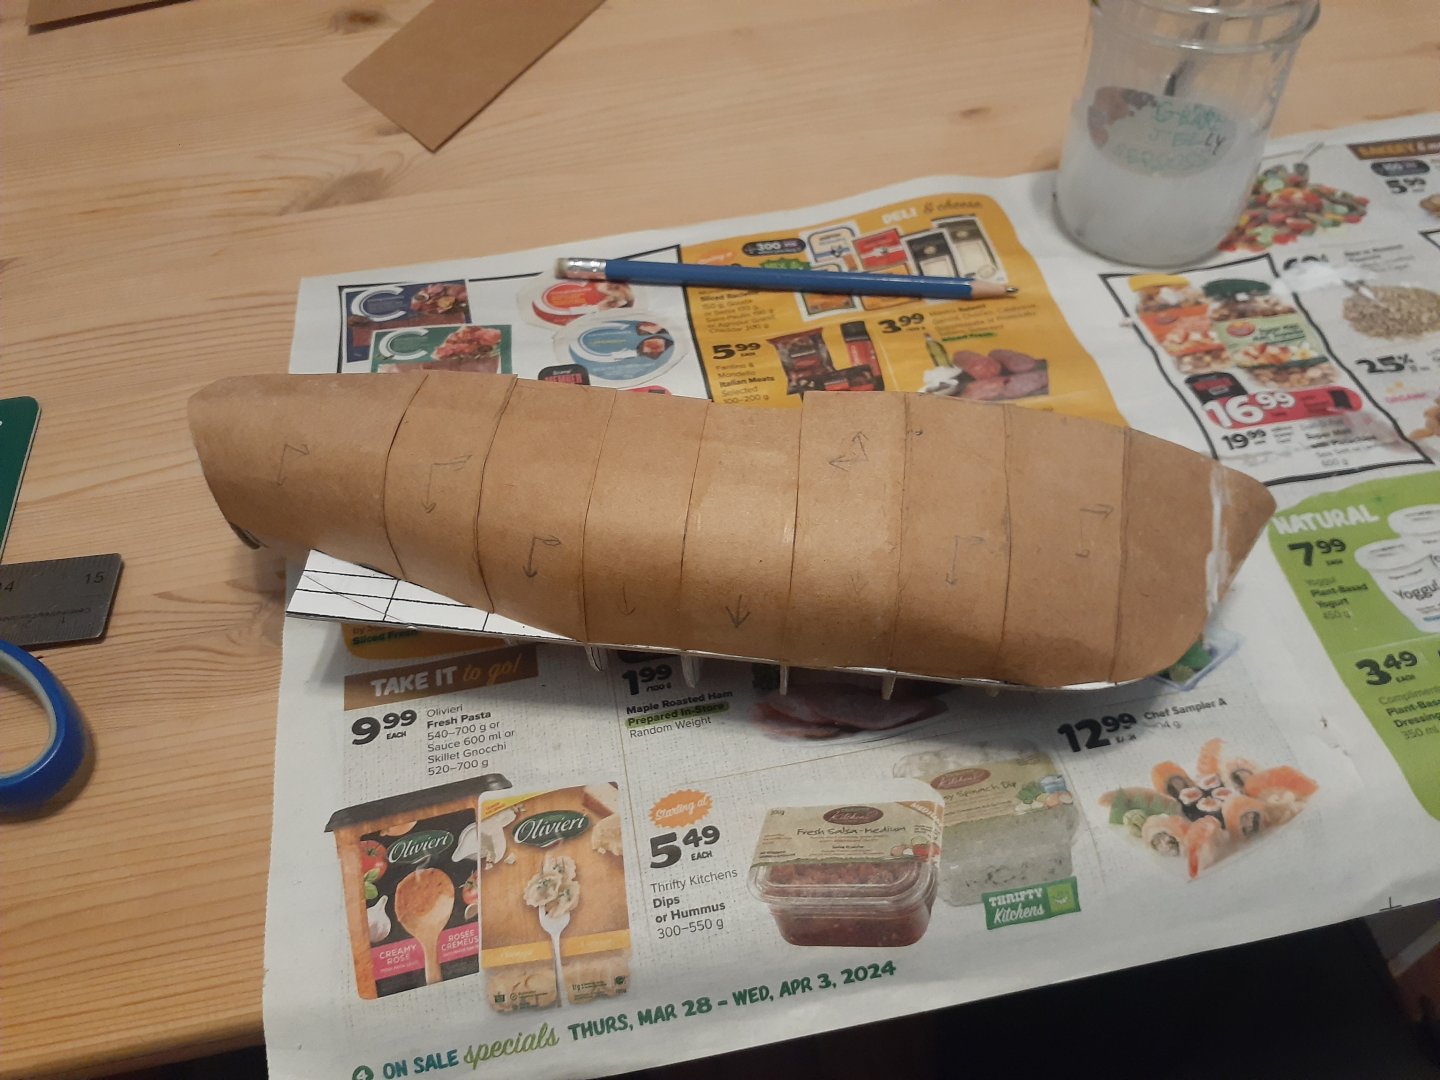
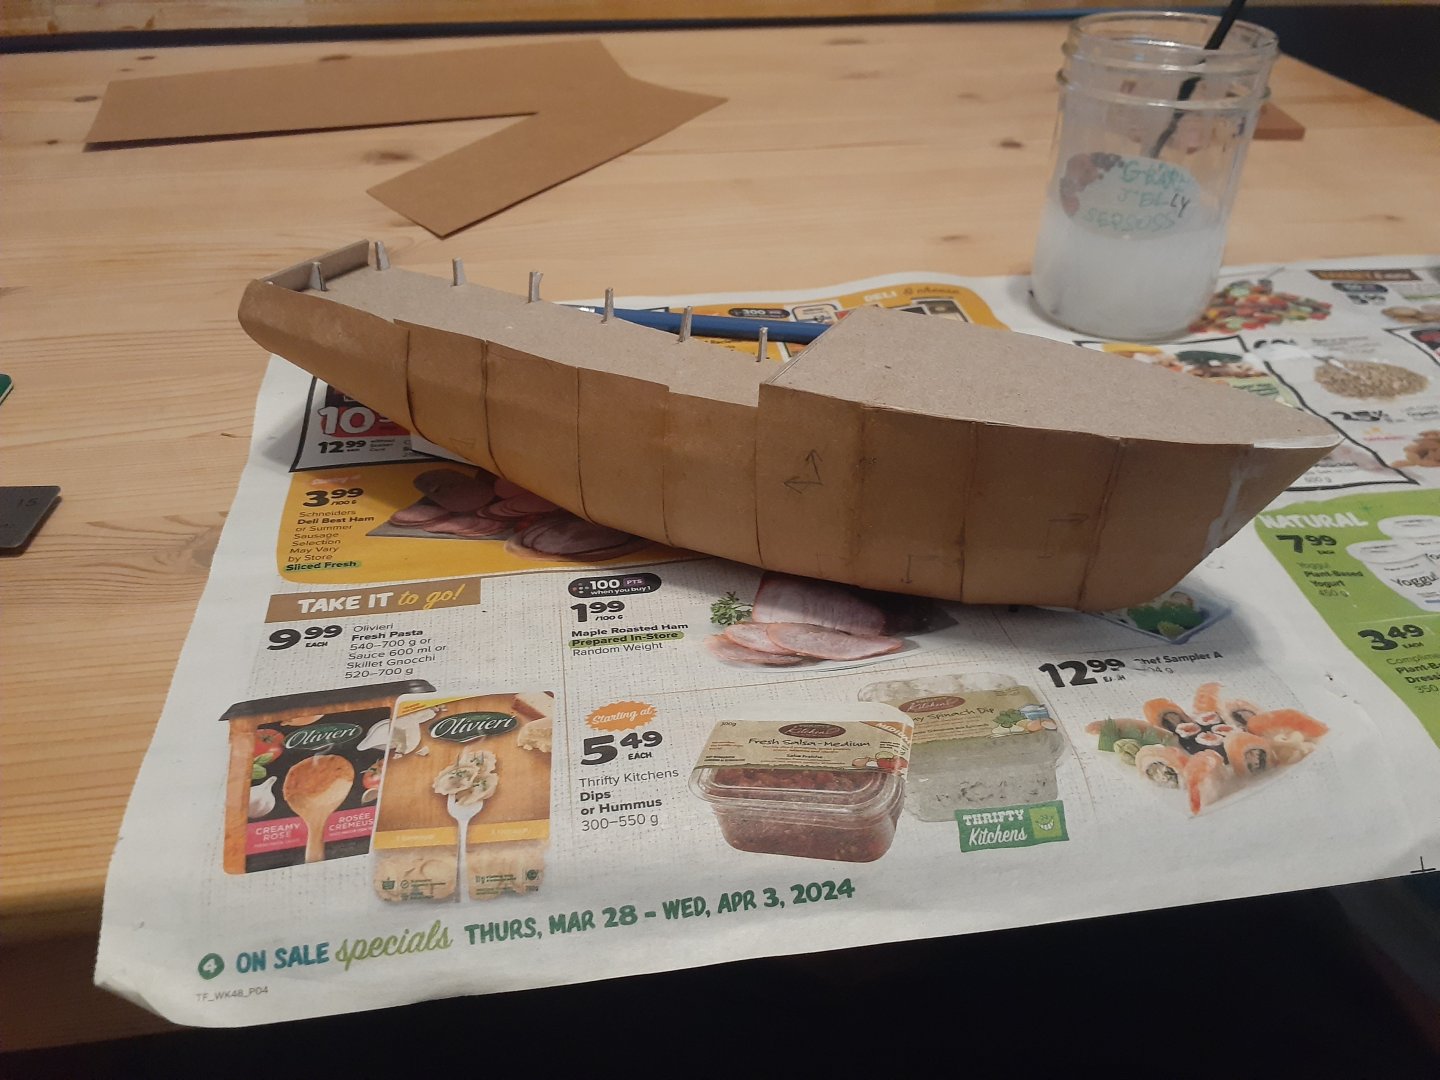
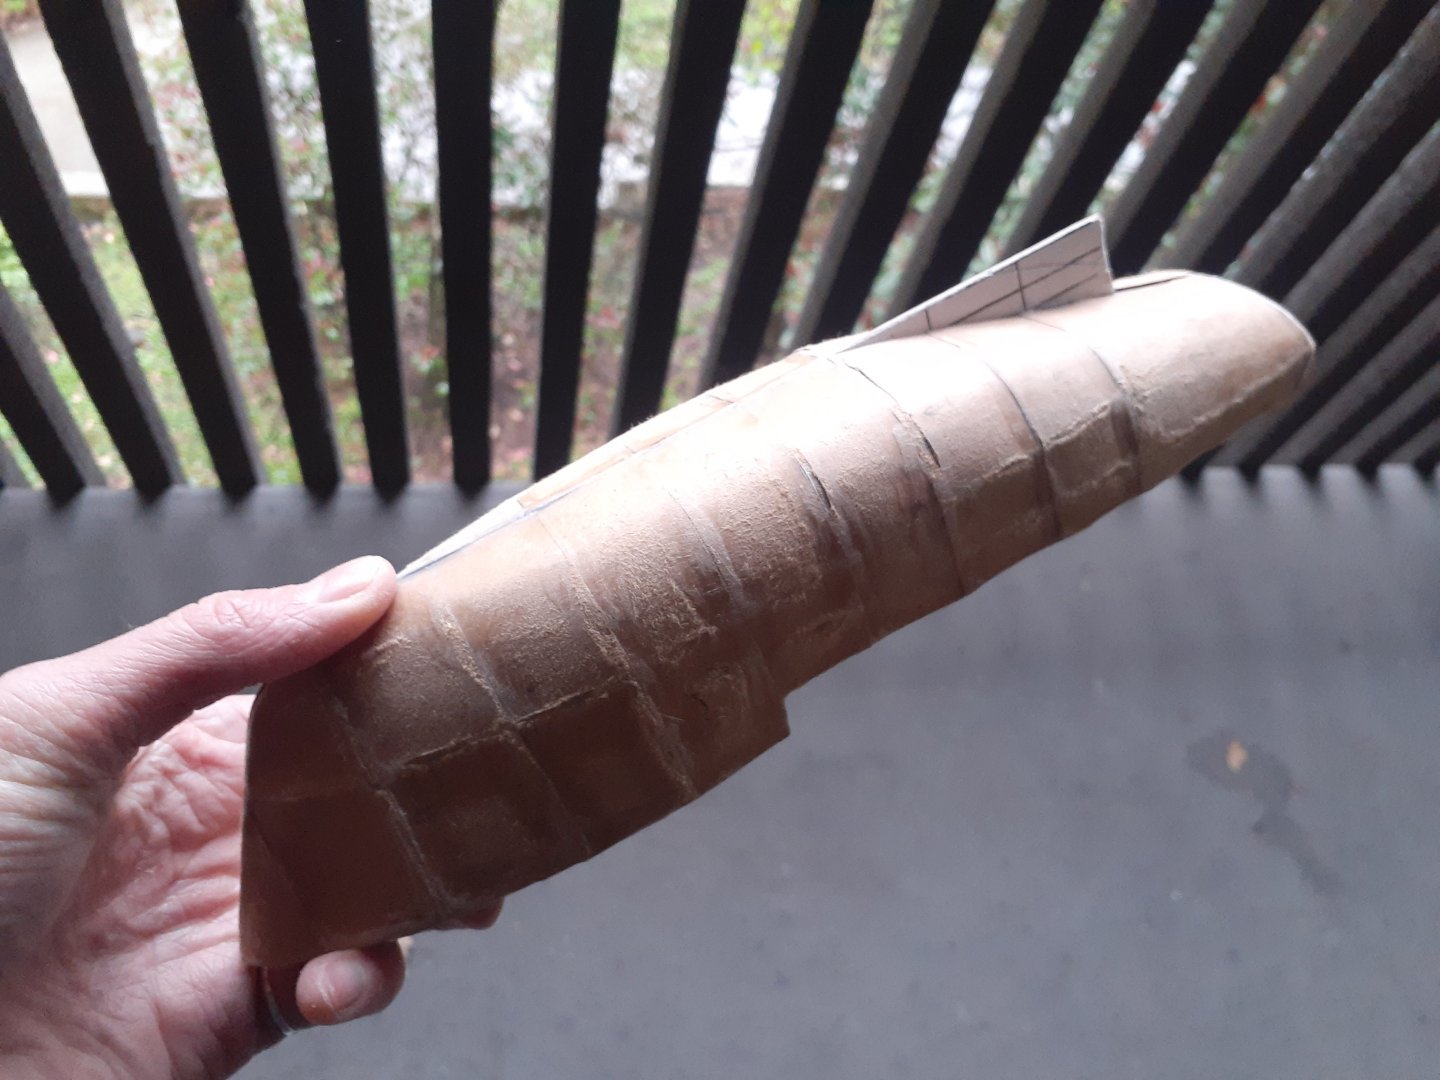
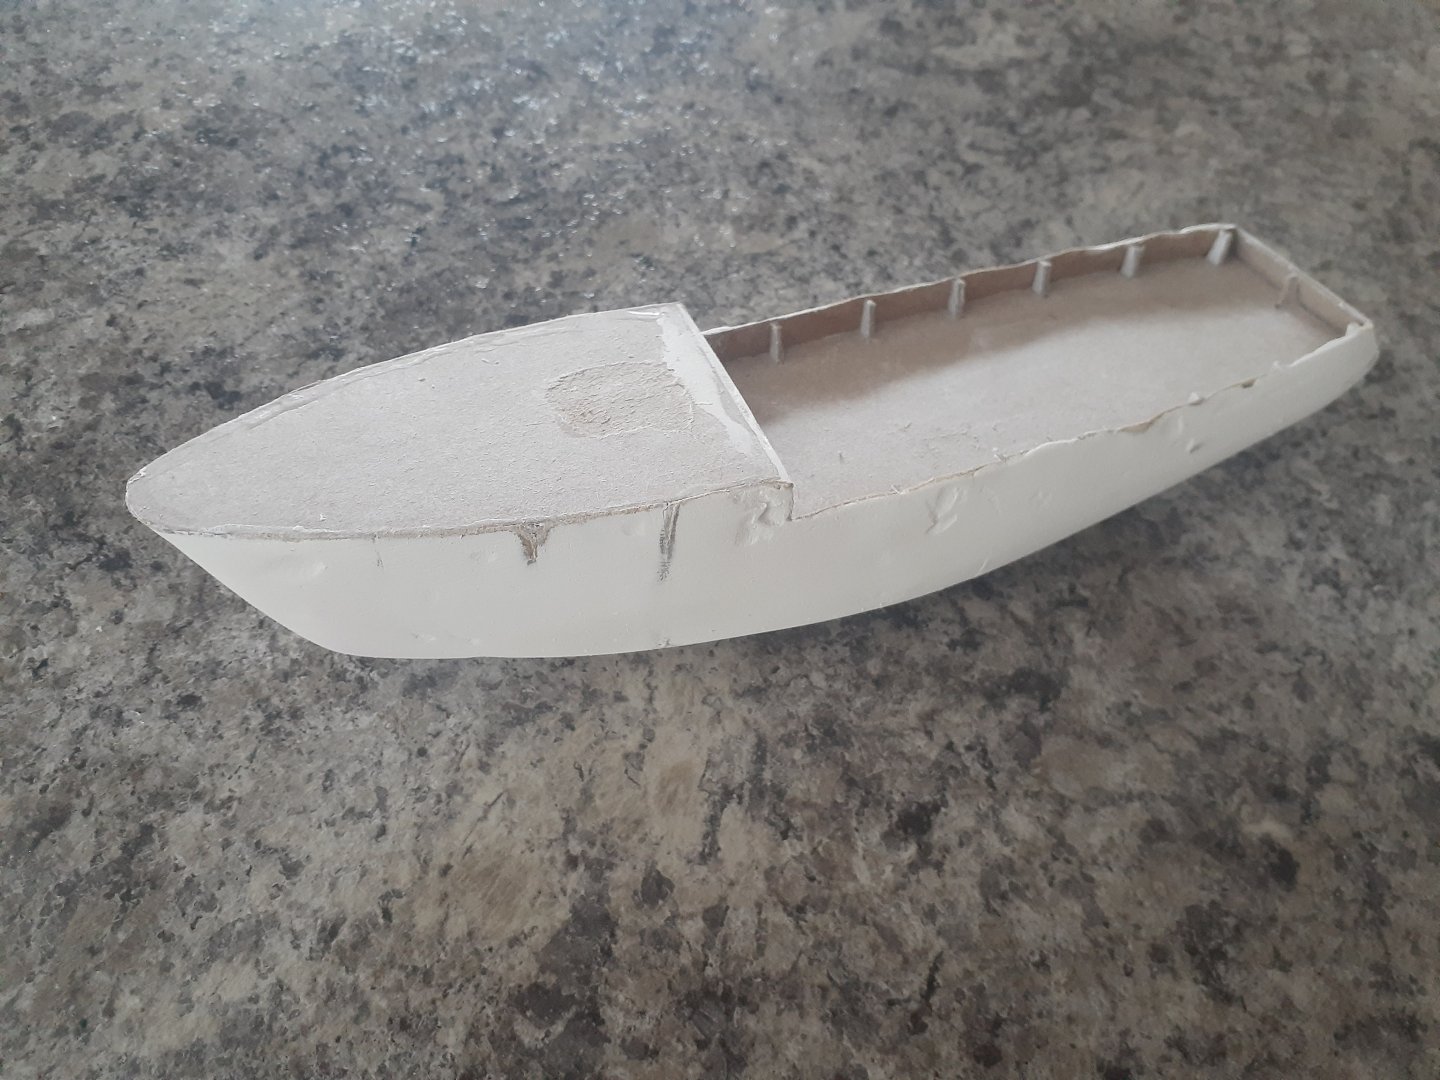
Hello Model Ship Worlders! Having recently found some more free time in my schedule, I thought it might be time to start a new hobby. Being inspired by the impressive work of GrandpaPhil and Ab Hoving, I have decided to undertake a card model build. My aim isn't necessarily to create a perfect scale replica, but simply to learn more about ship modeling, have some fun and make something I'm proud of! I have chosen to follow some plans I found on http://www.freeshipplans.com for a Soviet shrimp trawler named "Krevetka". I have found very minimal information about this ship online, and only one photo. However, the simple hullform serves my purpose well, and the deck fittings should be an interesting kitbashing challenge! I've been working on this project for a few weeks so far. Here is the progress so far... Plans printed and backed with cereal boxes. As you can see, I mistakenly sliced off part of the keel... This was fixed when I double layered the cardboard. Crisis averted. First dry fit of the model! after this is when I decided to double the cardboard layers, as it wasn't as stiff as I liked. Gluing up the frame and bulkheads! I was going to reinforce the bulkheads with popsicle sticks, like on BH5, but decided it wasn't worth it and just laid the glue on in thick fillets. The plating process. I used thin cardstock instead of wood pulp board, as I couldn't find any in local stores. This seemed to work okay. However, by this stage I had made a few mistakes. My cuts for the frames and bulkheads weren't perfect, and I forgot to fair that out before I started plating, leaving some pretty pronounced ridges and bumps. In addition, my bulkheads weren't thick enough to glue the planks down properly, so I had to overlap them, leaving more ridges. Thankfully, putty covers many sins! Before applying putty, I did some fairing. Better late than never. I went through the cardboard in some places, but nothing major. First layer of filler applied! I used the same product recommended by GrandpaPhil in some of his builds, which seems to work great. The final update for this first post! The first sanding is complete. I'm quite happy with the progress so far. I have learned some lessons but haven't had any major obstacles. However, I have some questions on how best to proceed. The ship this model is based on has a metal hull. I'm considering a few options to achieve this look, and am wondering which one those who have gone before me would recommend. 1. My first thought is to simply continue applying the spackle I have and sand it down to a high grit. I'm concerned that it won't smooth out as nicely as I want, or that it will leave pockmarks like those shown in the pictures above. This is probably the easiest option for me, and I'll probably do a second layer regardless. 2. I have seen many impressive planking examples and tutorials, and its definitely a skill I'd like to learn. However, I'm not sure this method will give me the smooth look I'm looking for. 3. I have also thought about using a different product, something like Bondo, to fill the small pockmarks and achieve a smoother finish. However, if I can just use the spackle I have, that would be preferred. I am going to continue my research and have a think about this. In the meantime, I will start the superstructure and deck fittings, also out of cereal boxes! Sorry for the long post, I tried to keep it as condensed as possible. Thanks for reading and following along! I'm looking forward to posting further updates. David


- 17 replies
-
- 10
-