
richardhd
-
Posts
57 -
Joined
-
Last visited
Content Type
Profiles
Forums
Gallery
Events
Everything posted by richardhd
-
 There are plenty of incredible Titanic builds on this forum, but this is my favorite paint scheme I’ve seen to date. Always excited when you drop an update!
 -
Mark, That is frustrating! I think you convinced me not to grab the PE set for this kit. Which is a bummer because it looks fantastic. I am sure the effort and stress of surgery will be well worth it. Looking forward to seeing the outcome!
-
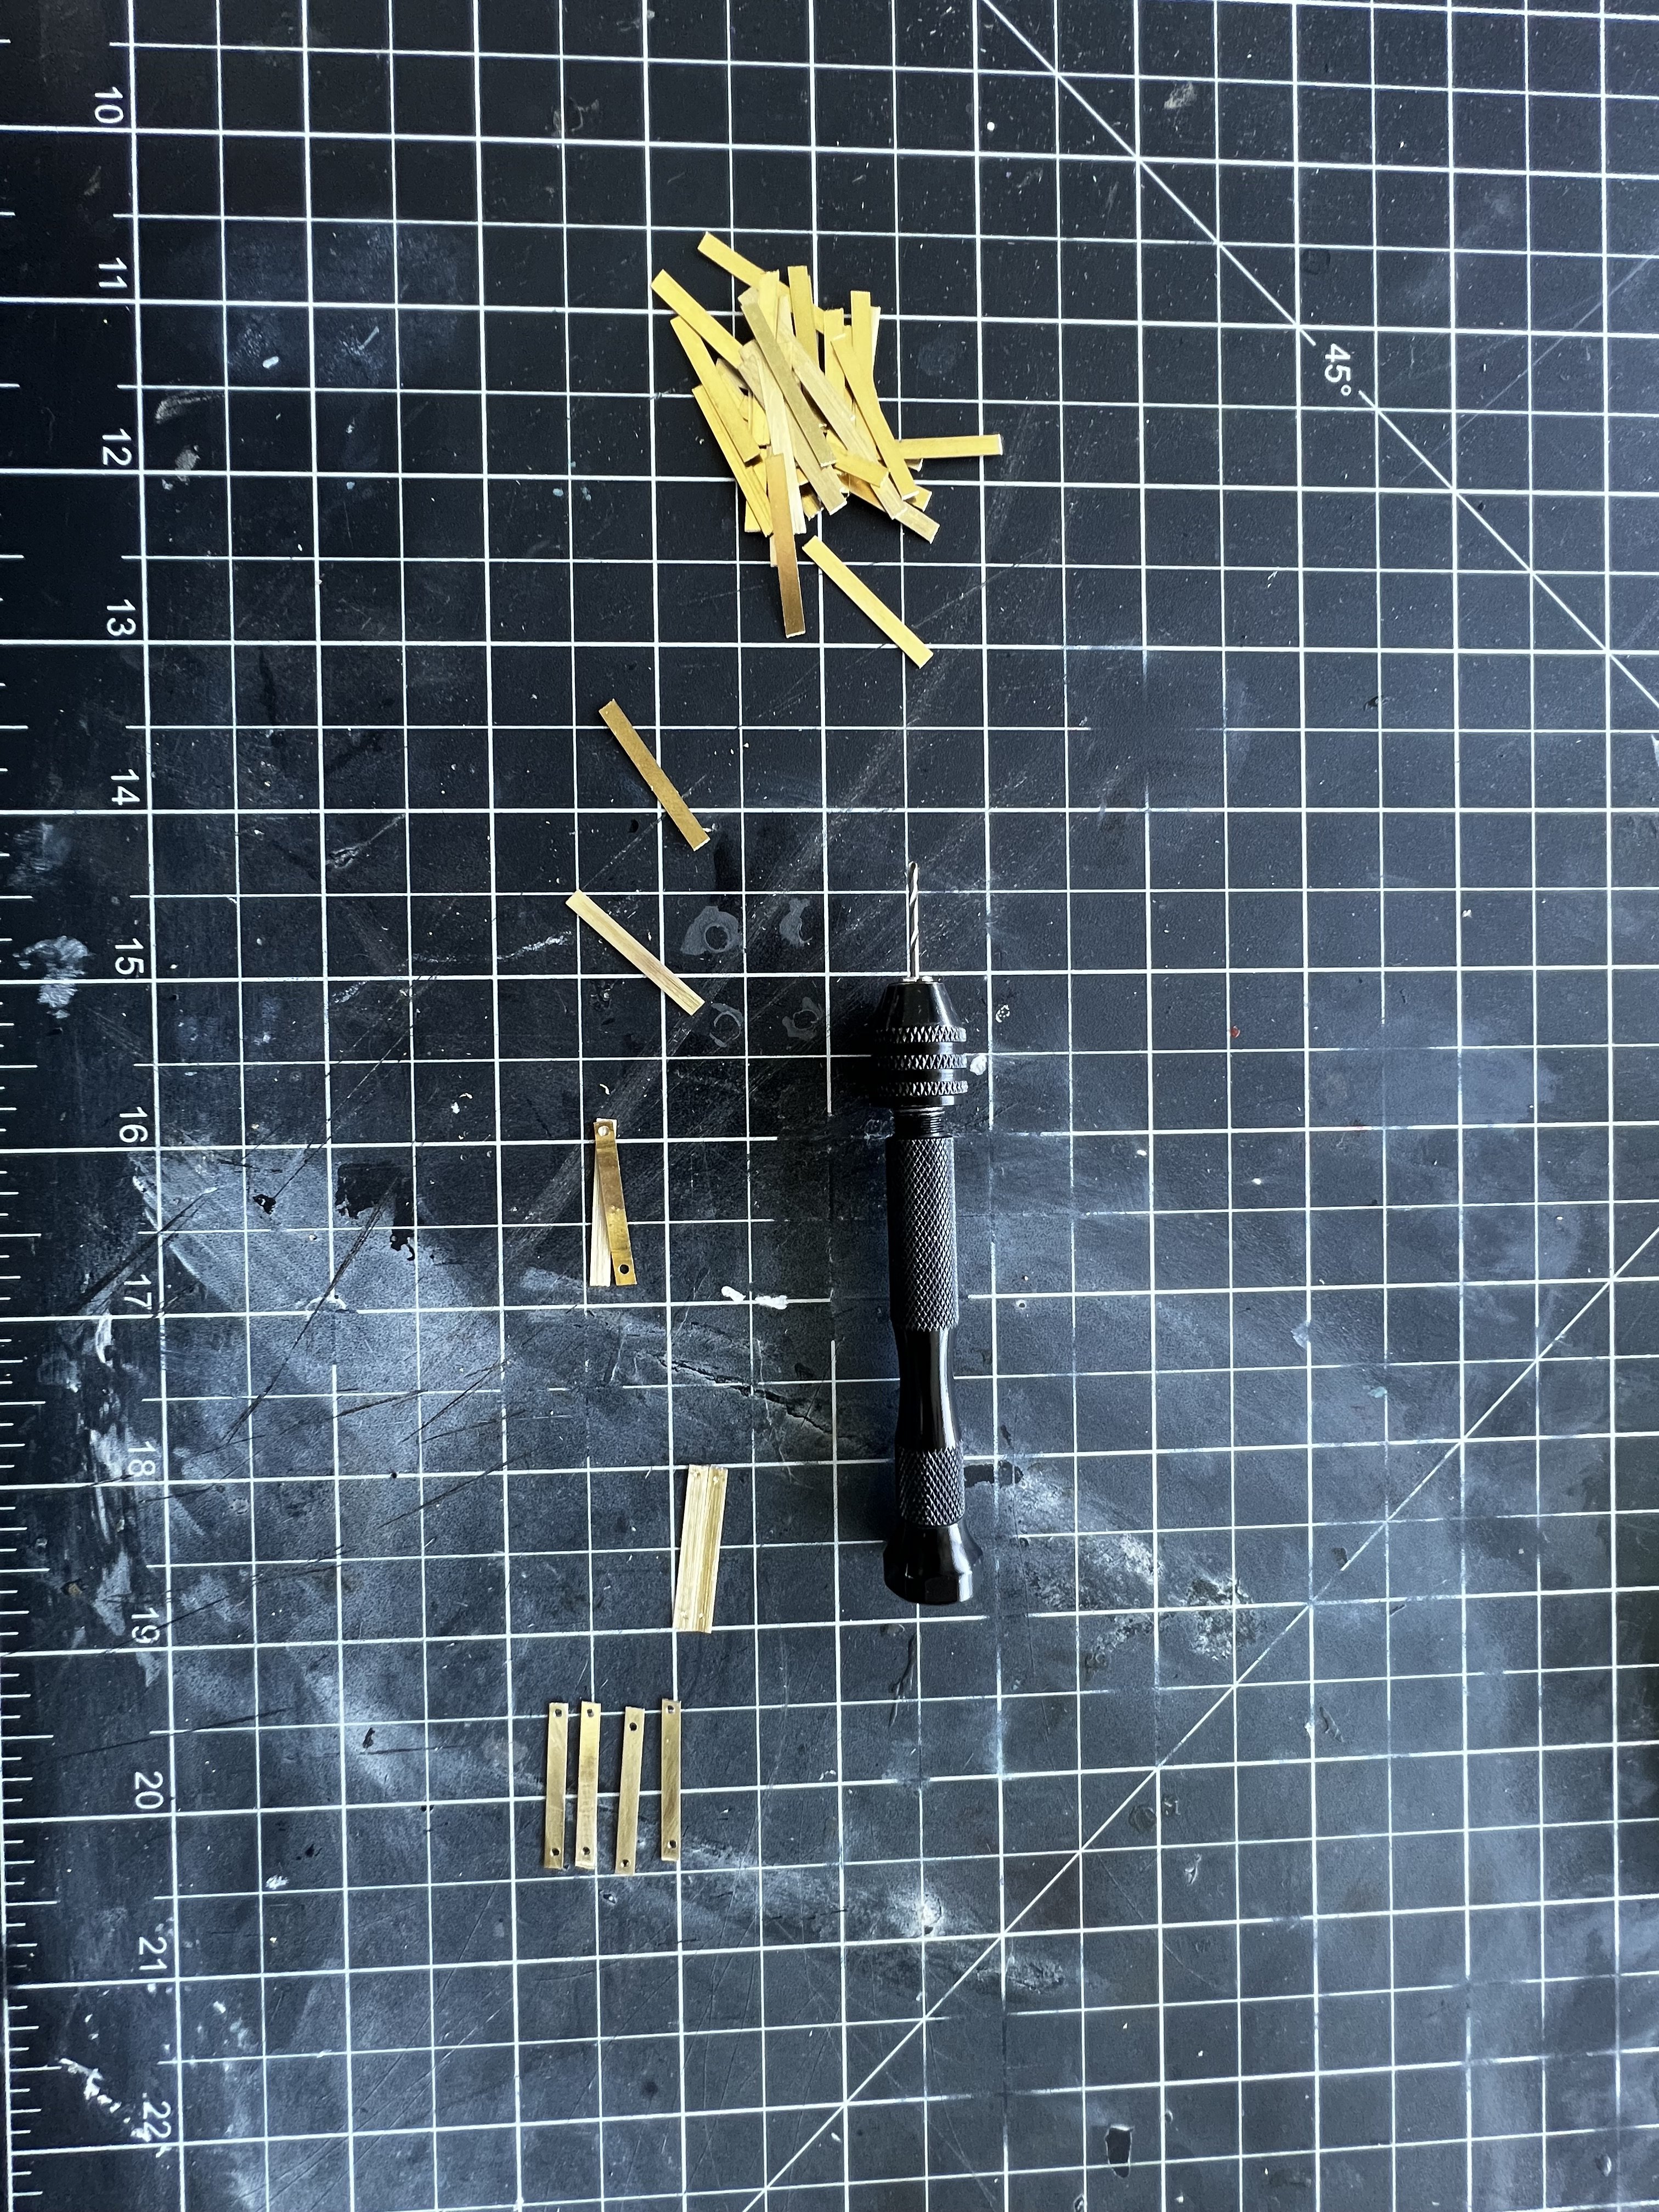
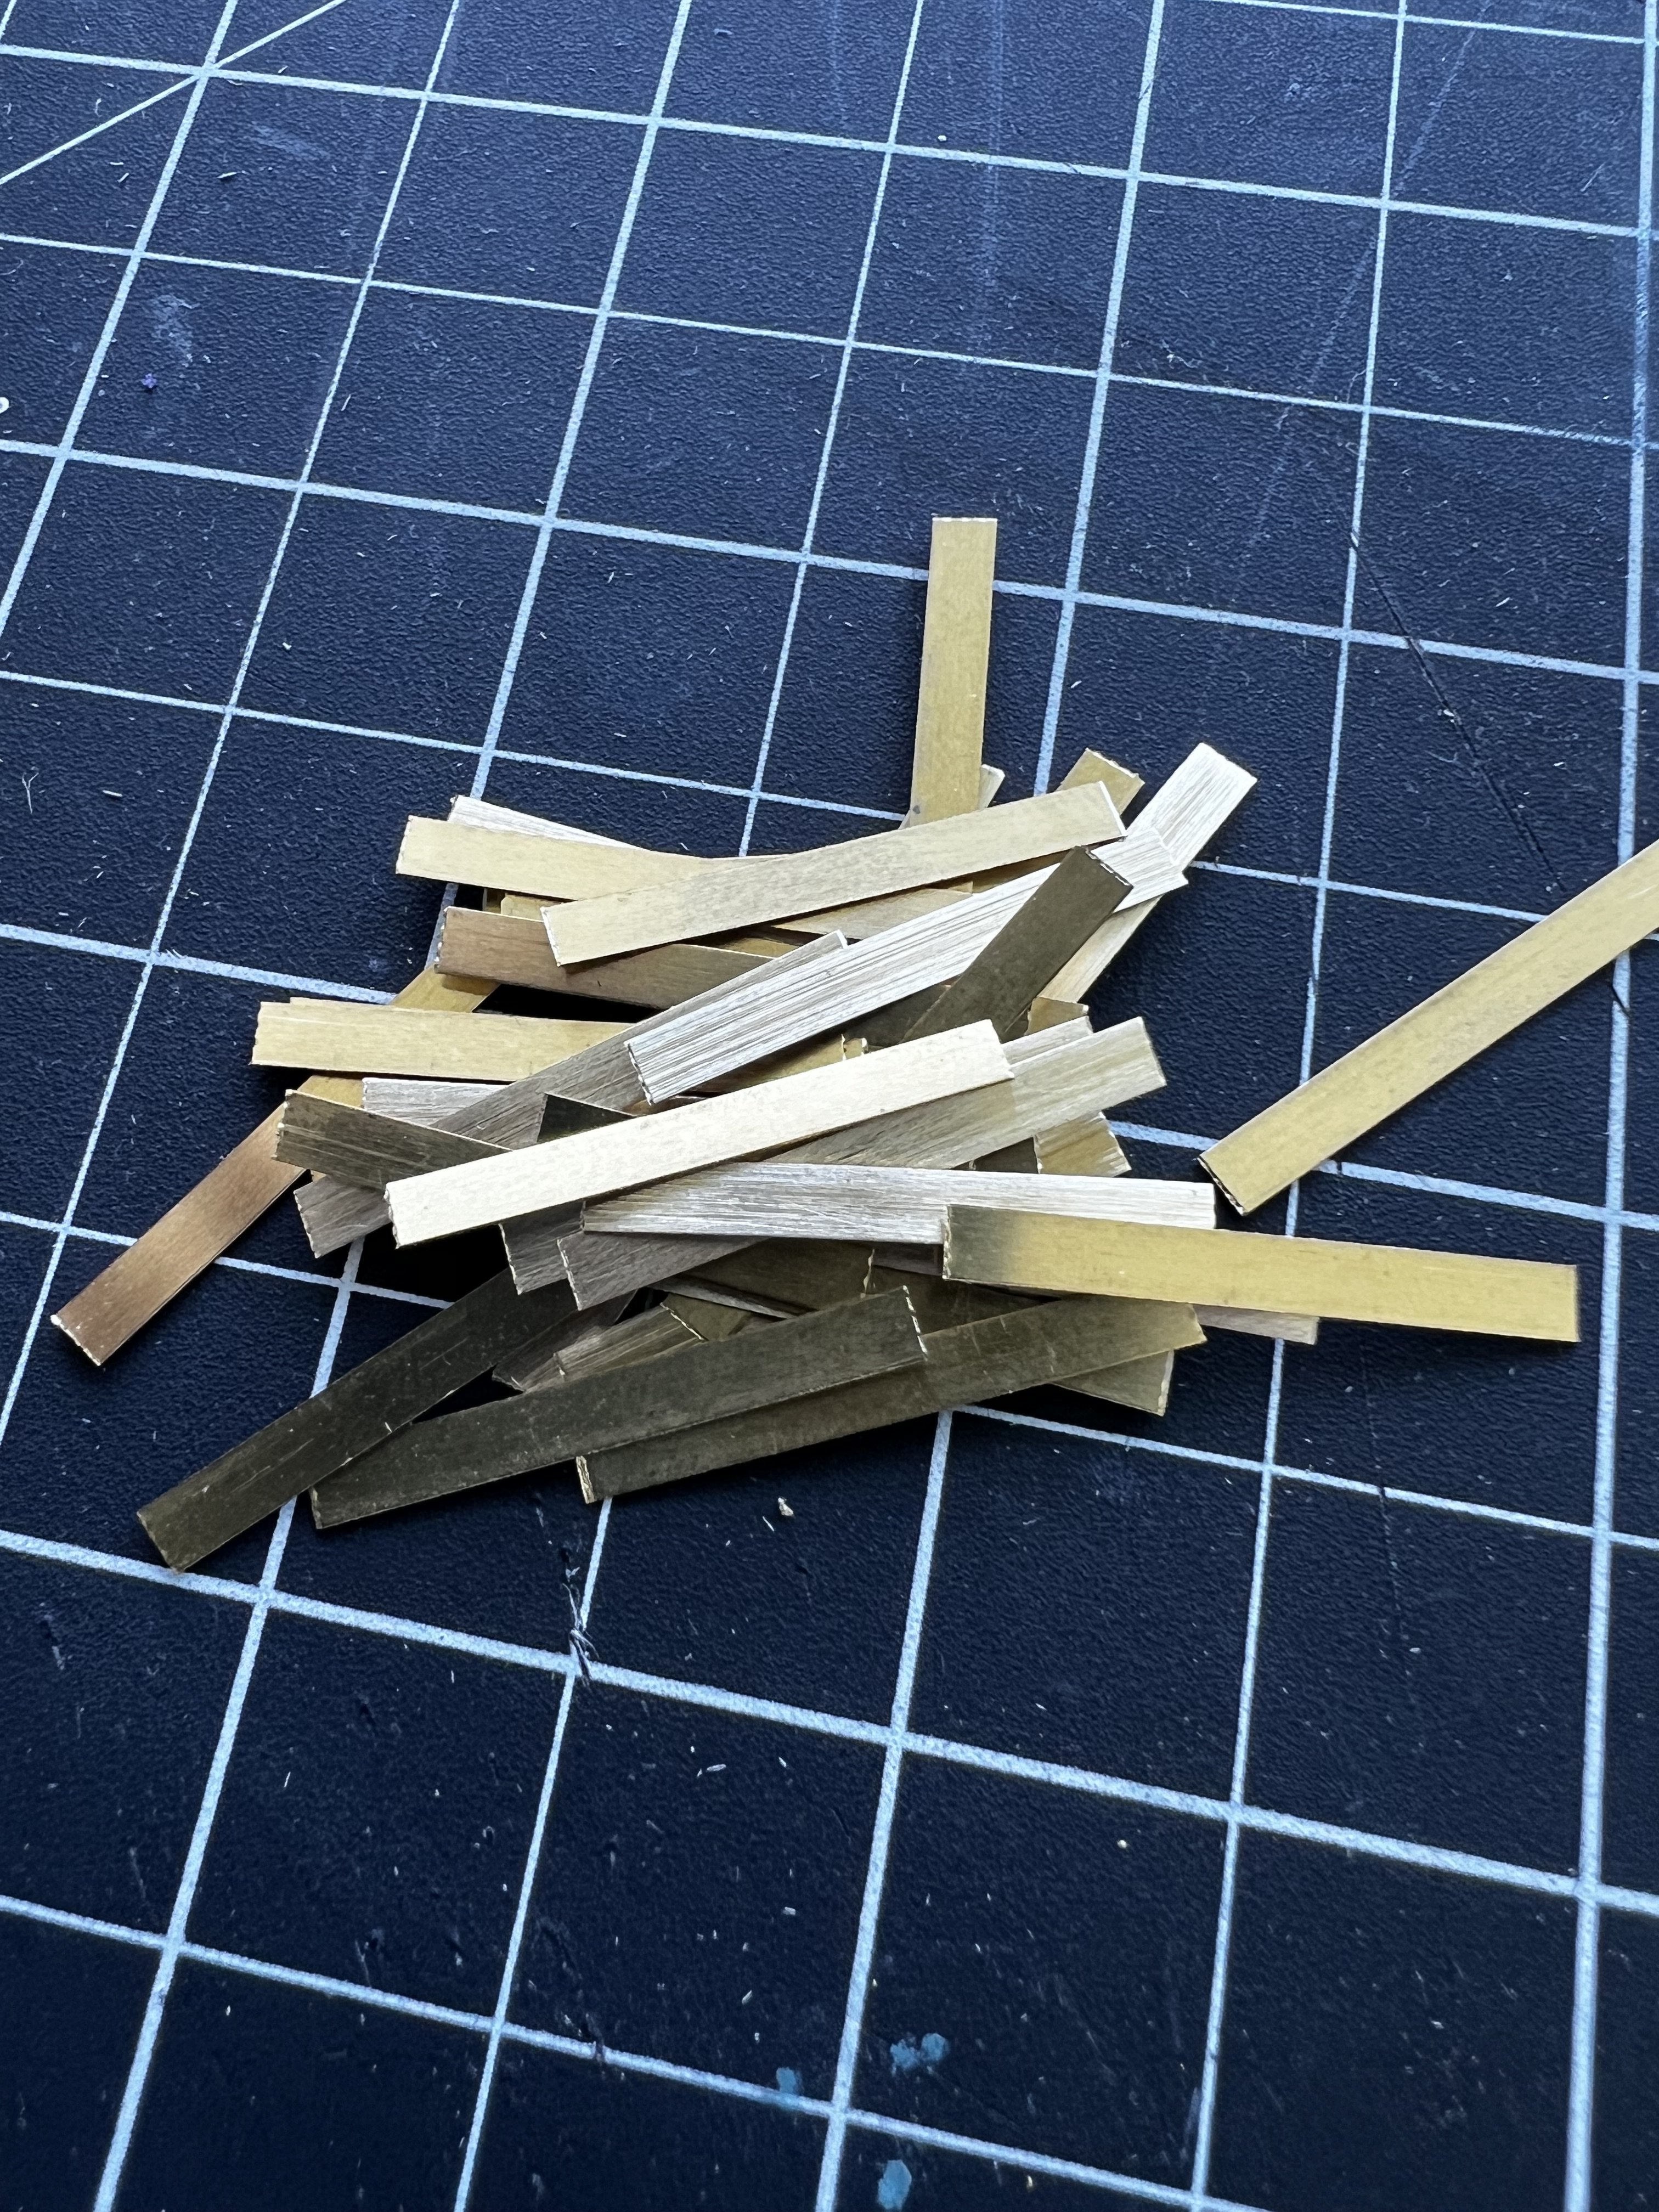
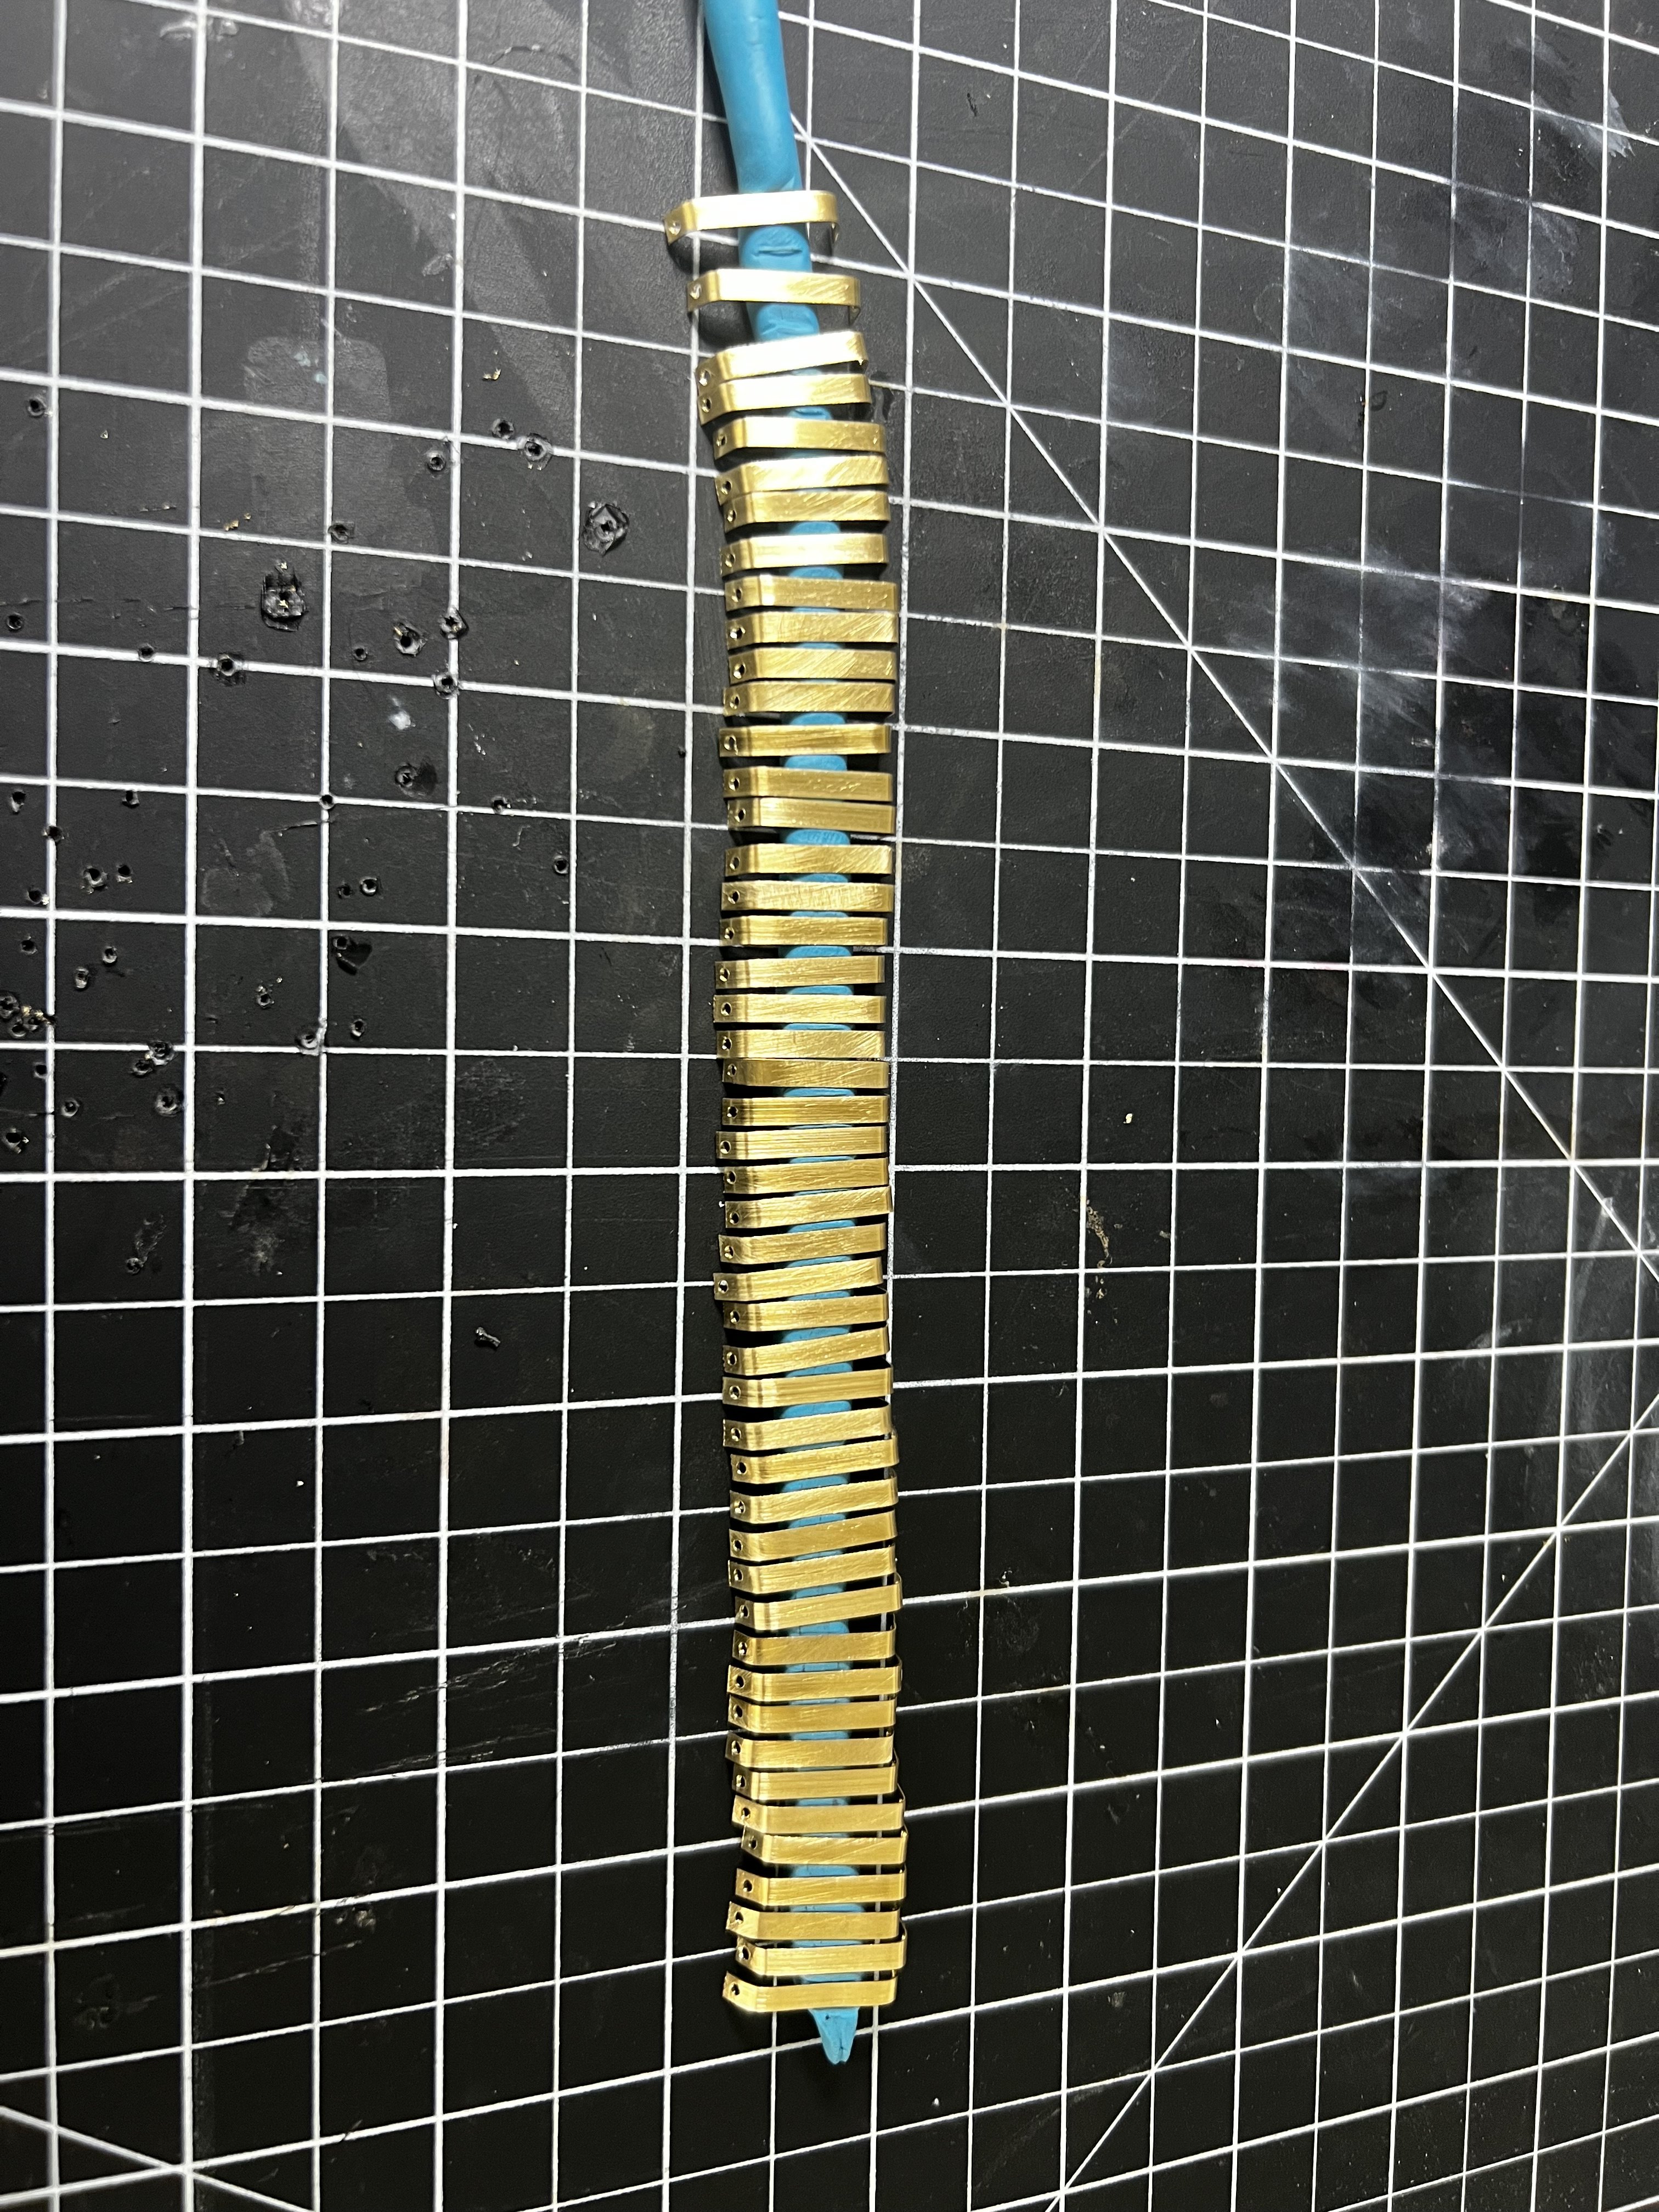
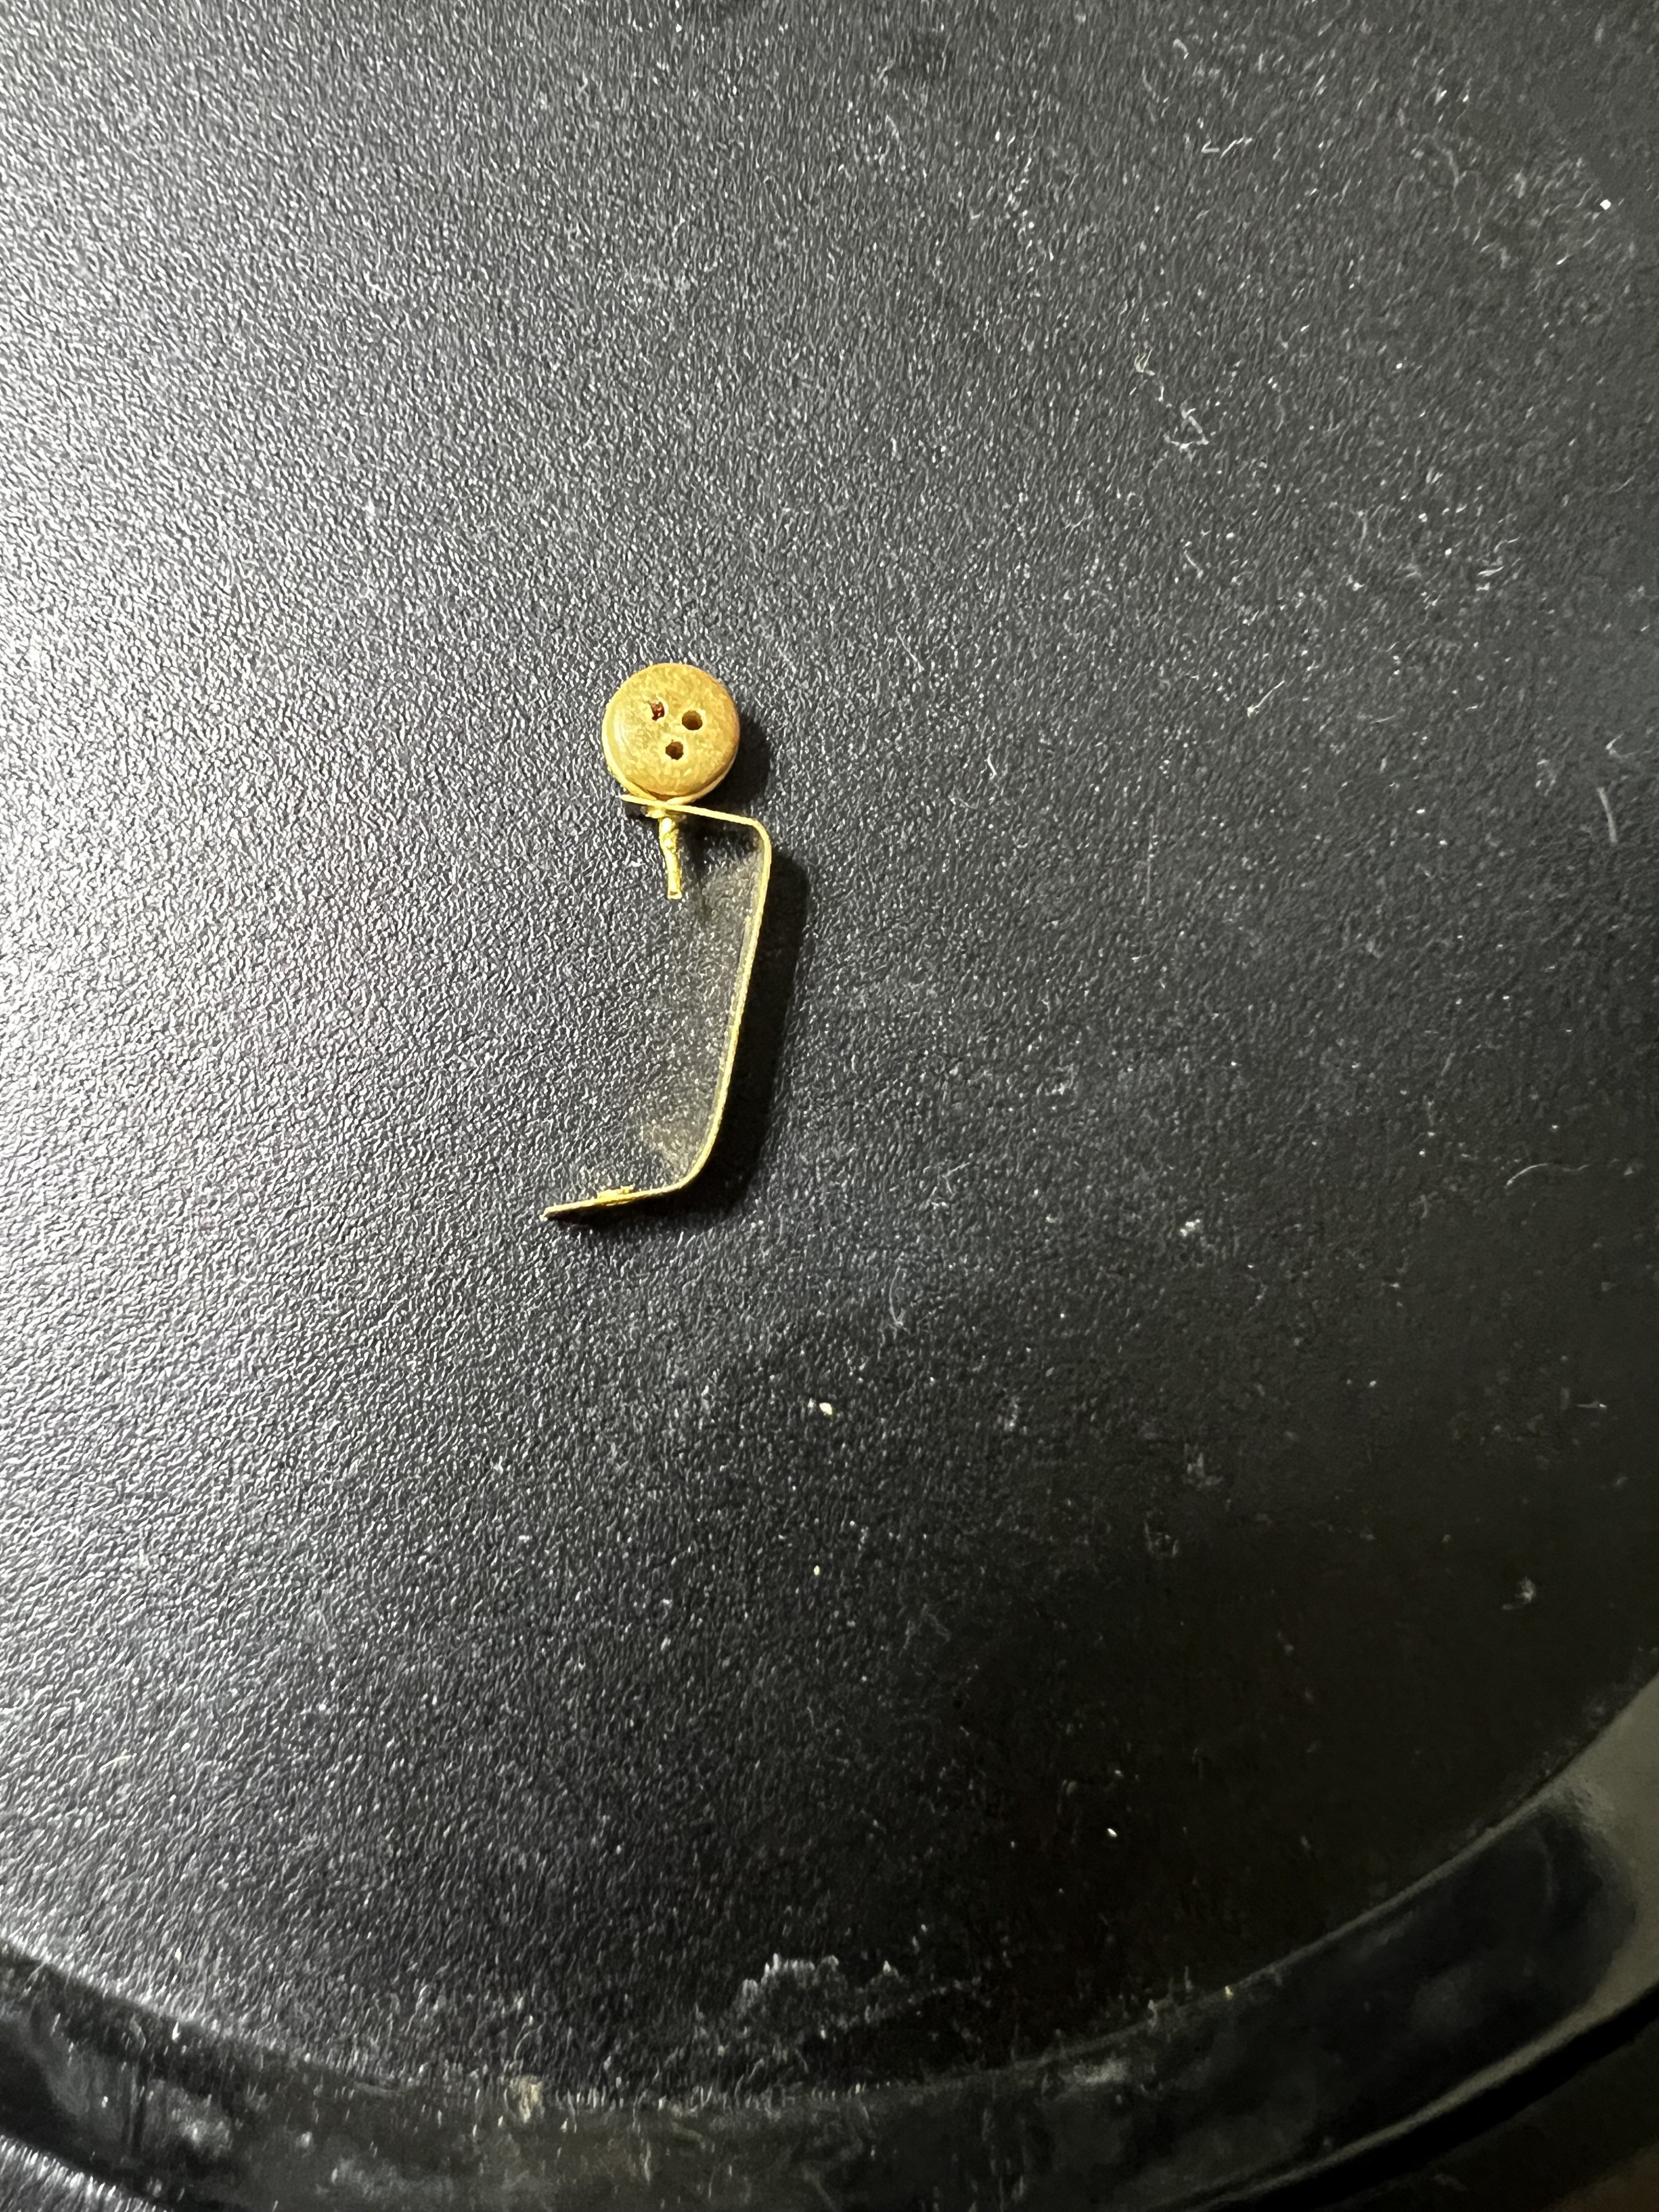
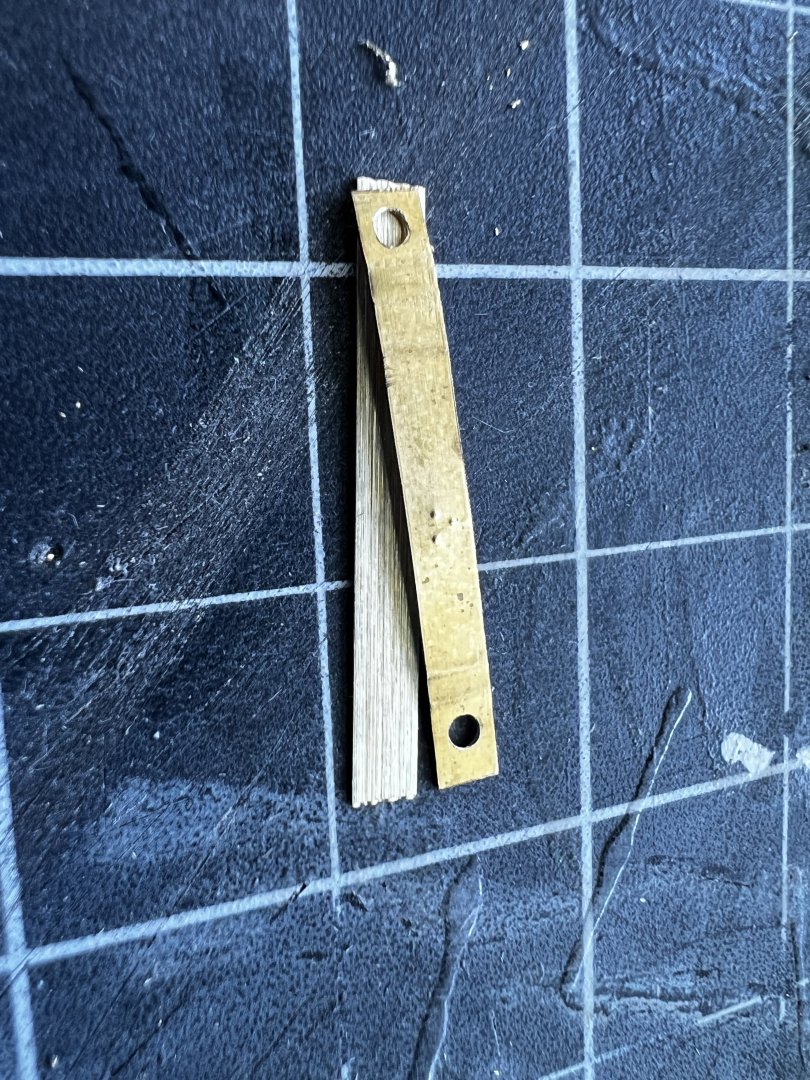
Hey all, Posting to confirm I am indeed still working on the Terror. We have been busy and I have been unable to dedicate as much time as I’d like. However, it’d be an untruth to say I haven’t also been delaying work on the build because of the daunting tedium of these chain plates! A brief summary on how I am making them: I have been cutting some brass ribbon to size, sanding, shaping, painting, and fastening them to the hull. Only 48 more to go!


-
Eric, no apologies needed, I appreciate you sharing your thoughts and expertise here. As far as scale goes this will likely be a bit of trial and error. @vossiewulf thanks for the suggestion as well! I hunted around for something like what you sent and think I found a good match. I have some miniature gravel on the way that I intend do affix to the foam and dry brush in greys and whites to get the bleached effect. Will post a test piece once I’ve completed it!
-
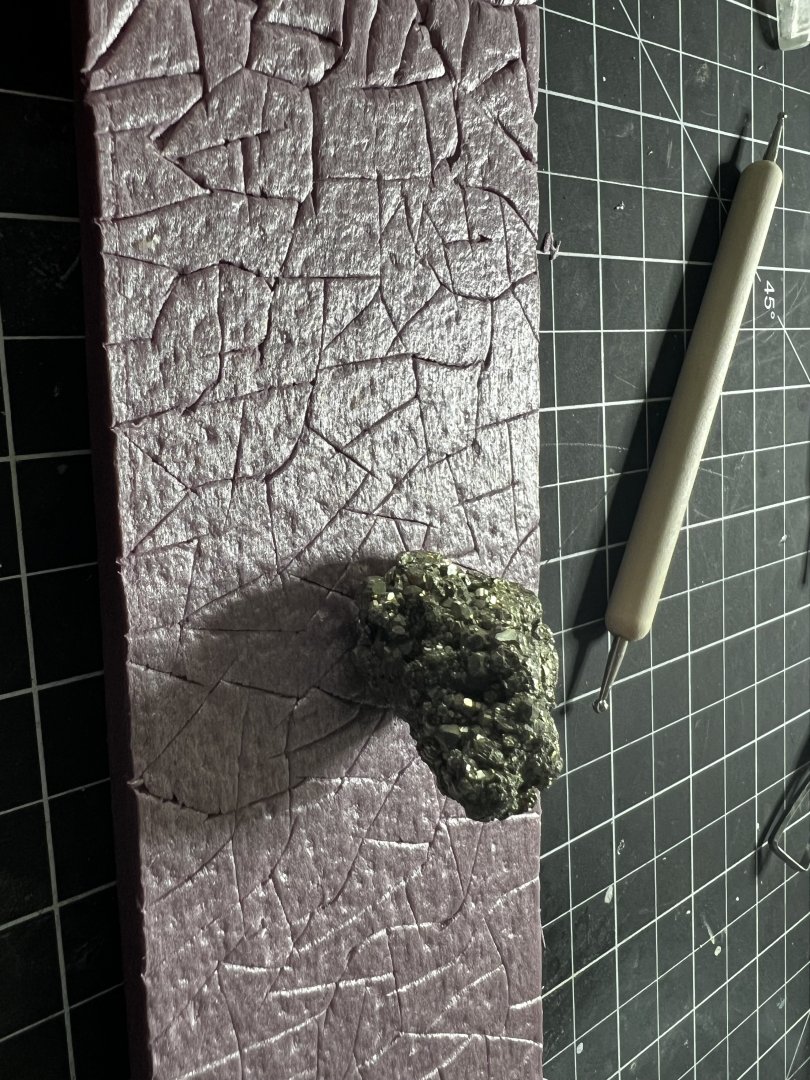
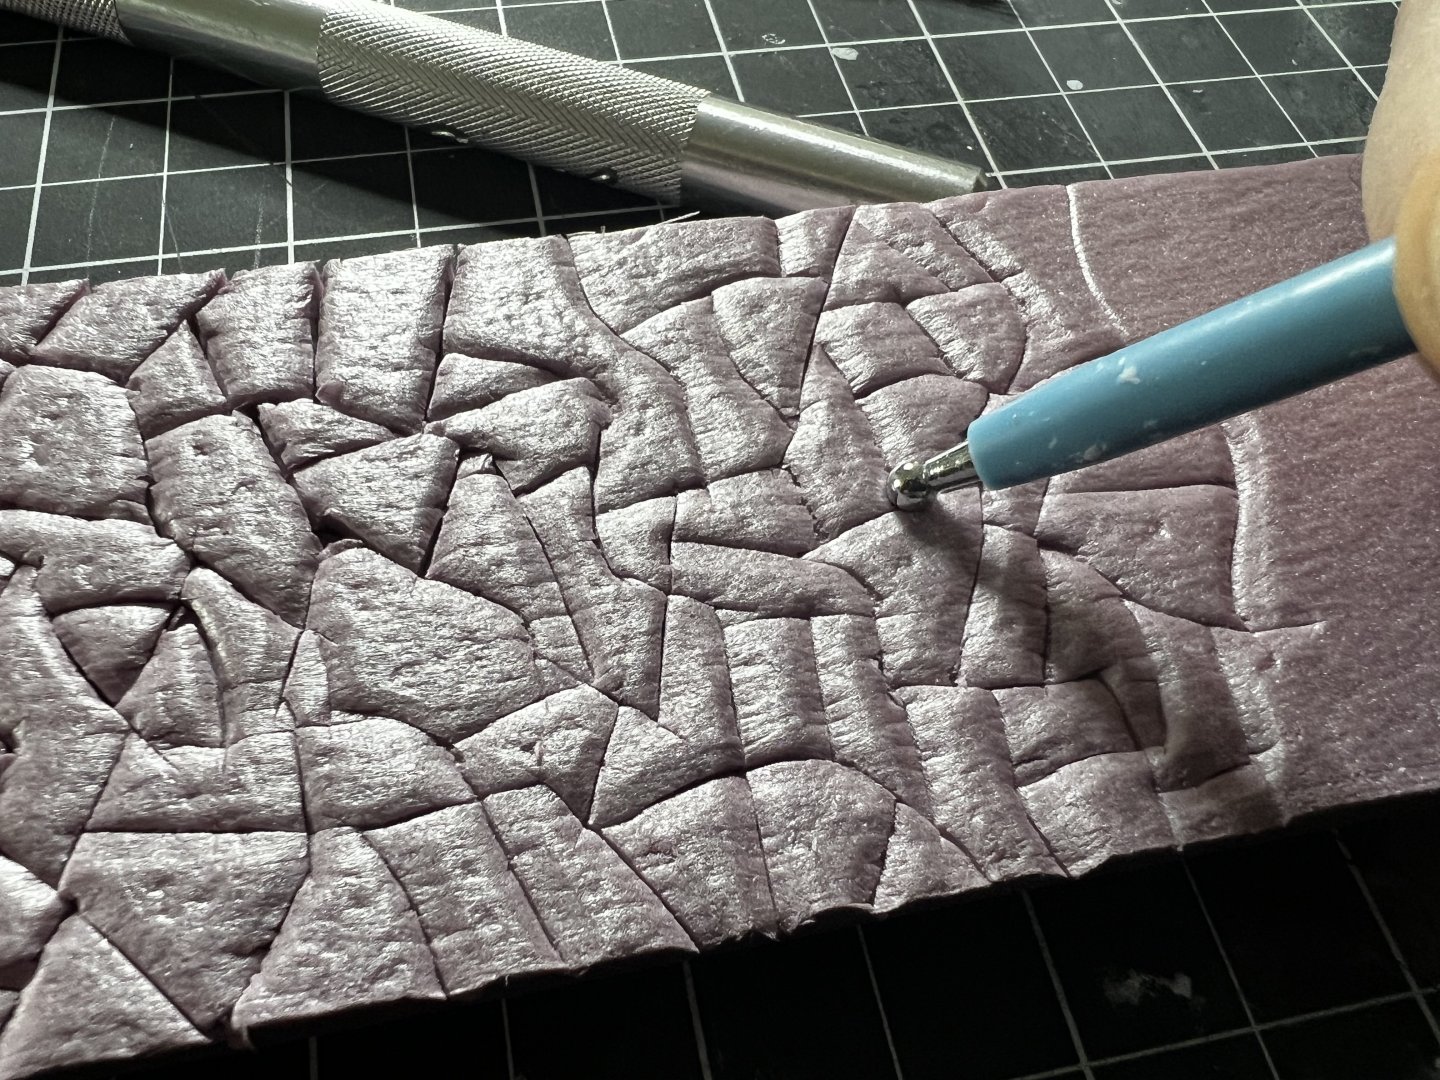
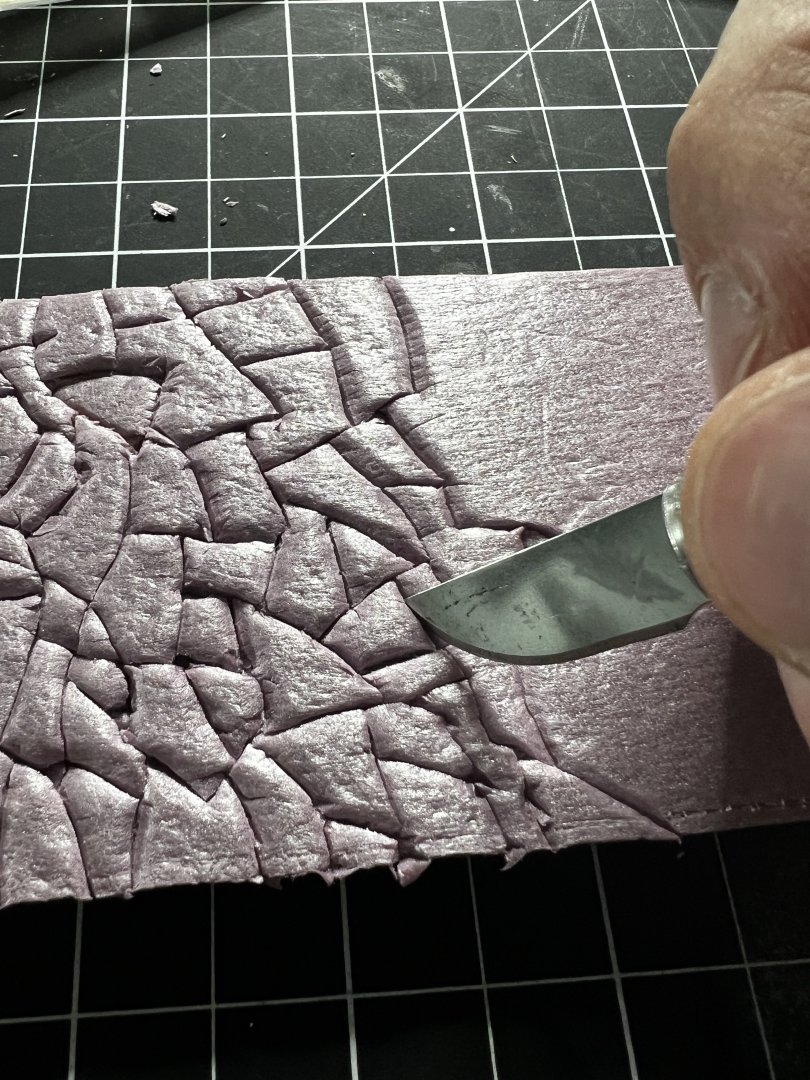
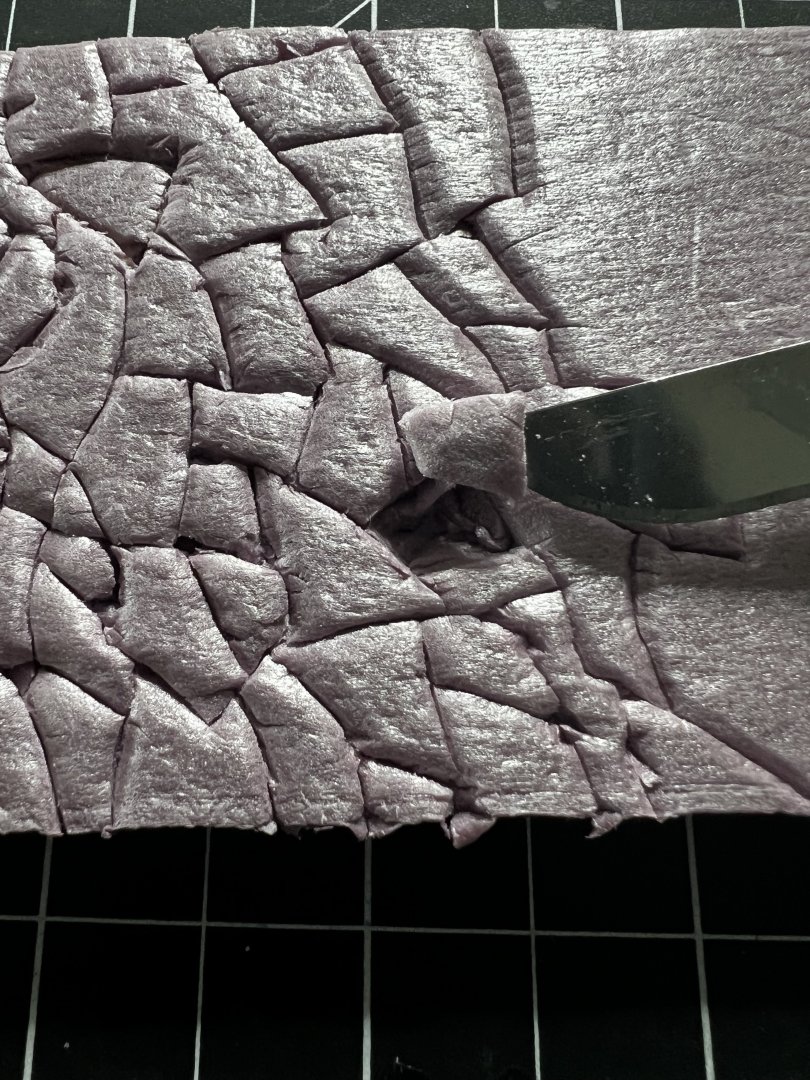
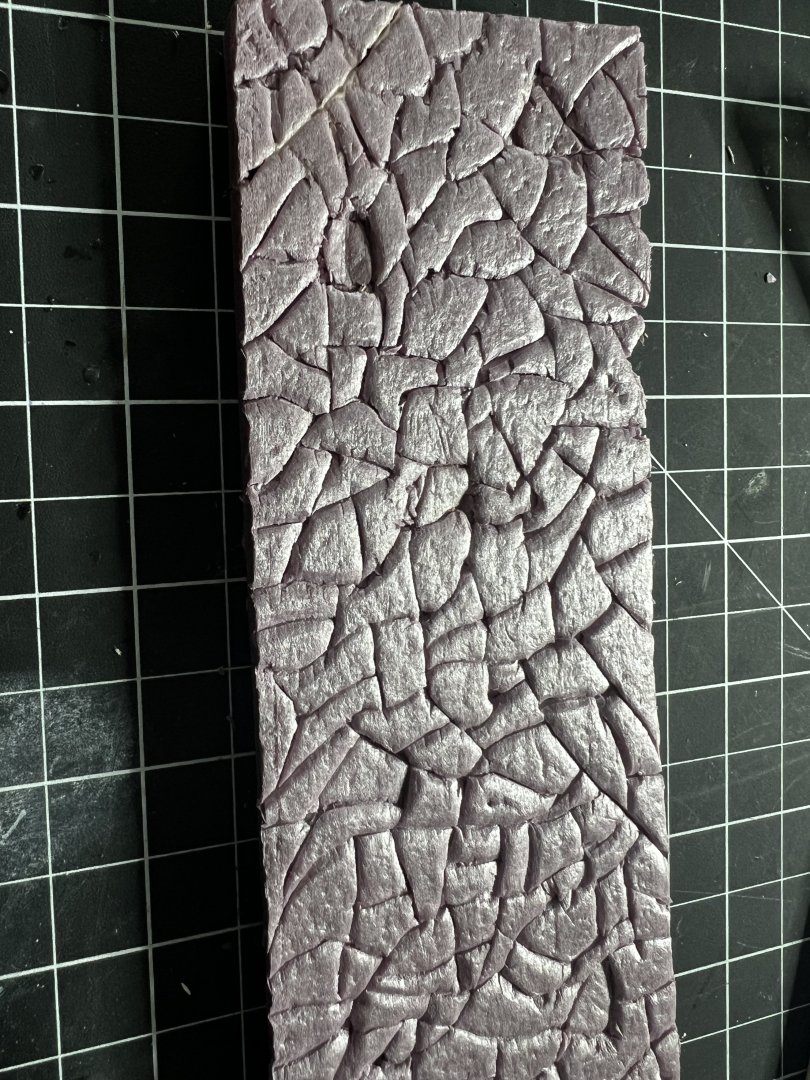
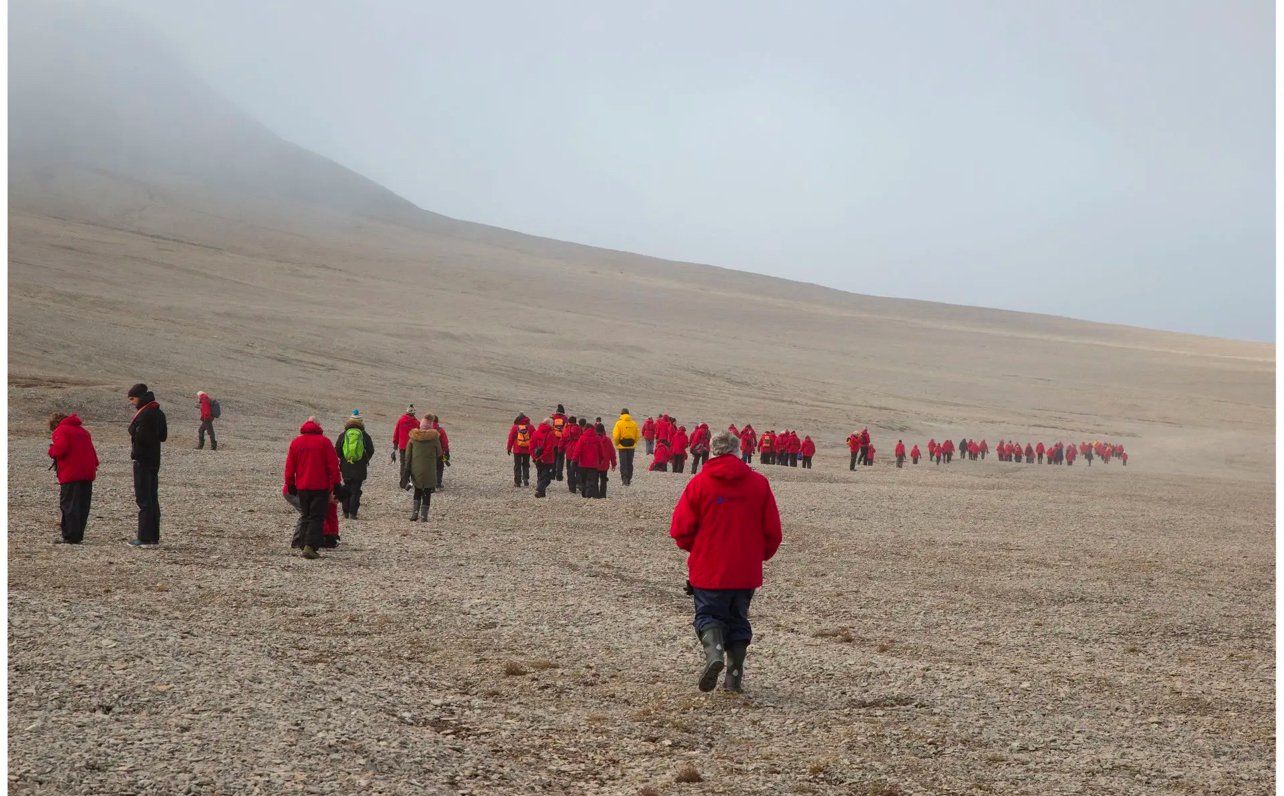
Eric, Thanks for weighing in with your expertise and note on the idea overall! I am inclined to agree with you that the foam base I have worked on so far is starting to look like a solid piece of rock or some very tightly joined stone masonry and that is not my intention. I would like something this prominent and custom in the build to be as accurate as possible. I think the best route here is to finish texturing the foam and then be much more indiscriminate with removing a lot of the "stones" so most of the surface can be replaced with cemented down sand to act as the "gravel" and have only a few of the larger stones remain. I will have to test a few methods for doing this. Regarding your note about the shape of the gravel--I have included below some other reference photos of Beechey Island that I am using as I work on this. I am curious on your thoughts about whether some miniature slate will help to mimic the stone of Beechey Island.


-
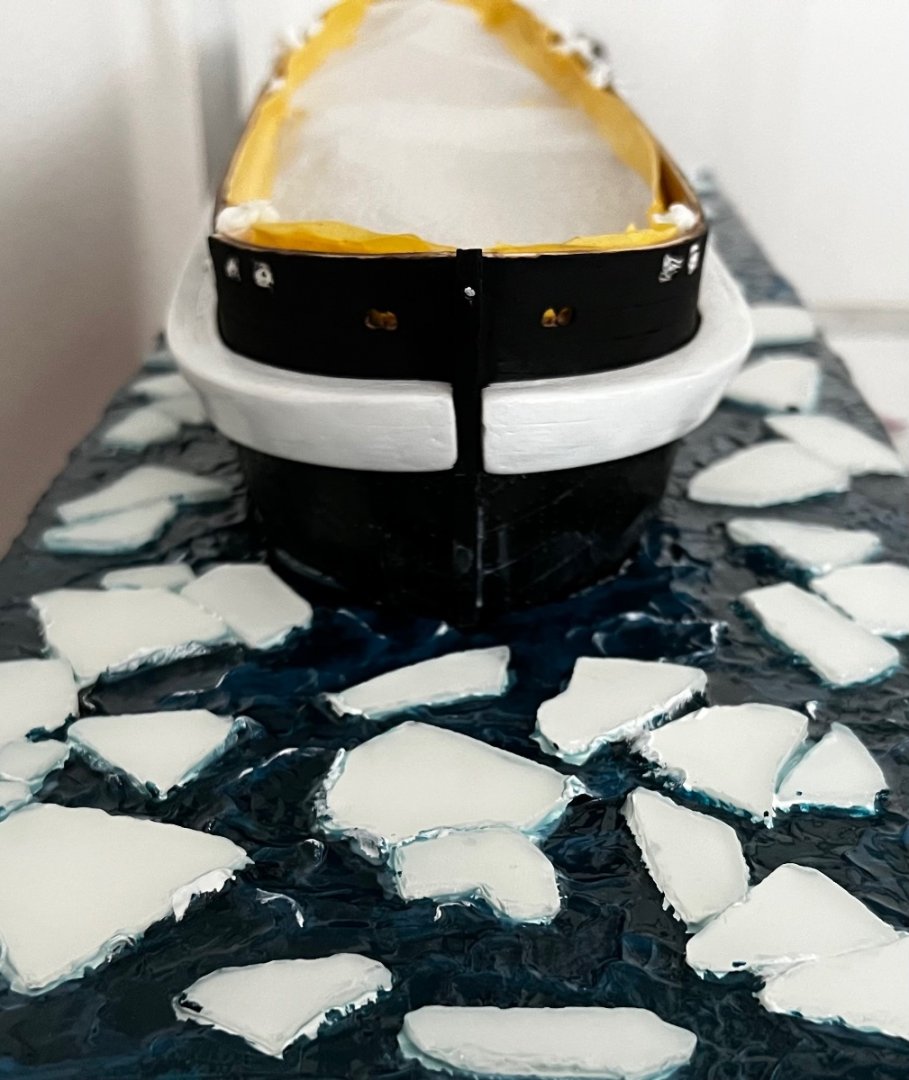
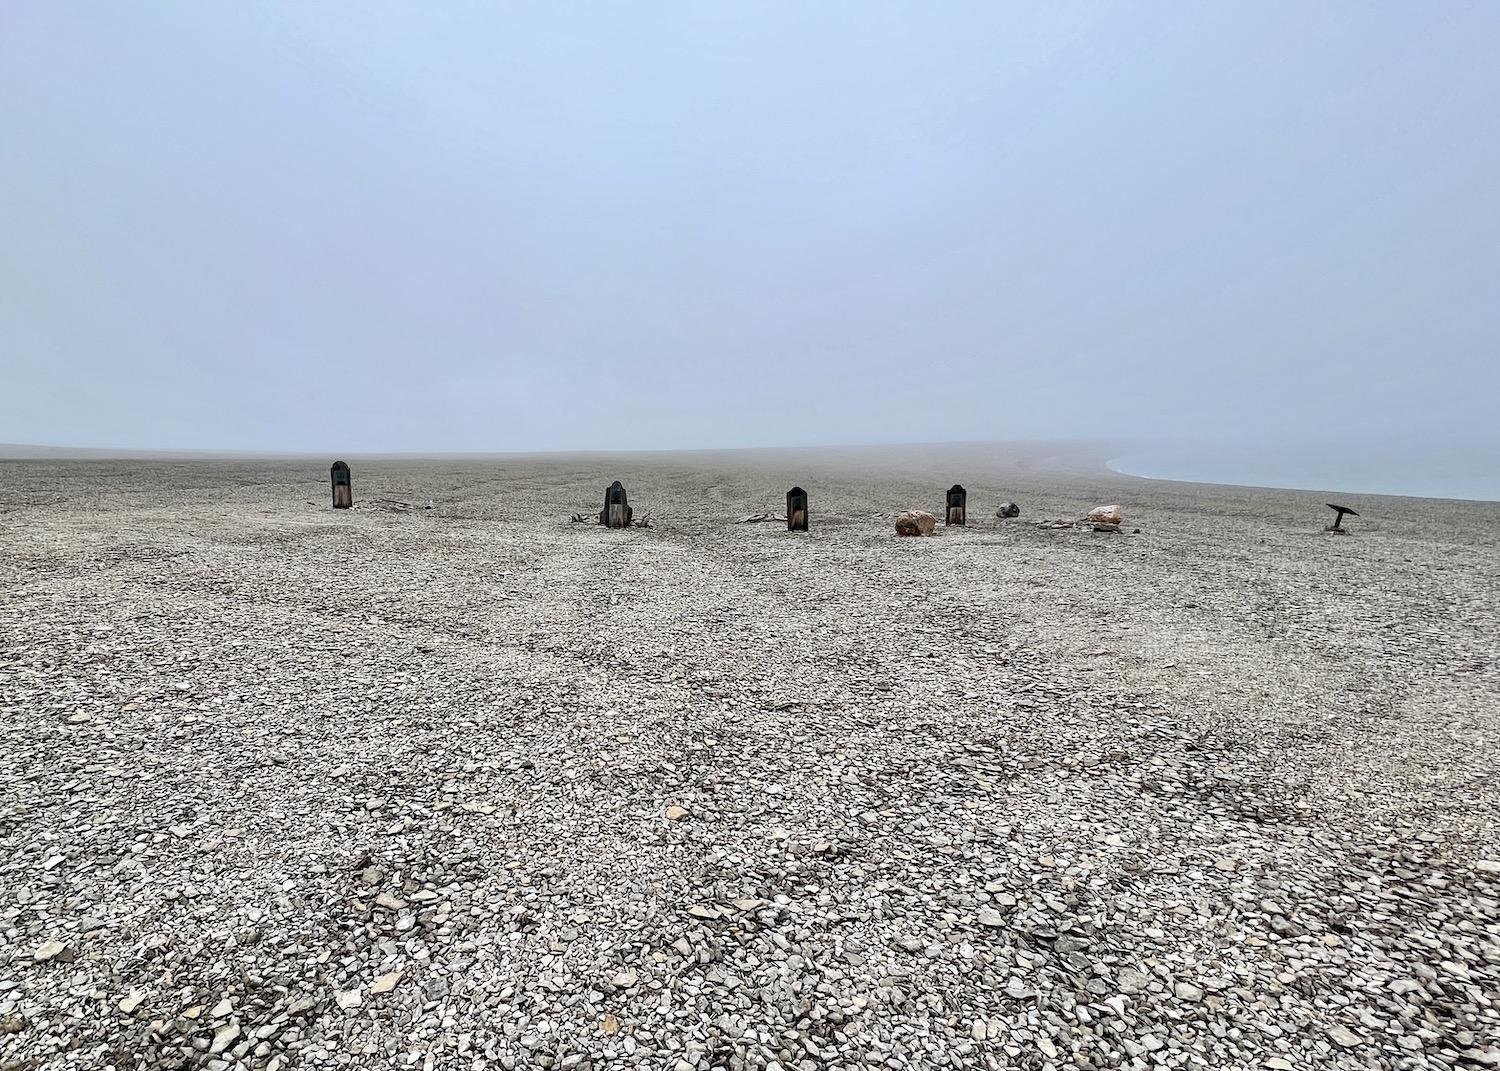
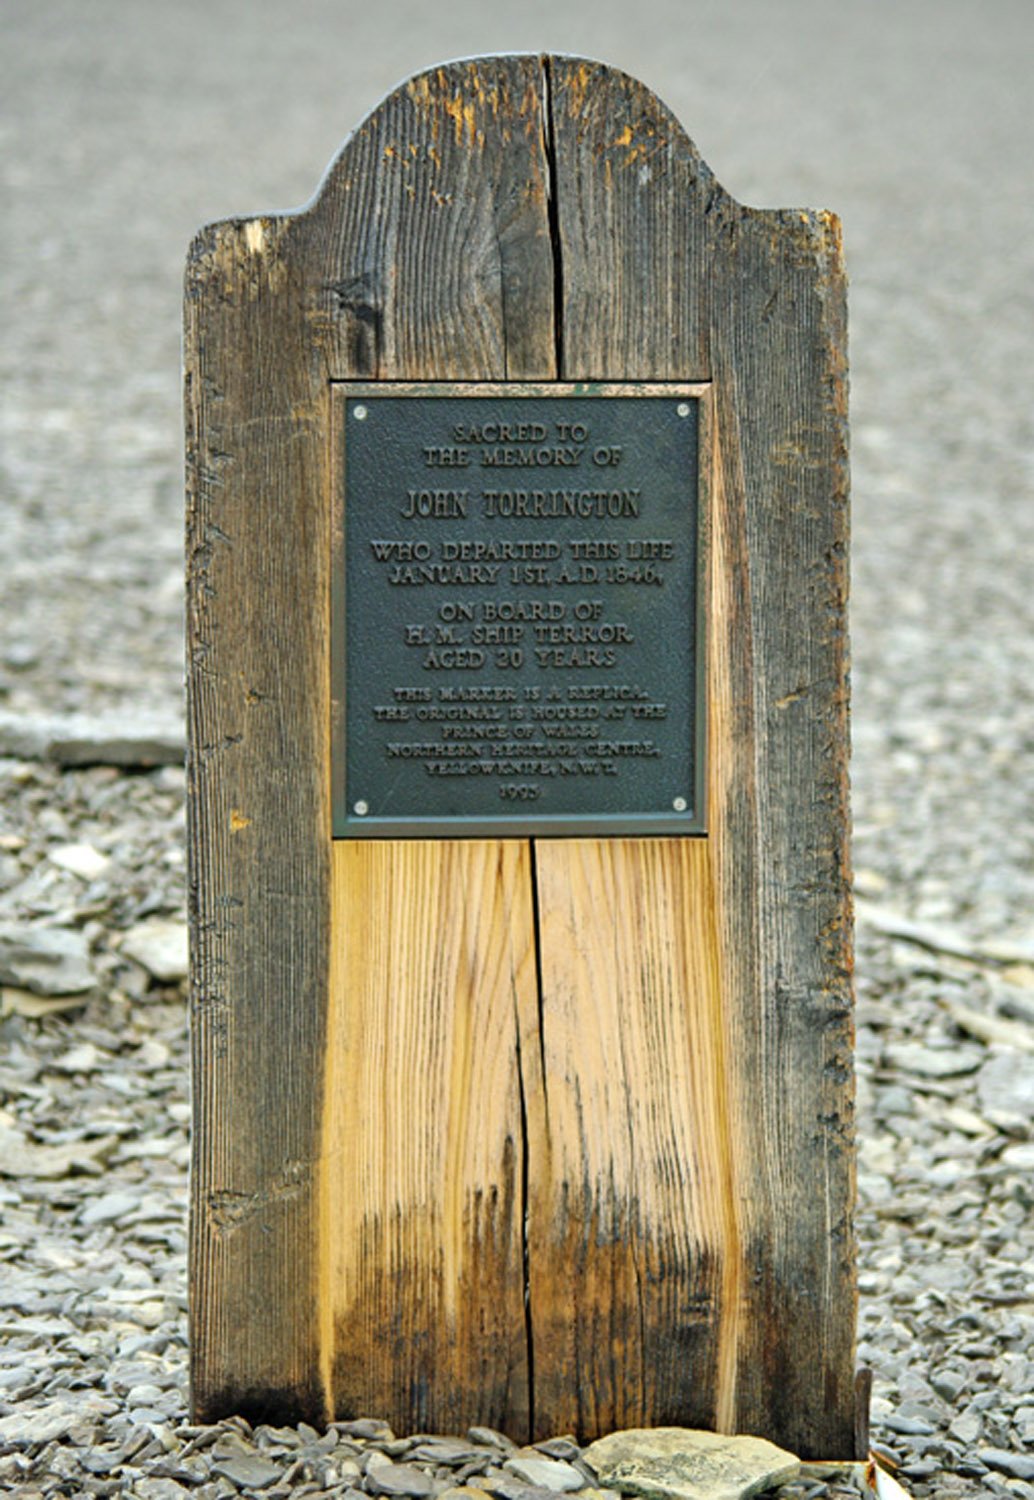
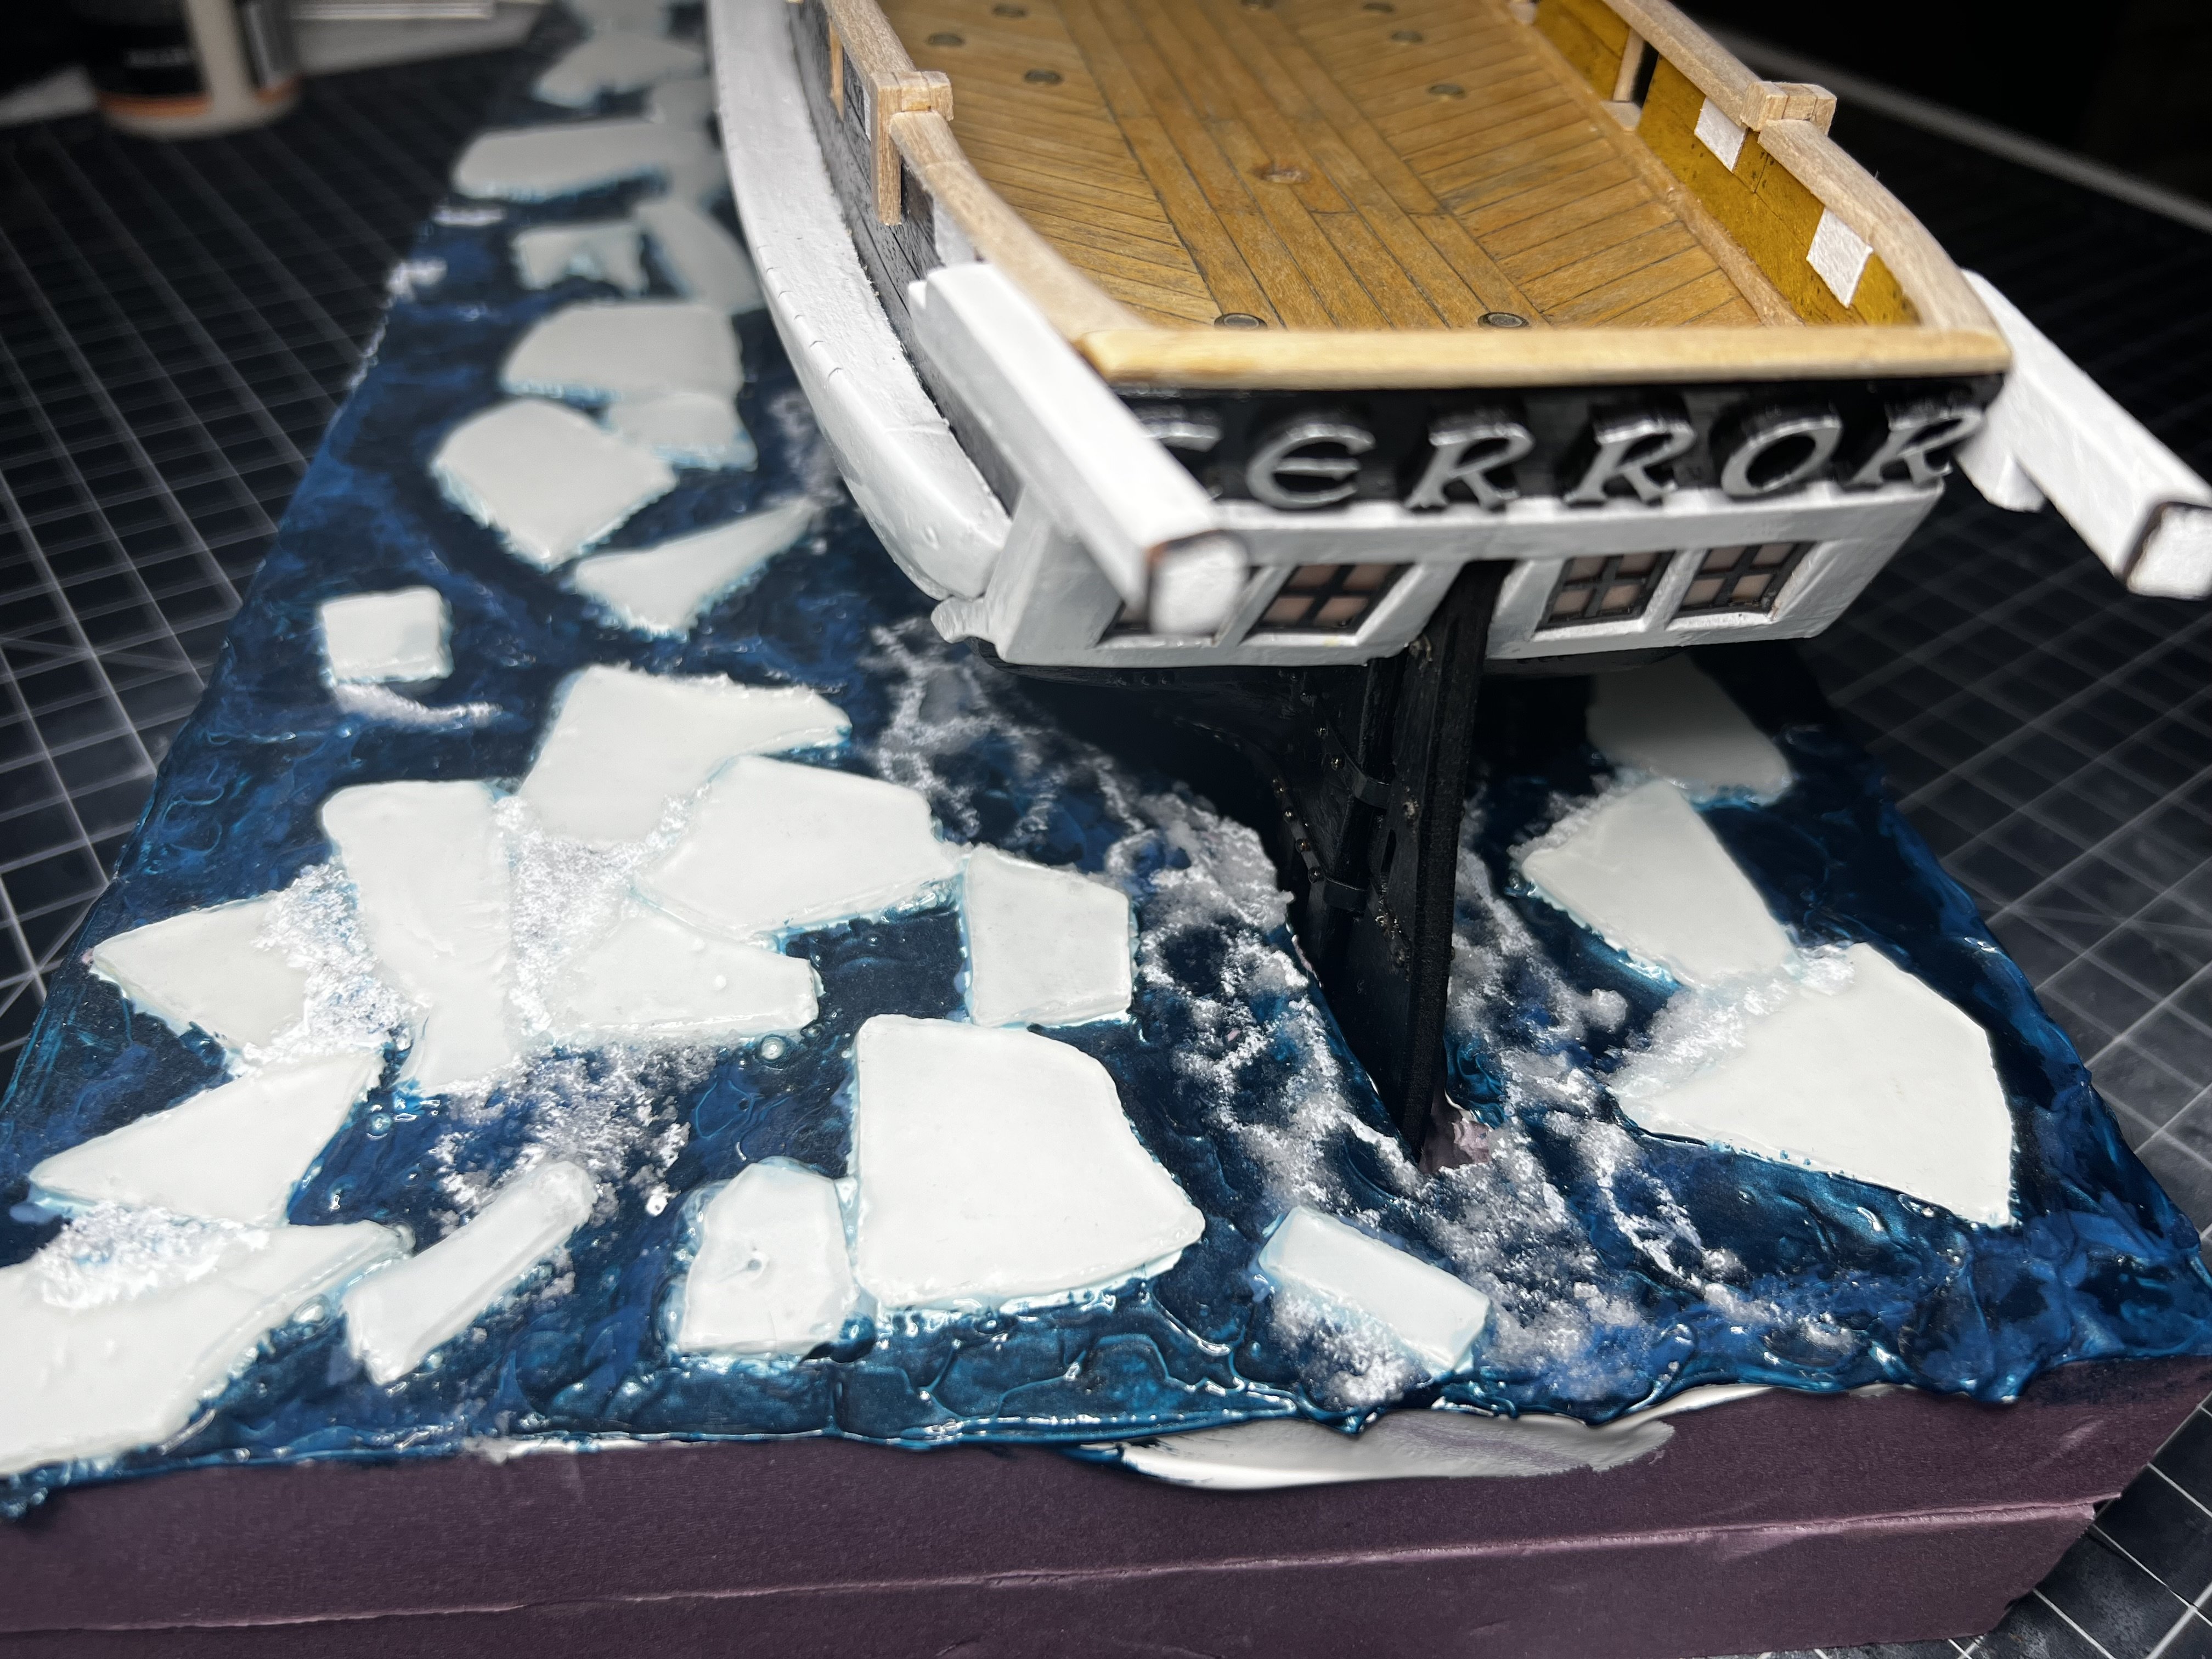
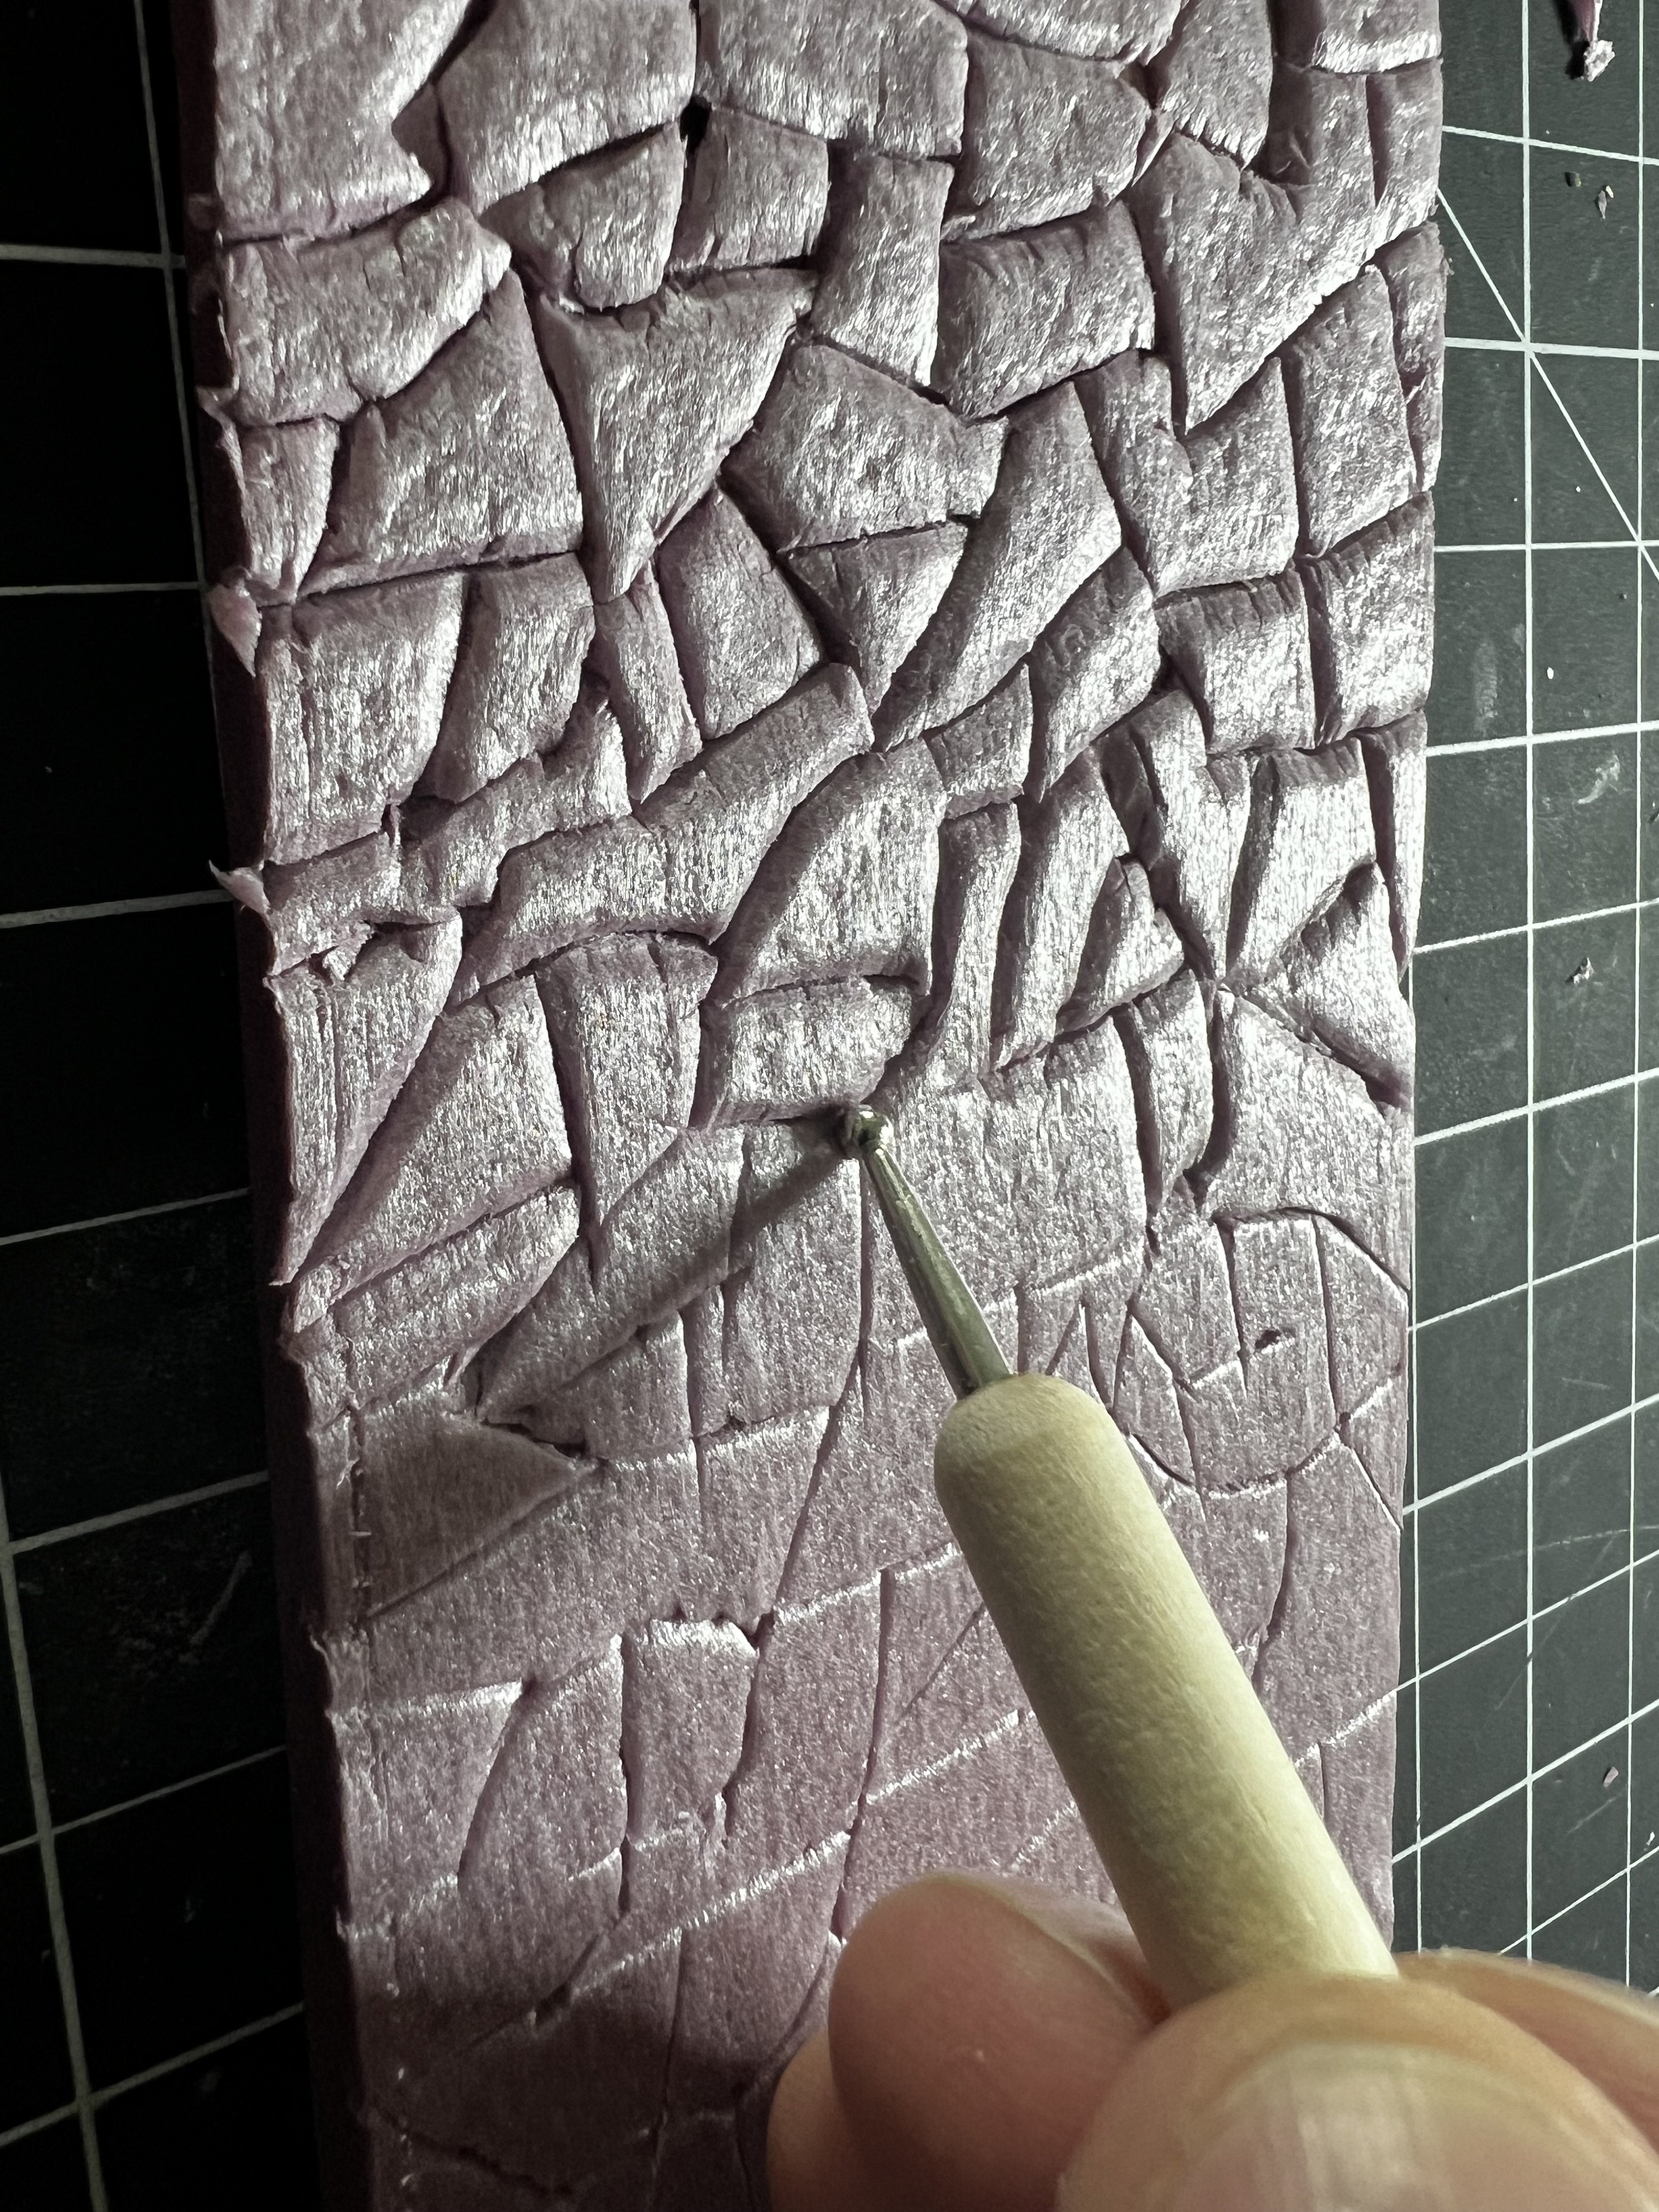
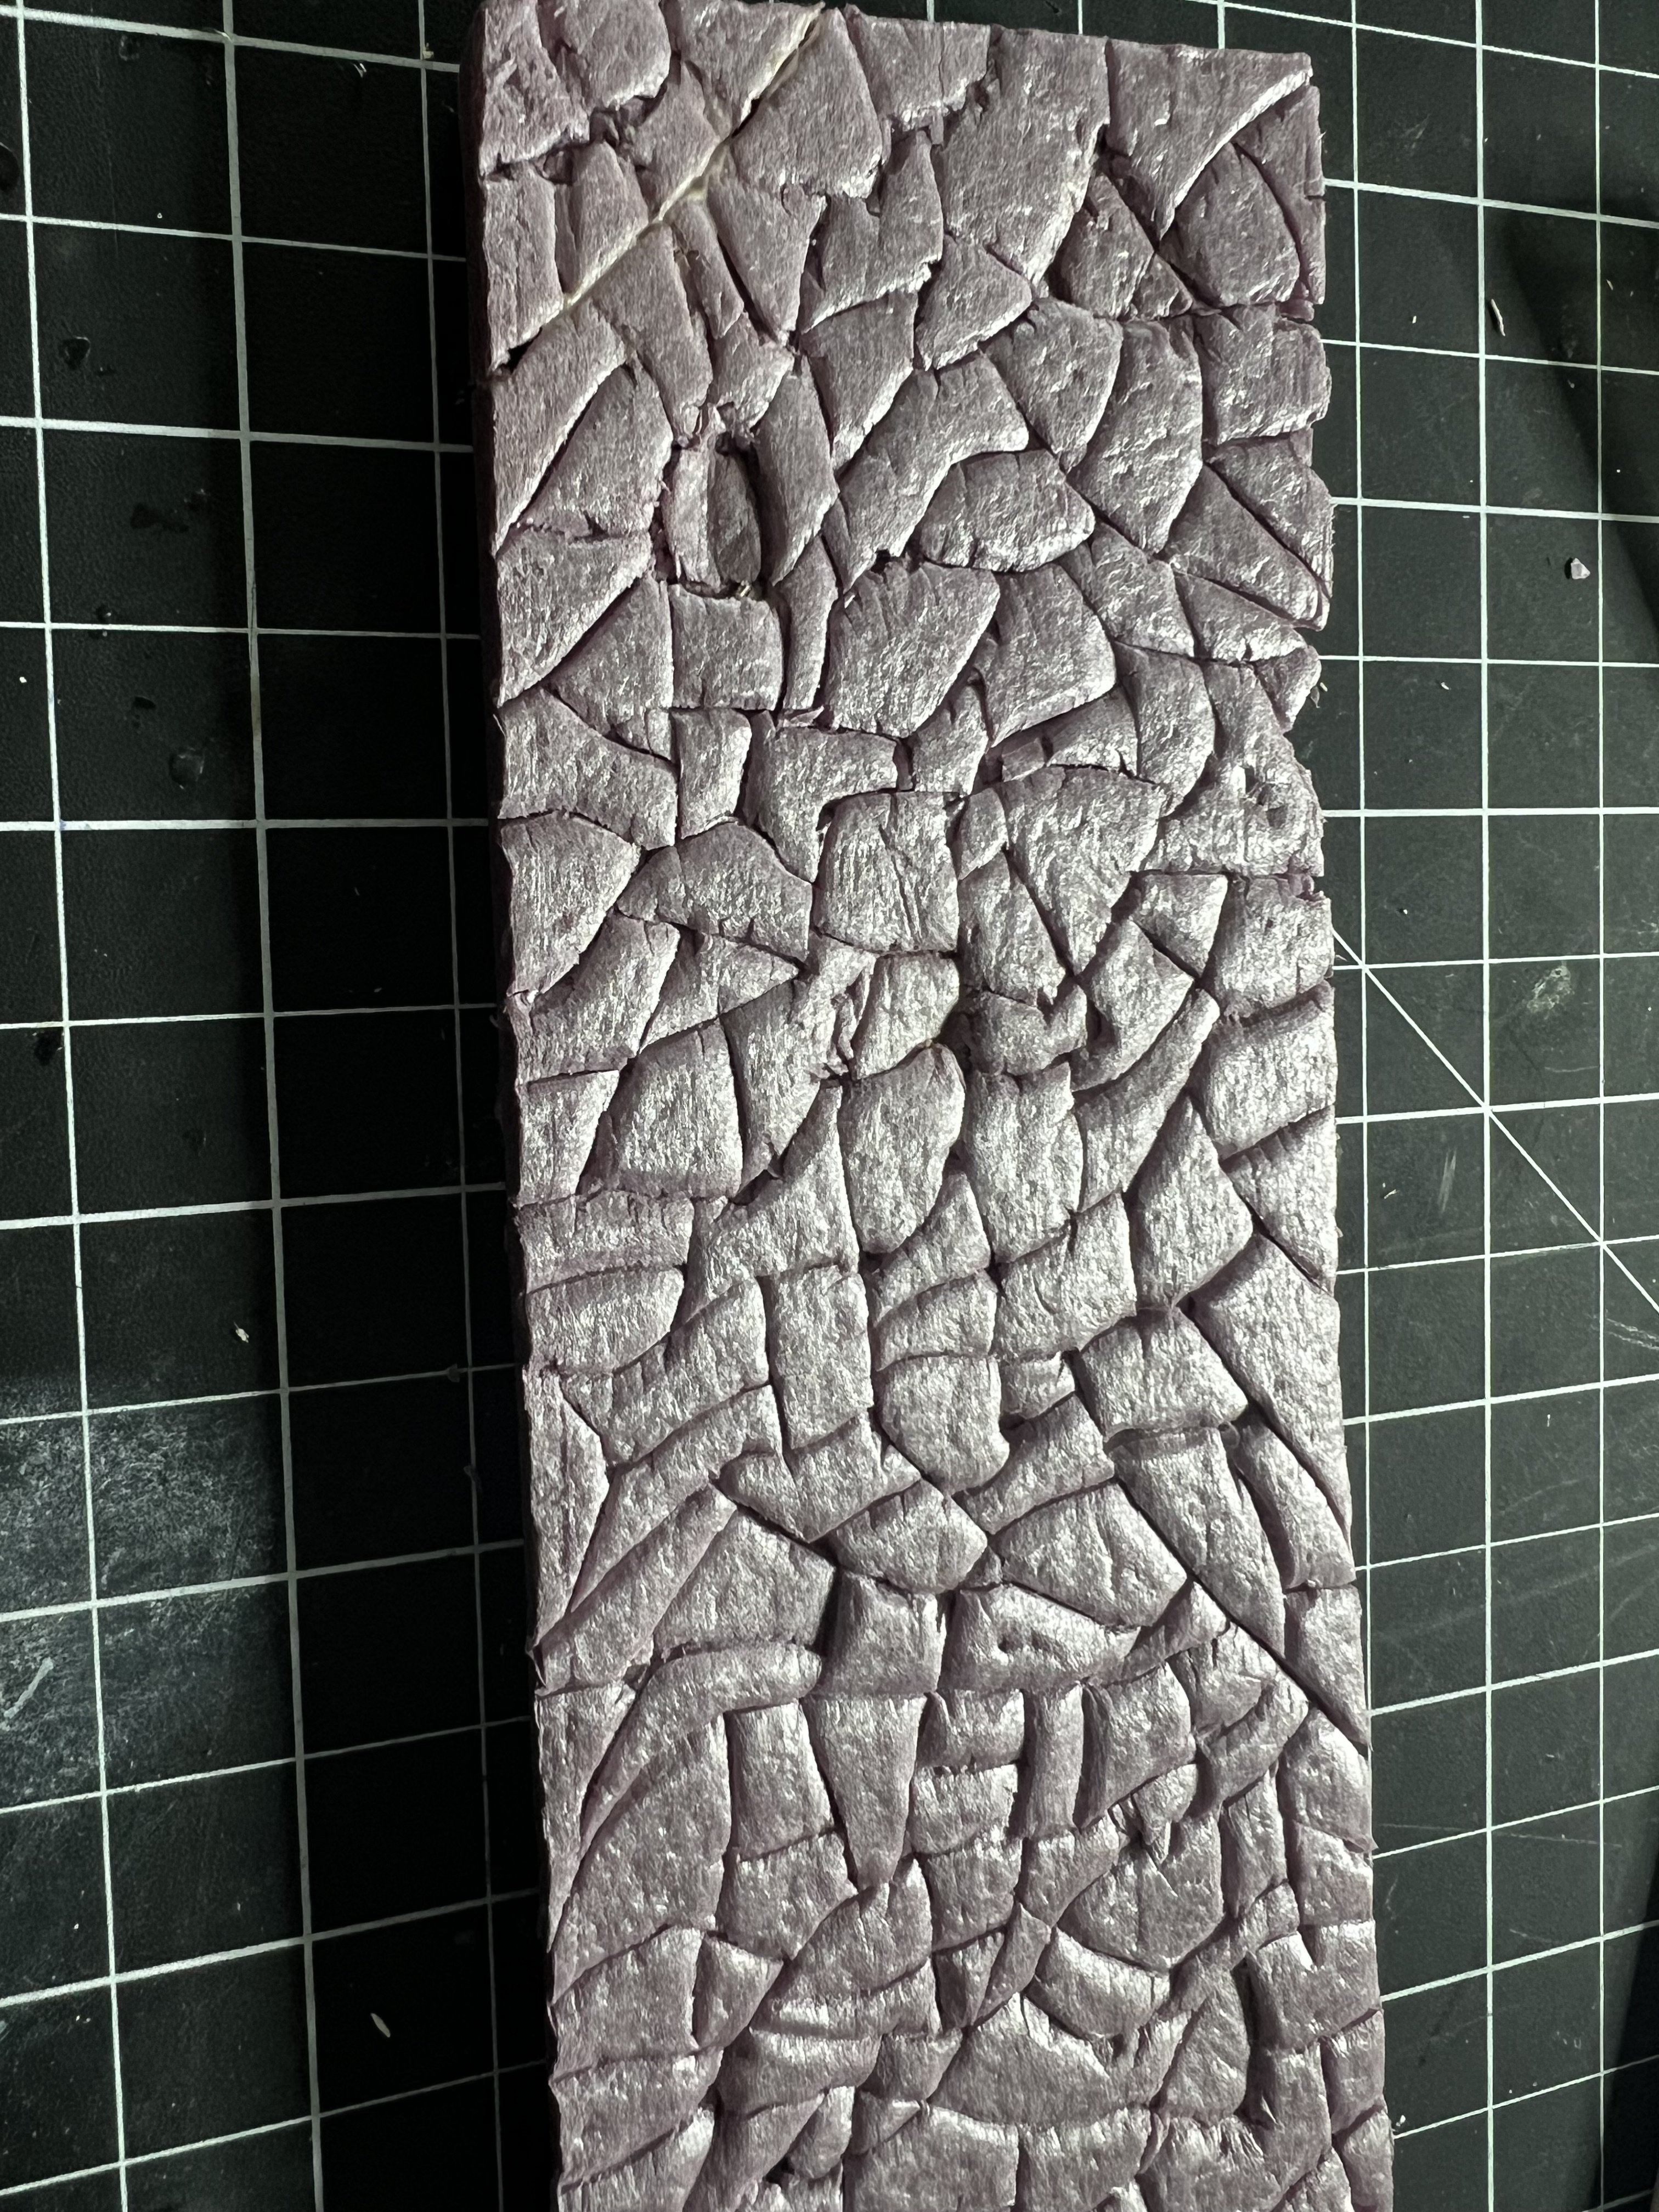
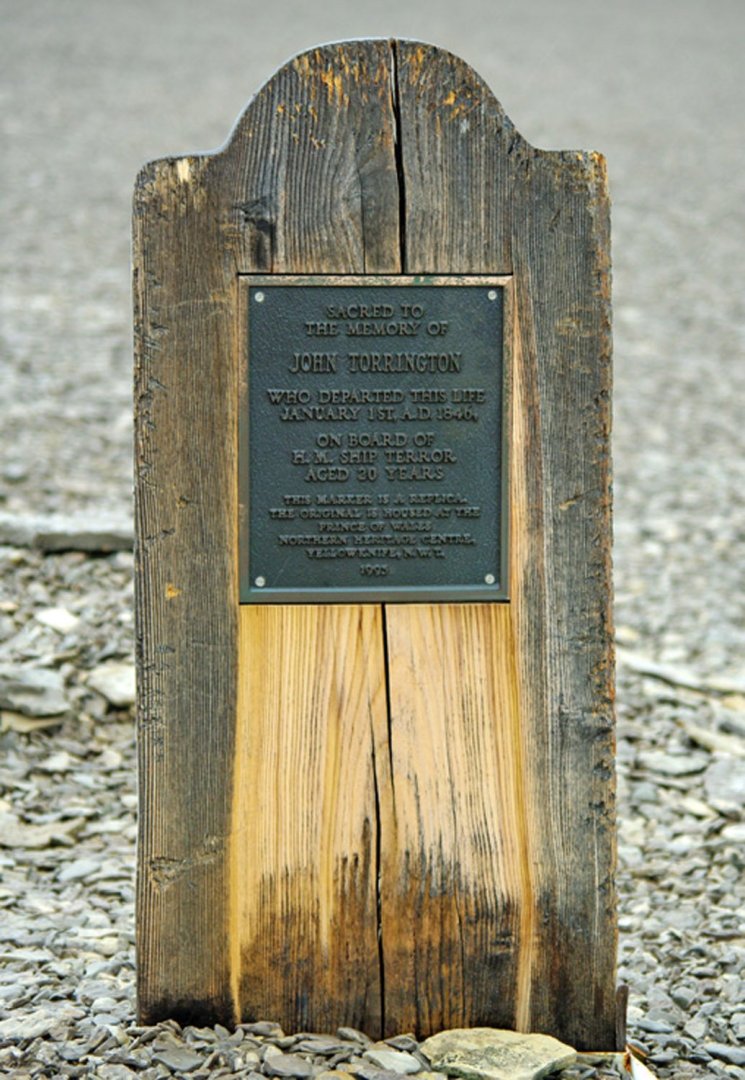
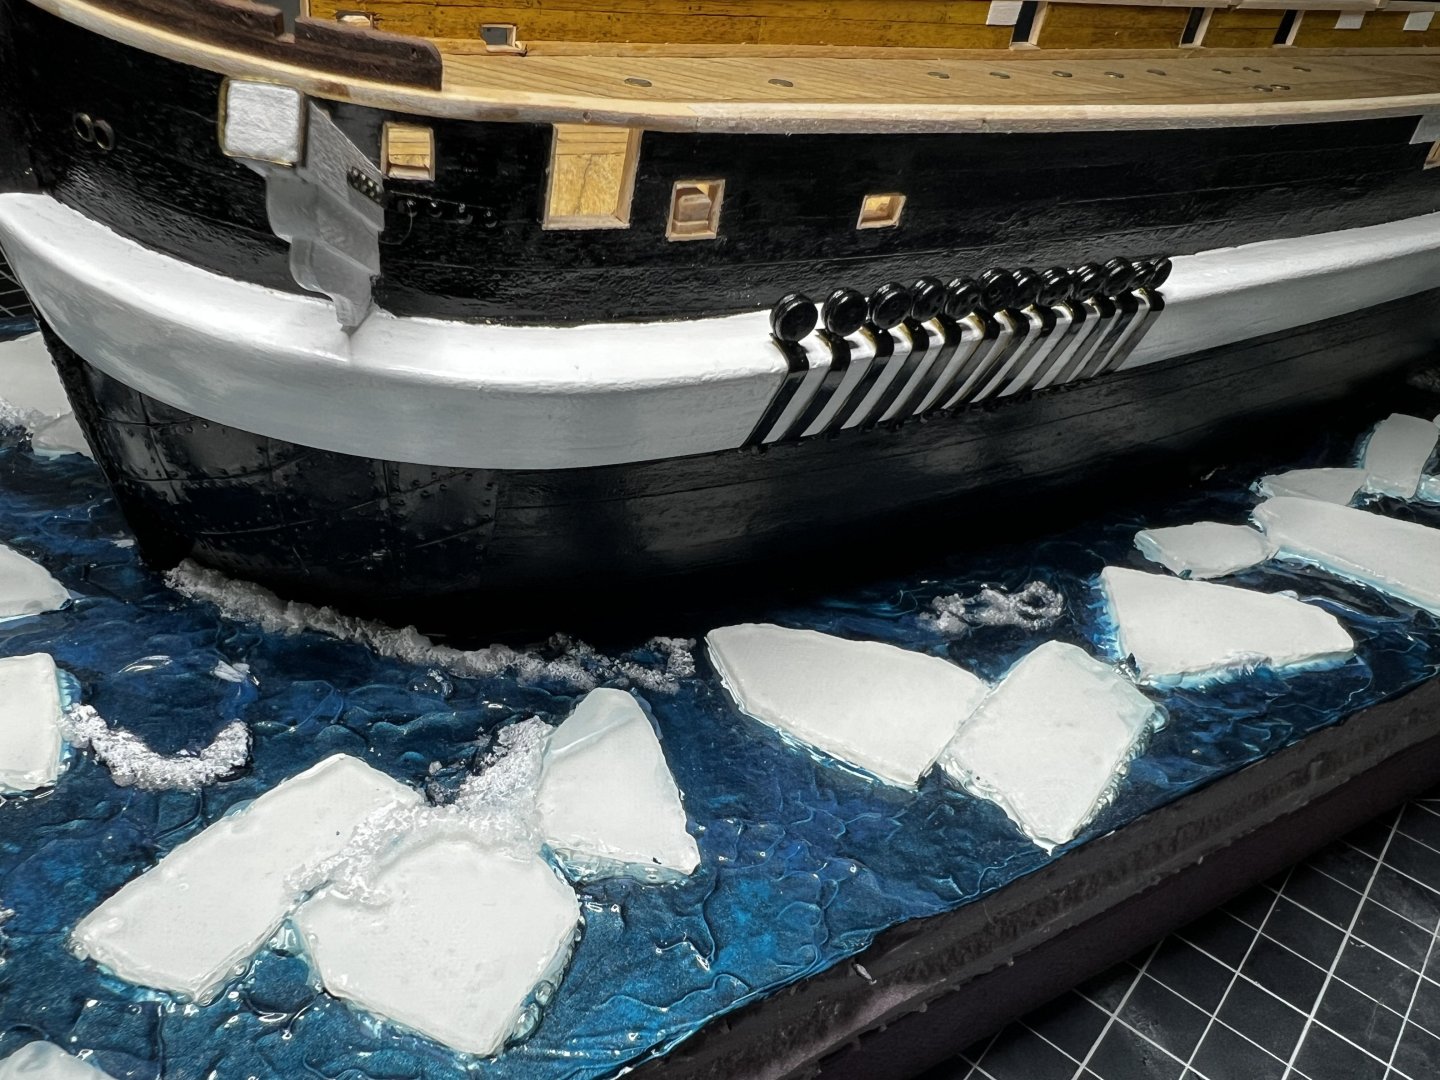
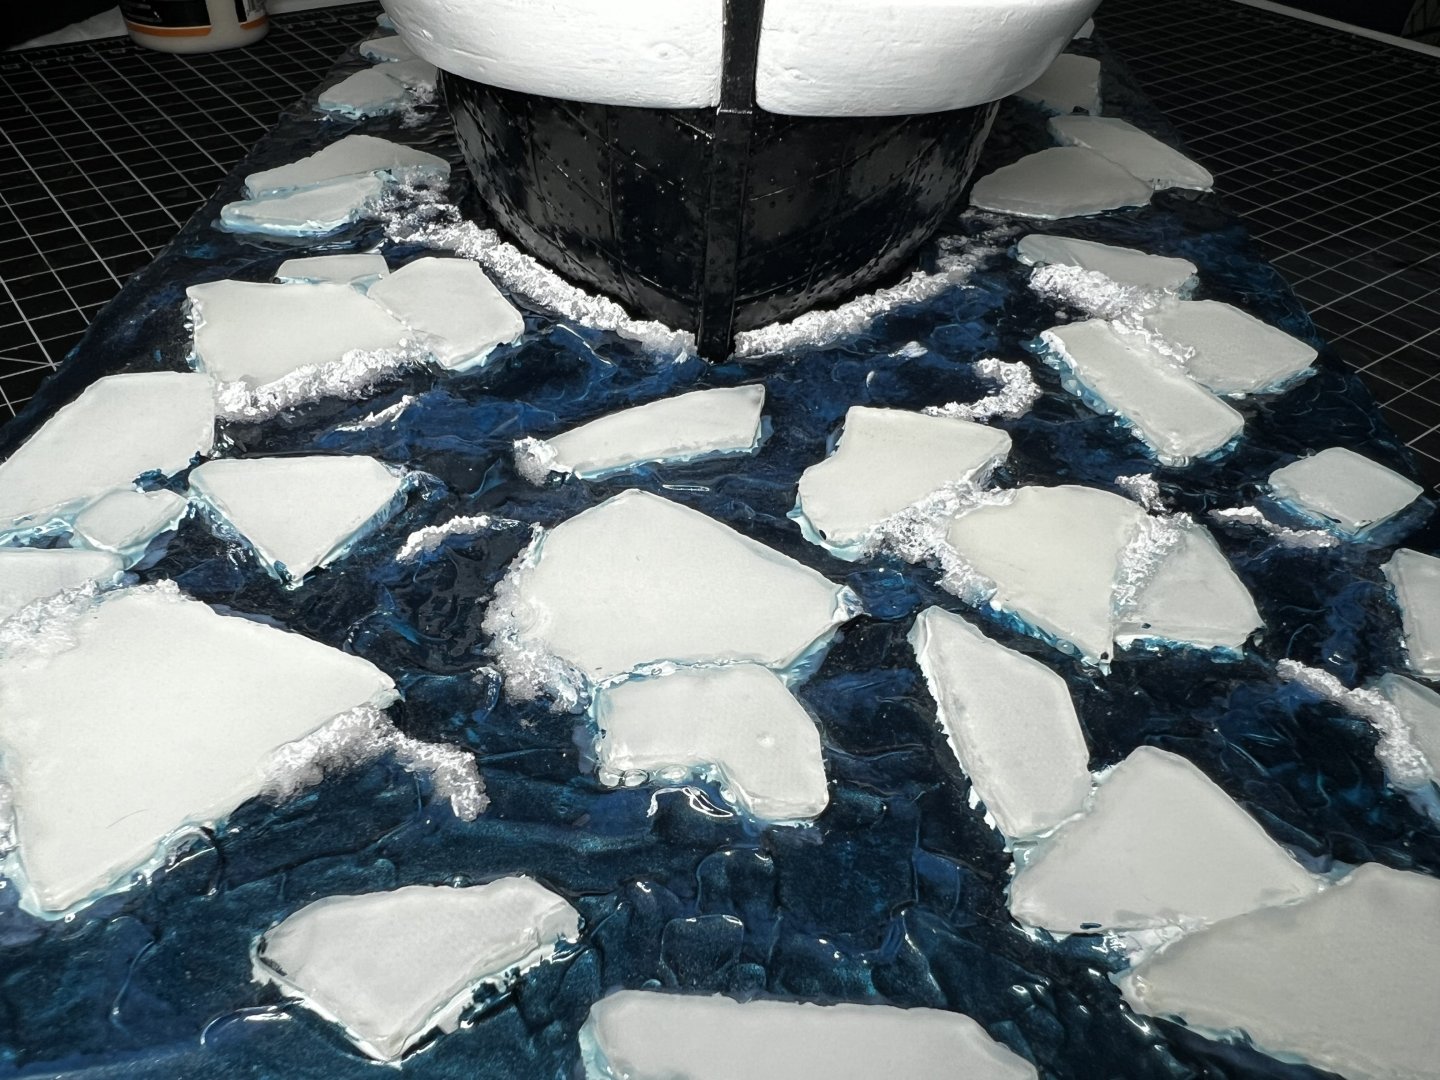
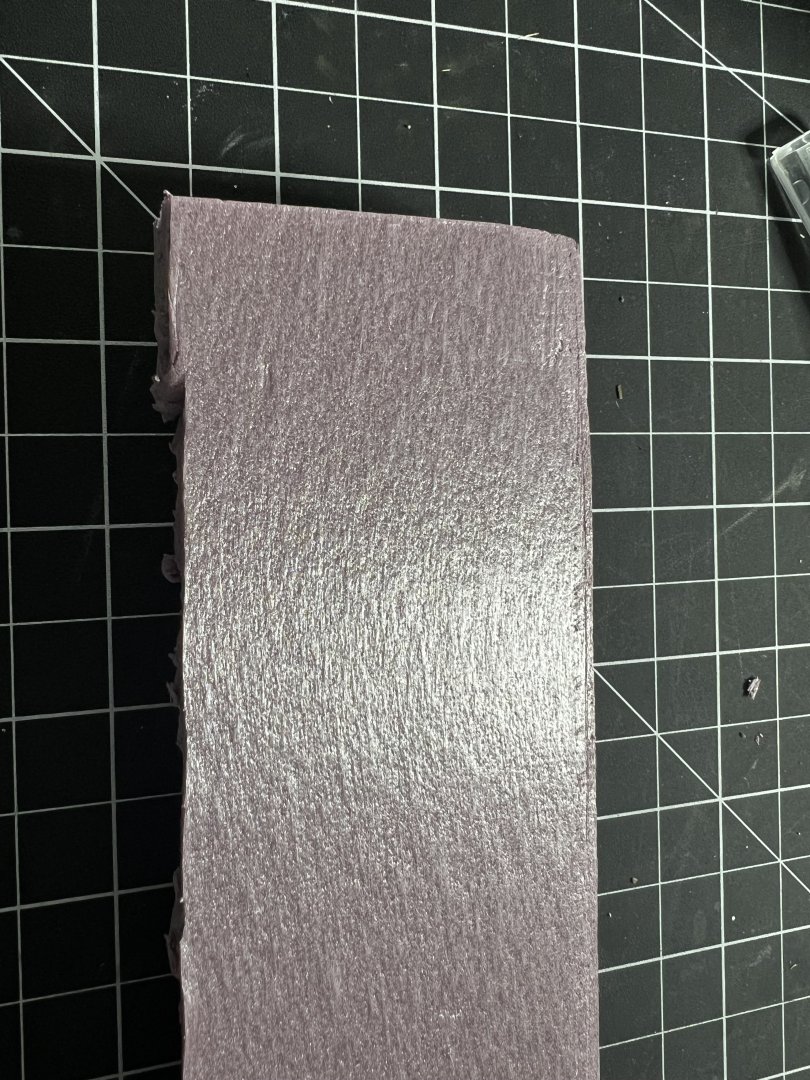
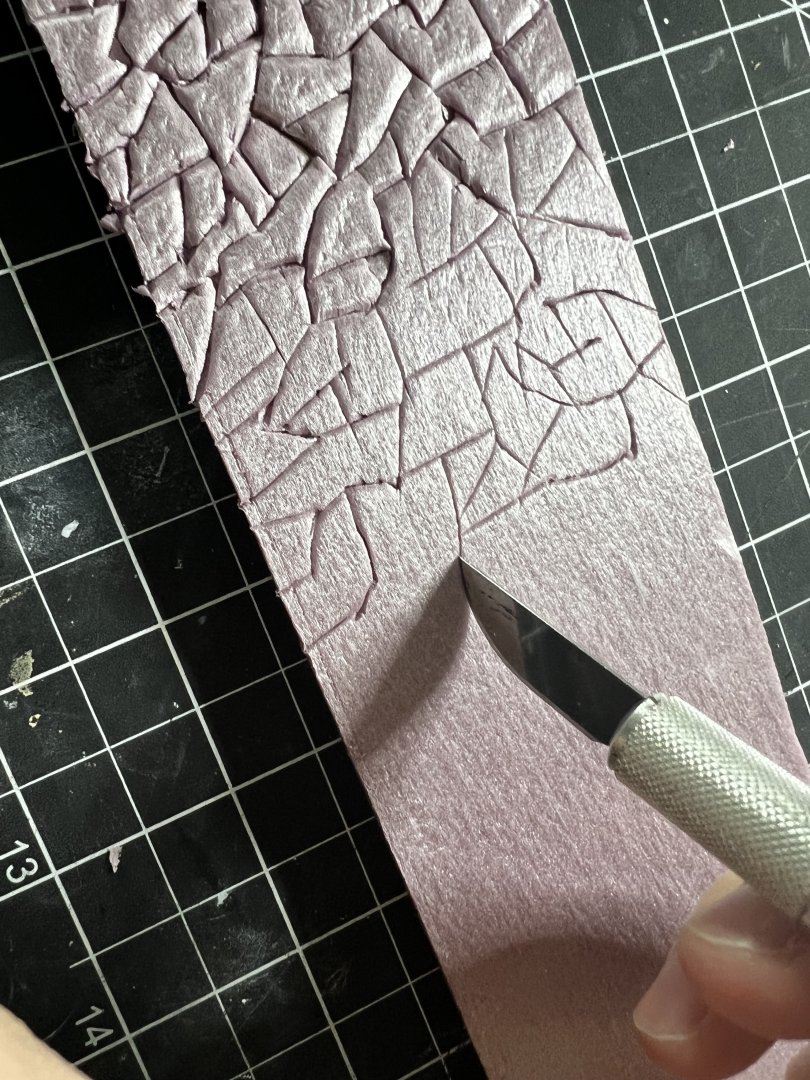
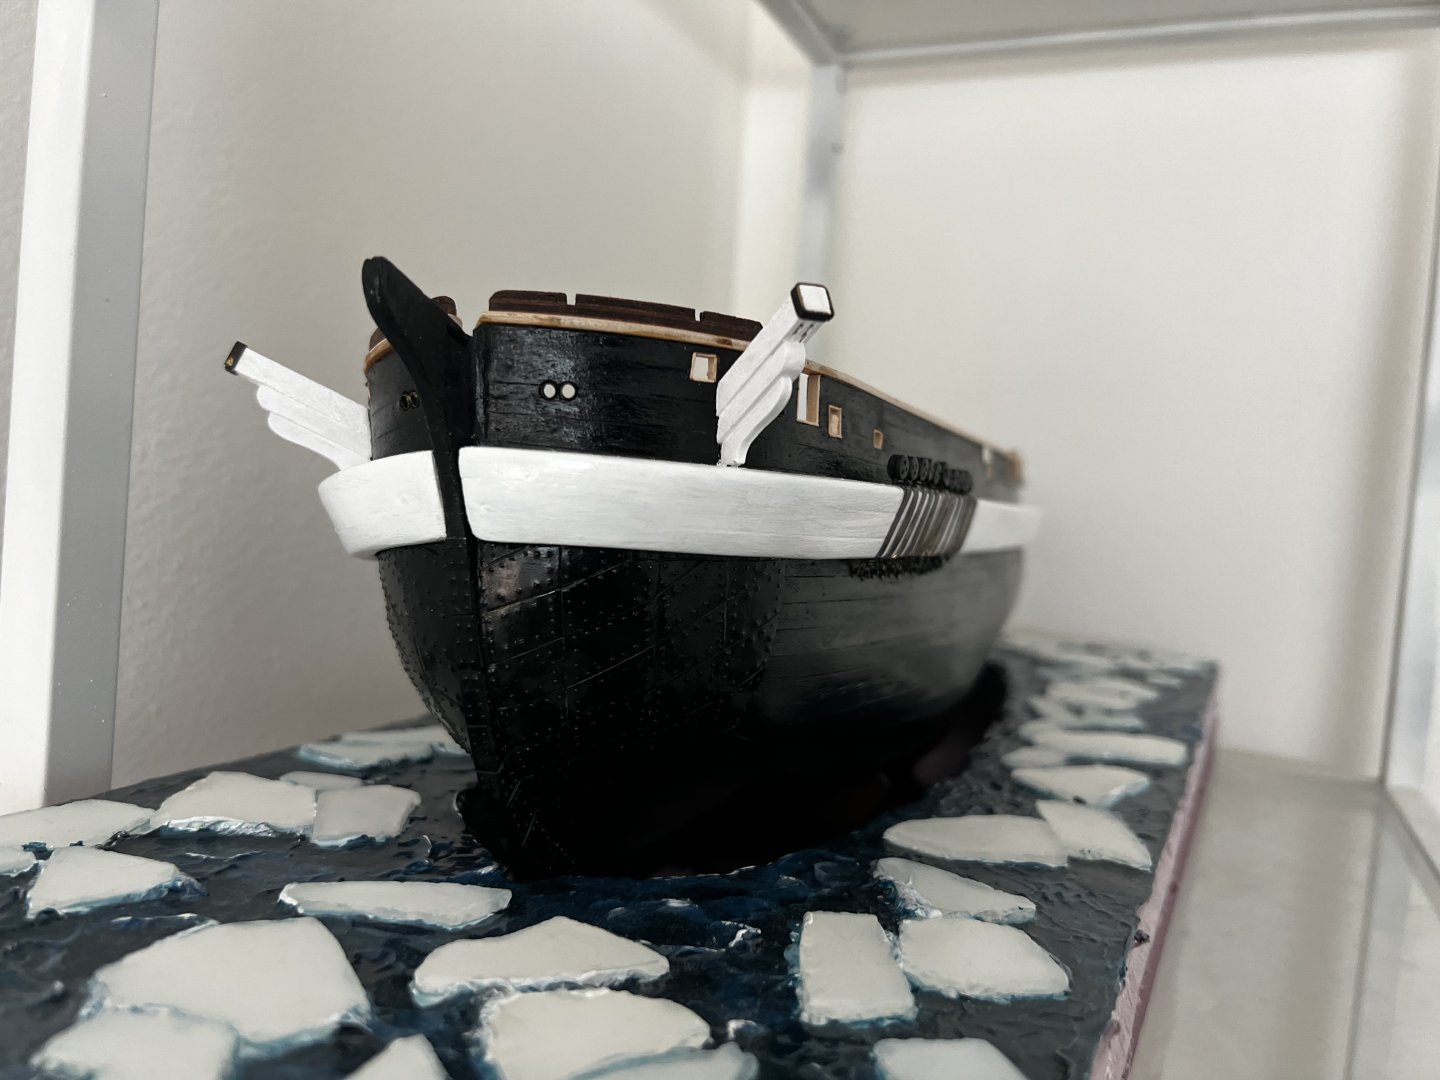
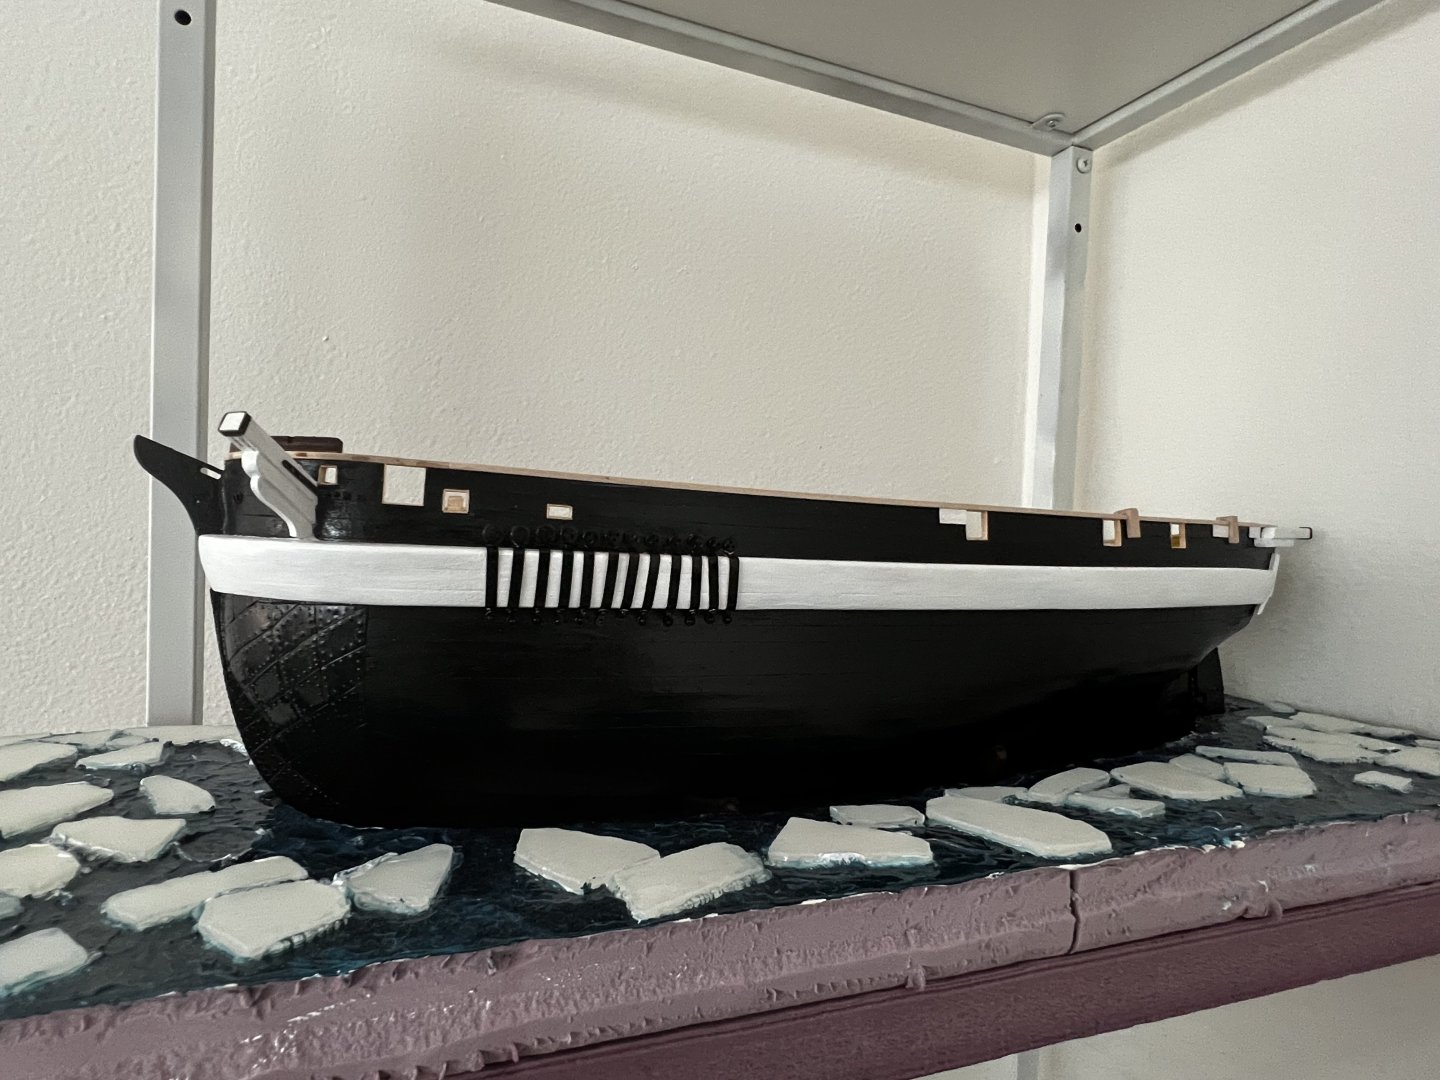
Hi all, Some additional work on the display base this week while I procrastinate chain plates 😬. First up, I have not been very pleased with lack of motion in the diorama aspect of the display base. My goal is to display her as she was last seen, pushing through Baffin Bay in 1845, and a motionless ship in flat icy waters is not very compelling. So I set about adding some life to the base in the form of some sea foam. I’d seen a technique a while ago using a mixture of fake snow and water effects to create sea foam and then dry brushing it with white paint that I’ve been wanting to try. It certainly added a sense of movement to the scene, now she looks like she’s sailing through Baffin Bay instead of just drifting in sea ice. Close-up of the sea foam effect: Secondly, as I have had the ship in her half finished base for a while now I have had time to think about how I want to complete the base’s sides. Initially I was just going to frame it in some nice black molding, but simplicity demands precision and I’m also interested in trying something unusual. The landscape of Beechey Island—where the Franklin expedition buried William Braine, John Hartnell, and John Torrington—has always surprised me. I imagined it so much more ice-covered and “Arctic” than it is in reality, where is is really just a landscape of grey gravel. So I got an idea to “frame” the scene in an approximation of the Beechey Island landscape. I like this for several reasons: 1: It is another way to tie the model to the fascinating history of the expedition 2: It is probably going to be more visually interesting than a plain black frame 3: Irregular gravel will be more forgiving of imprecision First step was to select the material, I went with foam. Next was to start tracing out the shapes of the gravel with a knife using photos of Beechey Island as a reference. Next I used what I have been assured is genuine model making gold to texture the foam. Then a series of shaping tools to deform and define the gravel stones. To avoid creating the appearance of cobblestones, I will need to vary the level and size of stones. One method is to pop some out, trim the backs, and glue them back in place. And here is where I’ve called it good for today. Some painting, some finer gravel, and some dry brushing should help this to more resemble Beechey Island rather than a slab of foam i spent half an afternoon chopping up. This is a laborious process too, so I have something to use as a break from chain plates and vice versa. Thanks for looking in!


-
@Jond Followed your terror build! Awesome to see you traveling to the site where the ships were. The ice was a fun side project and I’d like to eventually frame the base in black molding with a name plate.
-
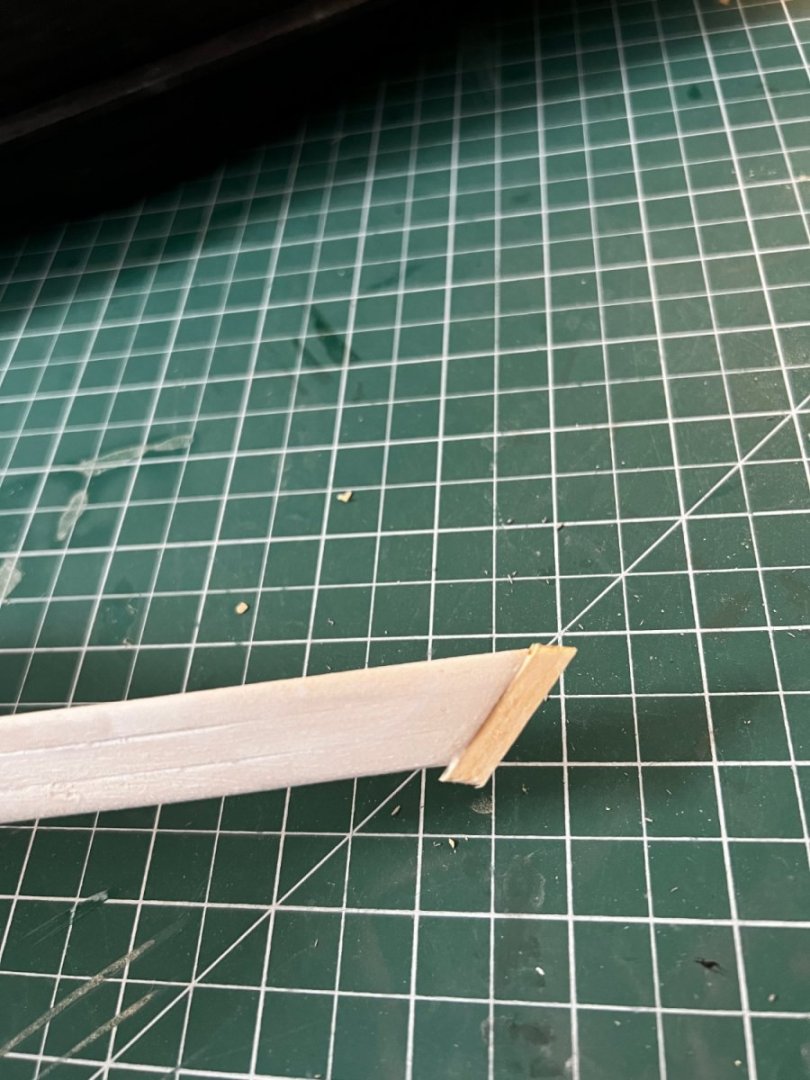
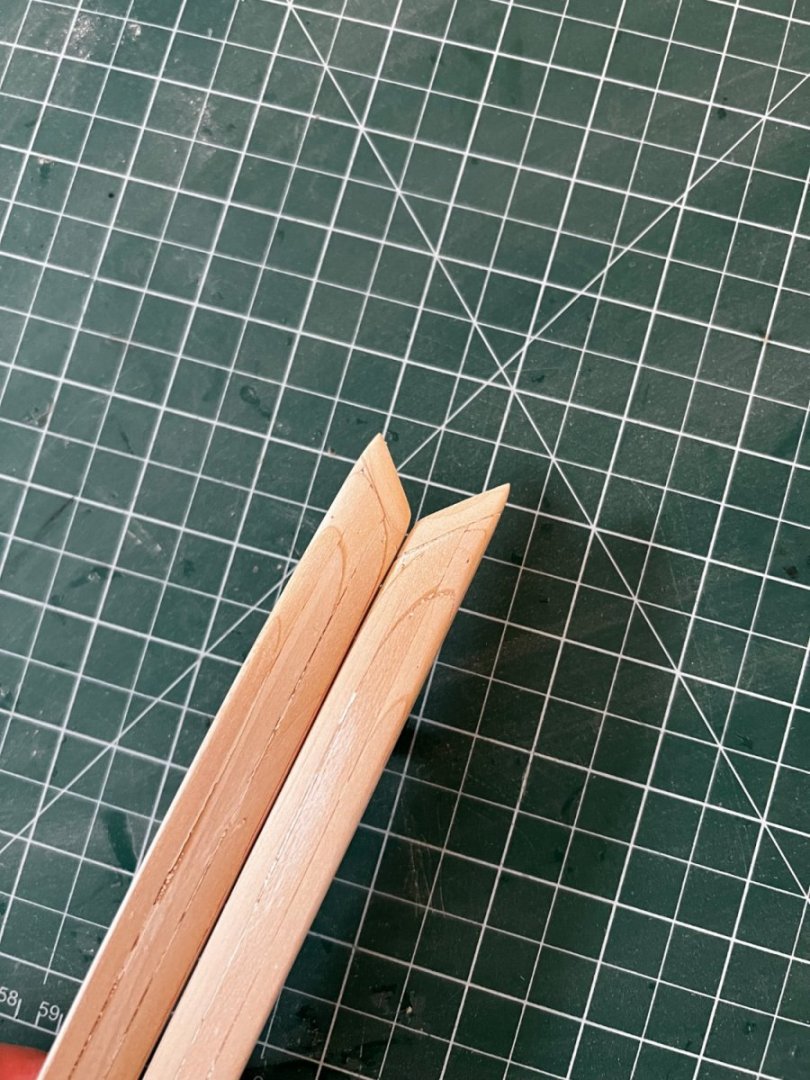
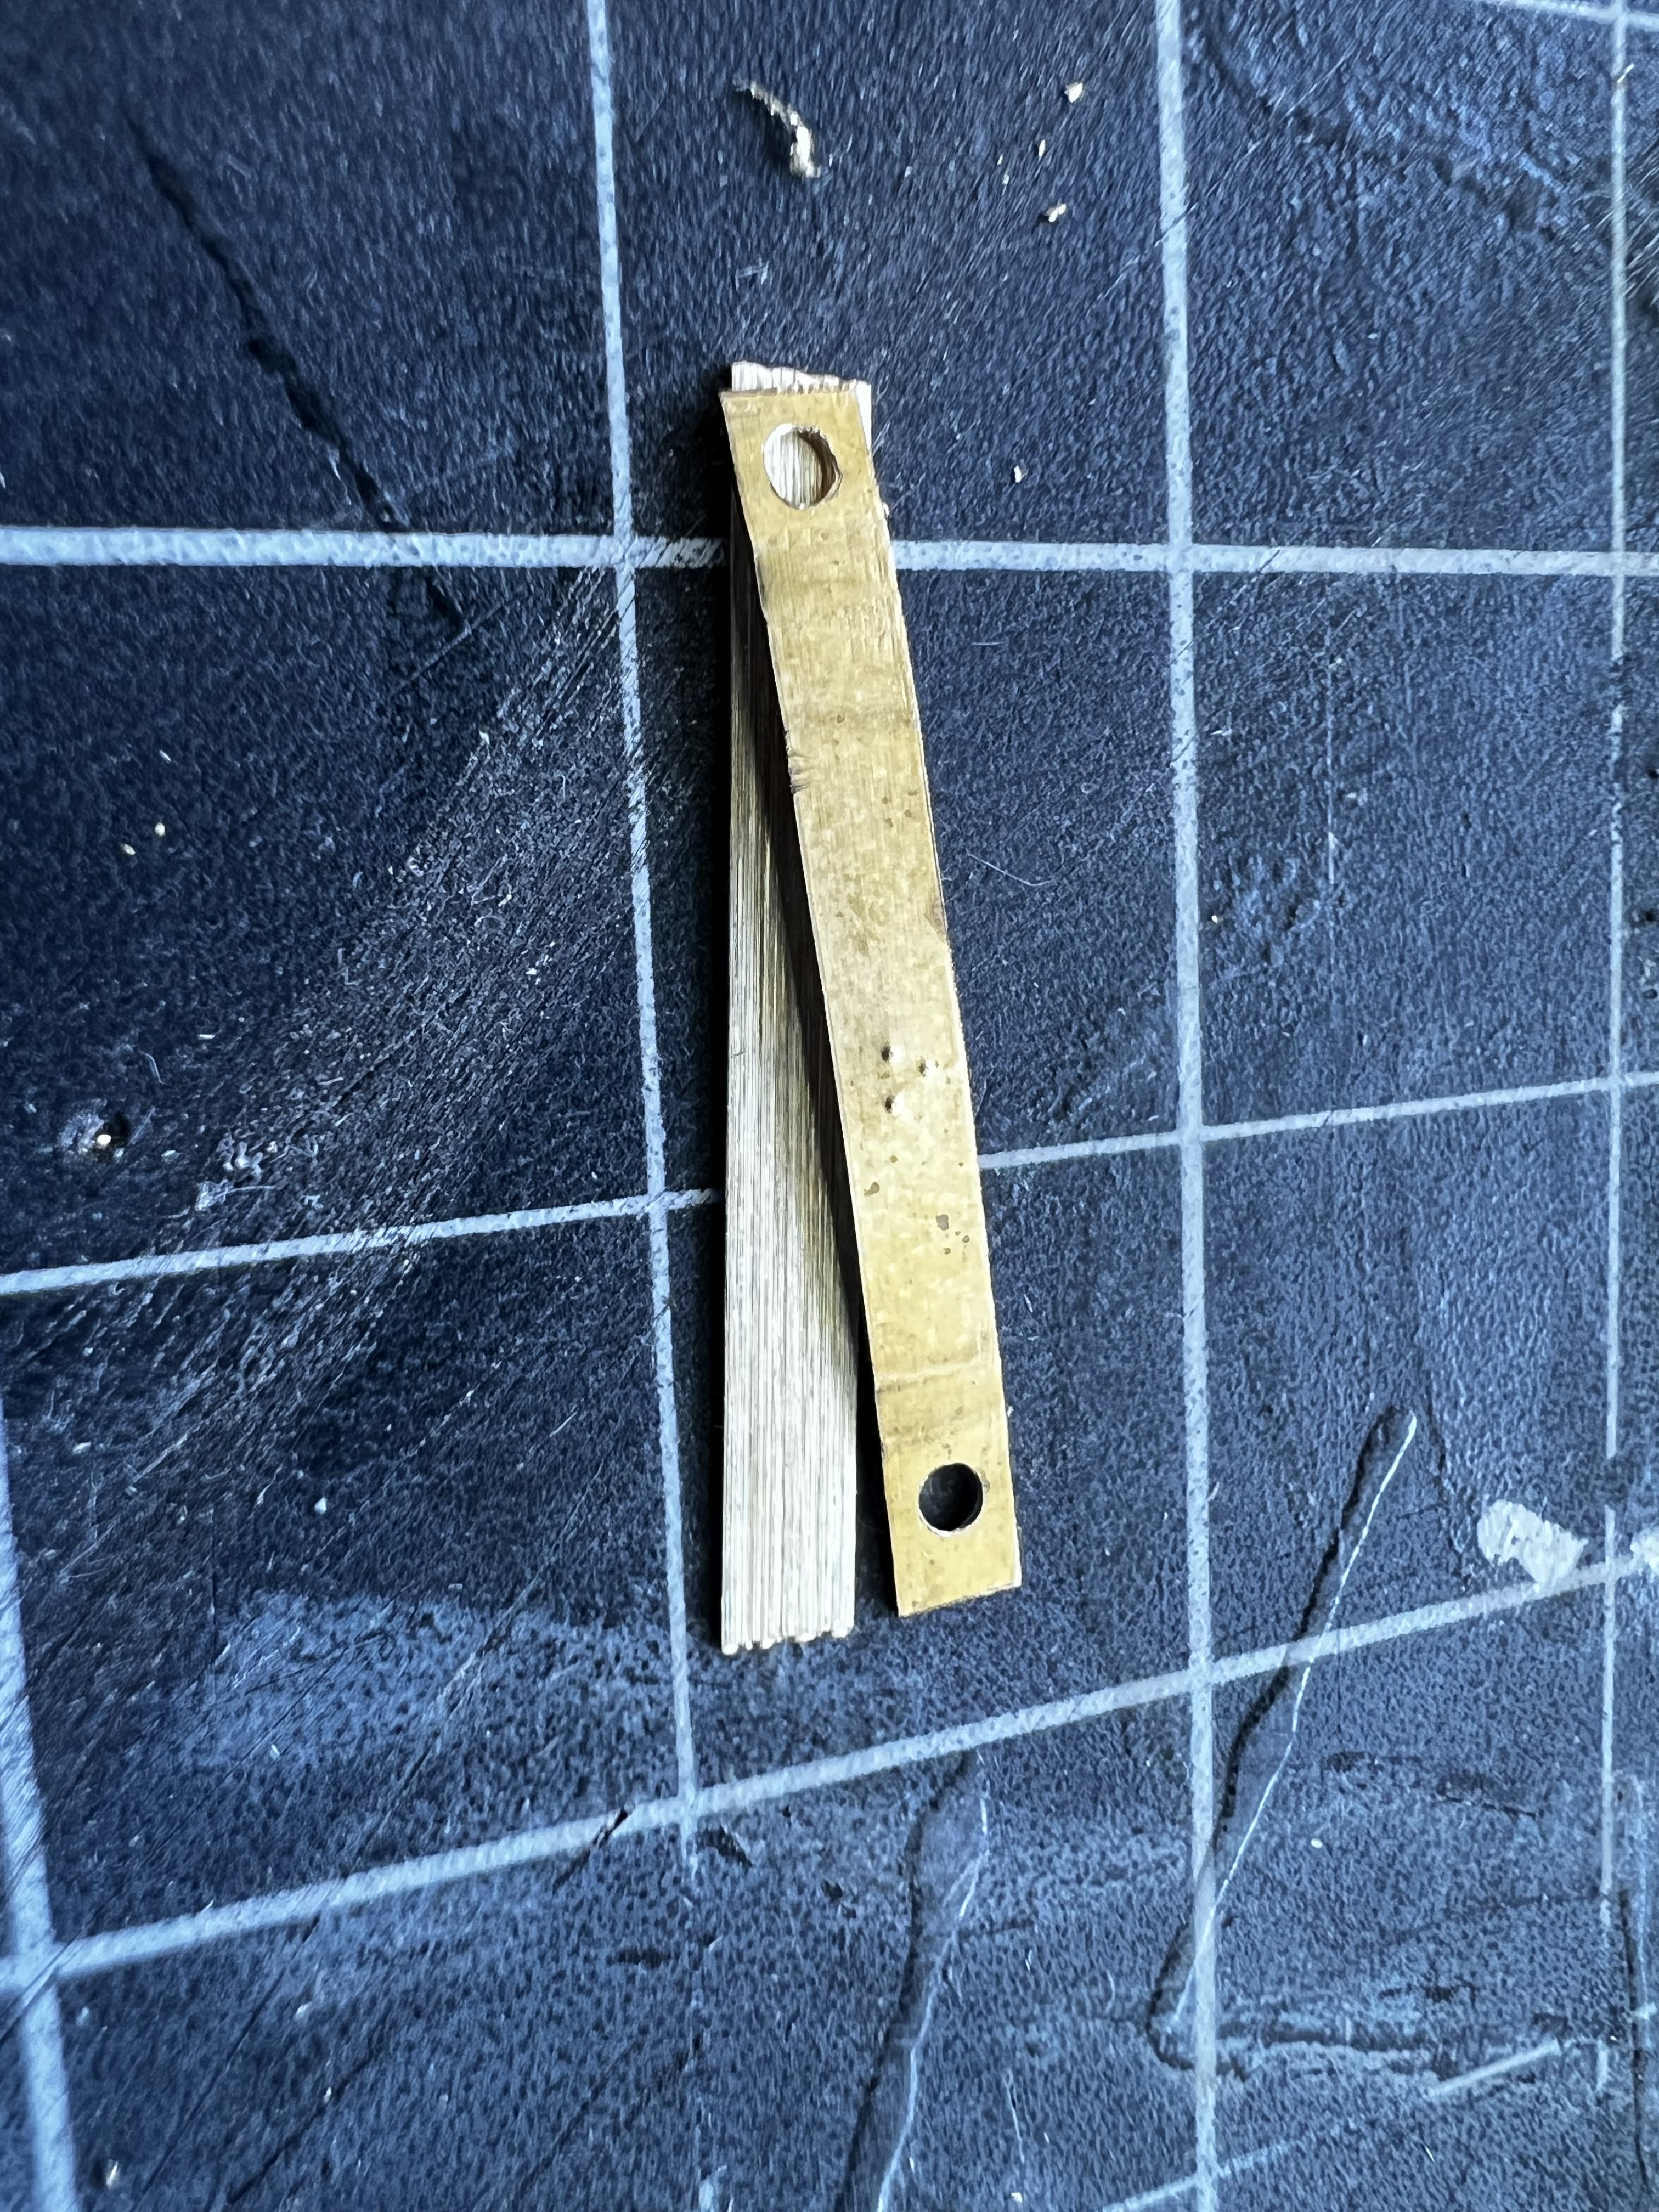
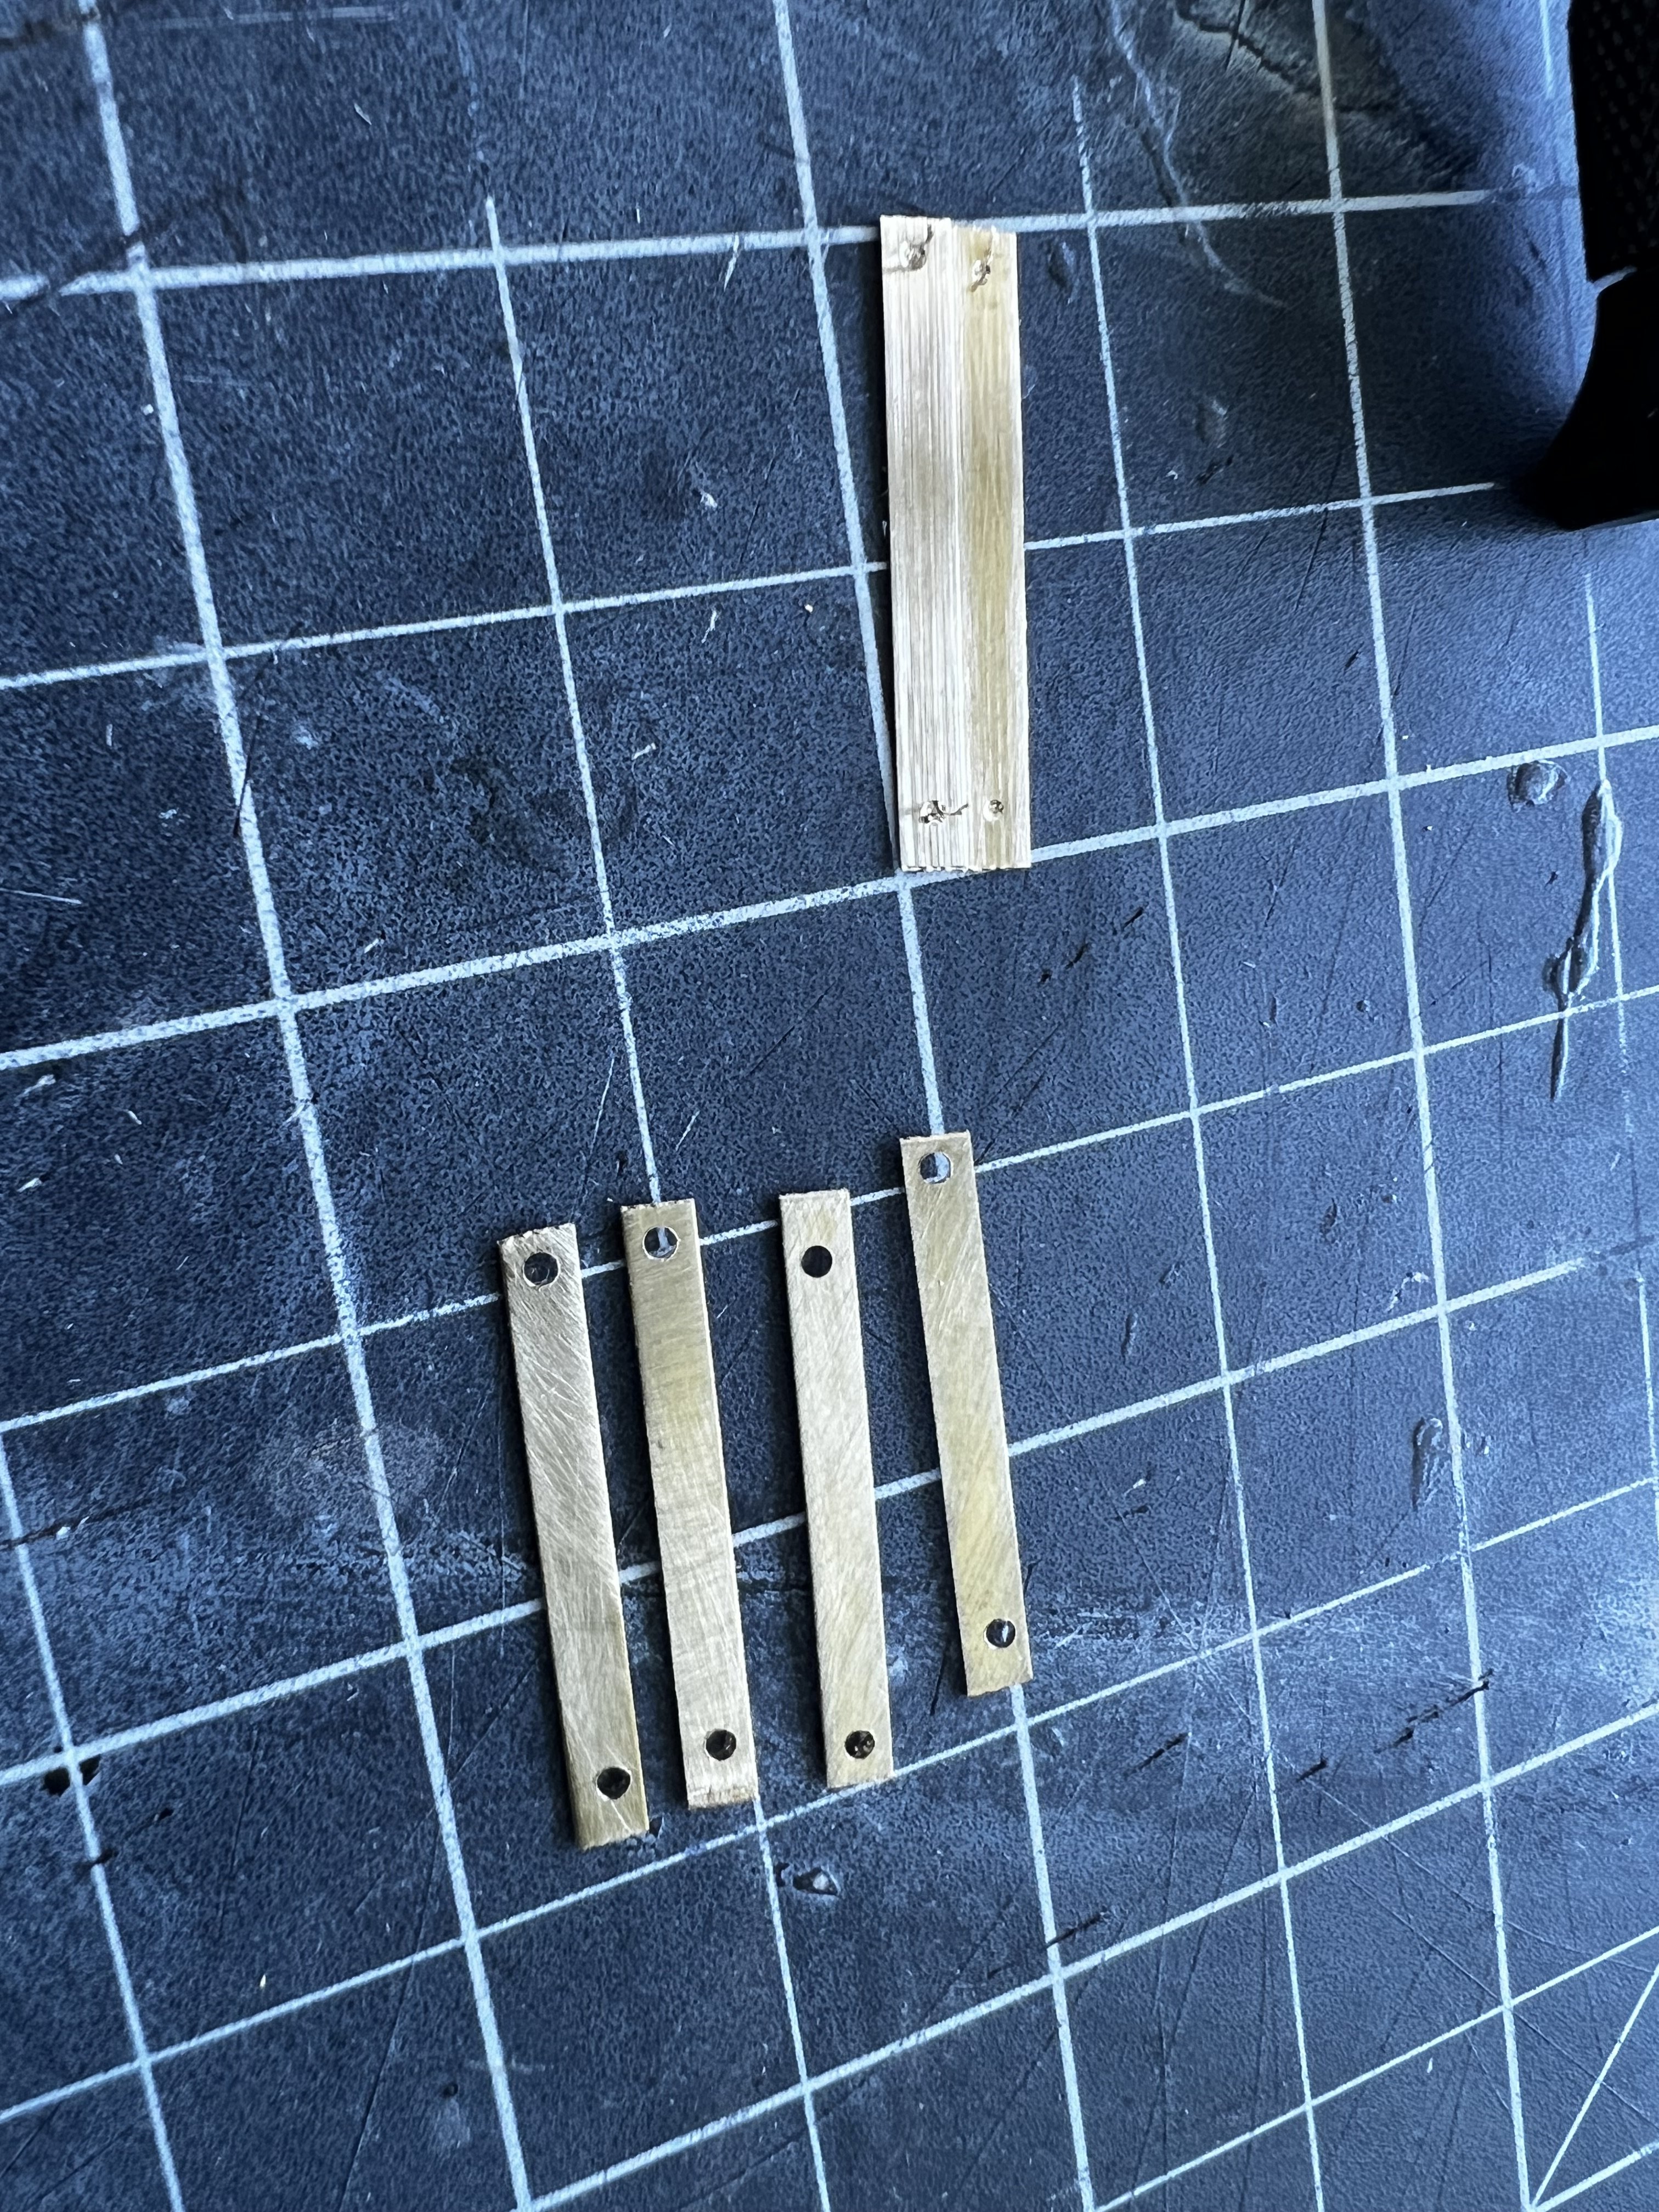
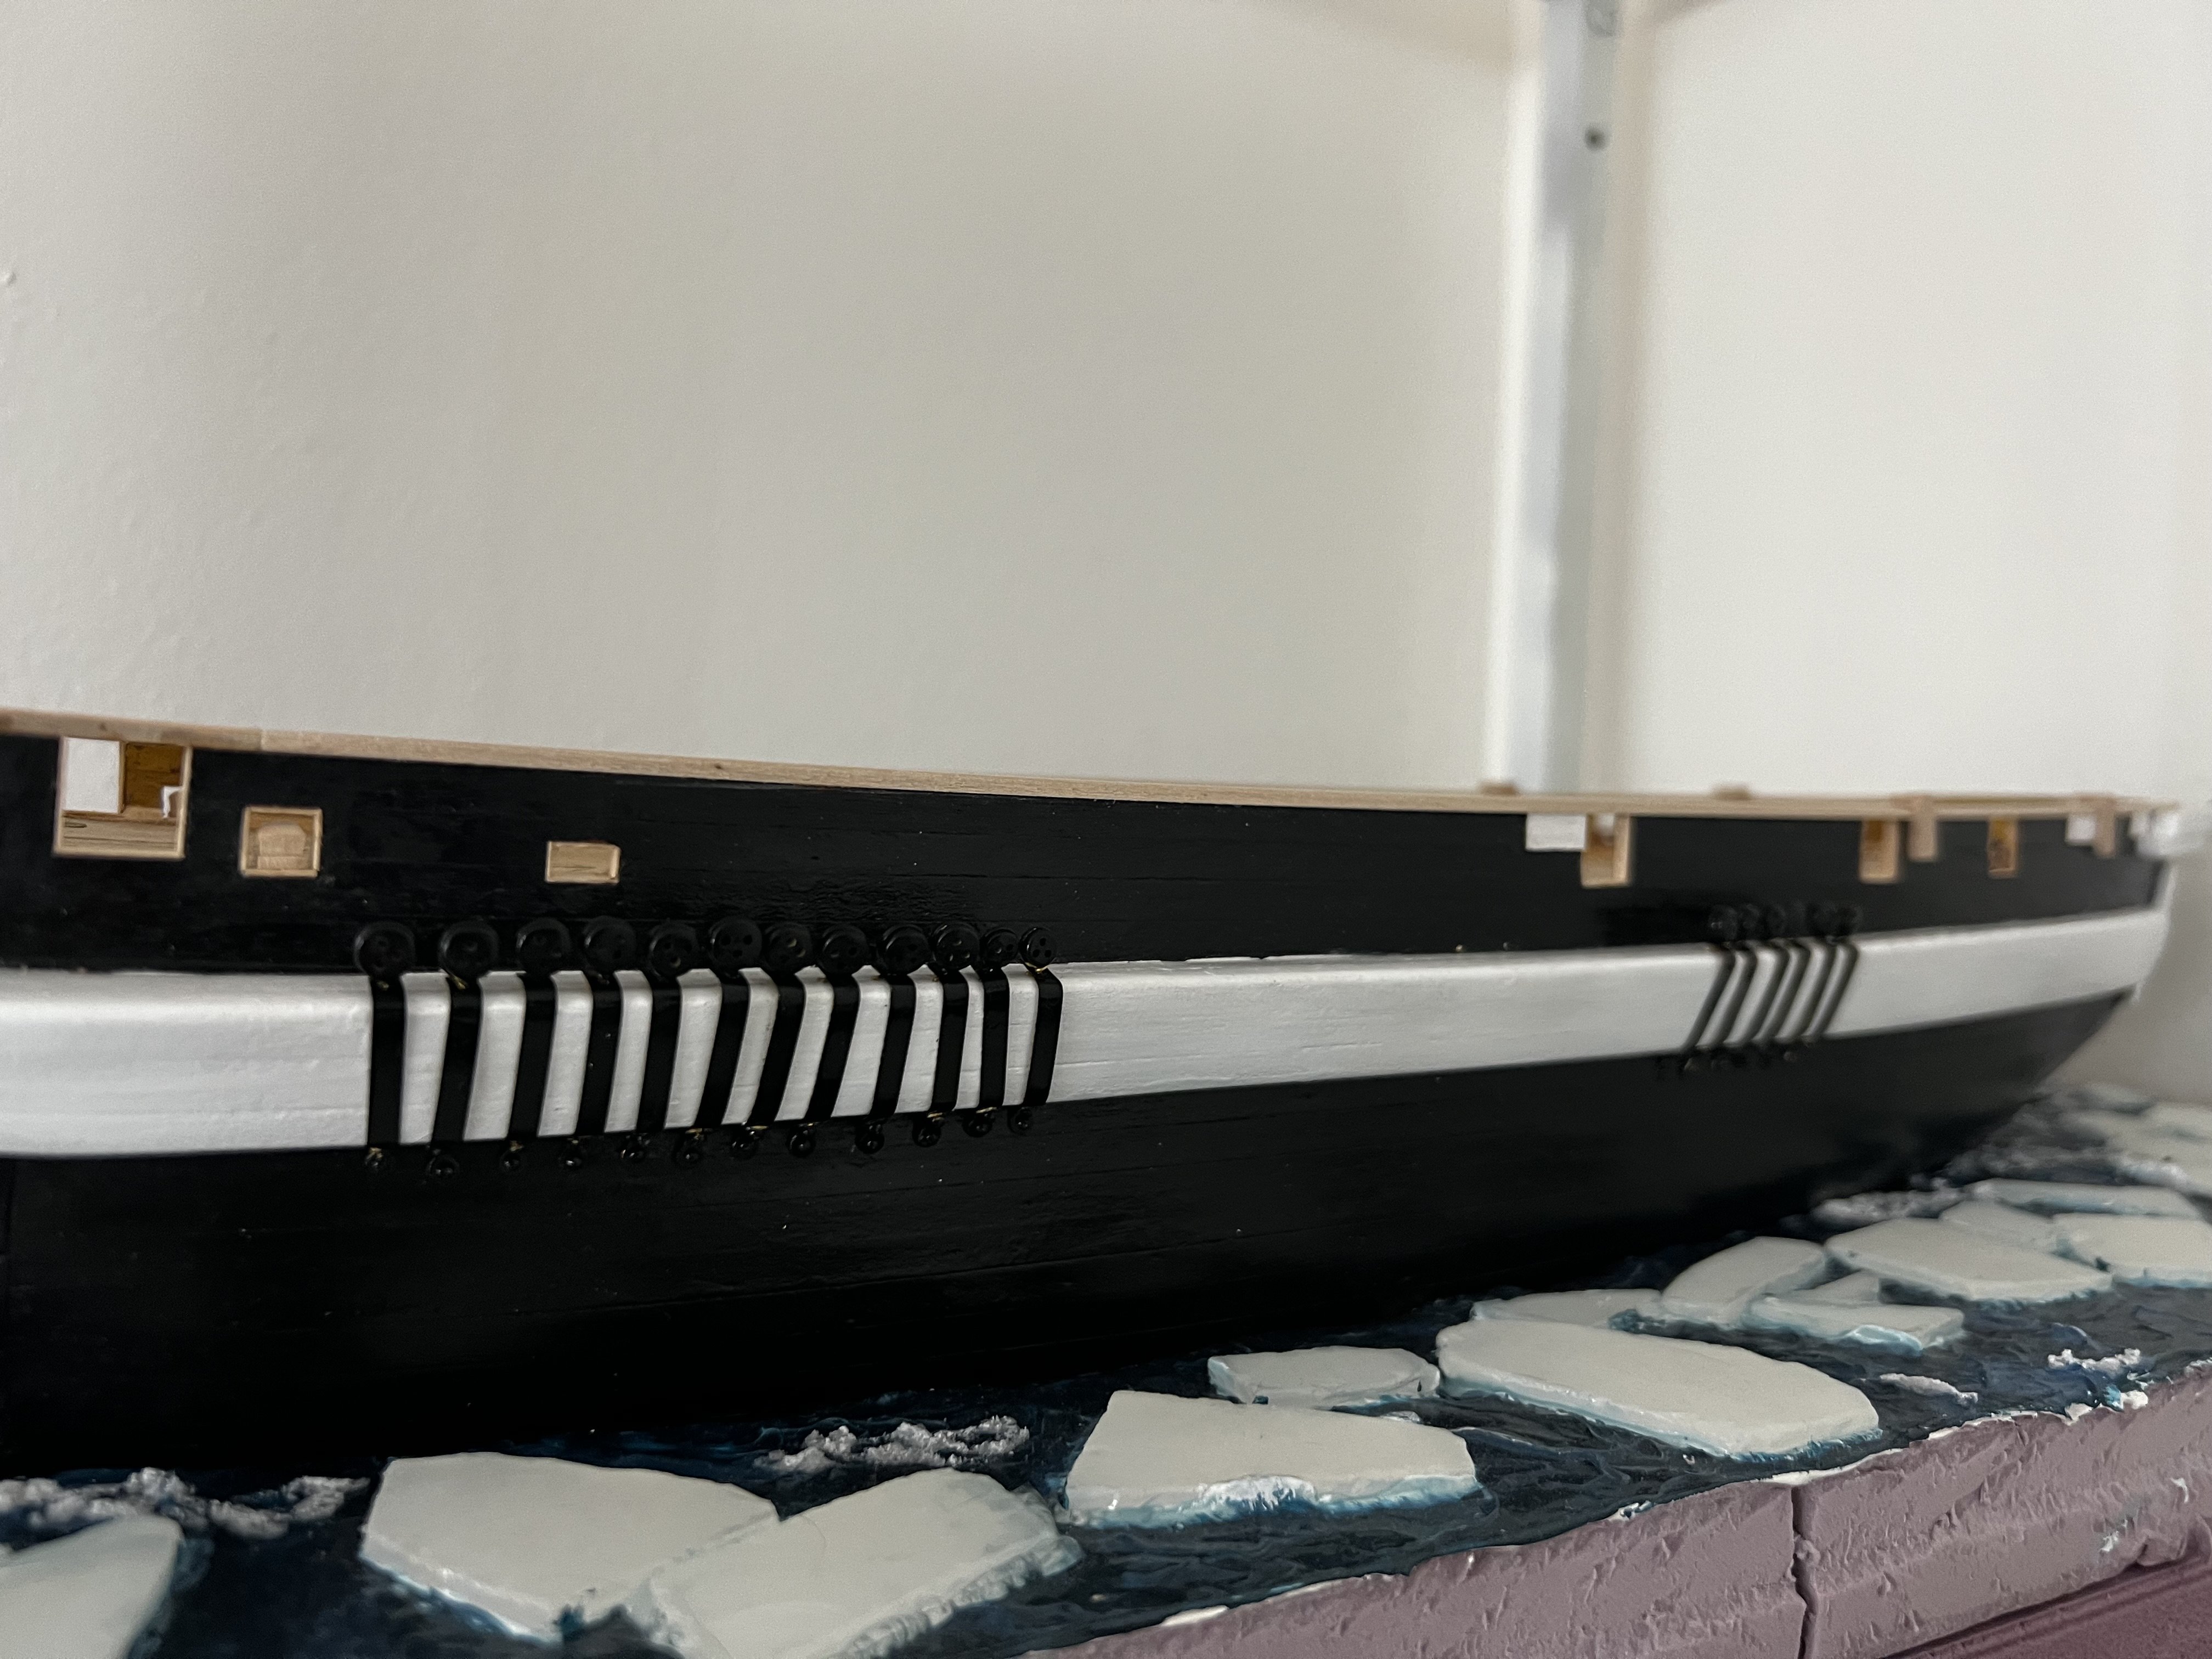
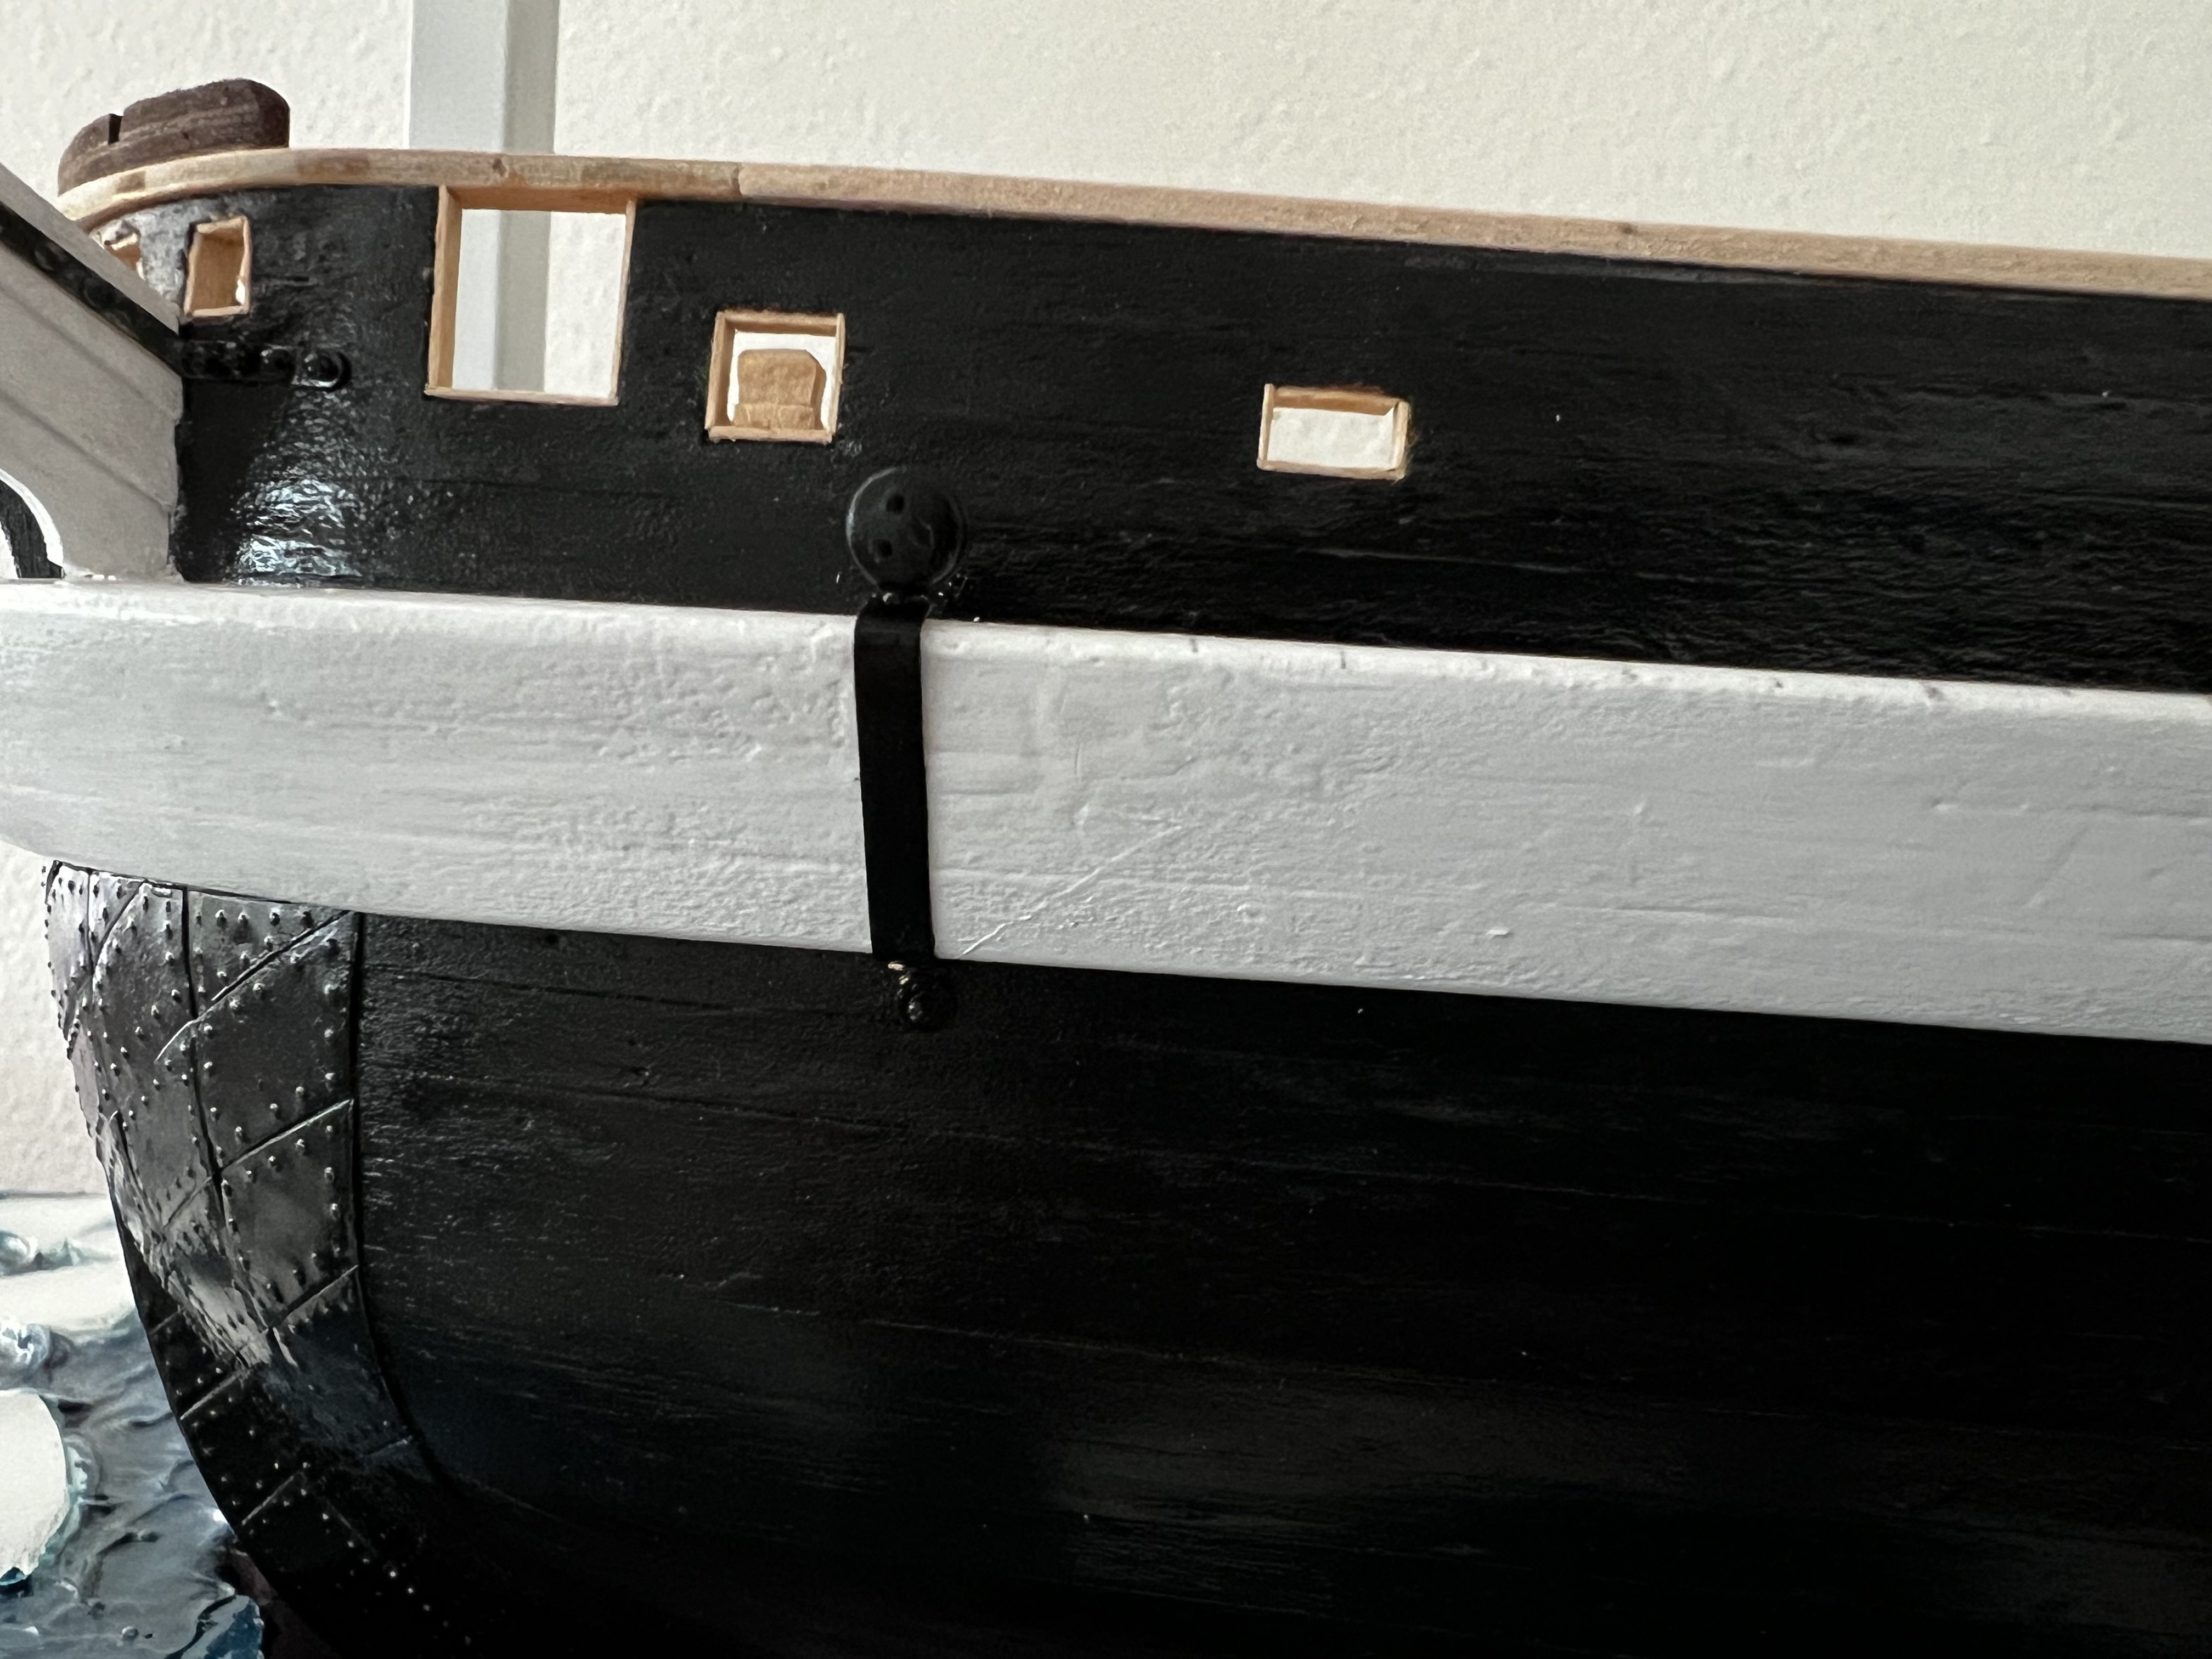
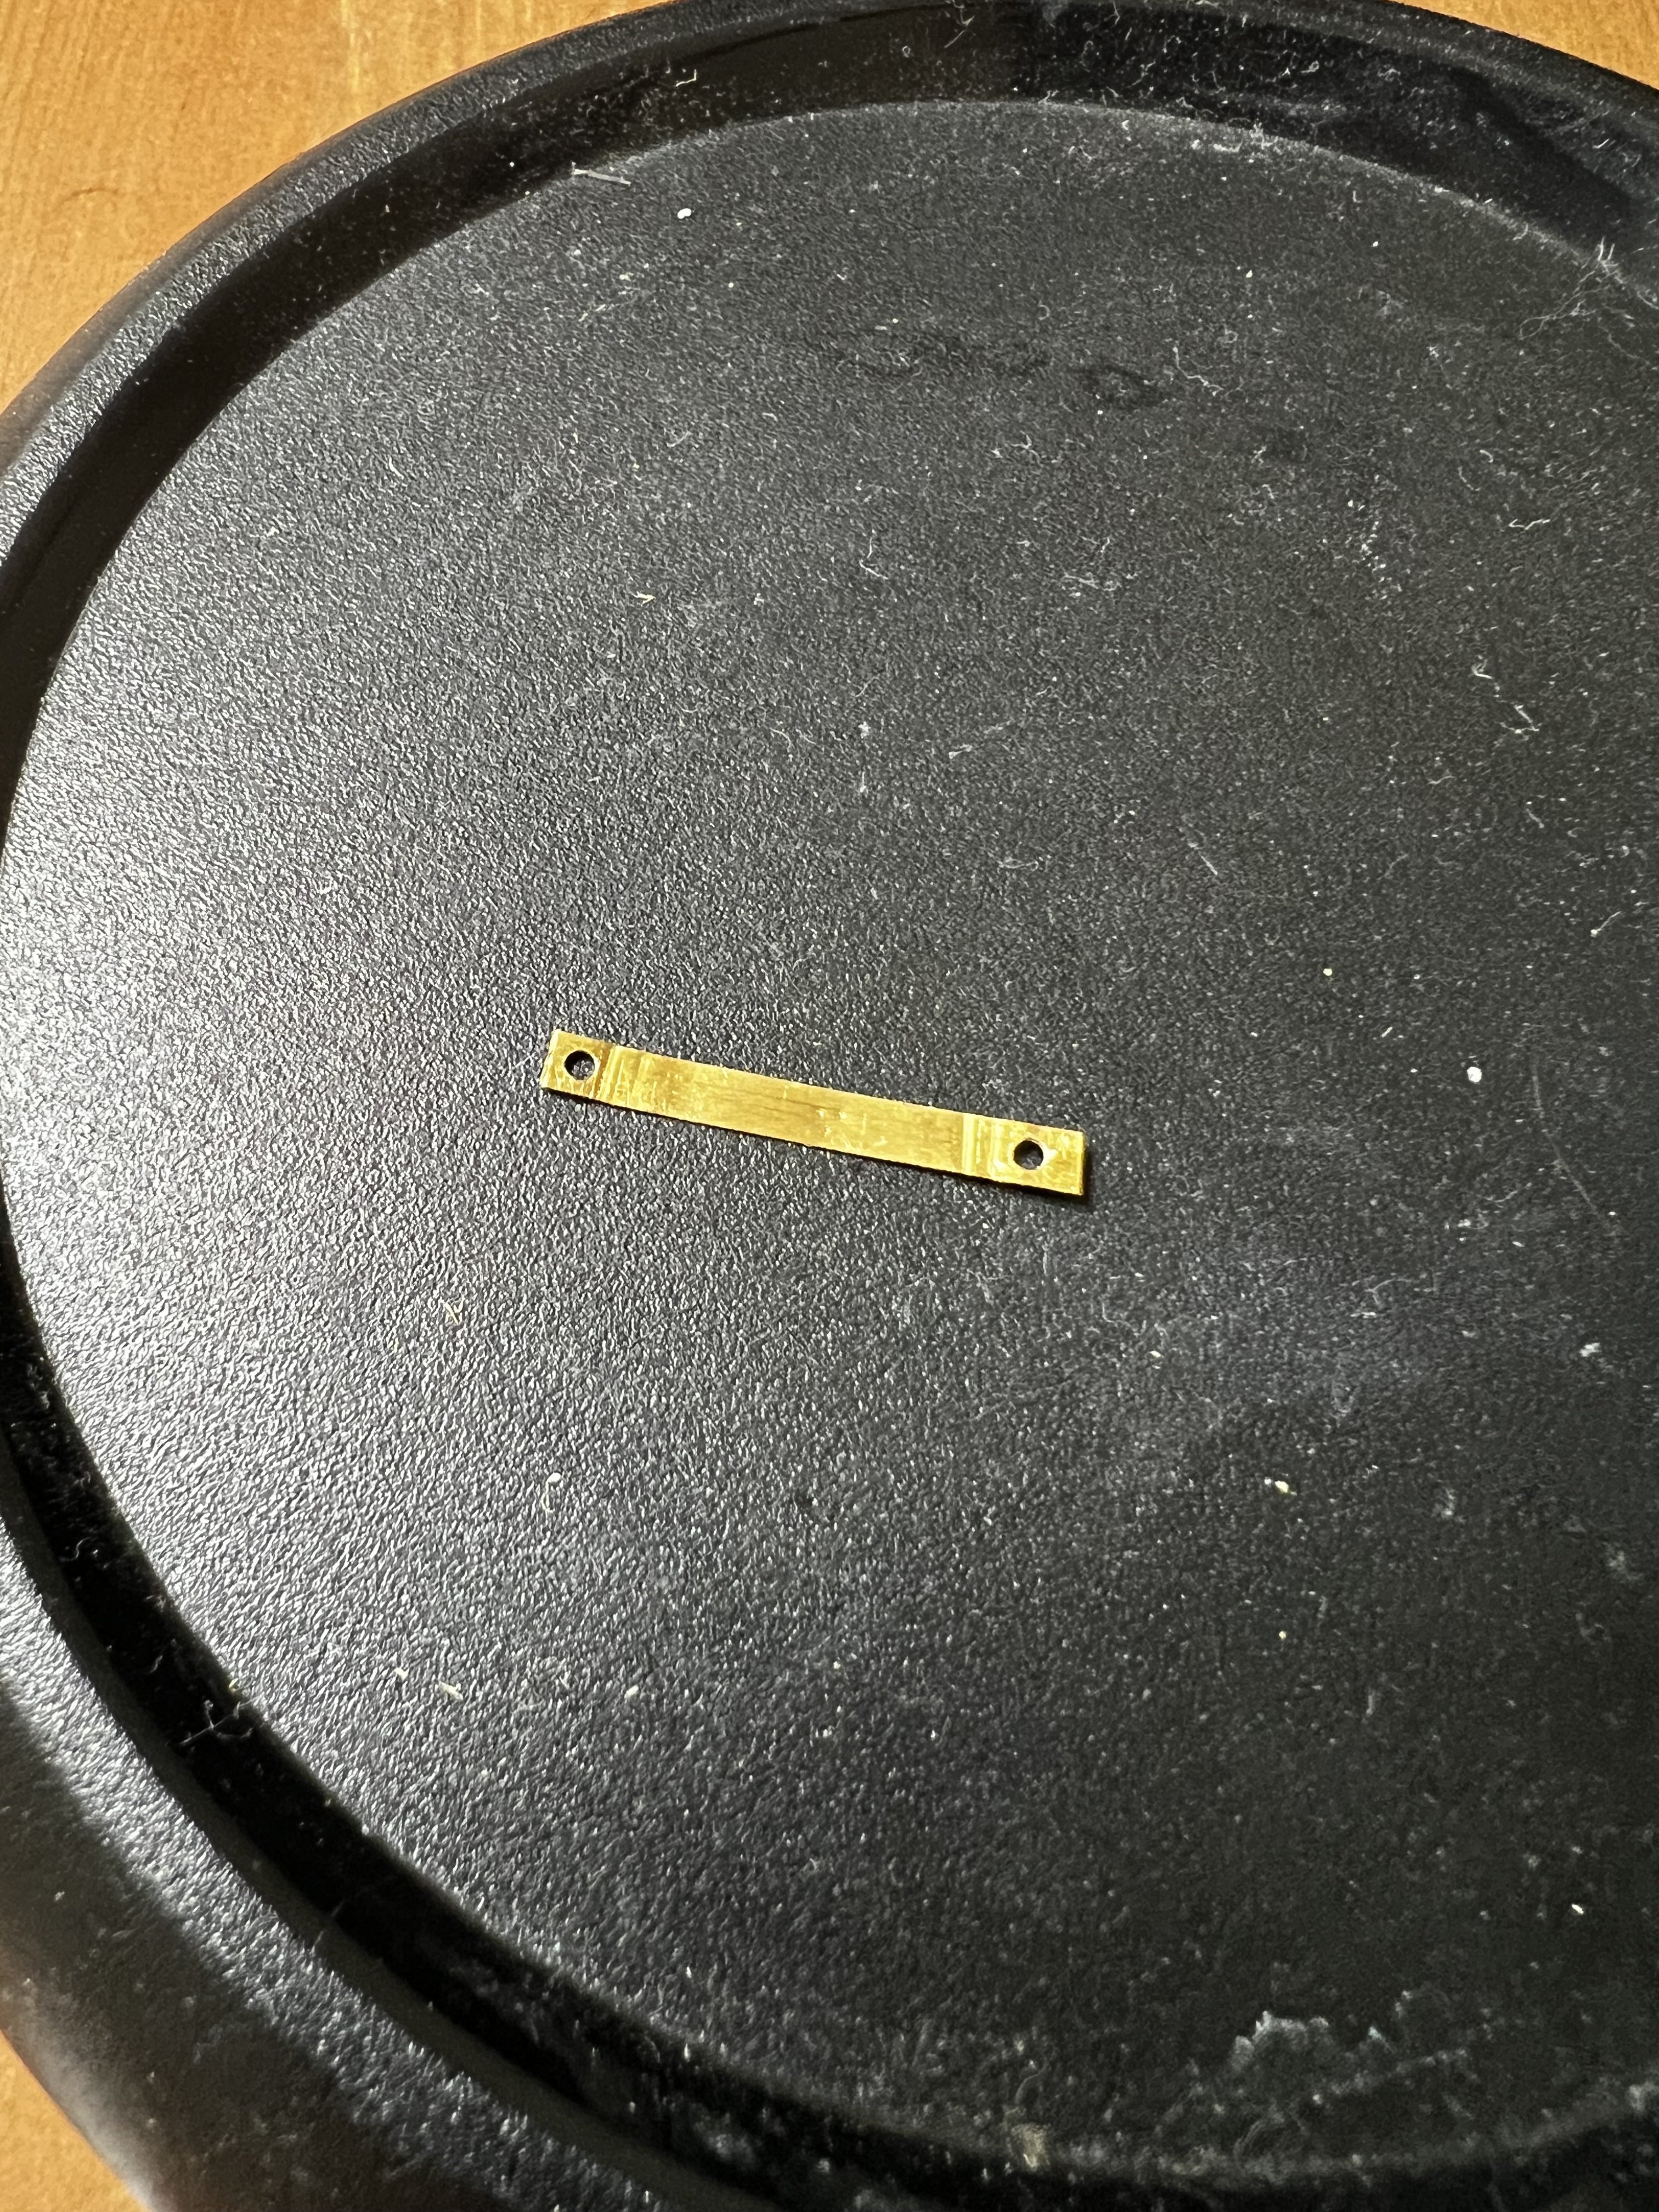
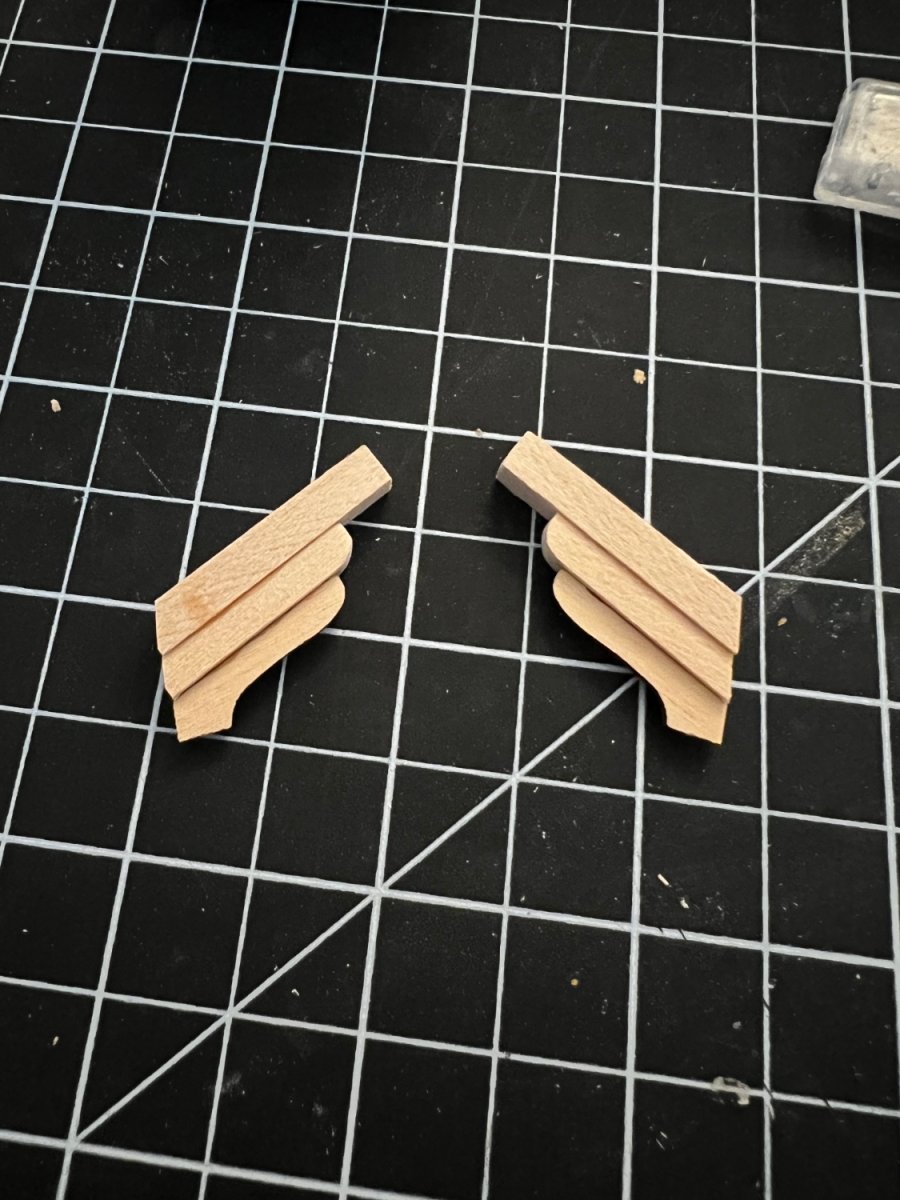
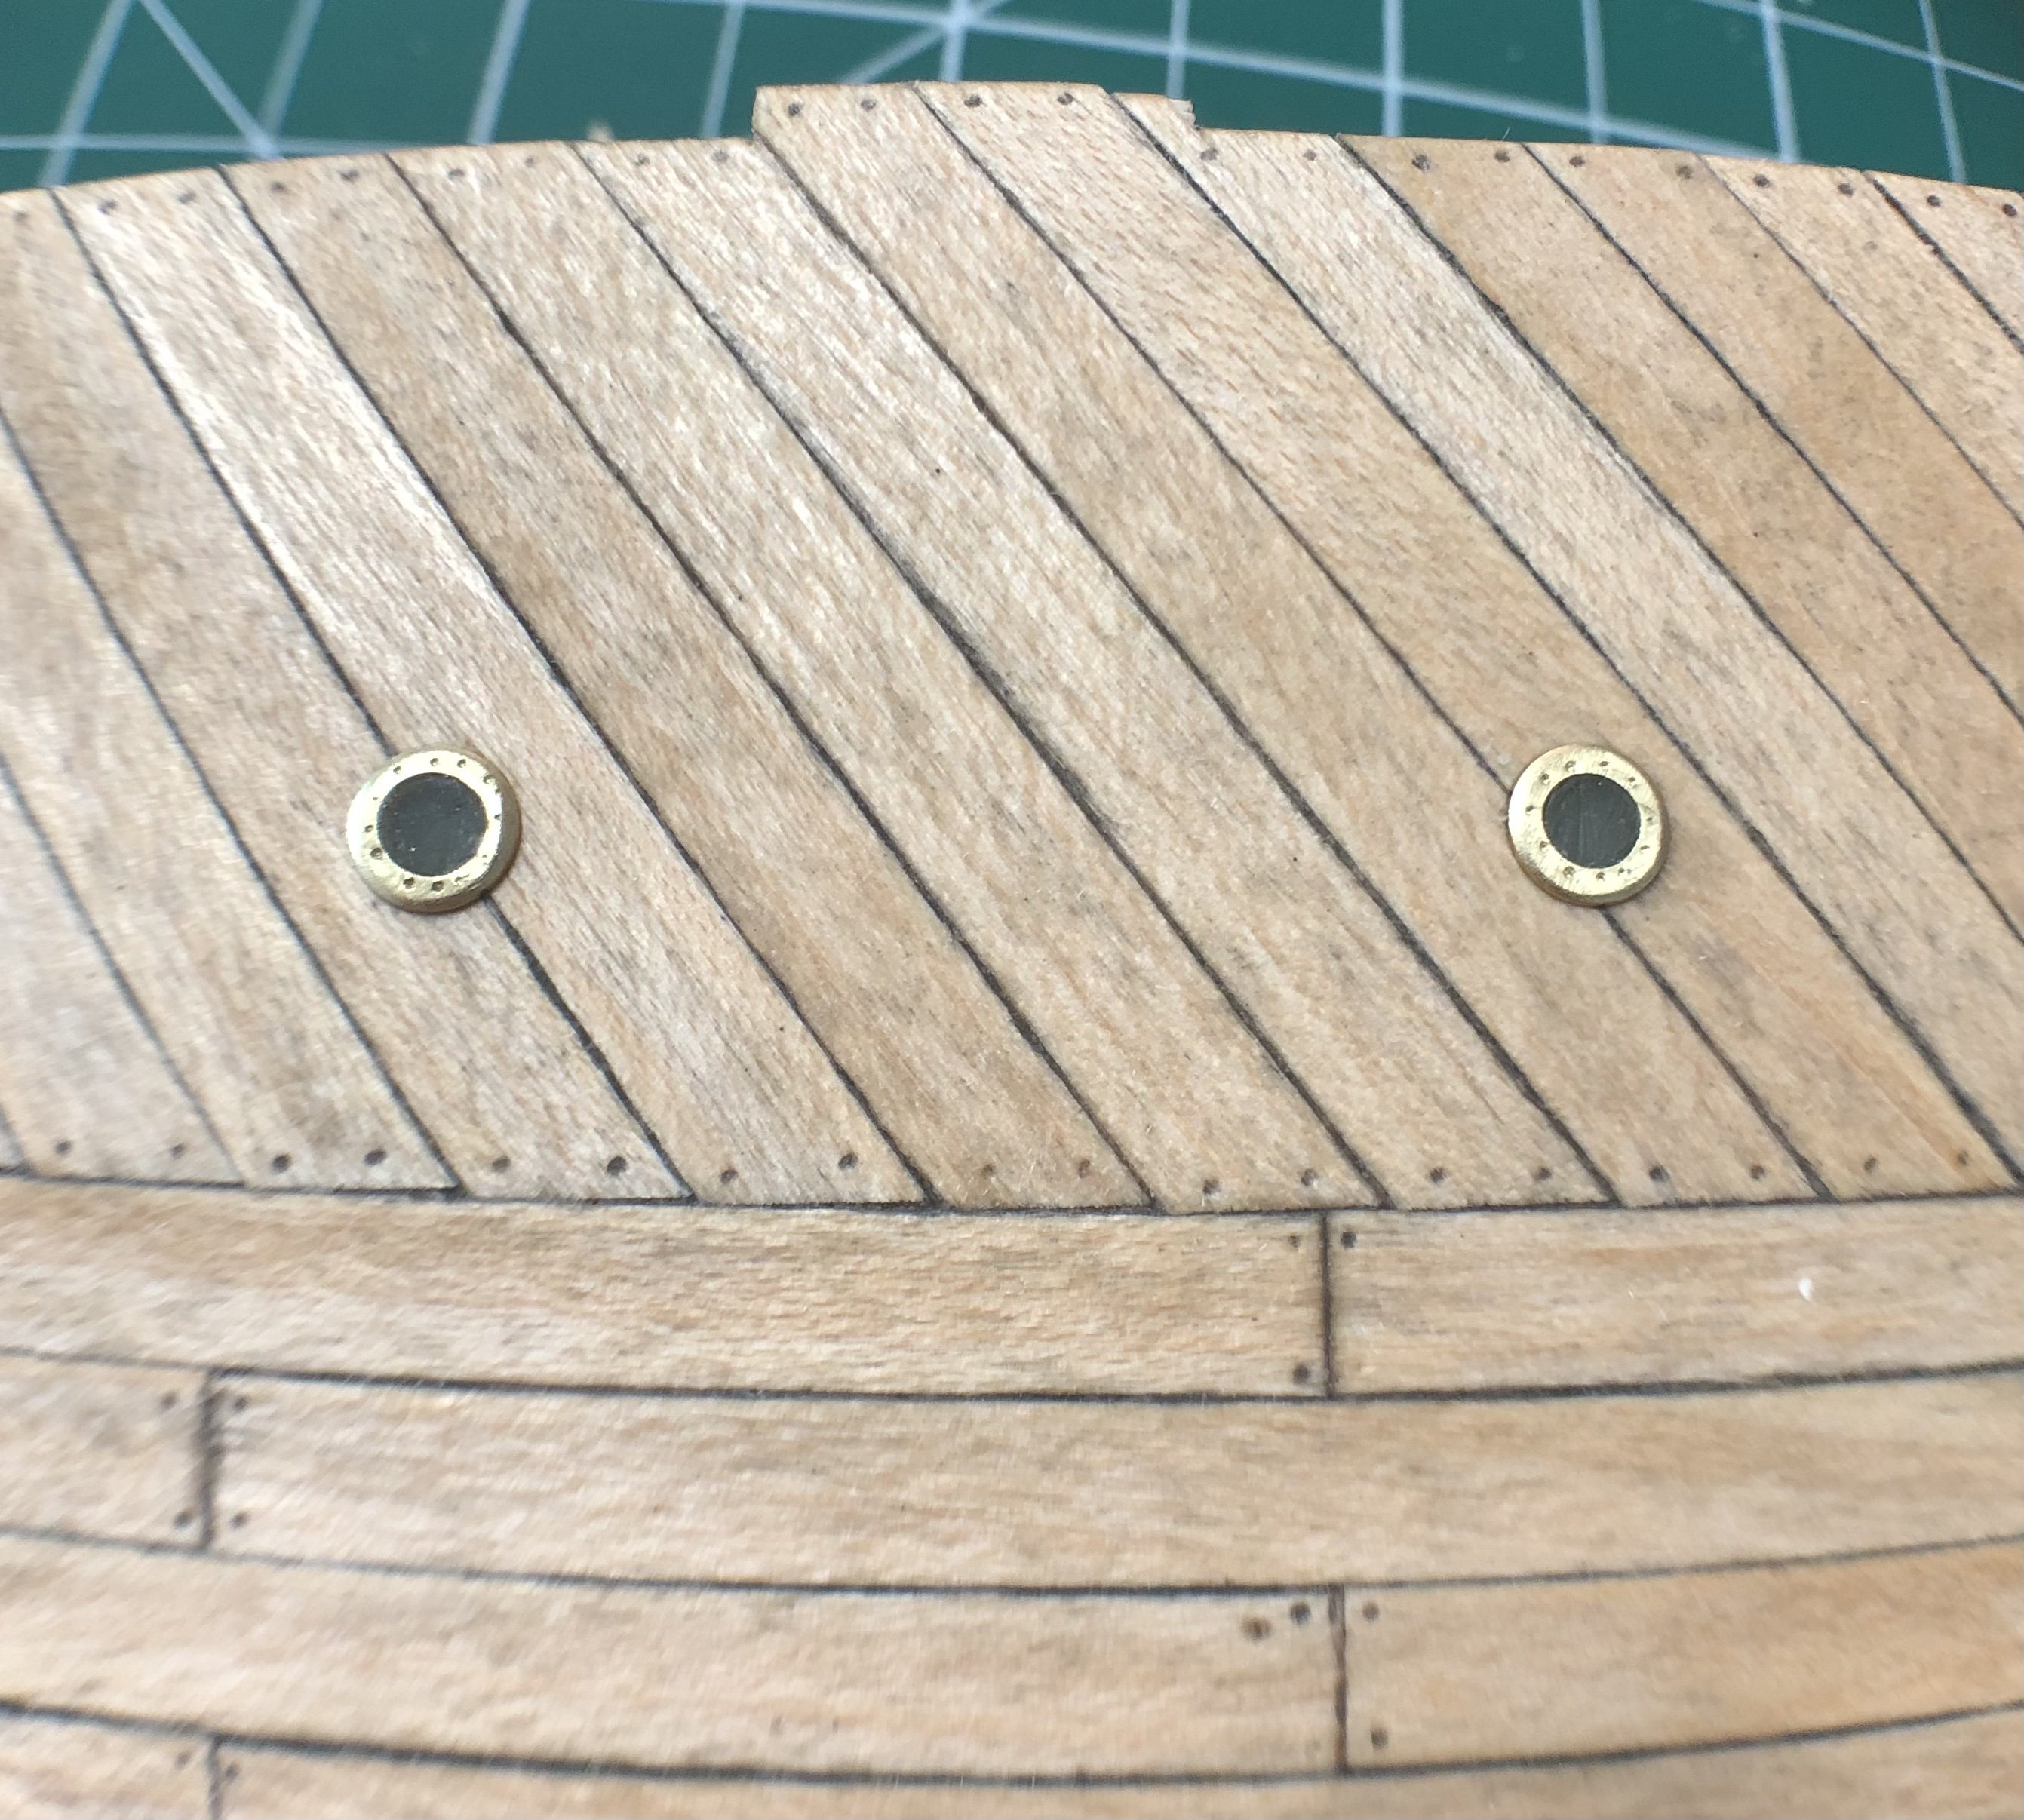
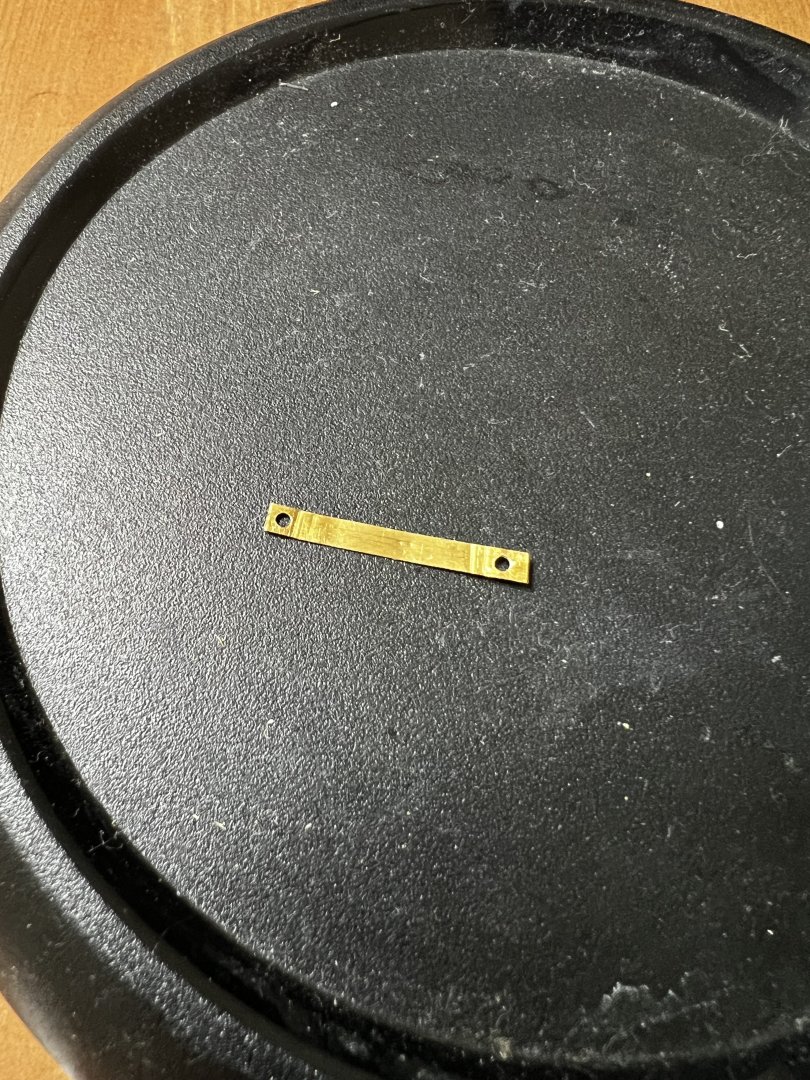
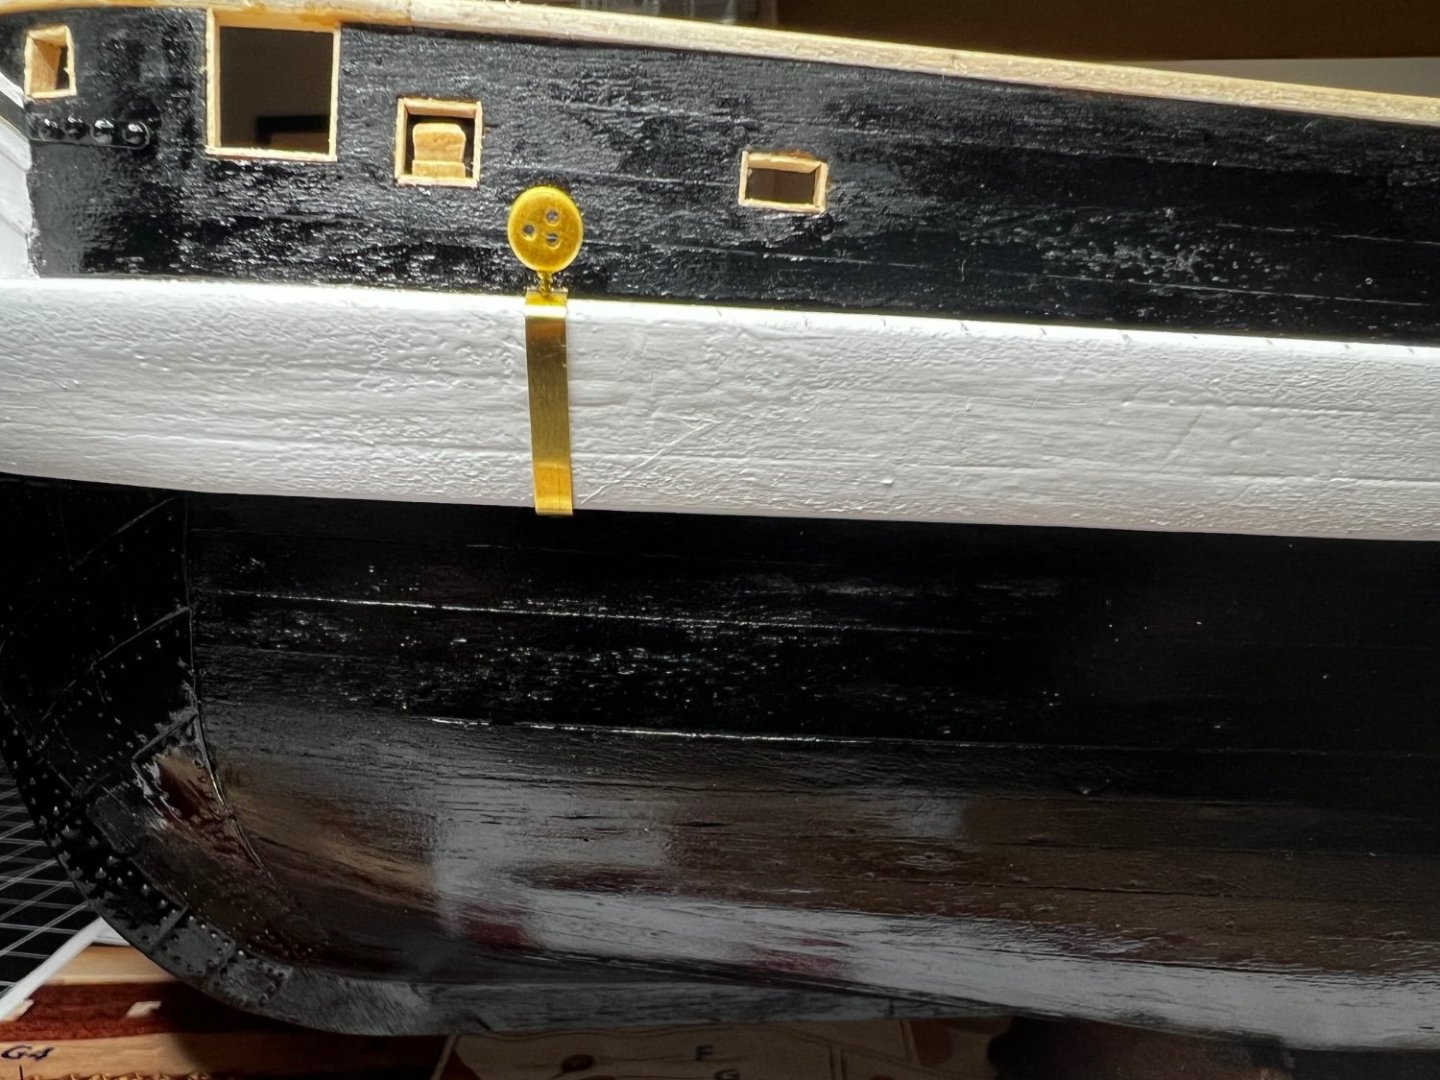
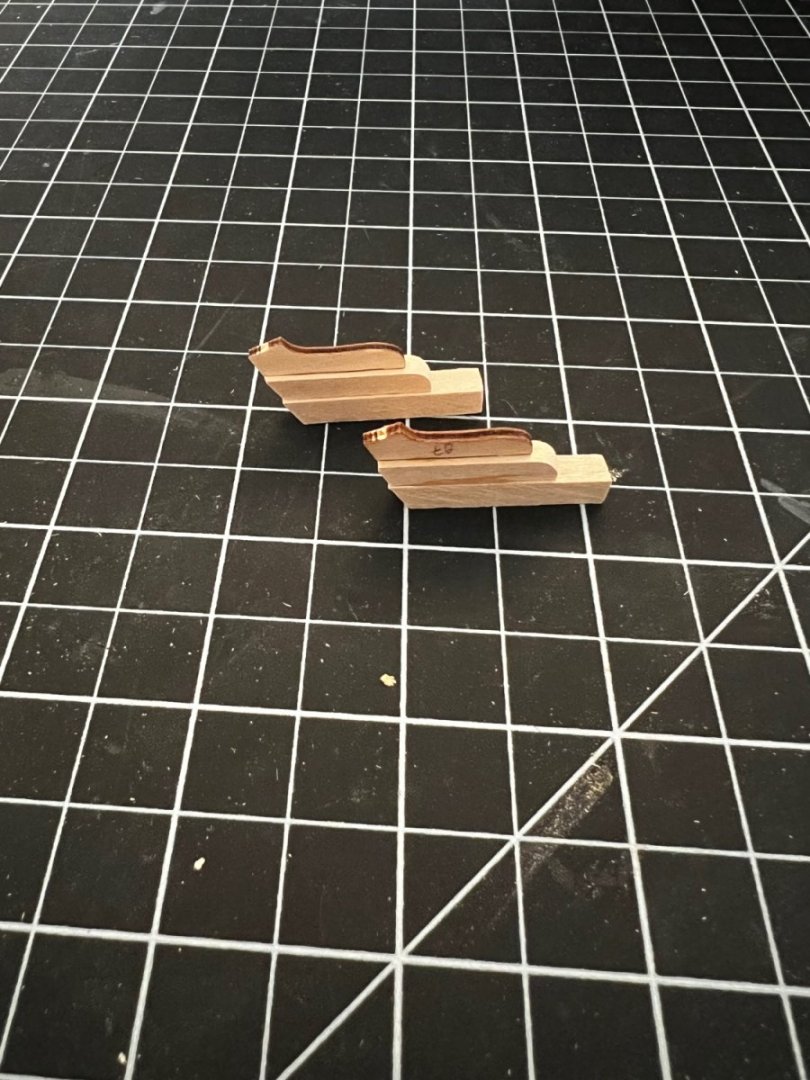
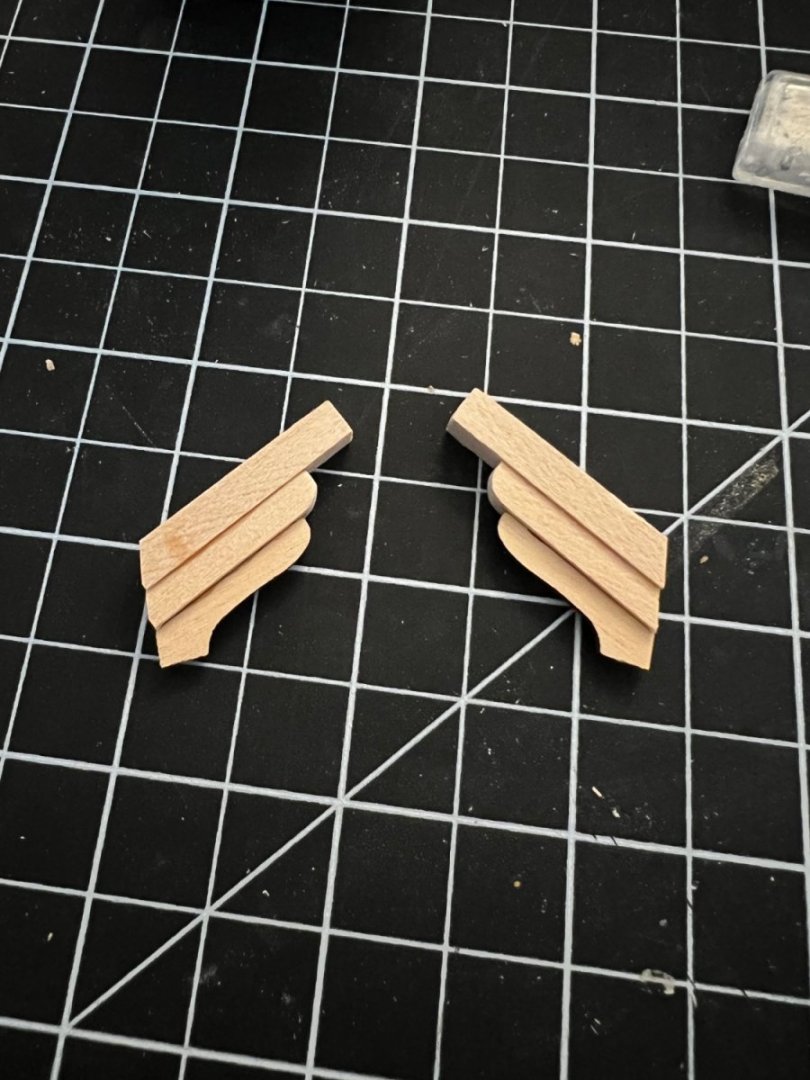
Hi all, Well, nearly a year later and I finally have an update on the build. The first section of chain plates is done, not quite as clean as I’d like it (particularly how uneven some of the angles are), but a good bit better than what the kit provided! I made these chain plates by cutting a strip of 3mm brass sheet to length and drilling two holes through the ends based on a template I cut and drilled. Then it’s simply a matter of sanding, bending, painting, assembling, and fastening to the hull. I don’t completely trust that the deadeyes will stay in place once I start the rigging, so I’m unspooling a small section of the brass wire and bending it as a “tab” to keep it from slipping back through the drilled hole in the brass sheet. The other end of the wire is then pressed into the soft wood with some CA glue in a pilot hole I have drilled. As a result the whole chain plate is held in place at four points: the brass wire in the wood, the brass wire bent out to hold the sheet, and the two nails below the ice bumper. A surprising amount of work for such a little piece of the build, but I think well worth it once completed. I’ve done 12 so far, just 60 more to go…


-
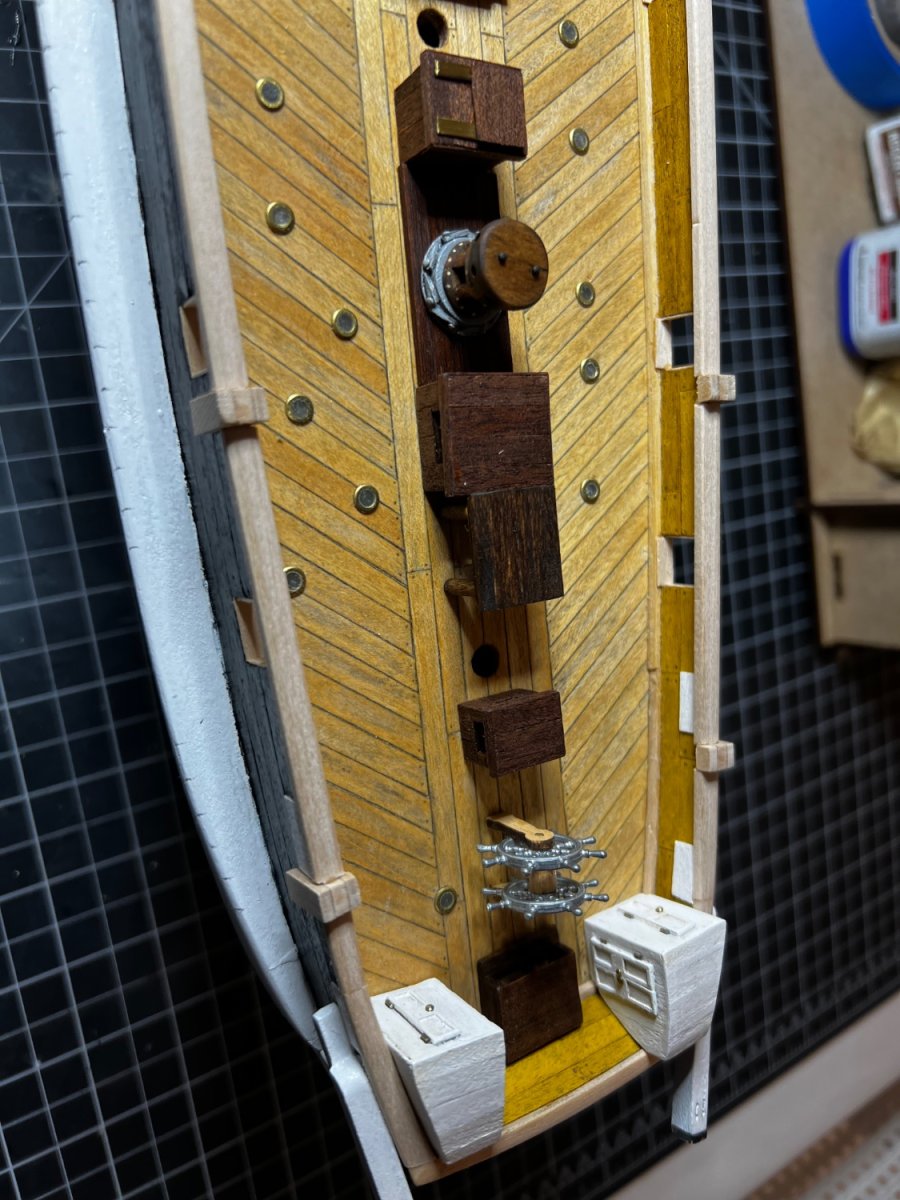
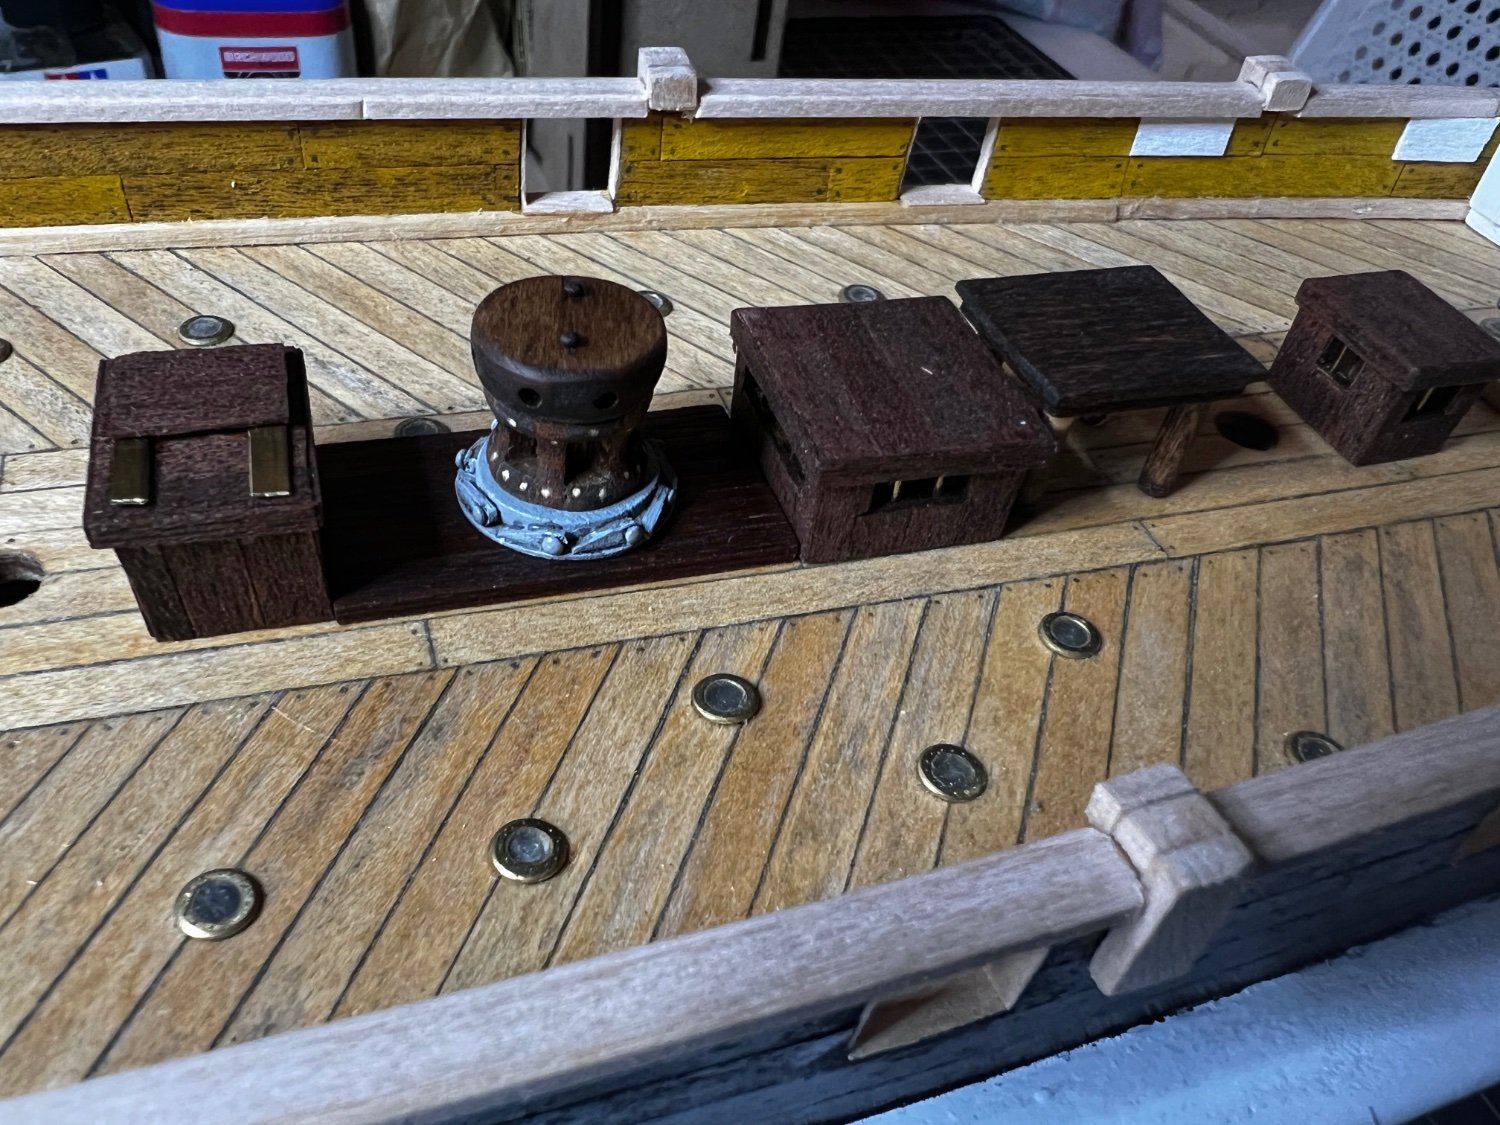
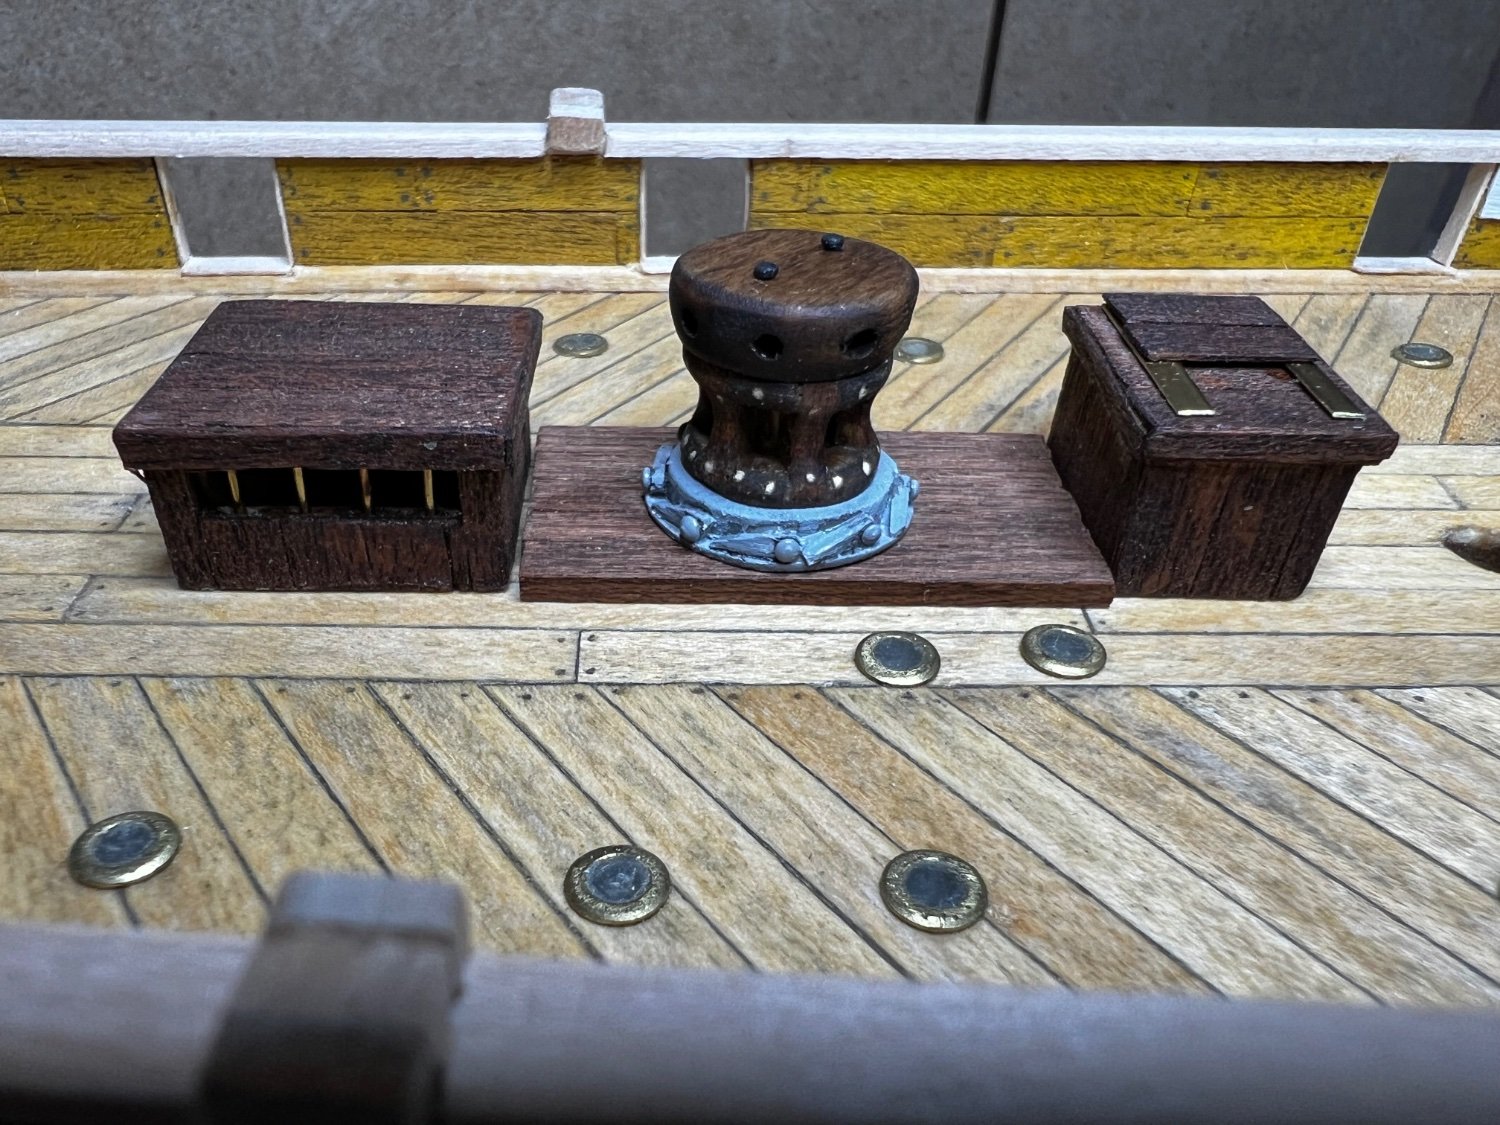
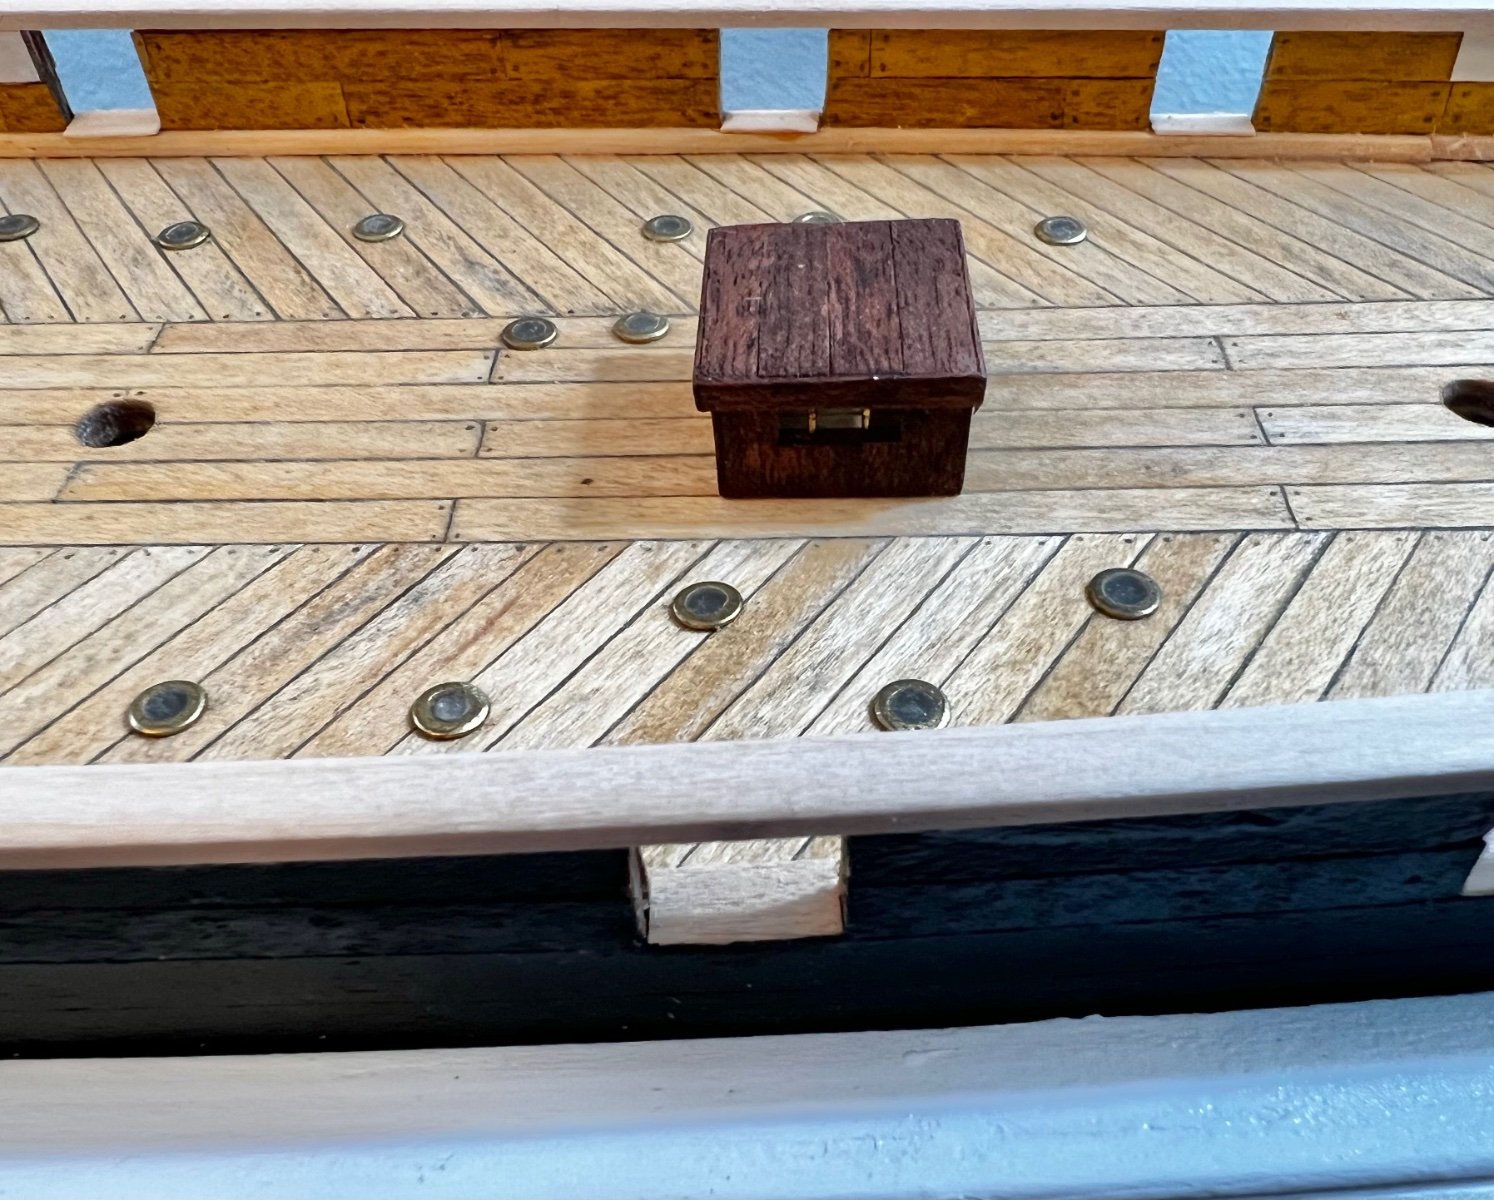
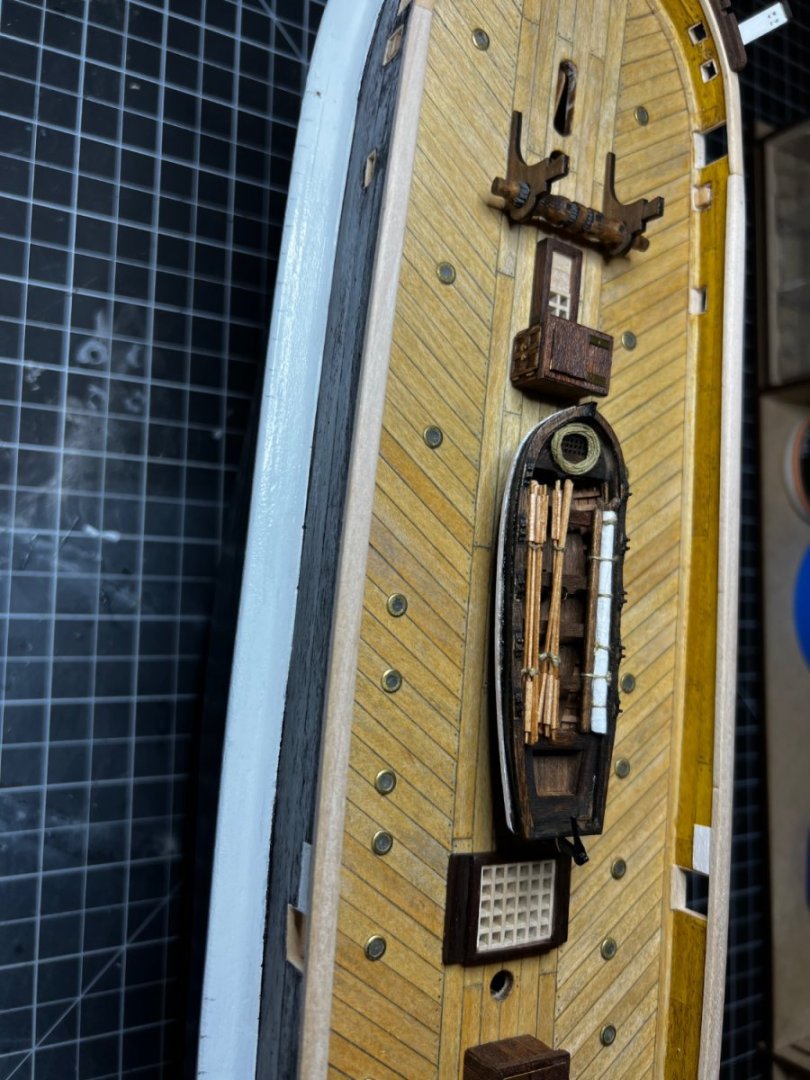
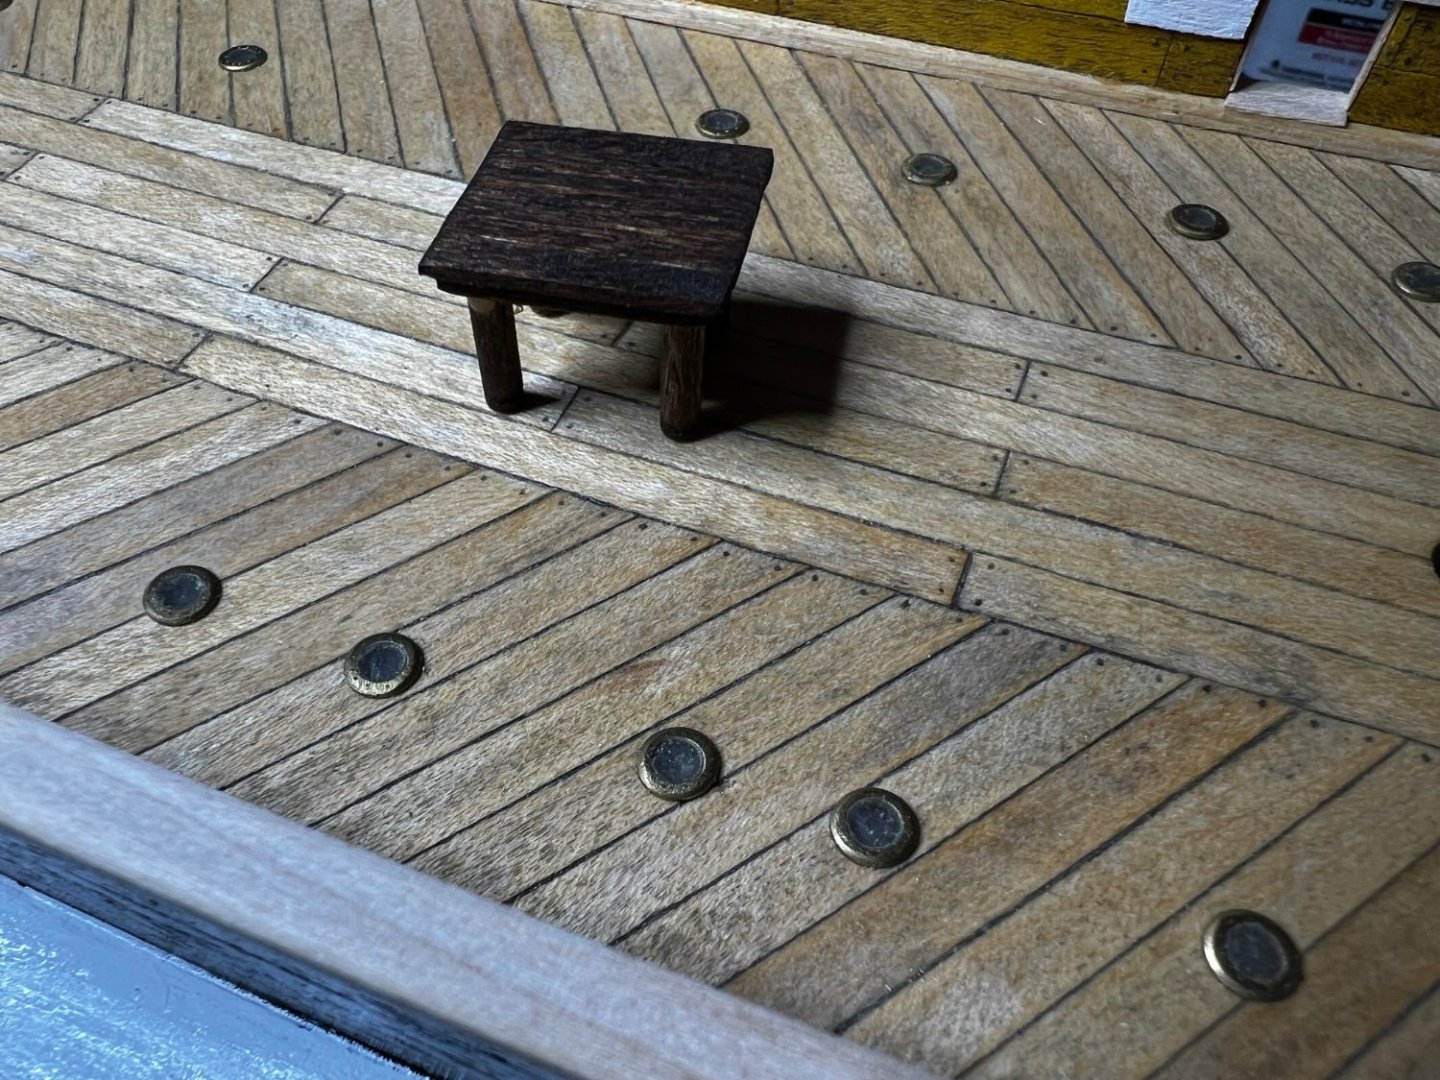
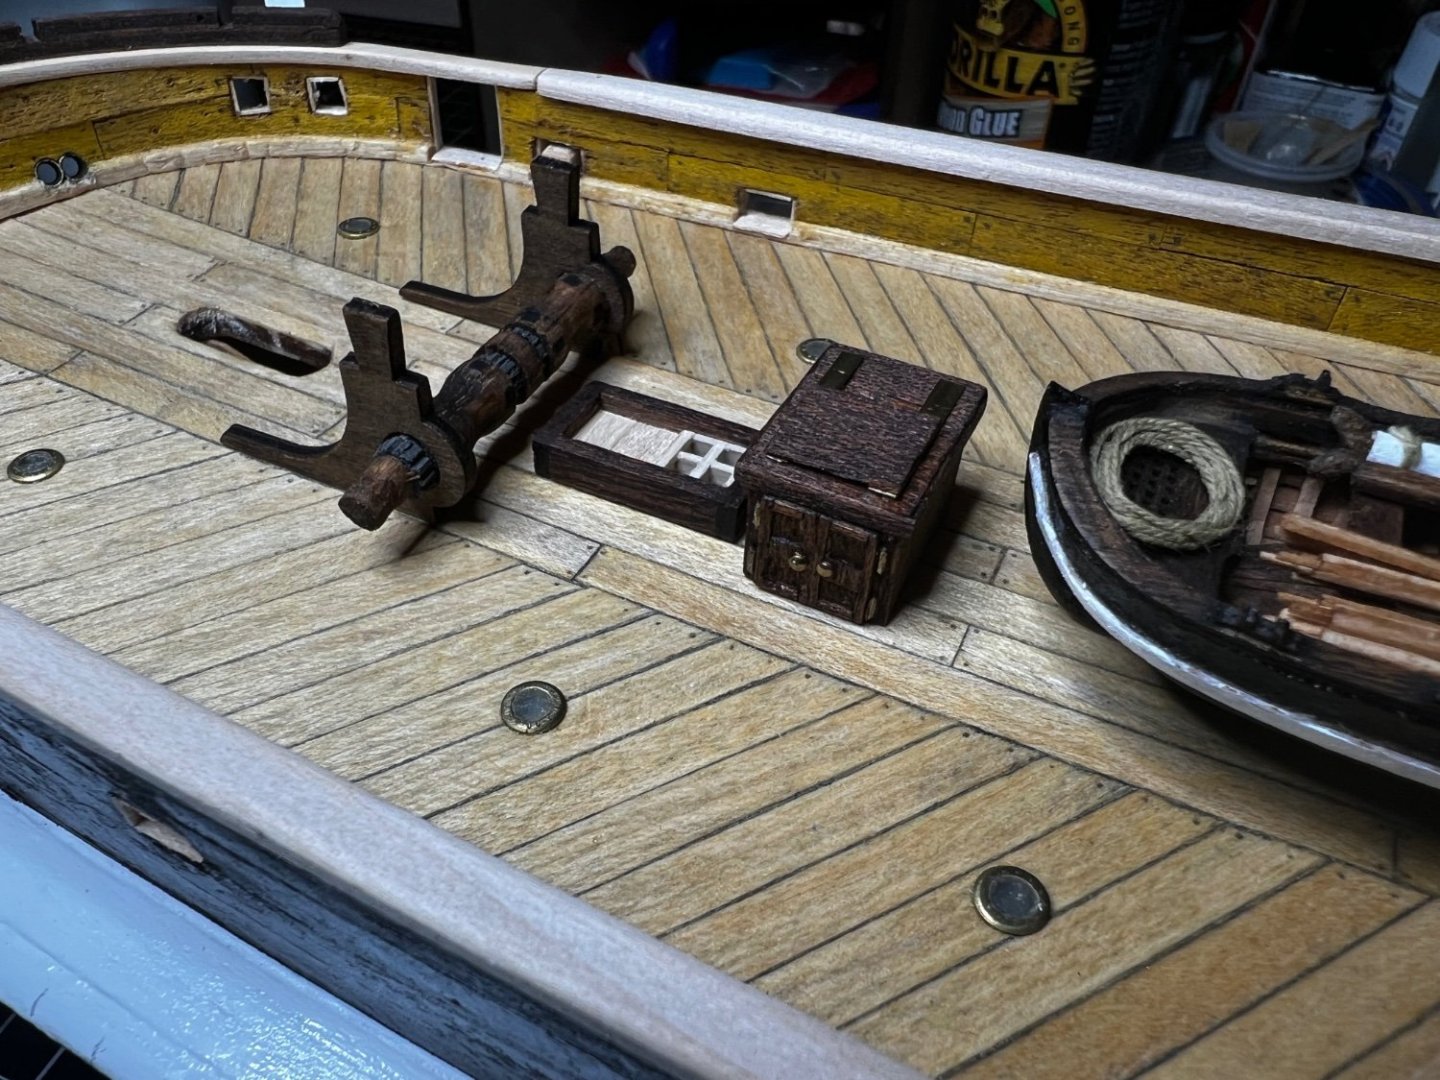
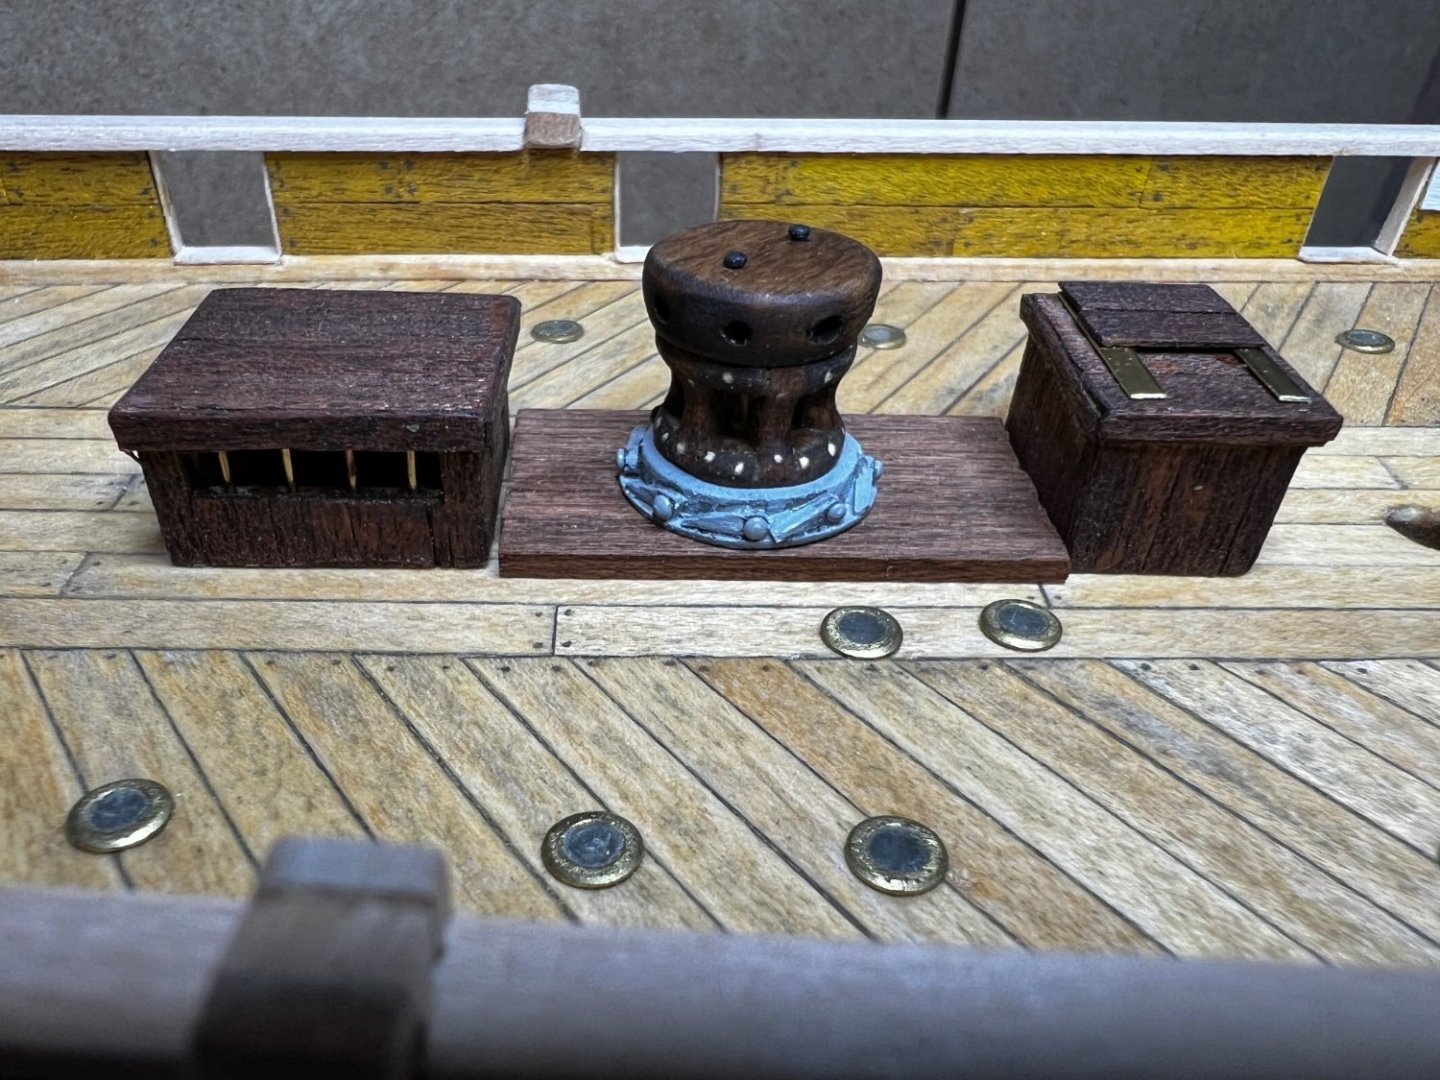
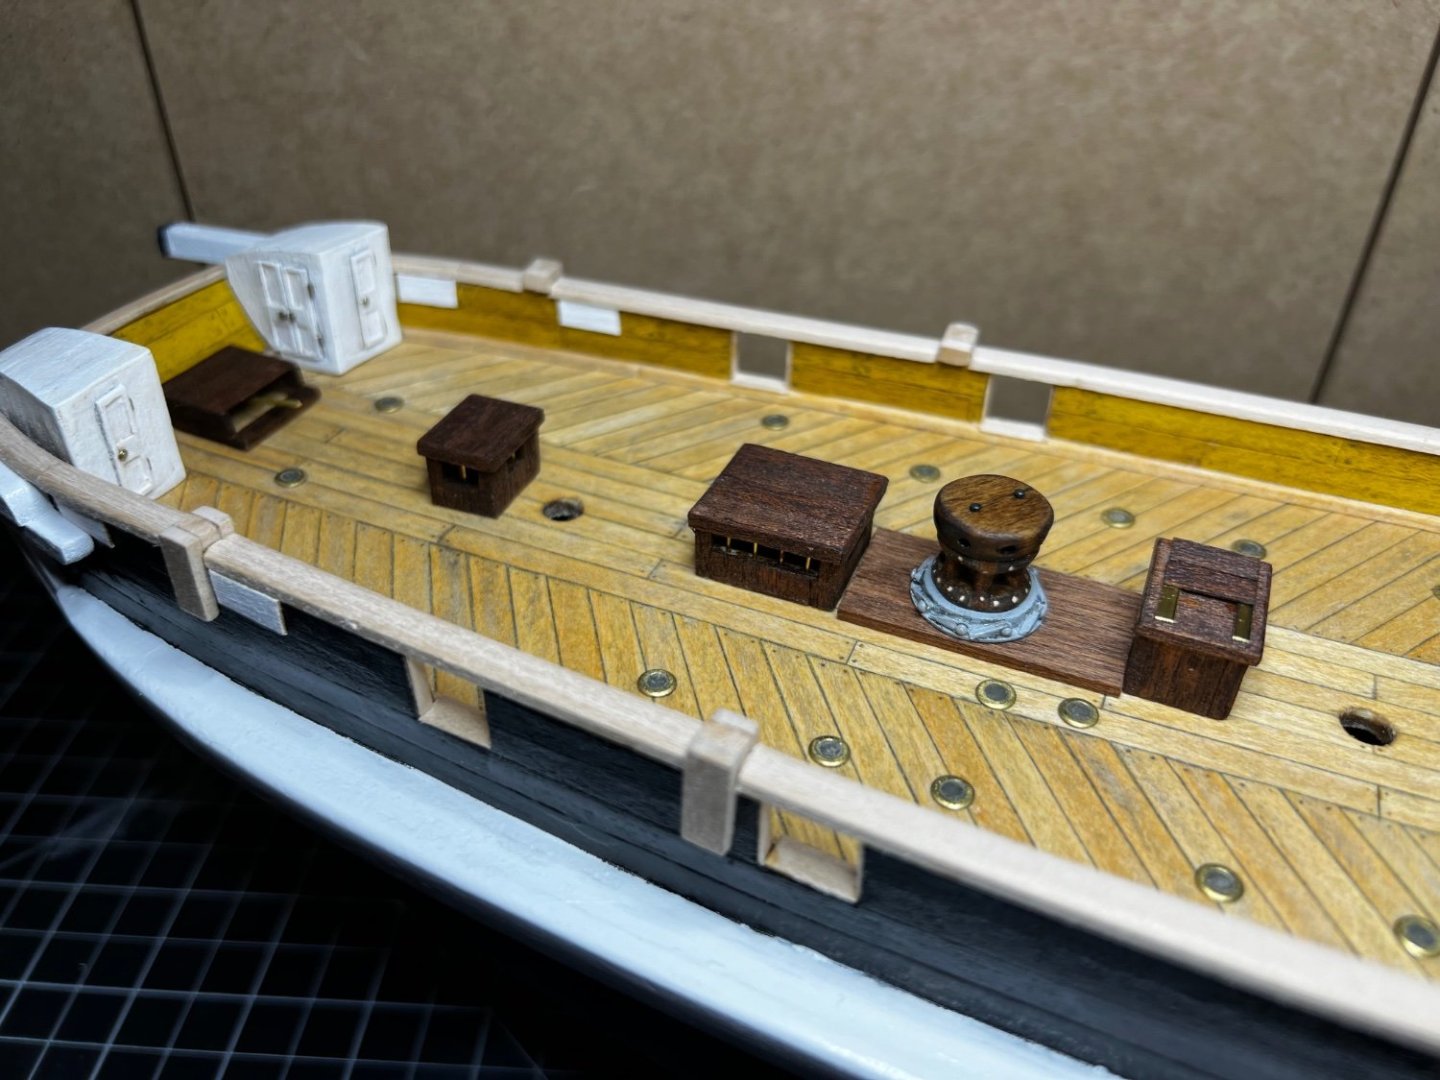
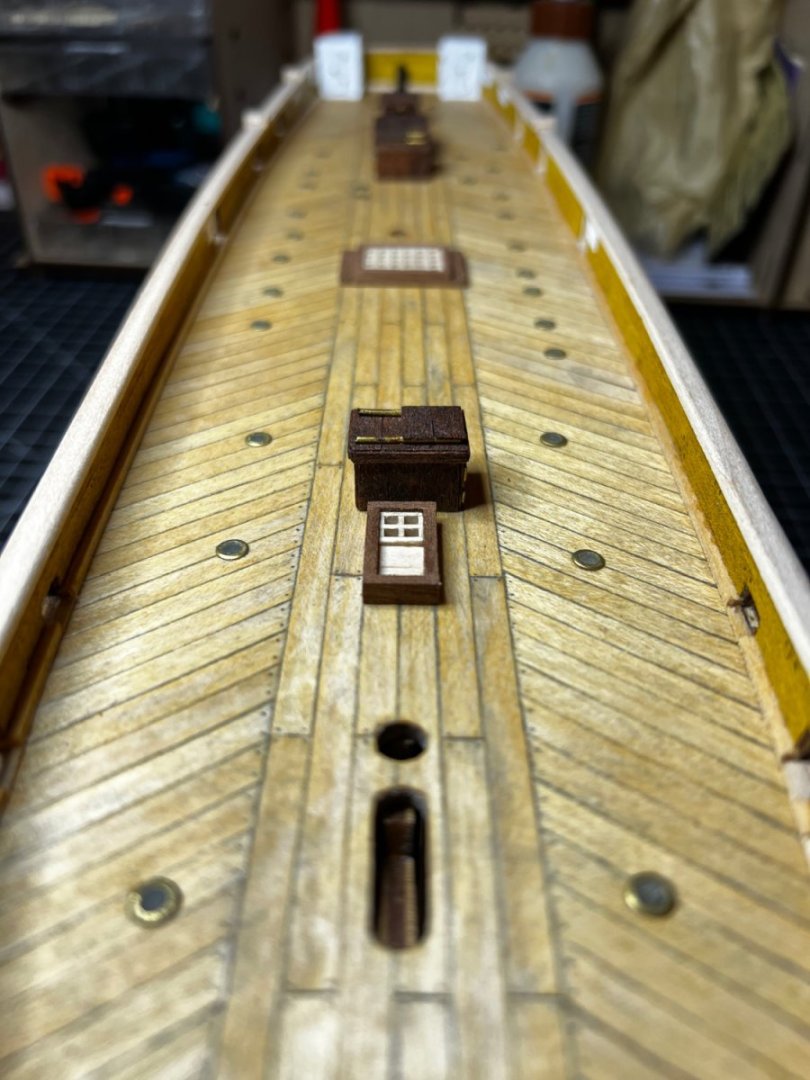
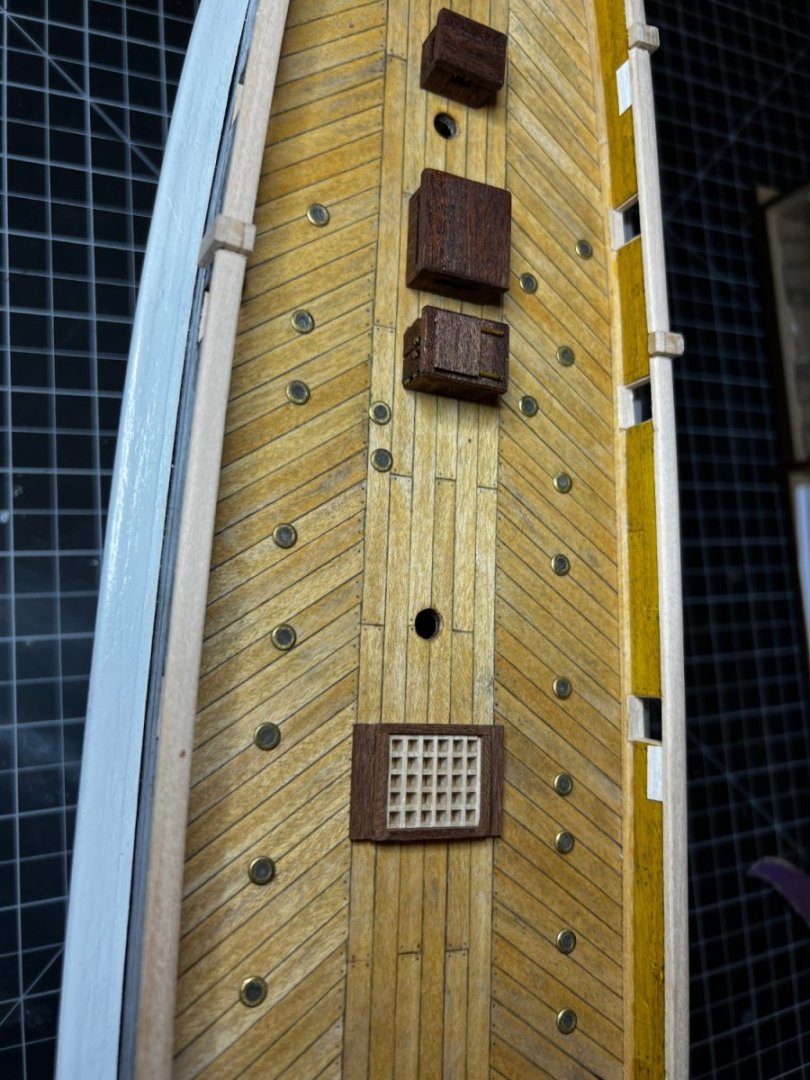
Hello all, Rainy day means Terror time! Got some work in on additional deck details: the windlass, the table, started the ships wheel, and added some other small details. The windlass came out ok, I used a dowel I purchased at the hardware store and the wood is pretty dense, so I was apprehensive about cleanly cutting square holes out of it. In the end I opted to draw them on. Very apparent in pictures, but much less so from ~ 18 inches away, which is as close as any observer should be viewing this in real life. Also, either I calculated wrong or Occre did, but I do not think I received enough brass wire to make the required number of chain plates! So I took the opportunity to purchase some 3mm wide brass sheet. Looks much more the part anyway and I’m quite pleased with it. Thanks for checking in!


-
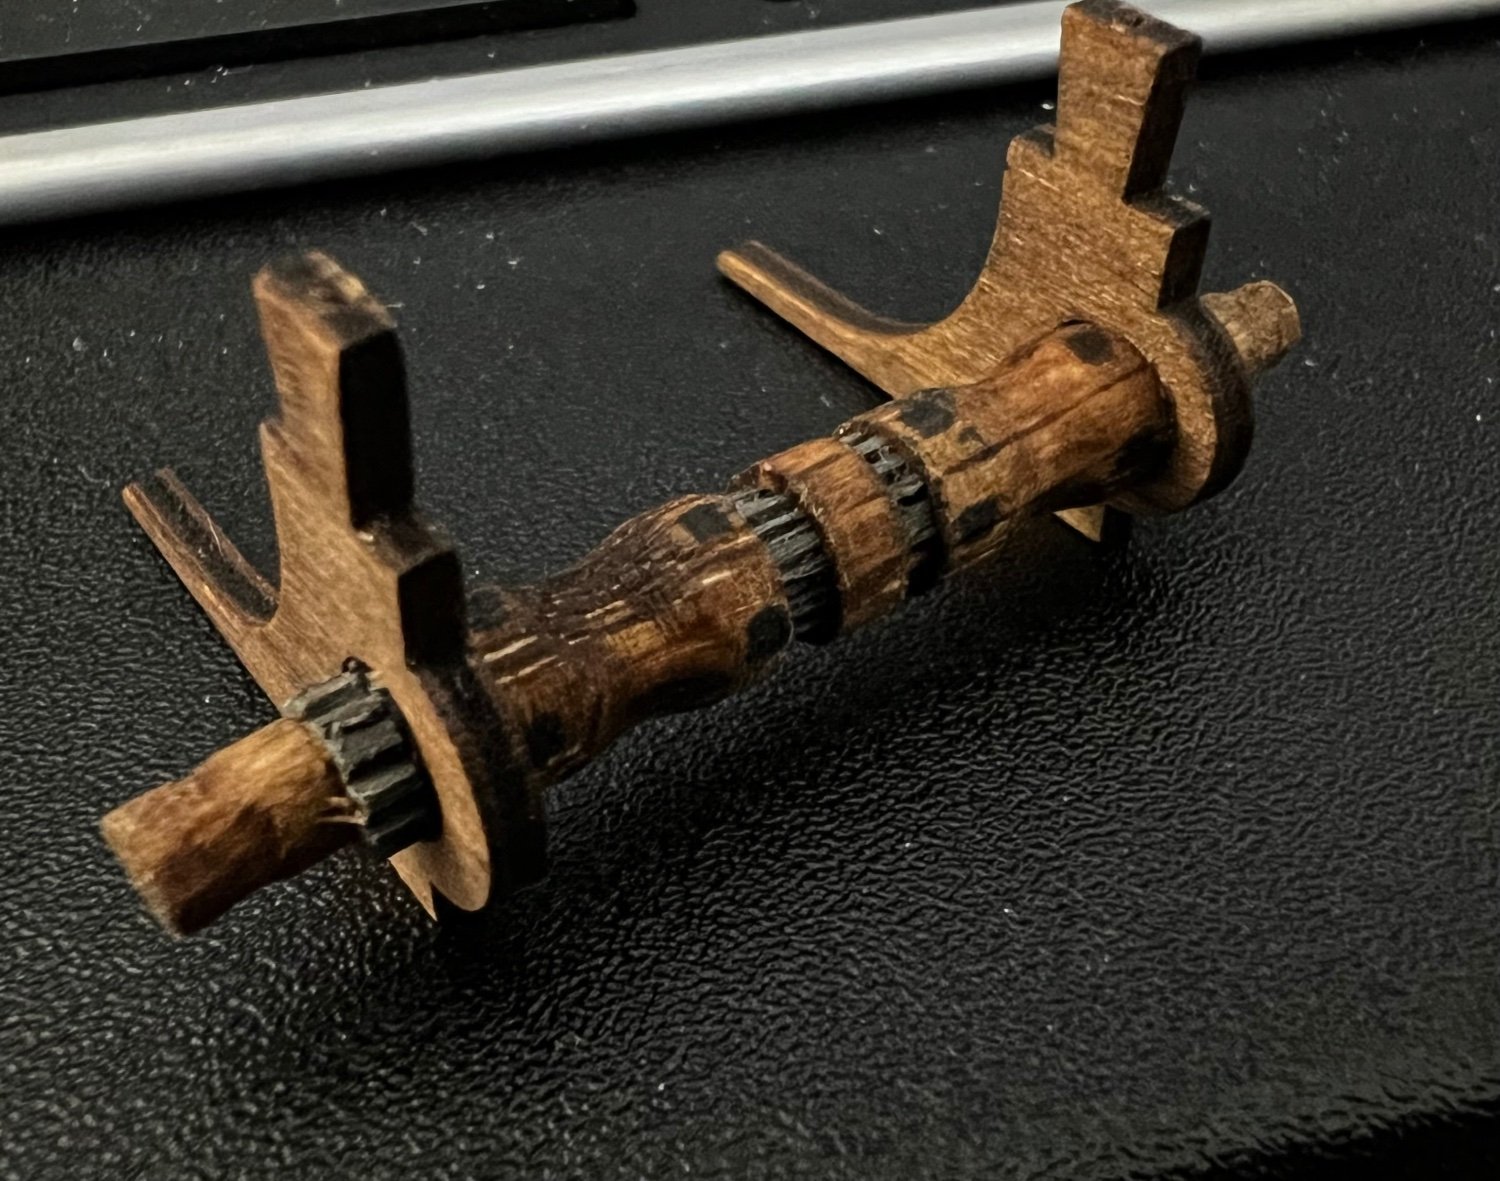
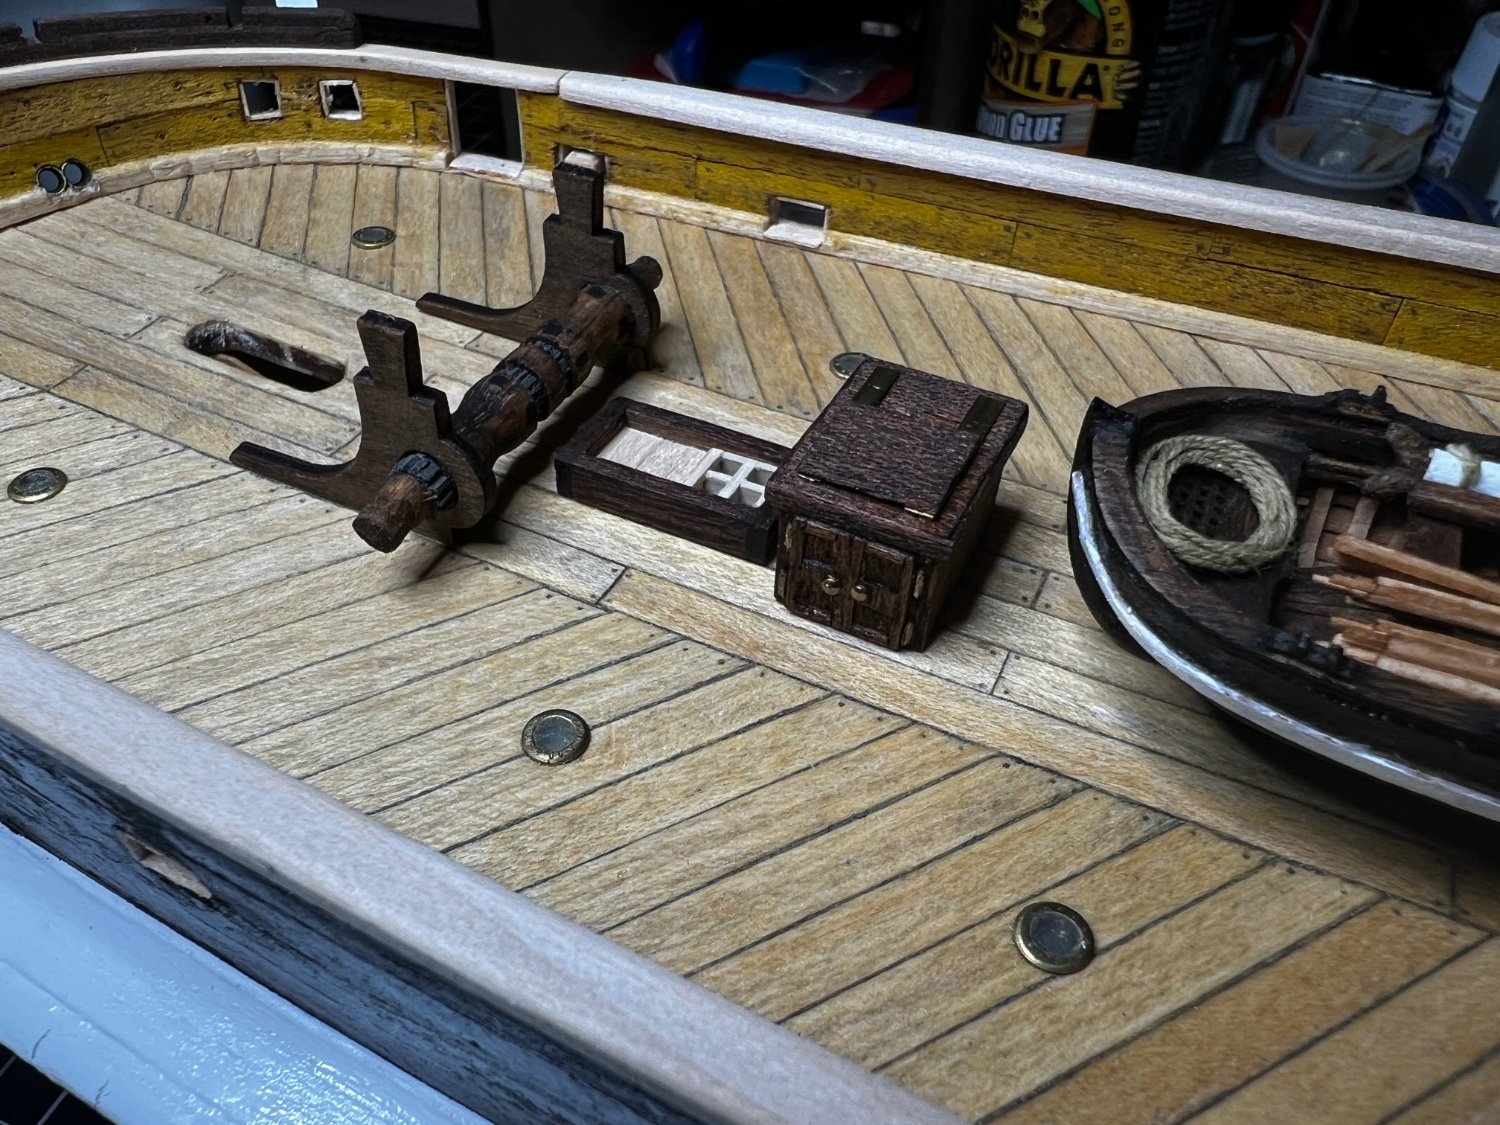
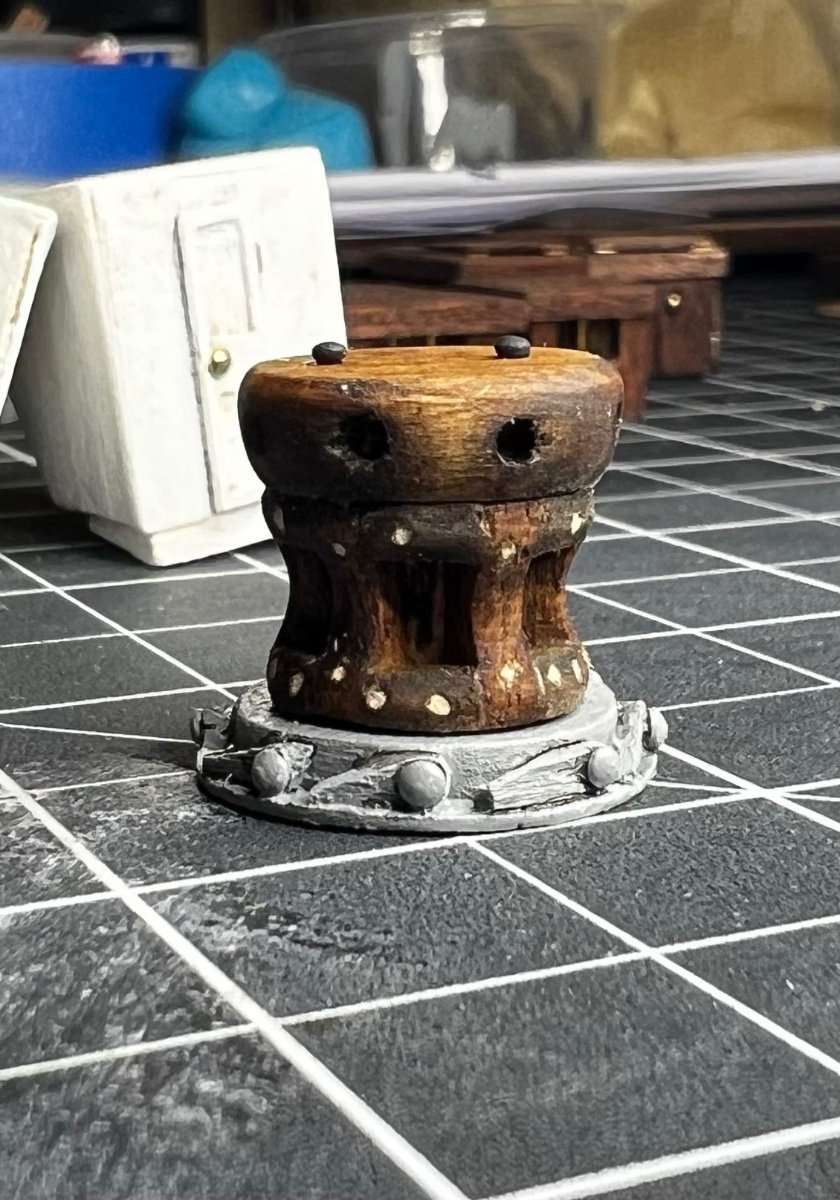
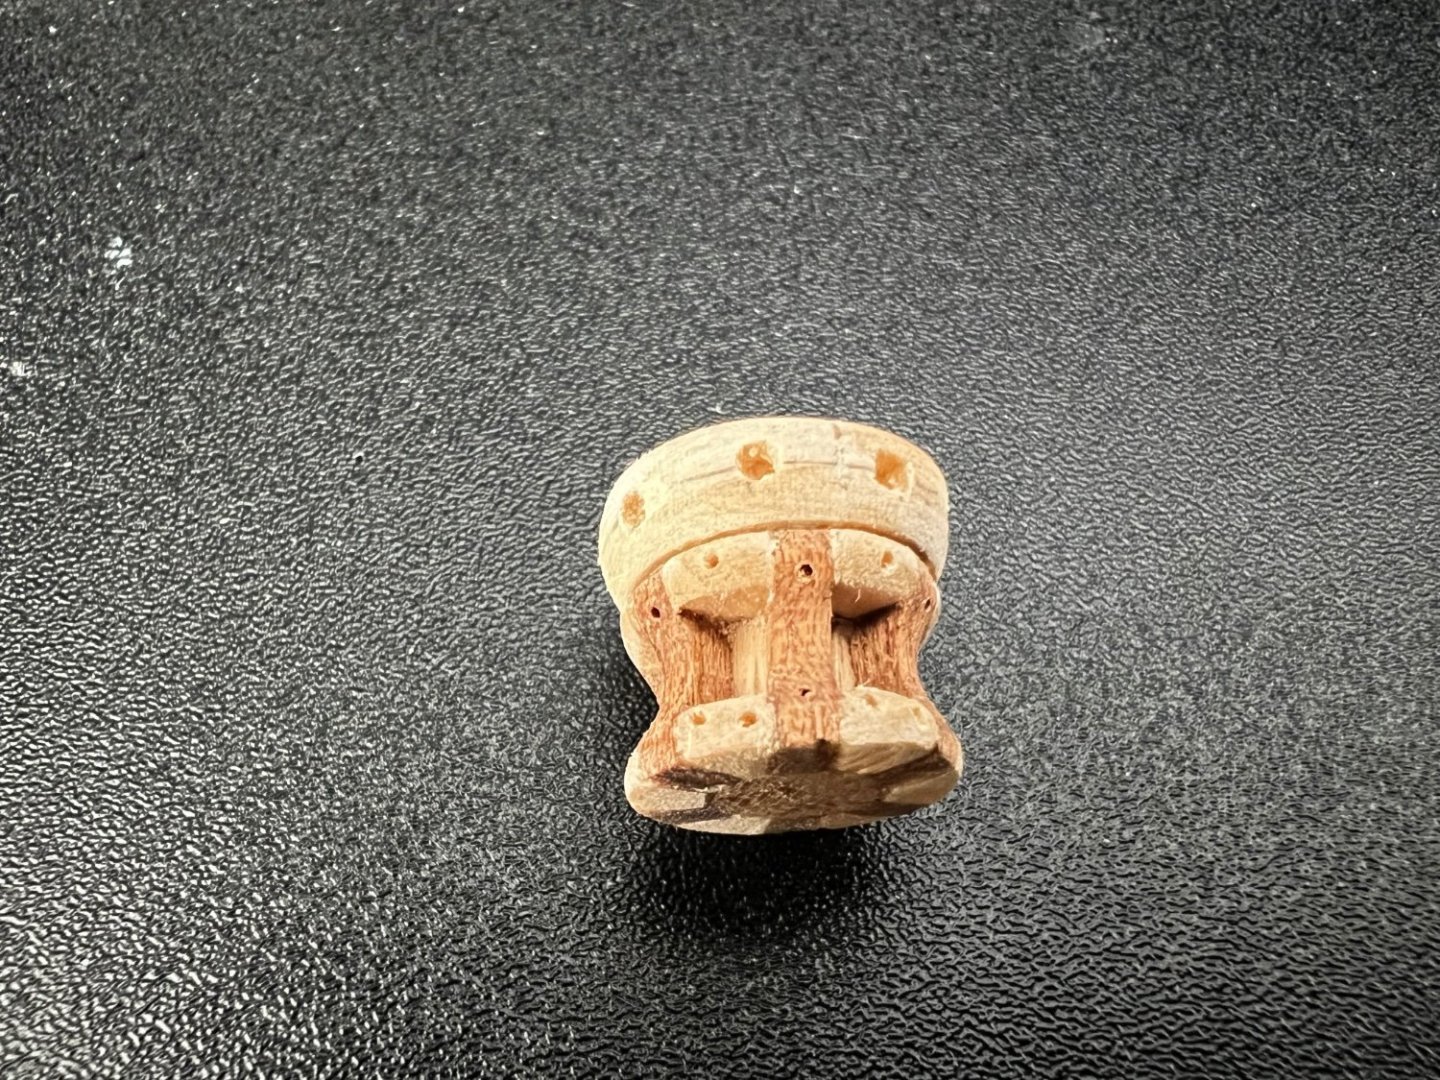
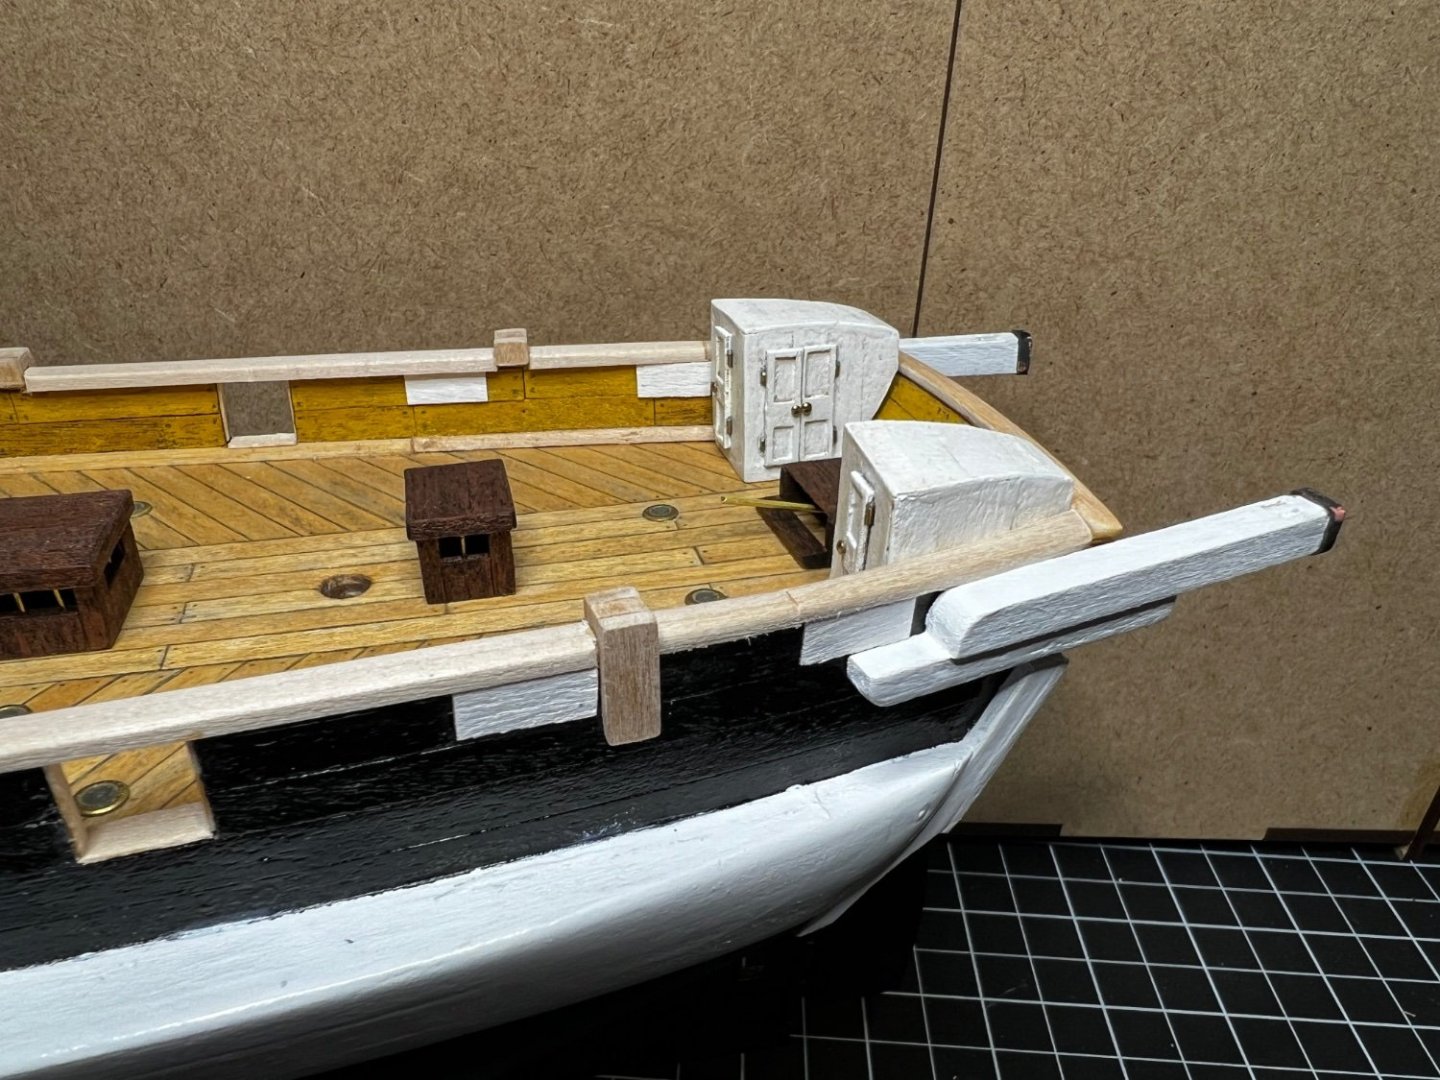
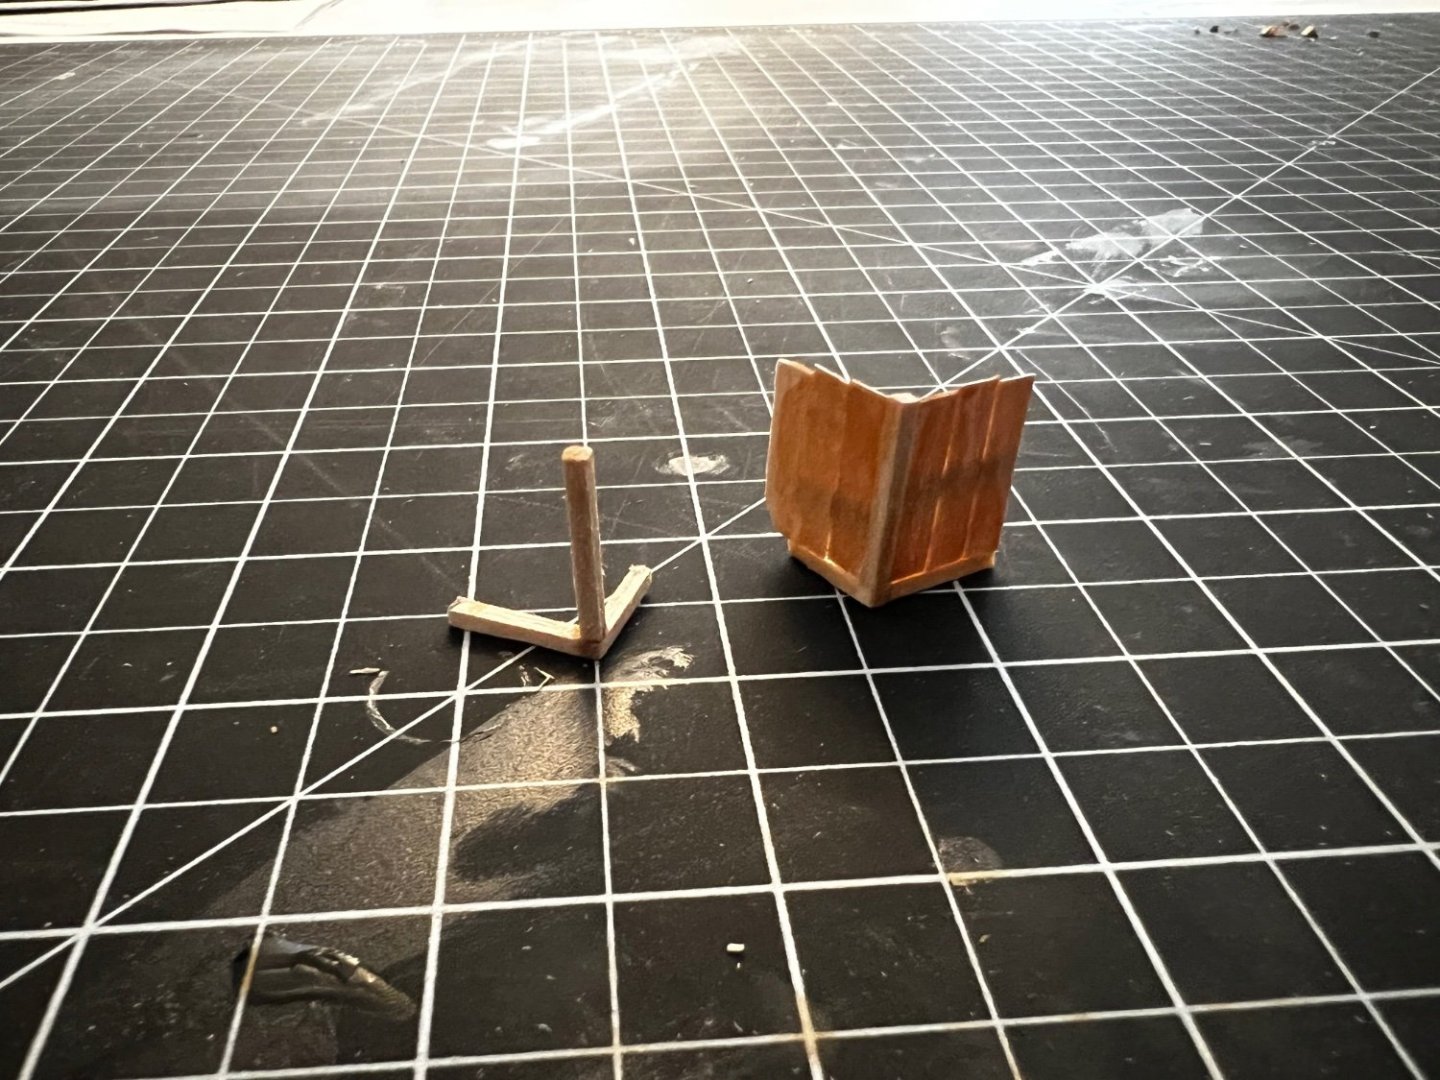
Hi all, got some more time on the Terror the past few weeks, some pictures and updates below. First up was the Phillips capstan. I’d never built something so tiny from scratch before and I can’t say I’m itching to do it again. It did turn out a bit squat, but overall I’m satisfied with the appearance, so it’s going on the ship. Beats the kit capstan anyway… Next, the stern davits. I kept them straight as I do not trust myself to get a clean angle on both that will look symmetrical. Also added the little housing over the rudder post. Thanks for checking in!


-
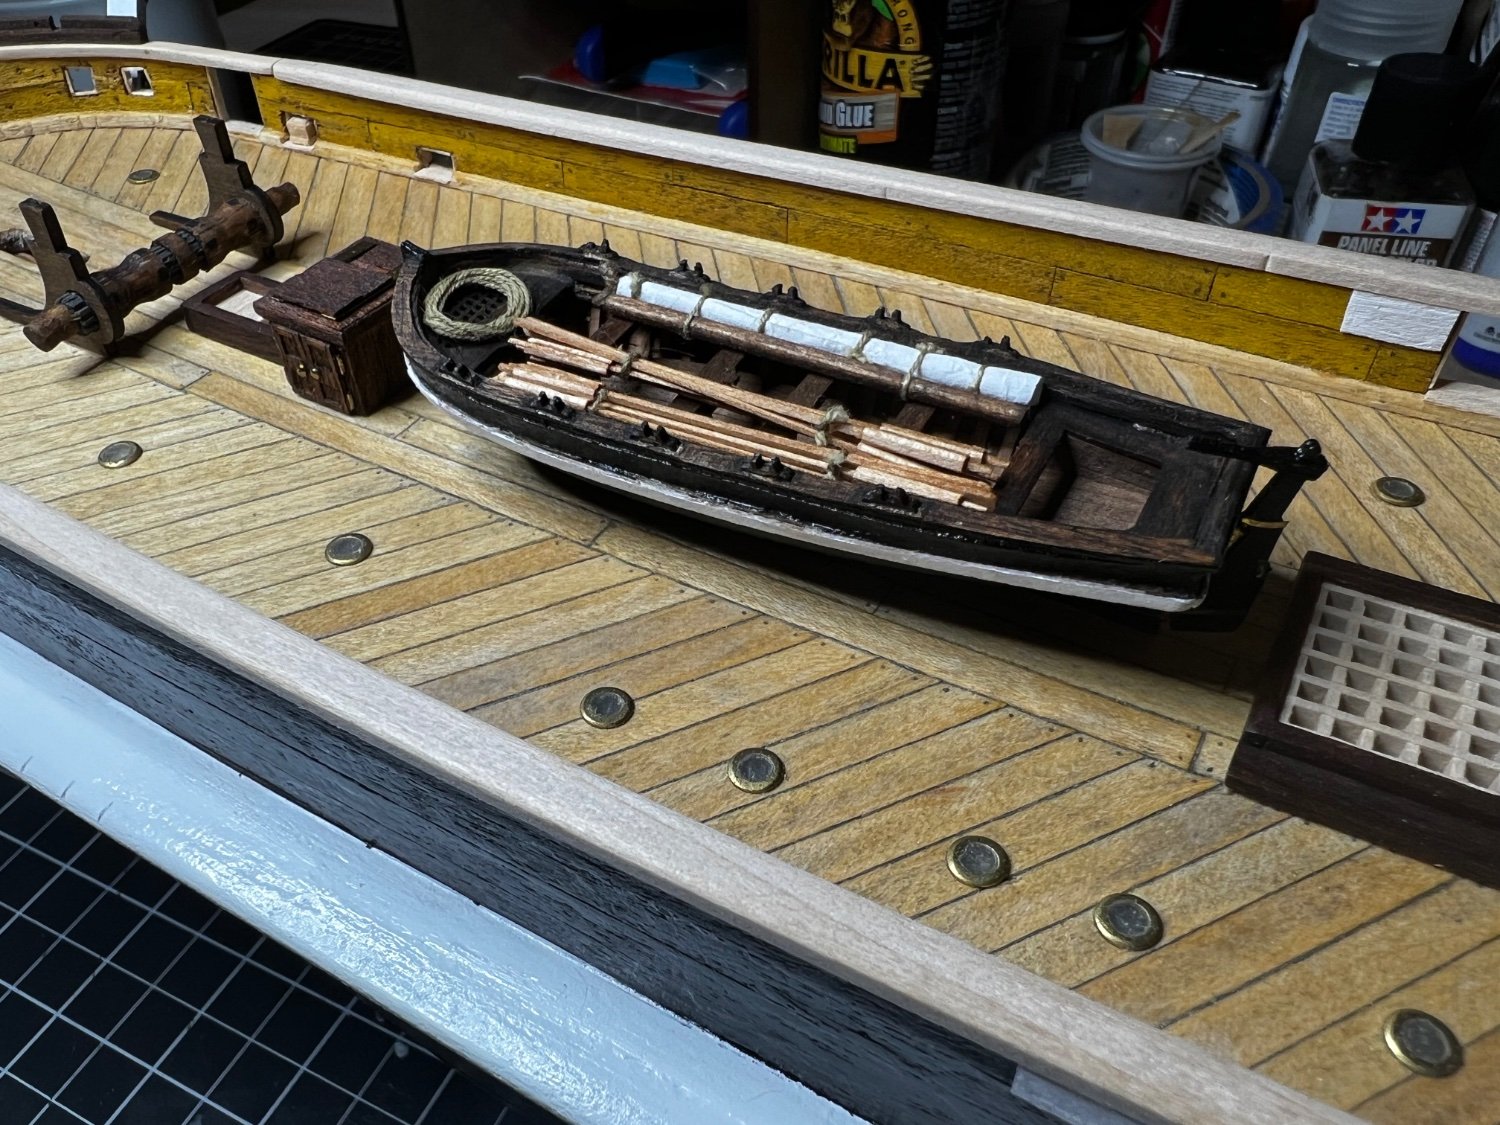
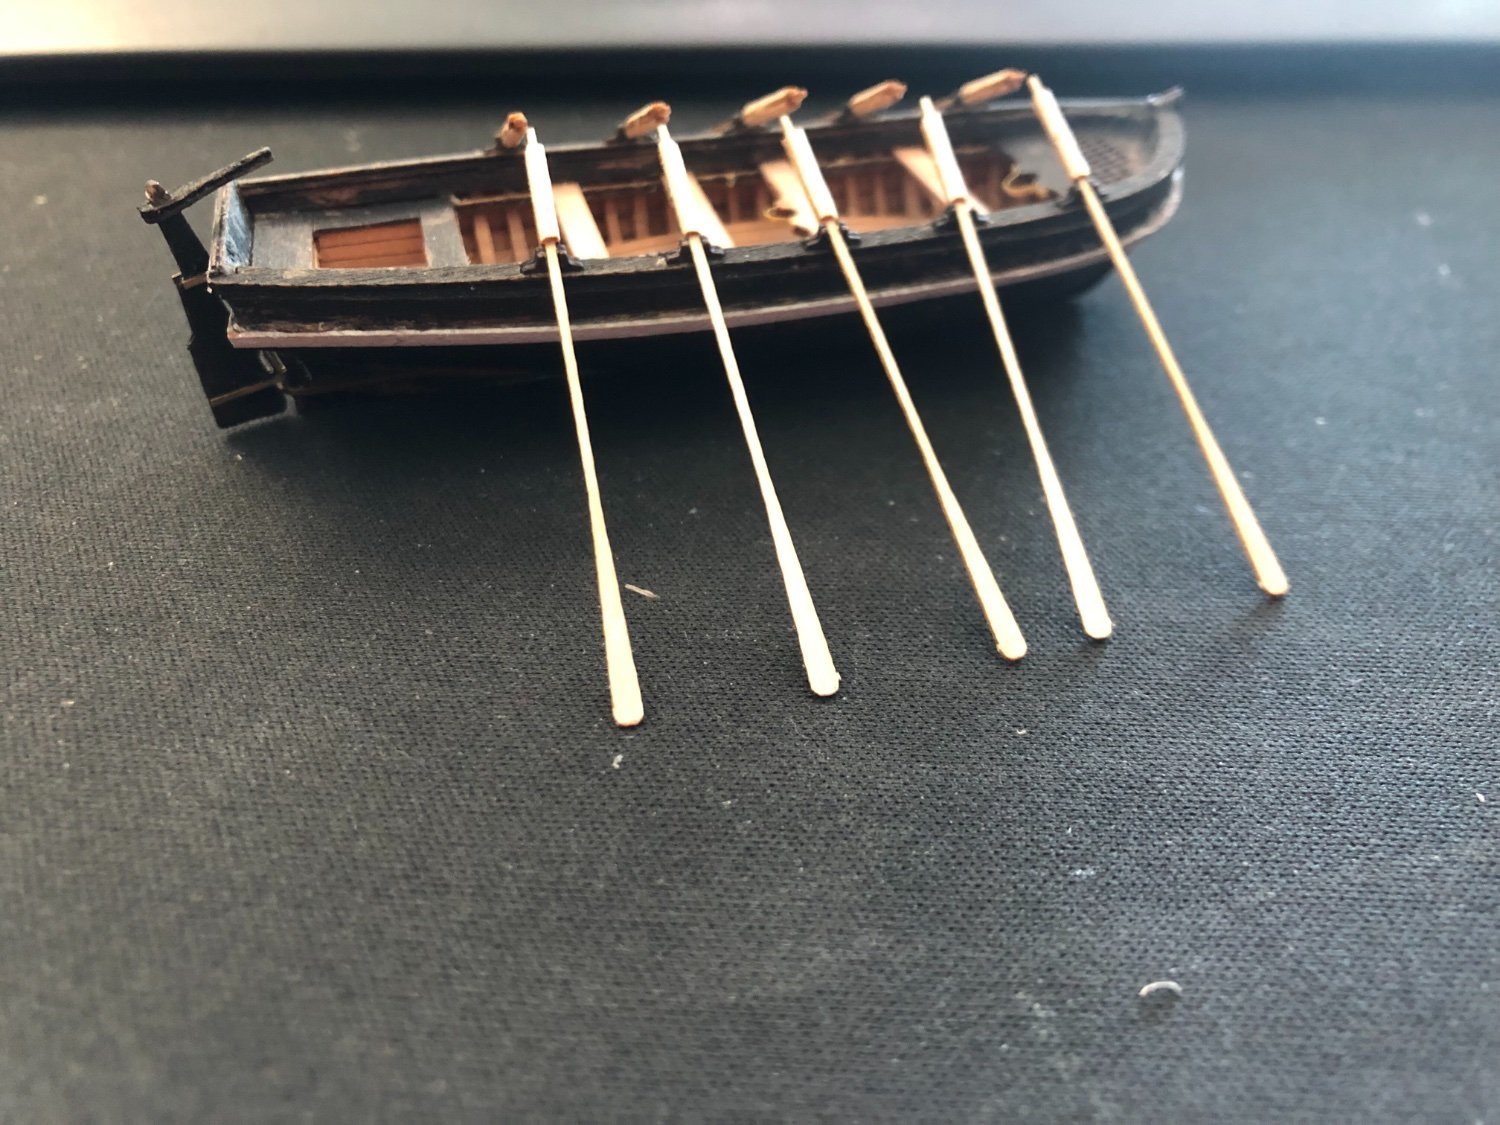
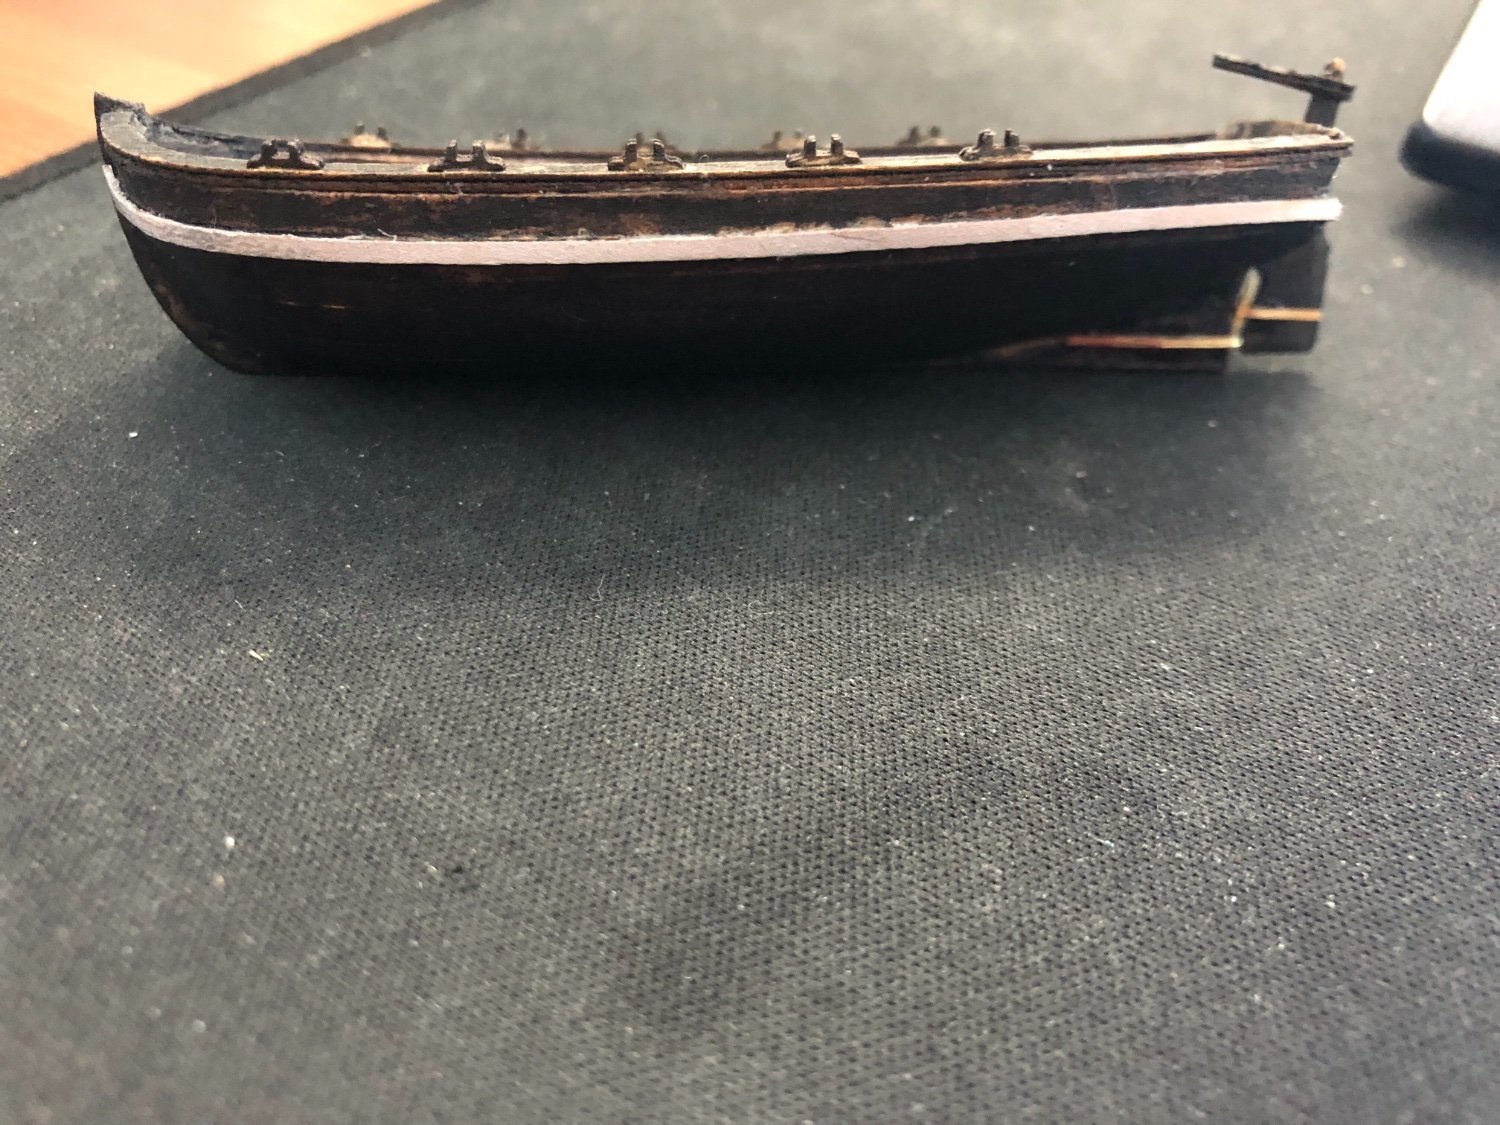
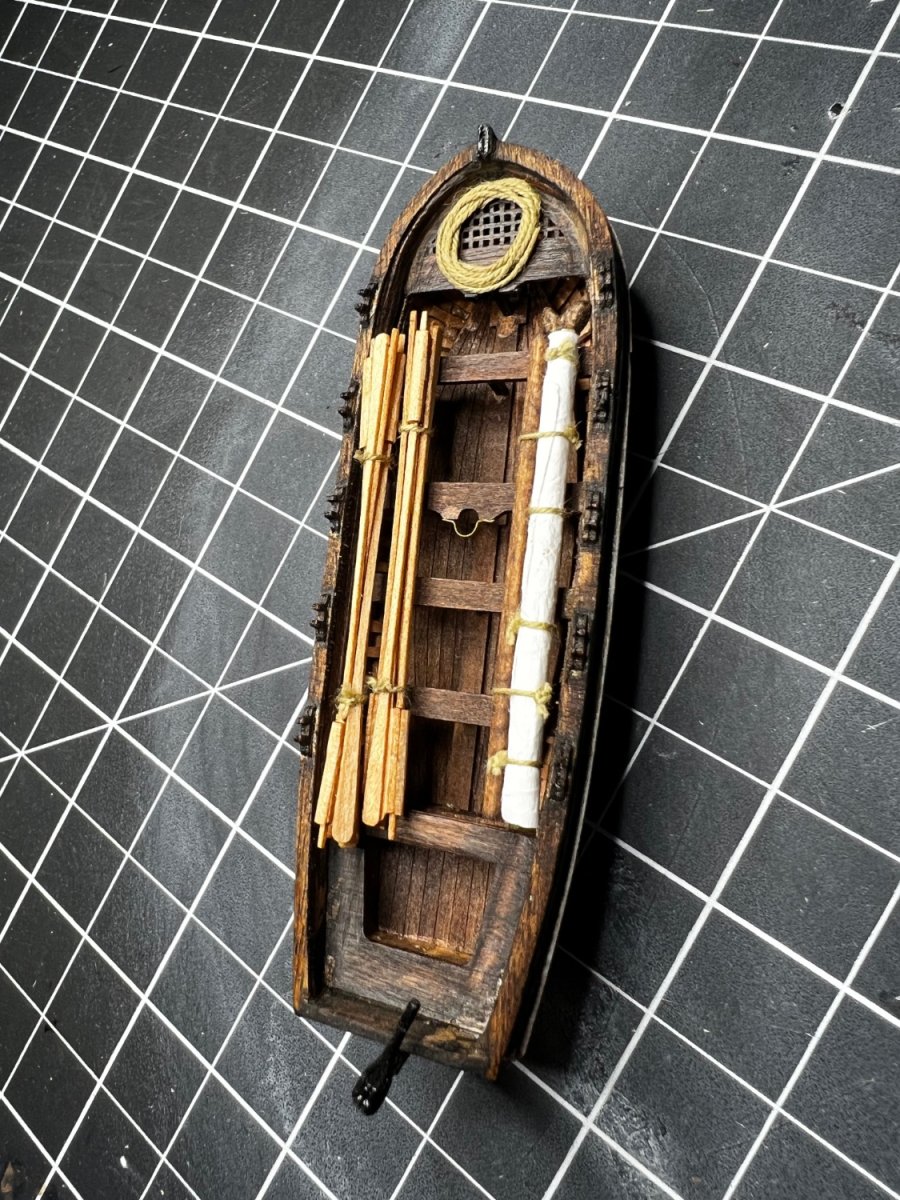
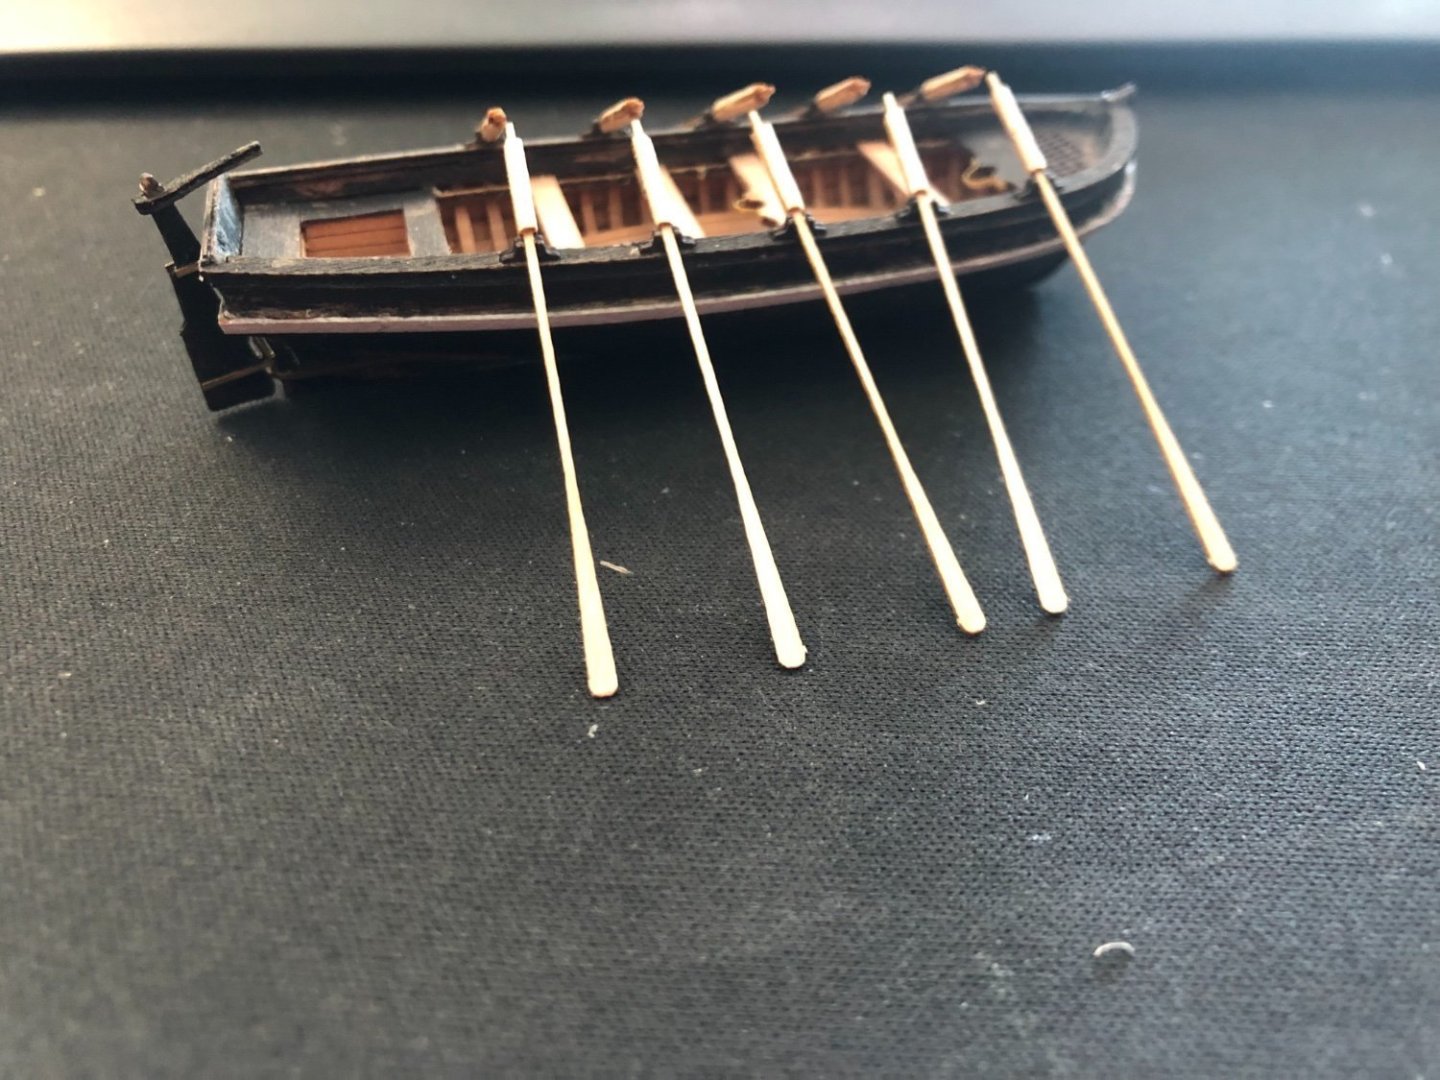
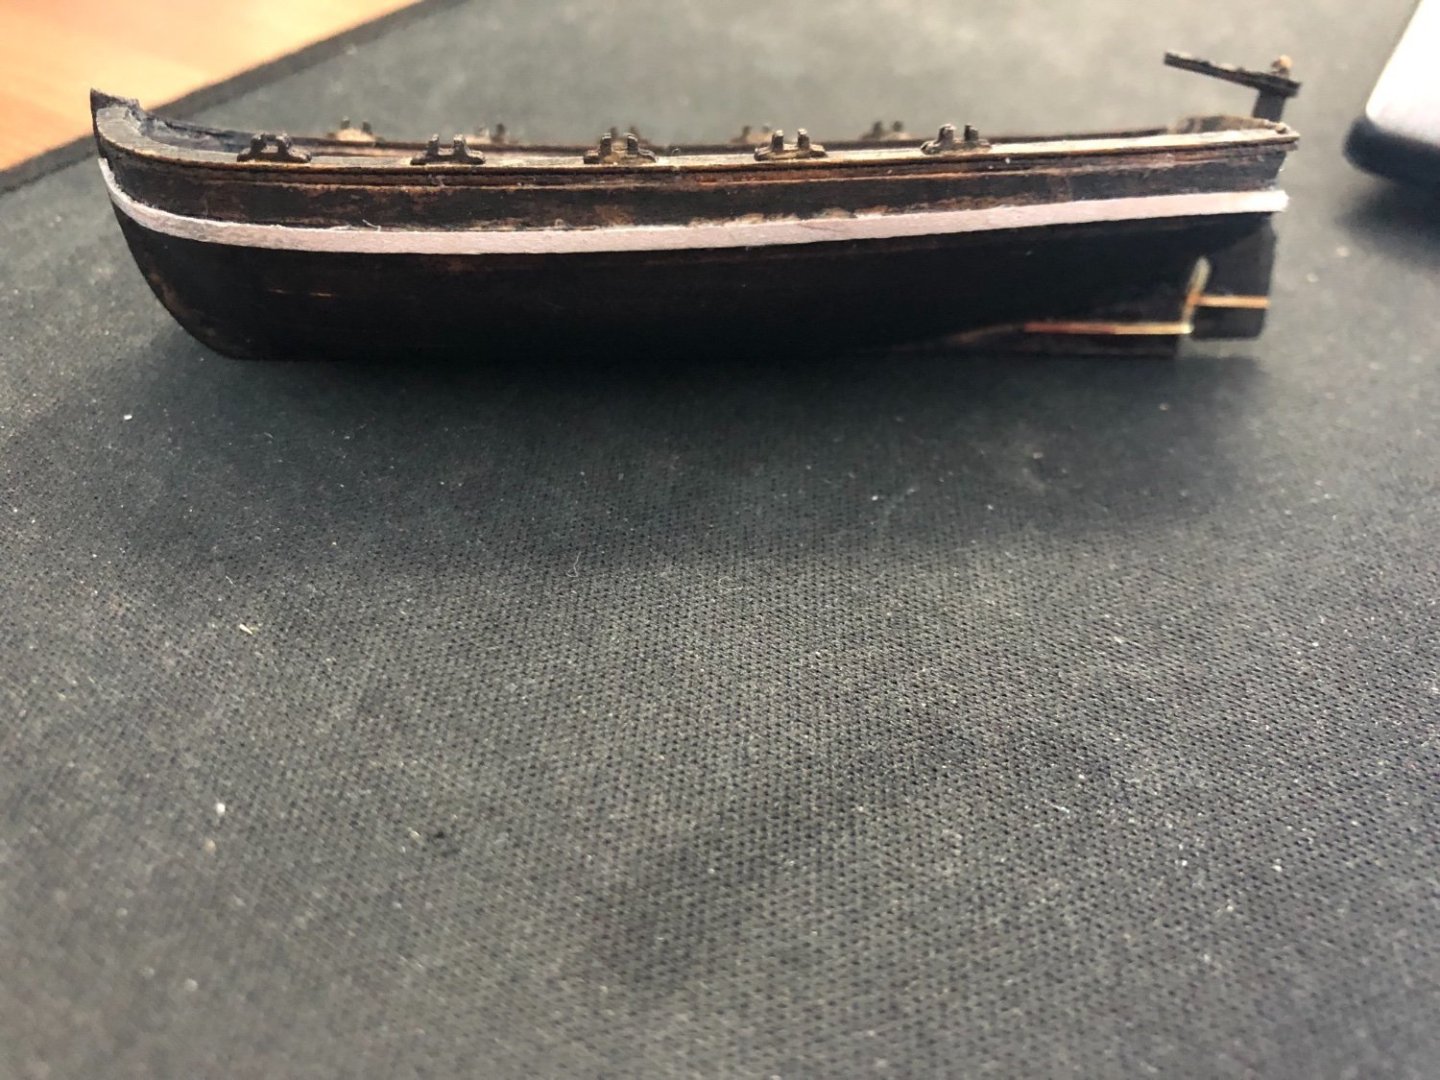
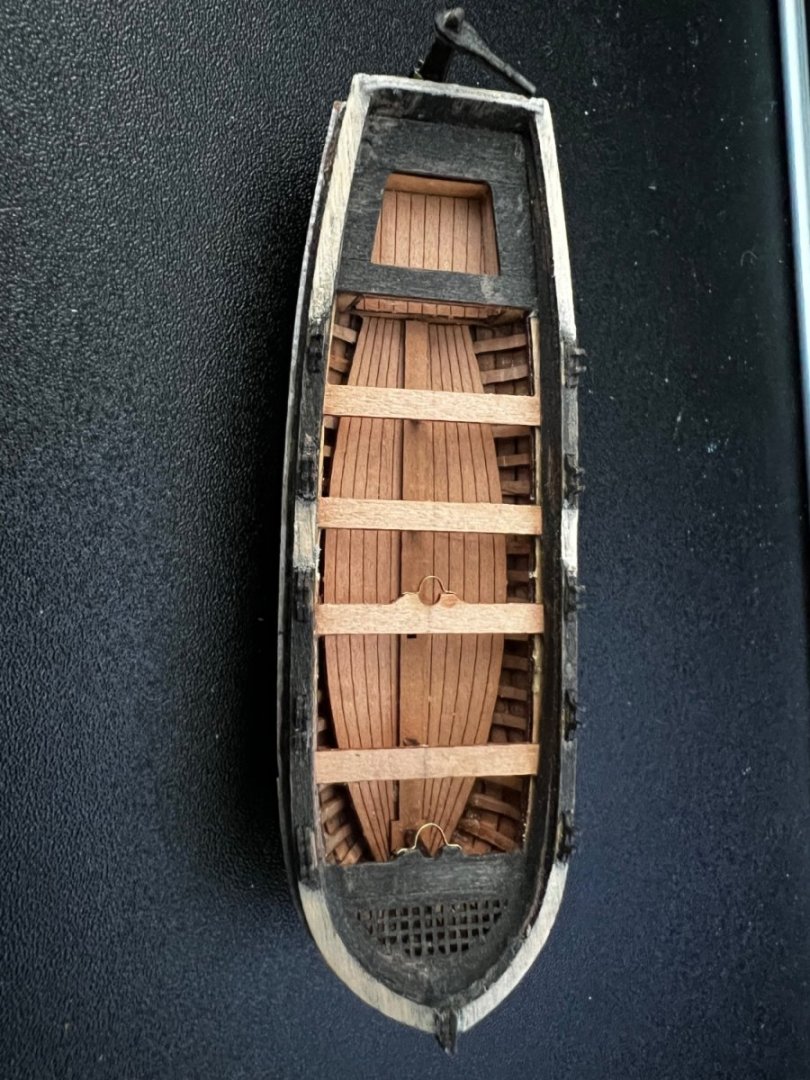
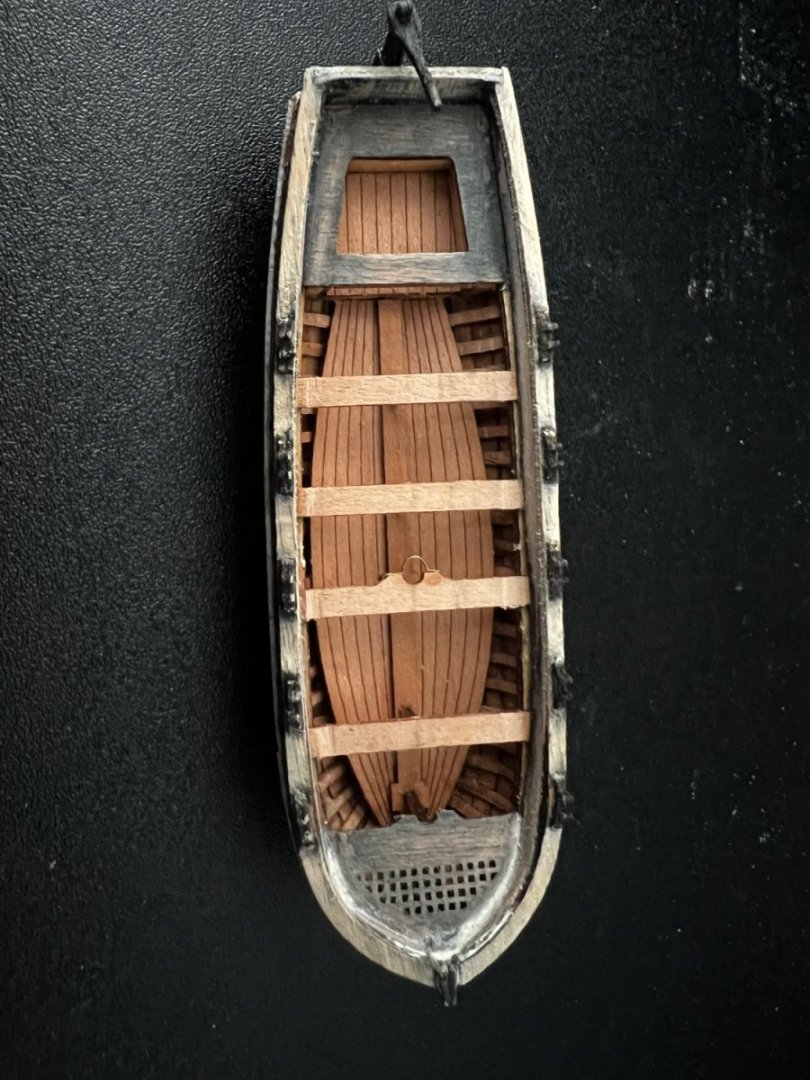
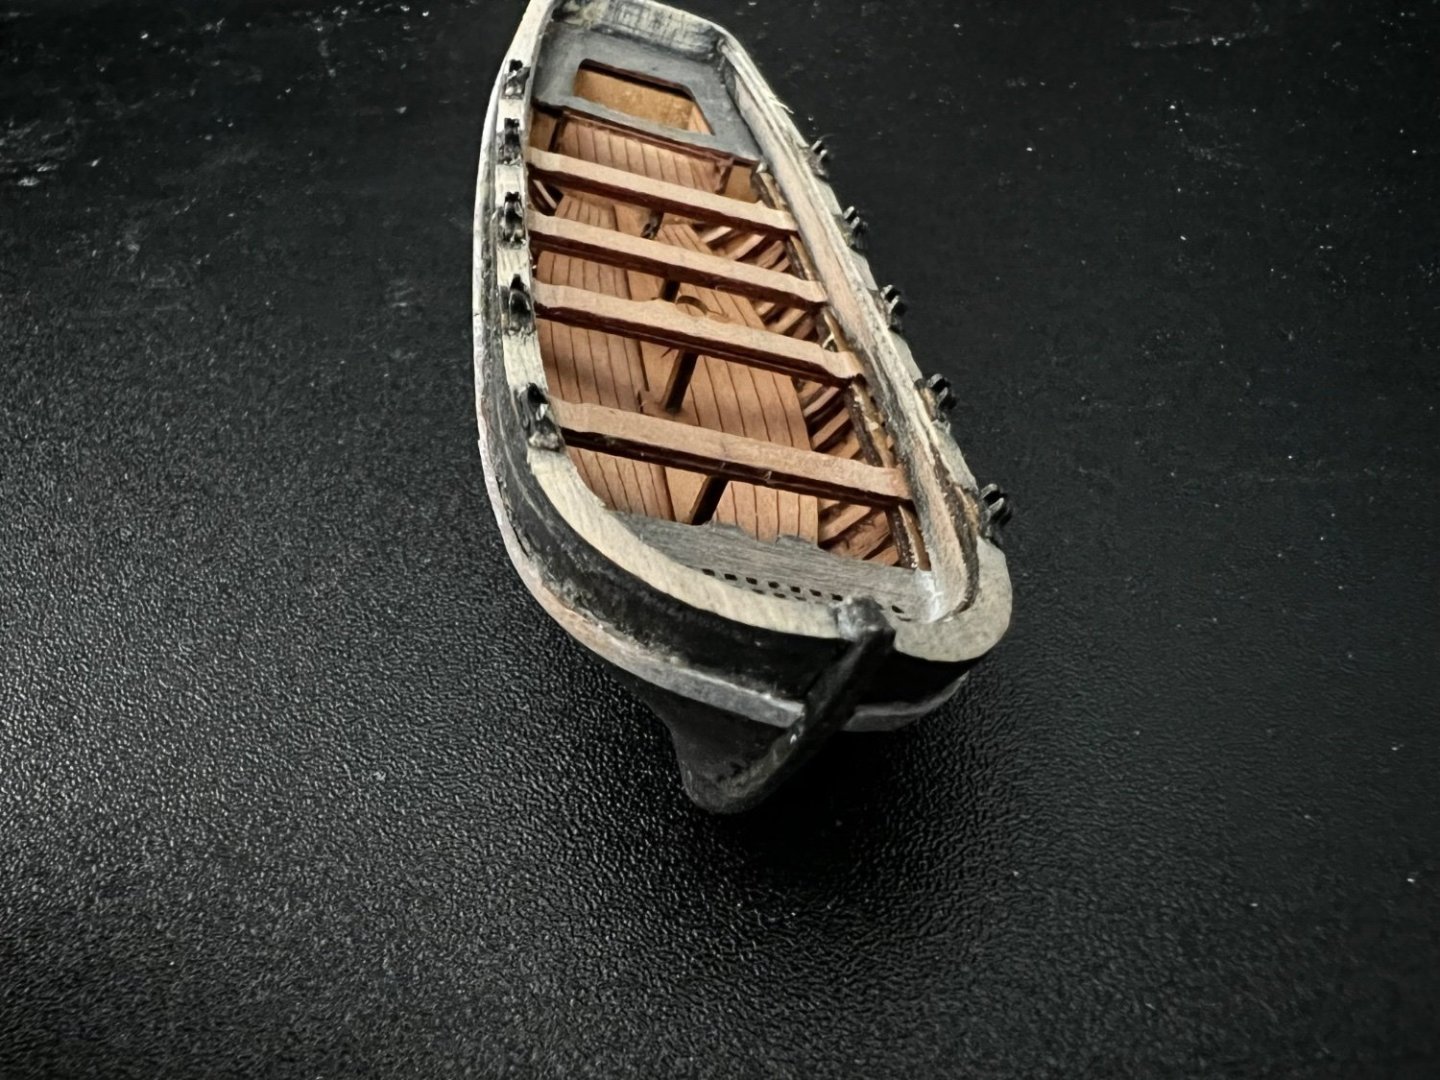
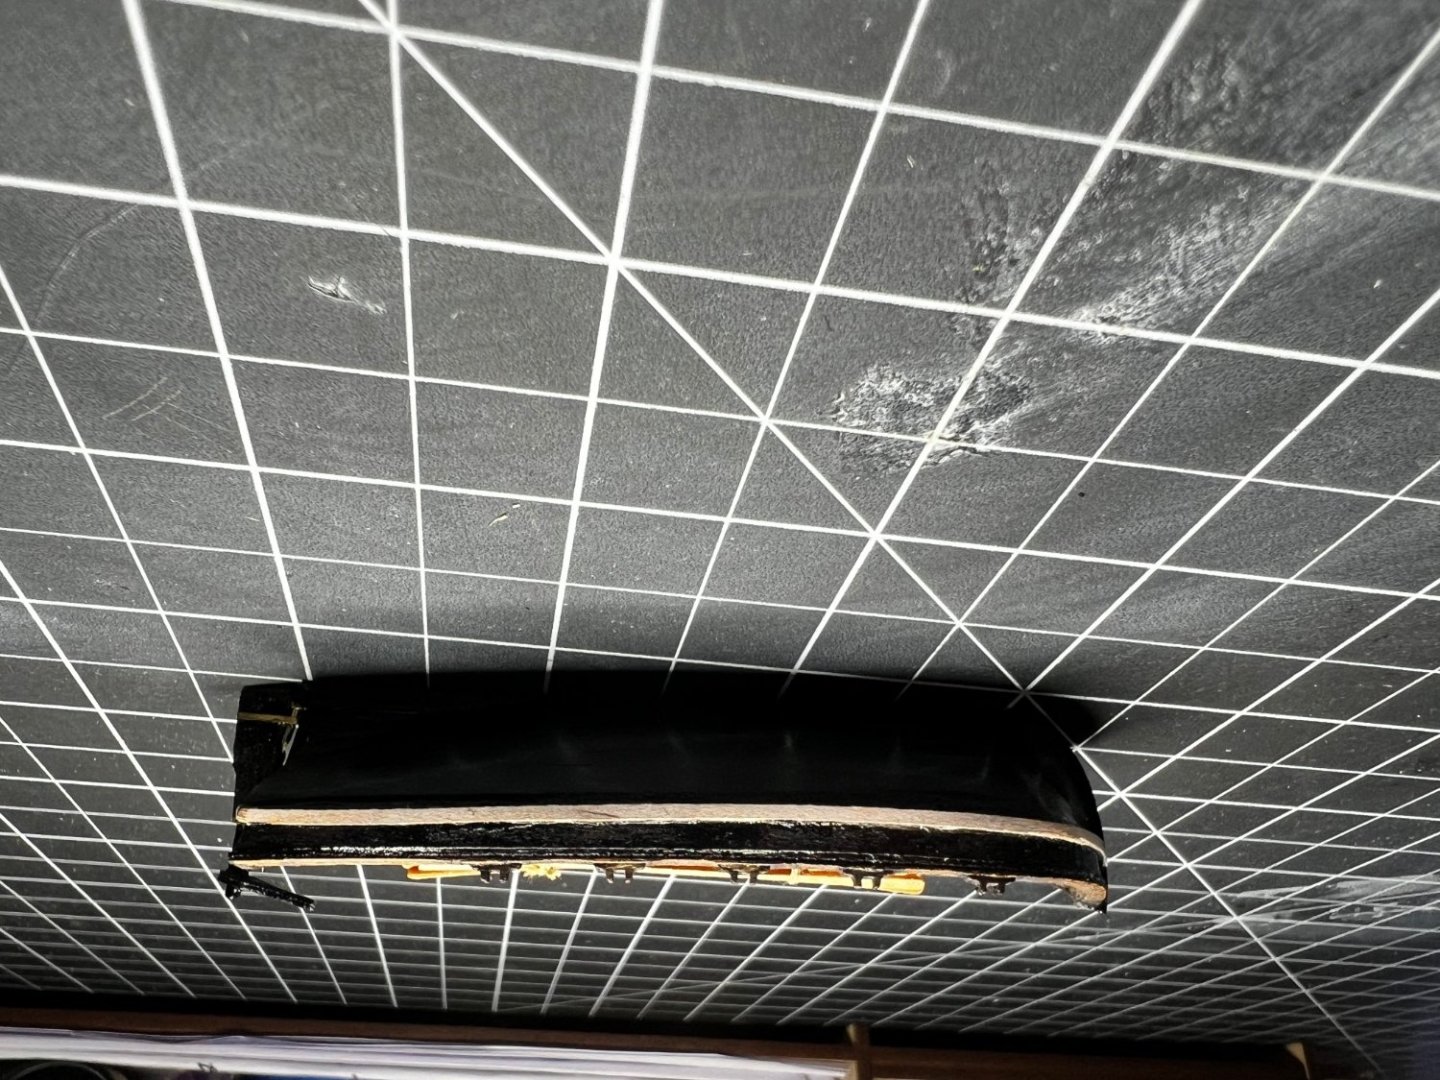
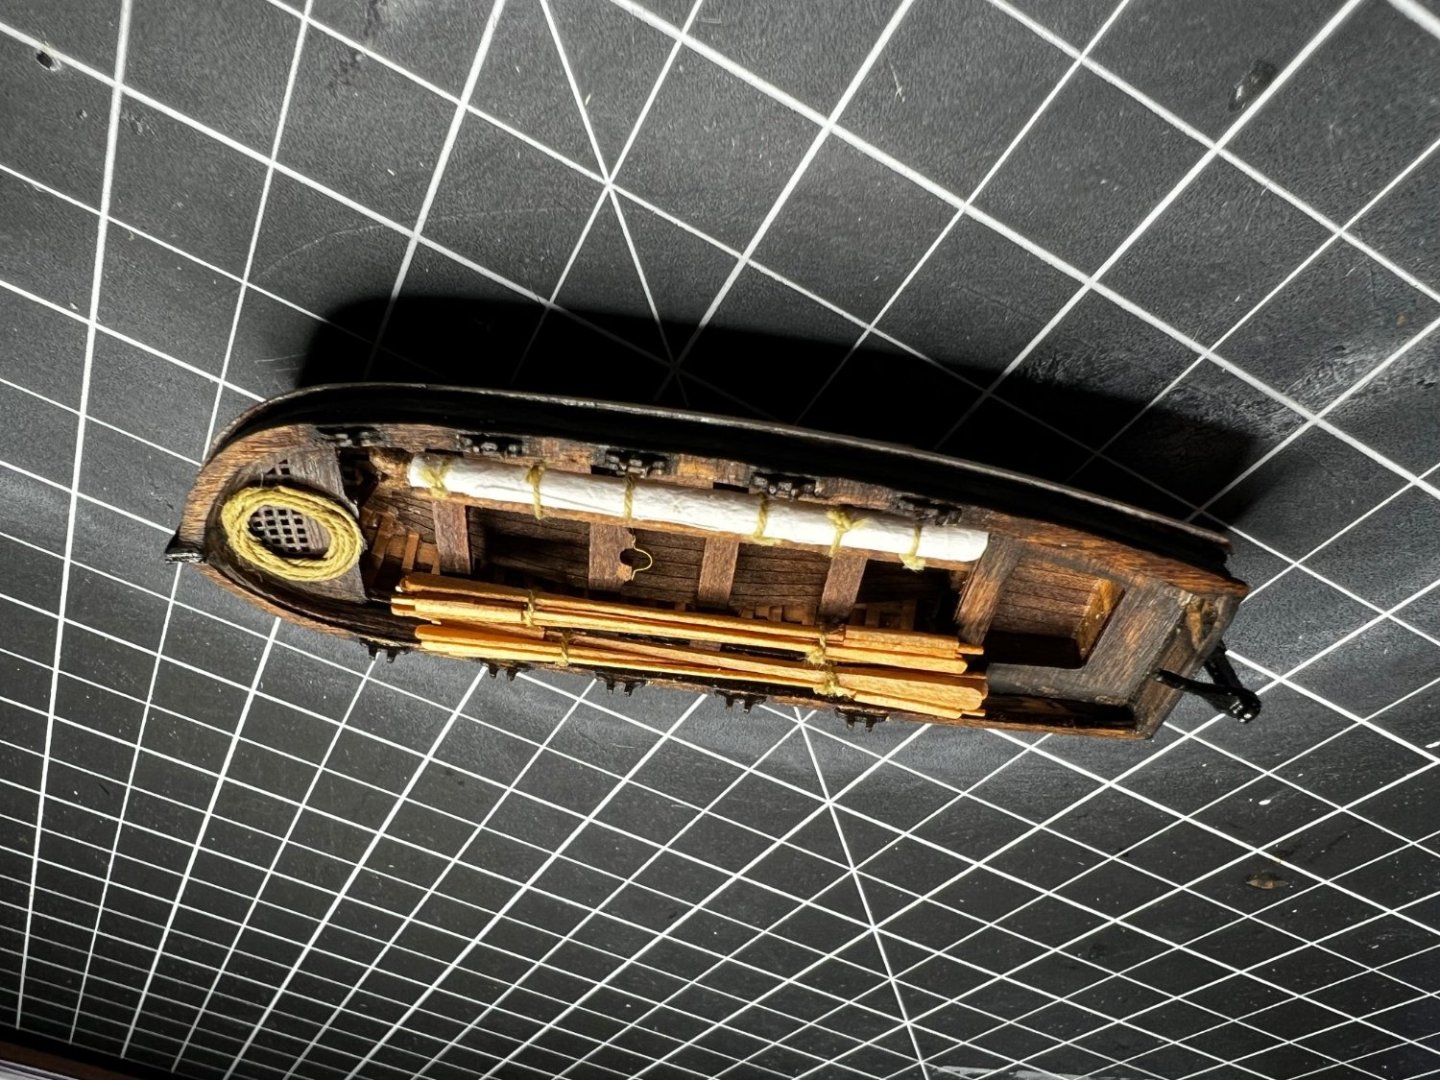
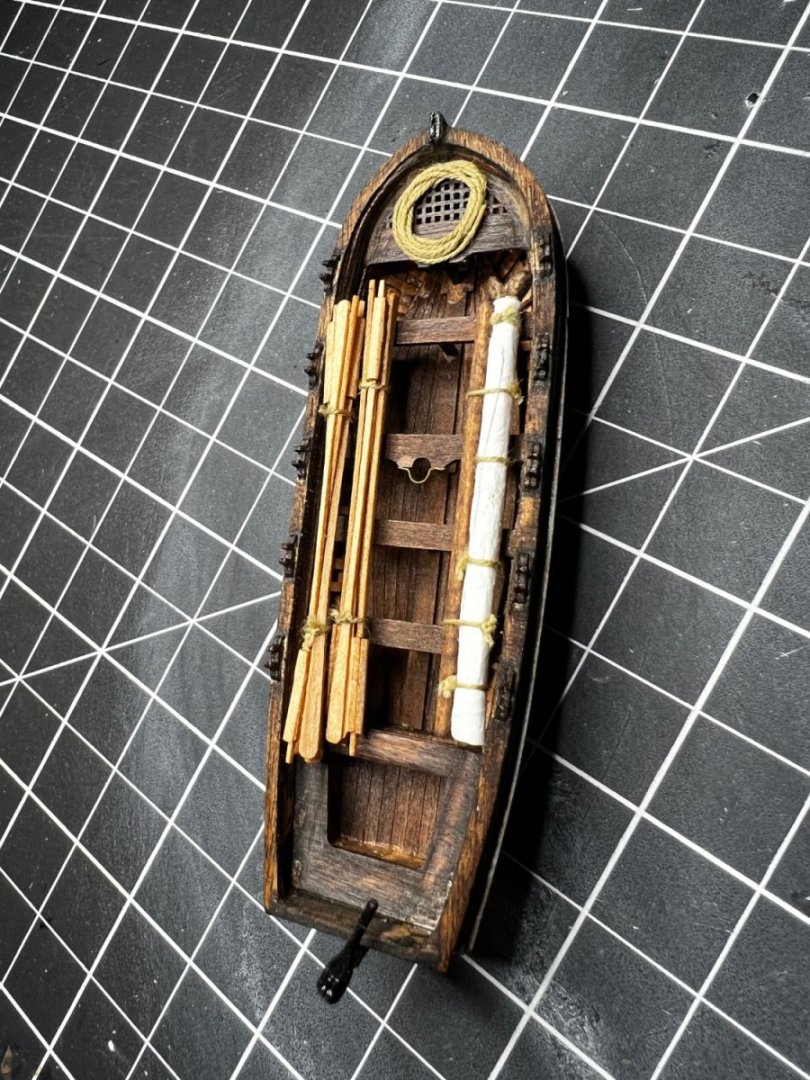
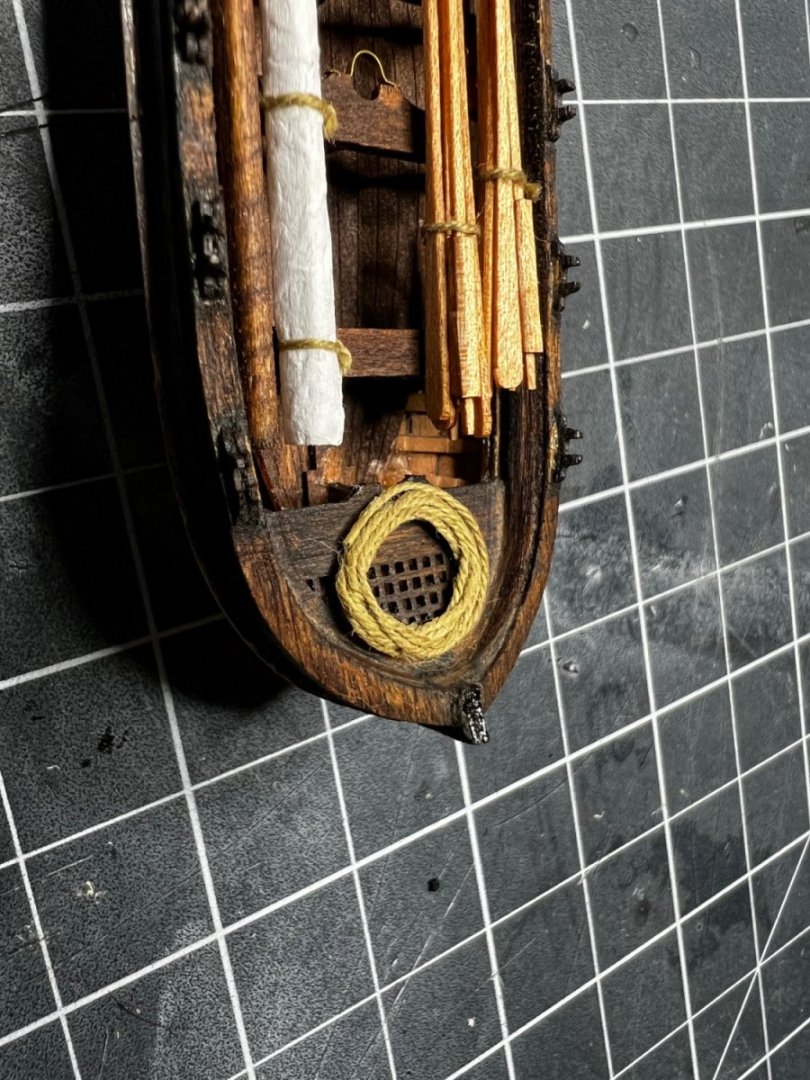
Fixes, fixes… Hi all! Very early on in this project I posted a couple pictures of one of the master korabel boats. When I ordered the Terror kit it took so long to be delivered that I ordered, received, and built the small boat kit in the time between ordering and receiving the Terror. It was officially my first foray into wooden models and as a result I made many novice mistakes. You can see below it looks quite bad: As I have worked on the Terror I have learned a lot about wooden model building and have grown increasingly dissatisfied with my little boat. So much so, that I decided that if I wanted to display the Terror I’d need a replacement boat. Prior to ordering a replacement I tried my hand at salvaging my first attempt from two years ago since it’d end up trashed anyway. I sanded off the black stain, painted the hull, and re-stained the inside with a walnut stain. Results below: Overall, I’m happy enough with the results that I’m going to keep this boat as the display boat on the Terror’s deck. Nice to have confirmation that I am growing as a modeler. Thanks for checking in!
-
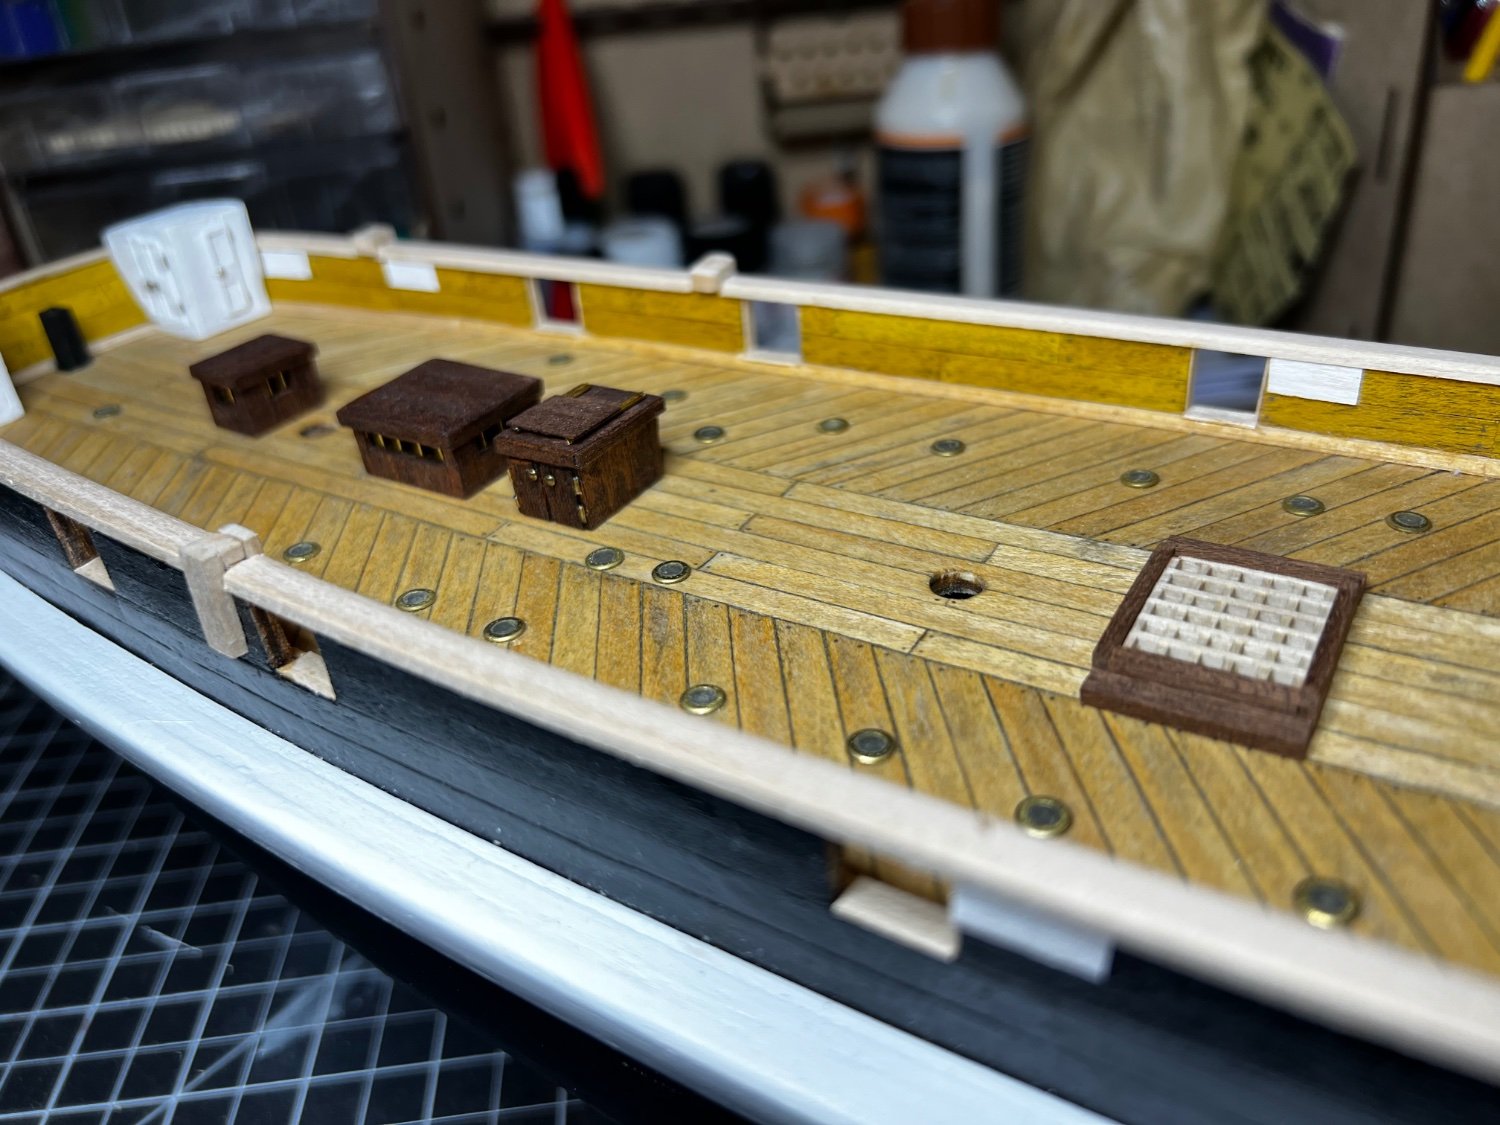
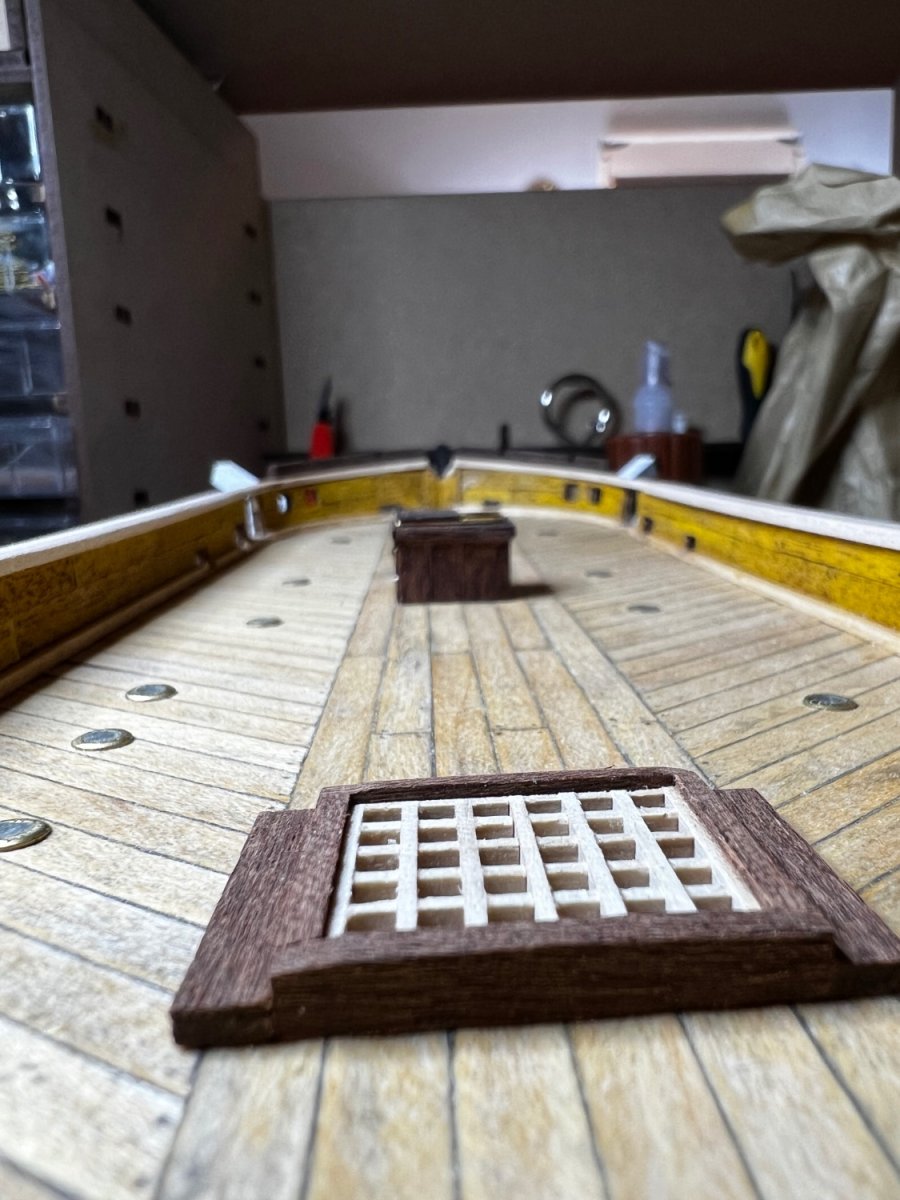
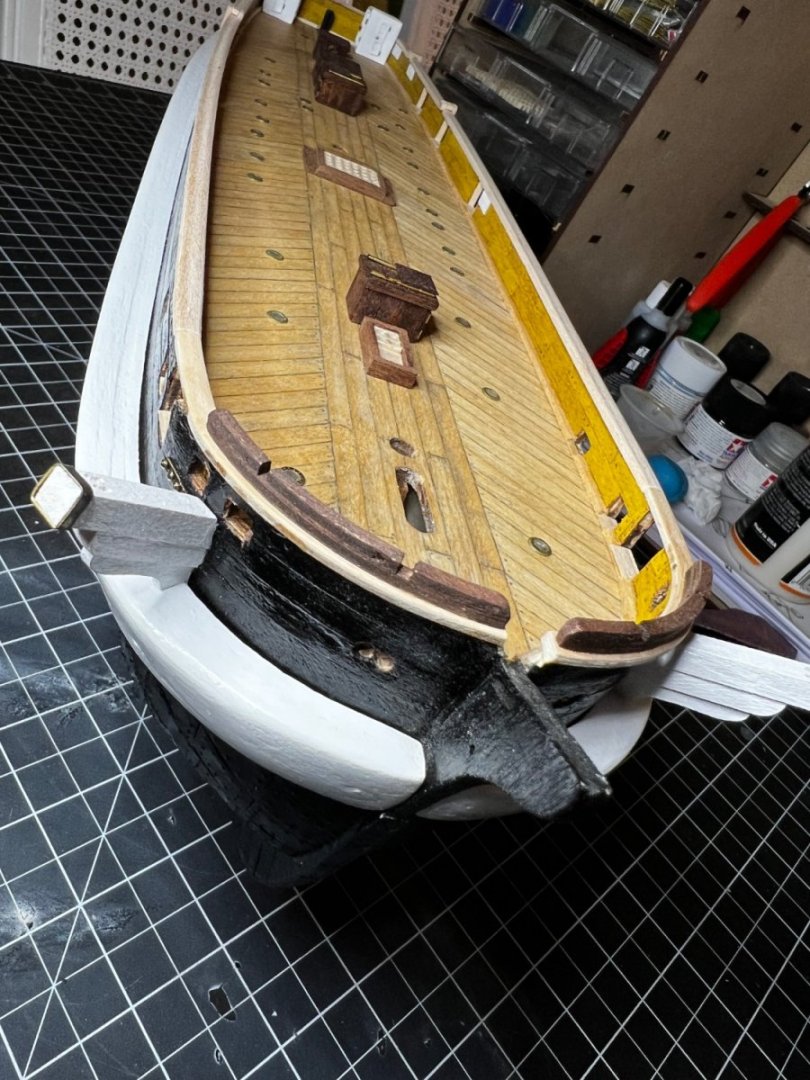
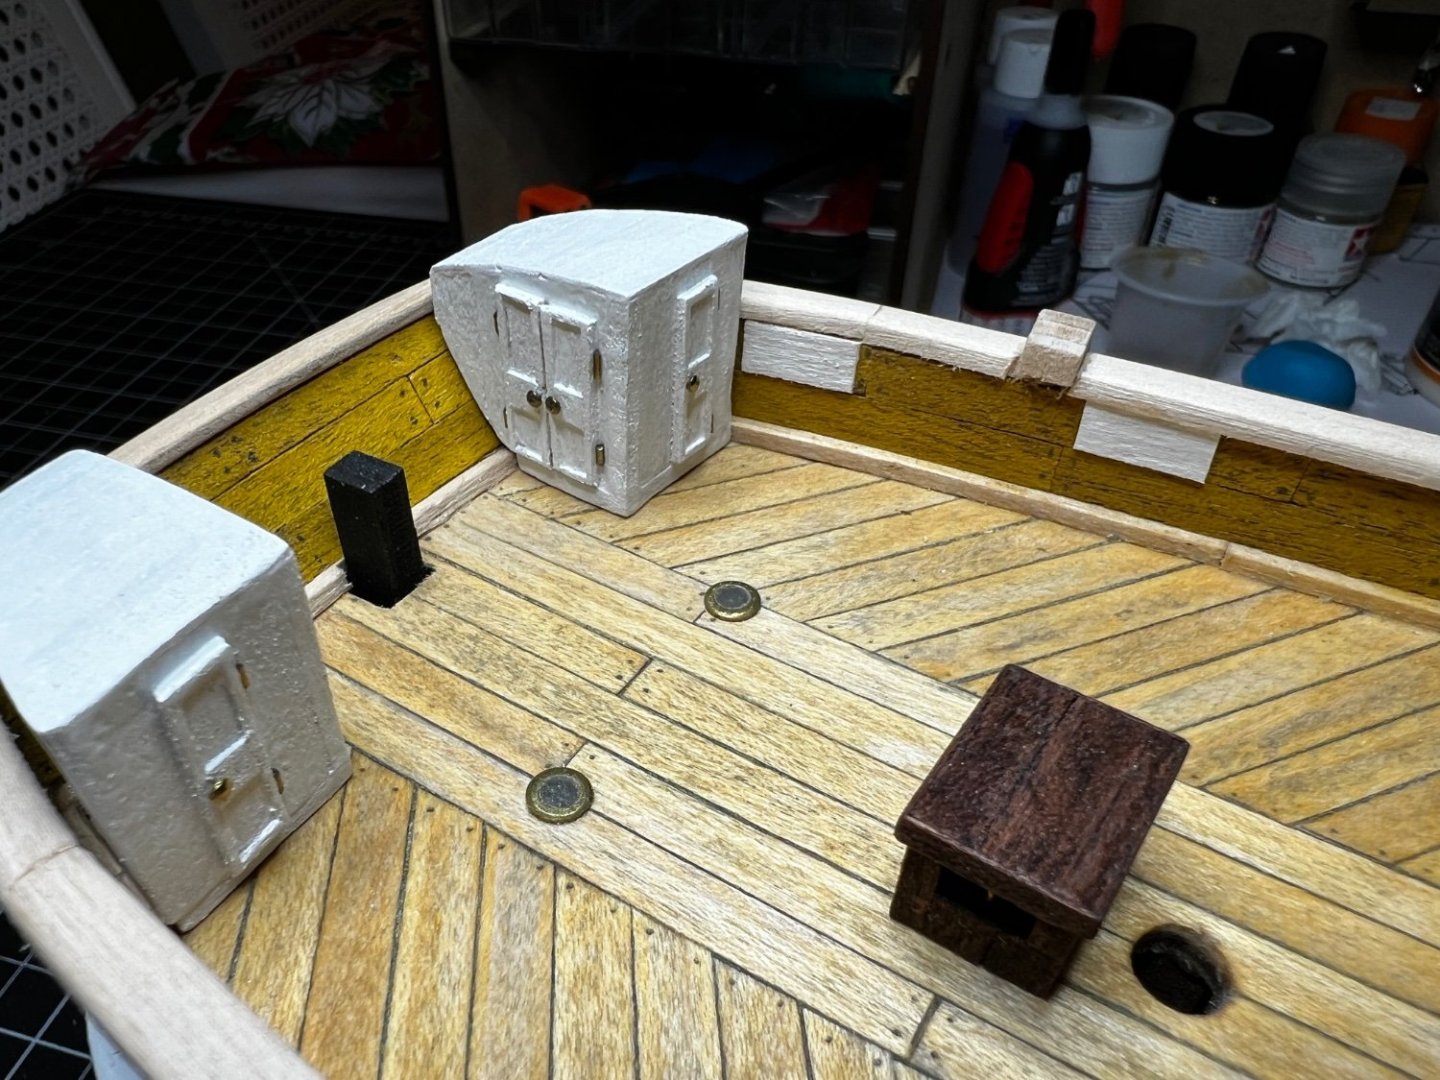
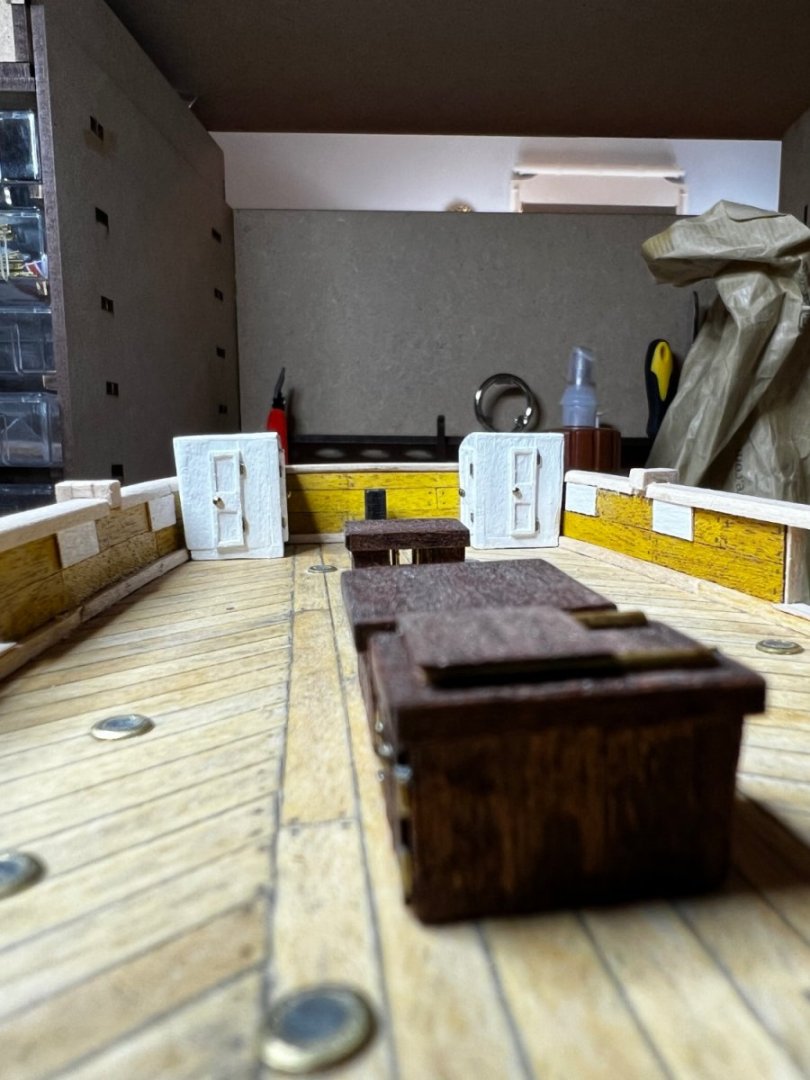
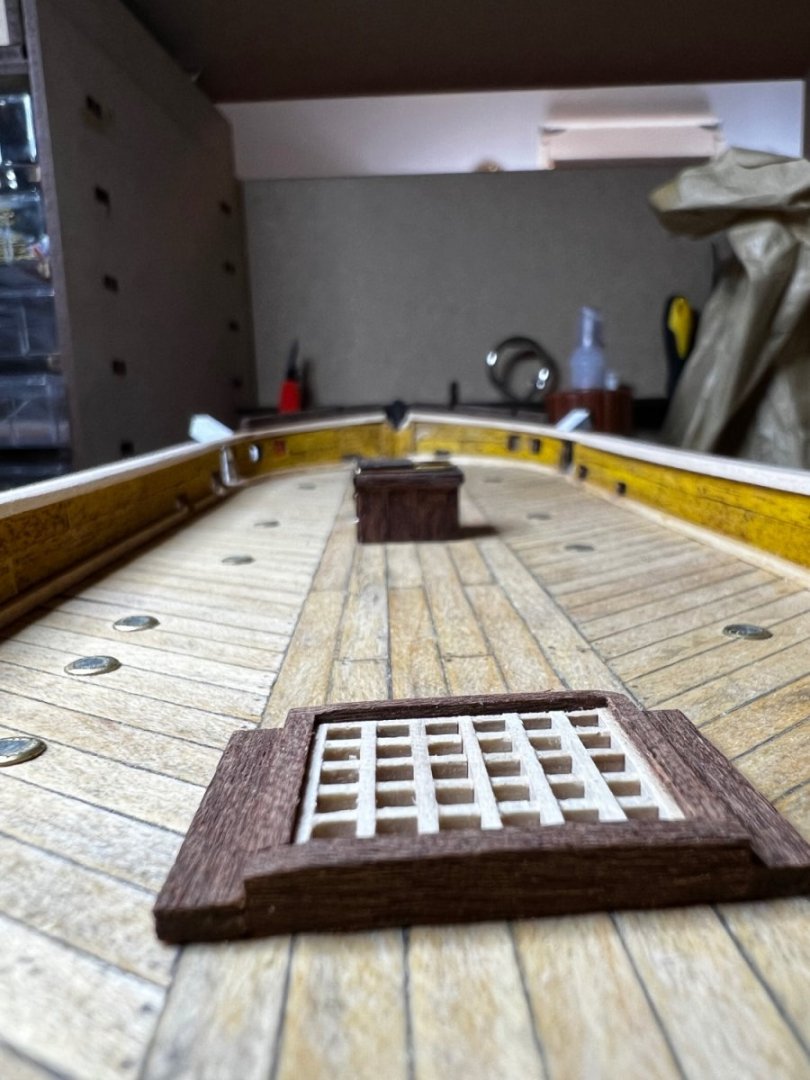
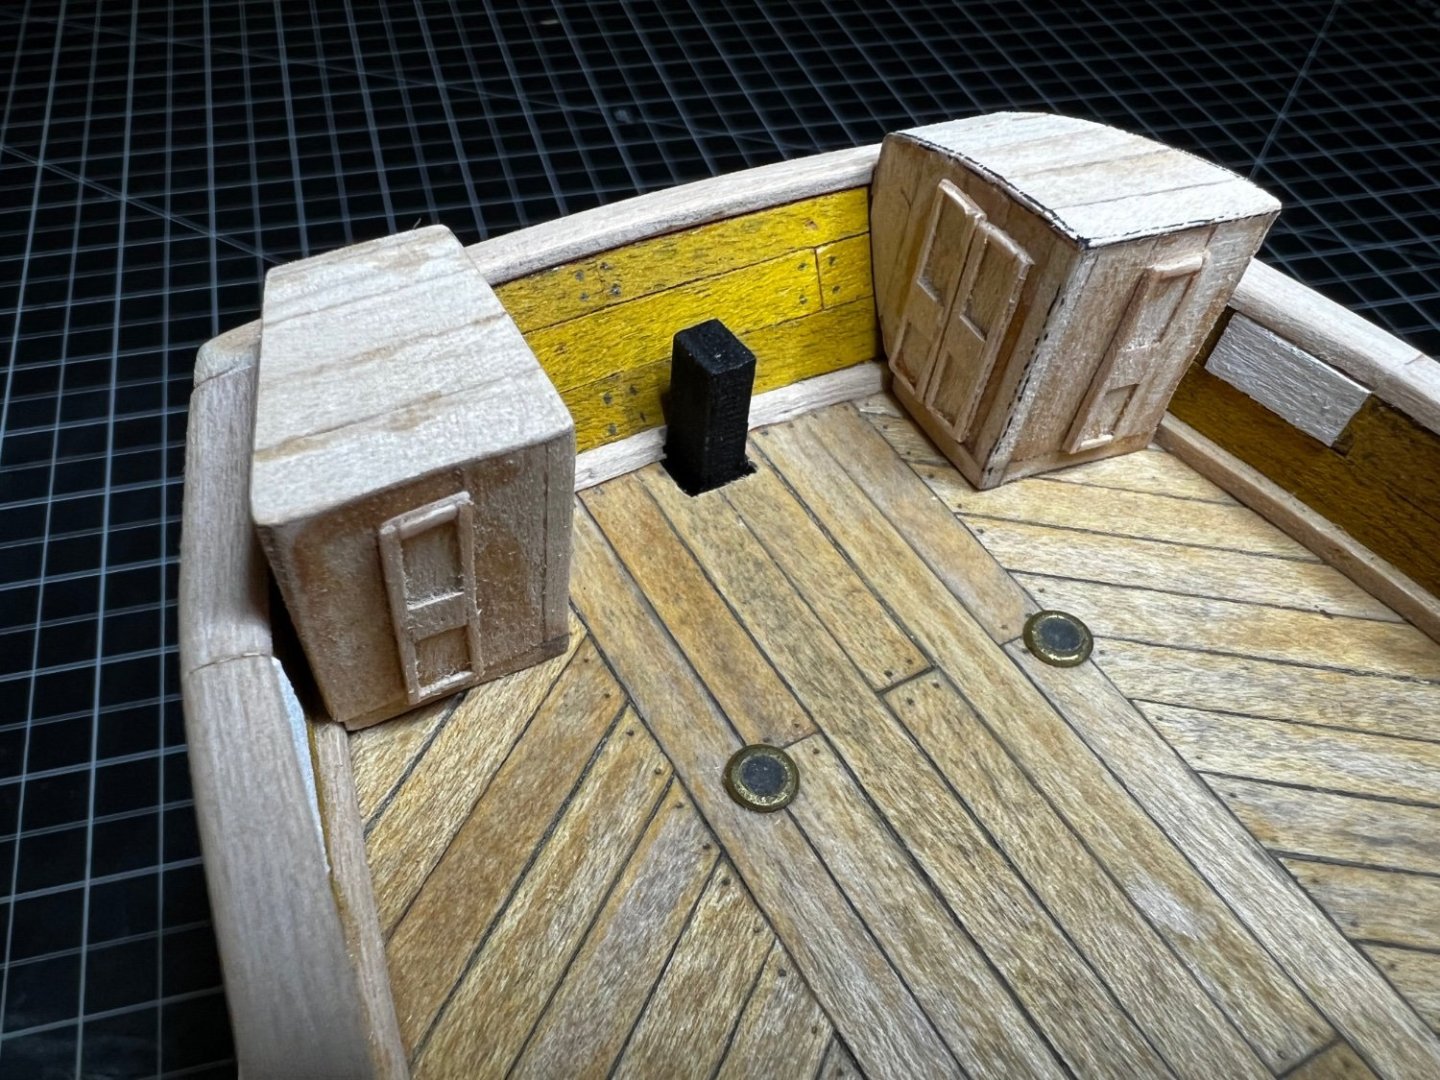
Hi All! The second half of 2023 turned out to be an extremely busy time for me and I logged exactly 0 hours on my HMS Terror from September*-December 😕. But I’ve finally had a quiet weekend and got to spend some time working on her. Things to note: Scratch Deckhouses: painted and fitted with knobs and hinges Grates: done Catheads: done Bow pieces: done and glued Stern Davits: started Some Critical Decisions: made The critical decisions are largely what extra resources I’d like to put into this build and hemming and hawing on them had delayed my progress. When I started this build I had very ambitious plans for the alterations I’d make to force the OcCre kit into a more historically-accurate build (fueled, of course, by my observation of the fantastic Terror builds on this forum). So far, I’ve been able to make some of those alterations where they involve scratch building and serve the overall goal of completing the kit (reshaping the stern, building a Master Korabel boat to learn the basics of planking and have a better ships boat, building the deckhouses, etc.) but I am reaching a point where the list of changes is becoming unwieldy and potentially very pricey. These include, but are not limited to, purchasing: a new ships wheel, chain plate replacements, more ships boats, Dr. Betts book, a new capstan, replacement belay pins, a new windlass, etc. Ultimately I could justify some of these, but this is my first wooden build and to complete it will be a satisfying accomplishment on its own. With that in mind I will be moving forward with what is in the kit and I will make alterations to be more historically accurate where I can. So she will have an 8-spoked ships wheel and out of scale belay pins, but I will build a new capstan and windlass and so on and so forth. I suppose I’m mostly writing this out to assure myself that it’ll still look good when finished. Anyway, enough musing. Some update pictures below! Thanks for checking in.

-
Been lurking on this build so far without commenting. Incredible discipline and dedication to fidelity on this! Every time I think you’ve got the hull 100% accurate you update another Trumpeter error. Can’t wait to see it painted, it’s going to be impressive.
-
When I logged in I saw your Erebus build and wondered if it was your original build and maybe all this time I’d just misread it as a Terror build! I’ll have to check it out. Yeah not sure why OcCre hasn’t made some of the simple changes they could to improve the kit. The deckhouses were very fiddly and difficult to build from scratch and certainly would’ve looked better had they been based on instructions or pre-cut pieces. On the other hand, they are pretty satisfying to have completed entirely from scratch.
-
Emphasis on the “slowly”, Keith! But it is coming along. Catheads installed and deckhouses constructed. Still need to paint and add doorknobs. edit: wording


-
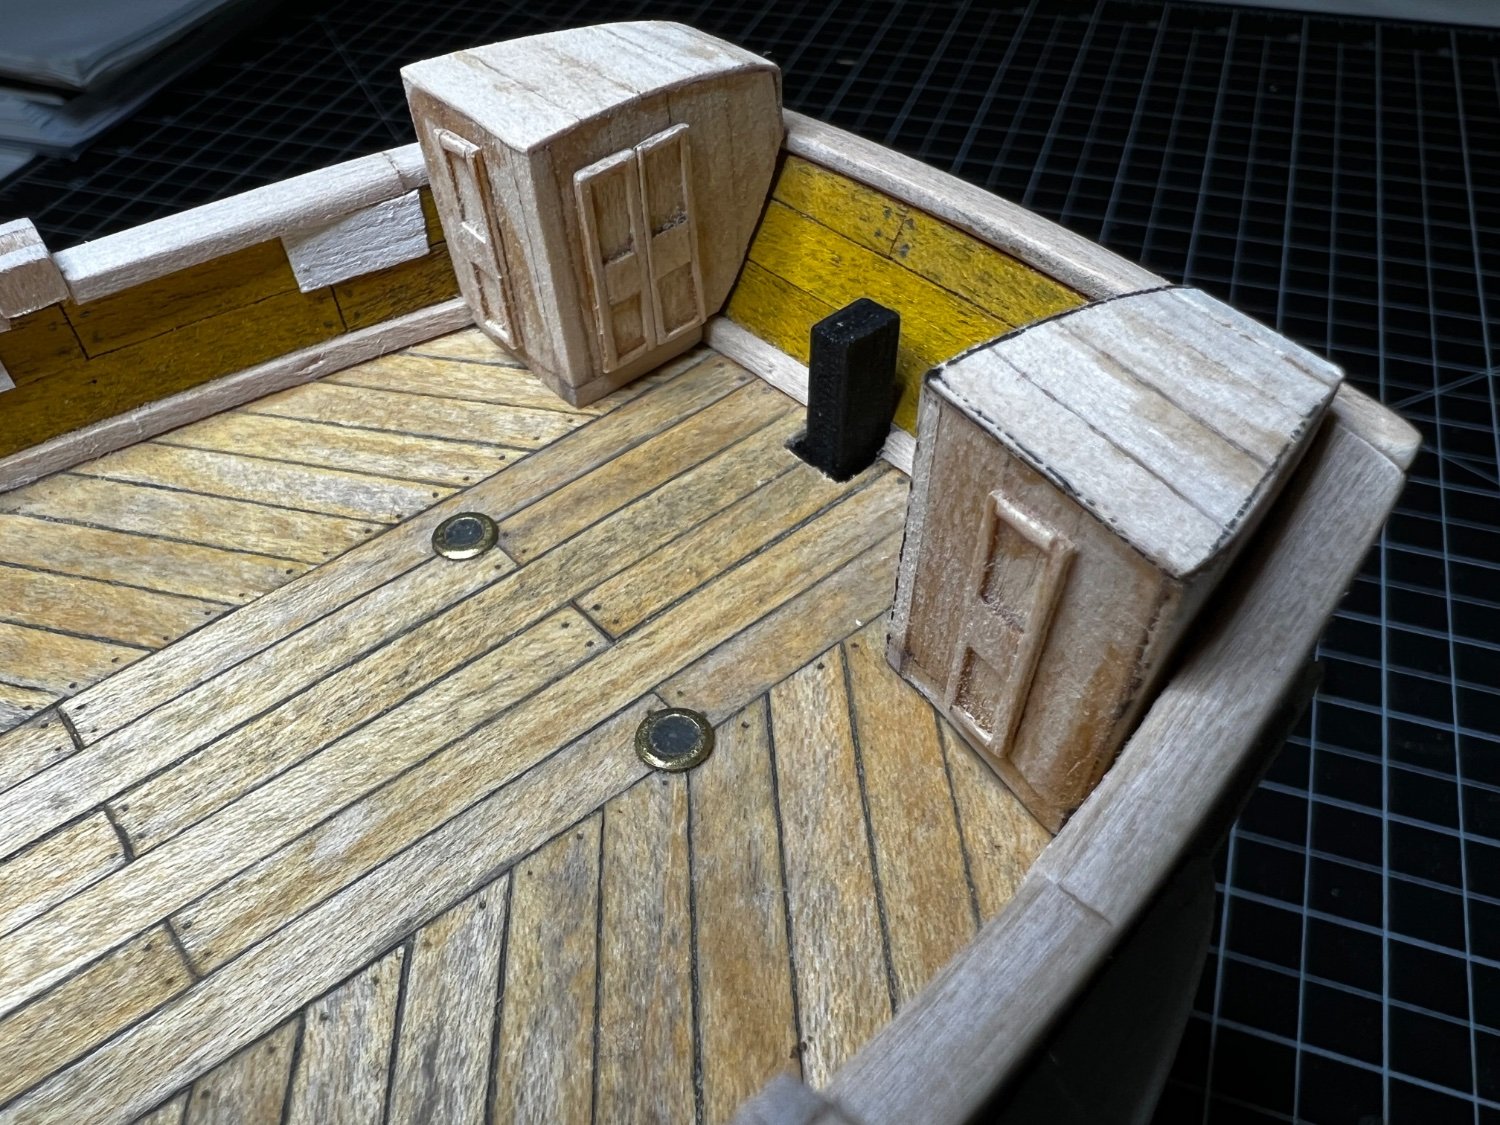
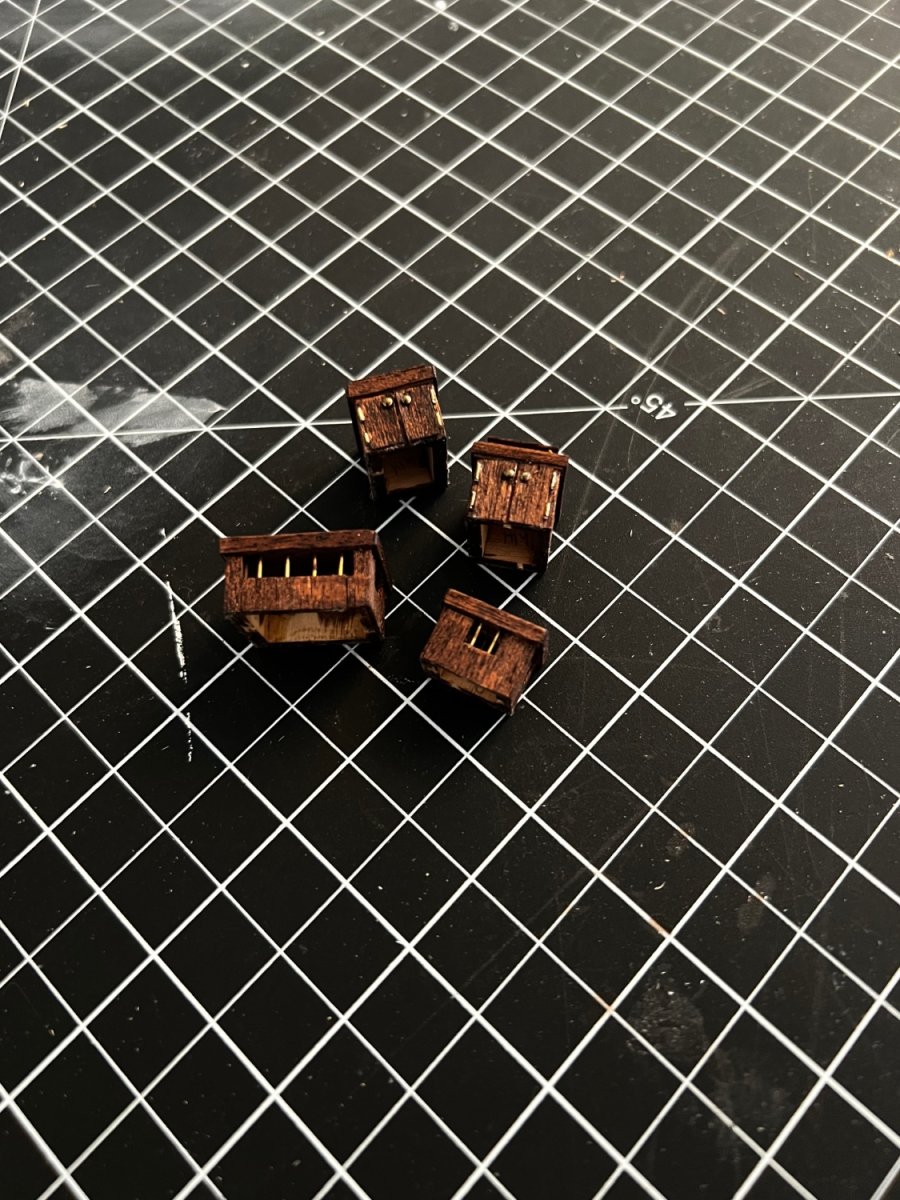
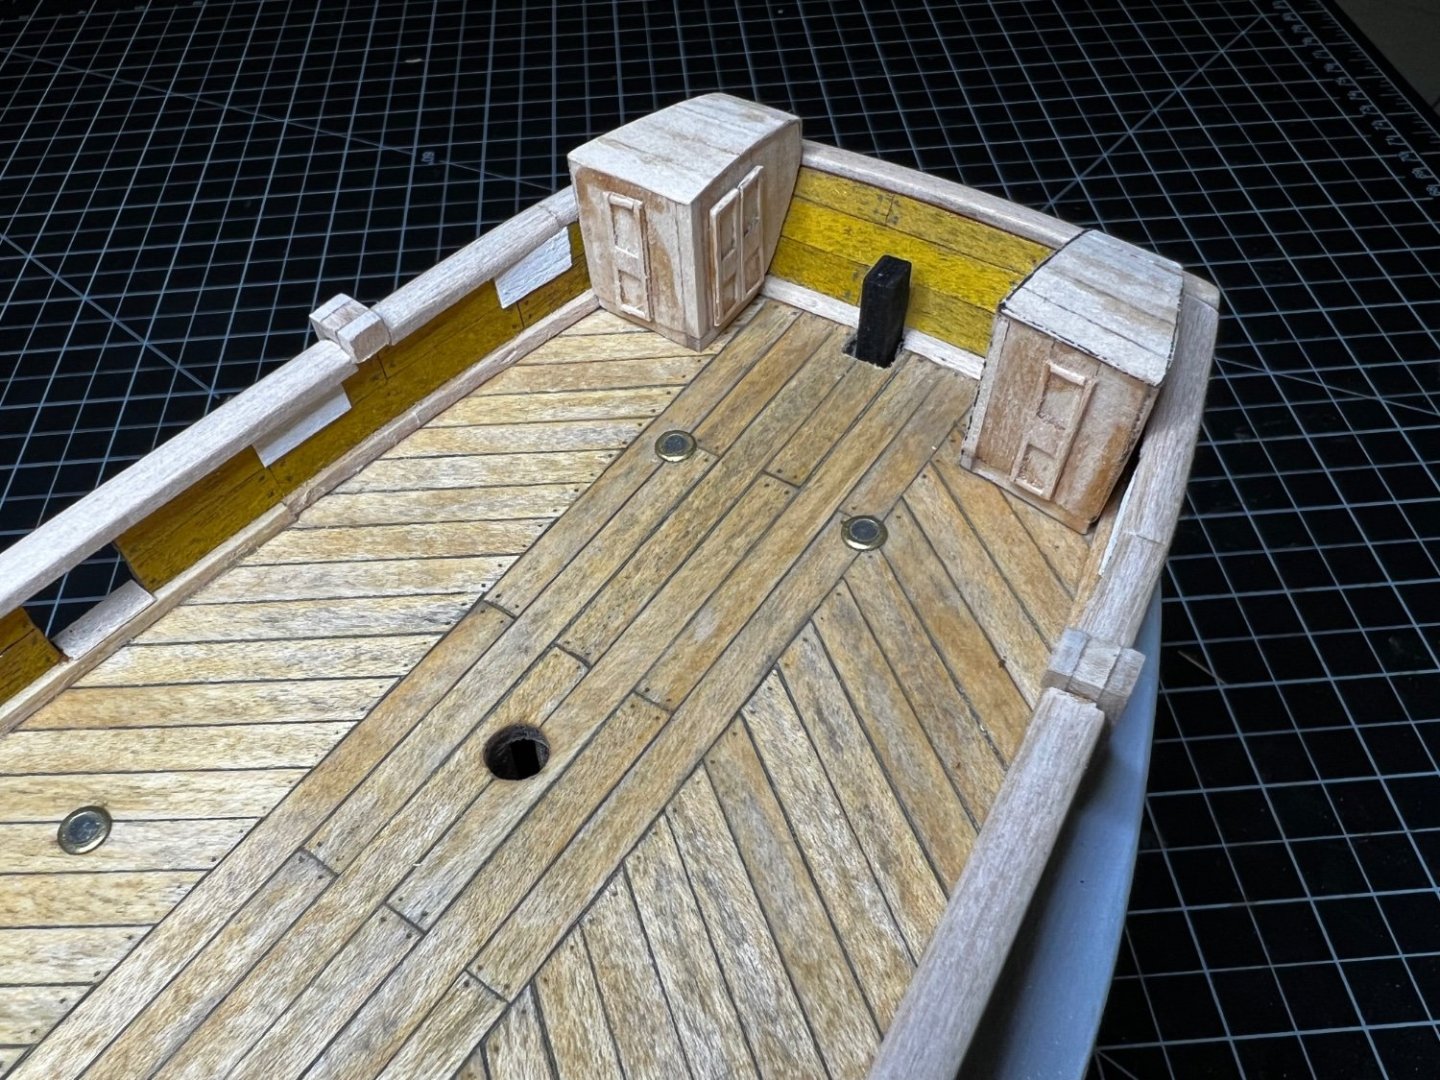
Hi all, Short update today. I’ve tested out a wood stain for some of the deck fixtures that I like against the color of the deck and the yellow bulwarks. This week I stained the kit-provided deck houses with it. I’m happy with the results. Nothing secured down yet, just testing things out. Also started putting together the catheads (less work than I anticipated!) and the not-kit-provided stern deckhouses (more work than I anticipated!). The deckhouses don’t look like much now, but I am making this up as I go along just trying to make sure my end results look like what I’ve seen on other terror builds here! Fun additional shot: late night for Captain Crozier.


-
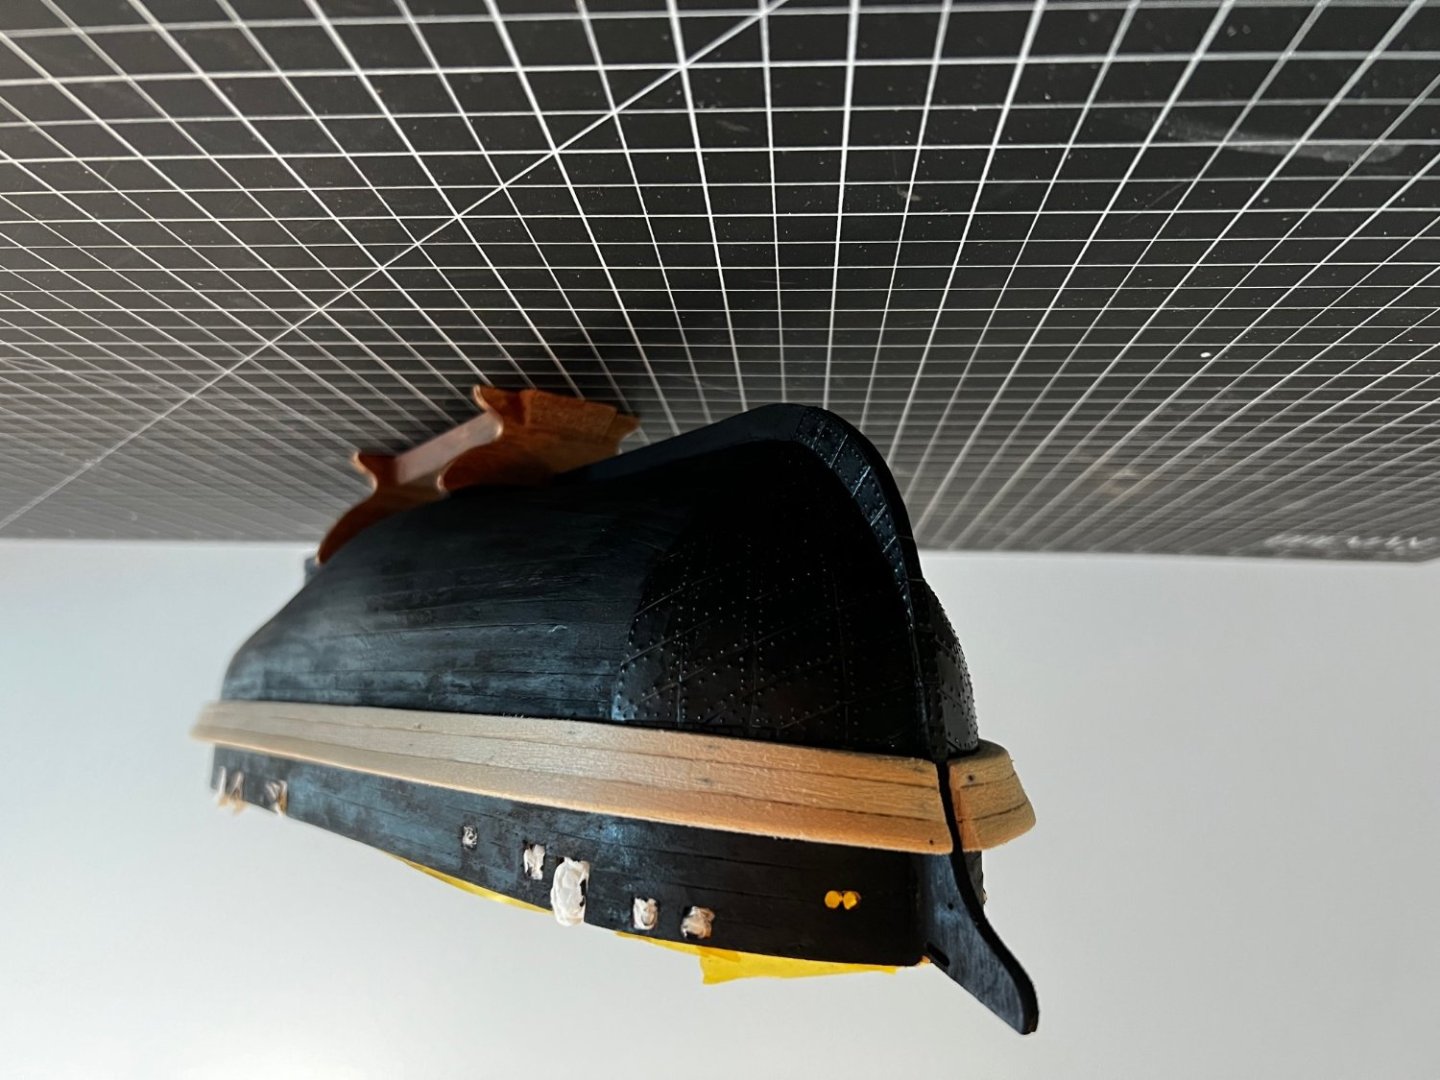
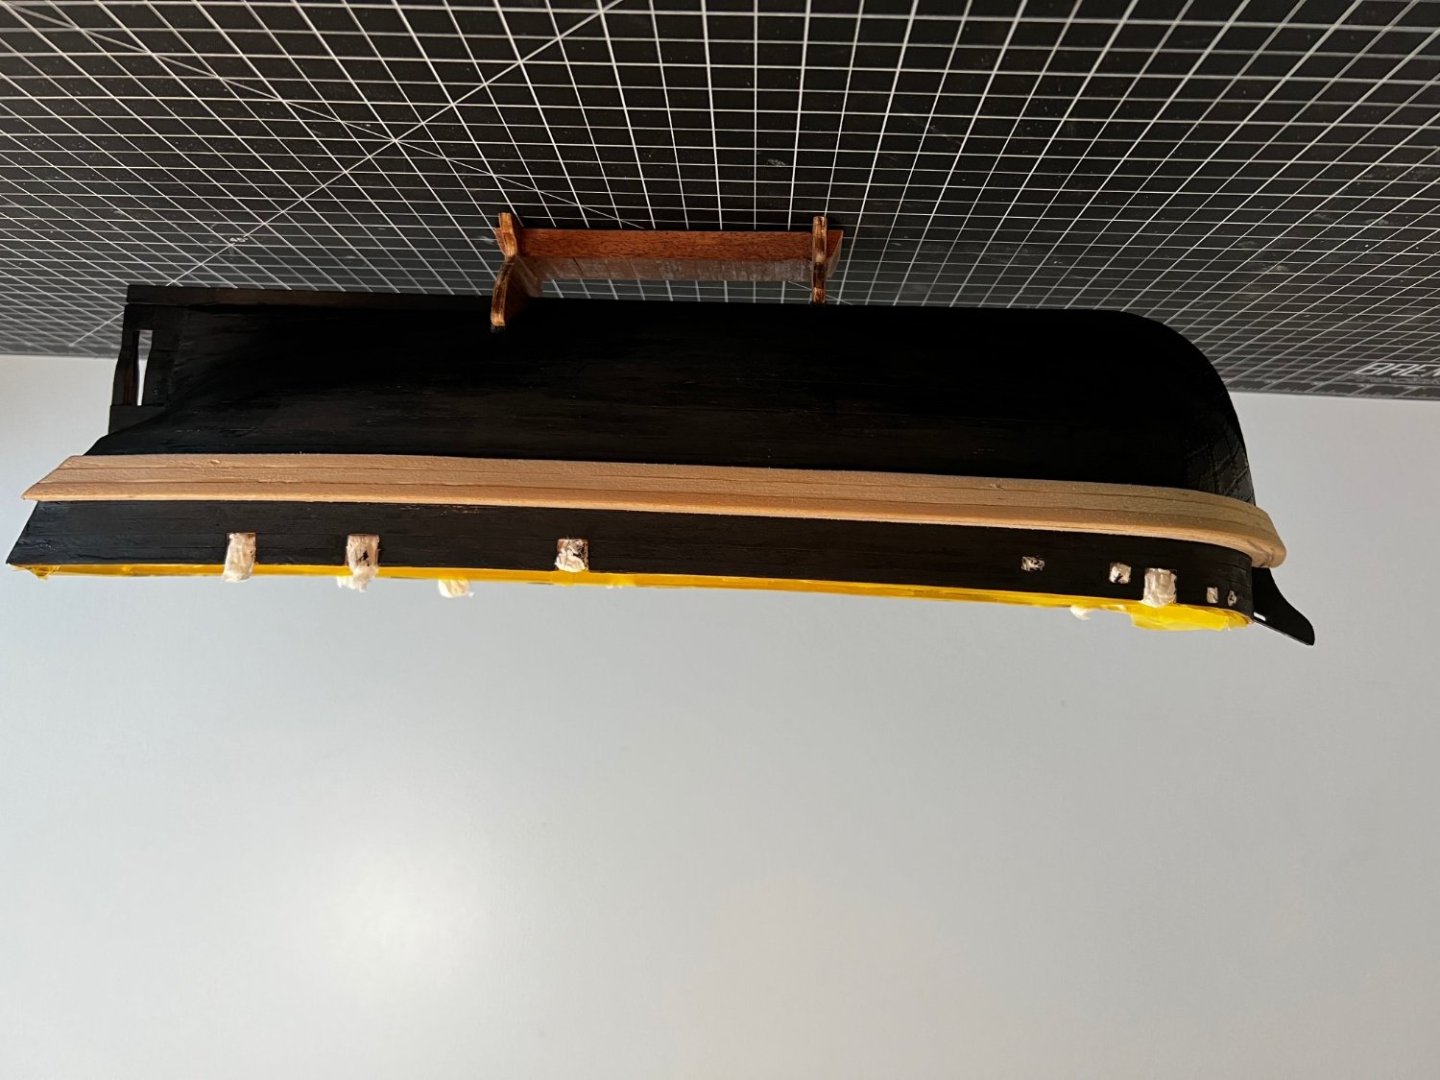
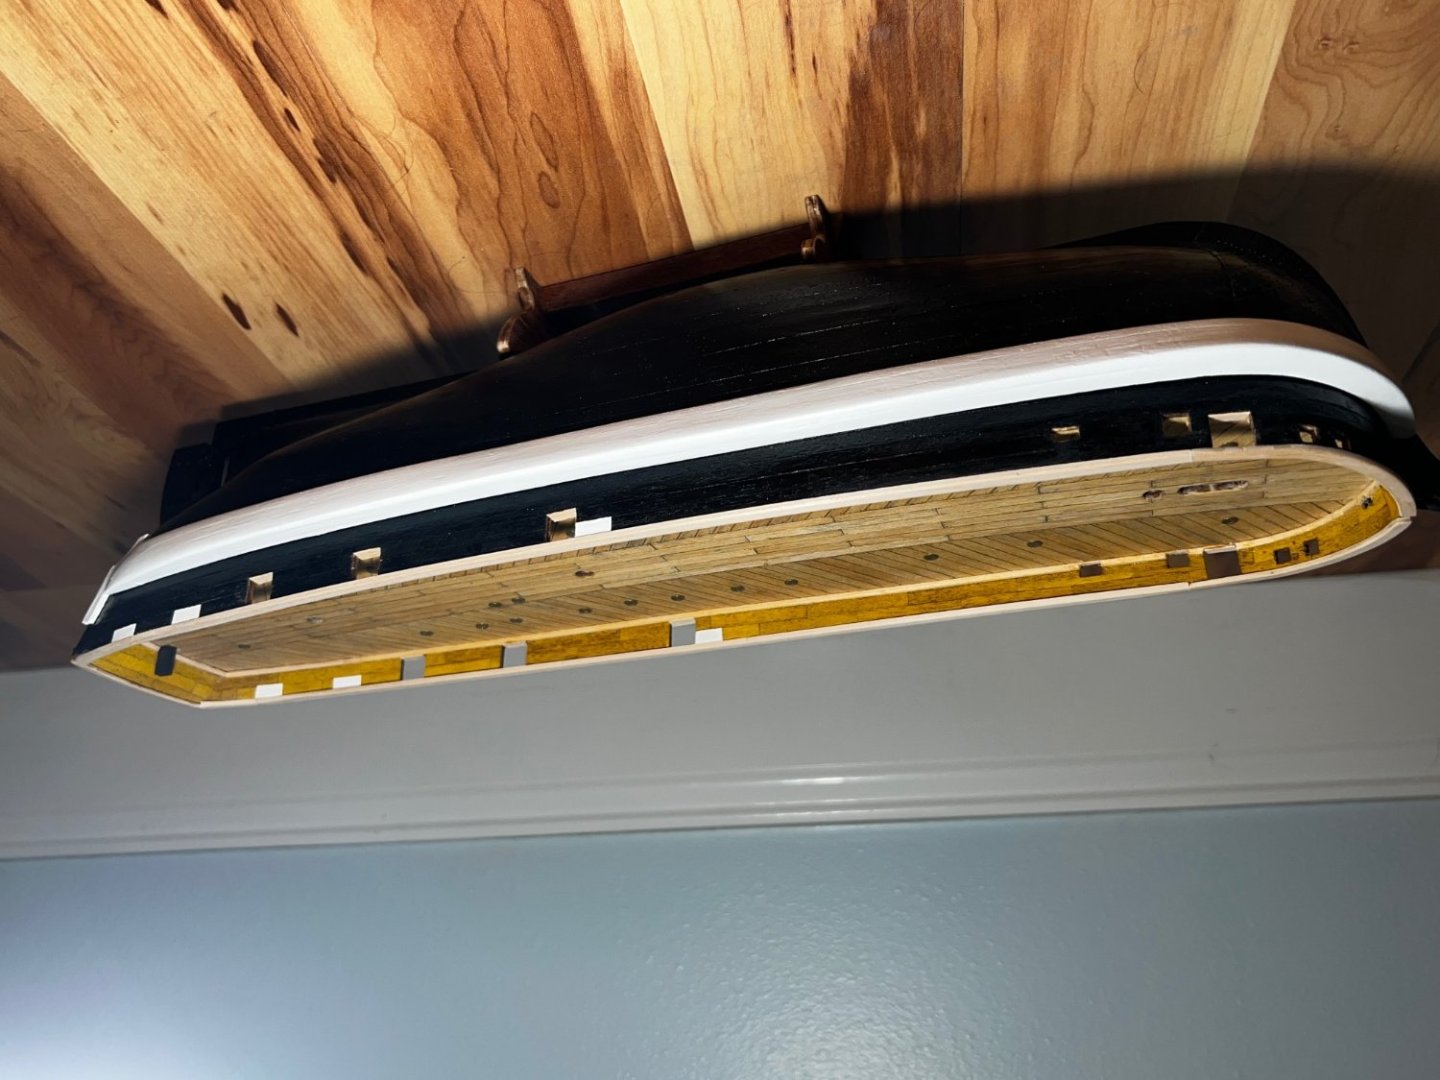
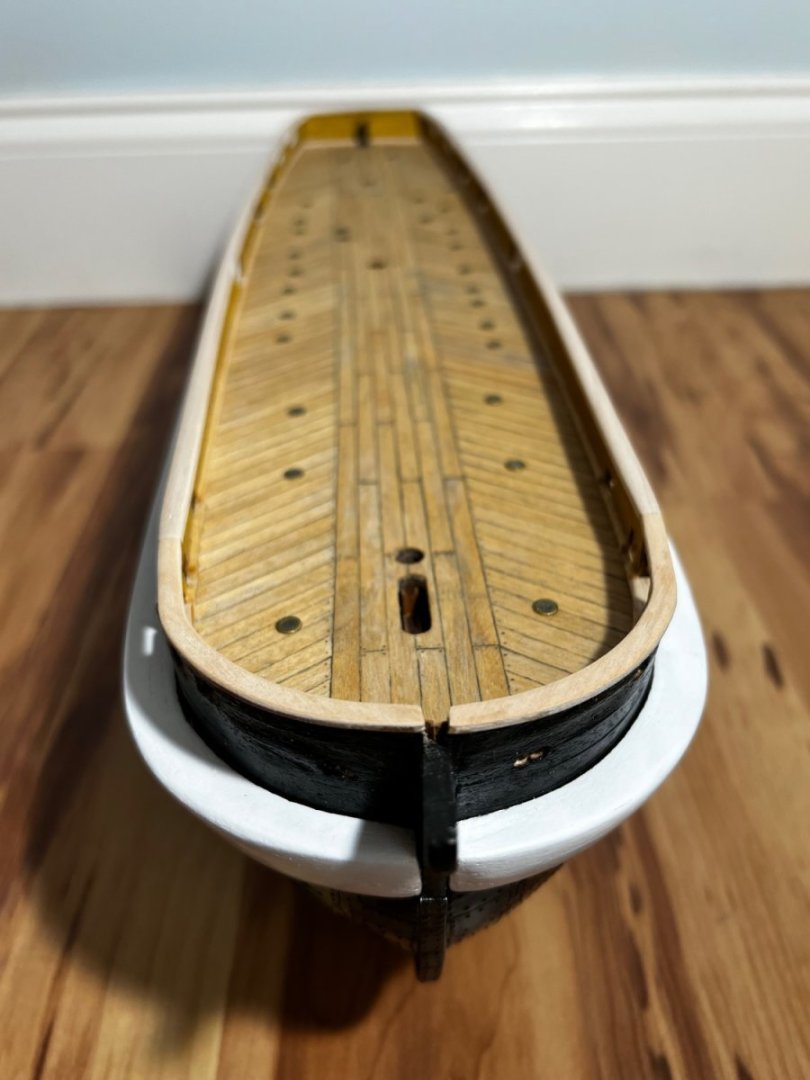
Hi all, Been a pretty long break away from the Terror for me, but this week I finally got back in the shipyard and brought the hull a little closer to being done. A few shots of the progress below. As usual, at least one photo insists on being upside down no matter what I do 😋.


-
Thanks Keith! I think that’s a great idea. Since I am not certain how she was painted above/below the waterline, my initial thought was to do the whole hull in semigloss black and do the armor and reinforcements in matte black. I’ve looked at some reference photos* and seen some staining at the waterline just from wear and tear, so I also considered that, but a change in finish might work really well. (*of still sailing wooden ships of course, not the wreck)
-
Third year on the terror! Makes me feel not so bad about taking a year on the hull alone. The build is looking stellar.
-
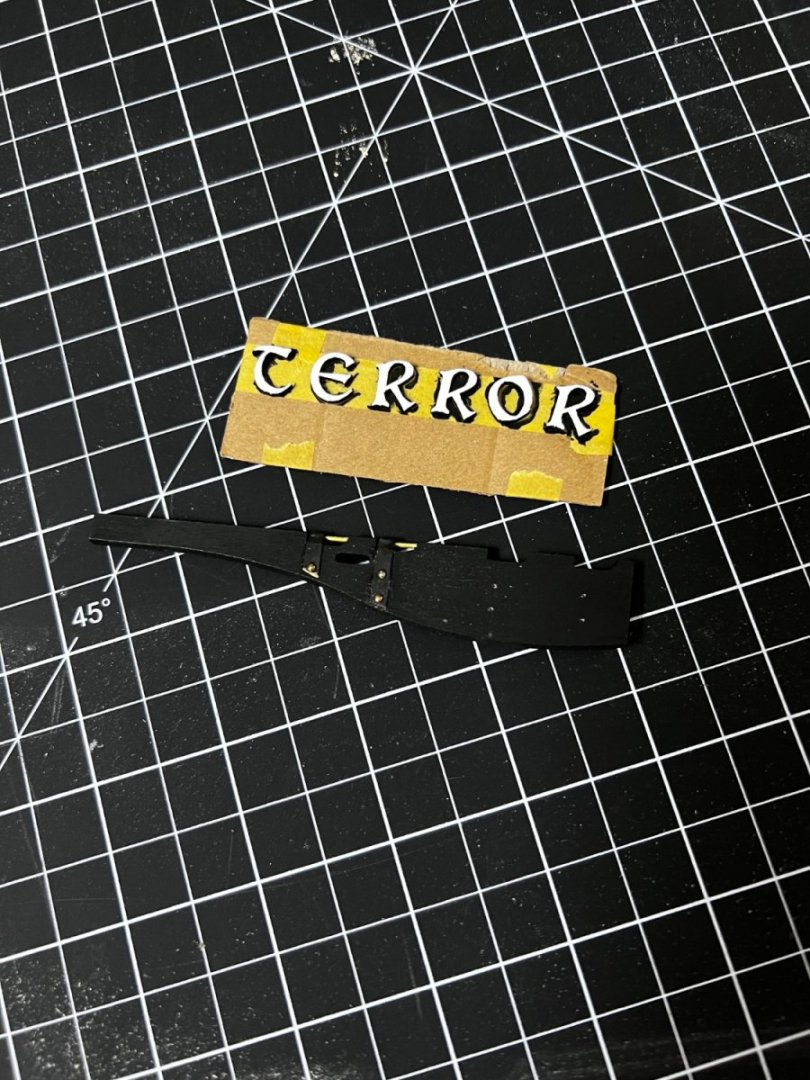
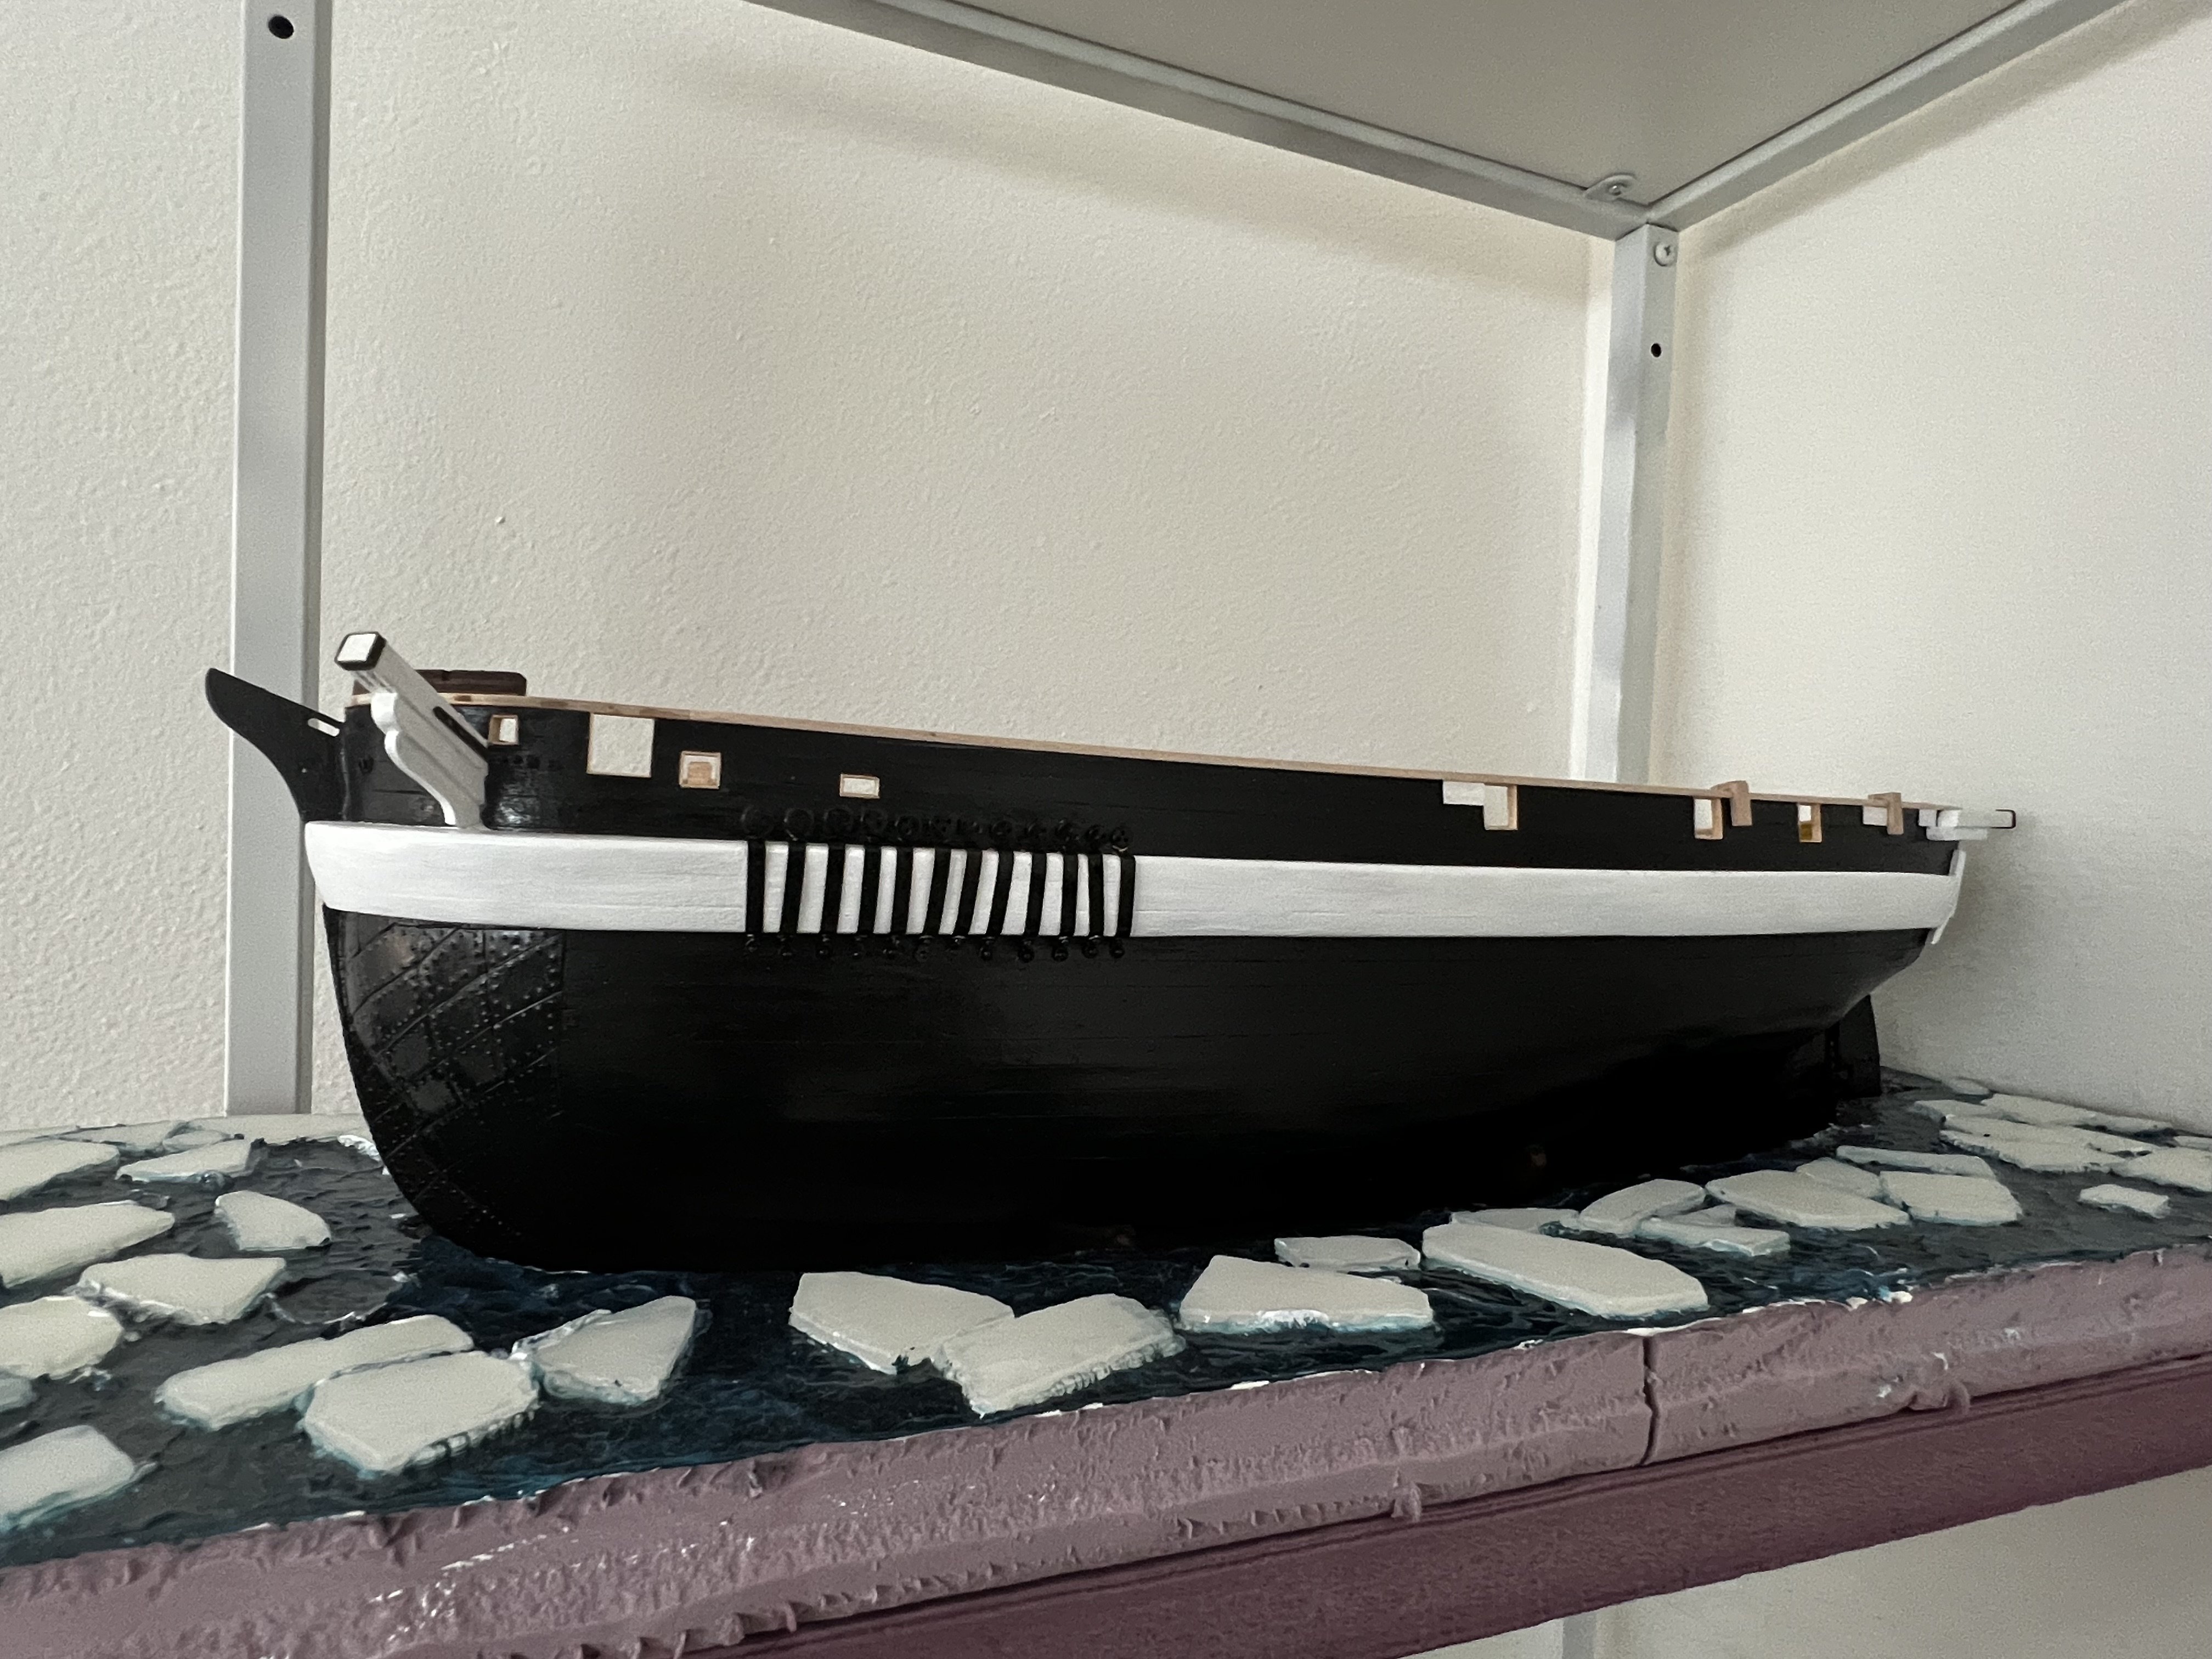
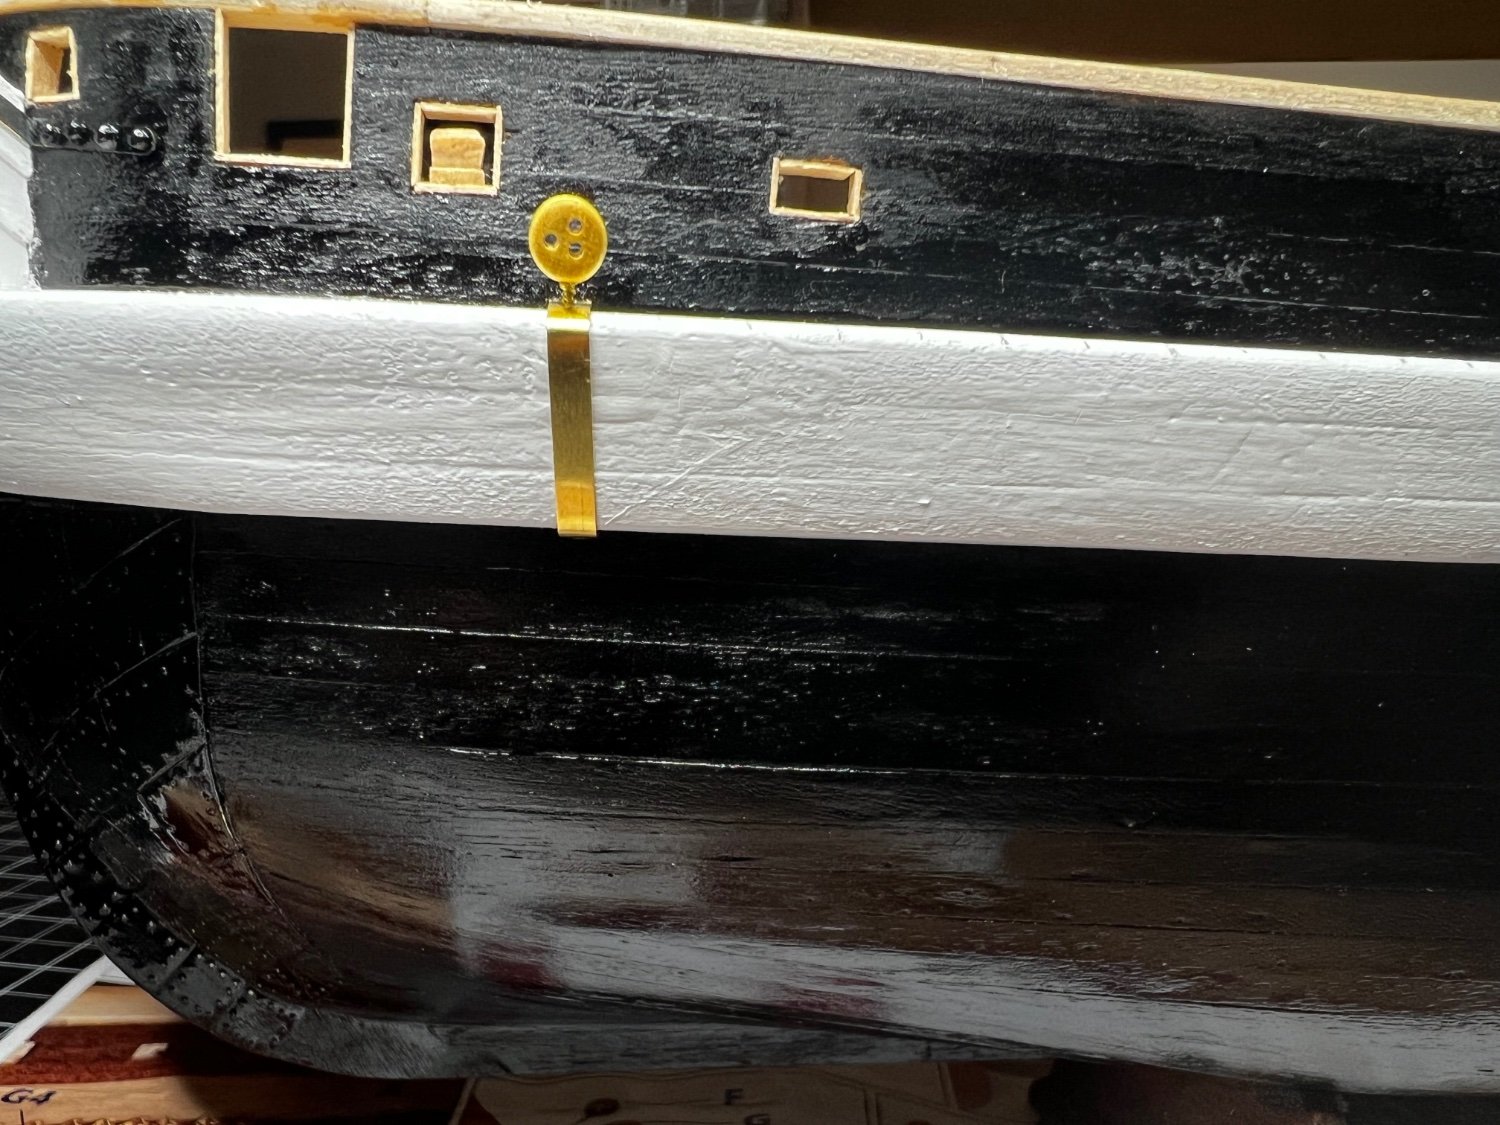
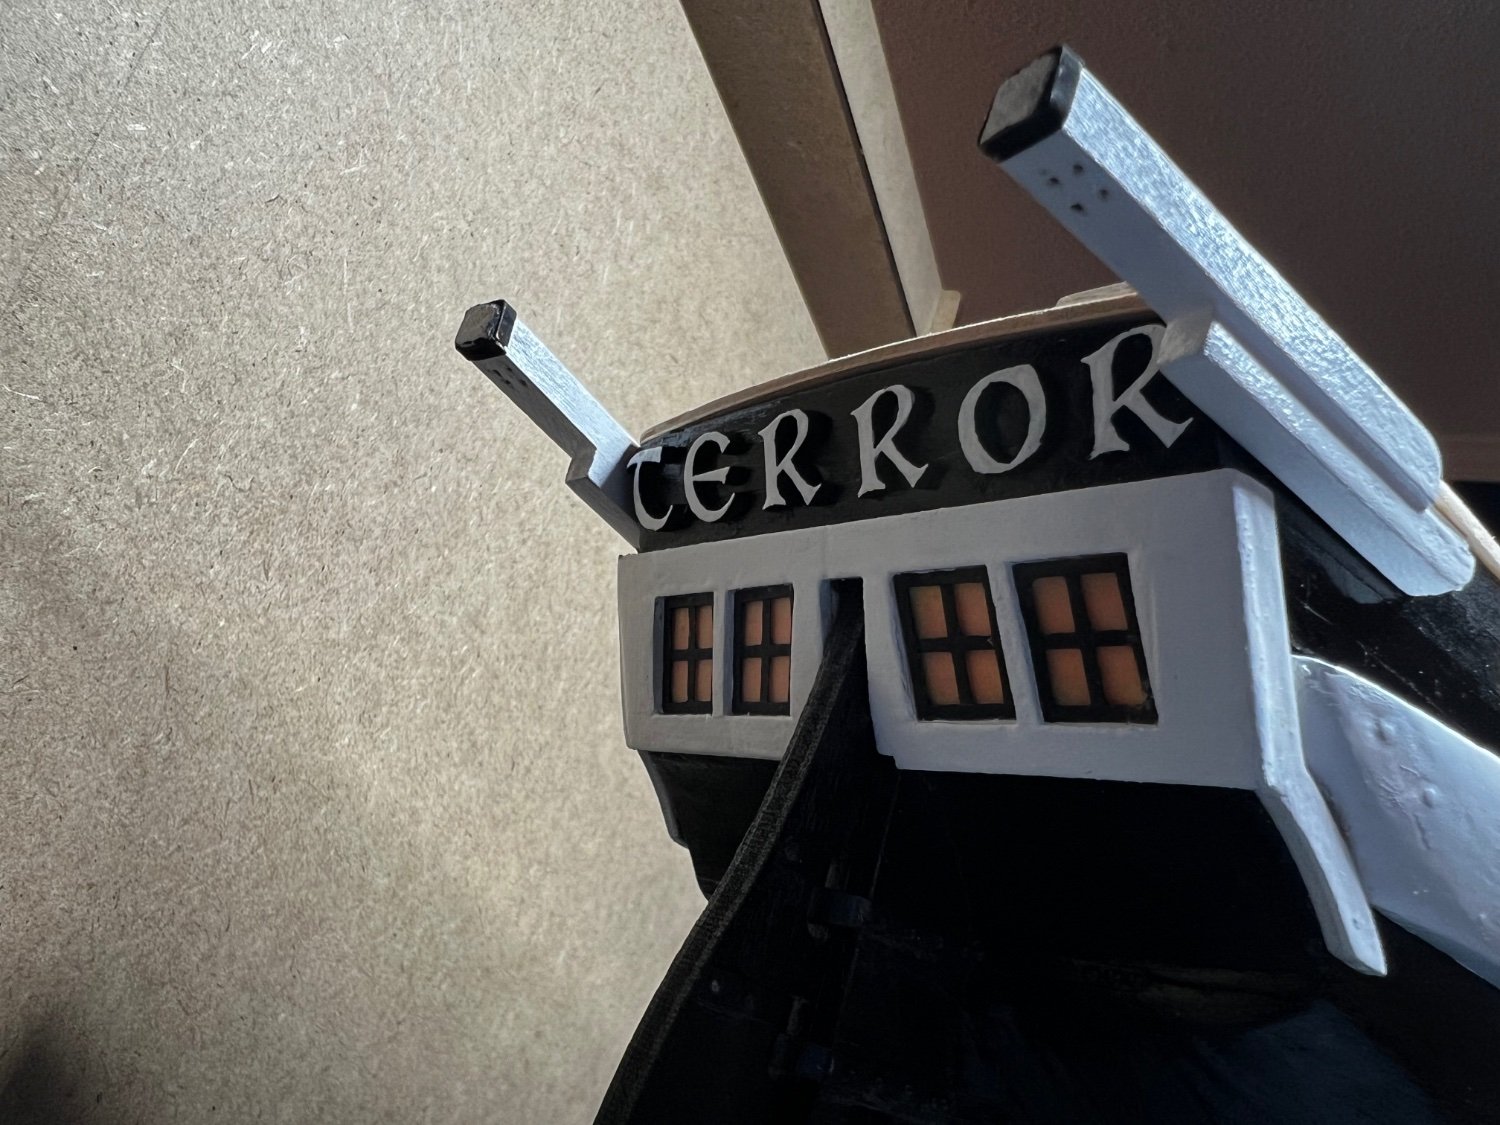
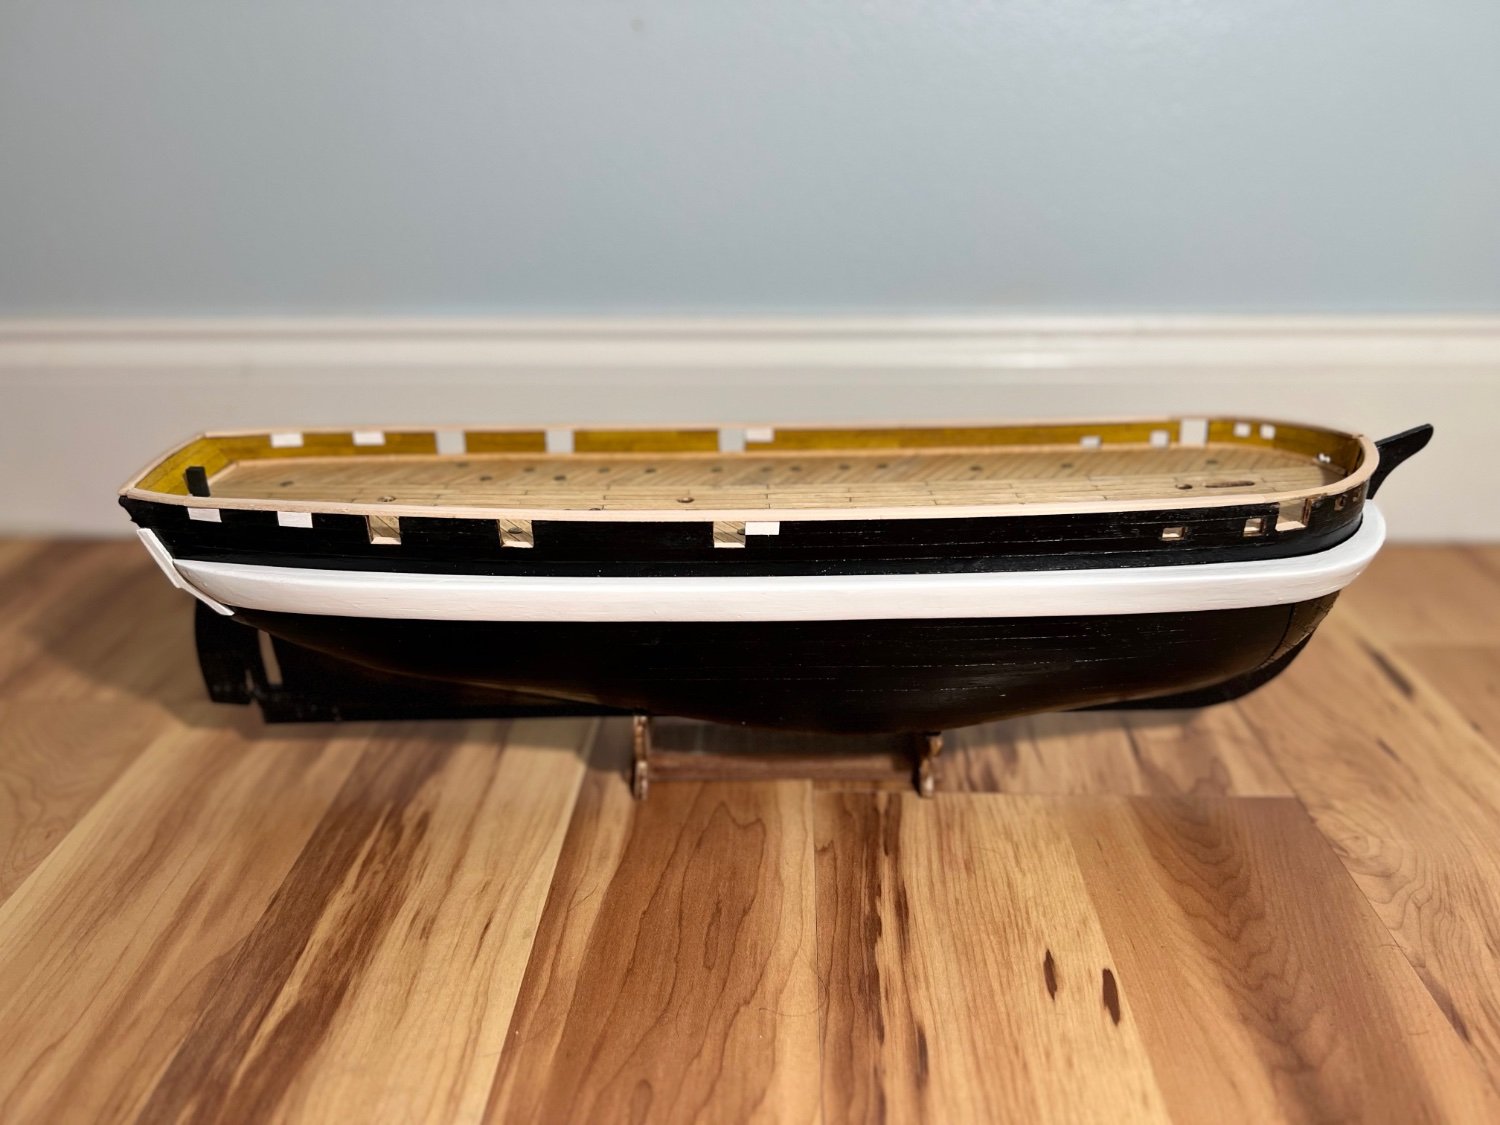
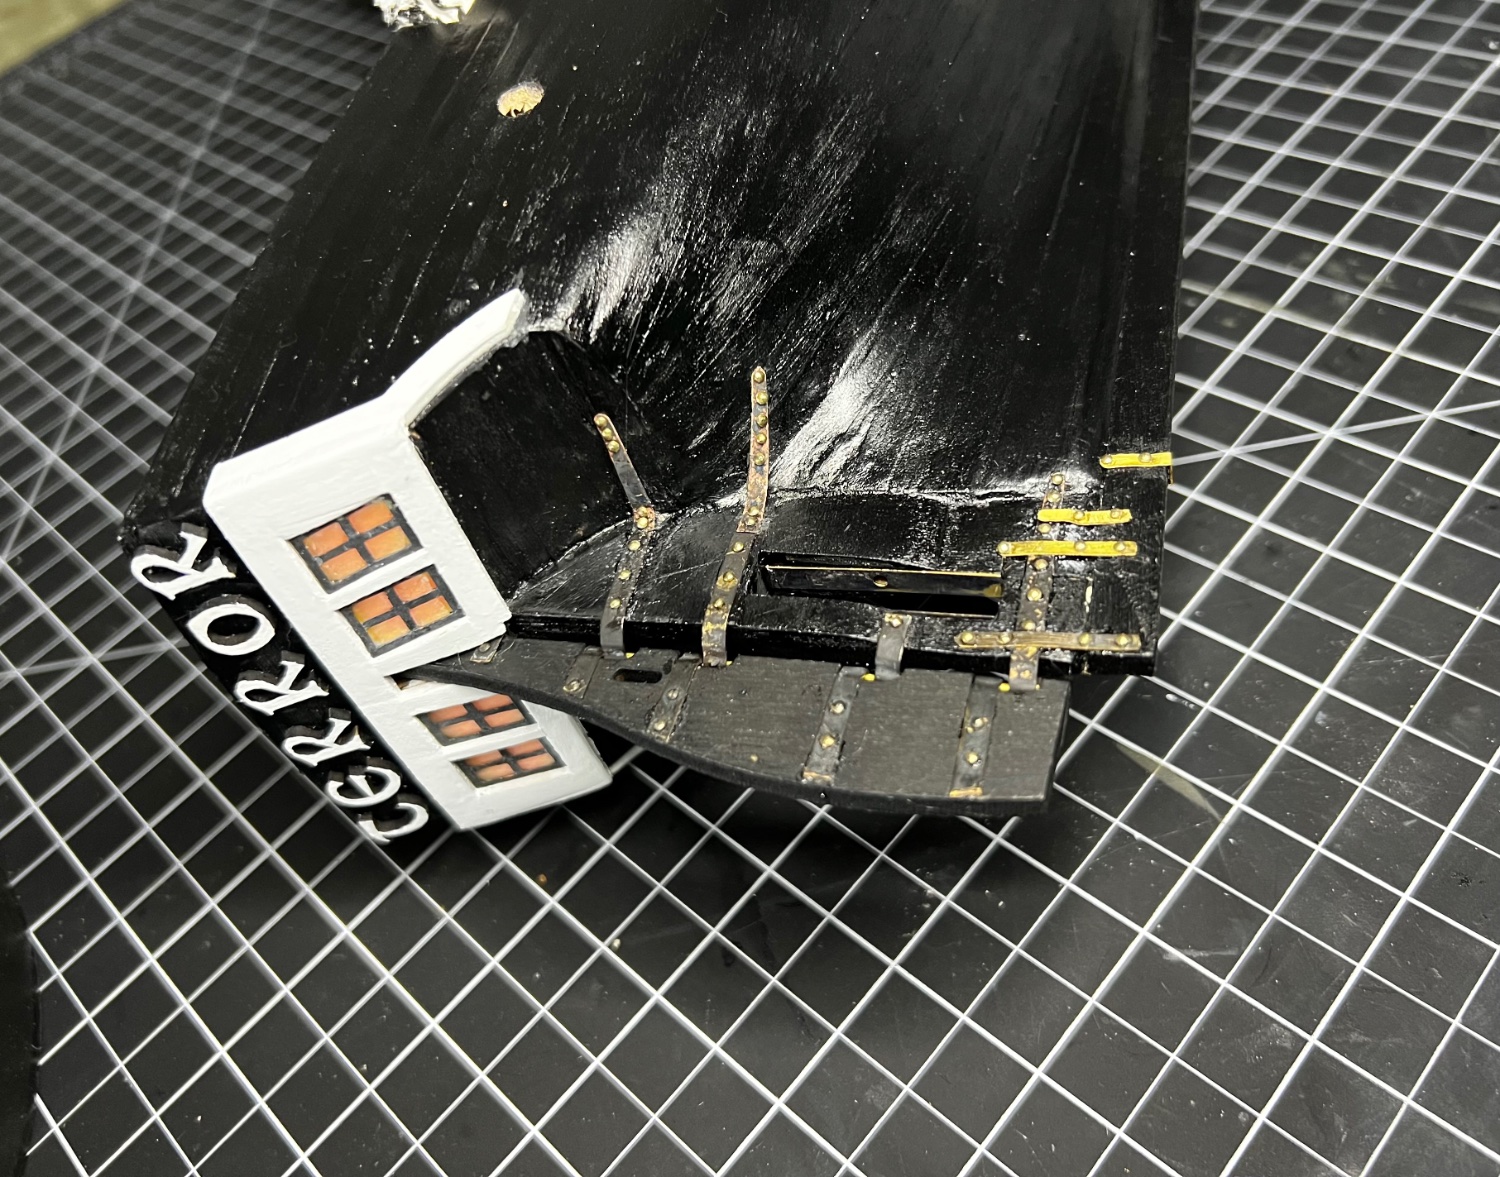
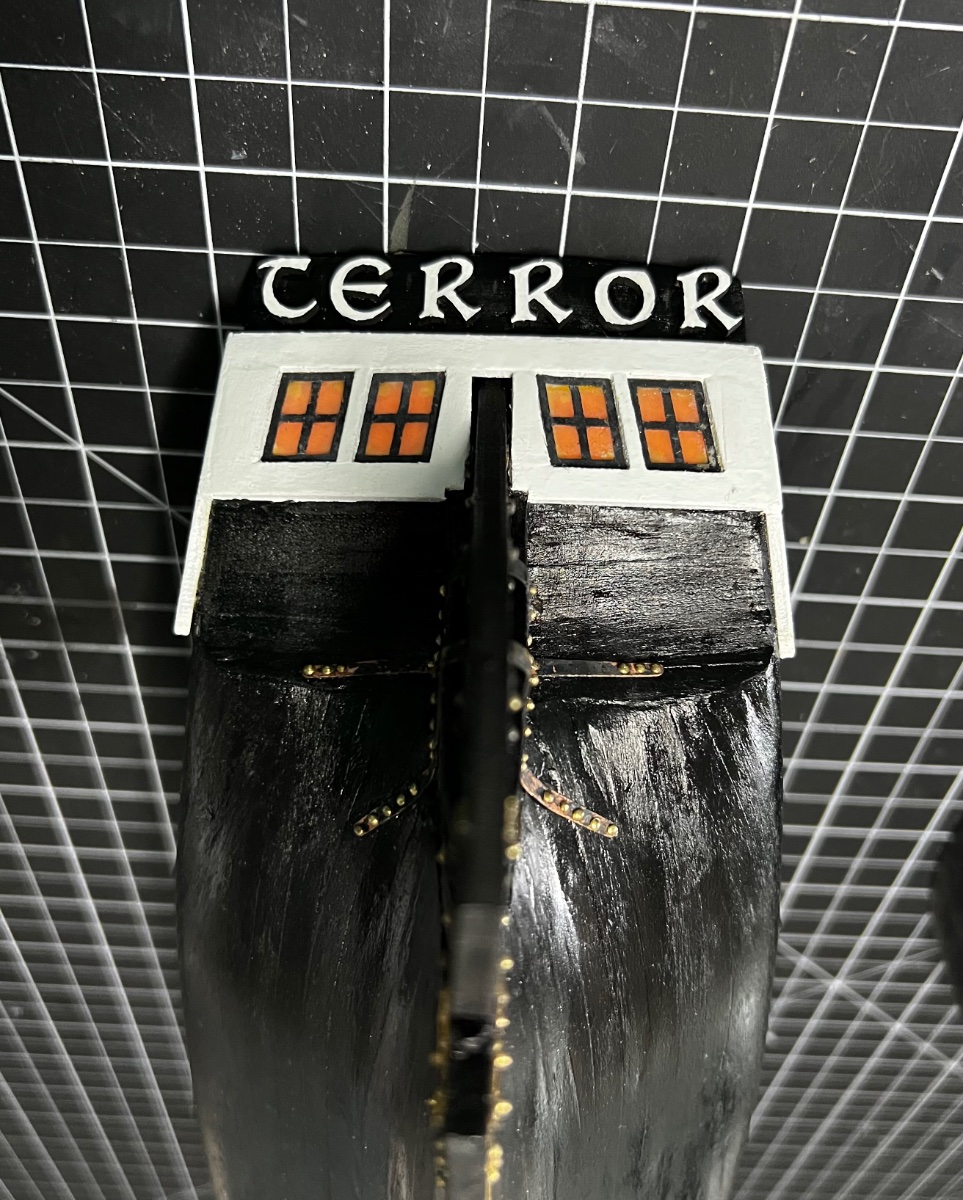
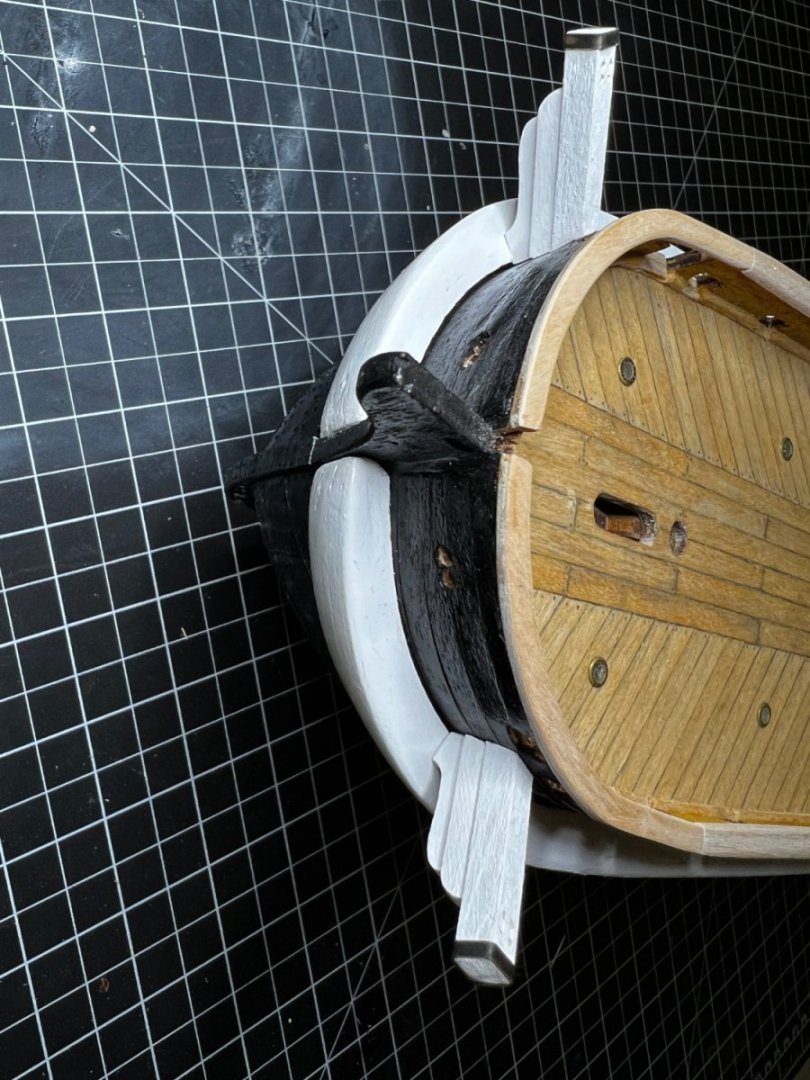
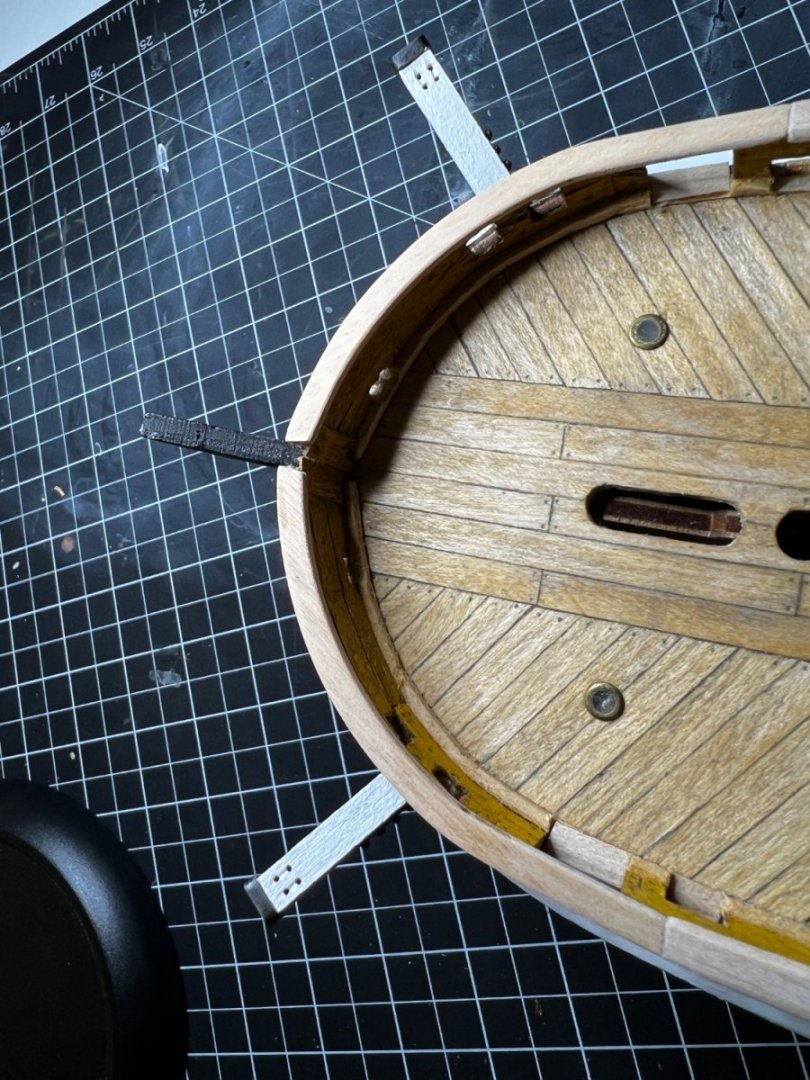
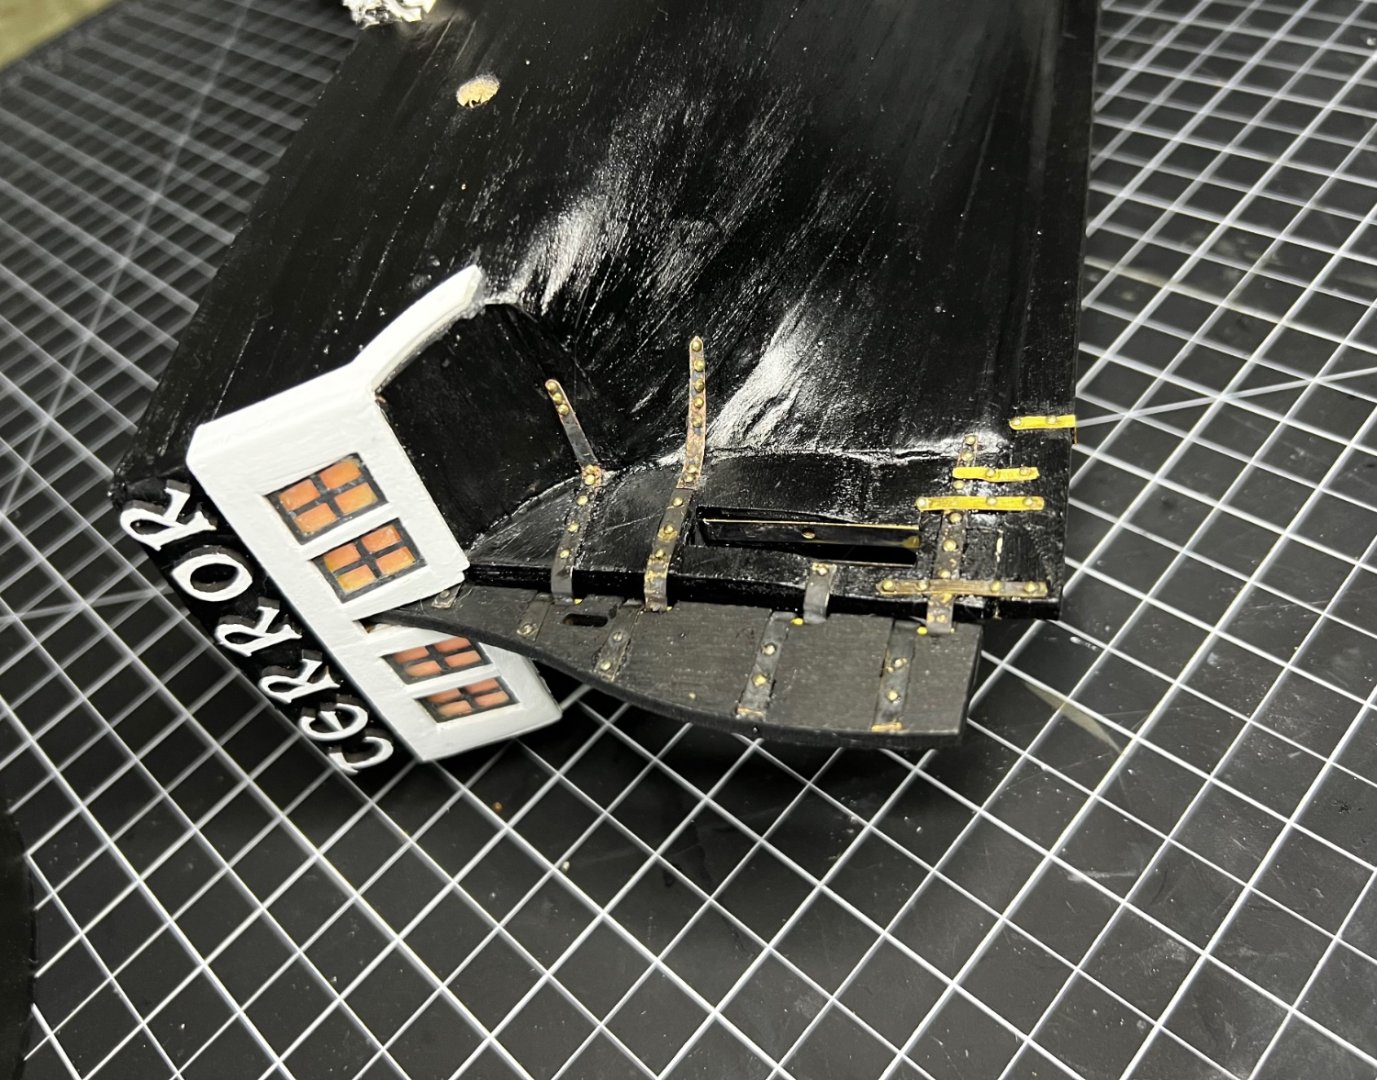
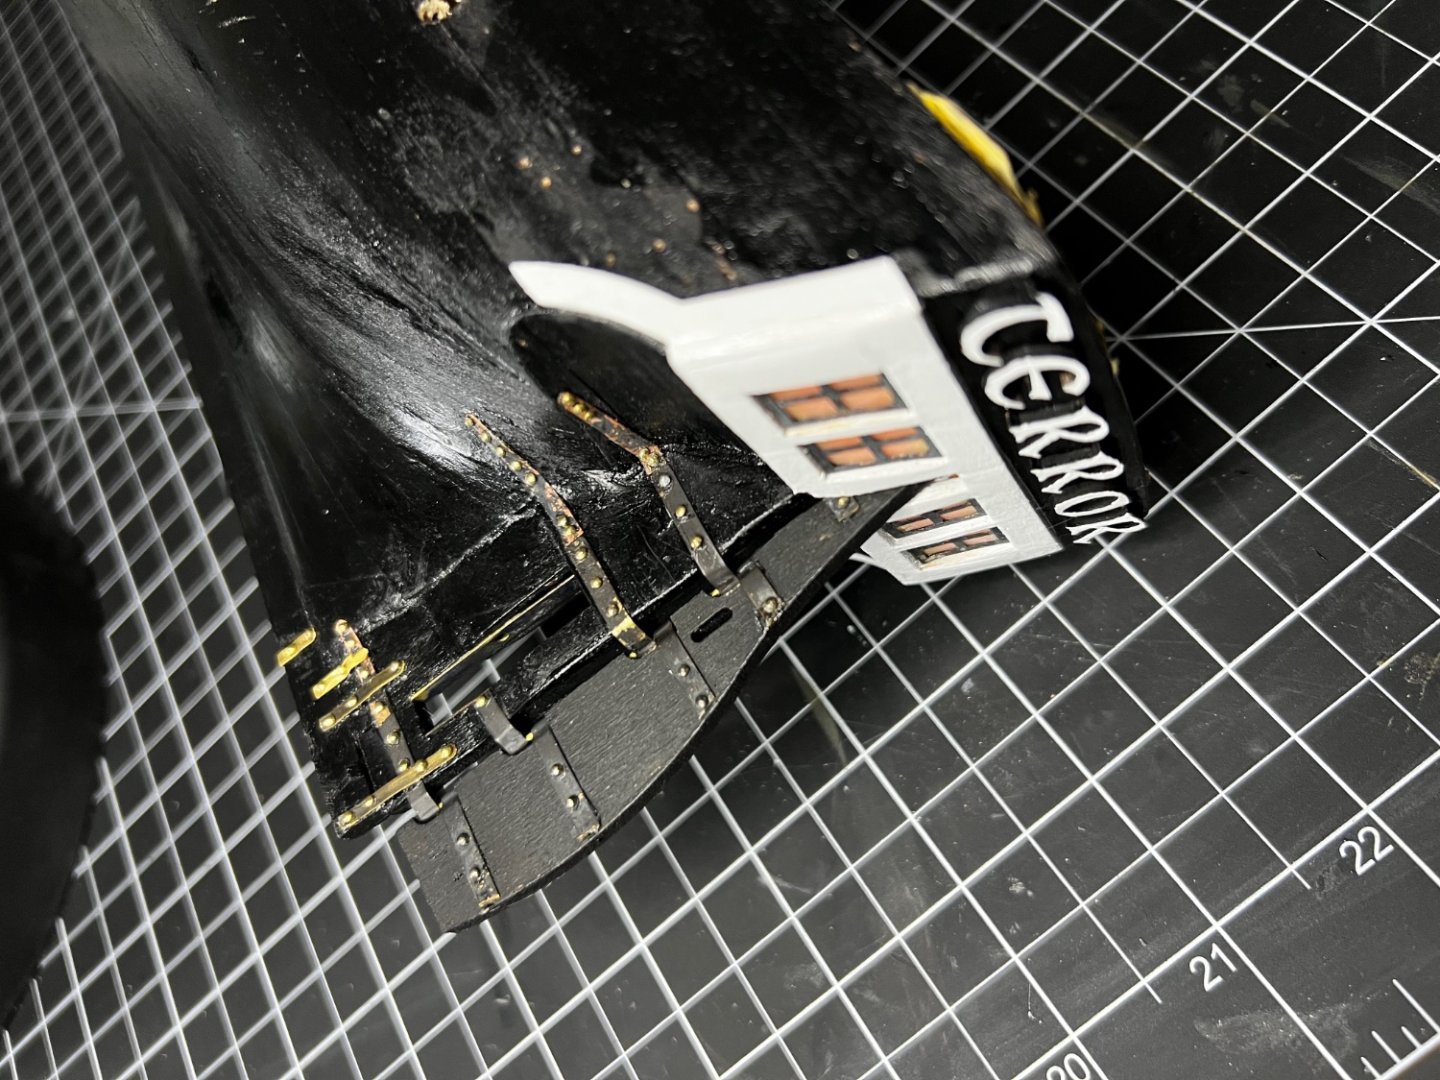
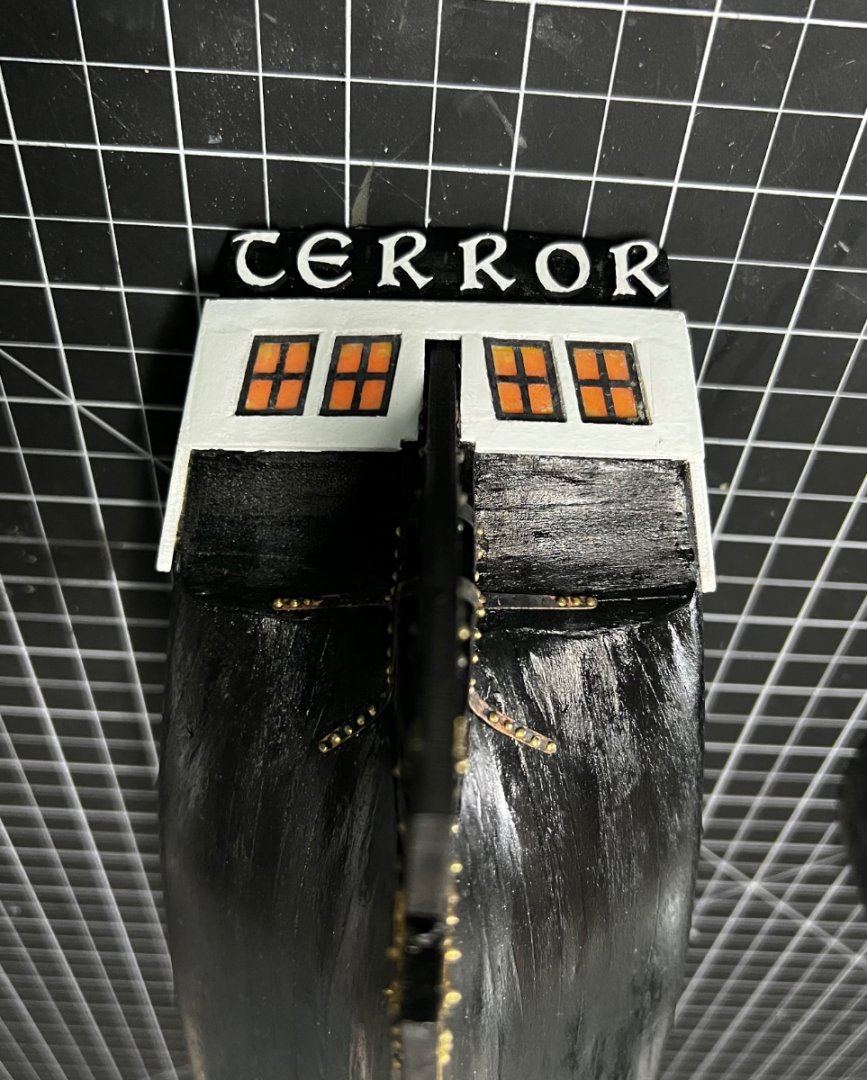
Hi all, Making steady strides on the terror. Rudder and iron stern reinforcements added, as well as the name. All quite fiddly work and I’m certainly glad to have it done, but a very rewarding part of the build so far. She’s definitely in need of some cleaning up—paint needs touching up, have to get the rudder to match the rest of the hull, iron bands need blackening again—but at least the hardware’s in place! looking forward I think I’m about ready to cement the ice chocks in place and give the whole hull a protective coat. Then I can finally remove the masking over the deck and get a good look at how it’s all coming together! Hope everyone had a fun and safe new year!
-
Yeah that does sound like quite a lot of effort! I have some time to decide on whether I’m going to take that plunge. May even just avoid the whole issue and do furled sails
-
Sails and lines are looking great! Are they silkspan? I recall earlier in the log someone mentioning that silkspan can be difficult to obtain. Not sure if I’m remembering correctly.
-
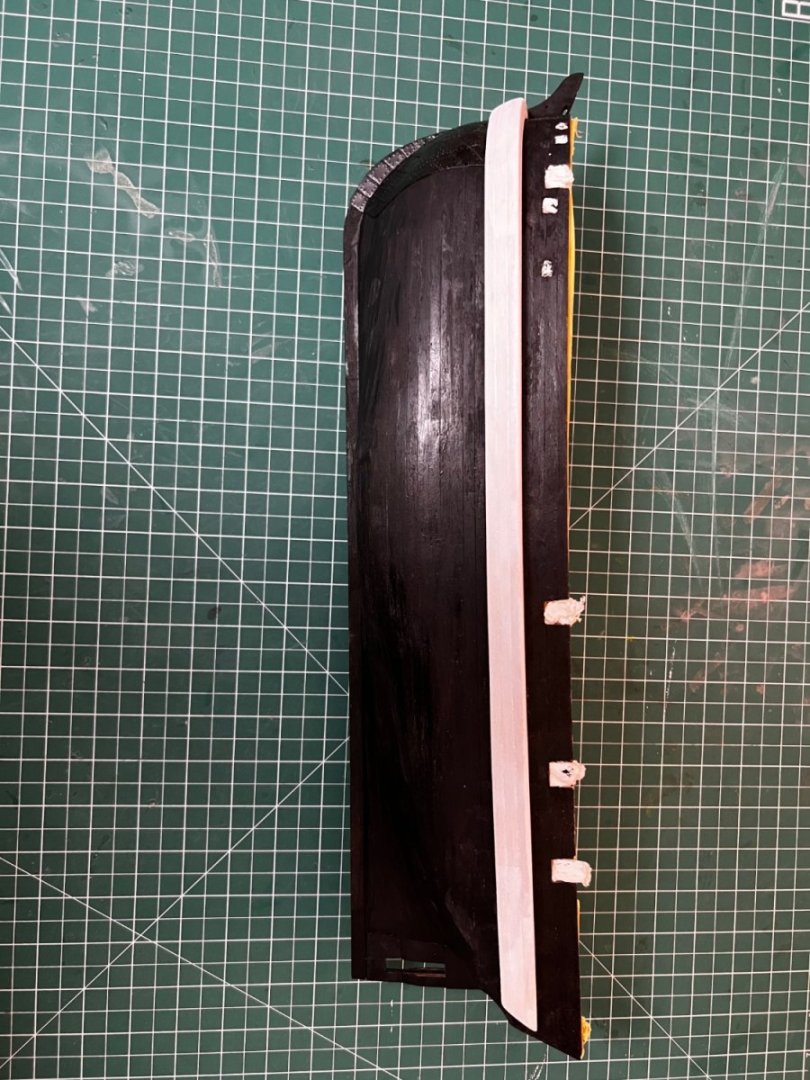
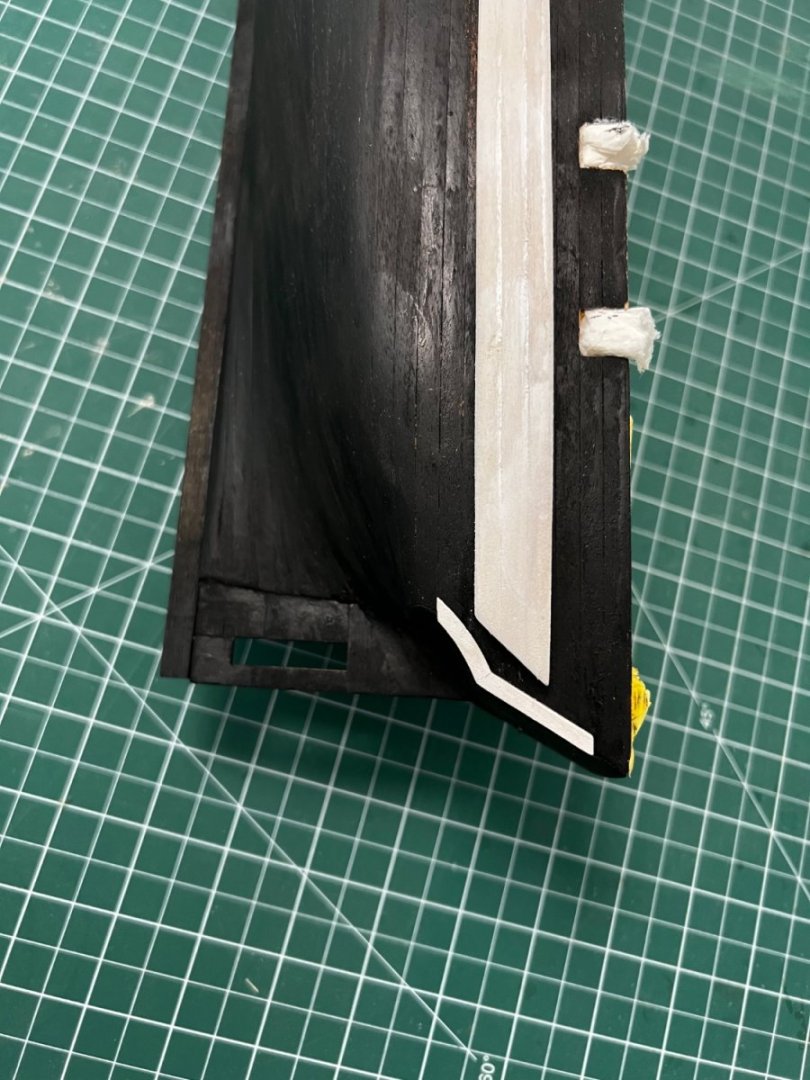
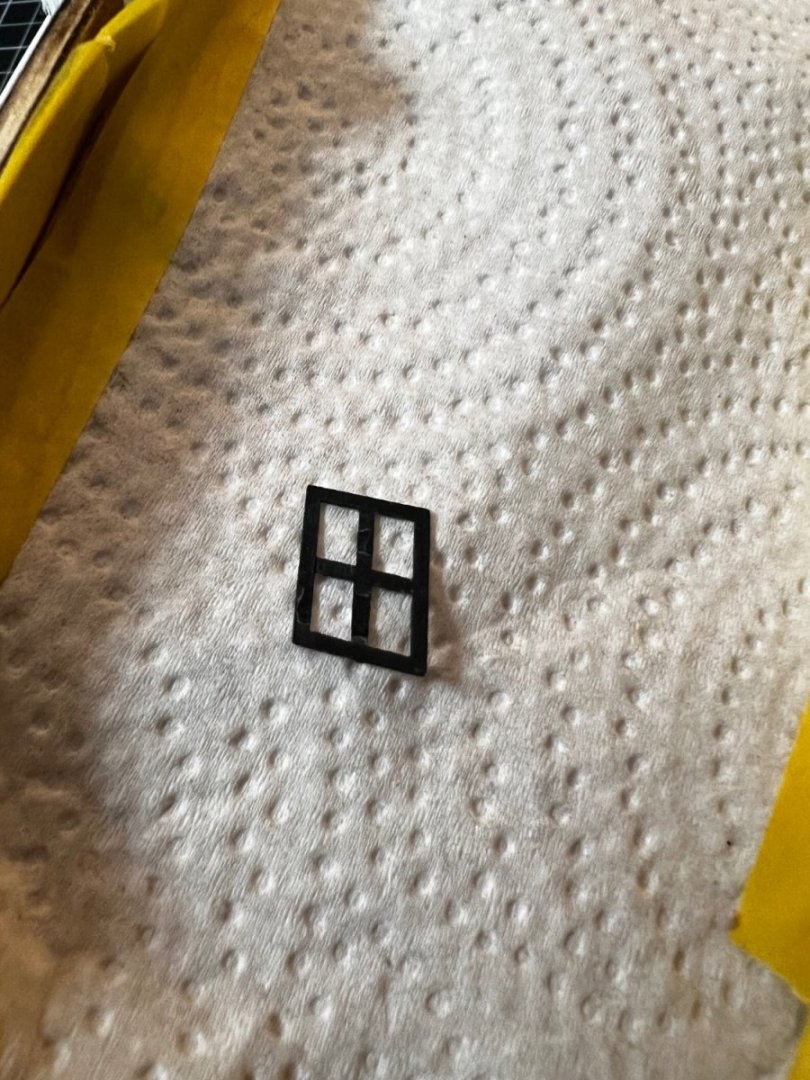
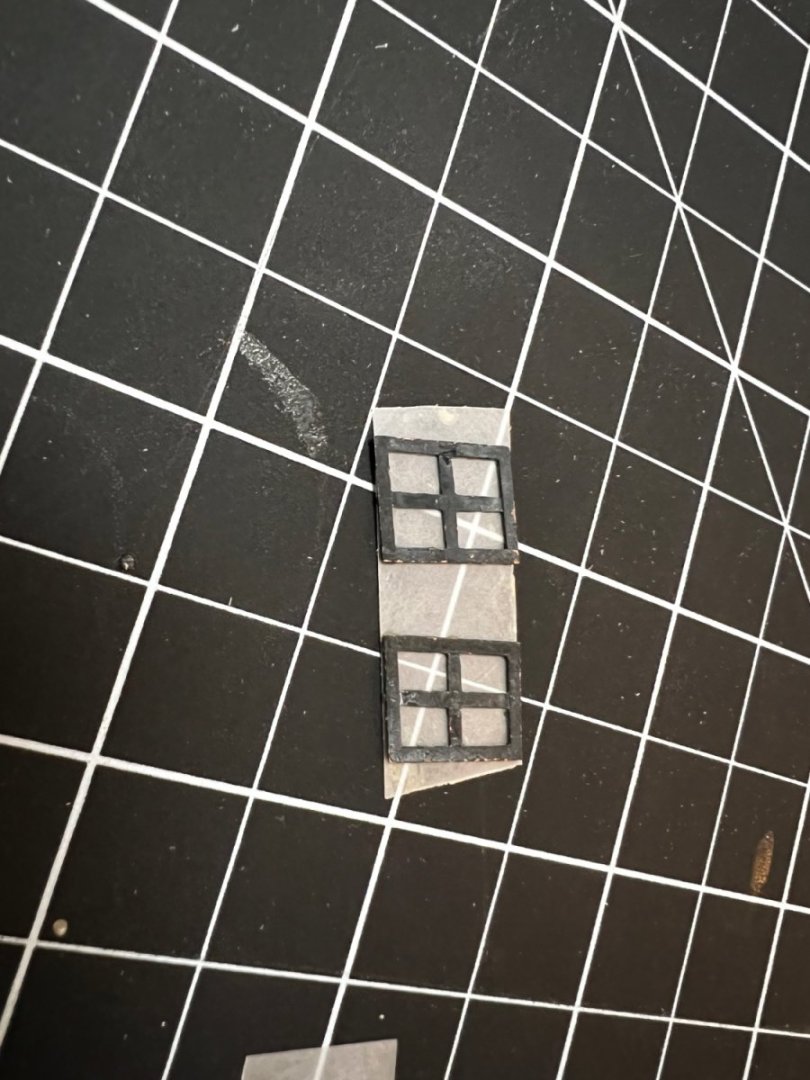
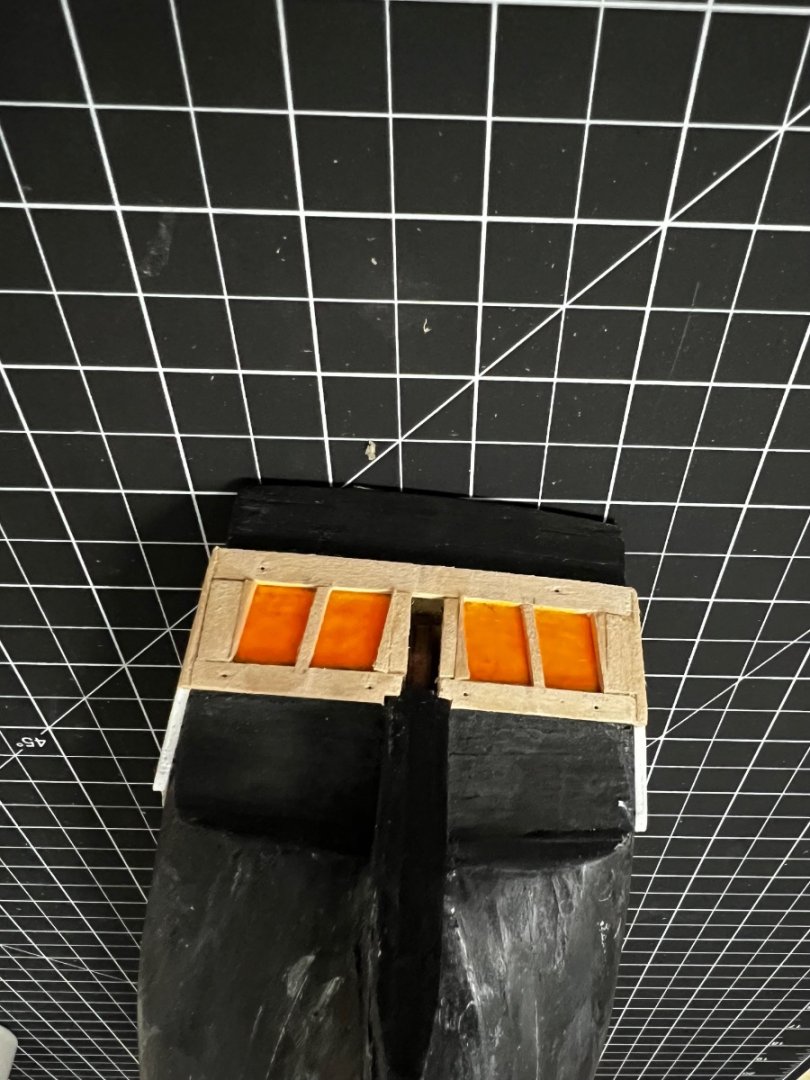
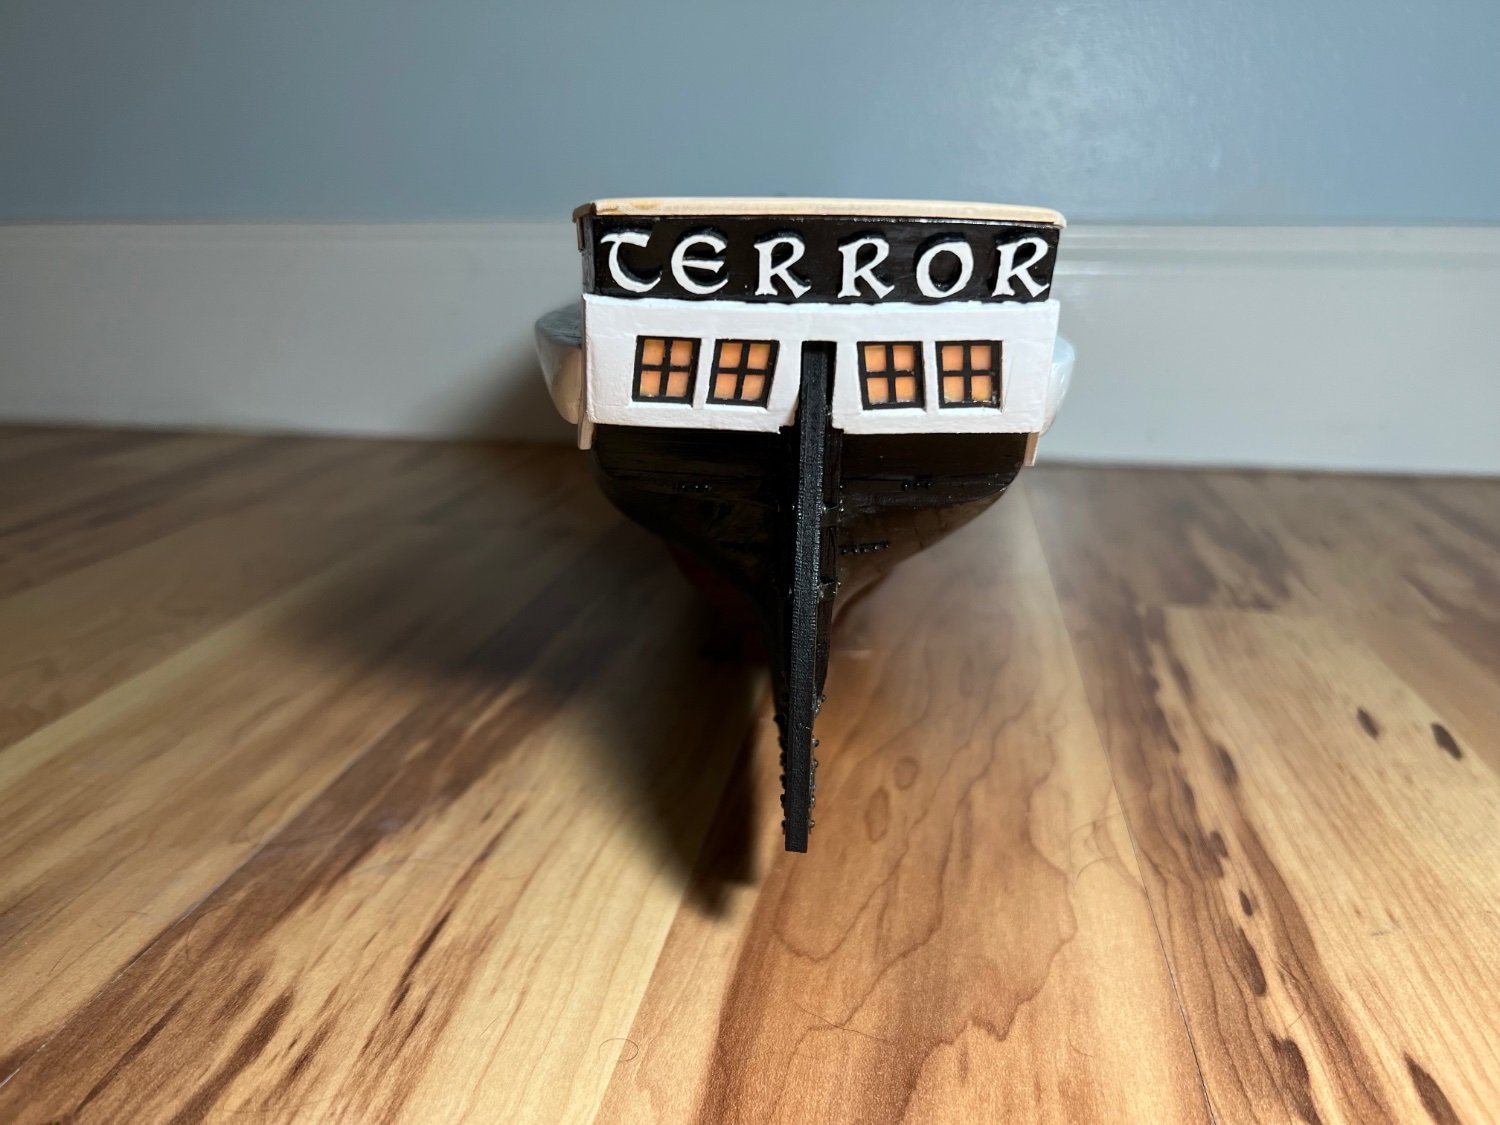
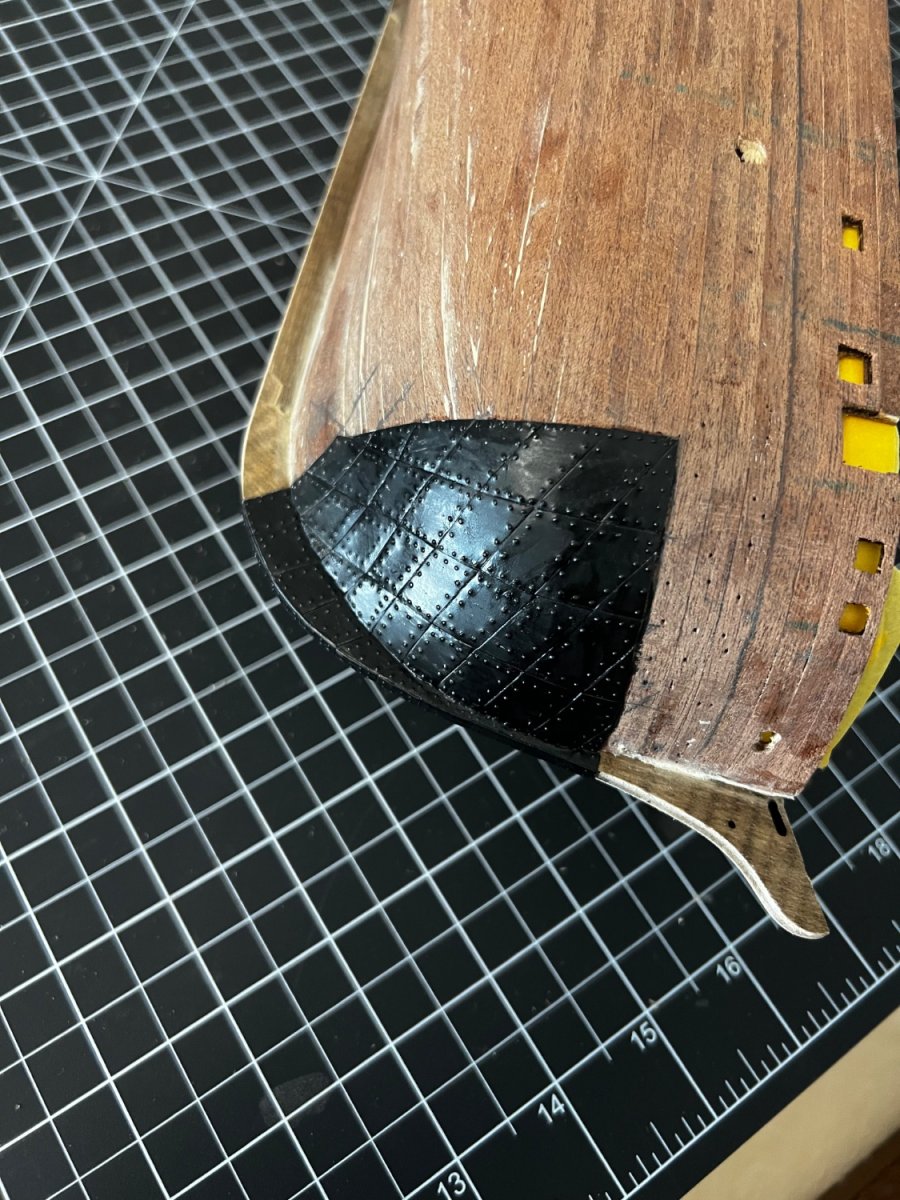
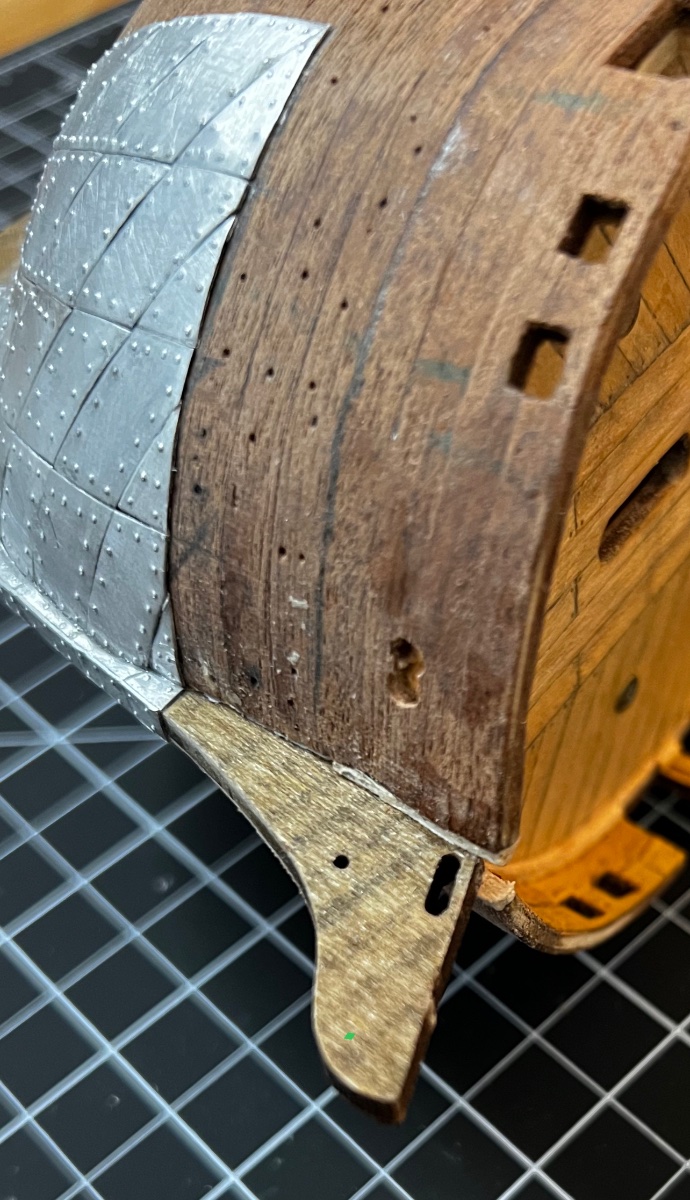
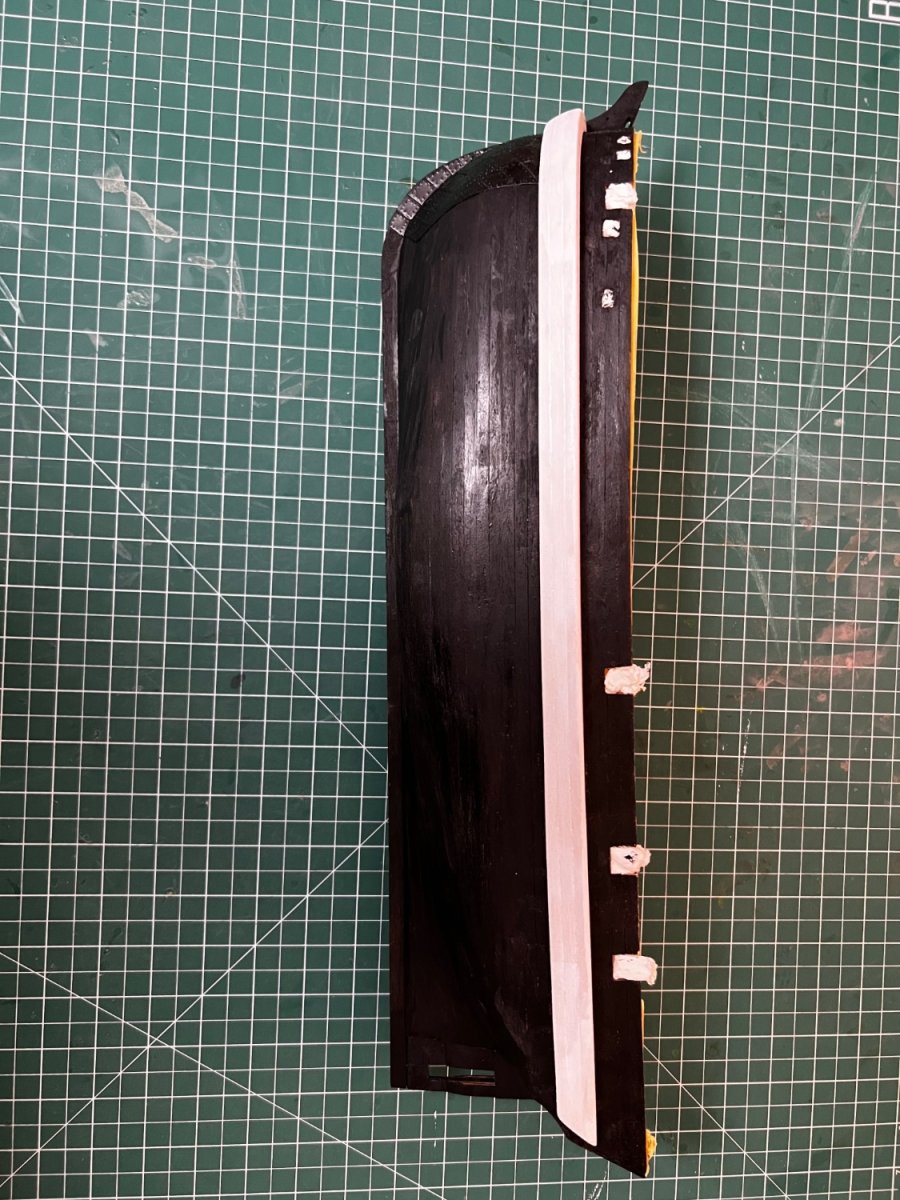
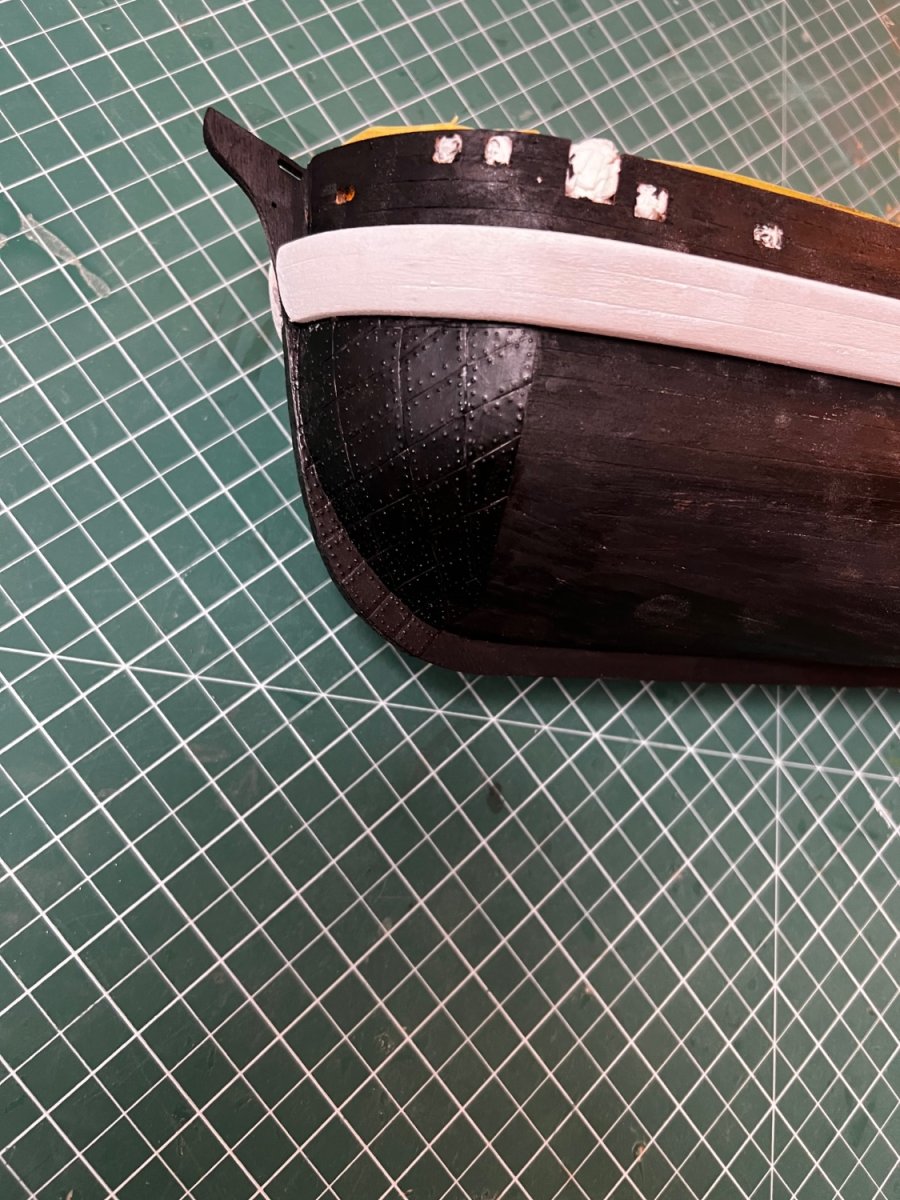
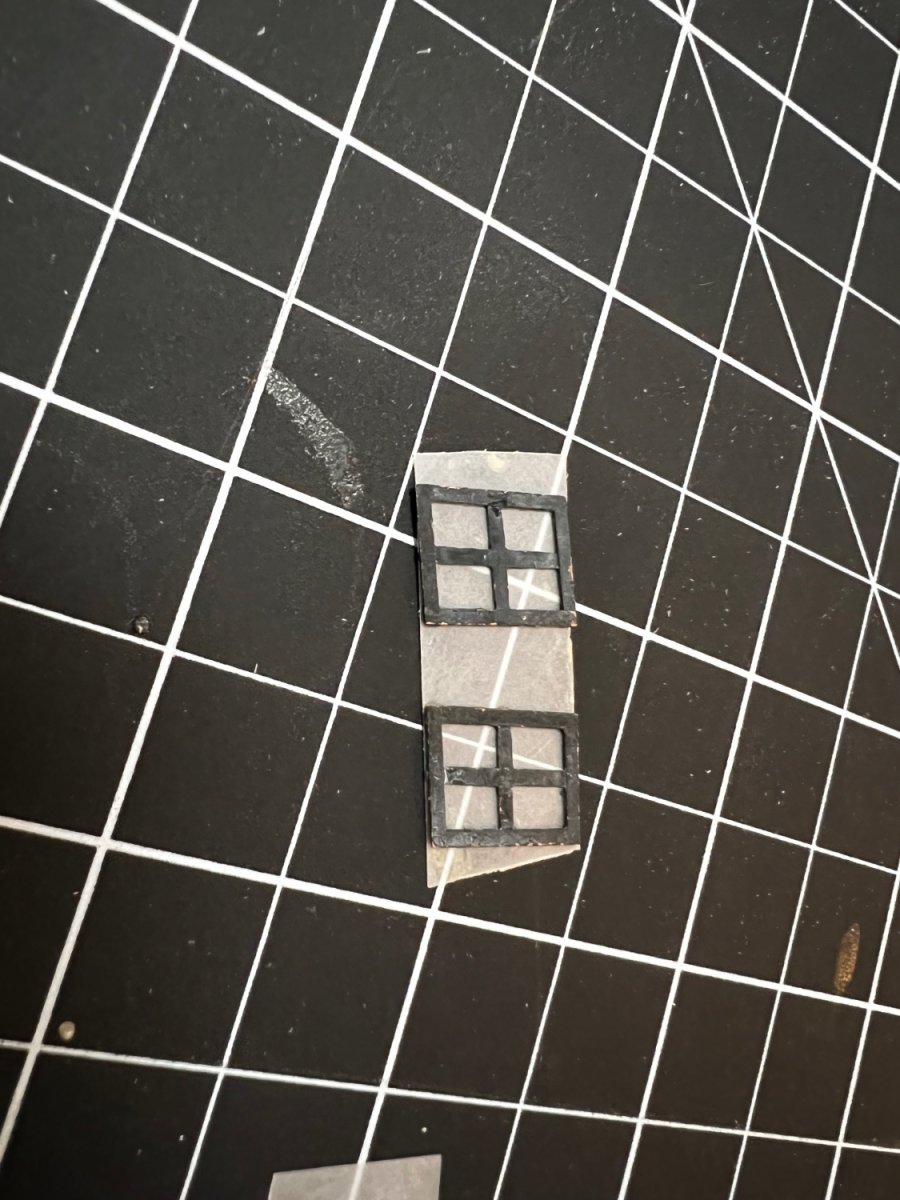
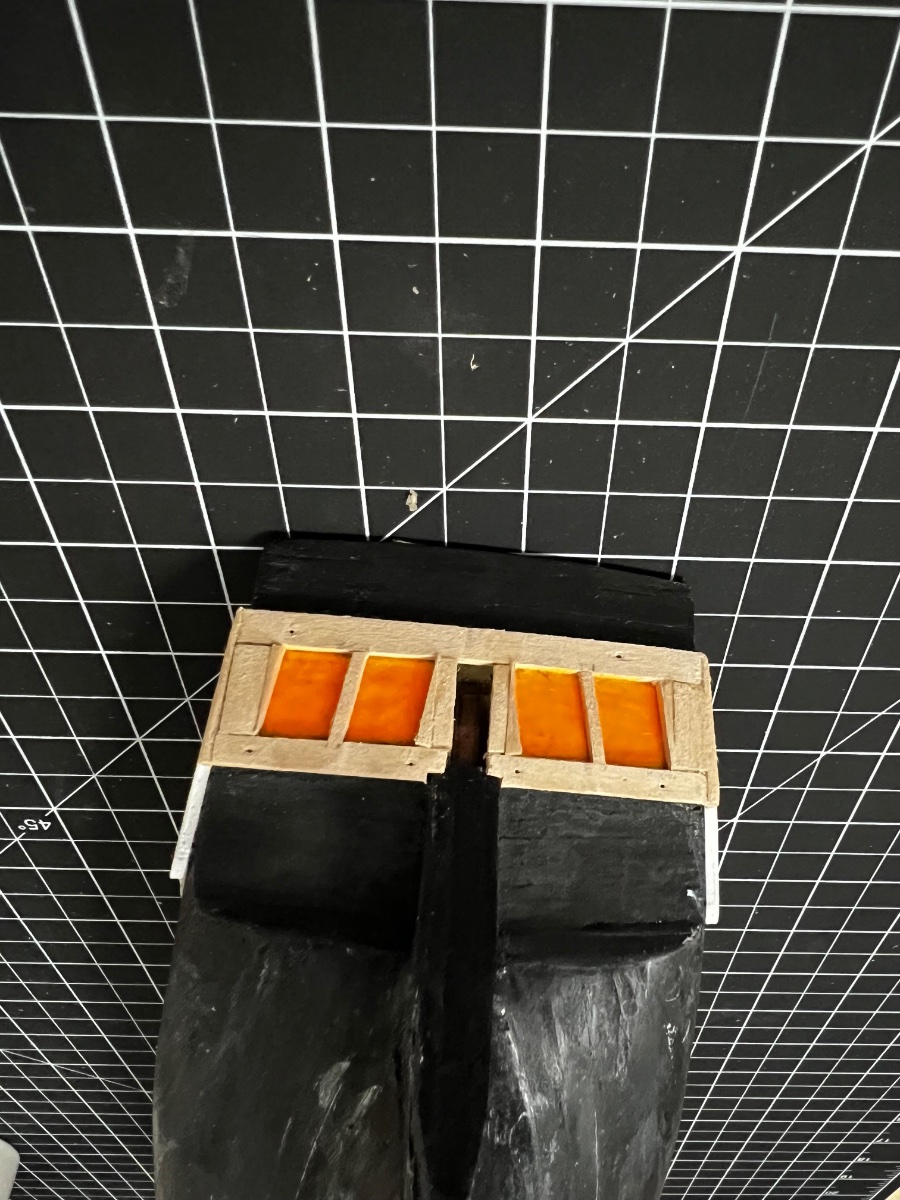
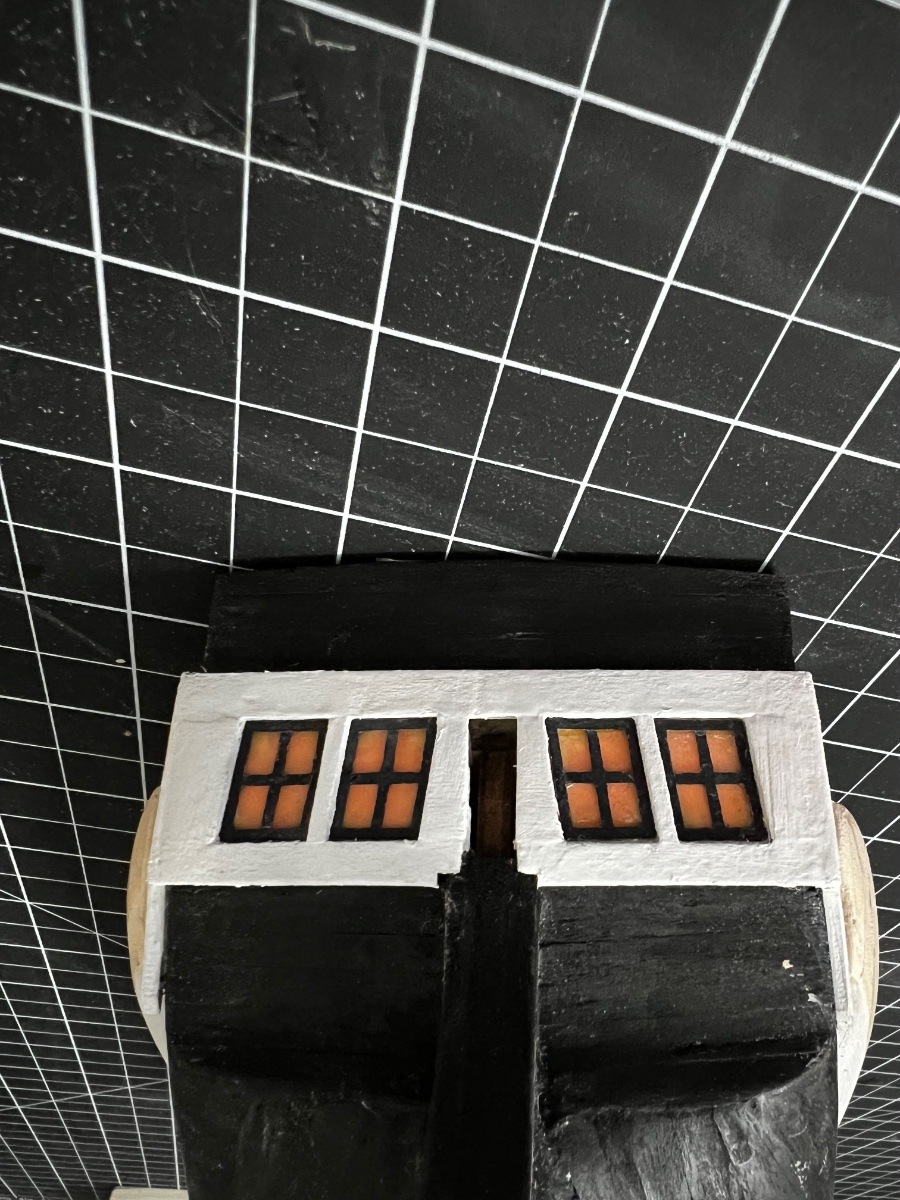
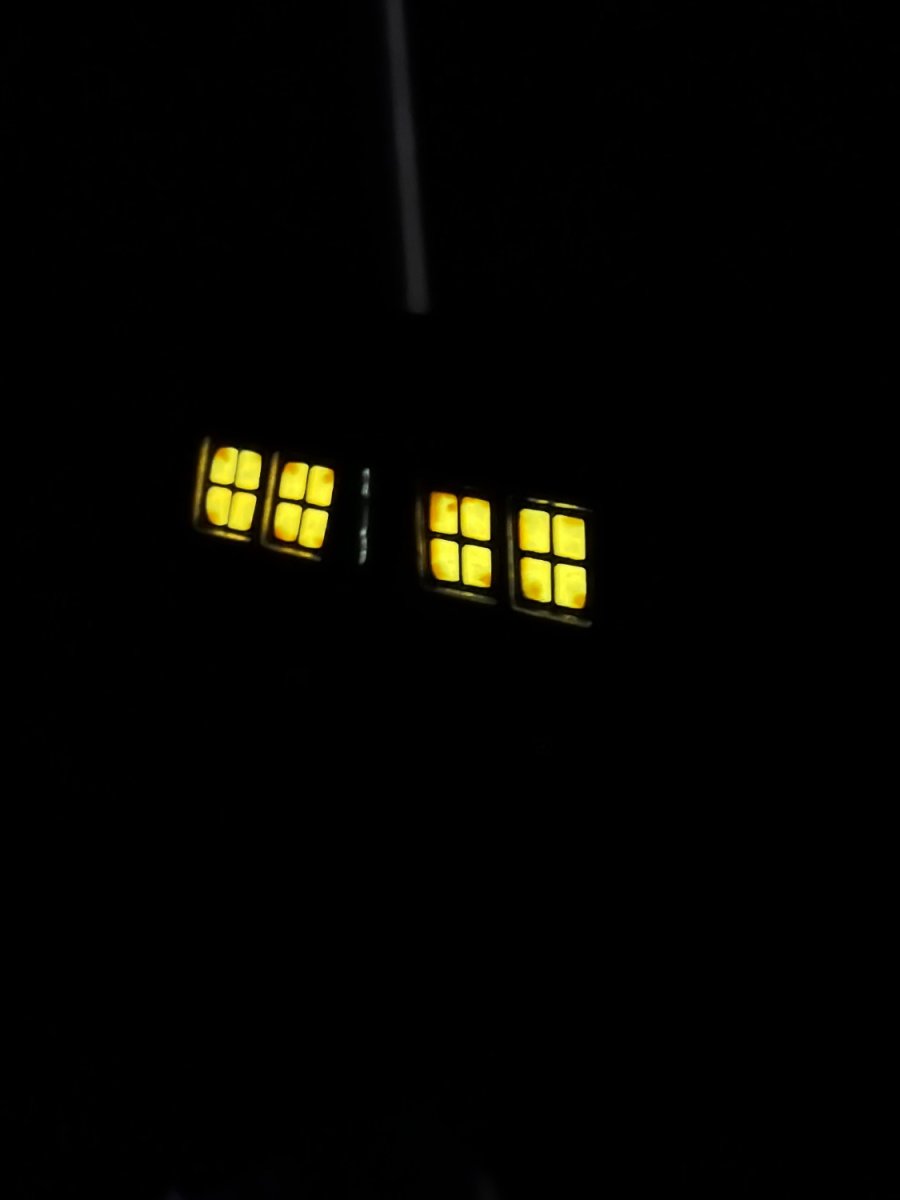
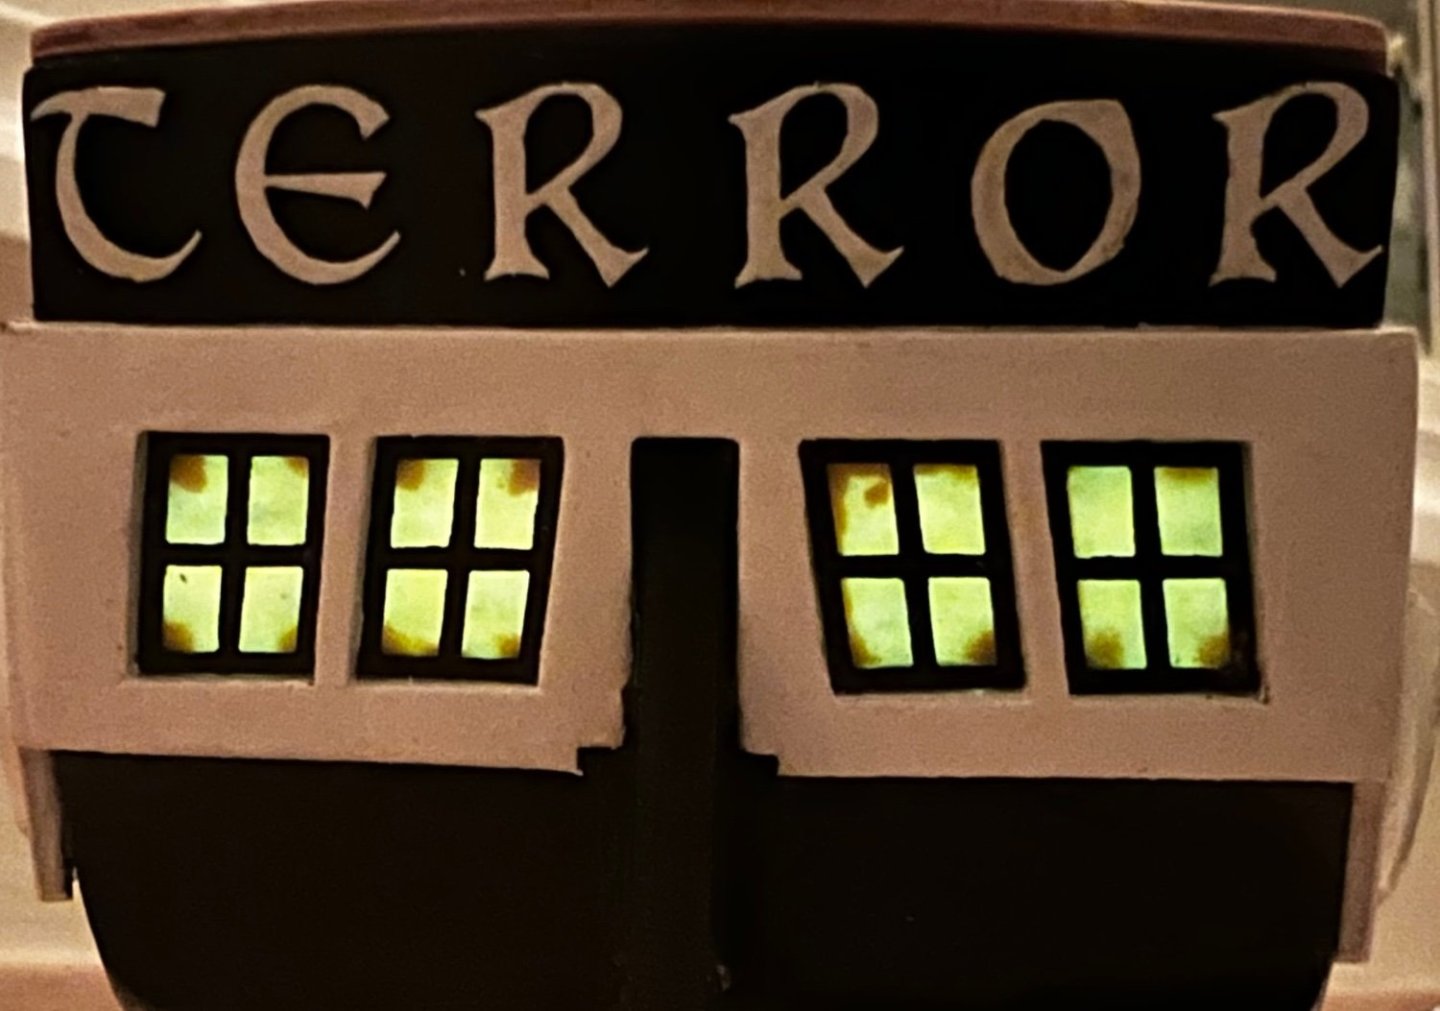
Hi All, More extensive of an update today. It’s been quite a few weeks but I have been busy on the Terror. Since I last posted she’s had a coat of paint, some work on the captain’s cabin, and work on her ice chocks. Following completion of the bow plating I found a method to fill in the gaps between the prow and the hull, then I painted the plating to ensure that it all looked as desired. It all looked alright, rivets are a bit big, but happy with the result. Following that you can see that I masked off the deck in anticipation of painting the hull, of which I have one coat completed. Side note: I am unsure why the pictures are displaying upside down. I even tried flipping them in my album prior to uploading and they still posted upside down. Apologies! I ran into a little trouble with the ice chocks next. They were quite the chore to sand, it felt like the more I sanded the less progress I was making, but eventually I reached a stopping point and got them painted. But there was more trouble to come. I’d cut them too short! Not sure where this error was made as I’d been fairly careful and checked where they should be cut, but nevertheless here I was with two too-short ice chocks. Maybe I could just…? Well that worked way better than expected. This was around the time I built the base for the model, here’s a shot of it in the finished base. The next item to work on was the windows for the captain’s cabin. After seeing Daniel’s Terror on this forum with the interior lighting, I couldn’t quite let go of the idea of illuminated windows, but this is my first model, I do not have the wooden model skills required to make the modifications to add internal LEDs and this build is long past the stage to start incorporating them. So I found some glow in the dark paint that could mimic lantern light. I also chemically blackened the window frames. Of course, a shot of it lit up. Now I’m moving on to building the rudder (which is much more fiddly and irritating than I expected) and painting some laser cut letters I will place along the transom. Thanks for looking! Hope all are well!