flutlo6180
-
Posts
146 -
Joined
-
Last visited
Content Type
Profiles
Forums
Gallery
Events
Everything posted by flutlo6180
-
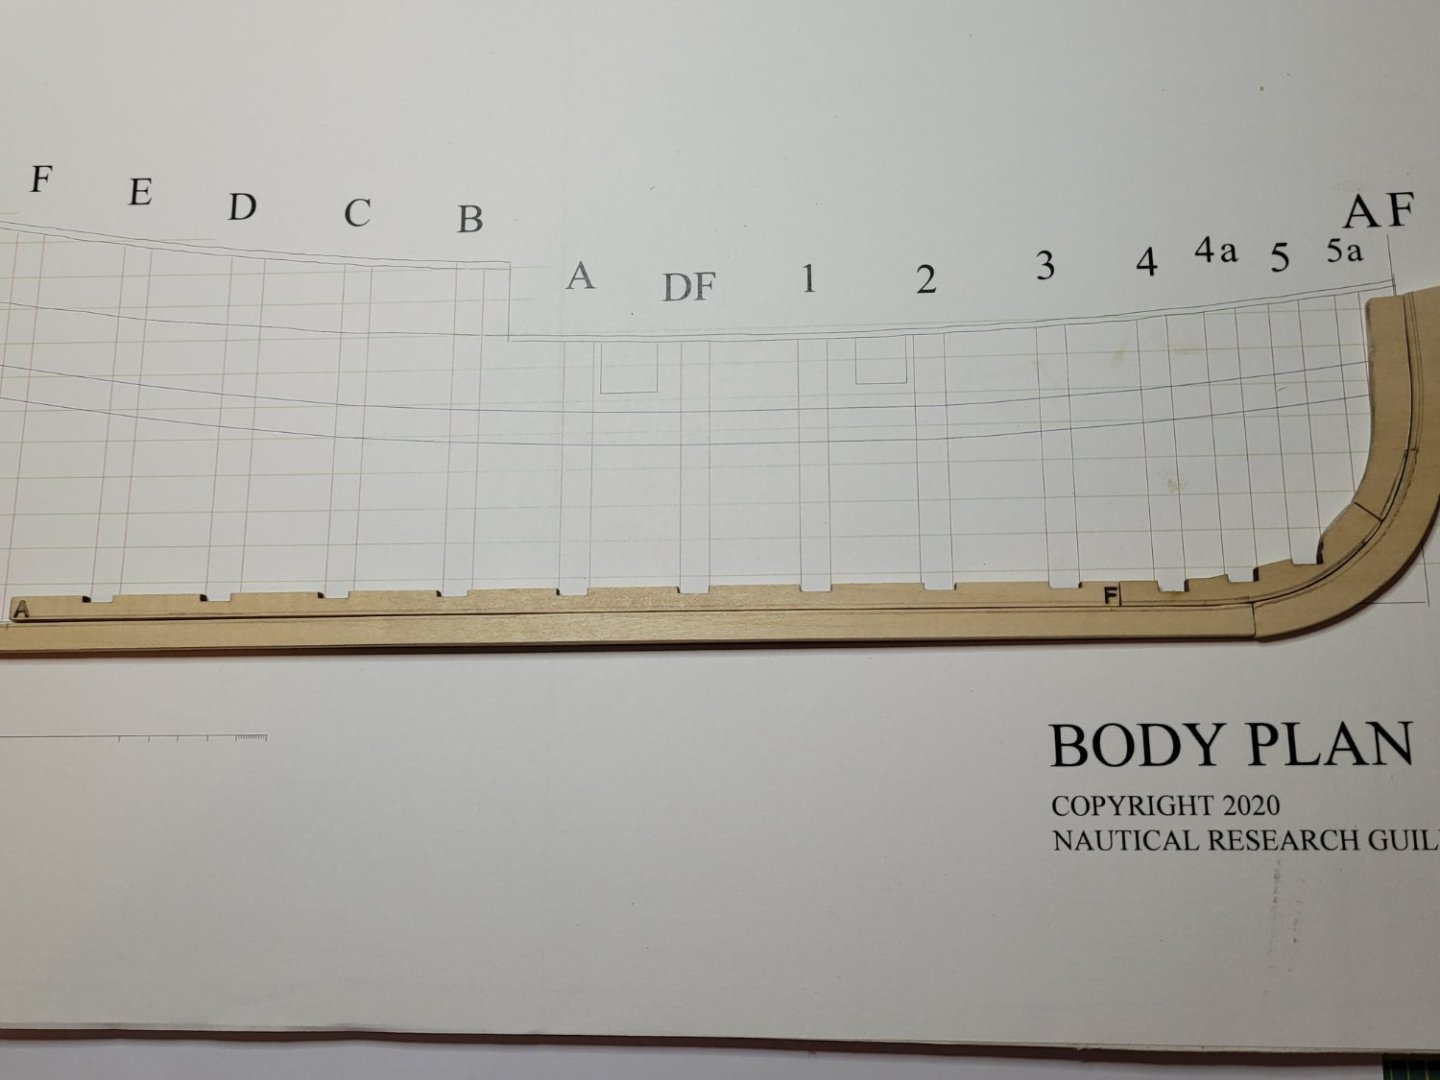
 I'm just about ready to start planking!!! Today, I rebuilt and faired frame 5a using the scrap basswood, cut the frame tops back to match the topline, and laid out the wale as planned. I proceeded further and also laid out the line for the garboard strake. Discovered that the 10mm Tamiya tape on hand isn't quite wide enough to properly layout the garboard plank for transfer to the basswood. Another unfortunate materials delay, but I'm pretty excited about where I am with this build. I received the HMS Alert kit from Vanguard over the weekend and will take this forced break to crack open the box and start reading through the instructions.
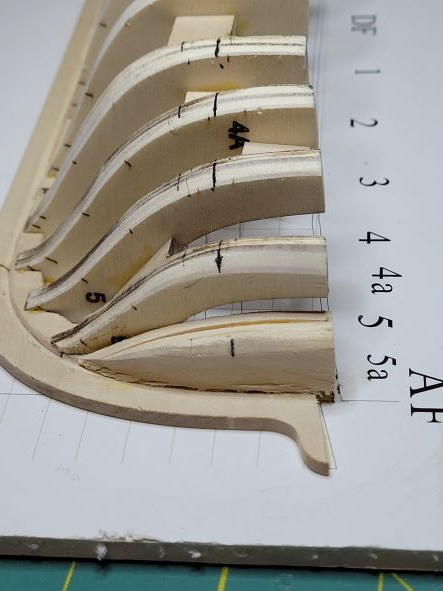
-
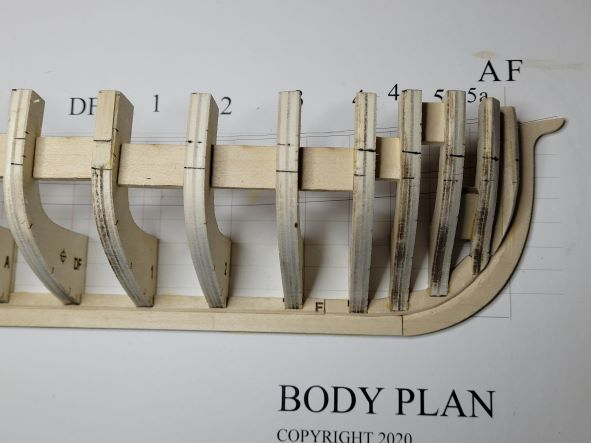
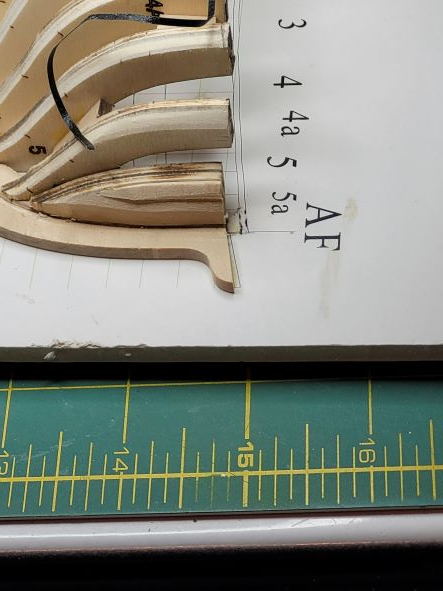
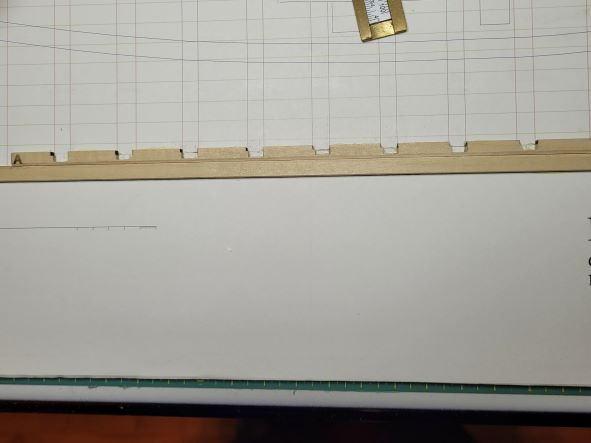
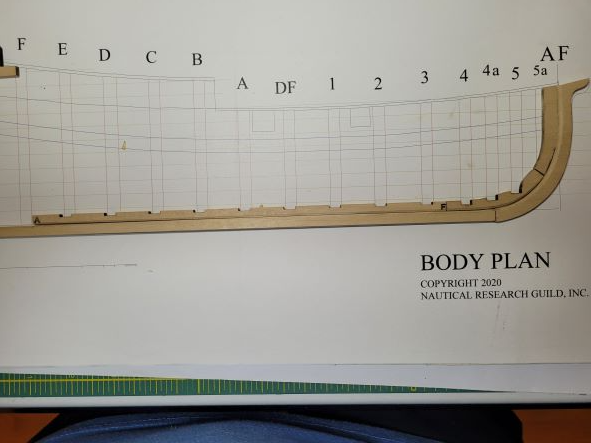
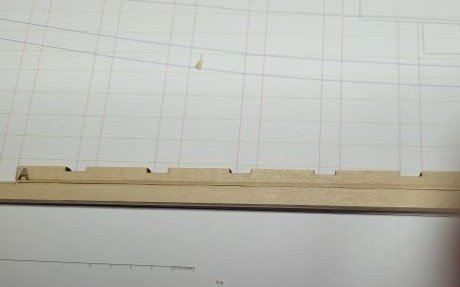
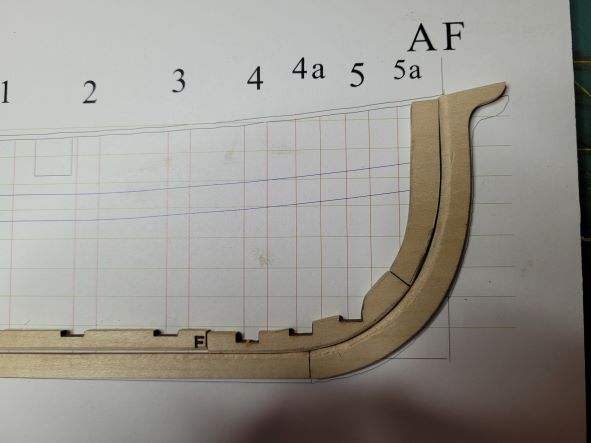
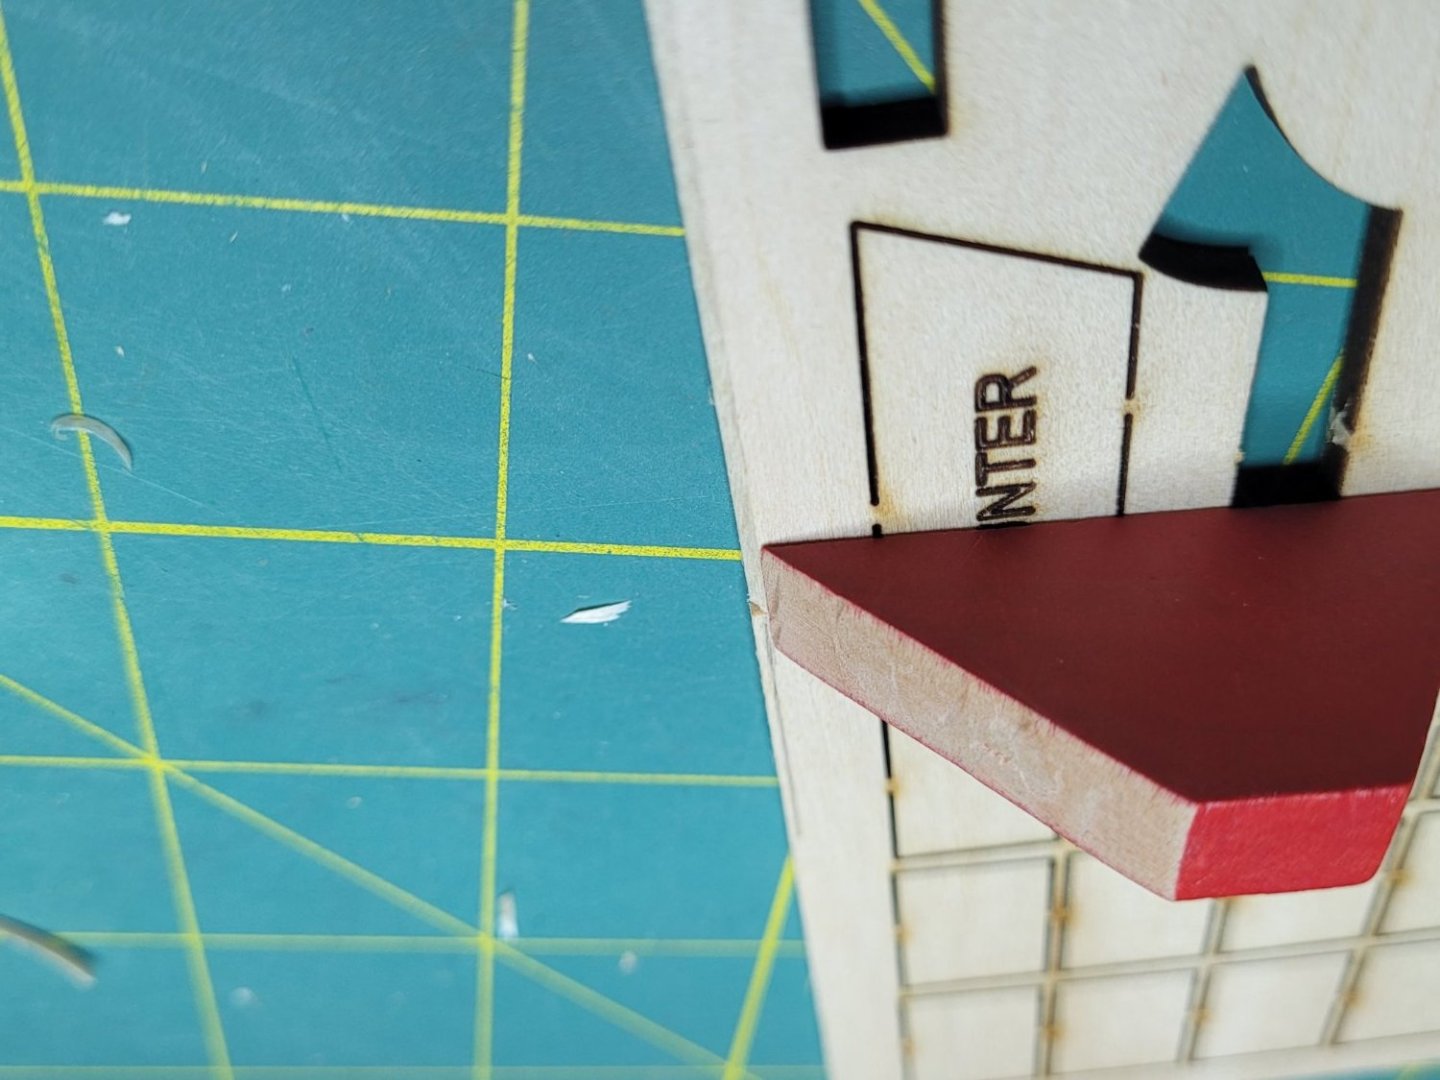
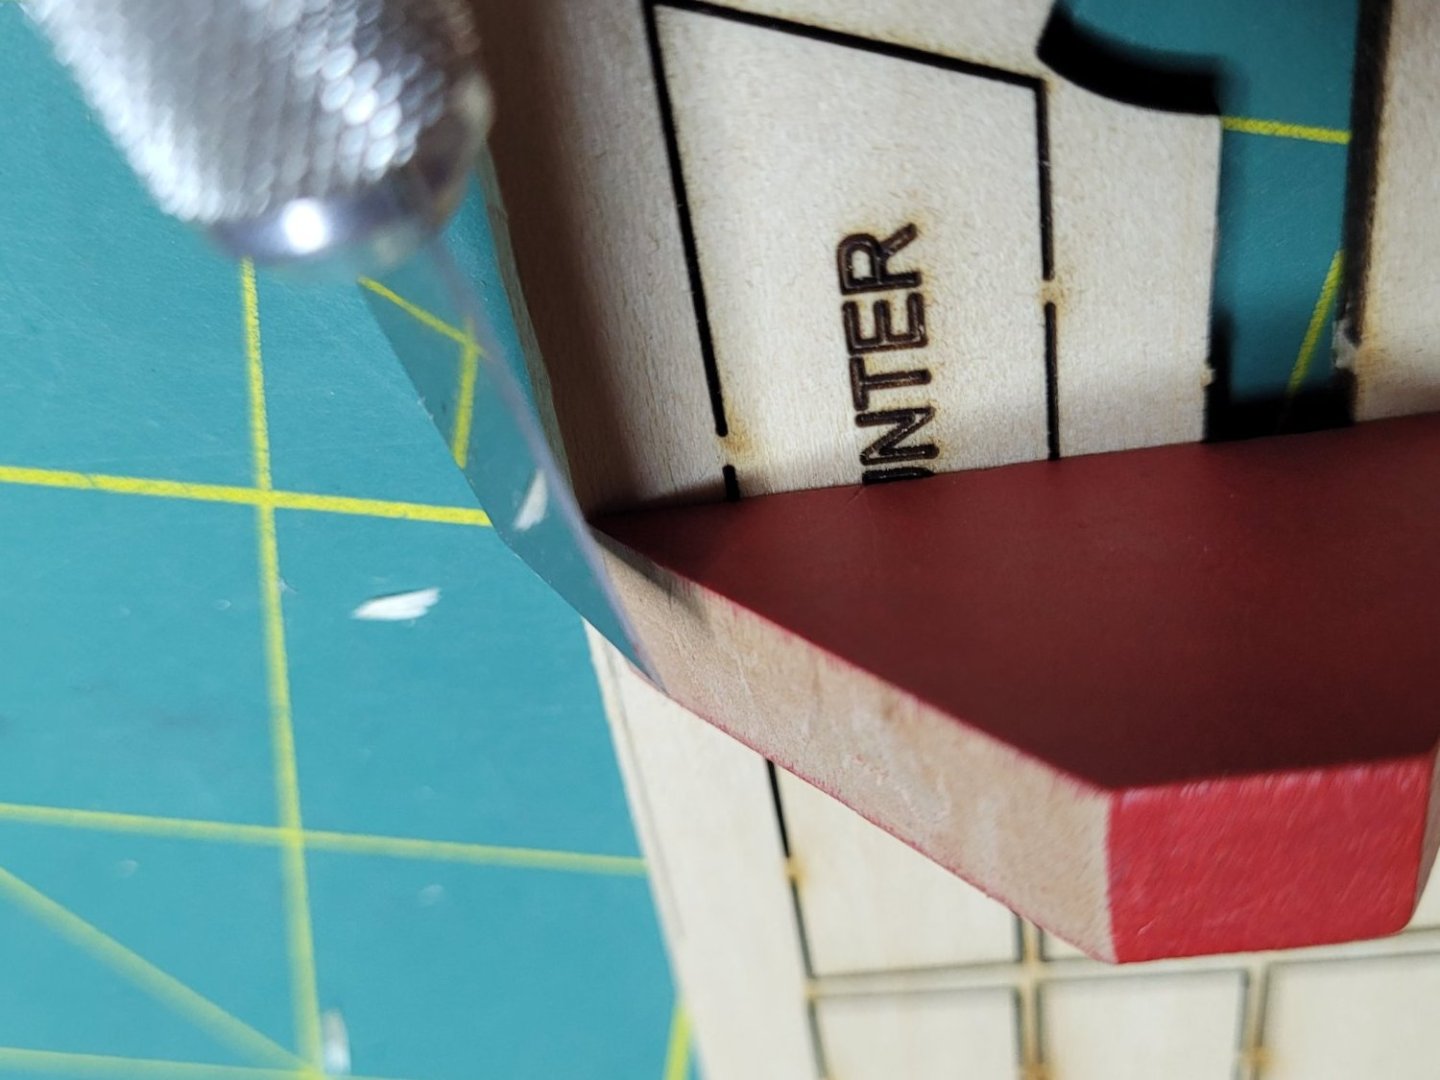
The shim installed on Frame E raised it the the right height and I was able to get the section faired. As I started fairing the midship frames I found that Frame 1 was also low and was successfully shimmed. I decided to wait to layout the top rail line until after shaping the shimmed frames and laid out the line after some fairing of the hull. Aft top rail came out well as shown below. Laying out the top rail for the forward section revealed an issue with frame 5a and the filler piece at the stem. Looks like I inserted the frame to far towards the keel and it is about 1/8" below the top rail line. I considered trying to build up this area to fill the gap and then recalled the issues I had with my felucca build by trying to press forward, and decided to tear down this section and rebuild using replacement pieces. I've stacked 3 layers of scrap basswood cut to shape of Frame 5a which should work. I used the basswood because it's easier to cut it to proper shape then the plywood. My plan is to rebuild this area tomorrow (I need to buy some alcohol tomorrow to release the pva) and then finish the top rail line, trim the frames, and then layout the main wale line.

-
Hi TJ, Welcome aboard. If you are so inclined, post some photos of your Bluenose and Constitution builds in the gallery.
-
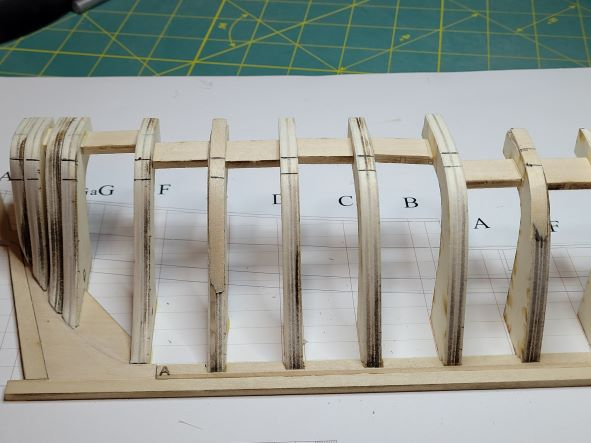
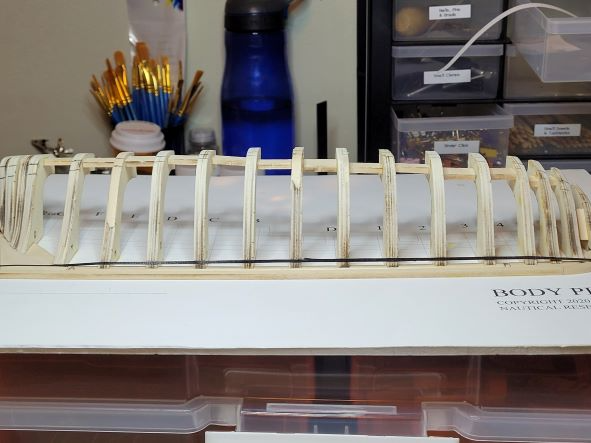
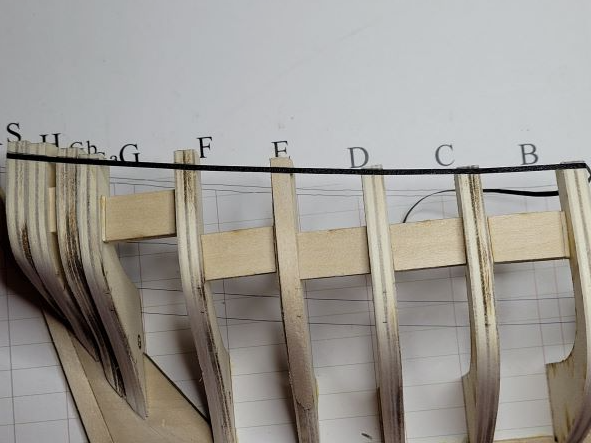
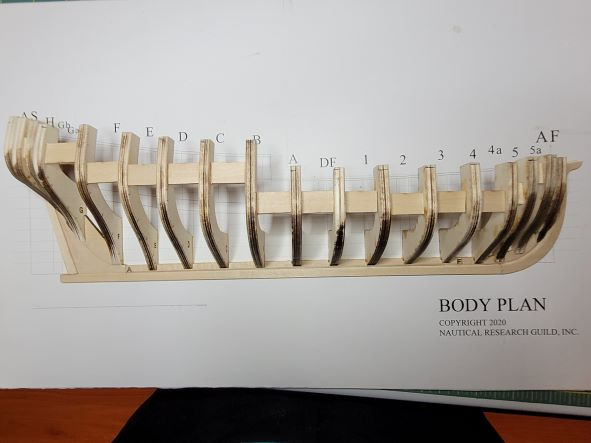
Framing is complete. I opted to wait to install the transom and counter until after several courses of planking are finished as suggested in the instructions to avoid breaking. Getting the bow filler cut to follow the rabbit line wasn't as challenging as I feared and I like the end result. There is and issue with frame E as shown below which is a bit over 2mm lower than the line between frames D and F. I have a piece of limewood planking from my felucca build that is the right width and 2mm thick should work as a shim to build up this frame. My plan is to soak the piece, shape it to the frame and then glue it in place once dried. That extra piece should be sufficient for me to fair the frames in this area.

-
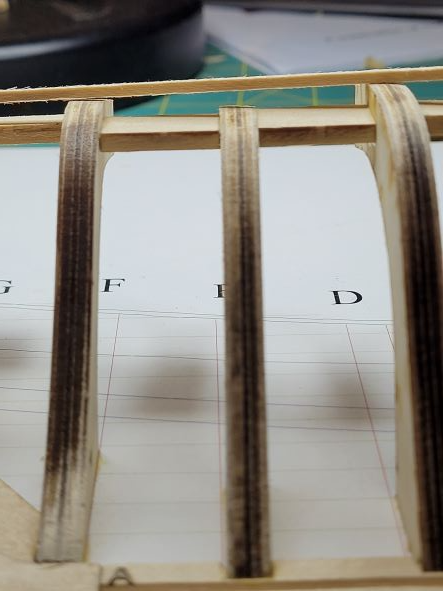
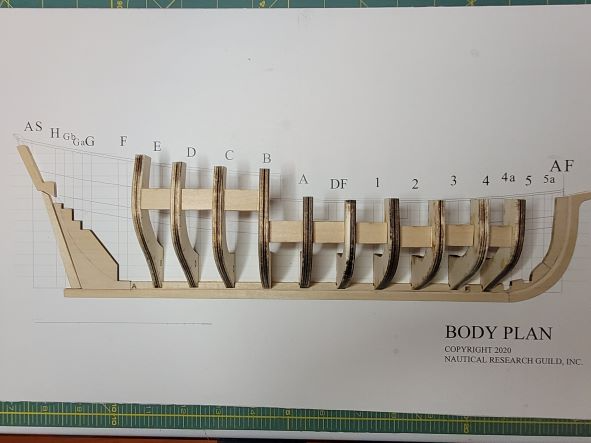
Another good build day and its starting to look like a hull. My efforts yesterday to trace the frame outlines for cut lines on the back of the frame sheet paid dividends. Frames E through 4 and spacers installed, bearding line drawn, and the shallow slope sanded into the deadwood.
-
Hi Rich. Welcome aboard.
-
Hi Allen. Welcome aboard.
-
Hi Steve, Welcome aboard this fantastic forum. Please start a build log, its the best way to ask and receive advice and answers.
-
Hola Alvaro, Bienvenidos a bordo. I'm looking forward to seeing you models.
-
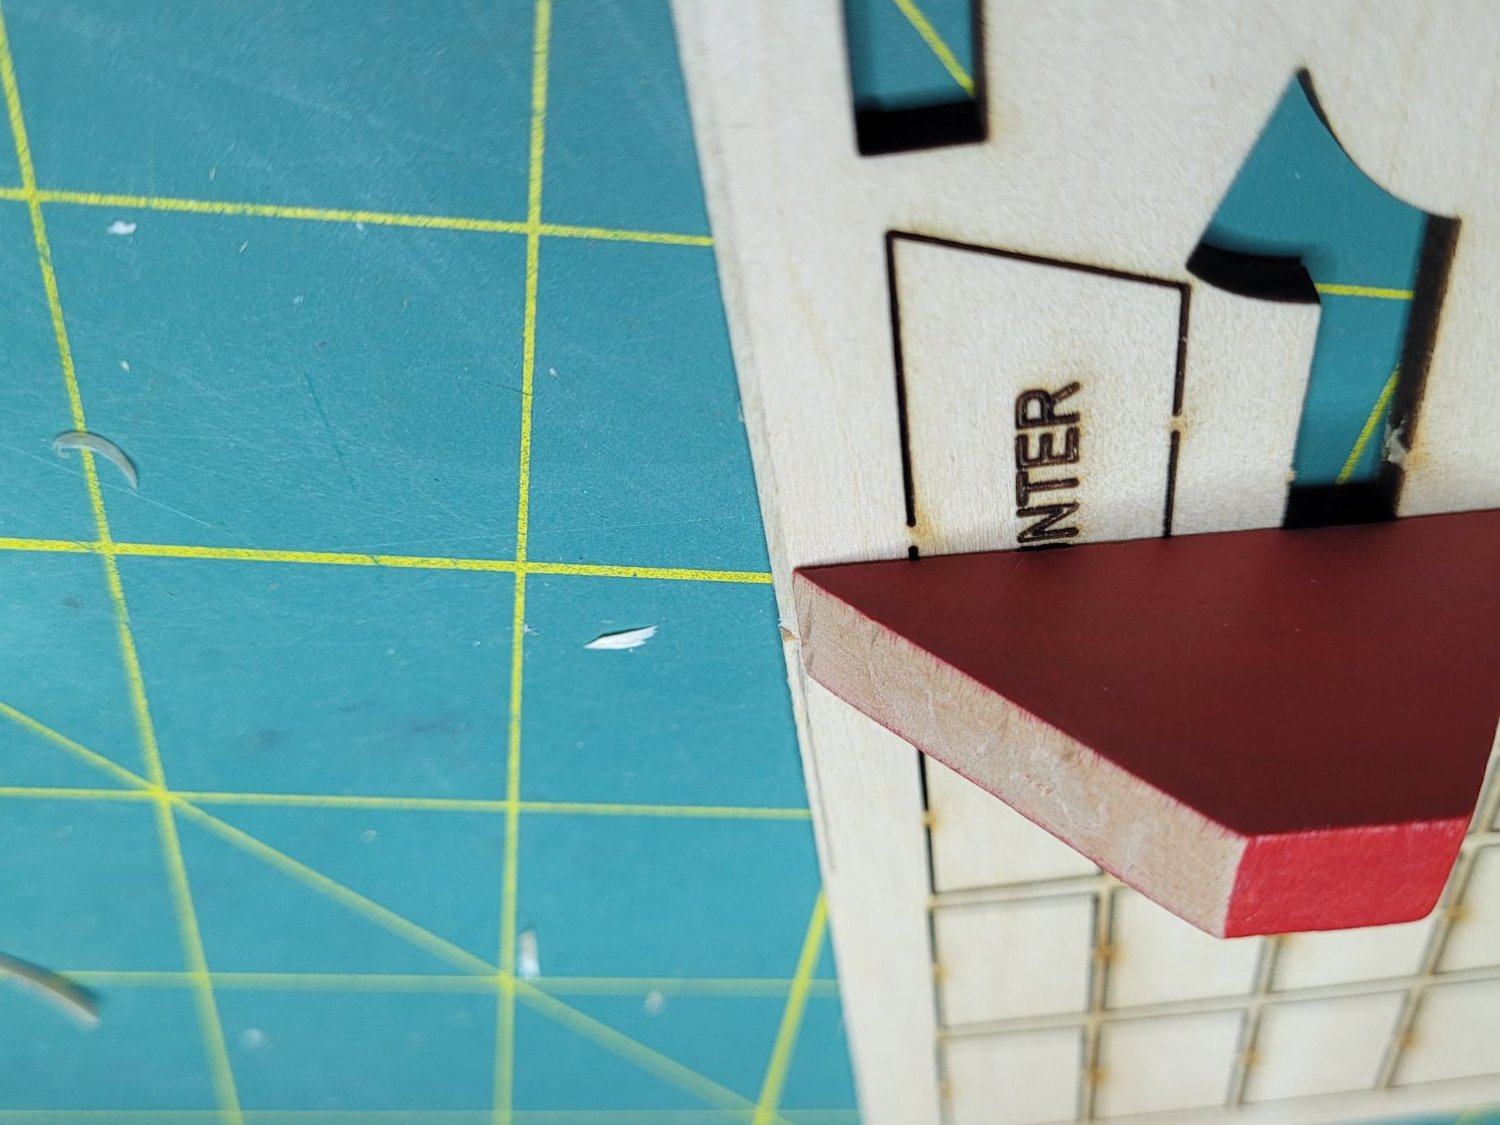
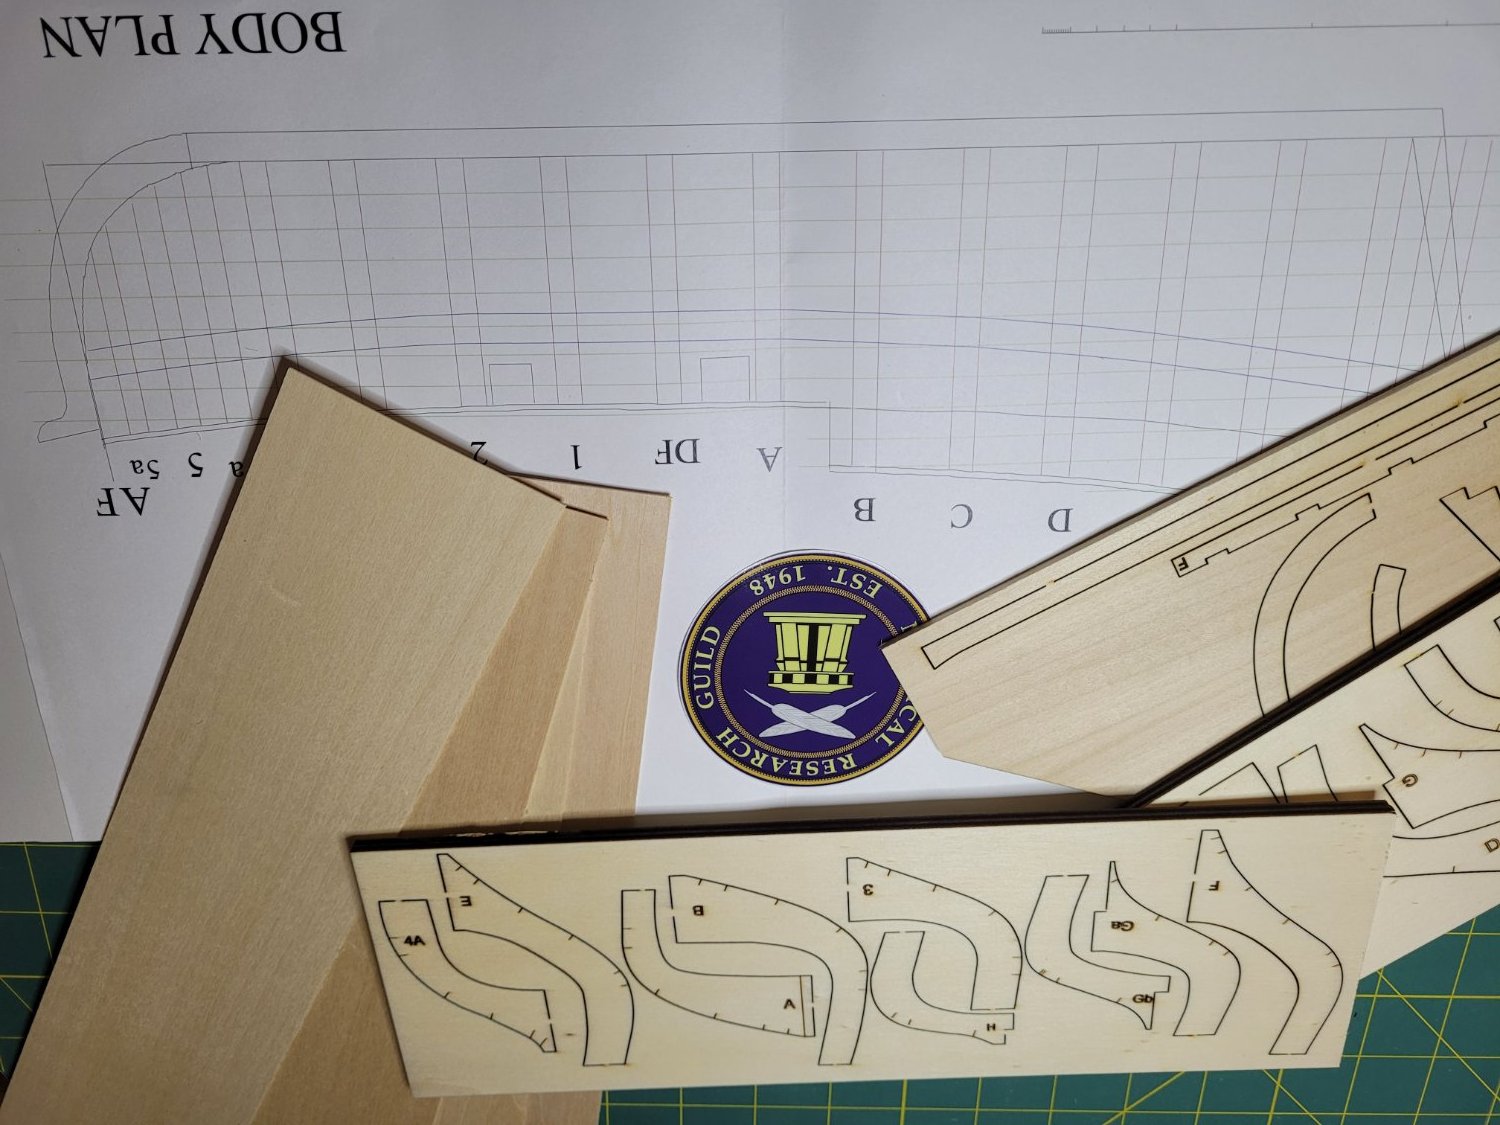
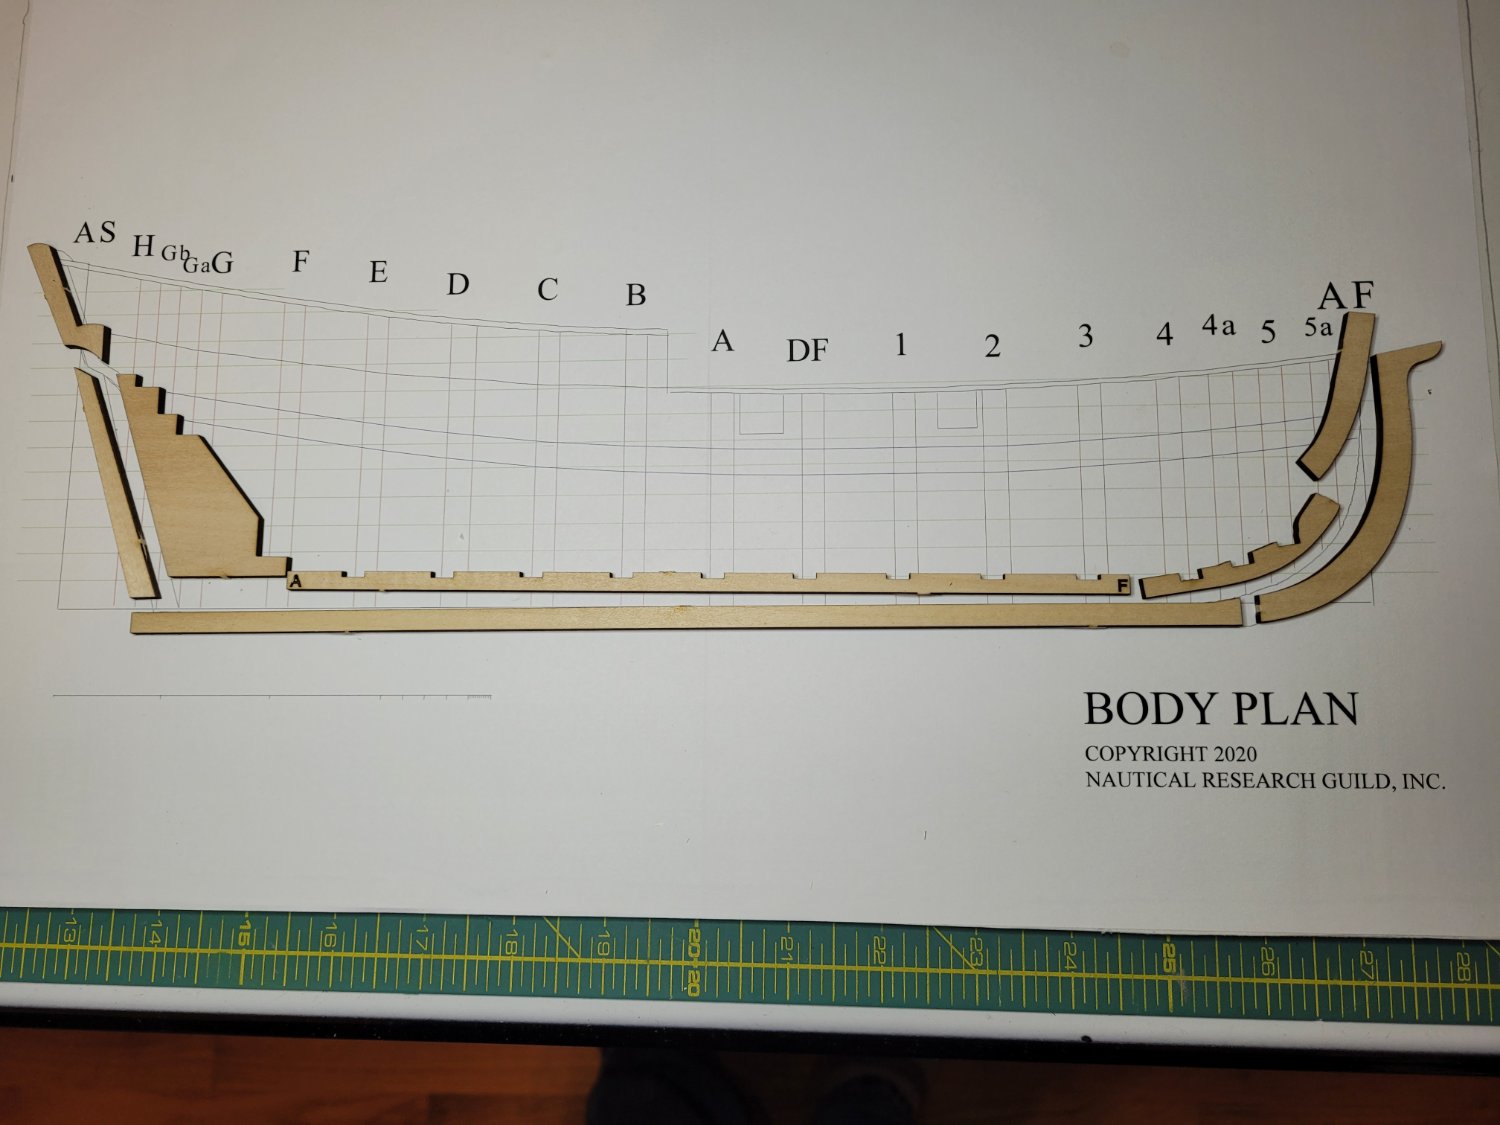
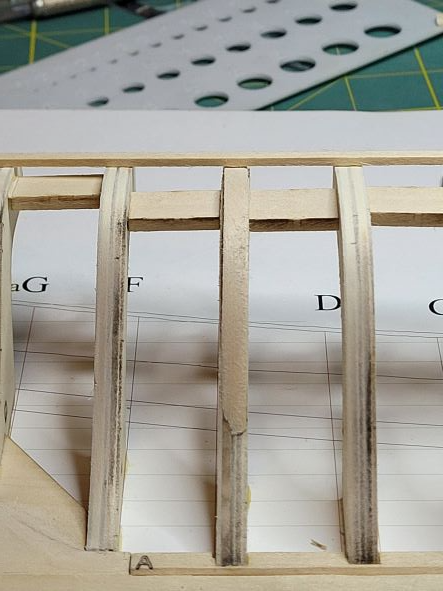
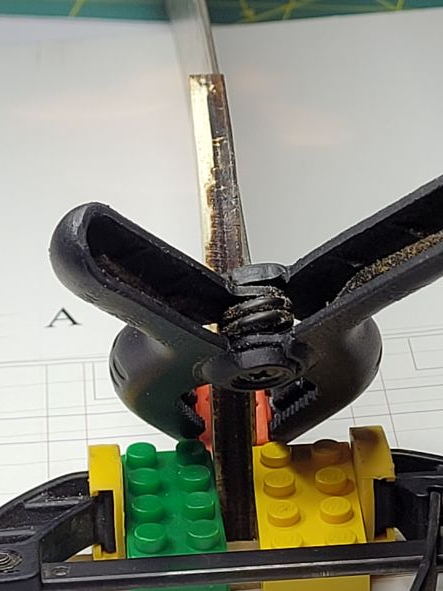
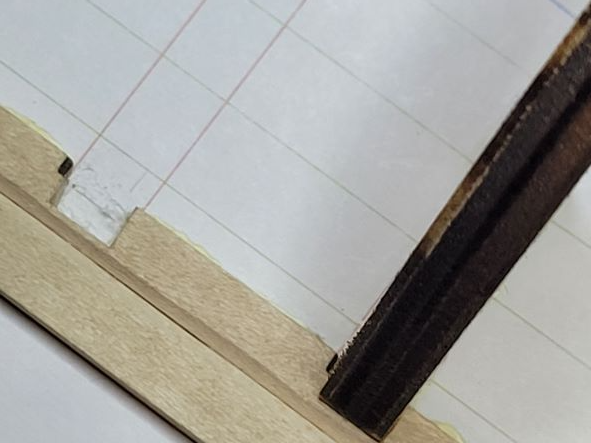
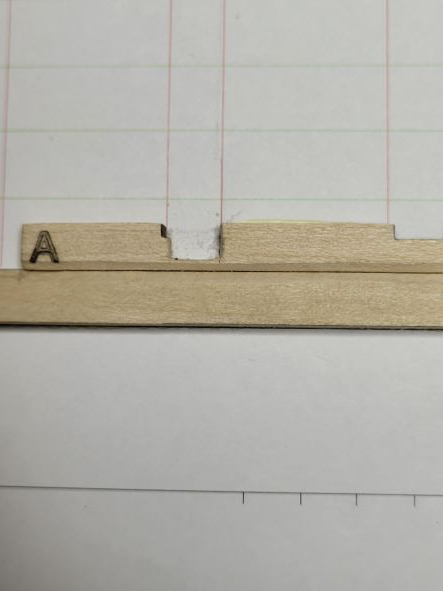
Today, I started installing the frames with the first 3 glued in place. Getting this done took much longer than I expected - not to get them set and glued but to get them released from the sheet. One of the 2 sheets with the frames didn't get cut through by the lazar and in many places I couldn't see the cut line on the bottom even with shining a bright light from the top. As a result, I had to tracing a template of each frame using the cut line on the top and then tracing the template on the bottom. Fortunately, there was enough of a cut line visible so I could align the template and get the right outline. I discovered that even with the outline traced, that it took a great deal of care to get the frame cut from the sheet. You can see where I broke off a small piece of the back of the center frame in 3rd photo. The 1st photo shows my approach to getting the frame square to the keelson using a couple Lego blocks. Using these blocks to keep the frame square vertically, and the machinists square firmly holding the frame perpendicular to the spine on the alignment line resulted in a nice and true installation. The 2nd photo shows the difference in width of the pre-cut slot and the actual width of the frame (forgive the weird angle of the shot). This extra width would have been a problem if I hadn't cut the slot narrow when expanding it to the rabbit line. I did needed to shave just a bit more to get a nice tight fit but I happy with the results thus far.

-
Today I cleaned up the stem rabbit, glued the spine to the build board, and extended the keelson frame slots to just above the rabbit. The lazar cut was 1/32" wider than the actual frame so I adjusted the slots to 7/32" when I cut the extensions. The first picture shows the difference more clearly. I'm aligning the slots to the right hand red framing lines for consistency and to ensure the spacers will fit correctly.
-
Thanks Cathead. I finished cutting the rabbit on the keel, keelson, stem and stemson pieces. The guide block worked well and changing the rabbit angle on the stem and stemson wasn't that difficult. A little clean-up needed on couple of areas on the stem and stemson pieces before gluing to the build boar pied, but overall I'm pleased. While the glue dries, I'll start prepping the frame pieces and then deepening the slots for the frames.
-
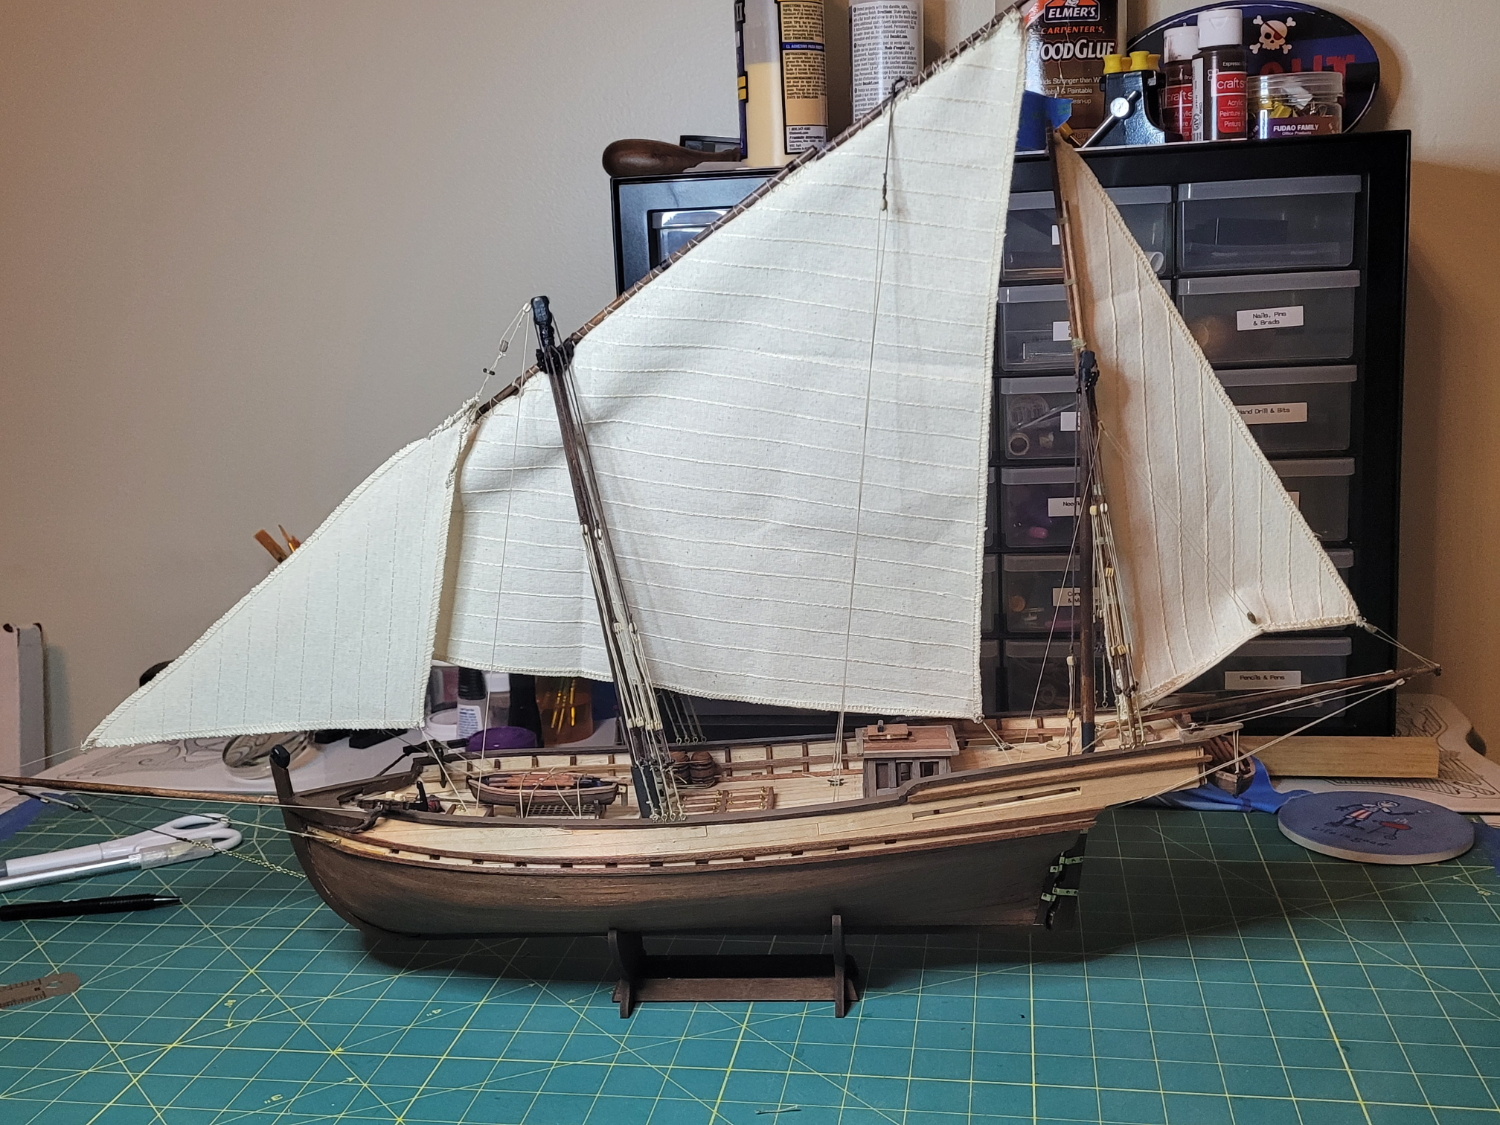
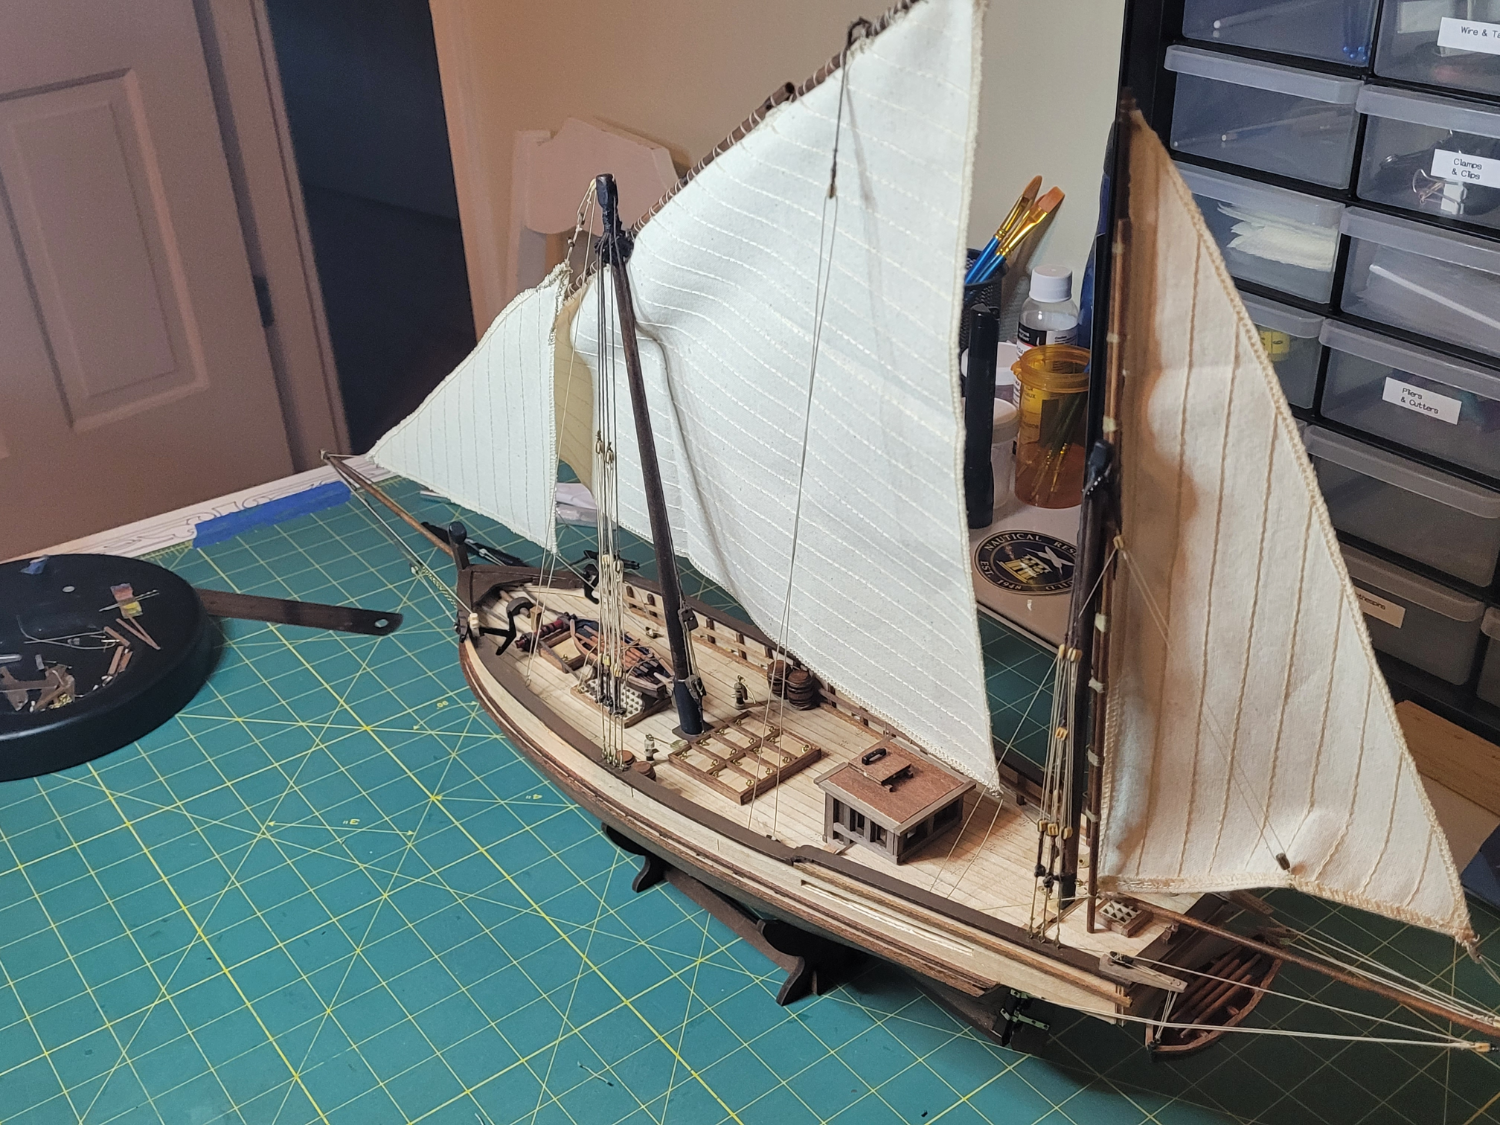
I finished!!! So excited to complete my first build despite all its flaws. Not including technique and methods, here are some quick lessons I learned during this build: Read through the complete build plan carefully before starting Build sequence may need to change - look for sequences that could cause difficulty Mistakes don't get better with age, they tend to compound If a part breaks, stop, tear it down and rebuild a new part When in stuck or in doubt, ask the question on the build log. There is always someone (and usually several) experienced modelers willing to throw a lifeline. Thanks to all who responded to my questions, periodically monitored my build, and commented or liked aspects of my build during this journey. Going to order my next kit now!!!


-
Thanks for the feedback Allen. I was so pleased that I had found a good method, but you are correct, they are all upside down. Another lesson learned.
-
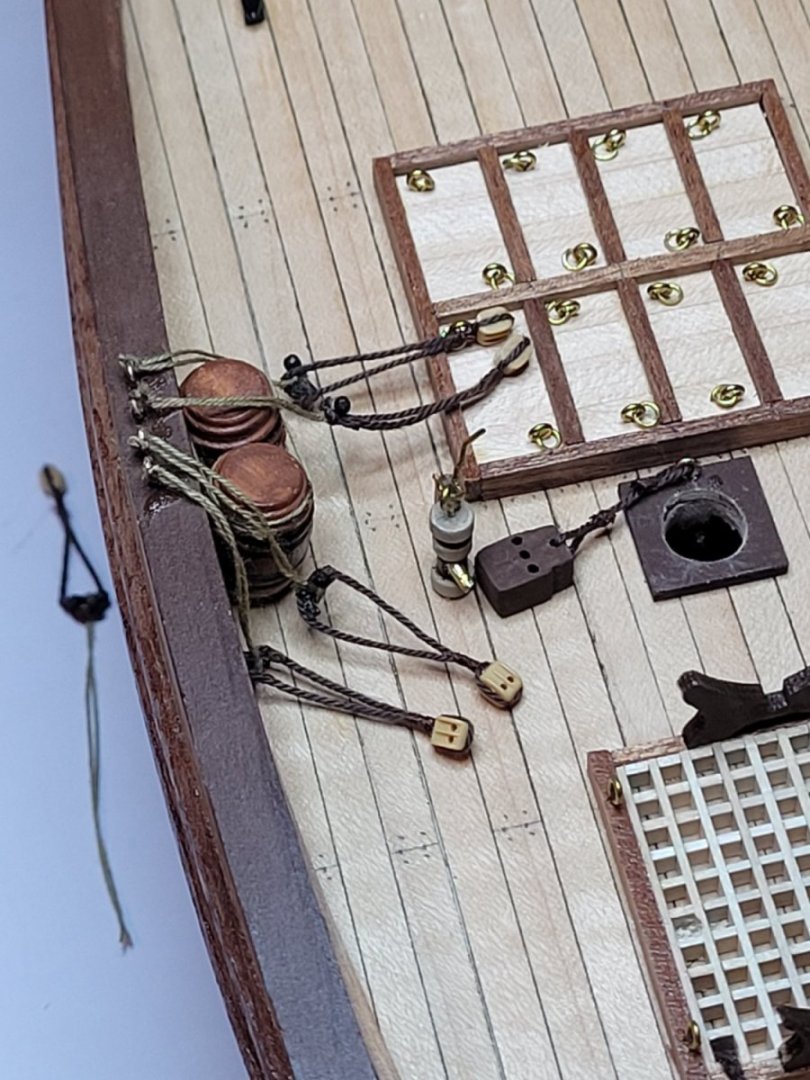
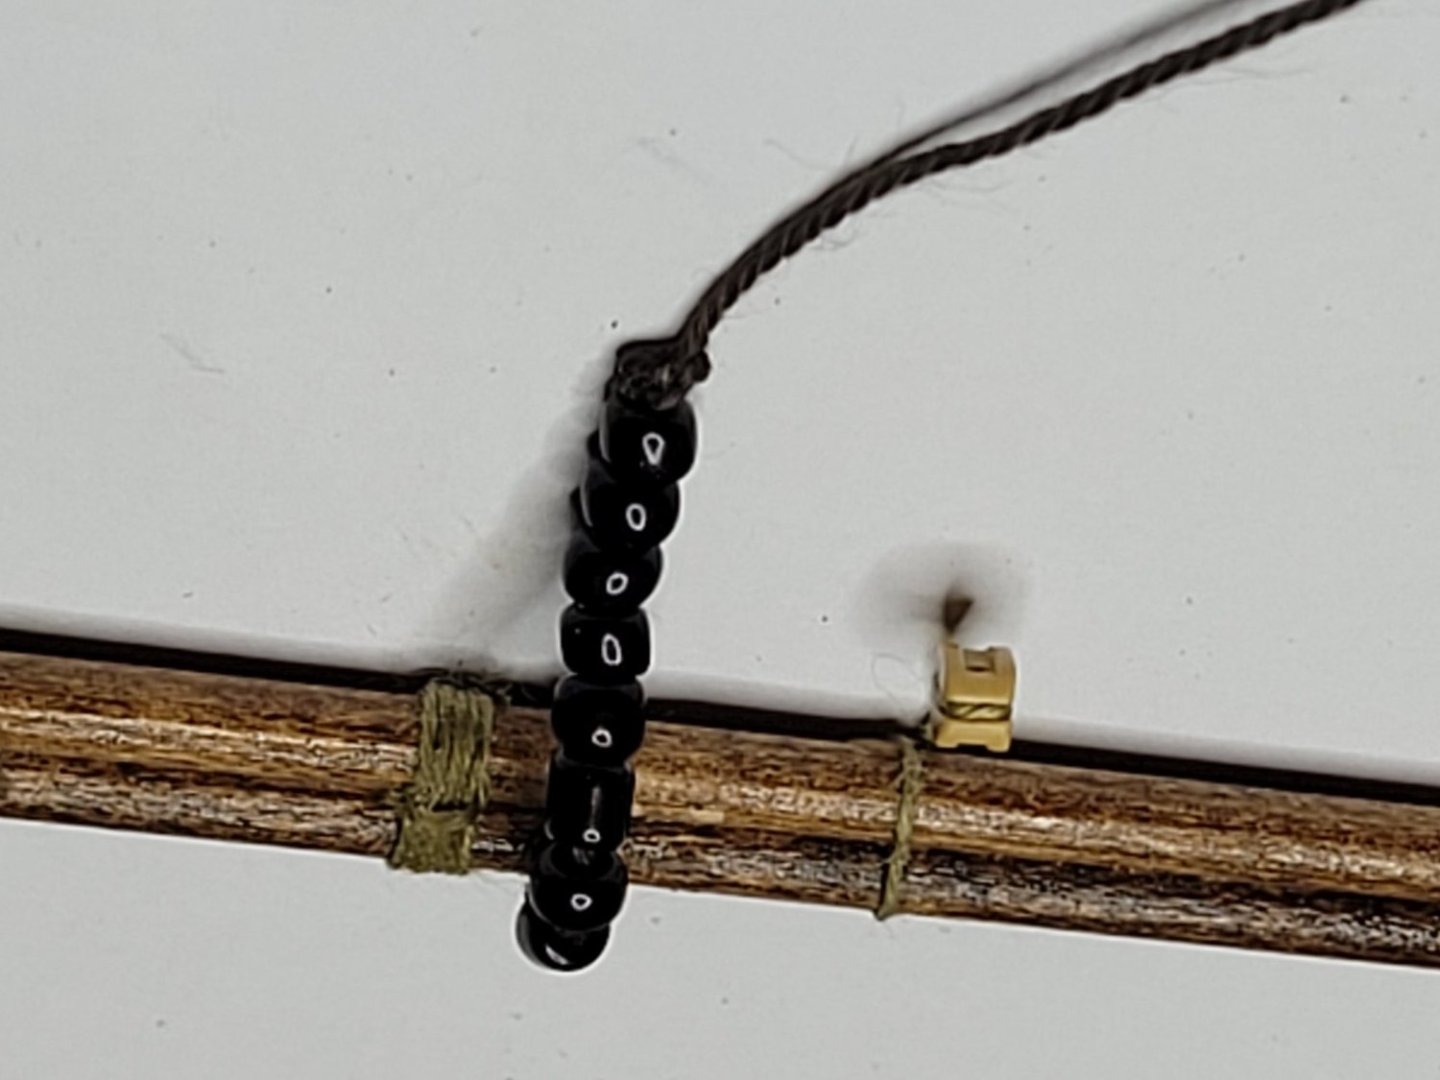
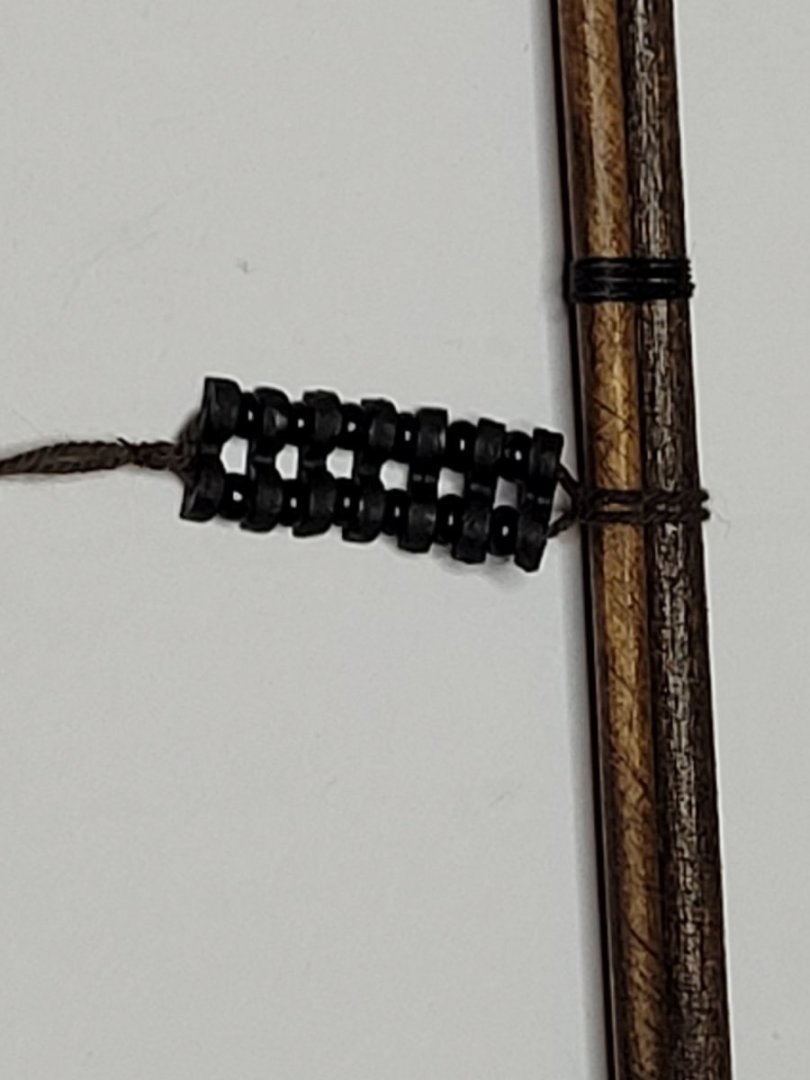
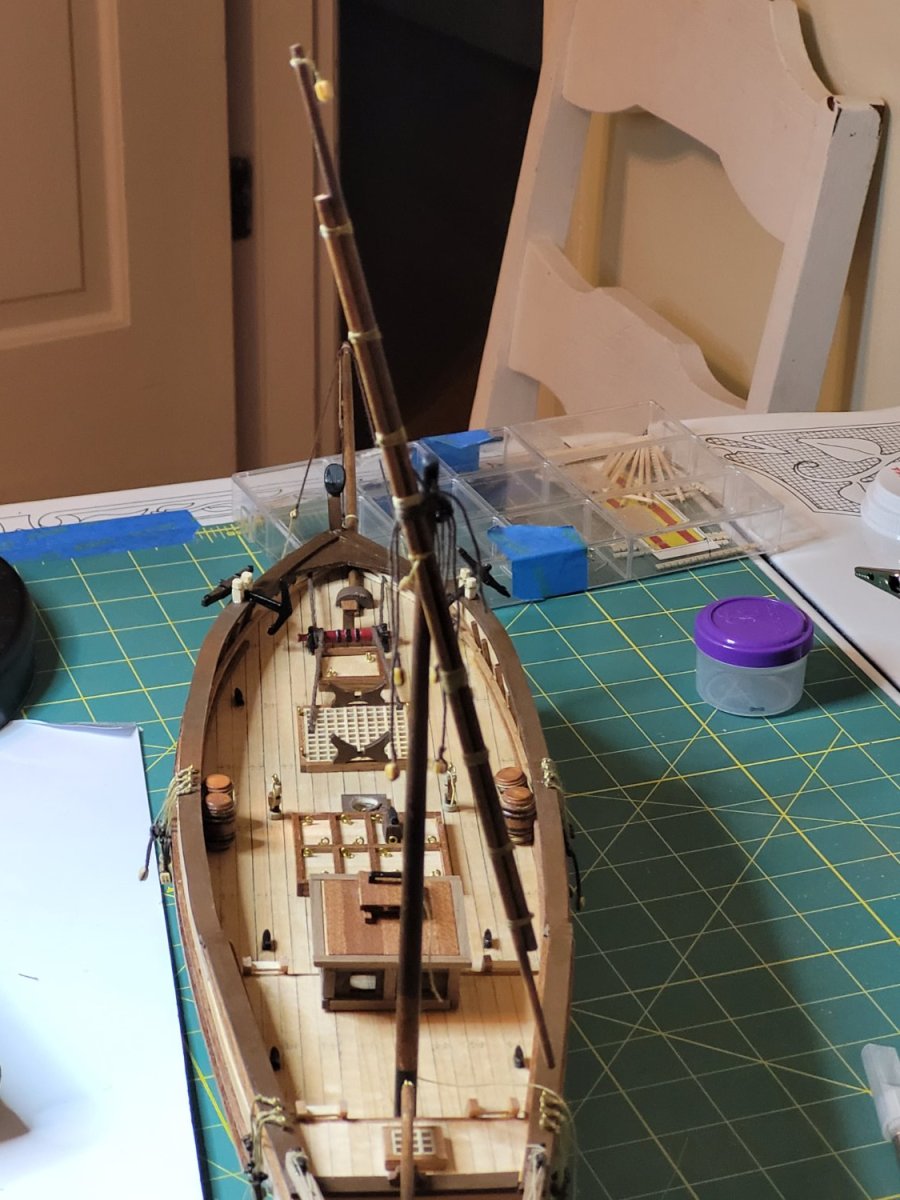
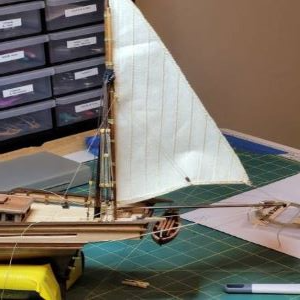
Received the rope I needed and shifted back to this build from the half-hull planking kit. I realized after lashing the top of the mizzen shrouds to the mast head that I neglected the beckets in the blocks. Fortunately I was able to resolve that issue without having to start over with new shroud lines and re-strapping the blocks. With the minor setback behind me, I was able to complete rigging the remainder of the mizzen mast and install the sail. Admittedly, I am learning a lot from this first build but I find this kit leaves a lot to be desired. Plans have many lines just tied to the pin rail (no belaying pins at all), up to 3 running lines connecting to the same deck cleat, and sail sheets tied off to the cleats on the aft boat boom. Additionally, the number of single blocks was not sufficient for all the places needed (I've had to make 3 so far and will need 1 more), and an overage of double blocks. I will still display it with pride as my first build and as a reminder of the many lessons learned - both good and otherwise - I've discovered during the process.
-
Hi Jason. Welcome aboard. Are you currently building a model or selected what you want to start for your build? Make sure you start a build log.
-
Today is day 3 of my build and I finished fitting and shaping the spine pieces, and laying out the rabbit line on the keelson, keel, stemson and stem pieces. I intend to wait to begin cutting the rabbit until tomorrow, but wanted to practice first to refine a technique. For the keelson and keel, I used a 3/4" thick wooden block cut to a 45 degree angle as a guide. My practice piece was an edge from the boxwood sheet, and the guide worked out quite nicely. By placing the edge of the guide block on the cut line and holding the chisel blade flat against the block, I achieved a nice, clean and consistent cut at an even 45 degrees. The approach also worked well and an inside and outside curve but I will use a thinner block when I cut the stemson and stem rabbit.
-
While I wait on some replacement items to finish my San Juan Felucca build, I decided to crack open the half-hull planking kit and get started with this build log. A piece of quarter inch foam board from my wife's craft room and some spray adhesive and the build board was ready after setting overnight. The spine pieces took some care to get released from the sheet as the cut did not go completely through the wood. I tried both scrapping and sanding to remove the laser char from the surfaces to be glued. I found that using an old blade to scrape the chare worked best on the curves and kept the edges straighter than sanding, but sanding worked well on the flat edges.


-
Hi Zack. Welcome aboard.
-
Hi John, Welcome aboard. MSW is an amazing forum. I look forward to checking in on your build log when you get started. Ken
-
Hi John and welcome. I look forward to following your build log. Ken
-
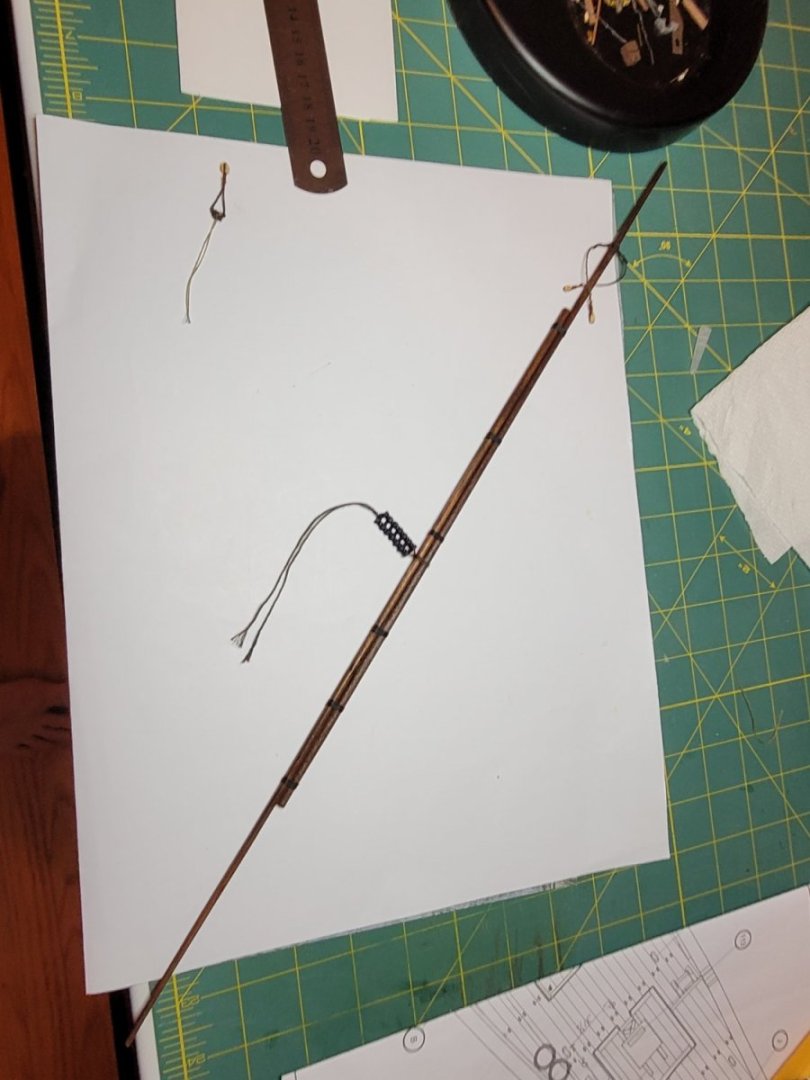
My San Juan is moving past the sheer hull with the mizzen mast stepped, yard installed and spanker boom set. Connecting the yard with the parrel just seems odd as it just wraps around the mast and gets tied in place. I understand the mechanics and looked hard and the build log from Baltic-submariner and a you tube video, but not sure I have it correctly connected to the yard lift. I took 2- turns around the mizzen and tied the perrel off with the lifting line tied to where the parrel and mast meet. It's functional, but just seems wrong. I am following the advice and sequencing in Frank Mastini's Ship Modeling Simplified and built the mast off to the side on a block of wood. I can certainly see why he says to not build the mast after stepping it in place. It would have been very difficult to file lines, blocks and the parrel any other way and would likely have resulted in breaking something. Strapping the blocks took longer that I anticipated an I still need to connect the spanker sheets, but all said I think I made good progress this weekend. Ken

-
The deck rail looks really nice! Ken
-
Good progress this week on my build and almost ready to step the masts, bend on sails and install the yards and mizzen boom, Masts and yards are shaped with blocks and parrels fitted, and working on the lower blocks for the shrouds. This rig is quite different in that there are no deadeyes and the shrouds are set for quick disconnect via a pin similar to a belaying pin. I am quite excited about where I am with this first build, and the Commander in Chief is chuckling at me every time I go show her my progress. Overall, I'm pleased with the results, albeit far from the quality of workmanship I see from so many other build logs, but I plan to get there at some point. I've learned so much thus far in the build and am keeping a running list of lessons learned that I'll post when the San Juan is complete. Ken