
Chestcutter
-
Posts
20 -
Joined
-
Last visited
1 Follower

-
 Chestcutter reacted to a post in a topic:
Adding water to model ships - using acrylic - reversable
Chestcutter reacted to a post in a topic:
Adding water to model ships - using acrylic - reversable
-
Esap reacted to a post in a topic:
HMS Vanguard 1787 by Chestcutter - Victory Models - 1:72
-
Kingspoke reacted to a post in a topic:
HMS Vanguard 1787 by Chestcutter - Victory Models - 1:72
-
Kingspoke reacted to a post in a topic:
HMS Vanguard 1787 by Chestcutter - Victory Models - 1:72
-
Knocklouder reacted to a post in a topic:
HMS Vanguard 1787 by Chestcutter - Victory Models - 1:72
-
Techtonic reacted to a post in a topic:
HMS Vanguard 1787 by Chestcutter - Victory Models - 1:72
-
KARAVOKIRIS reacted to a post in a topic:
HMS Vanguard 1787 by Chestcutter - Victory Models - 1:72
-
mort stoll reacted to a post in a topic:
HMS Vanguard 1787 by Chestcutter - Victory Models - 1:72
-
flyer reacted to a post in a topic:
HMS Vanguard 1787 by Chestcutter - Victory Models - 1:72
-
ccoyle reacted to a post in a topic:
HMS Vanguard 1787 by Chestcutter - Victory Models - 1:72
-
AON reacted to a post in a topic:
HMS Vanguard 1787 by Chestcutter - Victory Models - 1:72
-
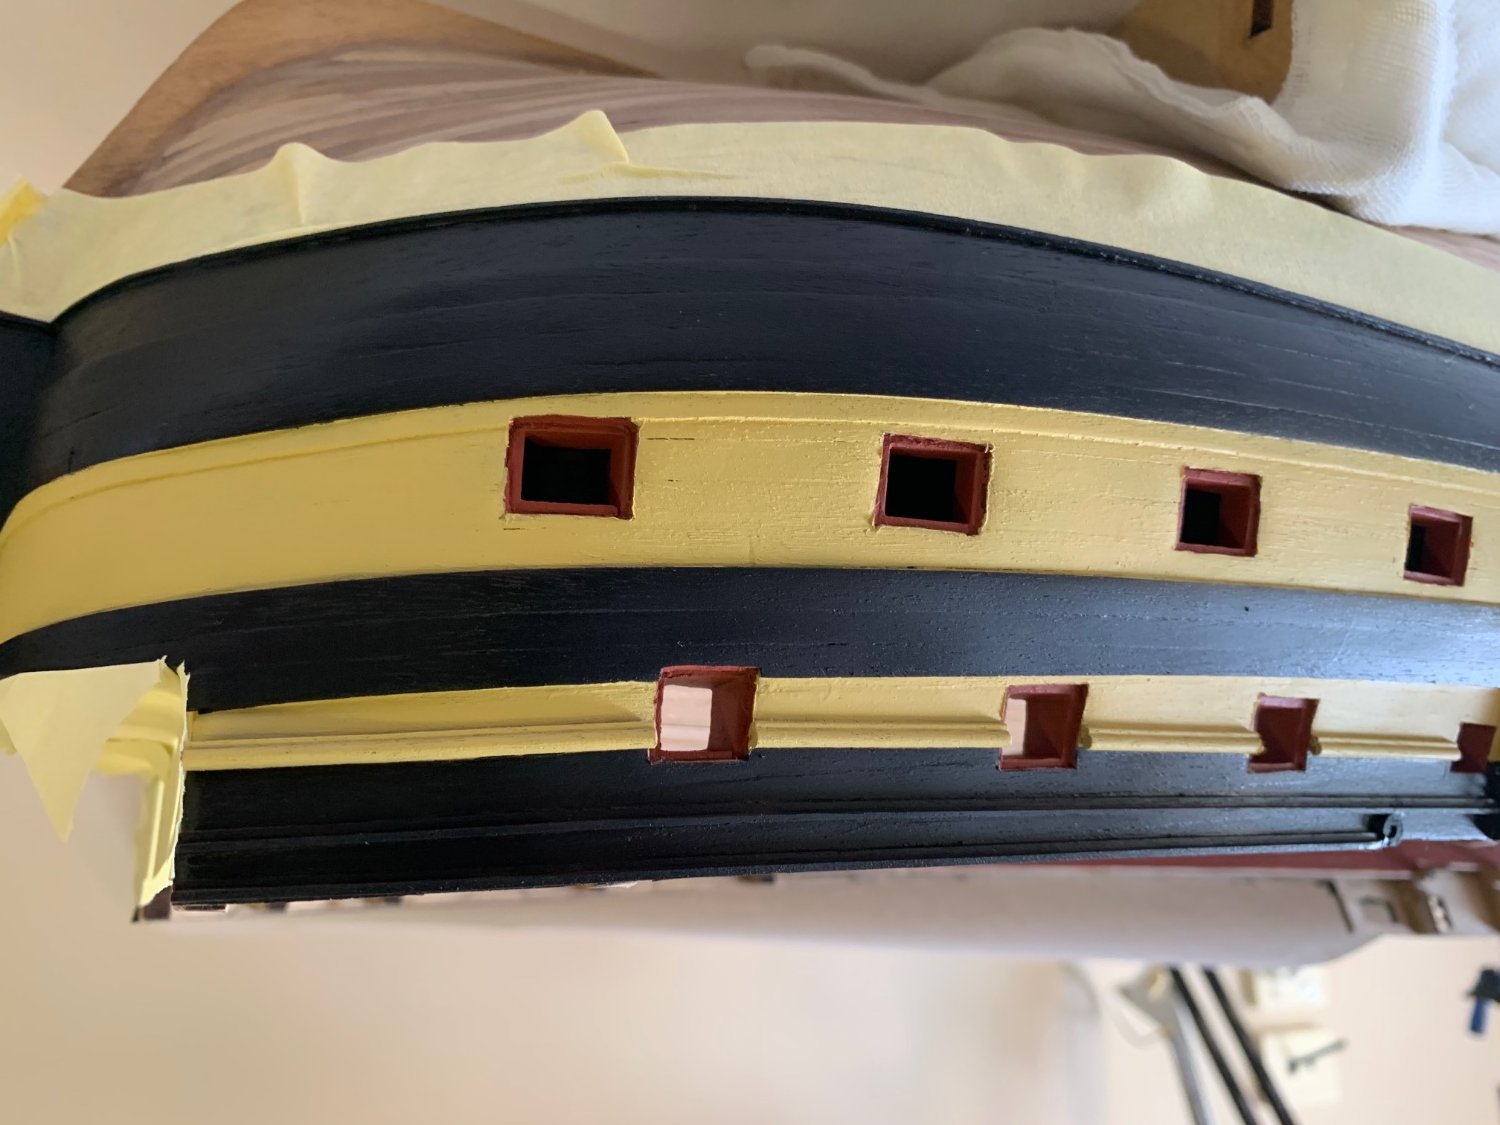
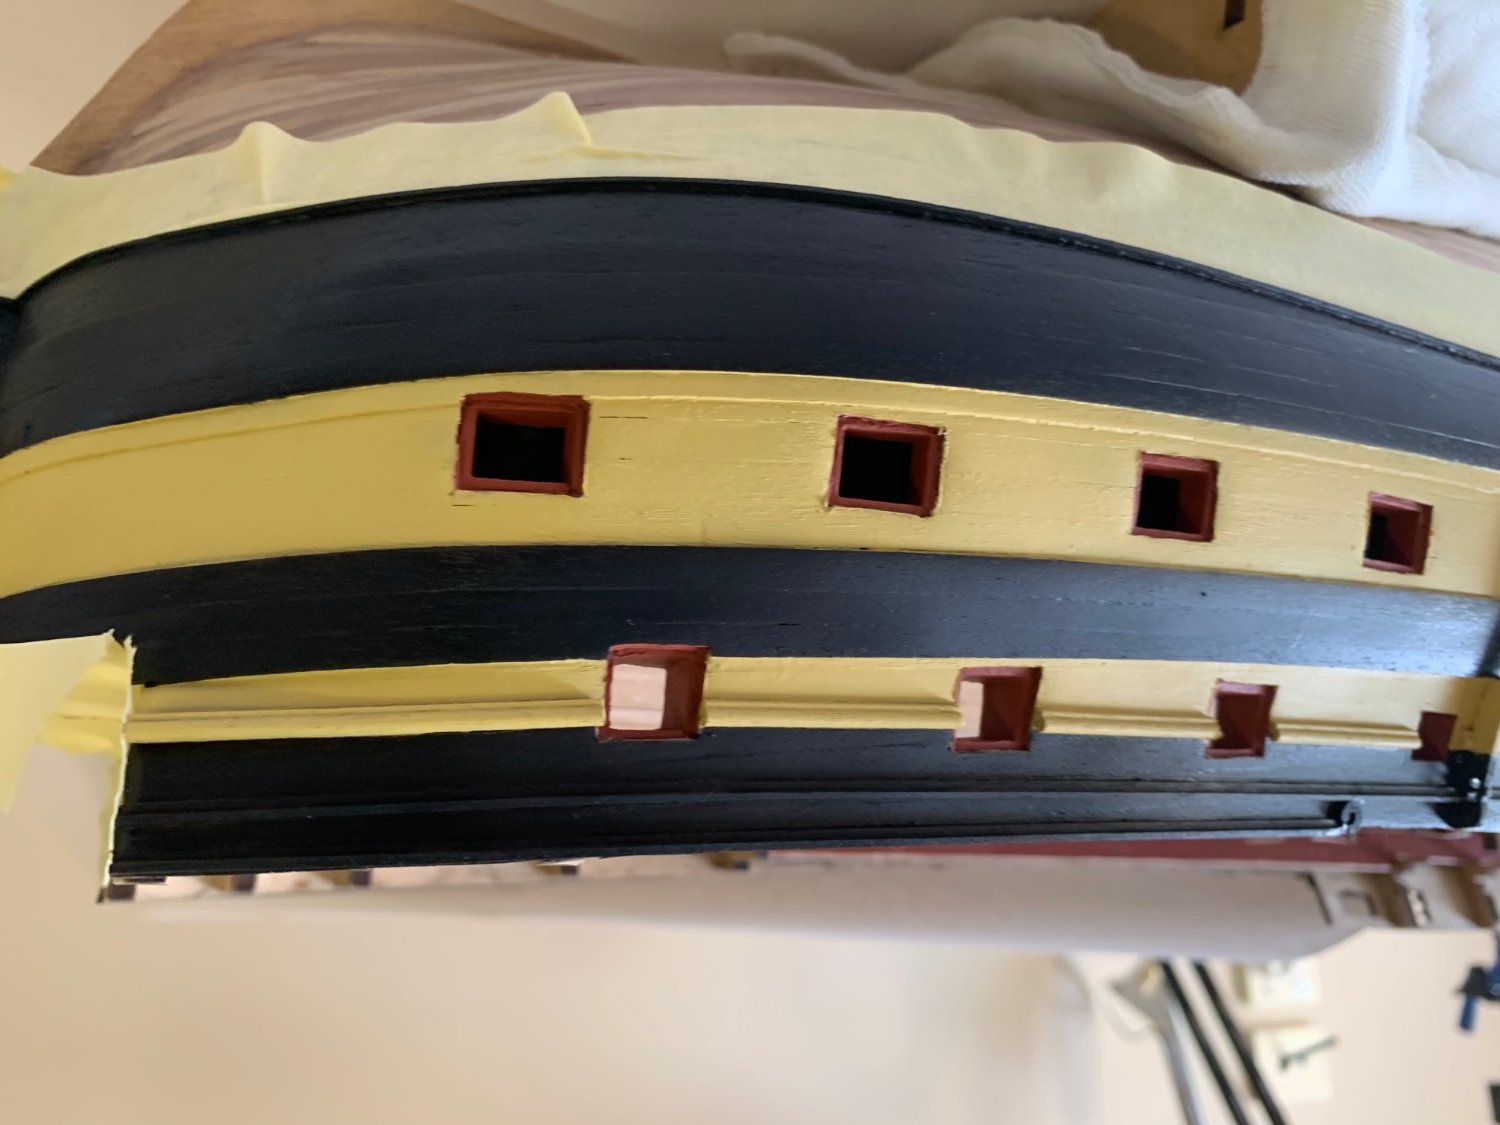
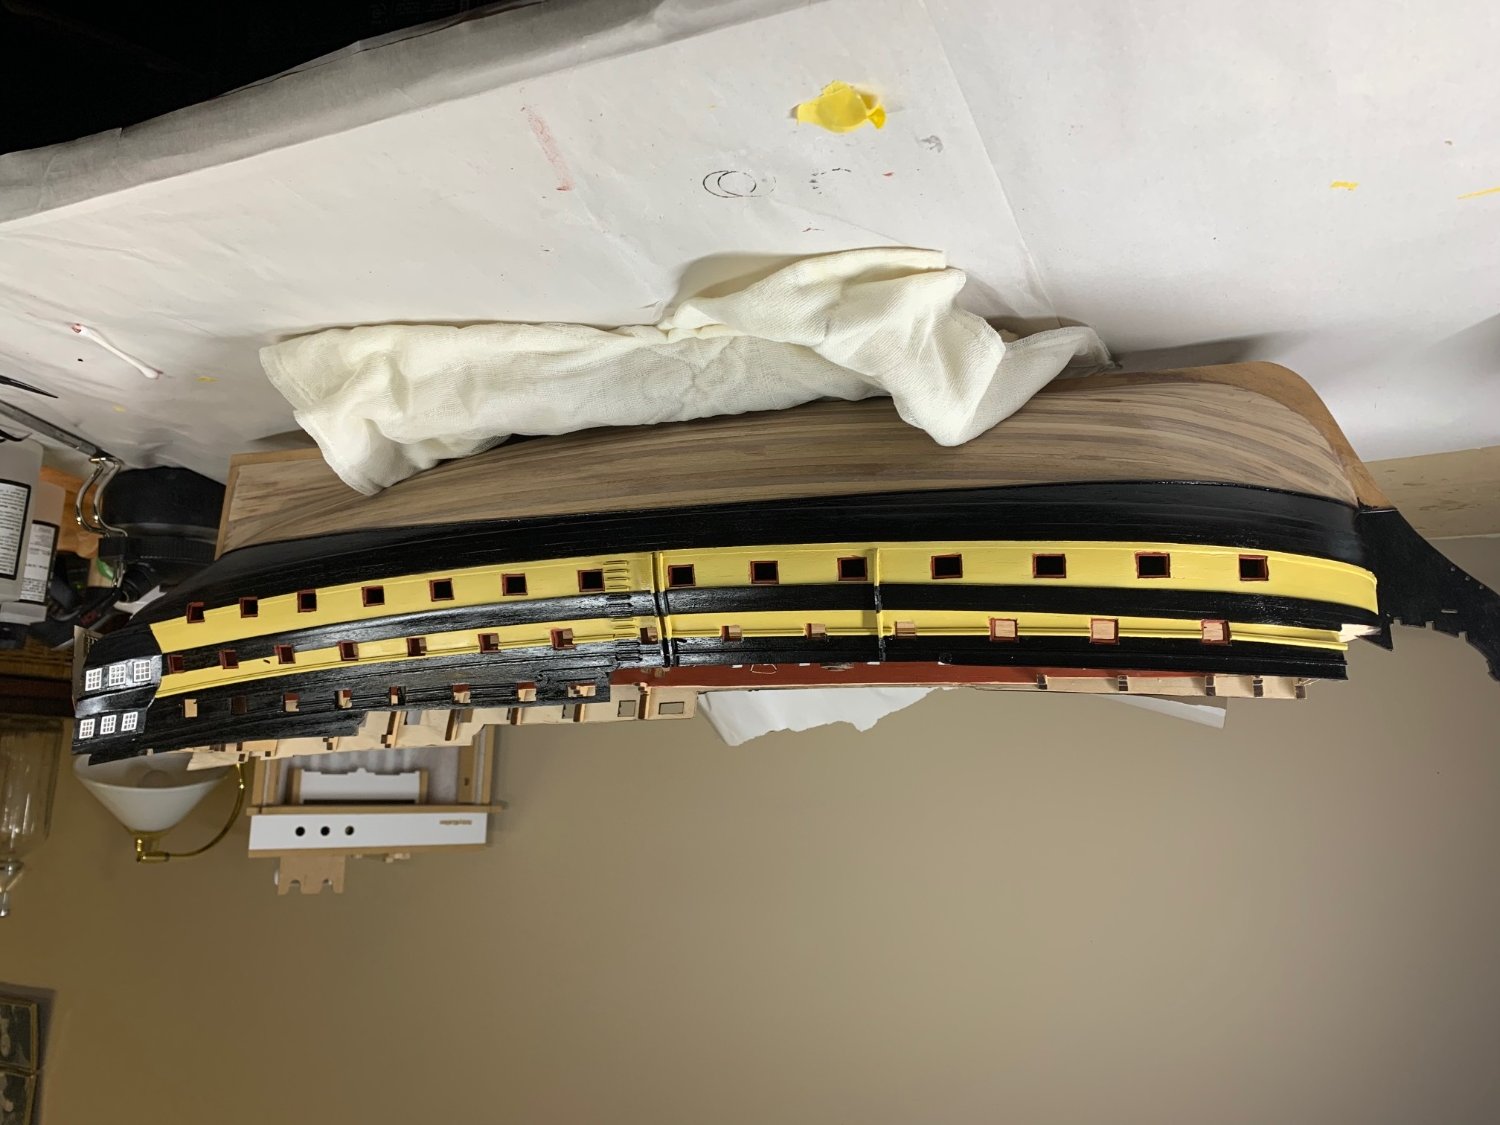
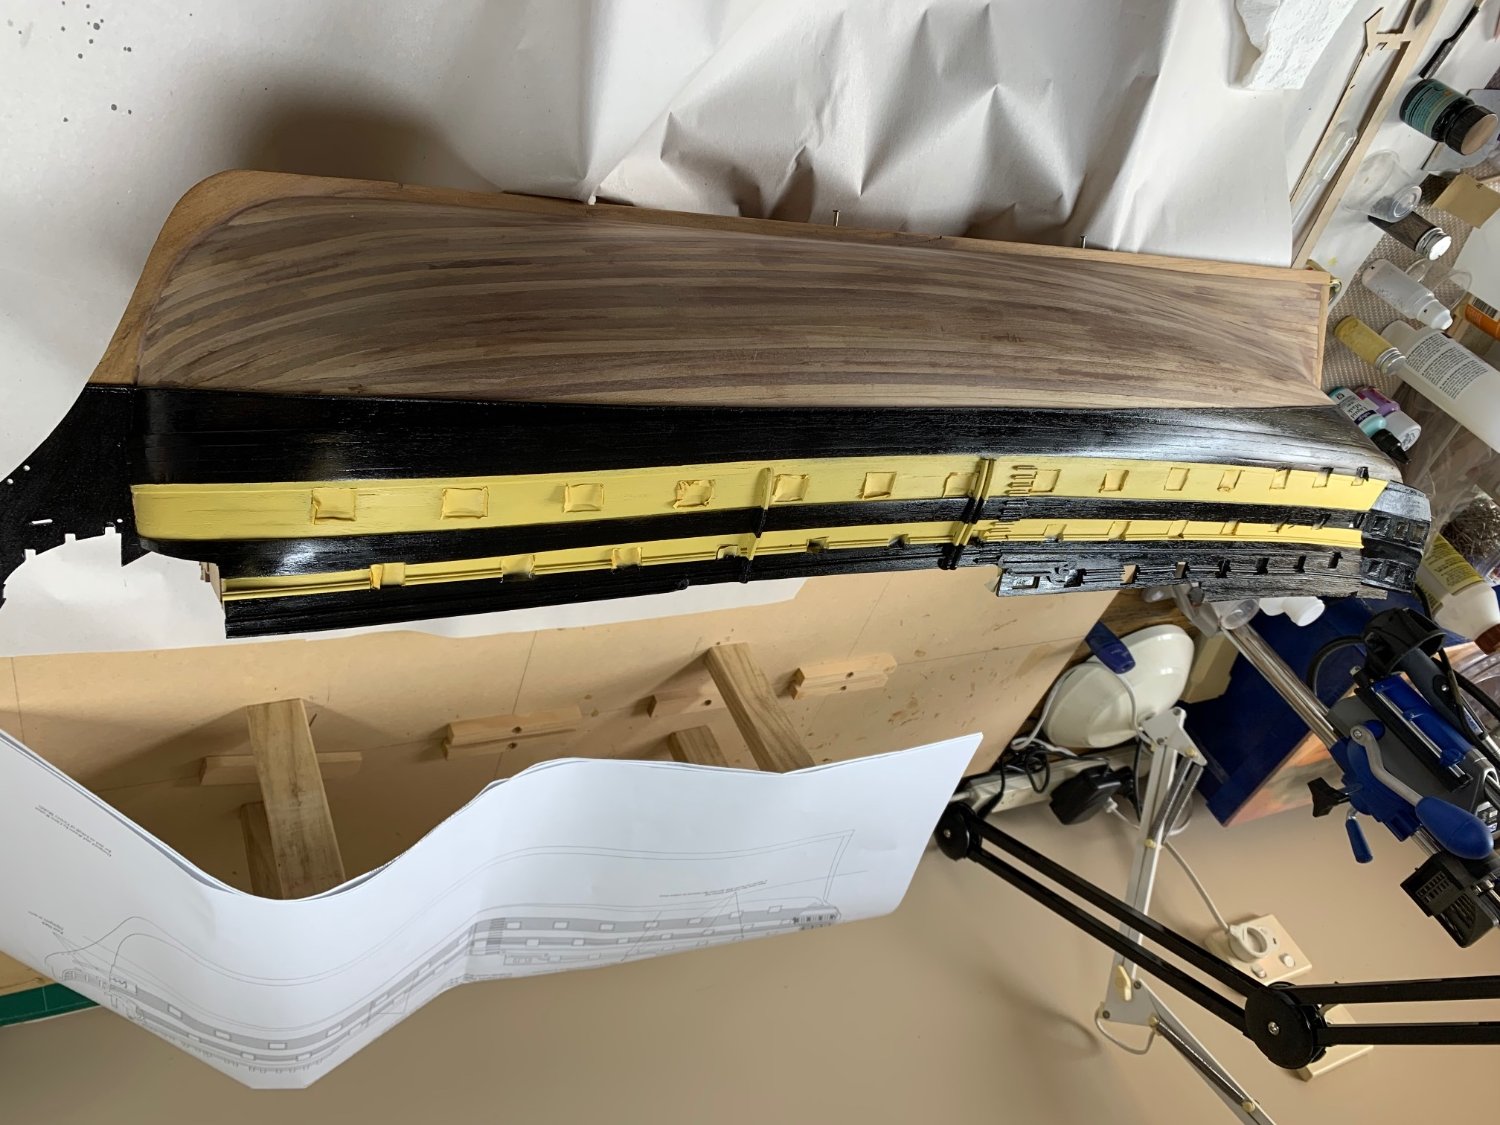
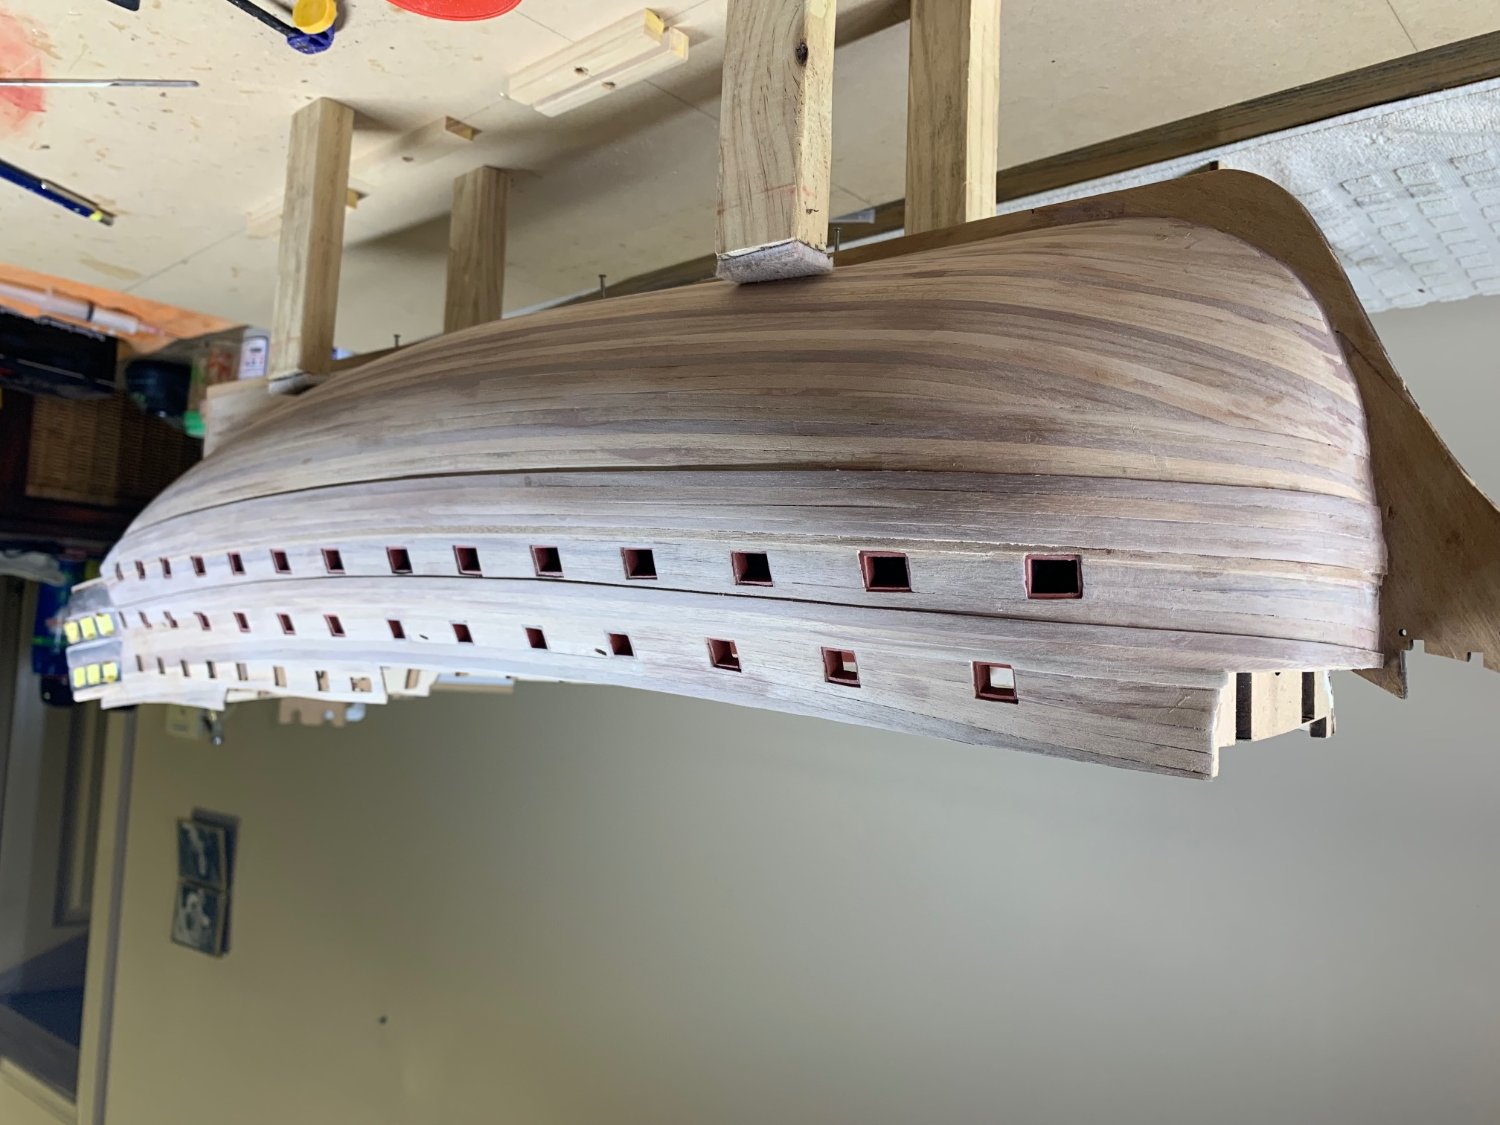
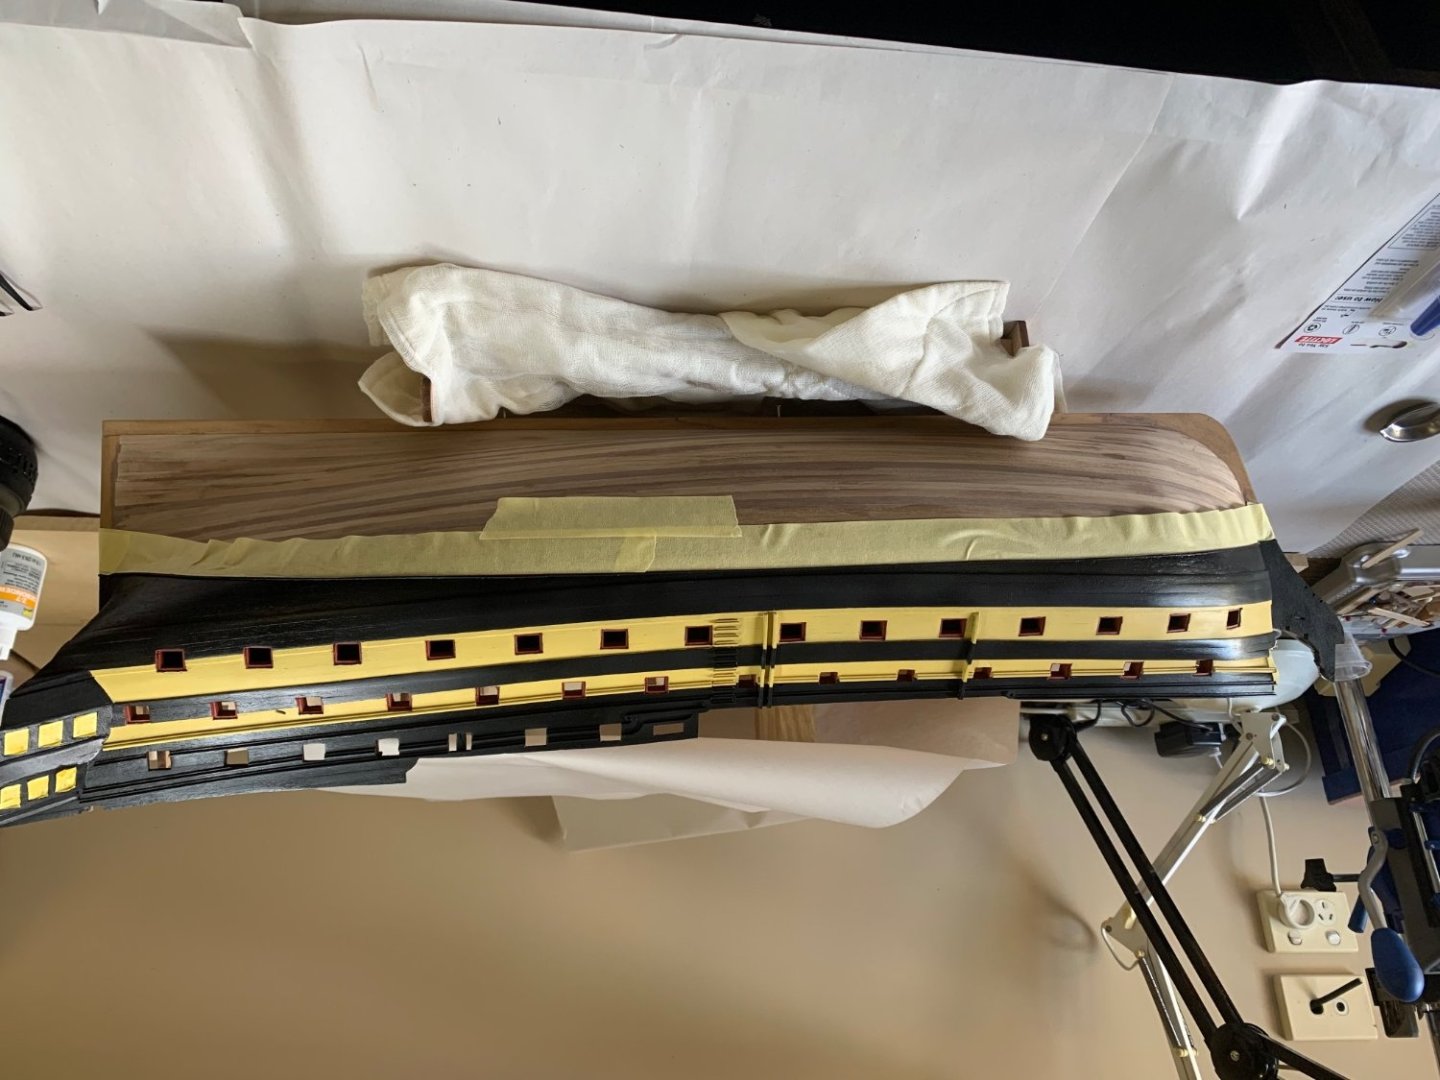
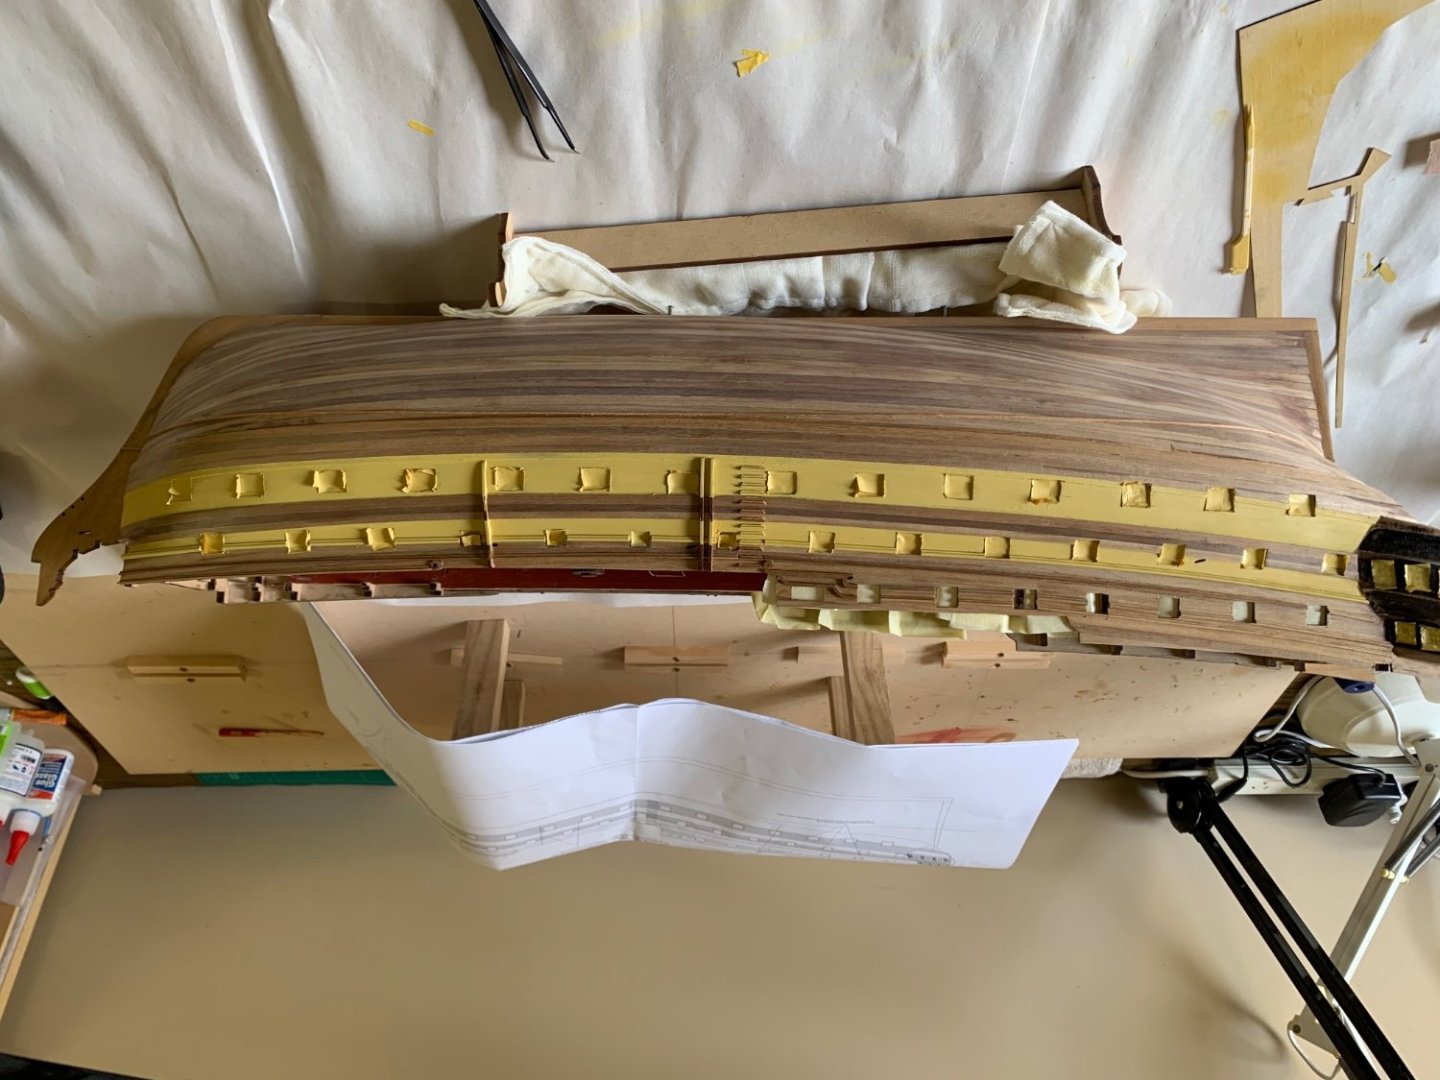
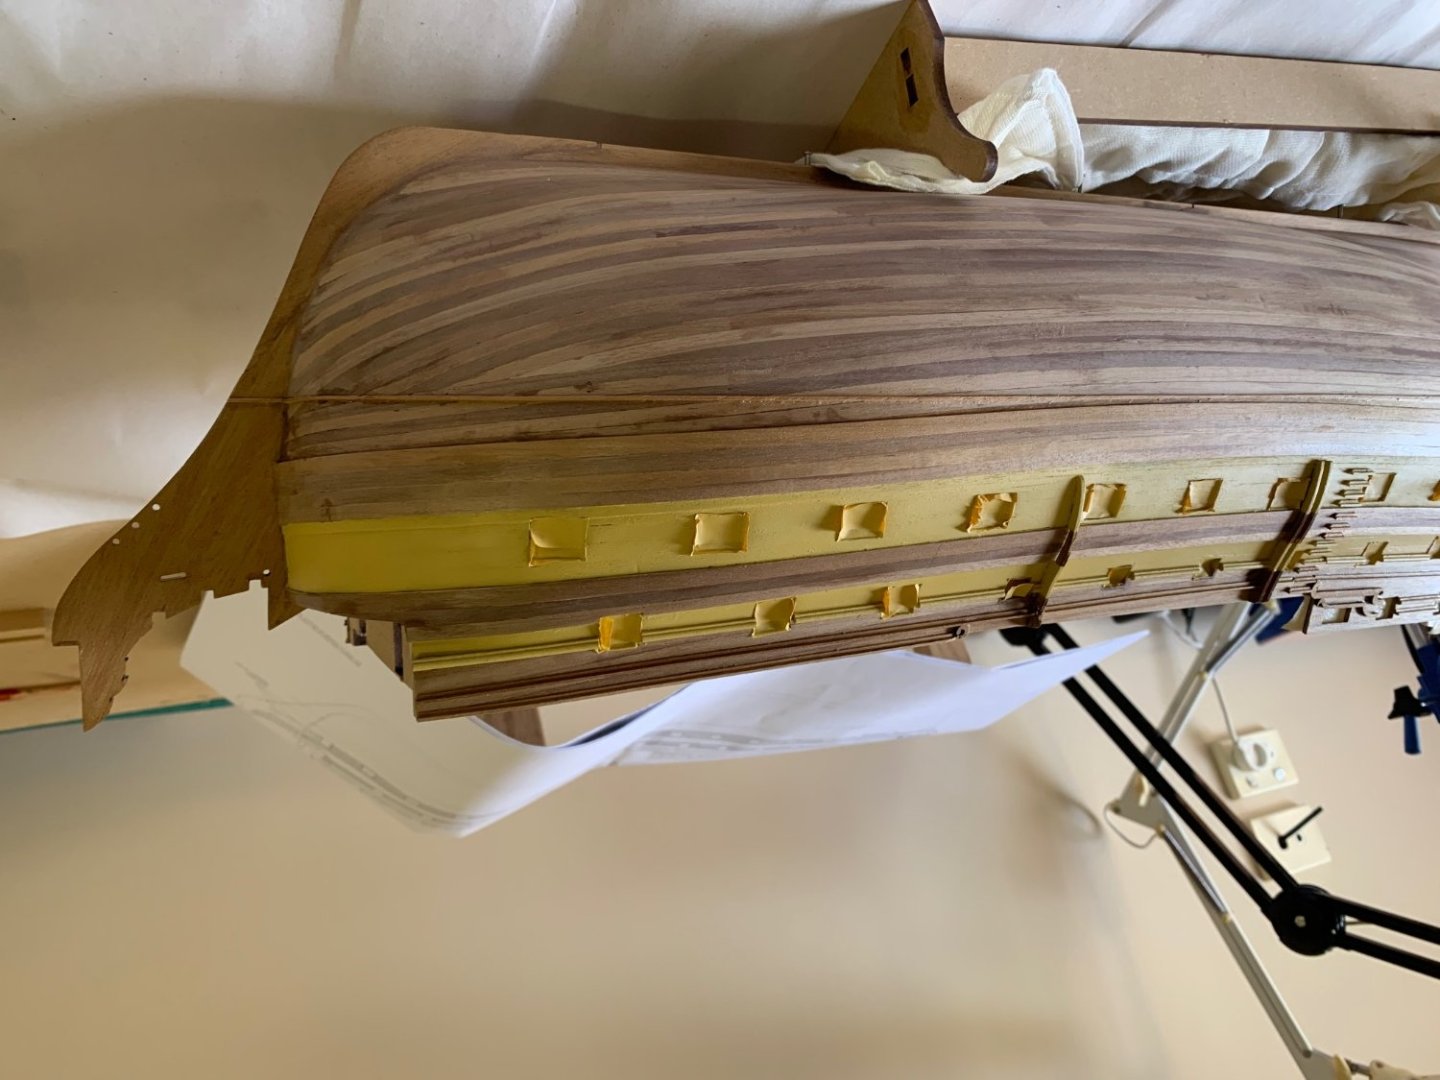
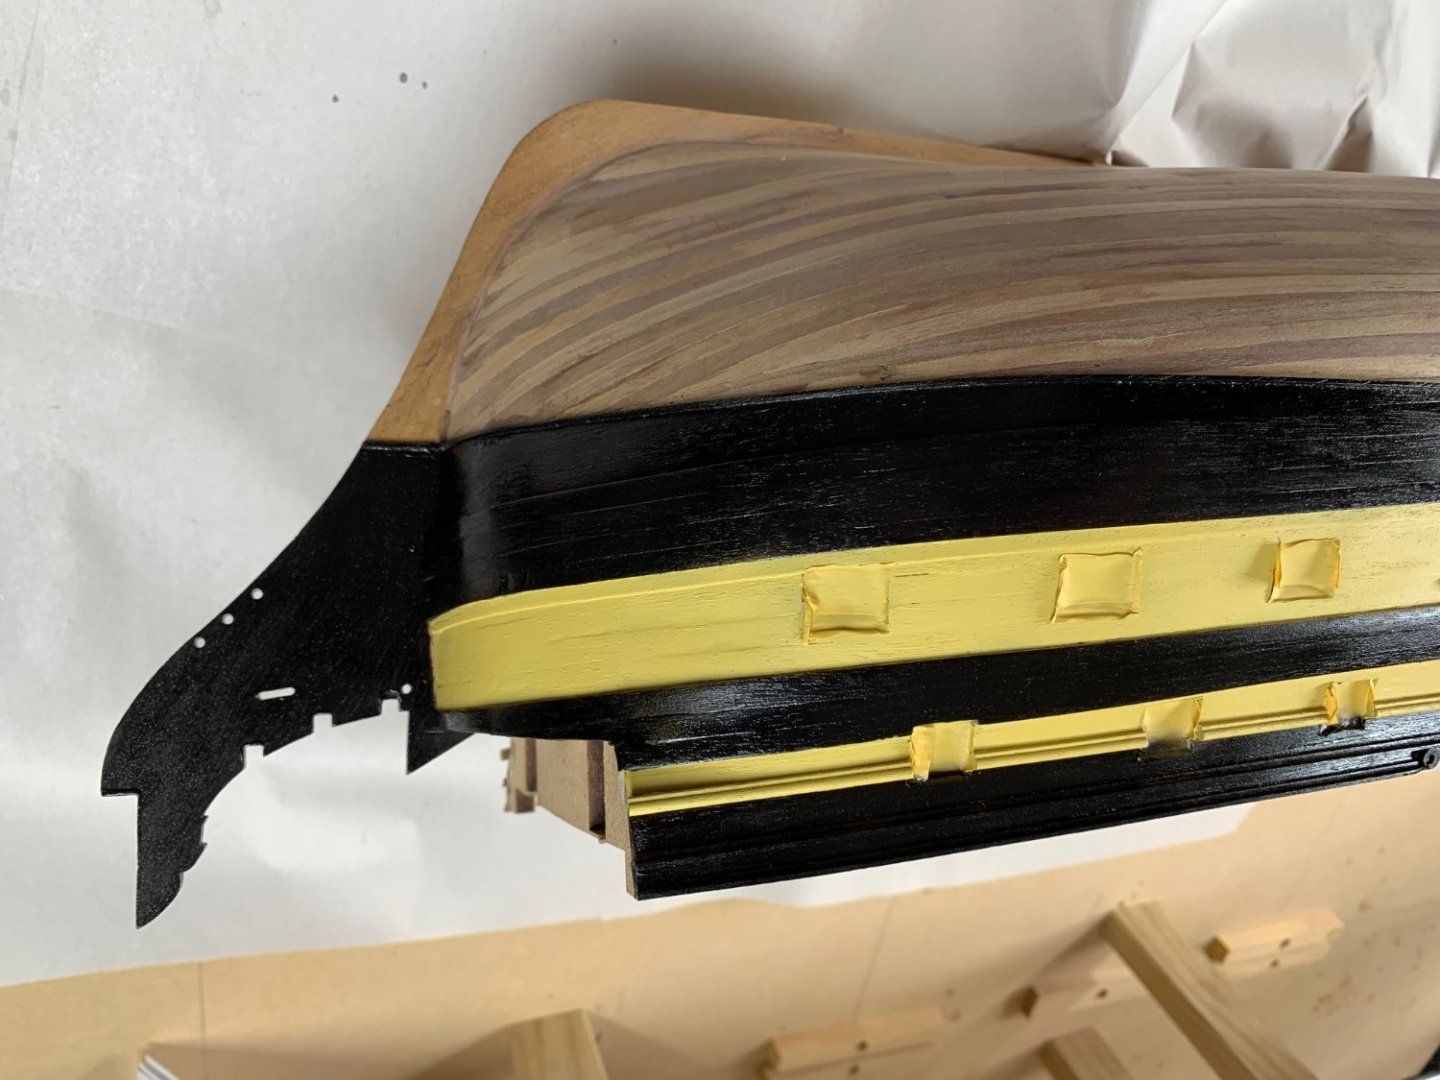
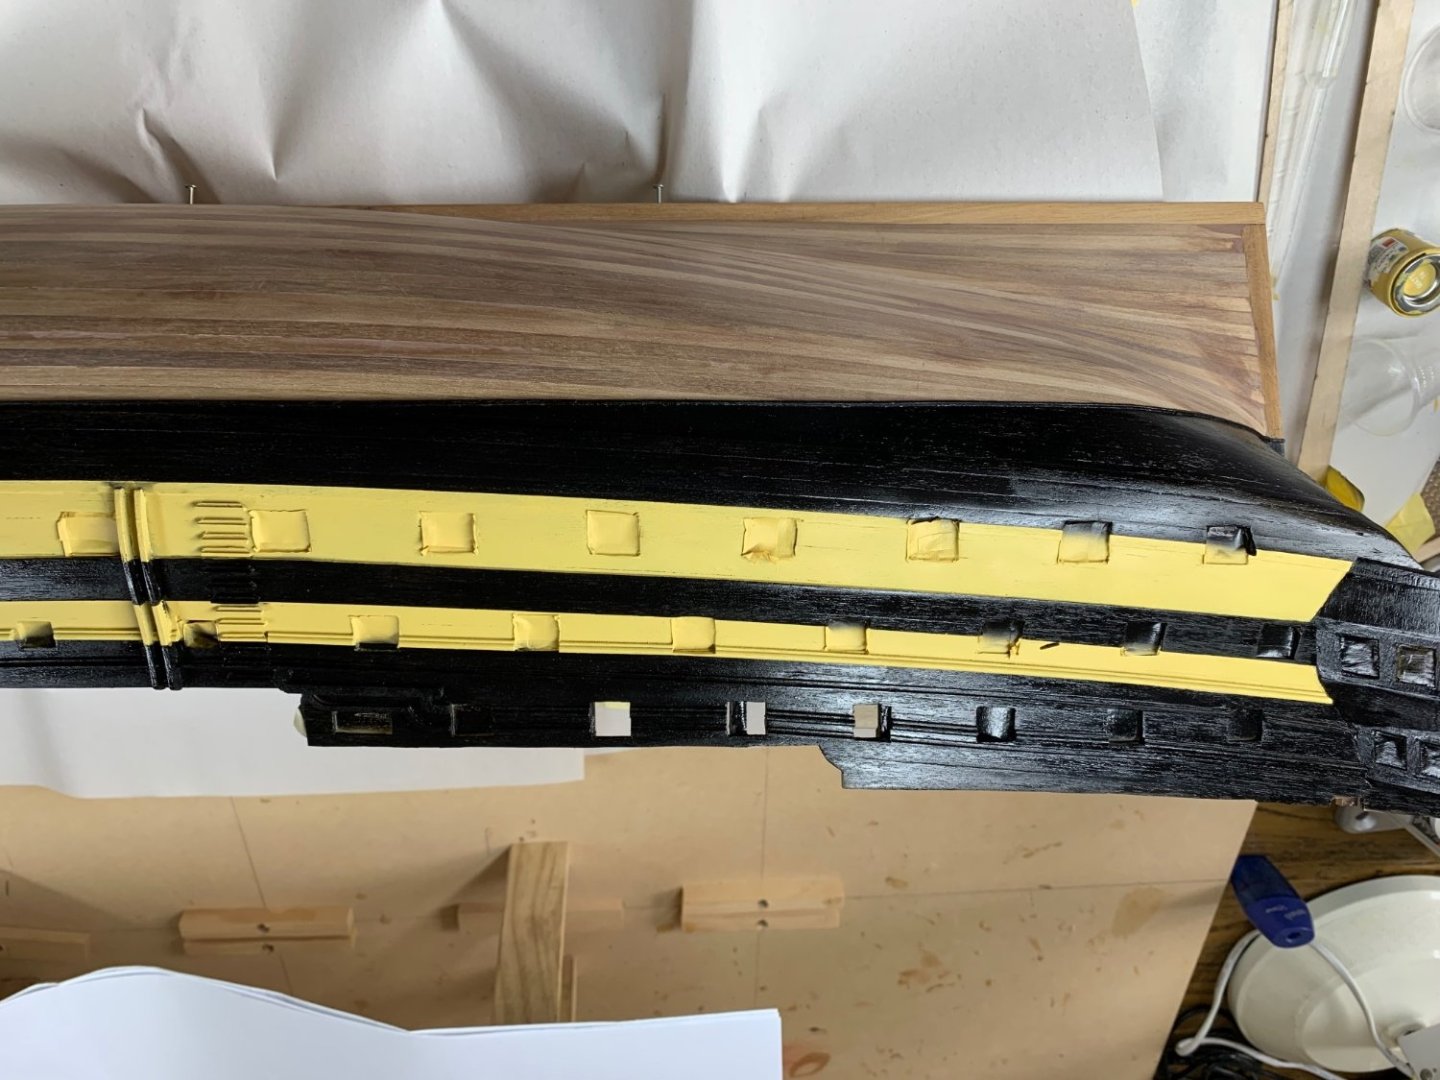
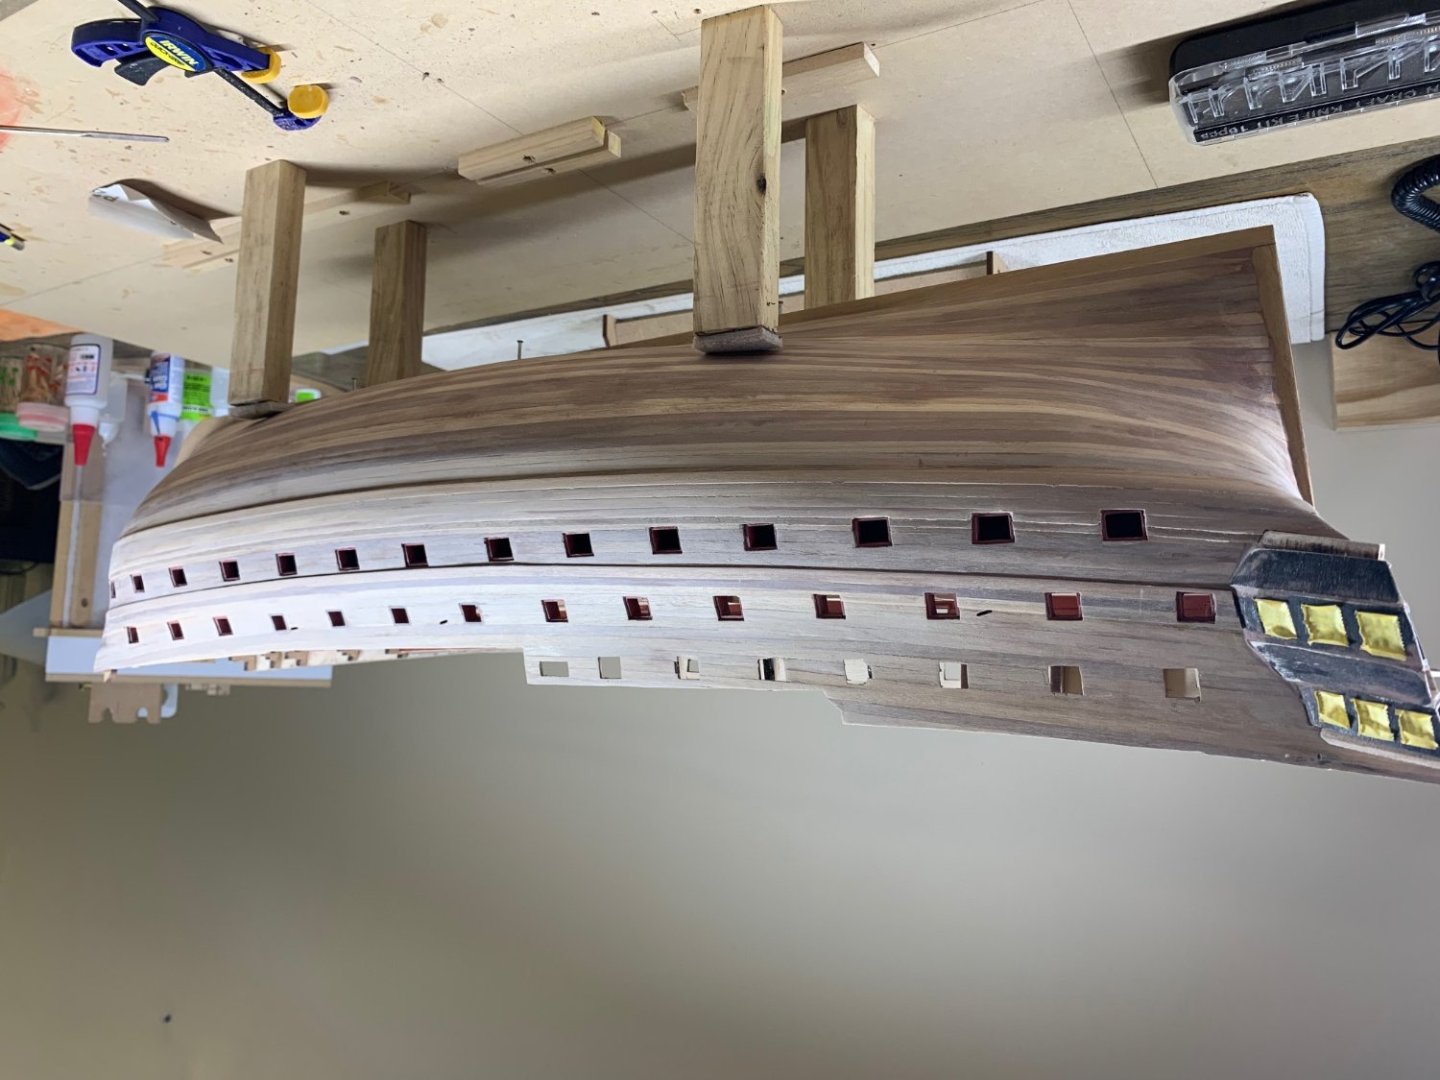
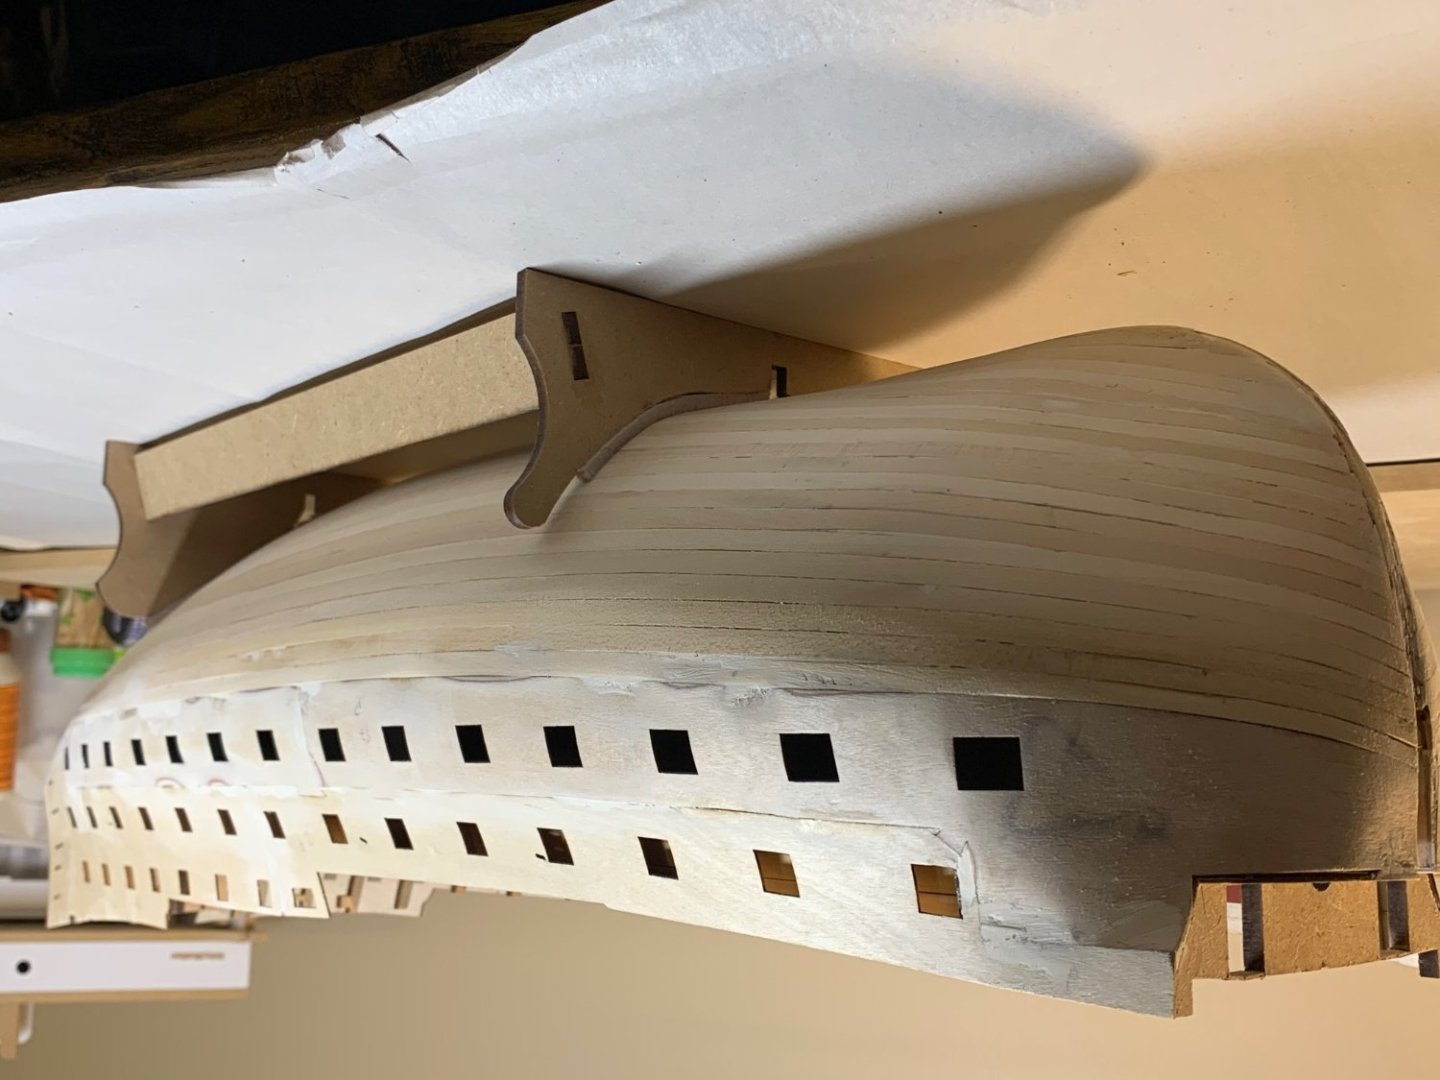
 Painting finished with yellow bands following the curve of the wales not the gunports, as she was pre 1798. Refreshed the gunports sills and sealed with polyurethane Matt varnish (PMV). The PMV did a nice job protecting the paint and taking out the shiny black finish of the Dull Black paint I used. Sorry that all the photos are upside down, probably because I’m downunder in Australia. I can’t seem to get them upright. Please don’t strain your necks looking.


-
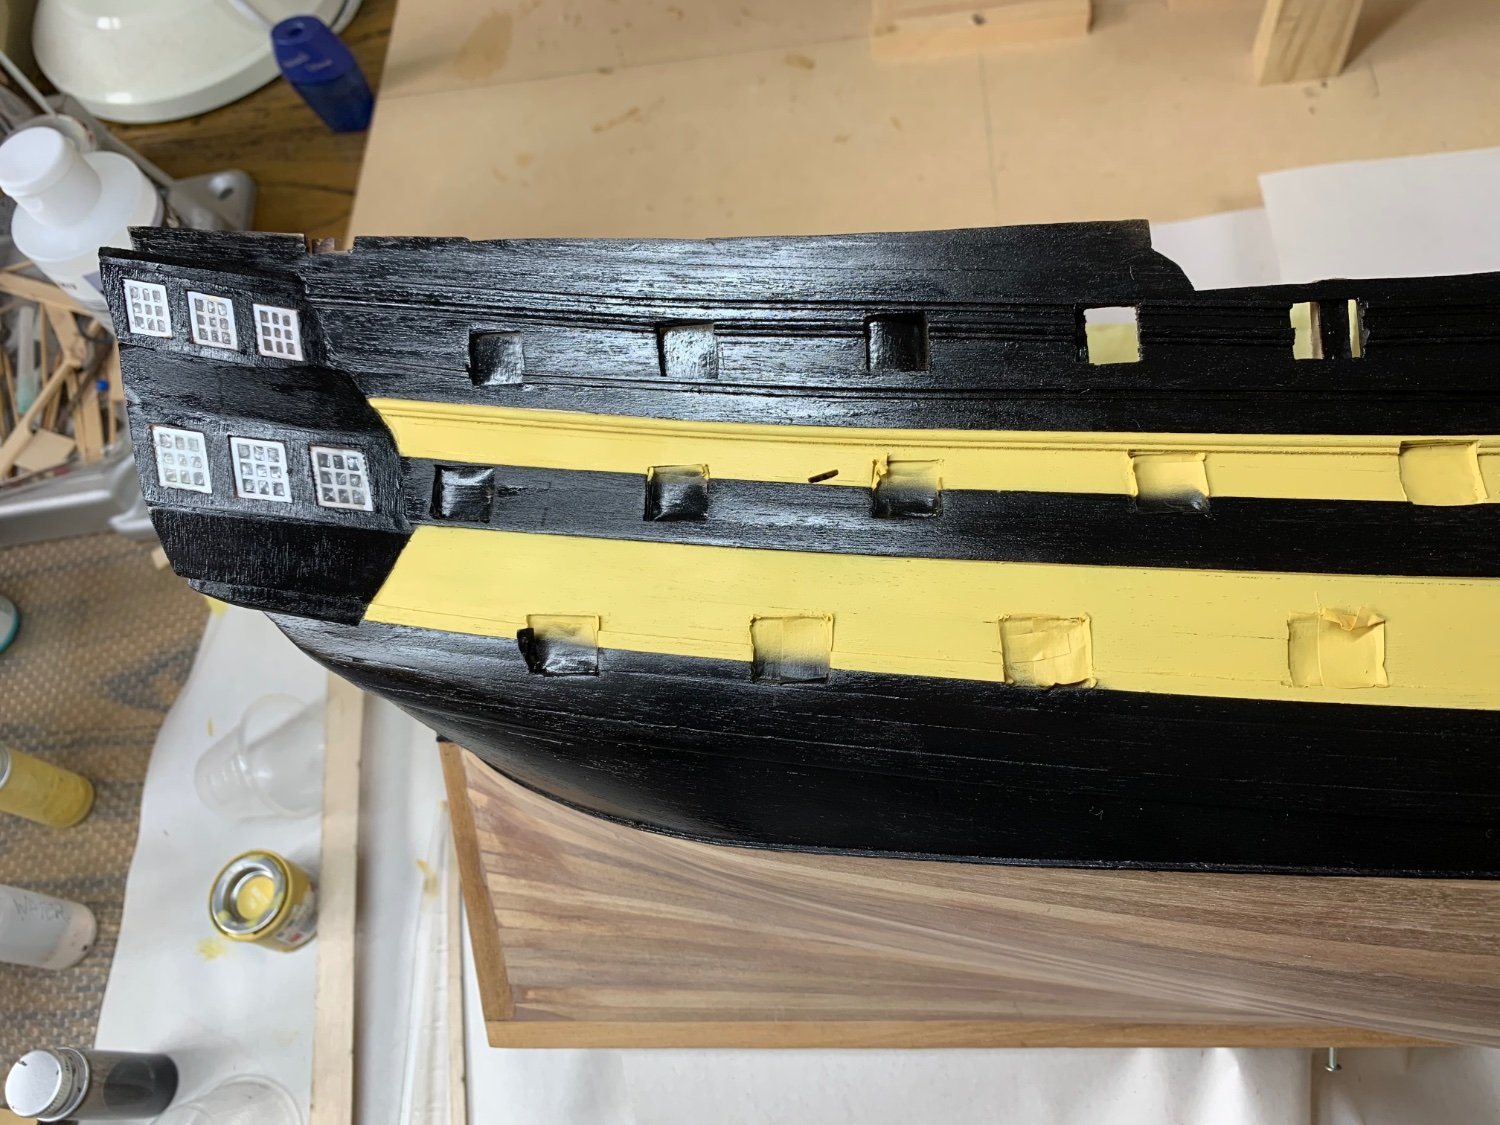
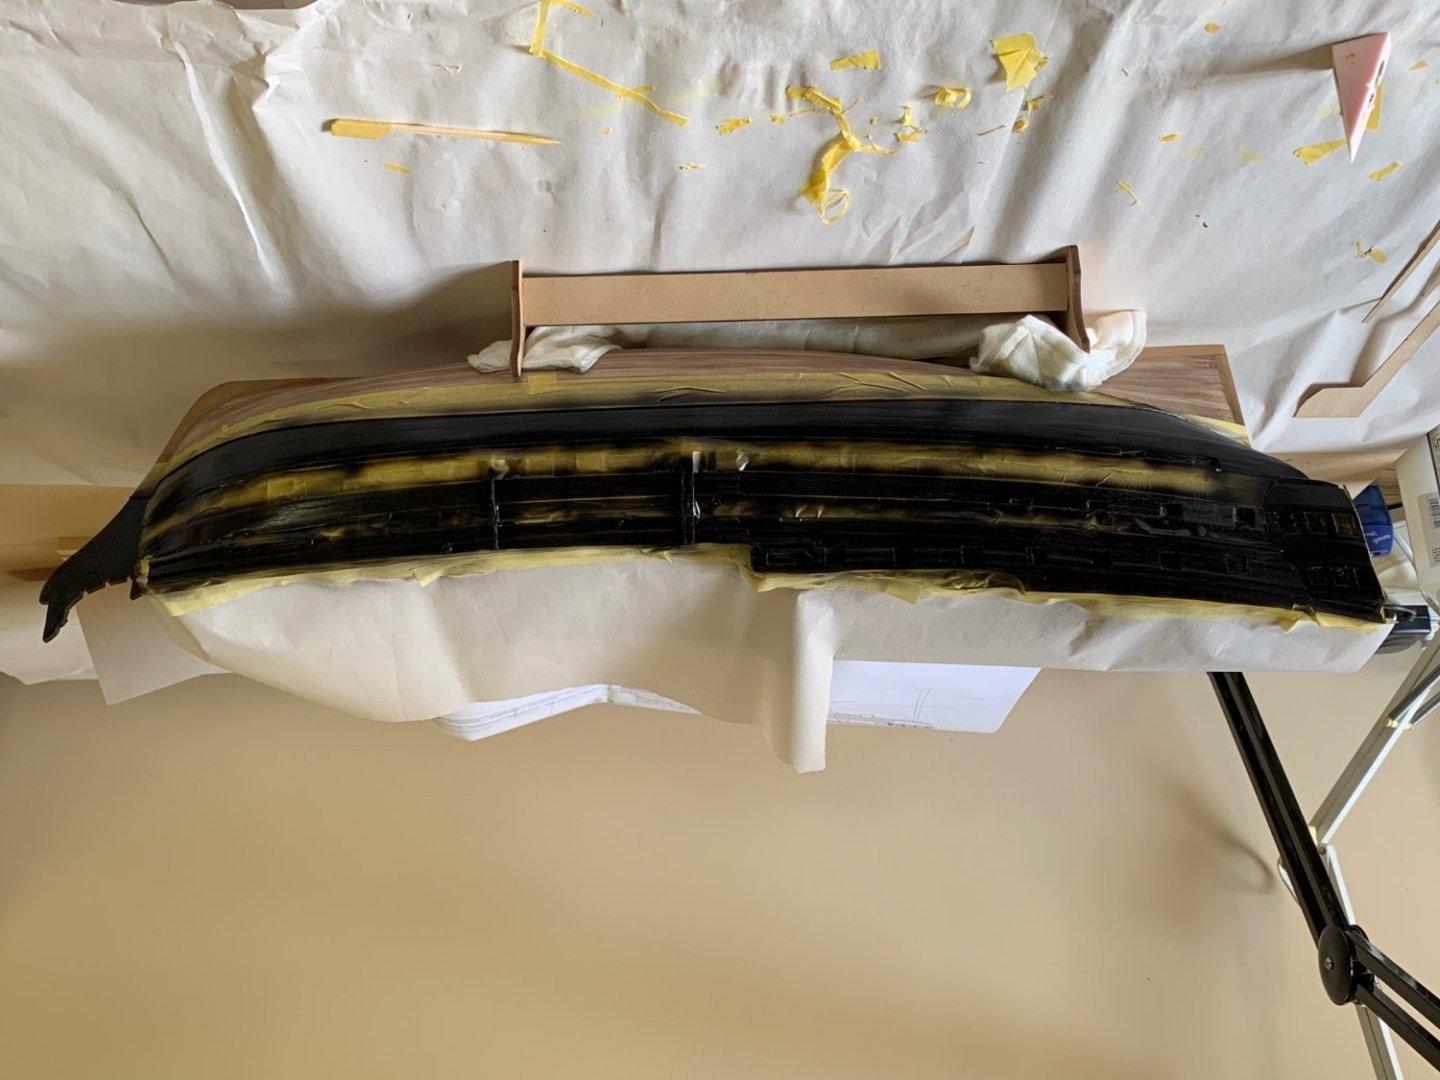
Started painting the hull. Using airbrush for first time so still learning much. Enamel Humbrol Yellow and Acrylic Caldercraft dull black. Tamiya masking tape is amazing quality and makes a world of difference.


-
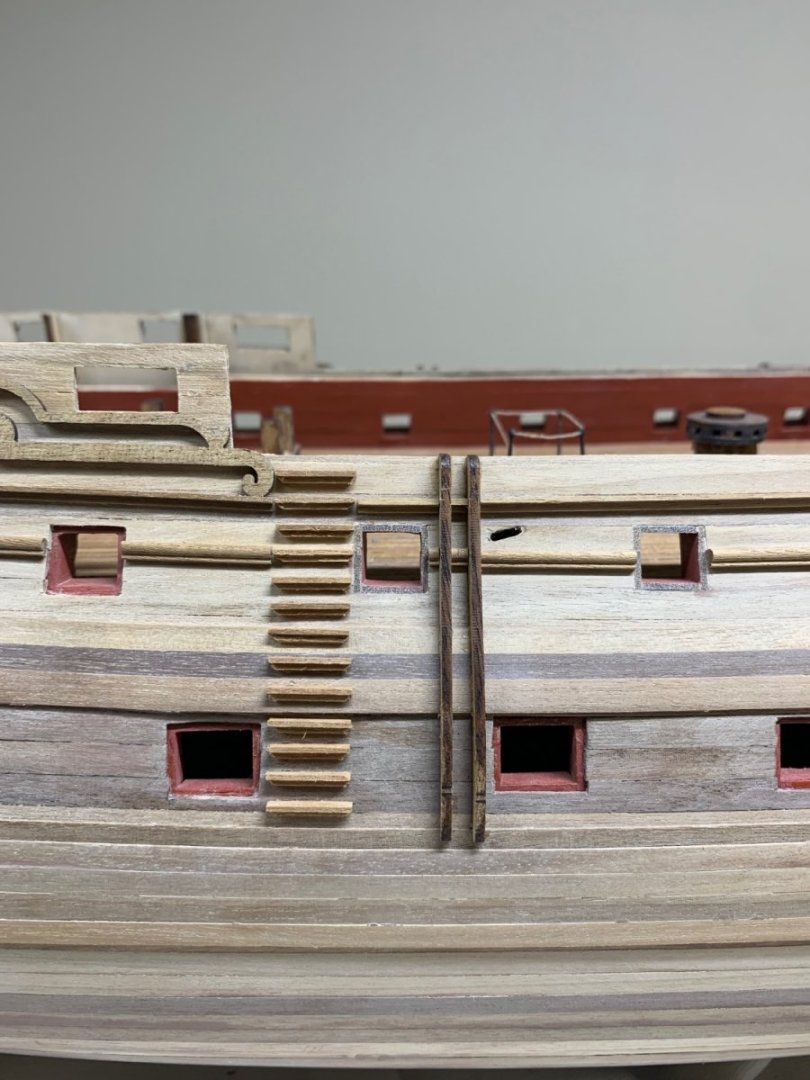
Have applied the decorative strips and the steps to both port and starboard. Pleasingly everything measured up well and all the landmarks were lineing up.

-
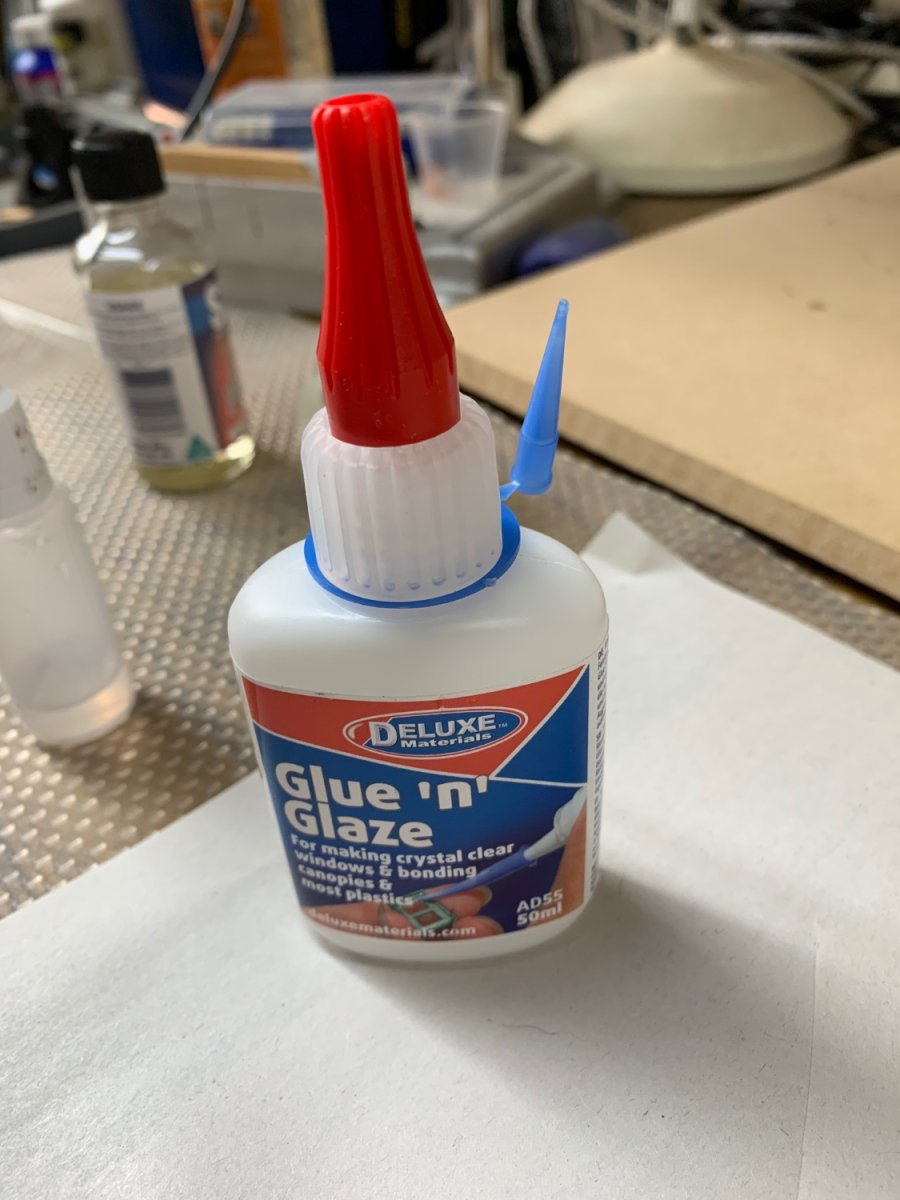
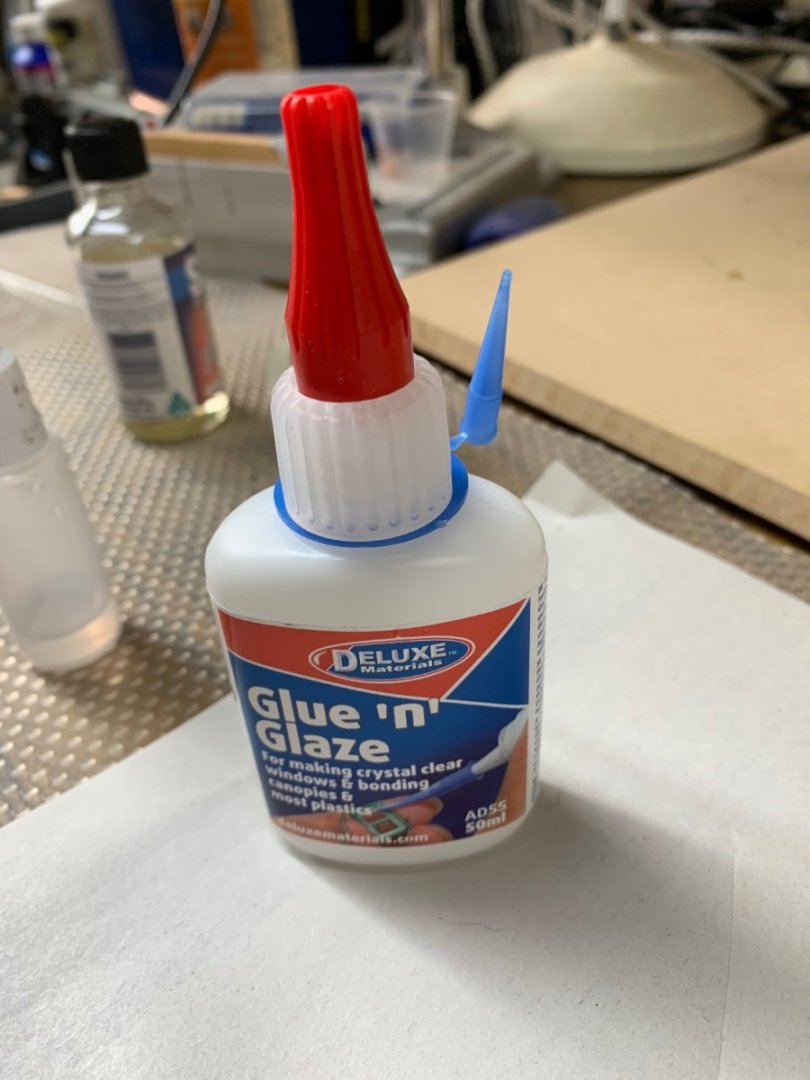
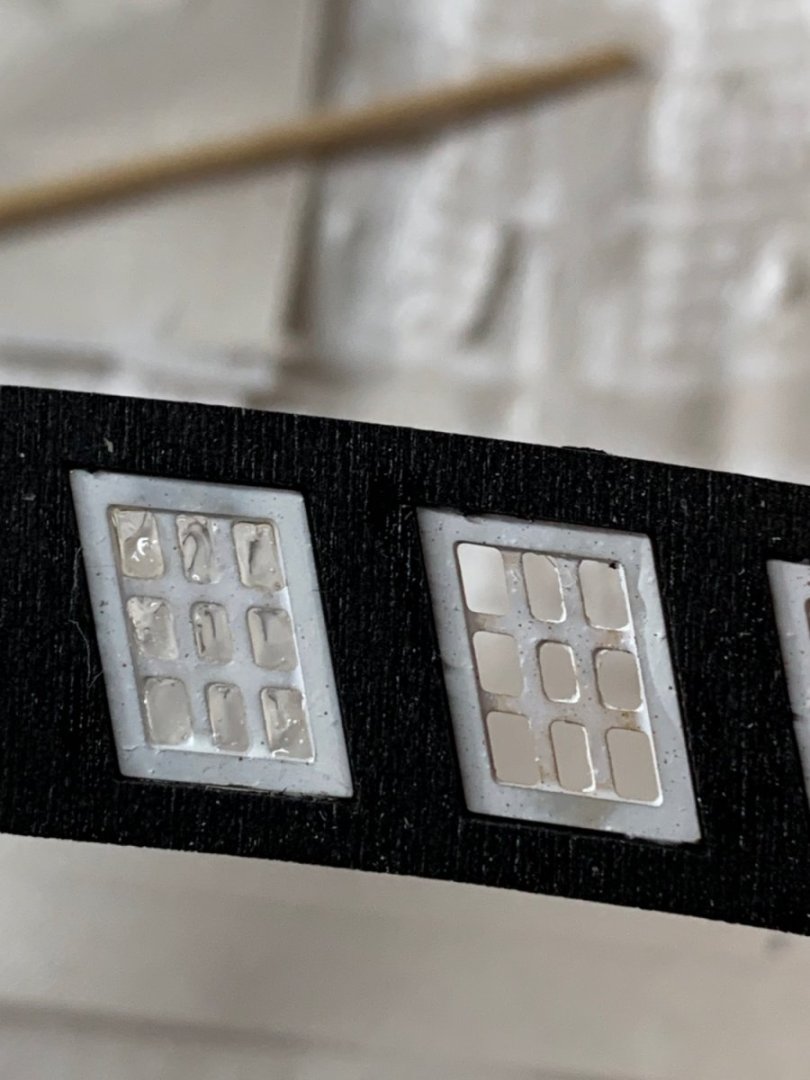
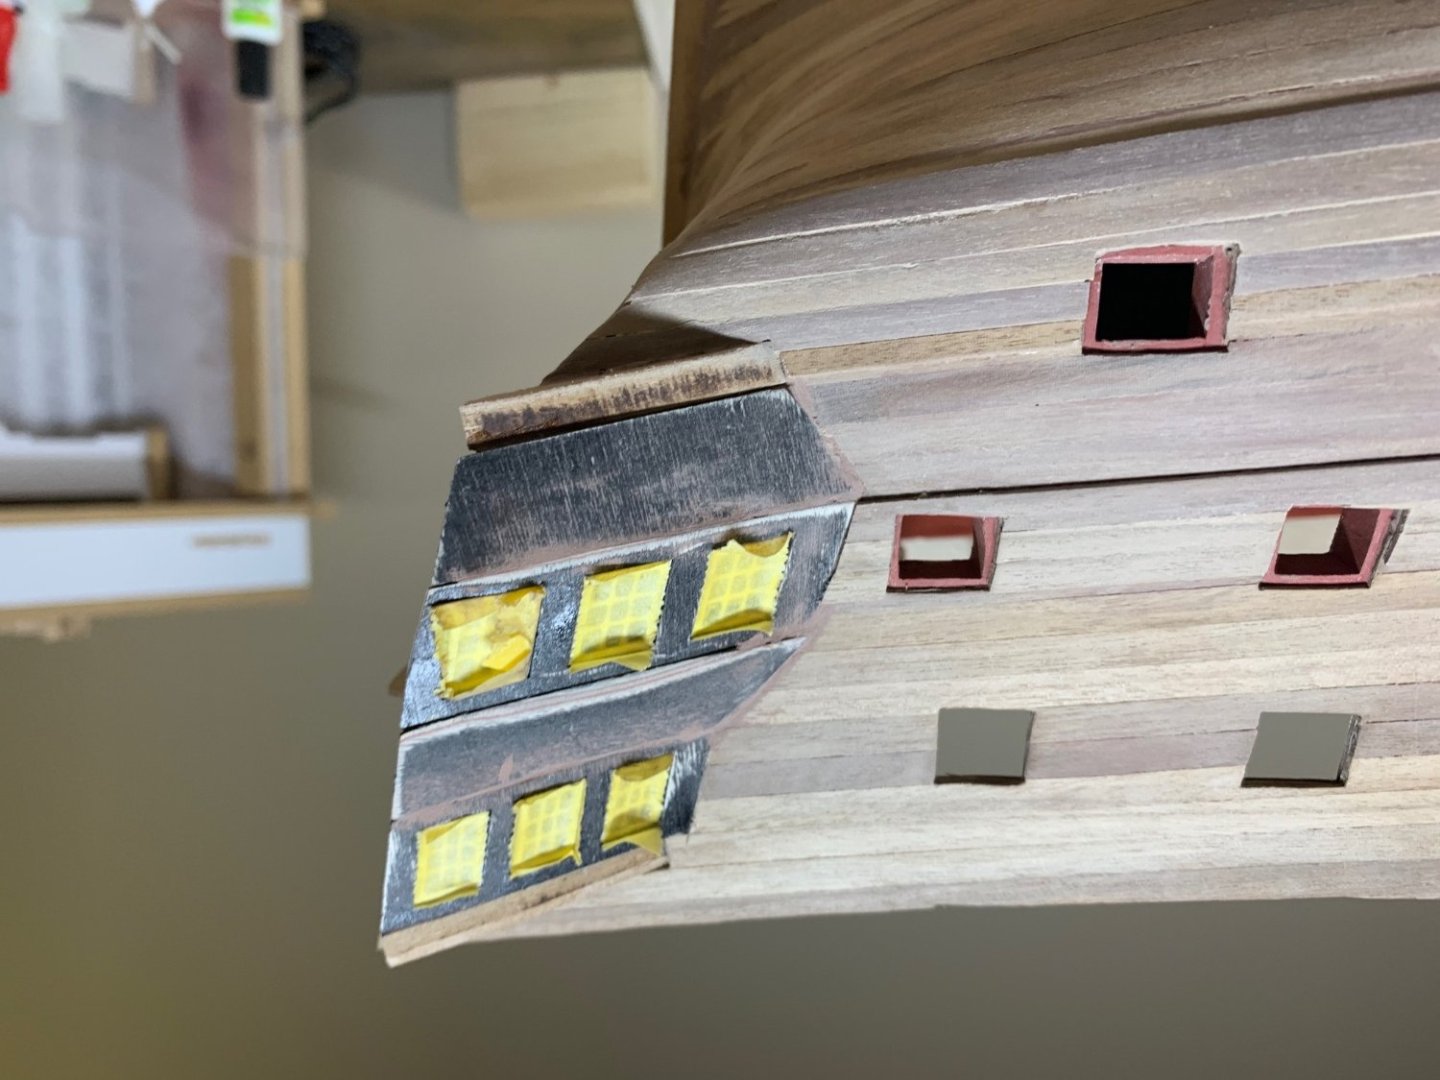
Hi Alan, I bought it online from Australian hobby supplier, they are an excellent source for many great tools and supplies, highly recommend their service. https://www.hobbytools.com.au/deluxe-materials-ad55-glue-n-glaze Using the product was easy, there are some good YouTube videos to assist. It suggests that openings greater than 6mm can be done easily, but larger openings can be built up too. I am happy with the result, looks better than sticking acetate on from the back. Thanks for looking at my log.
-
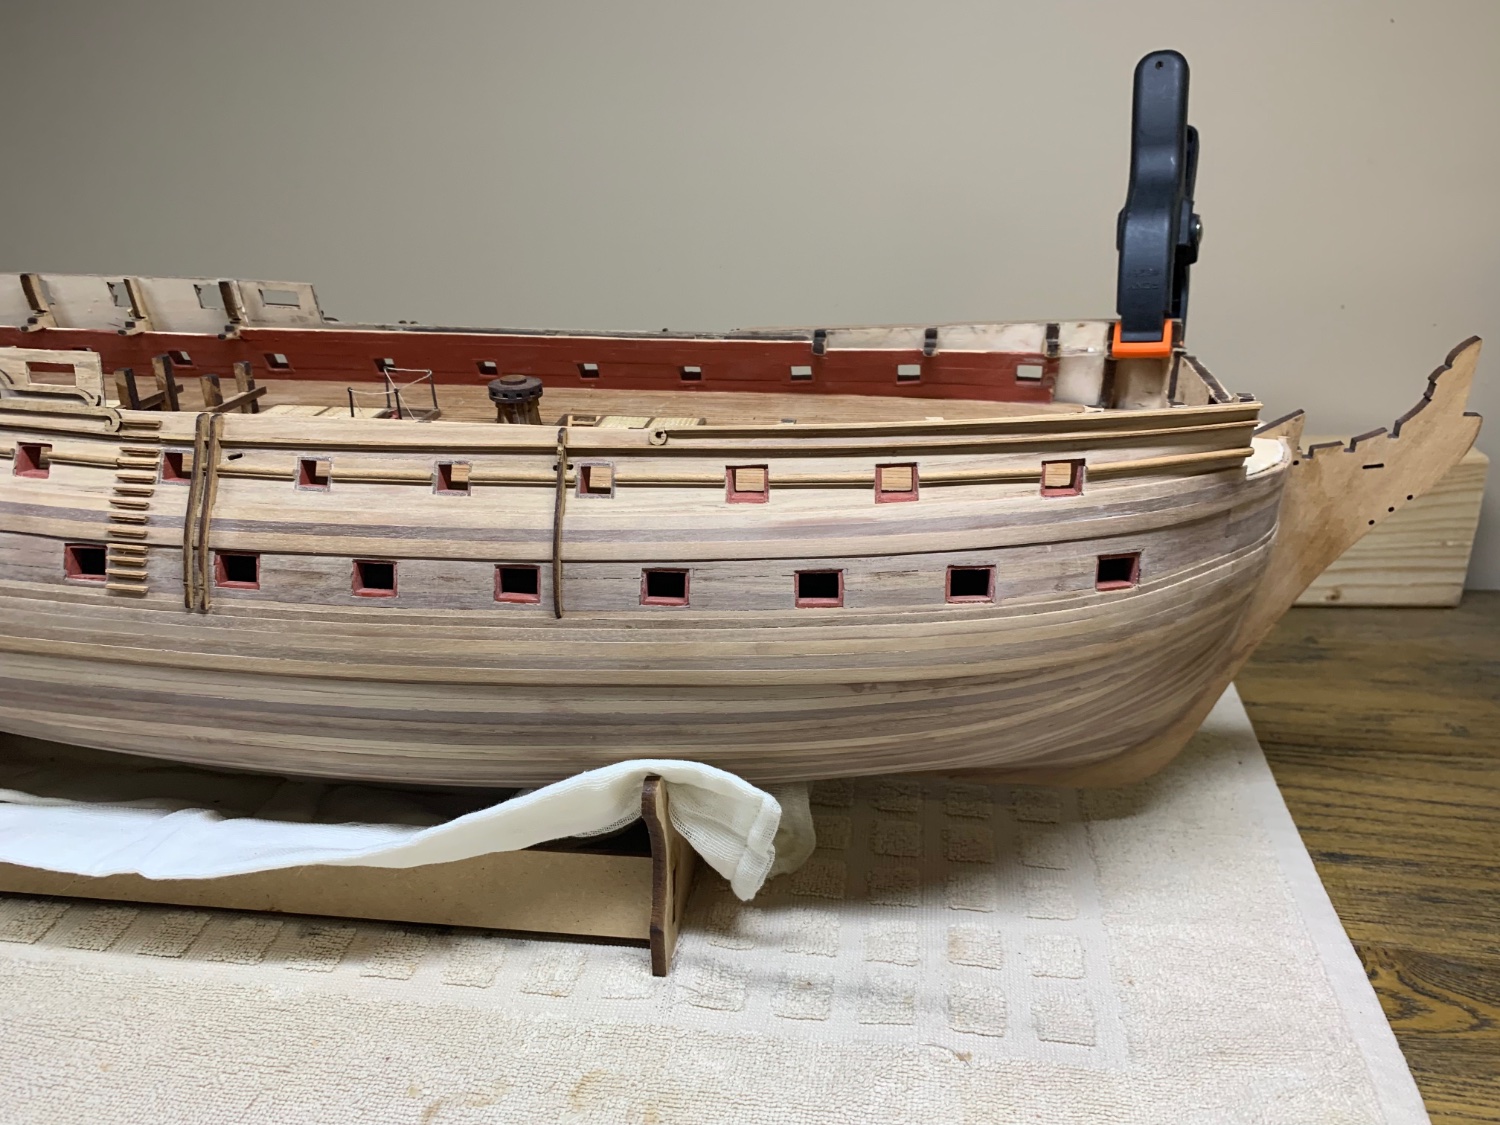
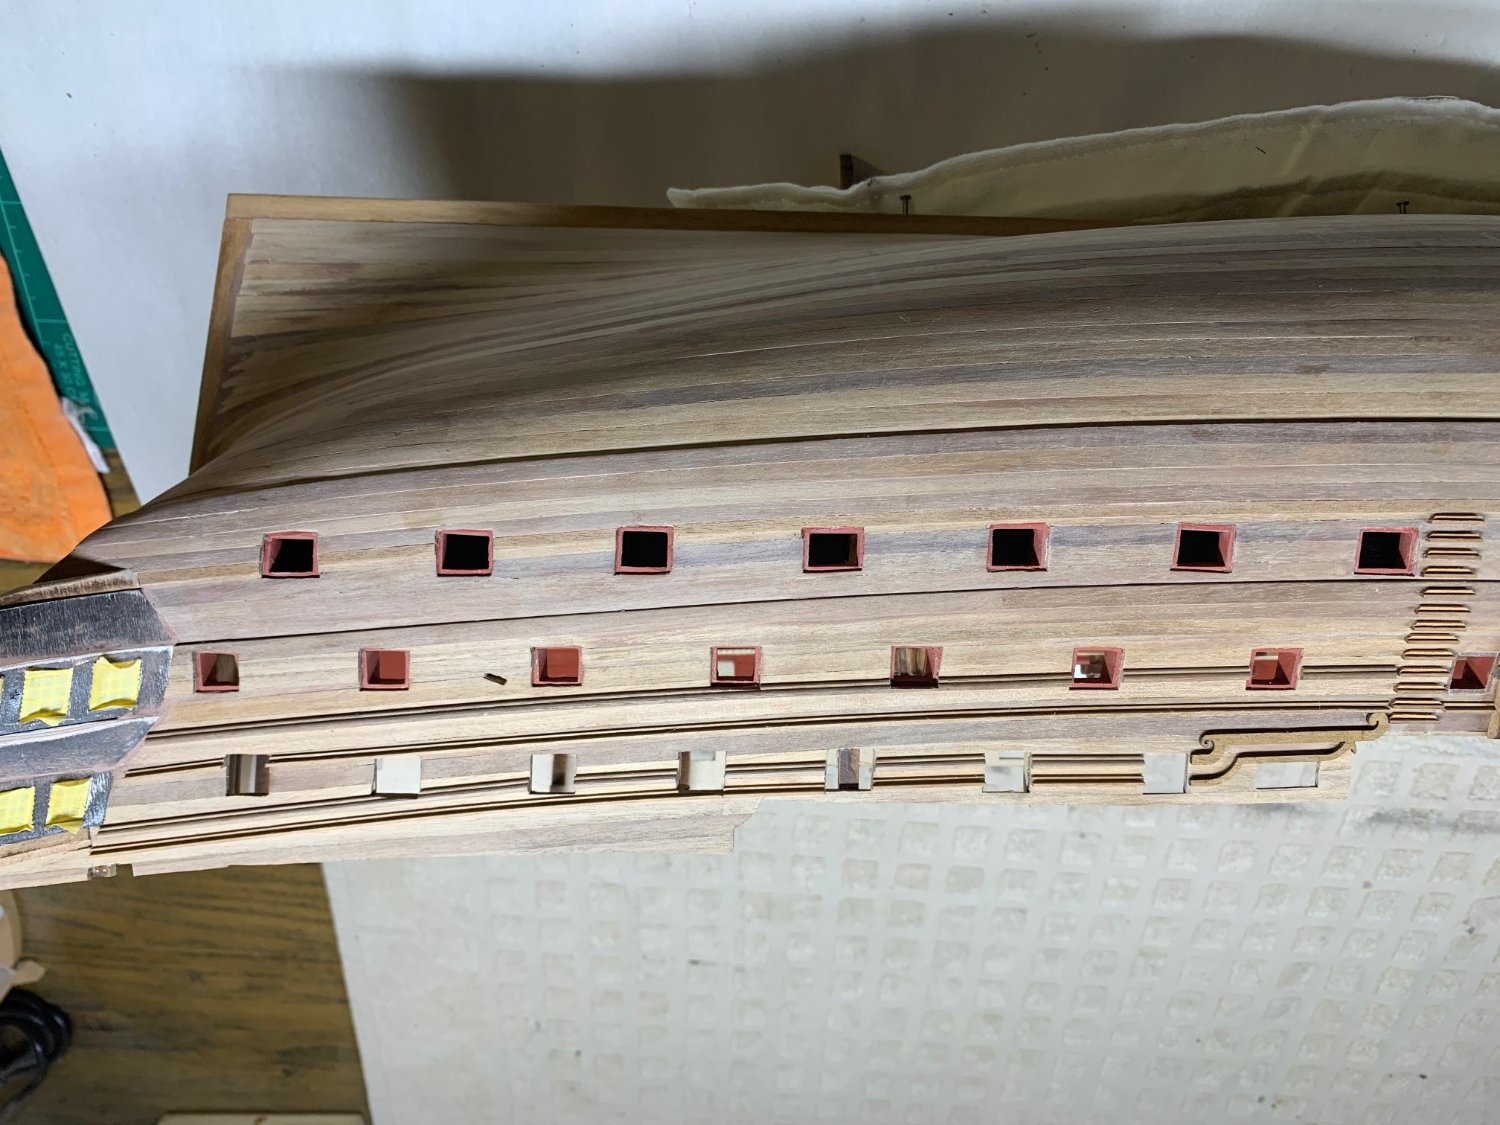
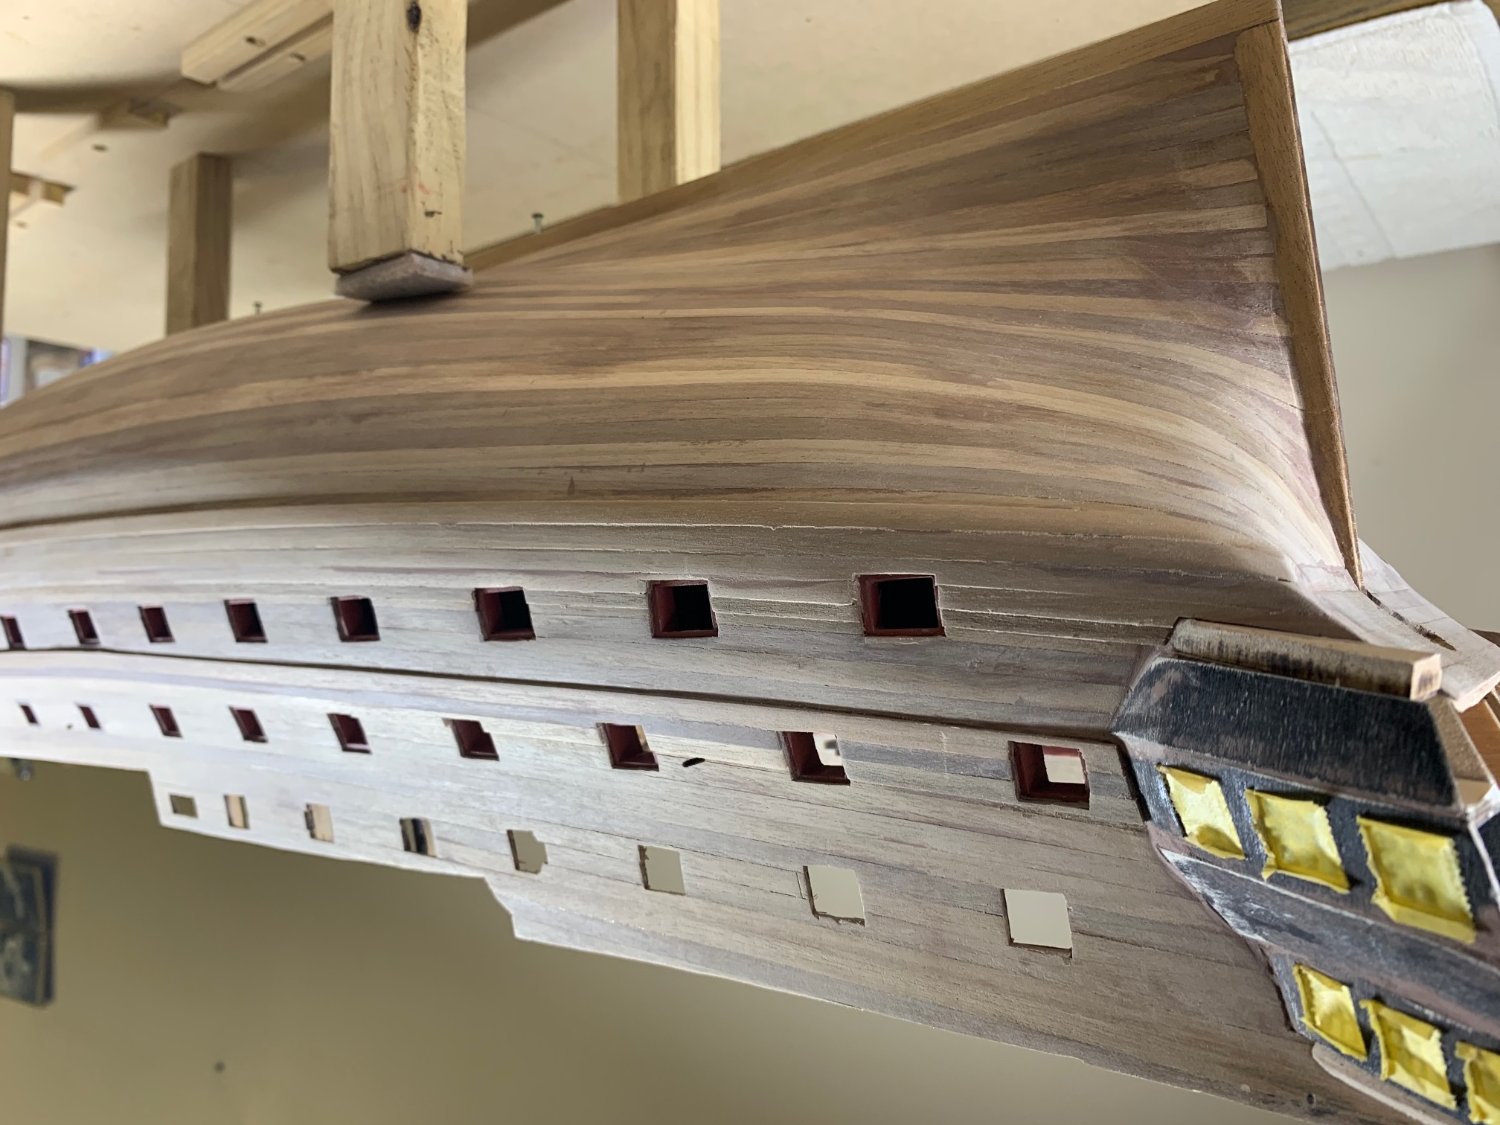
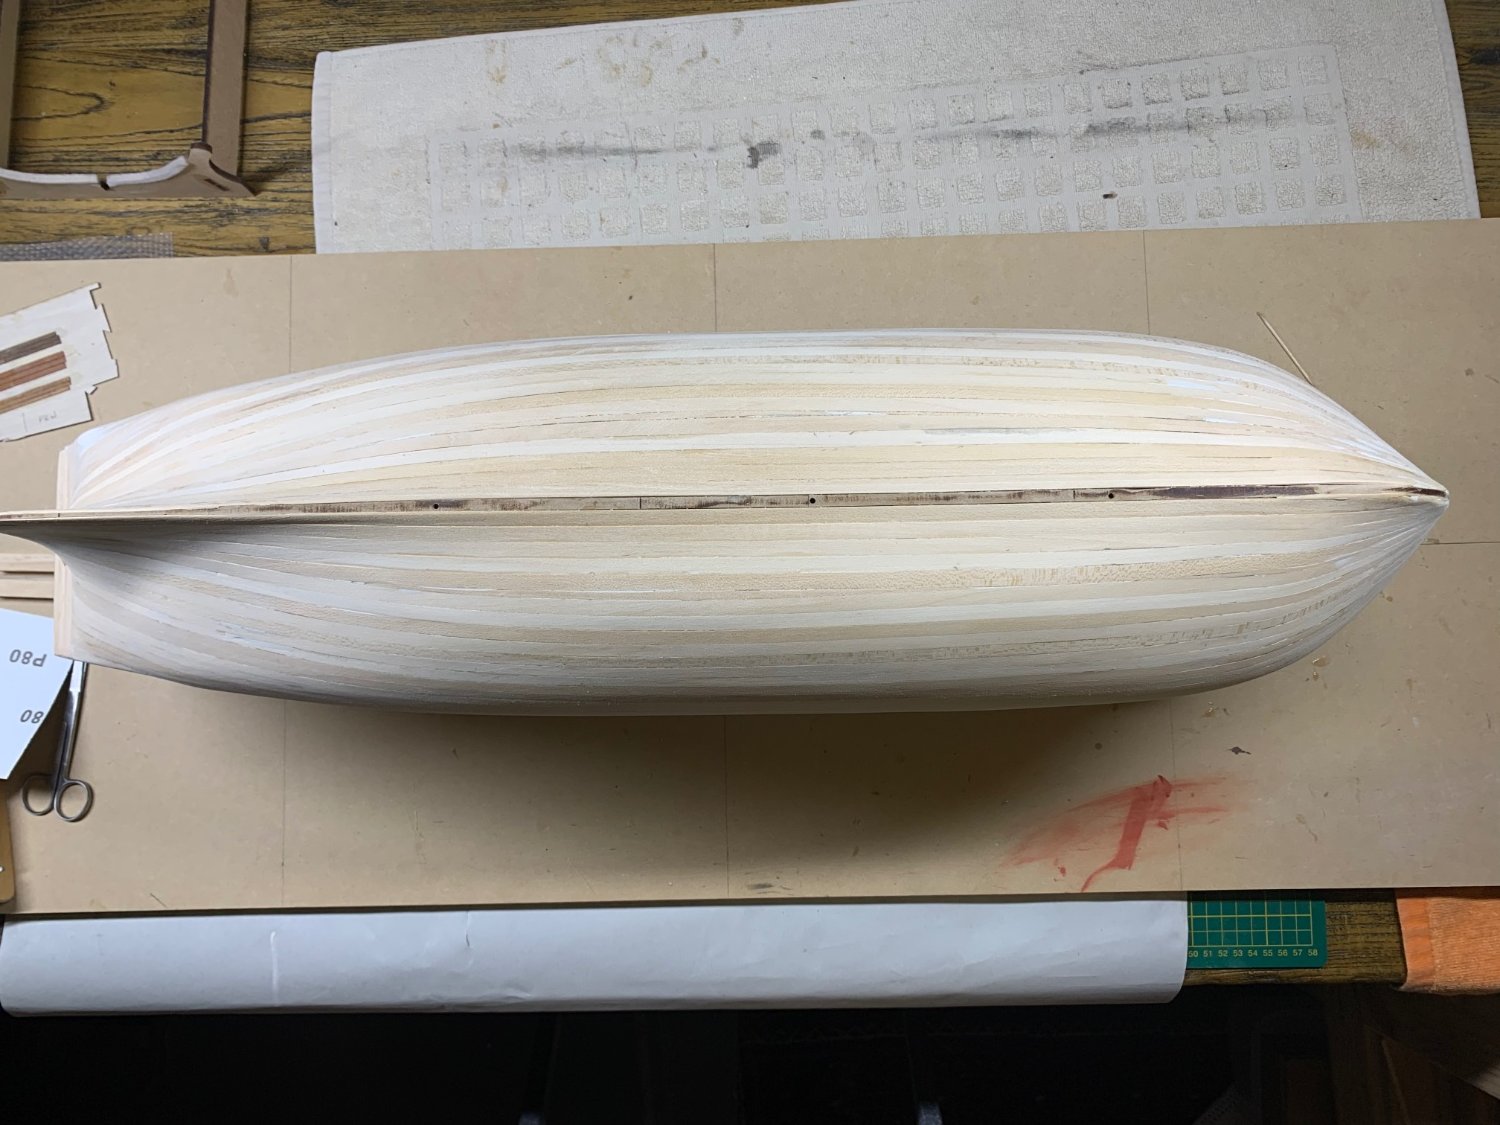
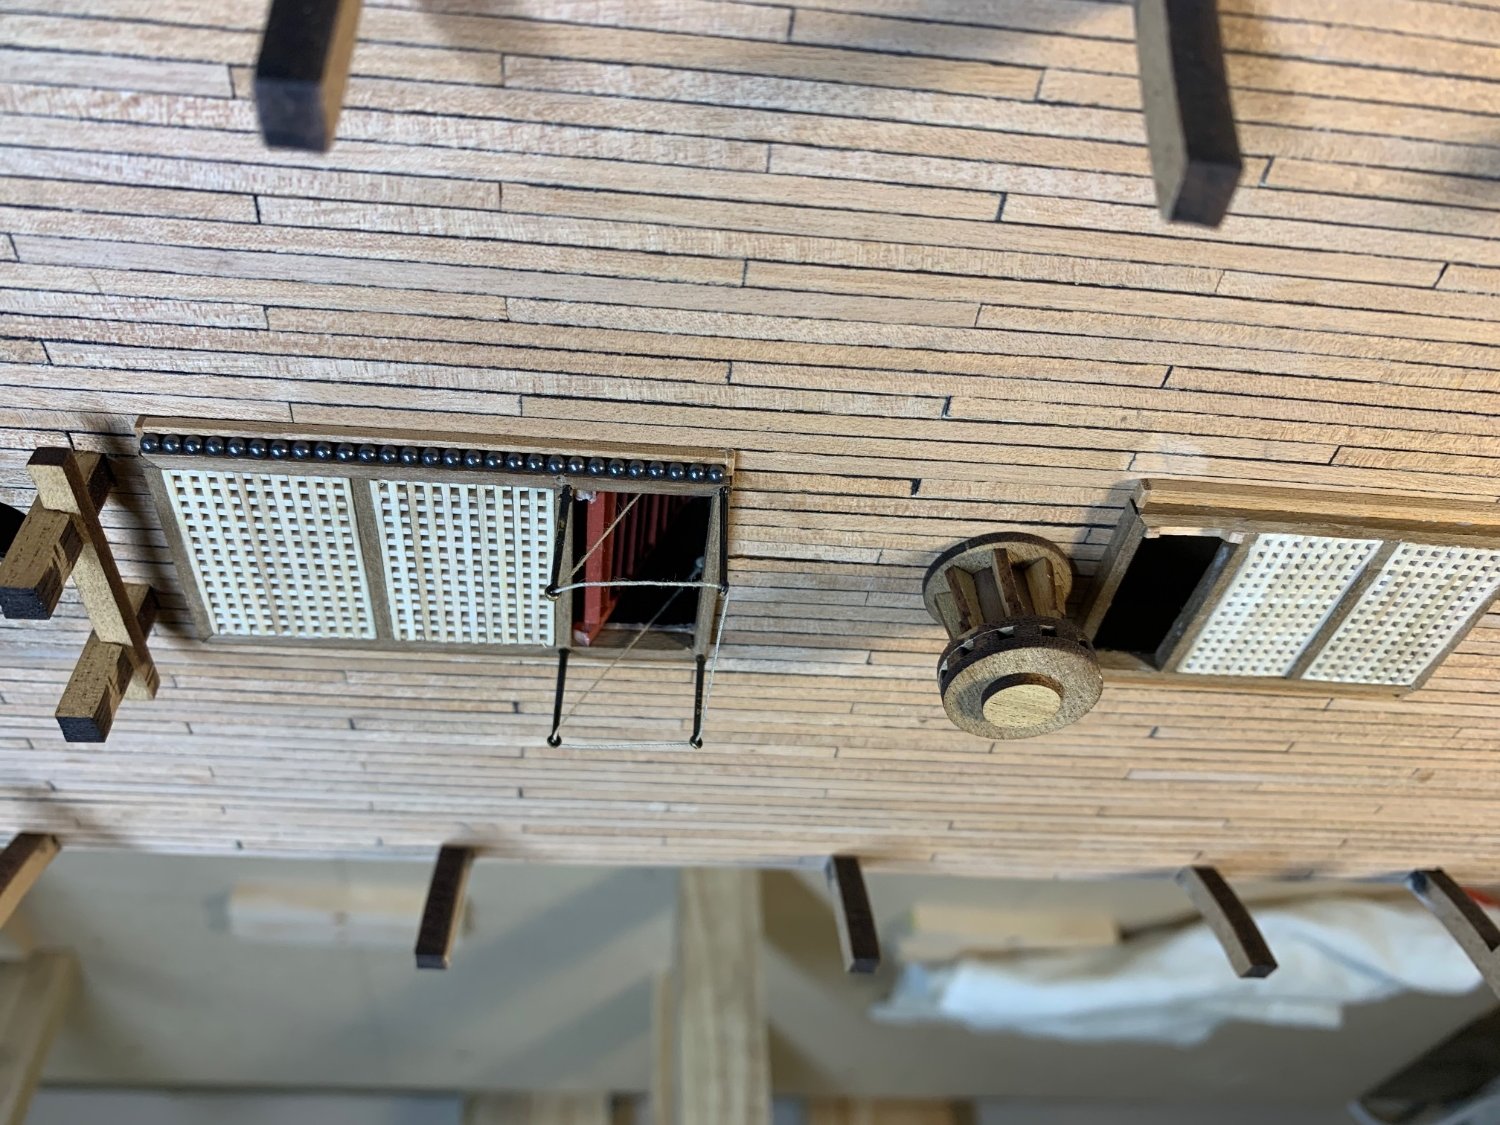
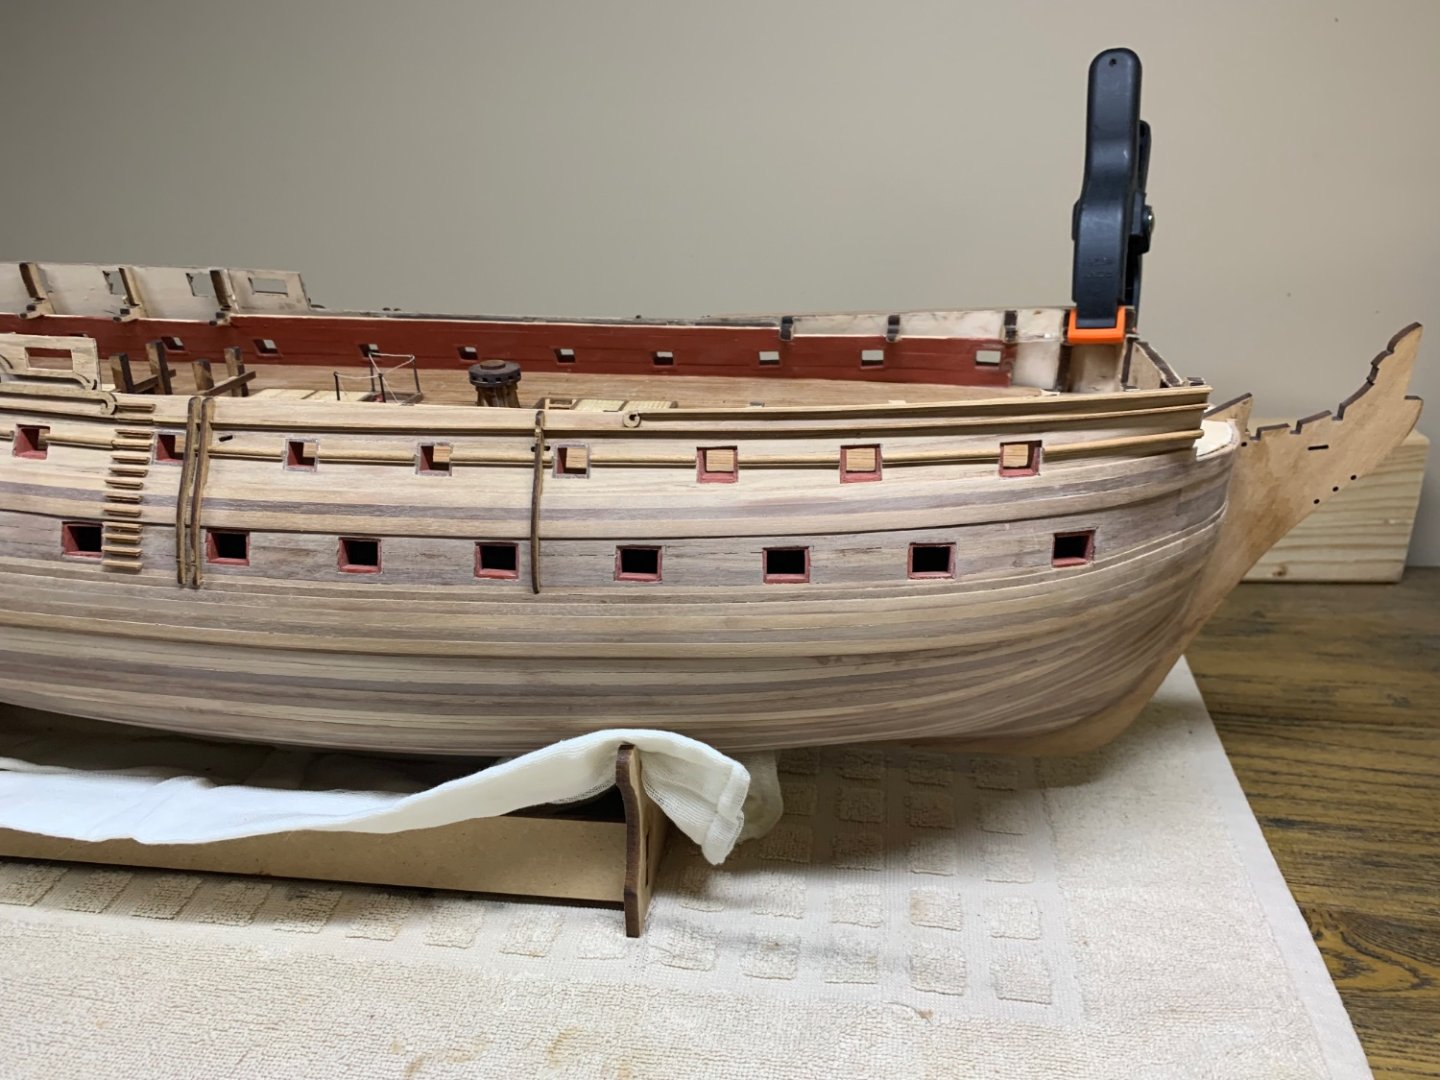
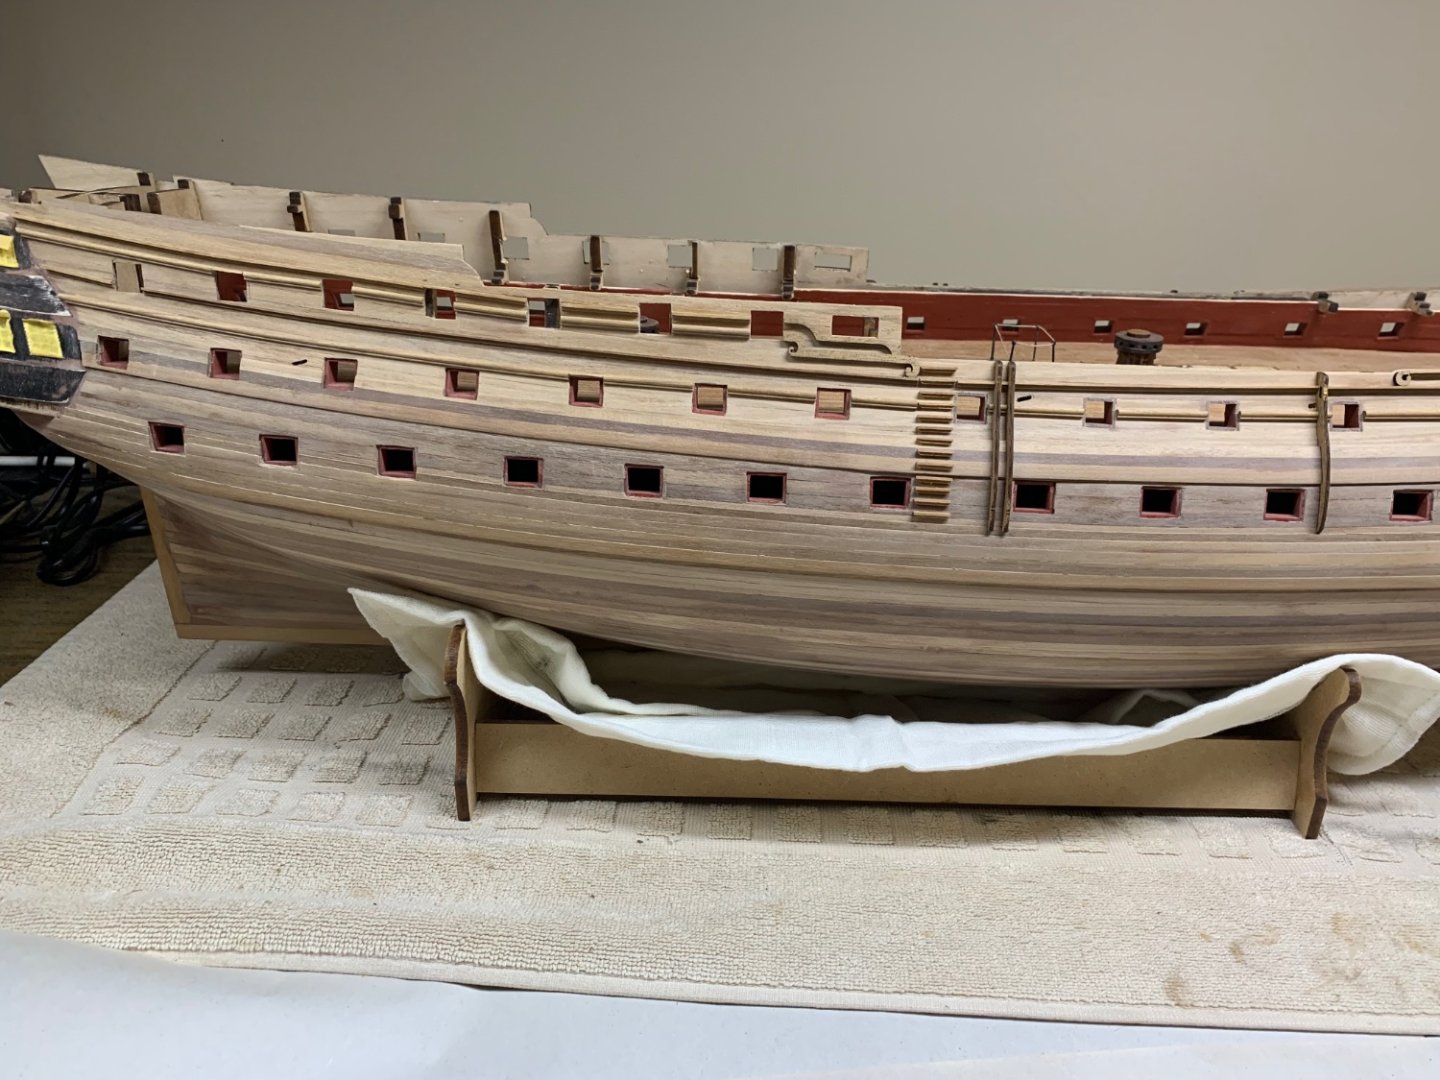
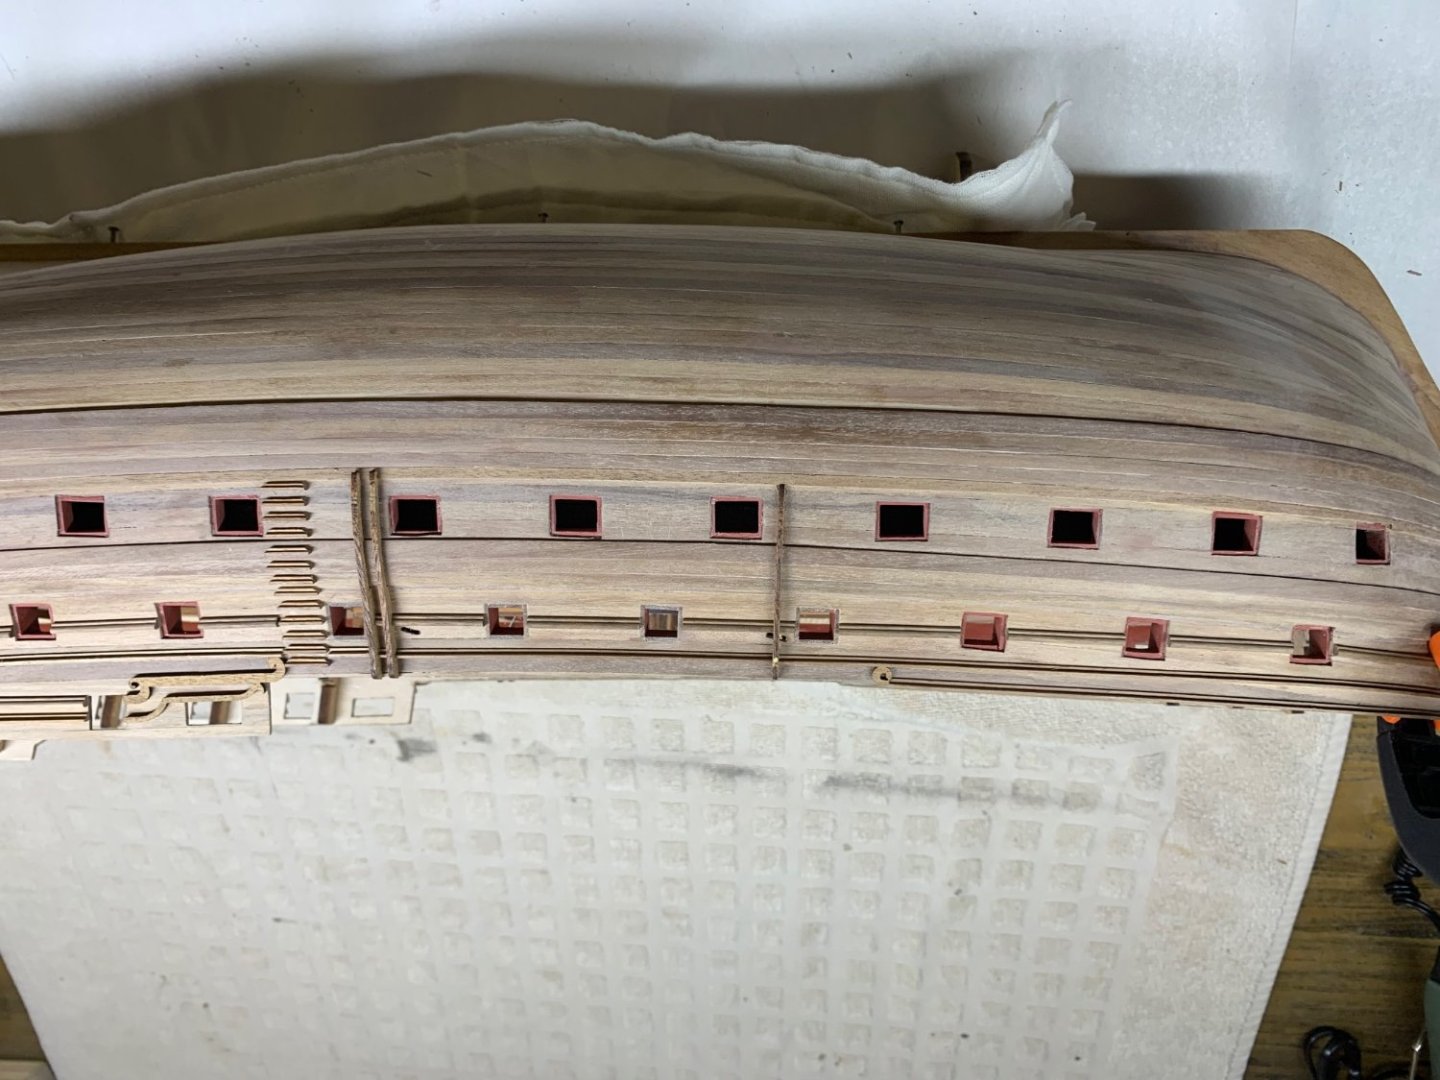
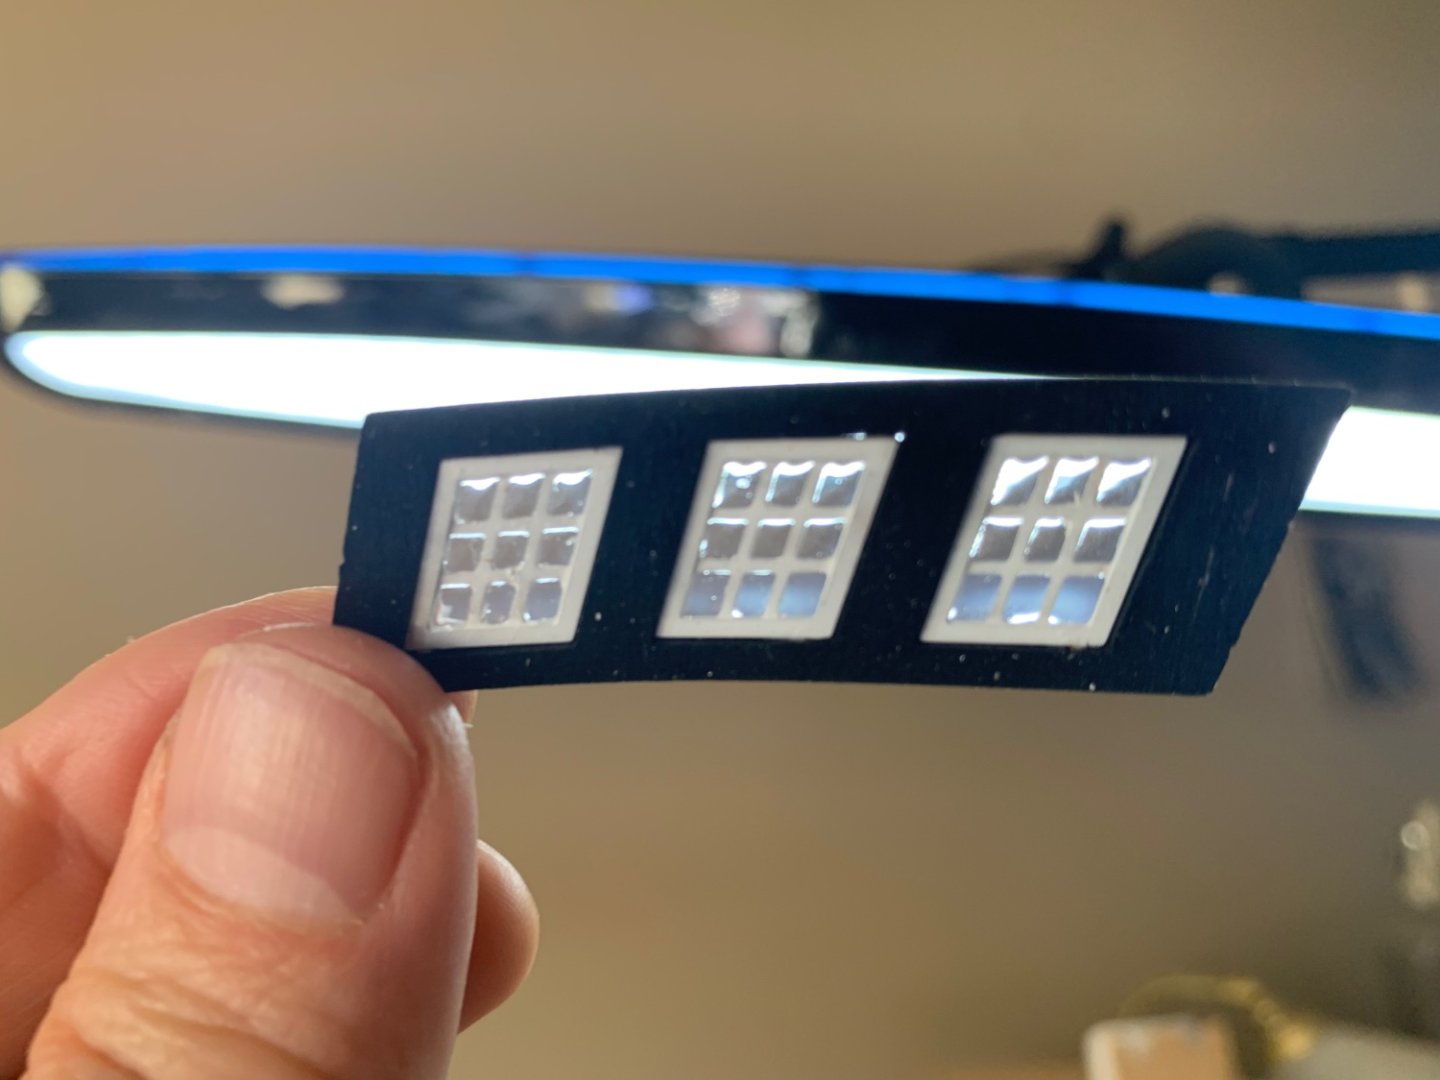
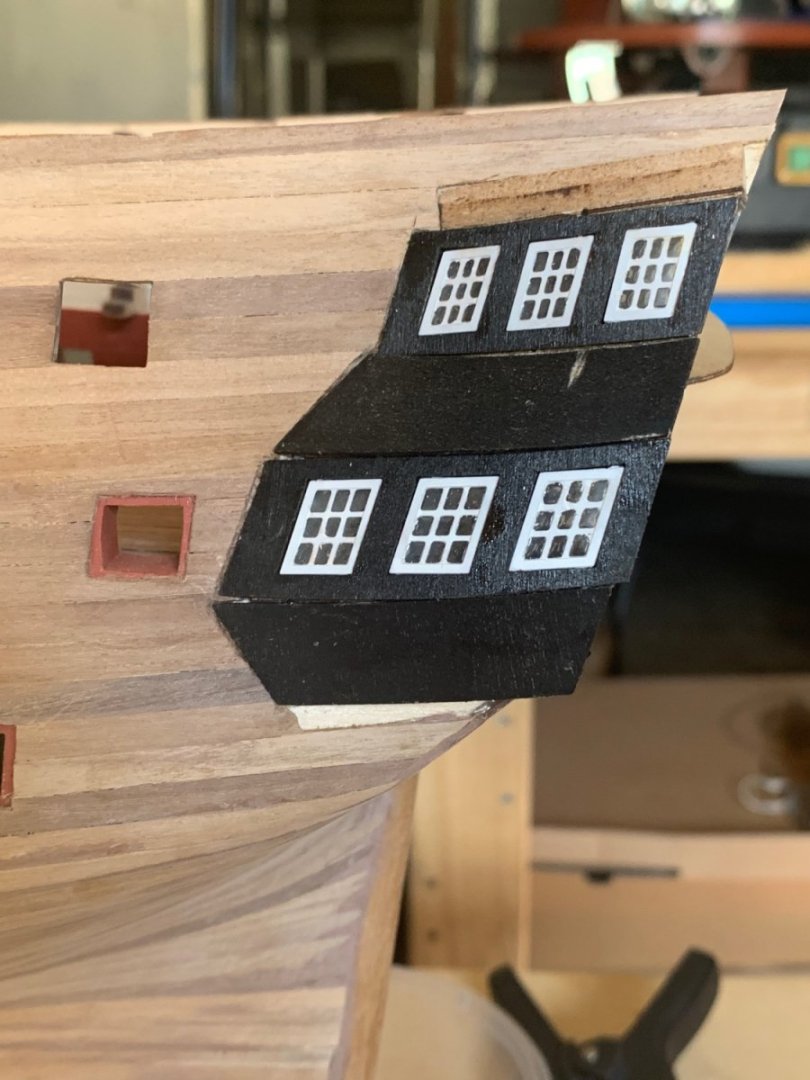
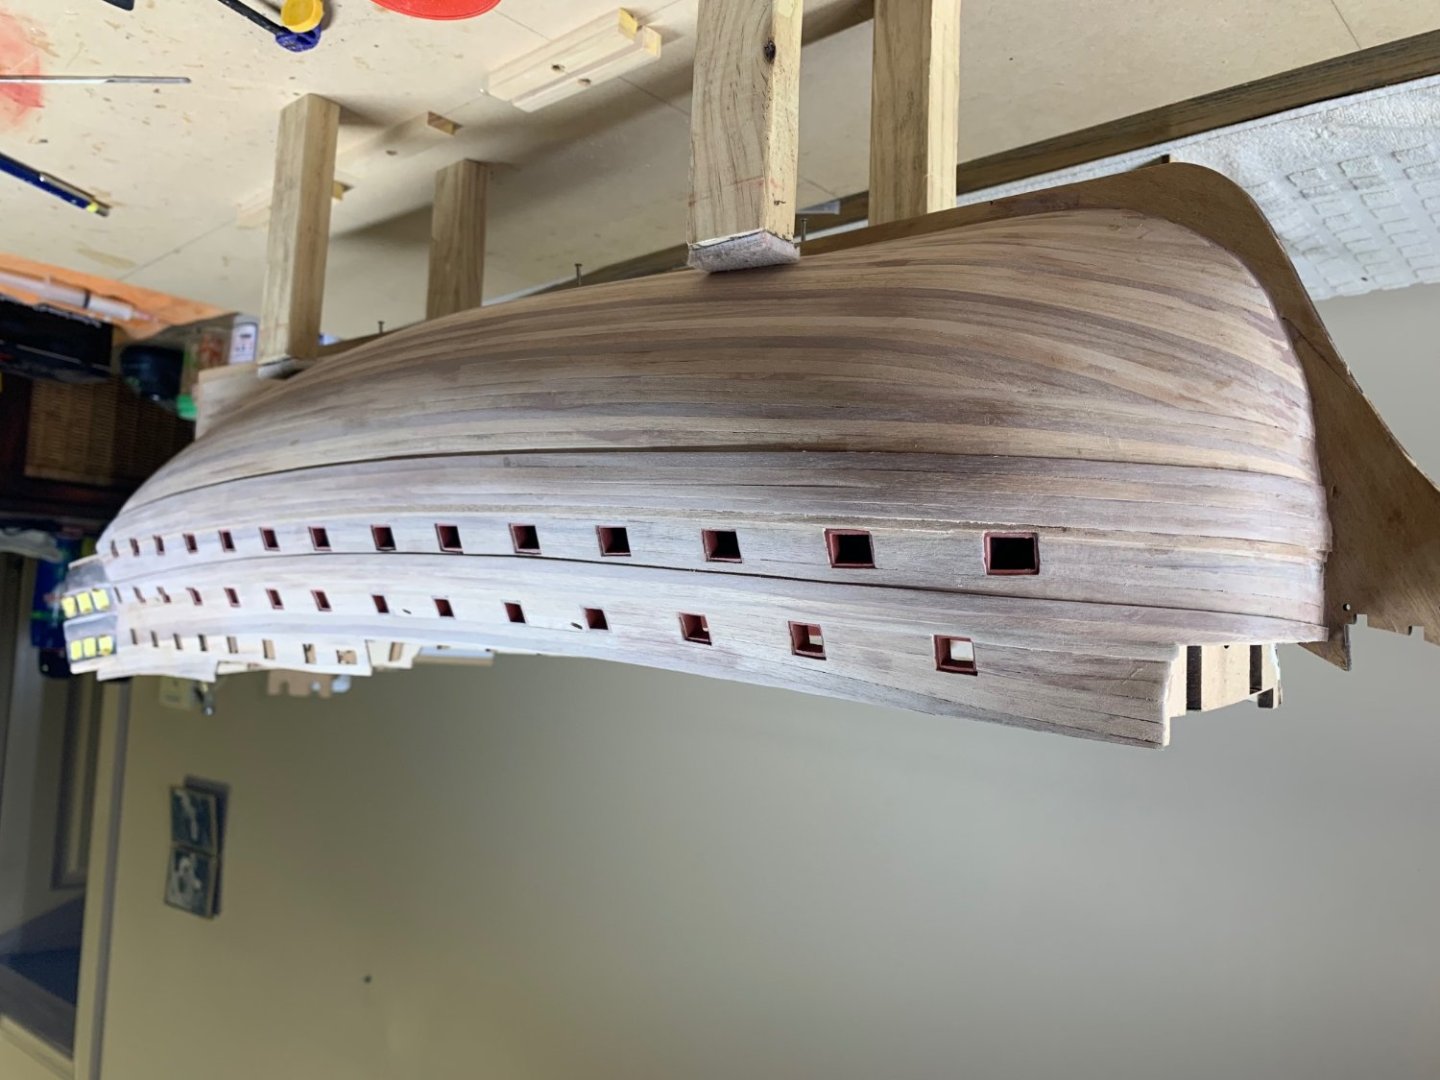
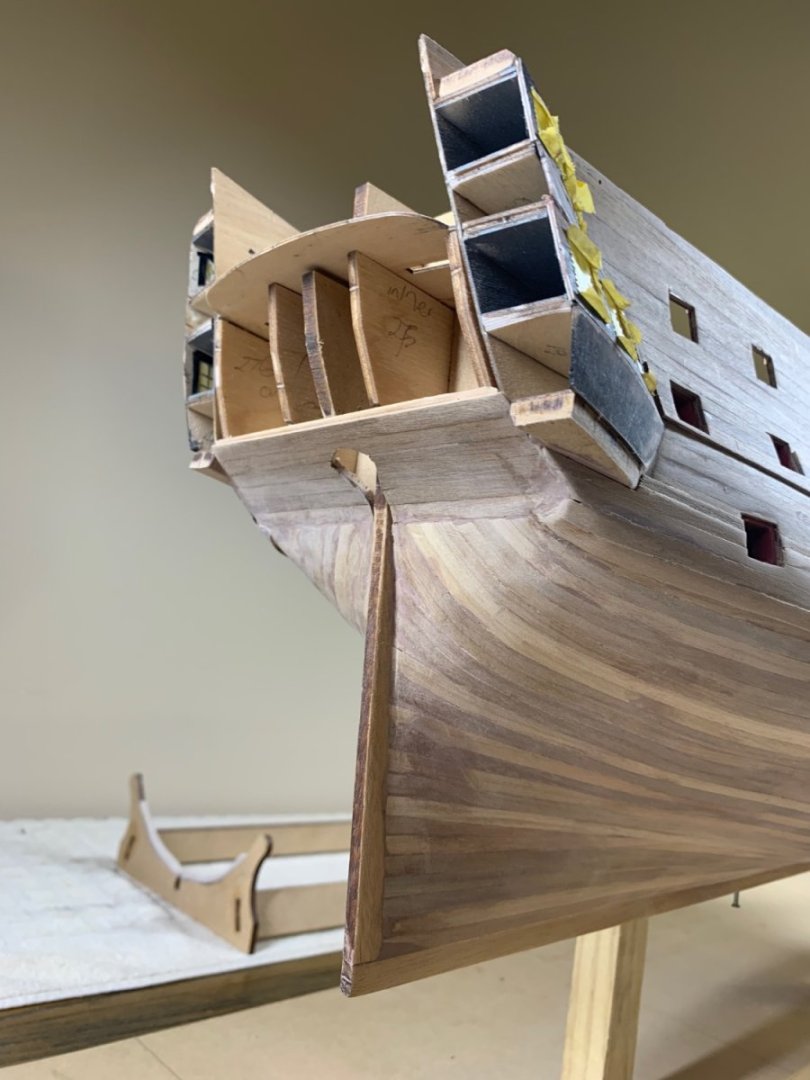
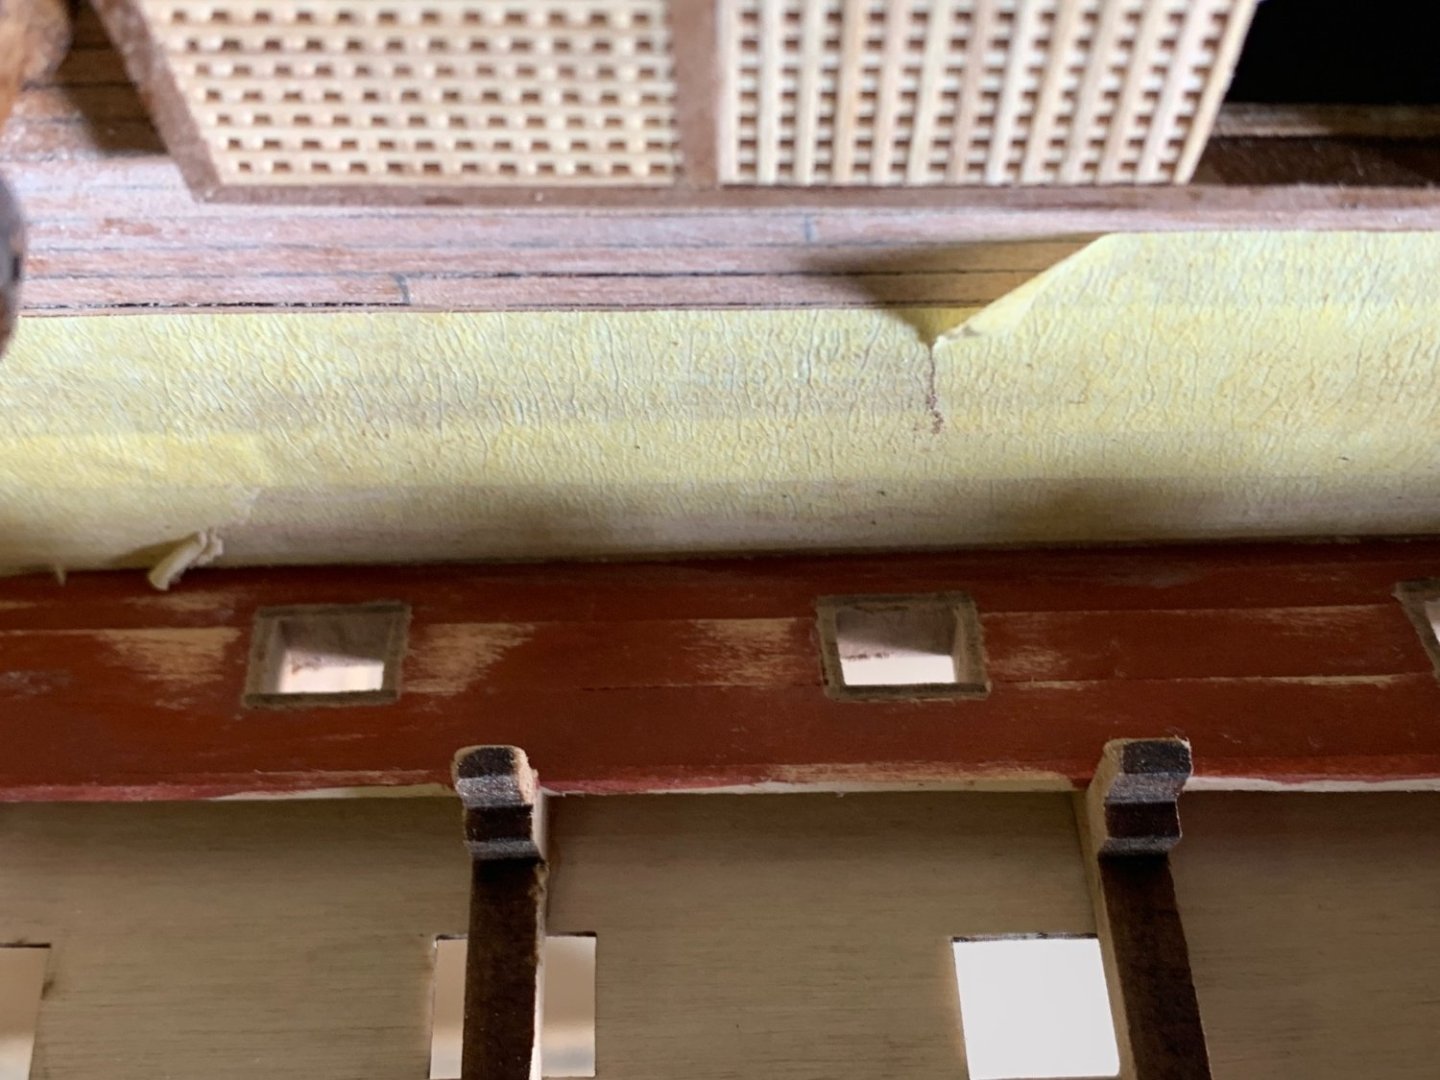
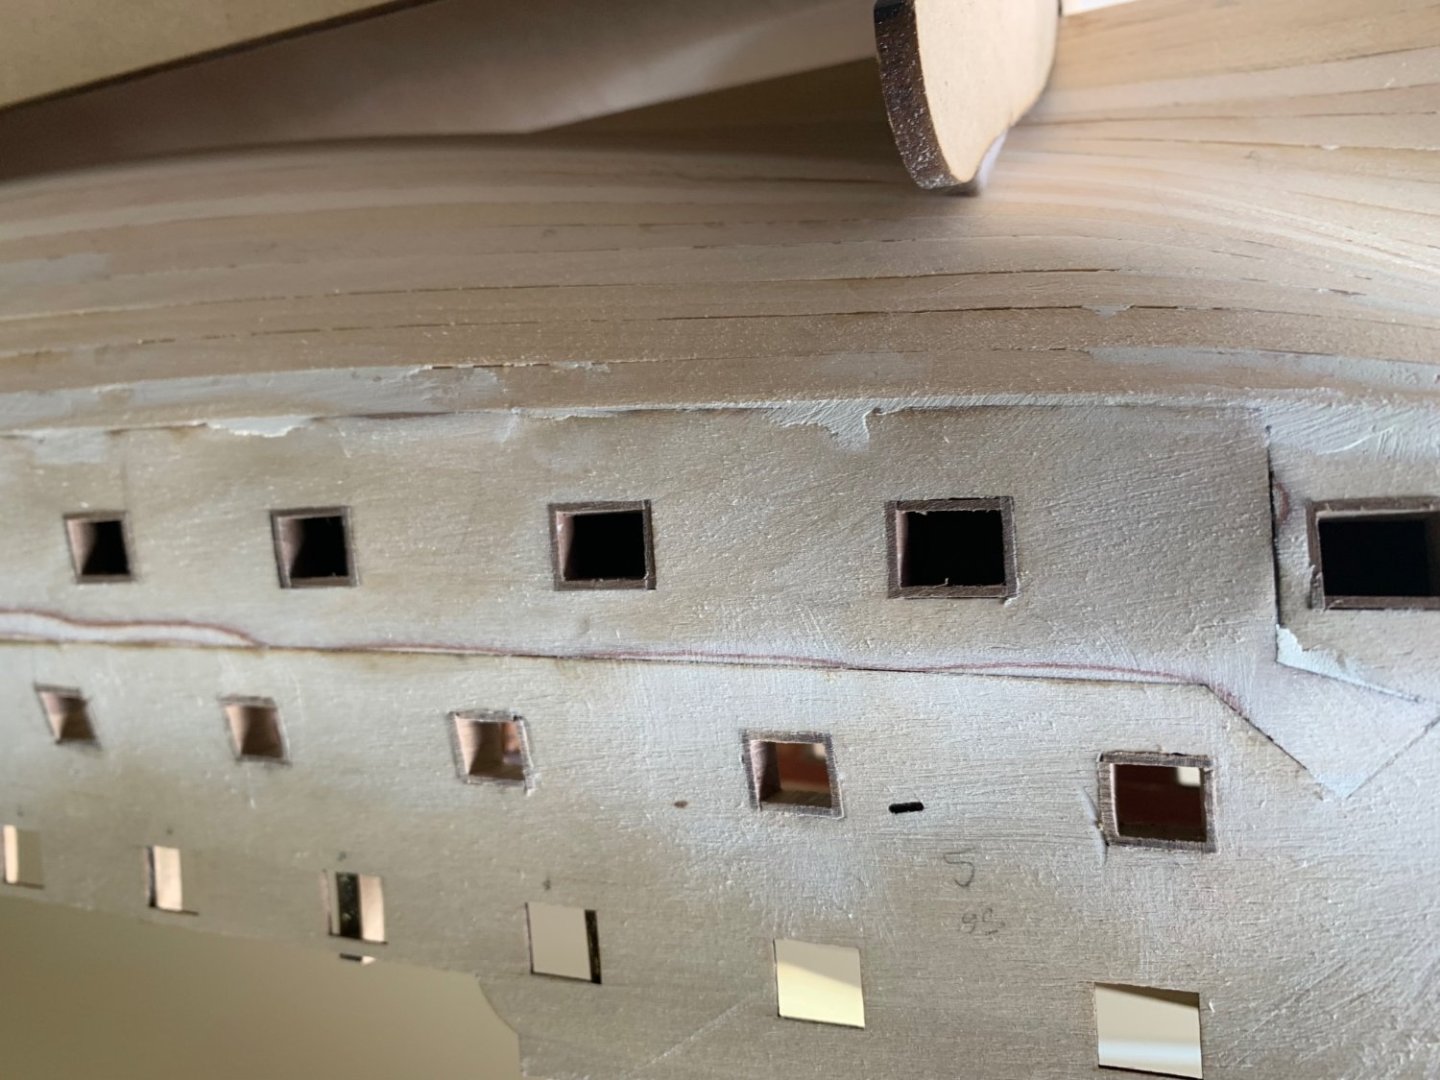
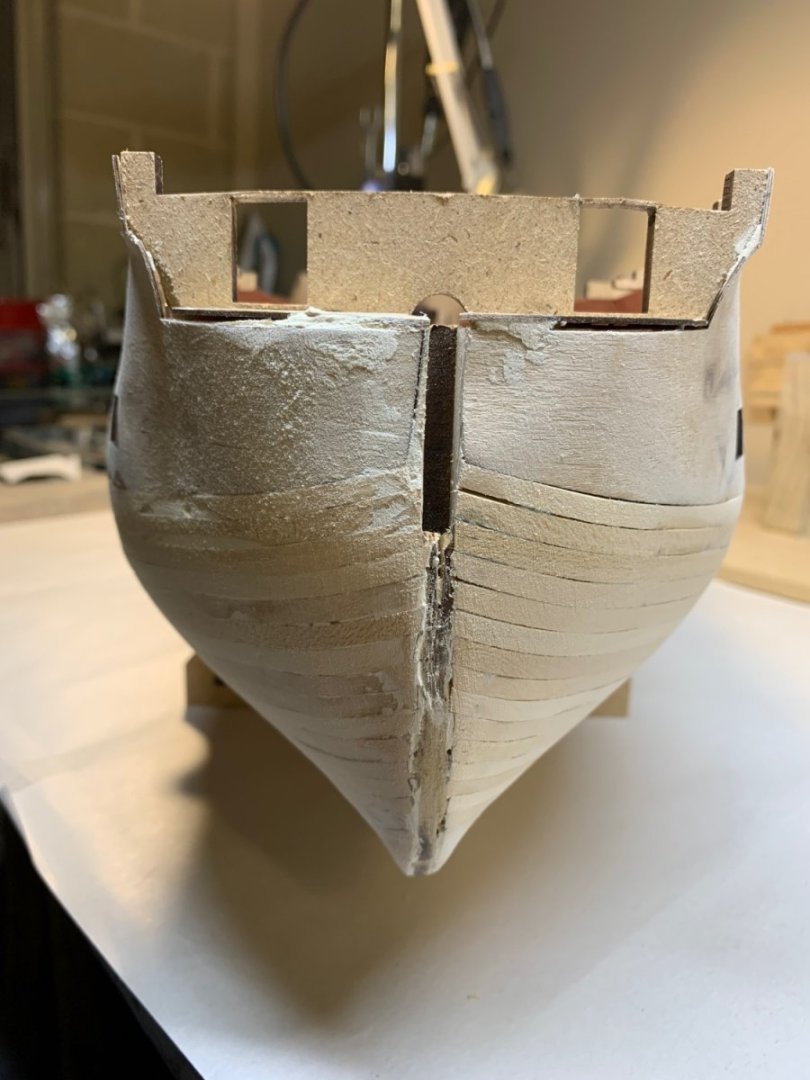
Second planking done and gunports lined. Added main and minor wales and strake, and installed the quarter galleries. I used a product called glue n glaze to make the windows in the galleries, I think it looks good.

-
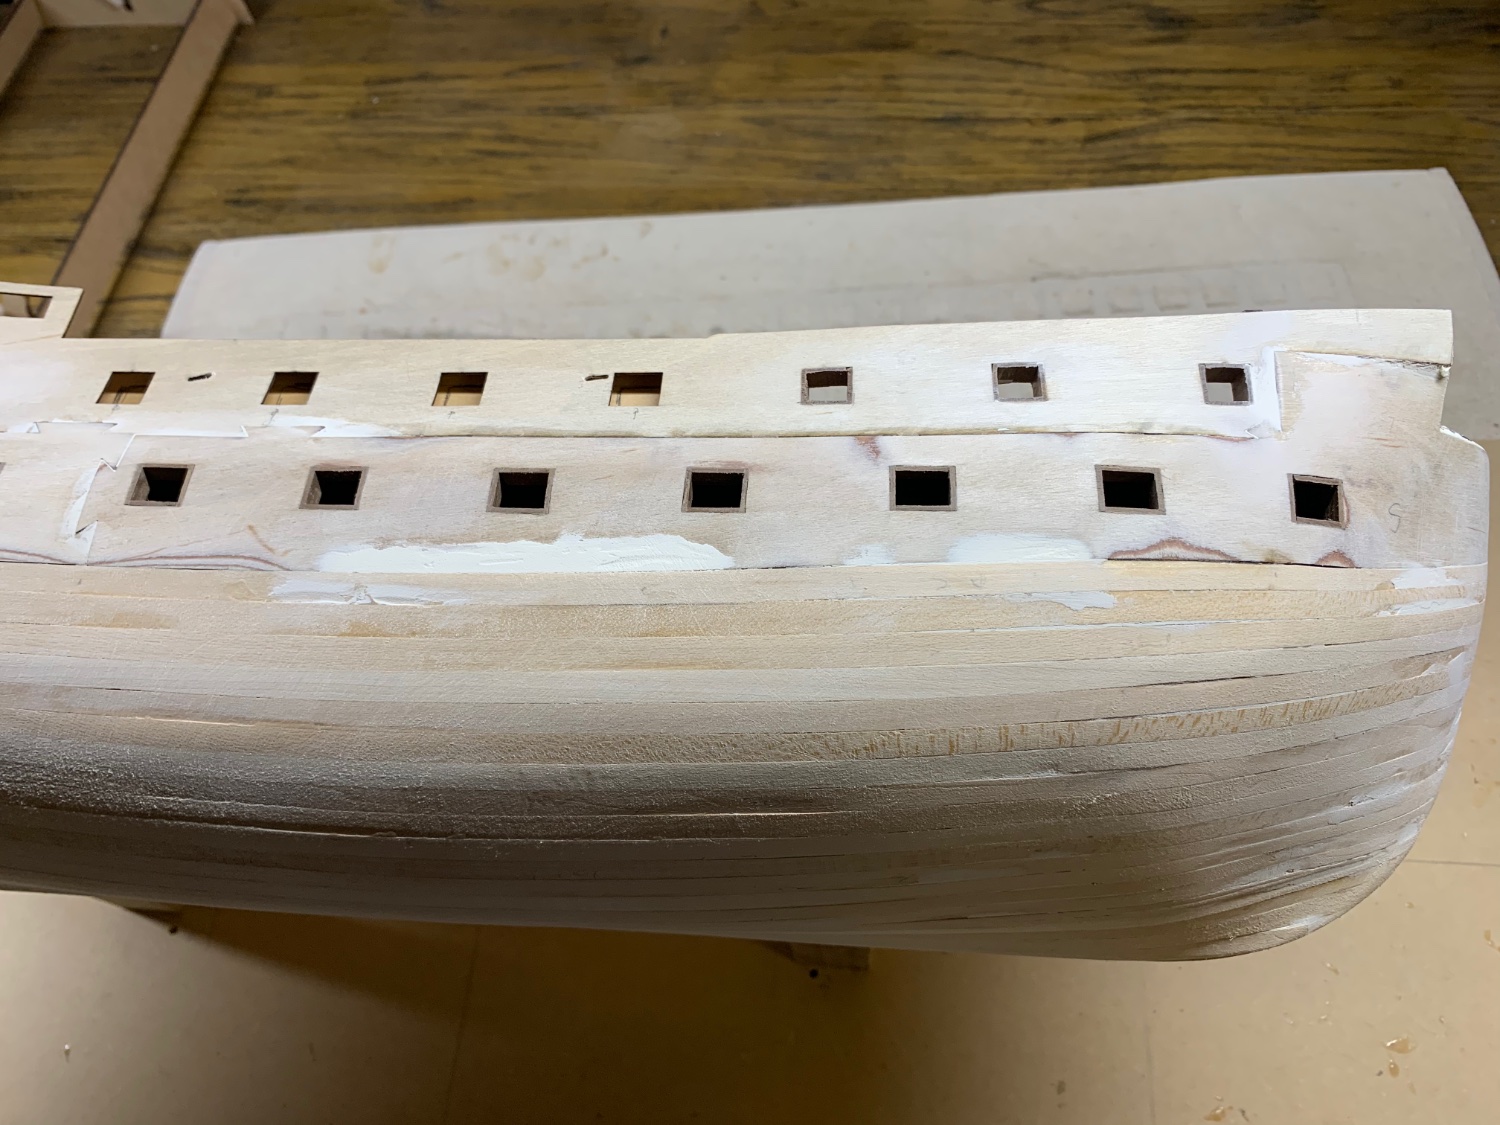
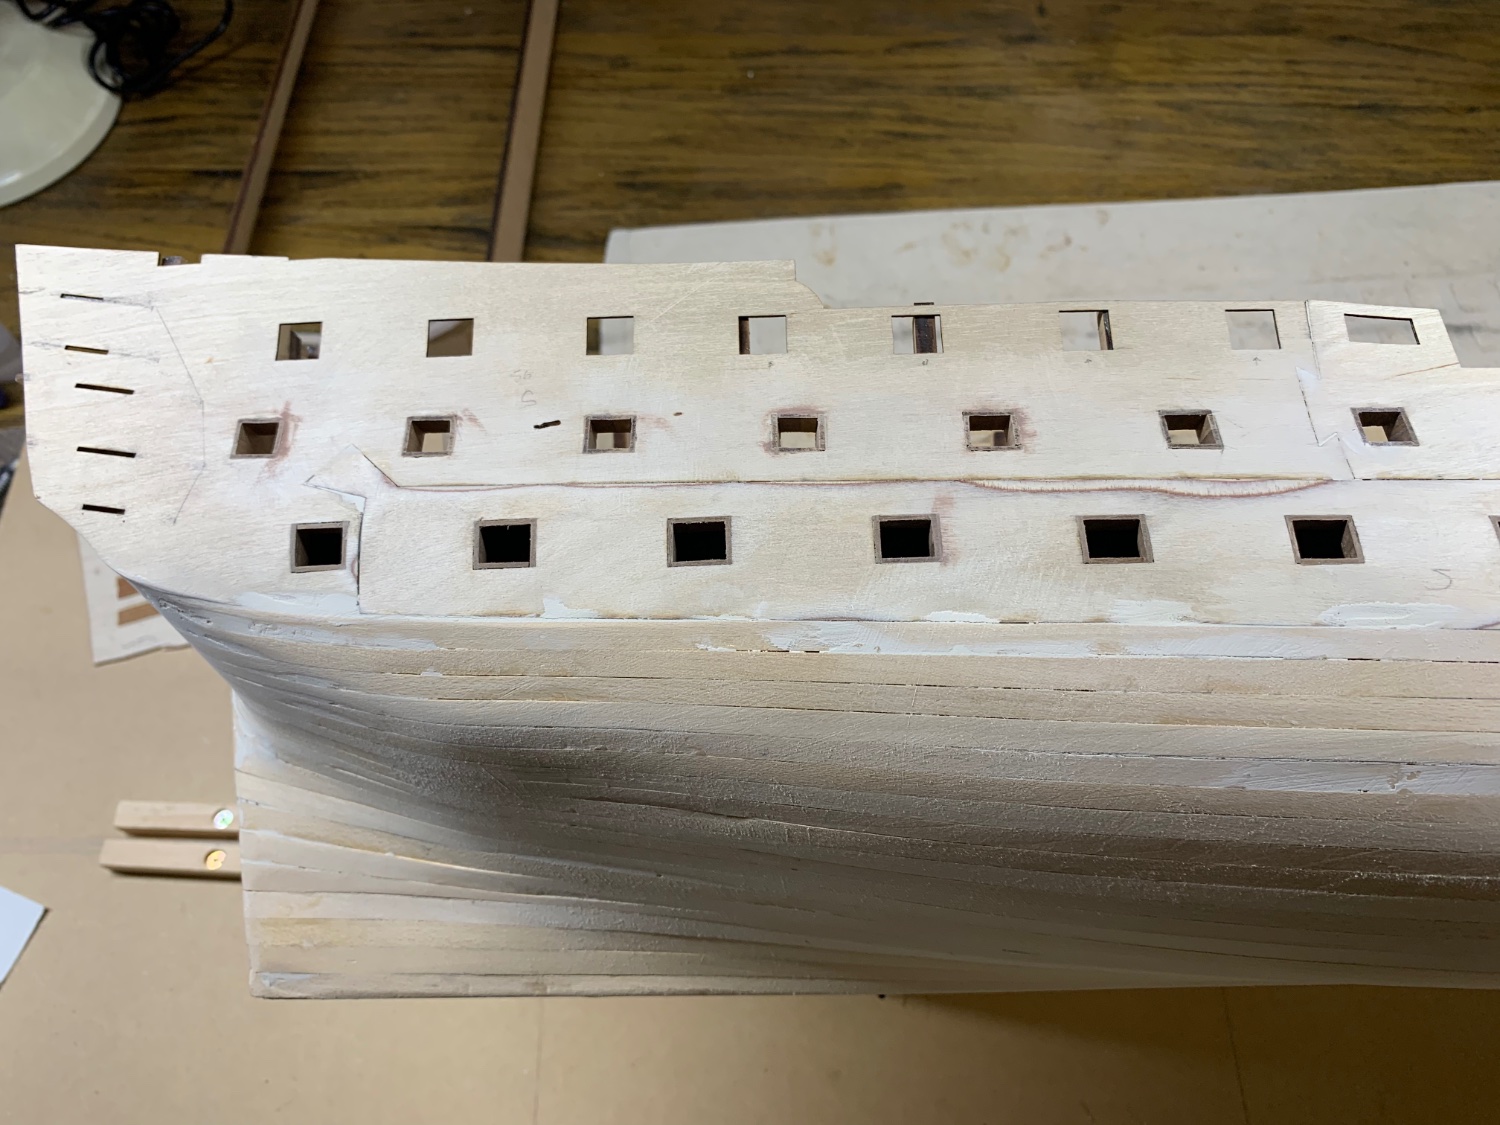
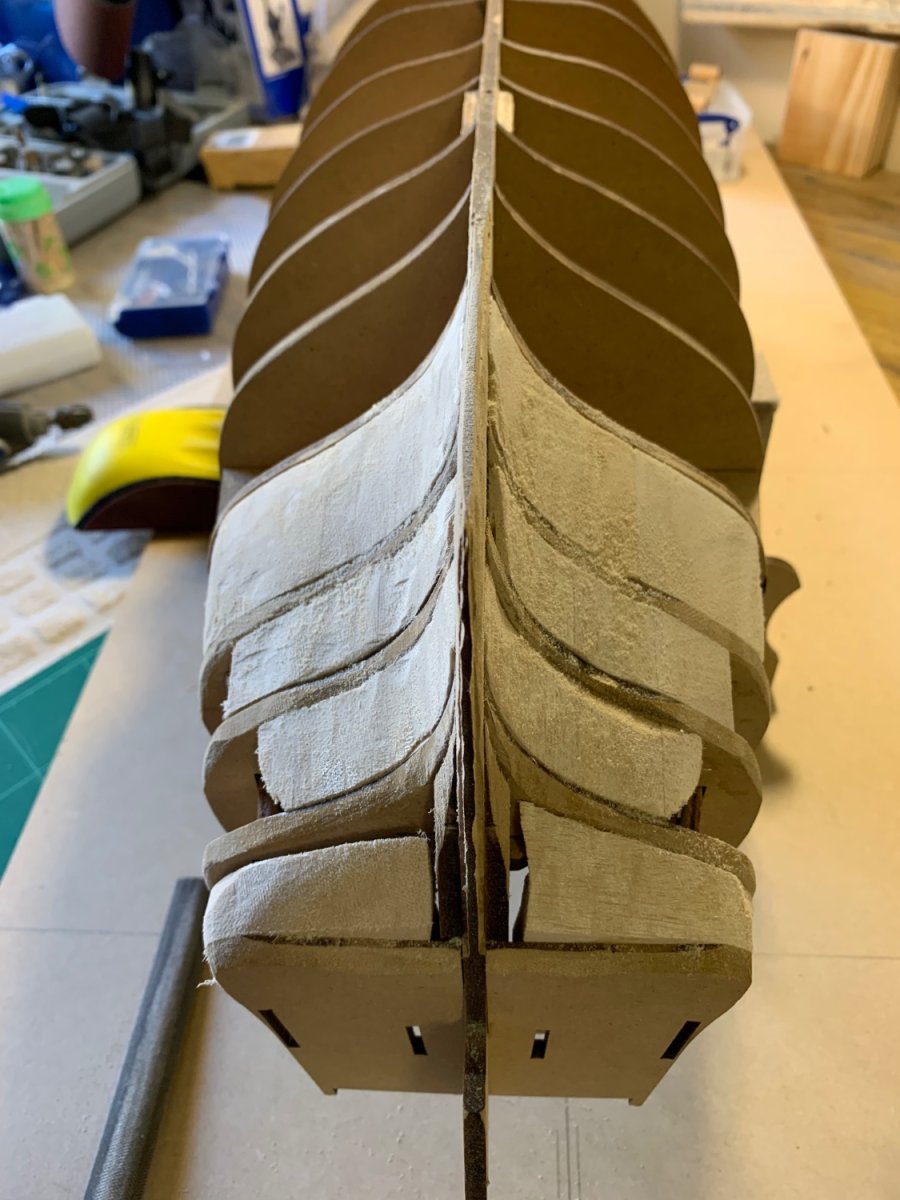
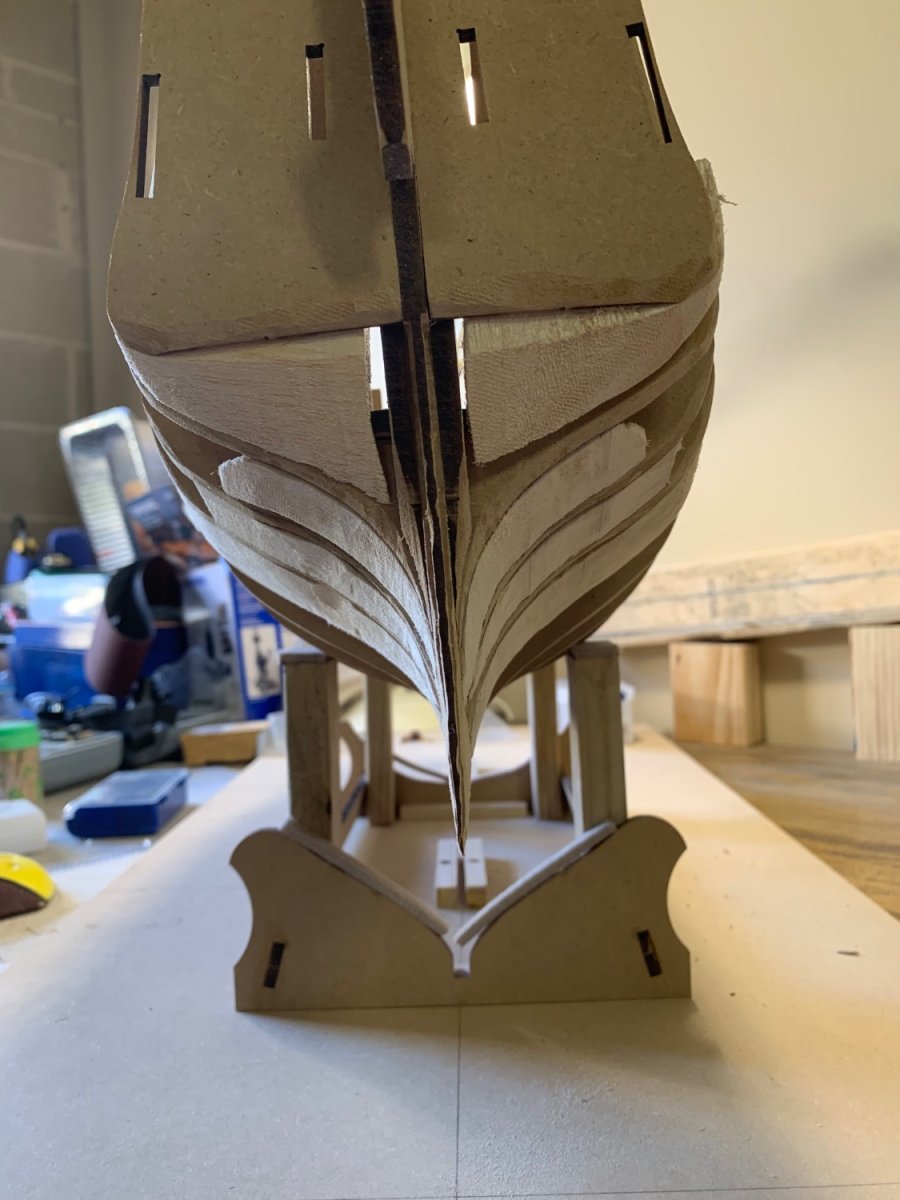
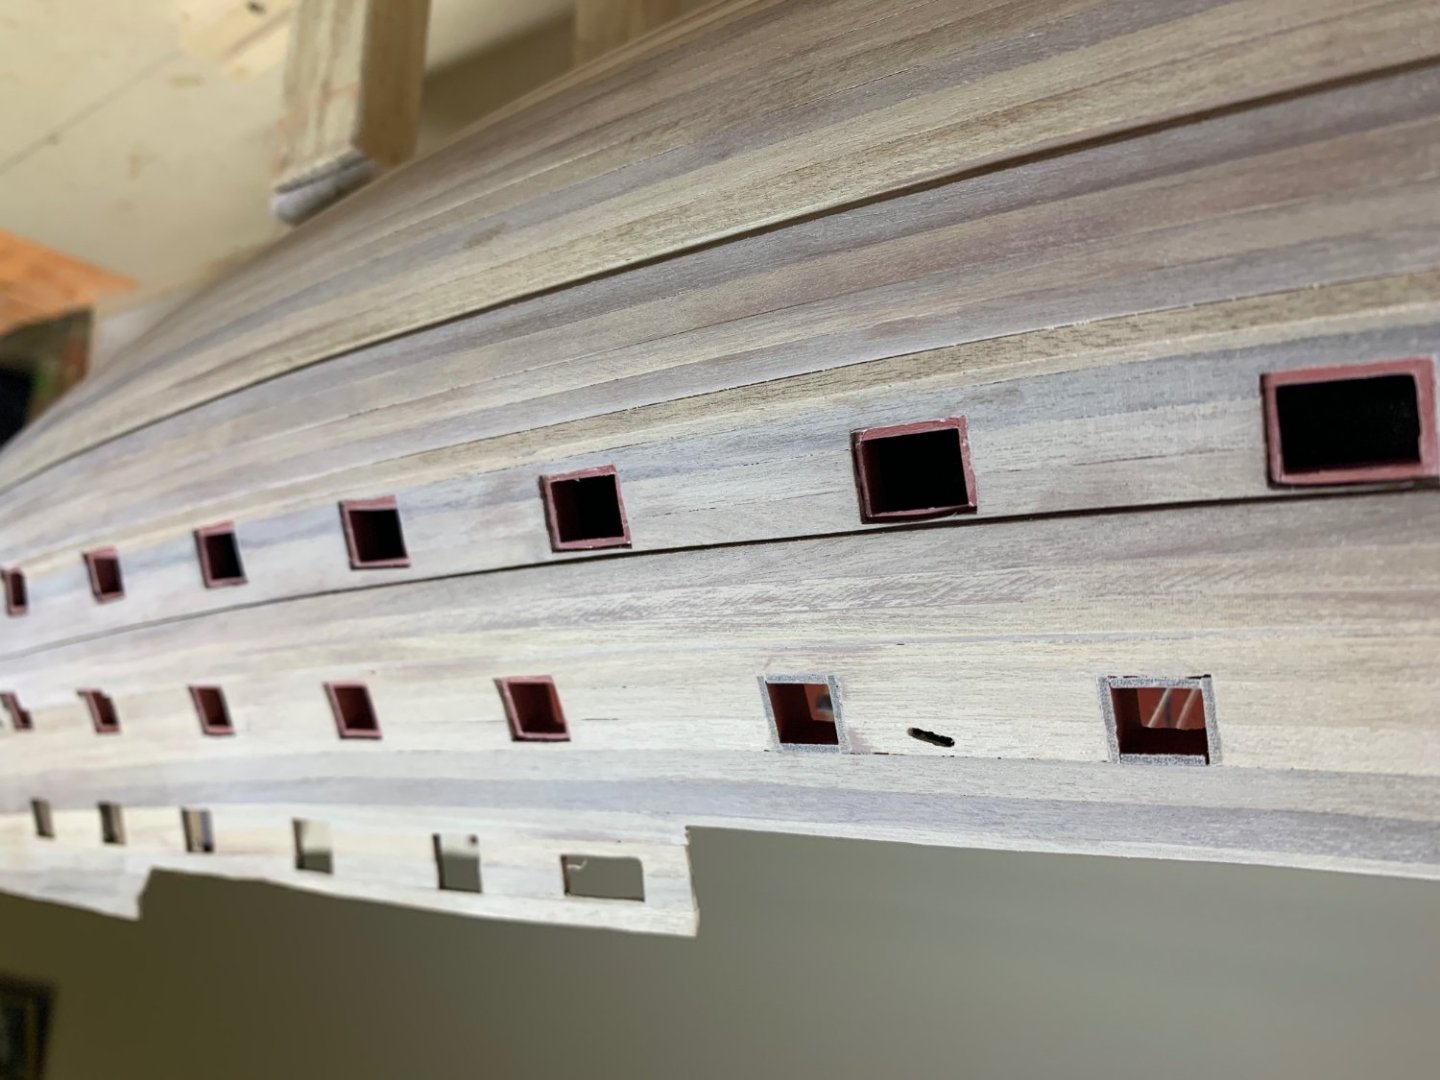
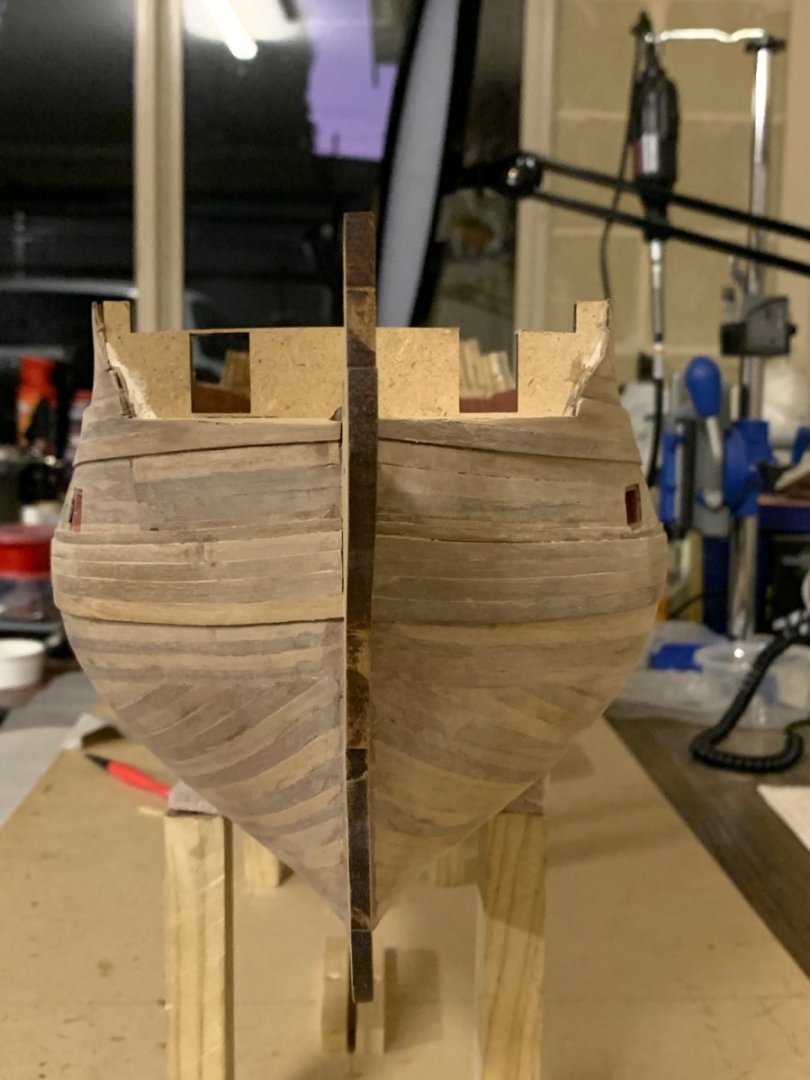
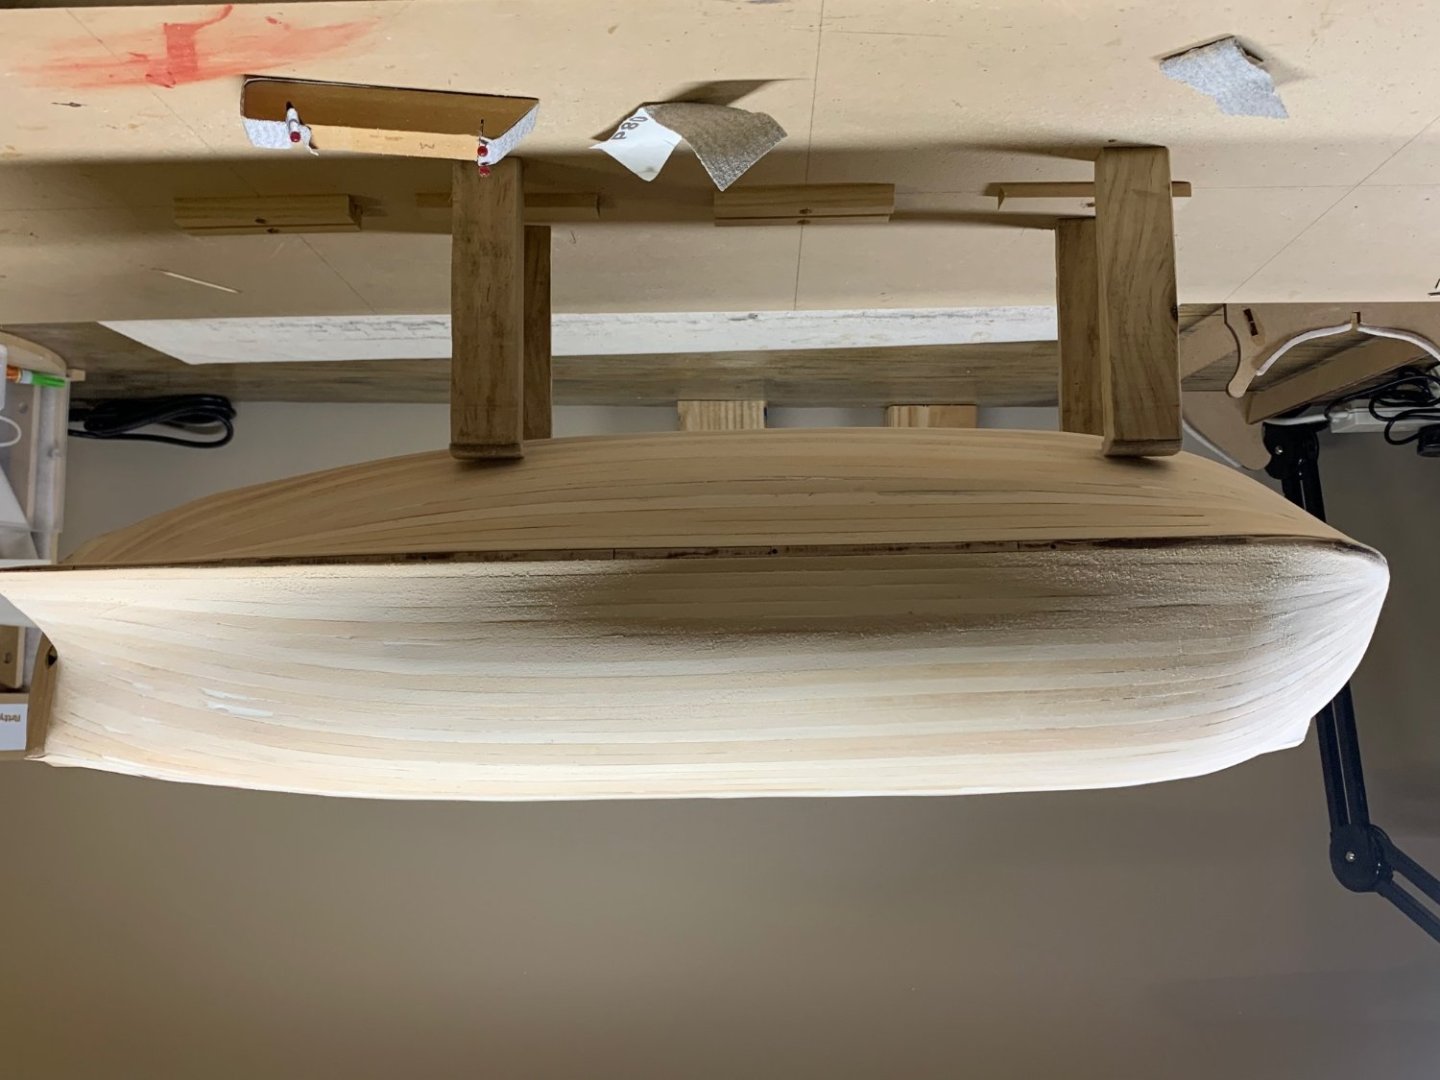
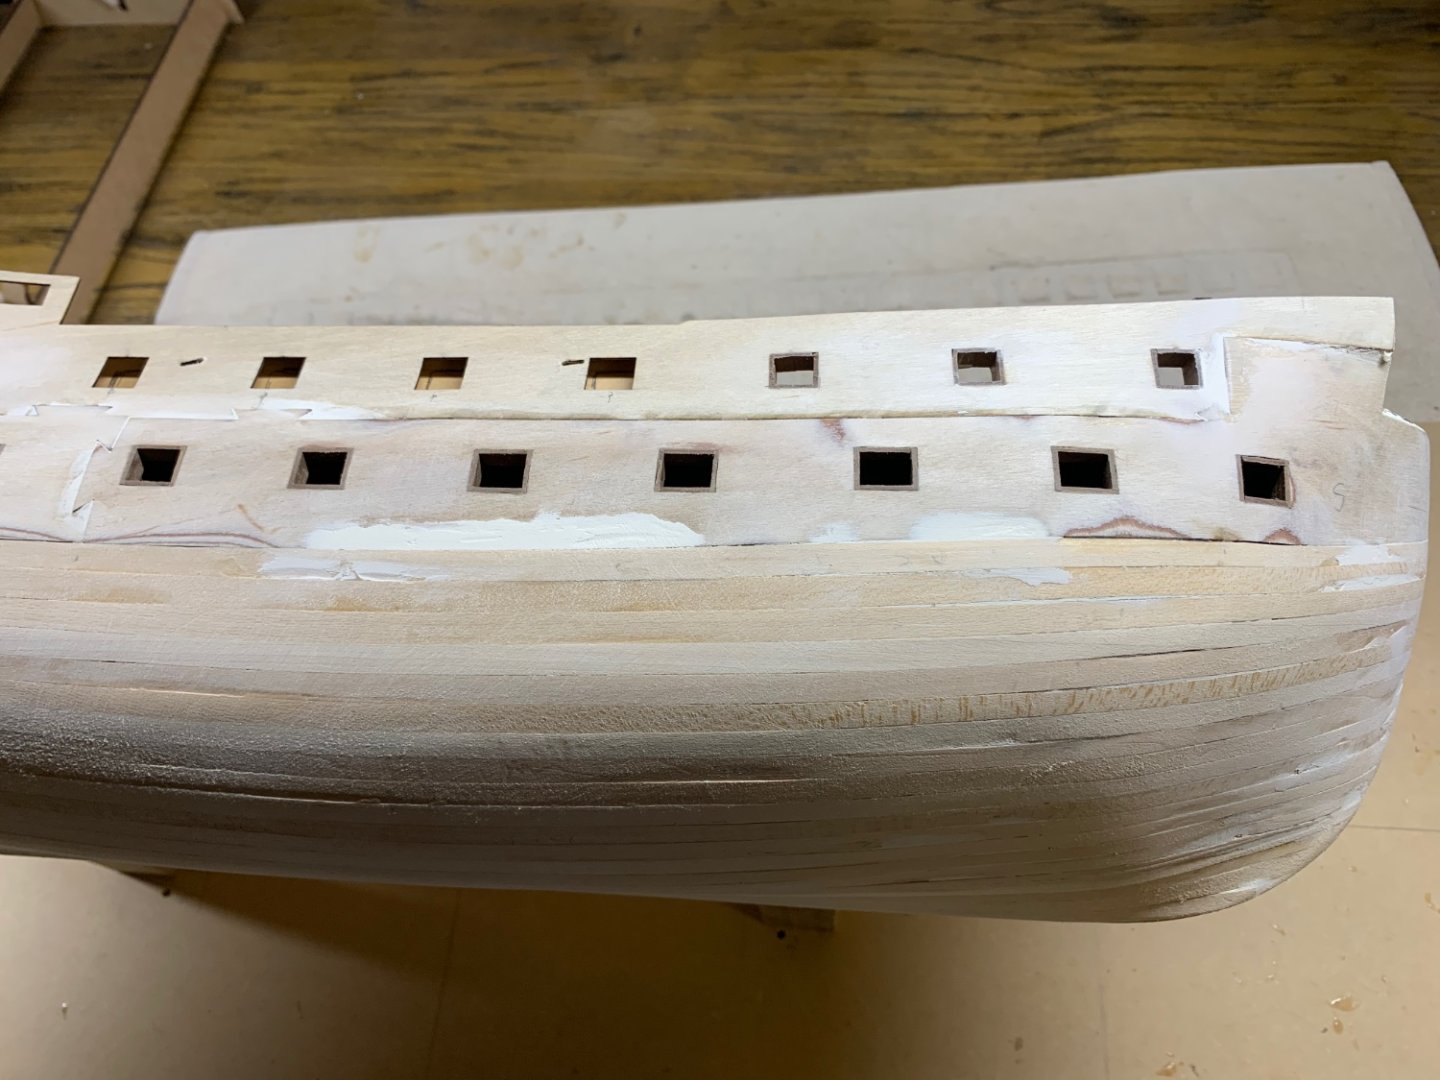
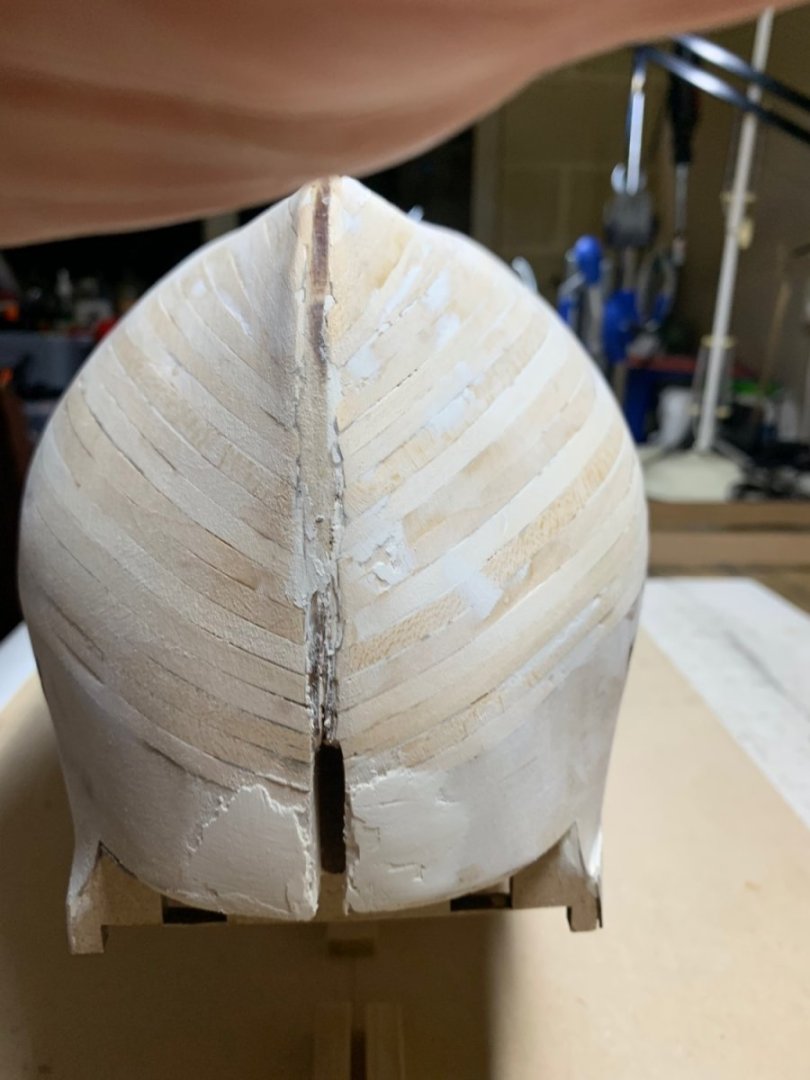
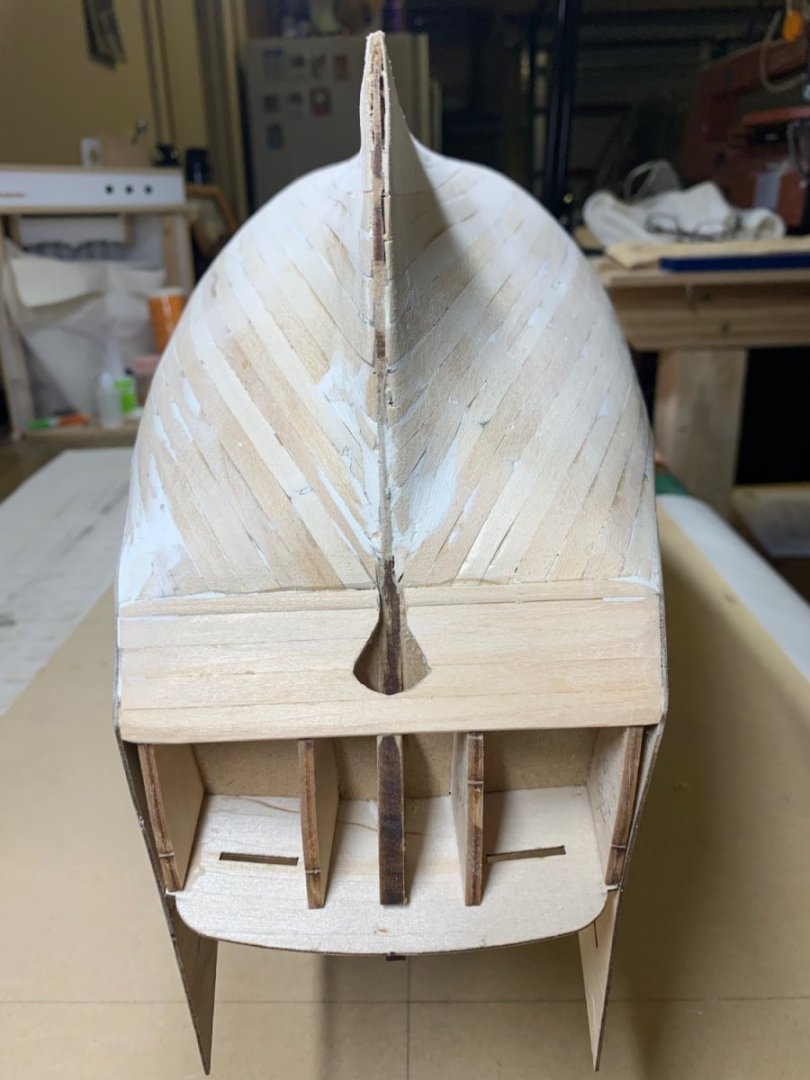
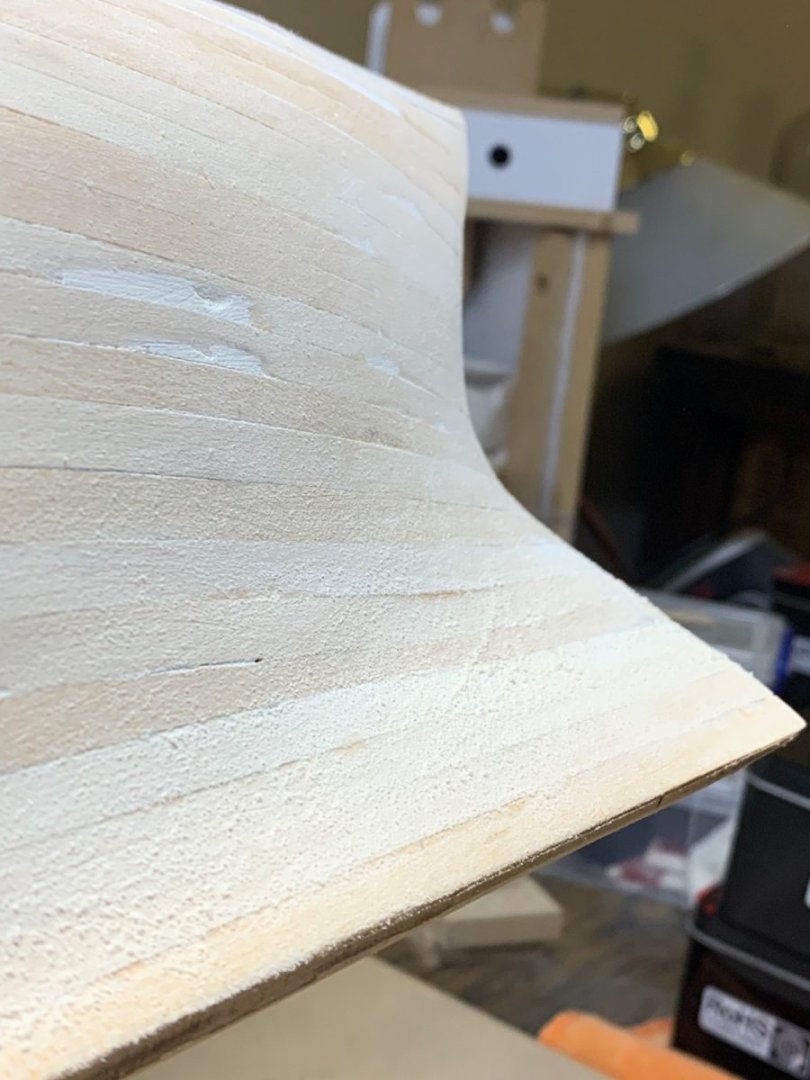
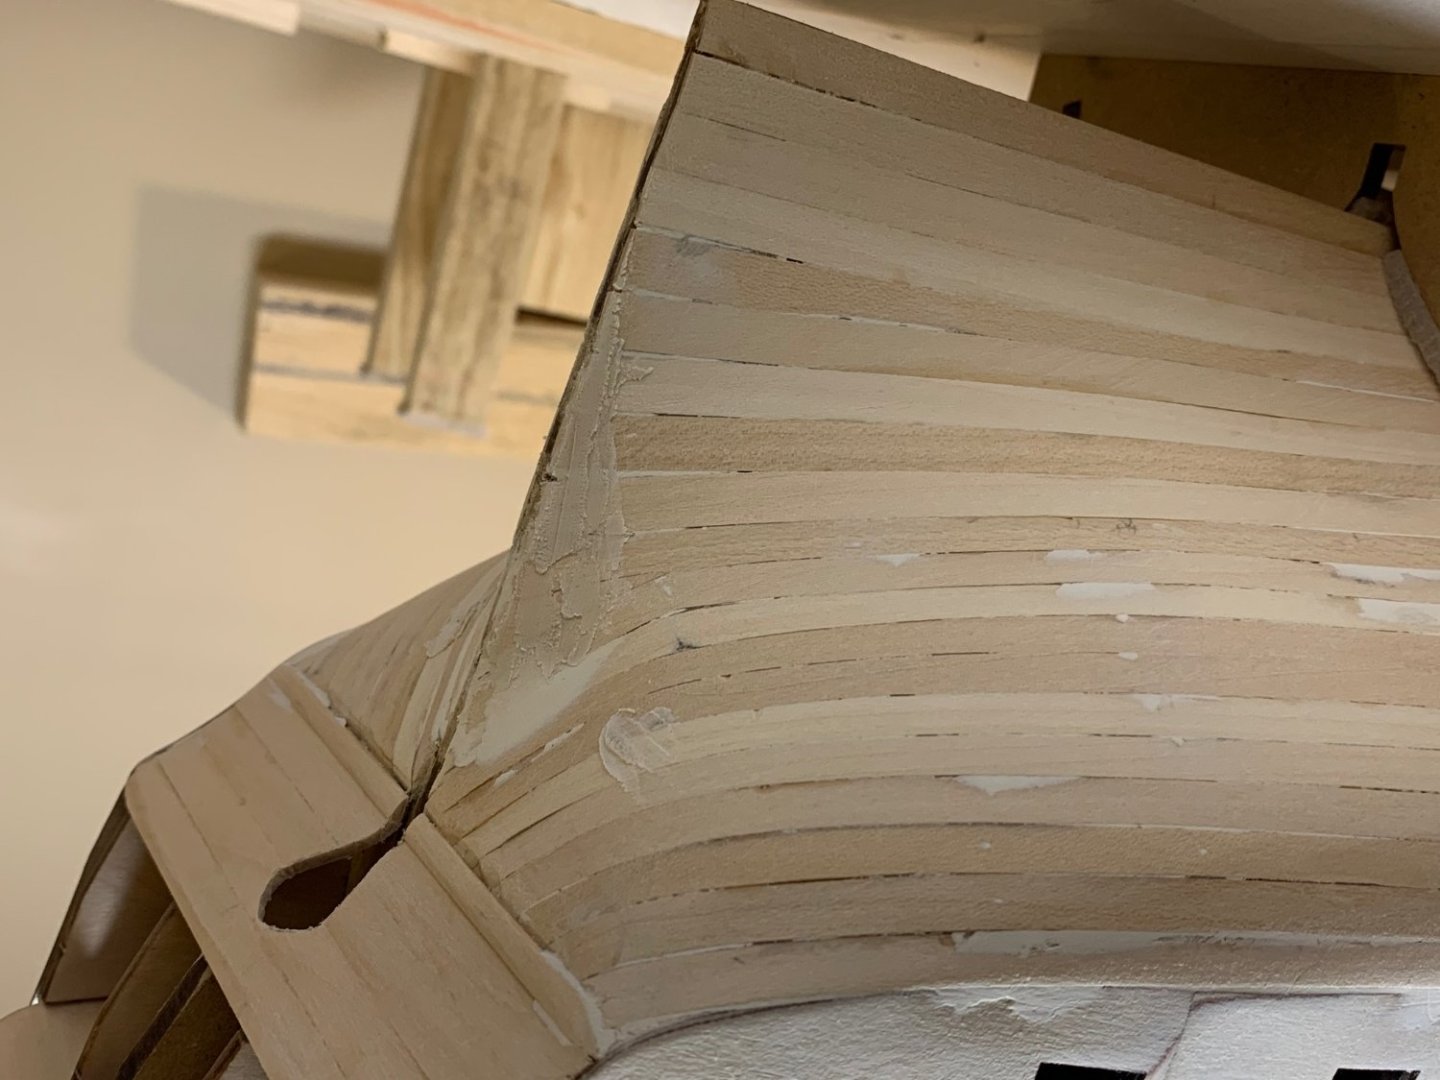
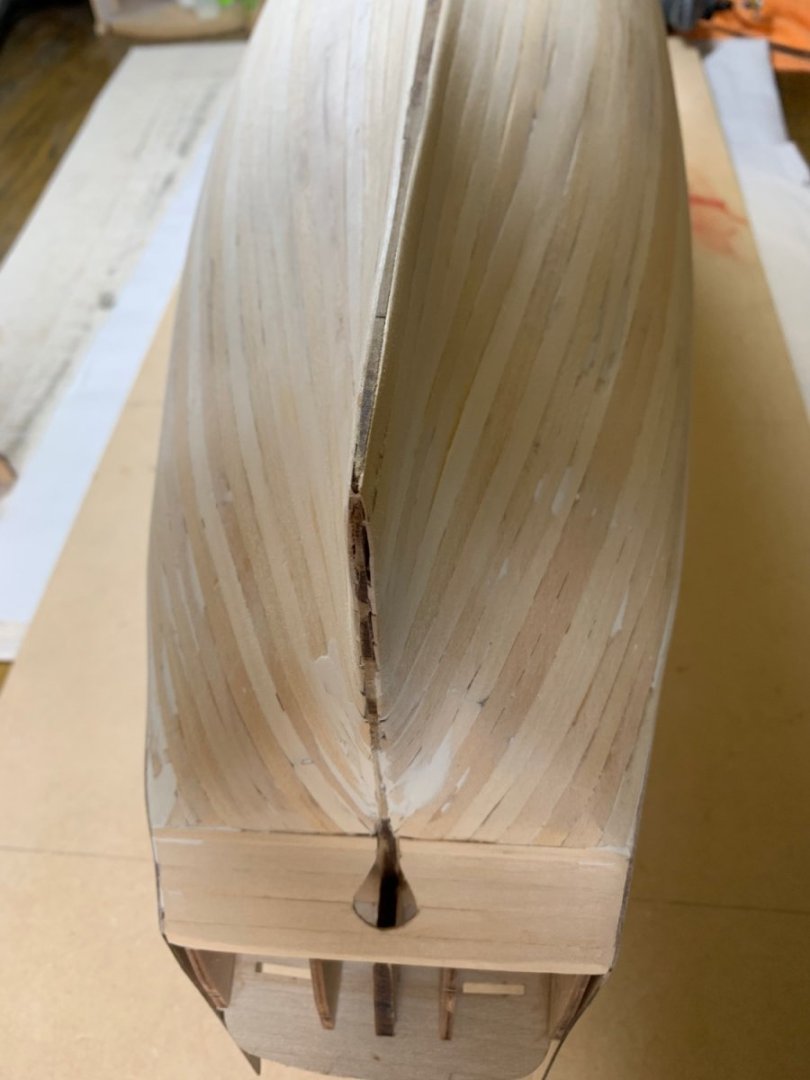
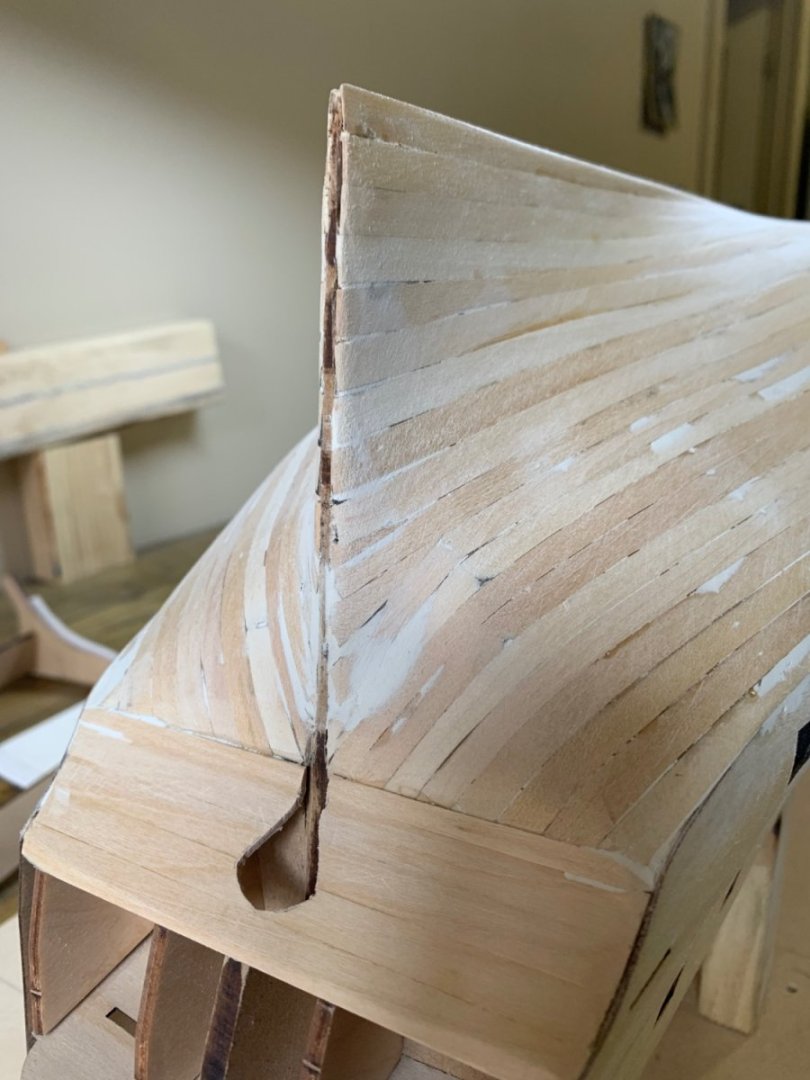
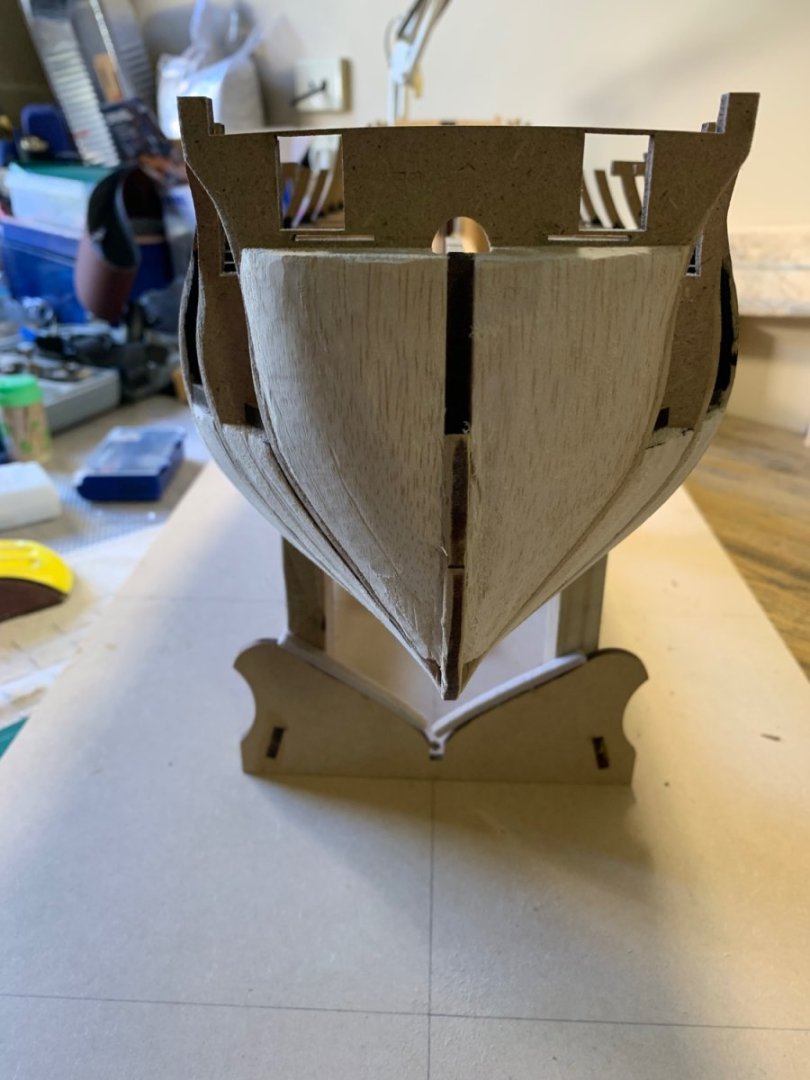
First planking done. The stern area is challenging. The lower counter fell apart after soaking and bending, so I replaced it with lime wood strips. Sanding and filling at present. Trying to get a smooth hull that seems good enough is elusive. I need to use all my senses and look in light fro different angles to pick the high and low spots. Planking the gun ports with lids to get them recessed before 2nd layer planking. Tried making tubes but wasn’t happy with the squaring and cutting caused breakages. Did them with vertical sills the horizontals which were press fitted with finger pressure to get a good seal. Planning to paint them all before second planking. Sorry if some of the pics are upside down. I don’t have a computer to fix them.


-
 Chestcutter reacted to a post in a topic:
HMS Vanguard 1787 by Chestcutter - Victory Models - 1:72
Chestcutter reacted to a post in a topic:
HMS Vanguard 1787 by Chestcutter - Victory Models - 1:72
-
Chestcutter reacted to a post in a topic:
HMS Vanguard 1787 by Chestcutter - Victory Models - 1:72
-
Thanks for the feedback Peter. I have enjoyed your Bellerophon build log, and use it to help guide my journey amongst some other great Vanguard logs. I will try to manage my photos with the computer in future, as I see the use of mobile devices has this inversion bug thing. Thanks for the tip on painting etched brass parts. I have very little experience with painting and am appreciative of any tips and suggestions. I am currently waiting on an order for etch primer https://www.metrohobbies.com.au/products/sms-plp04-etch-primer-50ml?currency=AUD&variant=31872588742741&utm_medium=cpc&utm_source=google&utm_campaign=Google Shopping&gclid=Cj0KCQjw7KqZBhCBARIsAI-fTKLfhUY3jMVNTXO-xwZTxMSMU7jCaYdMu31iRDxcF4ZPhvu0bLWpHY0aAi3-EALw_wcB&gclsrc=aw.ds from an online hobby source. I am planning to use an airbrush where suitable.
-
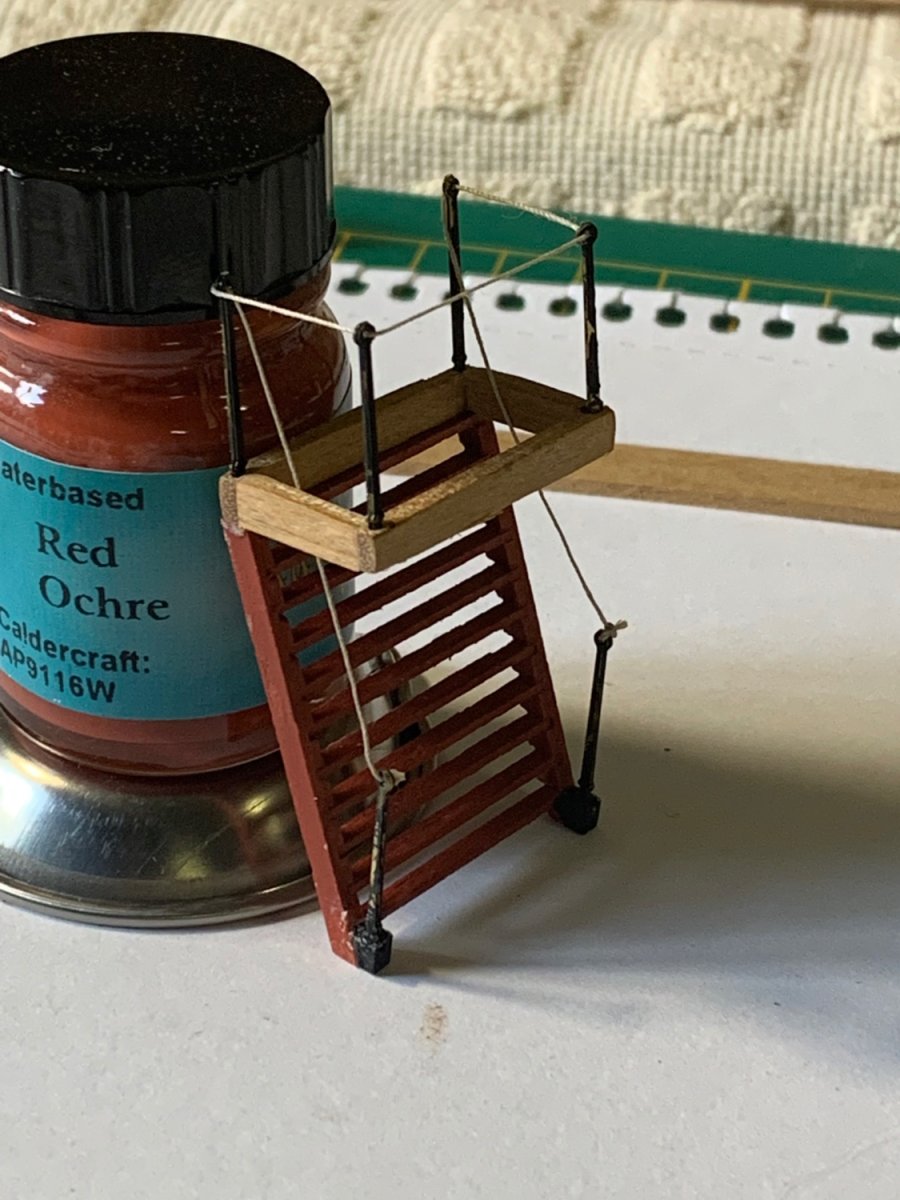
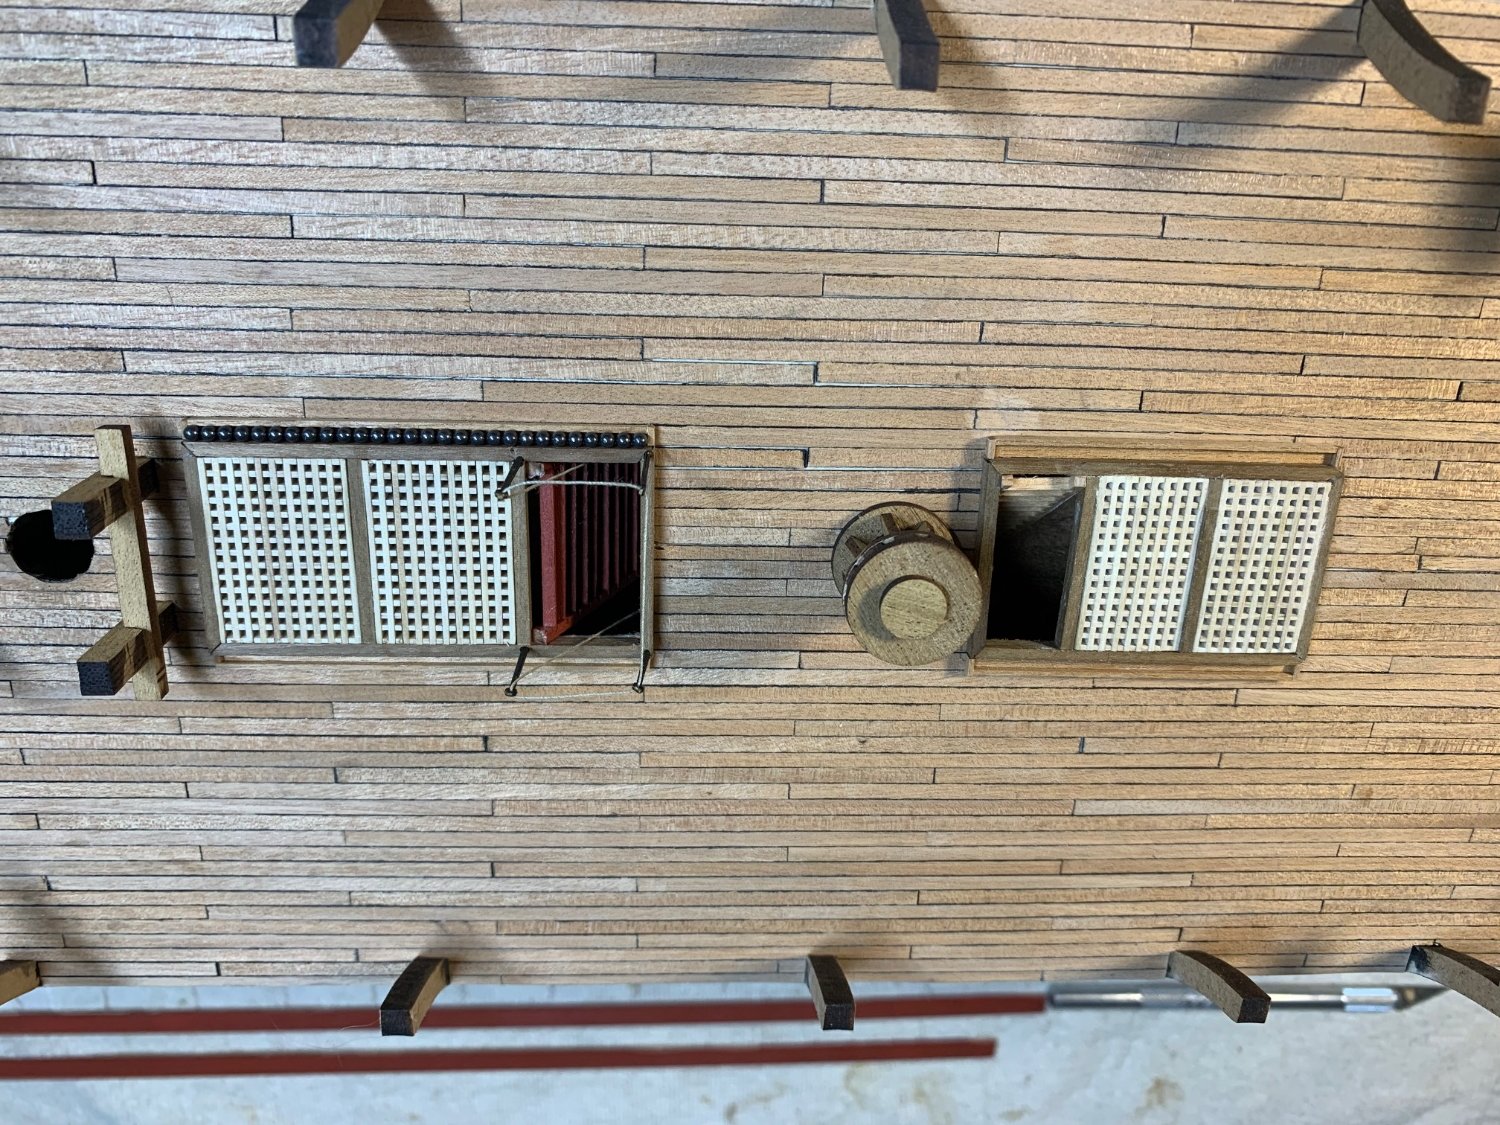
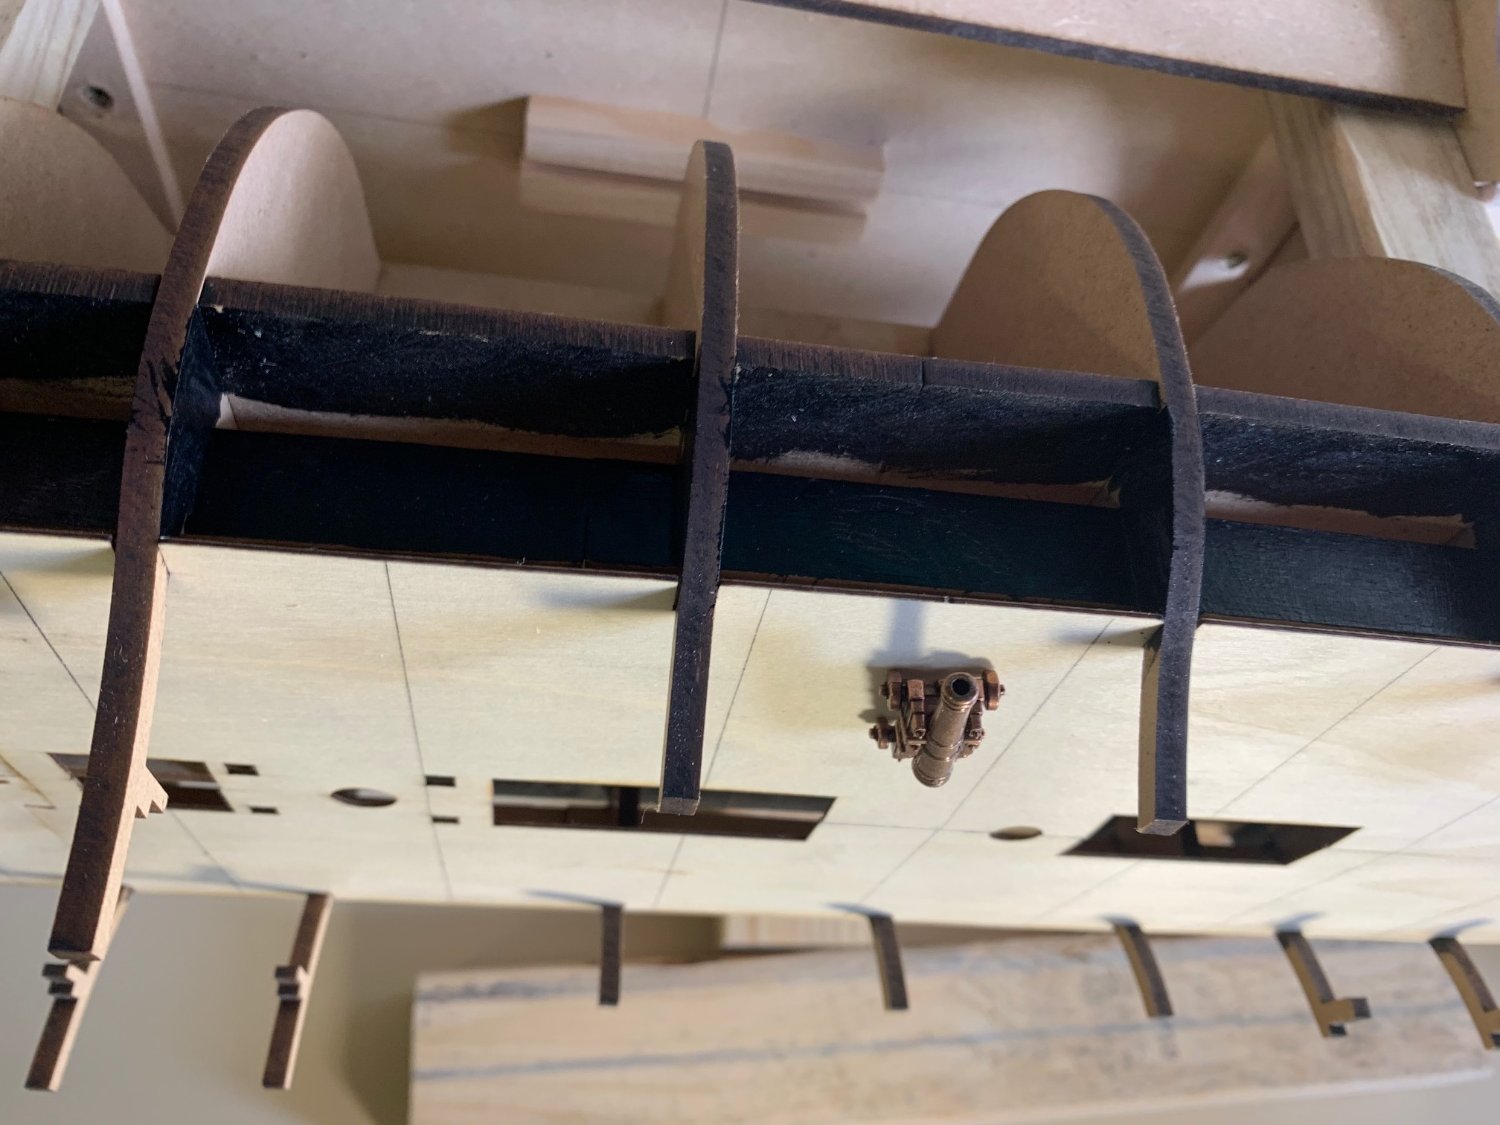
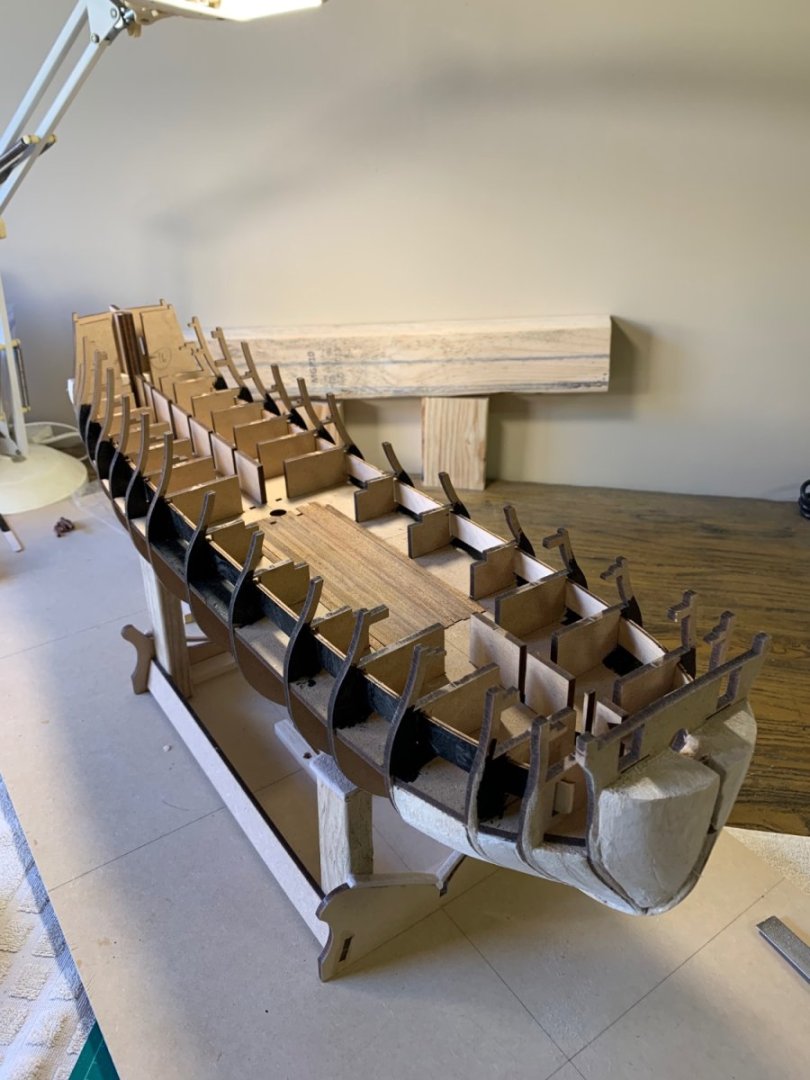
Have finished planking the lower gun deck and the hatchways made. Capstans, oven not painted yet, and shot garlands. planning the inner bulwark planking and preparing the guns.


-
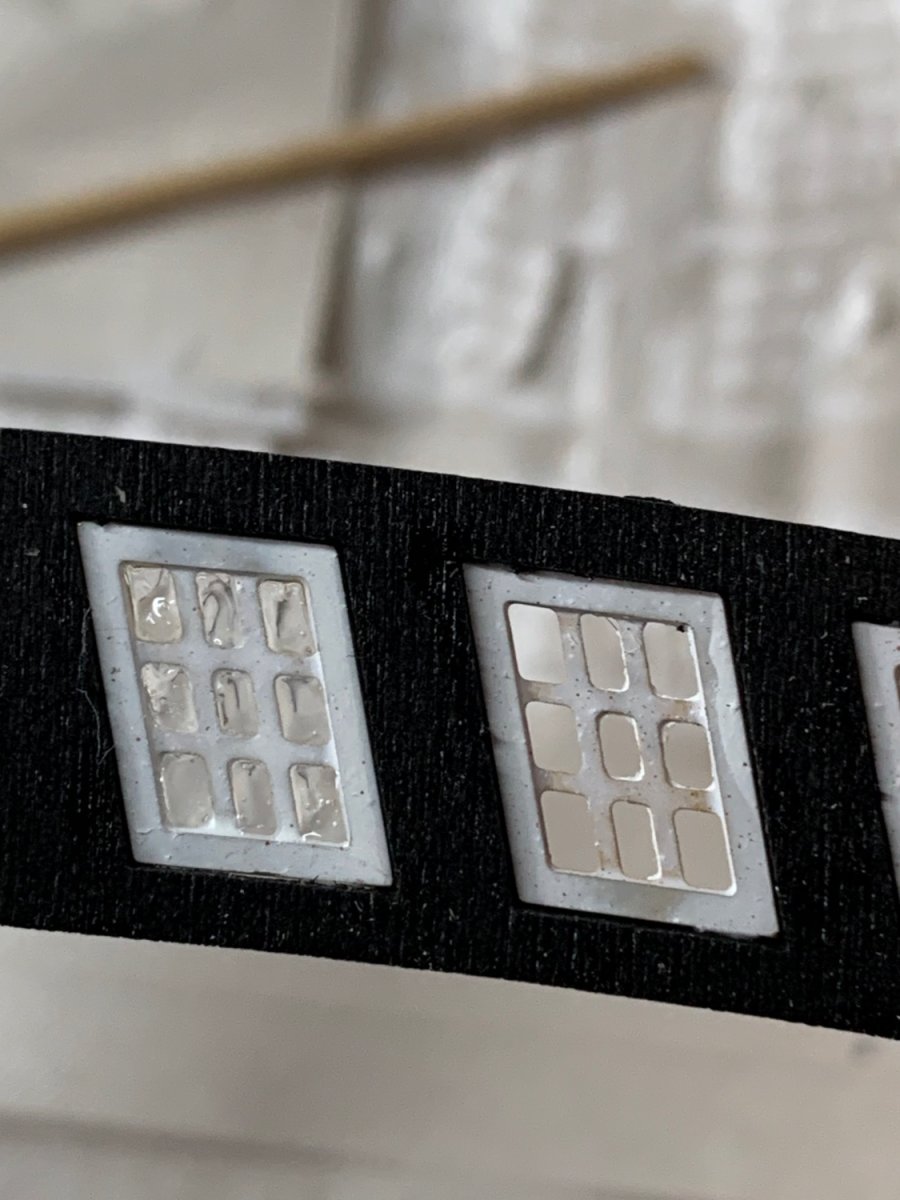
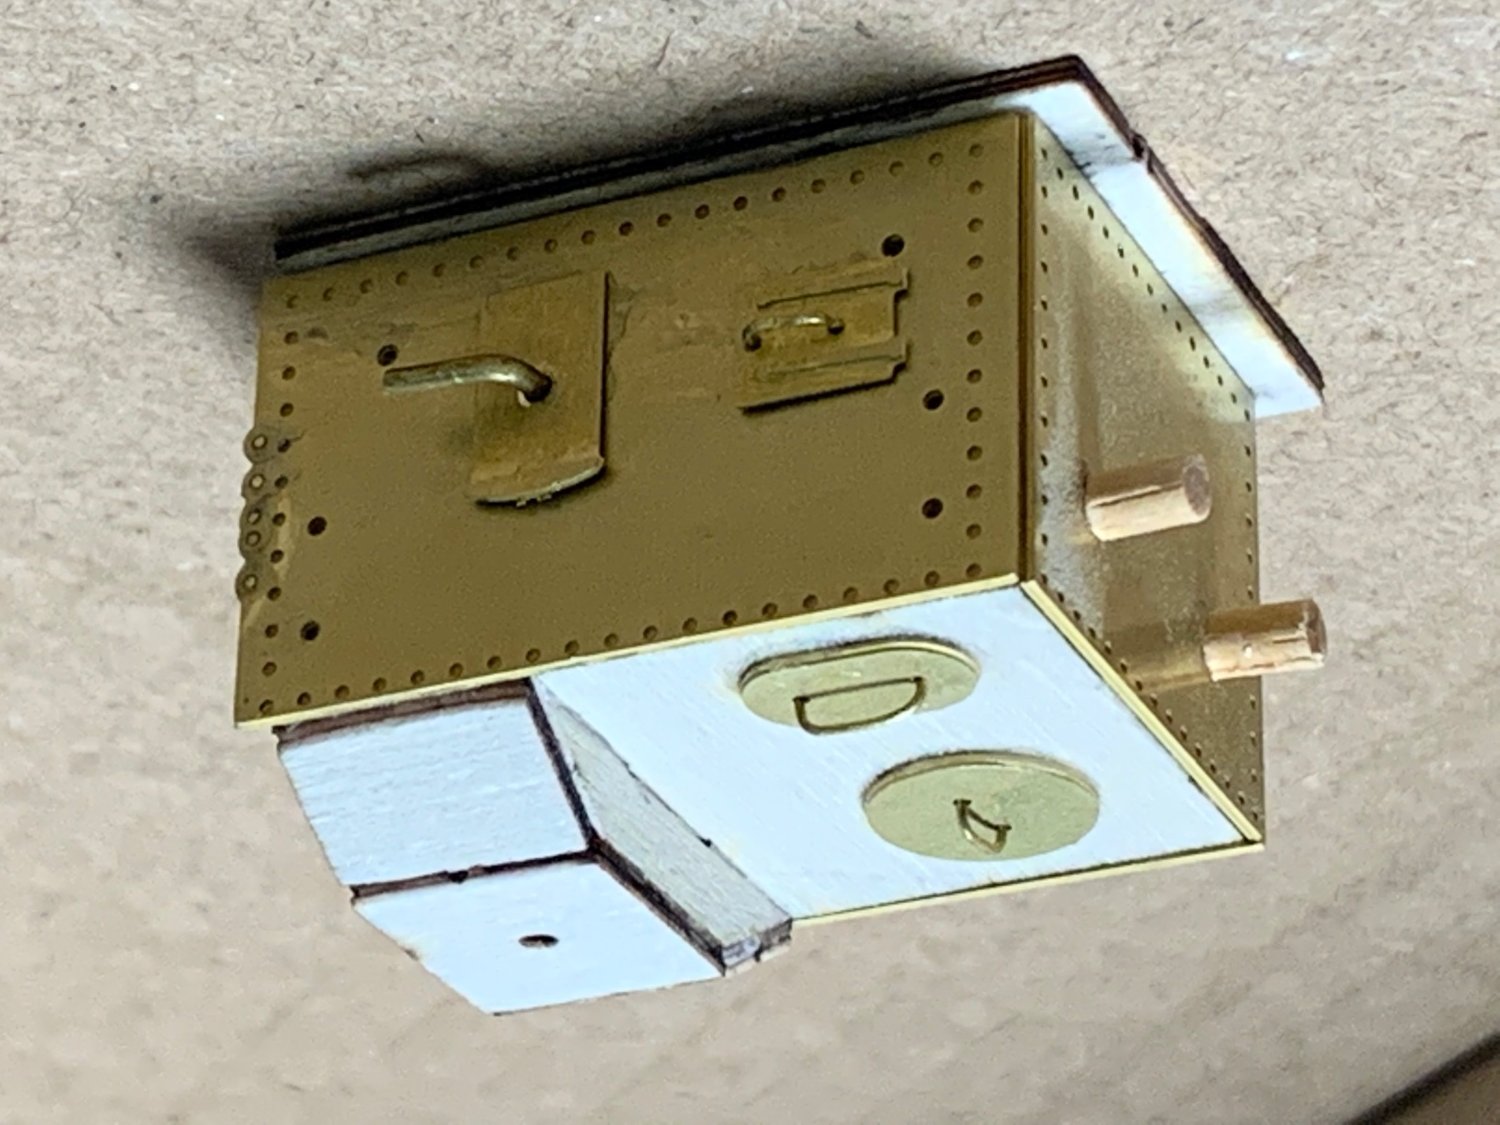
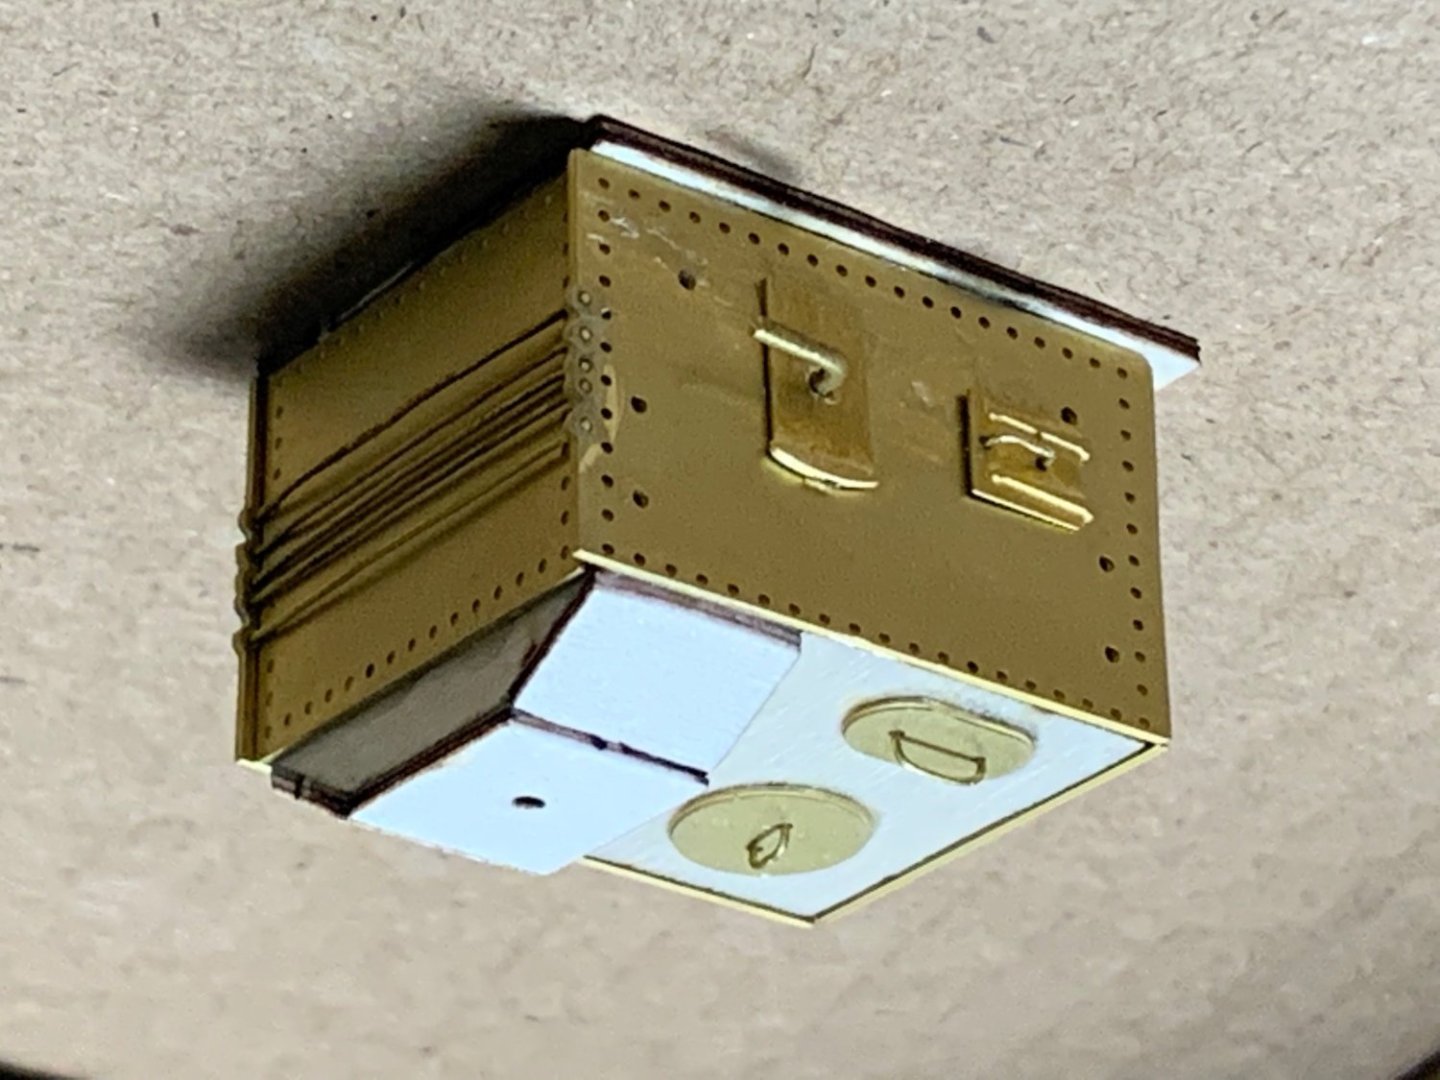
I am looking for some advice from any members on the MSW forums. Have started to build the ship stove for the Vanguard. It has both plywood parts and covered with etched brass parts. The finished stove needs to be black in colour and the details on the brass are quite fine. My question is what is the best way to assemble and colour the parts? Paint first? Paint with brush or airbrush? What is best way to paint the etched brass parts? Do they need a primer? Any recommendations to primers? or Use Blackening acid like the Birchwood Casey Brass Black? Paint after assembly? Thanks for your advice in advance.
-
Thanks Mort. I will probably do this too.
-
Started planking the upper gun deck. I have noticed the first error in the plans/instructions. The larger imaged building instructions indicate planking with 0.6 x 3mm Tanganika, whereas the smaller written instructions say 0.5x3mm. I couldn’t find any 0.6mm, so assume it’s just a typo. others have reported in their build logs that the length of the strips are suggested to be 120mm by the instructions, but I am unable to find any reference to the size of the planks to be used or the jog pattern. I chose 100mm which is easily divisible by 4 to map out the jog pattern on the deck. The instructions recommend sealing the deck with varnish once completed and sanded. Can I ask some advice from others regarding how to glue further fittings to varnished or painted surfaces, I understood that glue doesn’t bond well to treated surfaces. So I am inclined to varnish after deck fittings in place, or should I just tape out the areas where further fittings and glueing will be required?


-
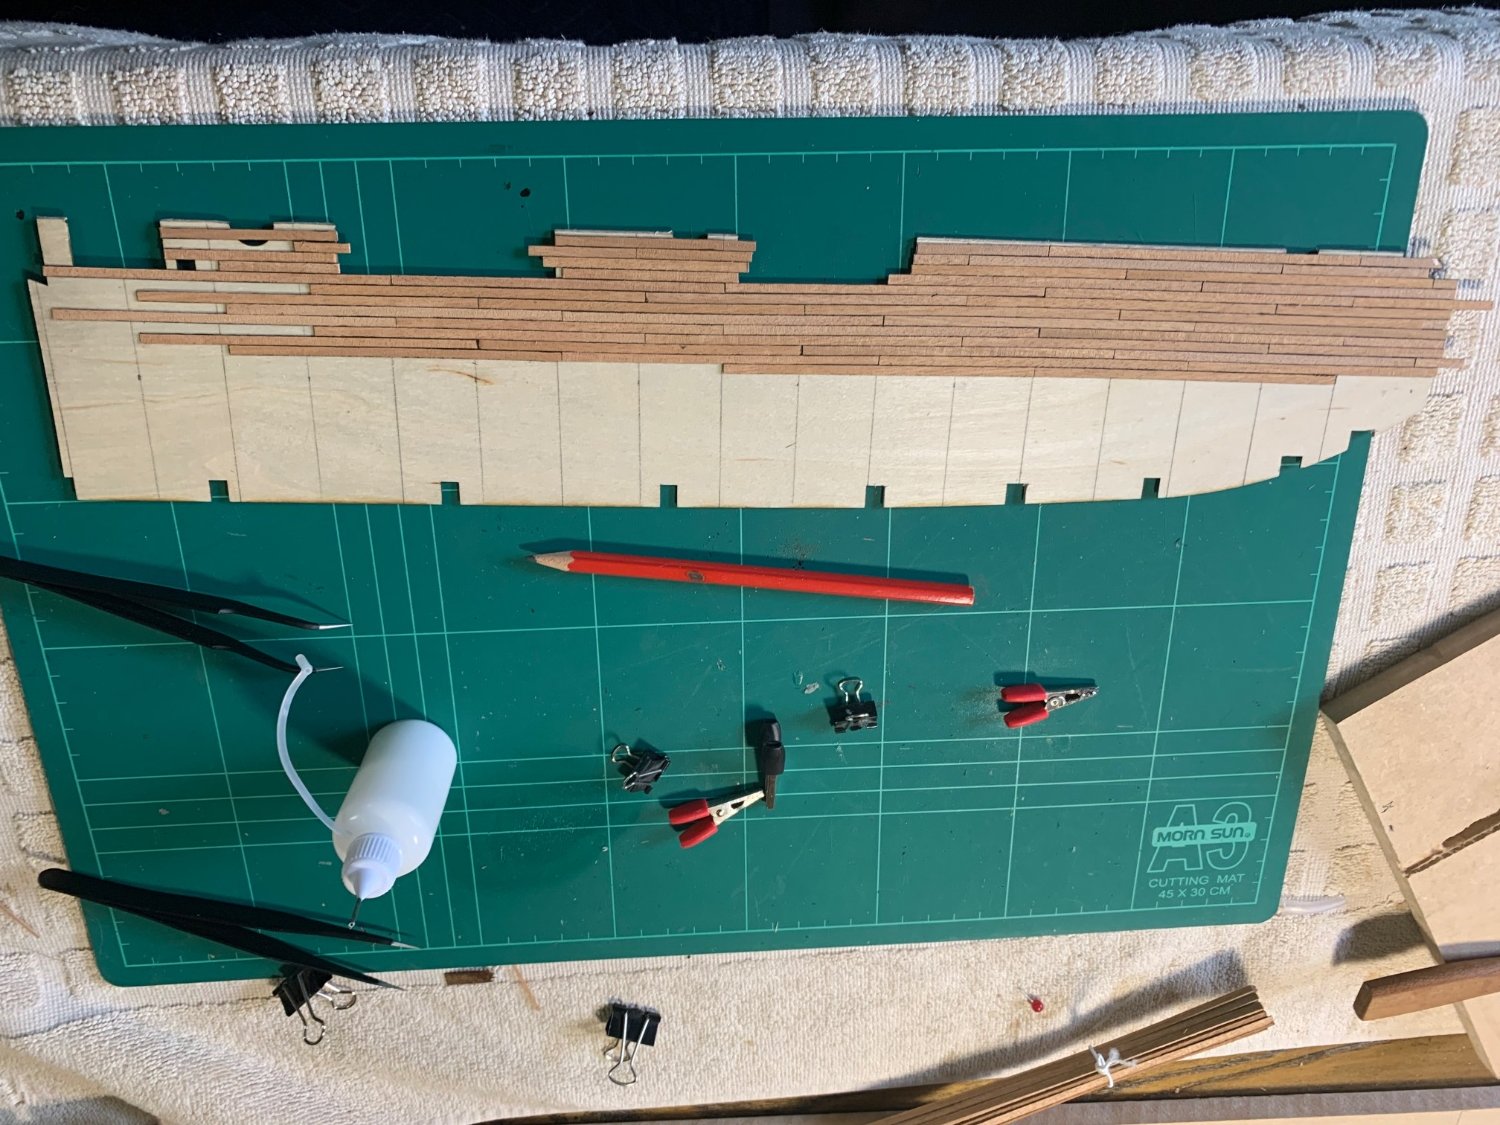
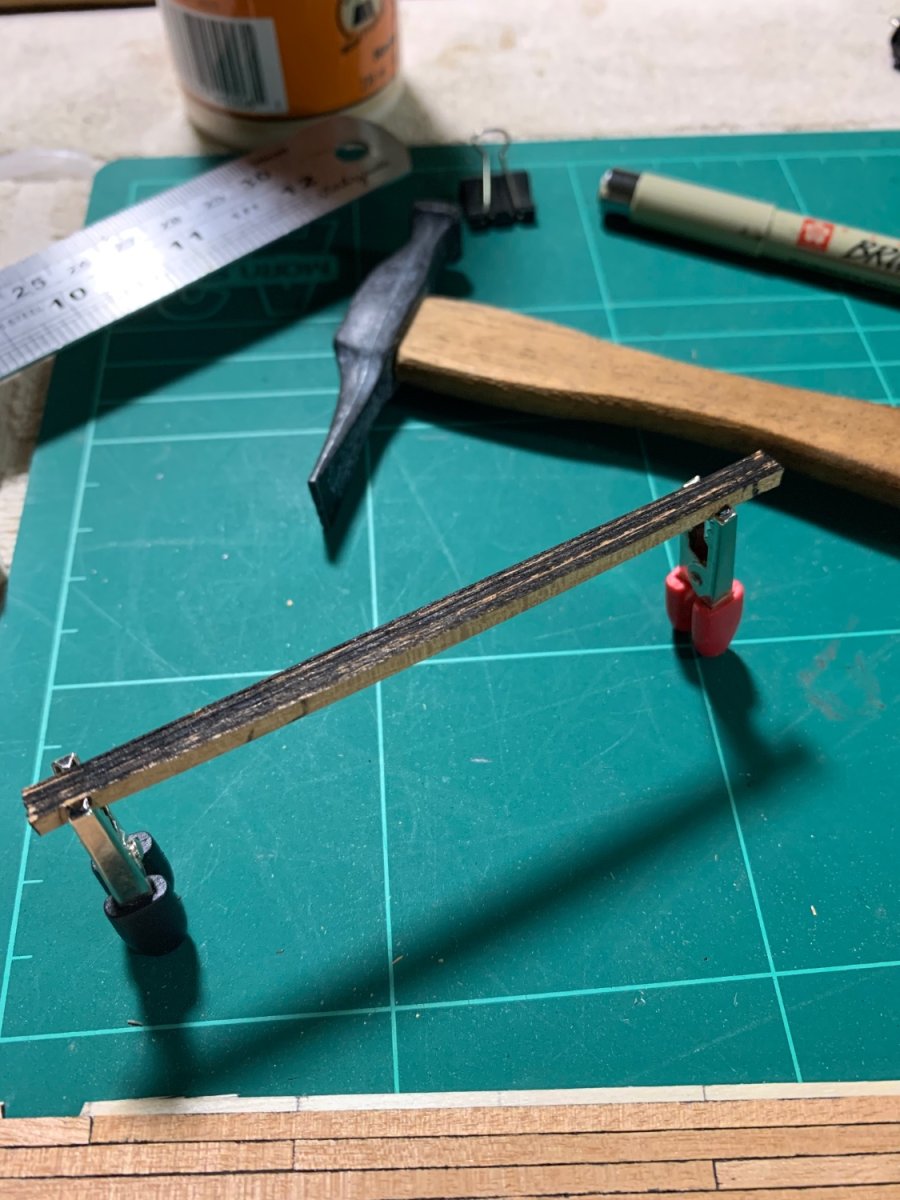
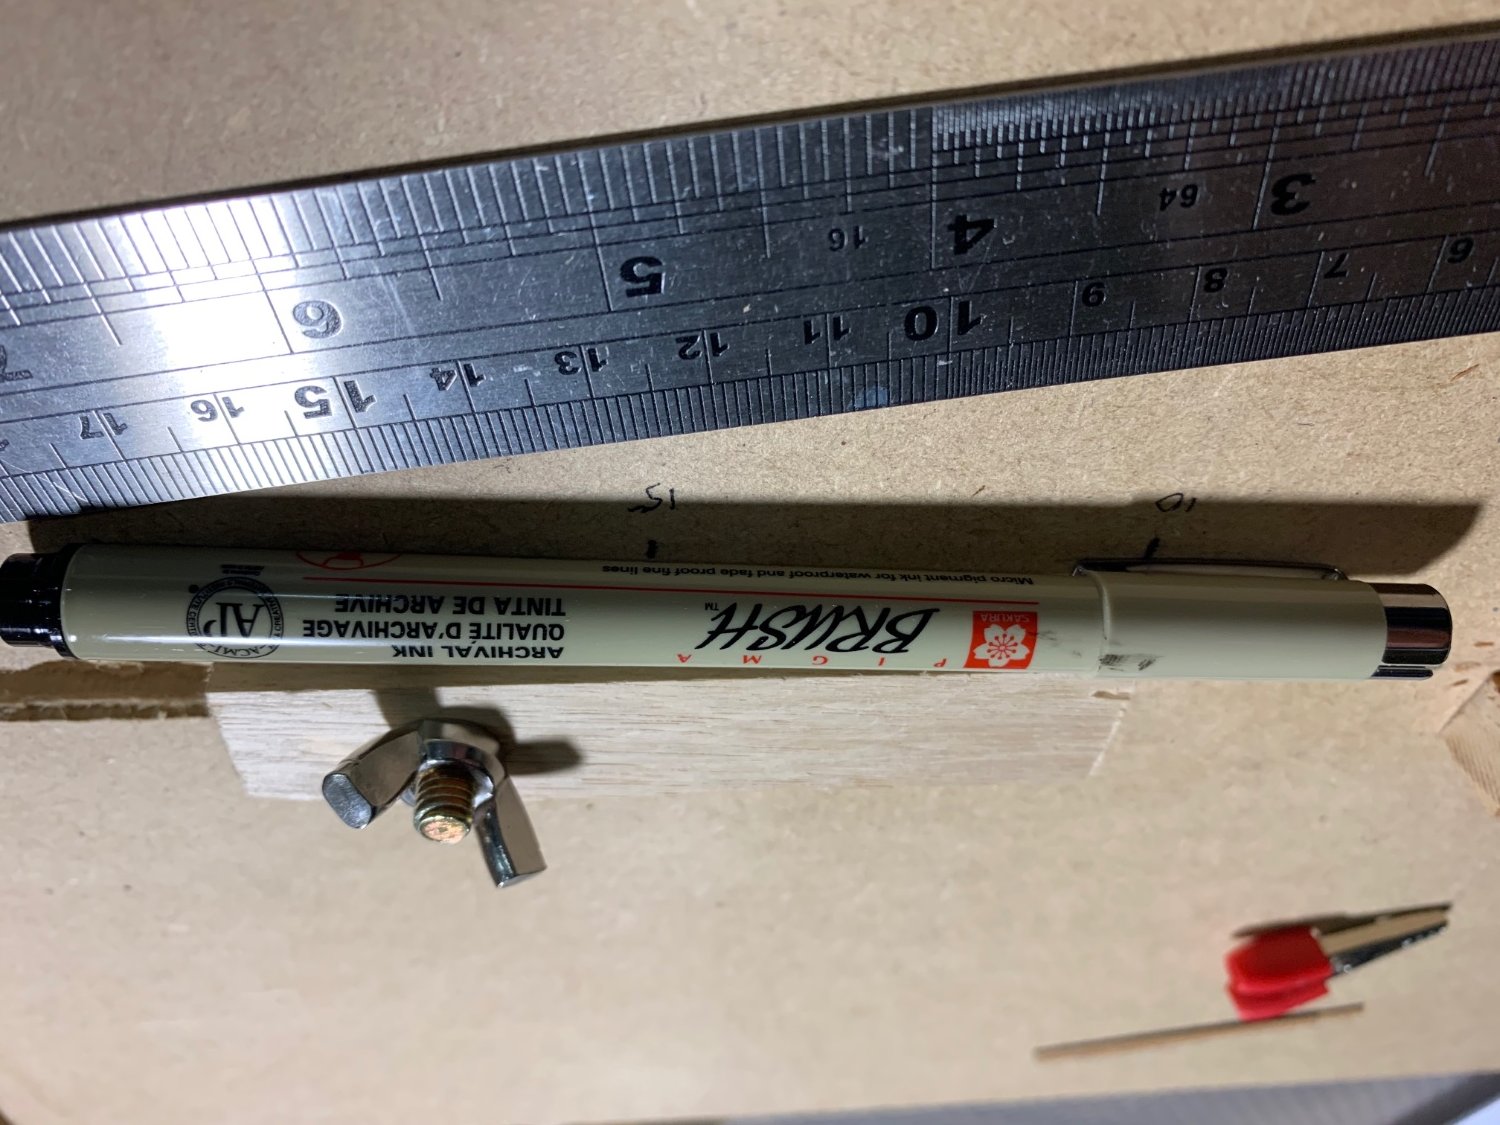
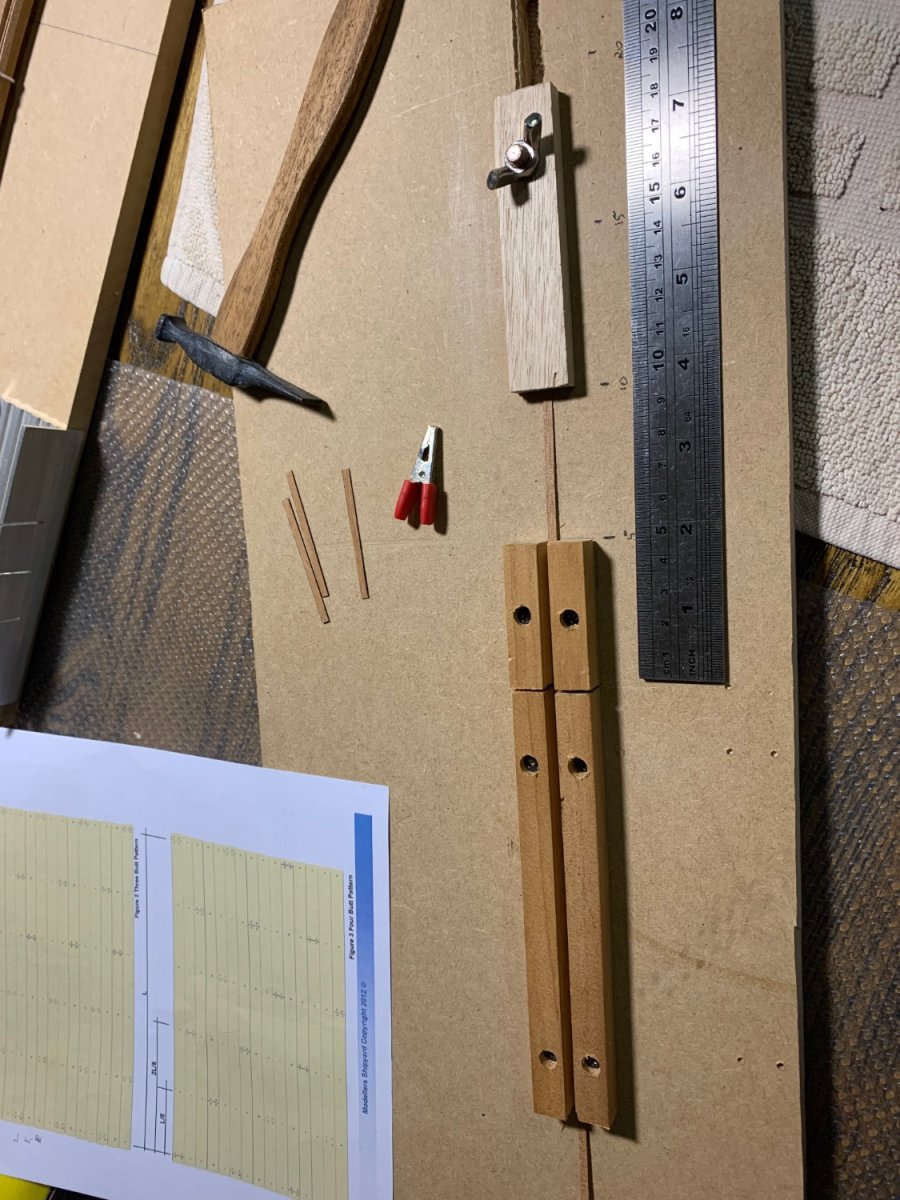
Have added the last bulwark, No 17. Also painted the dummy barrel strips, planked the mid portion of the lower gun deck where it might be visible, and remembered to drill holes for the handrail from the stairway down to this deck before it becomes inaccessible. Have started to get the gun deck ready. Have decided to cut it in half as the instructions suggest is one way of approaching it. A question for some of the more experienced modelers here : I read that most planks were 6, 9 or 12 feet long. So my calculations for a 12 foot plank at 1:72 scale is 50.8 mm. This seems to be shorter than what most others have used in their builds as best I can tell from photos. Also planning a three butt pattern. What length should I cut the planks? What is the trenall pattern at the ends and in the middle of the planks? Thanks for checking in on my build.


-
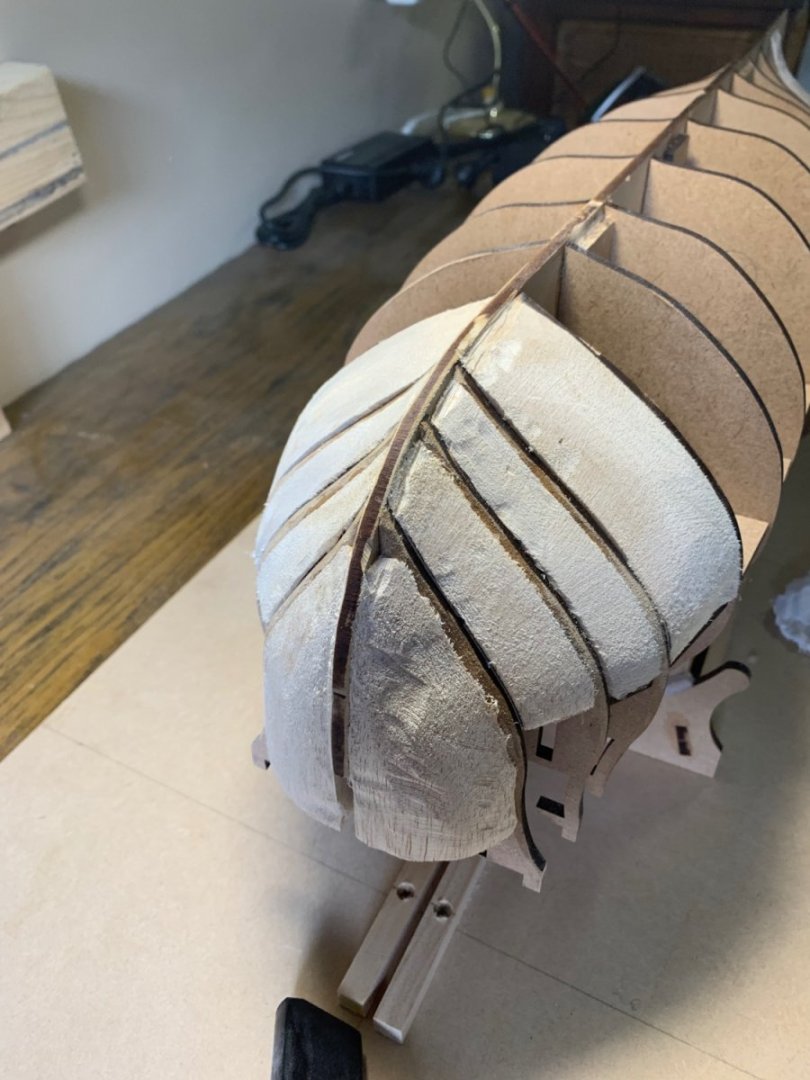
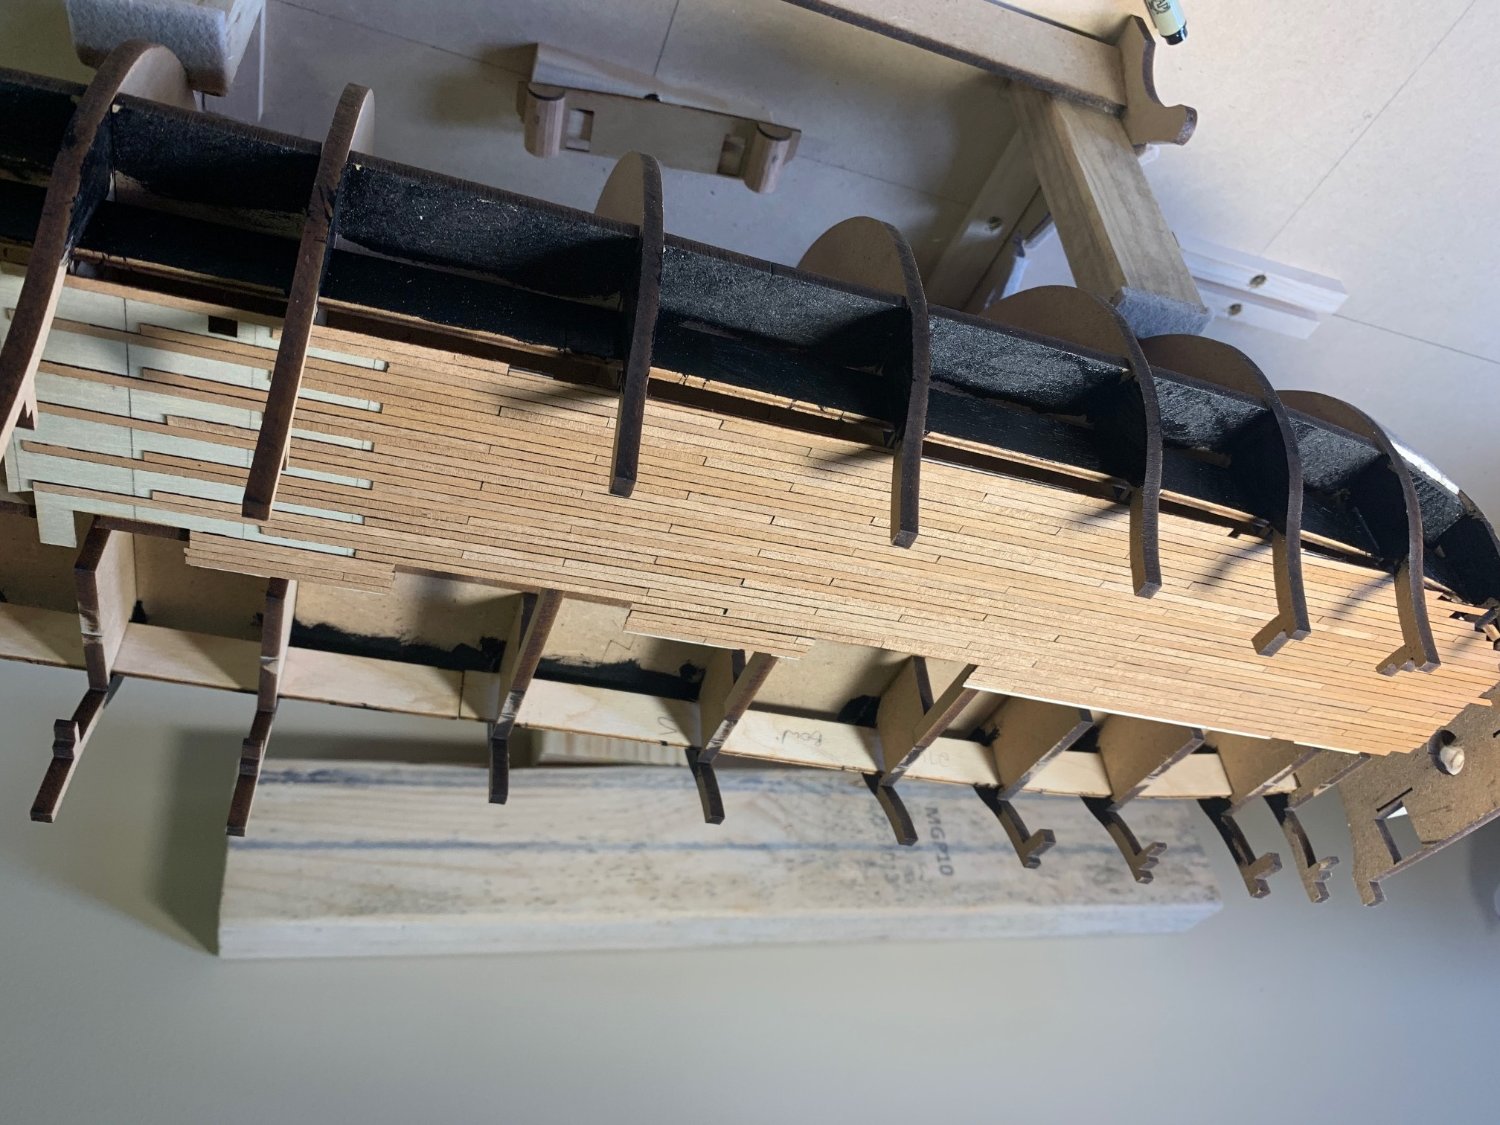
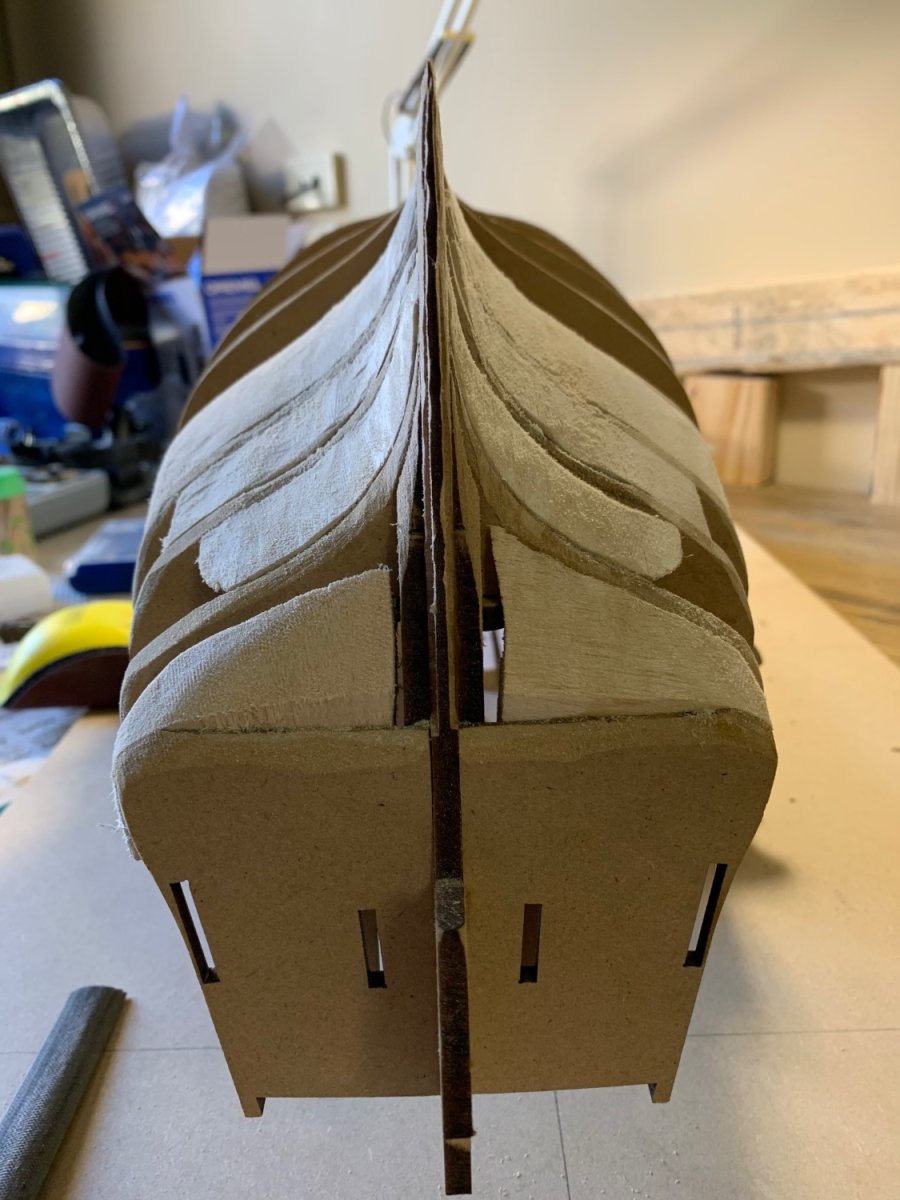
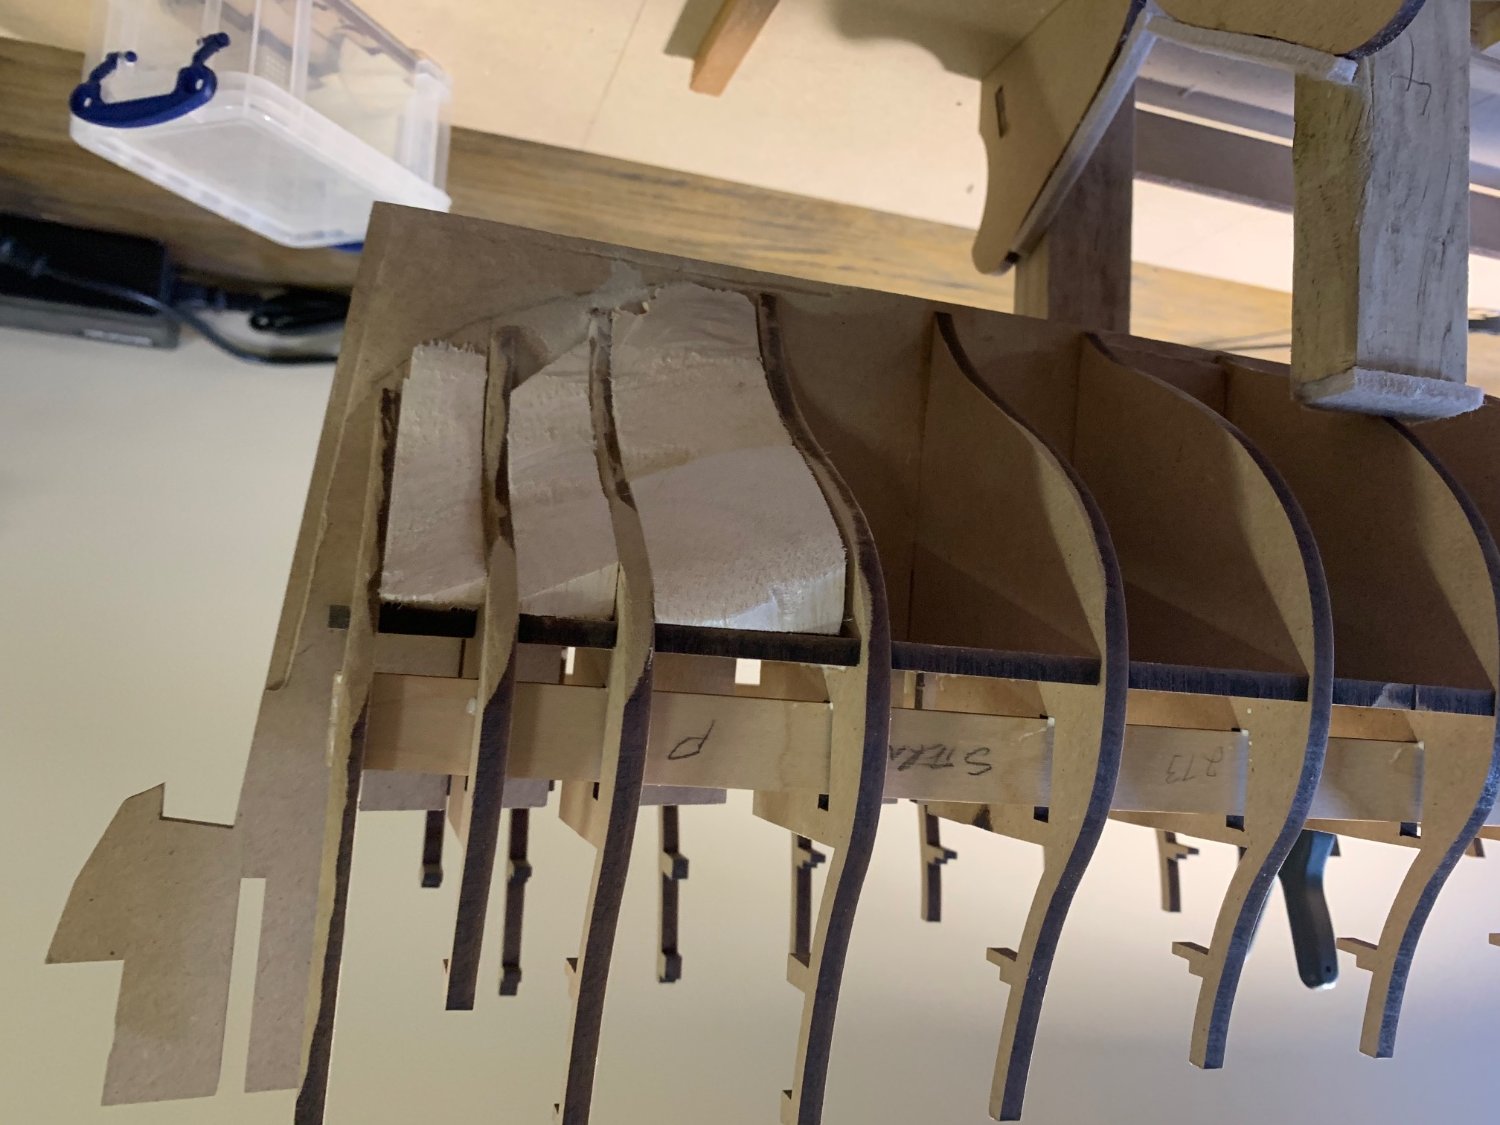
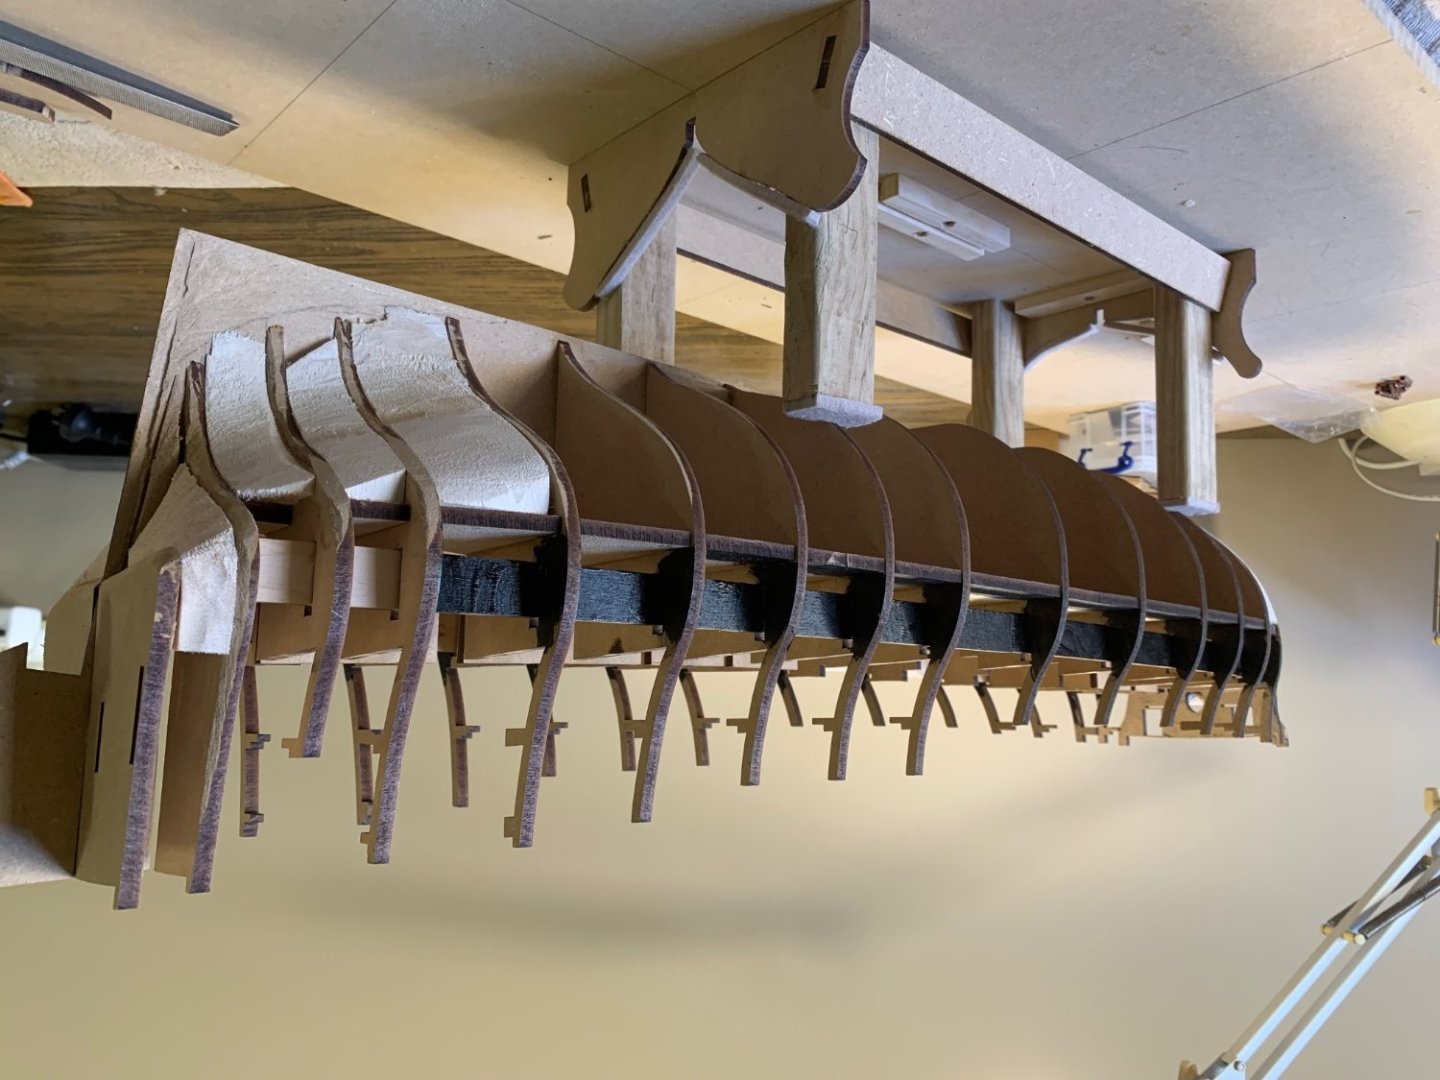
Now sanding the filler blocks and fairing the frames. Also got the dummy gun barrel struts into frames. This was a bit tricky as described in other logs of this kit. I sanded down the outer edge of the slot in frame 2, and the corresponding edge on the strut. I then made some compressions on the inner aspect of the leading 3 cm and by levering the member at the fourth frame away from the midline (keel) and pushing from behind got the members into the slot. Everything glued and once dry will paint the dummy barrel wood and the chamber black.


-
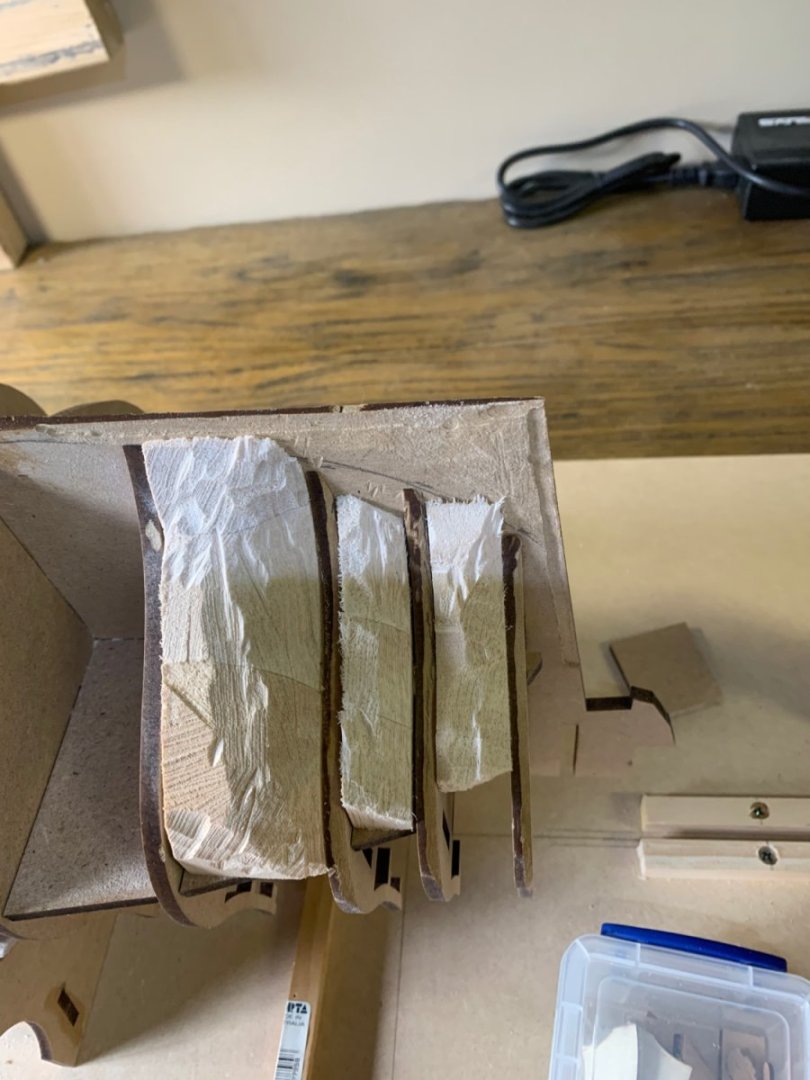
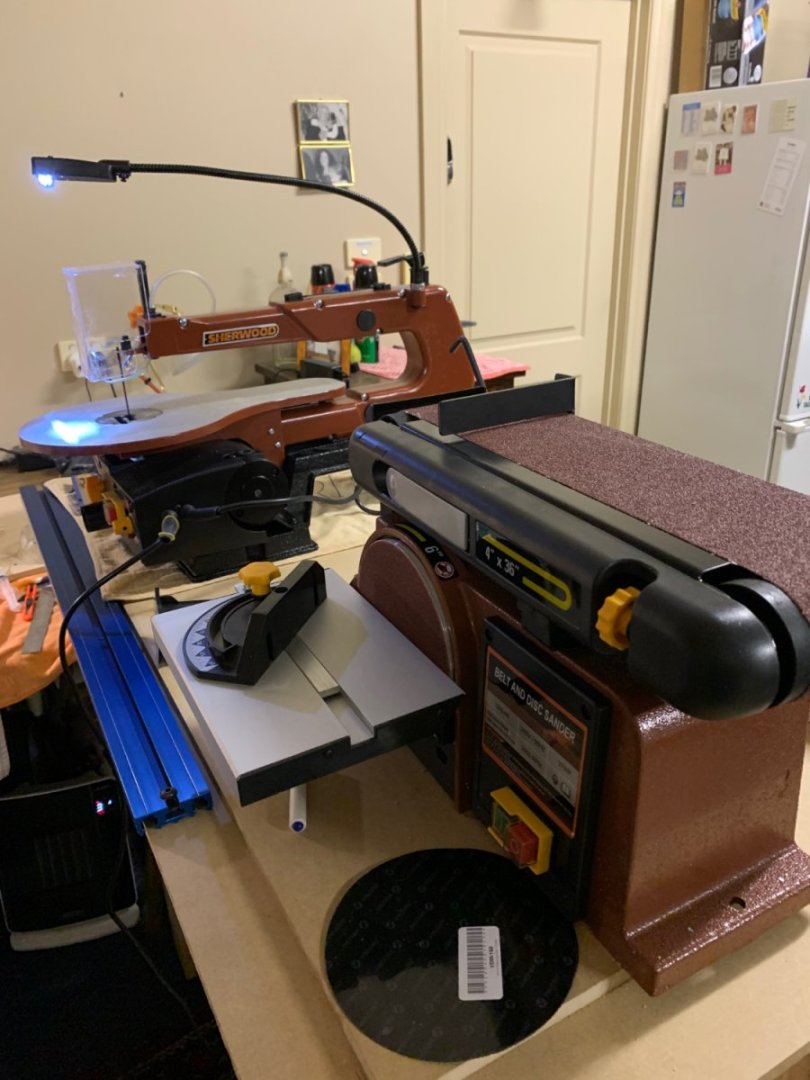
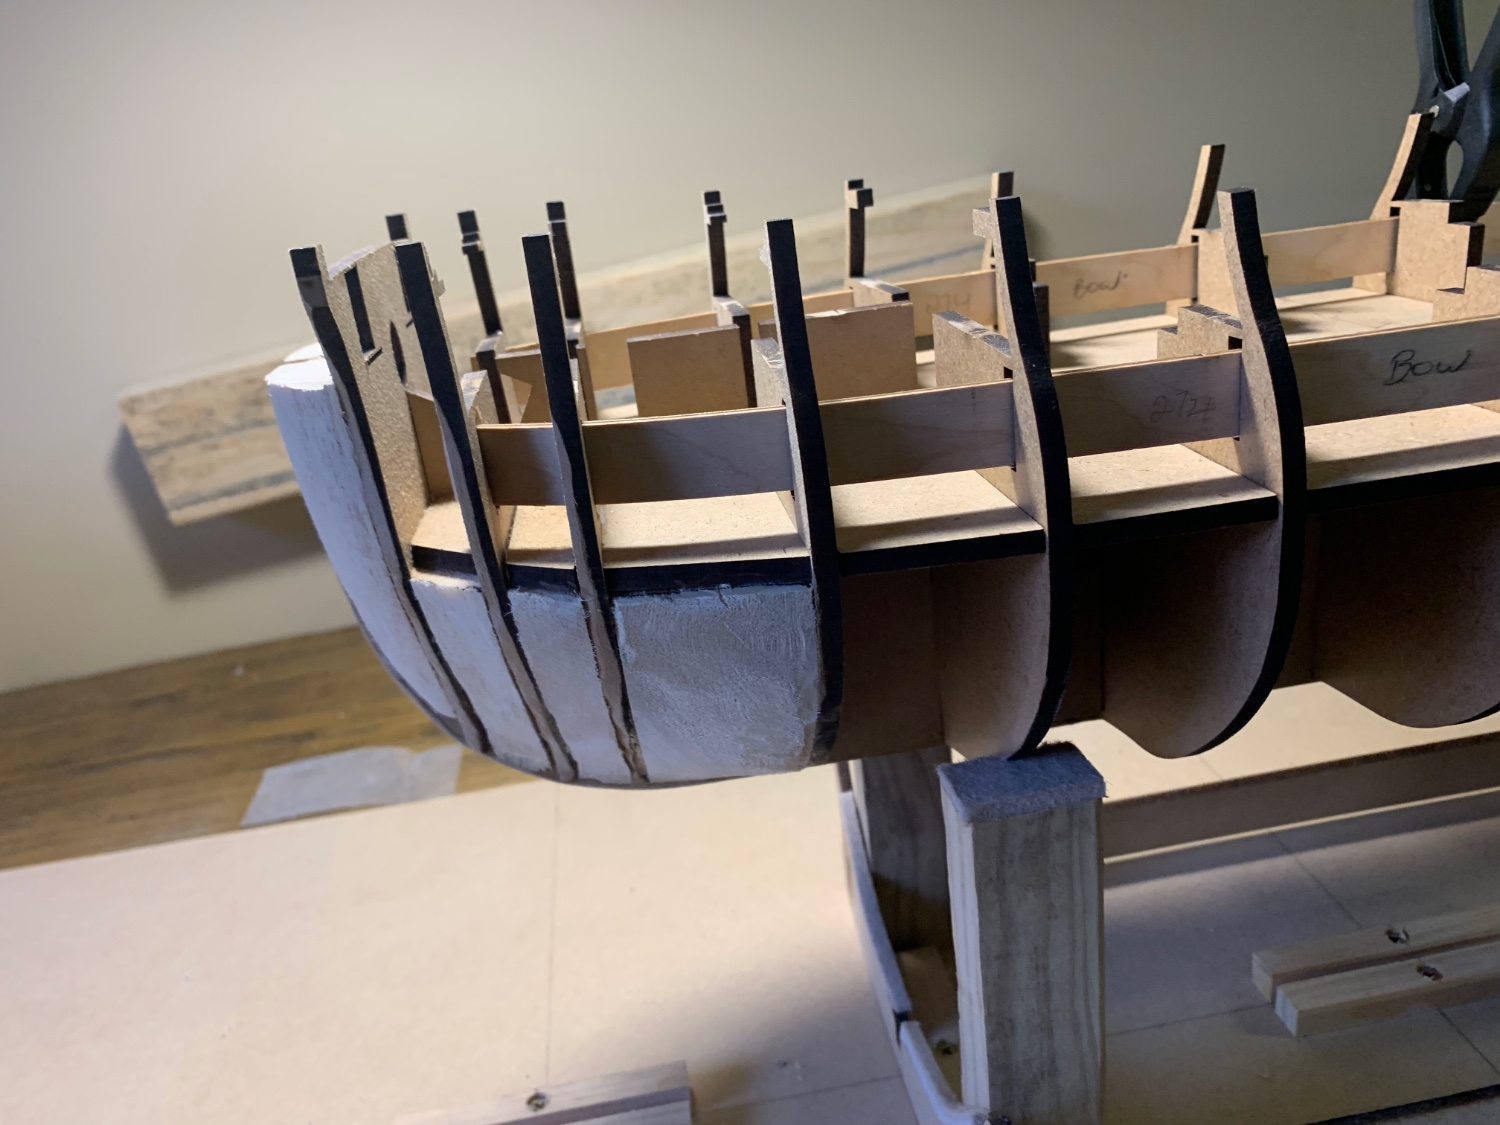
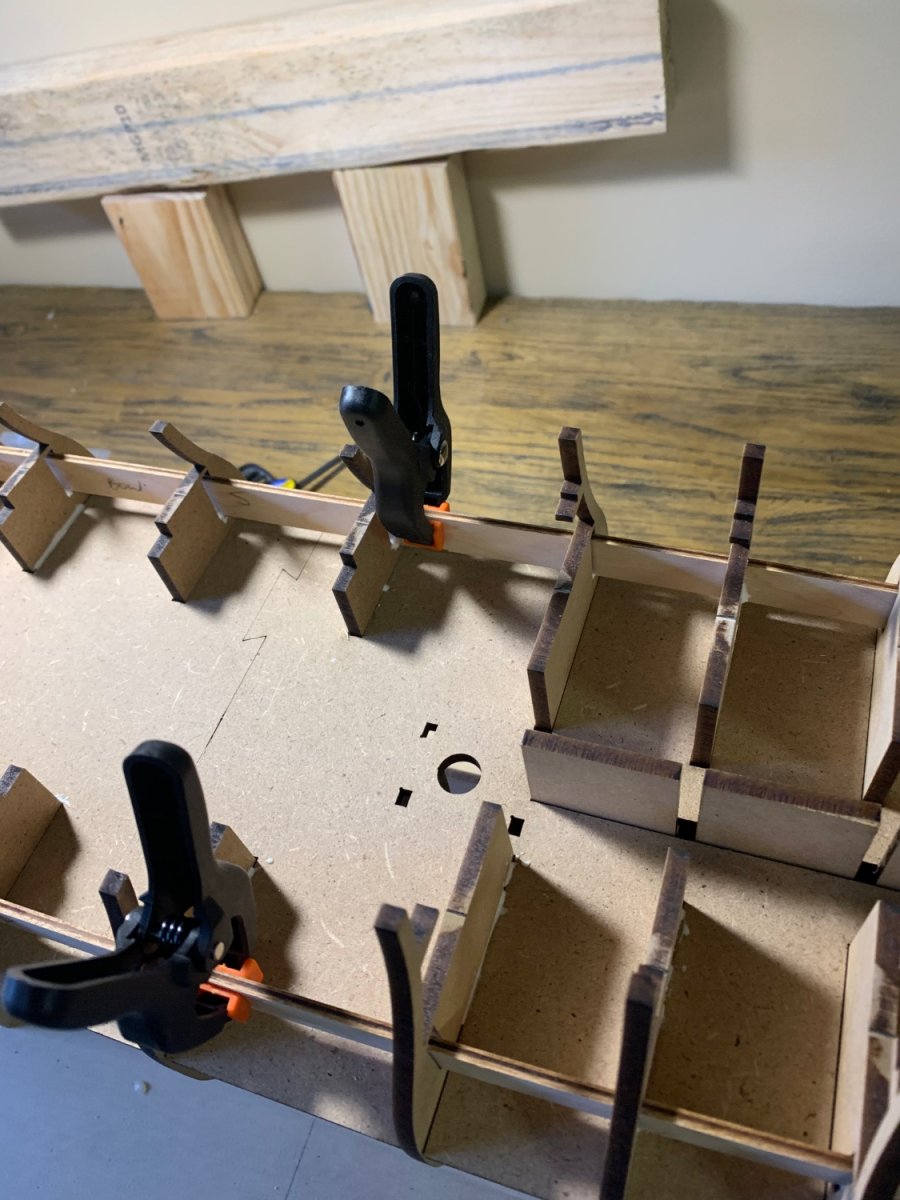
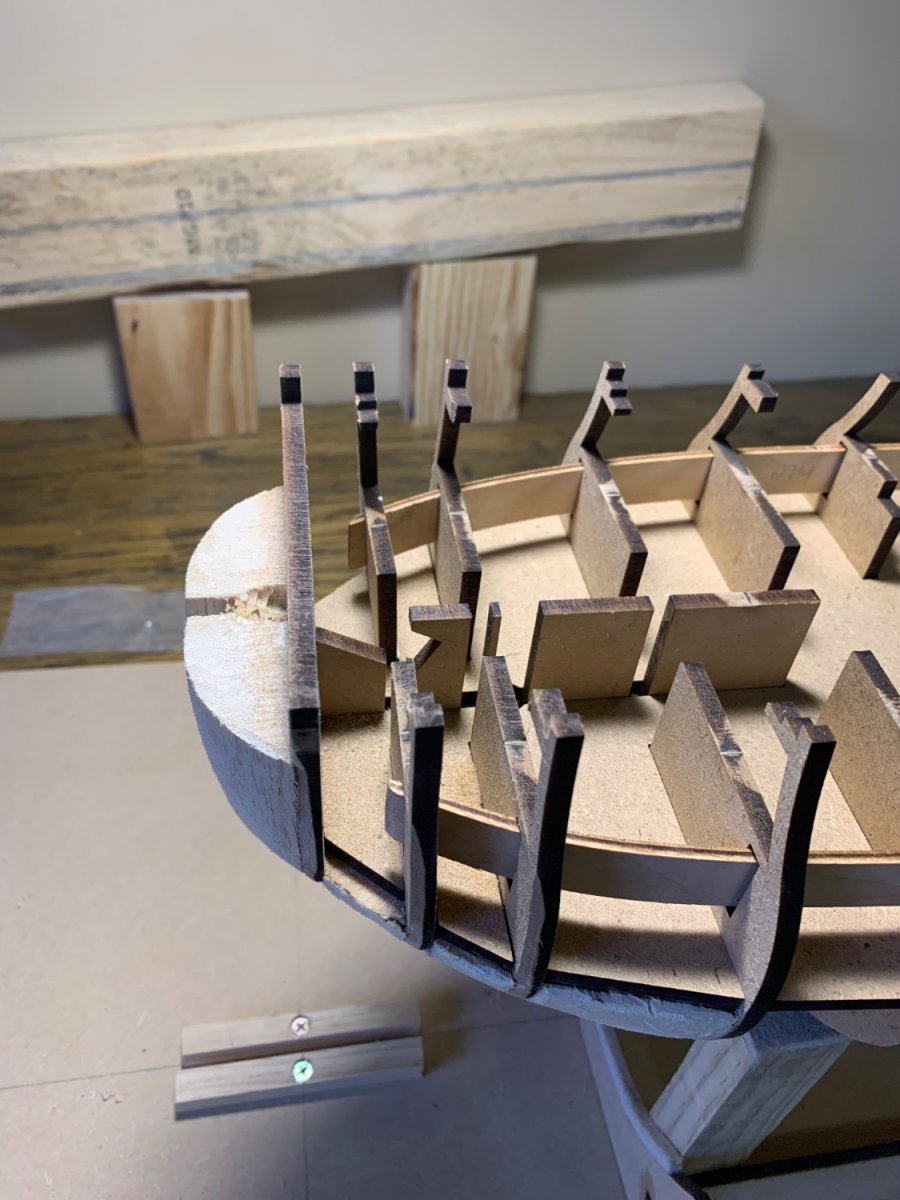
Had a good few hours in the shed with some progress made. Have made some bow and stern filler blocks from balsa wood. Wow balsa is pricey here in Oz Also treated myself to some Father’s Day presents, 16” scroll saw and bench sander. Saw helped cut the filler blocks to rough outline.