Techtonic
-
Posts
145 -
Joined
-
Last visited
Recent Profile Visitors
640 profile views


-
 Techtonic reacted to a post in a topic:
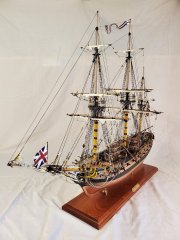
HMS Pegasus by Beakerboy123 - Amati/Victory Models - 1:64
Techtonic reacted to a post in a topic:
HMS Pegasus by Beakerboy123 - Amati/Victory Models - 1:64
-
Techtonic reacted to a post in a topic:
HMS Pegasus 1776 by Moonbug - Amati/Victory Models - 1:64
-
Techtonic reacted to a post in a topic:
HMS Pegasus 1776 by Moonbug - Amati/Victory Models - 1:64
-
Techtonic reacted to a post in a topic:
HMS Pegasus 1776 by Moonbug - Amati/Victory Models - 1:64
-
Techtonic reacted to a post in a topic:
HMS Pegasus 1776 by Moonbug - Amati/Victory Models - 1:64
-
 Patrick B reacted to a post in a topic:
HMS Beagle by Techtonic - FINISHED - OcCre - 1:60
Patrick B reacted to a post in a topic:
HMS Beagle by Techtonic - FINISHED - OcCre - 1:60
-
 See The Gimps Chimp's post on October 28th.
 -
Techtonic changed their profile photo
-
Techtonic reacted to a post in a topic:
HMS Bellerophon by flyer - FINISHED - Amati/Victory Models - scale 1:72
-
Techtonic reacted to a post in a topic:
HMS Bellerophon by flyer - FINISHED - Amati/Victory Models - scale 1:72
-
flyer reacted to a post in a topic:
HMS Bellerophon by flyer - FINISHED - Amati/Victory Models - scale 1:72
-
Congratulations Peter on completing a superb build! I've been following along with great interest and have stolen quite a few of your ideas for my Bellerophon.
- 364 replies
-
- 1
-
-
- bellerophon
- victory models
- (and 2 more)
-
Techtonic reacted to a post in a topic:
HMS Bellerophon by flyer - FINISHED - Amati/Victory Models - scale 1:72
-
AON reacted to a post in a topic:
HMS Vanguard 1787 by Chestcutter - Victory Models - 1:72
-
Hi Andre, Since you quoted my post I believe maybe you are referring to my treenails? If so I used a black 005 extra fine tip marker, e.g. https://www.amazon.com/Prismacolor-XtraFine-Marker-Resistant-1-Each/dp/B0027ACMVQ. I also used the same marker to draw the plank ends. One tip is to check for color fastness of the ink with whatever finish you plan on using on the decks. I used a black brush calligraphy pen to create the caulking effect between the planks. I guess the ink in pen I used was water soluble as when I started to paint the deck with water based clear acrylic all the ink started to bleed, which looked like a right mess! Luckily I started applying in the area that is hidden by the upper decks so I was able to stop in time before any visible areas were affected. At this point I had a major panic that I would not be able to apply finish to the decks. After some experimentation I switched to oil-based polyurethane and fortunately that did not cause any bleeding. Even so - I now need to be carefull to not drip any water on the decks.
-
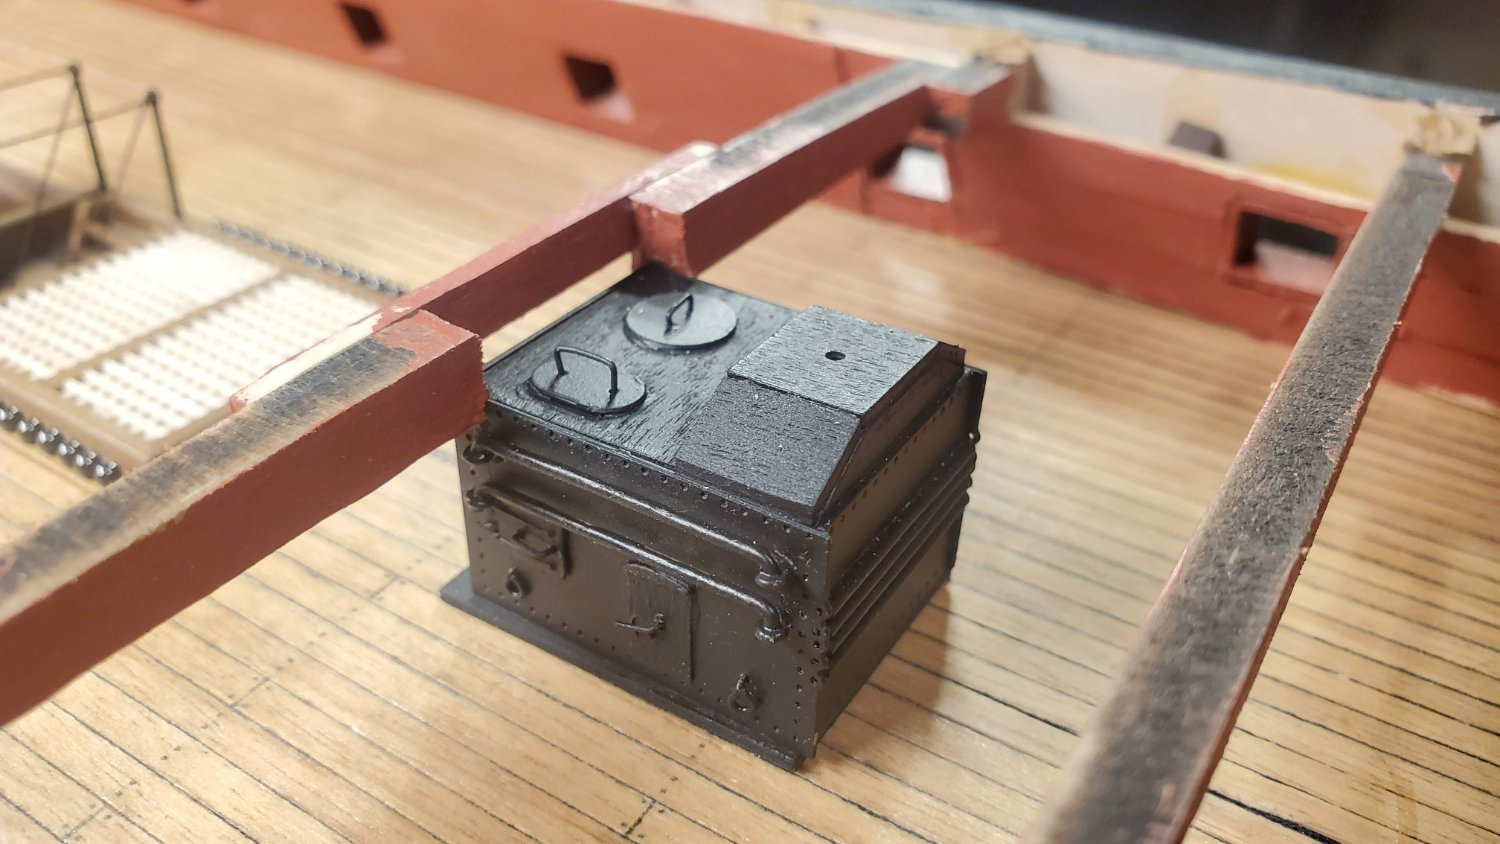
Hi Chestcutter, Just found your log an will be following with interest as I'm about 4 months in to building the Vanguard. For the oven I used flat black spray can from local hardware store and it worked great. I applied it after assembling the complete oven. I also used same for spraying all the black PE parts, eye-bolts, and canons. They came out great and was way quicker and smoother than hand painting. I didn't use primer - but then I don't expect any rough handling of the ship once complete. One other thing with the oven - Plan Sheet 4 shows some extra detailing on the sides with eye-bolts and wire that are not shown in the booklet. Though of course they'll be barely visible in the finished model. Here's what mine ended up like: You'll also see in the pic I added an extra beam just aft of the oven that is modified to bypass around the oven. I'm not sure if this beam is necessary, but it just seemed to me the deck above was not very well supported in this area without it.

-
FYI the second episode of this is now available here https://www.youtube.com/watch?v=TrC3yMMDsc8 and just as interesting as the first. HMS Bellerophon even gets an honorable mention at around 27:15.
- 364 replies
-
- 3
-
-
- bellerophon
- victory models
- (and 2 more)
-
Thanks for the side by side pic. Your cloth is a surprisingly big improvement on the kit cloth. A pity I couldn't find anything like it at my local fabric store. I don't suppose you recall if the material had any specific name? That would make it easier to find in online stores.
-
The spanker looks great Peter! What material did you use? And how did it compare to the material supplied in the kit? A week or so back (I know I'm a long way from the sails stage, but nothing like planning ahead!) I searched around Joann's, which is a large fabric store chain over here in the US. I bought a sample of the finest cotton they had. But when I got it home and compared it to the material in the kit, it was no finer and had more imperfections in the weave. While I was there I did also get some cream plain bridal veil netting which looks like it will work great for the hammock cranes, etc. So not a complete wasted visit.
- 364 replies
-
- 1
-
-
- bellerophon
- victory models
- (and 2 more)
-
Thanks for the port side pic, it doesn't look bad - just doesn't look as interesting as from starboard. I'll probably stick with Bellerophon but I've got a while before I need to commit. I considered doing a build log but never pulled the trigger on this one.
- 364 replies
-
- 1
-
-
- bellerophon
- victory models
- (and 2 more)
-
I found this log a few days ago which includes some nice details on making furled and set cloth sails - I thought the end result looked very good. I'm definitely considering something similar for when I get to the sails. https://modelshipworld.com/topic/3741-queen-annes-revenge-1710-by-shipmodel-finished-136-scale/page/6/#comment-283055
- 364 replies
-
- 1
-
-
- bellerophon
- victory models
- (and 2 more)
-
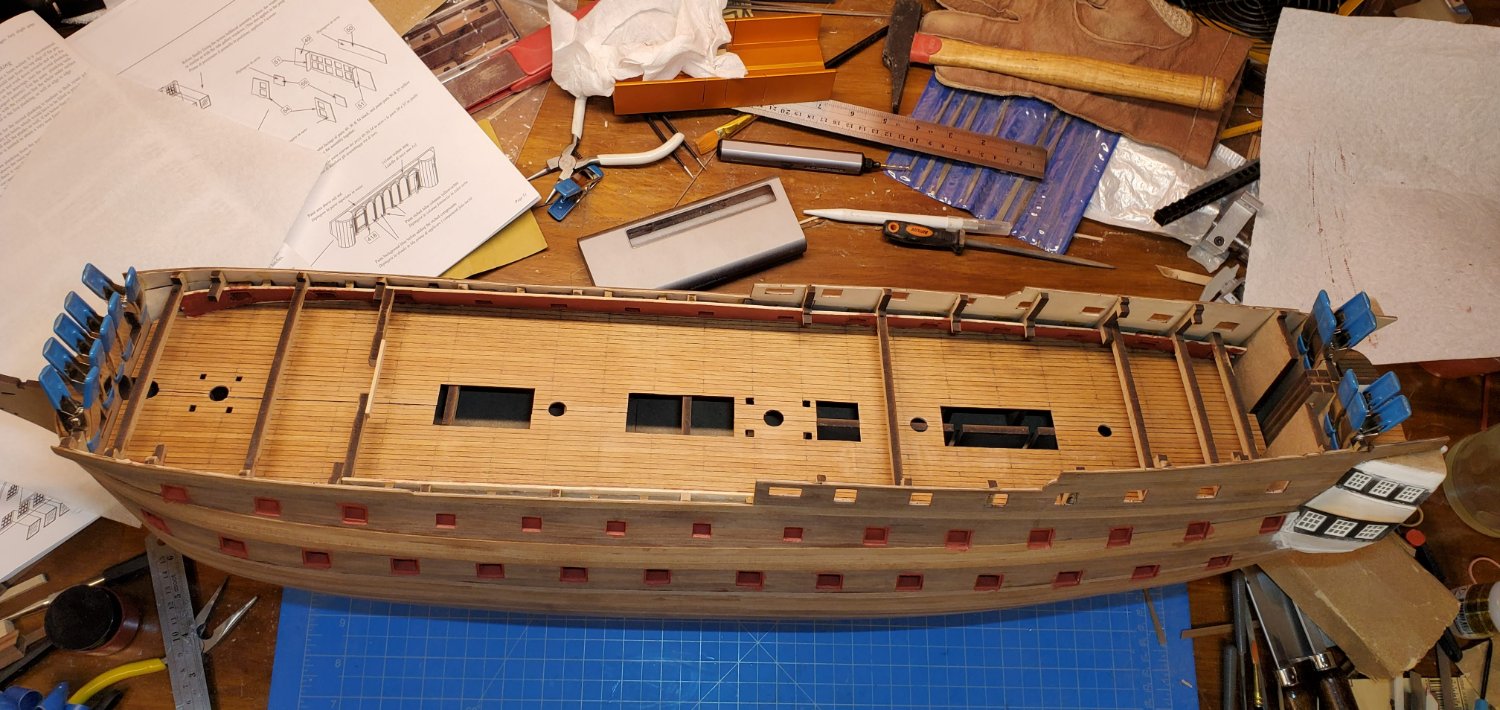
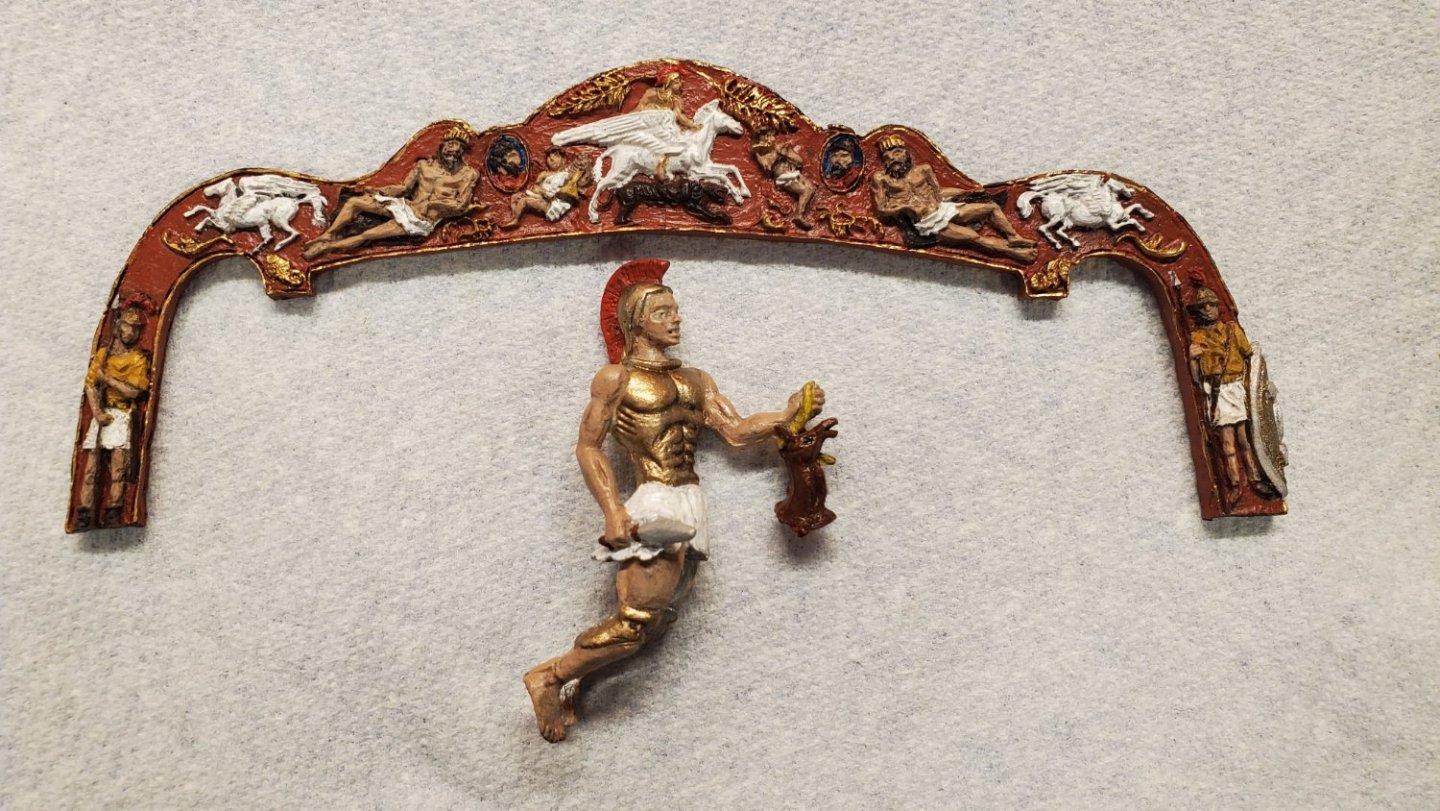
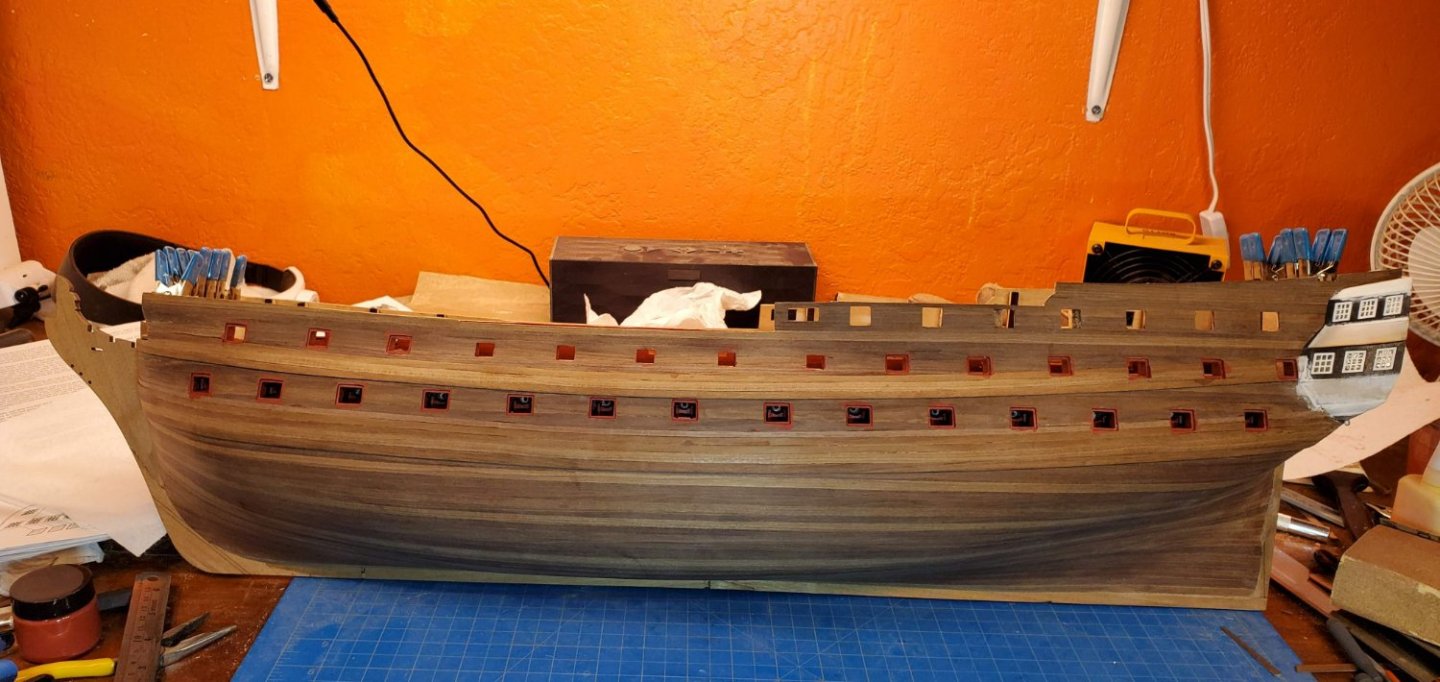
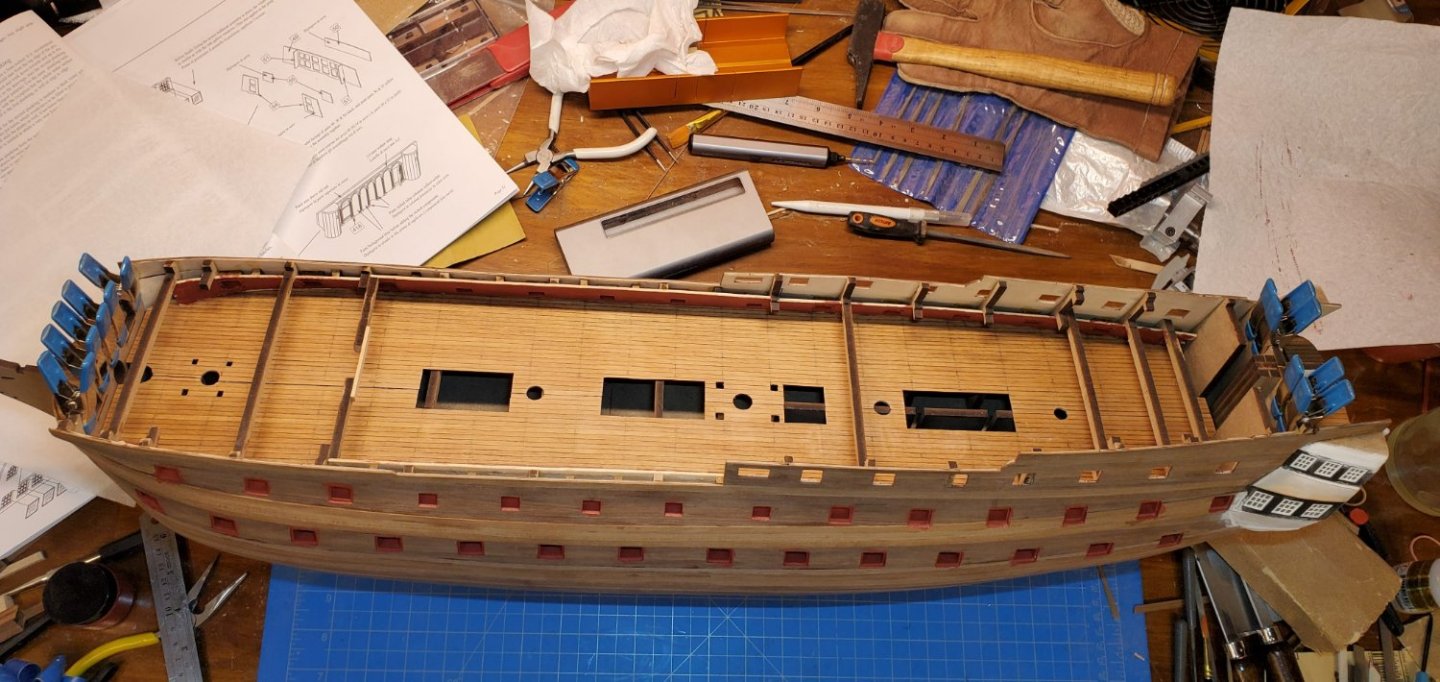
My current leaning is towards HMS Bellerophon since I like the mythological link with my previous HMS Pegasus build. A month or so back I painted the transom decoration and figurehead. I followed your lead with the transom decoration and modified the Elephant resin one. Here is what I ended up with: I like the result - but I noticed a problem when trial fitting it to the boat. My intended resting place for the boat will have it viewed mainly from the port side, which means the figure head is looking away from the viewer, which is not his best side. So I may end up switching to doing HMS Vanguard instead. Here's a couple of other shots of my progress so far. I've just finished doing the dummy lower gun carriages and gun port linings:
- 364 replies
-
- 5
-
-
- bellerophon
- victory models
- (and 2 more)
-
I just came across a a new documentary on the anatomy of HMS Victory that I thought might interest you and other followers of this log. There's enough similarities between Vanguard and Victory that this was well worth watching: https://www.youtube.com/watch?v=61SYvhojGvg
- 364 replies
-
- 1
-

-
- bellerophon
- victory models
- (and 2 more)
-
I built the 95mm boat from Master Korabel (https://www.agesofsail.com/ecommerce/new-master-korbel/ship's-boats.html) as an add on to my Pegasus. It's a very nice kit - each plank is pre-shaped laser cut from very thin ply so they fit together nicely. There's a three part review someone did here: https://shipmodeler.wordpress.com/2021/06/02/building-a-master-korabel-ships-boat-kit/ https://shipmodeler.wordpress.com/2021/07/05/building-a-master-korabel-ships-boat-kit-part-2/ https://shipmodeler.wordpress.com/2021/08/16/building-a-master-korabel-ships-boat-kit-final/ I also see Vanguard Models recently bought out a whole range of boats at 1/64th https://www.agesofsail.com/ecommerce/new-vanguard-models/ship's-boat-kits.html. Looking at the pdf instructions it looks like, unlike the MK boats, the planks must be hand tapered.
-
EZ - I'm pretty sure this is the exact same model you are building. I'm guessing Glenn just put 1/67 after doing some math comparing the model length and the real ship length. It's not unusual for models to not be exactly at the scale they claim to be. Glenn - thanks for your build log - I just finished reading through all of it. It will no doubt be of help and inspiration as I continue my build of HMS Vanguard. I hope I don't get as put off by the coppering as you were. I coppered my Pegasus in about a weeks worth of evenings - so I'm thinking the Vanguard will take maybe three to four weeks so long as the tedium doesn't kill me midway like it did with you! I share the same surname as the great Sir Thomas Slade, so I like to think I share some family connection to the ships designer. Hopefully this will provide me with the inspiration needed to complete the build.
- 101 replies
-
- 1
-
-
- victory models
- amati
- (and 2 more)
-
High torque, really low speed drill
Techtonic replied to Brinkman's topic in Modeling tools and Workshop Equipment
This micro drill just came on the market a couple of weeks ago: https://www.amazon.com/gp/product/B0B3HYVPR4 To me it looks ideal for ship modelling type applications so I ordered one. When I ordered it it was only $35 with the coupon - but I guess that was an initial promo price as now it is $47 with coupon. It ships from China so mine should arrive in a week or so. There's also pro, drill press and screwdriver versions of it: https://www.amazon.com/s?k=ARROWMAX&crid=121NPJHTL5150&sprefix=arrowmax. I found more info on it here https://www.indiegogo.com/projects/sds-pro-smart-motion-control-mini-electric-drill--2#/ -
I used Silkspan to do the furled sails on my Pegasus, I think it looks great for furled sails - you can see the results here https://modelshipworld.com/gallery/album/2554-hms-pegasus-164-amati-victory-models-by-techtonic/. For set sails, while the silkspan may look more accurate to scale, I've a feeling the cloth sails may be more aesthetically pleasing. The cloth supplied with the Vanguard is very fine so might look reasonable. I'll probably experiment with both to see which looks best.
- 364 replies
-
- 1
-
-
- bellerophon
- victory models
- (and 2 more)