Tsm209
-
Posts
29 -
Joined
-
Last visited
-
 Tsm209 reacted to a post in a topic:
Titanic by Tsm209 - 1/100
Tsm209 reacted to a post in a topic:
Titanic by Tsm209 - 1/100
-
Tsm209 reacted to a post in a topic:
Titanic by Tsm209 - 1/100
-
Valeriy V reacted to a post in a topic:
Titanic by Tsm209 - 1/100
-
clearway reacted to a post in a topic:
Titanic by Tsm209 - 1/100
-
clearway reacted to a post in a topic:
Titanic by Tsm209 - 1/100
-
mikegr reacted to a post in a topic:
Titanic by Tsm209 - 1/100
-
KeithAug reacted to a post in a topic:
Titanic by Tsm209 - 1/100
-
KeithAug reacted to a post in a topic:
Titanic by Tsm209 - 1/100
-
KeithAug reacted to a post in a topic:
Titanic by Tsm209 - 1/100
-
yvesvidal reacted to a post in a topic:
Titanic by Tsm209 - 1/100
-
Canute reacted to a post in a topic:
Titanic by Tsm209 - 1/100
-
Titanic by Tsm209 - 1/100
Tsm209 replied to Tsm209's topic in - Build logs for subjects built 1901 - Present Day
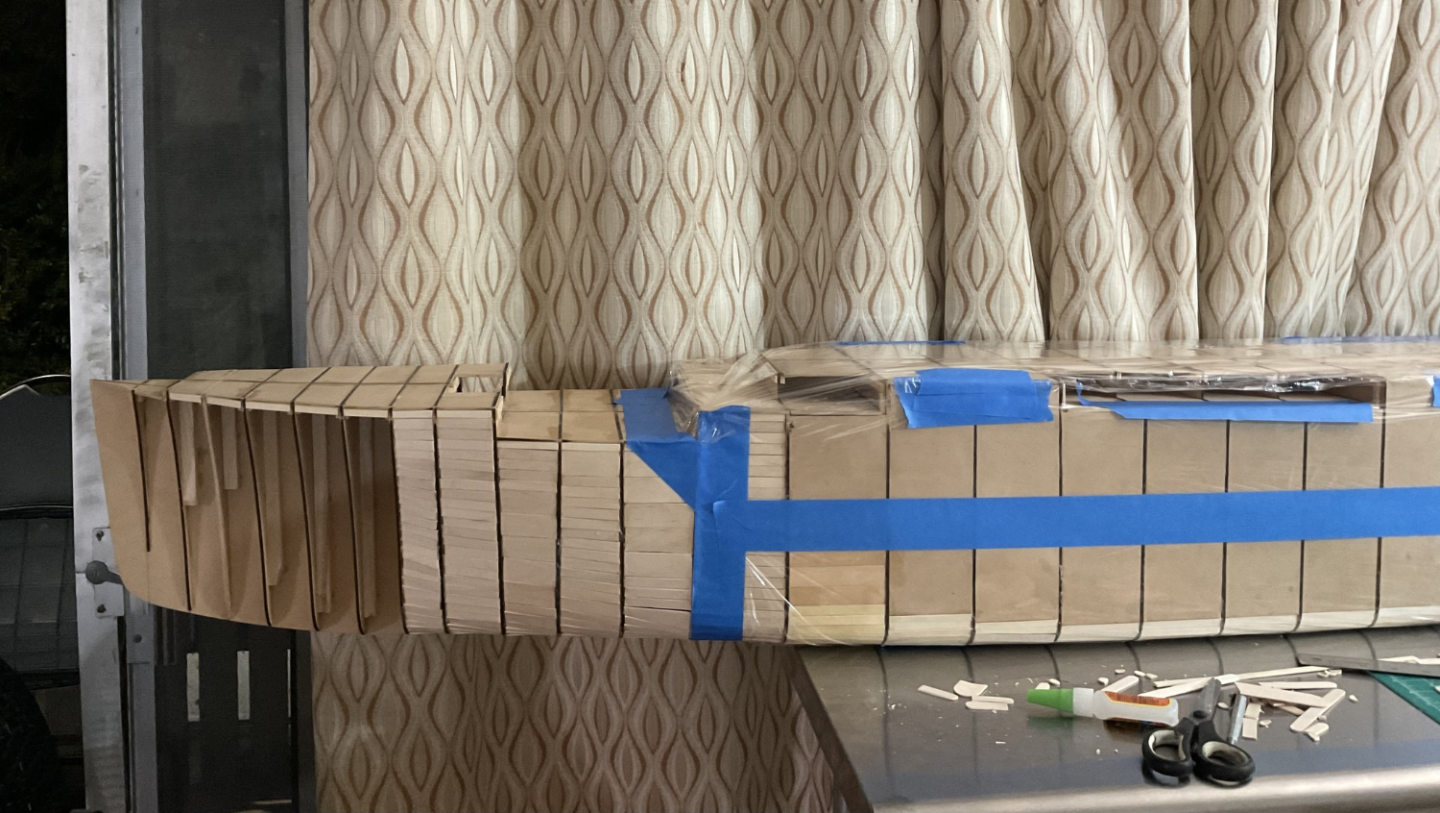
I’ll post as much progress pics/details of the hull as I can. The bottom plating is relatively simple, from about midway on the ship to the double riveted plate strakes is where all the detailing comes on the hull. -
Tsm209 reacted to a post in a topic:
Titanic by Tsm209 - 1/100
-
Canute reacted to a post in a topic:
Titanic by Tsm209 - 1/100
-
Titanic by Tsm209 - 1/100
Tsm209 replied to Tsm209's topic in - Build logs for subjects built 1901 - Present Day
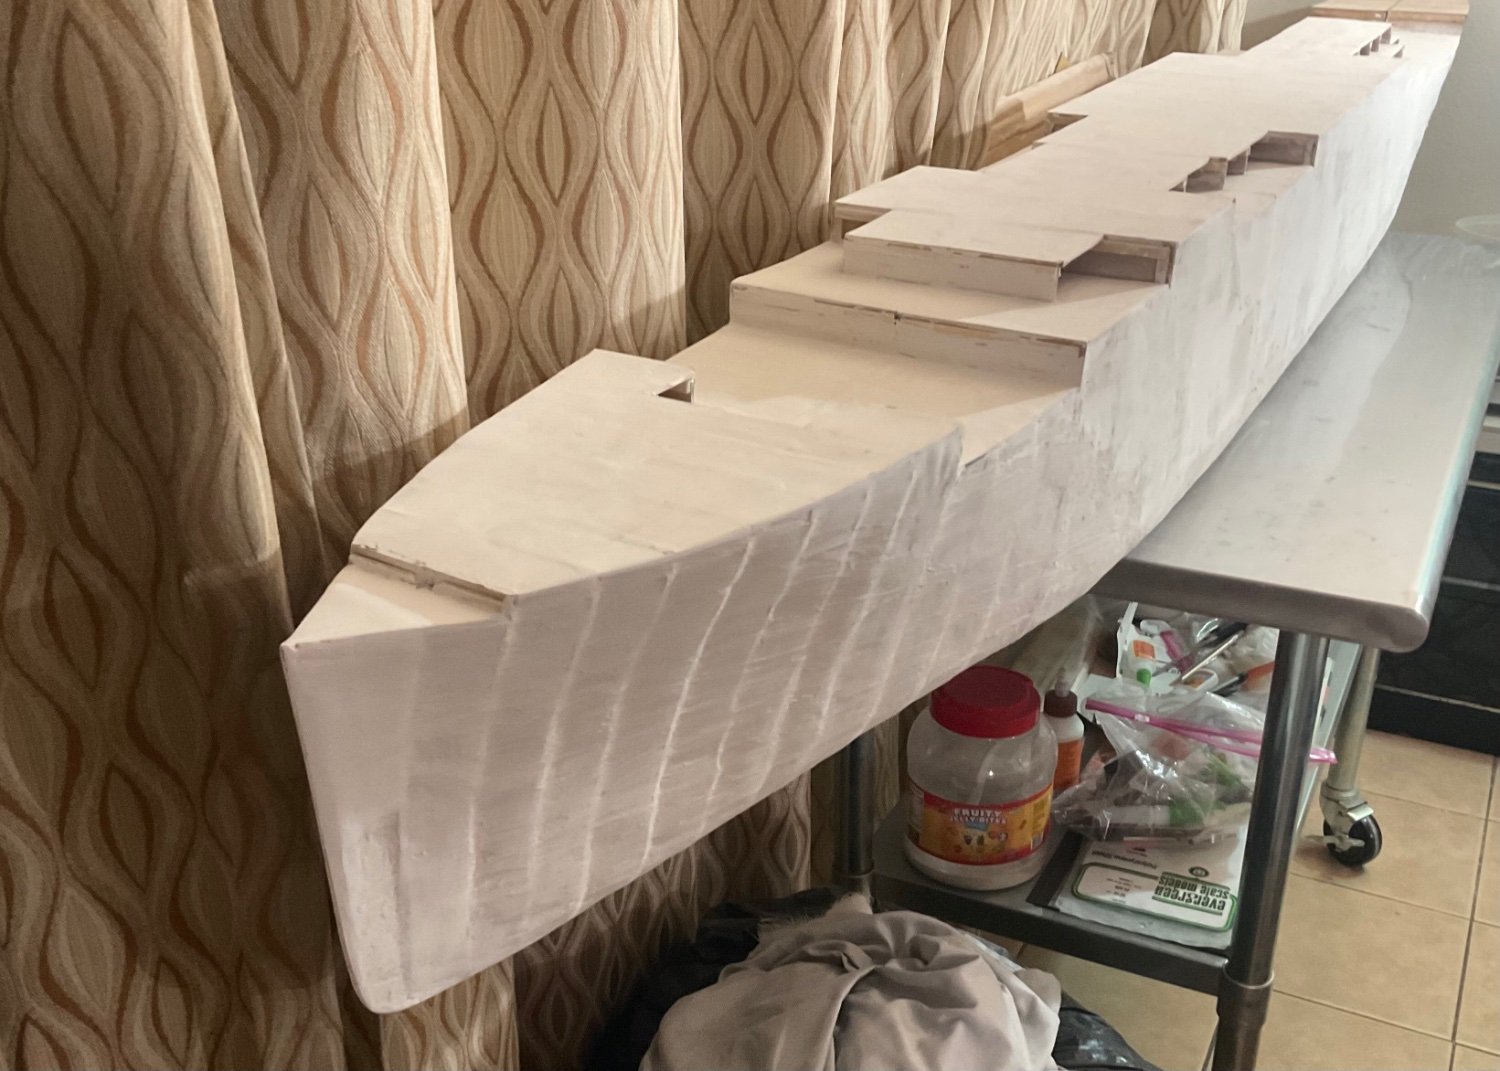
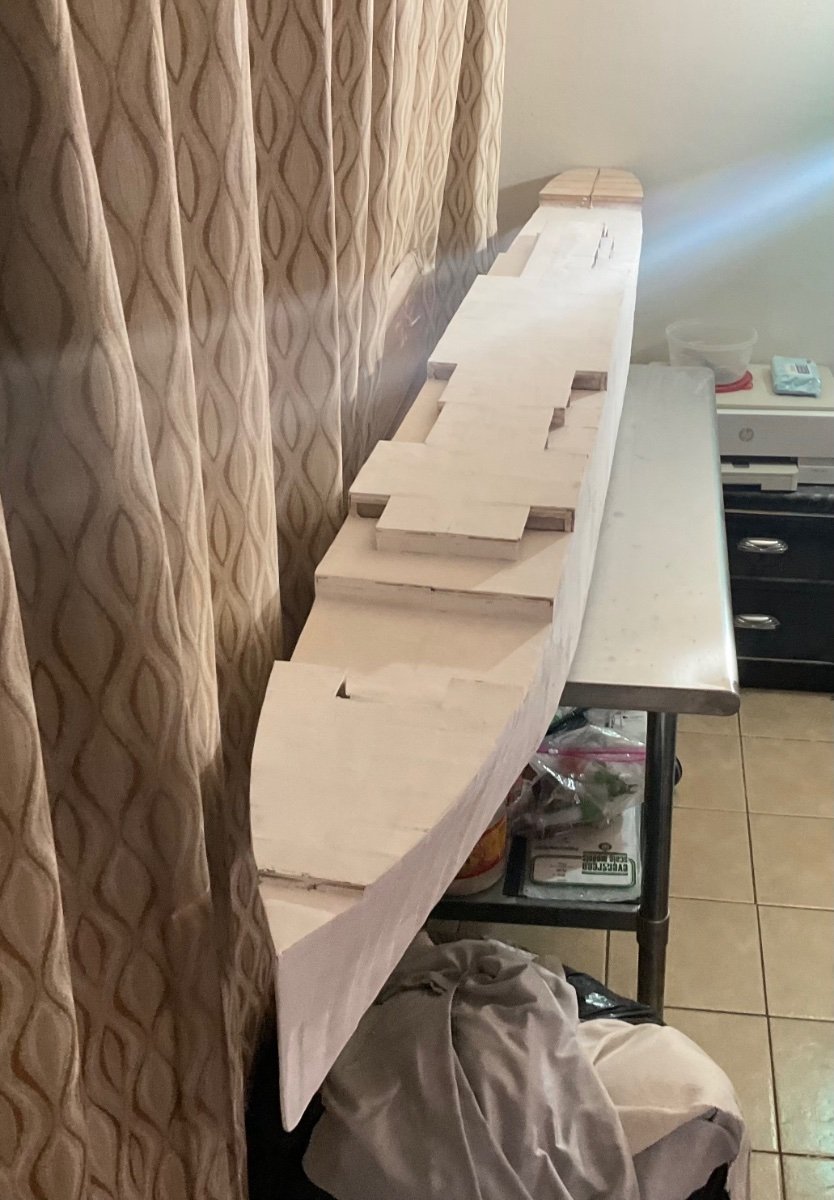
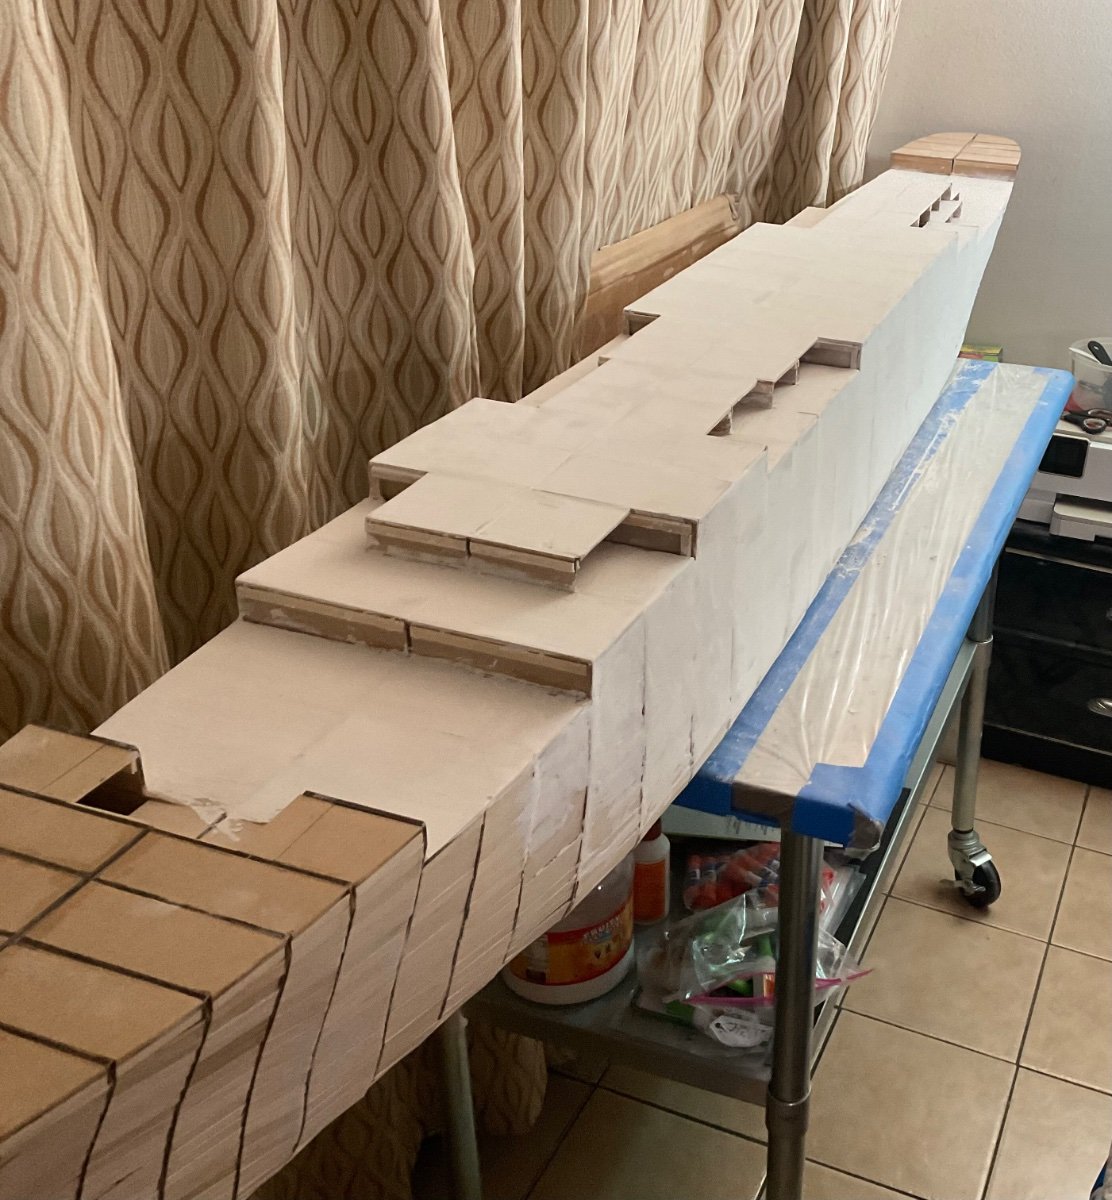
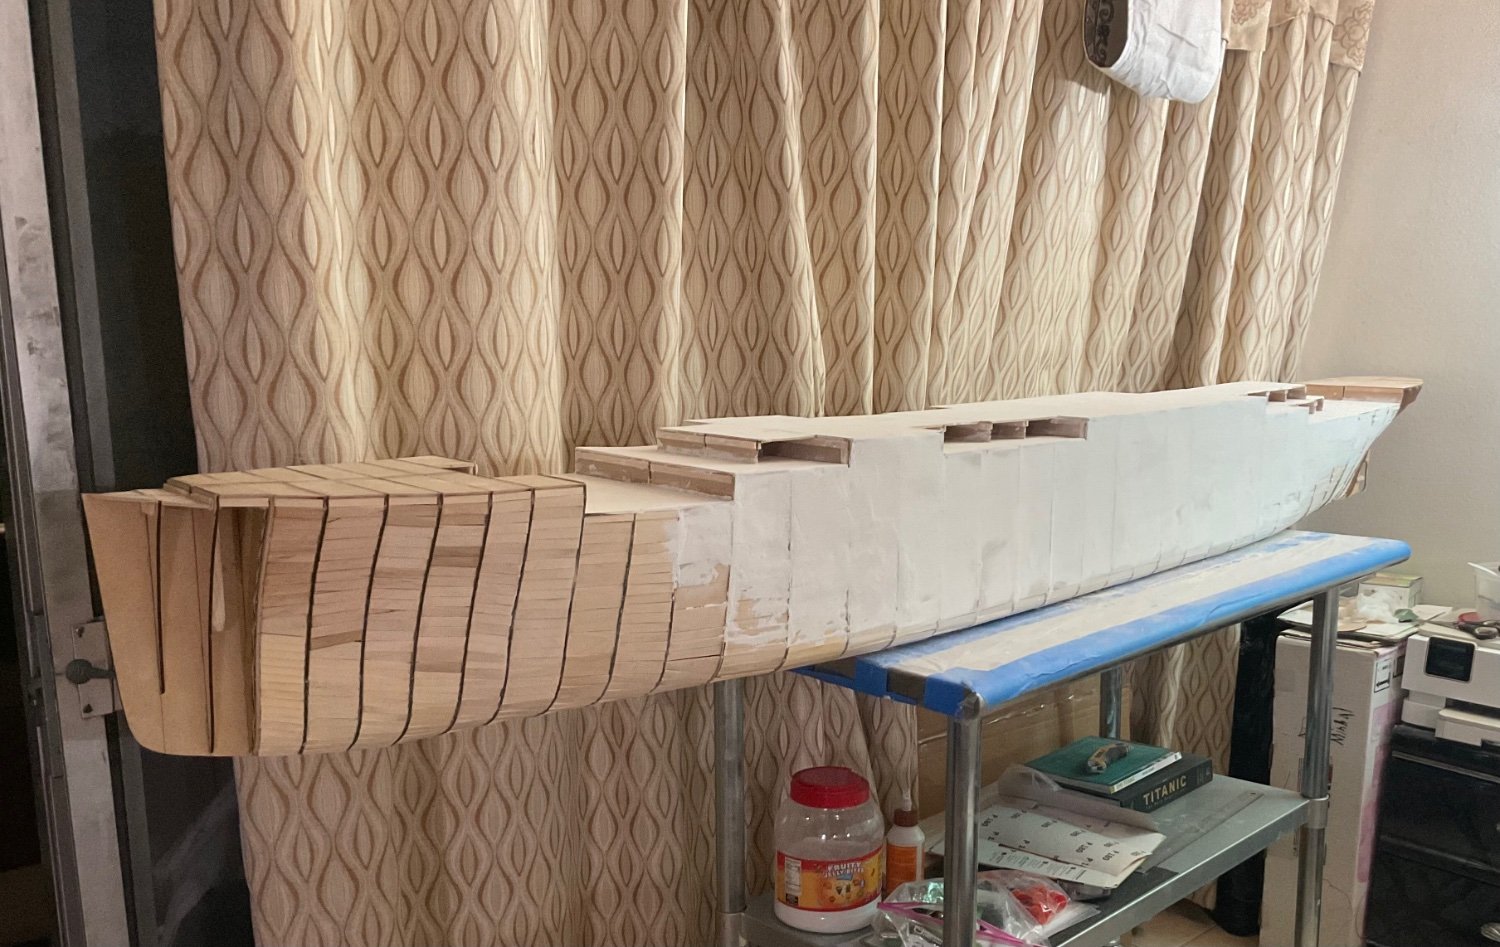
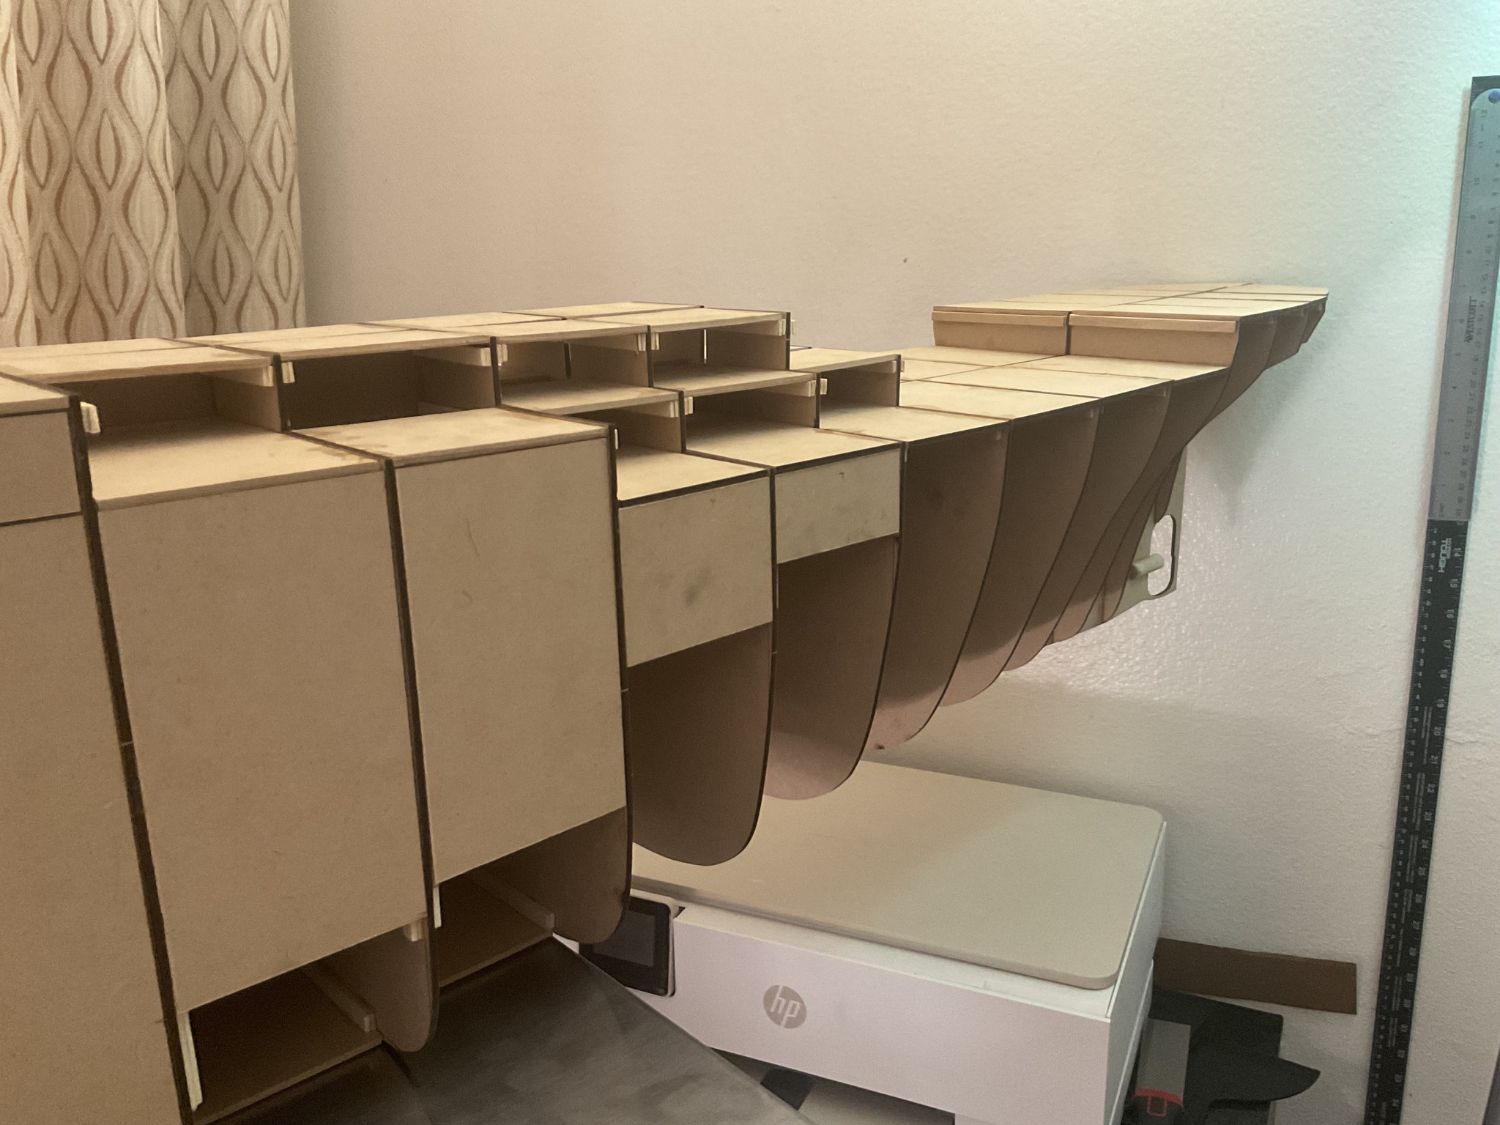
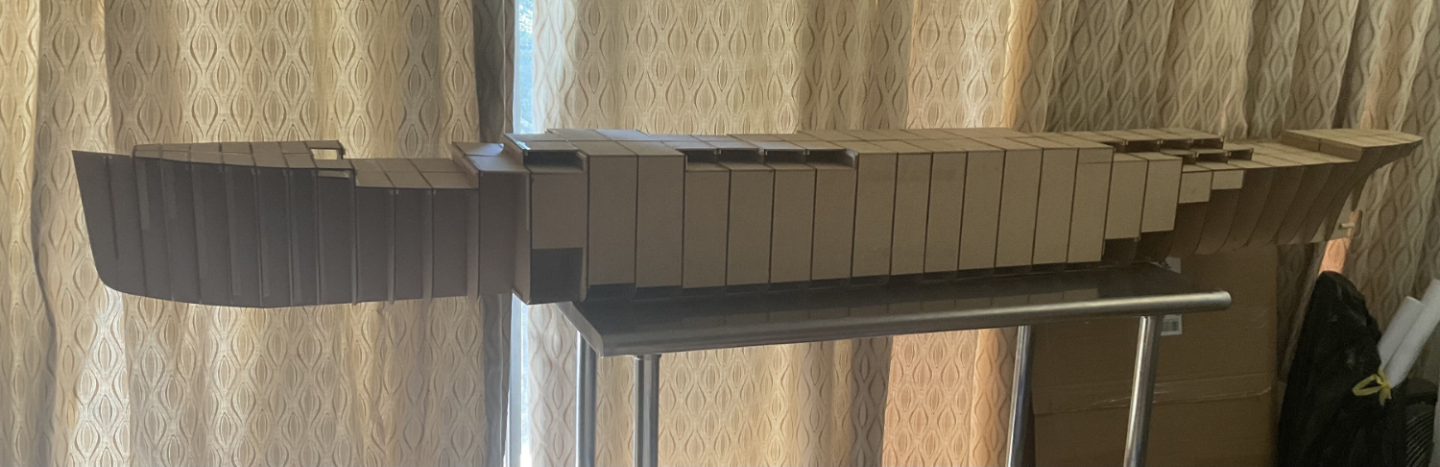
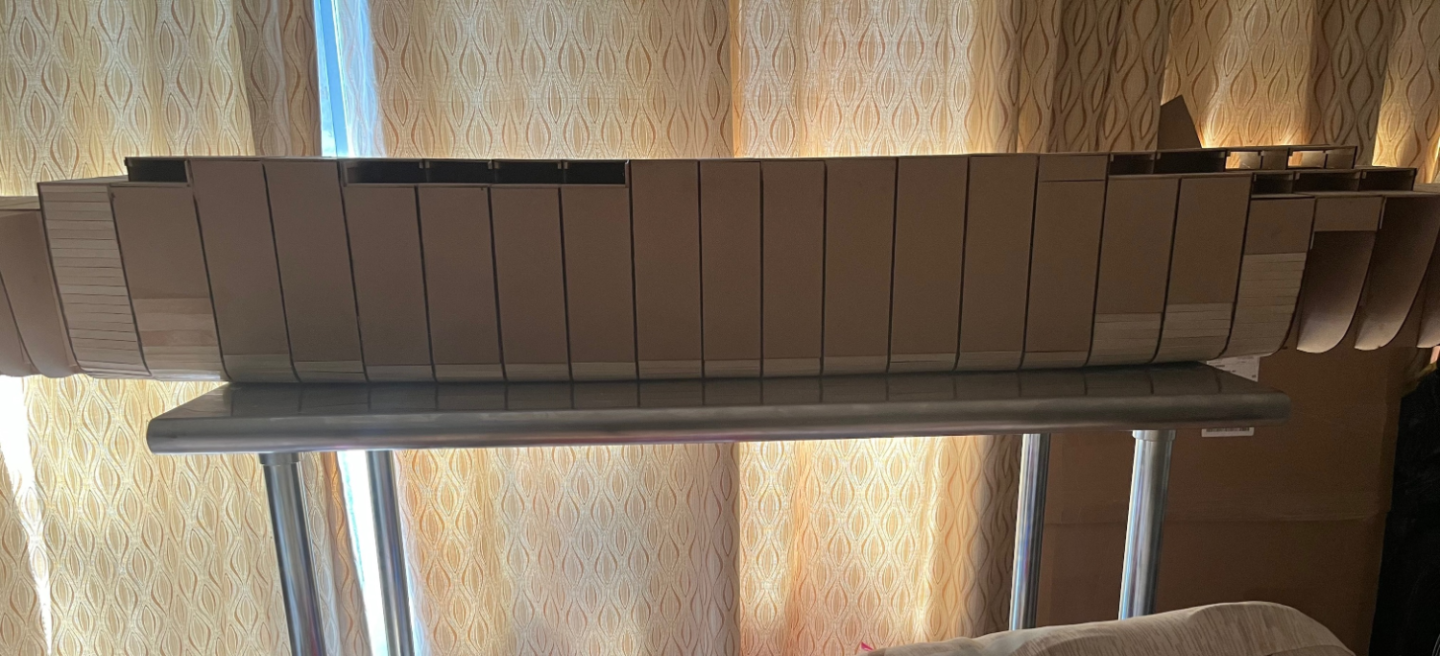
Finished up the hull. It's now ready for the hull plating stage of the build. I hope to mark the plates out on the hull in the upcoming month.

-
Titanic by Tsm209 - 1/100
Tsm209 replied to Tsm209's topic in - Build logs for subjects built 1901 - Present Day
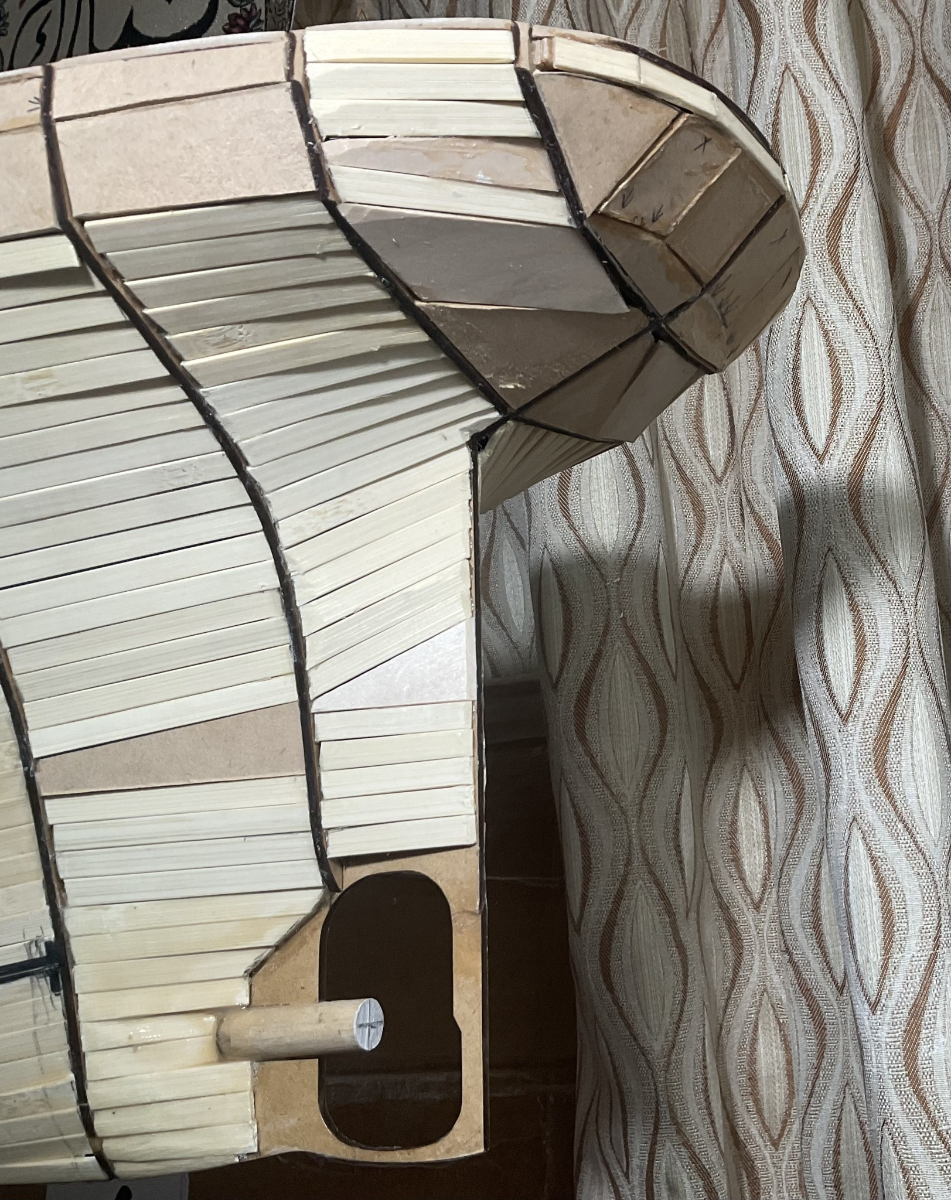
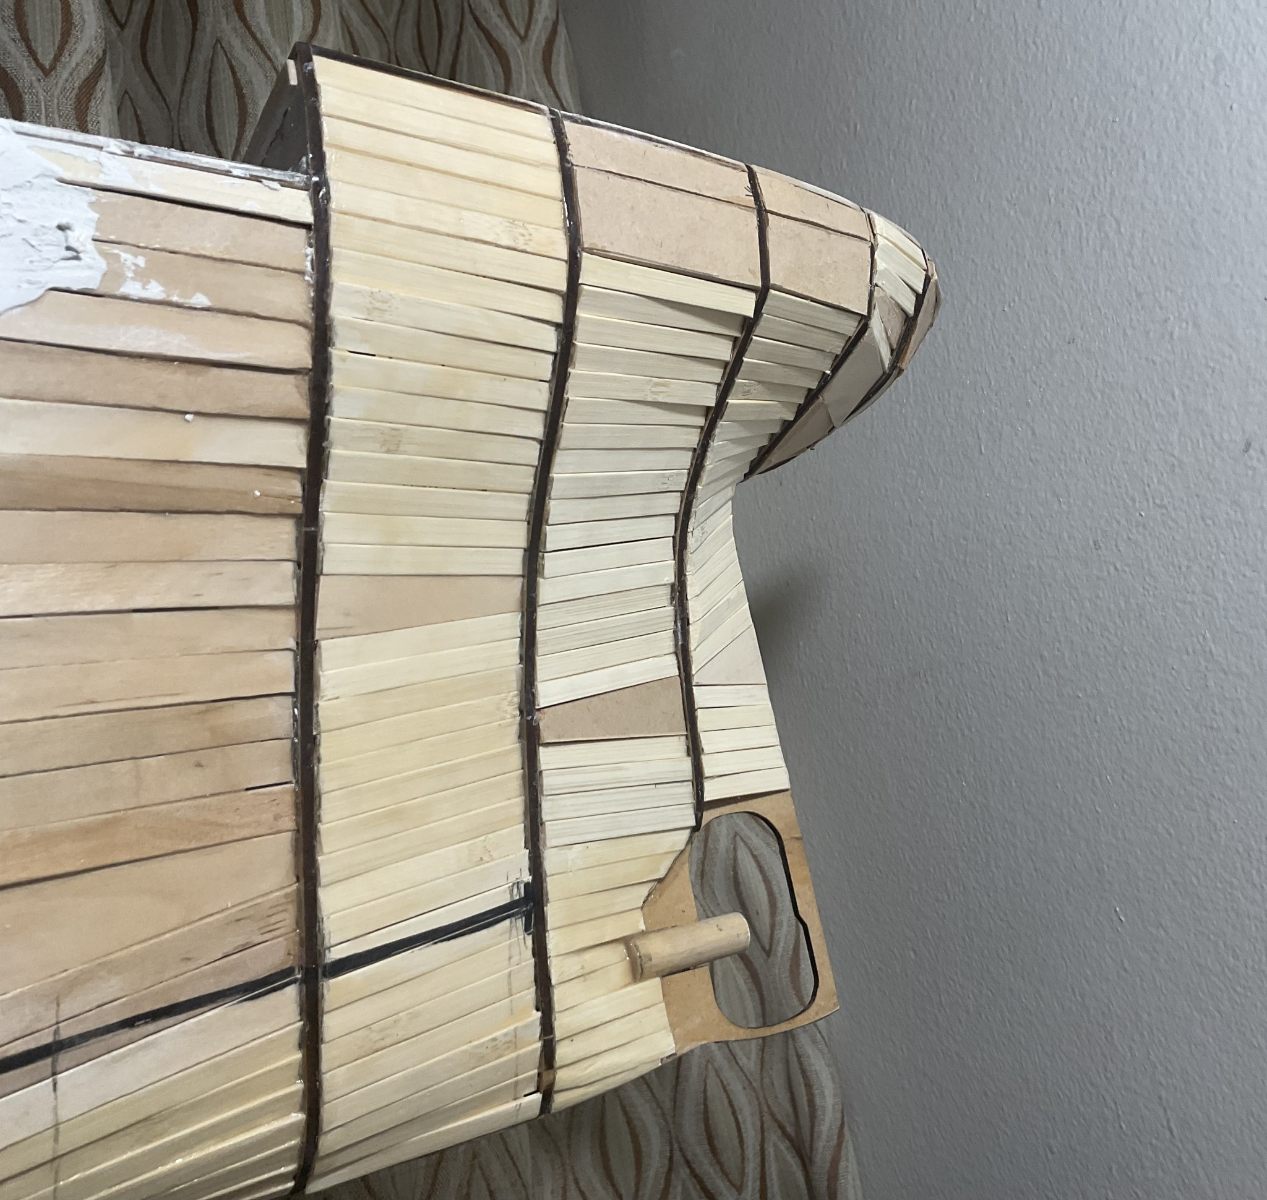
The filler and smoothing process is going nicely. When it's done I'll probably post some more pics here. I still need to make the outboard propeller wings and then I can start marking out the hull for the hull plating. That should be fun. -
Titanic by Tsm209 - 1/100
Tsm209 replied to Tsm209's topic in - Build logs for subjects built 1901 - Present Day
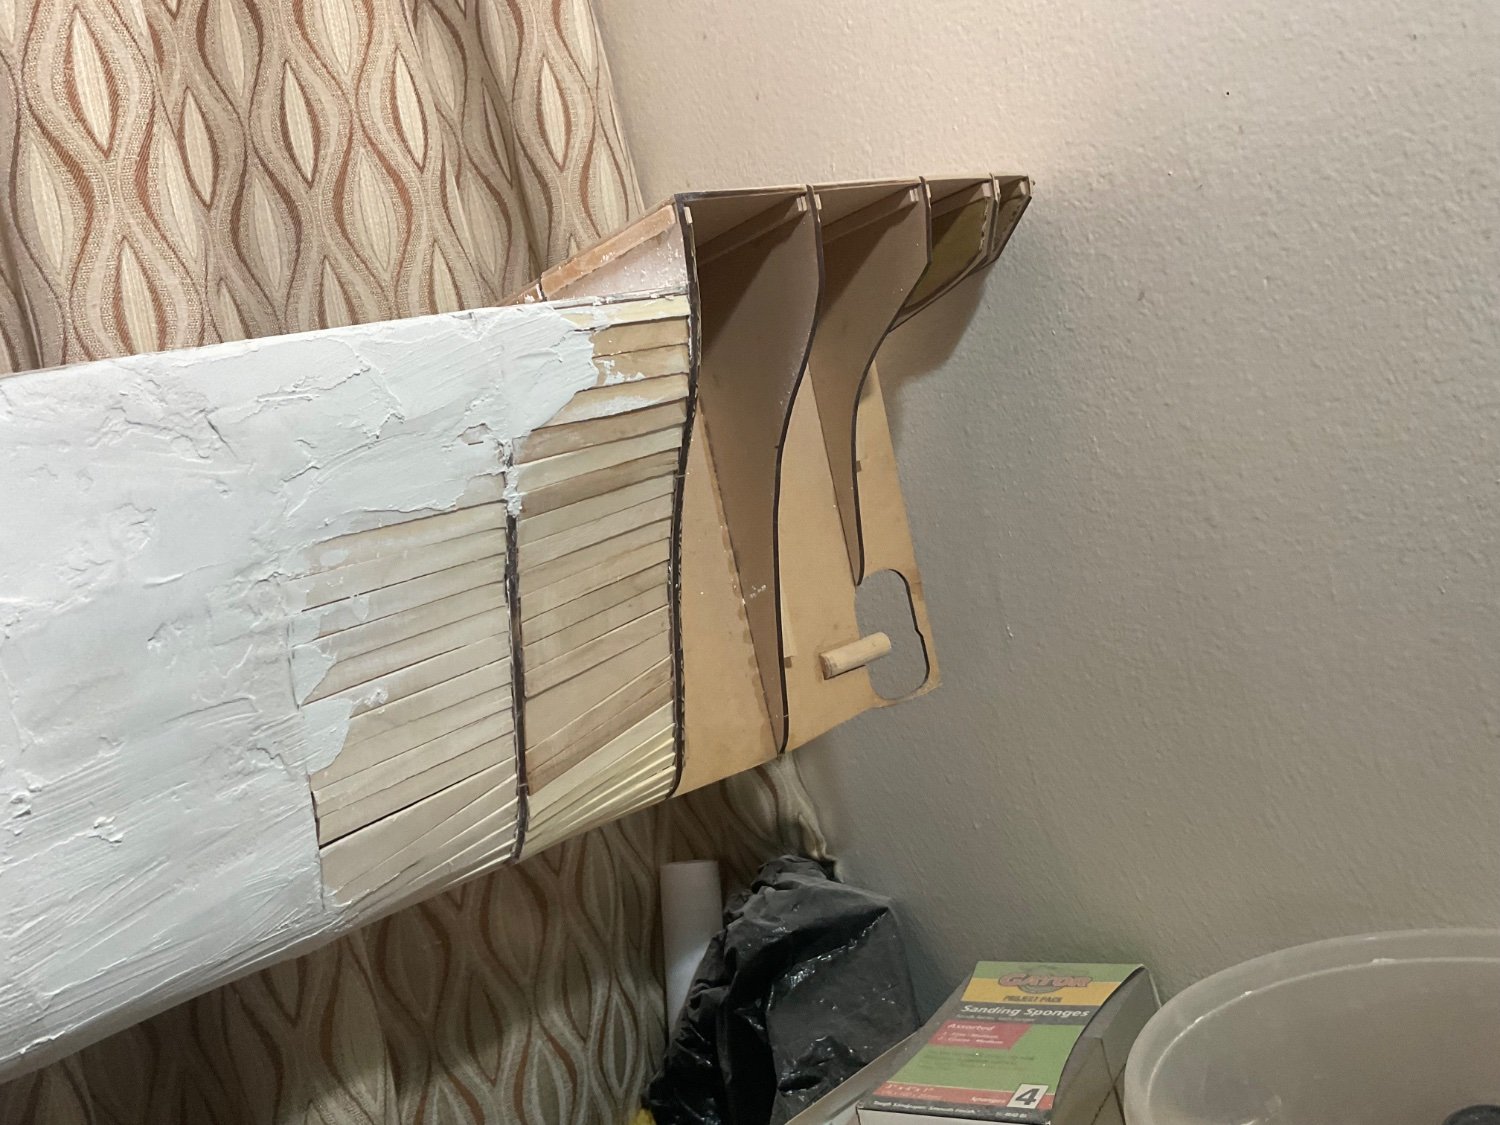
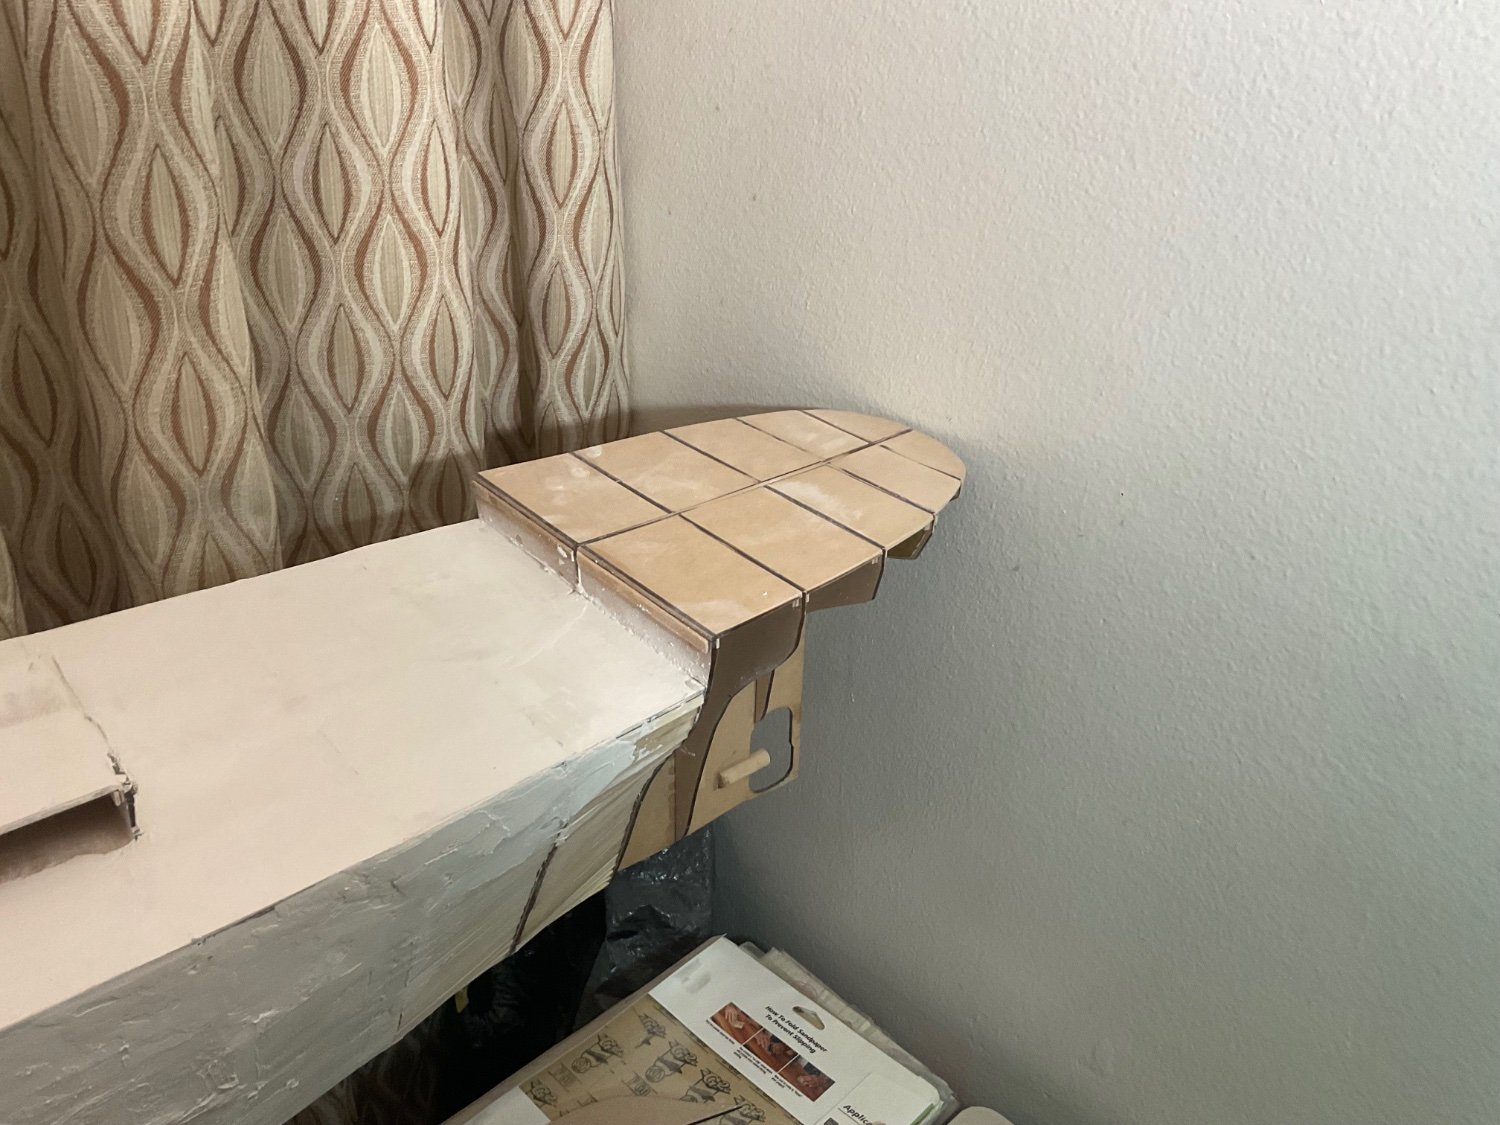
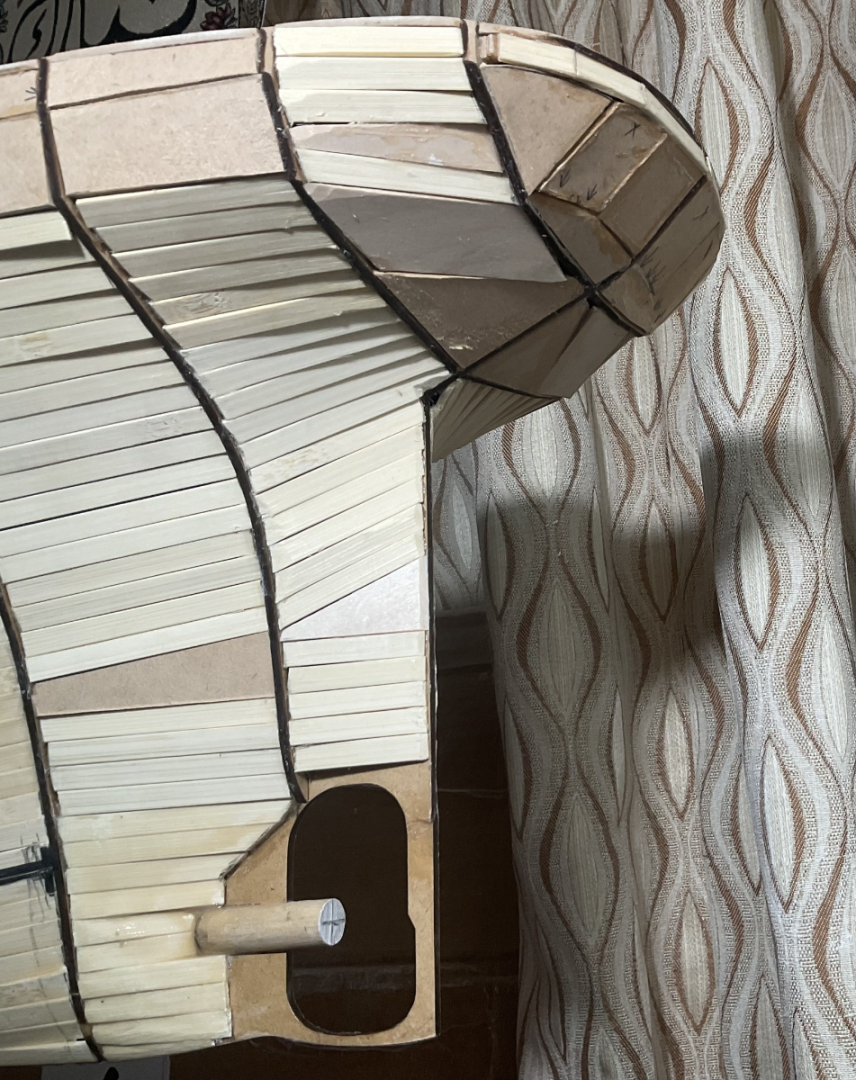
Finally finished up the stern. It‘s very rough, but I think that some filler will do the job and smooth it out.


-
Titanic by Tsm209 - 1/100
Tsm209 replied to Tsm209's topic in - Build logs for subjects built 1901 - Present Day
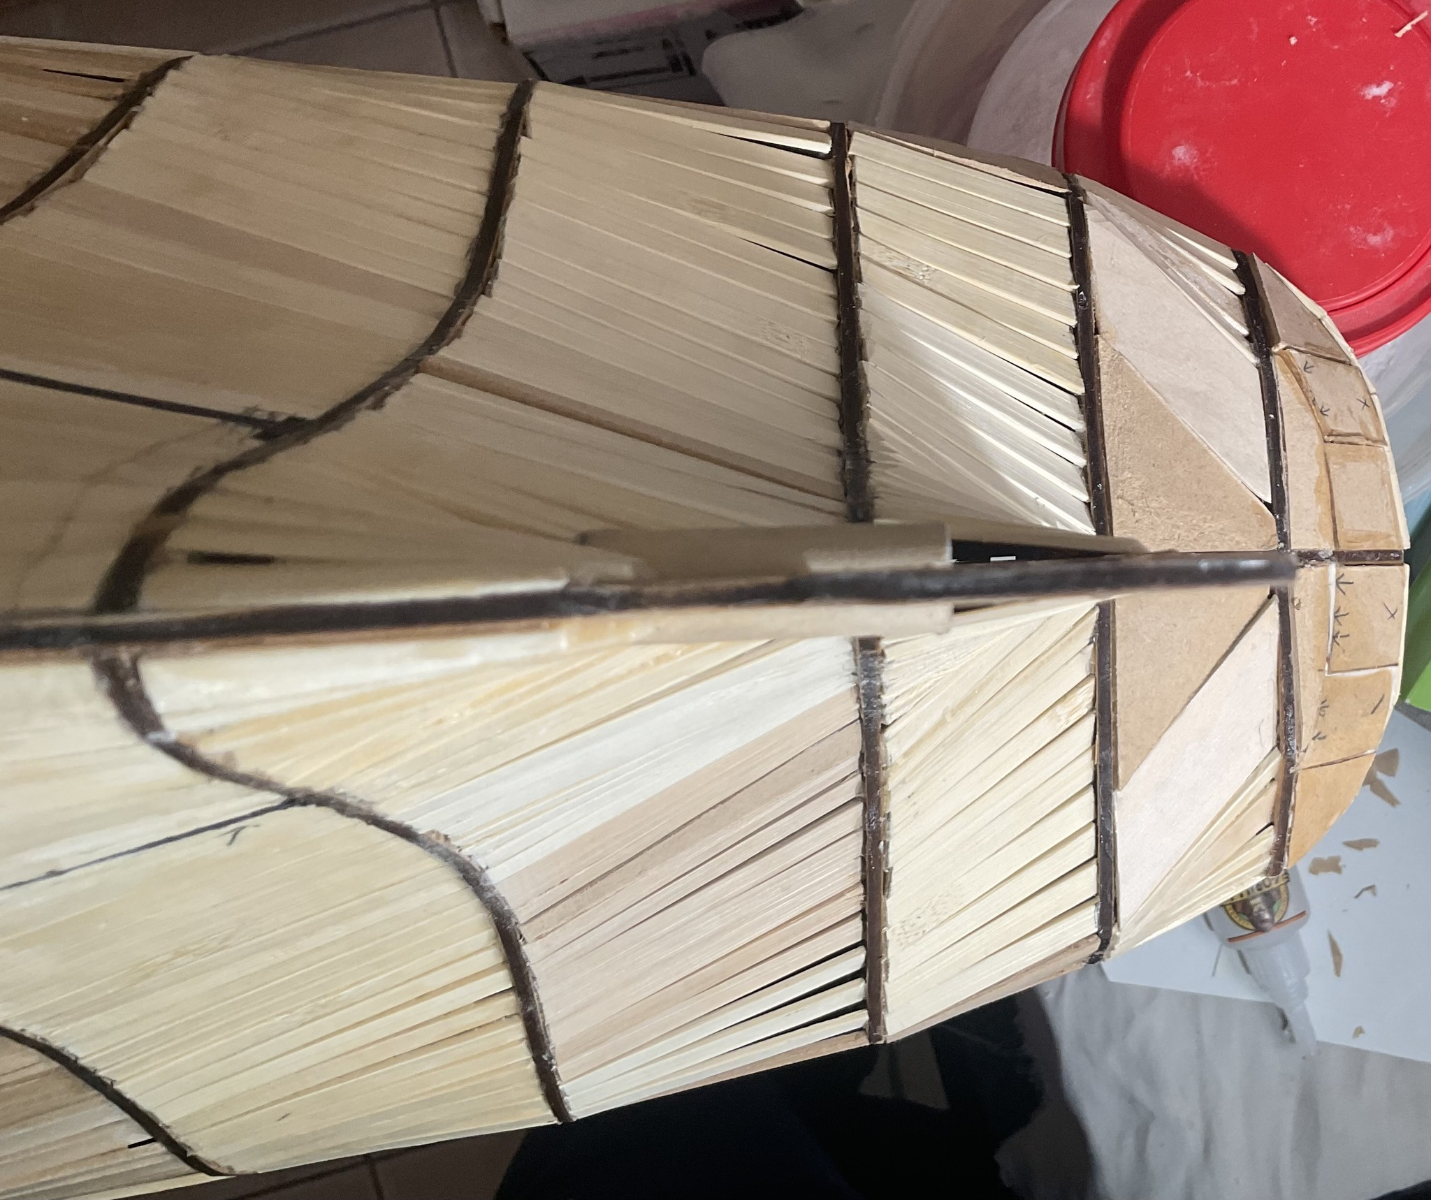
The photos do help when tackling these tricky shapes. I'll have to make it up as I go along, following the frames to give me a guide of the shape. -
Tsm209 reacted to a post in a topic:
Titanic by Tsm209 - 1/100
-
Titanic by Tsm209 - 1/100
Tsm209 replied to Tsm209's topic in - Build logs for subjects built 1901 - Present Day
The bow has been filled, although some slight gaps to be still filled so that it is completely smooth. Now remains the tricky shape of the stern.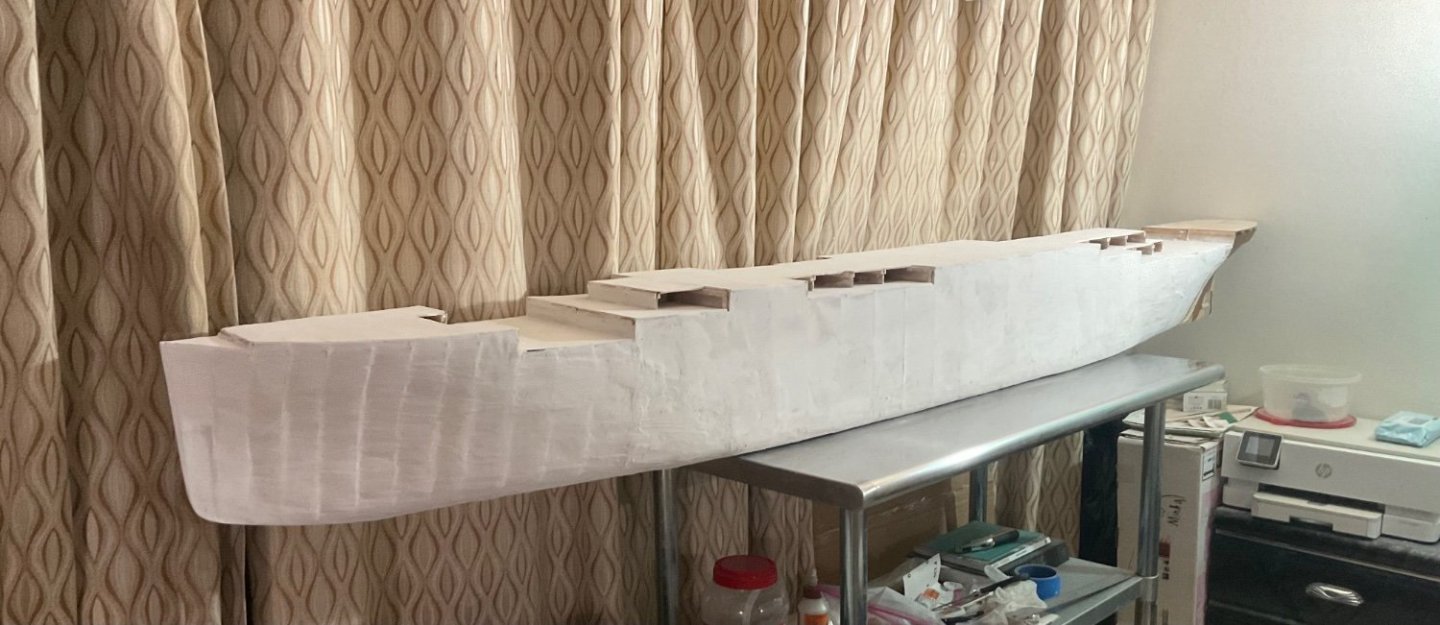


-
Titanic by Tsm209 - 1/100
Tsm209 replied to Tsm209's topic in - Build logs for subjects built 1901 - Present Day
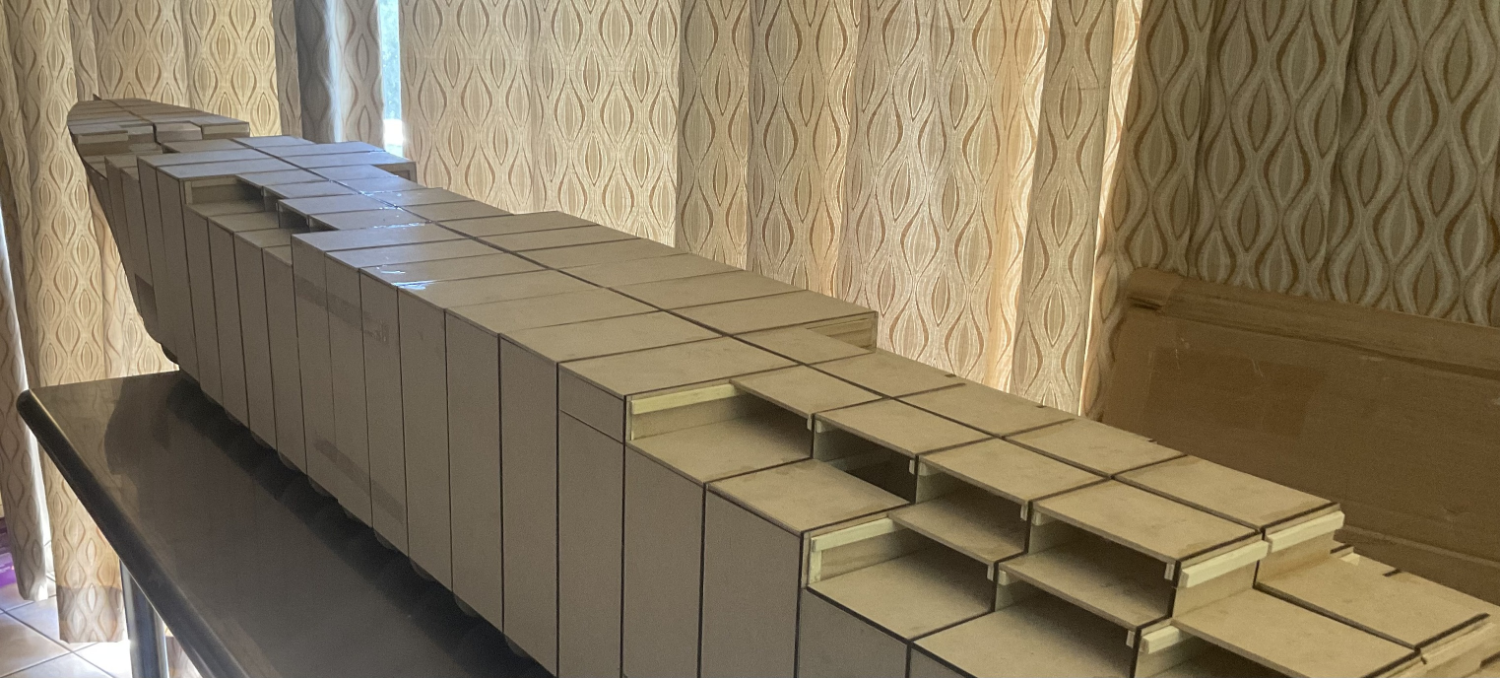
Yes it is quite big, almost 9 feet. -
Titanic by Tsm209 - 1/100
Tsm209 replied to Tsm209's topic in - Build logs for subjects built 1901 - Present Day
I’ve started to fill the hull in with filler.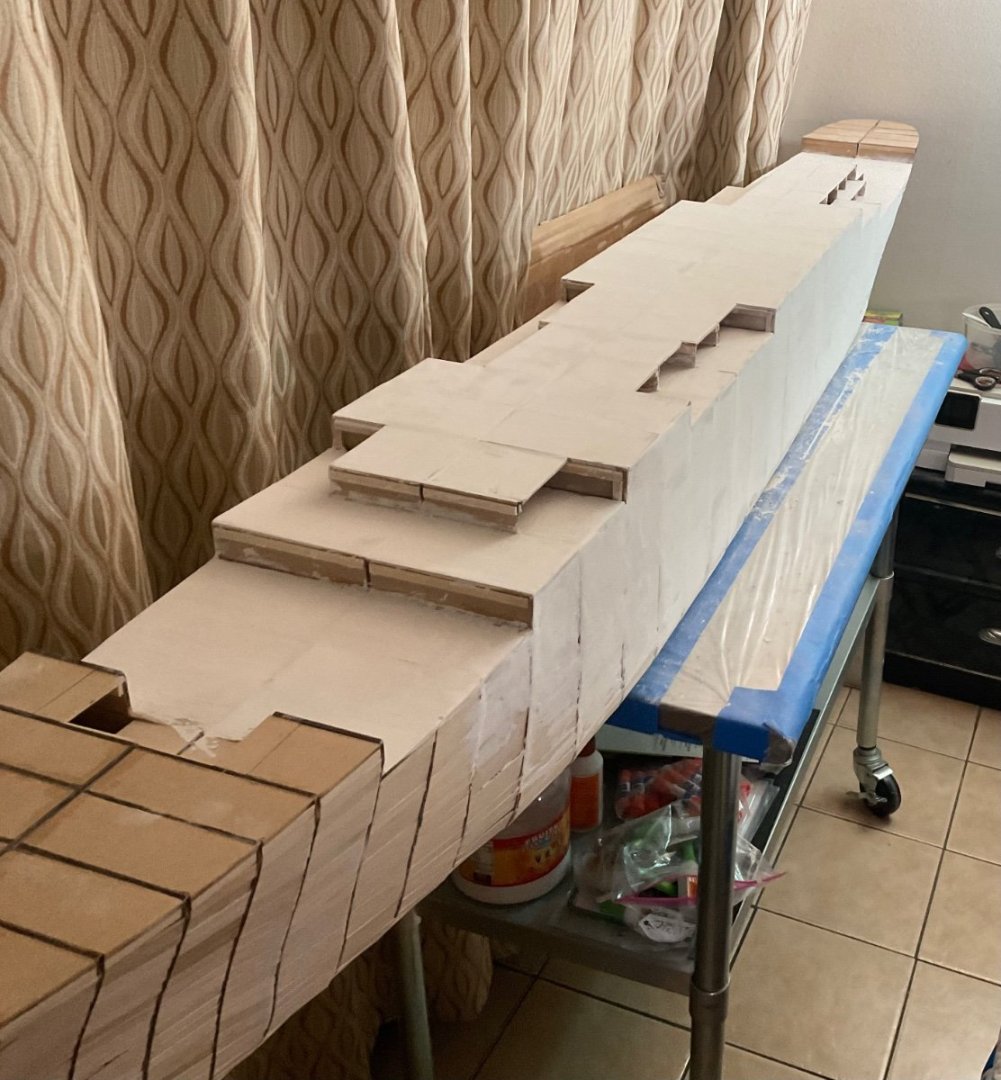

-
Tsm209 reacted to a post in a topic:
Titanic by Tsm209 - 1/100
-
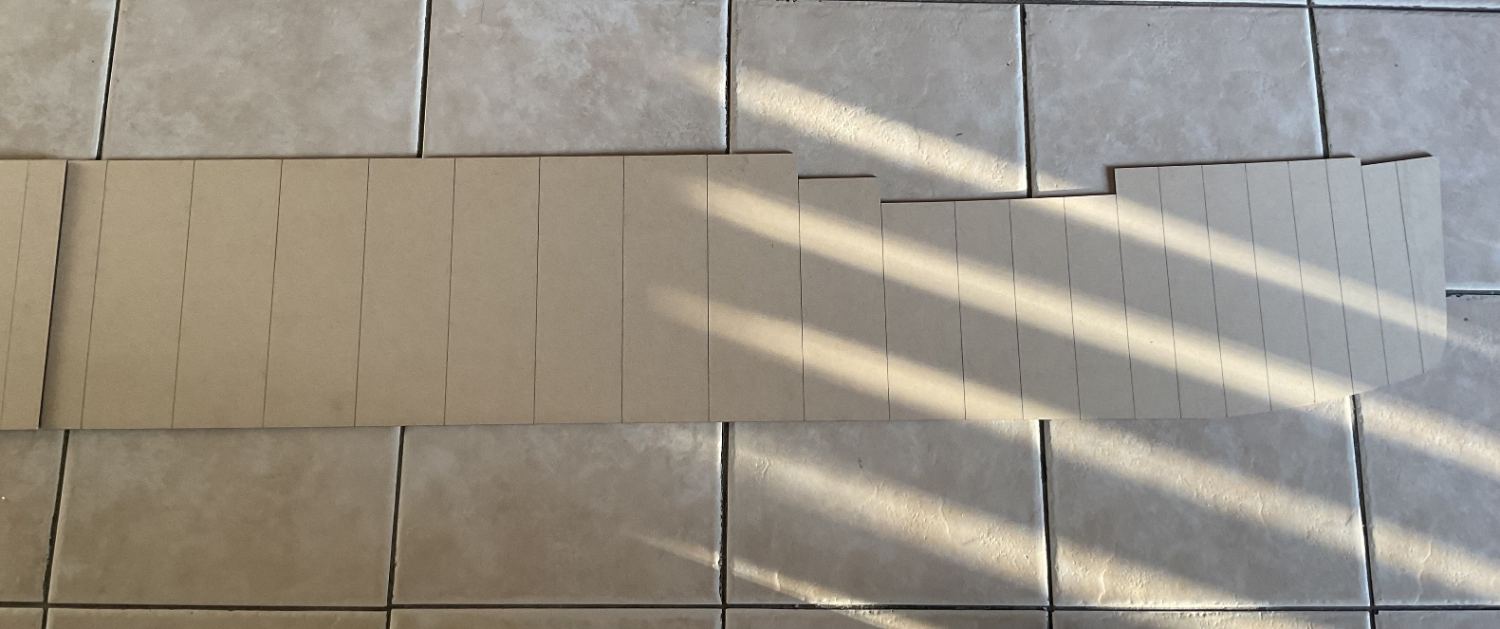
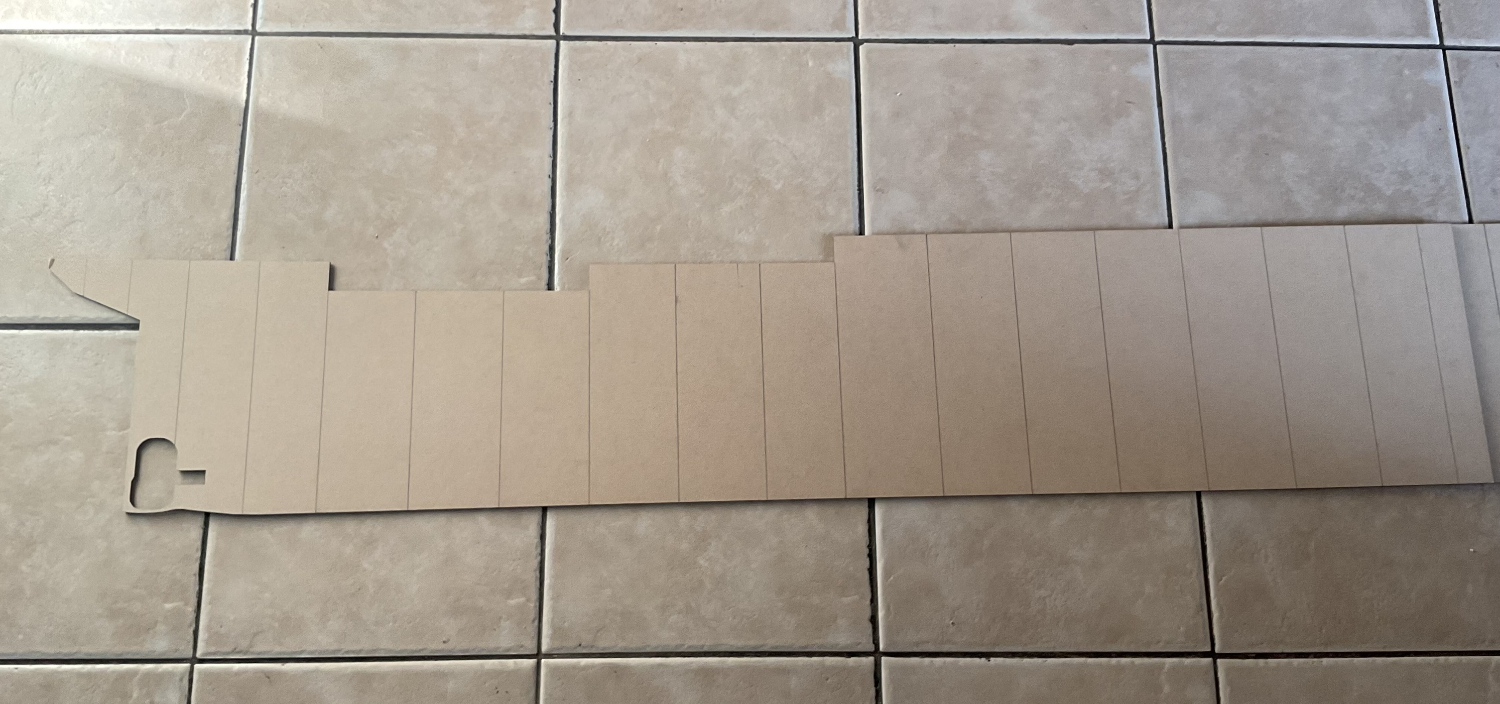
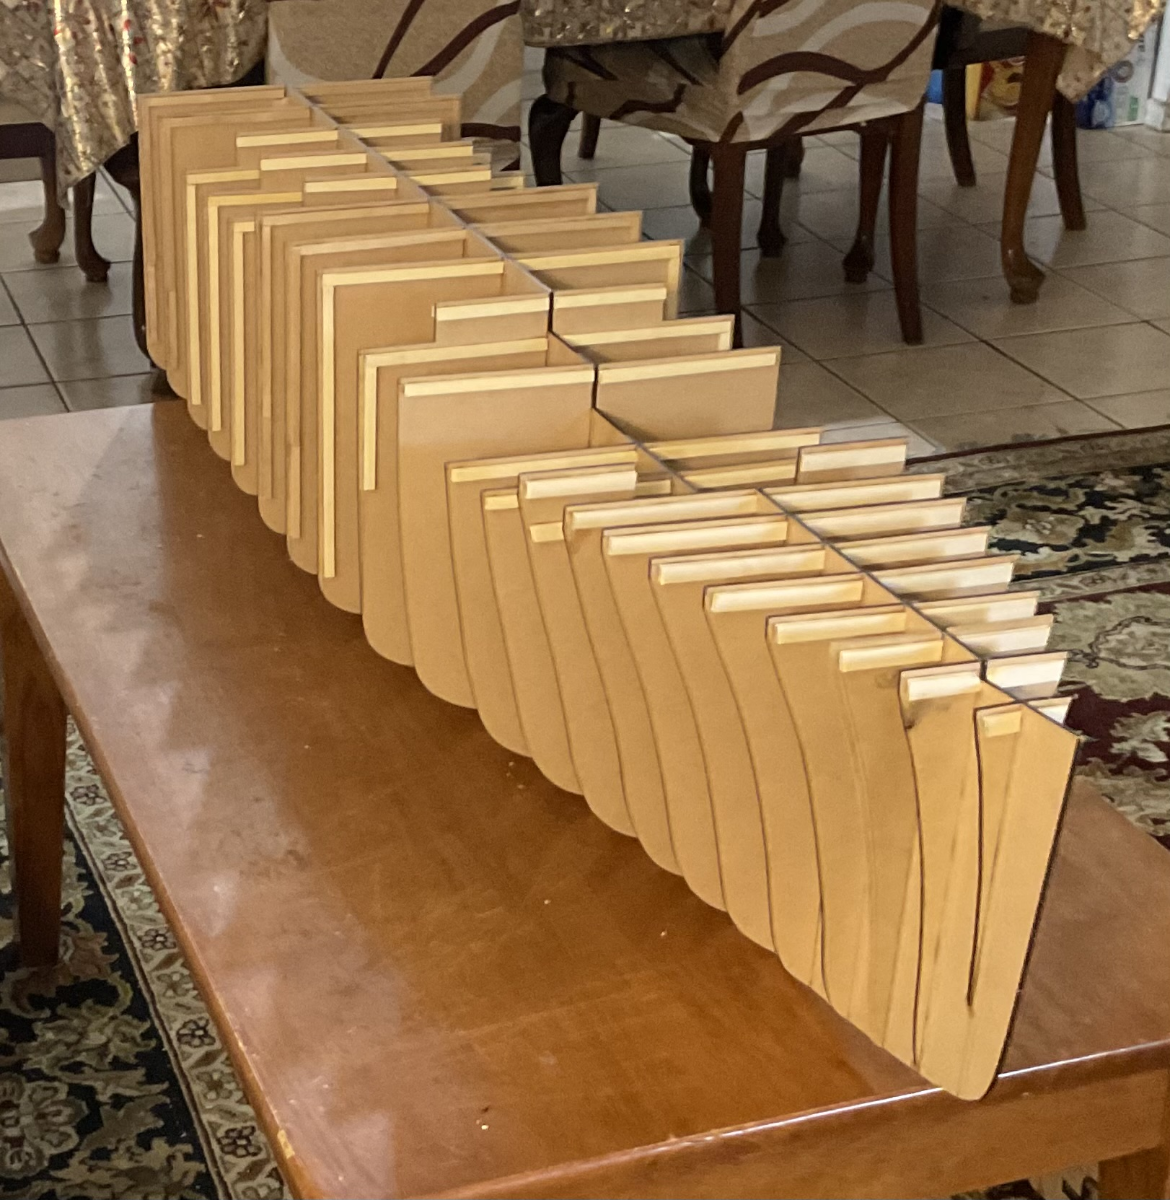
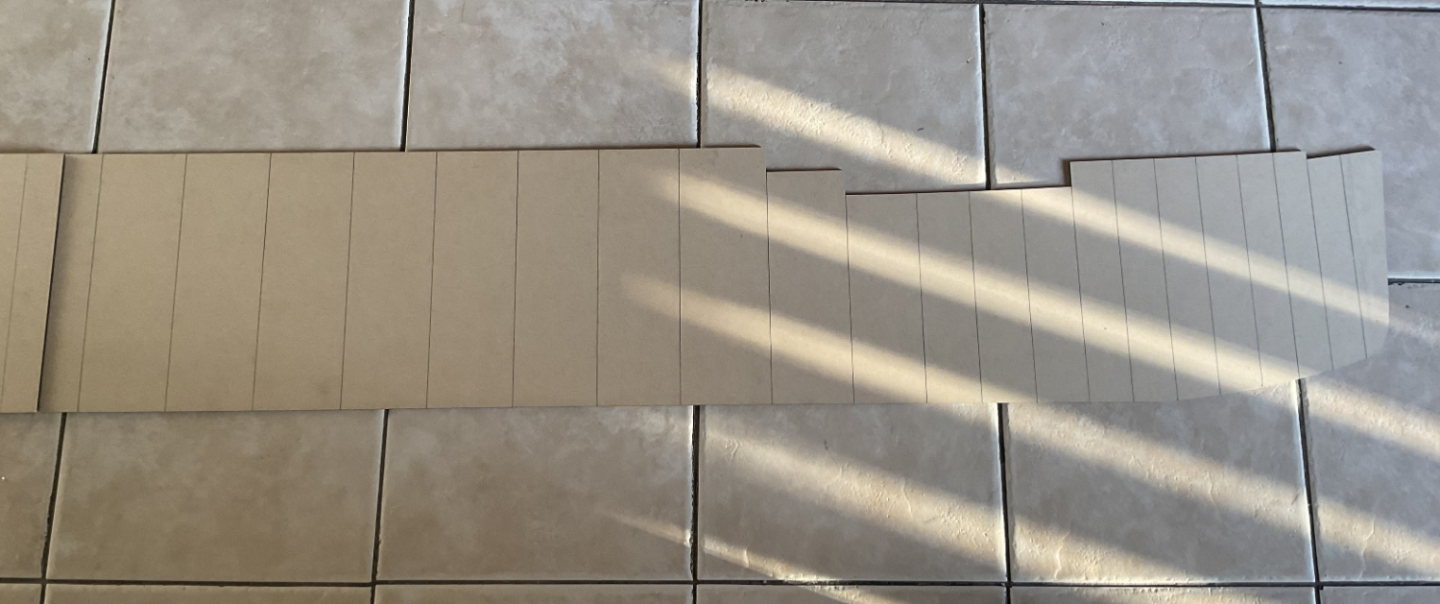
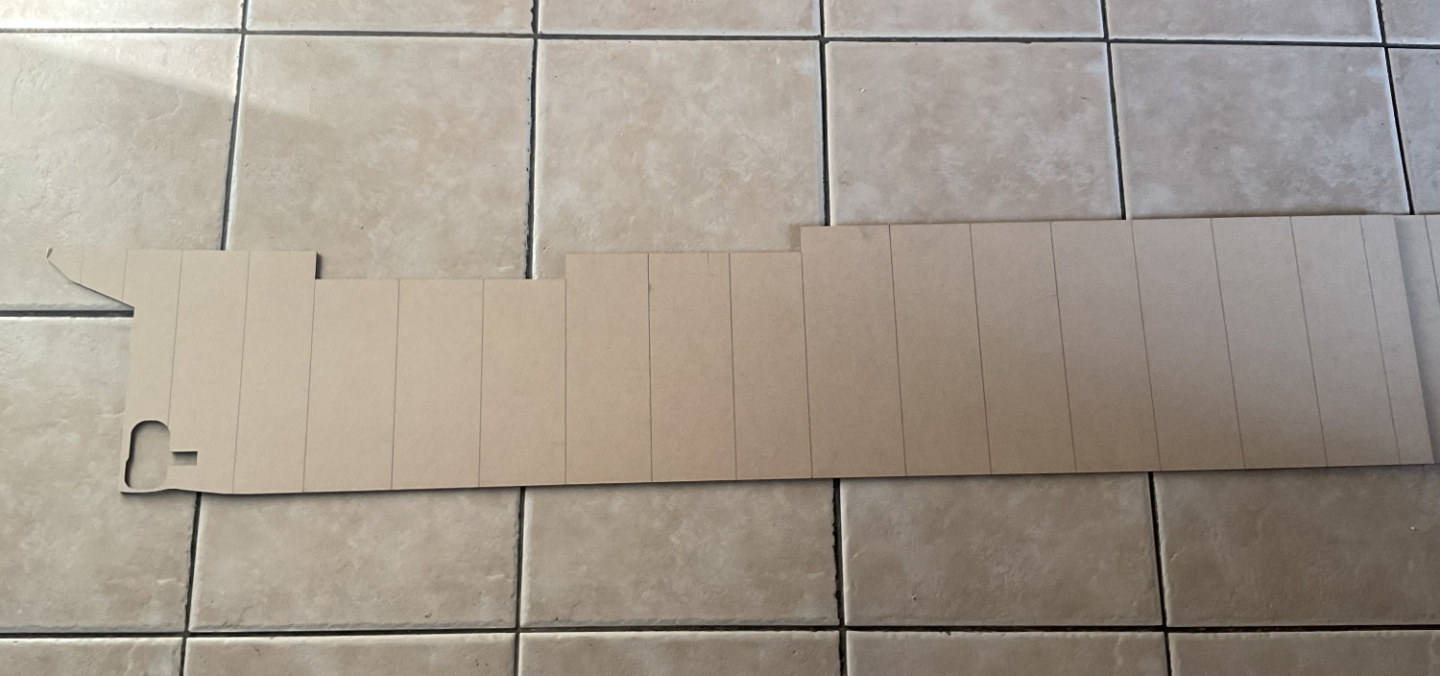
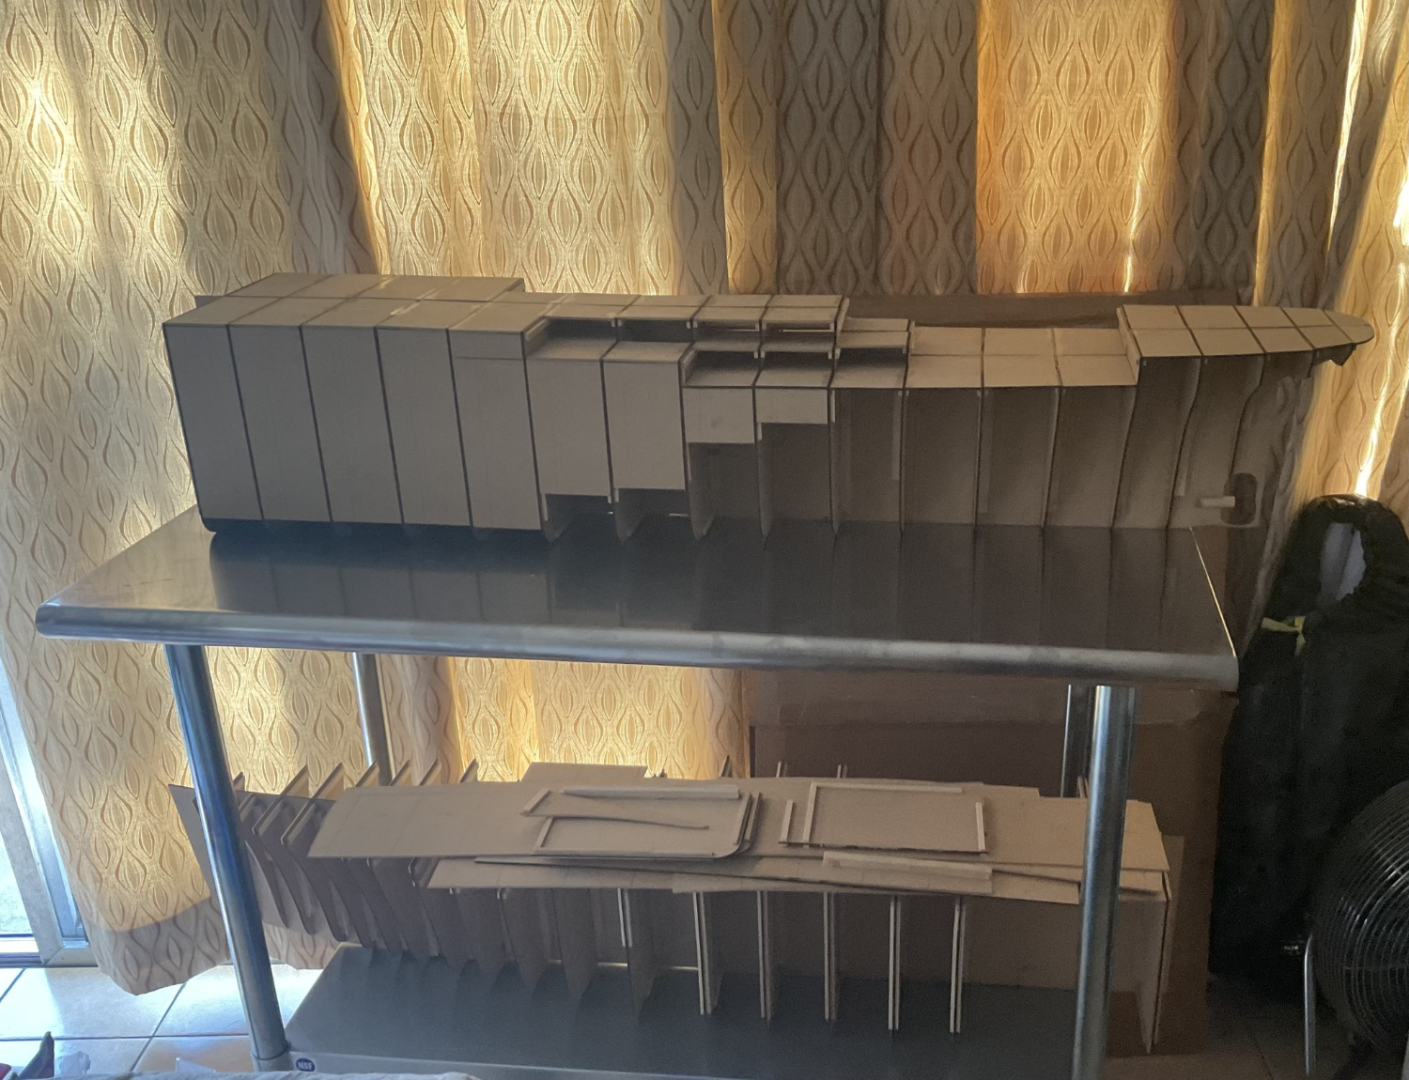
Hello, I have been working on a scratch-built 1/100 Titanic for quite some time now and I have decided to share it on here. I am actively working on the ship to get the hull frames filled in and to start the hull plating. Here is the keel of the ship cut out into 2 pieces. Forward and aft parts of the ship with the frames glued. Aft section of the ship, partially filled. Here is the ship with both pieces together to create a massive hull. Slowly but surely, getting the frames filled.


-
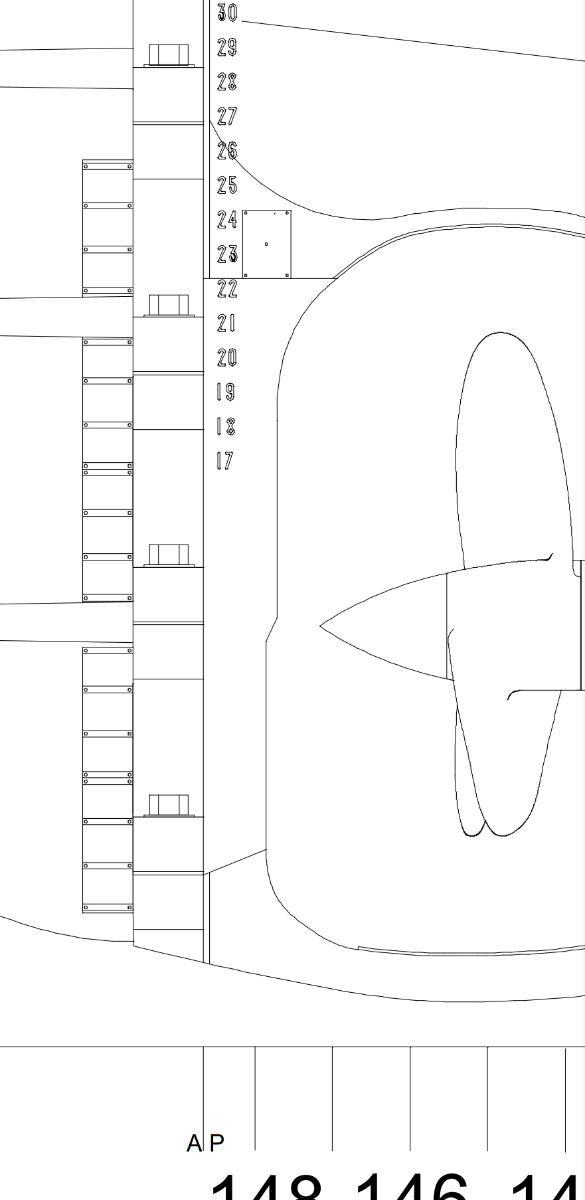
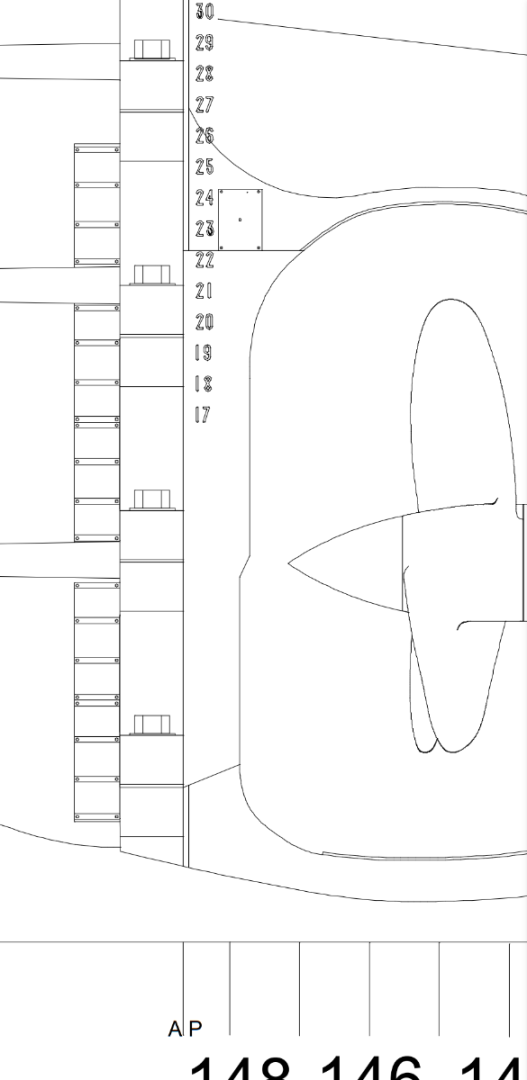
Very nice on the small details. Just be aware, the zinc anodes on the rudder are different than originally thought. Here is a drawing. (Drawing courtesy of Robert Read)
-
I like using pollyfilla for the more larger gaps, spreads easily, dries hard, and is easy to sand, it's also paintable. It gives a smooth wall-like surface. Though for wood models, wood filler is the way to go.
-
Just looked up, I think a scroll saw is best for the project I am on right now. Asking someone else to cut it would probably mean that they will only cut straight, not the intricate shape of the keel and frames.
-
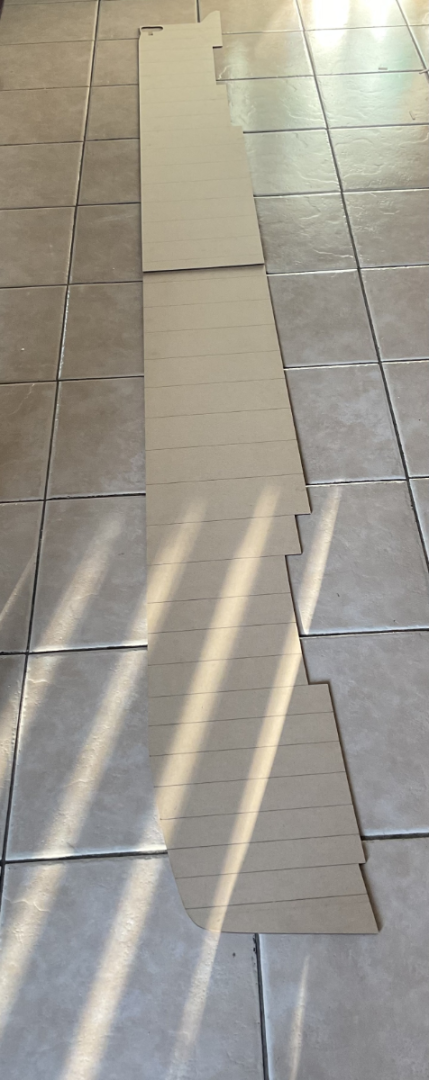
I just need to cut out the hull frames and keel, I already have it drawn on the wood. Budget is modest
-
Where is the best place to get the keel and frames of a ship cut, if not what is the best tools that one can use to cut wood by themselves?