Adam C
-
Posts
13 -
Joined
-
Last visited
-
 robert952 reacted to a post in a topic:
Block Tumbler Help
robert952 reacted to a post in a topic:
Block Tumbler Help
-
Ryland Craze reacted to a post in a topic:
Block Tumbler Help
-
mtaylor reacted to a post in a topic:
Block Tumbler Help
-
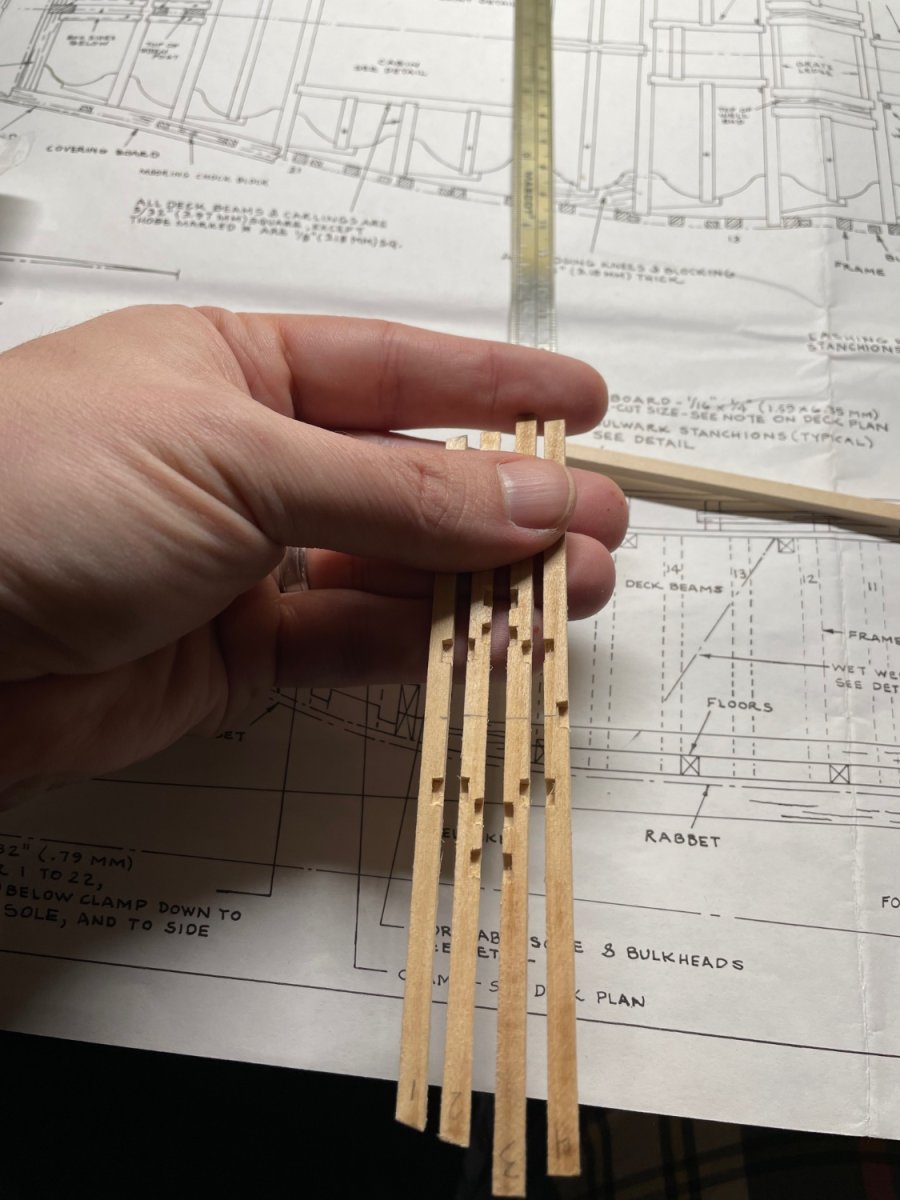
I ran it at a pretty high speed. I don’t know what my drill goes up to, but I just held it at wide open for about 30 second increments. Took maybe two or three minutes total.
-
mtaylor reacted to a post in a topic:
Block Tumbler Help
-
cotrecerf reacted to a post in a topic:
Block Tumbler Help
-
Ryland Craze reacted to a post in a topic:
Block Tumbler Help
-
Chuck Seiler reacted to a post in a topic:
Block Tumbler Help
-
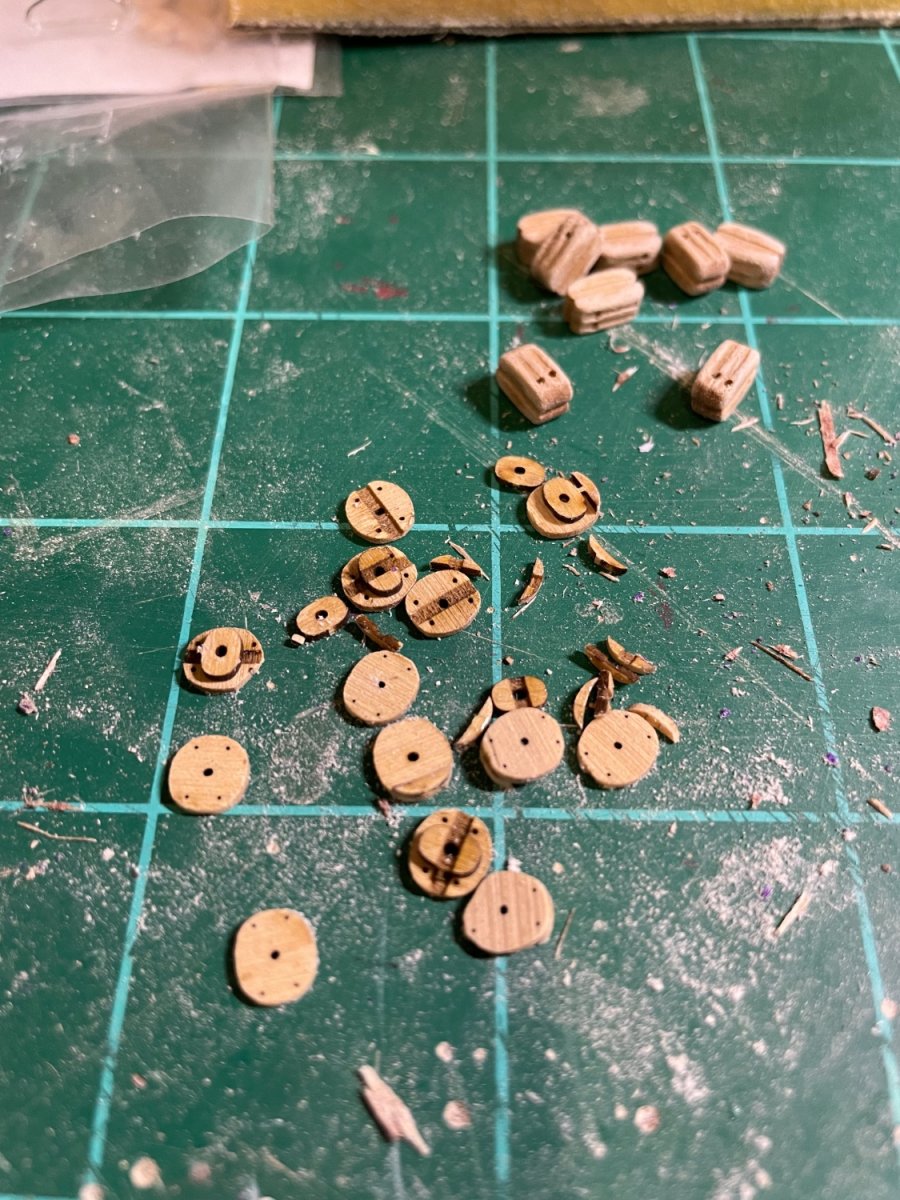
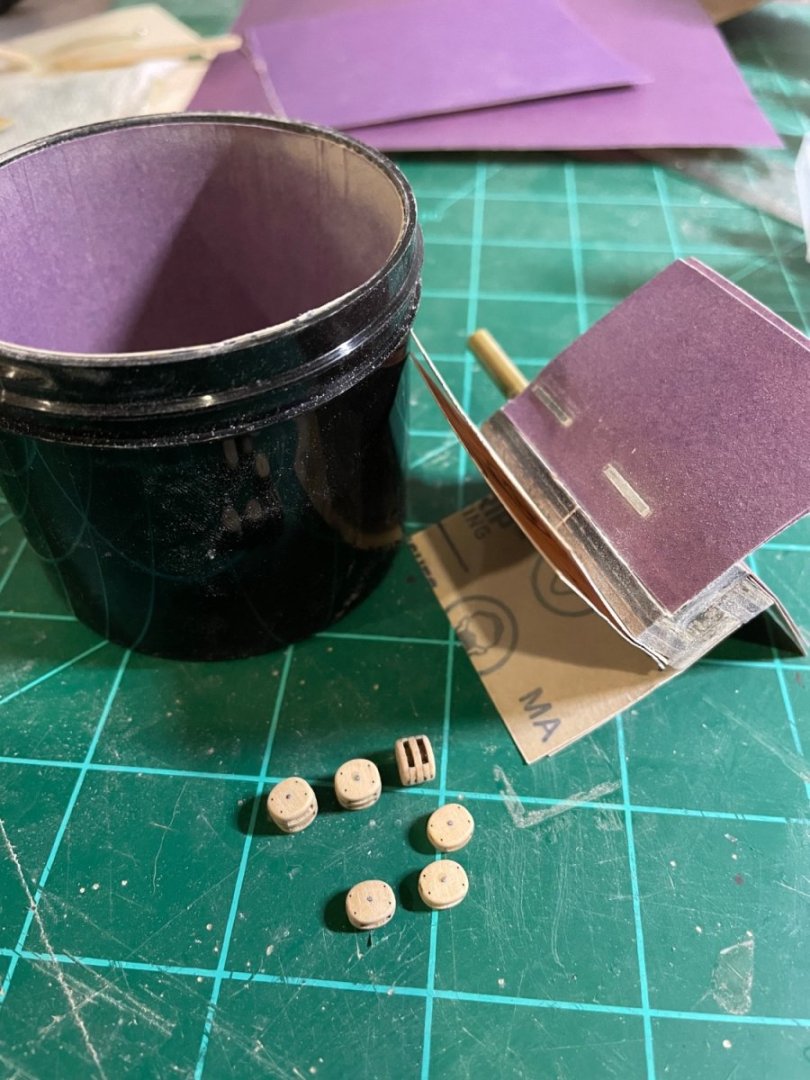
Based on y’all’s feedback, I ended up modifying my block sander with 320 grit and replaced the paddles with sandpaper. I just stapled a double ply to the center mandrel. Worked like a charm! Chuck’s blocks came out looking incredible.
-
Chuck Seiler reacted to a post in a topic:
Block Tumbler Help
-
Keith Black reacted to a post in a topic:
Block Tumbler Help
-
 Keith Black reacted to a post in a topic:
Block Tumbler Help
Keith Black reacted to a post in a topic:
Block Tumbler Help
-
Thank you both! The support on this forum is incredible, when even the guy who makes the blocks is there to help! I’m going to try and modify it to get rid of the paddles like Chuck’s. Even when I threw in normal blocks it jammed them against the sides and chipped the paddles. Sir, you’ve got another block order coming tonight. Let’s try this again!
-
Anyone have any tips on a block tumbler? I bought the block buster from Model Expo and tested it on some junk blocks, but when I put a couple of Chuck’s internally stropped blocks in, it ripped them to shreds. I tried a bunch of different angles and techniques, but it started to destroy the paddles too. blocks get jammed between the paddles and the sides and either the block or the paddle breaks. What on earth and I doing wrong?

-
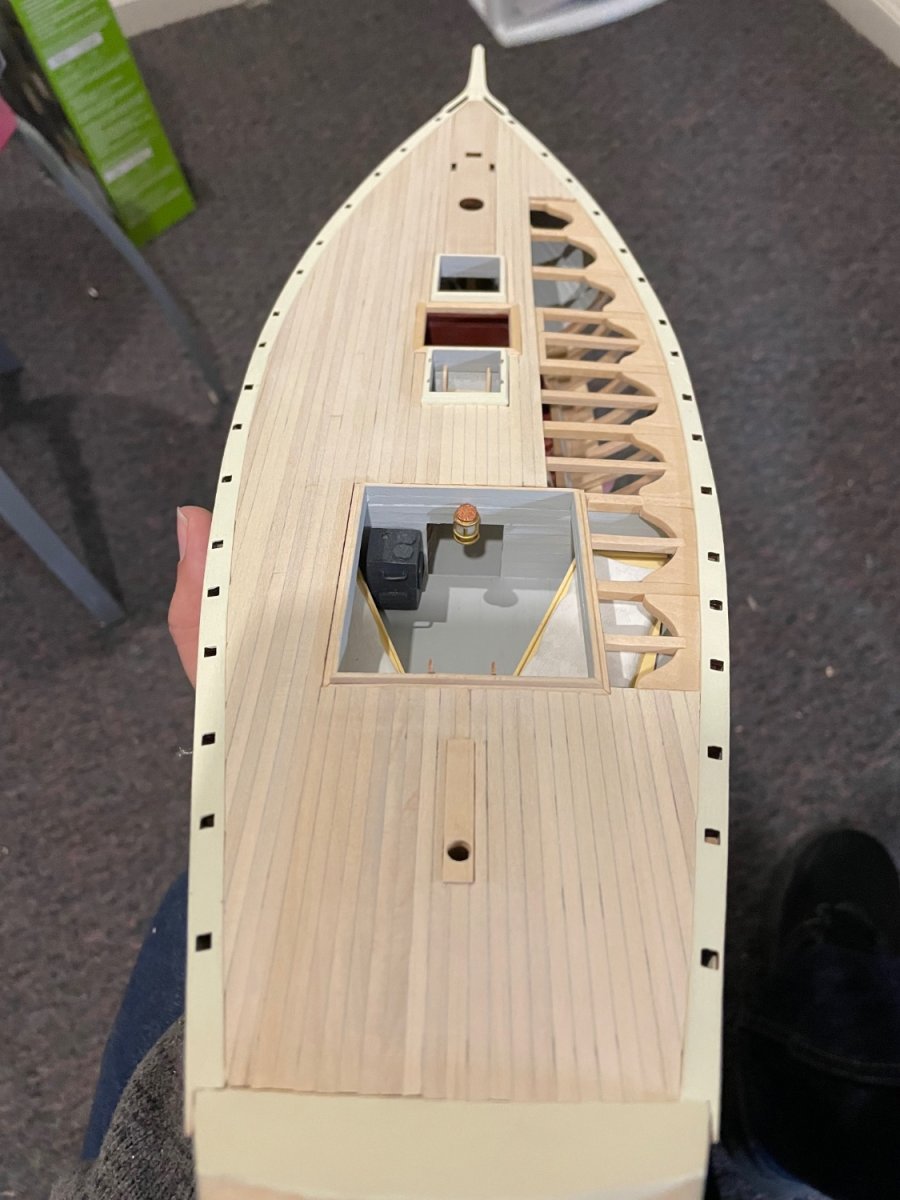
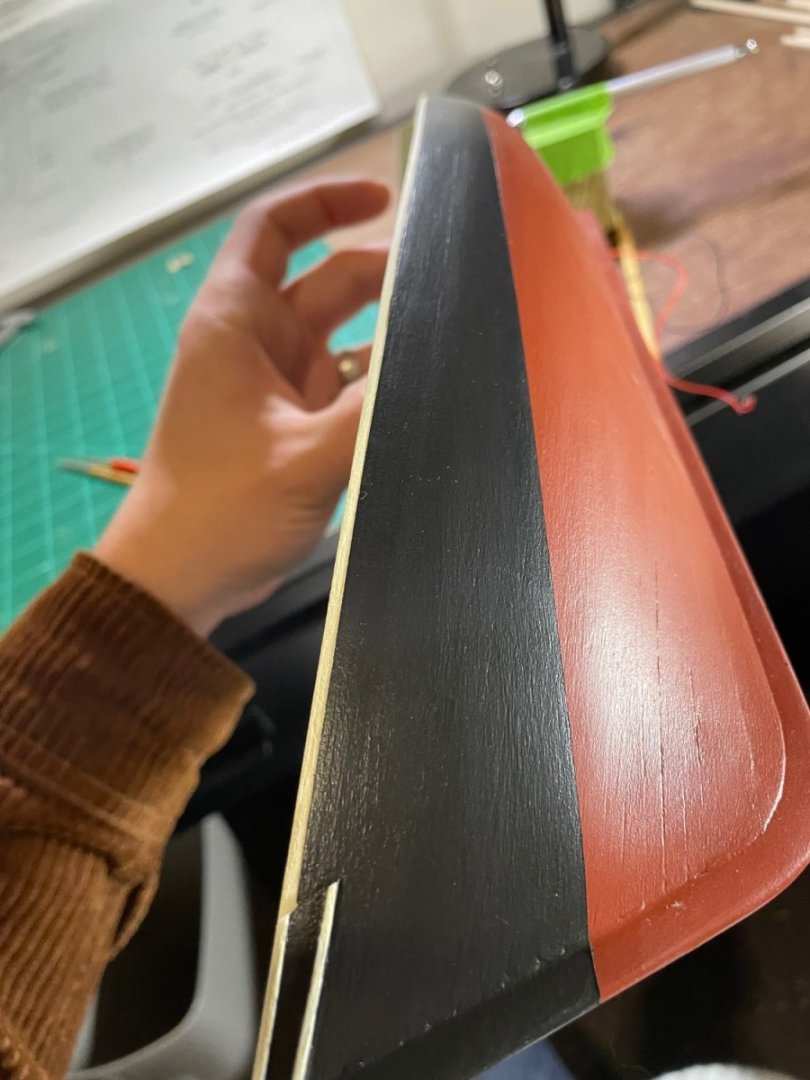
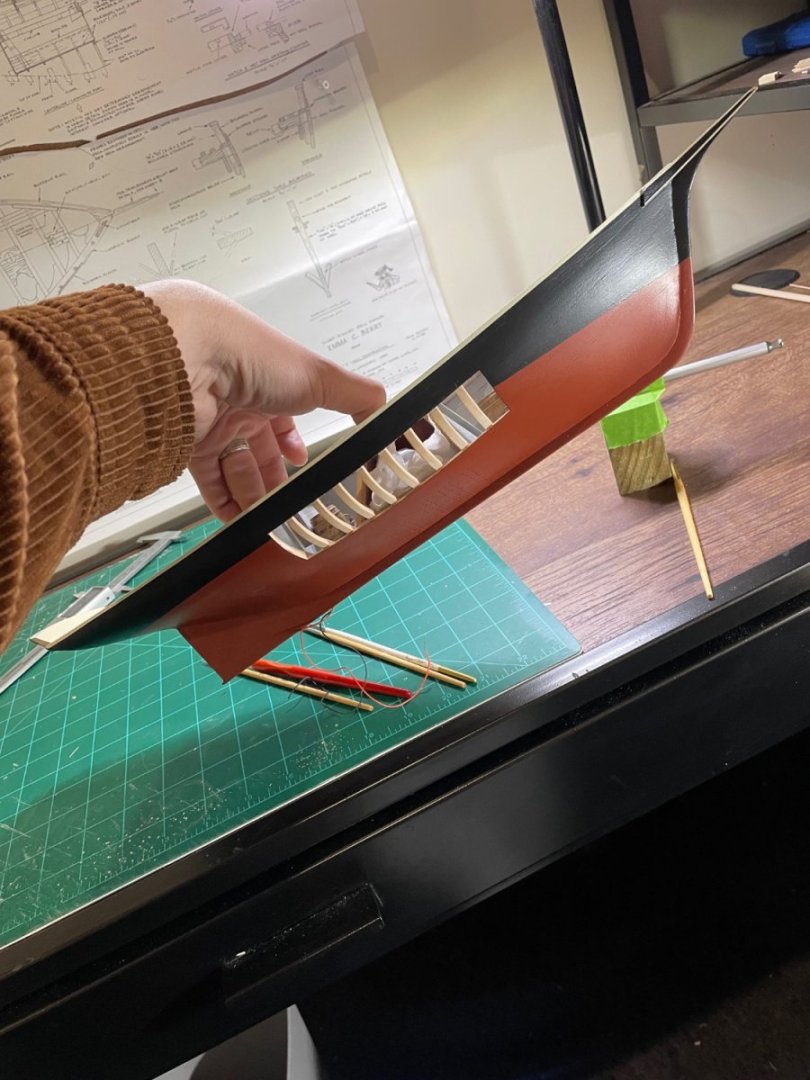
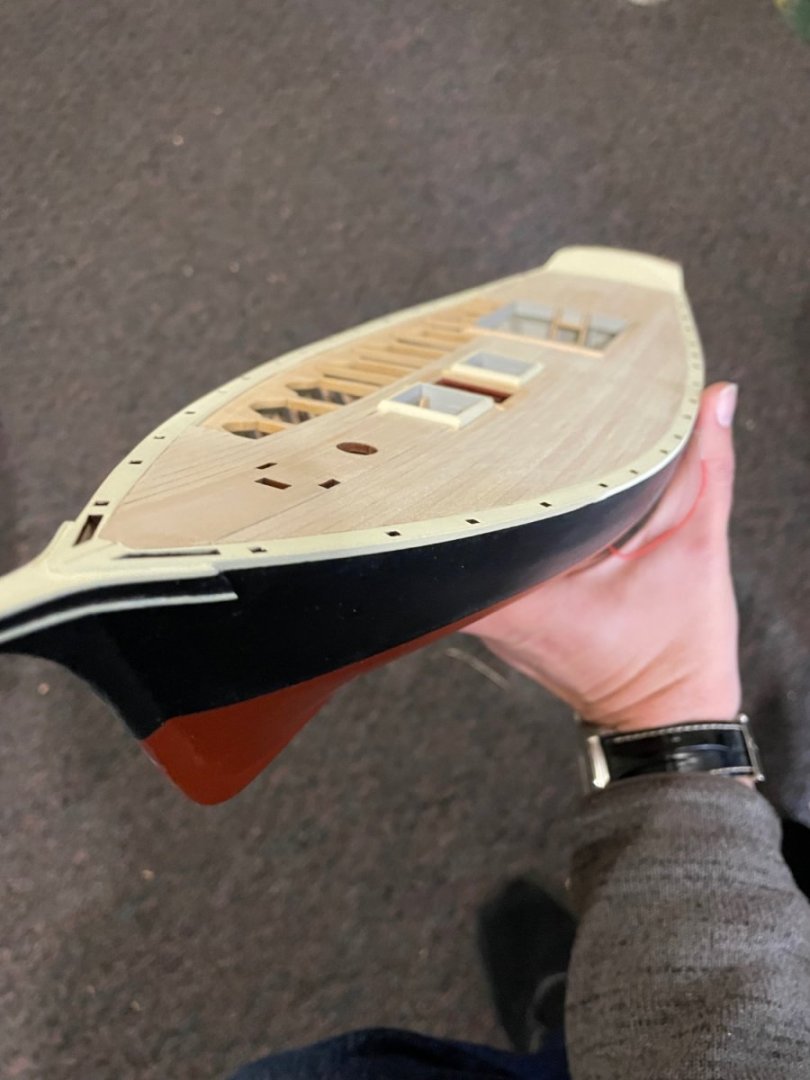
The next step was finishing the planking up to the covering board. No surprises there and unfortunately I don’t have any pics of the work. Quick aside, I spent forever measuring an individual tick strip for each frame and then doing actual math (a dangerous pastime for me) to mark exactly how many millimeters between each plank. Never imagined there’s the a super simple fan chart that could have saved so much time. The bow was a little finicky. The smooth curve of the decorative scrollwork was done partly by bending wood and partly with a lot of filler sanded down. I think it’s ever so slightly too narrow, which would cause issues later. I left a window unplanked on the starboard side. Deck planking was straightforward too. I just had to be careful when going around one of the coamings to keep the planks in line. I used a pencil to darken the edge of one side of each plank for the caulking effect. I also left a part unplanked here as well.


-
Really interested in your conversion. I’m loving this kit. It’s great to see everyone’s take on the interior.
-
Adam C reacted to a post in a topic:
Emma C Berry by Adam C - Model Shipways - 1:32
-
Adam C reacted to a post in a topic:
Emma C Berry by Adam C - Model Shipways - 1:32
-
100% agree. It’s a great kit that has great plans. Its small size means I can really get into the knees and plank-on-frame details without it being too intimidating. As my first PoF ship, I’m loving it.
-
Haha, I wish it was fast progress. I started this kit in 2015, put it aside for a few years, and now I’ve been hammering away for about 18 months on it. I’ve never done a build log so I guess I wanted to make sure it was worthy of posting on the forum before I could get the courage to do so. I’m farther along than this, and trying to catch this log up to present.
-
 Adam C reacted to a post in a topic:
Emma C Berry by Adam C - Model Shipways - 1:32
Adam C reacted to a post in a topic:
Emma C Berry by Adam C - Model Shipways - 1:32
-
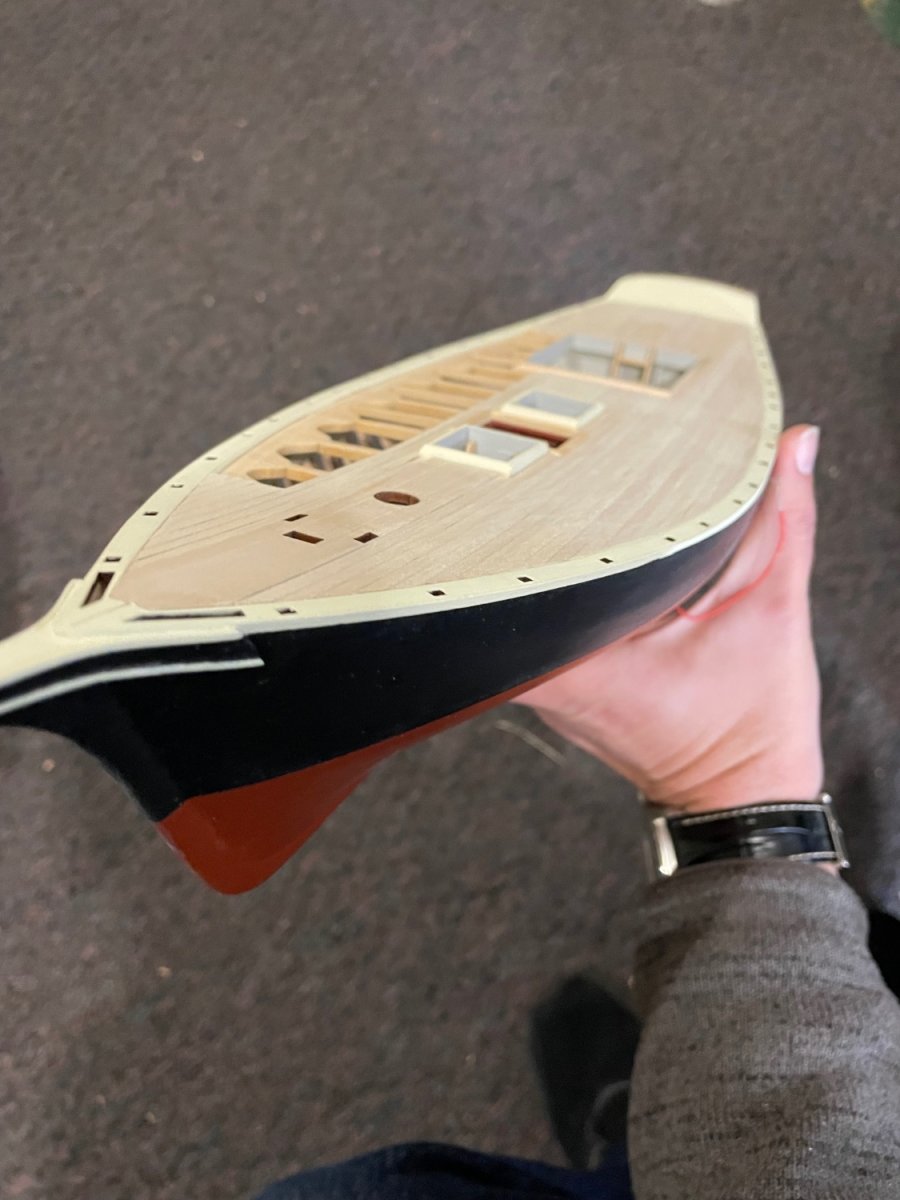
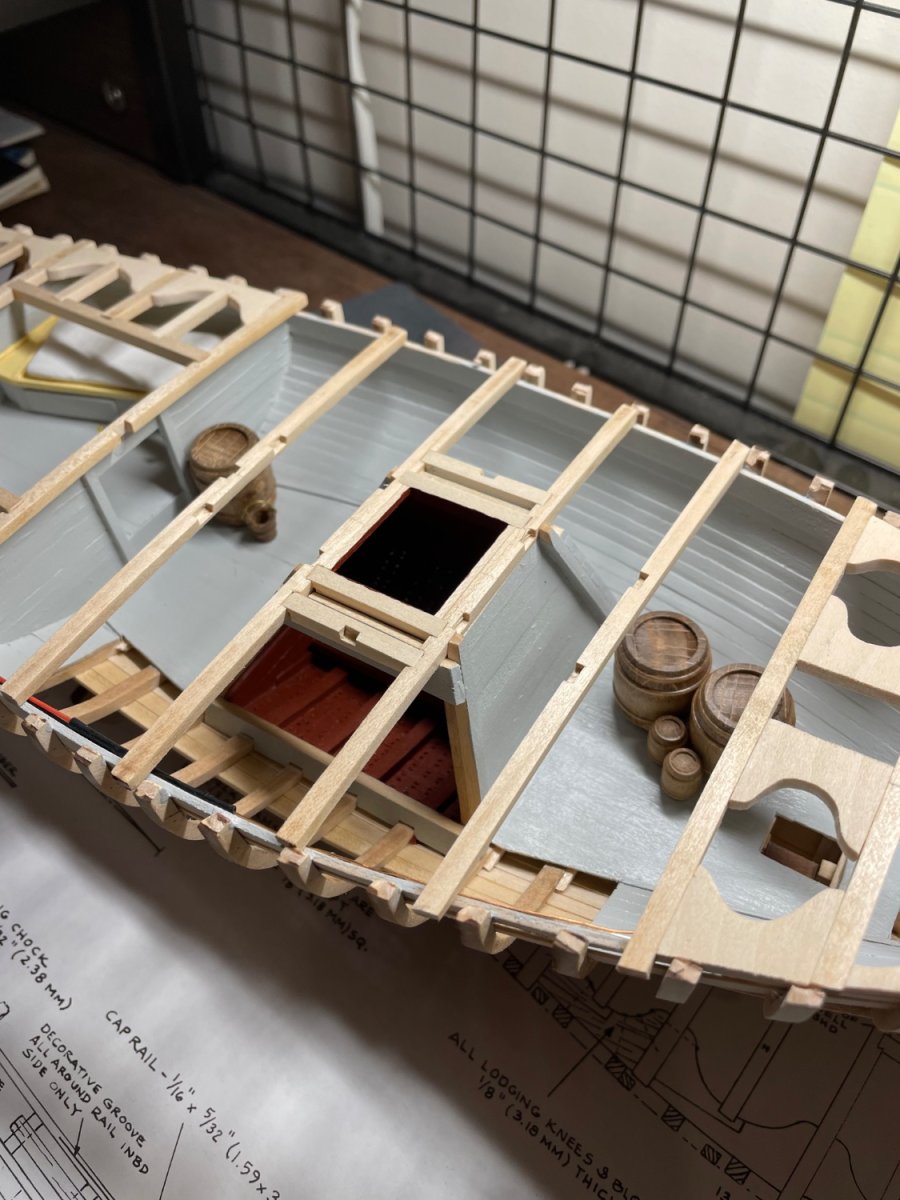
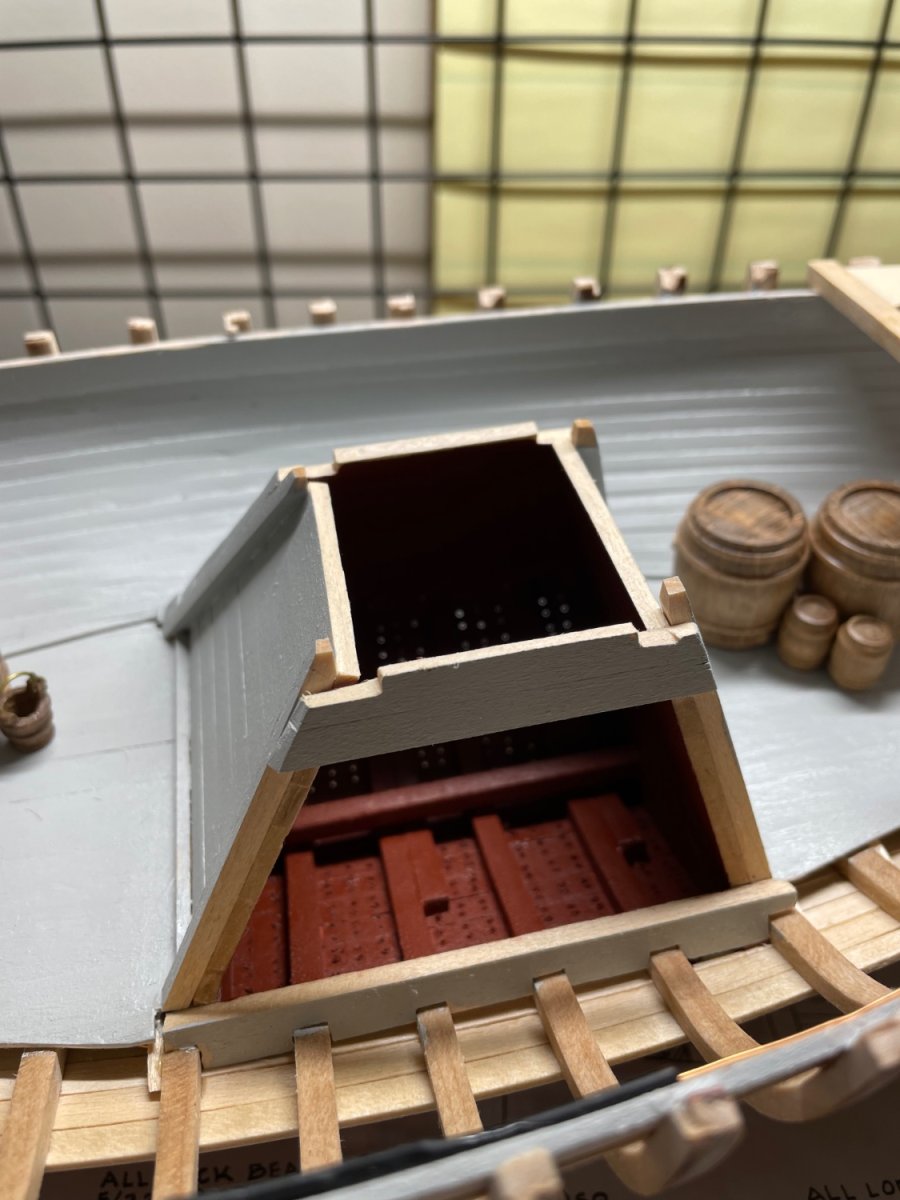
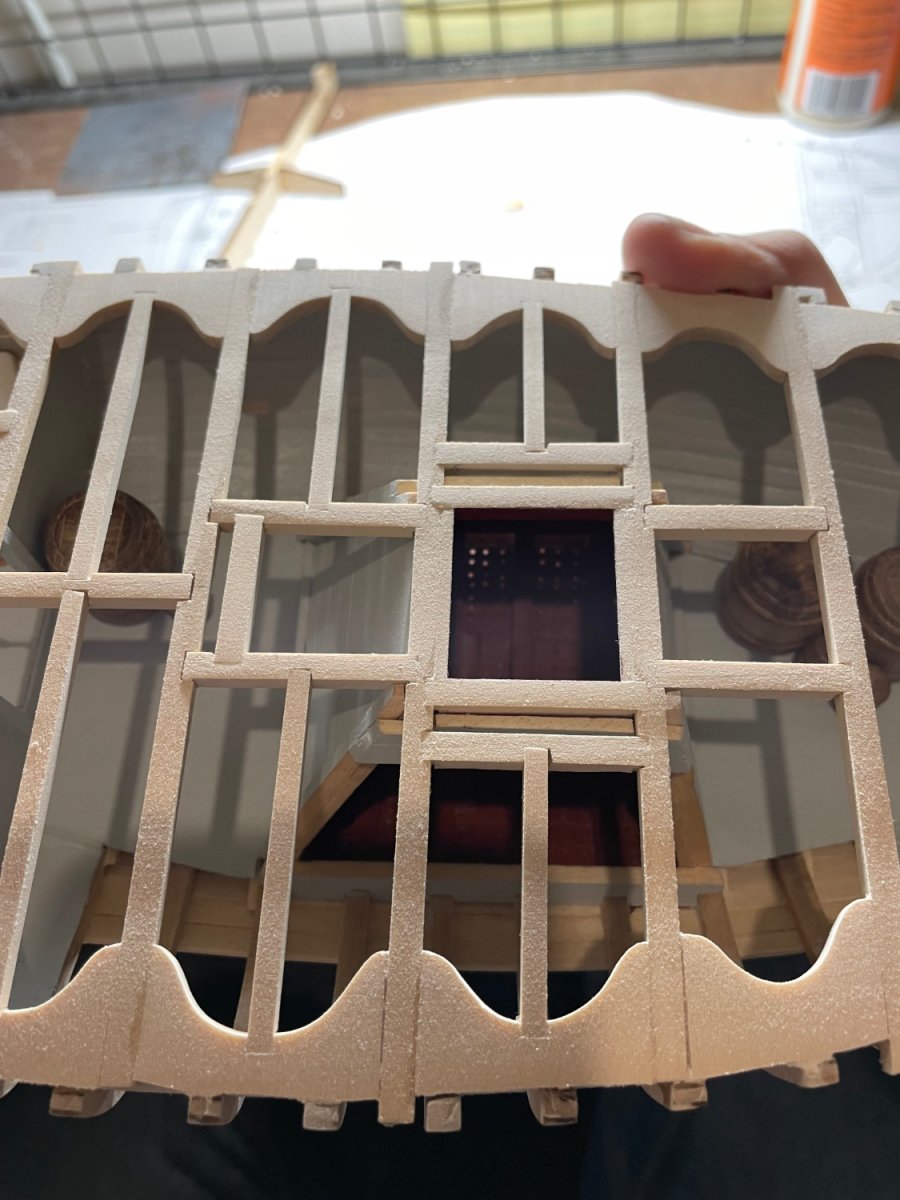
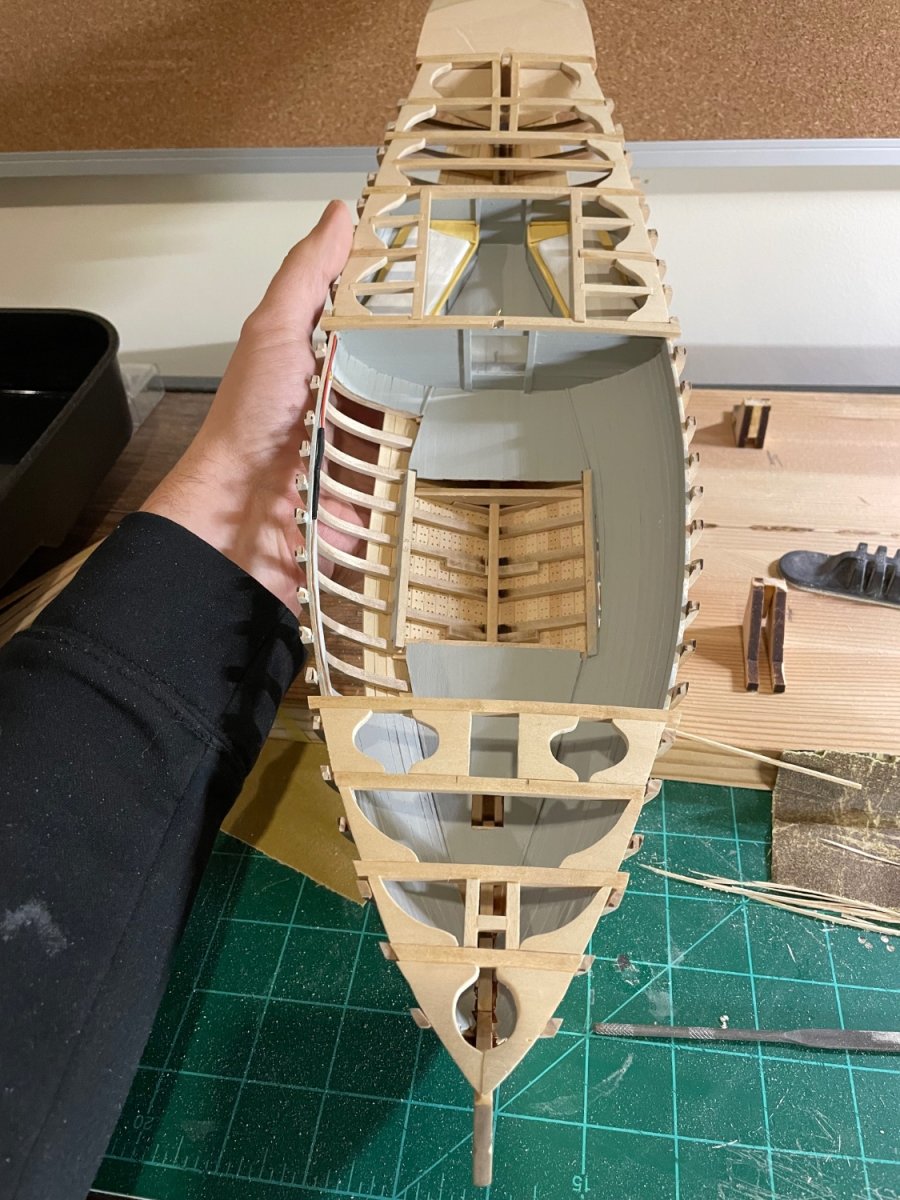
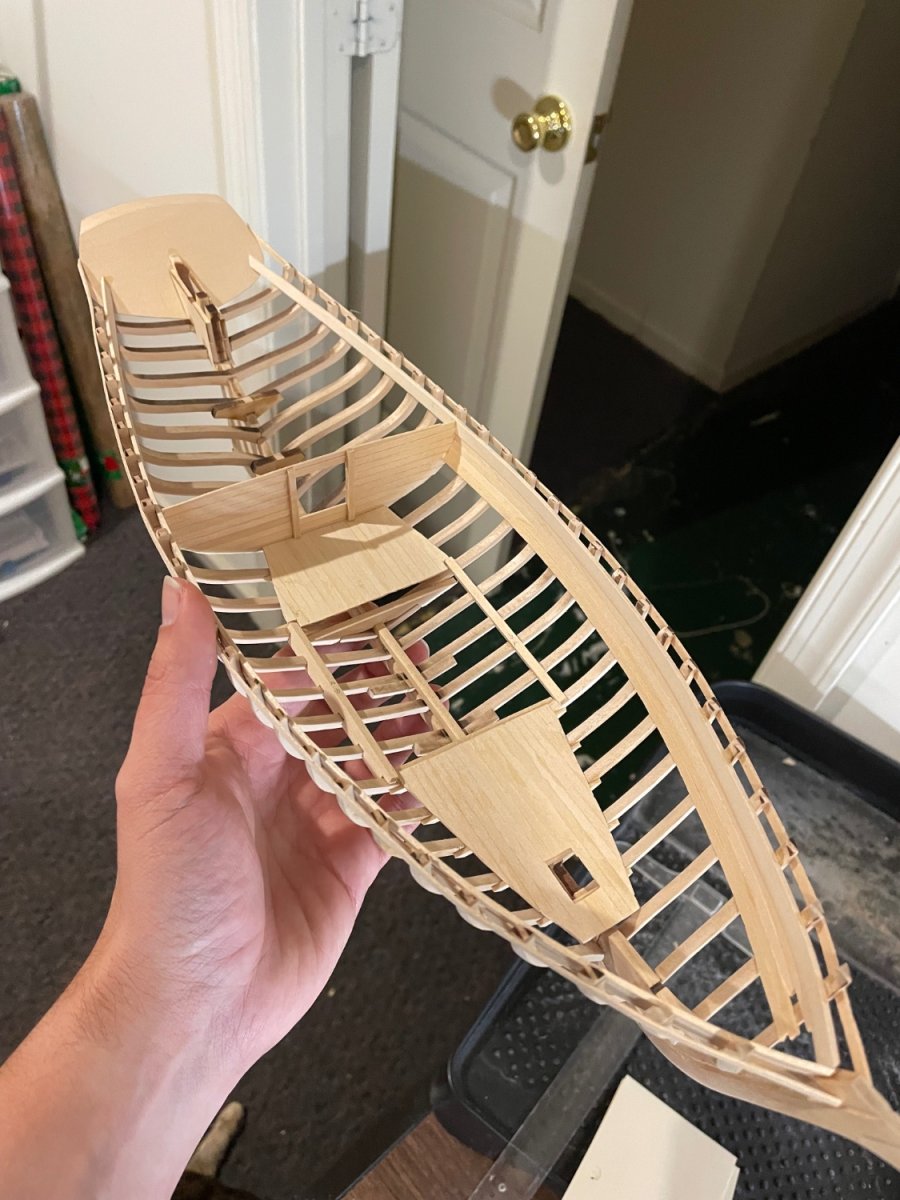
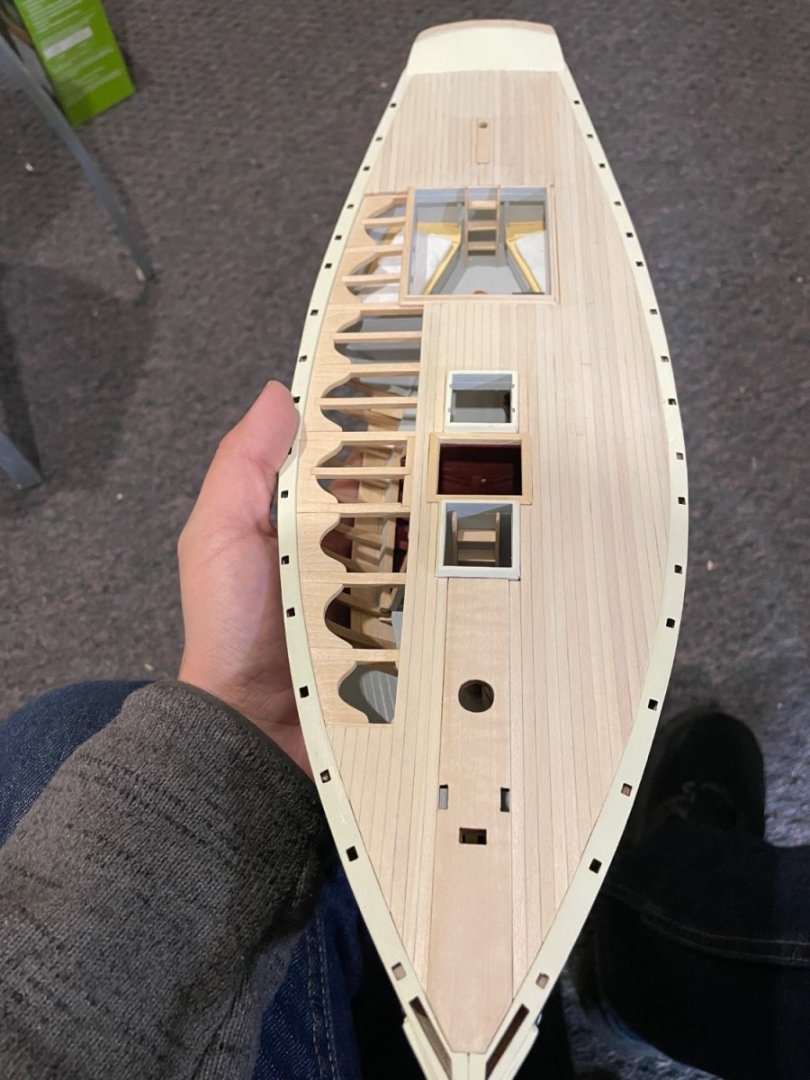
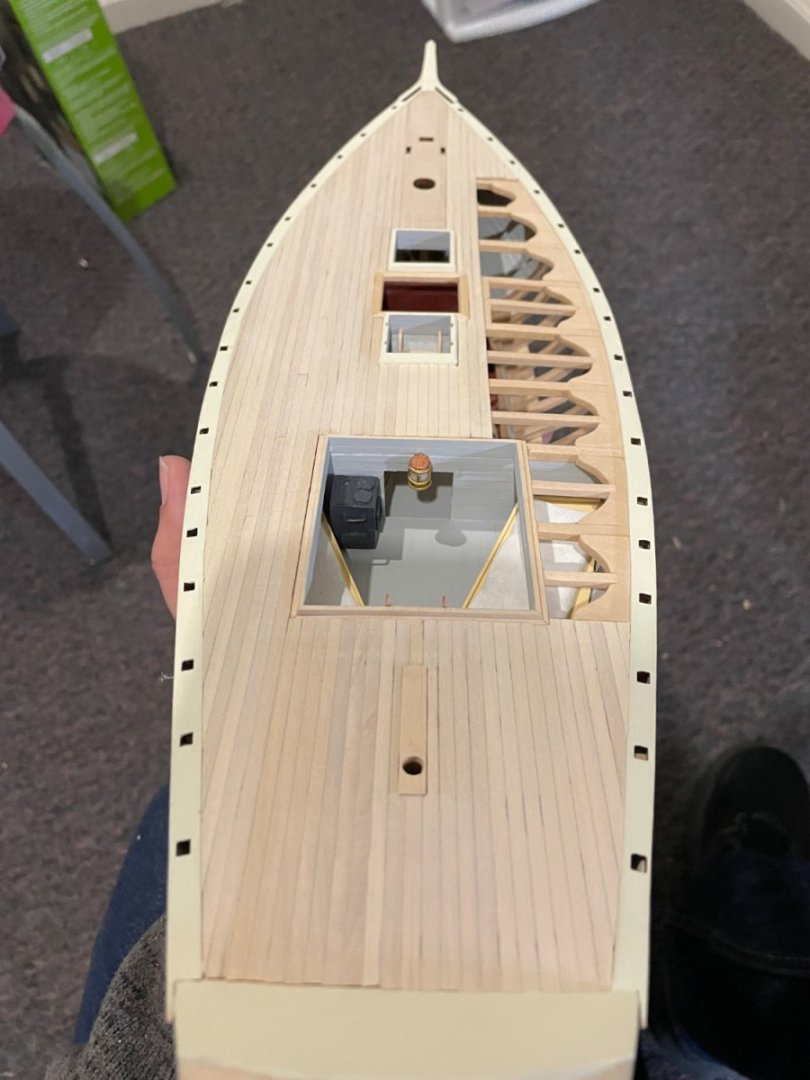
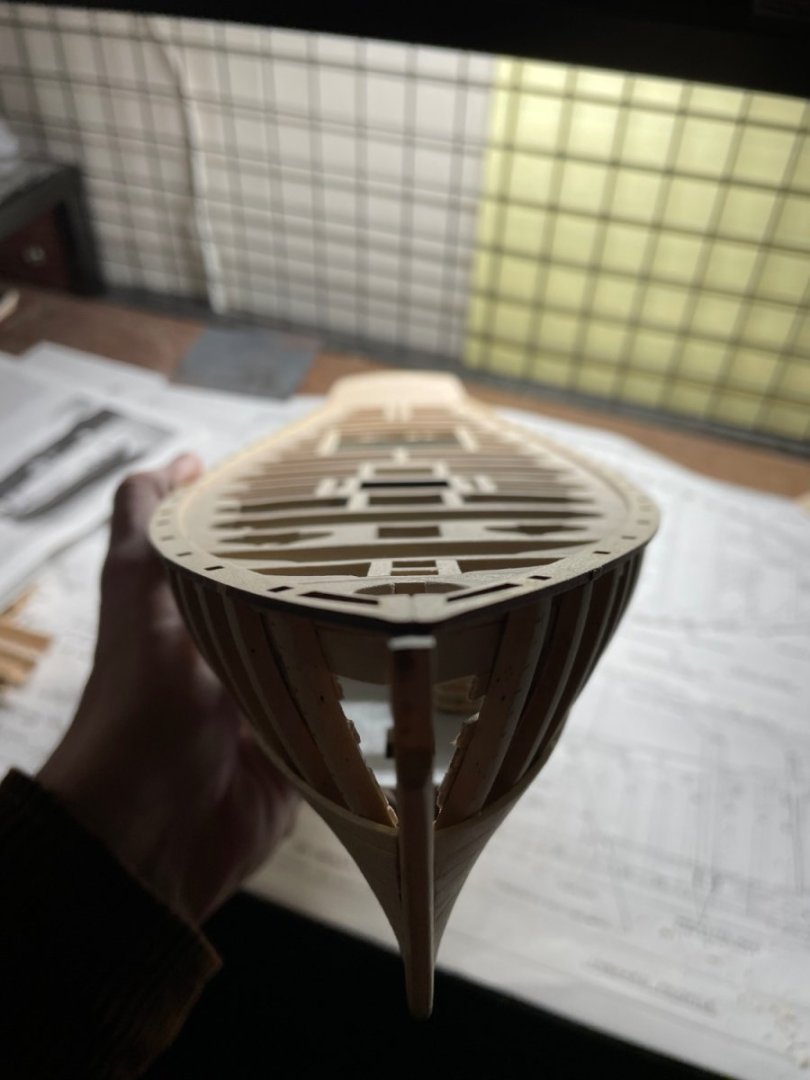
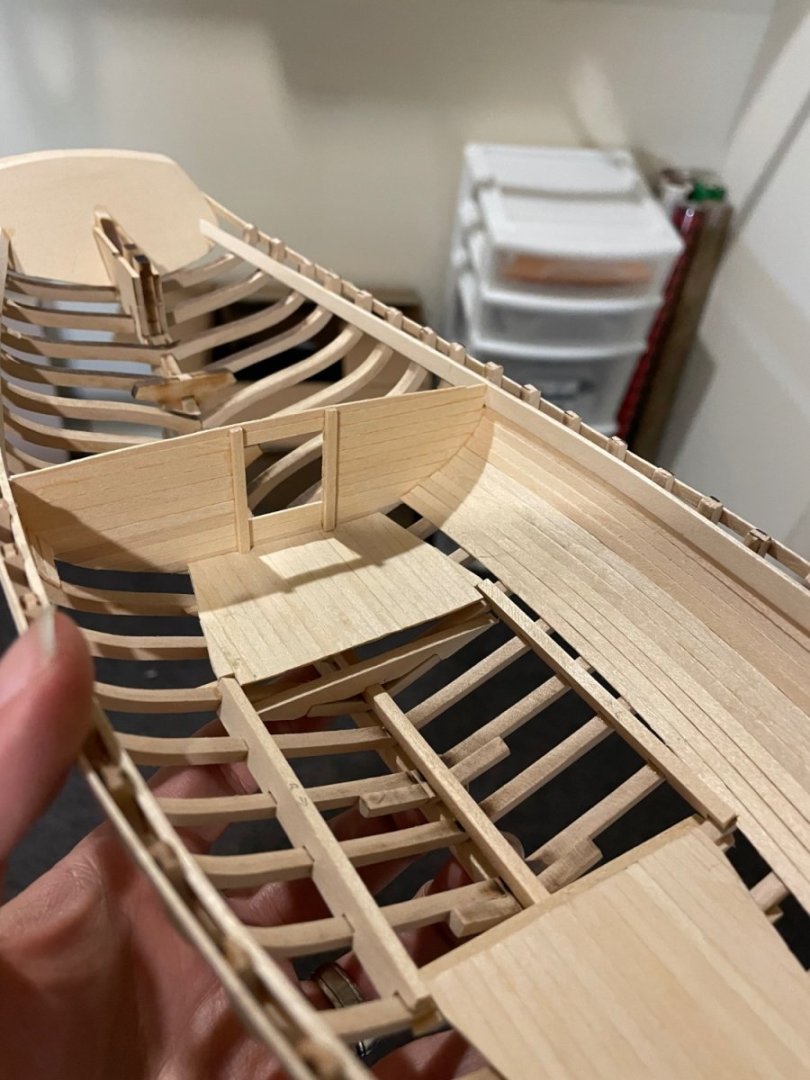
After finishing the interior, I started on the deck beams. First I framed out the beams around the wet well so I could position the four timbers that support the corners of the well correctly. I then removed the deck beams so I could build up the wet well and paint the interior. Once the well was complete I continued with the deck beams. I had never cut such small rabbets before. I then had to cut all the knees. Someone (I wish I remembered who) on this forum gave me the idea to trace the front curve of each knee from the plans on thin plastic, and then hold the plastic over the actual boat to trace the sides and outboard curve. It worked great and I cut them out with a small coping saw. After a good fairing, I glued on the covering boards. I’d been dreading this because I knew if it was a hair off the boards wouldn’t fit and the board wouldn’t blend into the hull planking, but the fit ended up perfect! And…. then I accidentally screwed up the placement when I glued it down. It happened when I went to ensure the king plank was lined up. Somehow the covering boards got glued about a 1/16 of an inch too far back and I didn’t notice. Even that small amount caused some of the bulwark stanchion holes to misalign and did wonky things to the amount the covering board overhung. However, I was pleasantly surprised by how much I was able to fix later (or at least hide) and I’d actually forgotten I screwed this up until I sat down to type this. So don’t worry so much!


-
Adam C reacted to a post in a topic:
Emma C Berry by Adam C - Model Shipways - 1:32
-
Adam C reacted to a post in a topic:
Emma C Berry by Adam C - Model Shipways - 1:32
-
Adam C reacted to a post in a topic:
Emma C Berry by Adam C - Model Shipways - 1:32
-
Adam C reacted to a post in a topic:
Emma C Berry by Adam C - Model Shipways - 1:32
-
@yvesvidal thank you! I bookmarked your own ECB build log and looked at it constantly! I got a lot of the interior and the idea for using the scrap wood between the deck beams as intermediate beams from you.
-
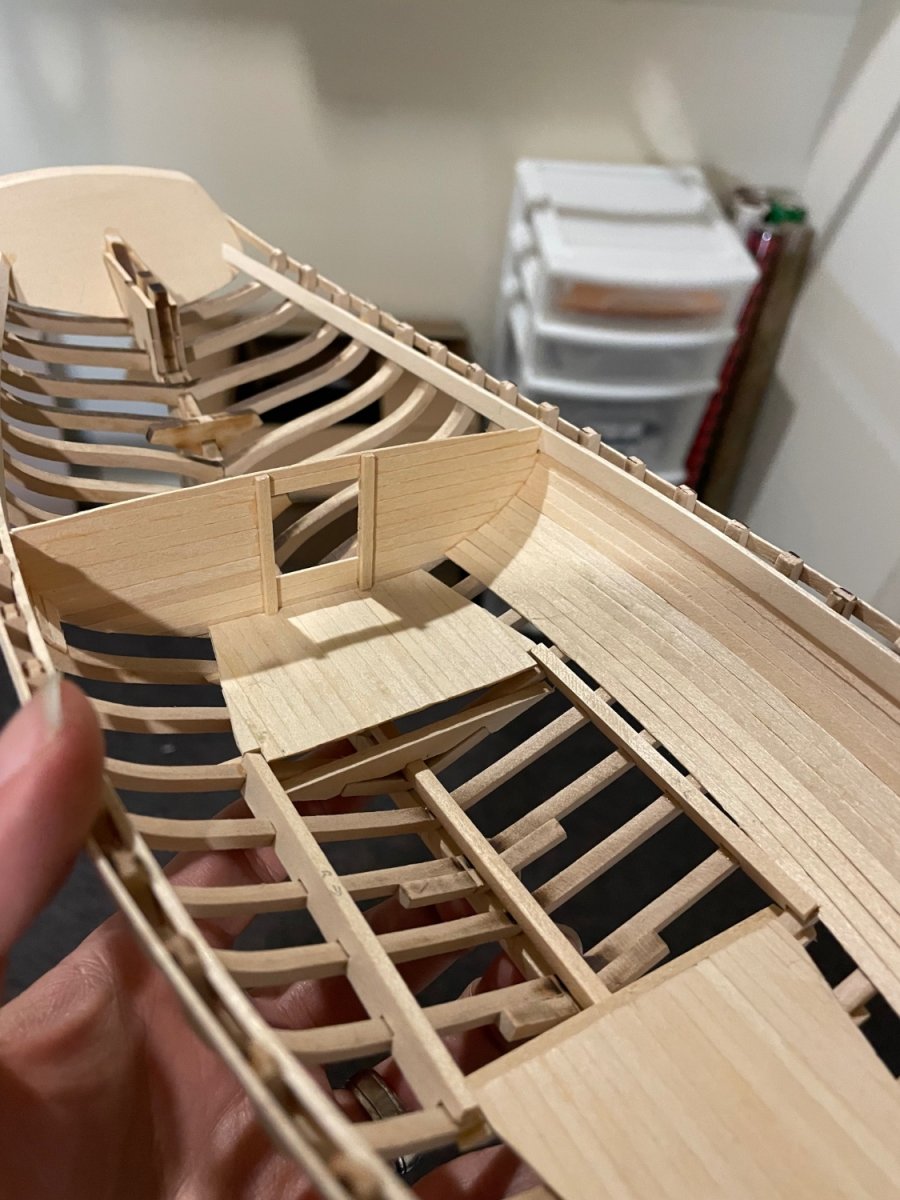
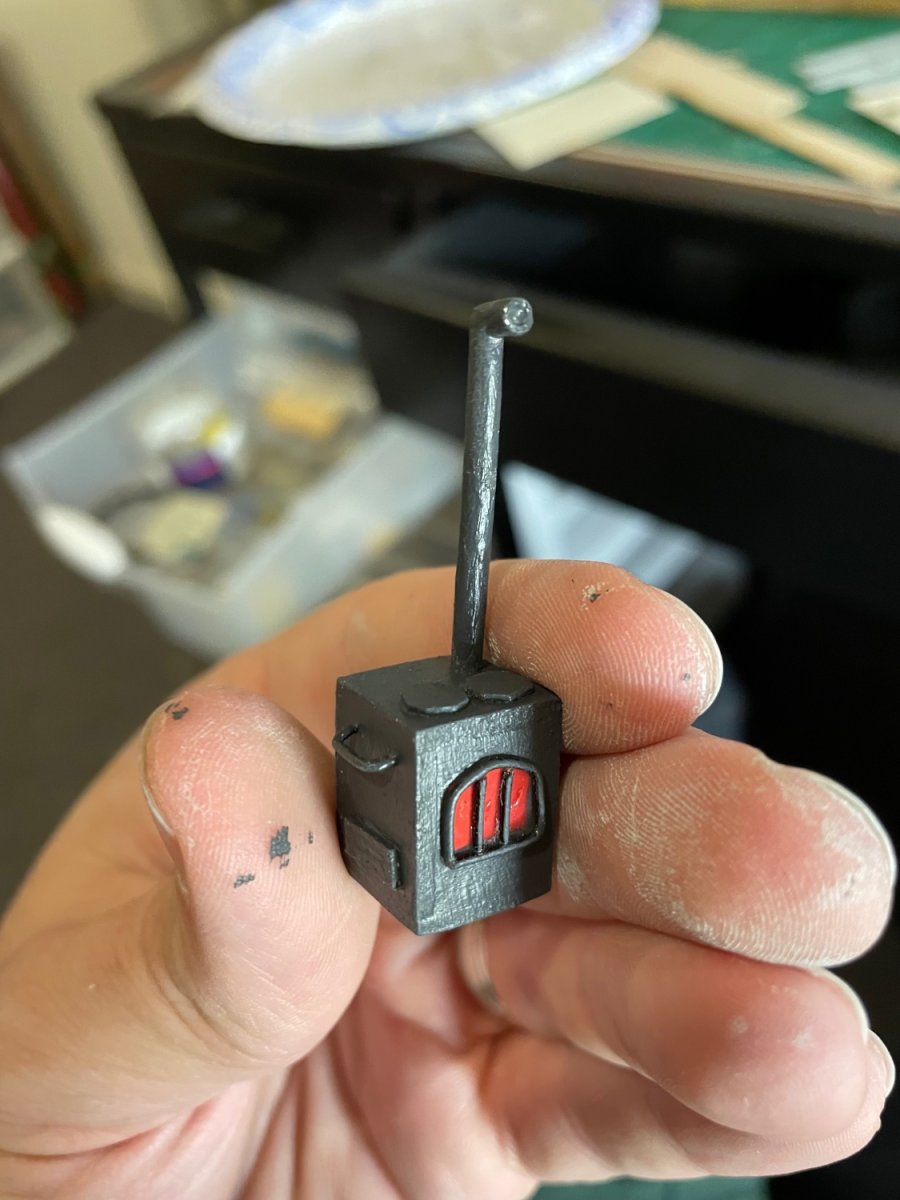
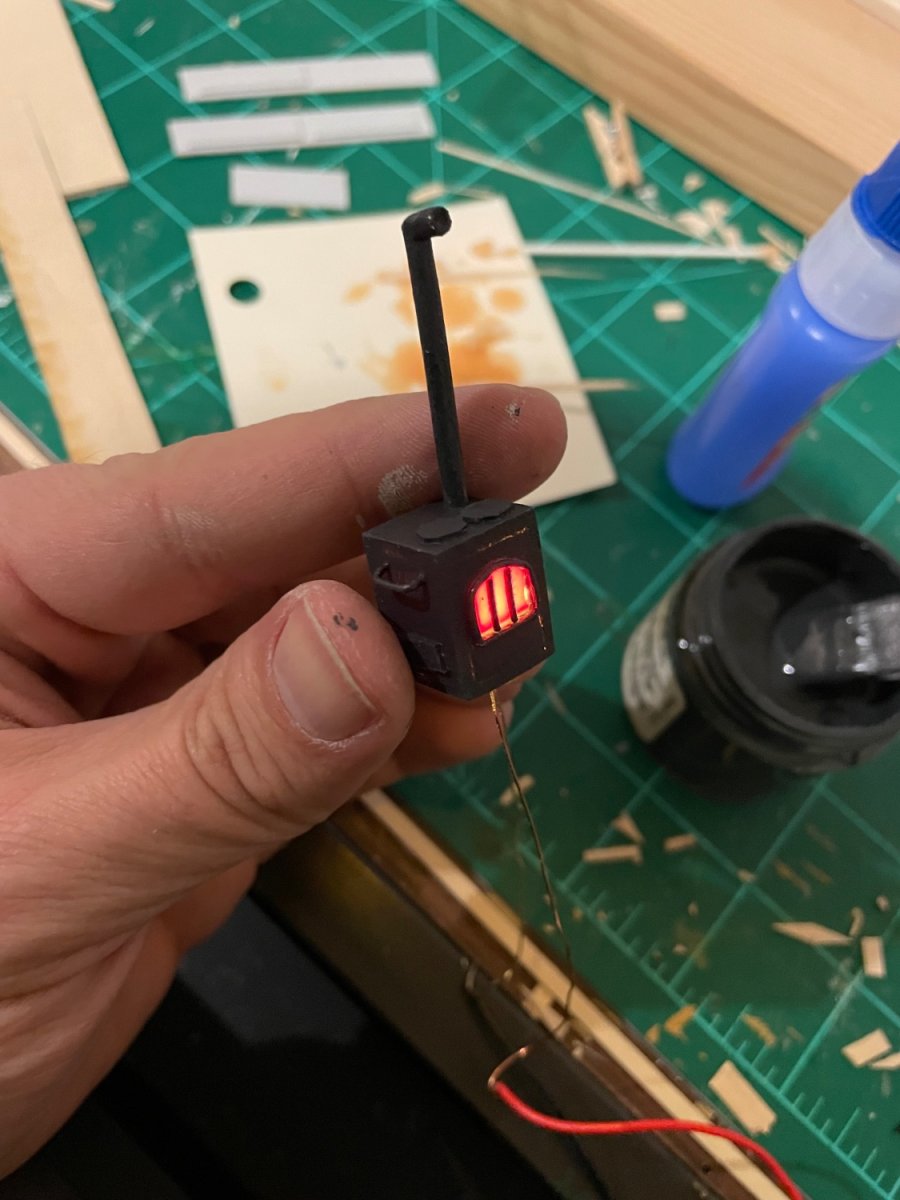
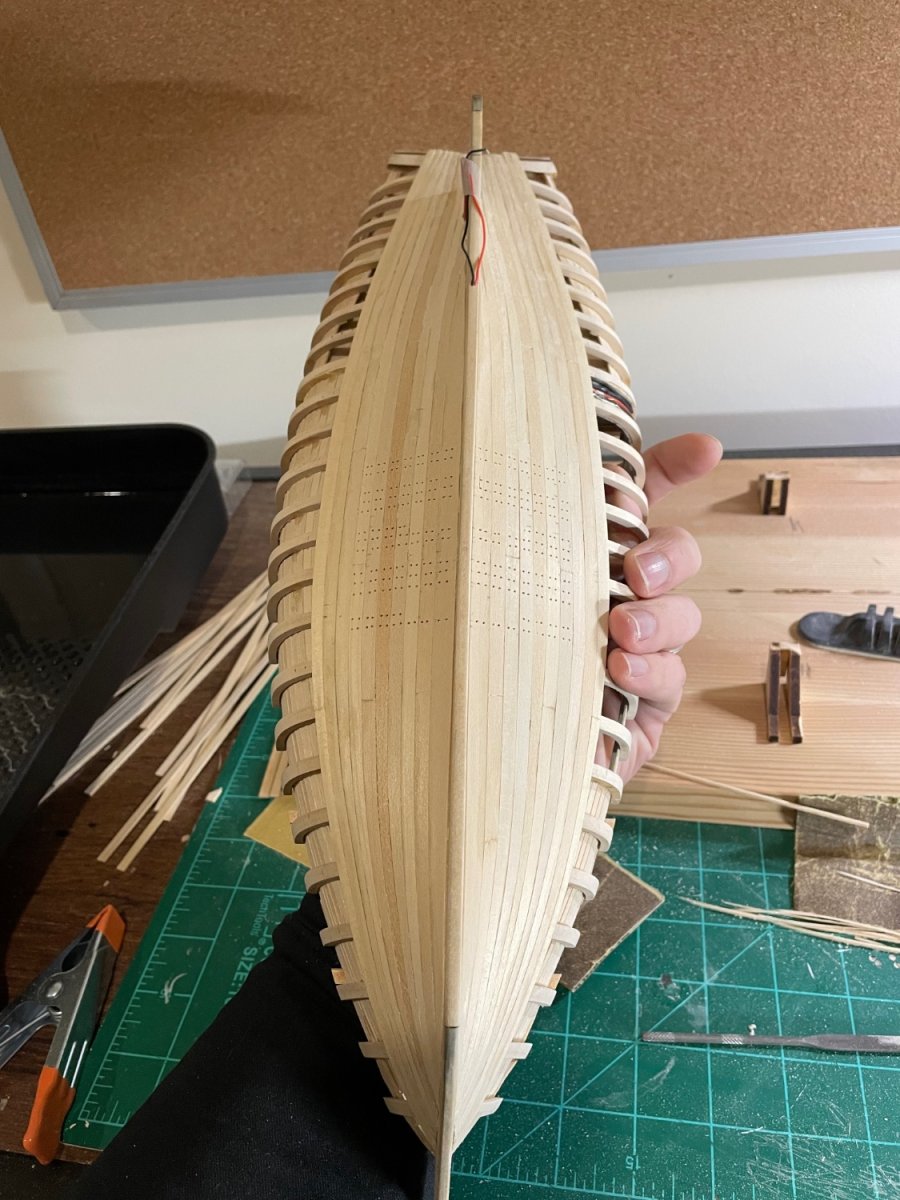
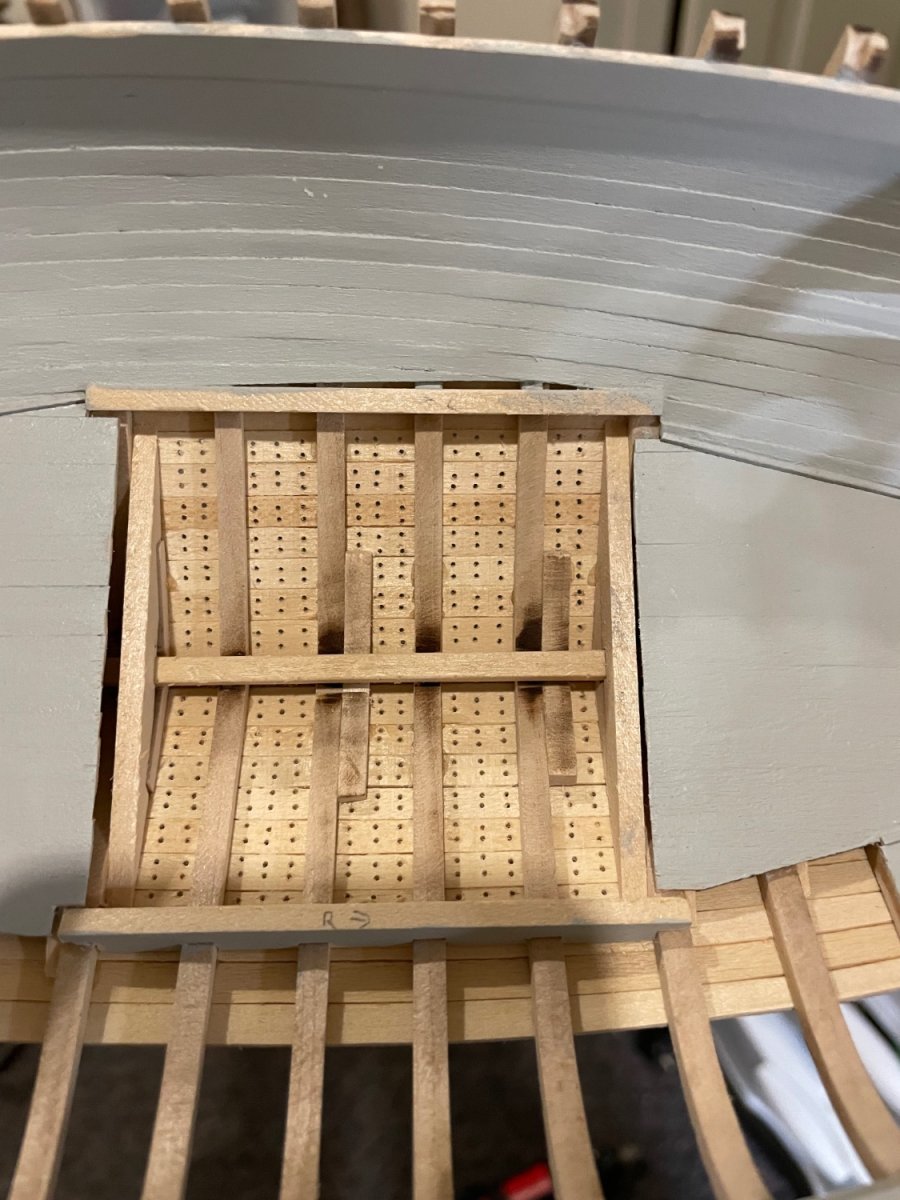
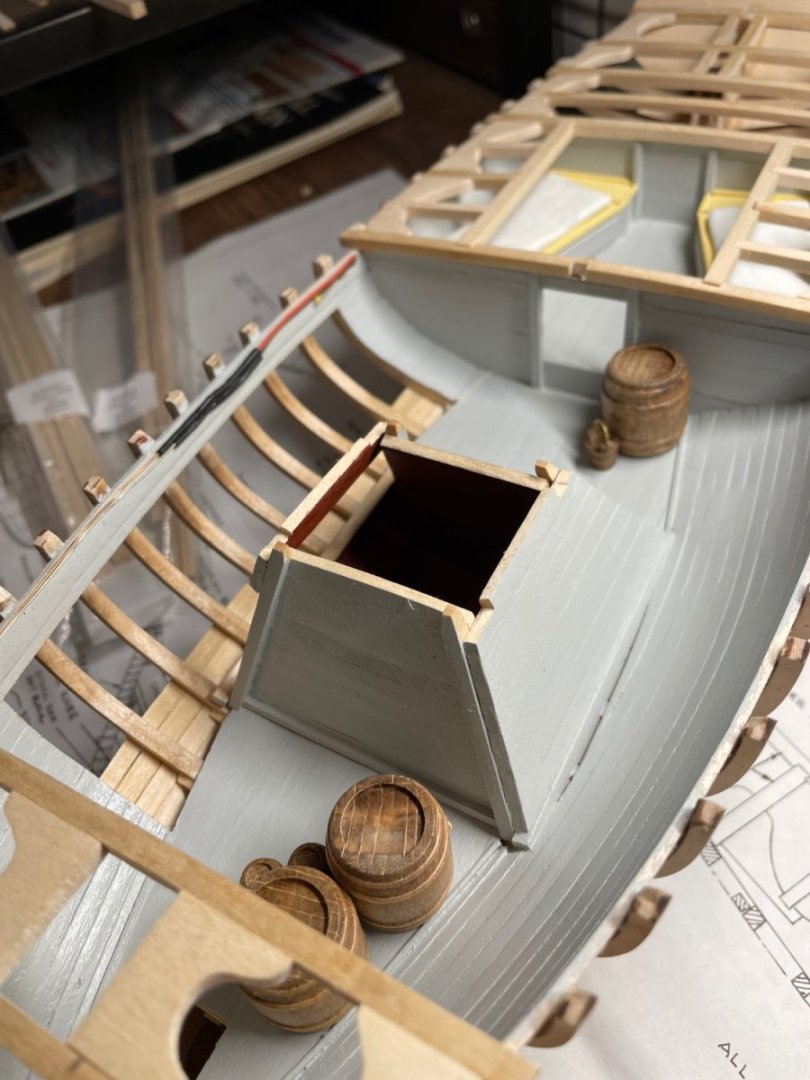
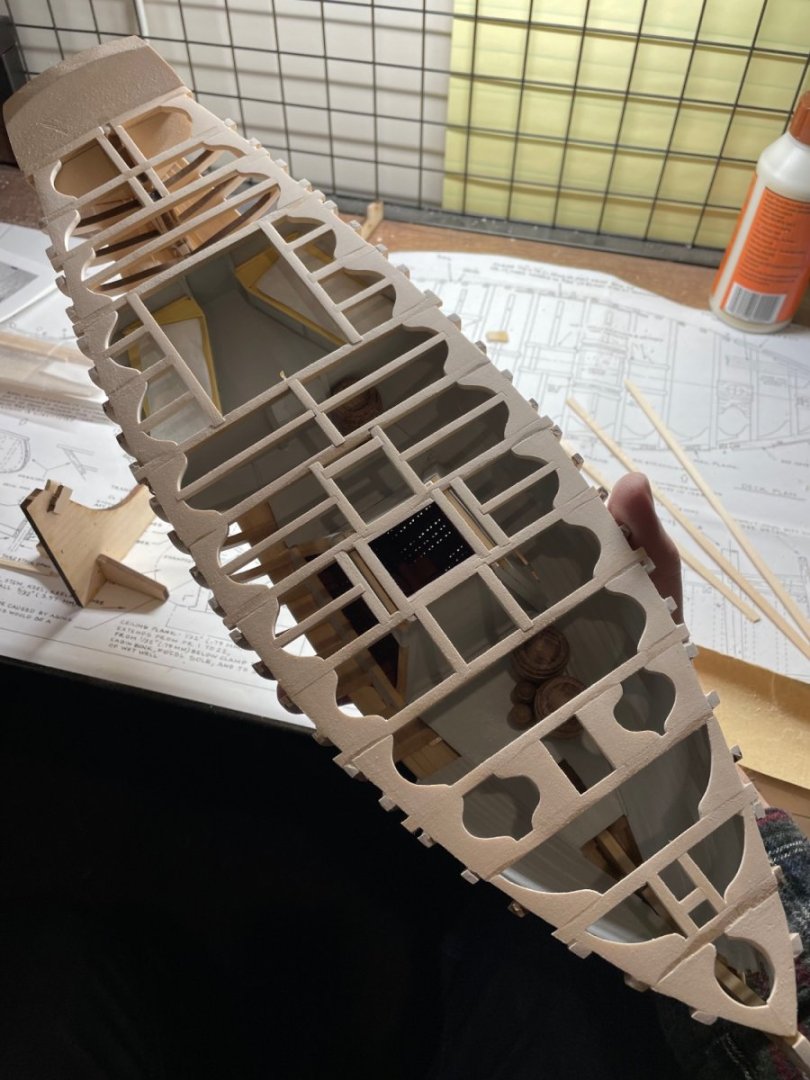
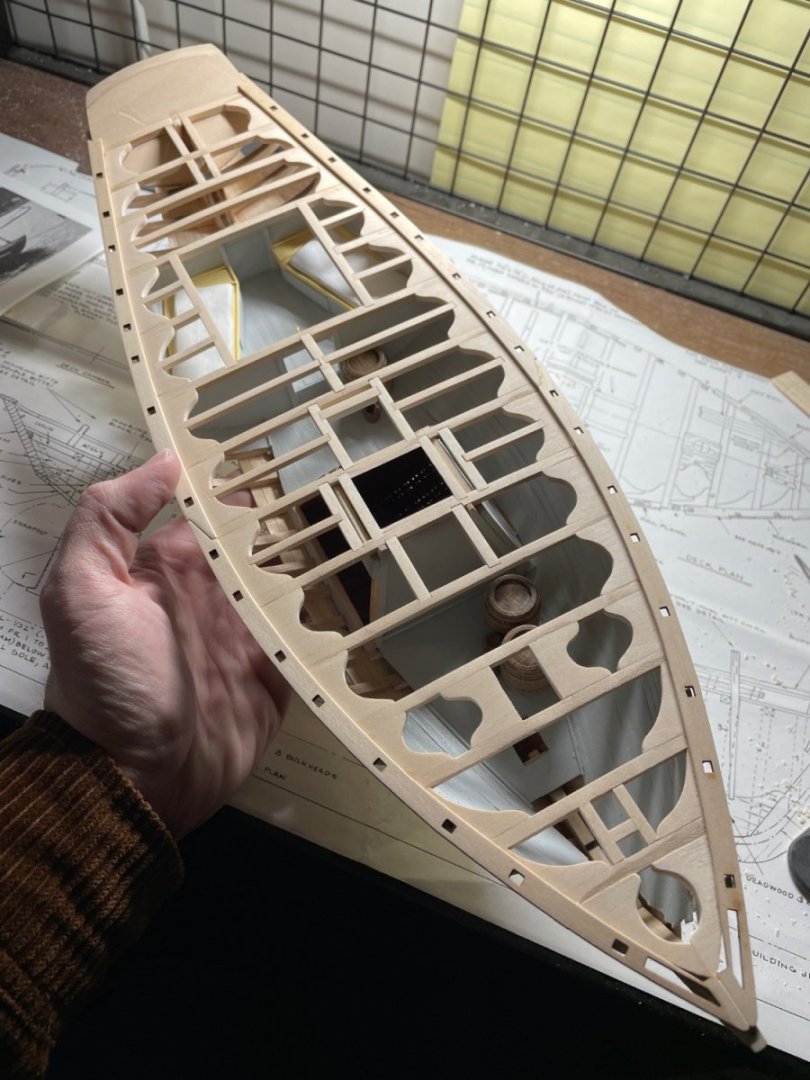
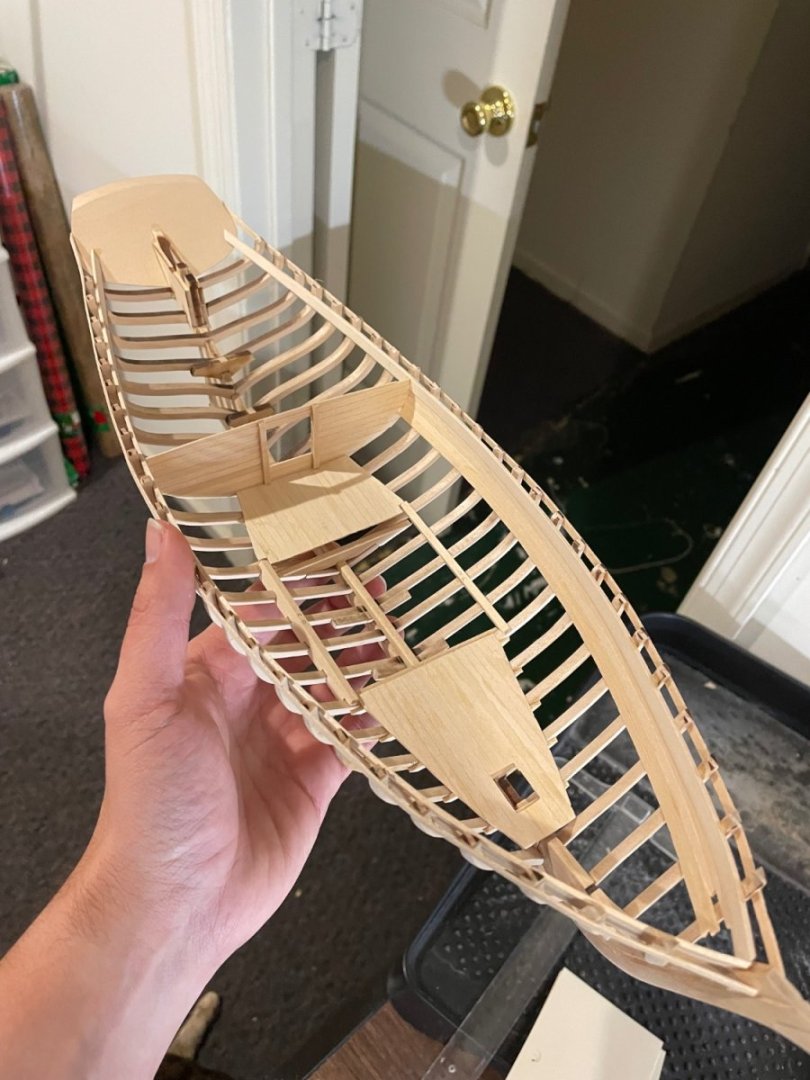
Once I had a stable hull shell, I started to fabricate the interior. I just kinda winged it mostly. I wish in hindsight I’d have tried to make it more accurate and structurally logical, but I mainly went for appearance. I wanted parts of the hull to be unplanked and also rigged up some lights to illuminate it. There’s four LEDs along the underside of the deck beams, one that is inside of a wall lantern in the main cabin, and one that comes out of the floor and makes the stove glow red. All the wiring was run inside the walls before it was planked and will exit through the keel into the display stand. Before I built the wet well, I had to plank the lowest run of planks so I could drill the holes. The planking went fine, but the holes took forever. I used wipe on poly and then painted them, but the holes were so small they kept closing up on me. I was using many coats of very diluted paint, and the solution that worked was after each coat I used canned air to blow the wet paint out of the holes before it dried.


-
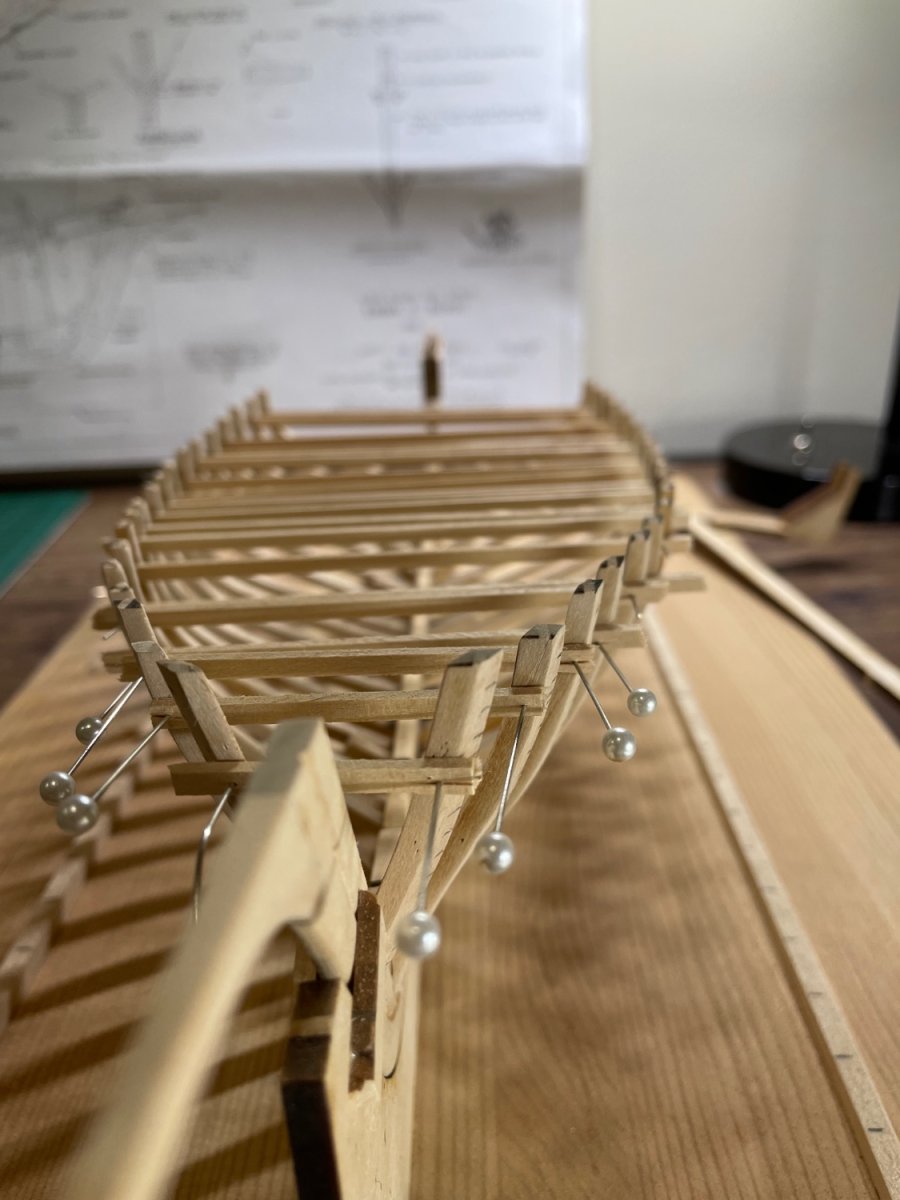
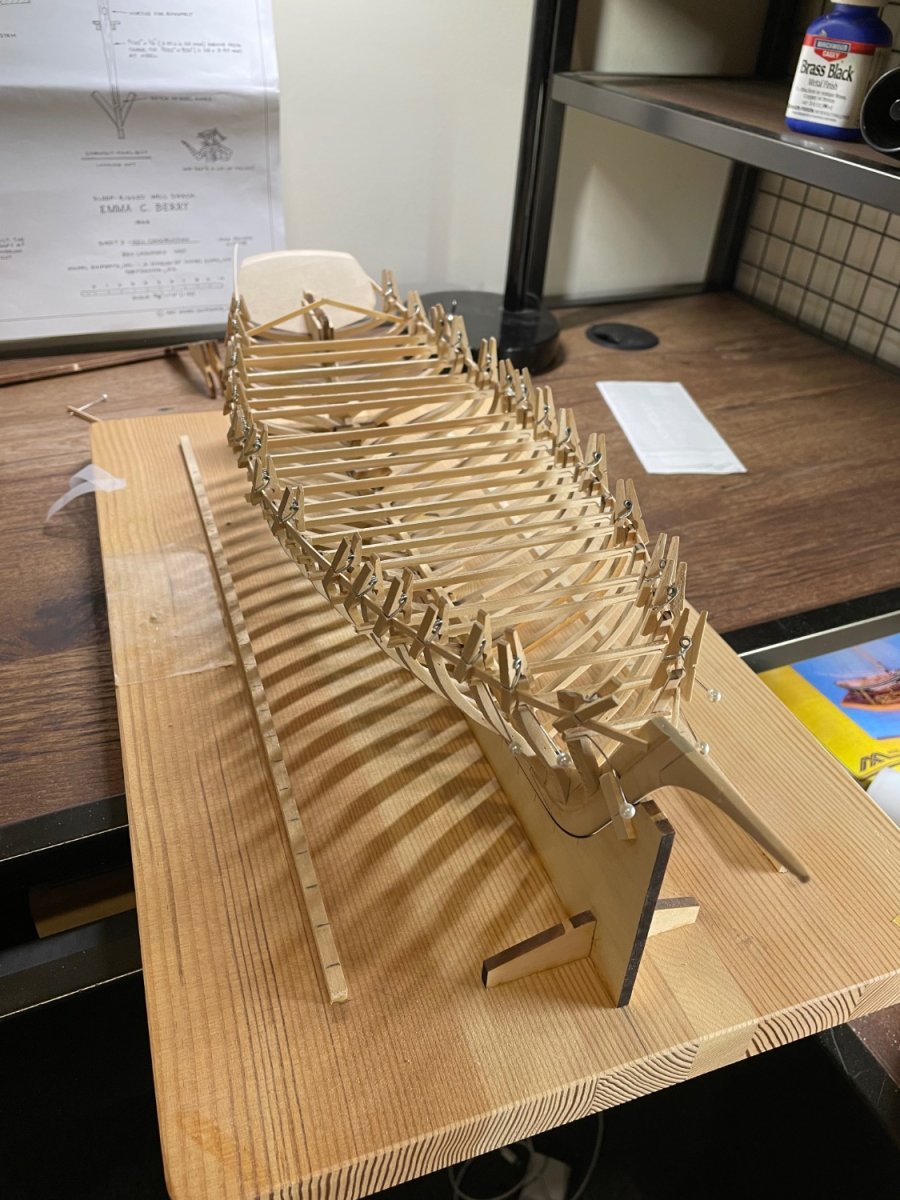
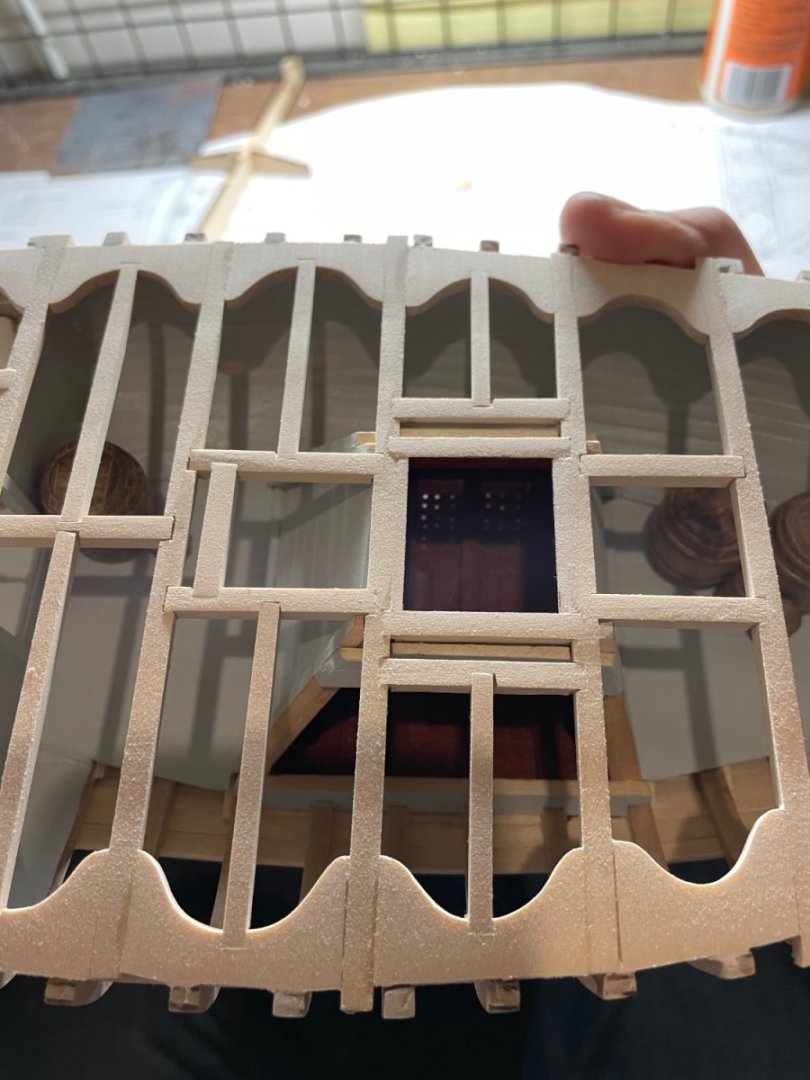
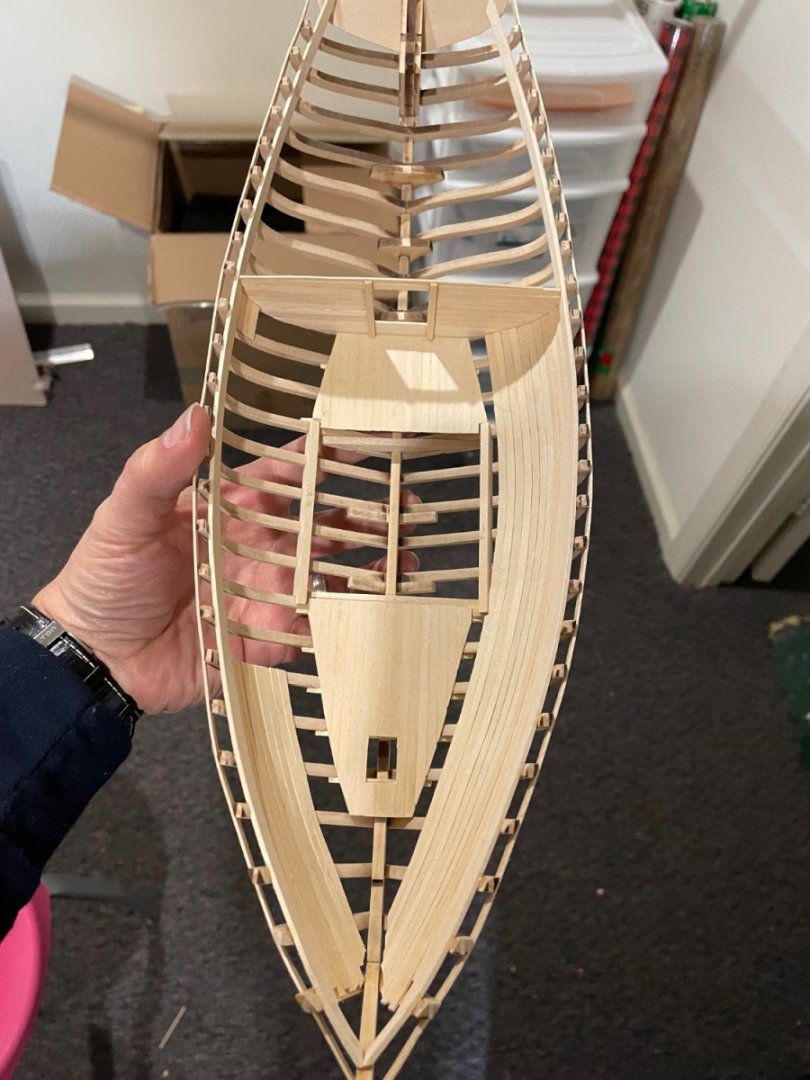
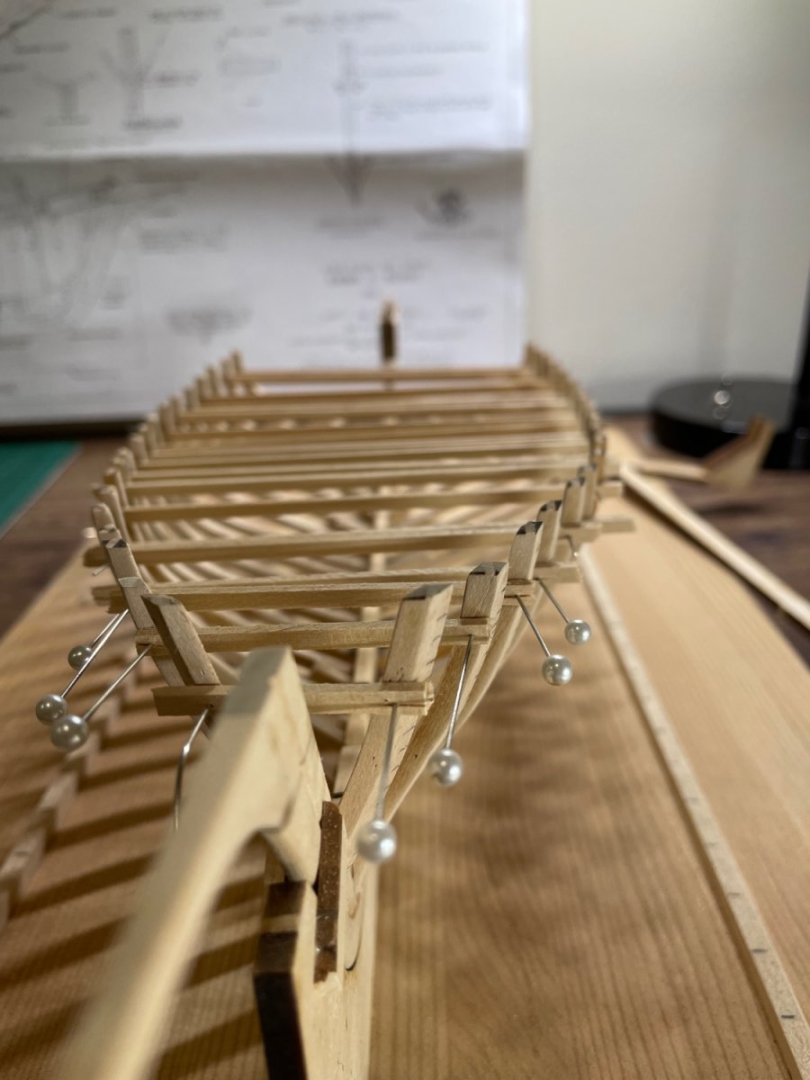
I started working on the model while temporarily living in a very small room in Korea, using only the hand tools I could put in a small carrying case. I was able to glue together the keel and most of the frames without any trouble. The jig Model Shipways provided worked great. I faired the frames on the inside and outside prior to glueing them to the keel. I thought it was a lot easier to do a rough fairing this way, but I also erred on the side of caution and left them a little large so I could take them down to the final dimensions once assembled. It worked out ok. The hardest part was the height of the frames. You can see they are off in the pic. Some of this I fixed later and in the end all of it was hidden by the covering board, but I’ve learned for next time. There’s THREE dimensions to pay attention to. Next I attached a temporary batten which allowed me to remove many of the temporary stringers between frames. I cut a few of the deck beams to size and used these as spacers to make sure I kept the hull from flaring out or closing up on me as I worked. I wanted to fully build out the inside, so I needed a lot of room to work on the inside.

-
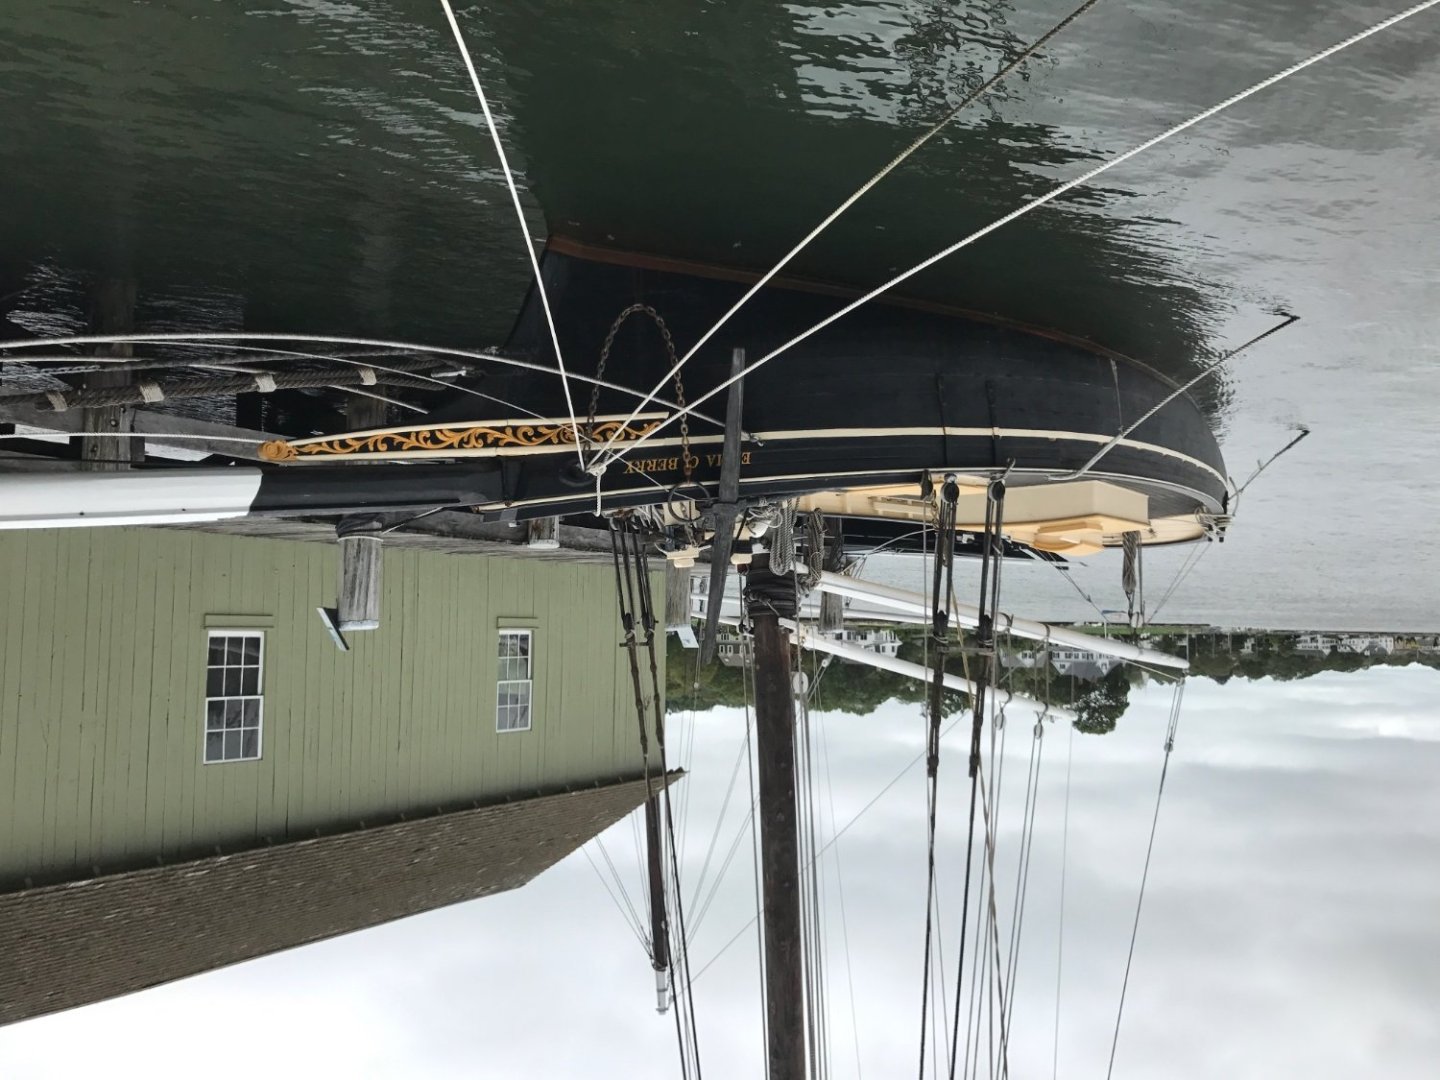
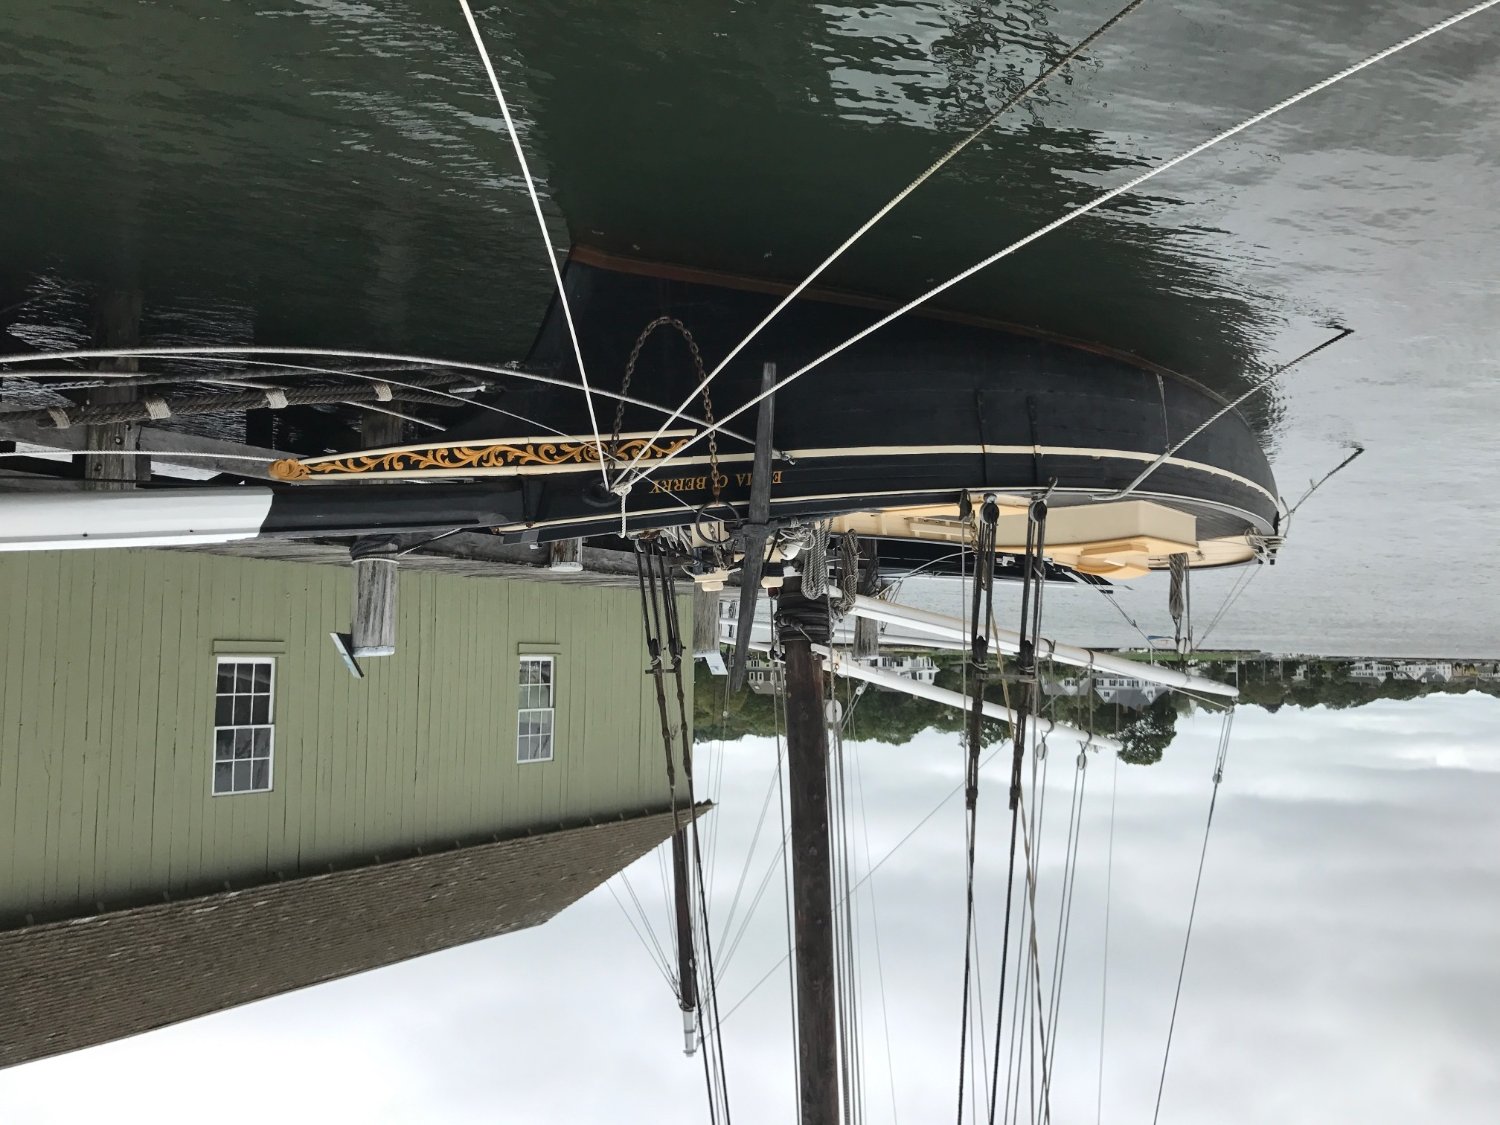
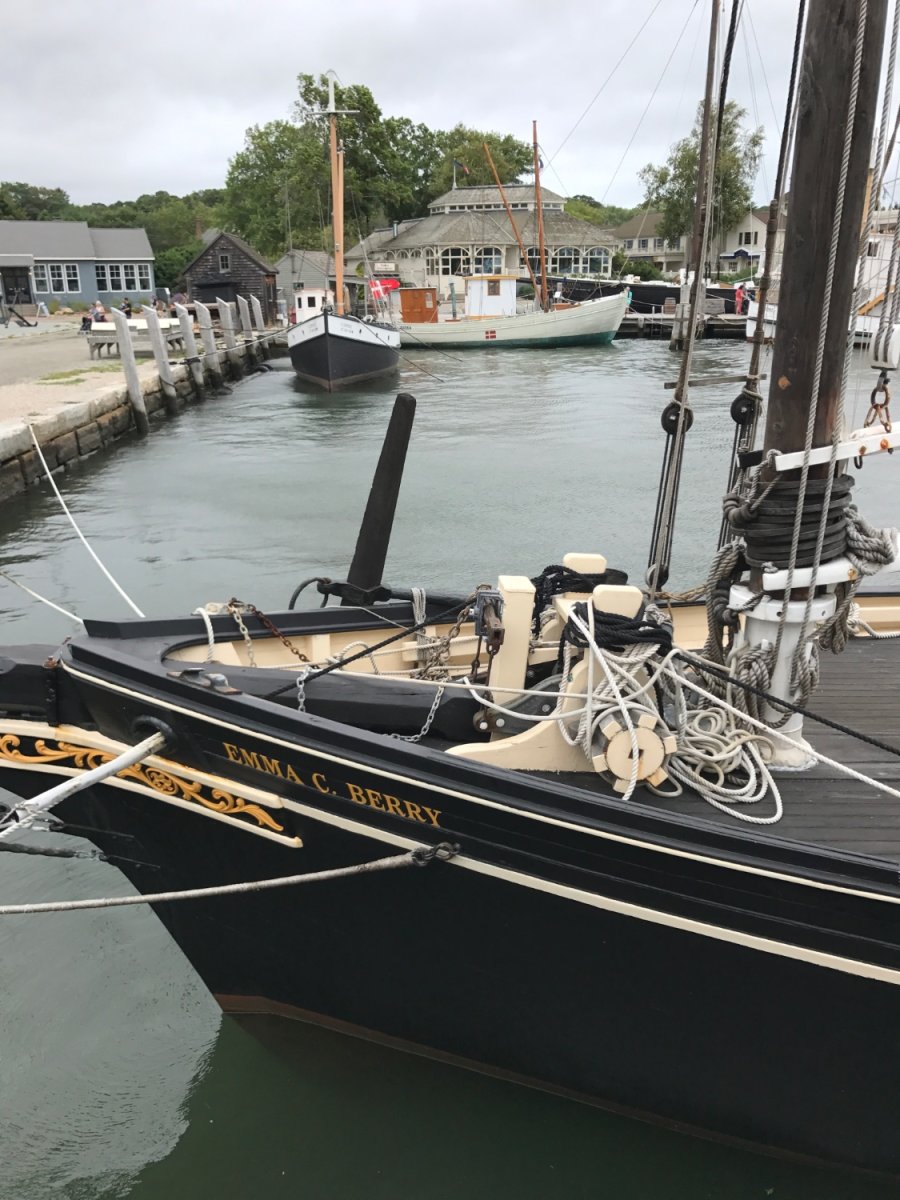
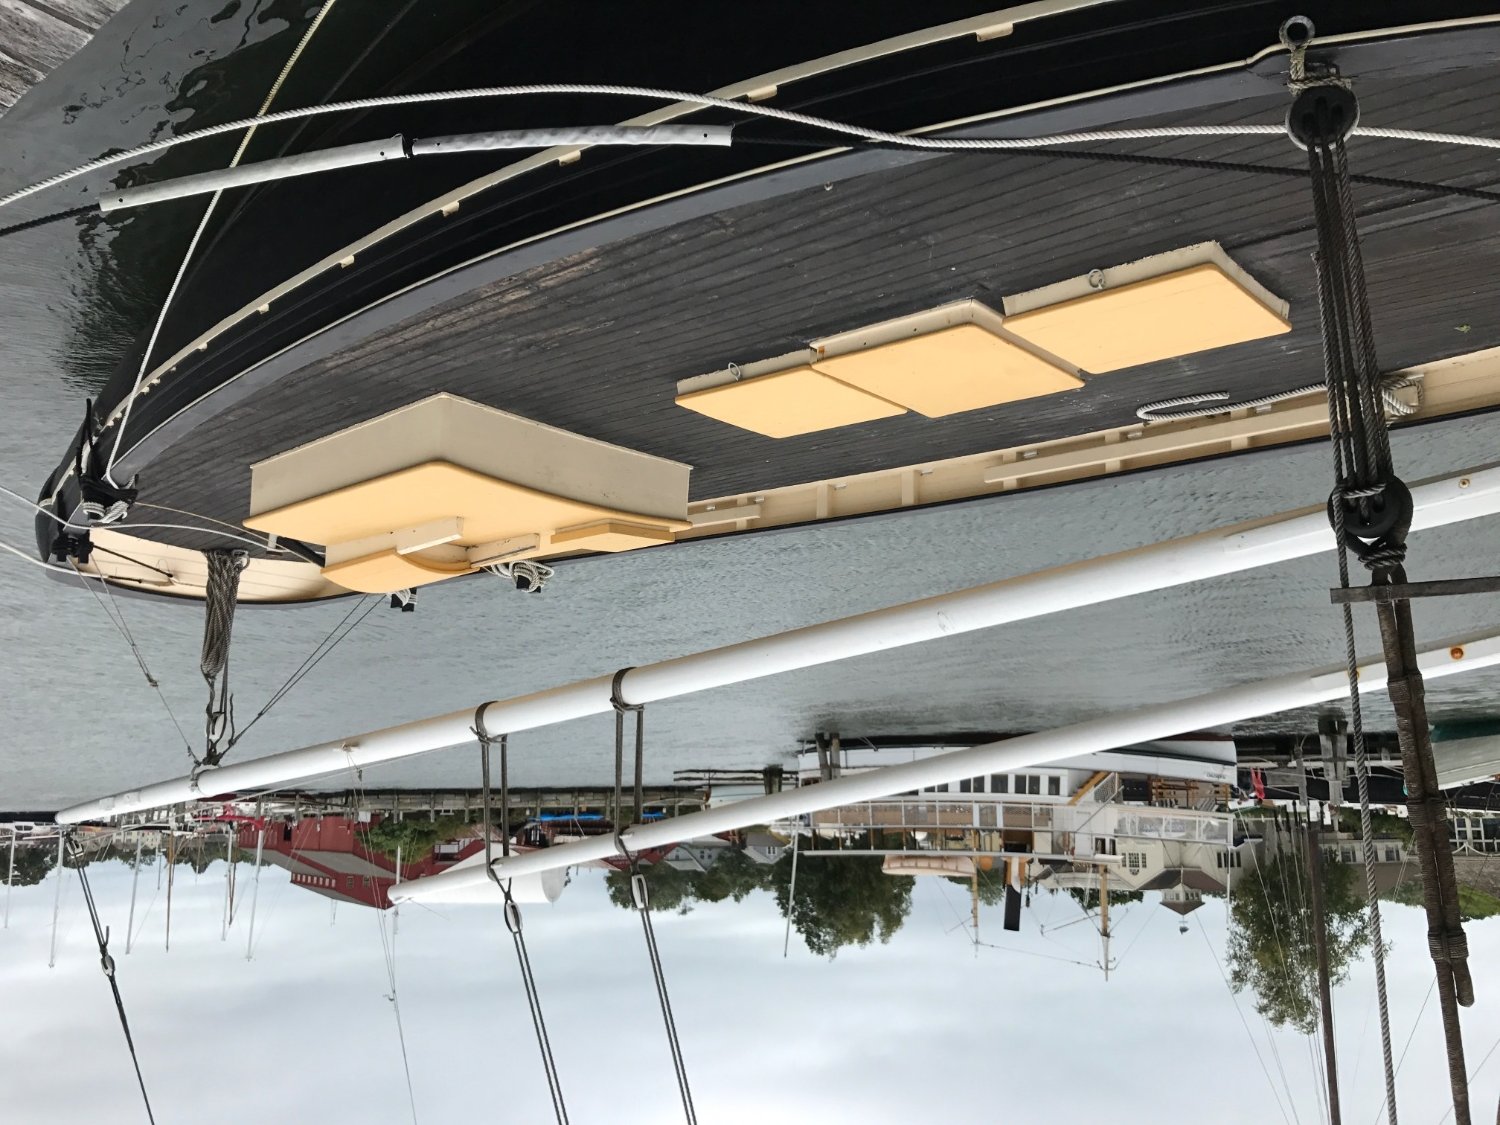
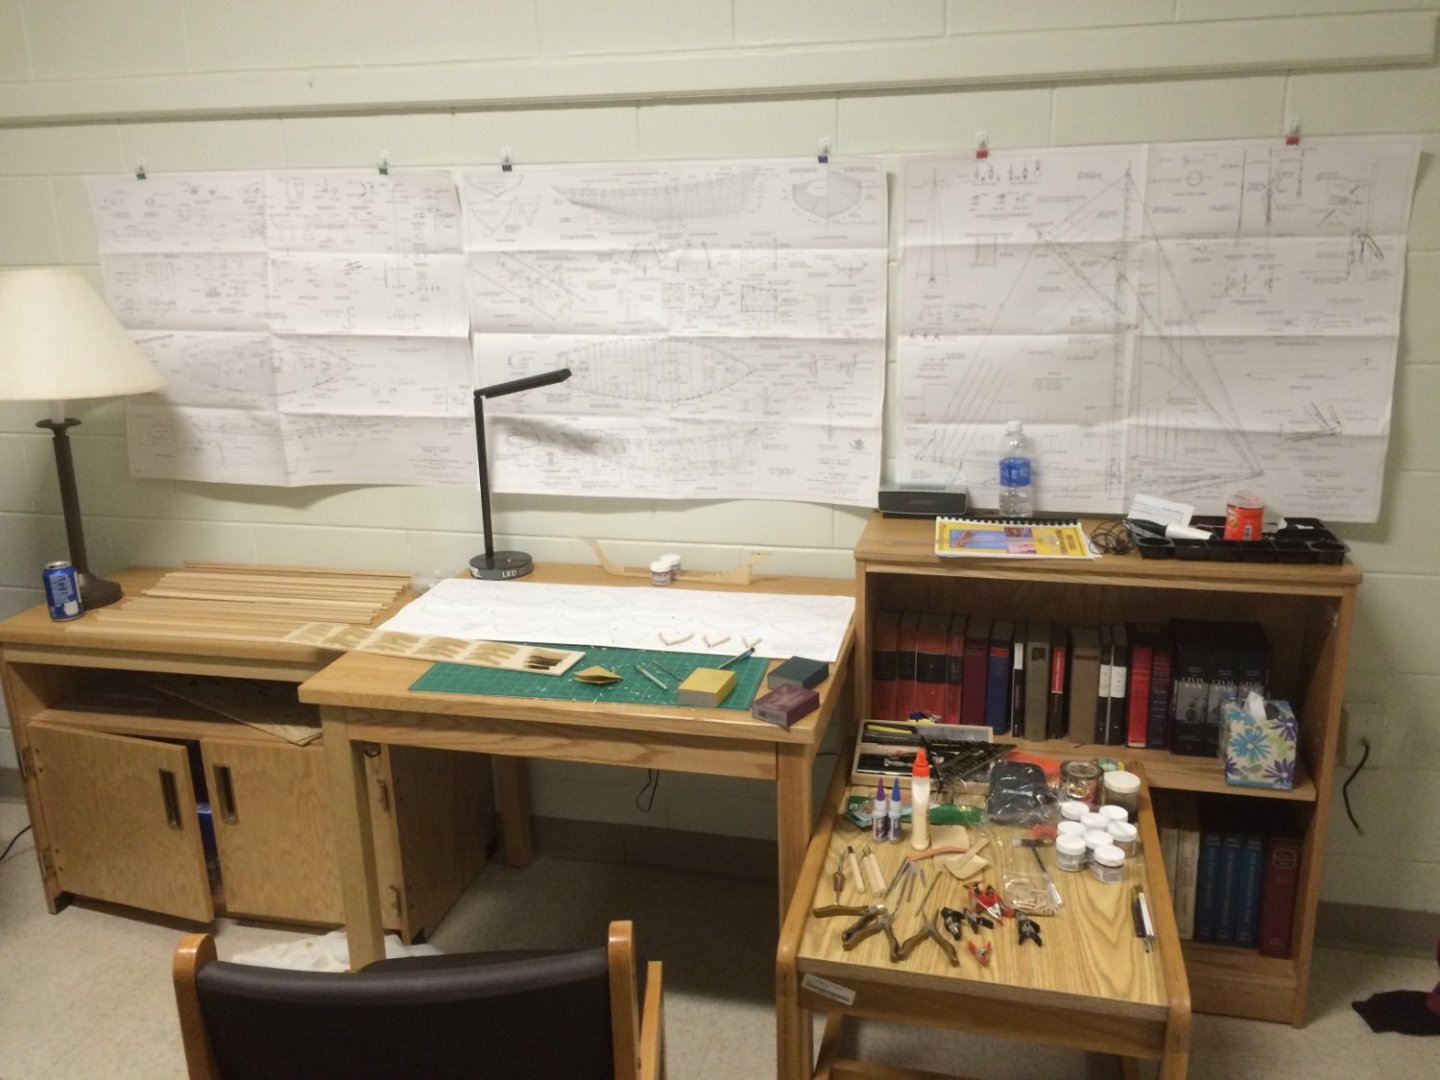
I’ve never made a build log, mostly because I usually have no idea what I’m doing and am still a beginner at this. However, I’ve learned almost everything I know from build logs on this forum, so maybe it’s my turn to contribute and I will (belatedly) start one on my ECB build. It’s about 70% complete, but I’ll post the pictures I took during construction here (and then hopefully keep it updated until complete). First, some photos I took of the real thing when I visited Mystic a couple of years ago. It’s an incredible place. (Not sure why some of those are upside down)