


Olaf
-
Posts
25 -
Joined
-
Last visited
Content Type
Profiles
Forums
Gallery
Events
Posts posted by Olaf
-
-
-
Hi everyone. I am looking on YouTube Chanel where modeler was showing how to clean airbrush without stripping off airbrush on parts. He is from USA. I had this link but lost it! Can anyone can help me out with this please?
-
-
Hi guys. I found on AliExpress PE paravanes for 1/200. Somebody bought from AliExpress any products and was happy about this side? I know that comes from China but this kit looks fine. Or maybe I am wrong?
https://www.aliexpress.com/item/1005002376800441.html?gatewayAdapt=glo2kor
-
On 10/28/2016 at 1:09 AM, RGL said:
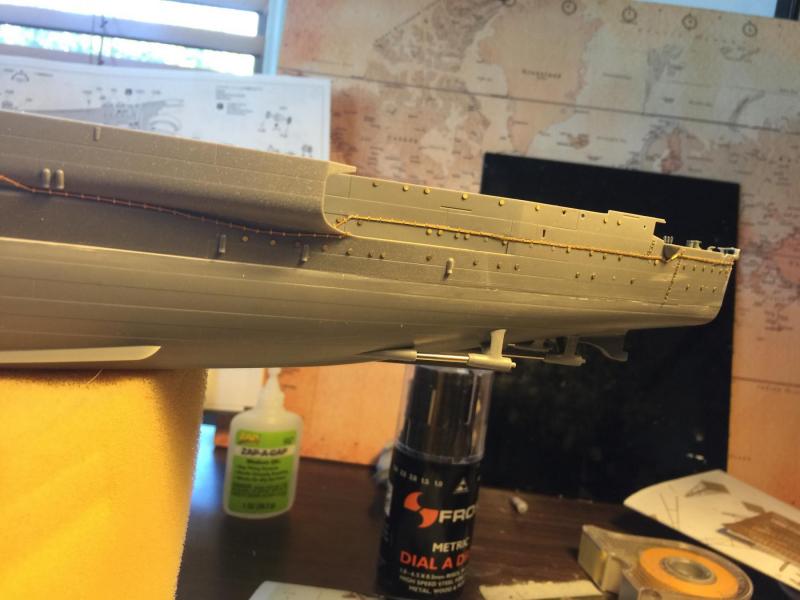
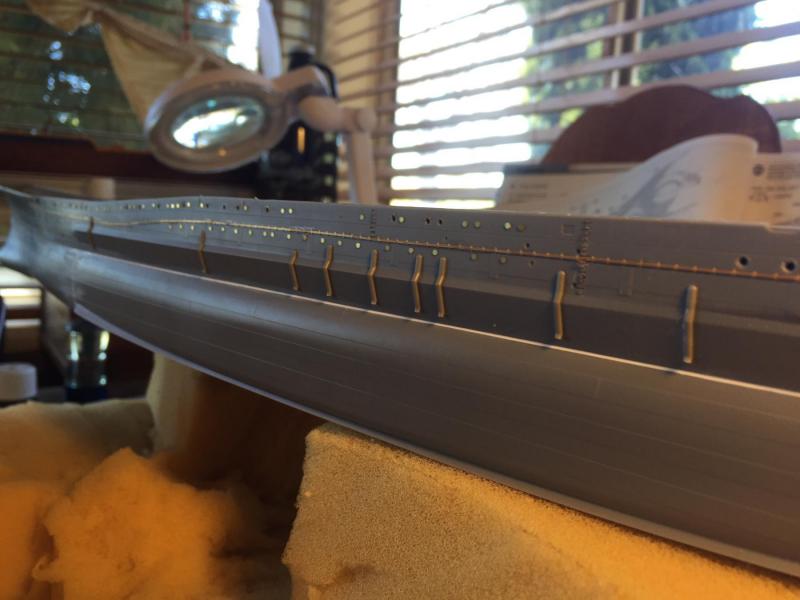
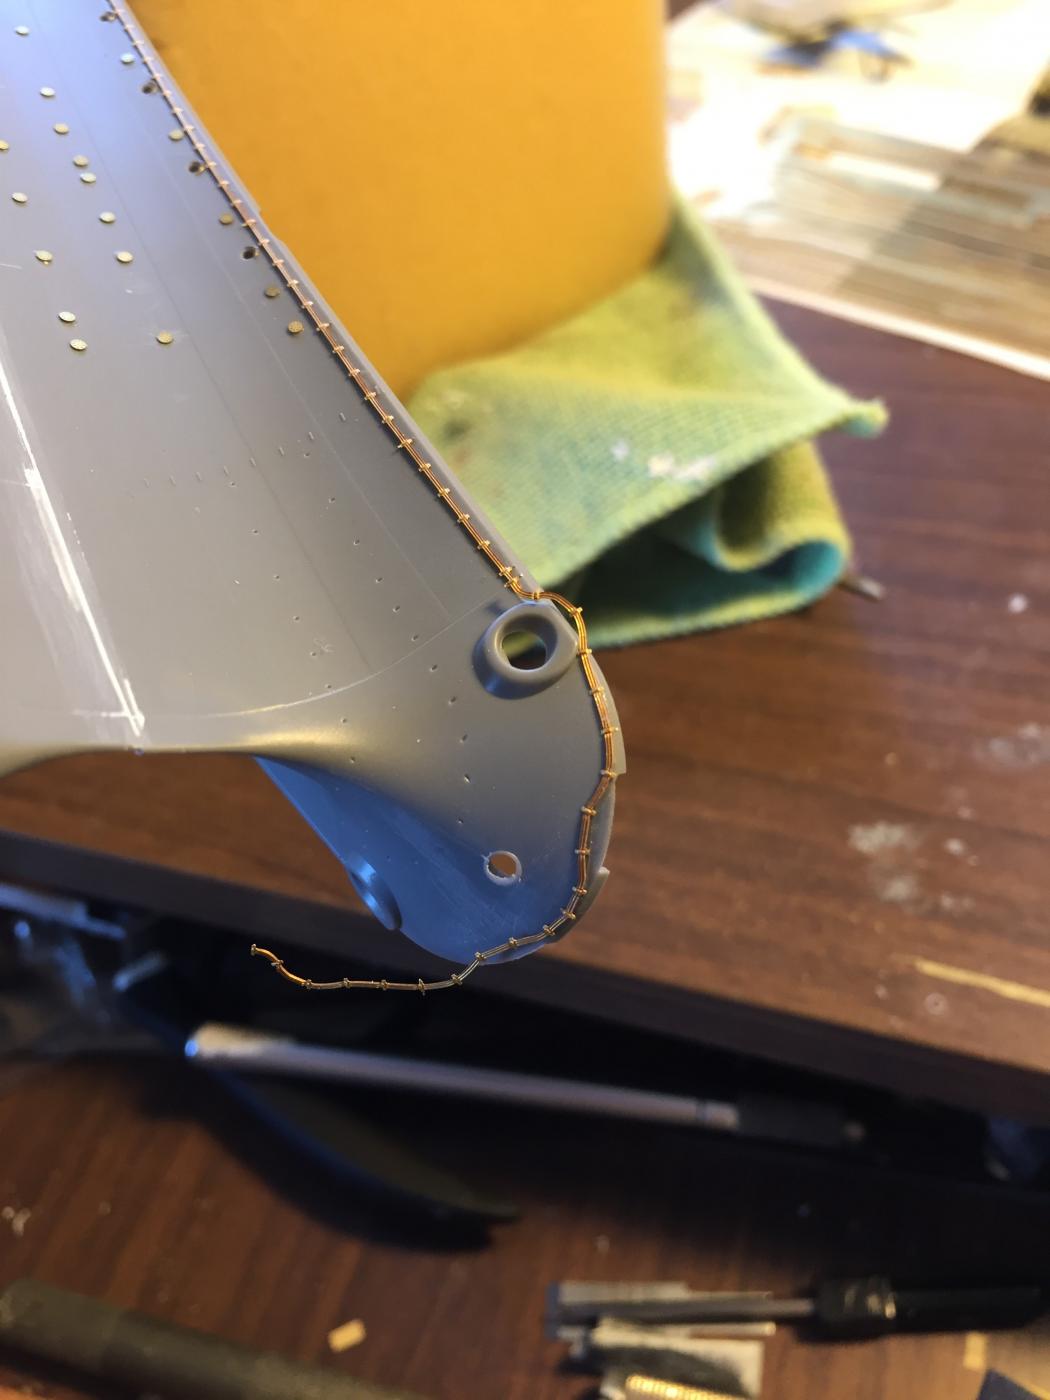
Moving along with the hull, I have placed the degausing cables. You are given two options, one closed and one open. I used the open one as it looks better and I suspect Tamiya got the idea from the photos of the wreck
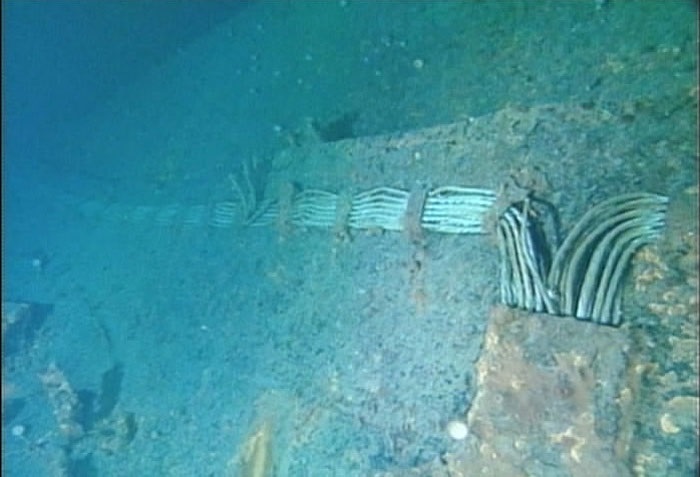 but I suspect the keyboard warriors are correct when they say the covers have rusted off. Still, looks nice.
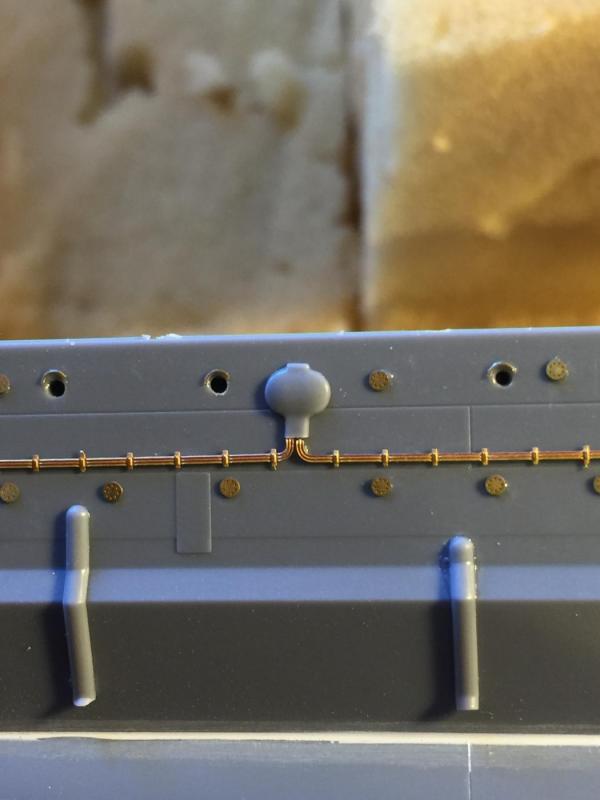 .
.

So all up there is about a metre of it, which at 1/350 is a lot.
Hi Greg. Can you tell me what is diameter of this cables please? I would like to make for 1/200 scale. Pontos 1/200 doesn’t have for this cables . I would like to sand of molded one and put replacement.
-
On 10/20/2016 at 8:30 AM, RGL said:
There is a build I'mfollowing on another forum that's quite good as it points out the bits that the instructions don't tell you about and is nicely weathered. When I get an airbrush there is a wealth of info on it, I know how to but there is so much good stuff out there now on the internet that did not exist back in the day that it's a whole new world. I think the secret is to be subtle. I imagine the hull will be battered and dirty but the Japanese were and are so fastidious the areas that were accessible would be as clean as possible or their seniors would have flogged them.
I keep telling myself stop rushing.
Hi @RGL. Can you please give me a link for this forum ? I would like to get so many information as possible before I start my project. I can see there are more Pontos PE for 1/350 Yamato model than for 1/200 Yamato scale model. I would like also replace cables going along side the ship. It will be difficult.
-
21 minutes ago, myxyzptlyk2003 said:
I don't use them. My ship modeling area is only used for ship modeling. The counters have kitchen counter type coverings. In over 20 years they still are clean and without significant cuts.
Hi @myksyzptlyk2003. What kind of surface do you use for cutting of PE?
- mtaylor and thibaultron
-
 2
2
-
Hi guys. I saw a few type of cutting mats. Which ones do you recommend?
-
Like above guys. Which color better for Yamato hull?
-
5 hours ago, GGibson said:
I am actually preferring the curved #10 Xacto blade for my work, including the removal of PE pieces. I can "rock" the blade easier, rather than slicing with the #11 blade.
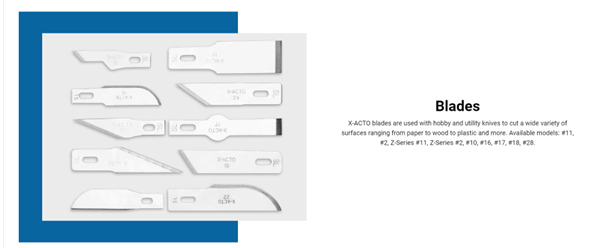
Hi GGibson.Can you give some examples of this blades and what knife I can use for this blades please? I just getting nystagmus on websites🙃
-
6 minutes ago, Roger Pellett said:
Since you have posted this under metalworking it would seem that you are considering metal. Metal, particularly brass can be an excellent choice for very small parts as grain is not a factor. A piece of hard brass wire should work.
Thanks for advice. I think it will be best choice.
- Roger Pellett, mtaylor and Canute
-
3
-
57 minutes ago, allanyed said:
What actual diameter do you need? One idea that comes to mind if I am picturing this correctly in my mind, you can run bamboo through a draw plate to the largest diameter you need for the mast then taper as needed with sandpaper. My preference is to start with bamboo skewers or chopsticks and split them to a workable size, then run them through the draw plate holes until I reach the diameter I need.
Allan
Thanks for replaying mate. I think I will try use first tooth picks. And use sandpaper make smaller diameter. Thanks for idea what can I use 😀. Will have fun with it.
-
Need suggestions how to make small masts for Yamato lifeboats. I think to use 0,2 wires to do this. What do you think guys? Anyone can give me some advice and tips please?
-
-
Hi guys. I am looking where to buy aftermarket two rudders for Yamato. Maybe someone knows where to get it please? I try find in UK but can not find it.
-
3 hours ago, Jaager said:
I like the shape of the Fiskars Softgrip Ergonomic Detail Knife for hand feel.
A very common blade is the #11 shape. Getting a 100 pack of a high quality #11 blade, not the OEM version is my choice.
When researching this, I just discovered that XActo - which as not been my choice for blades - has a XZ series that has a zirconium nitride coating
Feedback suggests that the hard coating makes the tip prone to snapping off - especially with lateral force. If your cuts are straight line they might work.
An alternate direction is a double bevel 1/4" violin makers knife. #11 shape - just a bar of steel with no handle. Expensive but it is lifetime for one. There are maybe 6 widths.
With both disposable and permanent blades, very frequent shroping on leather charged with a green, red, or gold polishing compound crayon keeps a fine edge and reduces changes. I do not know if zirconium is harder than the compounds. It may require diamond.
Can I replace blades on this particular model @Jaager? Doesn’t say anything.
-
-
-
-
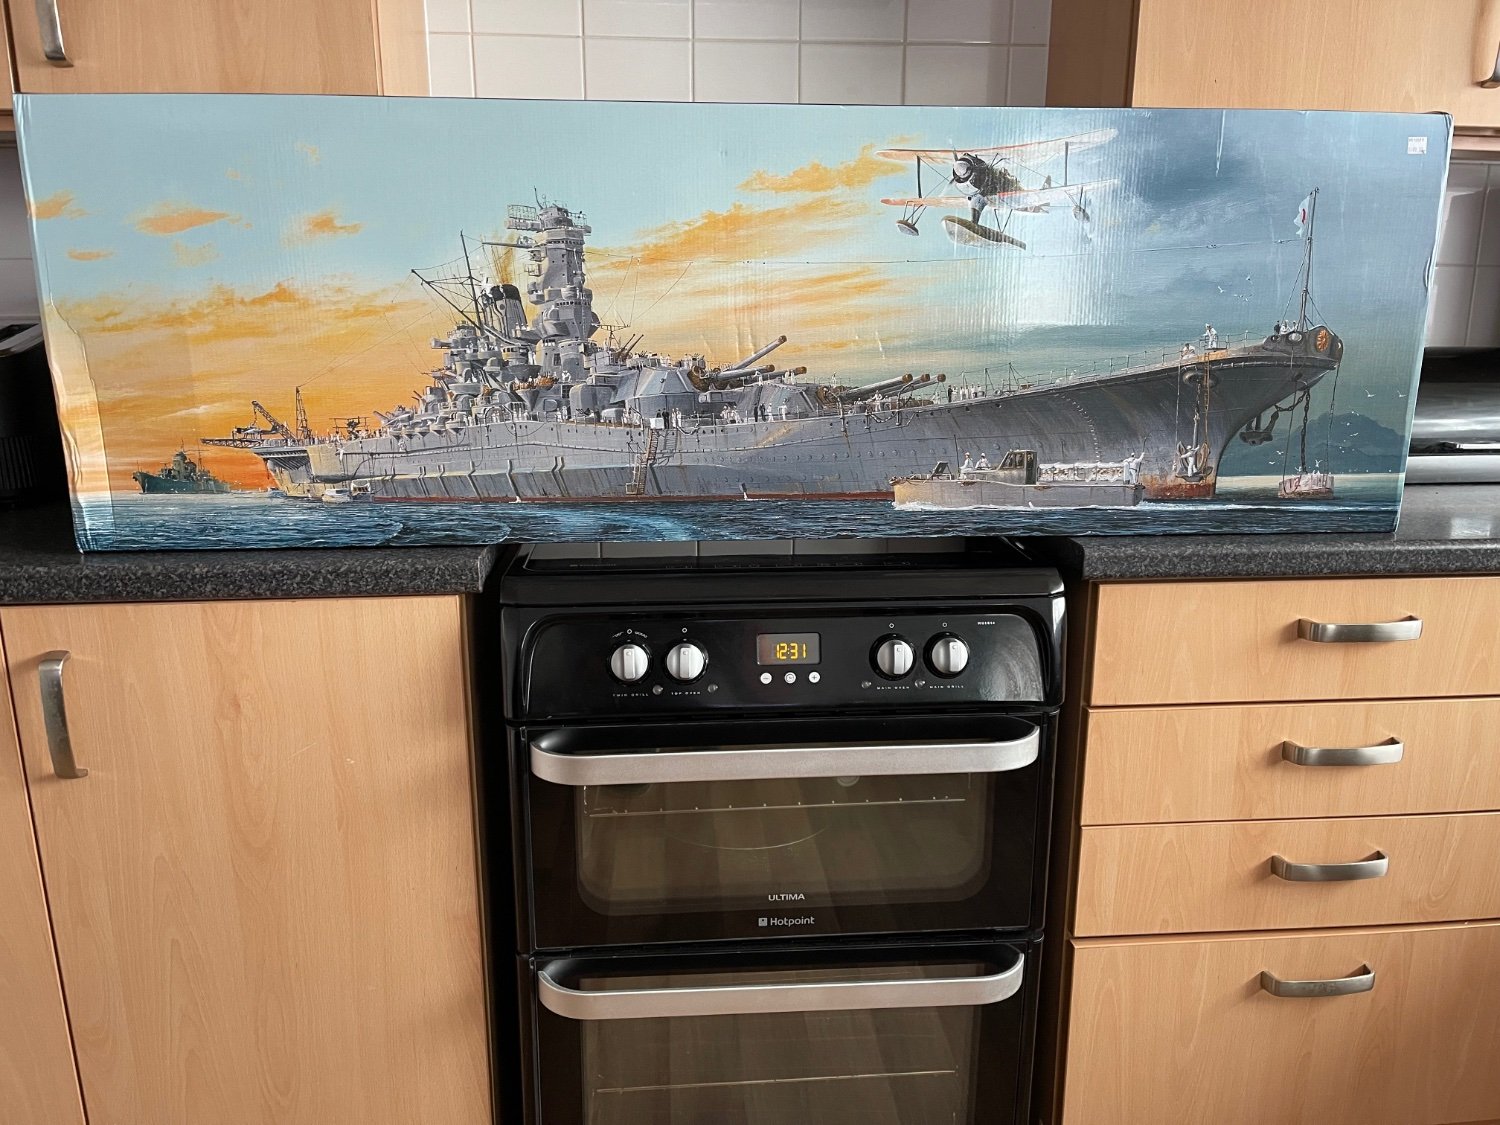
Hi mellow guys. Can someone tell me which Woden deck is the best do 1:200 Yamato Trampeter please? I am new to modeling and went for hard project. I know 🙂. And also need advice what kind of magnifying lamp or head one to buy? I can see that some of them are from 8X up. Thank you for your advice guys. Ship is coming in few days 😀. I hope my wife will not get heart attack when will see the box.
-
-
-
-
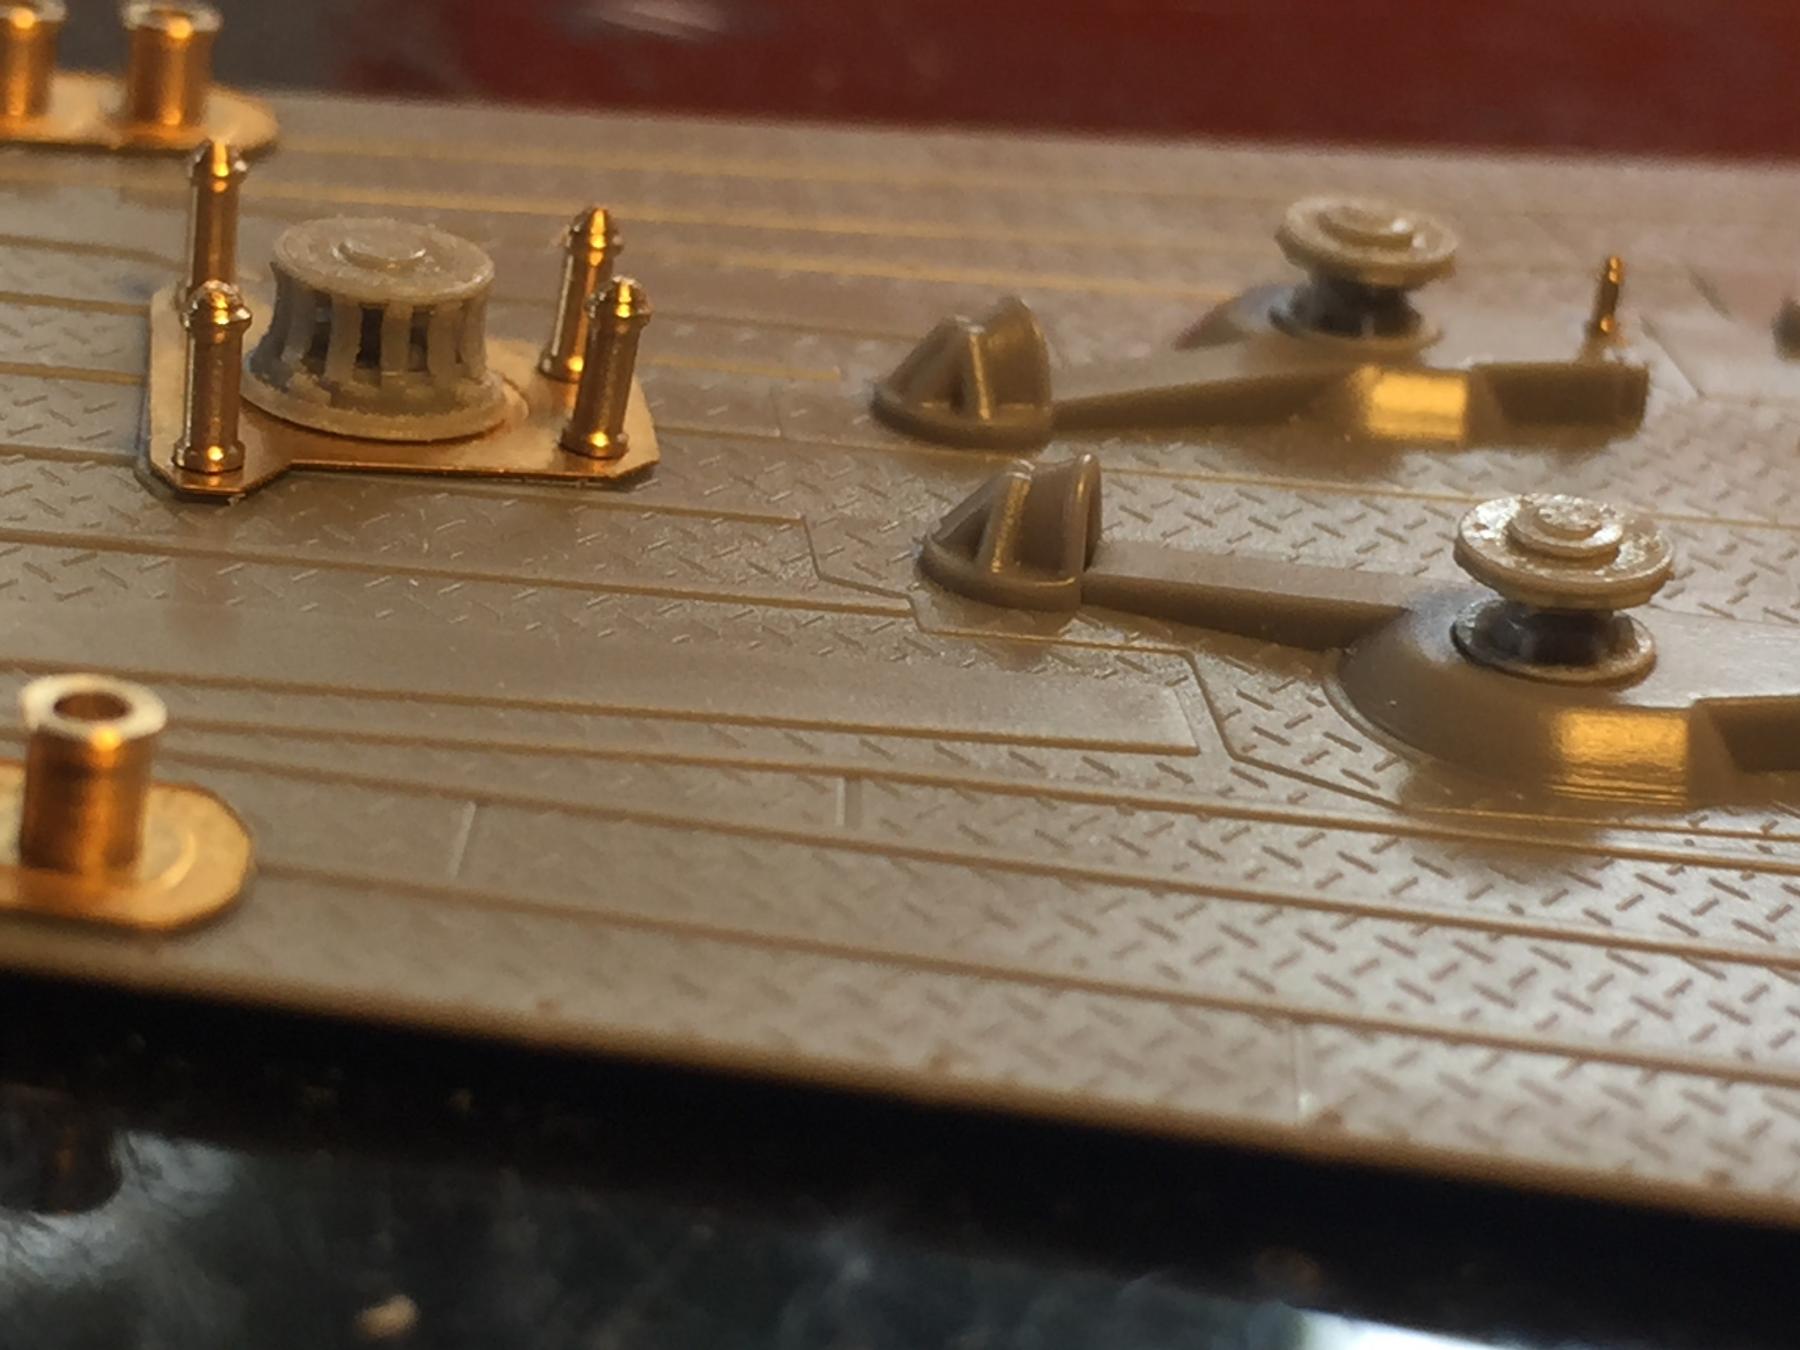
On 10/18/2016 at 4:12 AM, RGL said:
Moving along, I have done everything t the deck I can do before painting. There are marked places for the stanchions but I cannot drill them until I do up the hull.

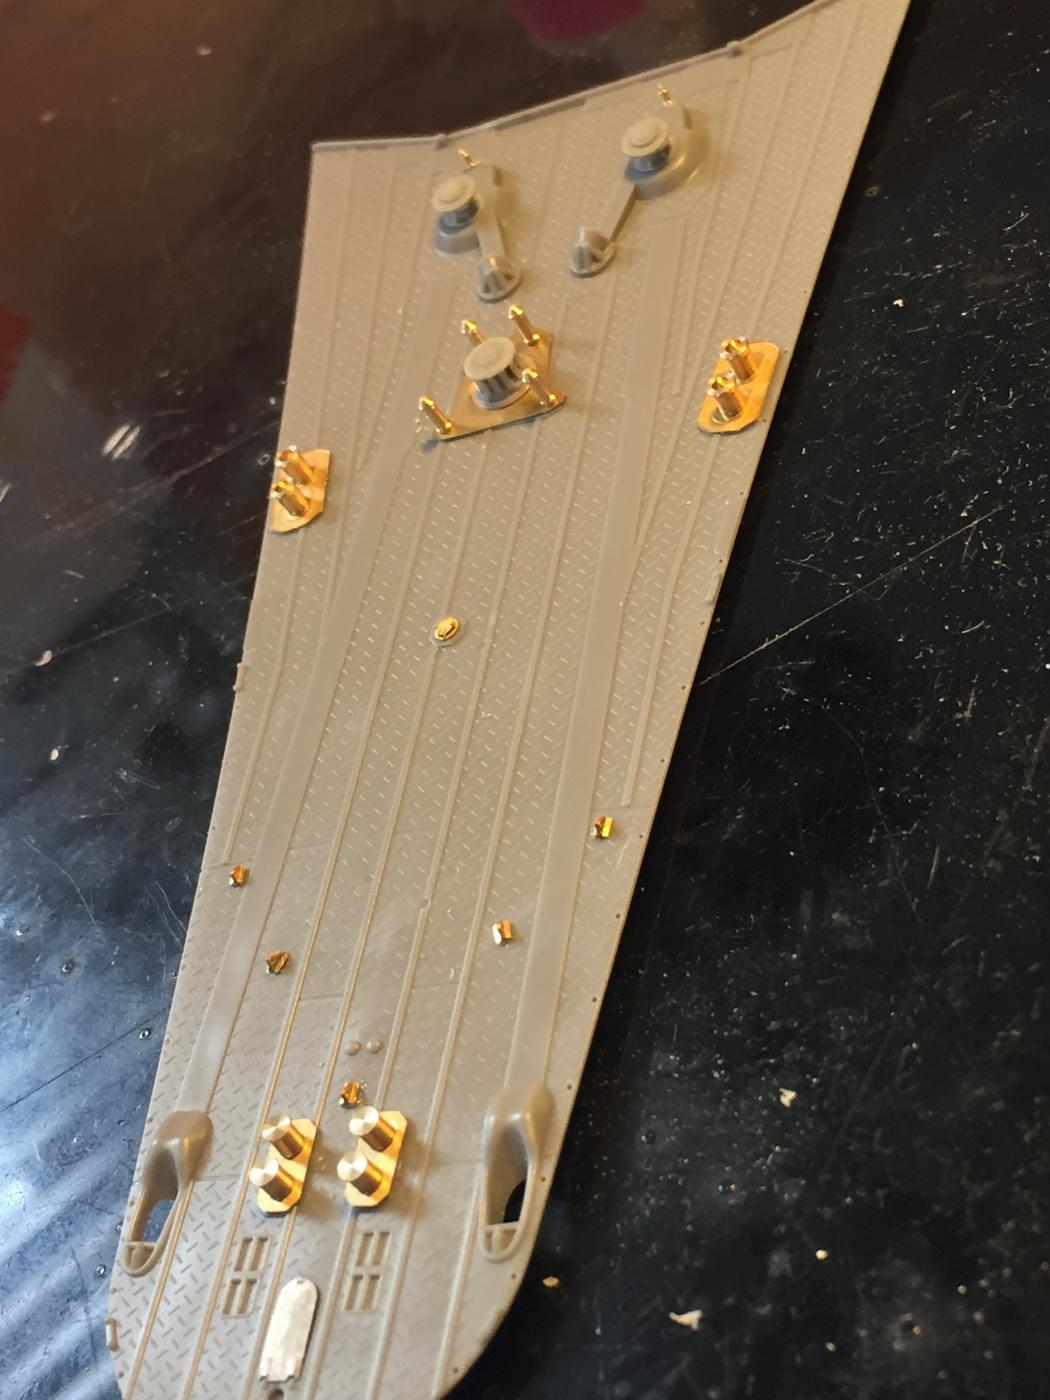
The Forecastle is a very nice mold. As you can see from the AOTS there is not really much to be done here.
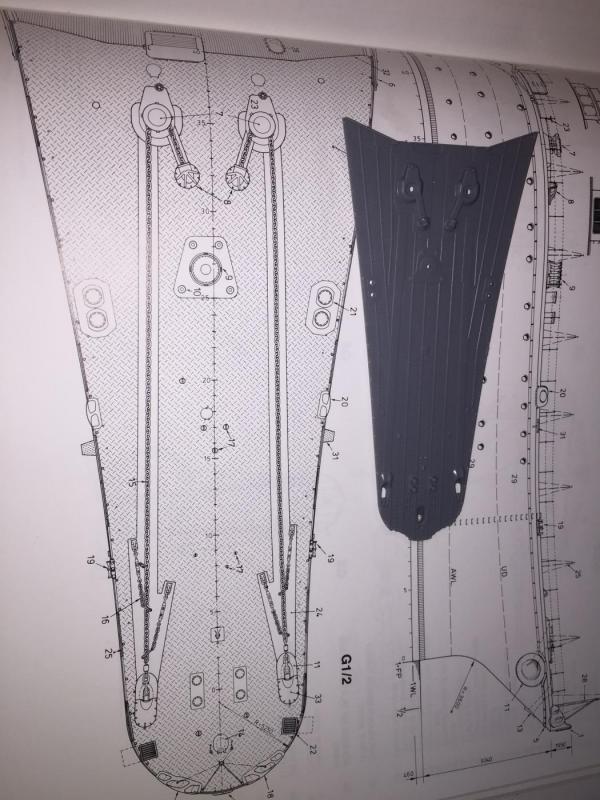
The Tamiya capstan and cable holder are fairly bland;
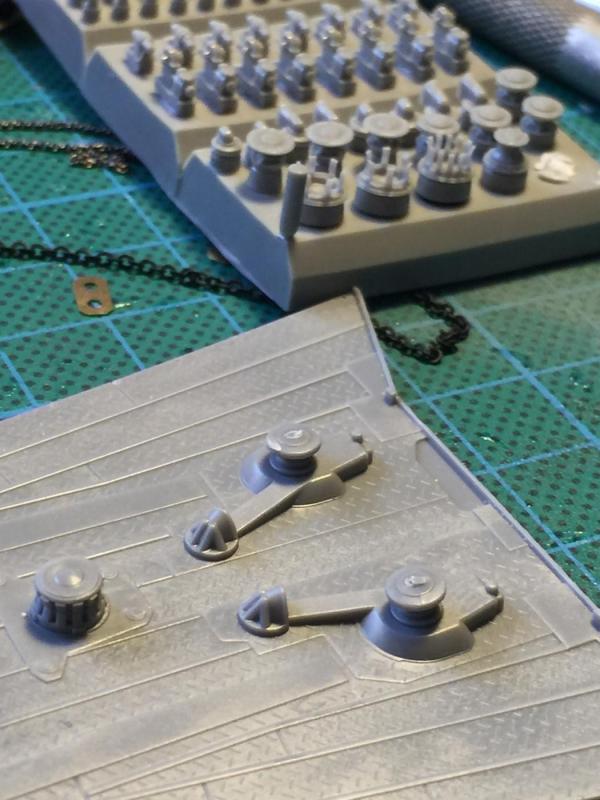 and I have replaced them with the Chrysanthemum set which is just lovely.
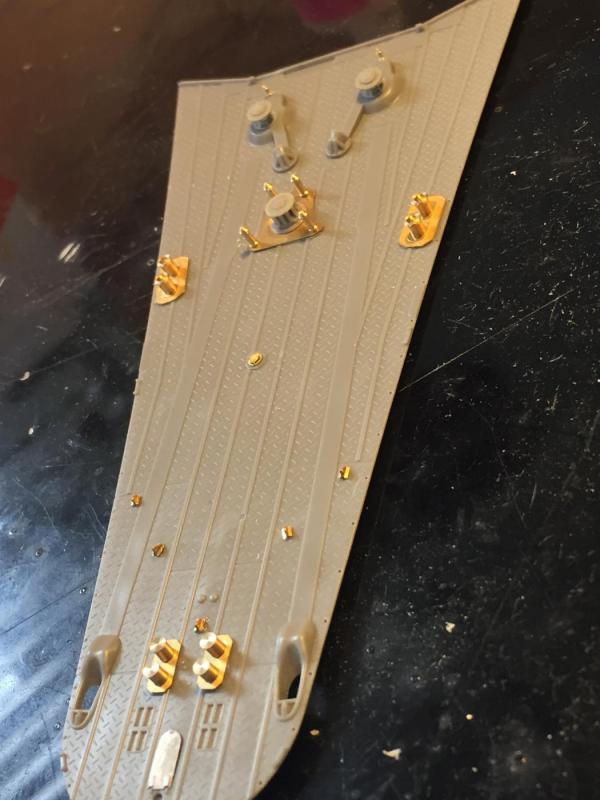
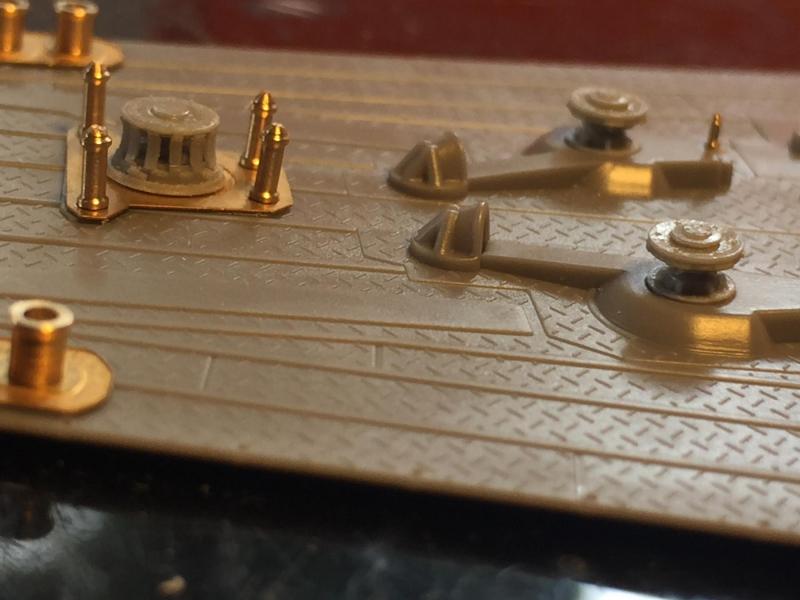
The front hawser hole is provided by Tamiya but the other brass is all Pontos.
Now it's in its' box until painting time. What next?
On 10/18/2016 at 4:12 AM, RGL said:Moving along, I have done everything t the deck I can do before painting. There are marked places for the stanchions but I cannot drill them until I do up the hull.
The Forecastle is a very nice mold. As you can see from the AOTS there is not really much to be done here.
The Tamiya capstan and cable holder are fairly bland;
and I have replaced them with the Chrysanthemum set which is just lovely.
The front hawser hole is provided by Tamiya but the other brass is all Pontos.
Now it's in its' box until painting time. What next?
Hi RGL. You done great job. But I have question to you. Is it worth to but Pontos PE kit like on this link?
Kind Regards
Olaf
- mtaylor, Canute and Old Collingwood
-
3


Easy cleaning airbrush
in Painting, finishing and weathering products and techniques
Posted
Thank you @Nirvana that I could help a little :). This is just beginning of my way to modeling and now I am collecting all parts and informations for my project including 3D printing extra parts. Just need search for someone else who is very good in 3D reisen printing. All parts and tools will cost me trple more than model 😅.