
DanielNG10
-
Posts
11 -
Joined
-
Last visited


-
 etubino reacted to a post in a topic:
Norske Love by DanielNG10 - Billing Boats - 1:75
etubino reacted to a post in a topic:
Norske Love by DanielNG10 - Billing Boats - 1:75
-
mrcc reacted to a post in a topic:
Norske Love by DanielNG10 - Billing Boats - 1:75
-
brunnels reacted to a post in a topic:
Norske Love by DanielNG10 - Billing Boats - 1:75
-
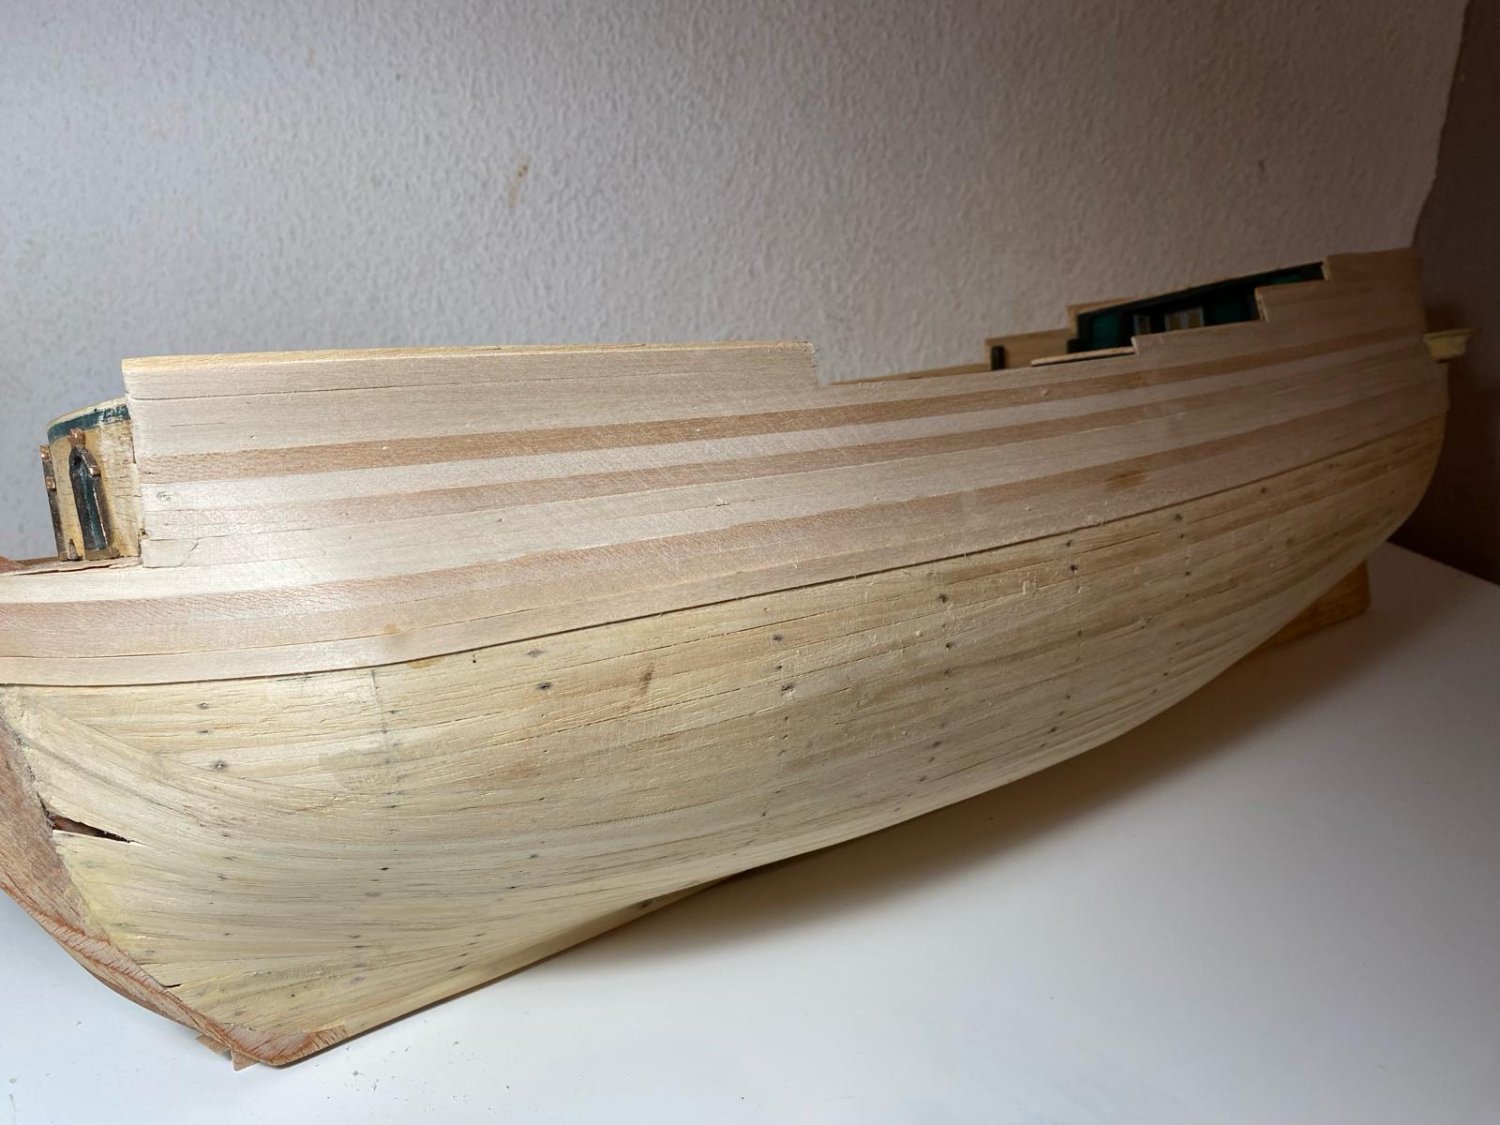
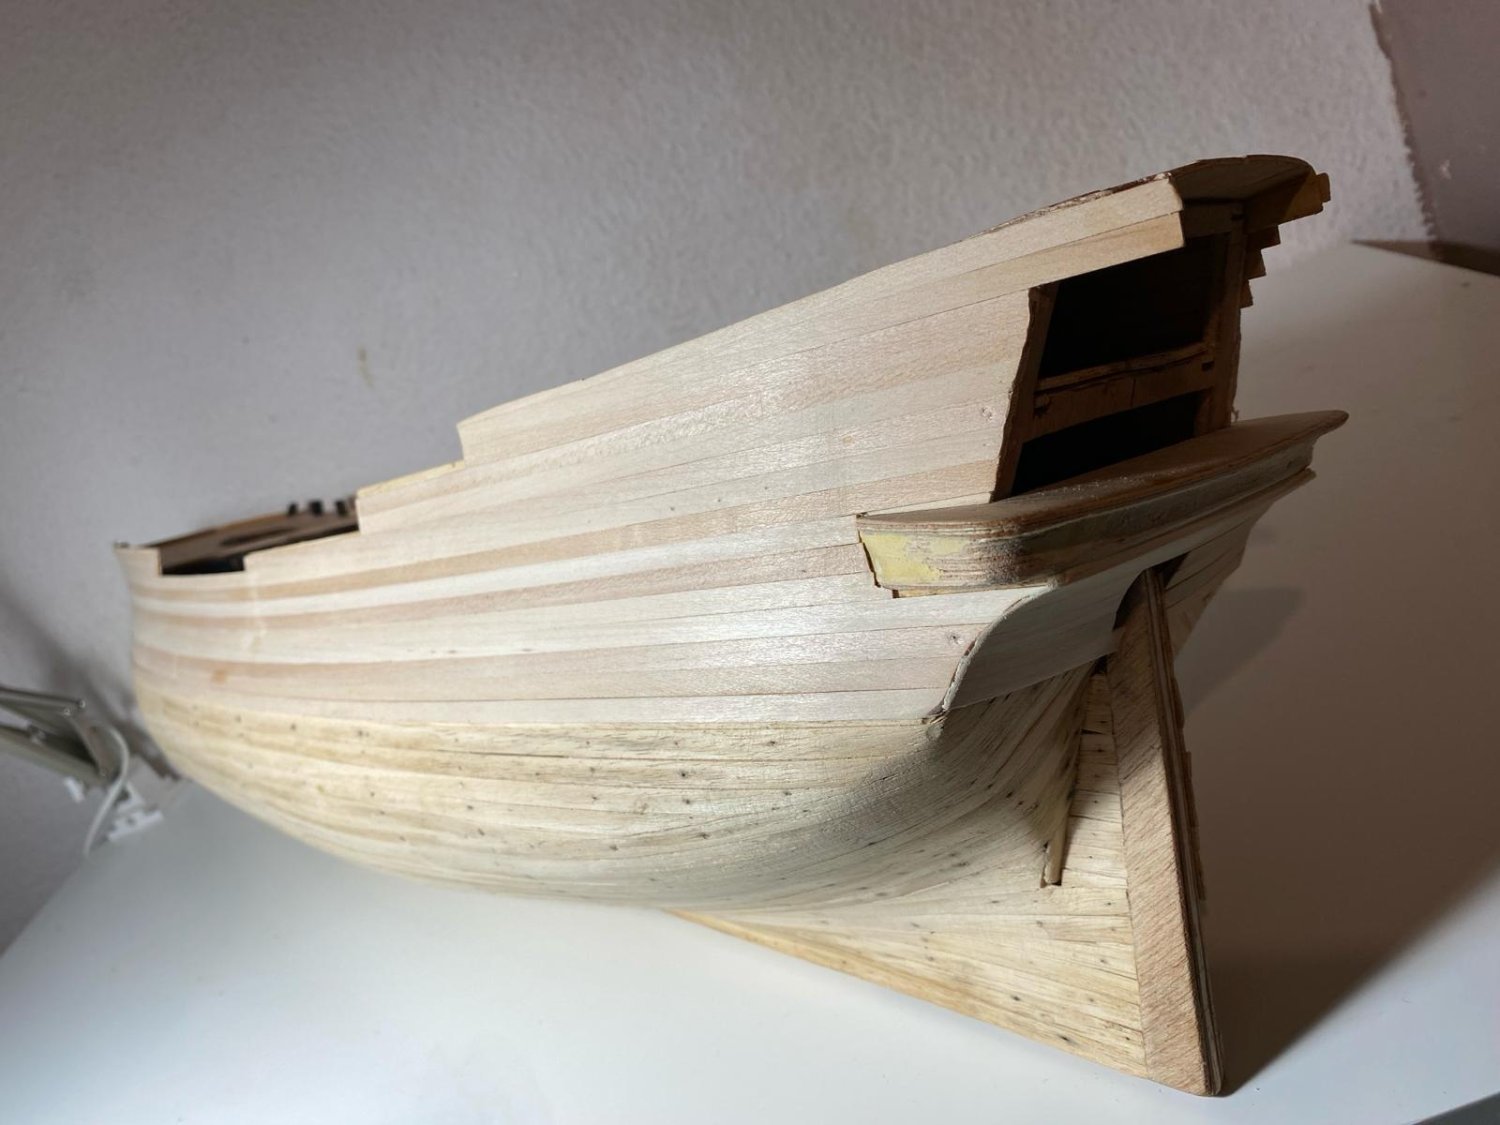
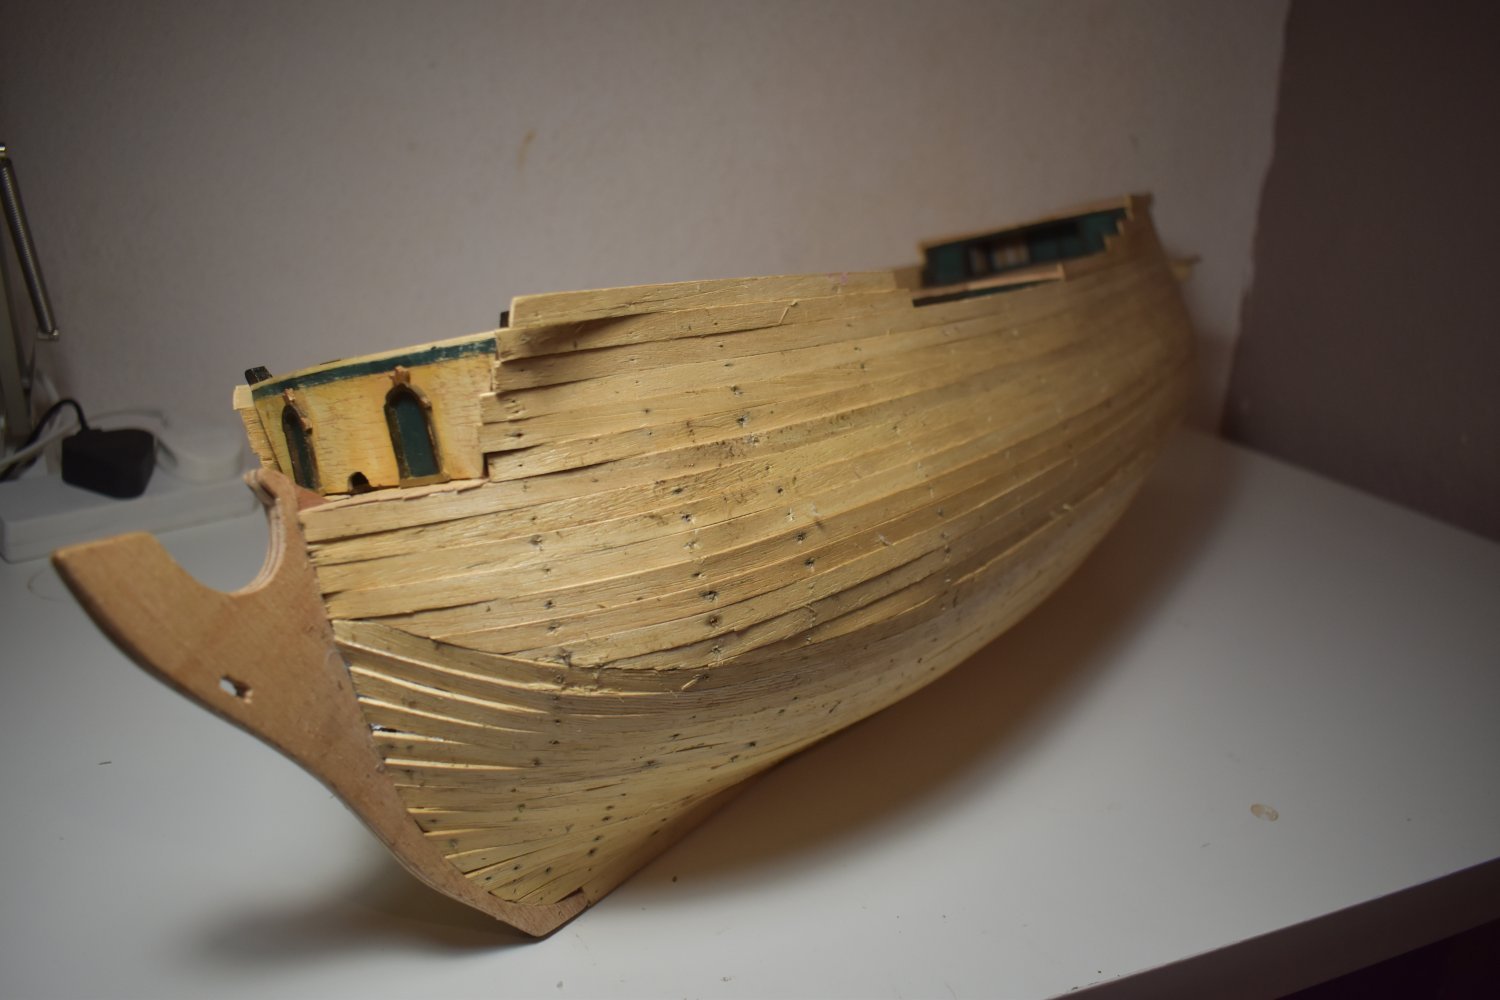
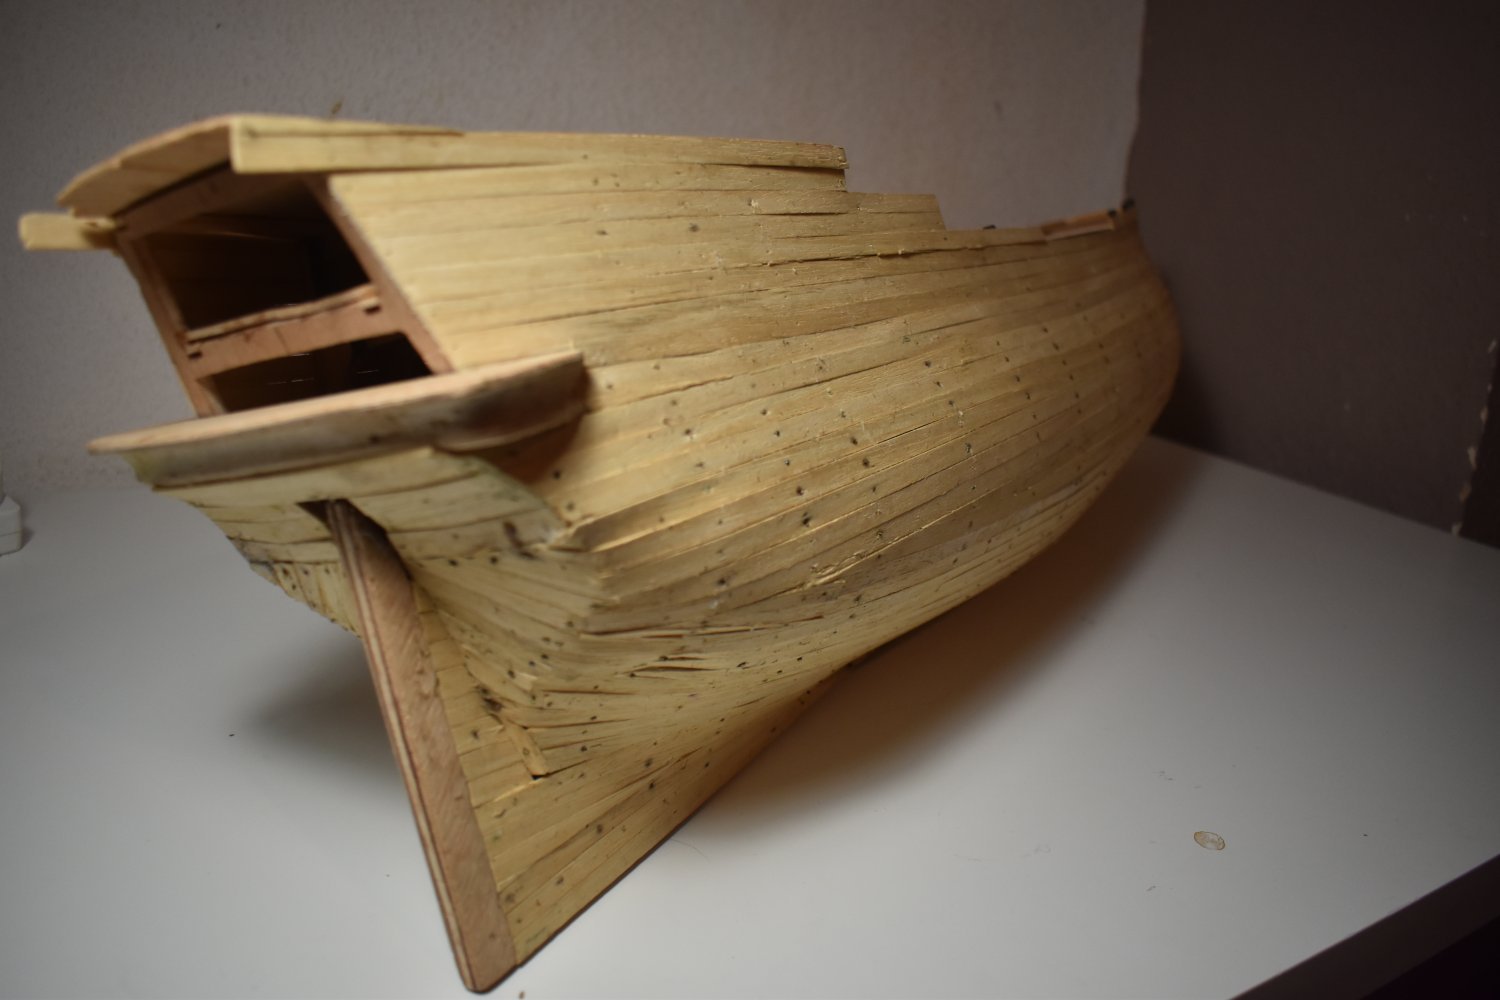
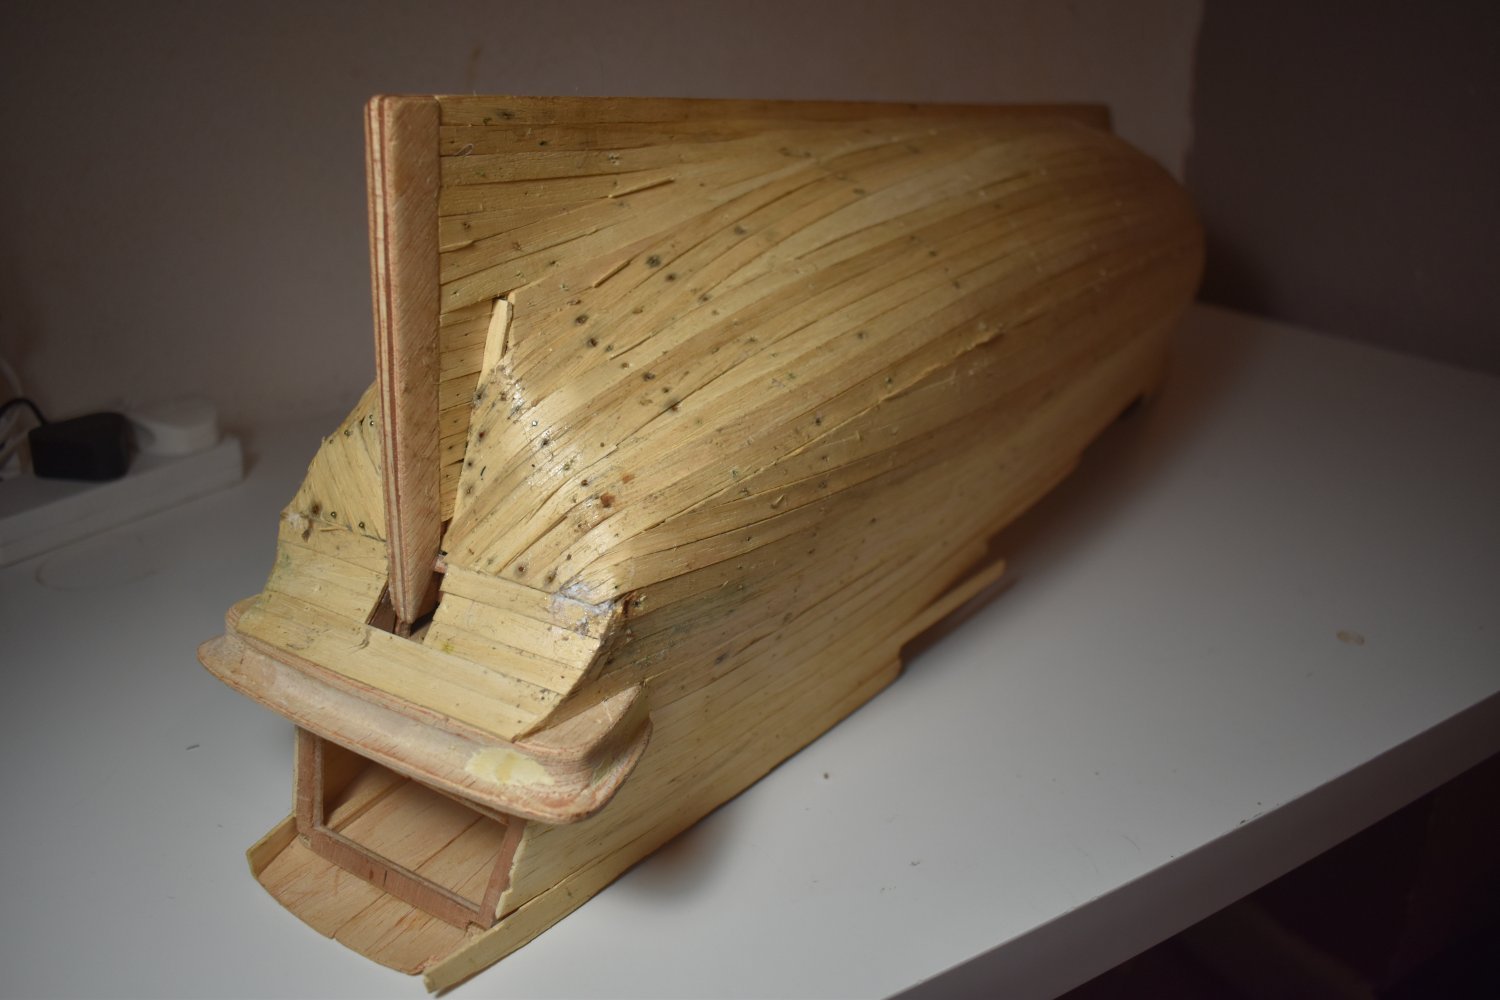
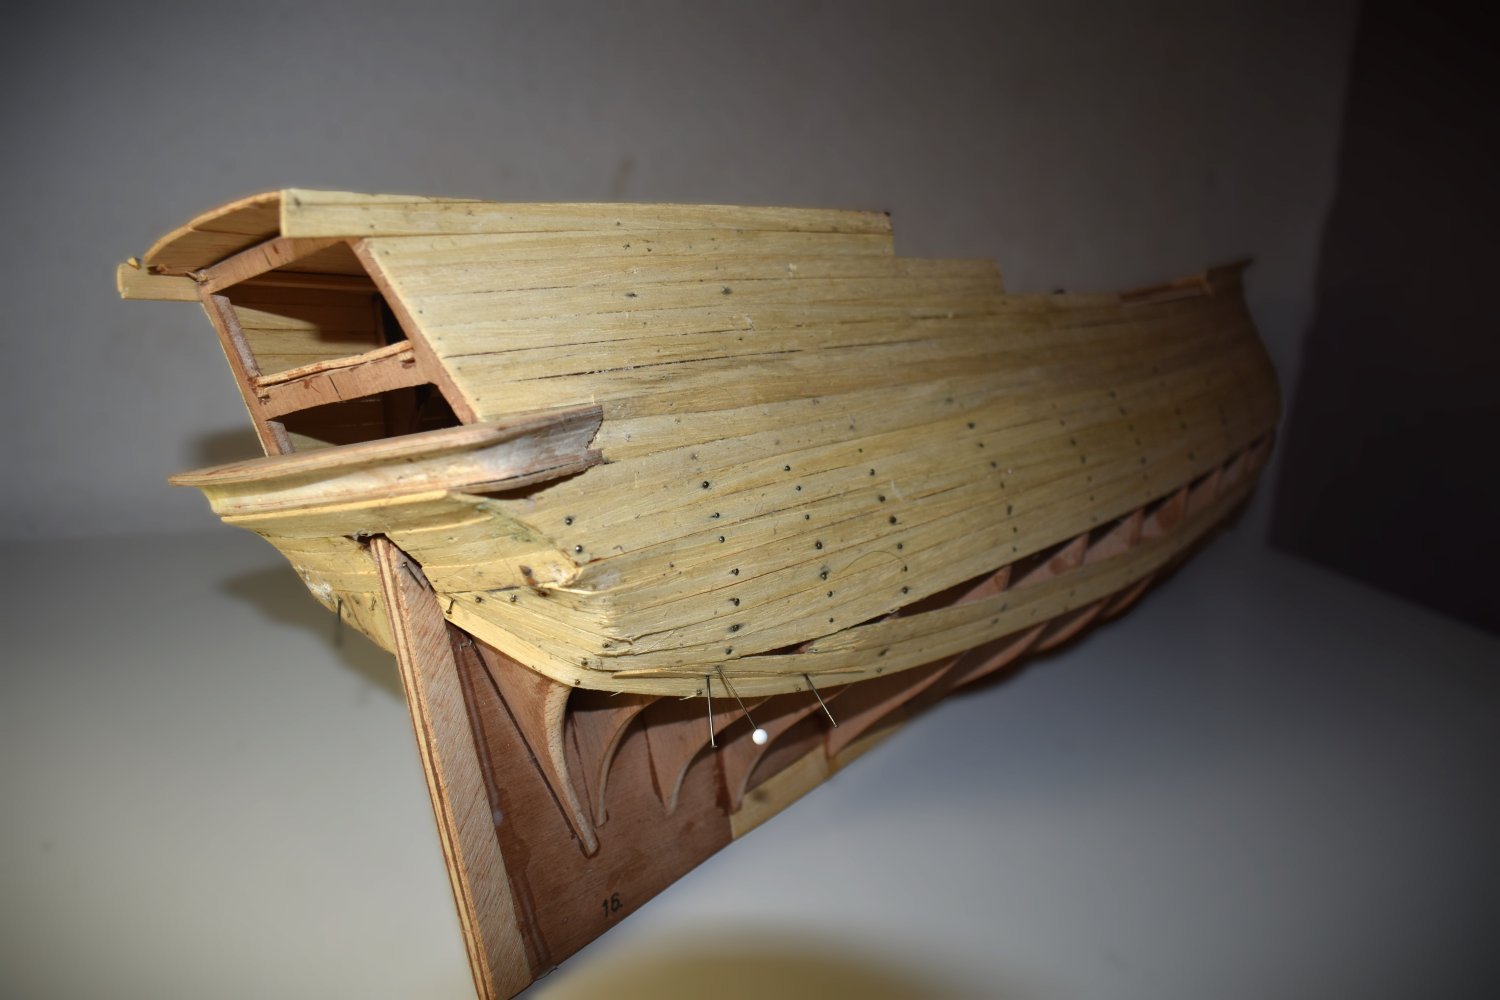
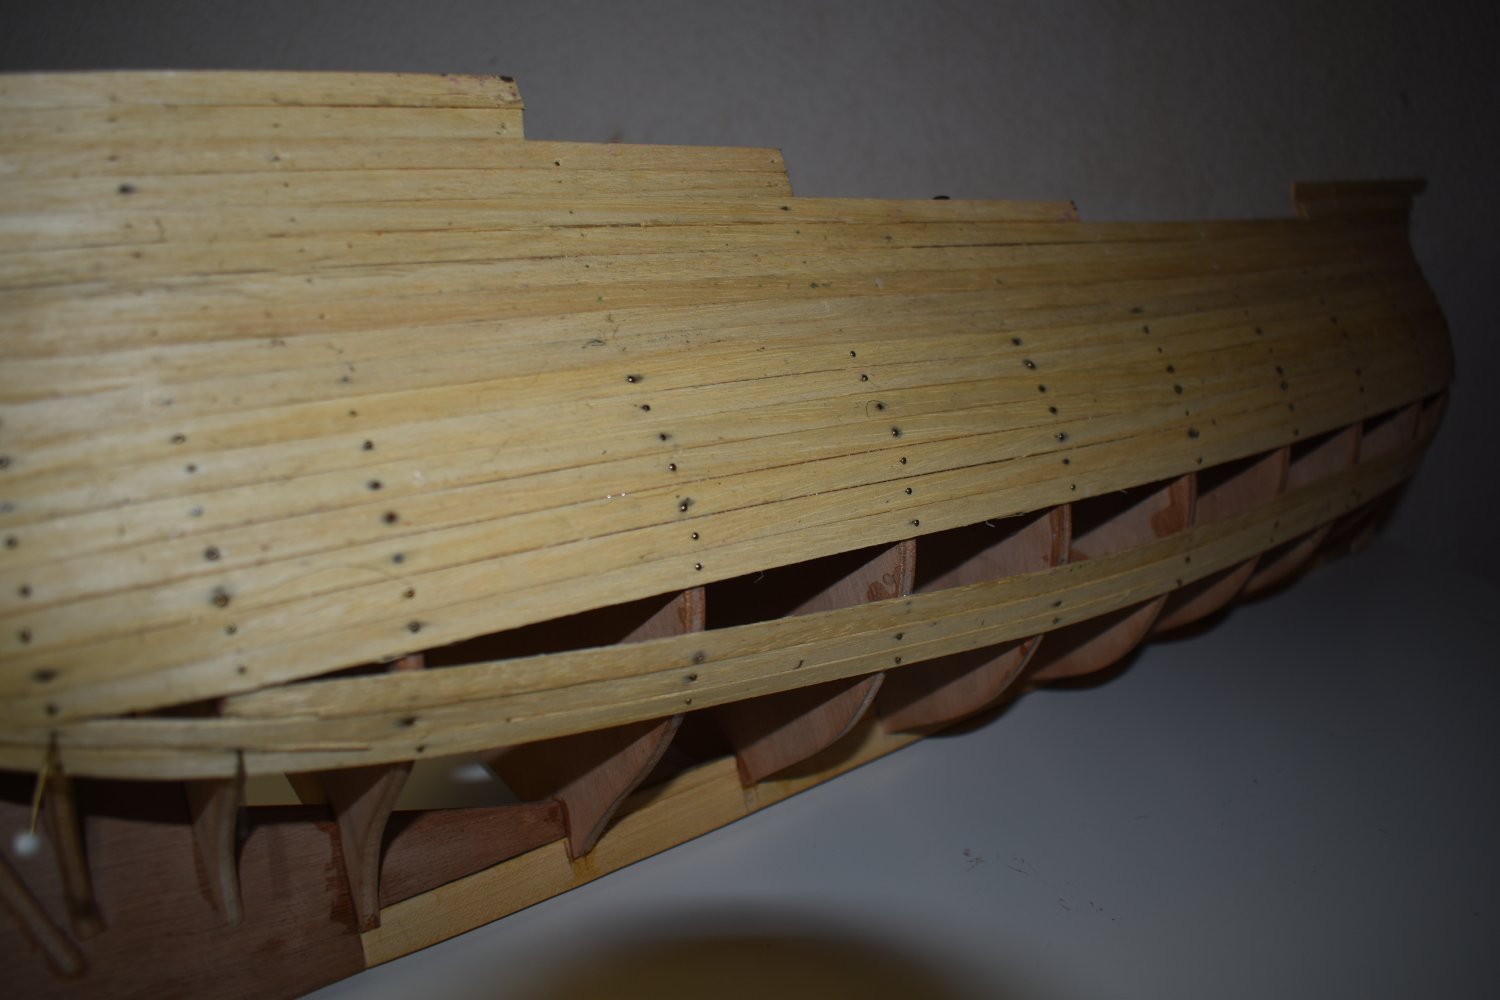
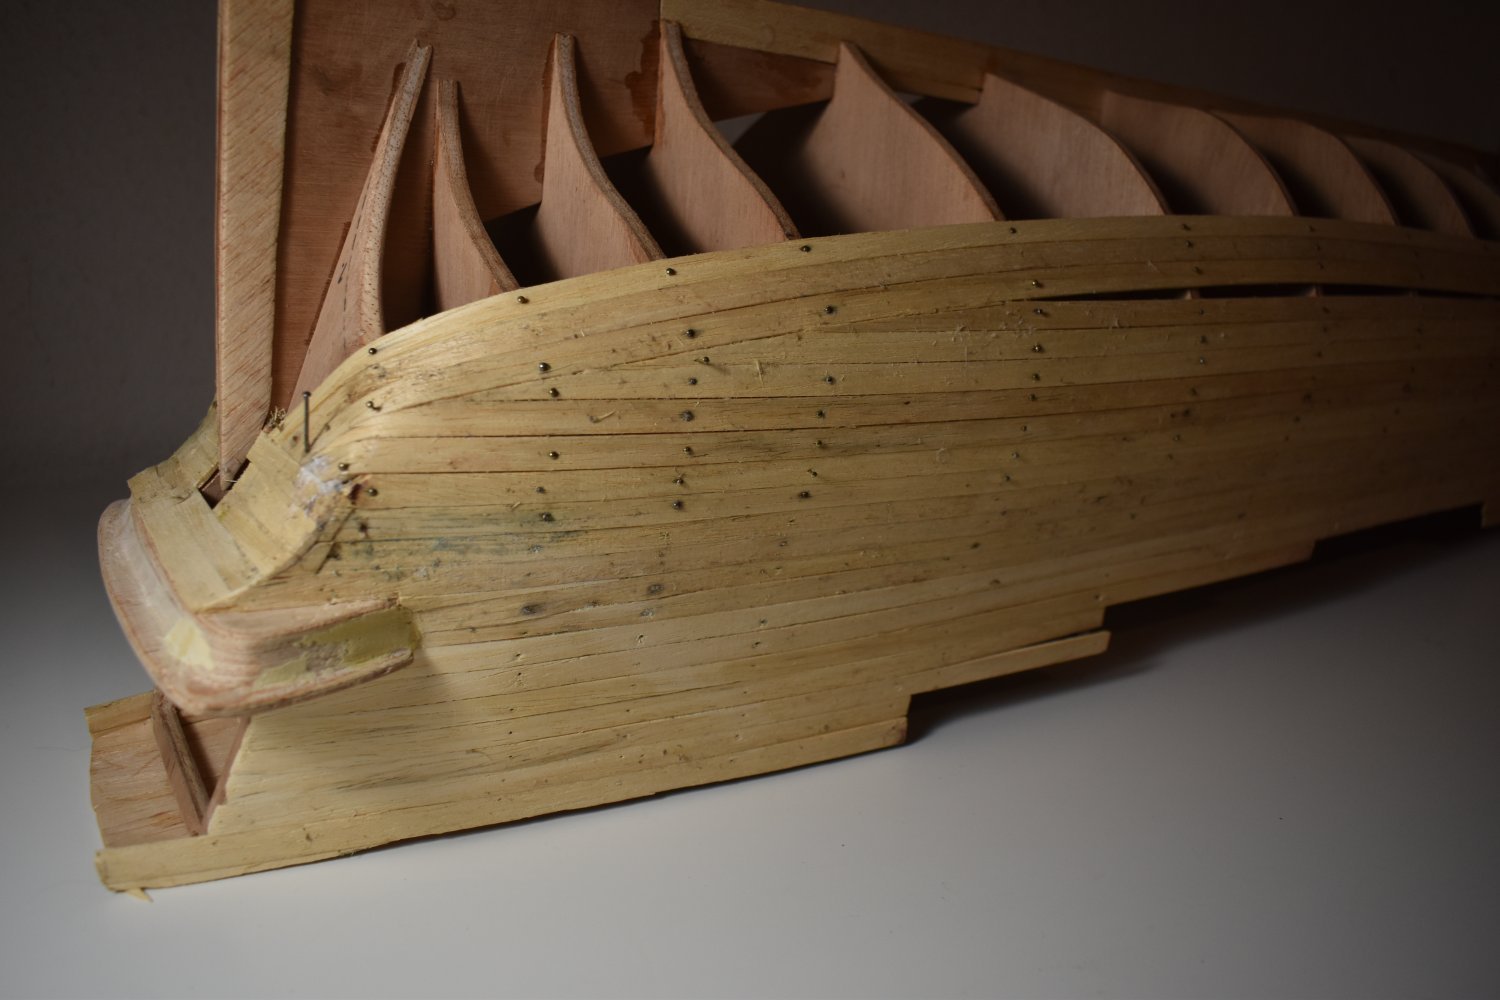
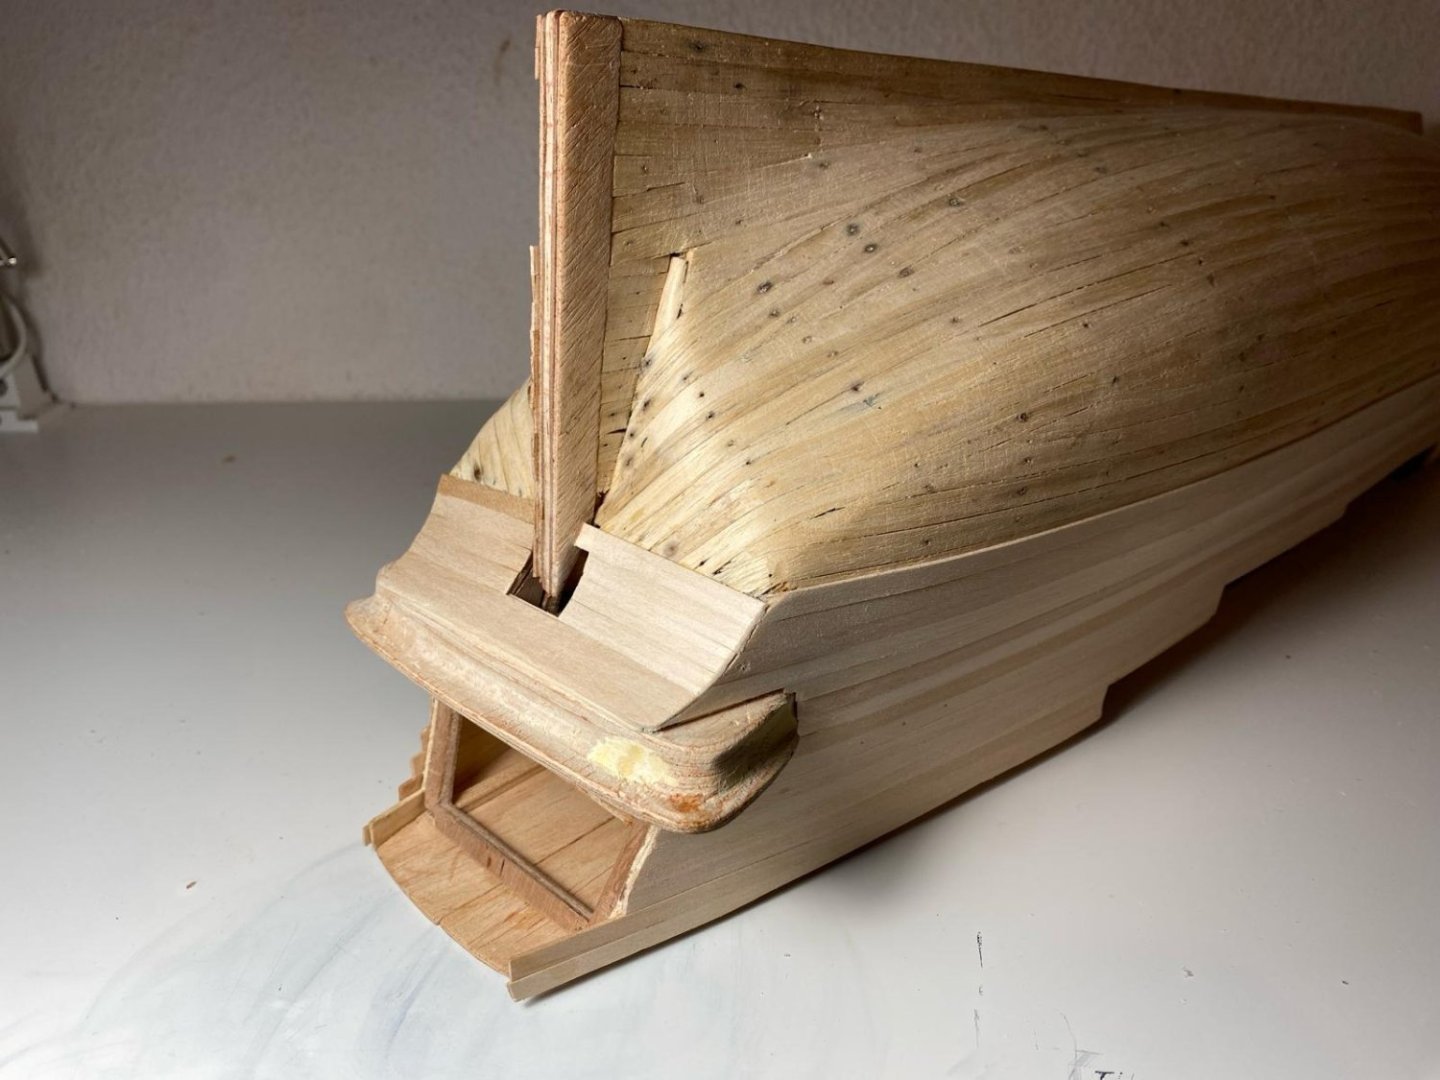
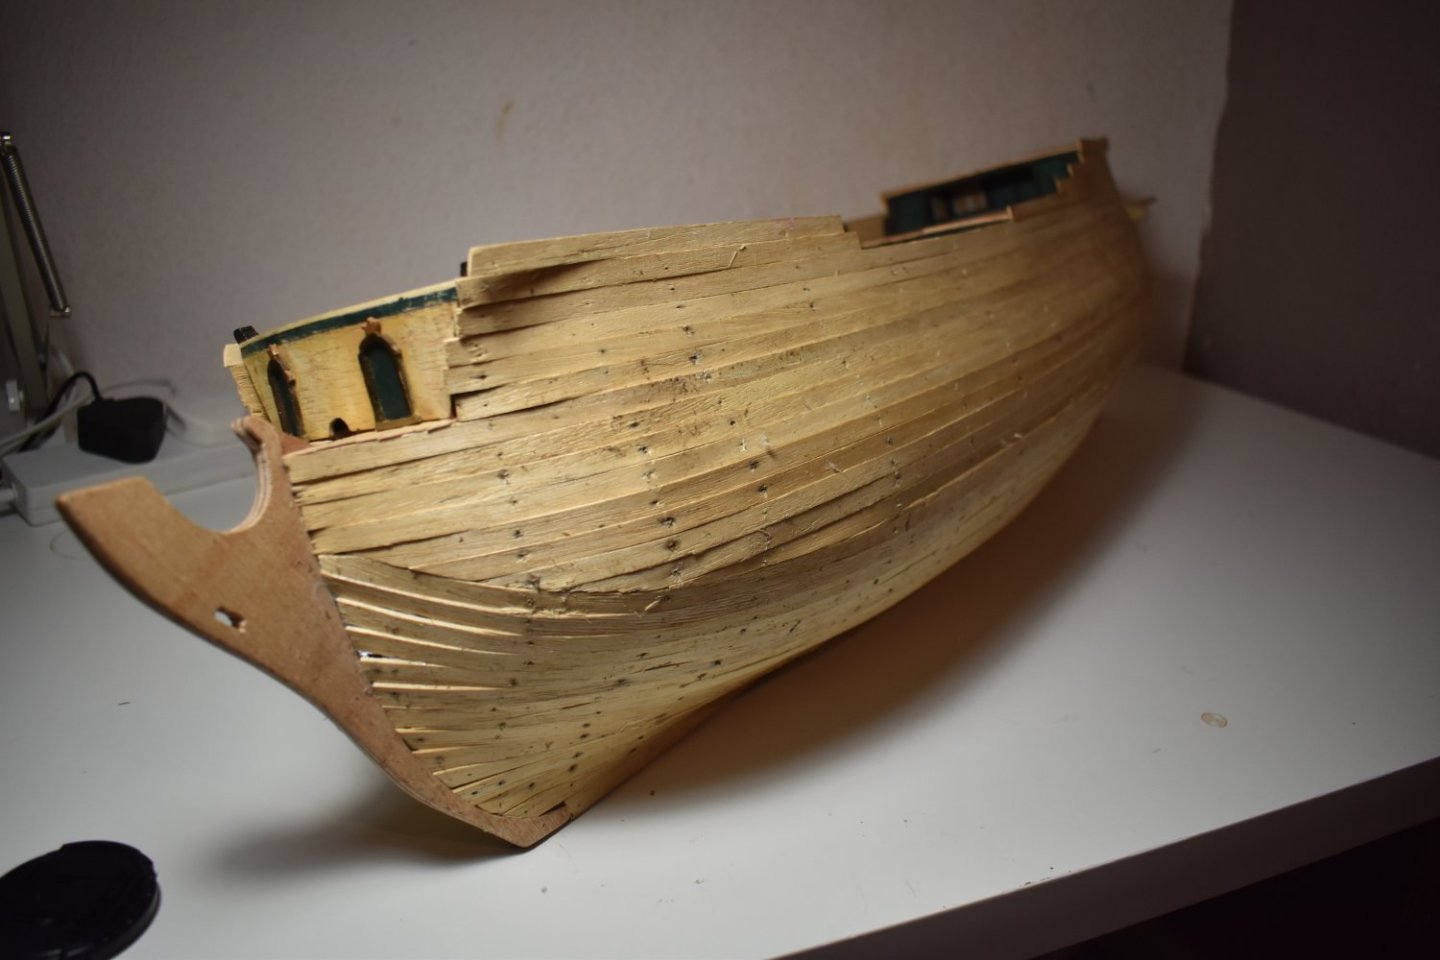
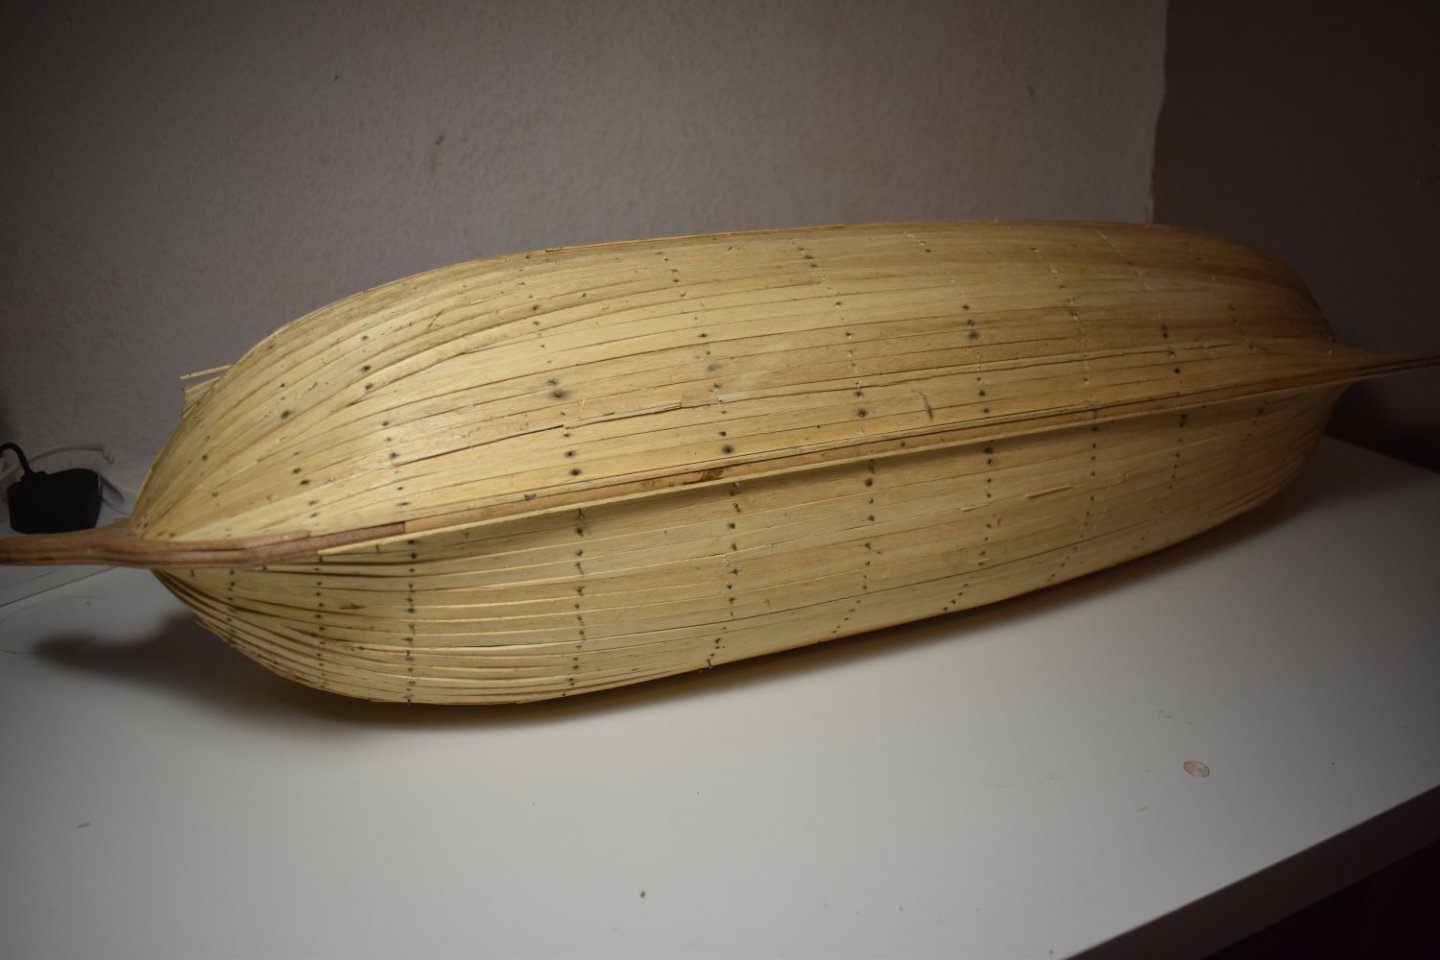
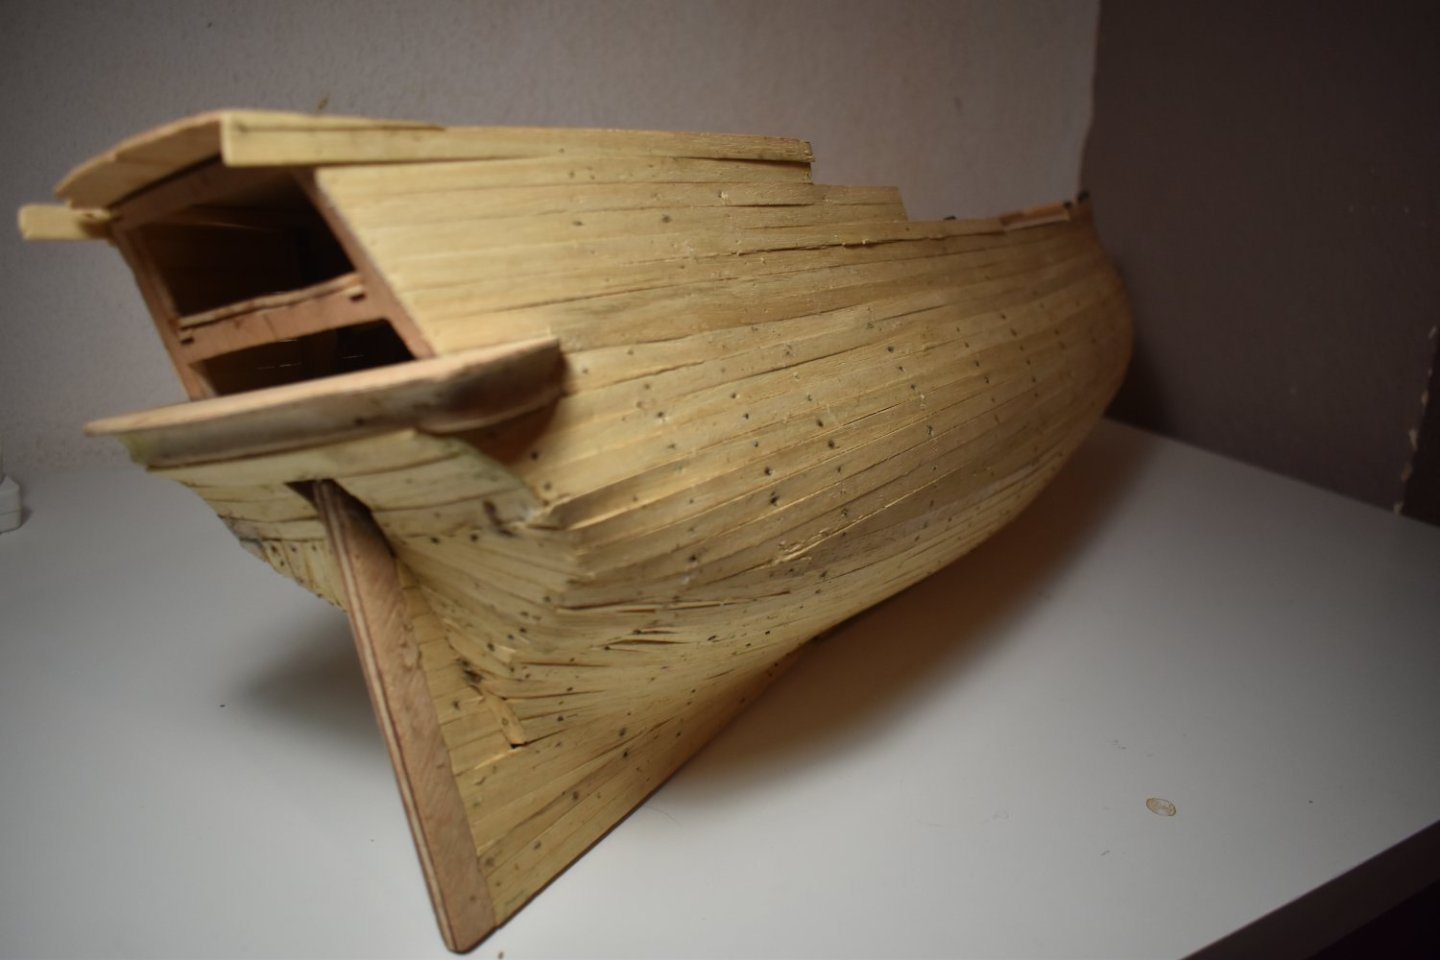
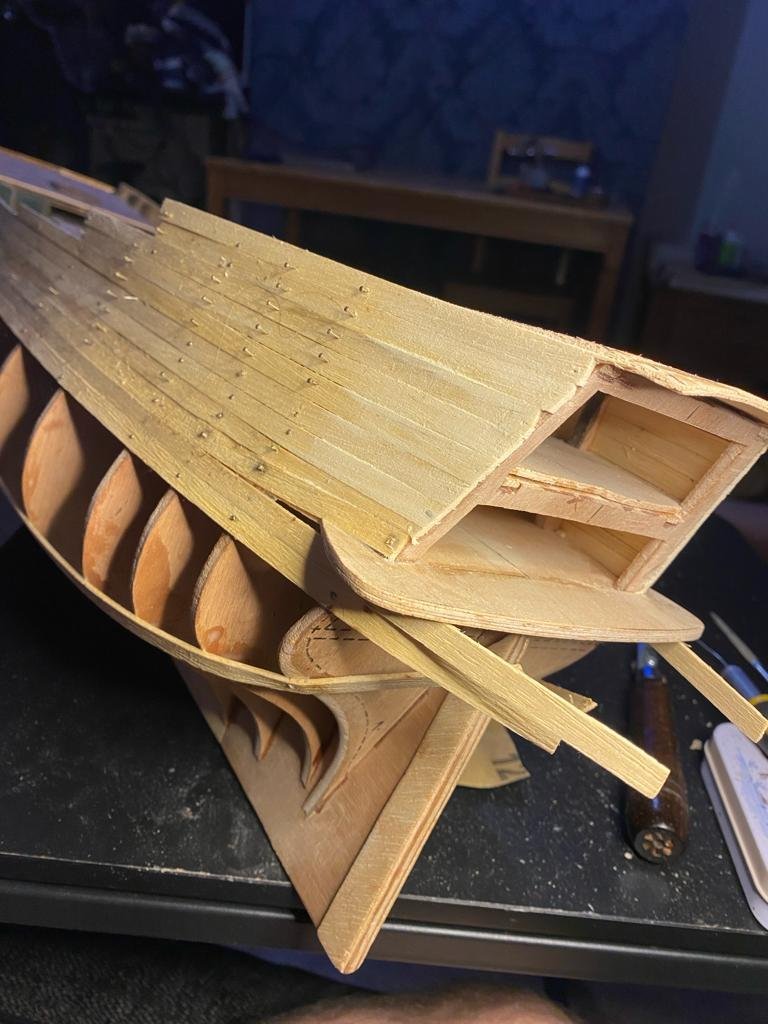
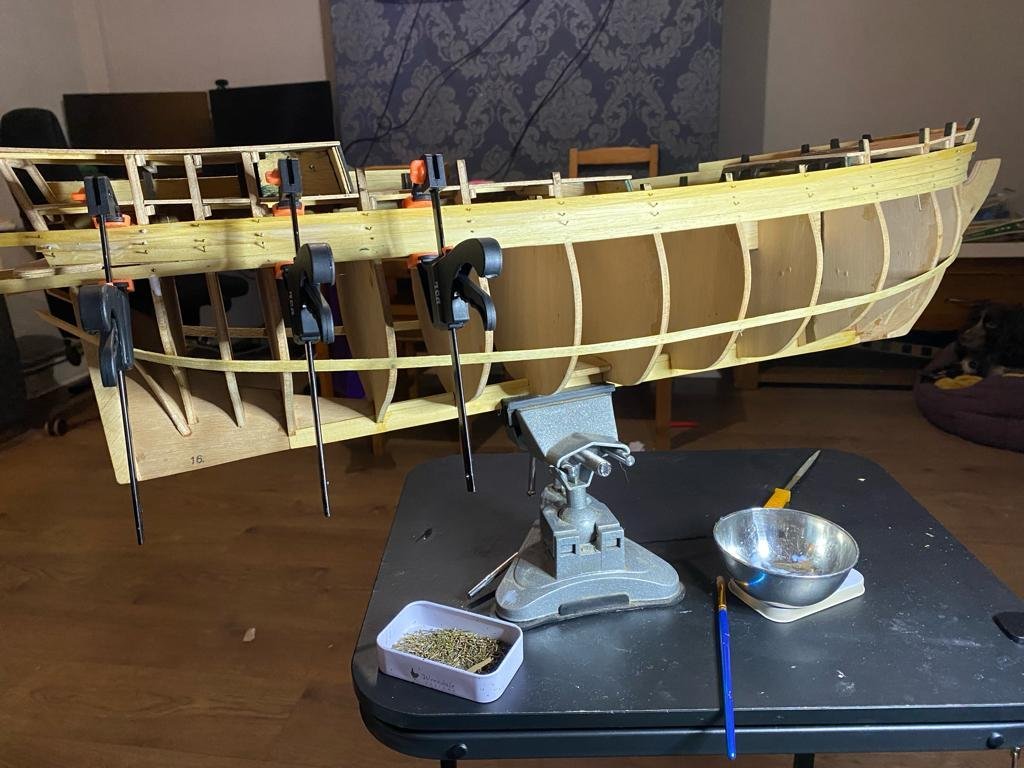
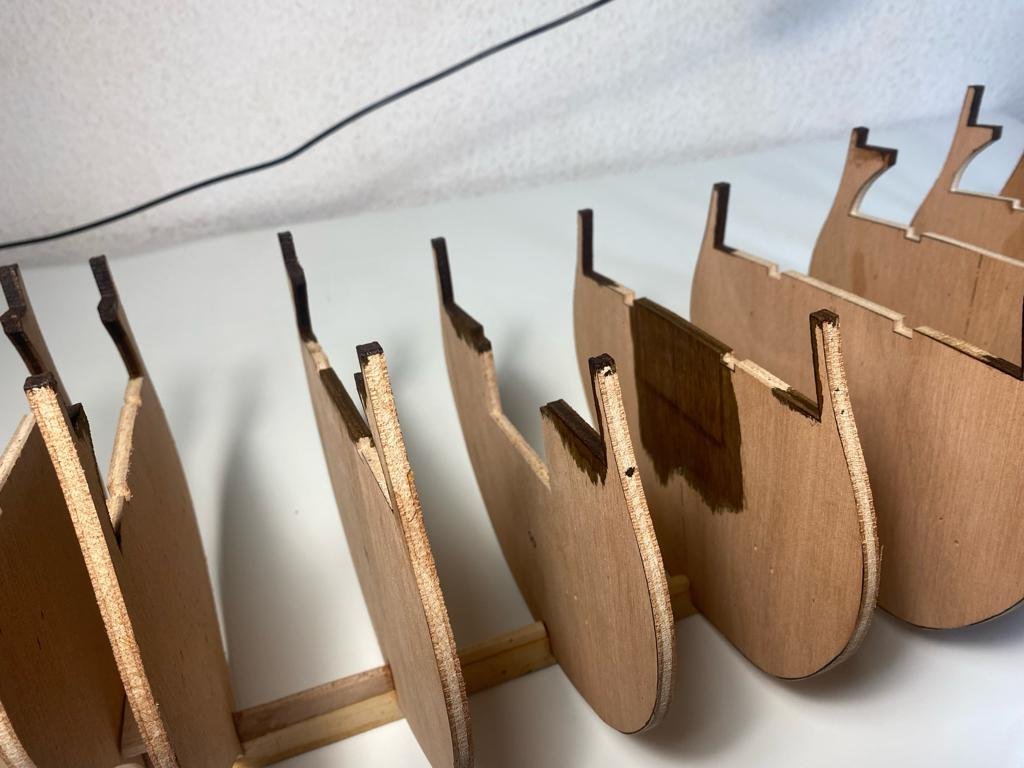
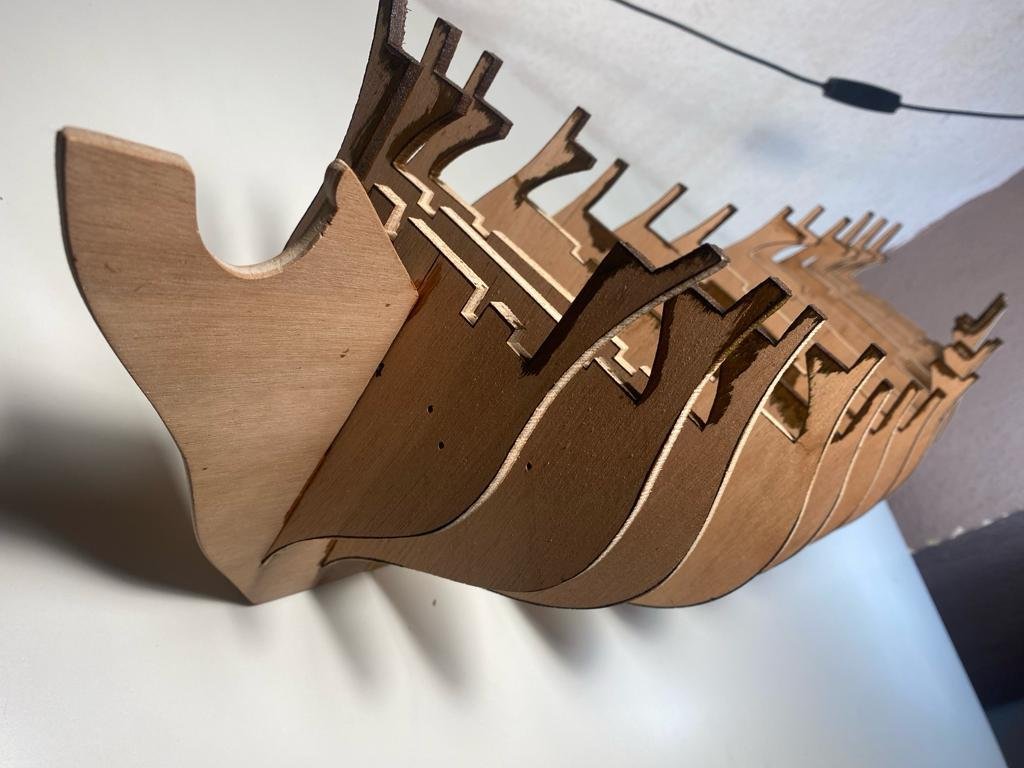
 UPDATE NINE The progress is less dramatic at this stage, however, I hope you can see the progress in smartening up the planks. So…. I’m not a fan of Billing Boats. Granted, this is an older model which I brought from EBay, so maybe the more recent ones have fixed these problems. I’m not a fan of the one layer of planks. I attached the planking around the ship, yeah it’s a messy job and I’m sure people more skilled than me can do a jolly good job first time of asking. I’ve sanded and filled in some of the gaps, but even doing this, it doesn’t do the model justice. Having those finishing planks going over the top would make a difference. Additionally, the plastic fitting aren’t the best so I’m going to have to replace them, but that’s for another post. So, I couldn’t find finishing planks online, everyone was sold out annoyingly. I brought some thin planks which would be used for the initial layer. Then I’m sanding them down. The photos show my progress so far. I’m massively apricate you checking out my Instagram page: https://www.instagram.com/byron_dockyard/

-
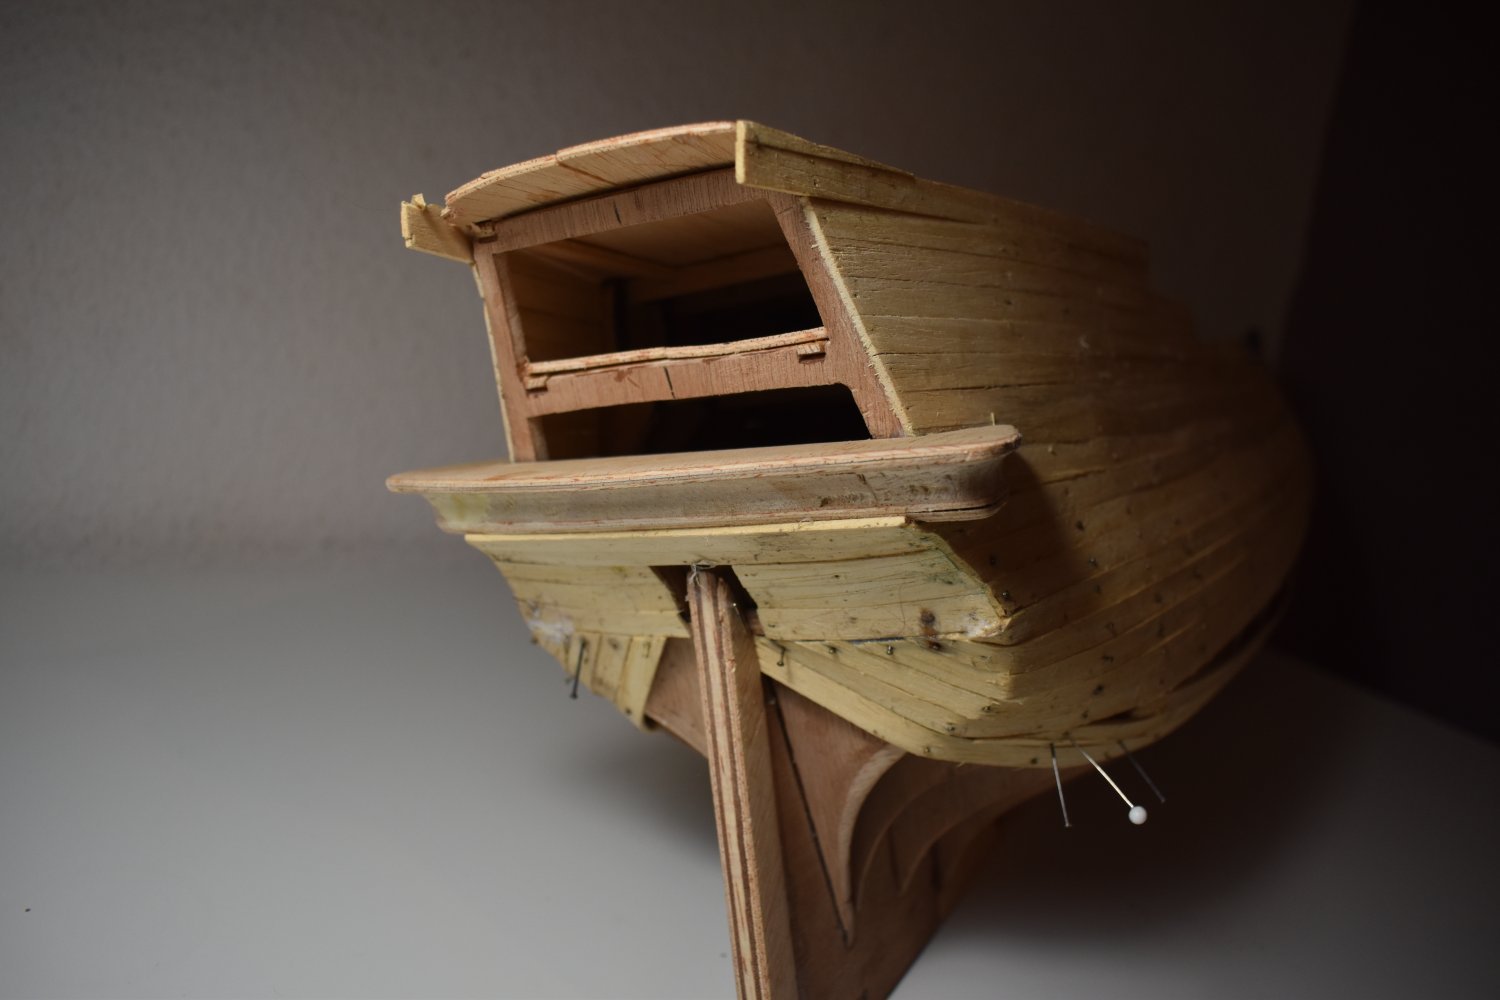
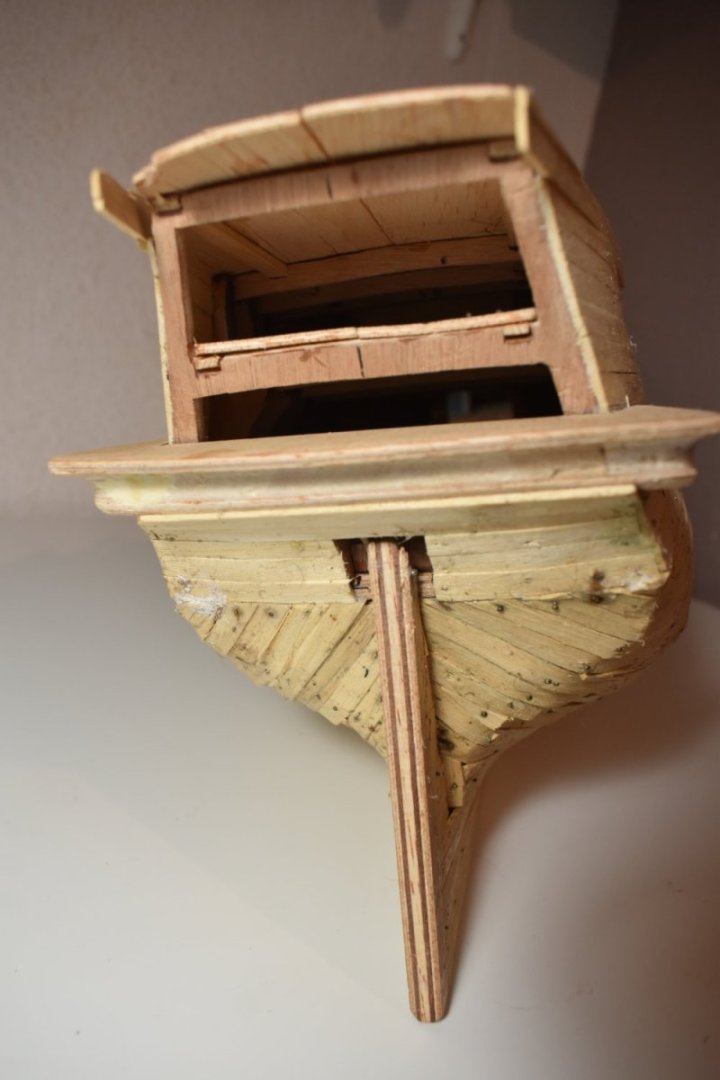
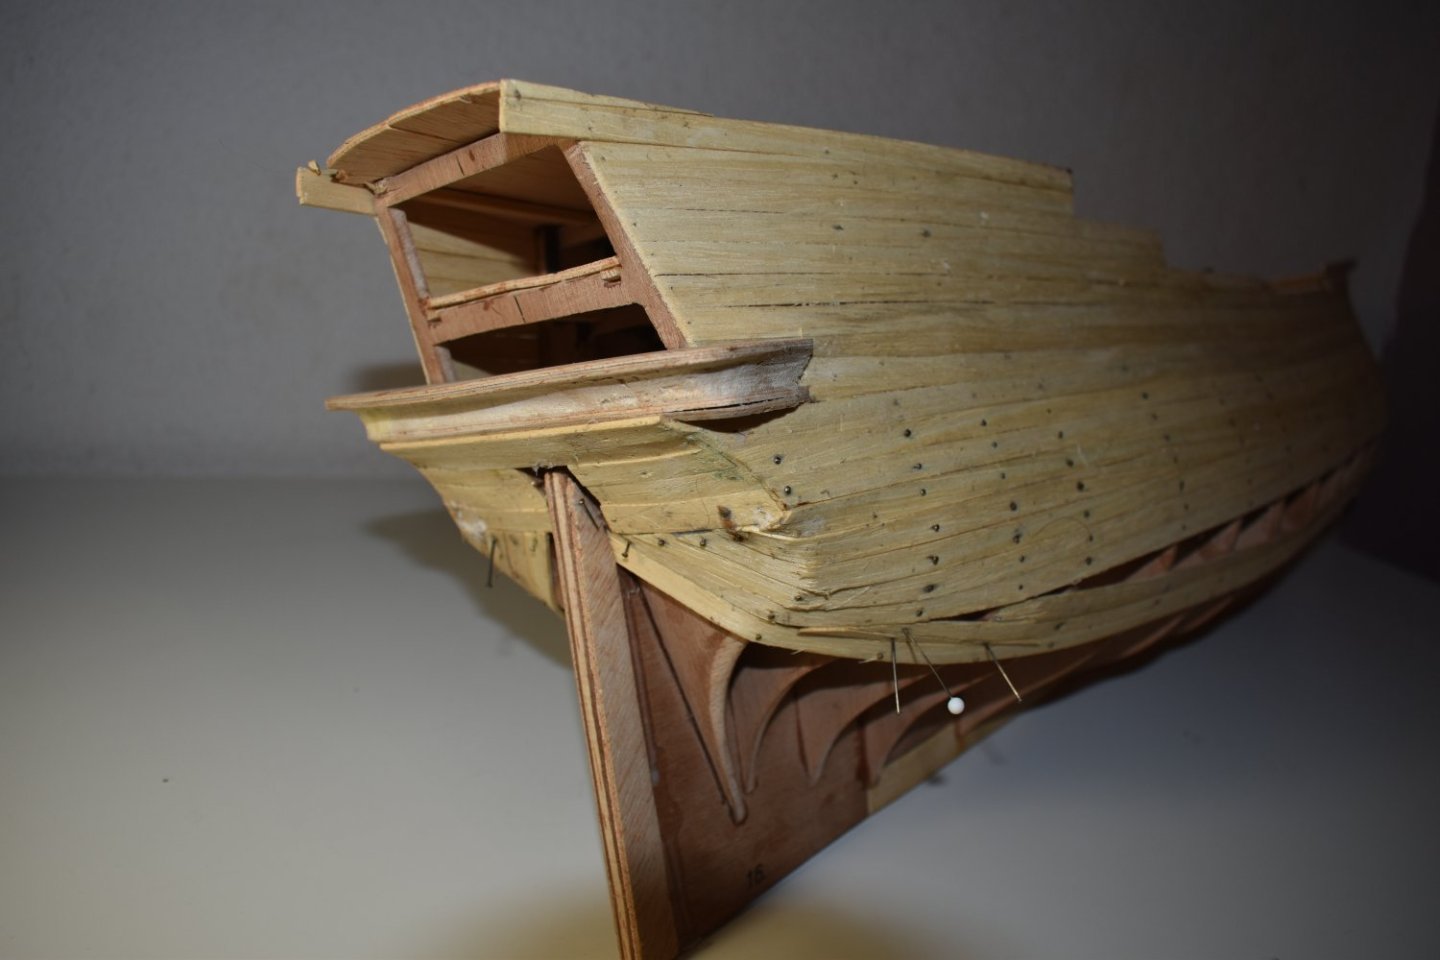
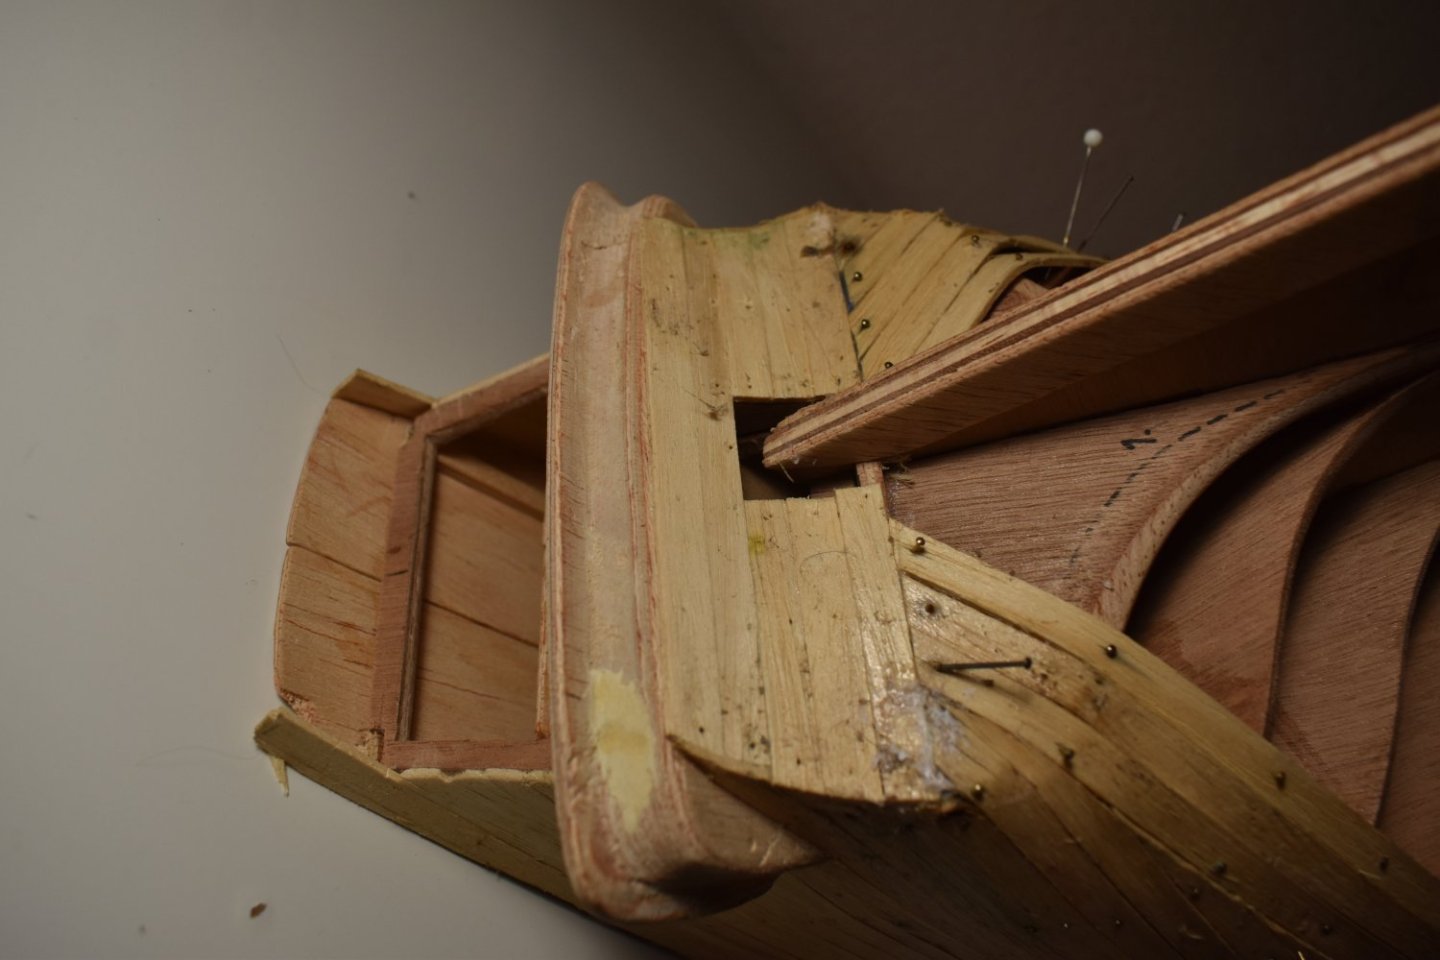
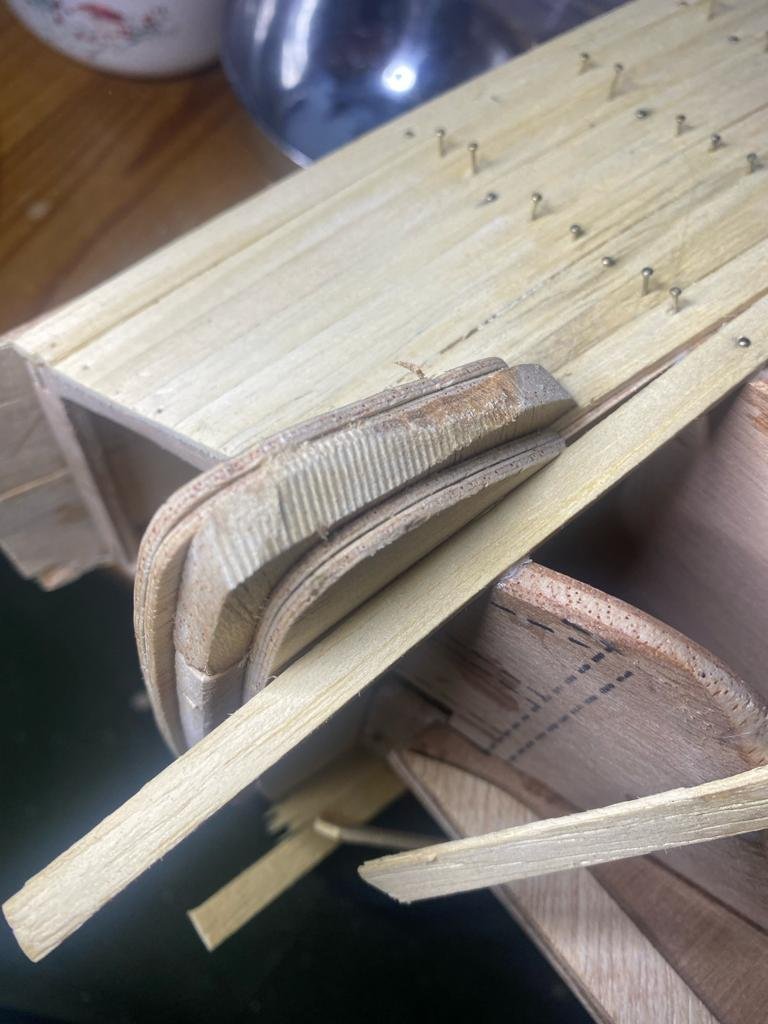
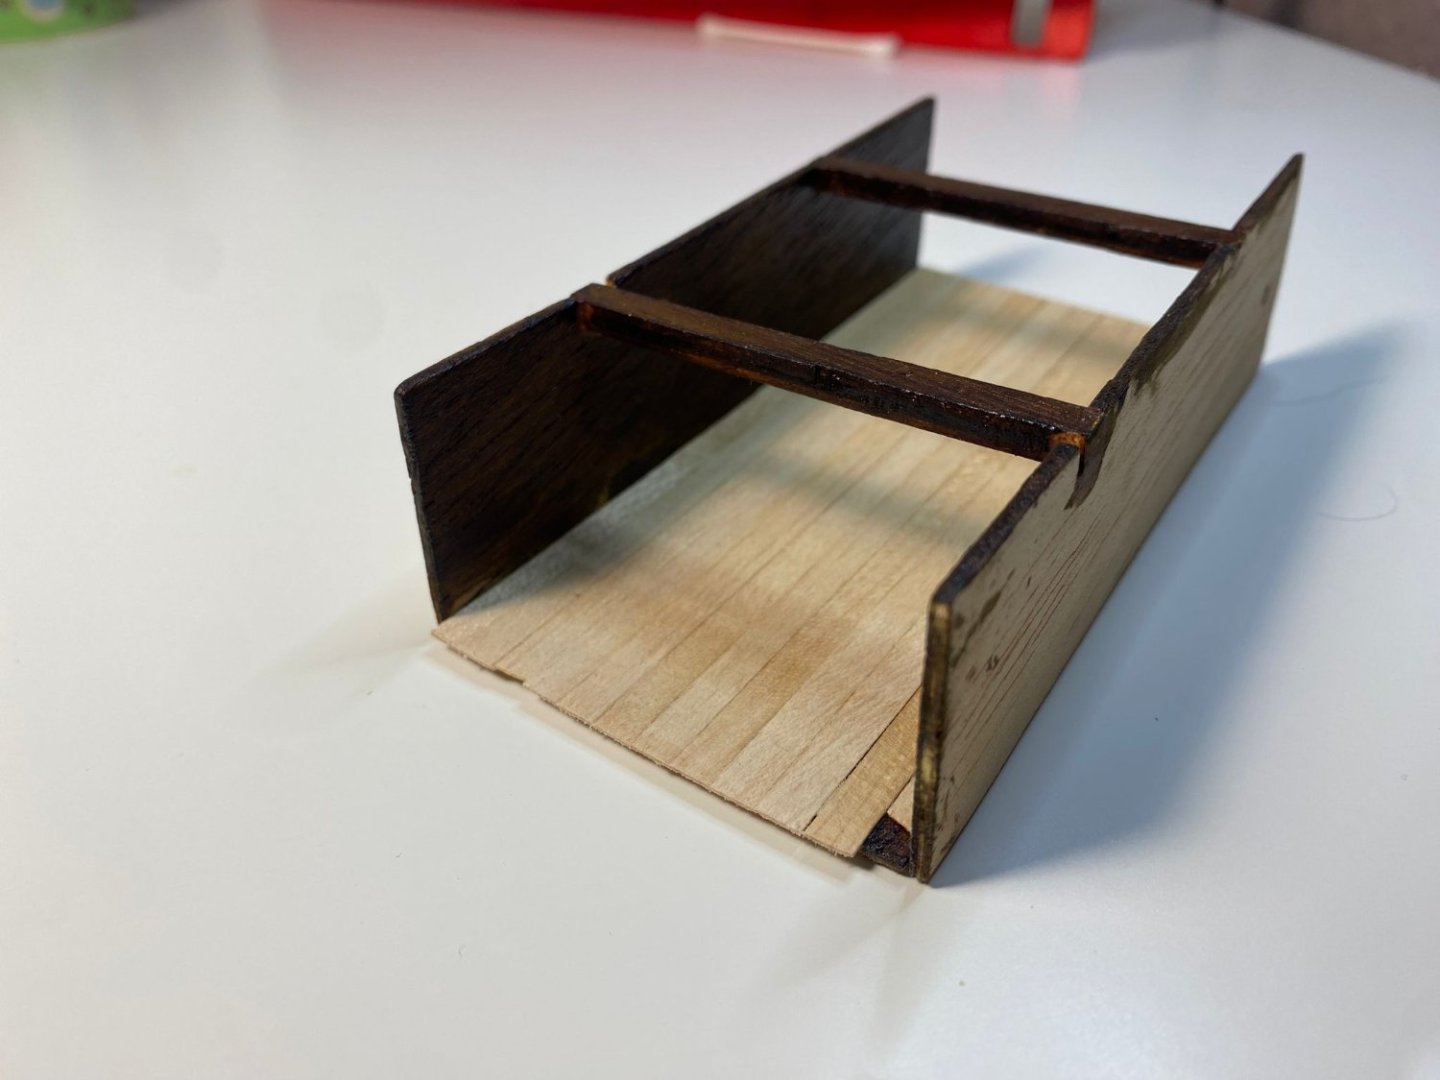
Not a full update, but I've about completed the planking. This is the unedited version - before sanding and filling in a couple of the gaps. I've taken half of the pins out already so you might notice some still. A couple of the planks are slightly damaged around the deck, but we'll see what we can do with them or whether they need to be replaced. It'll be interesting to have a before and after shot! https://www.instagram.com/byron_dockyard/


-
DanielNG10 reacted to a post in a topic:
Black rigging wax?
-
UPDATE EIGHT Not too much to report at the moment as I've been taking my time in planking the hull. I have a planking iron (not actually sure on its official name) which is most useful at the moment, especially when bending the planks around the bow and the stern of the ship. I know it looks a mess at the moment, however the planks are quite thick here so I know they’ll be quite forgiving when I start sanding everything down, I’m more bothered about not having any (or at least very small) gaps between the planks as there are no finishing planks to go on the top. The pins are holding everything in place as I’m using wood glue here with its slow drying time. The benefit here is it doesn’t hinder the staining process later on. Not the best looking ship at the moment, but I guess it never is at this stage. Looking forward to it coming together following the planking. Thank you for checking on my build log. https://www.instagram.com/byron_dockyard/


-
Really enjoyed looking at this. I think this is going to be my next boat. Really good job here. You should be proud!
-
DanielNG10 reacted to a post in a topic:
Havmagen by Panteg Models - Billing Boats 683 - 1:30
-
DanielNG10 reacted to a post in a topic:
Havmagen by Panteg Models - Billing Boats 683 - 1:30
-
DanielNG10 reacted to a post in a topic:
Havmagen by Panteg Models - Billing Boats 683 - 1:30
-
DanielNG10 reacted to a post in a topic:
Havmagen by Panteg Models - Billing Boats 683 - 1:30
-
ccoyle reacted to a post in a topic:
Norske Love by DanielNG10 - Billing Boats - 1:75
-
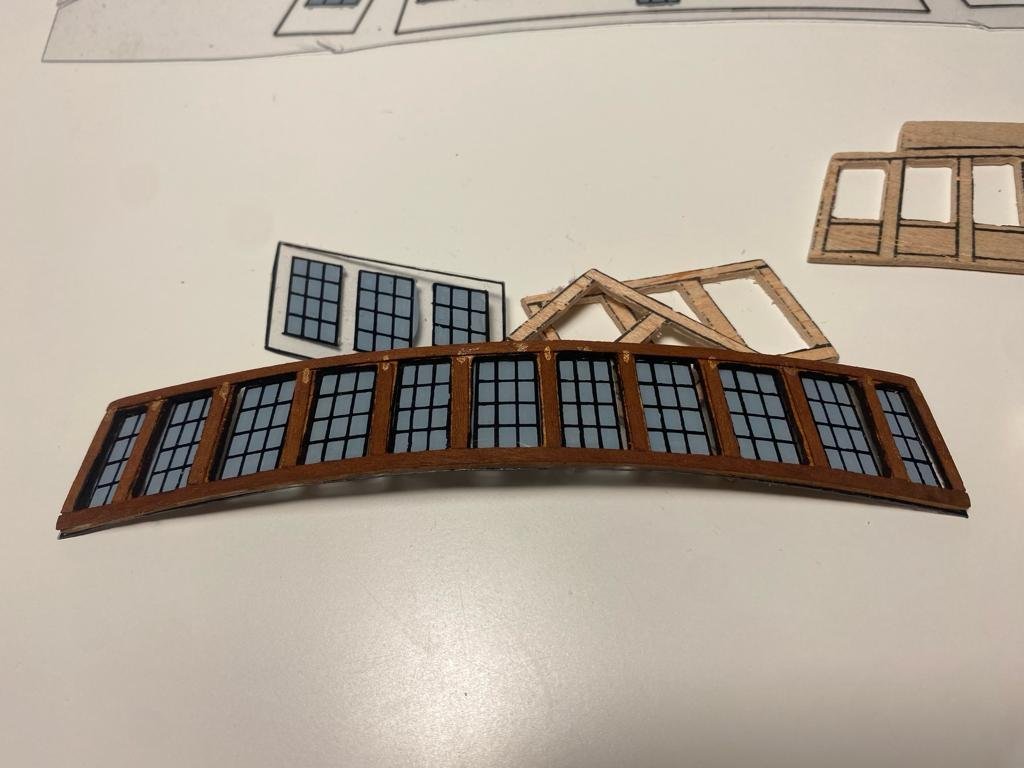
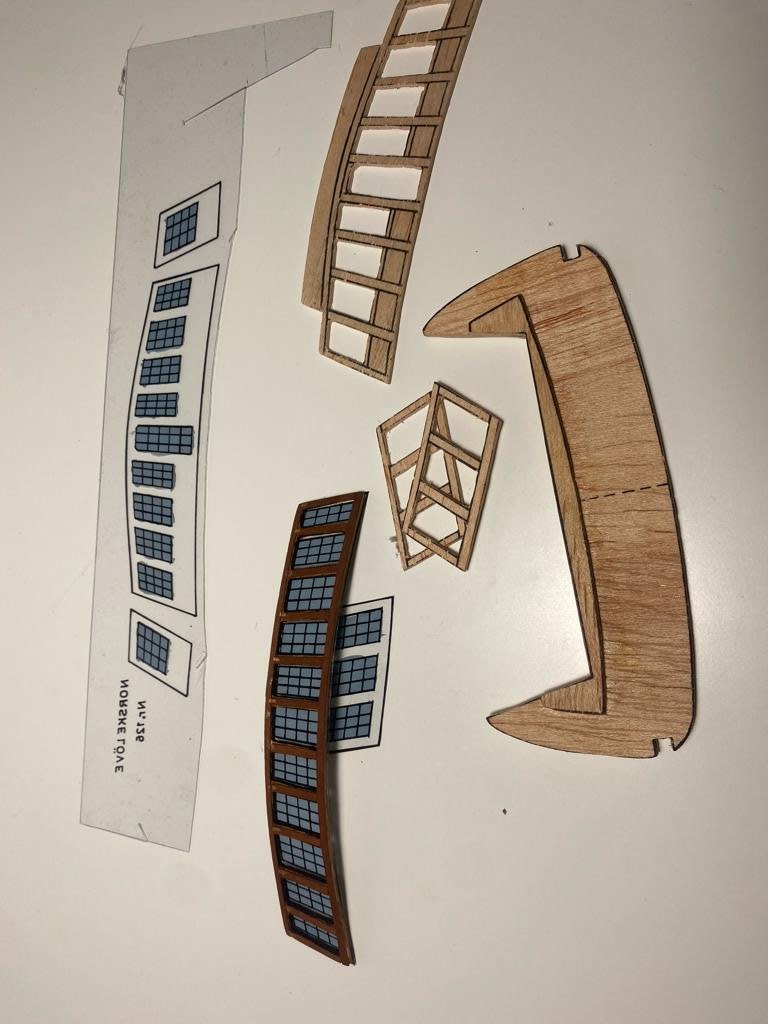
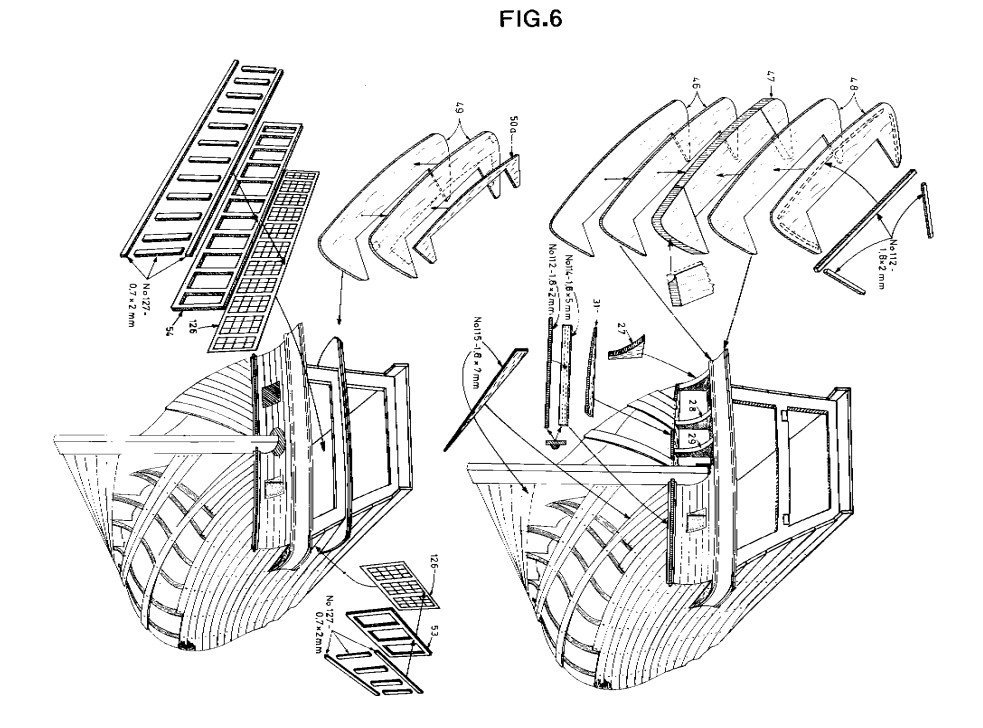
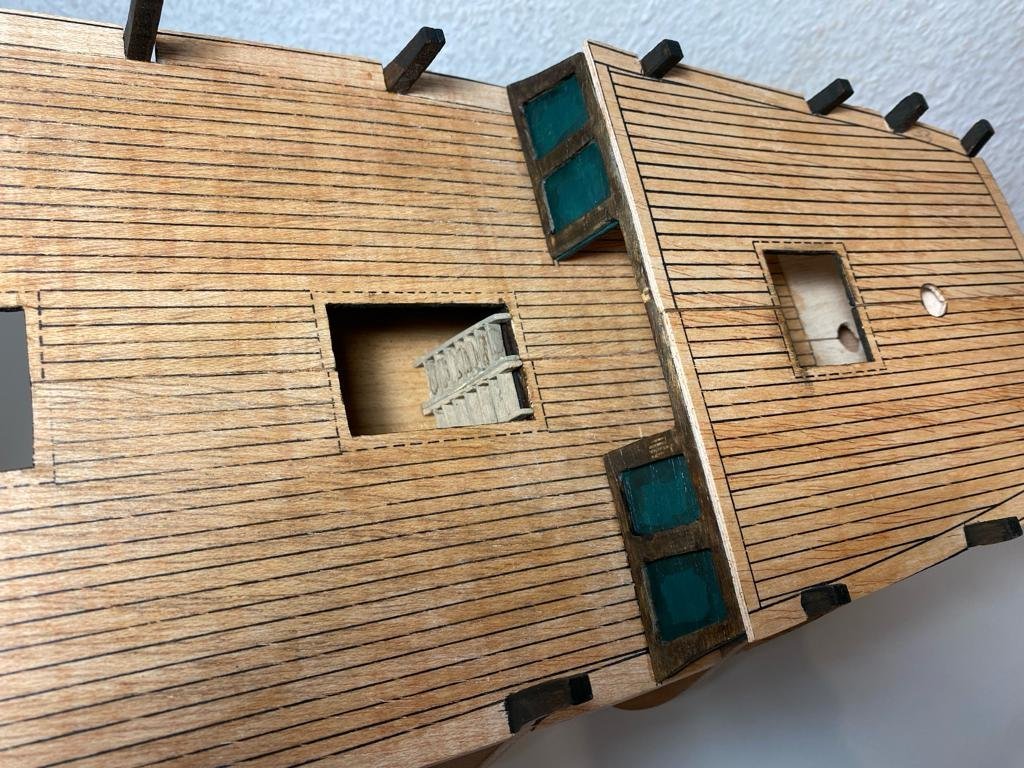
UPDATE SEVEN – I can see why I only really find half finished build logs of this boat! So, I think I’ve realised that the order the ‘FIGs’ are in, isn’t necessarily the order in which the boat is to be constructed. Also, the instructions here give me a headache. But here goes with my translation of assembling this boat… So, started planking. I put a couple of planks in as guides then started at the top. The next headache I am foreseeing is the stern. So I’m going to plank the top 3rd of the boat, then have a look at what I need to do here. I’ve made a mistake already.. The top most plank needs to come out, and I didn’t do it. Whats more, I knocked the boat off the table and slightly damaged the deck in the corner. Once all the planks are attached, its my intention to sand it all down. I don’t want the pins to be left in. The OcCre ships that I made usually have some finishing planks that go over the top of the chunky base planks. Anyway, the boat doesn’t have these. I don’t want to use filler as I’m going to be staining the wood so I want to make sure all the planks are hugging each other – Should I have had finishing planks I don’t really get worried about small gaps in the hull as the filler will be hidden behind the finishing planks. The clamps are essential in helping me out here. Its at this point I knocked the boat off the table and damaged it. Bugger! As I said the stern is giving me some problems. I think I want the planks to come out away from the hull at the back to the vertical planks under the bottom shelf. I want to make sure before I push on, so while I decide I’m going to sort out the other ‘shelfs’. I sanded the back of the ship just so everything is flat. Attached it all together. It needs some work sanding down. The window is a faff and I broke it trying to bend it slightly to see what I wanted to do with it. Superglue. Then I did what I should had done initially and stuck it in some boiling water for ten minutes. I used the bending iron to create the shape that I think I need. Instructions says I need to put some finishing planks around the frame of the window. I think it would had been better having them a more pale colour, that way I could had stained everything together. Alas. I painted the window, and when dry I painted over the paint with PVA glue. Just to protect the paint from chips while I’m working on everything else. I stuck everything together then tidied up for the night. Thank you for reading this far. Please check out my Instagram page and give it a follow. https://www.instagram.com/byron_dockyard/


-
ccoyle reacted to a post in a topic:
Norske Love by DanielNG10 - Billing Boats - 1:75
-
scrubbyj427 reacted to a post in a topic:
Norske Love by DanielNG10 - Billing Boats - 1:75
-
scrubbyj427 reacted to a post in a topic:
Norske Love by DanielNG10 - Billing Boats - 1:75
-
UPDATE SIX. Norske Video - Made with Clipchamp.mp4

-
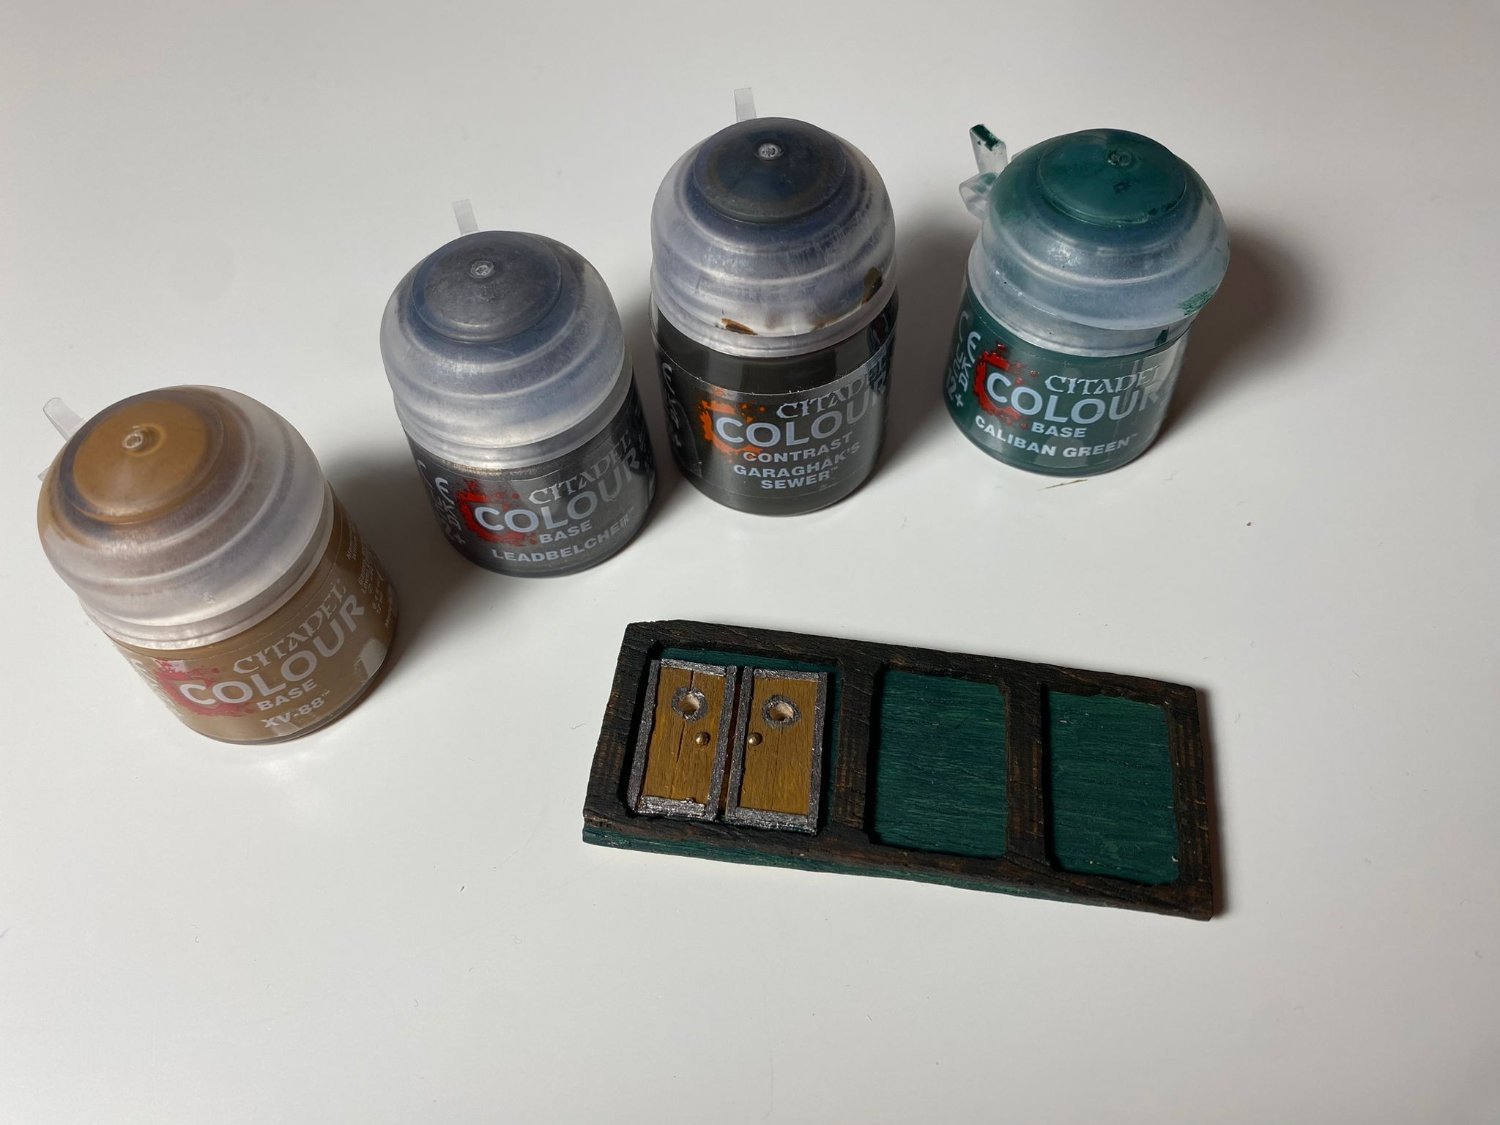
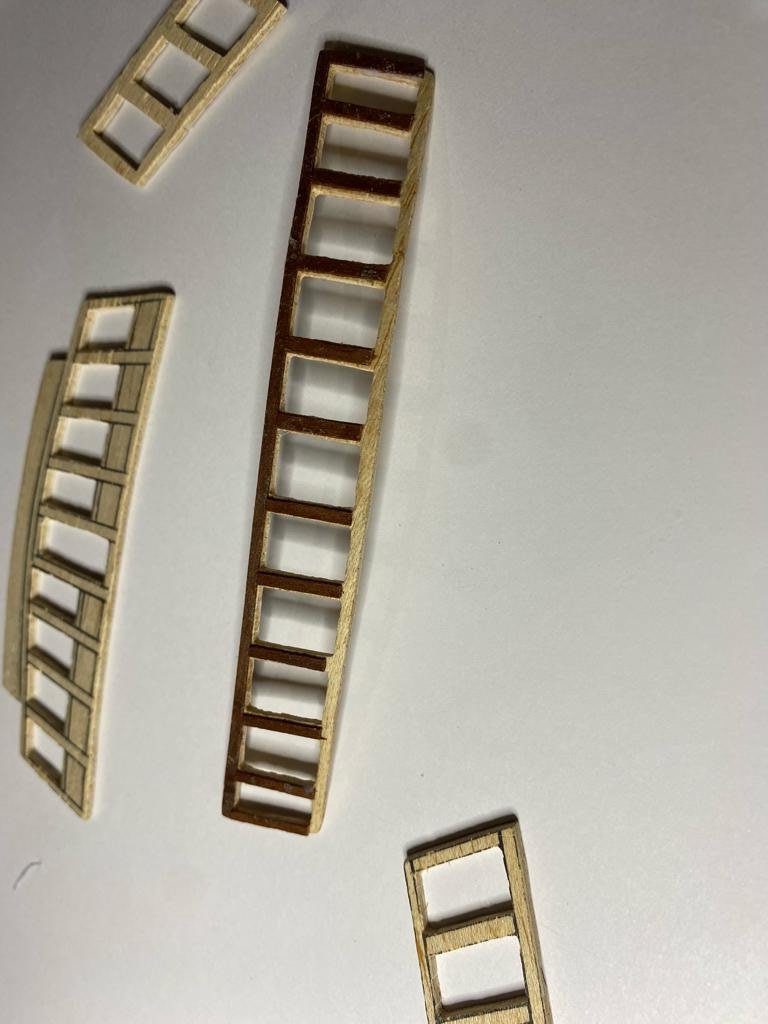
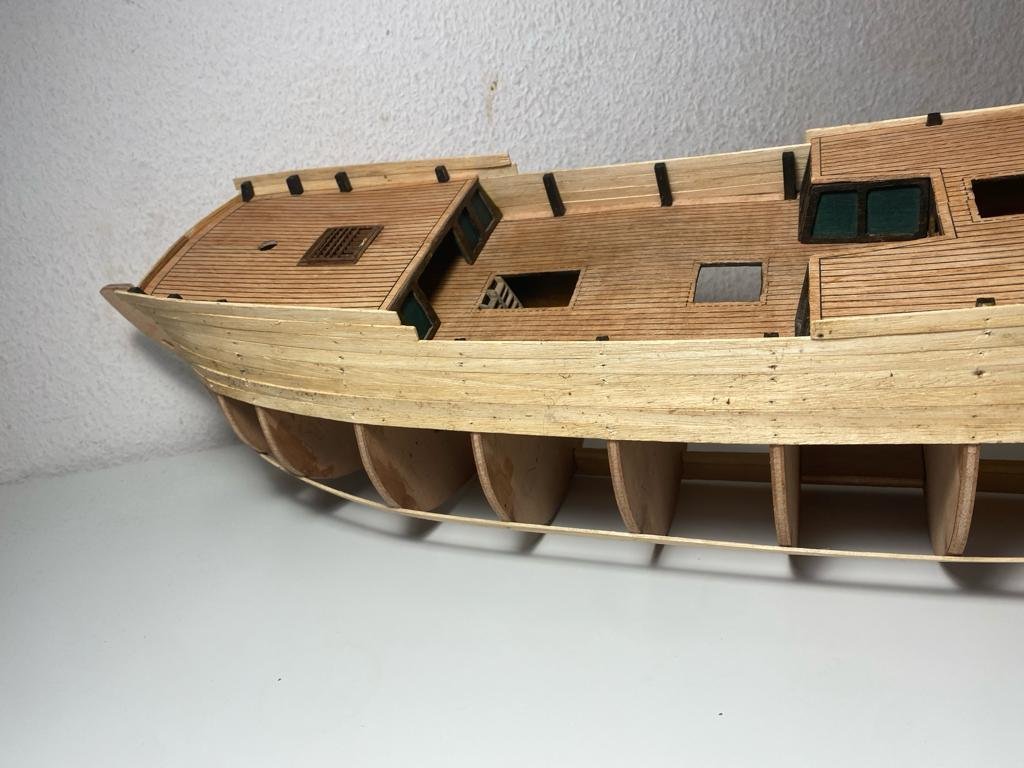
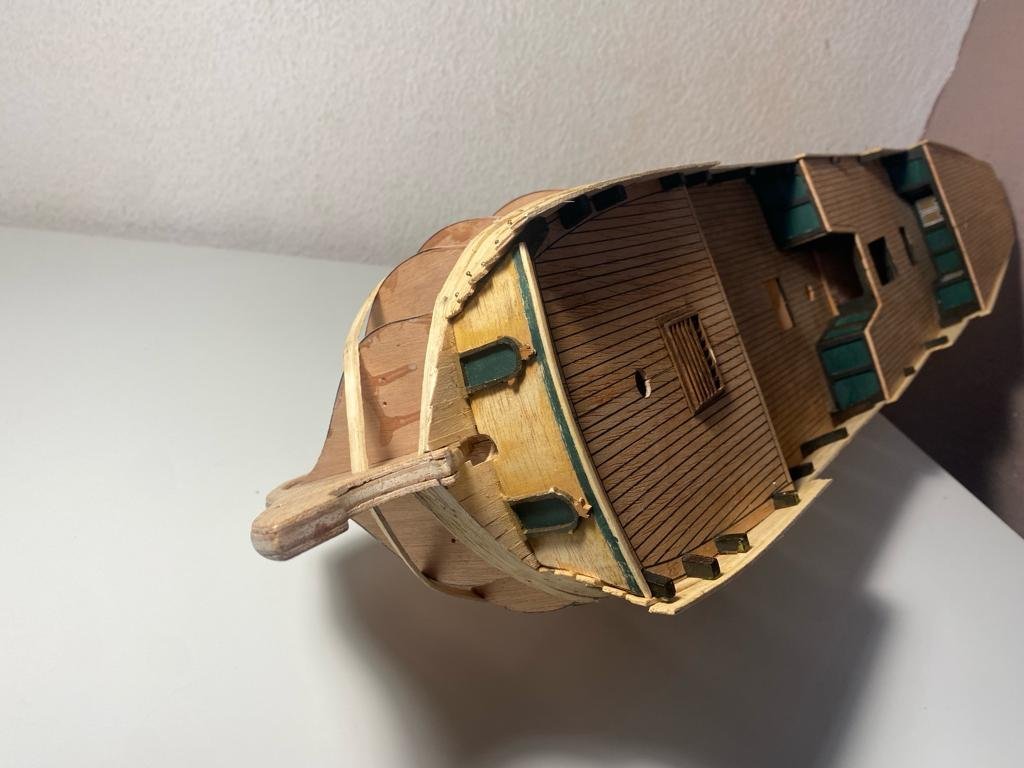
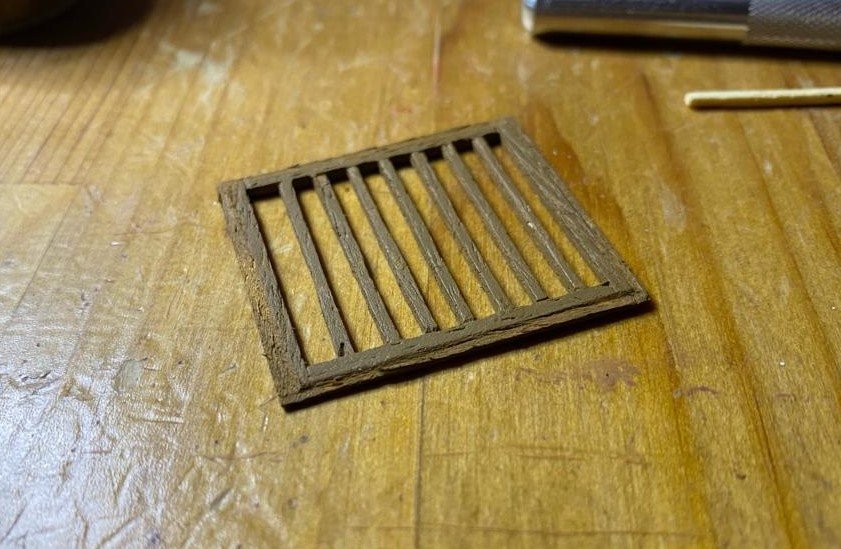
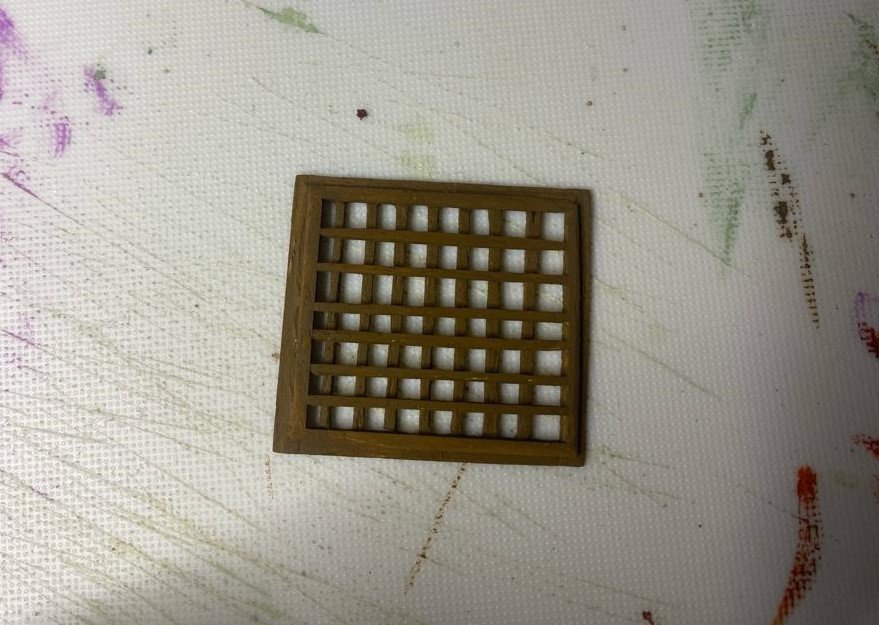
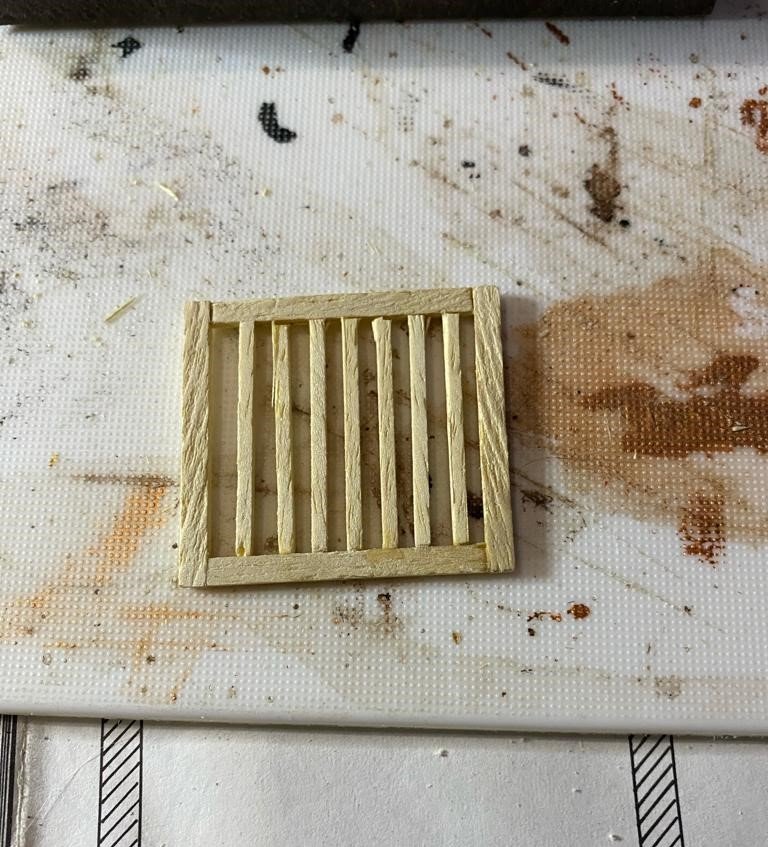
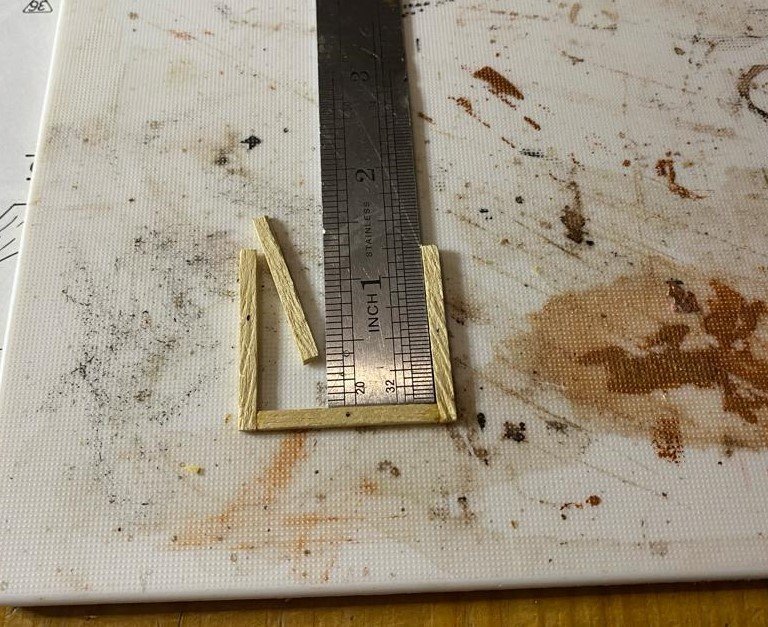
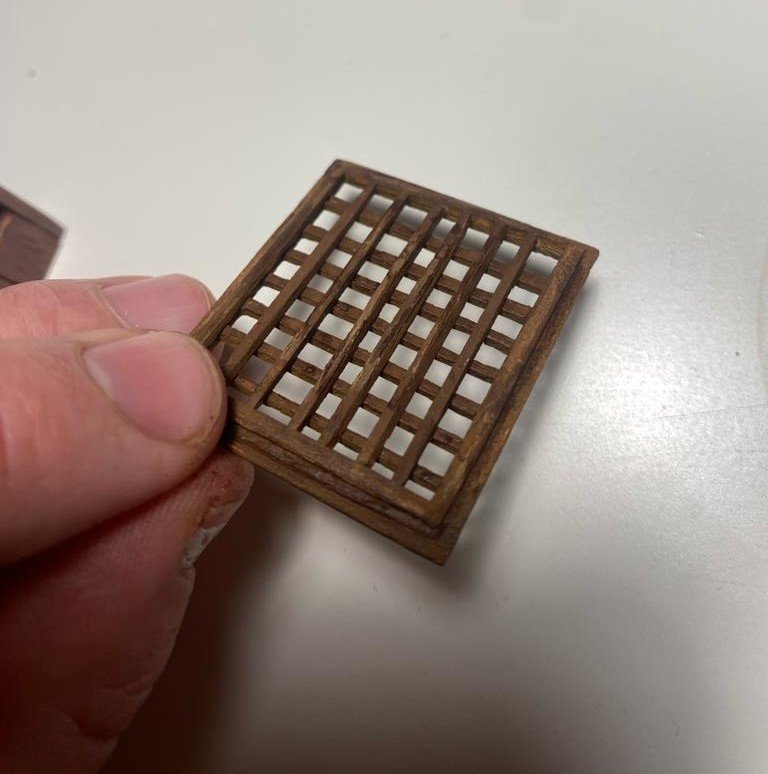
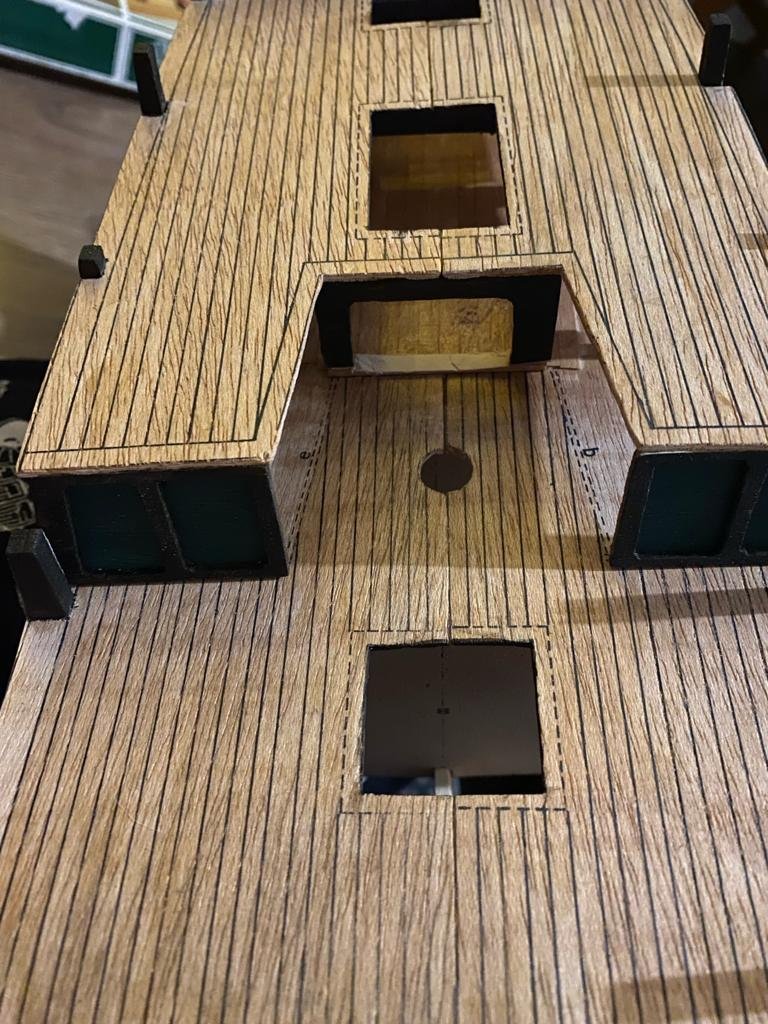
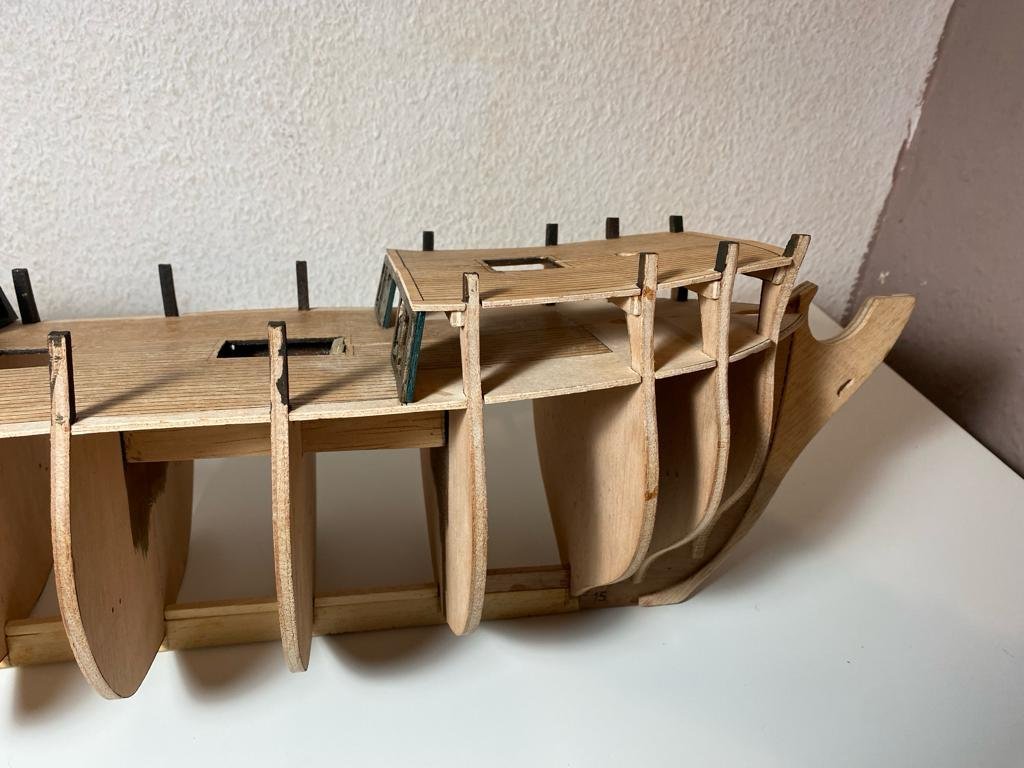
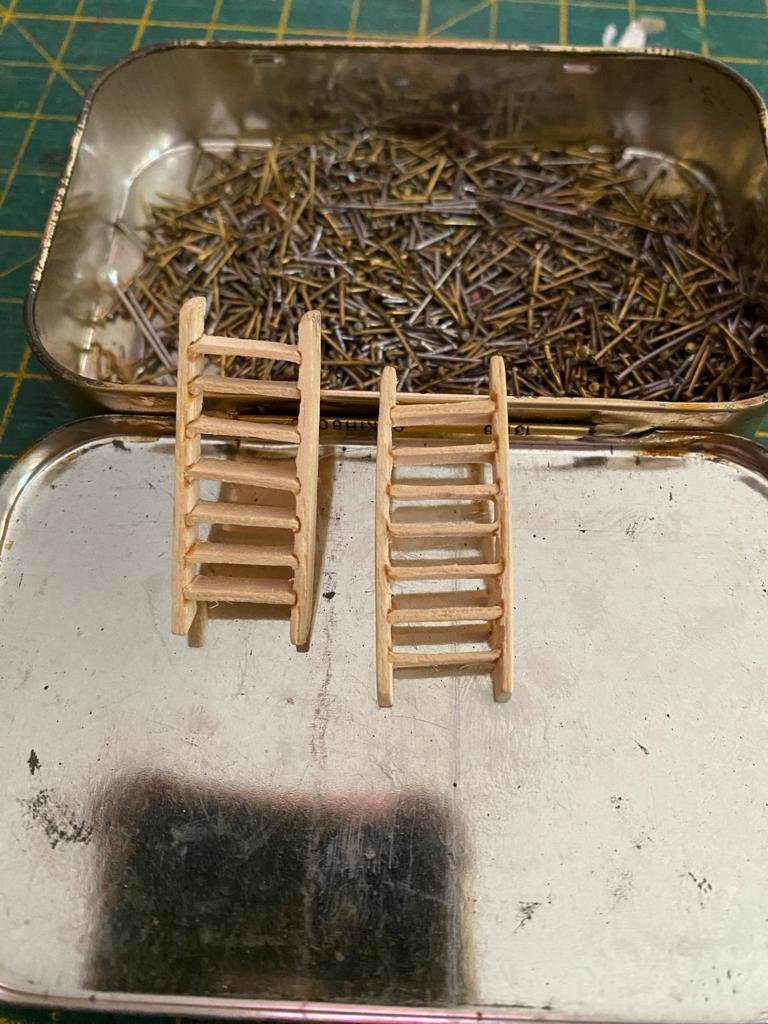
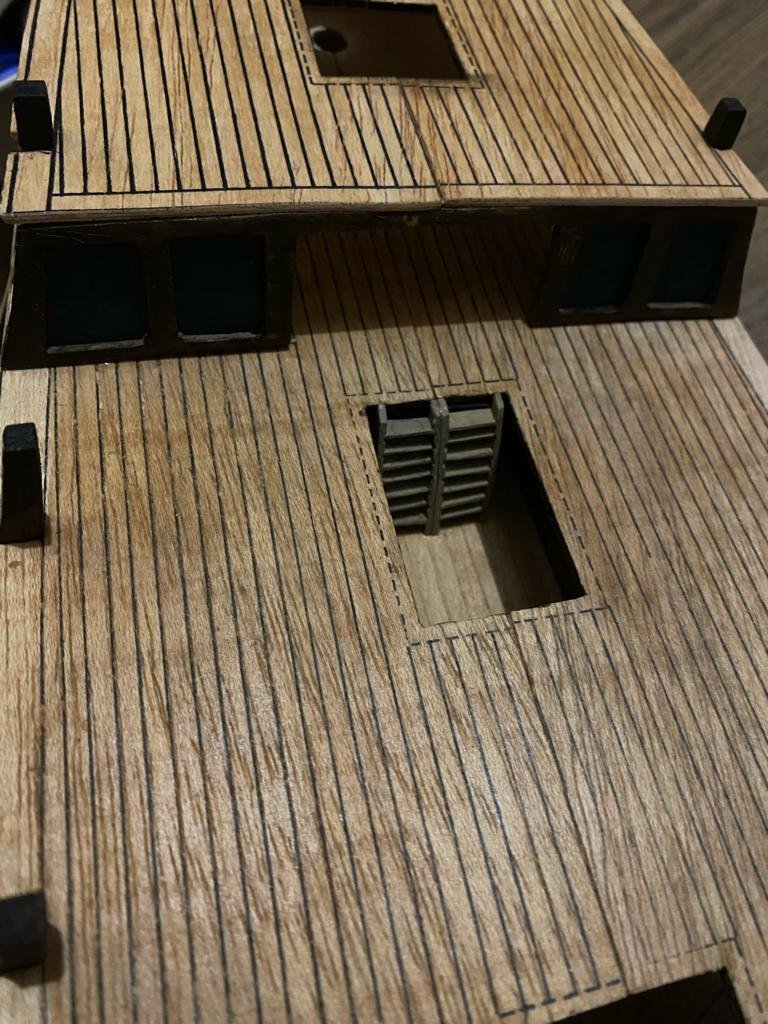
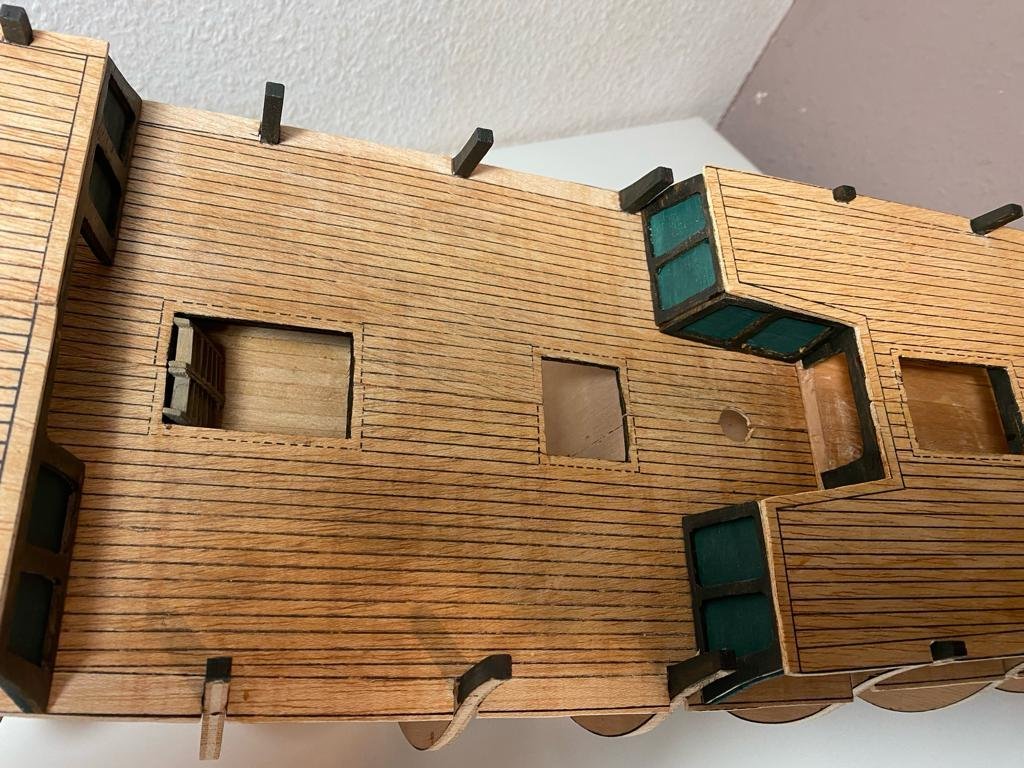
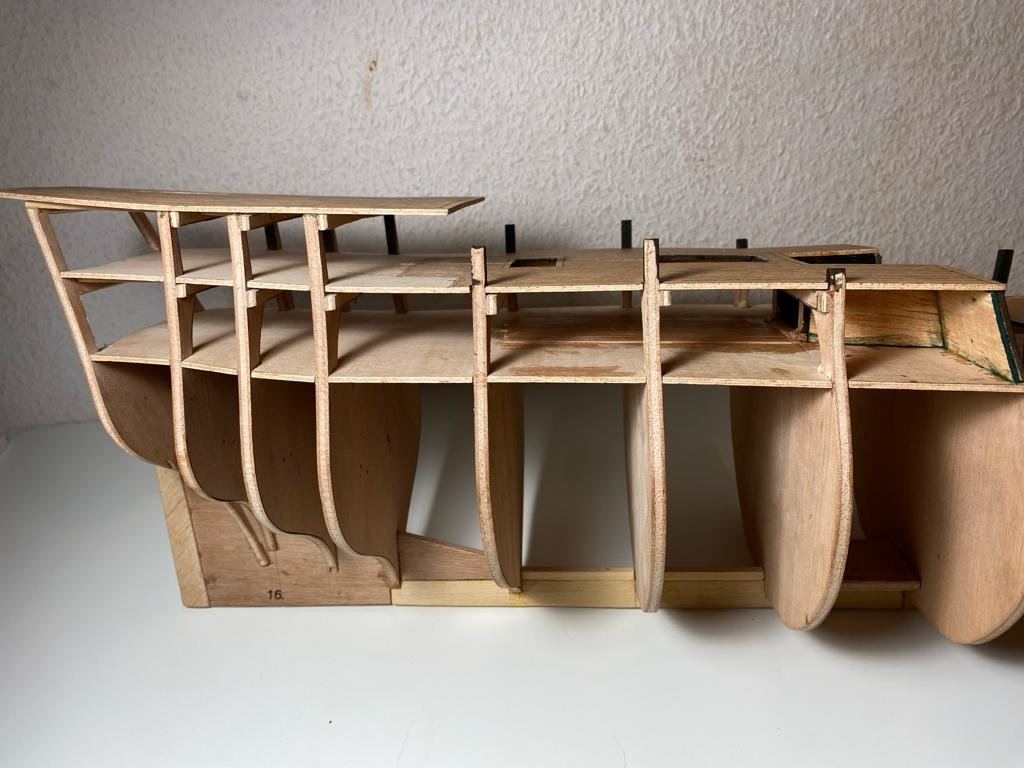
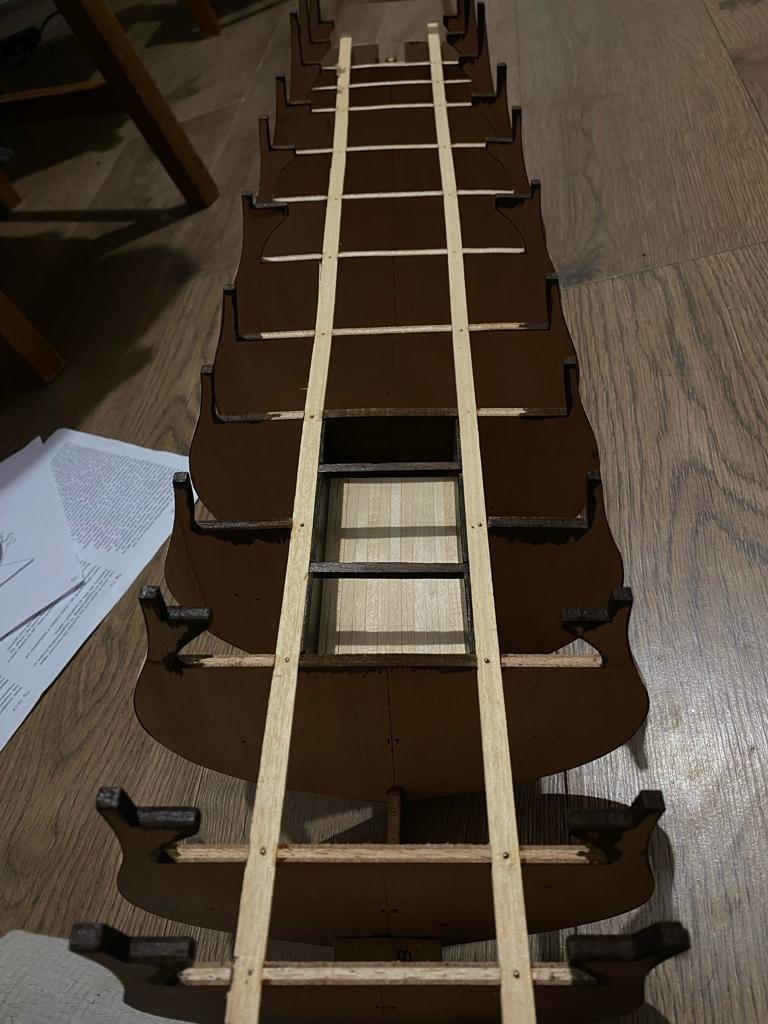
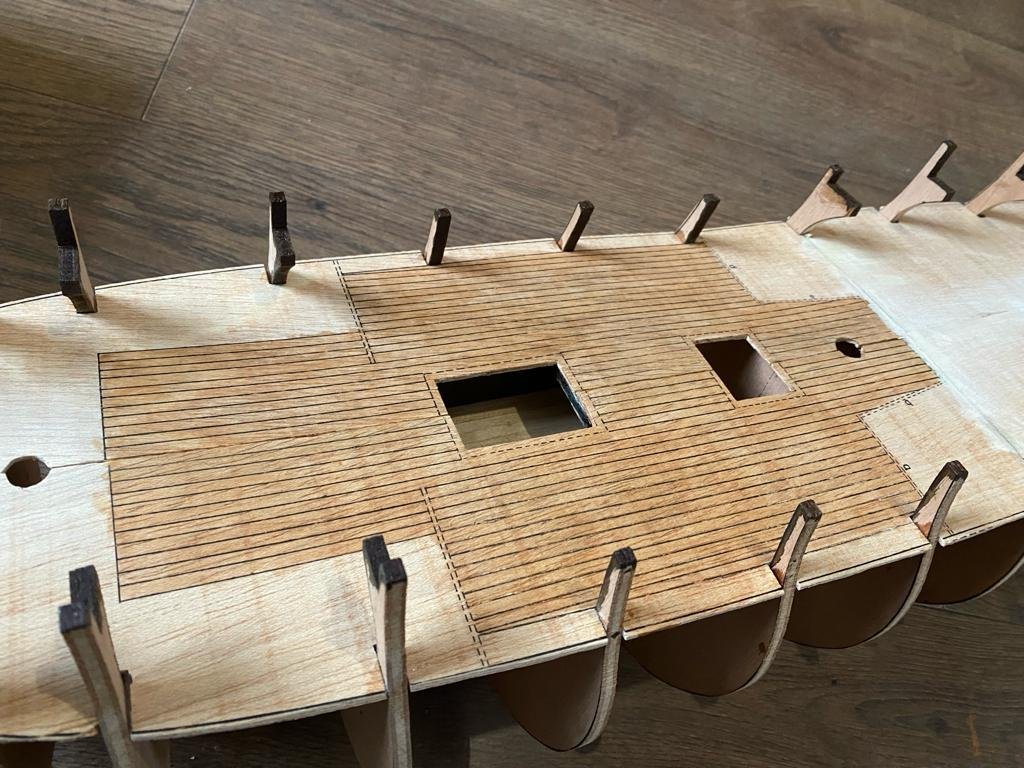
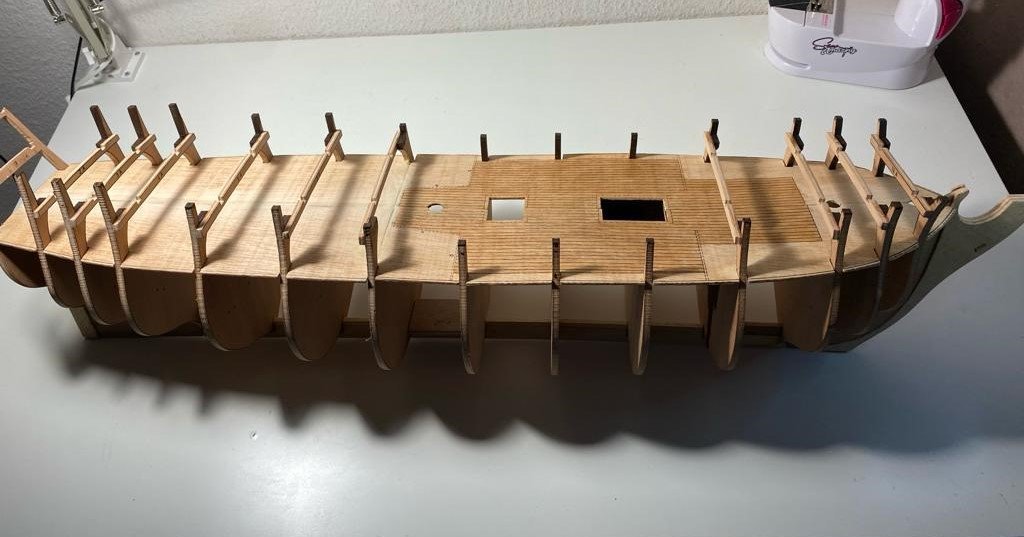
PART FIVE Right so, FIG 2. Is complete. Painted parts 35 and 36. For the backs I used Citadel Colour Caliban Green and for the frames again I used Citadel, but this time I used Garaghan Sewer. I do think these colours came out a little darker than I hoped, but its not too bad. Check out the photo when attaching the backs to the frame with 35. The instructions aren’t clear here but there needs to be a lip. This helps when attaching the completed parts to the boat. The ladders for the main deck were rather enjoyable to make. I filed grooves into the side rail of the ladders. You need to make two sets of ladders’ so I used the first side rail as the template. The wood is quite thick, so you need a fine file to sand the rungs down to how you want them. I didn’t have enough of NR 22. I put this down to missing parts as this is an Ebay buy. I cut short what planks I had, then missed a bit in the middle (around ribs 3-4) where you can’t see it. I don’t think it’ll make a difference. The deck 32 and 33 went on okay. However, after attaching I noticed something that bothered me. You can see inside the larger middle deck, but the printed planking doesn’t cover this area like it does with the front middle deck (forecastle deck??) I have some finishing planks from a previous build. So I, somewhat fiddley, attached these. I used a bit of wood to hide the start of these planks to make it less obvious. Next stop was painting the tops of the ribs using Citadel Garaghan Sewer. I also did the inside edge of the holes in the decks (man holes?) Finally I sanded around the outside of the ships so all the decks align with the hull as I think planking this isn’t too far away. As always, self promotion! Please check out my Instagram: https://www.instagram.com/byron_dockyard/ Thank you.


-
ccoyle reacted to a post in a topic:
Norske Love by DanielNG10 - Billing Boats - 1:75
-
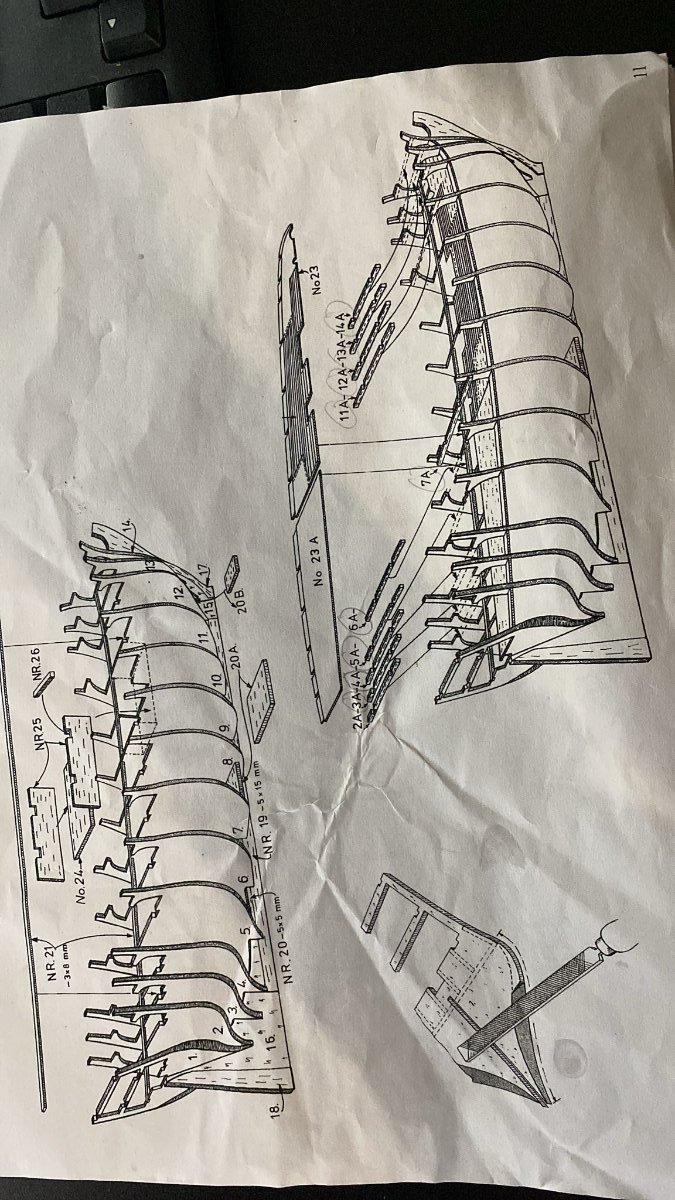
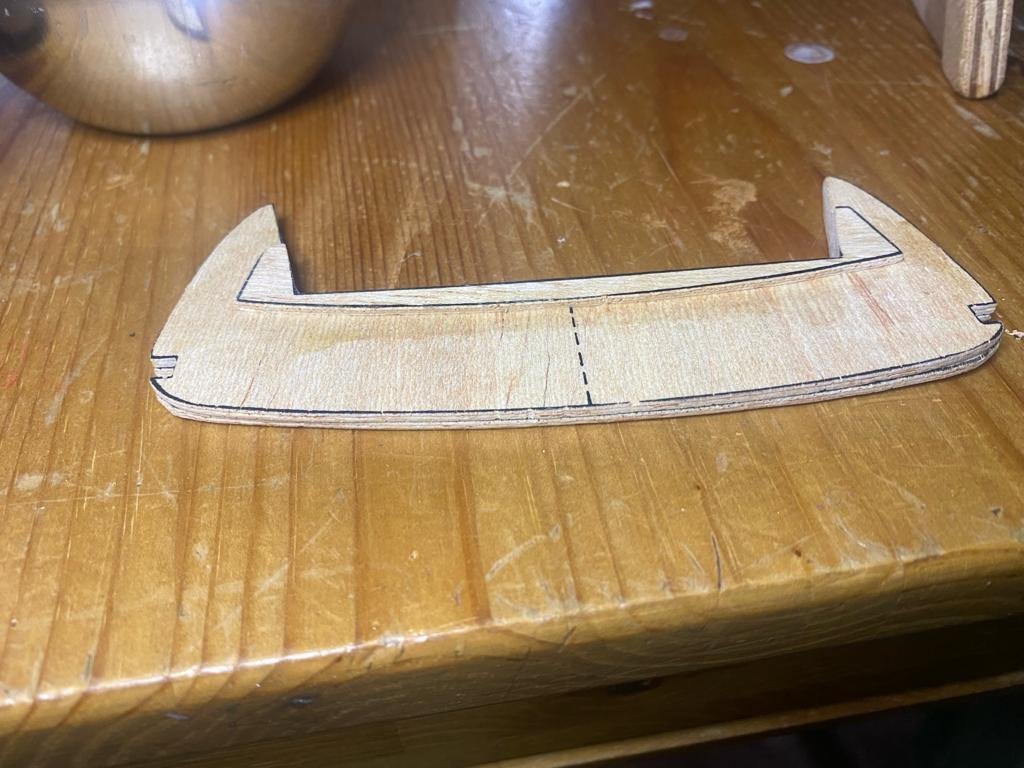
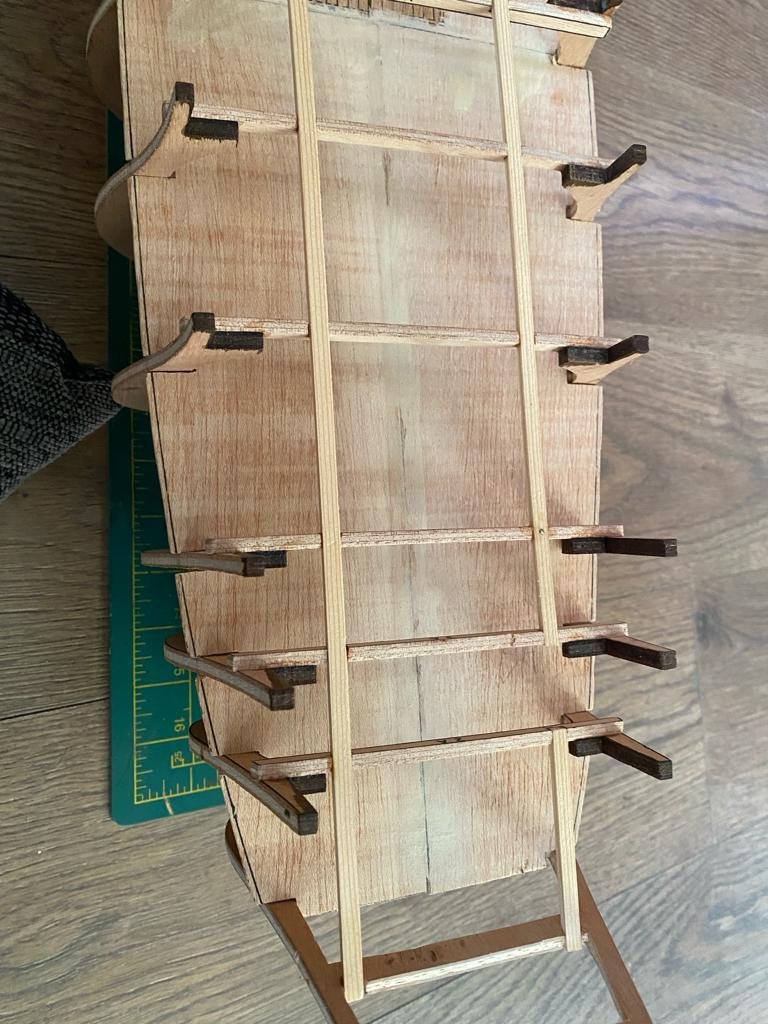
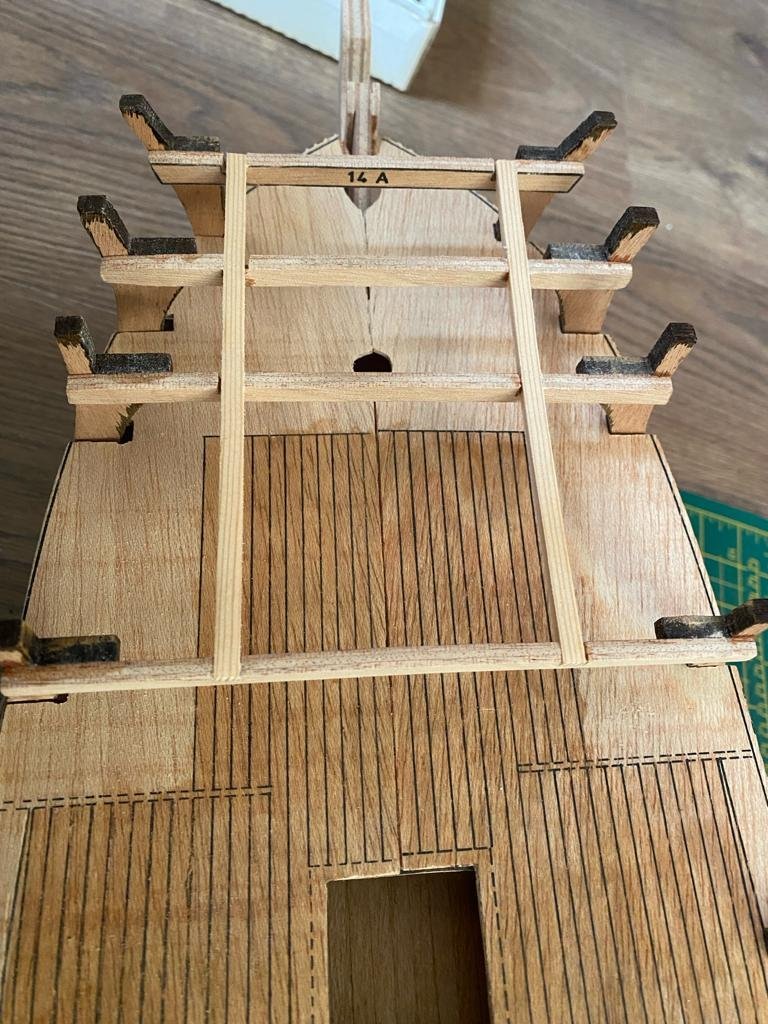
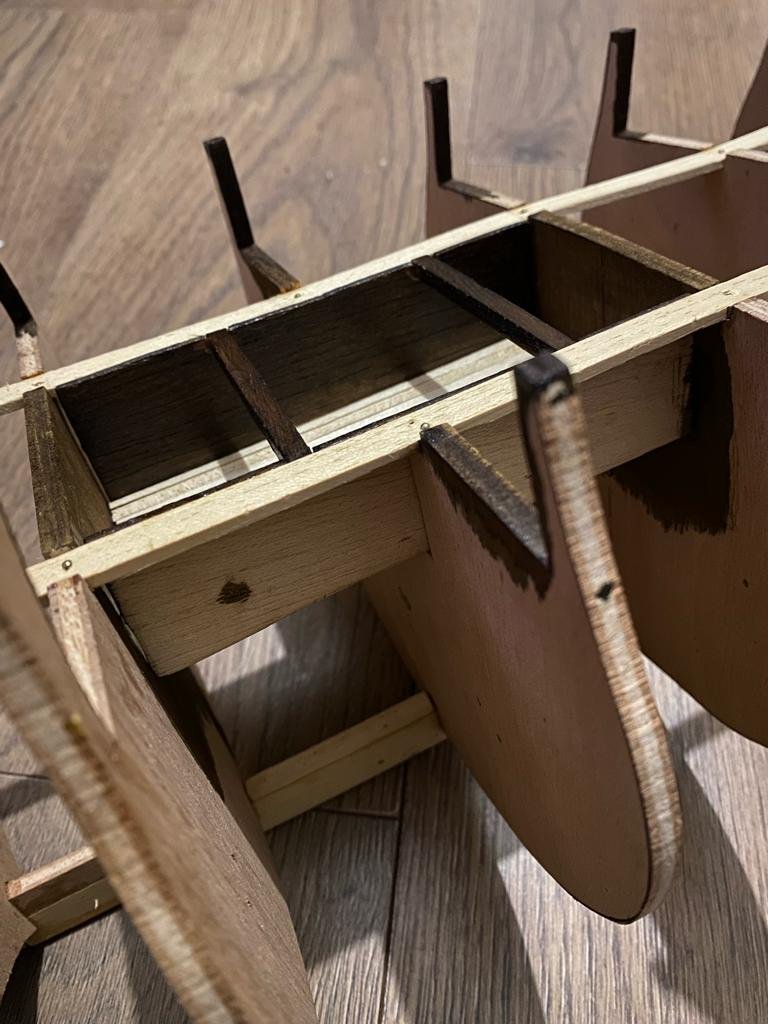
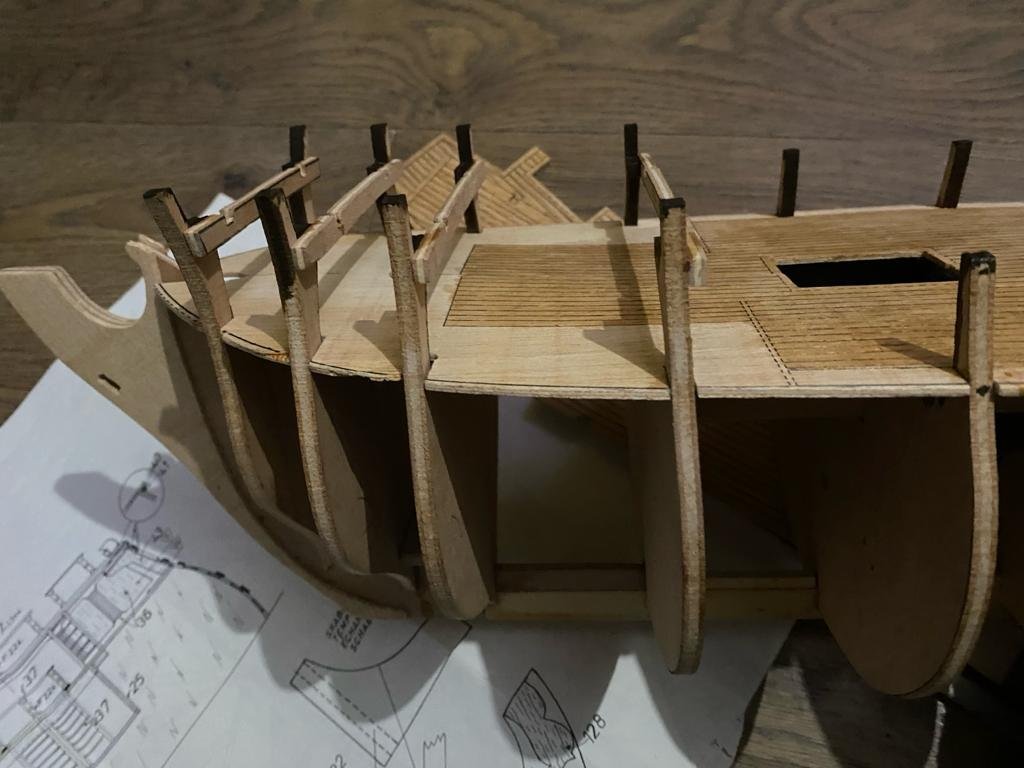
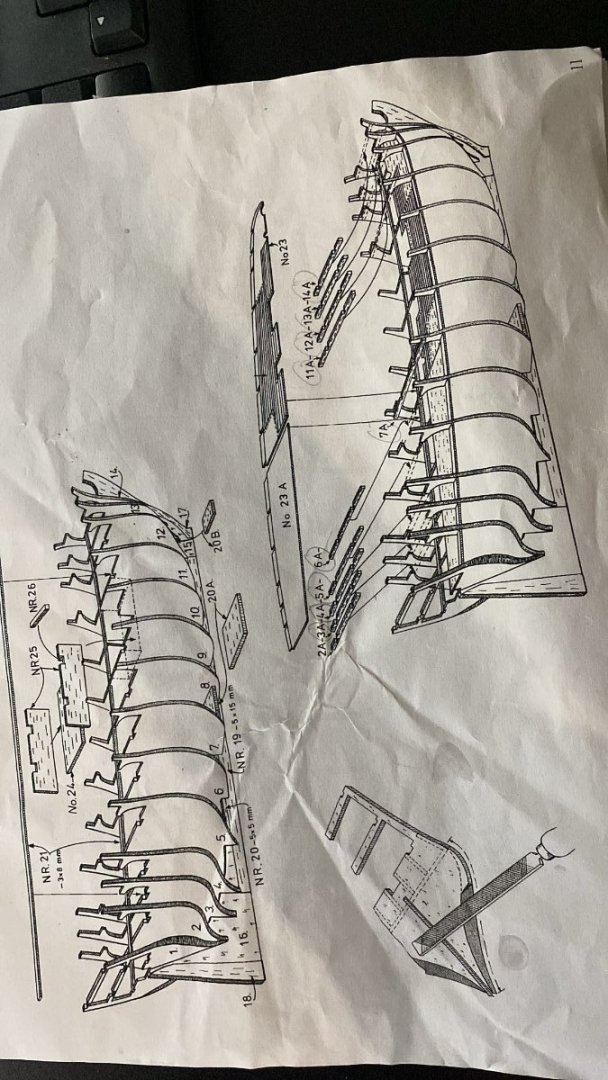
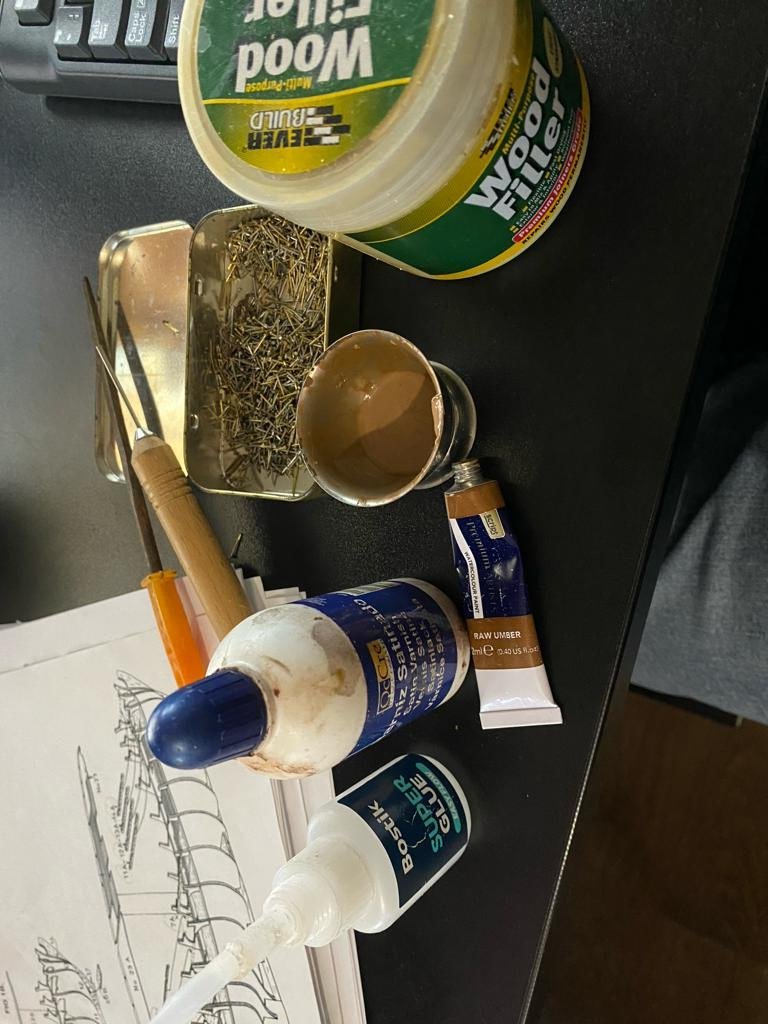
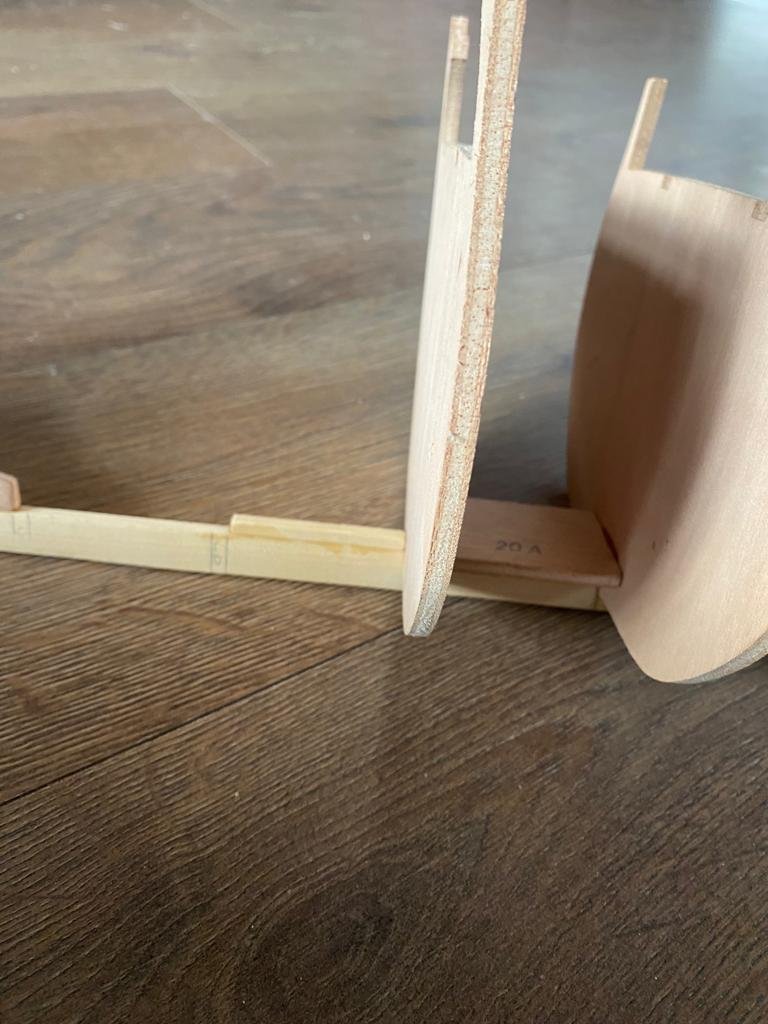
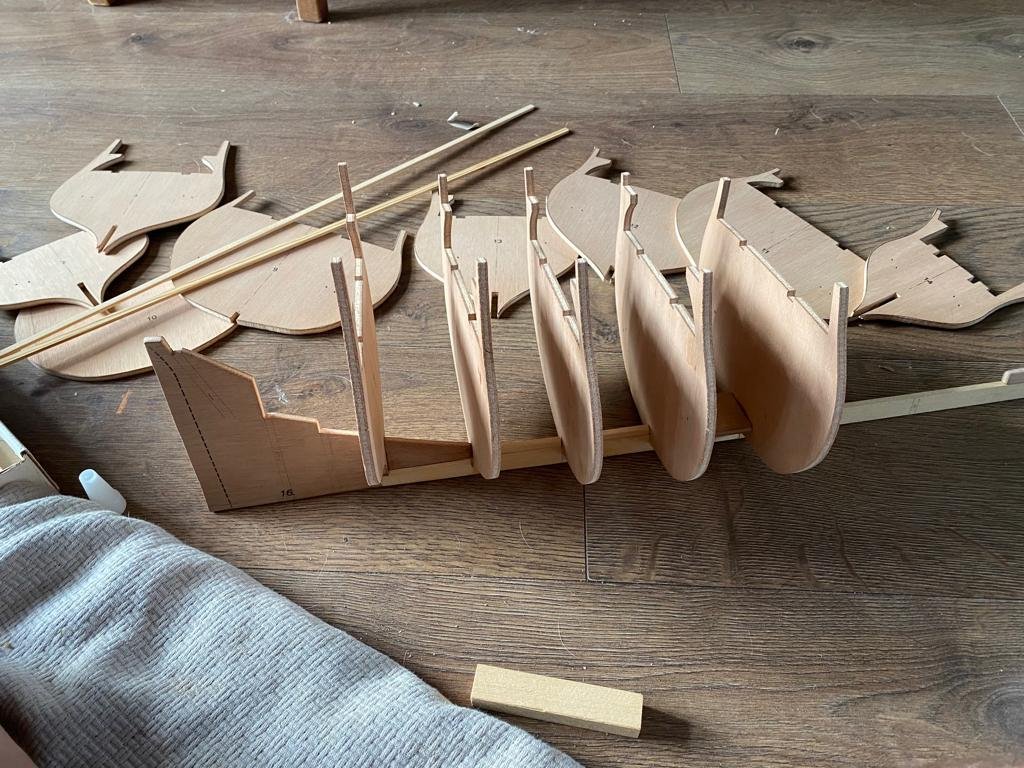
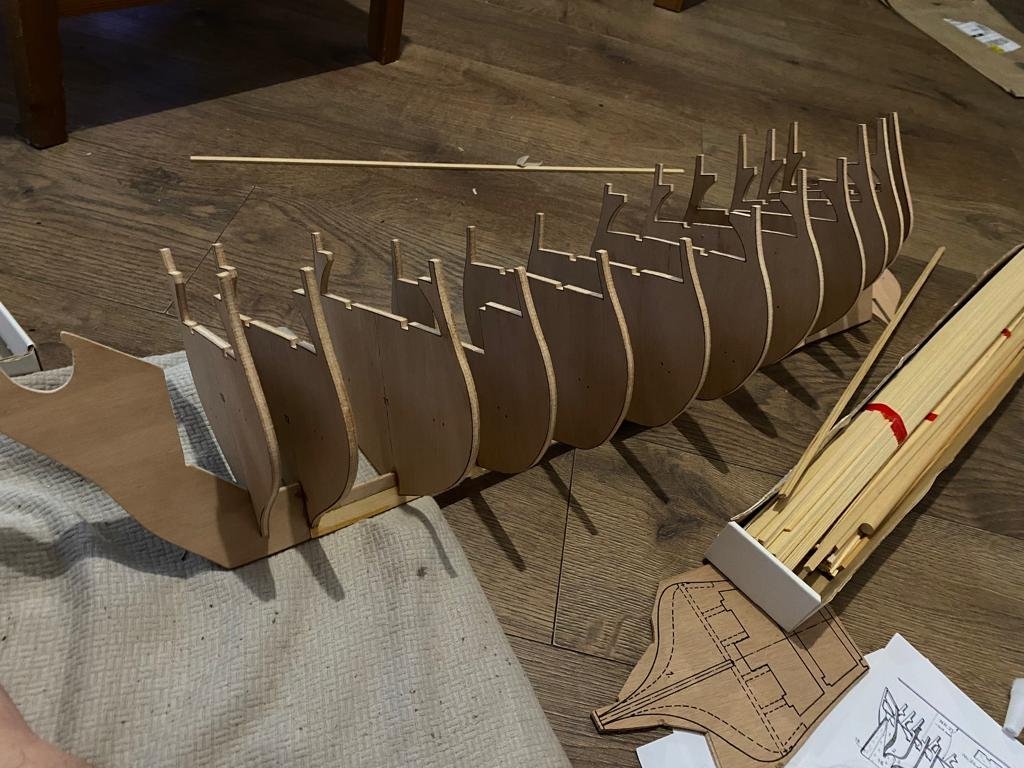
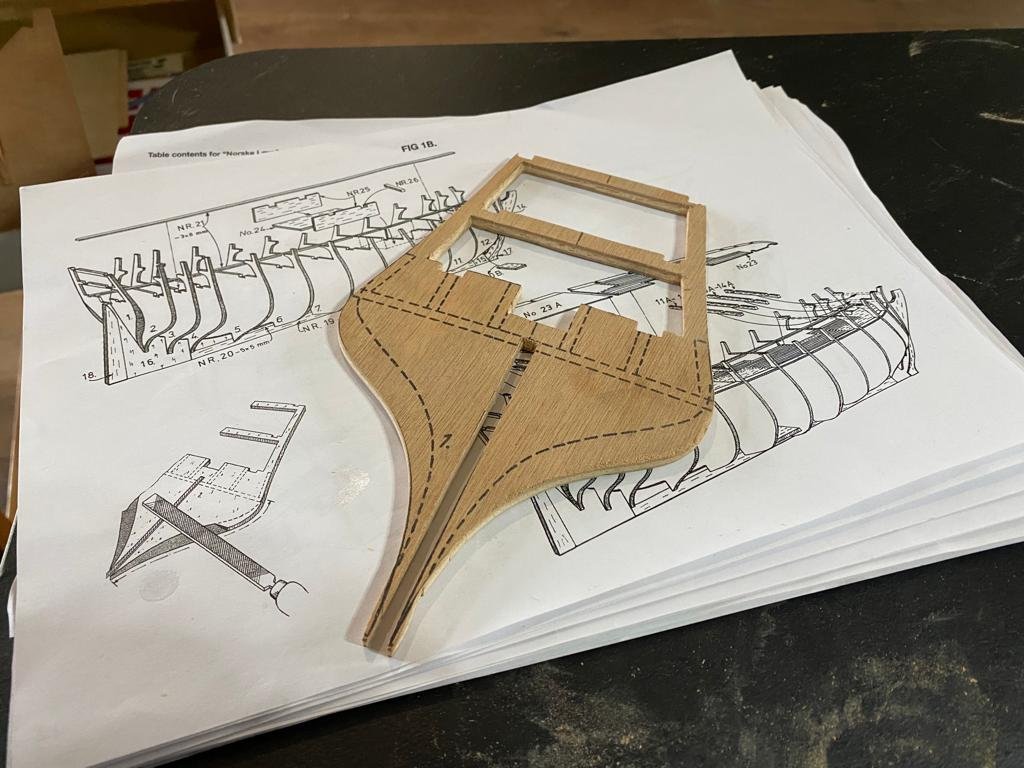
PART FOUR BUILD: Billing Boats. Norske Love. So, a couple of small dramas here, but the steps come thick and fast so I’ll bullet point them. I’ve completed FIG 1B. - Attached 20B between ribs 12 and 13. - Cut out, attached and then sanded parts 18 x 2 and 14 x 2. Using small dabs of super glue here. - Right, first drama. Looking on FIG 1B top picture, it looks like the frame NR 25 that NR.26 (support beam) is closer to the bow of the ship. This isn’t correct, its actually towards the stern. This is reflected correctly in the plans, however, I didn’t use them for this step. The mistake came to night when I attached the deck (No. 23 x 2) and the holes didn’t like up. Thankfully it came away without any damage. I flipped it around and attached. - Attaching NR.21 x 2 was fairly straight forward. The ribs are quite thick which allowed me to use pins and a pin pusher to attach it. Note though, use the deck to guide you here so the ribs are in the right place. - Attaching the deck was rather a little complicated. The material seems brittle and I didn’t want to damage it, so I filed the notches a little deeper into the deck. Only a couple of millimetres each side, which gave me the room to line it all up fairly well. Starting from either end of the ship, I used a couple of daps of superglue to attach the deck to each rip. - I’m painting as I go. This is certainly the right approach. So I mixed some Raw Umber watercolour paint with OcCre Satin Varnish and painted all the deck that I’m going to be using – I wanted it to all be the same shade. I’m quite happy with how it came out. - Finally, I attached 2A – 7A and 11A – 14A. No dramas. Note which side of the ribs they are attached to though. This is clear in the plans rather than the instructions. - I’ve included a photo of the tools/equipment I used. So a thought: when I have time and the experience…and properly the tools, I’d like to have a go at a ship this size with the planks removes allowing you to see inside the various decks. Also, a quick bit of self promotion. Please check out my Instagram. Post all my boating photos on there. Would massively apricate your support. https://www.instagram.com/byron_dockyard/
-
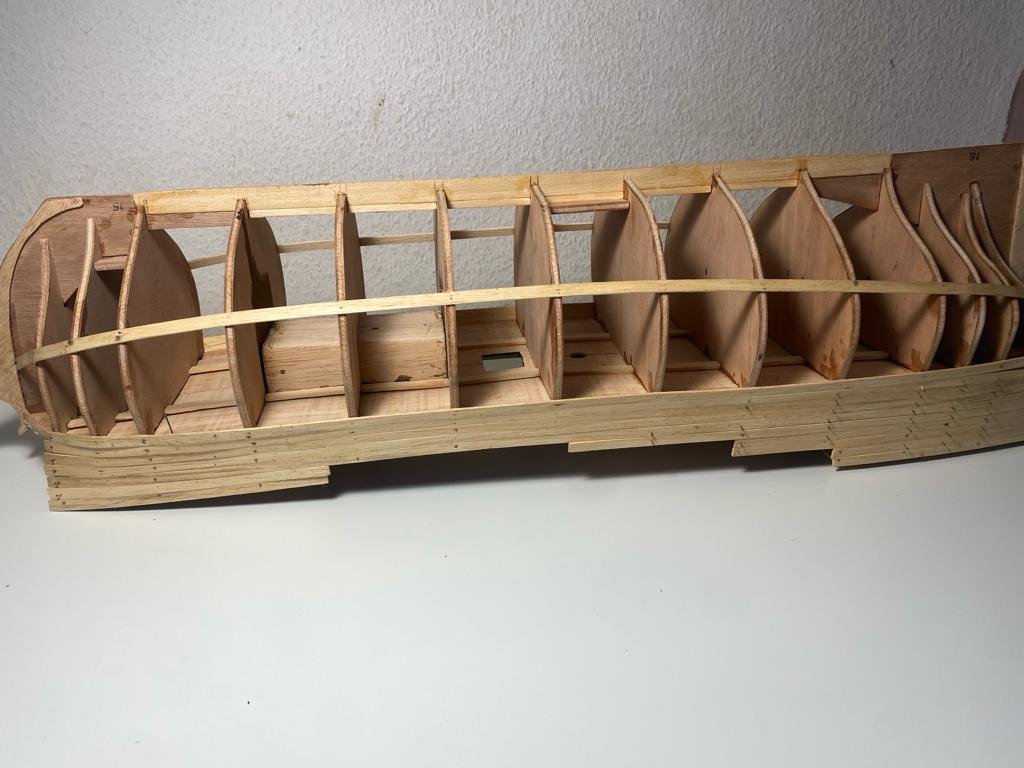
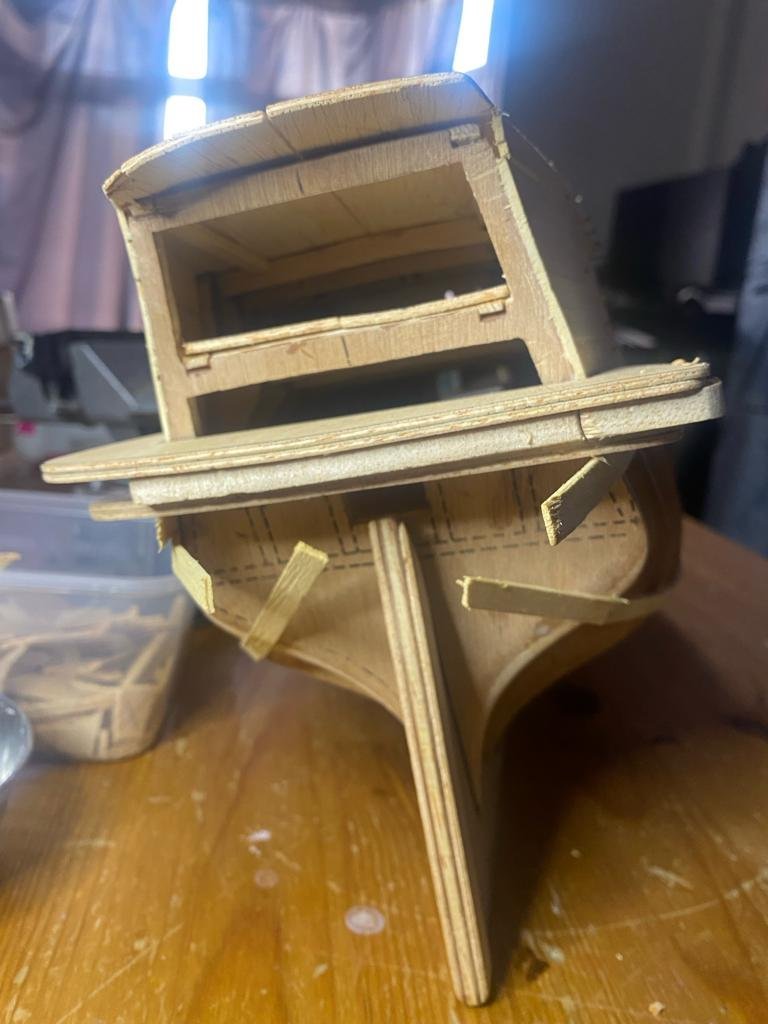
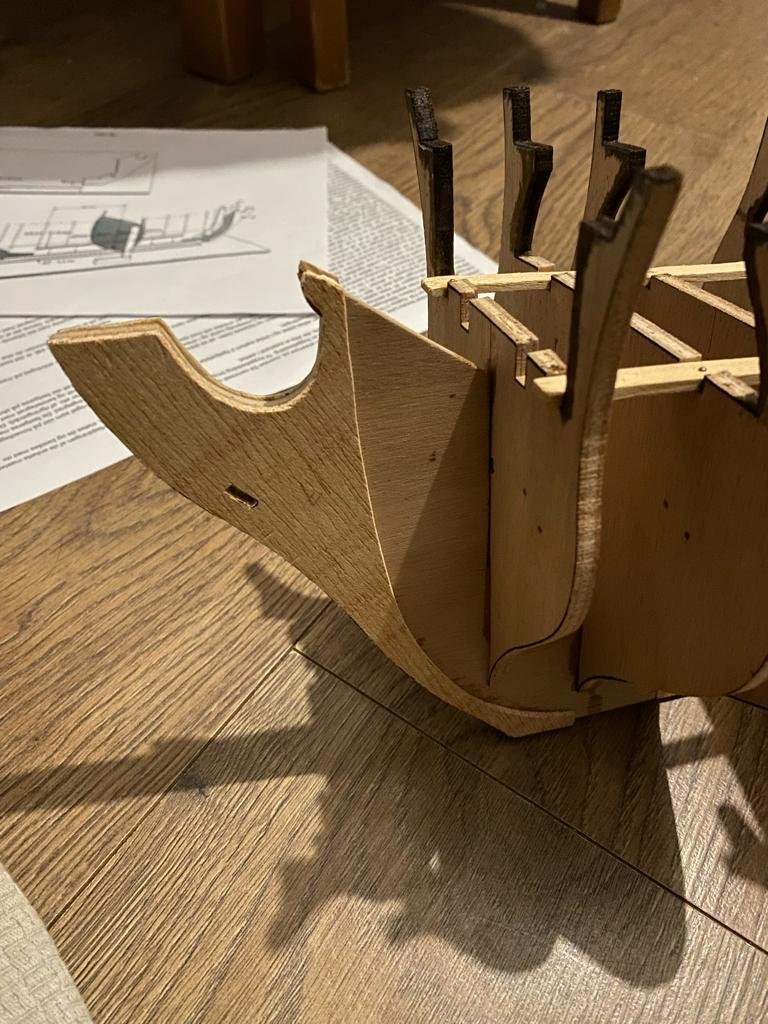
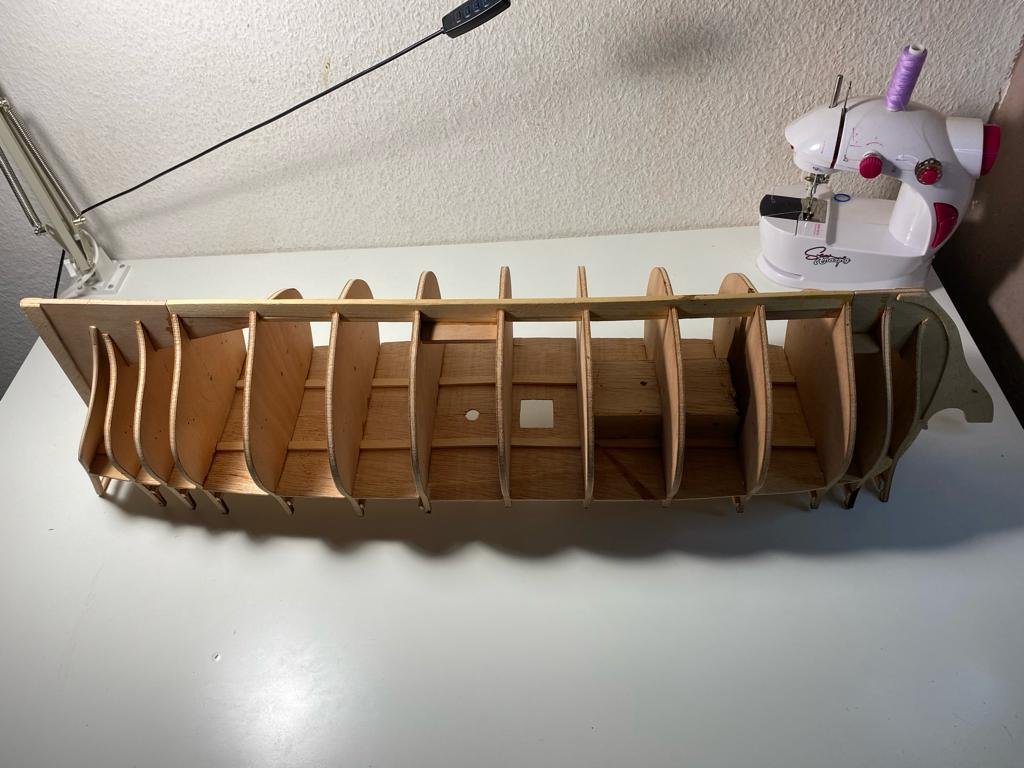
PART THREE So, this was quite straight forward. Build the frame of the hull. Stuck it all down with superglue. Section one needed some work as it was part of the uncut pieces. Filed it down on the sides and it appears to fit quite well. I’m going to hold off attaching it just yet as I want to make sure the planks around the hull fit alright with it. However, the build might dictate that I attach it before then, but we’ll see. As I said previously, I’m going with a paint as I go approach here (usually I paint everything at the end, but it can be rather difficult). I’ve painted the top of the frames a ‘dark oak’ this is stain from OCre used on a previous build. I used some of the OcCre varnish also as I have some spare. I’ve also stained part was down no.11 back, and no. 9 front. I’m expecting this to be visible as the build progresses. At the bottom of the hull there are pieces of wood which hold everything in place. So far so good. No dramas yet. Self promotion, but if you are able to check out my Instagram, all me other boating builds are on there. Thank you. https://www.instagram.com/byron_dockyard/
-
AiDi reacted to a post in a topic:
Norske Love by DanielNG10 - Billing Boats - 1:75
-
ccoyle reacted to a post in a topic:
Norske Love by DanielNG10 - Billing Boats - 1:75
-
DanielNG10 changed their profile photo
-
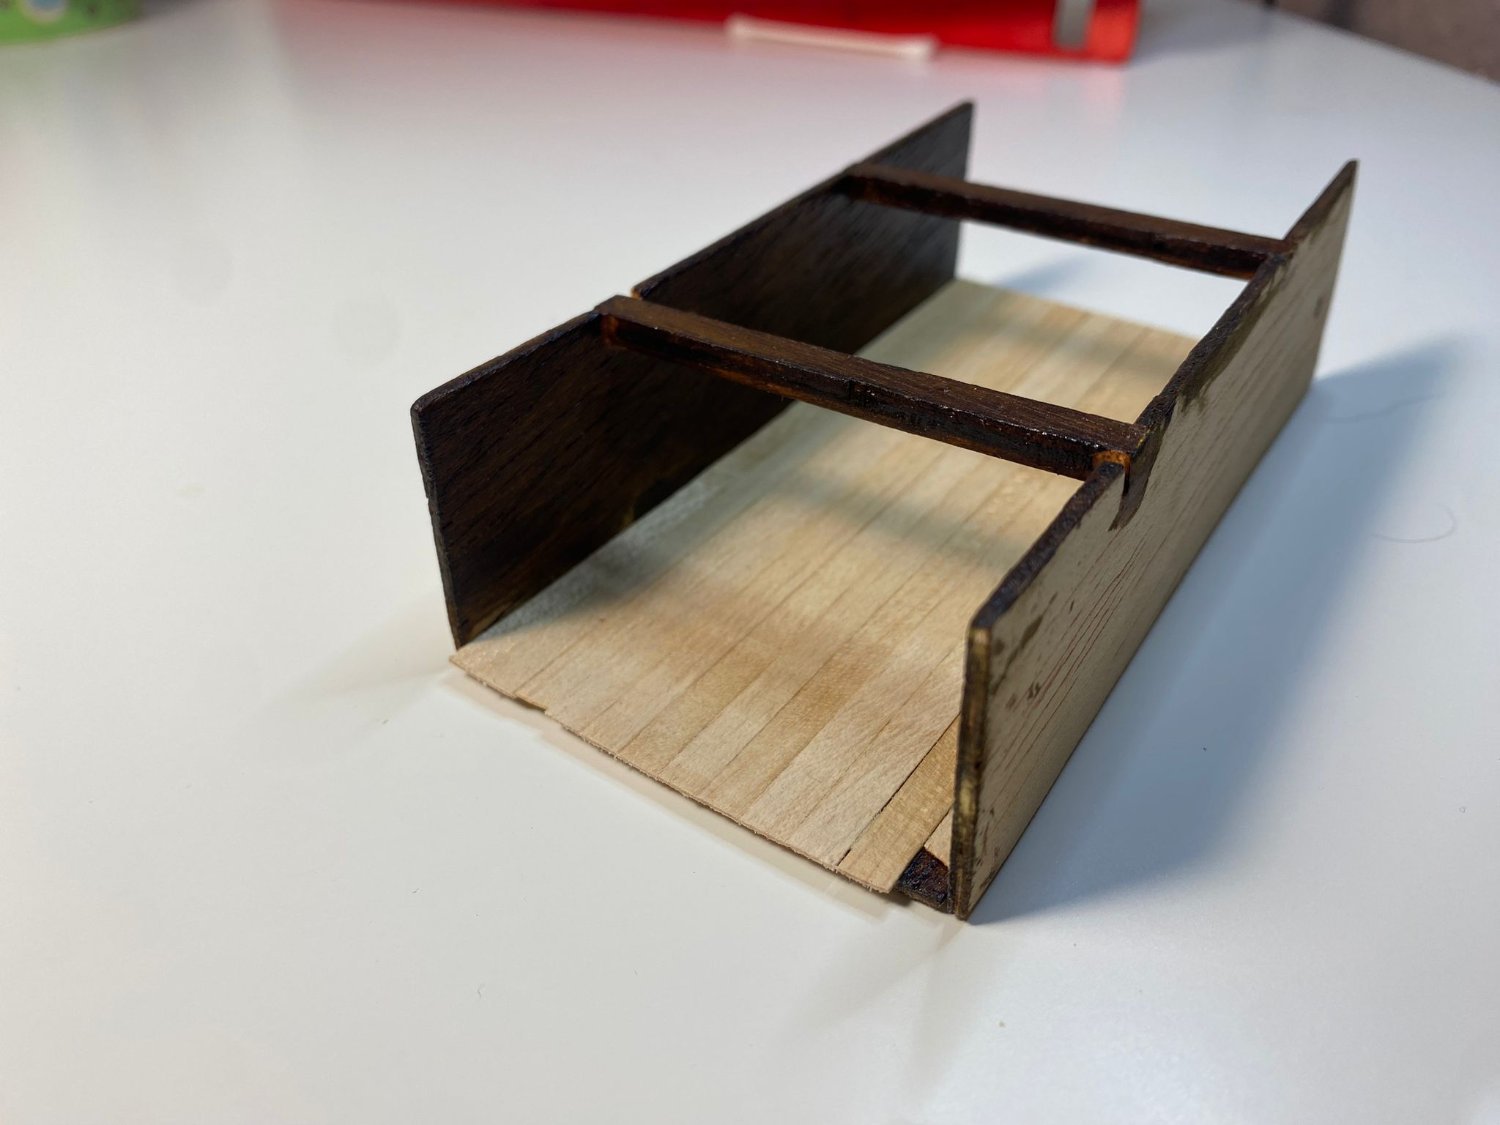
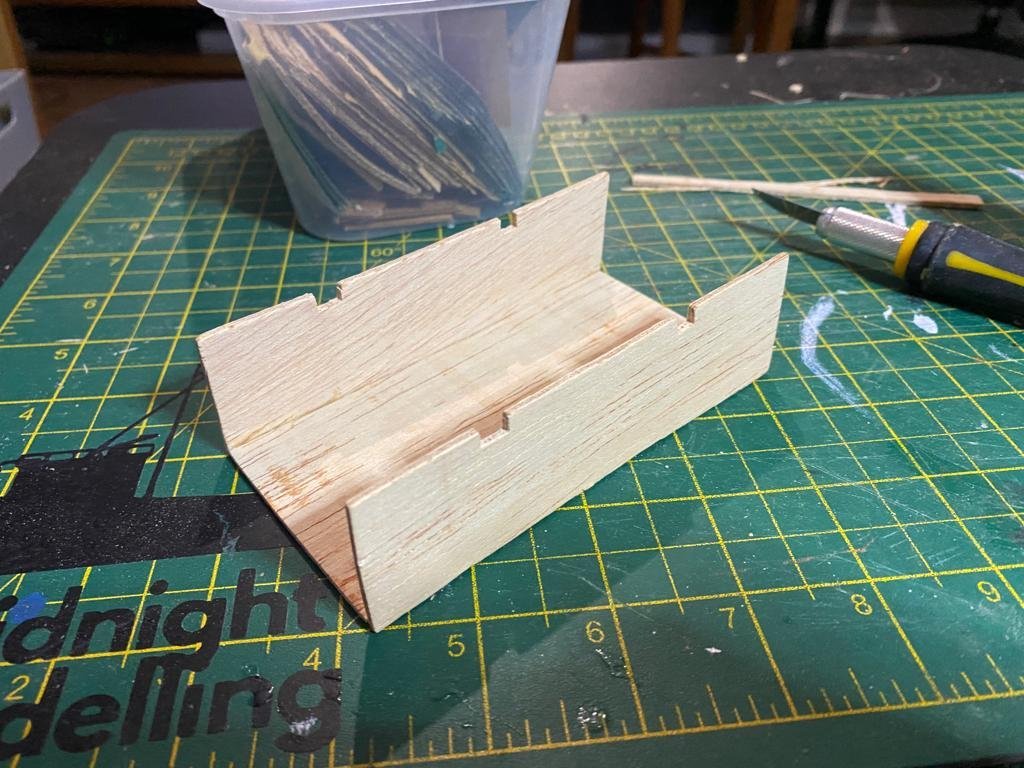
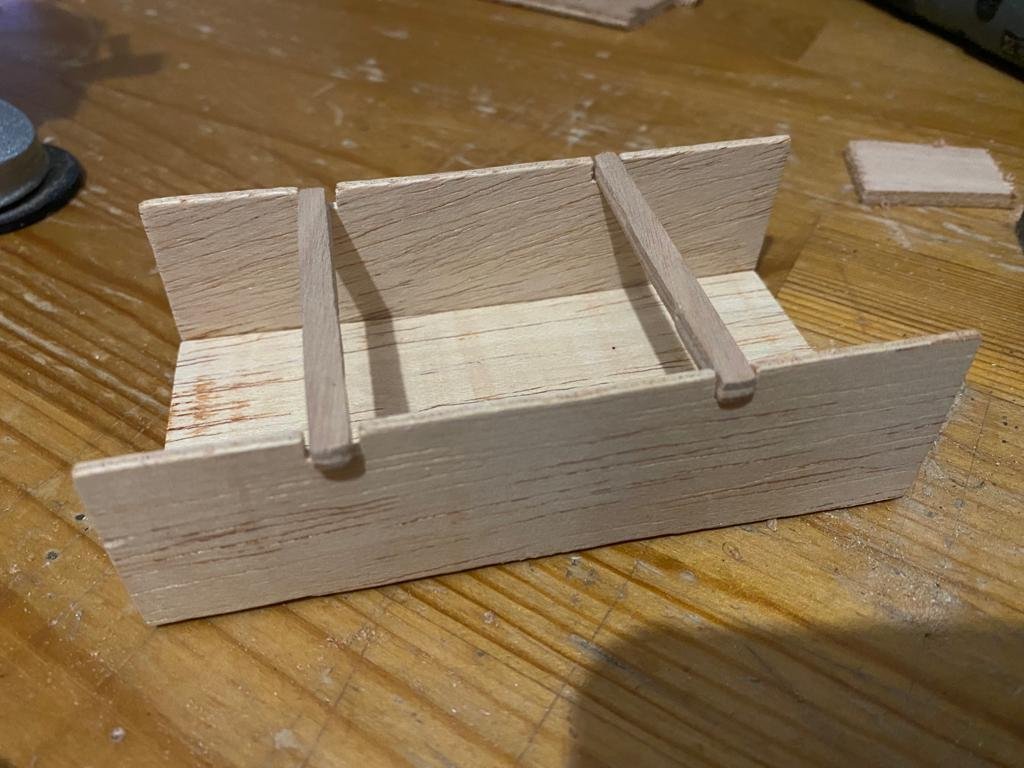
PART TWO So, a couple of updates: I’ve been working on the frame which will hold the ladders down to the gun decks. Previously I’ve painted my ships at the end of the build, however, I’m adopting a paint as you go here. I have some finishing planks left over from a previous build, I thought they would complement the floor, rather than just stain it a Dark Oak colour which was my original intention. See NR. 24-26 just below Fig 1B (top image). I think I might slightly weather the floor before I secure it into hull. Important! Get the measurements right on the frame BEFORE you start sticking things together. I think its easier to adjust the floor of the frame (no. 24) rather than shave the sides of the hull (no. 9) Finally, if you can give my Instagram page a follow, they’ll be amazing. I’m sharing all of my build logs on there also. https://www.instagram.com/byron_dockyard/
-
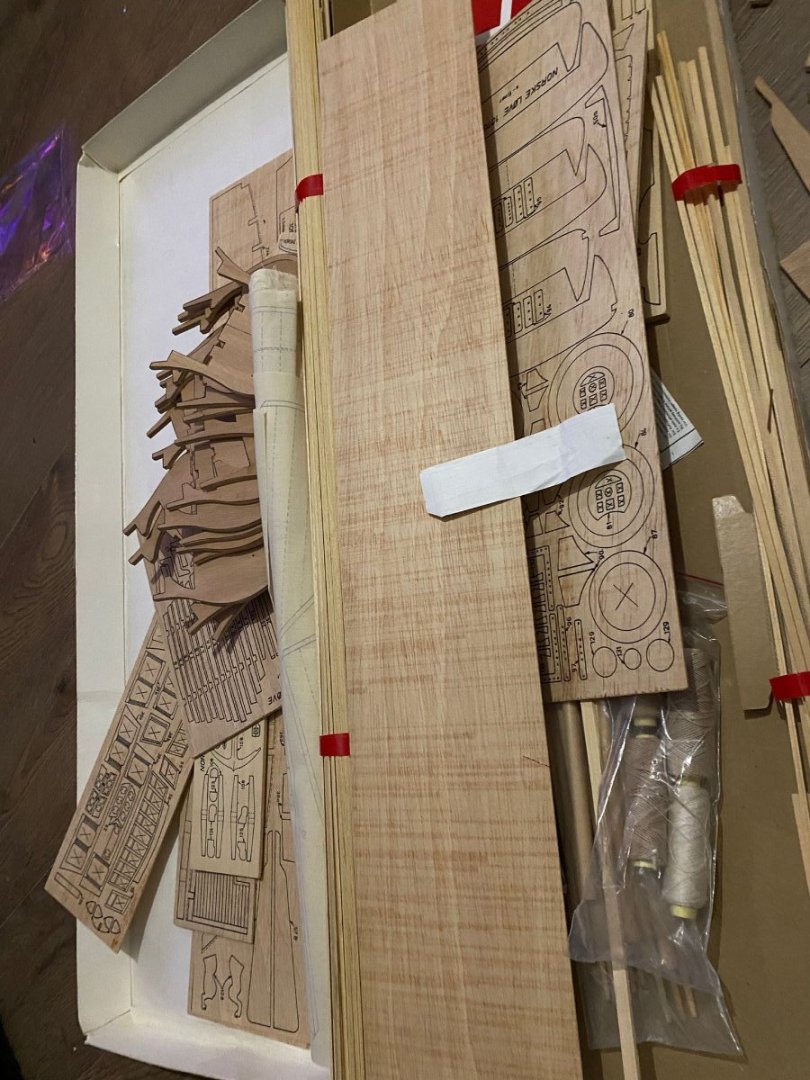
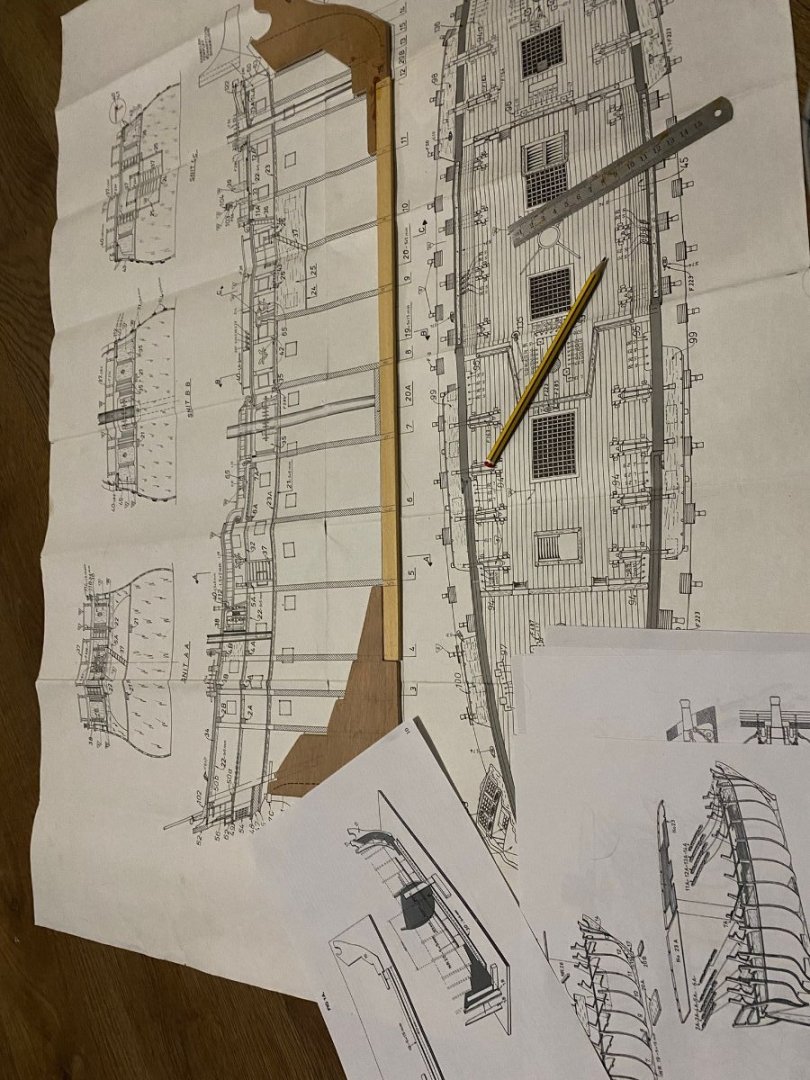
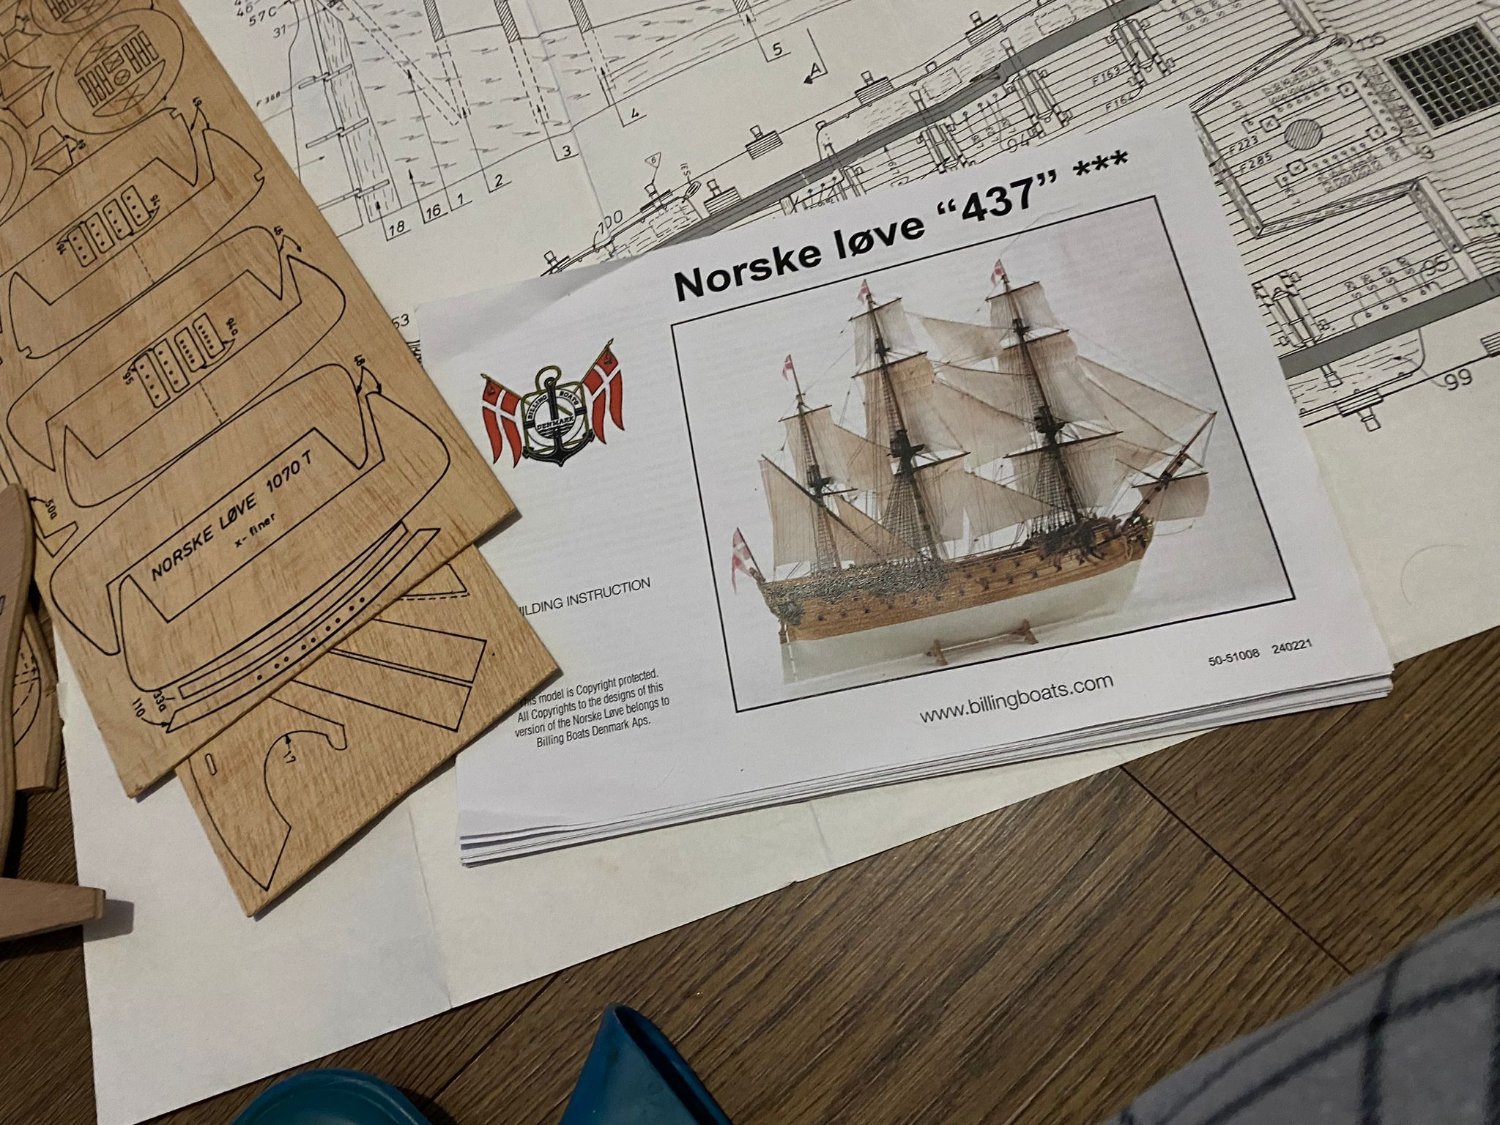
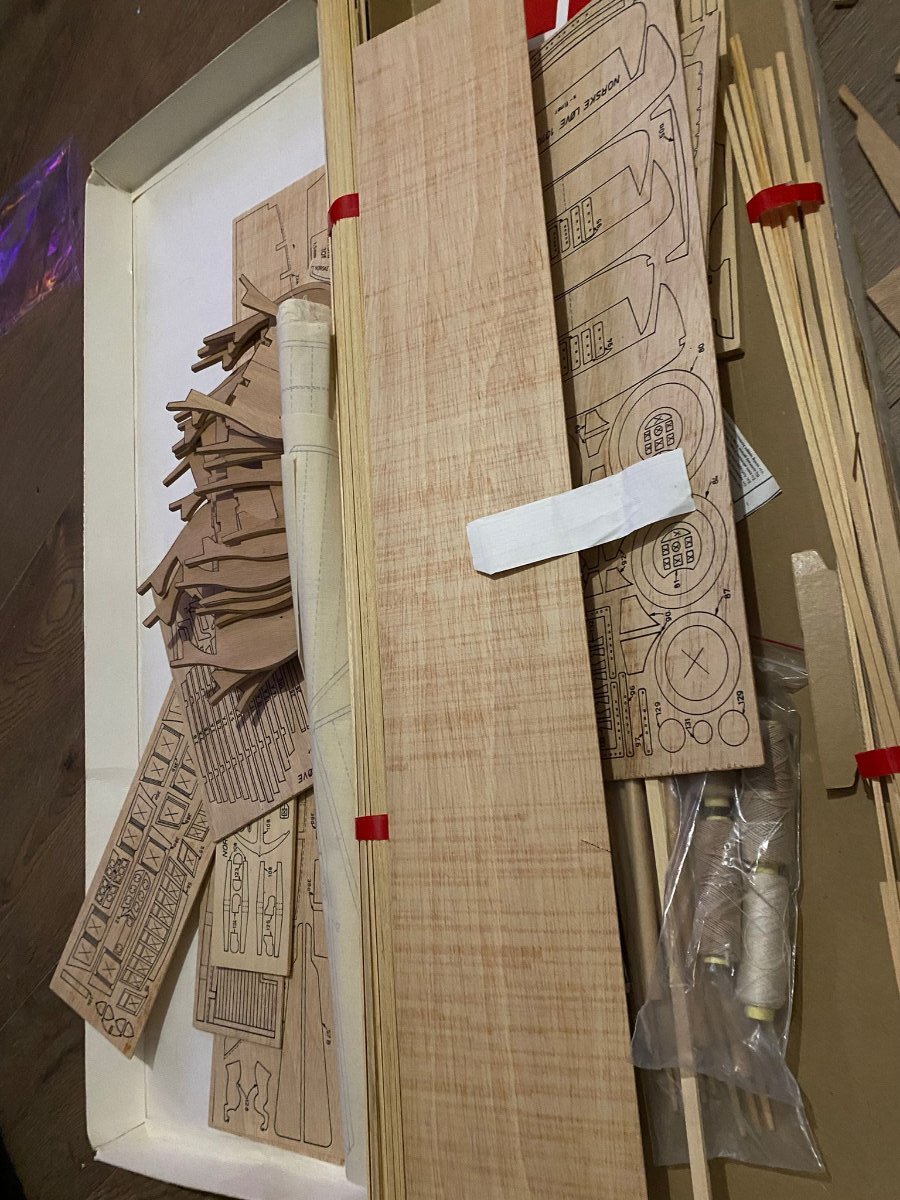
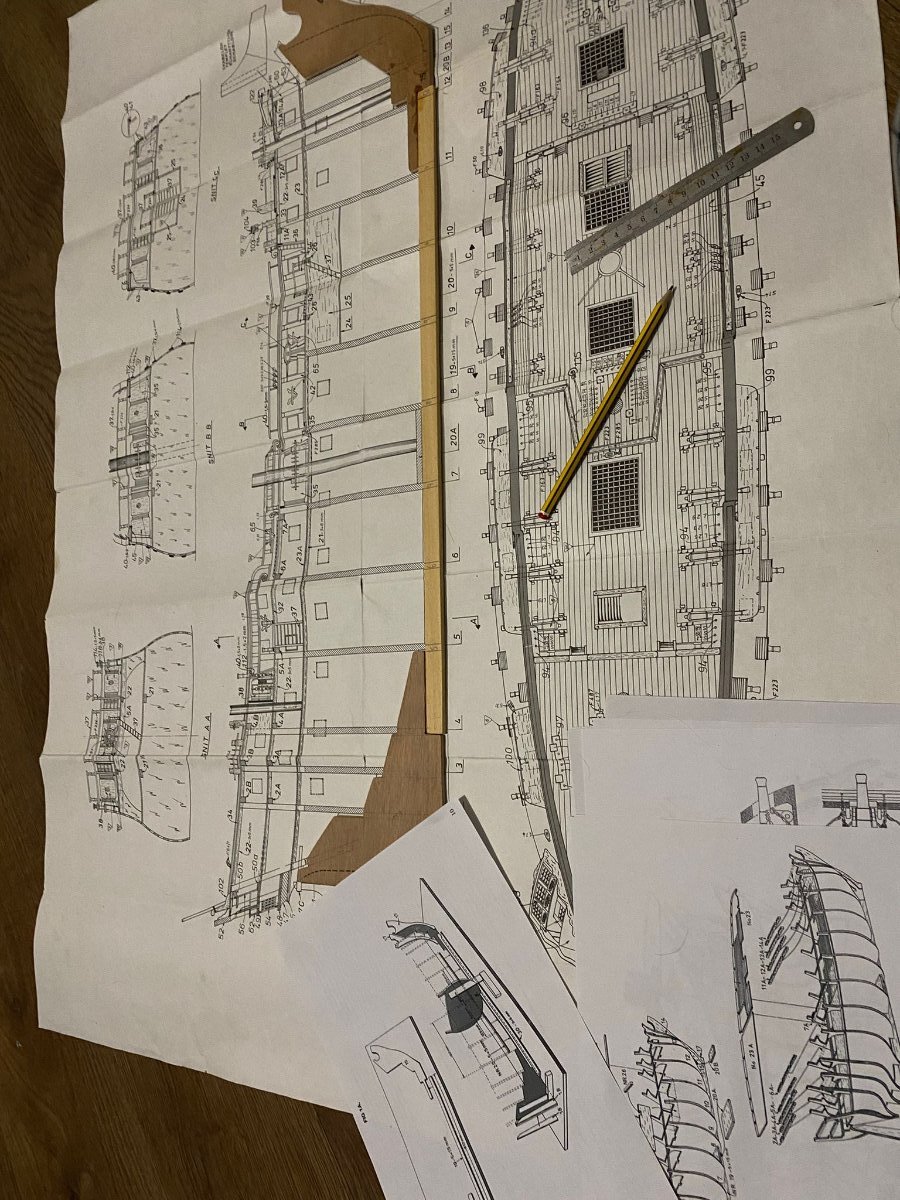
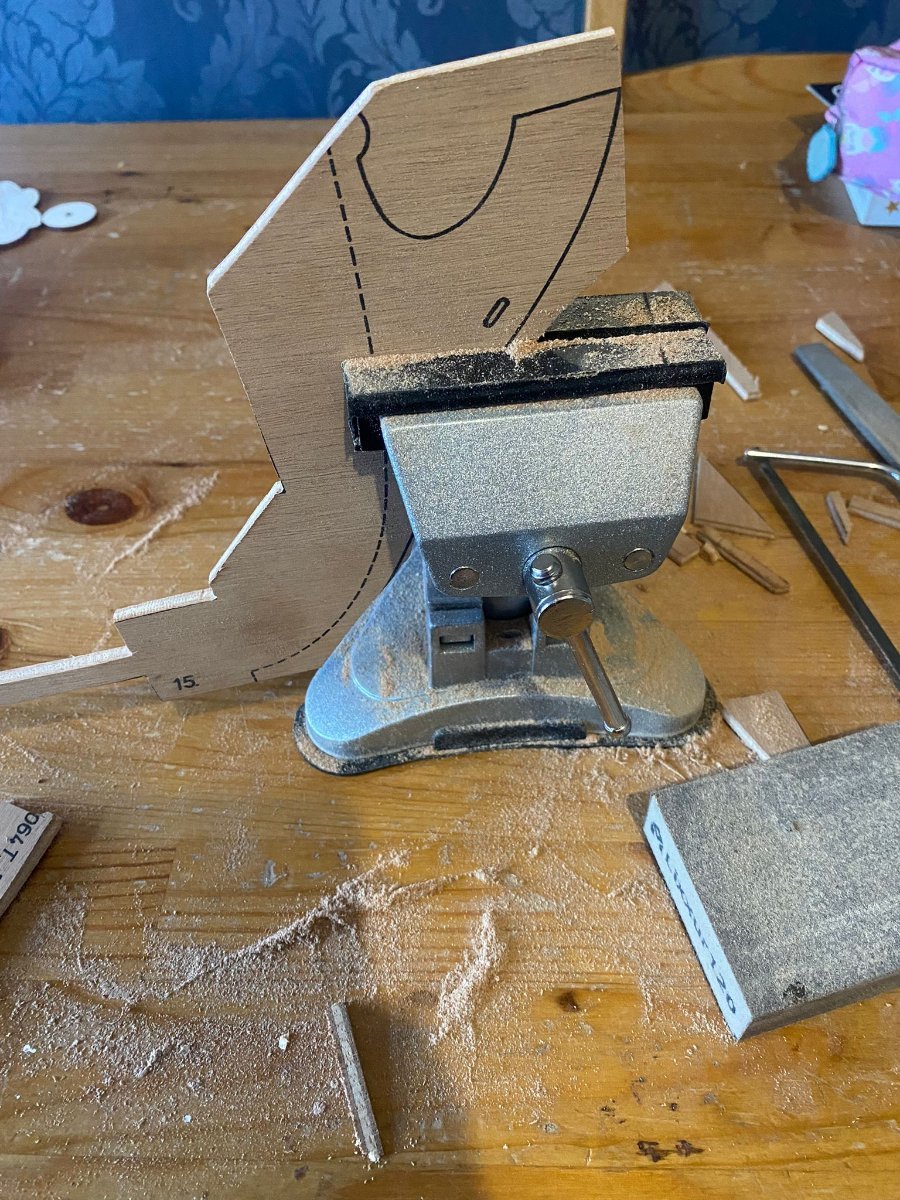
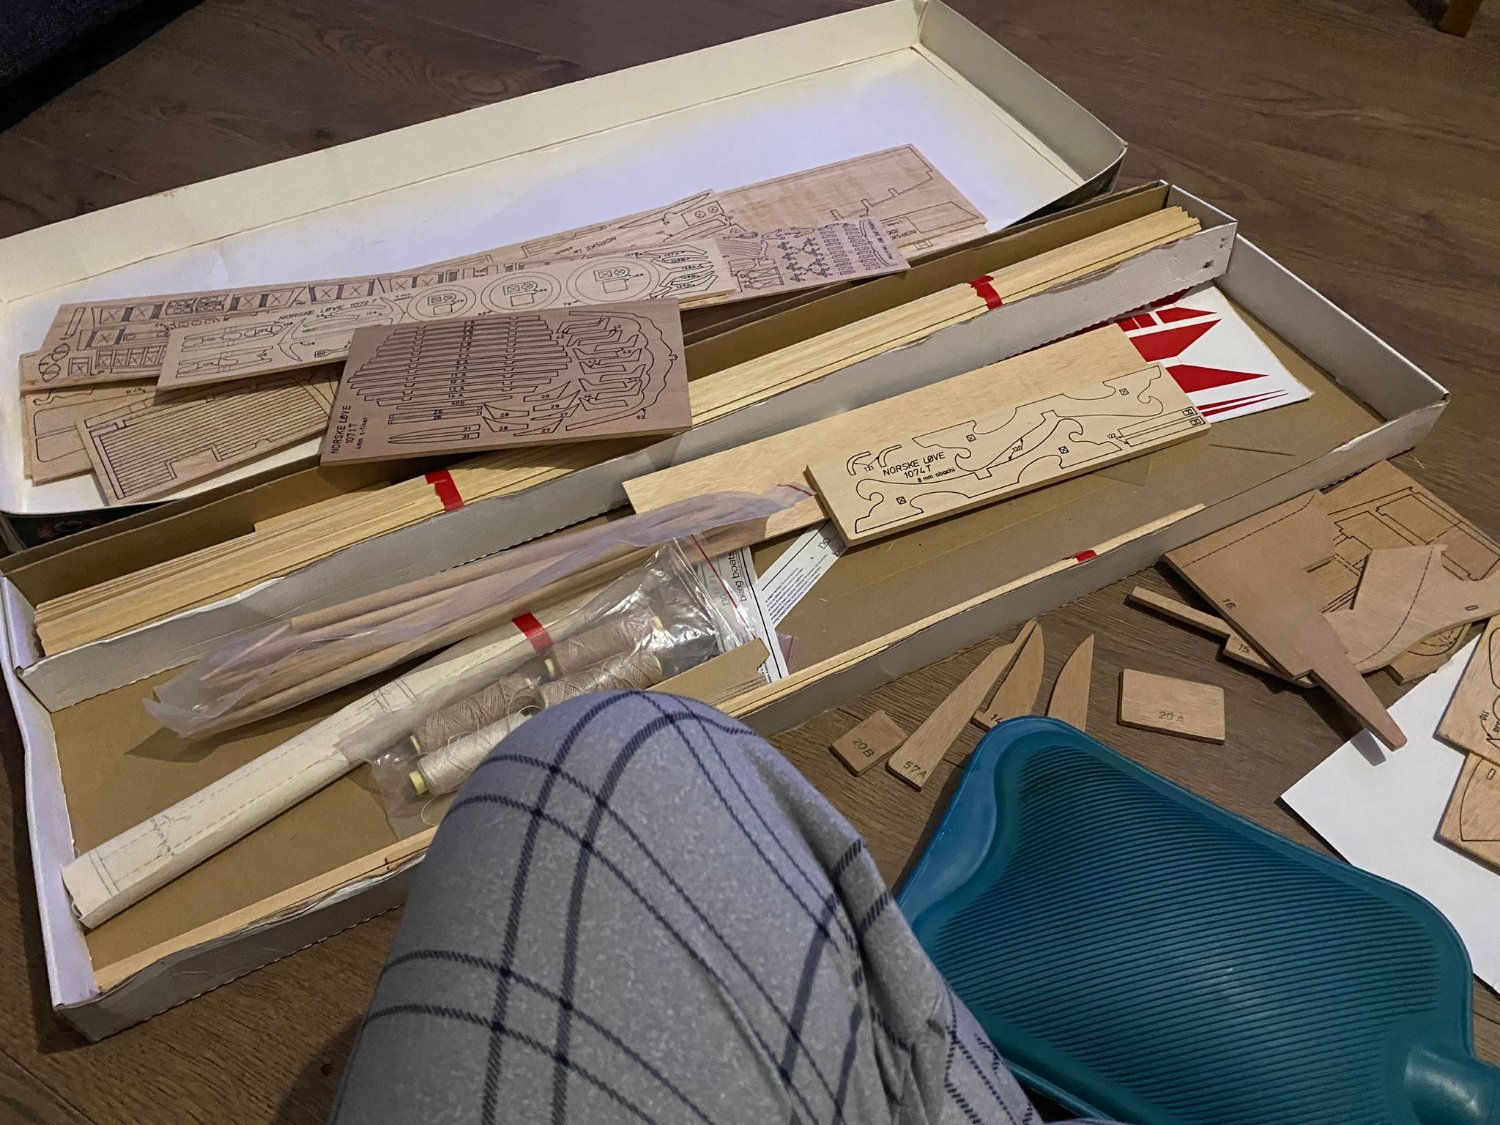
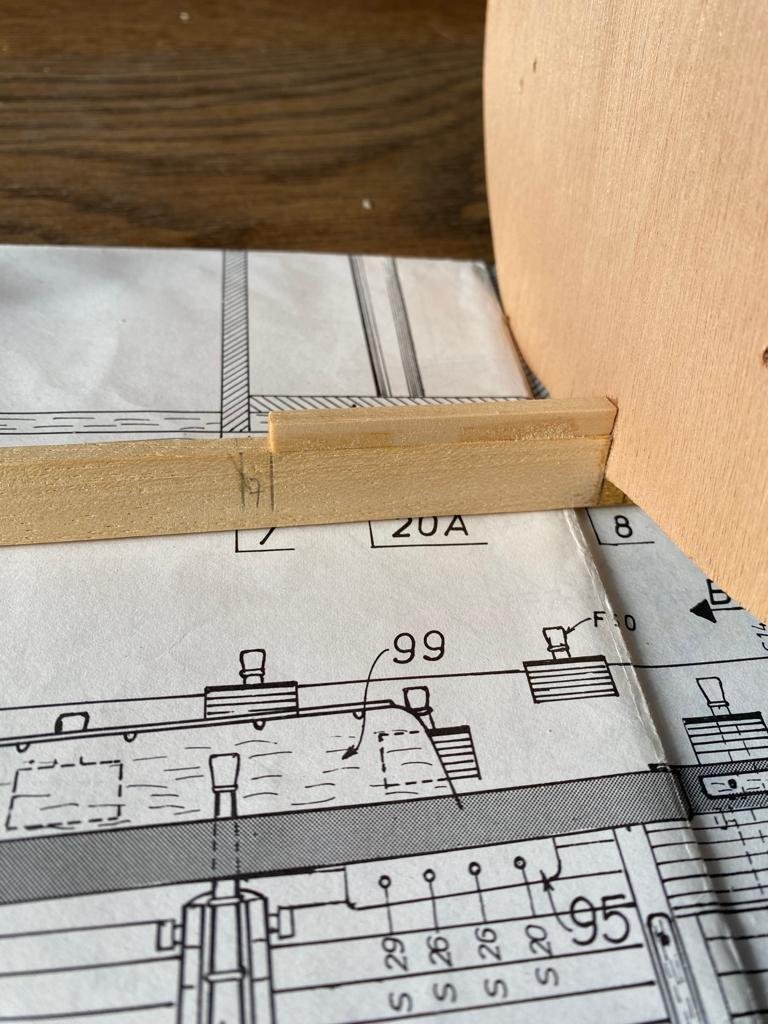
Hello, first post here but long time lurker. I've recently started building the Norske Love model from Billing Boats that I brought from Ebay. Lets see how it goes, right! Billing Boat Norske Love that I brought from Ebay! Hoping all the pieces are here... Unlike the Occre models that I'm used to, Billing dont Lazer cut the wood fittings that you need. Didnt want to buy a jigsaw, so using the vice and a couple of small saws to cut out the pieces that I need. The model didn't come with instructions, only the massive blue prints in the photo, however, you can find the instructions easy enough online. First step then, cut everything out and sand it all down. Expect lots of cutting and sanding photos! Quick self promotion if its allowed! https://www.instagram.com/byron_dockyard/ I've posted all my previous builds on here plus random boat building / set up photos. I hope this is okay.