
HOLIDAY DONATION DRIVE - SUPPORT MSW - DO YOUR PART TO KEEP THIS GREAT FORUM GOING! (Only 24 donations so far out of 49,000 members - C'mon guys!)
×
madtatt
-
Posts
257 -
Joined
-
Last visited
Content Type
Profiles
Forums
Gallery
Events
Everything posted by madtatt
-
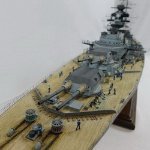
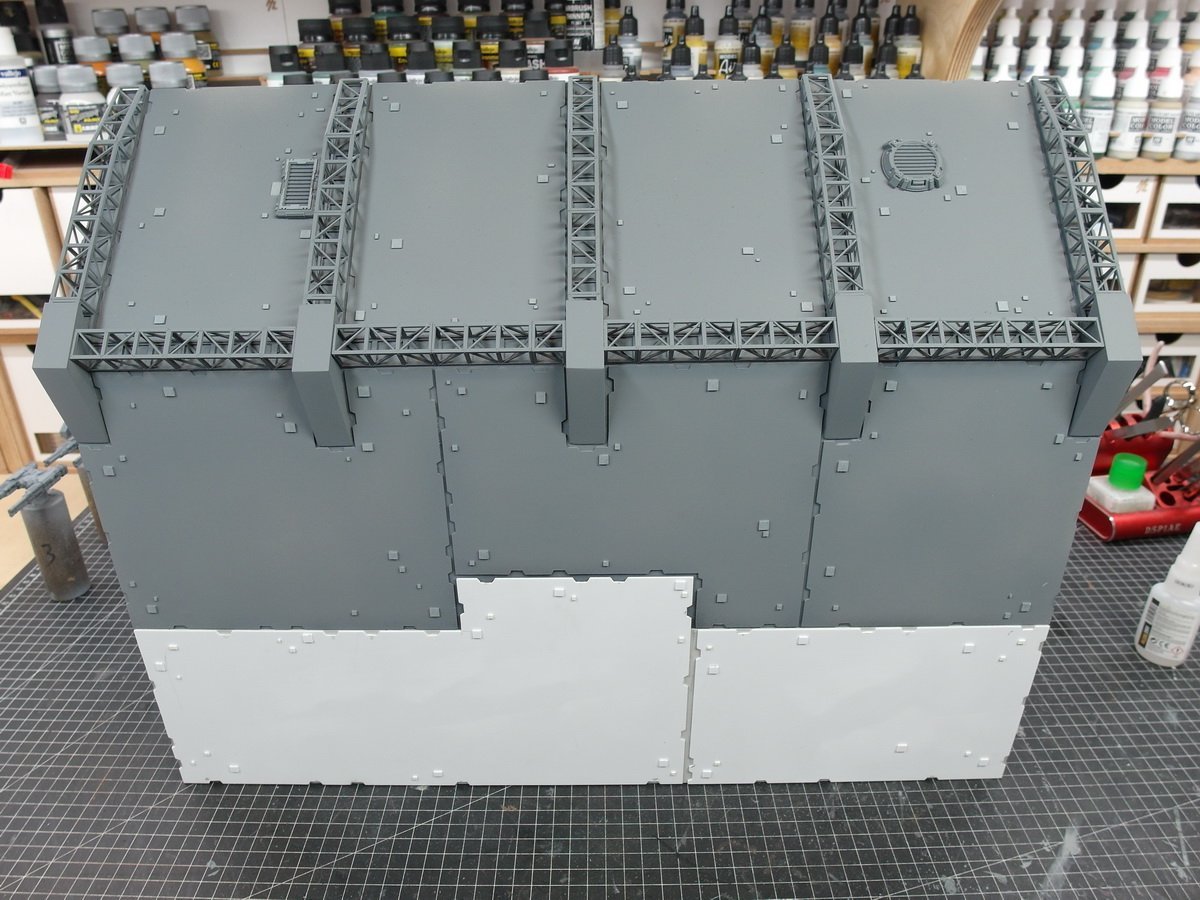
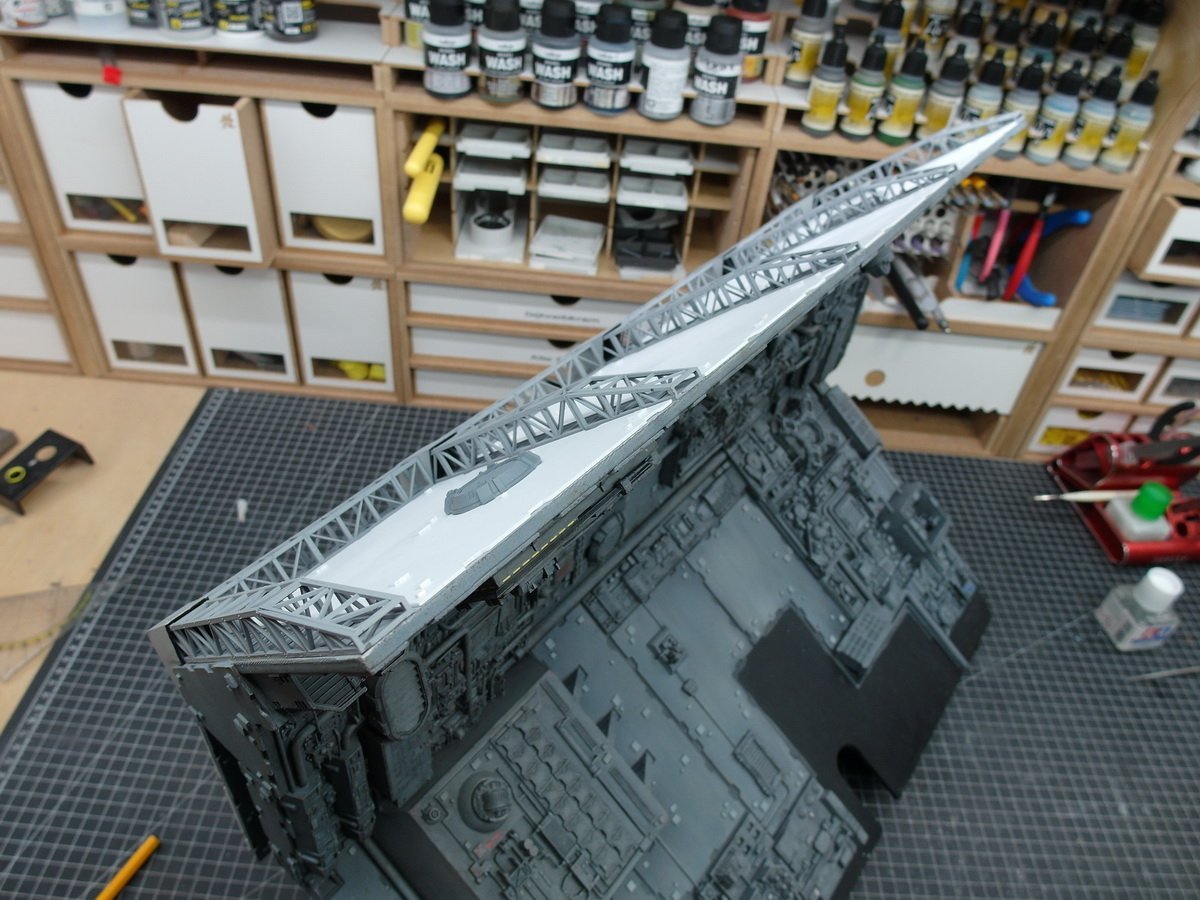
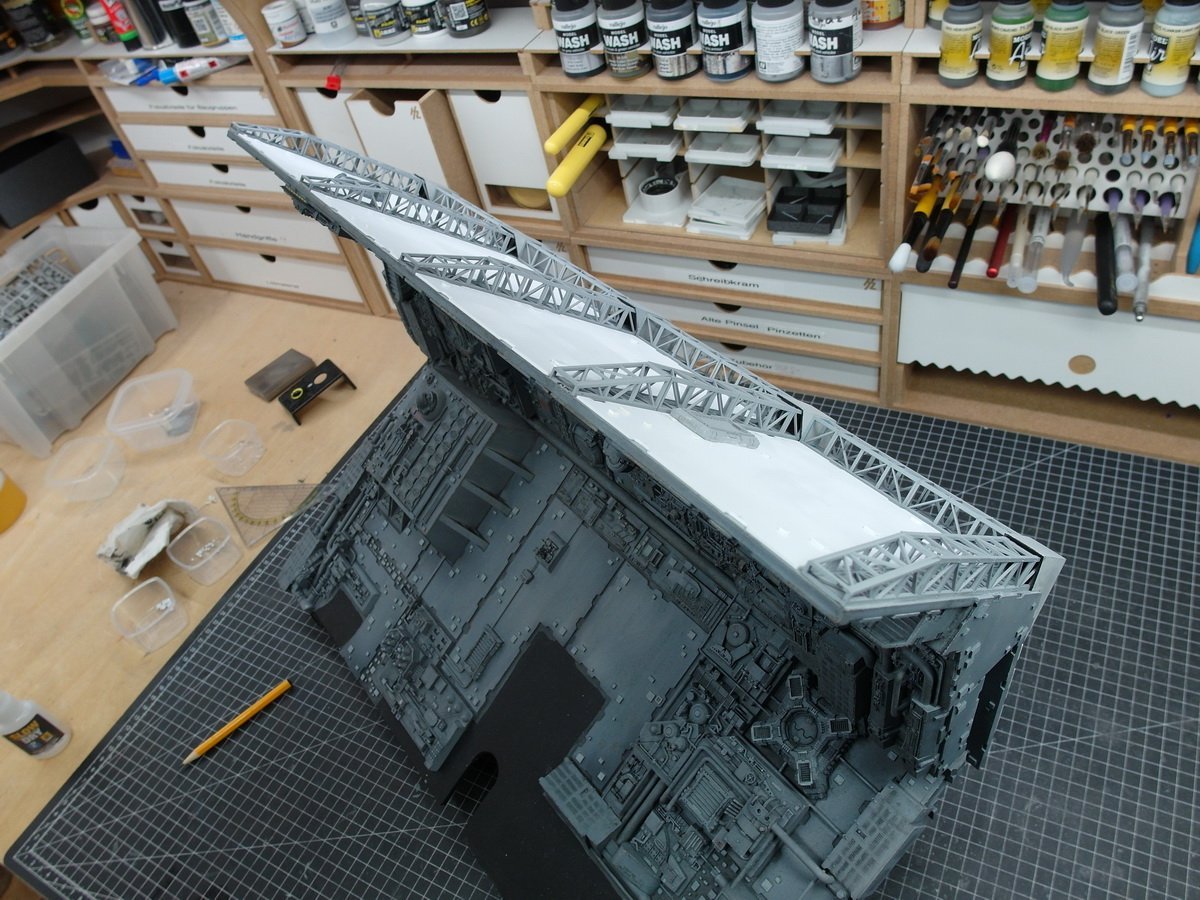
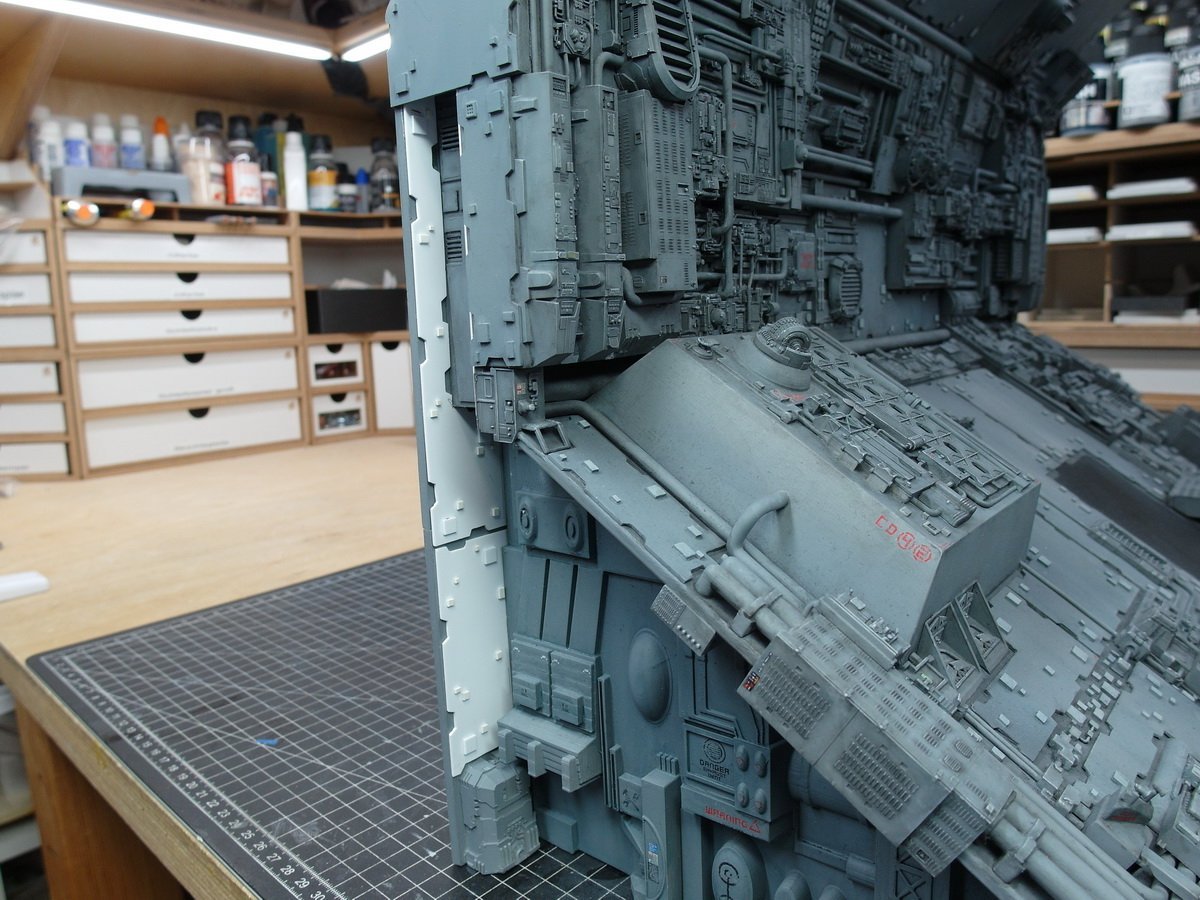
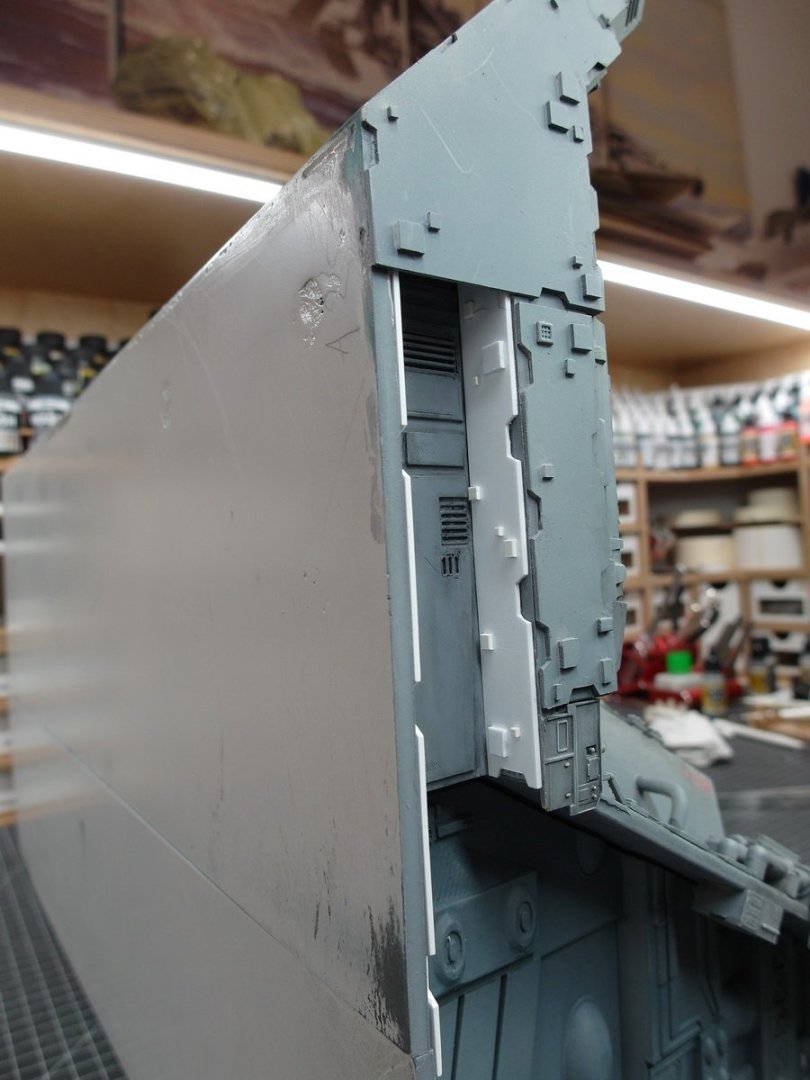
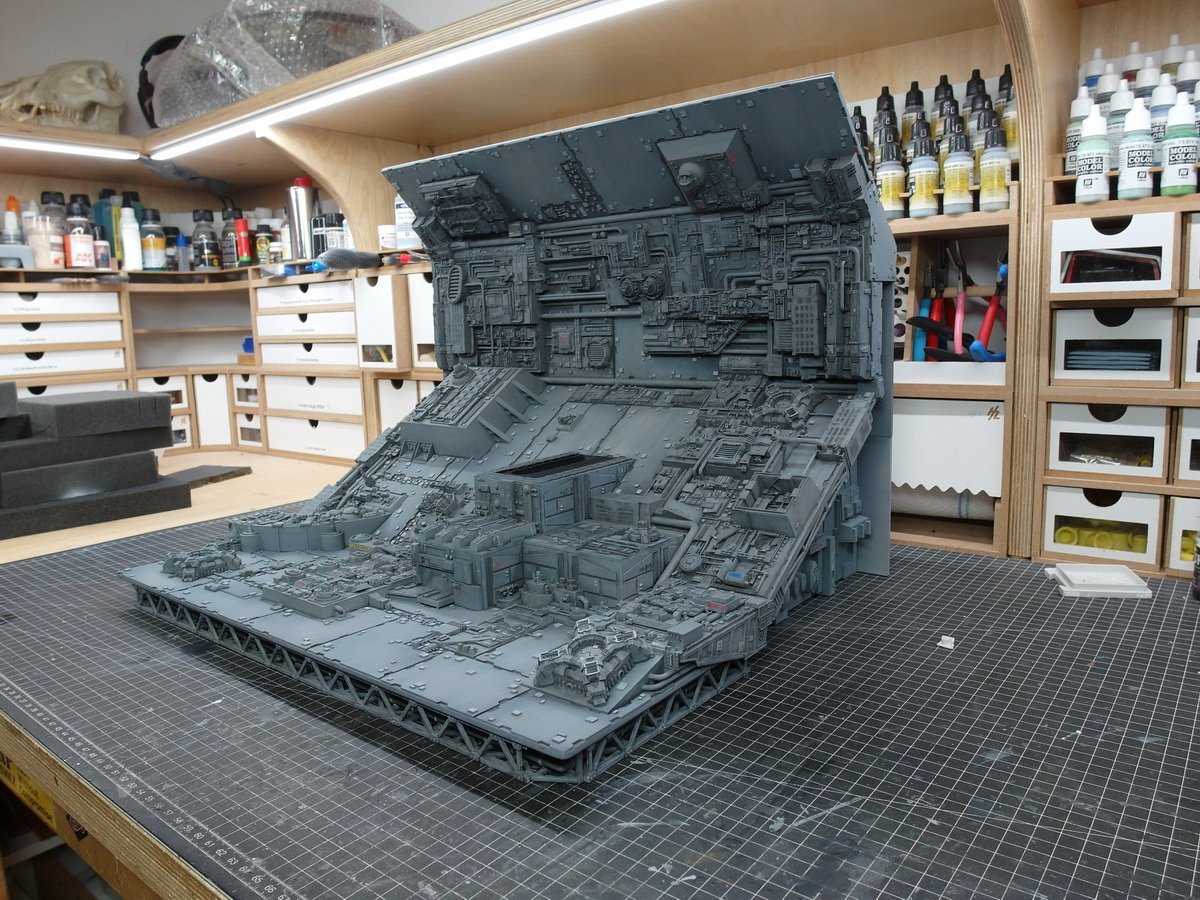
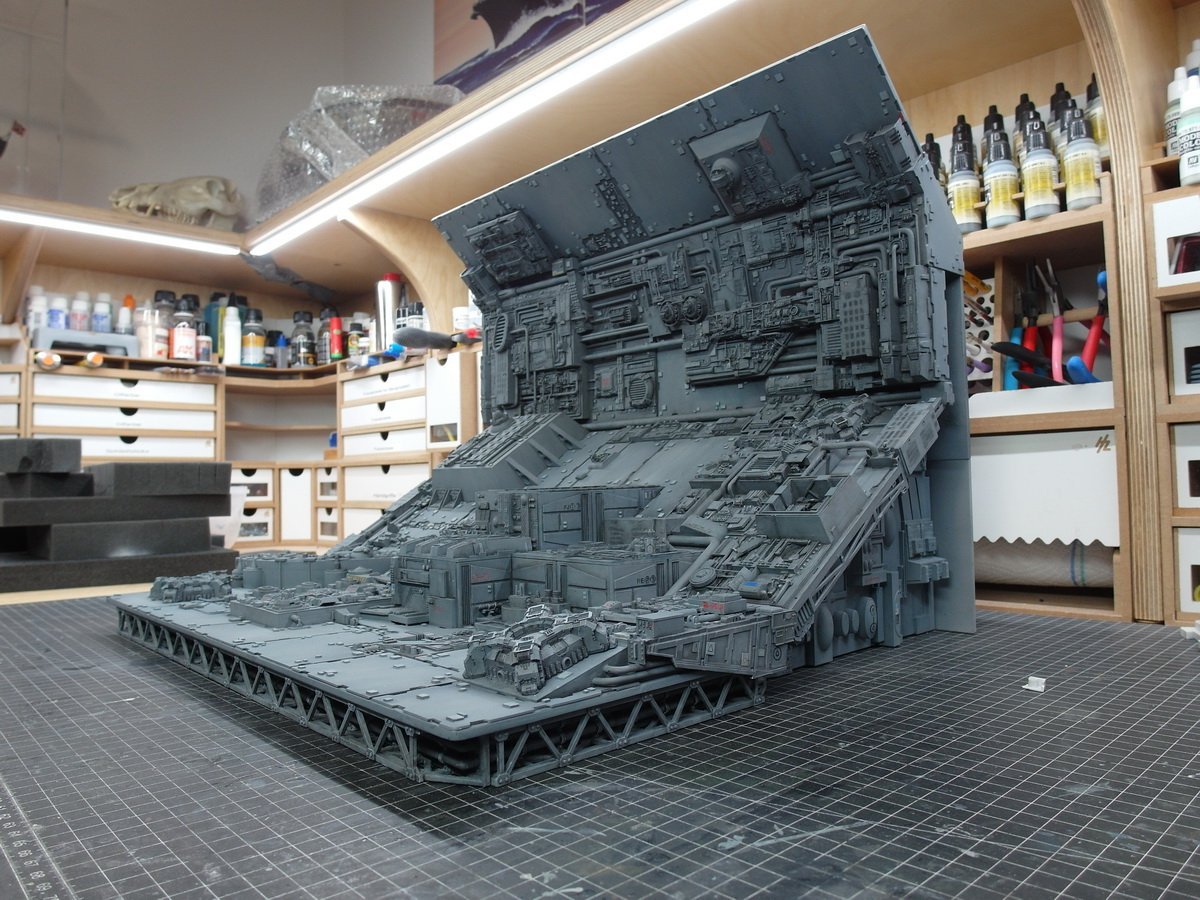
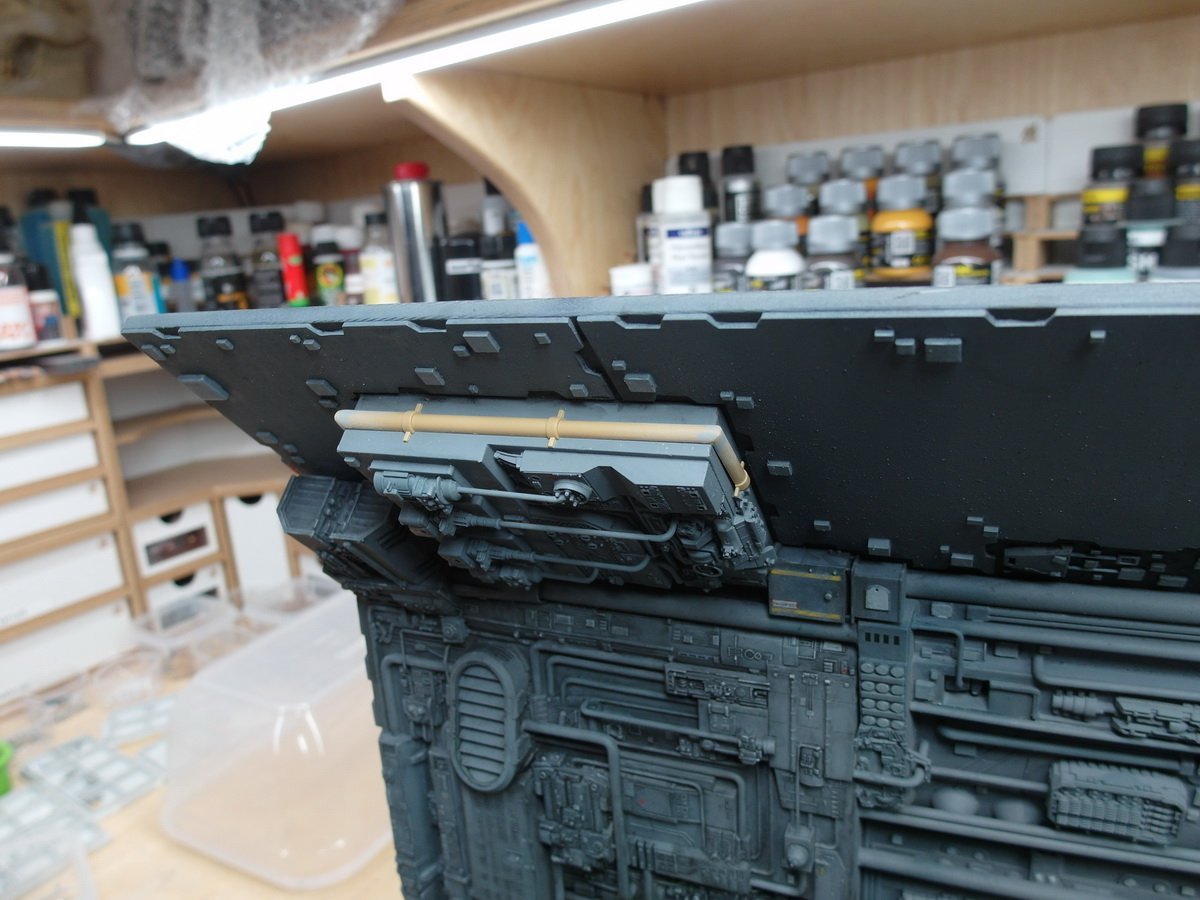
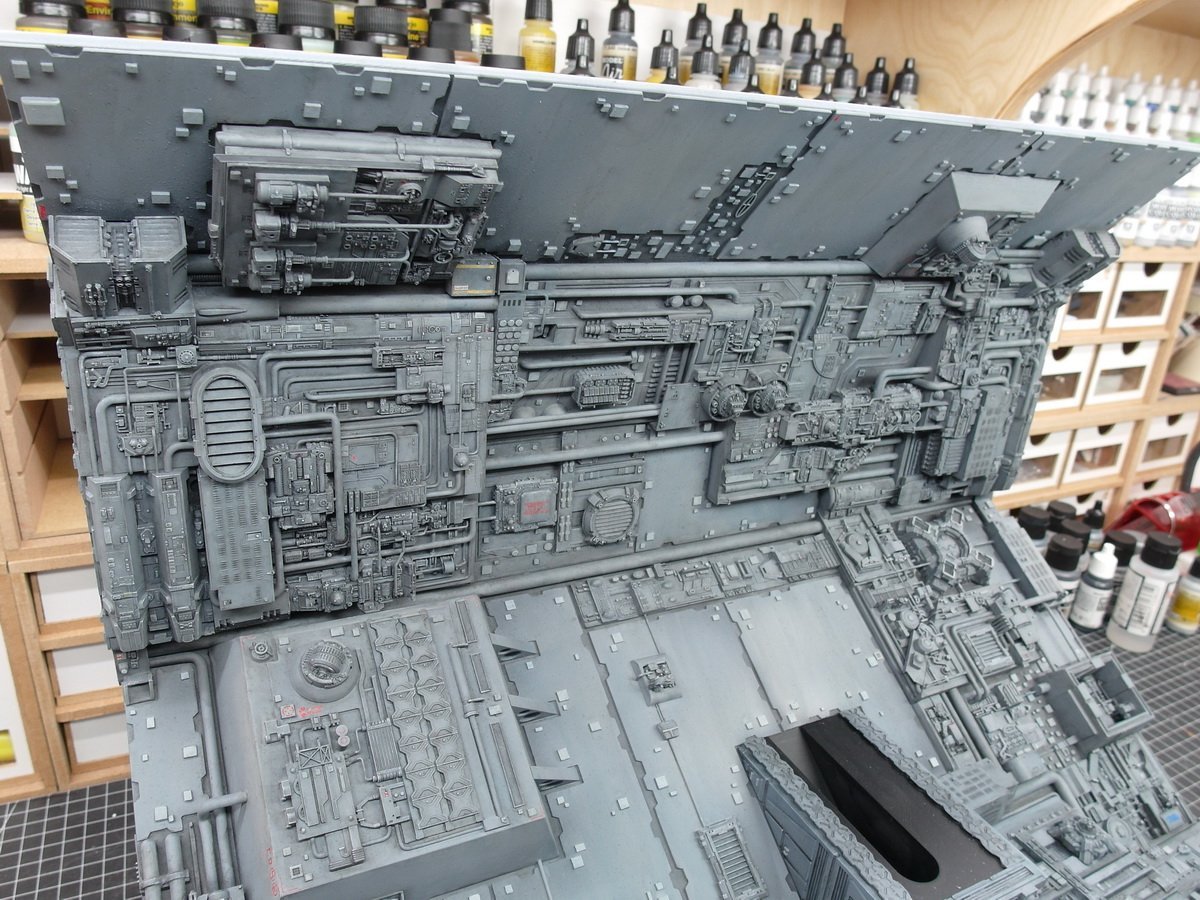
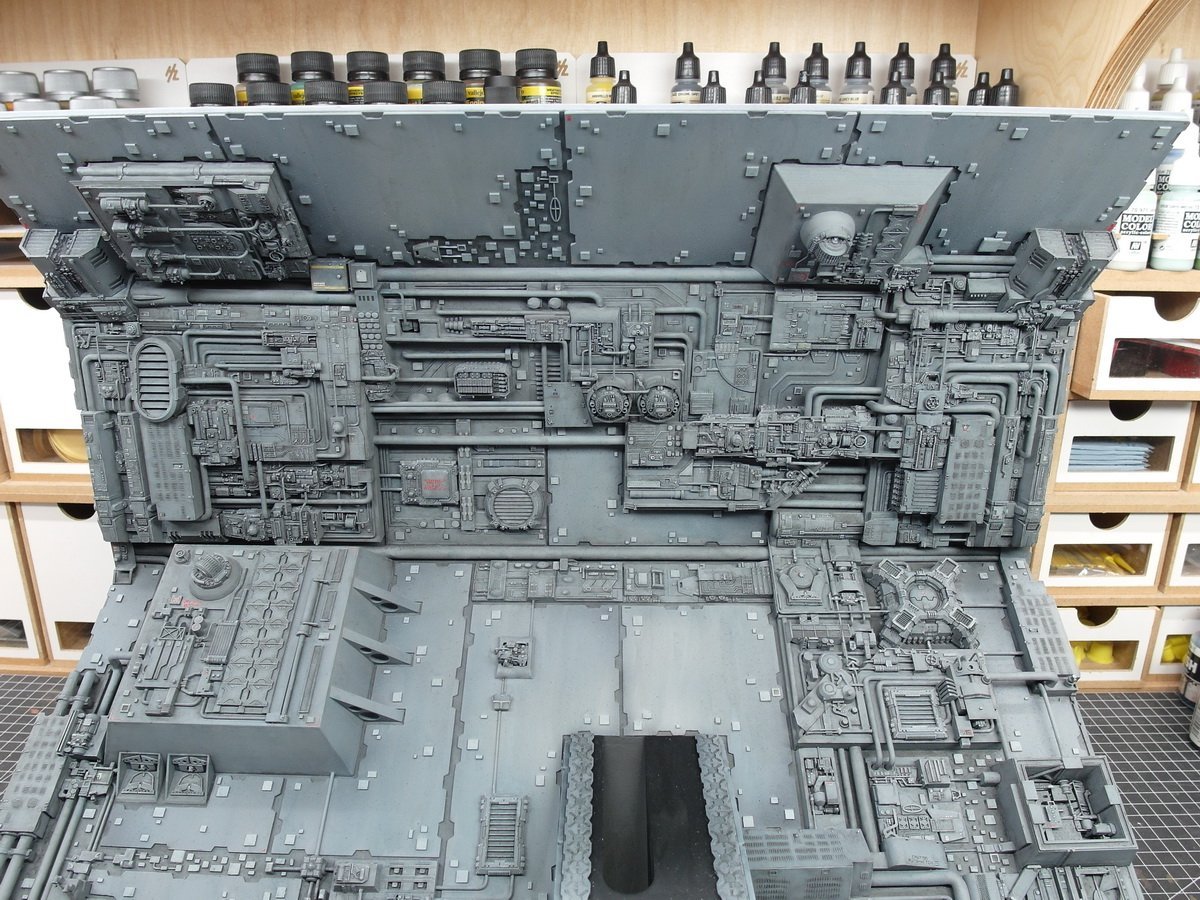
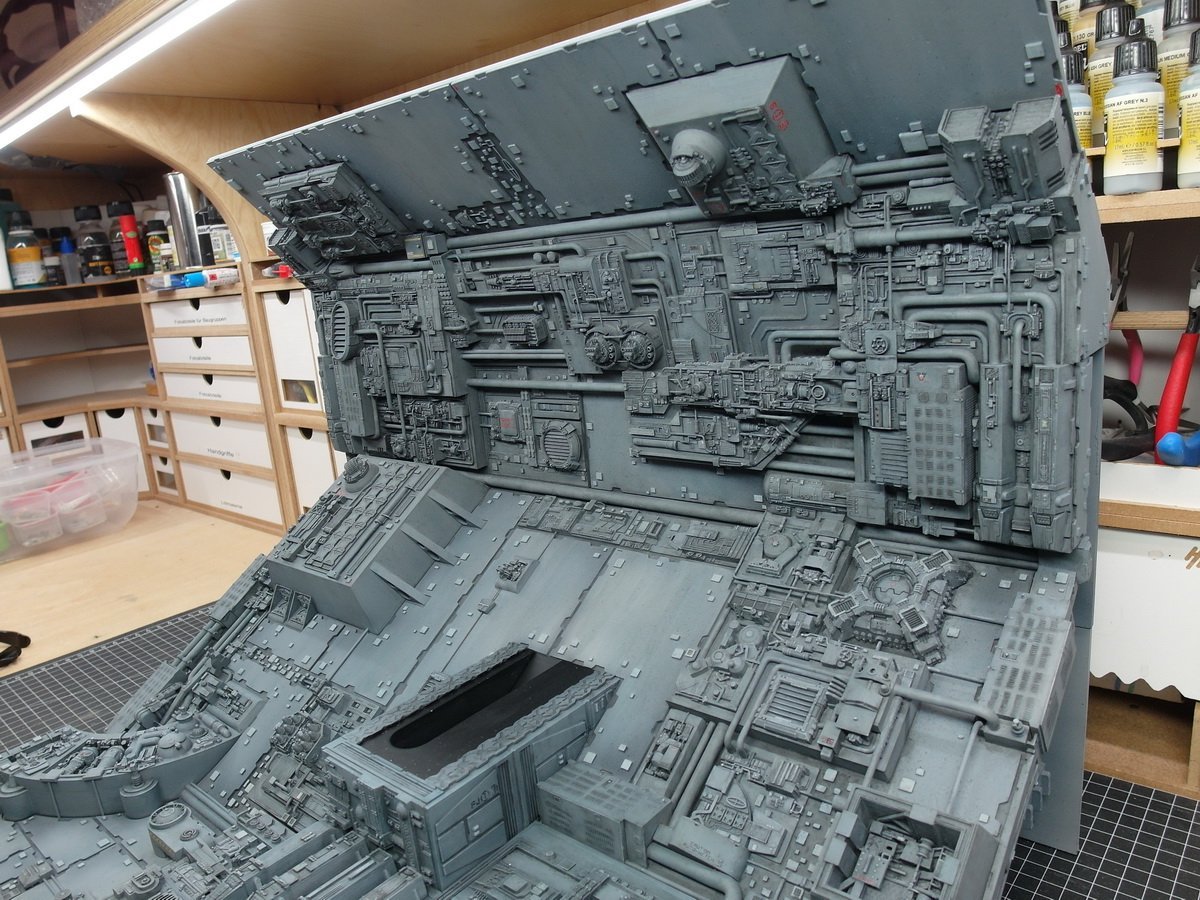
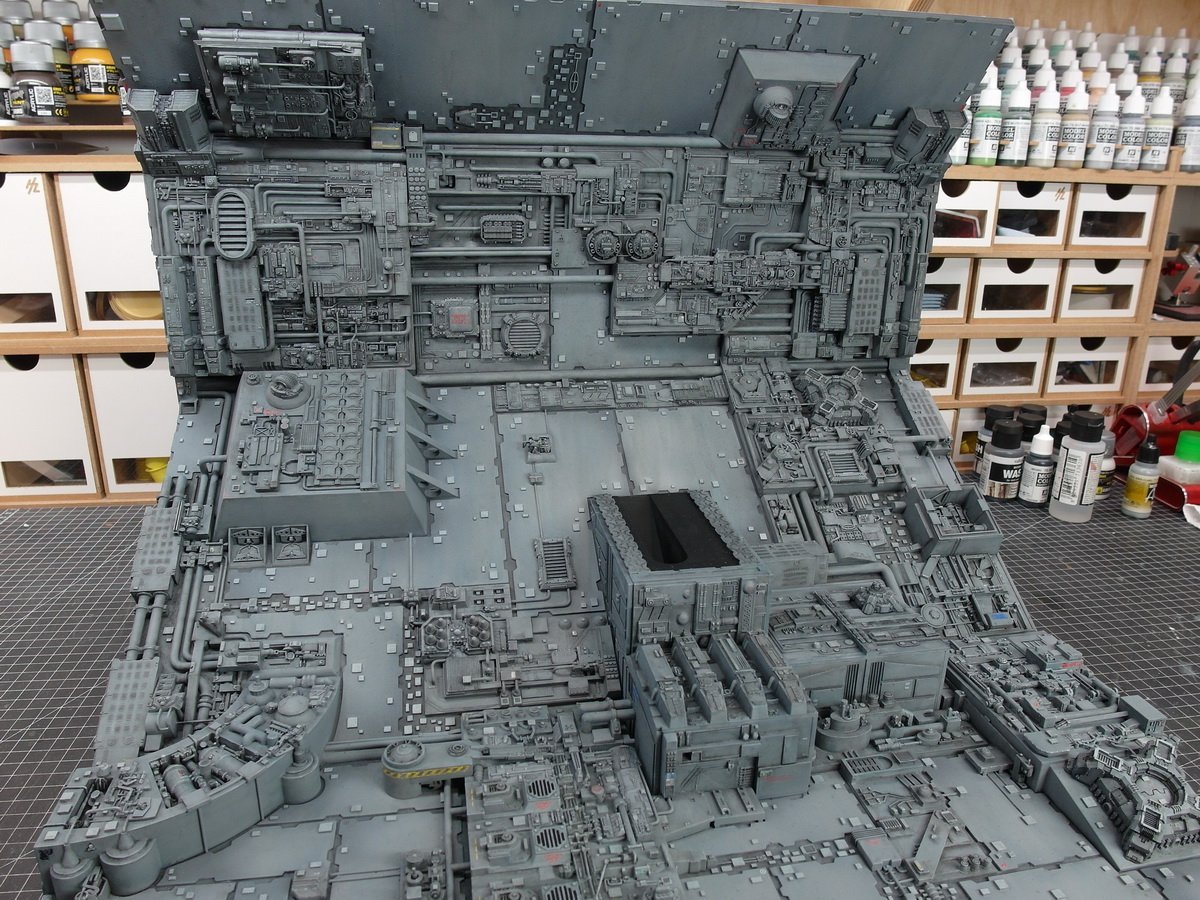
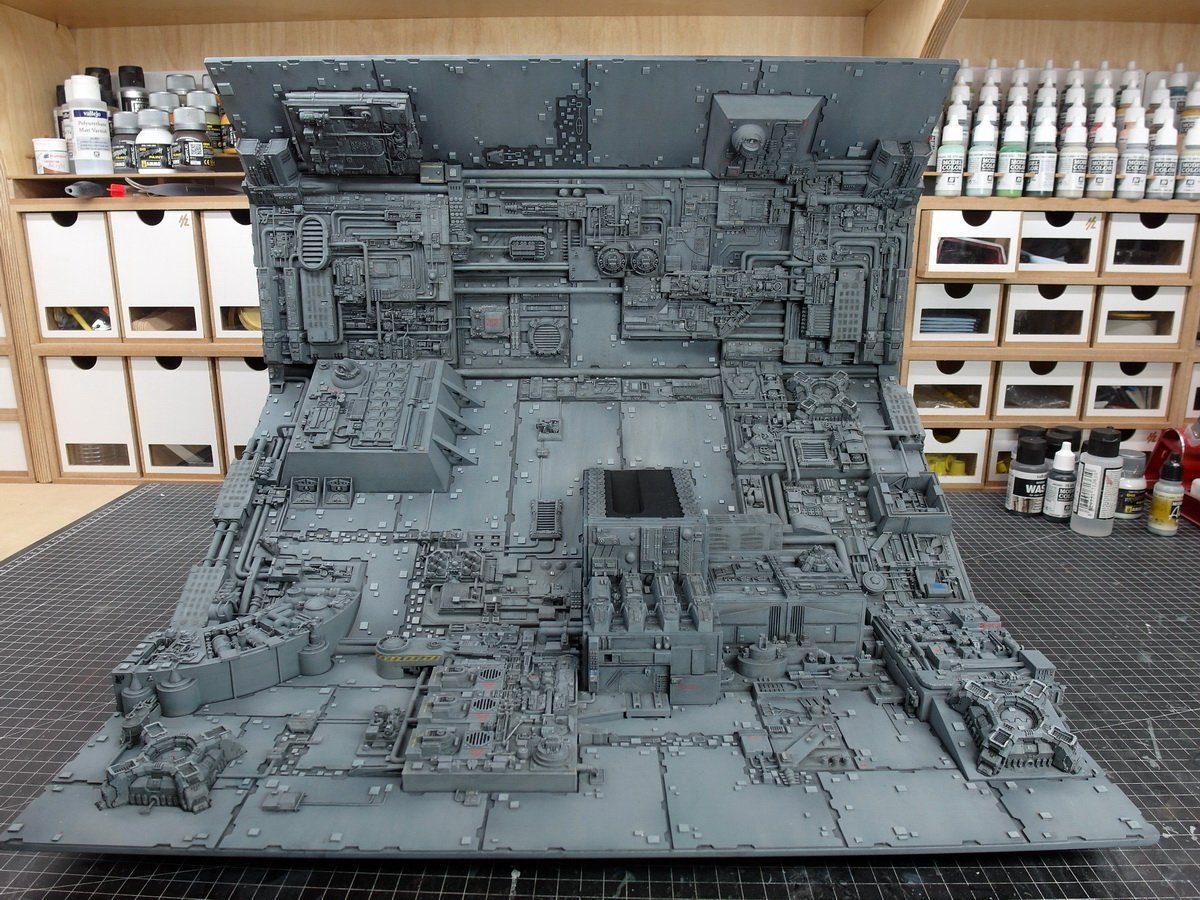
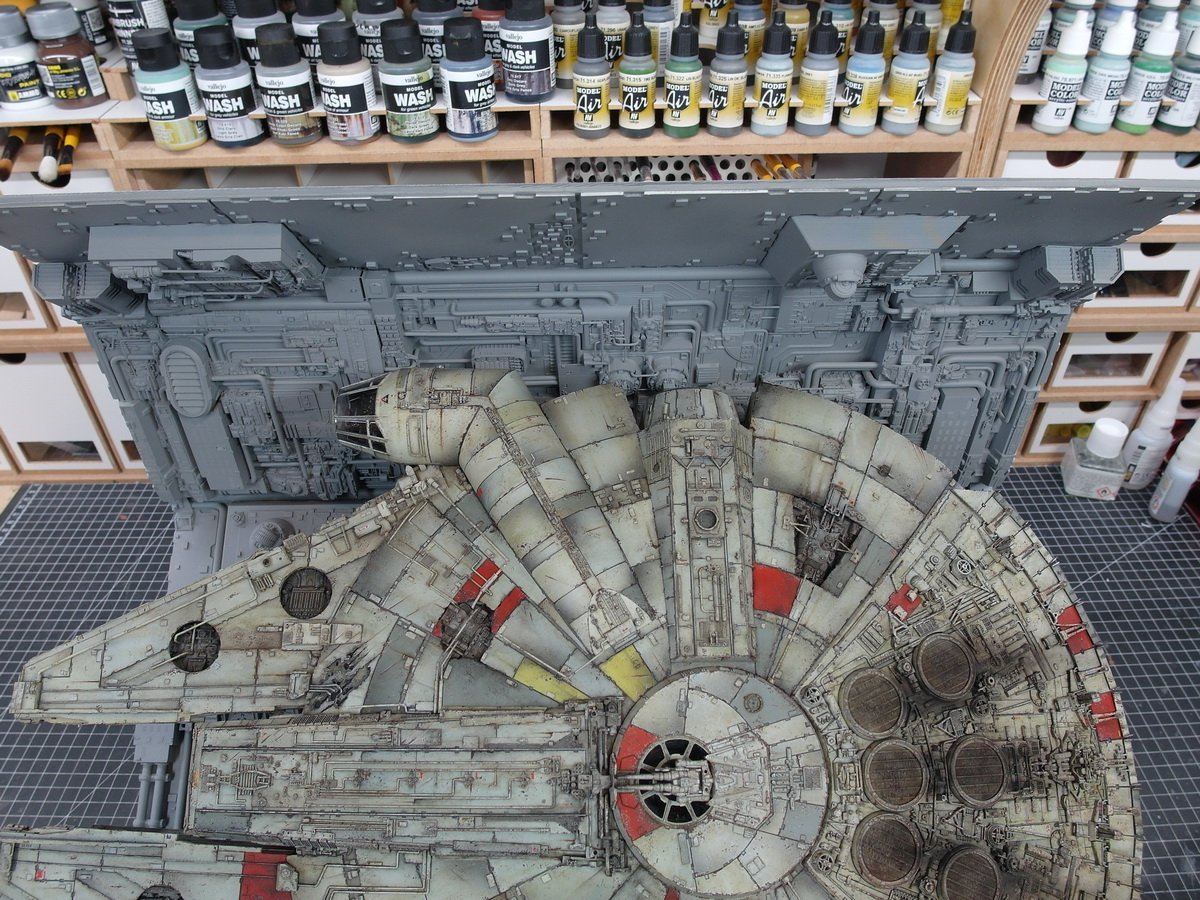
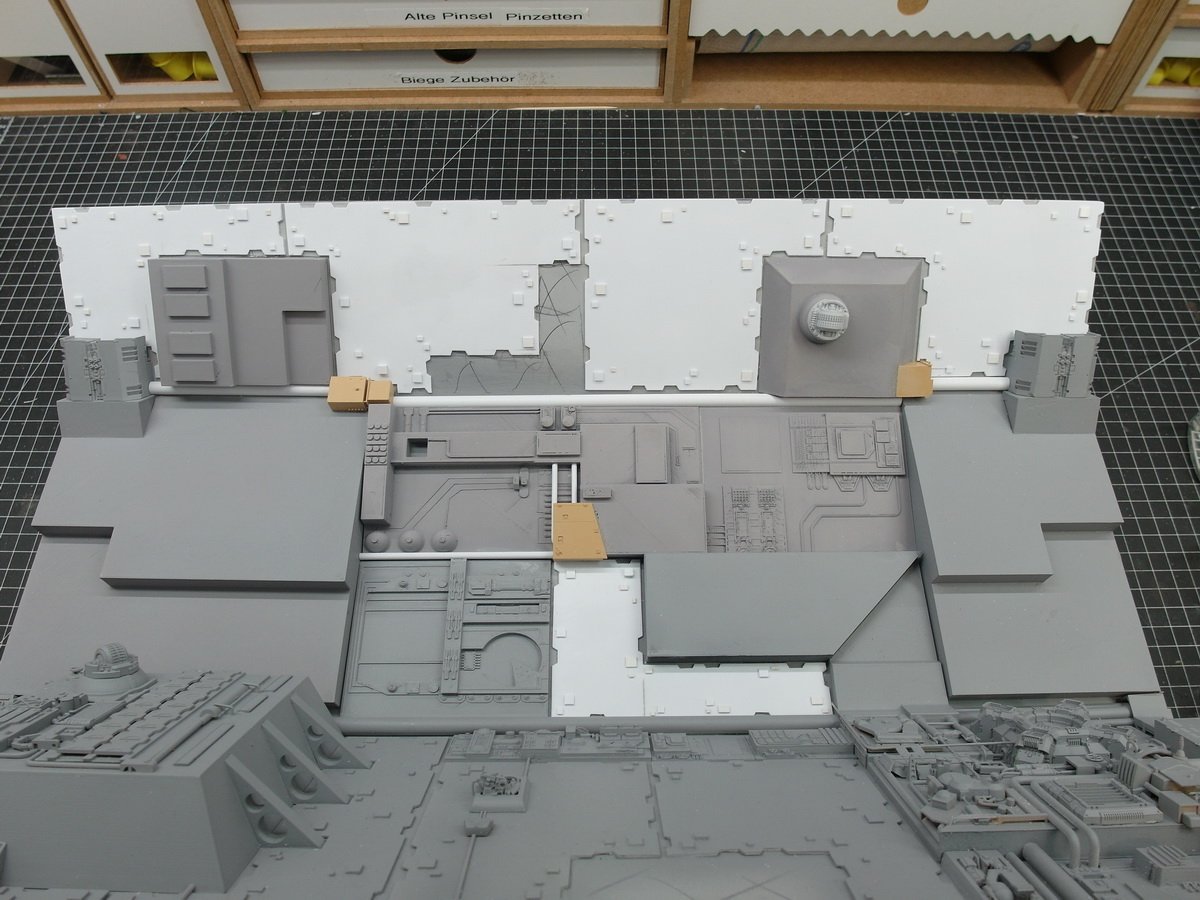
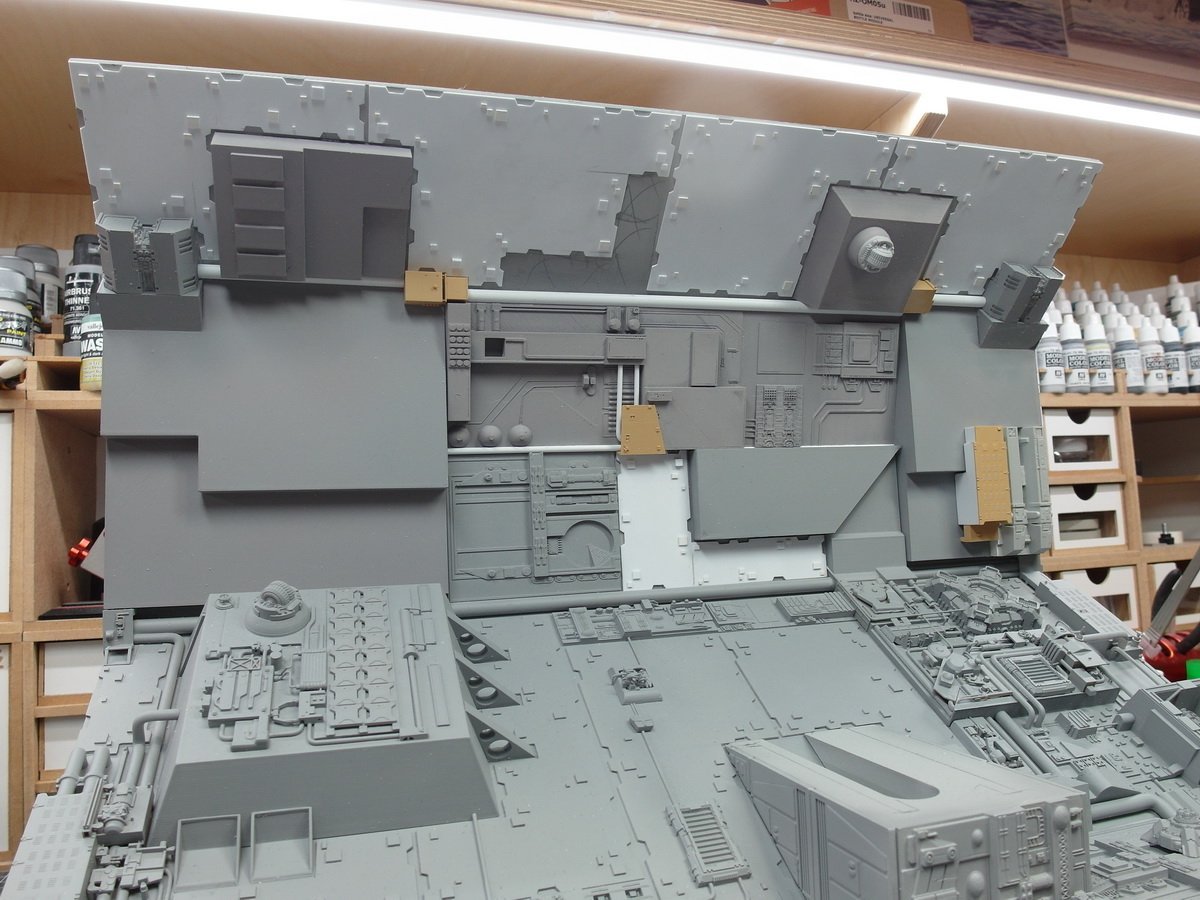
 And again a small update is inserted. I have installed the last big panel and the end is near… 🥳 First the locking mechanism for the maintenance hatch. It now closes tightly with two small, strong magnets. Preshading of the upper armor plates. Base coat on it. And here are the last two armor plates. Cut, cleaned and glued. At the top, the small squares have already been given their lighter base color to increase the contrast.
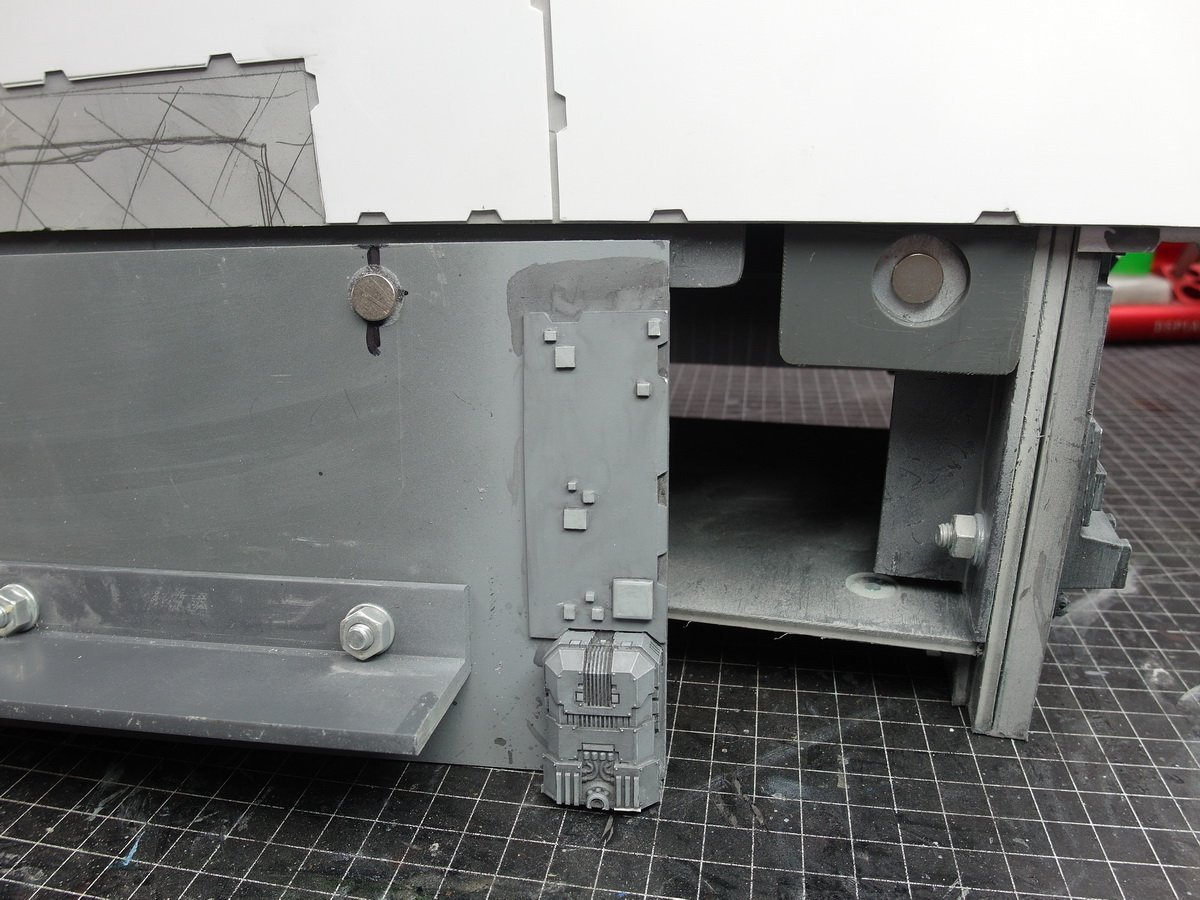
- 86 replies
-
- 10
-

-
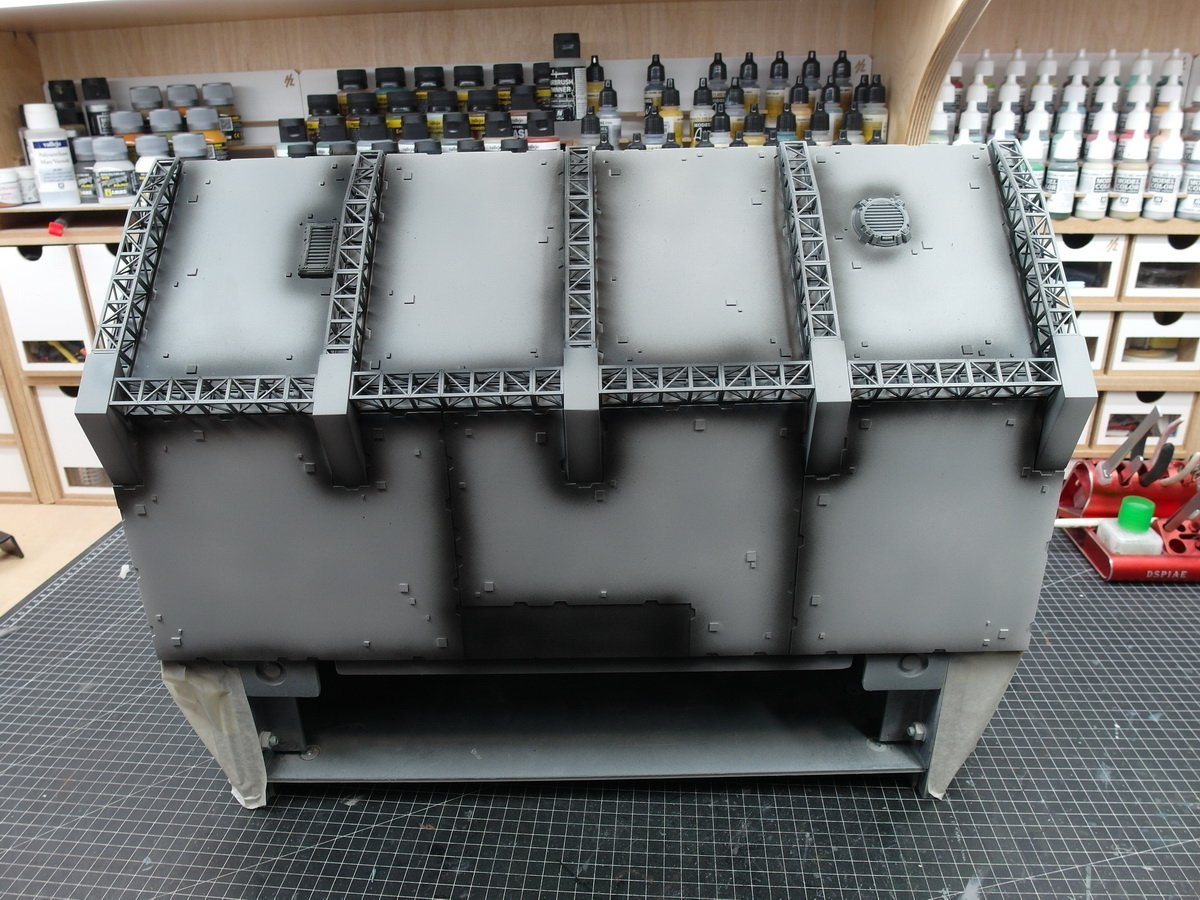
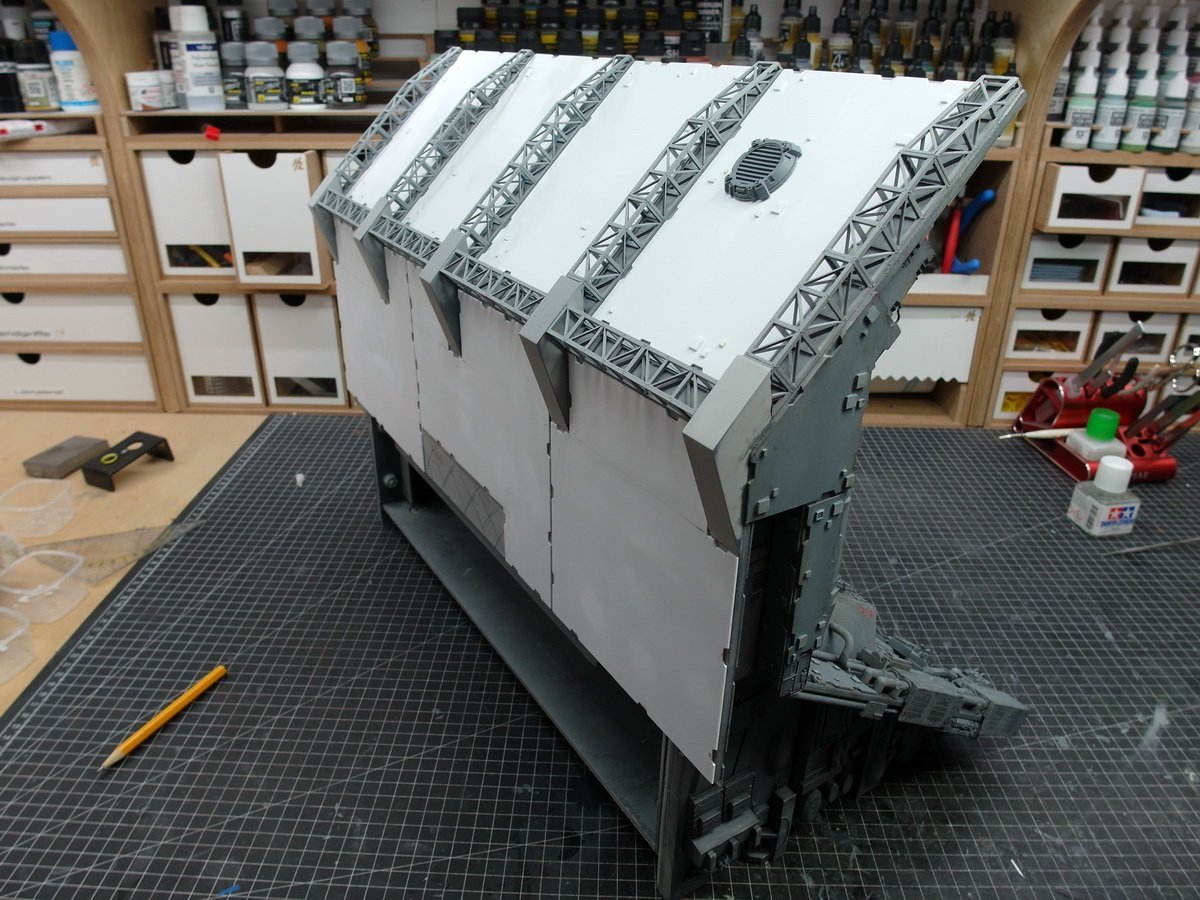
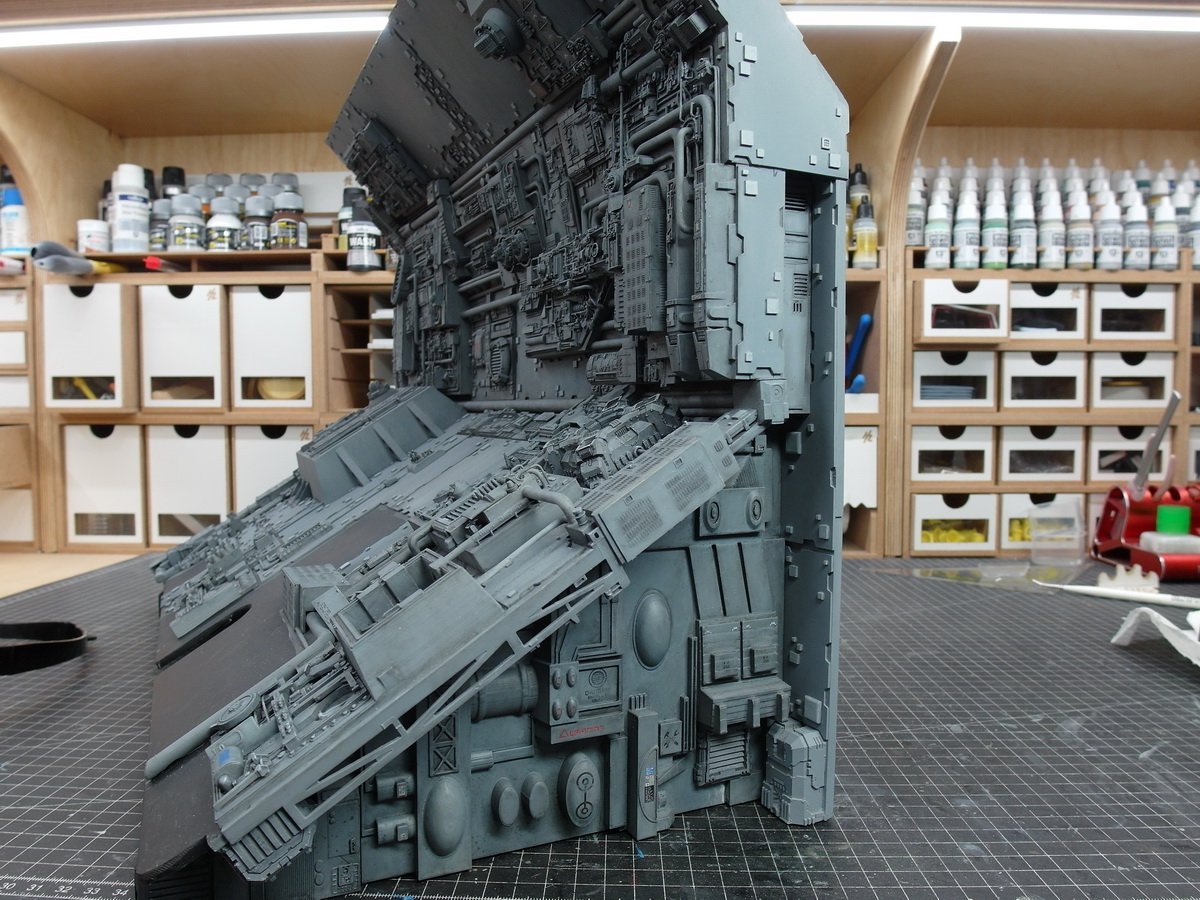
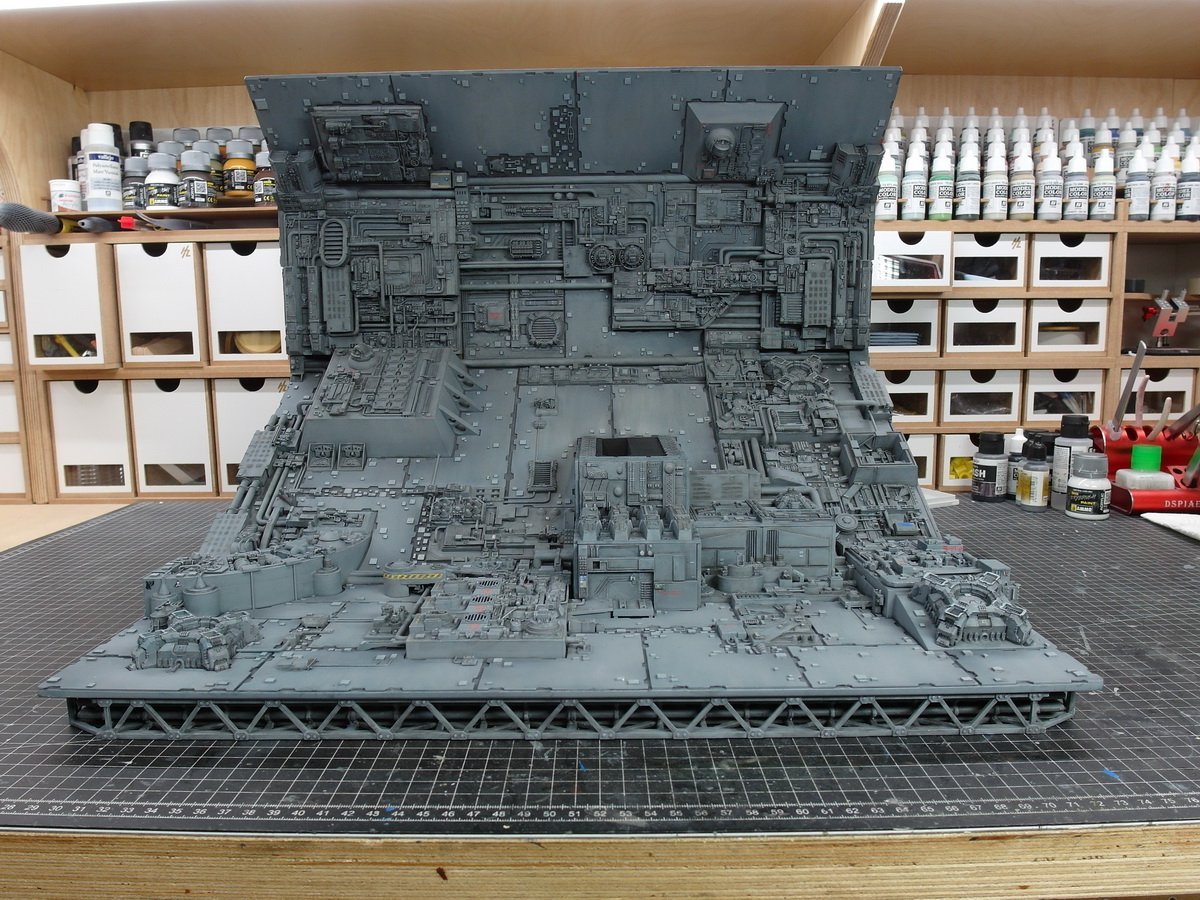
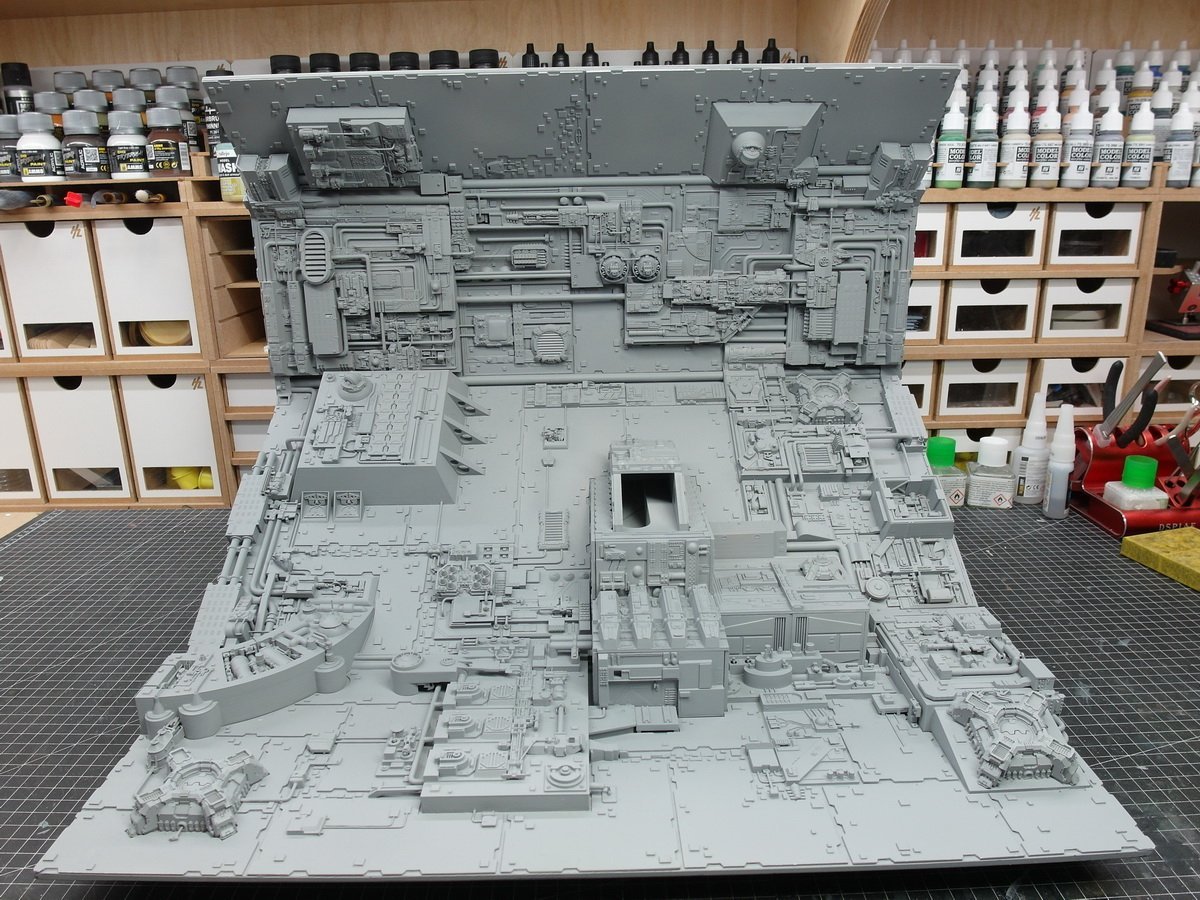
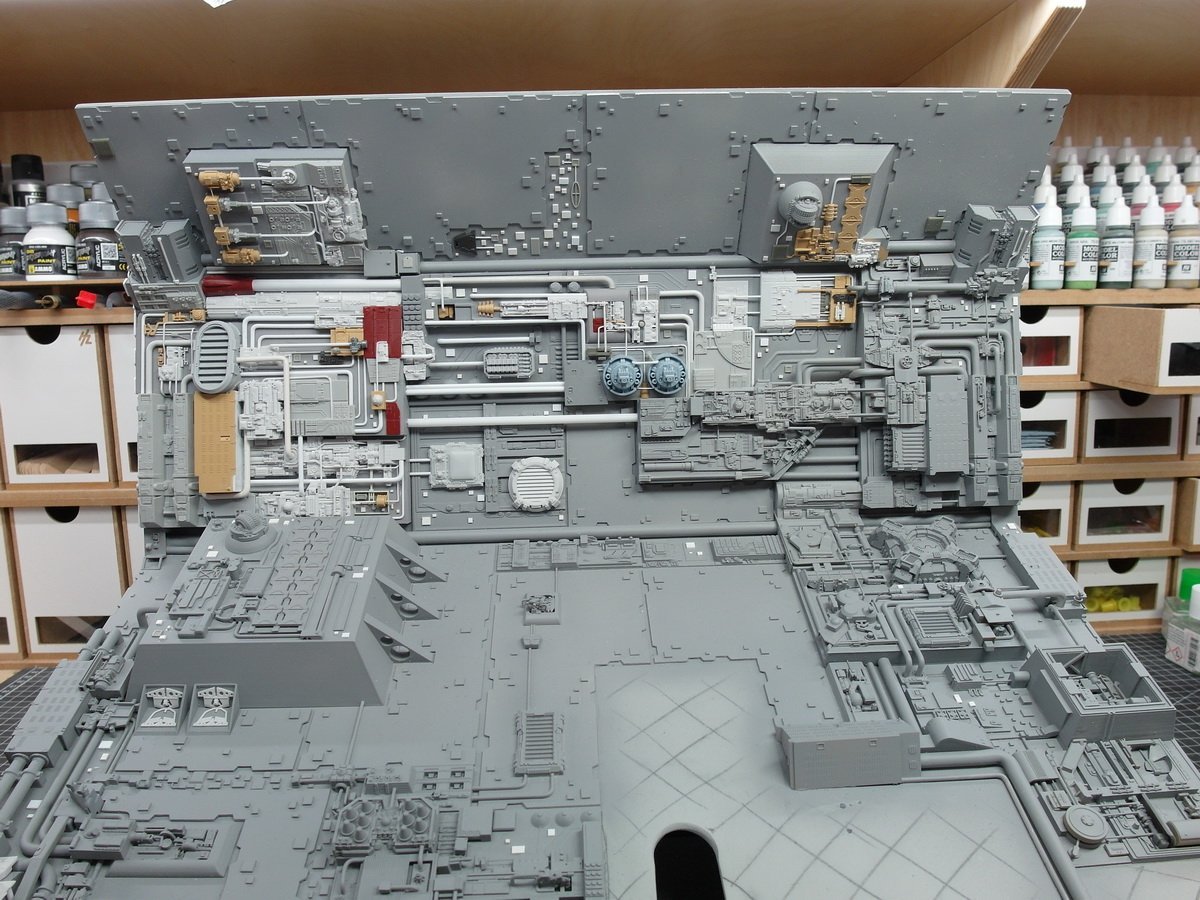
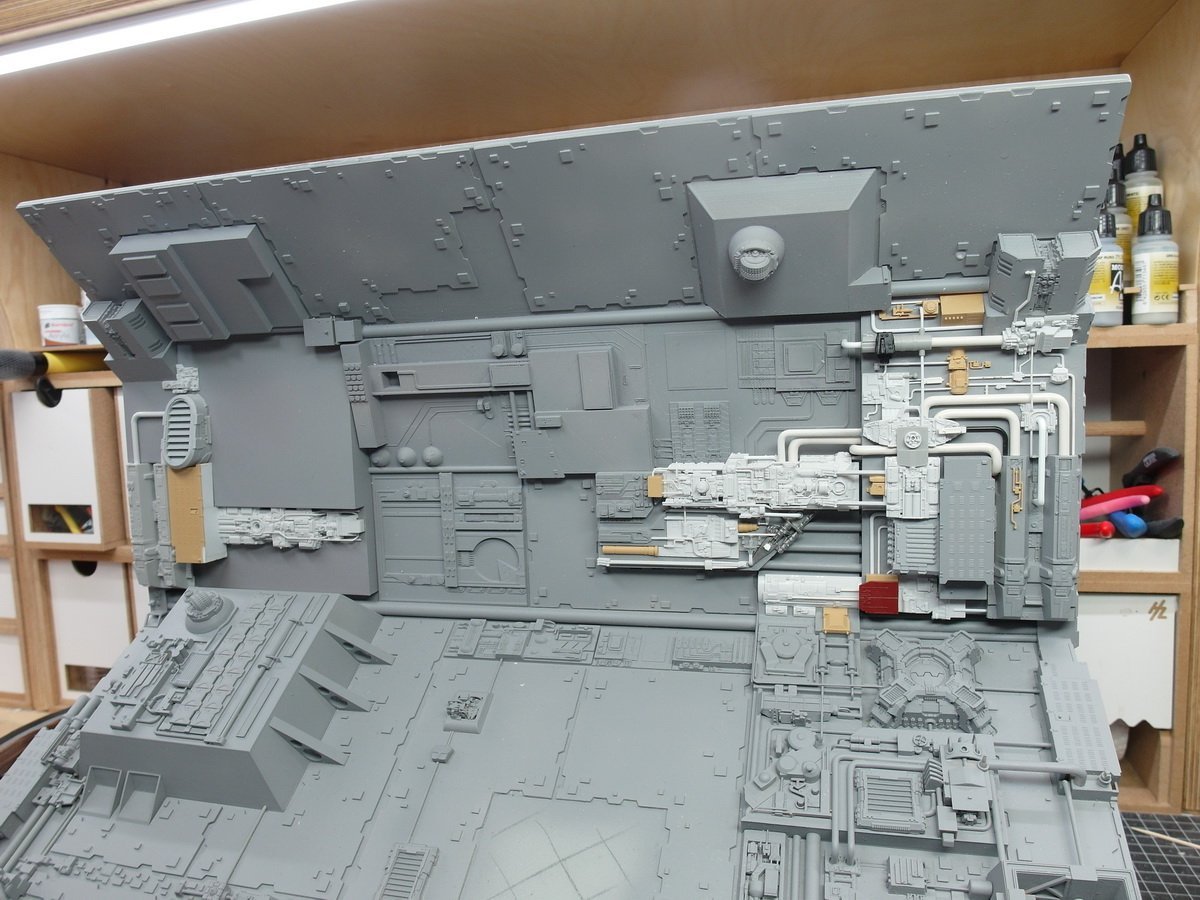
Thanks for your enthusiasm, Mike. You won't have to wait too long for the final result. Then I want to show you the results from this weekend. The back wall panels were still missing. Here I made it easy for myself with the extremely large units. You can hardly see any of it afterwards anyway. All the little squares are still missing. And the view from the front. The fan blades are mounted just above the large structures on the bottom. I think that rounds off the view of the top plate well. And now also the sofa. 😉

- 86 replies
-
- 12
-
-
I’m making good progress.
-
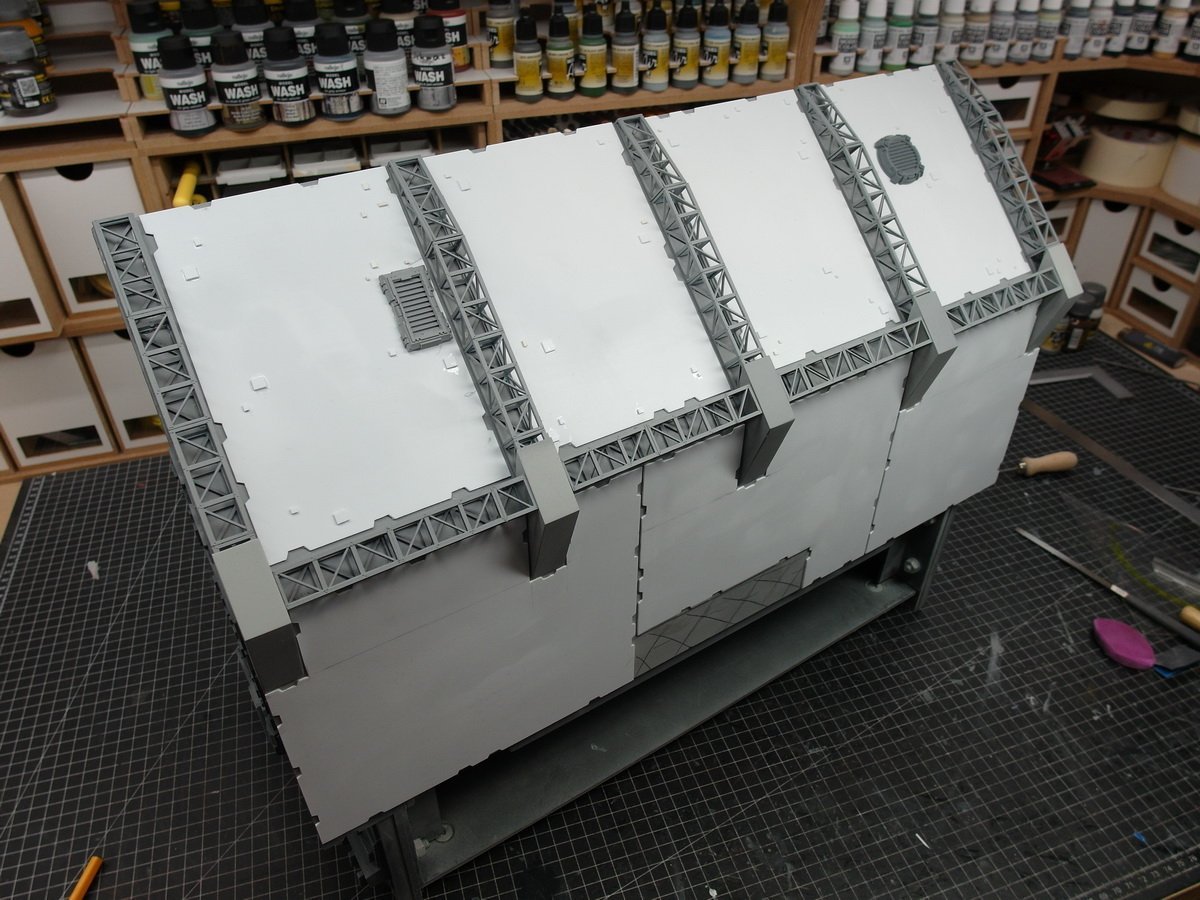
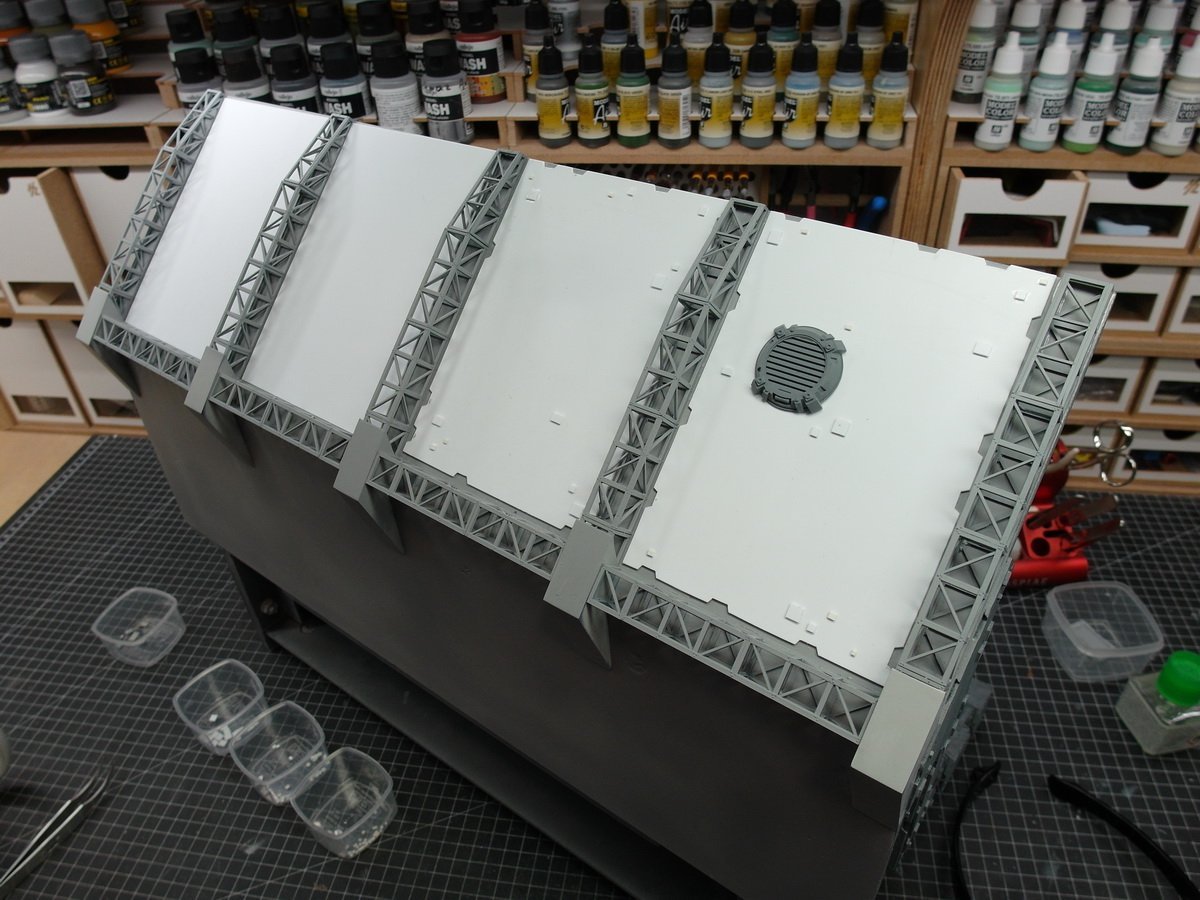
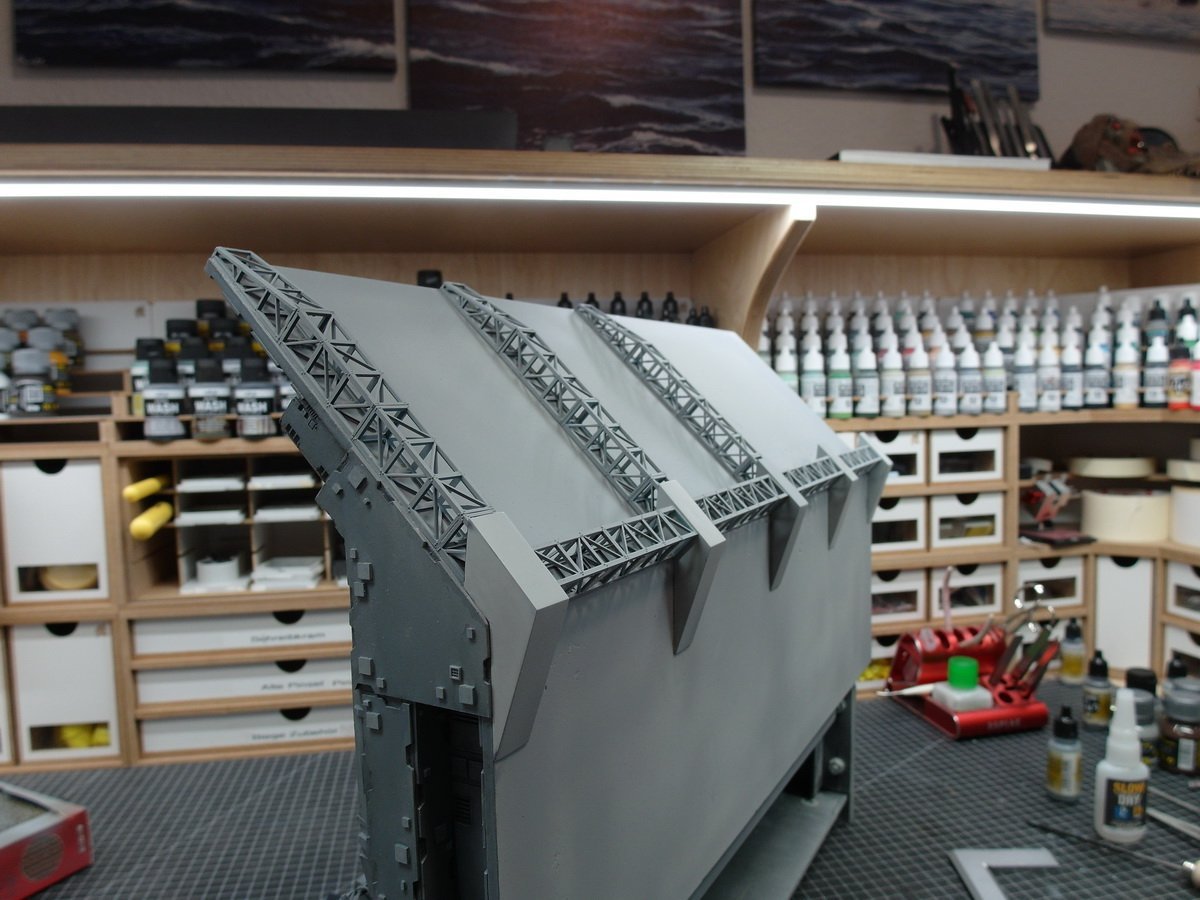
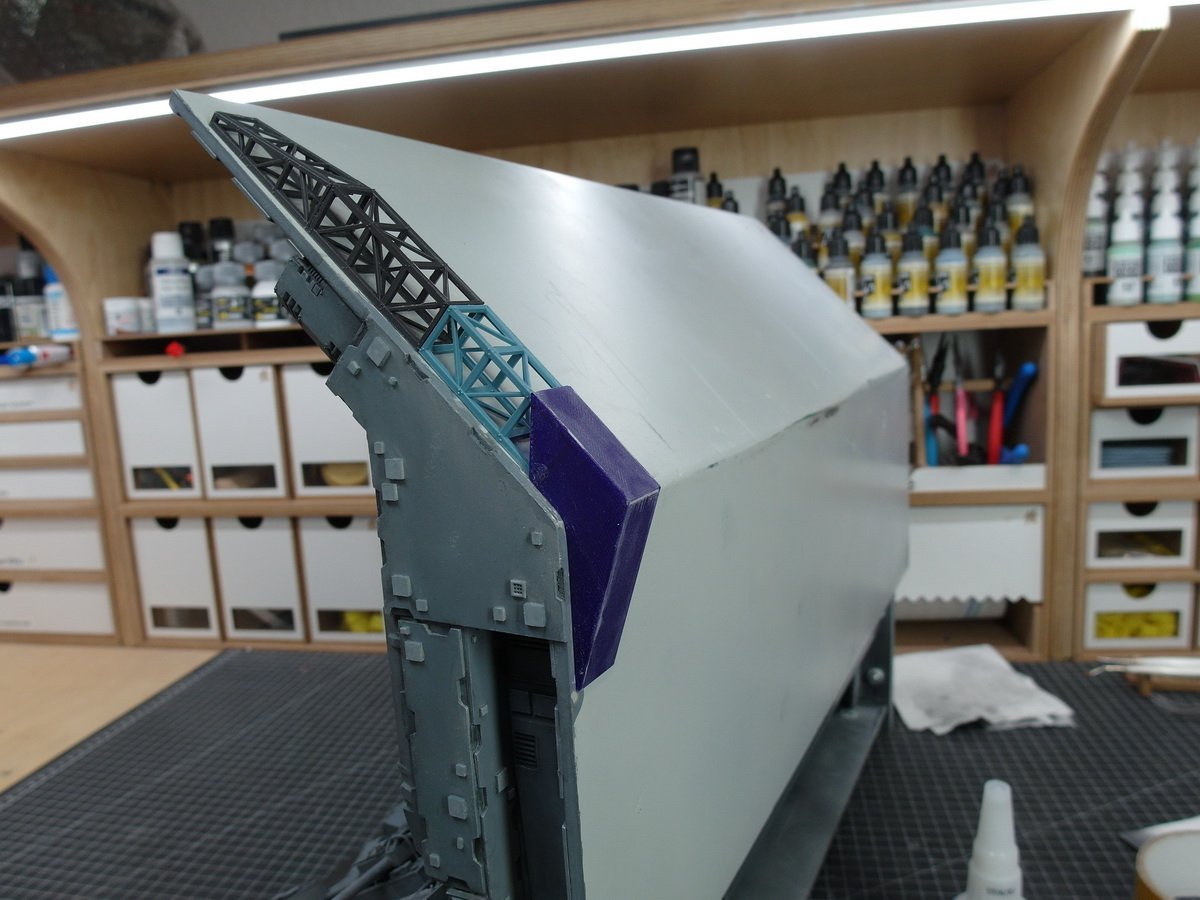
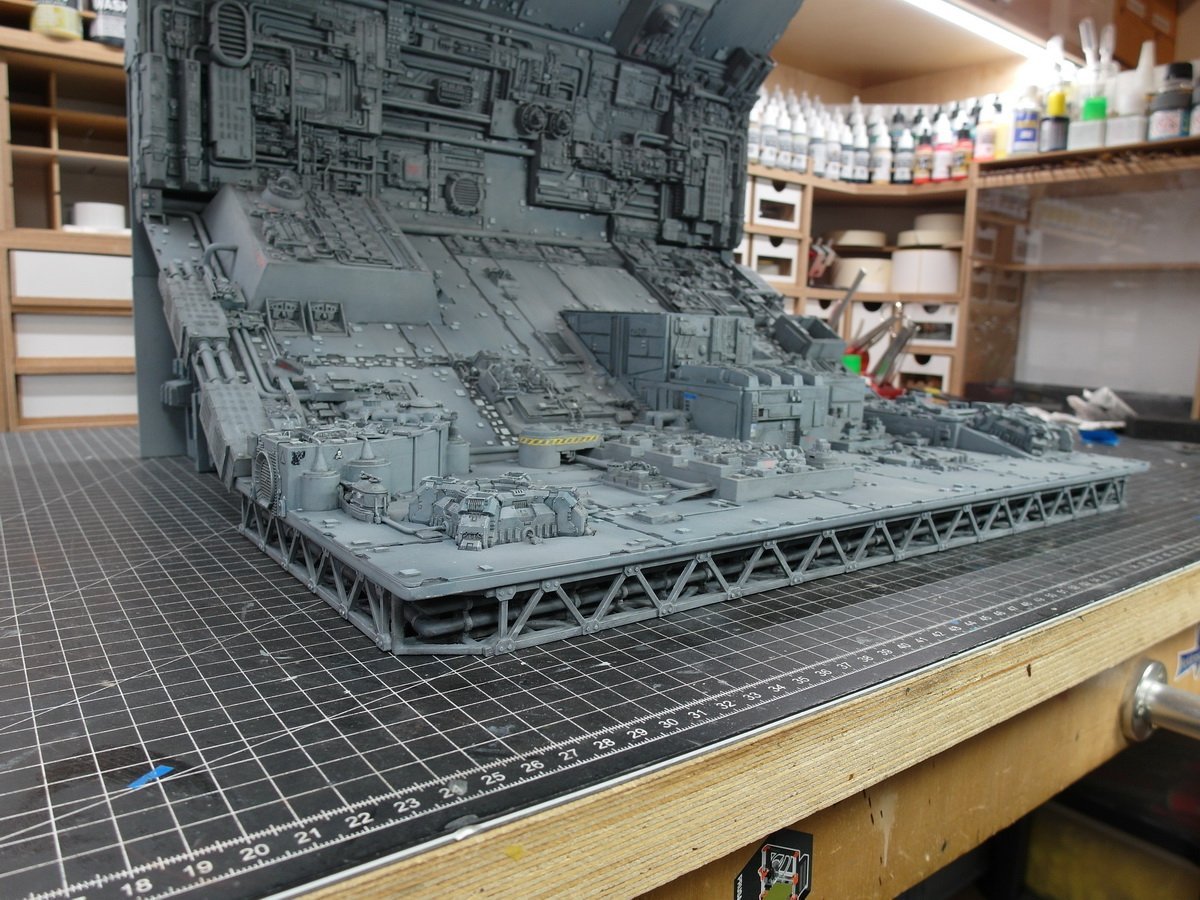
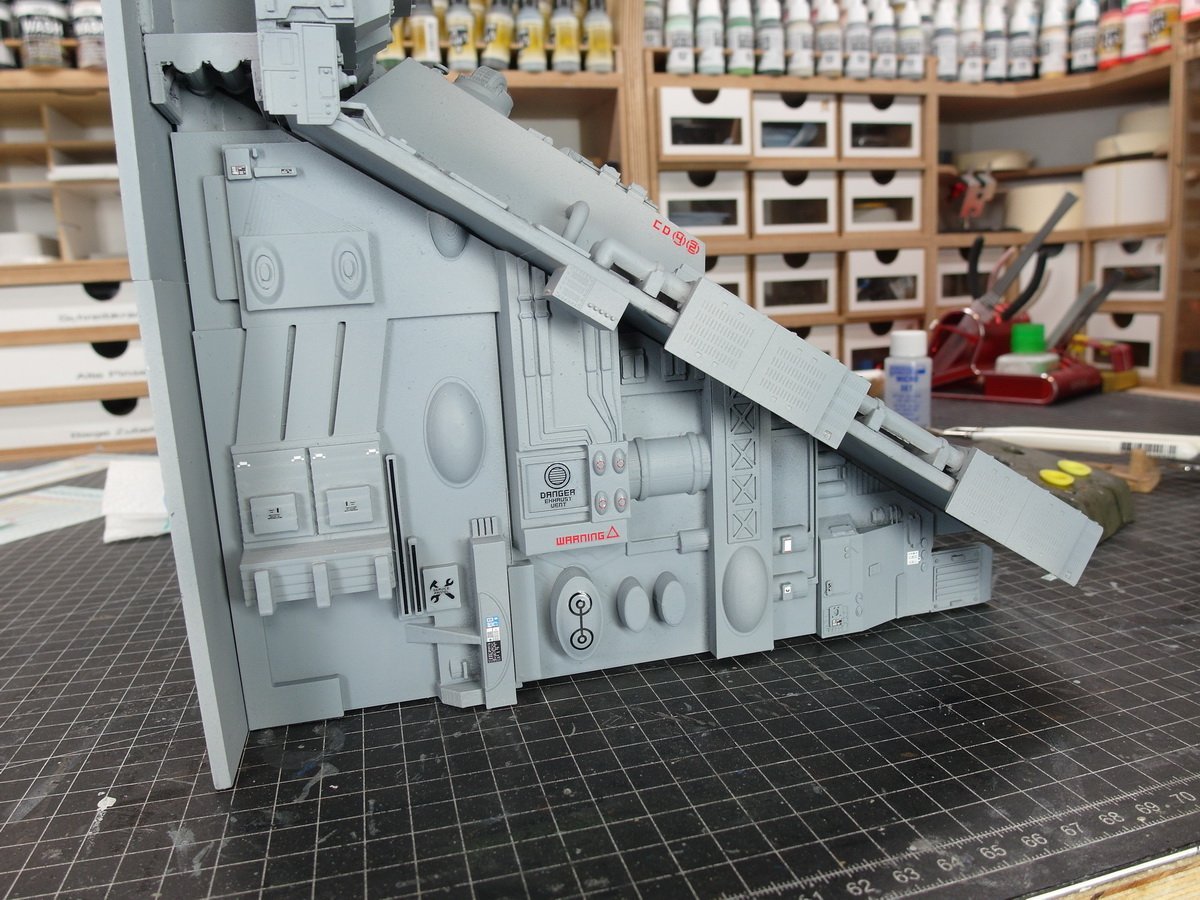
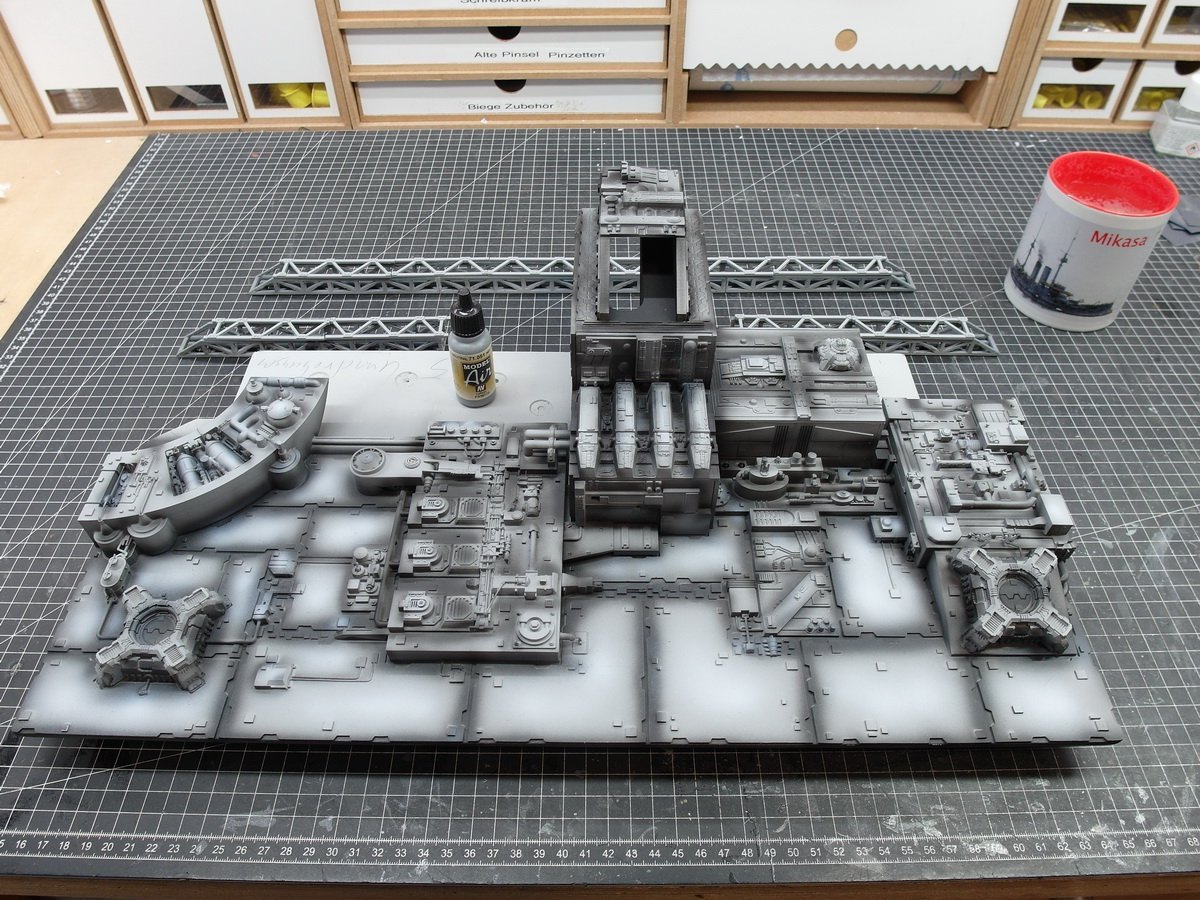
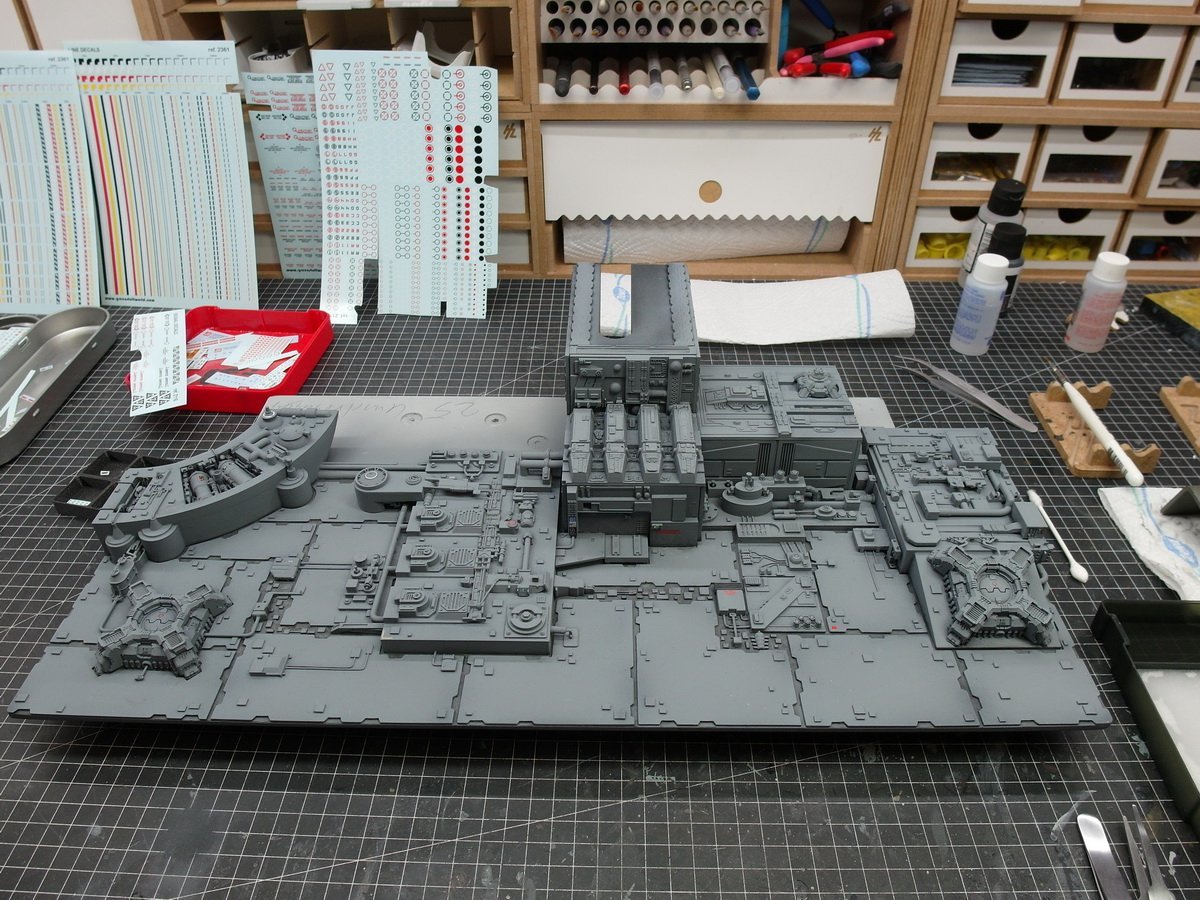
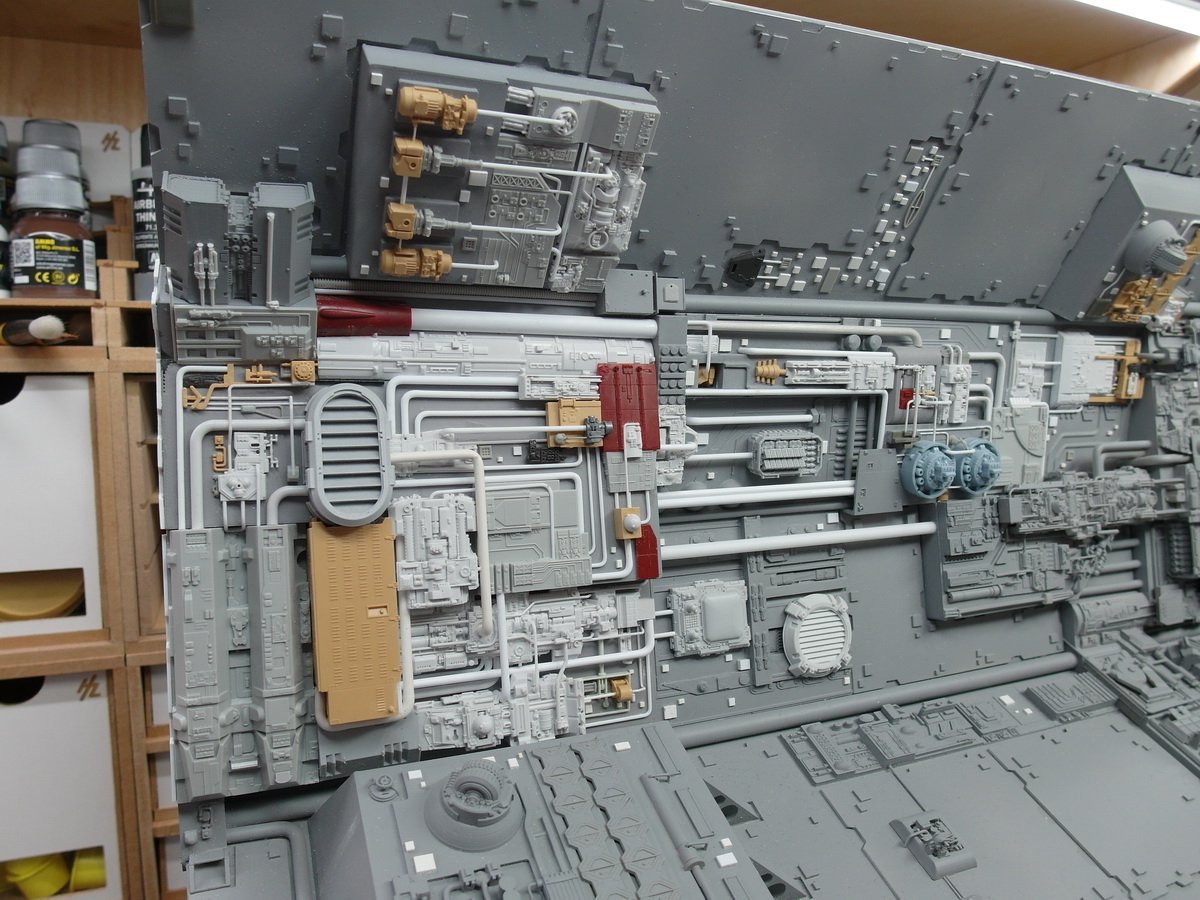
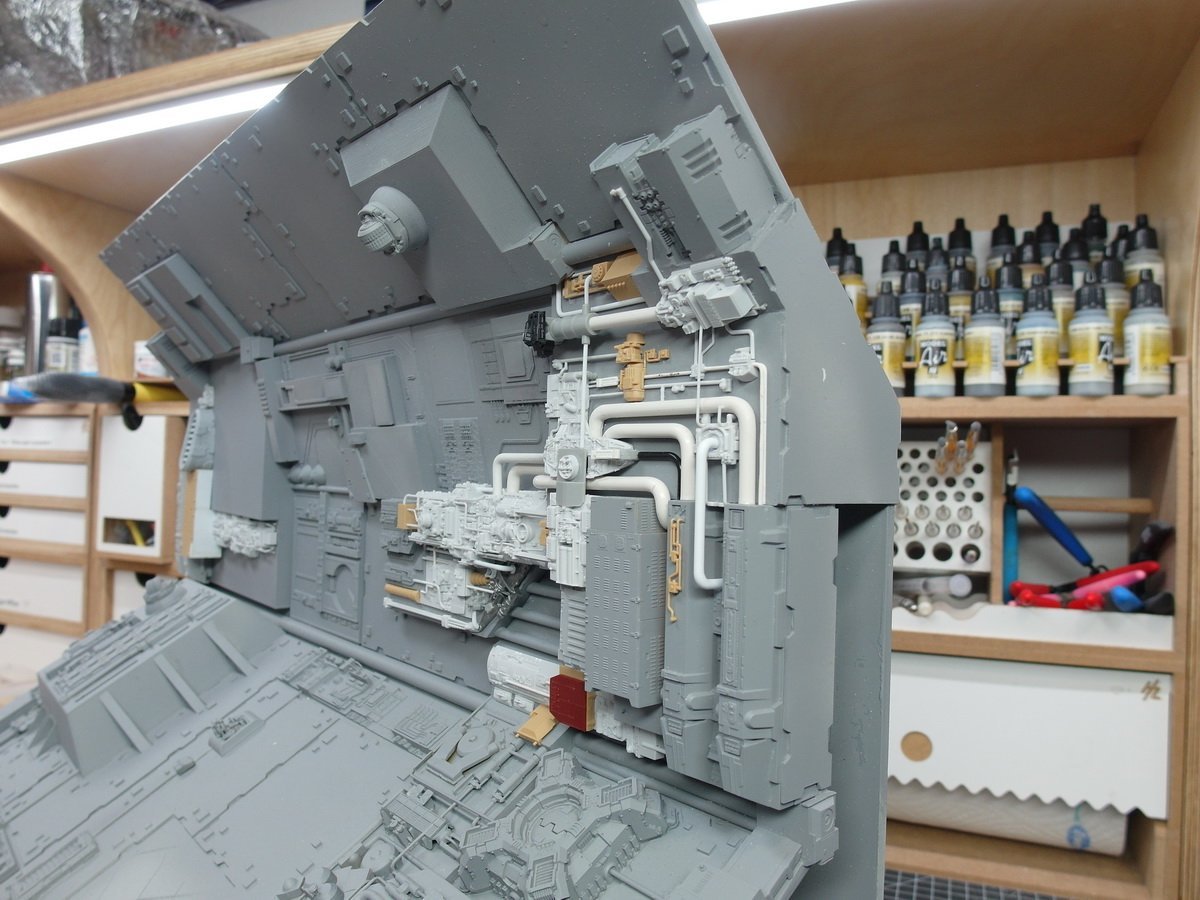
Another little update The steelwork supports are primed, glued and the left side is finished. Now the armor plates in between are missing. But it’s the weekend and I hope to have this section finished by Sunday.

- 86 replies
-
- 11
-
-

-
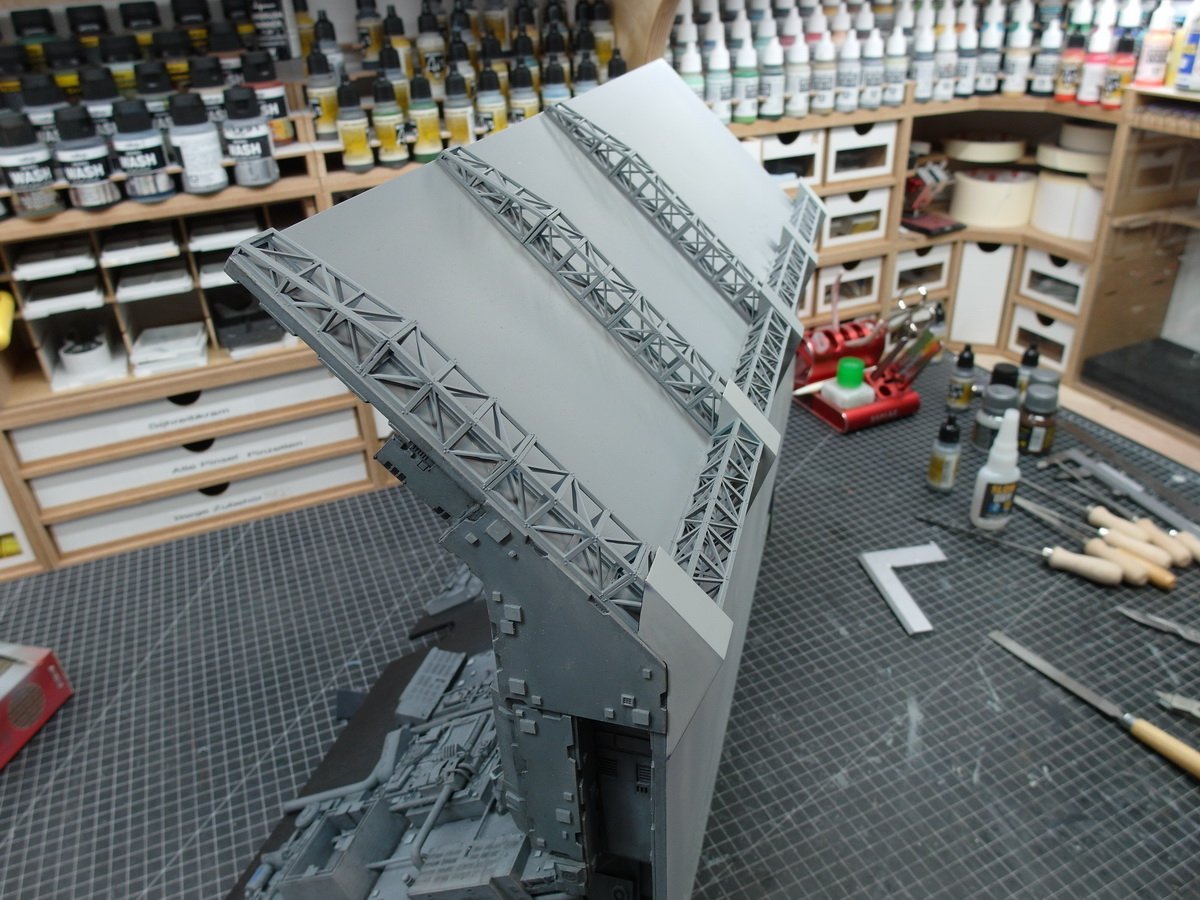
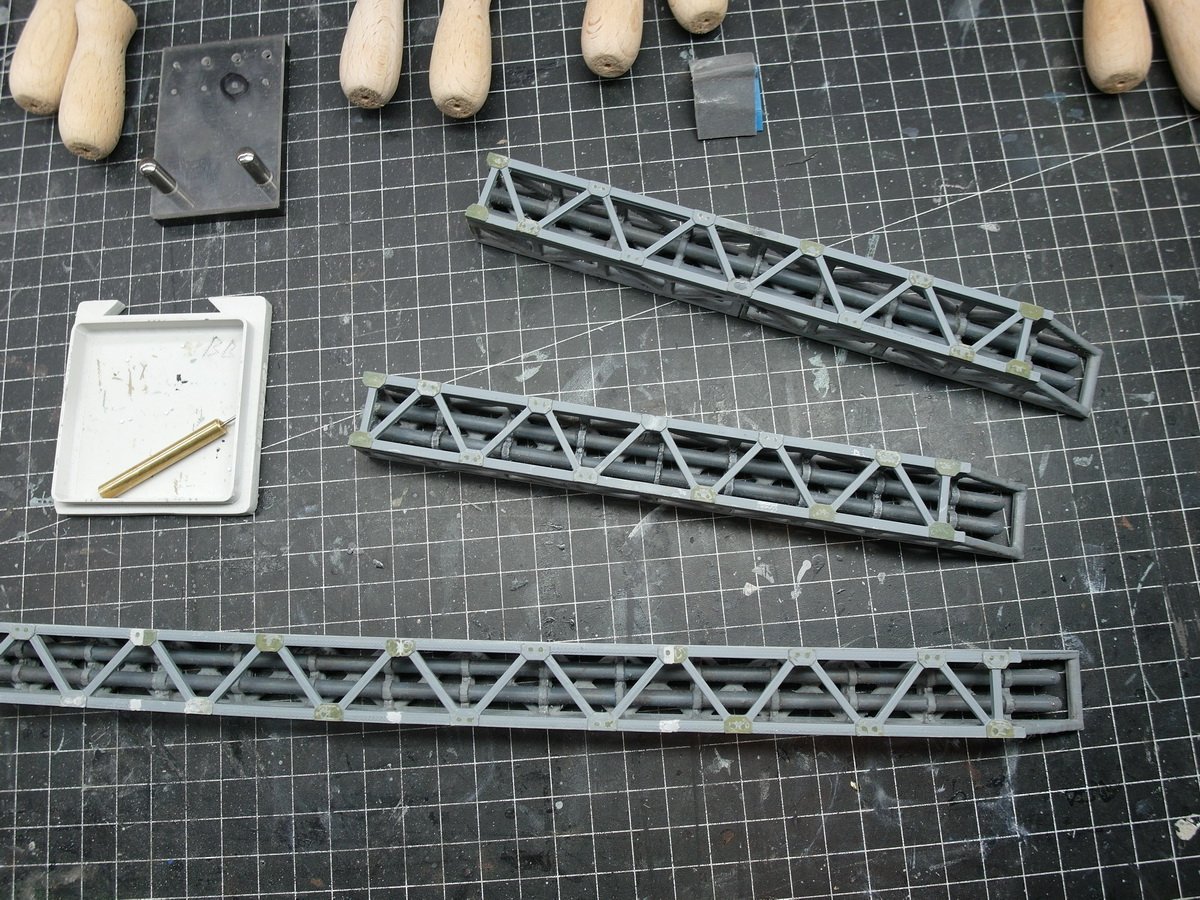
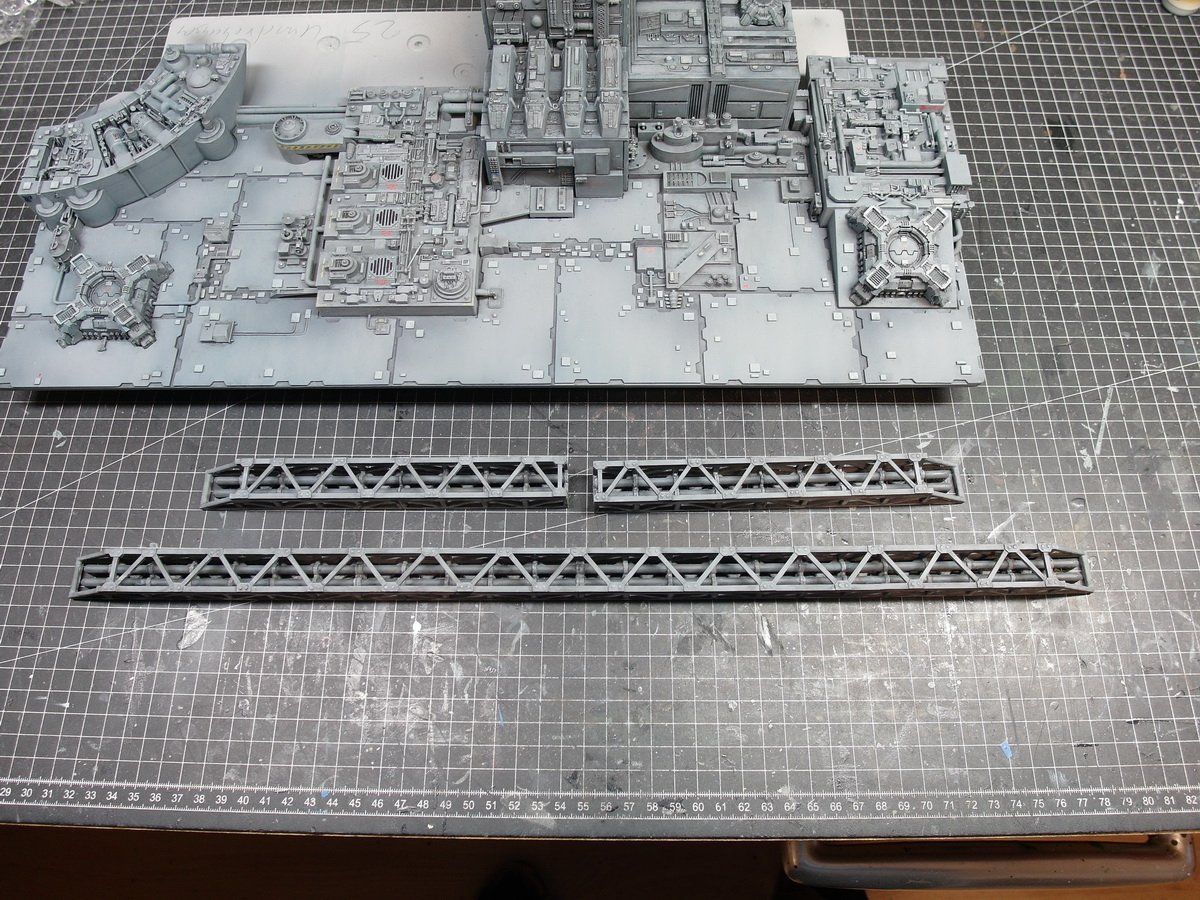
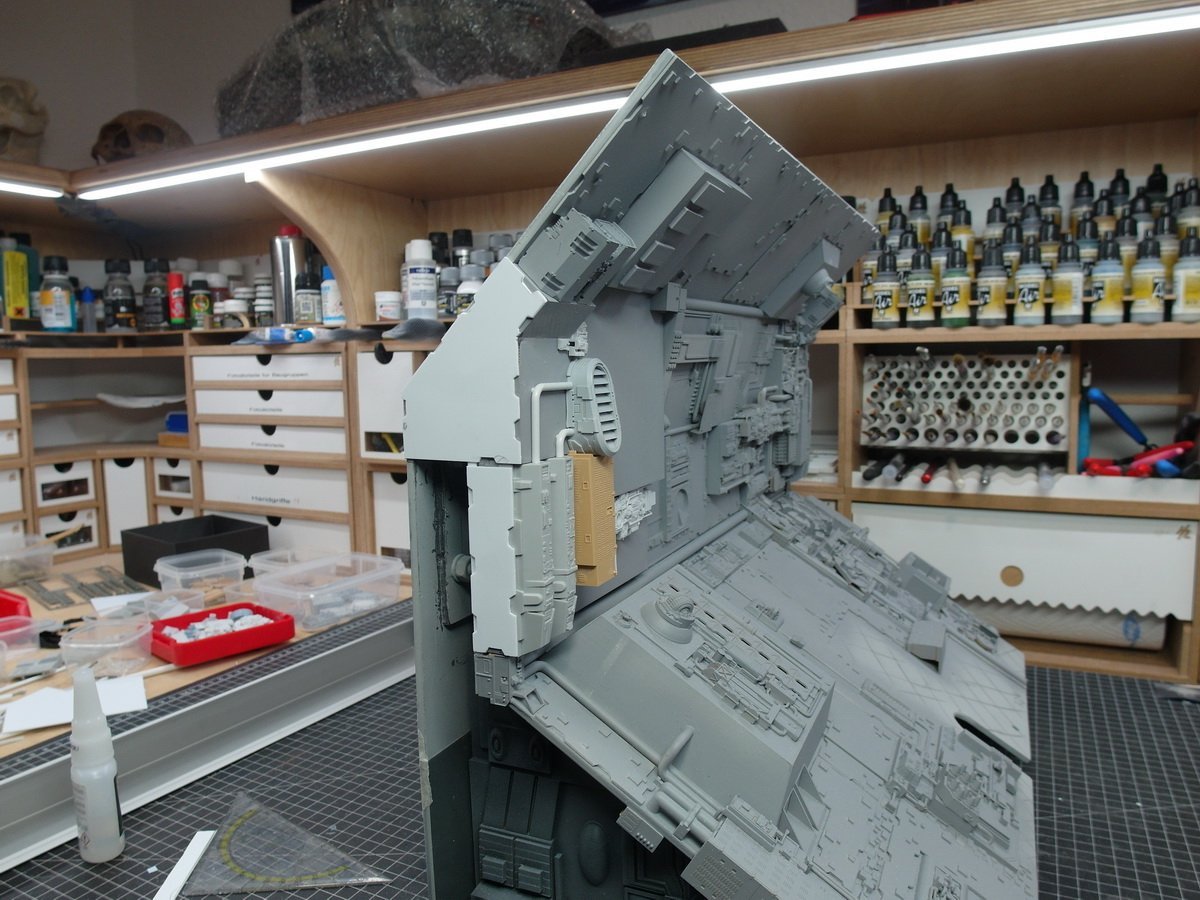
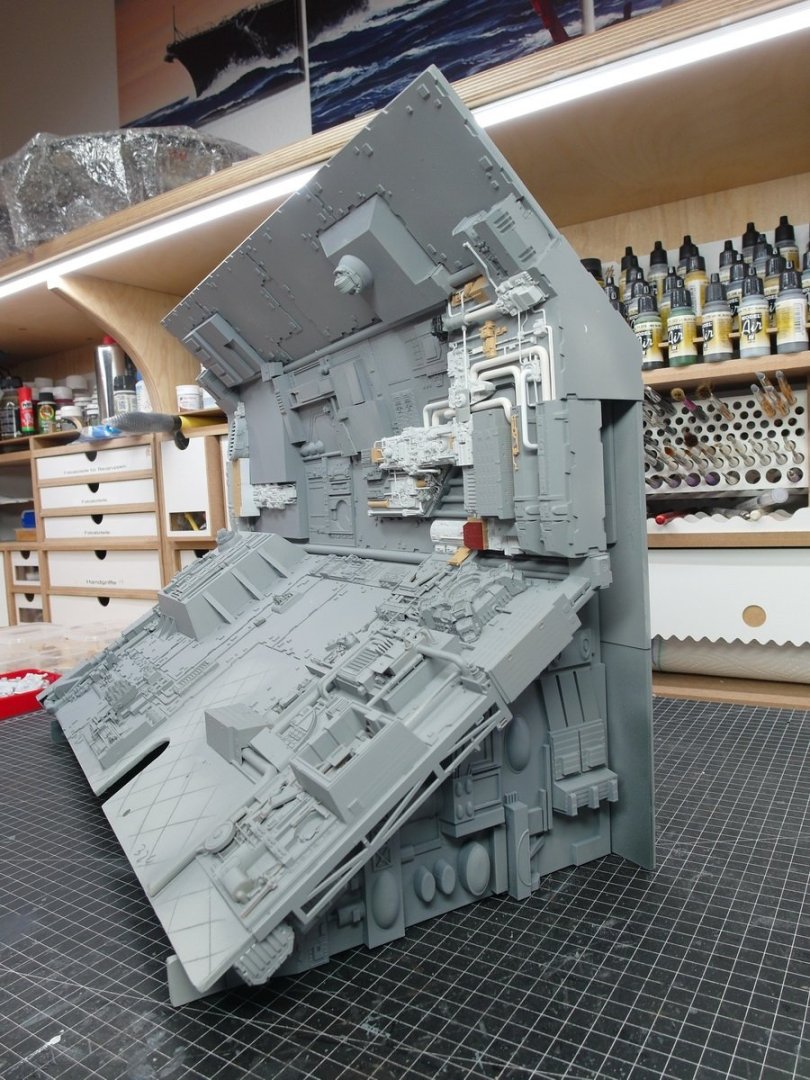
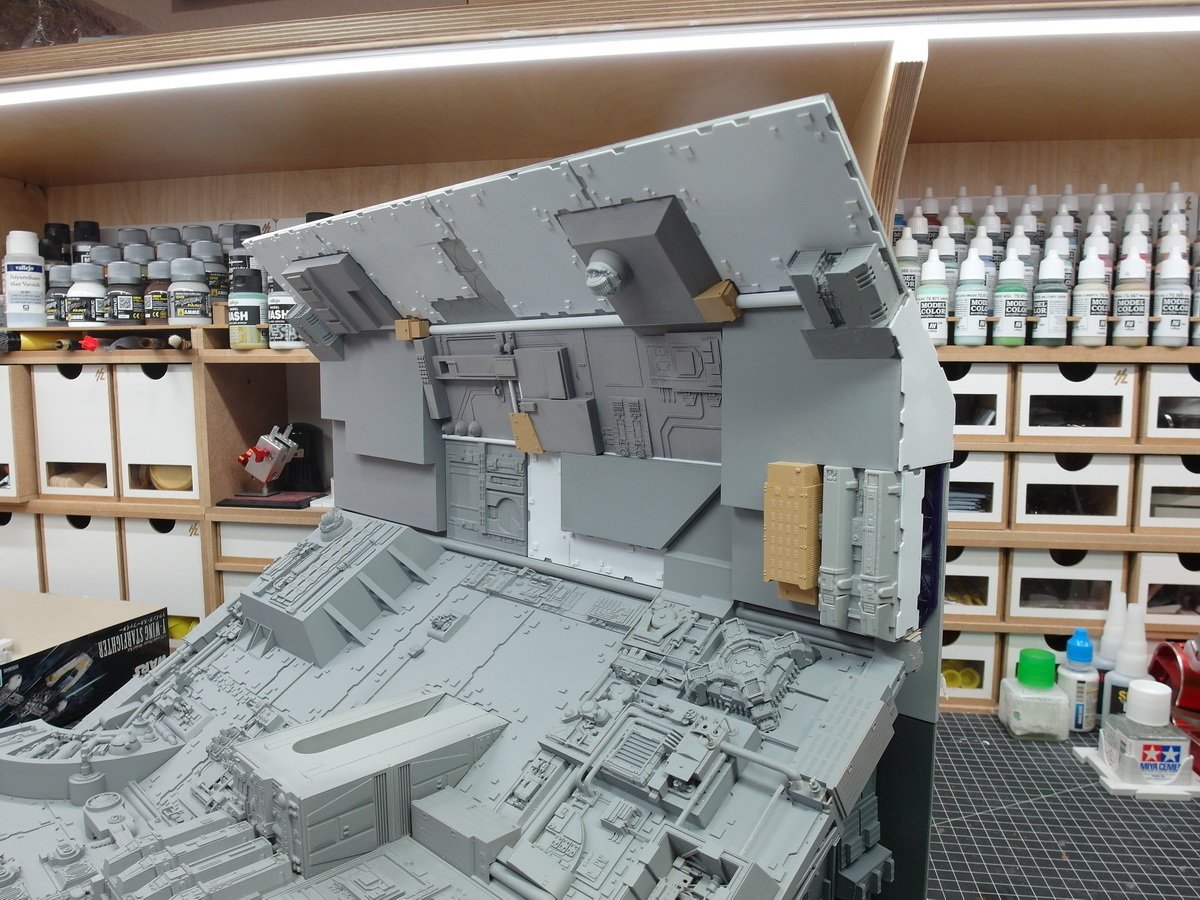
Today was construction day again. Not much will happen on the back wall of the diorama, as you can only see a little of it. The surface will probably mainly be decorated with large armor plates. Only on the sloping top plate should a little structure round the whole thing off. That’s why I got a few delicate steelwork girders from the railway model making sector, which are supposed to end in a bracket I printed. The first prototype. I will then distribute four or five units of these over the area and also lay armor plates in between.
- 86 replies
-
- 10
-
-
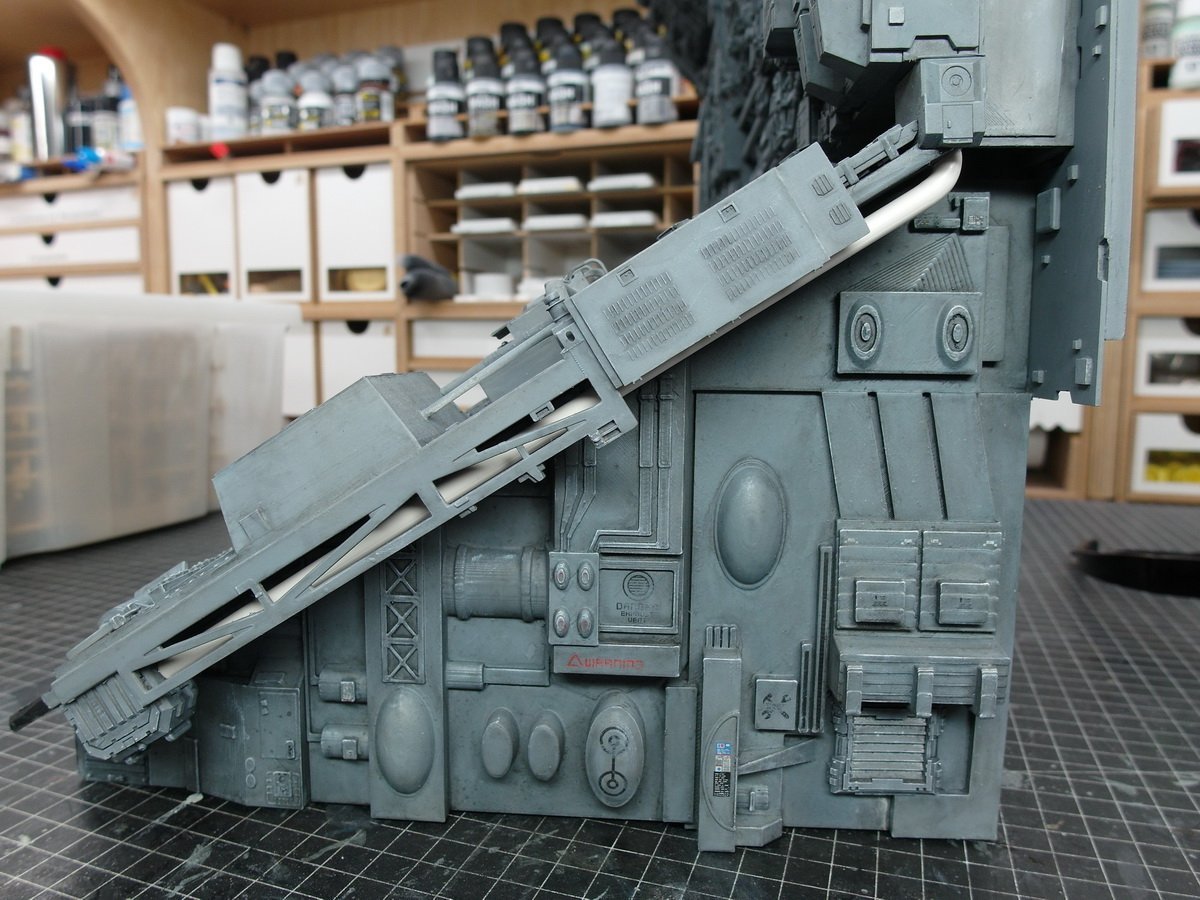
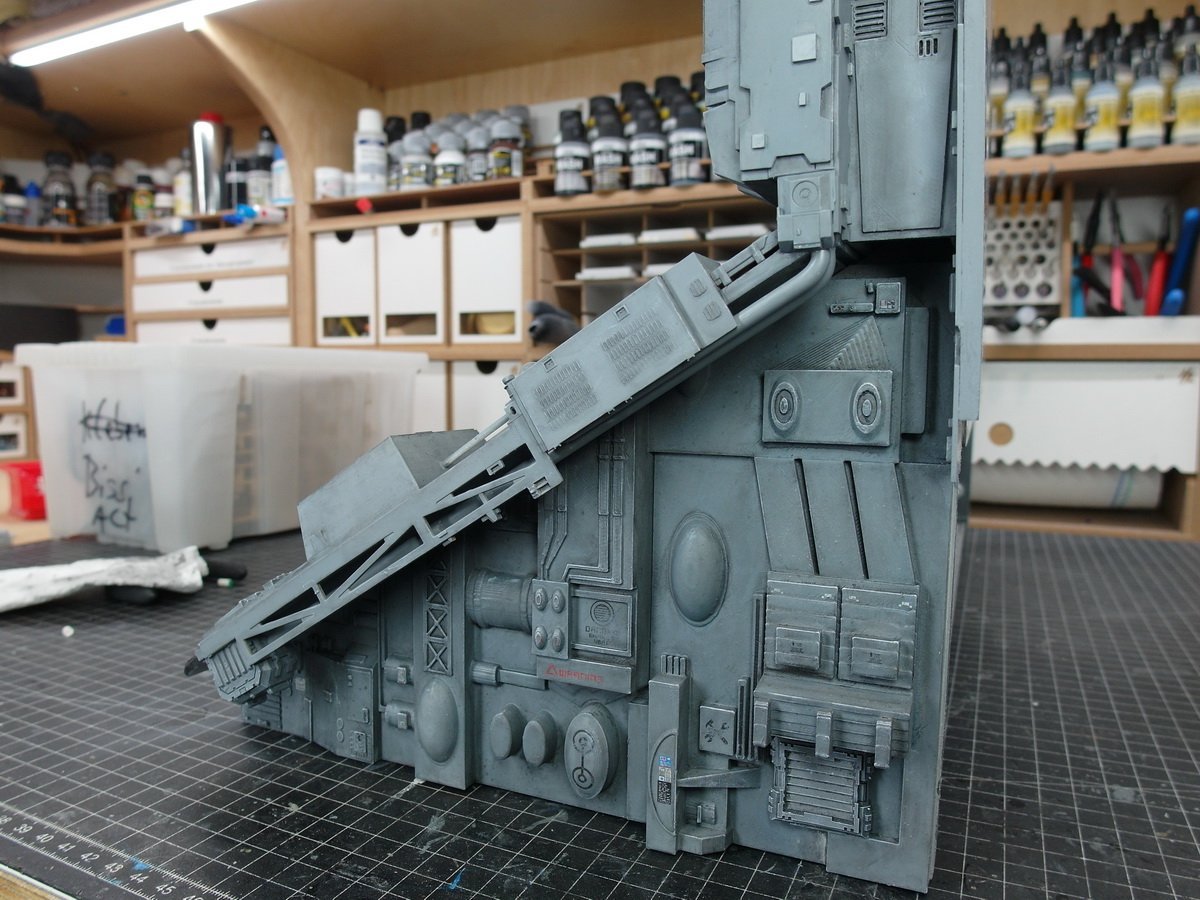
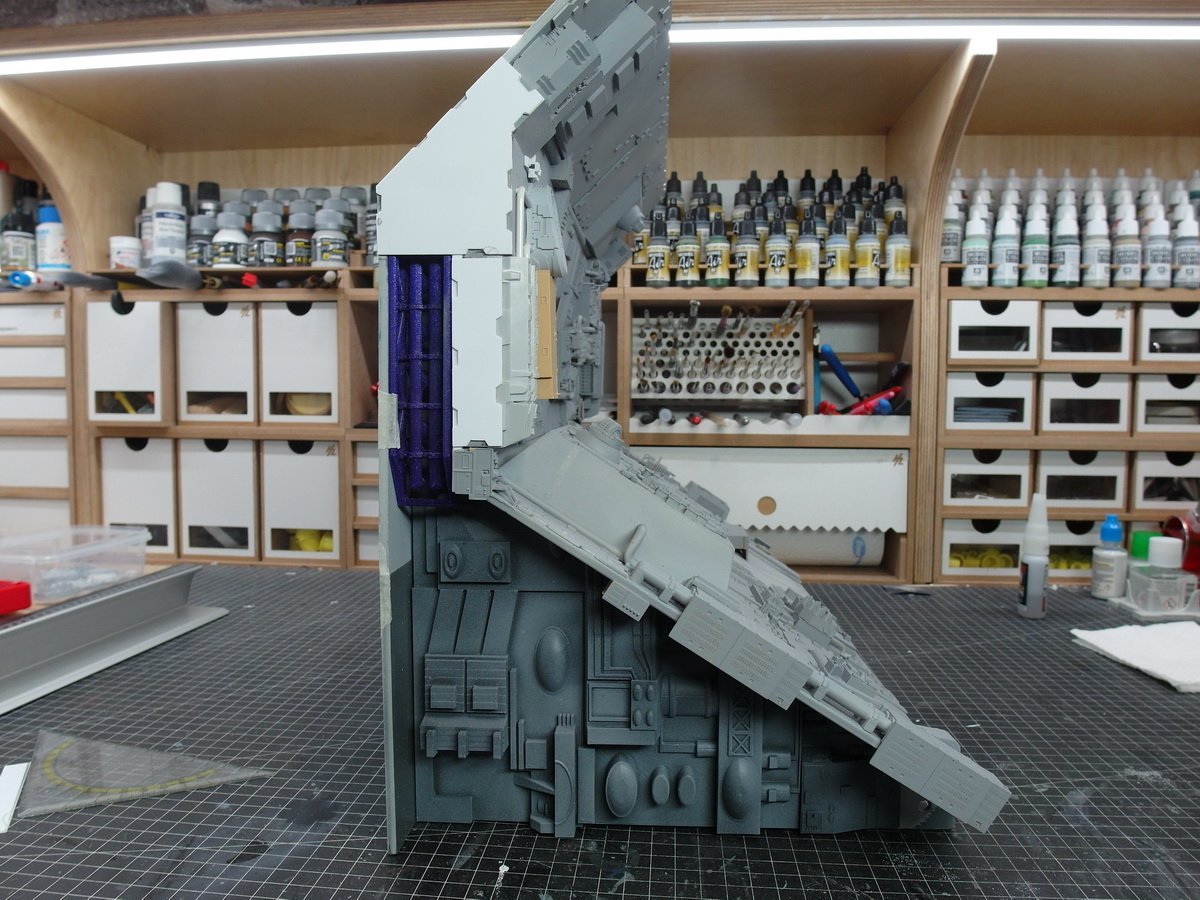
Do you know that?! The pages are finished…pffff…whatever. 🤪 When I looked at the Dio from behind, something was missing. It still needed a little more substance. And with this technical surface, what’s better than pipes? That’s right, more plumbing. So I took out the hot air dryer again and quickly made some. I put another one in front of it and now it’s more consistent on the sides in my opinion. Now just need to be aged.
- 86 replies
-
- 11
-
-
-
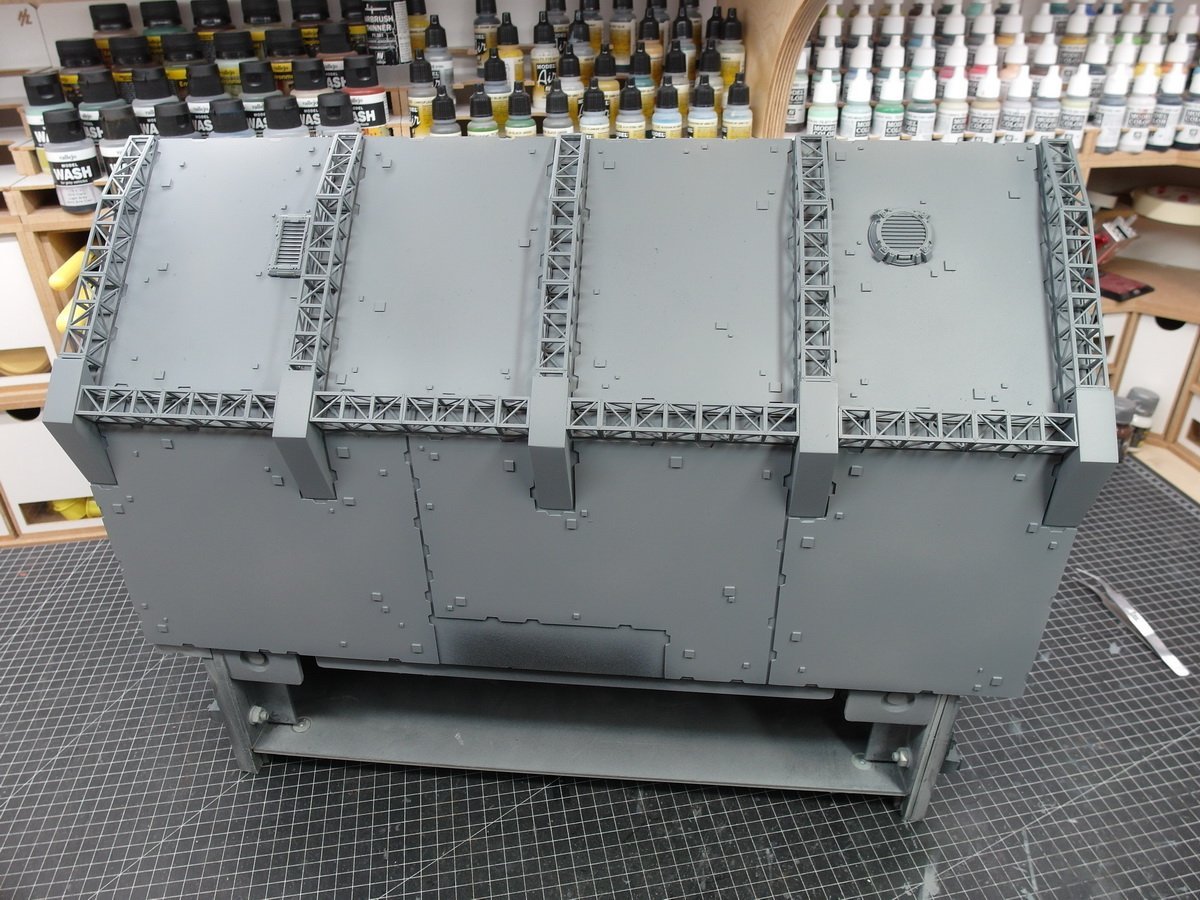
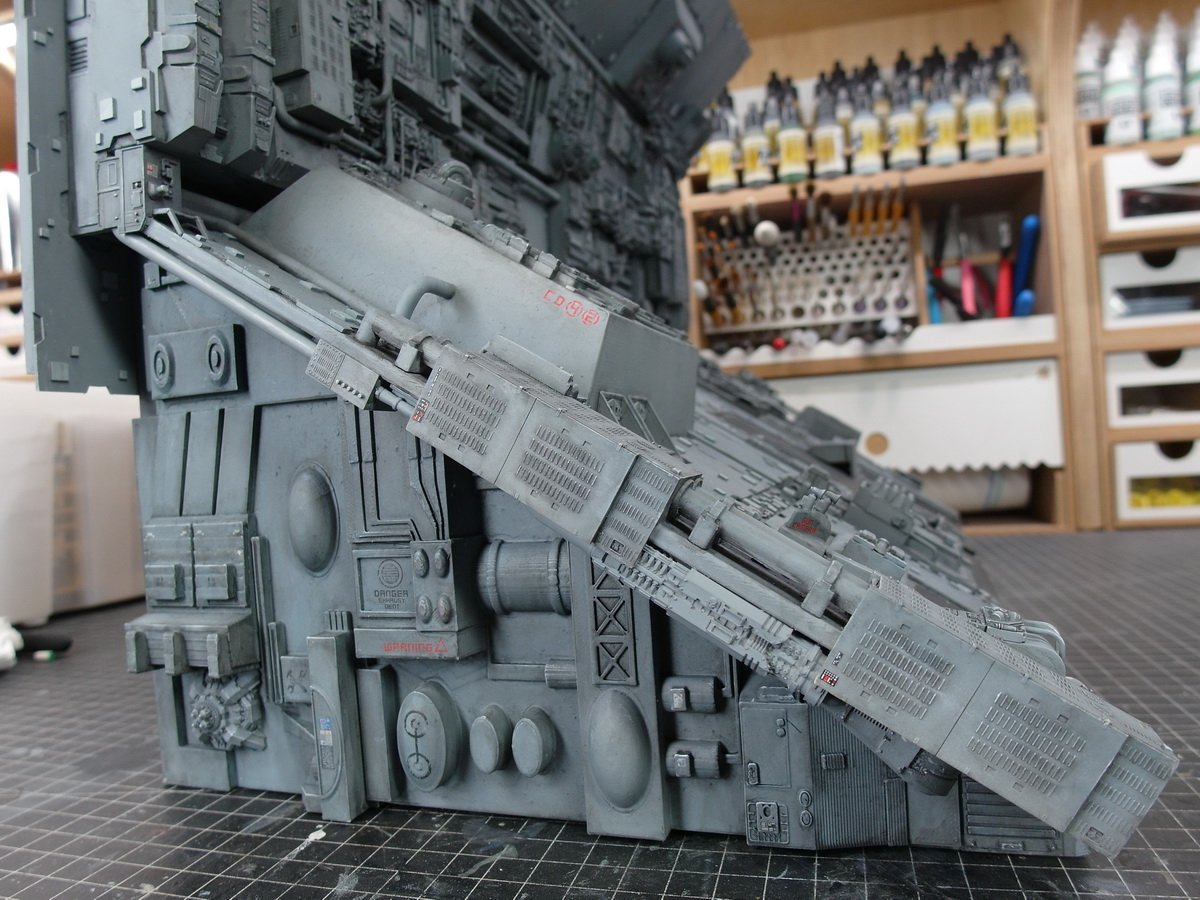
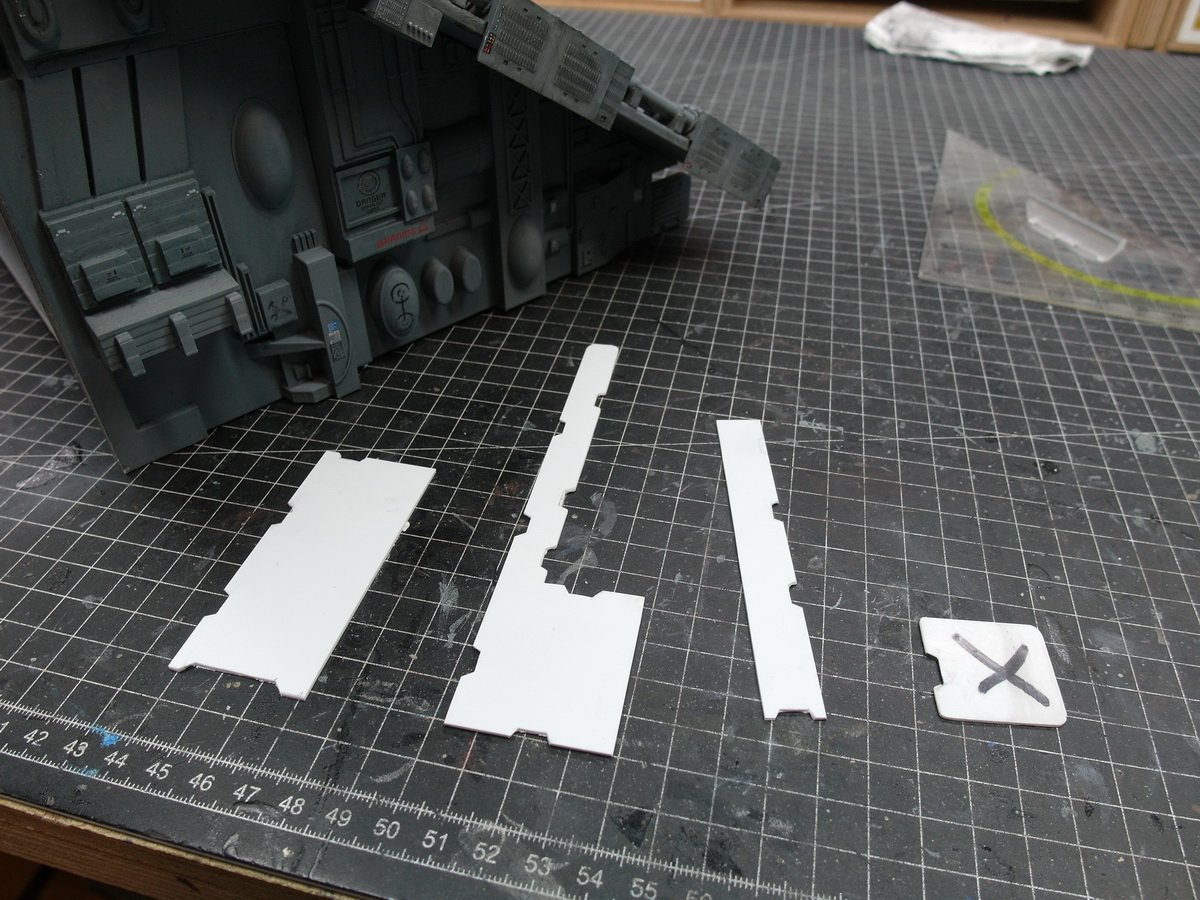
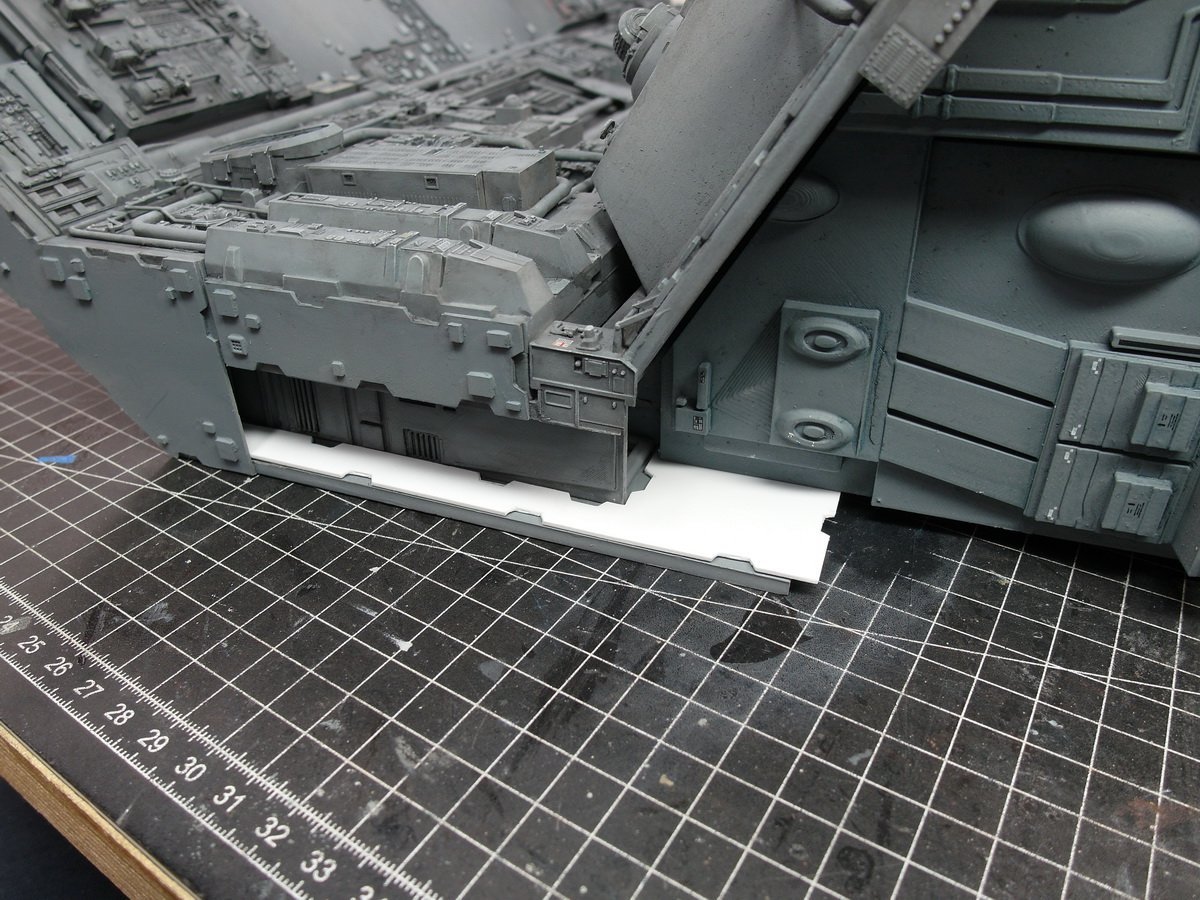
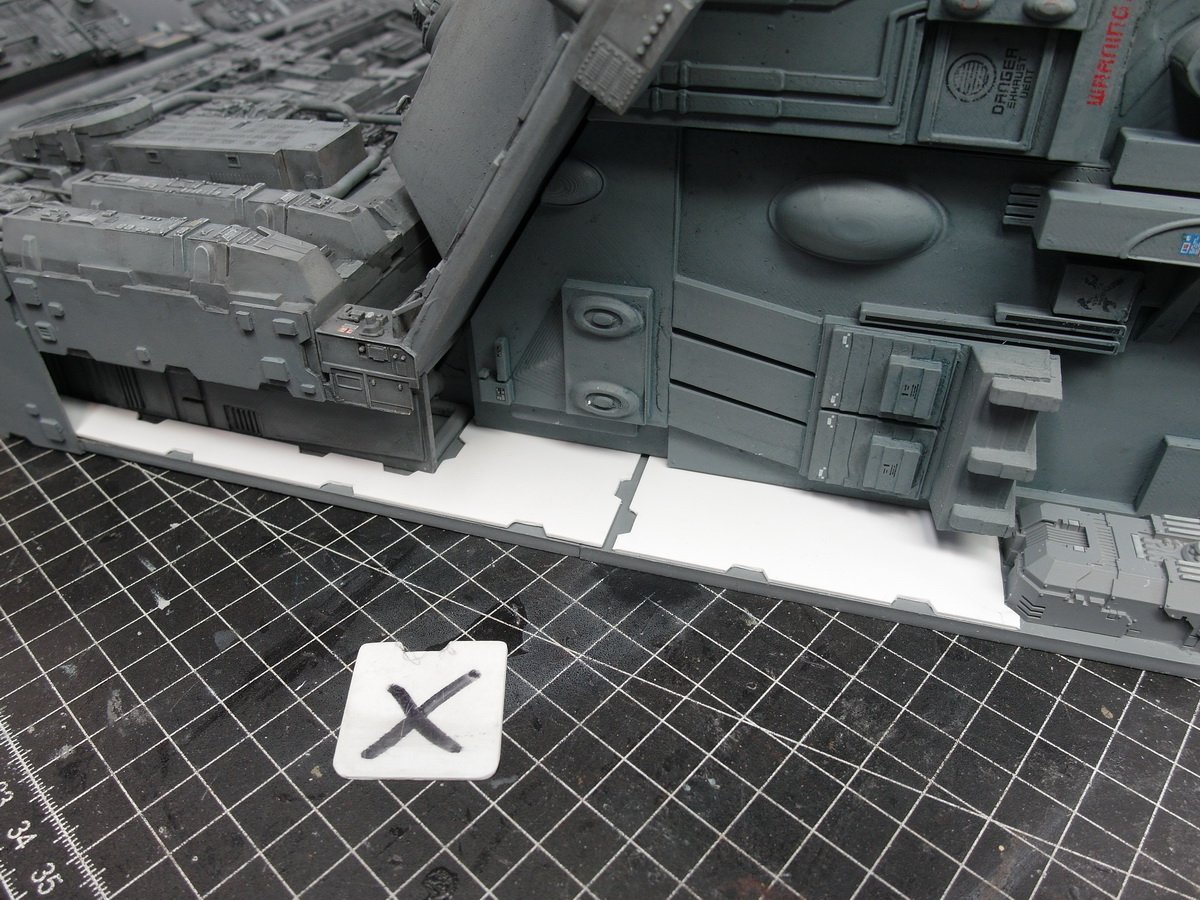
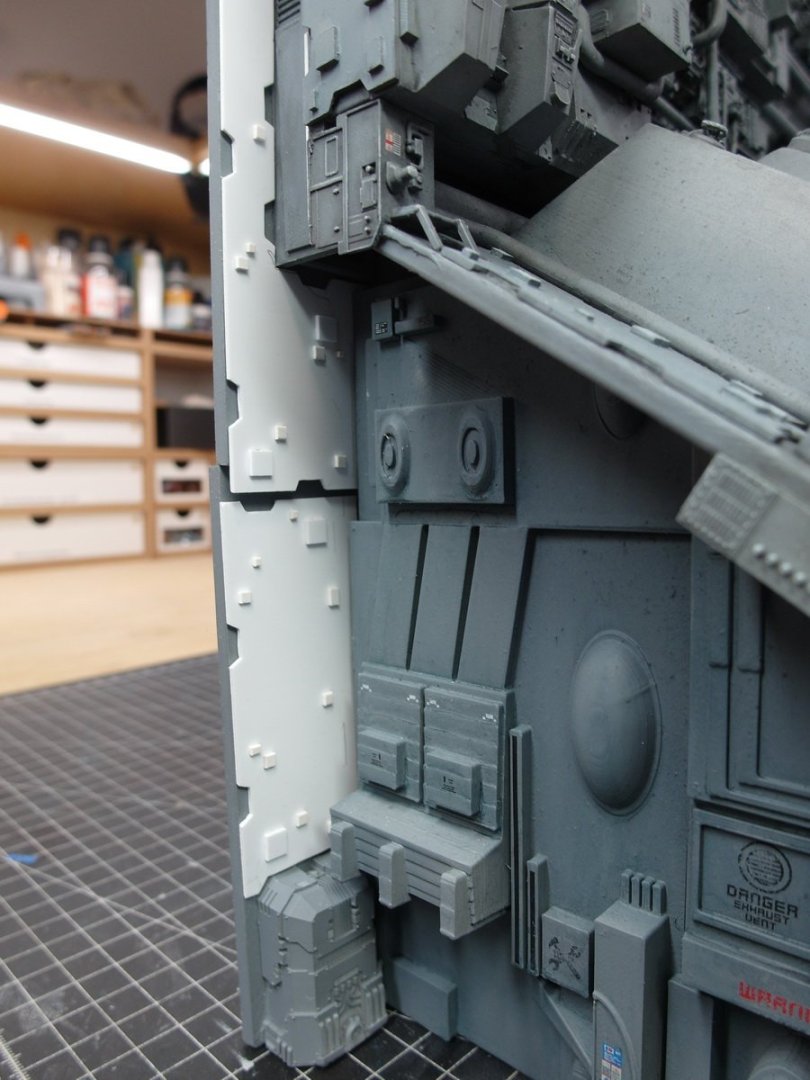
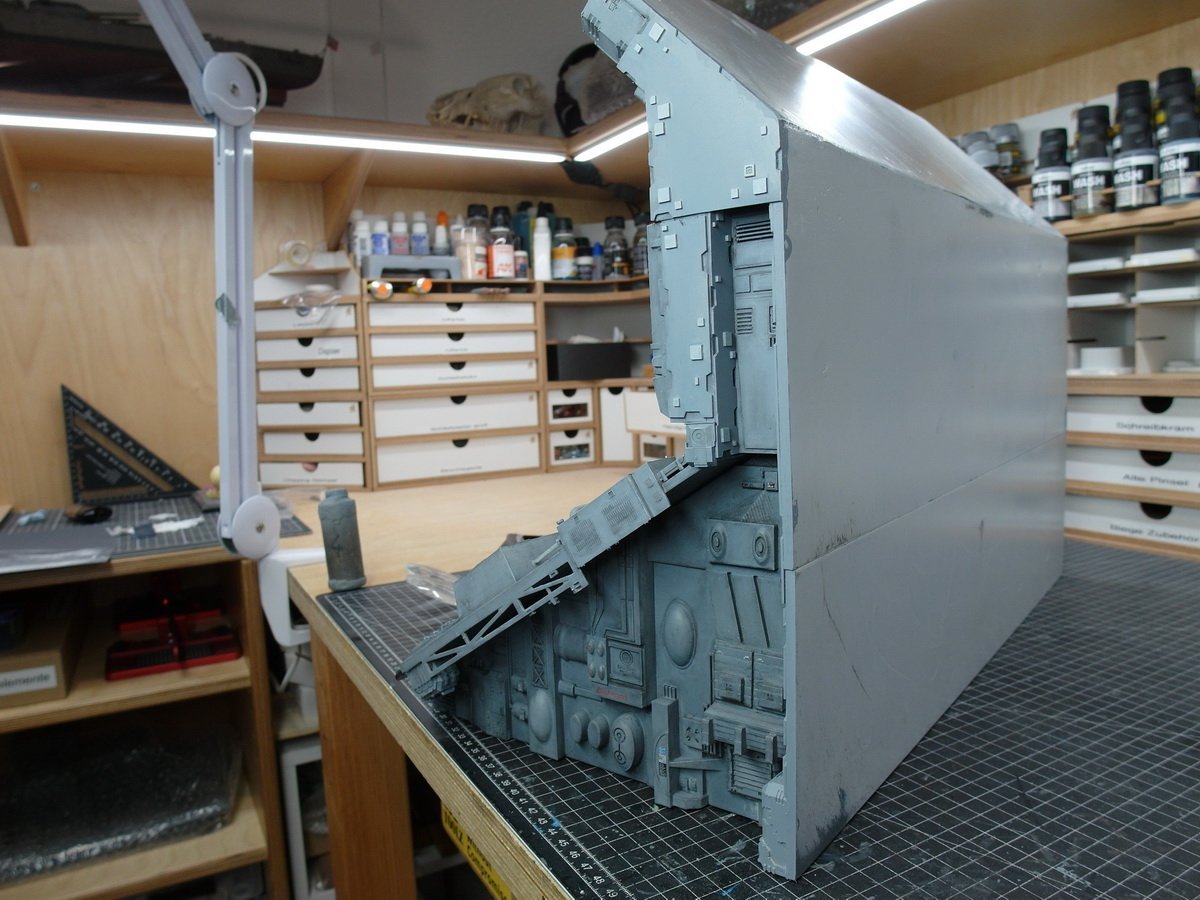
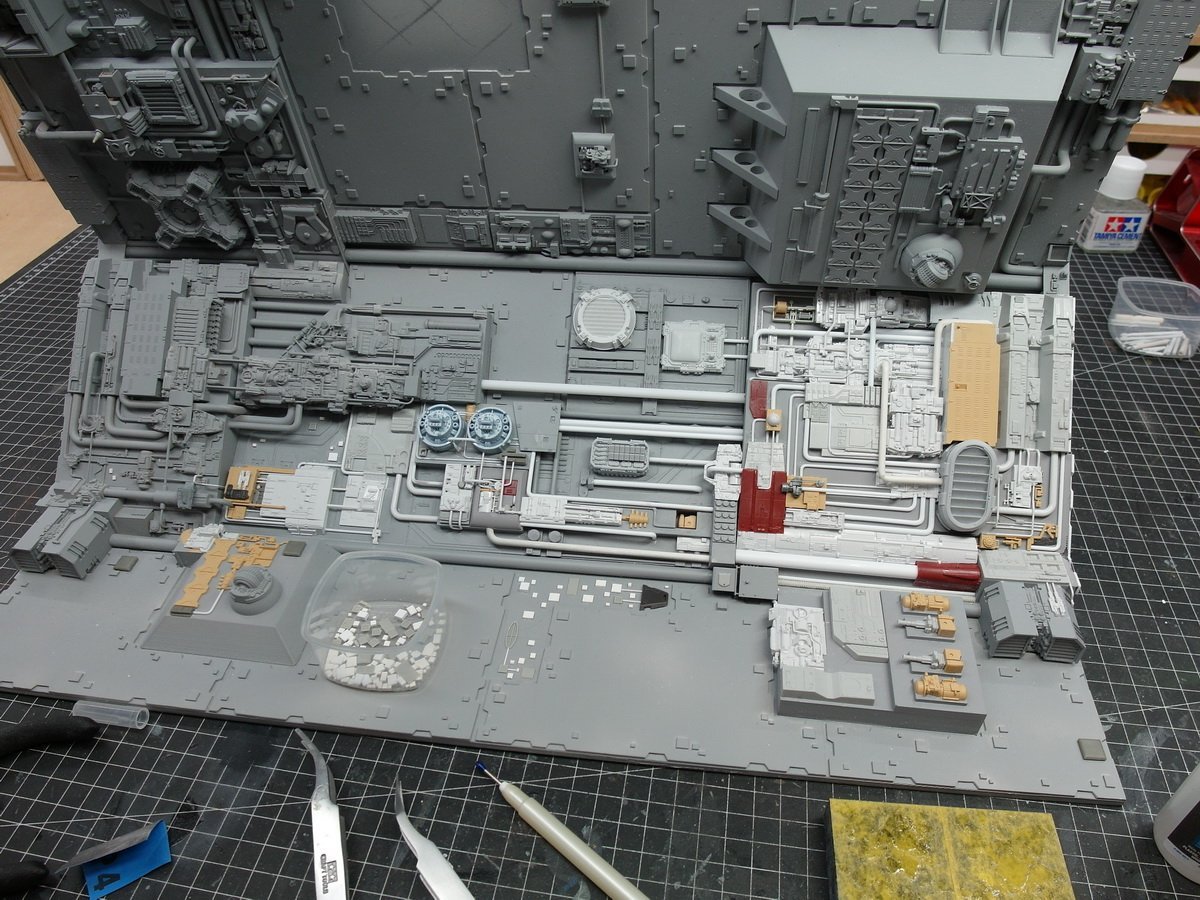
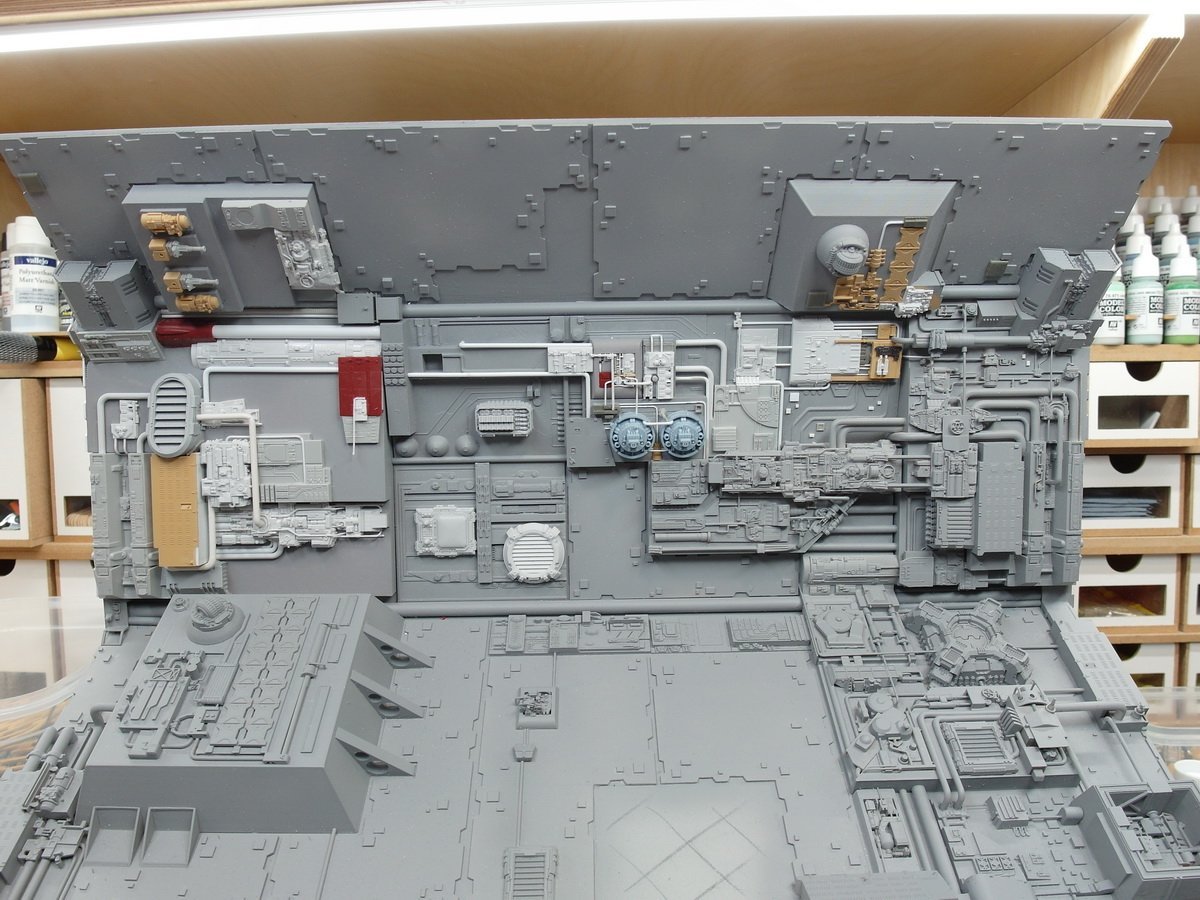
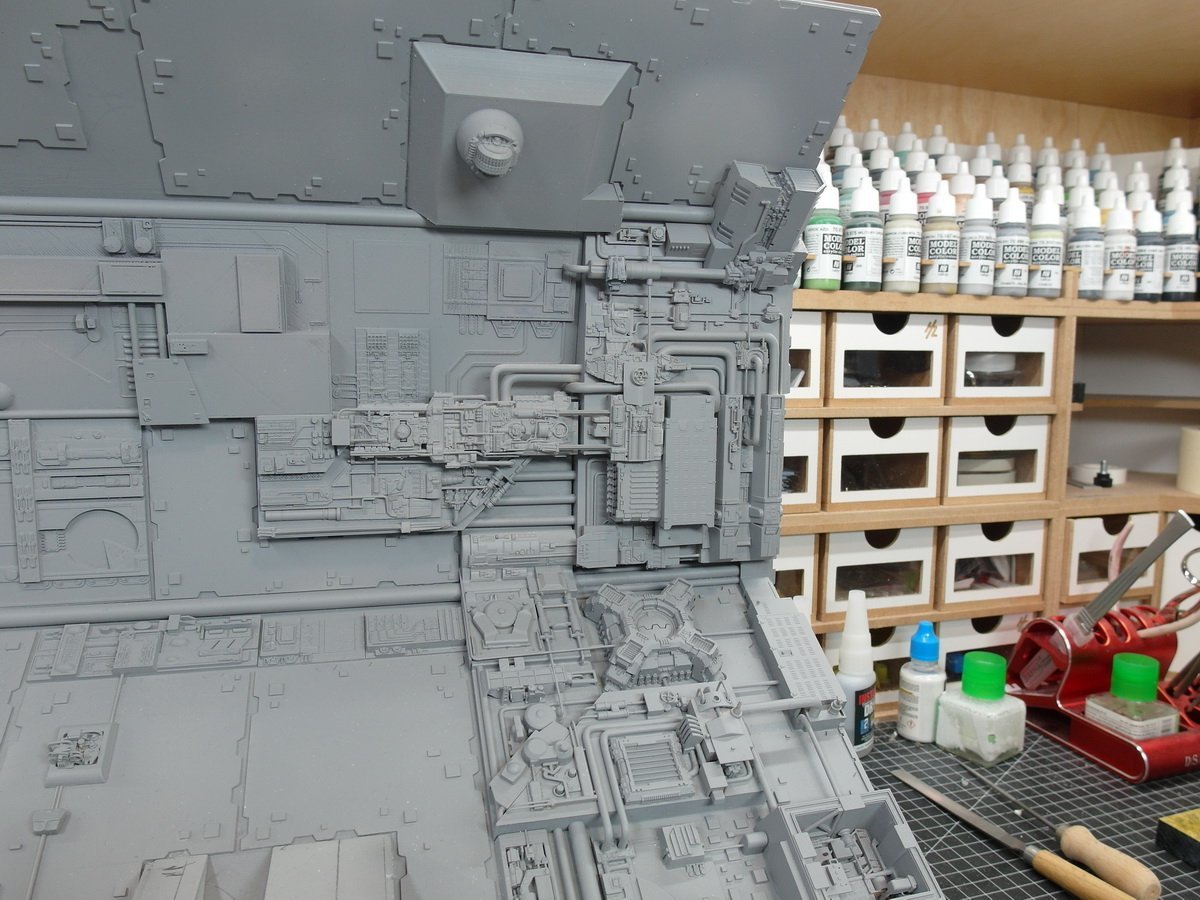
Happy New Year and it can go on. I’ve made a lot of progress with the pages. First I cut the armor plates with which I will cover the surfaces. Fits. By the way, the styrene plate with the X is not a plate but the gauge with which I always mark the same recesses. A few more squares spread out. I attached the top plate with a little overlap, which conceals the gap nicely. And in the front, of course. Base color on it Here’s the overhang again. This should ensure that the maintenance flap is well covered. I will probably create a locking device using a magnet. Left side finished. And the right one.
- 86 replies
-
- 11
-
-
-
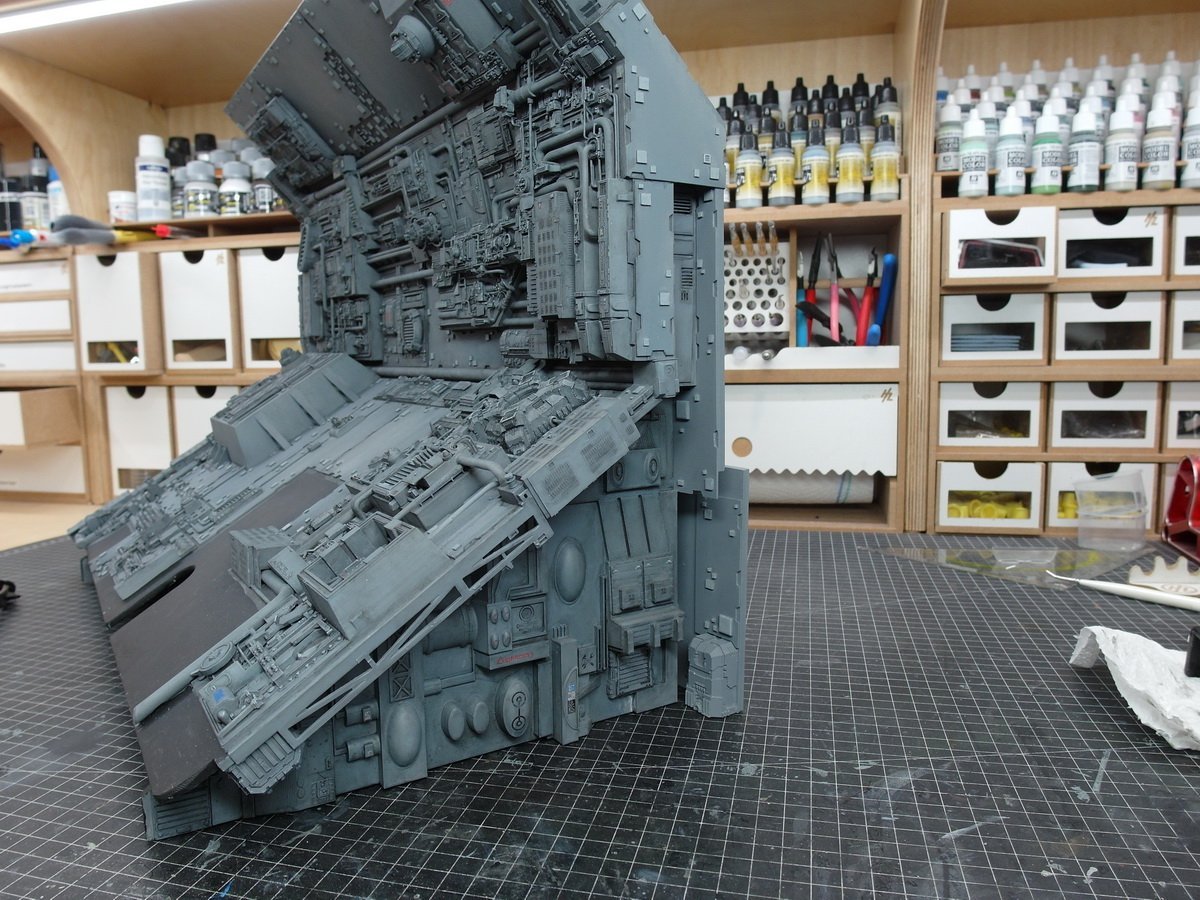
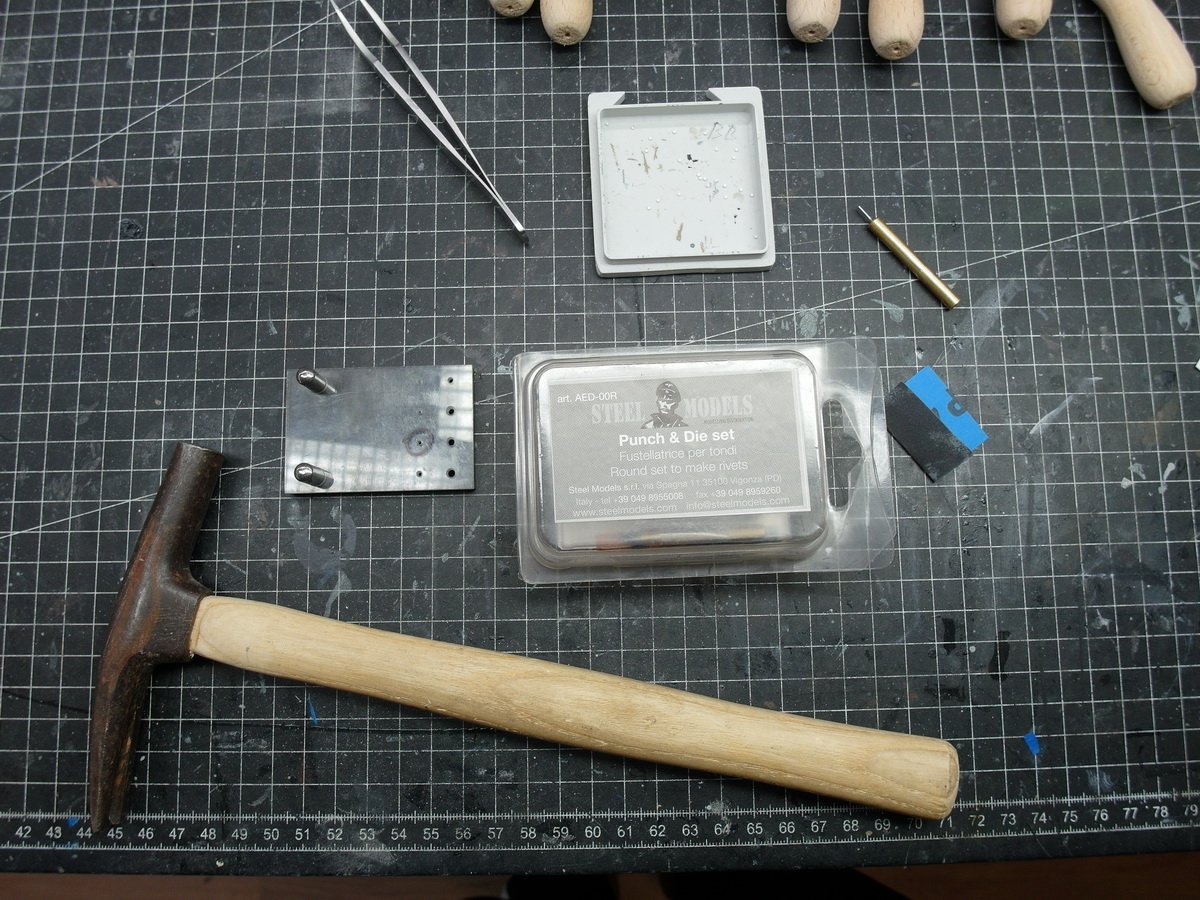
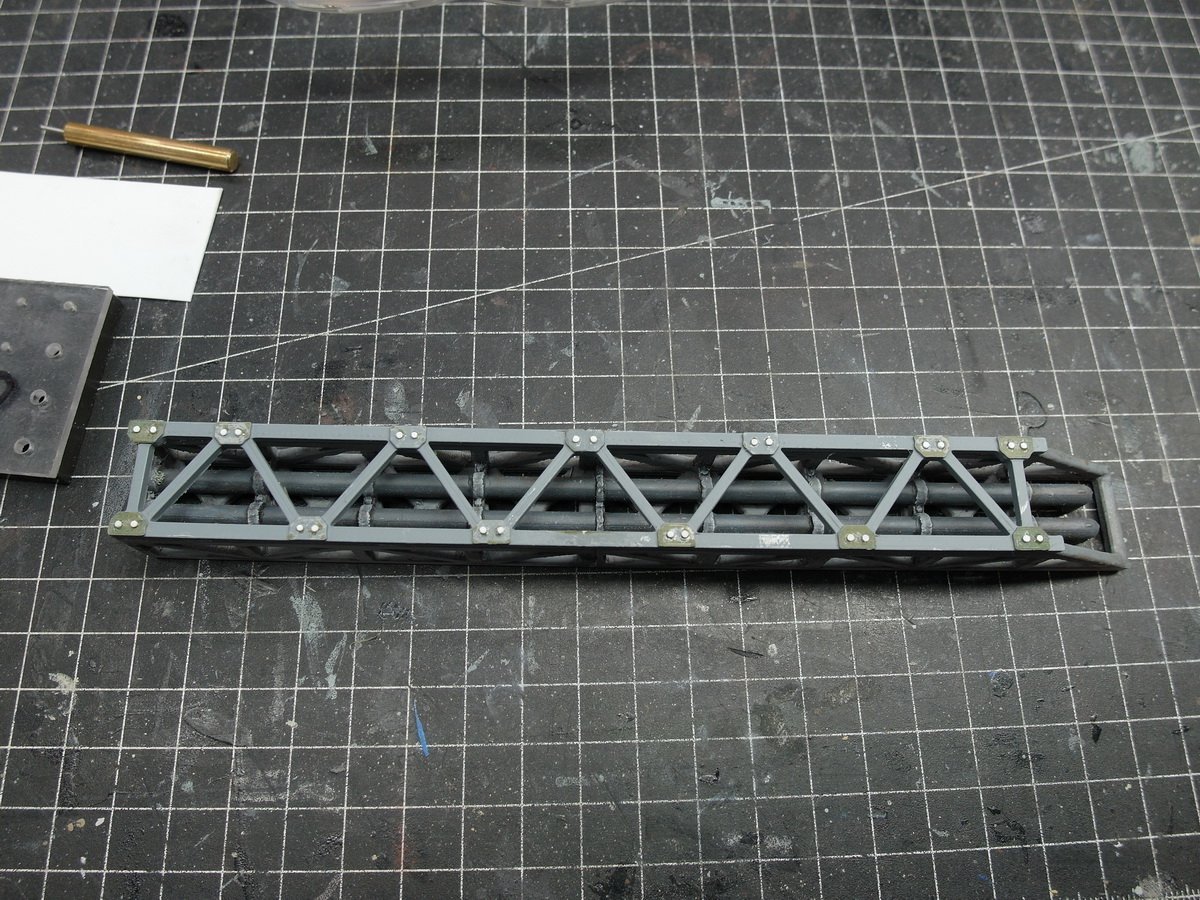
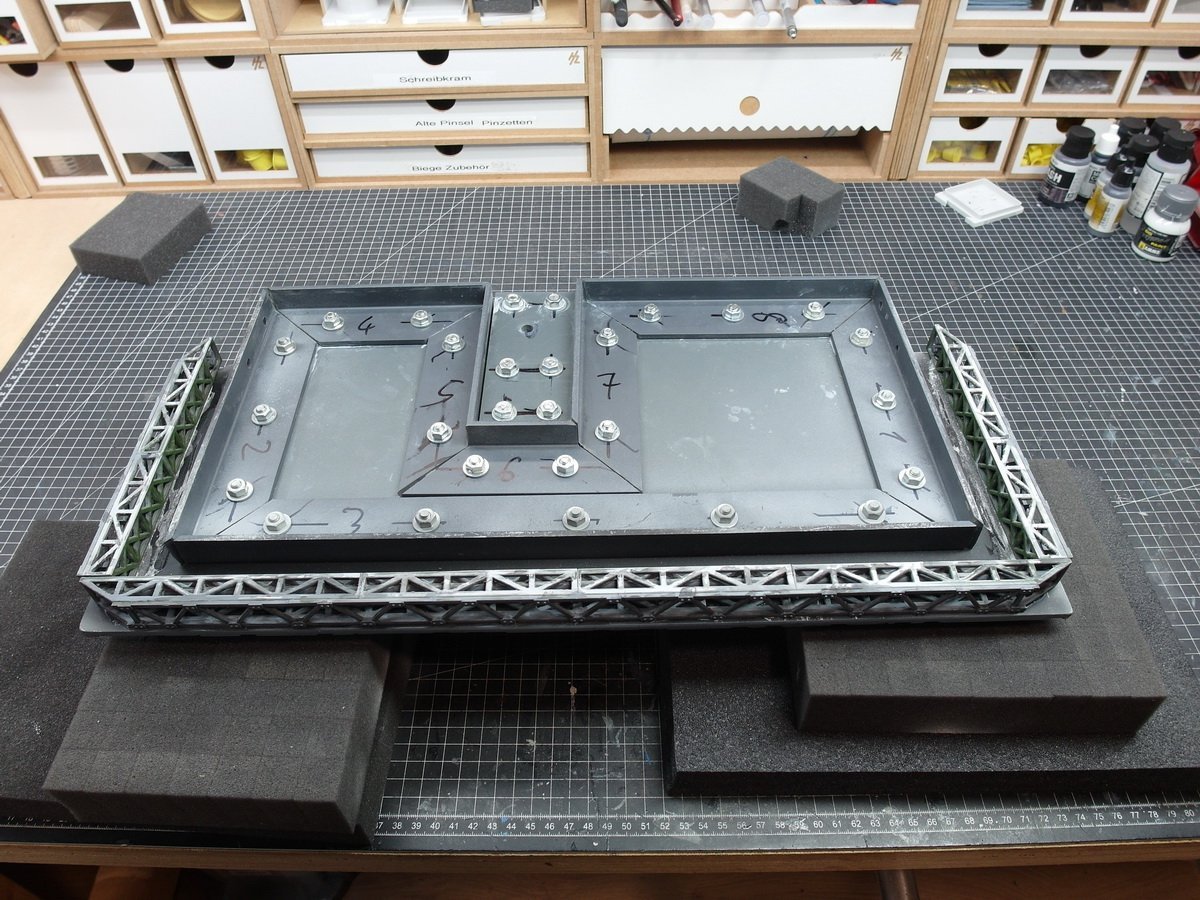
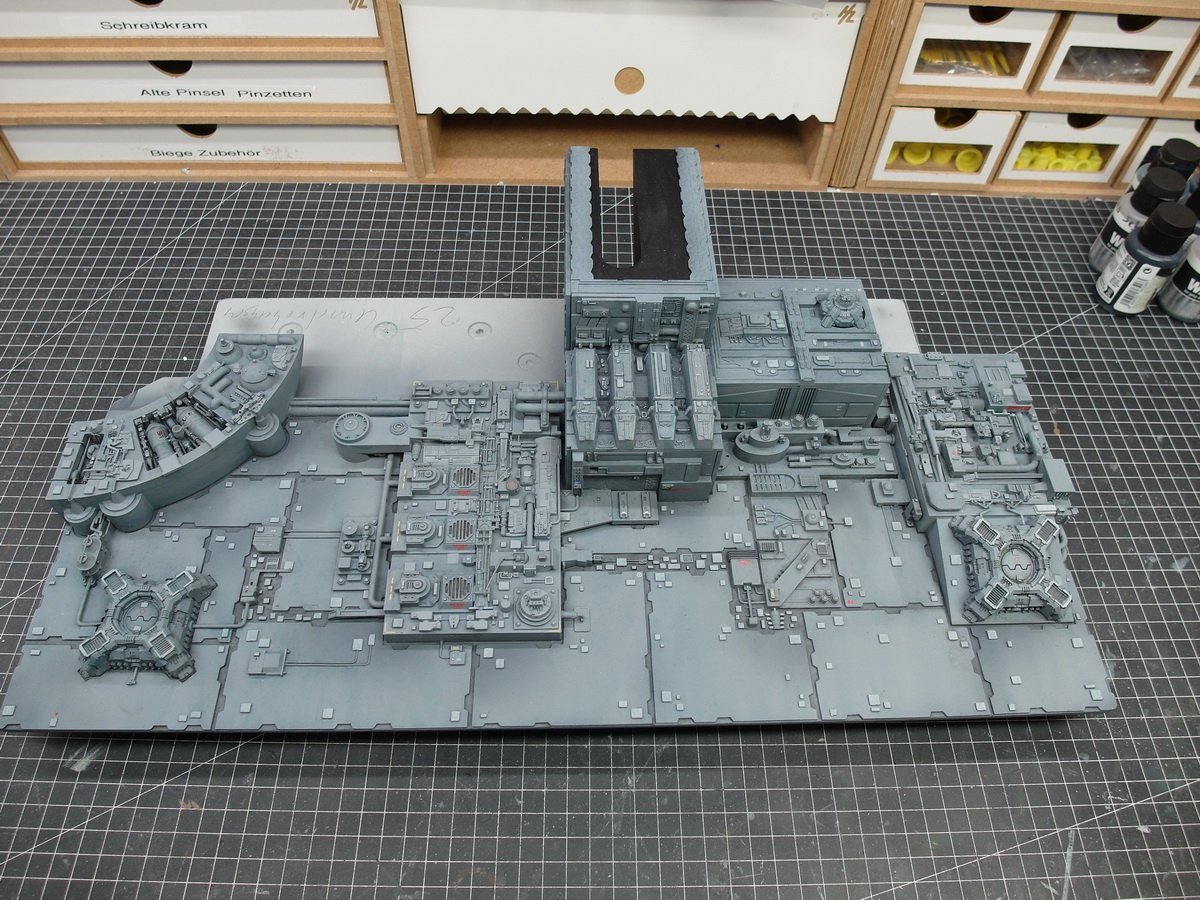
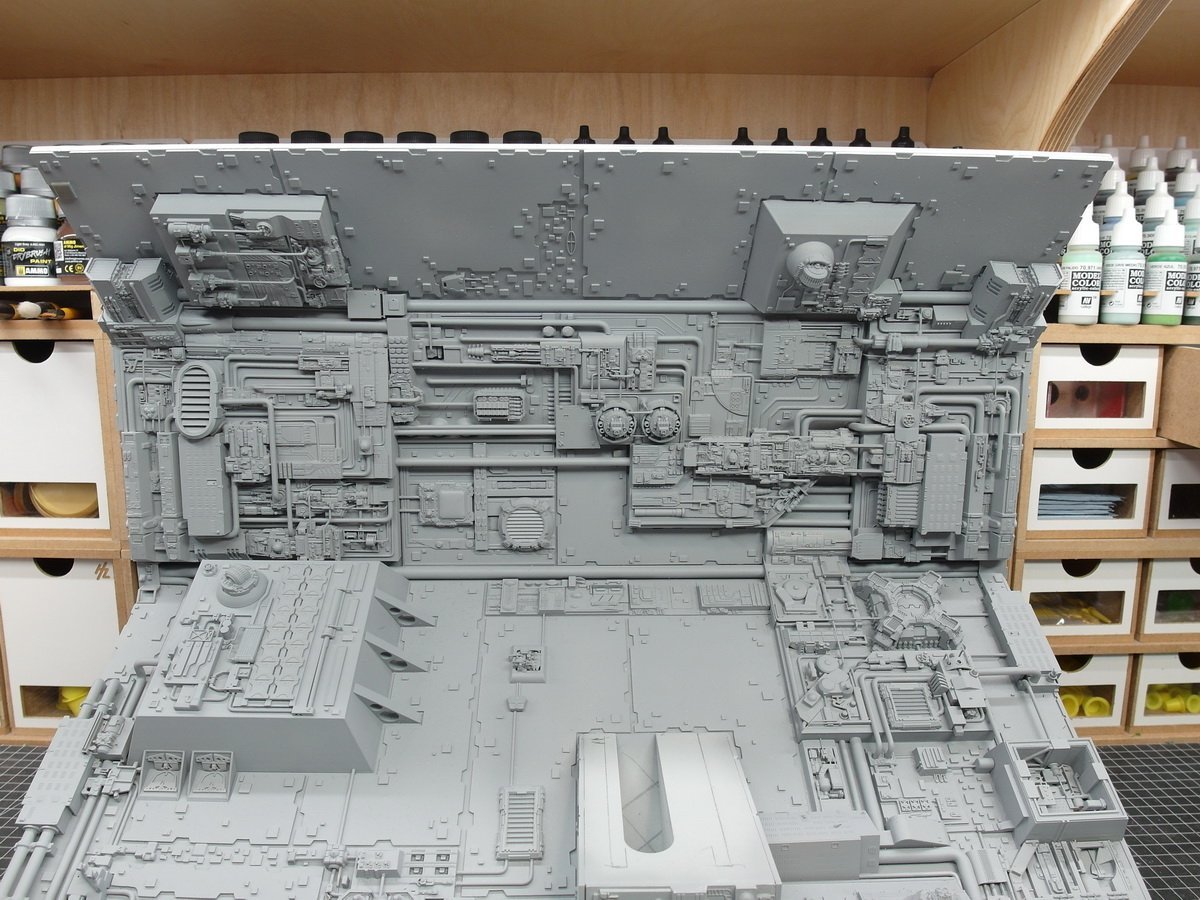
I have one last post for this year. I also have to hurry up a bit. I would like to have the project completed by March, because then the largest plastic model making fair will take place here in Germany and I would like to take part in the competition with the model. Euro Model Expo So, it goes on. To finish off the base, I printed out steel structural elements. However, I am still a beginner in 3D printing and therefore the rivets were defective no matter what I tried. Here are the freshly printed front pages. That’s why I removed the rivets after assembly. I just didn’t like it. My old Punch & Die set helped. I got this for this model years ago because some rows of rivets were wrong or missing. And so the faulty rivets were replaced. Then painted. And glued under the base. Ready for inspection. The bottom plate is now finished. I think that it represents a neat conclusion to the bottom. Now I’ll continue on the sides. Then all that’s left for me to do is wish you a happy new year. 🥳 We’ll write to each other again in 2024.


- 86 replies
-
- 11
-
-
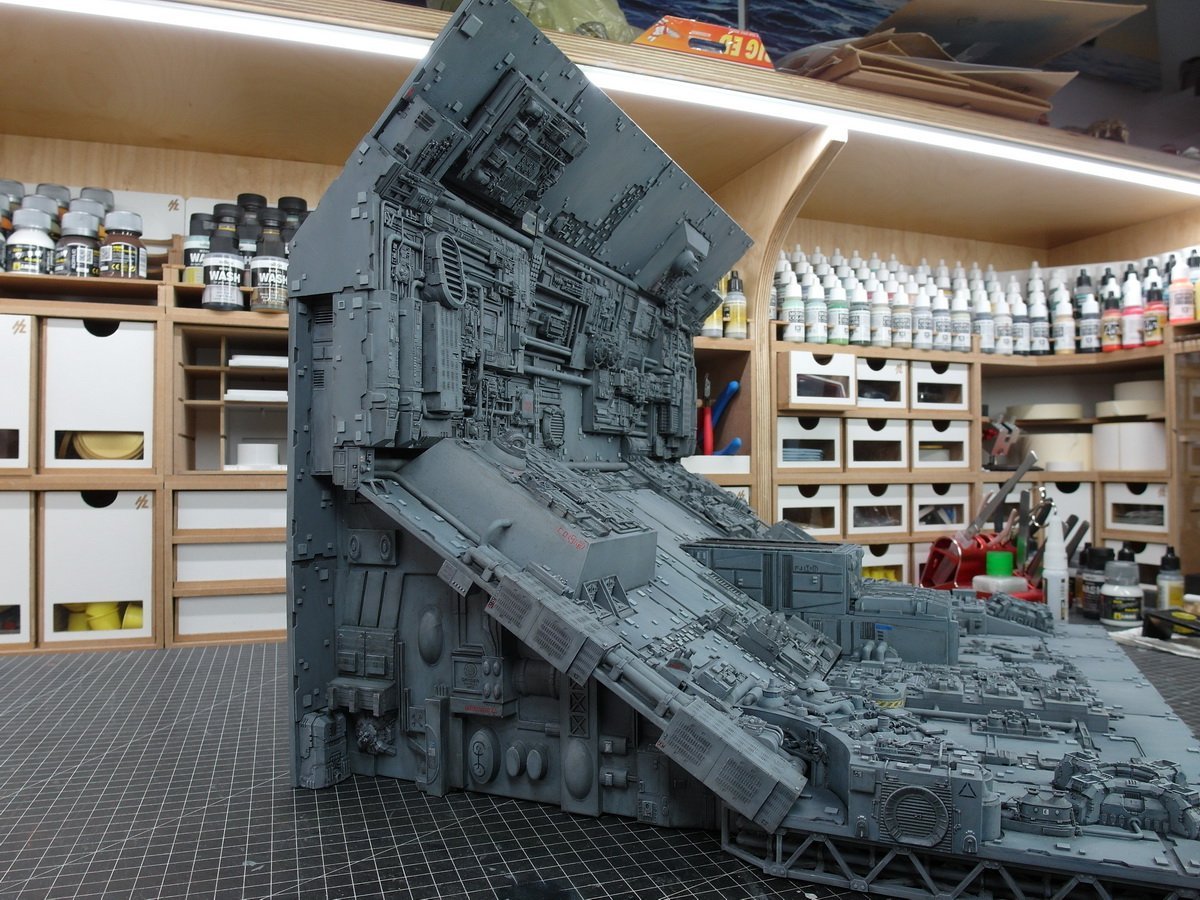
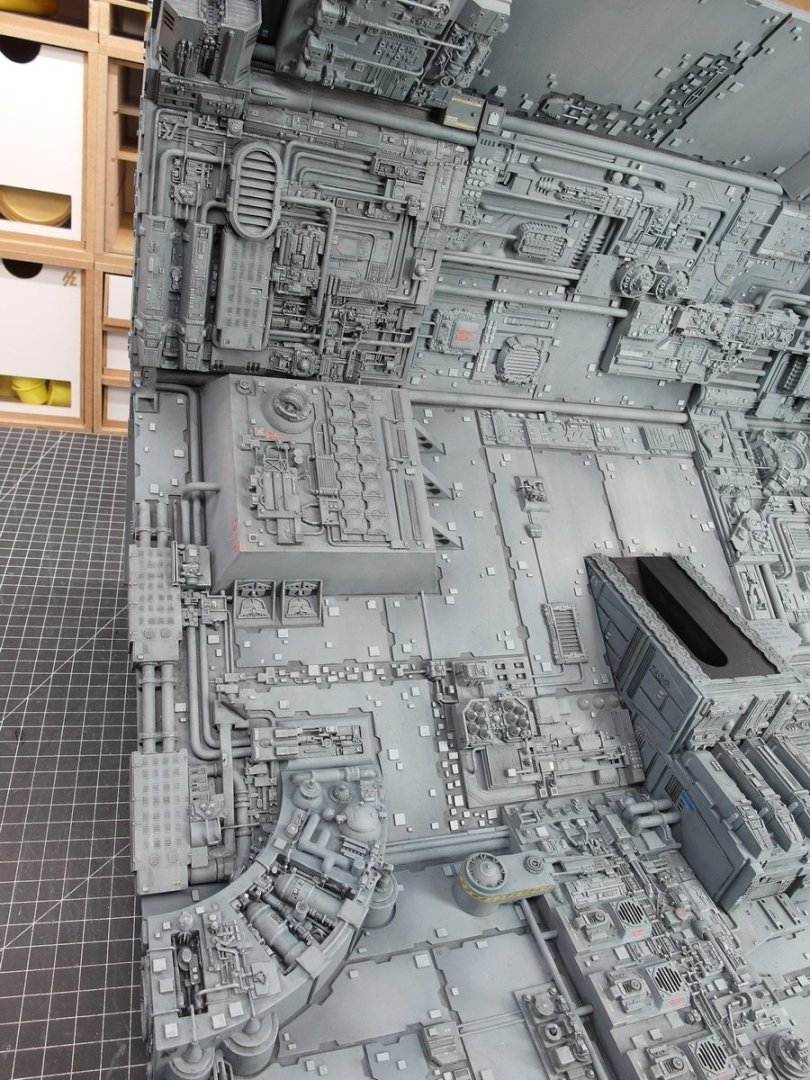
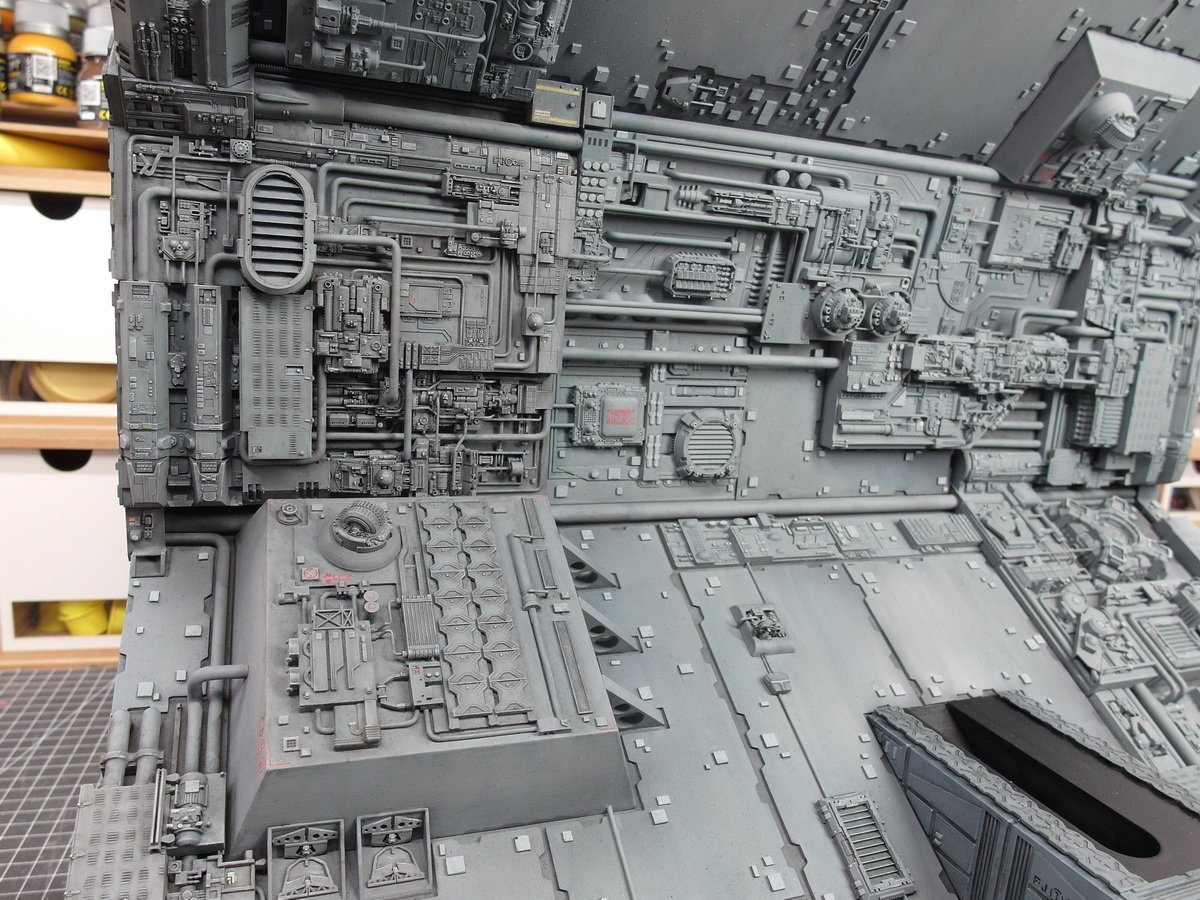
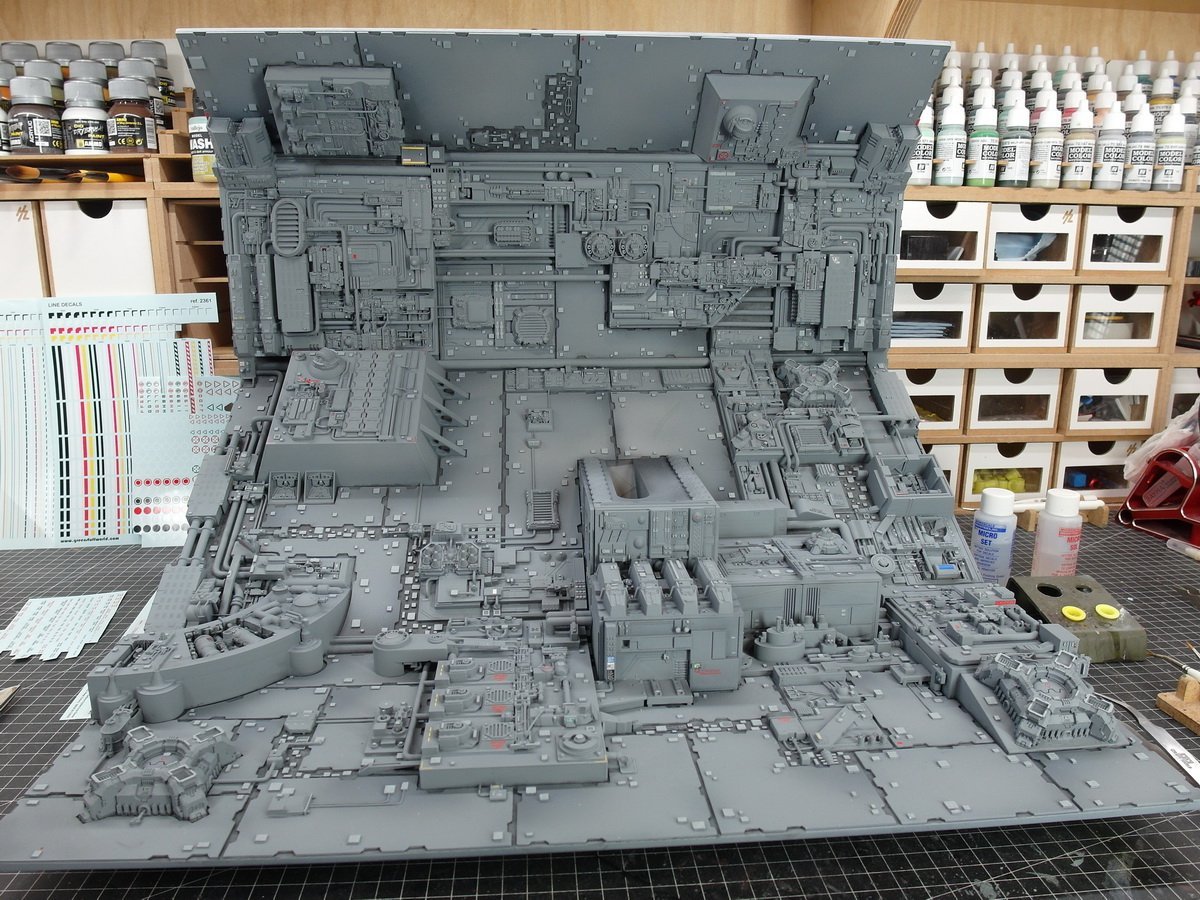
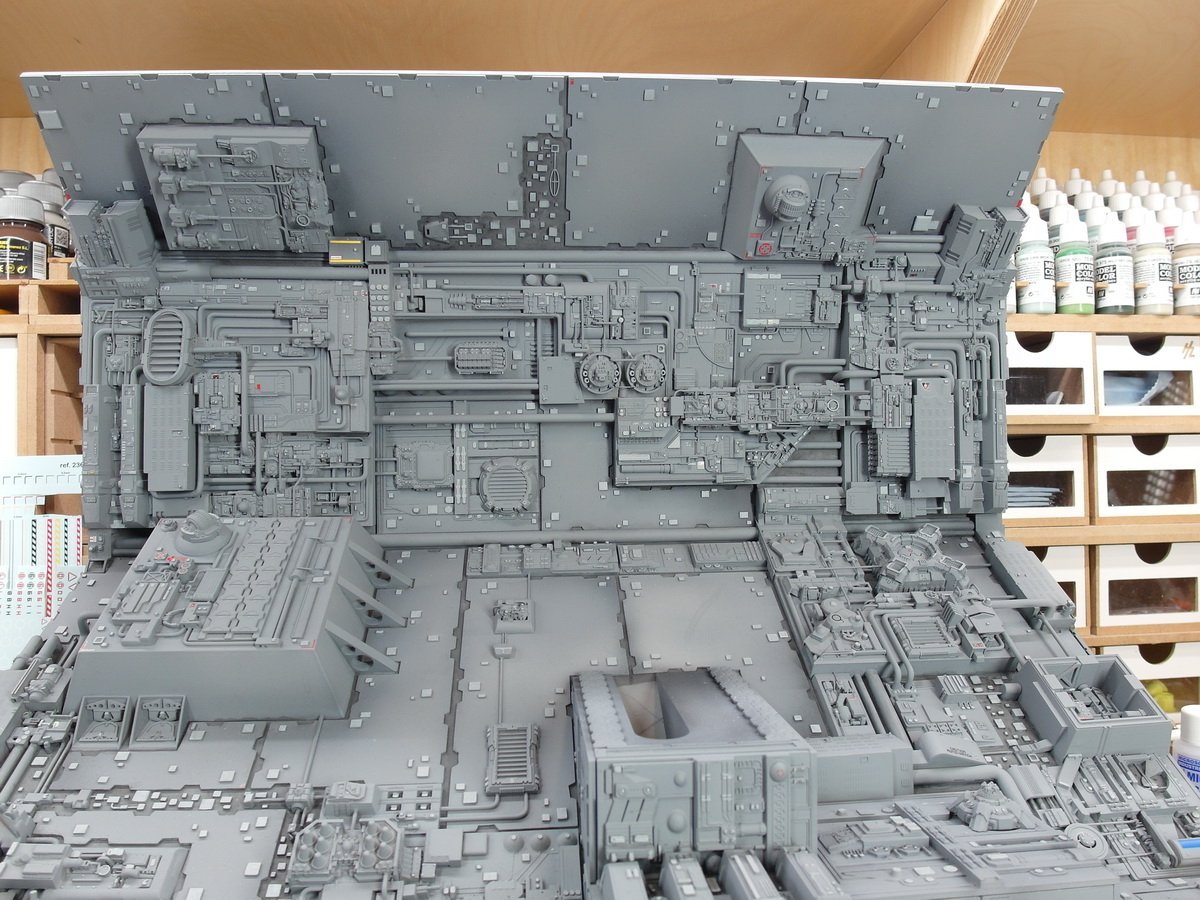
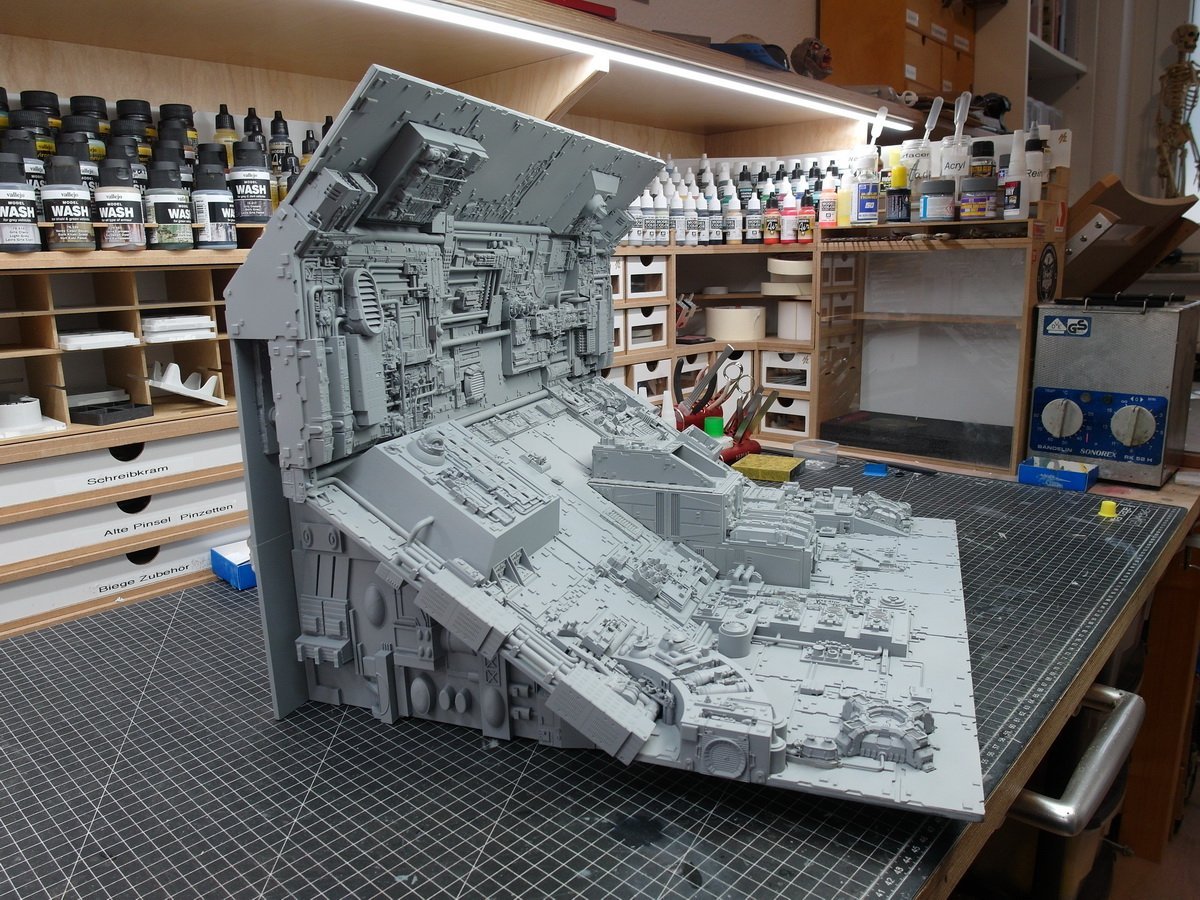
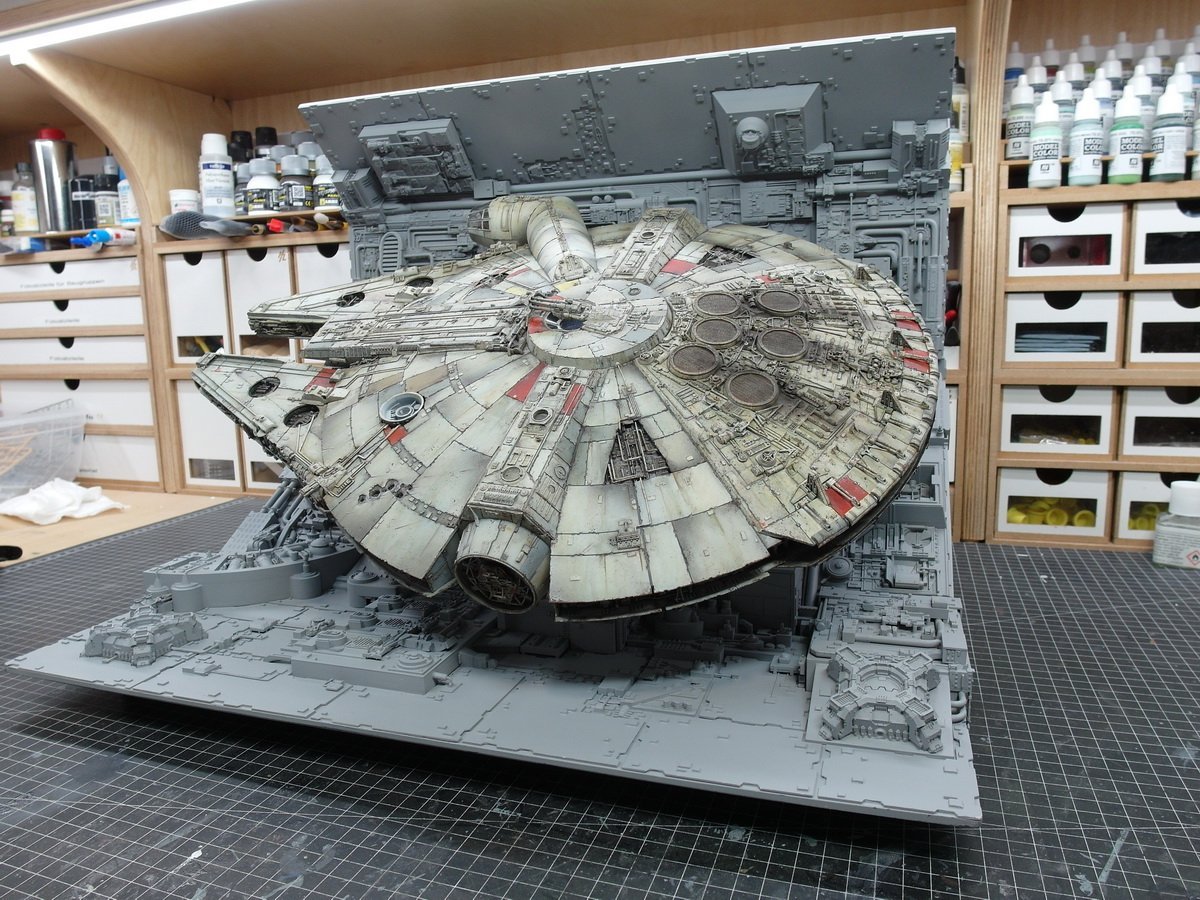
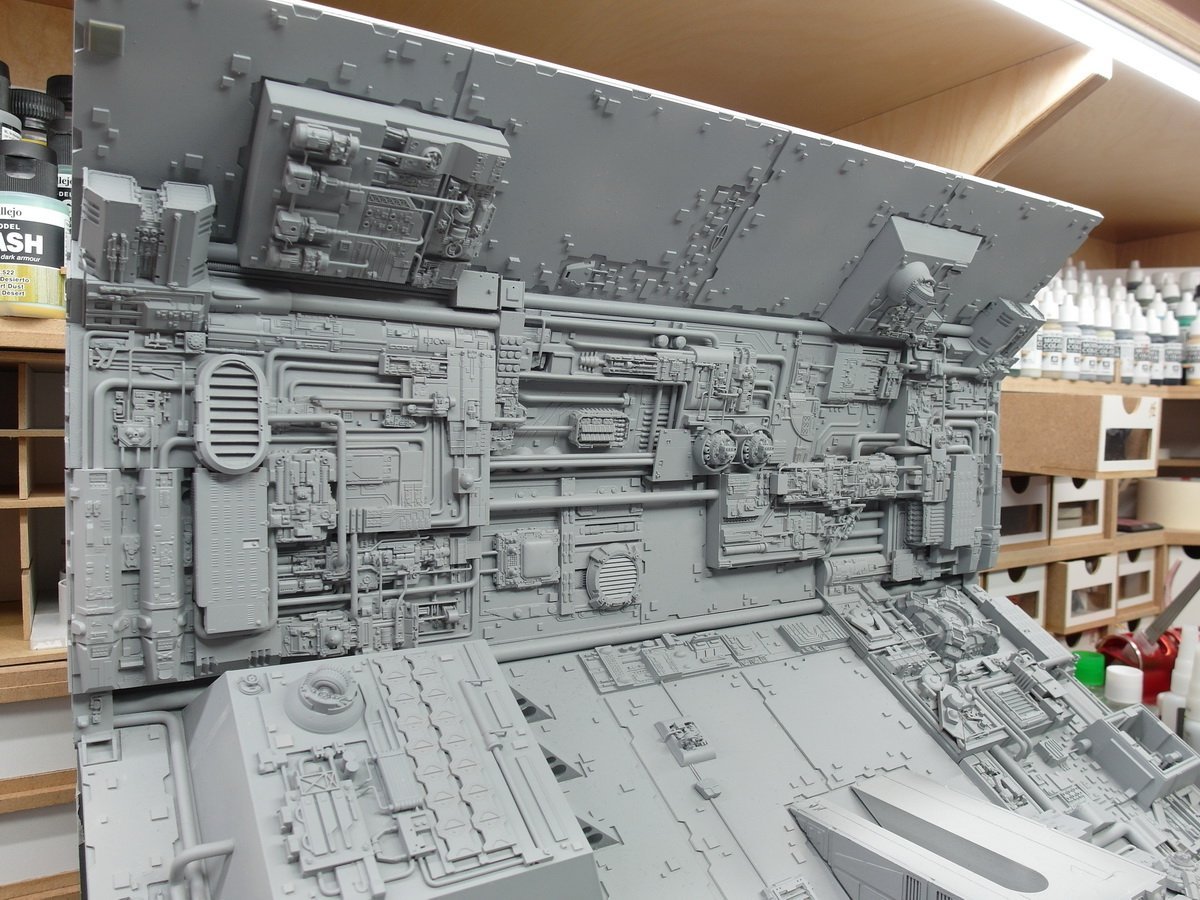
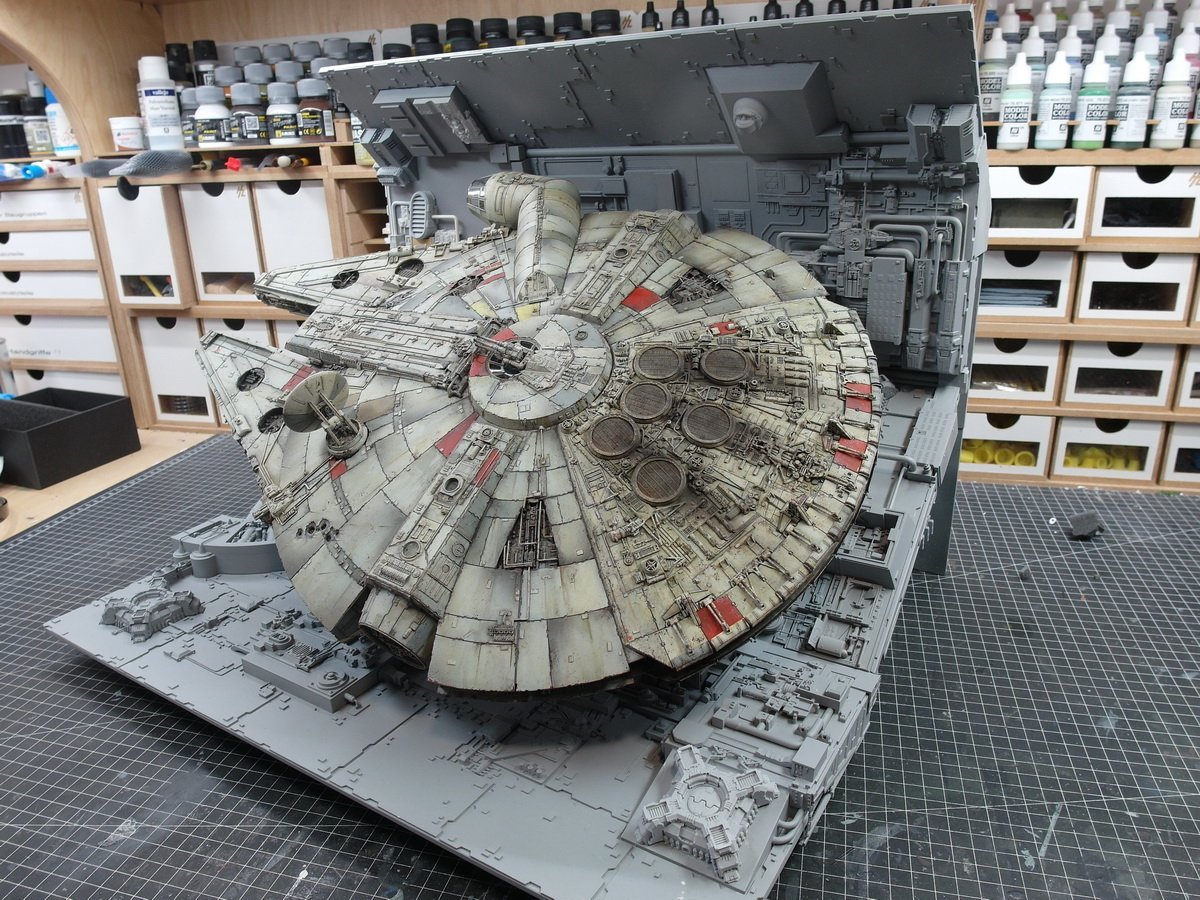
Thank you very much for the nice comment. ^^ It took a while, but the washing and dry painting of the plate is finished. But first I had to improve something on the upper structure, otherwise it would have been too bare. Then we could finally start with the upper level. What a slog. Countless places were difficult to reach. But it’s coming together more and more. And again the overall view from the front.
- 86 replies
-
- 12
-
-
-
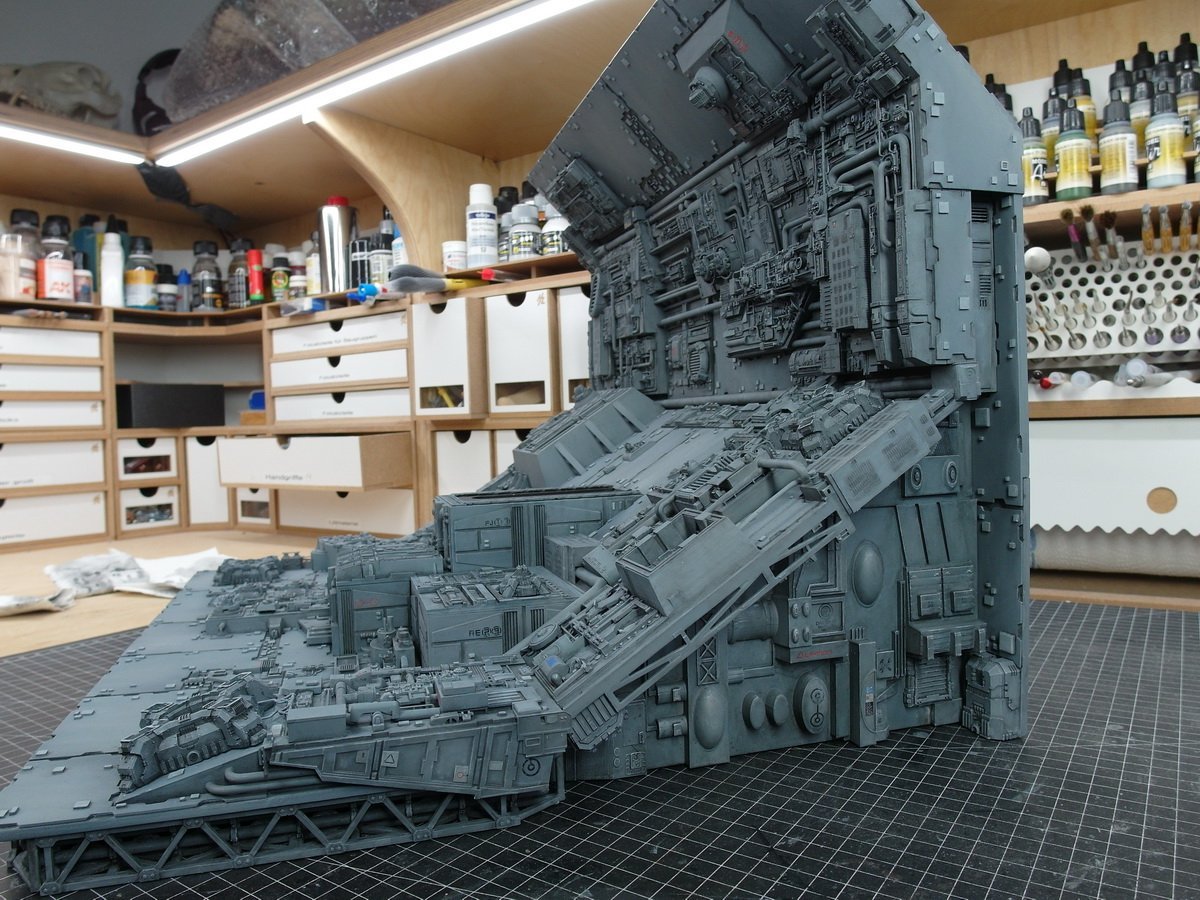
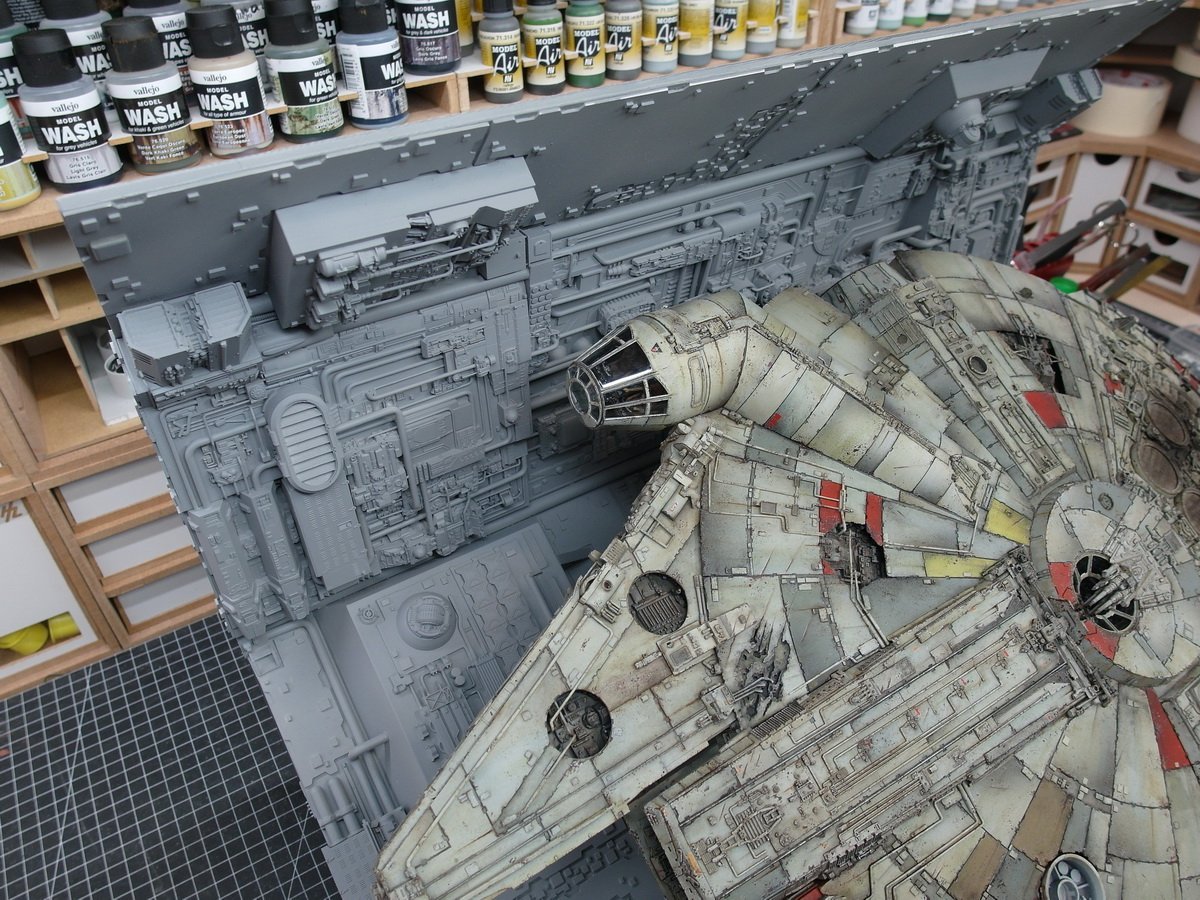
What have I done to myself… Washing and dry painting is extremely time-consuming. Thousands of places that you can hardly get to and you always have to be careful that excess paint dries on places that you don’t immediately see. But I think it’s worth it. A nice contrast is created. Left side up to the middle level is done. A week of work.😵

- 86 replies
-
- 17
-
-
-
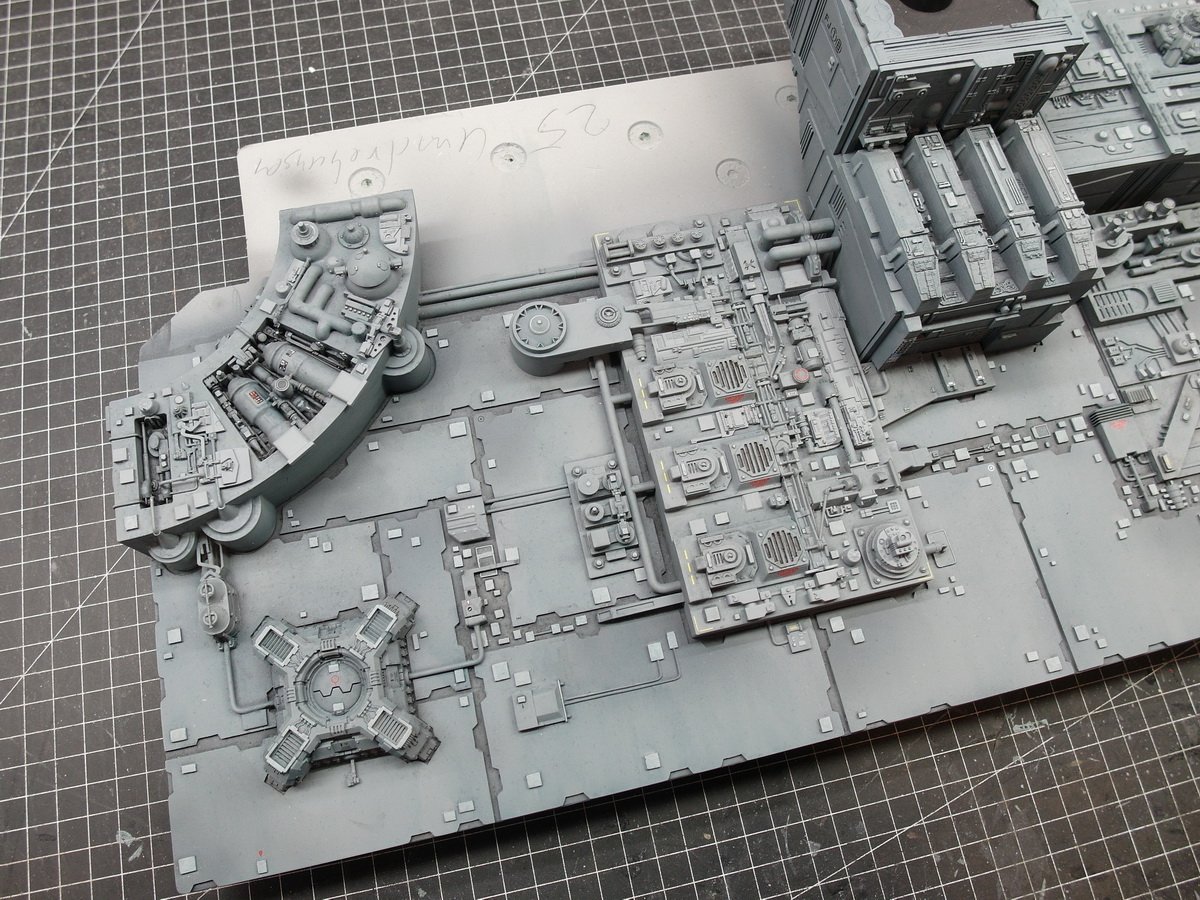
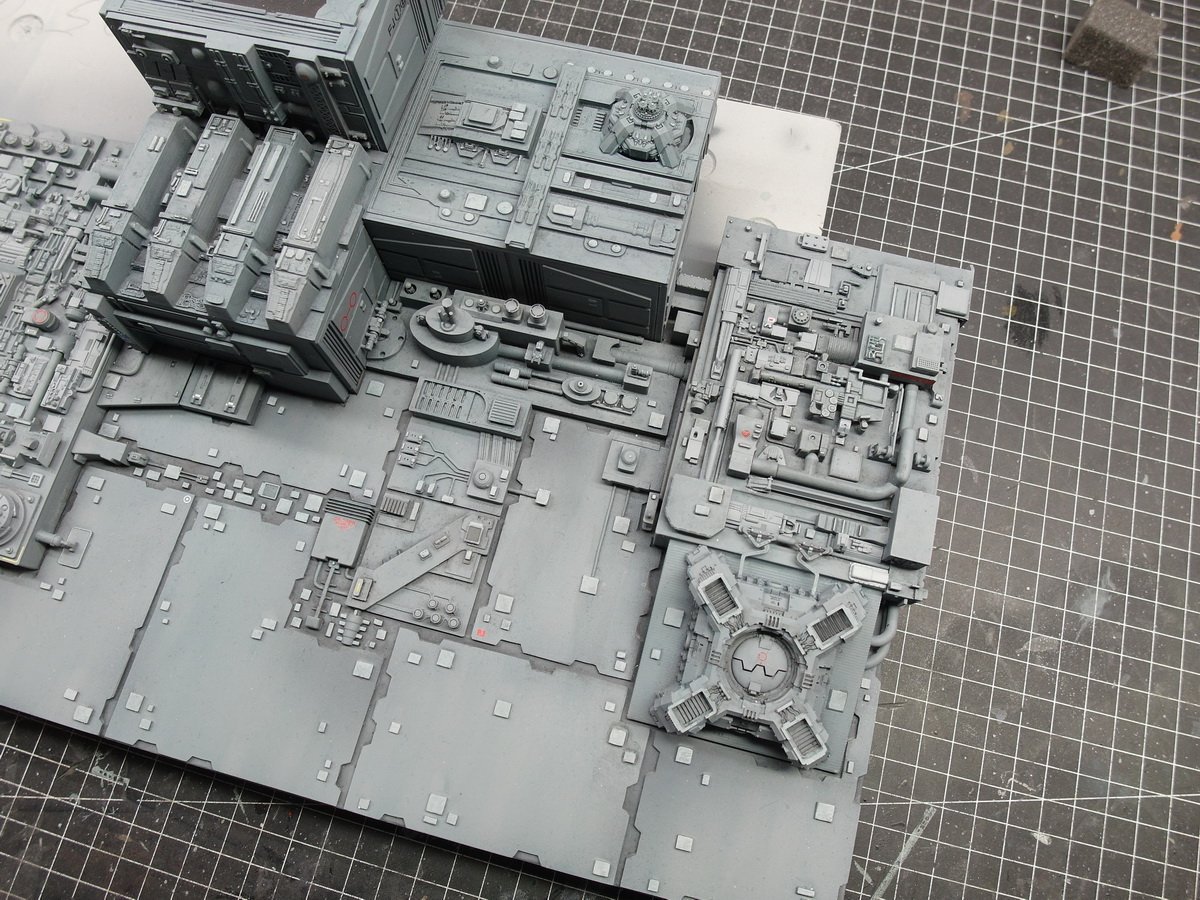
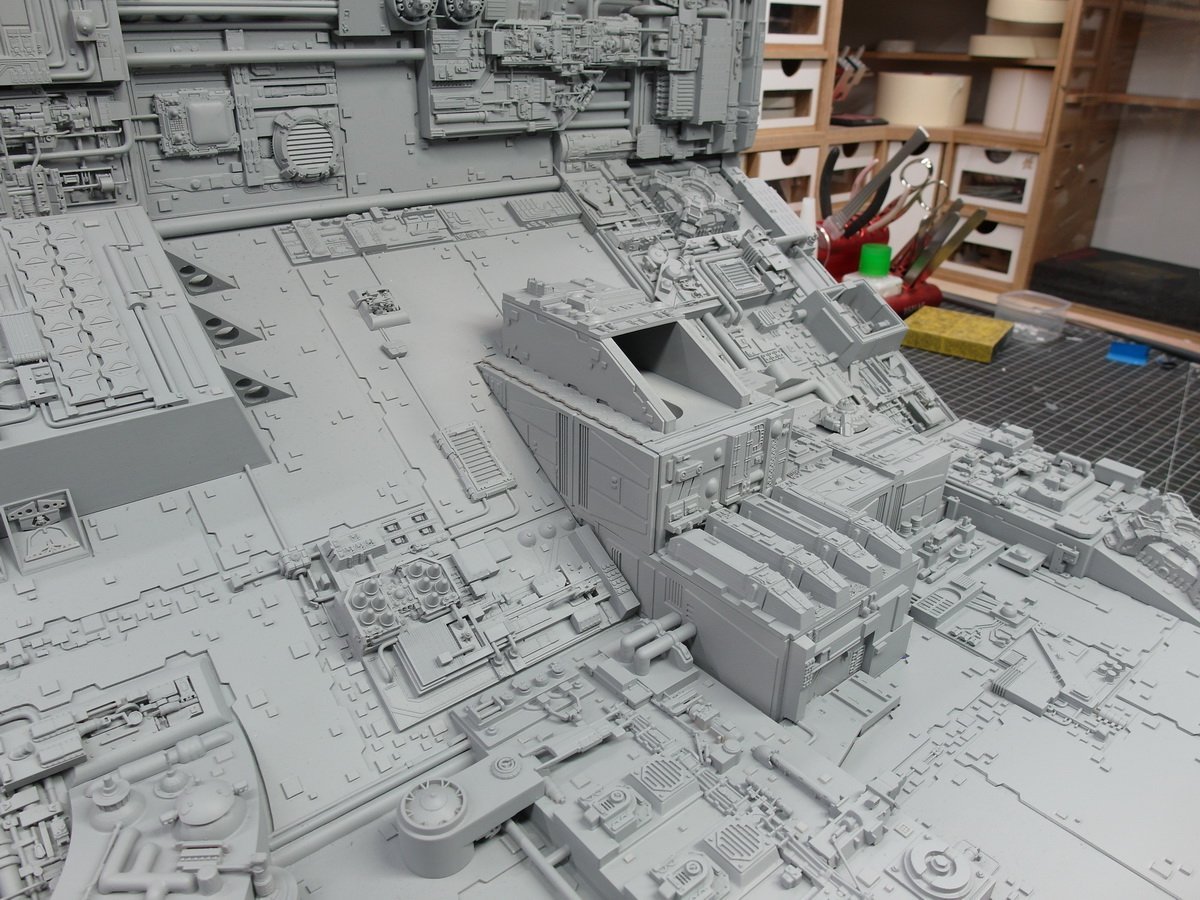
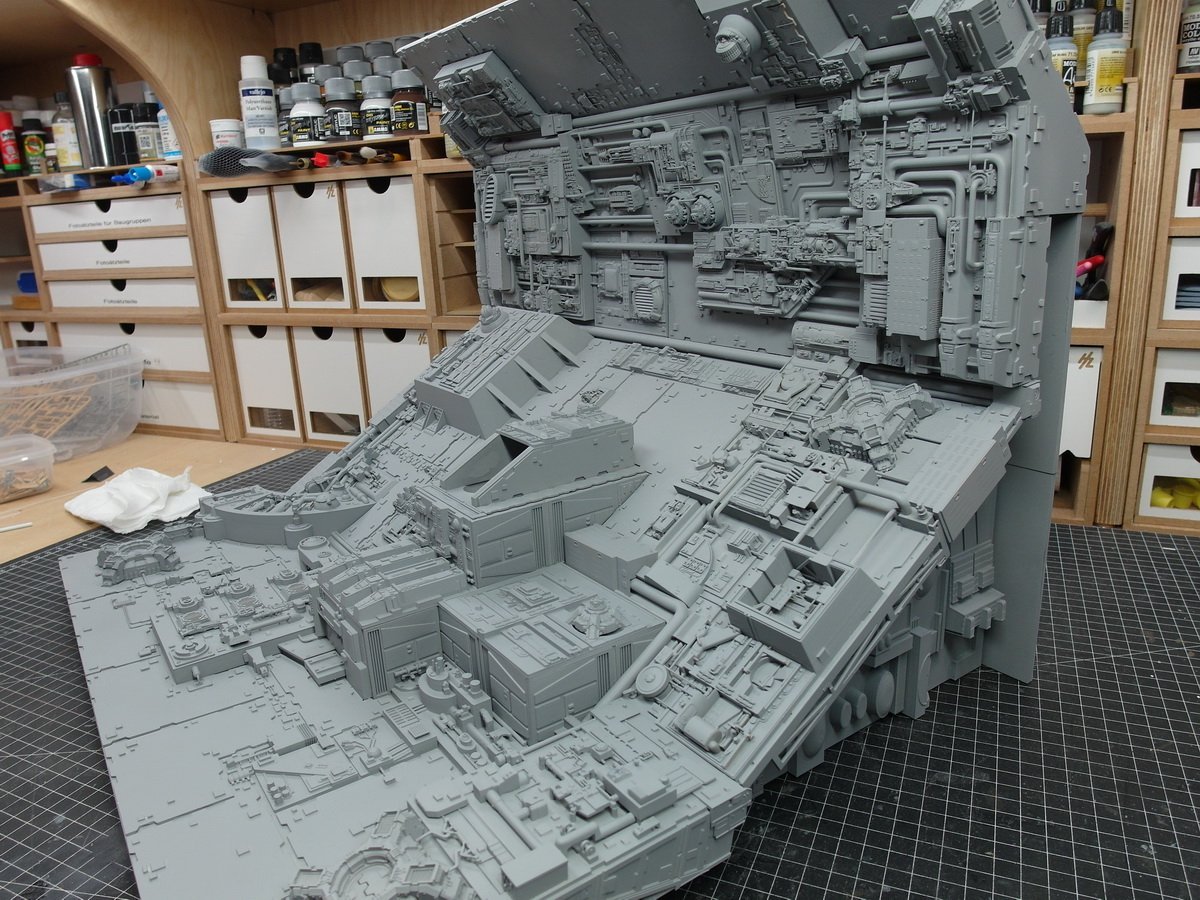
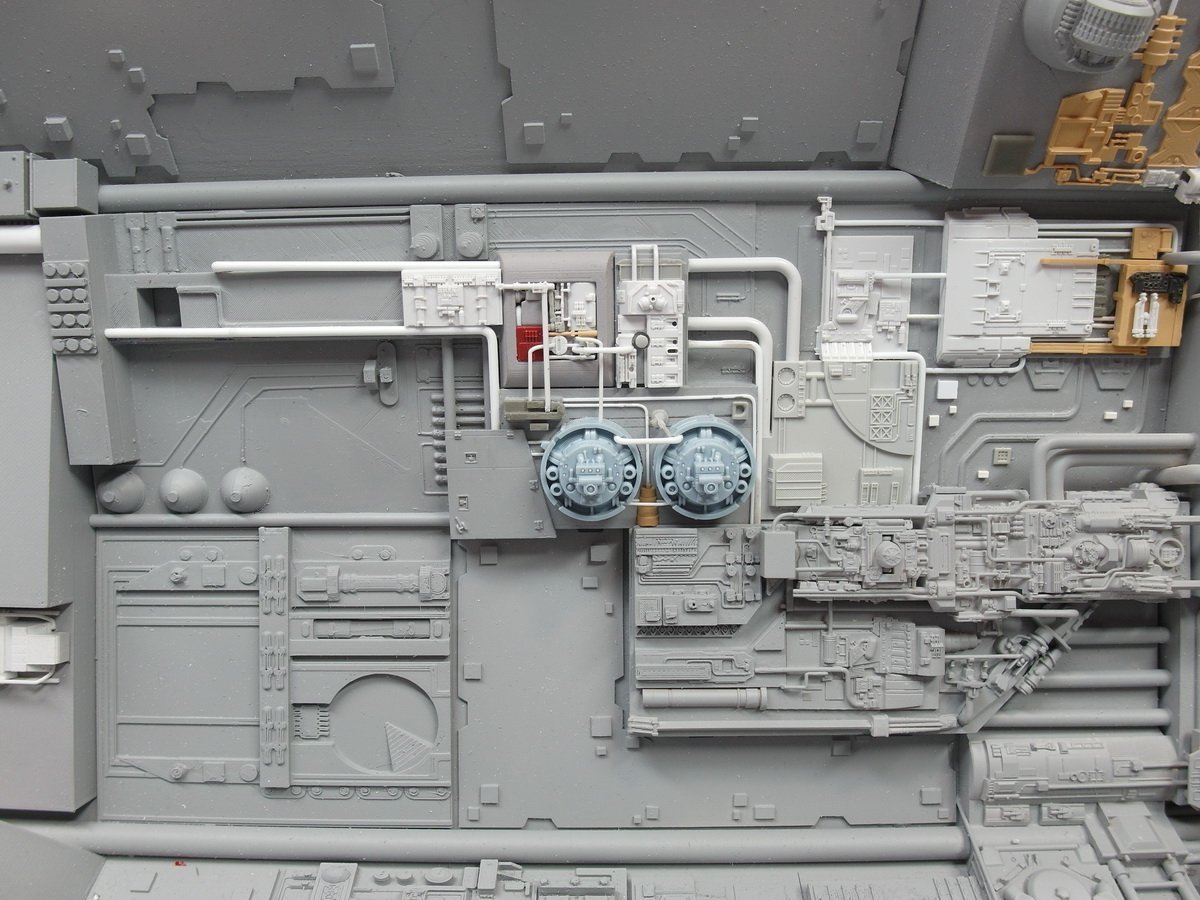
Thanks. After the top two sections were so full of great little details, I have to go back to the base plate. Here I started with the quarter circle and practiced kitbashing. After comparing it with the top plate, I found it to be a little sparse. So I picked out a few more parts and created more details. The newly added parts can be recognized by their lighter surface. The plate already has two filters on it. Consisting of blue-grey and a medium gray which also results in a slight washing. Since I added the Y-fighter parts very late, they enrich the lower section very well. Better filled the plate. And the sides received a few decals.
- 86 replies
-
- 13
-
-
Let’s move on to mid- and high-level preshading. Pannellining and lighting. As well as highlighting individual structures. Now I’m back to the decals, but I’ve had enough for today. 🤤 Everything is slowly coming to fruition.
- 86 replies
-
- 14
-
-
-
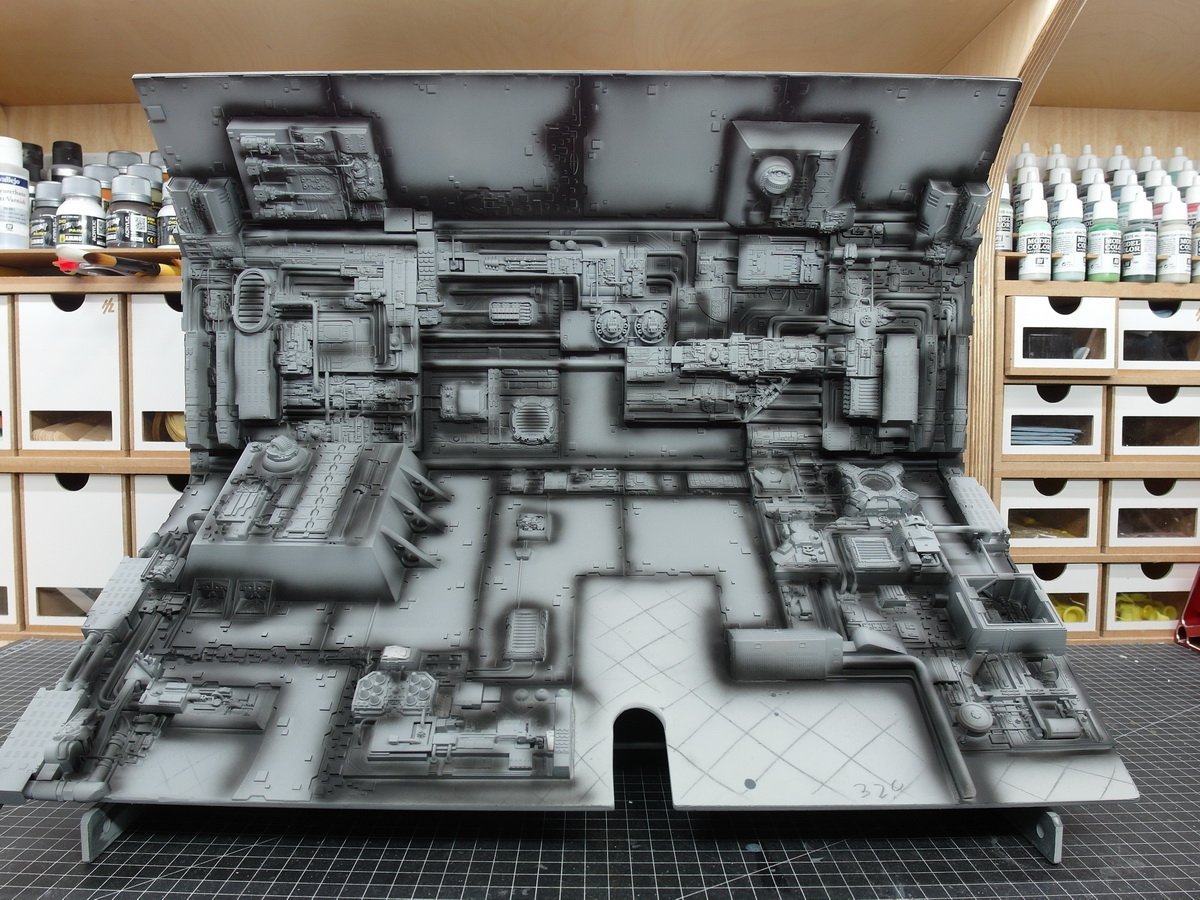
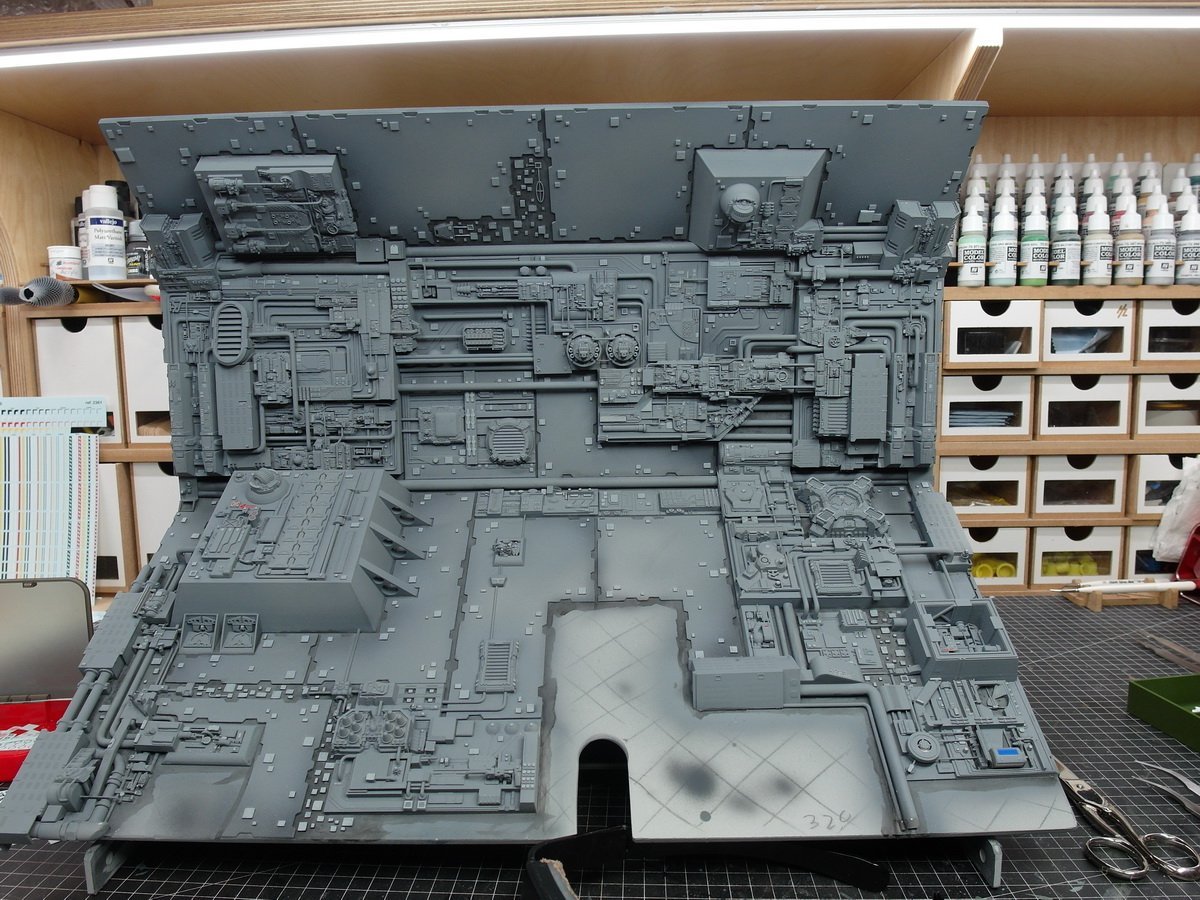
Too much honor, thanks guys. Let’s get to the painting work. First the obligatory pre-shading. Base coat on and decals glued. When it came to panel lining, things got complicated. It doesn’t work here like it does on the falcon model. The plates are only indicated there and the color is drawn into the gaps between them by capillary action. The panels of the diorama are of course glued on and the gap is much larger. That’s why I have to carefully apply the washing color here with a fine brush. But do it with a steady hand. The countless squares emphasized with a light gray. And the armor plates painted a shade of a darker gray in the corners. This way I get greater contrast. I’m pretty happy with that and I can move on to the next round.
- 86 replies
-
- 12
-
-
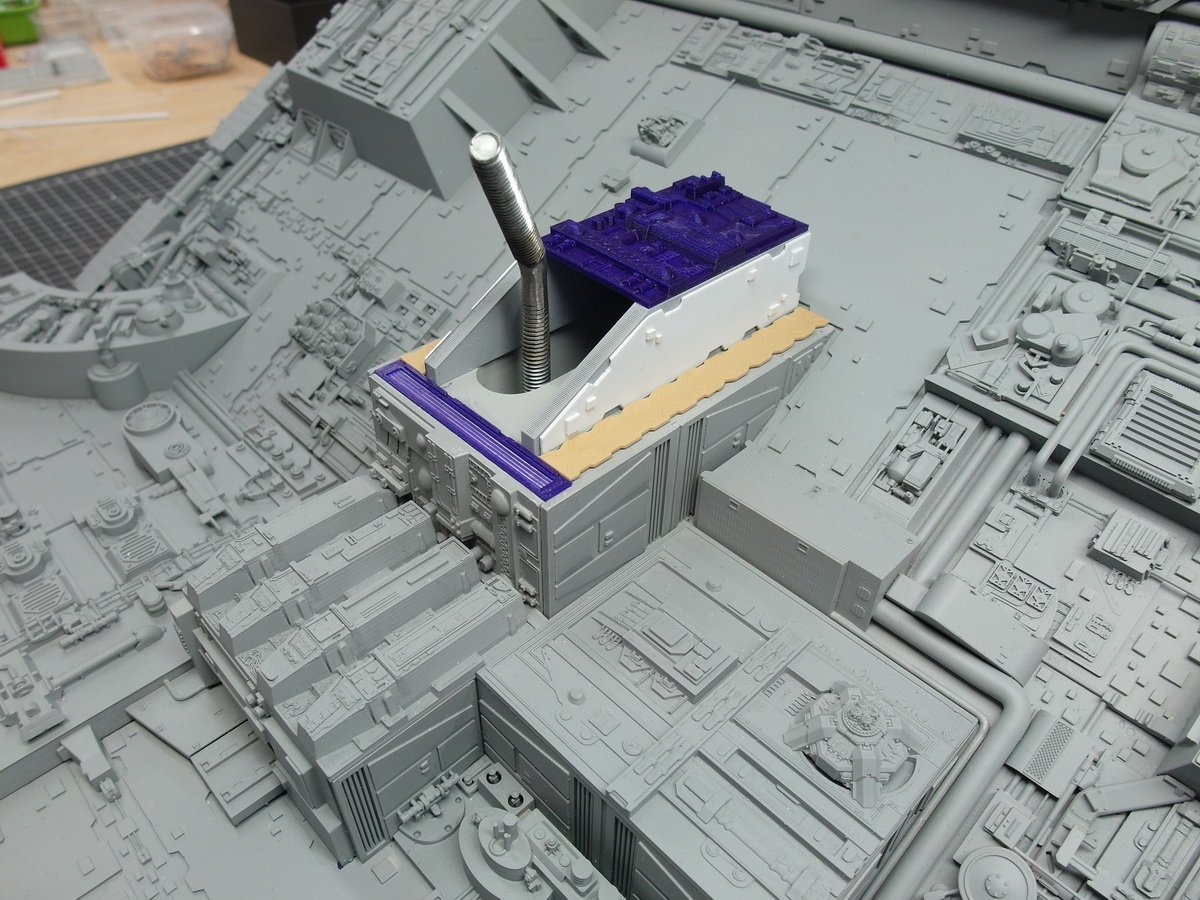
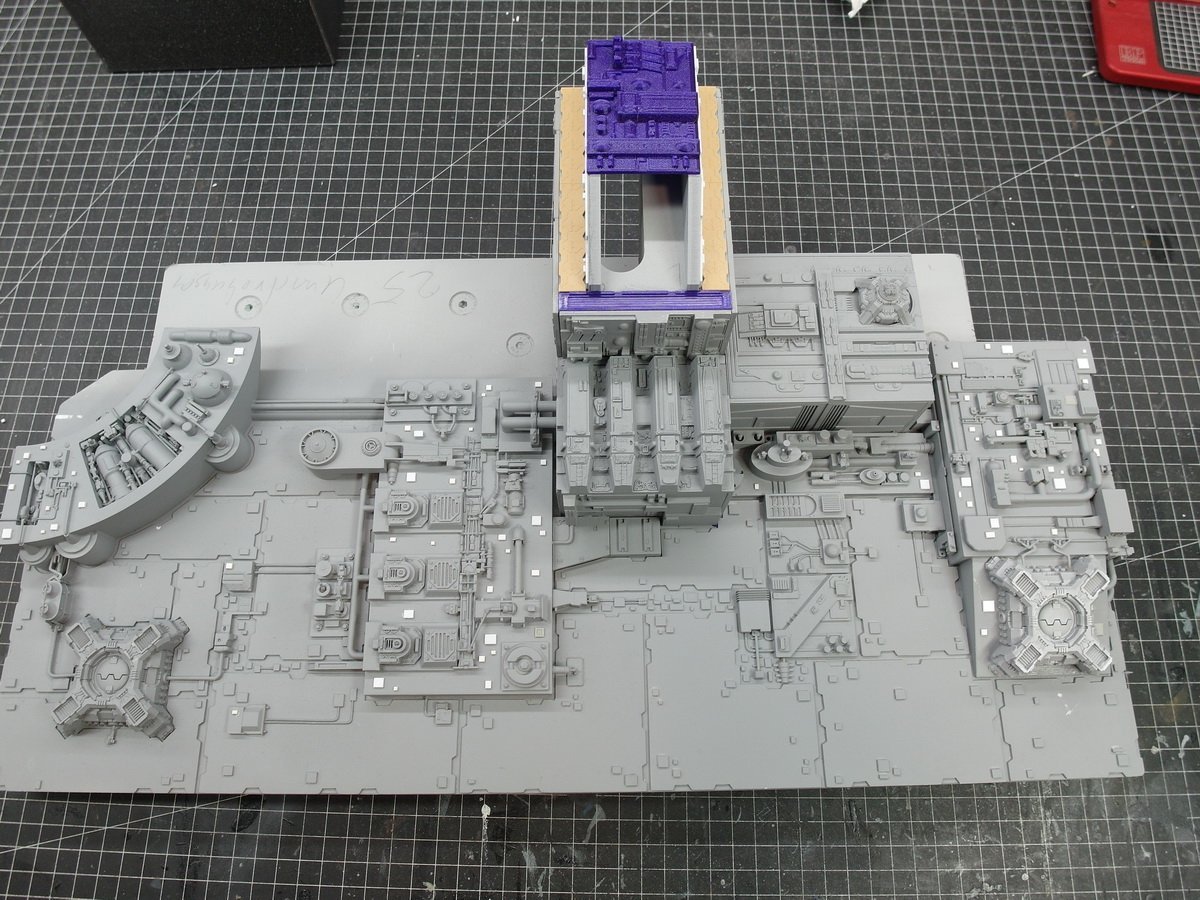
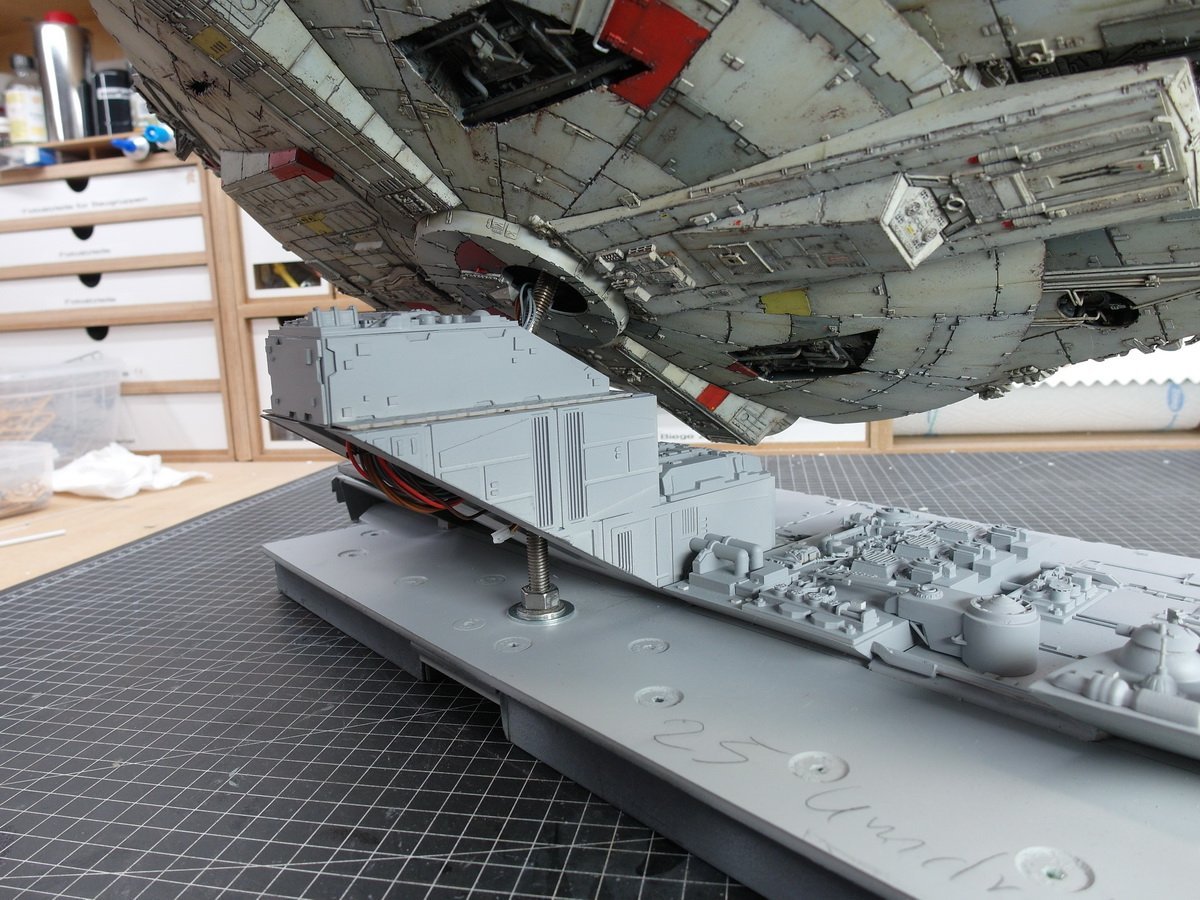
And on we go. Let’s start with the cover for the threaded rod. Printed and covered with styrene. From the paint booth… This should hide the cables and threaded rod quite well. The sides also have to be filled with the obligatory squares. And other Side. This completes the inner section of the star. Let’s get to the cover test. Everything seems to fit. Here are a few more pictures from the final test. The check showed that there were enough tubes and squares. I’m starting to have enough too.

-
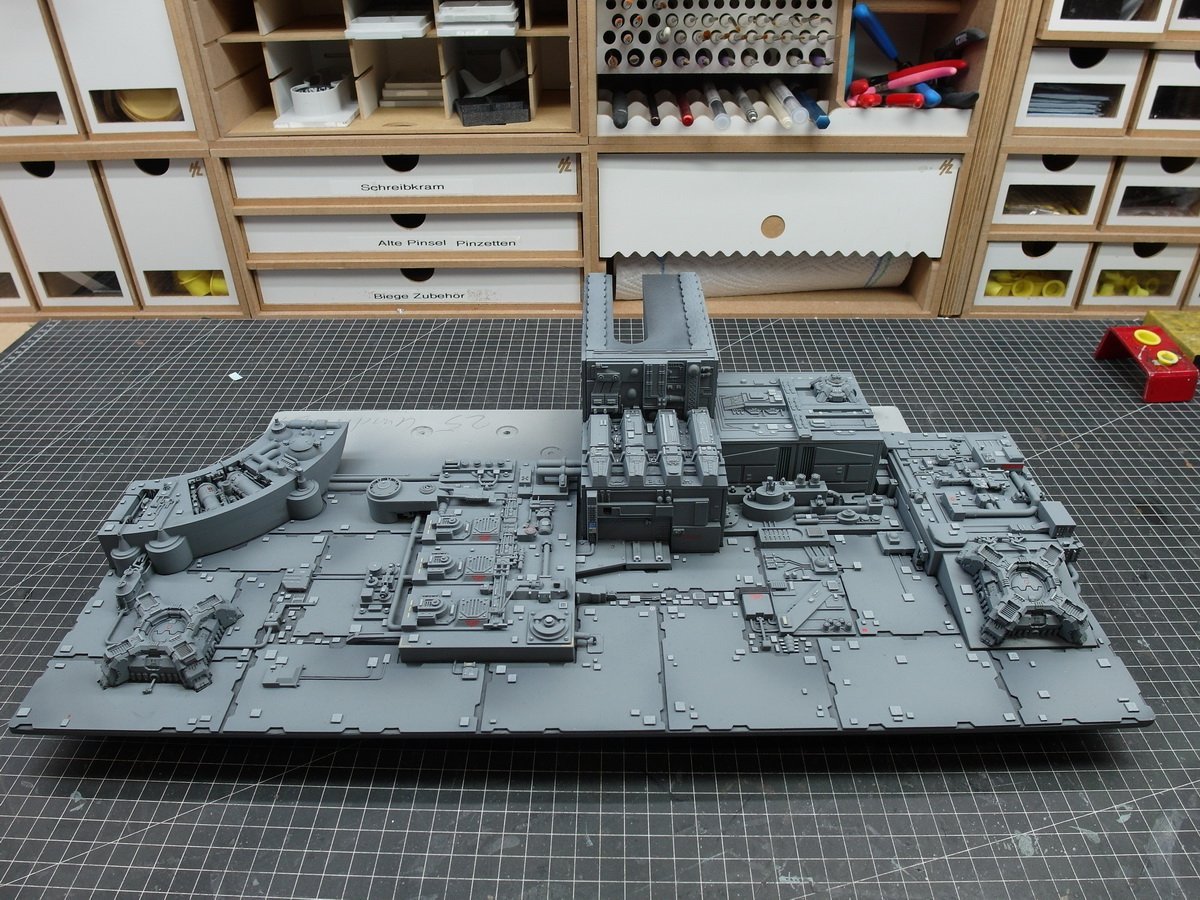
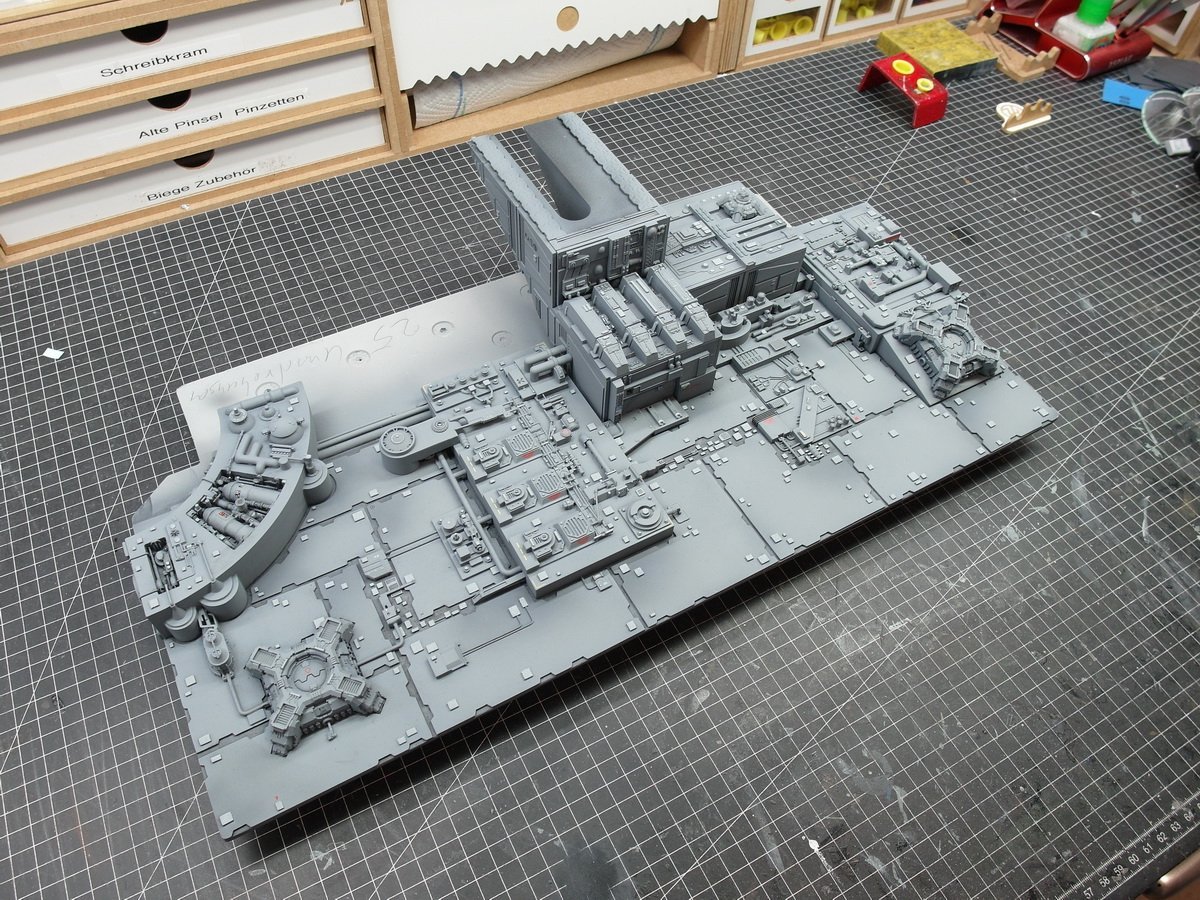
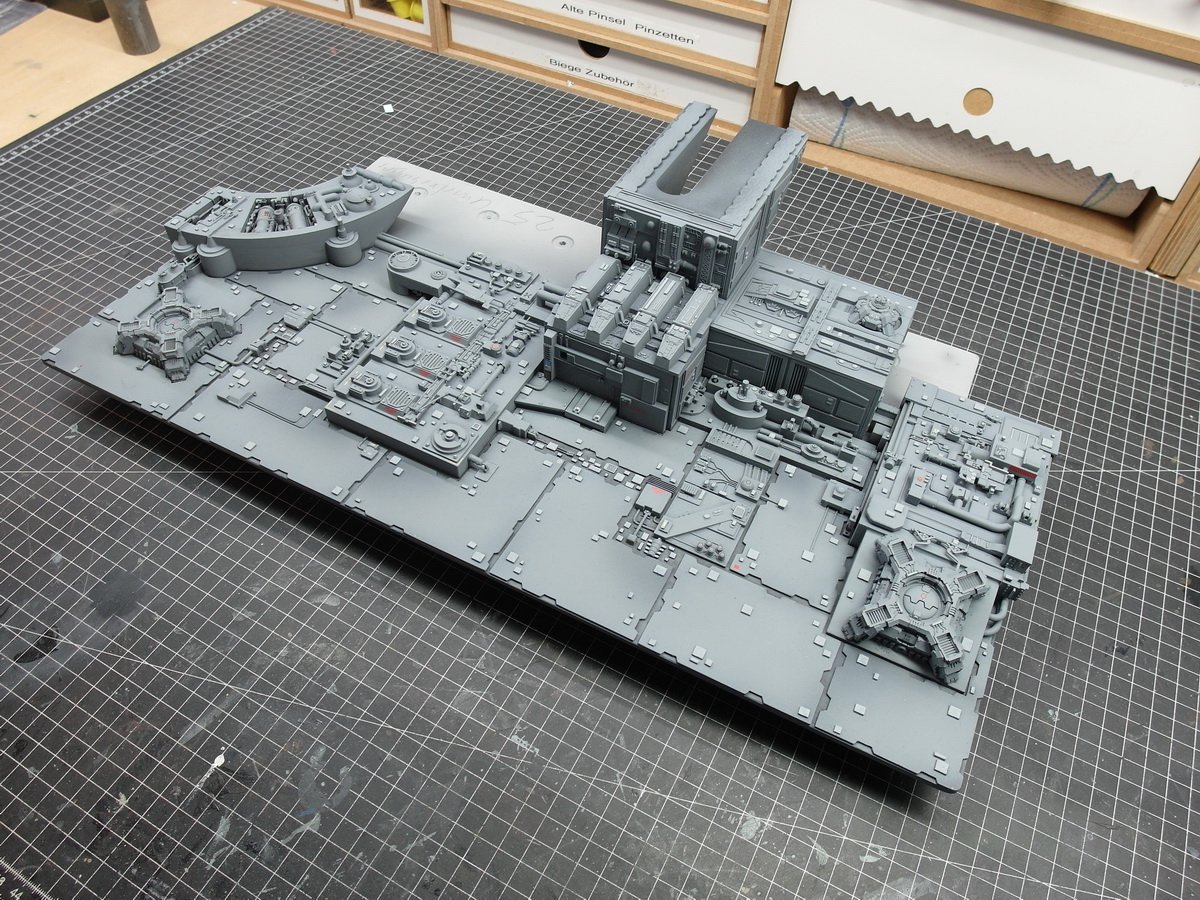
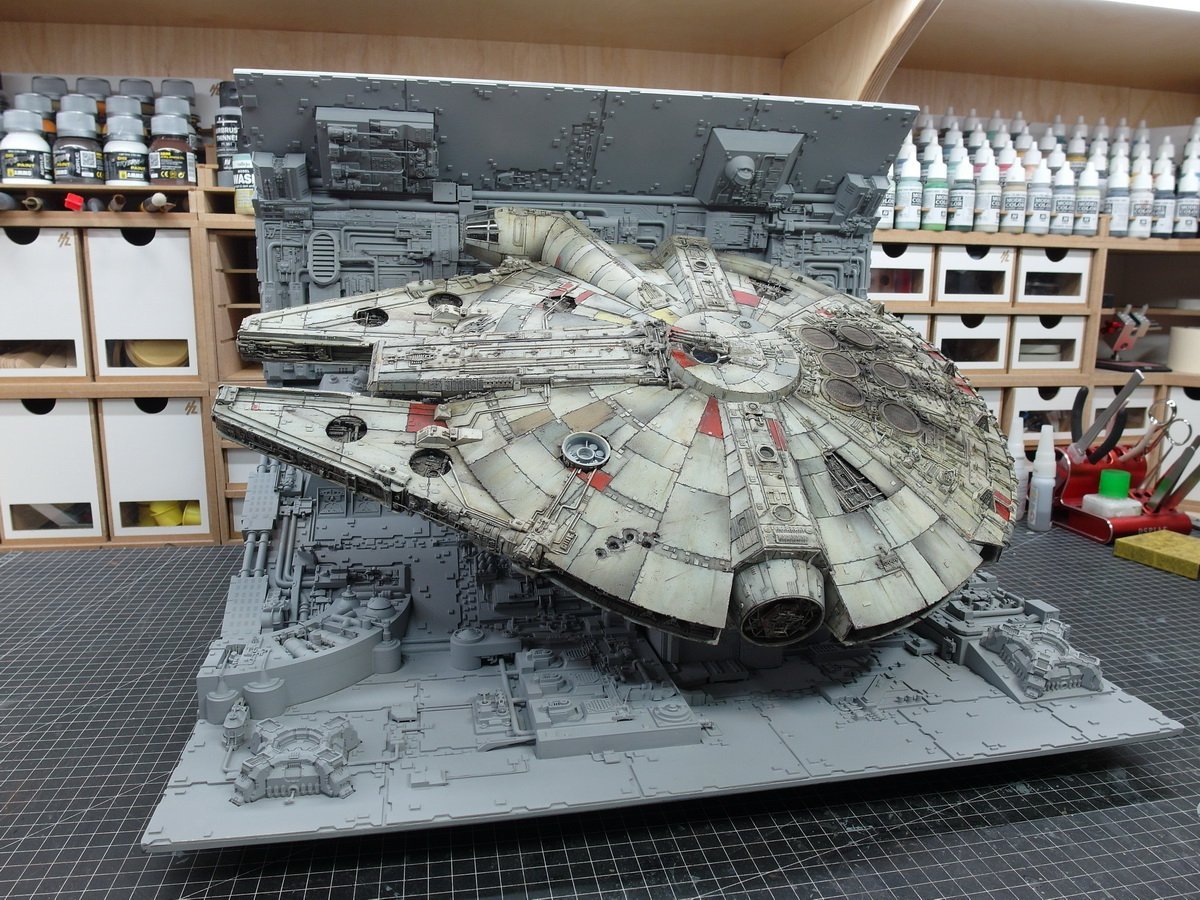
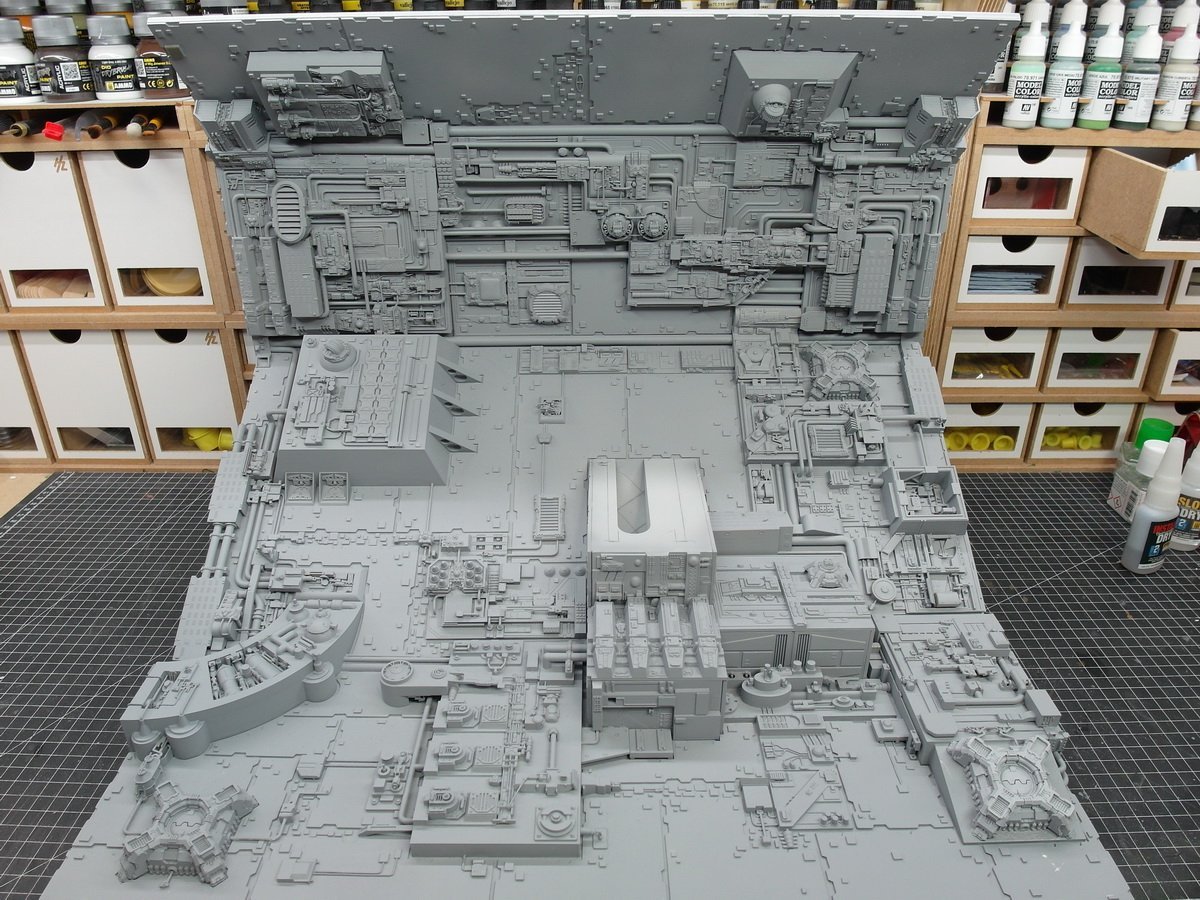
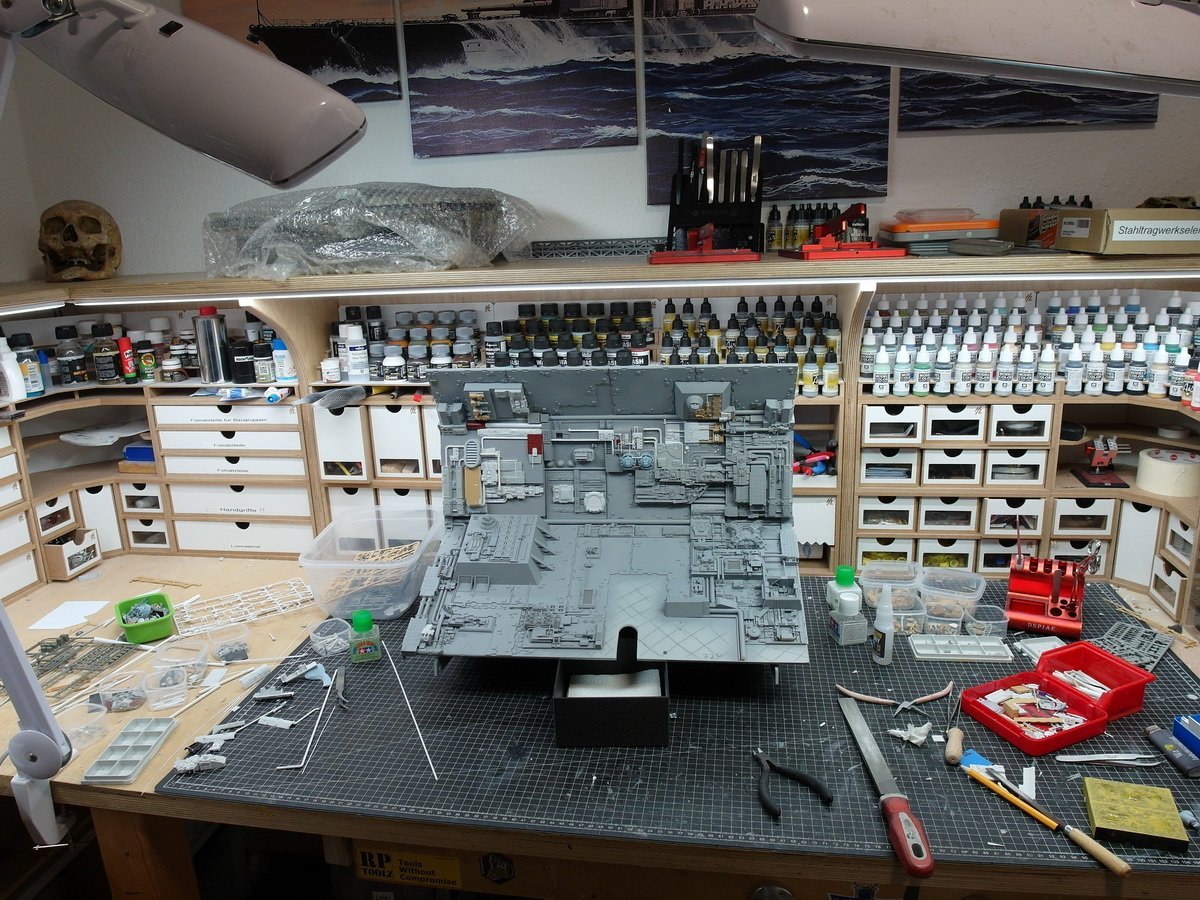
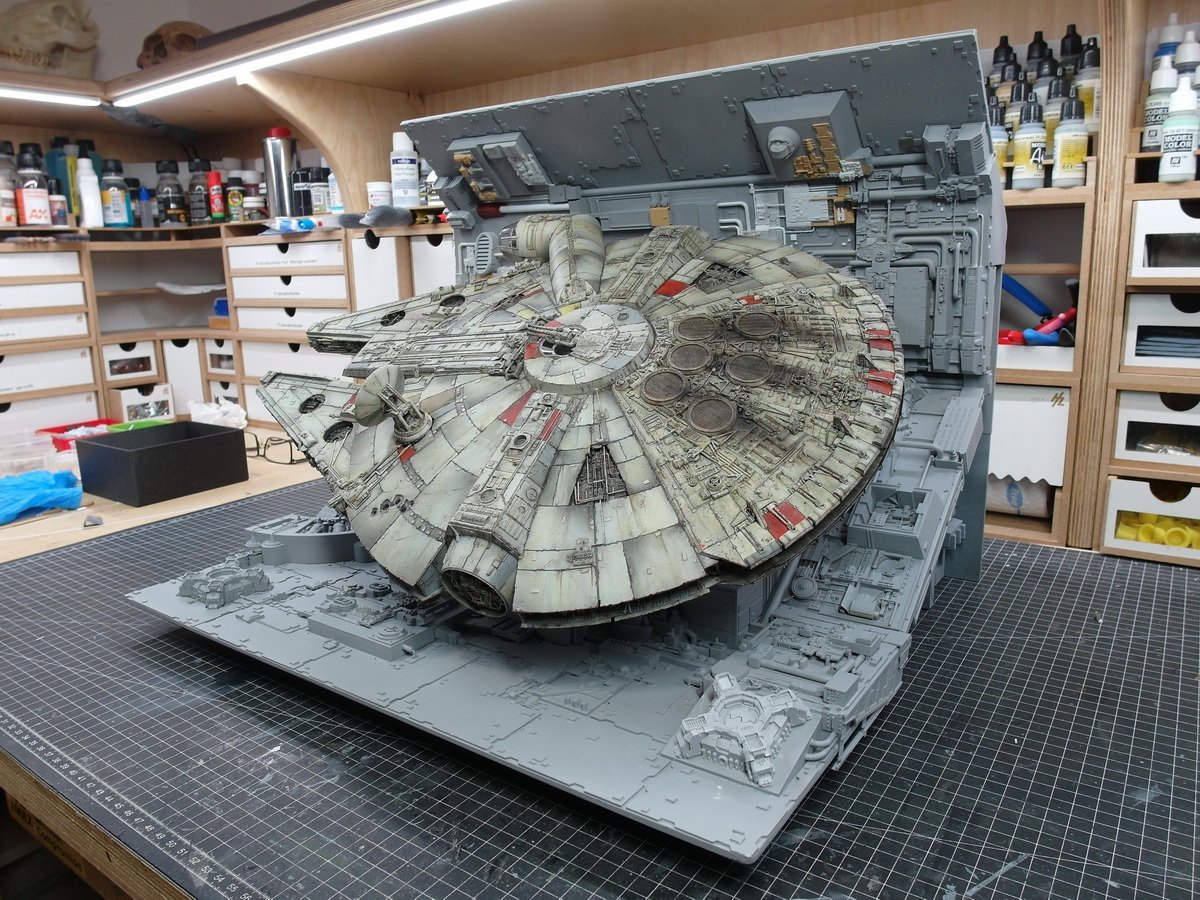
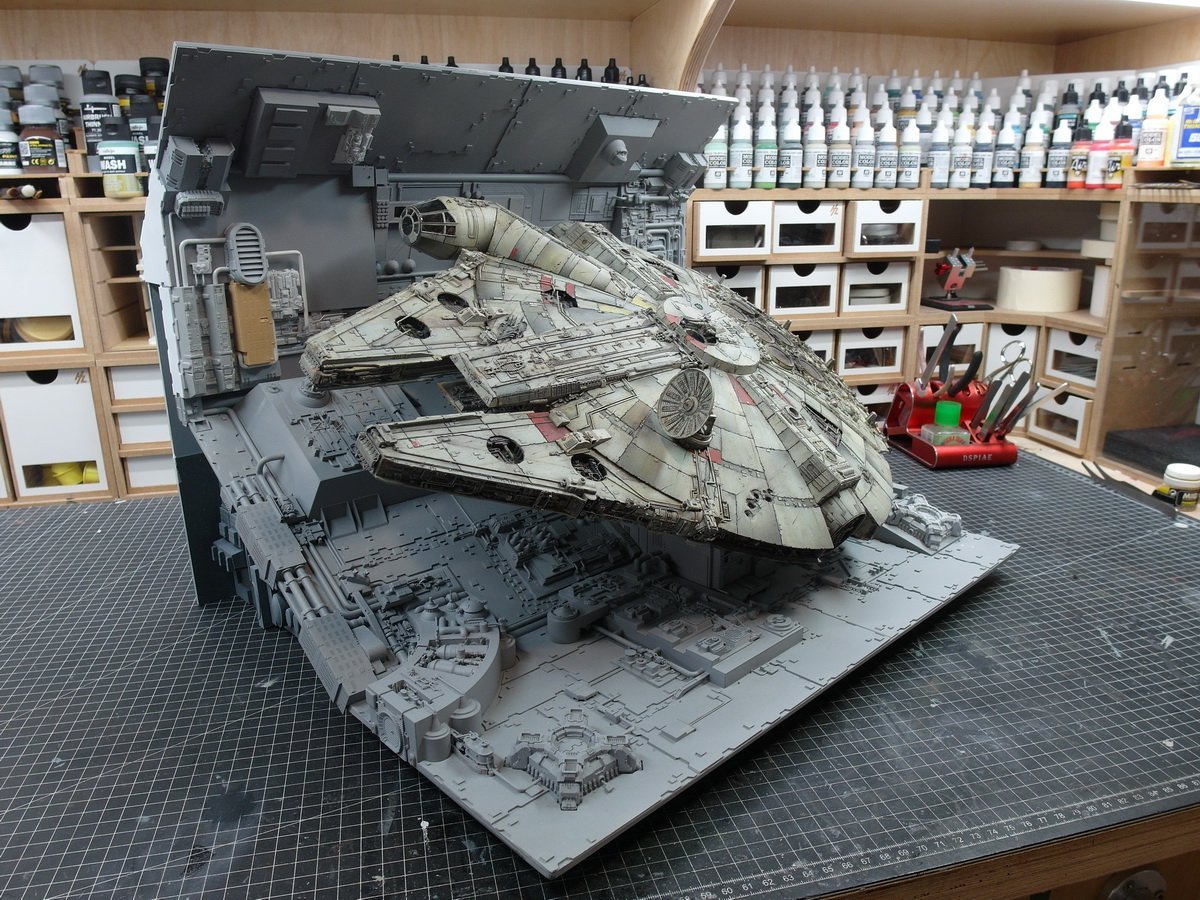
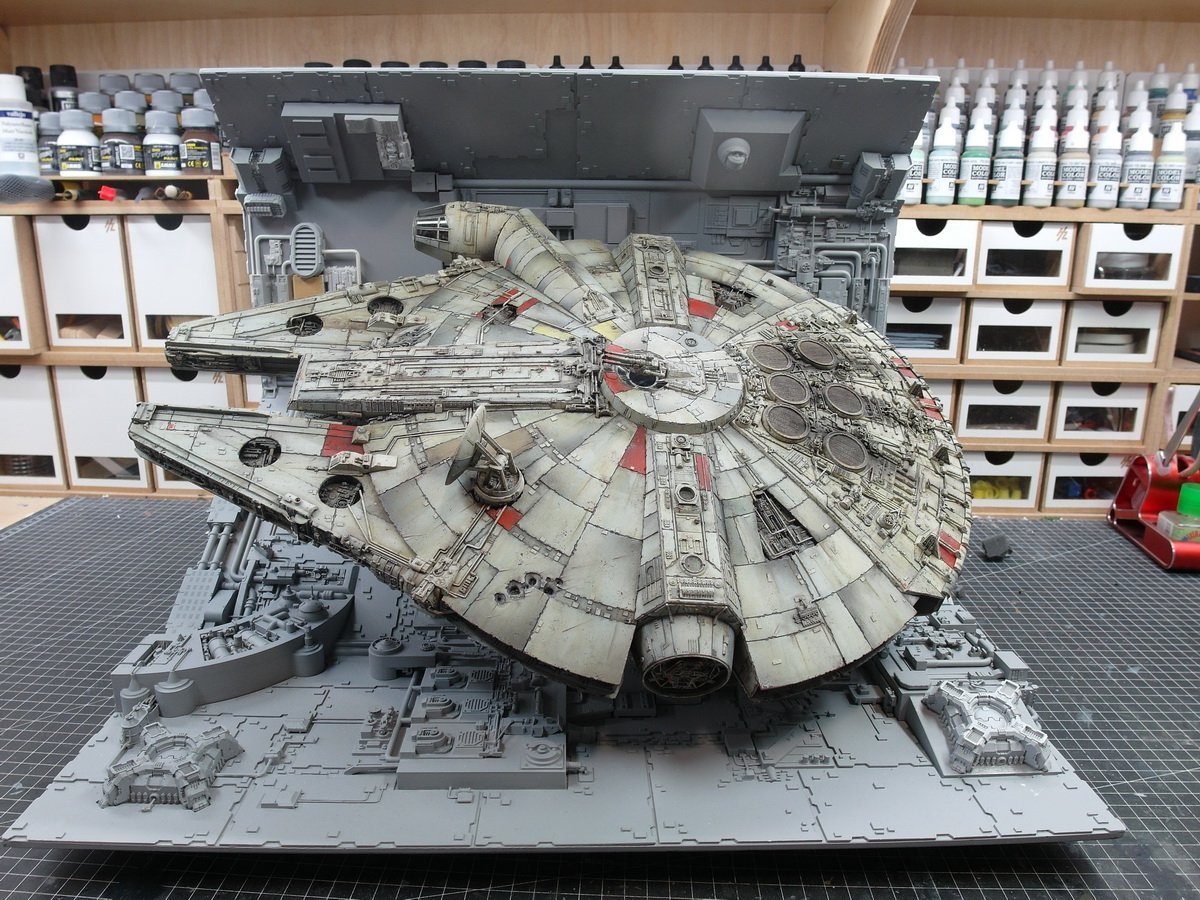
Let’s come to the finale of the middle and upper sections. After cutting what feels like 1000 small plates, we distribute them evenly into the remaining free areas. The Y hunters really pay off. It’s just money anyway. The last pipe was also laid. And with that I present fresh from the paint booth… My very own Death Star. And again in a long shot. Now I have to briefly go back to the lower plate. The covering for the threaded rod needs a surface on top.
- 86 replies
-
- 11
-
-
-
I'm coming to my meeting yesterday. More Y parts… And that happened today. And a few little things in the middle. Now clean up again before we continue.

- 86 replies
-
- 10
-
-
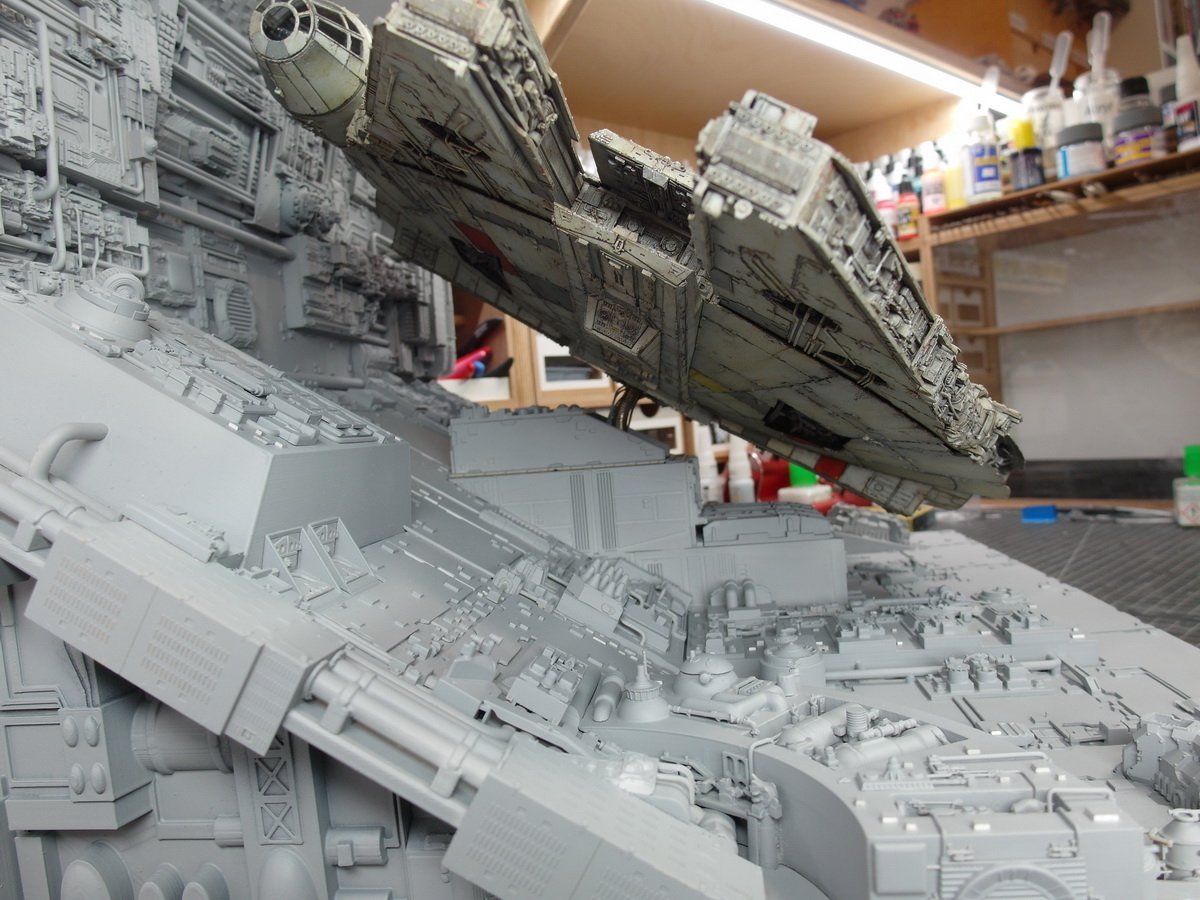
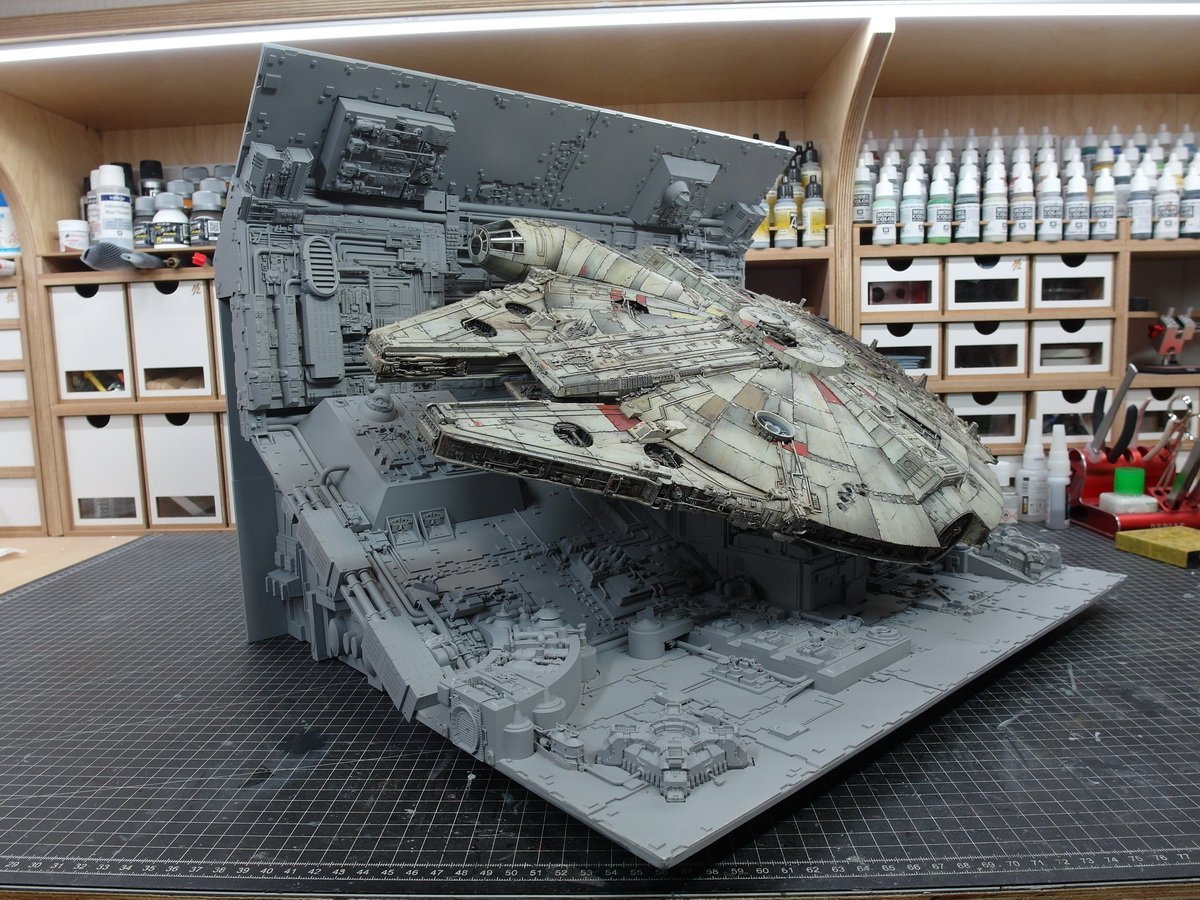
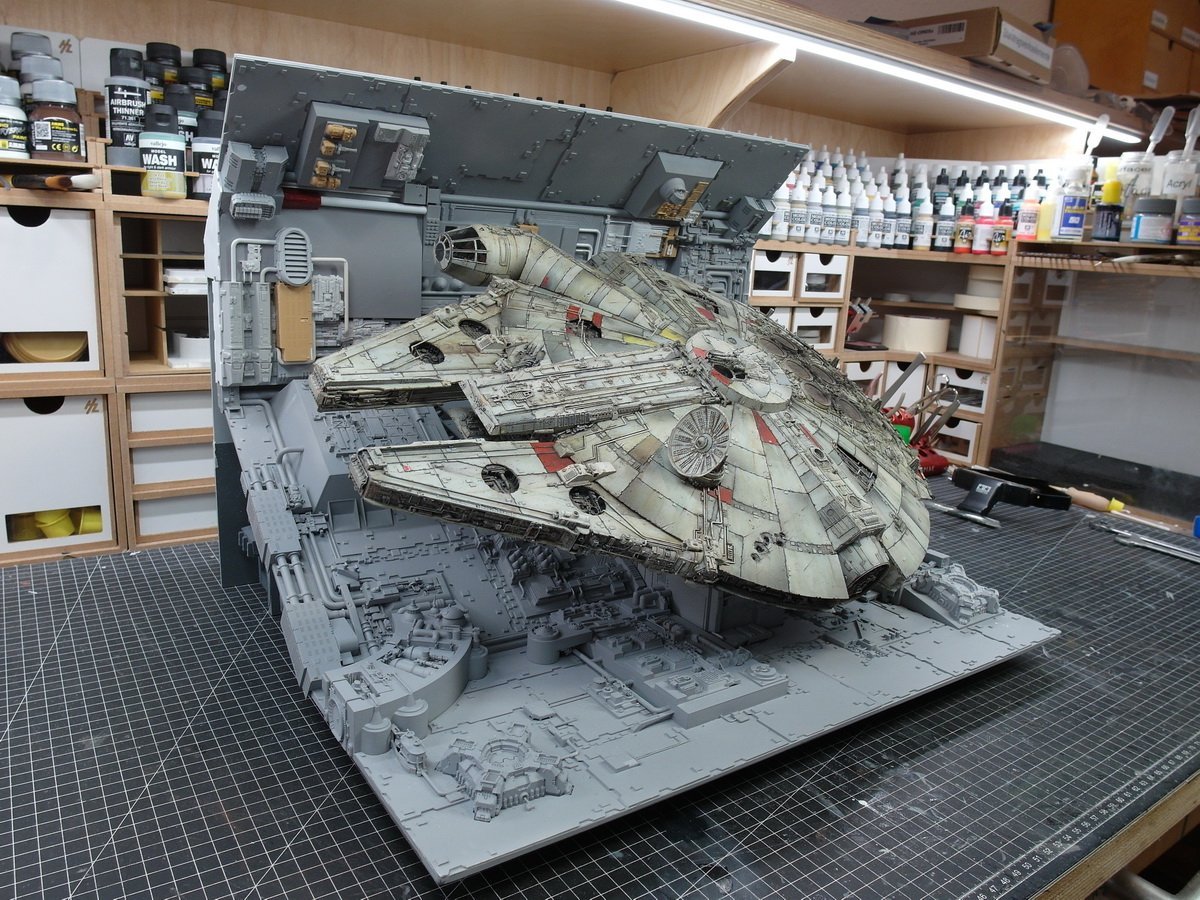
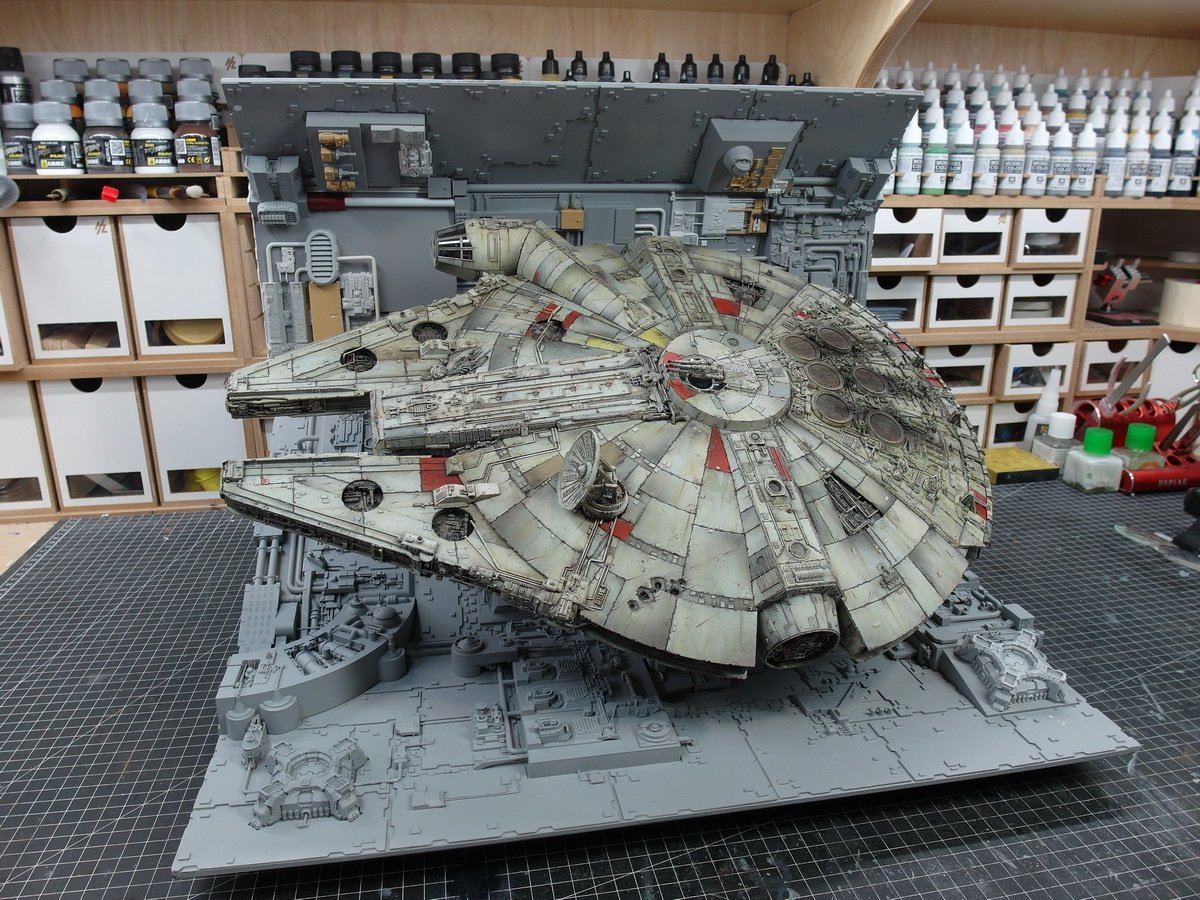
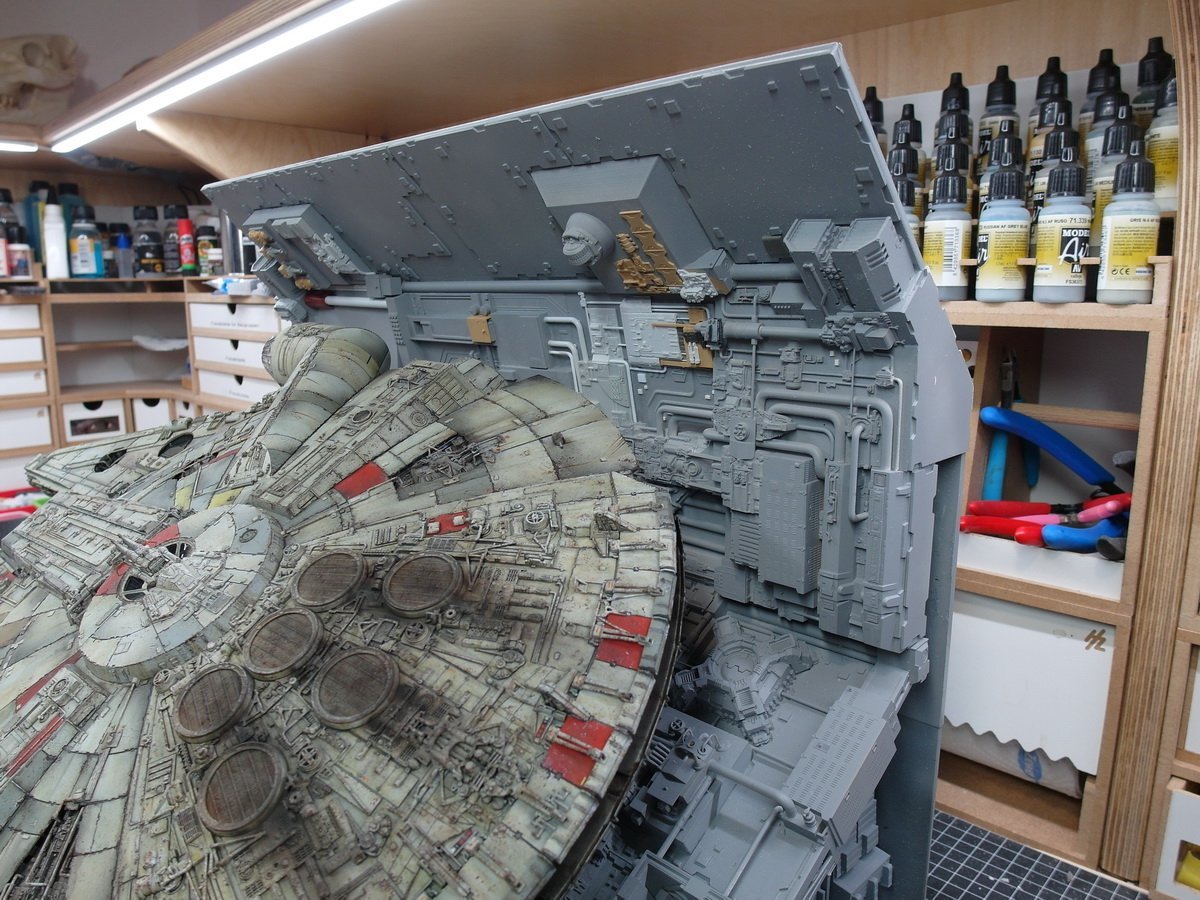
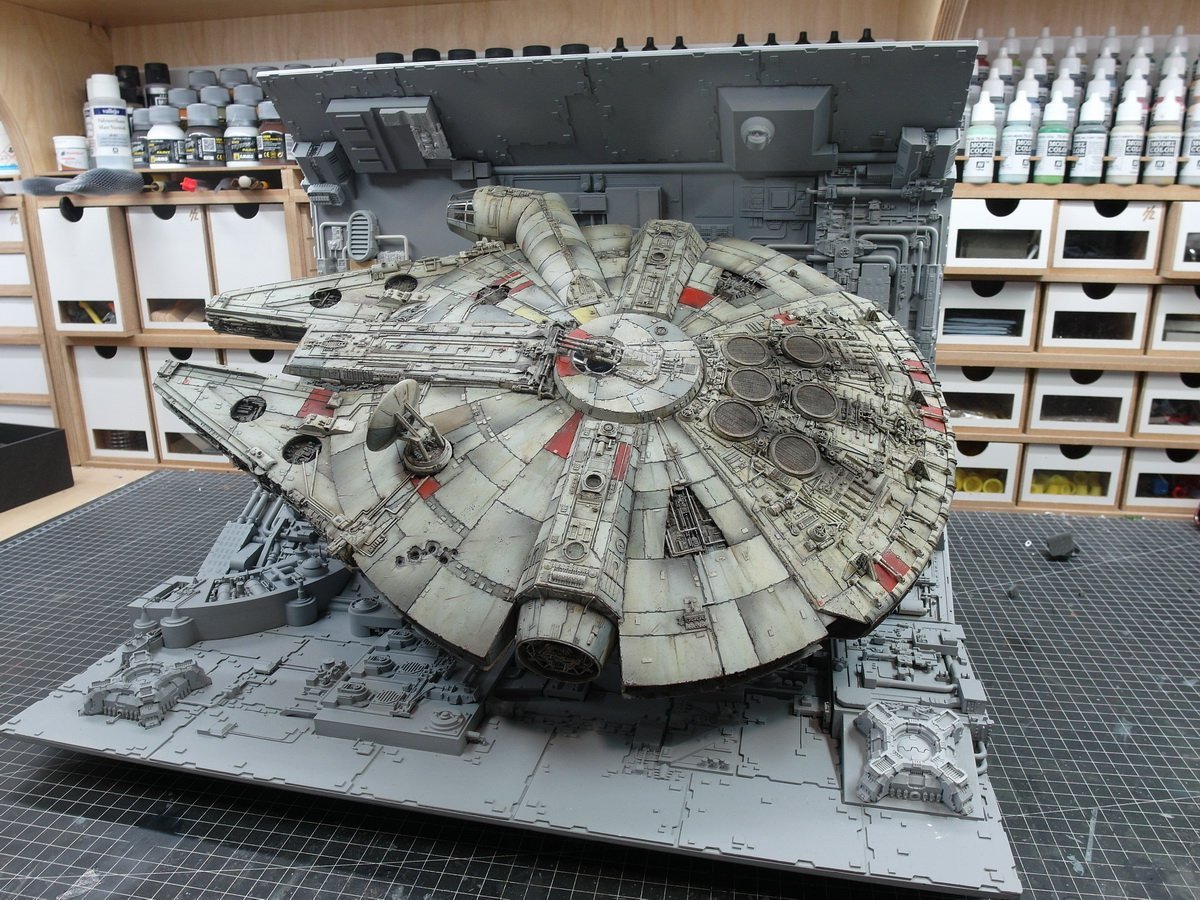
Hello dear model building nerds. Here's a look at my kitbash session today. I didn't really like the position of the bird in the diorama yet. So I tried a slightly longer threaded rod. I think the falcon looks better this way. Not so deep... ...then the backside hangs. This way you can see more of the hard-worked details.
- 86 replies
-
- 13
-
-
-
Hello together. I haven’t made much progress at the moment and just did another test today. So that I can see where more or less fine details need to go. At the top center, for example, more parts have to go than previously assumed. Whereas on the right side behind the falcon there are more than enough.😄 So march forward.
- 86 replies
-
- 12
-
-
Just a little update. The second side is also covered. Another printed steelwork beam was made to see if it would fit.
- 86 replies
-
- 10
-
-
Thank you, Mike. I am very pleased. And here, new material for you. 😉 The sides are painted, but not yet equipped with the small Styrene rectangles. So I can put it on the side so I can continue working there. Now further detail the basic structures I created. All I see in my mind’s eye are tubes. 😅 Buying the Bandai Y Hunter was definitely worth it. Won many small applications for kitbashing again. And in gray it looks like this. Now we can go to the other side.


- 86 replies
-
- 14
-
-
-
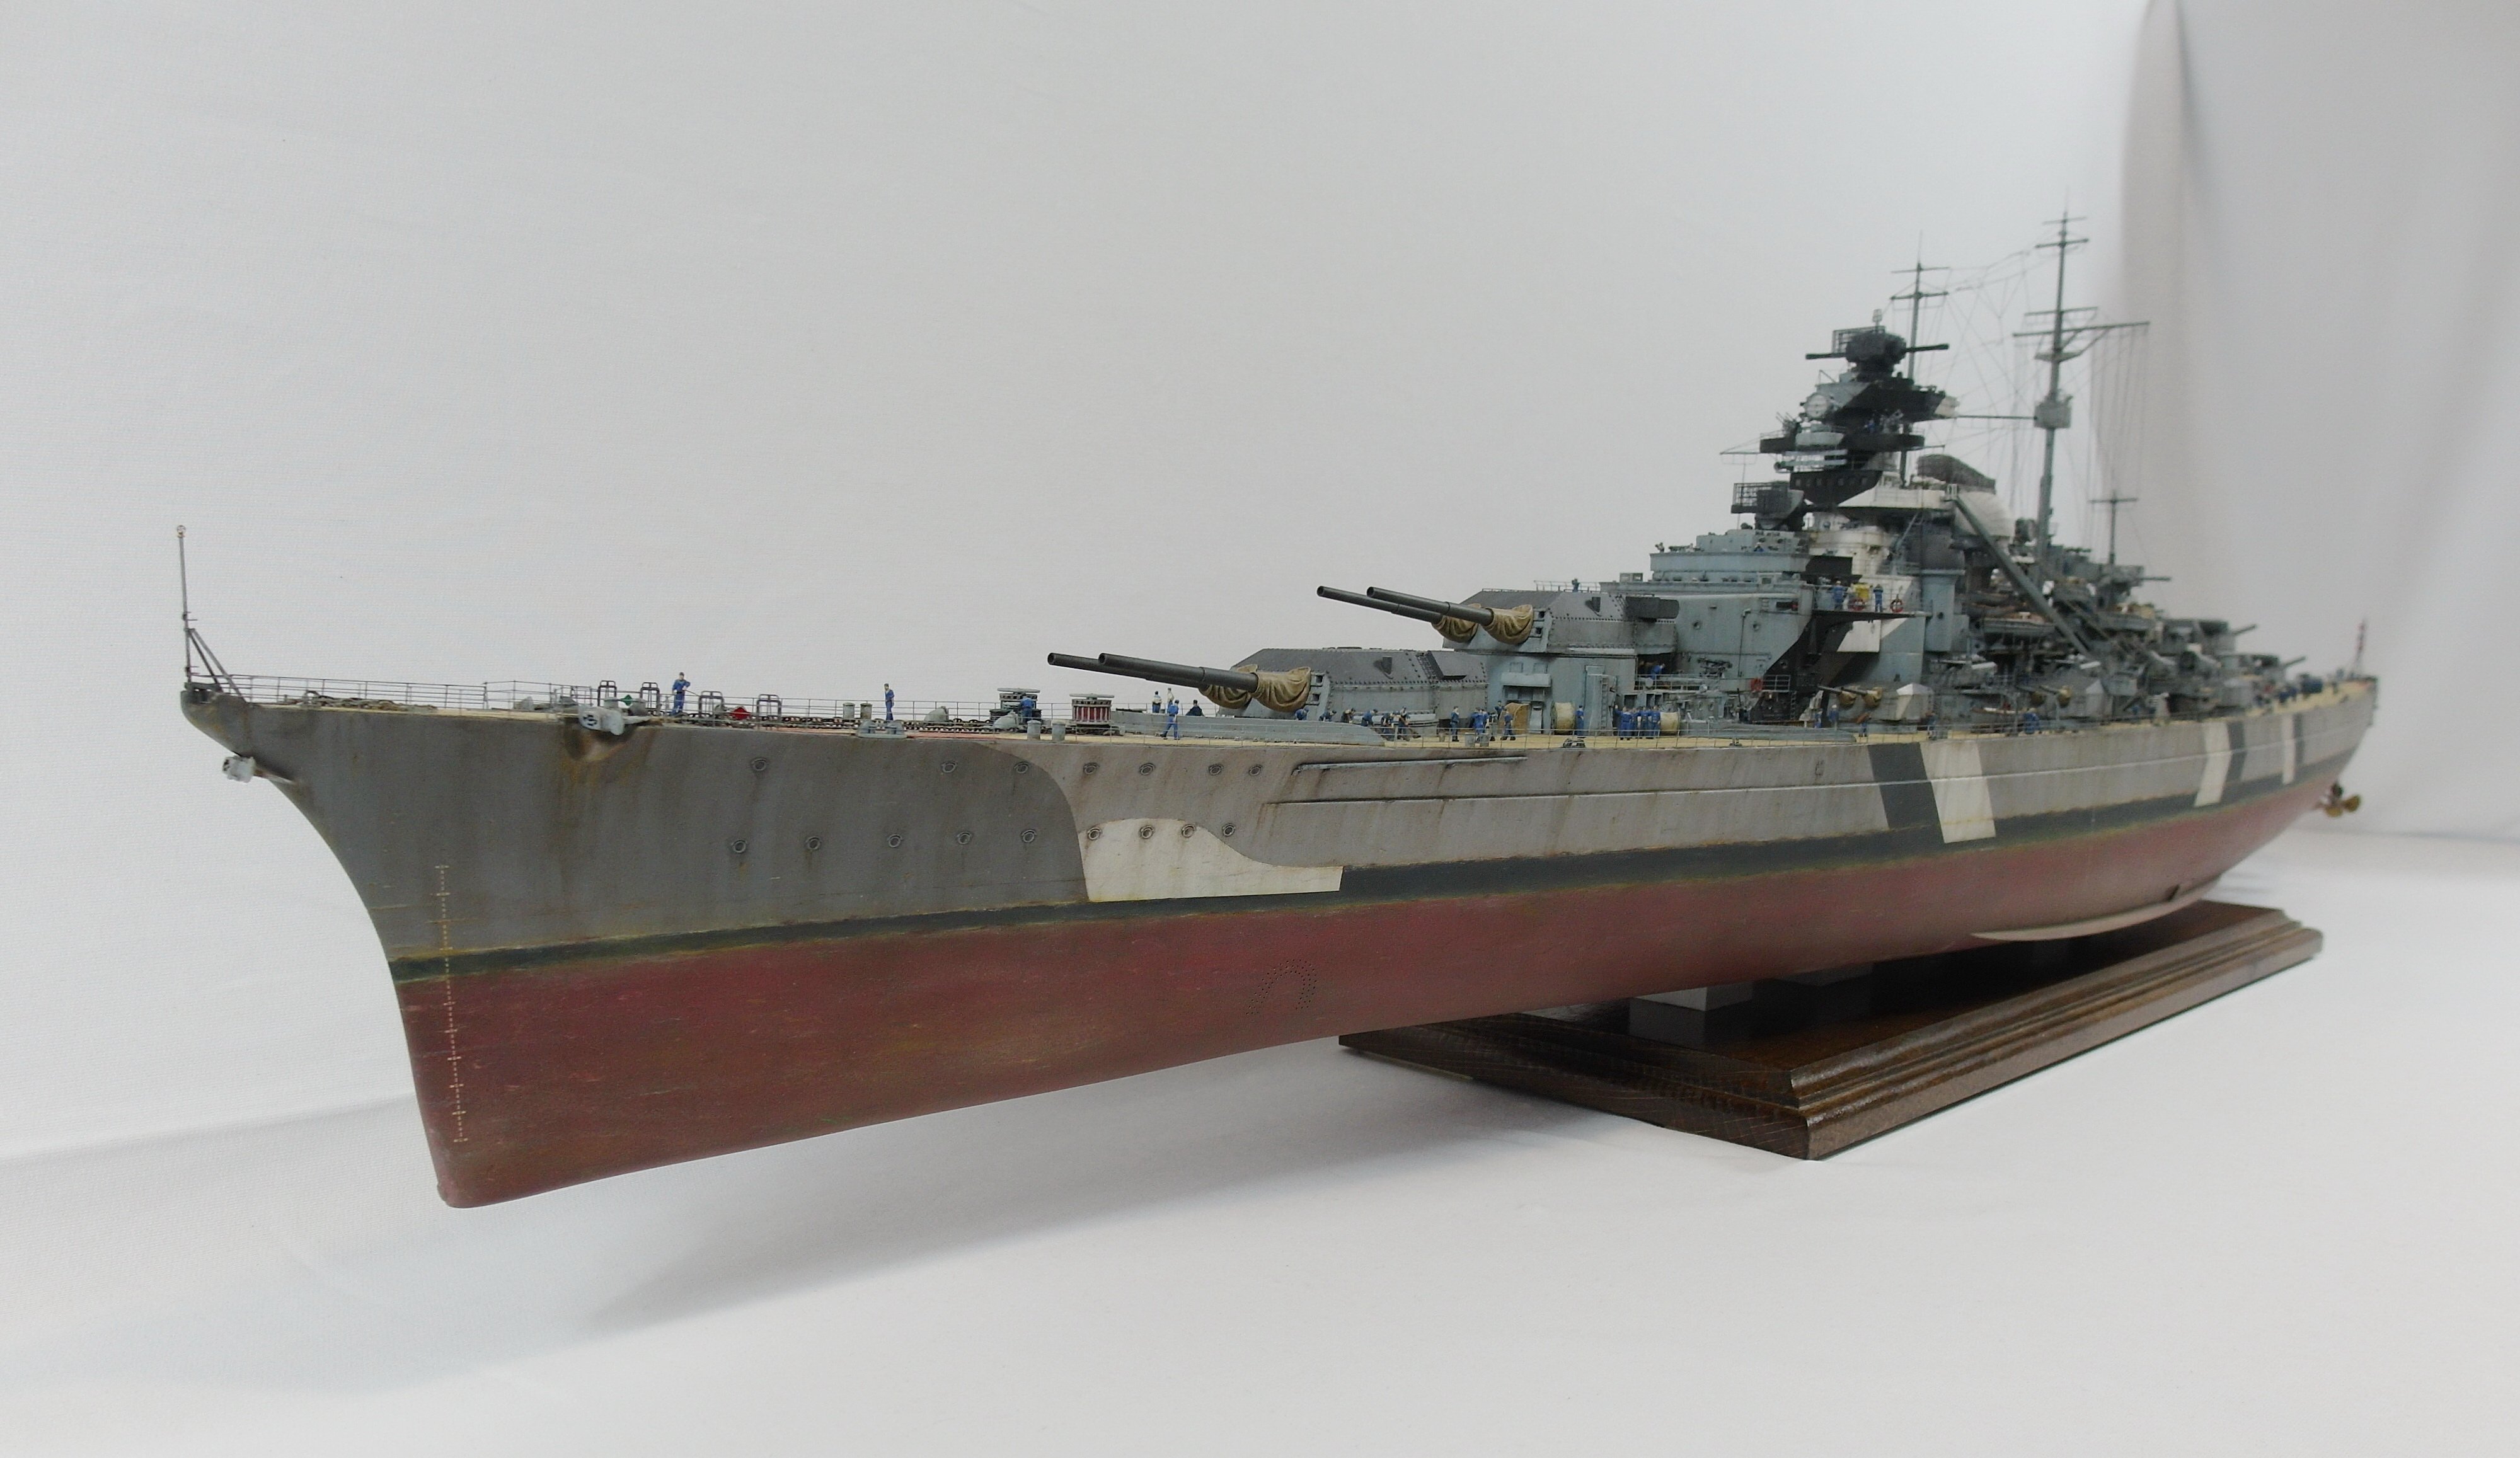
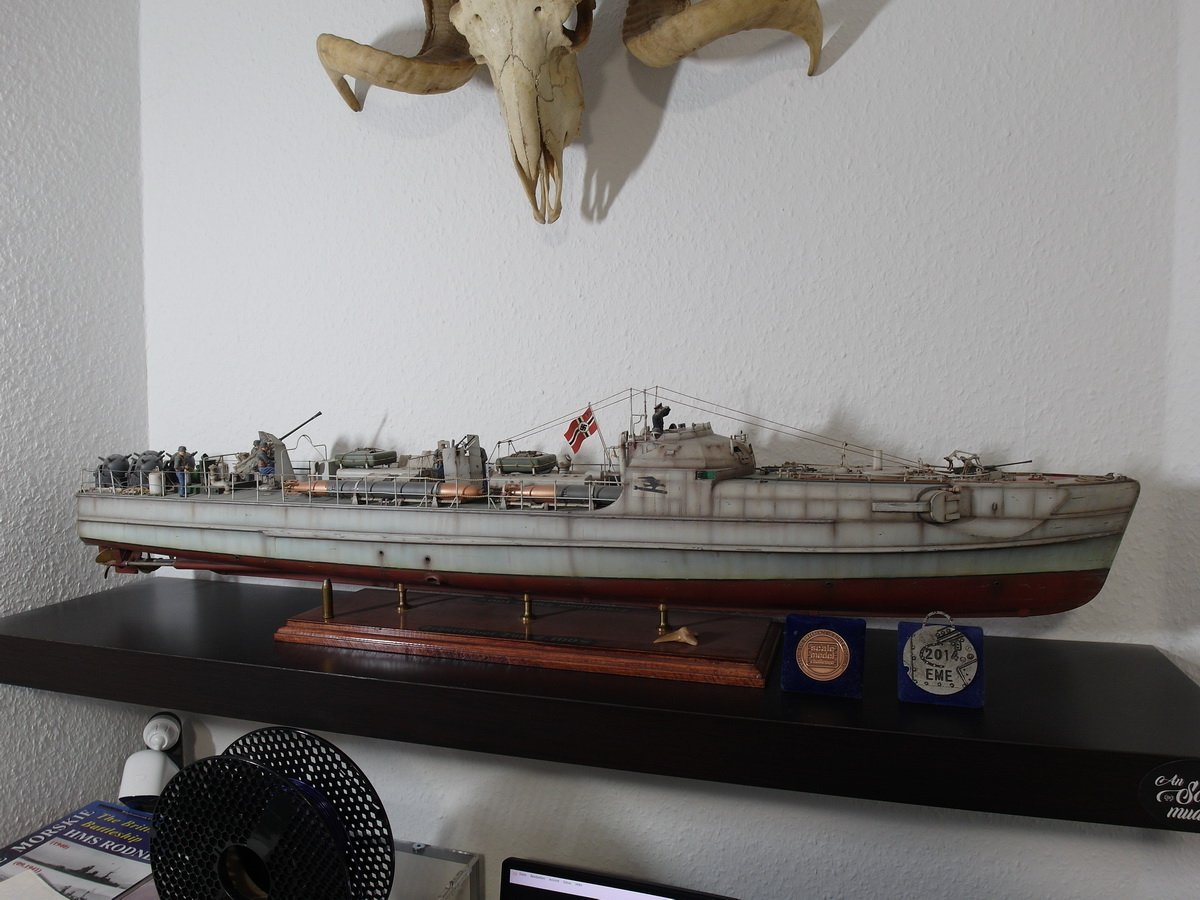
Thank you all. I had a lot of fun sharing my model with you. And I too am already looking forward to my next ship.
-
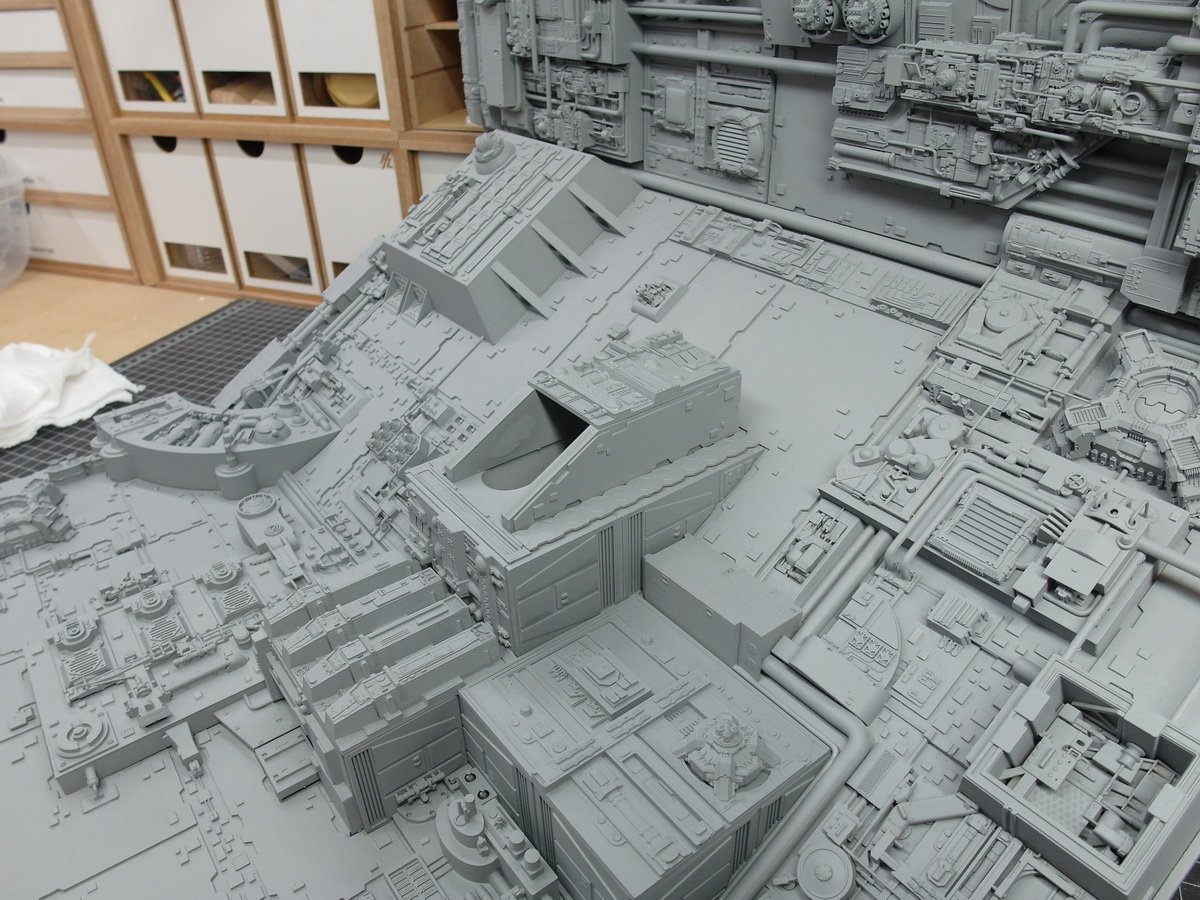
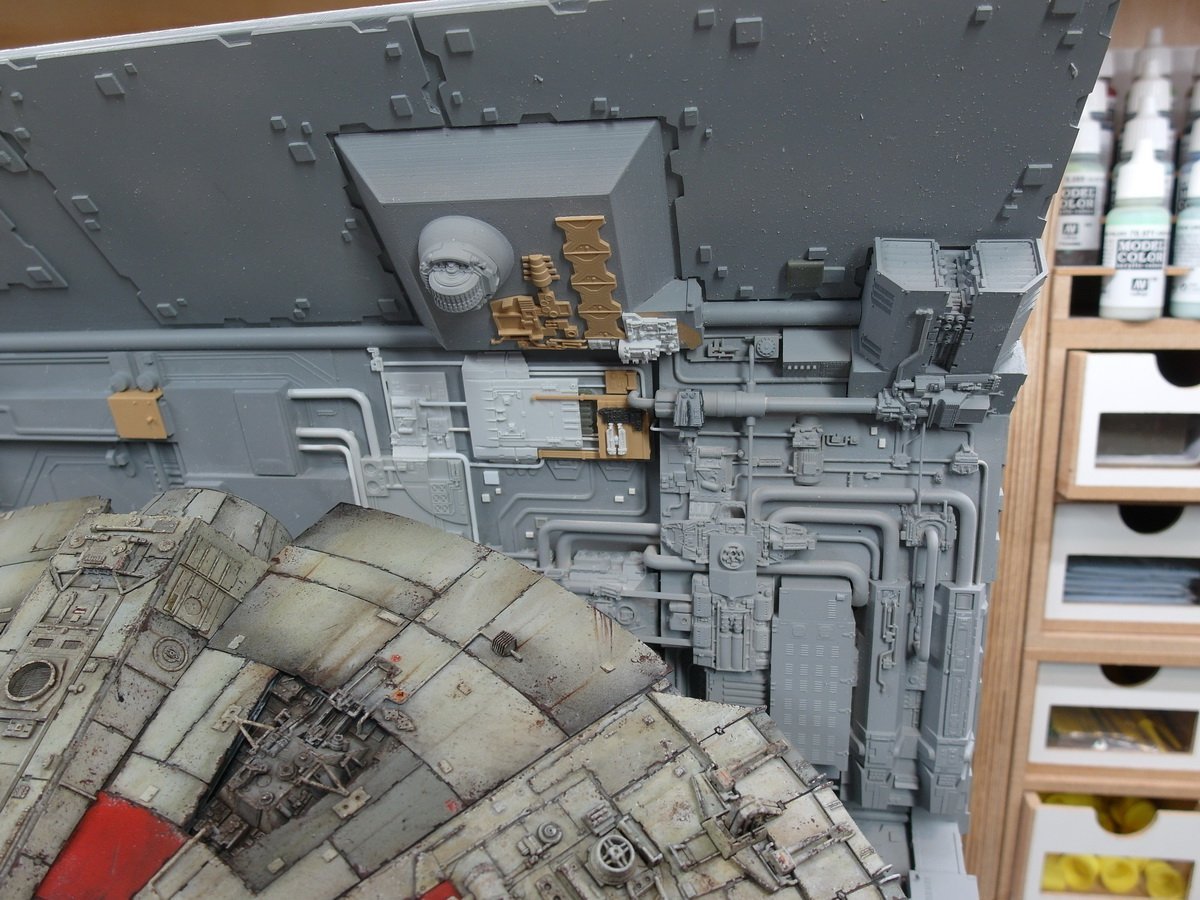
That pleases me. After a short creative break, we can continue fresh. First, armor plates were cut and attached to the top. Then on the right the structure started to be built further. Some people will probably call me crazy, but I got the Y-Wing Starfighter and the A-Wing Starfighter from Bandai to exploit. 😵 I’m slowly running out of good, adequate kitbash parts. Here you can see, for example, the sawn-off half of the Y-Wing stand. These are also covered with styrene panels. The right interior of the framework was provided with a printed plate, which I use like this. Super fine details are not so important here. This is part of the original Death Star interface that can be freely downloaded online. Primed with grease it should be enough to cover the print marks. This thing is starting to get really heavy. 😅
- 86 replies
-
- 12
-
-
-
1/200 Trumpeter IJN YAMATO - issued by MRC/Gallery Models
madtatt replied to yvesvidal's topic in REVIEWS: Model kits
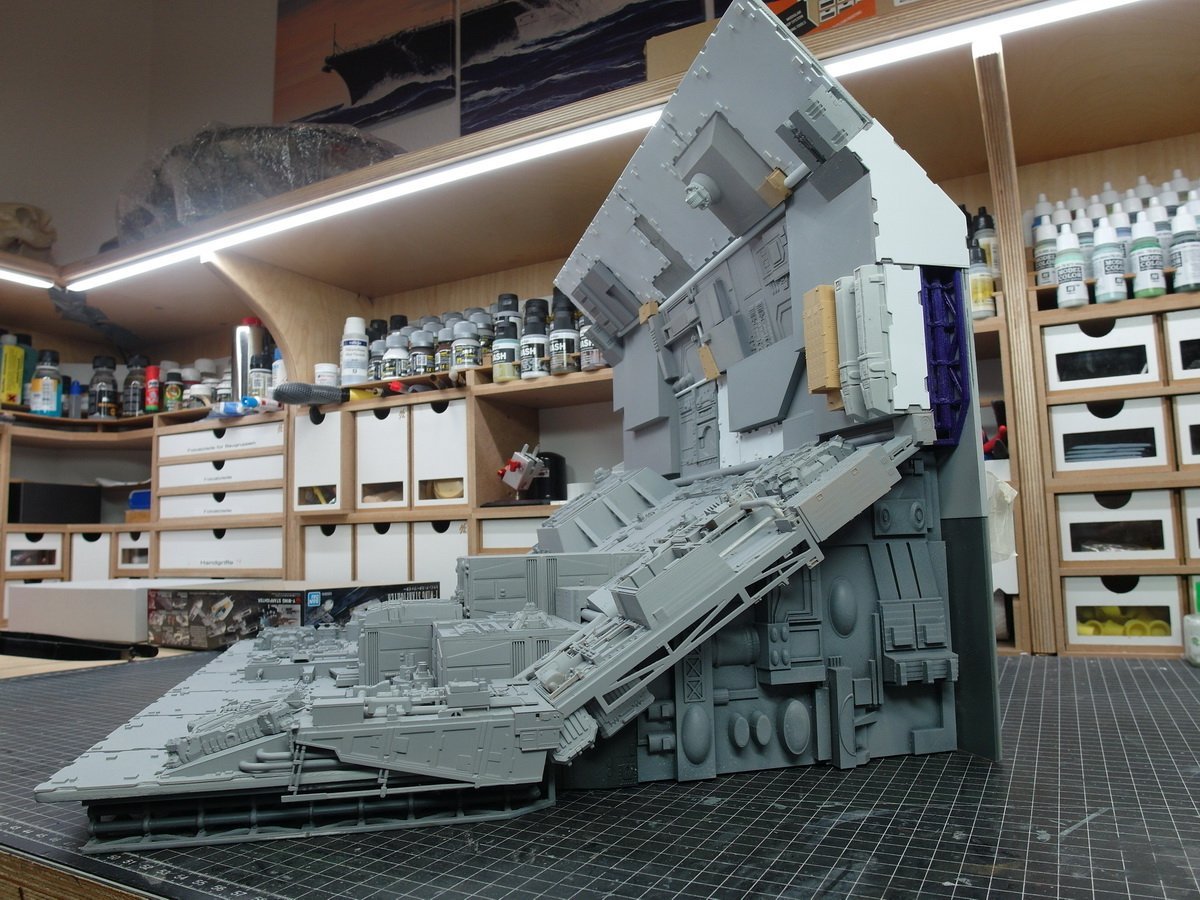
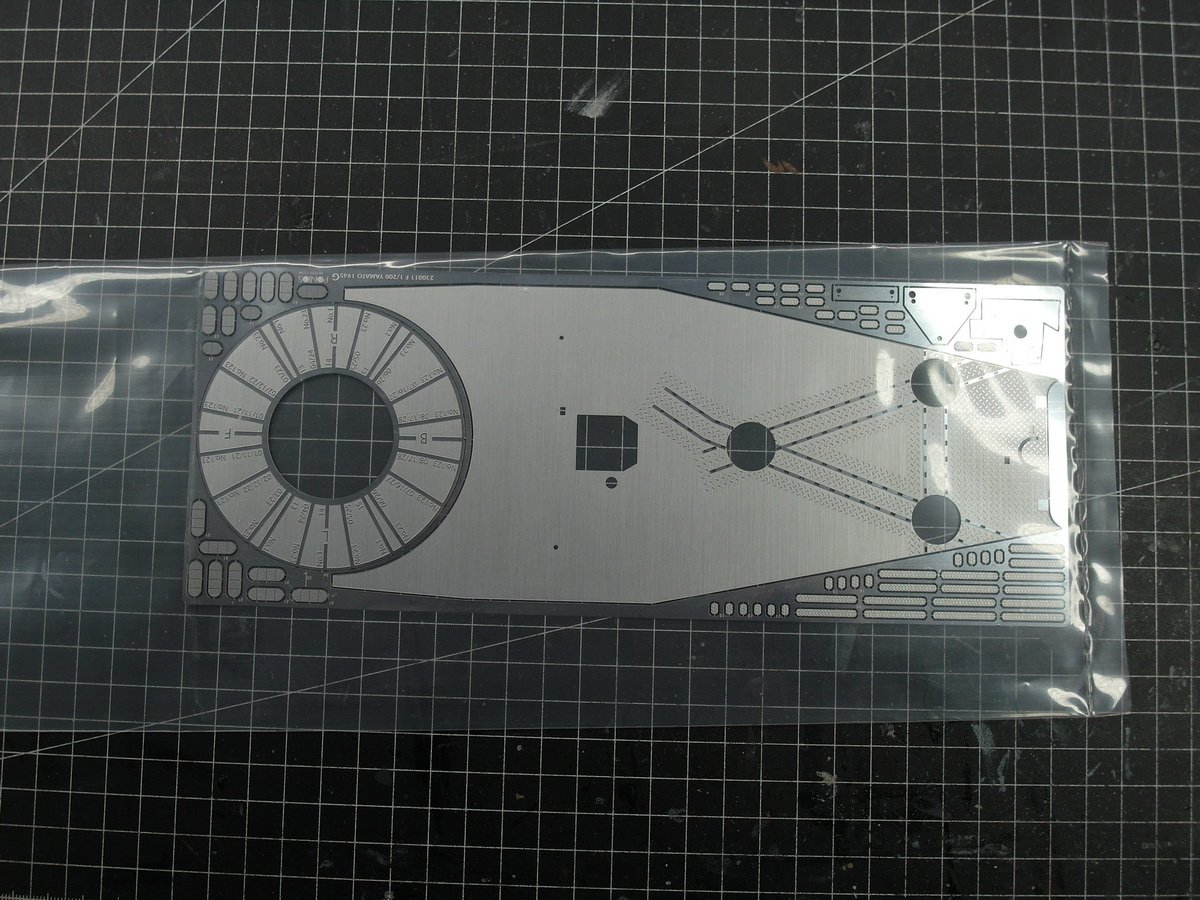
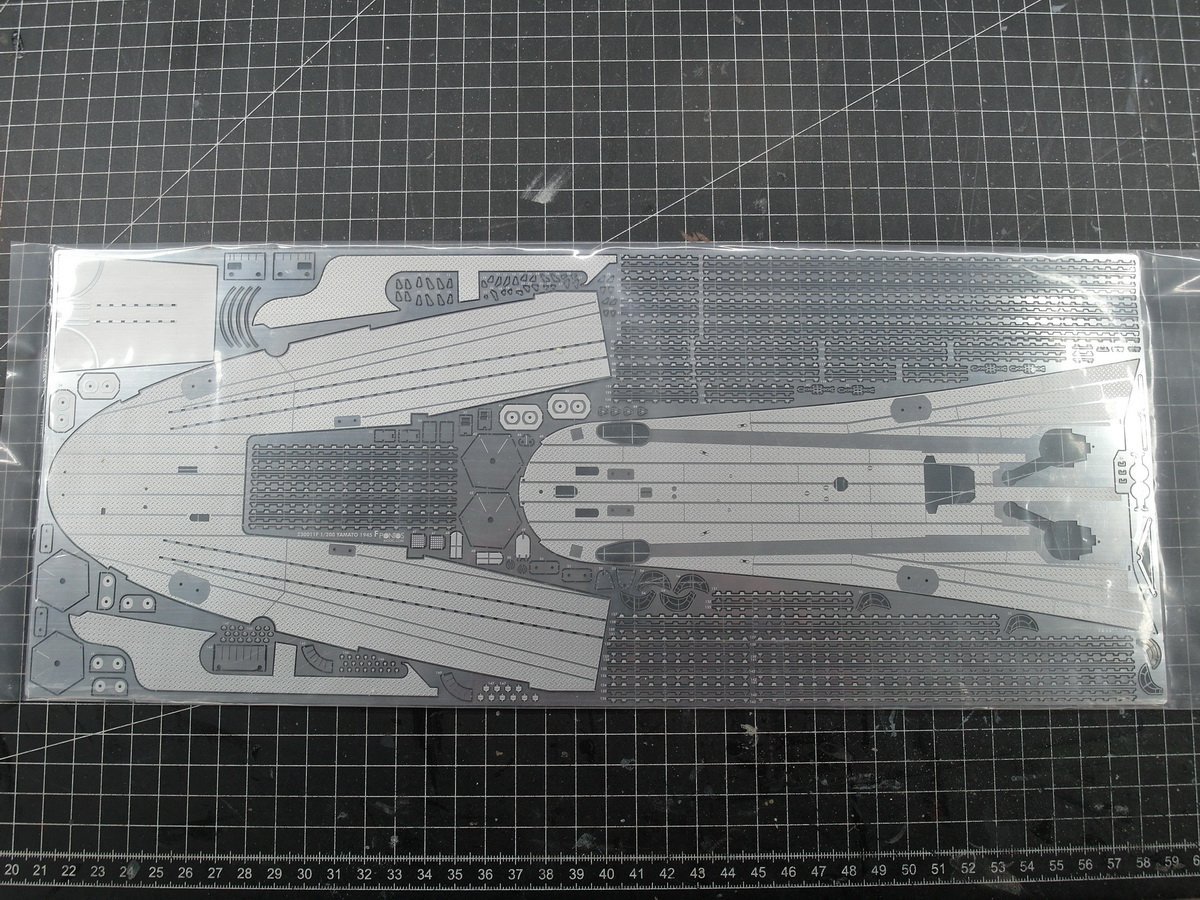
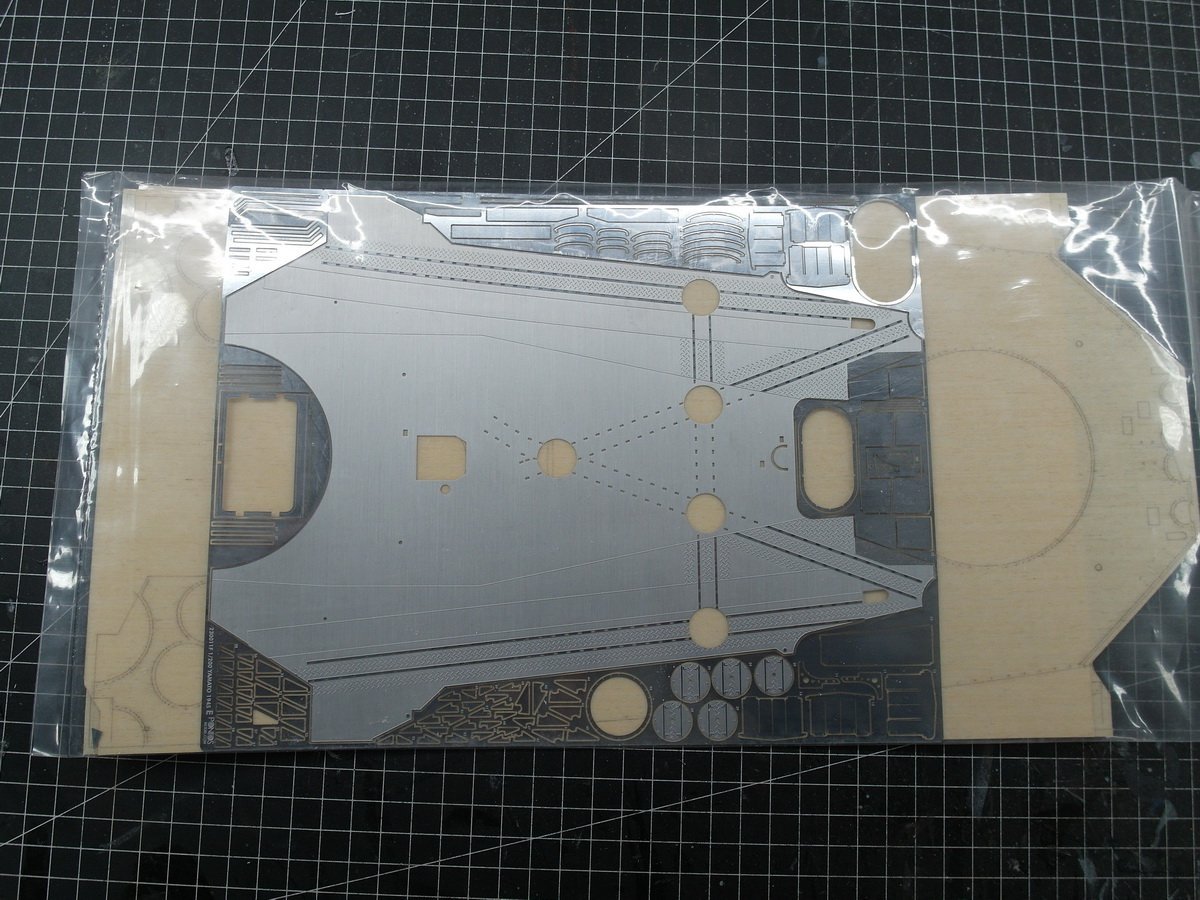
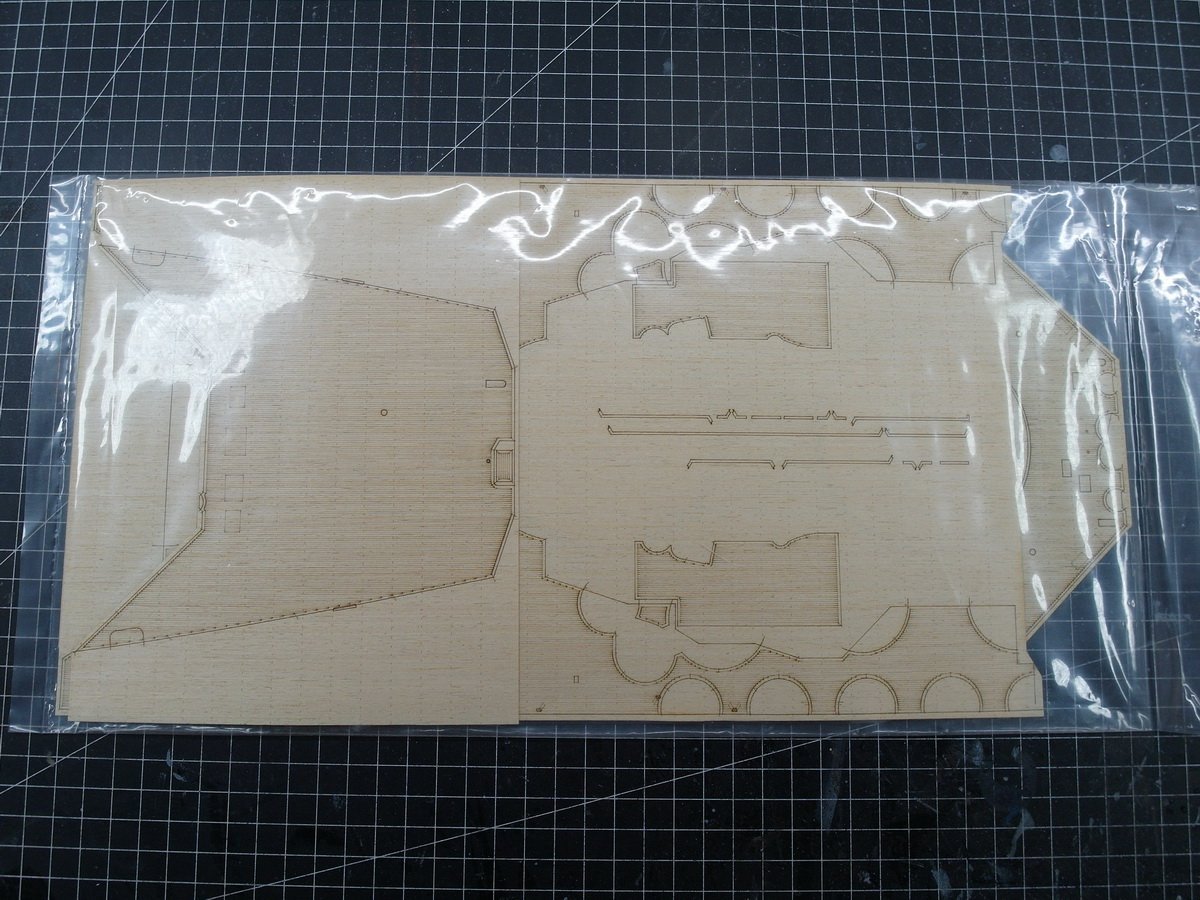
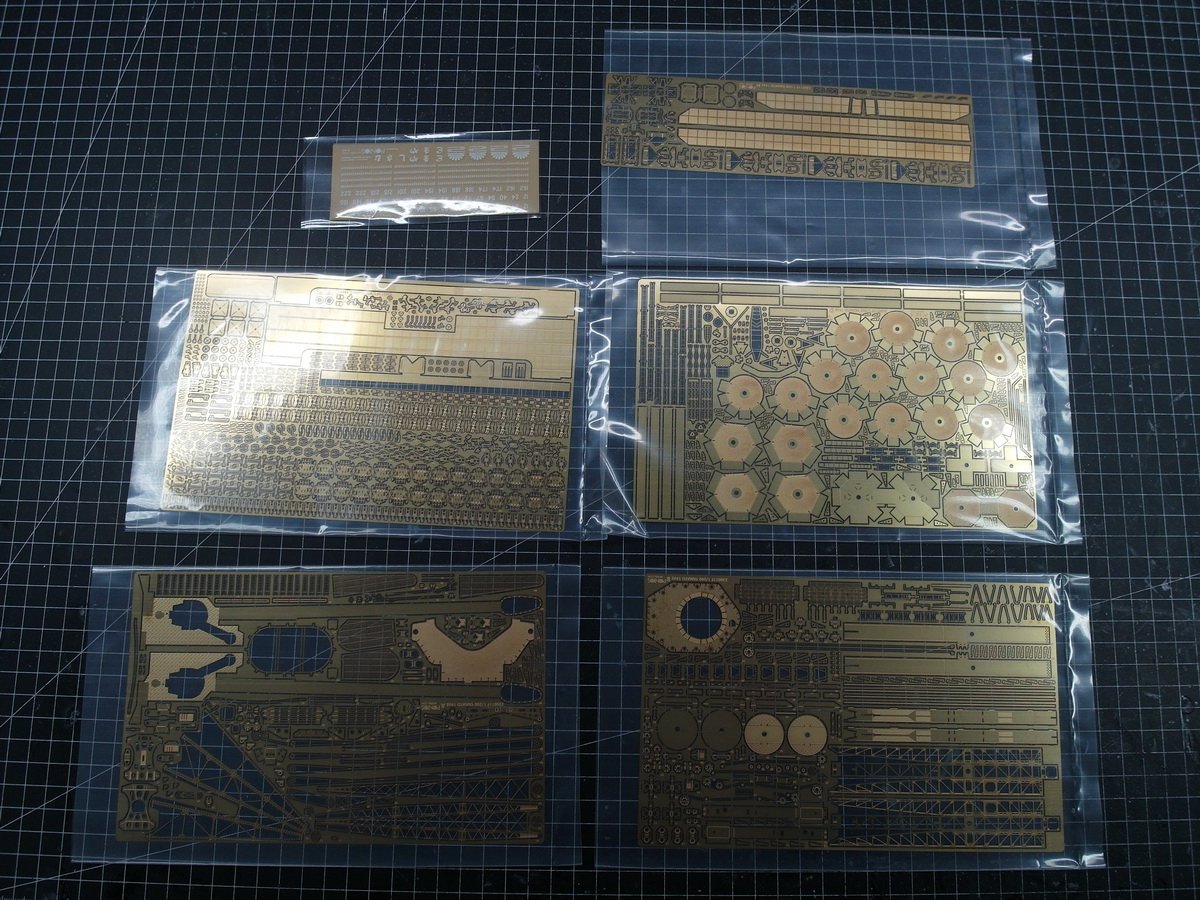
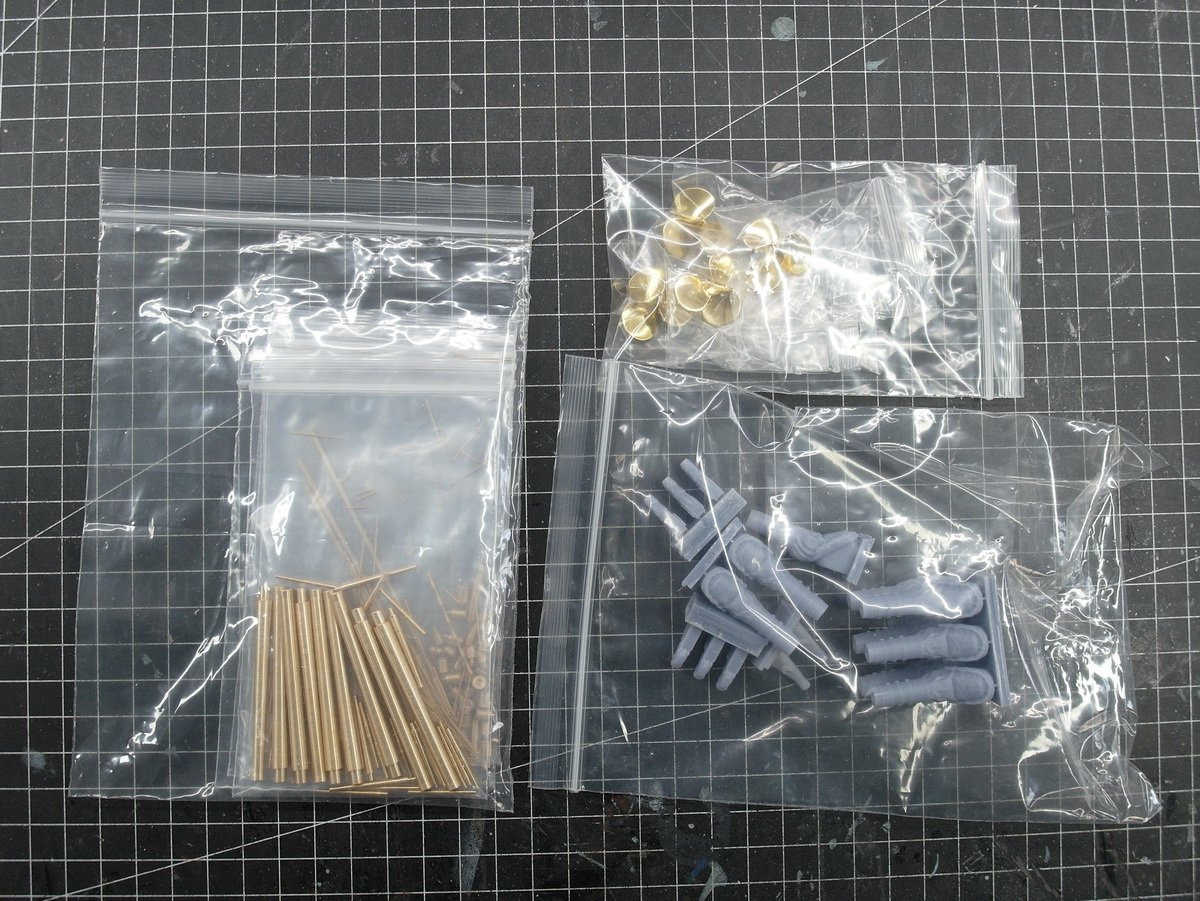
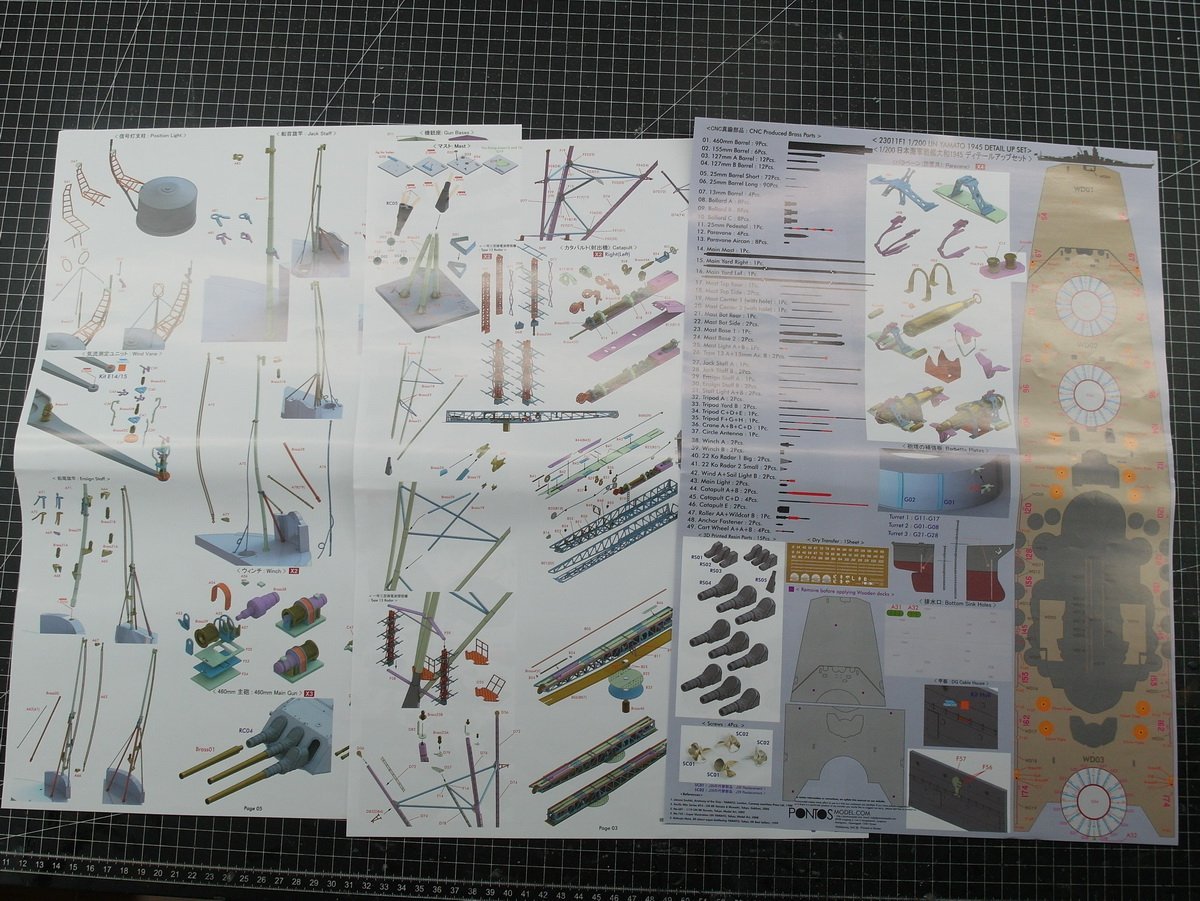
Hello everyone. Thanks for the kit presentation, Yves. My wife accepted the model when the postman came. I thank God that she likes my hobby so much. Of course there is already a Pontos set for the ship. Three sheets of instructions. Now made a little more understandable than before. All sorts of brass parts and resin blast bags. The obligatory wooden deck. Very good large etched parts for the deck. I hope you can see that through the bags. I don't like unpacking it before I start building. Fantastic surface details. As always with Pontos. Five etched part sheets and one sheet of dry decal. By the way, I still have parking spaces for the 1:200 monsters. 😅
- 104 replies
-
- 7
-
-
-
- MRC/Gallery
- Yamato
- (and 1 more)


