DerekMc
-
Posts
28 -
Joined
-
Last visited
About DerekMc

-
 aaronc reacted to a post in a topic:
Work area pictures only
aaronc reacted to a post in a topic:
Work area pictures only
-
Tecko reacted to a post in a topic:
Work area pictures only
-
rcweir reacted to a post in a topic:
Work area pictures only
-
GrandpaPhil reacted to a post in a topic:
Work area pictures only
-
DerekMc reacted to a post in a topic:
Model Machines LLC – Byrnes Model Machines - All machines to be back in production soon.
-
DerekMc reacted to a post in a topic:
Work area pictures only
-
SiriusVoyager reacted to a post in a topic:
Work area pictures only
-
paul ron reacted to a post in a topic:
Work area pictures only
-
Some Idea reacted to a post in a topic:
Work area pictures only
-
Ronald-V reacted to a post in a topic:
Work area pictures only
-
Dave_E reacted to a post in a topic:
Work area pictures only
-
bruce d reacted to a post in a topic:
Work area pictures only
-
Work area pictures only
DerekMc replied to Johnny Mike's topic in Modeling tools and Workshop Equipment
Nice work areas! I'm in the middle of a move to a new house. Here is my future workshop. I can't wait to get it all set up!
- 52 replies
-
- 14
-
-
DerekMc reacted to a post in a topic:
8" Mini Shear/Brake
-
DerekMc reacted to a post in a topic:
8" Mini Shear/Brake
-
DerekMc reacted to a post in a topic:
8" Mini Shear/Brake
-
DerekMc reacted to a post in a topic:
Ultimation tools
-
DerekMc reacted to a post in a topic:
Sheet Metal Shear Recommendations?
-
Sheet Metal Shear Recommendations?
DerekMc replied to DerekMc's topic in Modeling tools and Workshop Equipment
Phil, is this the metal shear you use? I've tried to find reviews without luck. There is one on the MicroMark site but I'd be interested in more. I've bought several tools from MicroMark. I've liked most but one wasn't worth the money so I'm a bit cautious. I notice that you live in Corvalis. I have fond memories of visiting Trump's Hobbies back in the day. It was a nice hobby shop! -
DerekMc reacted to a post in a topic:
Sheet Metal Shear Recommendations?
-
DerekMc reacted to a post in a topic:
Sheet Metal Shear Recommendations?
-
Sheet Metal Shear Recommendations?
DerekMc replied to DerekMc's topic in Modeling tools and Workshop Equipment
Thank you for the information. I'll check out your recommendation. Thanks! -
Sheet Metal Shear Recommendations?
DerekMc replied to DerekMc's topic in Modeling tools and Workshop Equipment
That's what I use currently on thin brass. My next projects involves brass that's a bit thick for my snips. It's a frame for a ) scale locomotive. -
Any recommendations for a sheet metal shear? I'm about to start a project that requires a good bit of brass sheet work. I did a quick amazon search and this looked interesting: VEVOR Hand Plate Shear 8" I've never use a sheet metal shear before so any insights and suggestions are appreciated. Thanks!
-
Looks great. What brand is it?
-
DerekMc reacted to a post in a topic:
TAIG Mini Lathe Table Saw Conversion?
-
TAIG Mini Lathe Table Saw Conversion?
DerekMc replied to DerekMc's topic in Modeling tools and Workshop Equipment
That's great news! It will be interesting to see at what price point they will be offered. -
TAIG Mini Lathe Table Saw Conversion?
DerekMc replied to DerekMc's topic in Modeling tools and Workshop Equipment
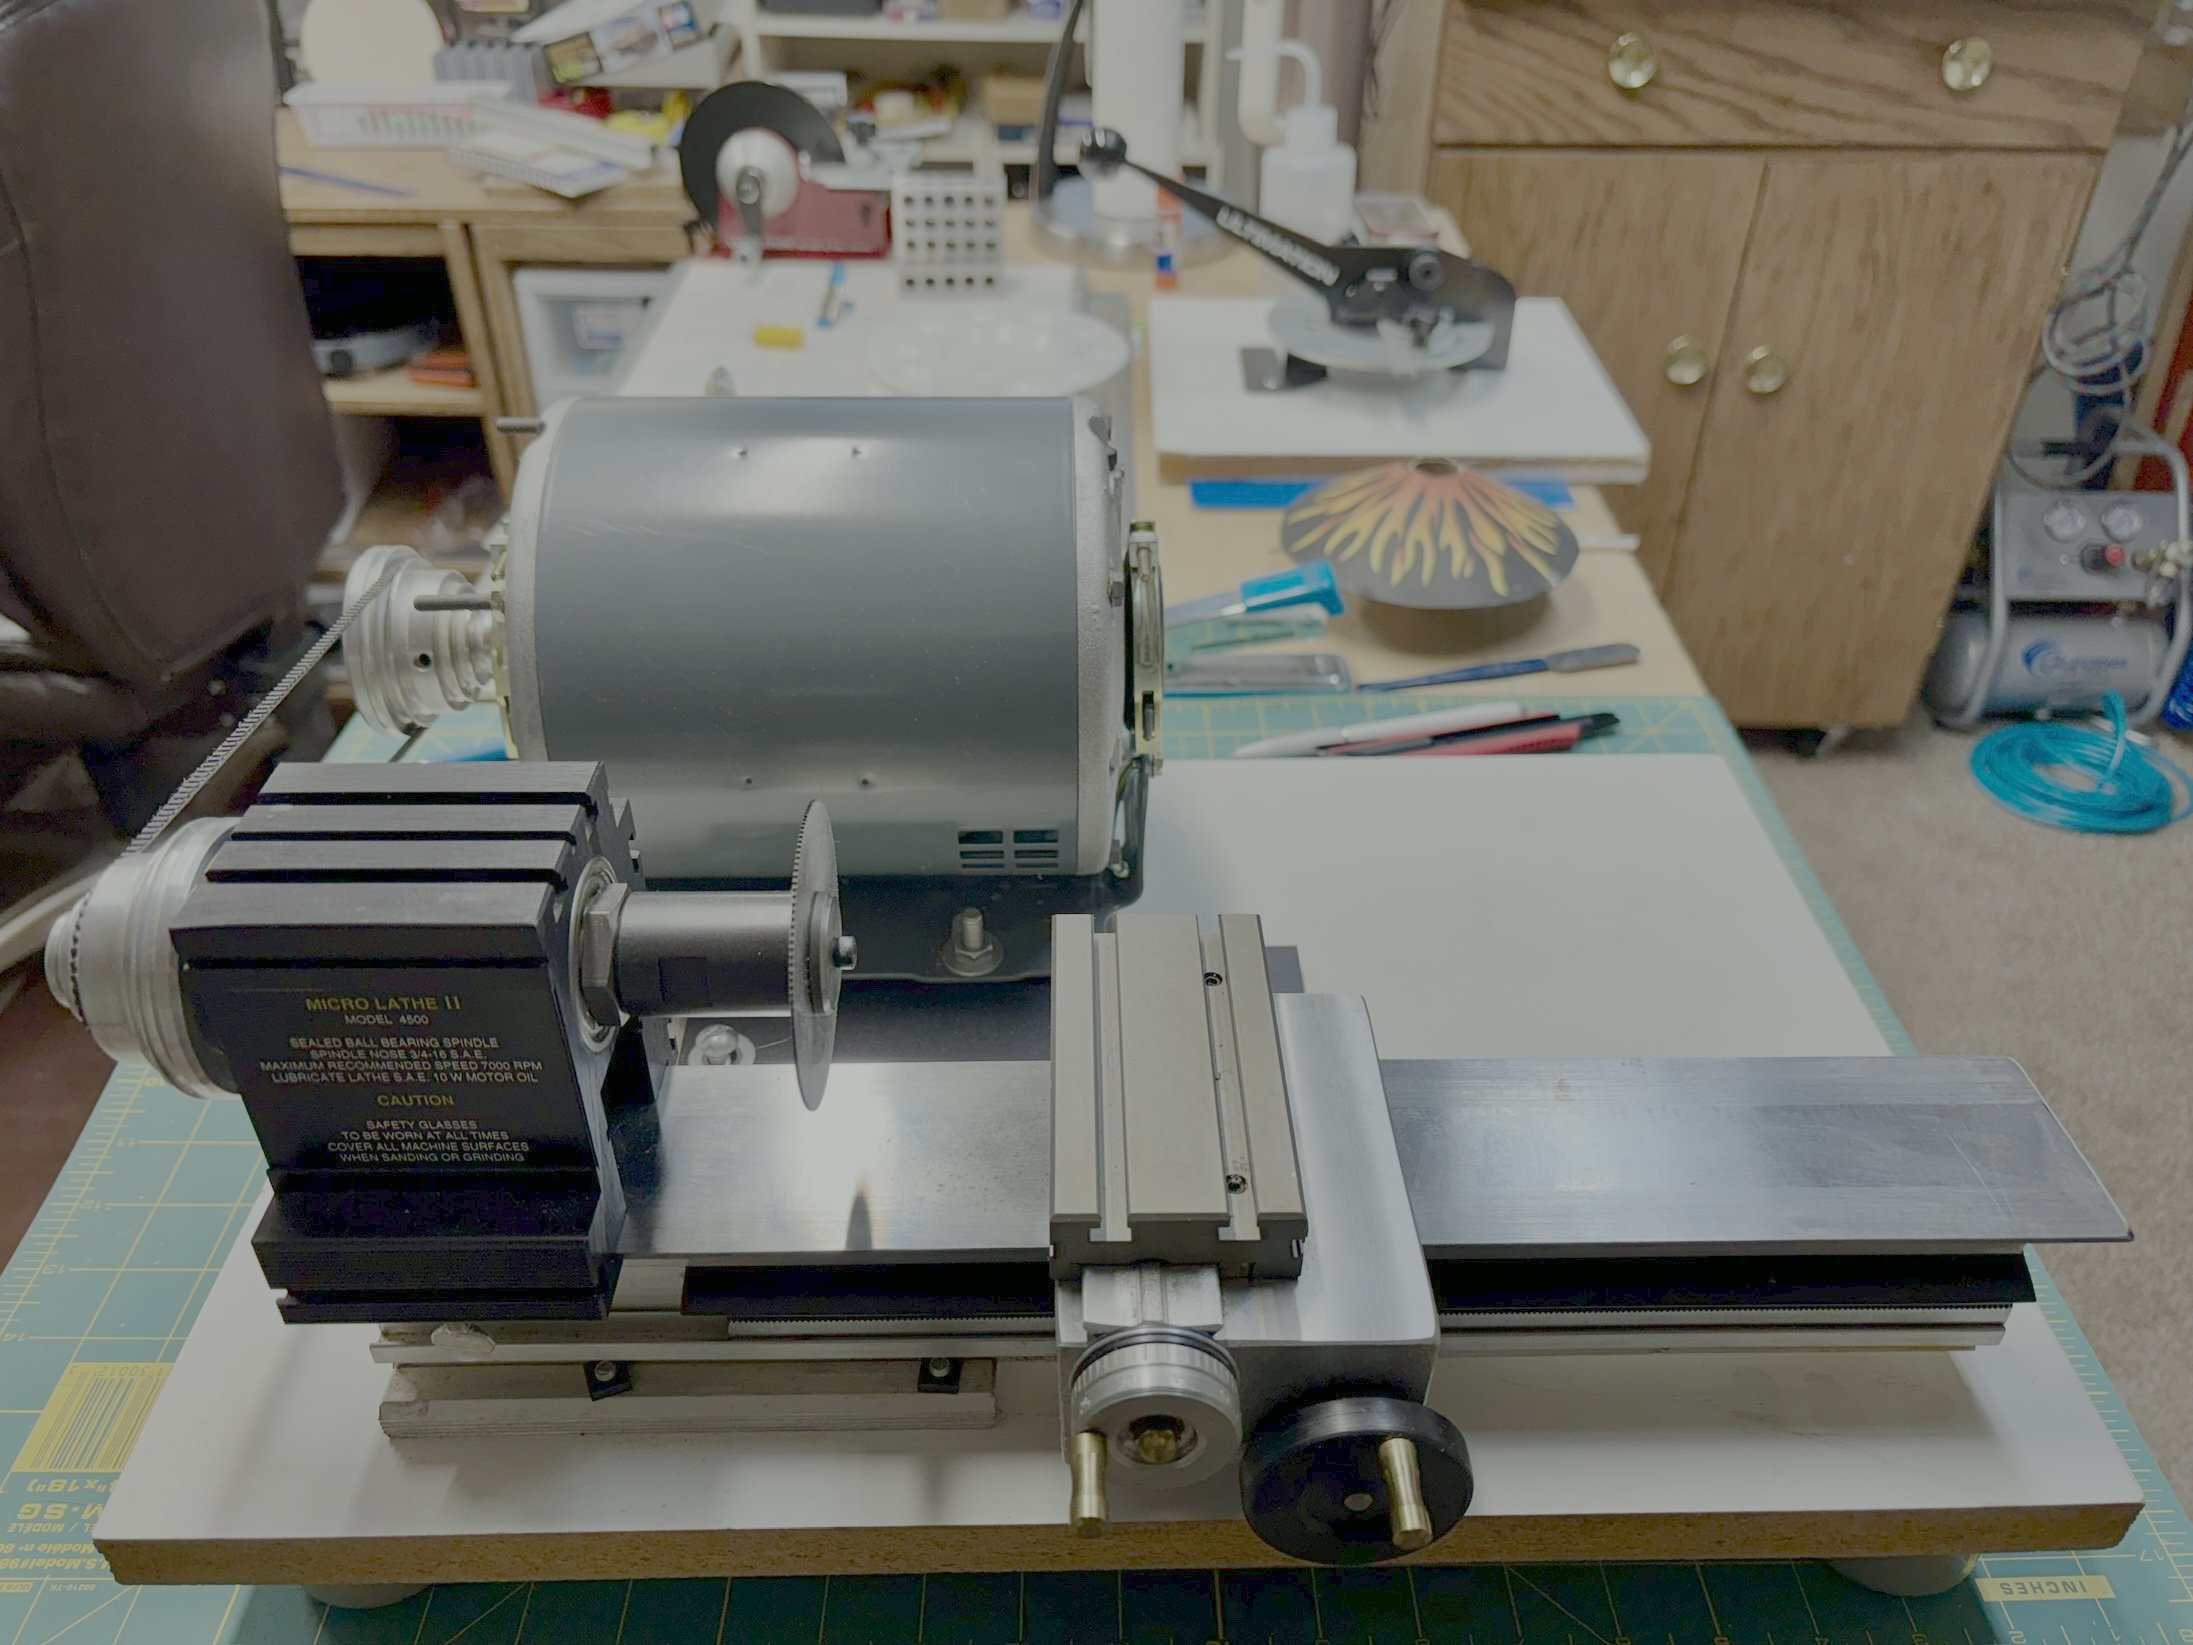
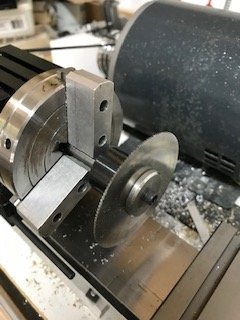
I'm still getting used to how to format posts on this site! Here is my TAIG Mini Lathe- I attached the slitting saw directly to the spindle which I think would help with accuracy. The challenge is that there isn't room with the placement of the motor to attach a table that allows the production of strip wood lengths. Not a problem when you are cutting short wing ribs like the previous post. Three immediate solutions- Use an extension to move the blade to the right so that it clears the motor. Use larger diameter blade- not sure it can be big enough without hitting the motor. Use a larger base board and reposition the motor so that it's off to the left and not in the way. Any other ideas? I know whatever I do won't be as accurate as a real table saw but it probably will work for most of my projects. Even better it's a project with equipment I already have!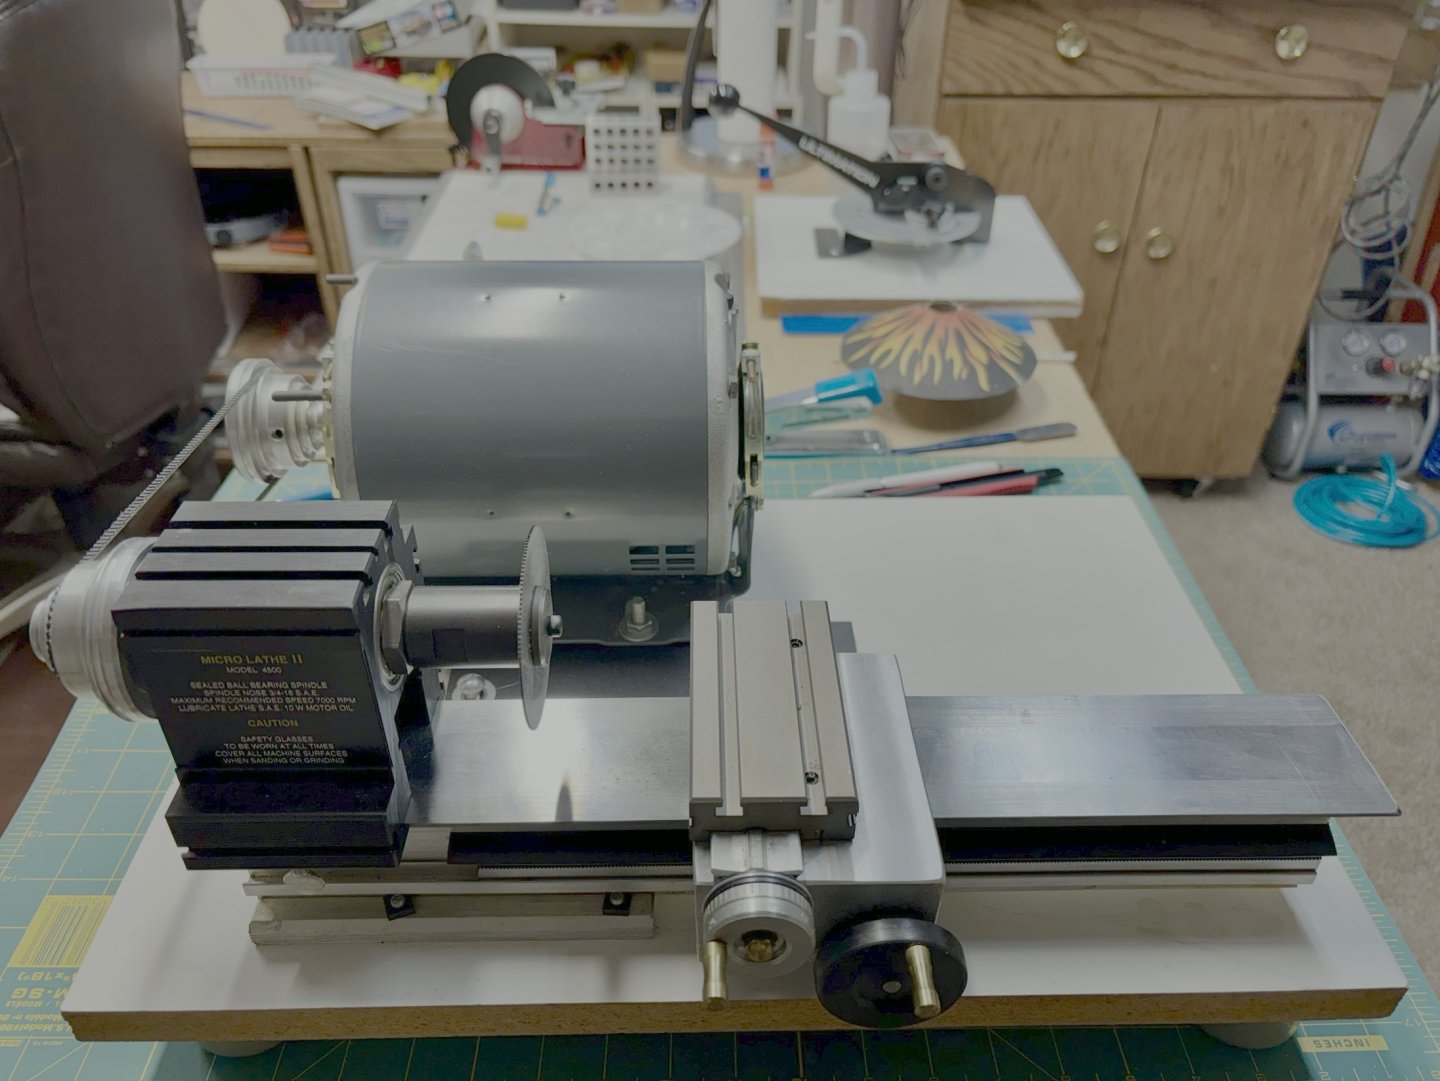
-
For years I wanted to buy a Byrne Table Saw and I'll keep my eyes open for a used one. In the mean time I can buy one of the other mini table saws or do something different. Going through a file of pictures in a saved aeromodeling folder I ran into these. Unfortunately I don't have a record of where I found them many years ago. I titled the folder "rib slicer." Here's a couple that show an attachment to the TAIG mini lathe.

-
The heat shrink is a great idea. I have several where I made the ends smaller for more precision in tight places.
-
I bought my kits at KMart for the most part. Fun times! The club meeting is tomorrow. I'm interested in what the other members built. I know several built old classic kits. I didn't because I don't have any. I installed the steering chain so its set for tomorrows meeting.
-
My local IPMS chapter decided to do a "Build like you did as a kid" group build. Basic idea is to pick a kit and build it in a straight shot. Paint is optional. I thought it would be a good time and checked the stack of kits. I didn't want anything complicated but still with a bit of challenge. I spotted the Meng Minenraumer kit I picked up on sale many years ago. Upon inspection the body part count was low and I didn't have any real plans for it so why not? First challenge is that the instructions weren't in the box. Problem solved by a check on the Scalemates site and download of a scan of the instructions. I had a day off with no commitments so Time to Build! The VsKfz 617 was a one off prototype that looks cool but didn't work well as a minesweeper. The prototype still exists at the Kubinka Tank Museum. First up was the body top. Putting together the small hooks was a pain and I lost a couple to the carpet monster. I must say that not worrying about seam lines sped up the pace quite a bit! Then came the tracks. They were a pain till I figured out a couple tricks in the assembly. The tracks have metal in them to make them heavier. Pretty cool but not really needed. Waiting for the glue to dry on the wheels: As the build continued I decided to keep the major assemblies separate so I can give them a decent paint job in the future. Who knows when that might happen? The assembled vehicle. It's missing a steering chain but once that's attached I'll call it good. I did leave two fiddly parts off. Other than that its a straight from the box build. This certainly was a change of pace compared to my usual builds. A pleasant seven to eight hours or so. Fun!
-
But I will! The bow mounted machine gun has a distinctive look. It shouldn't be all that hard to make one up from a paperclip and a bit of styrene.
-
My local IPMS chapter is having a T34 group build. A deceased member left a large number of 1/35 Tamiya T34 kits to the club so several member decided to have a bit of fun. My contribution is a bit different because I decided to use a 1/72 T34 kit from the stash and display it on a enlarge Advanced Squad Leader playing piece for the specific tank. Here is what the playing piece looks like. https://i.imgur.com/jgwfz1Pm.jpg Each of the numbers and letters have value in the game. The 76L is the gun size. The 16 is movement points ect. Here's the work in progress. I need to adjust the background color. It needs a bit more yellow. The font isn't exact but close. https://i.imgur.com/aMgEf9gm.jpg https://i.imgur.com/yPTF7Bfm.jpg The plan is to mount the paper on a nice wood plaque and add some scenery such as grass tufts and a bit of rubble. Now to finish the tank and adjust the base color. I have to figure out what to do for the bow mounted machine gun. It was captured by the carpet monster...grrrrr....
-
Probably not. I use Tamiya Extra thin and find that it smells. Still, it's an excellent glue. A couple things that can help with the odor. Minimize how long the bottle is left open. I use the lid brush so I place the glue then put the lid back on the bottle without delay. I use a small fan to move the air around a bit. It doesn't get rid of the odor but it will minimize the direct impact. Have a window slightly open for a bit of fresh air. Chilly in the winter! Nice job on the Humber!