EricWiberg
-
Posts
224 -
Joined
-
Last visited
Content Type
Profiles
Forums
Gallery
Events
Everything posted by EricWiberg
-
Thank you for that observation, Marc. I will make a few more.. they wouldnt be applied until after hull painting
-
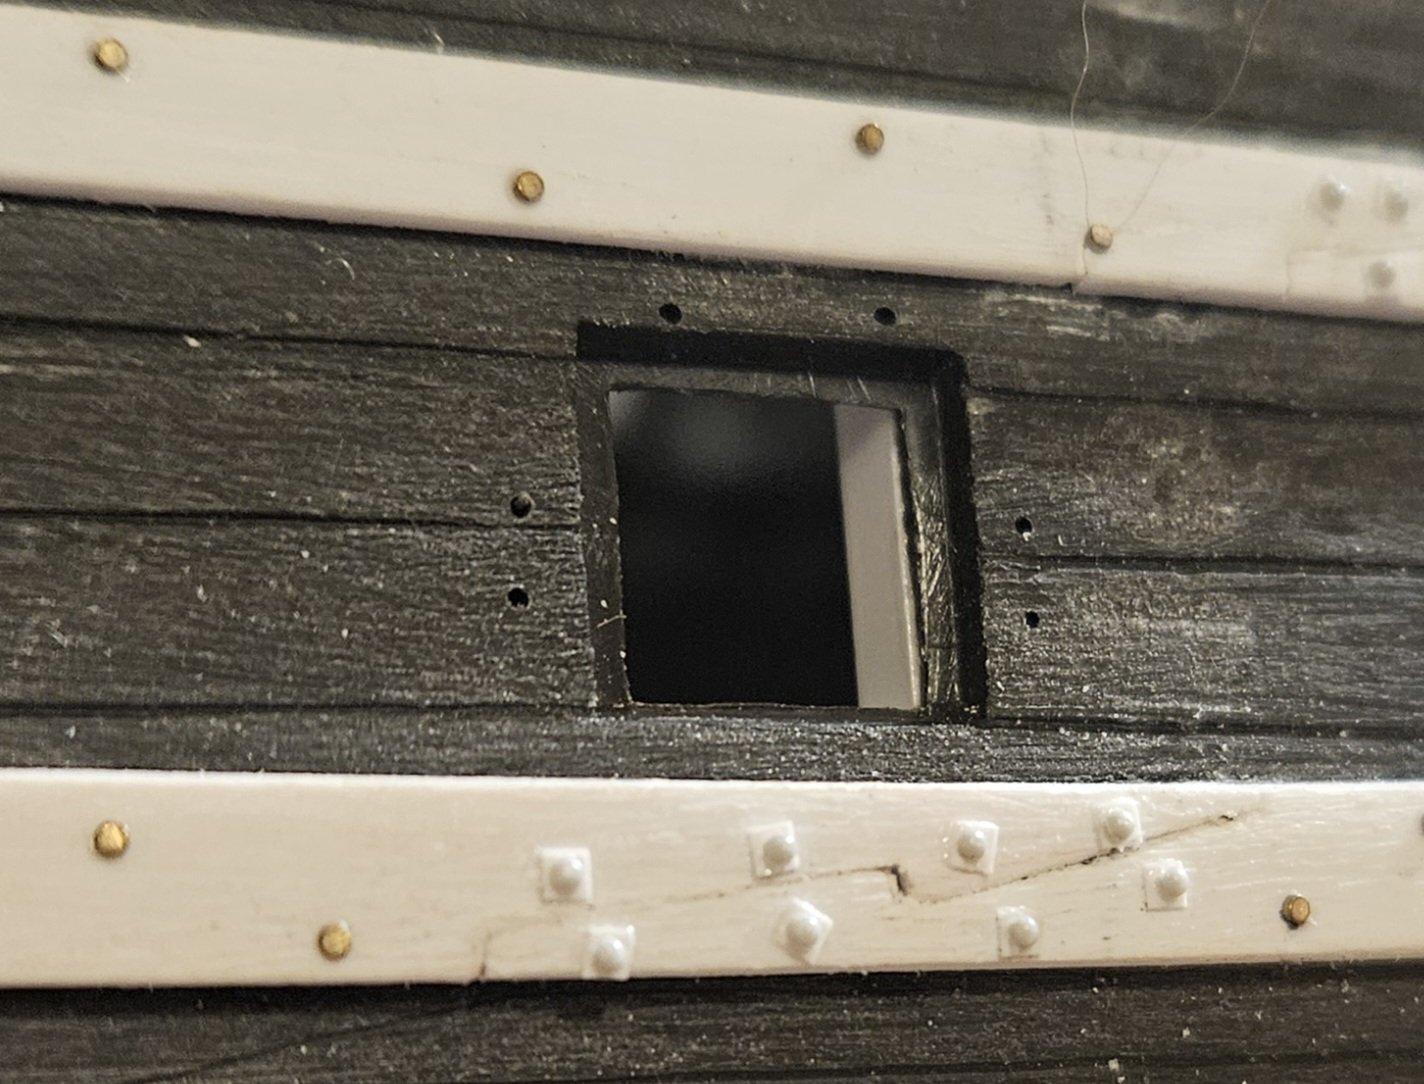
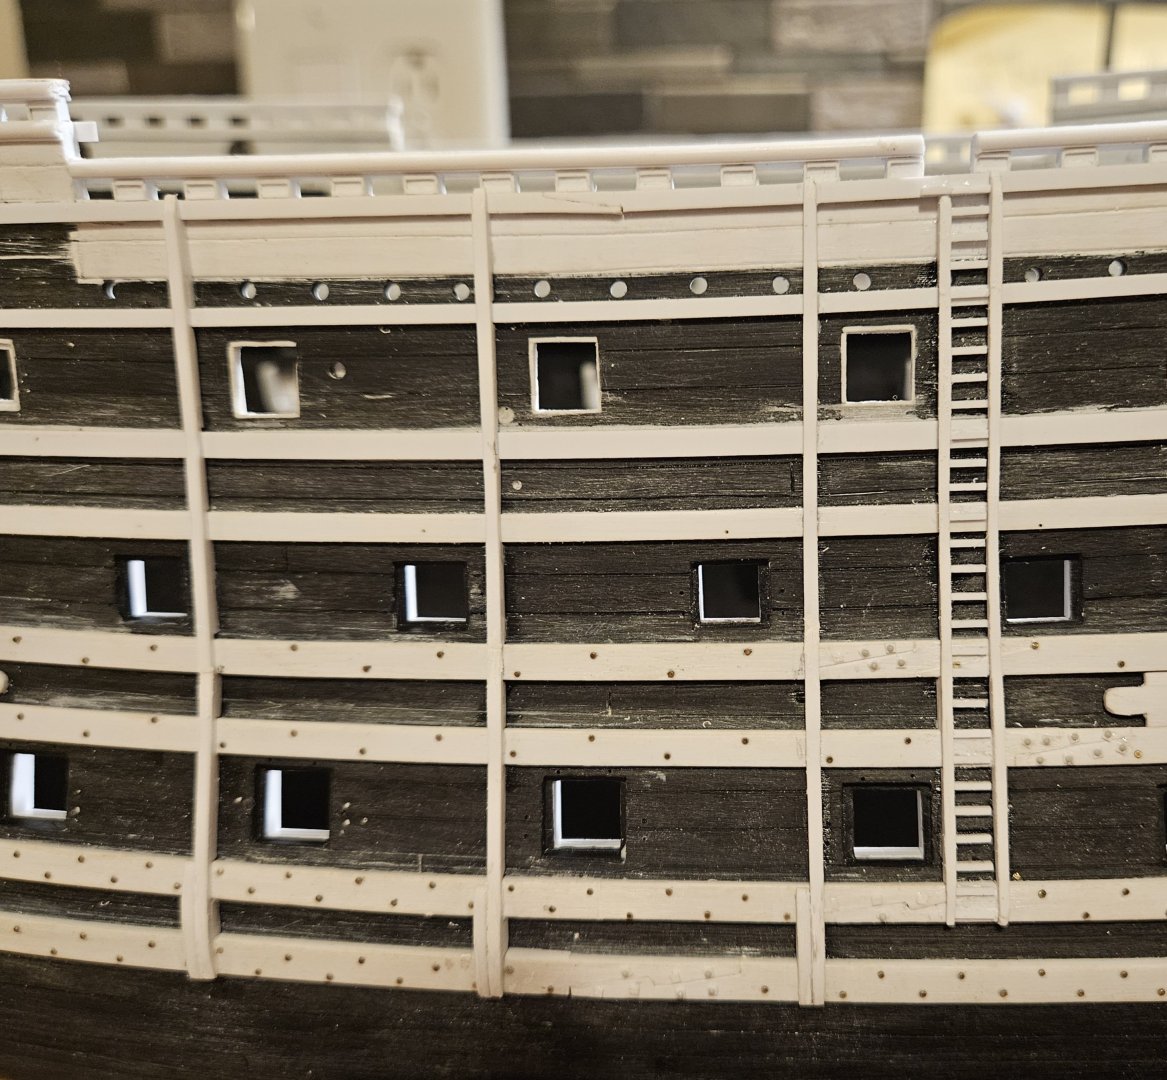
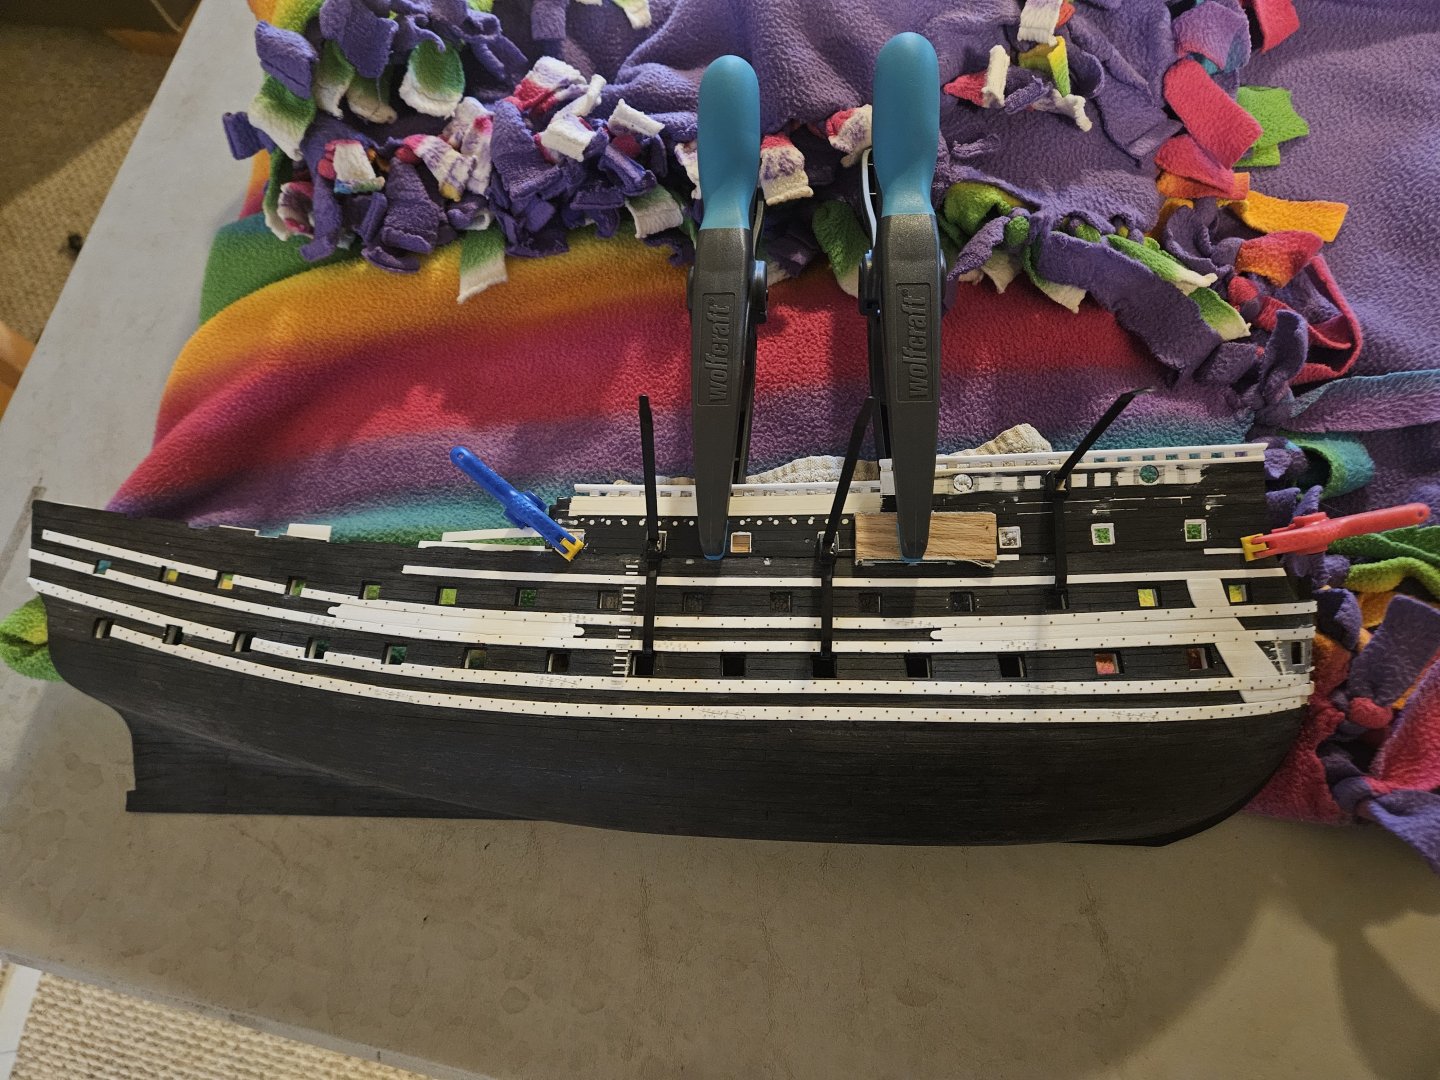
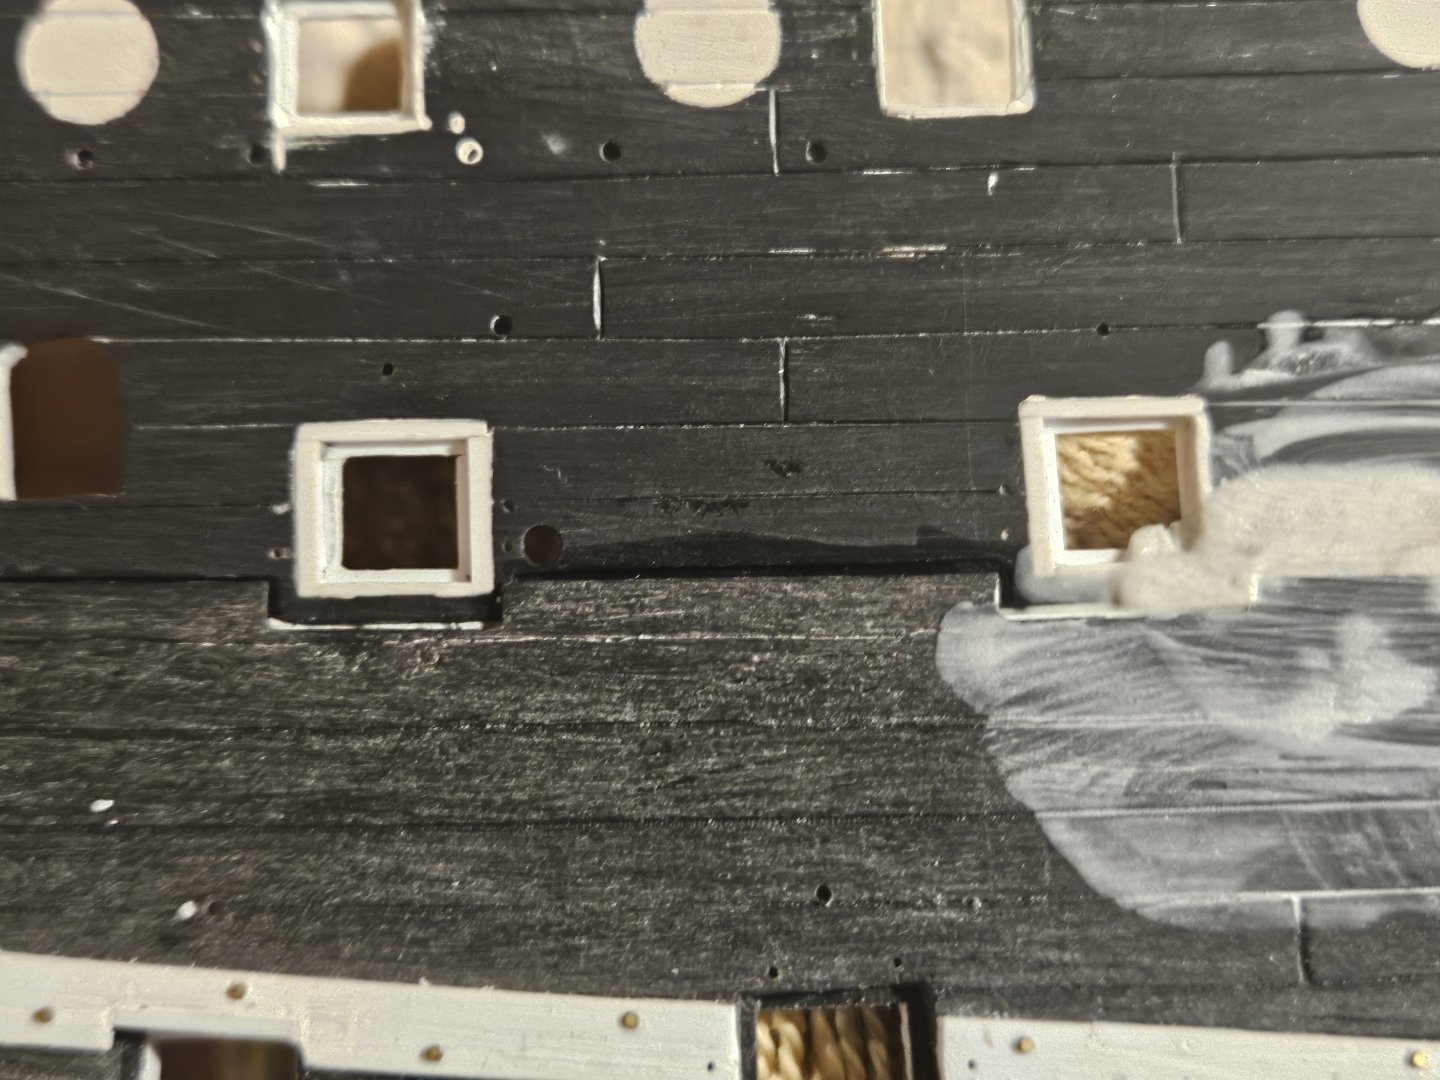
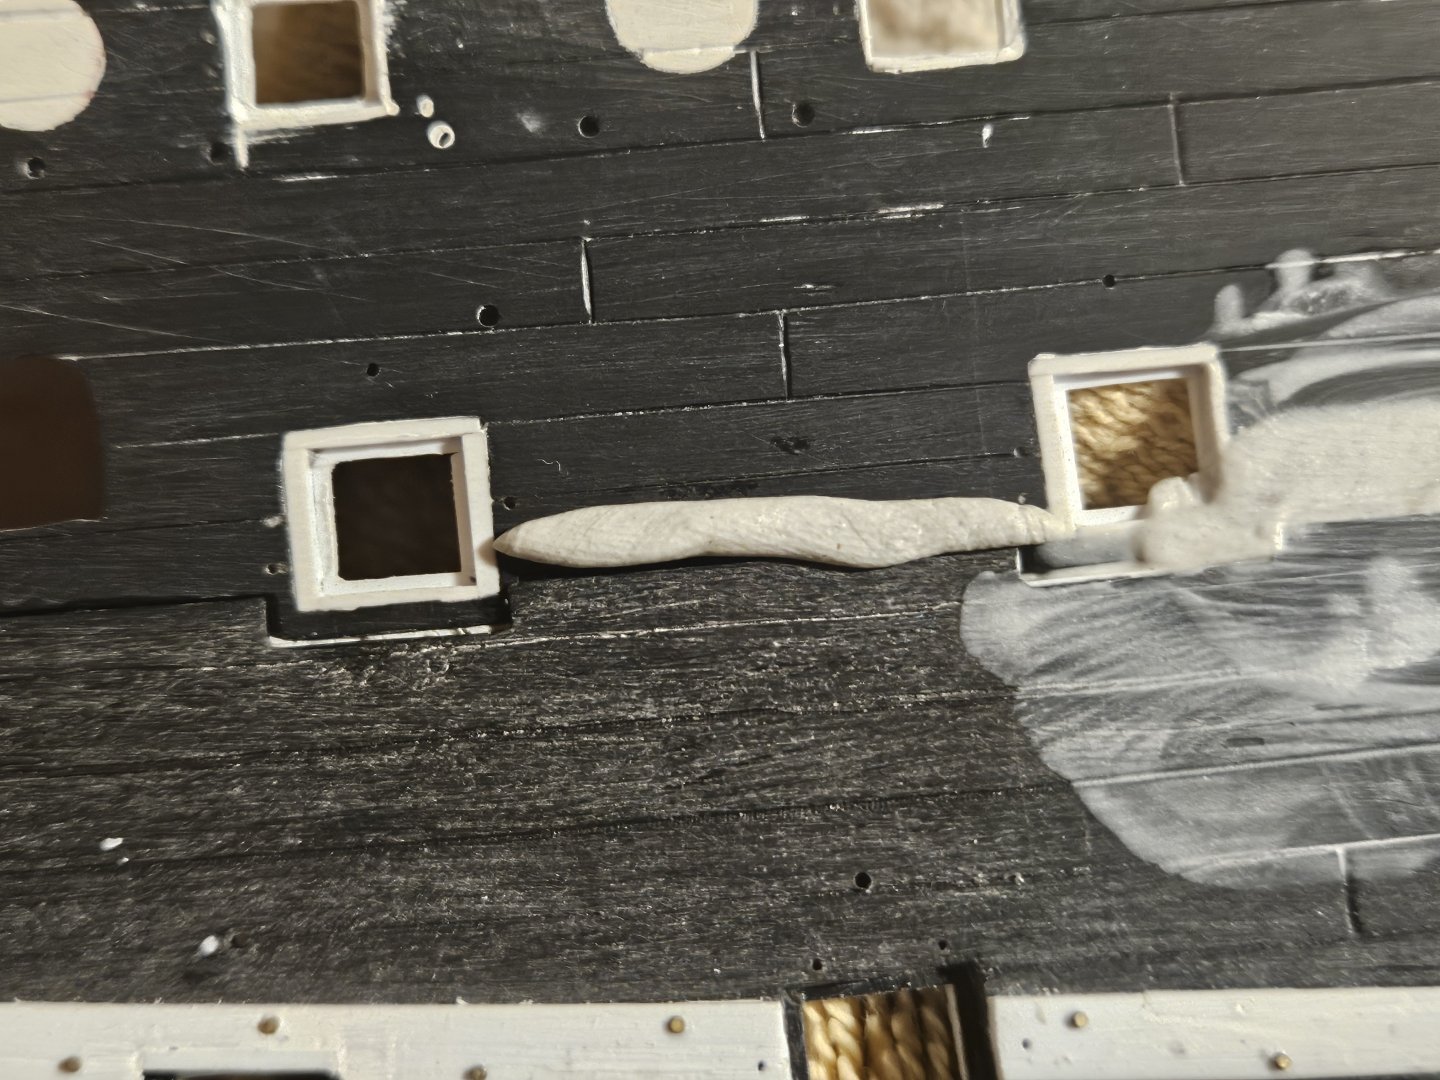
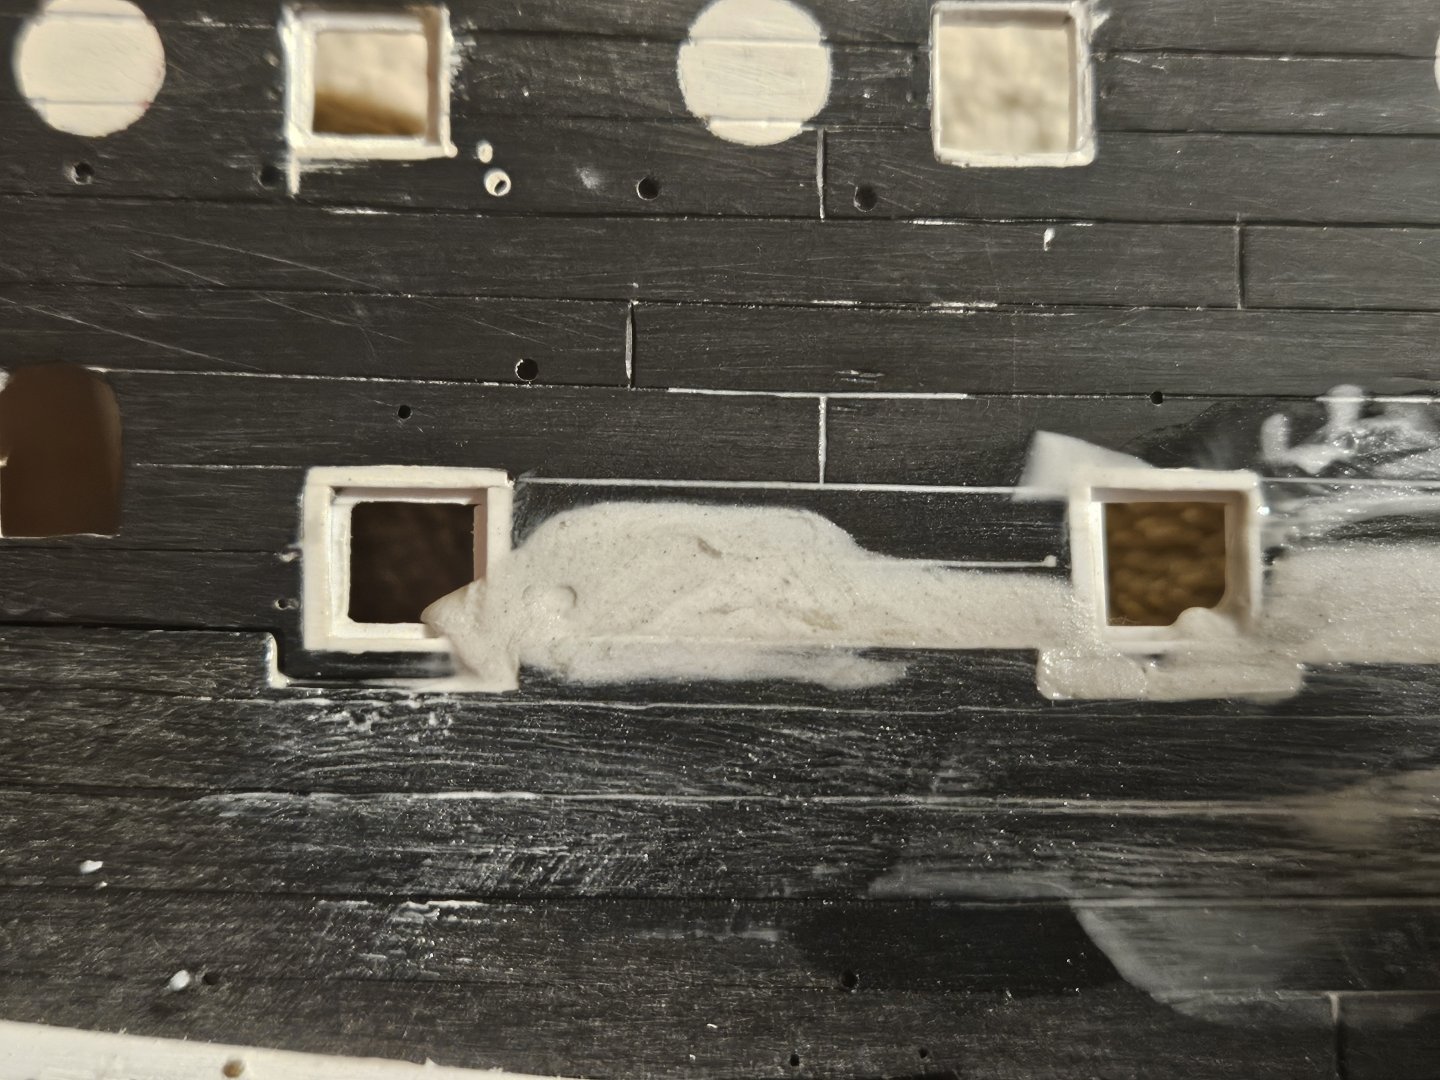
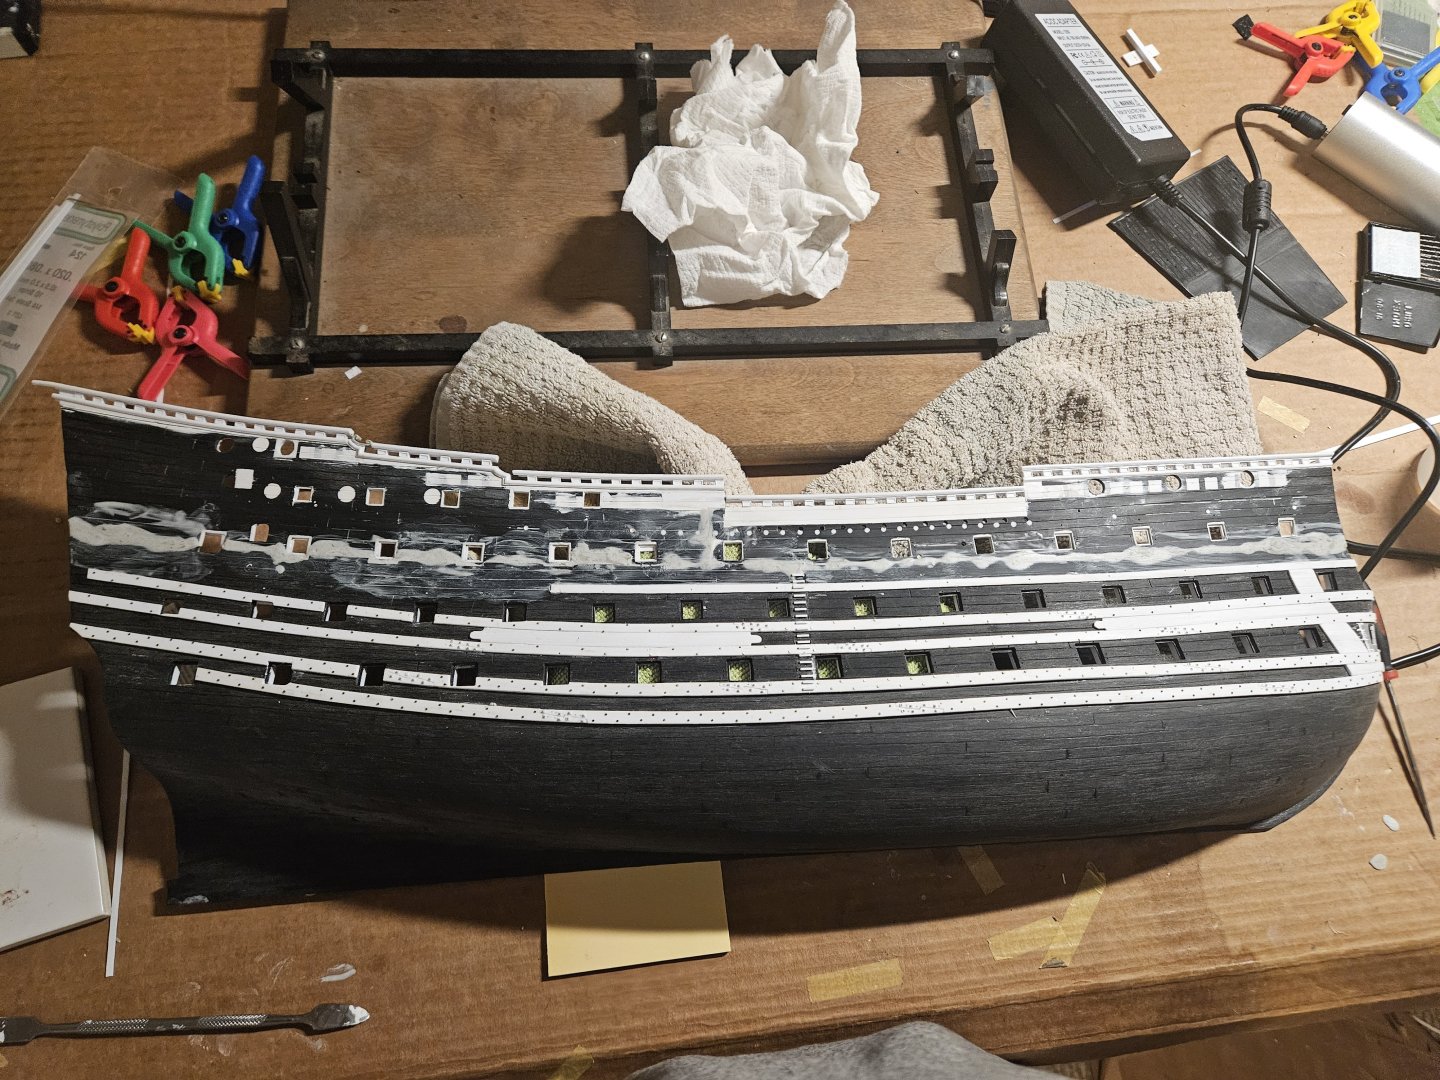
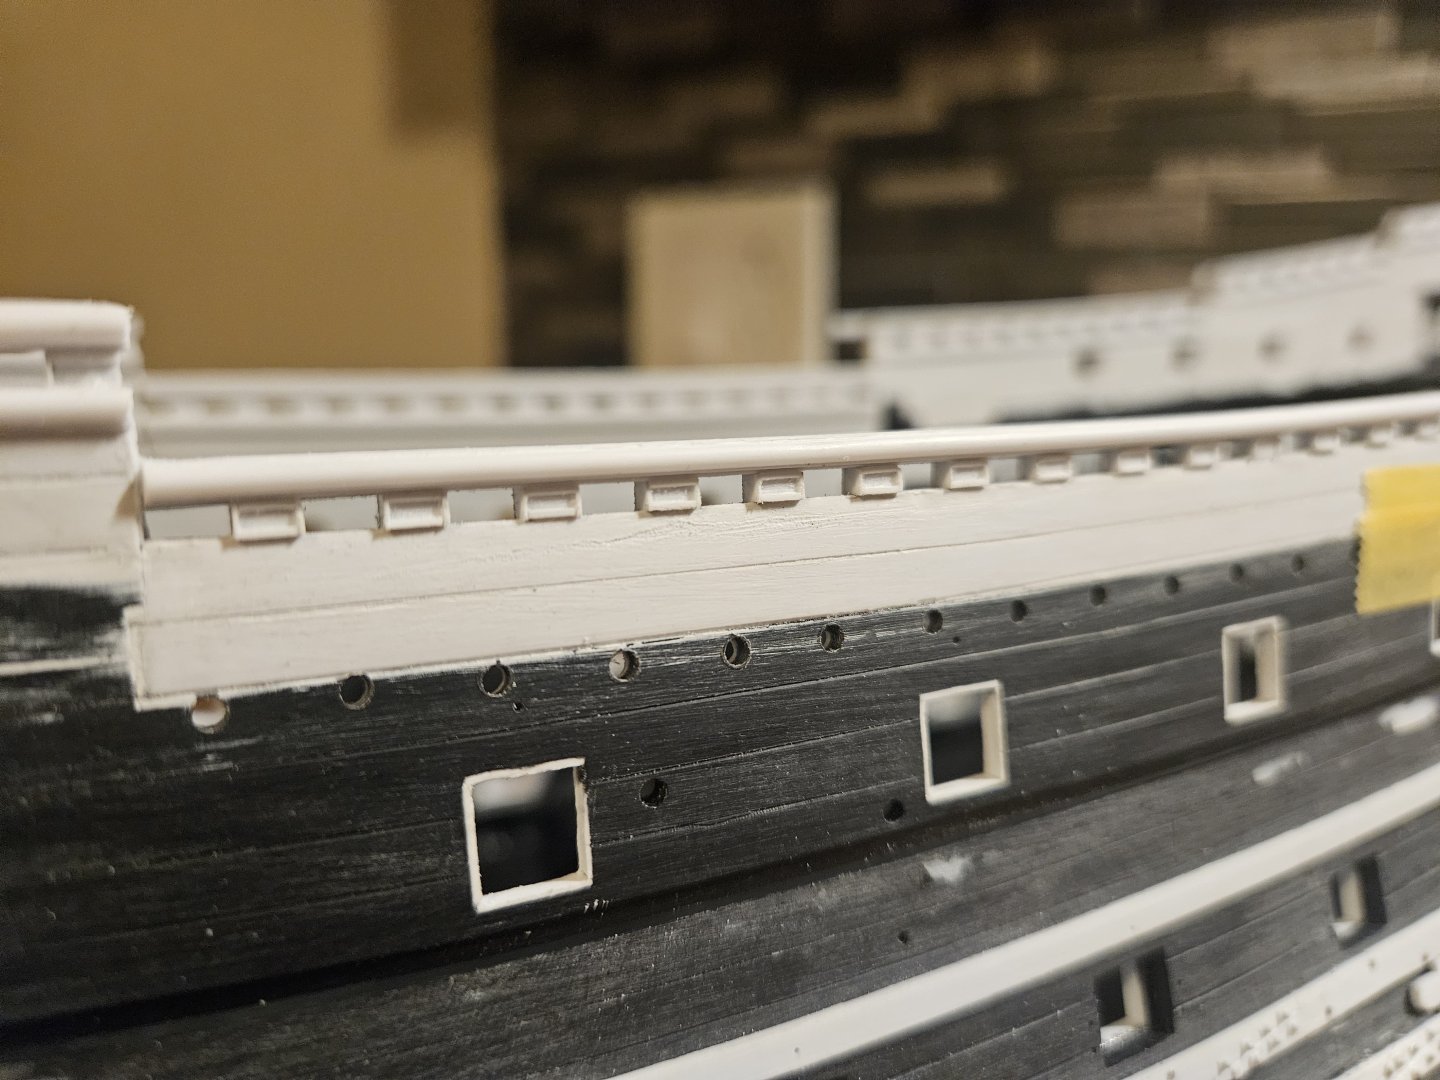
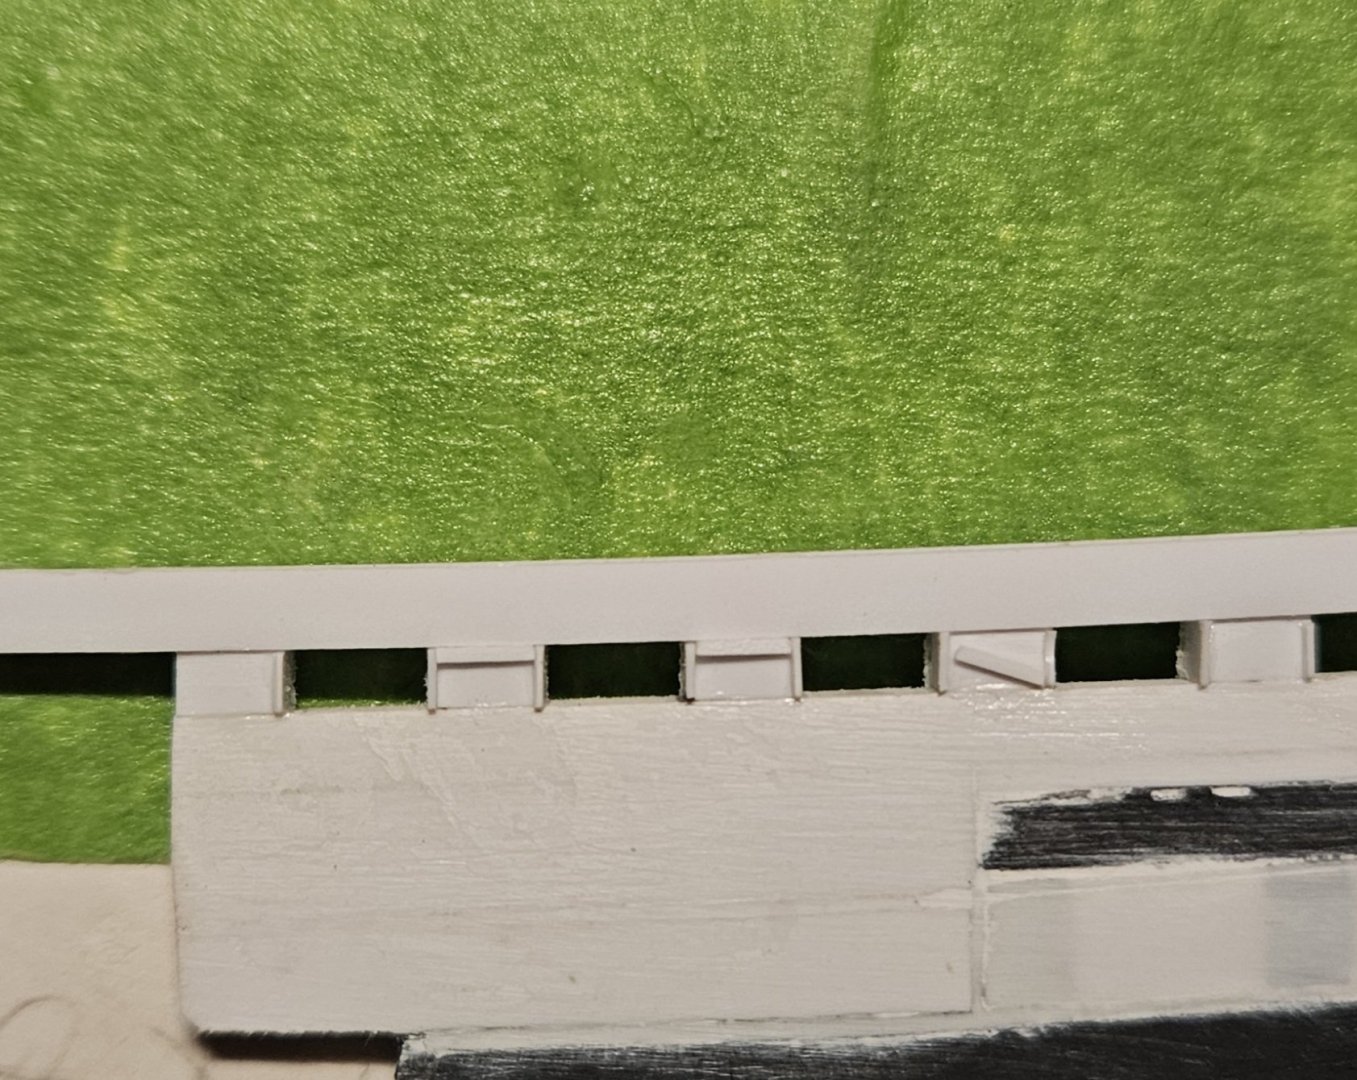
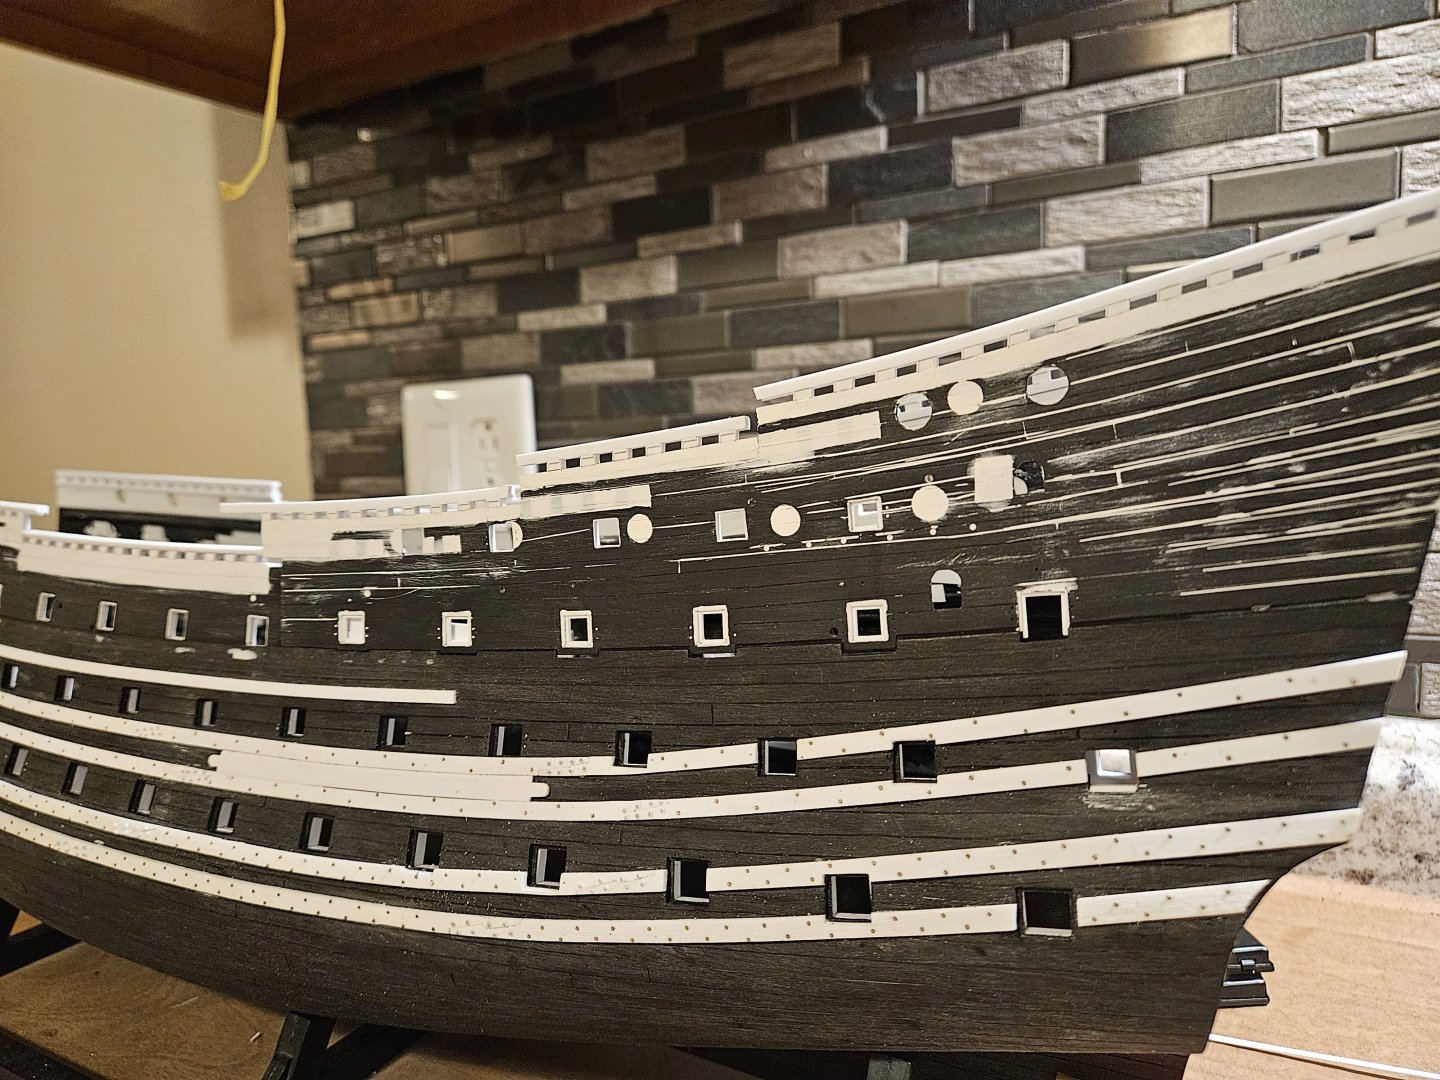
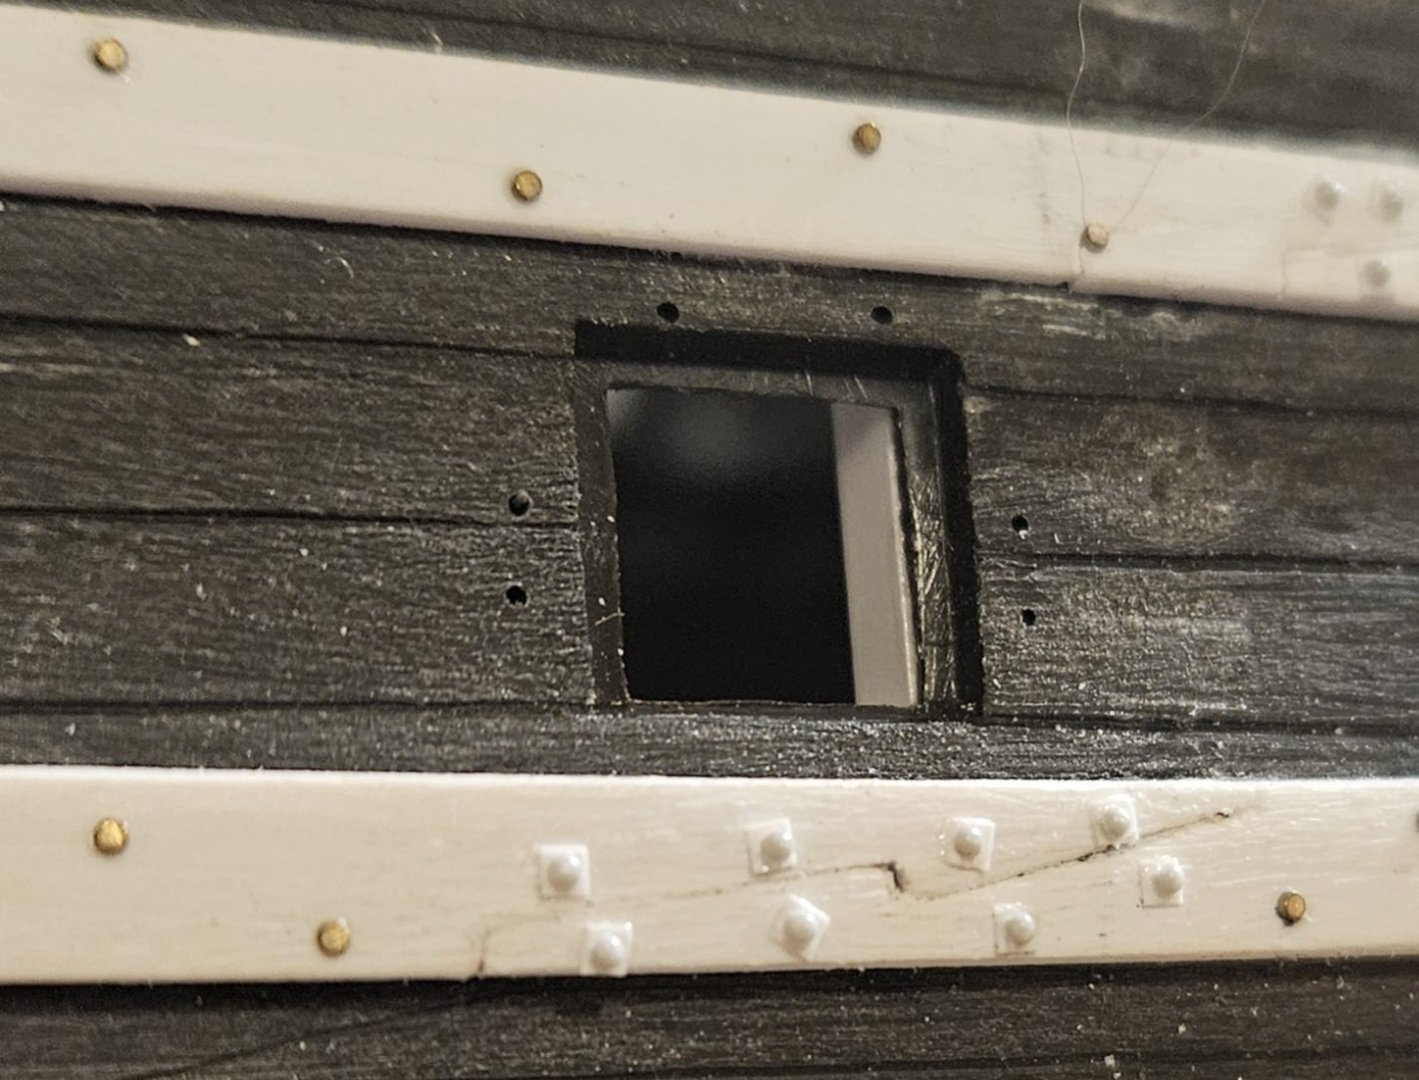
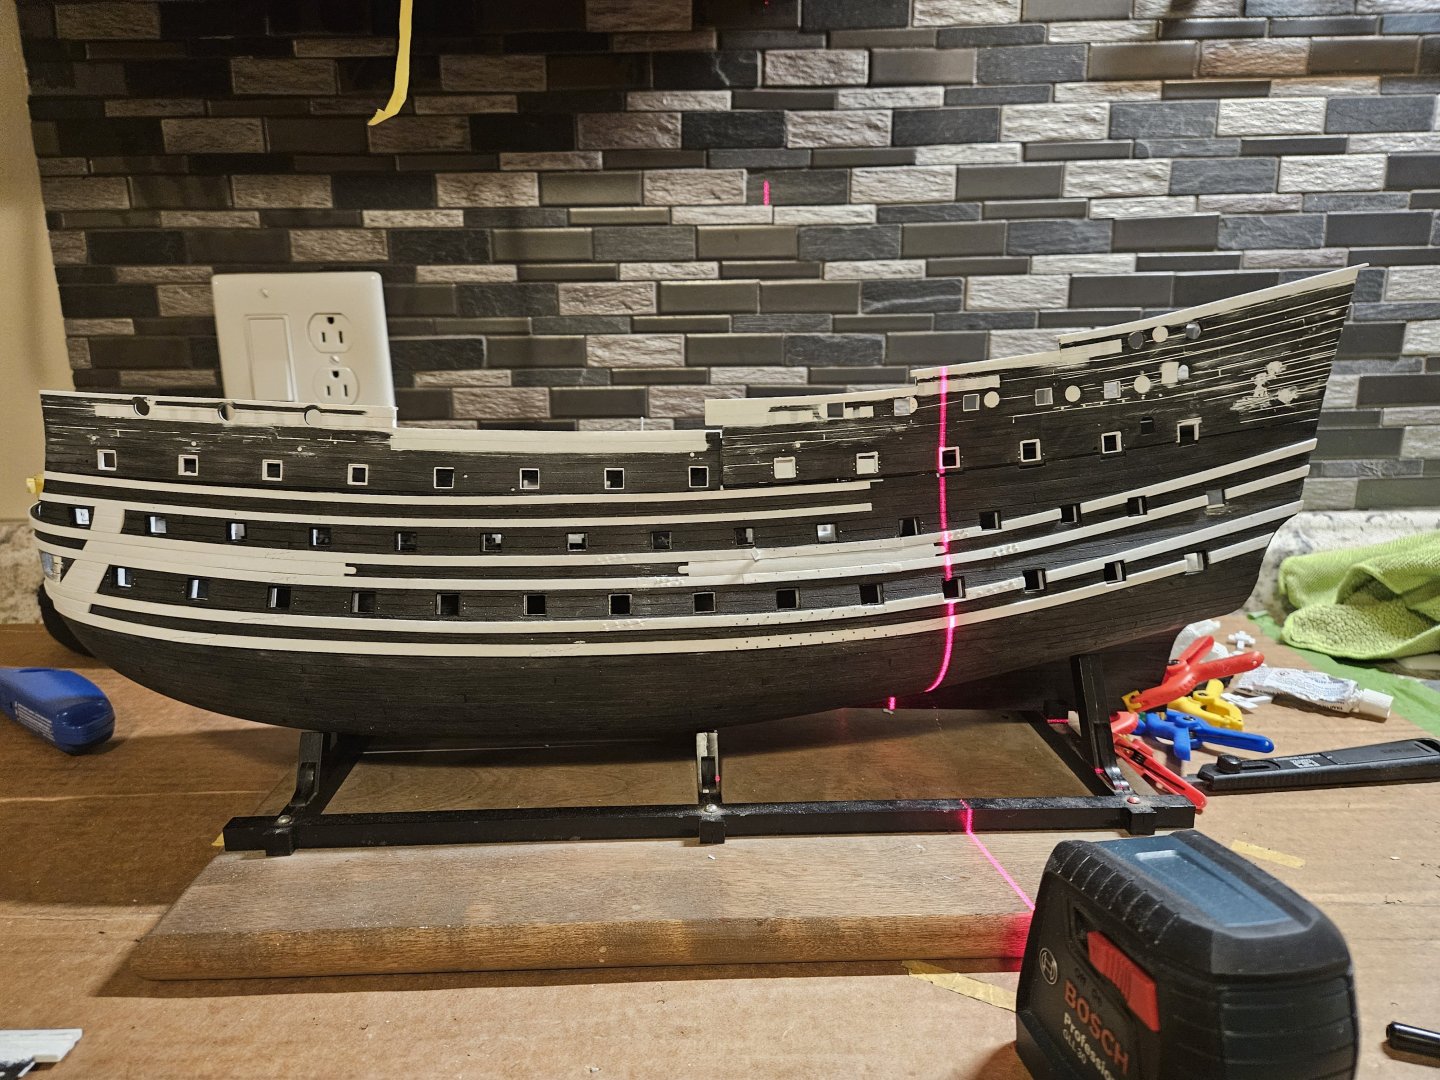
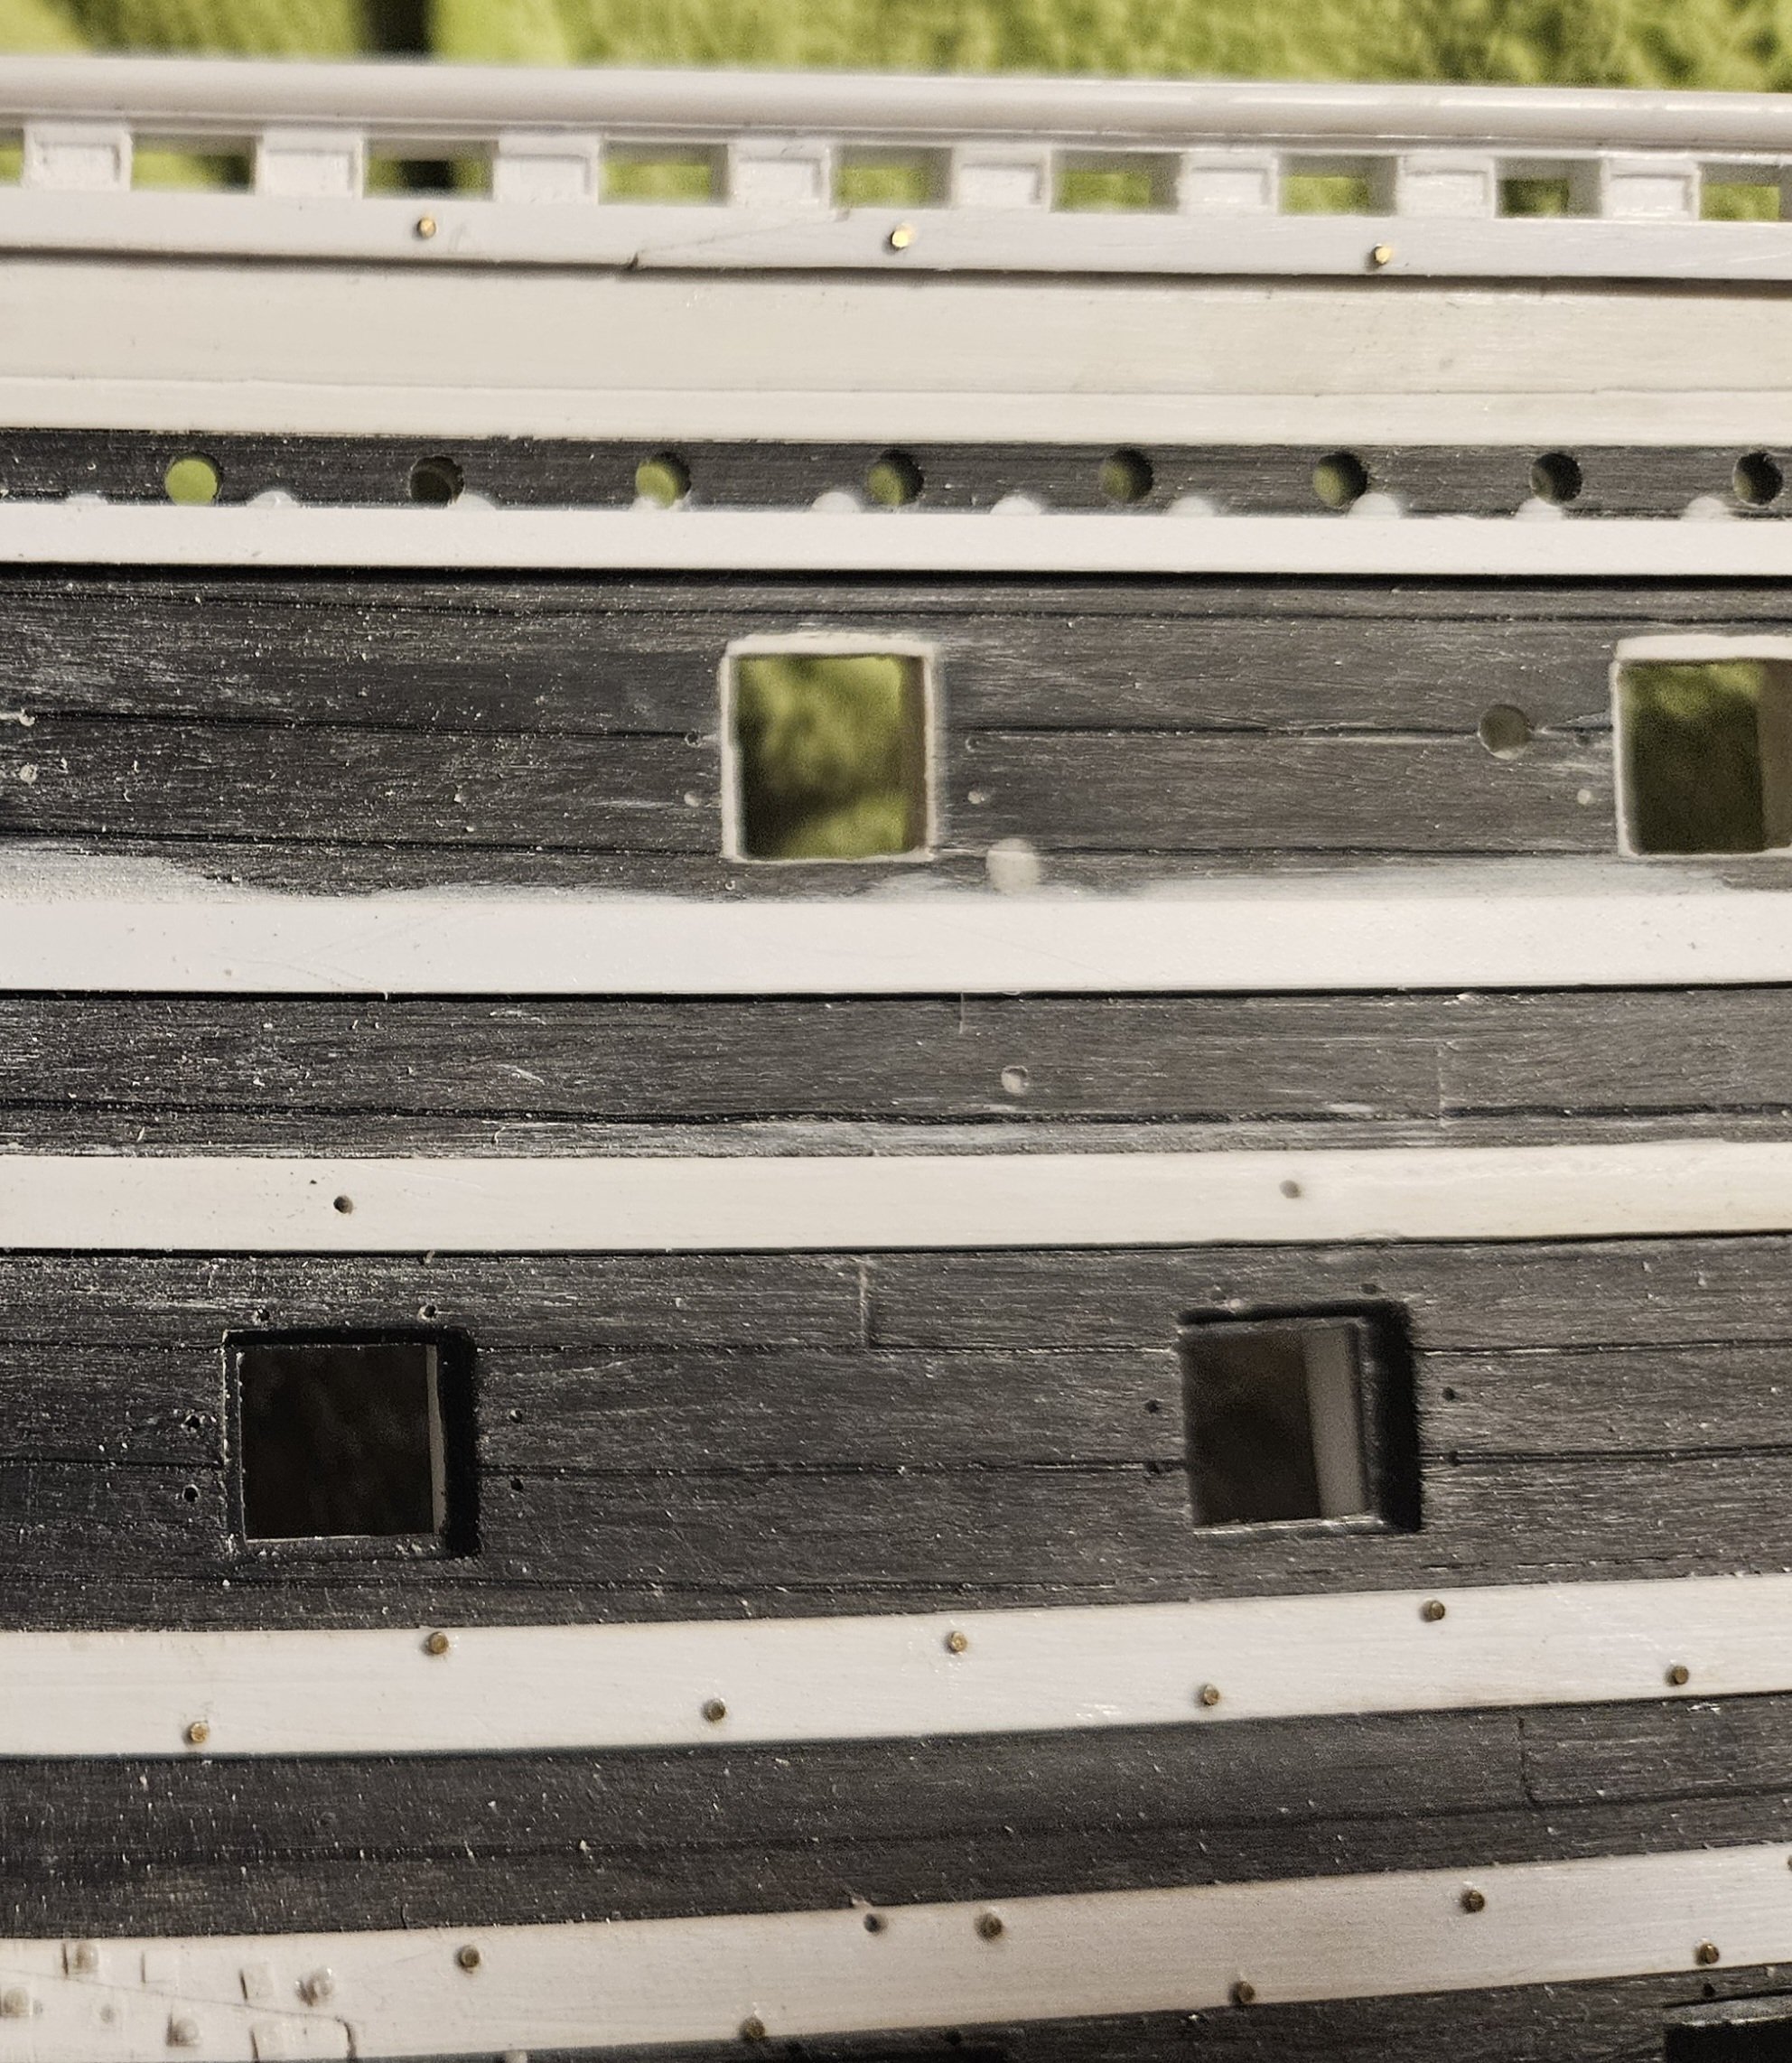
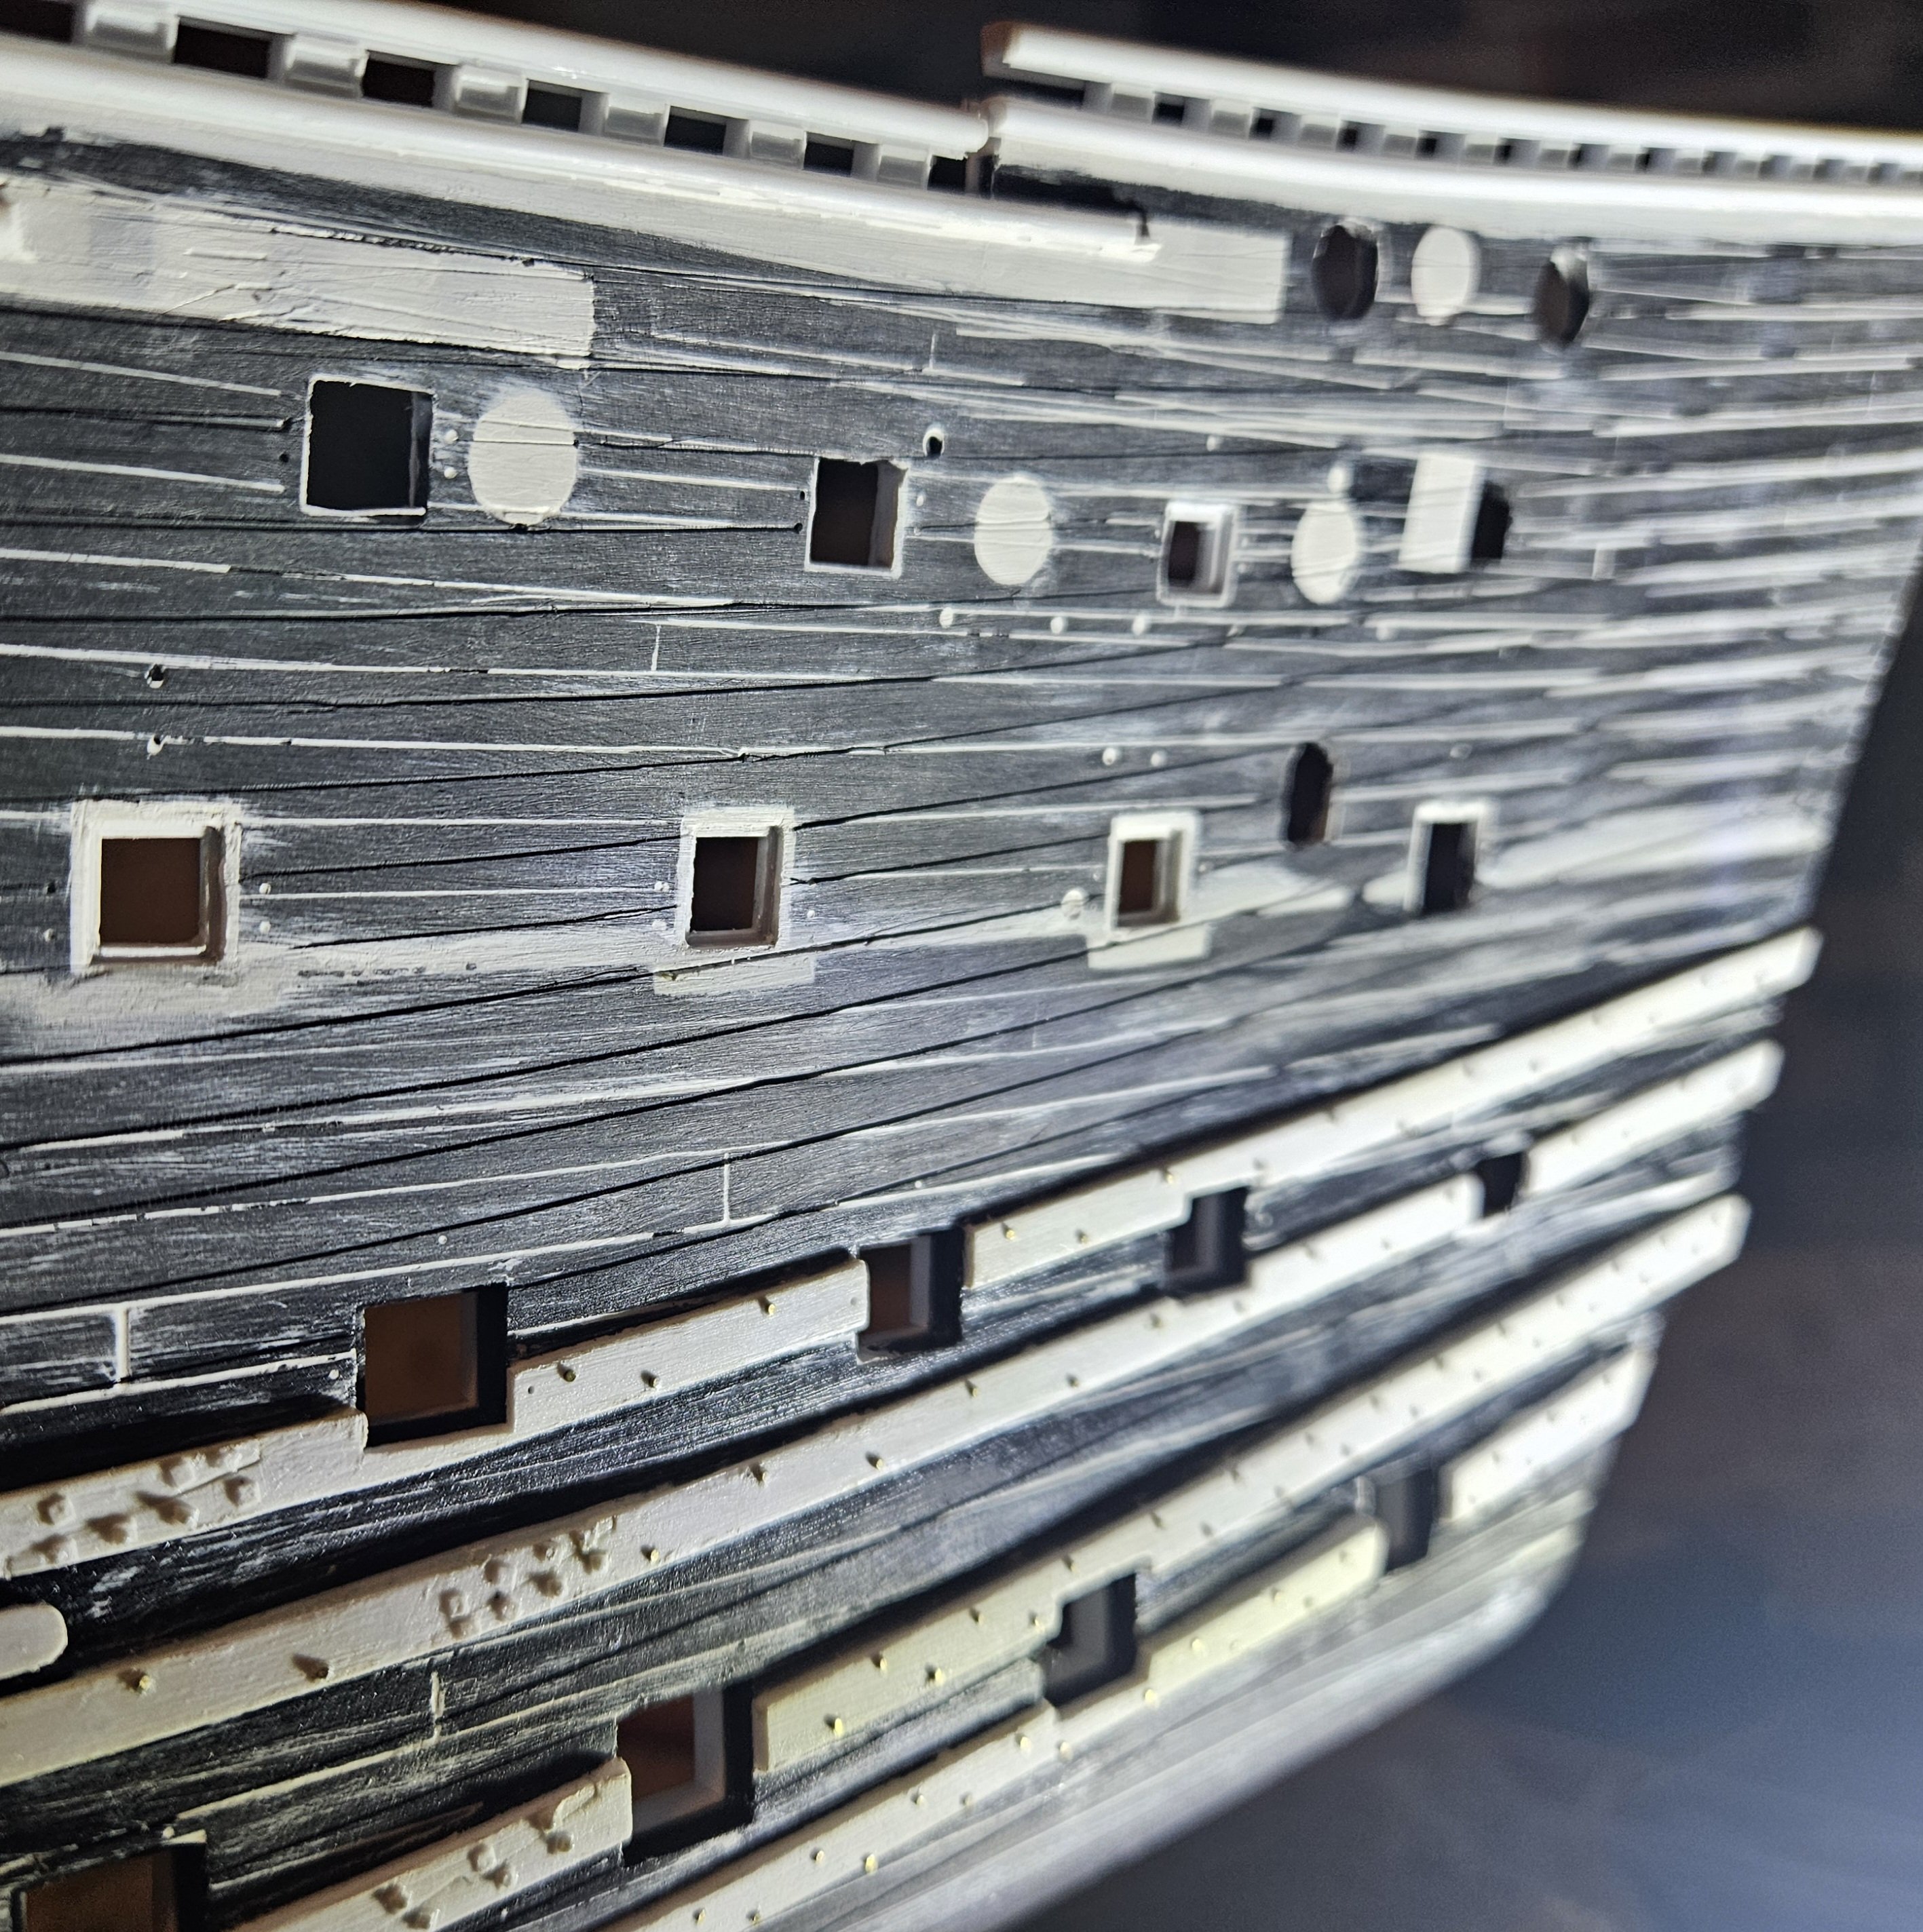
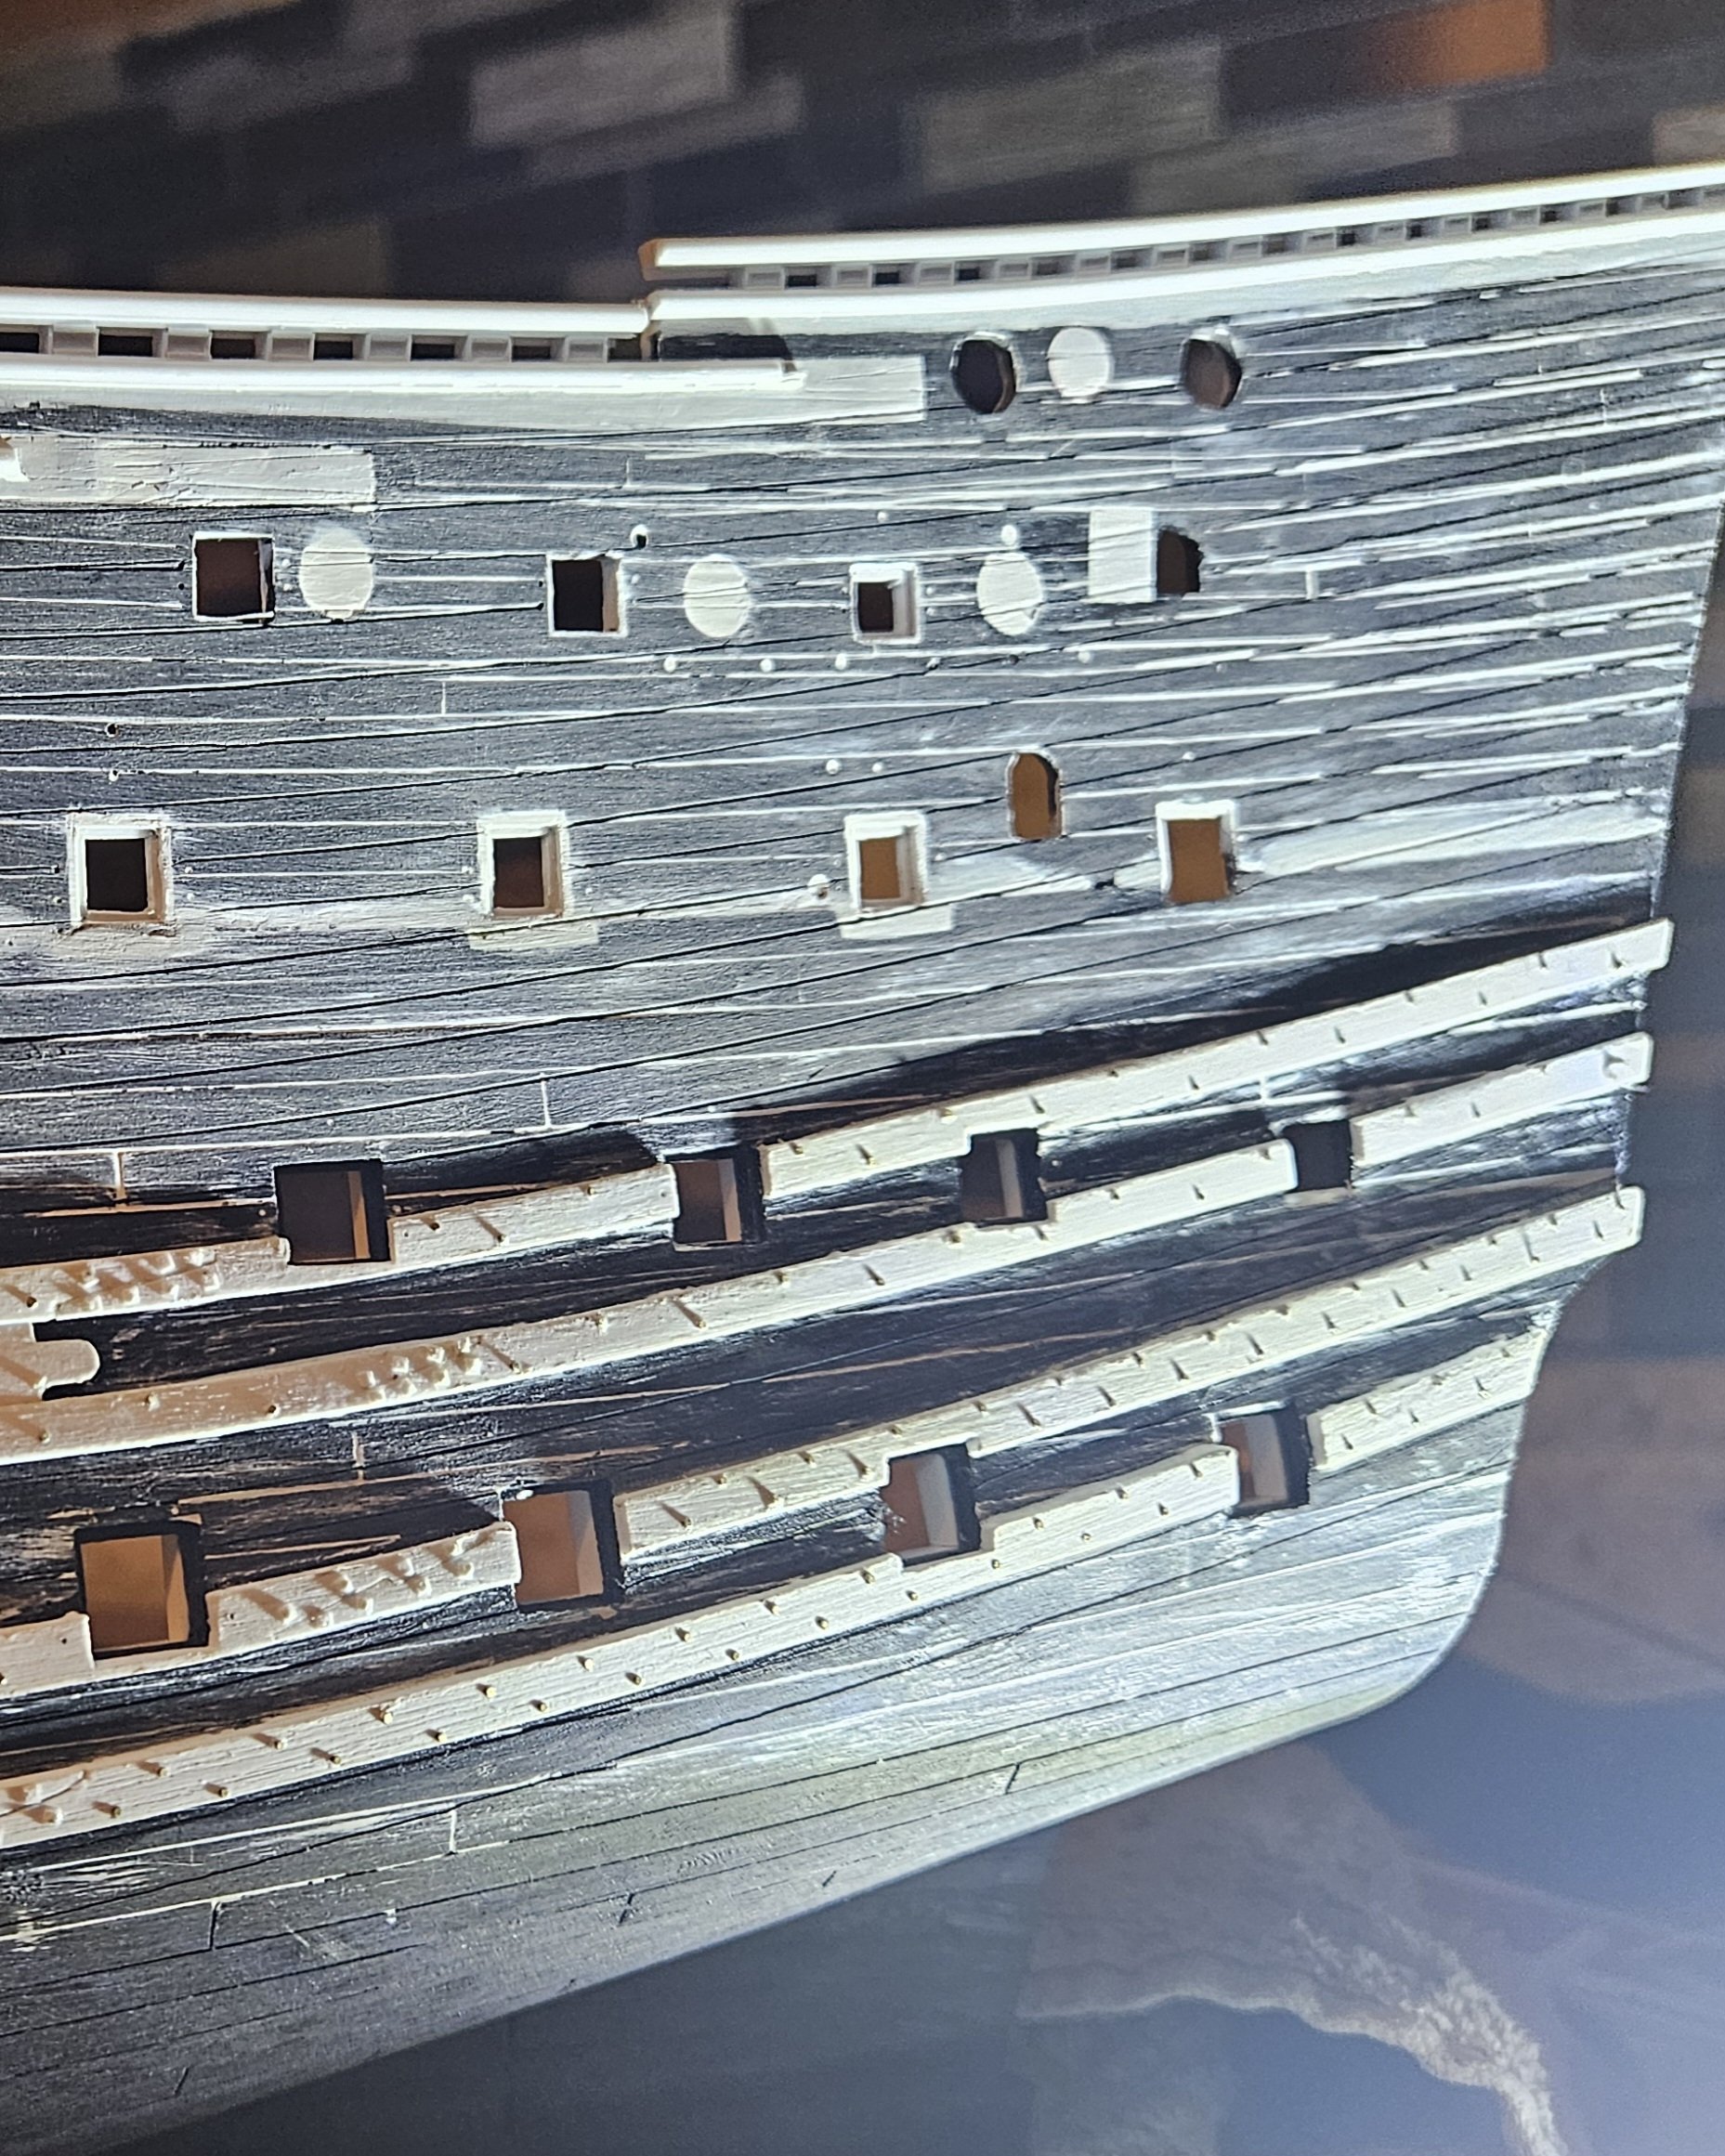
The various scuppers are done... it's been an interesting several days learning abut scuppers, as the subject is a little more complex than I thought! First, the small deck scuppers. Positioned at the lowest run of a deck to let gravity get the water out, and I have assumed that more deck scuppers would be needed on a weather deck. I decided to basically make them flush to the hull; sometimes they are portrayed as being a block that looked out past a wale. You can see 10 deck scuppers below; 5 on the top gun (weather) deck, 3 on the middle gun deck, and 2 on the lower gun deck ( do have a scupper hole for the manger at the bow). The holes are 0.030" (to simulate 3" at scale), and the scuppers are positioned below the level of the deck. The pump scuppers were a bit more interesting. The St. Phillippe mongraph states that SP had 6 total elm pumps. 4 at the main mast and 2 at mizzen mast. Surely another large ship like Soleil Royal would require 6 elm tree pumps, and I assumed at the same locations. So my first attempt was making large scupper boxes that protruded from the hull. But then I found a short video on YouTube that showed an elm pump being worked on the refurbished Hermione.... and the volume of water seemed rather small. One source said that HMS Victory elm pumps could do 25GPM, compared to the 1,000+GPM of a chain pump. So decided to downsize my pump scuppers... and I found another video by Animigraffs. This screen clip shows how the water is discharged from an elm pump, into what seems to be troughs that run the water through a scupper at deck. This seemed confusing... until I corresponded with Marc LaGuardia (Hubac's Historian"). He mused that the wood troughs were very likely movable, and would be moved into place as needed. So, while the deck scuppers are positioned several feet below the run of a deck, the pump scuppers must be right at deck level. The pump scupper holes have been downsized to 0.041", or 4" in scale. Note the smaller deck scupper to the right. BTW, all of the six scuppers were at the lower gun deck level, as that is where the elm pumps were worked and the moveable troughs would be laid on the lower deck So I learned more about scuppers than I thought was possible to know. I did mess around with 28 gauge copper wire rings that I gently tapped with a hammer, in order to make a thin ring that would suggest the lead that scuppers were lined with. Even 28 gauge is too thick; I really would want the ring to be super-thin so it could be flush with the hole; and tapping it to make it thin enough makes it too large in diameter - at least I think it appears out of scale.


- 432 replies
-
- 6
-

-

-
- soleil royal
- Heller
- (and 1 more)
-
Interesting observations on the scuppers, Marc. It would be interesting to try and model a "sock" on several of the lowest scuppers...hmmm And I agree completely on the J-shaped hancing pieces...
-
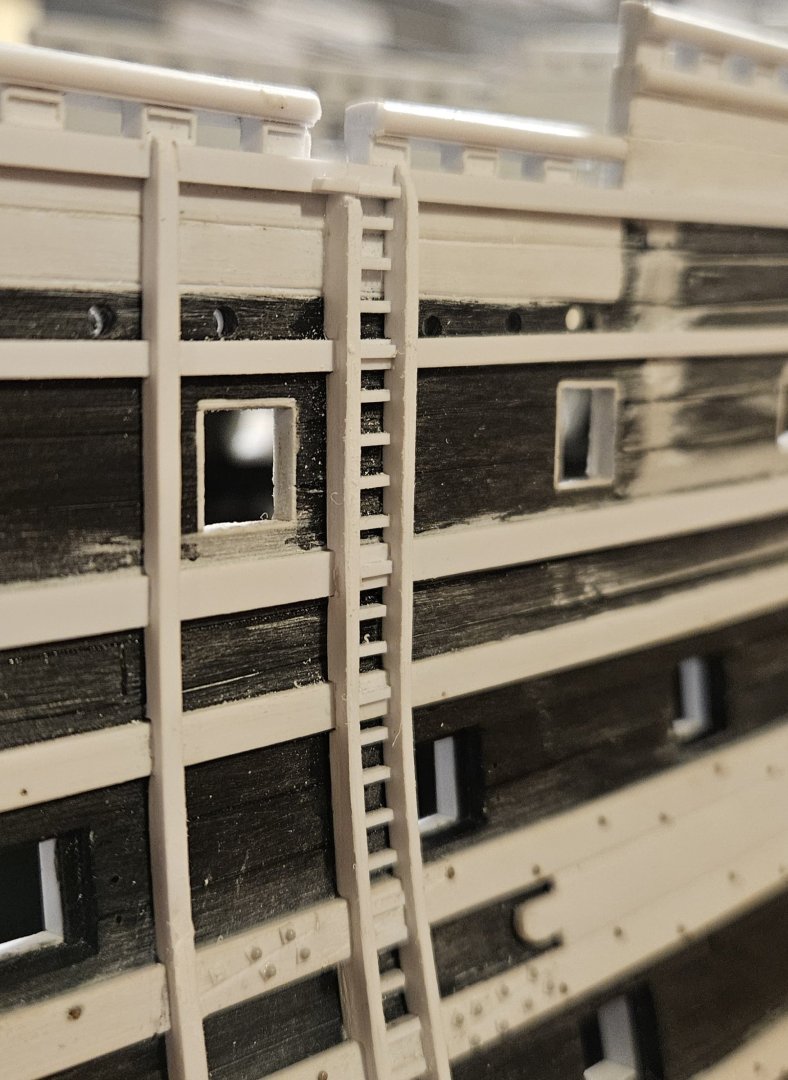
Finished the ladders. It would have been easier to keep the kit steps, but... they vanished when I ground off the wales. I made a simple template and placed them 3mm apart. It was actually very easy and took no more than 30 minutes to affix all of the steps (despite my dread months ago whem I ground the kit wales/steps off). Steps on a wale were only 0.5mm wide; while steps in between the wales were 1.0mm. Some clean up work needs to be done, and when I get several inches away with my magnifying headset, I see plenty that I don't like. However, when I back away a few inches, or look at the more distant perspective in photos, I can't see most of the flaws. I can live with that, and my technique will be better when I make my second ship. The boat fenders were 1.5mm wide (6.0 inches in actual size), while the ladder railings were only 1mm wide (4.0 inches in real size). On to scuppers. There seems to be a large range of latitude in scupper design and their numbers. Some models have scupper holes flush with the hull; some models have "boxes" that protrude a bit from the hull. Mondfeld (by the way, someone suggested a few months ago that I get Historic Ship Models... what a fantastic book!) suggests that three-deckers had two or three pairs of scuppers on the middle deck and upper deck, so I think that is what I will try. And I have to bear in mind a set of larger scupper holes for the pump, and he says these are located "above the waterline" (lower gun deck?) and located between the main mast and mizzen mast...


- 432 replies
-
- 6
-
-
-
- soleil royal
- Heller
- (and 1 more)
-
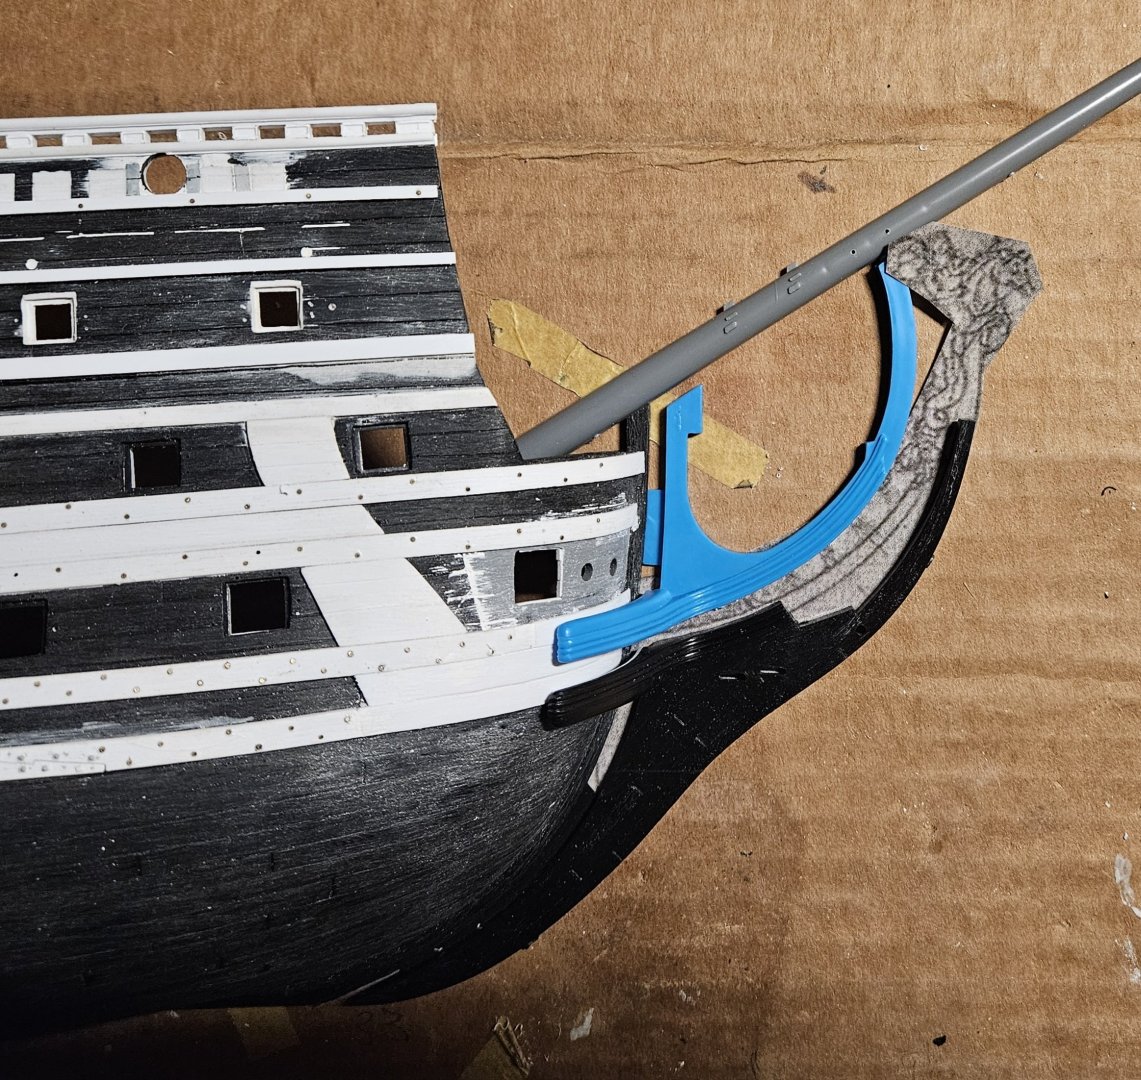
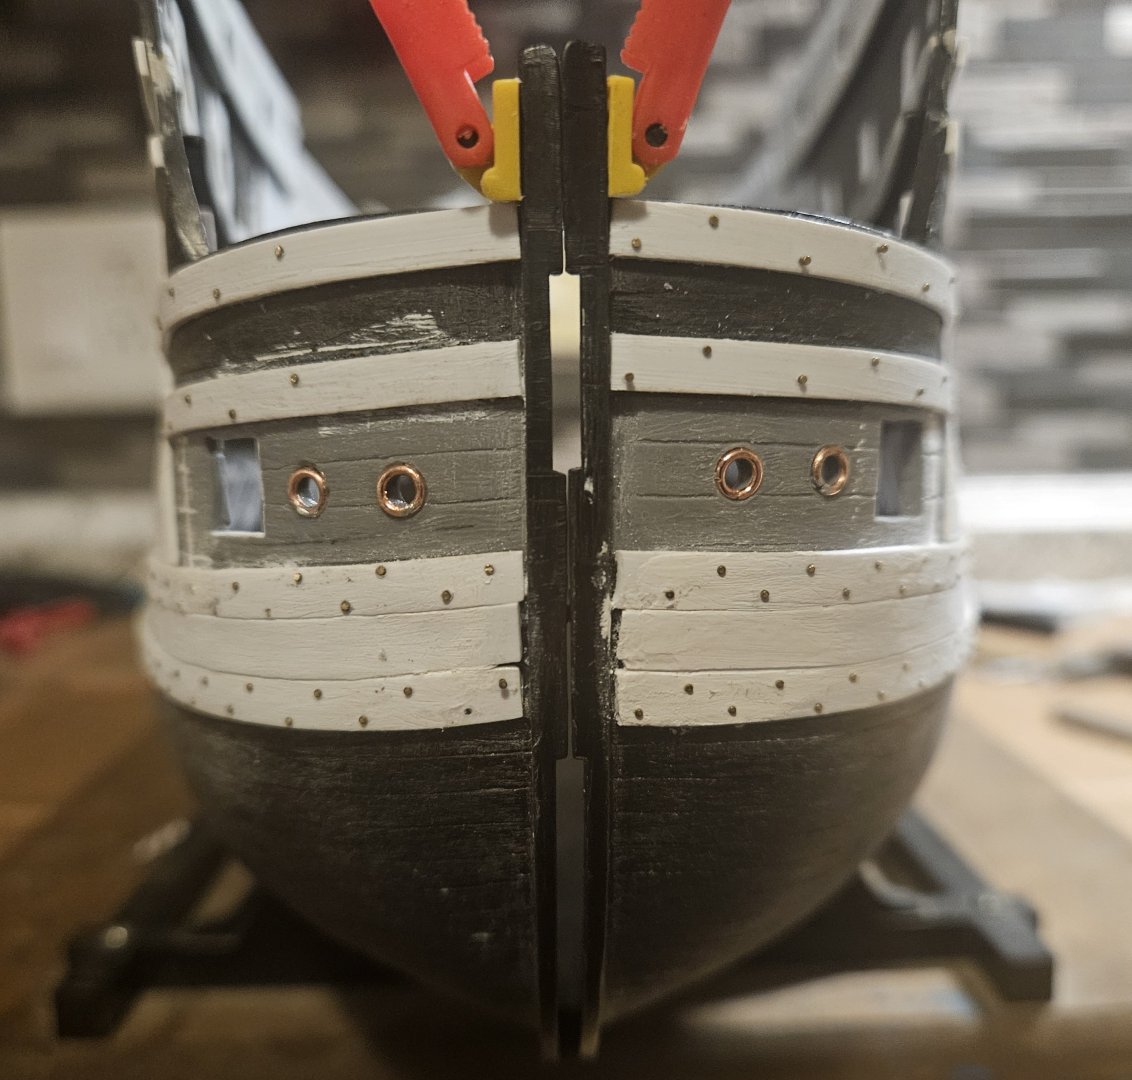
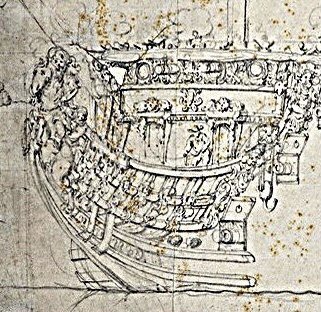
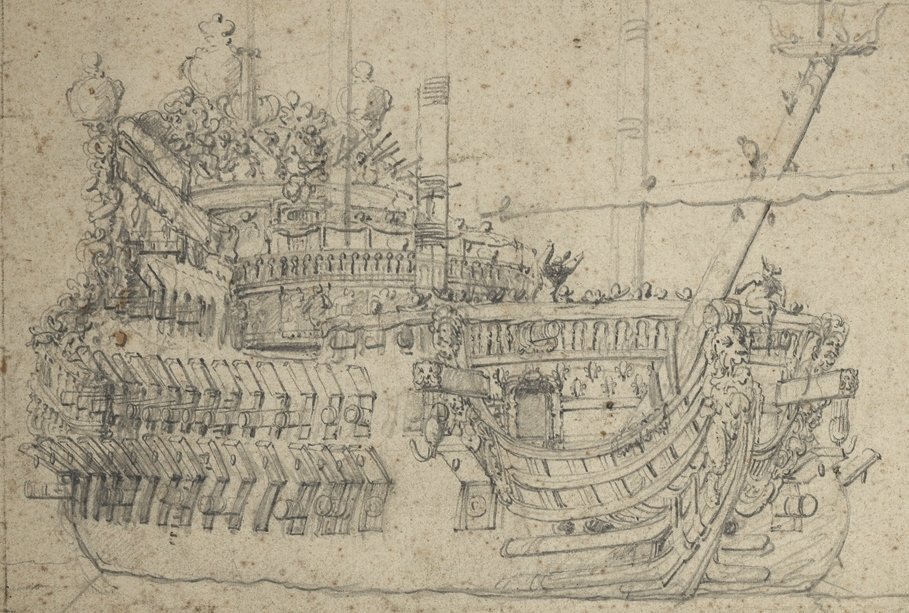
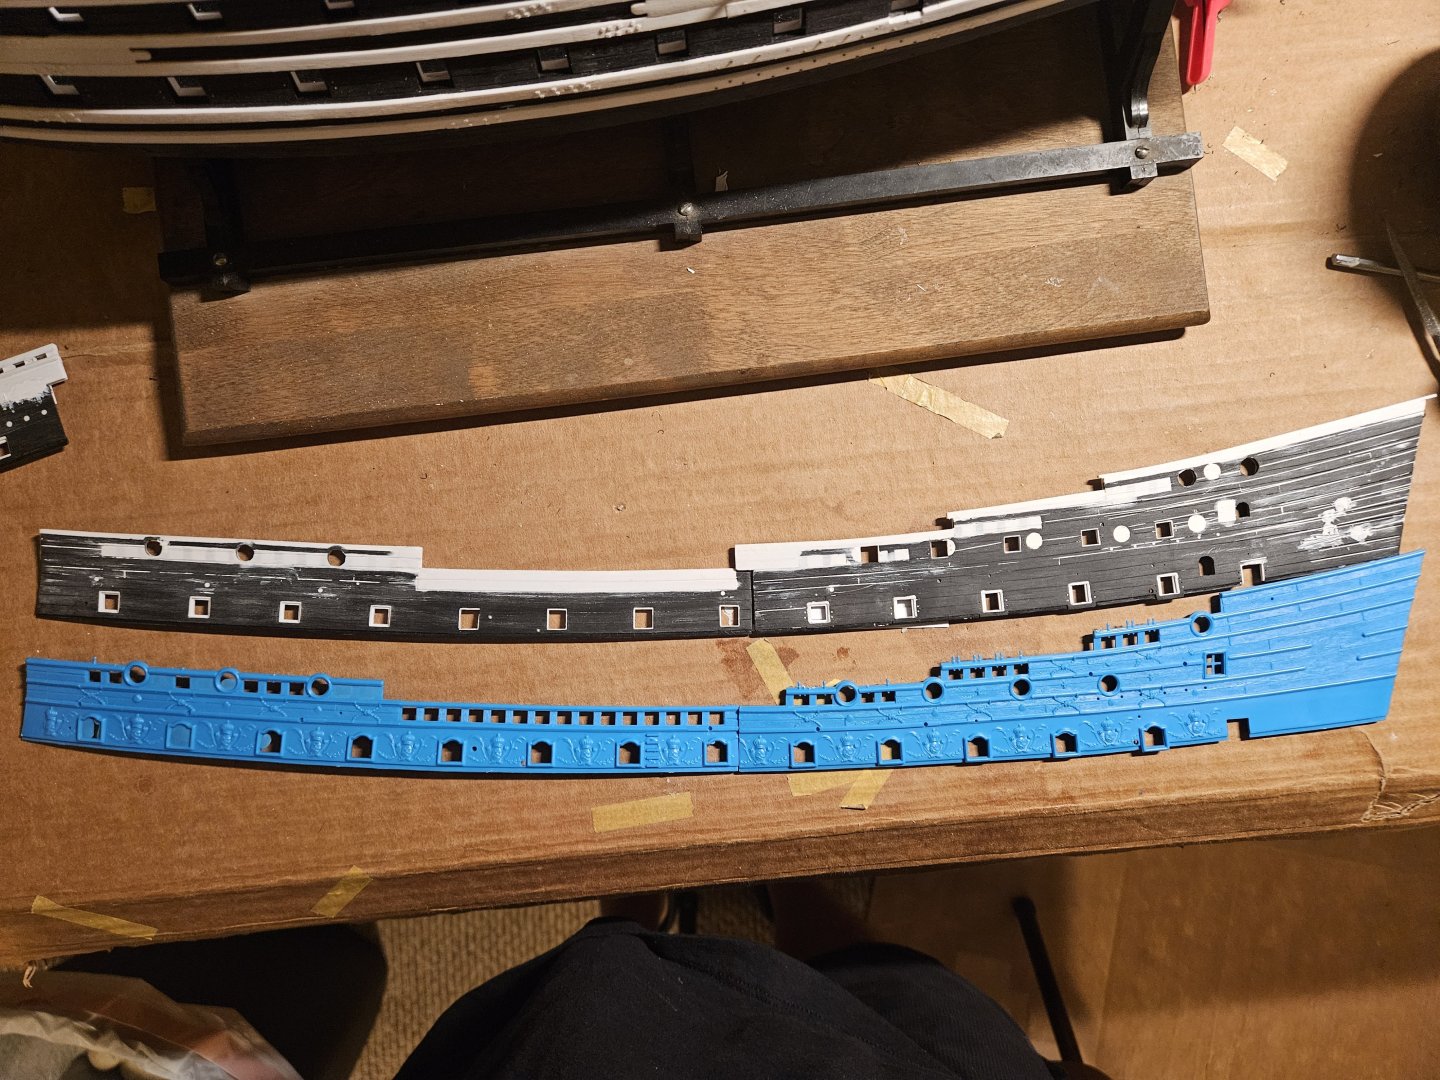
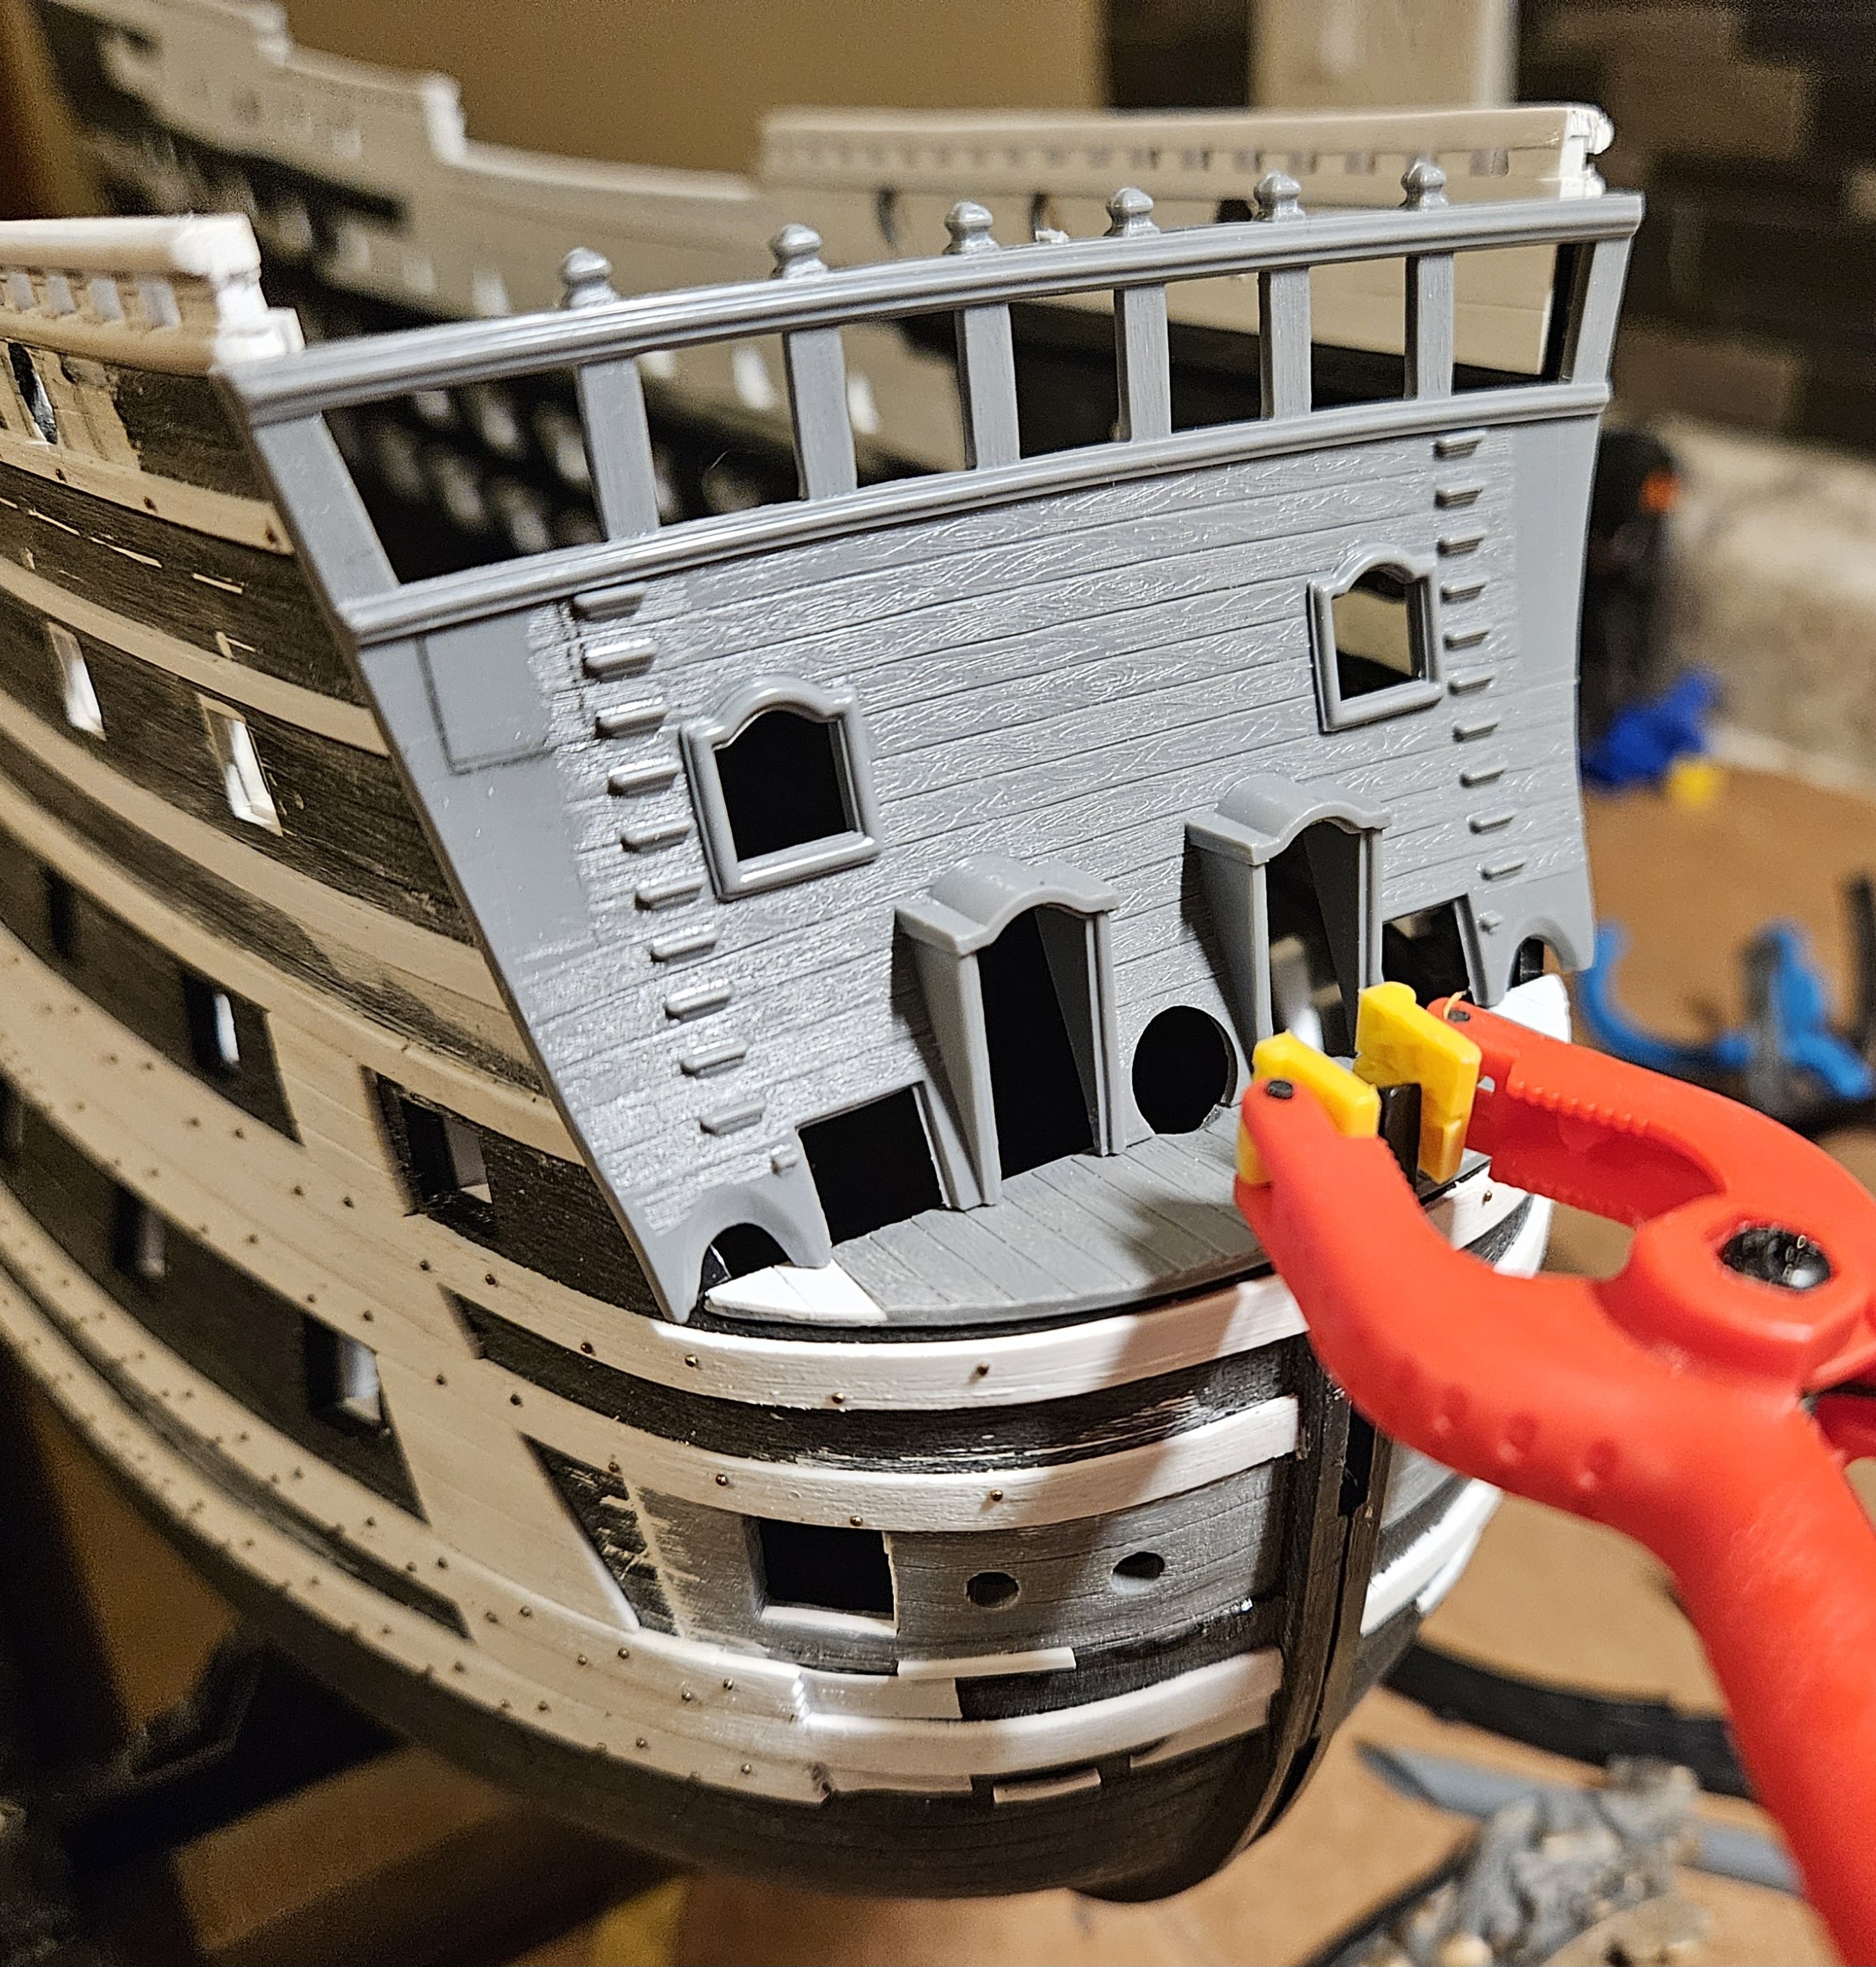
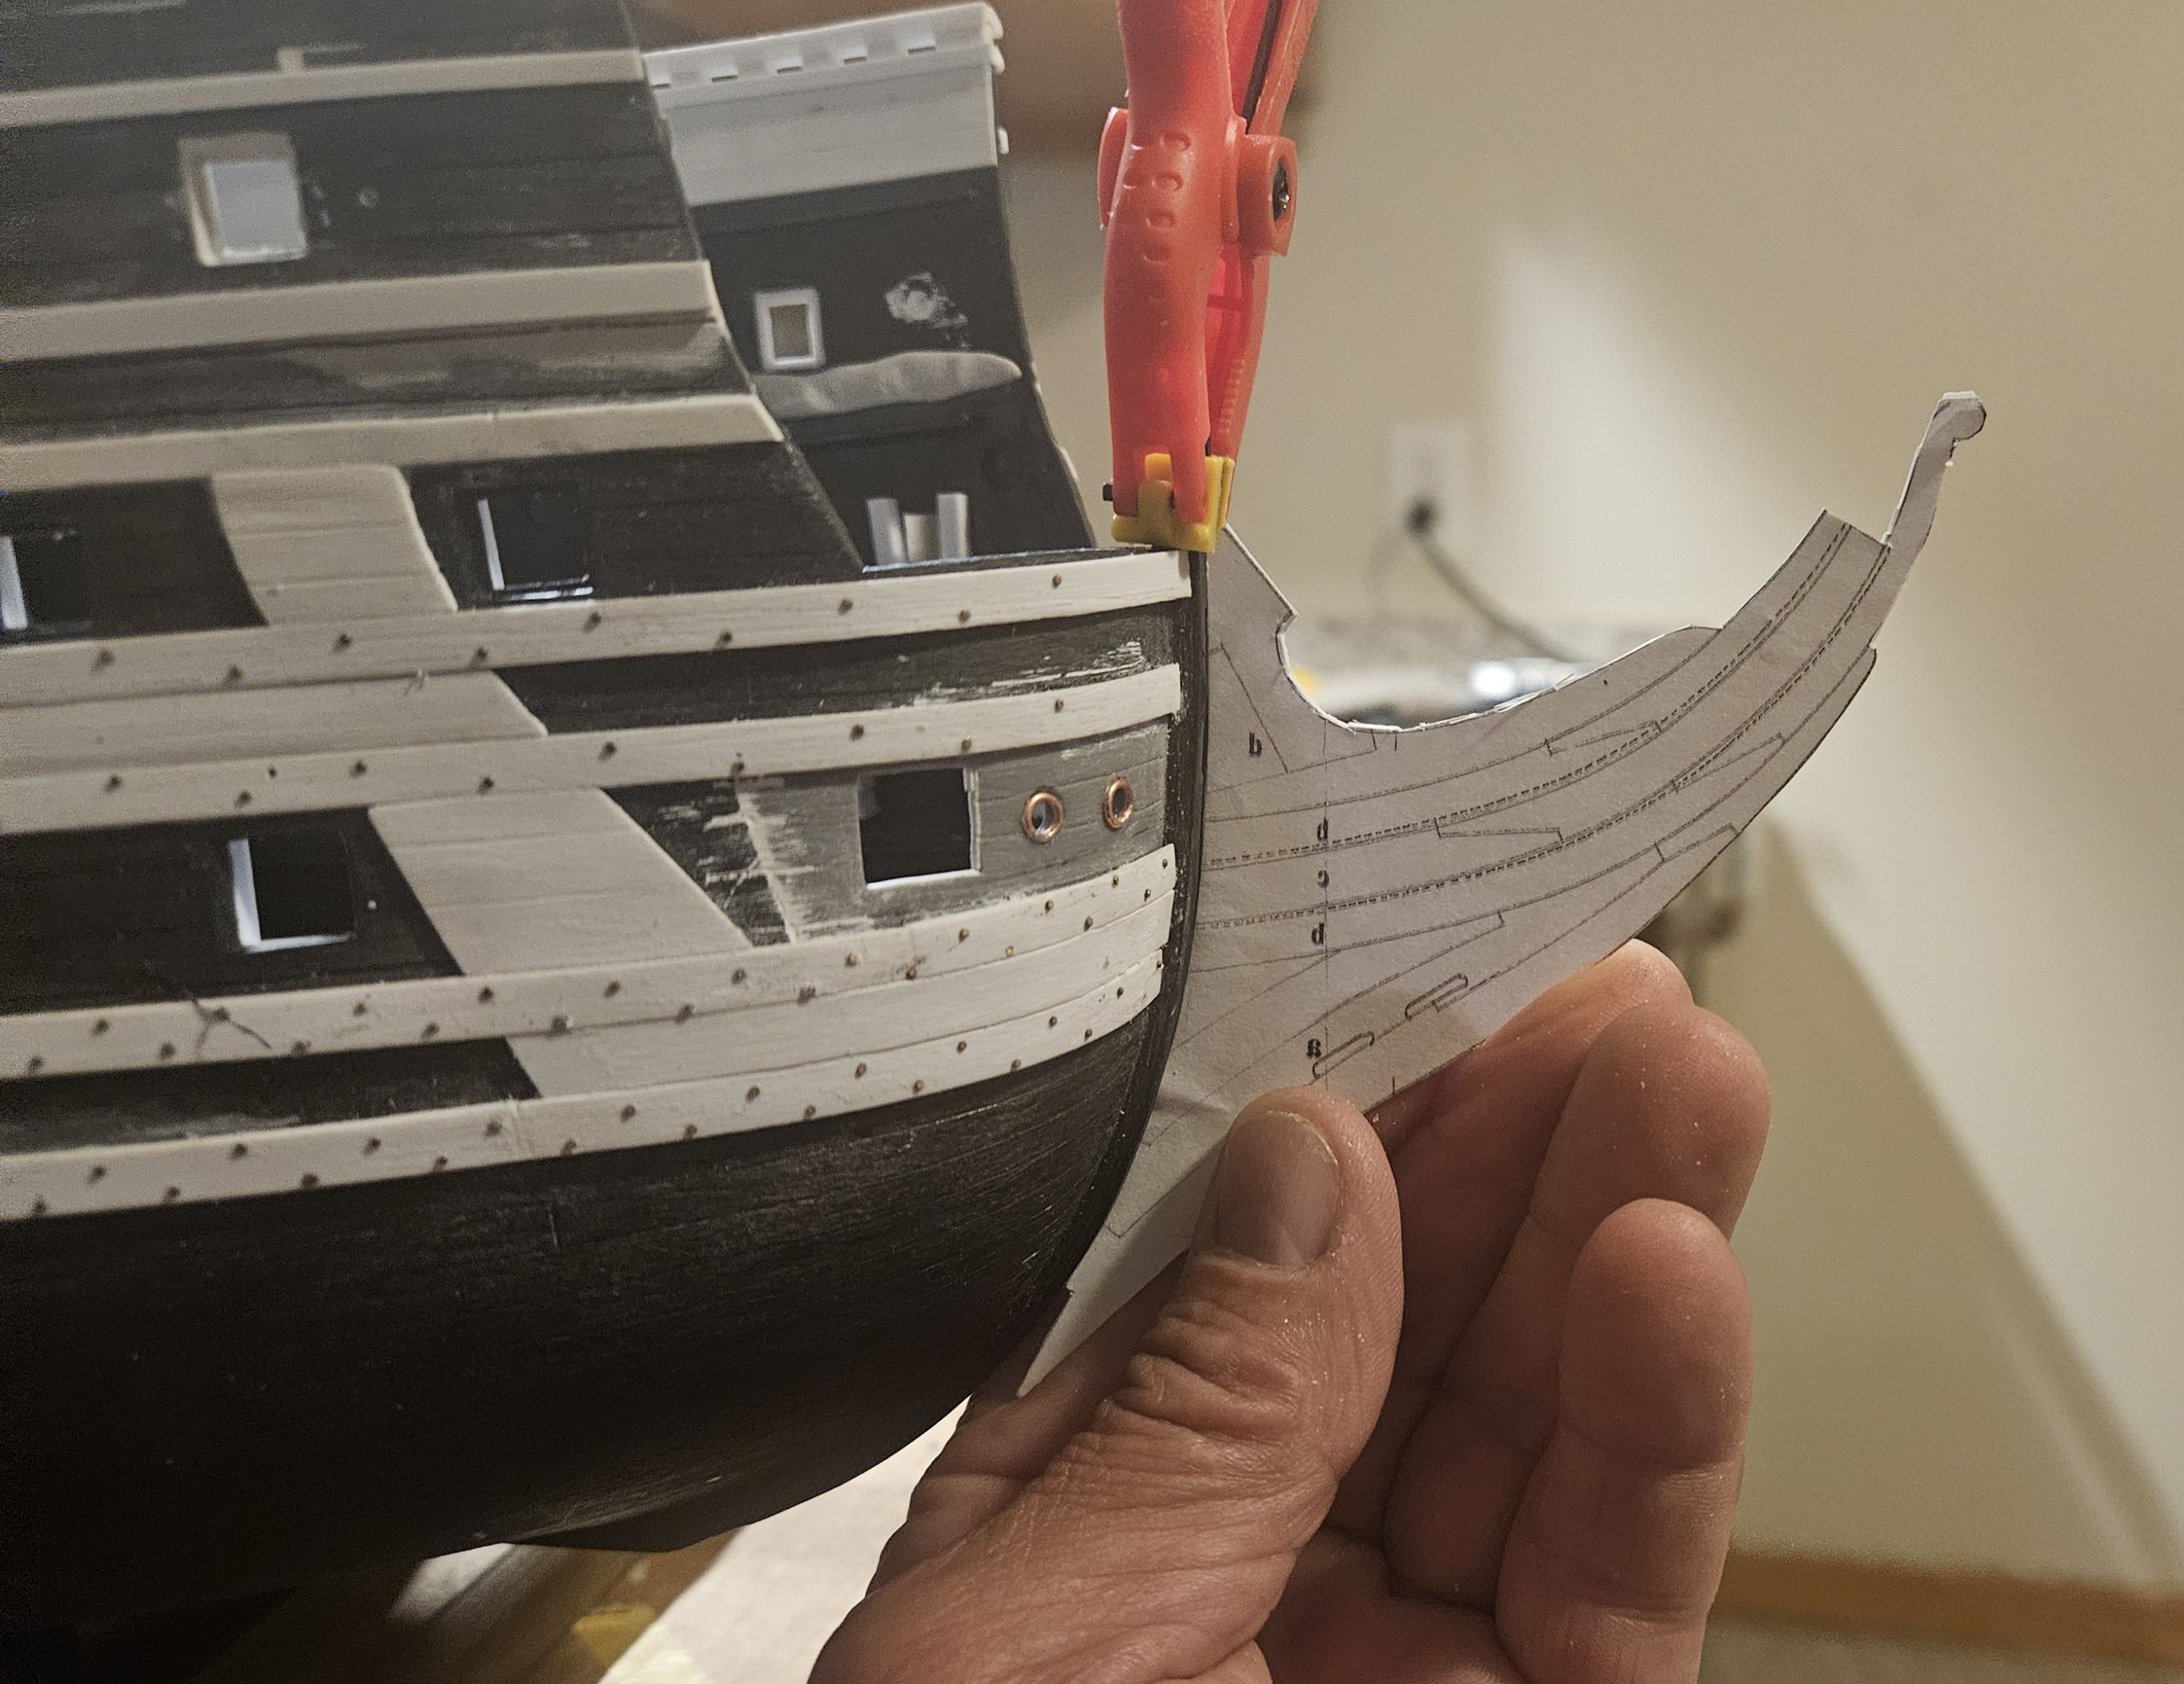
I have settled on the idea that the beakhead should appear "longer/lower" than the Heller kit model, something like this VDV drawing of La Reyne. I made of a copy of the St Phillipe monograph bulkhead and shrank it from 1/48 to 1/96.. and that is more of the look that I am trying to achieve. Compared the kit parts to the St Phillipe Evergreen cutout... Obviously, there is going to be a lot of scratch building. The first thing that I had to do was to complete the bottom wales all of the way to the stem (I hadn't run them all of the way before as that area was going to be covered up by the kit parts). It looked to me on the St Phillipe monograph that the thickness of the bottom wales really thinned out as they wrapped around to the stem, so I sanded/shaved them down. I then added the hawser... "holes"?... back by using 4mm copper rings that I countersunk a bit into the original plastic holes (I didn't worry about them being perfect as the anchor ropes will obscure most of the hawser holes). I will also add the ... name?? ... of the rounded moulding just under the hawser holes. I also started to make changes to the bowsprit deck by eliminating the round houses, and I wanted to see the layout as the foward bulkead "cheeks"(?) wrap forward around the bowsprit deck. Of course that means scratch building the beakhead bulkhead, but I was going to have to do that anyways as I raised the height of the forward bulkead by 5mm. So I now have a long list of things that need to be done and be considered regarding the beakhead appearance, but the hulls have to be painted and glued together first for that to proceed! The fenders are finished on both sides, so now the side ladder steps/railing must be finished... getting me ever closer to where I can start painting the hull halves.


- 432 replies
-
- 6
-
-
- soleil royal
- Heller
- (and 1 more)
-
Marc, I have been thinking about what you just mentioned for my next build.. is it possible to remove 1/8" of spacing between lower/middle gun decks and middle/upper gun decks. I will have plenty of time to look at this... for example, if I do a Royal Louis 1668, or SR 1671, I would likely redo all of the wales again to get the aft sheer sweep... and maybe a cut could be made unobtrusively that would get covered
-
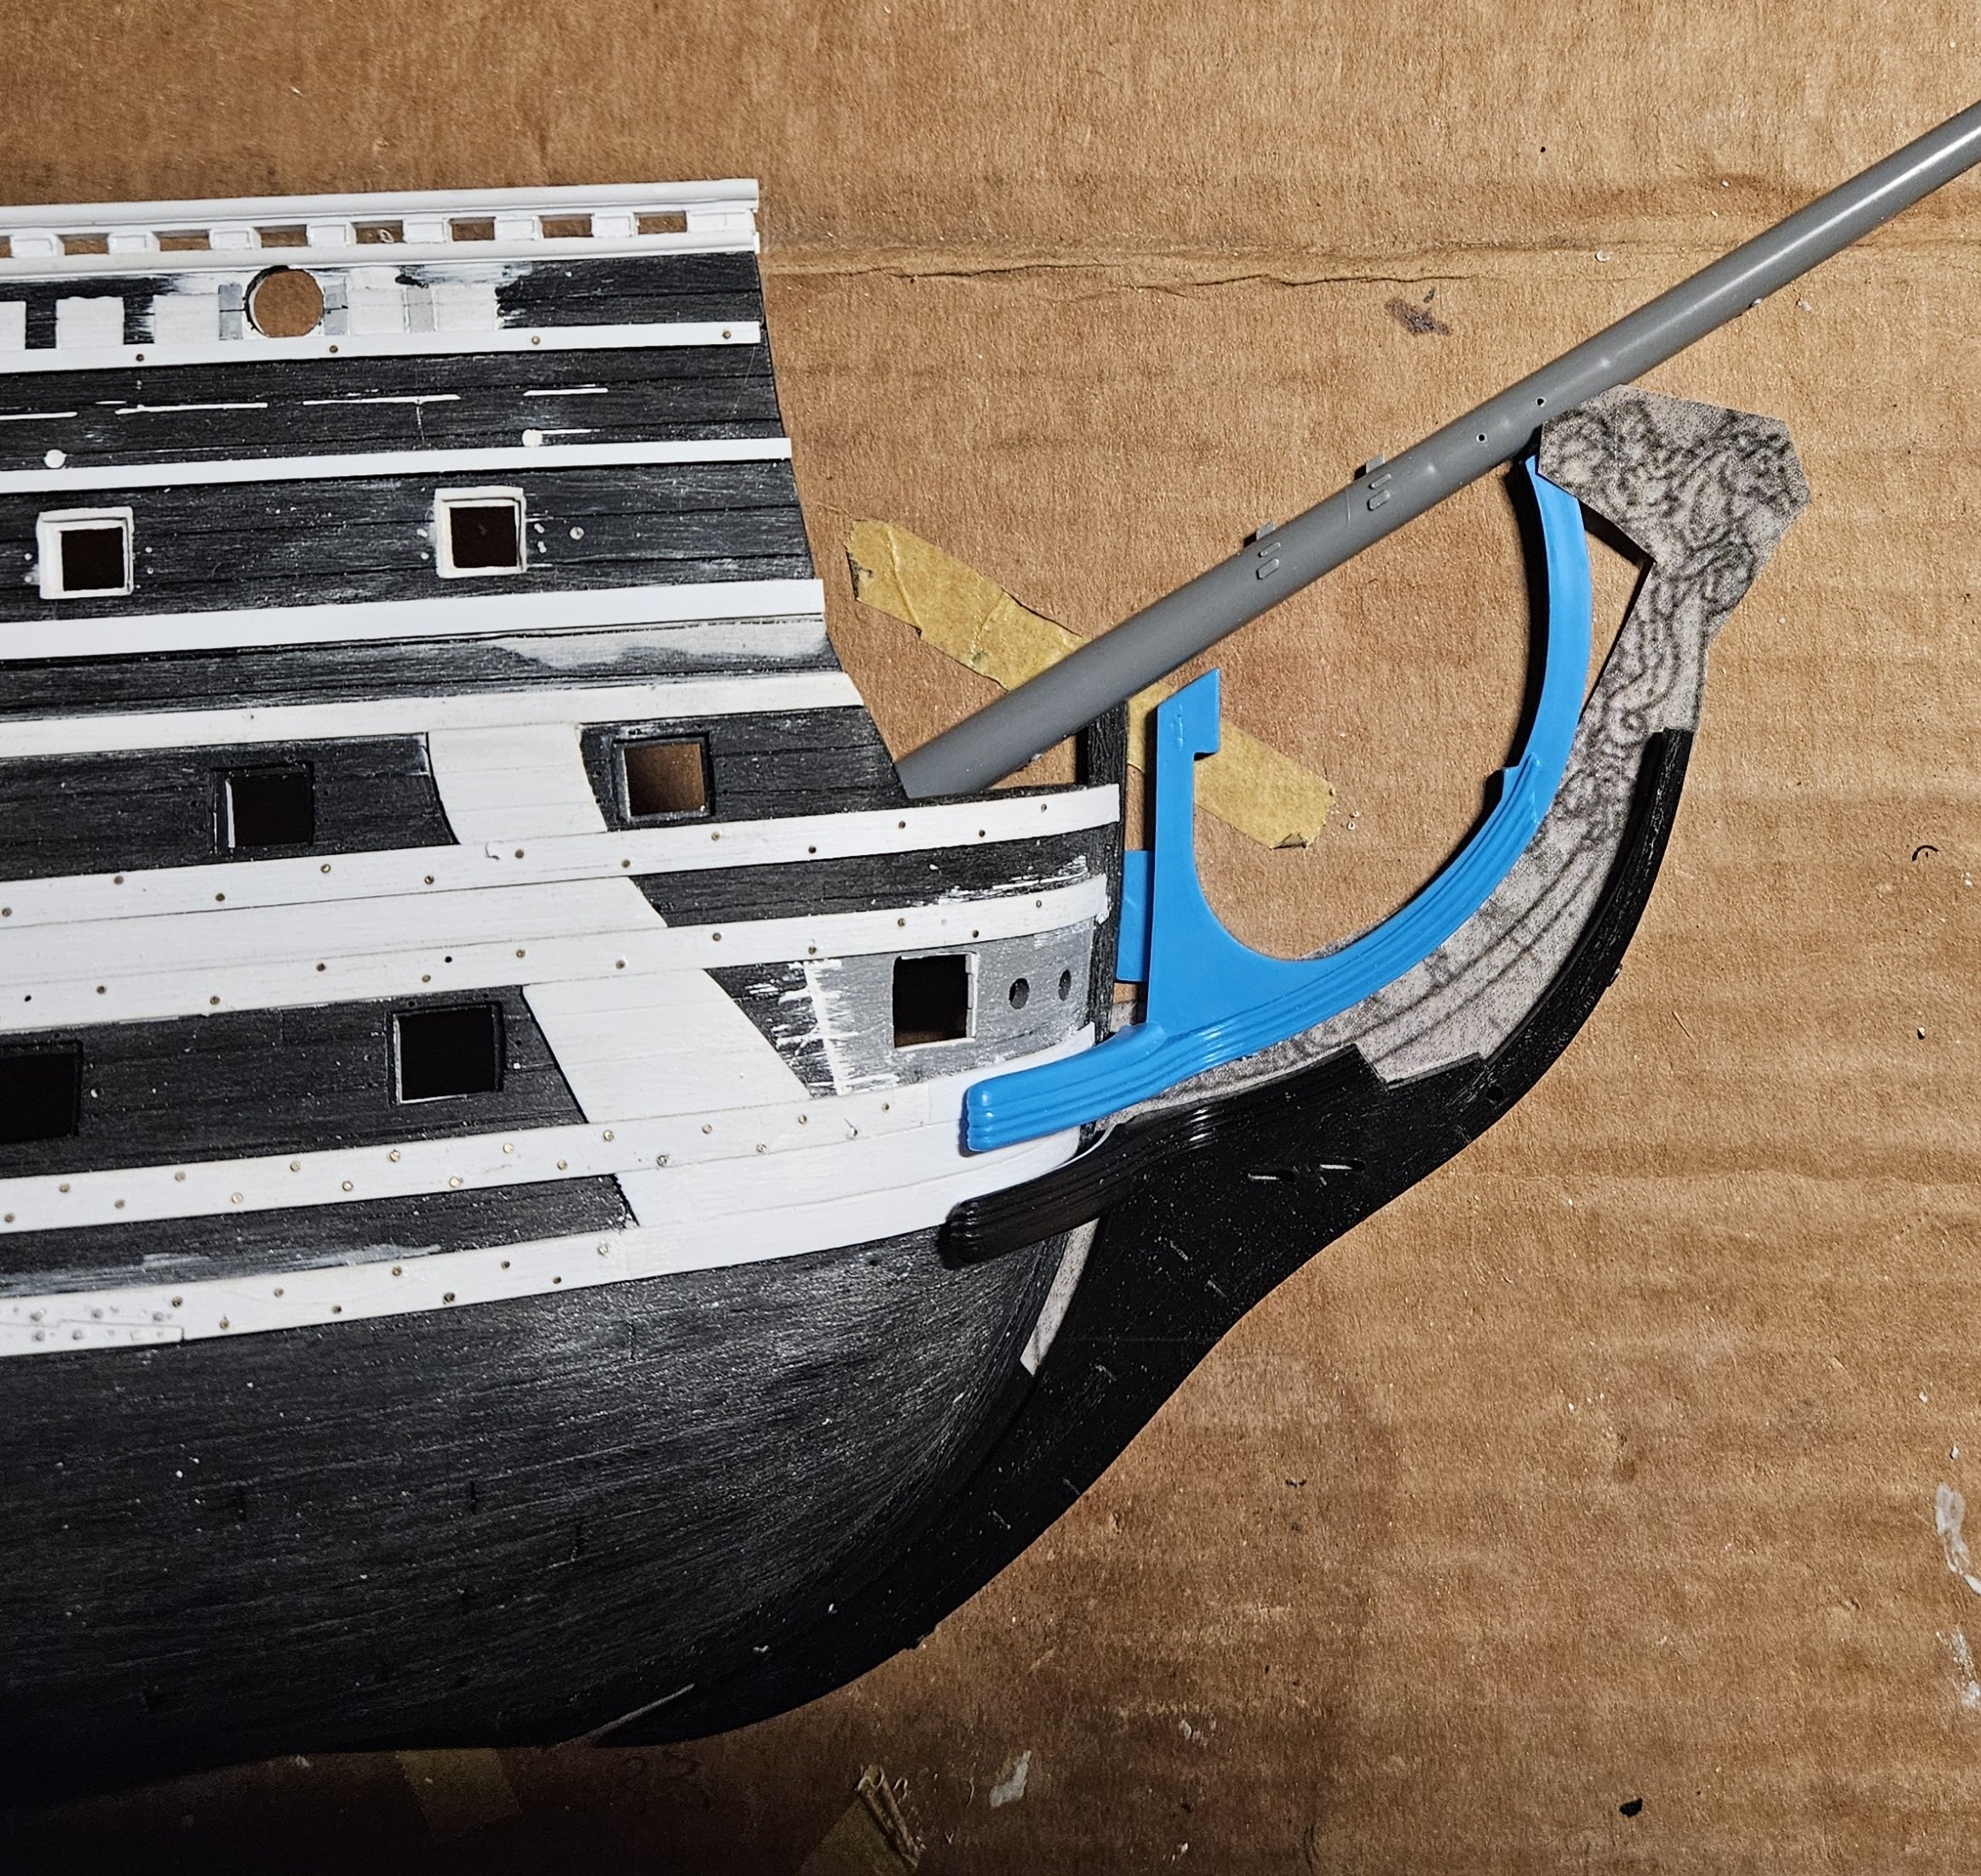
Henry, you are correct. Basically if I use the kit bowsprit fit as is, I can have longer/lower for the beakhead... OR a slightly higher angle of the bowsprit. There is one possibility though.... the Heller kit has the bowsprit going through the beakhead bulkhead. Cedric, in his La Reine build, stated that French ships before 1690 had the bowsprit go through the "first deck".... but I didn't know what he meant by that. I happened to look at Micheal Saunier's build, and his bowsprit is pushed forward and enters through the bowsprit deck - ah ha! the "first deck" - and NOT through the bulkhead. Marc (Hubacs Historian) agrees that this does seem a plausible design consideration for me.... so by pushing the bowsprit forward and have it enter the bowsprit deck, I does appear I can get the beakhead "longer/lower" AND maybe even tweak the bowsprit angle up (not sure how far yet). Playing with paper templates suggests this is possible. 🤞
- 432 replies
-
- 2
-
-
- soleil royal
- Heller
- (and 1 more)
-
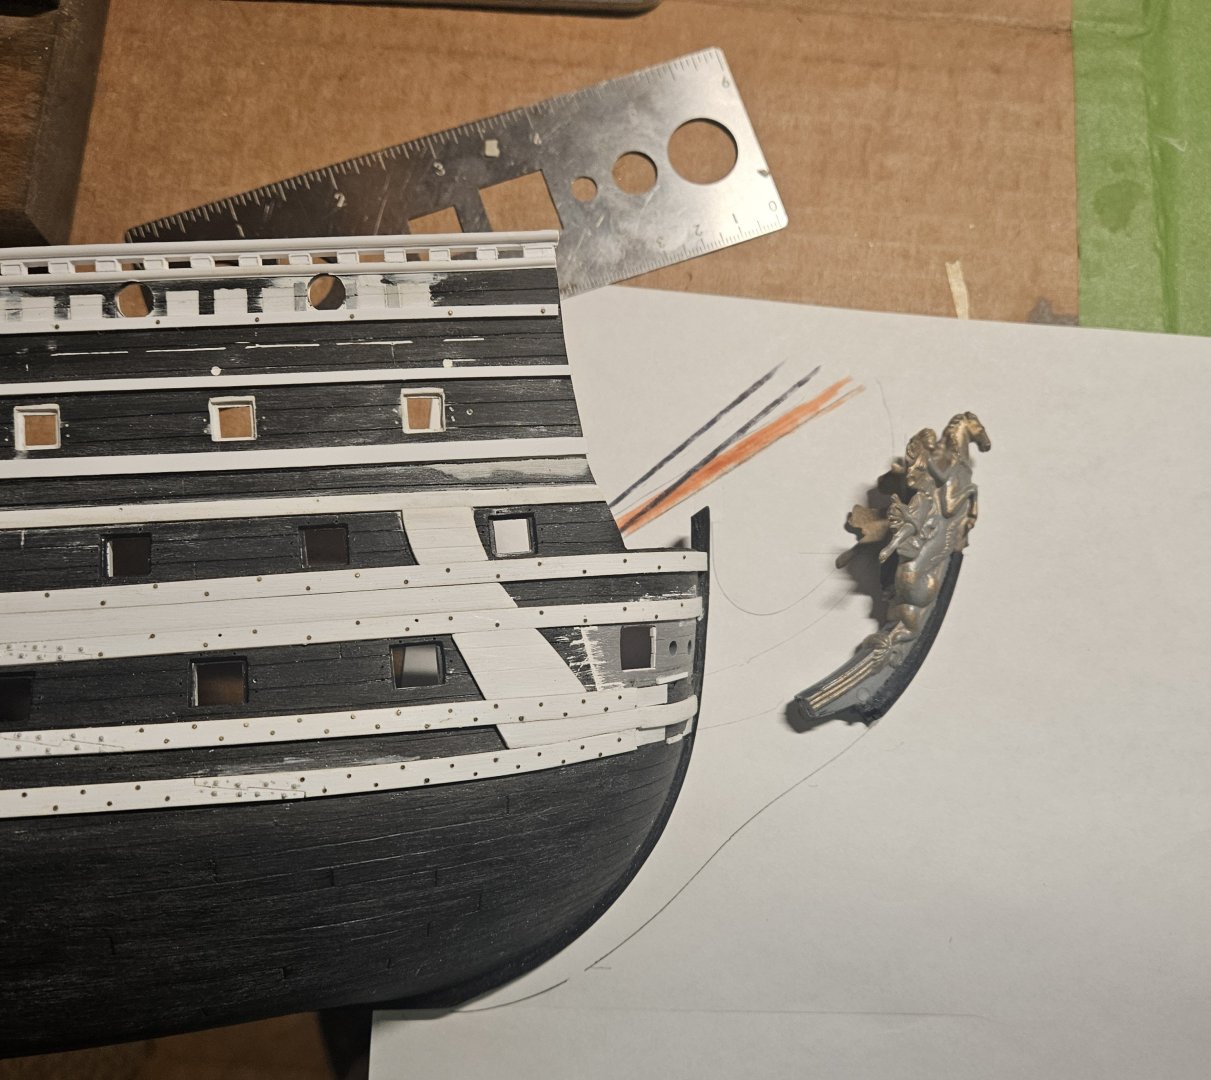
Back from a week of vacation in a warmer place than Wisconsin, and had a lot of time to relax and review other build logs. And I came to the conclusion that if I am really trying to model "Soleil Royal 1671", then I couldn't stop at simply bashing the wales/bulwarks to have much more aft sheer. I also had to make the bow more "Dutchy looking" (I think I first saw that term reading Marc's Hubacs Historian blog!). I want to: 1) change the bowsprit angle, 2) lower the catheads, 3) wrap the forward bulwark around past the beakhead bulkhead (not sure what this is called), and 4) lower/lengthen the beakhead Below you can see my tracing of the Heller kit supplied parts. The Heller kit has 34 degrees angle (orange marker below). Mondfeld says in 1665 it was 40 degrees, then 35 degrees in 1675. The St Phillipe monograph is 40 degrees, and I found a Zeven Provincean plan which is also at 40 degrees. Sooooo, I am thinking I could do 39-40 degrees and be just fine; see the new black lines drawn in. With a known bowsprit angle, the other items like cathead placement and headrail positioning will fall in place (yup, I am thinking I will scratch build the head rails..). Where I am struggling now is is with the beakhead design... "lower and longer". By increasing the angle of the bowsprit from 34 degrees to 40 degrees, the figurehead APPEARS to be lower. Perhaps I just need to examine some prints like the VDV drawing below and take cues to "lengthen" the beakhead a bit from the Heller kit part?
- 432 replies
-
- 2
-
-
- soleil royal
- Heller
- (and 1 more)
-
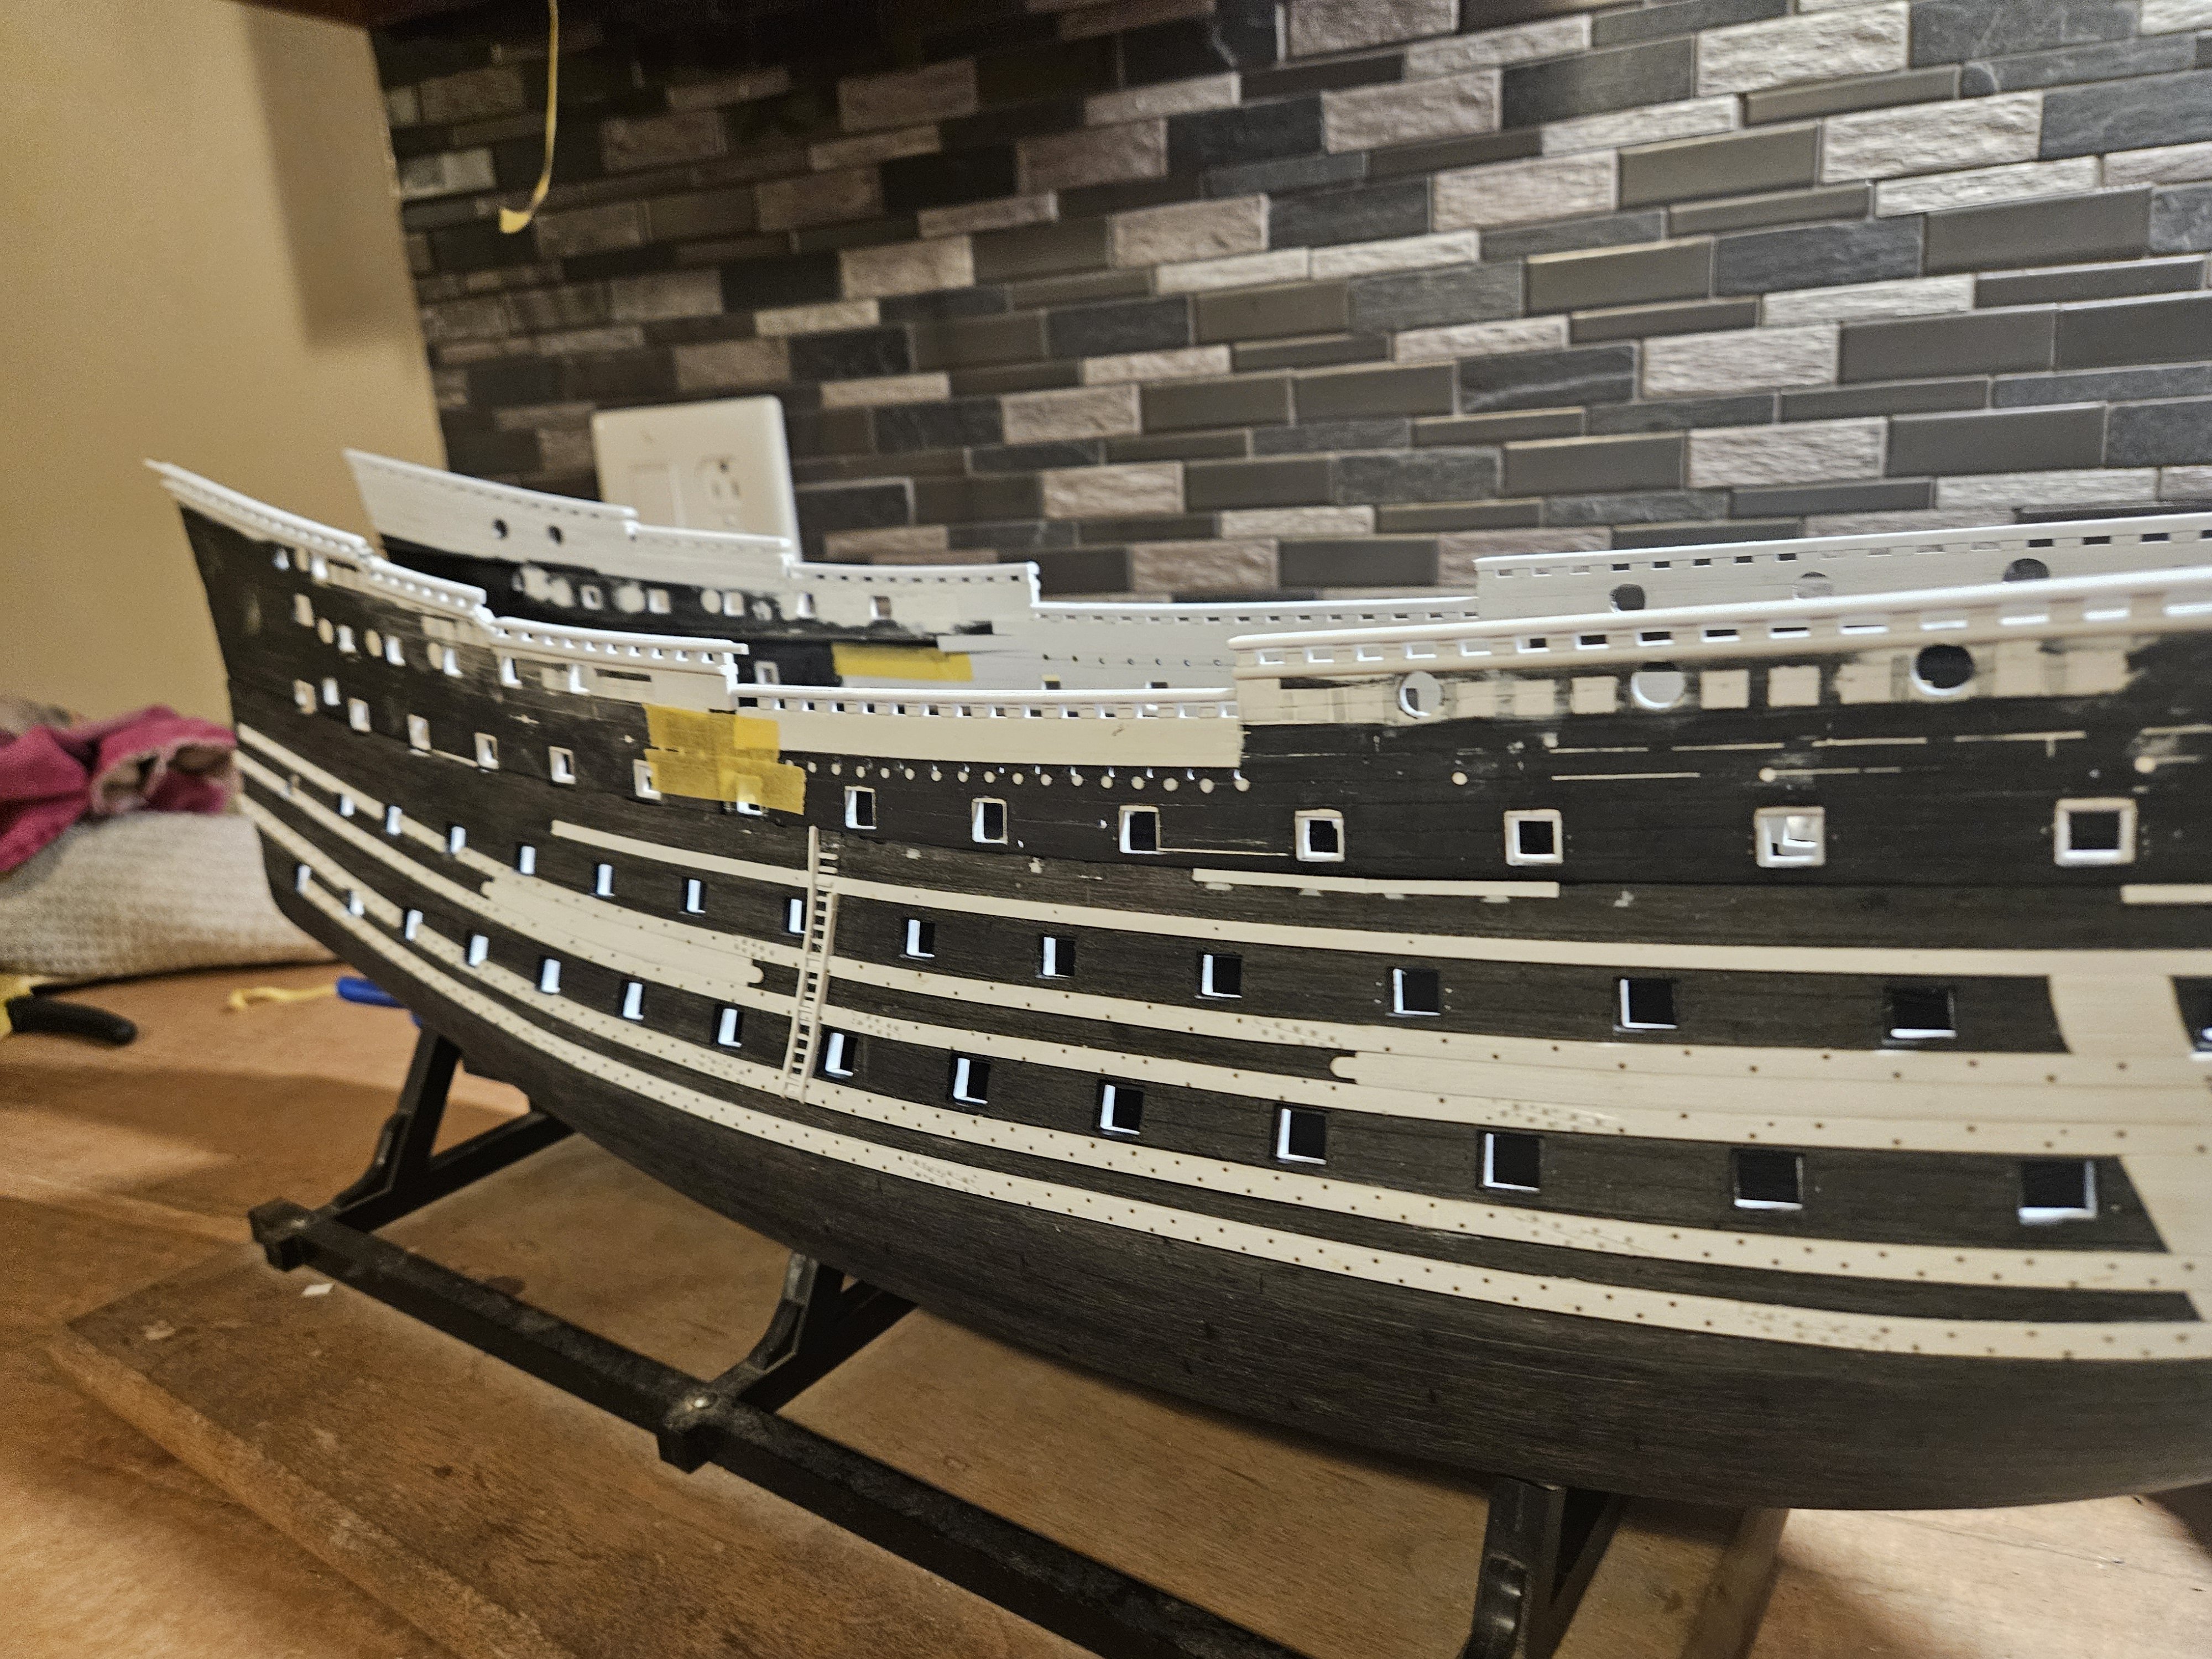
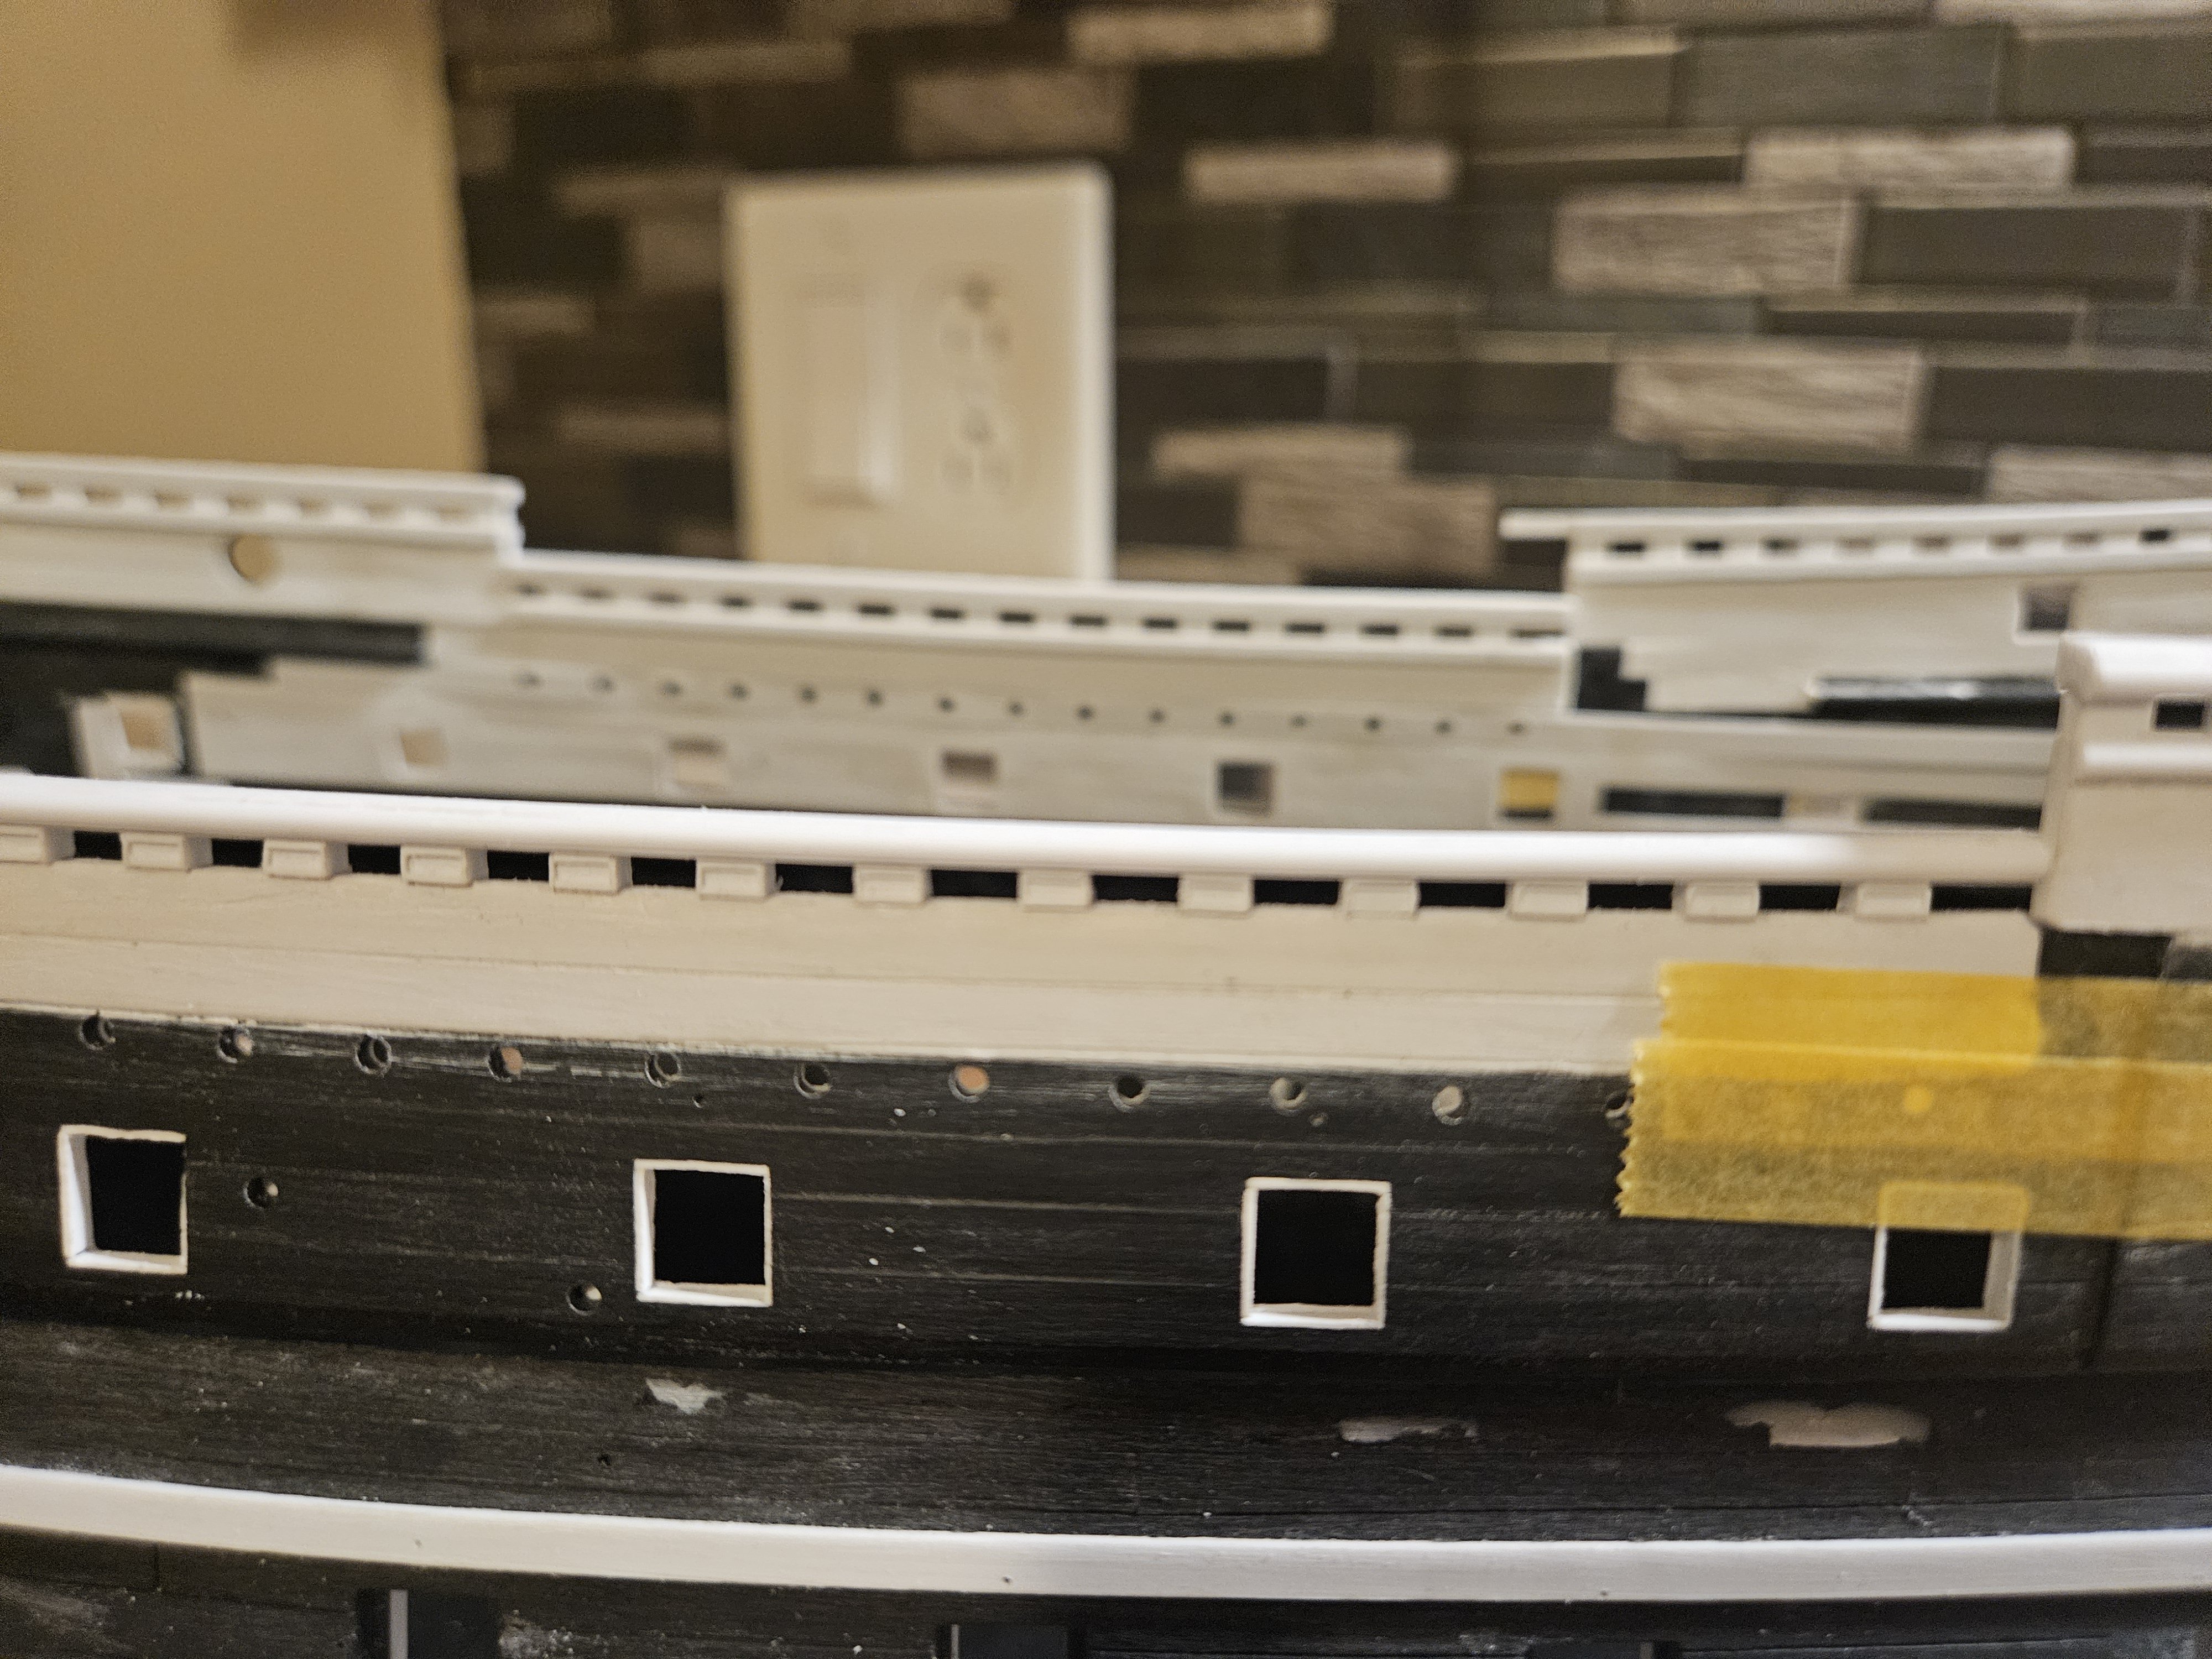
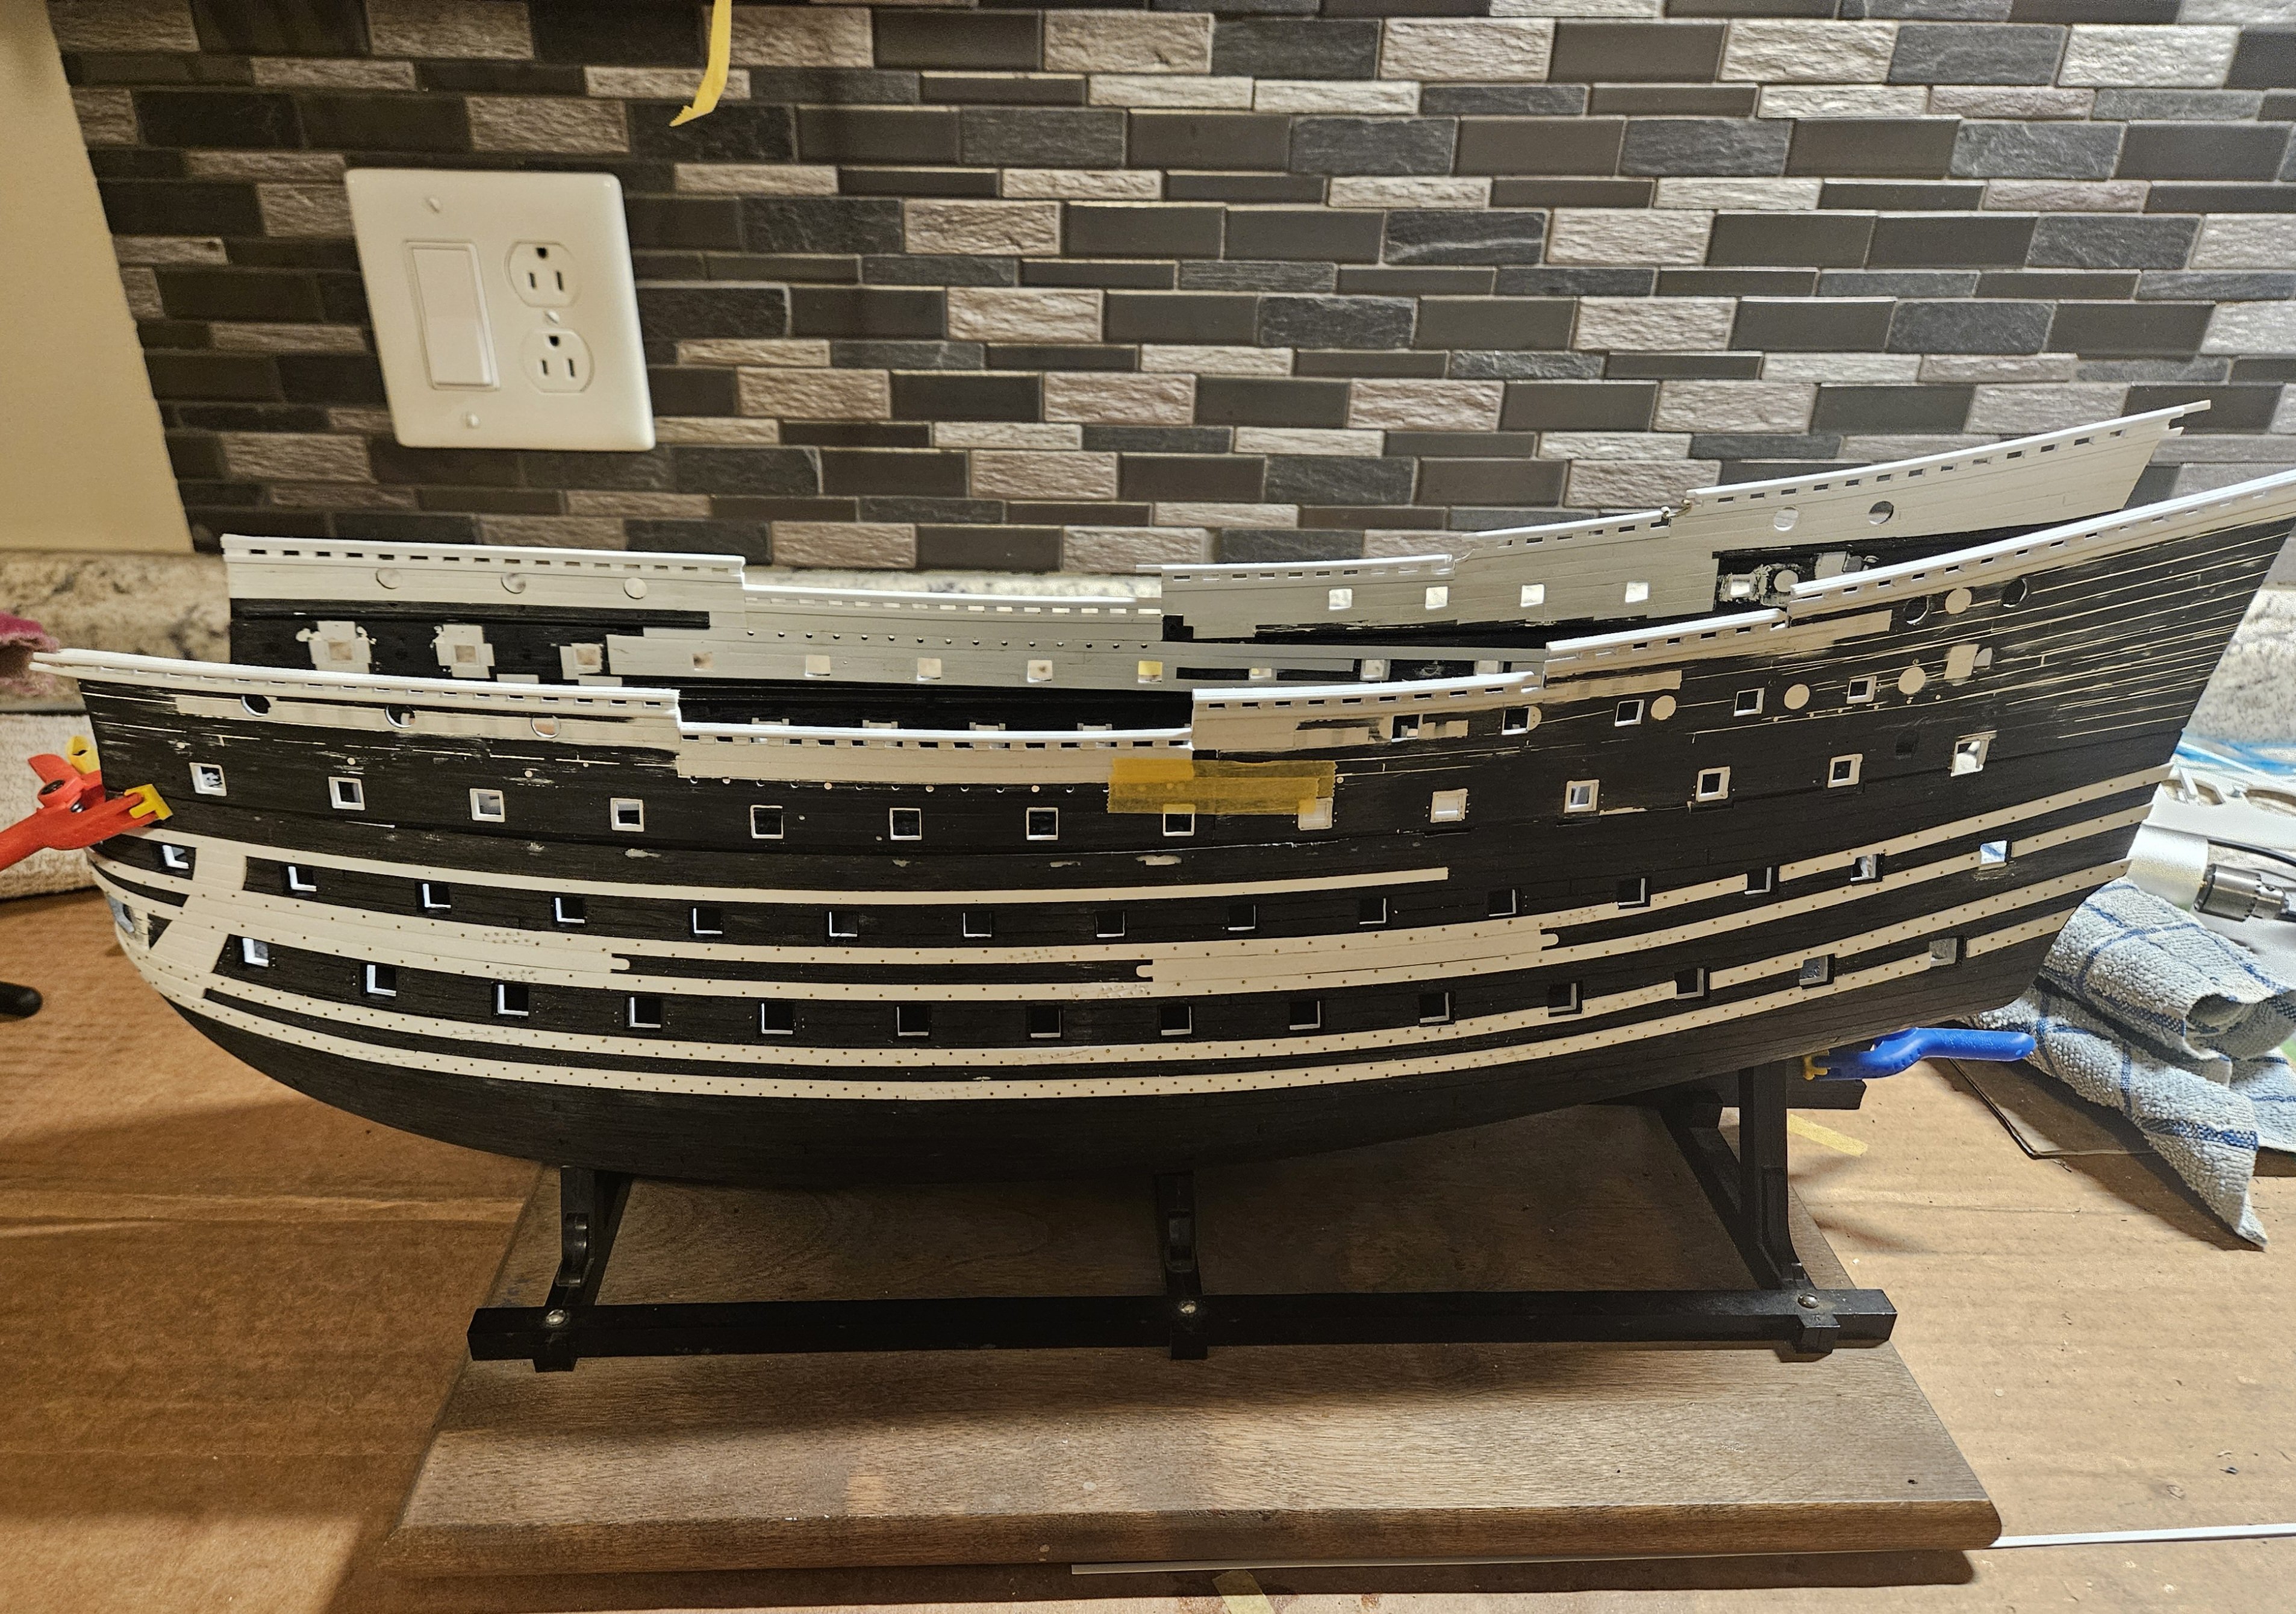
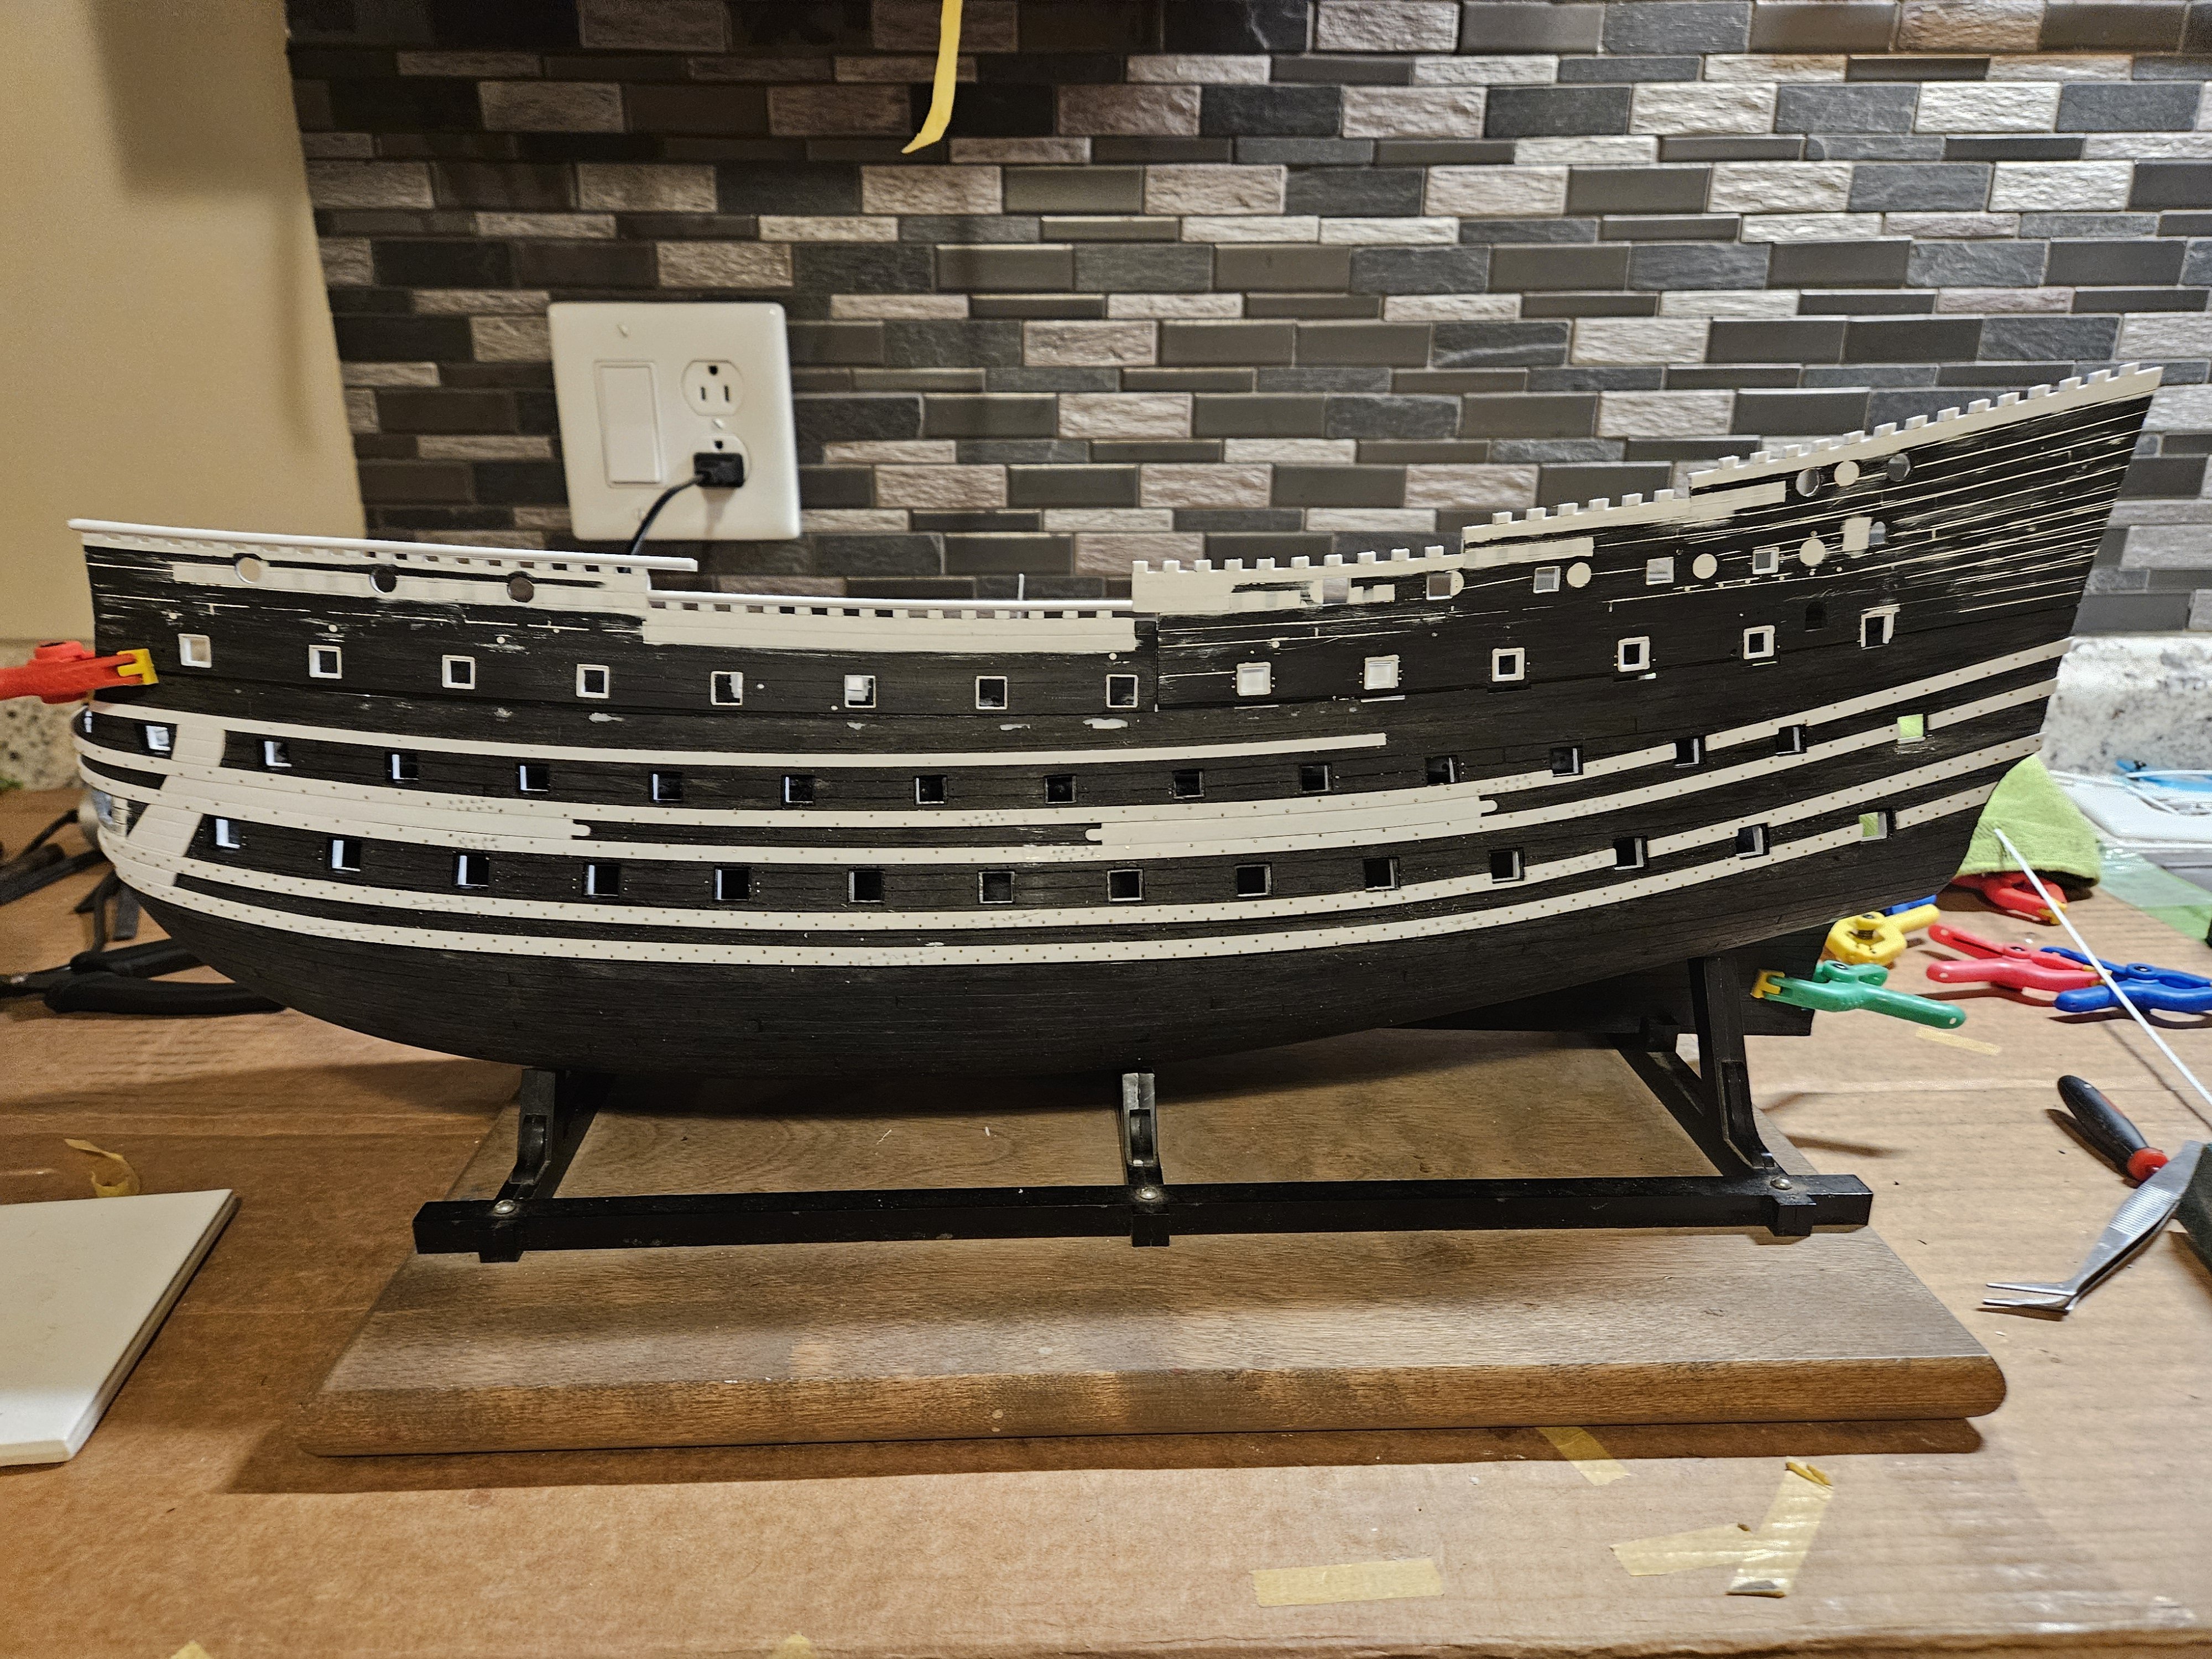
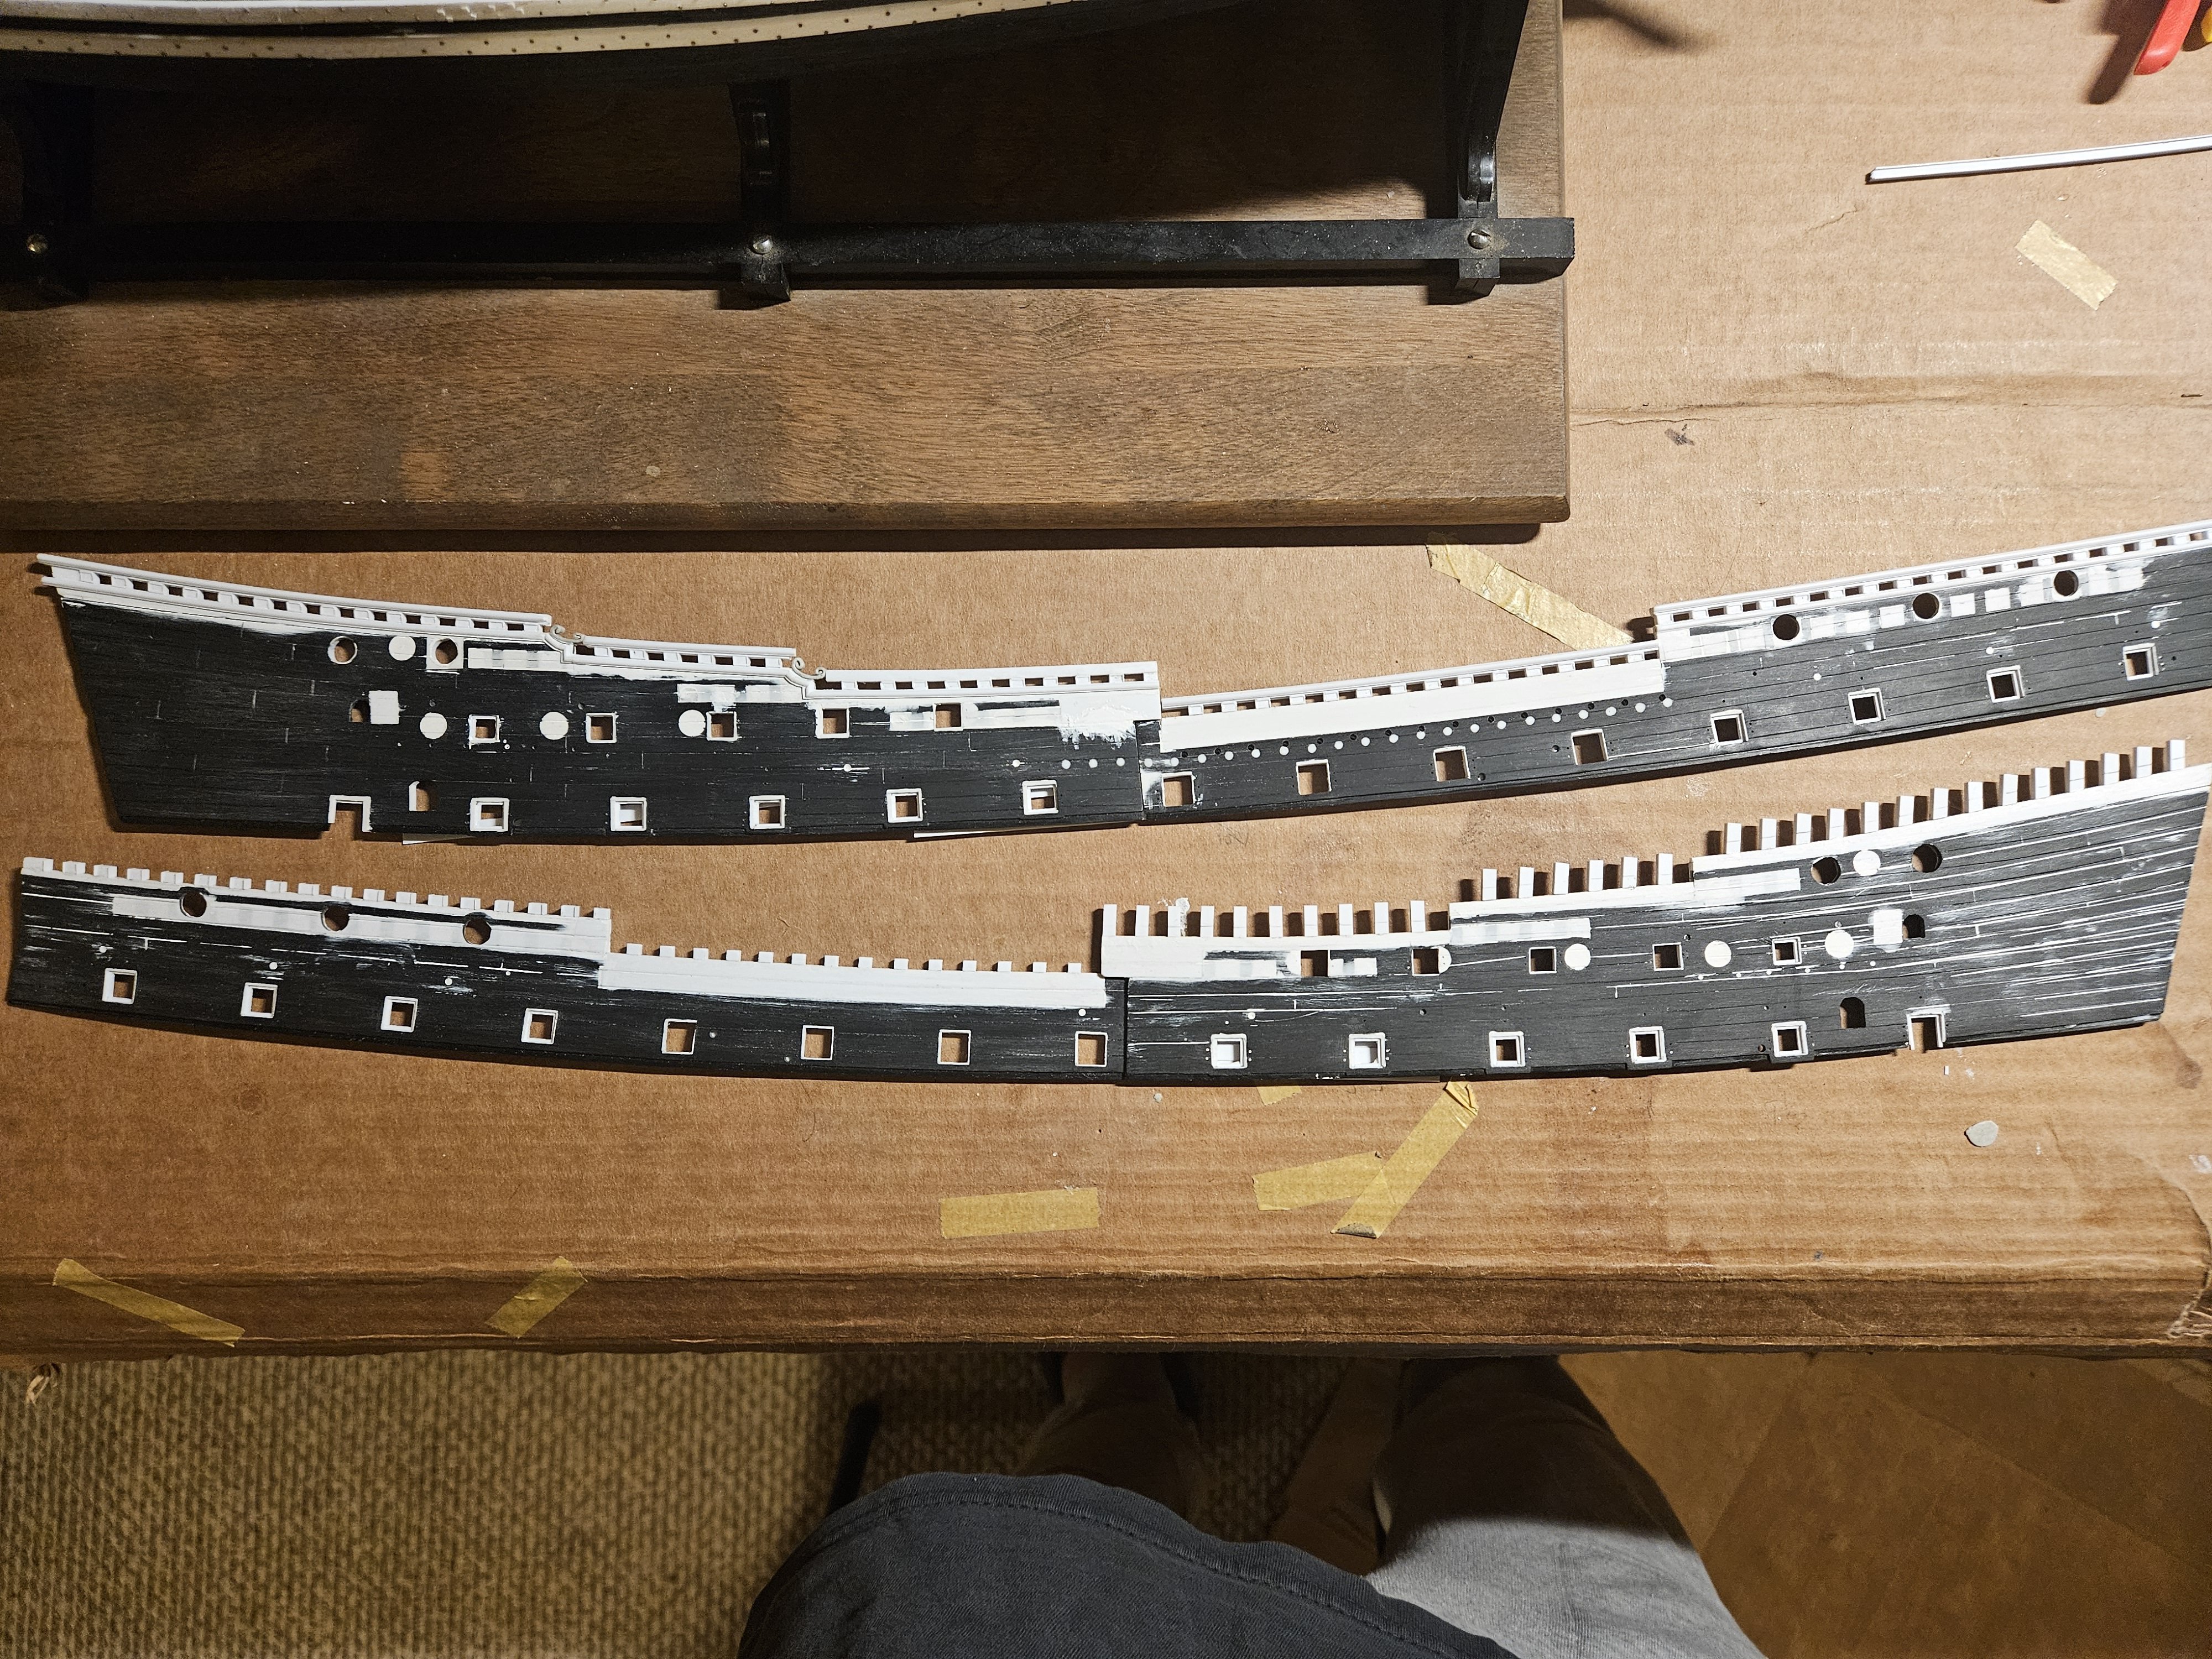
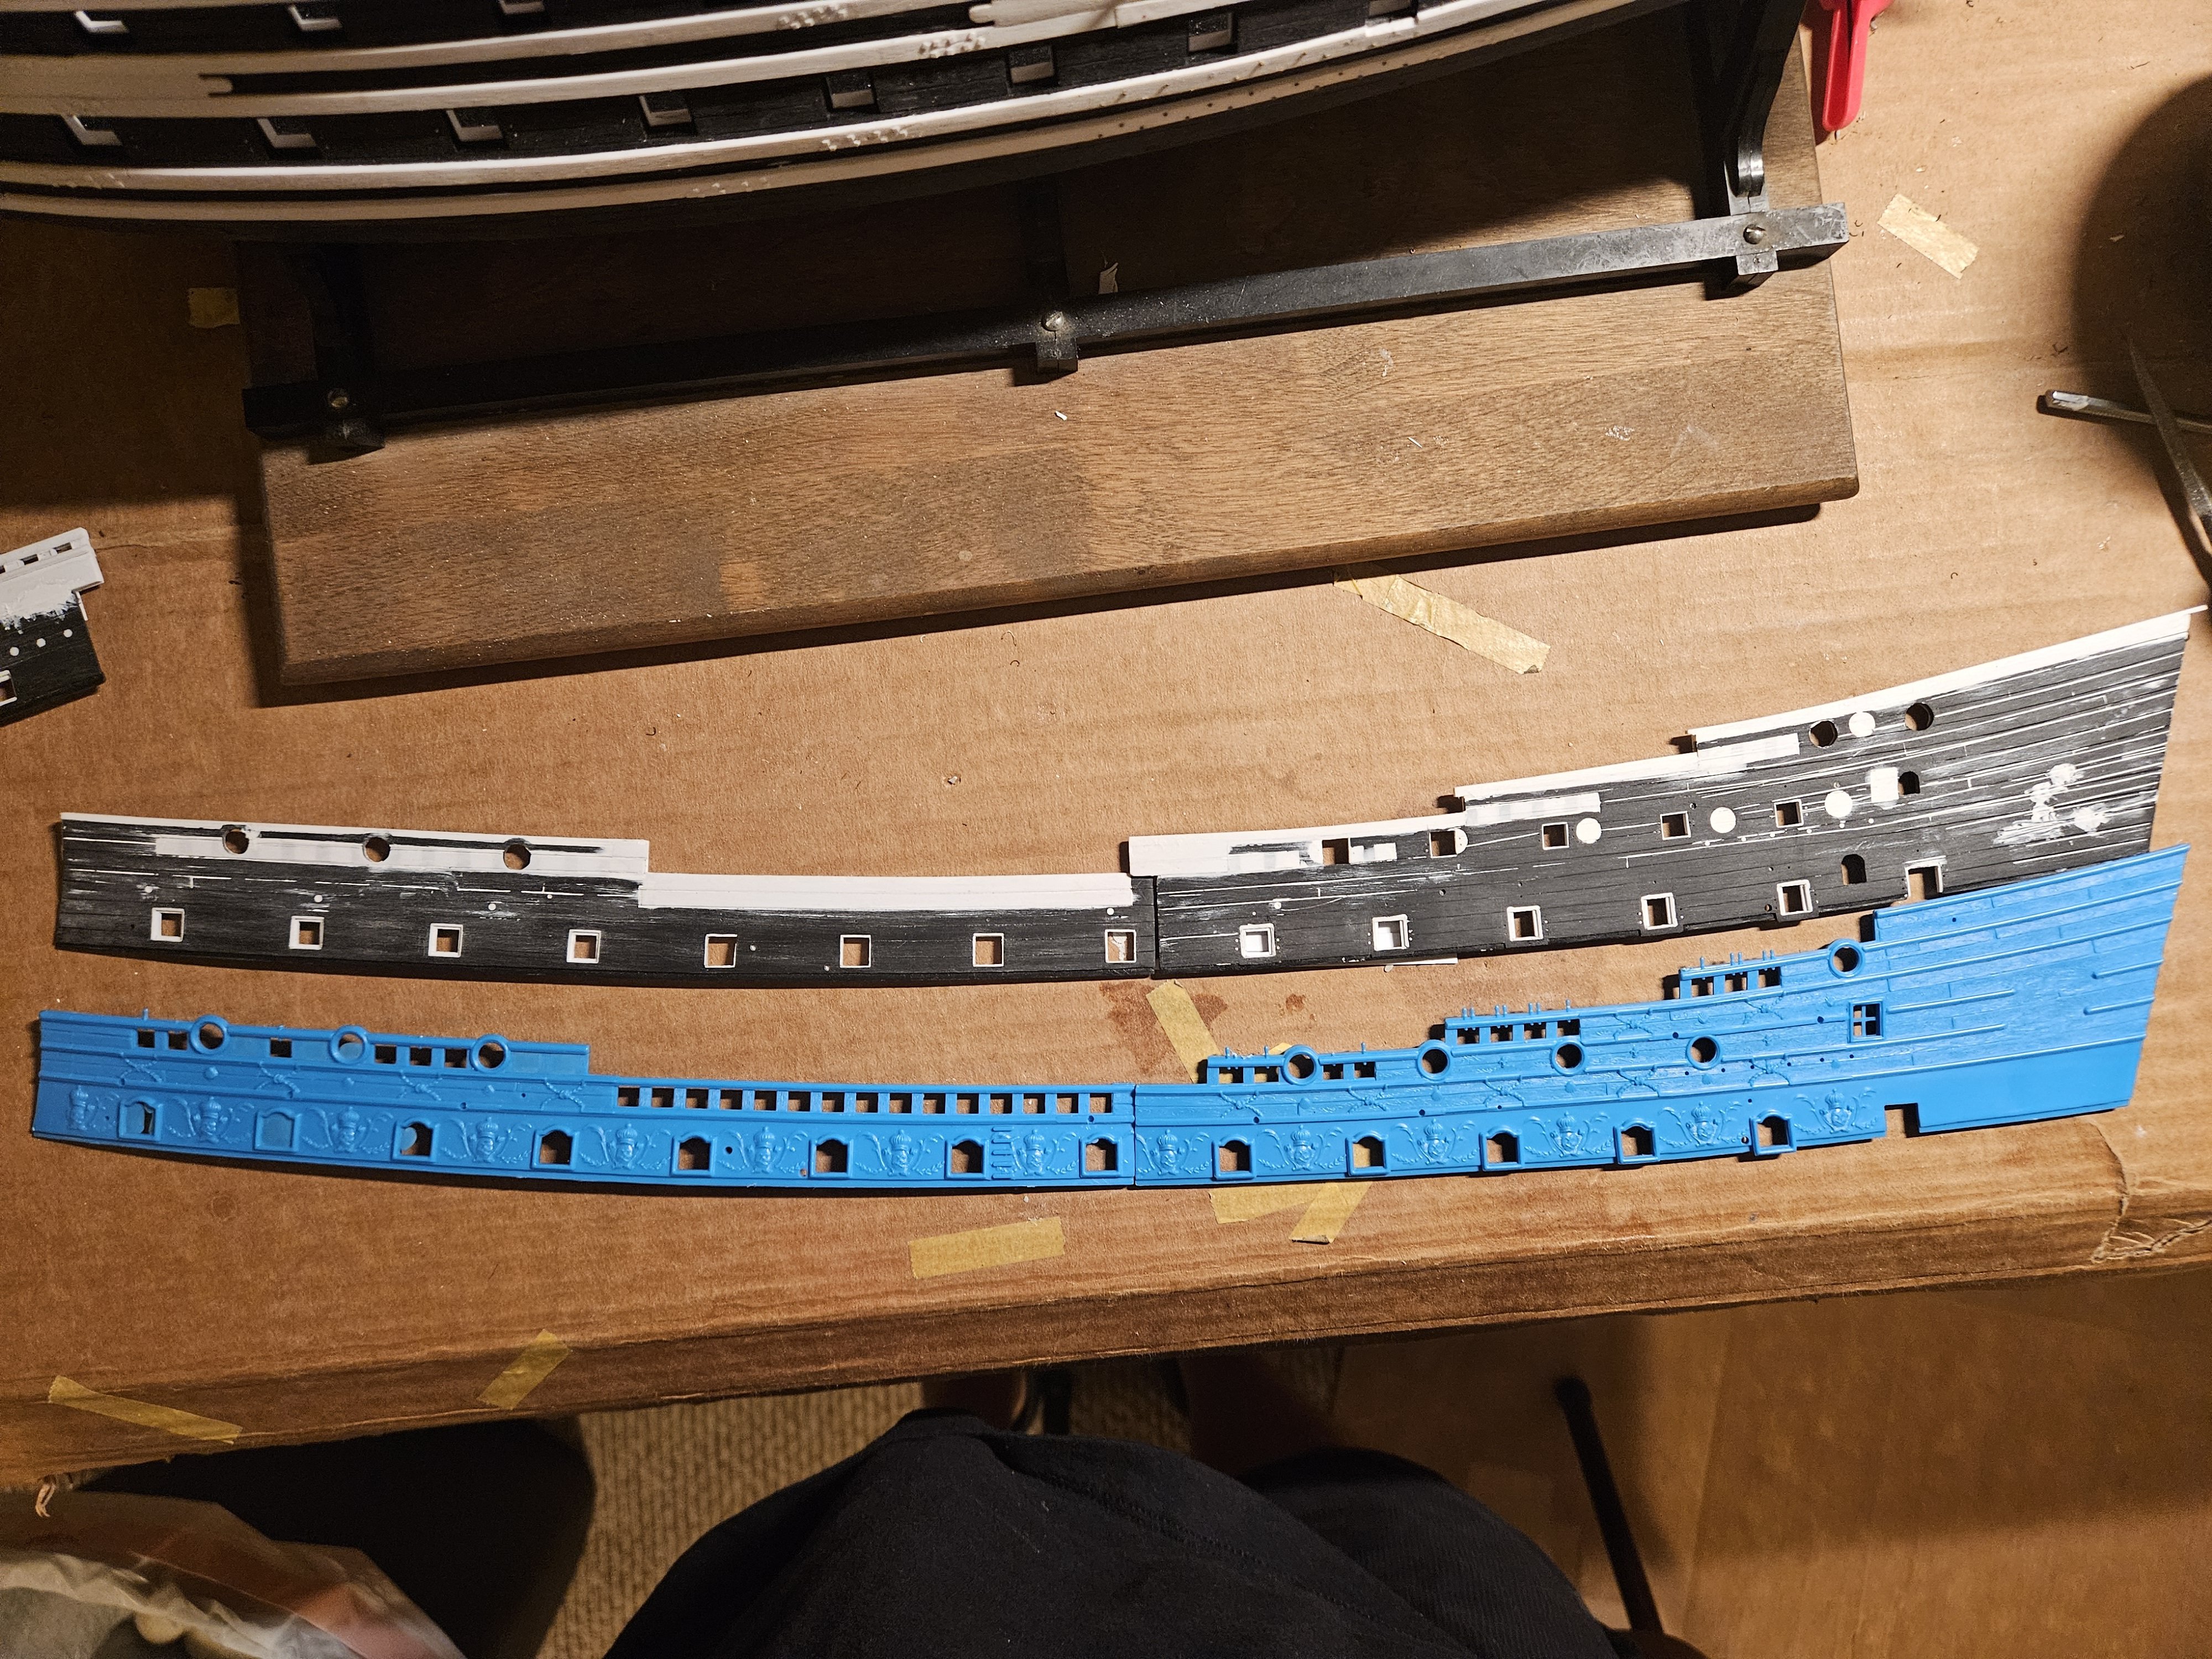
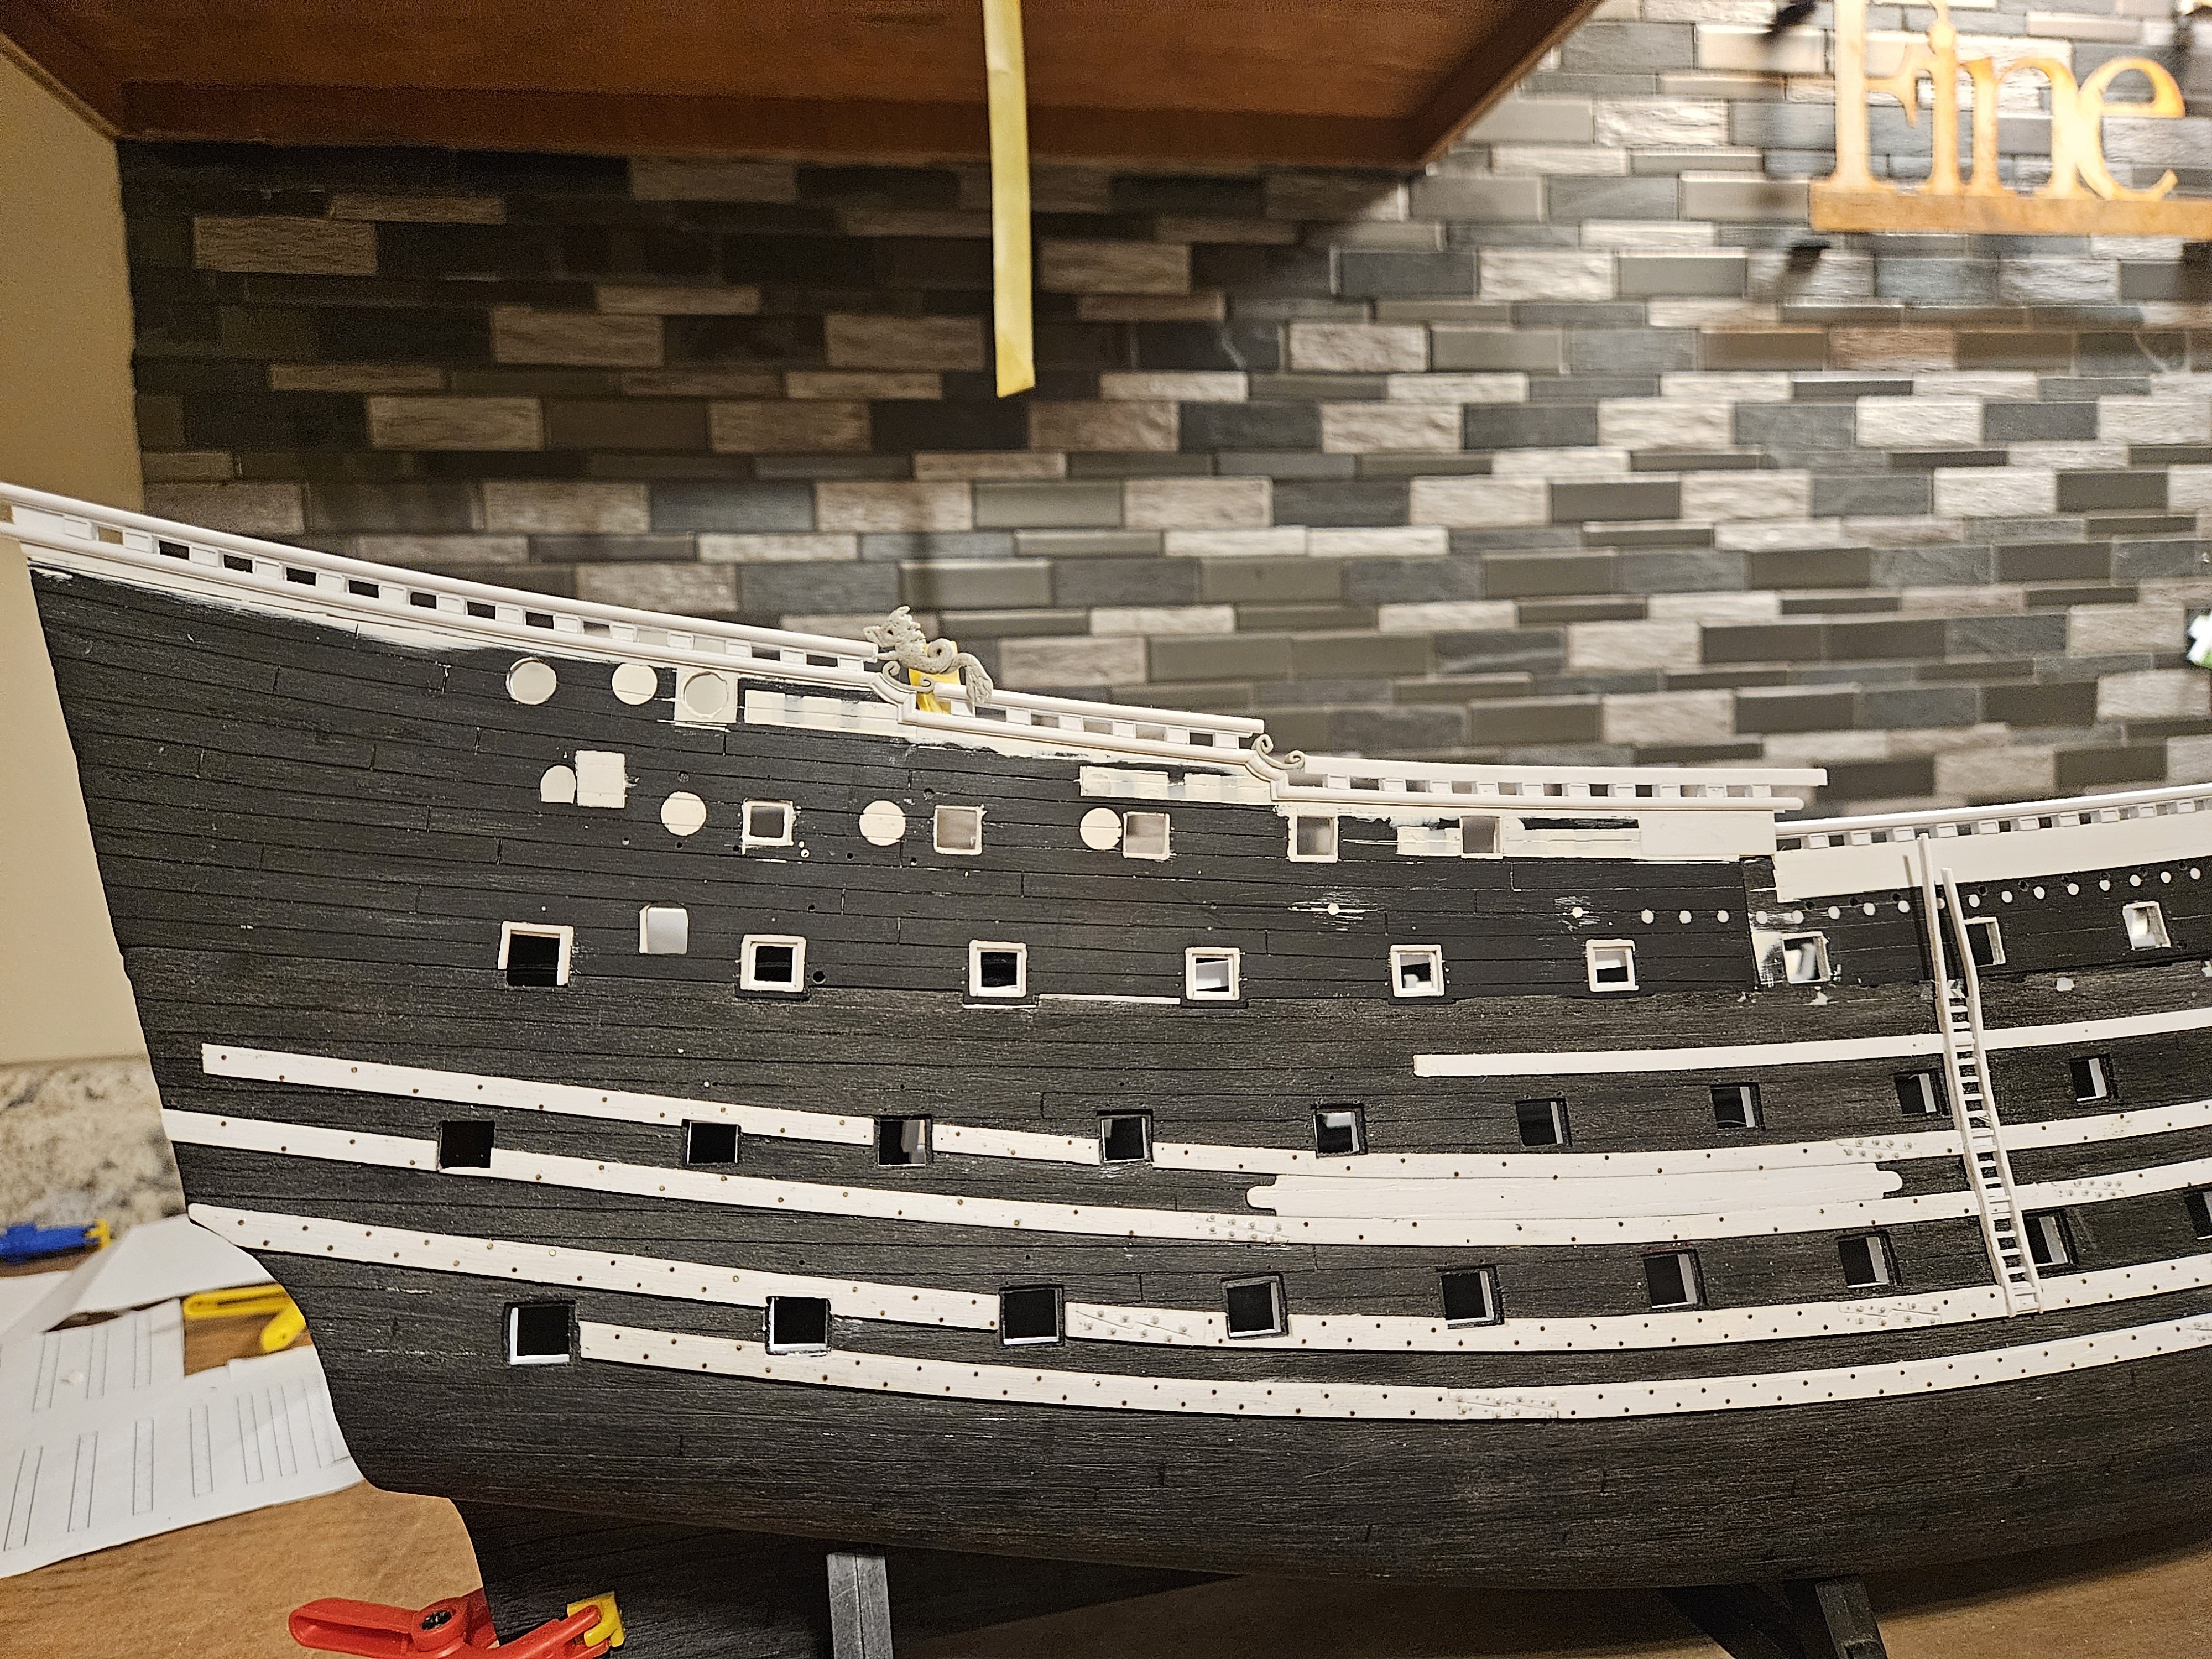
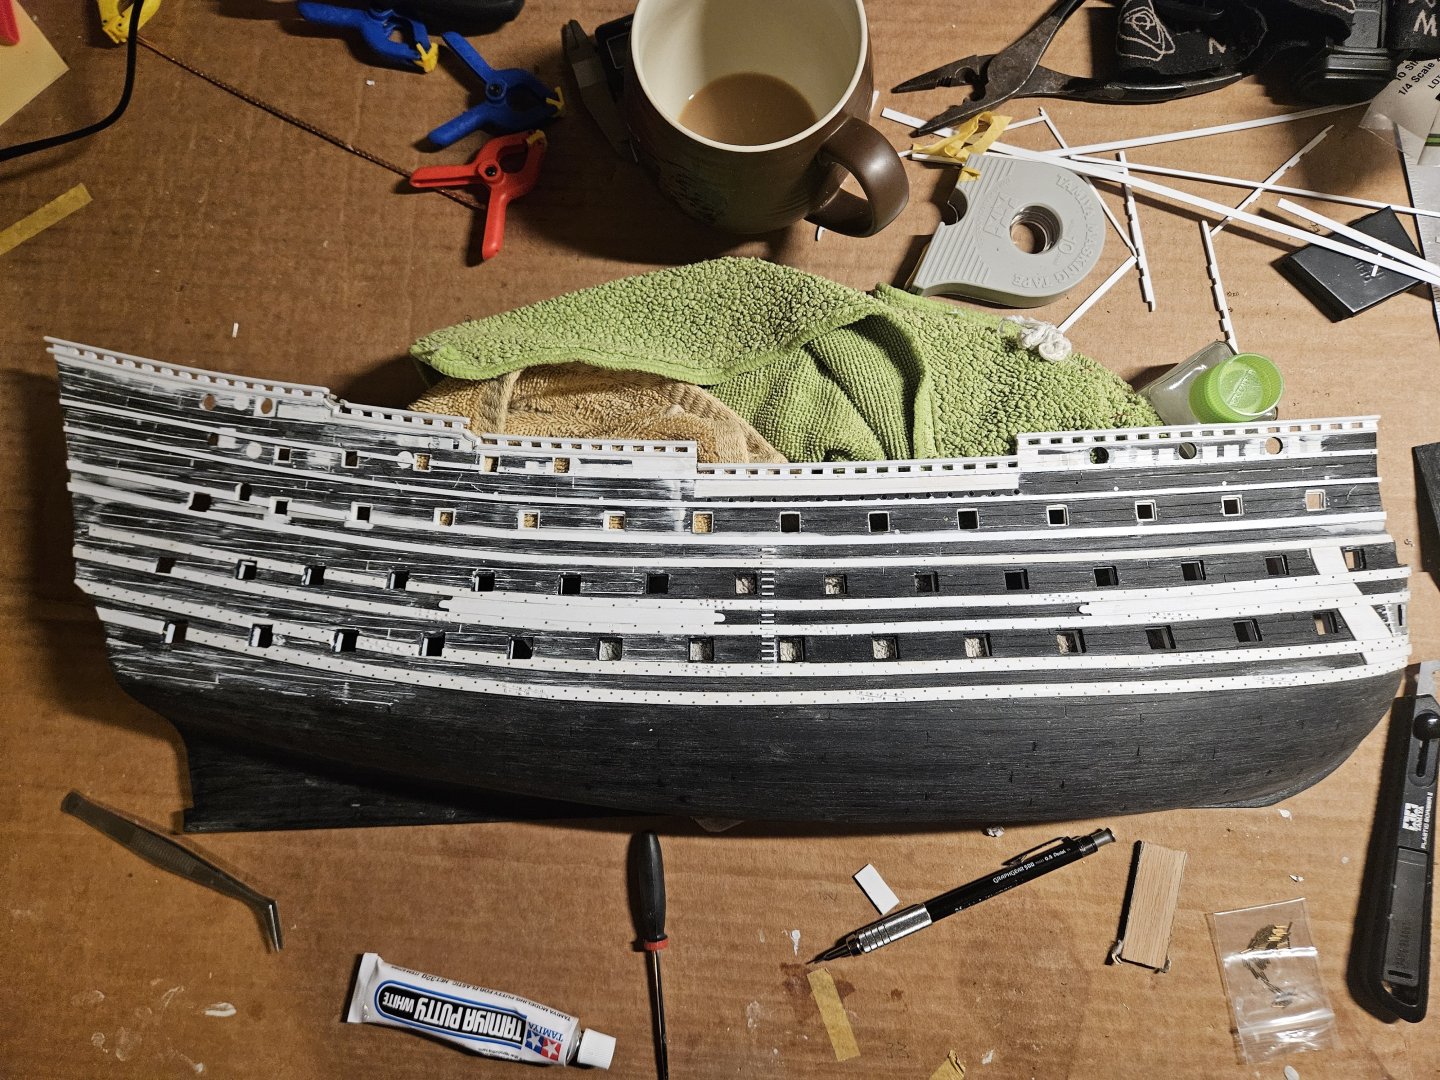
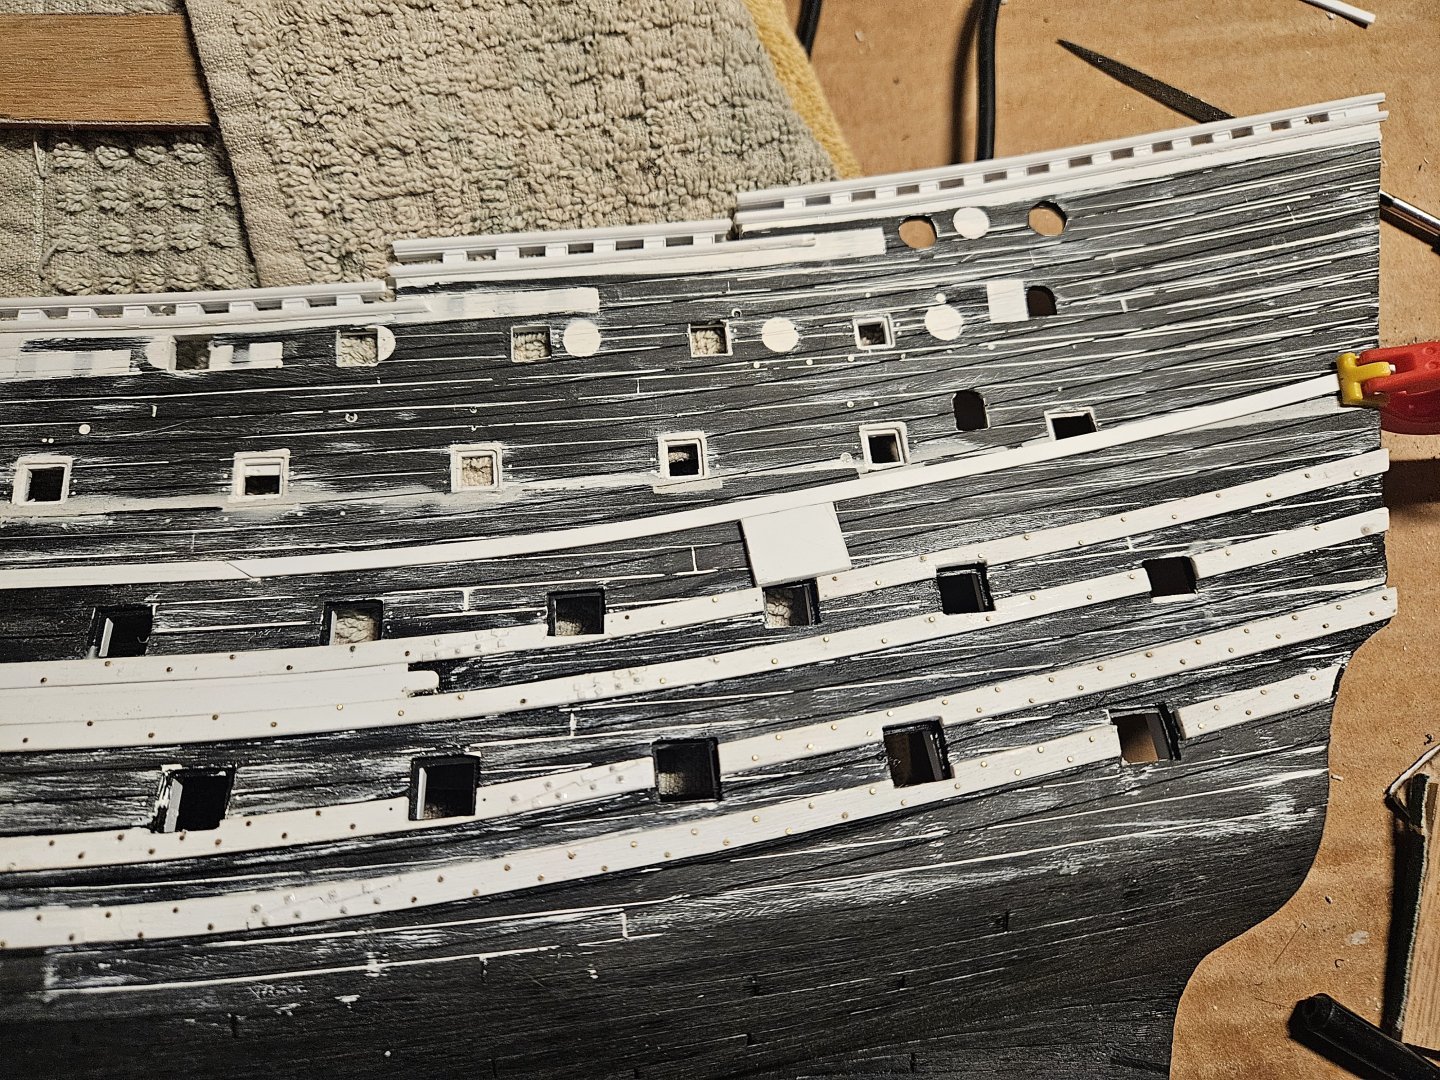
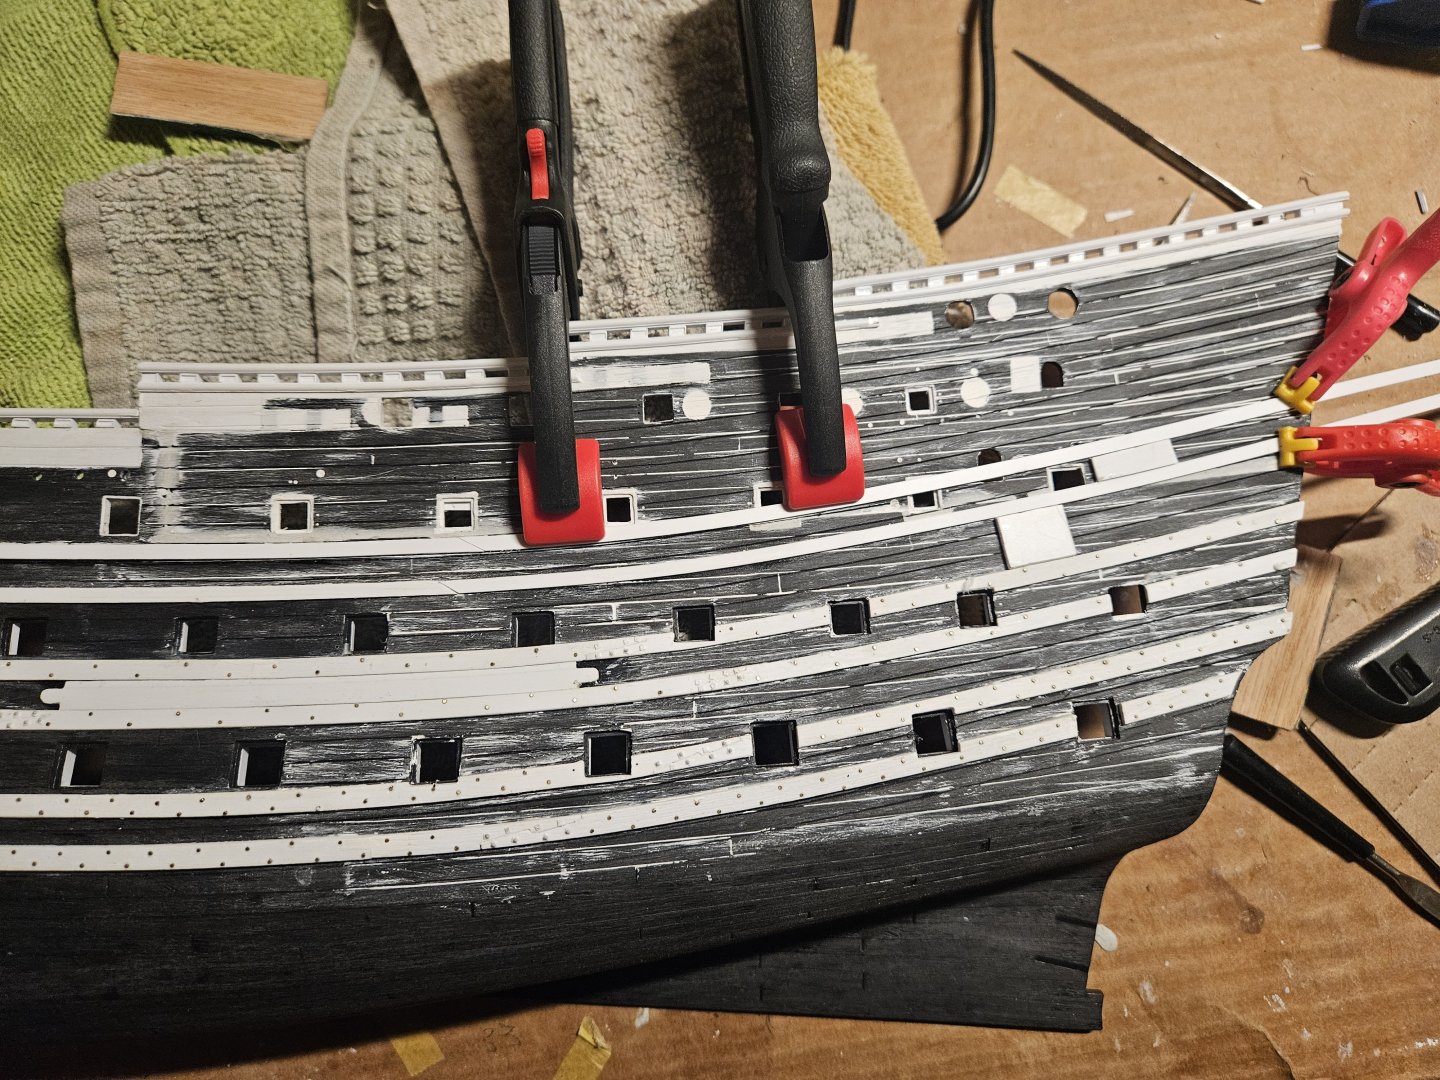
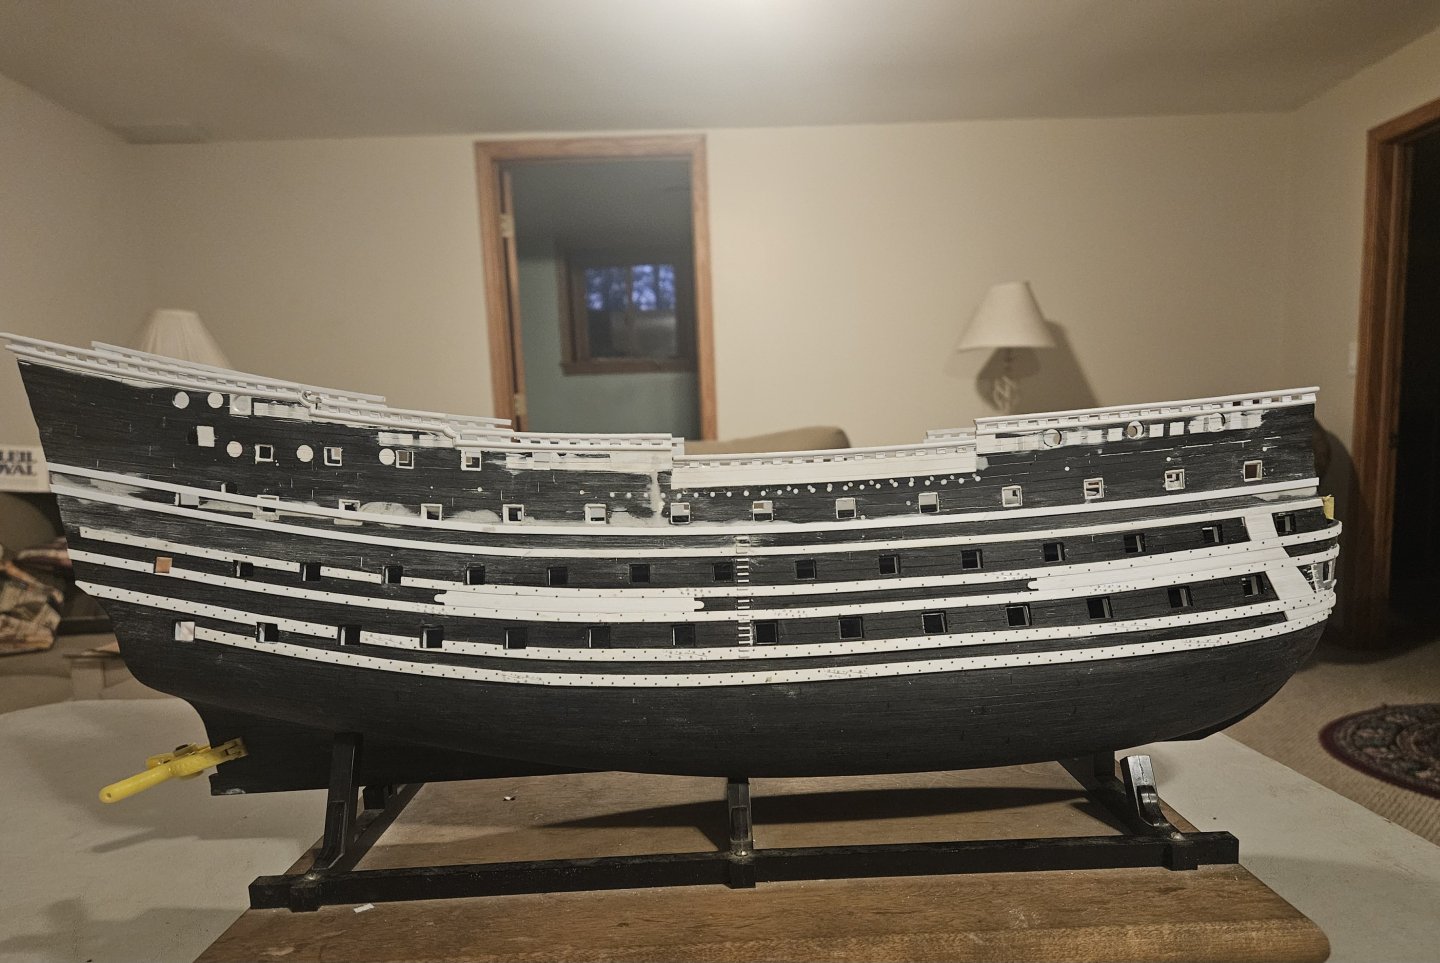
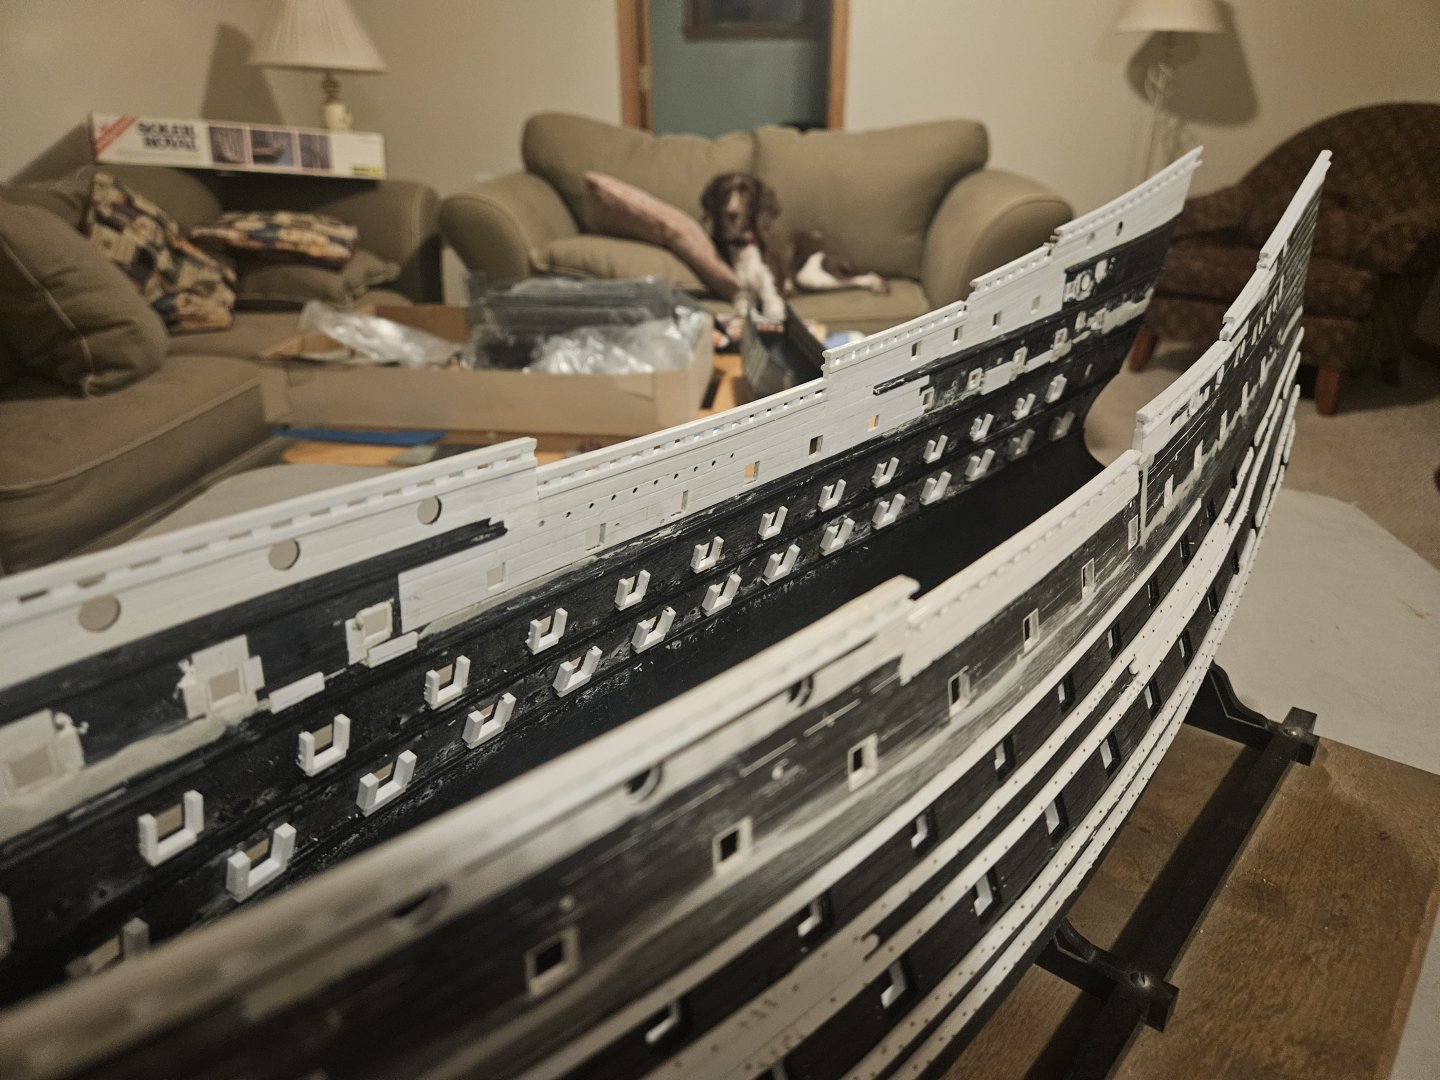
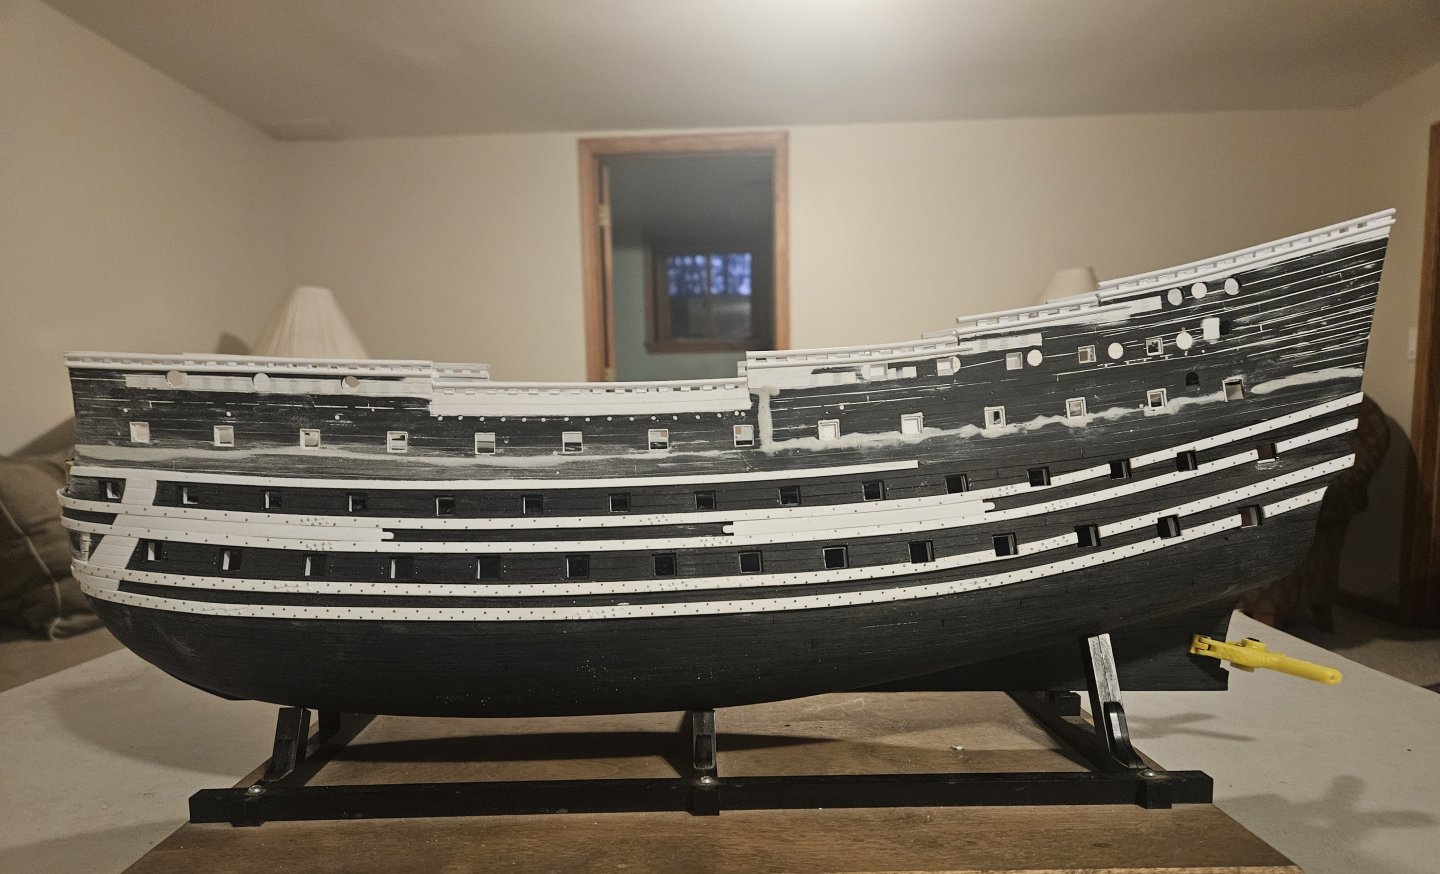
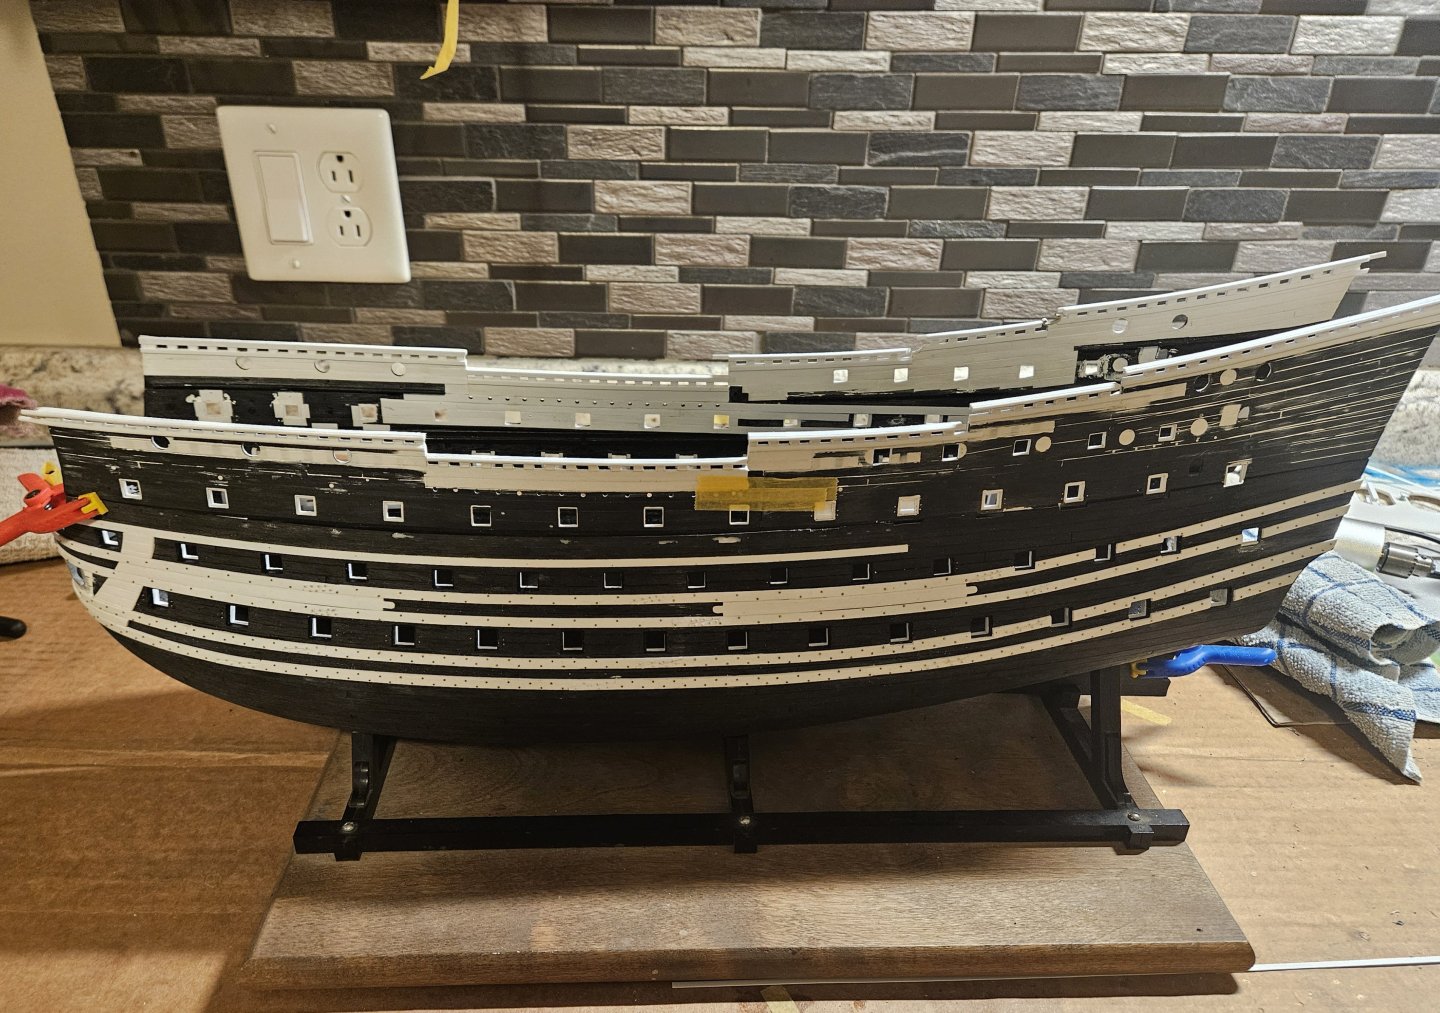
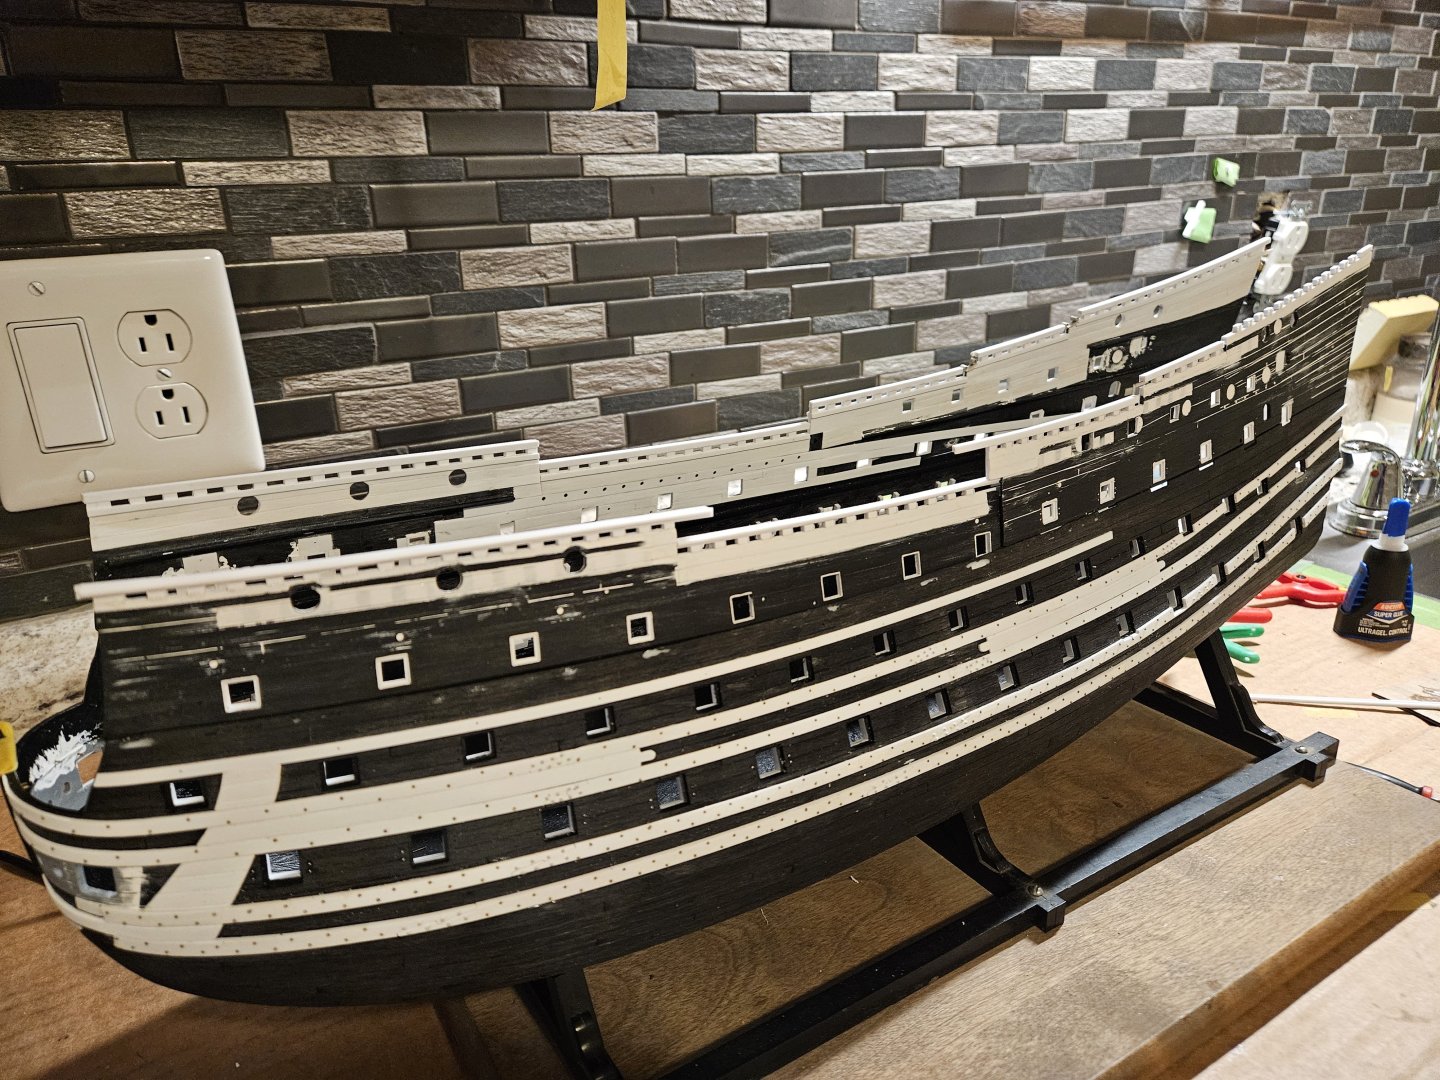
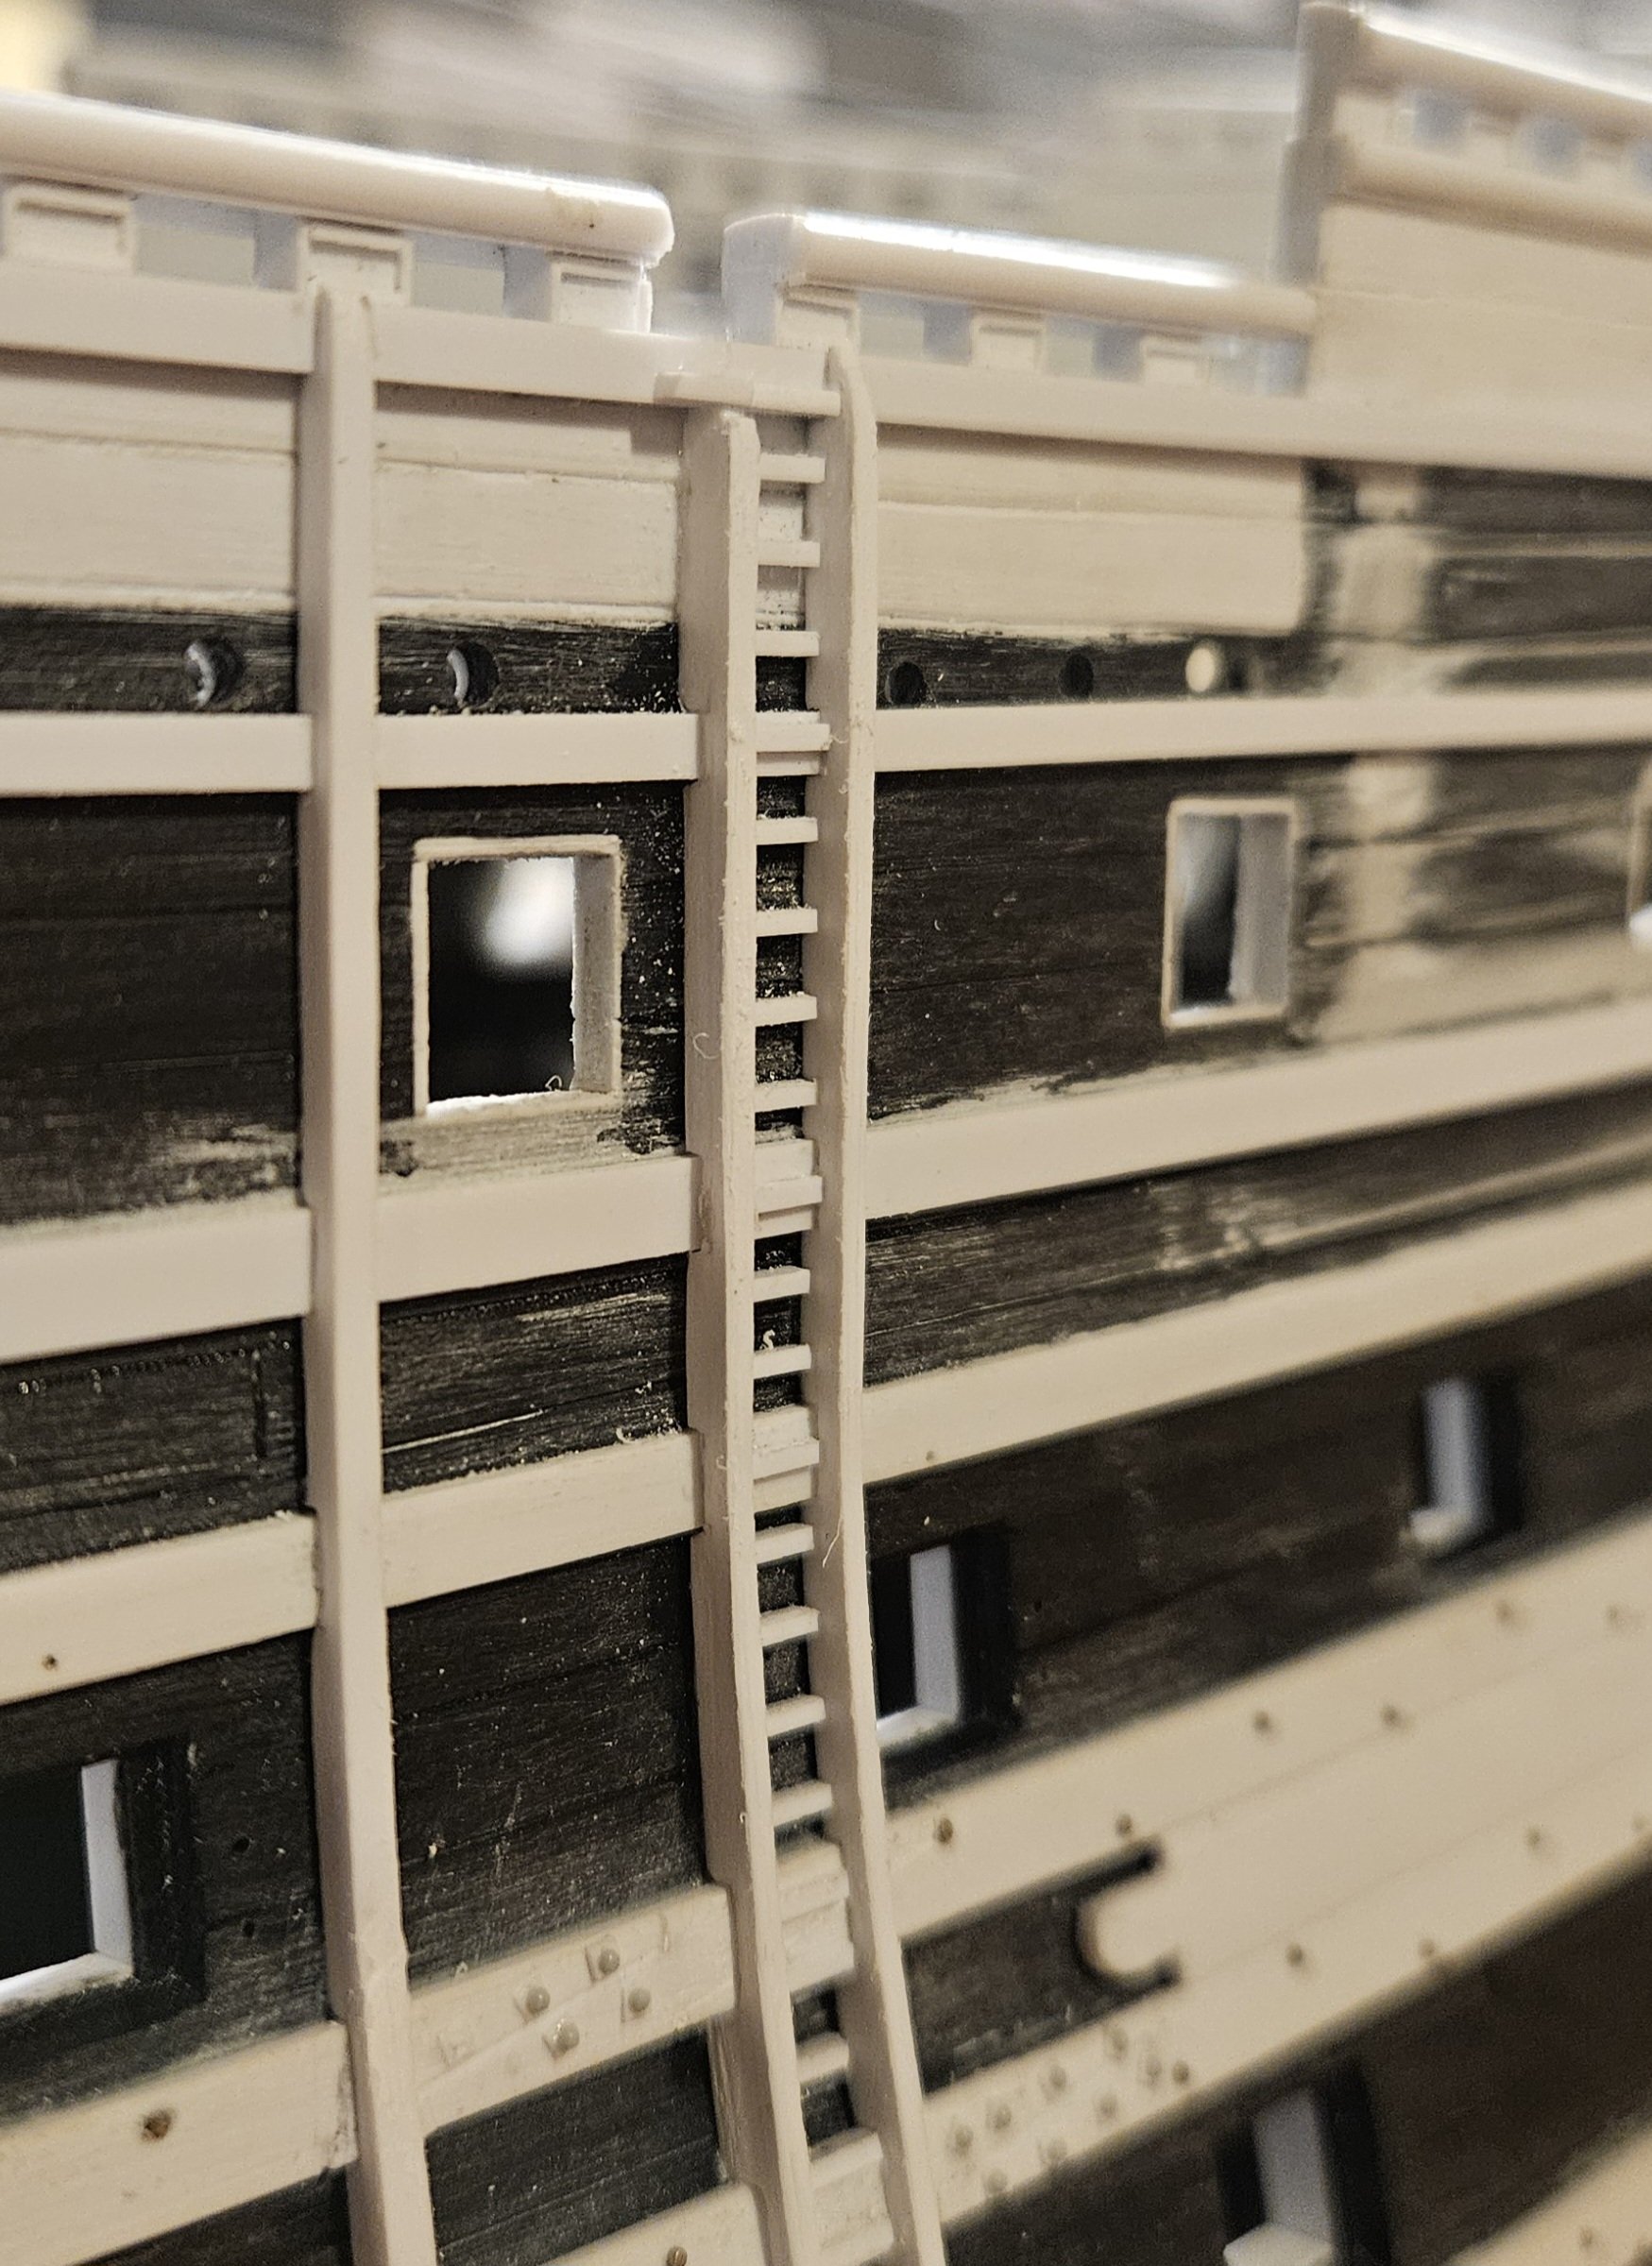
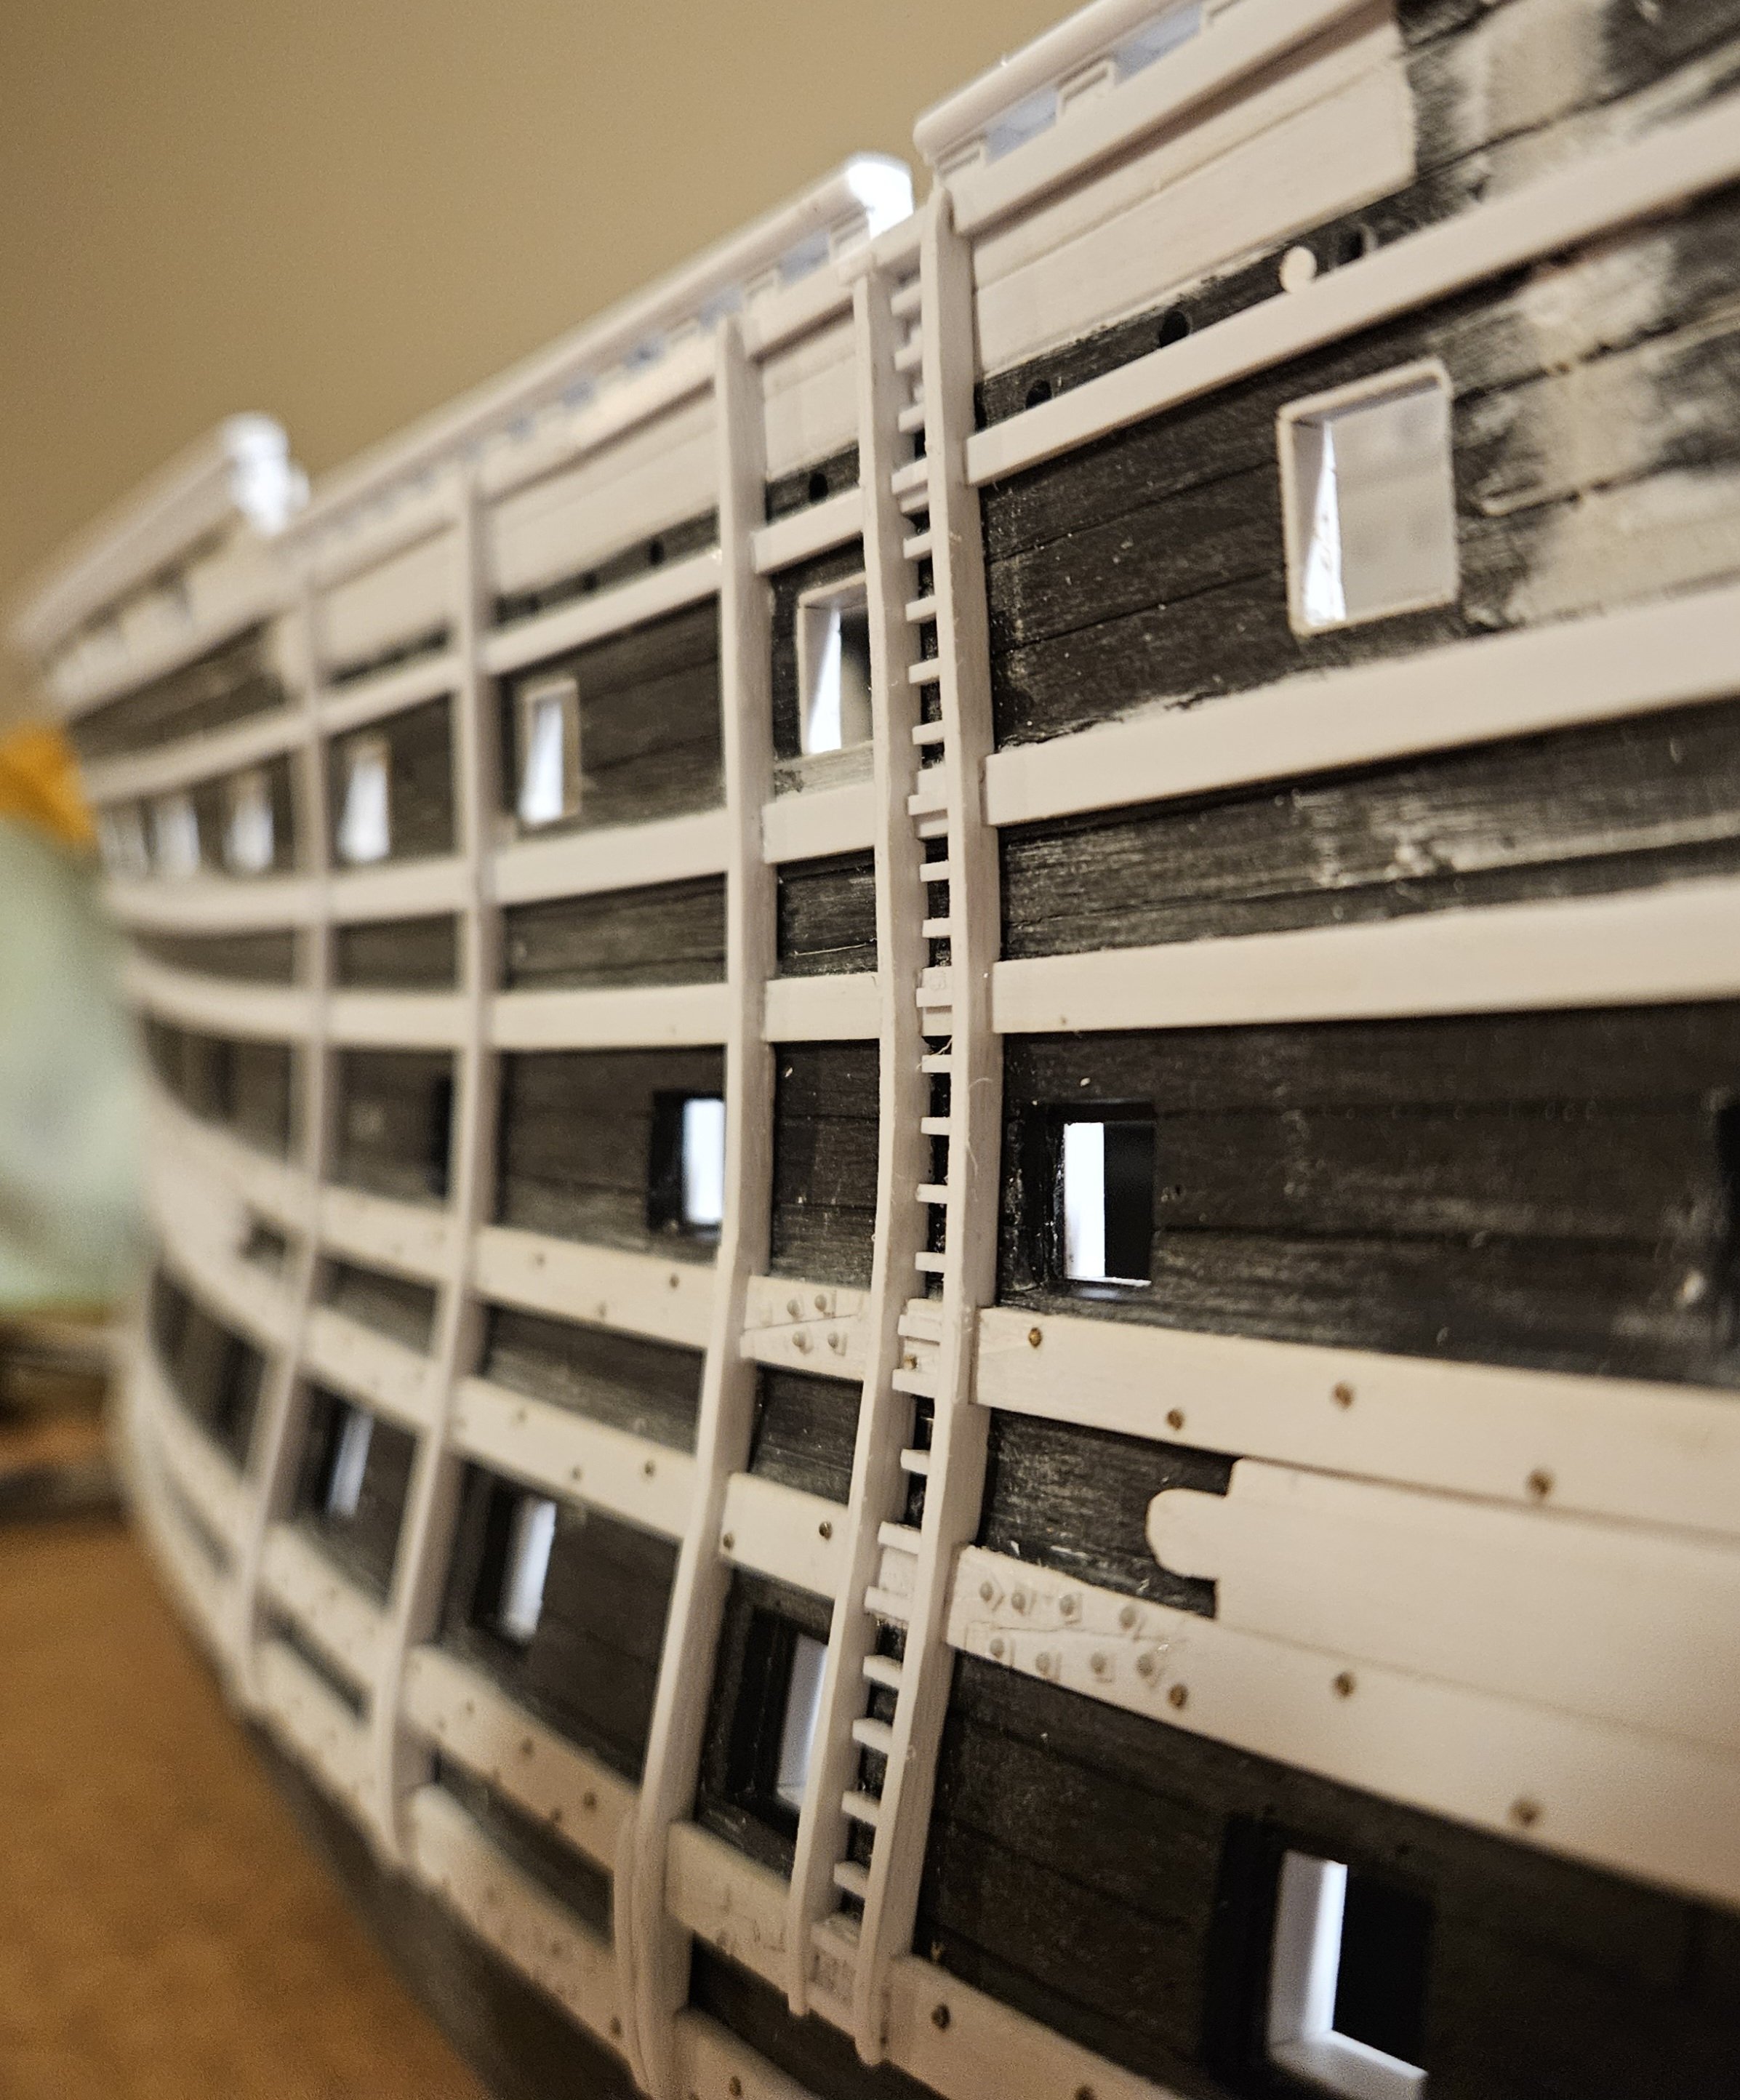
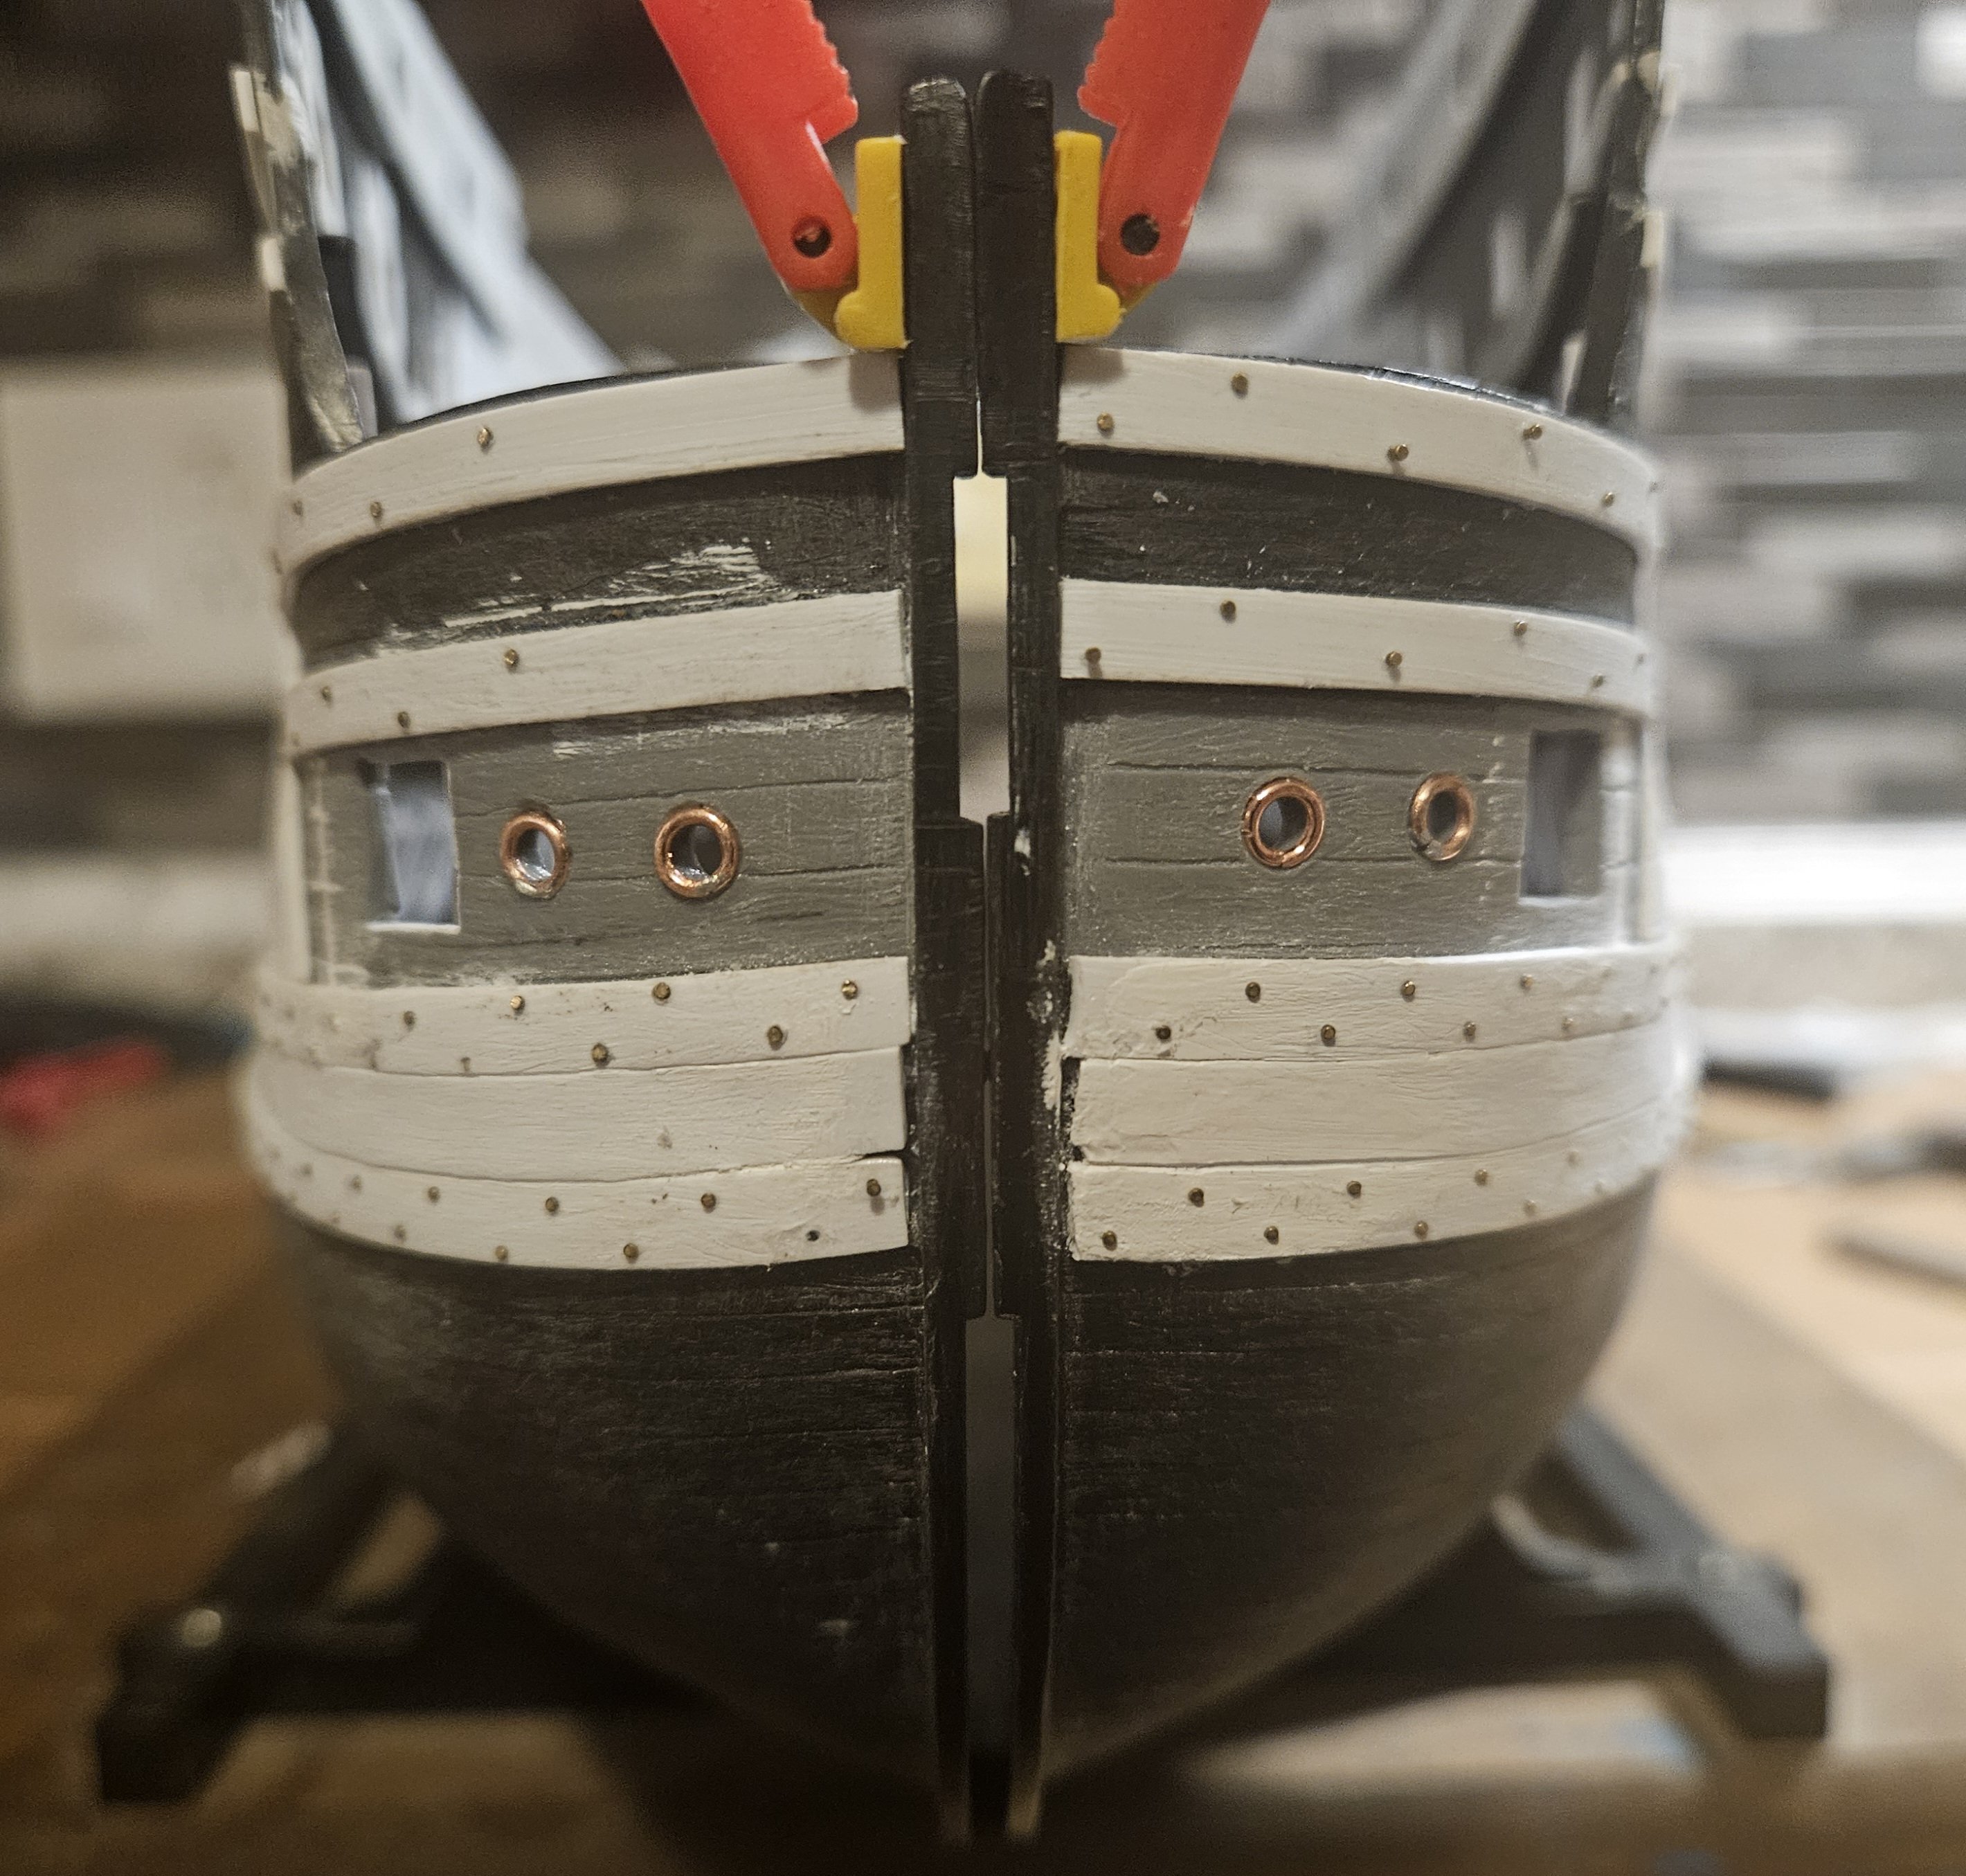
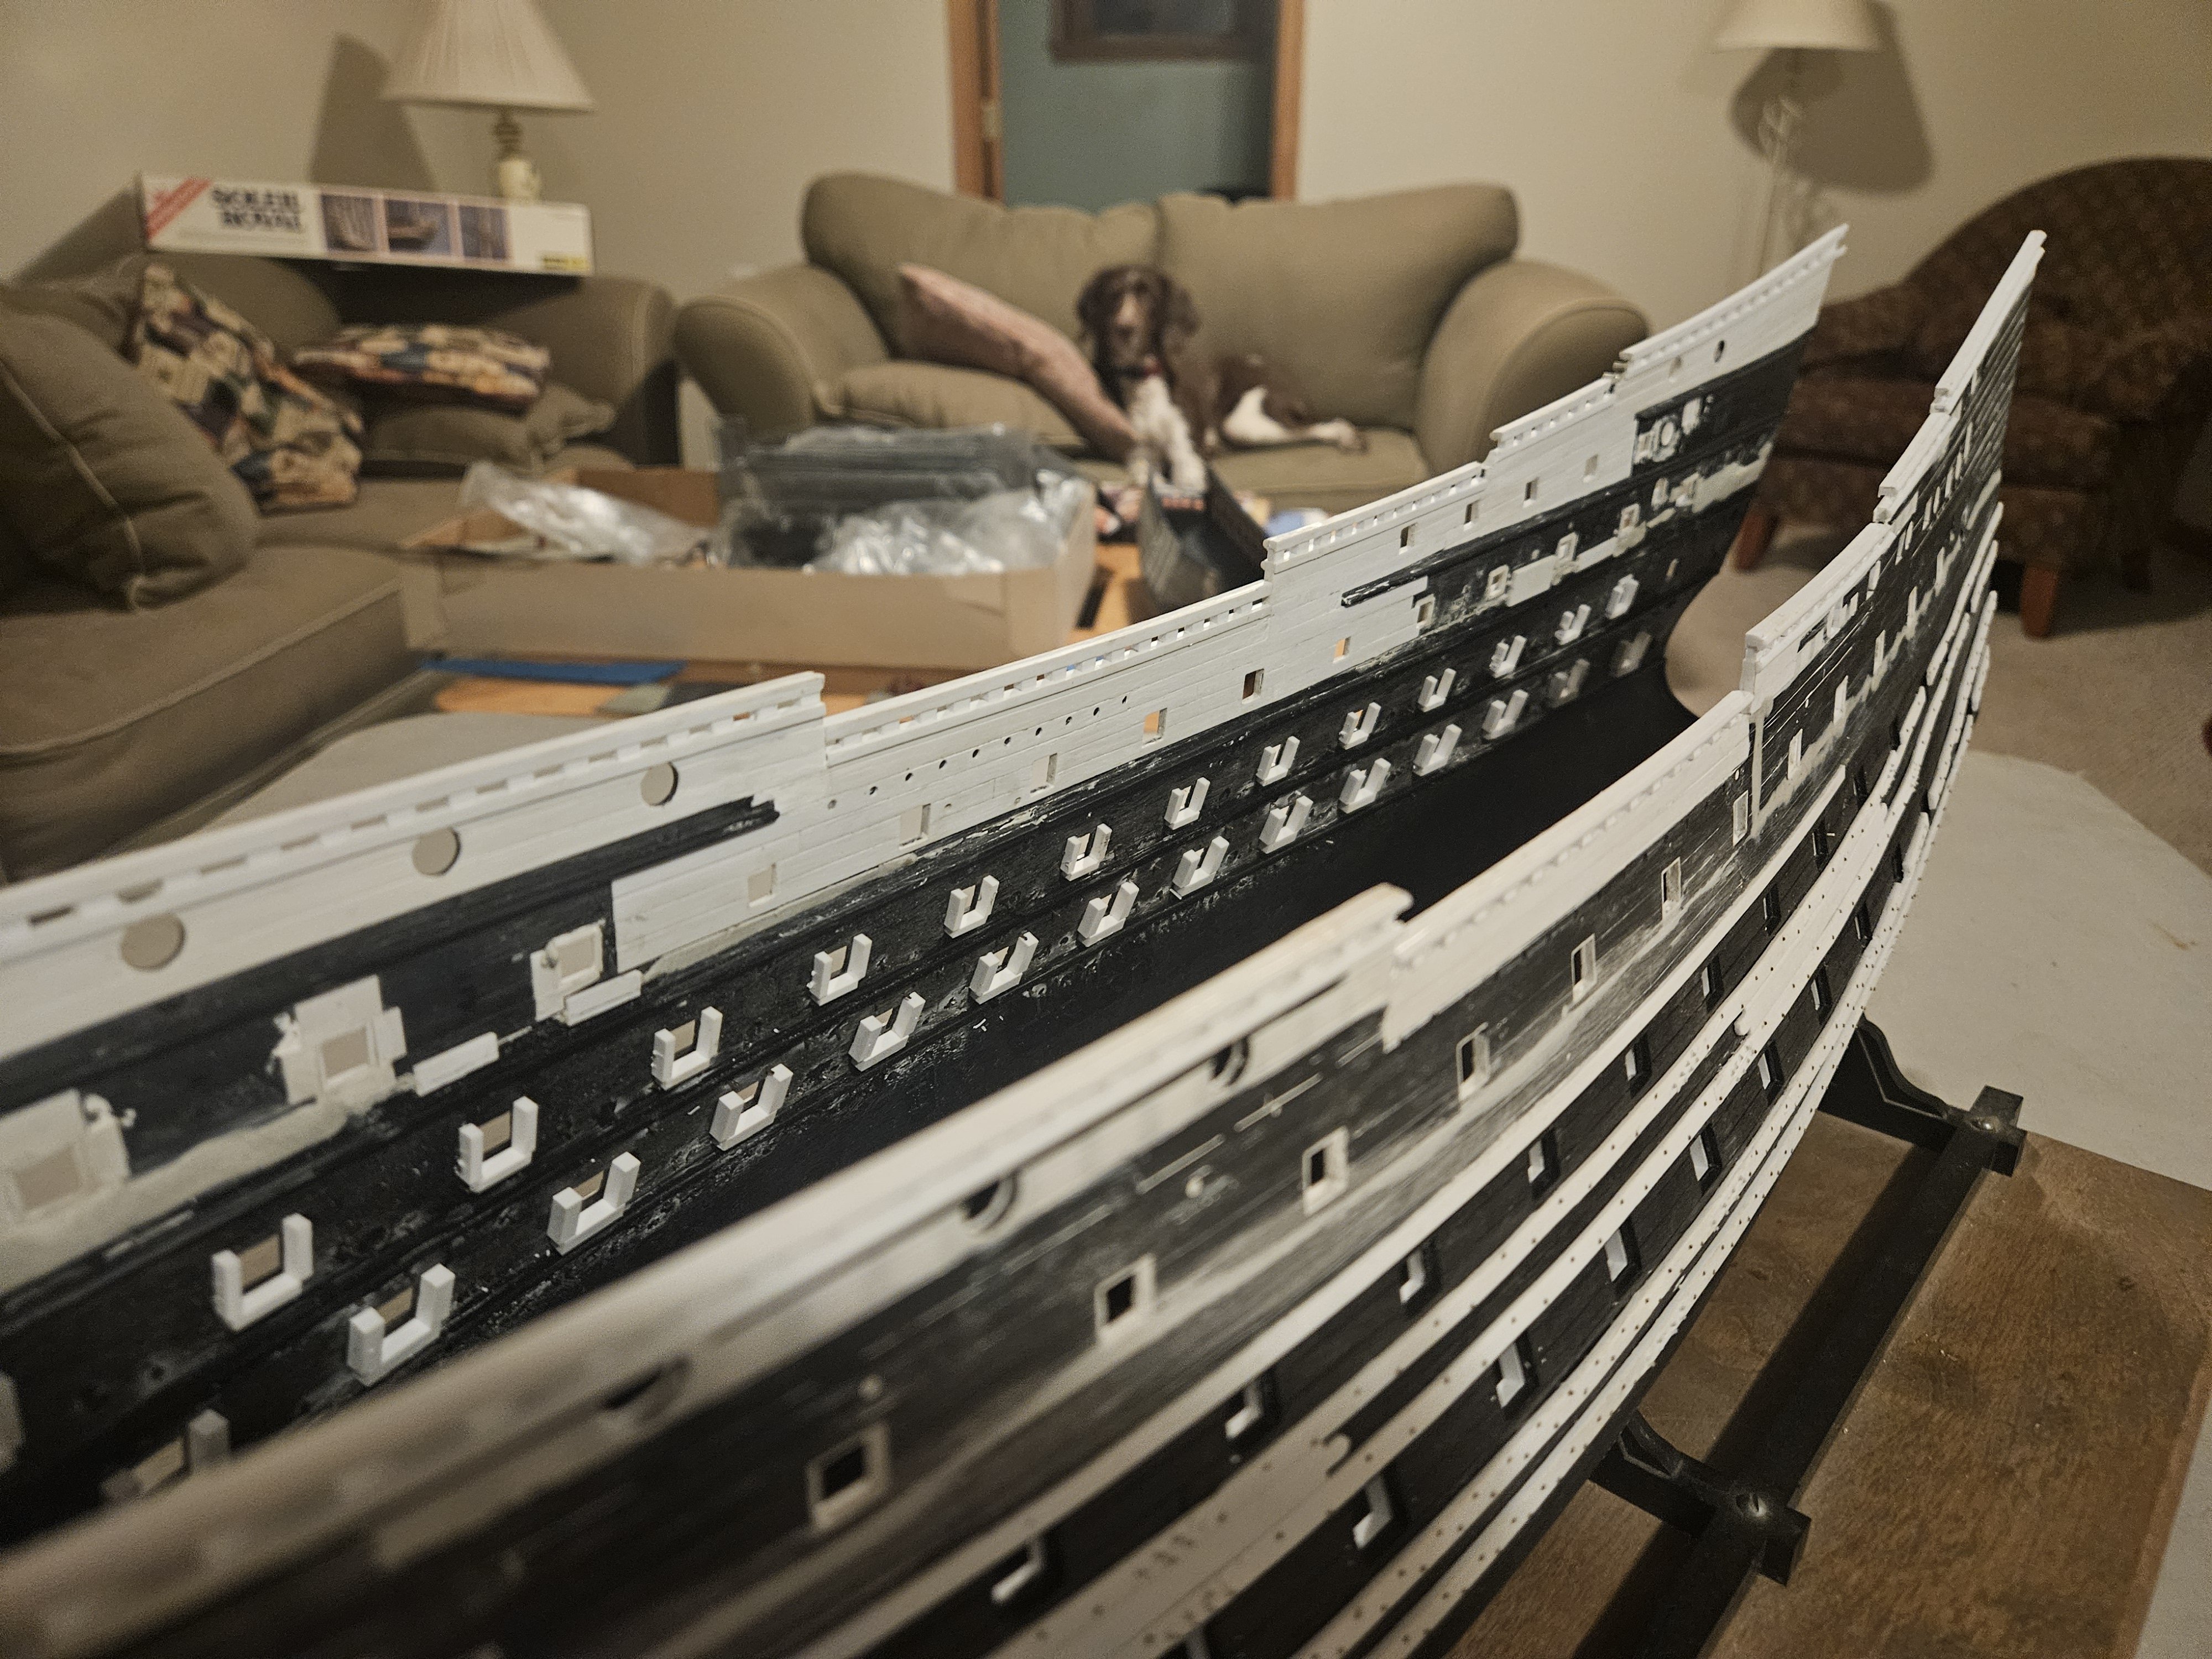
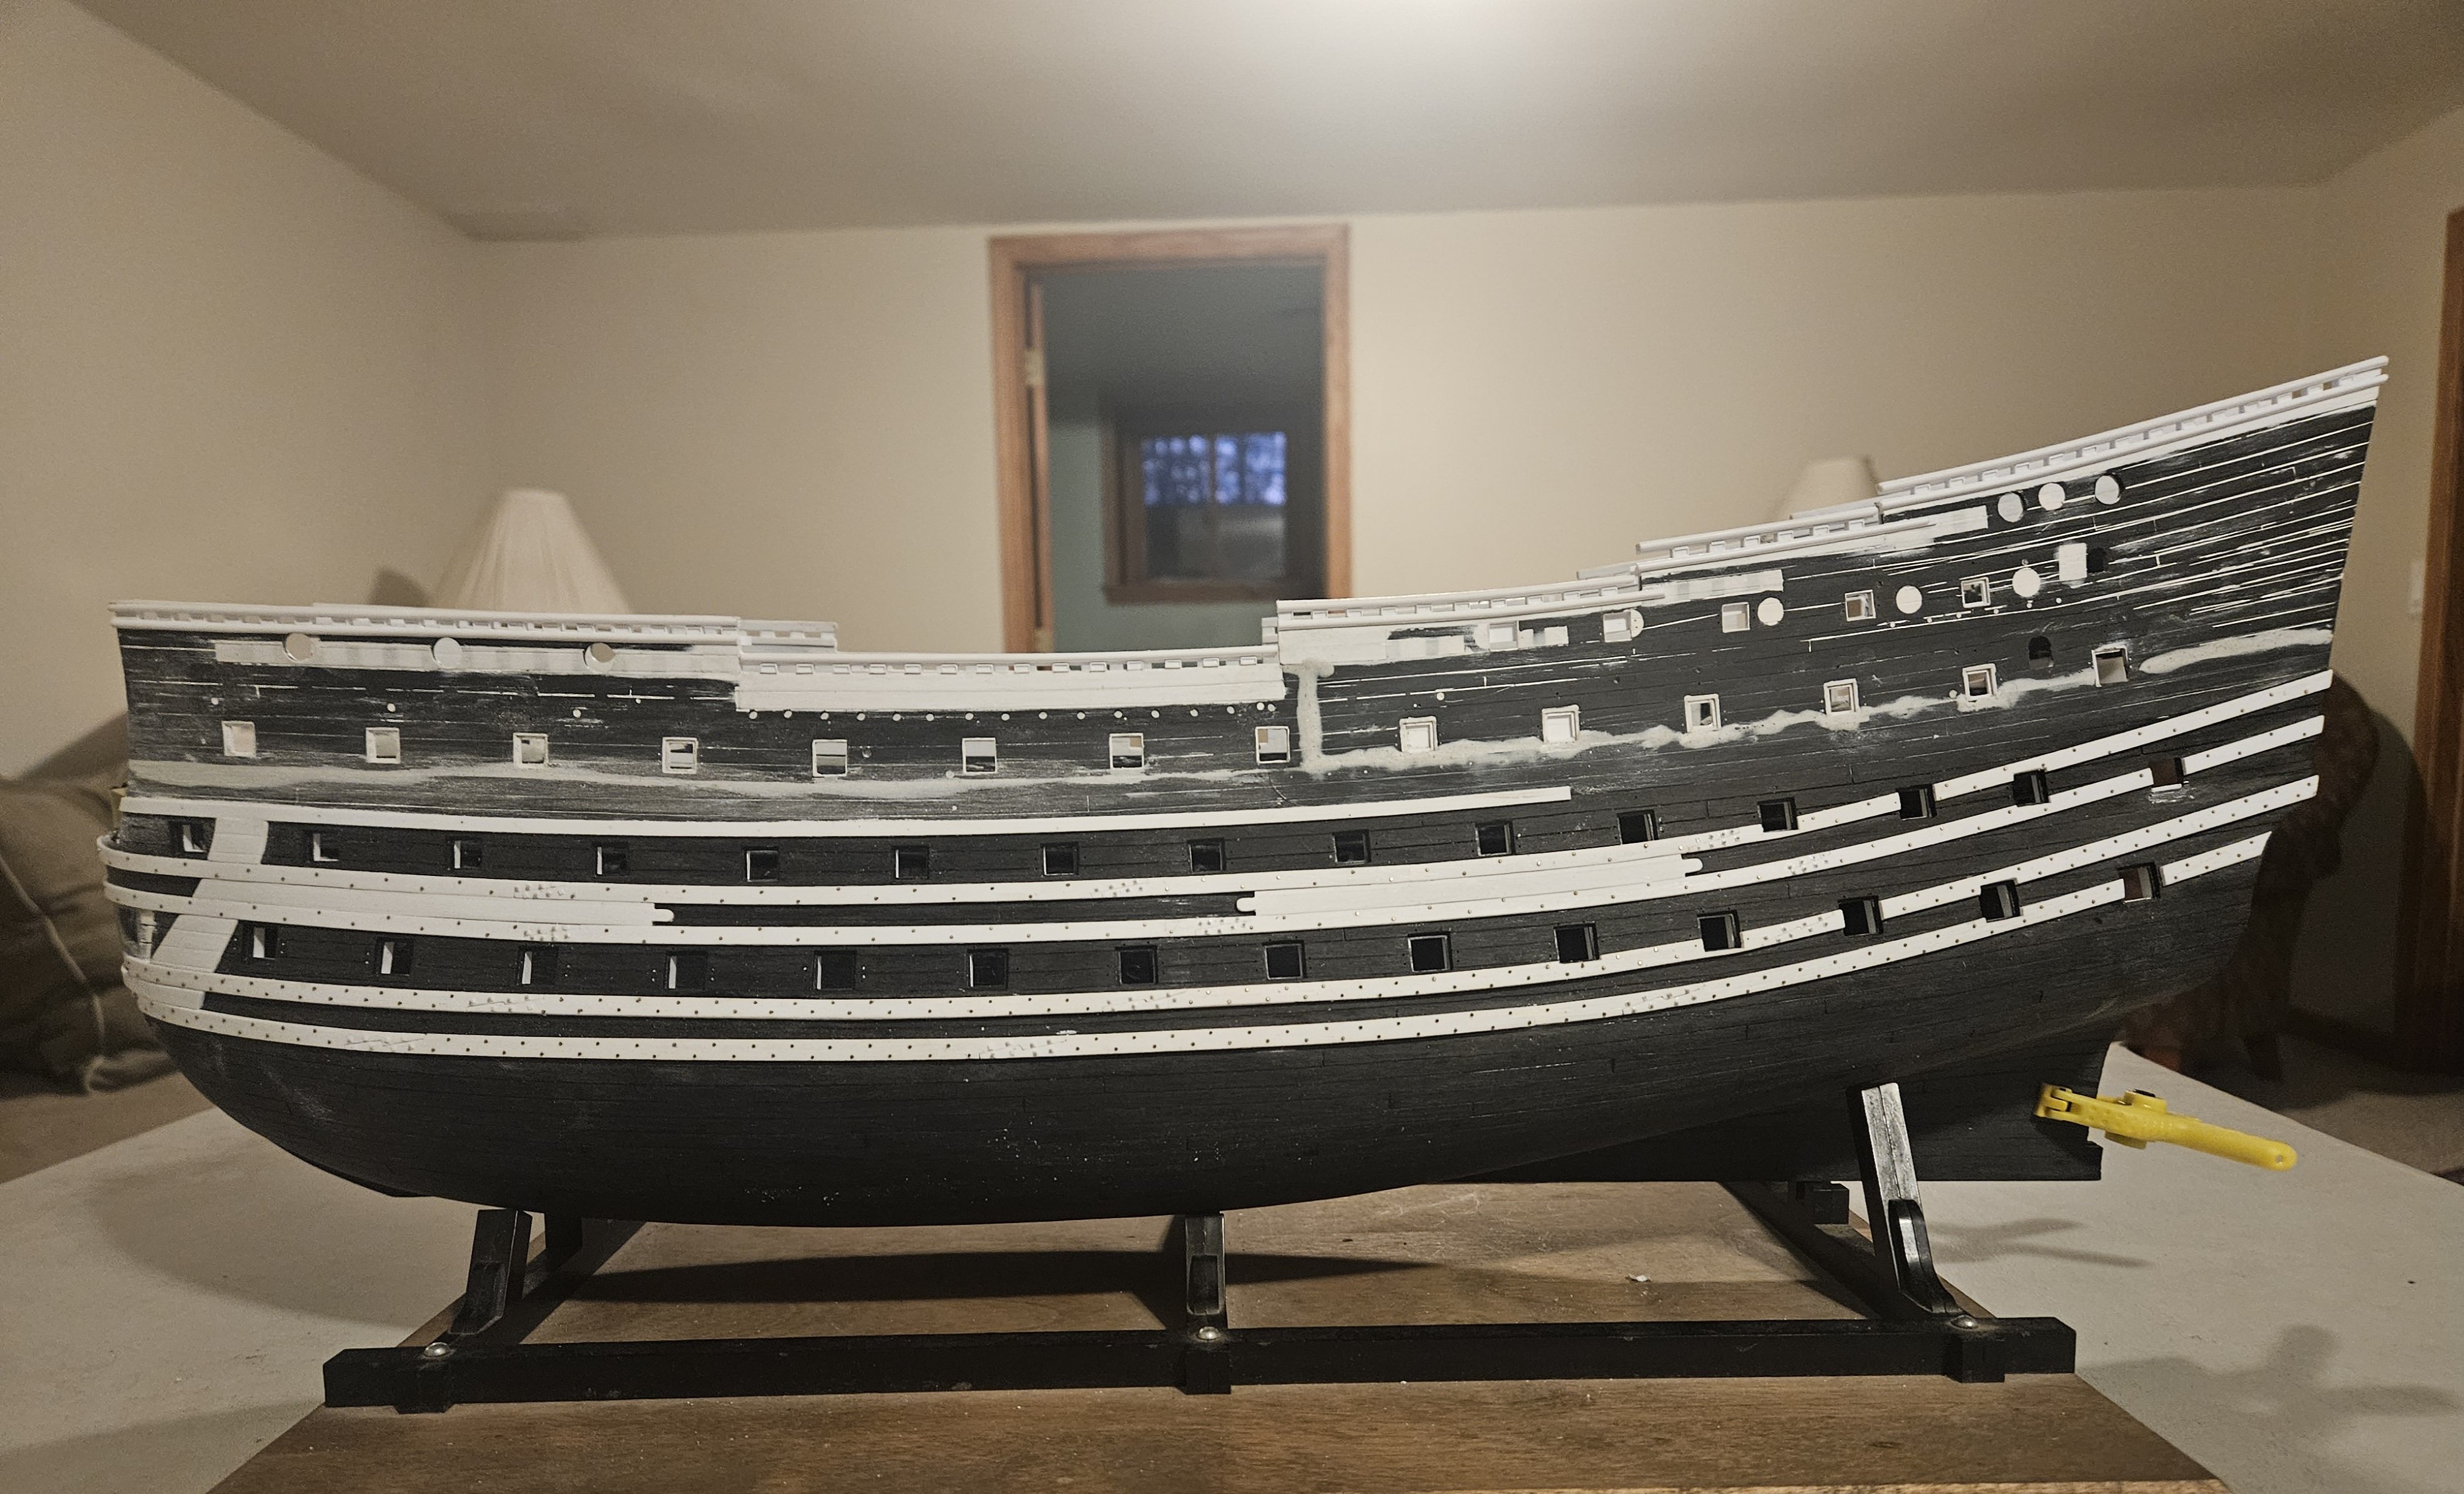
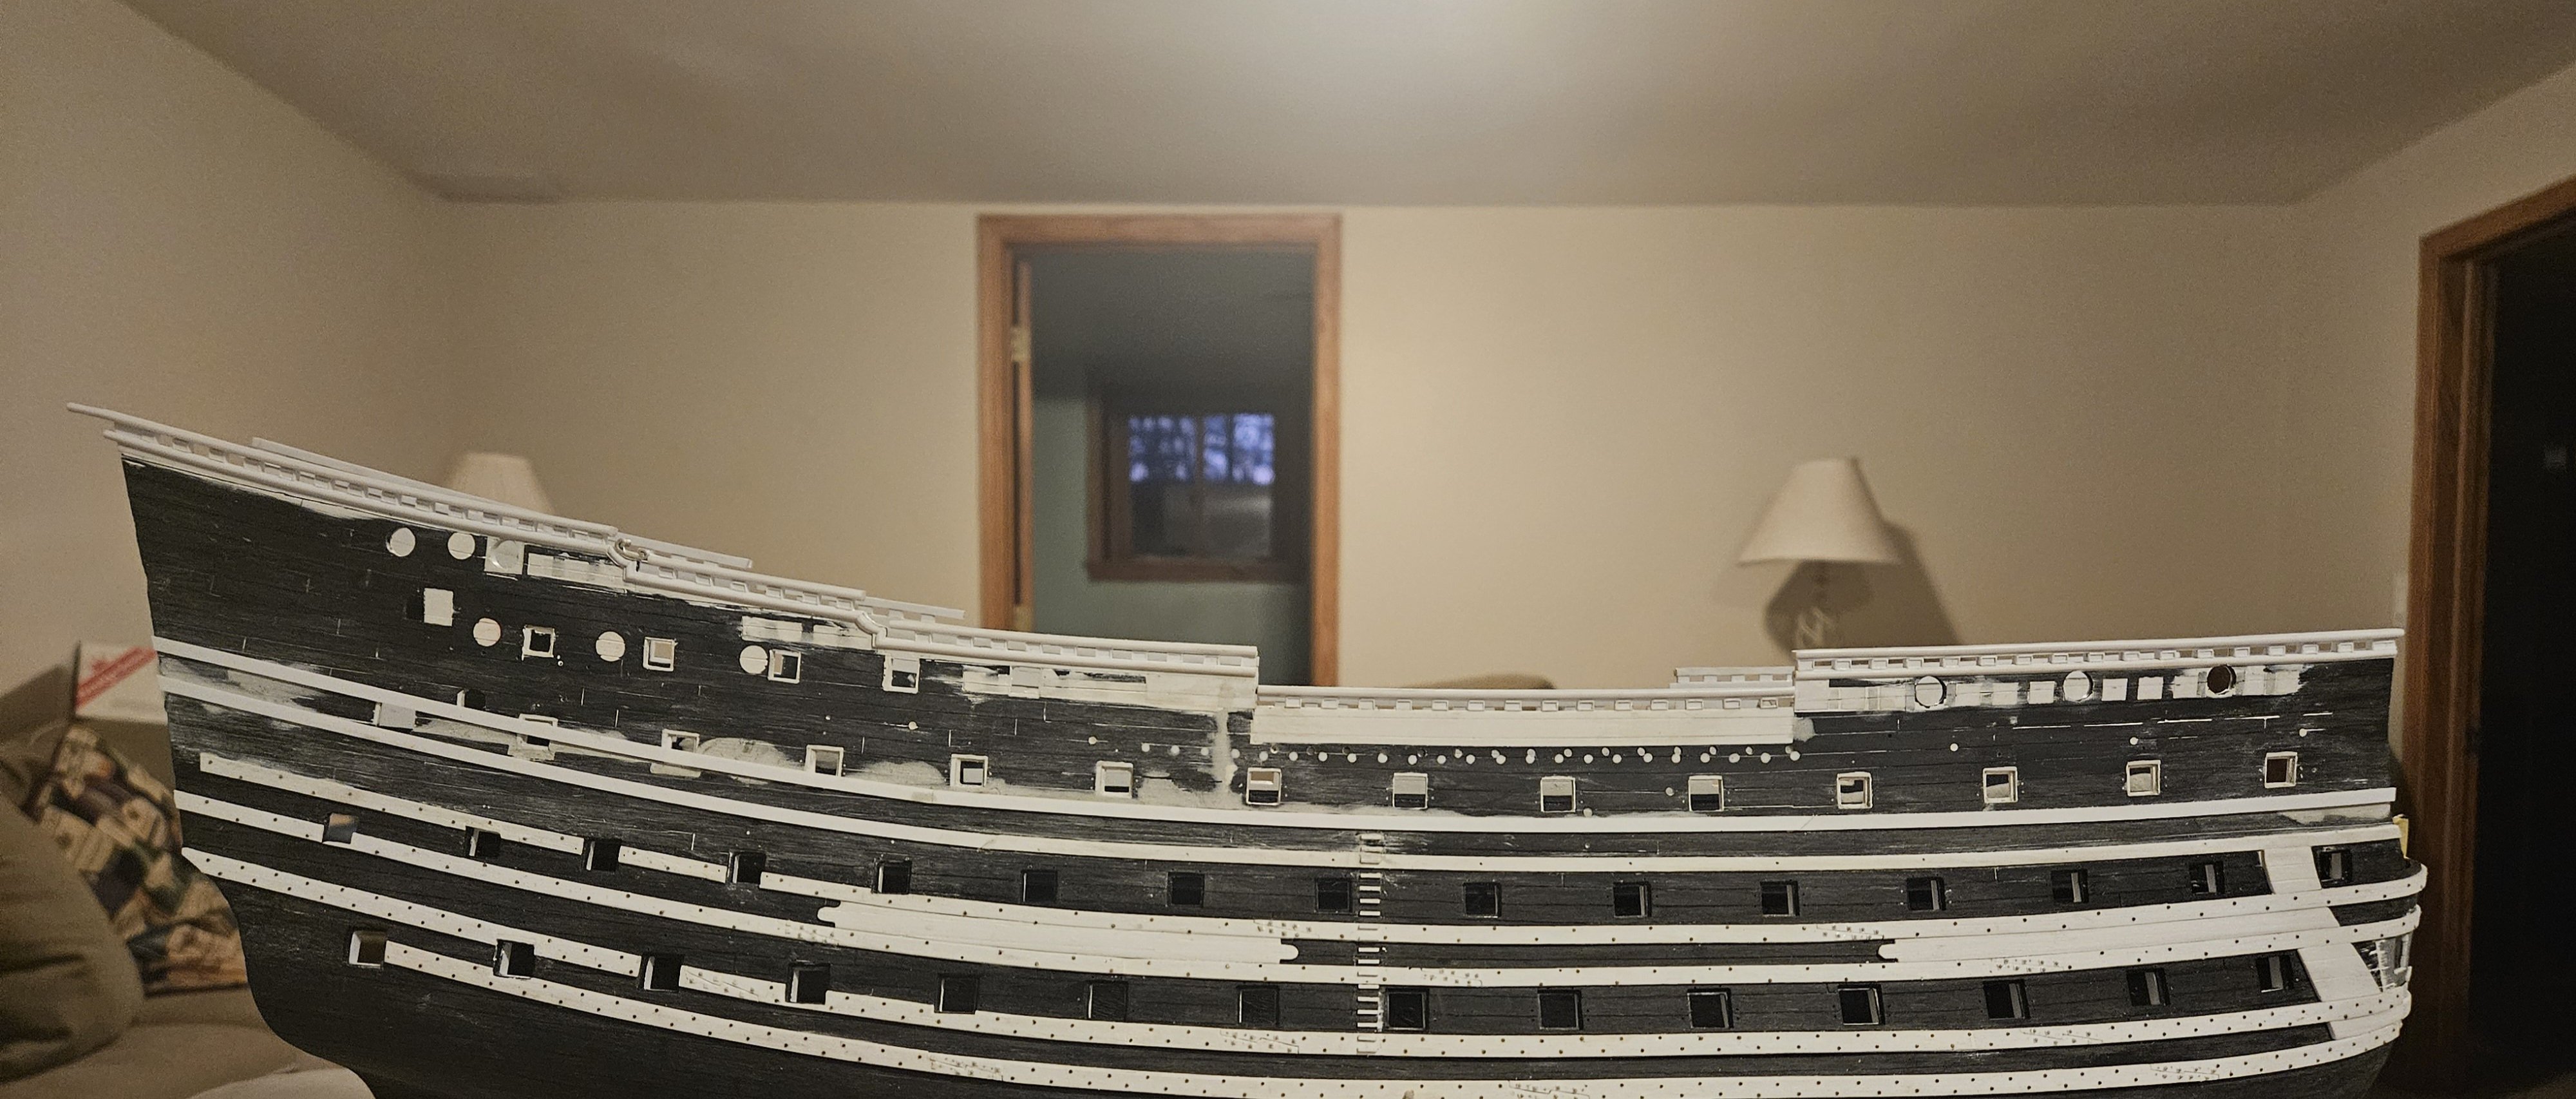
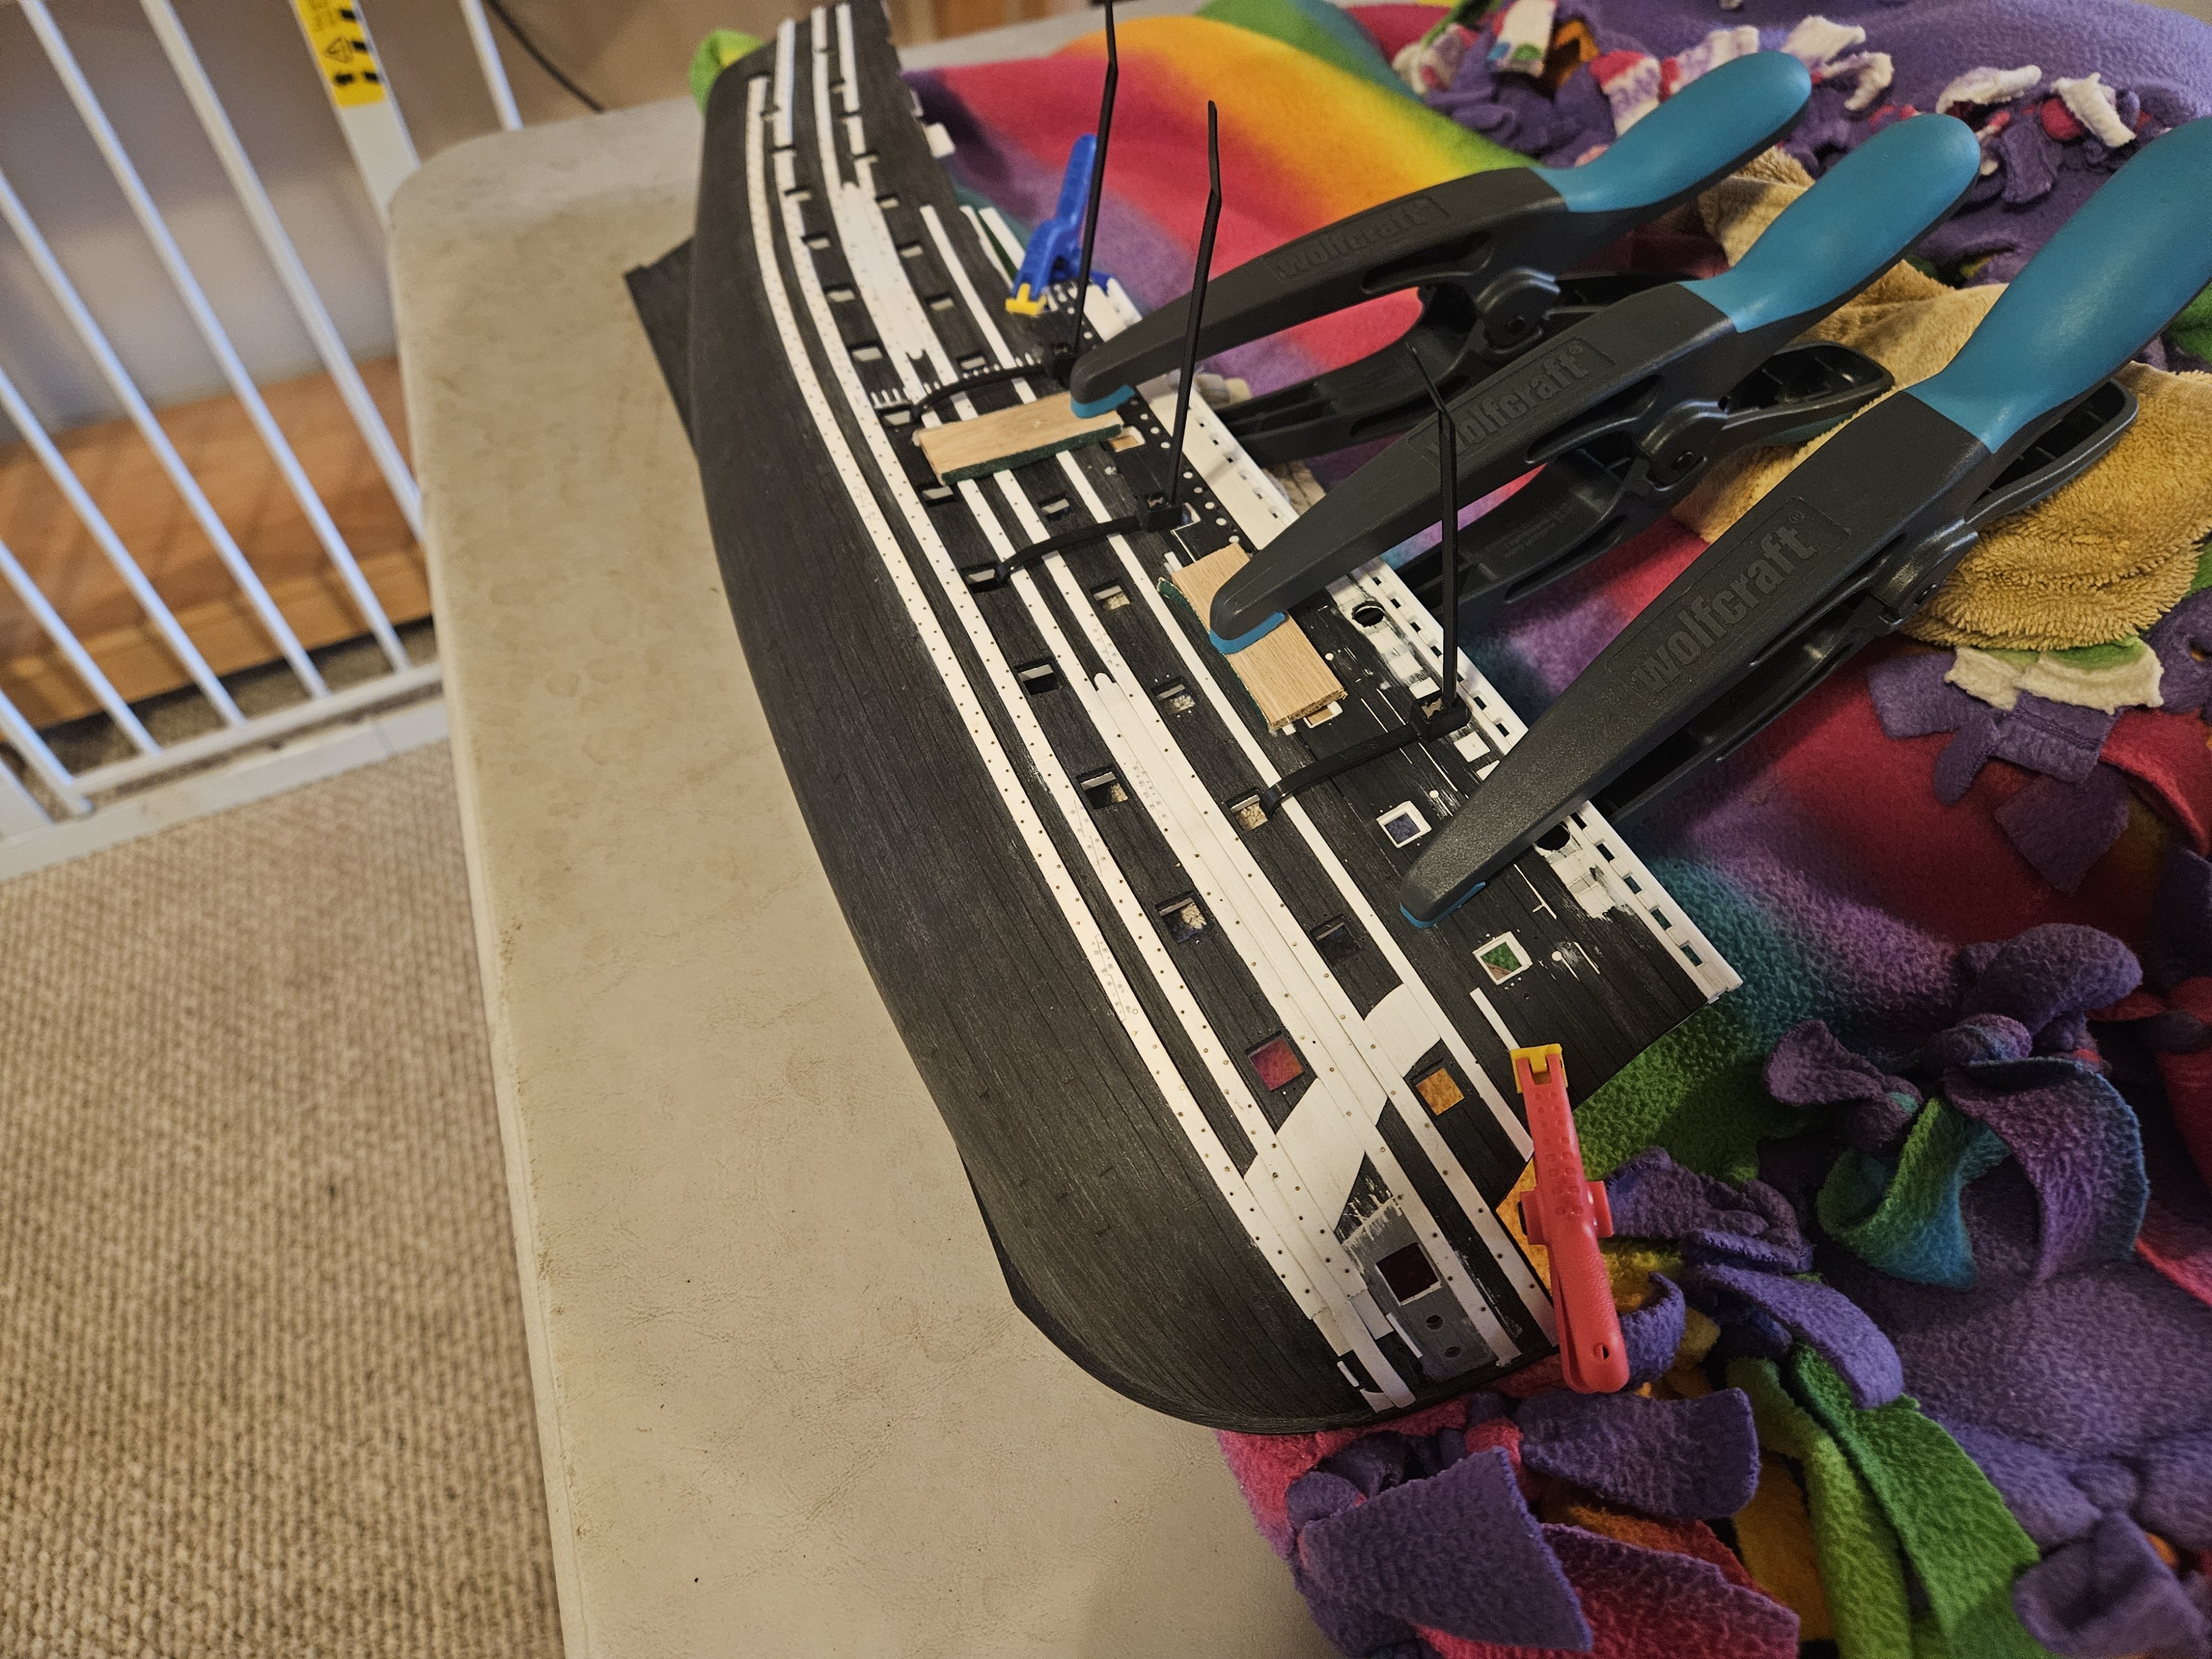
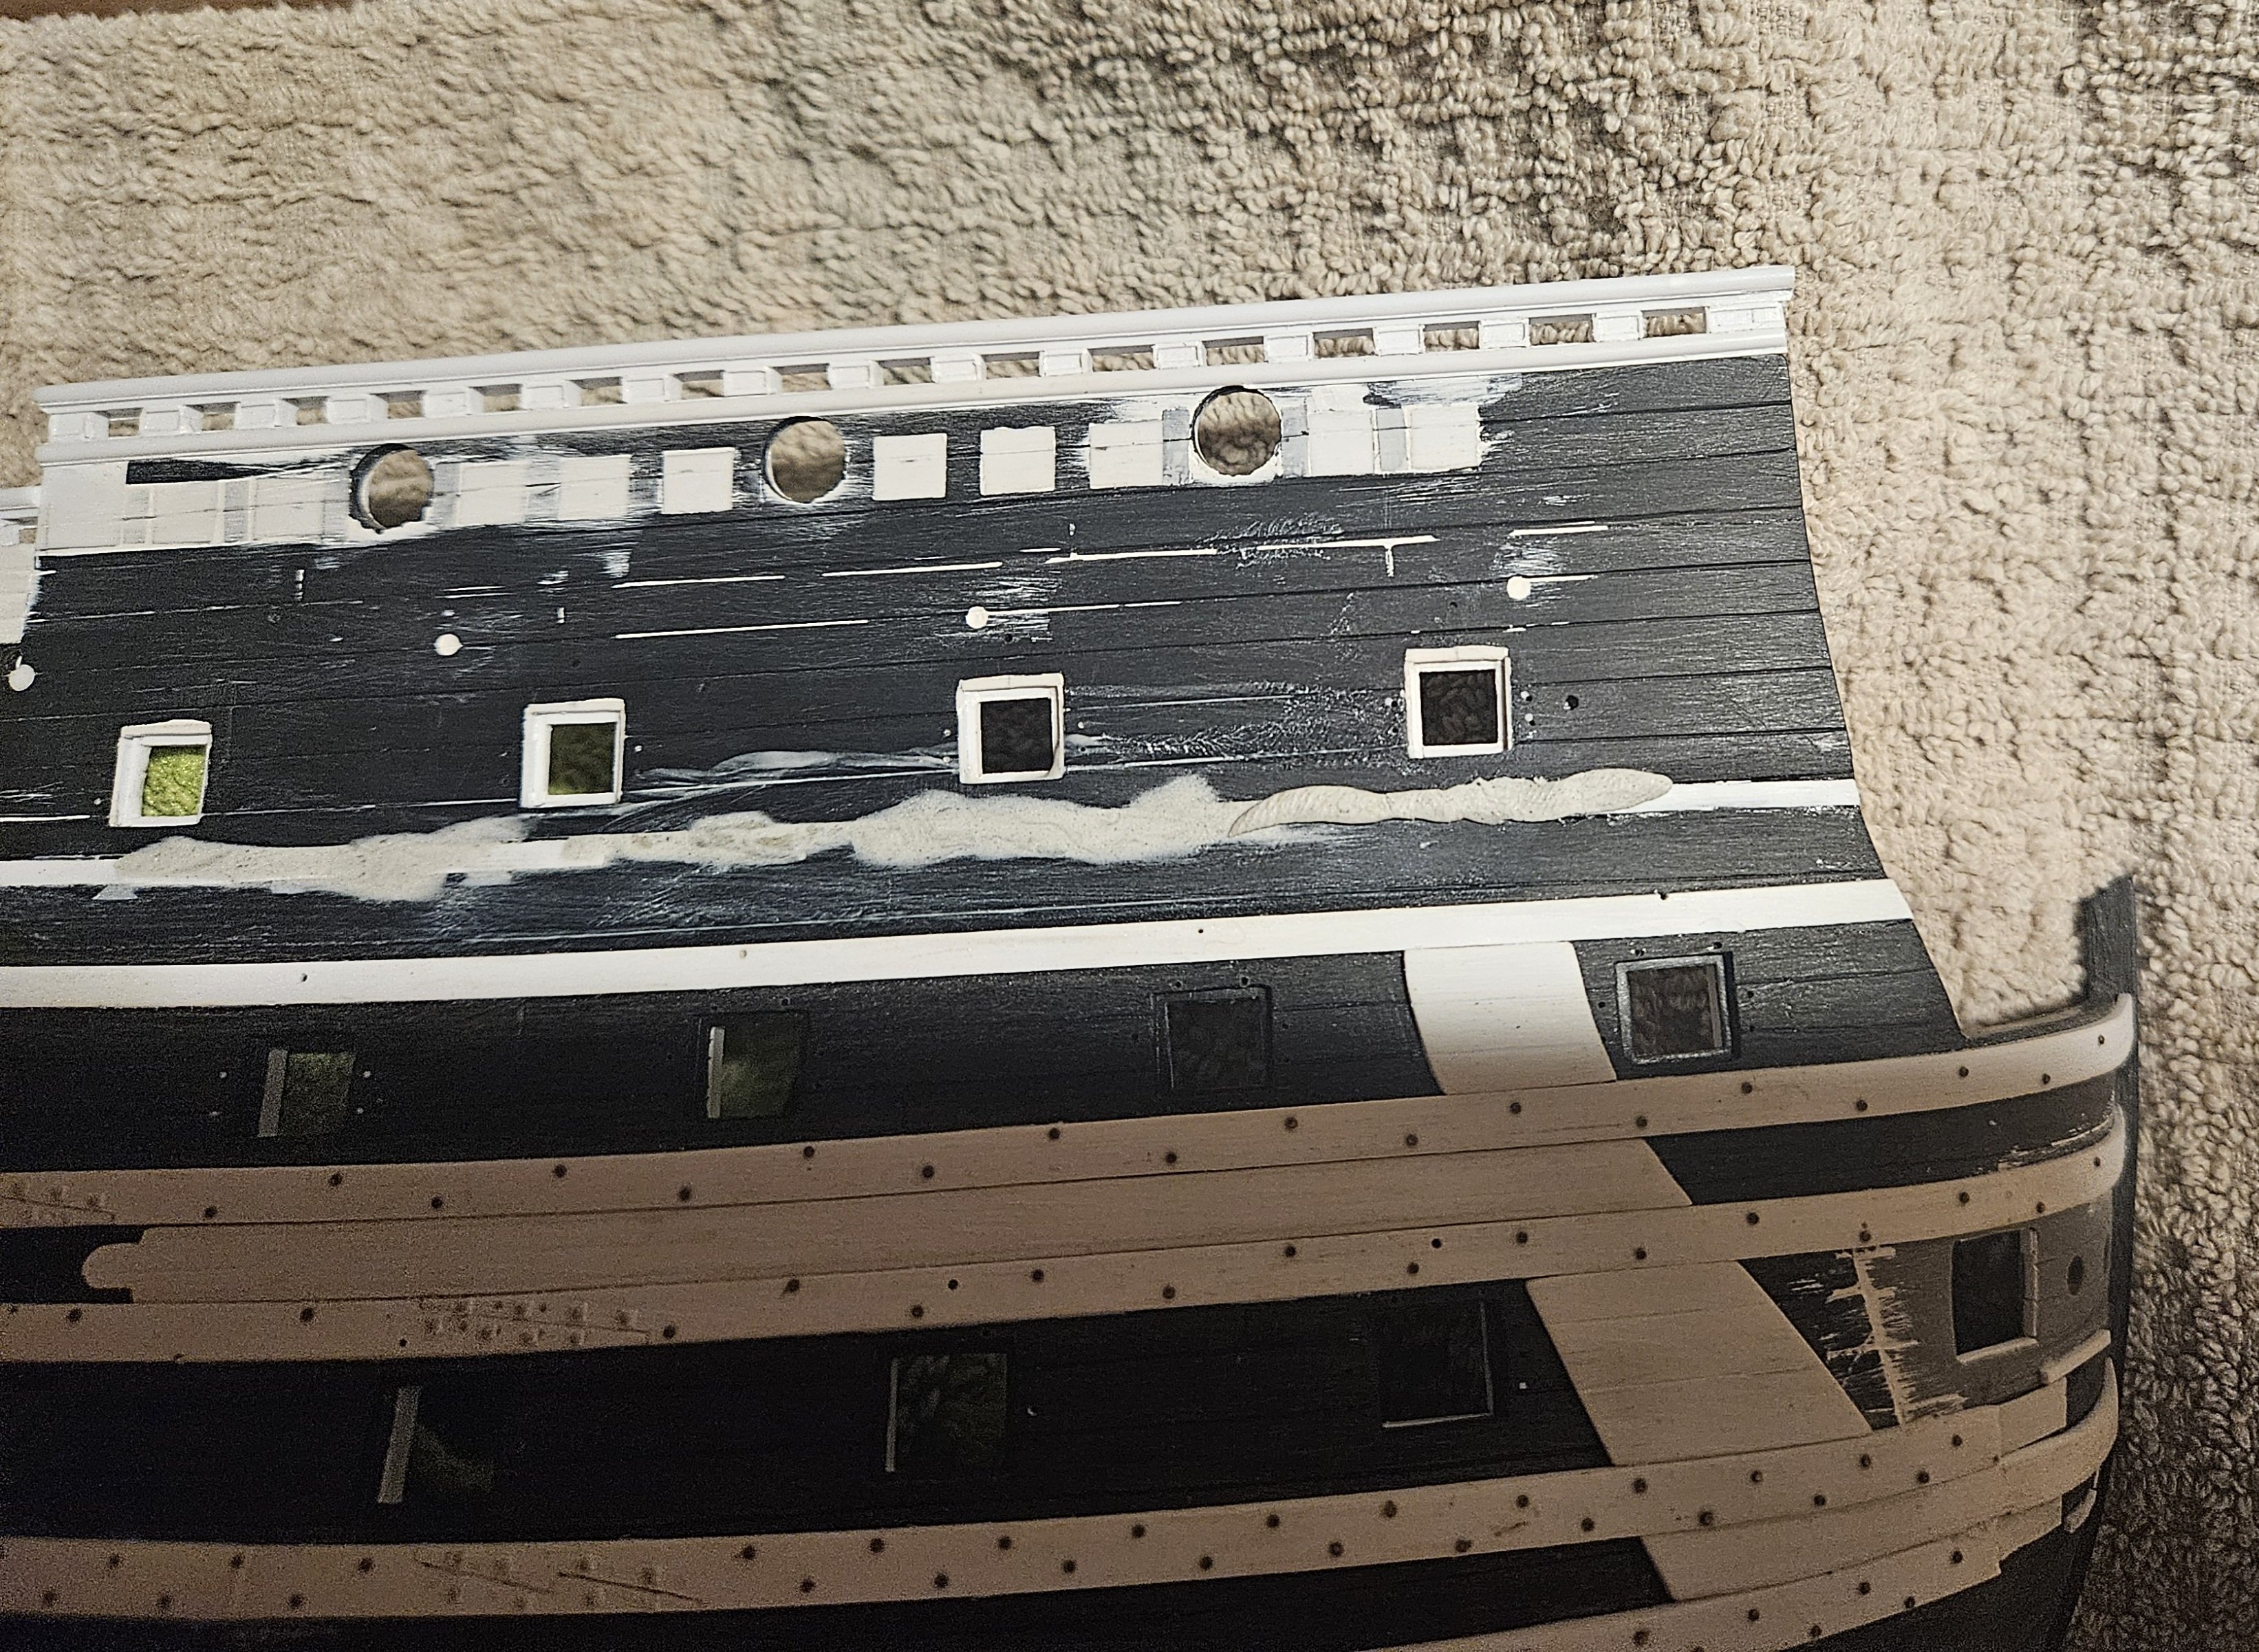
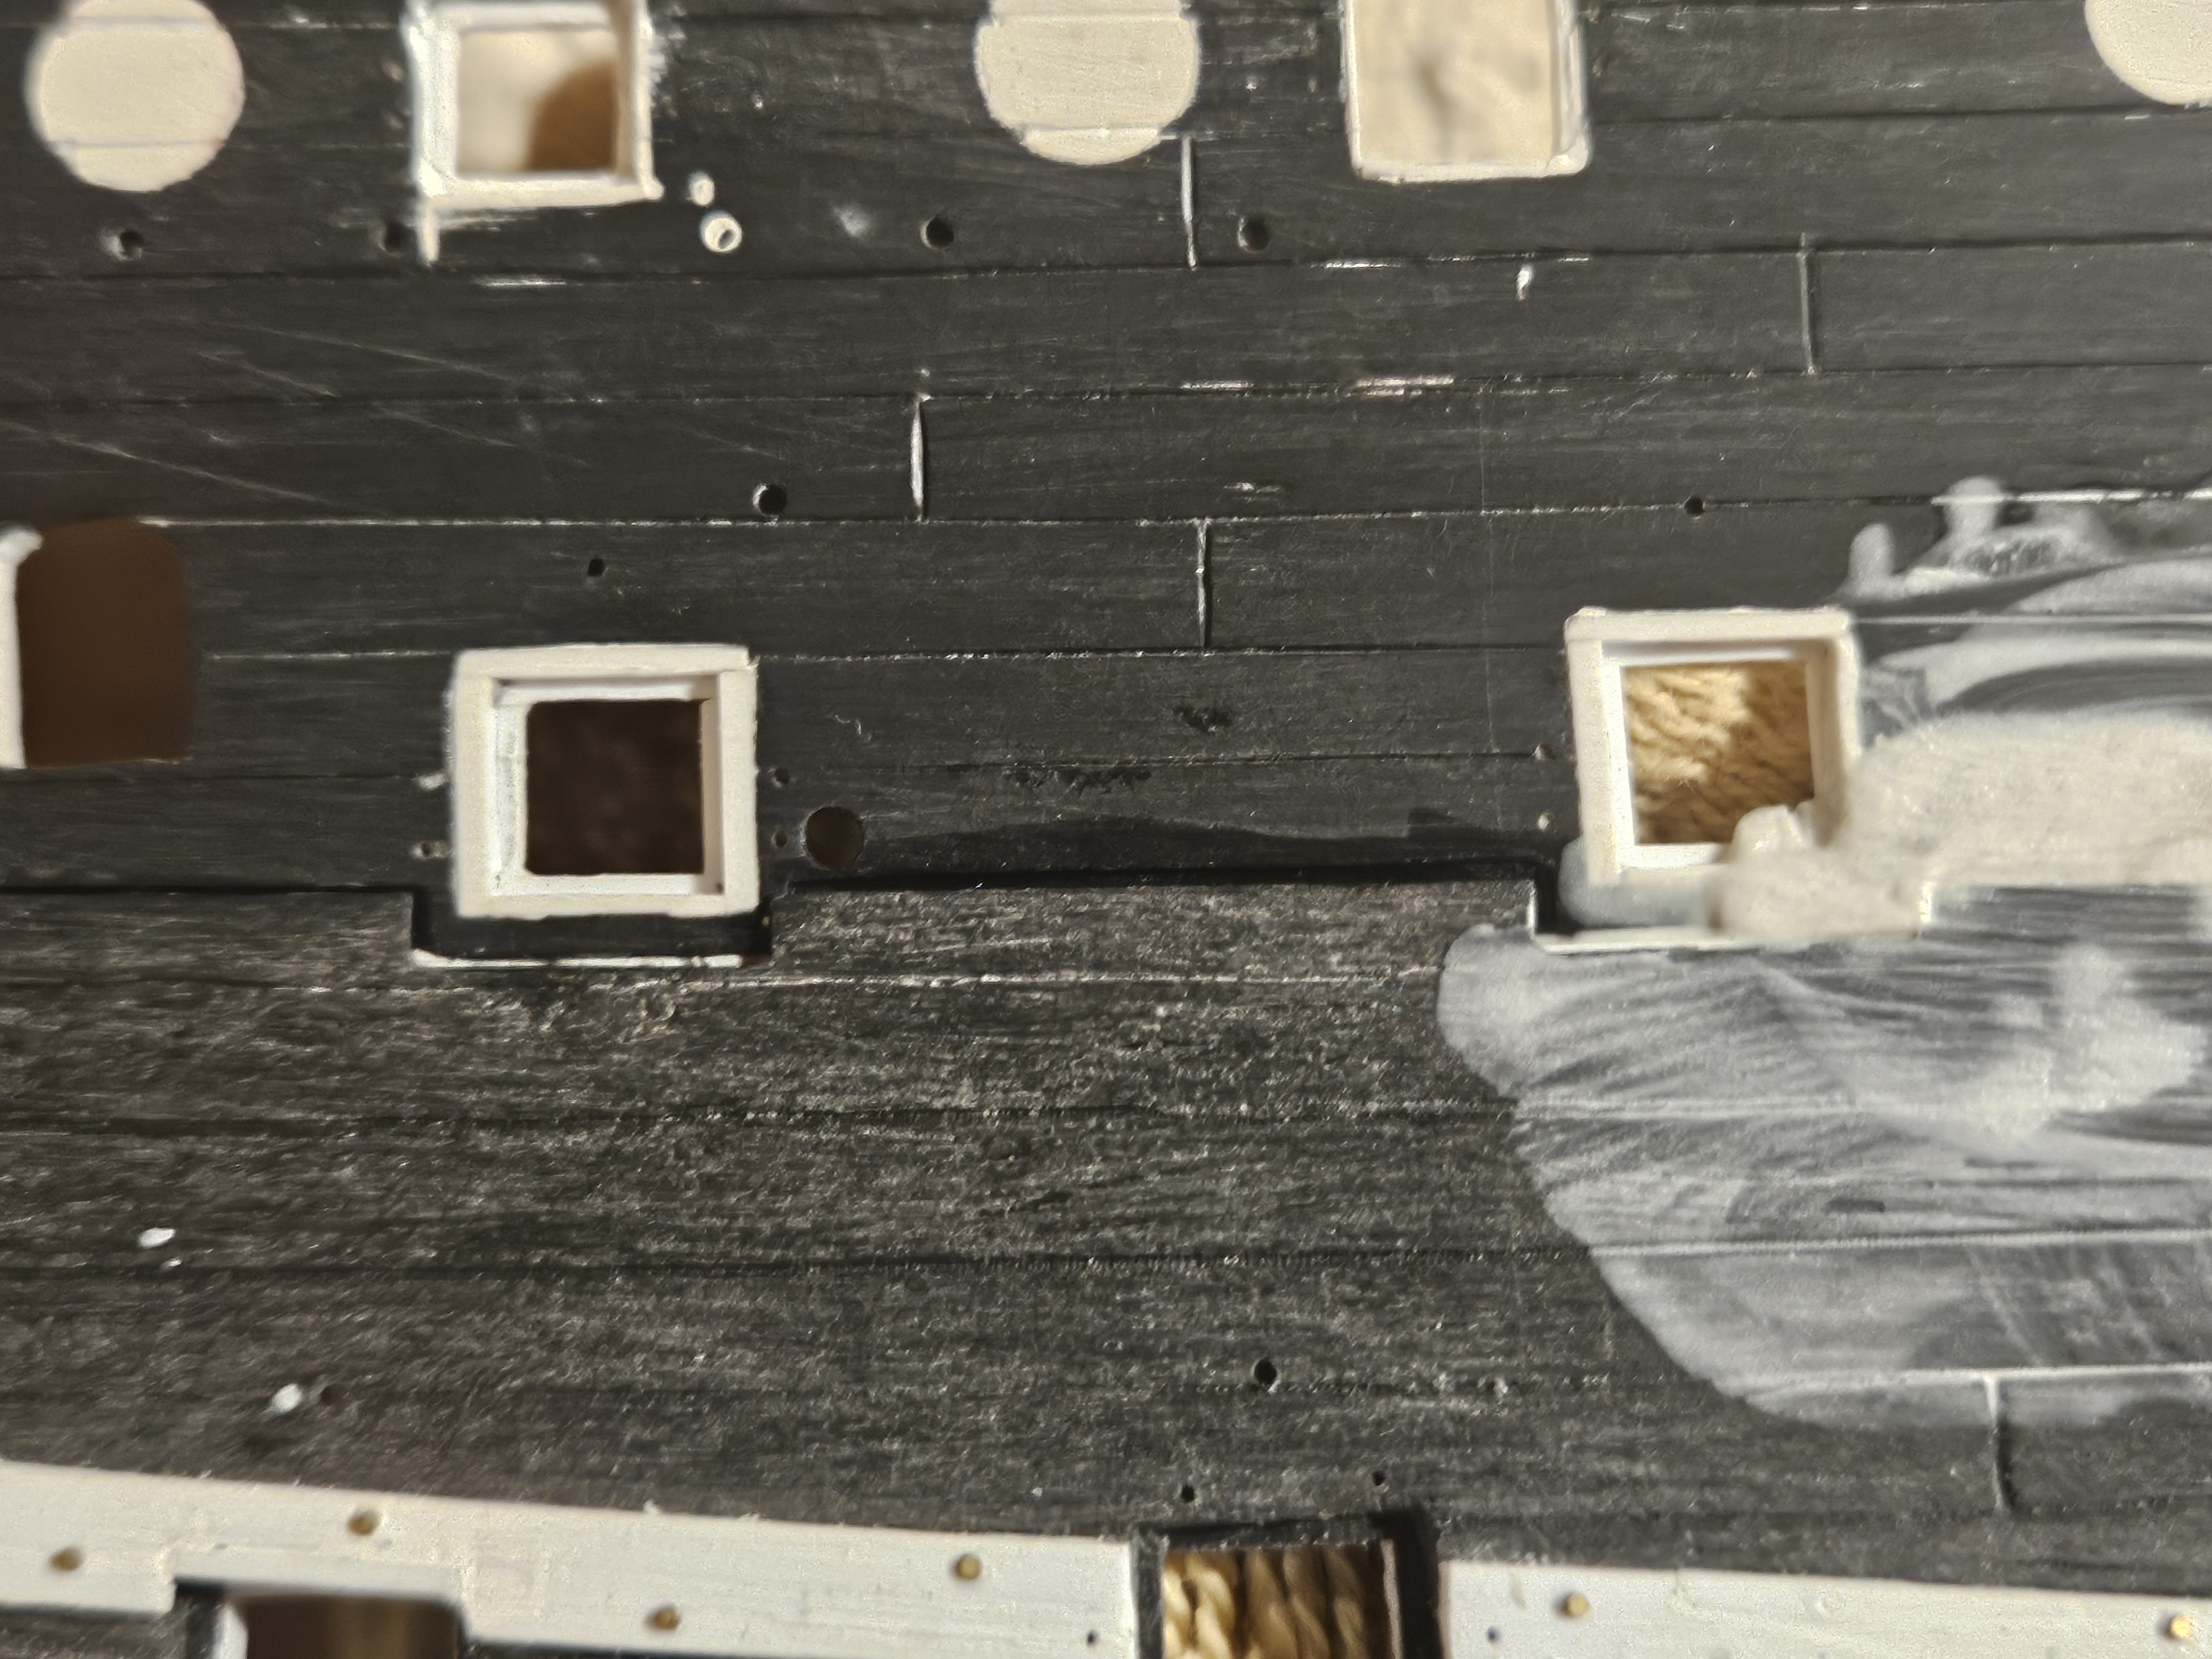
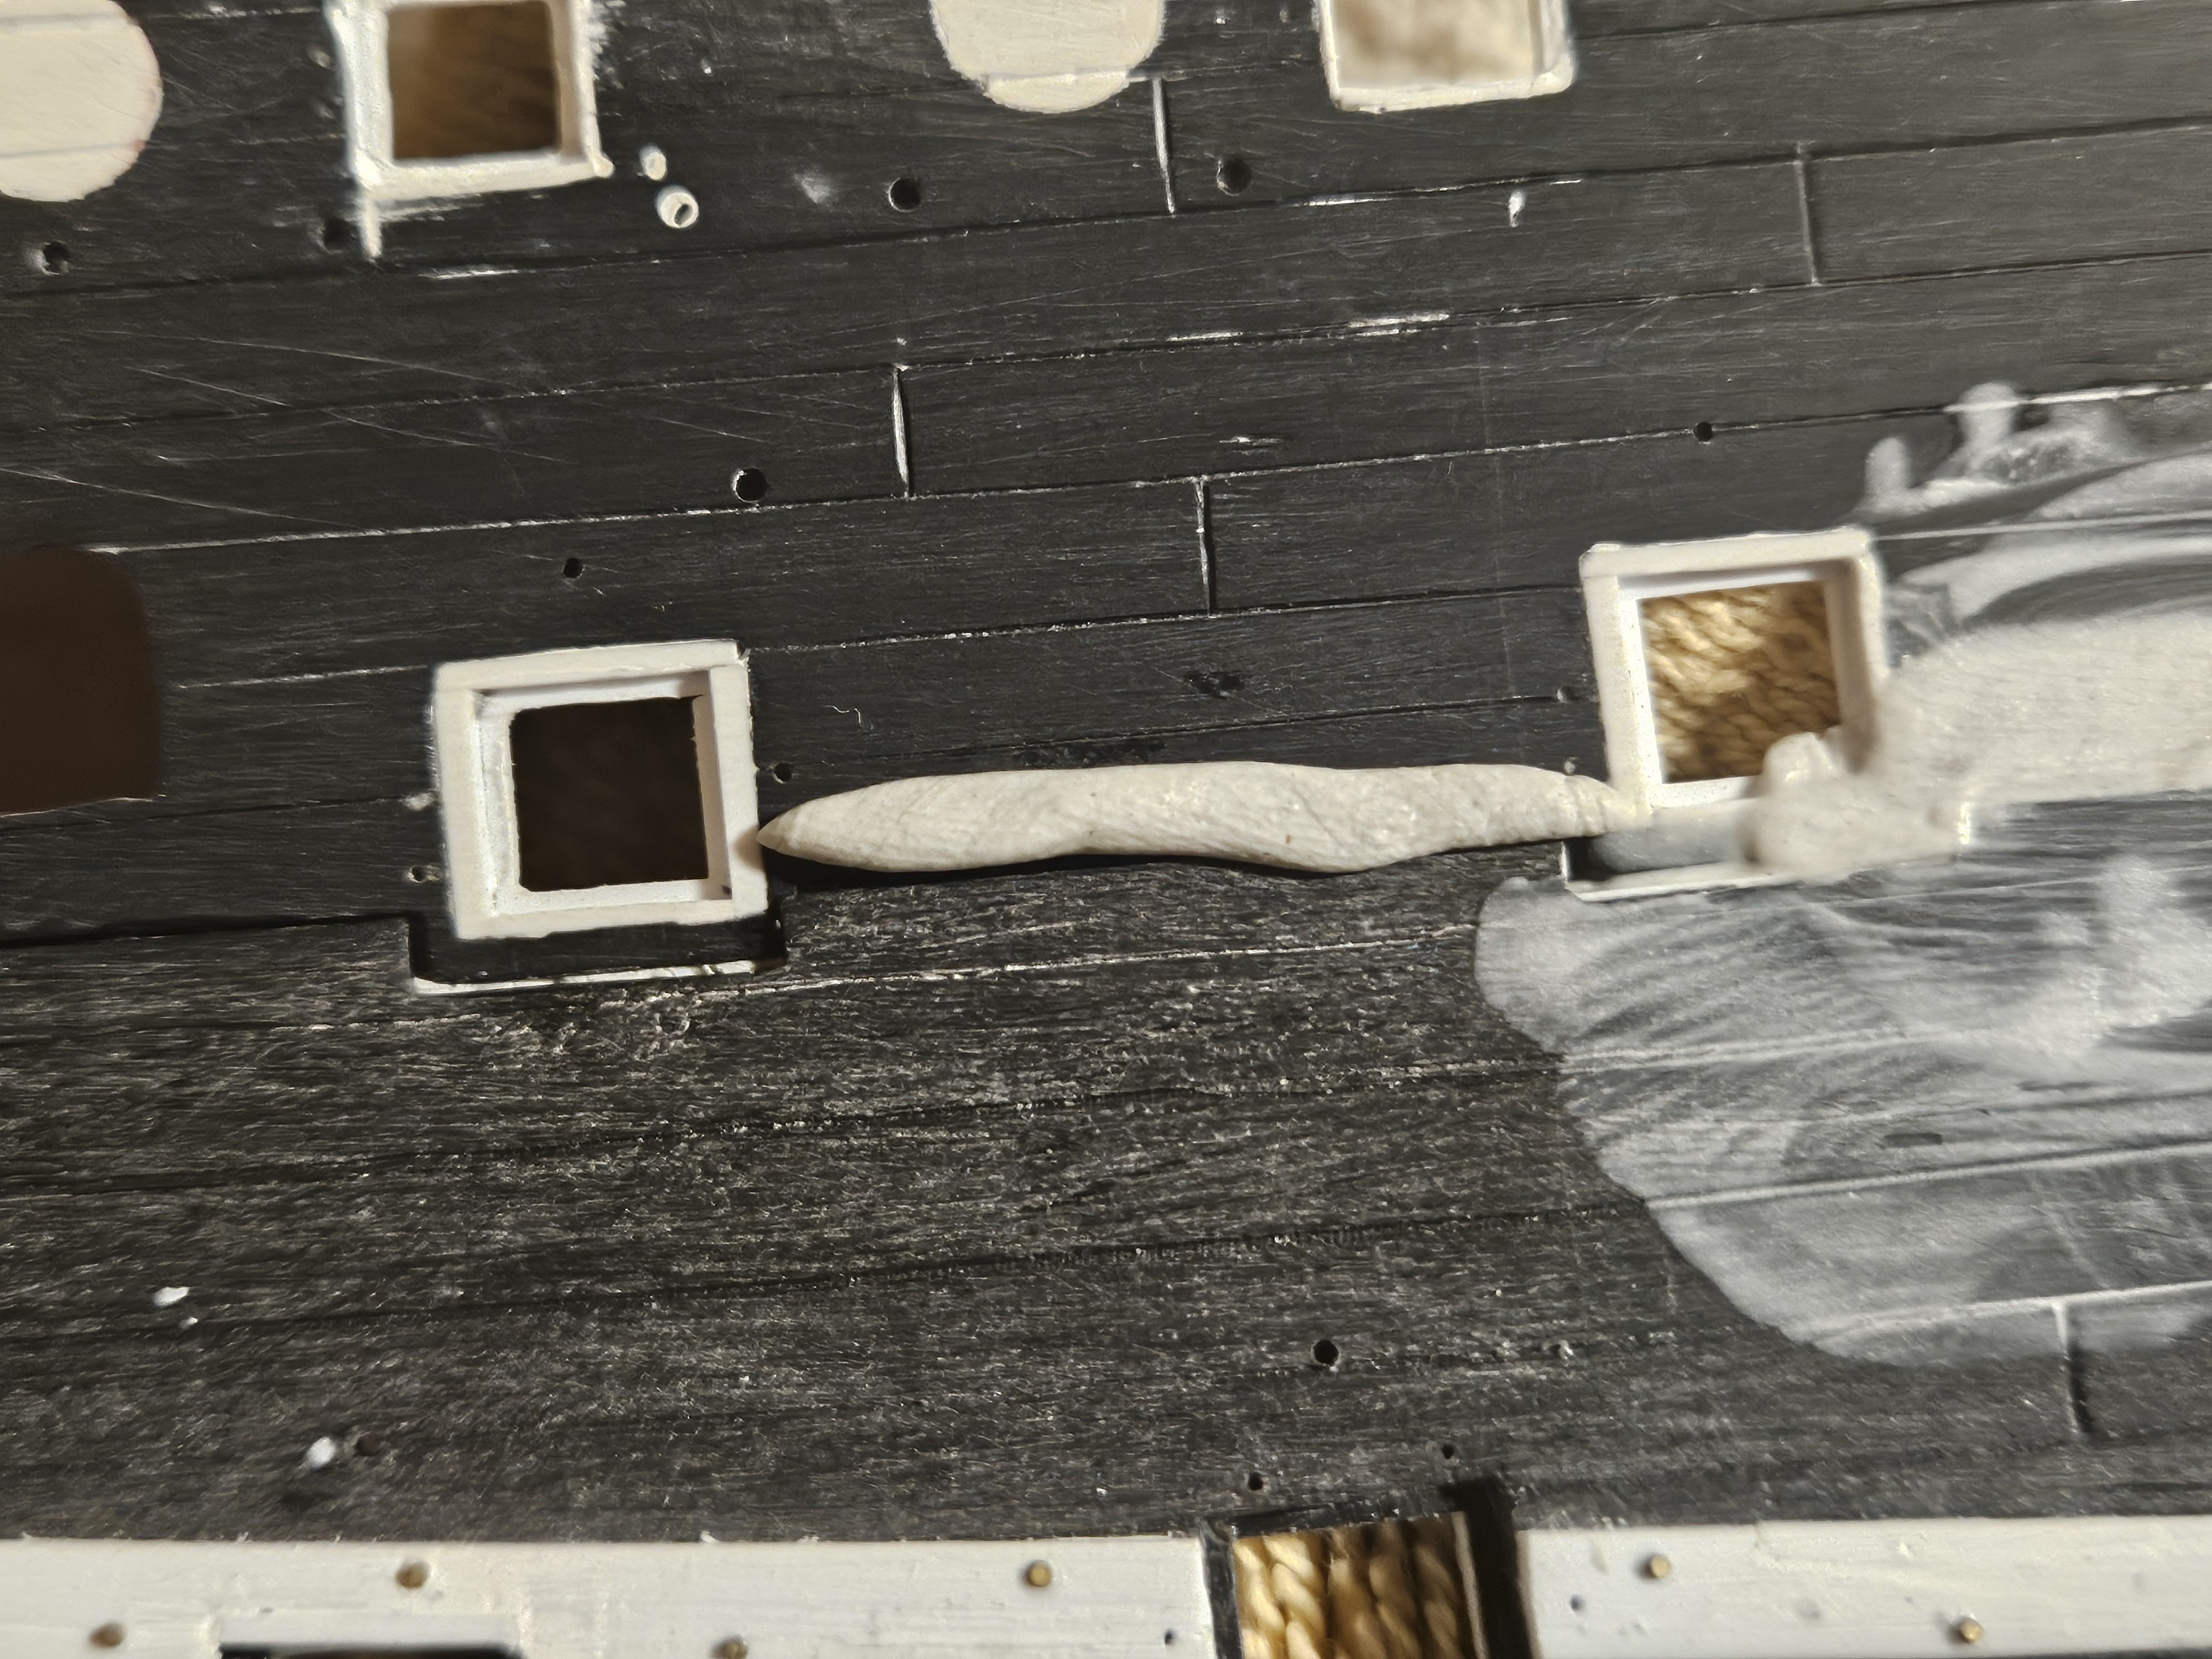
Finishing the starboard skids. I had fabricated the skids to extend down to the "top" bottom wale... but if the "lower" bottom wale is dipping into the water amidships, then it made sense to me to lower the skid down to the "lower" bottom wale. I am also doubling/reinforcing the thickness of the skids at the bottom wales; I have seen that on a few drawings and models... not sure what that is called besides "reinforcement". The next step will be the skids/hand rails at the ladder steps on the hull. However, I am a bit puzzled as... were all of the ladder steps jutting out the same amount from the hull.. let's say 6 inches? But if we have steps on a wale, they will stick out farther than a step not on a wale, if this makes sense. I am thinking that the ladder steps stuck out to to a fixed point, whether they were on a wale or not, that followed the tumblehome of the hull. So let's say we pick 12 inches out from the hull... on a 6 inch thick wale, the step would be 6 inches wide. but the next step - NOT on a wale - would this have to be 12 inches wide?!? Hope this makes sense
.thumb.jpg.85144e721df62baafe548f27a6273f31.jpg)
.thumb.jpg.3ff2d648f278a2caacbaa28fdd7724ee.jpg)
.thumb.jpg.245a9bb772627720b6e99eaa1015fb9c.jpg)
.thumb.jpg.67eebcfd45e1a8c9f9de909a395b8fb6.jpg)
.thumb.jpg.3a9d9c6902f2df6966eace09c8ef248f.jpg)
- 432 replies
-
- 3
-
-
- soleil royal
- Heller
- (and 1 more)
-
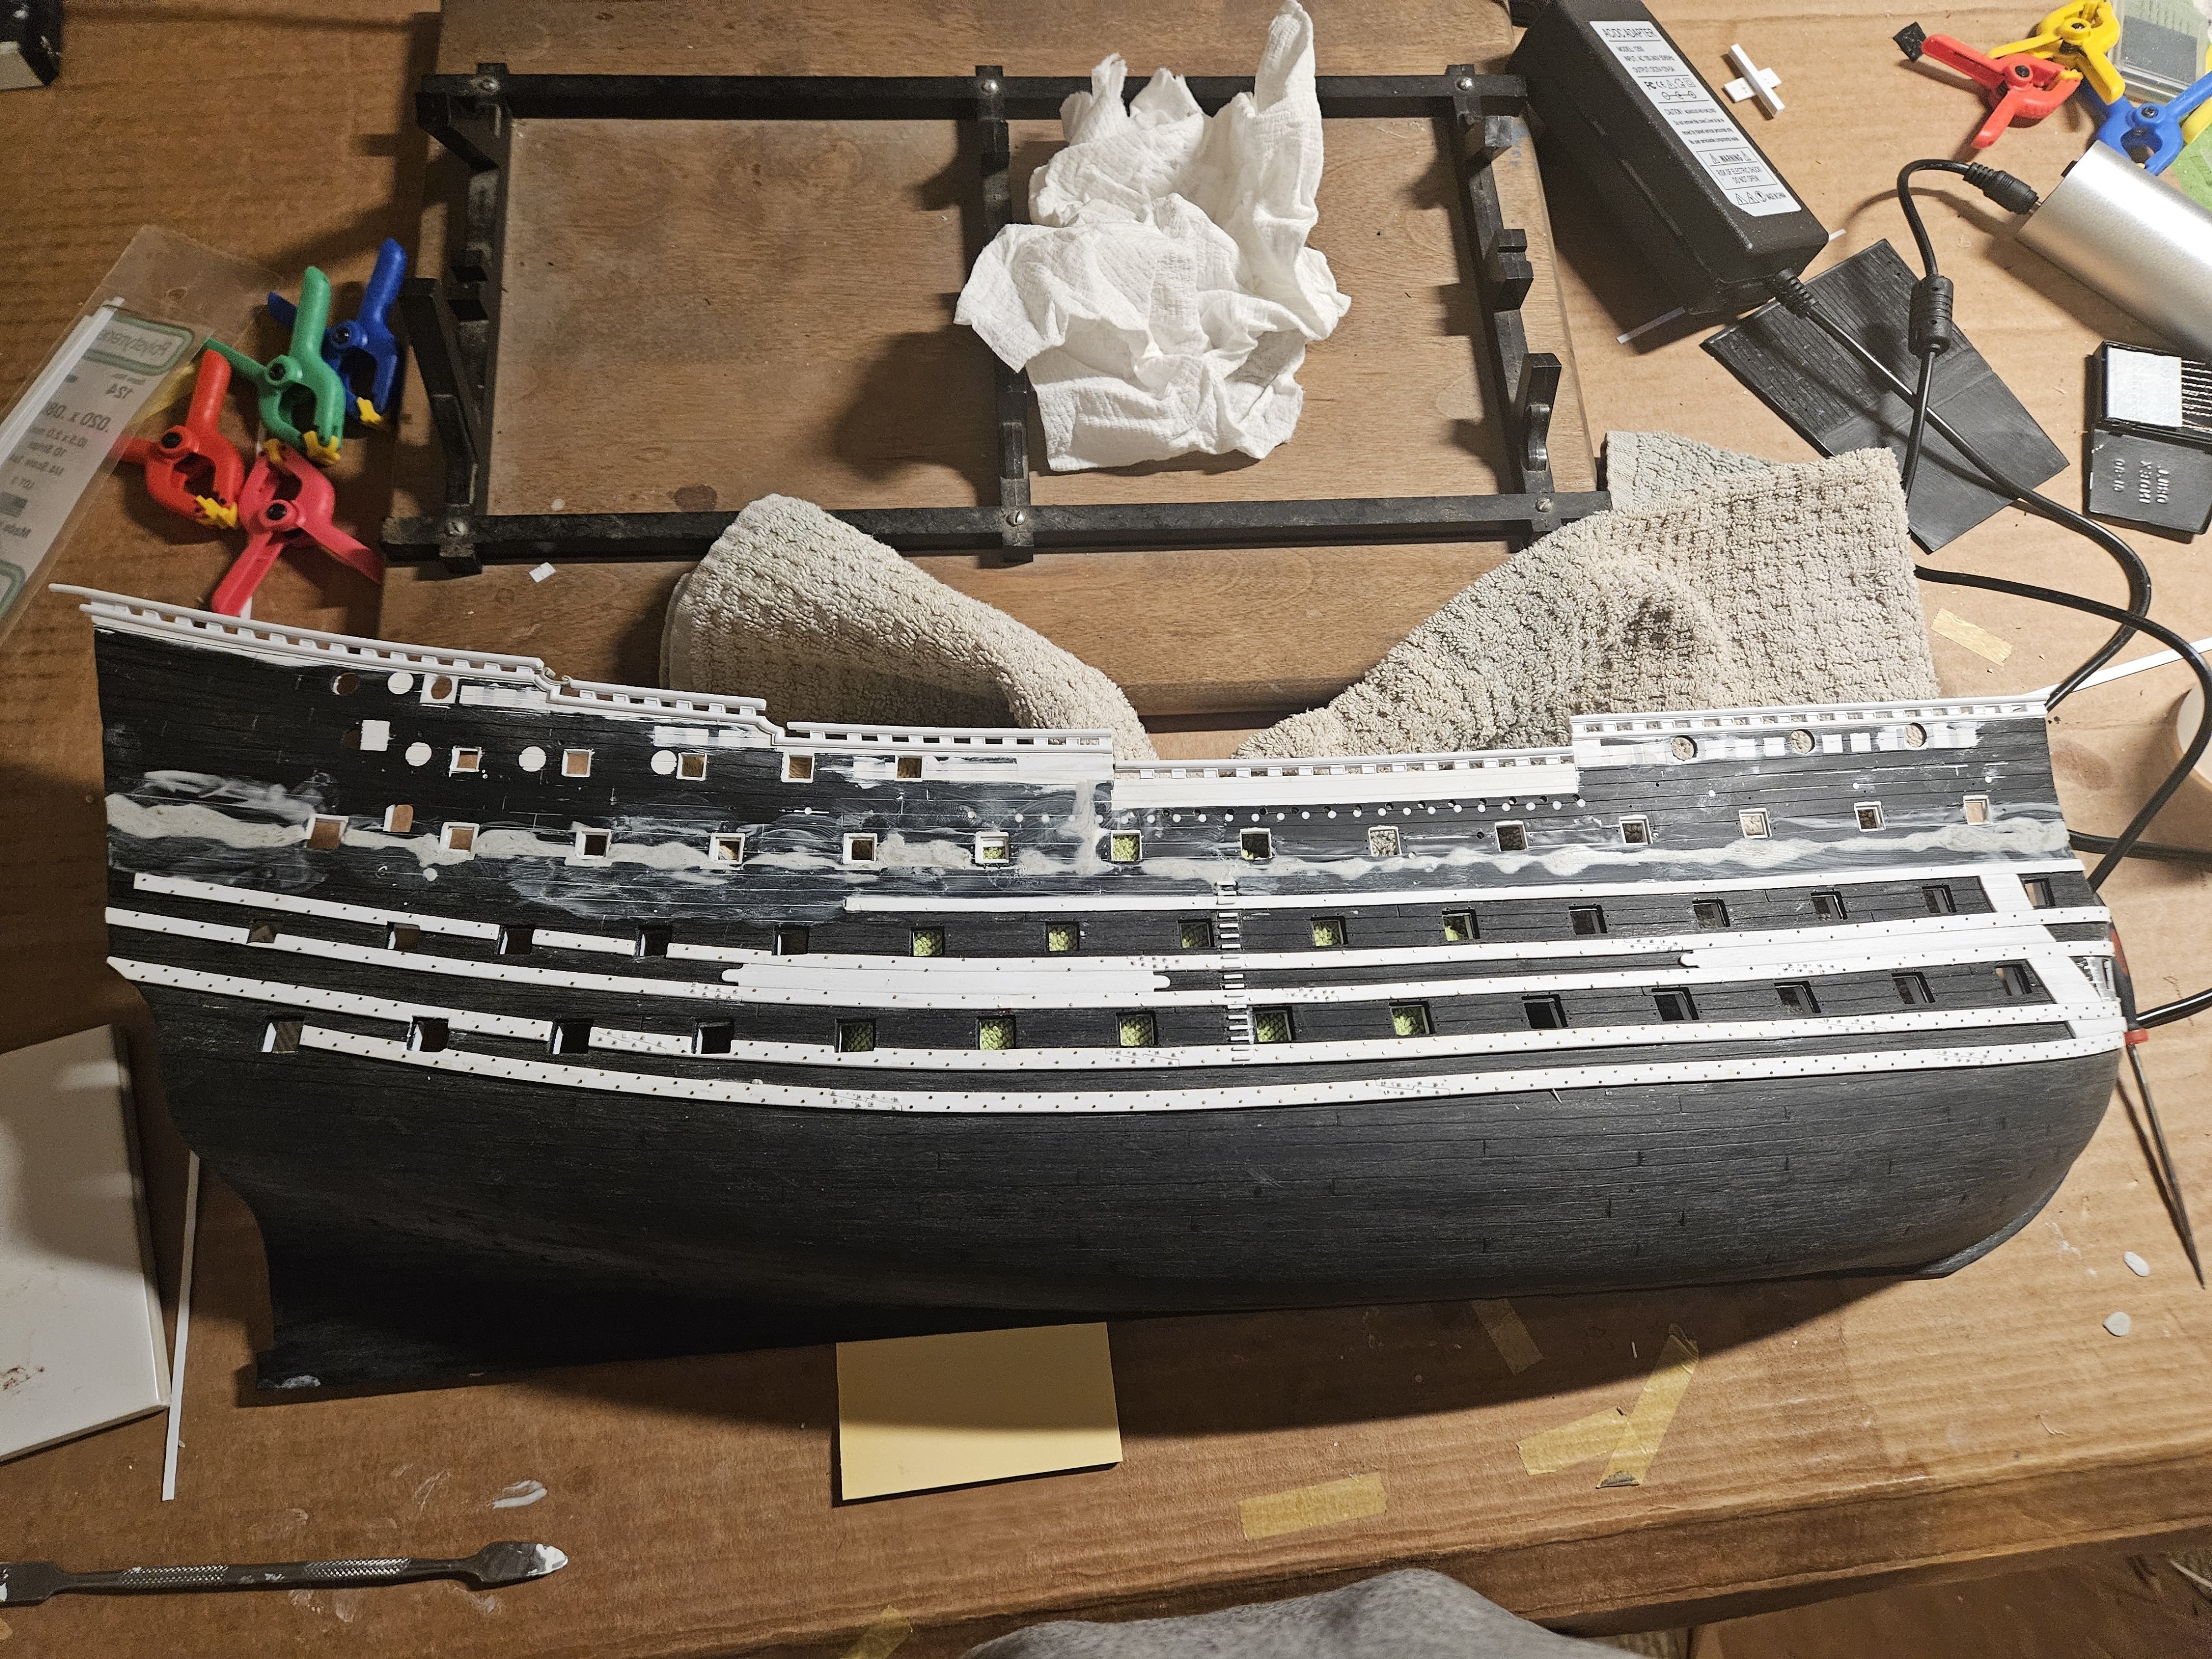
College soccer is done and outdoor preparations for winter are complete... so finally a lot more time is available for me to work in the shipyard! The wales and drift rails are complete on the starboard side. The upper wales and bottom drift rail will be covered with a golden listons d' or "rope", but the upper drift rail will be plain, so I am using bolts on the upper drift rail as I did on the lower and middle wales. I used 0.5mm (.020") diameter bolt heads on the lower/middle wales, so I used 0.3mm (0.012") diameter bolt heads on the top drift rail. I also fabricated new fenders and am ready to glue them in place... fortunately I remembered to make them a bit more proud than the listons d' or rope will be. That leaves the outside ladder steps/rail to be completed. So after the port side is completed in several days, I am on the verge of being able to paint the hull halves.


- 432 replies
-
- 5
-
-
-
- soleil royal
- Heller
- (and 1 more)
-
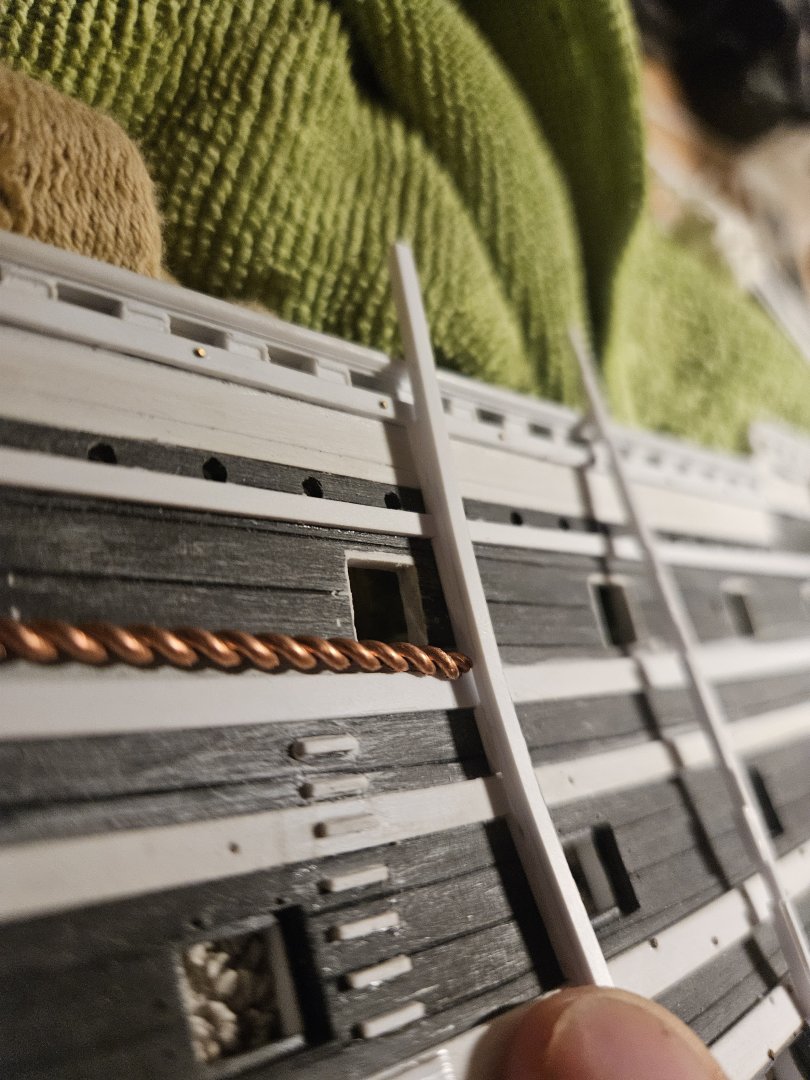
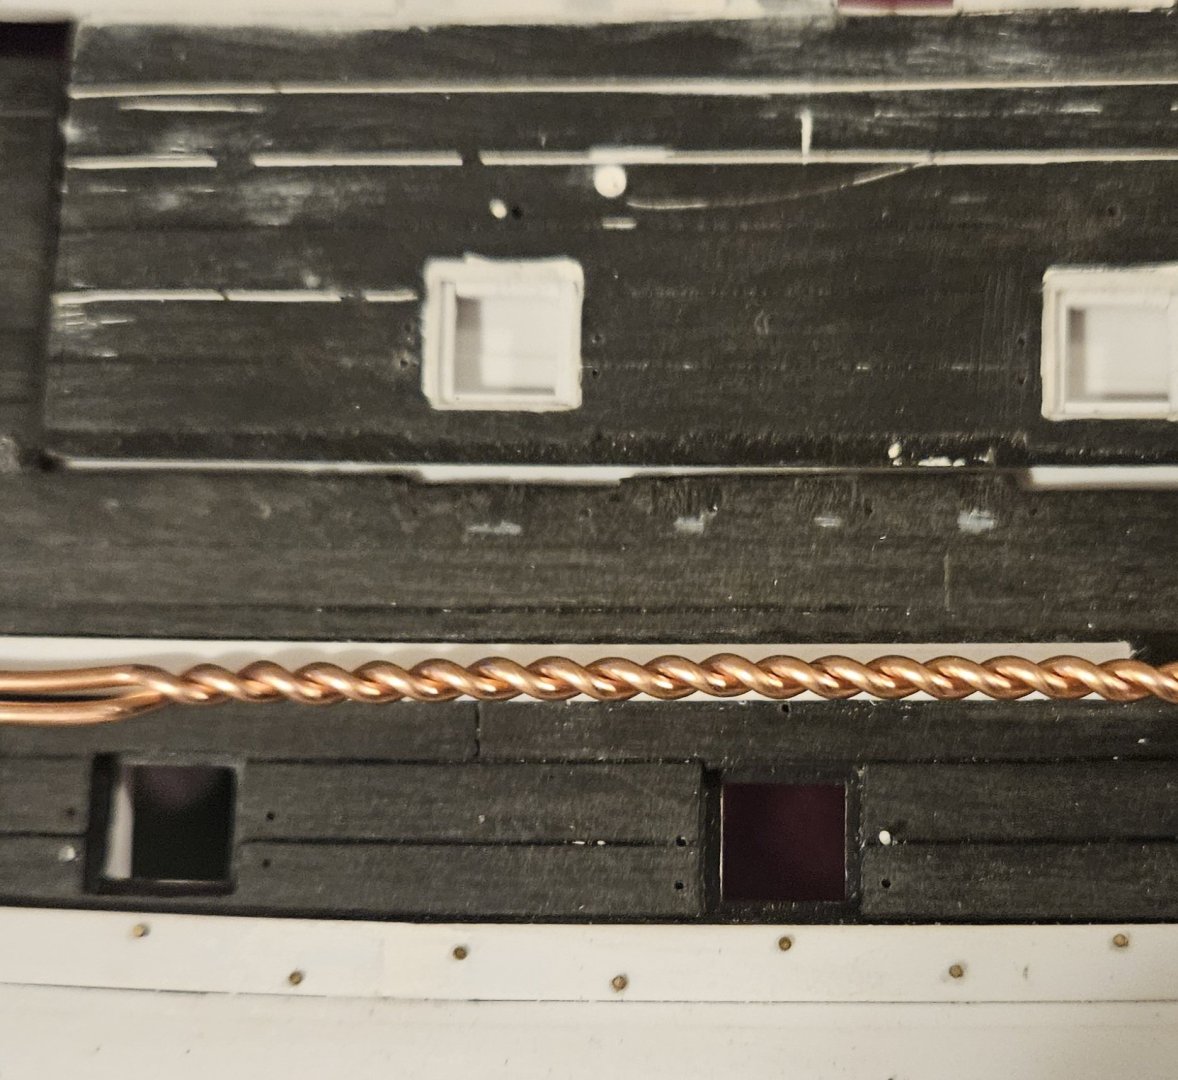
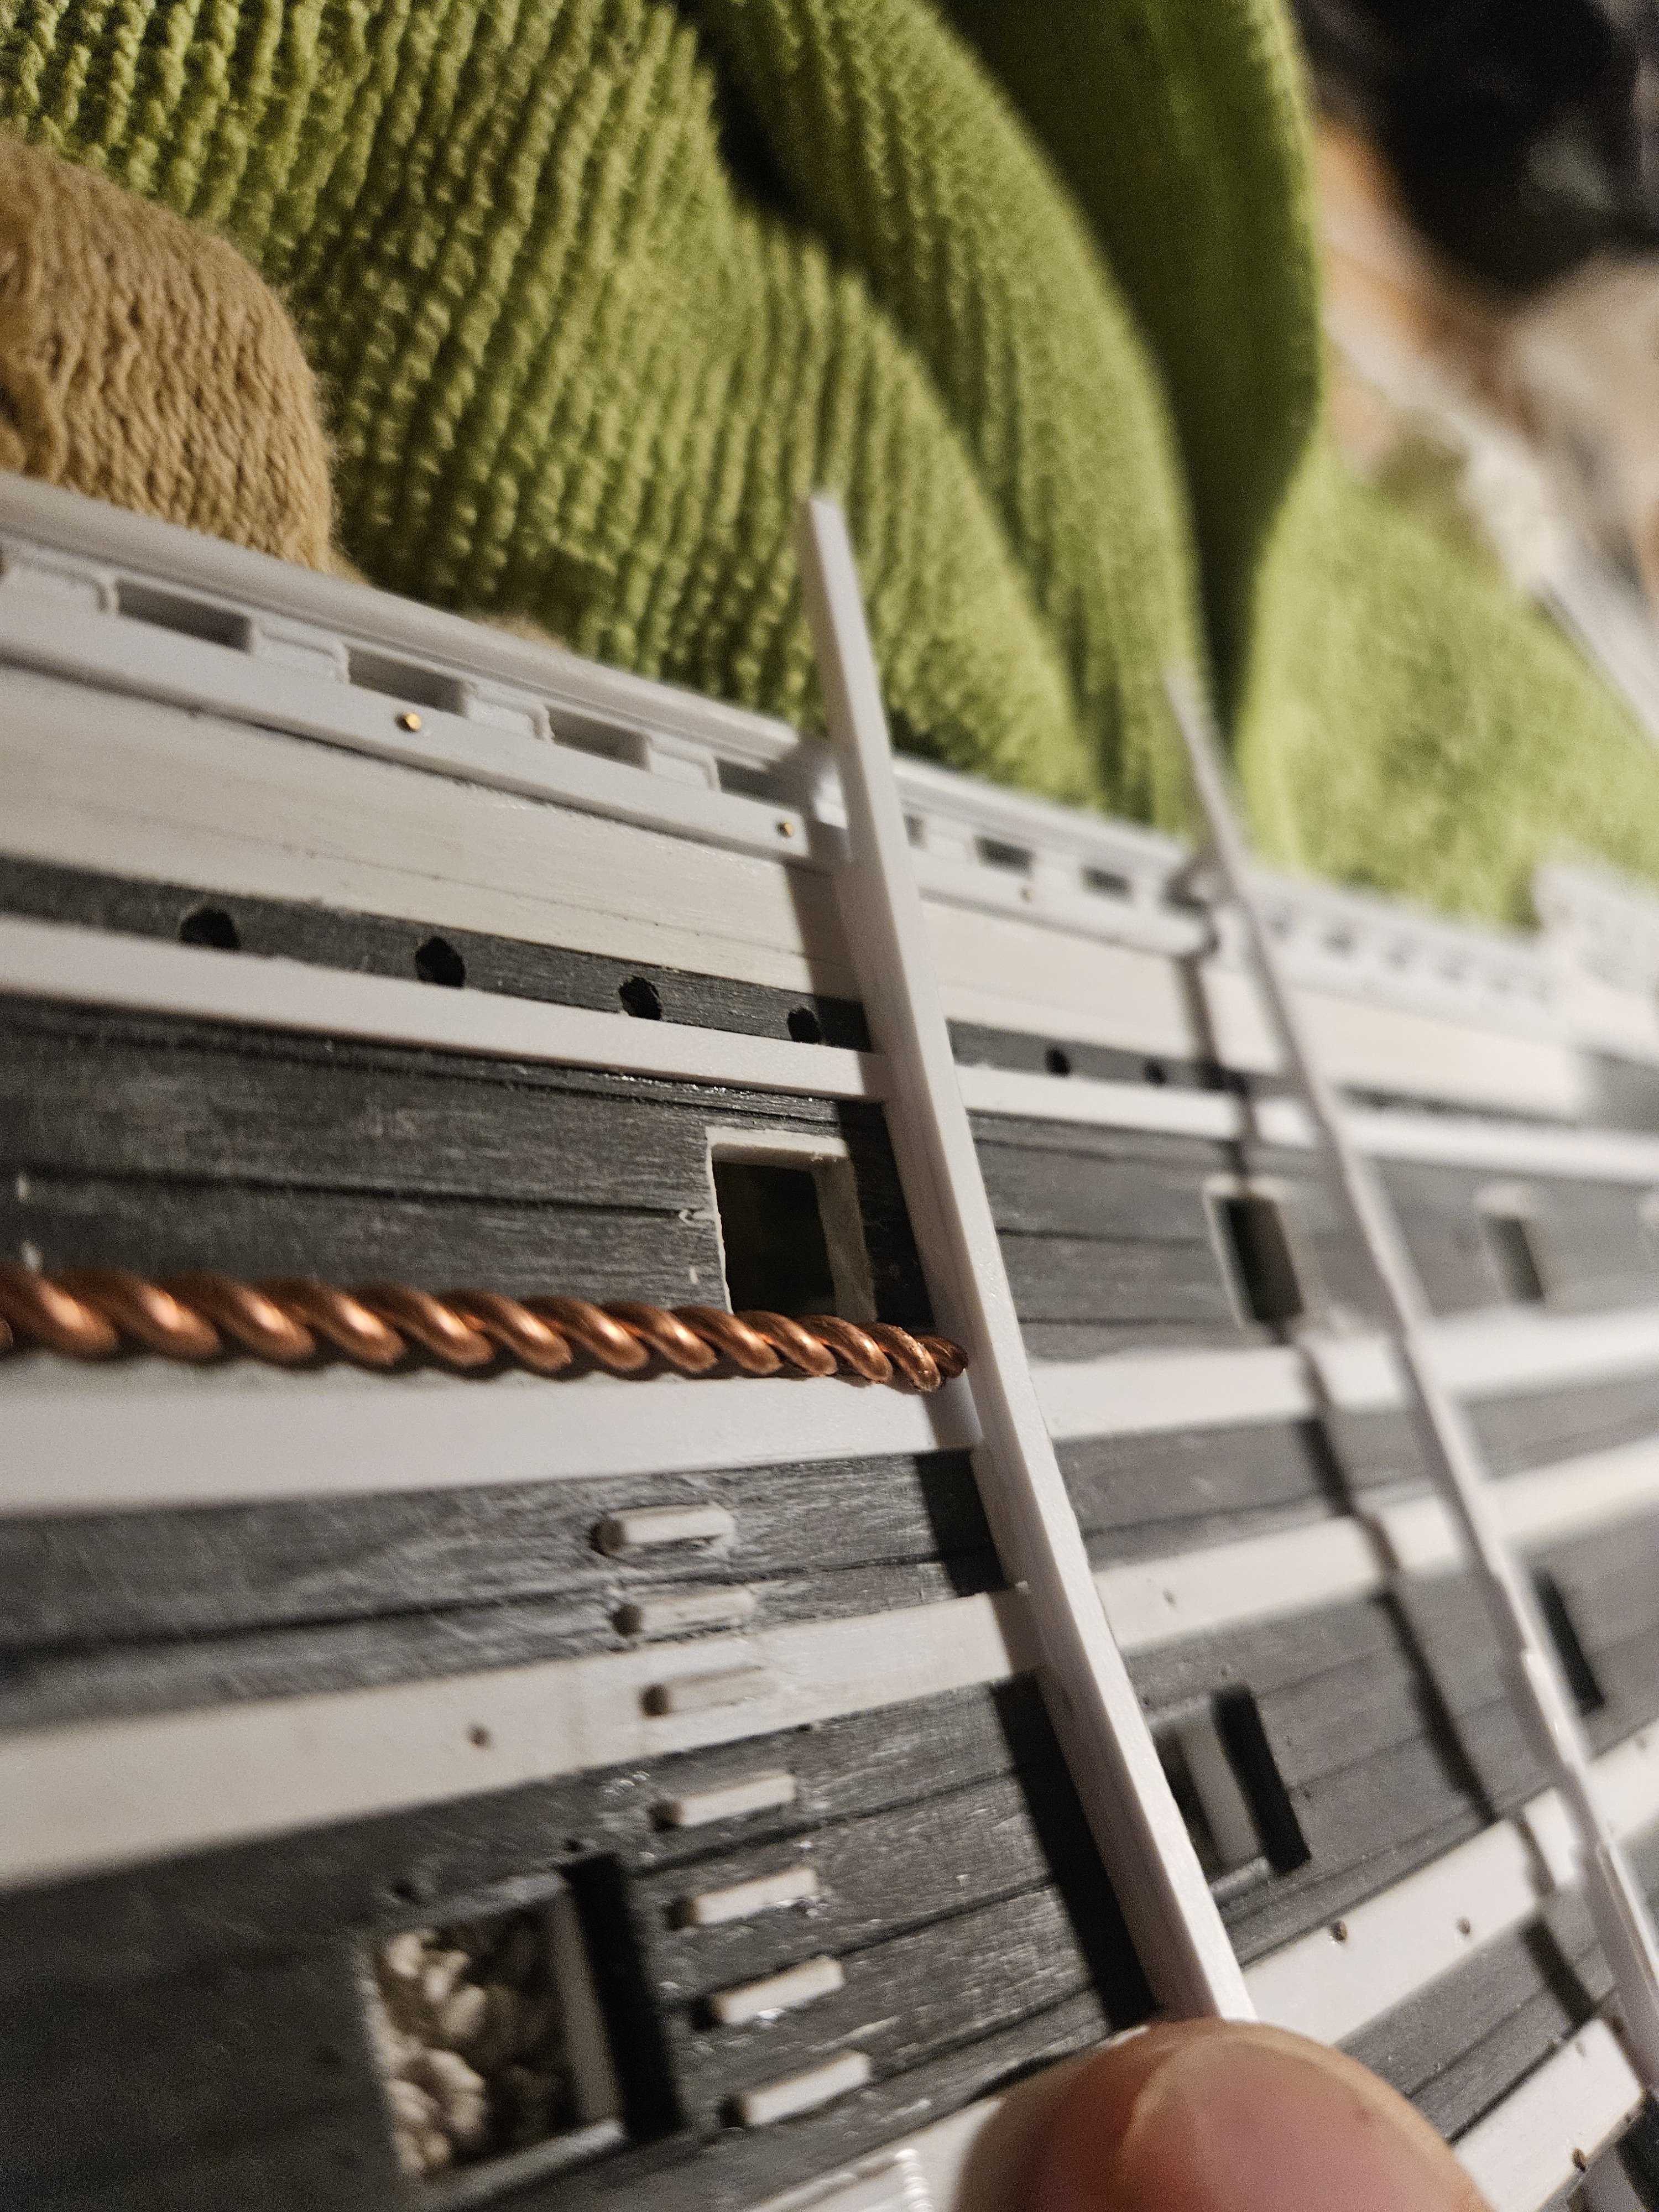
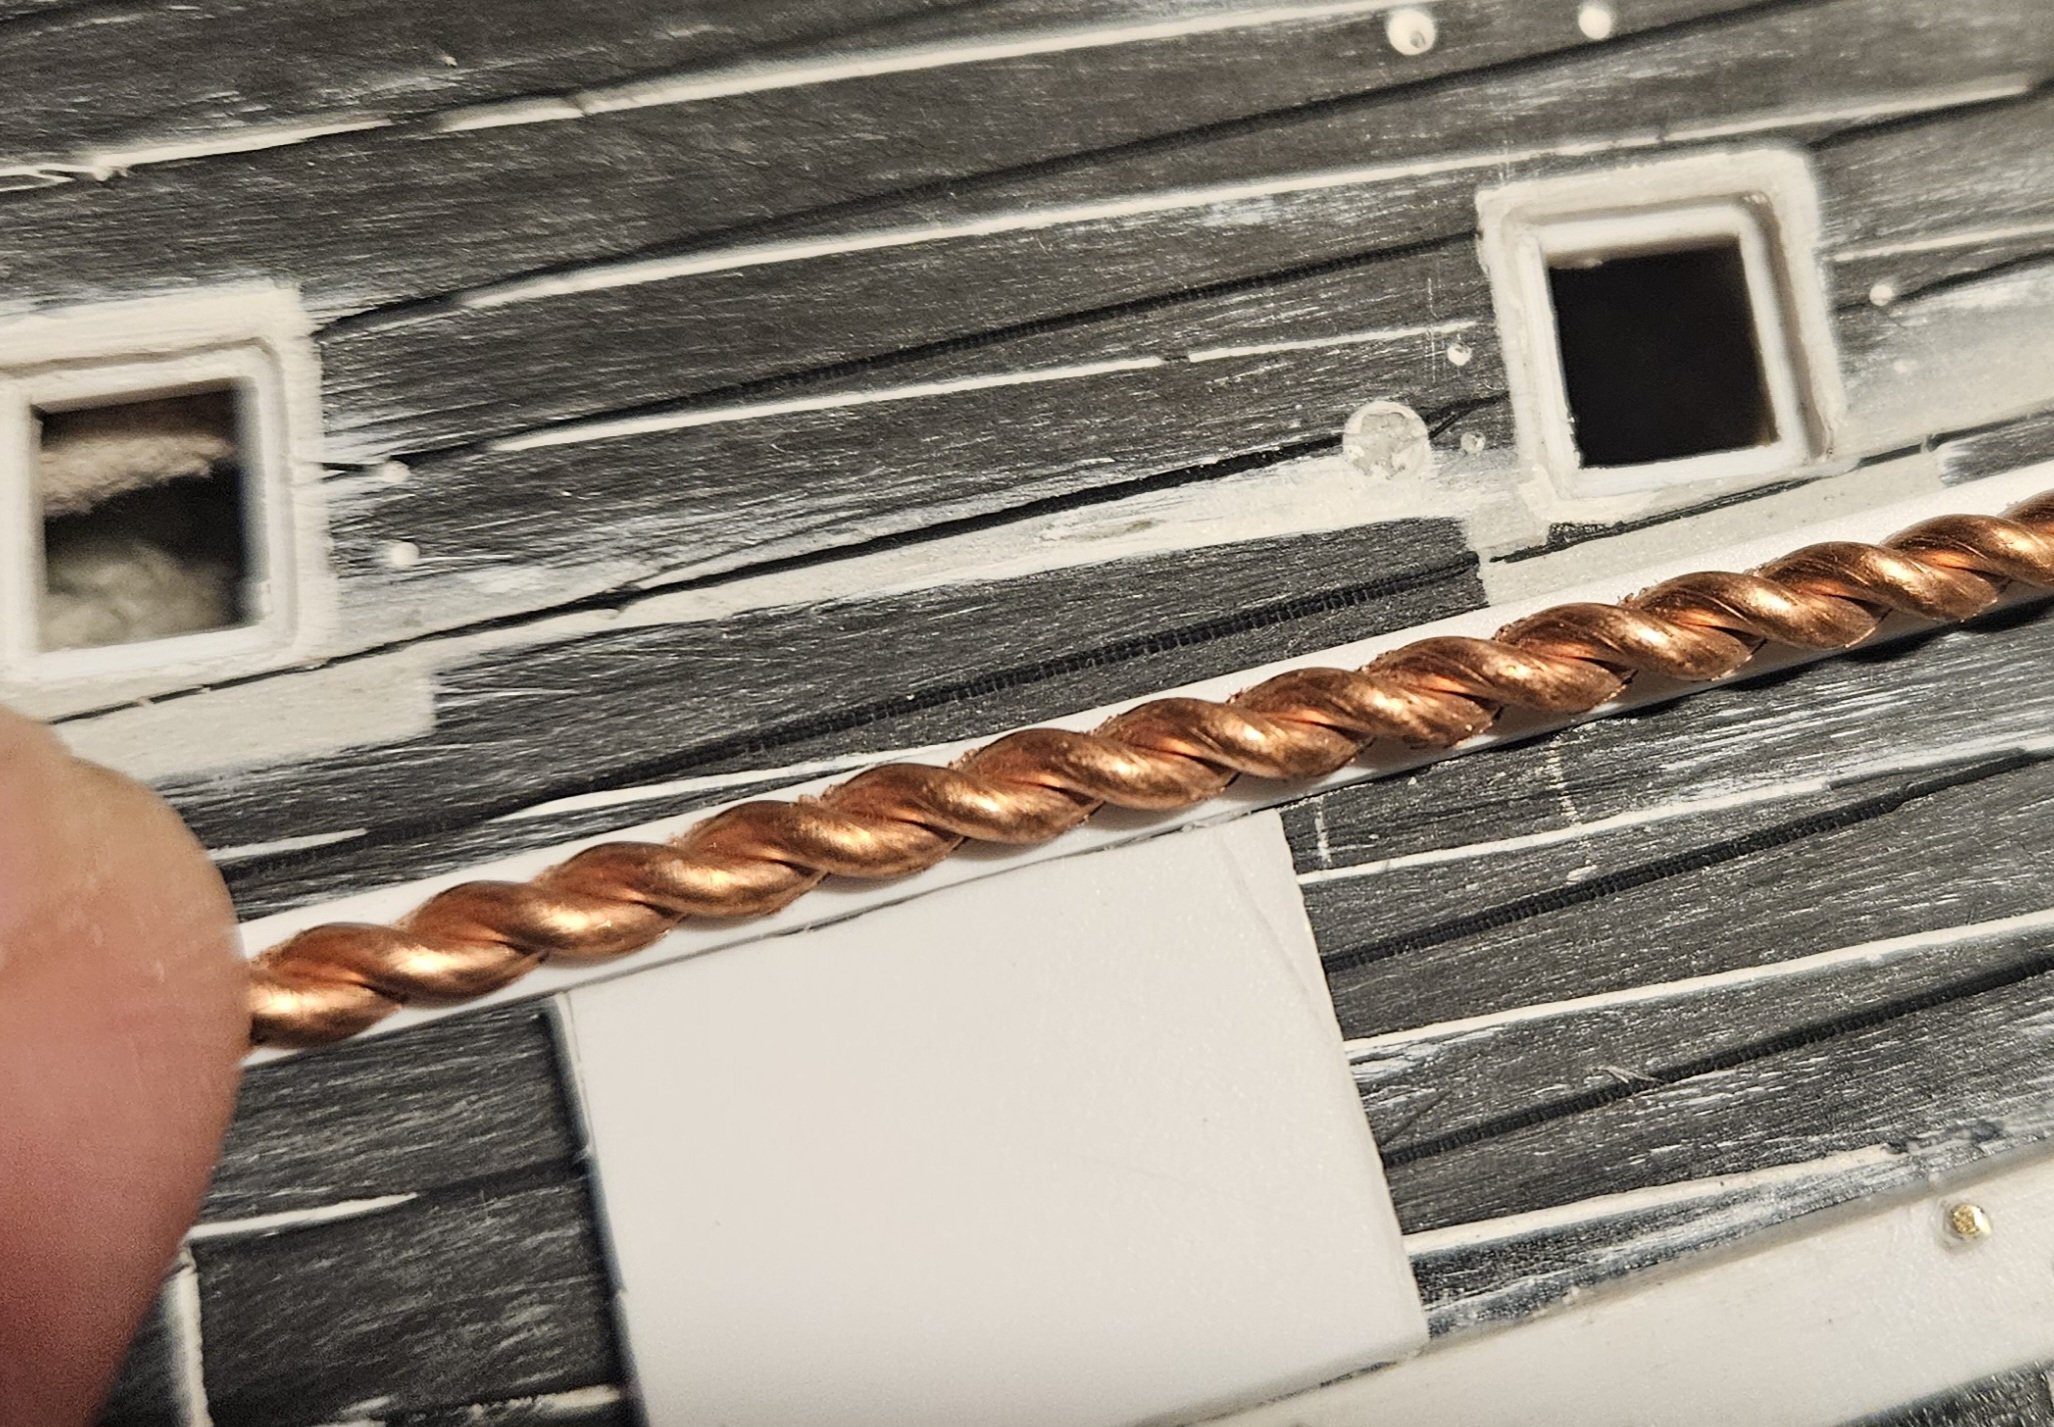
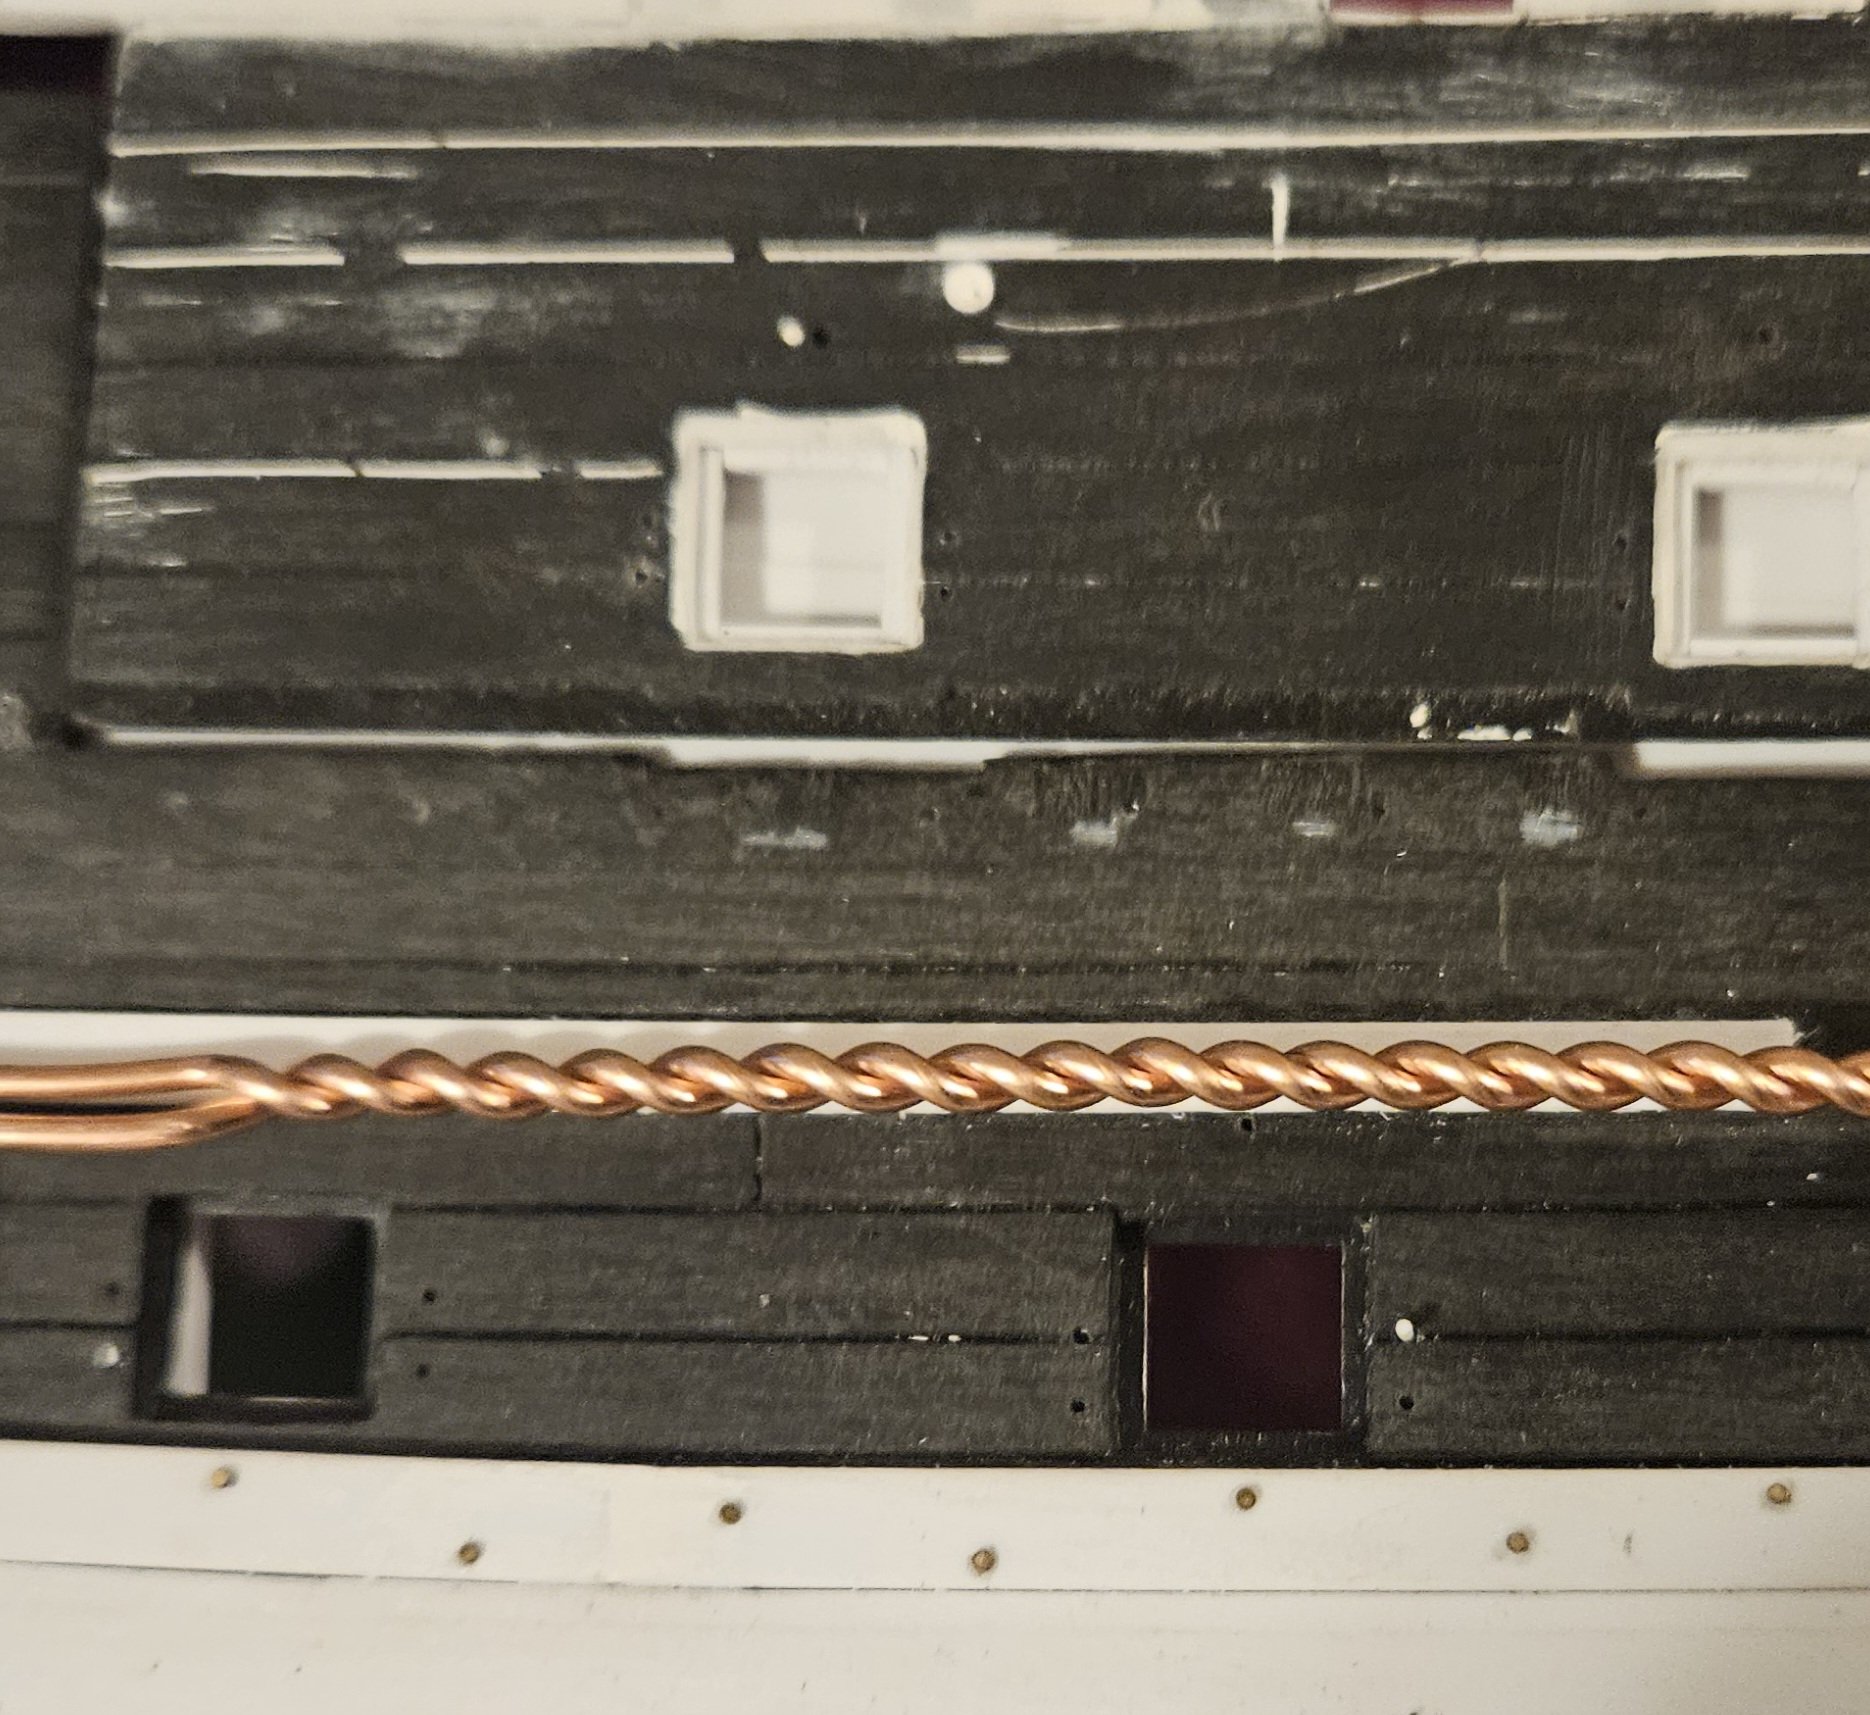
Well, that wasn't too painful! After Marc's observation that, in actual practice, the sheer of the hull planking would have aligned with the sheer of the wales... I had to fix it. Perhaps hard to see, but it should be much easier to see after painting and a wash coat. Of course, I have some touching up to do... Now to affix the upper wales to the port side. It was actully very easy to do, as once I got the lower bottom wale on ages ago, that became my guide. I just cut little spacer blocks to maintain the desired seperation between the wales, just by sliding the block back and forth and then clamping the wale in place. And I finally got a sample listons d'or available to see how it fits. The listons d' or is two 16 gauge copper wires twisted together so the diameter is 0.090"; then the wire is laid in a channel created by wood strips 0.055" high. A couple of passes with a belt sander results in a flat side and a rope that is now almost half its orginal thickness. As per Marc (Hubac's Historian) and GuyM, when laid on a wale, the goal is to have it appear that the gilded rope was carved down right out of the wale strip.


- 432 replies
-
- 3
-
-
- soleil royal
- Heller
- (and 1 more)
-
Thanks, Ian! Not sure about the brave part, though... maybe... "not aware of what I got myself into"!
- 432 replies
-
- 2
-

-
- soleil royal
- Heller
- (and 1 more)
-
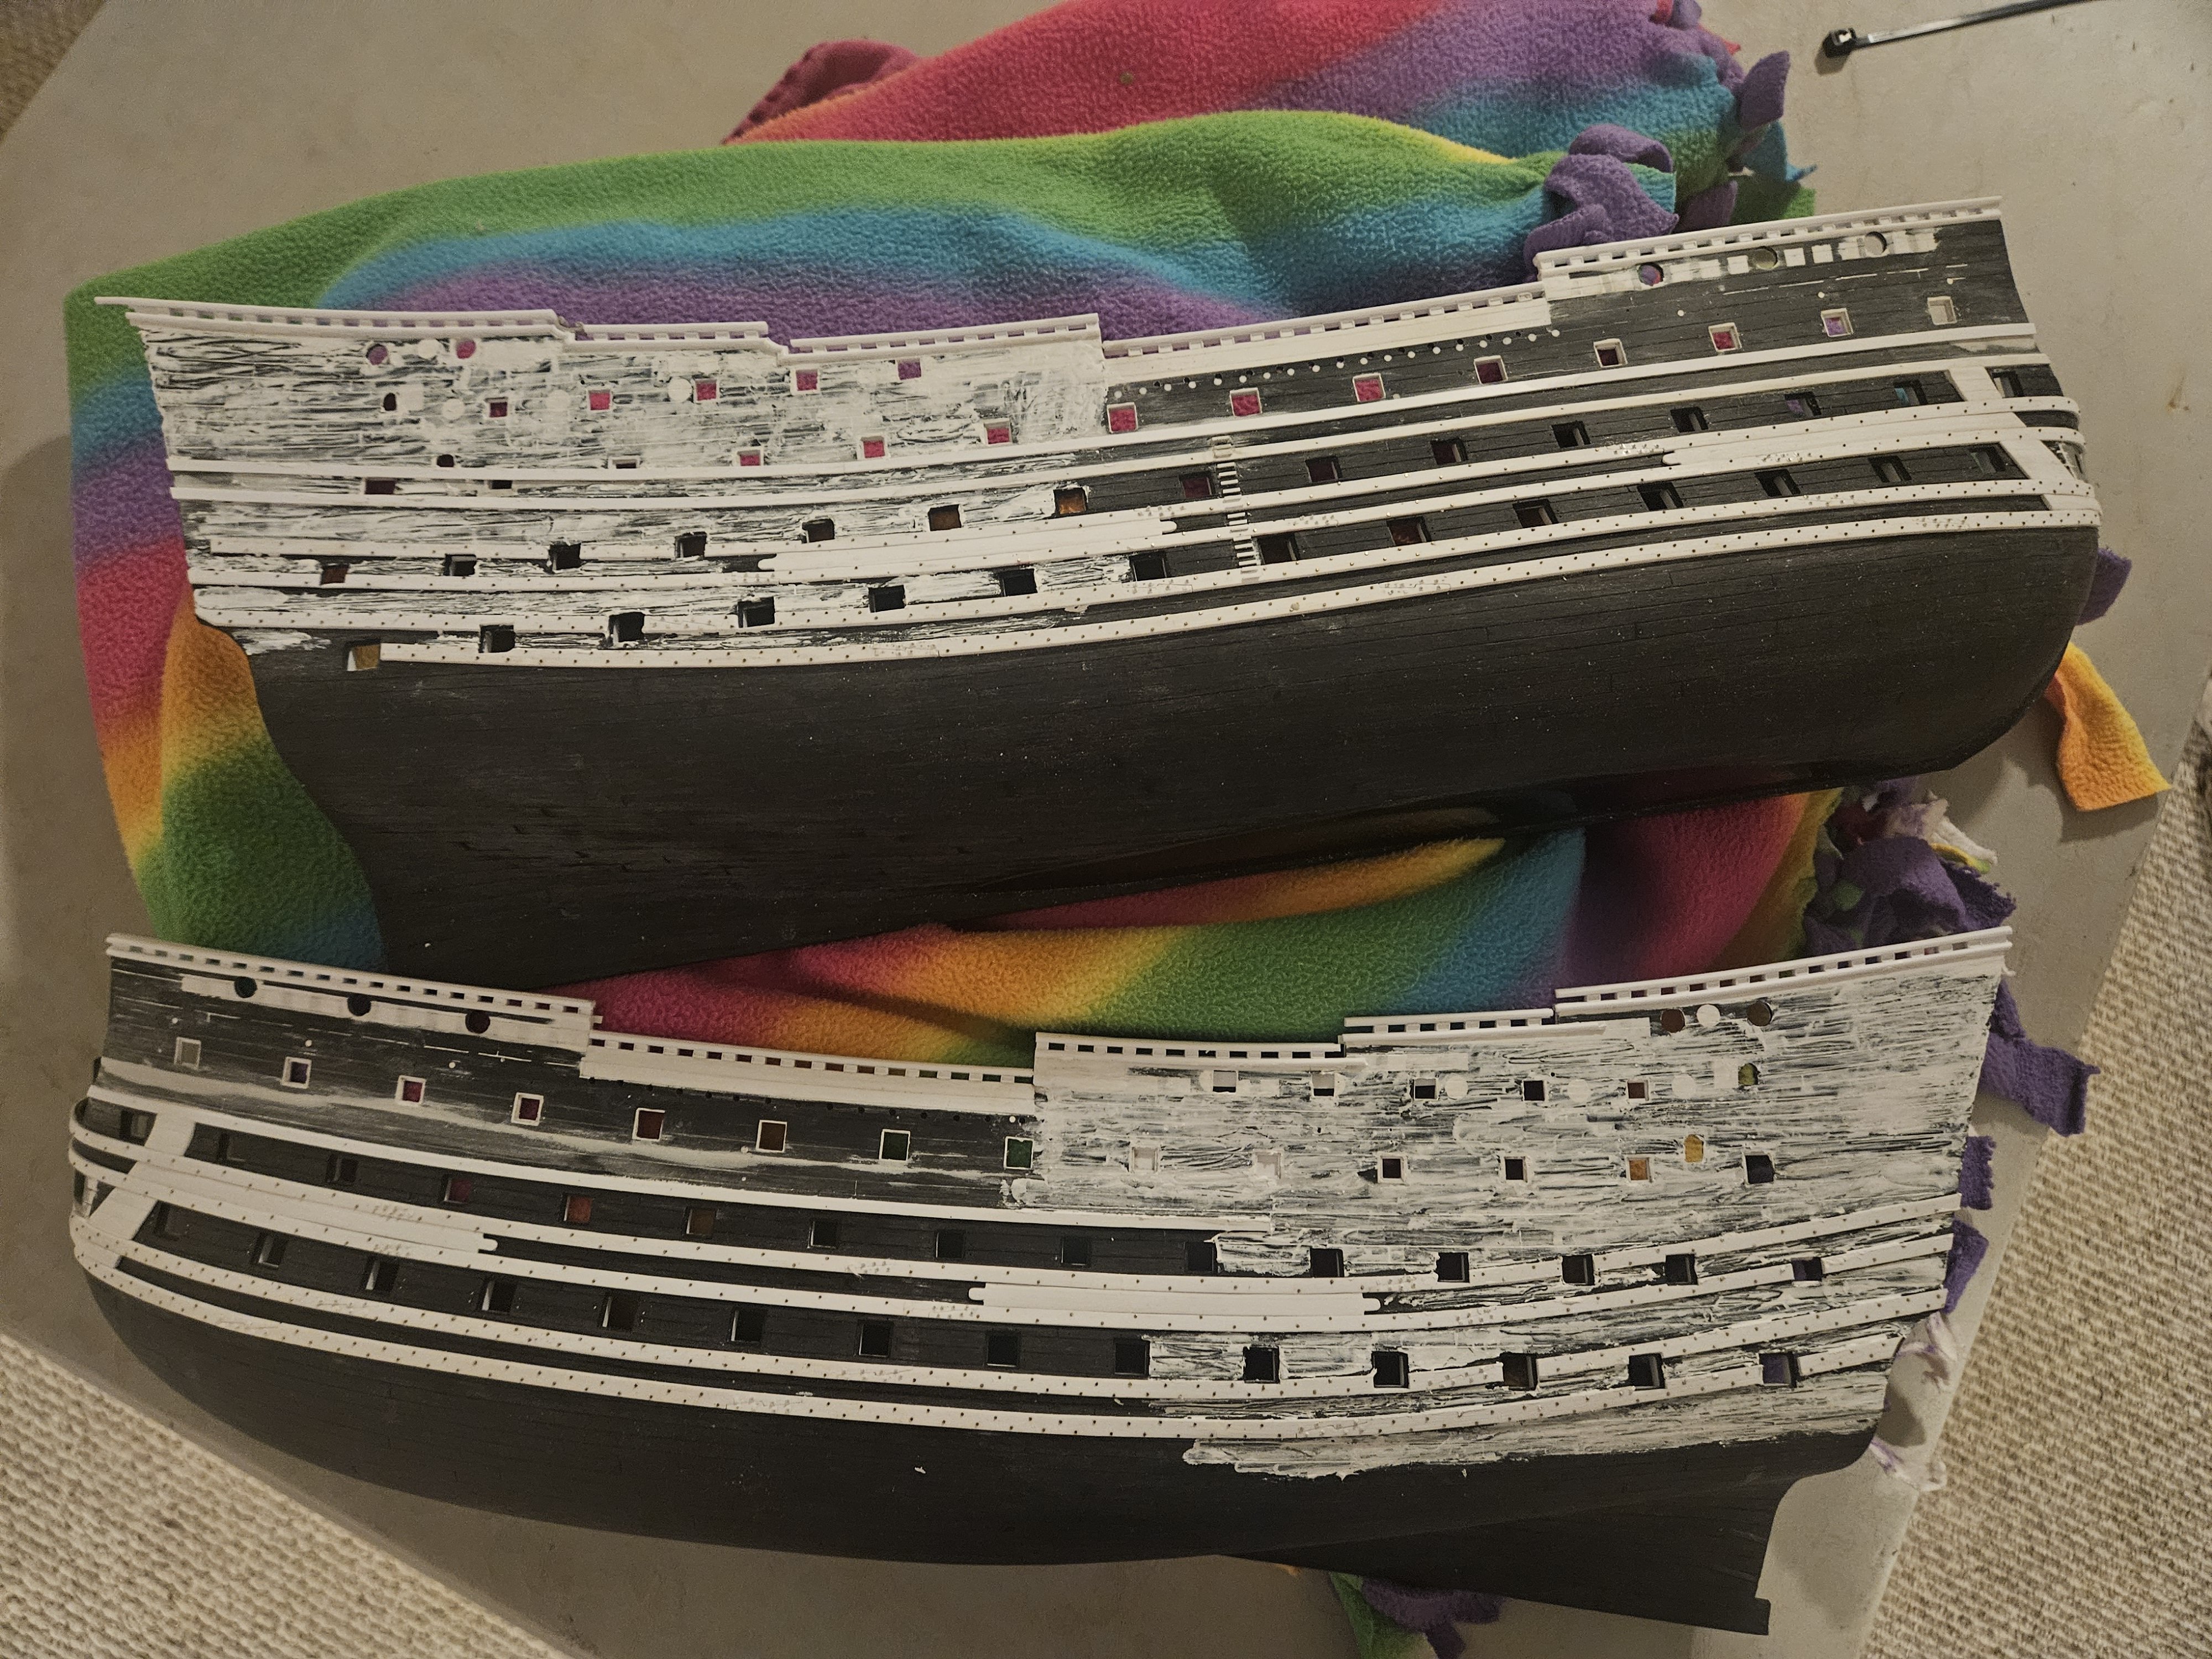
Well, Marc... I agree with you regarding the plank lines. The photo below from your Pinterest site clearly shows the plank lines match trhe sheer lines of the wales. I have come too far on this 1671 SR path to ignore an inaccuracy like this. So with a little bit of Tamiya putty... The good news is that there really is no issue at the bow or amidships. My "new" wales start to sheer up closer to the stern. Now, after light sanding and the rescribing, the hull truly will look like Frankenstein's Monster, but nothing that some primer and the eventual paint scheme won't cover up.

- 432 replies
-
- 4
-
-
- soleil royal
- Heller
- (and 1 more)
-
Regarding the underwater paint scheme for White Stuff.... I have imagined that to be a gooey mess that is smeared on. Would that have the effect of hiding the underwater plank lines?
-
Marc, as usual, I really appreciate any and all of your comments! Hmmm... you have given me something to think about with the planking... I have been dissatisfied with enough of my initial efforts that removing them and starting over - 2-3-4 times! - is commonplace. Thanks for the observation on gilding, as that is just one of the many things that are in my mind!
-
The front/rear bulwarks are glued on... Apoxie Sculpt makes a rock hard bond! Zip ties and clamps held the port side rear bulwark in place for 24 hours (the last bulwark to be attached). As the port side glue bonds dried, I affixed the upper wales on the starboard side, at 3.2mm wide, thinner than the middle and lower wales, and only 0.75mm thick to allow the listons d'or to be attached and seem to be carved out of the wale strip. The listons d' or for the upper wales are made from 16 gauge copper wire twisted together to imitate rope; the back side will be sanded on a belt sander almost 1/3 of the way through to make a flat surface for glueing. The starboard side is waiting for the Apoxie Sculpt to dry for light sanding of the bulwark/hull joints. The interior planking of the bulwarks are completed as well.. Finally, before she sits for the next 24 hours to dry, this is an attempt at a waterline photo to show the bulk of the ship above the waves.


- 432 replies
-
- 4
-
-
- soleil royal
- Heller
- (and 1 more)
-
Whew... the starboard bulwarks are glued in. .. thanks to zip ties and clamps. I knew that the the little rabbett available for glueing didn;t offer much structural support, so I made liberal use of Apoxie Sculpt to fill the inside gaps... I am also using small tabs affixed with CVA glue as well. After 48 hours of curing, the hull/bulwarks structure does seem much more rigid. I will have a lot of gentle sanding to do on the exterior. Note this large gap, into which I push a thread of Apoxie Sculpt. I then apply several drops of the Apoxie Sculpt solvent and gently rub, so the the Apoxie Sculpt becomes almost watery and it spreads out very well. The first half of the gap, from the waist to the bow, will be covered by one of the upper wales. However, the upper wales will sheer upward as it approaches the stern to match the lower and middle wales, so I have to fill/level the gap as best I can. This may take several iterations of Apoxie Sculpt before I am satisfied that the gap is levelled out. I won't touch the port side bulwarks until I learn from the starboard side; dry fitting shows that the port side bulwark fit is tighter, though, Glueing the bulwarks on at this stage initially seemed intimidating, but after a lot of thinking and reviewing the many other builds out there, I was able to lay out a sequential plan, andf then just execute the plan. I am sure that there will be plenty of "I didn't think of that!" down the road, but I will just deal with those as they arrive.


- 432 replies
-
- 4
-
-
-
- soleil royal
- Heller
- (and 1 more)
-
And.... we are ready to glue the upper bulwarks in! Cap rails, fighting holes, miscellaneous items are alll done. Some minor things can't be done until the bulwarks are in, such as finishing the interior planking, but the major focus will be on adding the upper wales with listons d' or. I have a several day wait for some spring clamps that I ordered online to arrive. I could not - even at the local box stores - find any clamps that had a minimum 4" long neck to fit over the bulwarks. They should be here on Monday... fingers crossed. In the mean time, I continue to puzzle over how to "finish" the top of the steps on the side of the hull. I will not have a gangway deck at the waist, so I may well have to somehow add a ladder on the interior. But, I have seen some drawings of Dutch ships that actually have a hinged door at the top of the bulwark at the waist, cap rails included on the door.
.thumb.jpg.743cfe2e2f592bb2d4ccfc75ab94c5cb.jpg)


- 432 replies
-
- 6
-
-
-
- soleil royal
- Heller
- (and 1 more)
-
Marc.. I never thought of it that way... "In reality, though, it’s just a long series of mini-builds that aggregate into the finished thing"... but that sums it up in one sentence!
- 432 replies
-
- 1
-
-
- soleil royal
- Heller
- (and 1 more)
-
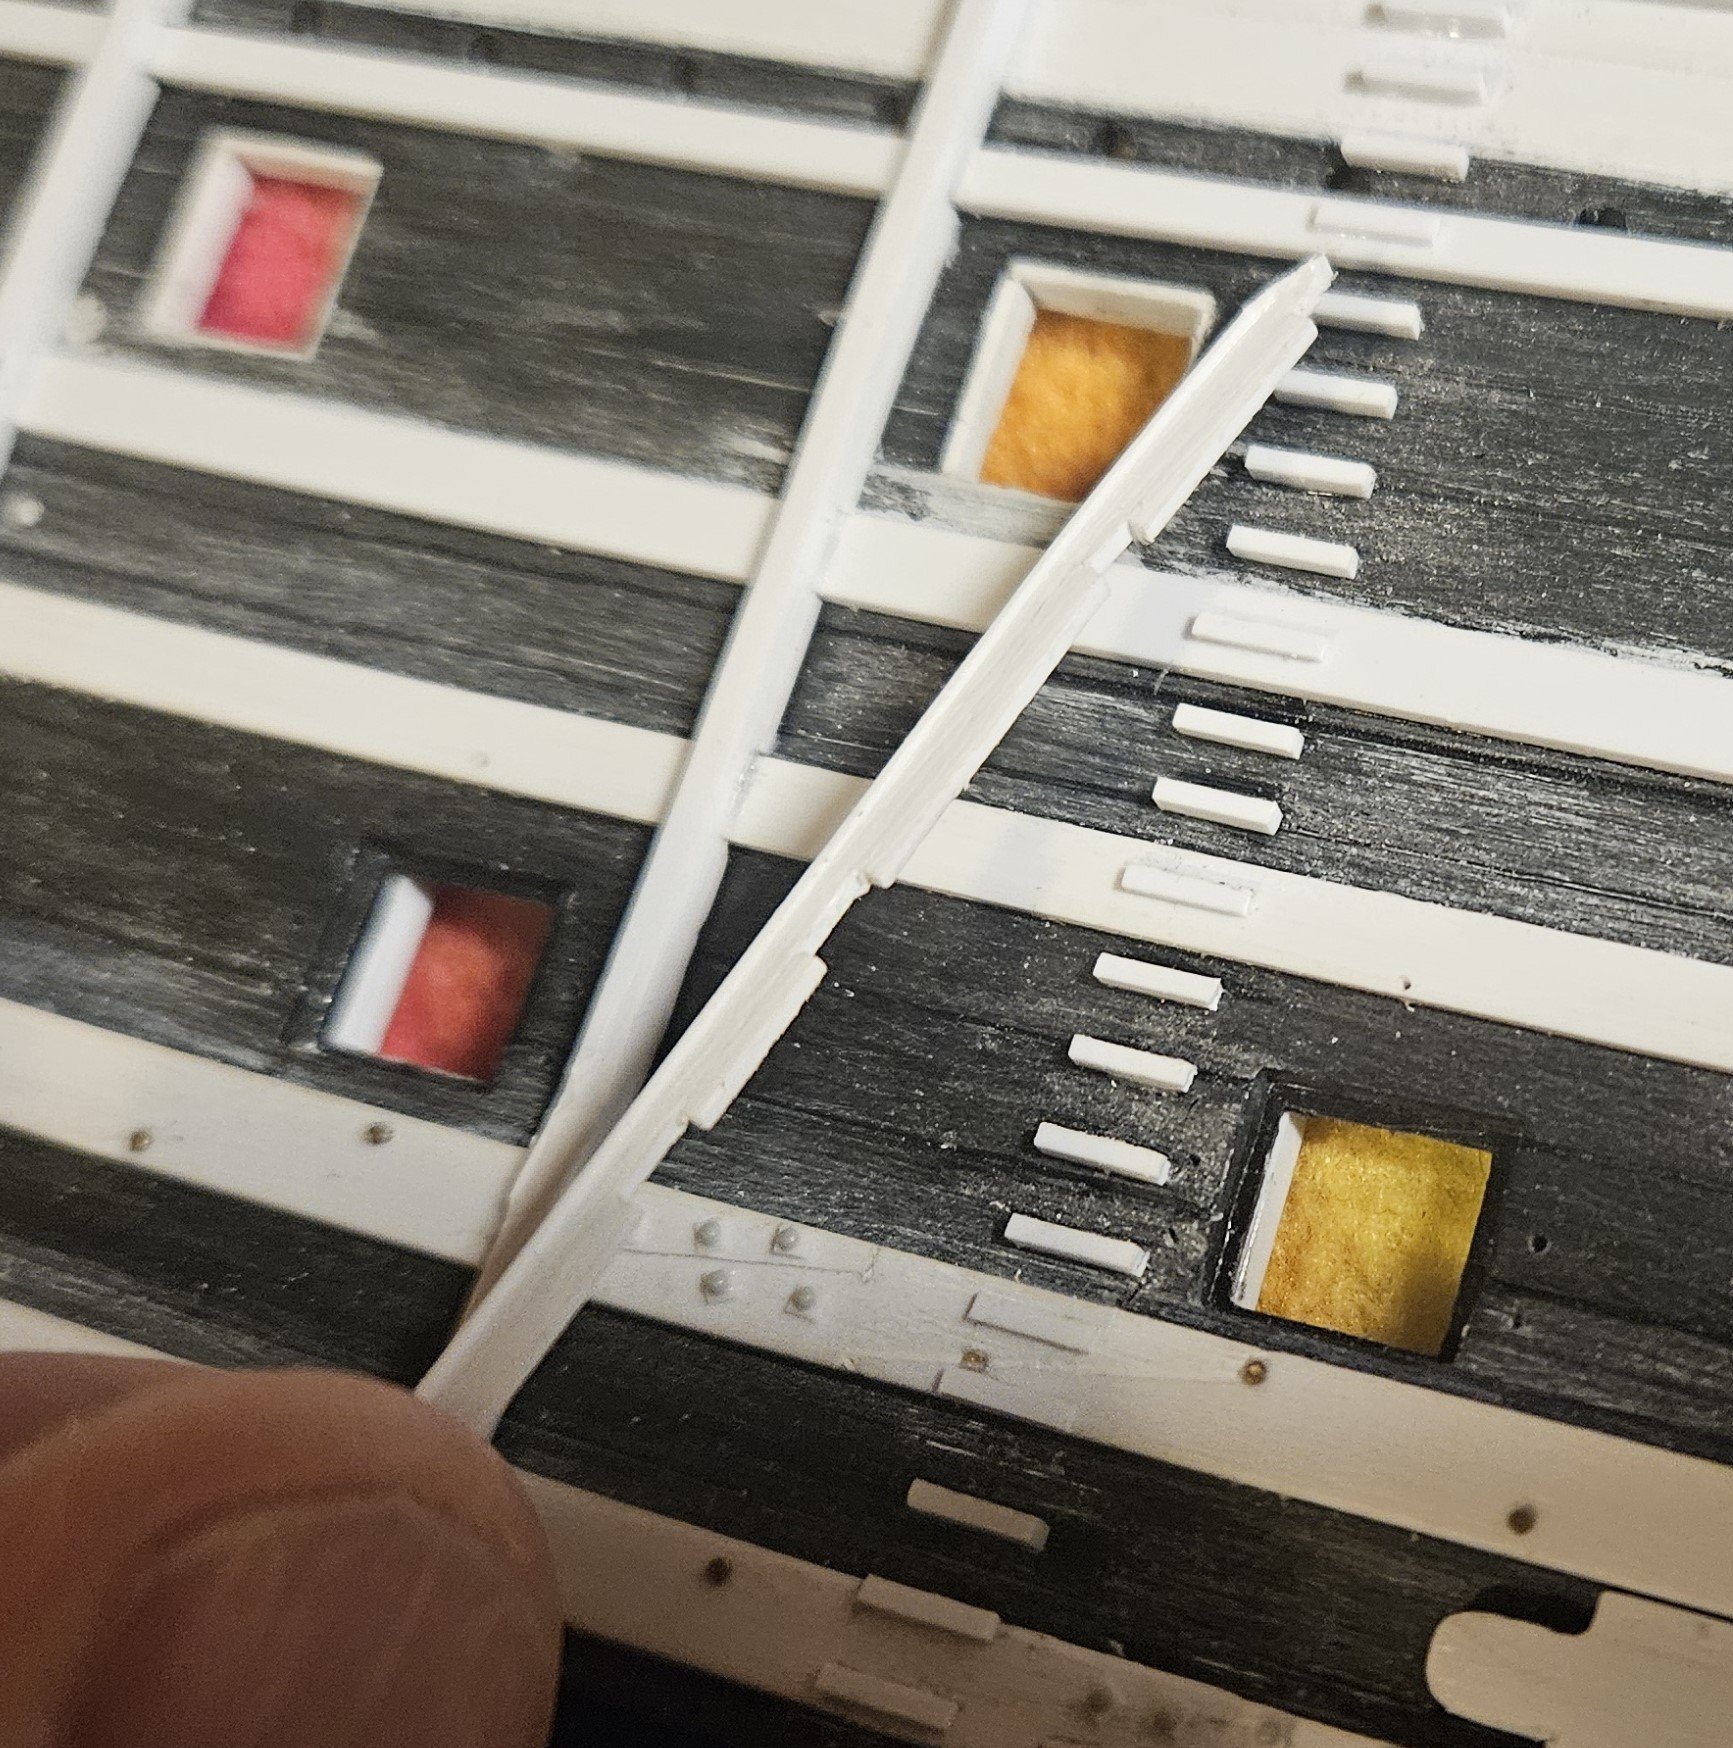
Finally... the port side is almost caught up with the starboard side (getting 3 hours of work every morning this week by waking at 5AM!). I had to finish the scarf joint through bolts and then the wale "bolts" on the port hull (tiny little round head nails that I found online). Then it was on the putting the timberheads on the sheer rails. Honestly, when I first saw how Marc (Hubac's Historian) did this several years ago and how he had to patiently account for the sheer step at every timberhead... I dreaded reaching that point in my build. However, I can honestly say it was so much easier to do than I thought. I would have absolutely no problem adding this detail again. Part of it may be the "Chopper"... it makes very nice, consistent cuts in the polystyrene. I made the initial timberheads 7mm in length before gradually cutting/sanding them down to 2.5mm in height; starting with 7mm made it very easy to use my laser level to ensure the timberheads were always plumb. Then I used 0.5mm thick stock to make the framing on each timberhead. So I simply have to finish the framing on the timberheads and drill out the fighting holes in the waist; so in 1-2 days, I will be finally in a position to glue in the bulwarks as GuyM has done. Of course, the hull is NOT glued together yet... the bulwarks need to be on to create the upper wales and also to see the area on the rear bulwqrk that I have available to festoon with fluer de lis.


- 432 replies
-
- 4
-
-
-
- soleil royal
- Heller
- (and 1 more)
-
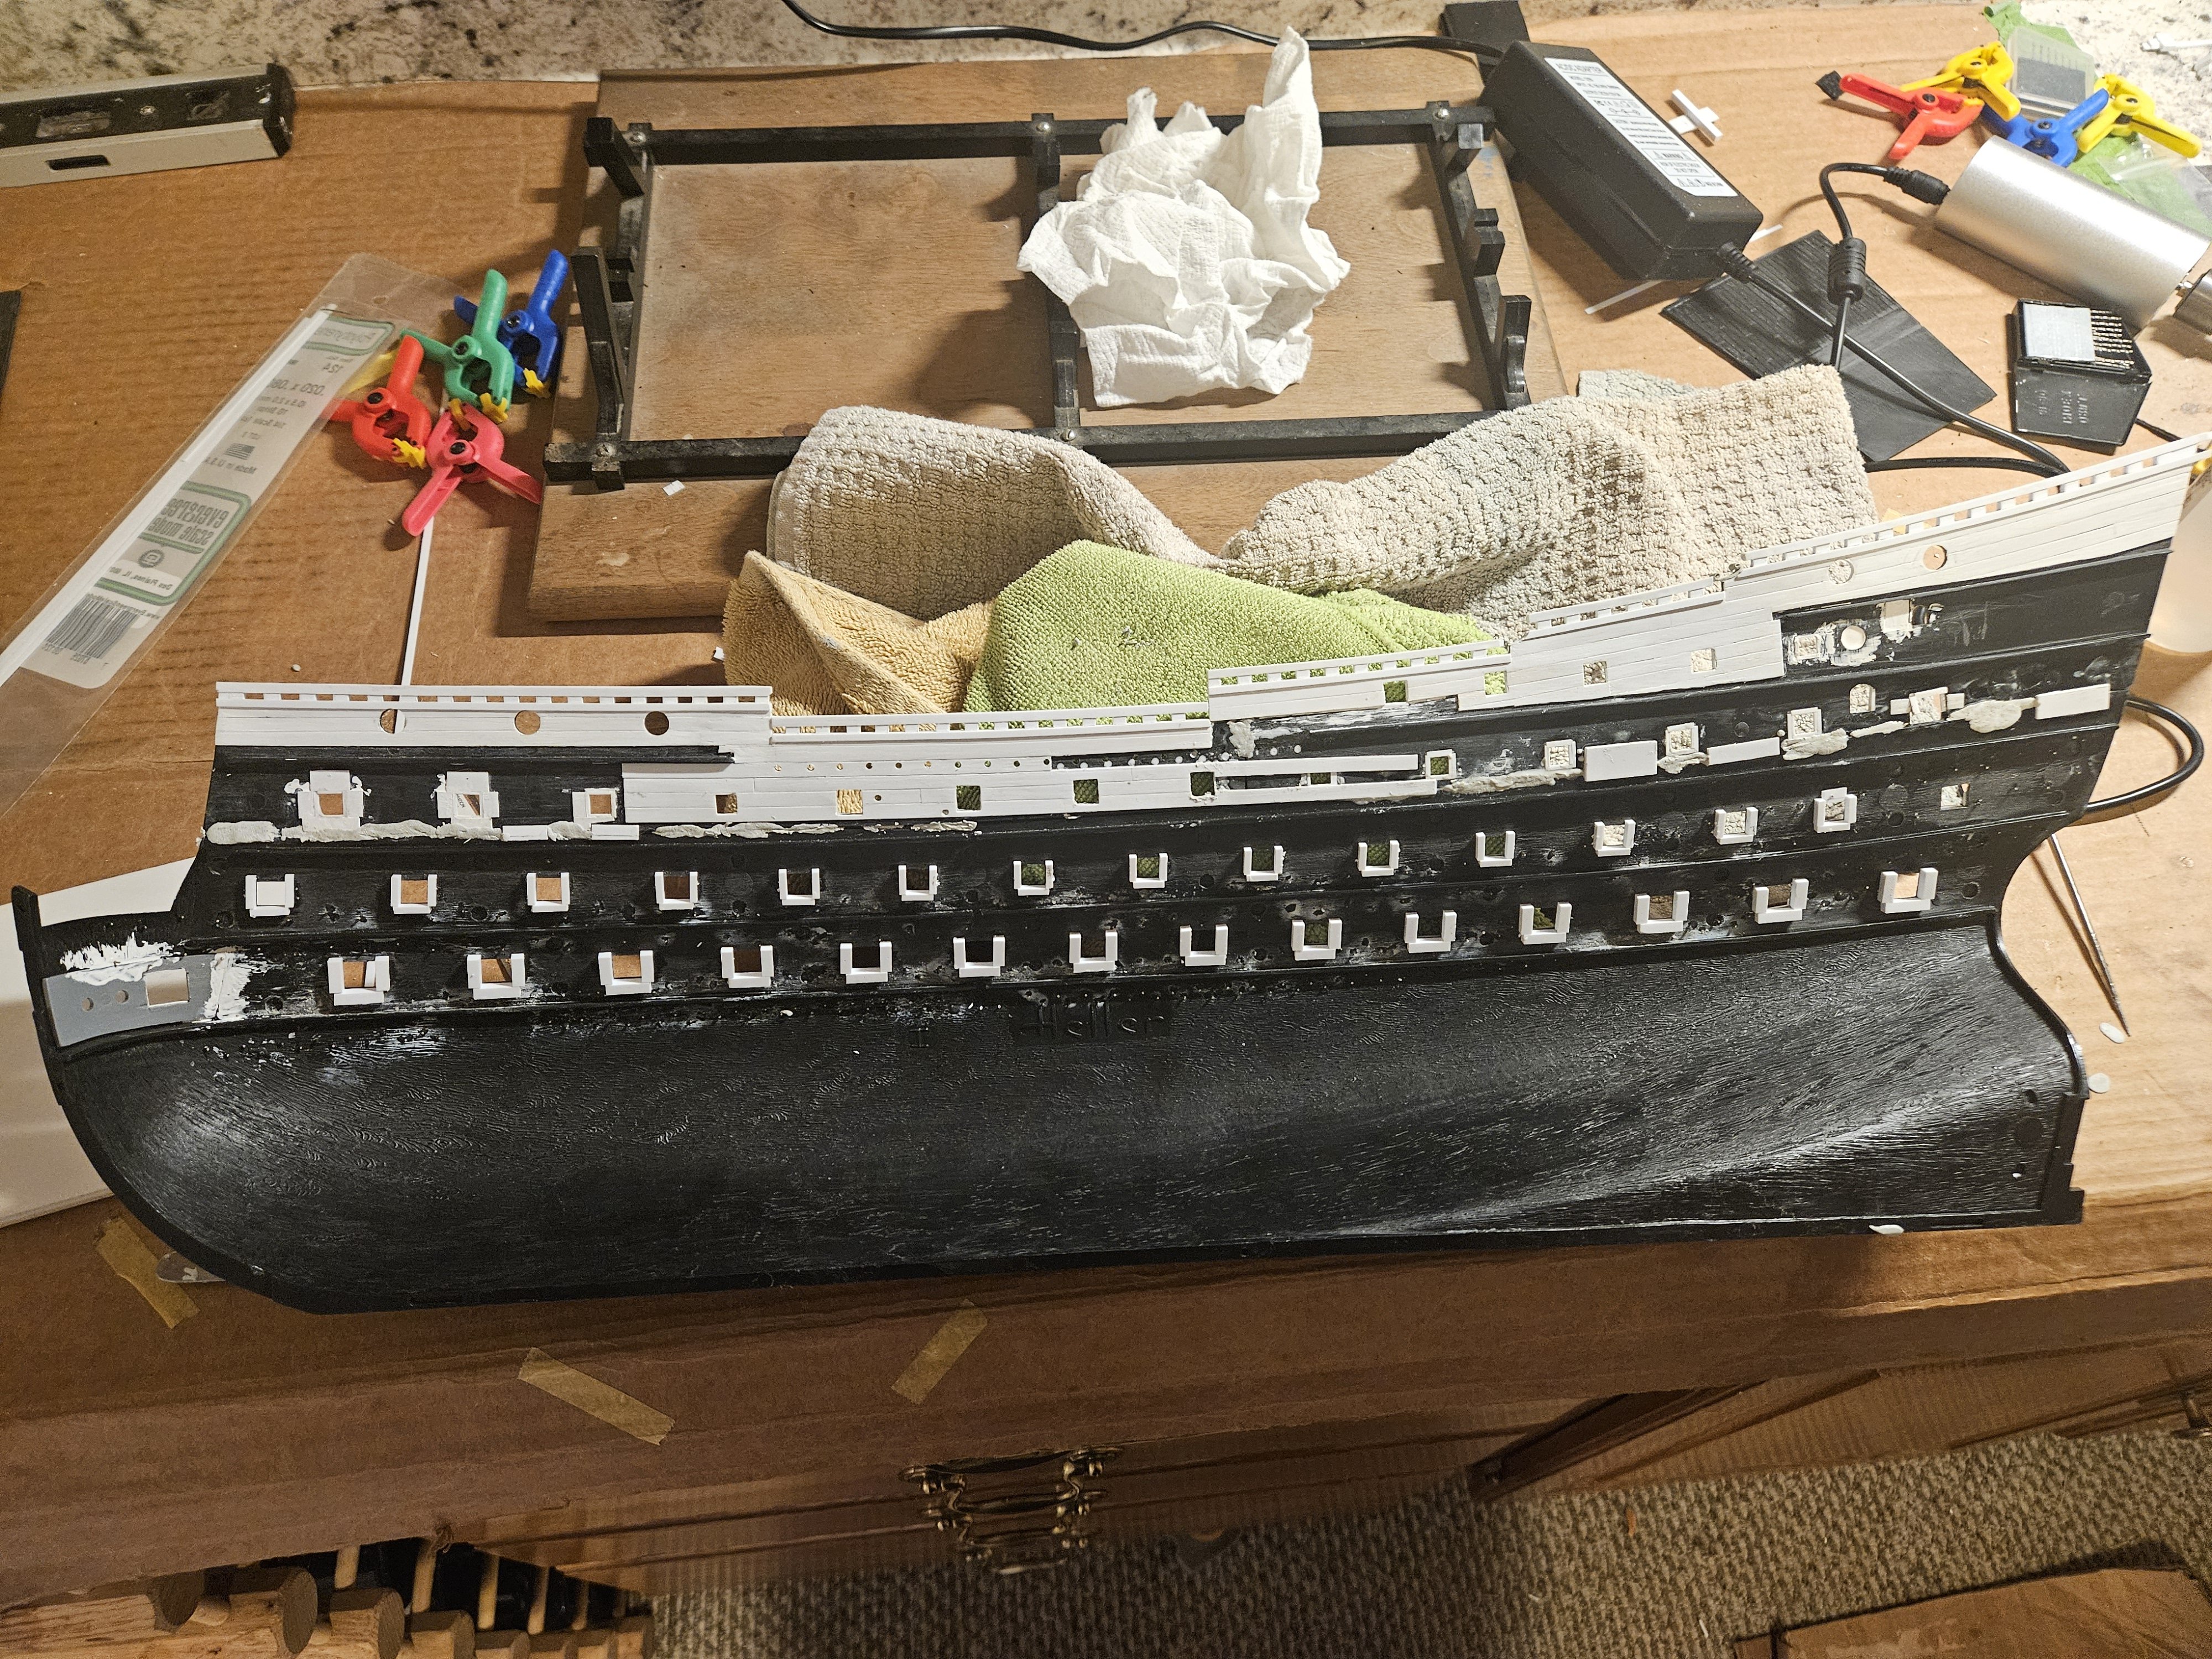
Work has continued over the last month, albeit at a snails pace (coaching college soccer consumes some time in the Fall!). However, I have enough time this AM to complete the rabbets for the port side gun ports.... that leaves only the fighting holes at the waist... and then I get to install the timber heads and cap rails. It is interesting to me to look at the "before/after" appearance of the bulwarks. And soon enough, they will be glued in place...
- 432 replies
-
- 4
-
-
-
- soleil royal
- Heller
- (and 1 more)
-
When I get to needing many items like that, I will certainly make molds as you have. I am OK with the dolphins being "hand made" individually as when they are almost dry, I can add any subtle bends or twists etc to make them fit snugly at the various sheer steps.
- 432 replies
-
- 2
-
-
- soleil royal
- Heller
- (and 1 more)
-
OK.. that's about it for labor in the shipyard for this weekend... it's too nice outside! I did solve my dolphin issue at the sheer steps. I was unhappy that the dolphin body was all in the same plane. I needed the belly to rest on the carving and the head and tail to come out from the body 2-3mm so they could be on the side of the rail. So I finally figured out to have 2mm Evergreen "steps" for the head and tail to rest on. Now the belly is not in the same plane as the head and tail. However, I will be waiting for some time to glue in the dolphins, I think, as they might as well have a sign on their necks that says "fragile, please knock me off!" I am so close to glueing in the bulwarks so I can finish the upper wales and get to "listons d or". It is time to clean up and make sure all of the holes are drilled etc. And I also am giving lots of thought to the quarter gallery layout... due to the sheer of the wales, I cannot use the kit QG. The inner bulwark planking needs a light scribe to finish it, etc.


- 432 replies
-
- 5
-
-
-
- soleil royal
- Heller
- (and 1 more)
-
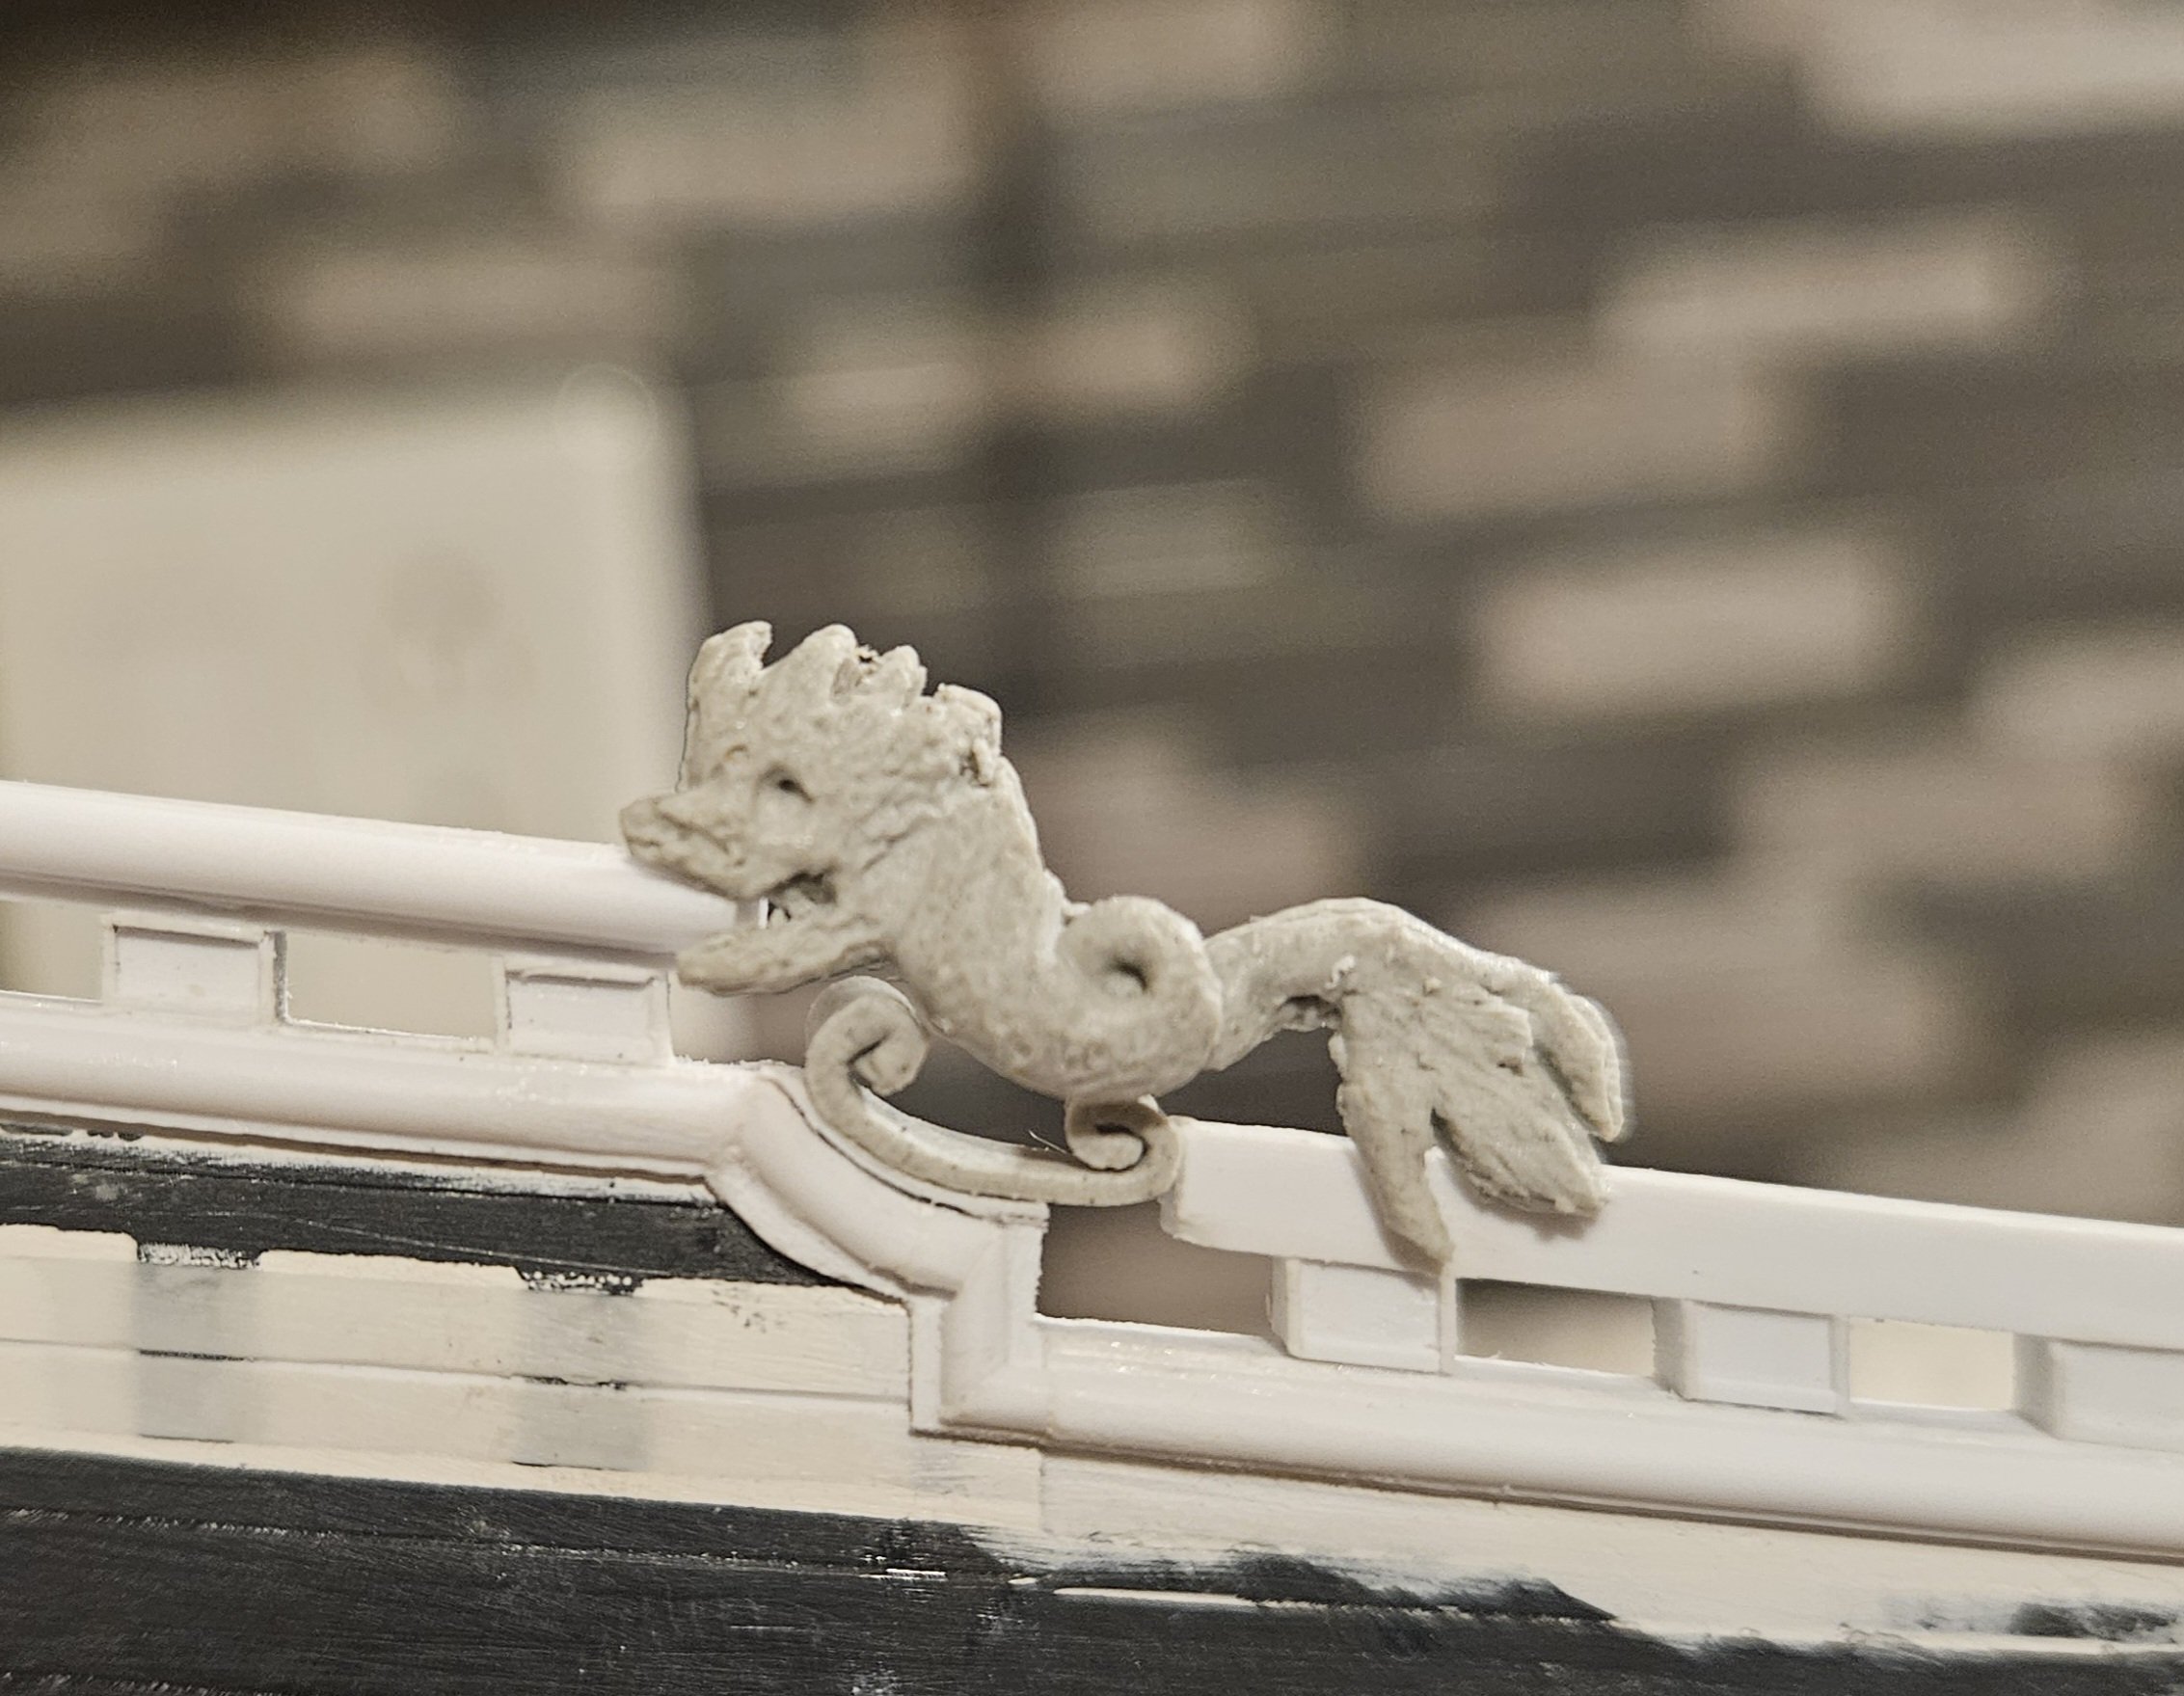
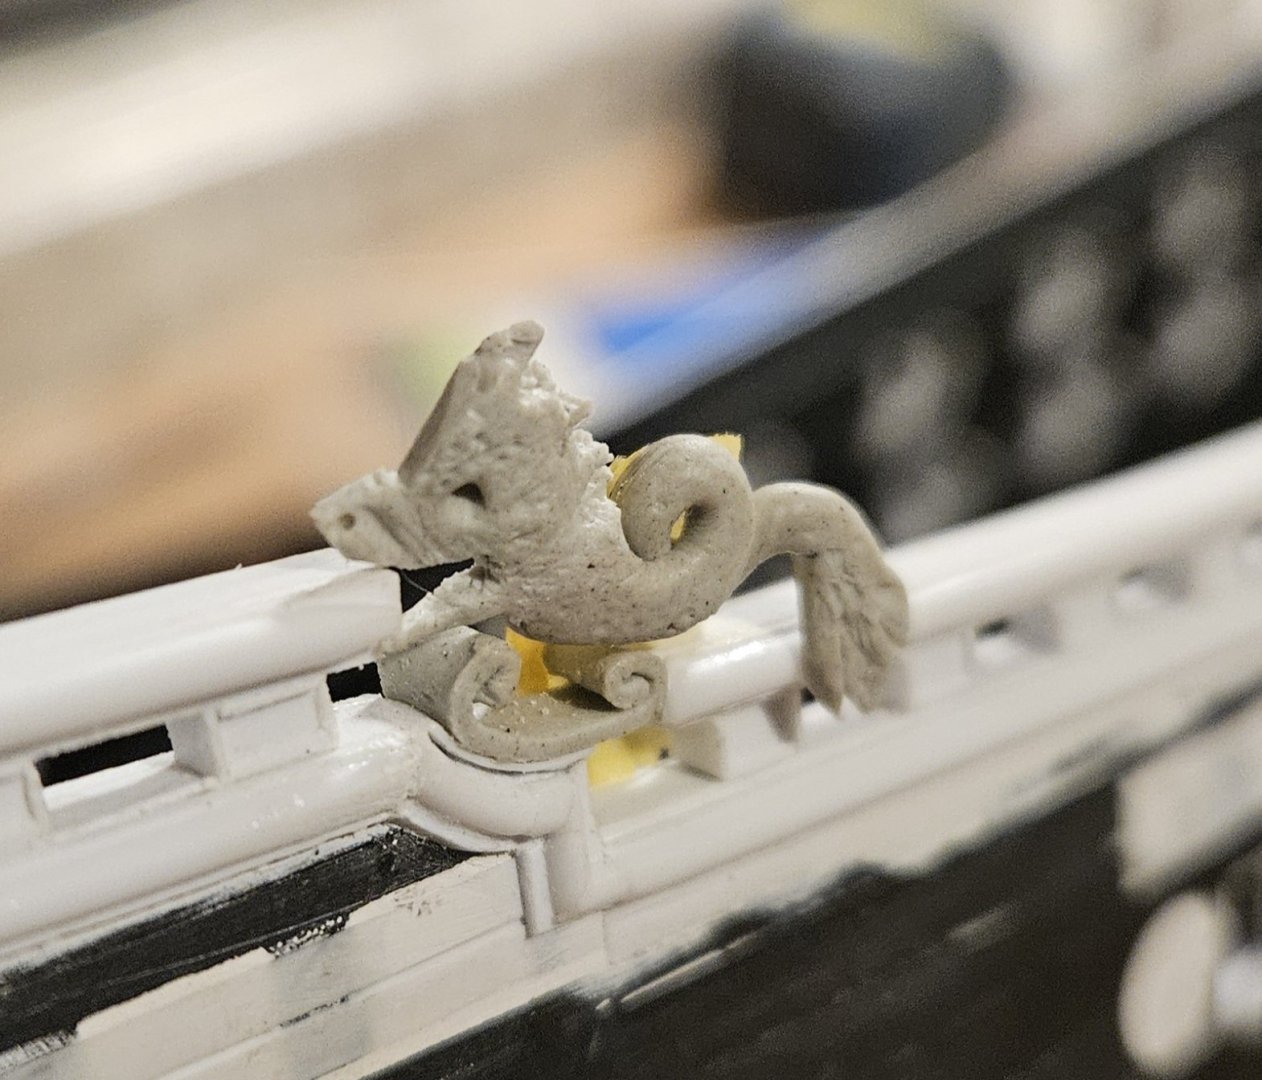
College soccer is back, so coaching will slow any work in the ship yard way down for the next few months. However, I did get the look that I wanted for the first sheer step, especially with the 1.5mm half-round (it took some experimenting with boiling water to bend the Evergreen piece into shape). The dolphin needs a little clean up now that the Apoxie Sculpt has cured and I think I will trim some of the hance piece (under the curved piece of half-round) so that only a little bit shows under the half-round to match the rest of the horizontal run. Otherwise I can move on to the next sheet step, as I already have the clay pieces made. I am wondering if in real-life, there was a curved base that the belly of the dolphin would nestle into for additional support?
- 432 replies
-
- 1
-
-
- soleil royal
- Heller
- (and 1 more)
-
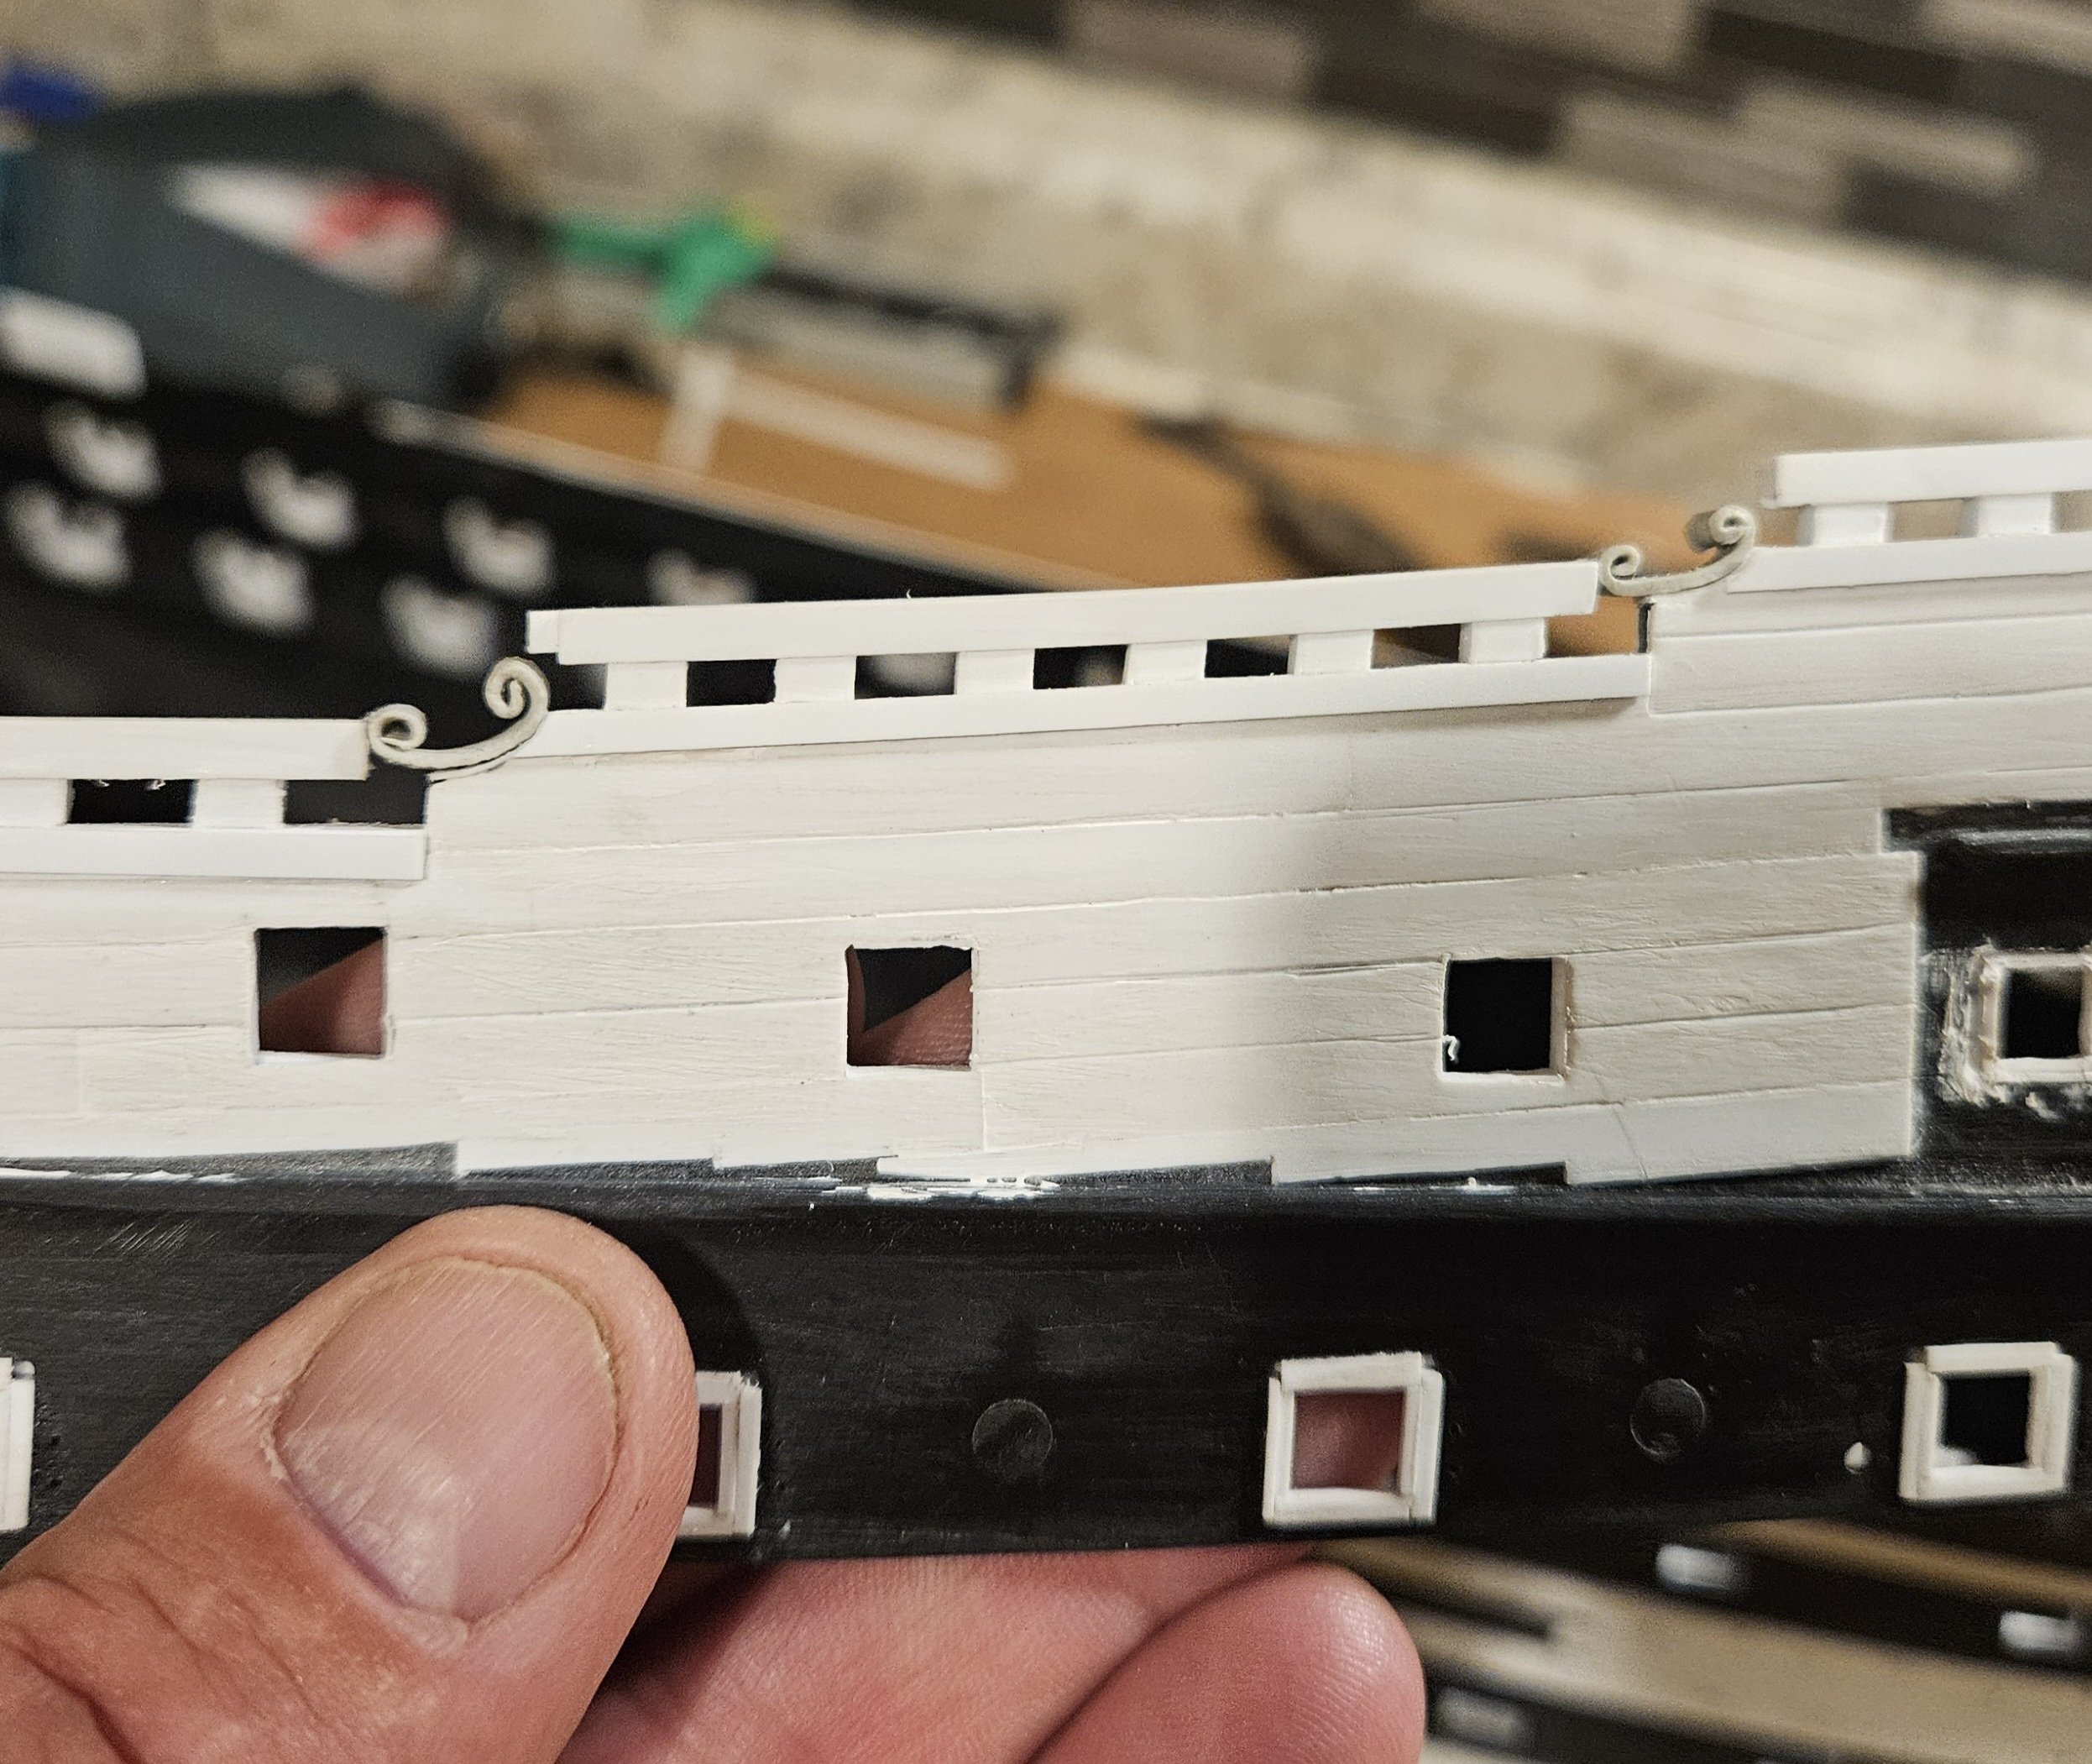
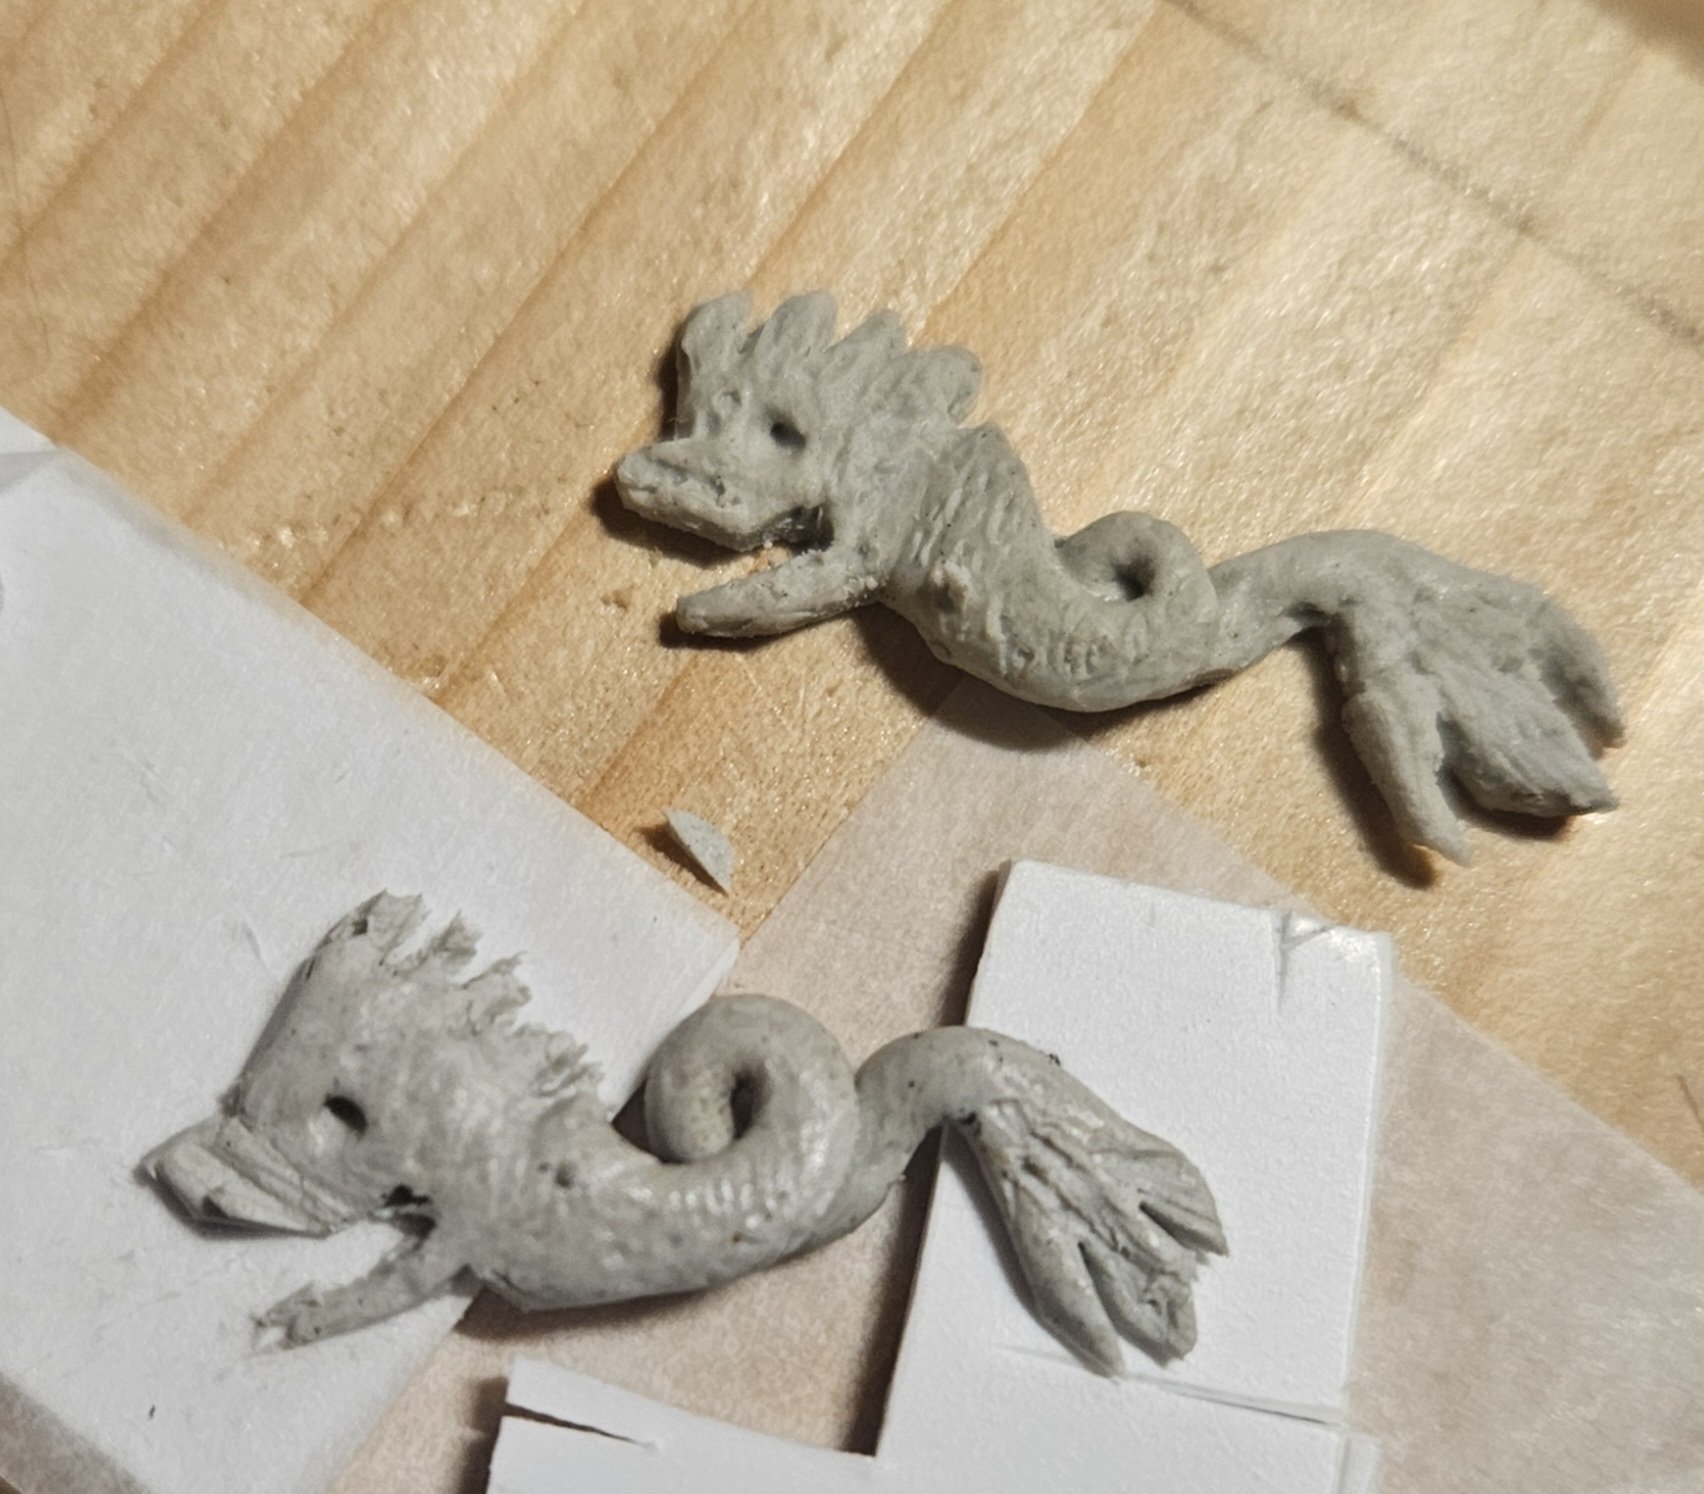
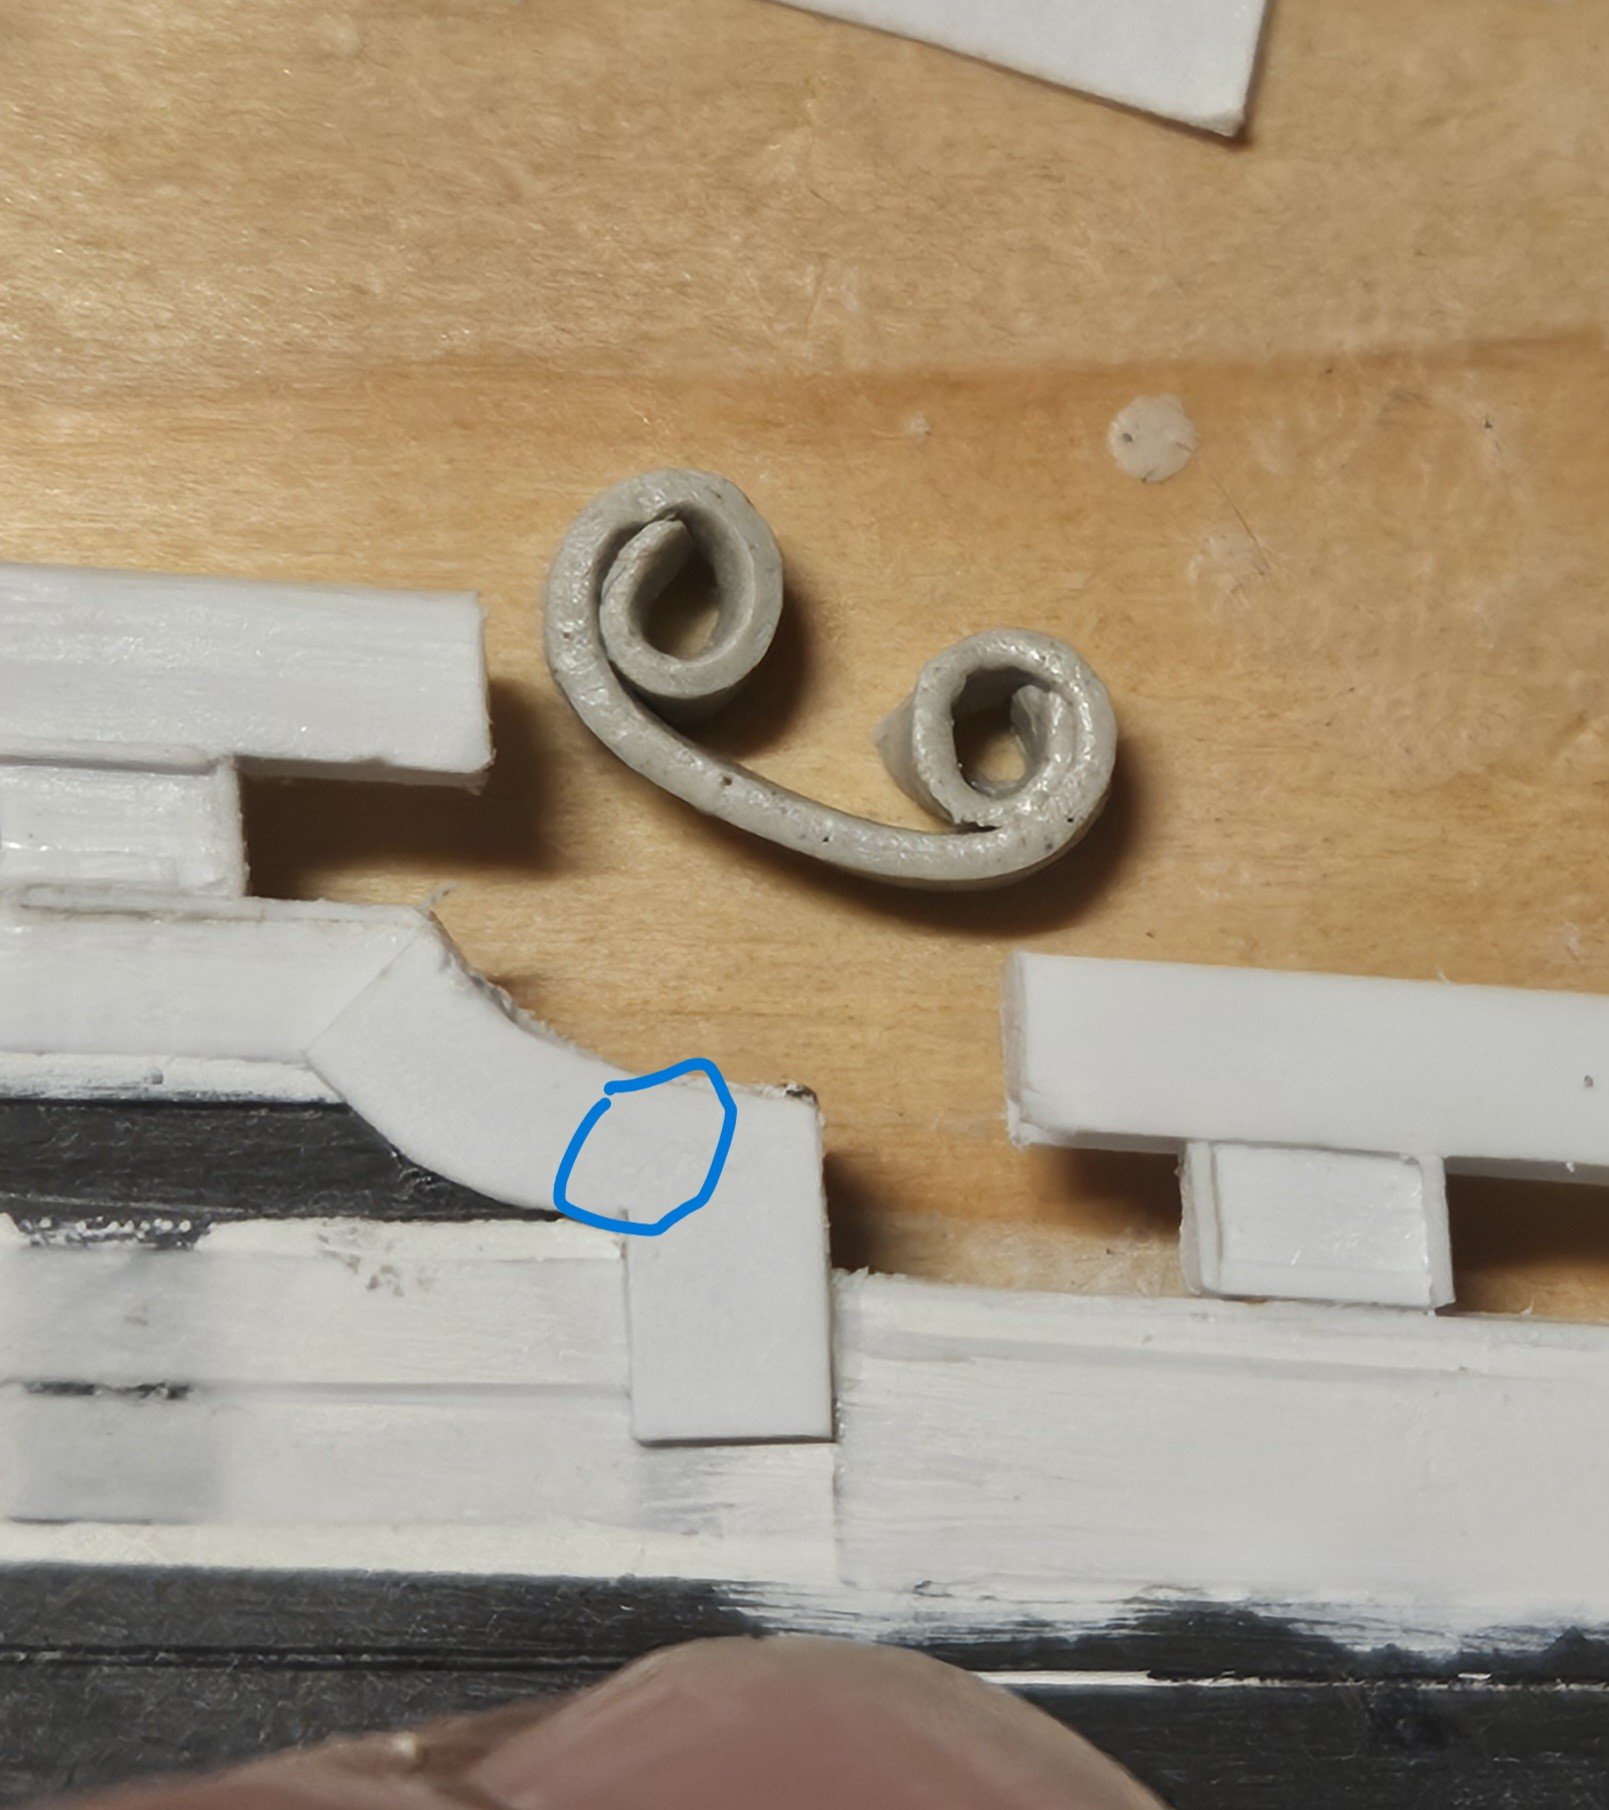
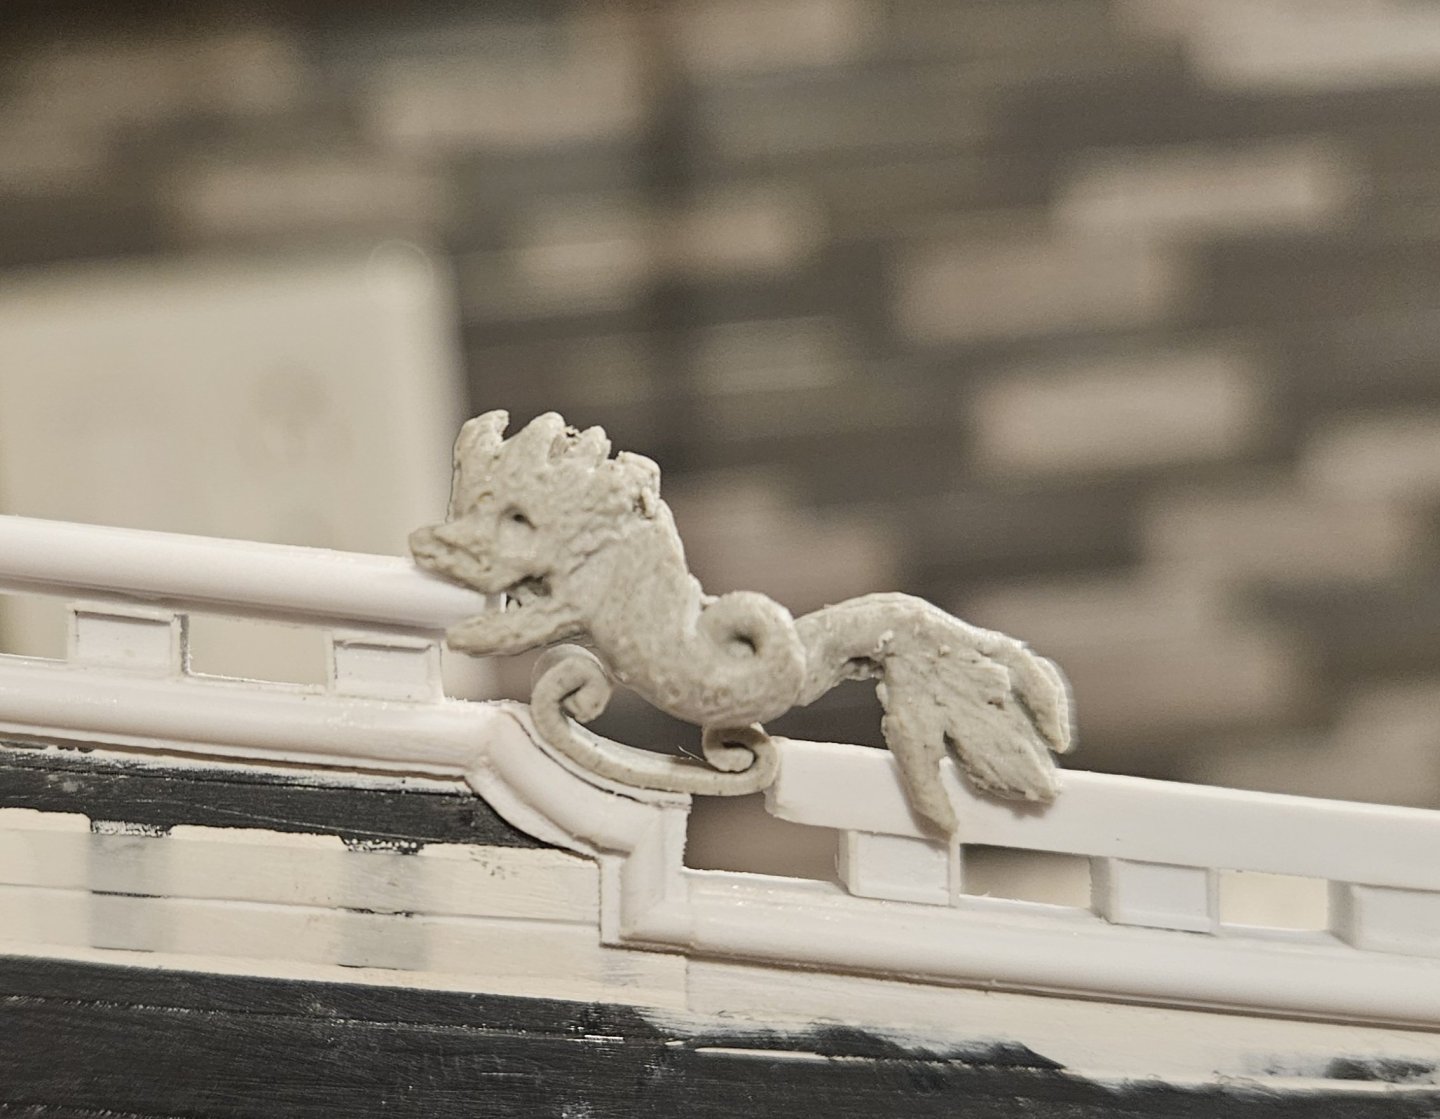
Well, I have any number of dolphins now to choose from... and the smallest ones are down to 15-18mm in length, so I think - based on drawings and other models - that the size is scale appropriate. I am not sure of my terminology, but there are three parts to the "hance" at the sheer step (?)., and this is what I have so far. The first part is the curved stock plank that ties together the two different railings together (note the blue circle on the piece); I will refer to this as the "hance piece". Next, I want a simple curved ribbon (name? - also a "hance piece"?) nestled into the curve of the hance piece where the bulwark has been cut away, and this appears to be the primary support for the dolphin. However, it is obvious that the curls at the ends are too big. They need to be nice and small... so I made a jig and will figure out how to make those tiny curls at the ends. Compared to my learning curve for the dolphins, it should be a lot quicker to make the curled hance pieces. It's a bit more difficult as I want the ribbon to be 2.5mm wide to match the thickness of the bulwark. I am finding that the Apoxie Sculpt needs to be 2-3 hours old, almost at the point that it is unworkable, otherwise the ribbon wants to deform every so slightly from its own weight.


- 432 replies
-
- 3
-
-
- soleil royal
- Heller
- (and 1 more)


.jpg.9afecb0afeabdb43e064ebc02c374111.jpg)
.jpg.742beb9cf96195b9e4d909052668697a.jpg)
.jpg.bd892ac6b5c960a6f53979650d658f2e.jpg)
.jpg.ca629a7ca55aa401cb2a6cb833d5b3b0.jpg)
.jpg.d1f6a914c9b83db07e2649b598915cee.jpg)


.jpg.74adcd38b21ac5fd729237b1e315008b.jpg)