cdrusn89
-
Posts
1,573 -
Joined
-
Last visited
Content Type
Profiles
Forums
Gallery
Events
Everything posted by cdrusn89
-
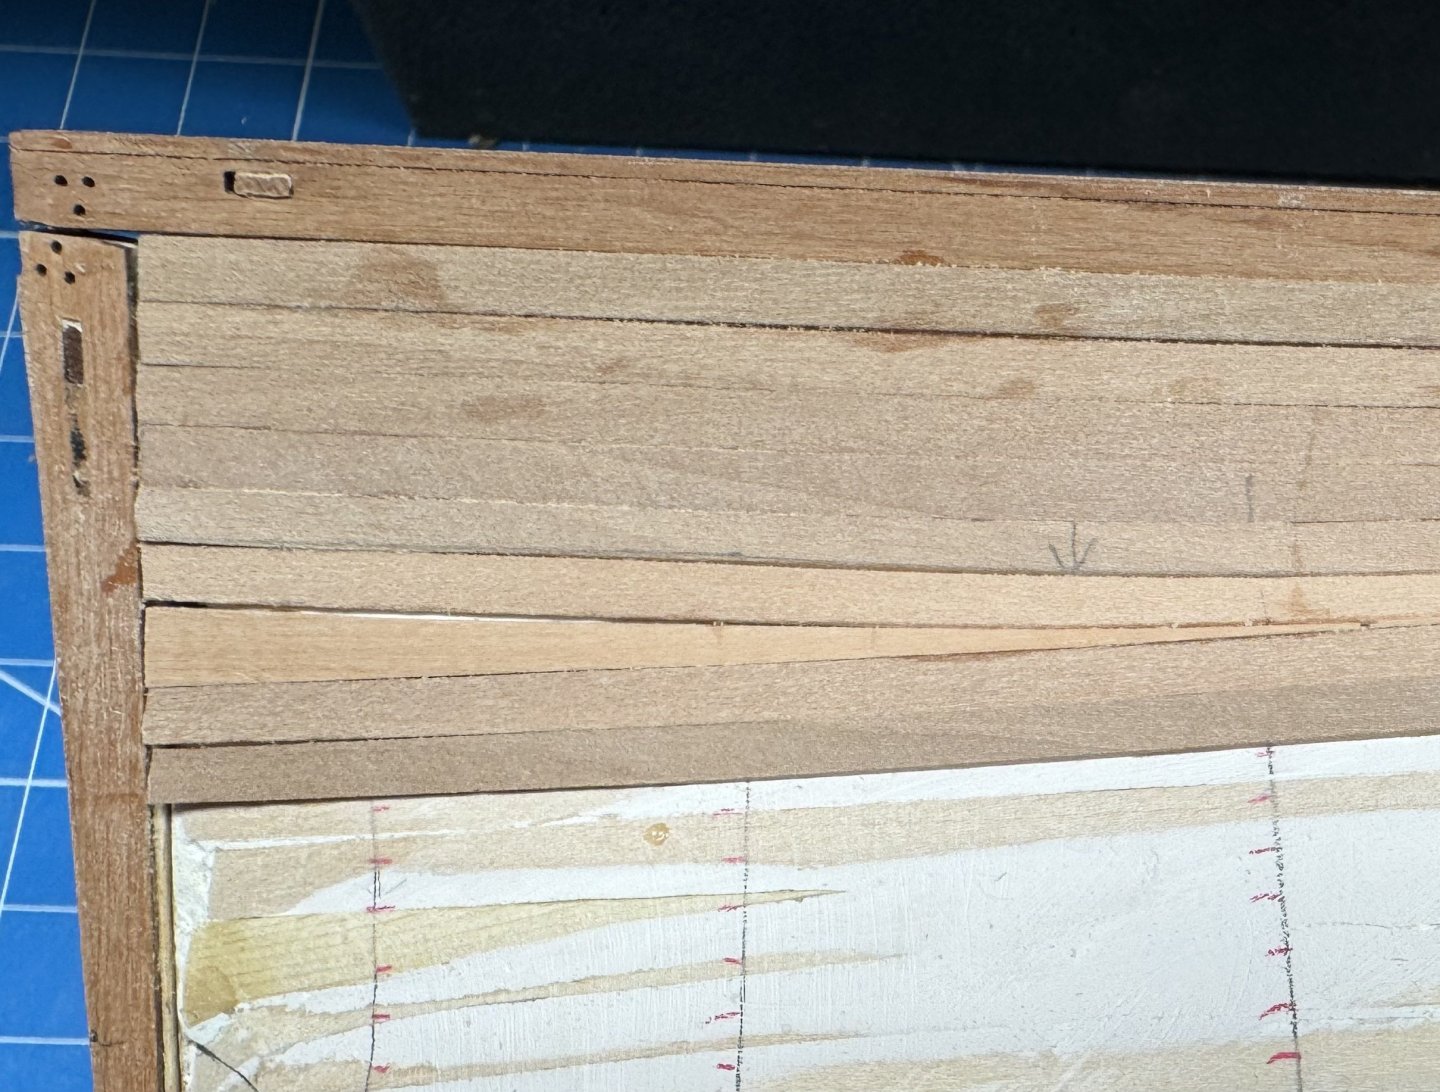
 Here is the port side completed to the same degree as the starboard - 11 or 12 (depending where you count) planks left to go on each side. On the port side I went with the "triangular" stealer. I cut a piece of my wider pear stock to 6.5mm wide and then "wedged" it into the opening created between the last two full planks. I recognize that this was not (is not) the way it is done full size but since this part will all be painted it is faster to implement then the more correct method on the starboard side. Plus since I went to the trouble to mill/sand down the pear for this eventuality I thought I should avail myself of the opportunity to use it. This is probably the only stealer that will be necessary. However, if it gets to the "last" plank and I need something a bit wider than 4mm I will not hesitate to cut whatever width I need to fit rather than have to cut two 4mm planks to fill a 6mm or so space.
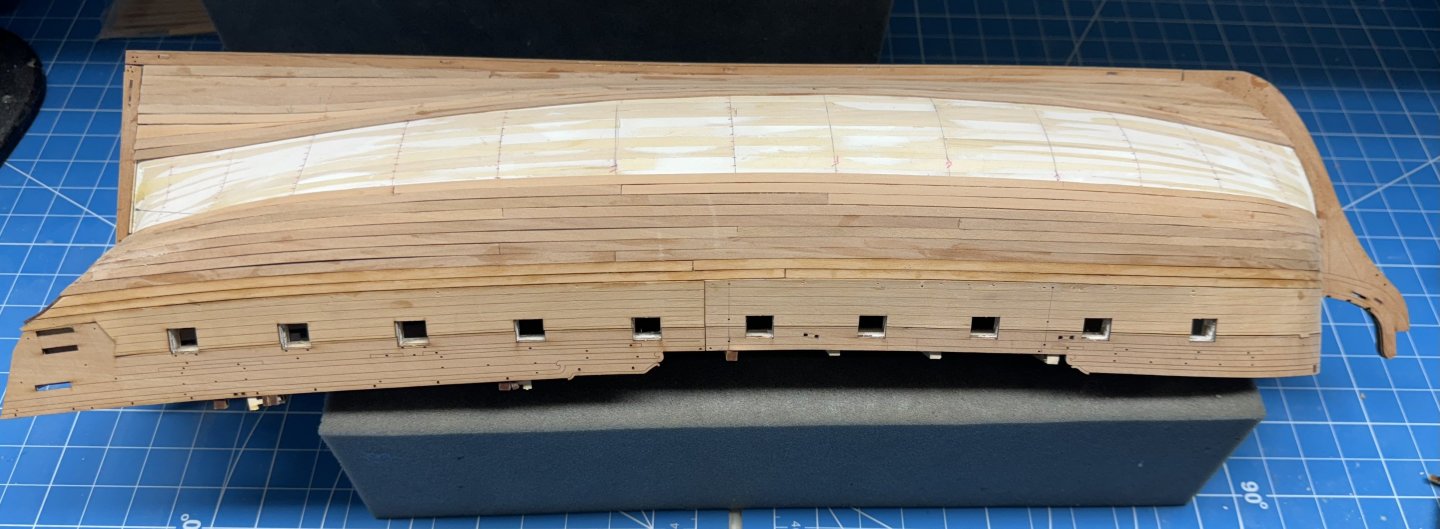
-
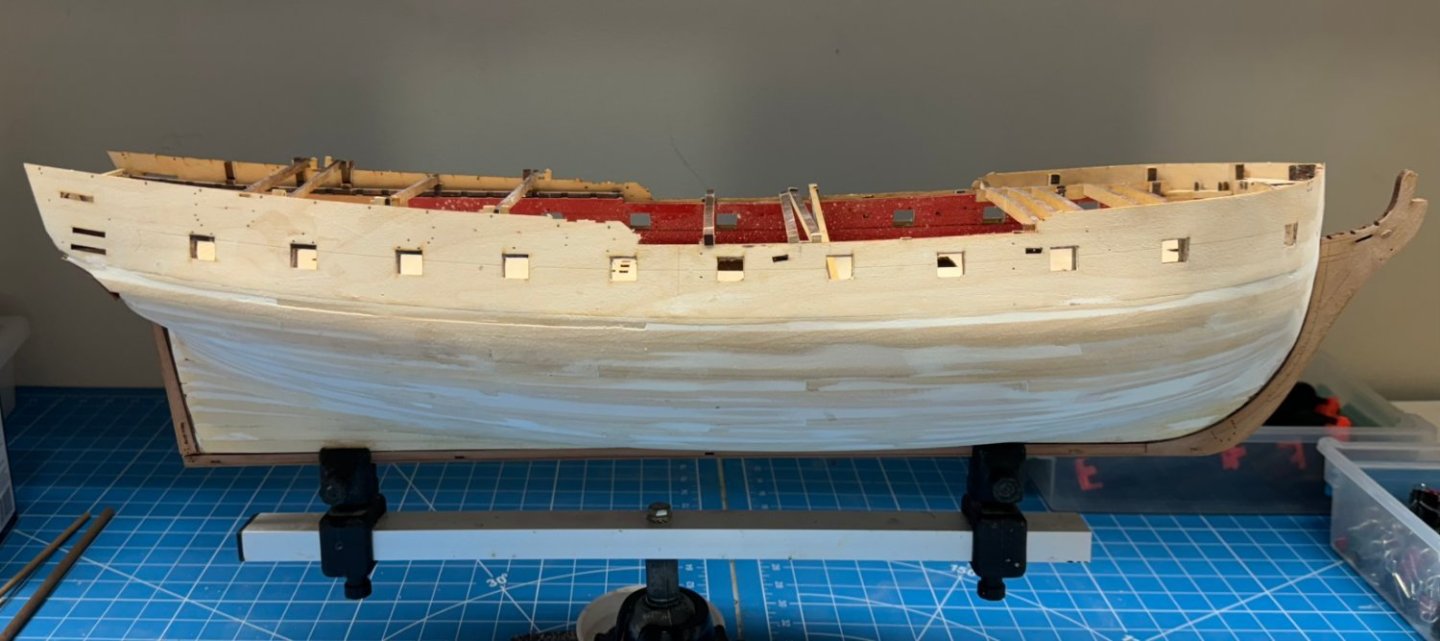
Starboard side with 14 of 24 rows complete. I did add one stealer at the stern but am not sure it really helped things all that much. Maybe I will see what it looks like on port side before I try this "over there".
-
And now three more rows on the bottom of the port side. 12 rows complete - 36 (more or less) to go.

-
And now three new rows on the bottom of starboard side. Starting to "get in the swing" of this now.
-
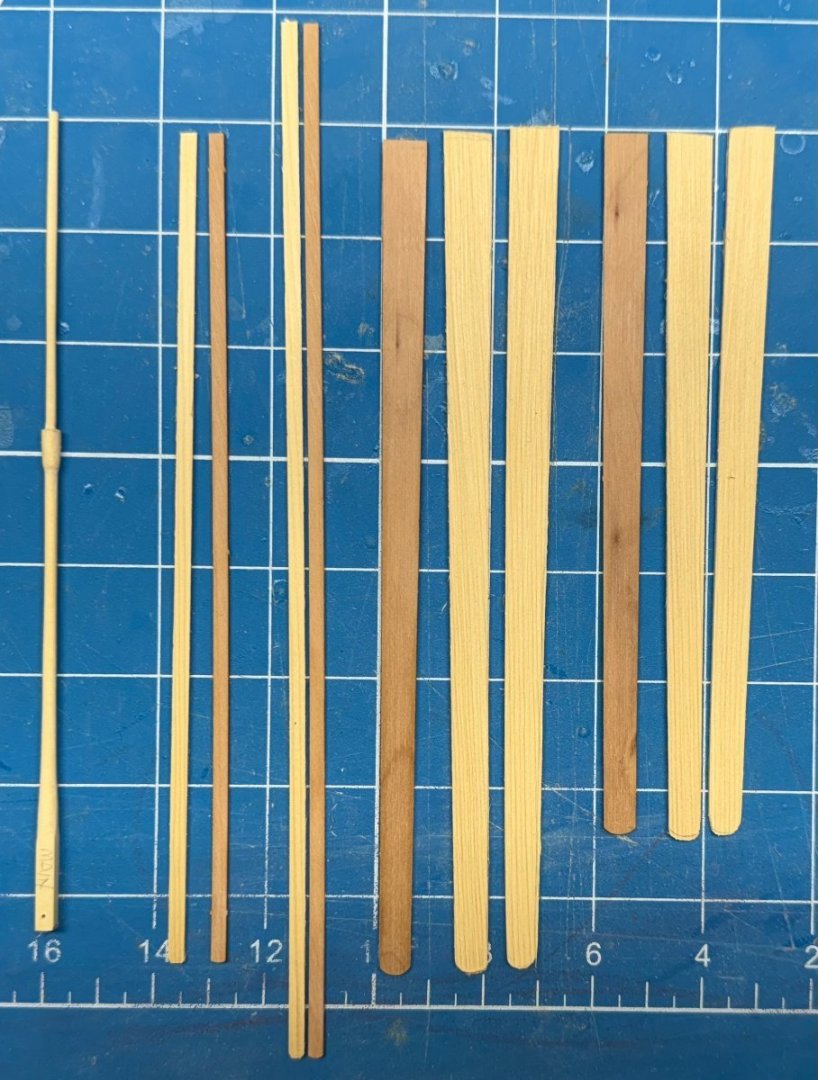
And now three rows on the port side. I did not taper the planks at the stern as I (mistakenly) did on the stbd side. In case I need them I created some .8mm thick pearwood strips this morning that i can use if I need something wider than the 4mm that came with the kit. Hopefully I will not need them but the contractor is coming to create a garage work shop and I will not be able to find anything once that starts. so I have them "just in case". Now back to the starboard side and consideration of whether or not to add the transition plank (transom to stern post) now or wait until it "comes naturally".
-
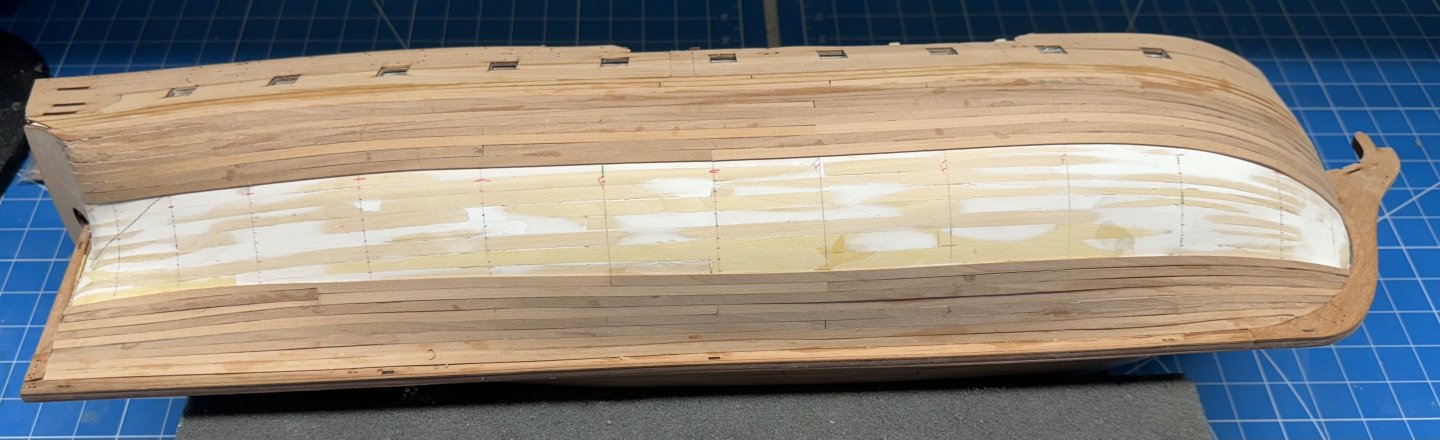
Three rows completed on the stbd side. I finally got around to marking the waterline (so I know where I have to be really careful) on both sides. Not sure it would meant anything had I marked on this side but I will find out when I get to the port side which is next on the hit parade. I am thinking about jumping ahead on this side and putting in the plank that marks the transition from ending at the transom to ending at the stern post. It seems (to me) that leaving that more or less to chance depending on how accurately I have measured/cut each plank between now and then (at least 6) is chancing having that transition not go well. For now - off to the port side.
-
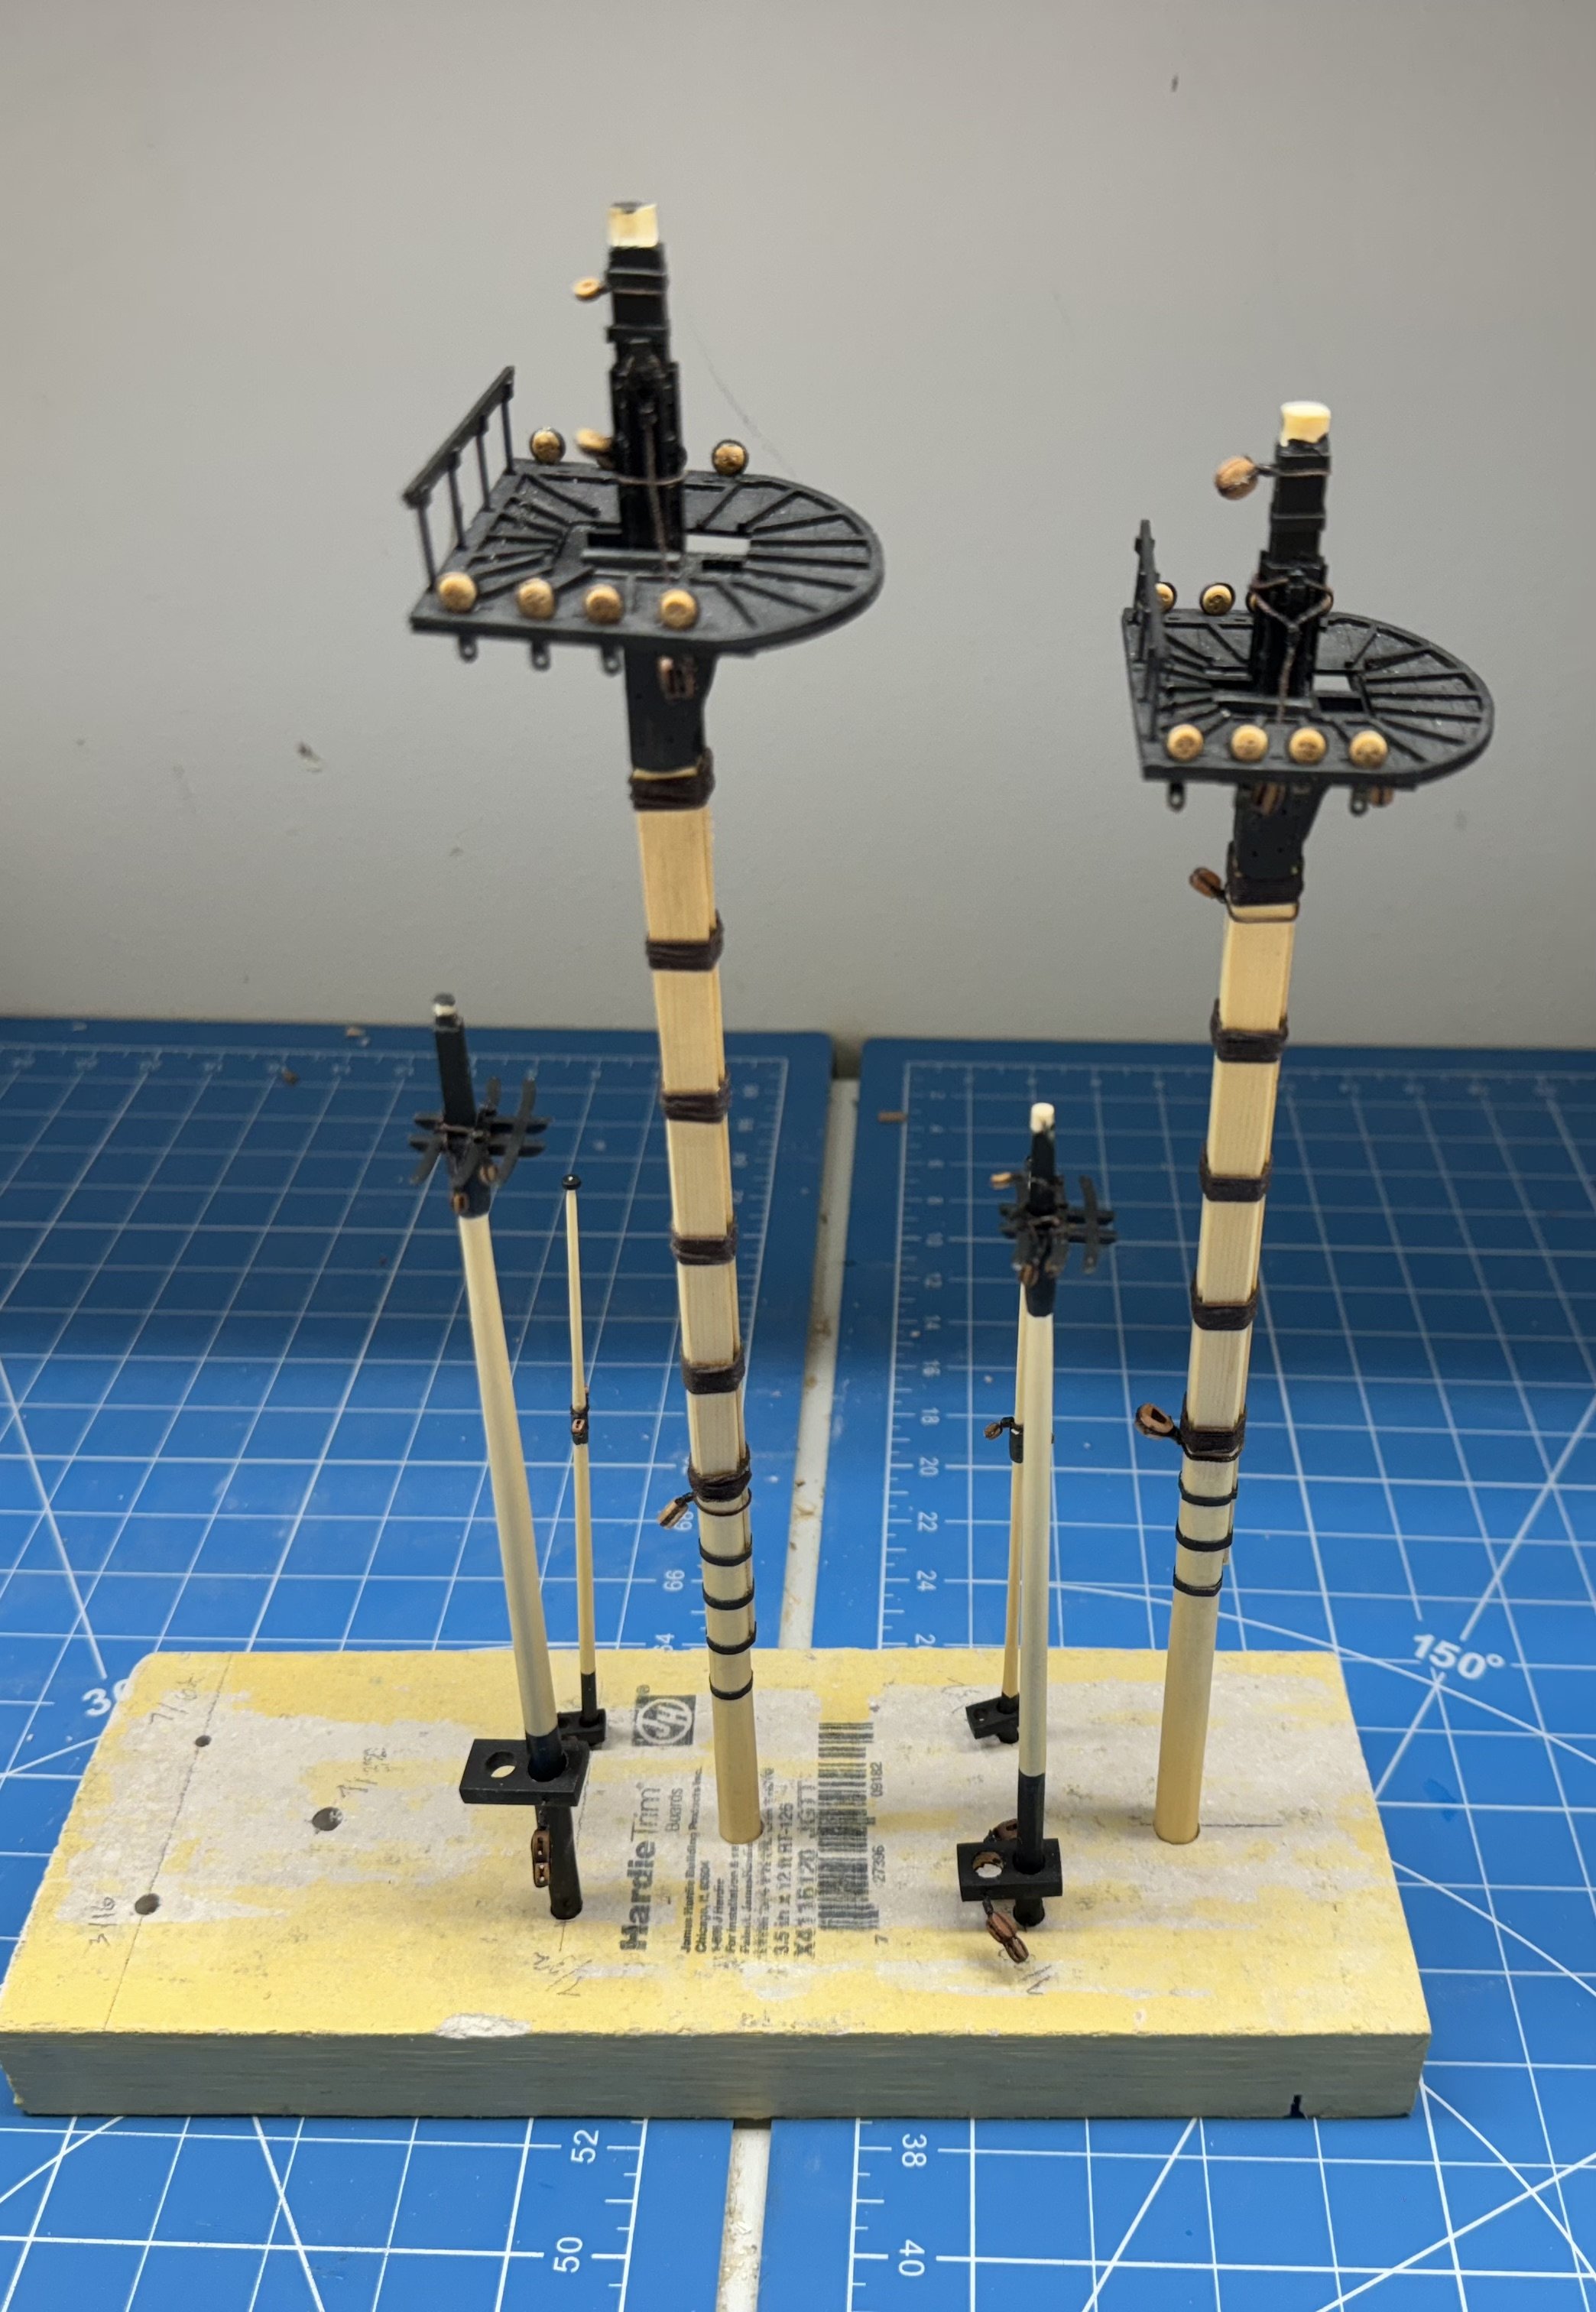
In my seemingly unending effort to NOT do the hull planking I did complete the Fore Masts and associated blocks, hearts and thimbles. Here they are awaiting the Mizzen which I shall attempt to ignore while I get to the planking.

-
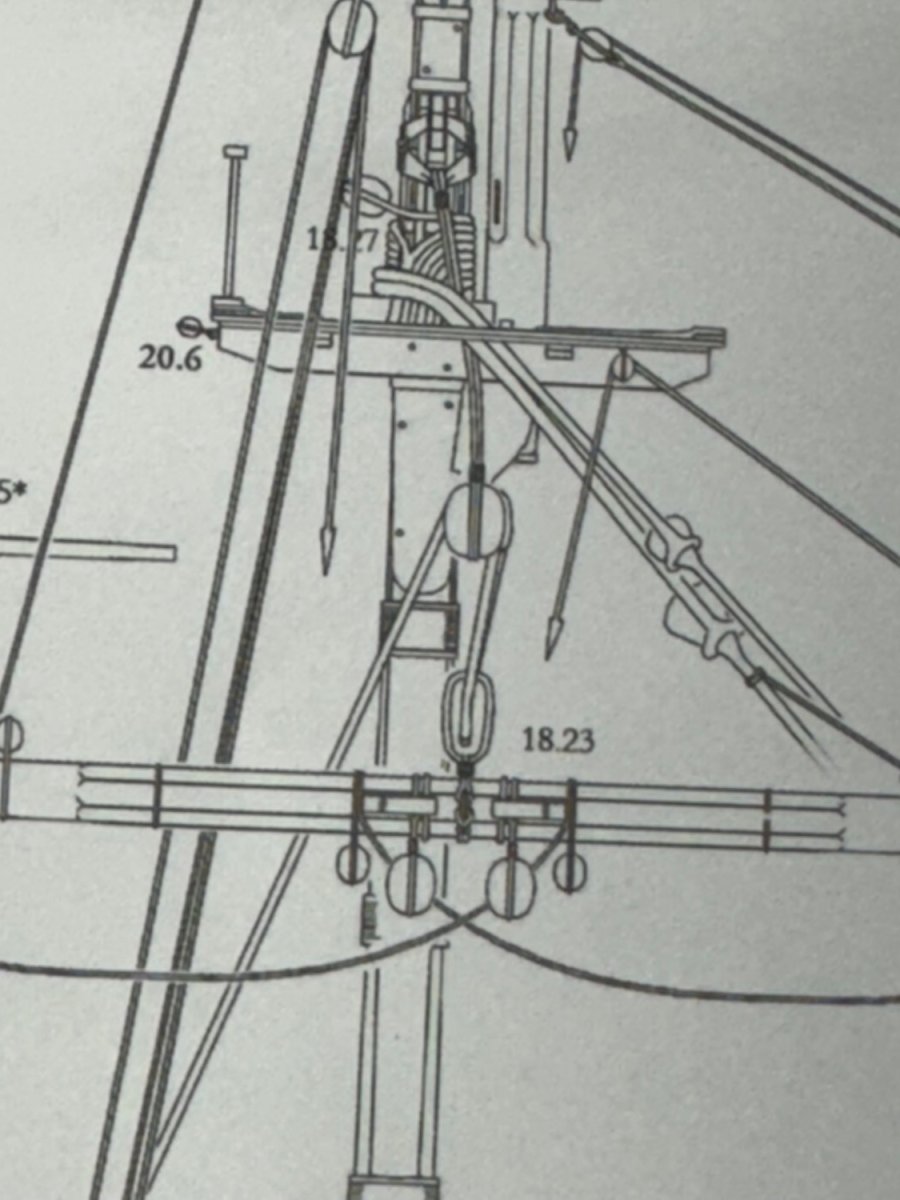
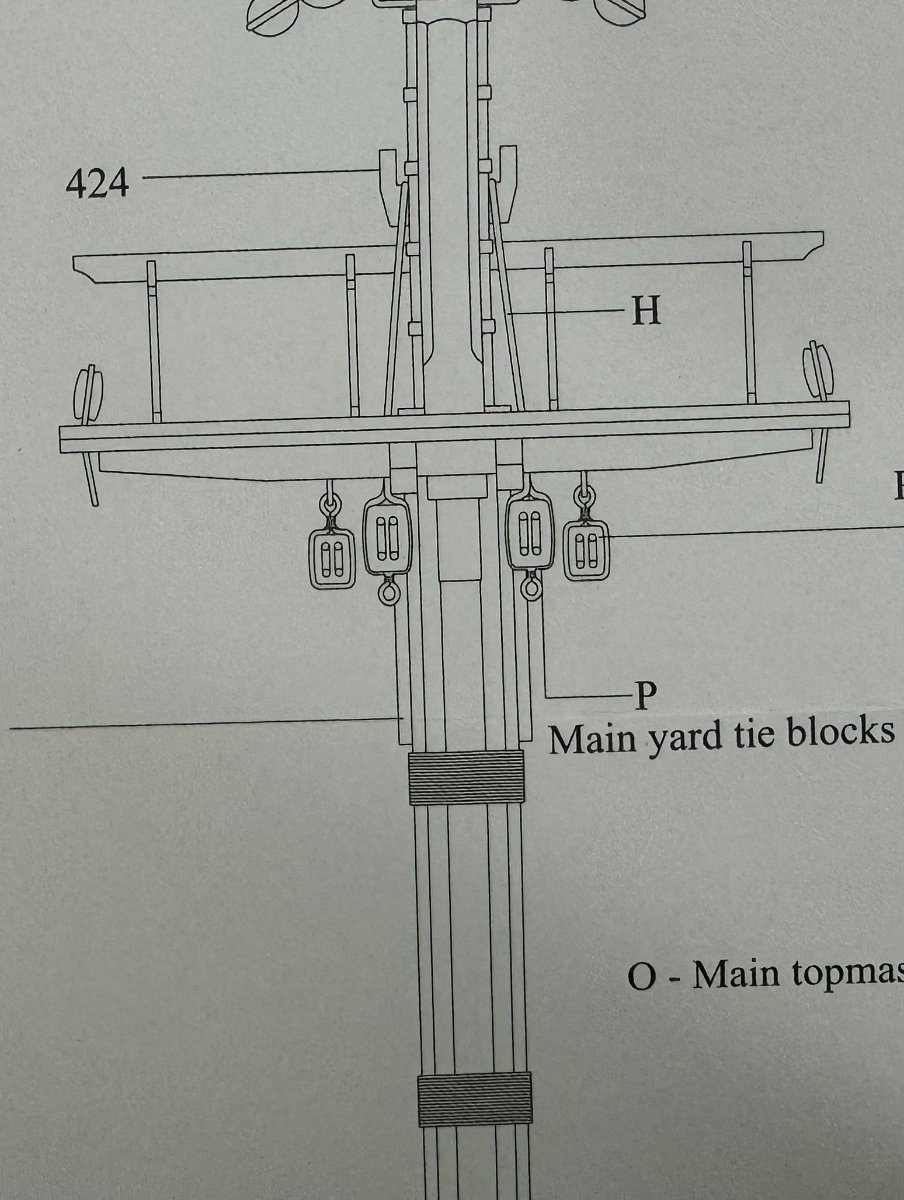
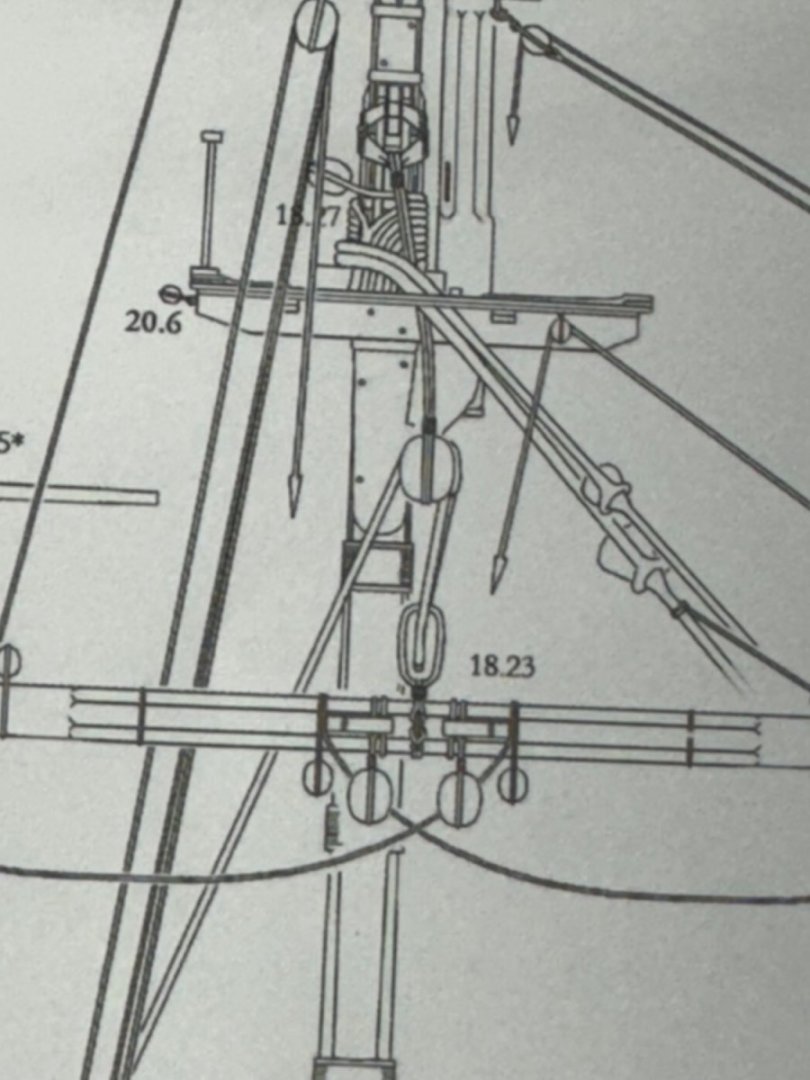
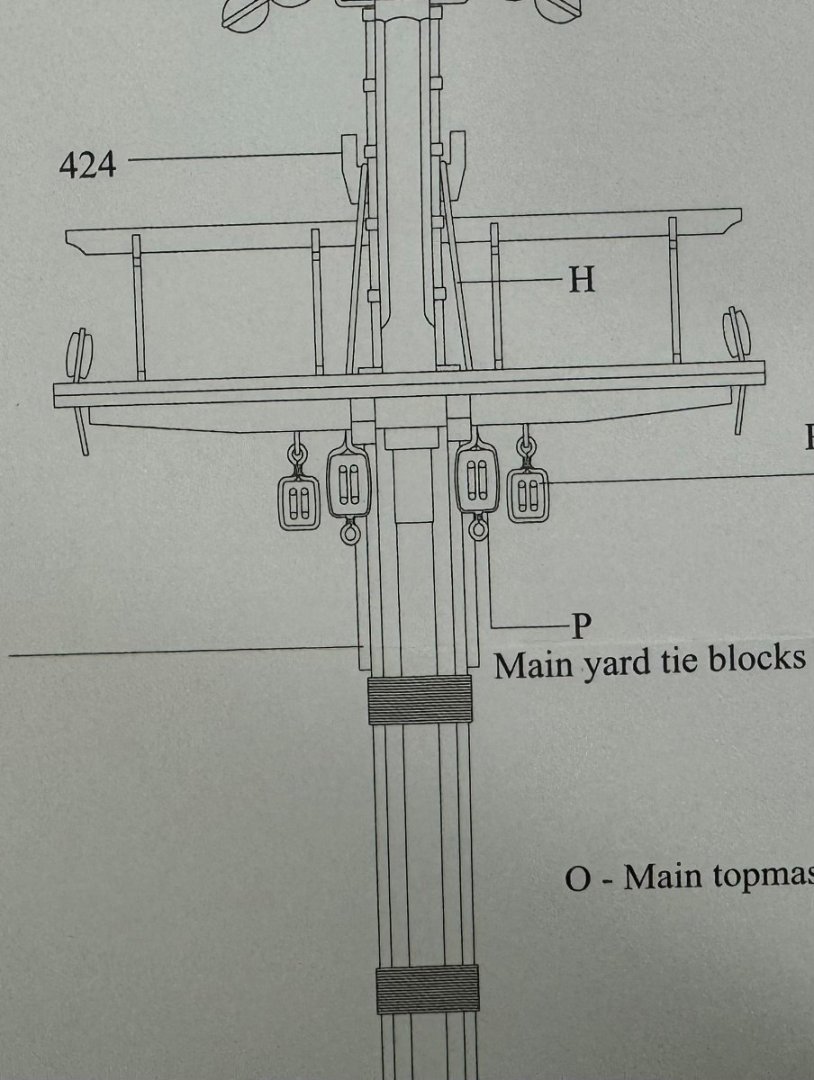
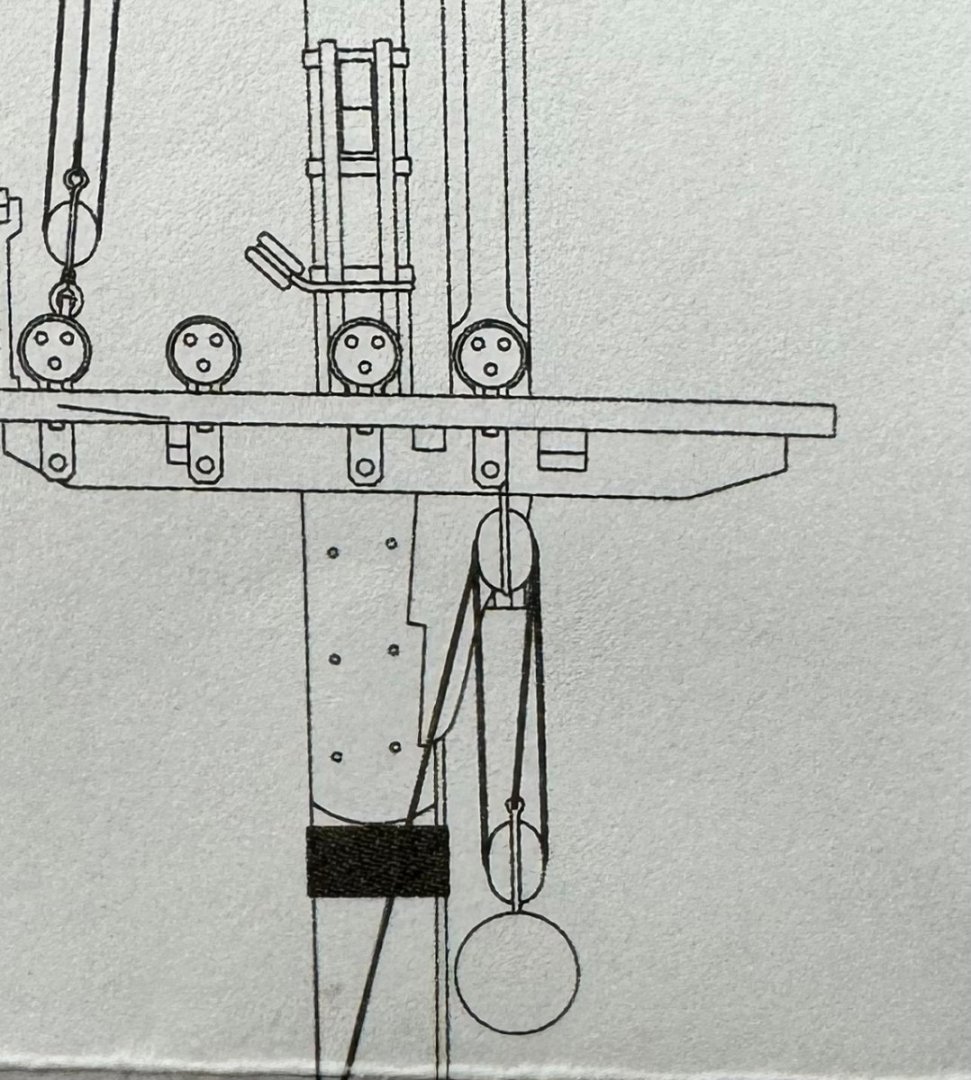
This one uses triple blocks with the standing end secured to the yard. This looks to be about as "big" (i.e. triple blocks above and below) as you could reasonably get and this is only a 36 gun 4th rate? Wow!! David Antscherl's "Rigging a Sixth Rate Sloop of 1767-1780" shows a single. albeit 20" (8mm at 1/64th scale) jeer block on the Fore and Main yards. I did not wrap the strop around the mast as above since there was no indication on the drawing showing that. I am not sure how that would work with the mast battens in place. Seems like the strop might crush the battens unless they were installed after the jeer block was in place. Probably not the sort of thing (jeer block) that got changed unless absolutely necessary. (aka battle damage).
-
While procrastinating getting on with the second layer of planks I went back to the Main Mast and looked at the rigging. I found an inconsistency between the rigging plans (Sheet 3) and the mast/yard drawing for the Main and Fore. I assume someone else has already caught this as there are many who have preceded me in this journey. The mast and yard drawings imply that the standing end of the tackle that raise the main and fore yards (I think they are called yard ties on the plans) is on the mast. Somewhere in one of the other build logs it is stated that the ring at the bottom of the block indicated the standing end of the line goes "here:. However the Rigging Plan sheet 4 pretty clearly (to me) shows the standing end to be on the yard. The yard drawings (this applies to Main and Fore only) is consistent with the mast drawing - no "ring" at the top of the respective blocks. This configuration is correct for the Mizzen as there is a single block on the yard where the Main and Fore have doubles "above and below". And now (after I fix the blocks on the Main mast) back to the planking.
-
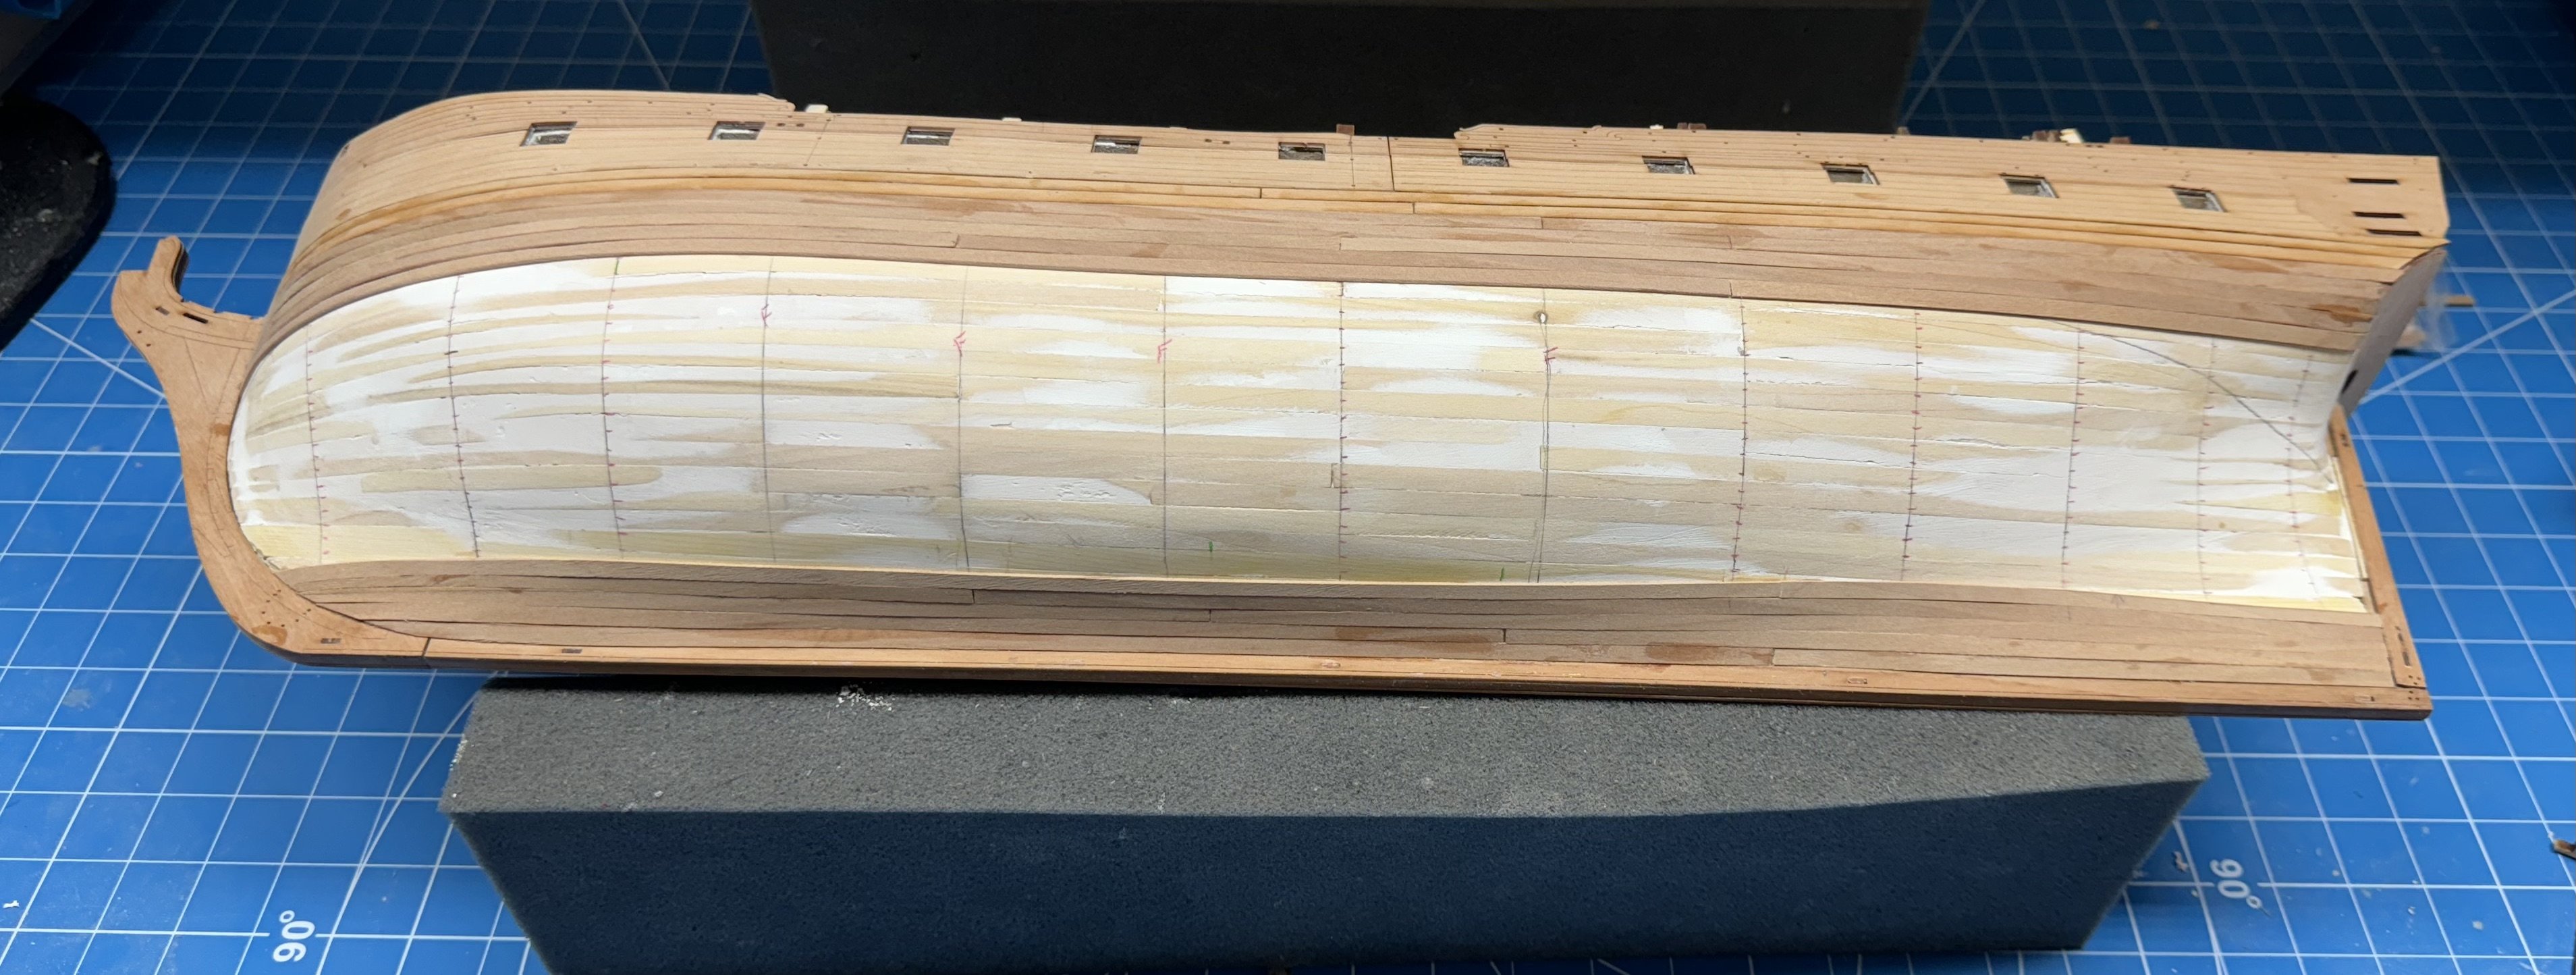
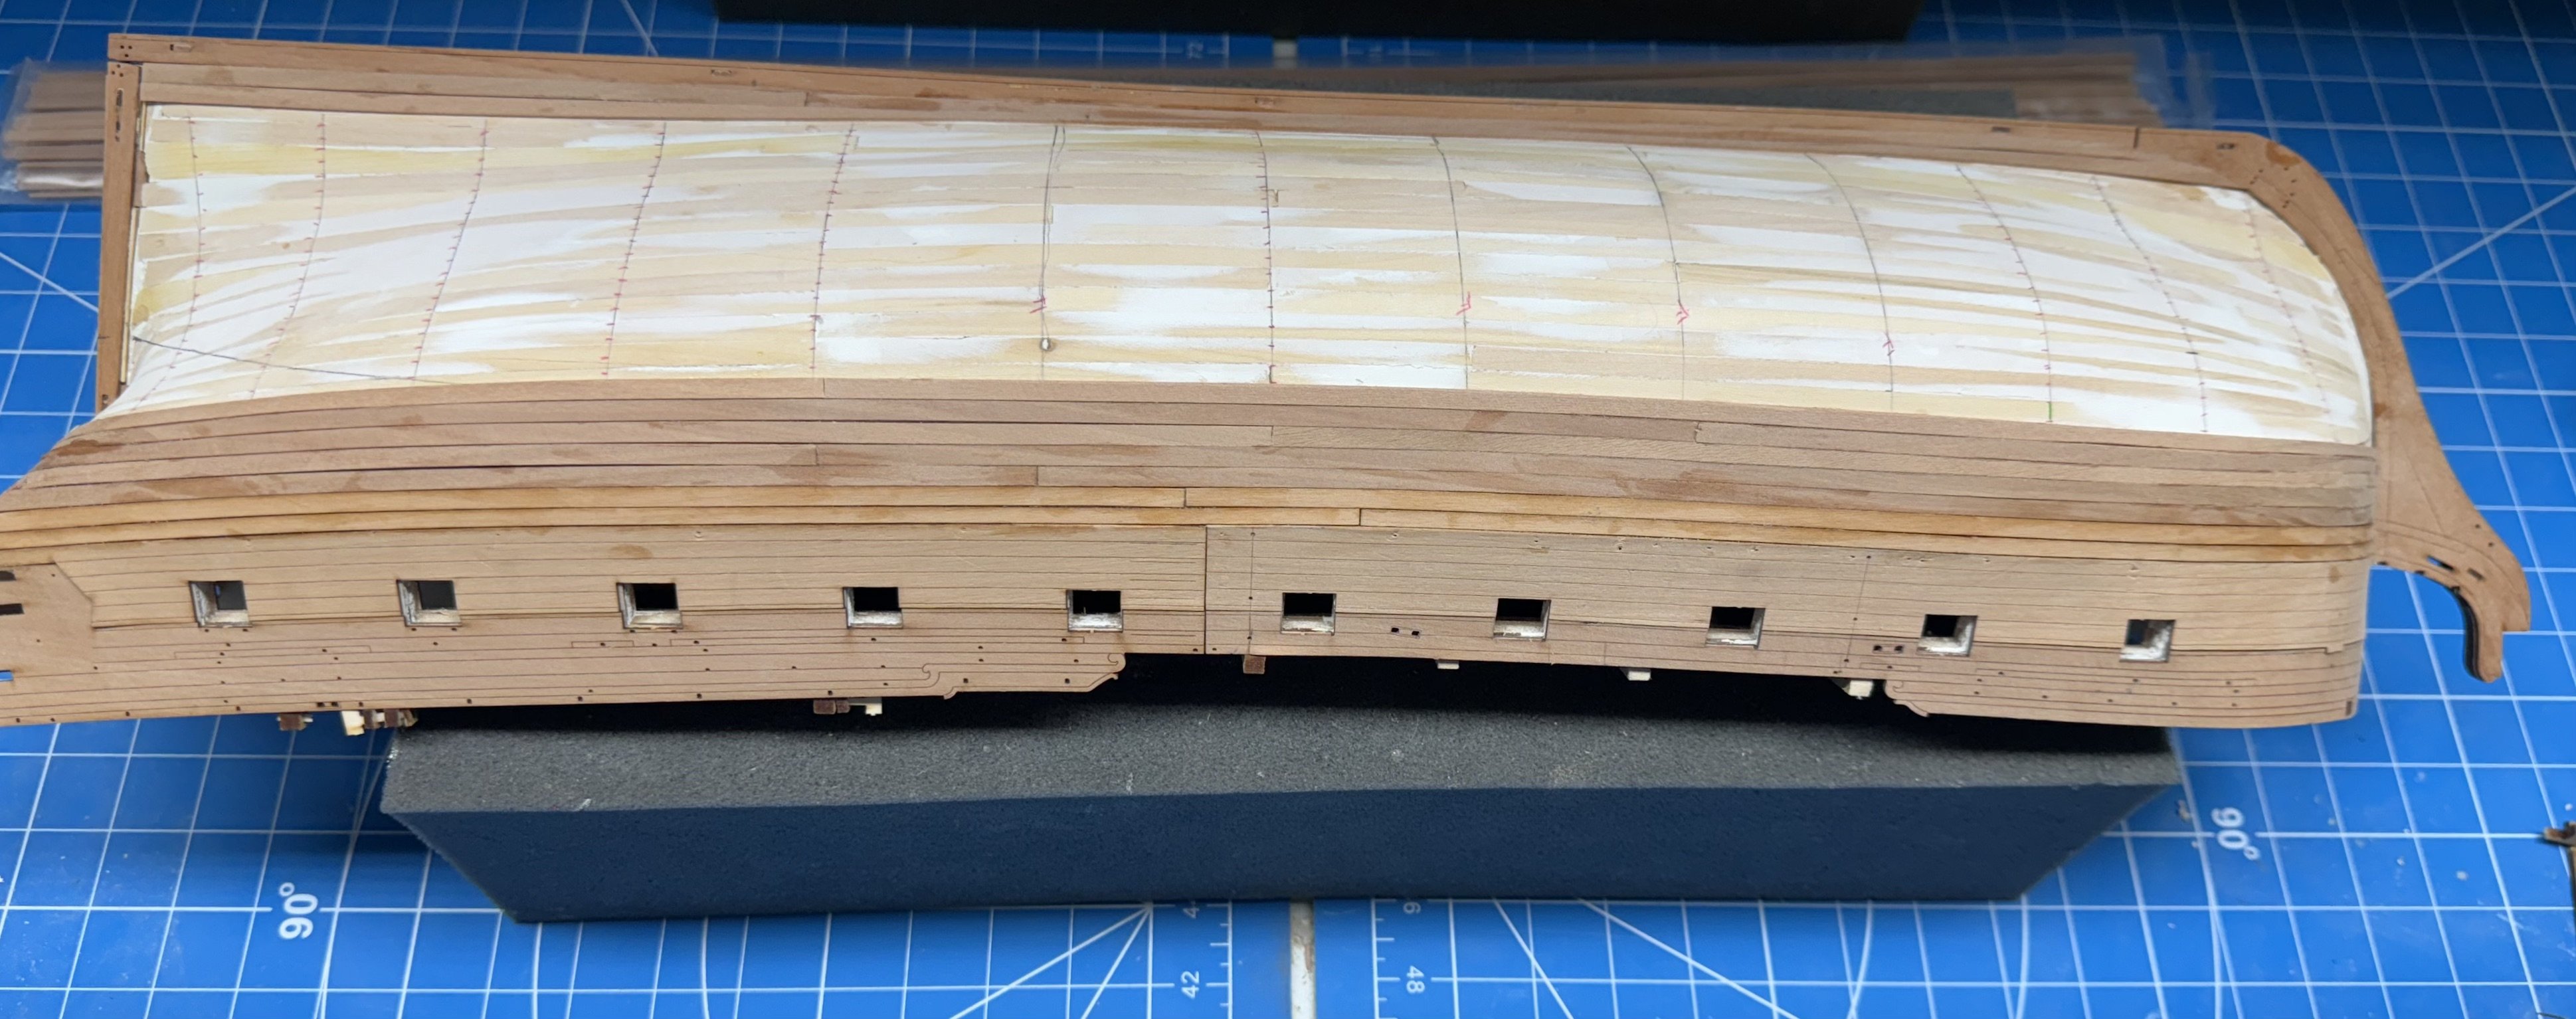
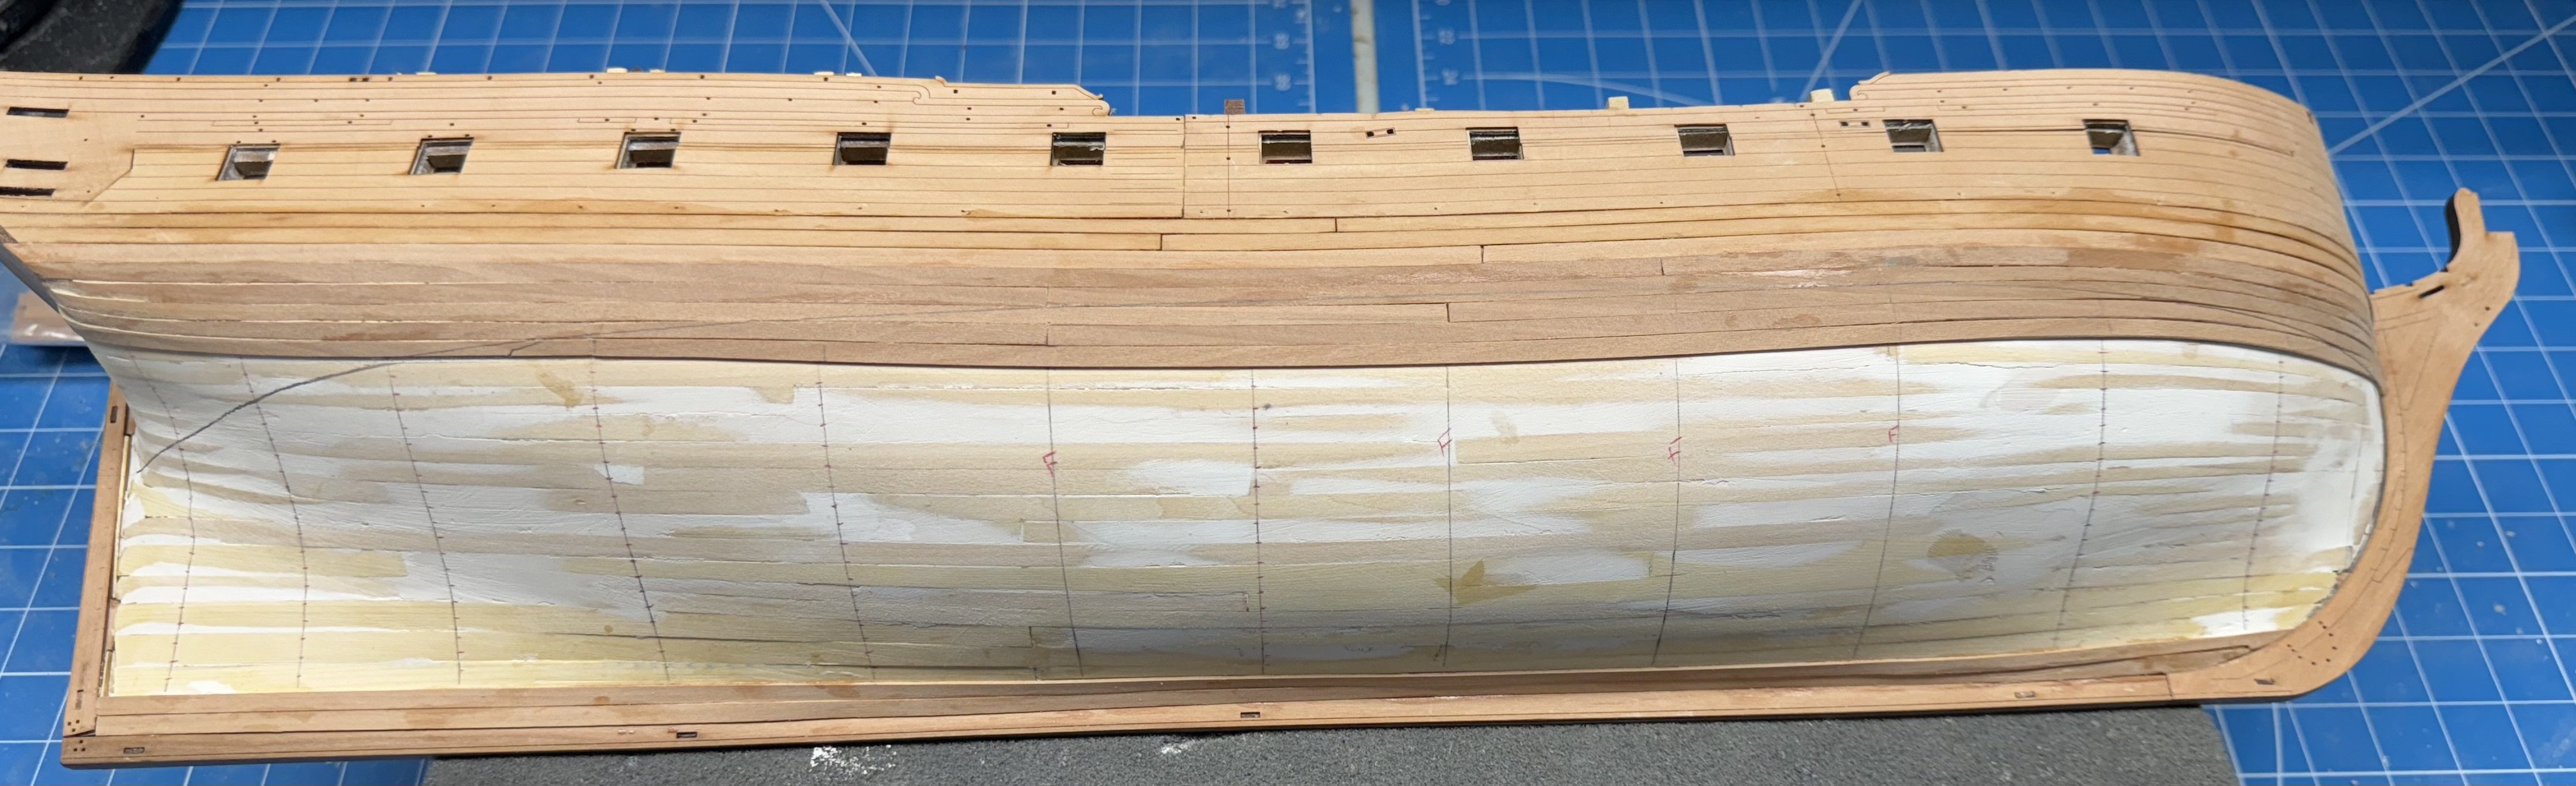
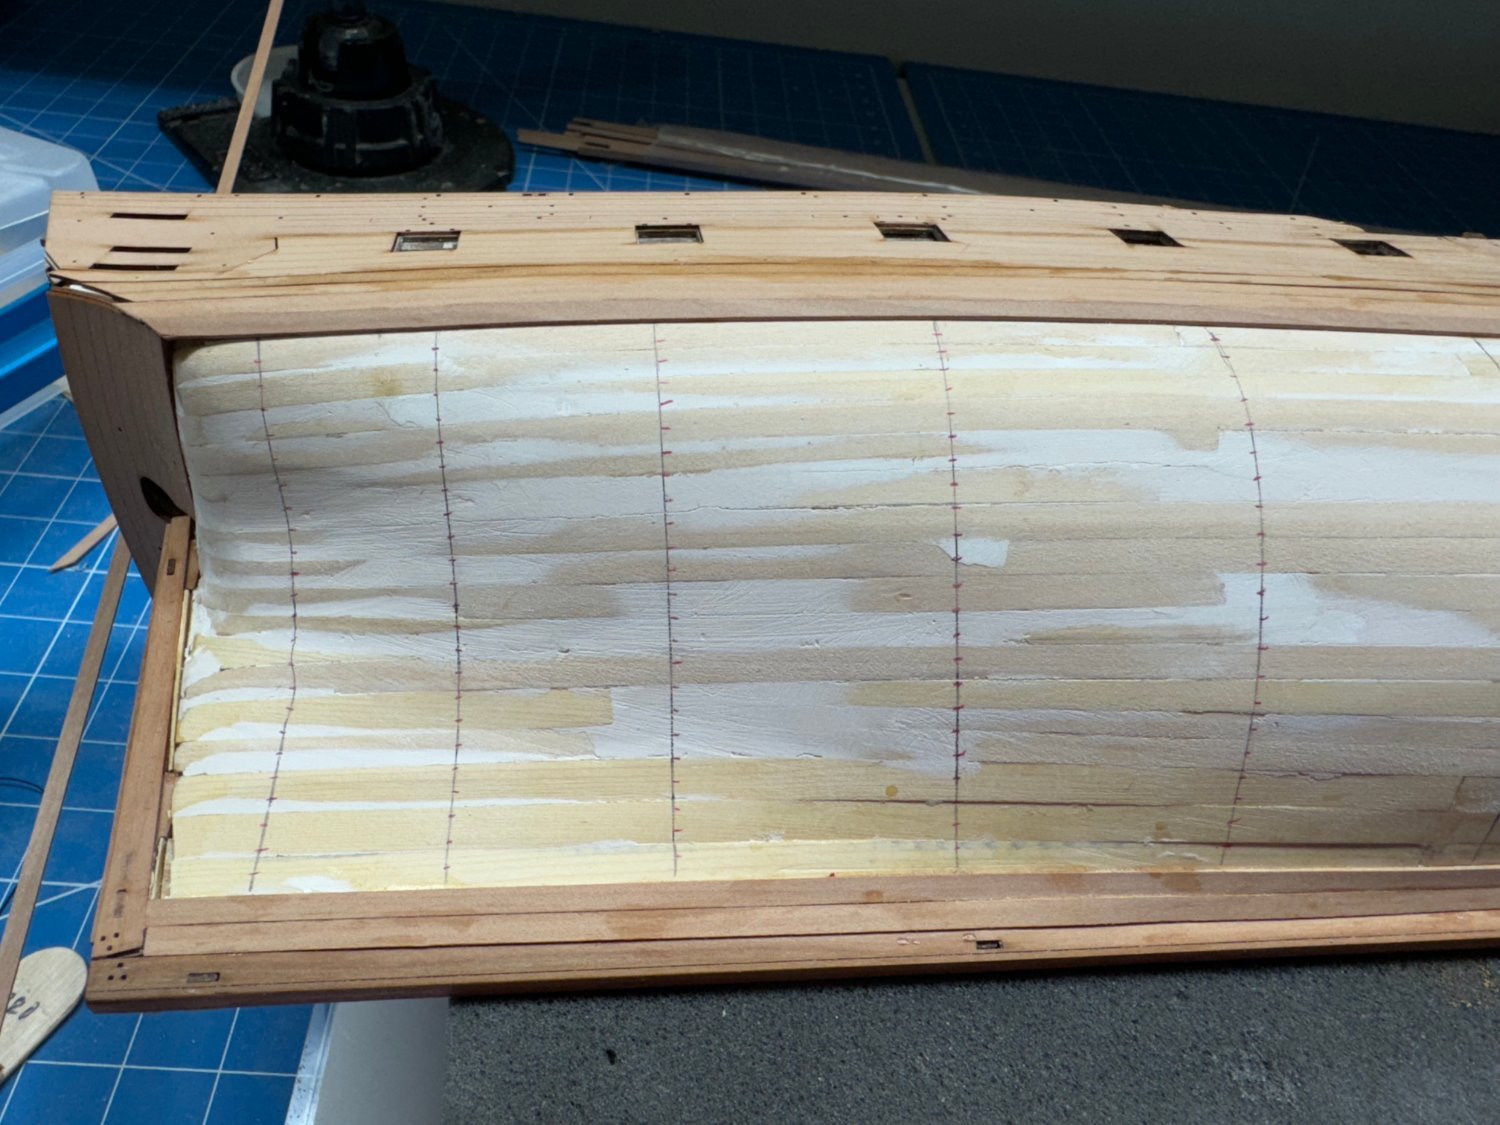
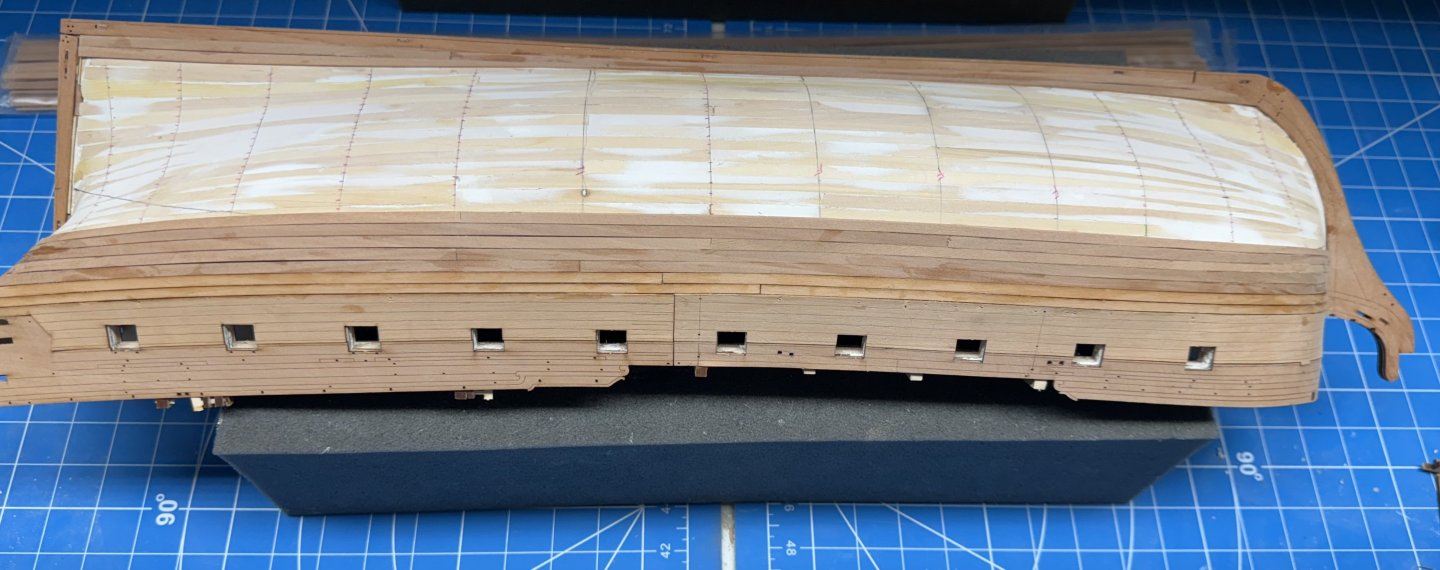
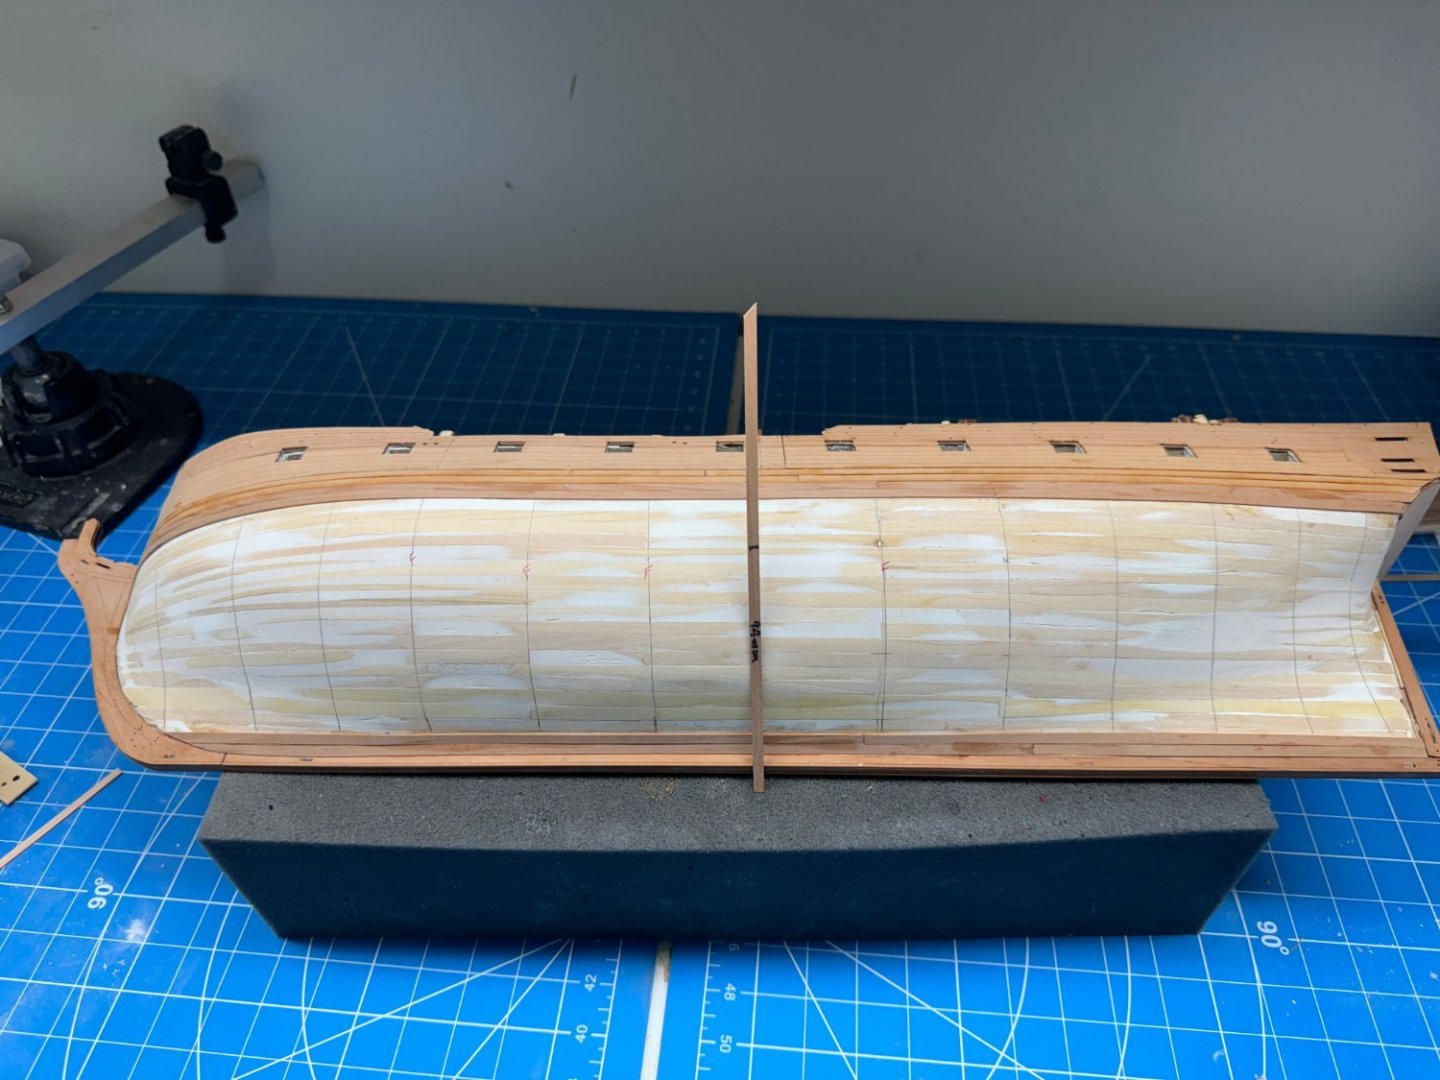
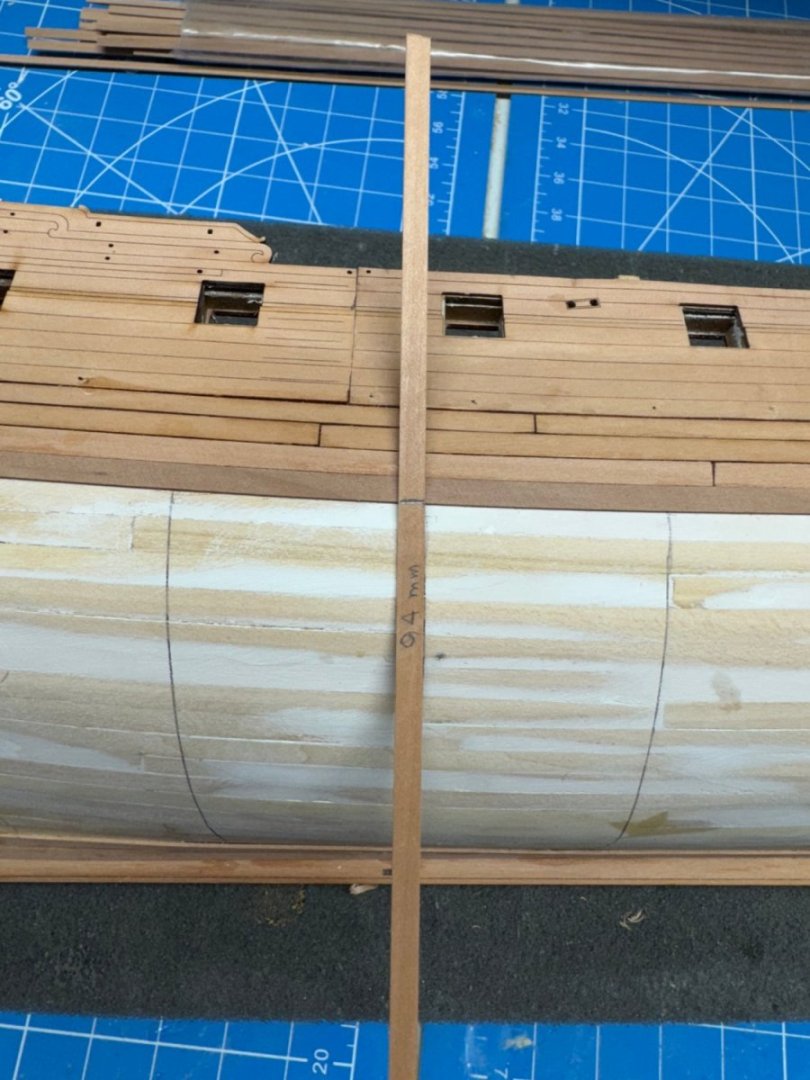
I added the four additional planks to the port side and measured at the amidships bulkhead and wonder of wonders it is the same 94mm as on the starboard side. I checked fore and aft of amidships and the same four additional bulkheads will need full width planks. Excellent kits design and manufacturing to get things to work out "as they should". Maybe a little skill in assembly as well. Now to "tic strip" the port side and start planking "in earnest".
-
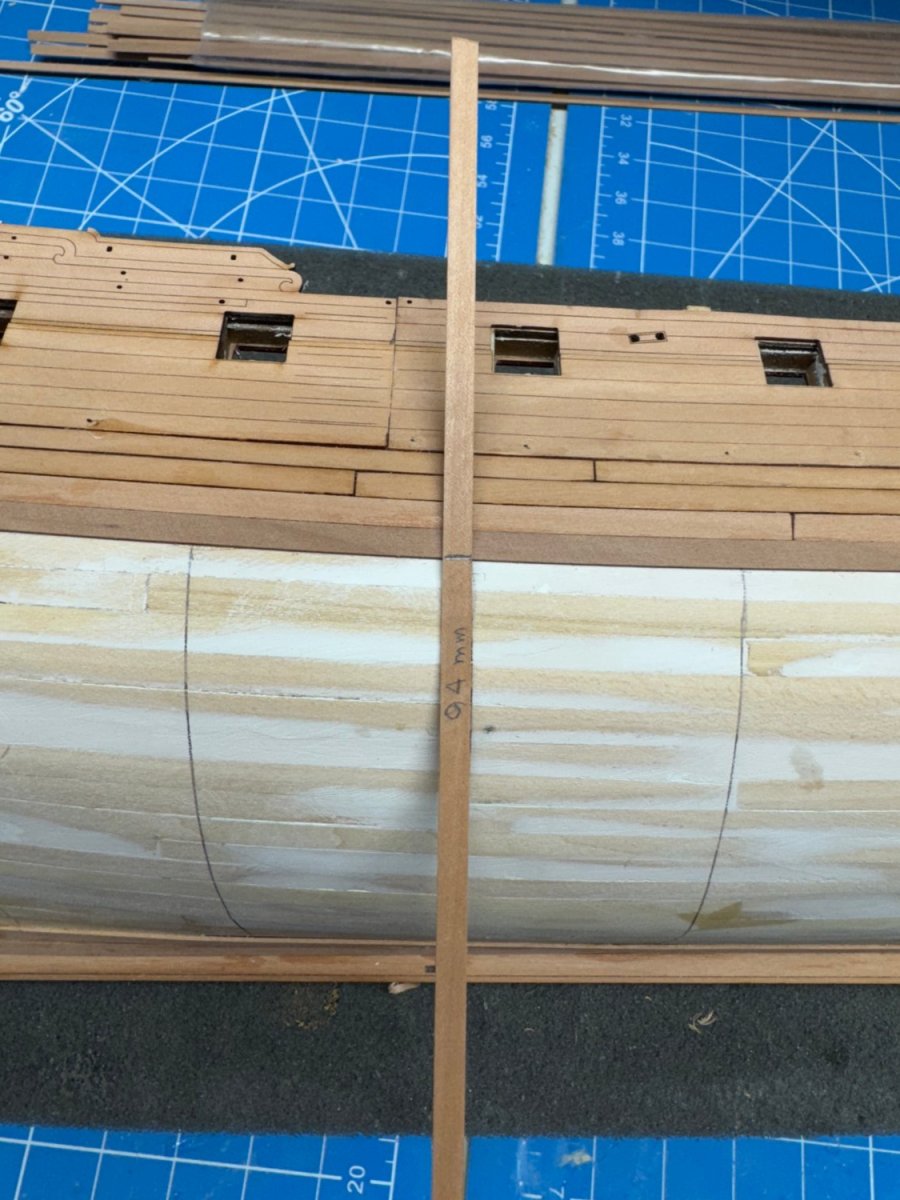
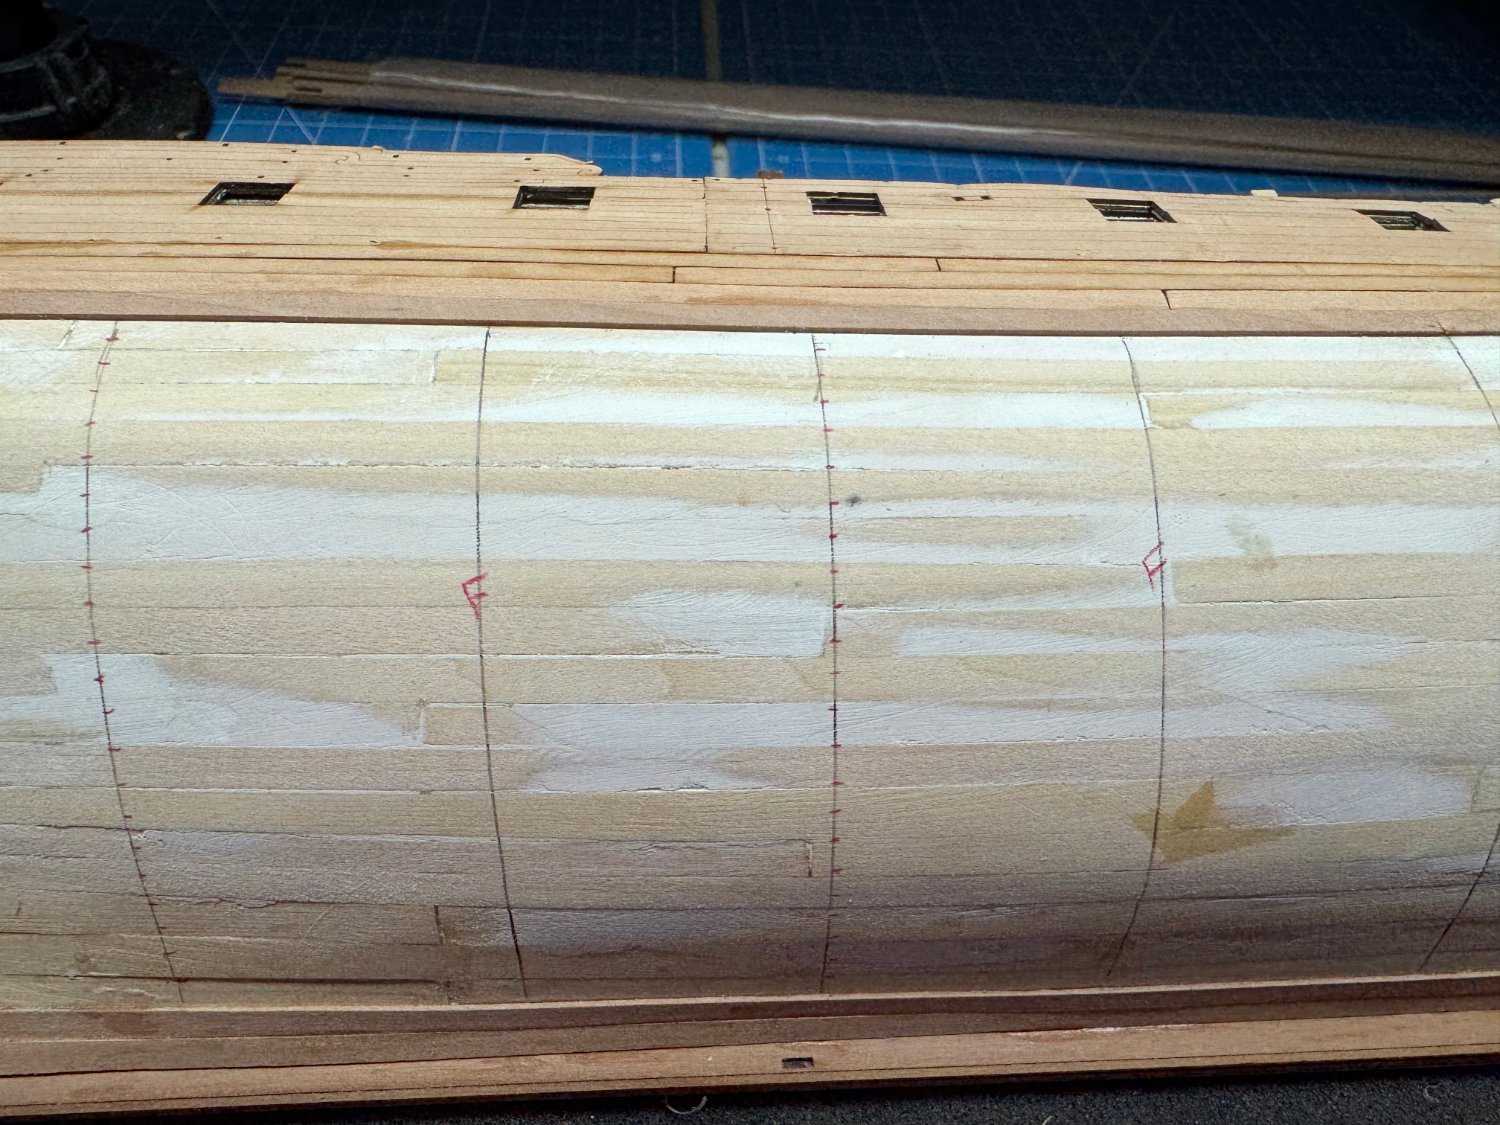
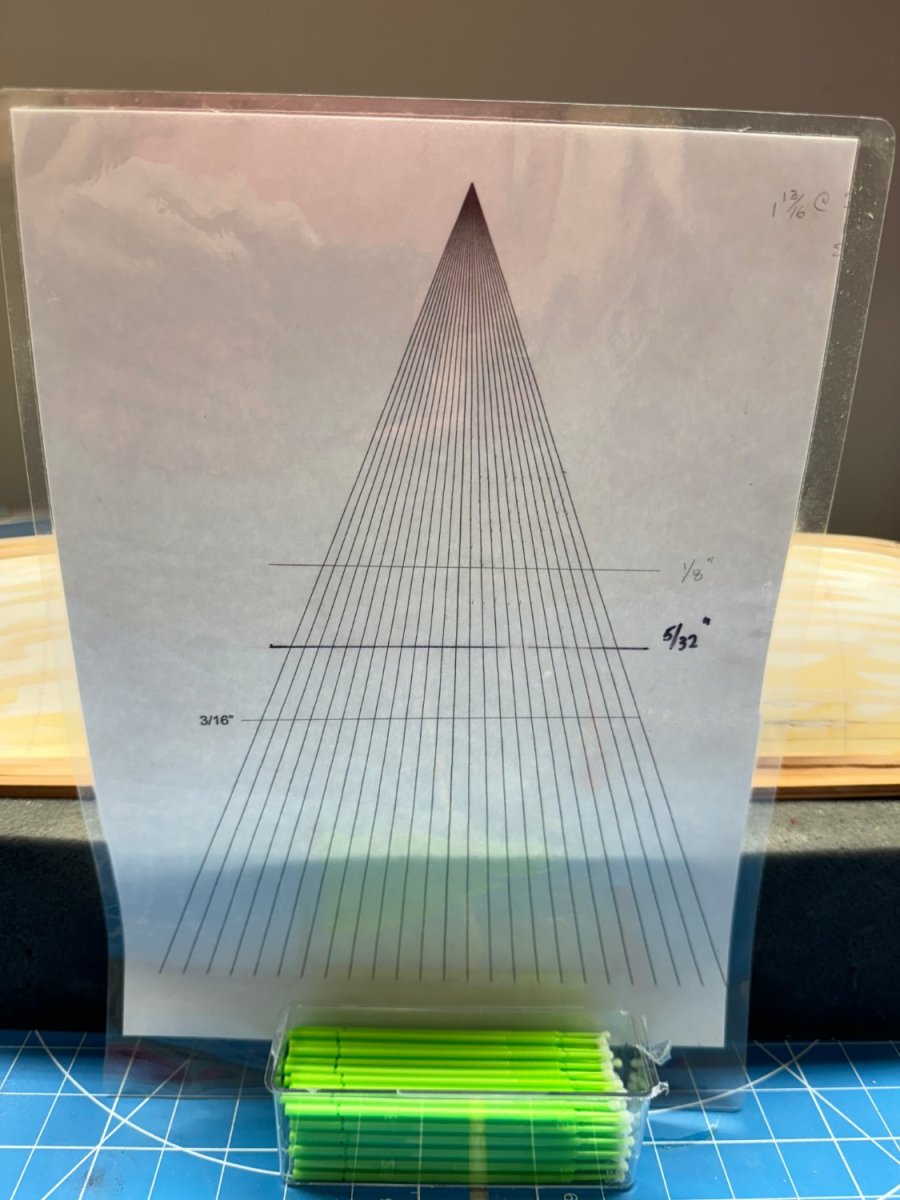
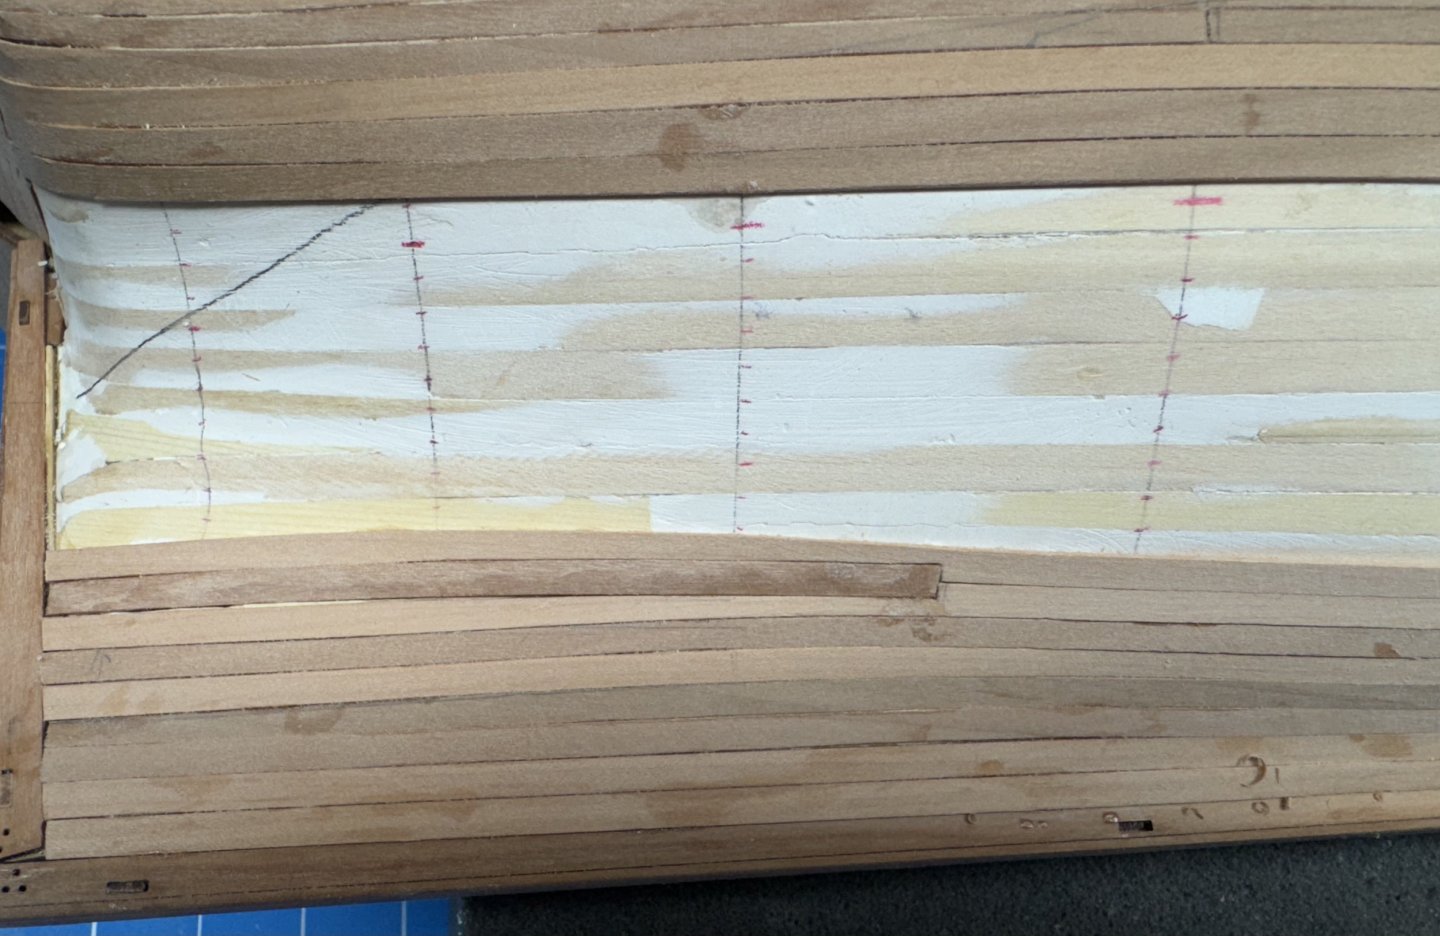
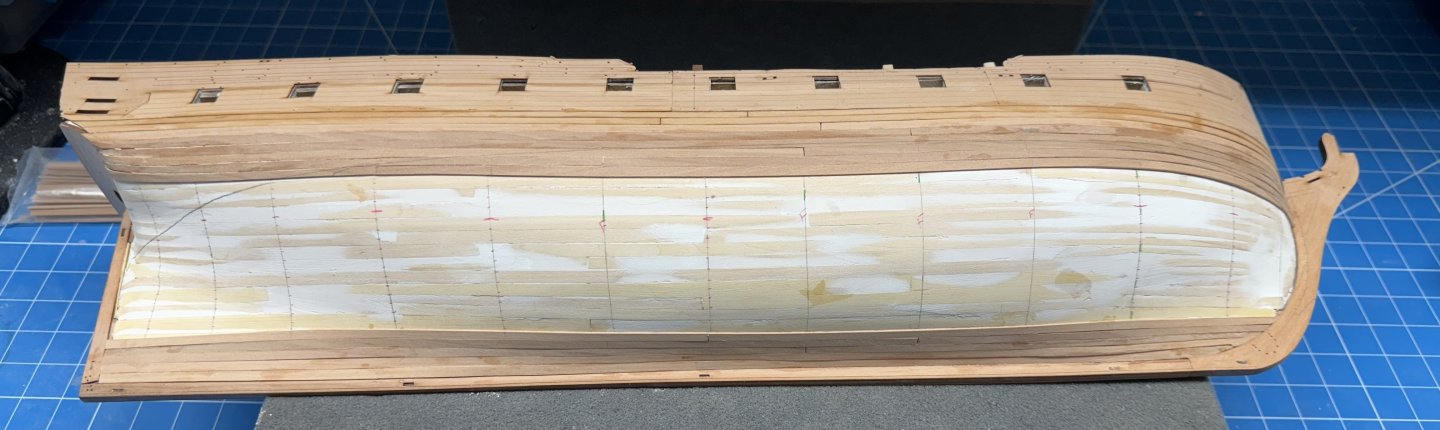
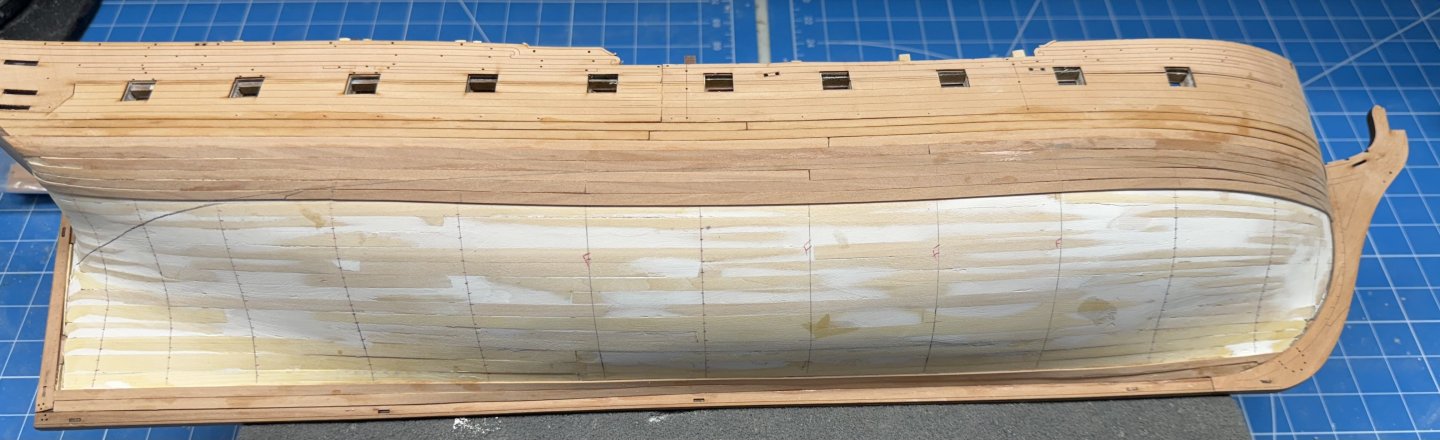
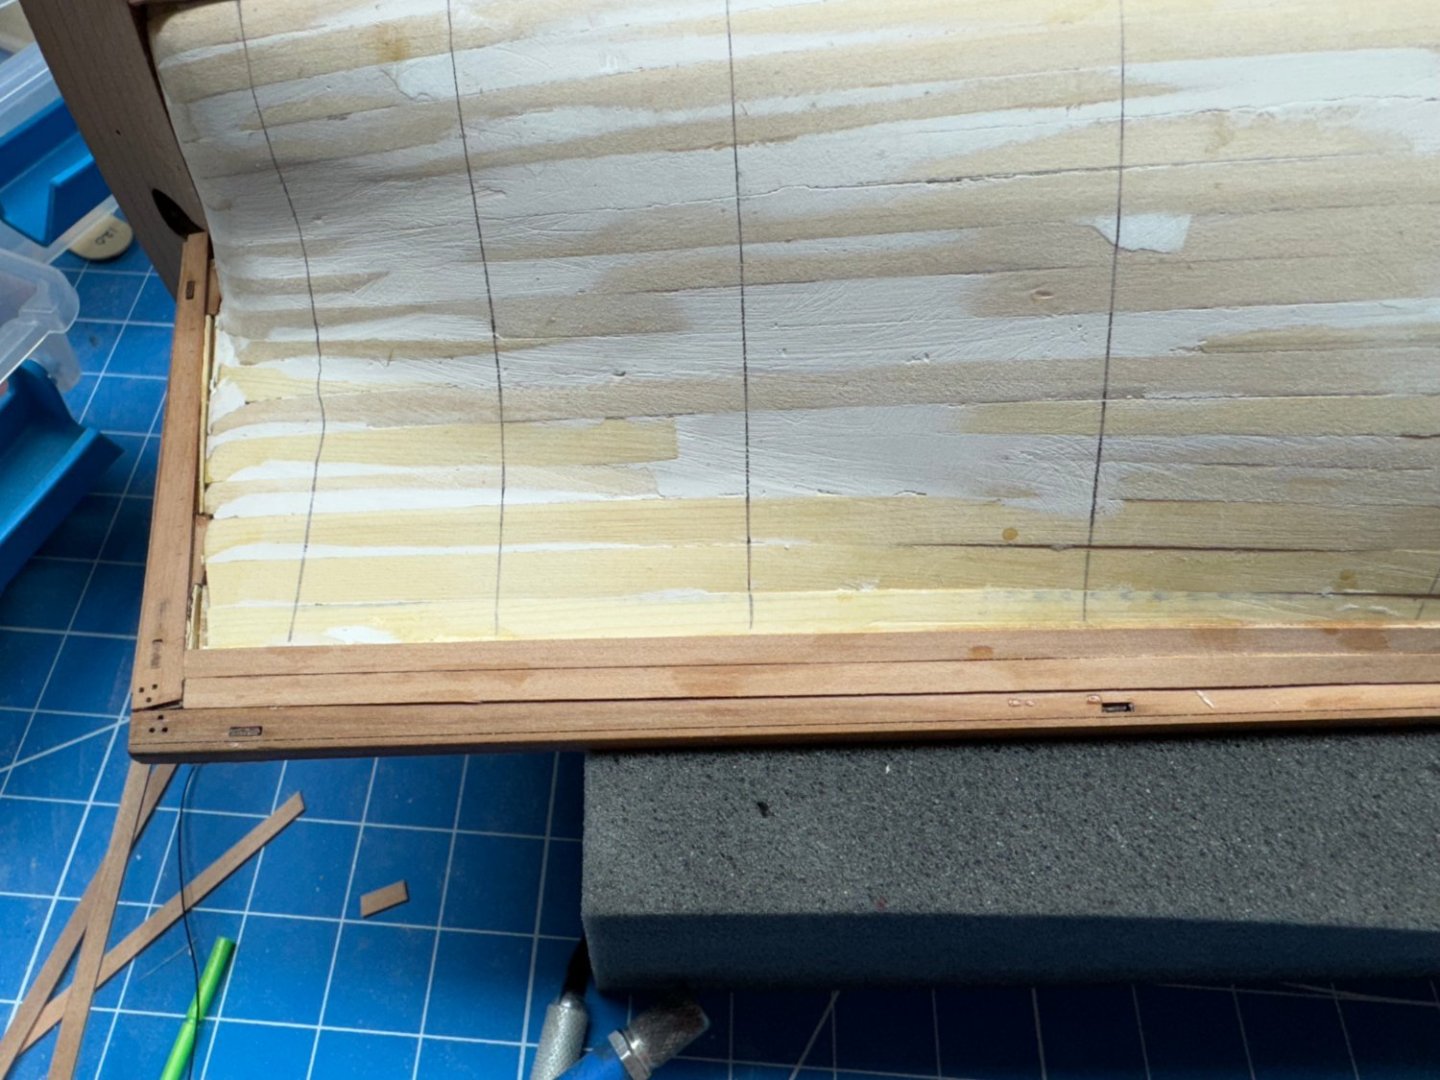
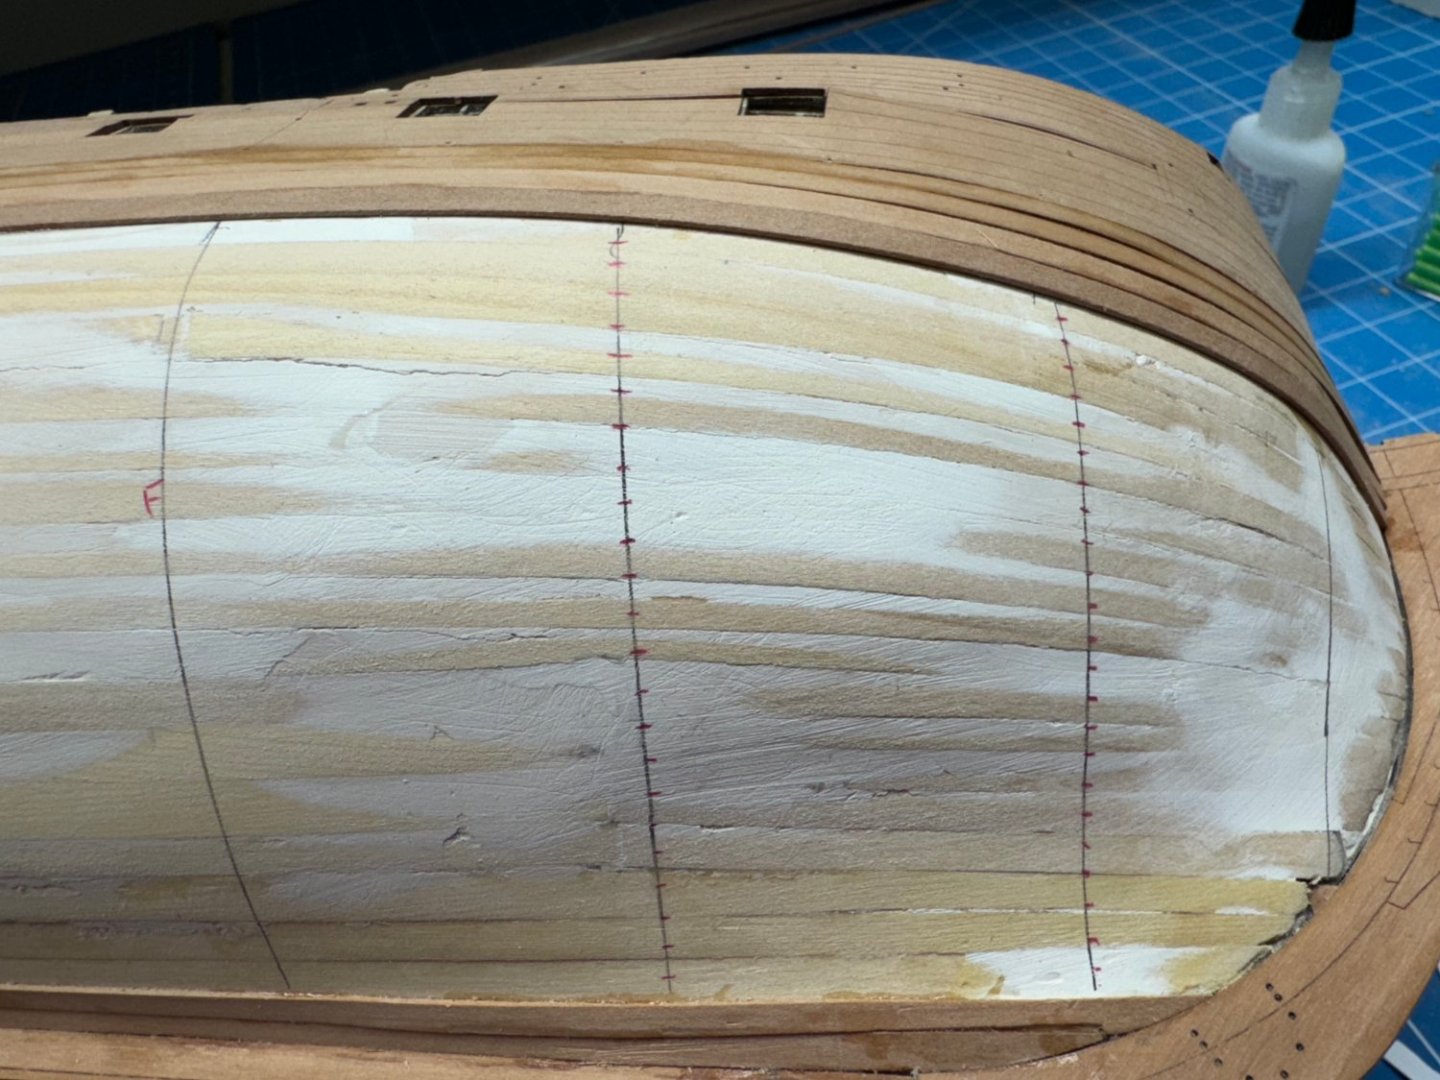
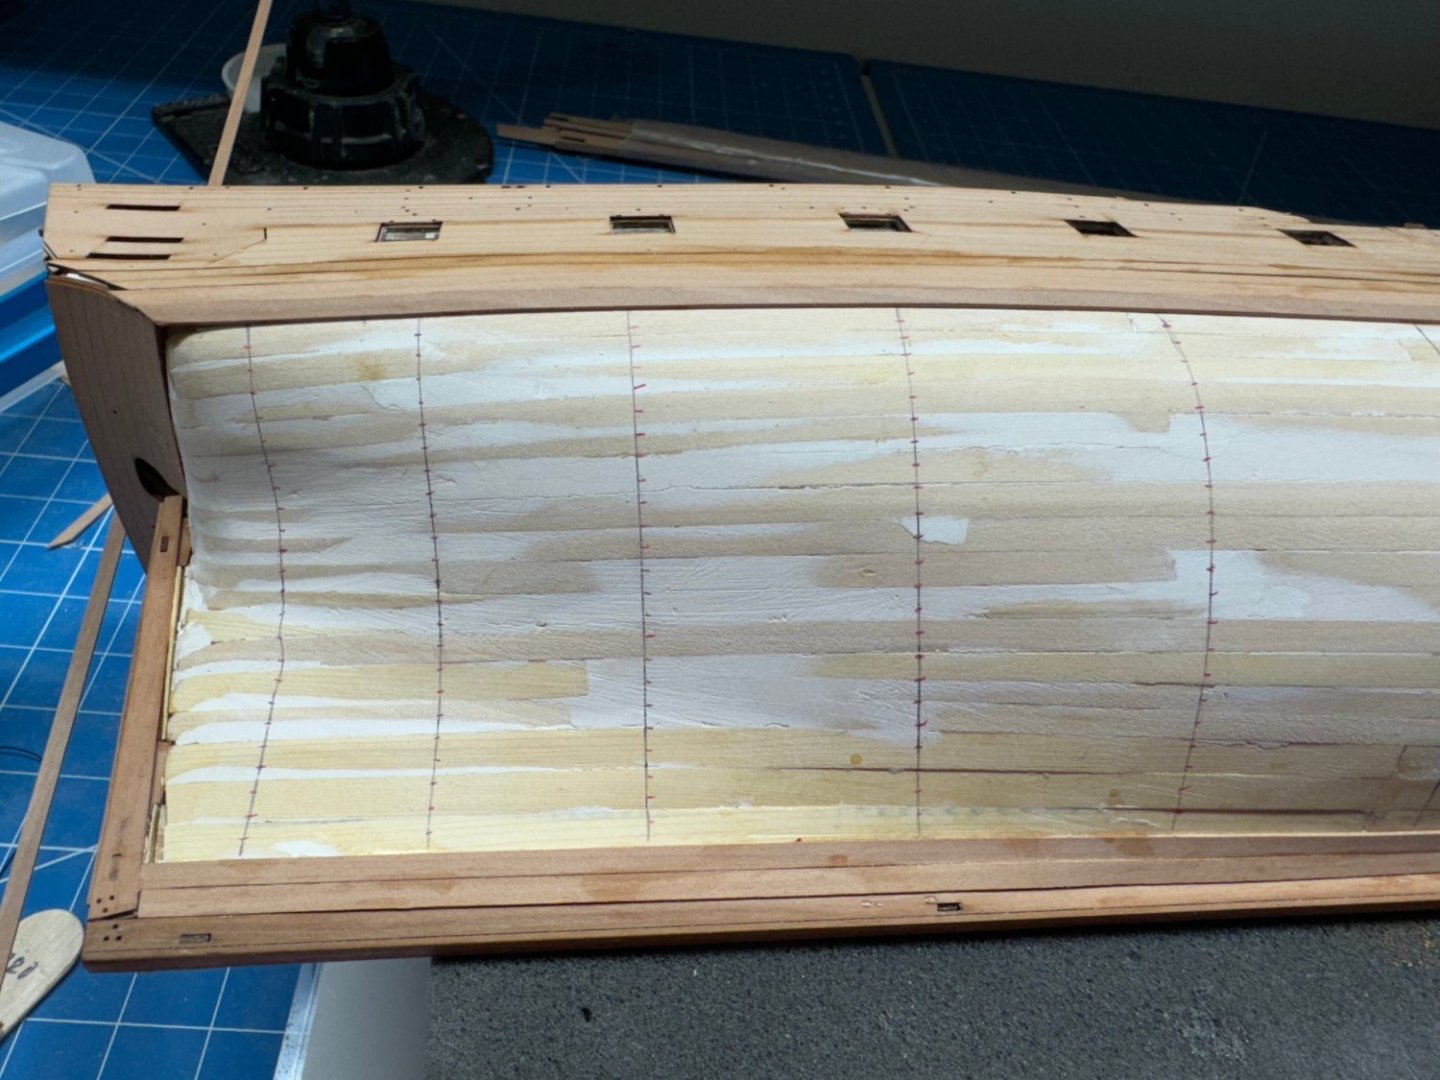
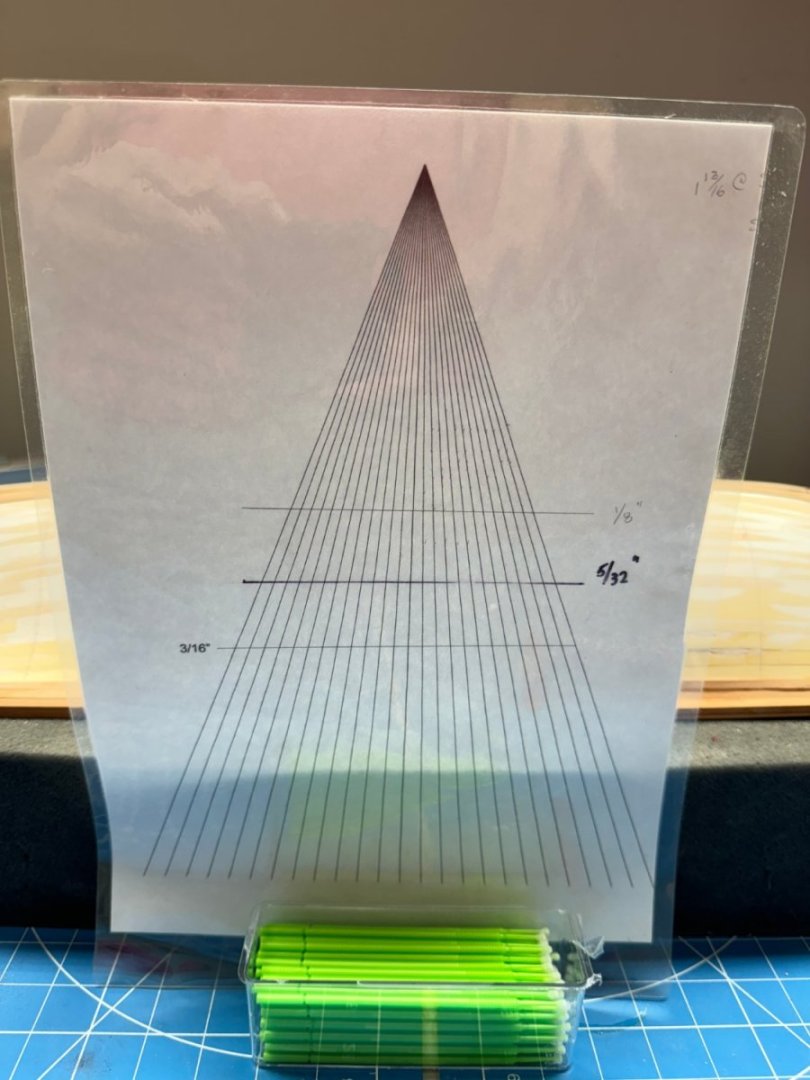
On to the planking. After getting the top two rows supplied with the kit in place I measured the distance from the keel to the bottom of the upper planks (in mm - makes the math easier) and divided by the 4mm plank width and found I needed like 28 planks to cover that span. That presents a problem for me as my planking fan is only 24 ticks wide. The 5/32" line is approximately 4mm so if all goes well all the strips should fall at or above this line. To solve the planking fan issue I added four more rows of un-tapered planks, two at the keel (garboard strake plus one more), and two at the top. I measured again and got 94mm which if my calculator is correct means 23.5 (aka 24) planks to fill this area. I got my tick strips out and measured, marked the strip then marked the hull at the bulkhead (more or less) locations I had drawn on the hull. I used a red colored pencil to mark the hull so I am not confused by errant pencils marks which may be on the hull. I have not decided how to handle the very forward area yet - I have the book, perhaps I should re-read that section. I am going to have to build a jig from cutting the planks to the required dimensions. Doing it by the unaided hand has never been one of my strengths. I marked the midships (aka widest point) bulkhead and then used that tick strip to see how far fore and aft full width strips would "work". I marked those bulkheads with "F" - I did not see any sense in marking the ticks since what they mainly provide is the plank width at that bulkhead.

-
I have a serving "machine" both the powered (which I have never used) and manual (from Syren). I served the shroud loop and the fore and main mast stays (there were only two masts - Niagara). I remember it was a lot of work and when done unless you knew it had been done it was really hard to tell. Those fishing lures I used to get some weight on the planking a few posts back were used to get the served lines to hang straight as they had a tendency to want to twist and turn. It worked out okay in the end but it was a lot of effort for little payback except knowing you did it. I am going to set up the powered one (from Russia before the war) and see if it materially reduces the effort. Then decide whether to serve the stays and shroud loops.
-
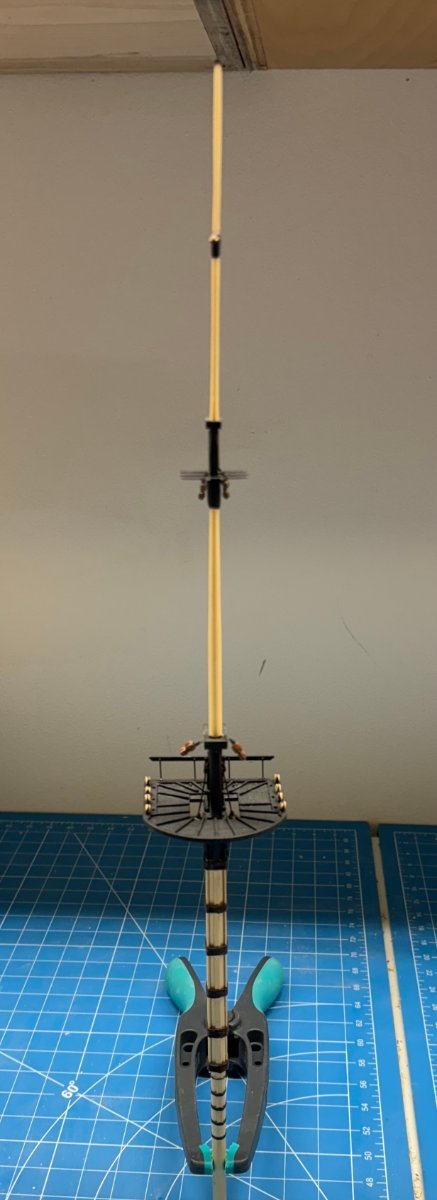
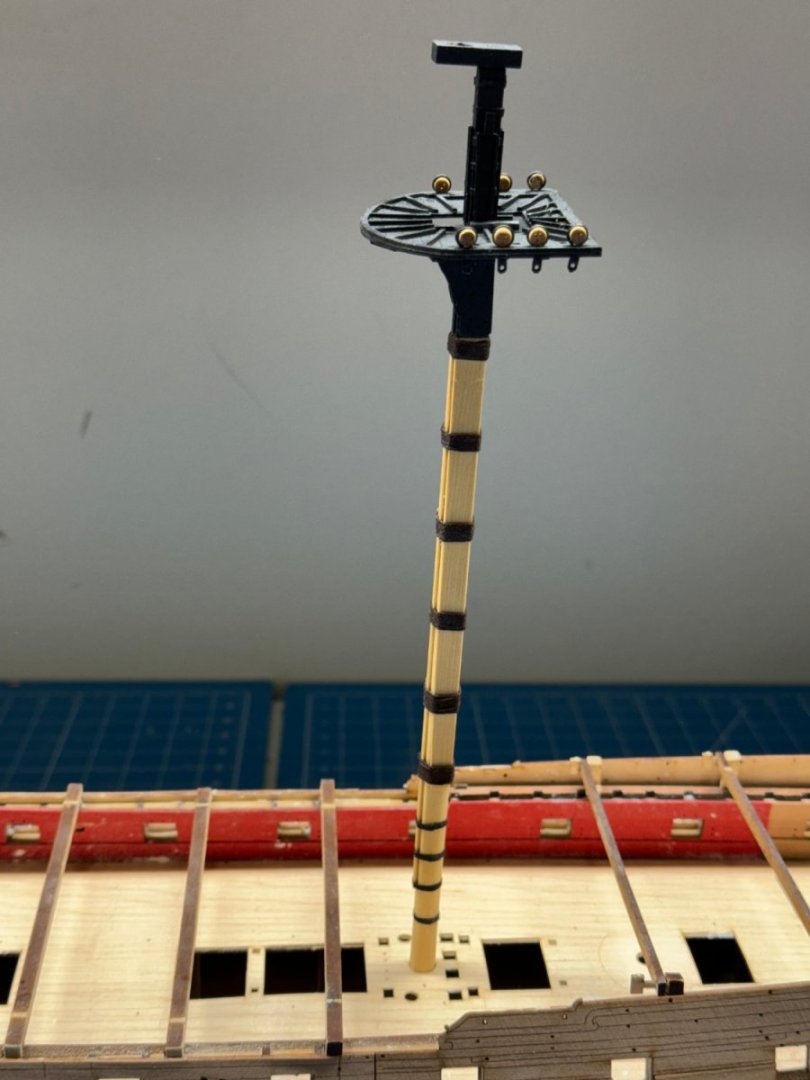
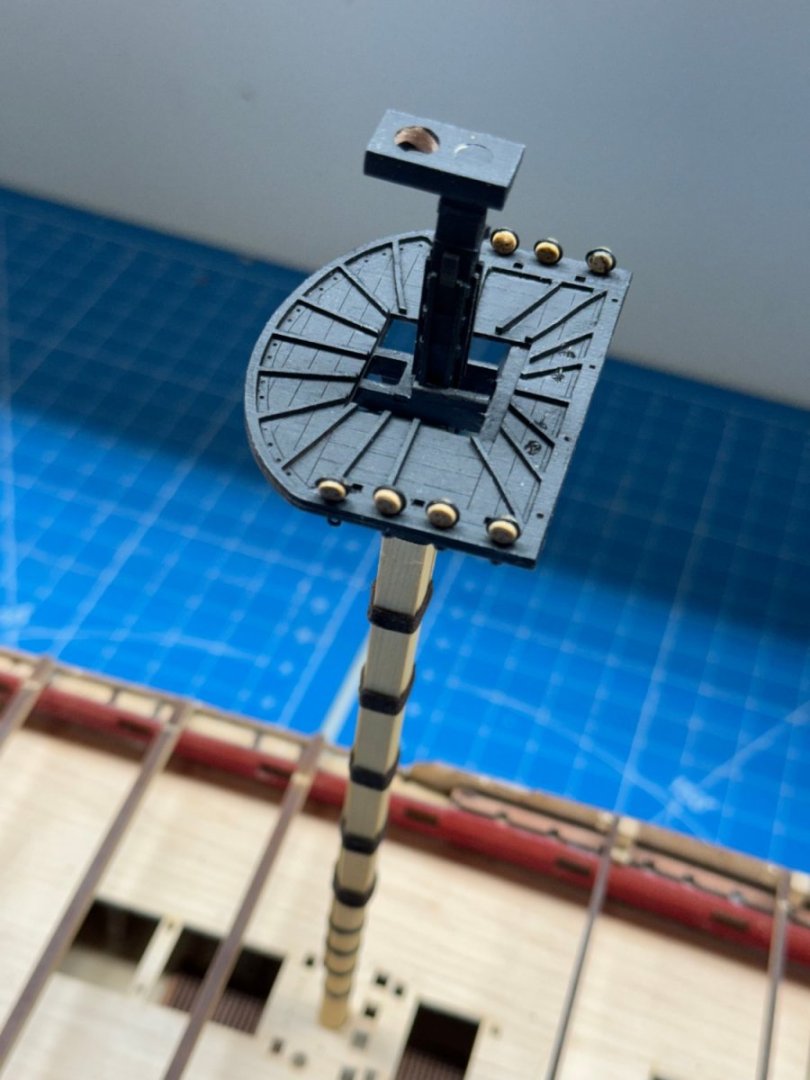
Thanks guys but, before I start on the hull planking I finished the Main mast as far as the instructions on page 121. I am thinking that maybe adding the upper stays/ratlines before installing on the hull might be at least worth thinking about. It would make getting the lower shrouds, etc. in place somewhat more difficult but it would certainly be easier (for me) to do that somewhat delicate (thinner lines/etc.) work where it is easier to get at and potentially lower on the work surface. I have found that the rigging done above the elbows particularly taxing. Anyway, here is the Main mast dry fit. I chickened out on the cap on top of the top gallant mast. I thought (briefly) about trying to fabricate it from the Alaskan Yellow Cedar but quickly returned to my senses and used the kit provided piece painted black. I have serious doubts about the AYC grain structure supporting really small pieces like required here. I also took the cowards way out on the fiddle blocks at the main cap. There is some discussion on some other build logs about where the securing lines should go - around the mast, around the cap, etc. I chose to put an eyebolt on each side and secure the fiddle blocks to them. I think I like the lighter color masts - more contrast with the black painted parts.

-
A planking we shall go; a planking we shall go..... Going to go cut some tic strips and find my planking fan. I am at least going to start in the "approved" manner this time.

-
While waiting for various items on the hull to soak, dry, be fitted, glued and dry I have been building the masts. As I mentioned previously there are all from Alaskan Yellow Cedar (since that is all i have in big enough section to make 8mm square billets without getting out the 10" table saw). So here is the lower Main Mast with "all the fixens", except the blocks and railing. One word on the deadeyes and strops. I painted the strops before hand using an "etching primer paint" supposedly designed to use on photo-etched metal. I either failed to properly prepare the surface or the etching does really work because most of the paint flaked off during the handling necessary to get the deadeye into the strop. This meant a good deal of very fine paint touch-up. I have modified my prep techniques and hope for better results on the other masts, not to mention the fifty odd deadeyes in the channels.
-
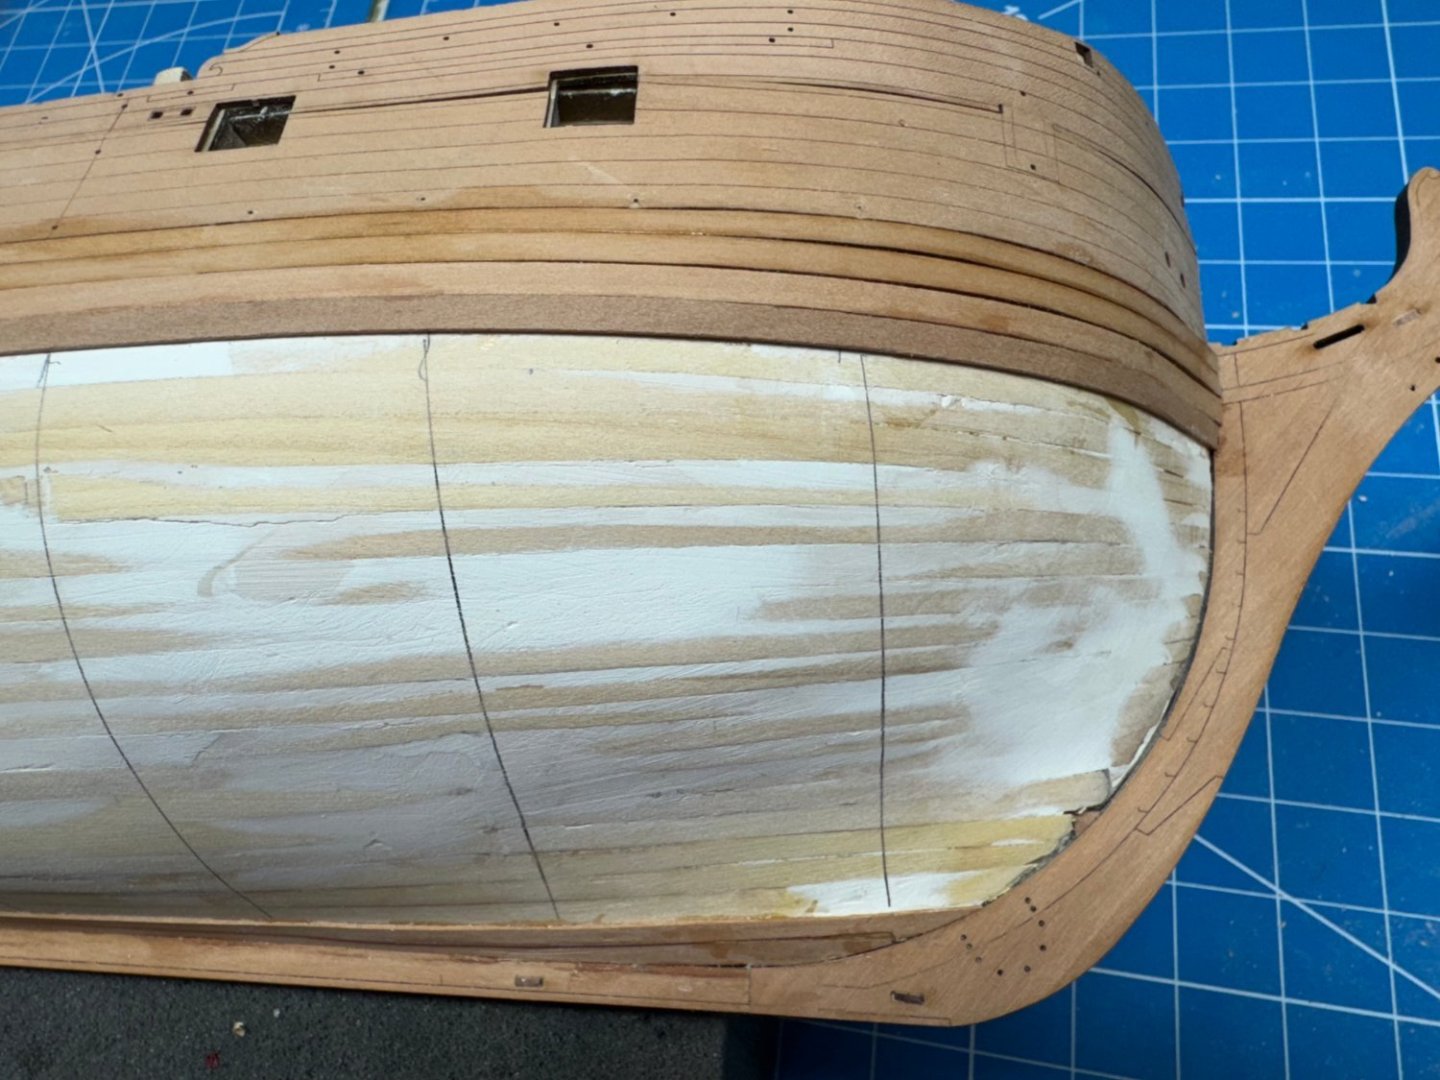
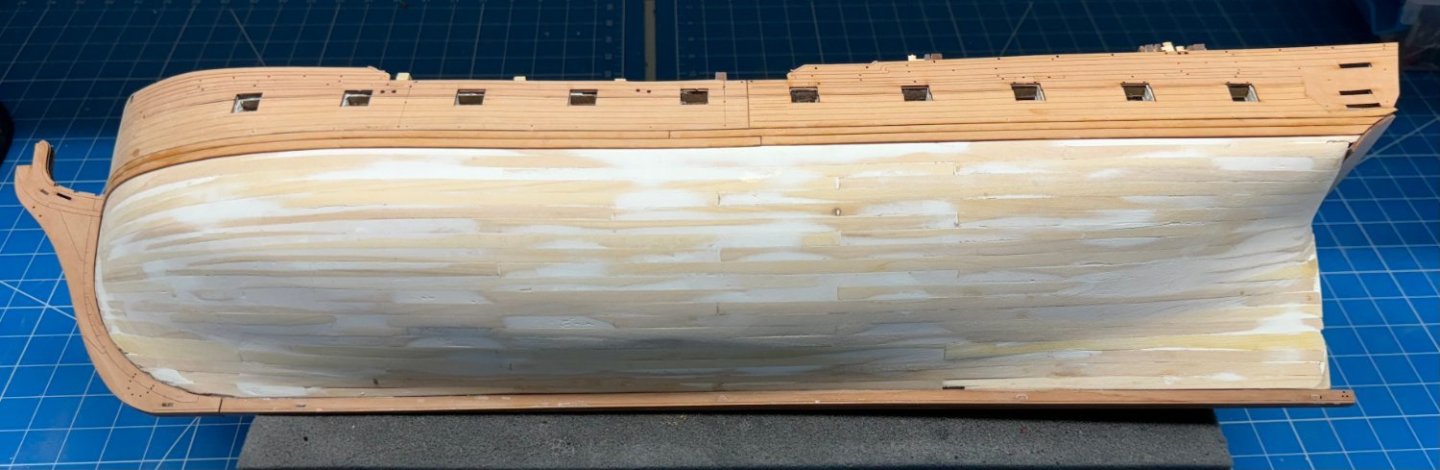
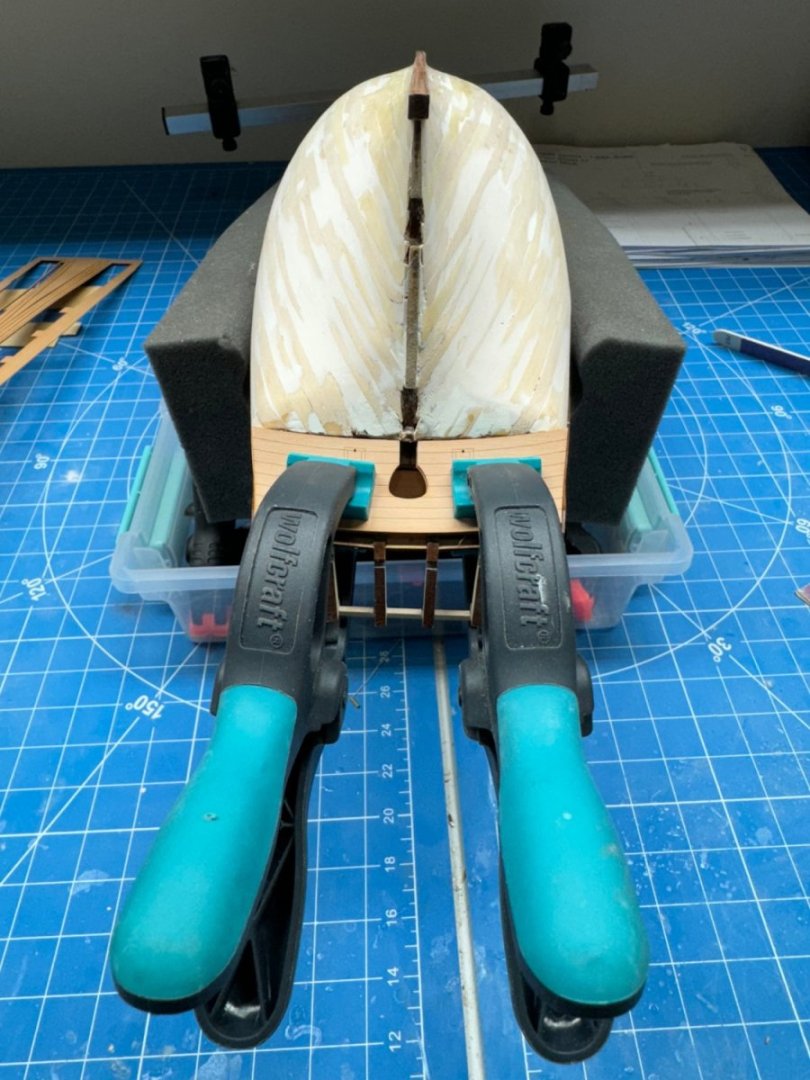
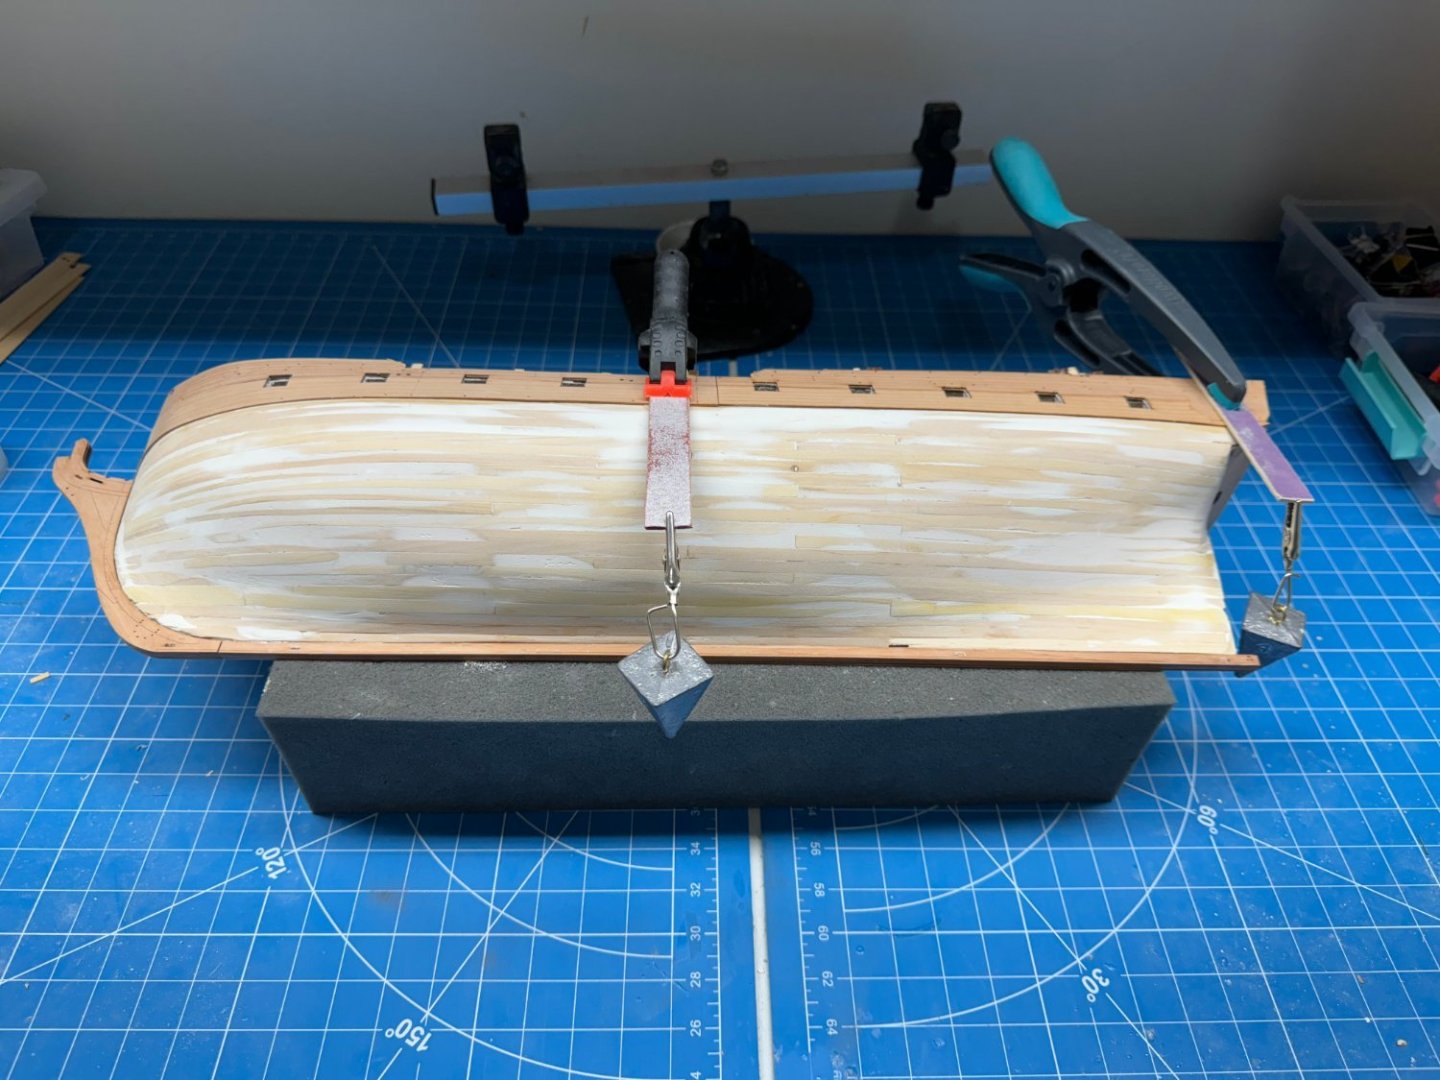
Fishing line weights appear to have corrected the bottom edge of the lower planking and the transom finish "pattern" is now attached and waiting for the glue to set - then on to the kit provided planking and then....more planking "fun".
-
Despite the nails/pins I still found areas where the lower pattern was not glued to the first planking layer. I thought it prudent to correct this and since the nails did not seem to work I tried something else. I had the fishing sinkers from an attempt (ultimately successful) to get some line to hang straight. Hopefully I can move on to installing the transom and then the first two rows of planking provided in the kit.
-
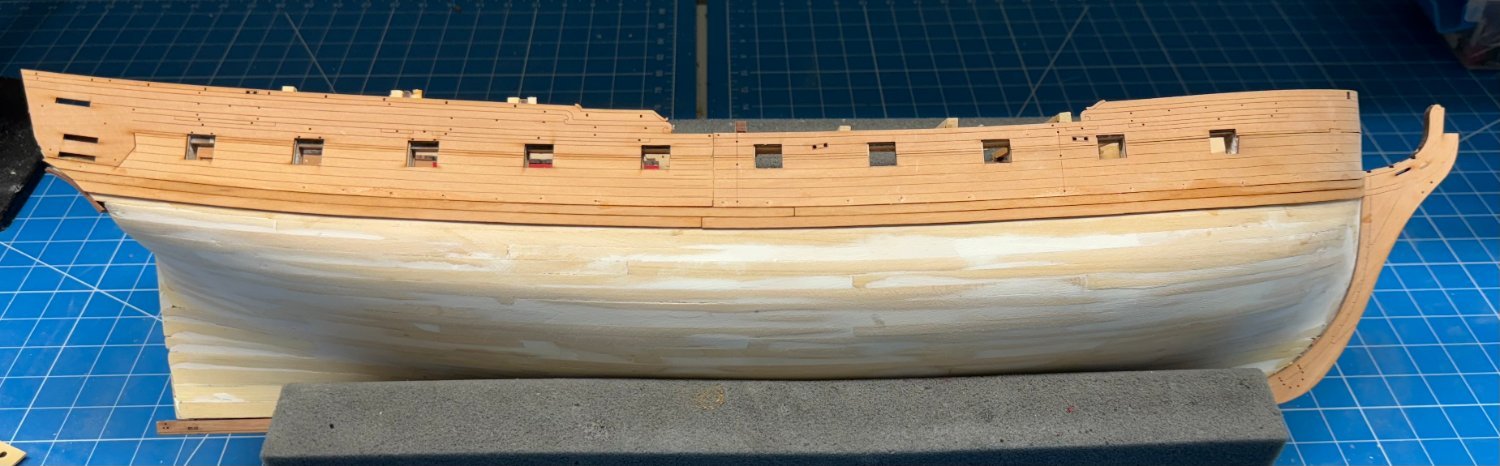
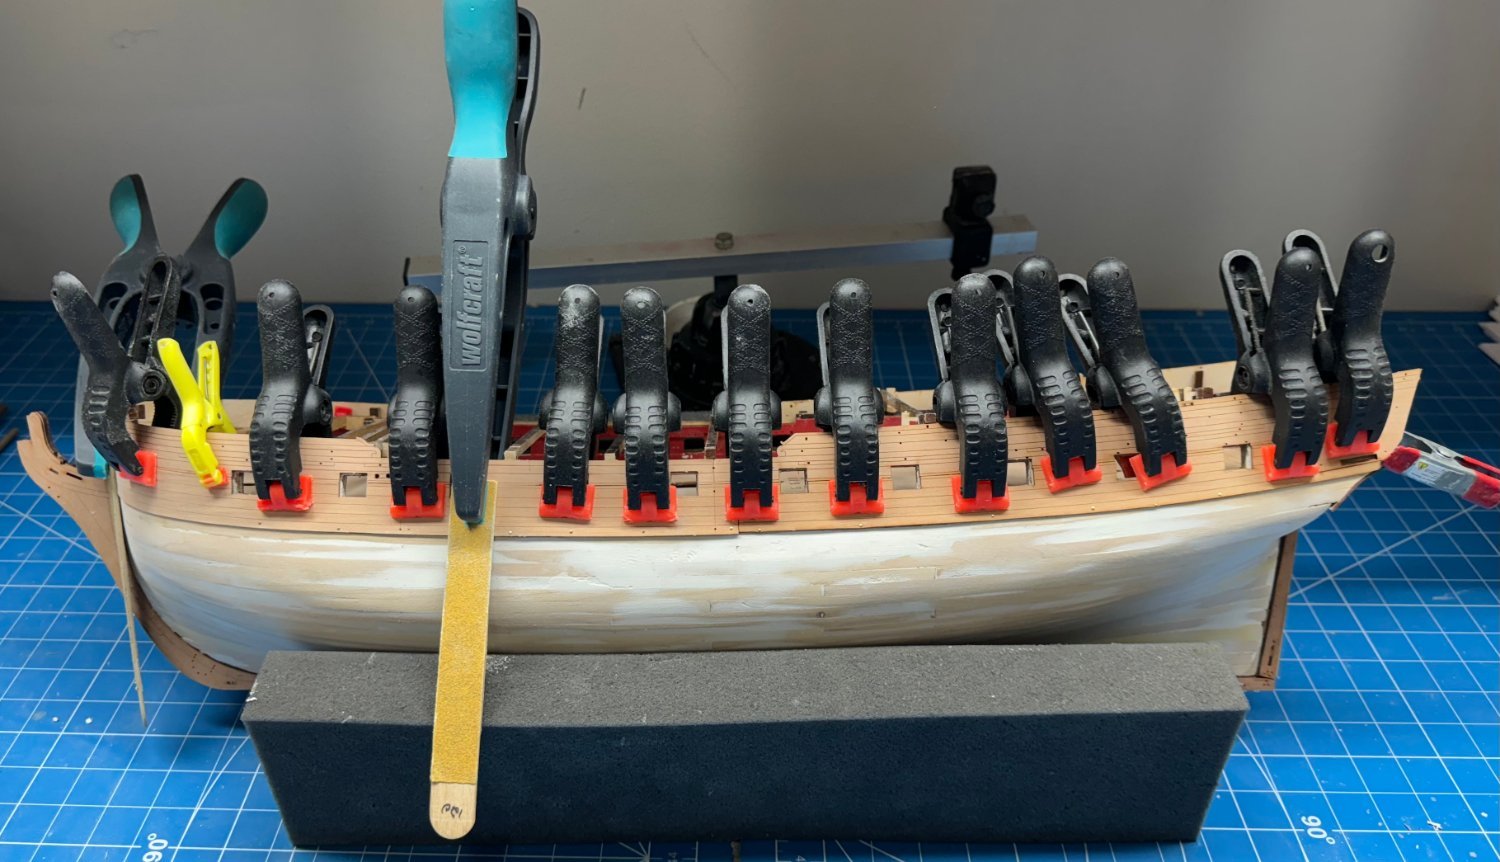
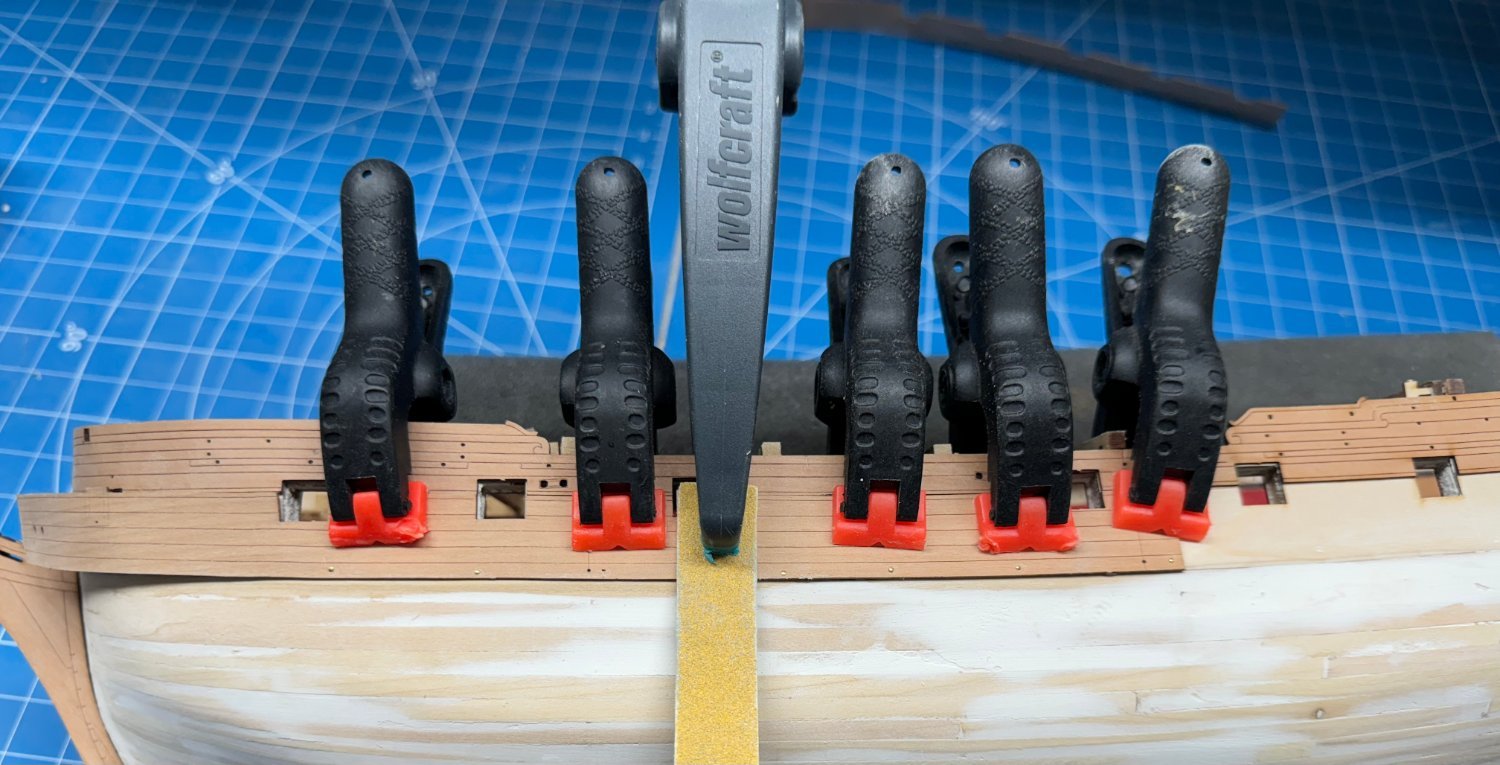
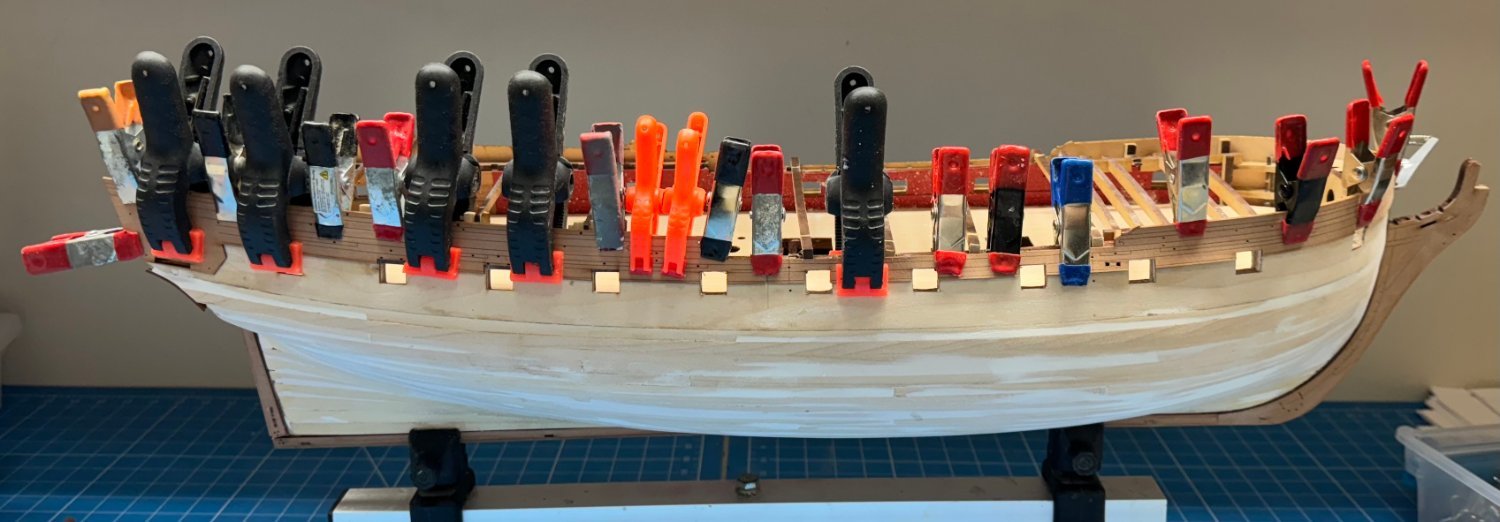
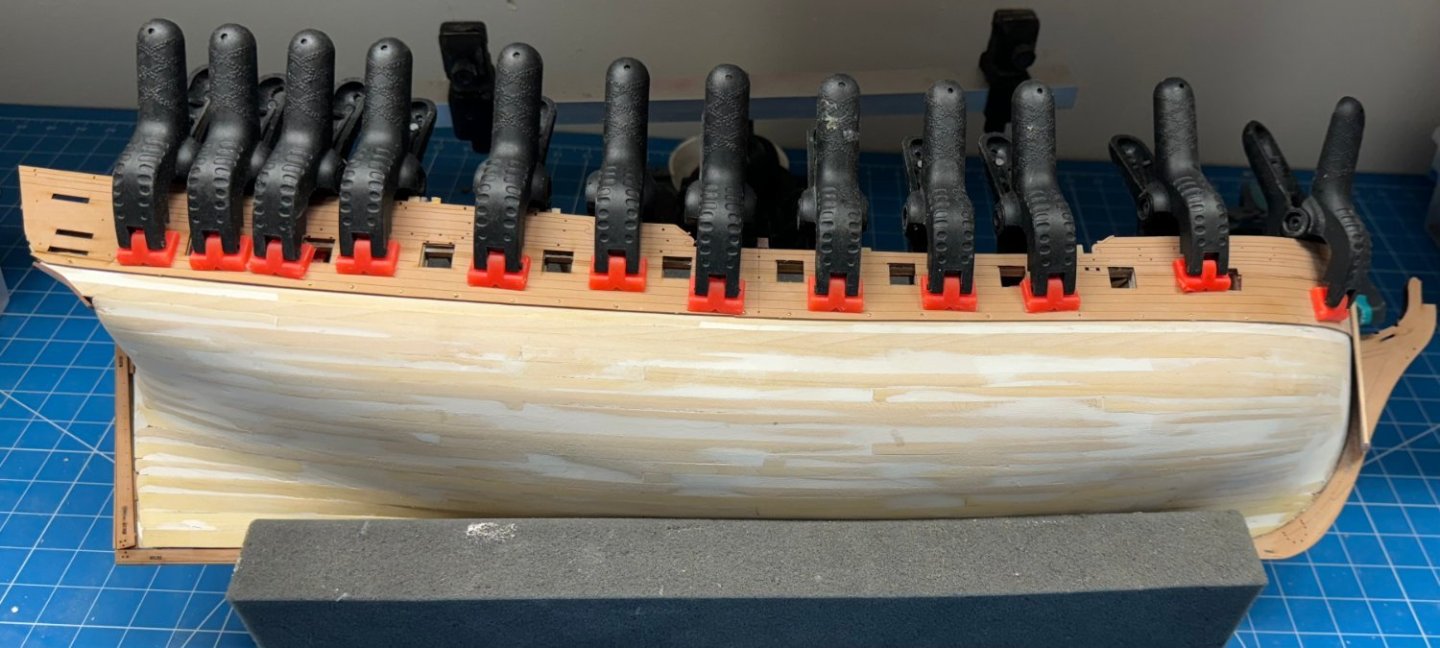
Starboard side "middle" planking patterns in place, glued and clamped. I put nails (aka pins) in along the bottom and tapped them down with a small hammer to try and ensure that the bottom edge in firmly glued to the first layer of planking (and filler). I will remove them once i am sure the glue has dried. According to the instructions this bottom "row" of planking will eventually be covered with the wales so the unsightly holes (and whatever damage removing the nails causes) will not be seen.
-
Forward portion of forward part glued and clamped along with the aft portion of the "middle" planking pattern for port side.

-
Continuing on with the hull and the "middle" set of external planking "patterns". I had to "fiddle" with the forward edge of the port side pattern to get the gun ports to all line up (more or less). It seemed difficult ot get them all to line up at the same time - move one end a bit and it is off somewhere else. I decided it was more important to get the midships ports aligned as these will be the most visible so I chose to get these glued down first and then deal with the bow when this piece is set. I will work the starboard side when the port is done - the pattern is already bent and dry - I will take the instructions word that it will retain its shape for another day. FYI the sanding stick is in there to try a get more pressure at that point. The nail did not hold very well and I can't get a clamp that low.

-
I have decided to redo the masts and leave them the natural AYC rather than try and stain them to match the pearwood. The stain looked okay on the lower masts but it was all blotchy on the topsail masts for some reason - probably poor staining technique on my part. That notwithstanding I think it will look better with the light masts and black yards. And i am getting pretty good at fabbing more or less circular masts from square stock. Below are the new cheeks and front fish fabbed in AYC along with the Main Top Gallant Mast. I did learn (or maybe relearn) a valuable lesson when thinning the spar down to the required dimension. Start at the thin end and work toward the thicker end. Don't ask me how figured that out. I'll just say I know exactly where the weak point of the Fore Top Gallant Mast is located. I have to try and disassemble the Mizzen Mast so I can reuse the parts as I have no desire to try and replicate the mast top and mast caps from scratch. Not to mention the PE upper top.
-
Done - thanks - since you remove the tabs the stiffeners attach to perhaps I won't need the alcohol; just carefully cut the tab off with the stiffener still attached.
-
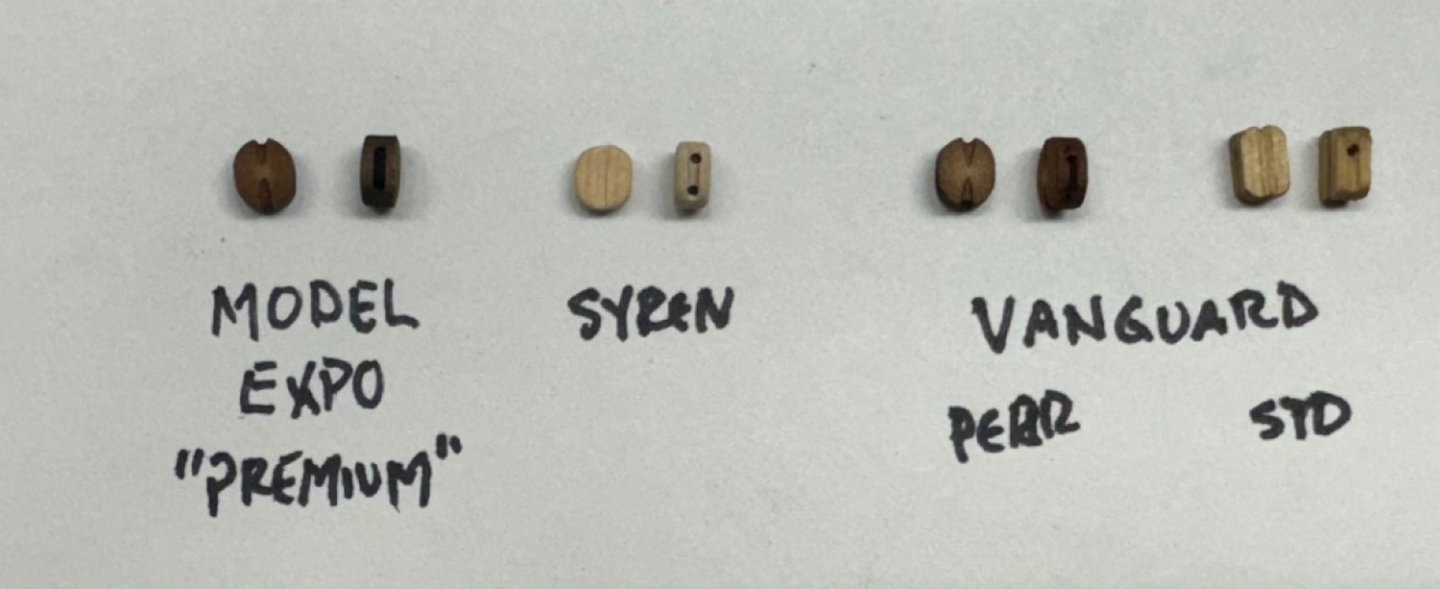
As promised here is a rigging block comparison. All are 5mm singles.
-
Here is the upper/upper planking on the starboard side waiting for the glue to set. I used 60/40 PVA/Water brushed on the hull as recommended in the instructions. I decided to do both pieces on each side because I needed to add a clamp through the bullnose to hold the bottom of the the most forward edge of the forward pattern. I suspect I will need to do something similar on the port side so...

-
Keel, stem and stern post added and hull is back on the Amati holder ready for the upper planking to be added. As yhou can see, keeping the hull stiffeners in place is not that easy. They are not that snug a fit on the little tabs anymore after being taken on and off repeatedly not to mention jostled around during the planking.