cdrusn89
-
Posts
1,940 -
Joined
-
Last visited
Content Type
Profiles
Forums
Gallery
Events
Everything posted by cdrusn89
-
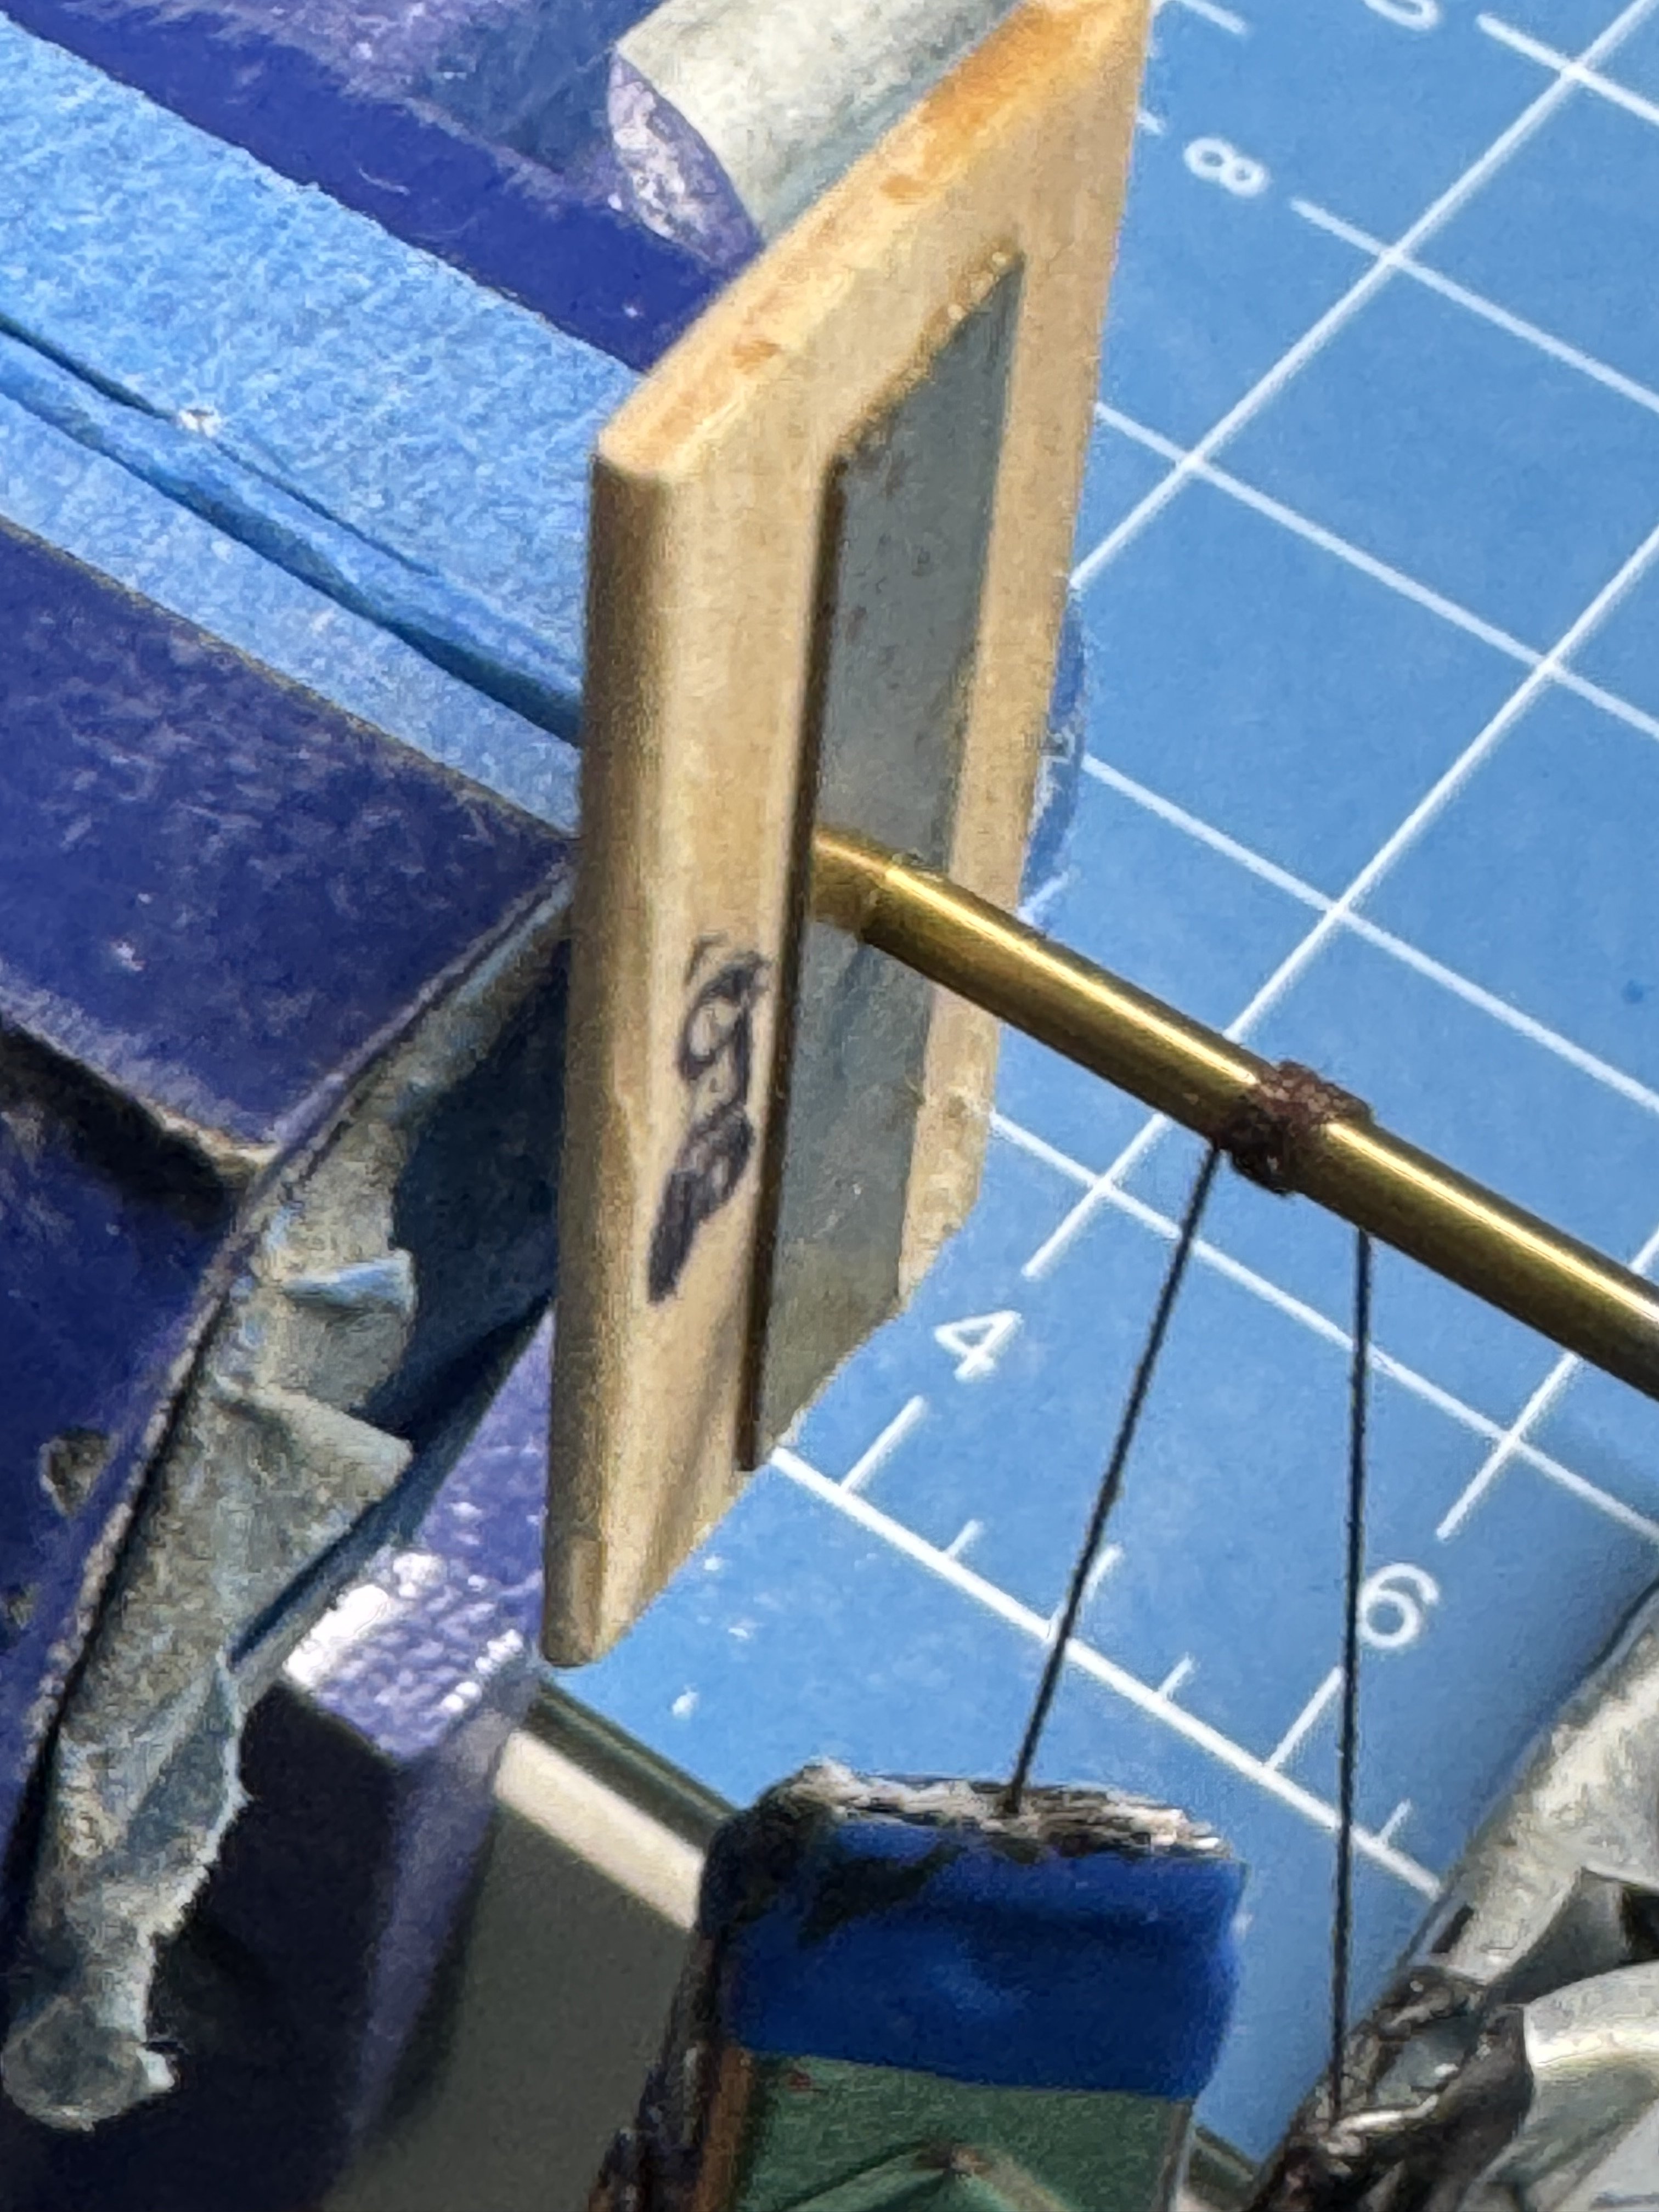
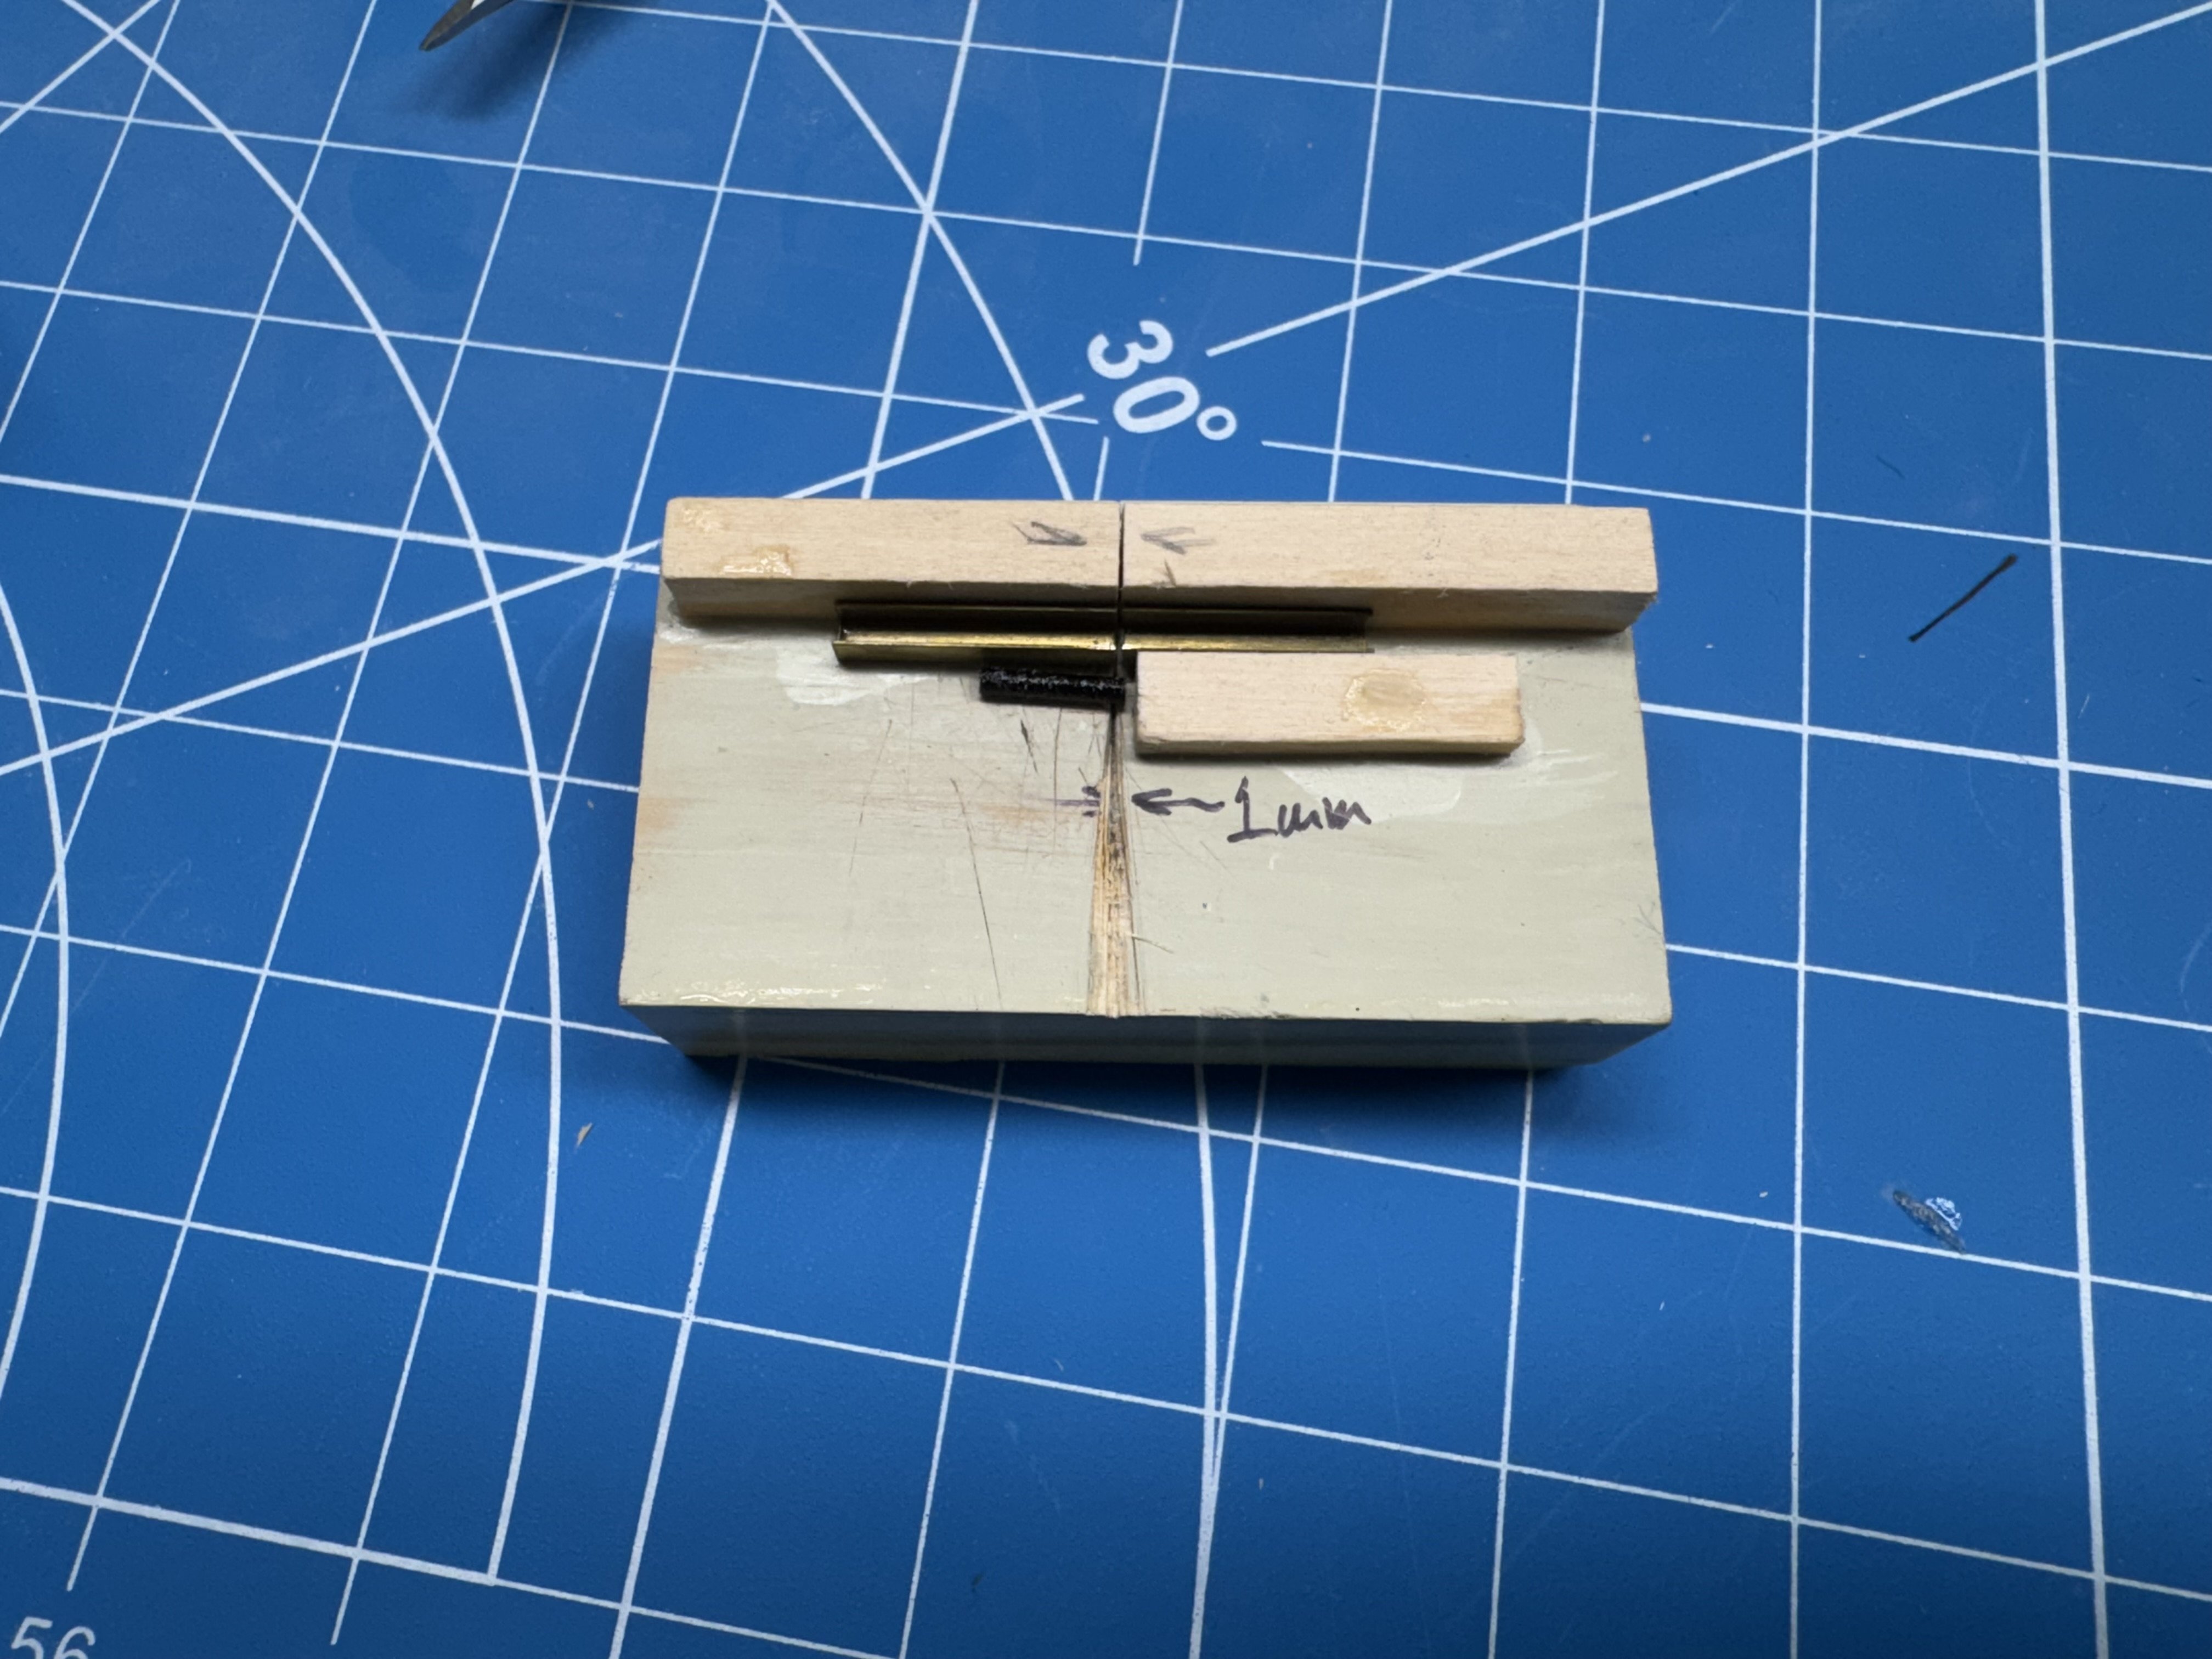
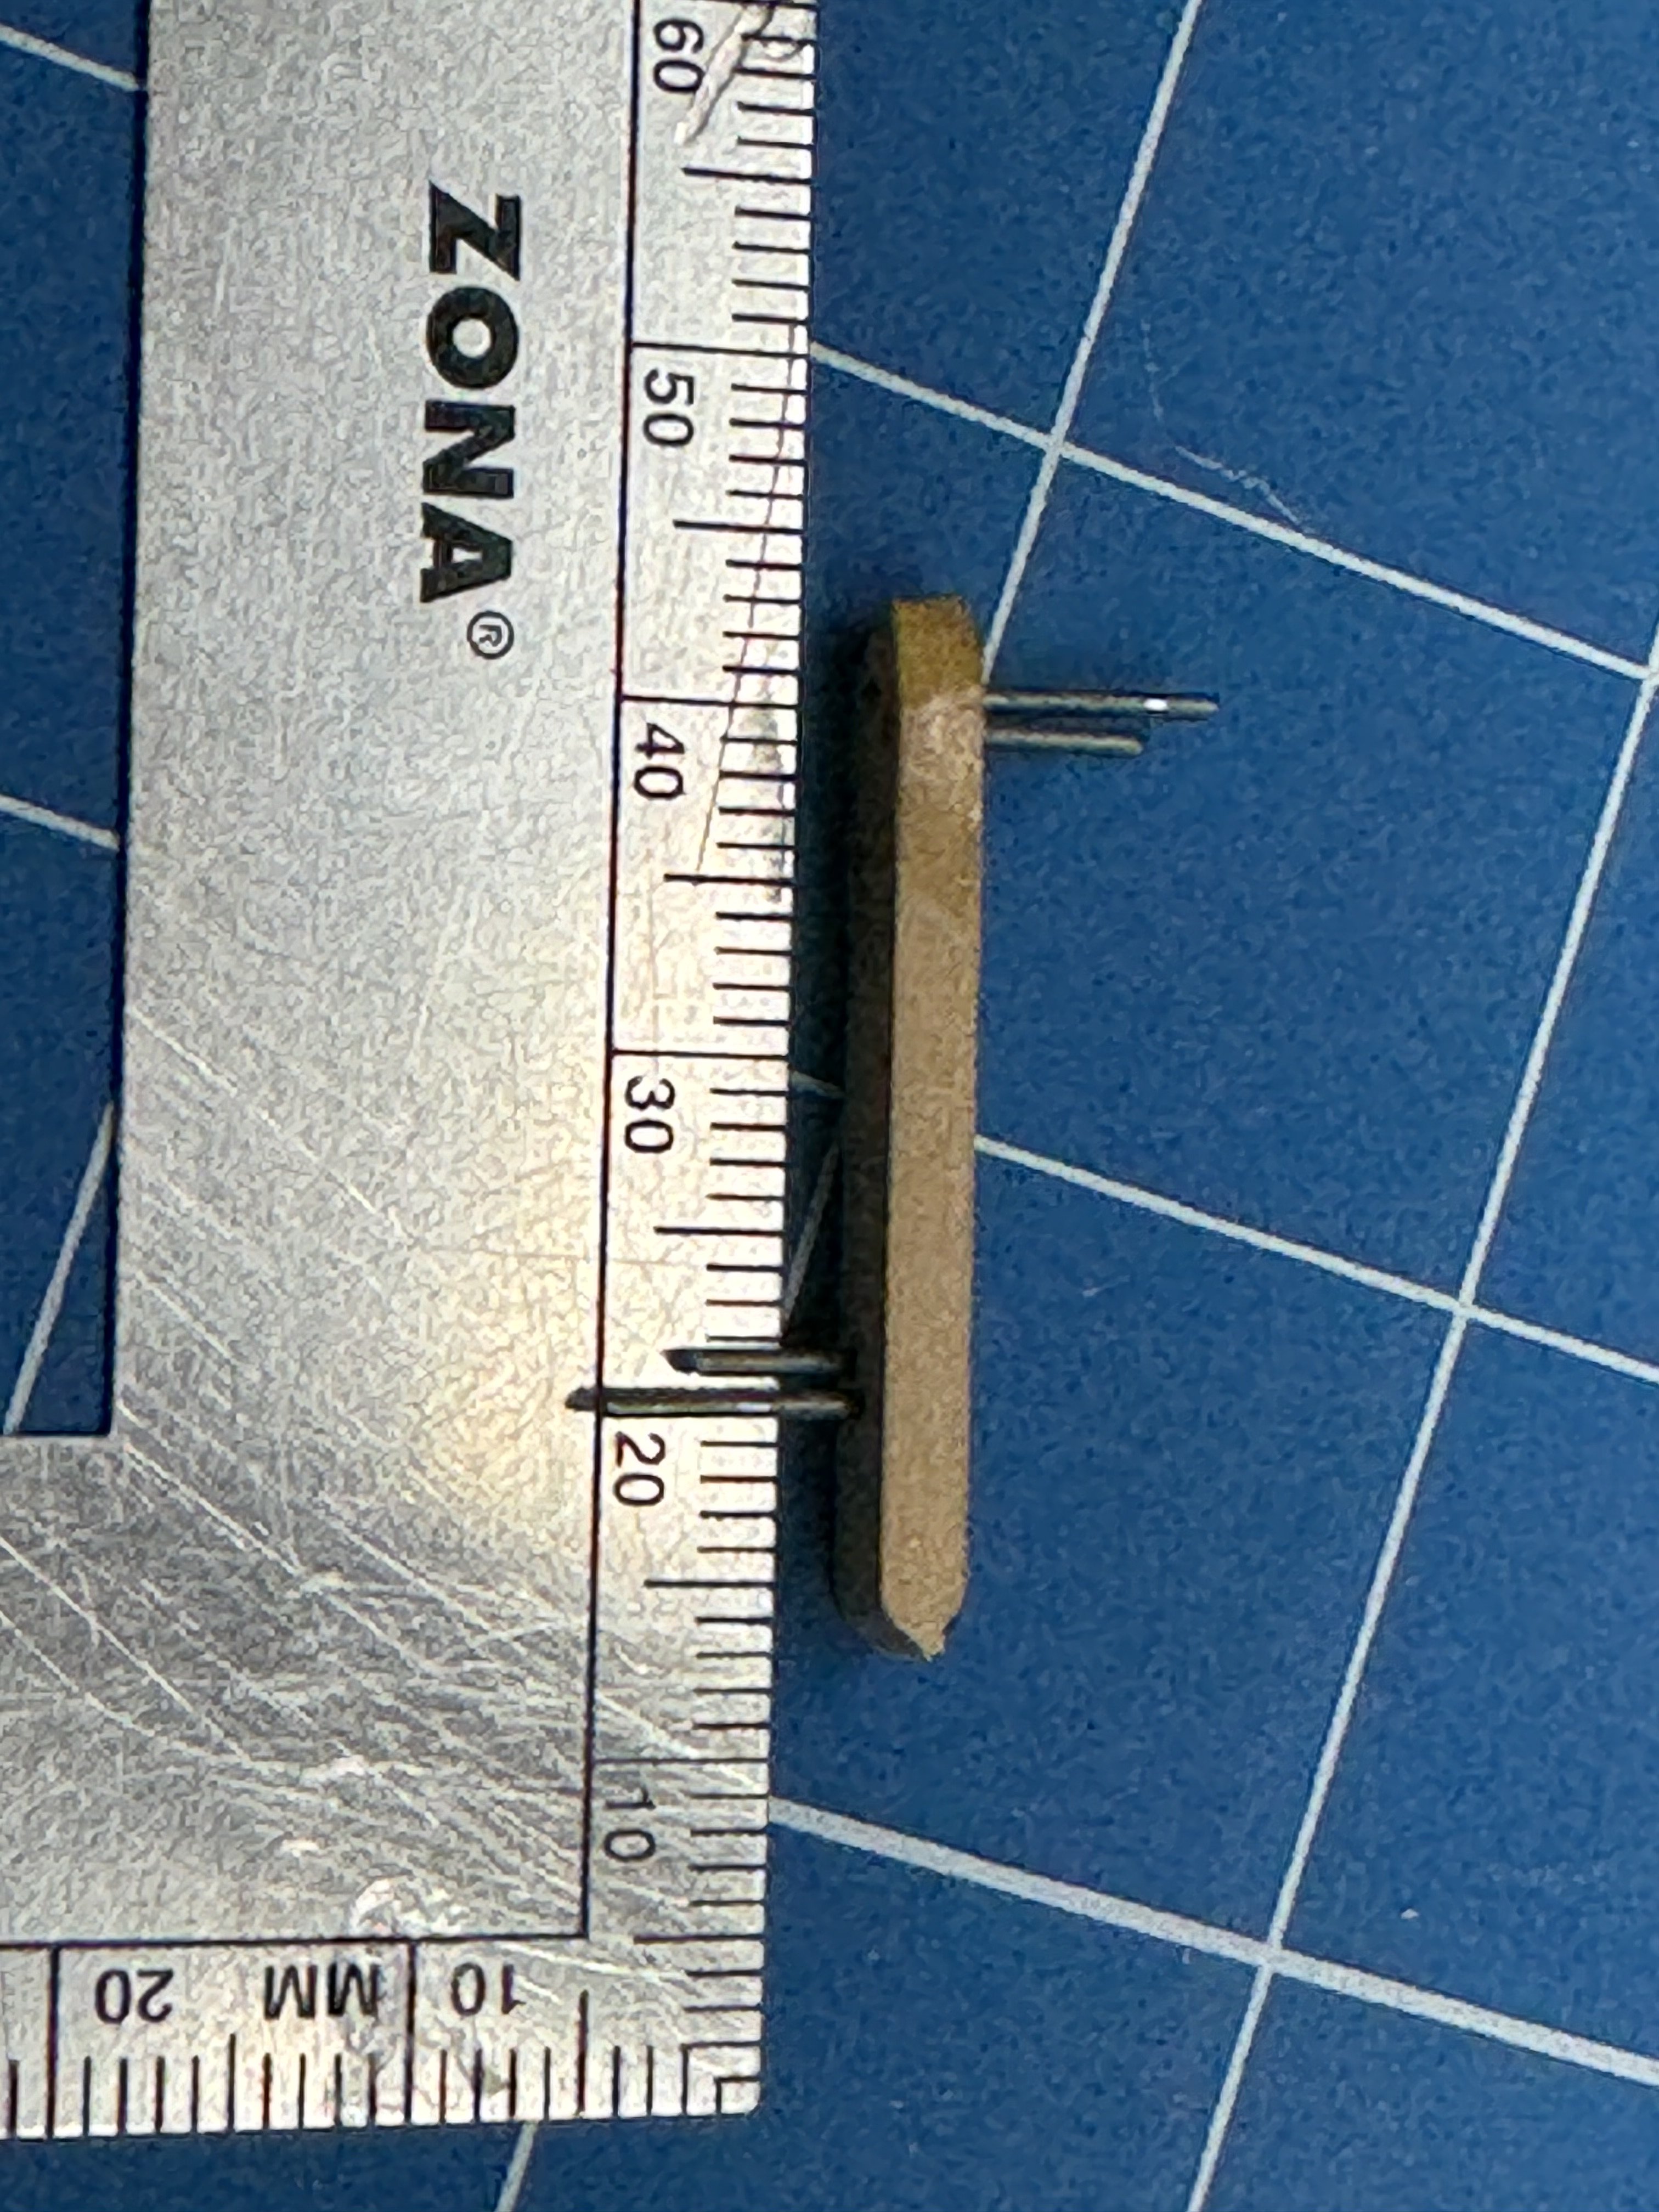
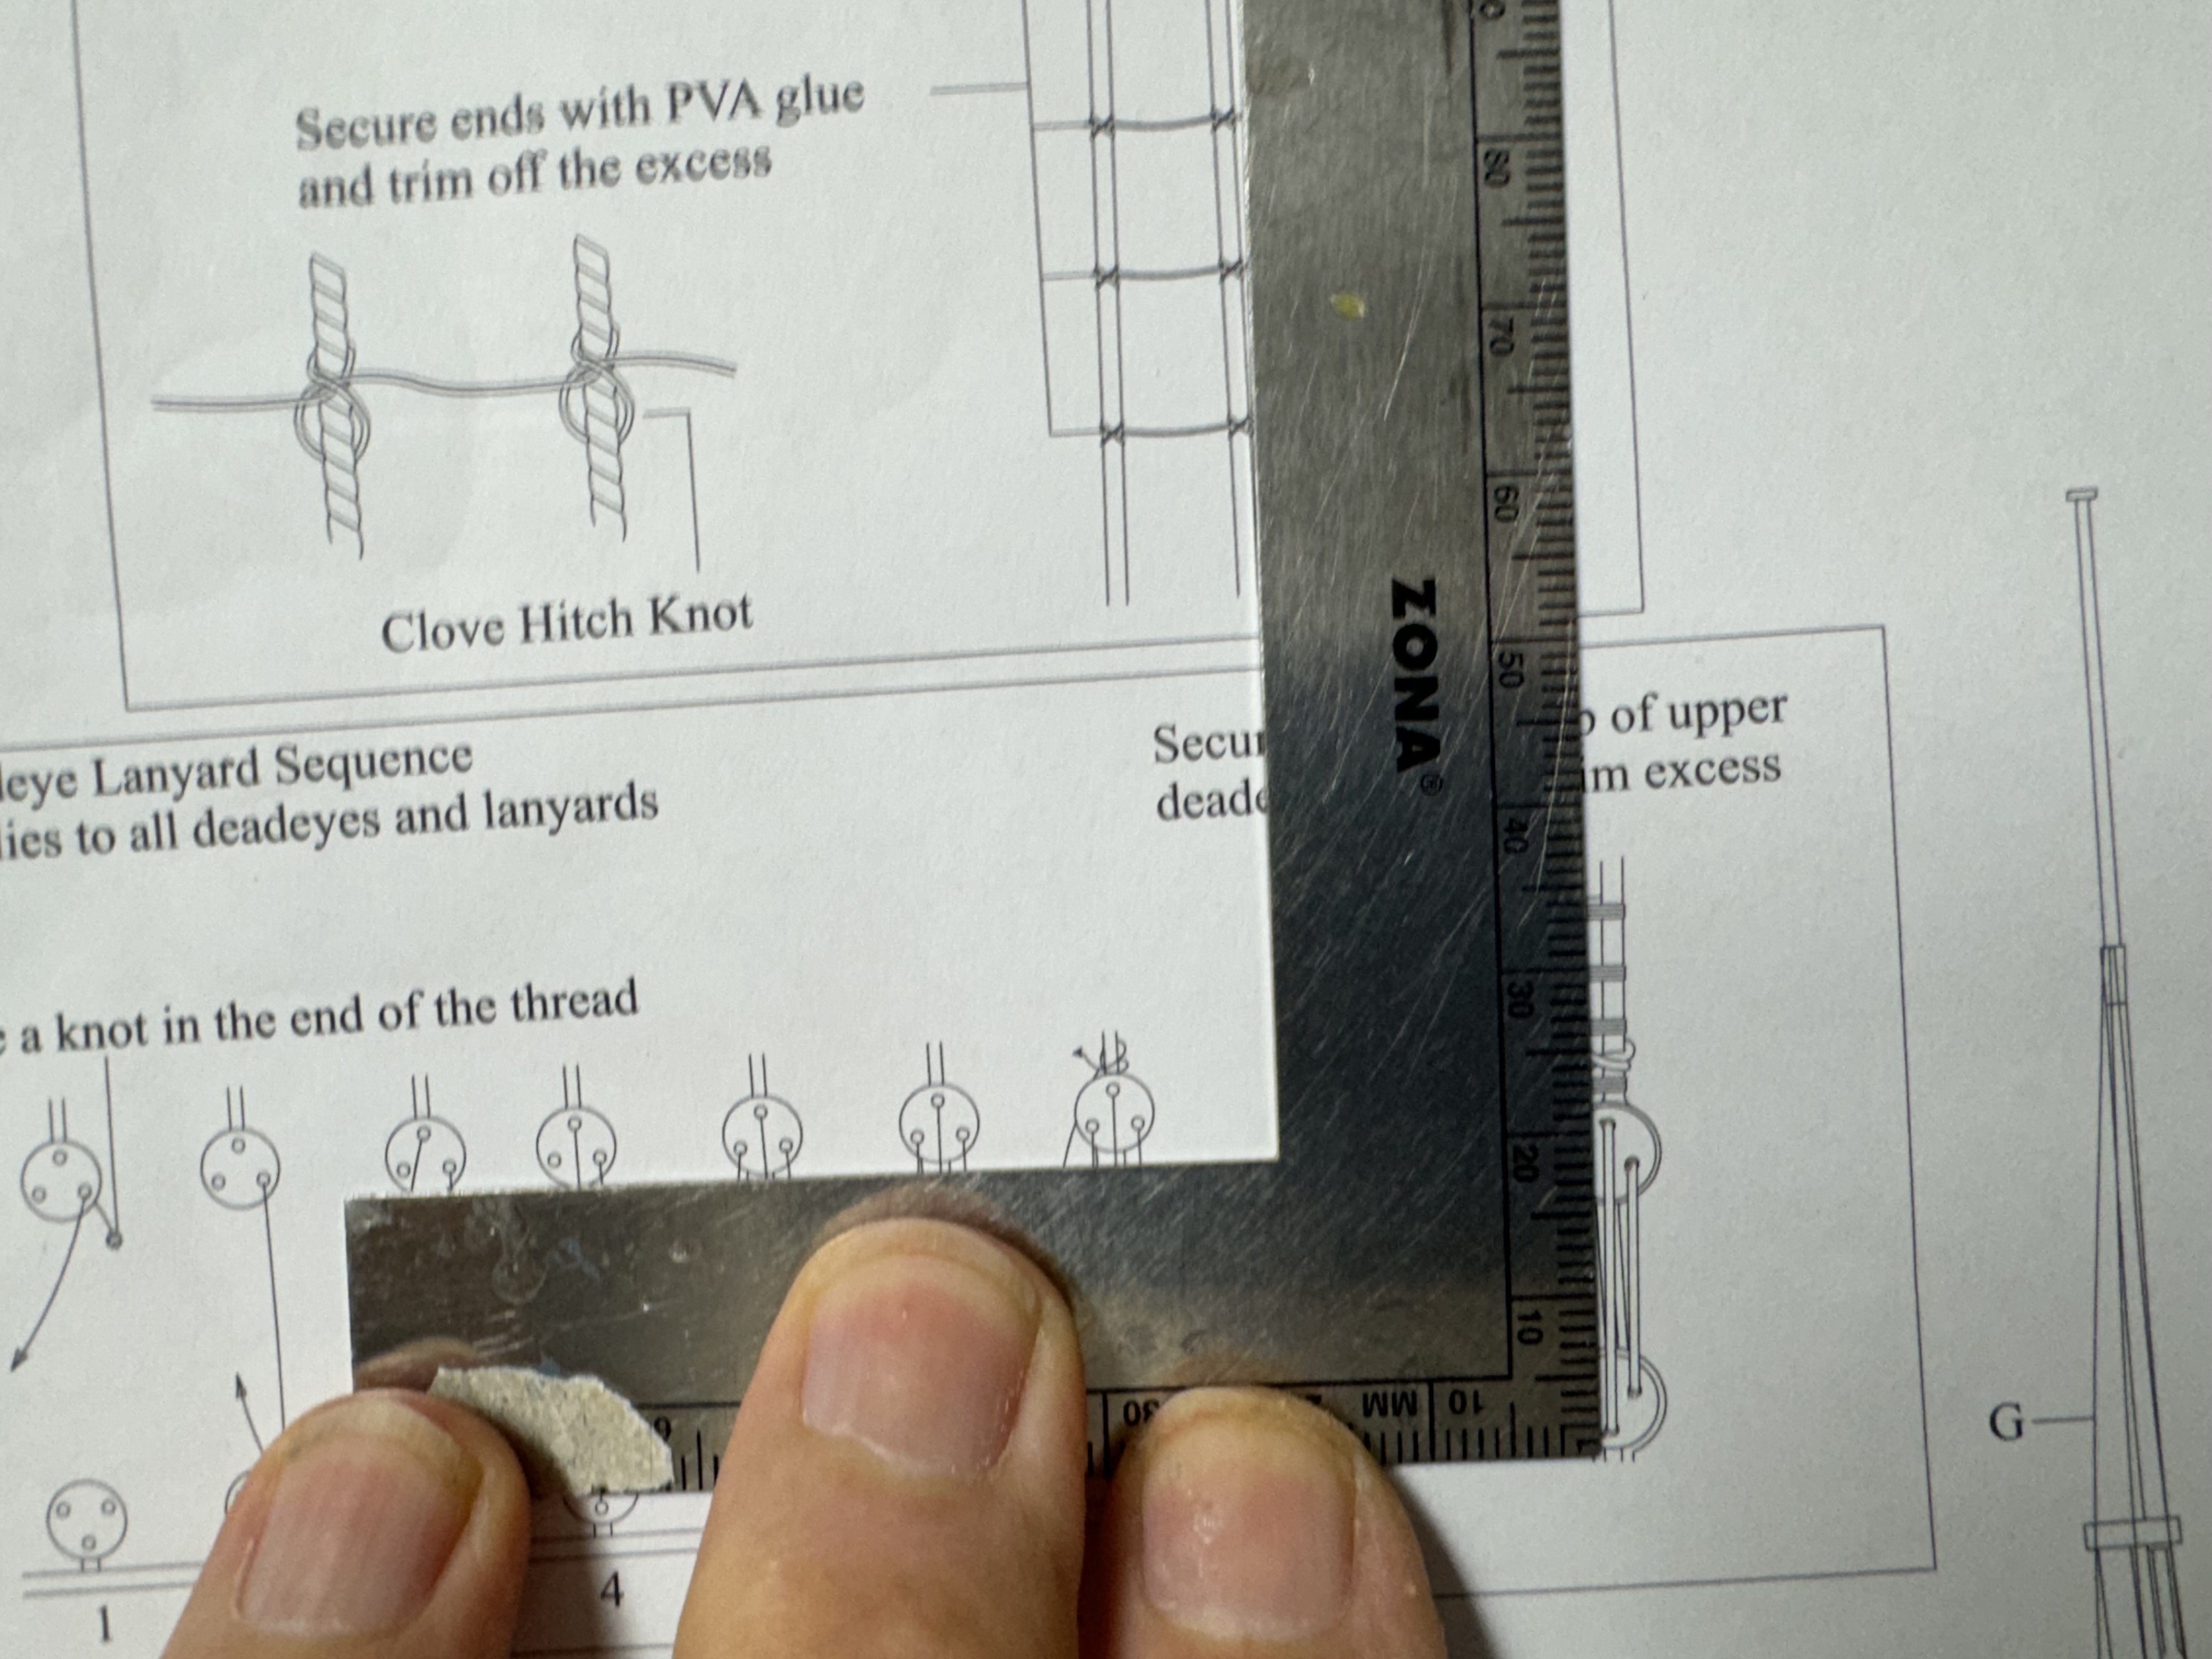
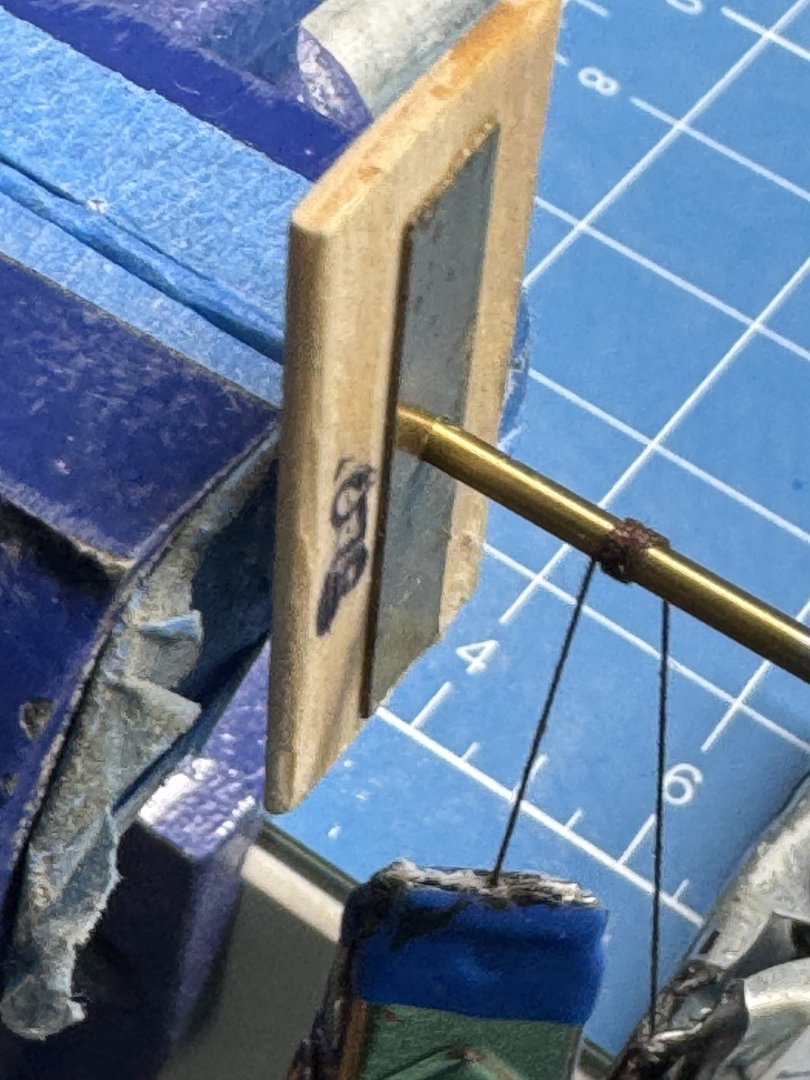
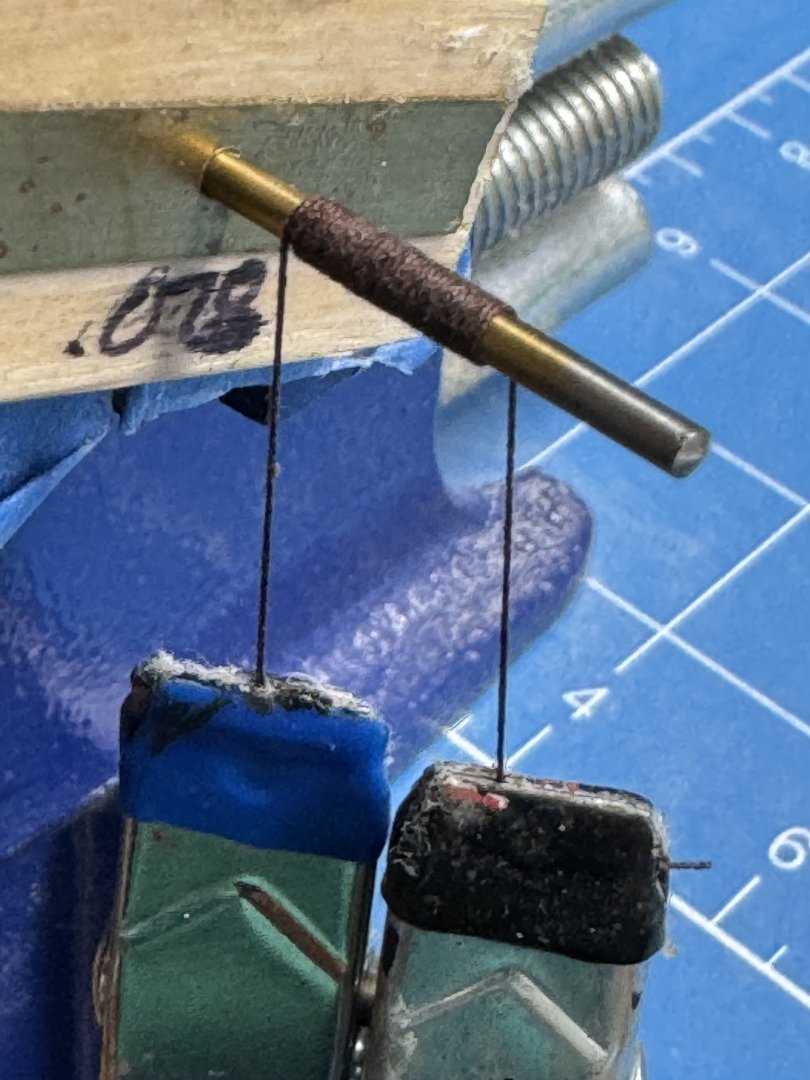
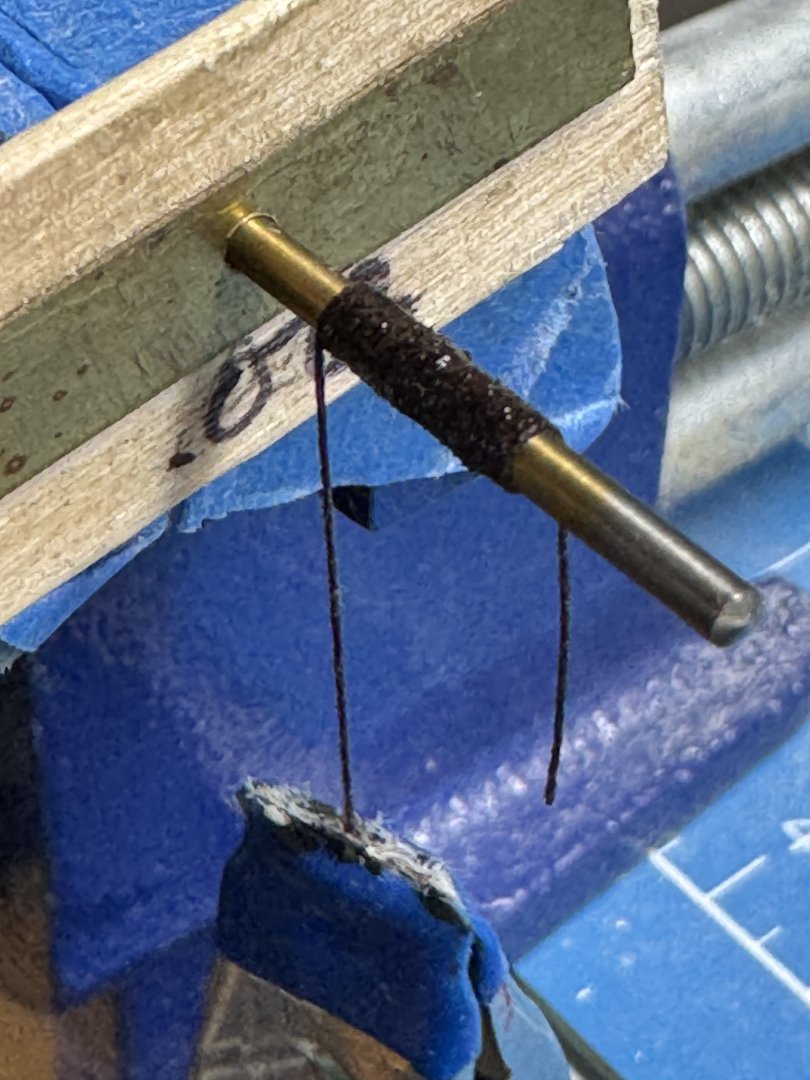
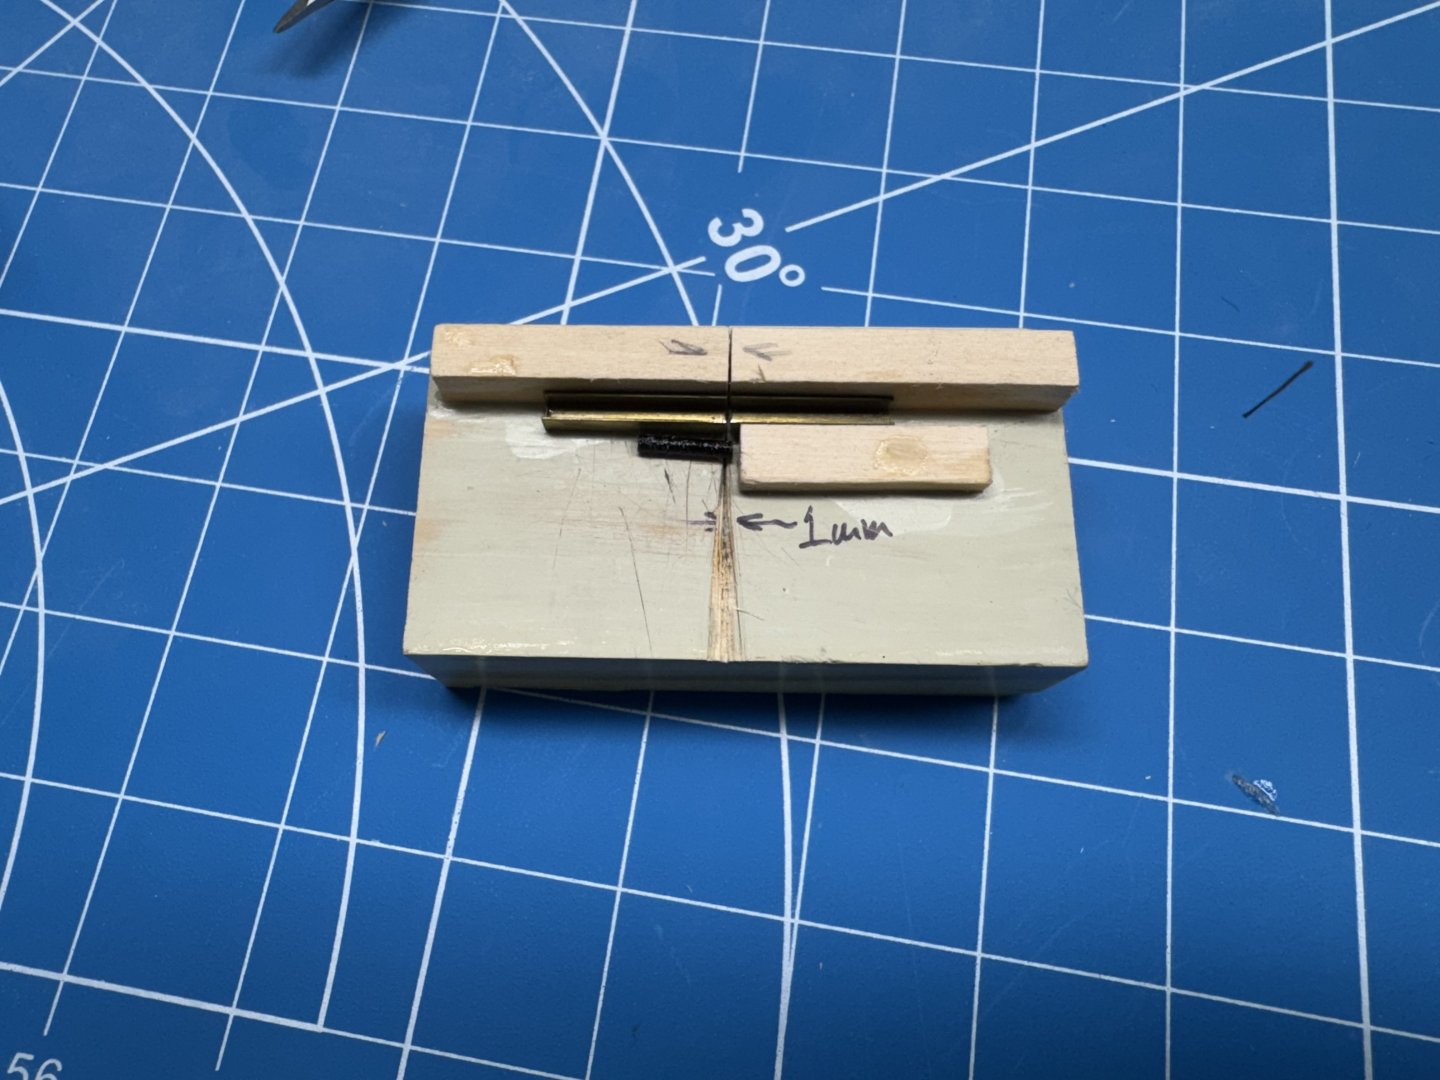
 They are called ZIP seizings and I found them on here:http://www.shipmodeling.ca. At the time the site was free now it is $45 for a lifetime subscription. I have used them almost exclusively for the last ten years or so. I do not want to deprive the site of their revenue so here is a brief description of how I use ZIP seizings. The first step is to determine what size line you need to join. As a general rule I size the seizing to just under the combined diameters of the lines to be joined. In the case of the shrouds on Sphinx where I am using .030" shroud lines I use a ZIP seizing of 0.052" inside diameter. To make the seizing you need a shaft (drill bits work for me) of the appropriate diameter - a #55 is .052" so that is what I used for the shroud seizings. In addition to the drill bit (shaft) you need a small sheet of wood with a brass strip glued on it. Here you see (this is for .078" diameter I use it only for illustration - this would be used for a Main stay using .045" line) the drill bit in the vise and the wooded/brass piece with a (in this case) .078" hole drilled through both pieces. I use .008" Syren line to make the seizing but anything of that general size will work - too small and there is not enough area to hold the glue, too large and it looks out of scale. Put a weight (spring clamp will work) on one end of the line and it wrap tightly around the shaft pushing the wrappings together as you go. I use 25 - 30 loops usually. More and it gets harder to pull the tube off the shaft. With a weight on both ends add thin CA to the line making sure it flows around the bottom so the entire line is covered in CA. When the CA is dry (typically less than a minute) take off one of the weights and use the wooden backer to pull the "tube" of line off the shaft. I leave one clamp attached as the line usually comes off the shaft when you least expect it and I have been unable to locate the little bugger after it hit the floor more than a few times. The clamp reduces the radius of movement and makes it easier to find on the floor. You now have a "tube" of hardened line that you slip (in a manner of speaking) over the two lines to be joined and there is enough friction (if the tube has been sized correctly) to hold position under most reasonable circumstances and dilute PVA or thin CA (depending on the circumstances) can be added to increase the holding power. I built a jig (several actually) to cut the tube in consistent lengths - this is the 1mm jig, I have 1.5 and 2mm ones as well. I use a razor blade to cut the tube. The brass channel is there so the the slot doesn't widen out with use as is likely if I only had the wood there. To thread the line through (actually the second line, the first one is no problem) I dip the end in thin CA and when hardened cut it diagonally to help get the second line through the tube. It takes some practice but IMHO it beats the daylights out of tying three seizings on each shroud. And it is not limited to shrouds. I use them to attach blocks to spars and most anywhere a seizing is needed.
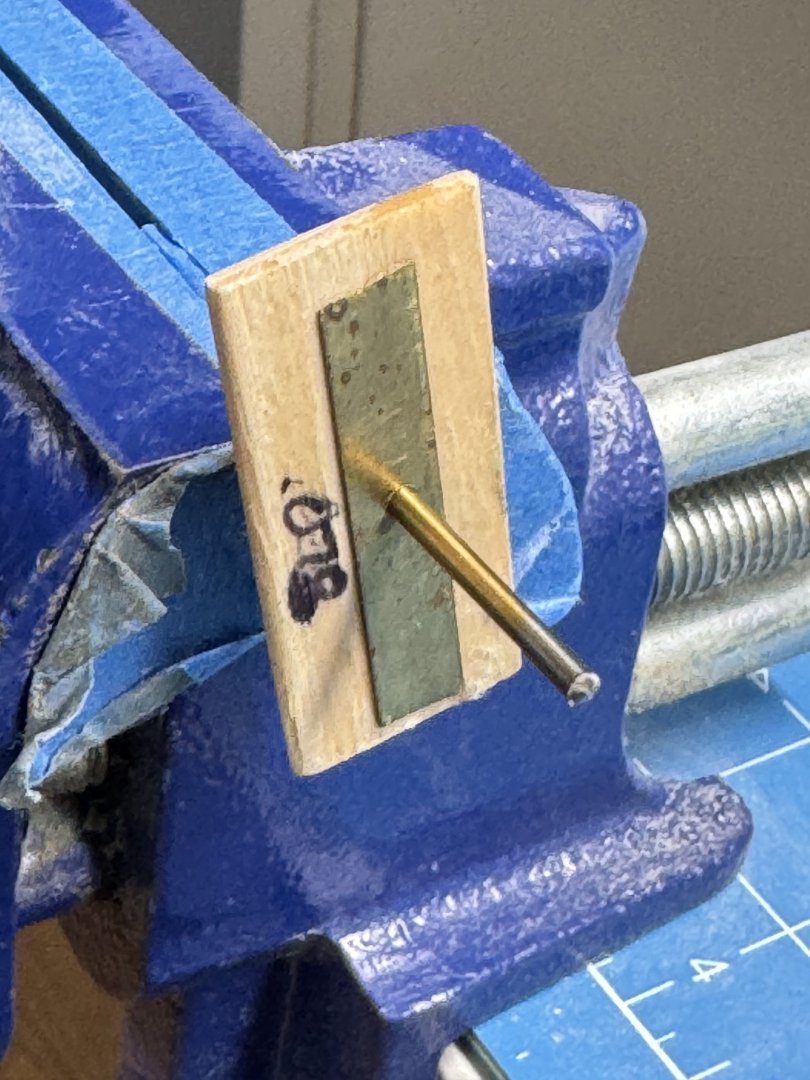
- 422 replies
-
- 6
-

-
- Vanguard Models
- Sphinx
- (and 1 more)
-
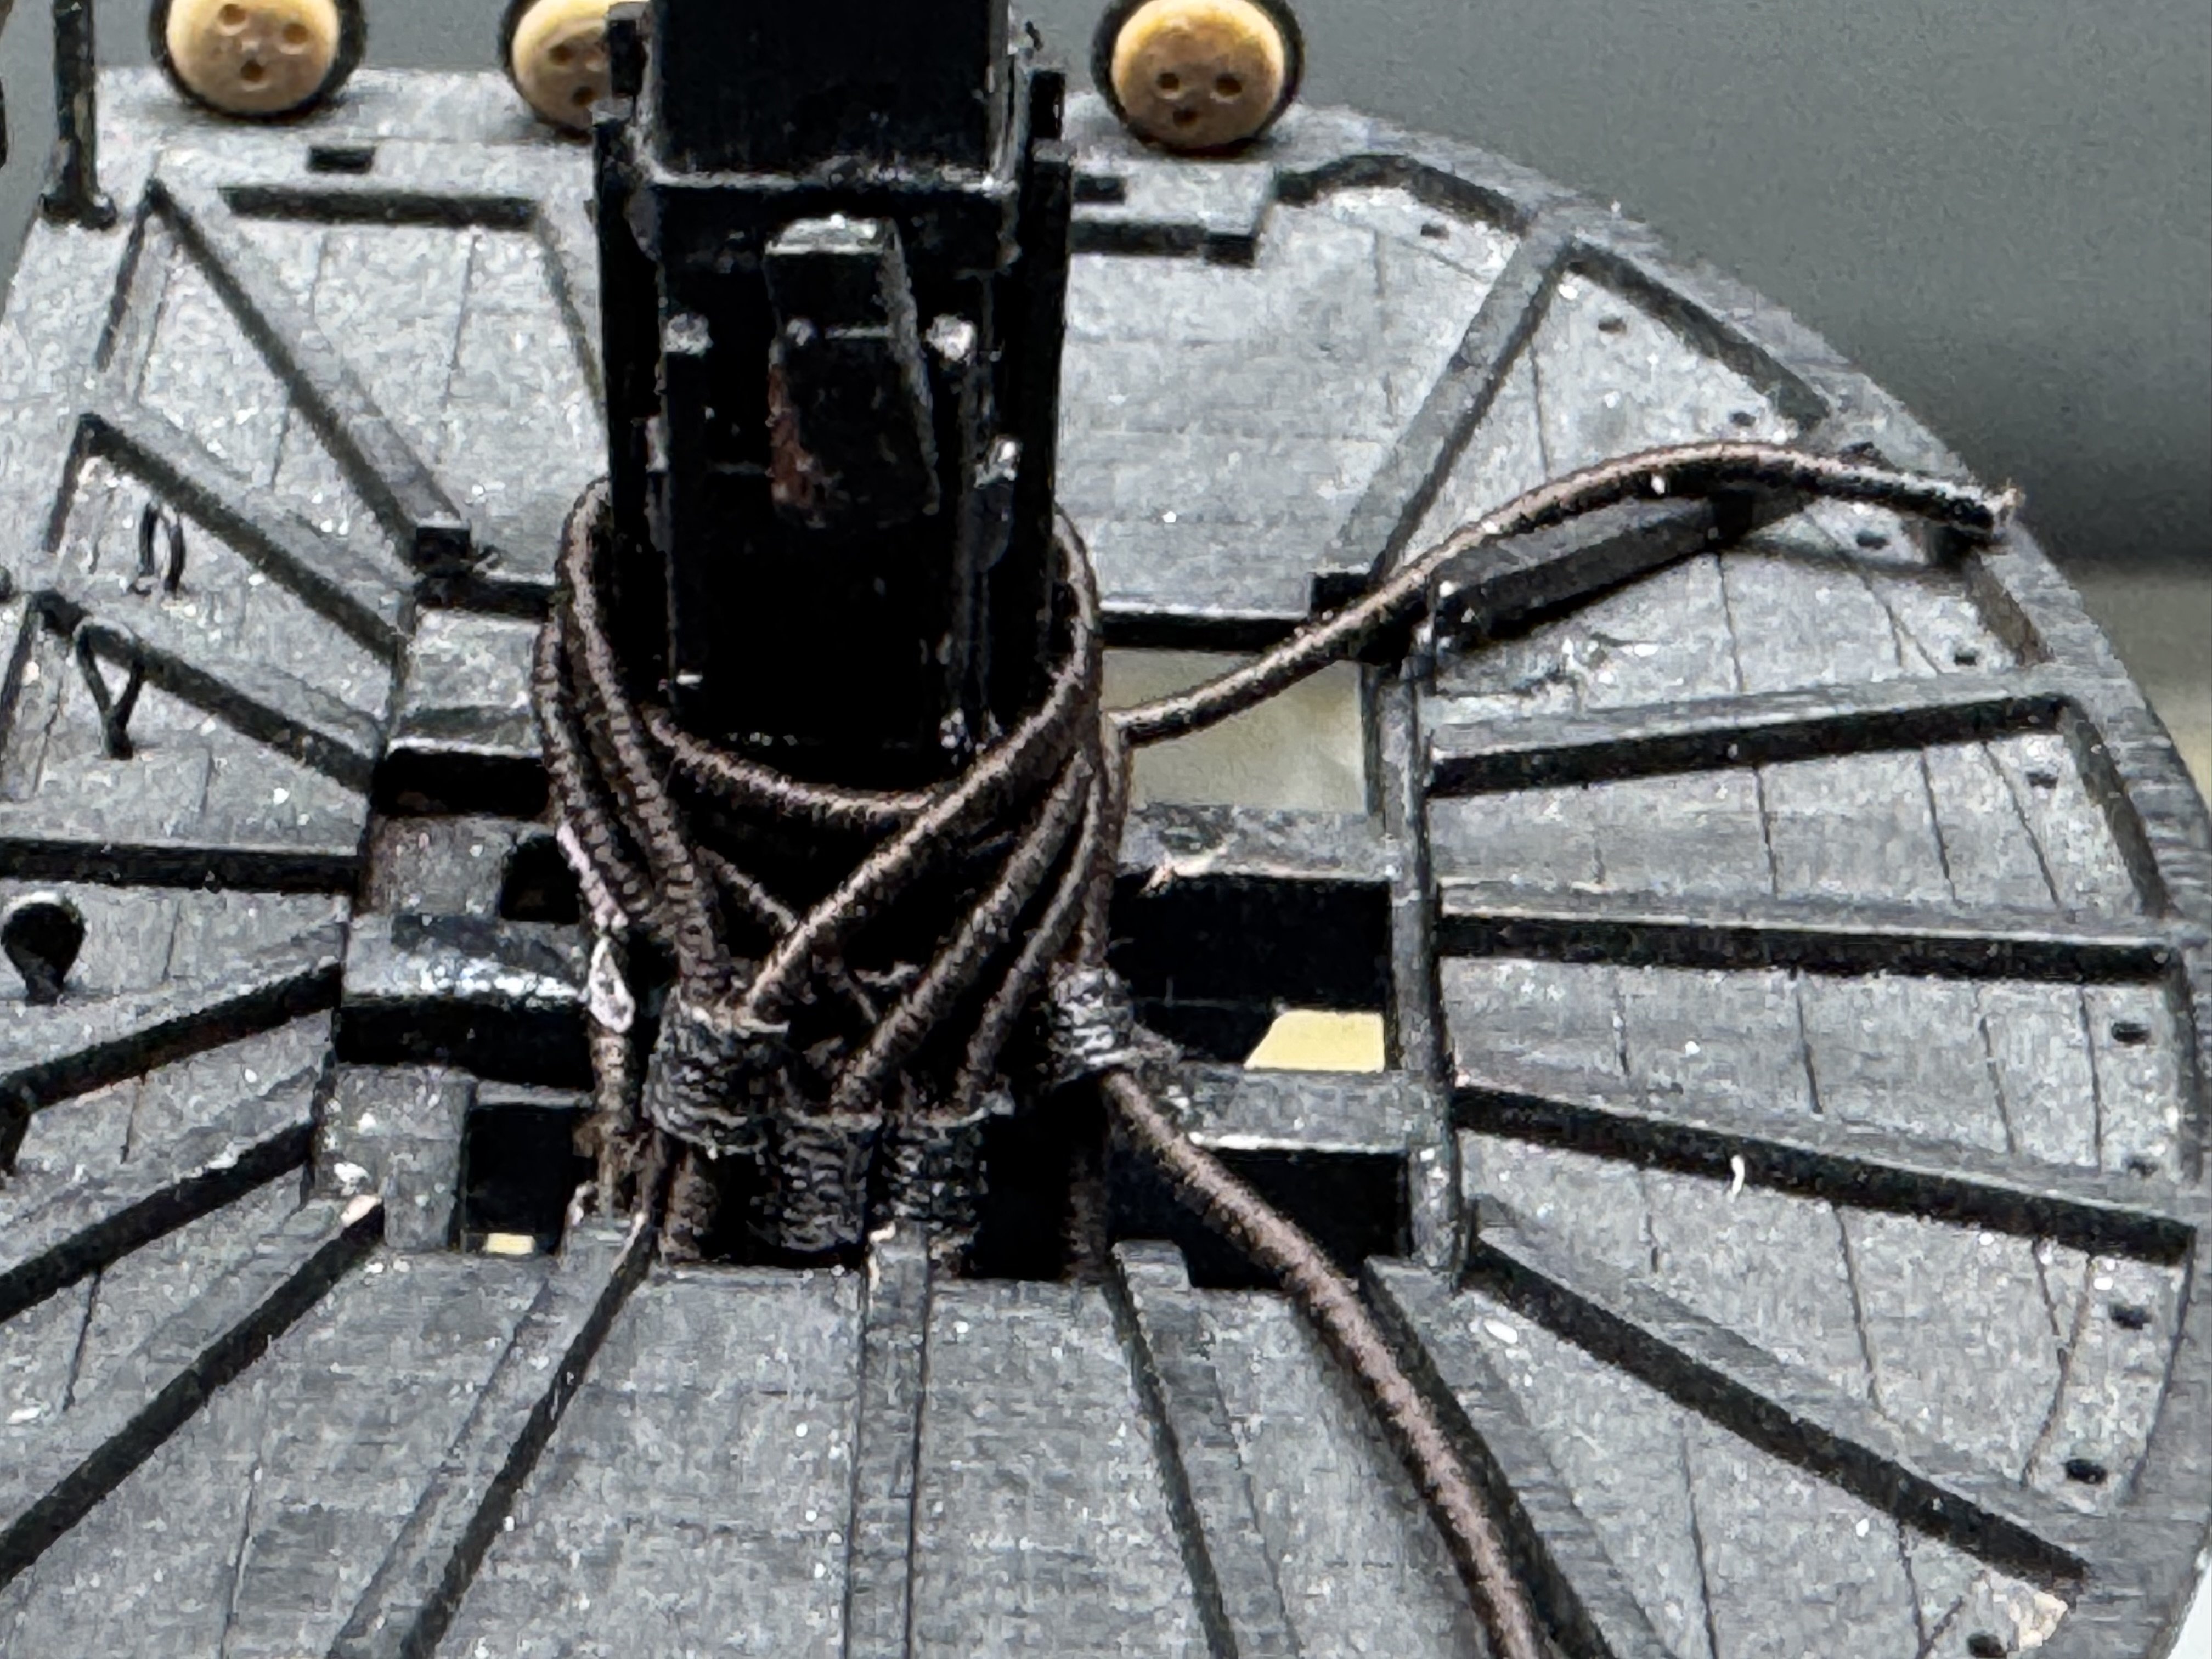
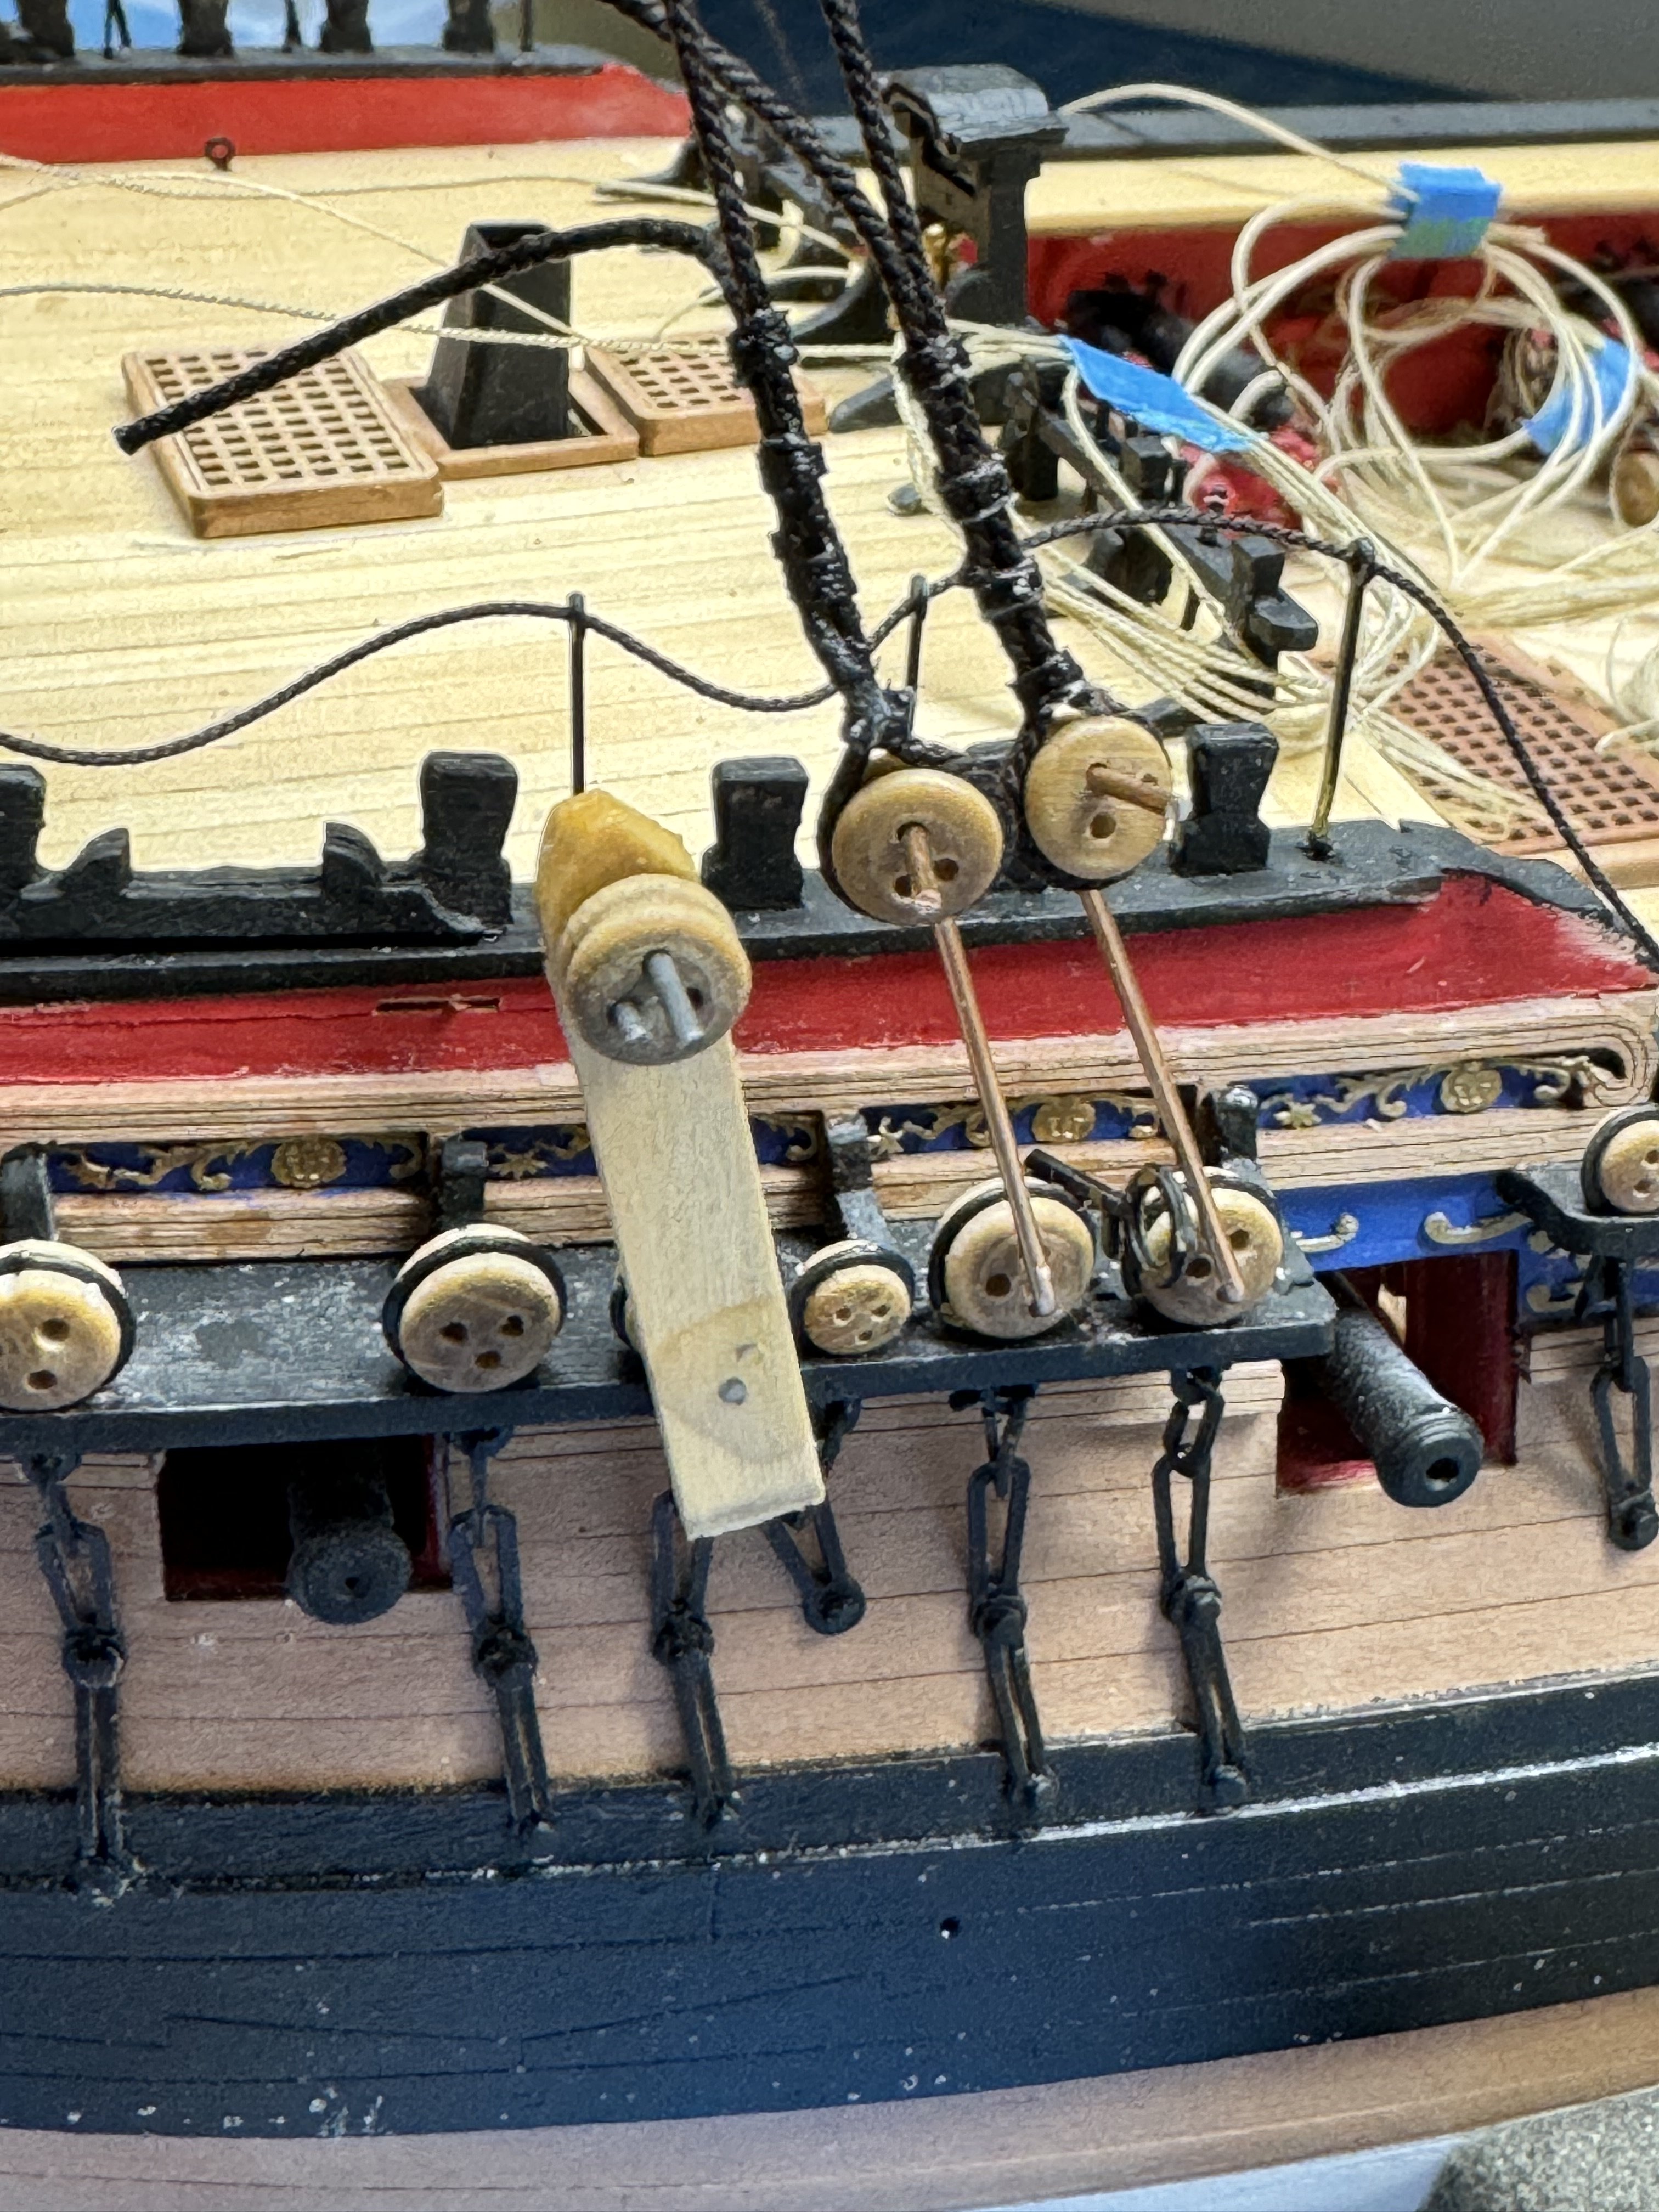
I used a piece of .008" Syren line to attempt a "throat seizing" just above the deadeye and then used a trio of pre-made seizings to replicate what is shown in the drawing. I had to be careful to keep the bitter end aft of the deadeye as that is what the drawing shows and it was not that easy to keep straight with the long bitter end. I finished everything off with dilute white glue and will trim the ends and the "throat seizing" lines after I remove the deadeyes from the jig. Assuming that all goes as planned I will move the jig over to the port side and "rinse and repeat".

- 422 replies
-
- 4
-
-
- Vanguard Models
- Sphinx
- (and 1 more)
-
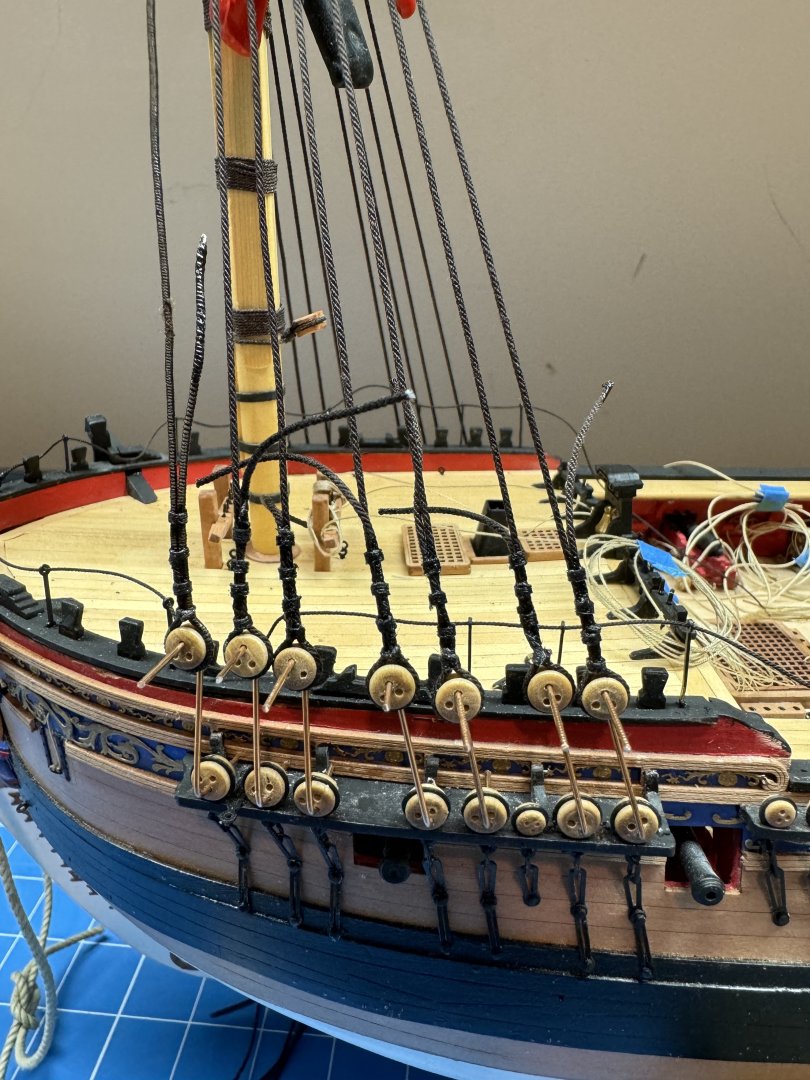
So I remade the fore mast shrouds and installed them. I have my jig but I only made one so I either make another (would have been easier to make two before I glued the wires in) or take my chances doing all the deadeyes on one side and then the other. I have weights on the port side shrouds and think that will make it easier to tie off the starboard side shrouds without pulling the mast out of alignment. Given the diameter of the mast I think pulling it out of alignment would be "really hard". I am not sure that the smaller diameter shrouds made much difference at the mast head. I still have to trim off the "keeper" on the forward all served shroud.

- 422 replies
-
- 4
-
-
- Vanguard Models
- Sphinx
- (and 1 more)
-
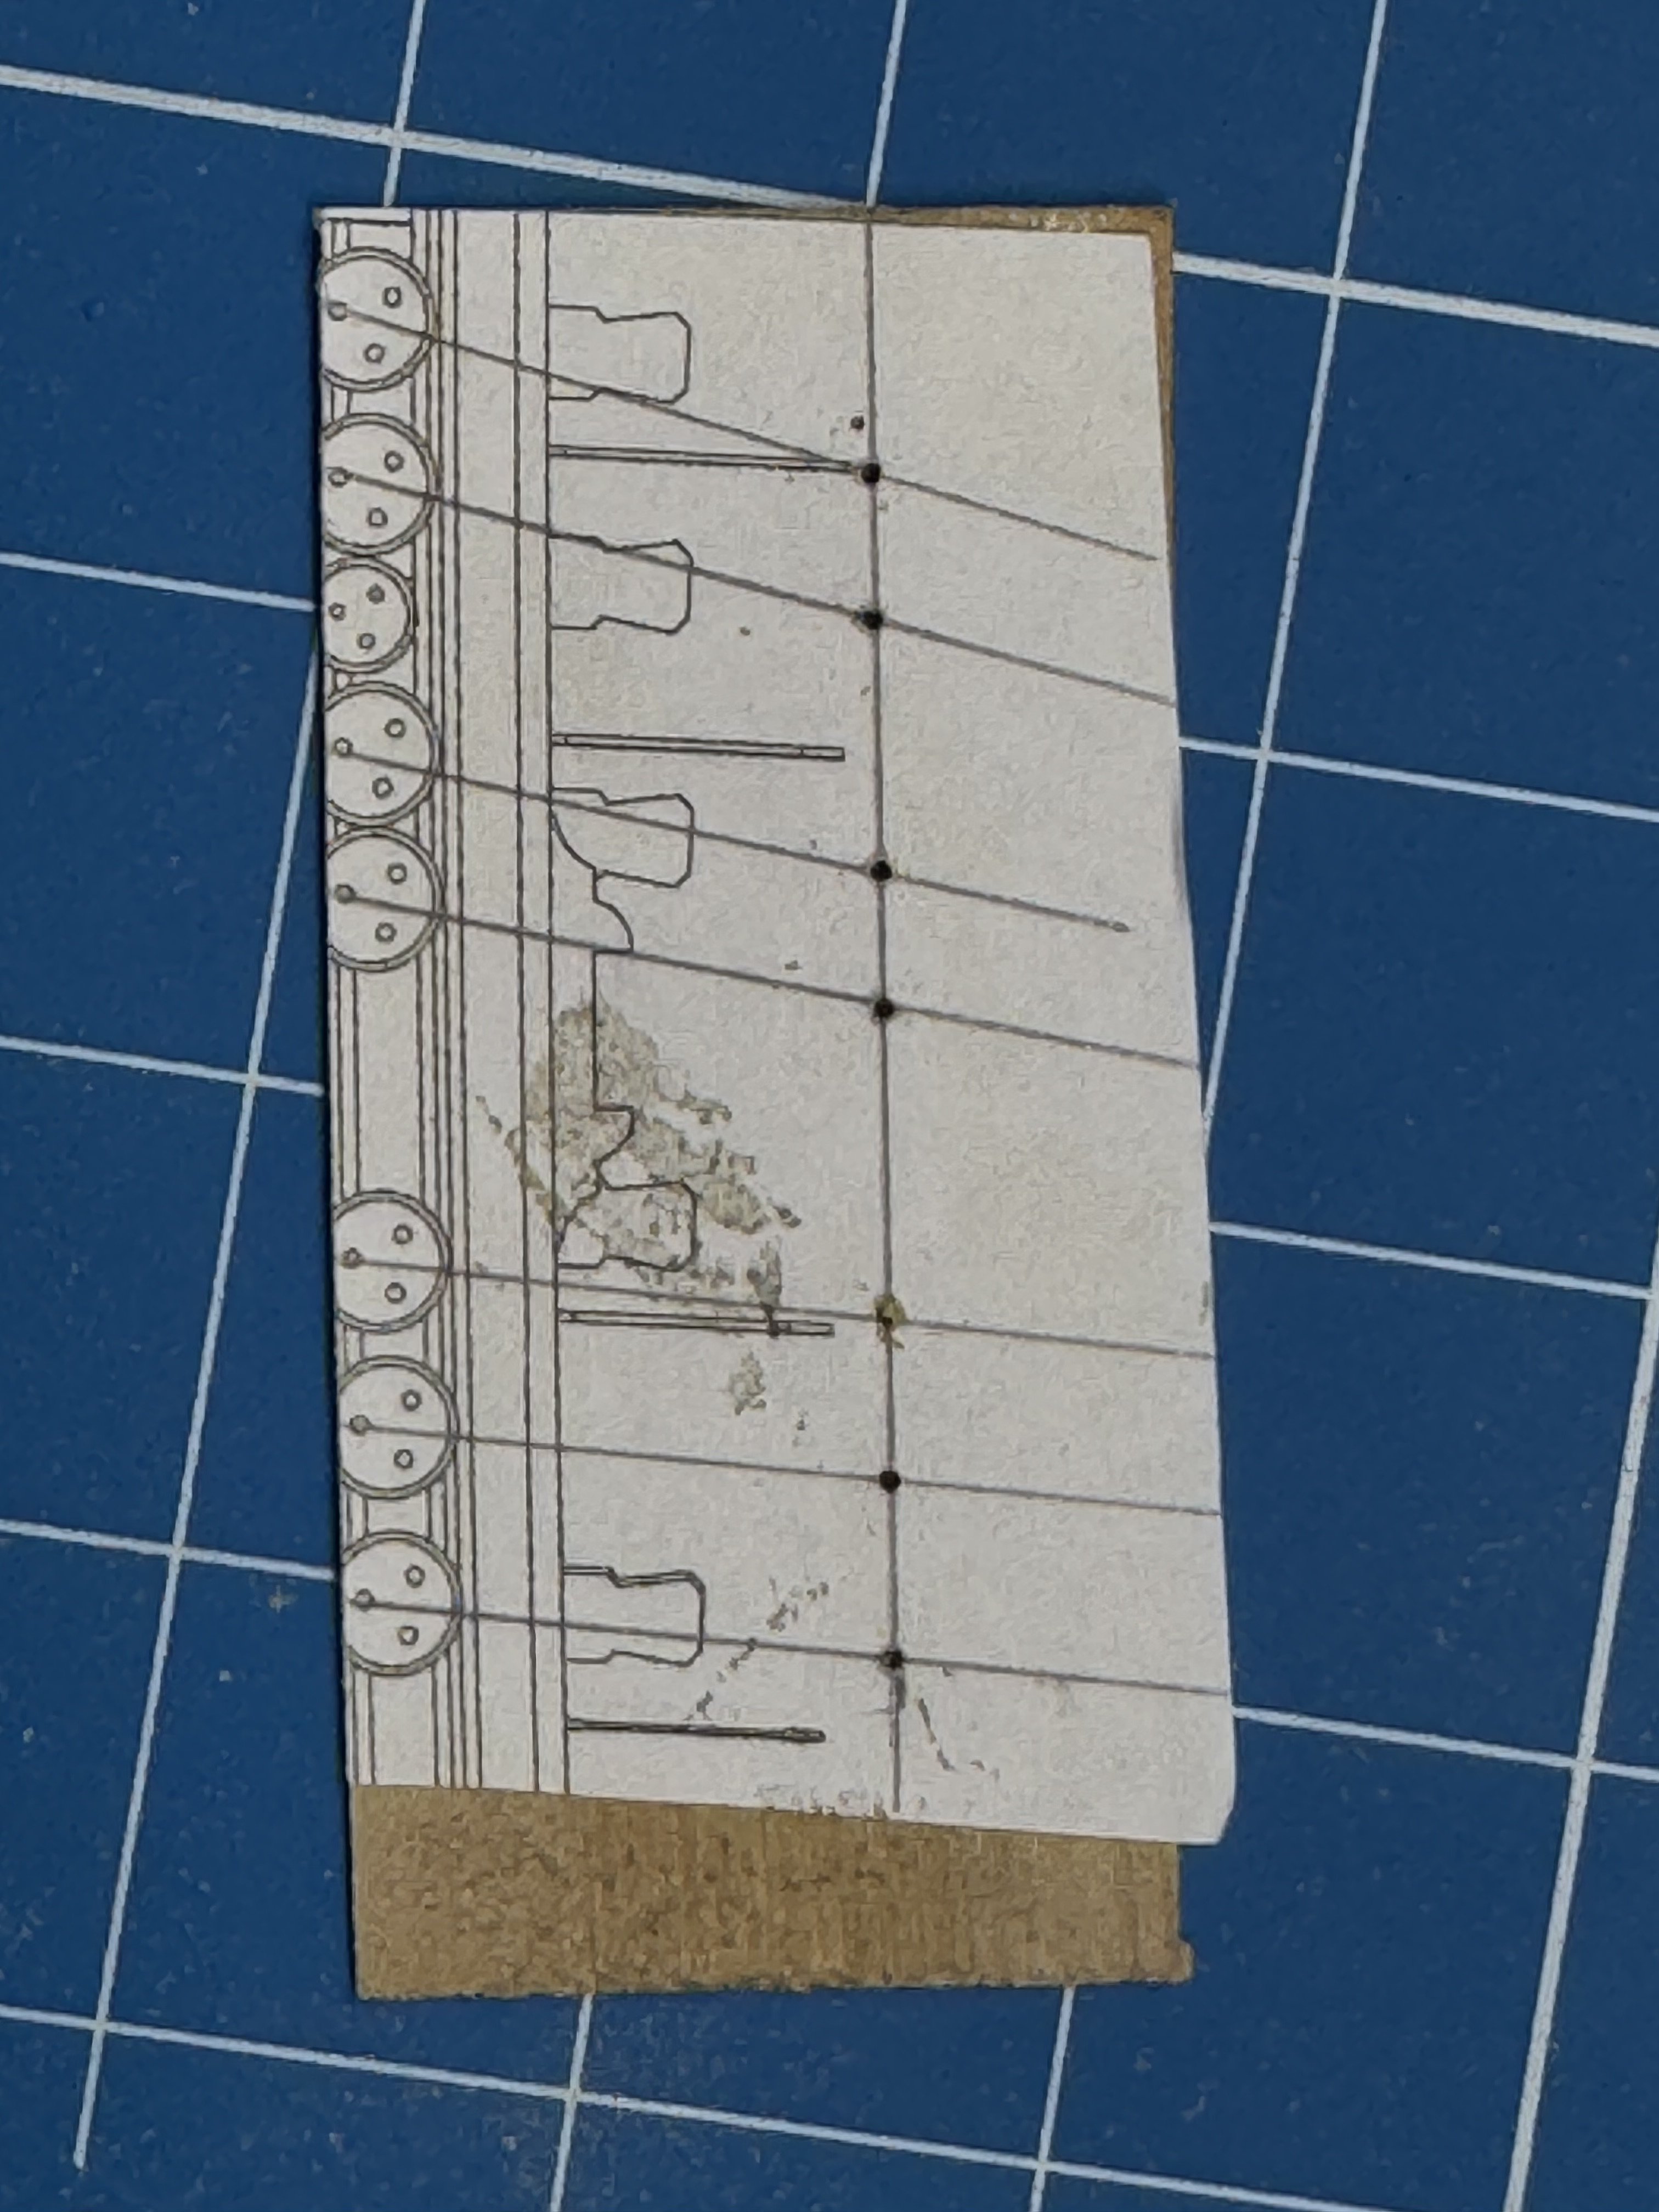
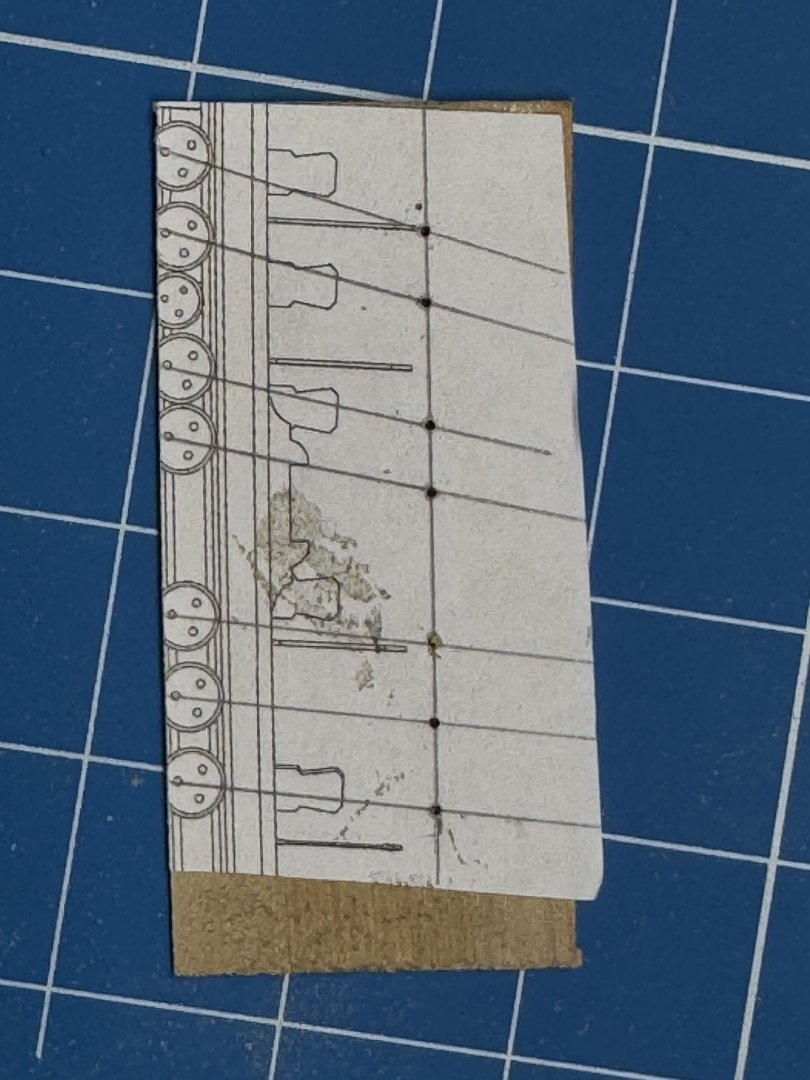
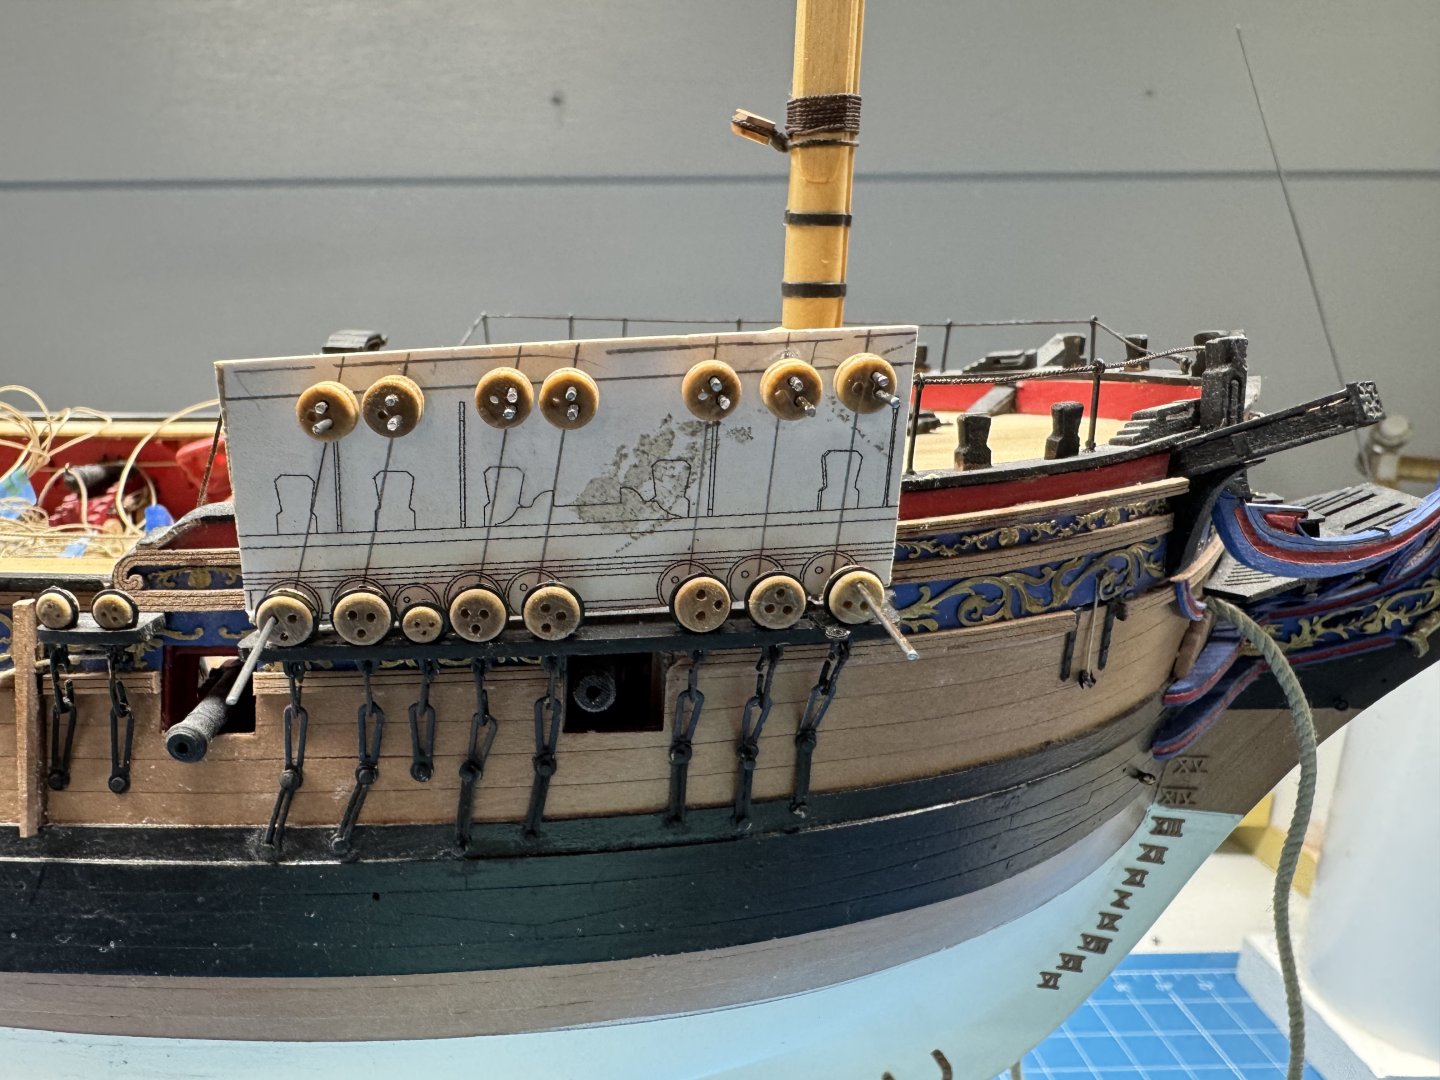
When I got the Sphinx back on the workbench I decided that the foremast shrouds did not turn out as well as I remembered so I removed them and started over. One of the problems I encountered was my inability to get the upper deadeyes to line up in a more or less straight line. I know this should be "child's play" by now but either i have lost the "touch" or forgotten how I did this "before". I has been four of five years since I had to deal with deadeye/shrouds so maybe I am experiencing a "senior moment" and it will all come back to me - someday. in the meantime I thought maybe I could set up a jig to allow all the deadeyes on one side to be made up at the same time. I made a copy of the part of Sheet 15 that shows the forward channels. If there is a 1/64th scale drawing that shows the upper deadeyes I cannot find it so a drawing with the lower deadeyes will have to do. NOTE - make sure your printer is set for full scale (100% on mine). Don't ask me how I know but using any other scale will not yield satisfactory results which may not be obvious until the entire jig is completed. I cut out the relevant portion of the drawing and extended a line from the lower deadeye bottom hole and the end of the chain plate up to locate where the upper deadeyes would go. I used some spray adhesive to glue the paper to a 1.5mm thick piece of boxwood. I drew a line about 18mm above the top of the lower deadeye and used the intersection of the lines as the location of the upper hole in the upper deadeye. I then drilled a #68 (.032") hole at each point. I cut some short pieces of .032" music wire and one at a time put the wire in the hole and a deadeye over the wire making sure the deadeye was oriented correctly then marked the lower forward hole and drilled this as well. The end result is 14 holes marking two of the holes in each of the upper deadeyes. I then put the wires in the holes and added a drop, or two of medium CA. I cut the wire long enough so it sticks out of both sides about 7-8mm so I can use the jig on either side. I drilled out the holes in two of the lower deadeyes and used more music wire pieces to secure the jig to the channel and mounted the seven 5mm deadeyes for the starboard shrouds. Now I have to make up the shroud lines (serving and all) and see if this is any better (for me) than doing it "by eye".
- 422 replies
-
- 4
-
-
- Vanguard Models
- Sphinx
- (and 1 more)
-
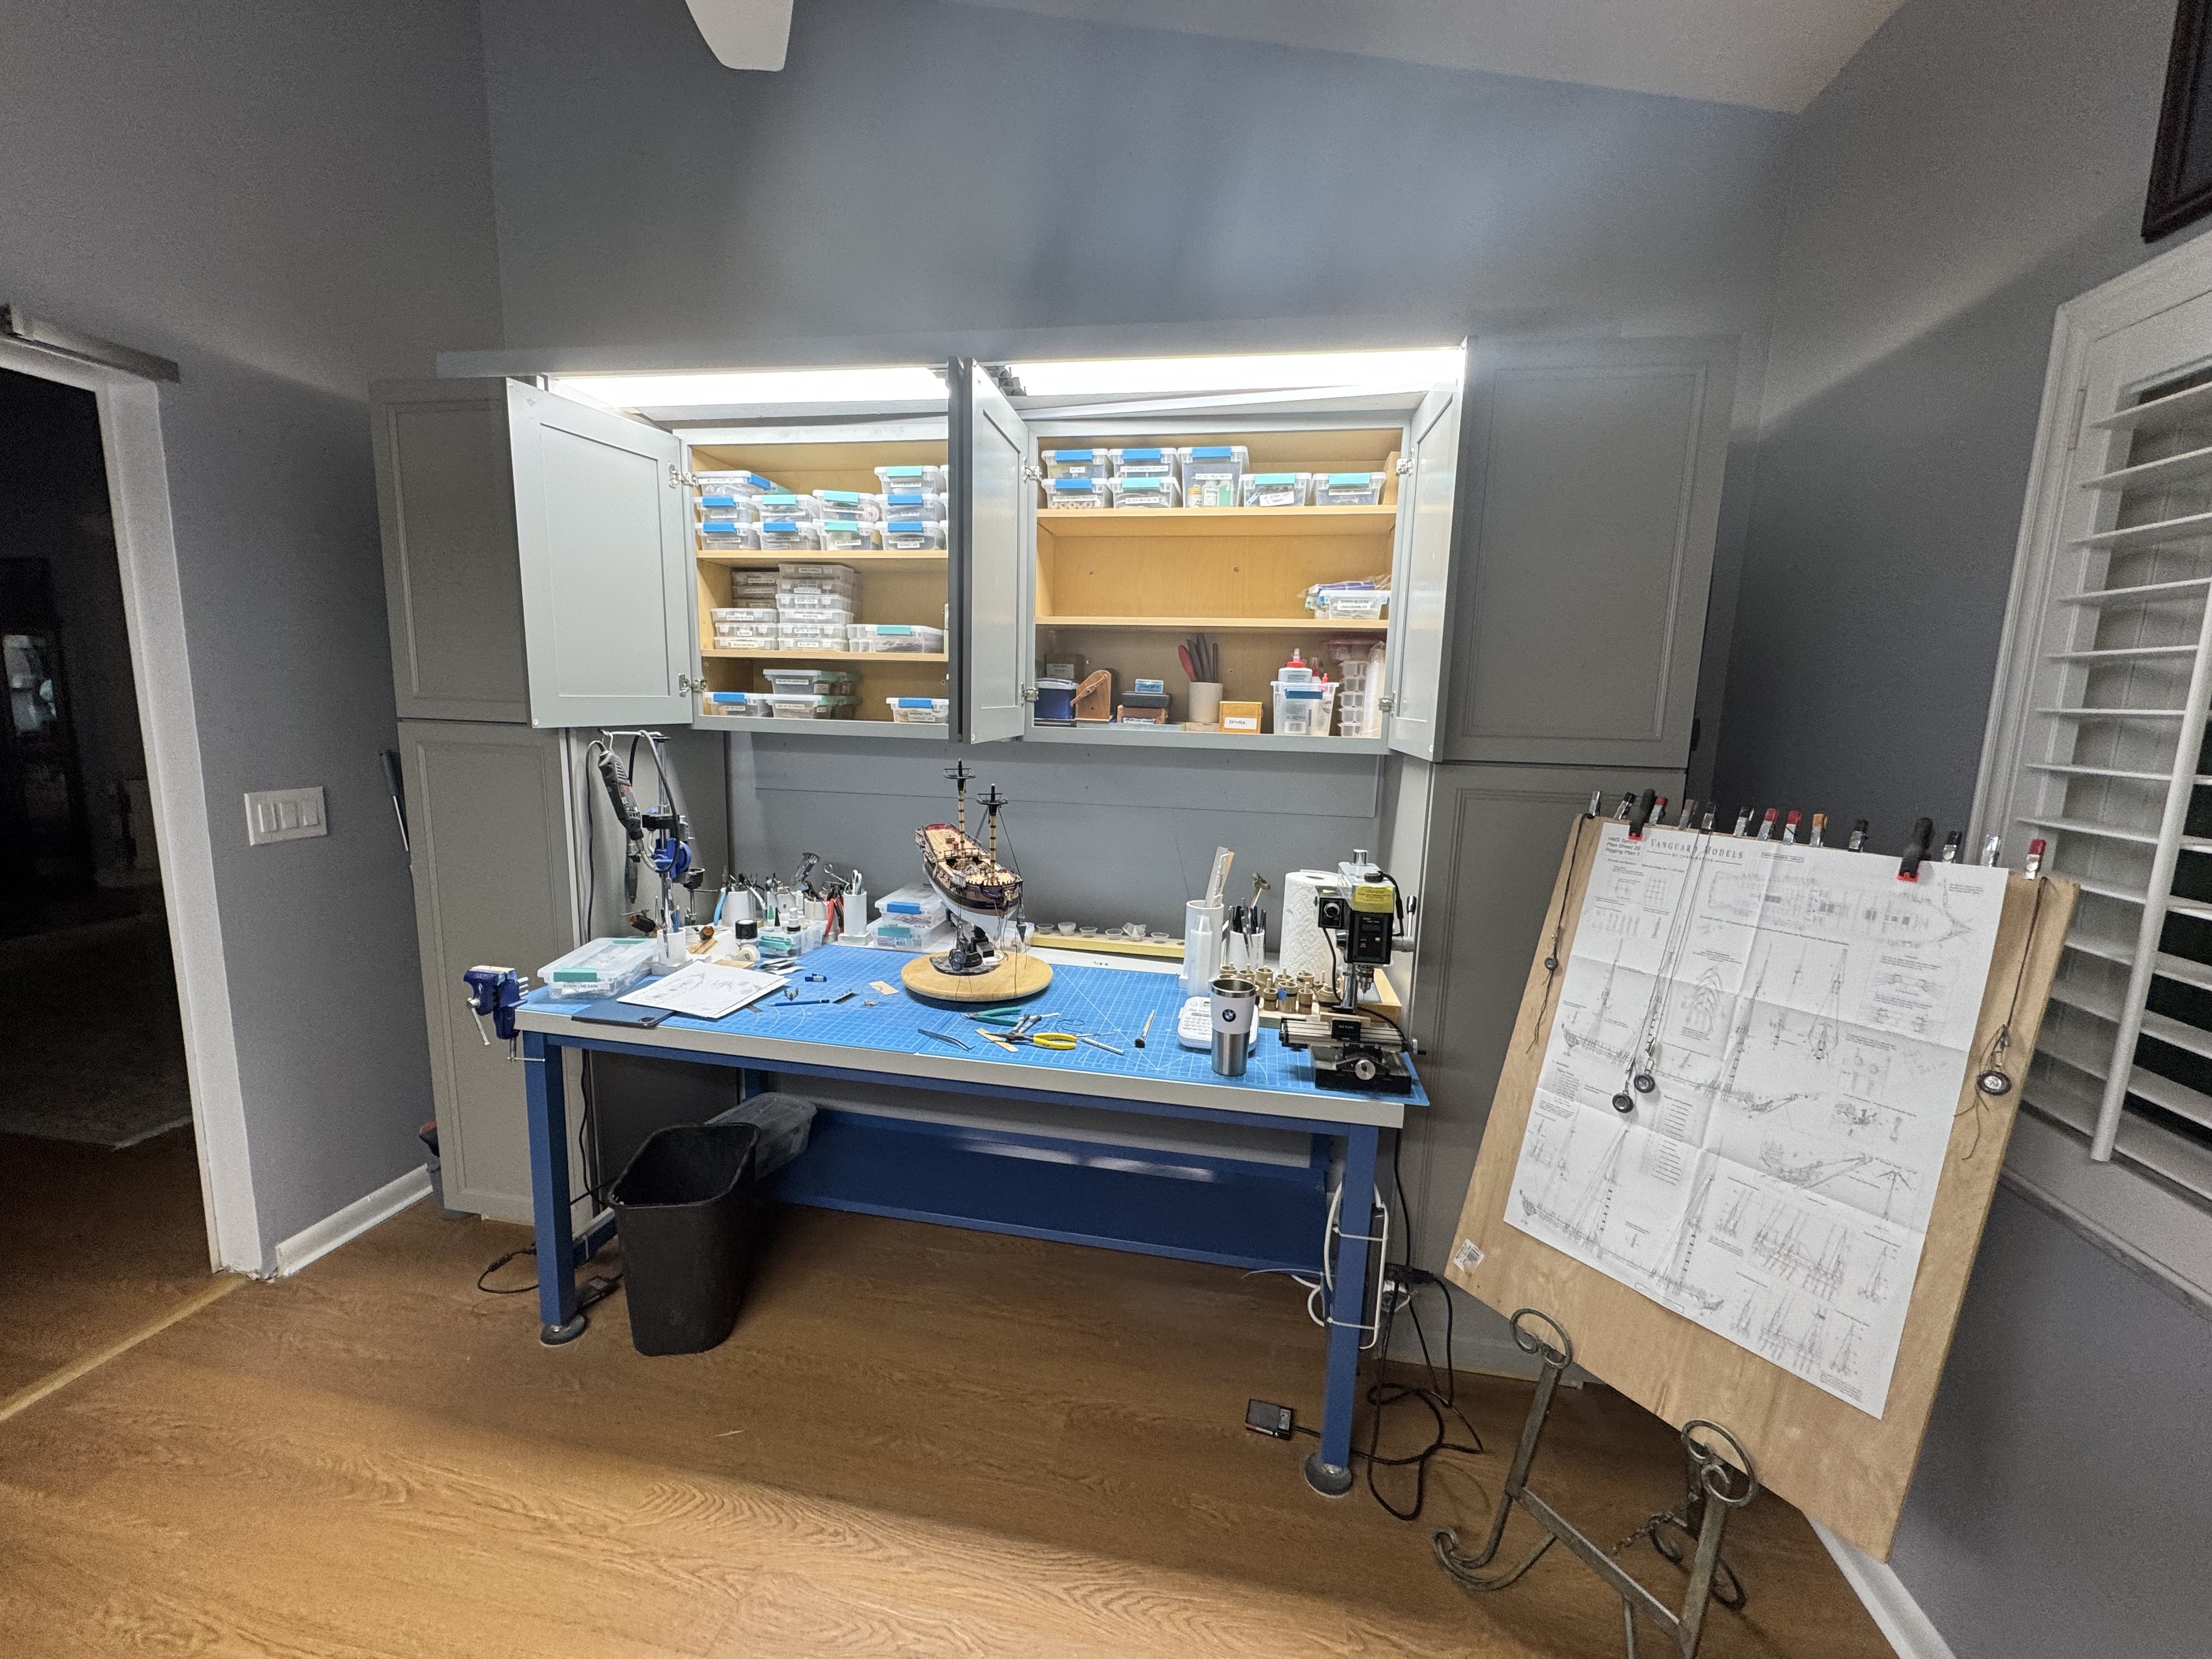
It has been more than two months since I last posted and I have been busy, just not on building ship models. It all started when the contractor began the bathrooms "redo". Unfortunately the path to the bathrooms leads directly through my workshop so everything came to a standstill during the rip out phase. When the tile removal and drywall work started it quickly became obvious that unless I wanted everything covered with a thick coat of dust I better get everything under cover or somewhere else. So I emptied the workshop benches and shelves into the garage. When the work was finally done I decided that since I had the workshop empty it would be a good time to upgrade things (like lighting and new cabinets), paint, drywall patching etc. which took another week or so. Now things are back in place (I even have some empty space in the cabinets now - I still have some "stuff" in the garage awaiting a "need" to find it a home) and work can begin again.

- 422 replies
-
- 5
-
-

-
- Vanguard Models
- Sphinx
- (and 1 more)
-
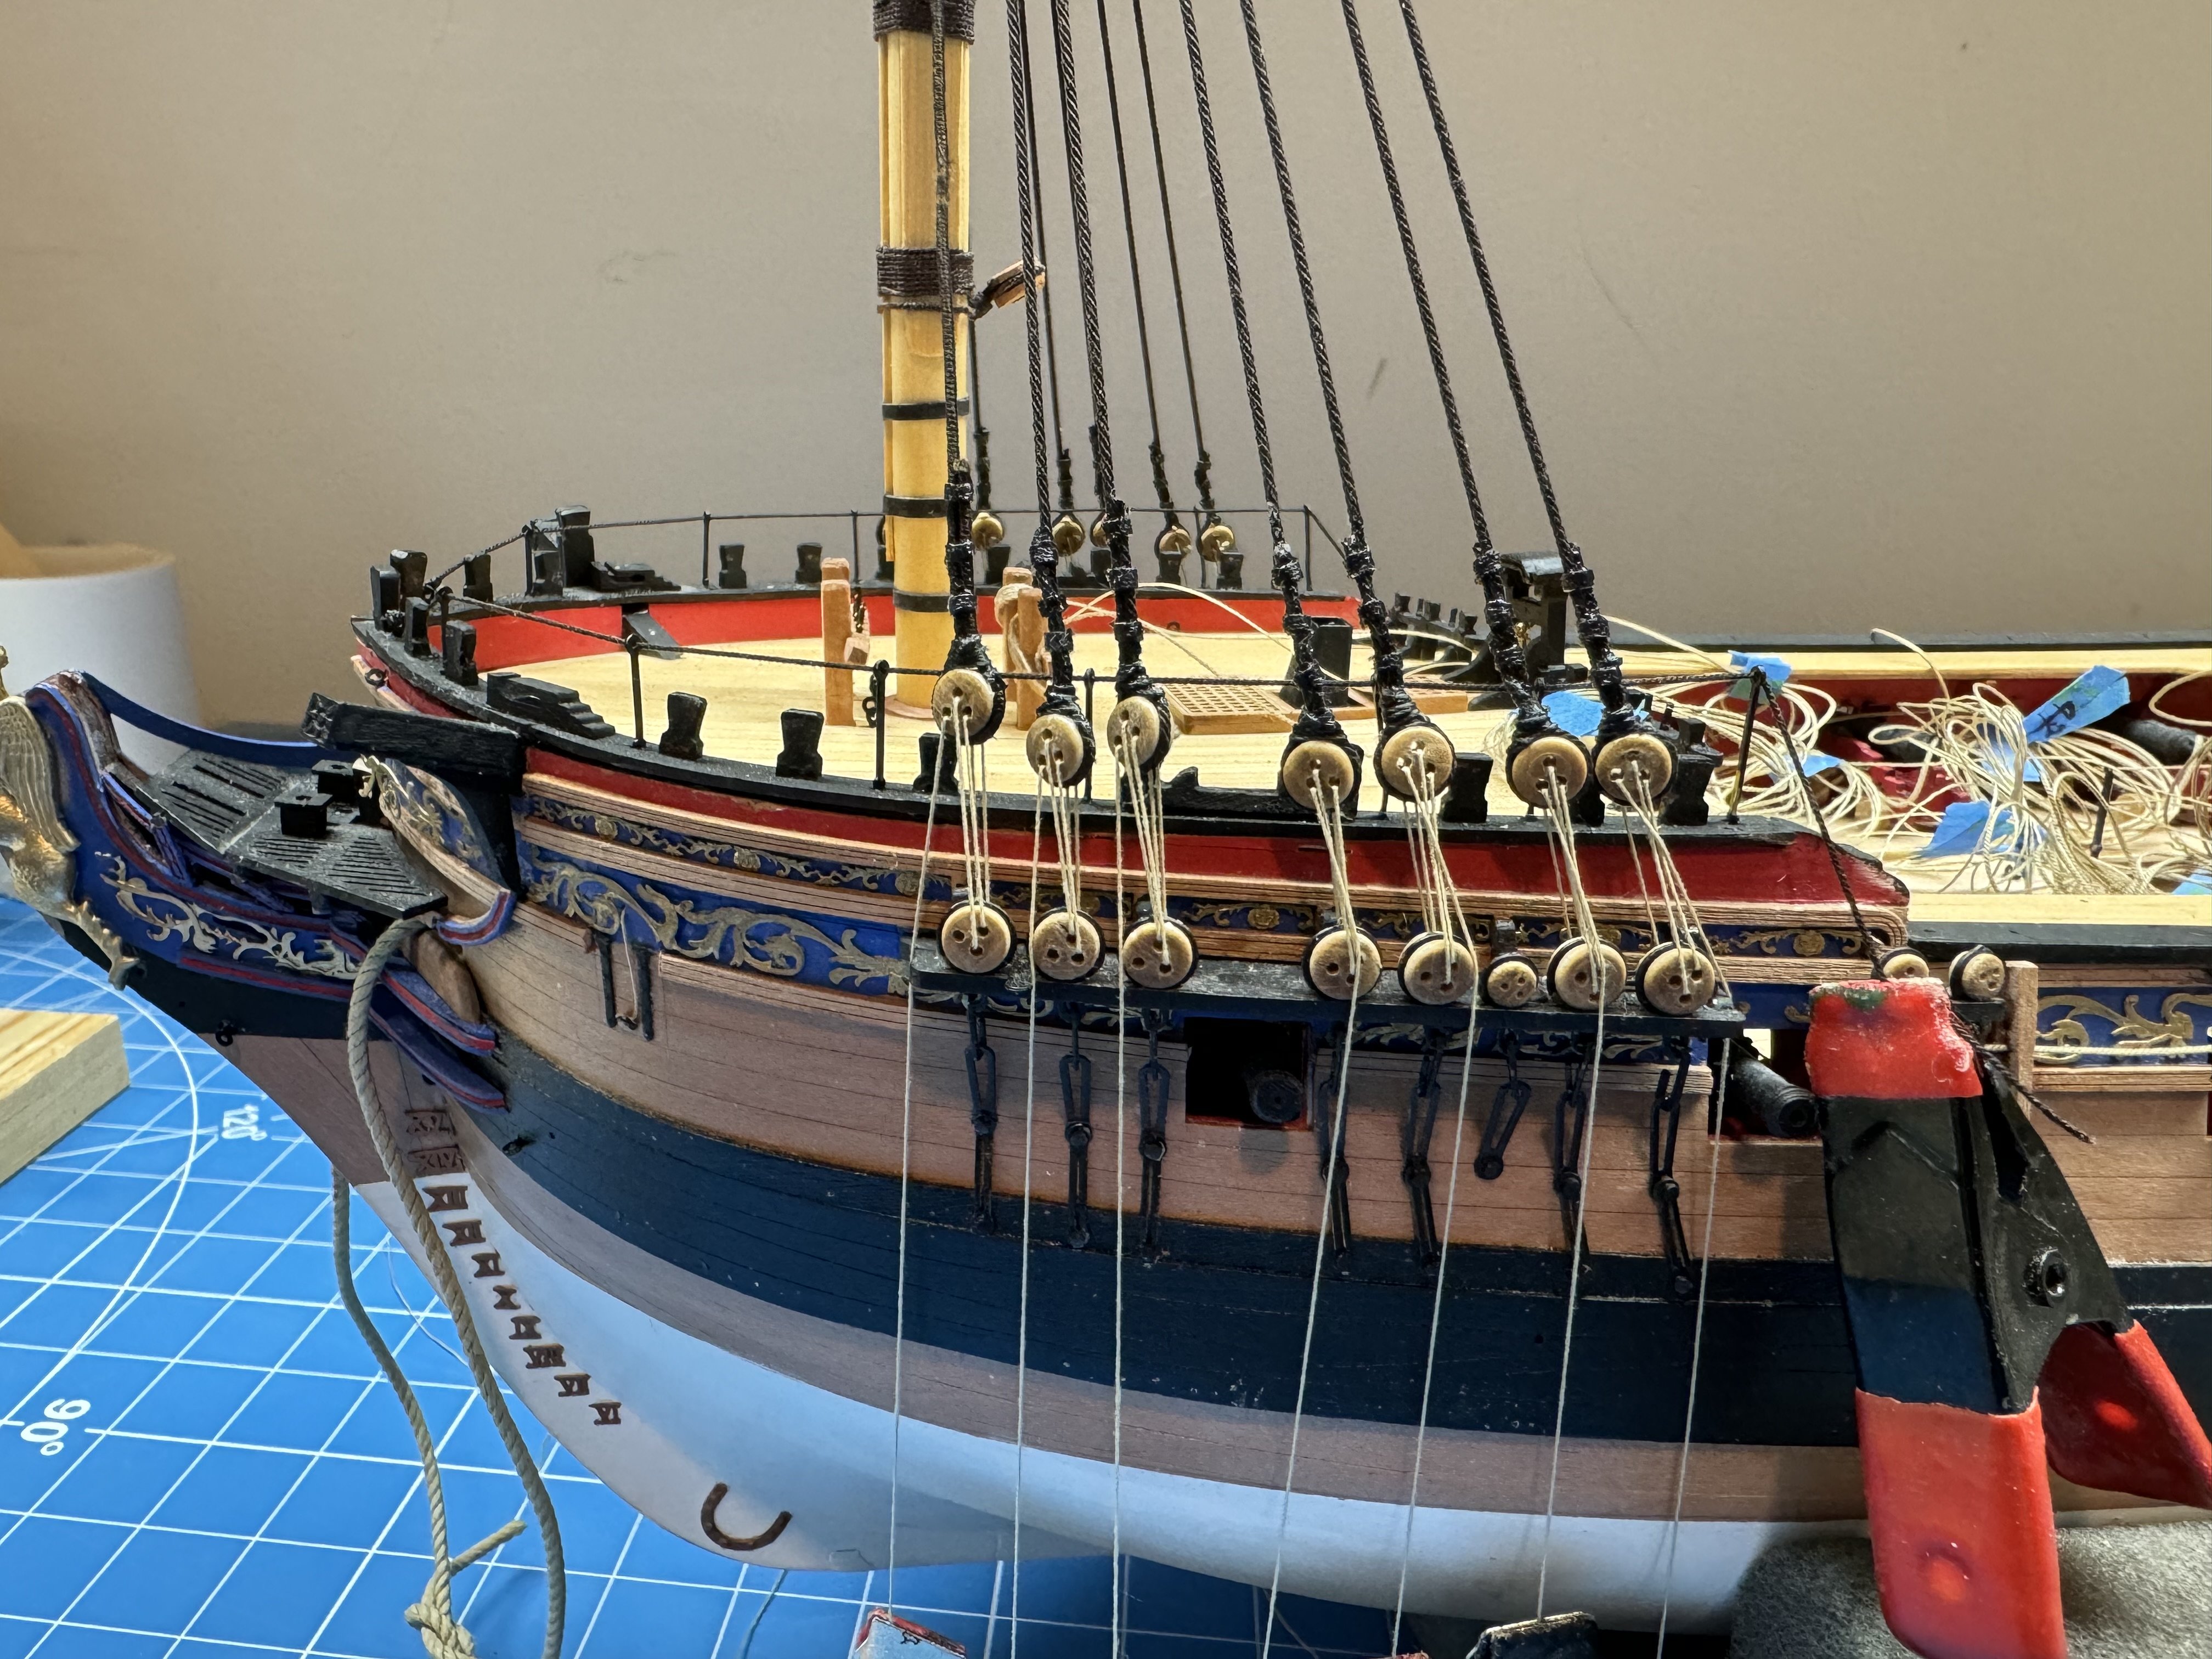
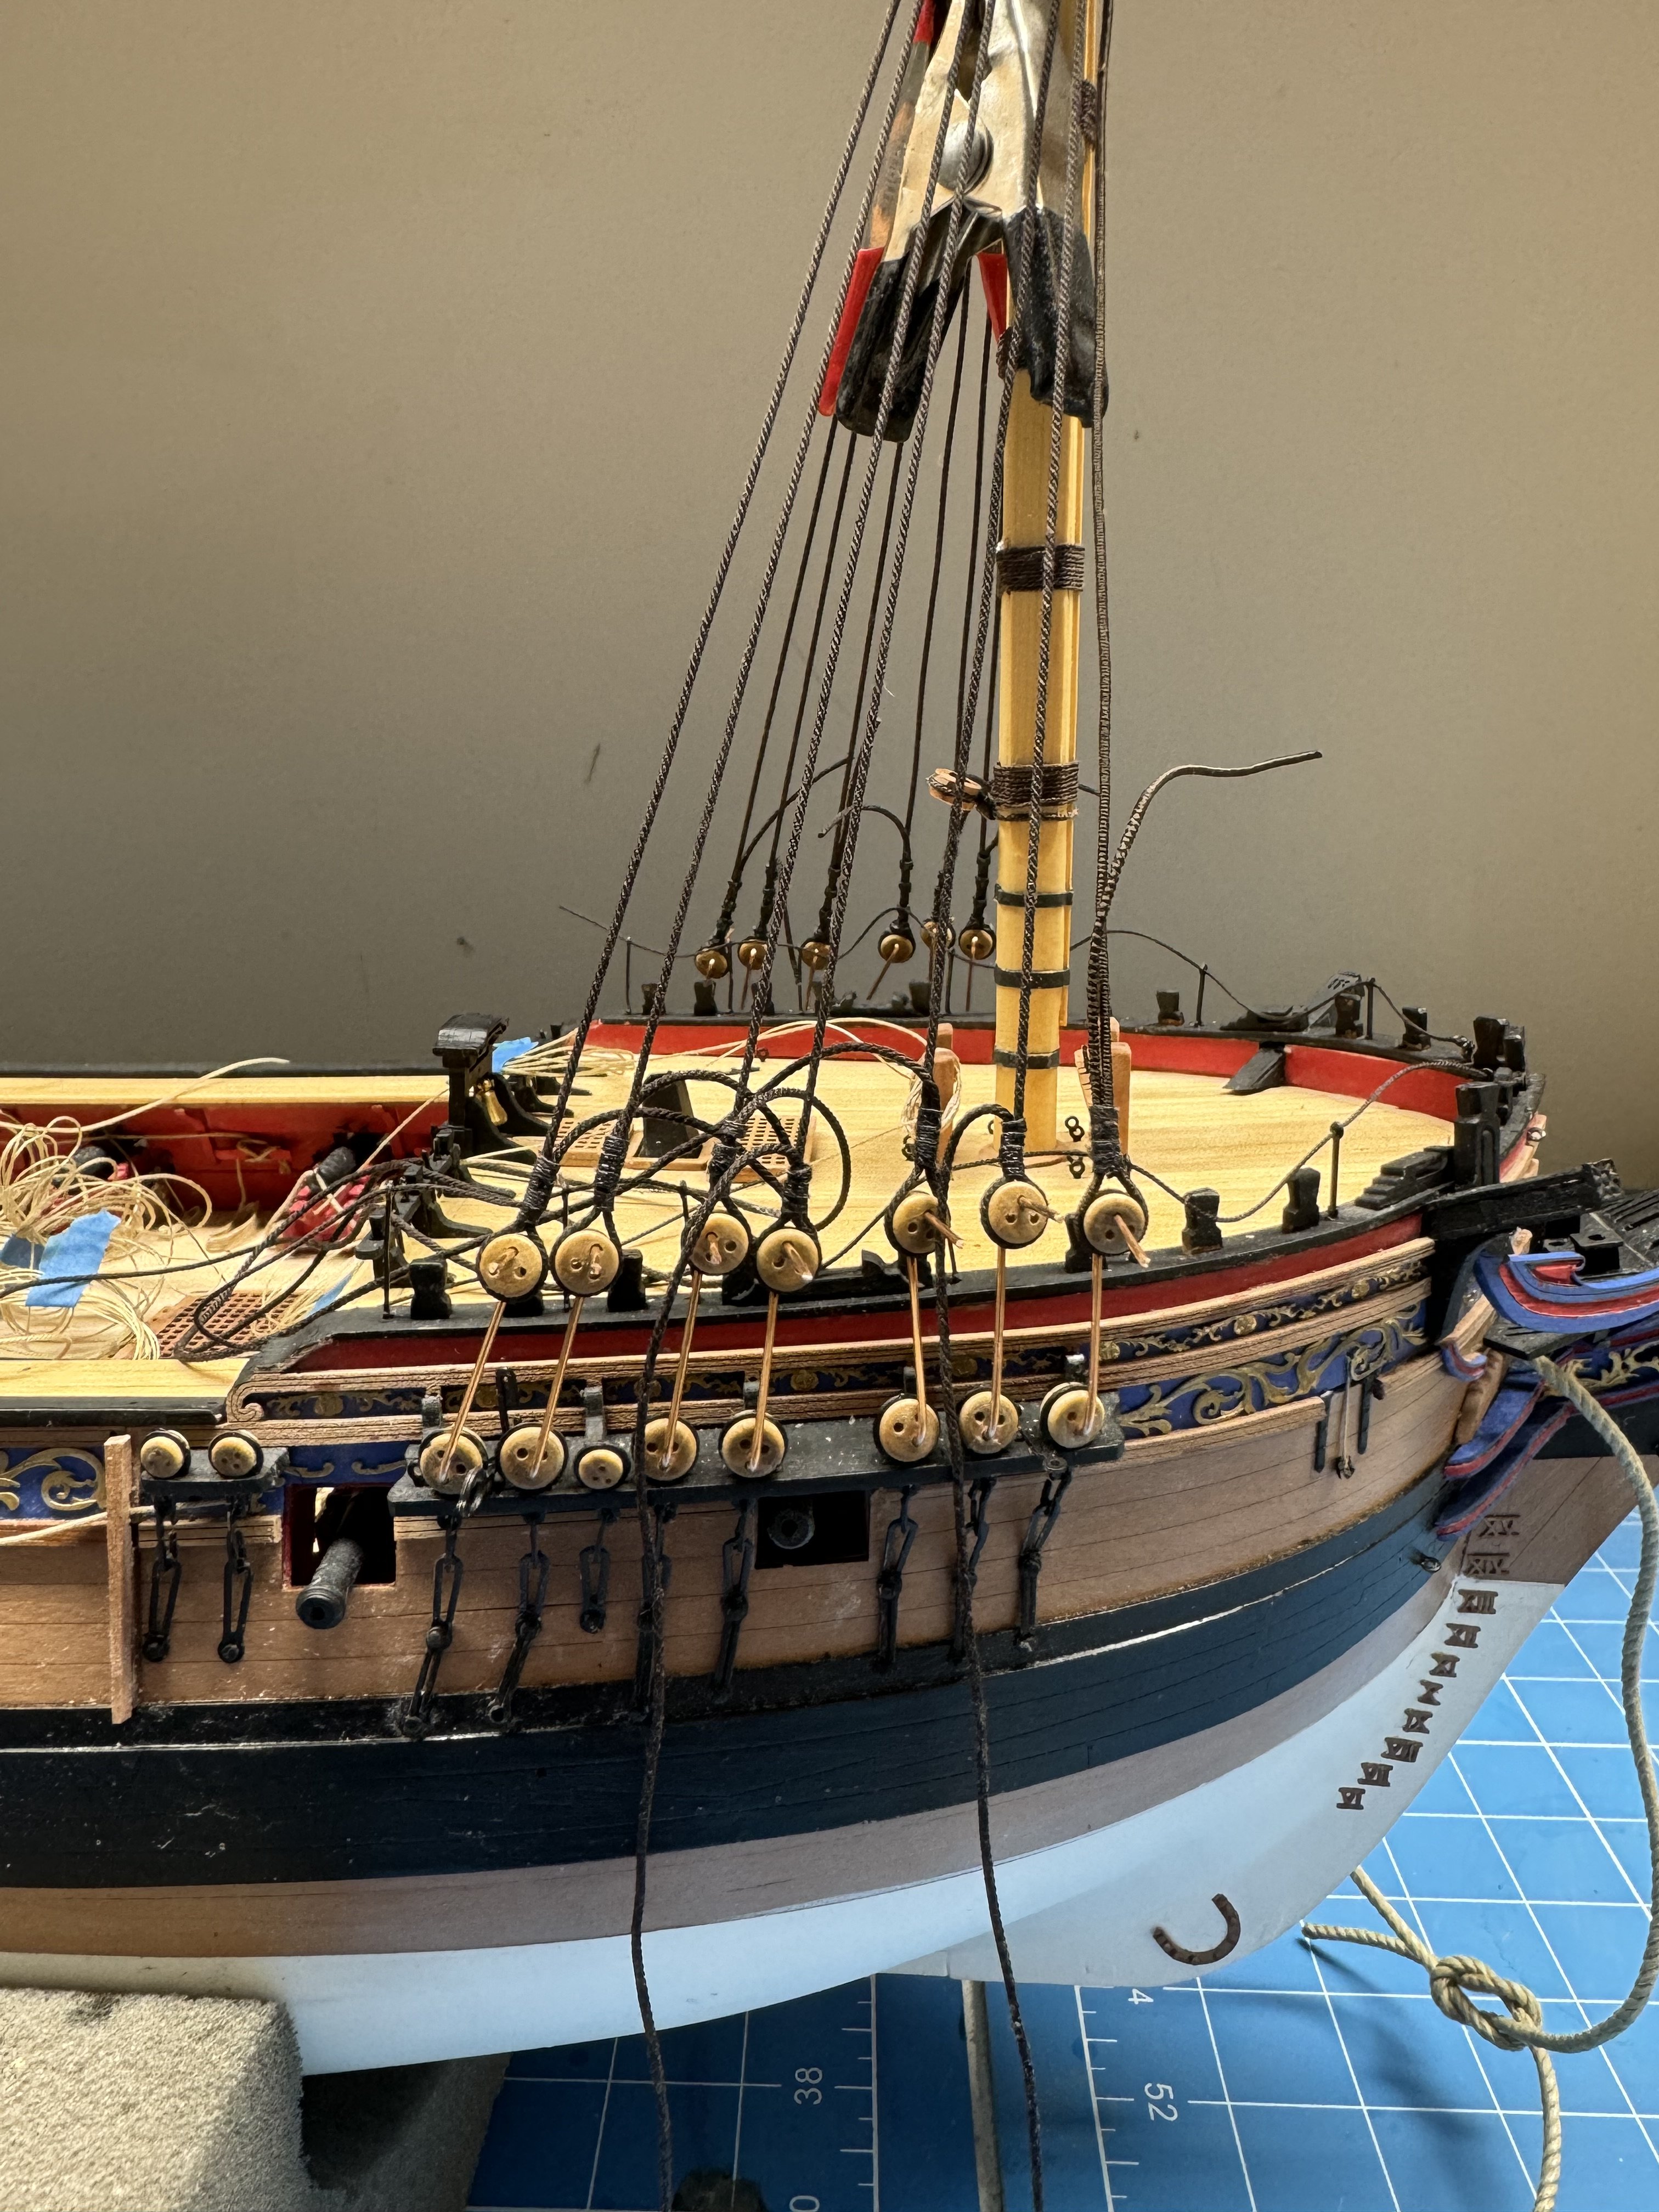
Fore mast lower shrouds and deadeyes in place and rigged. I have to tie off the lanyards yet but am wondering about the next step(s) after that.. I could go ahead and bit the bullet and rig the ratlines now and then the Carpathians before moving on to the main mast. Or just move on now while I remember the "lessons learned" from the foremast - like to keep the bitter end of the shroud on the same side as the standing end at each shroud - dah! I need to find a better way of determining which side of the shroud wants to face outboard. On more than one occasion I had to reverse that orientation because the deadeye refused to face outboard despite repeated twistings and tension on the lanyards.


- 422 replies
-
- 7
-
-
- Vanguard Models
- Sphinx
- (and 1 more)
-
Soon you too can join the rigging fun - assuming you are going to rig yours.
-
Thanks TBlack - will give that a try on the Main Mast. Starboard side of fore mast is done but on this side I did not more or less permanently 'install" the deadeyes. I am going to start rigging the lanyards and hopefully if a deadeye needs to be moved up or down (hopefully only a small amount if at all) I can do that before they are "secured". On the port side I am pretty much stuck with whatever is "there" now. Hopefully I can use more or less tension in the lanyards to even the deadeyes out. So I think I will rig the lanyards on each mast before moving on to the next. Am considering doing the ratlines as well. I am not sure I want to "prolong the agony" but my shoulders do not hold up as well as the used to doing ratlines and this is my first experience with three masts of them.

- 422 replies
-
- 6
-
-
- Vanguard Models
- Sphinx
- (and 1 more)
-
Thukydides - thanks for the info. I was just following the rigging drawing included with the kit. I looked in my "Rigging a Six Rate Sloop" book by David Antscherl and it too shows the throat seizing, and only three sets not four as shown in the drawing. However, since the port side deadeyes are more or less permanently installed I think I will press ahead and blame any errors in authenticity on the kit drawing.
- 422 replies
-
- 1
-
-
- Vanguard Models
- Sphinx
- (and 1 more)
-
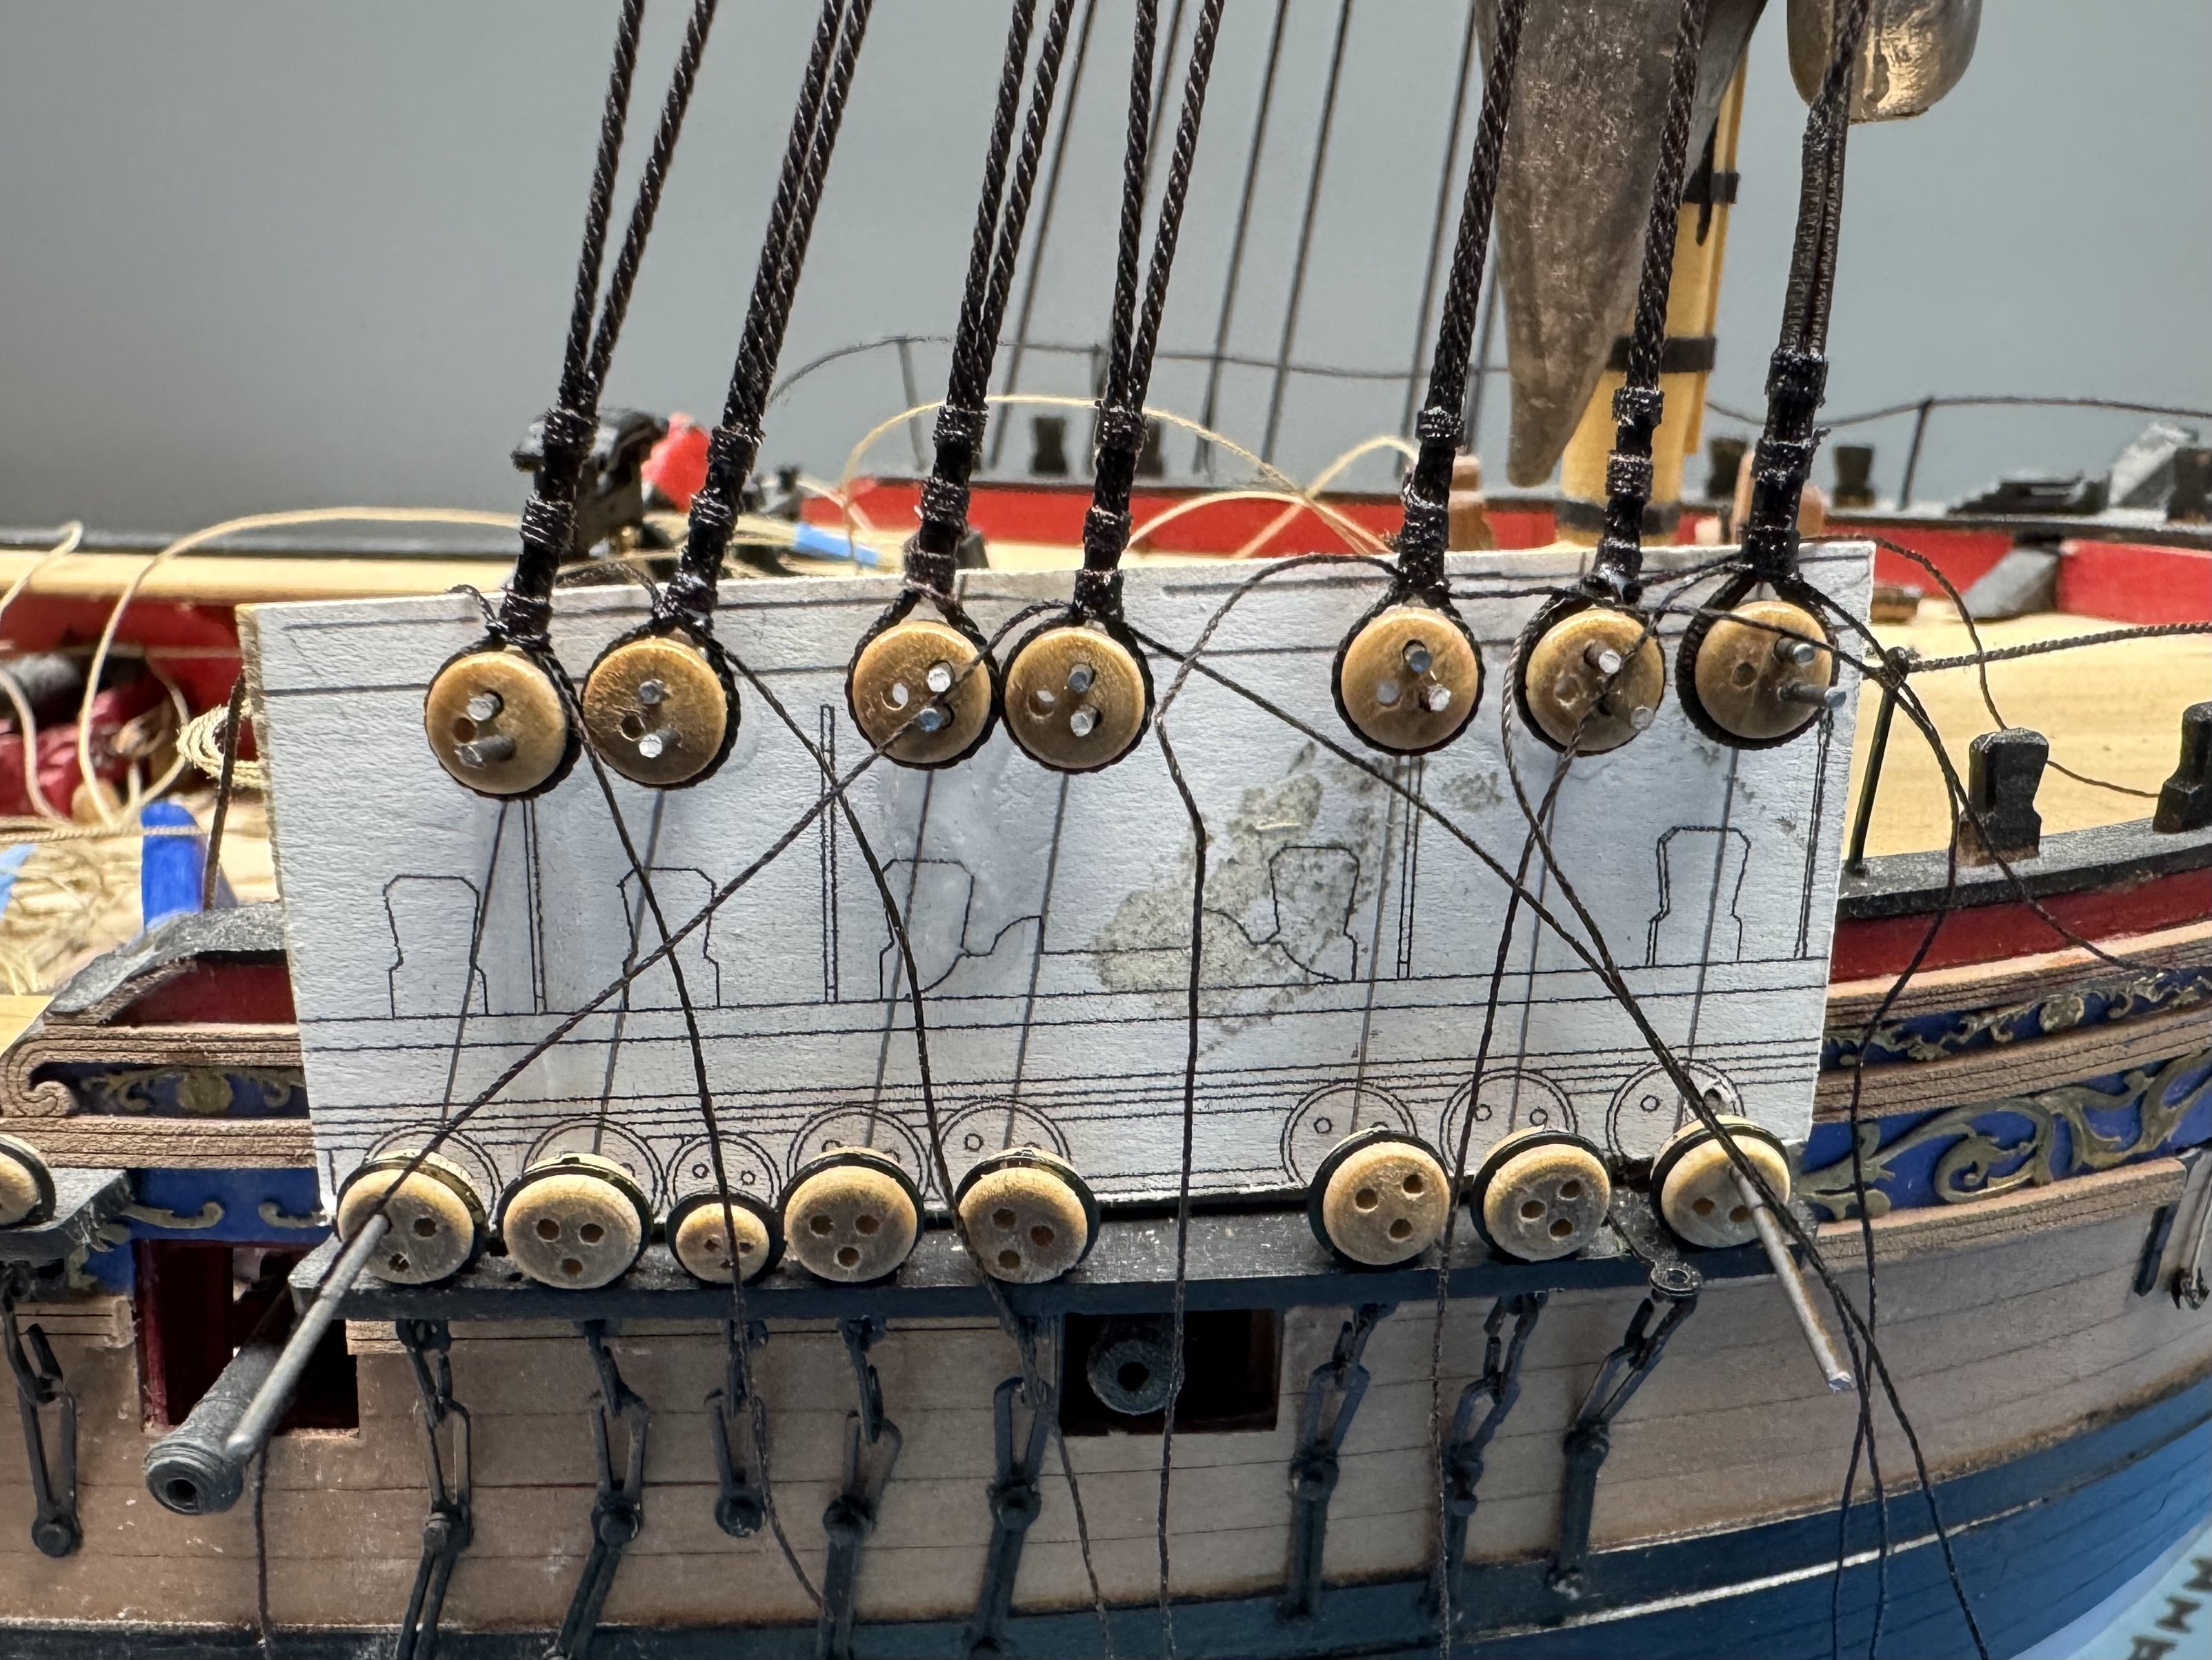
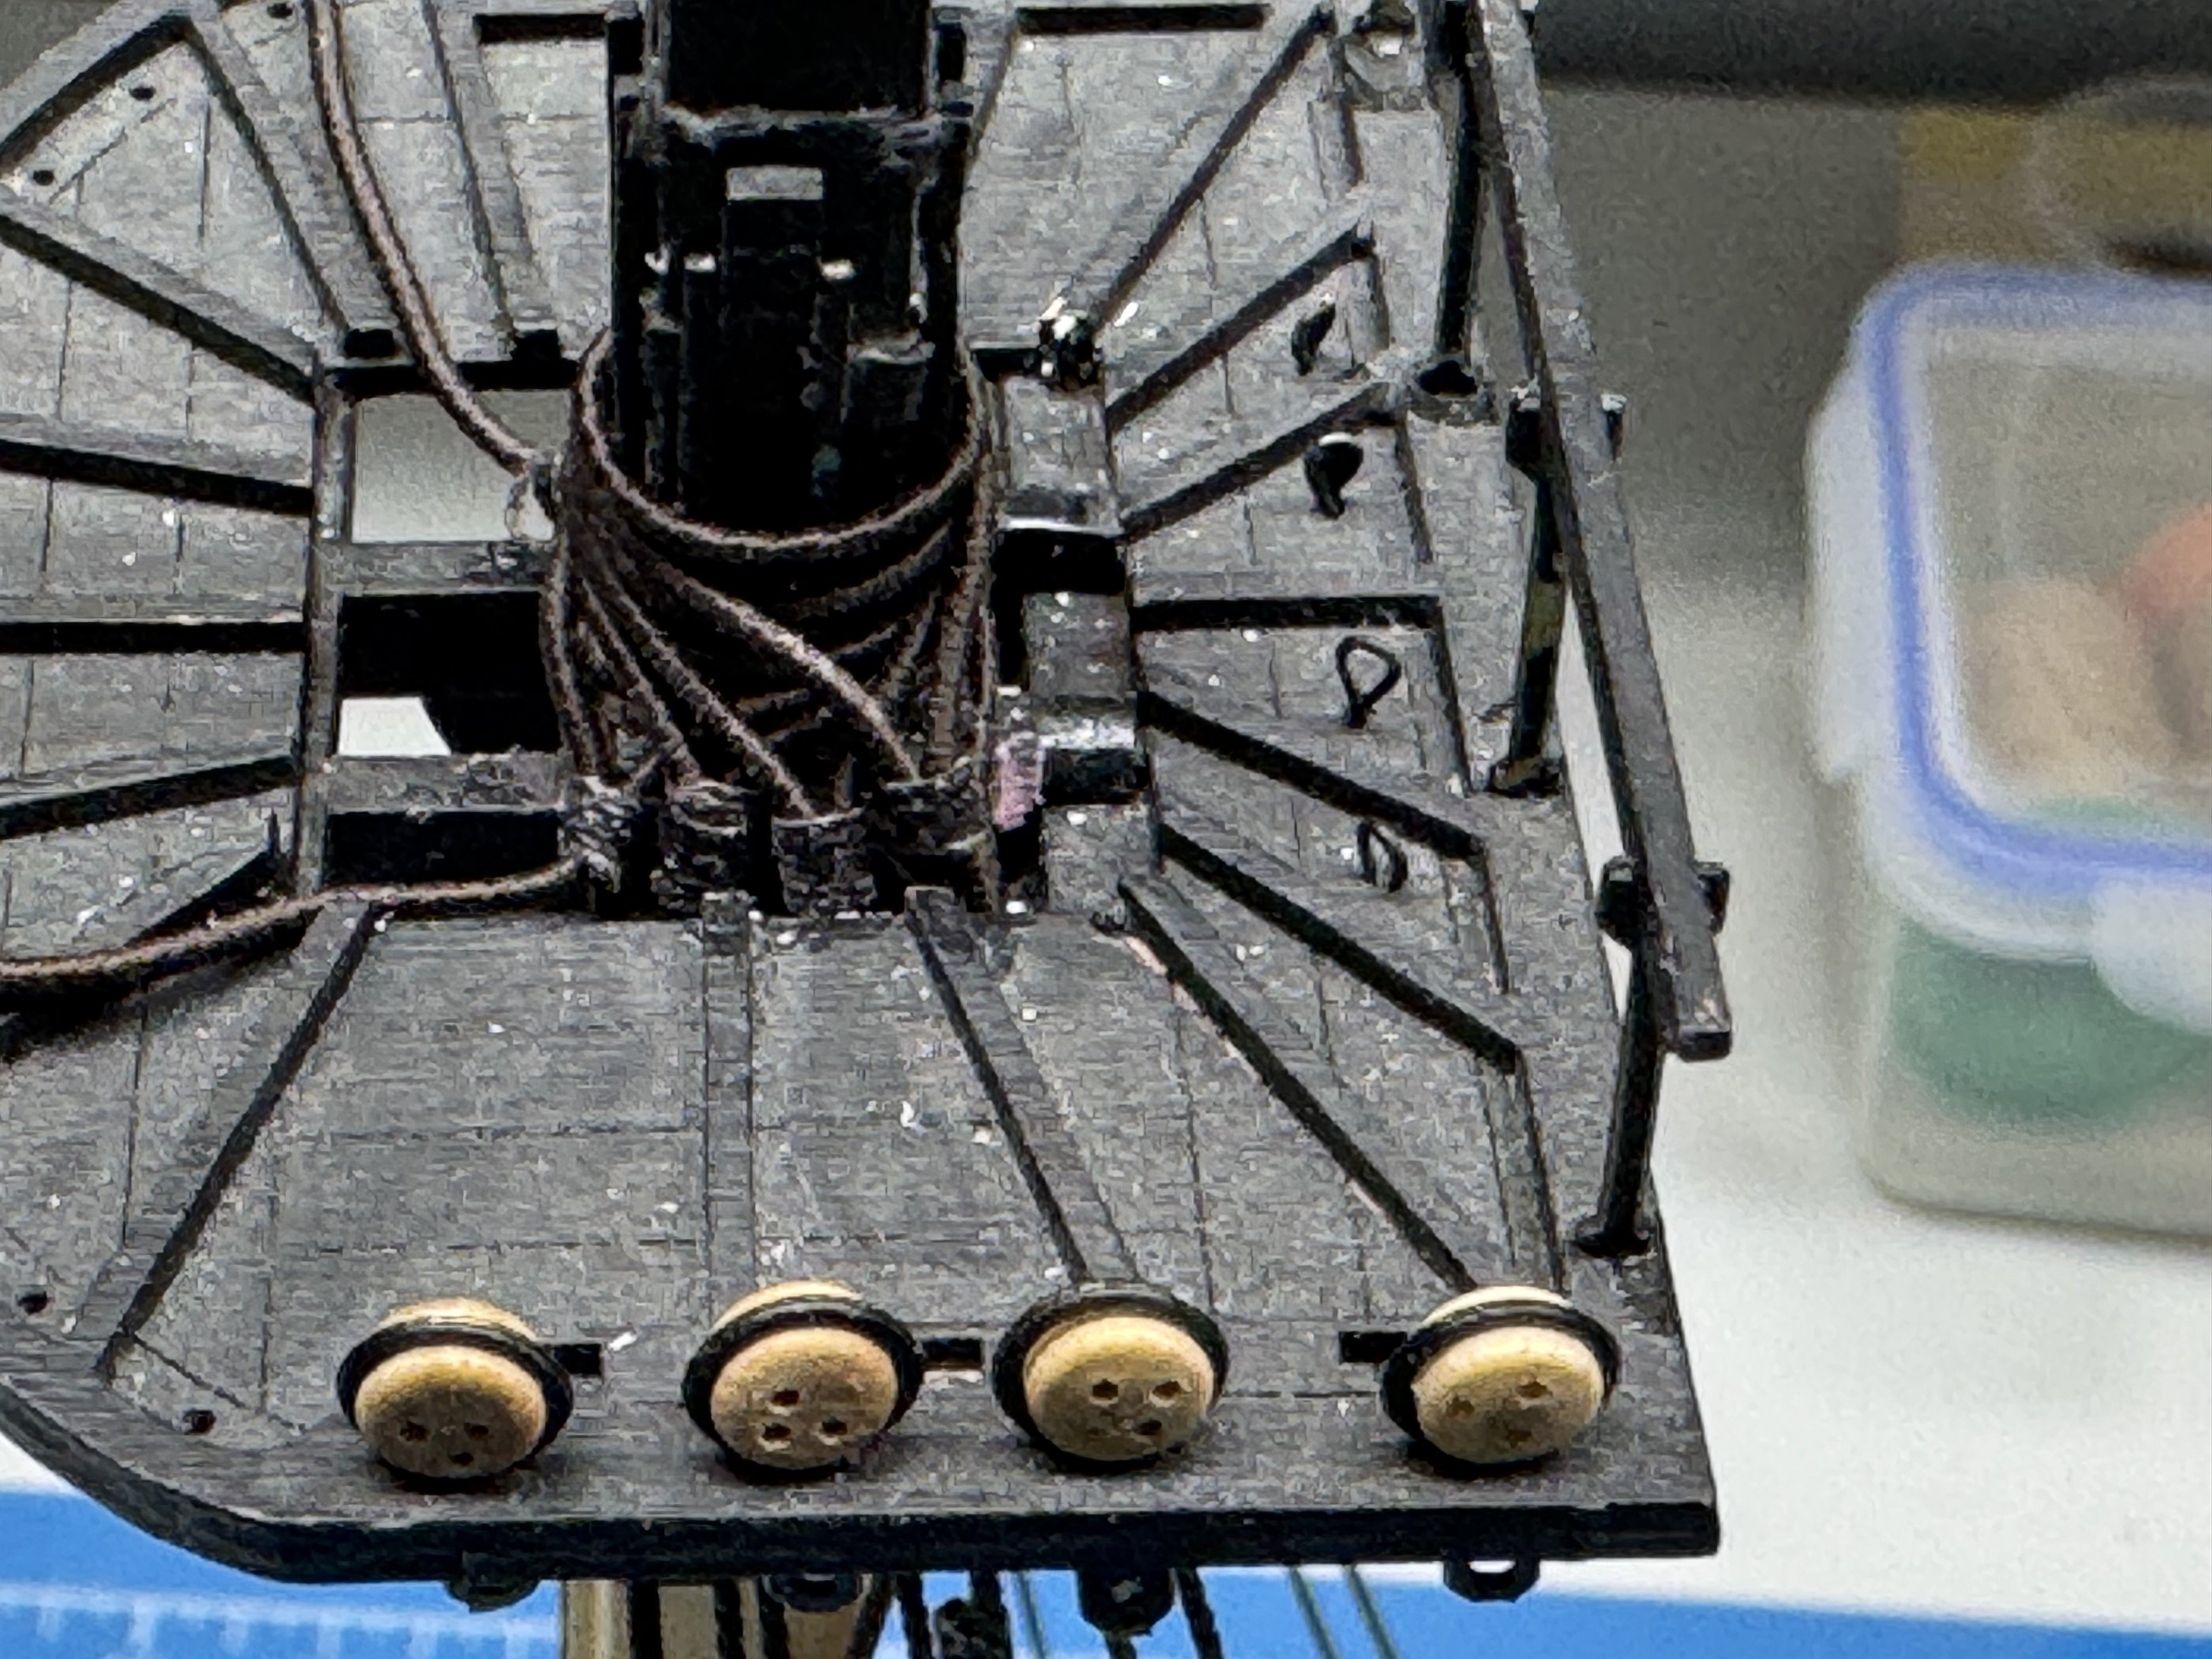
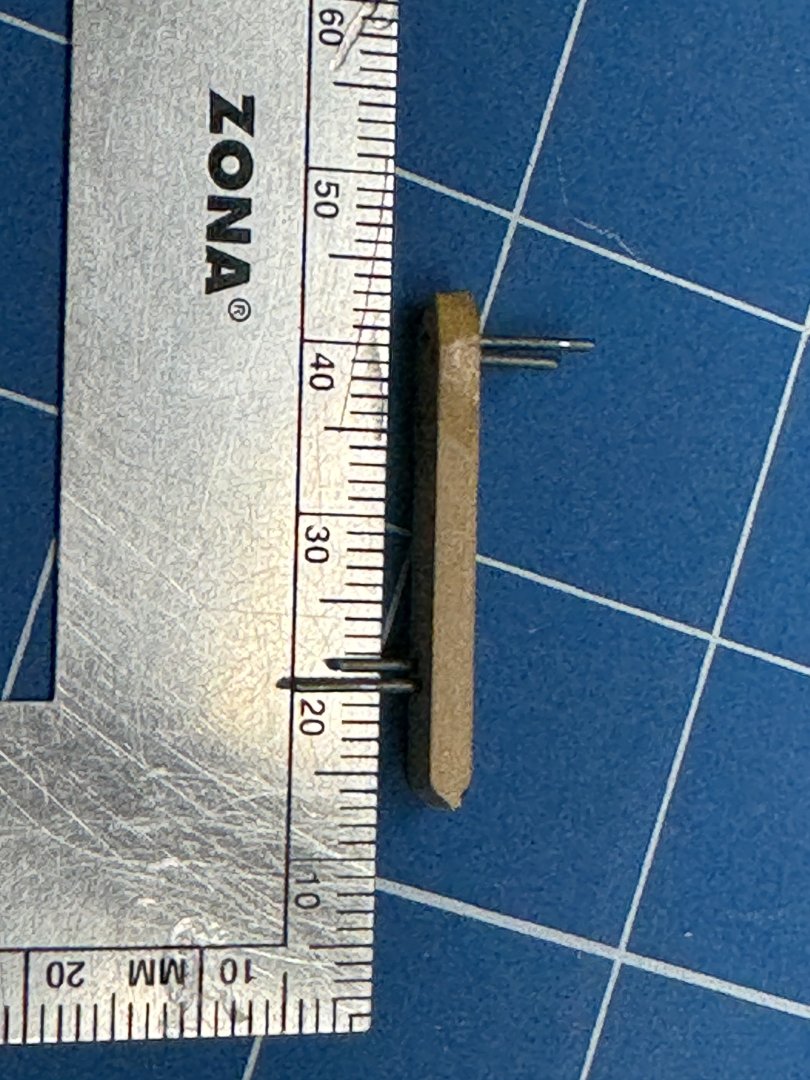
I have started the somewhat (to me) daunting task of getting the fore mast deadeyes attached to the shrouds. There are doubtless many ways to do this but always ready to plow new ground I built my own 'jig". According to the drawing it is 20mm between the outermost "holes" of the deadeyes. Sorry the light did not hit the ruler very well - trust me 20mm. I then cut a short piece of 3/16' X 3/32 boxwood and drilled #68 holes 20mm apart on the centerline. I then used a deadeye to mark one of the other holes for each deadeye and drilled holes there as well. I cut some short (one shorter than the other) pieces for each end from .032" piano wire. I pounded the piano wire in (#68 drill is a bit short of .032 -.031 according to my chart) and then used a drop of thin CA on the back side of the wires. I put the two sets of wires on opposite sides of the wooden batten to help keep the new deadeye on the jig - don't ask me how I know this works better than both sets of "pegs" on the same side. Here is the jig verifying that it is 20mm between the "pegs". The end with the rounded end goes into the deadeye on the channel and the shroud deadeye on the other end making sure the upper peg goes in the "top" hole. Now loop the shroud around the deadeye and use your favorite method to secure the deadeye to the shroud. I also built a jig to bend .032 phosphor-bronze wire to the 20mm spacing and use them to keep the already completed shroud/deadeyes out of the way. Here is the port side shroud/deadeyes completed.


- 422 replies
-
- 8
-
-
- Vanguard Models
- Sphinx
- (and 1 more)
-
Thanks guys - some things just take a little more time (and effort).
- 422 replies
-
- 1
-
-
- Vanguard Models
- Sphinx
- (and 1 more)
-
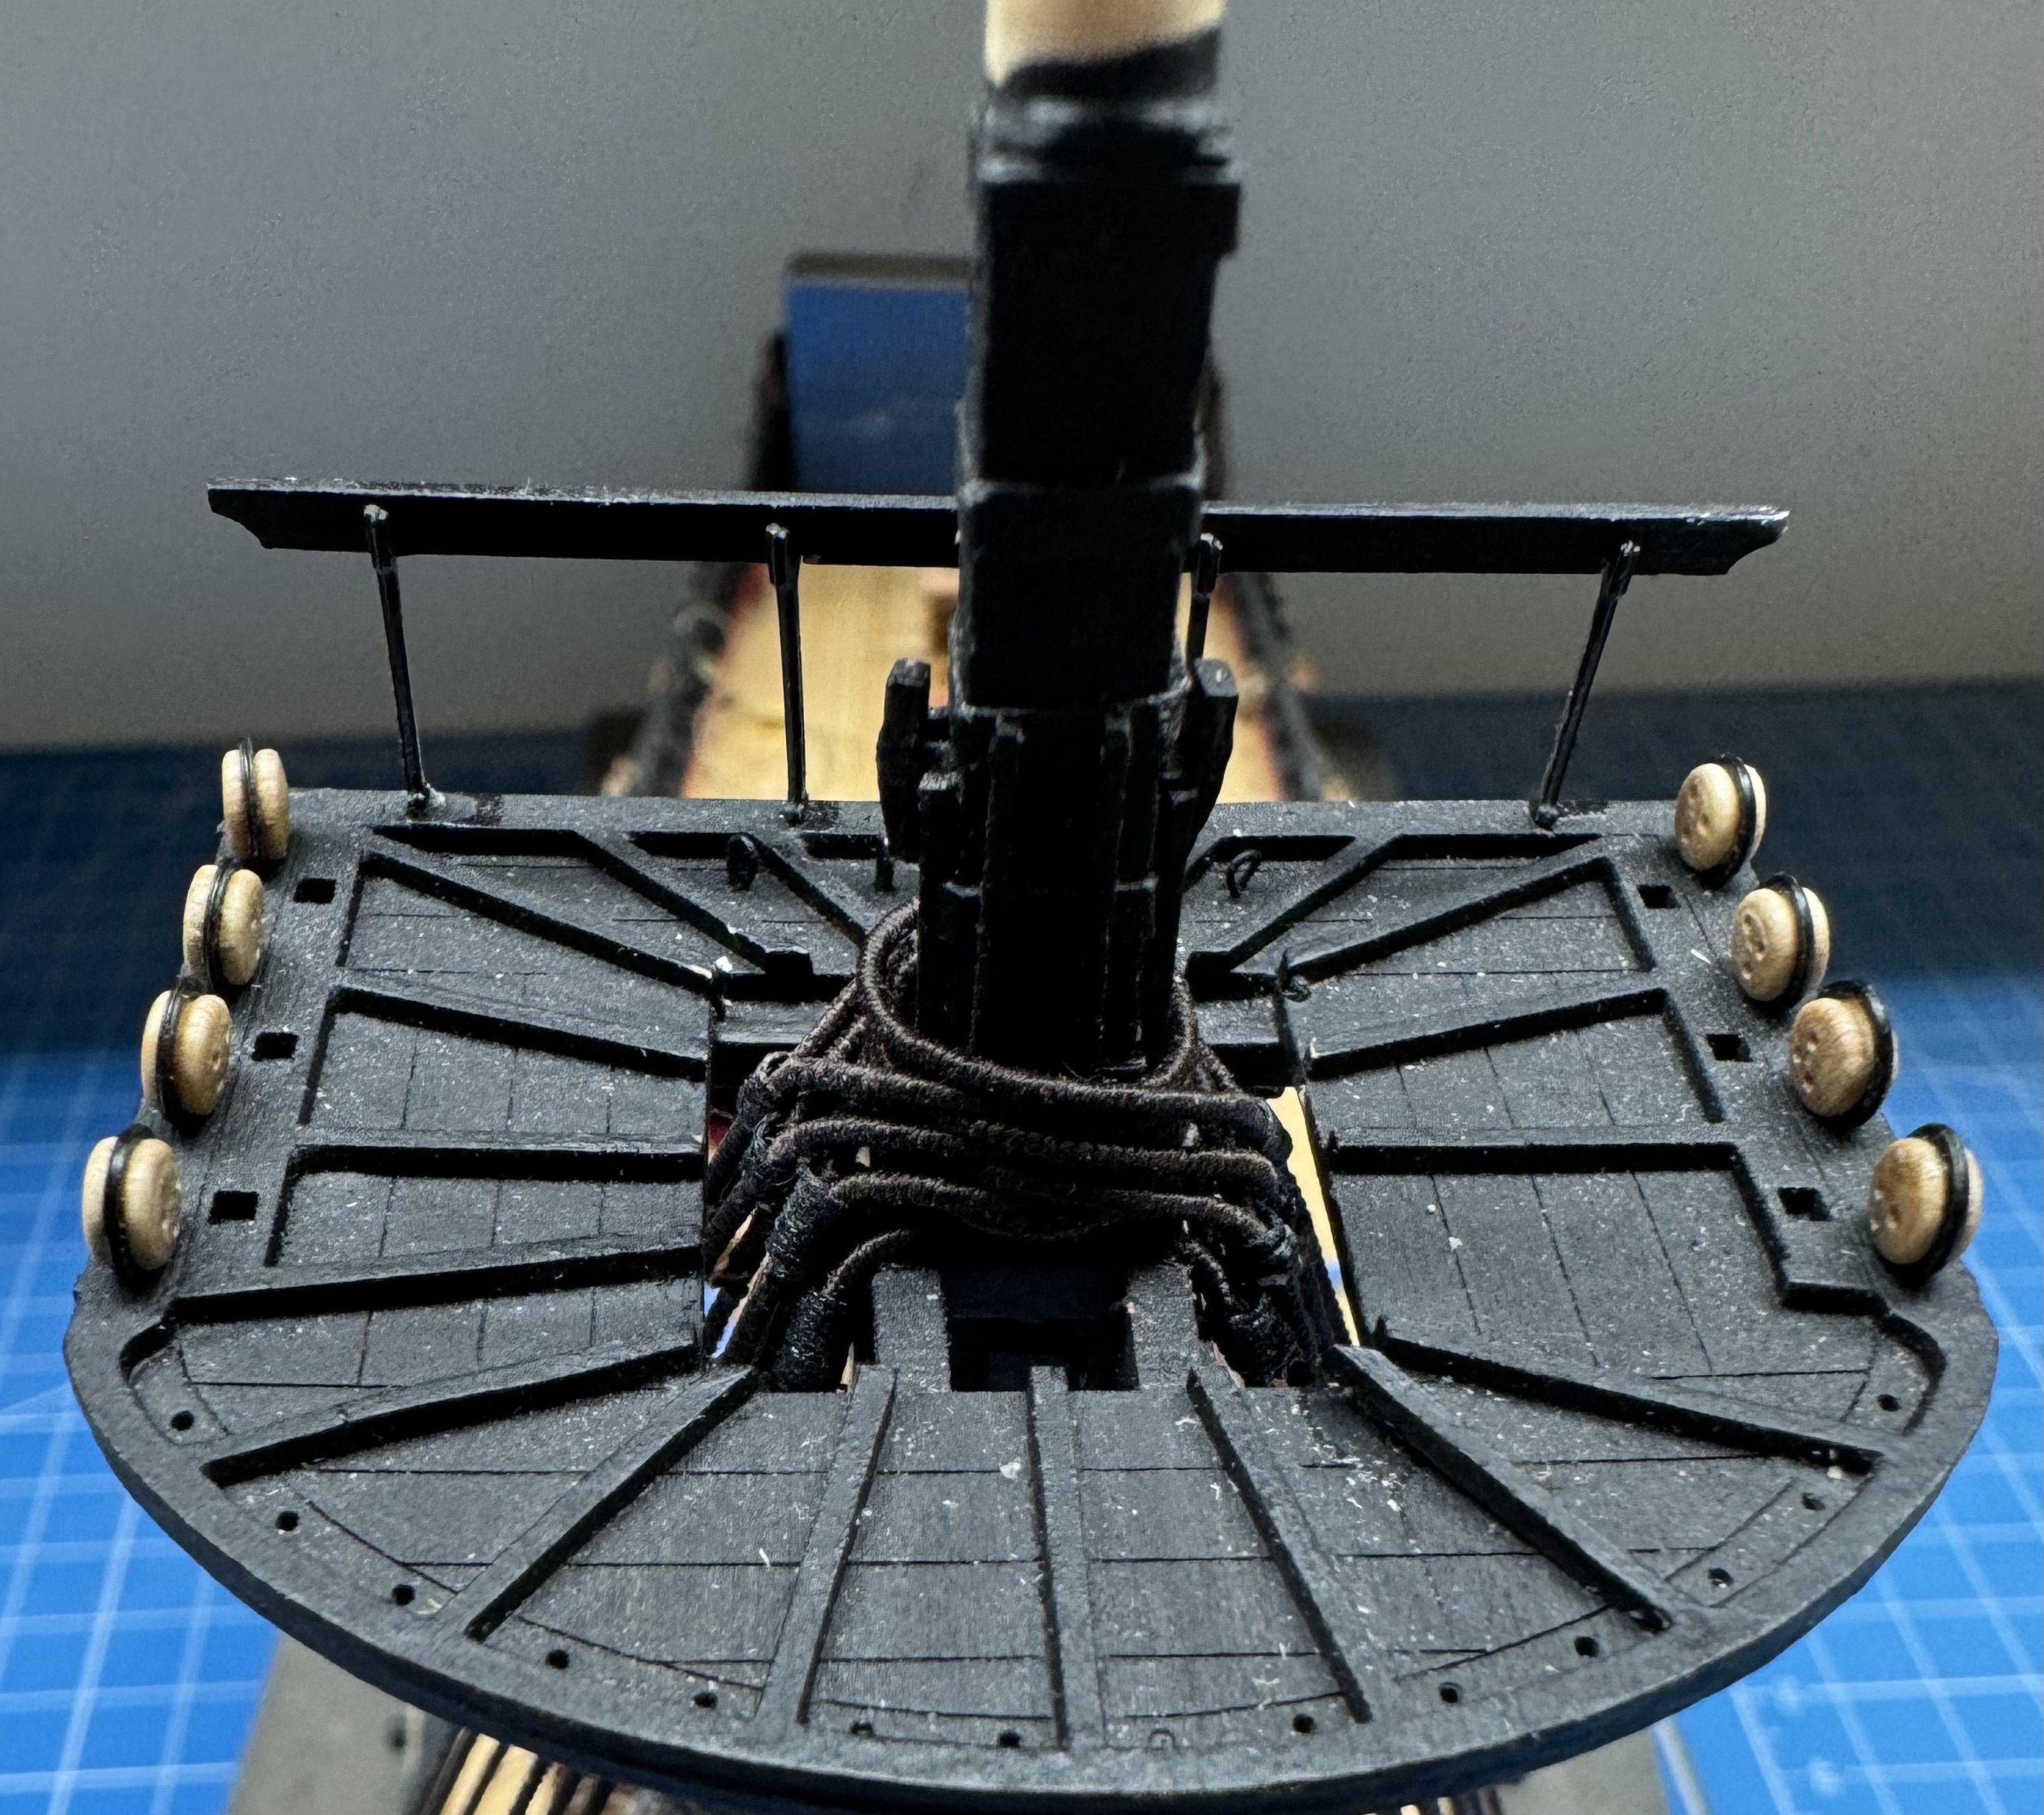
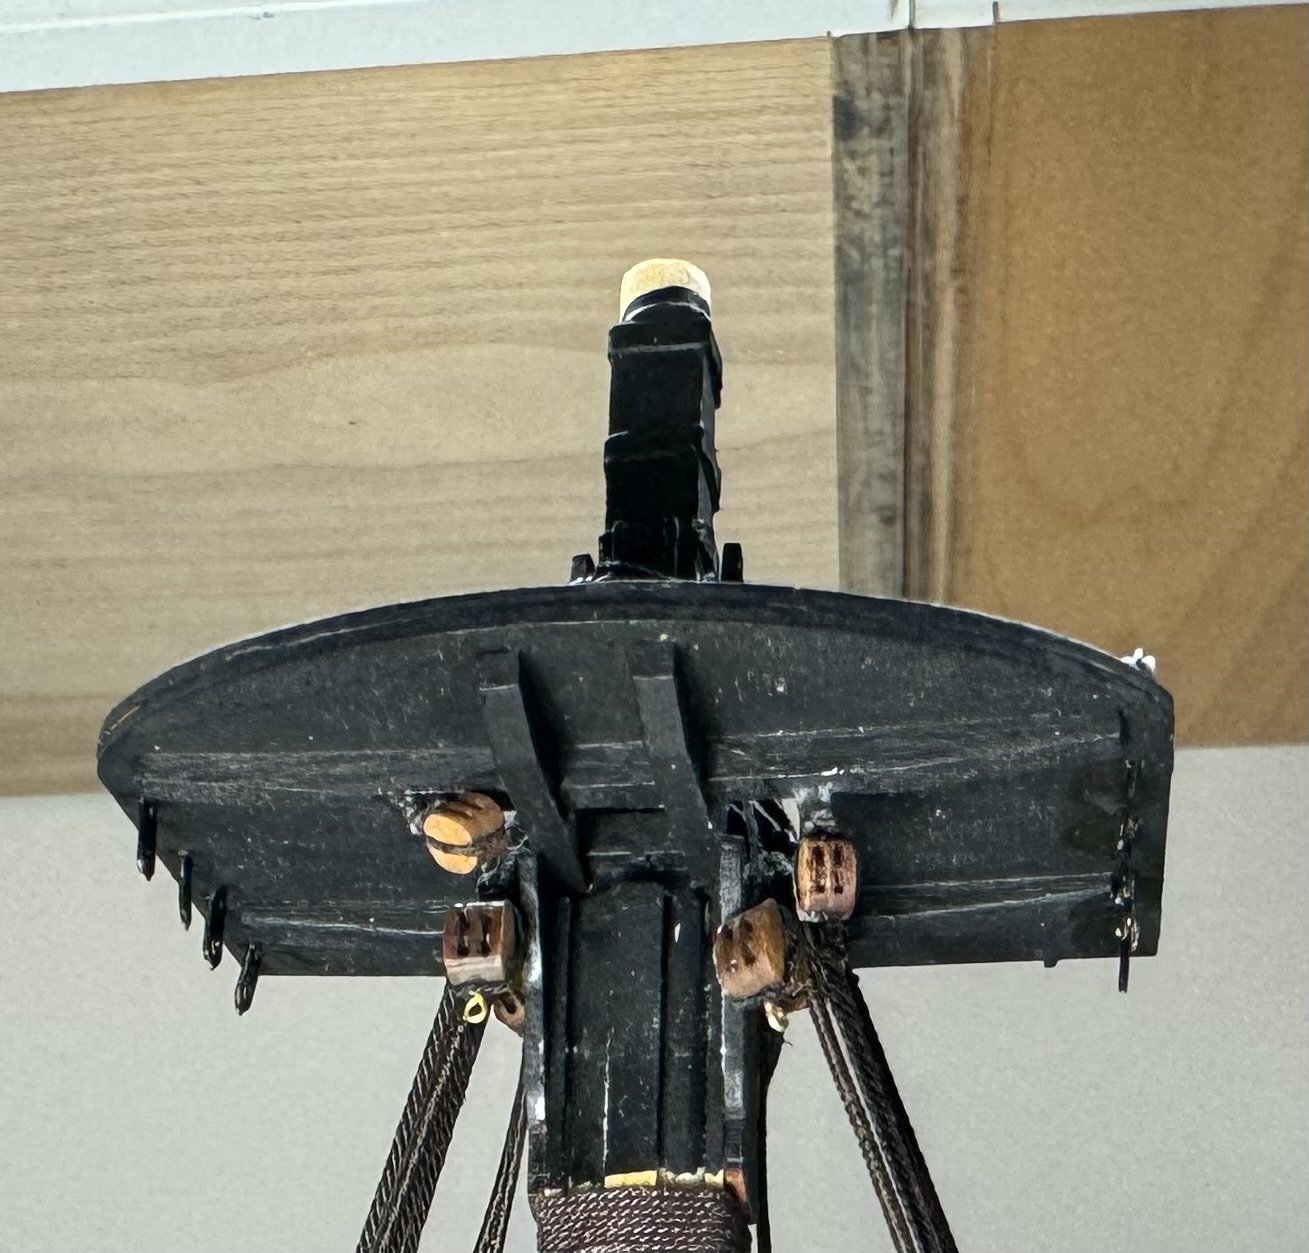
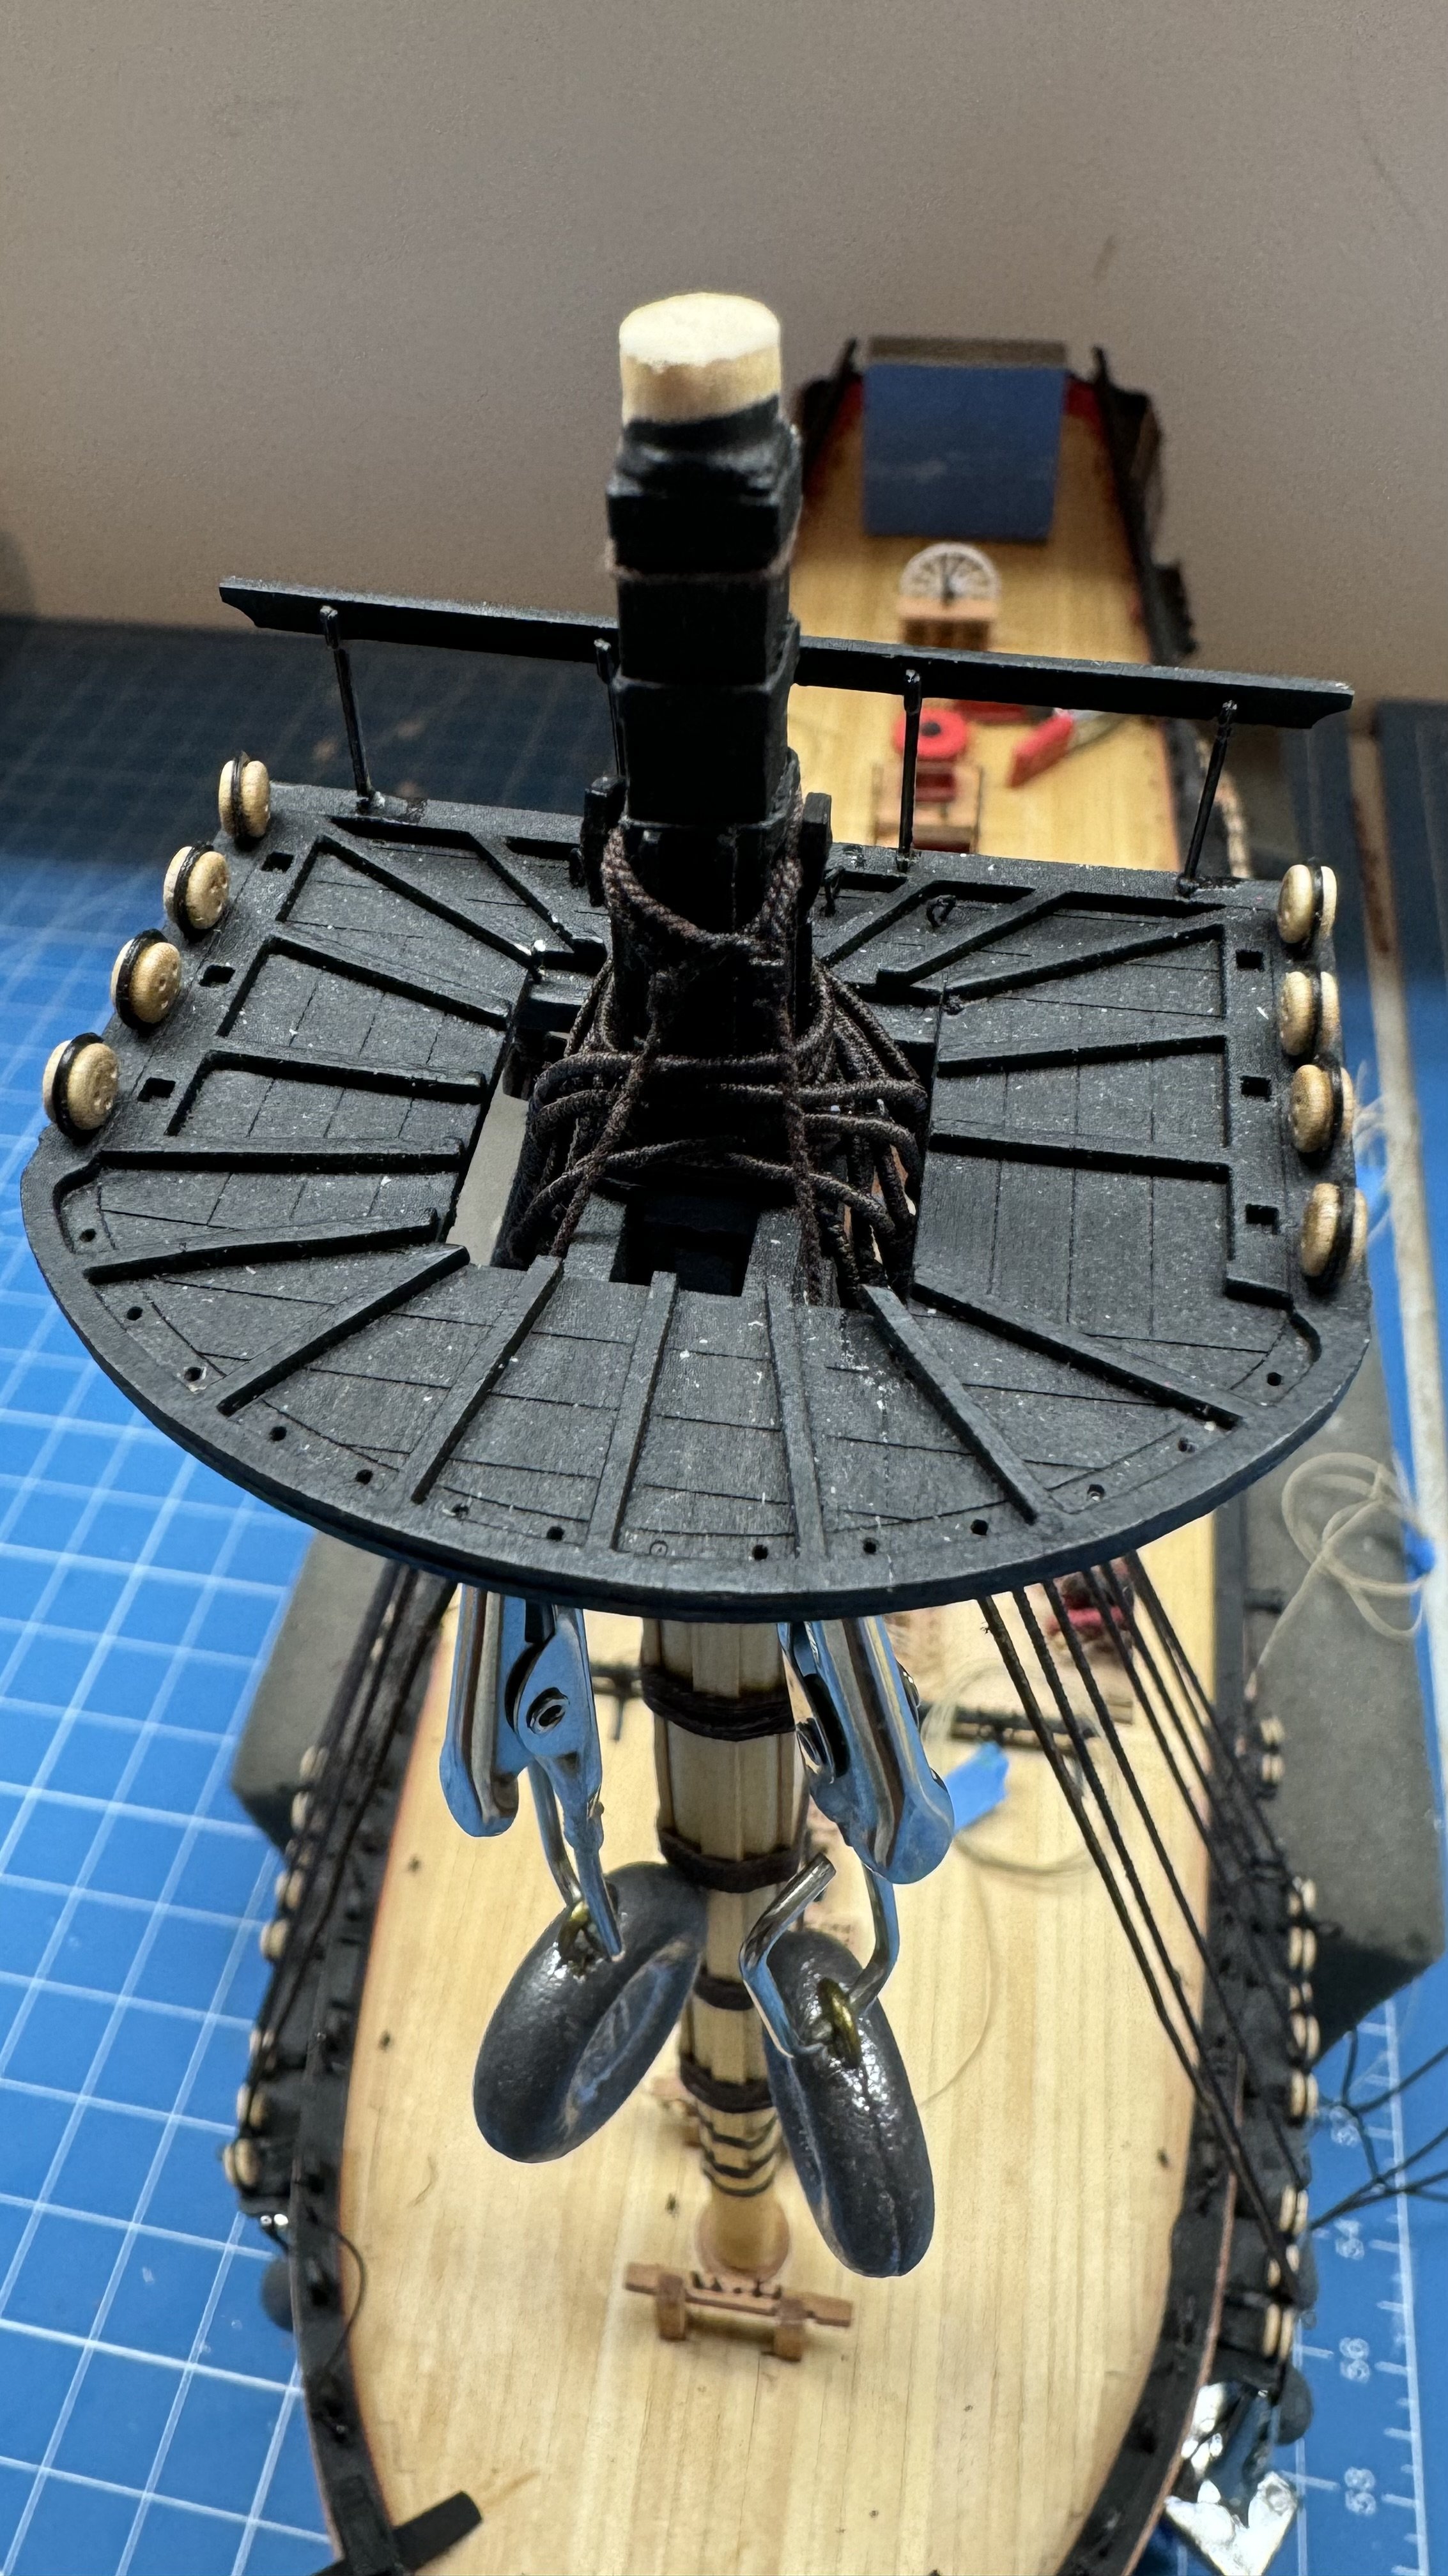
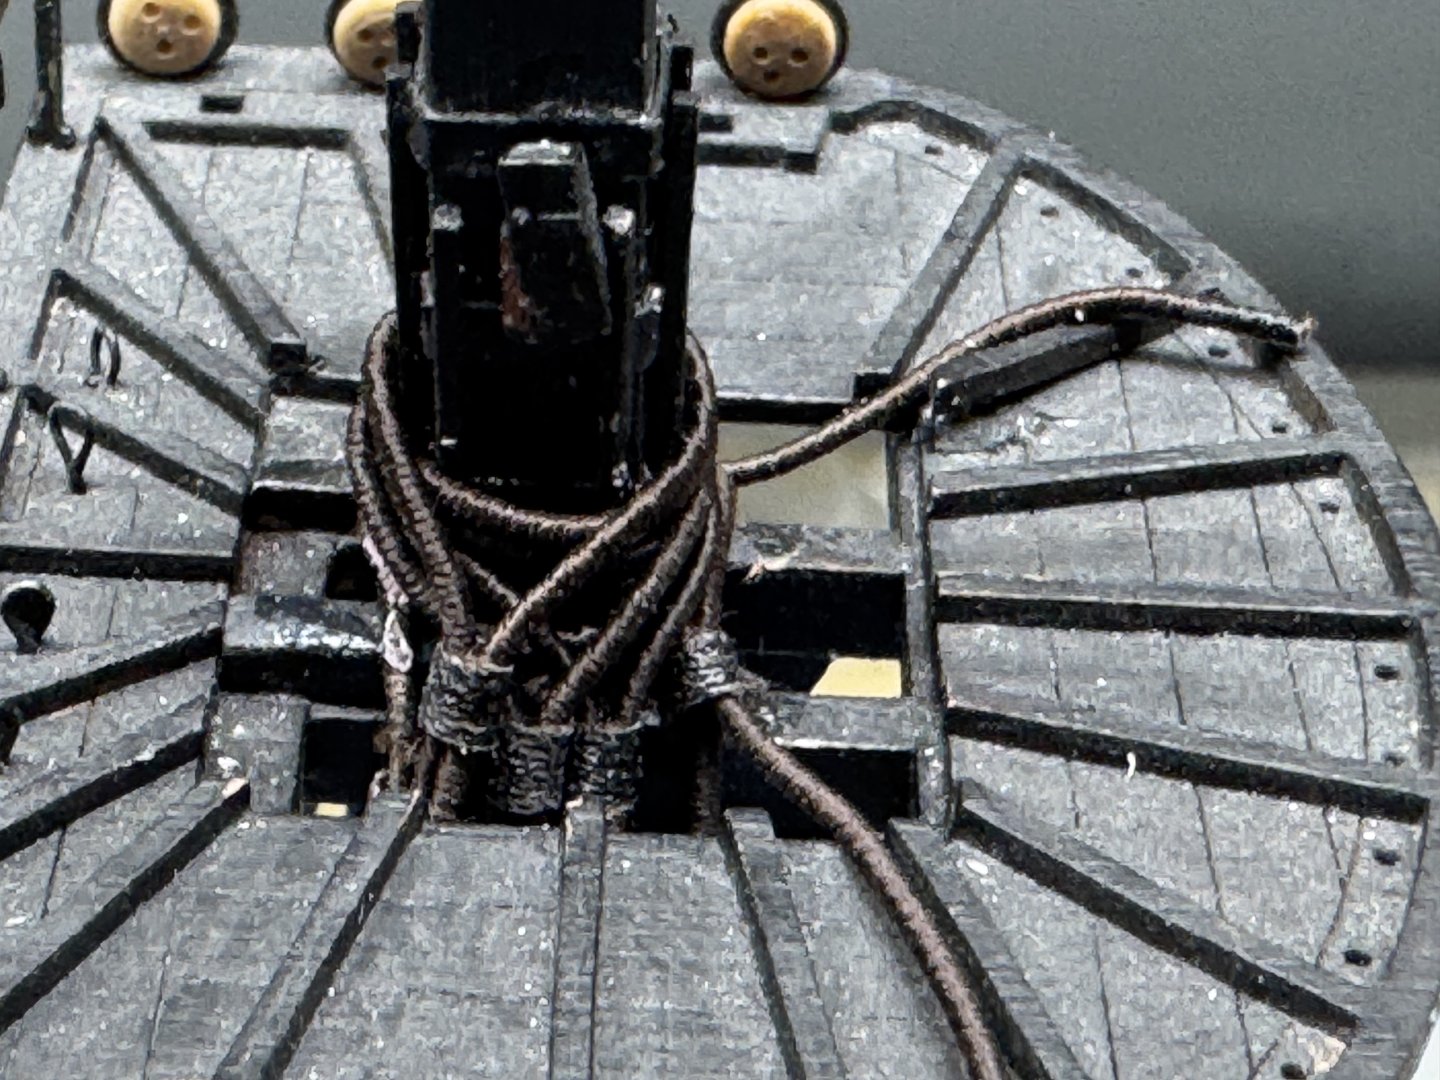
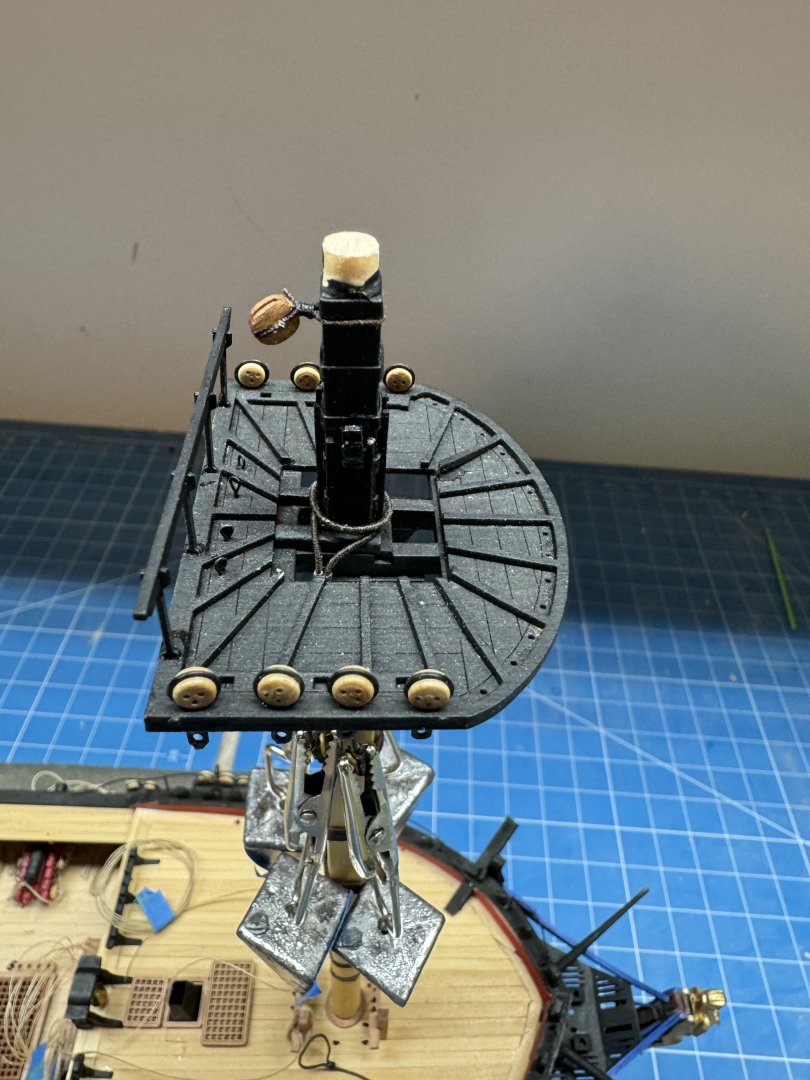
I decided that good enough really wasn't so I redid the shrouds trying to pay closer attention to how they "stacked" around the mast top. Tried to get both sides looking approximately the same. I think it looks better but then I would. I also remade the two 5mm double block with becket that are part of the fore yard lift system. I think they hang below the platform enough now to rig the lift but only time will tell. The other two double blocks carry the sprint yard braces down to the pin rail forward of the fore mast. Now back to figuring out a jig for getting the upper deadeyes on "straight".


- 422 replies
-
- 11
-
-
- Vanguard Models
- Sphinx
- (and 1 more)
-
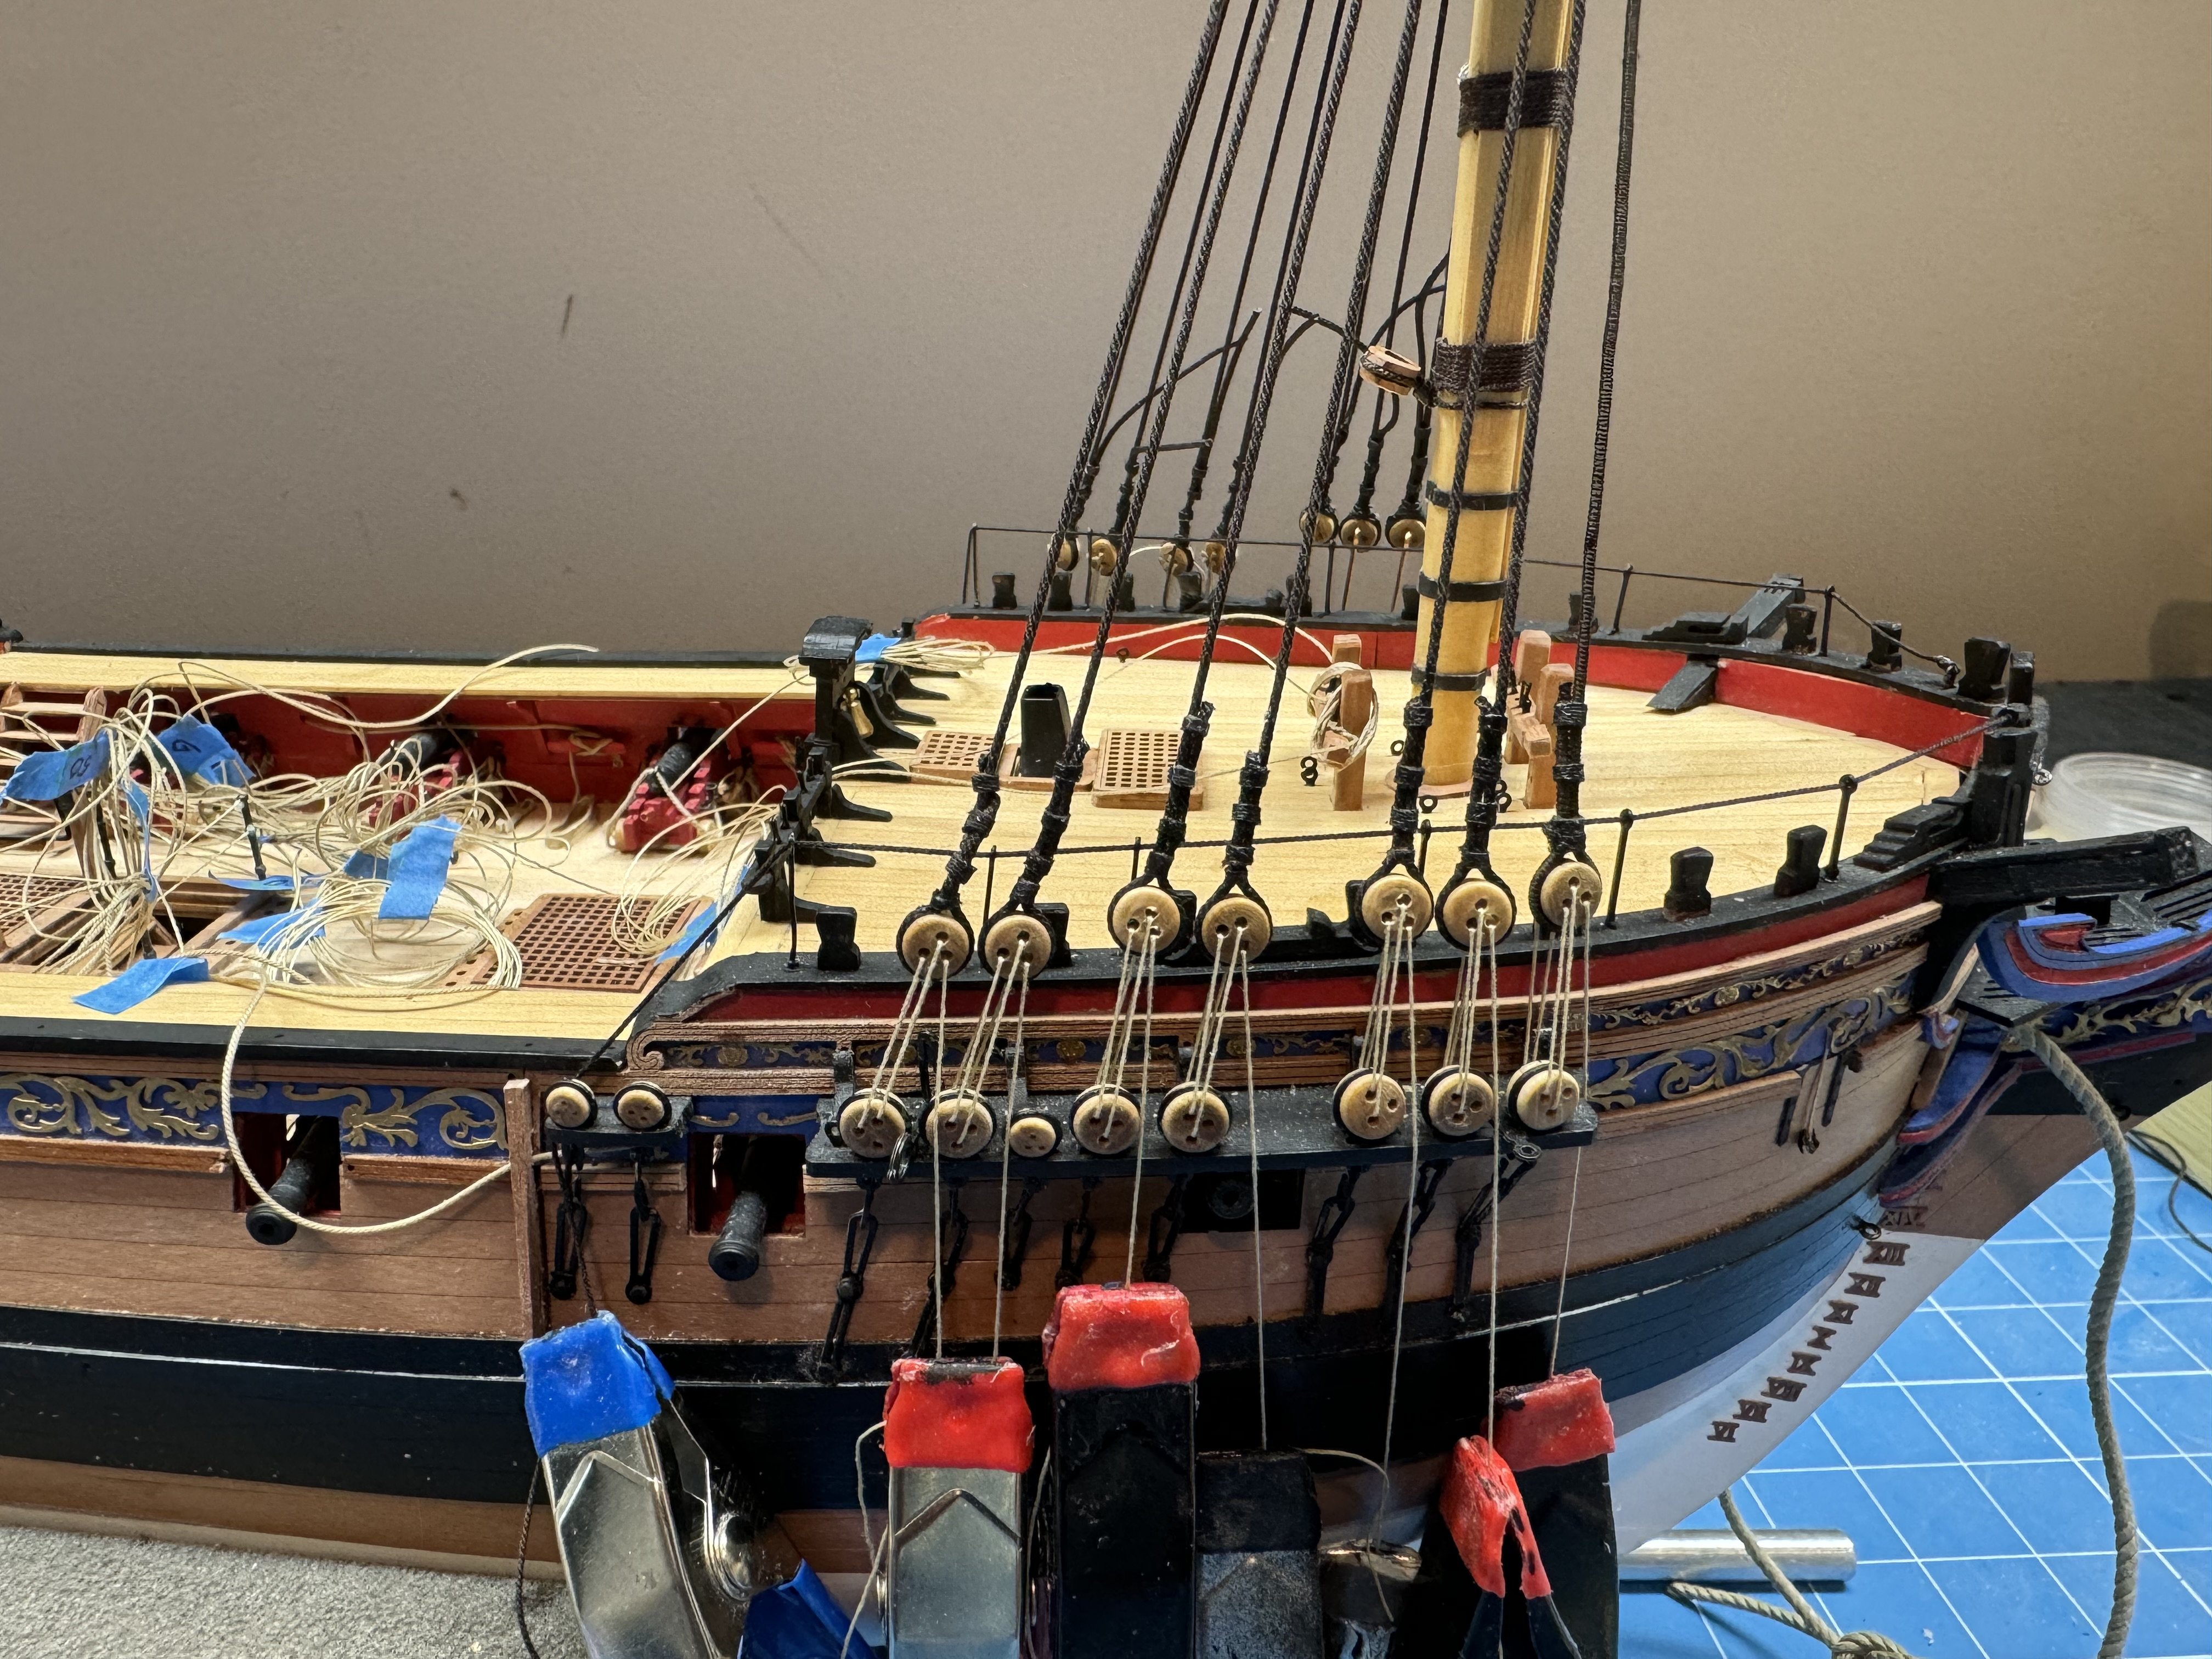
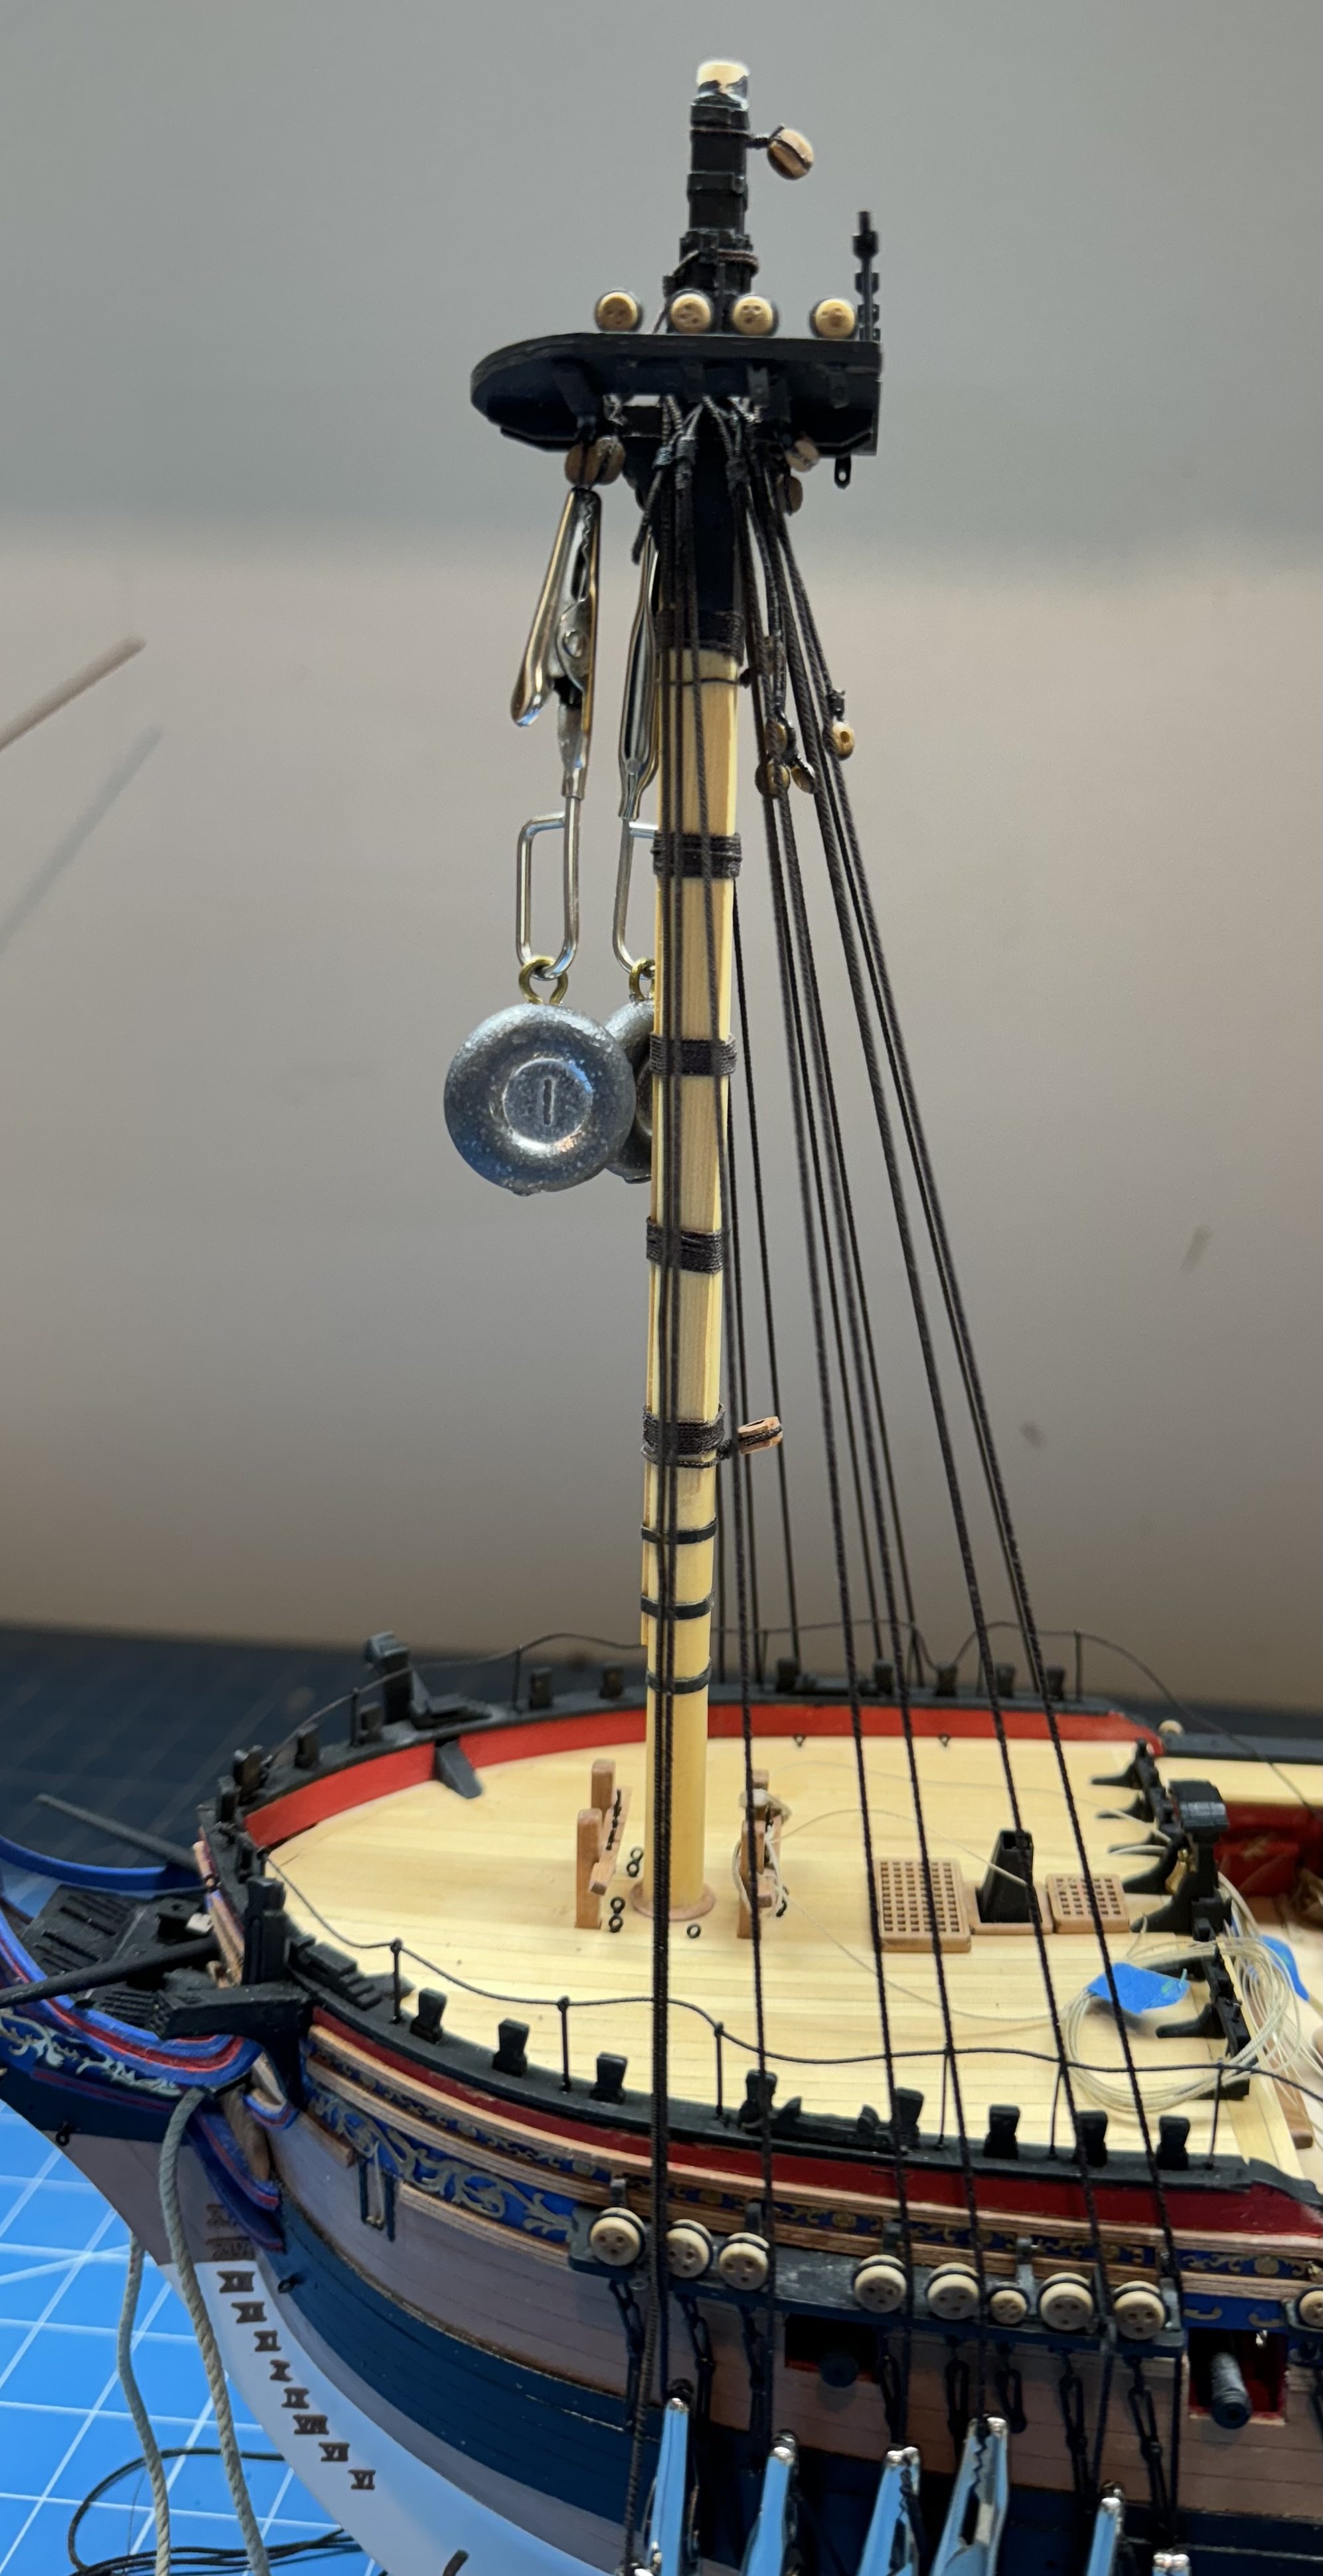
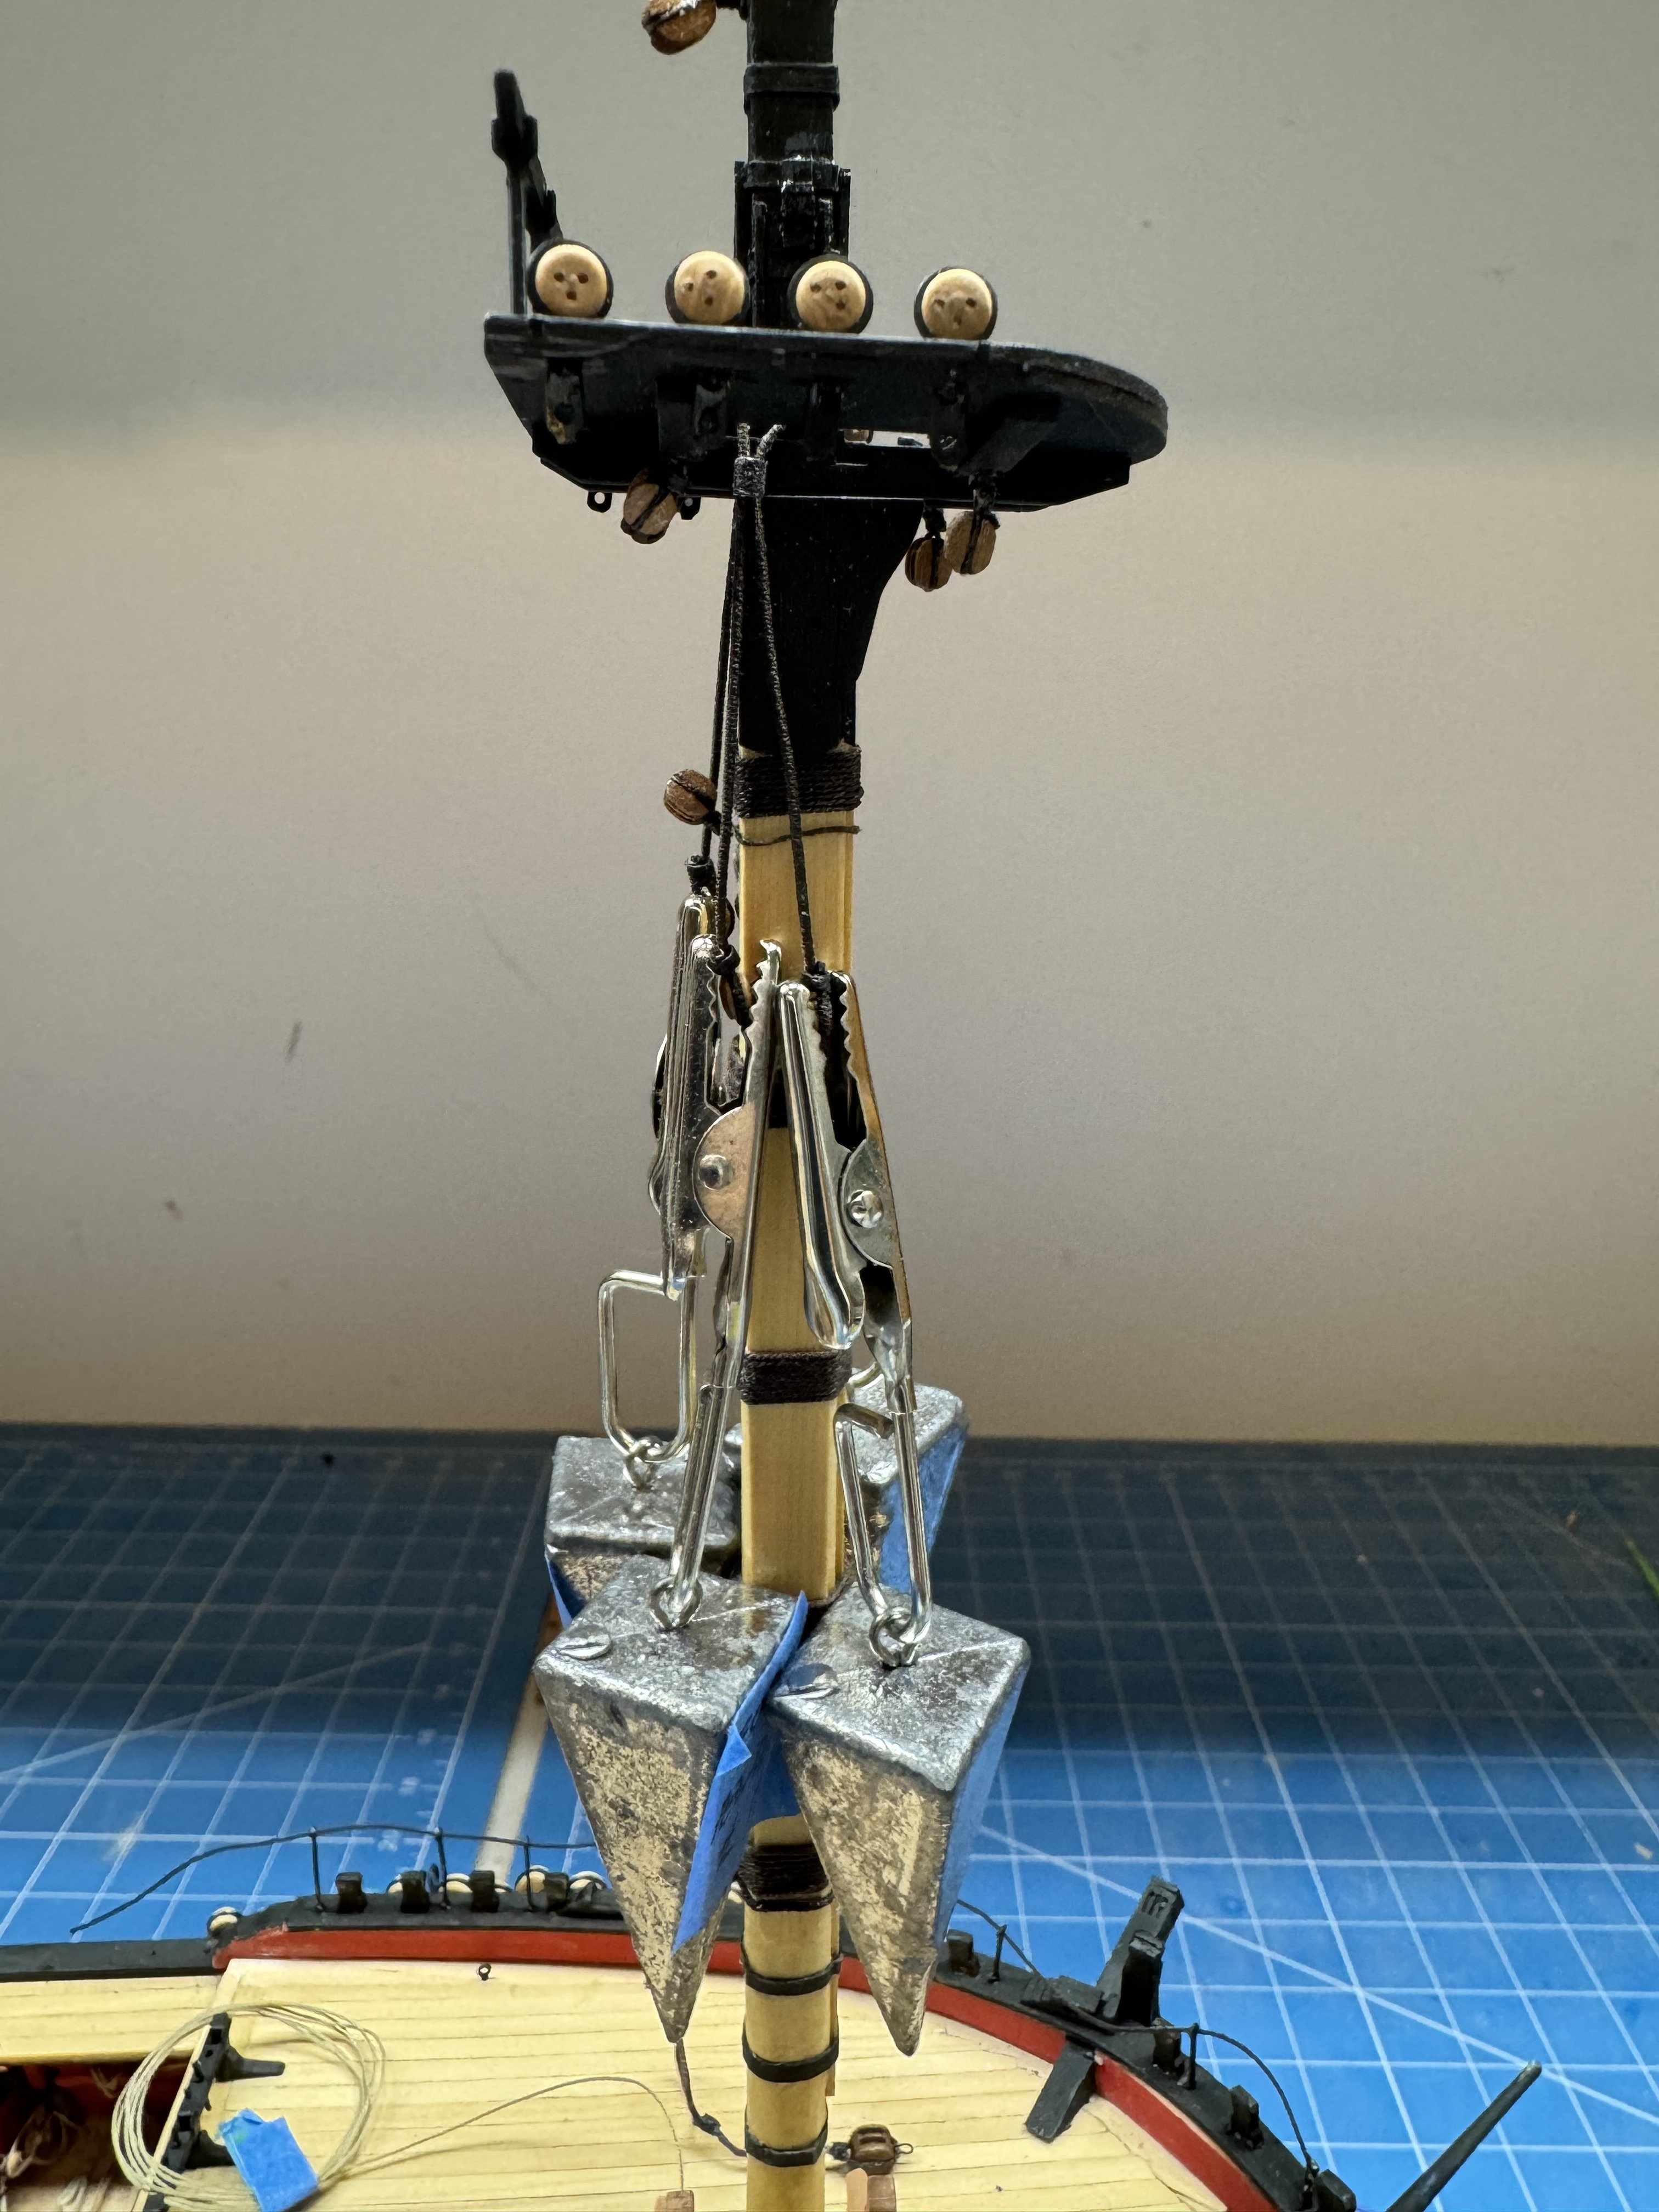
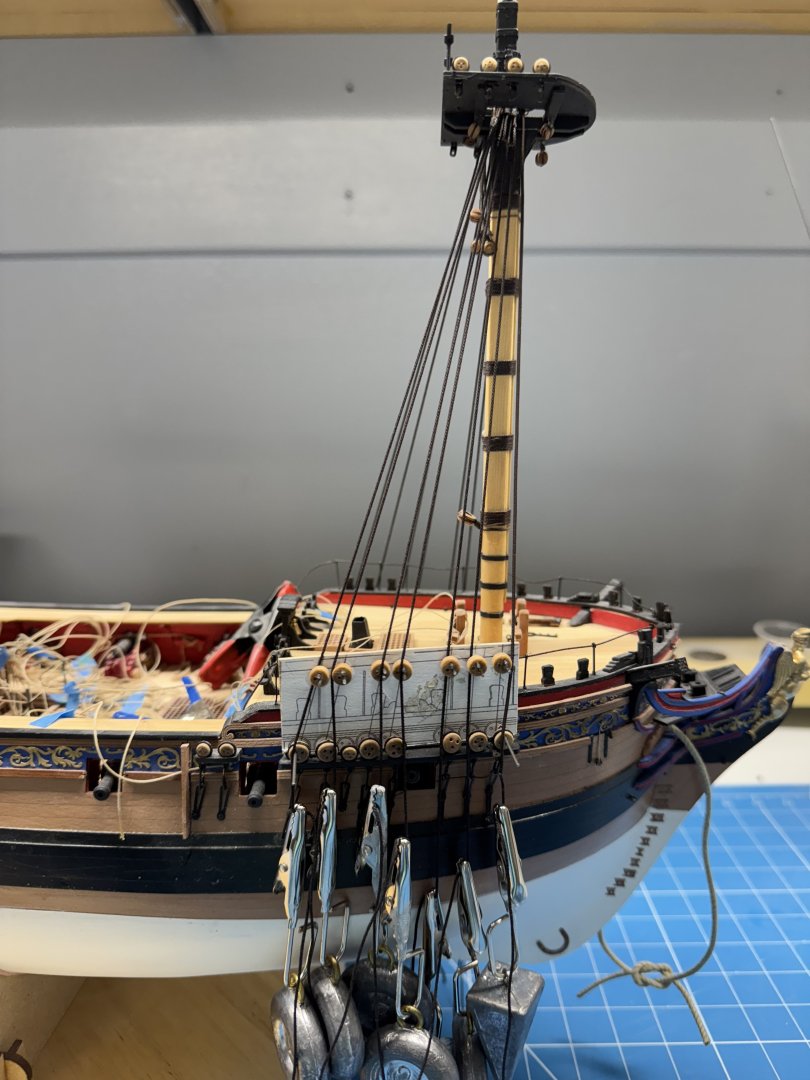
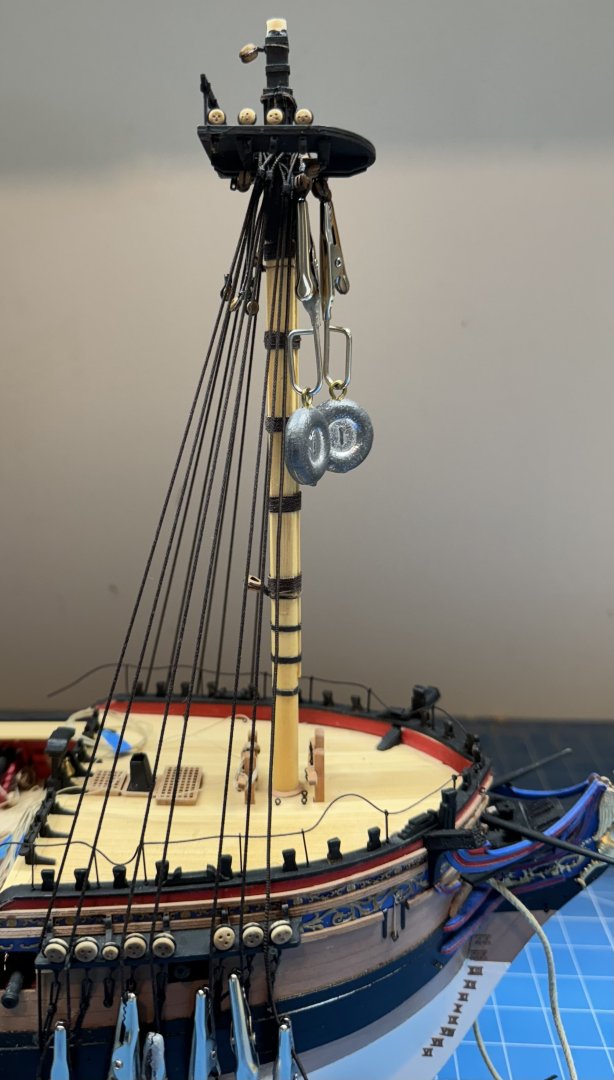
I have the fore lower shrouds in place. I worked for quite a while to get the shrouds to lay like you see in the rigging books but the serving on the upper parts of the shroud pairs (about the center 2") makes them quite stiff (and the line is .035" ("I") so it was pretty thick to begin with) and after awhile "better" became the enemy of "good enough". So this what the upper portion of the lower fore mast looks like now. The weights you see in the foreground are attached to the two blocks that will form the fore yard lift (the blocks are under the chocks half way down the mast top. Rigging these is going to be "really fun" as they just barely clear the bottom of the platform. I weighted all the shrouds and tried to align them with their respective deadeyes. So here is what the fore lower shrouds look like at this point. Next I need to come up with a clever jig to help getting the deadeyes in place and all at the same level. I have a couple of ideas but need to flesh them out before trying to construct the jig. Bad news I will probably have to make a custom jig for each mast.


- 422 replies
-
- 6
-
-
- Vanguard Models
- Sphinx
- (and 1 more)
-
Lower Fore Mast is in place and the first two "elements", the pendant tackles are in place. The serving of the .025" line makes it somewhat more stiff than one might prefer so I have weighted them down and will let them sit overnight in hopes that they will hang a bit lower and straight in the morning. Then it is on to the first set of shrouds which if I remember correctly are a single "pair"; one on each side instead of the more usual two on each side as was done with the pendants. I have (I think) all of the lower shrouds for all three masts "ready to go"; served where necessary and hopefully getting them on the masts will be relatively straight forward. How many times have I thought THAT?


- 422 replies
-
- 7
-
-
- Vanguard Models
- Sphinx
- (and 1 more)
-
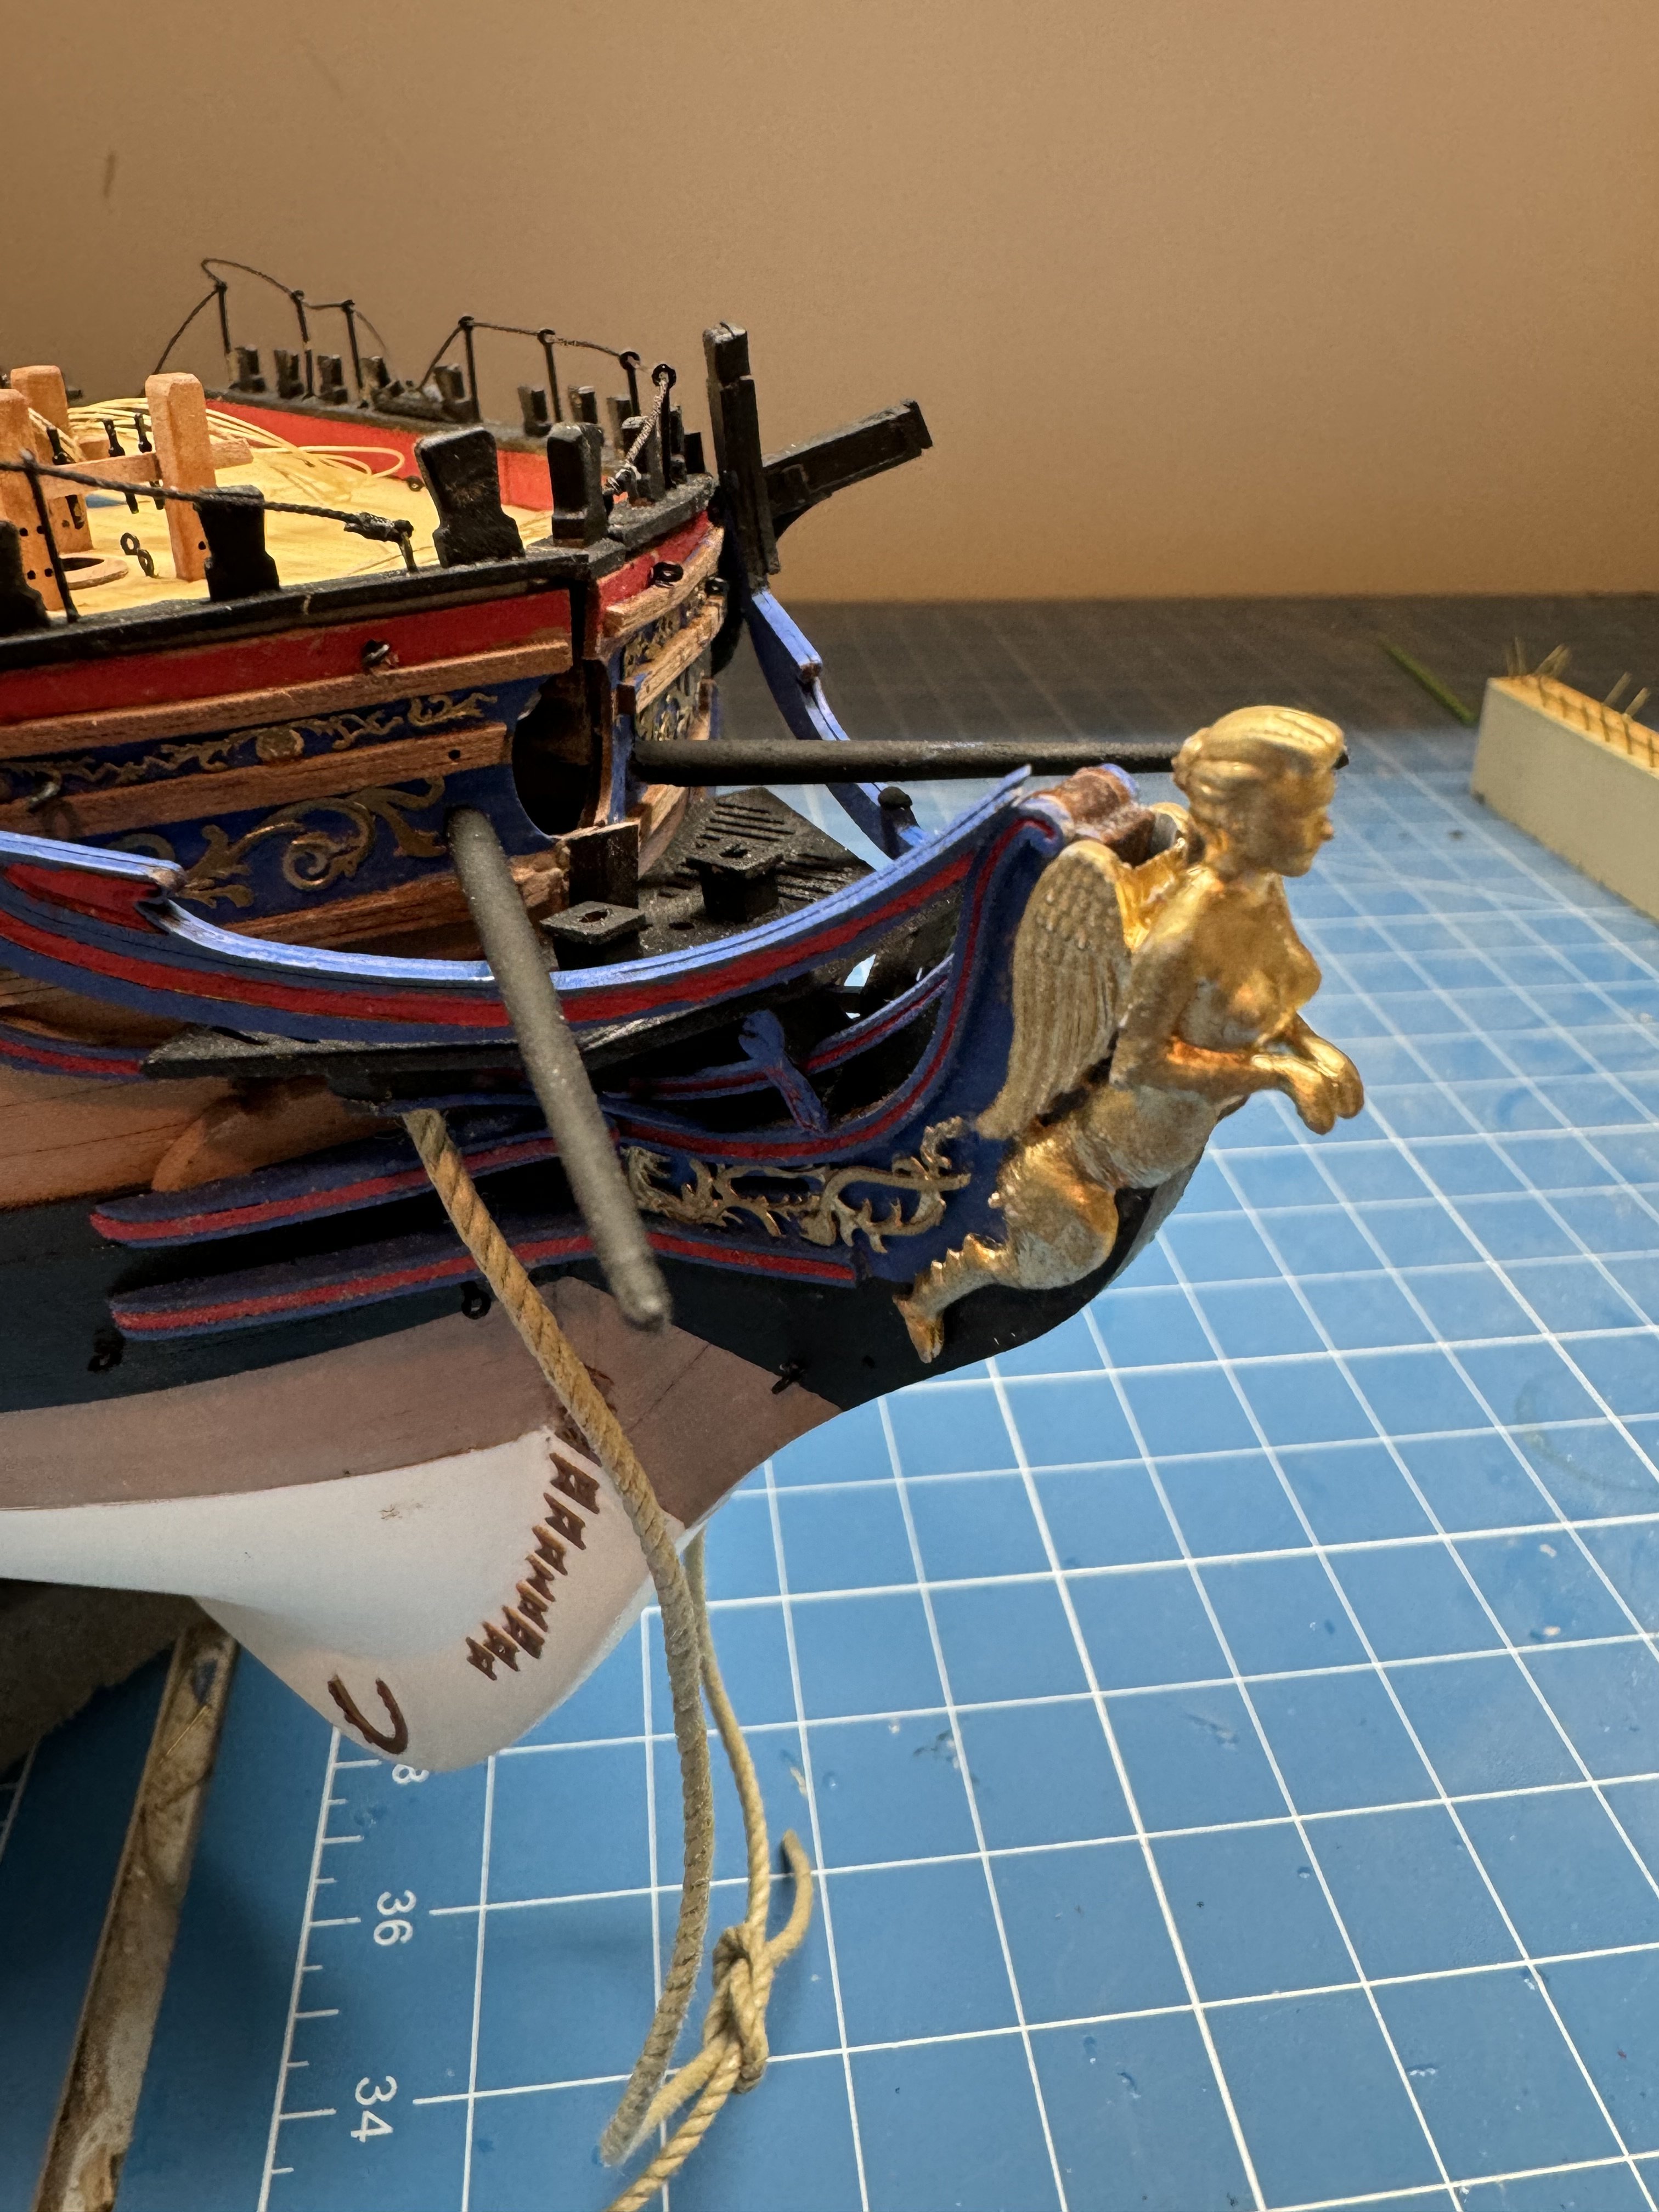
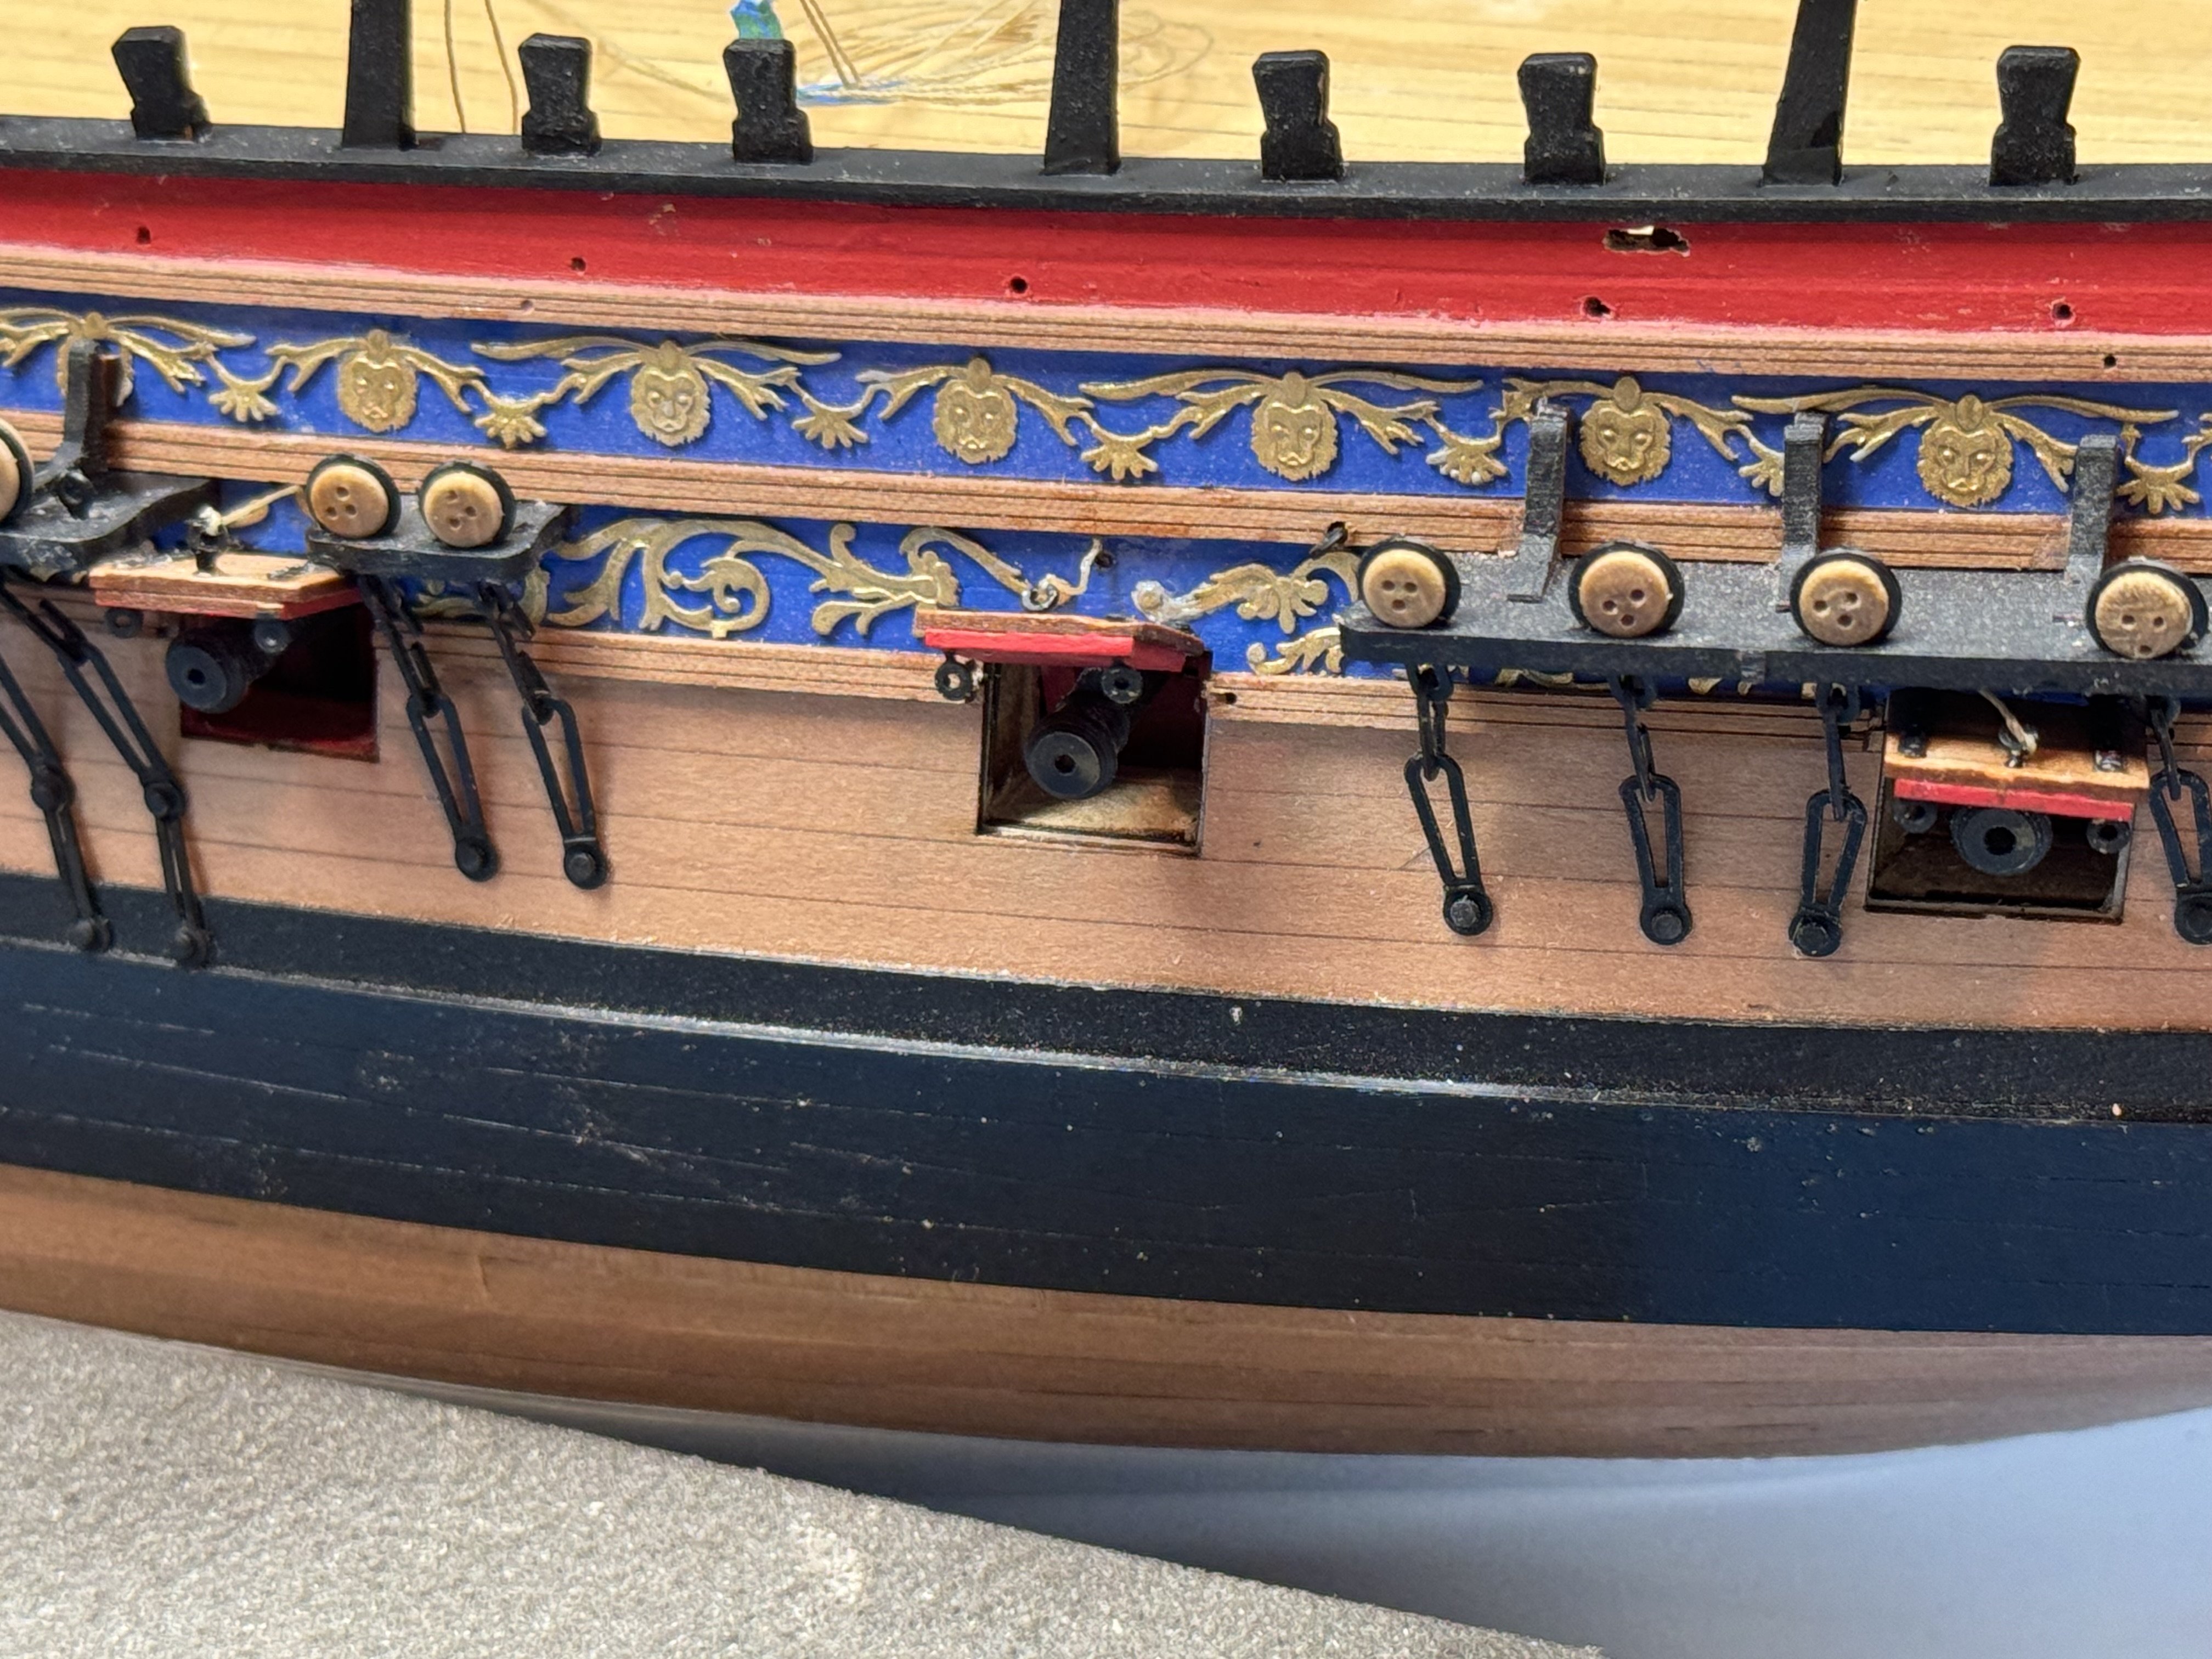
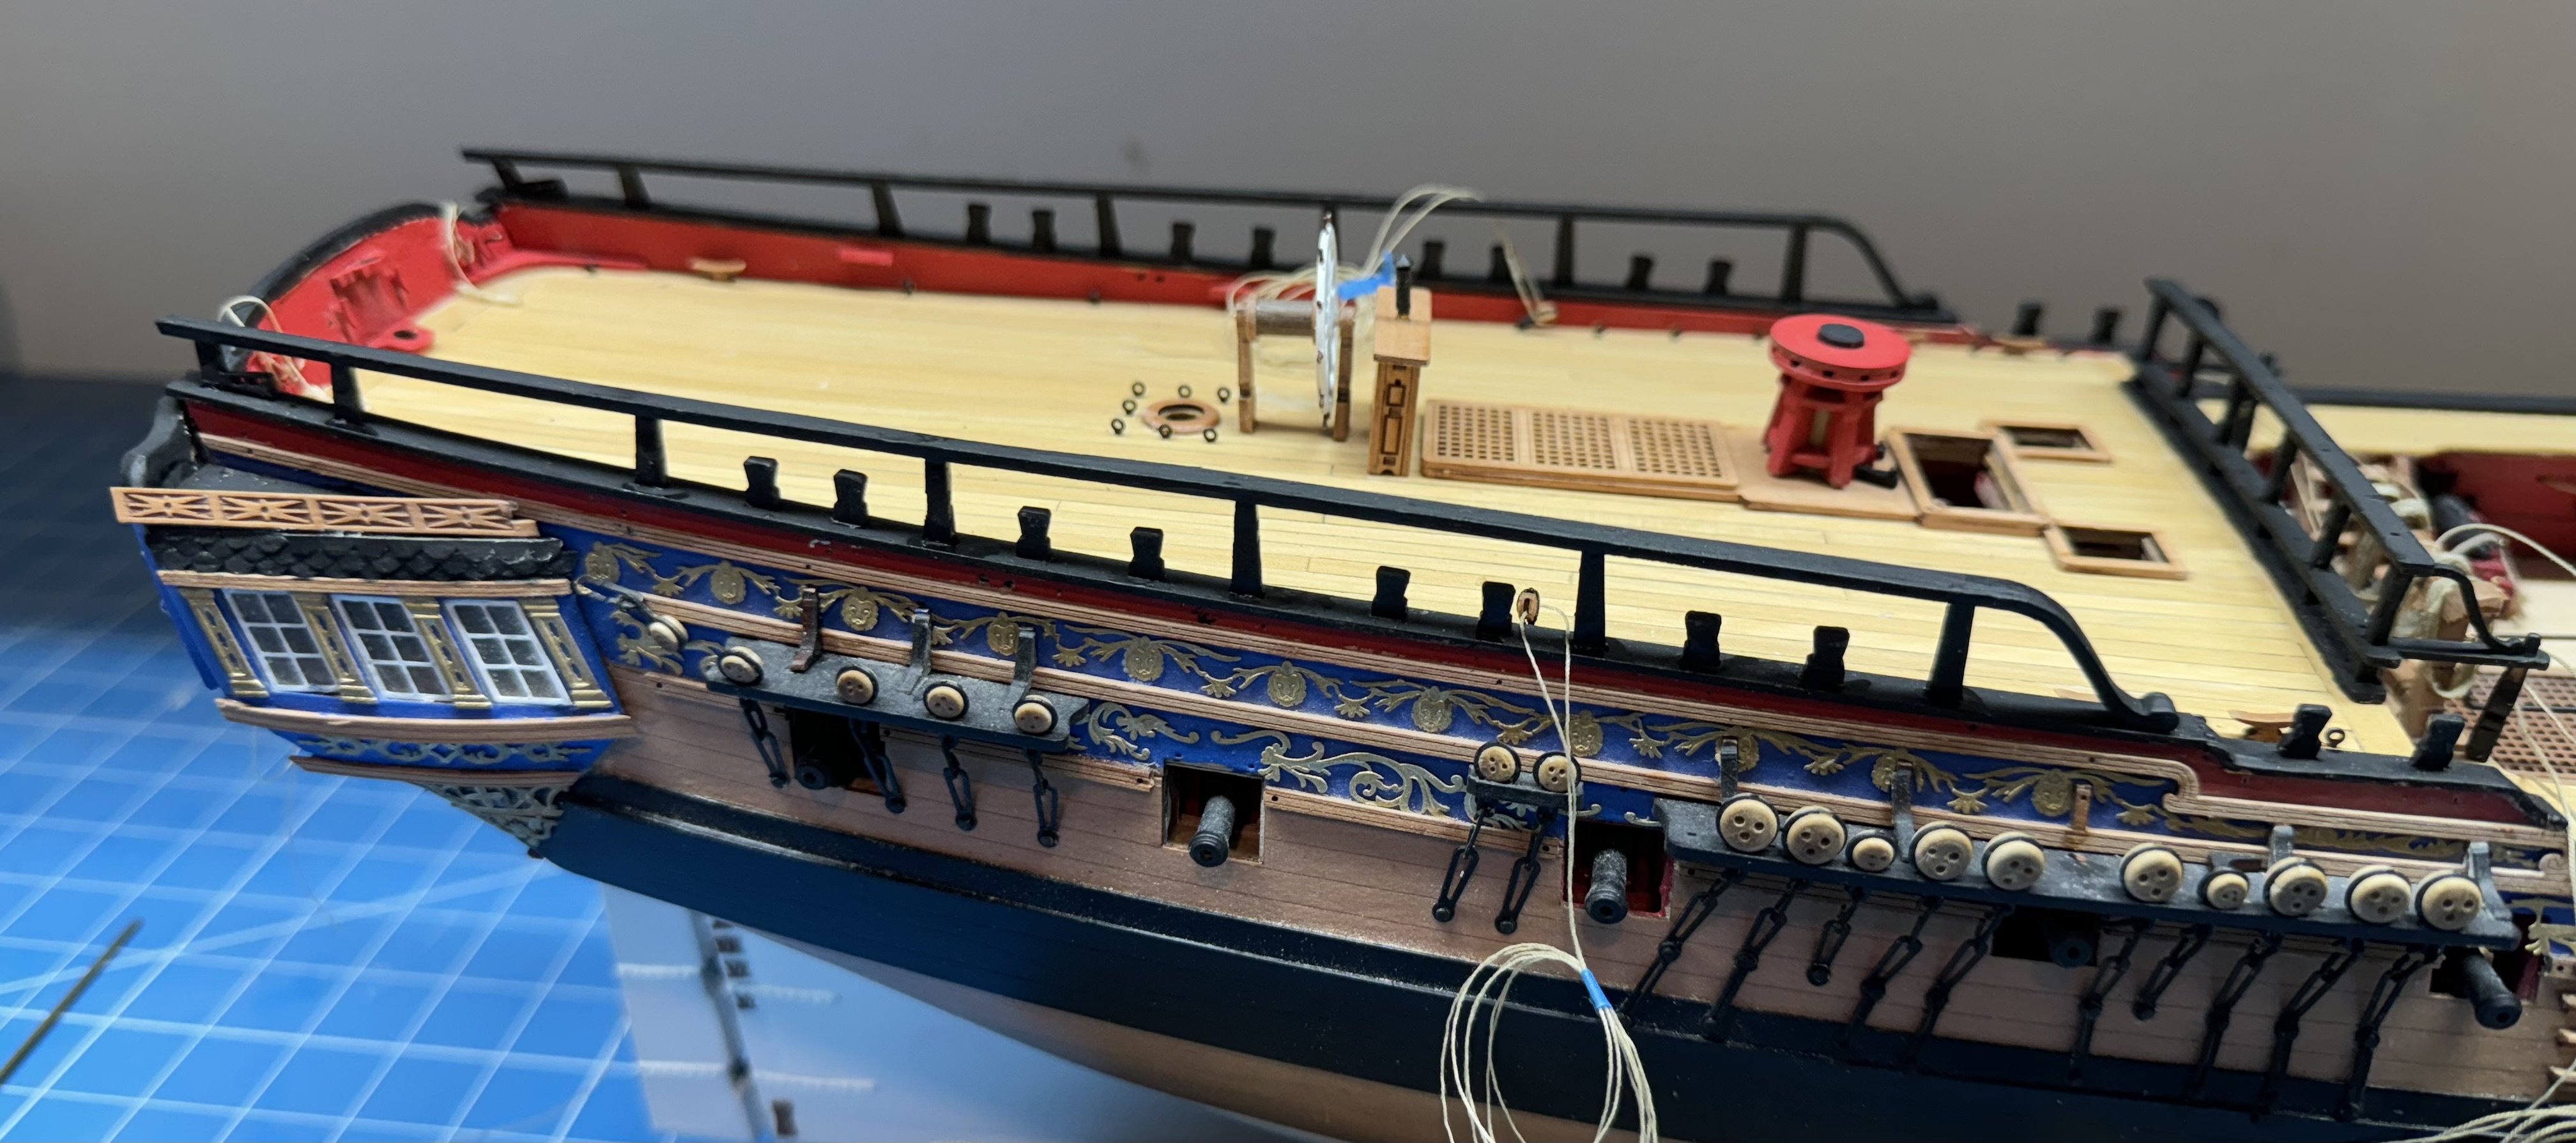
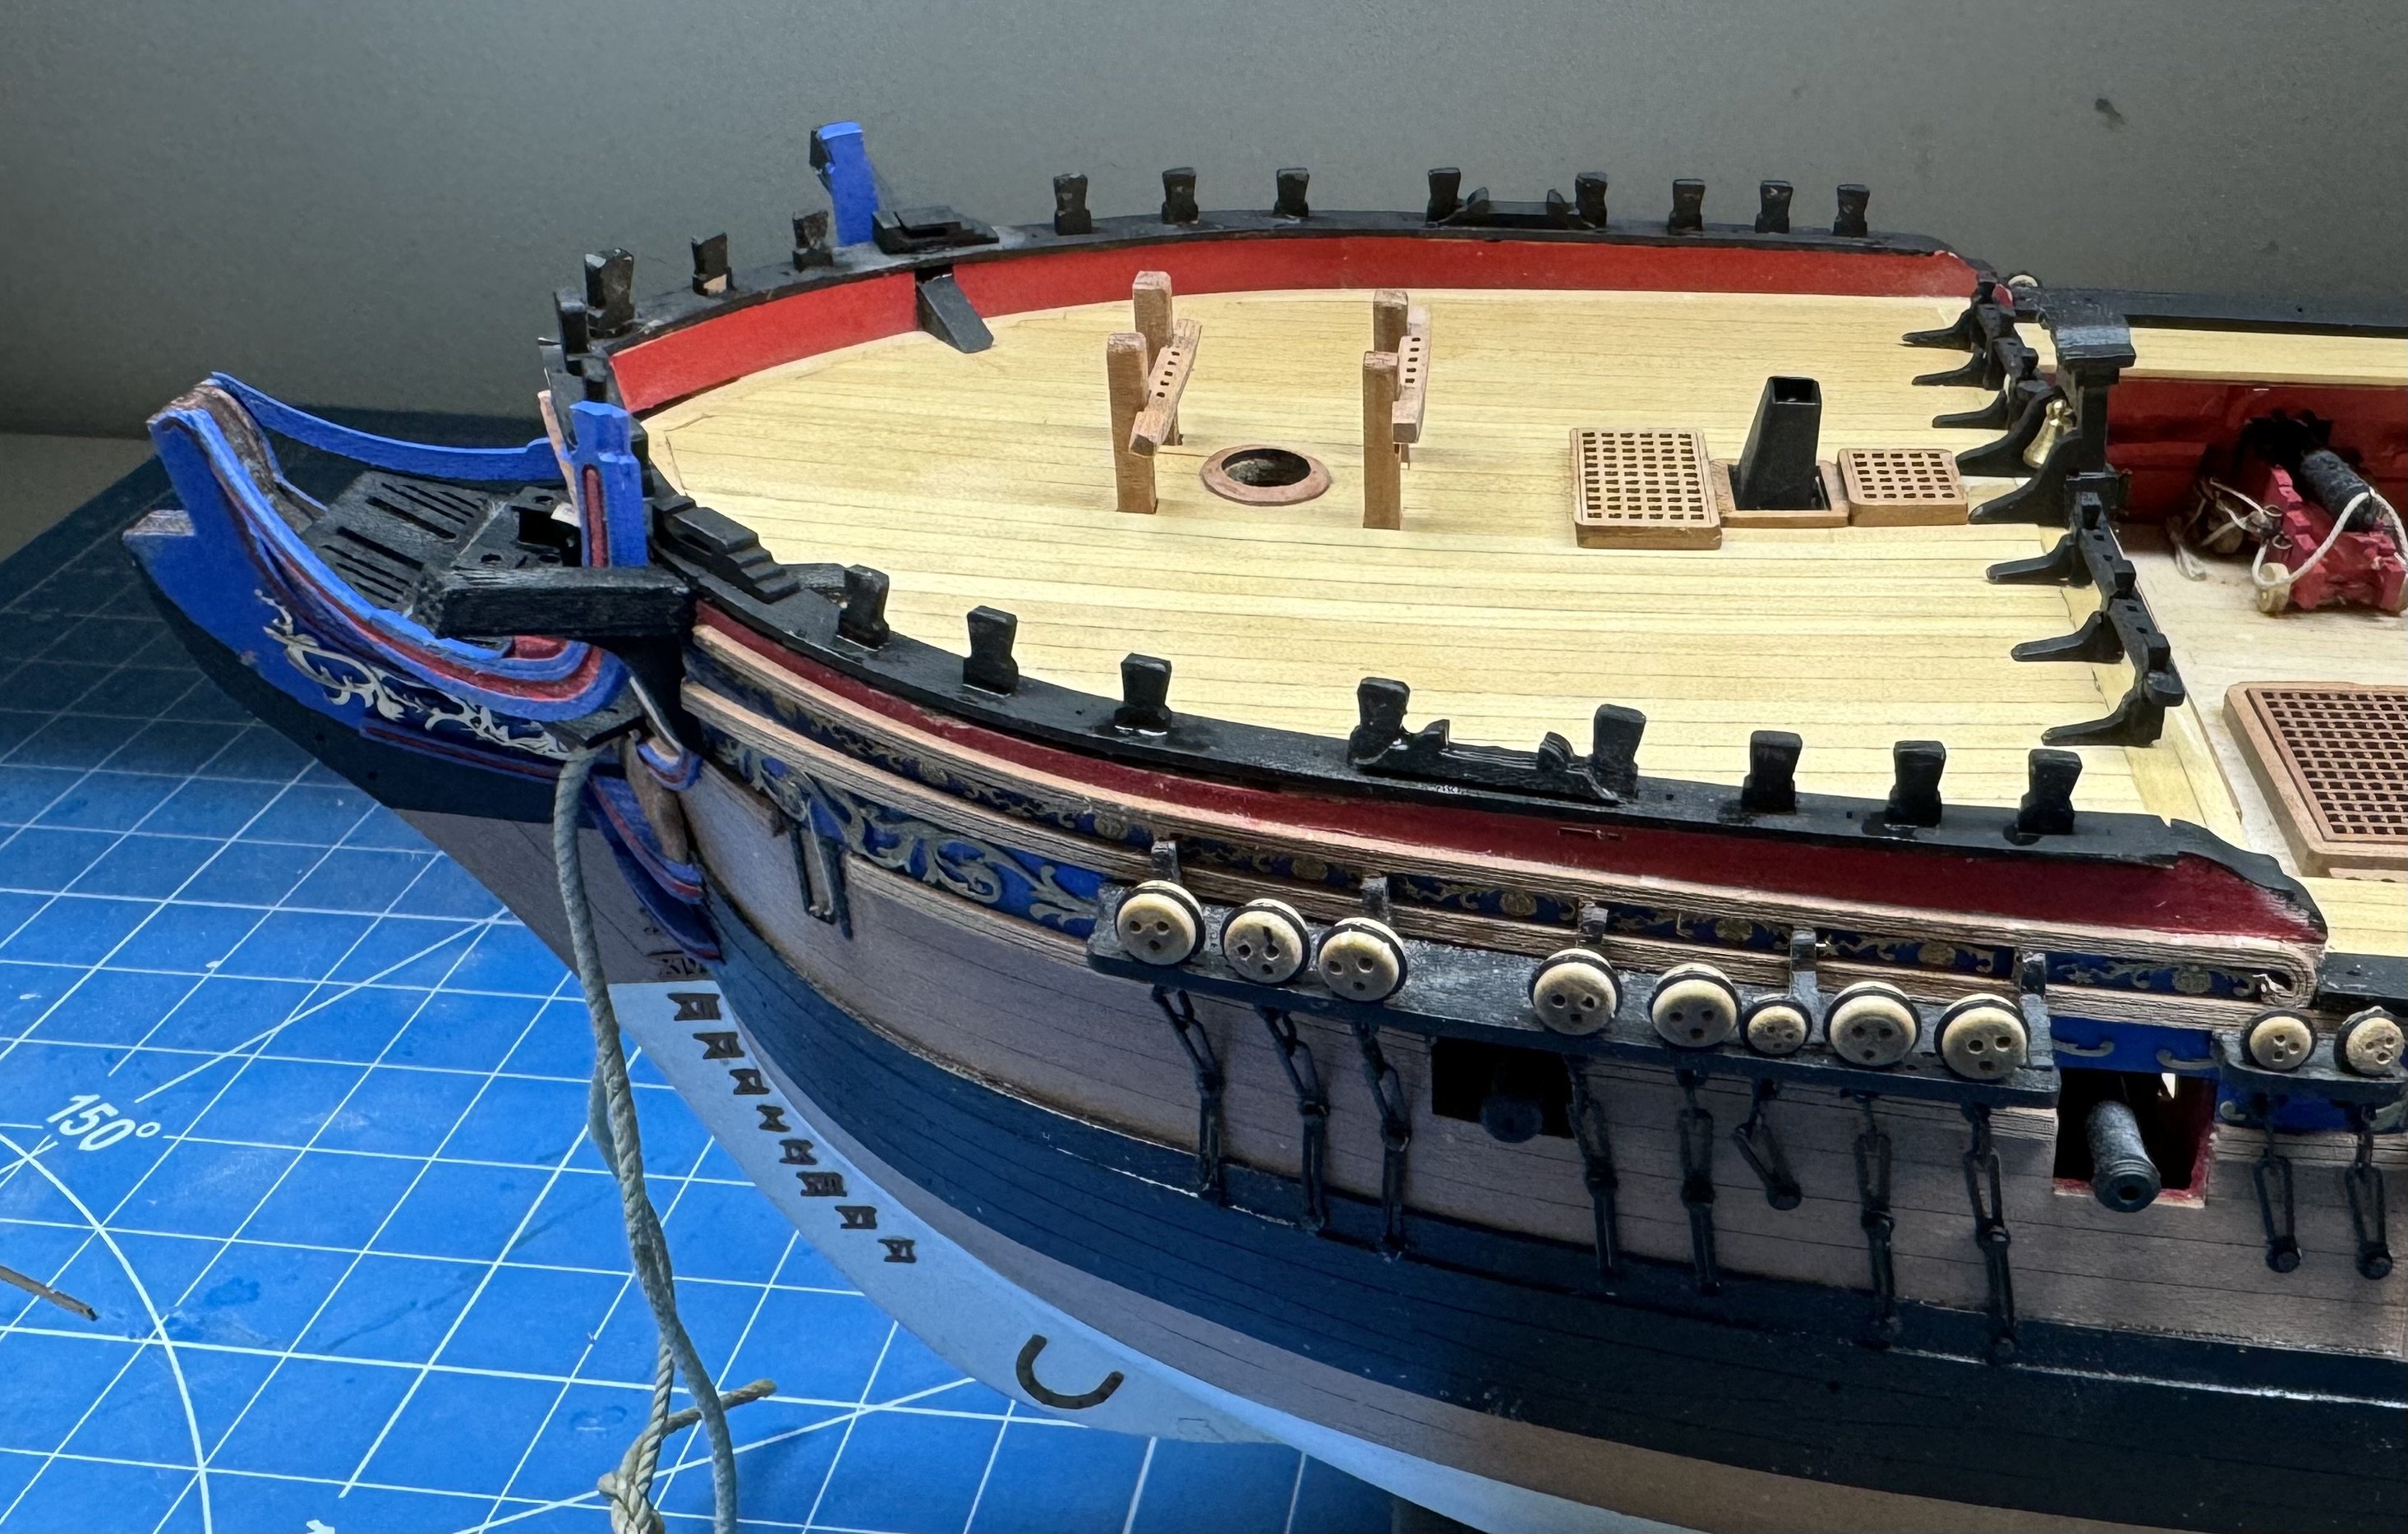
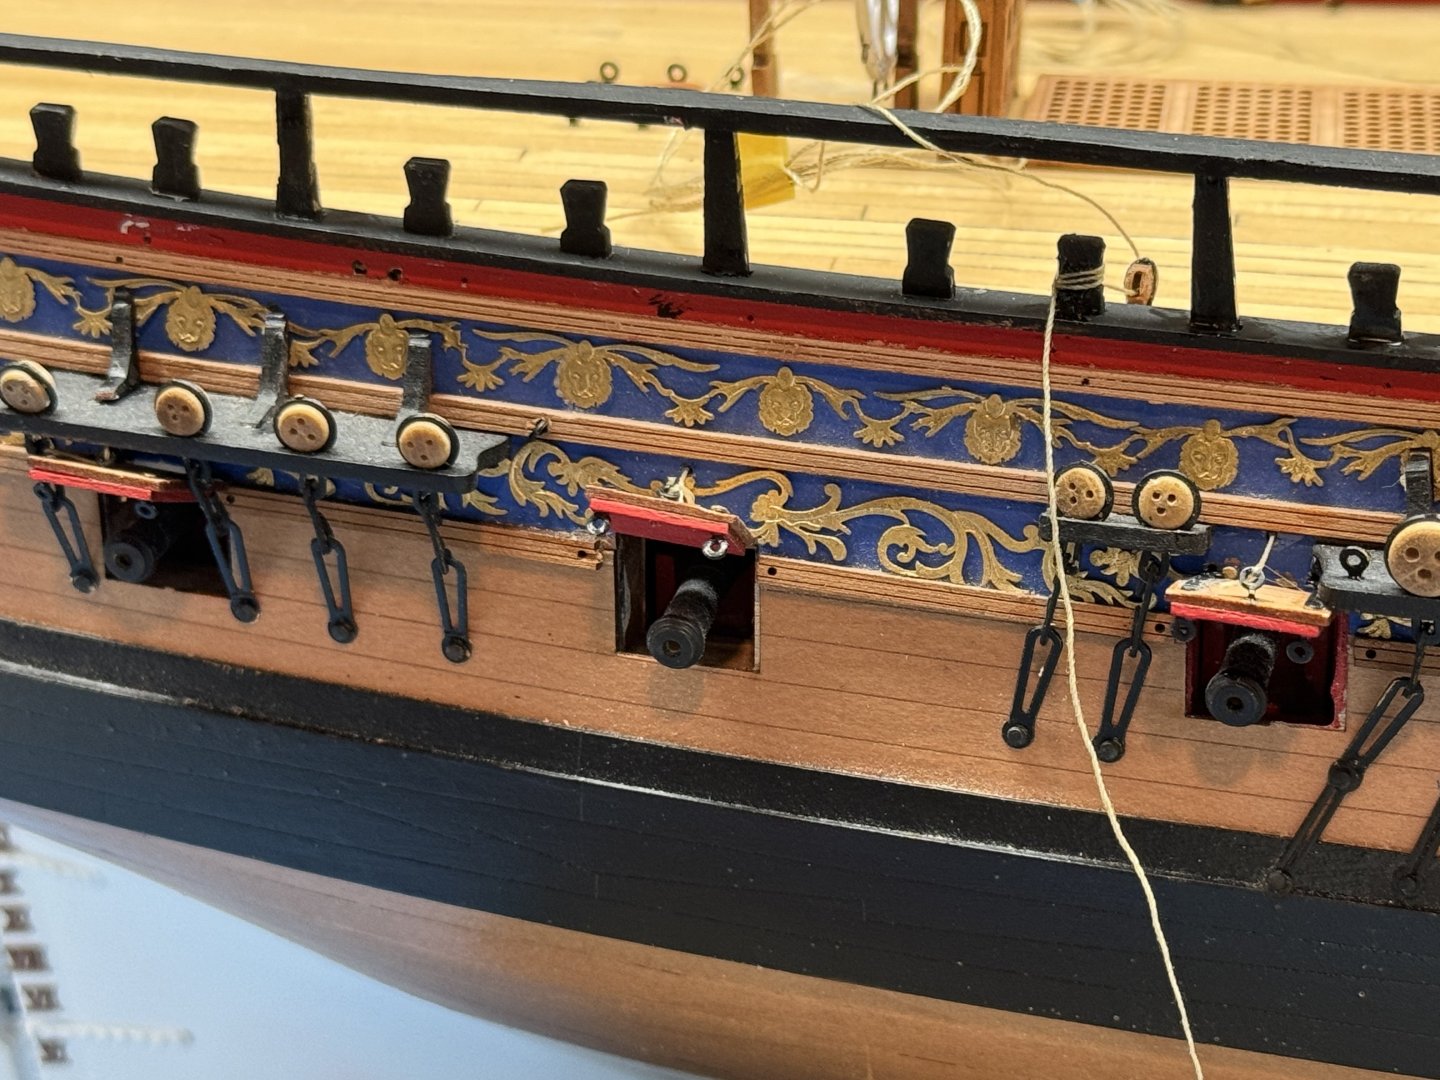
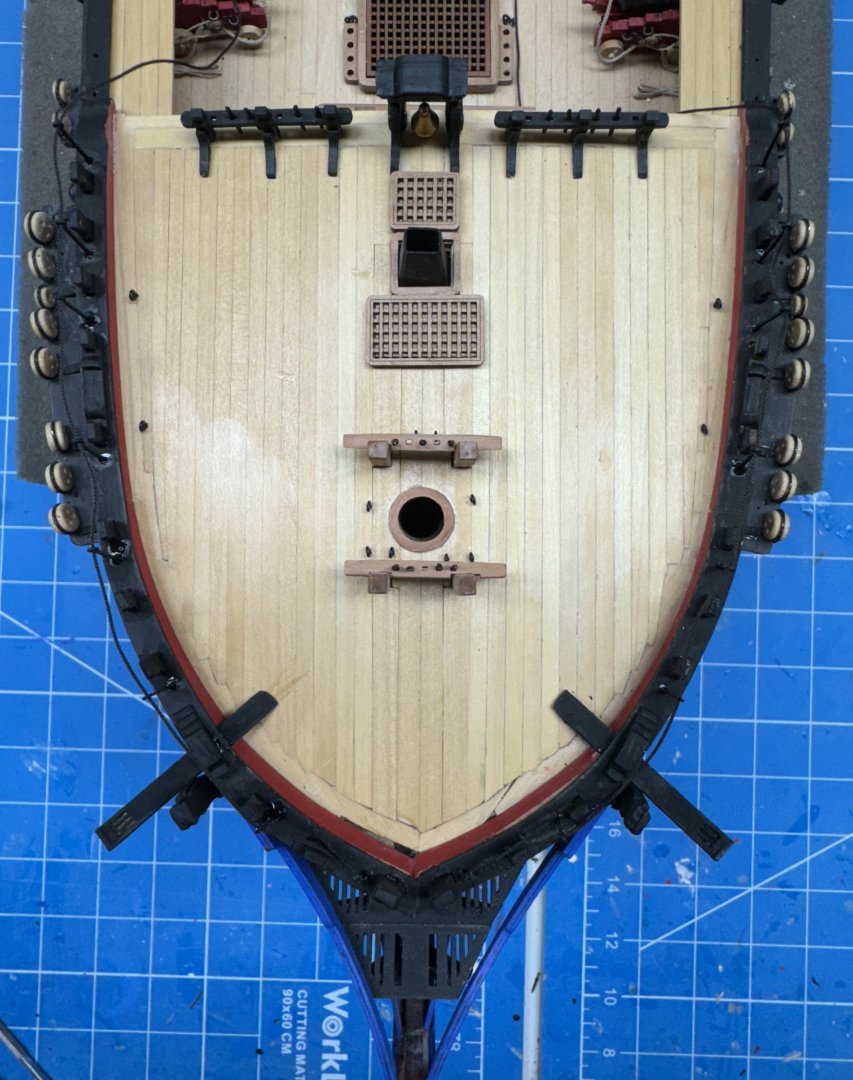
I think I got everything on the "punch list" to complete the hull enough to get ready to start the masts. I added the figurehead and boomkins at the bow. I installed the gun port doors - both sides. I put up the safety rails around the q-deck companionway using some after market "two hole" stanchions. And I decided to rig the lines for the fore and main sheet tackles that run through the sheaves in the bulwark in the waist. Not the most seamanlike job on the cleats. I probably should have added these lines before the catwalks were added - would have made it much easier to get the lines on the cleats. I also recognize that excess line would not generally be left on deck but I think I was faced with just omitting the excess line or laying it on deck. There really isn't enough room on the cleat (for me) to get even a small amount of excess line there. This is the heaviest running rigging line used (D .75mm) although I used Syren .025" line which is actually a little smaller (.75mm = .029"). Now for some shop cleaning and re-organizing to support the next phase. I am going to deviate from the instruction suggested sequence and step the lower masts and get their shrouds and ratlines done before adding the bowsprit. It is just too tempting a target, especially when shifting from side to side as the shrouds are added on each mast.


- 422 replies
-
- 5
-
-
-
- Vanguard Models
- Sphinx
- (and 1 more)
-
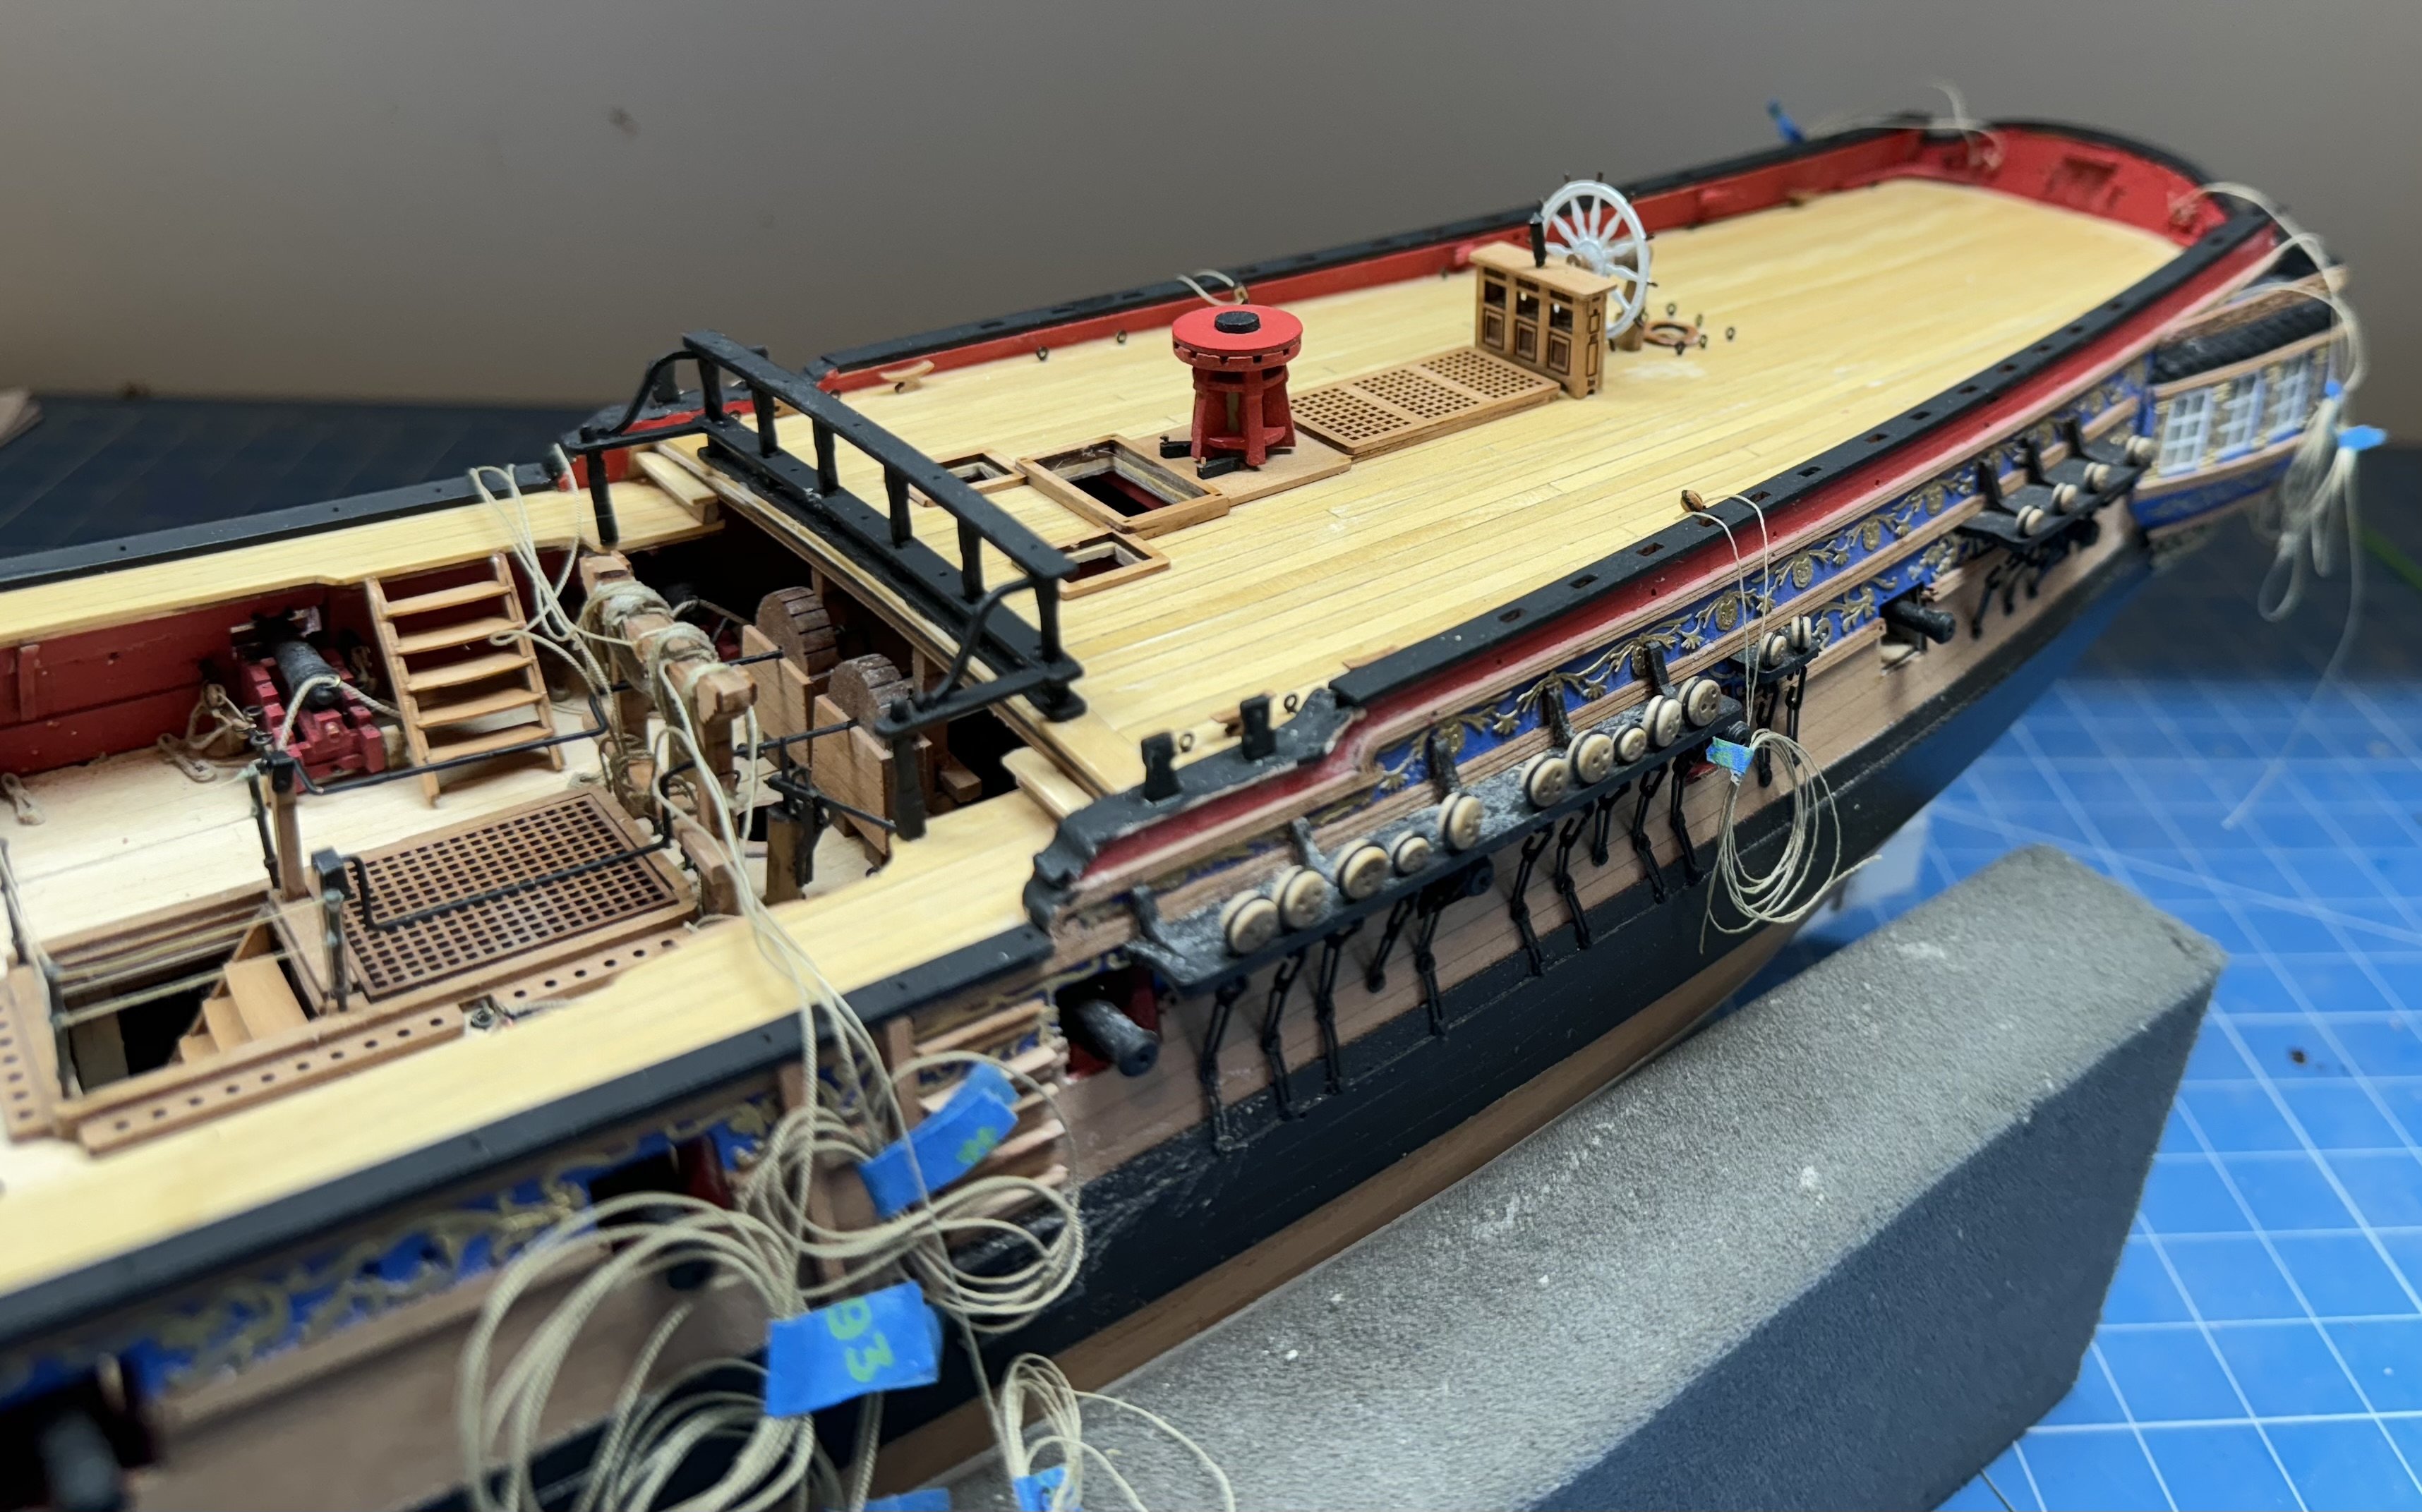
Q-deck railing completed. It was easier than I had anticipated. I installed all the timberheads first as they do not impact the railing. Railing assembly went as per the instructions - no surprises. I installed the rail and stanchions two at a time starting at the front. The stanchions fit into the railing, as is usual with Vanguard kits with a snap so I knew it was seated correctly. Then I pushed it into the gunwale slot after removing the paint on the part that fits in the slot. Ditto for the next stanchion going aft. With two in place I used thin CA to freeze them in place and worked the rest in a similar fashion. There is enough "give" in the rail to allow sliding the stanchions into the gunwale slot after inserting it into the railing if you are very careful. Don't ask me how I know but it is possible to pop the railing off one of stanchions where you thought it was secure. So now some clean up work, installing eyebolts on the hull exterior, gun port doors, boomkins, figurehead etc. I am undecided about the hammock cranes on the q-deck forward railing at this point. I may wait until the masts and shrouds are done. I am absolutely going to wait on the waist and forecastle hammock cranes until "later".

- 422 replies
-
- 9
-
-
- Vanguard Models
- Sphinx
- (and 1 more)
-
This is only my second square rigger (Niagara was the first and that was 6 years ago) and I am NOT looking forward to doing ratlines on six sets of shrouds but "ya gatta do what you gatta do". So that is coming up shortly - after I get the q-deck stanchions and railing done. I am creating a spreadsheet of every piece of rigging (I did this on Niagara) - it is a good deal of work but allows me to pre-build the various rigging pieces (single block with becket, single block with hook, single block with hook and becket, etc.) all in one "session" rather than building them as needed (and potentially forgetting how I built this type this last time). This will be my first experience with the shroud cleats. I believe that the shrouds will need to be tensioned more than "normal" as the lines belaying on the shroud cleats will tend to pull the shrouds in different directions and potentially distort them. The ratlines should (in theory) help distribute the load but I am planning on trying to keep the lower shrouds pretty taut.
- 422 replies
-
- 1
-
-
- Vanguard Models
- Sphinx
- (and 1 more)
-
Q-deck forward railing is done. As I mentioned above I had to use one of the spare railing stanchions for the waist railing. Seems whatever misalignment occurred is still haunting me. Except for a slight misalignment between the two waist railings everything came out "okay". I am also taking this opportunity to install the lines that belay at the main jeer bitts. There are five lines according to the rigging plans. The main yard lifts (port and starboard), the topsail yard lift, and the fore yard braces (port and starboard). Although not pictured below i am making similar provisions for the lines that belay on the fore bitts. The jury is still out about the lines that belay on the forward pin rail. I will look at those agin when i have the fore bitts lines done. Now for the q-deck stanchions and railings.


- 422 replies
-
- 8
-
-
- Vanguard Models
- Sphinx
- (and 1 more)
-
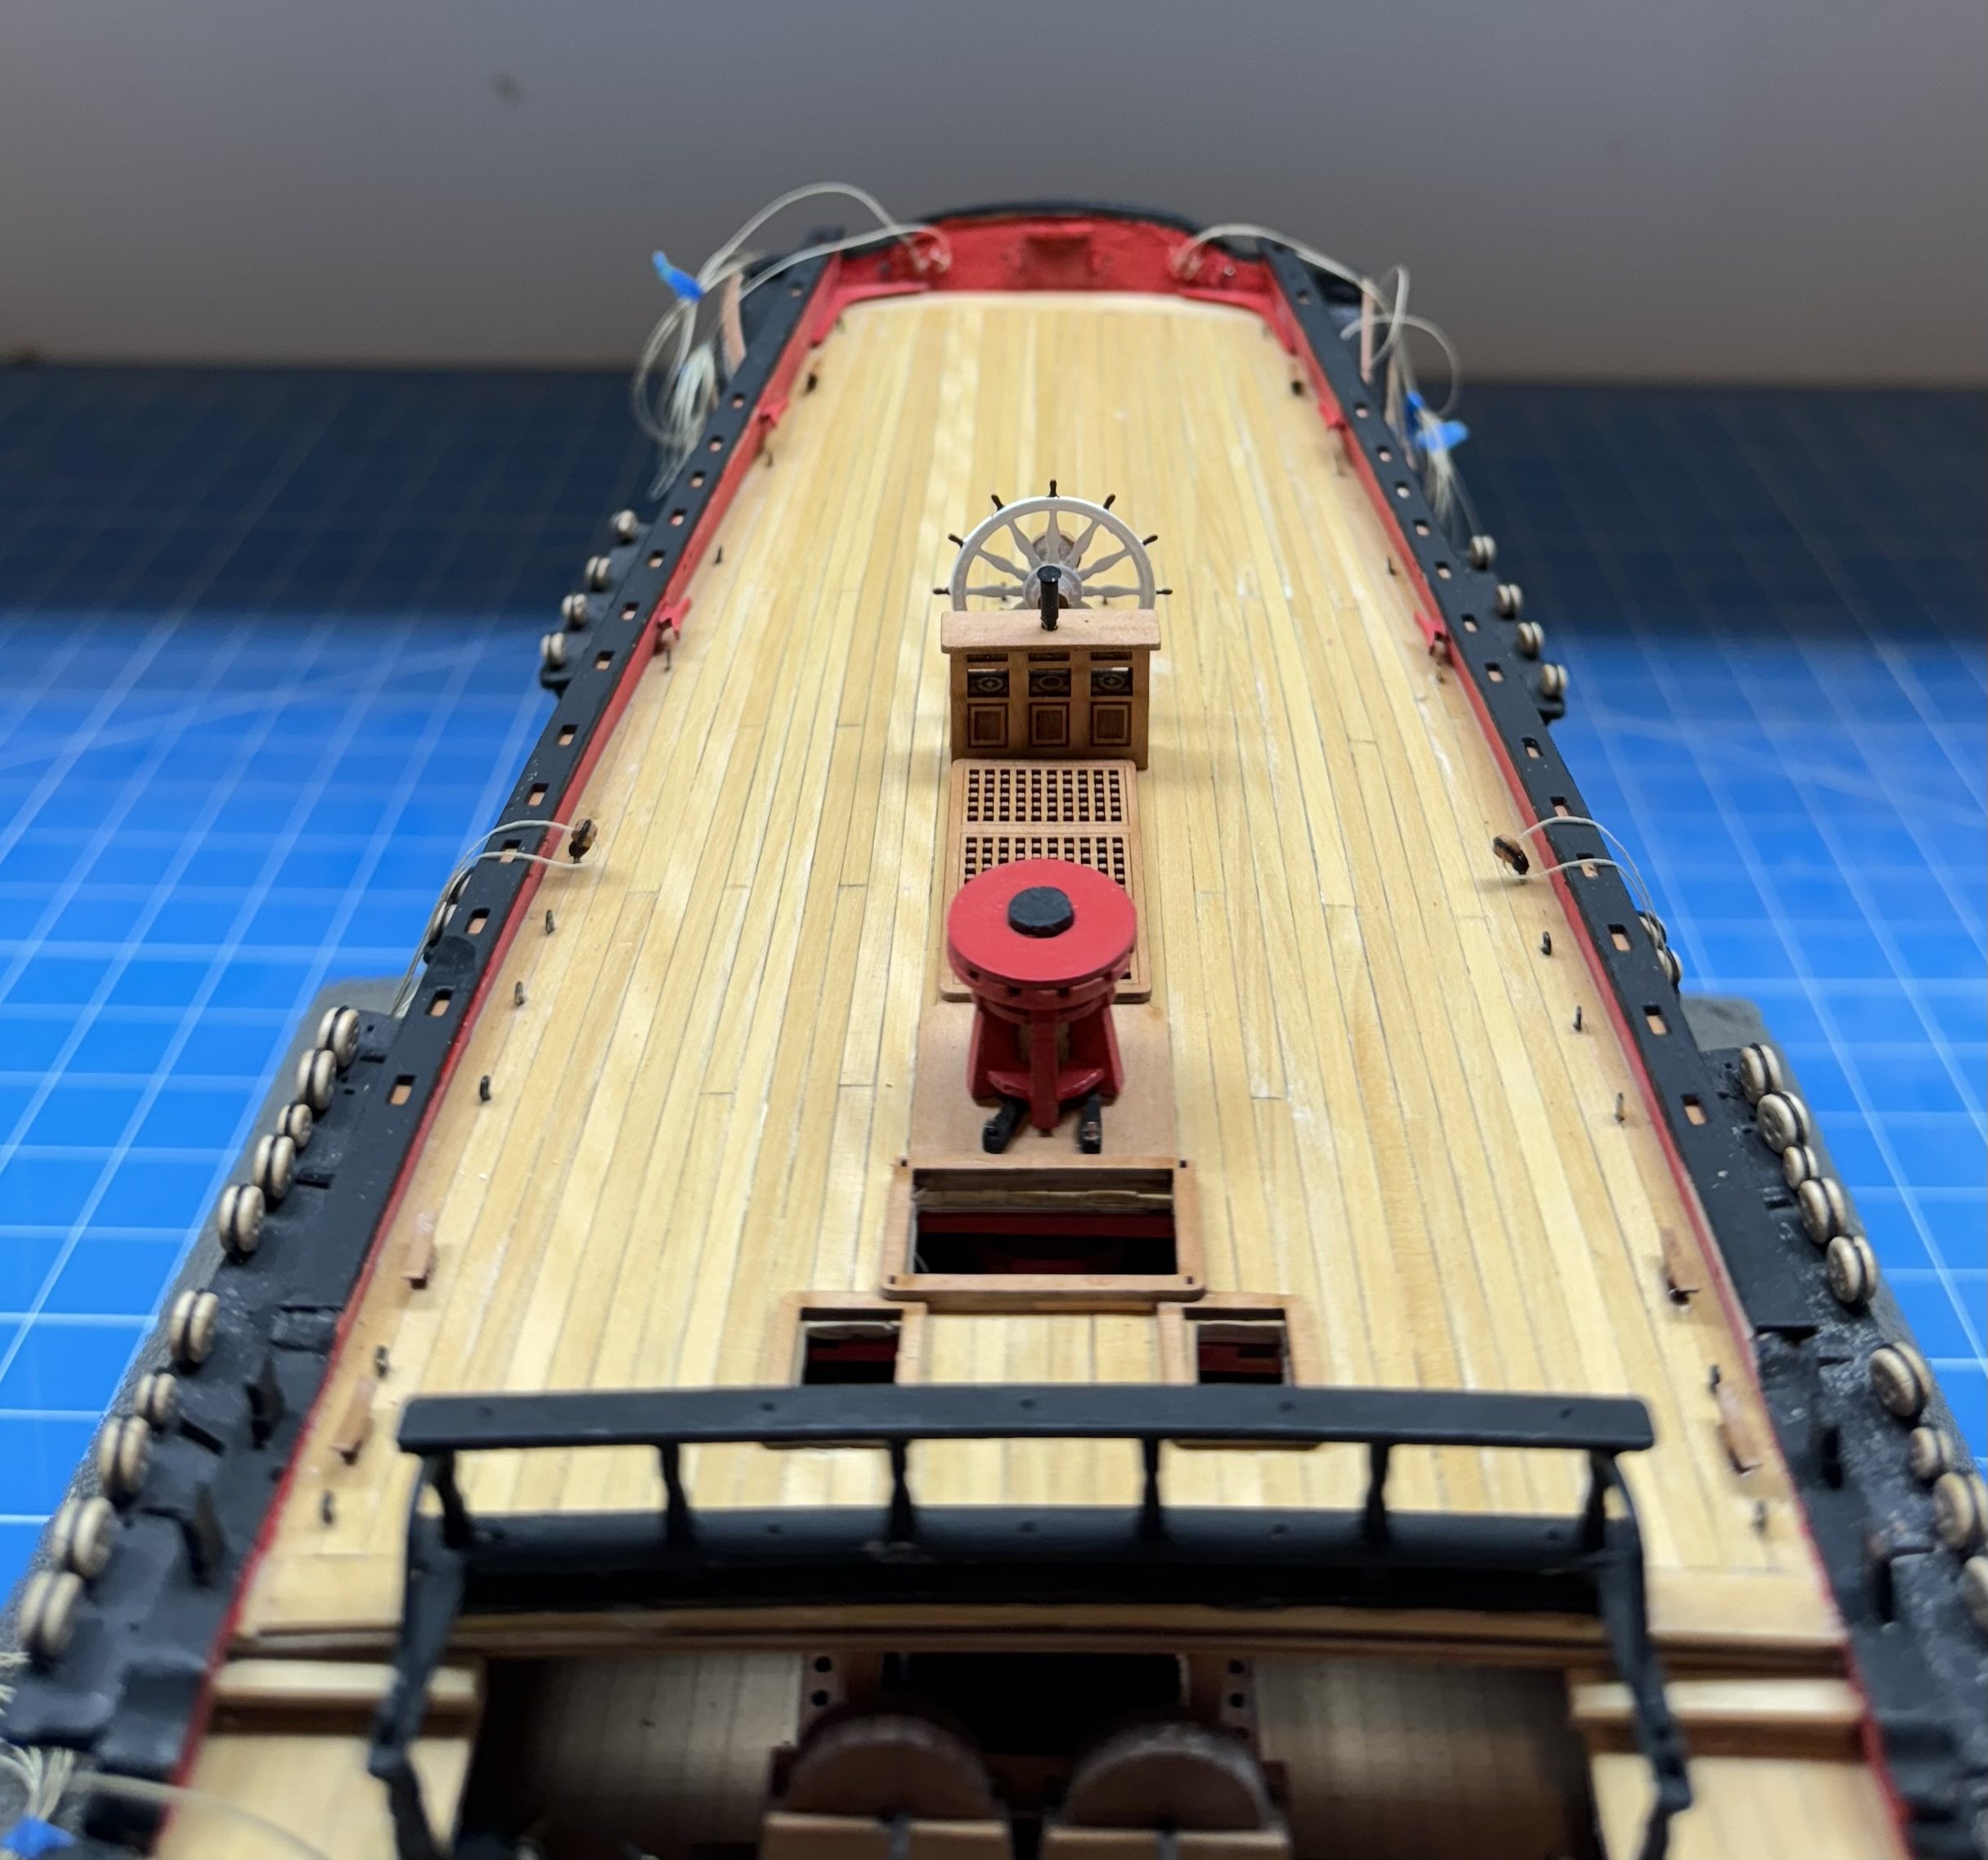
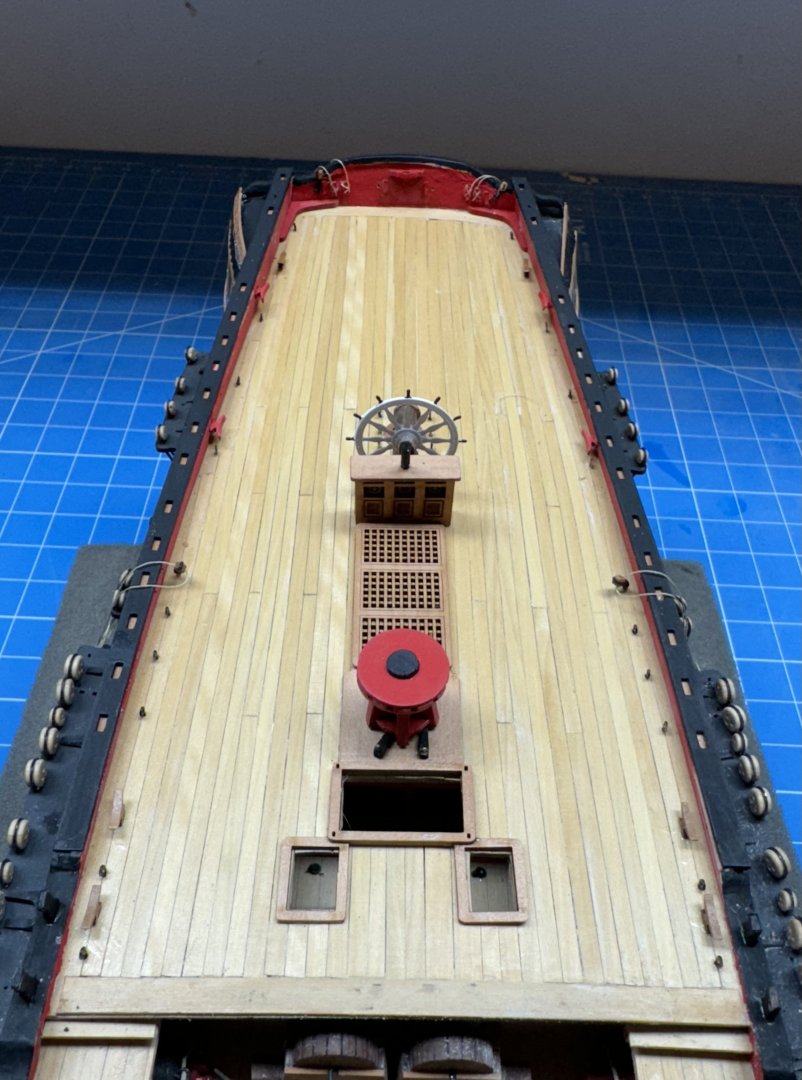
With the forecastle (hopefully) completed attention turns to the q-deck. I got all the eyebolts and cleats installed and then took a gander at the rigging sheets which show a 3mm single block on each side just aft of the main channels. Given that the main. shrouds might make access here difficult I went ahead and added the blocks and ran what i hope is plenty of line through to complete this part of the rigging. I also added 2 3mm blocks on the transom and added lines to the very small cleats on each side of the transom. Getting lines on these cleats will never be easier than right now so I decided to take advantage and rig them now. For the railing at the forward end of the q-deck I "tacked" the lower rail to the deck, fashioned the stanchions and assembled the stanchions and the other components of the railing hopping that the "tacking" would hold the bottom rail in place on the curved deck. When the glue was set (but not really fully hardened) I removed the entire assembly from the deck. Then I cleaned up the deck area and the bottom of the lower rail, painted everything black and will reinstall the railing shortly. While the railing was in place I tried to fit the waist rail stanchions and rail. For whatever reason the provided stanchion is too short to have the waist railing meet the middle railing of the q-deck railing. I am going to modify two of the "extra" q-deck railing stanchions to fit the waist railking and hopefully this will resolve this issue. More later. Here is the q-deck with most of the furniture in place.

- 422 replies
-
- 7
-
-
- Vanguard Models
- Sphinx
- (and 1 more)
-
Be careful with the filler there on the scroll work on the q-deck. Those two slots will house timberheads. Don't ask me how I know but it would be useful to stick a "place holder" in the slots before adding the filler. Will make things easier later.
-
Thanks Ronald - probably what I should have done but measuring off the drawing was not all that hard - just a bit time consuming. I did catch the markings for the cleats on the q-deck but forgot (or missing) all the eyebolts.
- 422 replies
-
- 1
-
-
- Vanguard Models
- Sphinx
- (and 1 more)
-
I only "thought" I was done with the forecastle. When I moved to the q-deck I thought it appropriate that before I started the timberheads, etc. that I should add the various eyebolts and cleats that are shown on the drawing (Sheet 15). As I looked over that drawing I noted a bunch of eyebolts that are on the forecastle too. Hmm, I guess when planking the deck yourself you loose all the markings on the maple deck and (at least in my case) reminders that "something goes here". So I went back to the forecastle and added the eyebolts shown on the drawing. While I was at it I checked the rigging plans and added the belaying pins required to the pin racks. Then I reconsidered the stanchions and lifelines. My original thought was to leave these off for now as they are pretty vulnerable to errant elbows, shirt sleeves, etc. On second thought most of the stanchions are behind the shrouds and will be harder to get at once they are in place, and they will be the first items added once the masts are in place (more or less the next step after the q-deck is "populated"). So I added the stanchions and rigged the lifeline but left plenty of extra line so I can run it below the stanchions and hopefully keep it out of the way until needed. FYI - I used .018" Syren ultra Dark Brown line and with the end dipped in thin CA the line was a near interference fit through the stanchions. Not sure what would have happened if I used the kit provided .5mm (.0196") line but if that is used care is required to thread it through the stanchions. Maybe the primer and paint I used restricted the stanchion opening more than I realized. Anyway here is the now (hopefully) really completed forecastle.
- 422 replies
-
- 5
-
-
- Vanguard Models
- Sphinx
- (and 1 more)
-
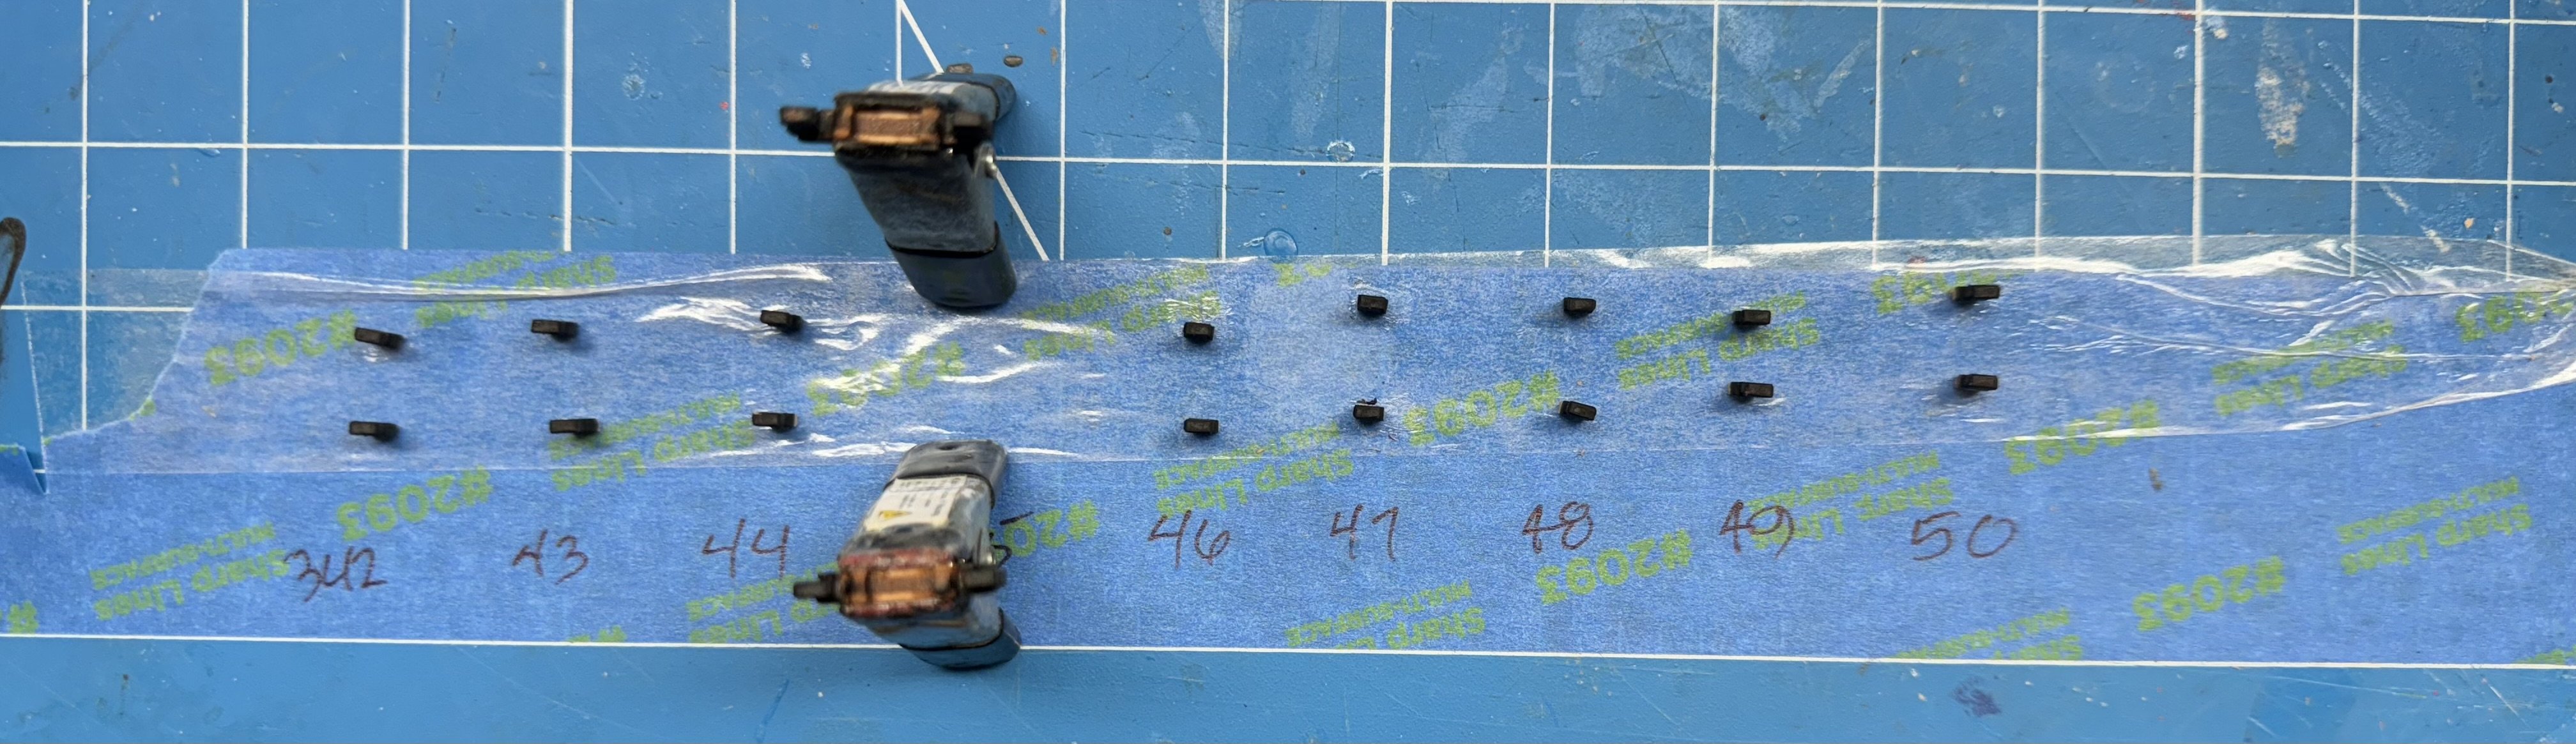
Forward timber heads are next. Since Vanguard went to the trouble of numbering each timberhead individually I am assuming it would be a good idea to keep track of them during the subsequent "processing". Here they are (less the two very most forward which will join the fun shortly) after having the carrier tabs removed, the edges softened, the "tab" tapered a tad to ease installation. and a first coat of flat black. I tried fitting them "unaltered" and it was a struggle so hopefully I have not done too good a job and now they are "unsteady" in the slot.

- 422 replies
-
- 4
-
-
- Vanguard Models
- Sphinx
- (and 1 more)
-
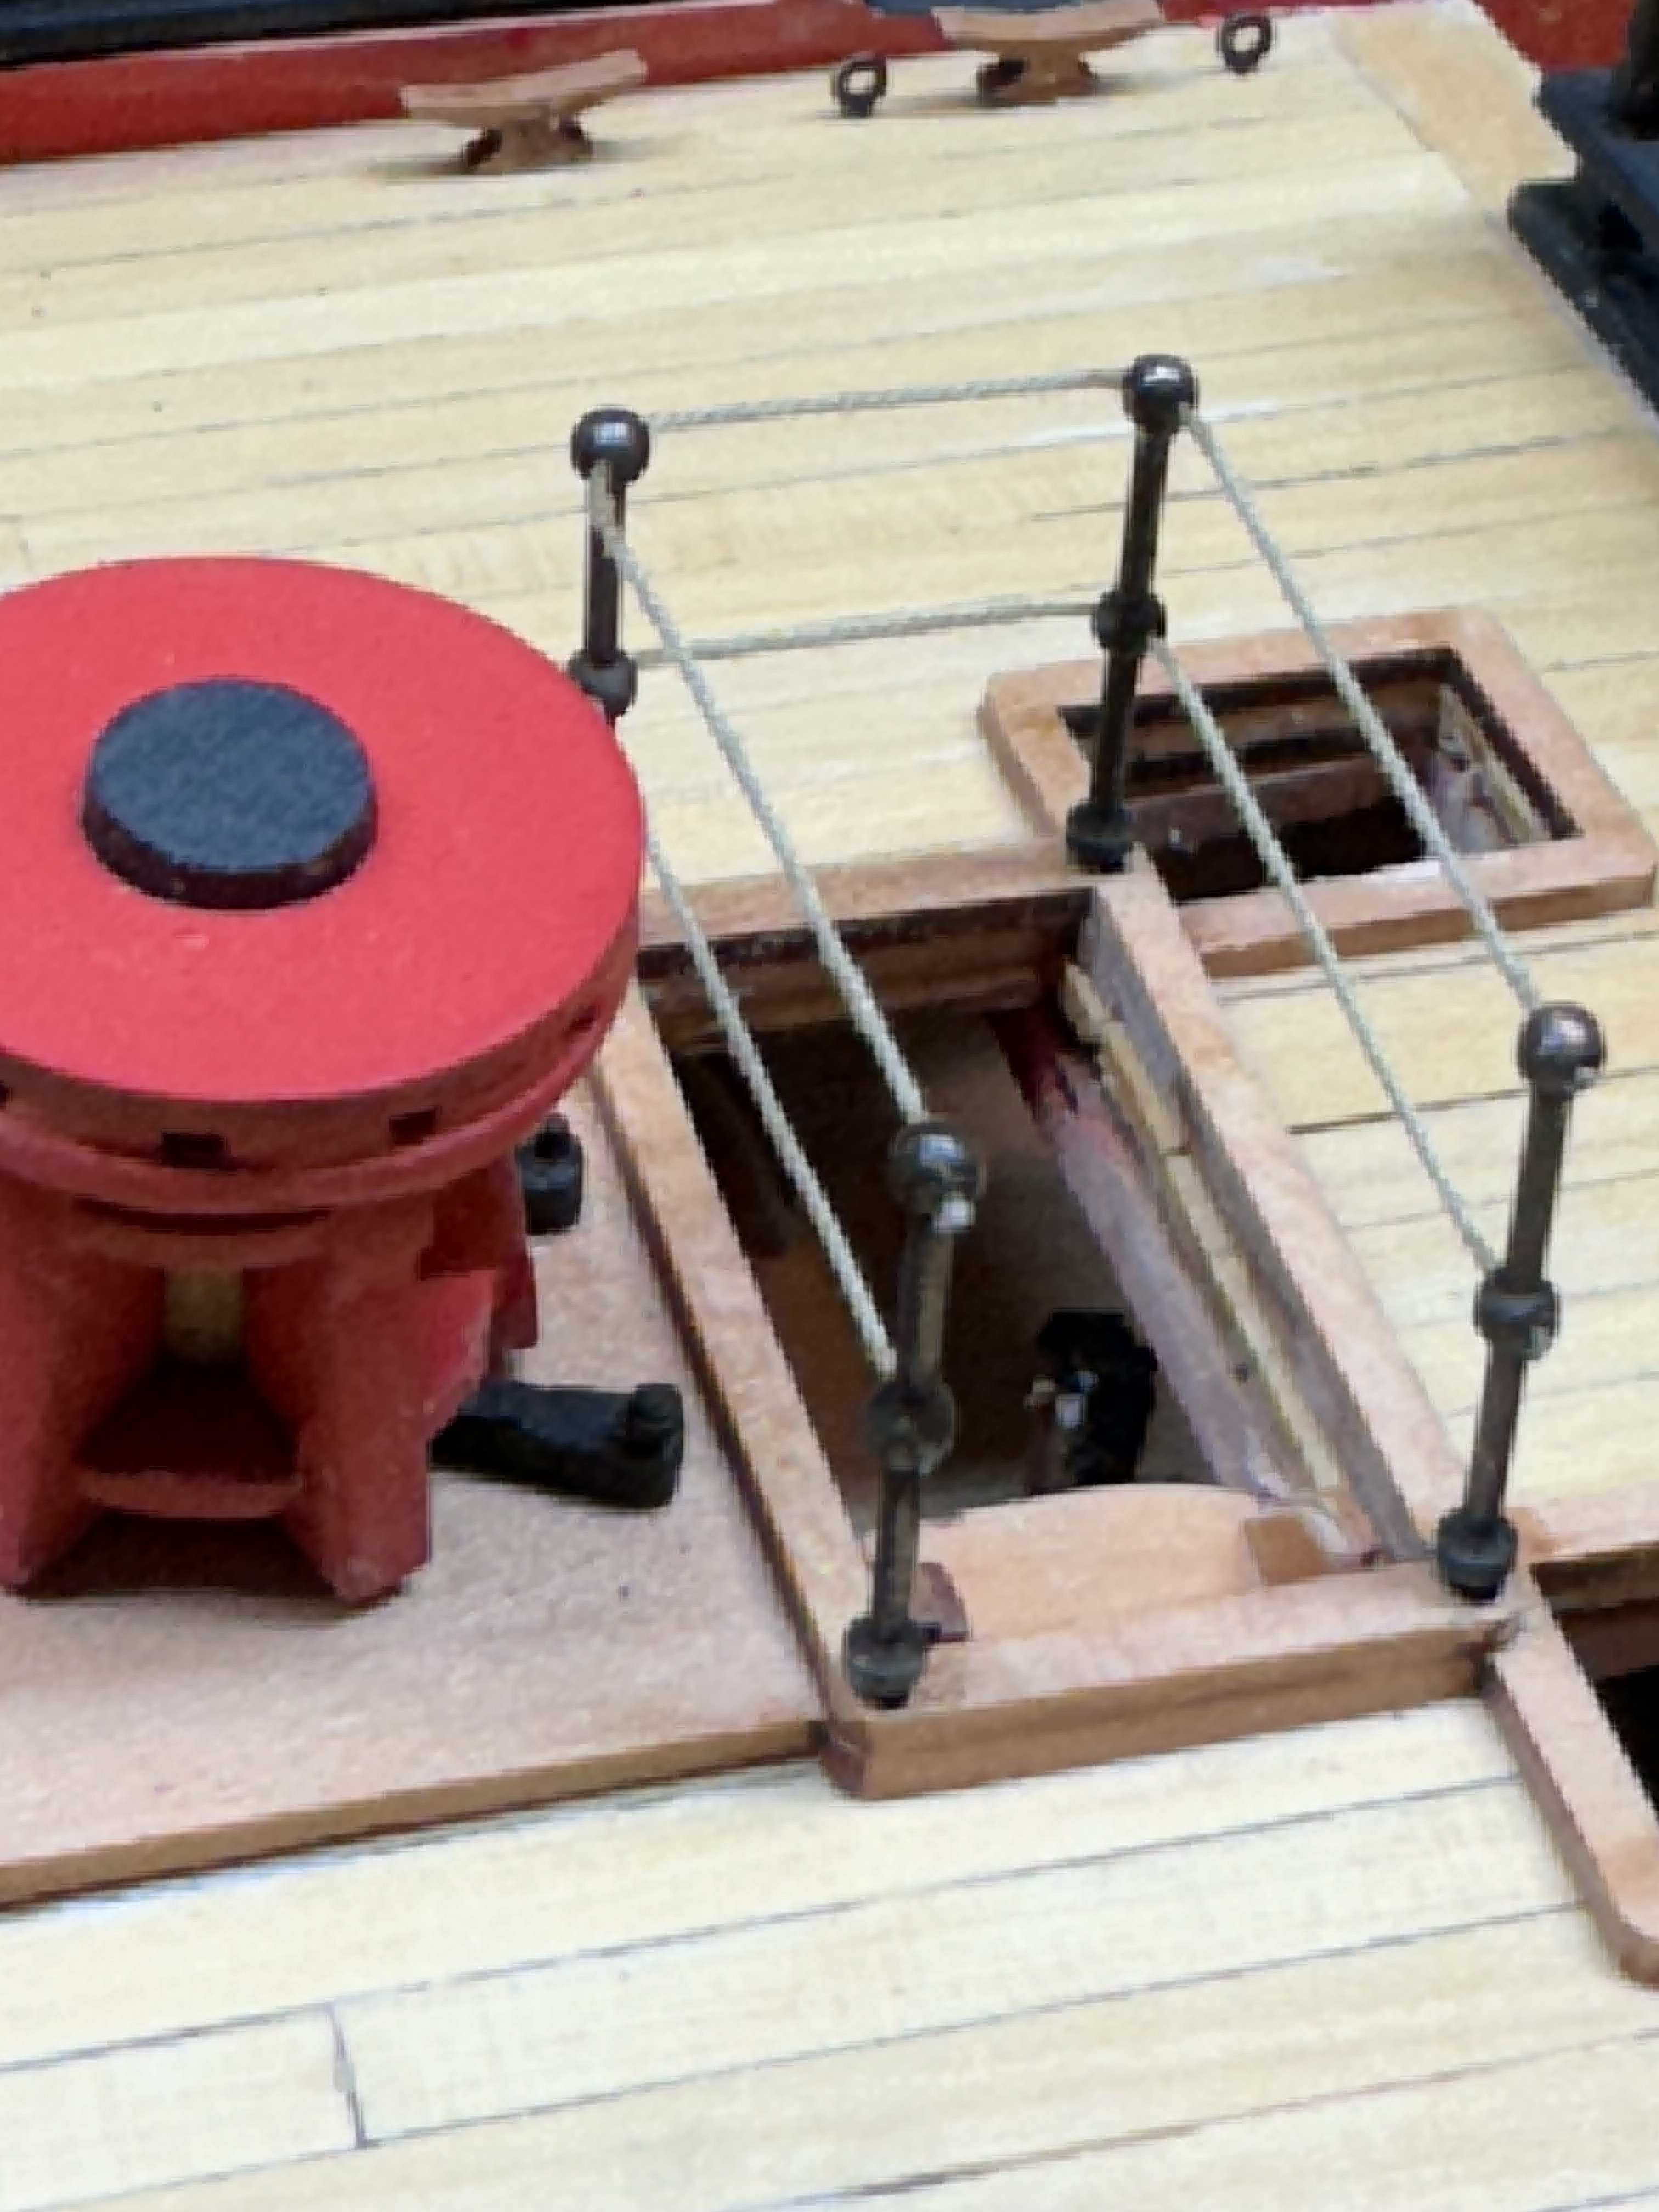
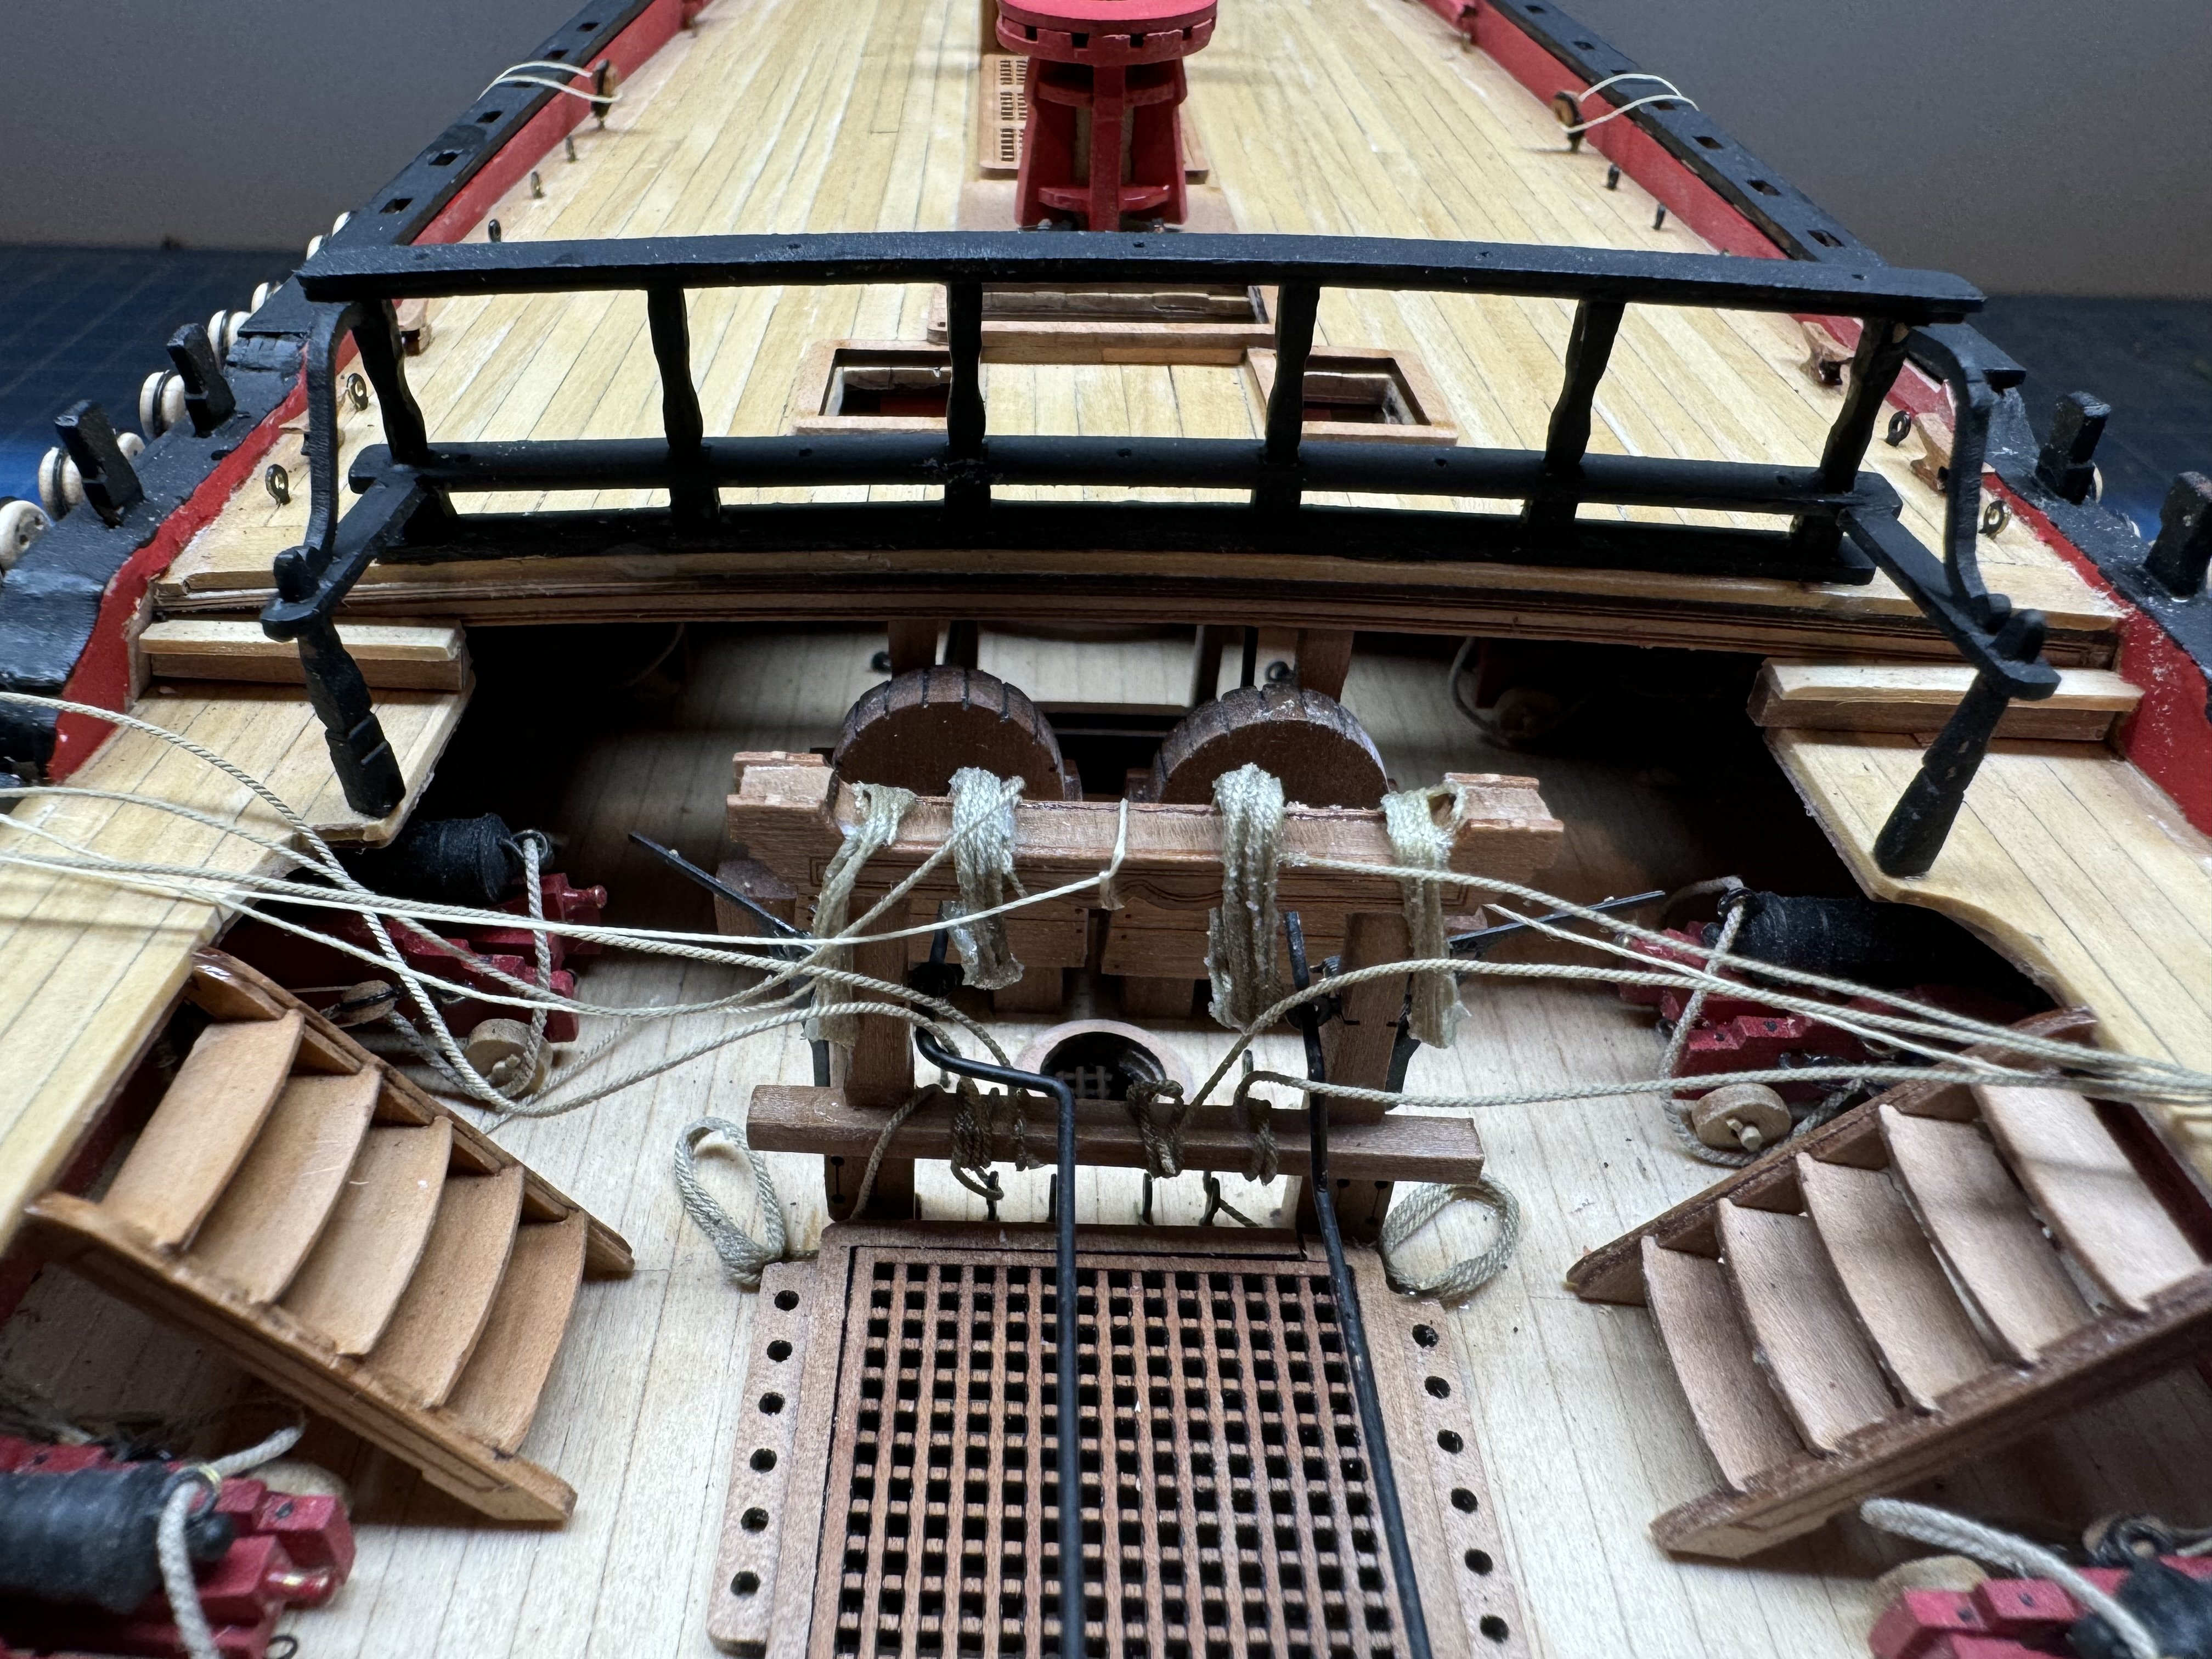
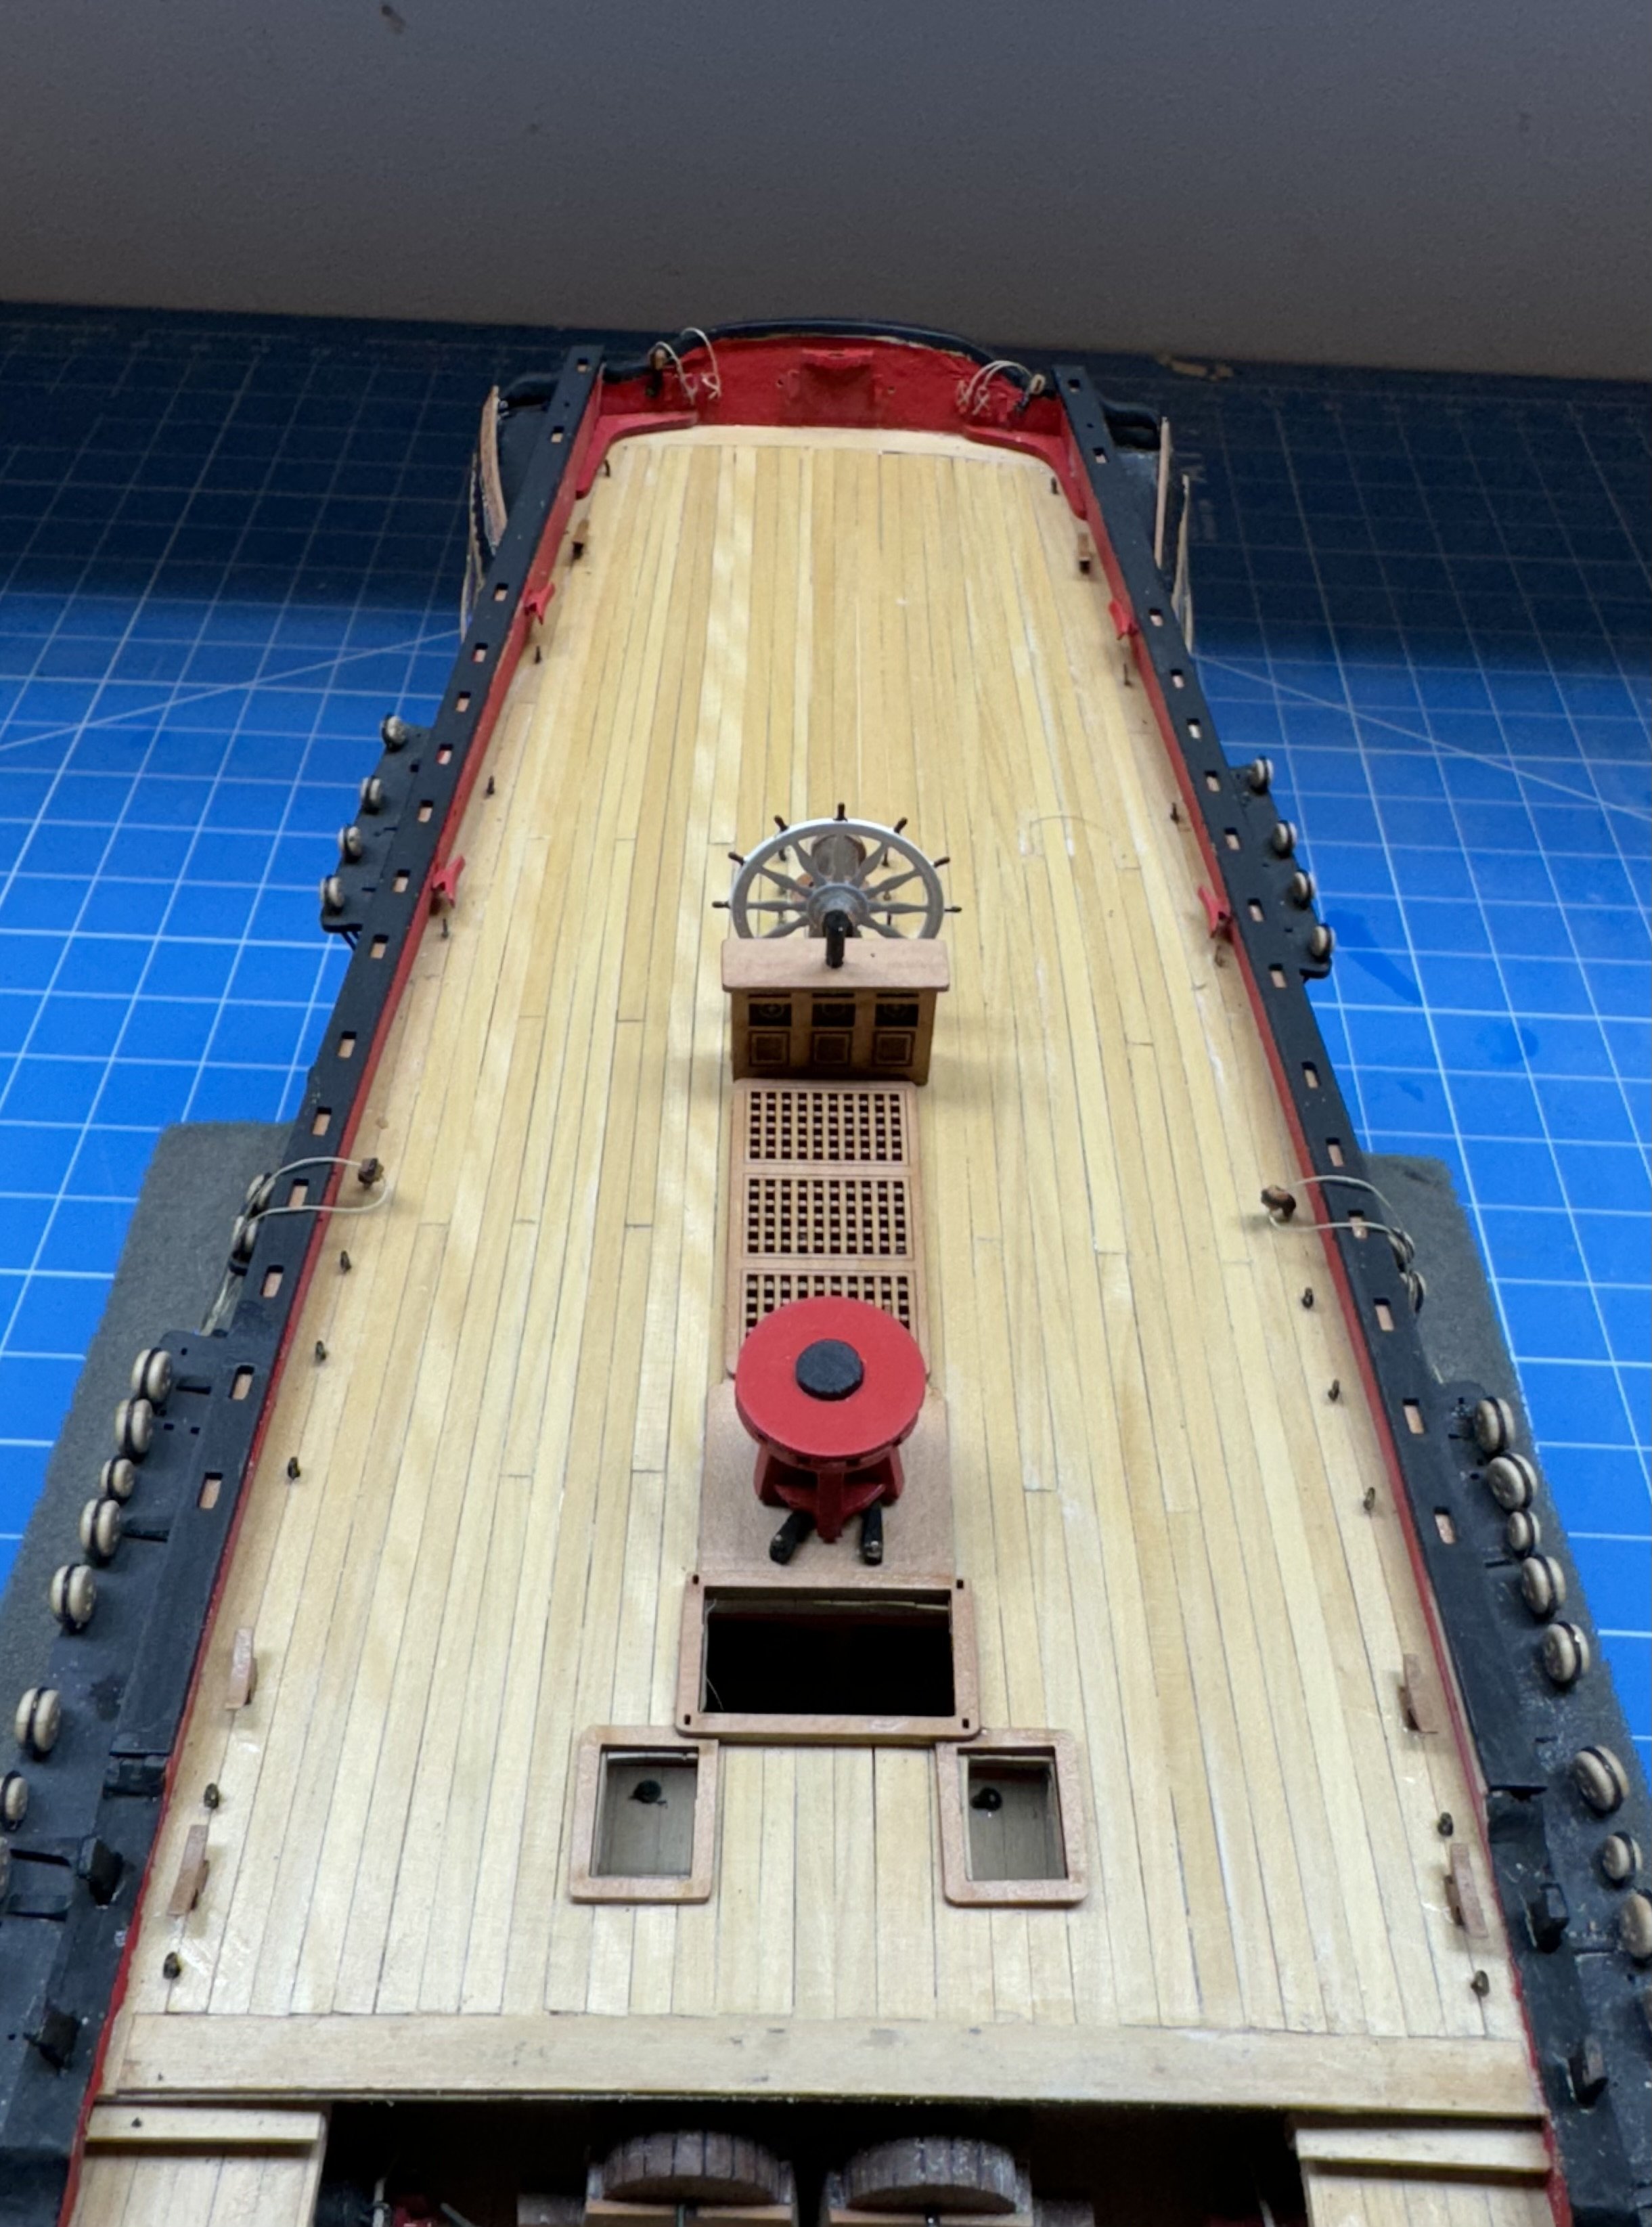
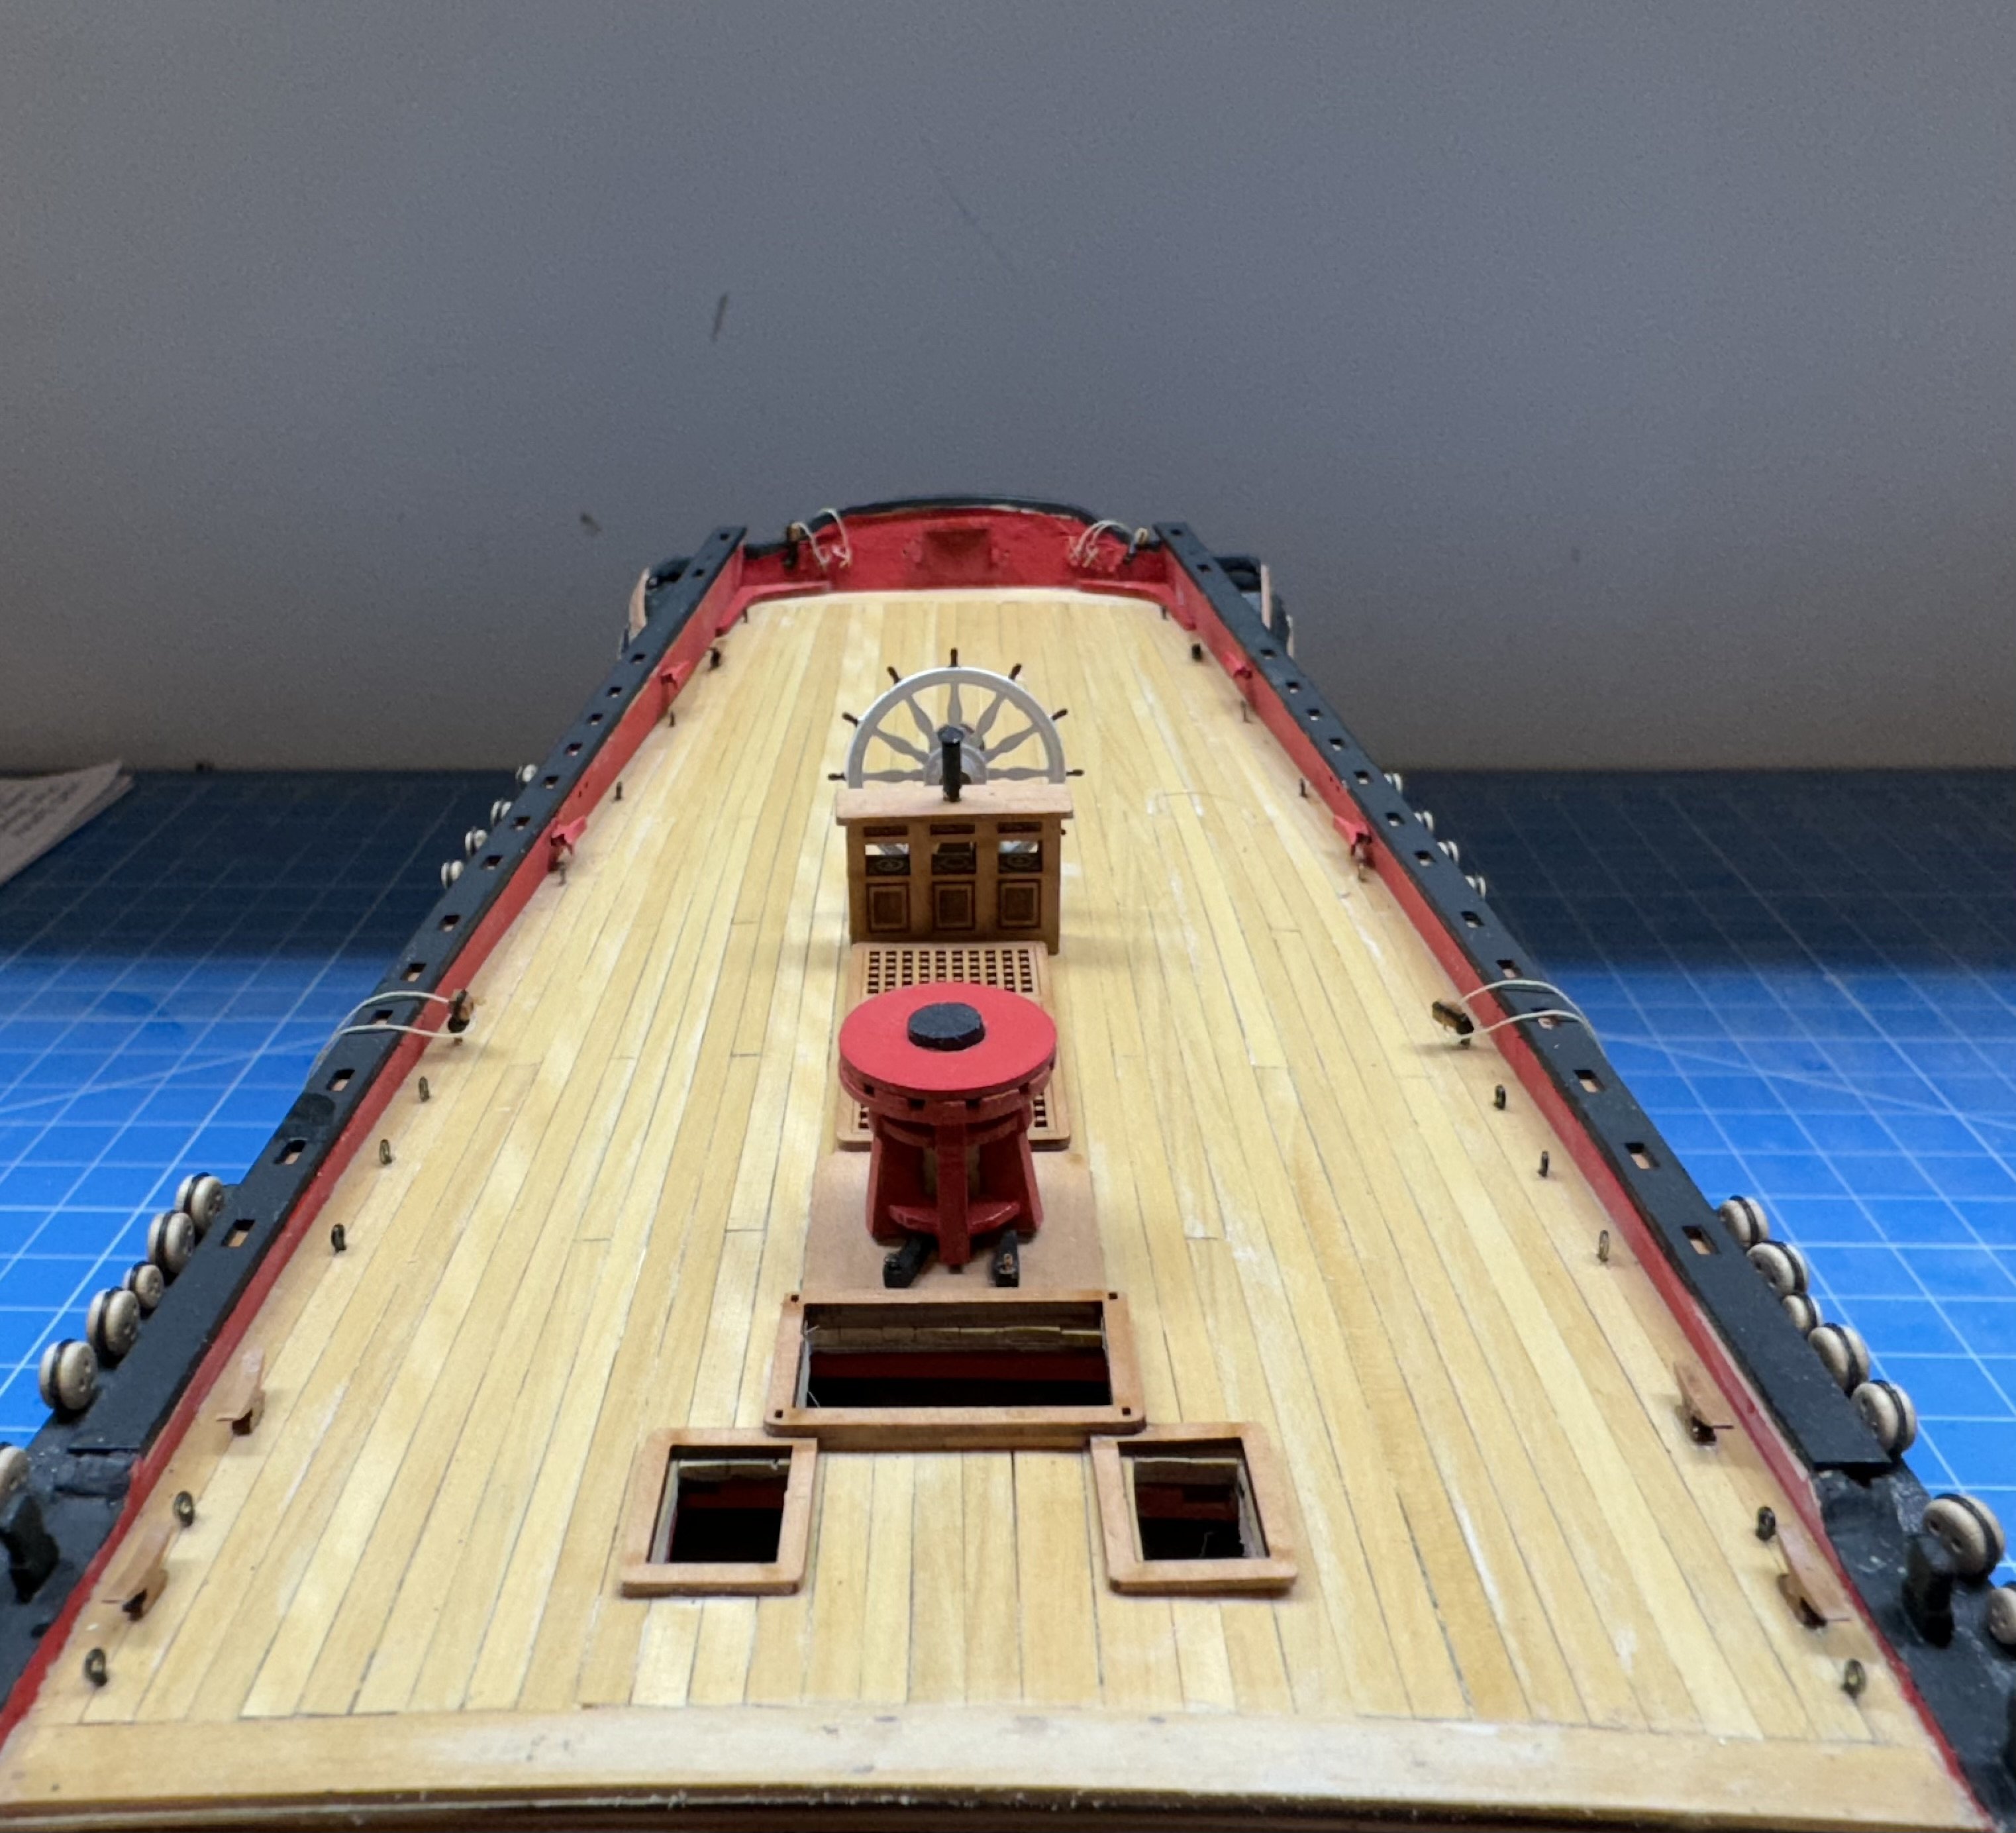
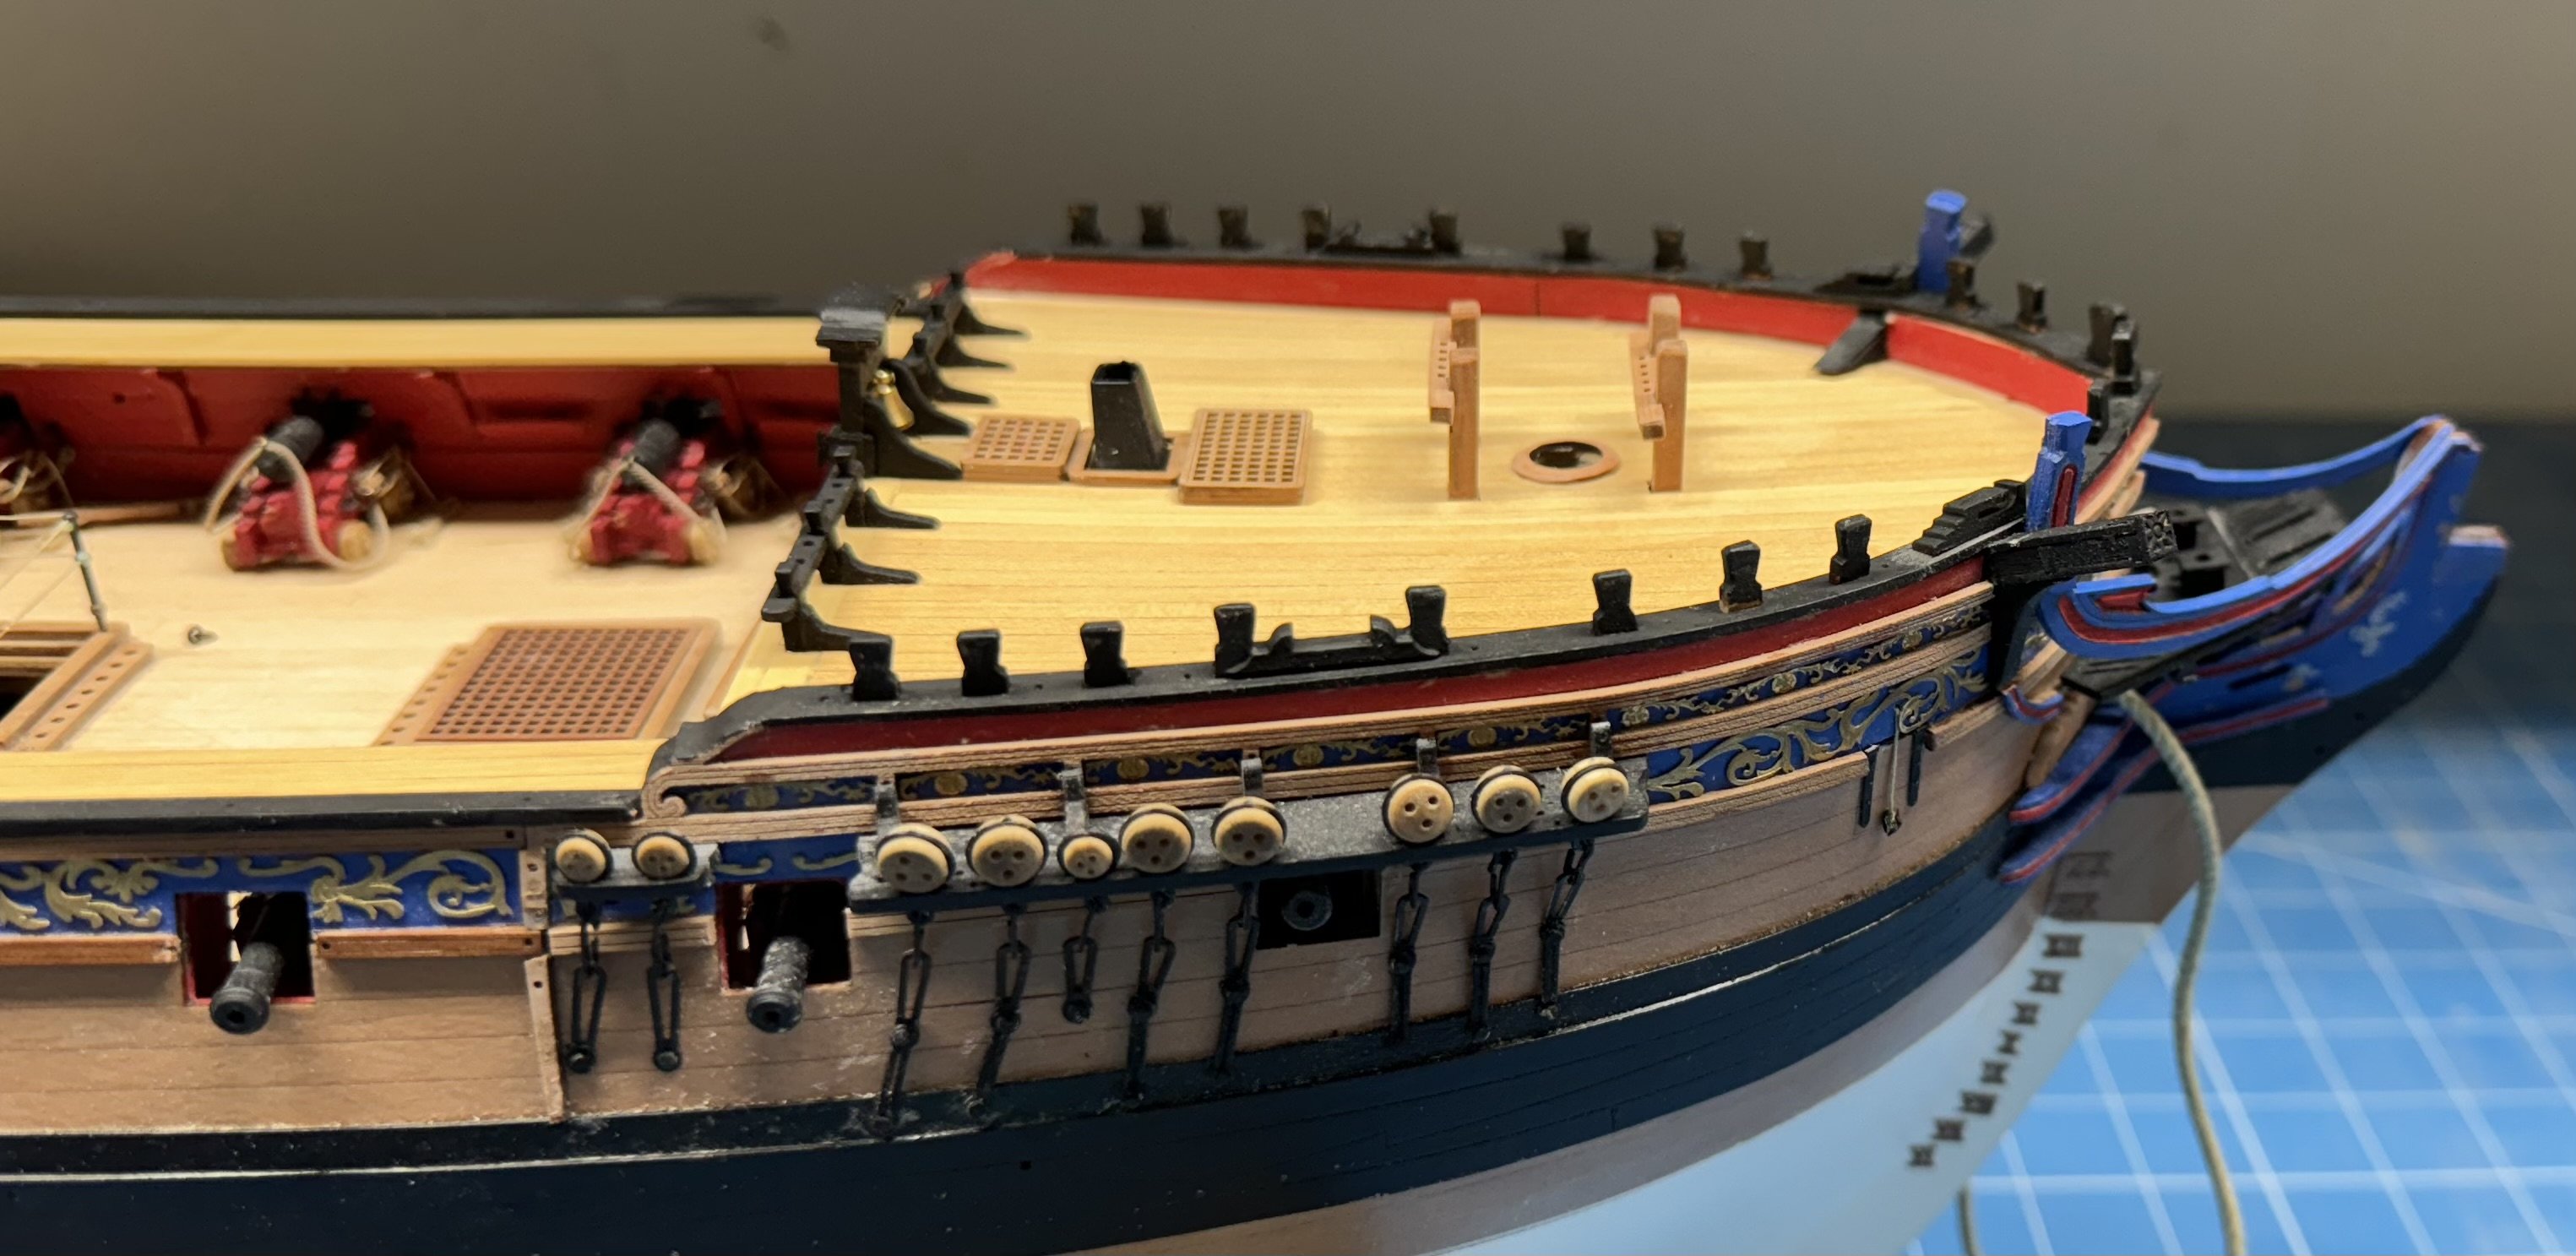
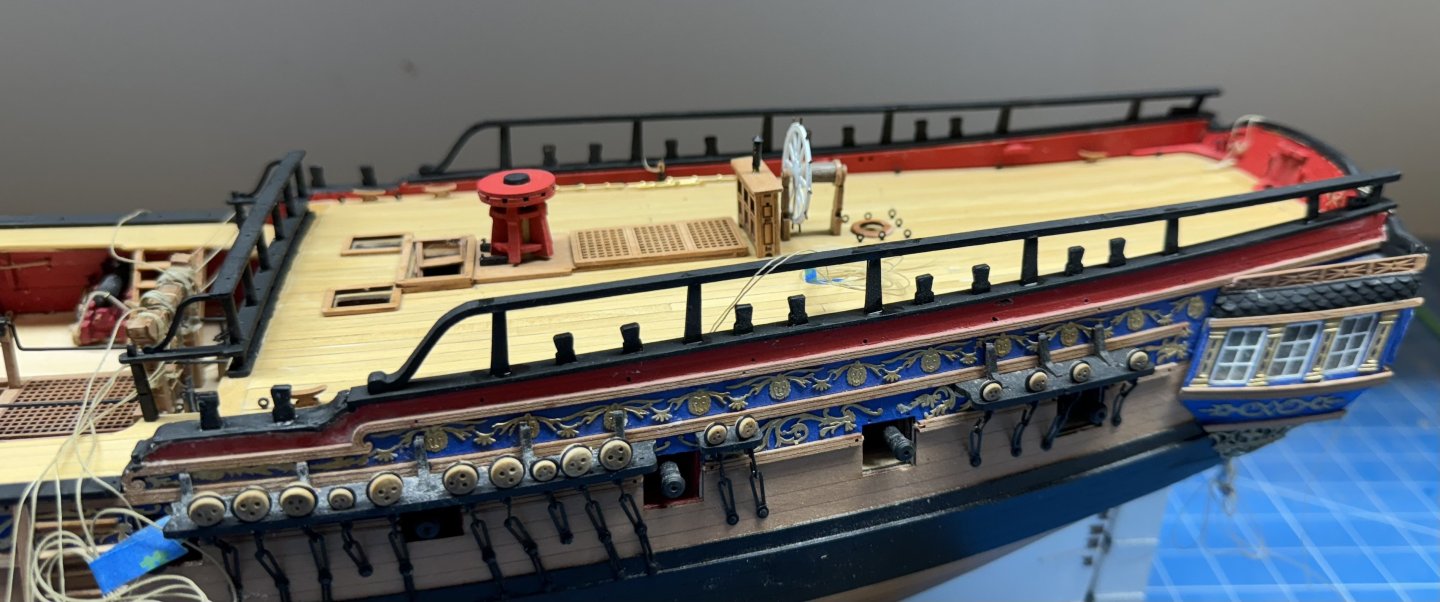
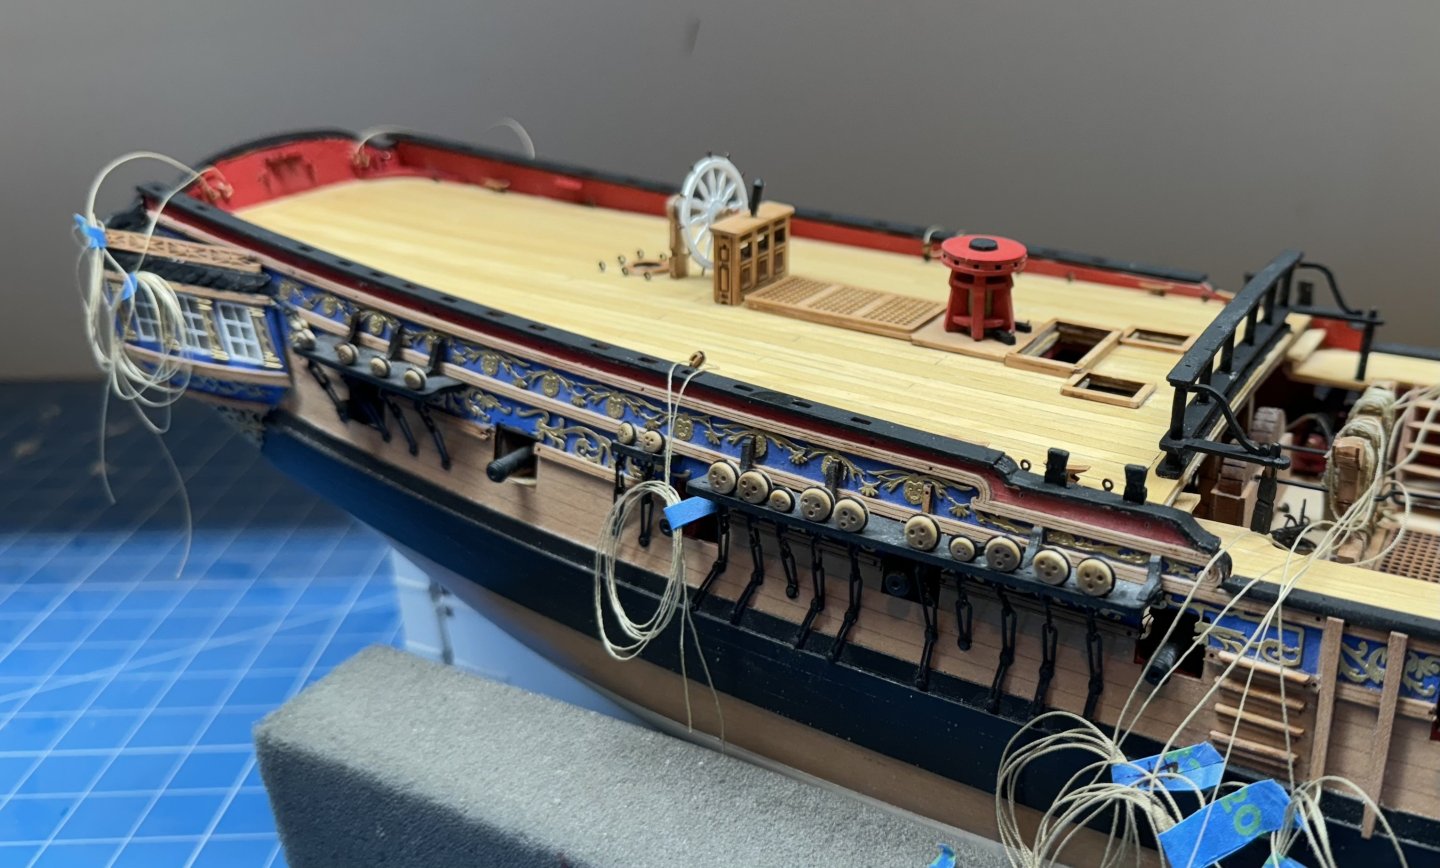
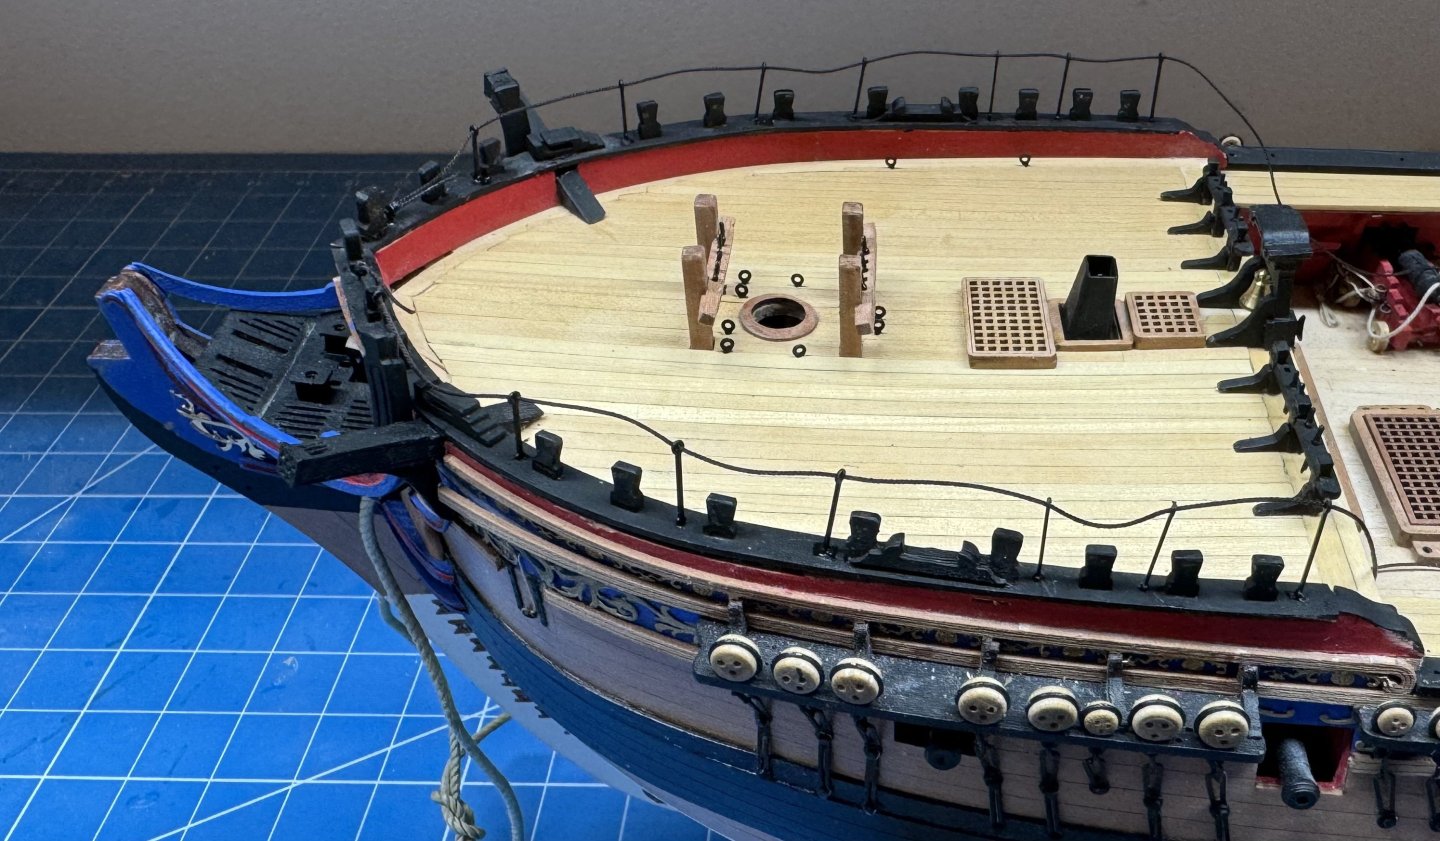
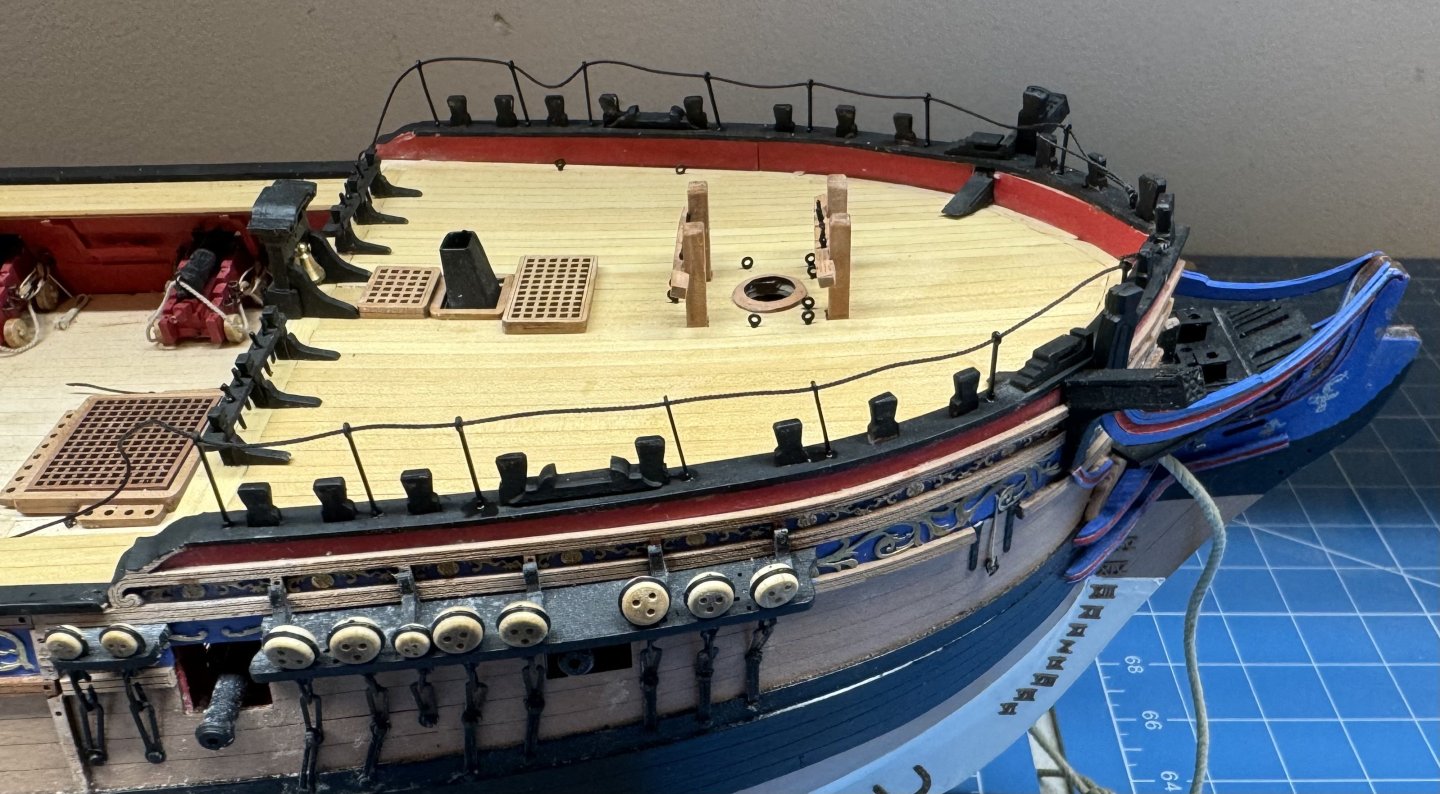
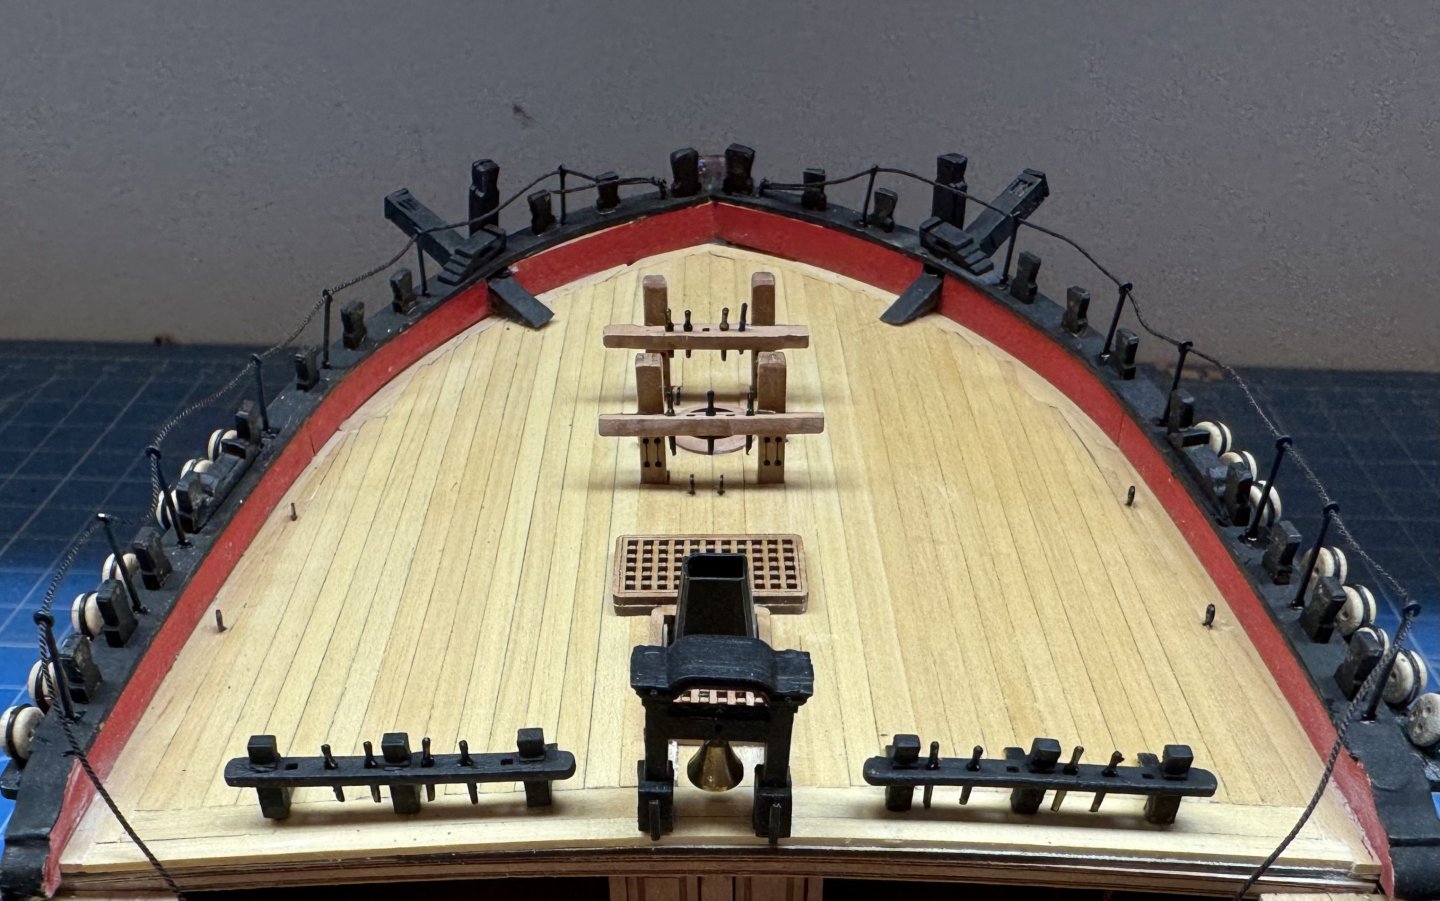
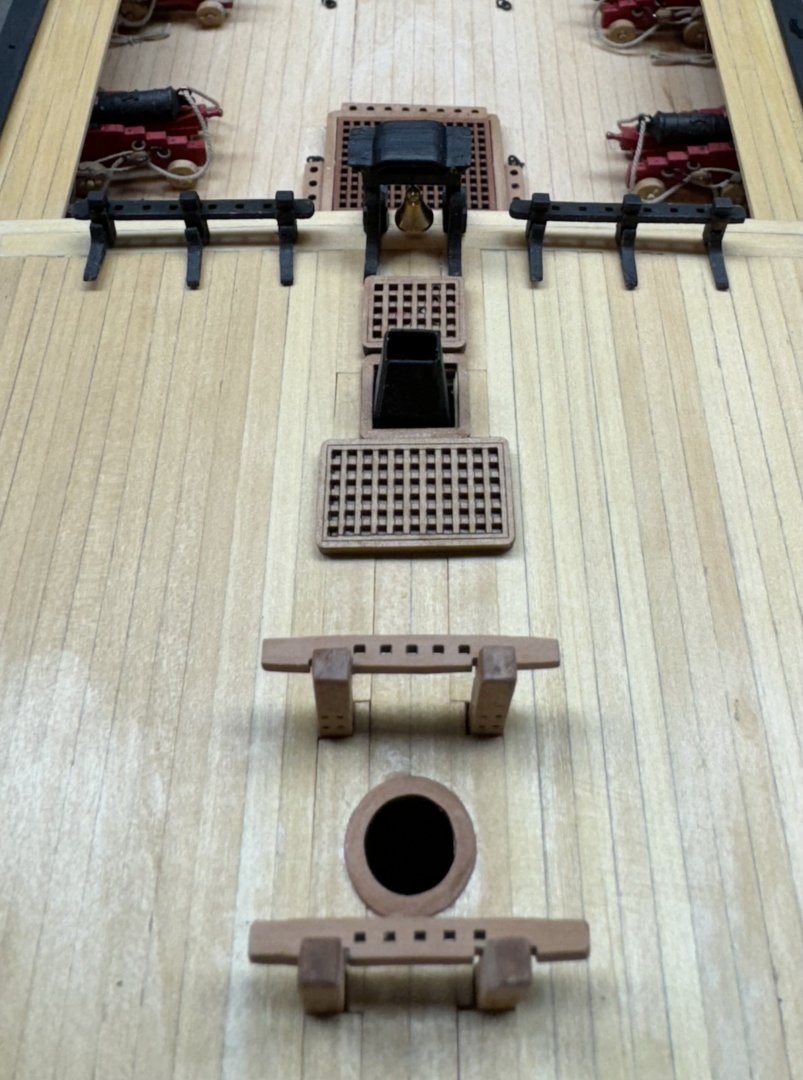
While "messing around" with the transom I also decided to work the bow "to completion" rather than moving forward to aft and back again. Seems better (to me) to get one end "done" before working on the other end. So here is the belfry and the forward pin rail in place and glued down. along with the hatch coamings and stove flue. I tried to get a picture lookung forwad from the waist but I can't seem to get the camera (iPhone) to cooperate. Have to save that for the next time i get my "big" camera out. I used epoxy to glue down the pin rail as there are rigging lines that belay here. Don't ask me how I know but it is never good to have a belay point come unglued during rigging.
- 422 replies
-
- 5
-
-
- Vanguard Models
- Sphinx
- (and 1 more)